

You’ve spent hours choosing the perfect threads, perfecting each stitch, and bringing your vision to life on fabric. But what happens when the last knot is tied? Too often, a beautiful piece of embroidery ends up unfinished, waiting in its hoop for a final touch that never comes.
The way you present your work is not an afterthought—it is the final step in the creative process. A thoughtful frame does more than just protect your stitches; it completes the story, enhances the texture, and transforms your project into a polished piece of art.
Here, you will discover how simple paper and cardstock can become your most versatile finishing tool. These techniques require no expensive materials, just a bit of creativity to create frames that are as personal and intentional as your embroidery itself. It’s time to give your work the beautiful finish it deserves.
1. Architectural Depth with Layered Paper

Create a dynamic sense of movement by layering precisely cut sheets of cardstock, each slightly smaller than the last.
Use a consistent color palette that pulls hues directly from your embroidery floss to achieve a cohesive, intentional look.
This technique works exceptionally well for modern, abstract geometric hoops, as the frame’s clean lines echo the stitched forms.
The subtle shadows cast between the layers add a professional, gallery-like quality that elevates the entire piece from a simple hoop to finished art.
2. Handmade Paper Pulp for an Organic Finish

Embrace natural texture by creating a frame from paper pulp, which you can make by blending scrap paper with water and glue.
Press the pulp around a simple cardboard form and let it air-dry completely; the resulting rough, deckled edge provides a beautiful contrast to delicate stitching.
This organic texture is the perfect complement for botanical subjects, especially lavender-inspired embroidery designs that evoke a rustic, handmade feel.
It feels less like a frame and more like an extension of the artwork itself, grounding it with earthy authenticity.
3. Dynamic Embellishment with Paper Quilling

Extend the energy of your embroidery beyond the fabric by adding a border of intricate paper quilling.
Roll thin strips of colored paper into tight coils and sculpted shapes, then arrange them around your hoop to mimic or complement the stitched motifs.
This method adds dimension and movement, turning a flat piece into a 3D mixed-media artwork.
These detailed paper art projects draw the eye outward, making the entire composition feel more vibrant and alive.
4. Sculptural Minimalism with a Faceted Frame

For minimalist embroidery, a frame should enhance, not overpower.
Construct a geometric, faceted frame from sturdy white cardstock to create a sculptural effect that plays with light and shadow.
The sharp, clean angles provide a modern architectural contrast to the soft texture of the fabric and thread.
This approach is ideal for showcasing delicate one-line embroidery wall arts, giving them a strong, contemporary presence without adding distracting color.
5. Expressive Energy with a Mixed-Media Collage
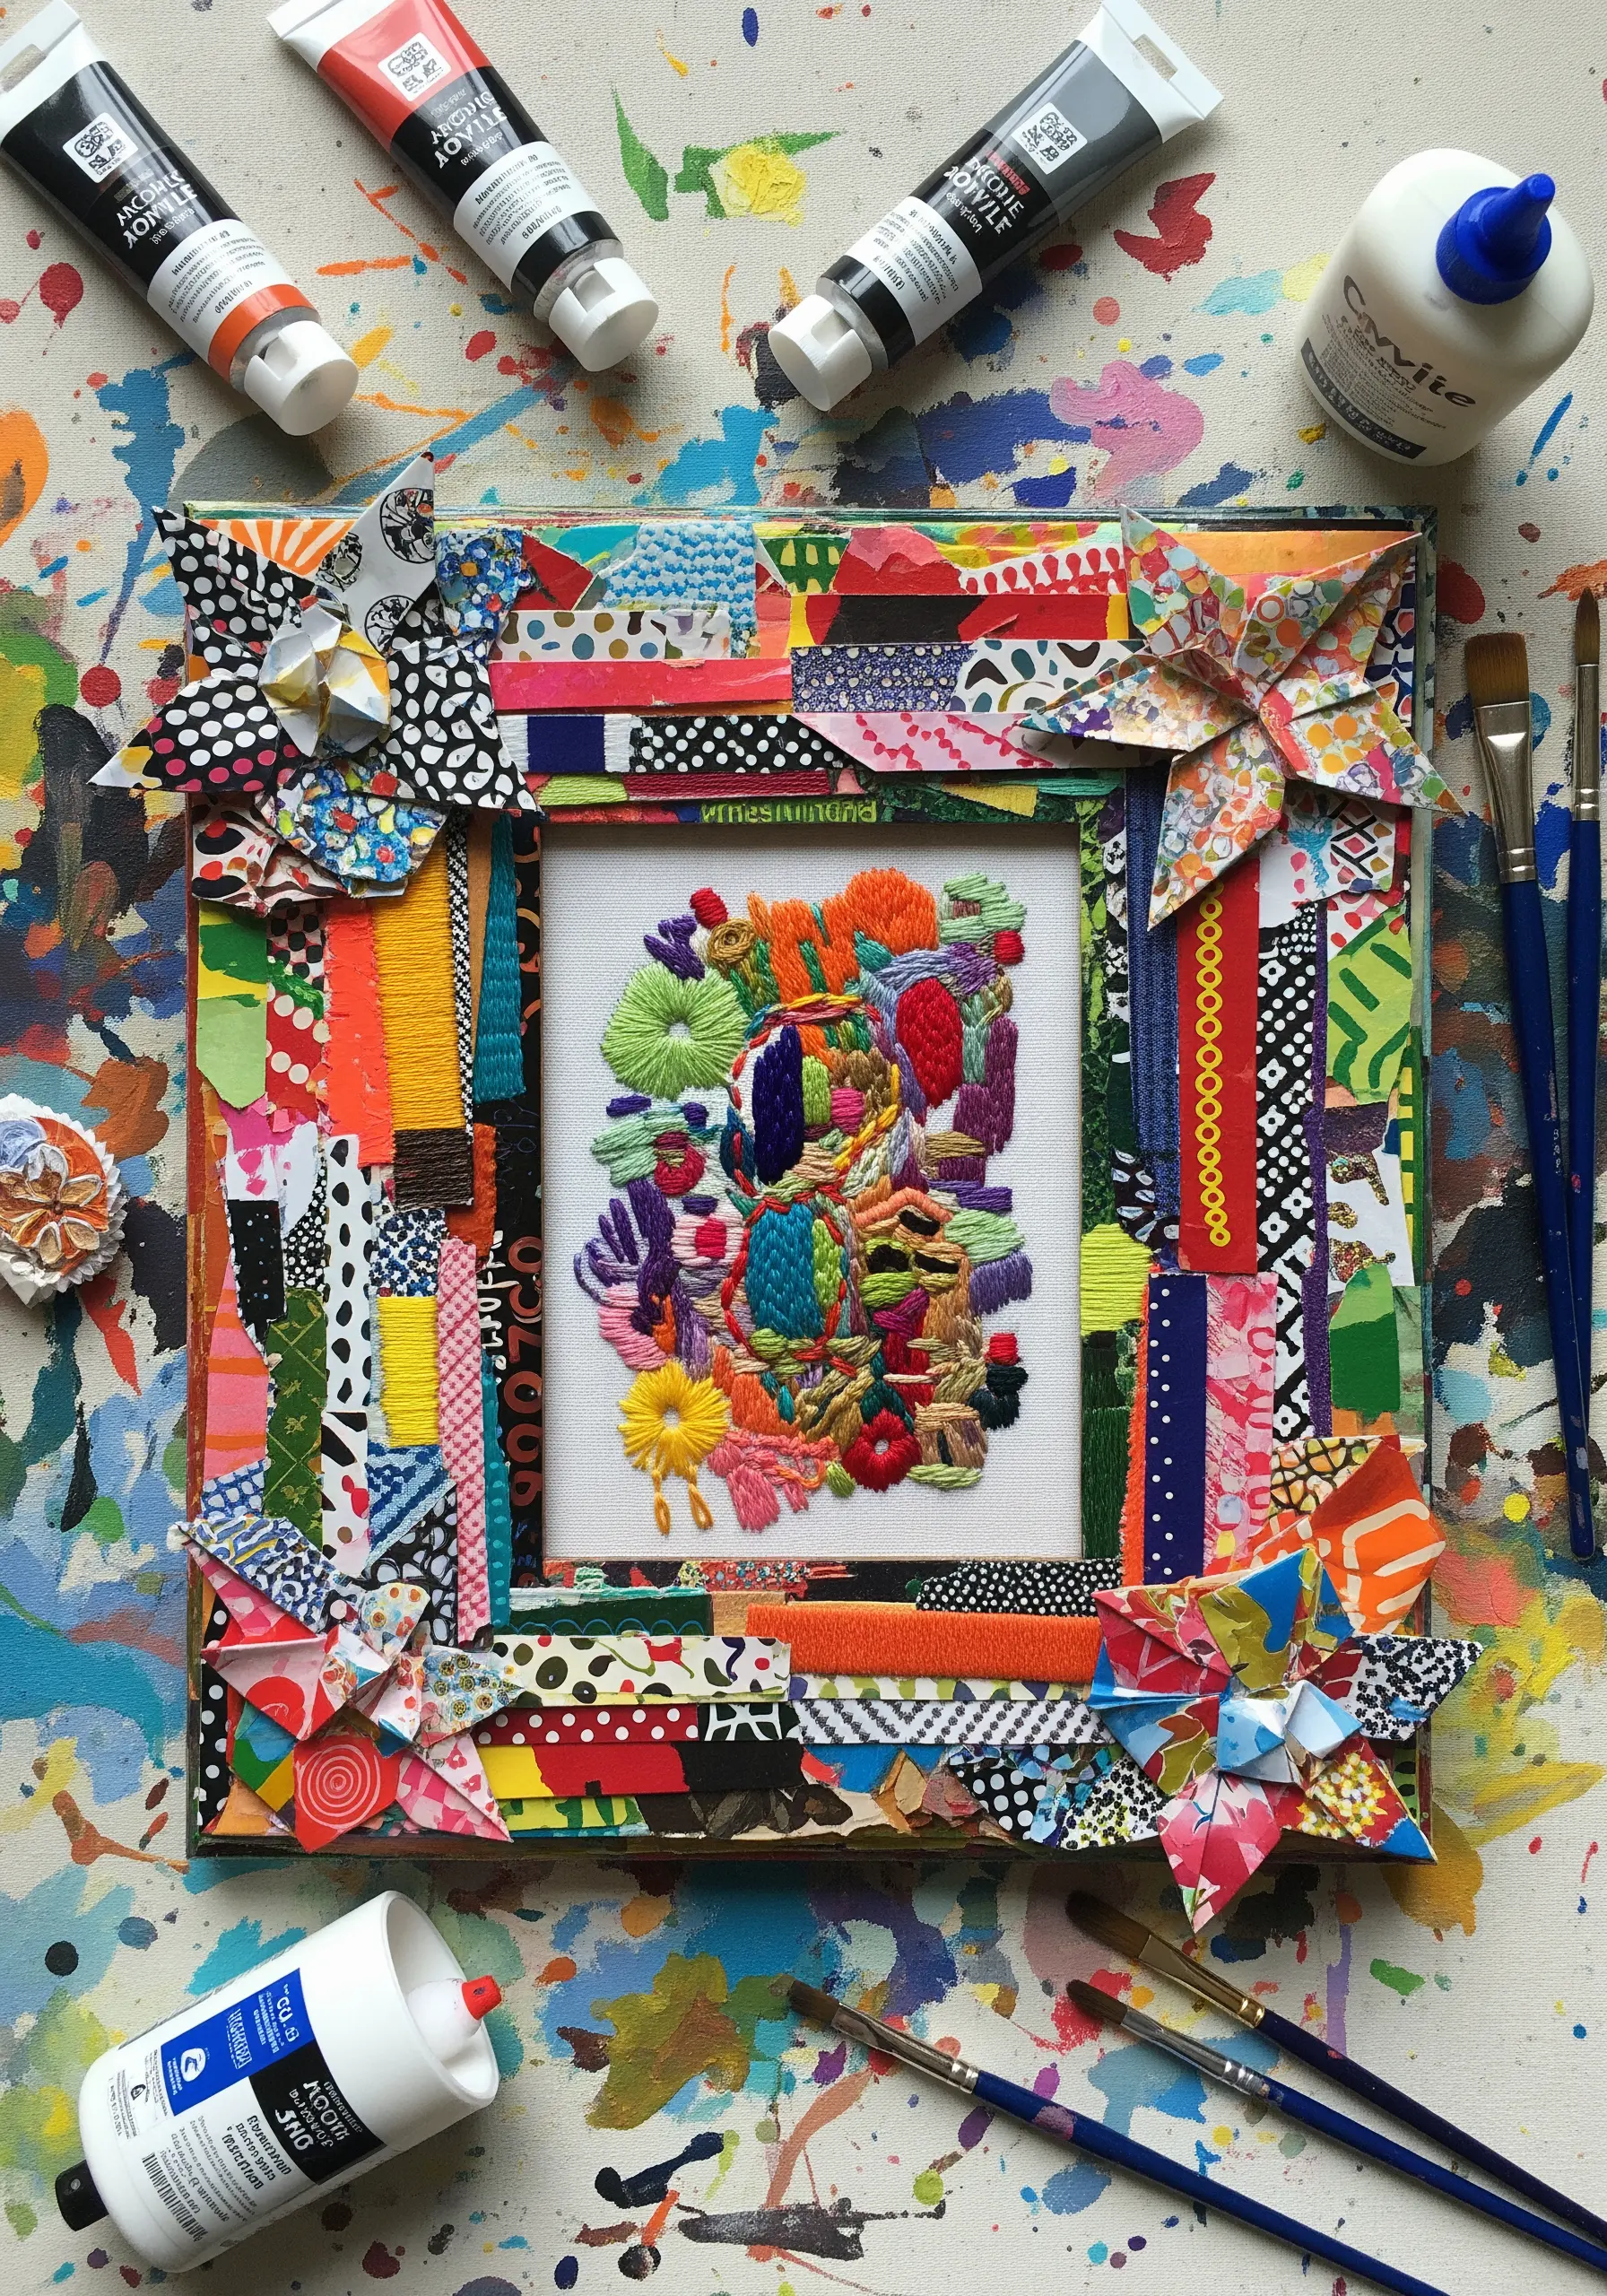
Channel a vibrant, maximalist spirit by crafting a frame from a collage of paper scraps, fabric remnants, and ribbon.
Focus on a controlled chaos of pattern and color, layering different textures to build a rich, tactile border.
This eclectic style is a perfect match for abstract or highly textured embroidery, as the frame becomes a joyful echo of the stitched artwork’s freedom.
Let your frame be as expressive as your stitching—it’s one of the most effective fabric collage embroidery ideas for creating a truly unique statement piece.
6. Narrative Depth with a Papercut Shadowbox

Transform your embroidery into a miniature world by building a layered papercut shadowbox around it.
Cut foreground, middle-ground, and background elements from different colored papers to create a diorama effect.
This technique adds incredible depth and context, making it feel like you are peering into a scene rather than just looking at a picture.
It works beautifully for nature-themed embroidery projects, turning a simple mushroom or floral motif into a captivating woodland story.
7. Intricate Filigree with Laser-Cut Precision

Achieve an exquisitely detailed frame using intricately cut paper, which you can create with a craft cutting machine or a sharp craft knife and a steady hand.
The delicate, lace-like pattern provides a sophisticated border that feels both modern and timeless.
A dark paper with metallic foil accents offers a stunning contrast against black fabric, especially for celestial or high-contrast designs.
This is a perfect way to frame minimal celestial embroidery wall designs, adding a touch of magic that feels intentional and refined.
8. Textural Interest with Woven Paper Strips

Create a frame with gentle, tactile appeal by weaving strips of paper over a simple cardboard base.
For a painterly effect, color plain paper with watercolors before cutting it into strips, allowing the hues to blend softly.
The woven texture adds a handcrafted warmth that complements the meticulous nature of embroidery without competing with the stitched details.
This technique is particularly effective for ocean marine embroidery wall themes, as the interwoven colors can mimic the movement of water.
9. Gilded Glamour with Art Deco Geometry

Complement a bold, stylized embroidery piece with an equally striking Art Deco-inspired frame.
Use black and gold cardstock to build a frame with strong symmetrical lines, sunburst motifs, and sharp geometric shapes.
This high-contrast, glamorous style turns your embroidery into a true statement piece, reminiscent of vintage luxury.
It’s a fantastic way to showcase the unexpected ways to use metallic thread in your own work, tying the shimmer of the floss to the gleam of the frame.
10. Playful Vibrancy with Scalloped Layers

For a cheerful and energetic finish, create a deep, layered frame using scalloped or flower-shaped cutouts.
Choose a vibrant, high-contrast color palette to make the piece pop, especially against a neutral wall.
This technique adds a playful, organic feel that is perfect for tropical motifs, whimsical characters, or any embroidery that celebrates bold color.
It’s one of the most joyful colorful framed embroidery art ideas for adding personality and fun to your finished work.
11. Subtle Elegance with Embossed Detailing

Add a touch of refined texture without adding color by using dry embossing techniques on heavy paper or cardstock.
Use an embossing folder with a subtle pattern—like vines or swirls—to press a raised design into the paper, creating a formal mat for your embroidery.
This method provides a sophisticated, tactile border that enhances the artwork’s elegance, especially for classic motifs.
It’s a perfect example of the ways to use neutrals in leaf embroidery and its framing to achieve a quiet, luxurious finish.
12. Industrial Texture with Recycled Paper Pulp

For a bold, contemporary look, craft a frame with the rough, substantial texture of concrete or stone using recycled paper pulp.
Mix shredded paper, water, and PVA glue to form a thick paste, then mold it into a chunky frame shape and allow it to dry completely.
The rugged, industrial aesthetic creates a powerful contrast with soft, textural fiber art, such as chunky woven yarn or thick wool roving.
This is a brilliant way to frame pieces that celebrate organic texture embroidery ideas, highlighting the interplay between soft fibers and hard surfaces.
13. Structured Delicacy with an Origami Fold
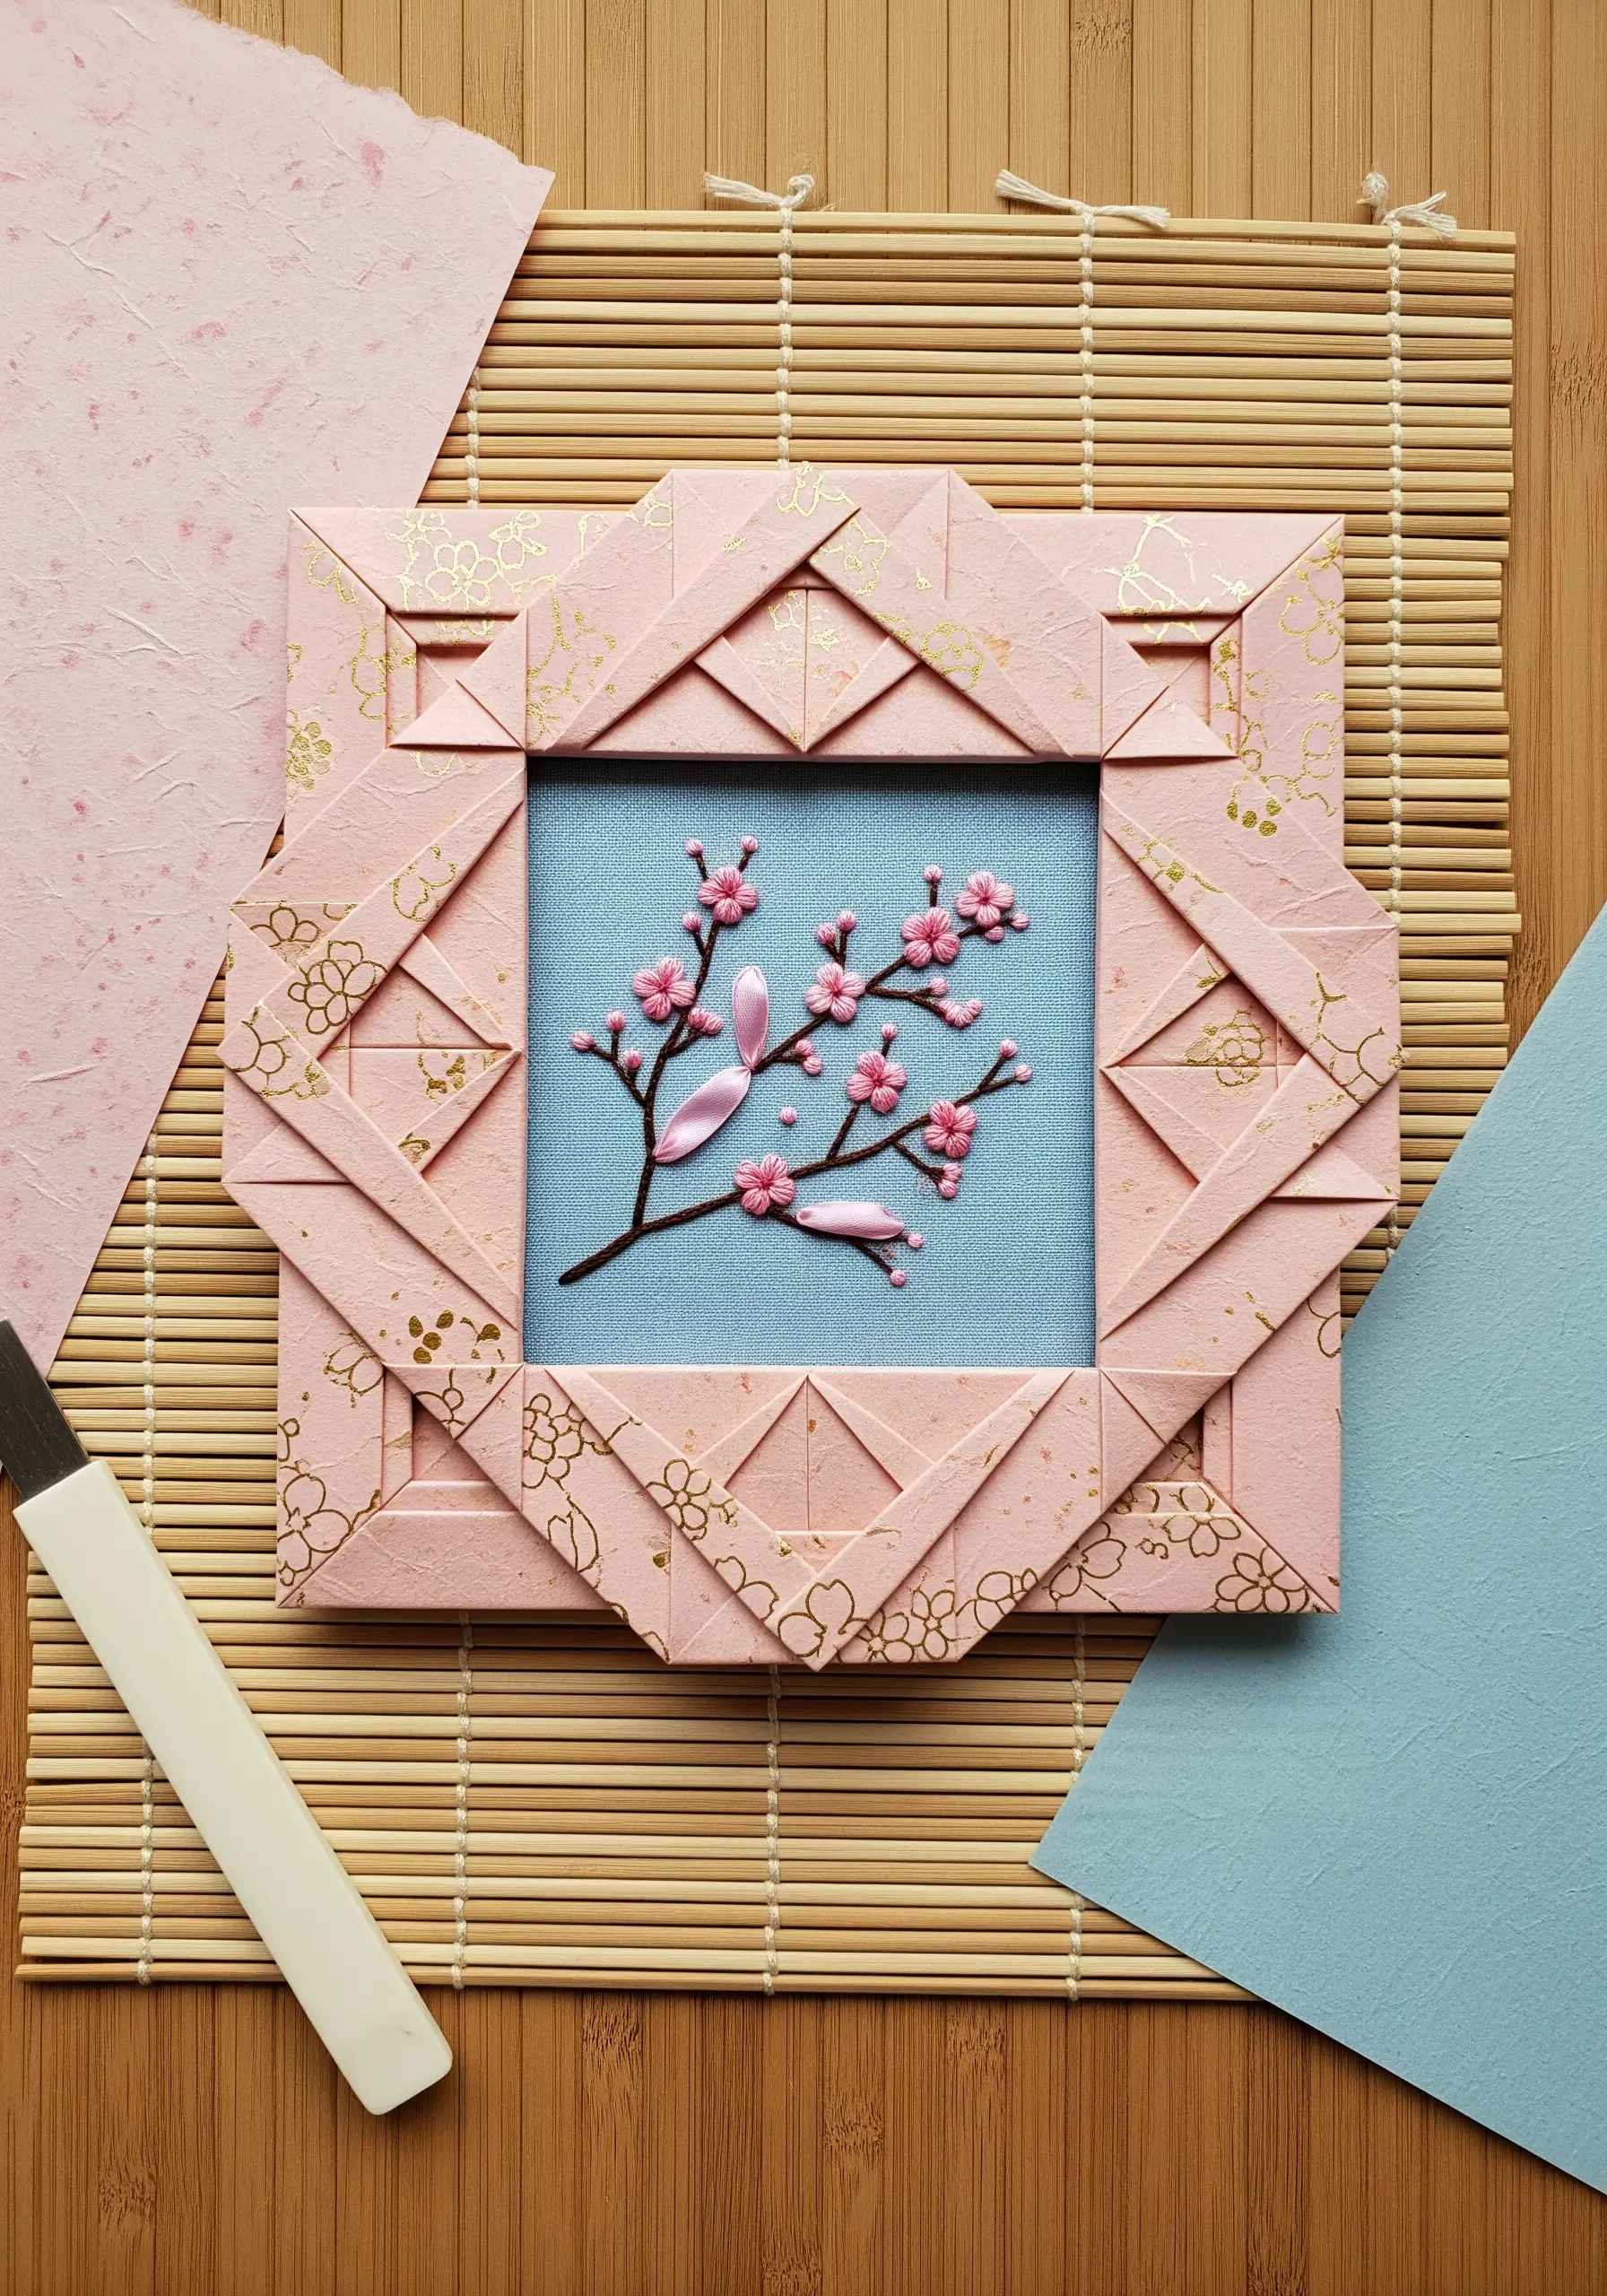
Use the precise art of origami to create a beautifully structured and geometric frame for your embroidery.
Choose a decorative paper, such as Chiyogami or Washi, to add subtle pattern and elegance to the folded design.
The crisp folds and symmetrical patterns provide a sophisticated border that feels both intricate and clean, enhancing the artwork without overwhelming it.
This Japanese-inspired technique is a natural fit for displaying delicate cherry blossom embroidery projects, creating a harmonious and culturally resonant presentation.
14. Airy Dimension with Layered Paper Lace

Create a frame with stunning, ethereal depth by layering multiple sheets of intricately cut paper lace.
Stacking identical die-cut or laser-cut designs creates subtle shadows and a three-dimensional effect that feels light and airy.
Keeping the paper a clean white allows the intricate pattern to be the star, providing a delicate yet impactful border for your stitched piece.
This approach transforms simple artwork into stunning minimalist embroidery wall art styles, perfect for adding texture without visual clutter.
15. Romantic Layers with Decoupage and Gilt

Craft a frame with vintage charm by using decoupage to apply decorative papers—like sheet music or floral prints—to a simple base.
Integrate torn edges to create soft, organic layers and add touches of gold leaf along the edges for a hint of tarnished glamour.
This technique creates a rich, narrative quality, as if the frame itself has a history.
It’s an ideal way to present romantic, vintage floral bouquet patterns, enhancing their nostalgic and heirloom appeal.
16. Whimsical Storytelling with a Paper Diorama

Bring a playful scene to life by setting your embroidery within a simple, layered paper diorama.
Cut charming shapes like trees, grass, and clouds from colored cardstock and arrange them in layers to create a storybook backdrop for your stitched character.
This method adds a delightful sense of place and personality, making the artwork feel more immersive and complete.
It’s a perfect choice for nursery stitch art wall ideas, turning a simple embroidered animal into a treasured character in its own little world.
17. Organic Landscapes with Torn Paper Layers

Evoke the soft, layered look of a mountain range or a rugged coastline with a frame made from torn paper.
Select papers in a muted, analogous color palette and tear them to create soft, feathered edges, then layer them to build texture and depth.
A few simple running stitches can be added to the paper itself to unify the frame with the stitched artwork.
This technique beautifully complements linear, nature-inspired embroidery and is a stunning way to display earth-tone embroidery projects.
18. Playful Structure with a Scalloped Border

Add a touch of sweet, retro charm with a simple frame cut from craft foam or heavy cardstock with a clean, scalloped edge.
Mount your finished embroidery—either in a small hoop or trimmed and adhered to a backing—onto a contrasting colored paper mat.
The soft curves of the scalloped border provide a playful structure that is perfect for whimsical subjects and bright color palettes.
This is an easy and effective way to frame quick cute stitch designs, giving them a polished and cheerful finish that’s ready to display.


