
Sometimes, the quietest voice in your head is the one asking for more—not more complexity, but more intention. You have the threads, the fabric, and the desire, but you’re looking for that shift that turns a pleasant pastime into a true artistic practice.
Forget the pressure to create a masterpiece with every stitch. Instead, let’s focus on the small, deliberate choices that elevate your work from handmade to artful. It’s in the way you direct a single stitch to catch the light, the decision to use three strands of floss instead of six, or the courage to embrace negative space.
Here, you’ll find ideas rooted in technique and modern aesthetics. Each one is a quiet invitation to refine your eye, trust your hands, and create botanical silhouettes that feel less like patterns and more like personal expressions, captured in thread.
1. Master the Flawless Satin Stitch Fill
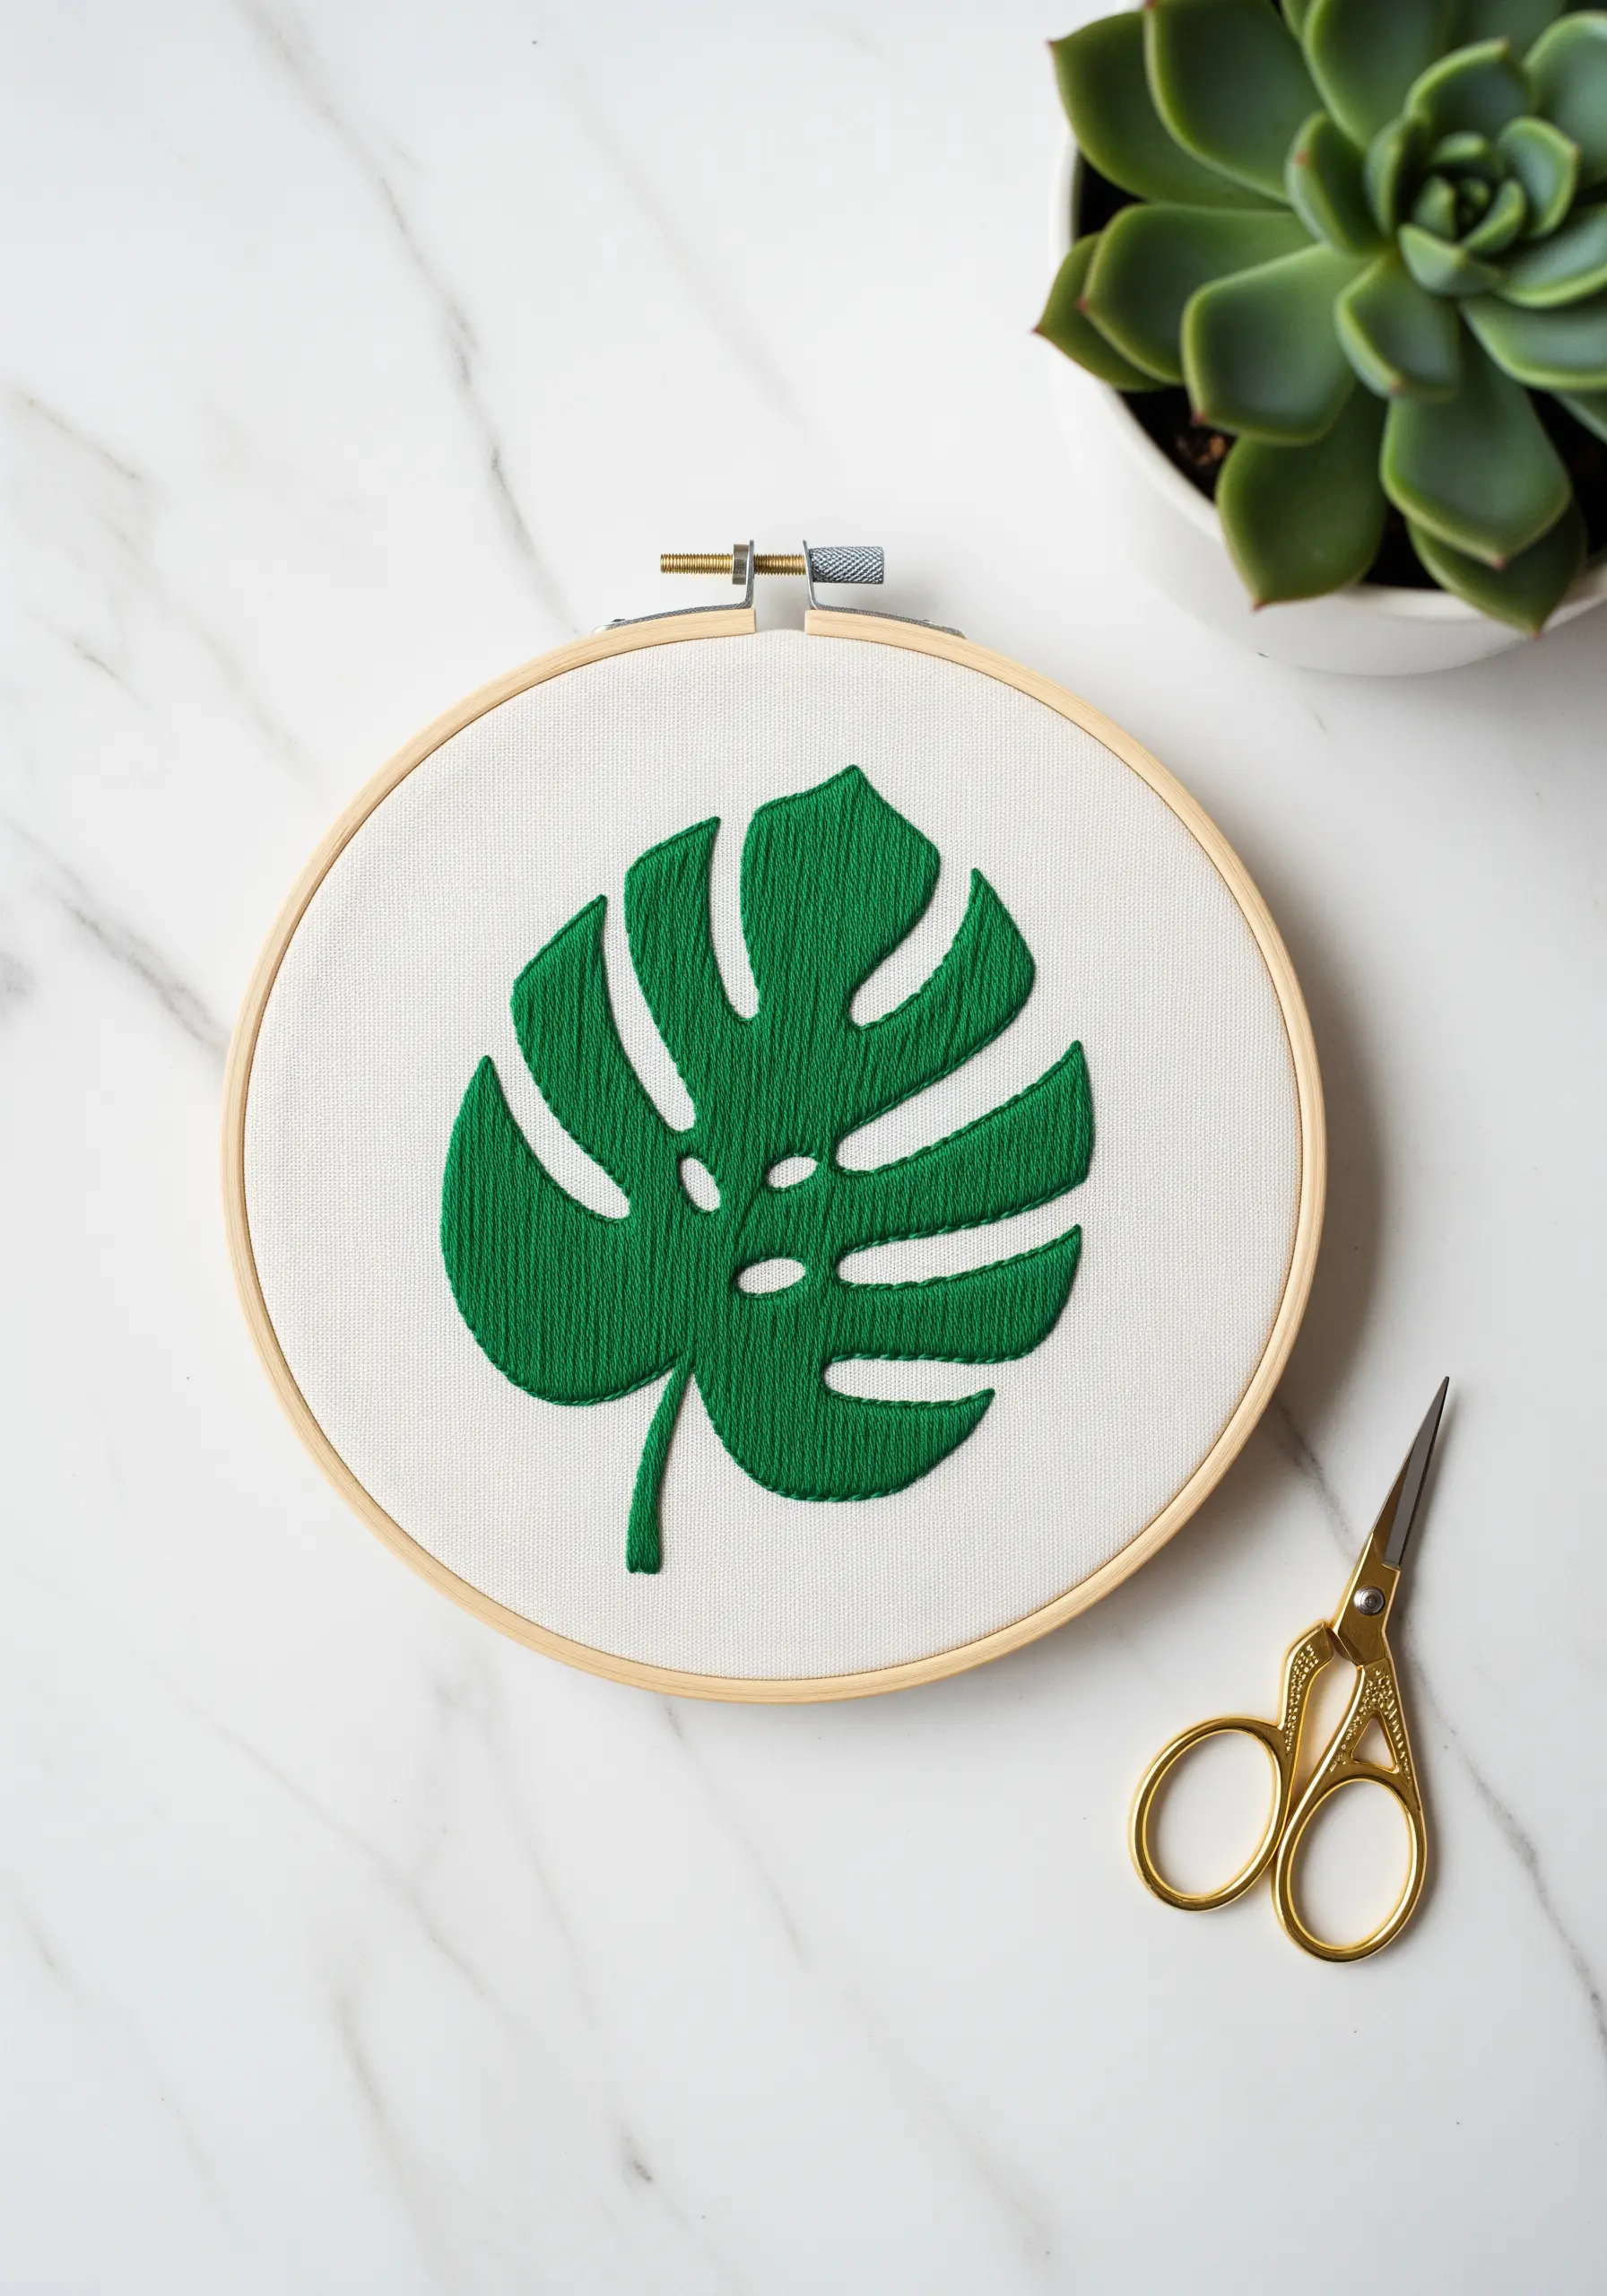
To achieve a perfectly smooth, solid fill for a bold silhouette like the Monstera leaf, first outline the entire shape with a single row of split stitch.
This raised edge acts as a guide and prevents your satin stitches from pulling or distorting the fabric, ensuring a crisp, defined border.
Use all six strands of cotton floss for a dense, high-coverage effect, and keep every stitch parallel to the one before it.
The key to a uniform sheen is maintaining a consistent stitch direction across the entire shape.
2. Create Fine-Art Effects with Metallic Line Work
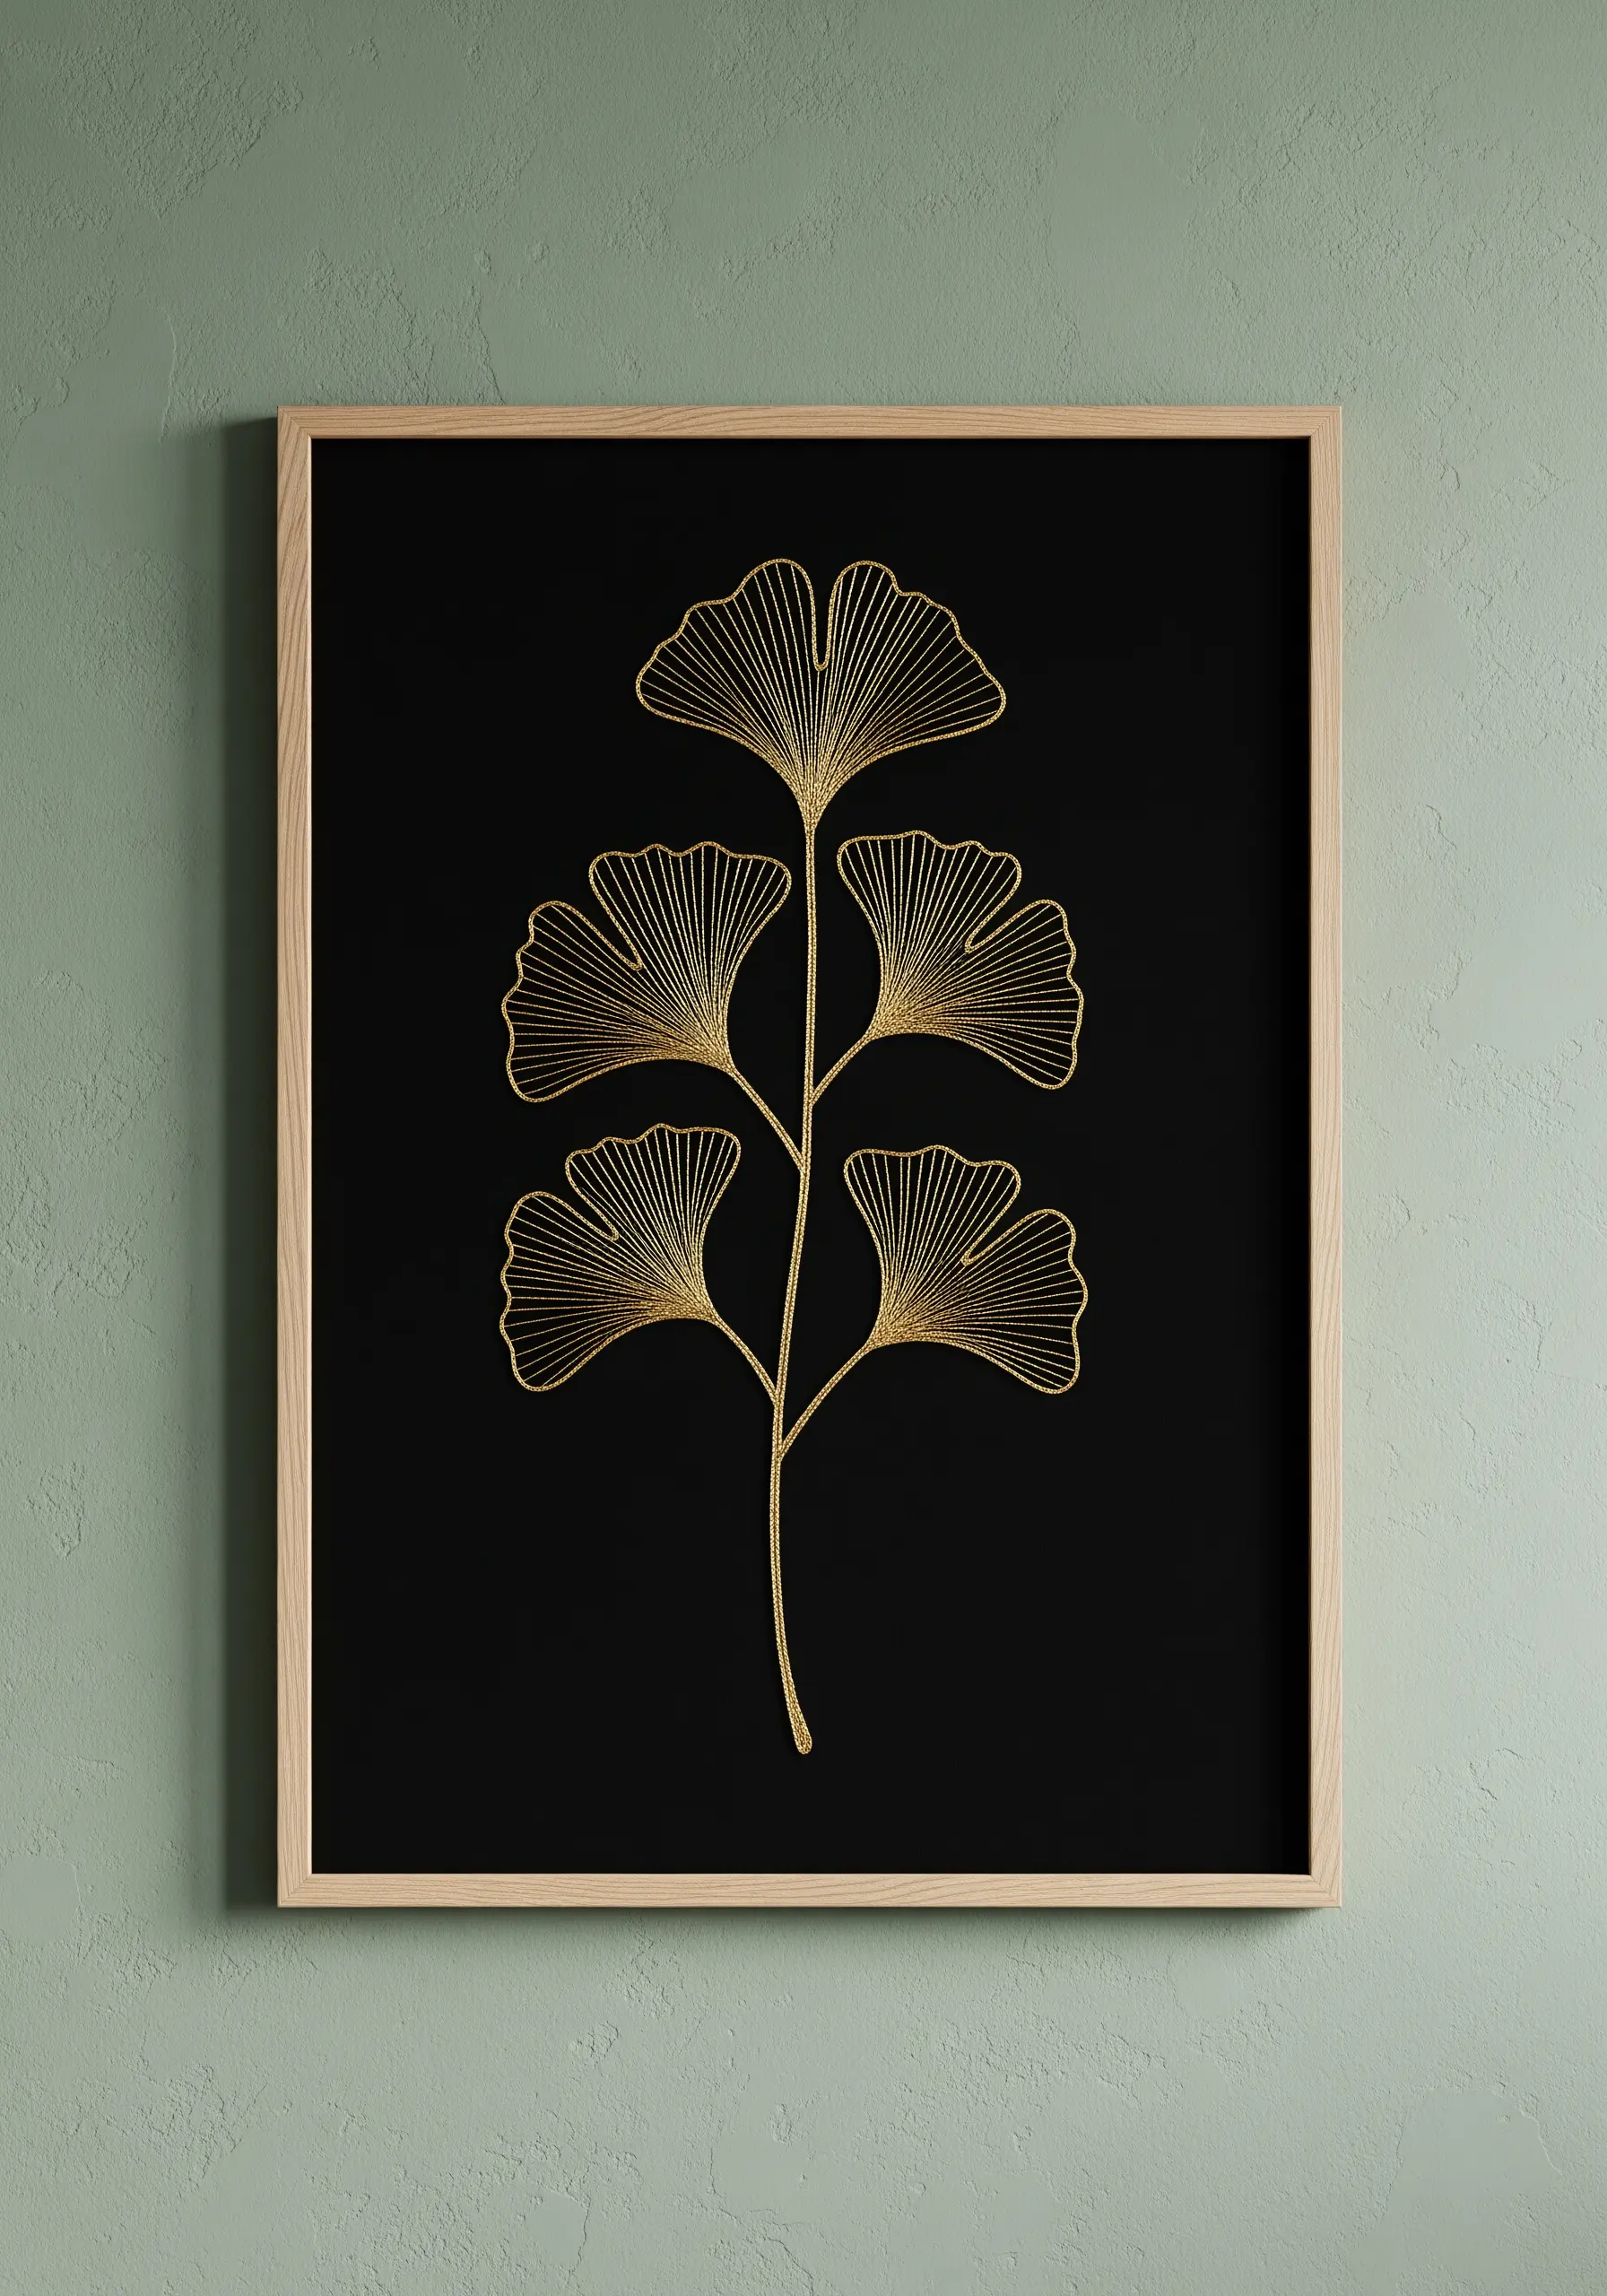
For an elegant, graphic statement, use a single strand of gold metallic thread on a dark, tightly woven fabric like black cotton or linen.
The high contrast makes every stitch count, transforming simple lines into sophisticated art.
To prevent metallic thread from twisting or snagging, use a shorter length than you normally would and consider a thread conditioner like beeswax.
This technique elevates a simple botanical sketch into dramatic metallic thread wall art that captures the light beautifully.
3. Build Tonal Depth with a Monochrome Palette

Create sophisticated texture without overwhelming the eye by working with a single color on a contrasting background.
Select a light thread, like pale blue or silver-gray, and stitch onto a deep navy or charcoal fabric.
Vary your stitches to build interest: use satin stitch for the leaves, a delicate chain stitch for the hanging details, and a simple stem stitch for the branches.
This restrained approach emphasizes form and texture, proving that you don’t need a full spectrum of color to create a visually rich piece.
4. Sculpt 3D Petals with the Turkey Stitch
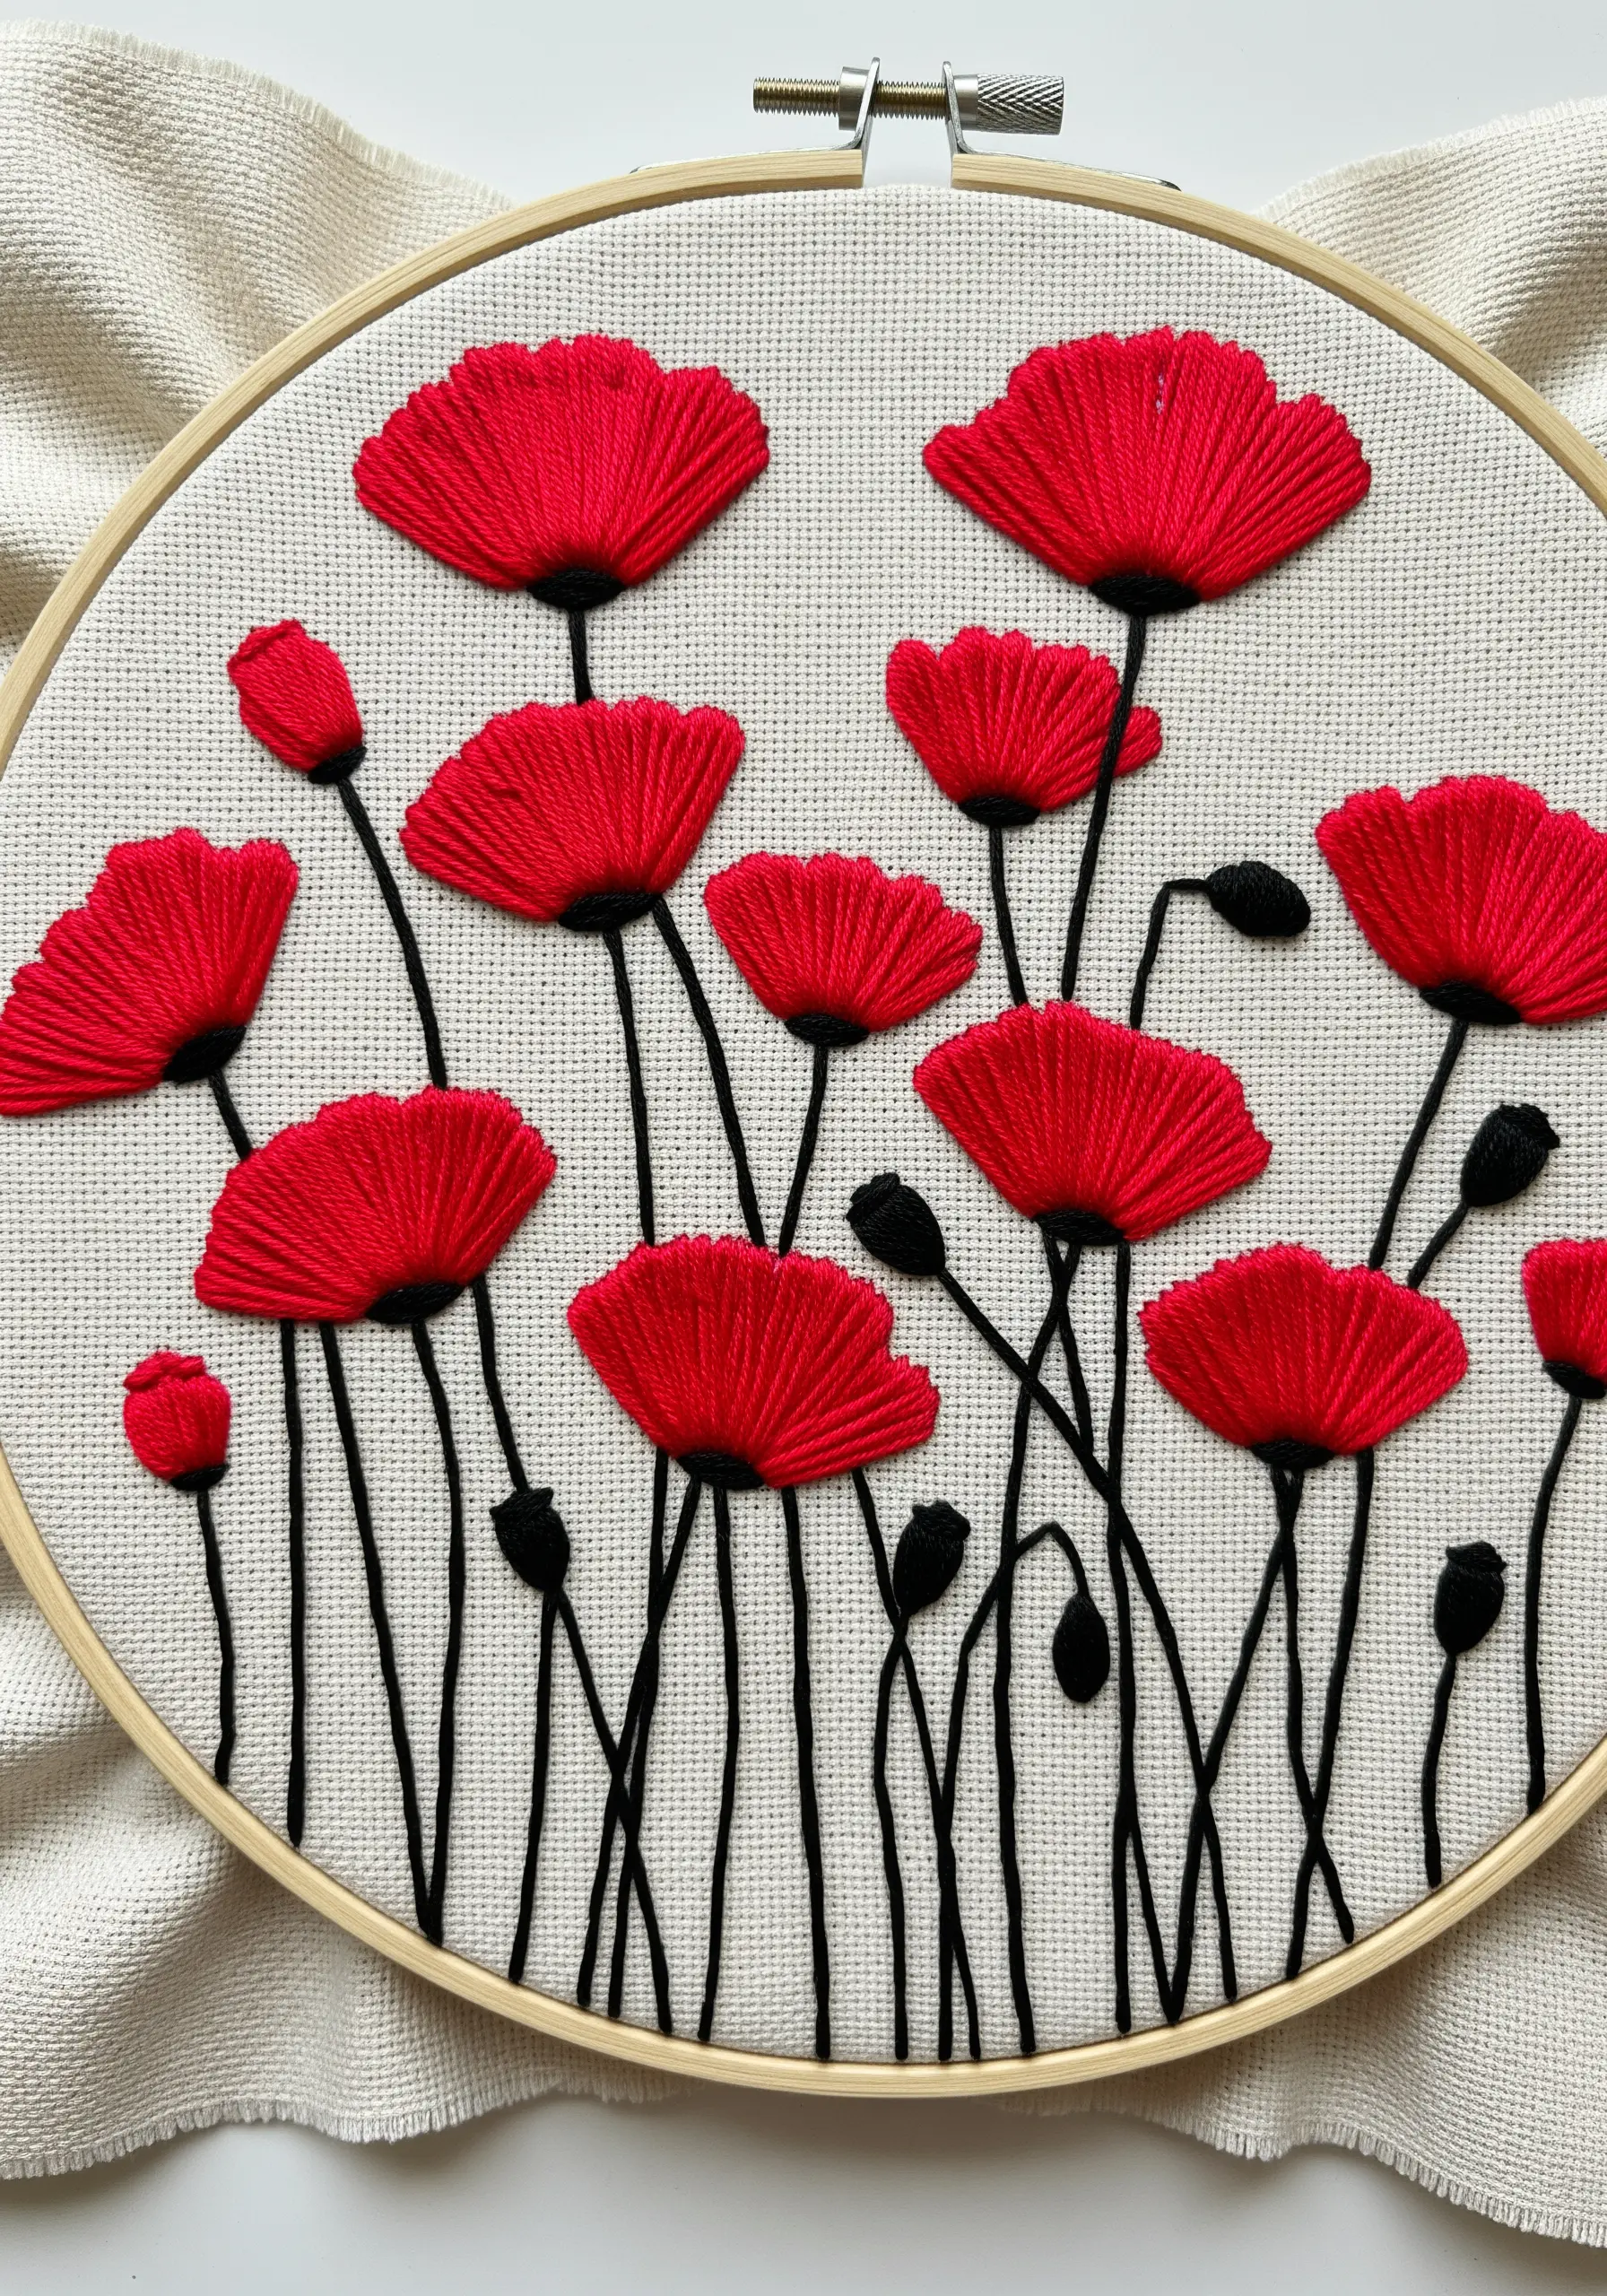
To give your flowers a lifelike, three-dimensional quality, move beyond flat stitches.
Use the turkey stitch (or long, unsecured straight stitches anchored at the flower’s base) to create loops that you can then trim to form velvety, fanned-out petals.
Contrast this high texture with simple, flat stem stitches for the stalks and solid French knots for the unopened buds.
This textural play between the bold red petals and the stark black stems creates a dynamic composition with incredible depth.
5. Capture Delicate Detail with the Fishbone Stitch
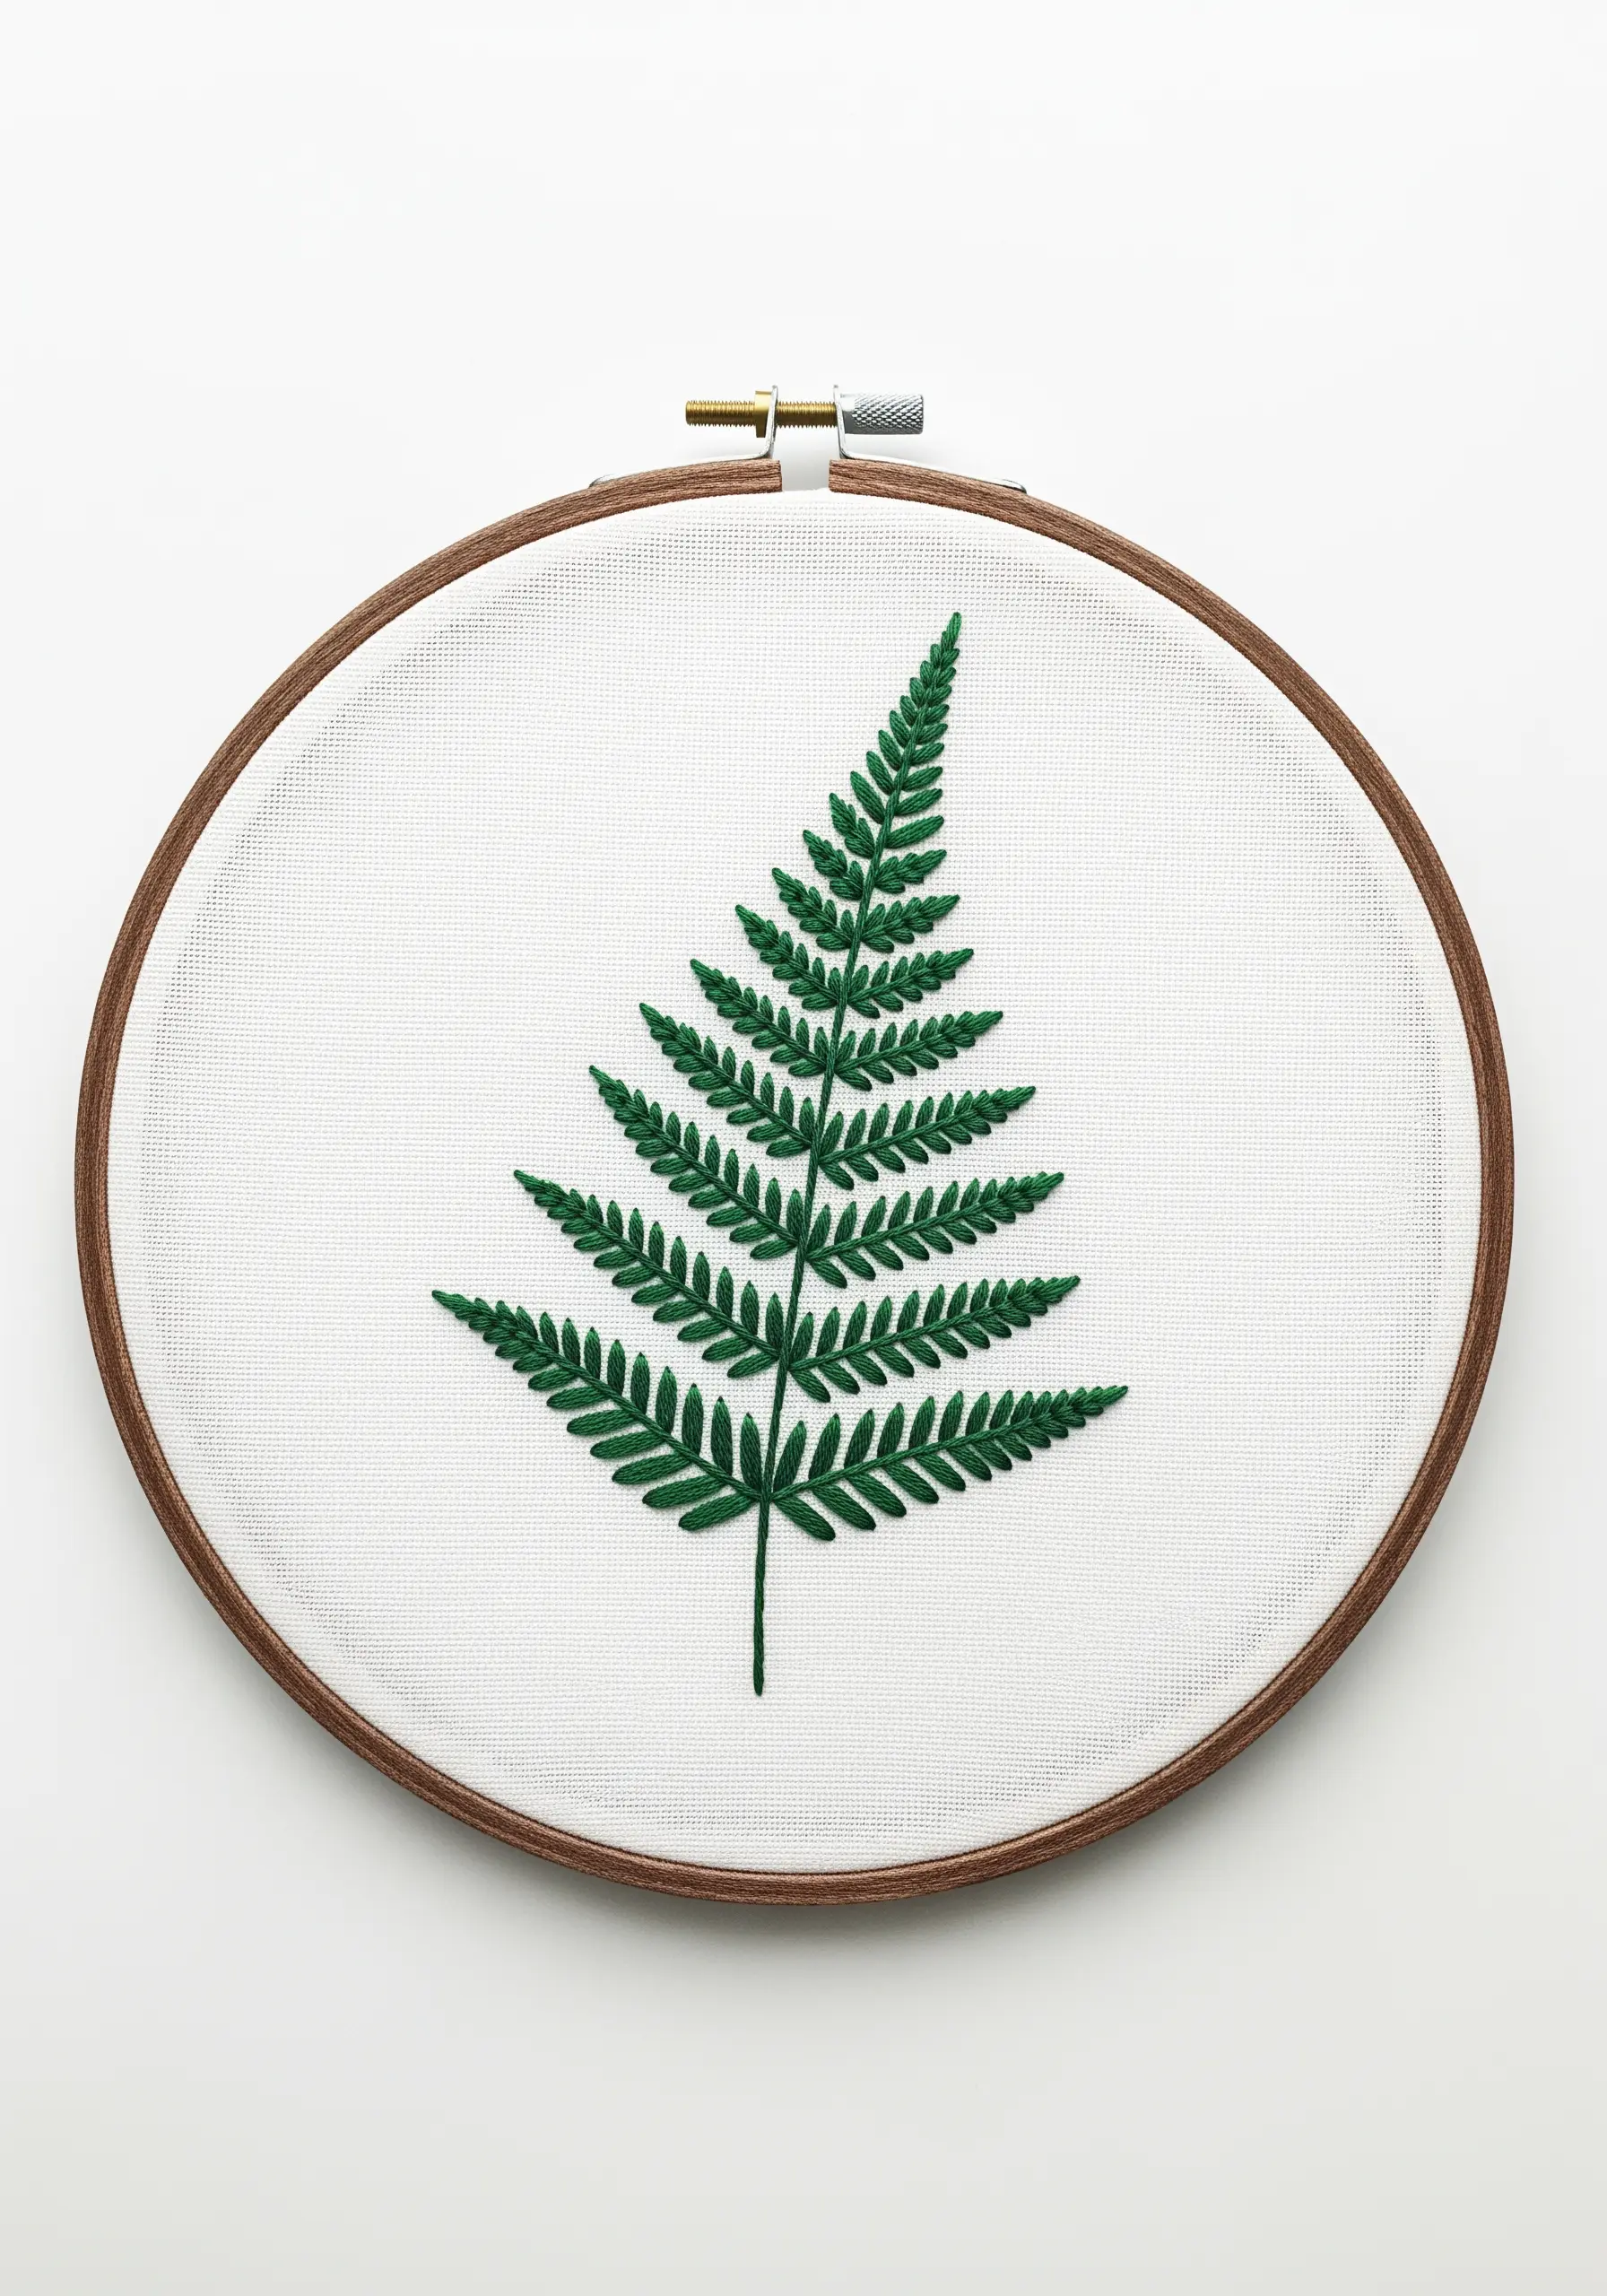
For intricate botanicals like ferns, the fishbone stitch is your greatest tool. It creates a central vein and angled leaflets all in one fluid motion.
Work with only two or three strands of floss to keep the stitches fine and avoid a bulky appearance.
Start each leaflet stitch at the outer edge and bring your needle down just over the central stem line, alternating sides as you work your way down.
This technique ensures a clean, symmetrical finish that perfectly captures the fern’s delicate structure.
6. Design a Cohesive Series with Color Variation
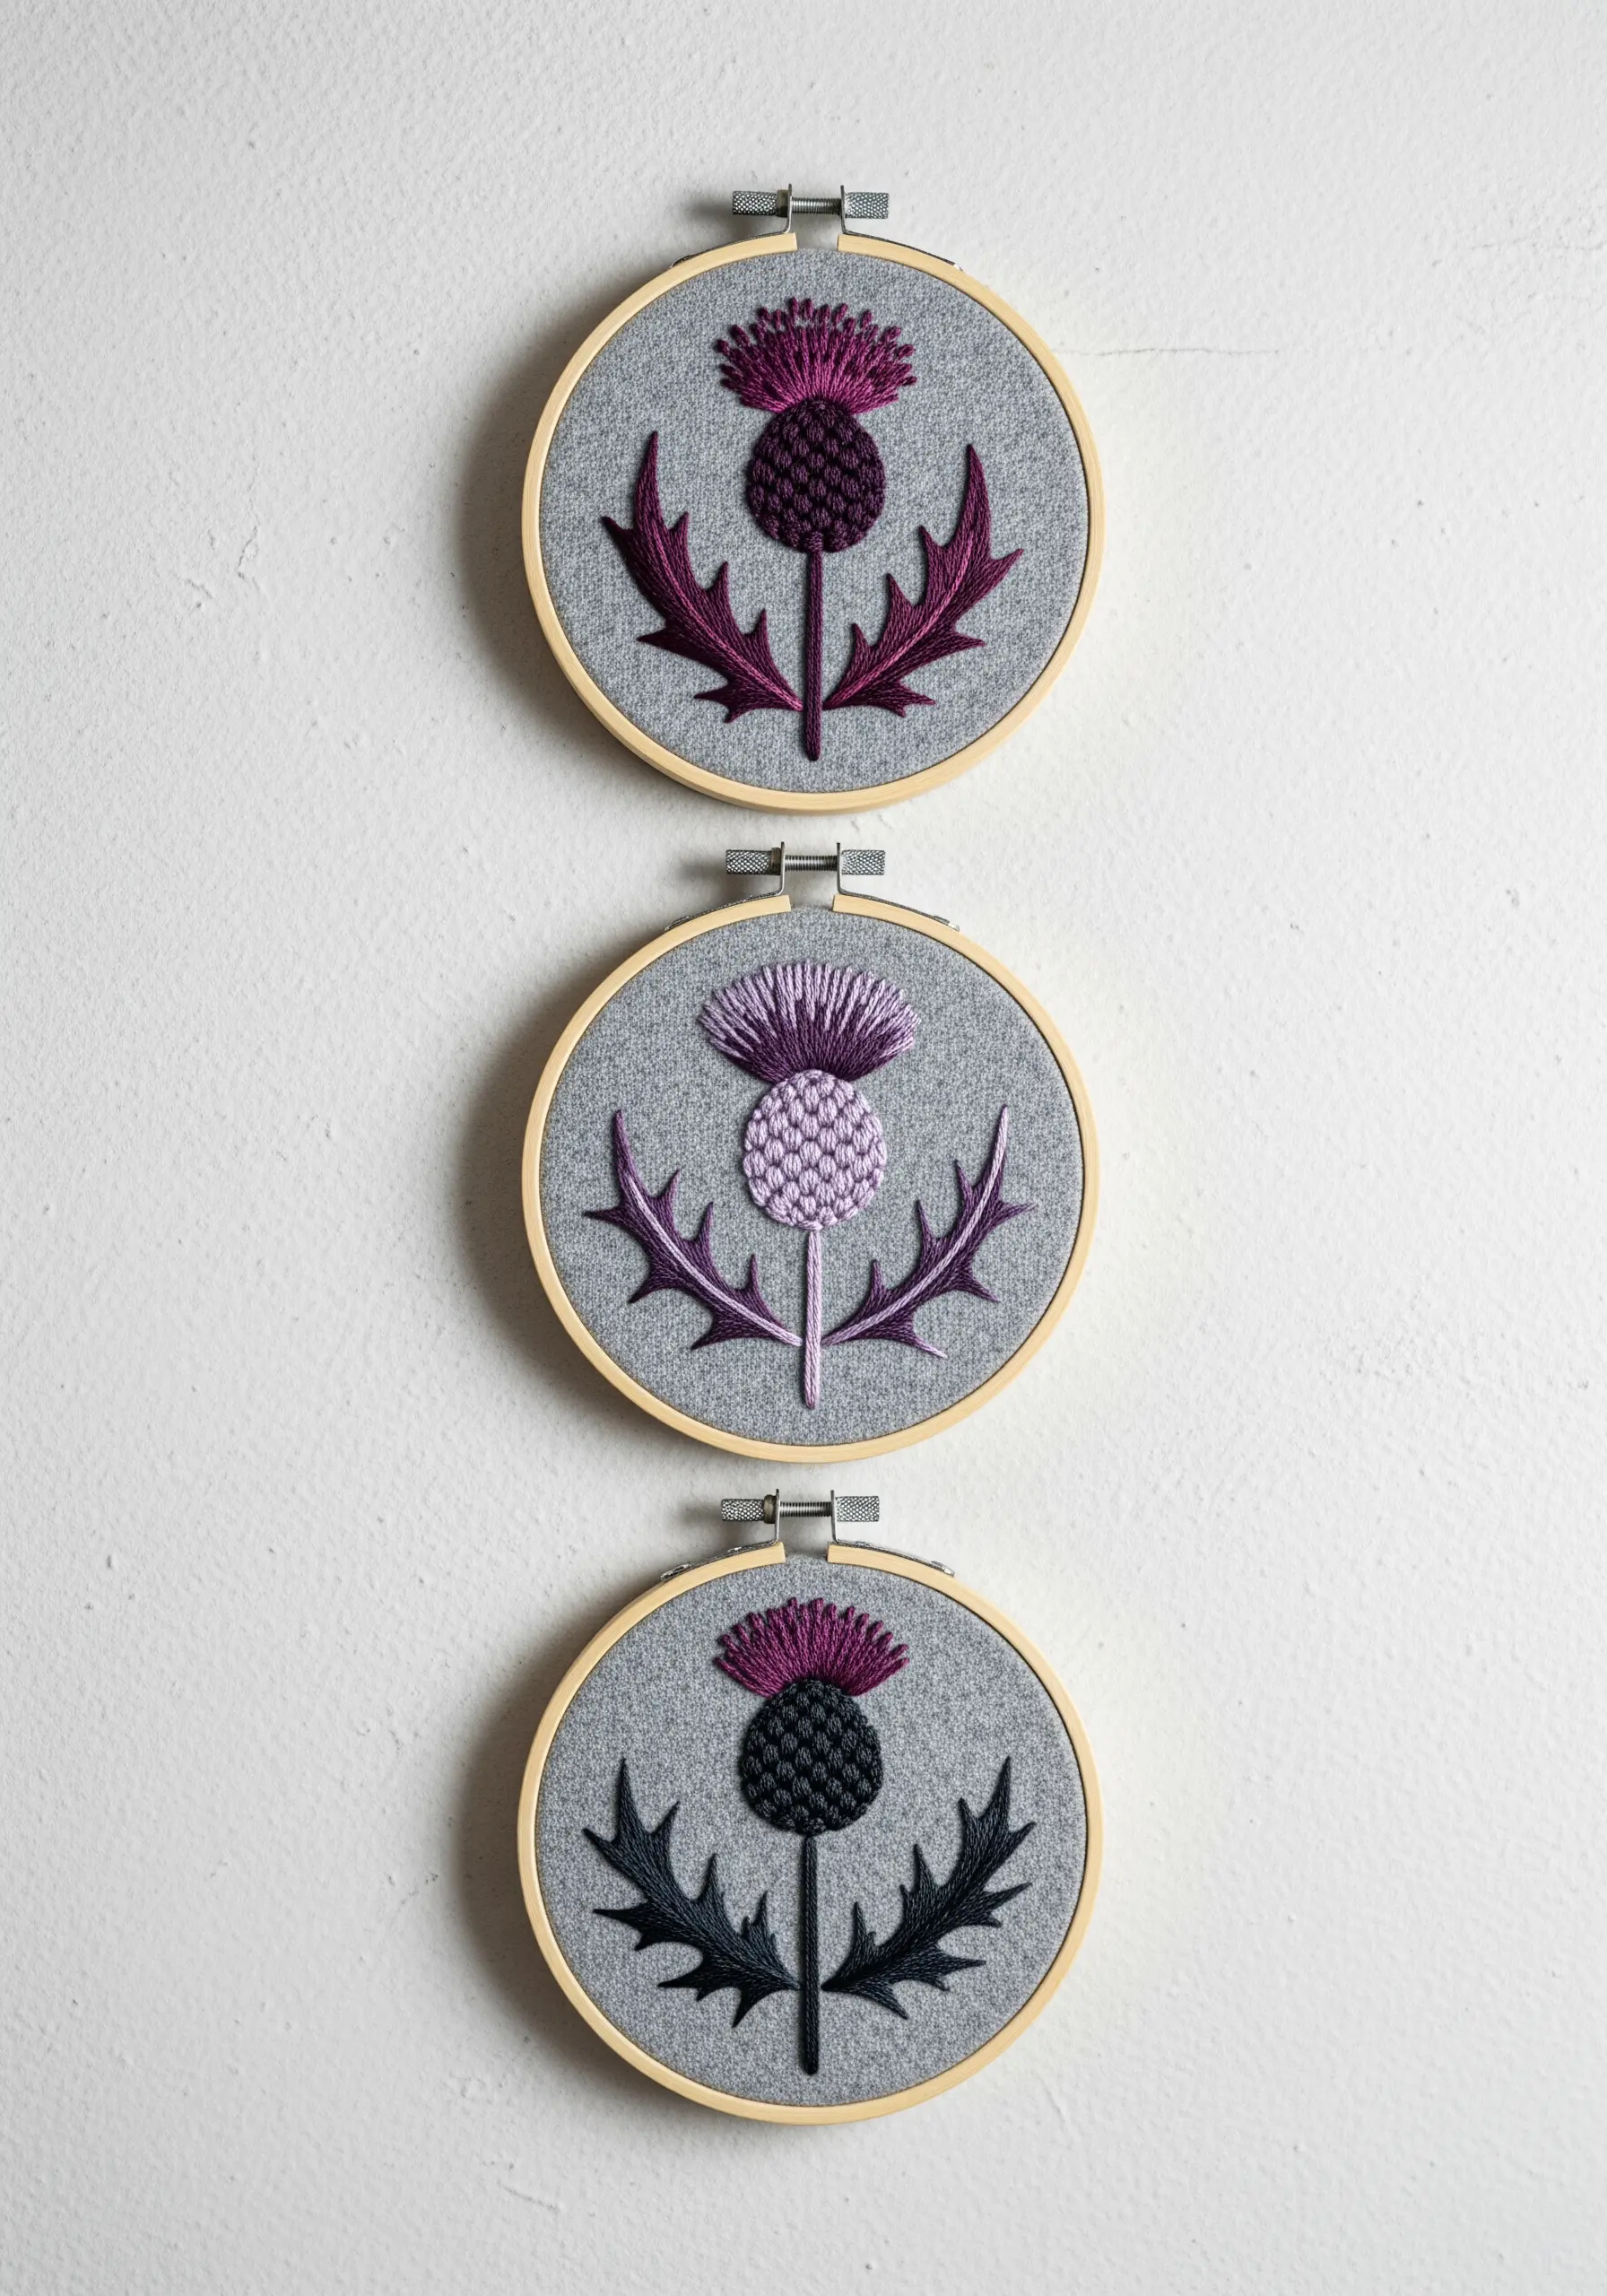
Elevate a simple motif by creating a triptych. Stitch the same thistle design three times, but introduce a subtle color variation in each hoop.
Keep the fabric and outline colors consistent to unify the series—here, the gray linen and dark leaf outlines are the constant.
Then, simply swap the fill colors for the flower heads and leaf accents, moving through a palette of related shades like magenta, lavender, and charcoal.
This creates a sophisticated set of minimal DIY embroidery projects that feel intentional and thoughtfully curated.
7. Blend Vibrant Color with Long-and-Short Stitch
Achieve a smooth, painterly transition from one color to another using the long-and-short stitch.
Start with your first color, making a row of alternating long and short satin stitches. Then, bring your second color up through the fabric and nestle its stitches into the gaps left by the first row.
This technique physically blends the threads, creating a seamless gradient that gives botanicals energy and movement.
It’s the perfect way to explore gradient color floral embroidery ideas without any harsh lines.
8. Add Dimension with Knots and Beads
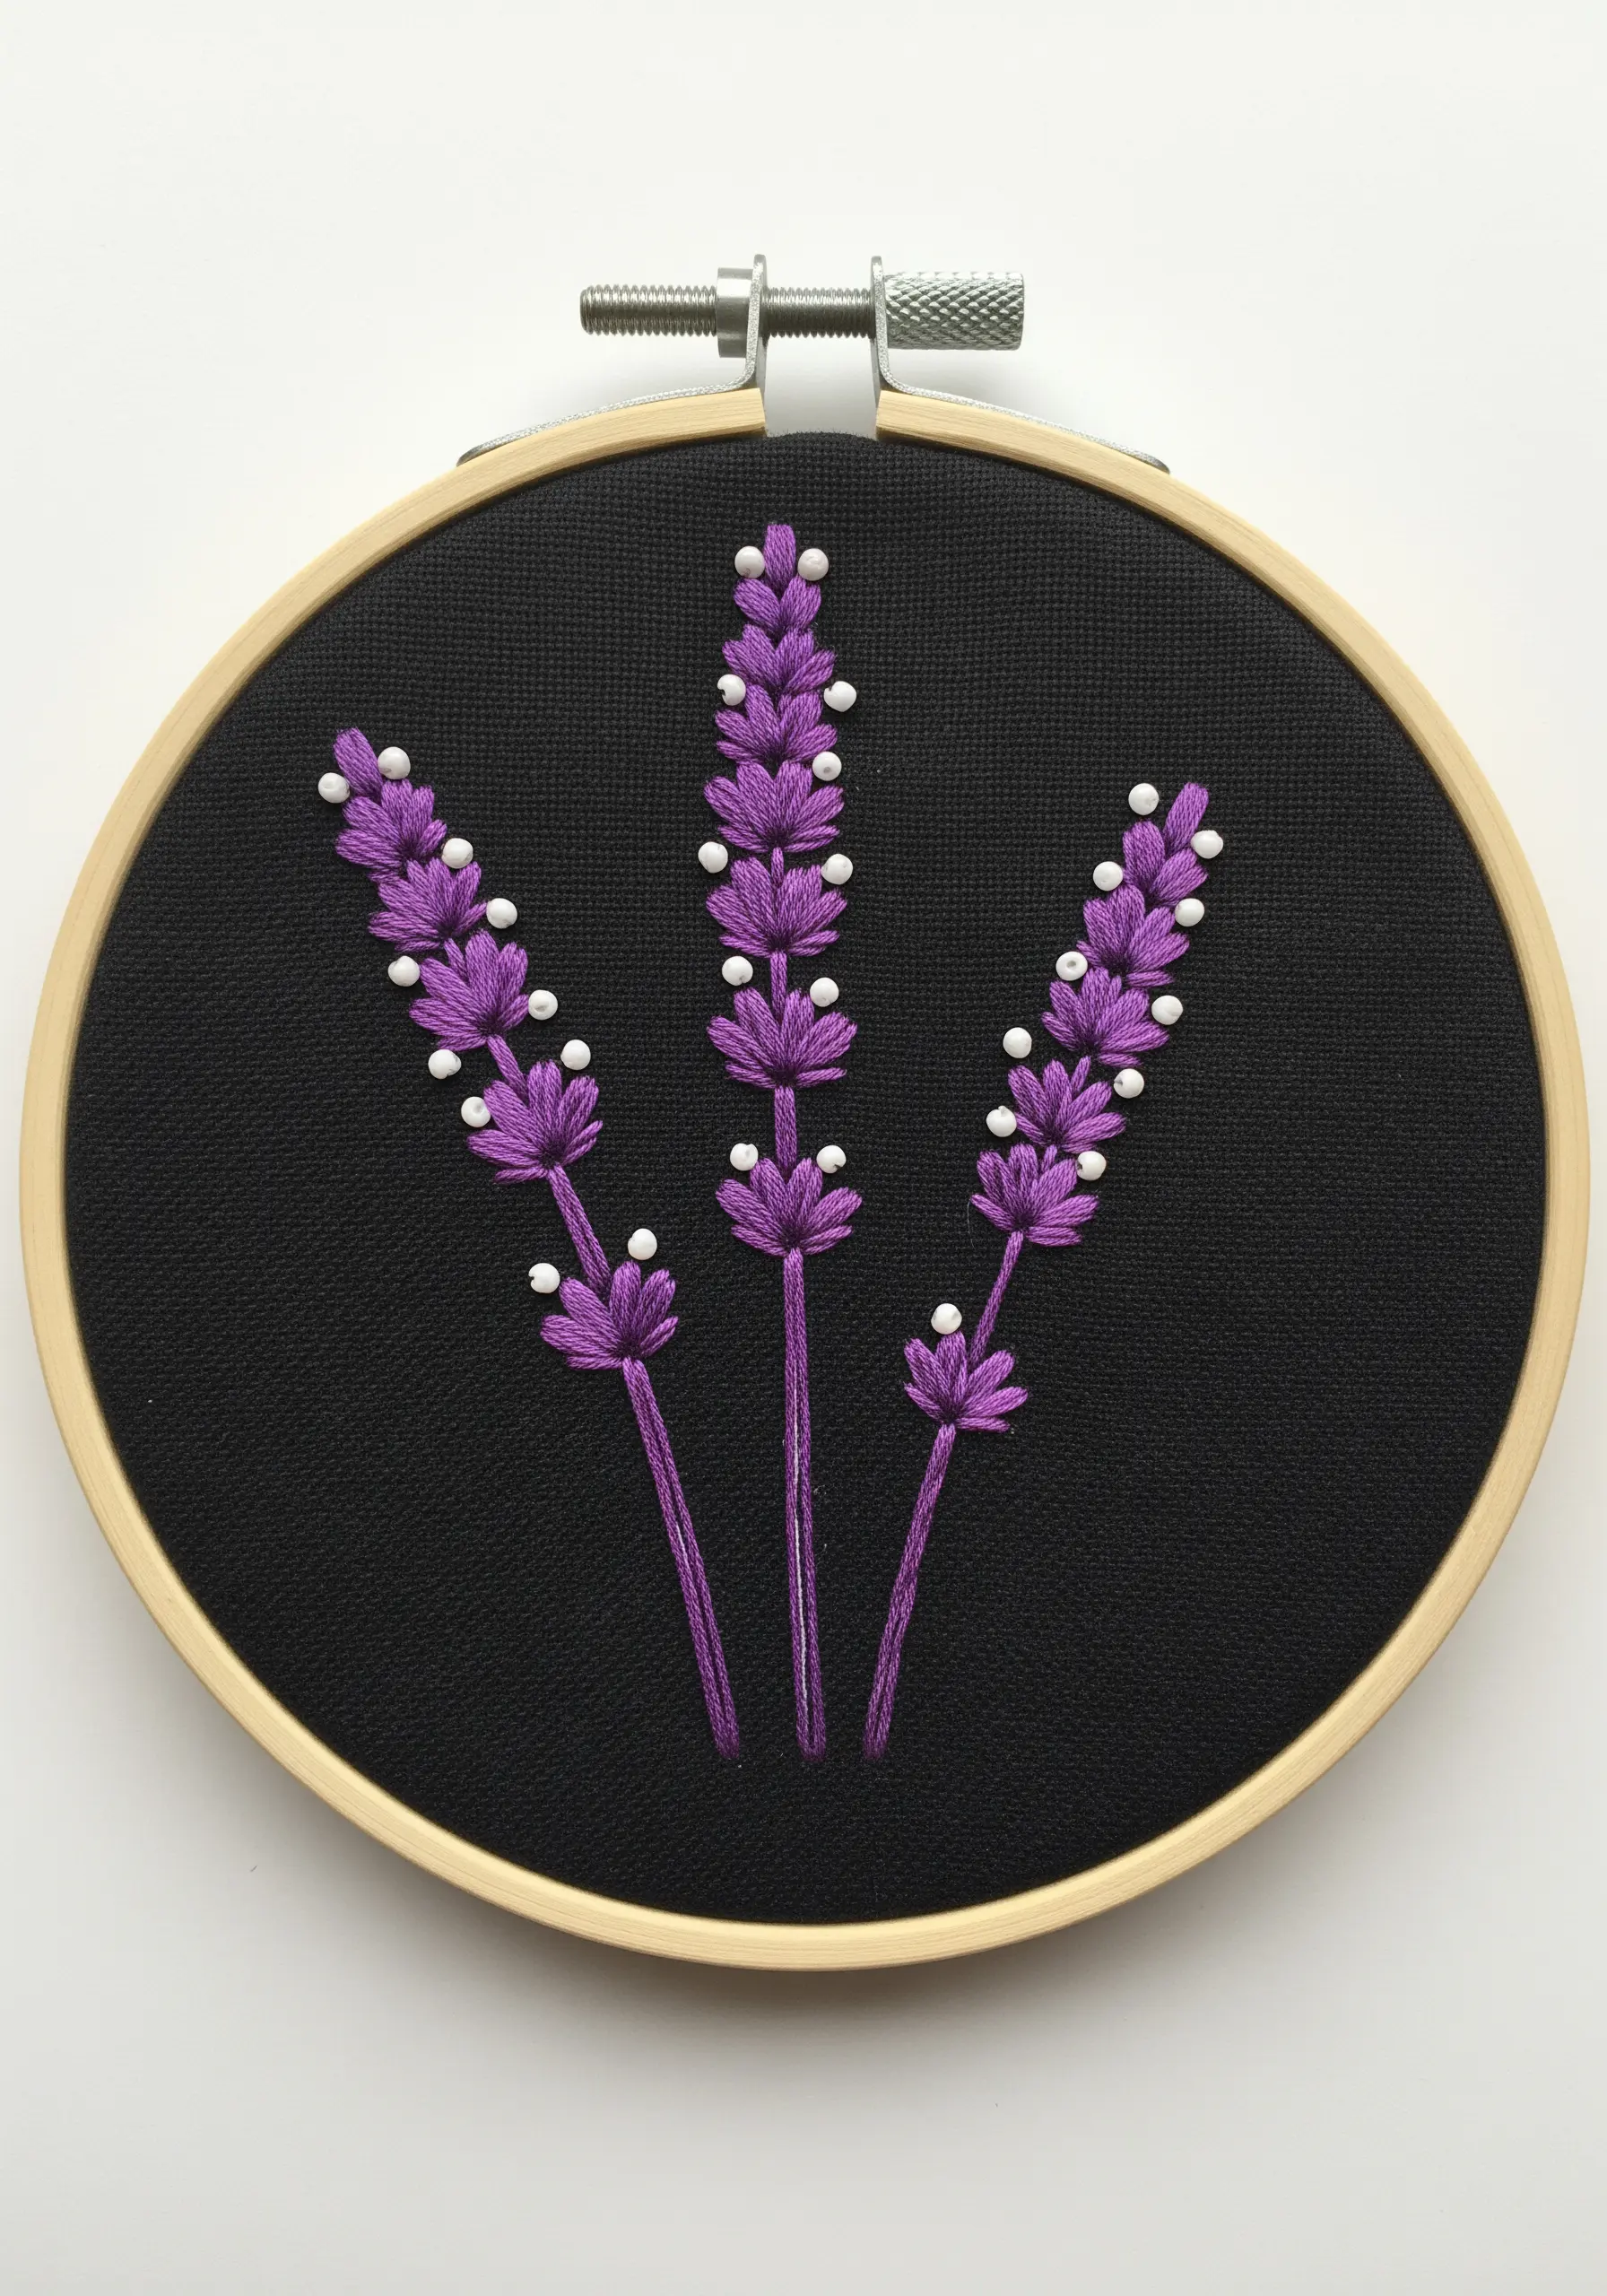
Introduce subtle dimension to your lavender stalks by combining classic stitches with mixed-media elements.
Use a simple stem stitch for the stalks and fill the lavender buds with tightly packed French knots in a vibrant purple.
For a touch of refinement and light, sparsely scatter tiny white seed beads among the knots. This mimics the delicate, unopened florets and adds a modern sparkle.
The contrast between the matte thread and the glossy beads on black fabric is visually striking and incredibly elegant.
9. Define Shapes with Expressive Outlines
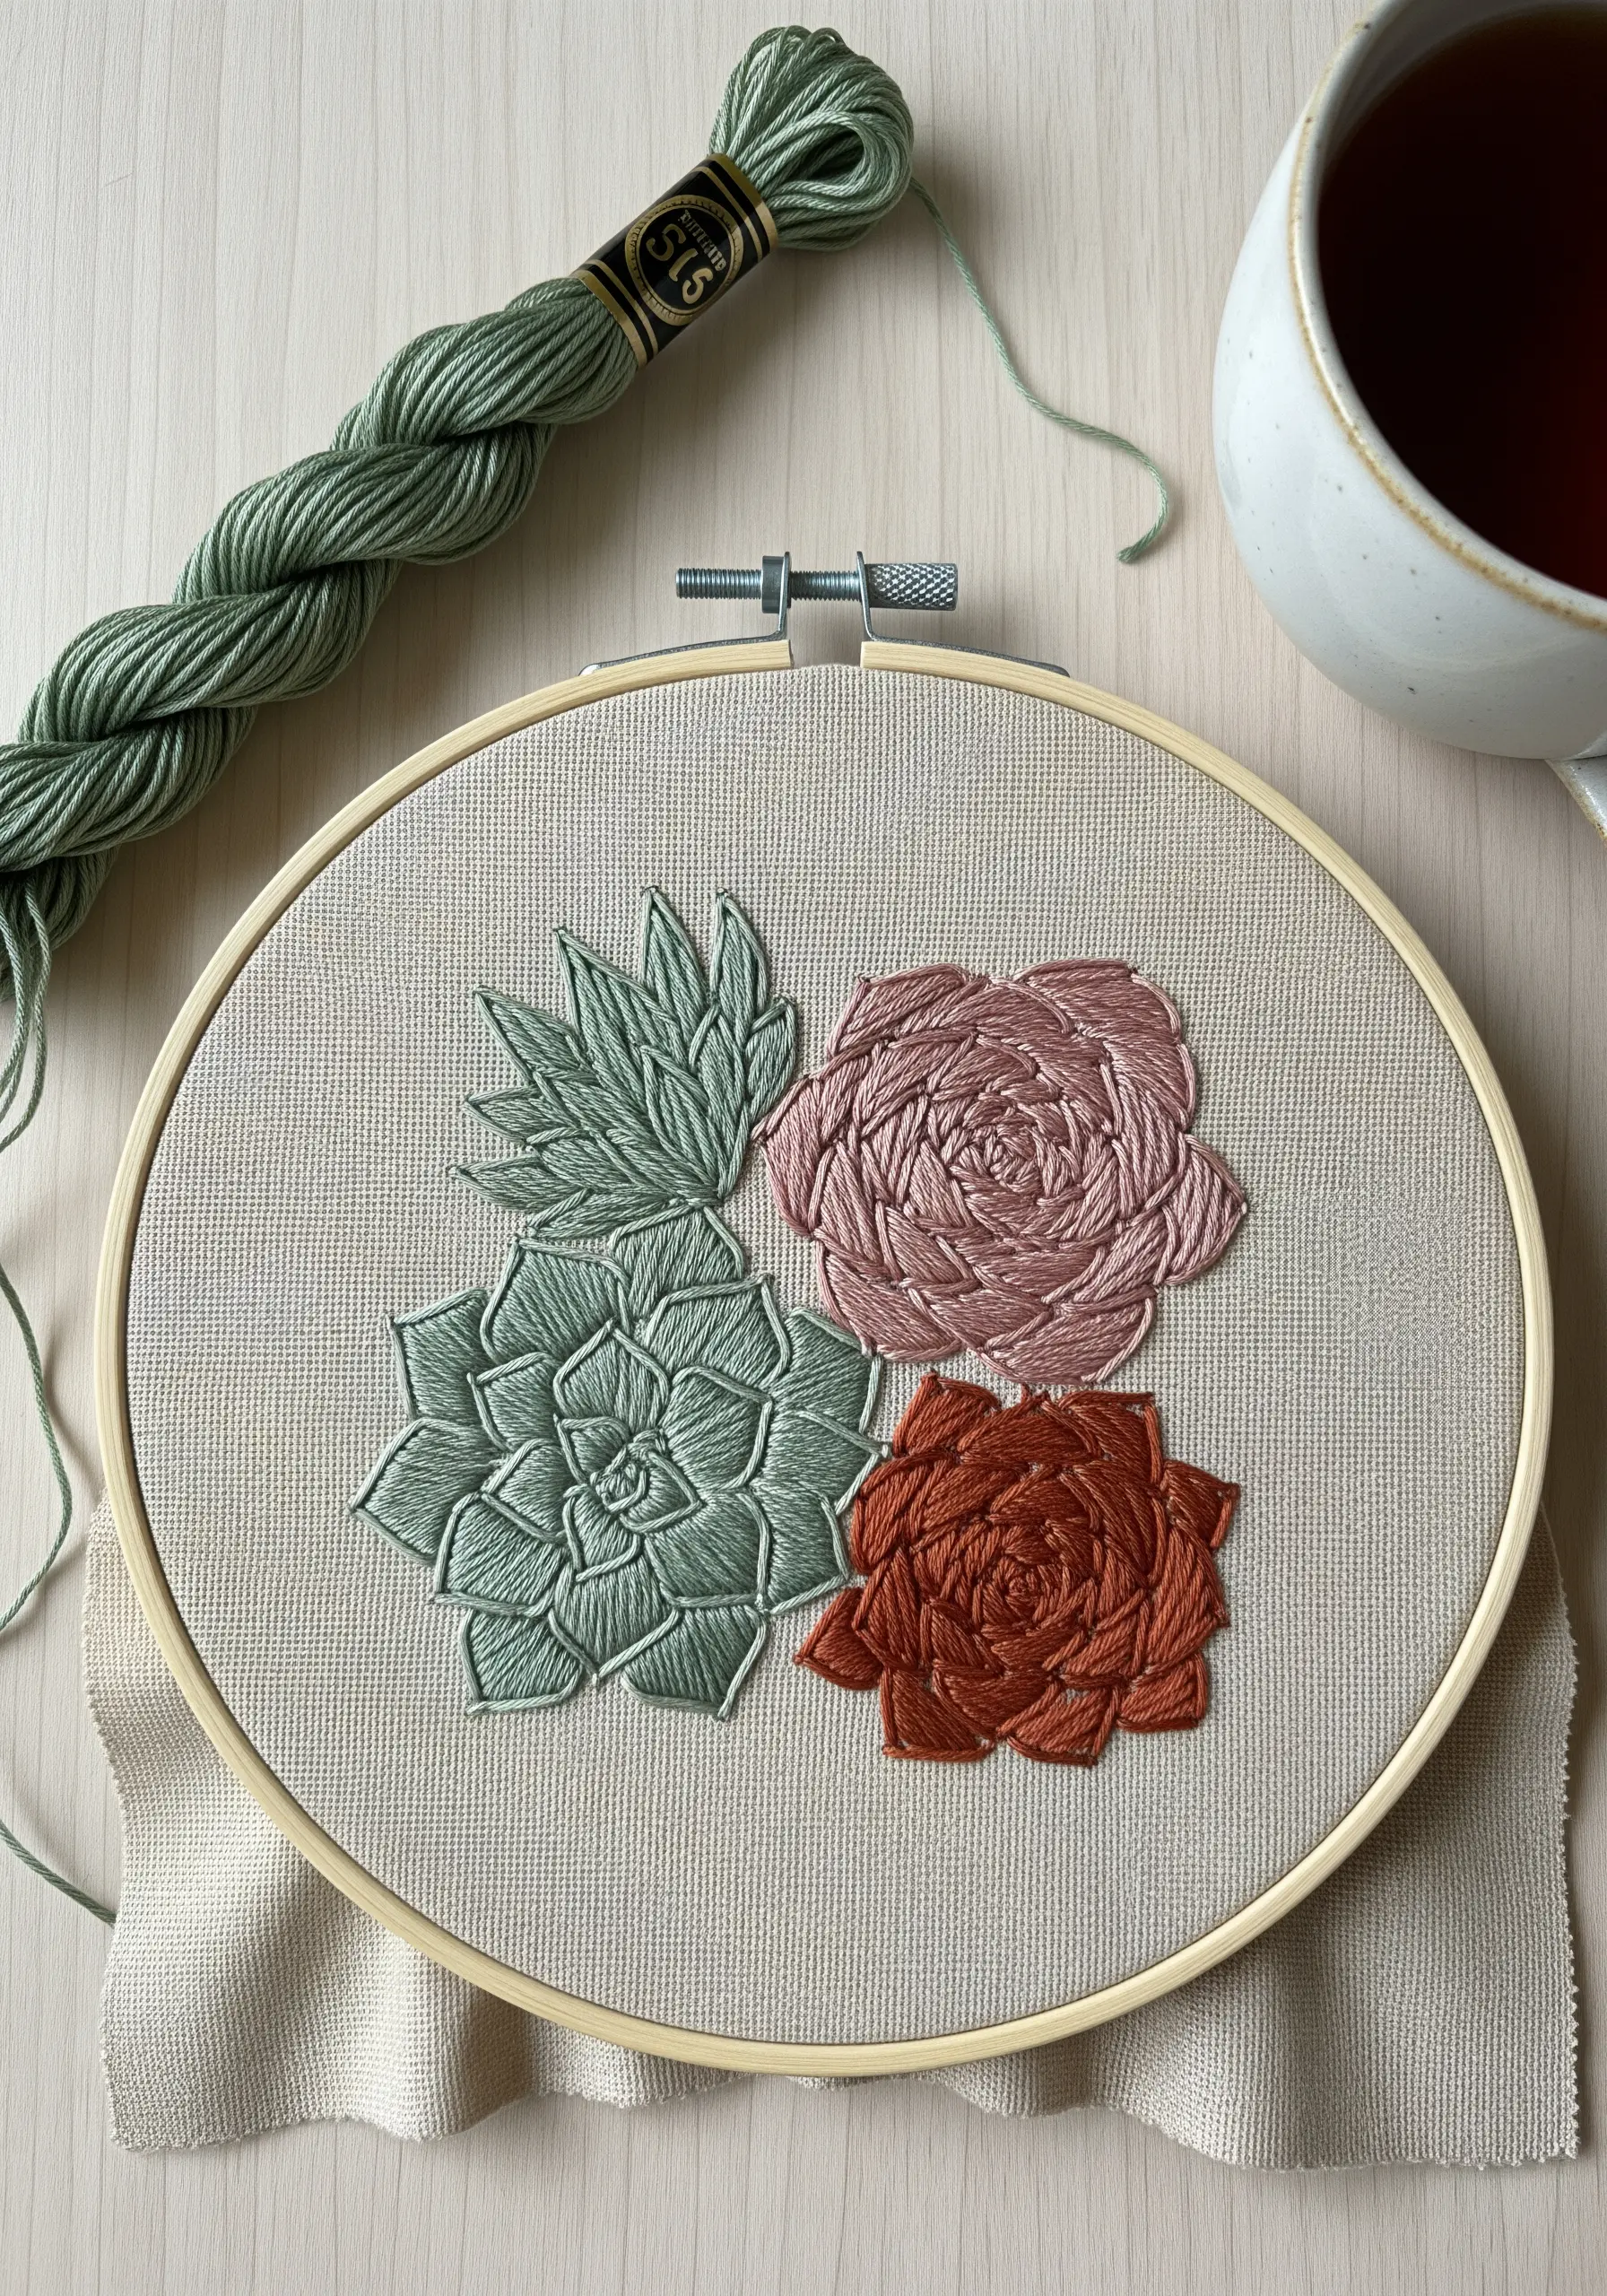
You don’t always need to fill a shape completely. Suggest form and detail with intentional outlines alone.
Use a stem stitch or a split stitch to trace the delicate edges of succulent petals. This approach feels modern and light, allowing the fabric’s color and texture to become part of the design.
Varying the direction of your outline stitches can also suggest the curvature and growth pattern of the plant, adding a layer of realism with minimal effort.
This technique is perfect for creating organic embroidery designs that feel both graphic and delicate.
10. Embroider on Denim with Confidence
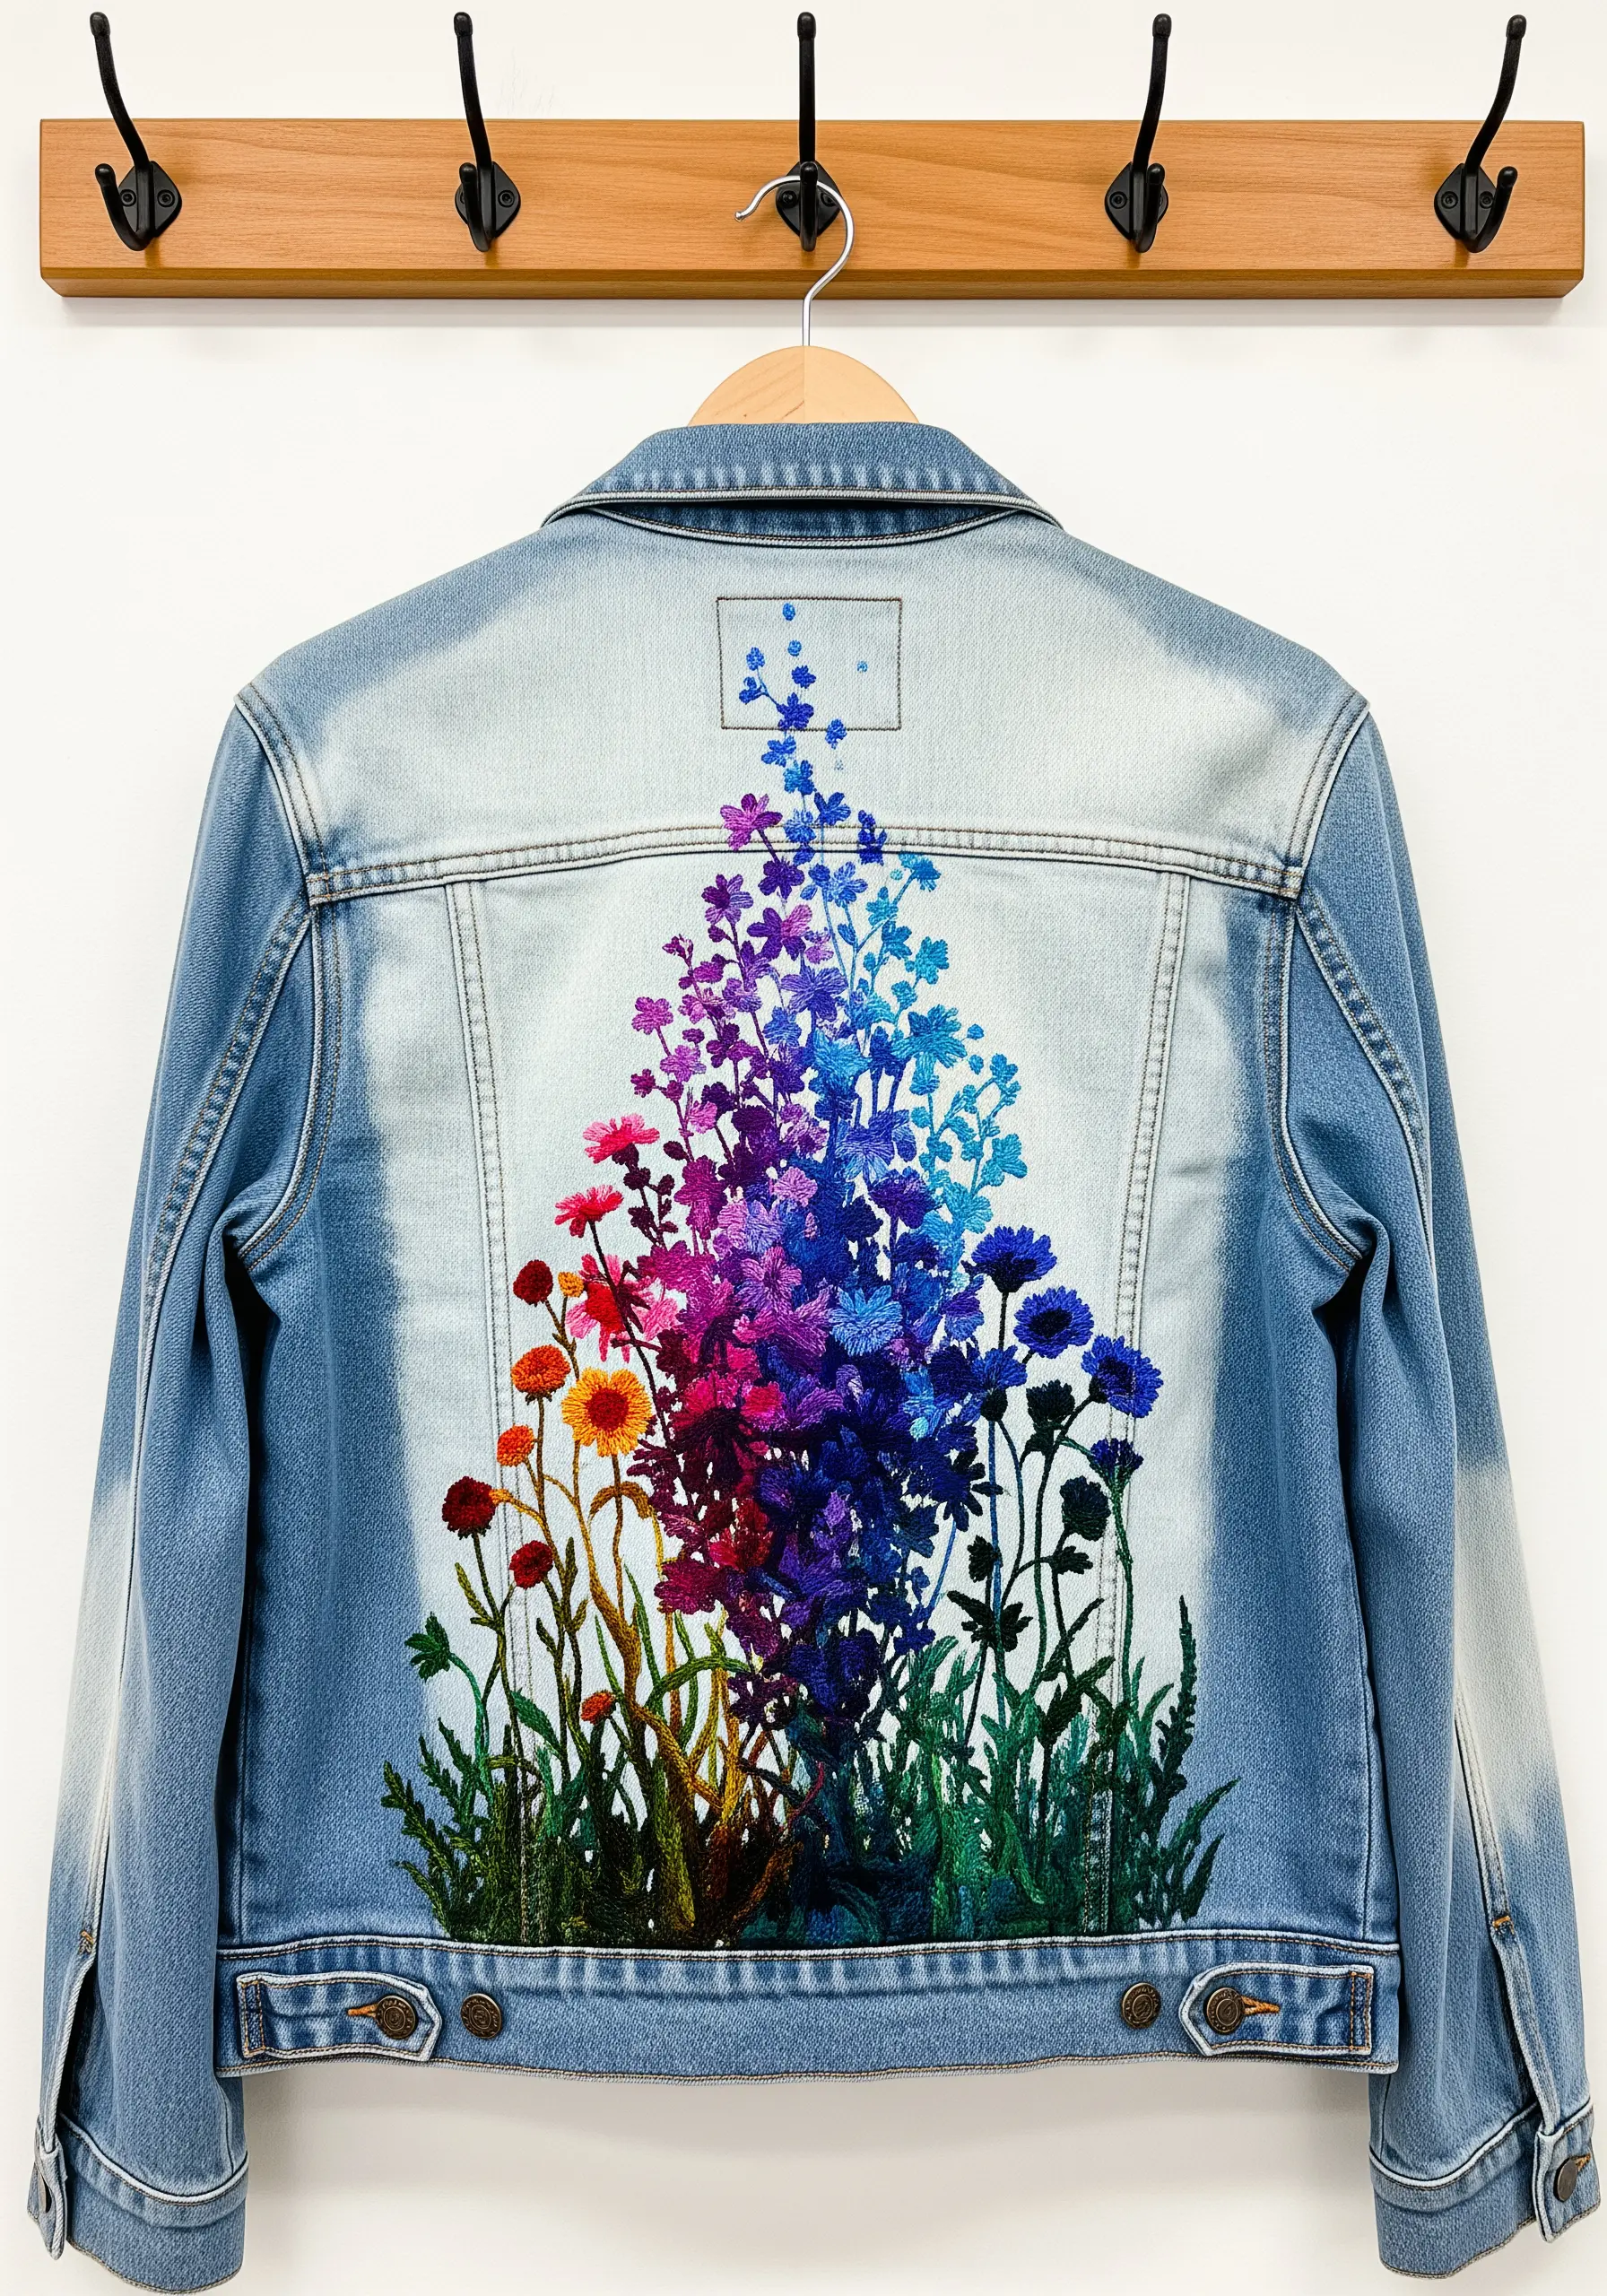
When stitching on a heavy, stretchy fabric like denim, a stabilizer is non-negotiable. Iron a sheet of medium-weight stabilizer to the inside of the jacket before you begin.
This prevents the fabric from puckering and warping under the tension of your stitches, ensuring your design lays flat and professional.
Choose high-quality, colorfast cotton floss that can withstand washing, and use a sharp, strong needle designed for denim.
This preparation turns a simple garment into a piece of wearable art, like these vintage-inspired denim jacket embroidery motifs.
11. Create Tactile Surfaces with Knot Fills
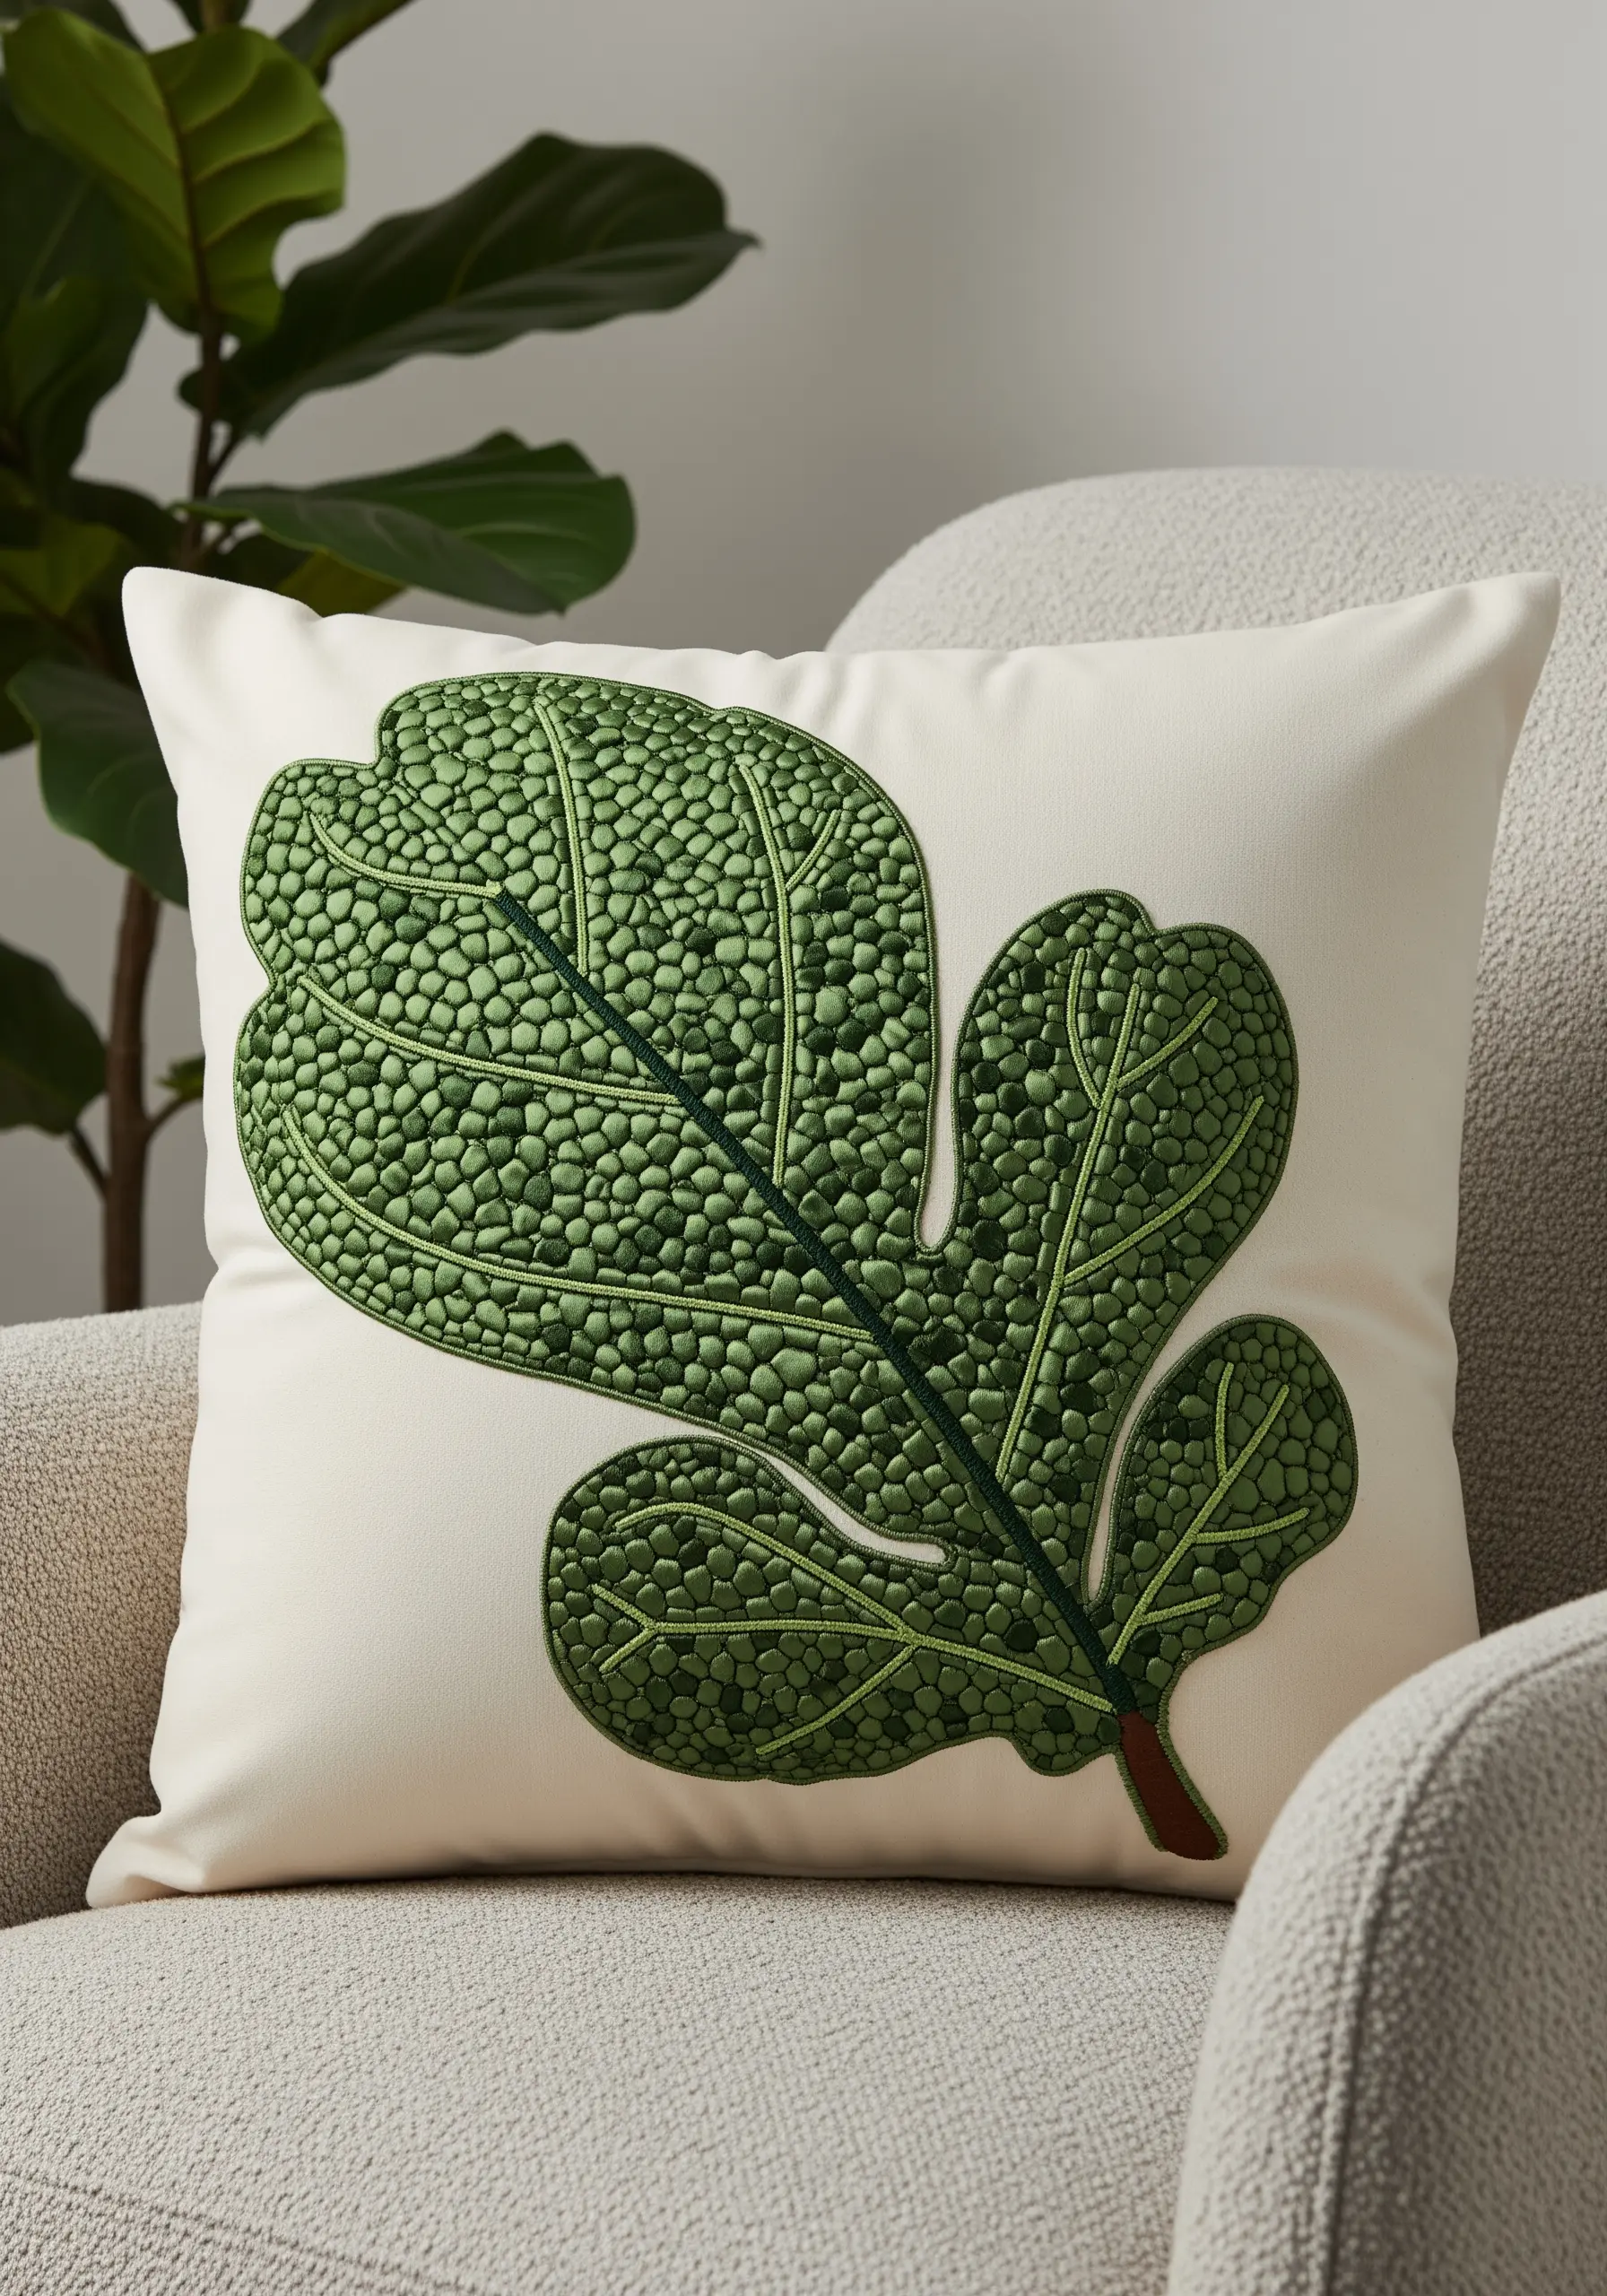
Instead of a flat satin stitch, fill a large leaf shape with thousands of French or colonial knots to create a rich, pebbled surface.
To add subtle depth, use two or three very similar shades of green floss and stitch them randomly throughout the design. This mimics the natural color variations found in a real leaf.
Finish with a clean stem stitch for the central vein to provide a smooth line of contrast against the highly textured fill.
These nature texture embroidery hacks transform a simple silhouette into a tactile experience.
12. Capture Airiness with Straight Stitches and Beads
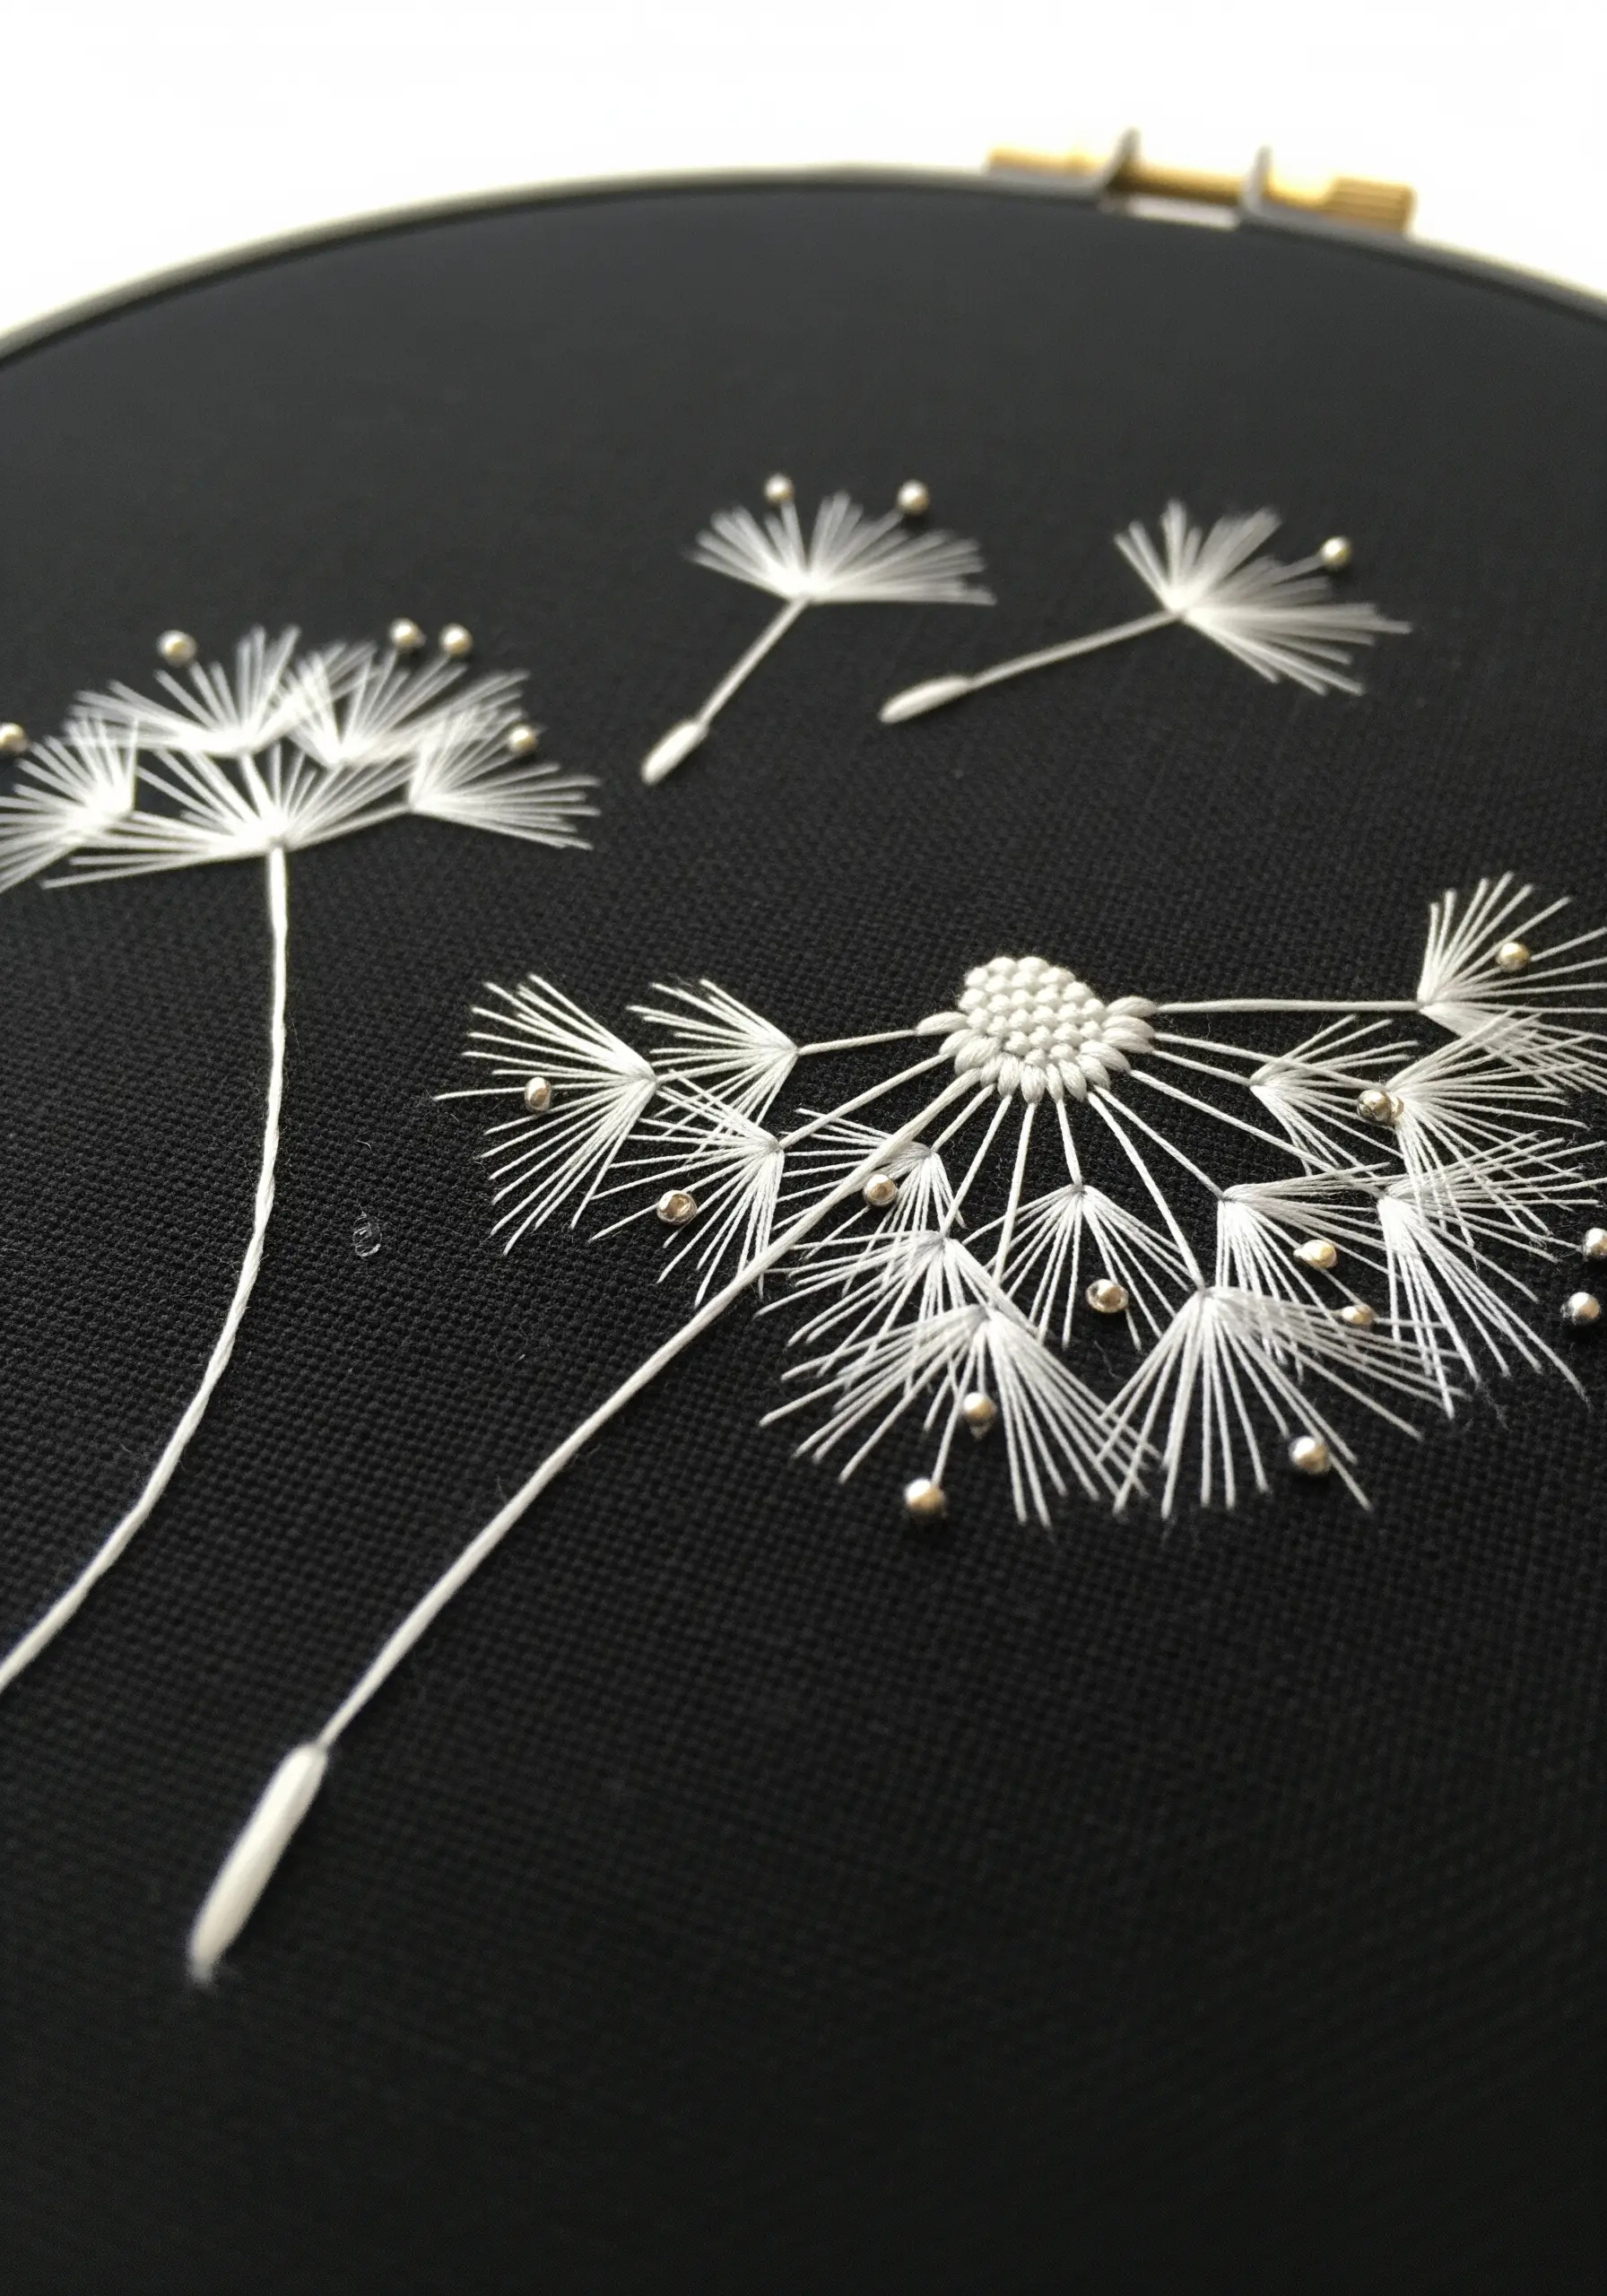
To embroider something as ethereal as a dandelion seed head, rely on the simplicity of straight stitches.
Use a single strand of white floss to create the delicate radiating filaments, keeping your stitches taut but not so tight that they pull the dark fabric.
Add tiny silver or glass seed beads to the tips of some strands to represent seeds catching the light. This adds a touch of weight and a subtle glimmer that elevates the entire piece.
The contrast against the black fabric makes this delicate composition feel both magical and modern.
13. Juxtapose Textures for Visual Impact
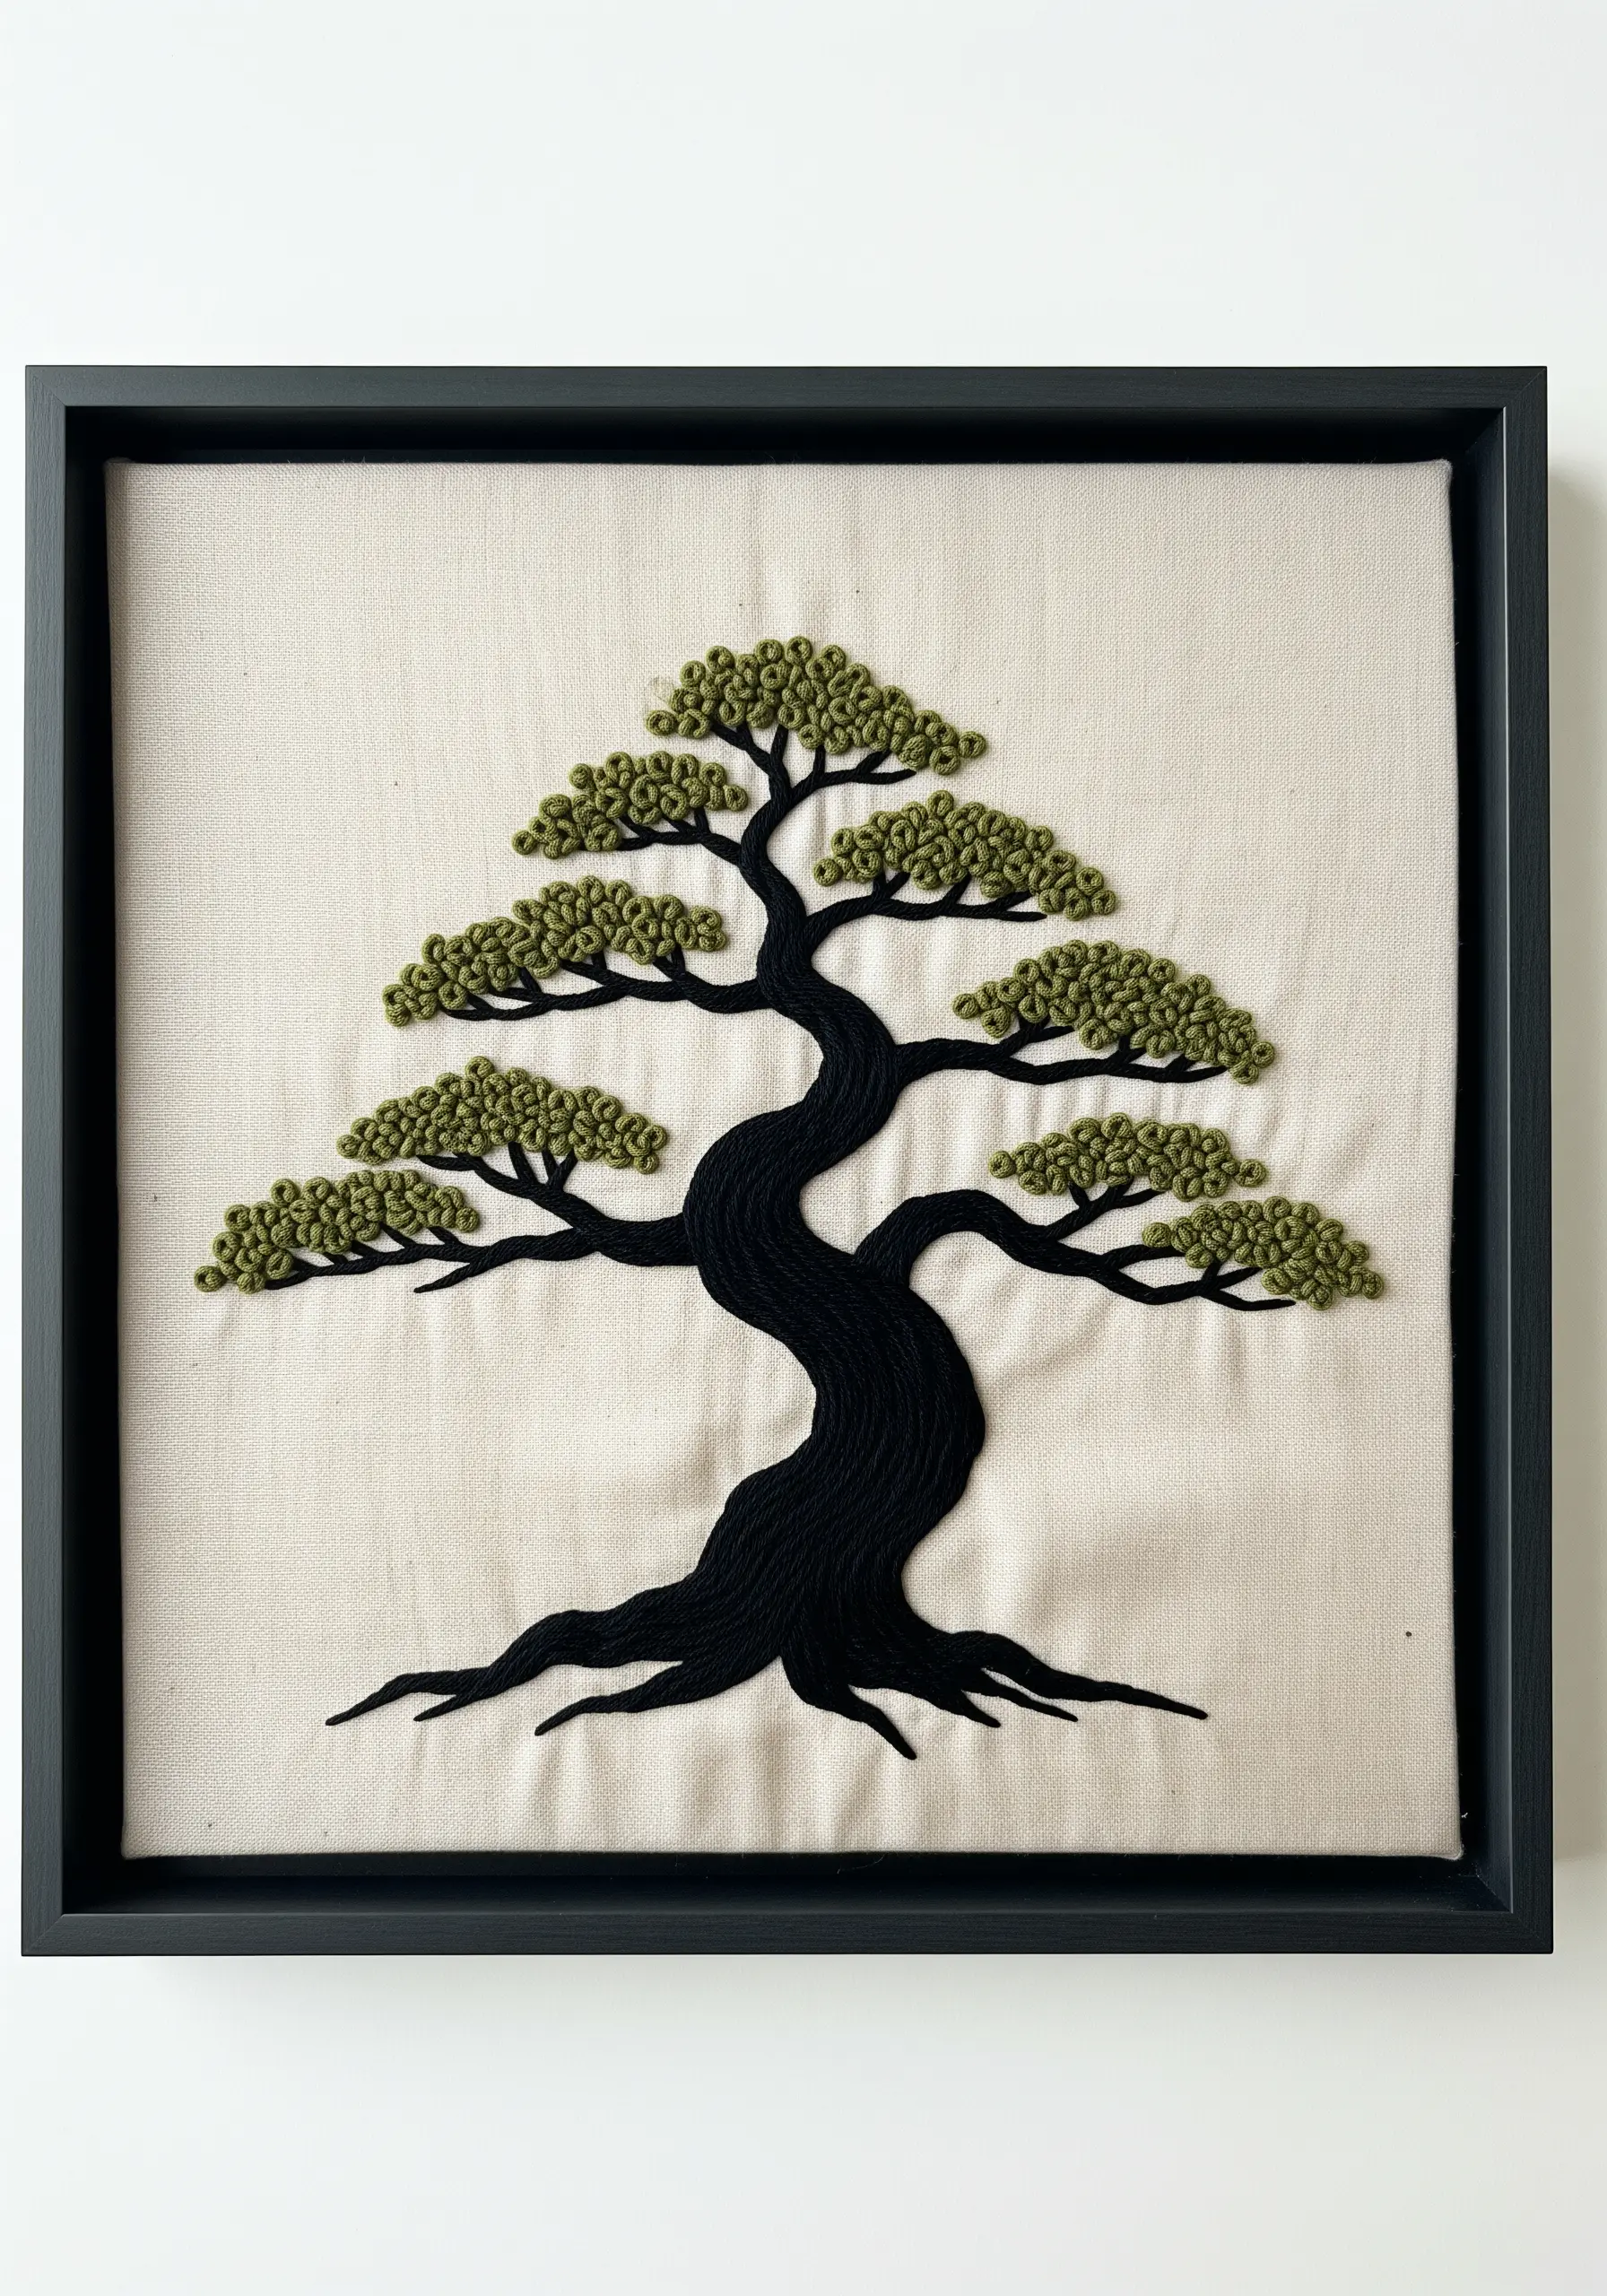
Create a powerful focal point by intentionally contrasting smooth and rough textures within the same piece.
For the bonsai’s trunk and roots, use a dense, directional satin stitch with black floss to create a solid, smooth silhouette.
Then, for the foliage, switch to tightly packed French knots in an olive green. The bumpy, complex texture of the knots immediately draws the eye and makes the foliage feel lush and dense.
This simple textural shift adds a sophisticated, sculptural quality to your work.
14. Design a Cascading Gradient Wall Hanging
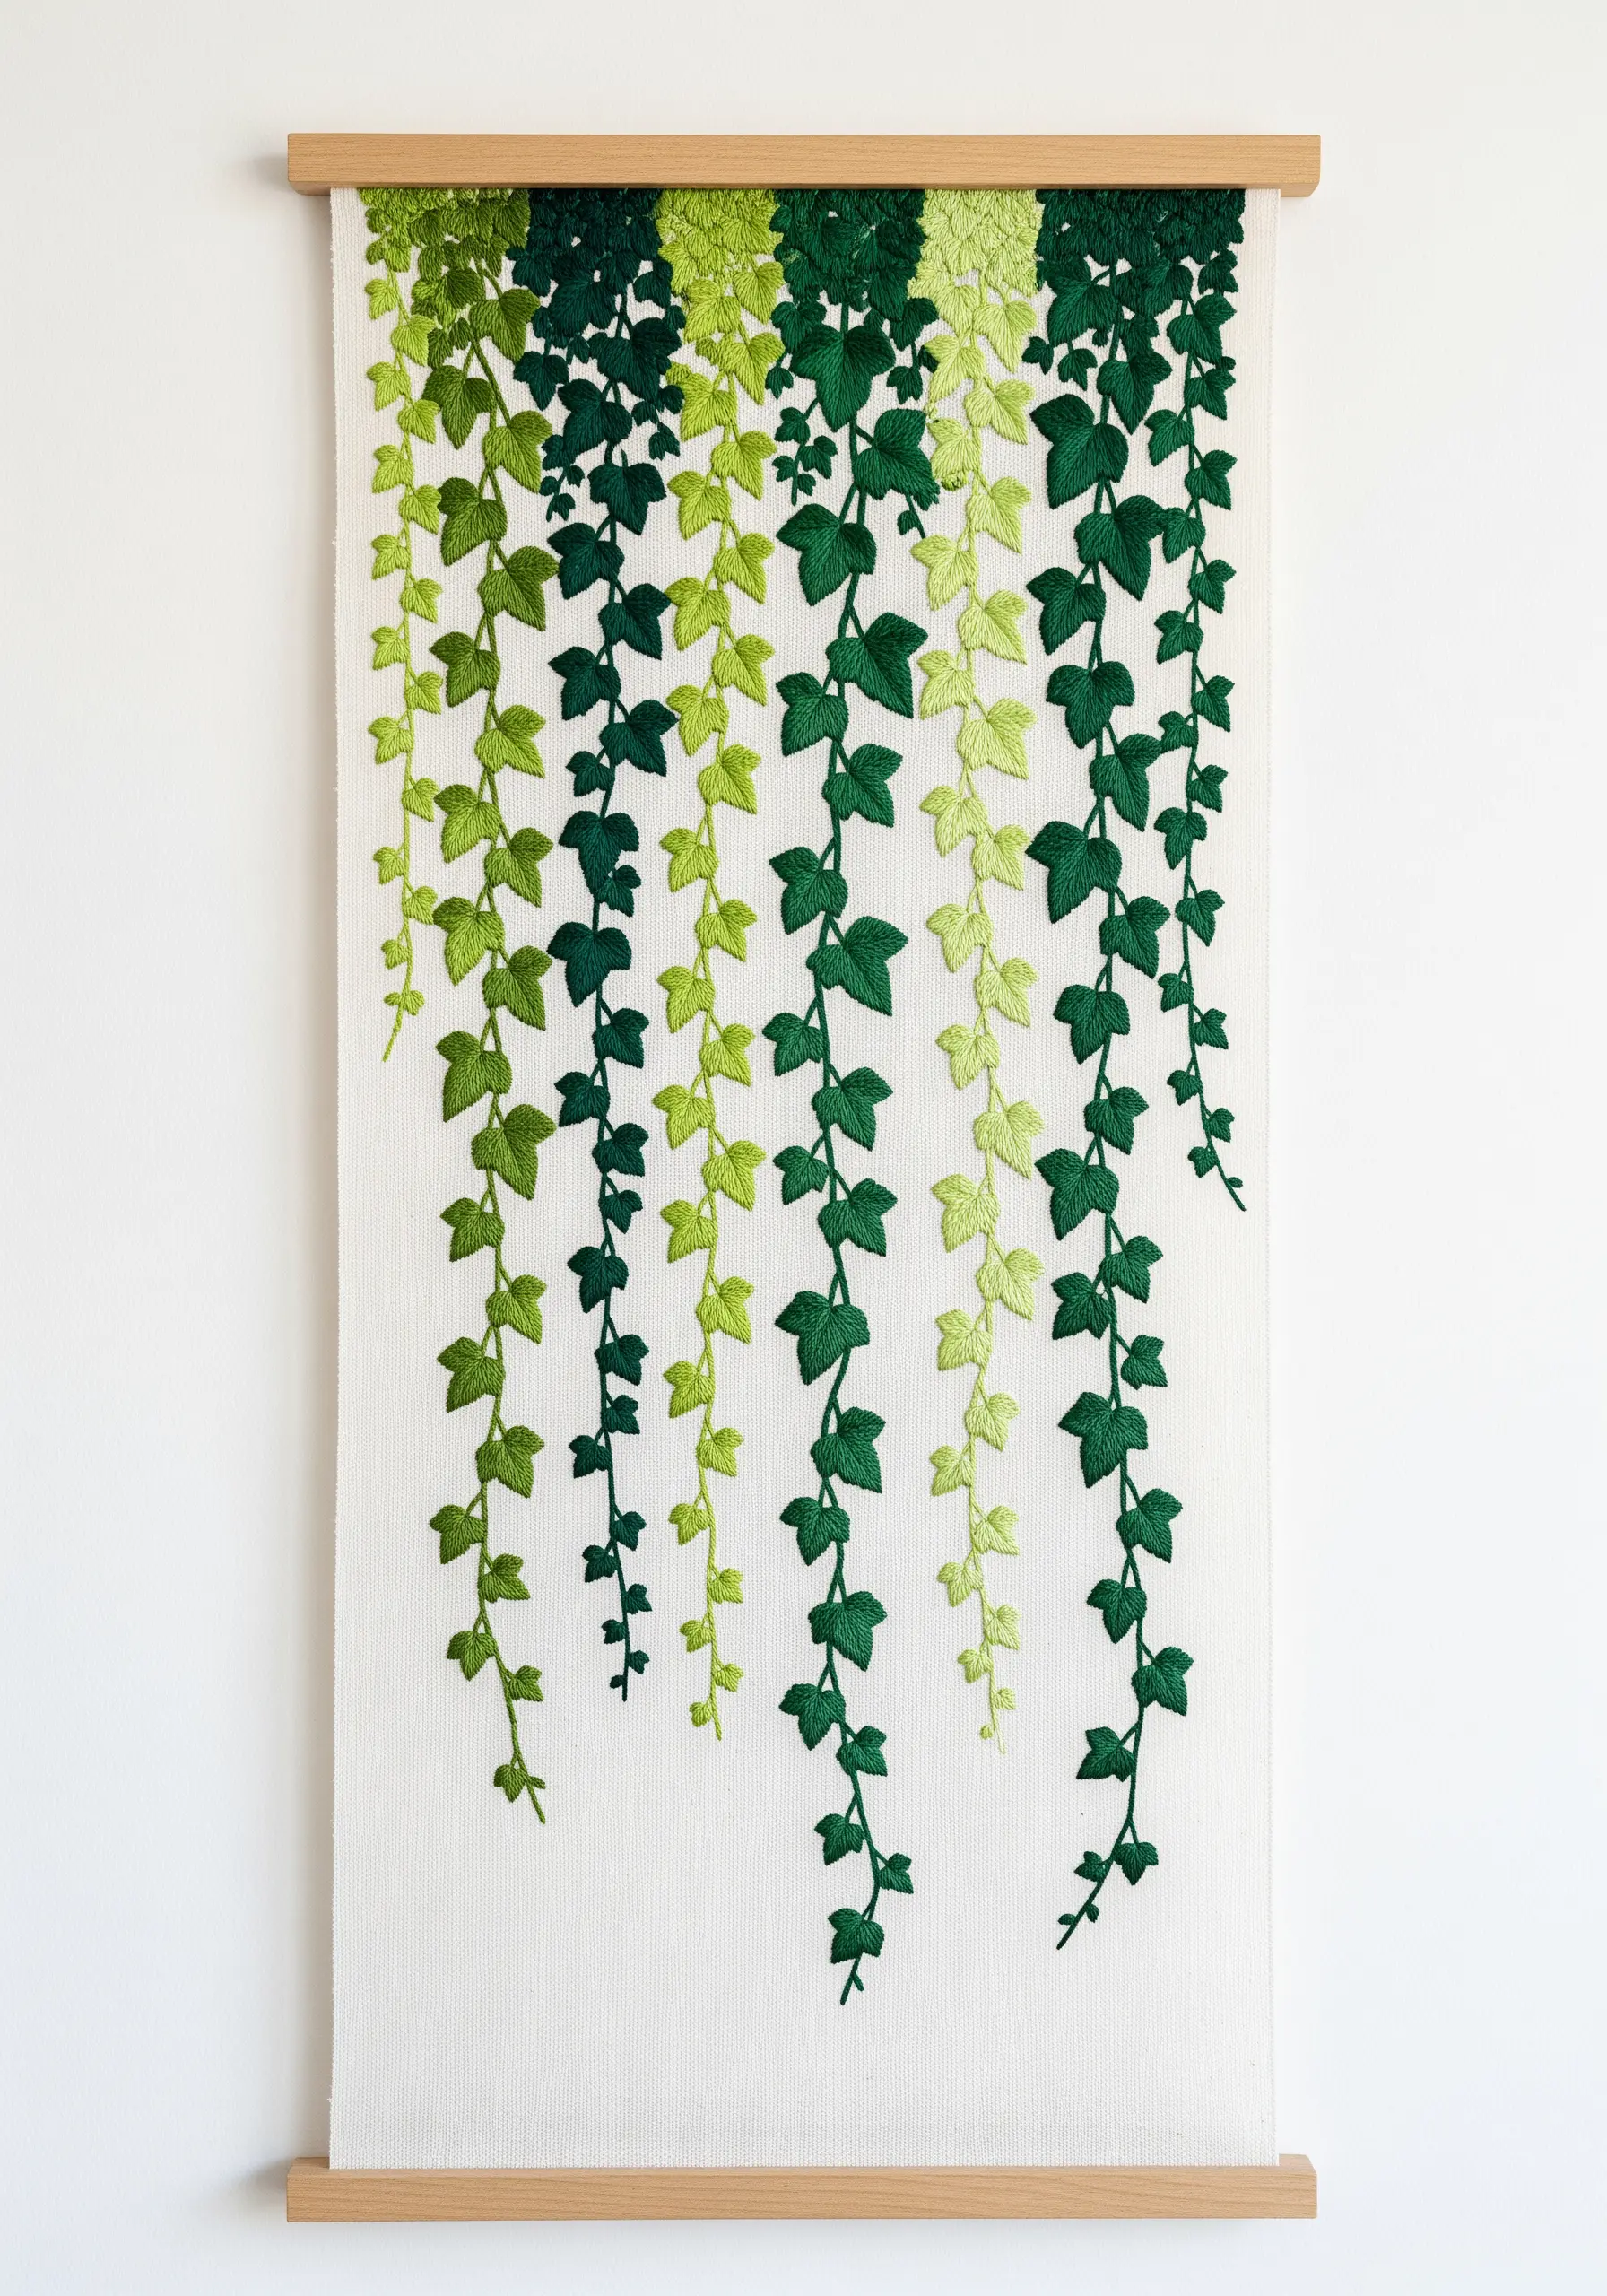
Transform a simple ivy pattern into a stunning piece of decor by thinking beyond the hoop.
Stitch your design on a long panel of Aida or linen fabric, leaving the top and bottom edges raw for a modern finish.
Create a sense of depth and movement by using a gradient of greens, transitioning from dark forest green at the top to a bright lime at the bottom.
This creates a beautiful ombre cascade, perfect for a DIY calm cozy wall hanging that brings nature indoors.
15. Approach Thread Painting with Confidence
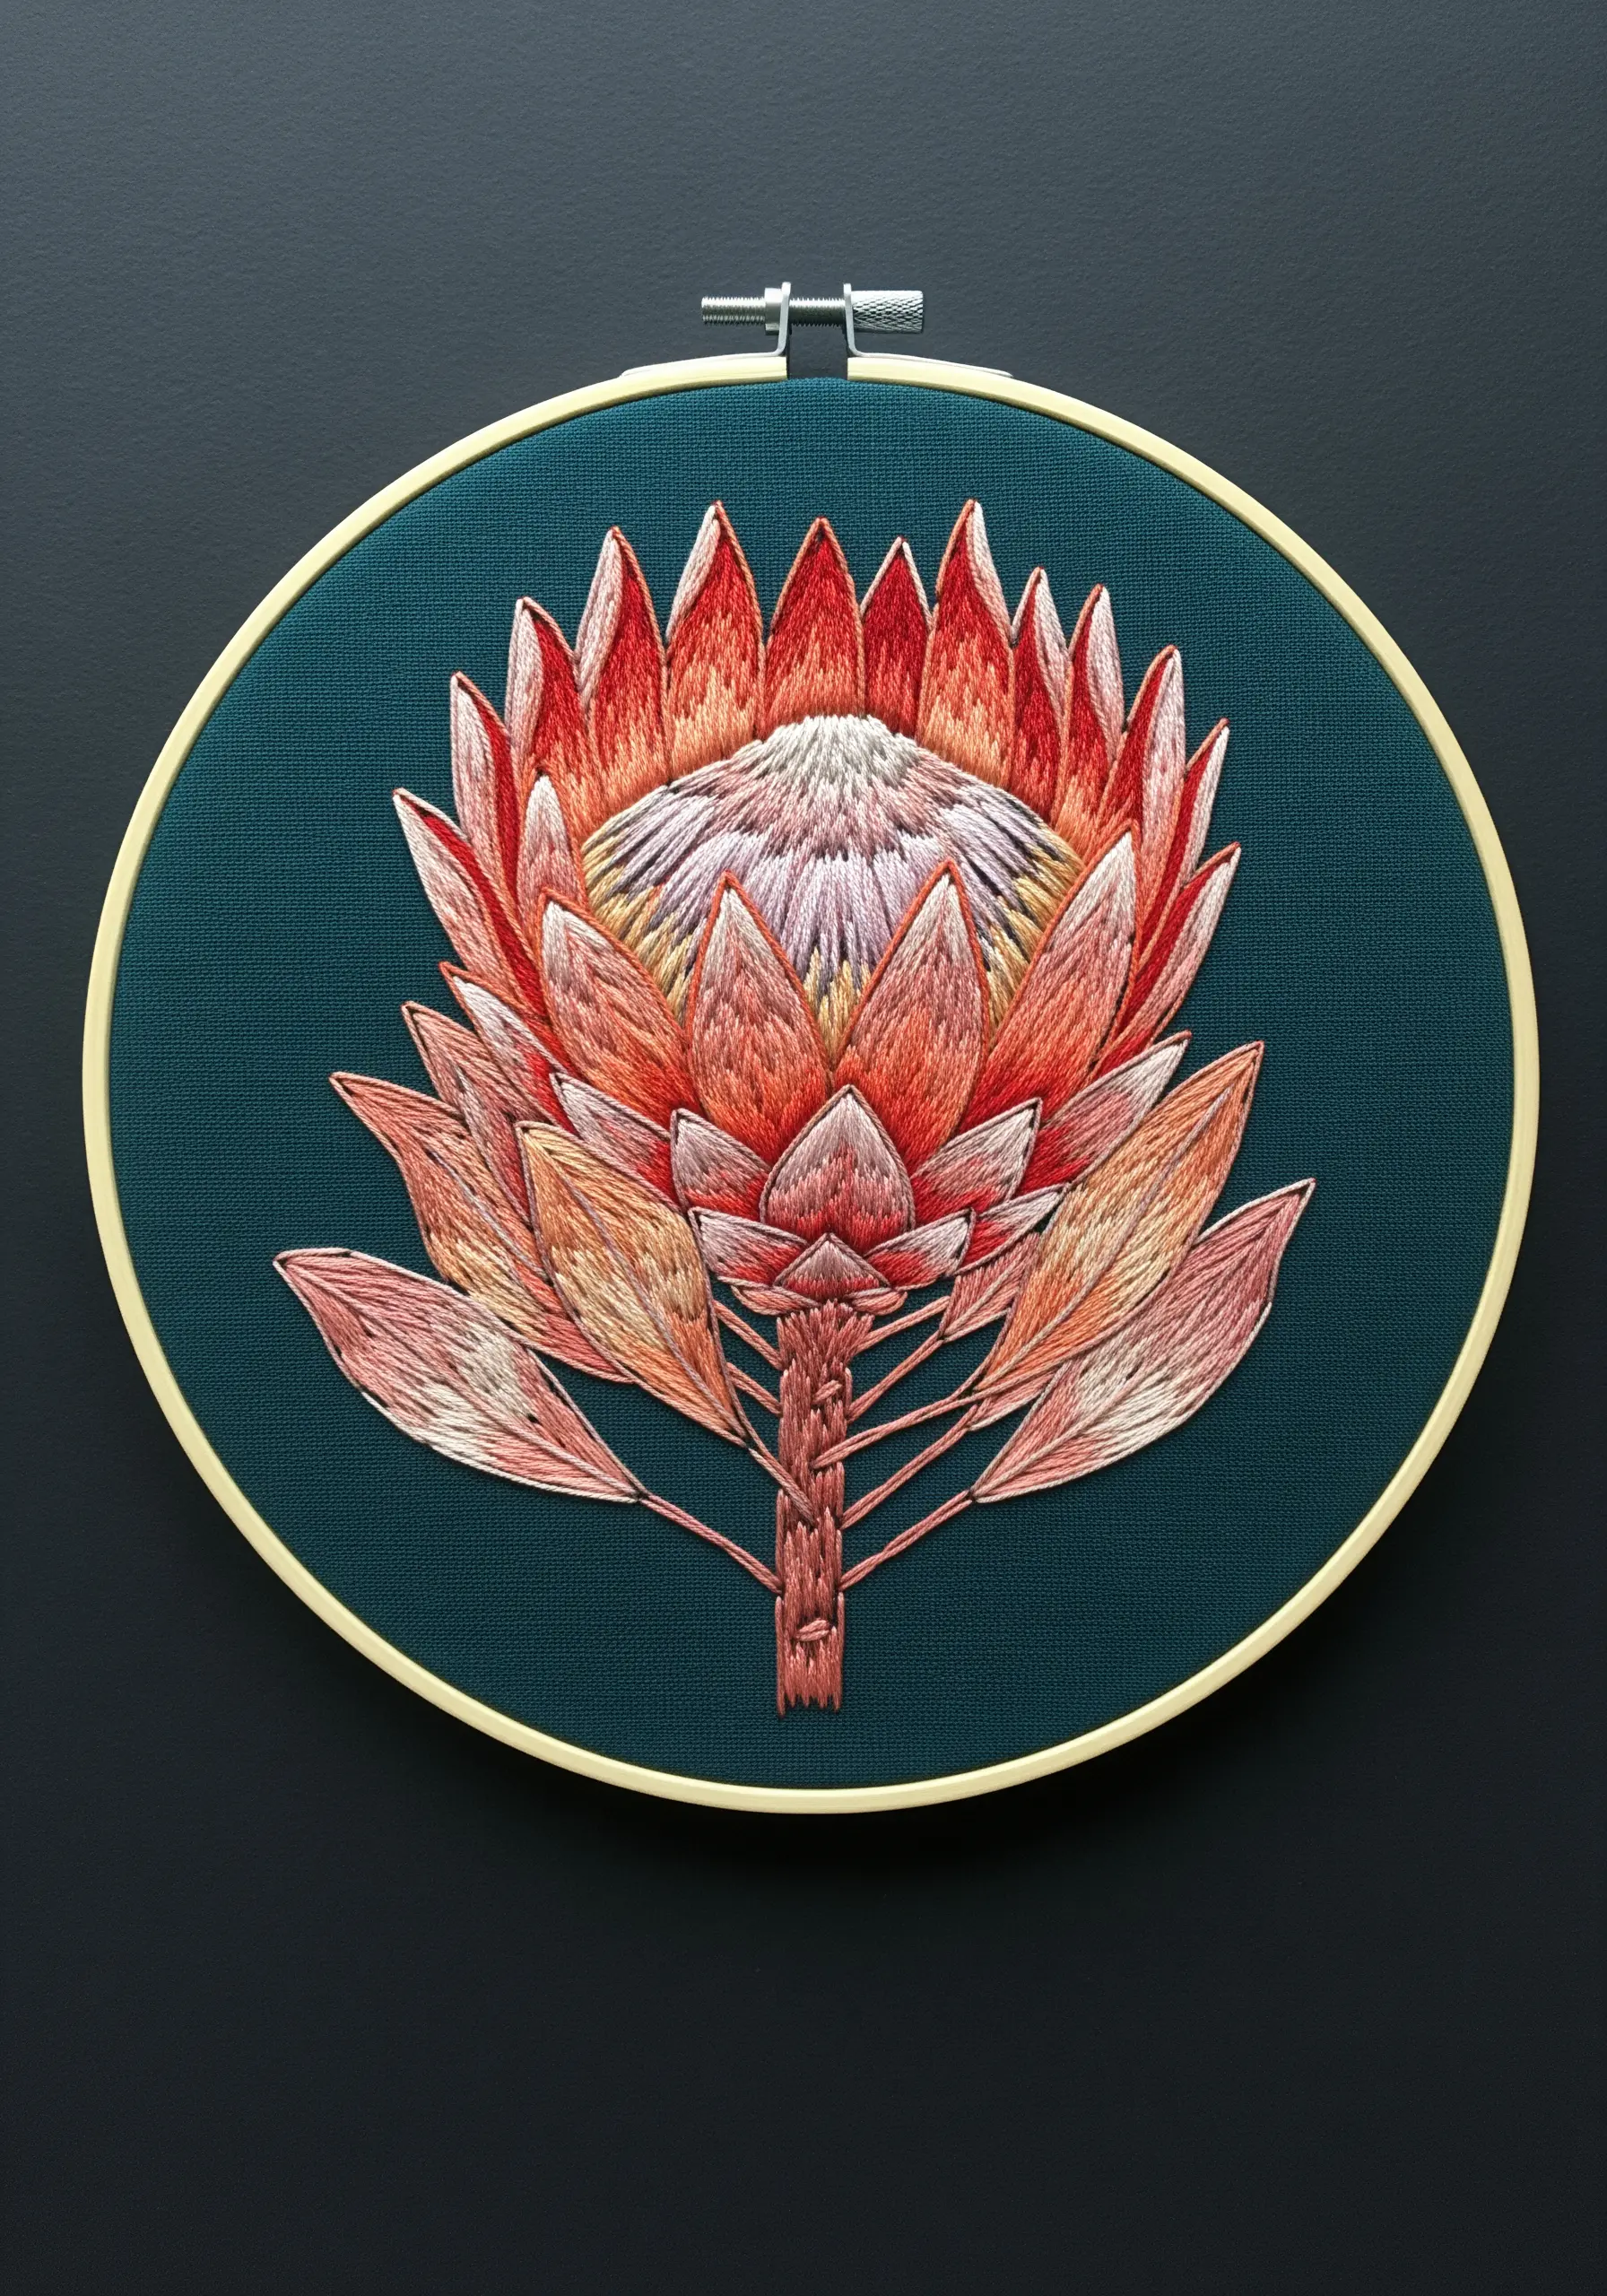
Thread painting, or needle painting, is simply the art of blending colors with long-and-short stitch. Don’t be intimidated.
Break down a complex flower like a protea into its individual petals. Treat each petal as its own small project.
Work with a single strand of floss for the finest detail, and always angle your stitches to follow the natural direction of the petal’s growth.
By blending shades of red, pink, and white, you can create realistic highlights and shadows that give the flower incredible dimension and life.
16. Use Negative Space as a Design Element
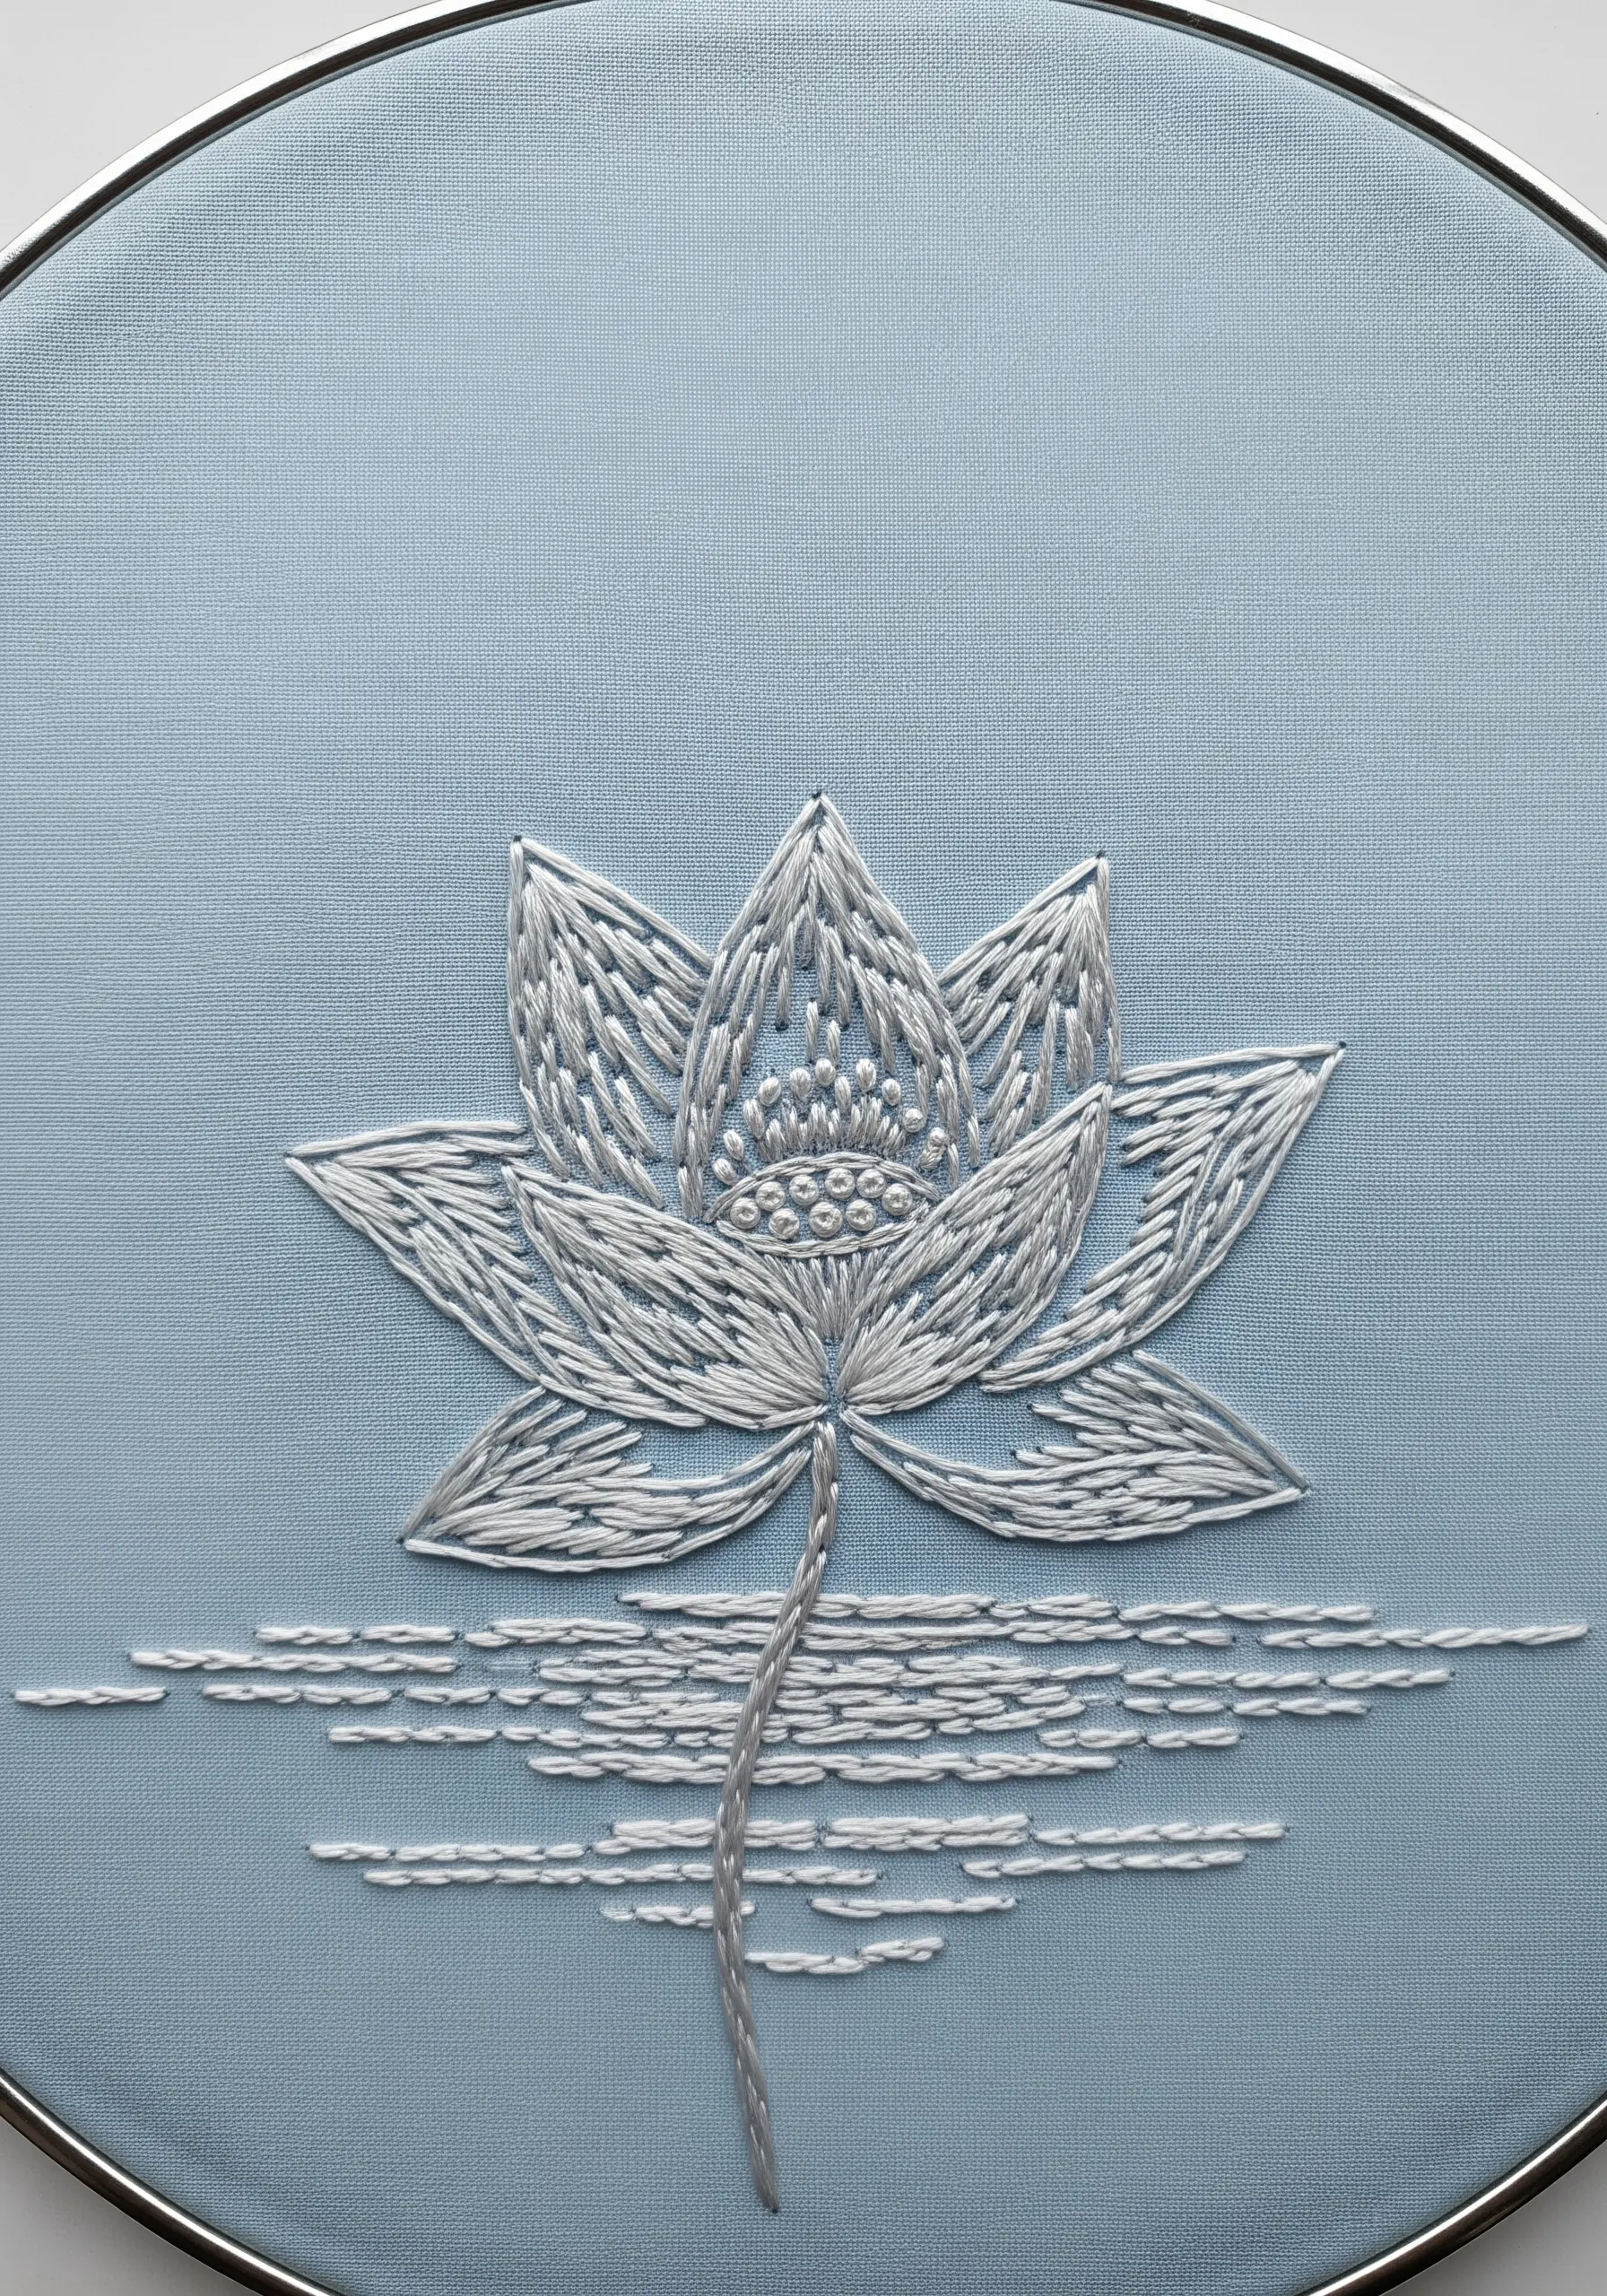
Modern embroidery often values what you *don’t* stitch as much as what you do. Embrace negative space to create a light, illustrative effect.
Instead of filling each lotus petal with solid satin stitch, leave deliberate gaps between your stitches.
This technique creates texture and the illusion of light hitting the petals, all while keeping the design from feeling too heavy.
The result is a serene, elegant composition where the background fabric plays an active role in the artwork.
17. Let Stitch Direction Define Form
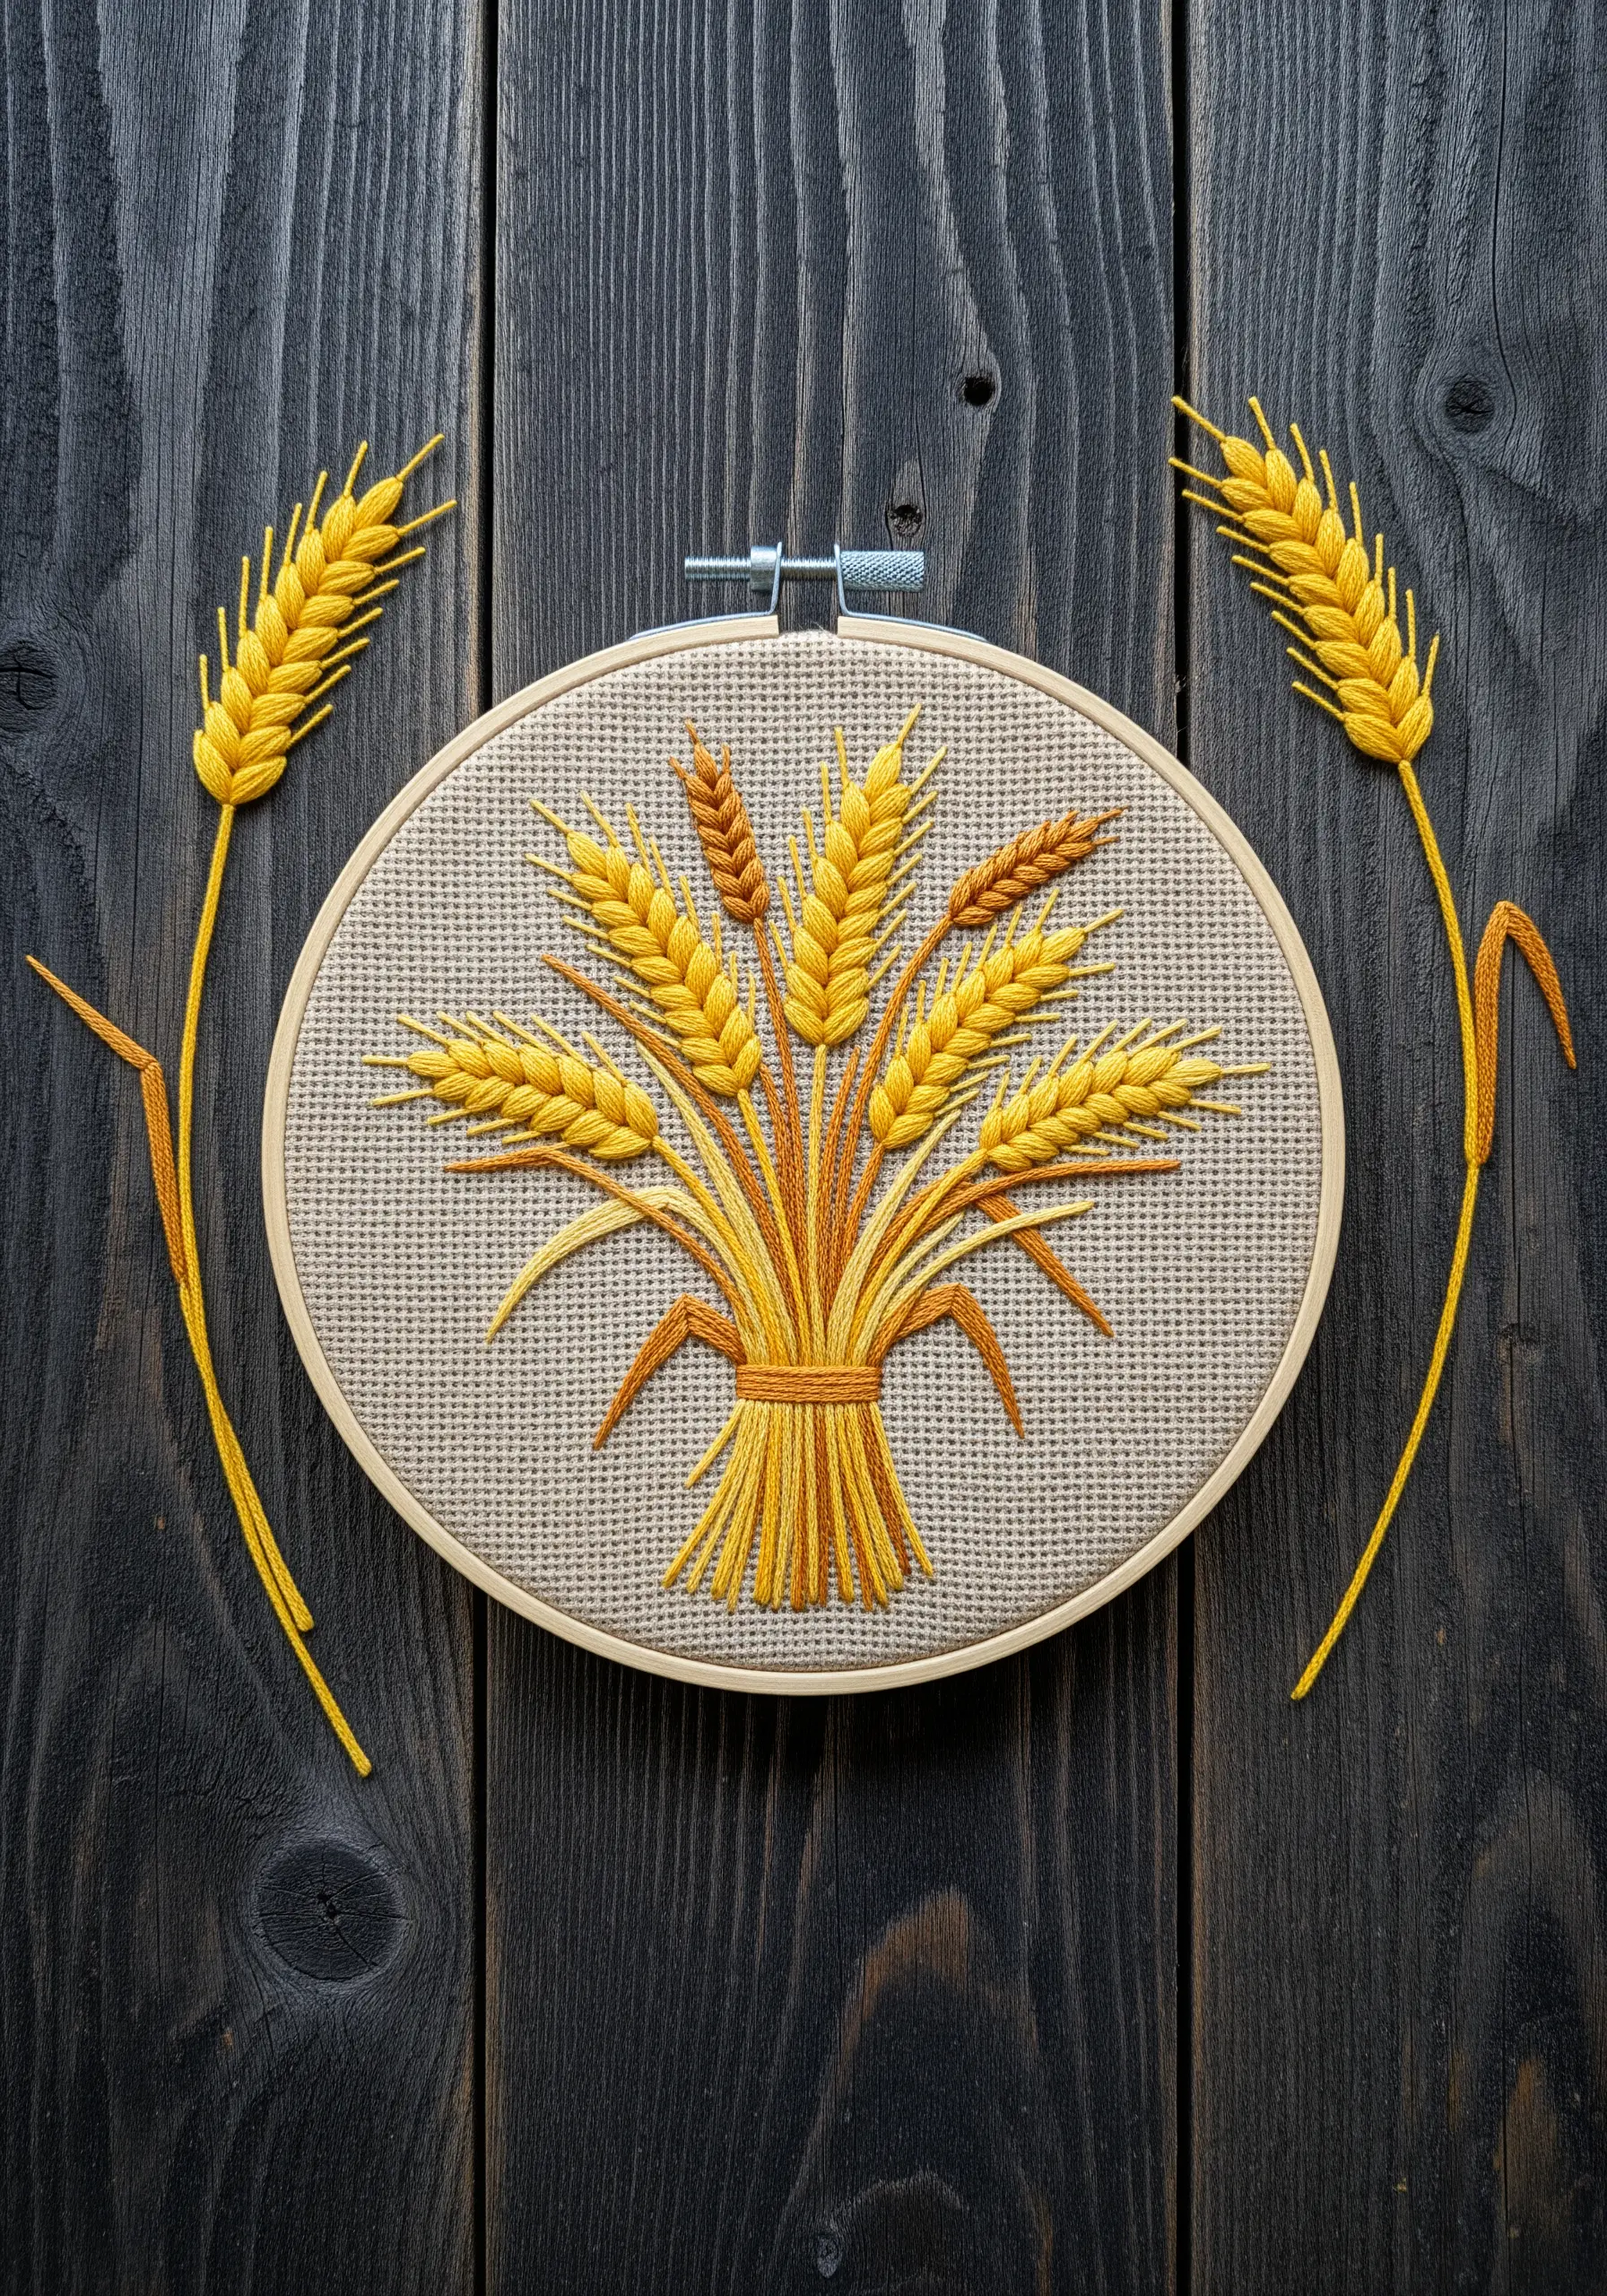
Pay close attention to the direction of your stitches, as it can define the shape and flow of your subject just as much as the outline can.
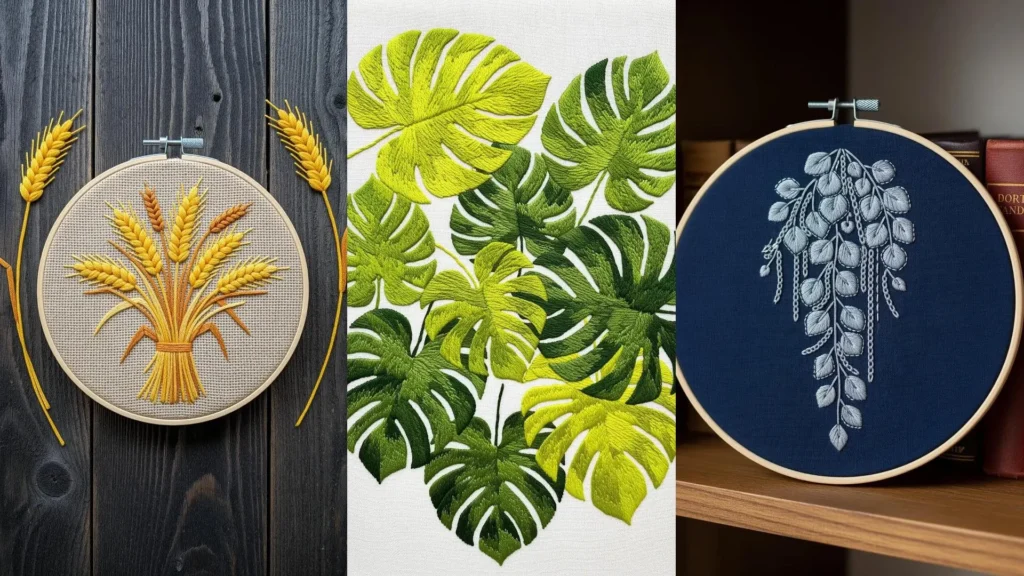
For wheat stalks, use short, angled satin stitches on the grains to mimic their natural chevron pattern.
In contrast, use long, vertical satin stitches for the bundled stems and the tie that holds them together.
This deliberate control over stitch direction is a subtle but powerful tool for adding realism and structure to your botanical embroidery.
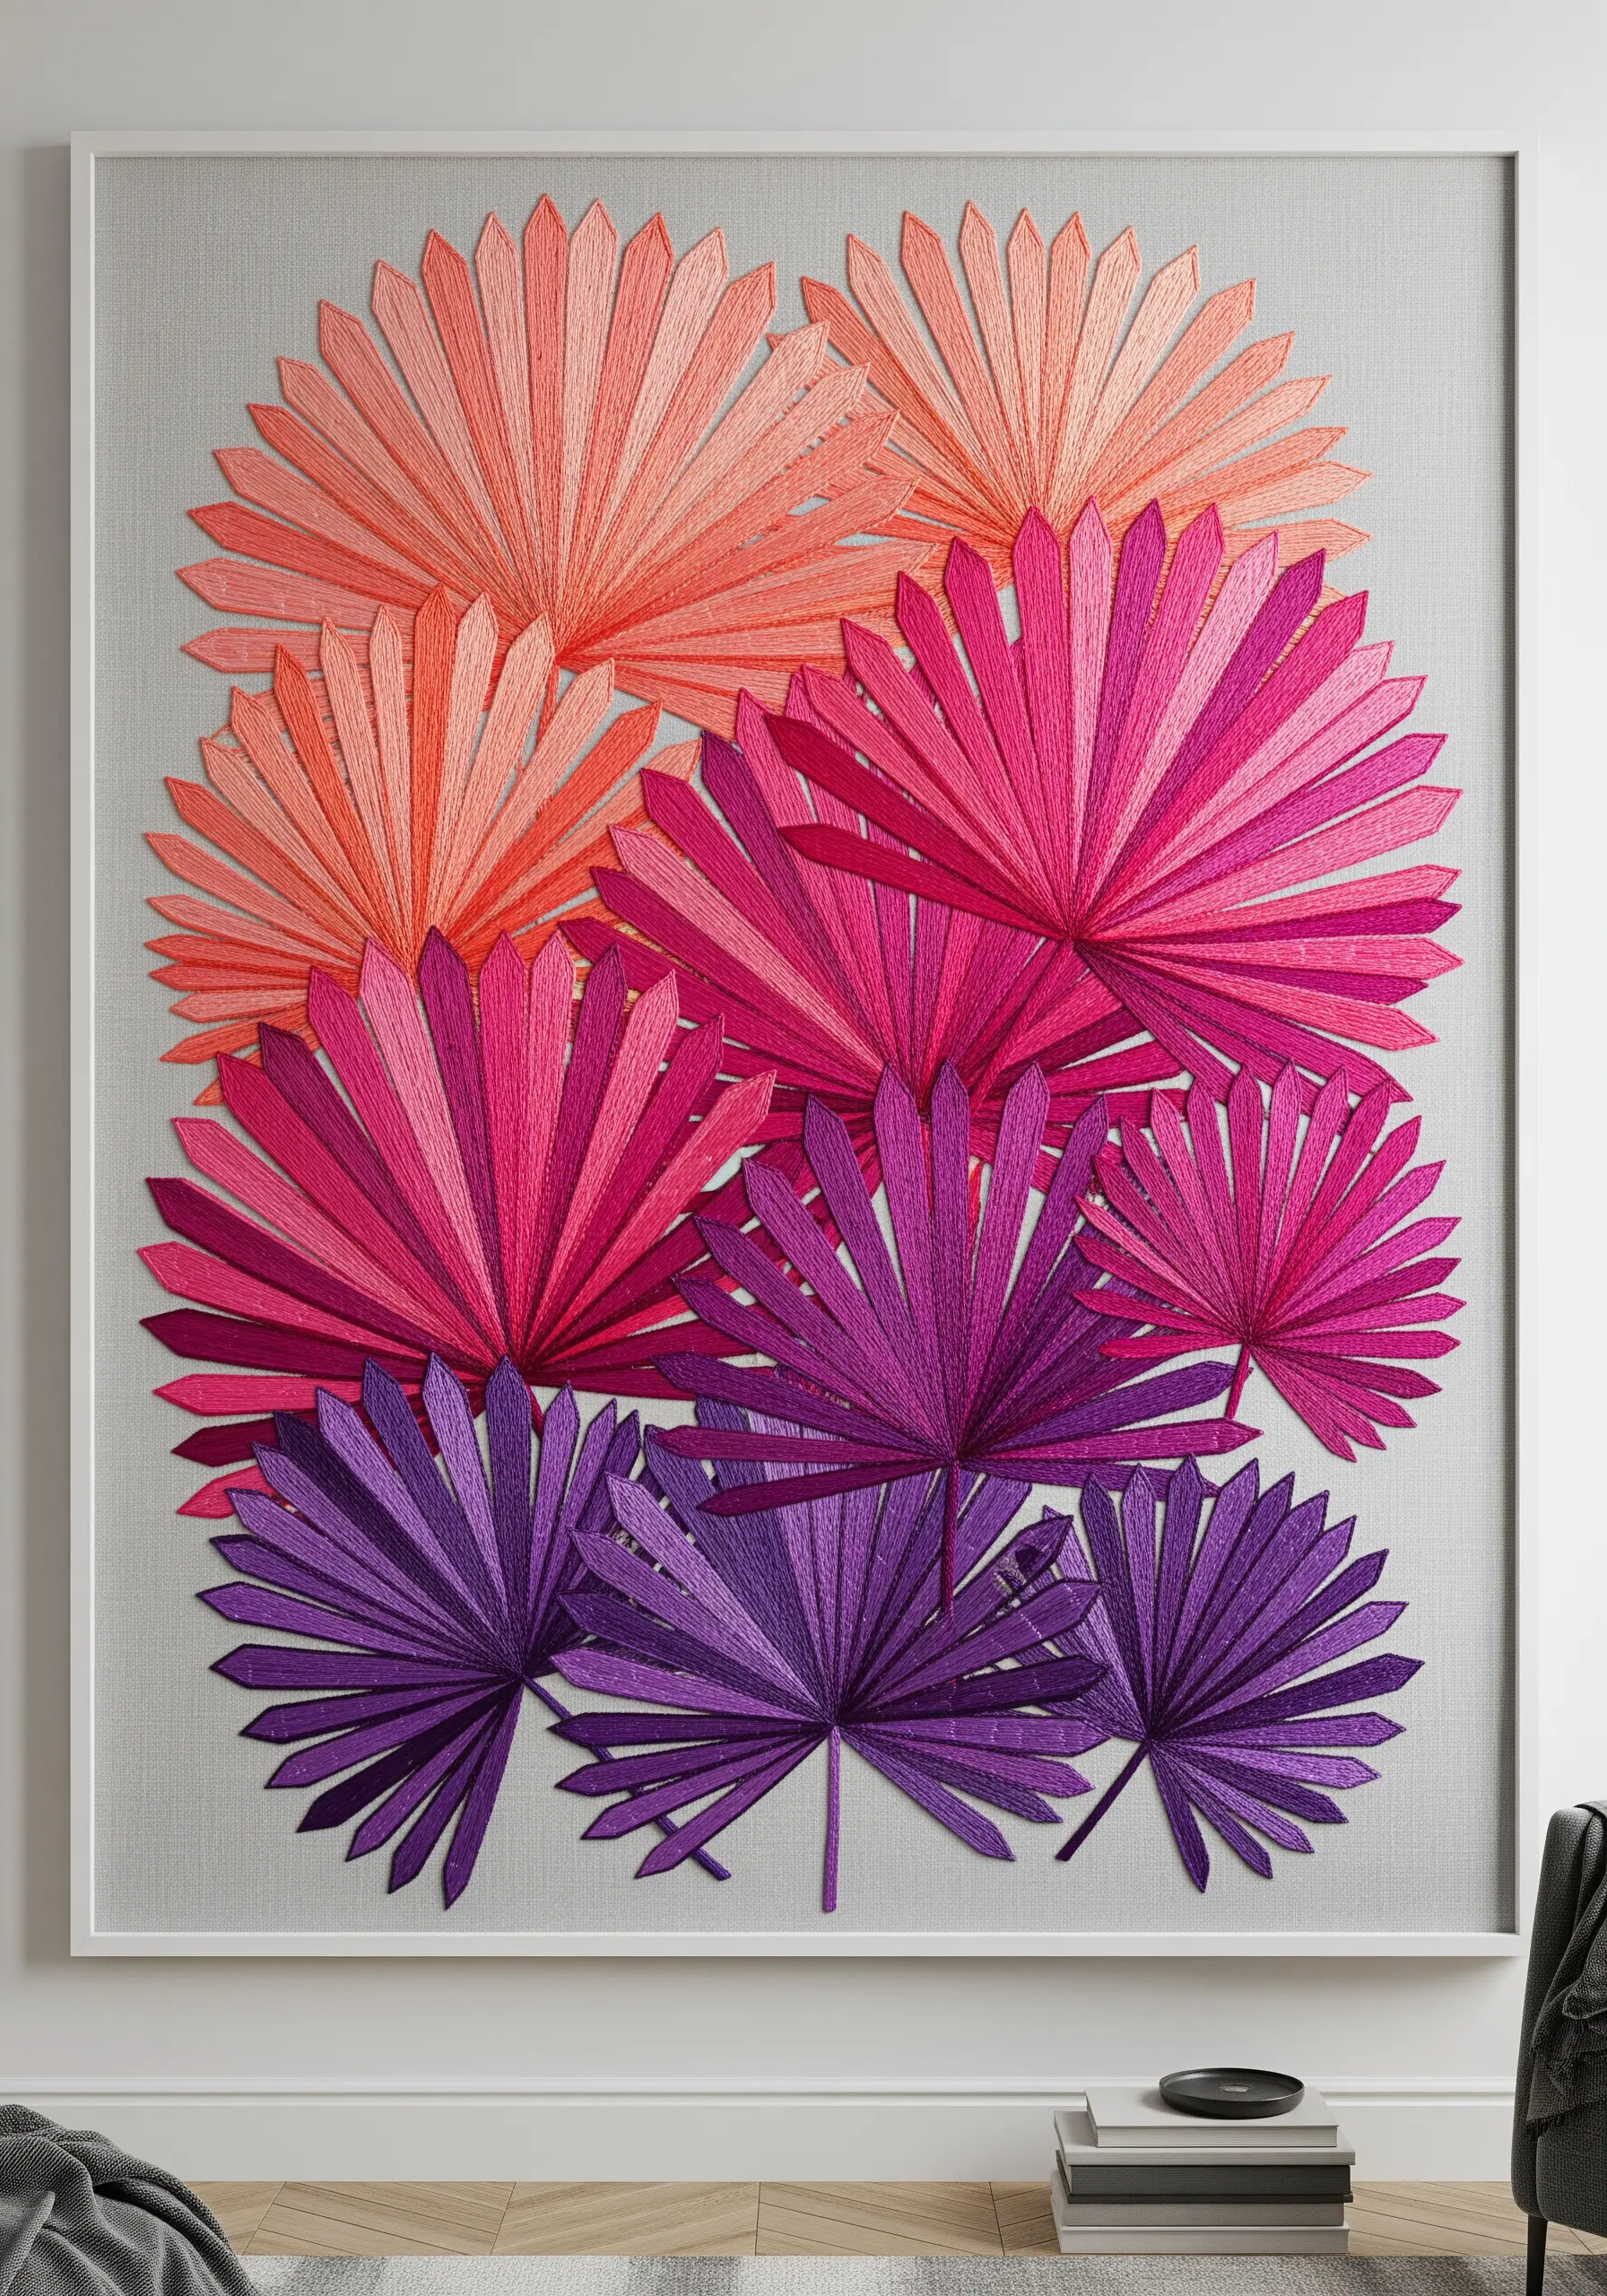
18. Create Depth by Layering Your Motifs
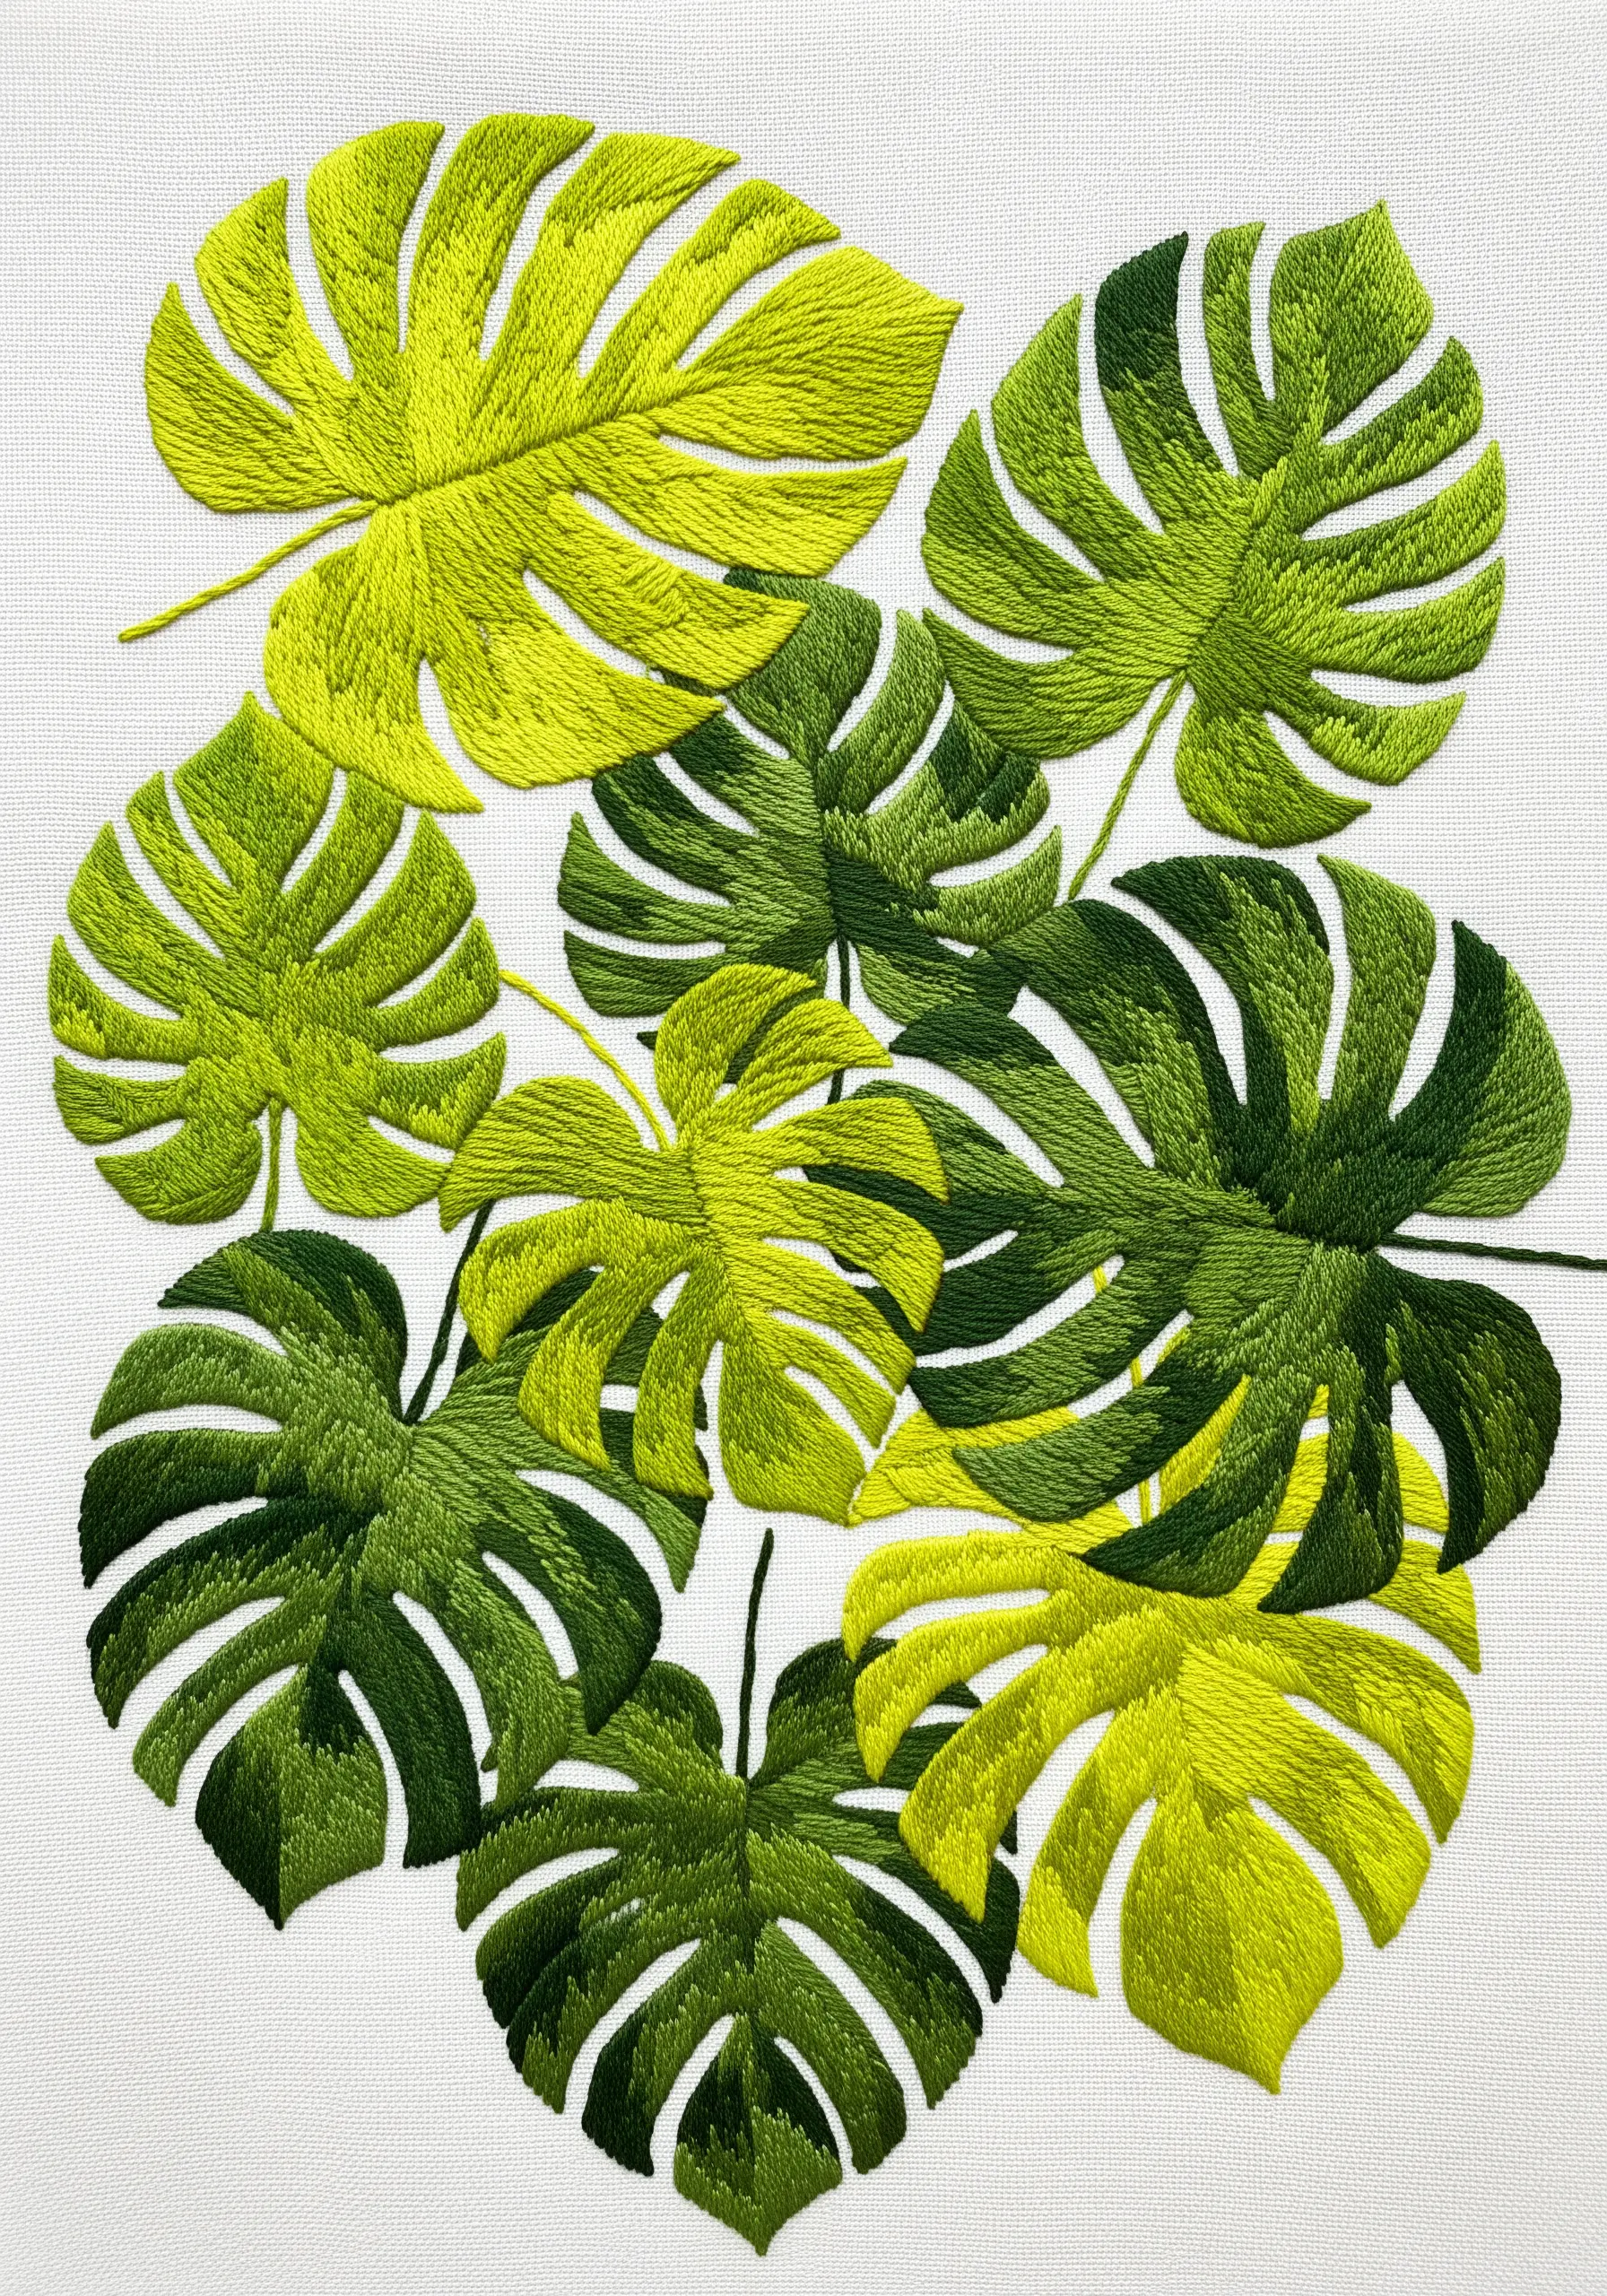
When composing a design with multiple repeating elements, like these Monstera leaves, avoid placing them side-by-side in a flat pattern.
Create a more dynamic and natural arrangement by overlapping them. Stitch the leaves that are ‘in the back’ first, then stitch the foreground leaves on top.
Vary the shades of green from leaf to leaf to enhance the illusion of depth and light.
This simple layering technique instantly transforms a simple collection of shapes into a lush, jungle-like composition.
19. Sculpt with Padded Satin Stitch
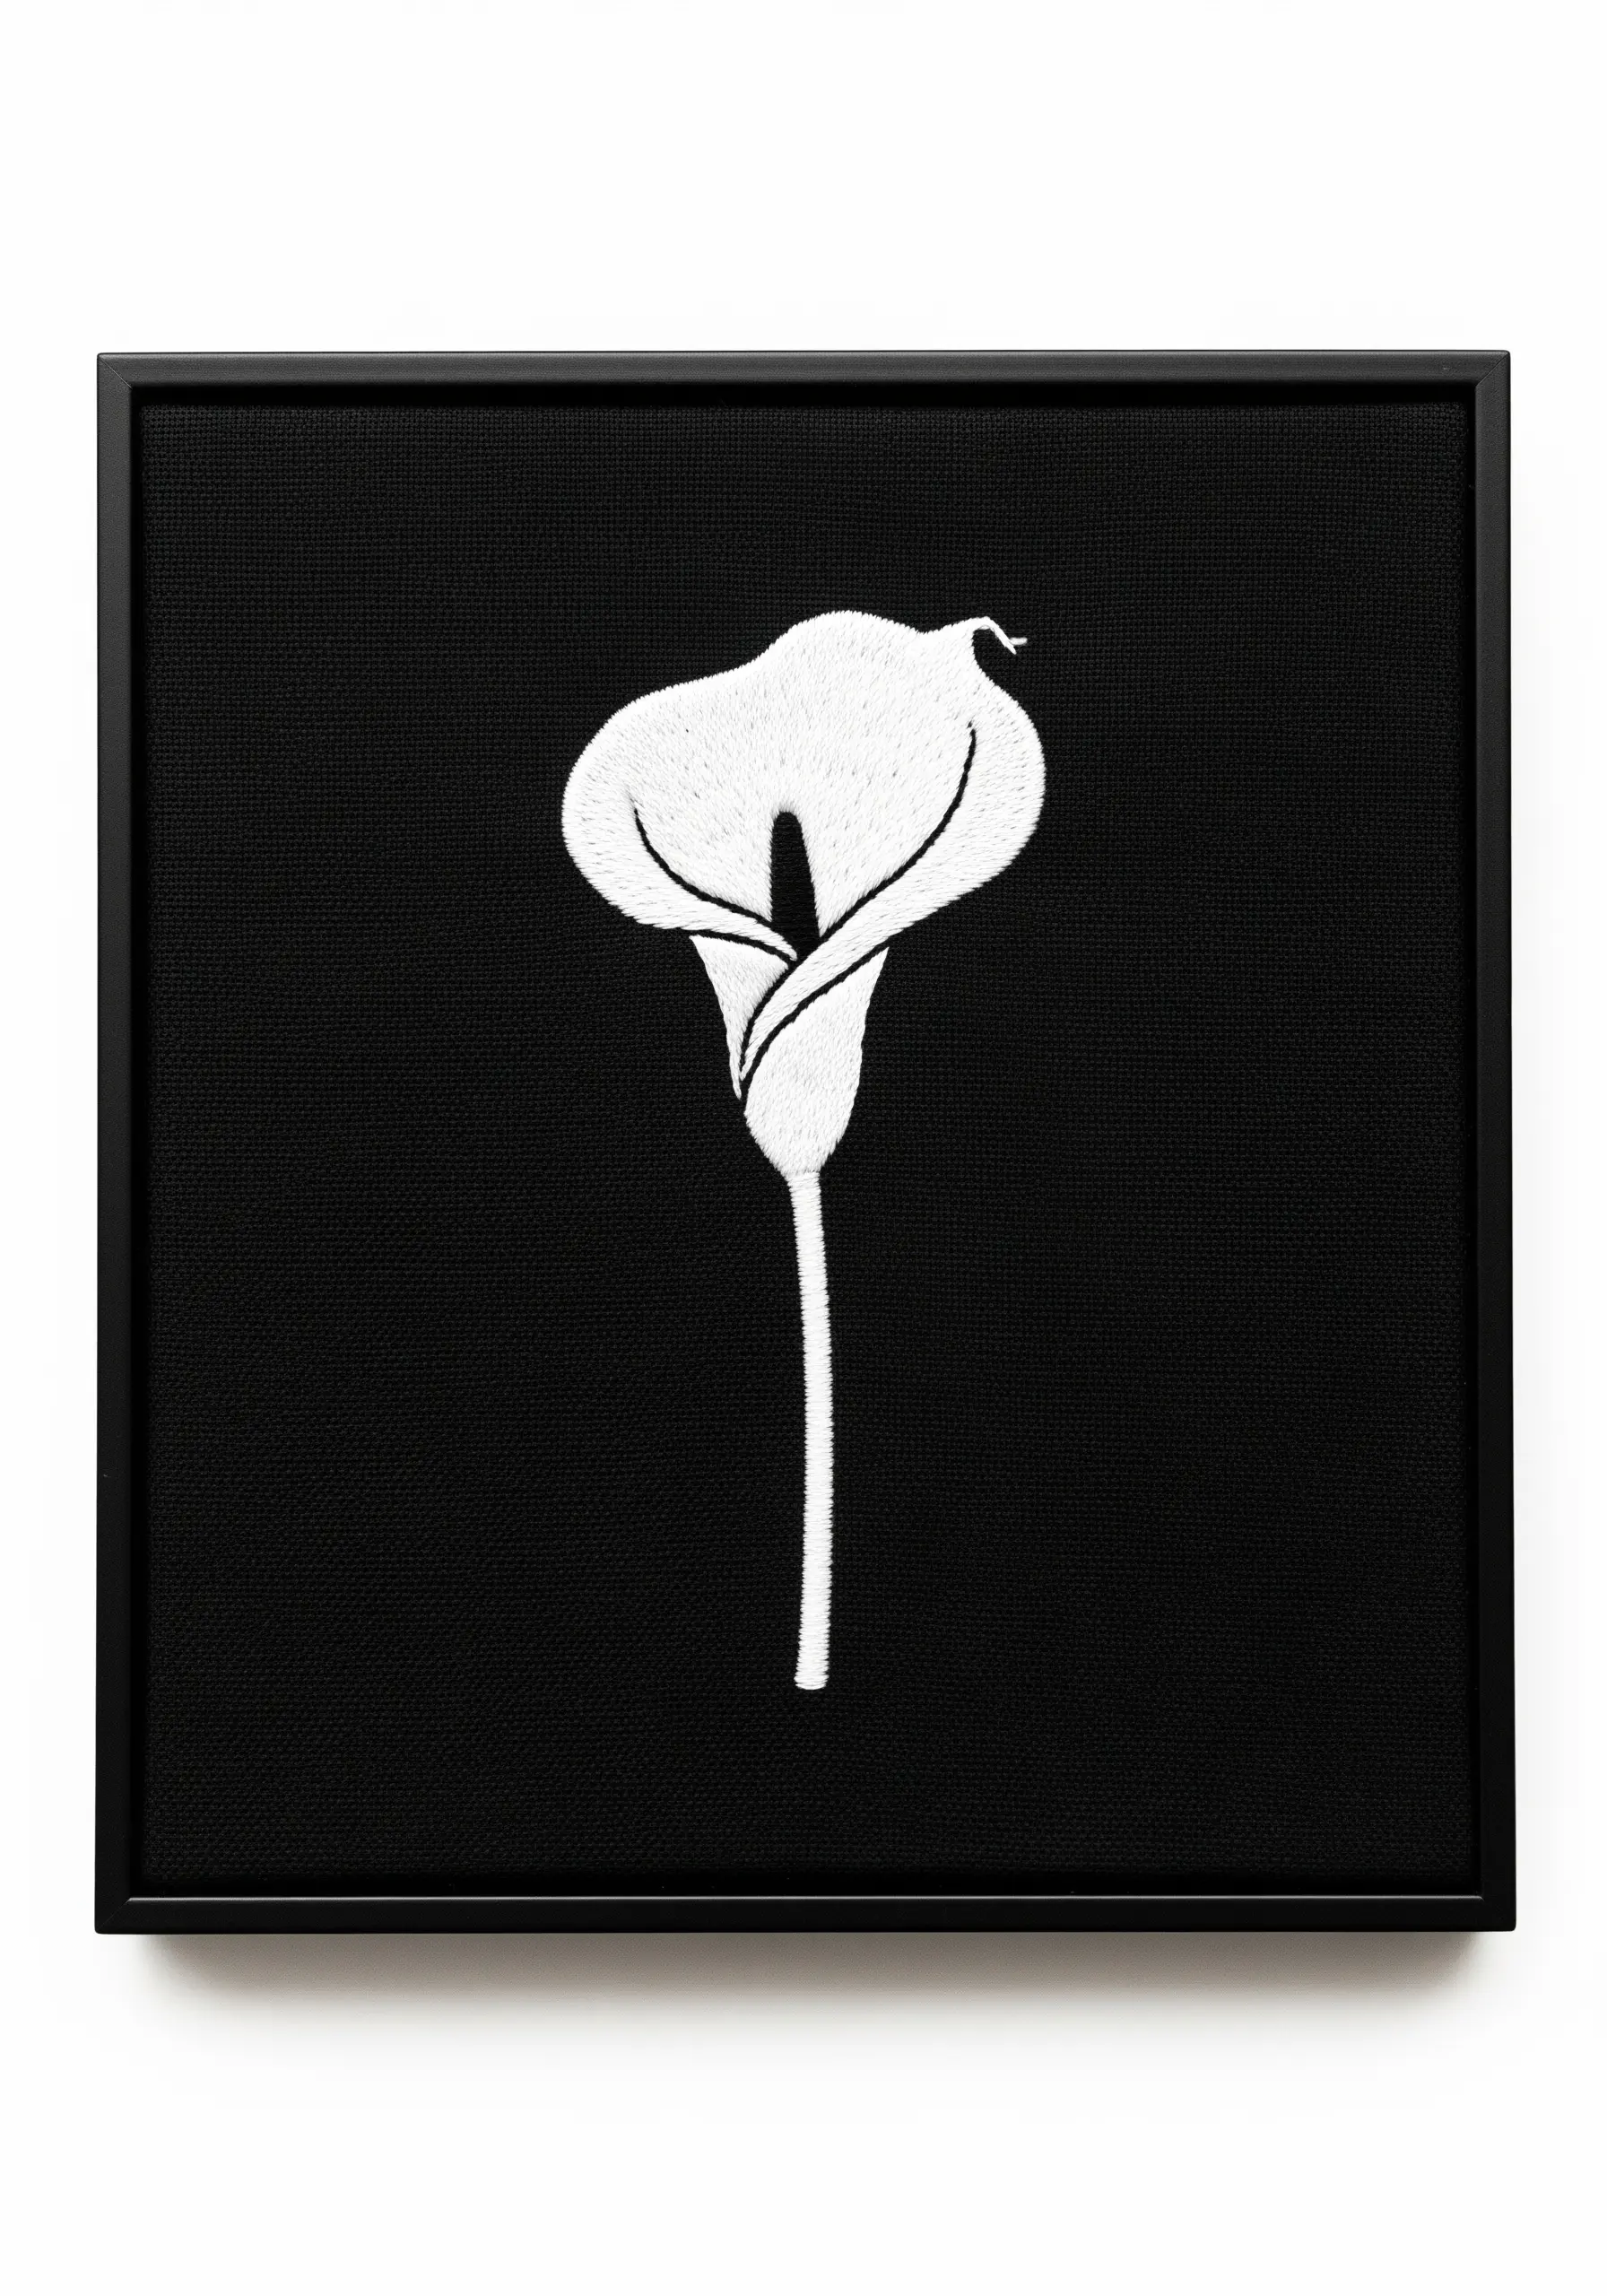
To make a simple silhouette truly stand out, give it a raised, three-dimensional profile with padded satin stitch.
First, fill the interior of your shape with a layer of foundation stitches—simple straight stitches or seed stitches will work.
Then, cover this padding with your final layer of satin stitches, working in the opposite direction. The underlying layer will lift the surface, creating a smooth, beveled effect.
This technique gives the calla lily a sculptural quality that feels exceptionally refined against the stark black canvas.
20. Stitch a Landscape with Color Blocking
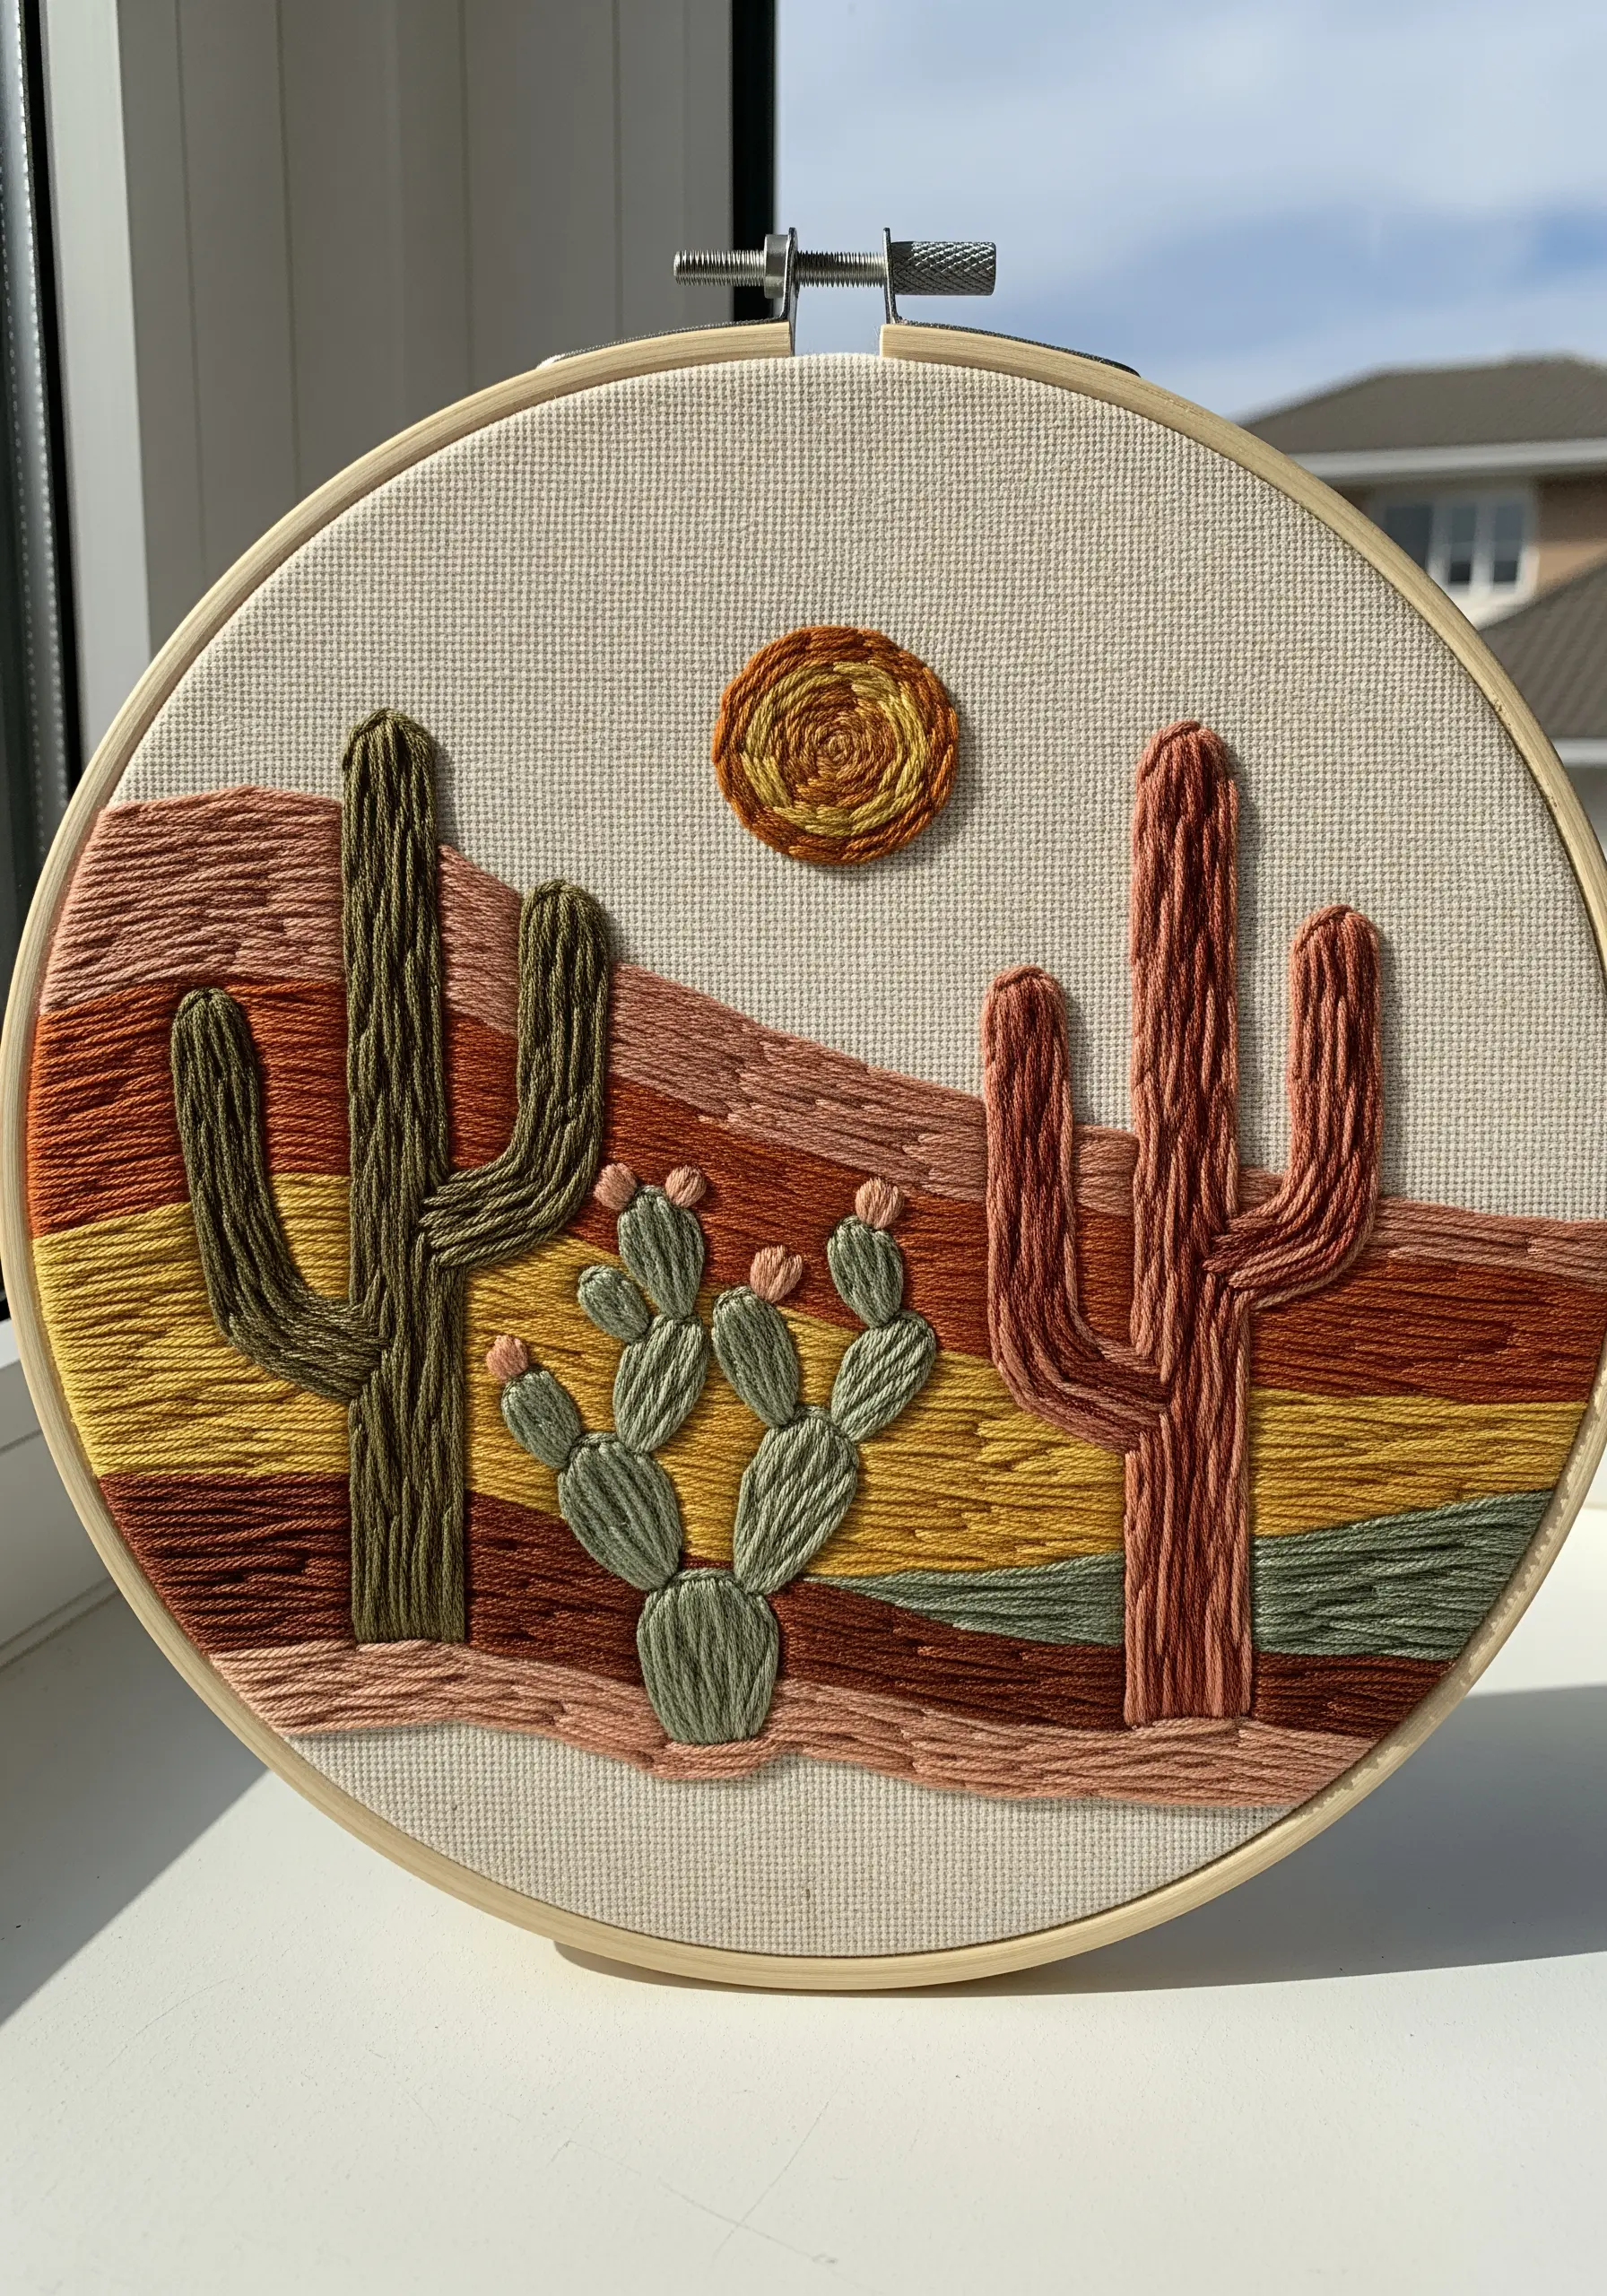
Create an abstract desert scene by using wide bands of color to represent the landscape.
Fill the background with horizontal satin stitches, using earthy tones like ochre, rust, and terracotta to suggest layered rock formations.
Use a variegated floss or blend several similar shades within each stripe to give the color a more organic, textured feel.
Stitch the cacti and sun on top using vertical stitches to create a subtle contrast in direction and make them stand out from the background.
21. Form Delicate Blossoms with Lazy Daisy Stitch
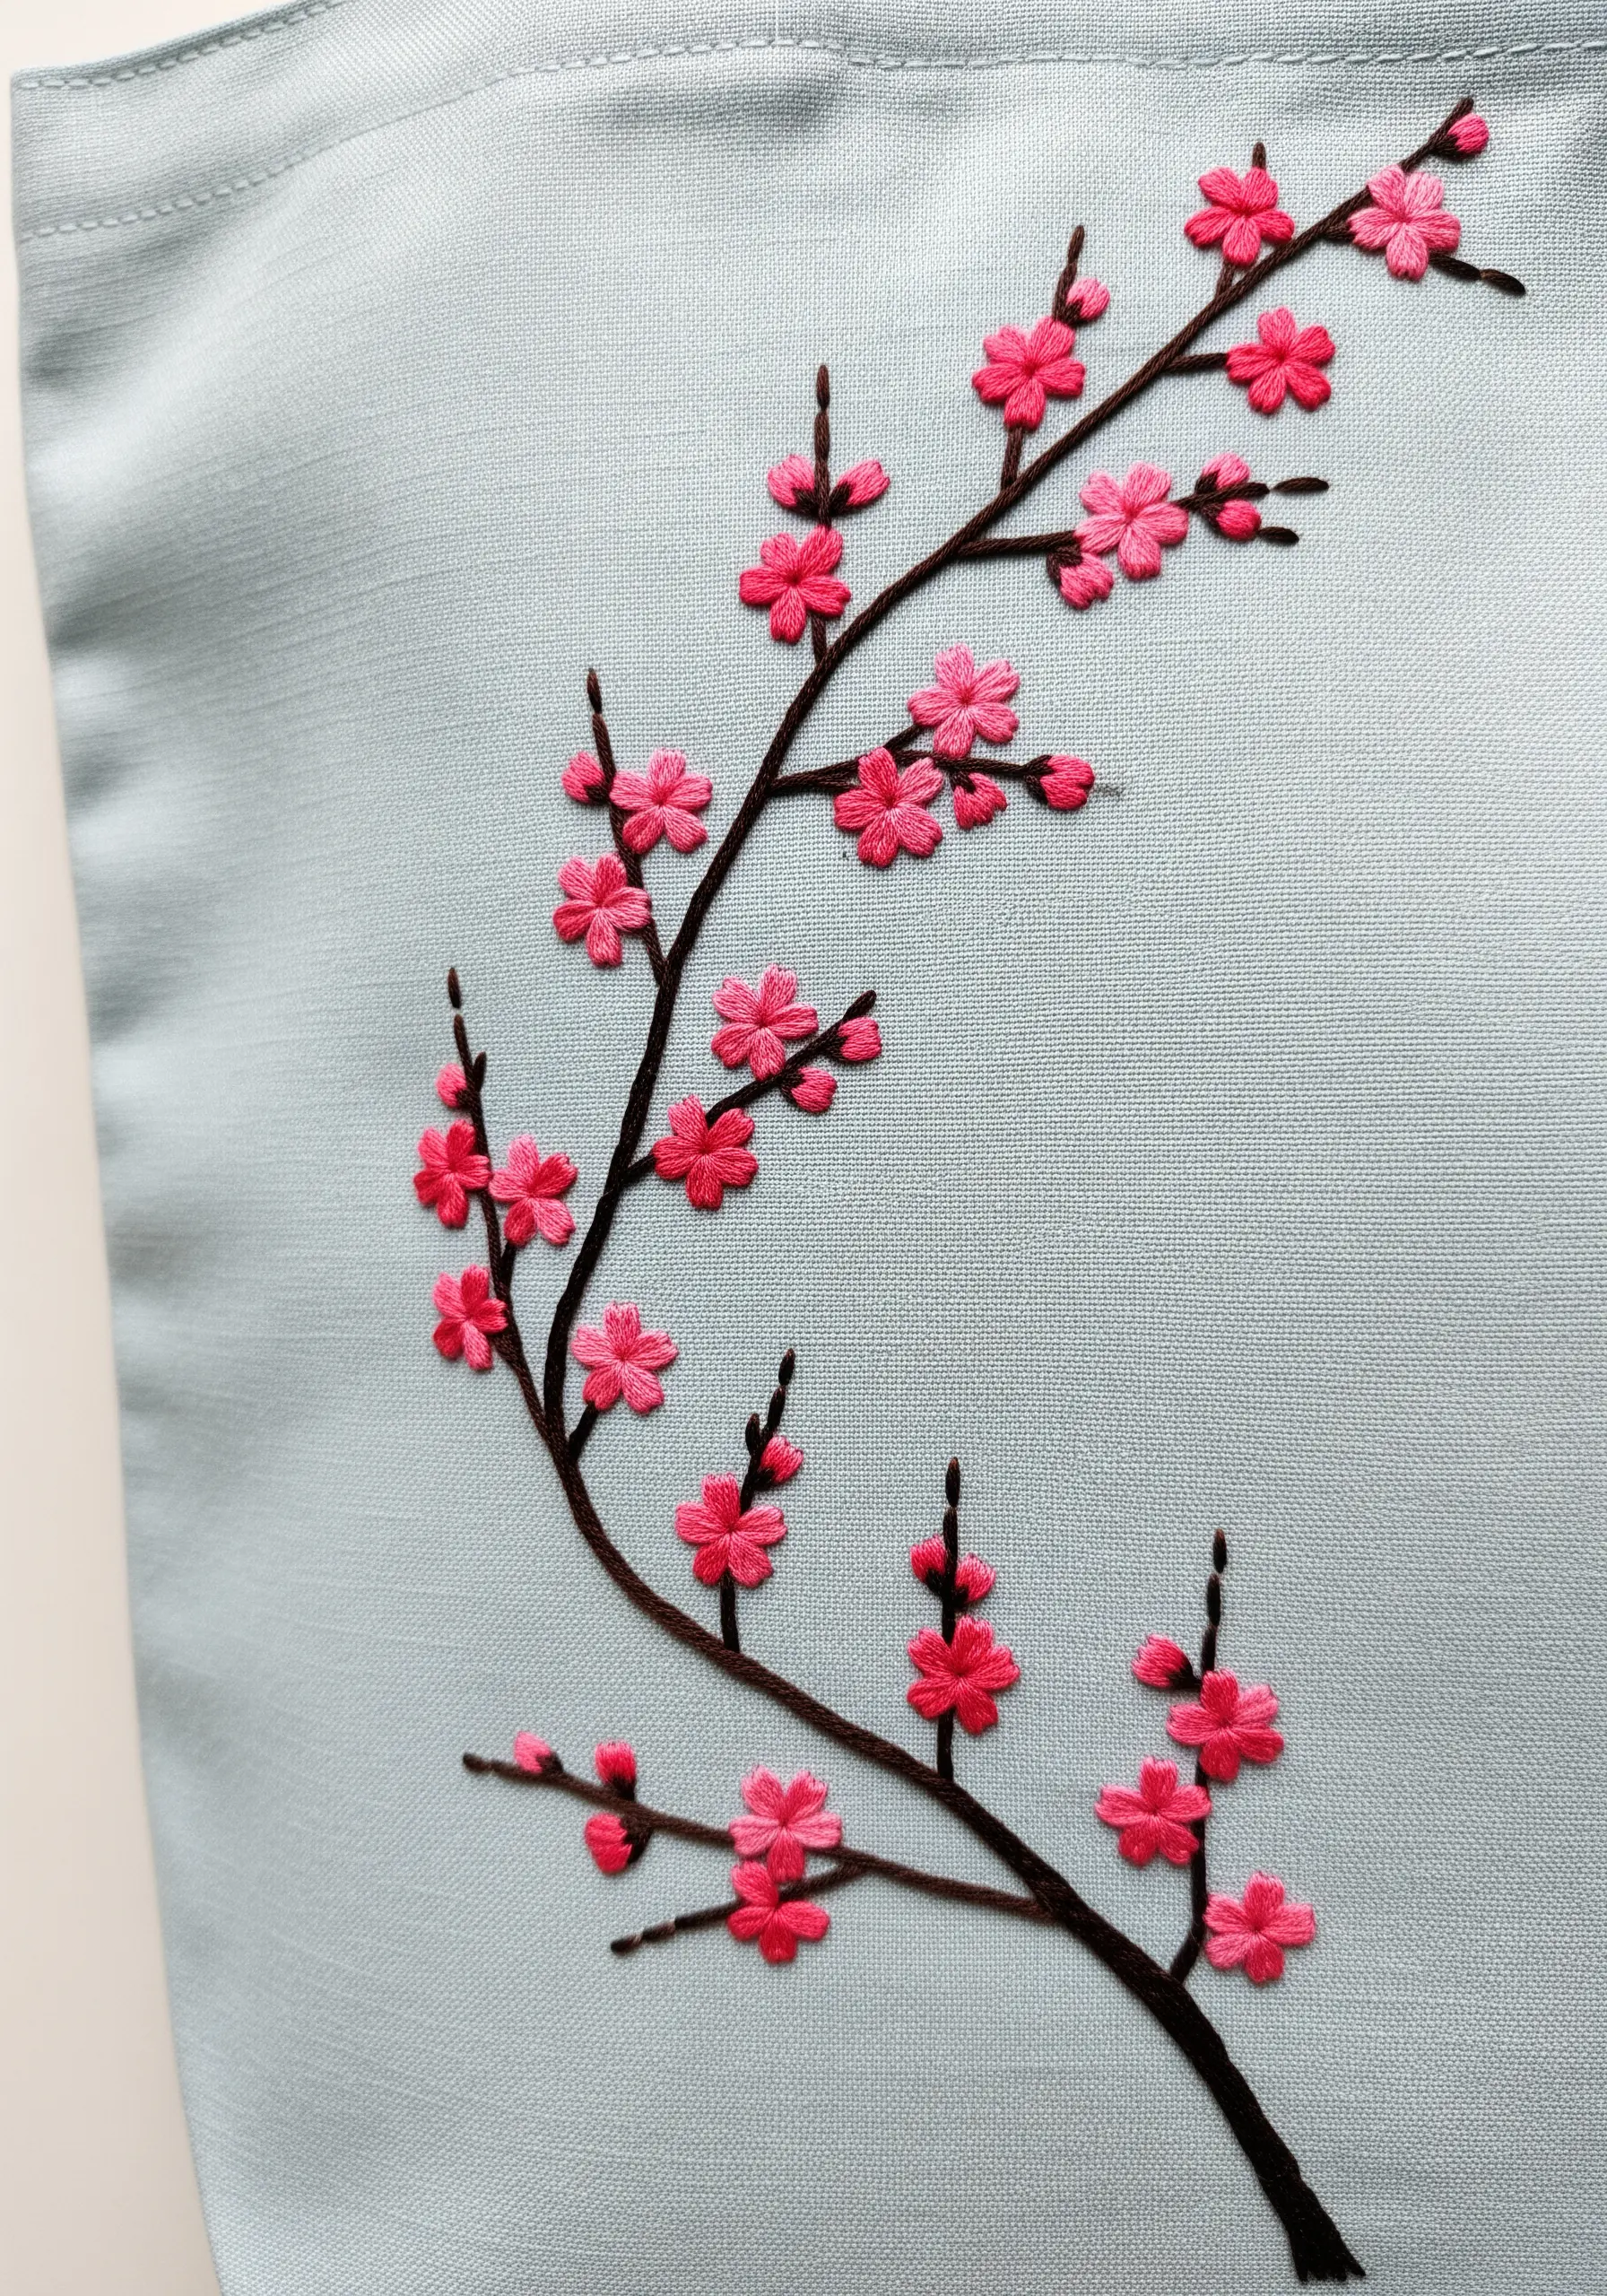
For small, delicate flowers like cherry blossoms, the lazy daisy stitch is the most efficient and elegant choice.
Create each petal with a single looped stitch. Arrange five of them in a circle to form the blossom, then secure the center with a tiny French knot or a contrasting seed stitch.
Use a dark, textured stem stitch for the branches to ground the airy pink flowers.
This combination of stitches allows you to create a full, blooming branch that feels both detailed and effortlessly light on tote bags or apparel.
22. Master Gradients in Complex Shapes
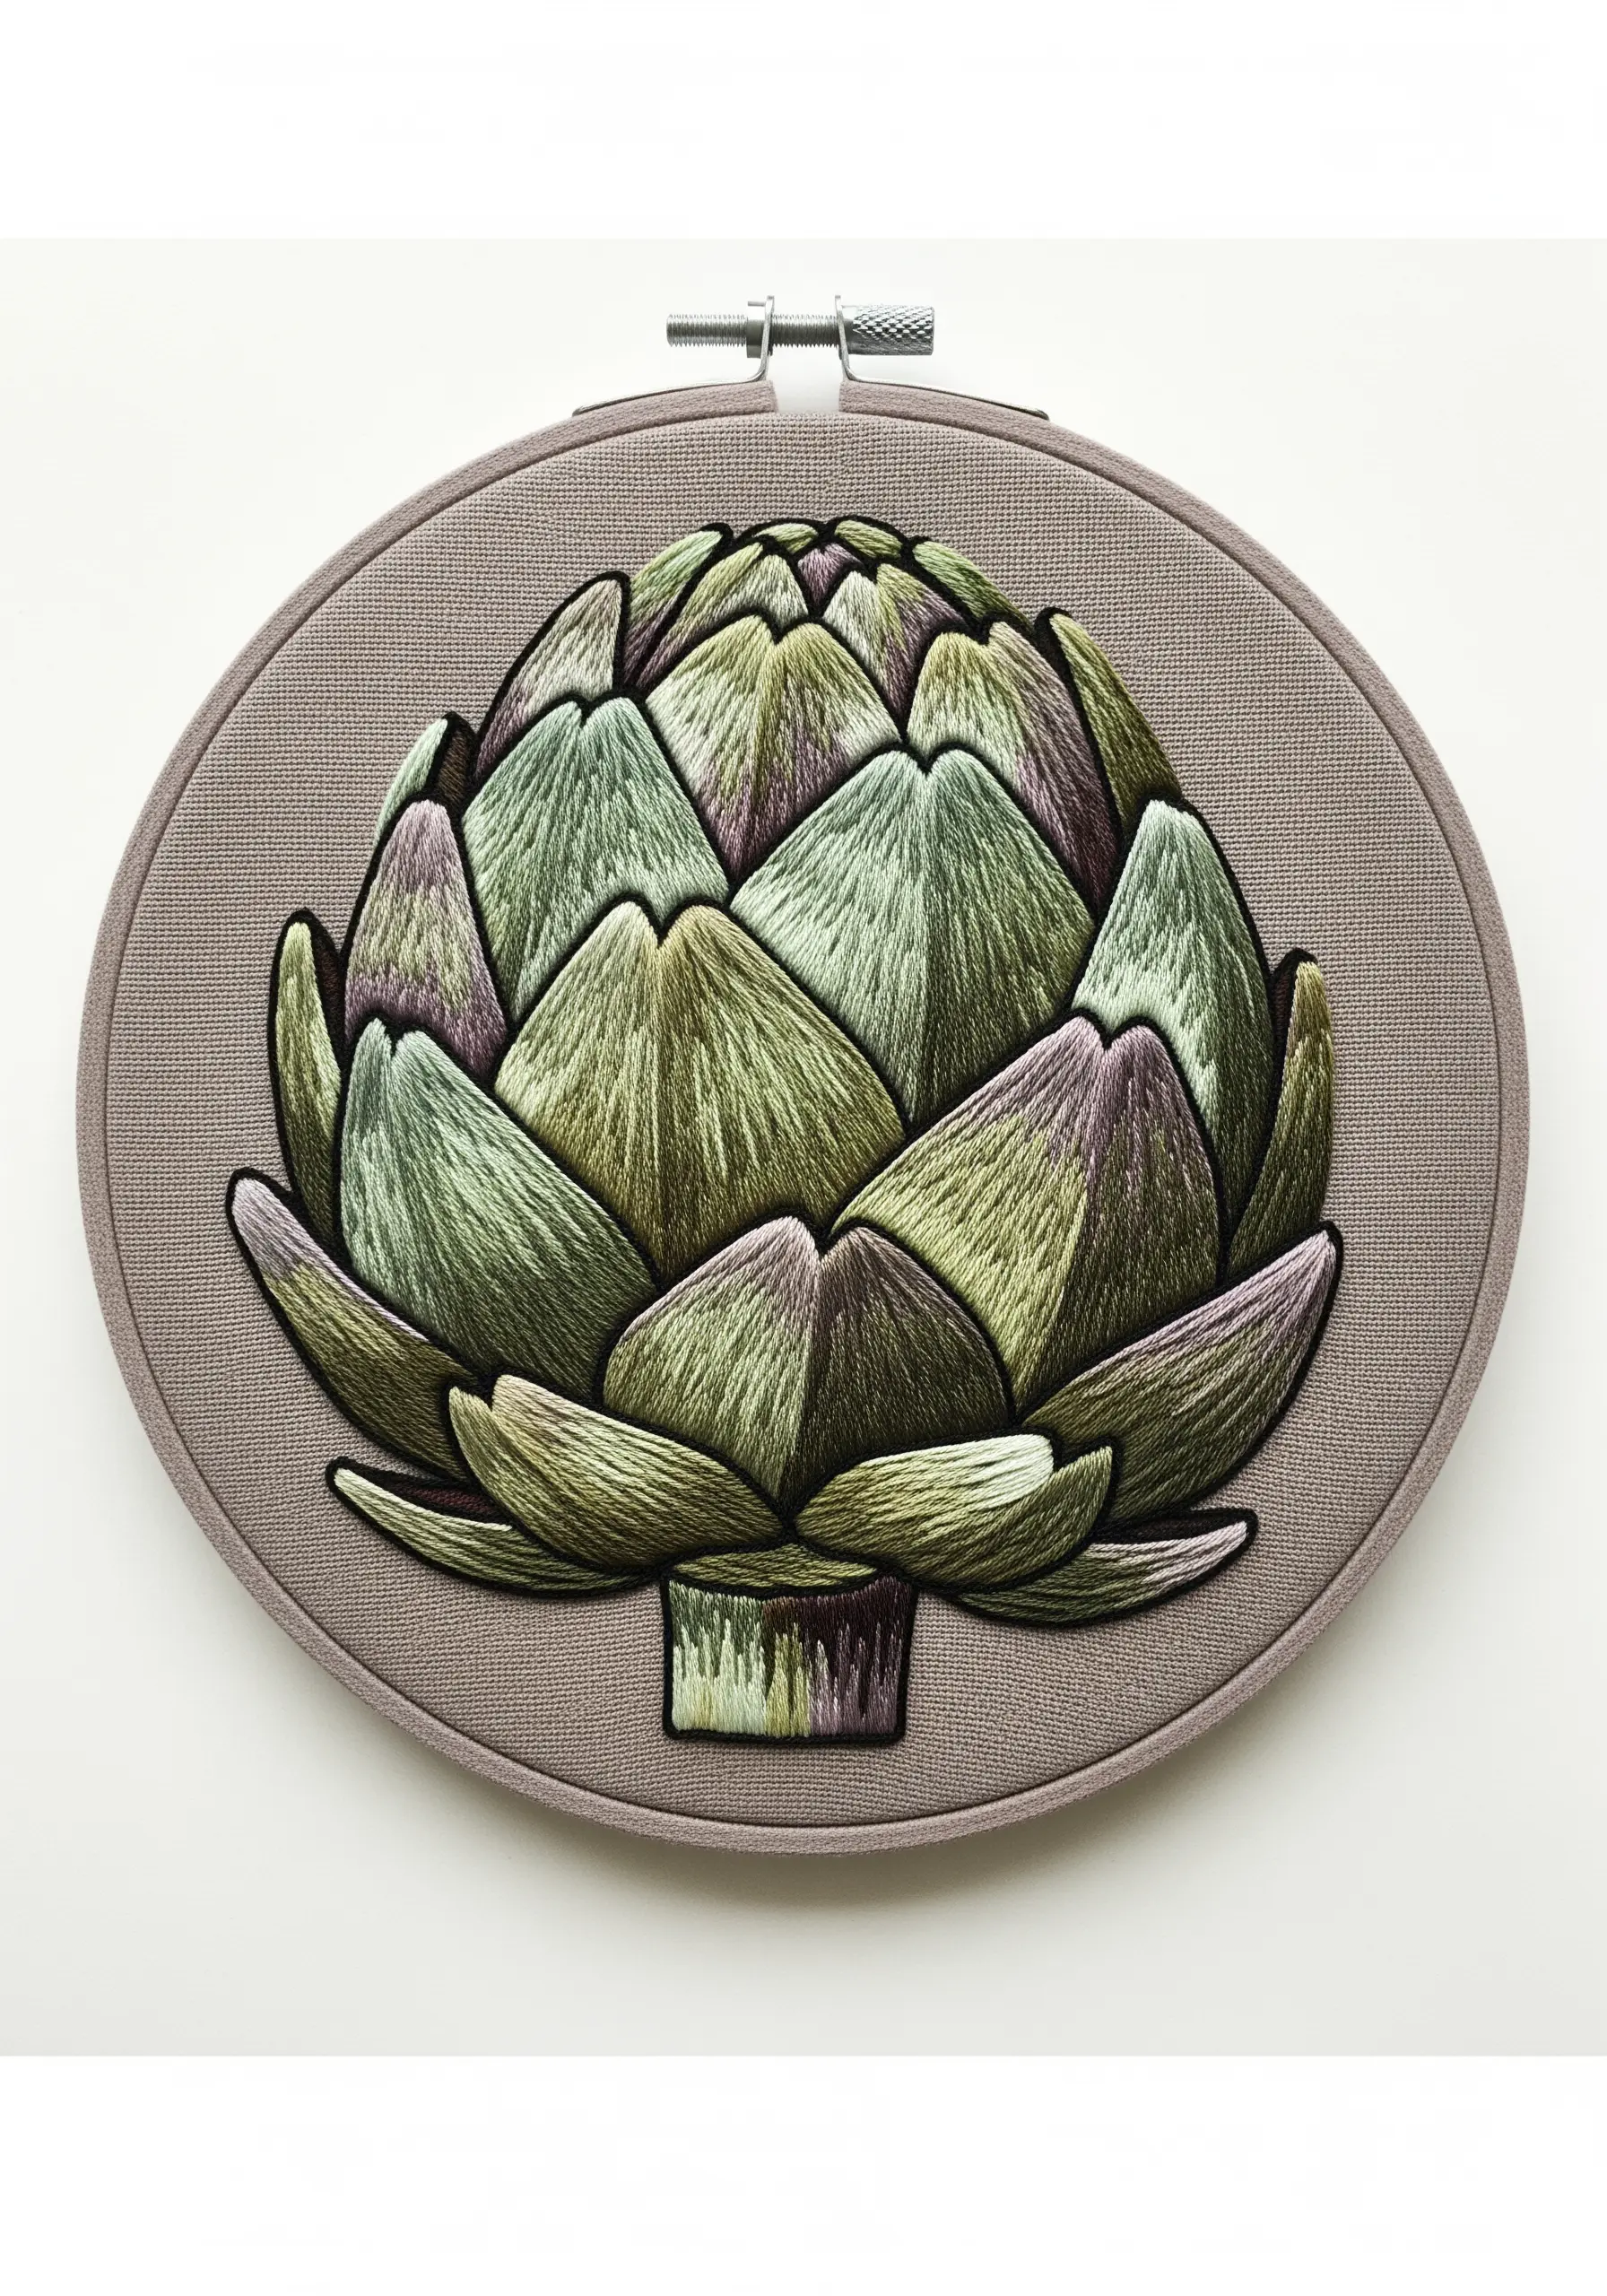
When faced with a complex shape like an artichoke, the key is to break it down into its simplest components—in this case, the individual bracts (leaves).
Treat each bract as a miniature thread painting. Use long-and-short stitch to blend two or three colors within that small space, following its natural curve.
A strong outline in a darker shade, like a split stitch, will help define each section and prevent the colors from looking muddy.
This methodical approach turns an intimidating subject into a manageable and stunning study of color and form.
23. Use Seed Stitch for a Forgiving Fill
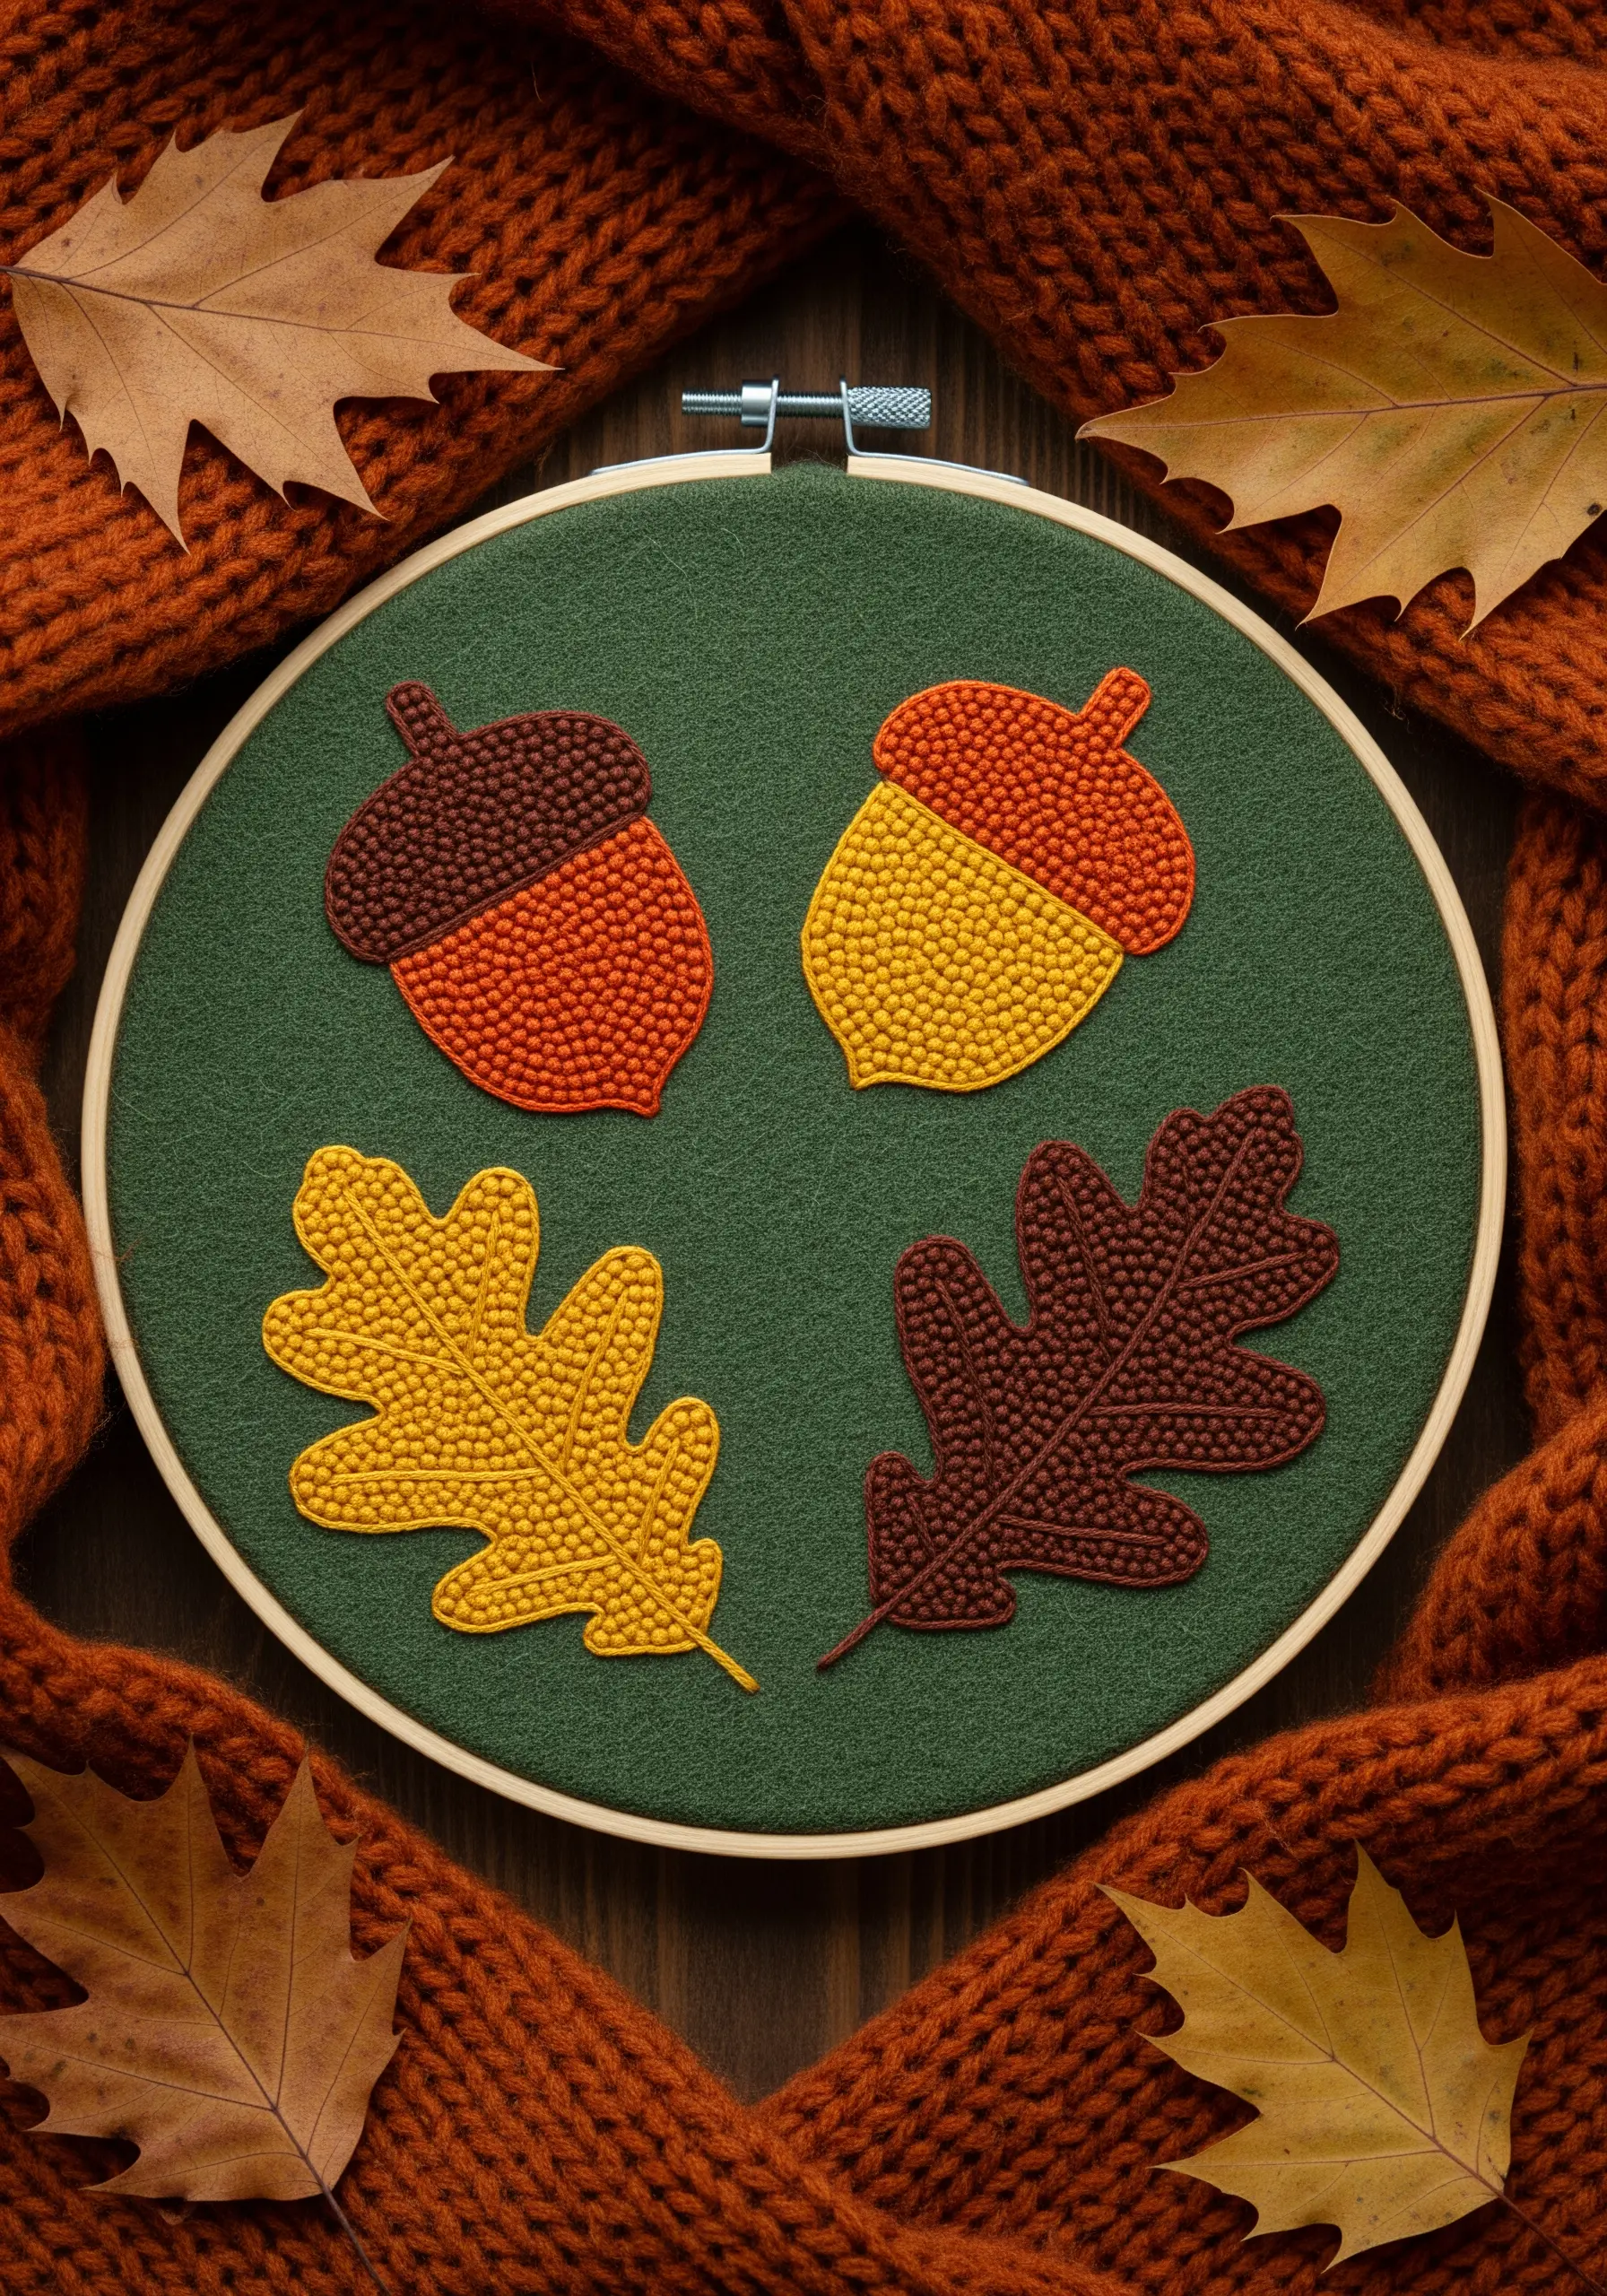
If you find satin stitch challenging, a seed stitch fill is a beautiful and more forgiving alternative for creating solid color blocks.
Simply fill the shape with tiny, randomly placed straight stitches, like scattered seeds. The more densely you pack them, the more solid the color will appear.
This technique is perfect for creating a matte, slightly textured surface that contrasts beautifully with a smooth outline.
It’s an ideal way to achieve the cozy, handmade feel of these earth tone patterns.
24. Create Natural Movement with Varied Stitches
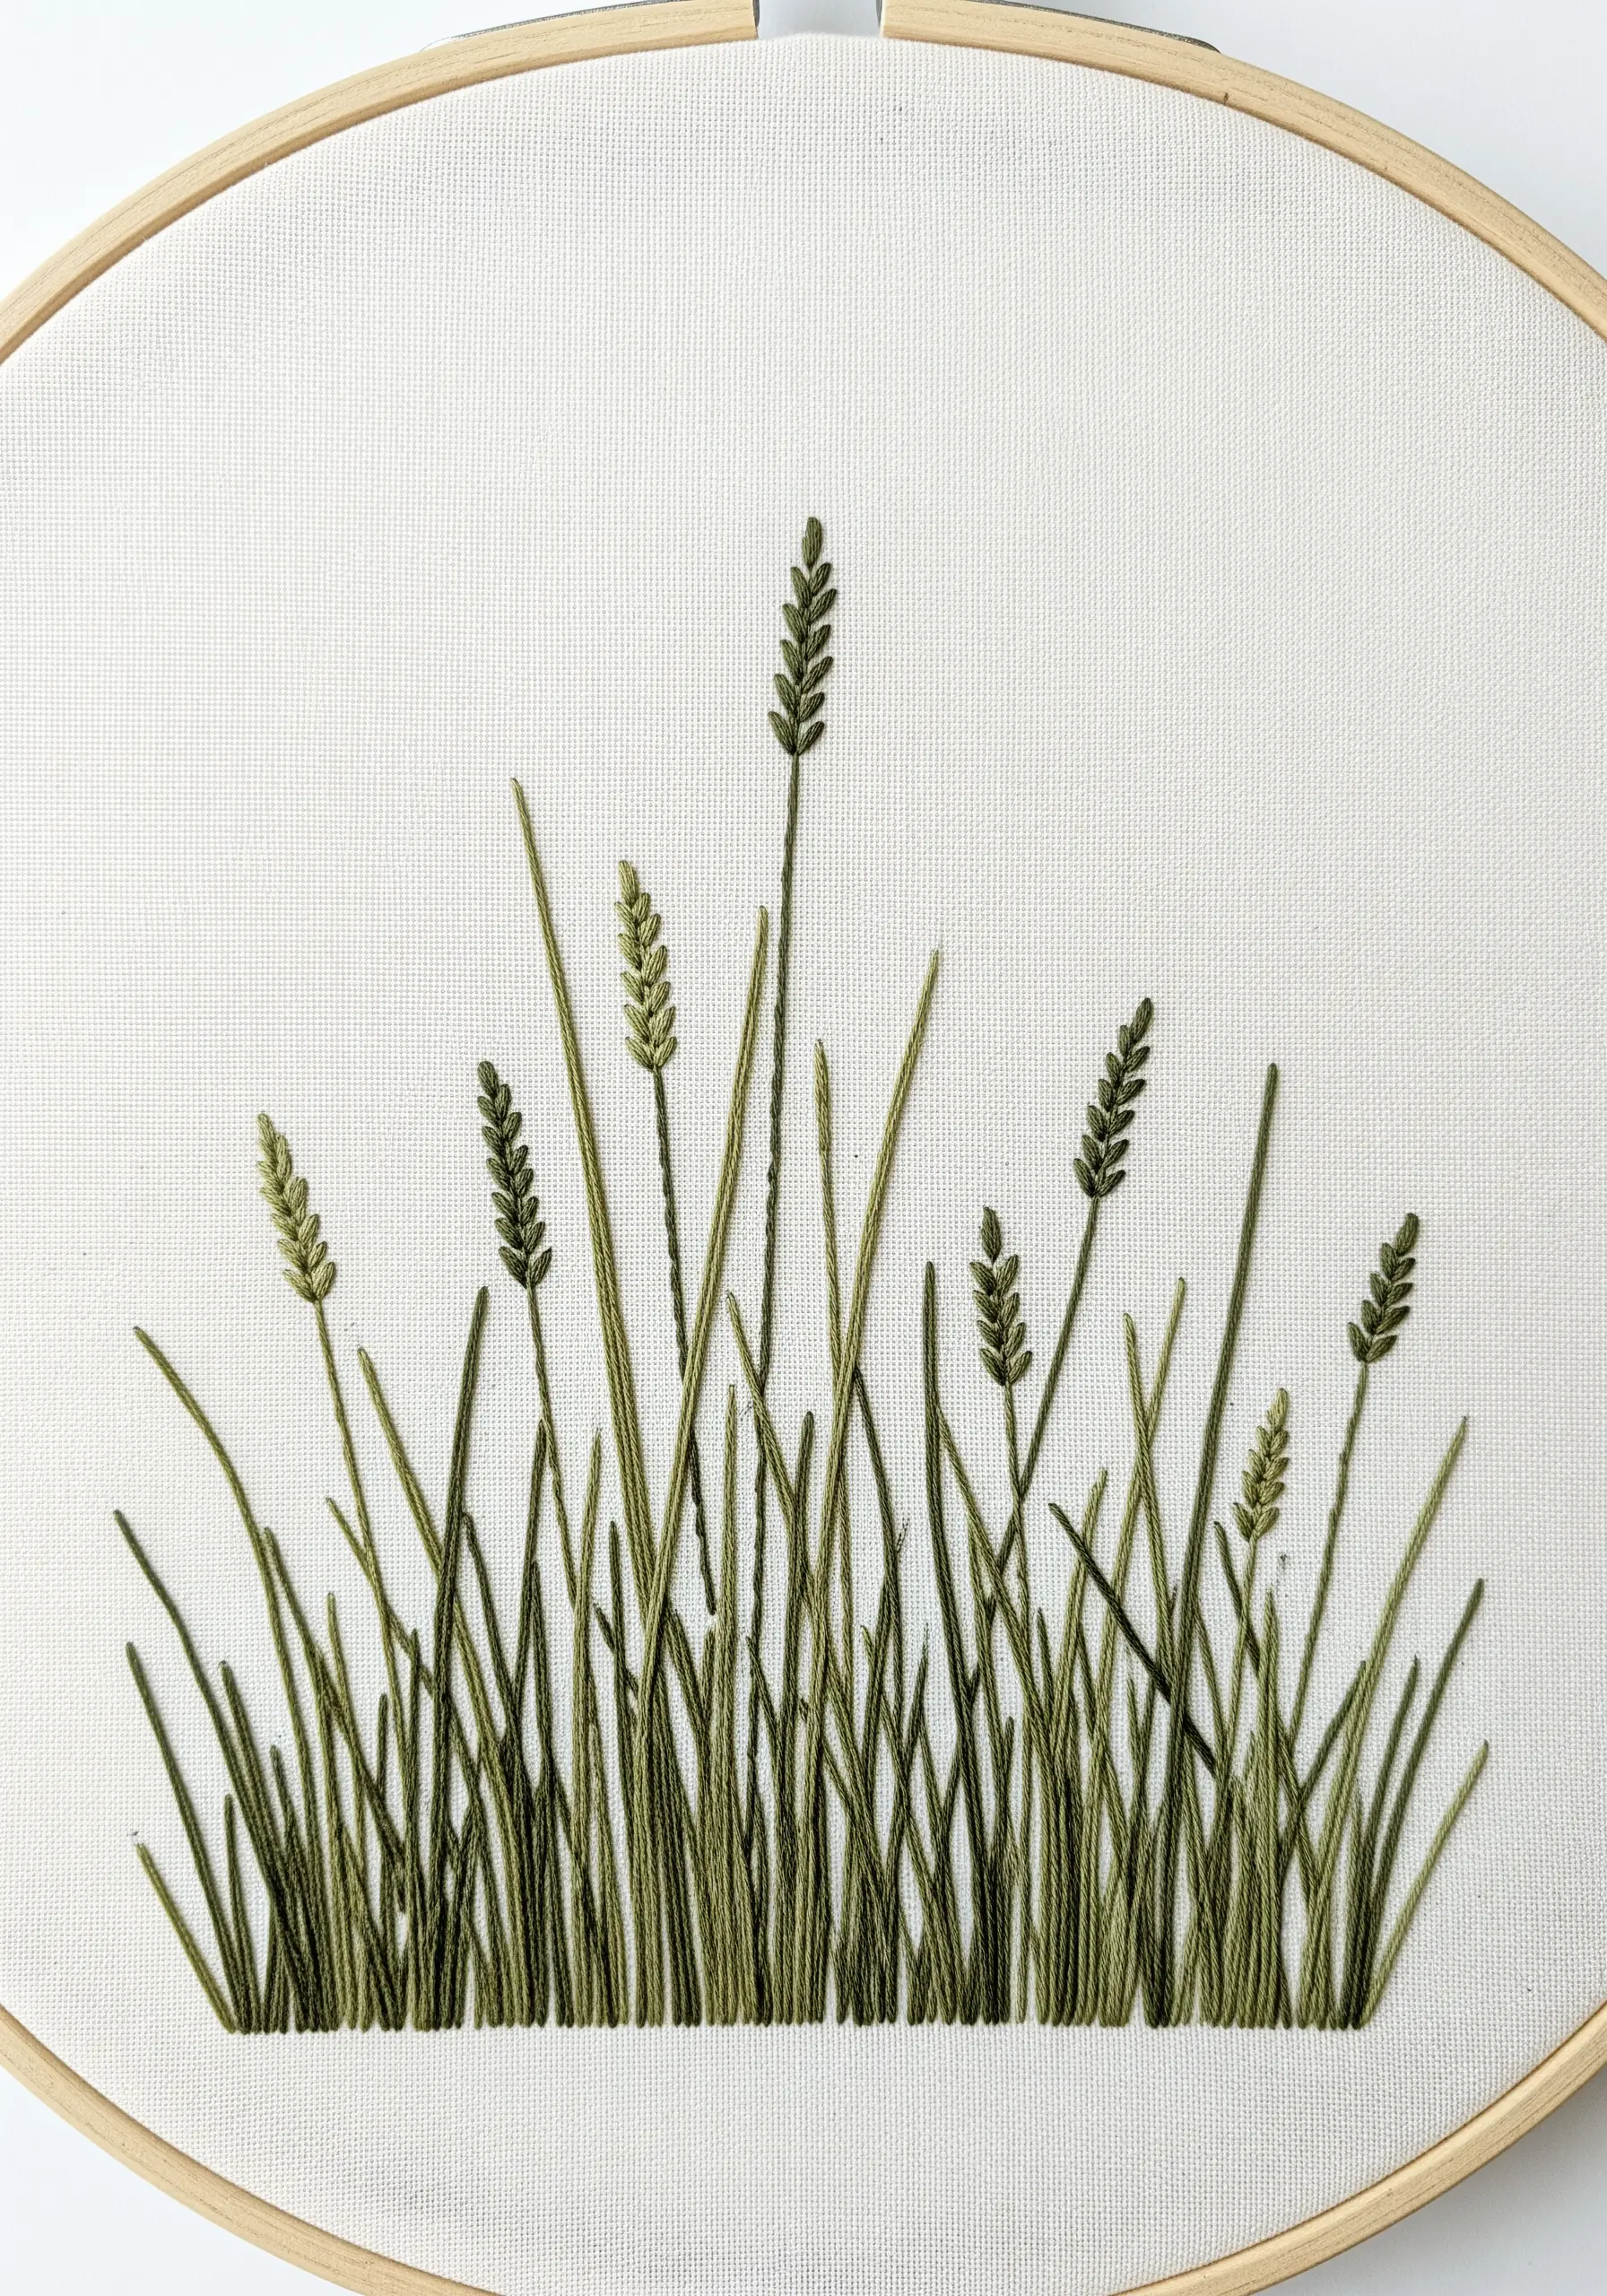
To capture the organic feel of wild grass, avoid uniformity. Your goal is to create a sense of natural, unplanned growth.
Use simple stem stitch or backstitch for the stalks, but vary their height, thickness (by changing the number of strands), and angle.
For the seed heads, use a few small, clustered straight stitches or a single fishbone stitch. Use at least two or three similar shades of green throughout the composition to add depth.
This intentional irregularity is what makes the final piece feel alive and dynamic.
25. Build a Playful Palette with Bold Stitches
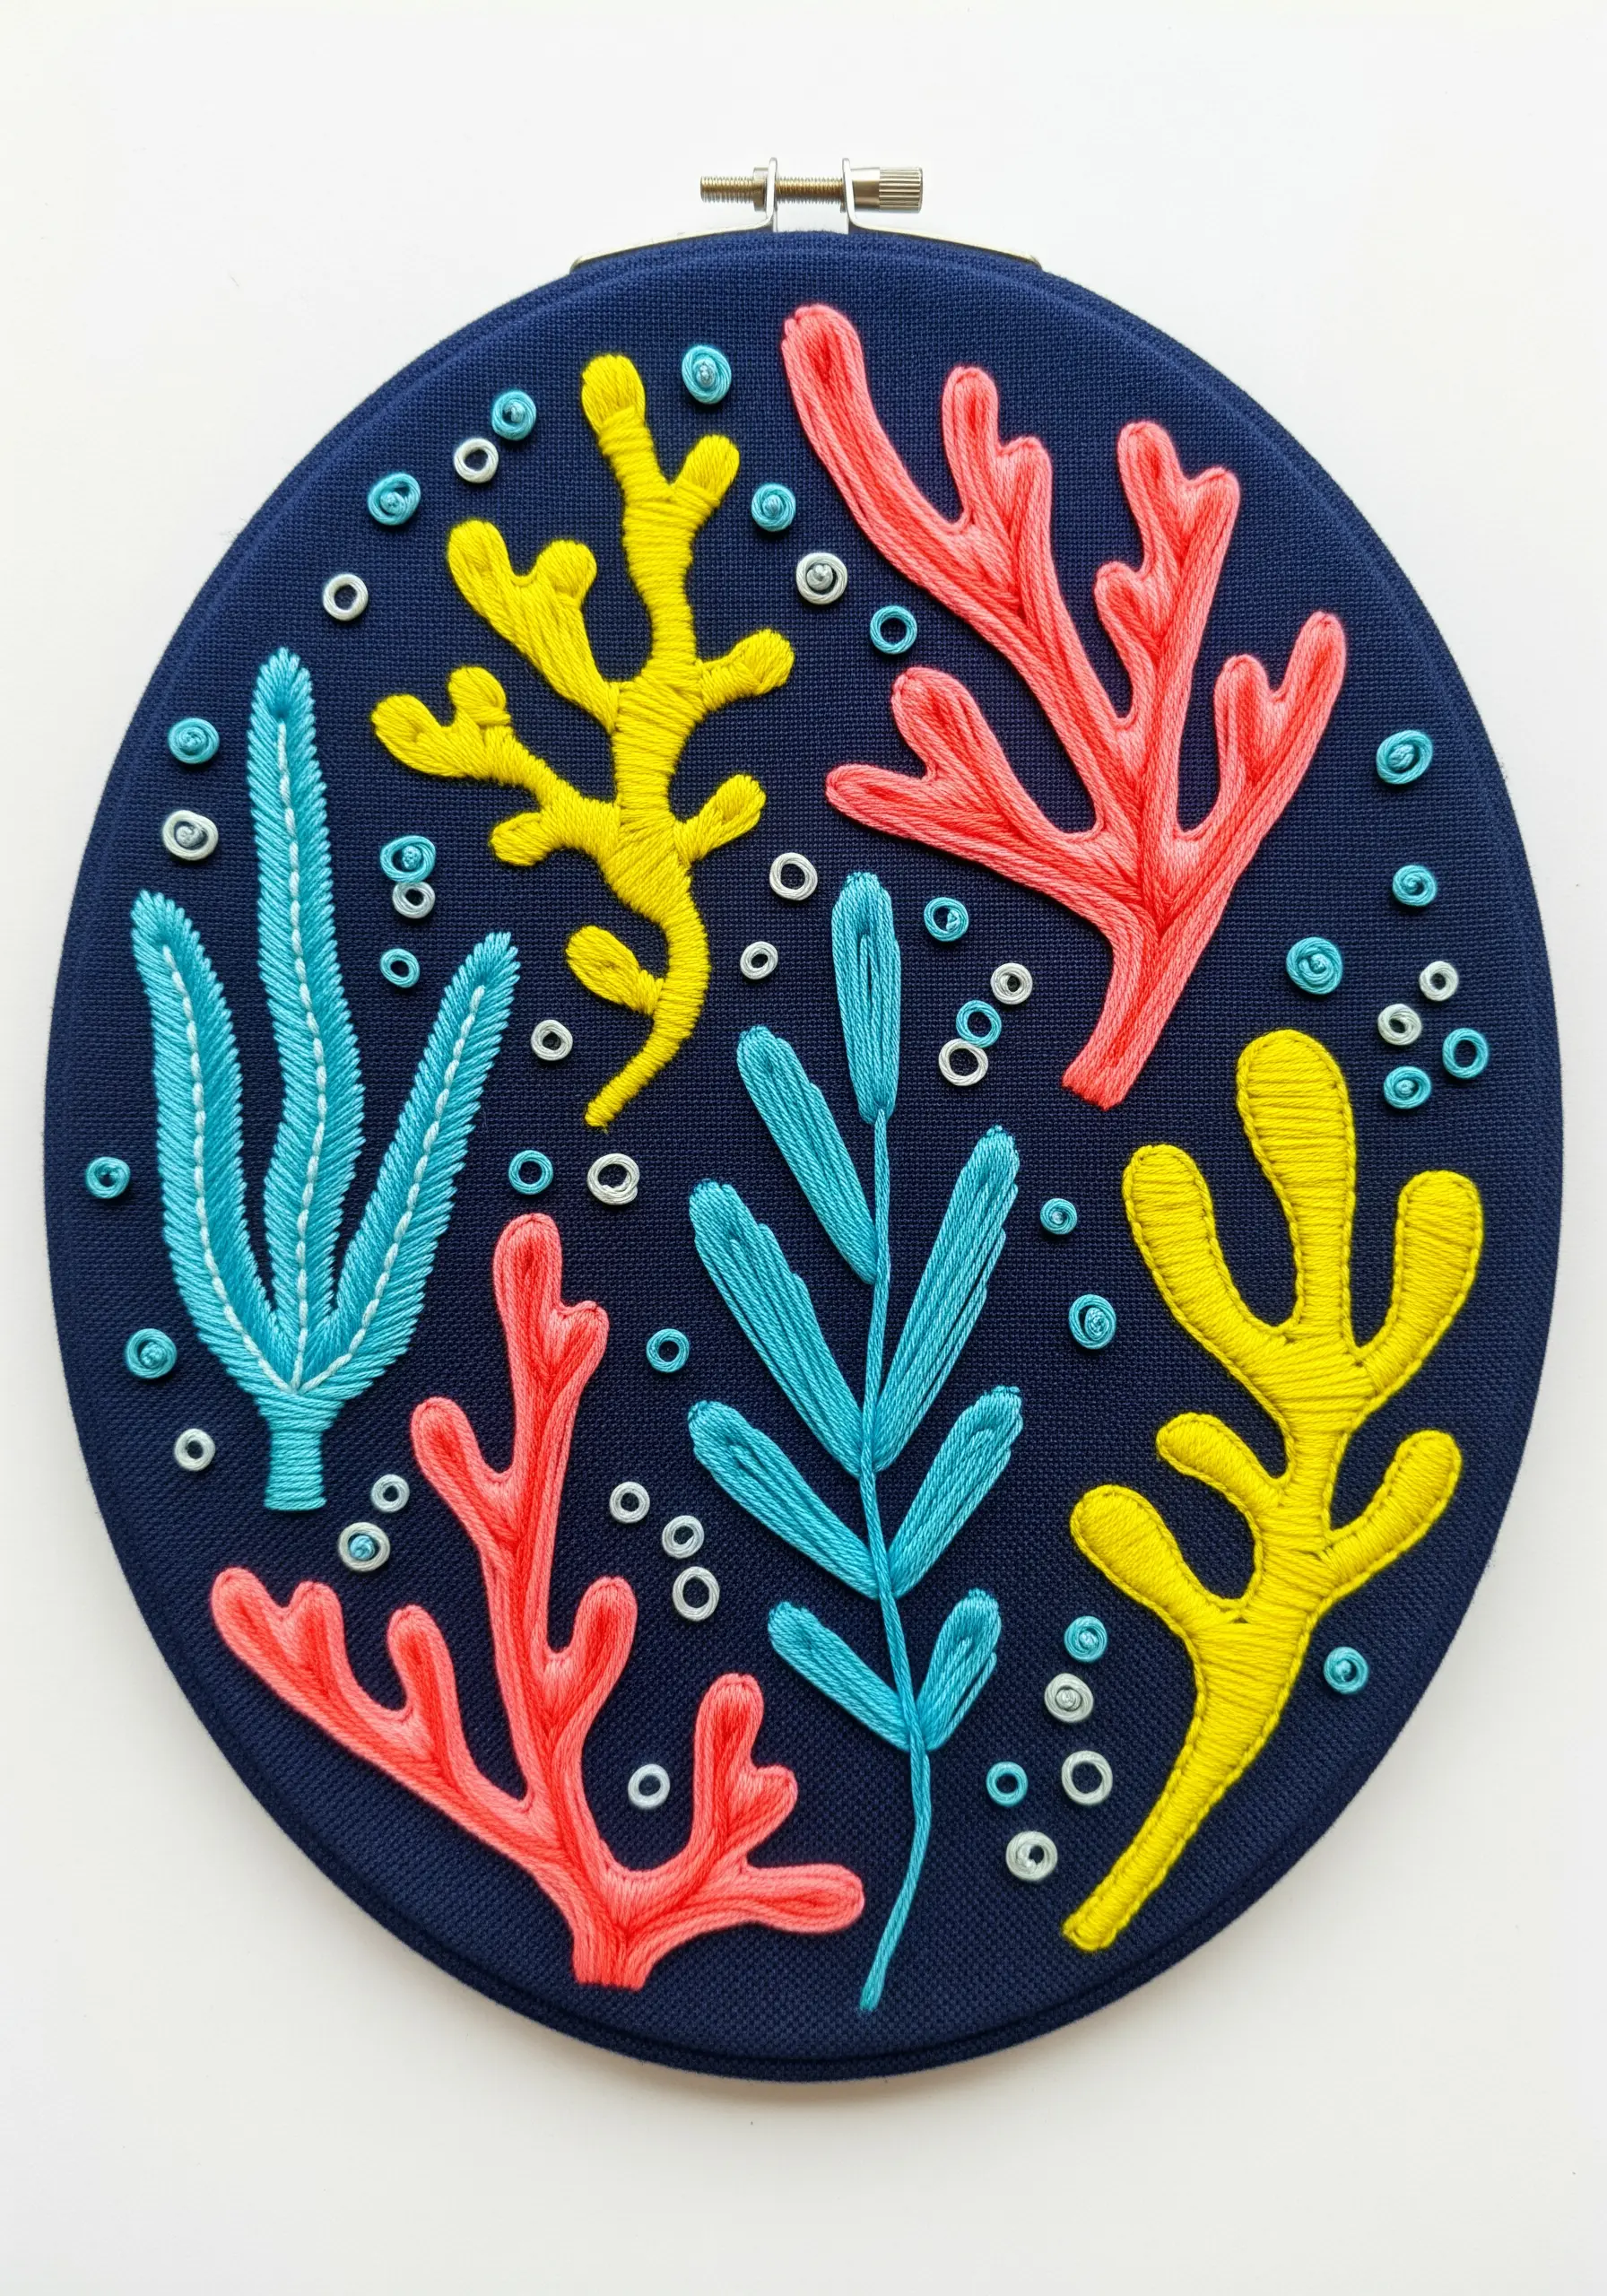
Embrace vibrant, unexpected color combinations for a modern take on botanical art.
Choose a limited palette of high-contrast colors—like coral, yellow, and turquoise—and set them against a dark navy background to make them pop.
Assign a different stitch or texture to each color to enhance the visual variety. Use padded satin stitch for the coral, a whipped backstitch for the yellow, and a fishbone stitch for the turquoise leaves.
This playful approach to color and texture results in a joyful and energetic piece.
26. Map Your Colors for a Perfect Gradient
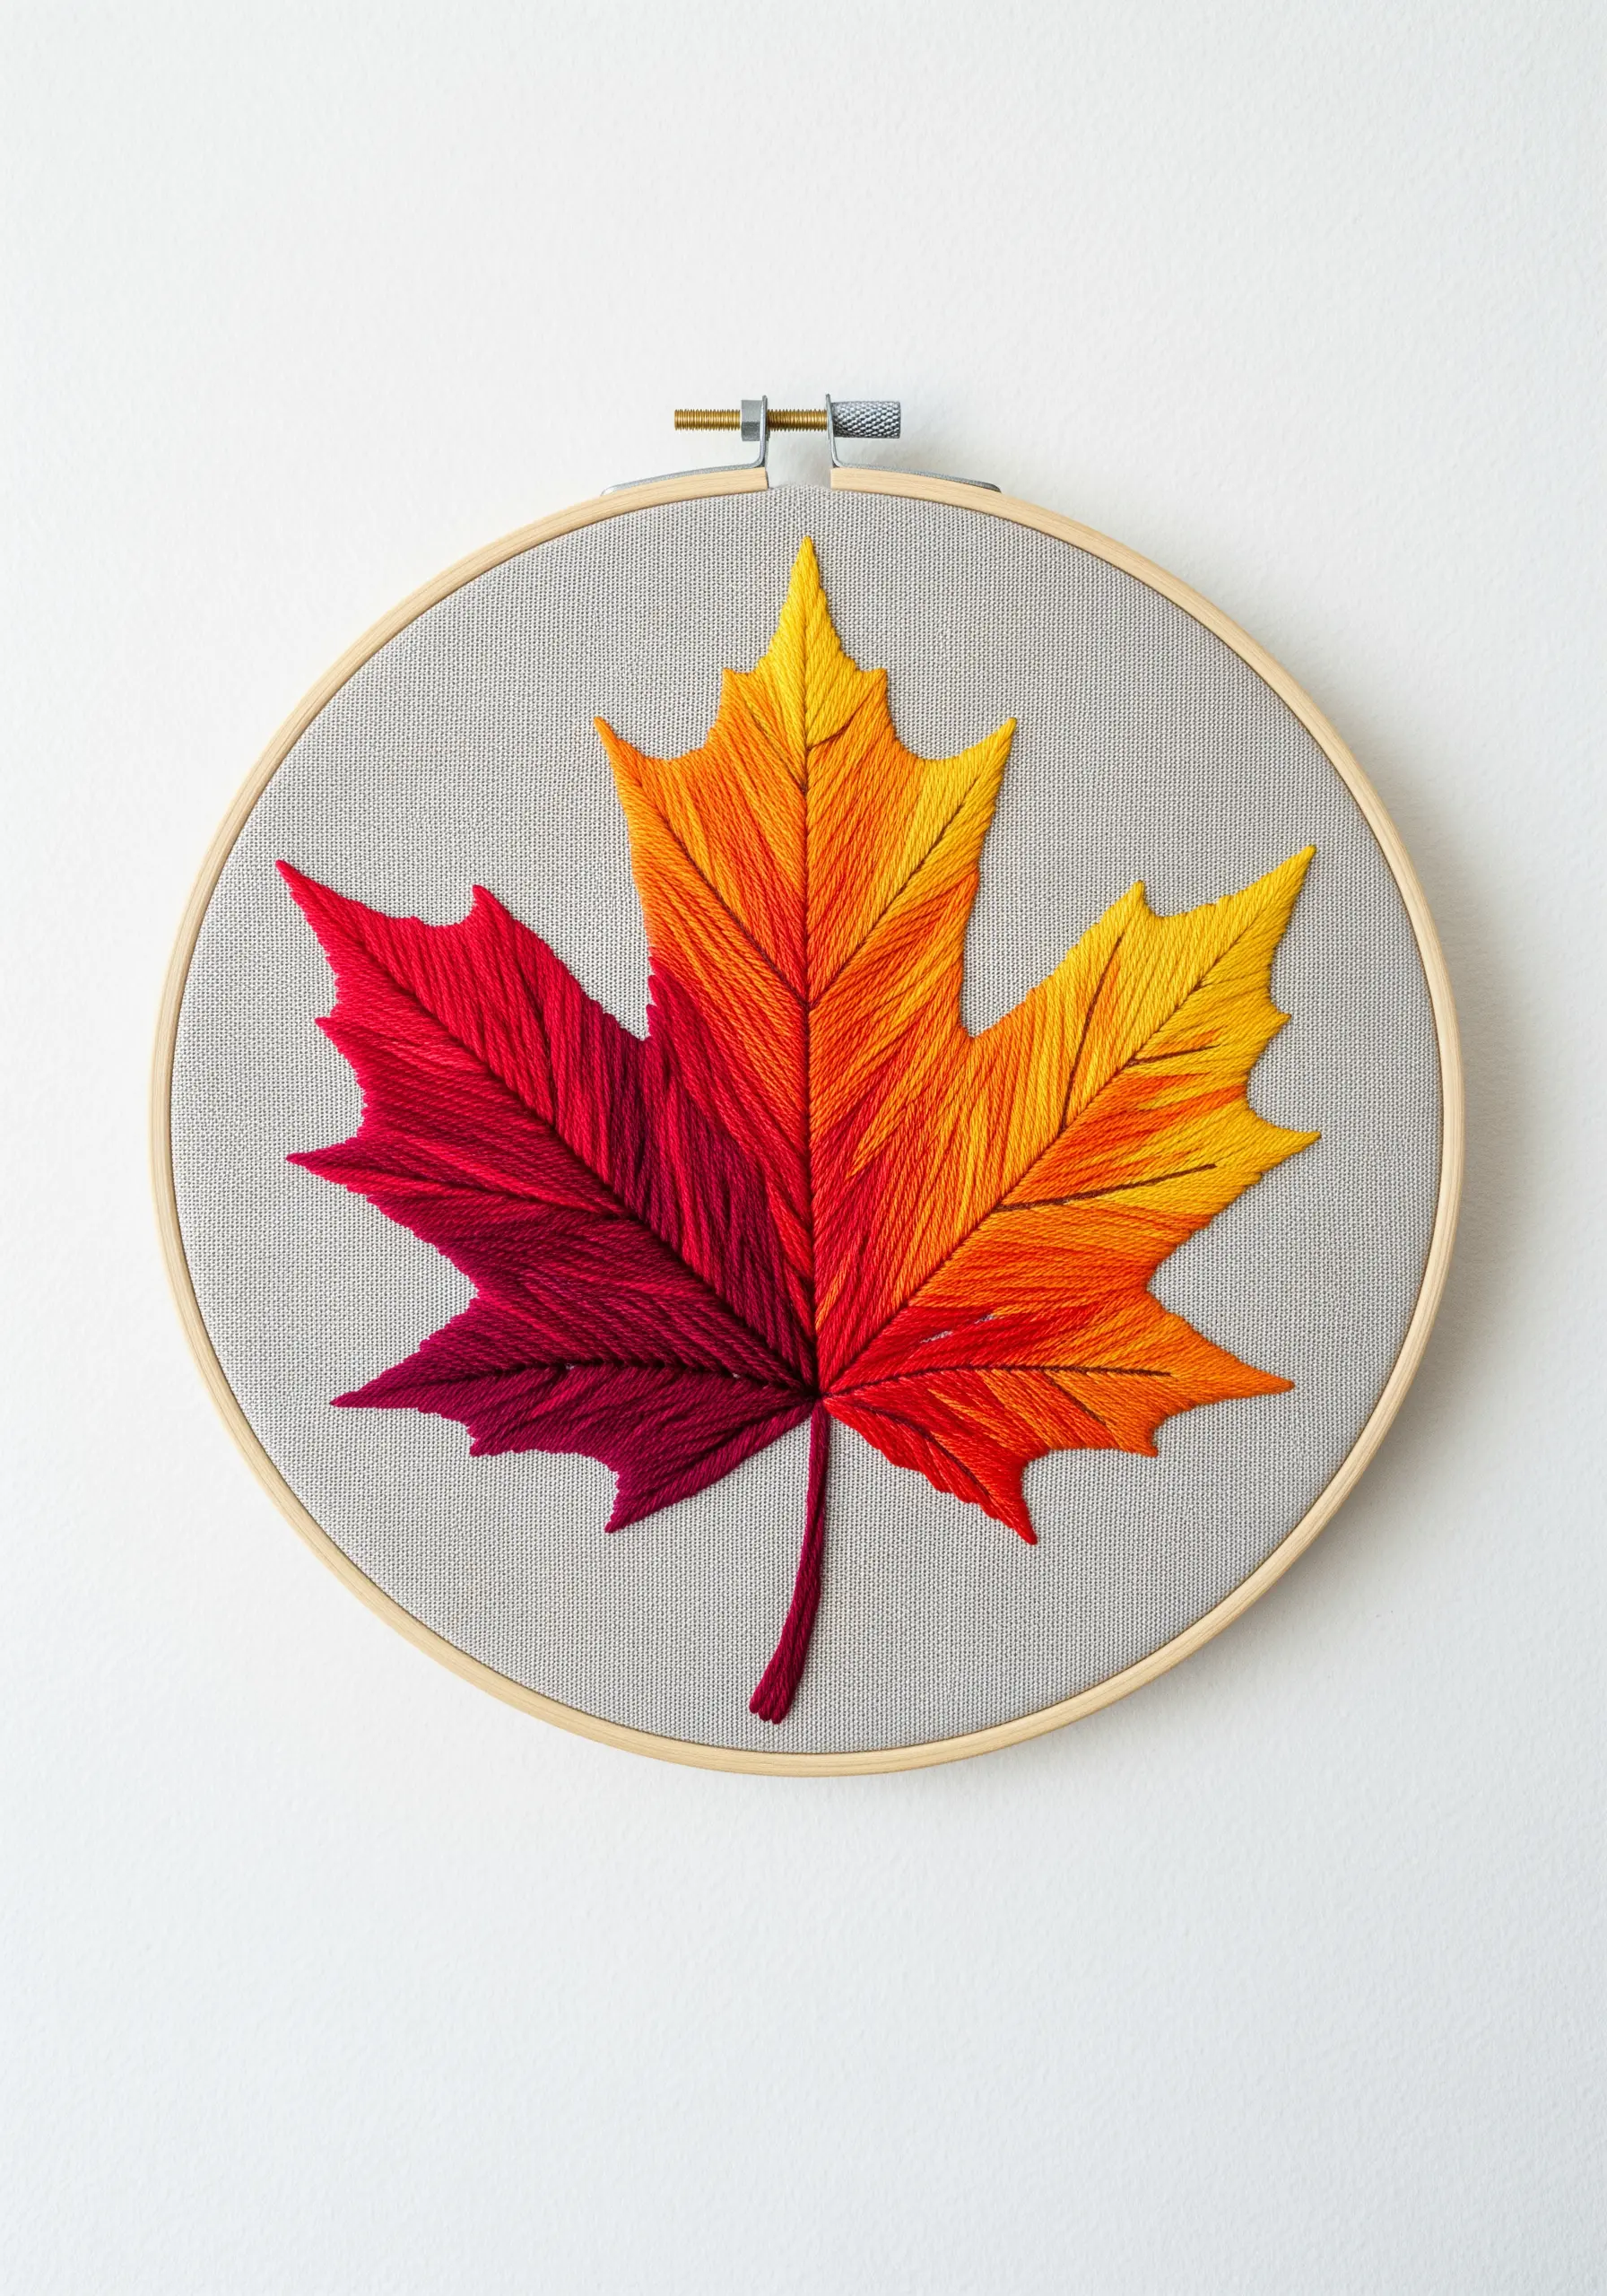
To execute a complex, multi-color gradient like the one in this maple leaf, planning is essential. Don’t try to blend colors on the fly.
Lightly sketch your color zones onto the fabric first. Then, select your thread palette—for example, three shades of red, three of orange, and three of yellow.
Work one color zone at a time using long-and-short stitch, allowing the edges of each zone to interlock with the next. This methodical approach gives you full control and ensures a smooth, flawless transition.
27. Define Shapes with Crisp Color Blocking
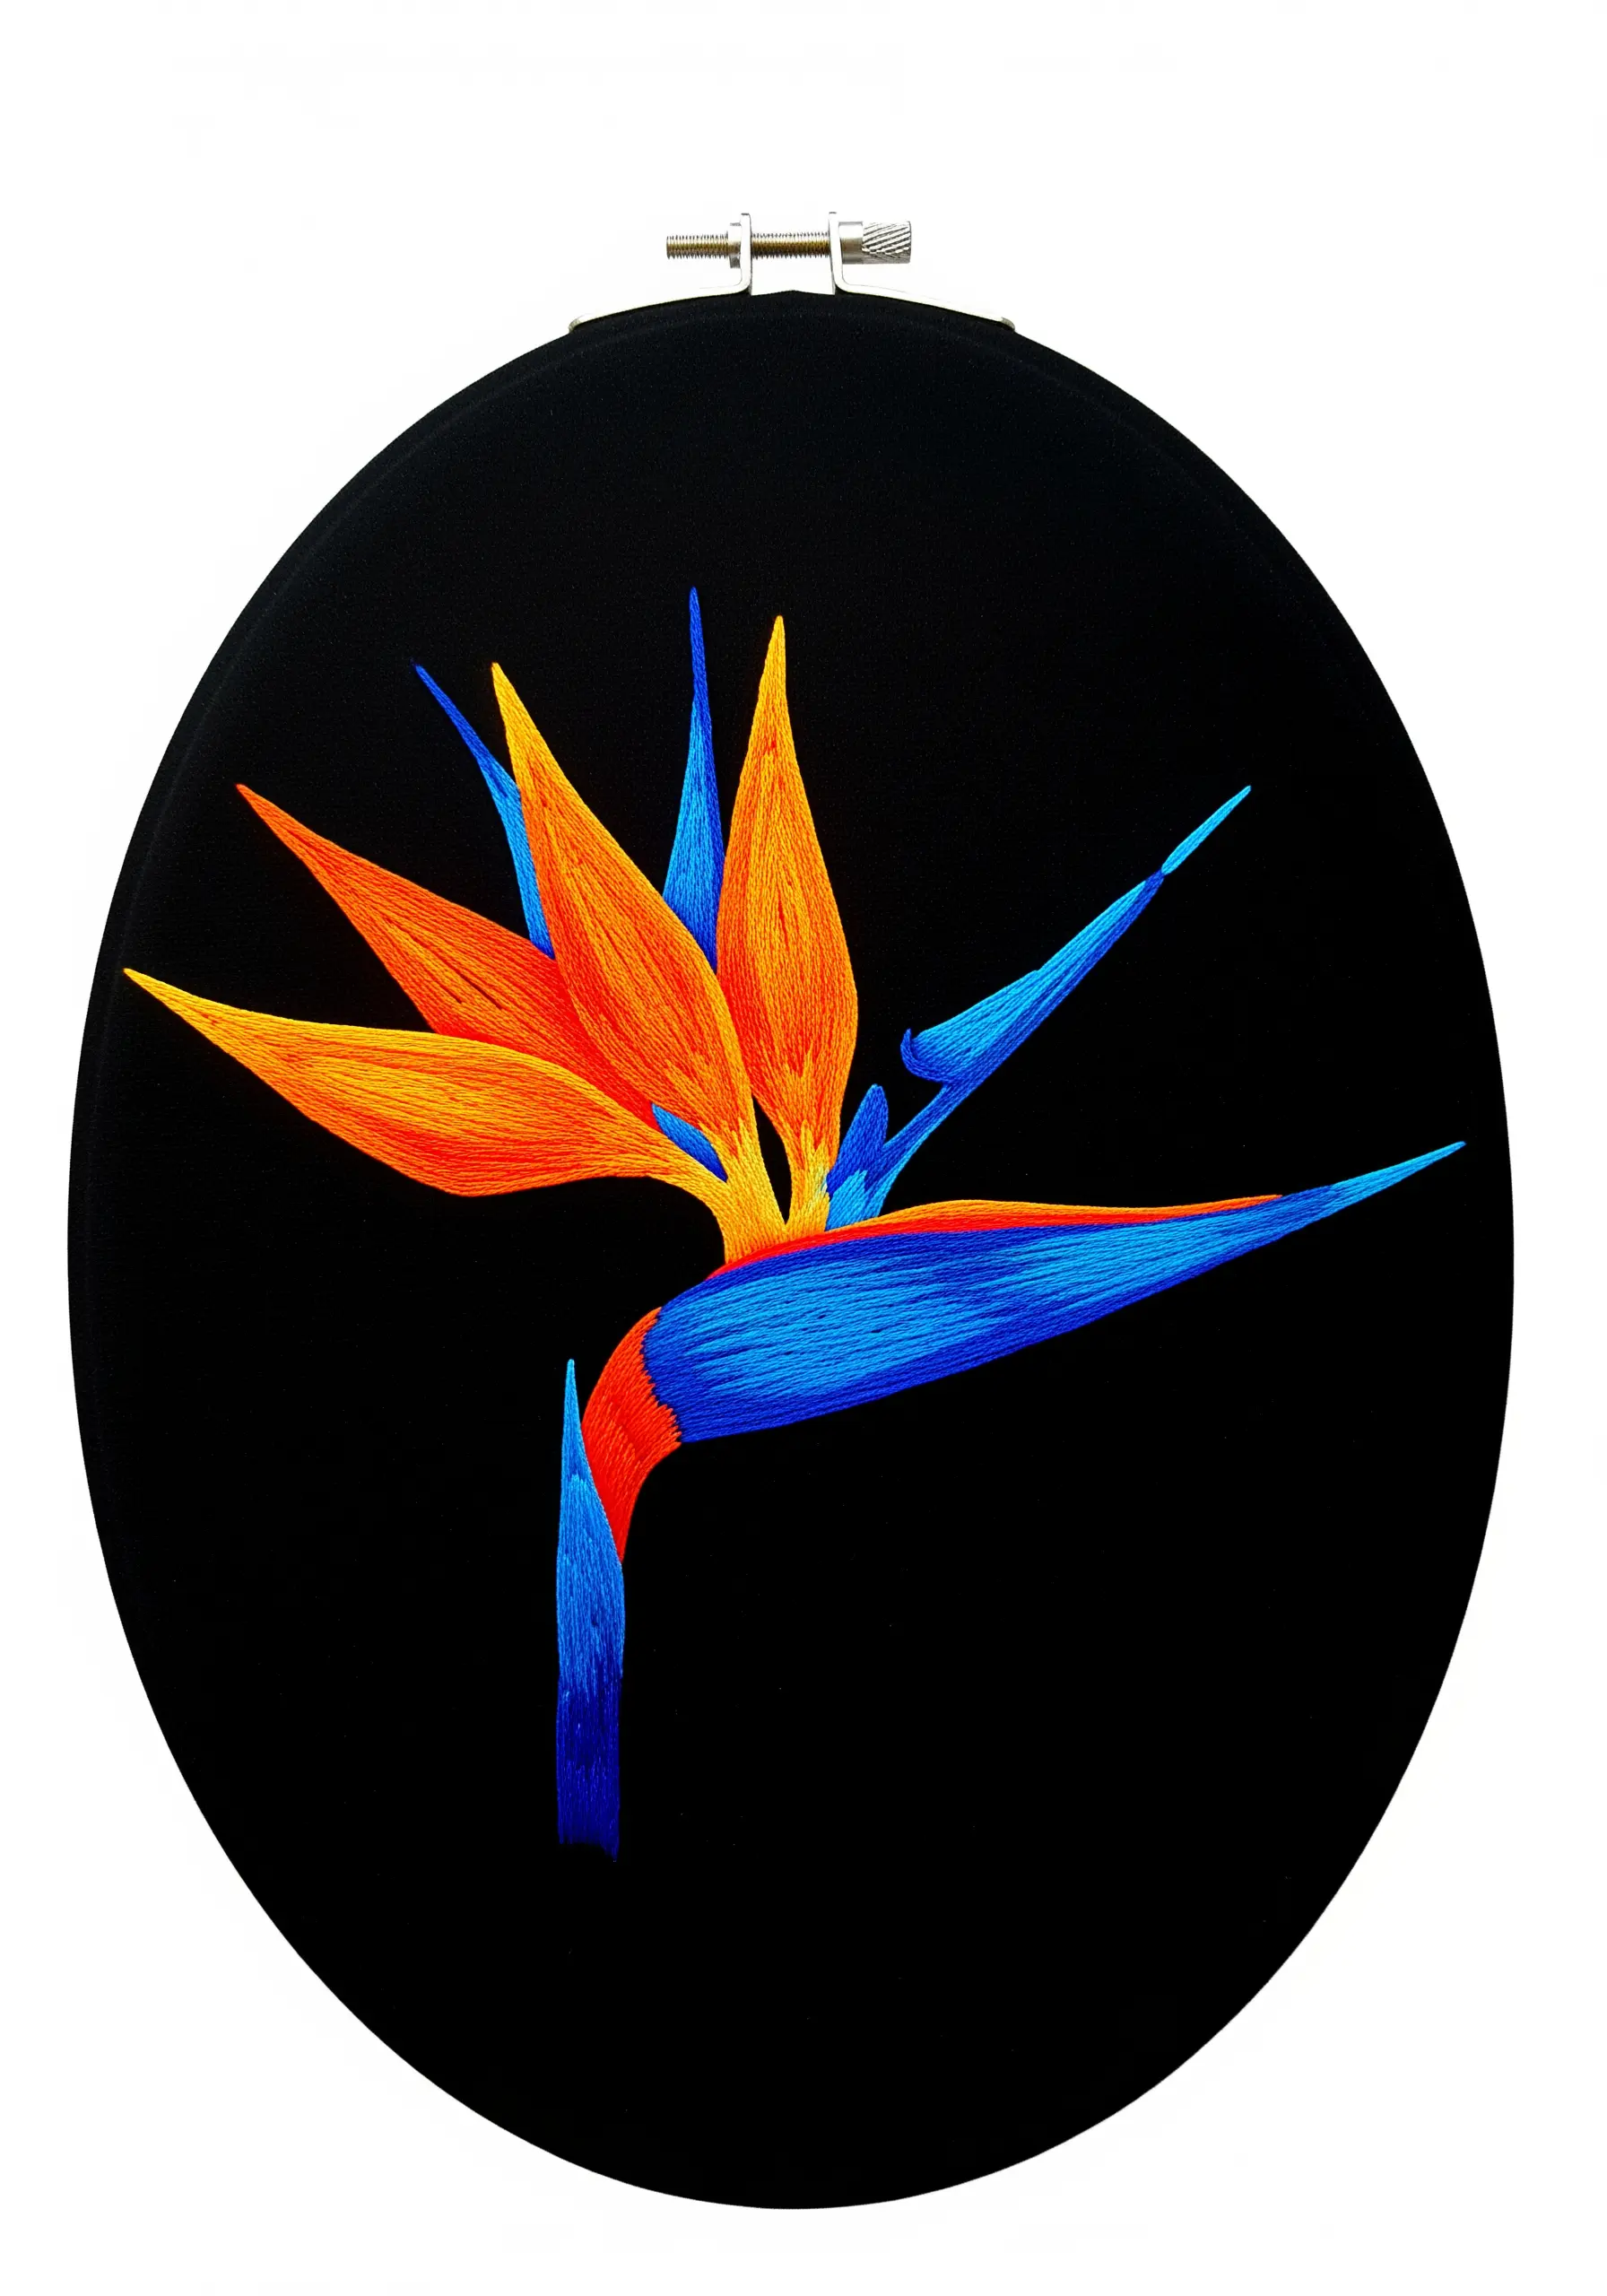
For botanicals with sharp, graphic shapes like the Bird of Paradise, focus on creating clean, crisp edges between your blocks of color.
Before you begin filling a section, outline it with a row of split stitch in the same color. This creates a slightly raised border that acts as a container for your satin stitches.
Fill each outlined section with directional satin stitch, ensuring your stitches lie flat and meet the outline perfectly.
This technique prevents colors from bleeding into one another and results in a bold, clean, and professional finish.
28. Embellish Functional Items with Delicate Greens
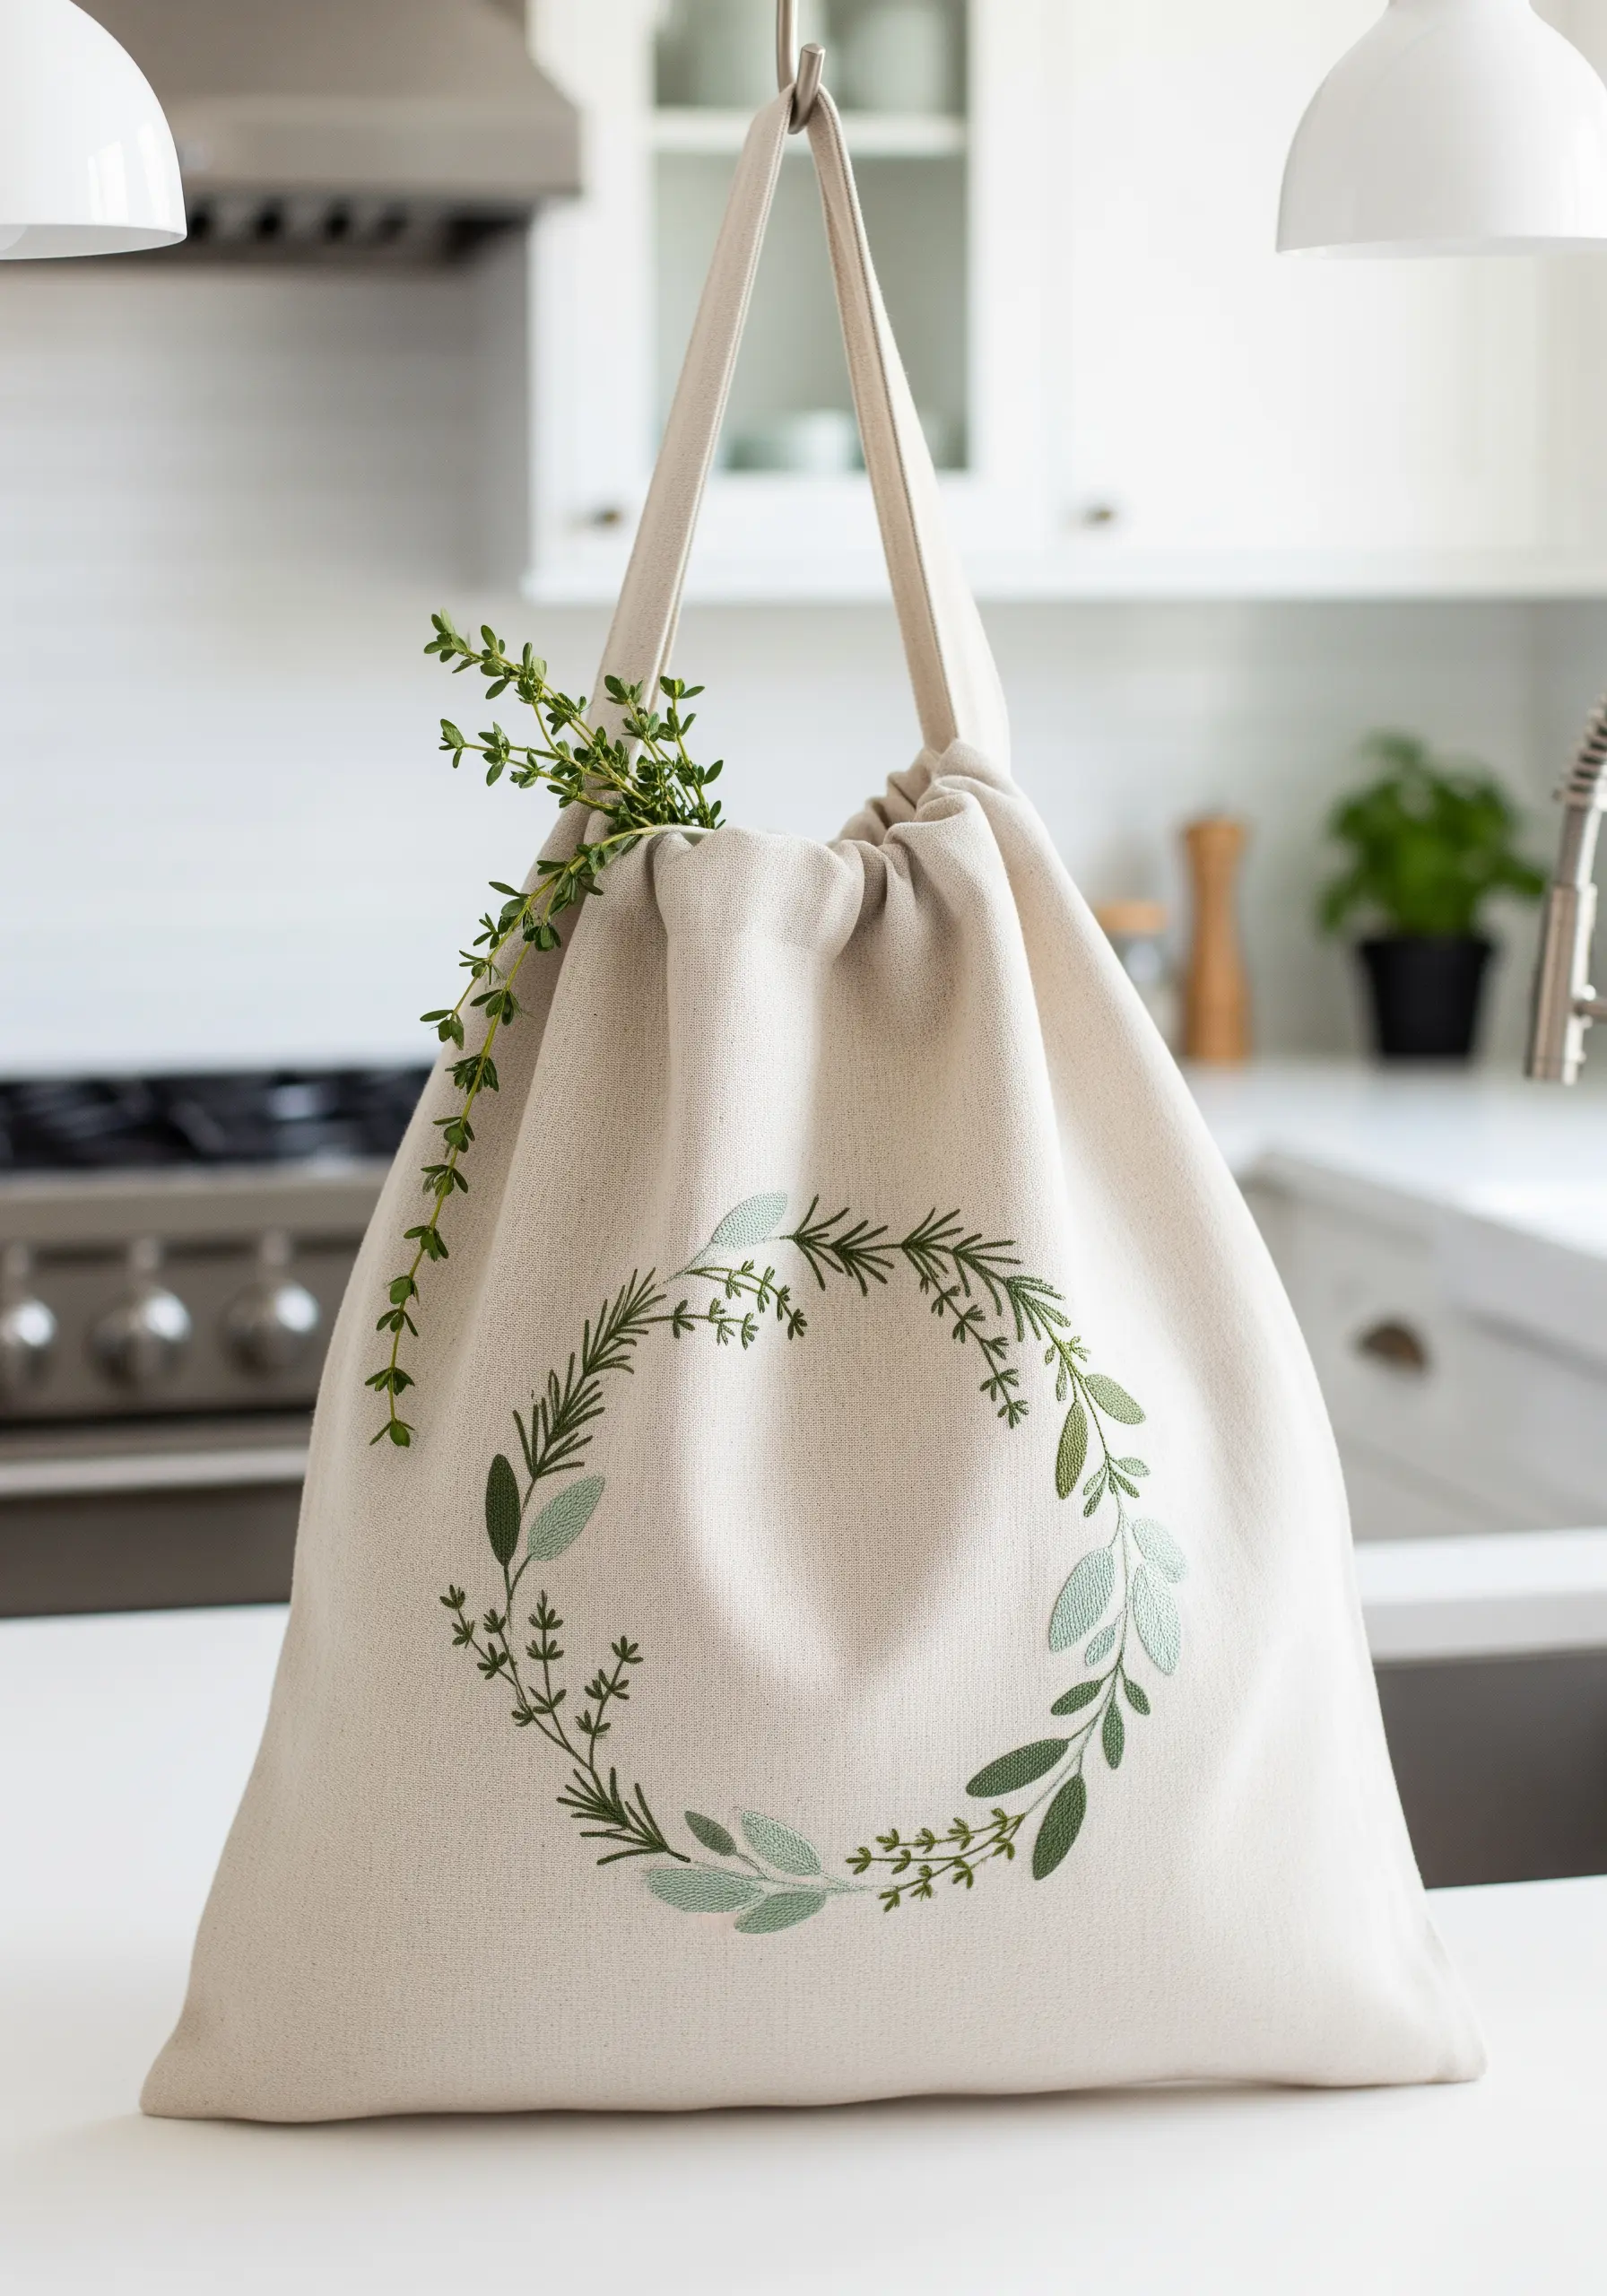
When embroidering on functional items like a tote bag, choose designs that are both beautiful and durable.
A simple wreath of herbs is an elegant choice. Use sturdy stitches like stem stitch, fishbone stitch, and lazy daisy stitch that won’t easily snag.
Work with just two or three strands of floss to keep the design delicate and prevent it from feeling stiff or bulky on the flexible fabric.
This thoughtful approach turns a plain bag into a piece of personalized botanical art you’ll want to show off.


