

There comes a moment in every stitcher’s journey when you look at your work and feel a quiet desire for… more. Not necessarily more complexity, but more intention, more polish, more of *you* in the final piece. You have the skills, but you want your embroidery to feel less like a hobby and more like art.
That shift doesn’t require expensive new tools or years of practice. It happens in the small, deliberate choices: swapping a satin stitch for a more textural one, understanding how thread direction can mimic light, or choosing a fabric that transforms your entire composition.
Here, we’ll move beyond simply following patterns. We’ll explore the subtle techniques and thoughtful adjustments that elevate your work from handmade to heartfelt. Consider this your guide to making tiny pieces of wall decor that not only look beautiful but feel deeply and intentionally crafted.
1. Create Botanical Dimension with Layered Stitches

To give your lavender a plush, three-dimensional feel, use a combination of French knots for the tiny buds and straight stitches for the emerging petals.
For the eucalyptus leaves, a fishbone stitch creates a natural center vein while filling the shape in one fluid motion.
Stitching on a neutral, evenweave fabric like Aida cloth makes your botanical shapes appear sharper and more defined.
This contrast between tight knots and smooth satin surfaces adds a satisfying tactile quality to your handmade embroidery touches that make every room feel natural.
2. Achieve Crisp Edges on Felt with a Split Stitch Base
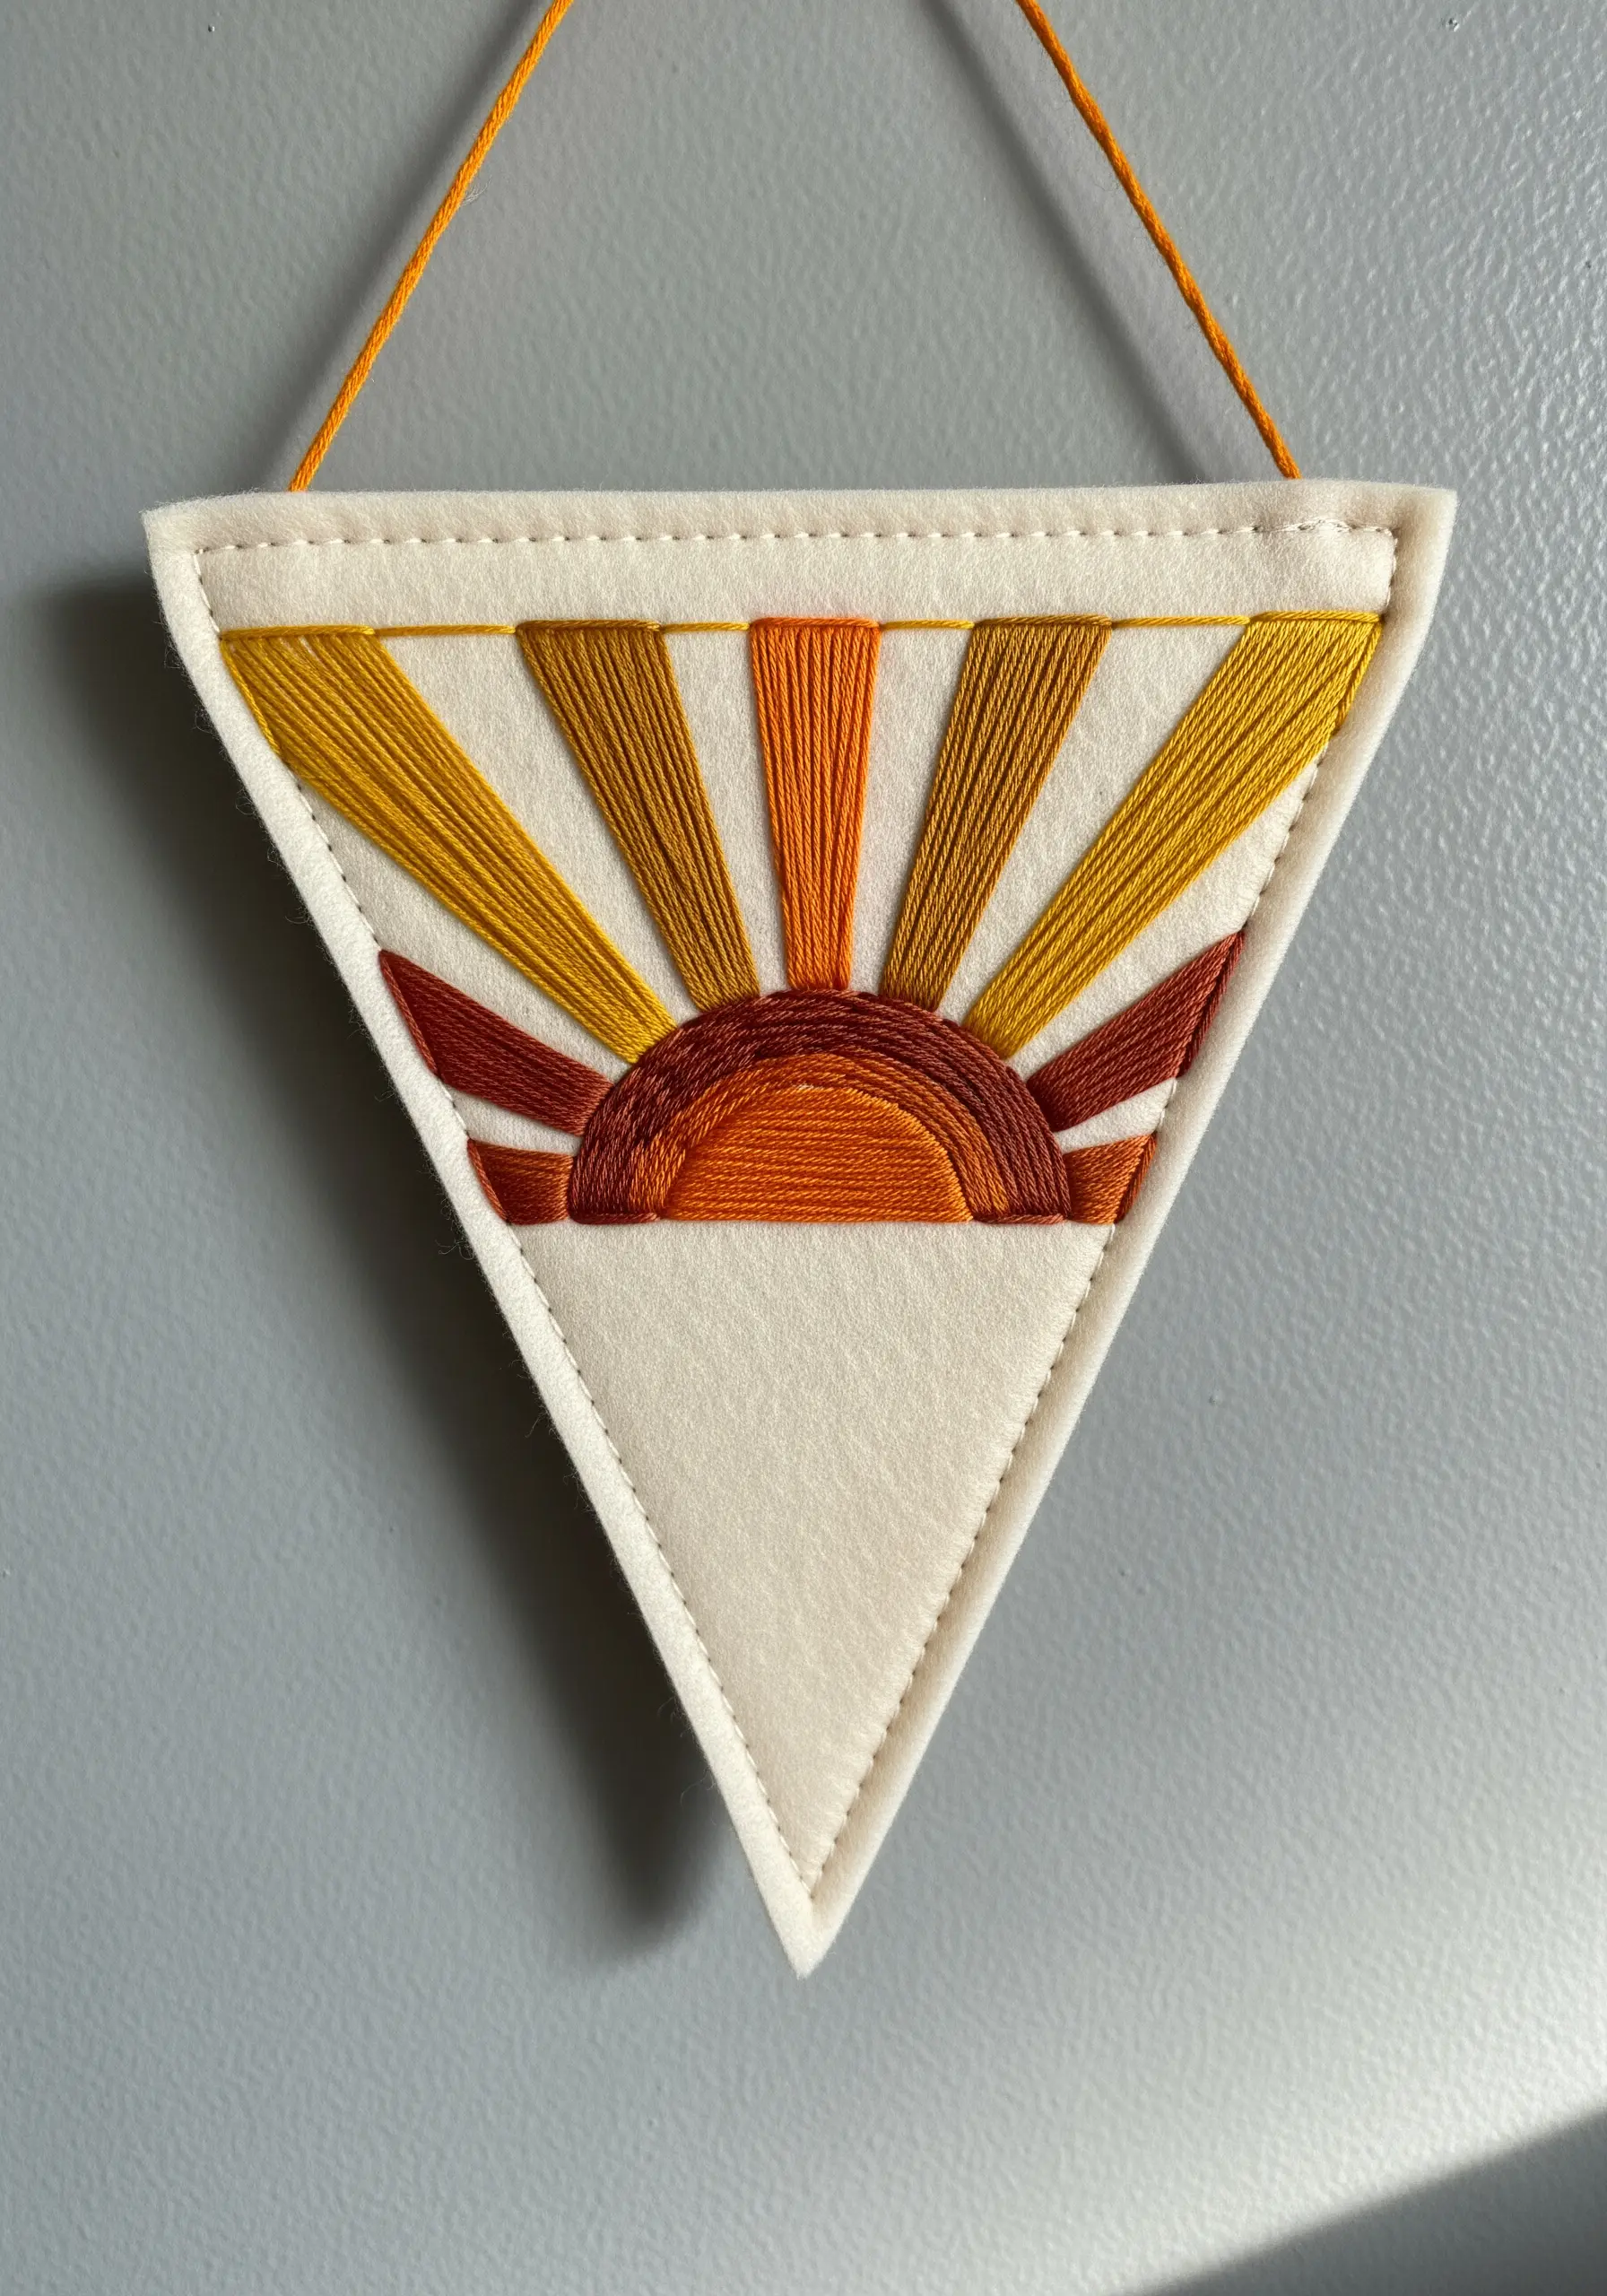
When working with bold, geometric shapes, achieving a clean edge with satin stitch can be challenging.
Before filling each sun ray, outline it with a single line of split stitch using the same color thread.
This technique creates a slightly raised border for your satin stitches to tuck against, ensuring a perfectly sharp and uniform finish.
Using felt as your base fabric also prevents fraying and provides a sturdy structure for a hanging pennant.
3. Weave Light and Shadow into a Crescent Moon

Instead of a simple satin stitch, create a dynamic, woven texture for a celestial motif.
Use a couching technique with a thicker, variegated, or metallic thread laid across the surface and tacked down with a finer, coordinating thread.
This method allows you to control the direction and density of the texture, creating the illusion of craters and light reflecting off the moon’s surface.
Stitching on dark navy or black fabric makes the metallic or white threads appear more luminous.
4. Craft Translucent Wings with Organza Appliqué

To achieve hyper-realistic insect wings, stitch the delicate veins onto a sheer piece of organza fabric stretched in a separate hoop.
Use a single strand of a light gray or metallic thread to keep the lines fine and ethereal.
Once finished, carefully trim the wing shape from the organza, leaving a tiny margin, and appliqué it onto your main fabric with small, hidden stitches.
This layering technique creates a sense of fragility and motion that a simple stitch on linen cannot replicate.
5. Paint a Landscape with Directional Stitching

Transform a simple landscape into a vibrant scene by treating your floss like paint.
Use long and short stitches, varying their direction to mimic the natural contours of the mountains and the flow of the sky.
Don’t be afraid to use single strands of floss to blend colors seamlessly, creating soft gradients that capture the warmth of a sunset.
This thread painting technique adds movement and emotional depth, turning a static image into a dynamic work of art.
6. Elevate Lettering with a Raised Stem Stitch

For clean, cursive lettering that looks like it’s floating on the fabric, use a raised stem stitch.
First, lay down several parallel foundation threads along the shape of your letters.
Then, work your stem stitches over these threads, not into the fabric itself. This technique creates a perfectly smooth, rounded, and three-dimensional line.
Framing the finished piece in a simple wooden frame turns a single word into a piece of framed embroidery ideas to showcase your favorite quotes with minimalist power.
7. Capture the Essence of Line Art with Whipped Backstitch

To translate a continuous line drawing into embroidery, a standard backstitch can sometimes appear disjointed.
Instead, use a whipped backstitch. First, create a standard backstitch outline.
Then, take a second thread and weave it under each backstitch without piercing the fabric, creating a seamless, cord-like line.
This method is perfect for single-line face profiles that create gallery-style hoop art, ensuring the final piece feels fluid and unbroken.
8. Group Simple Motifs for a Cohesive Wall Display

A single small hoop can feel lost on a wall, but a curated group creates a strong visual statement.
Choose a theme, like culinary herbs, and stitch each motif in a similar style and color palette.
Use consistent framing—in this case, identical wooden hoops—to unify the collection.
For the basil, use fishbone stitch to create the central vein and fill the leaves simultaneously, adding a touch of realism to the simple design.
9. Build Architectural Texture with Weaving Stitches
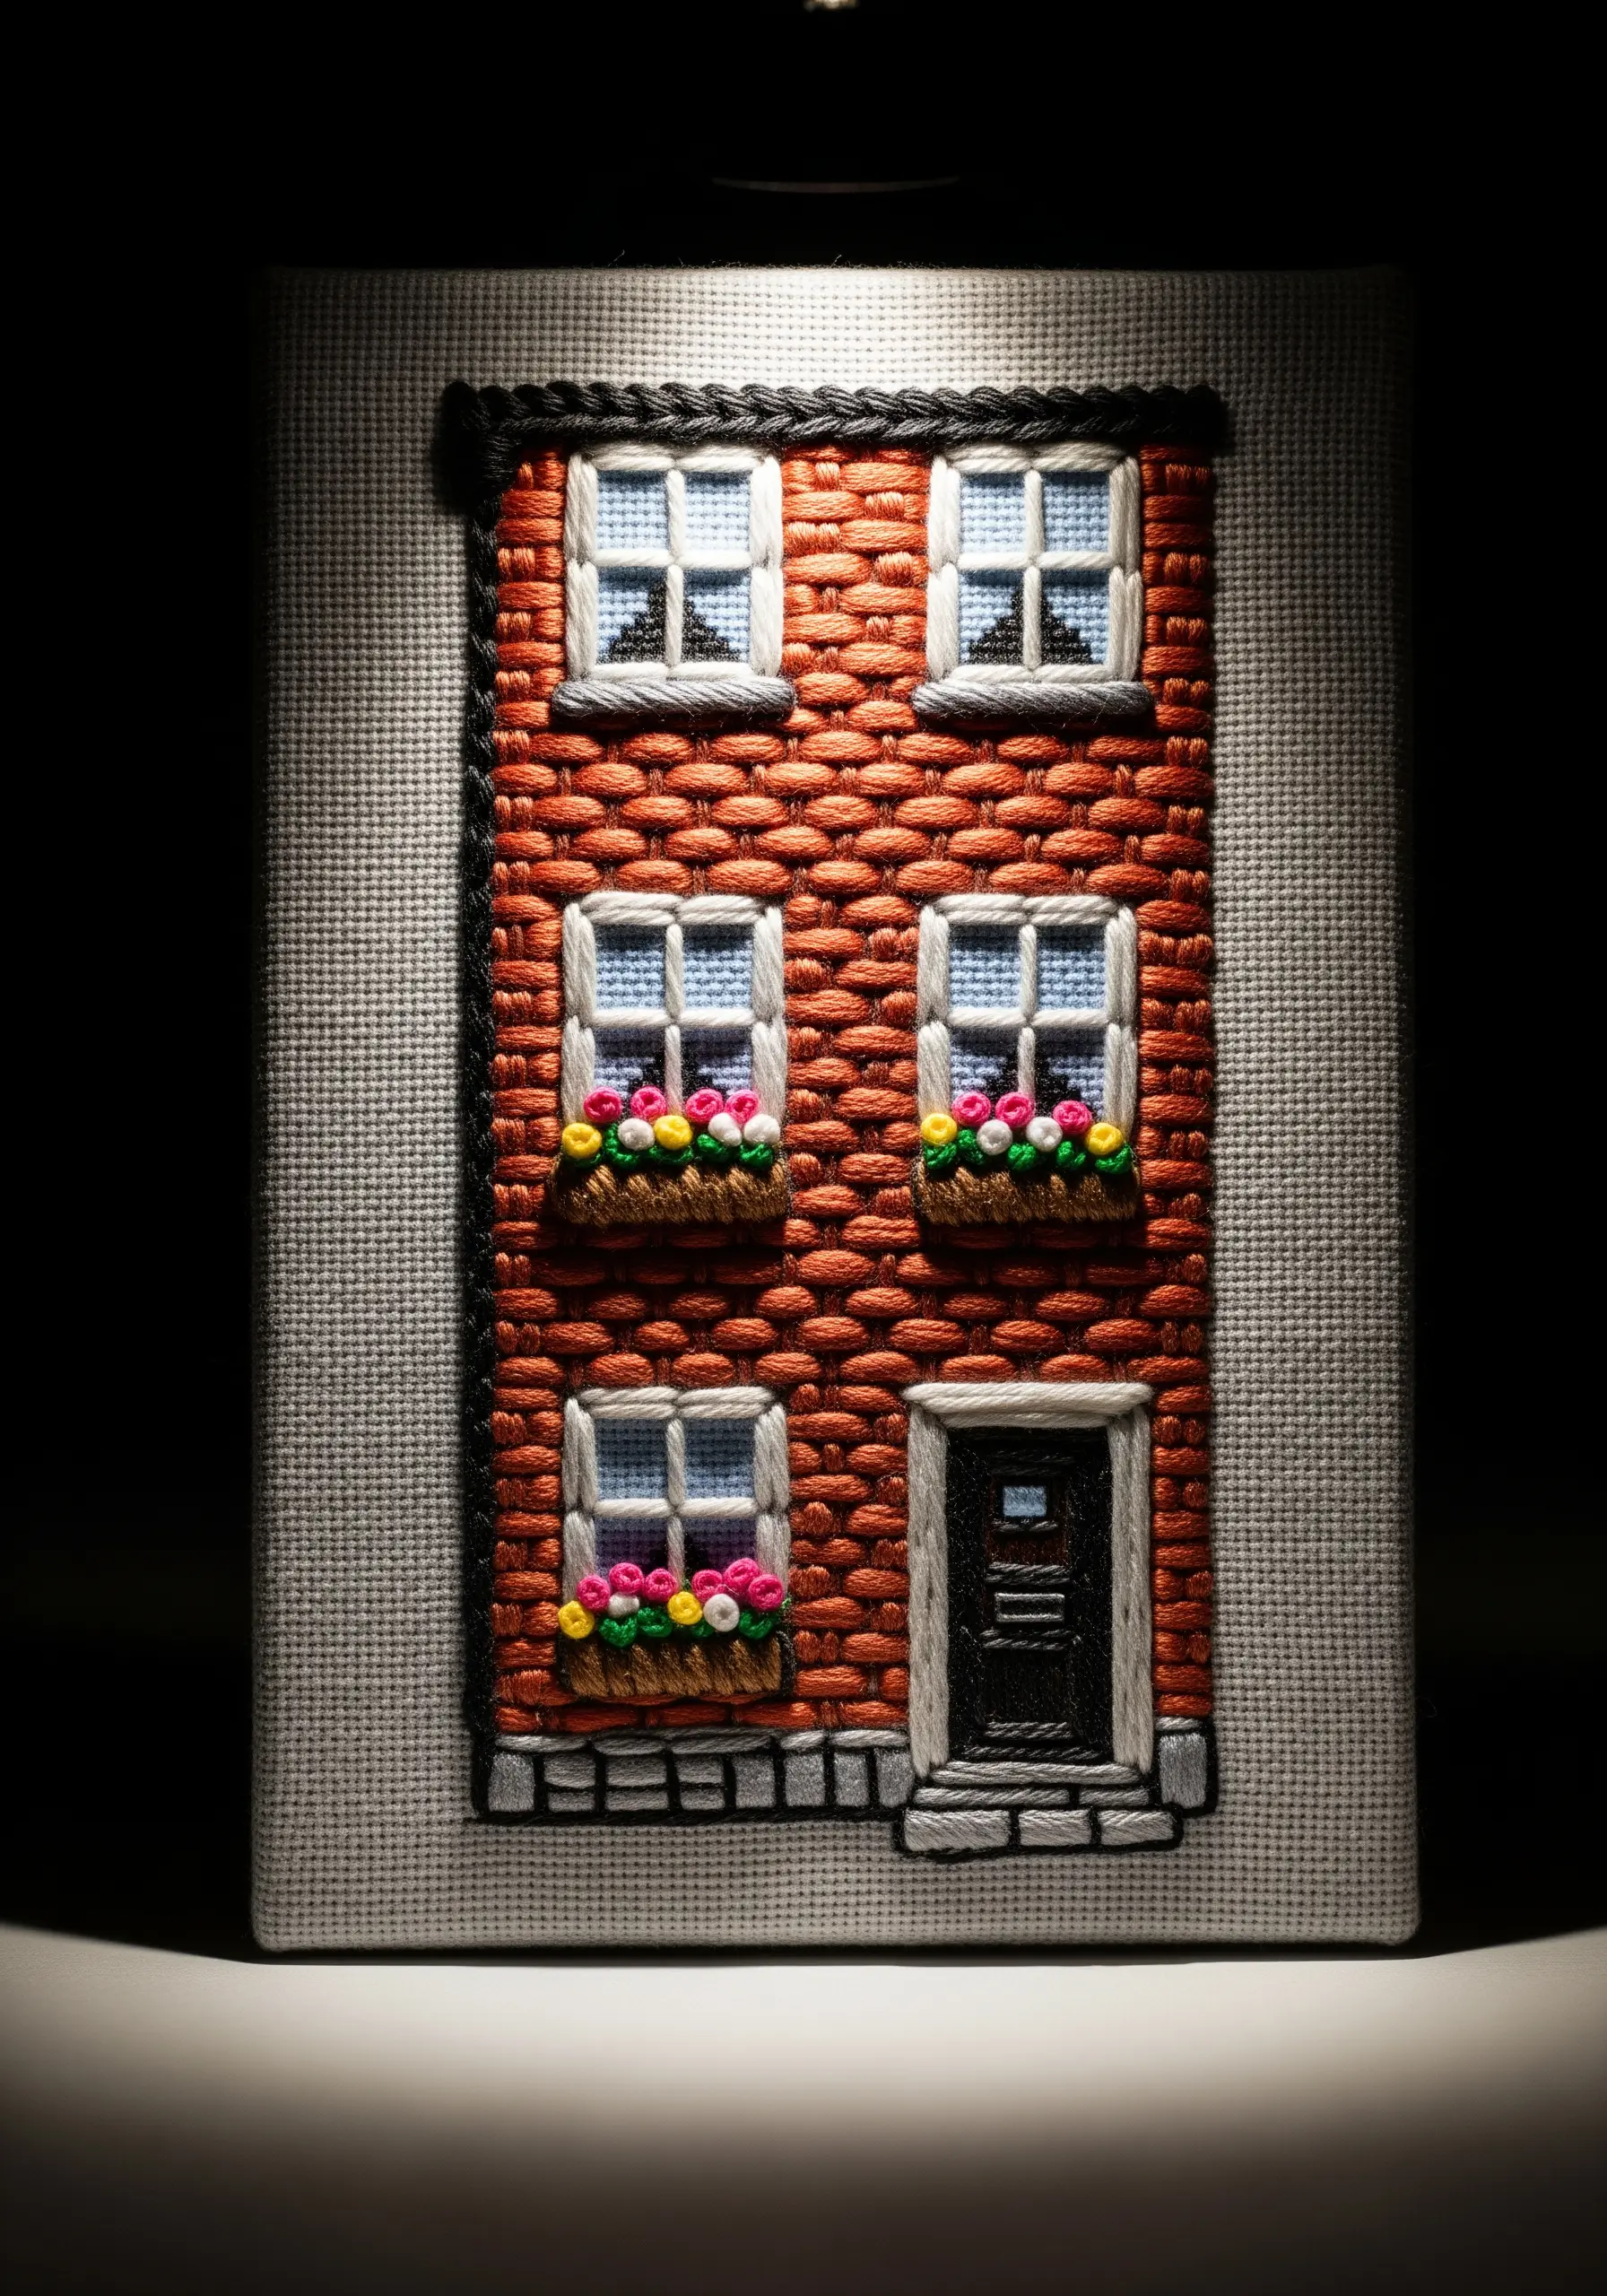
To create a realistic brick texture, don’t just use straight stitches—weave them.
Lay down vertical foundation stitches (the ‘warp’) and then weave your main color horizontally (the ‘weft’) over and under them.
This basketweave stitch adds an incredible amount of dimension and shadow, making the texture feel robust and architectural.
Mounting the finished piece on a stretched canvas instead of a hoop provides a clean, gallery-ready presentation for your architectural string art designs.
10. Integrate Beads and Sequins for a Pop of Shine

Elevate a simple design by incorporating beads and sequins directly into your stitching.
Instead of scattering them, use them intentionally to define shapes or create focal points, like the cactus flowers.
Outline sections with a couched thread, then fill the interior with rows of seed beads for a dense, mosaic-like effect.
This mixed-media contemporary embroidery technique adds a playful and tactile shimmer that thread alone cannot achieve.
11. Create a Fiery Gradient with Thread Blending
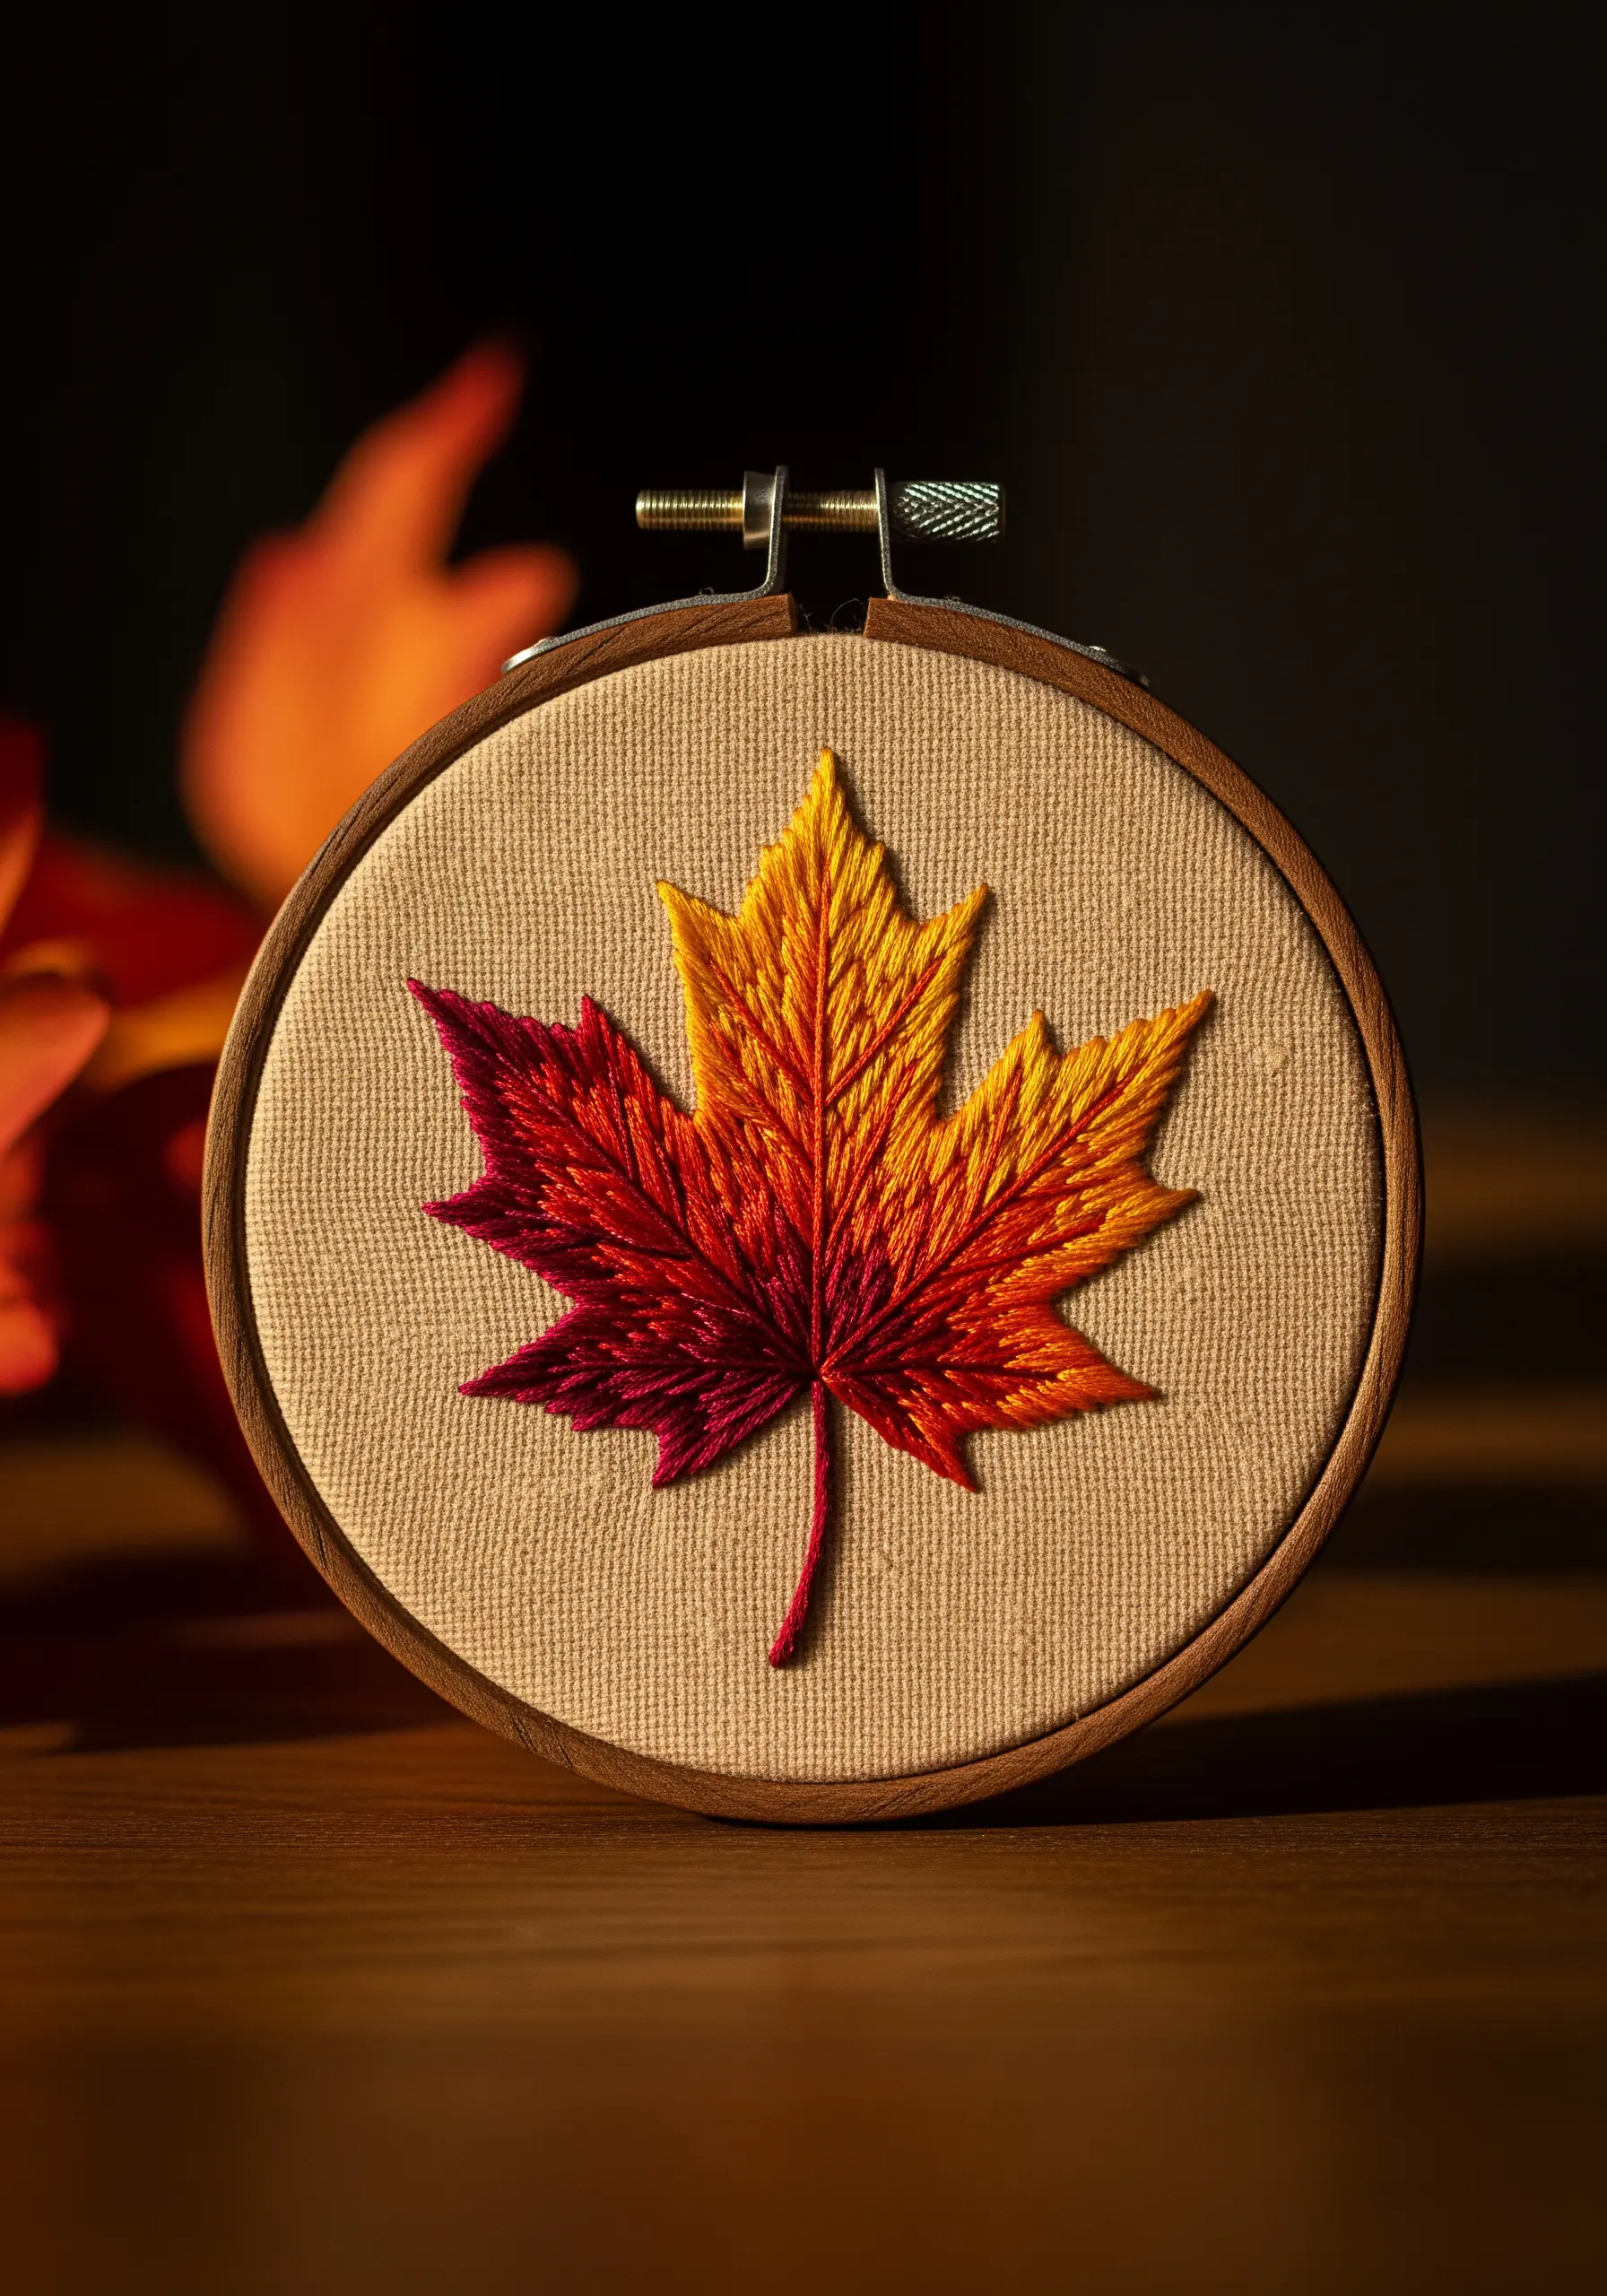
For a seamless color transition, as in an autumn leaf, blend your threads directly on the needle.
Instead of stitching solid blocks of color, use one strand of red and one strand of orange together for the transition area.
Then, move to two strands of orange, then one orange and one yellow. This subtle mixing creates a soft, painterly gradient.
A long and short stitch will enhance this effect, preventing harsh lines between colors and giving your leaf a natural, organic feel.
12. Embrace Simplicity with High-Contrast Sashiko

Sashiko, a traditional Japanese embroidery style, uses a simple running stitch to create striking geometric patterns.
The key to its impact lies in the contrast: use a thick, white sashiko thread against a dark, sturdy fabric like indigo-dyed cotton or navy linen.
Focus on maintaining consistent stitch length and spacing. The beauty is not in complexity, but in the rhythm and precision of your handwork.
This is one of the most effective minimal embroidery patterns that look harder than they are.
13. Construct a Seascape with Fabric Collage and Knots

Build a dynamic, textured seascape by layering torn strips of fabric for the ocean waves.
Choose fabrics with different weaves and shades of blue to create depth. Secure the layers with simple running stitches or leave the edges raw for a natural feel.
Use clusters of French knots or bullion knots to represent sea foam, and add tiny shells or beads for a final, tactile touch.
This approach transforms your hoop into a high-texture fabric collage embroidery piece.
14. Achieve Realistic Shading with Single-Strand Stitching
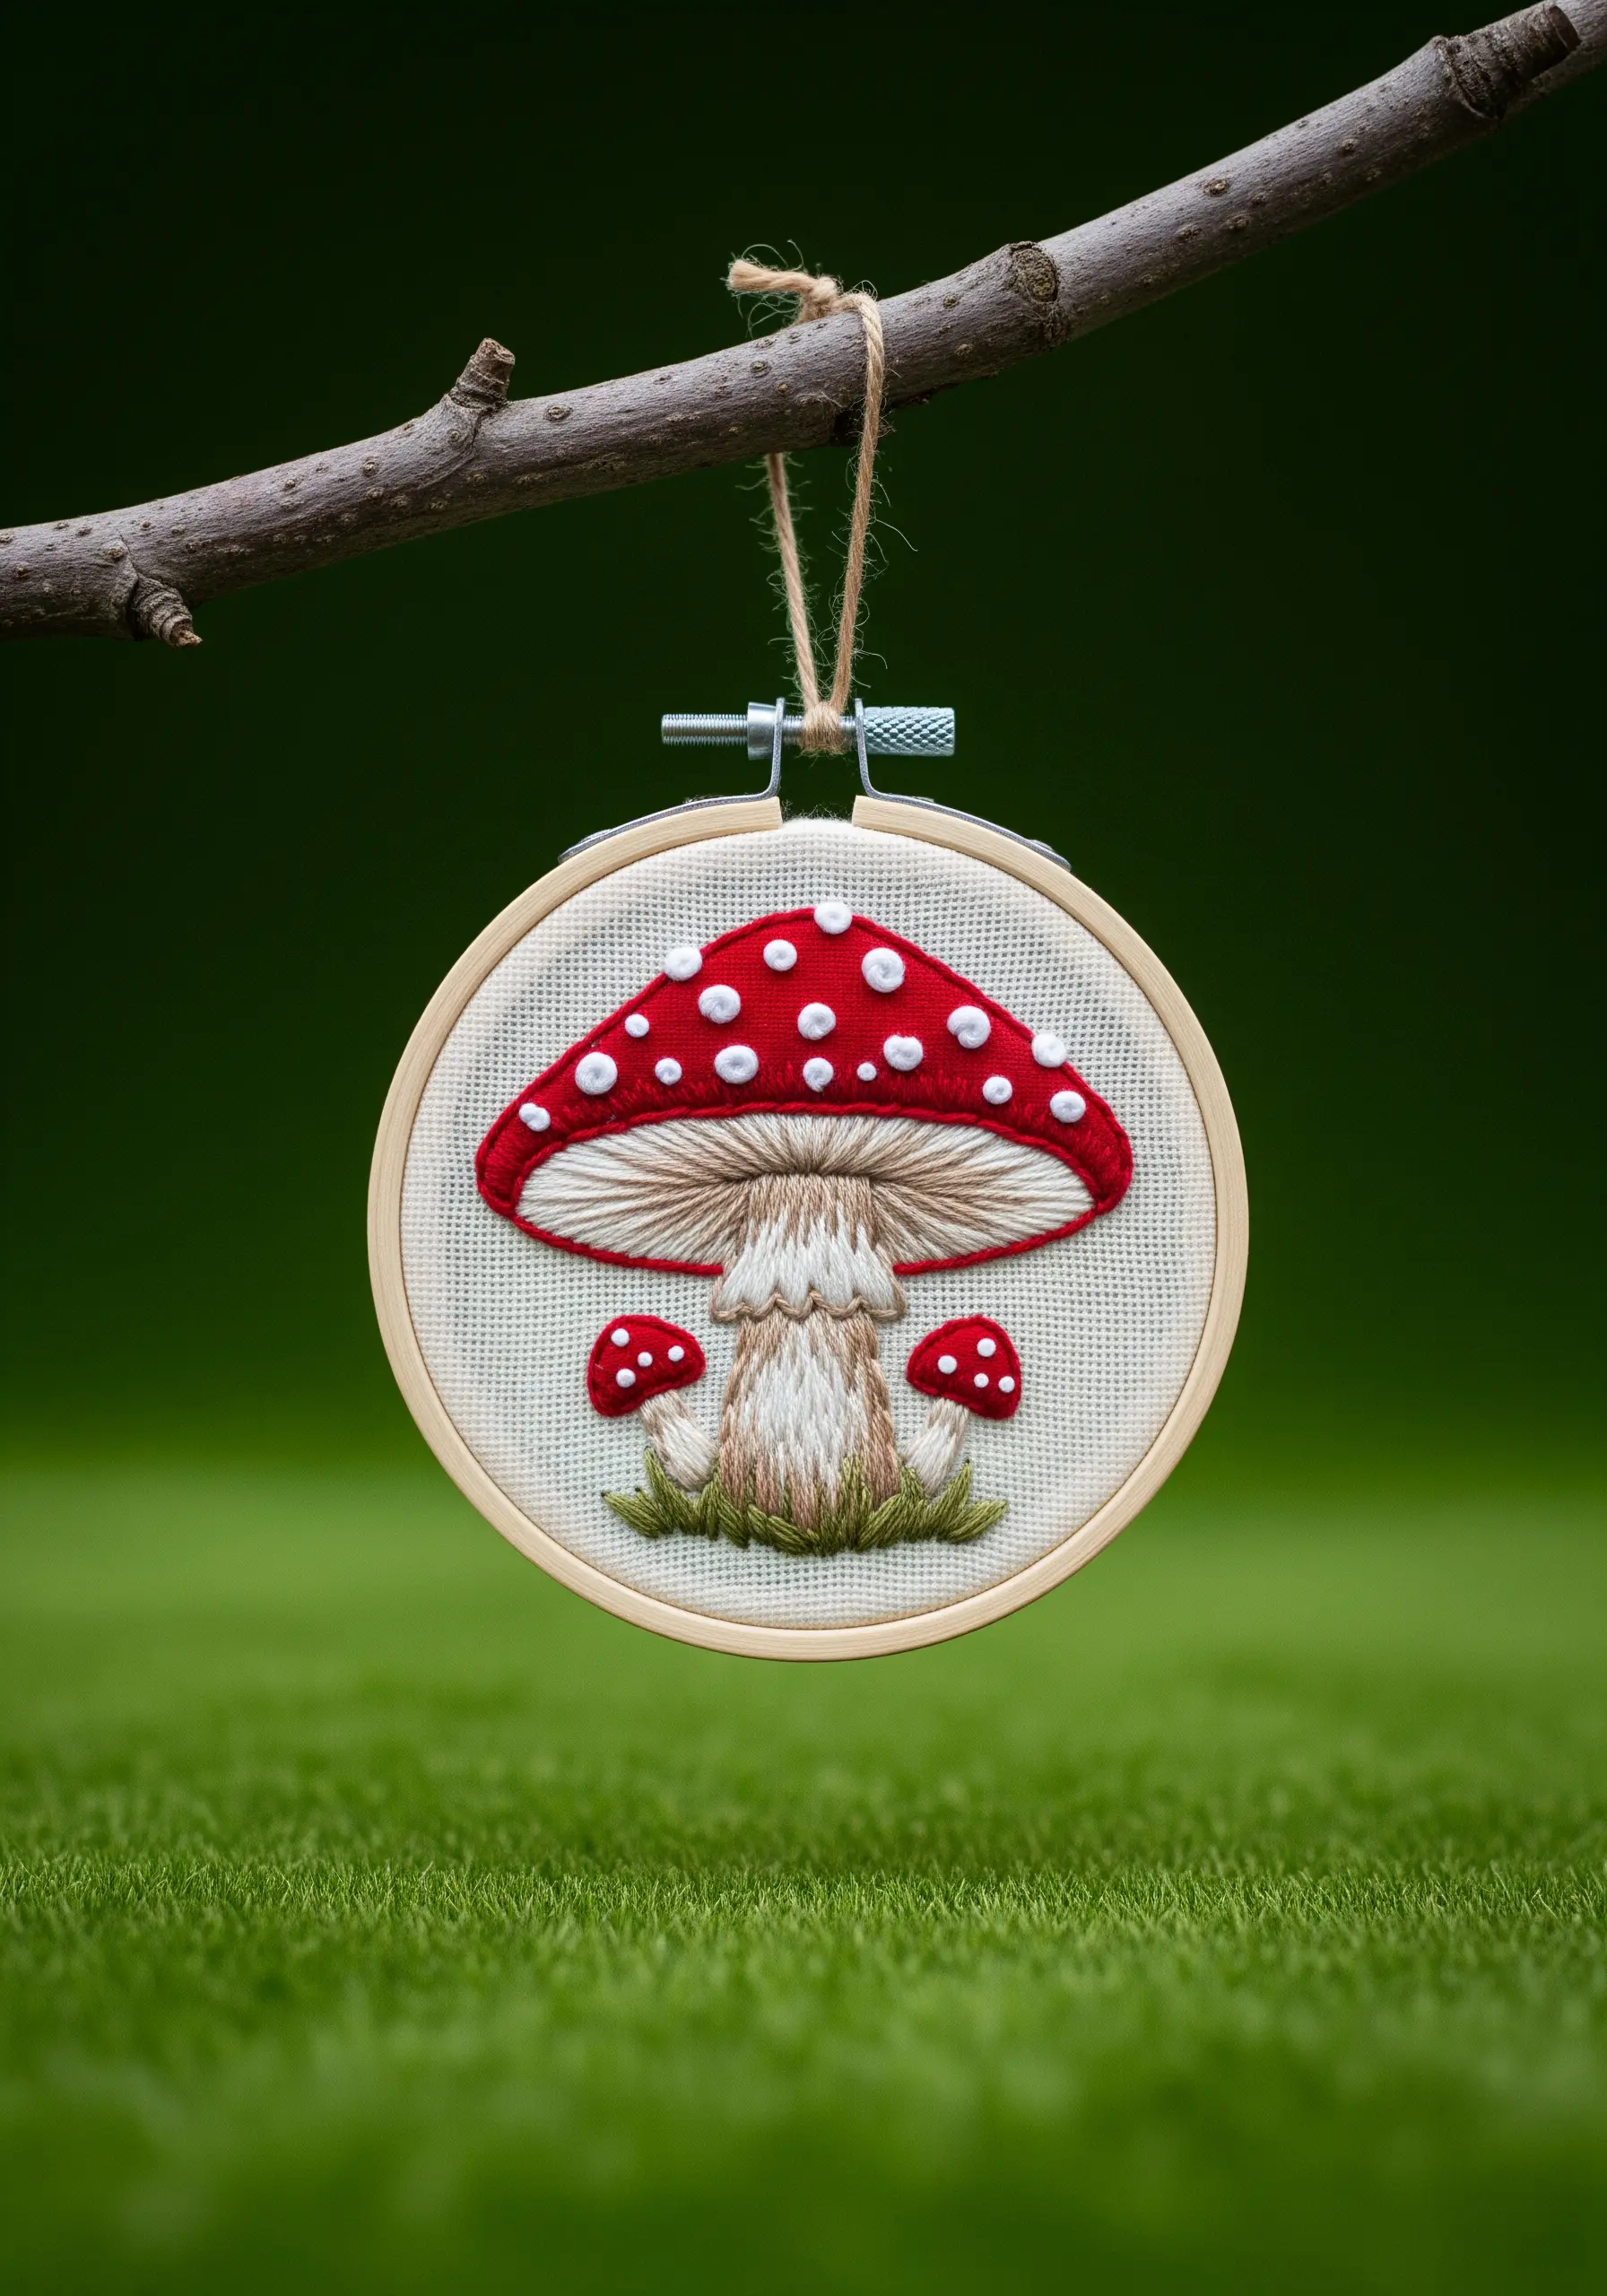
To create the delicate gills and stem of a mushroom, switch to using just one or two strands of floss.
This allows for incredibly fine detail and subtle shading that would be impossible with a full six strands.
Use a split stitch for the outlines to keep them crisp, and fill with long and short stitch, blending shades of brown and beige to create roundedness and depth.
The contrast between the finely stitched stem and the bold satin-stitched cap makes the entire motif pop.
15. Sculpt 3D Florals with Felt Appliqué

Move beyond the hoop by creating three-dimensional succulents from felt.
Cut individual petal shapes from different shades of green and purple felt, then layer and stitch them together at the base to build up the flower form.
Add simple running stitches or French knots to the petals for texture and detail before assembling.
Arrange your finished felt creations on a wooden slice or in a hoop for a piece of decor that truly breaks the flat plane.
16. Map the Stars with Beads and Glow-in-the-Dark Thread

Create a celestial map that comes alive in the dark by using glow-in-the-dark thread for the stars.
For extra dimension, use star-shaped beads or sequins for the brightest points in the constellation and small silver seed beads for distant stars.
Stitch on a black or deep navy fabric to make your cosmic creation stand out.
This combination of materials adds a magical, interactive element to your embroidery wall art.
17. Create Dynamic Silhouettes with Satin Stitch
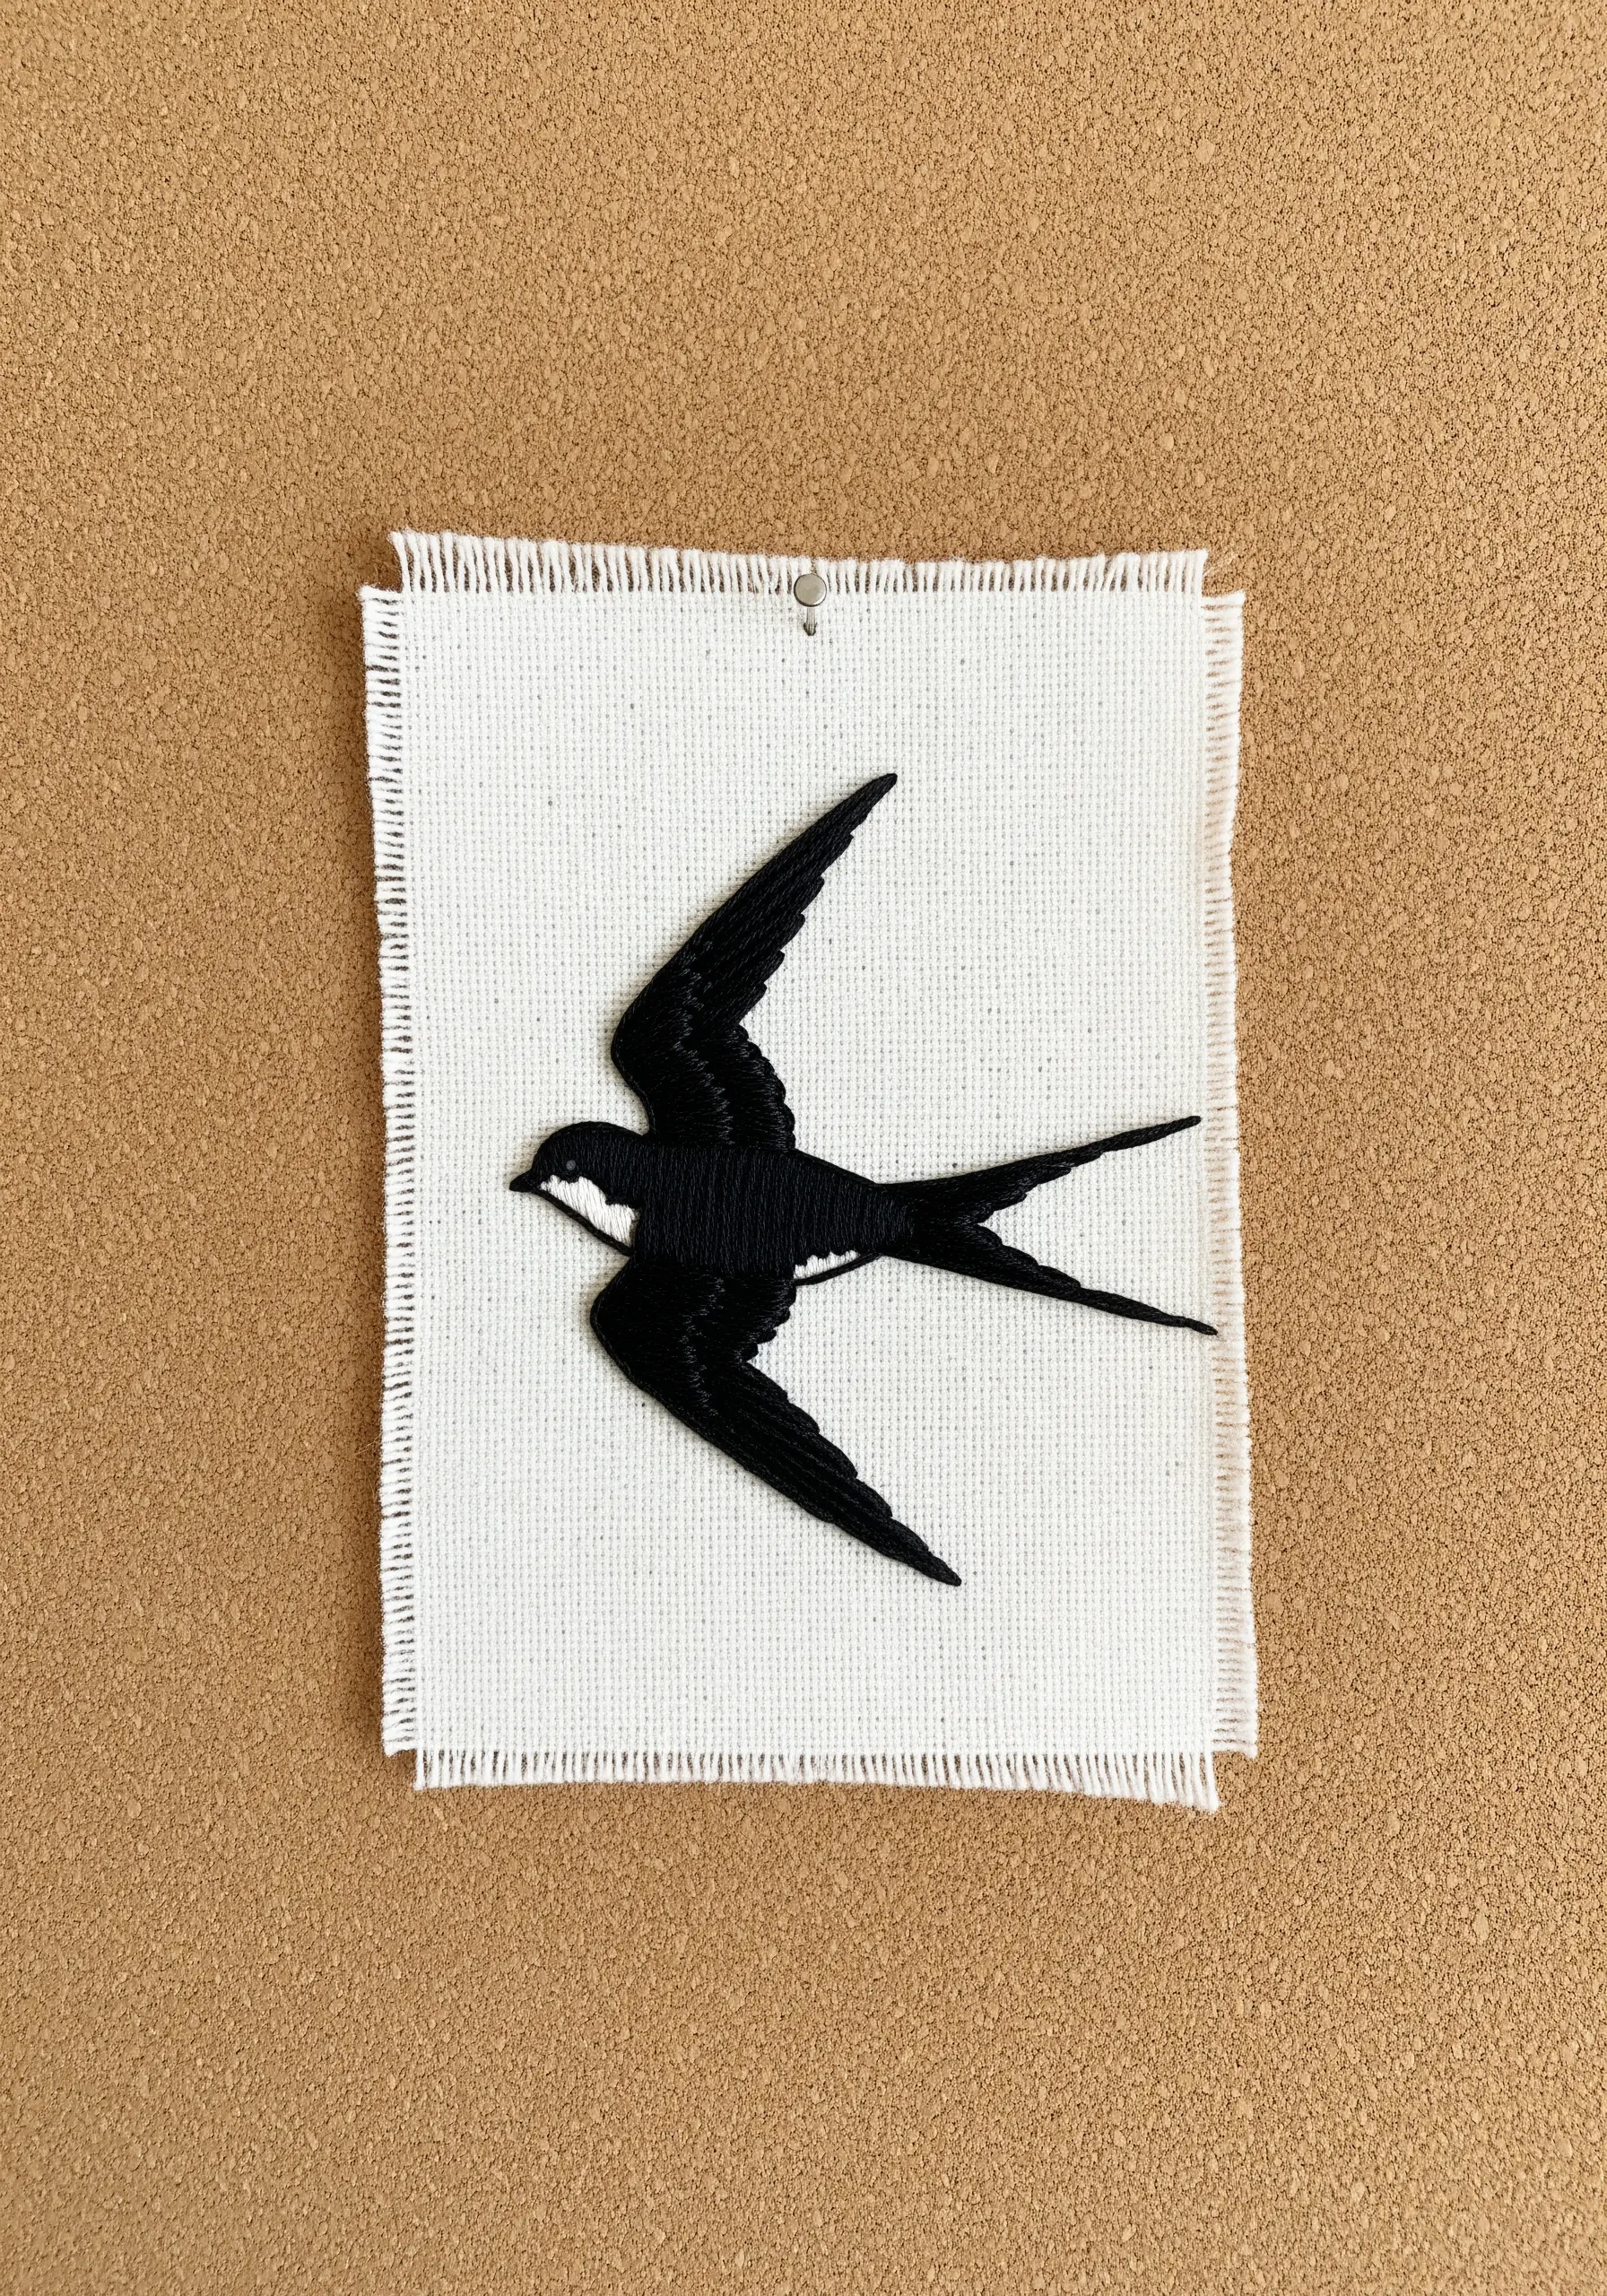
When embroidering a solid silhouette, like a bird in flight, the direction of your satin stitch is everything.
Instead of stitching uniformly horizontally or vertically, angle your stitches to follow the form of the body and wings.
This subtle shift in stitch direction will catch the light differently, creating the illusion of shape and movement within a single block of color.
Presenting it on a simple, raw-edged fabric square gives the piece a modern, gallery-like feel.
18. Define Shapes with Contrasting Outlines

To make landscape elements distinct, outline them with a contrasting stitch.
Here, a bold chain stitch in a dark color is used to separate the mountains from the vibrant, satin-stitched sky.
This technique adds a graphic, illustrative quality to the piece and prevents the colors from bleeding into one another visually.
It’s a powerful way to add structure and clarity to a composition filled with dense color.
19. Personalize Your Space with an Embroidered Monogram
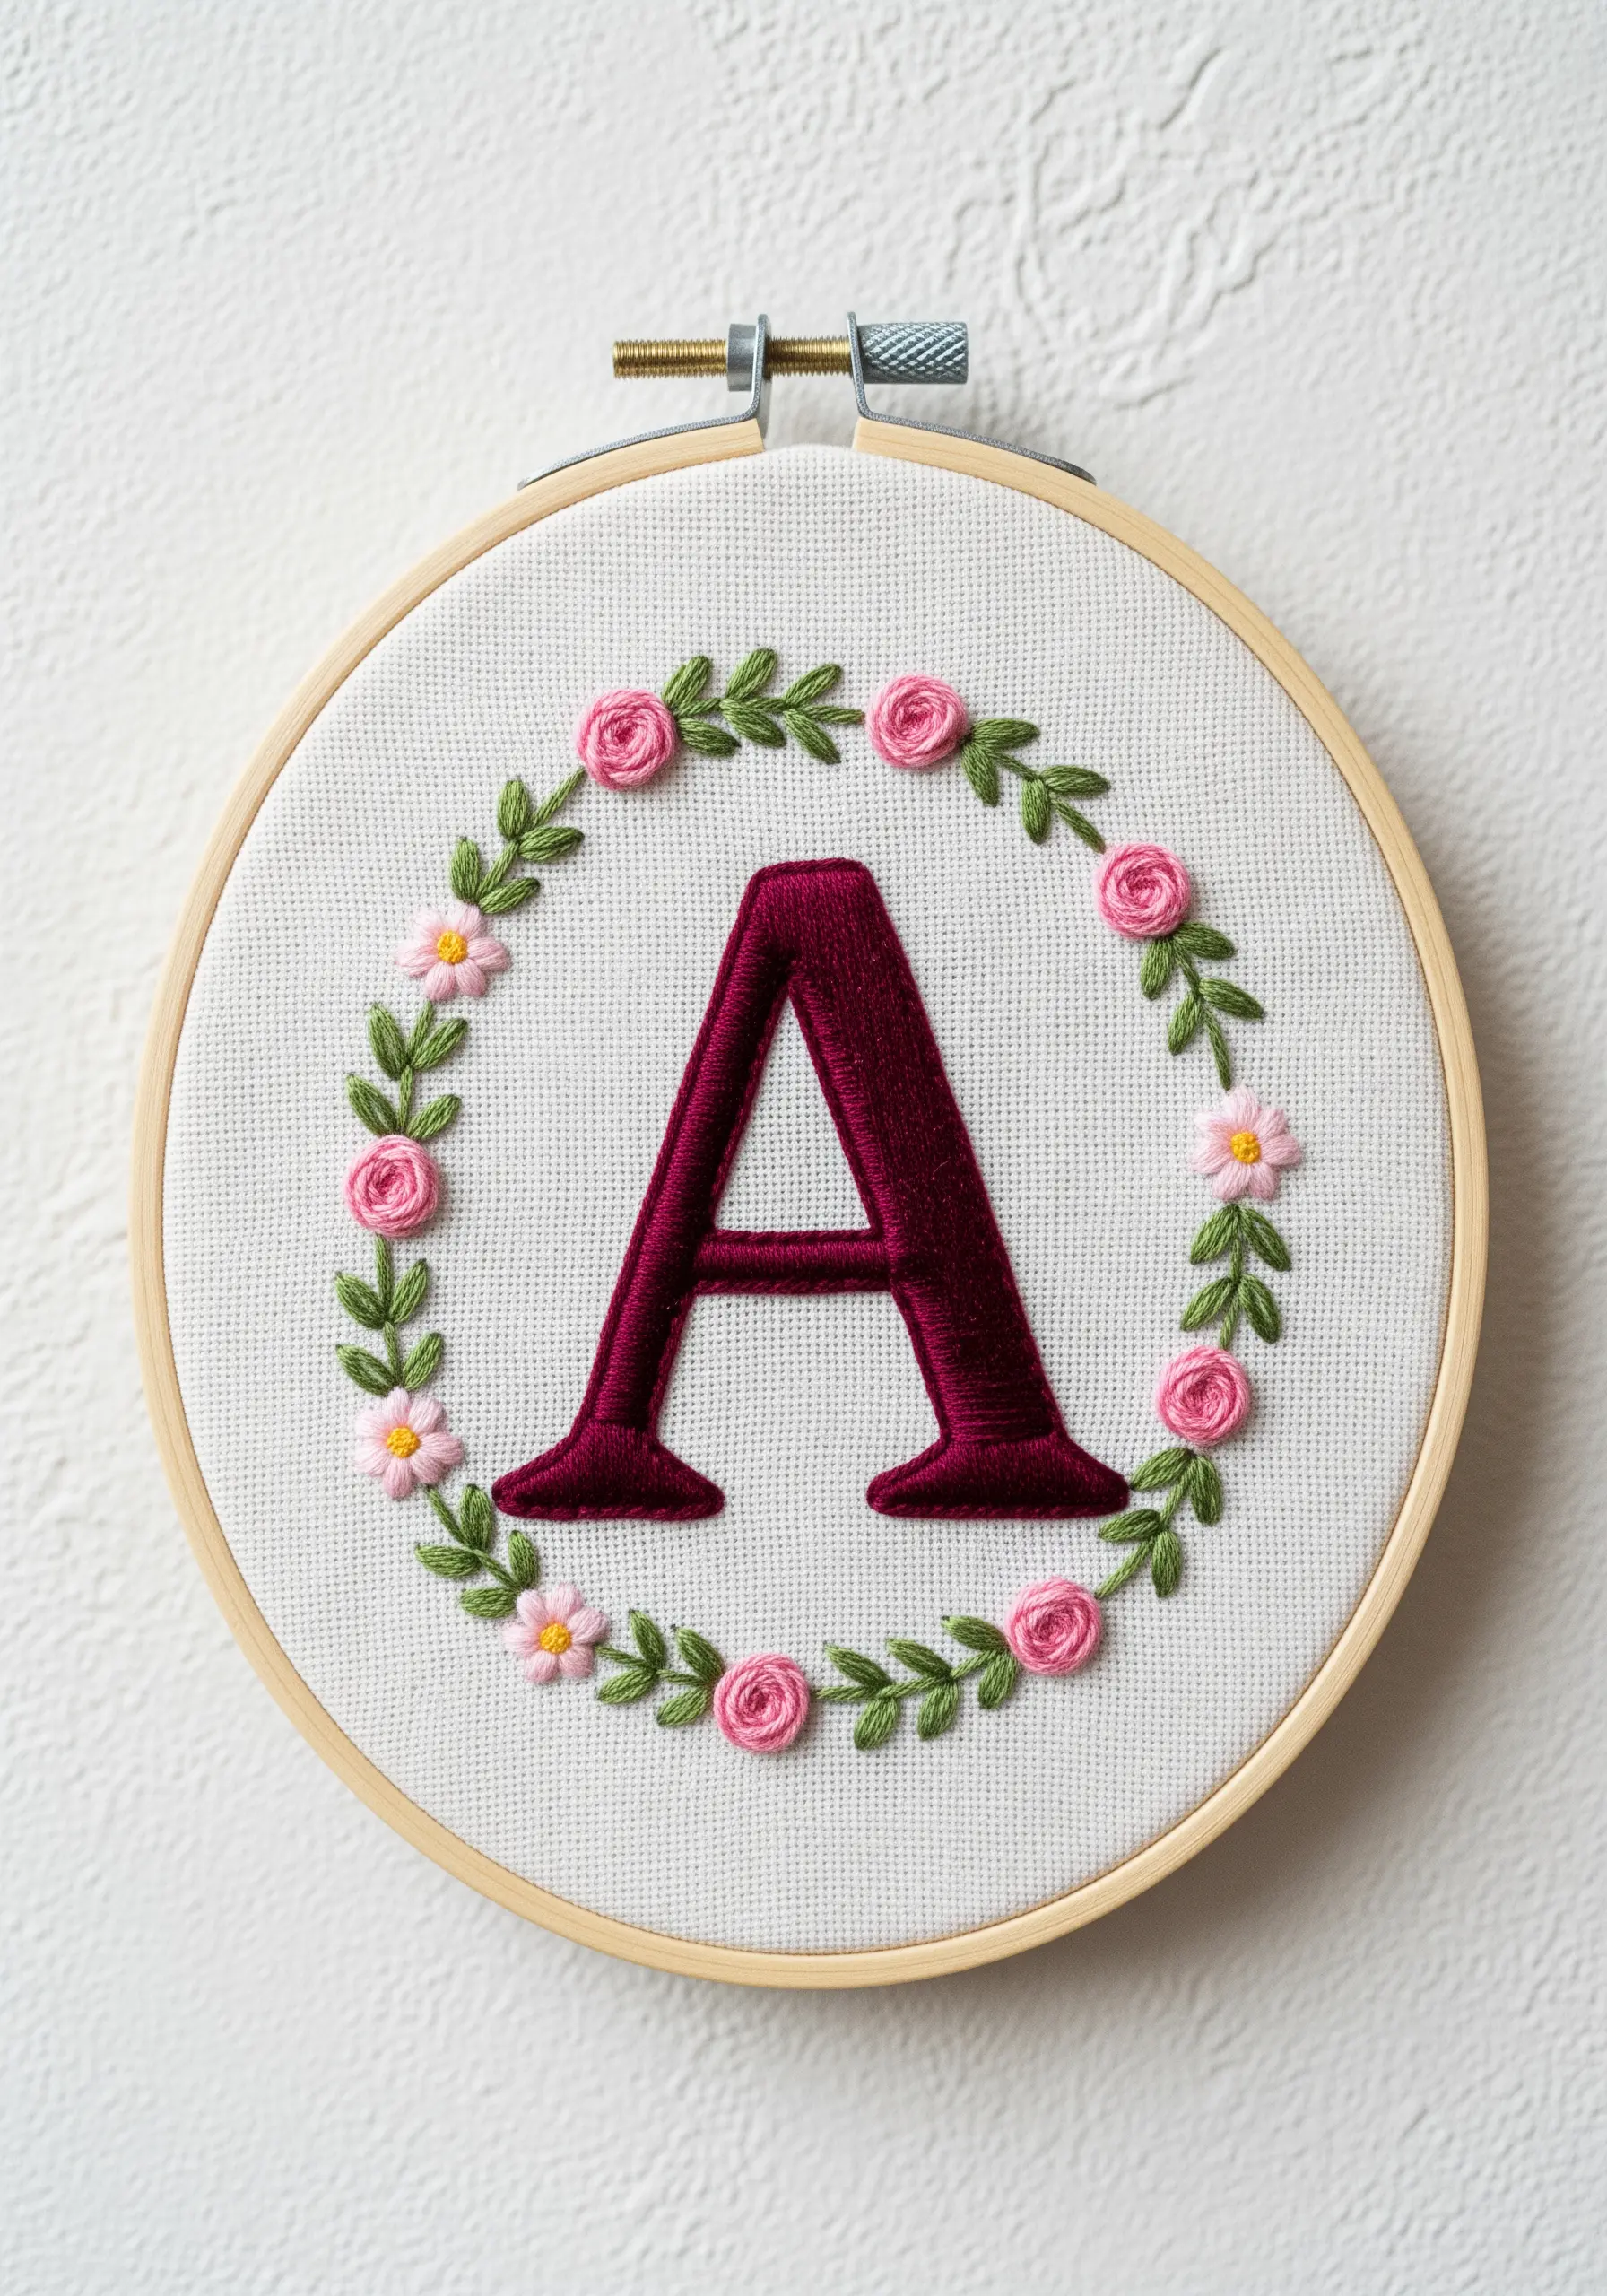
A floral monogram is a timeless way to add a personal touch to your decor.
For a clean, sharp letter, outline the shape with a split stitch before filling it with a dense, smooth satin stitch.
Create the surrounding wreath with simple lazy daisy stitches for the petals and woven wheel stitches for the roses.
This combination of bold fill and delicate floral details creates a beautifully balanced and personalized embroidery idea.
20. Explore Abstract Art with Punch Needle Texture
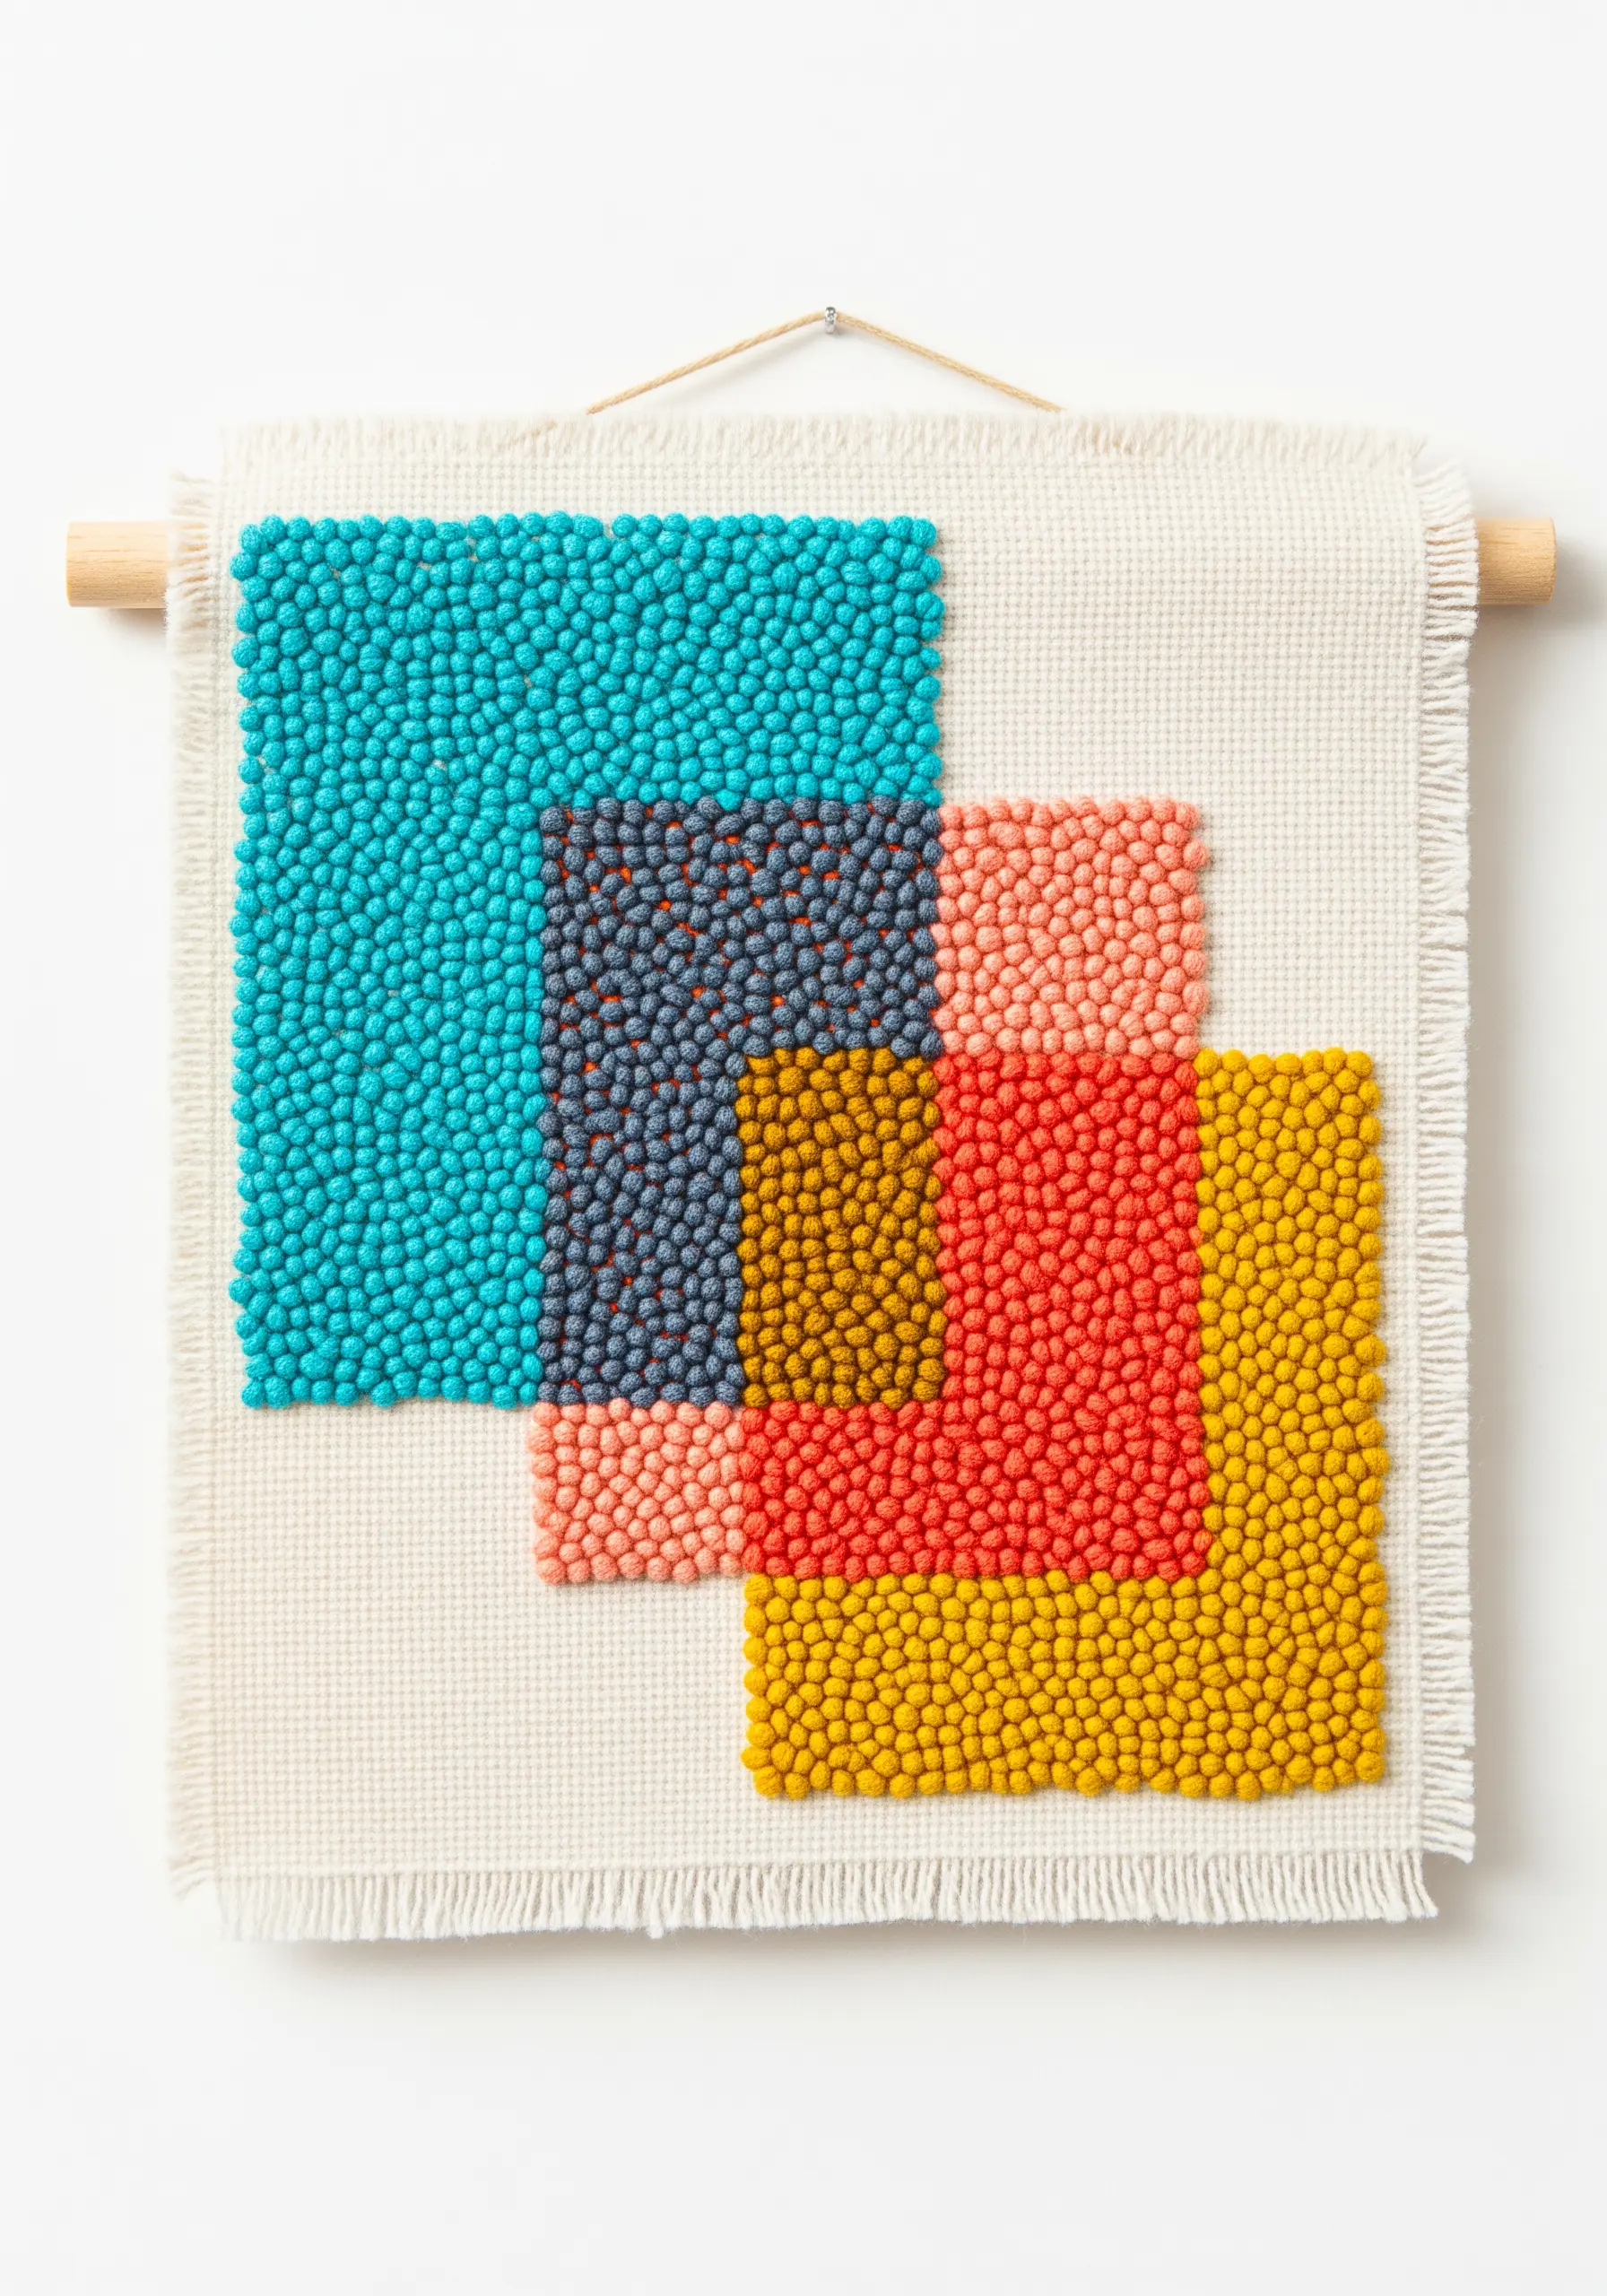
Punch needle embroidery is perfect for creating large blocks of color with a satisfying, uniform texture.
By displaying the looped side of the work, you create a surface that is plush and highly tactile.
Map out your abstract color blocks on a piece of monk’s cloth or weaver’s cloth, which are designed to hold the yarn loops securely.
This technique allows you to create abstract fabric collage embroidery ideas that feel like modern paintings but with the warmth of textile art.
21. Build a Miniature World with 3D Embroidery

Create a tiny terrarium by combining traditional embroidery with 3D elements.
Embroider the ferns using a fishbone or fly stitch for leafy texture.
For the mushroom, create a stumpwork cap by stitching over a small felt pad to give it a raised, rounded shape.
Add real preserved moss and tiny pebbles, securing them with fabric glue, to complete the miniature ecosystem. Displaying it under a glass cloche turns it into a captivating decorative object.
22. Add Fluffy Texture with Turkey Work Stitch
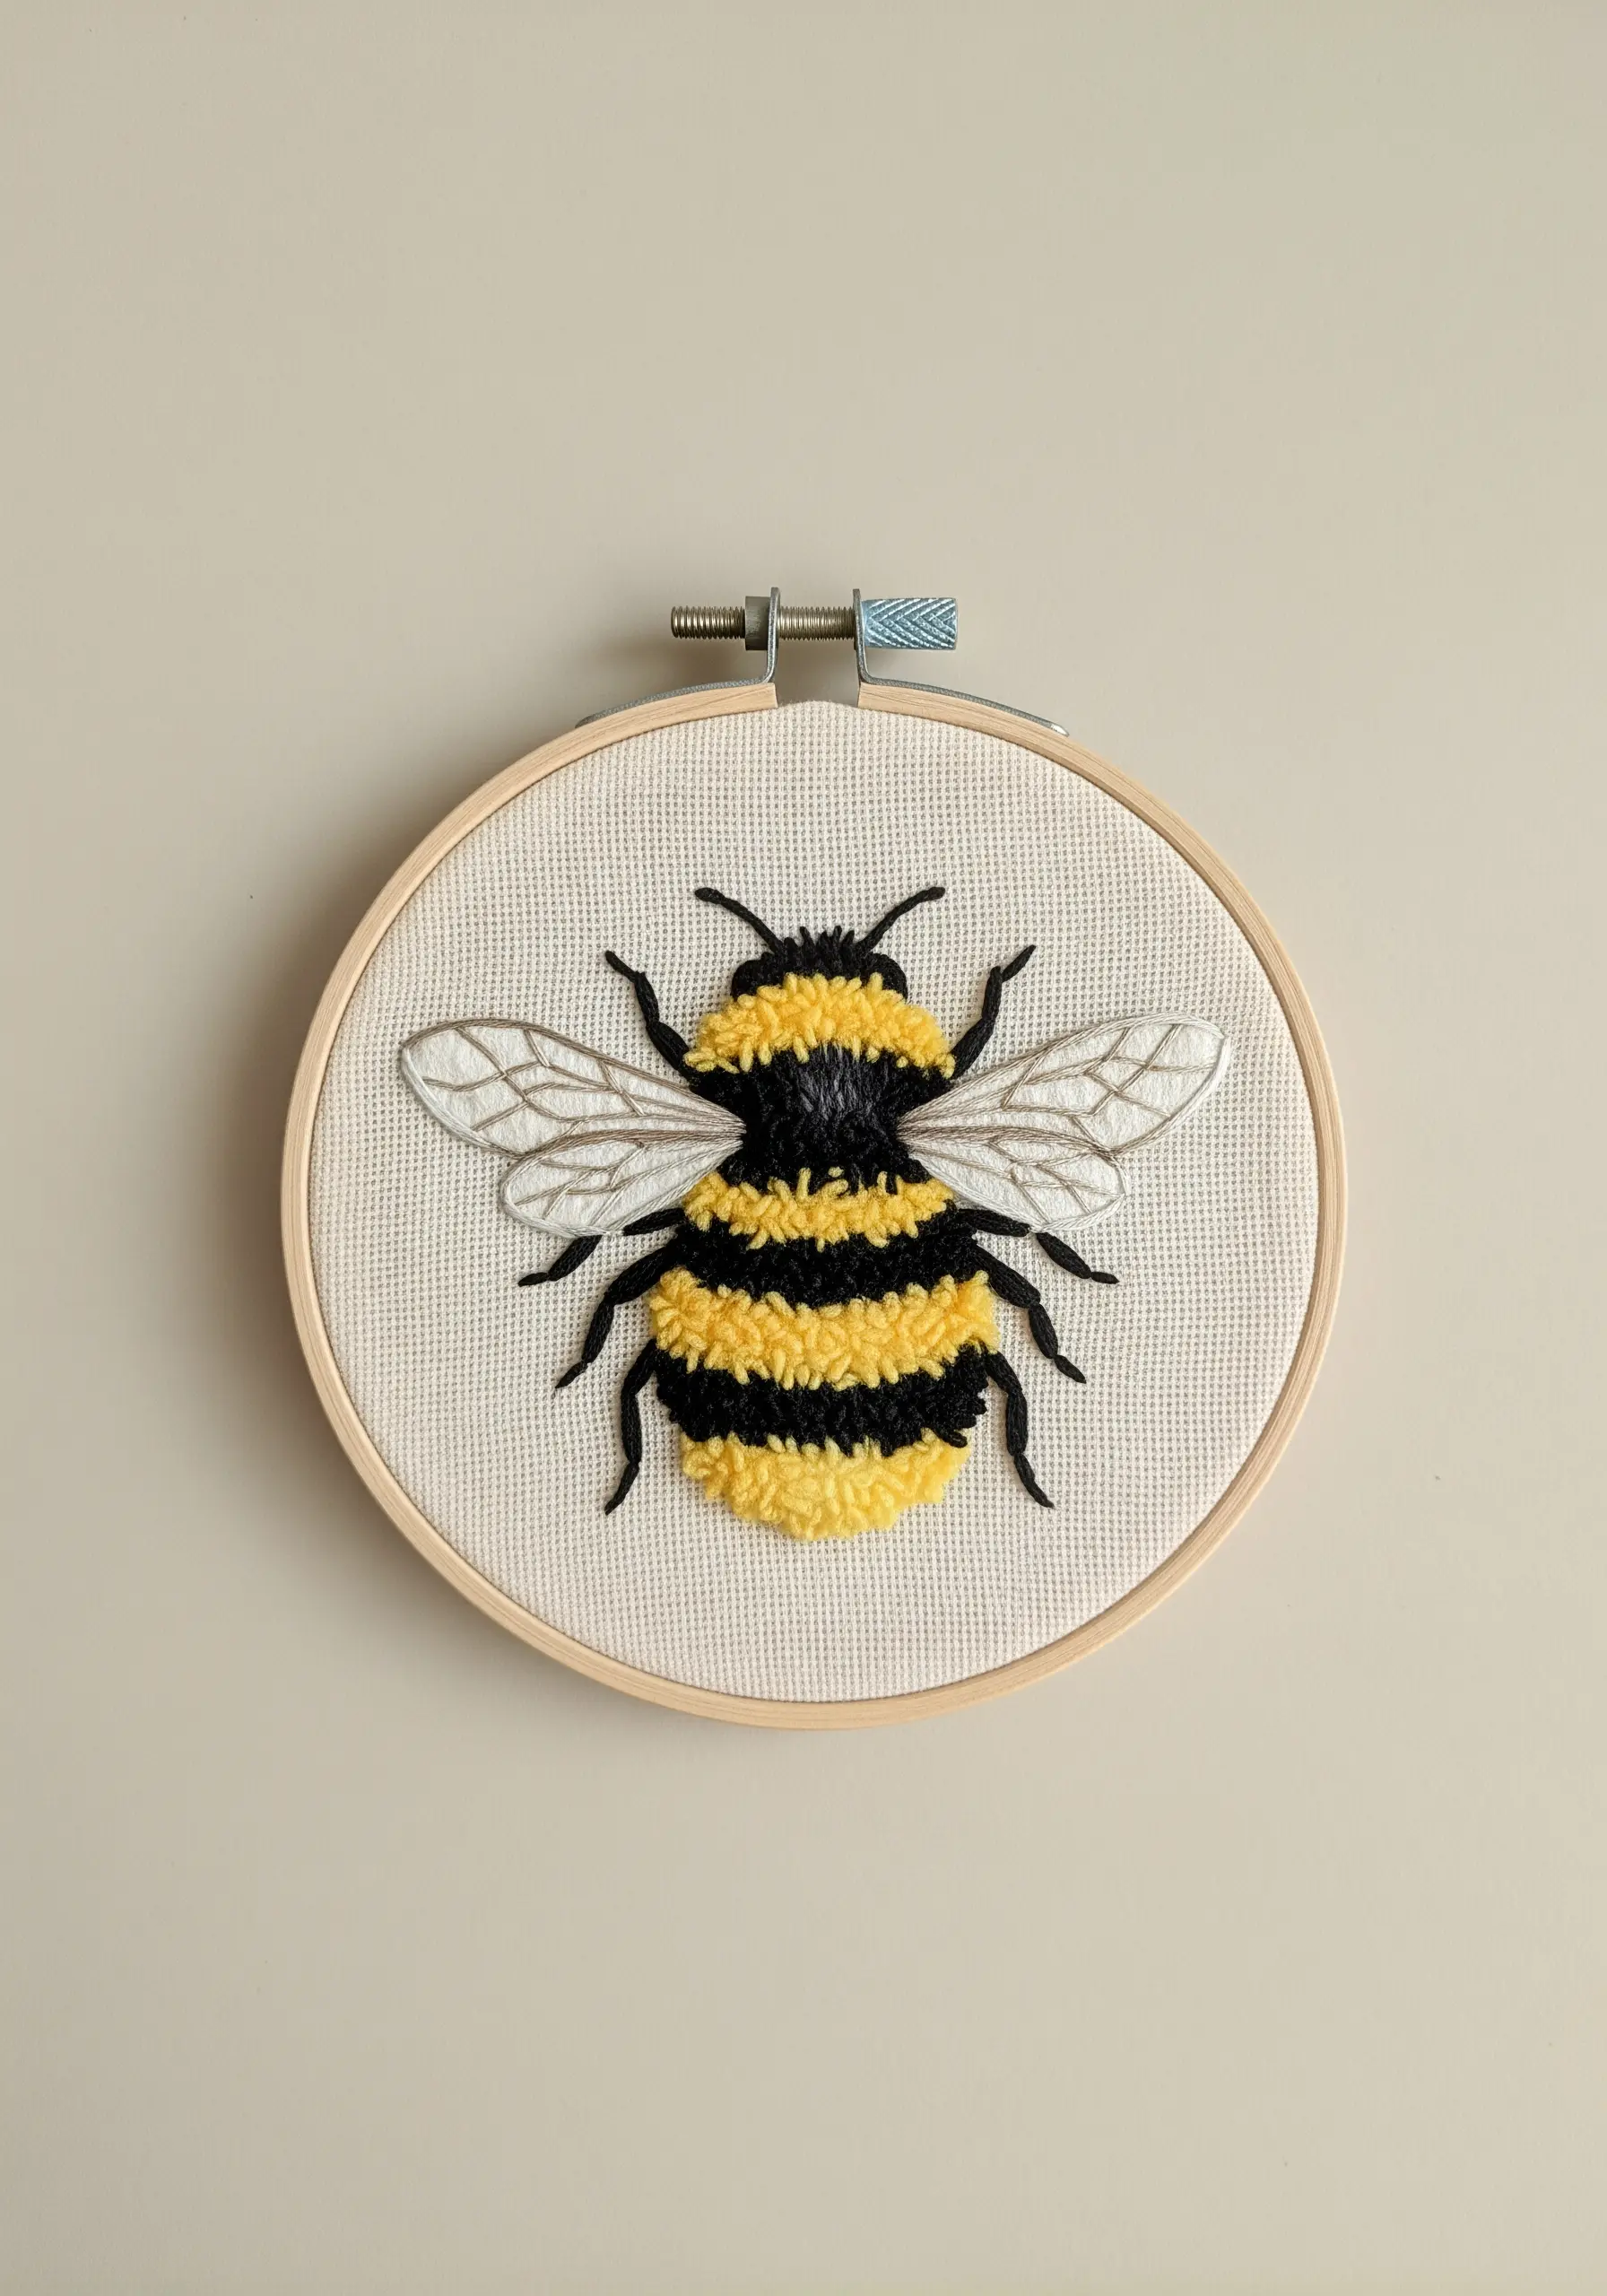
To give an animal motif a fuzzy, tactile body, use the turkey work stitch.
This technique involves creating loops of thread on the surface of the fabric, which are then snipped and fluffed up to resemble fur or fleece.
For a dense texture, place your stitches very close together. You can trim the loops to different lengths to create contour and shape.
It’s a perfect technique for realistic animal and insect embroidery patterns, adding a lifelike quality.
23. Create a Modern Wall Hanging with Mixed Materials

Explore lunar phases by combining different materials and techniques on a single banner.
For one moon, fill the shape with concentric circles of couched silver beads for a textured, reflective surface.
For another, use a classic satin stitch for a smooth, matte finish.
Introduce a fine silver chain, couching it along the crescent outline to add an industrial yet delicate element. This blend of textures creates a sophisticated and modern wall piece.
24. Embrace Cottagecore Charm with Patterned Fabric
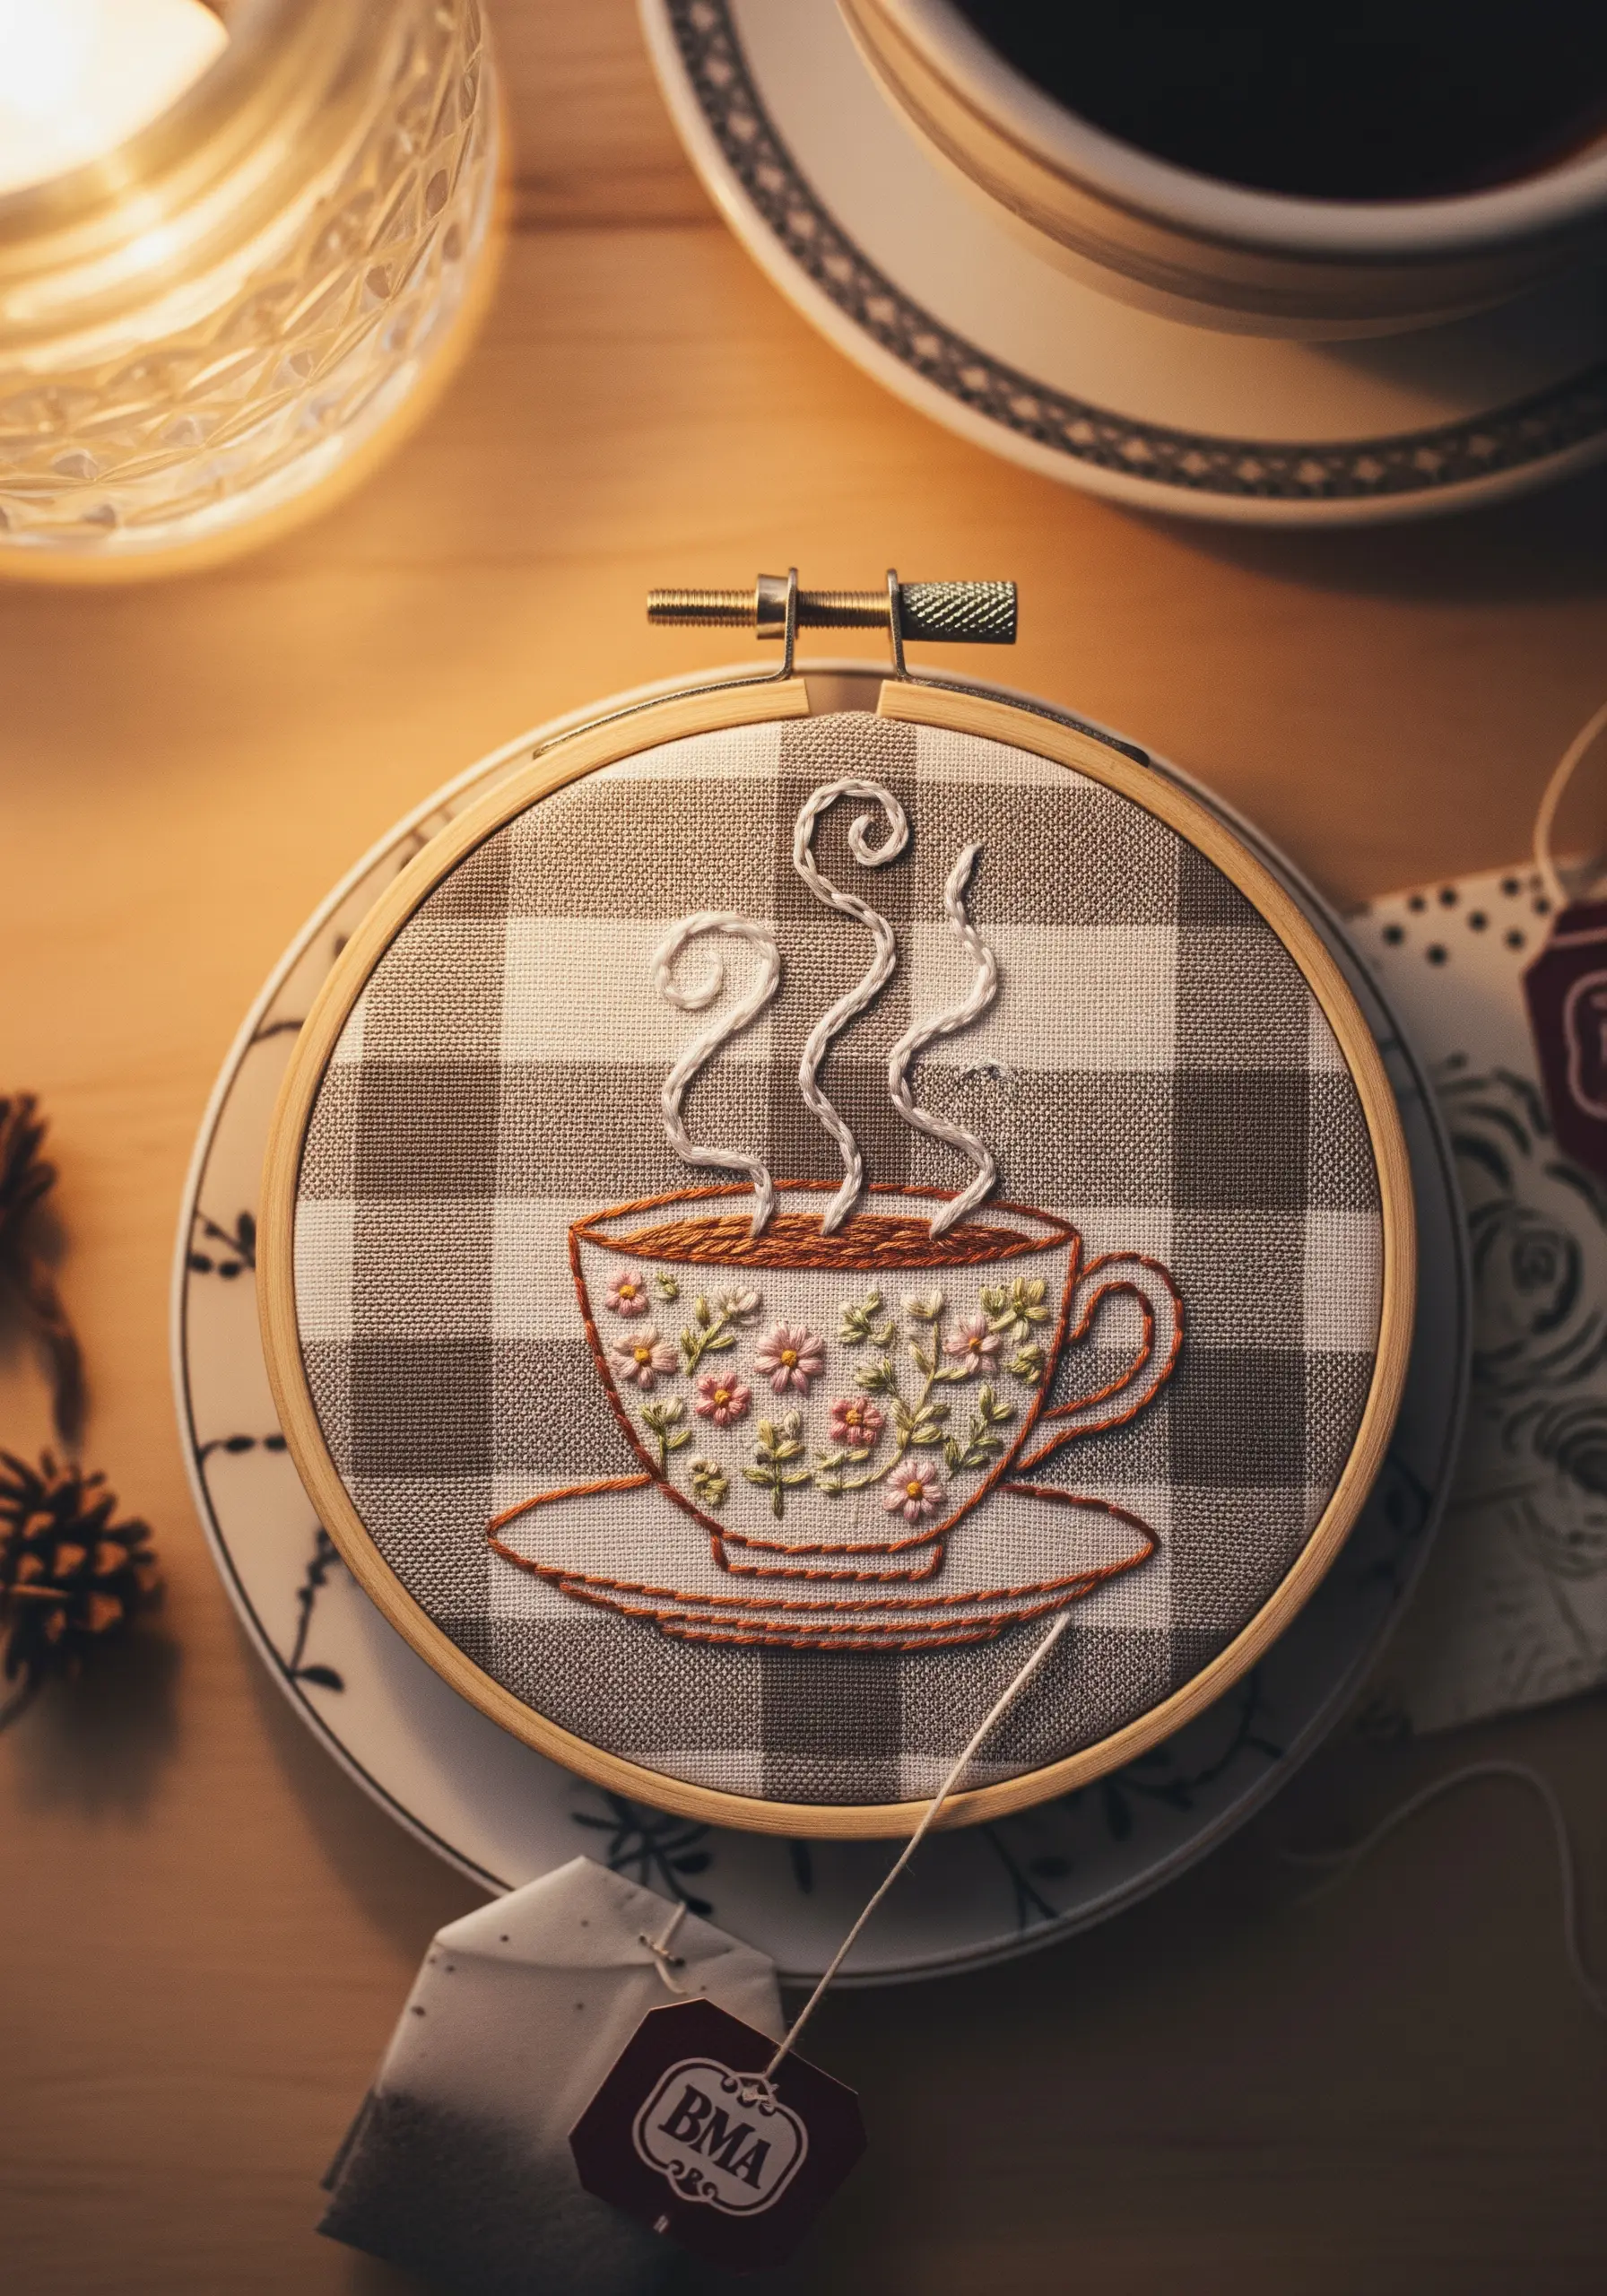
Don’t limit yourself to solid-colored fabrics. Using a patterned fabric like gingham can add instant character and context to your design.
Choose a simple line-art motif that won’t compete with the background pattern.
Select thread colors that complement the fabric—here, the terra-cotta outline and soft florals harmonize with the brown check.
This thoughtful pairing creates cute dessert & tea theme table linen embroidery motifs that feel cozy and intentional.
25. Achieve a Folk-Art Feel with Layered Chain Stitch

The chain stitch is incredibly versatile for creating both bold outlines and decorative fills.
Use a thick white thread for the main outline of your motif to give it a strong, graphic presence against a vibrant background.
Then, work smaller, layered rows of chain stitch in contrasting colors inside the shape to build up intricate, folk-art-inspired patterns.
This technique creates a rich, textured surface that is both playful and visually complex.
26. Replicate Natural Textures with Creative Stitching
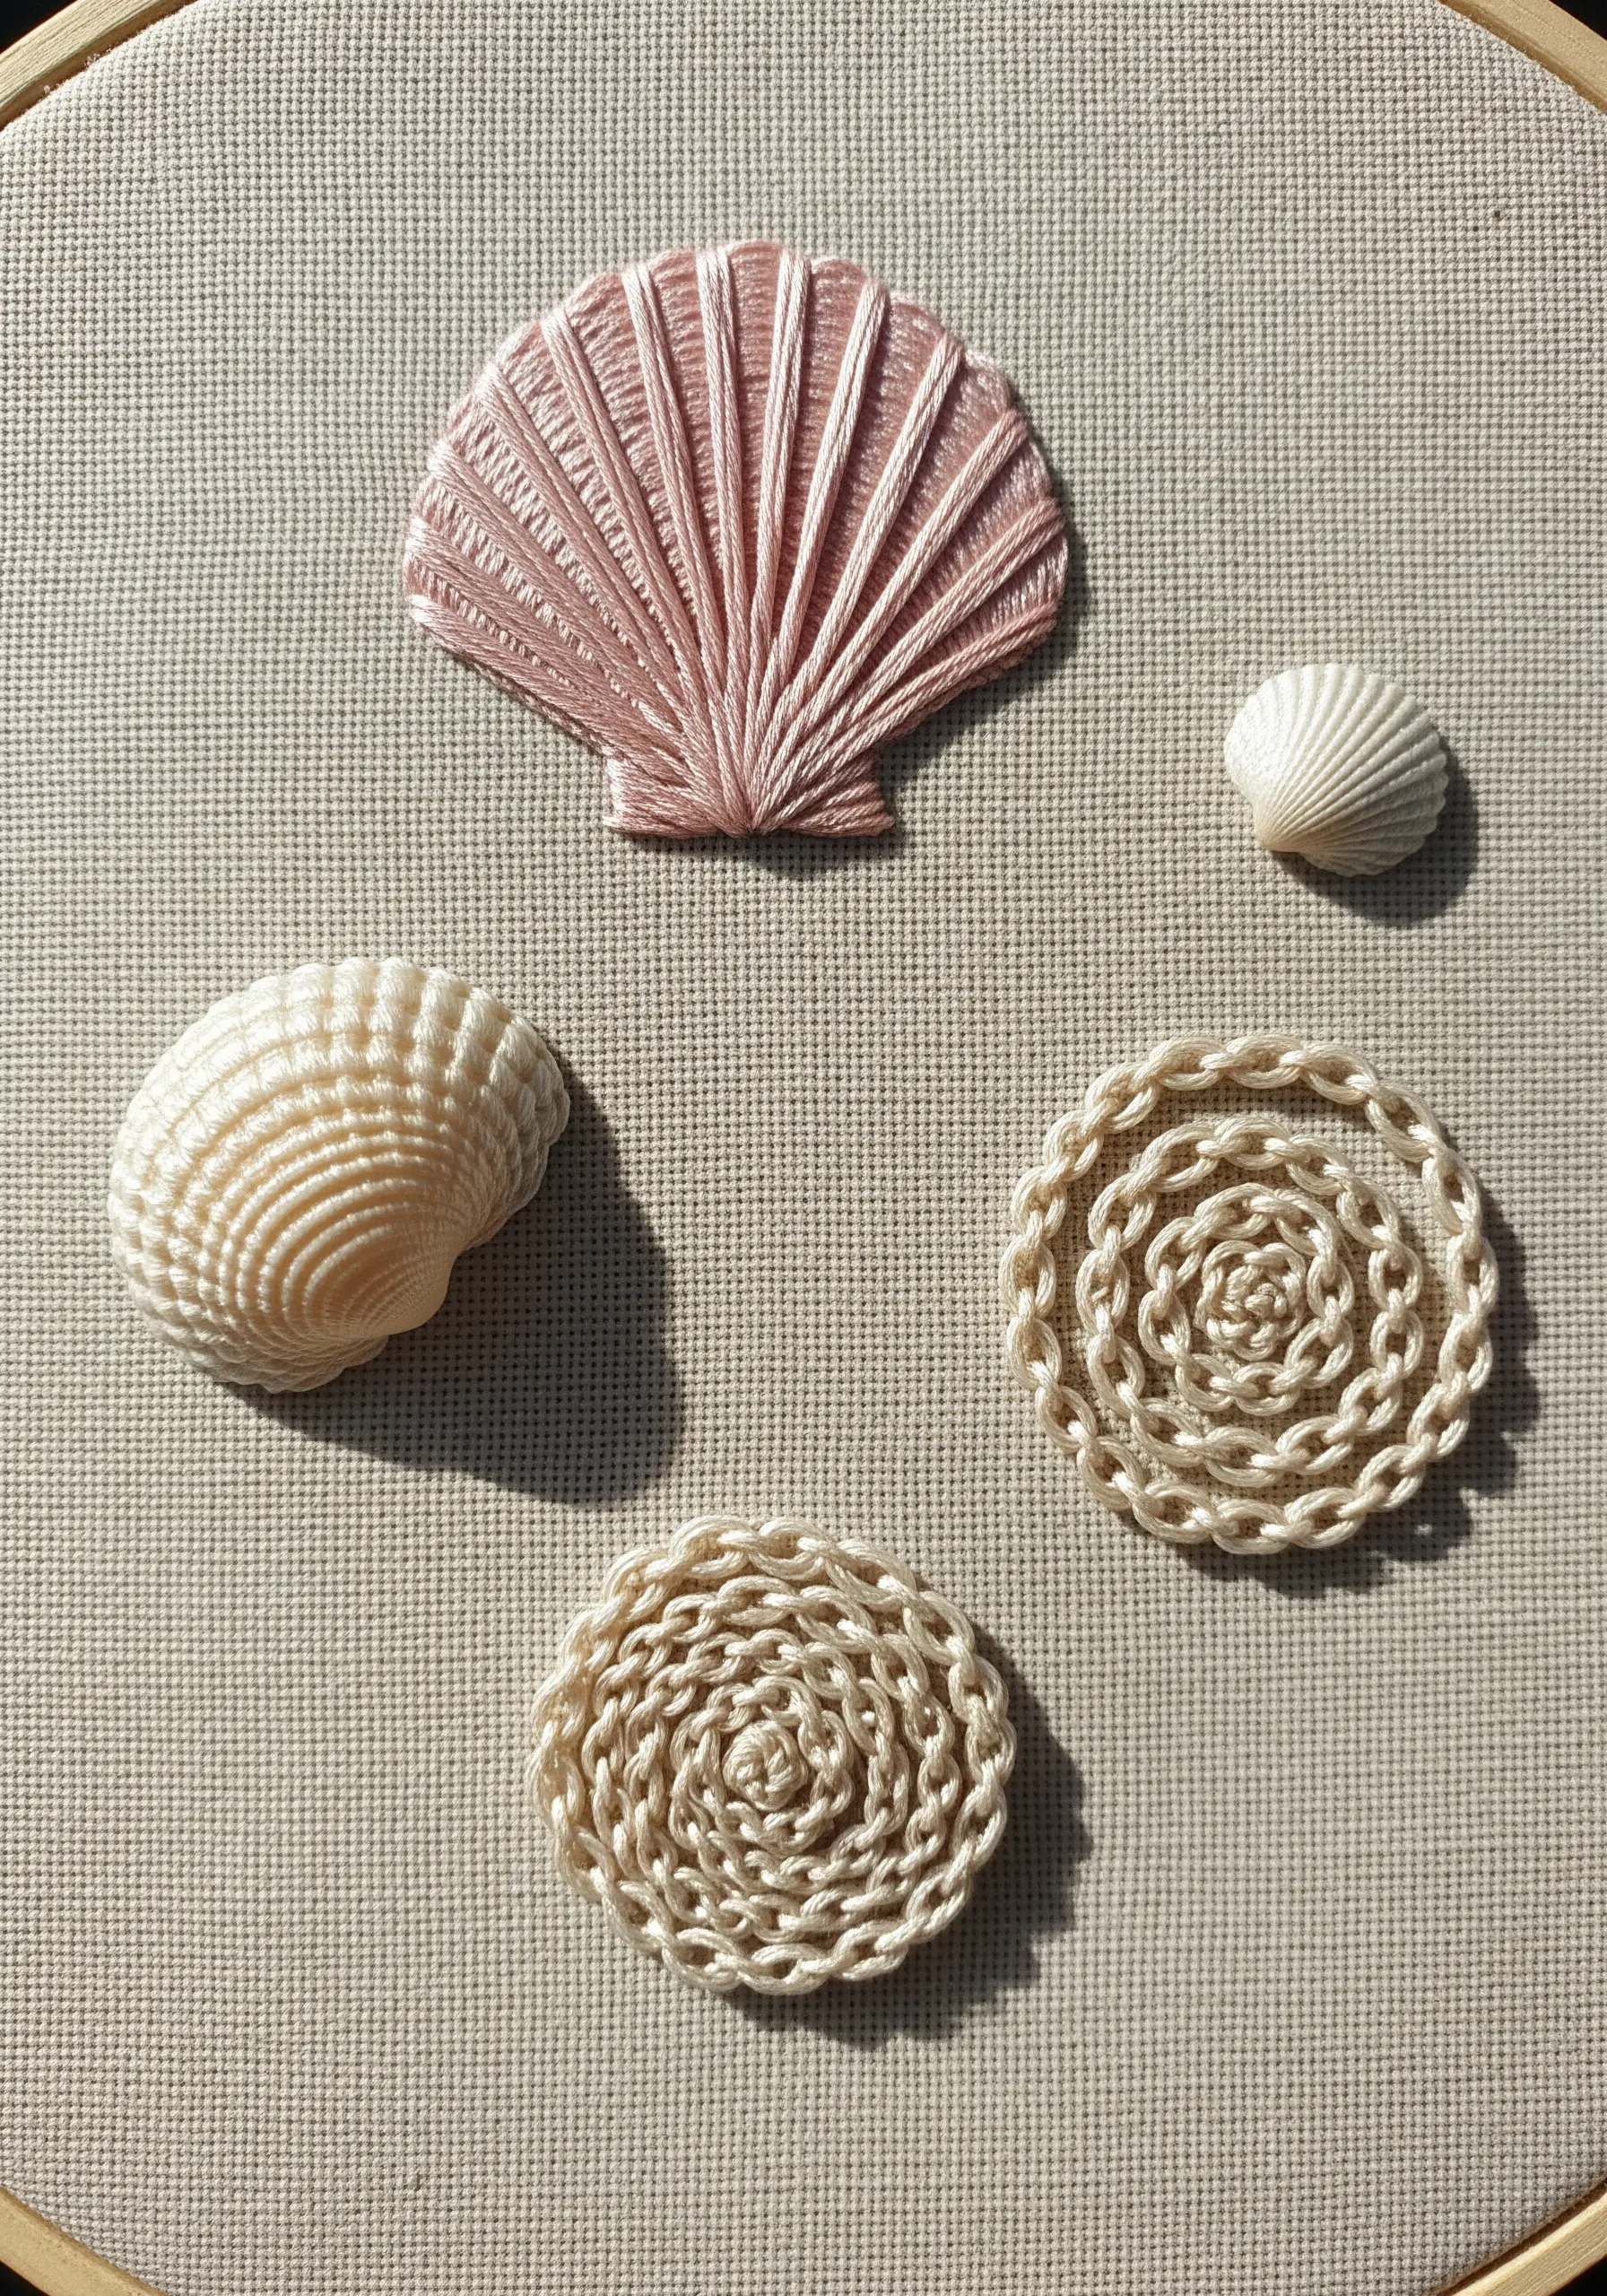
Challenge yourself to translate the textures of real-world objects into thread.
For a ridged seashell, use a fan of satin stitches radiating from a central point, padded underneath with foundation stitches to create a raised effect.
For a spiral shell, a coiled and couched line of chain stitch perfectly mimics the form.
This exercise in observation turns your hoop into a sampler of nature texture embroidery projects that feel amazingly real.
27. Sculpt with Thread for a Bas-Relief Effect

Create a truly sculptural piece by using a thick, braided cord or yarn instead of floss.
Lay the cord on the surface of your canvas and carefully tack it down from behind or with tiny, invisible stitches on the front.
By painting your canvas the same color as the cord, you create a monochrome, bas-relief effect where form and shadow take center stage.
This is a powerful way to make abstract concept art embroidery ideas with dramatic impact.
28. Quilt with Thread: A Fabric Collage Landscape
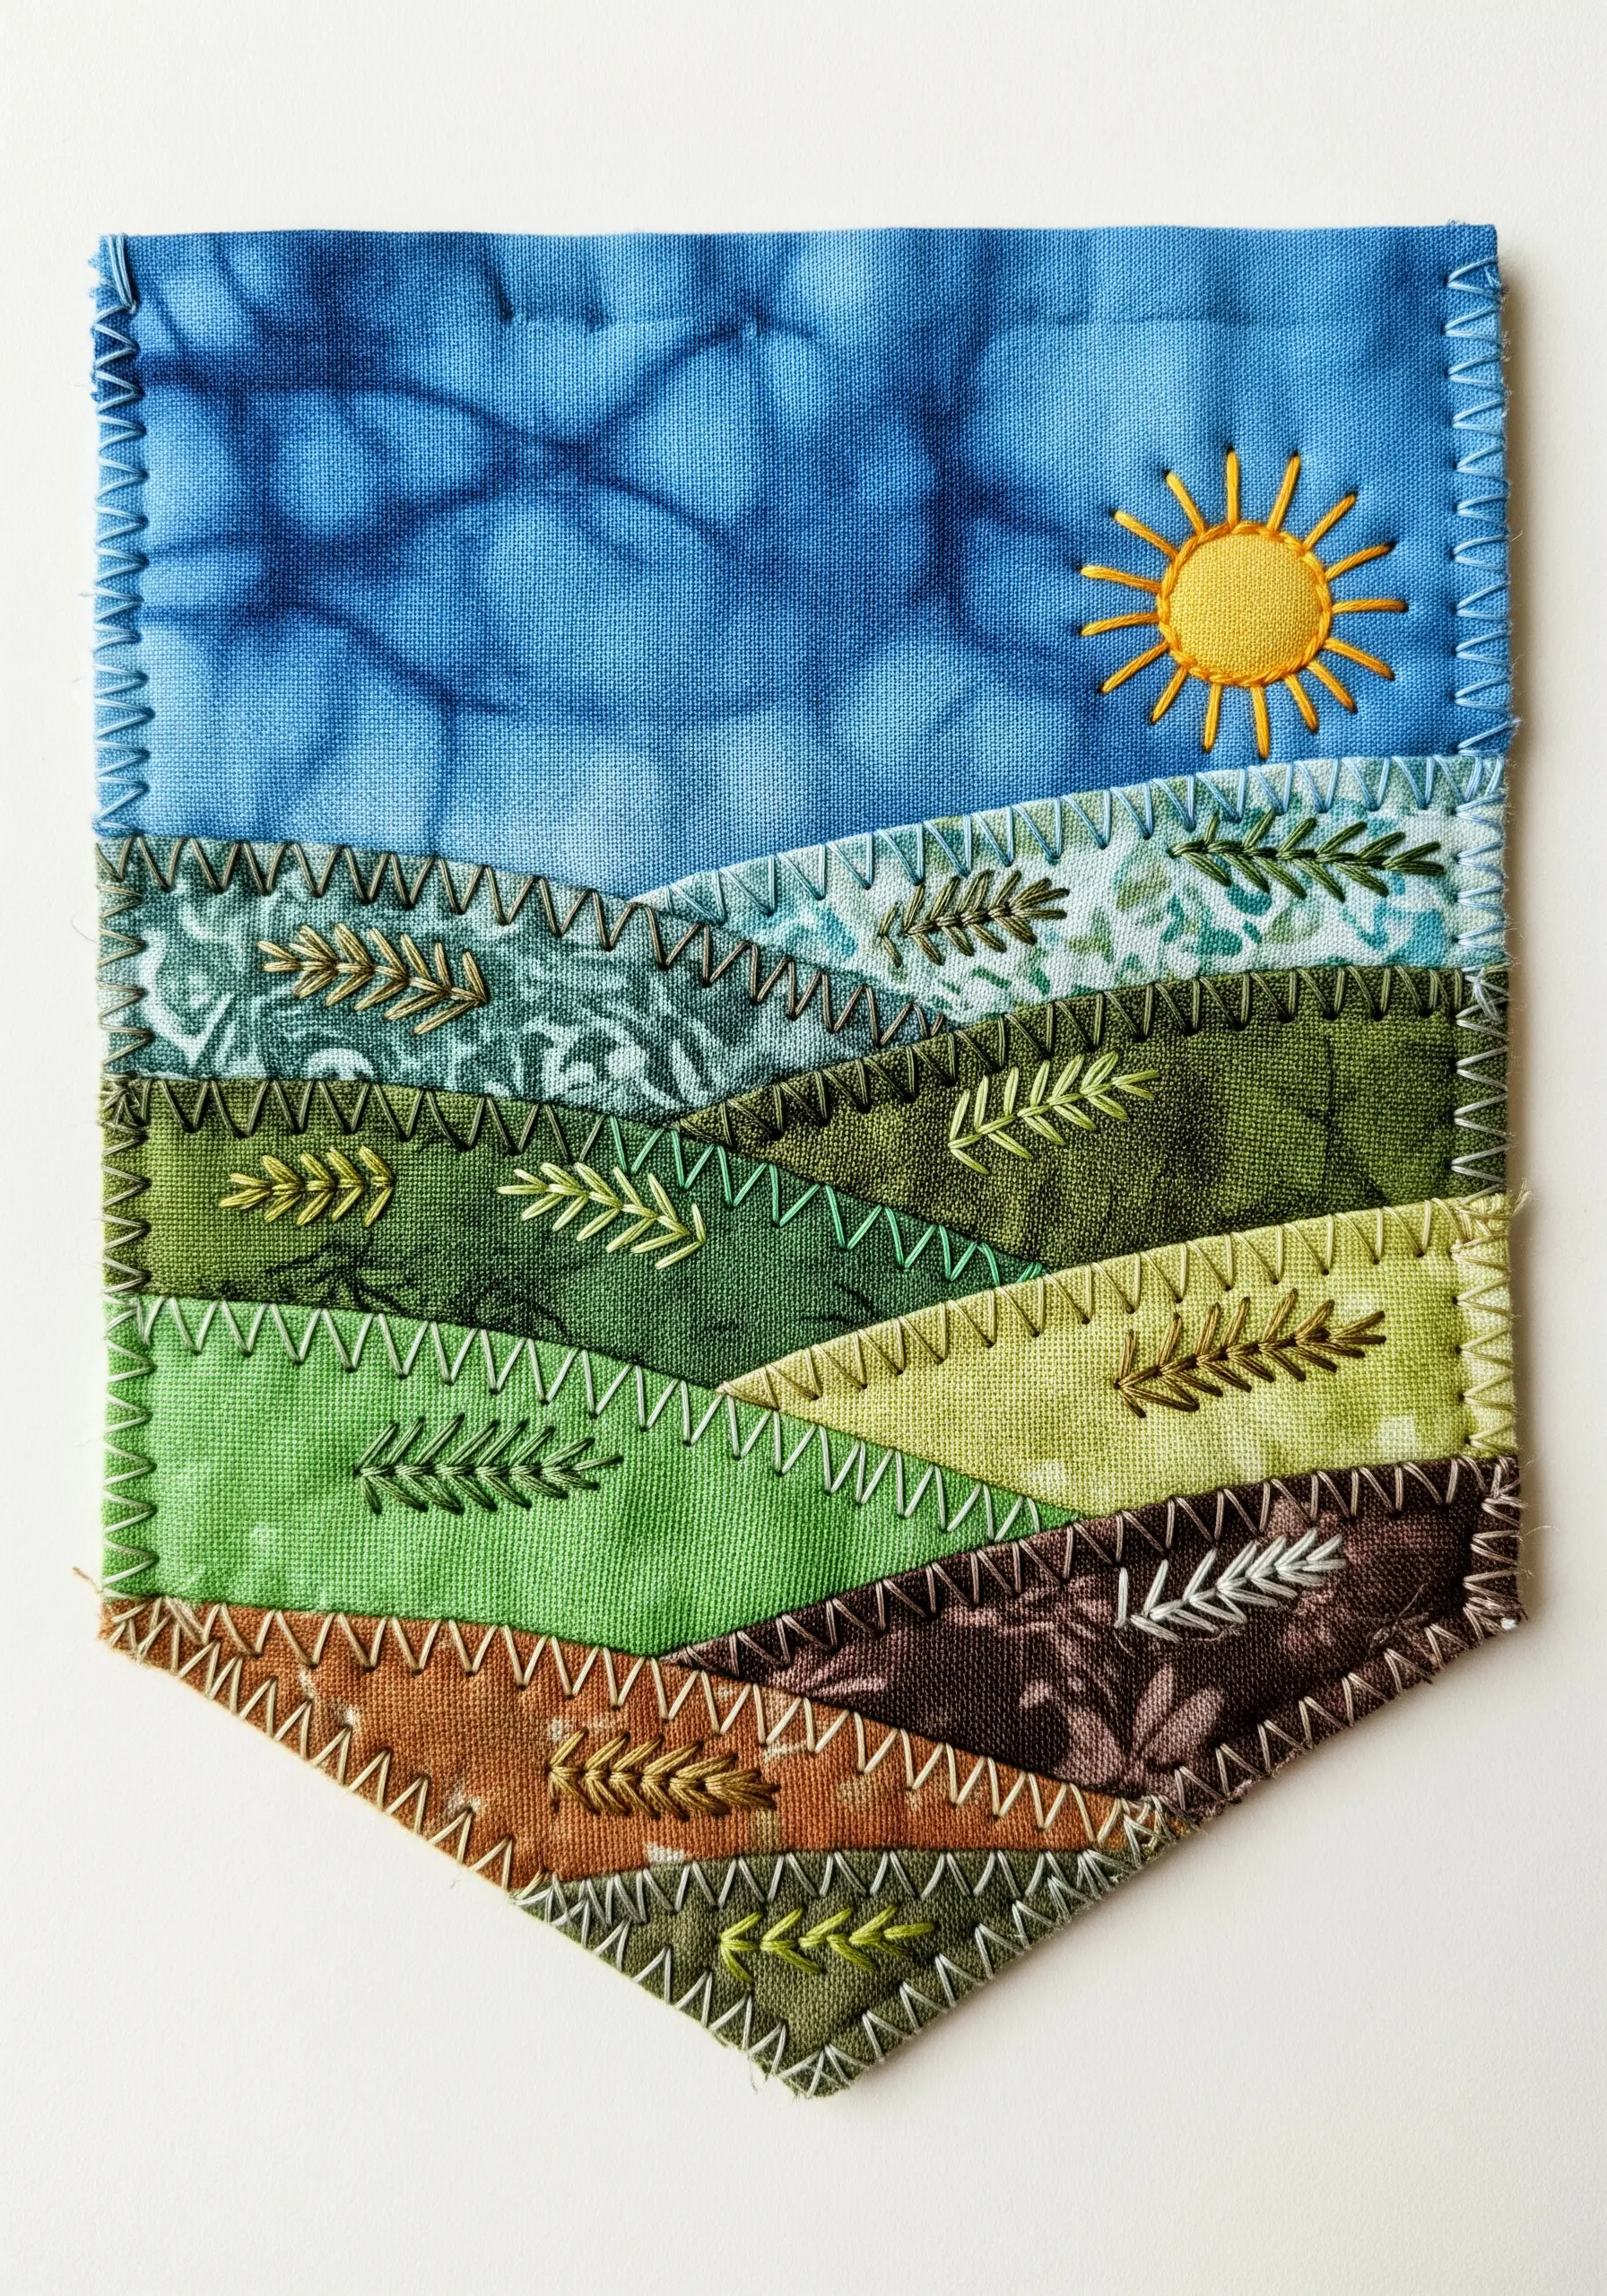
Create a landscape banner by piecing together scraps of patterned and dyed fabric for the hills and sky.
Instead of traditional quilting, use decorative embroidery stitches like zigzag or feather stitch along the seams to join the pieces.
Scatter simple motifs like lazy daisy flowers or fly stitch leaves to unify the composition.
This technique is a beautiful way to use up fabric remnants and create fabric collage embroidery ideas that reuse old clothes.
29. Create a Lush Lavender Bouquet with Bullion Knots

For a highly textured and realistic lavender sprig, use bullion knots instead of French knots.
A bullion knot is created by wrapping the thread around the needle multiple times before pulling it through, forming an elongated, worm-like stitch.
Cluster these knots tightly together to form the flower heads, varying the number of wraps to create buds of different sizes.
This technique adds impressive dimension and realism to your floral work.
30. Design a Split Composition for Visual Storytelling
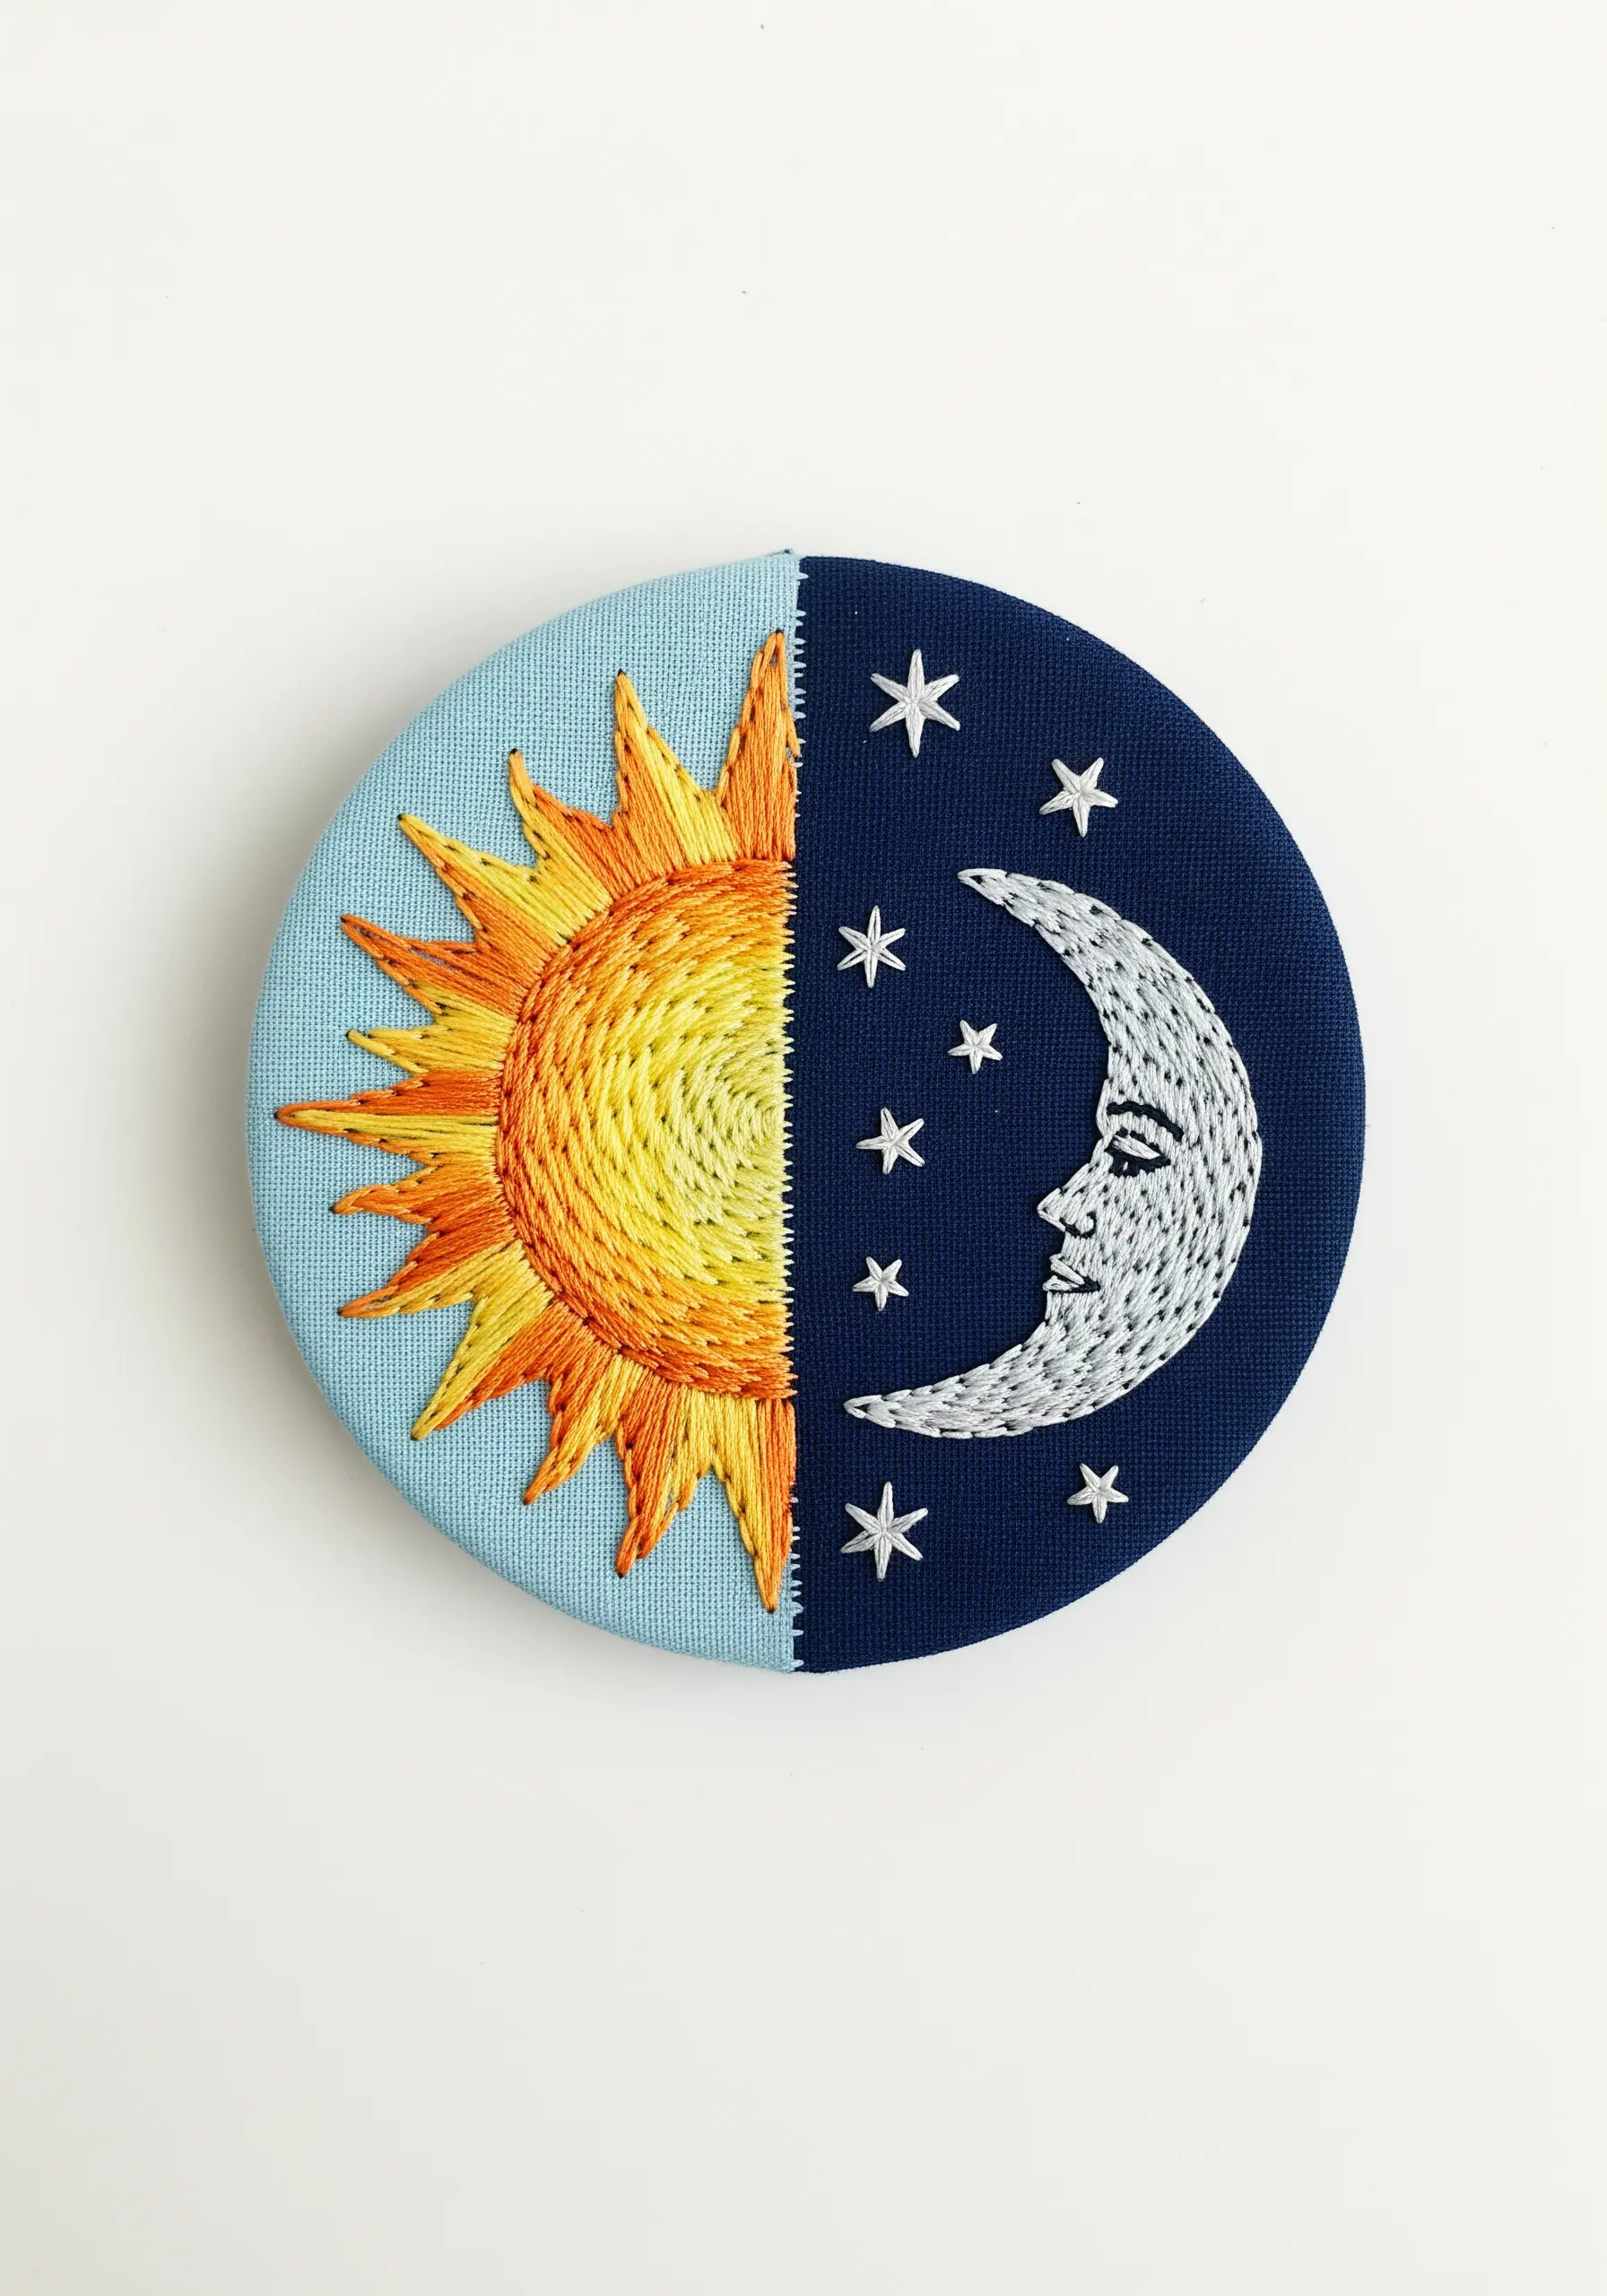
Tell a story within a single hoop by dividing the space into two contrasting scenes.
You can create the dividing line by stitching two pieces of different colored fabric together before hooping them.
Use thread painting techniques—long and short stitch—to fill each side with its respective motif, ensuring the colors and textures reflect the theme (e.g., warm for the sun, cool for the moon).
This simple compositional trick adds a layer of narrative and visual intrigue to your work.
31. Stitch Gemstone Facets with Satin Stitch Blocks

To create the sharp, geometric facets of a gemstone, think in blocks of color.
Outline each facet with a single line of split stitch to create a crisp edge.
Fill each block with satin stitch, paying close attention to the stitch direction. By angling the stitches in adjacent facets differently, you’ll create the illusion of light hitting the crystal from different angles.
Using multiple shades of one color family enhances the sense of depth and luminosity.
32. Build a Desert Scene with Varied Green Tones

When embroidering a scene with similar elements, like cacti, using a wide range of tones is key to creating depth and interest.
Select at least four or five shades of green, from deep forest to pale sage, and assign them to different plants.
Use simple stitches like satin stitch and seed stitch, letting the color variation do the heavy lifting in distinguishing each cactus.
This approach results in a composition that feels vibrant and realistic rather than flat and monotonous.
33. Create Rhythmic Waves with Textured Stitches
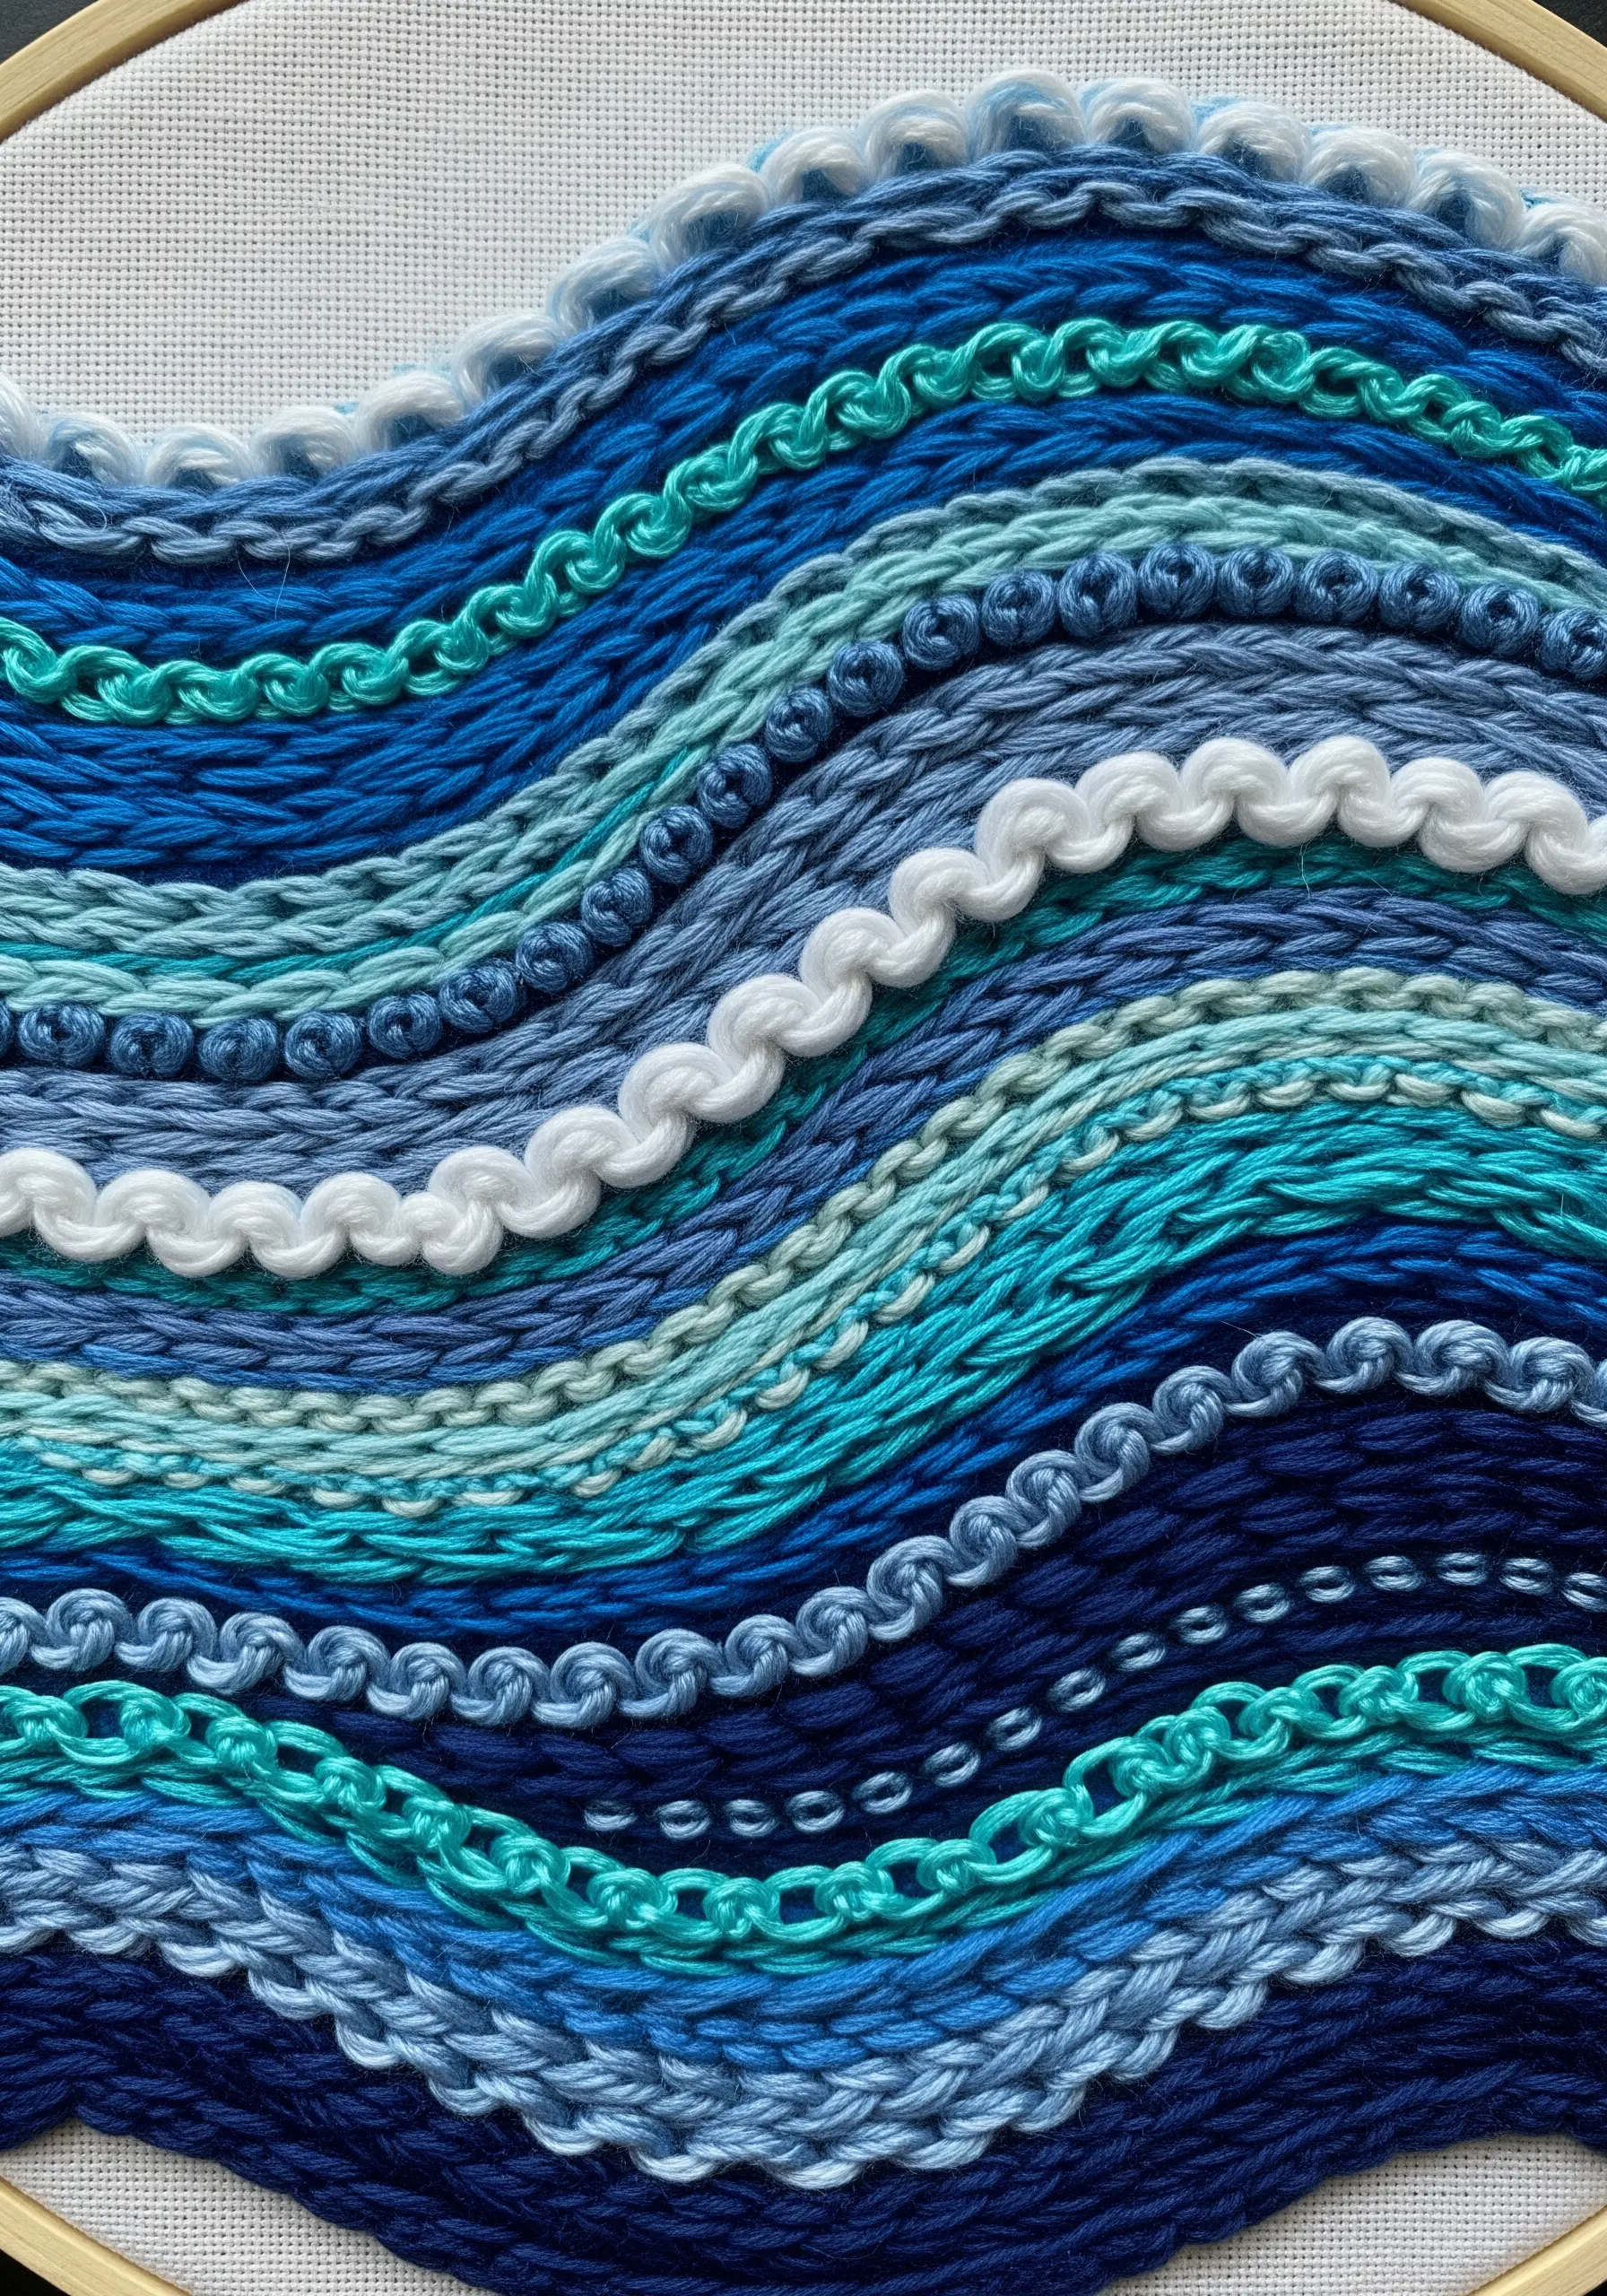
Capture the movement of water by layering rows of different textural stitches.
Combine thick lines of chain stitch, bumpy Pekinese stitch, tight French knots, and smooth whipped backstitch.
Arrange them in undulating lines, using a tonal palette of blues, teals, and white to represent water depth and seafoam.
This sampler-style approach to abstract thread waves & swirls creates a piece that is visually and tactilely captivating.
34. Embroider on Tulle for a Floating Effect
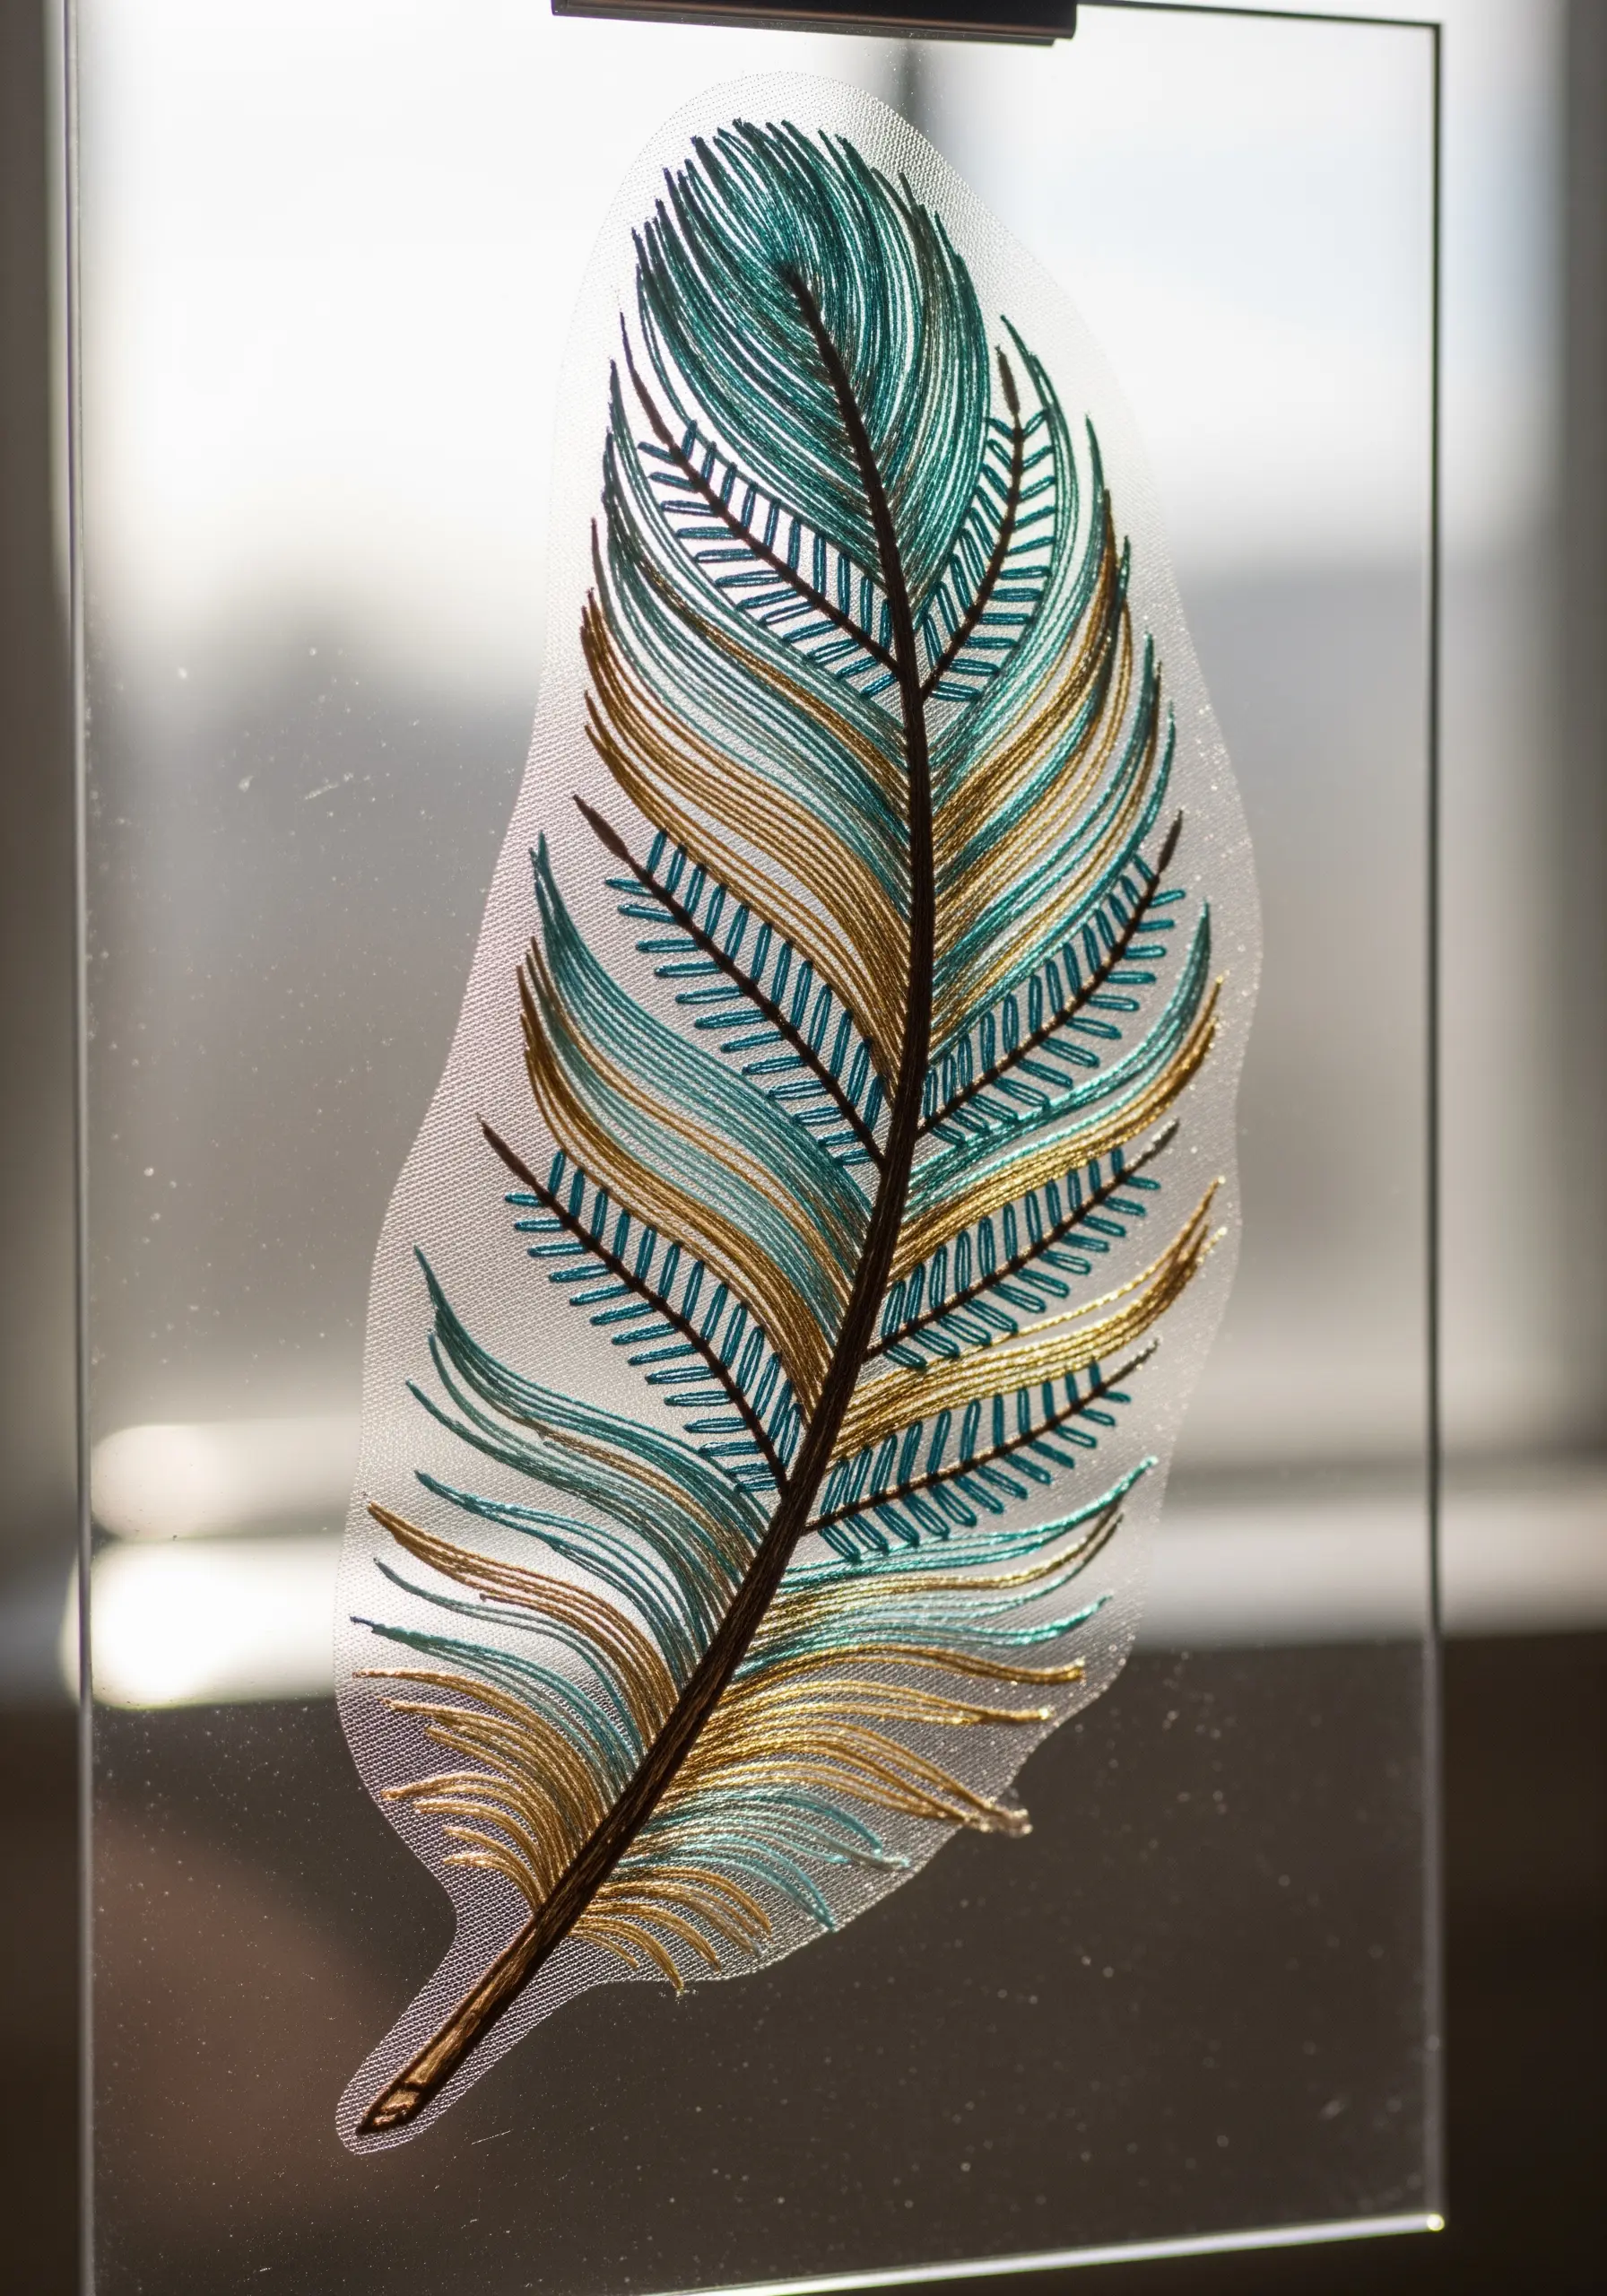
Stitching on sheer tulle or organza creates the magical illusion that your design is floating in mid-air.
You must use a stabilizer (like a water-soluble film) behind the tulle to support your stitches. Once you’re finished, the stabilizer is washed away, leaving only the thread on the transparent fabric.
This technique is perfect for delicate, airy motifs like feathers or insect wings. Displaying it between two panes of glass enhances the ethereal, suspended effect.


