
When life feels cluttered, the simple act of pulling a needle and thread through fabric can be a powerful anchor. It’s a quiet promise to yourself—a moment to slow down, focus, and create something beautiful with your own hands.
But simple doesn’t have to mean basic. The most profound shifts in your work come from small, intentional choices. It’s in the direction of a single stitch, the number of threads you use, or the way you layer one color over another. These tiny patterns are your space to play with those details.
Think of each one not as a project to finish, but as a meditation to experience. They are small enough to complete in a single sitting, offering a gentle rhythm and a finished piece of art that holds the calm you cultivated while making it. Let’s begin.
1. Lavender Sprigs with Tactile Detail
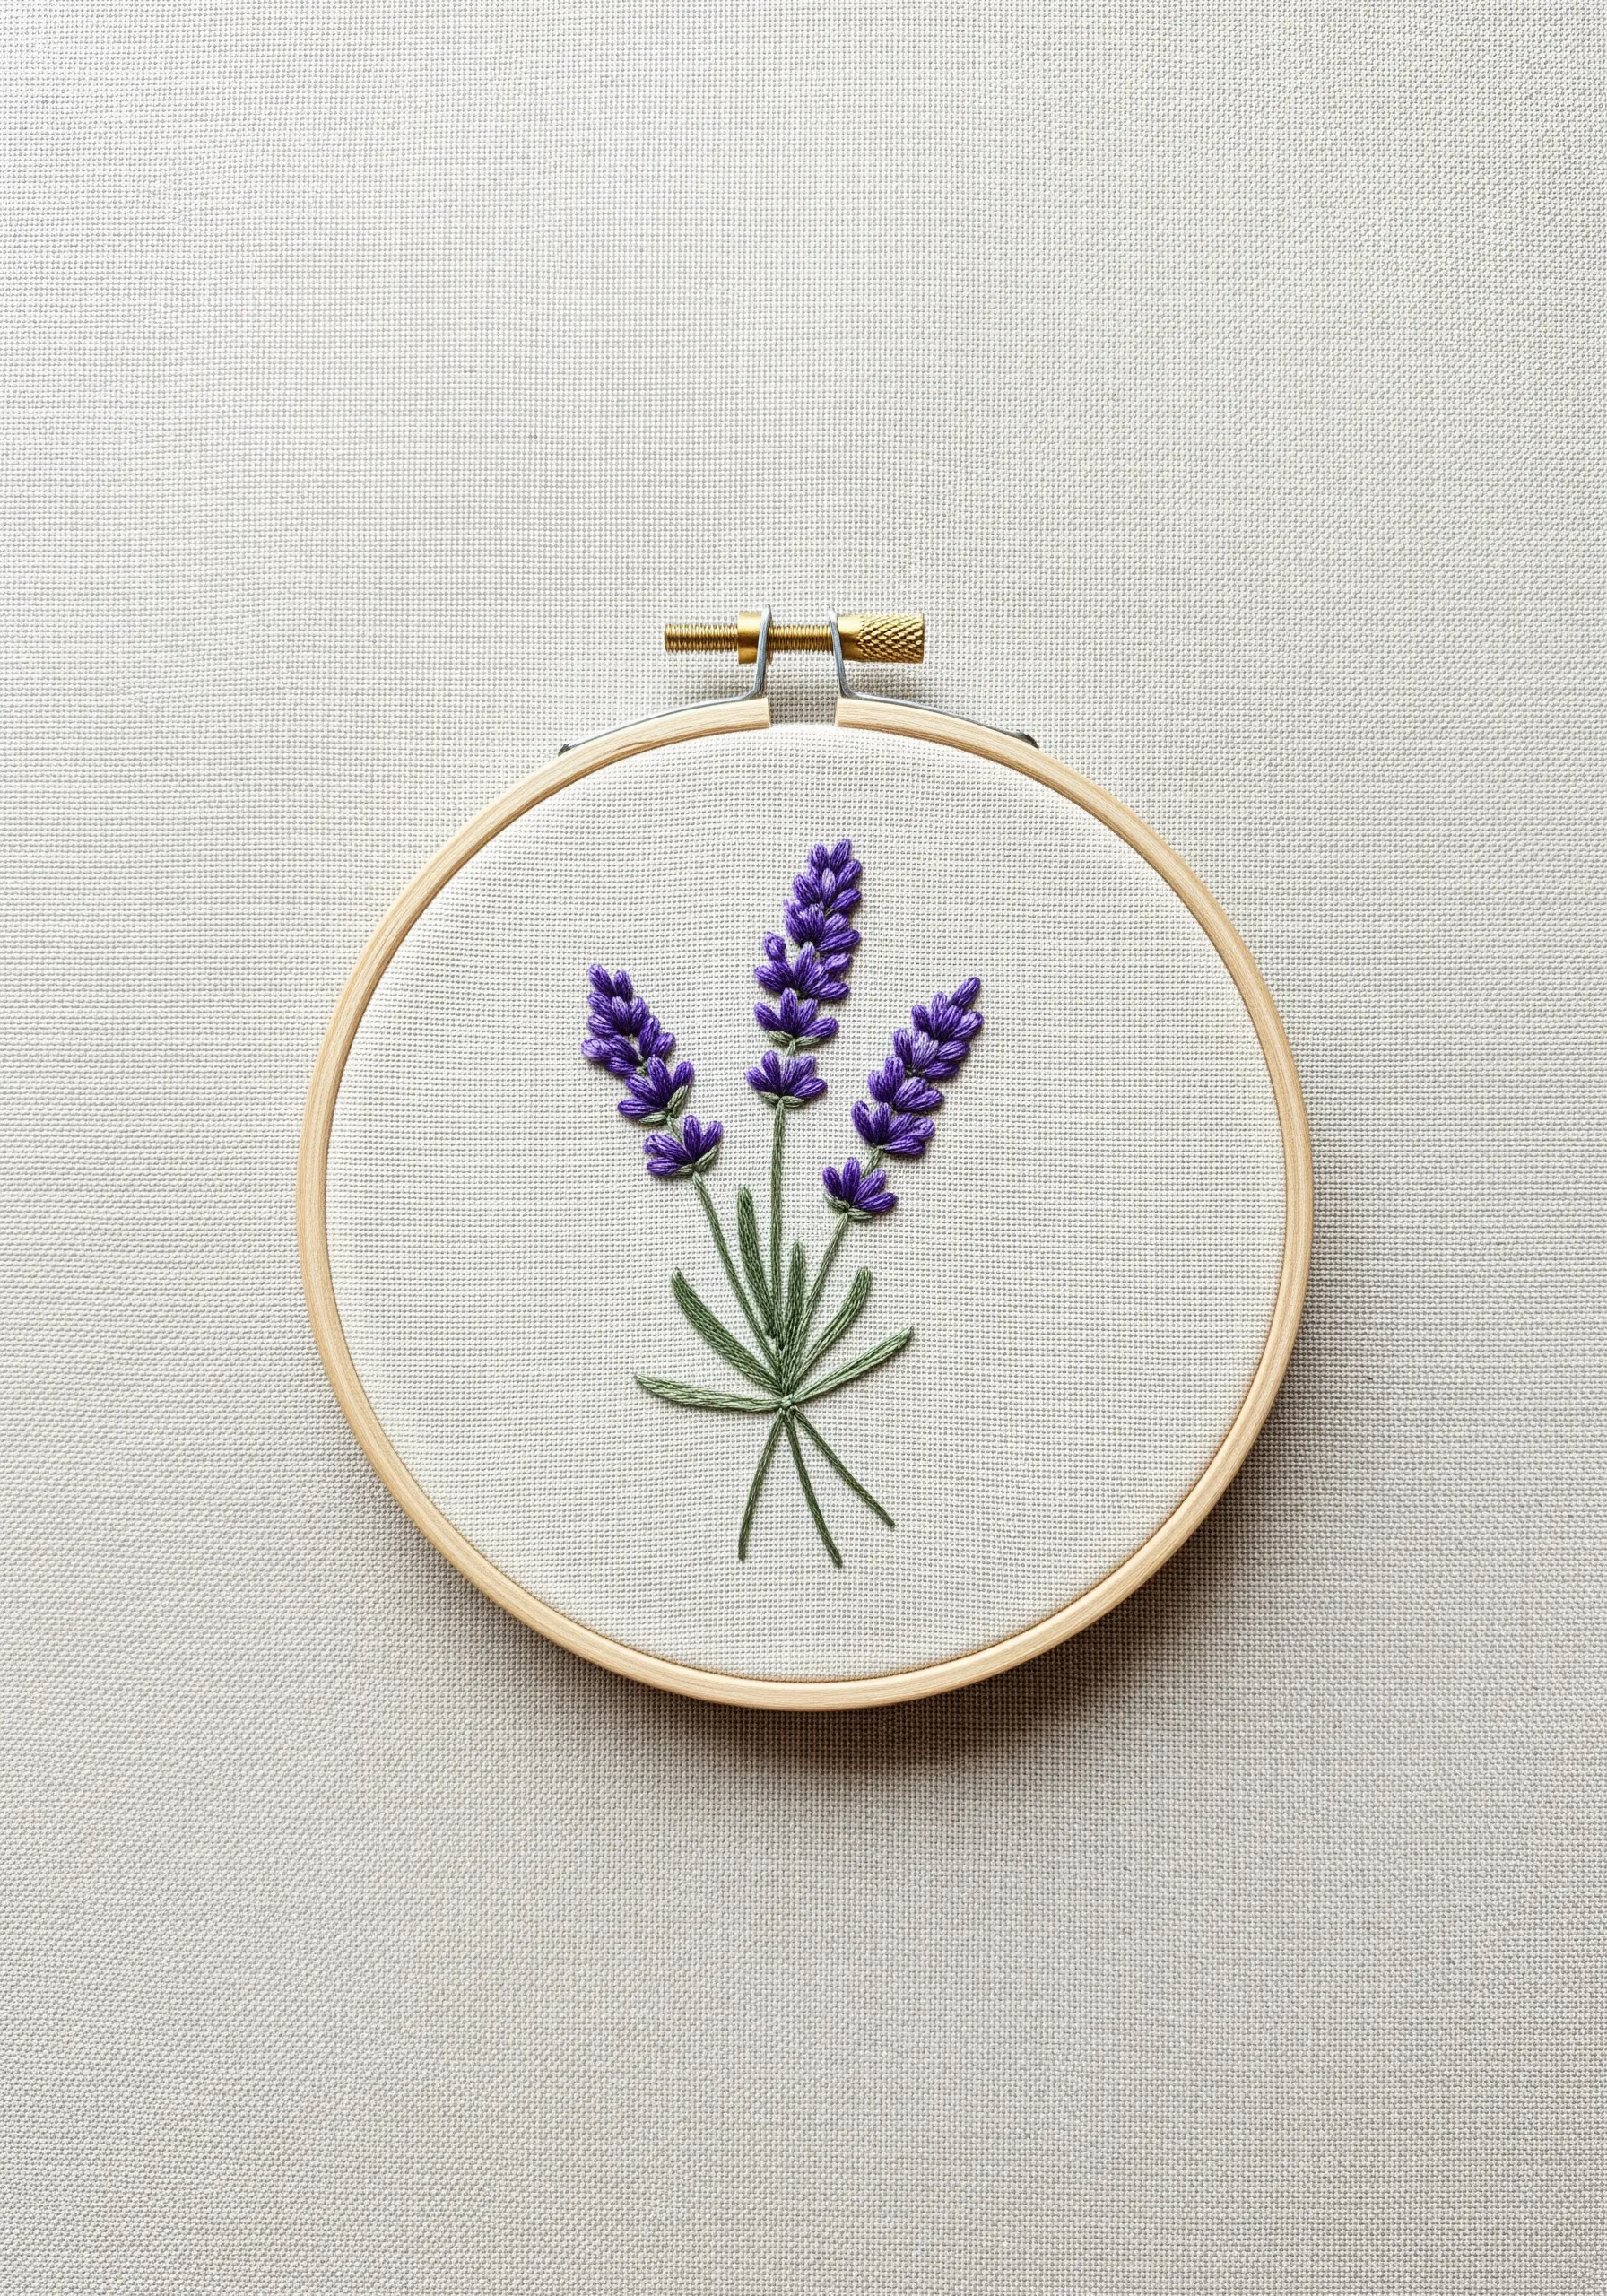
To give your lavender buds a realistic, clustered texture, use French knots instead of a flat satin stitch.
Wrap the thread around your needle just once for the smaller, tighter knots at the top of each flower, and twice for the fuller knots at the base.
This subtle variation in size creates dimension and mimics the way real lavender flowers grow.
For the stems, a simple stem stitch in a slightly darker green provides a grounding contrast to the textured purple blossoms.
2. Crisp Mountain Line Art
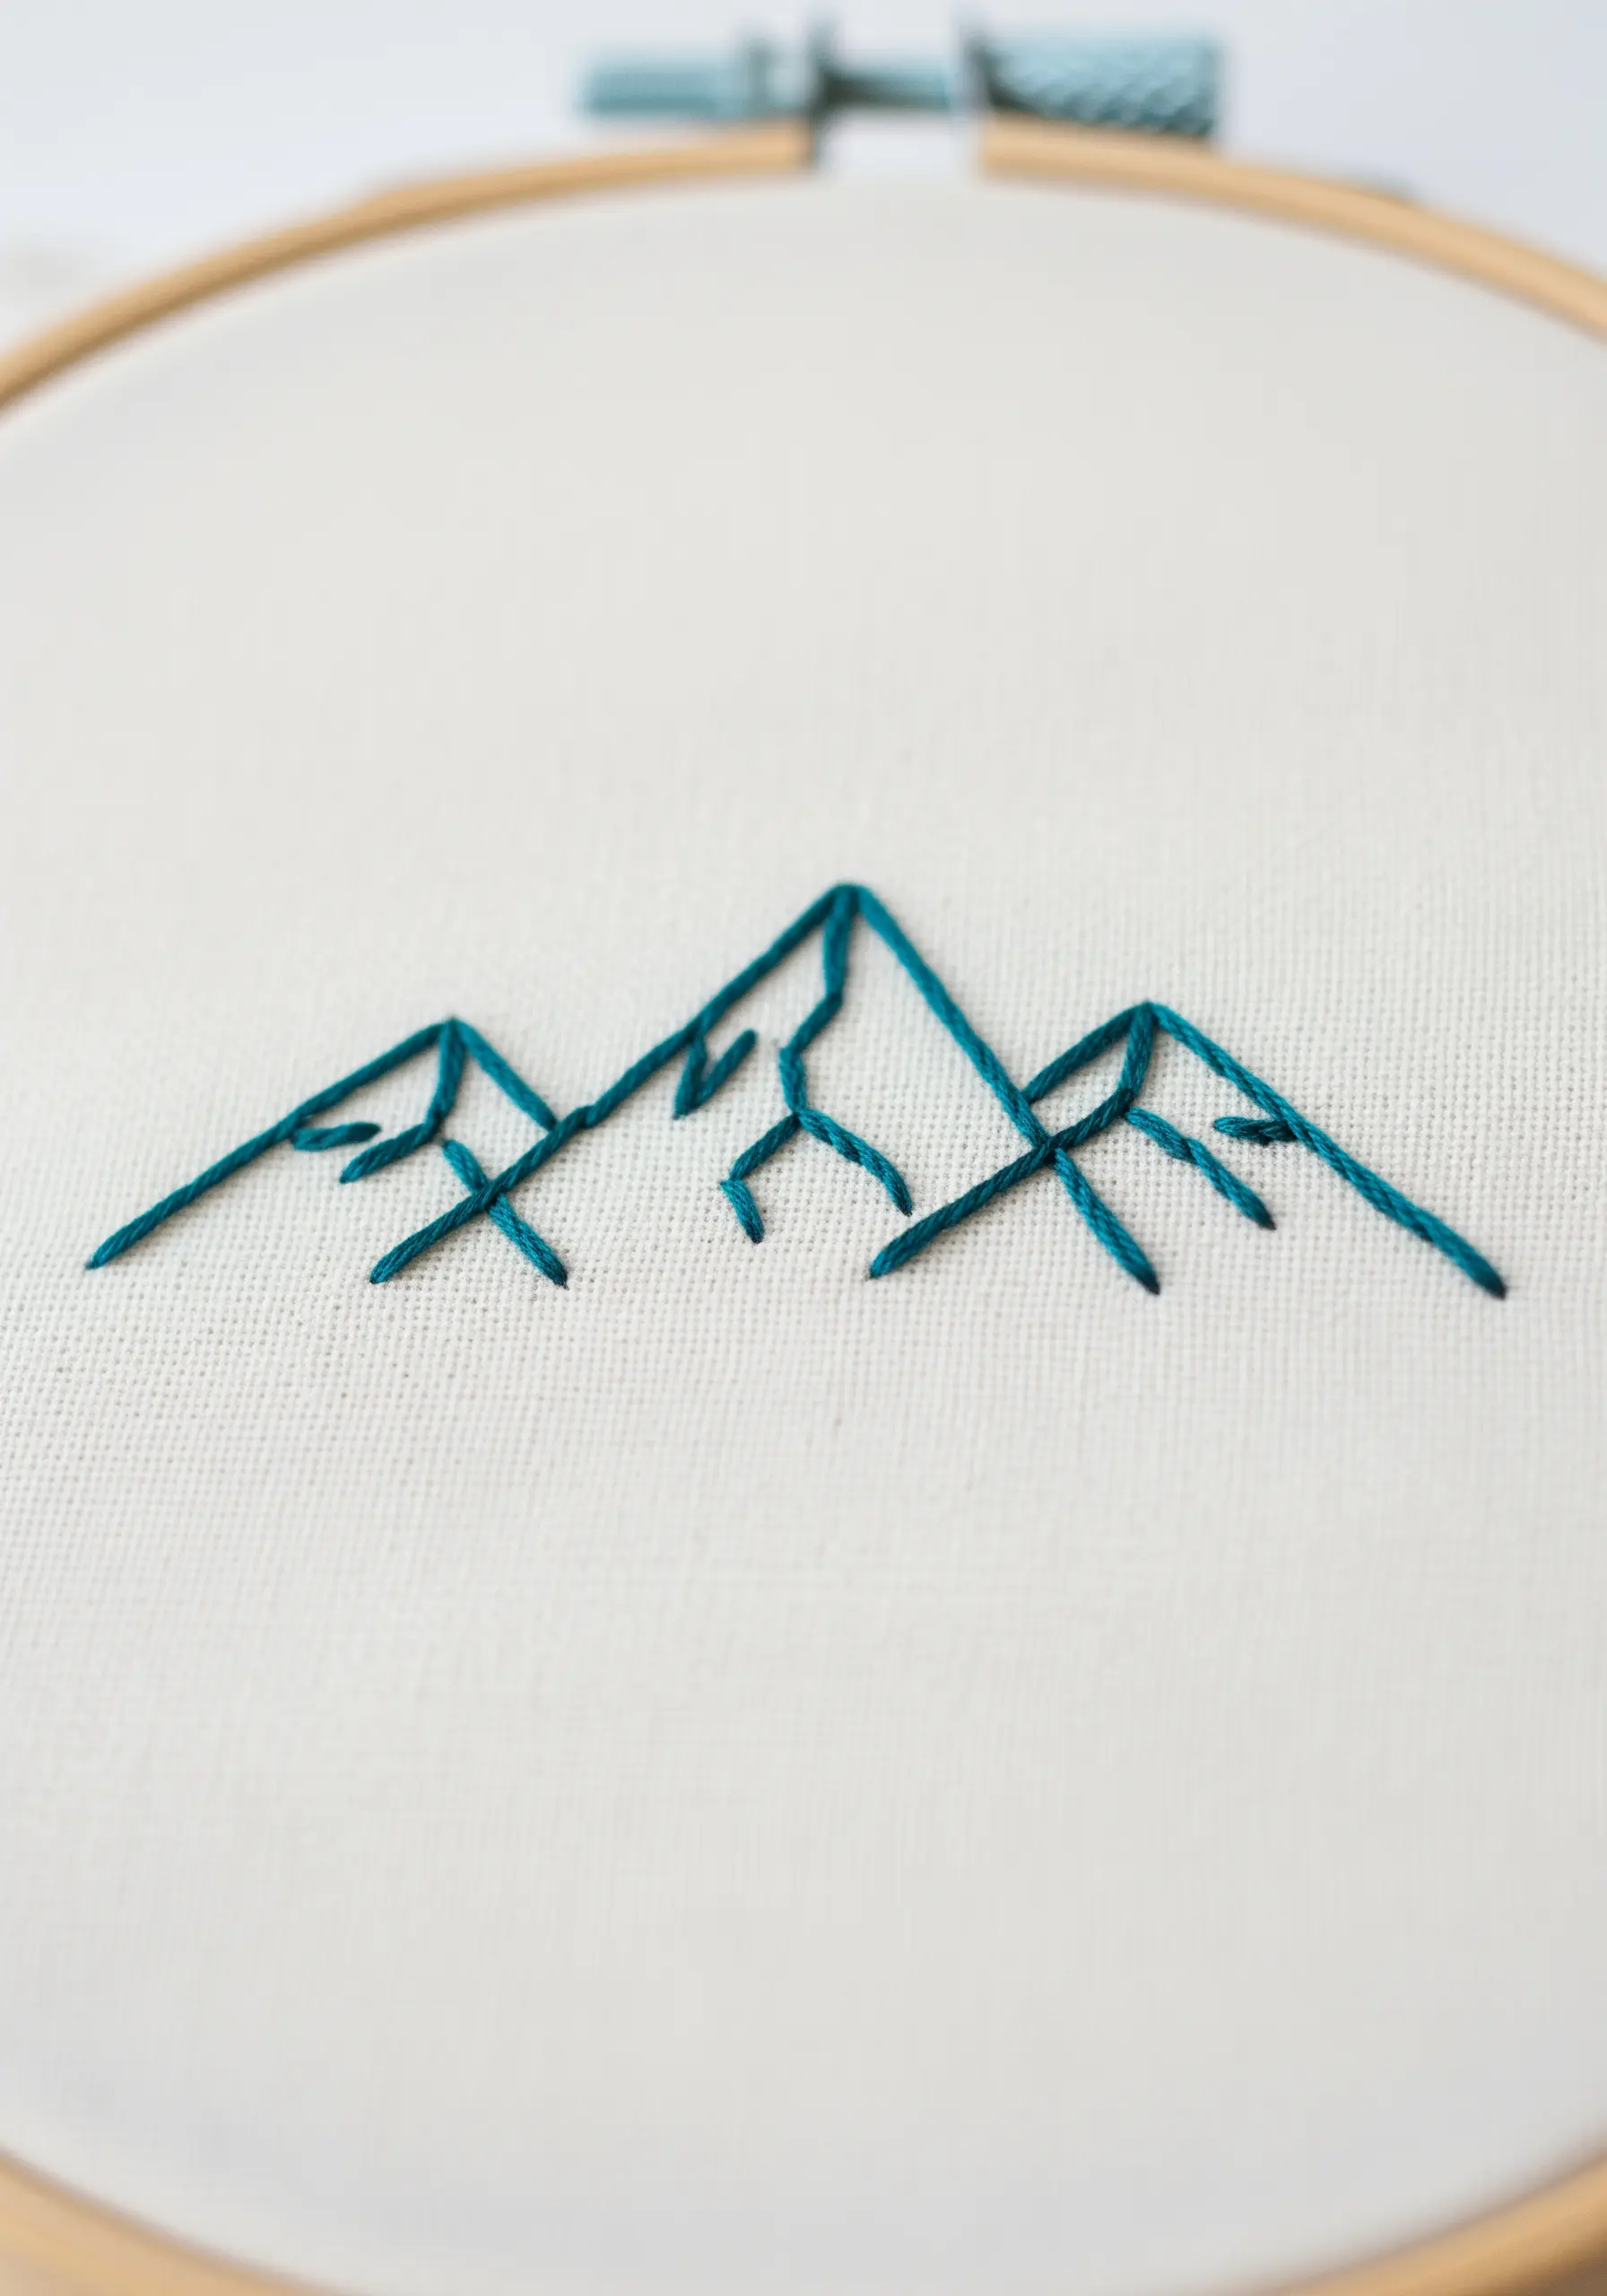
Achieve sharp, geometric lines in your mountainscapes by using a disciplined backstitch.
To create a perfect peak, ensure your final stitch ends precisely at the highest point, then begin the downward stitch from the very same hole.
This technical detail prevents rounded corners and keeps your design looking crisp and intentional.
Using just two strands of floss will maintain the delicate, modern feel of the artwork.
3. Organic Shapes on a Grid Canvas
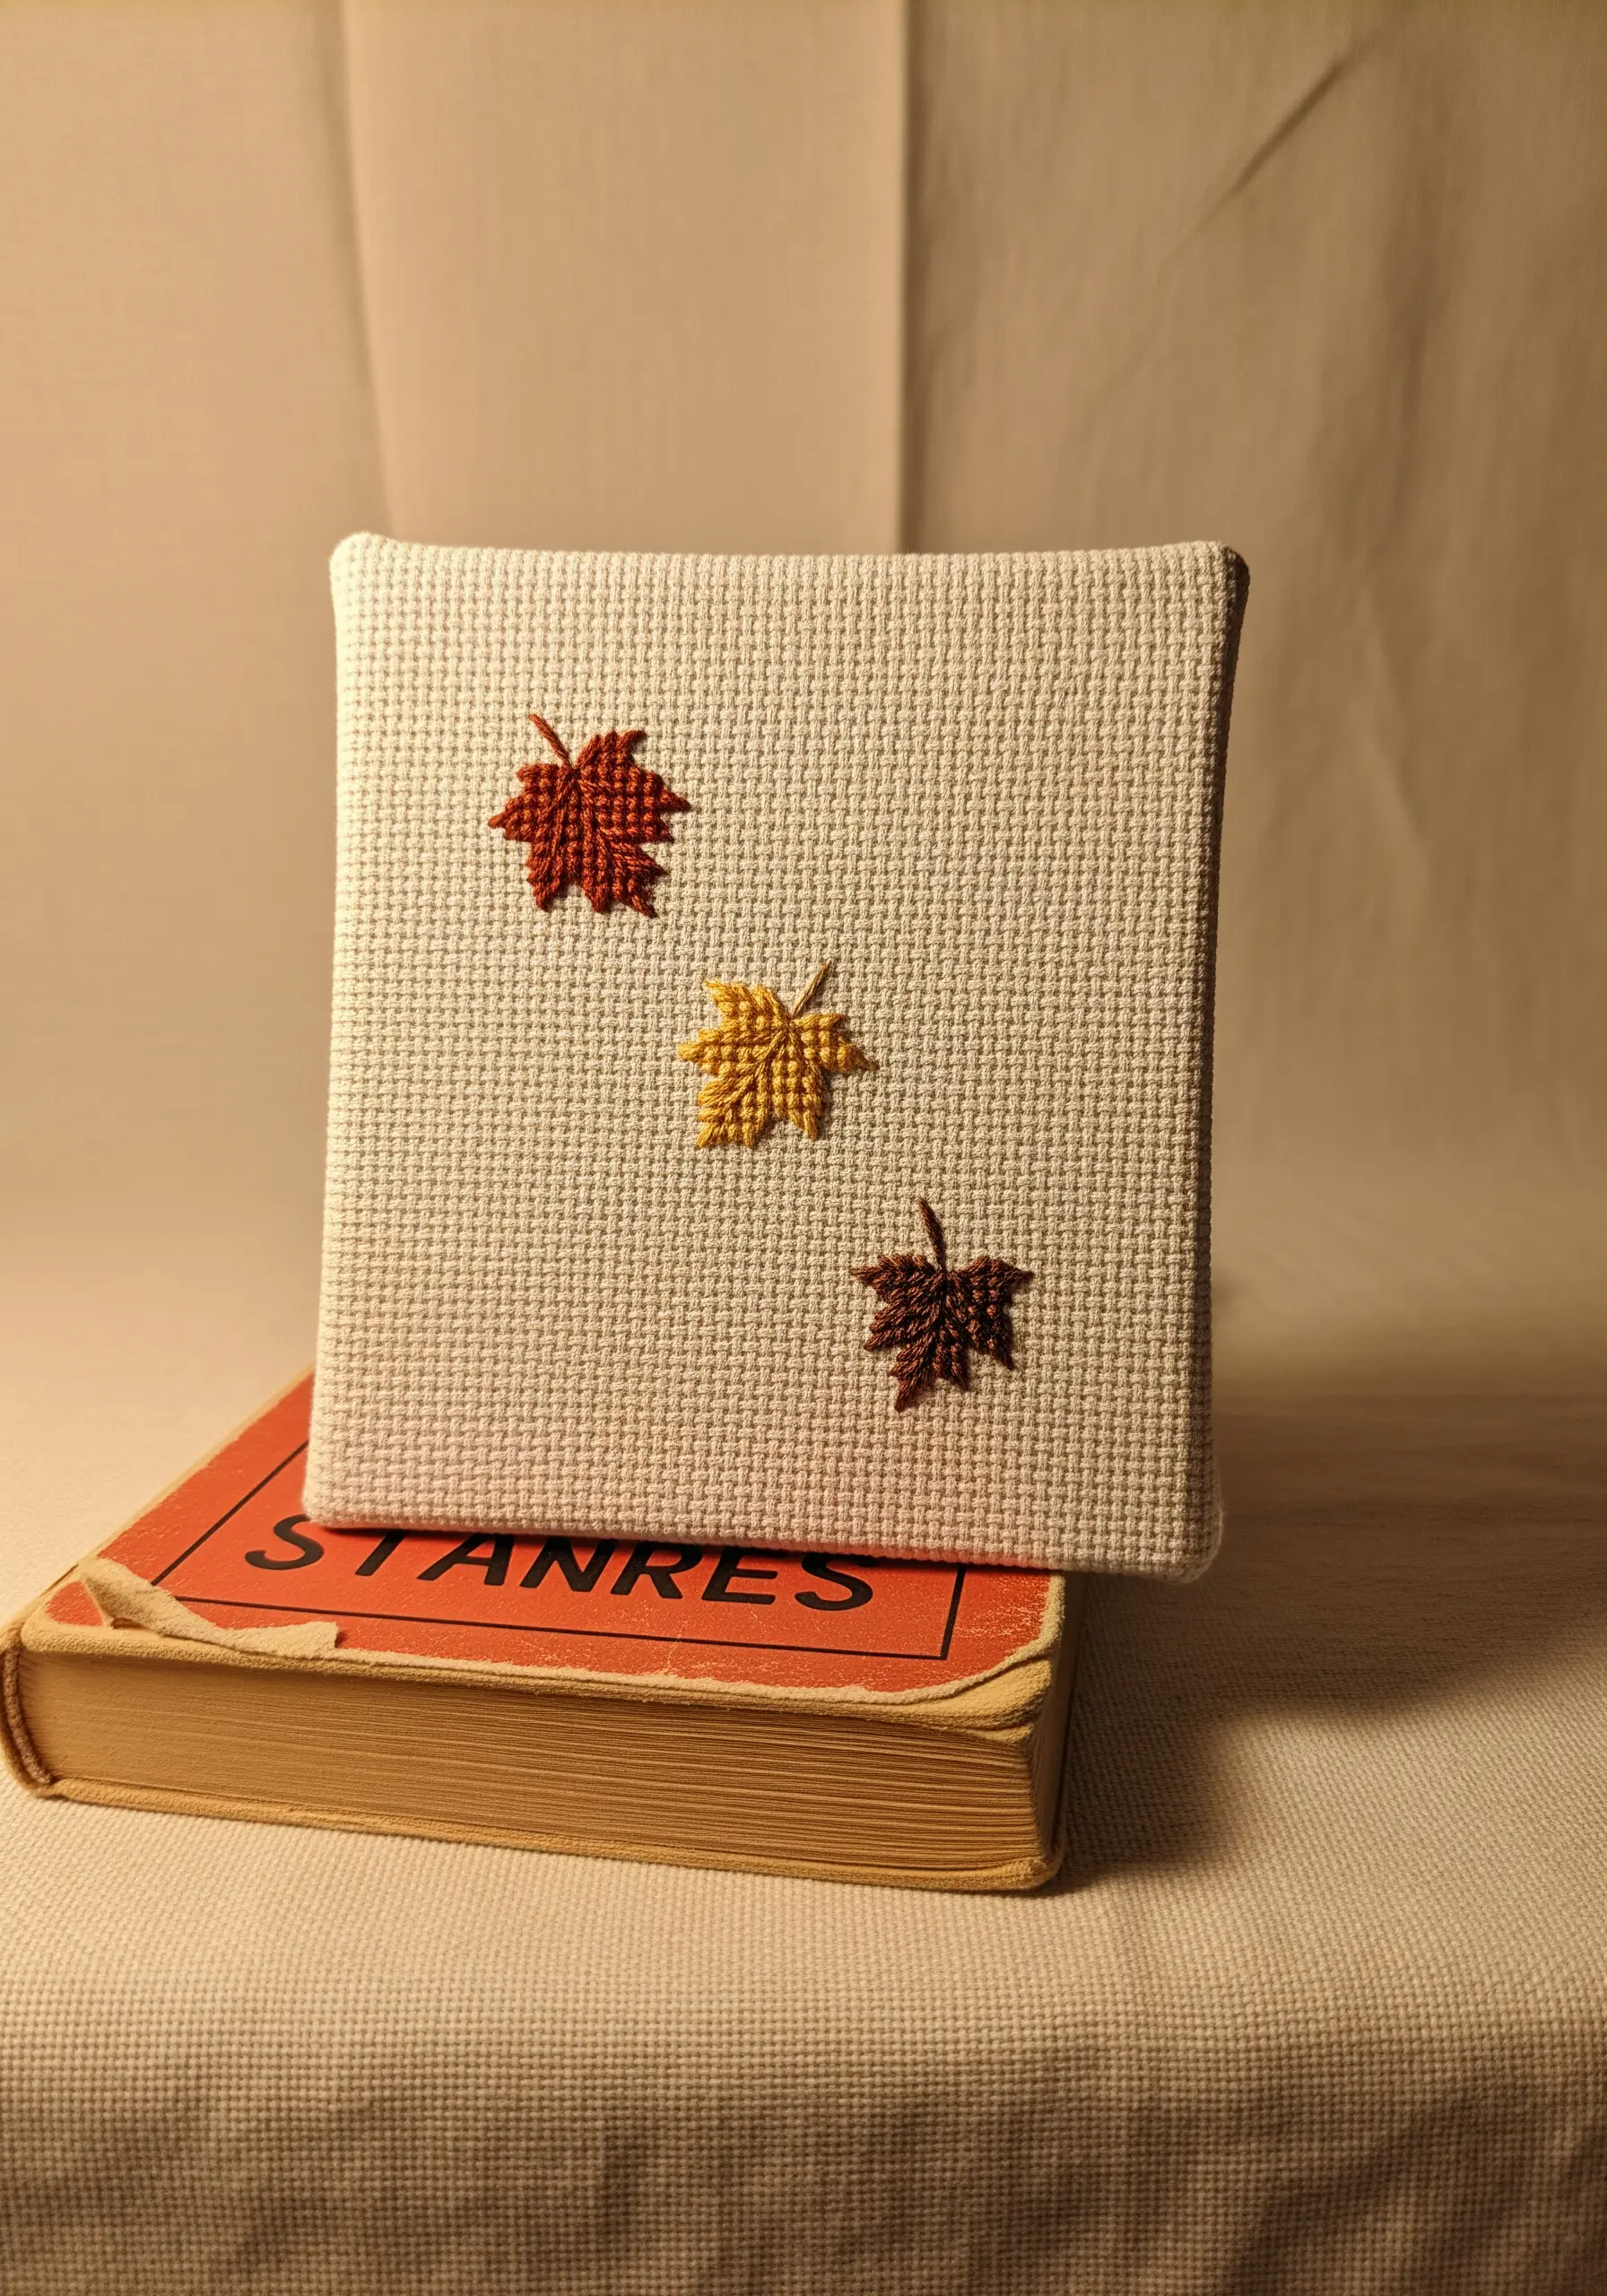
Don’t limit Aida cloth to cross-stitch; use its built-in grid to guide your freehand satin stitches for perfectly spaced fills.
To create a soft, autumnal blend within each leaf, use two similar shades of floss in your needle at once.
This simple technique adds subtle color variation without the complexity of thread painting.
Mounting your finished work on a small canvas board creates a polished piece of art that is ready for immediate display.
4. Textured Moon on a Night Sky
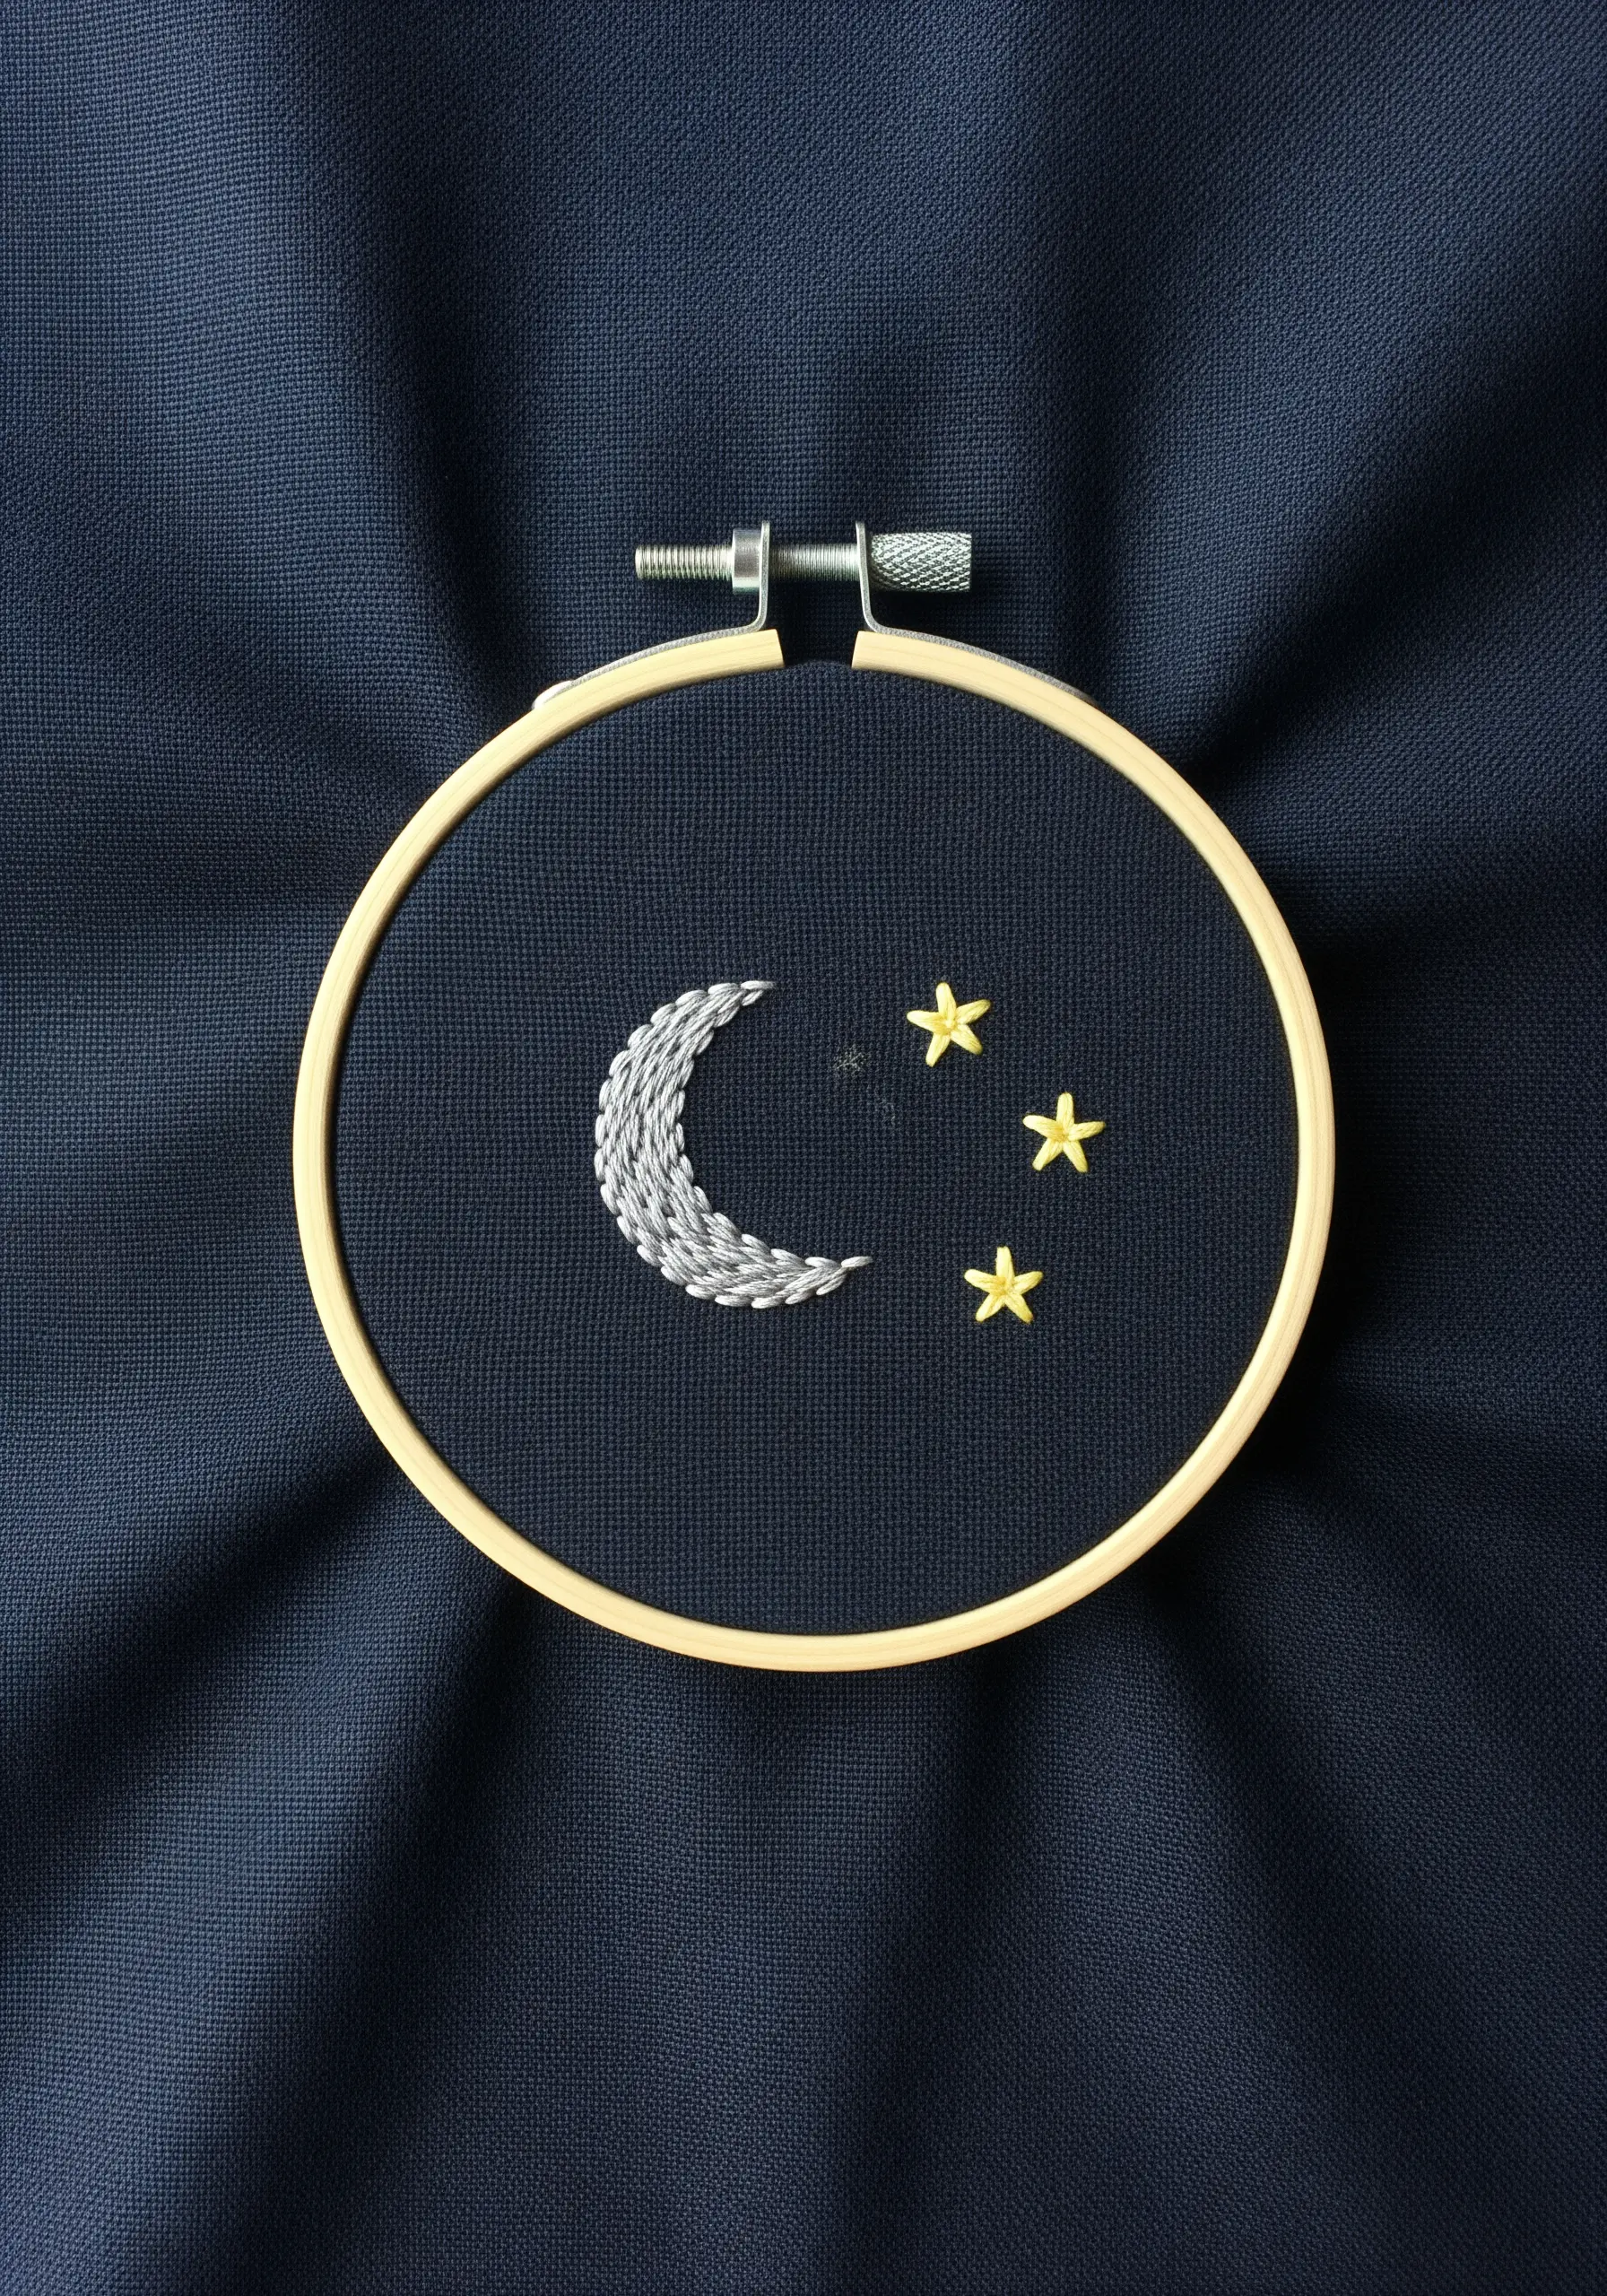
Create a beautifully textured crescent moon by using a laid stitch or couching technique.
Lay down strands of a lighter gray thread across the moon’s shape, then use a single, darker strand to make small tacking stitches over them.
This method creates a raised, woven effect that stands out dramatically against dark fabric.
Pair it with simple satin-stitched stars in a contrasting bright yellow for a balanced and striking composition.
5. The Meditative Chain Stitch Spiral
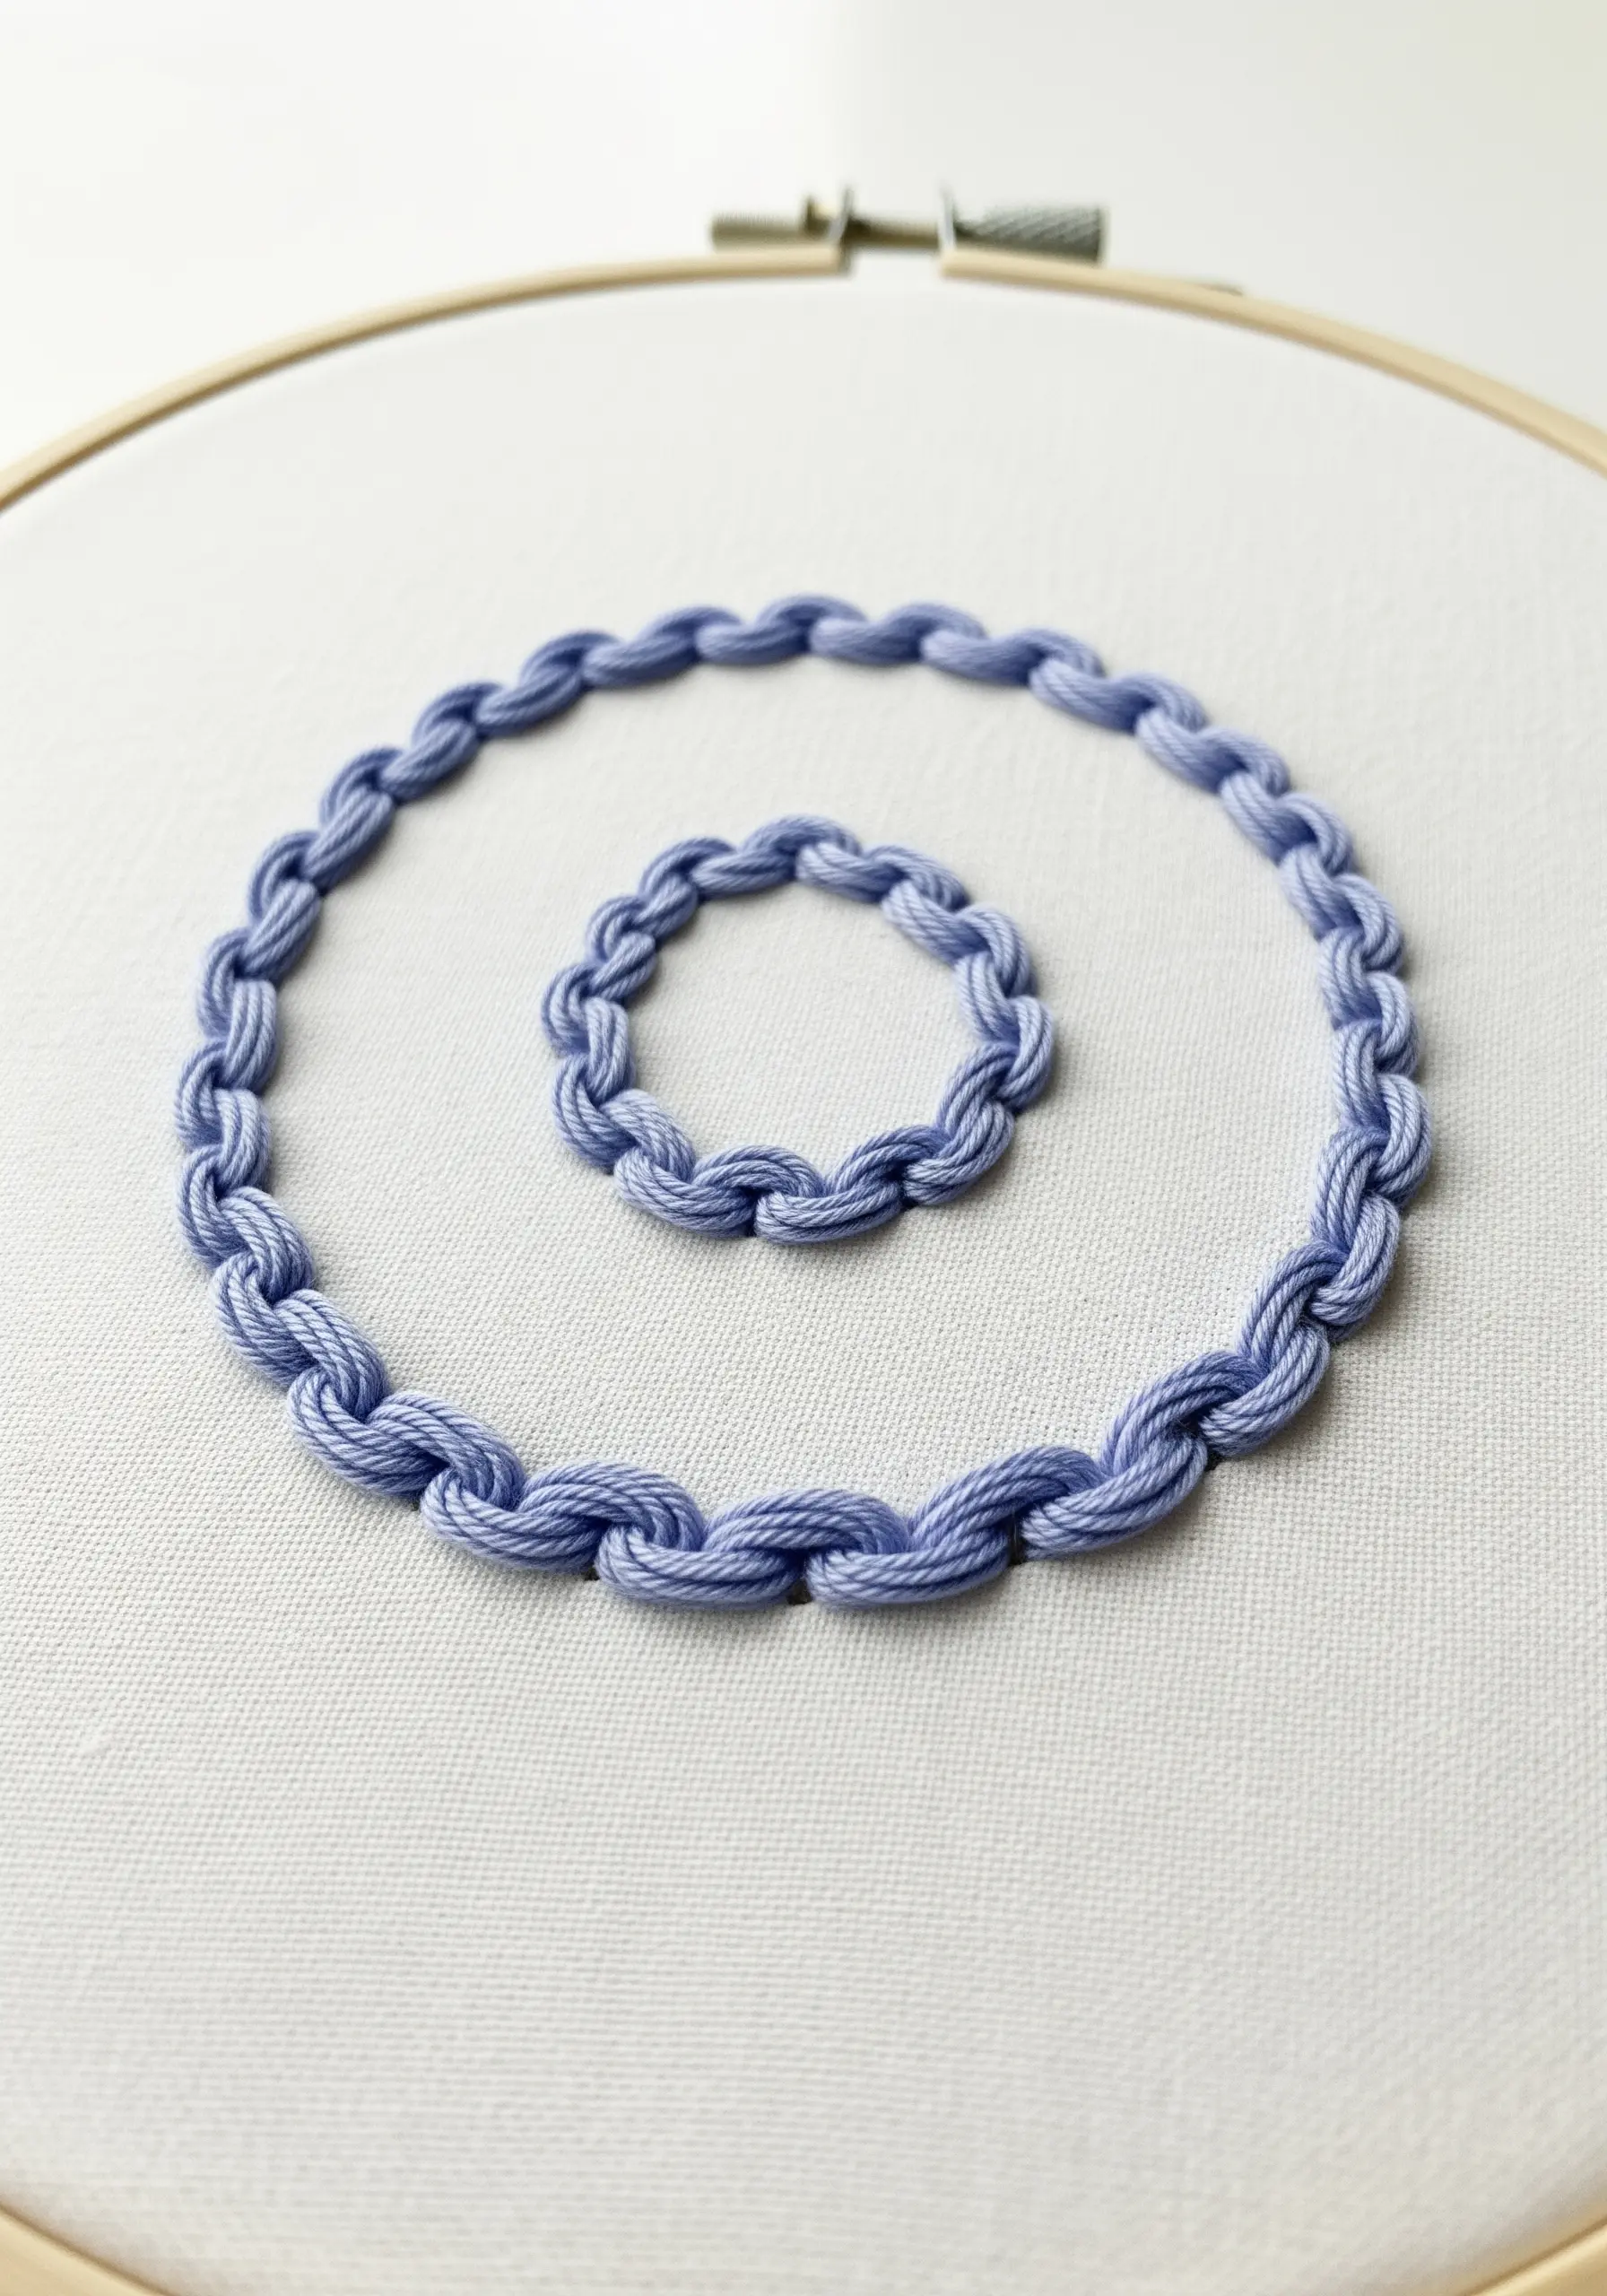
The chain stitch is perfect for creating continuous, textured lines like this meditative spiral.
To achieve a perfectly smooth curve, your focus should be on keeping each individual “chain link” the exact same length.
Lightly draw your spiral guide onto the fabric with a water-soluble marker before you begin to ensure a flawless final shape.
Using all six strands of floss gives the finished line a bold, rope-like quality that adds tactile interest.
6. Interlocking Satin Stitch Rings
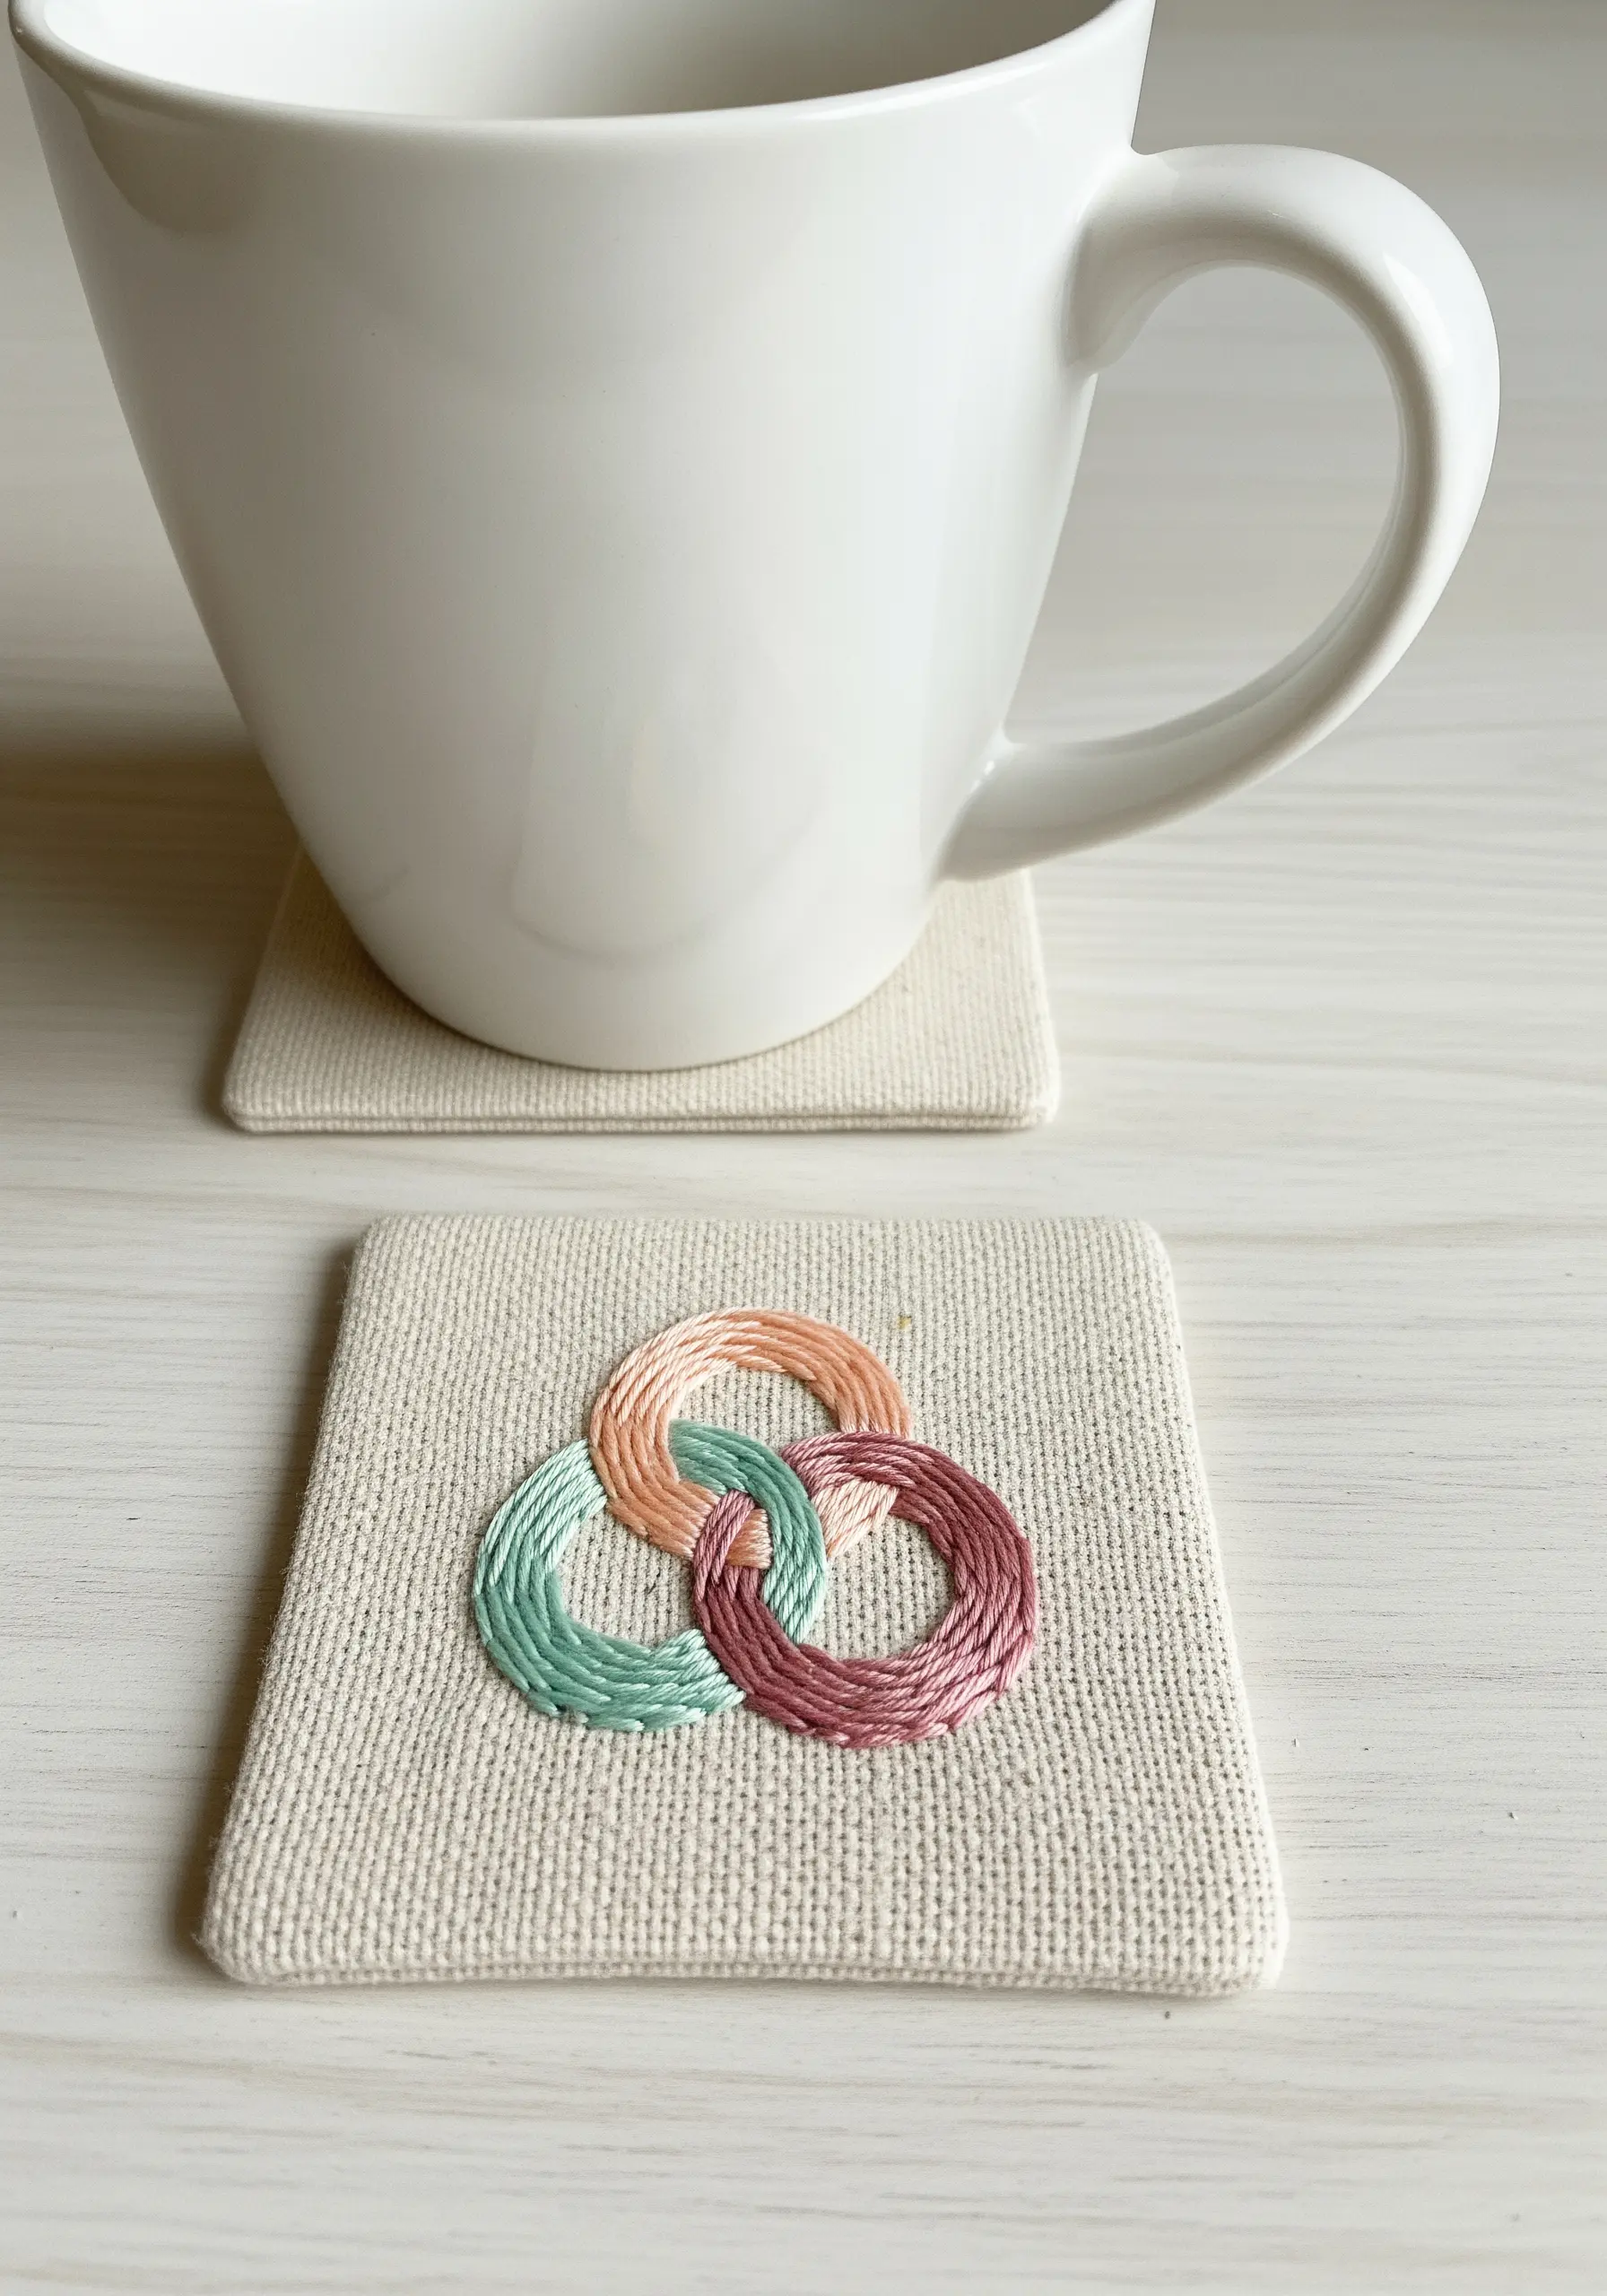
To create the convincing illusion of Interlocking Satin Stitch Rings, you must stitch the elements in layers.
Begin by stitching the complete bottom-most ring first.
For the other rings, stitch only the sections that appear to be “underneath,” then complete the design by stitching the top sections last.
This careful layering allows your final satin stitches to lay smoothly over the others, creating a clean 3D effect without complex outlining.
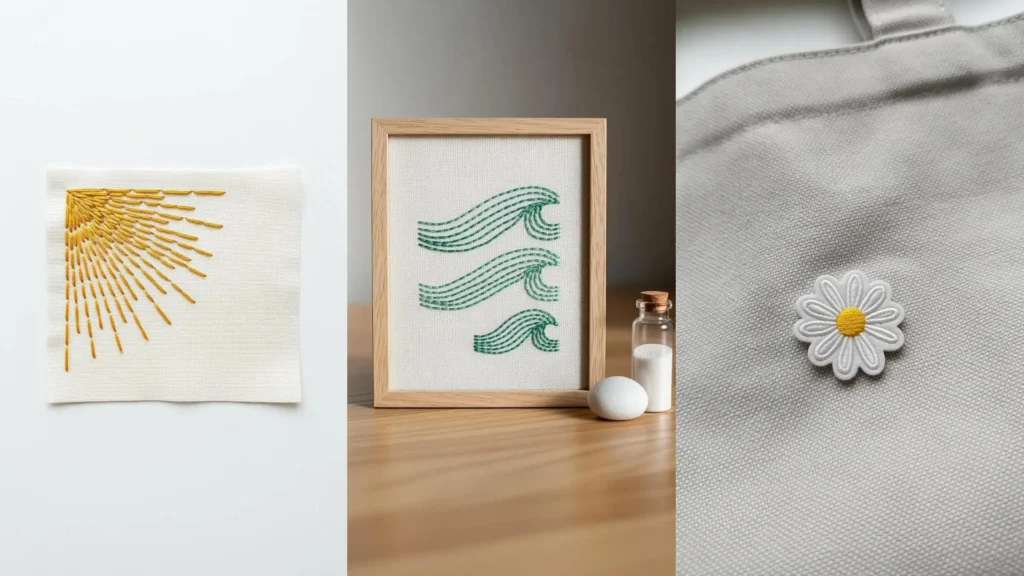
7. A Radiant Sunburst Corner
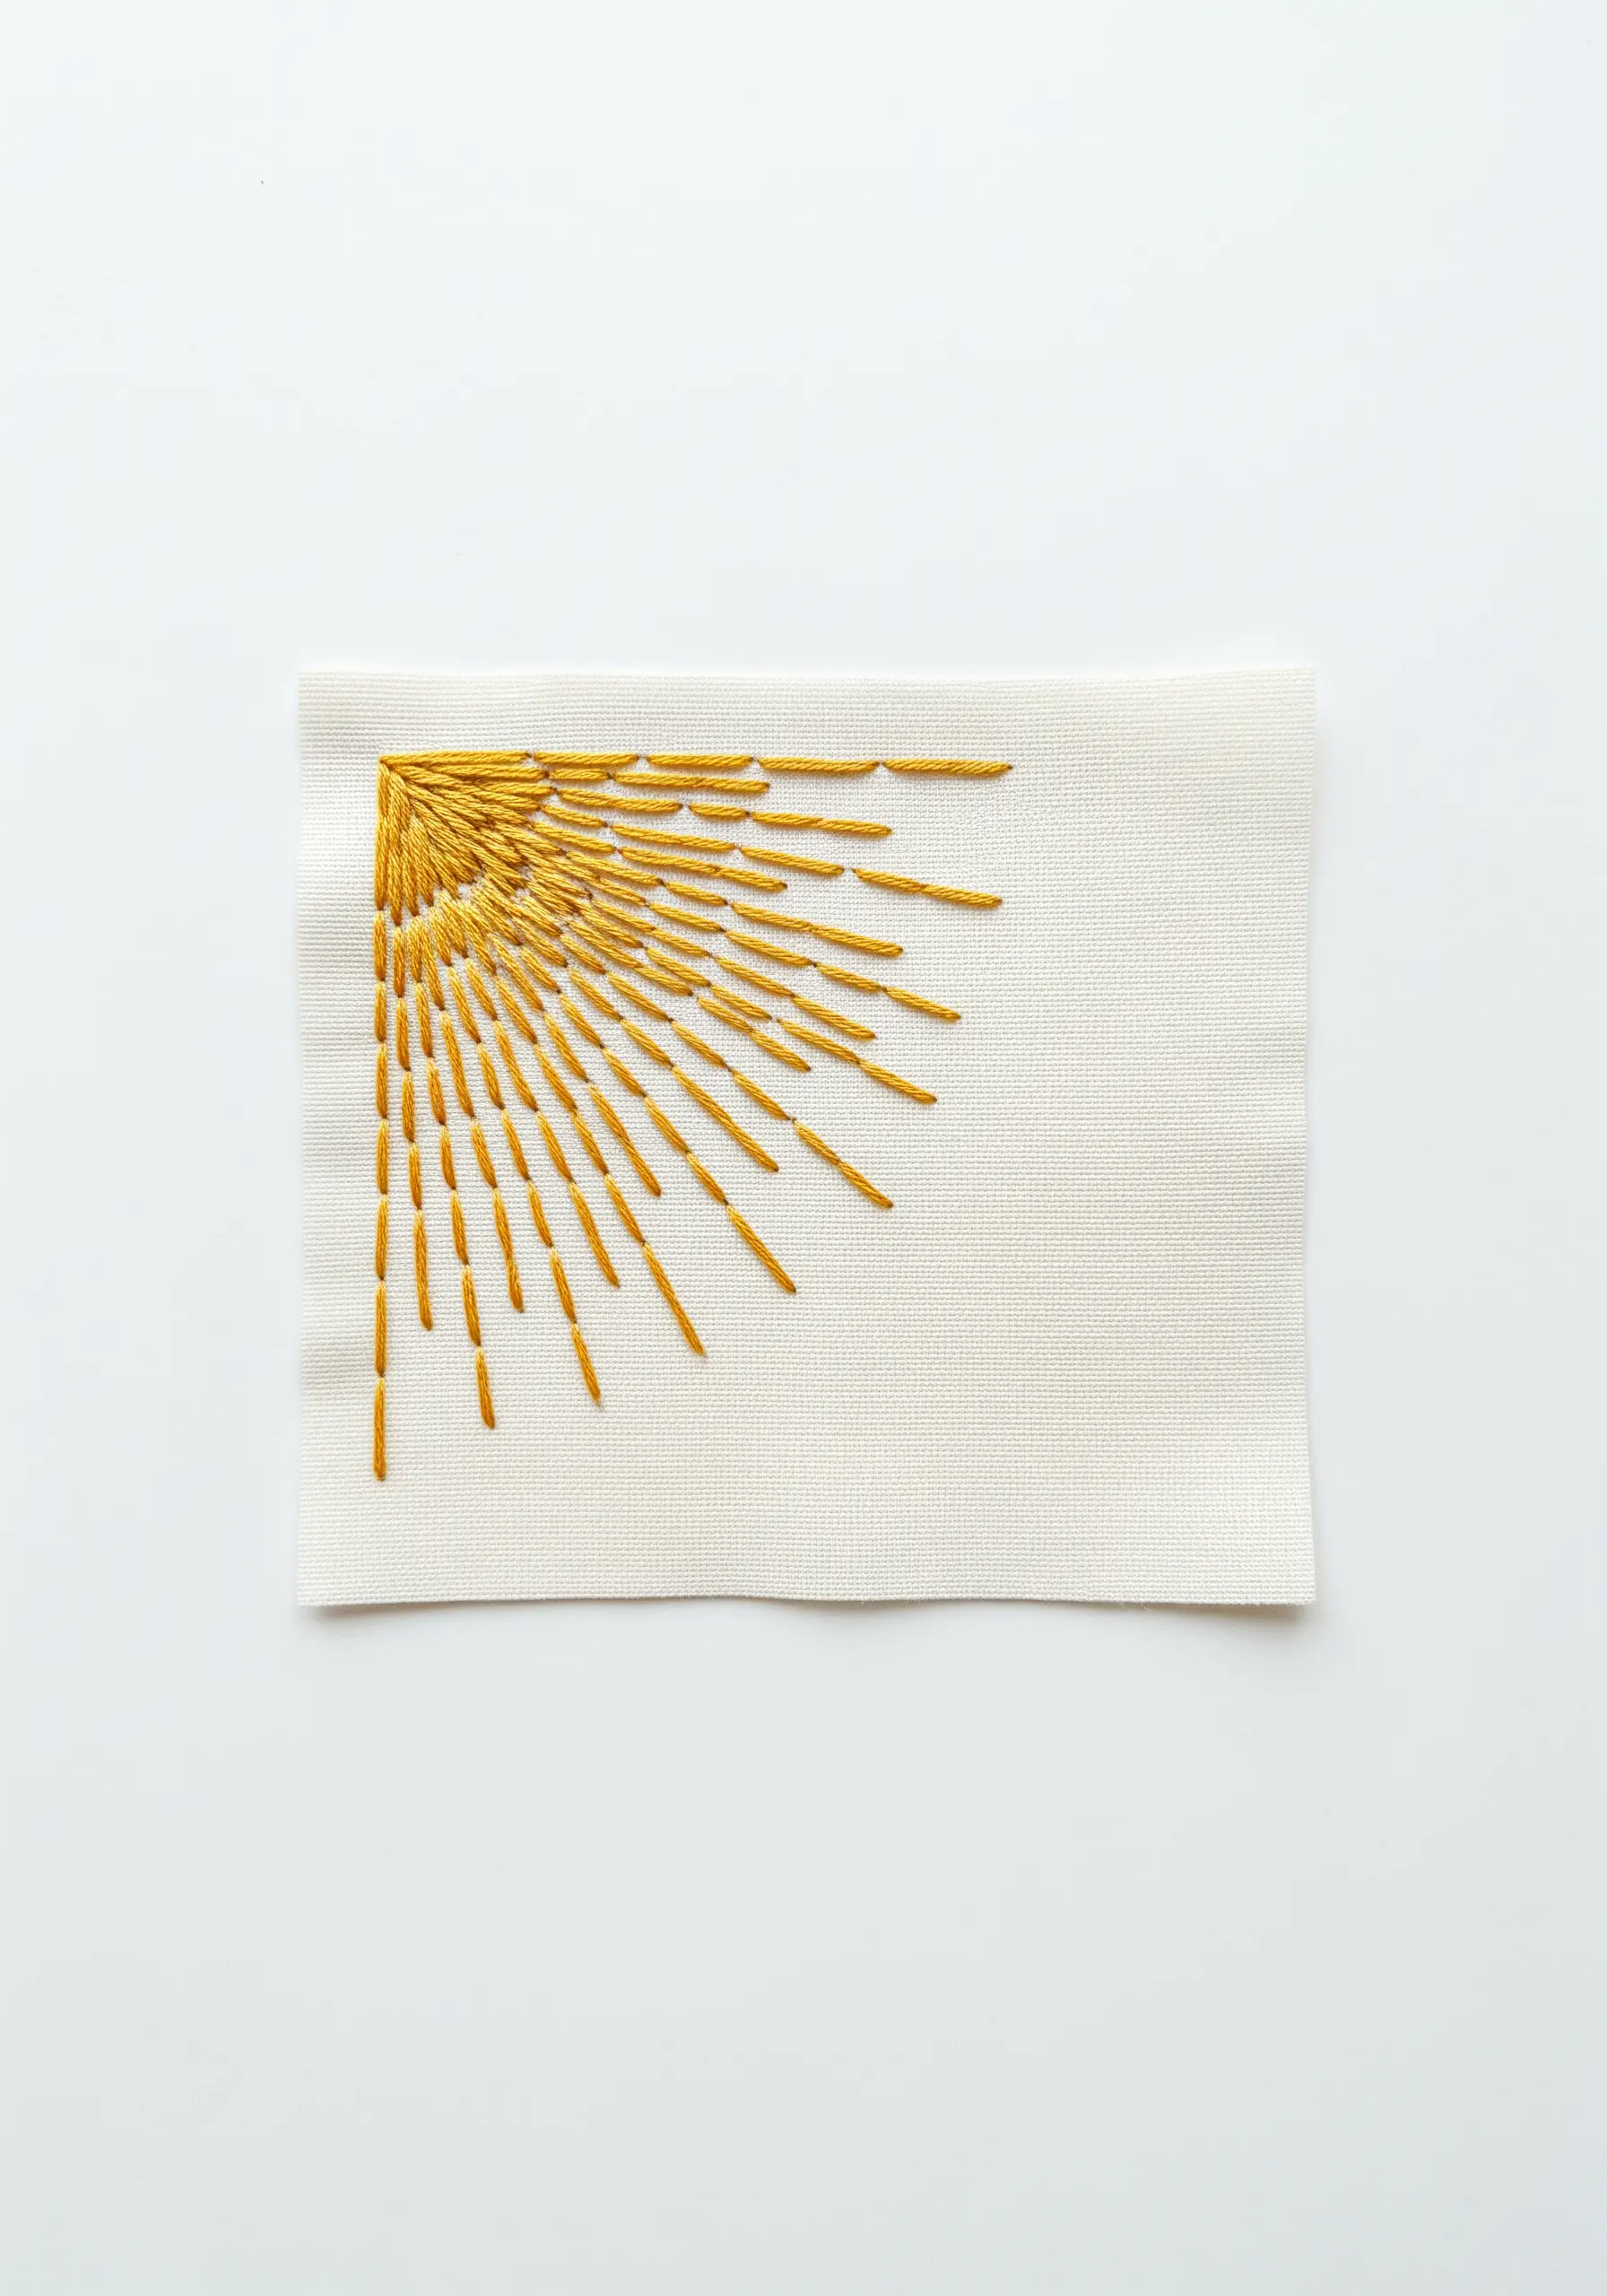
This energetic sunburst corner is built entirely from simple straight stitches of varying lengths.
Create density and a strong focal point by clustering your shortest stitches tightly in the corner.
As you move outward, gradually increase the length of each stitch and the space between them to create the powerful effect of radiating light.
Using a variegated or single-color metallic thread can add another layer of dynamic visual interest to this simple design.
8. Textured Rainbow Arcs
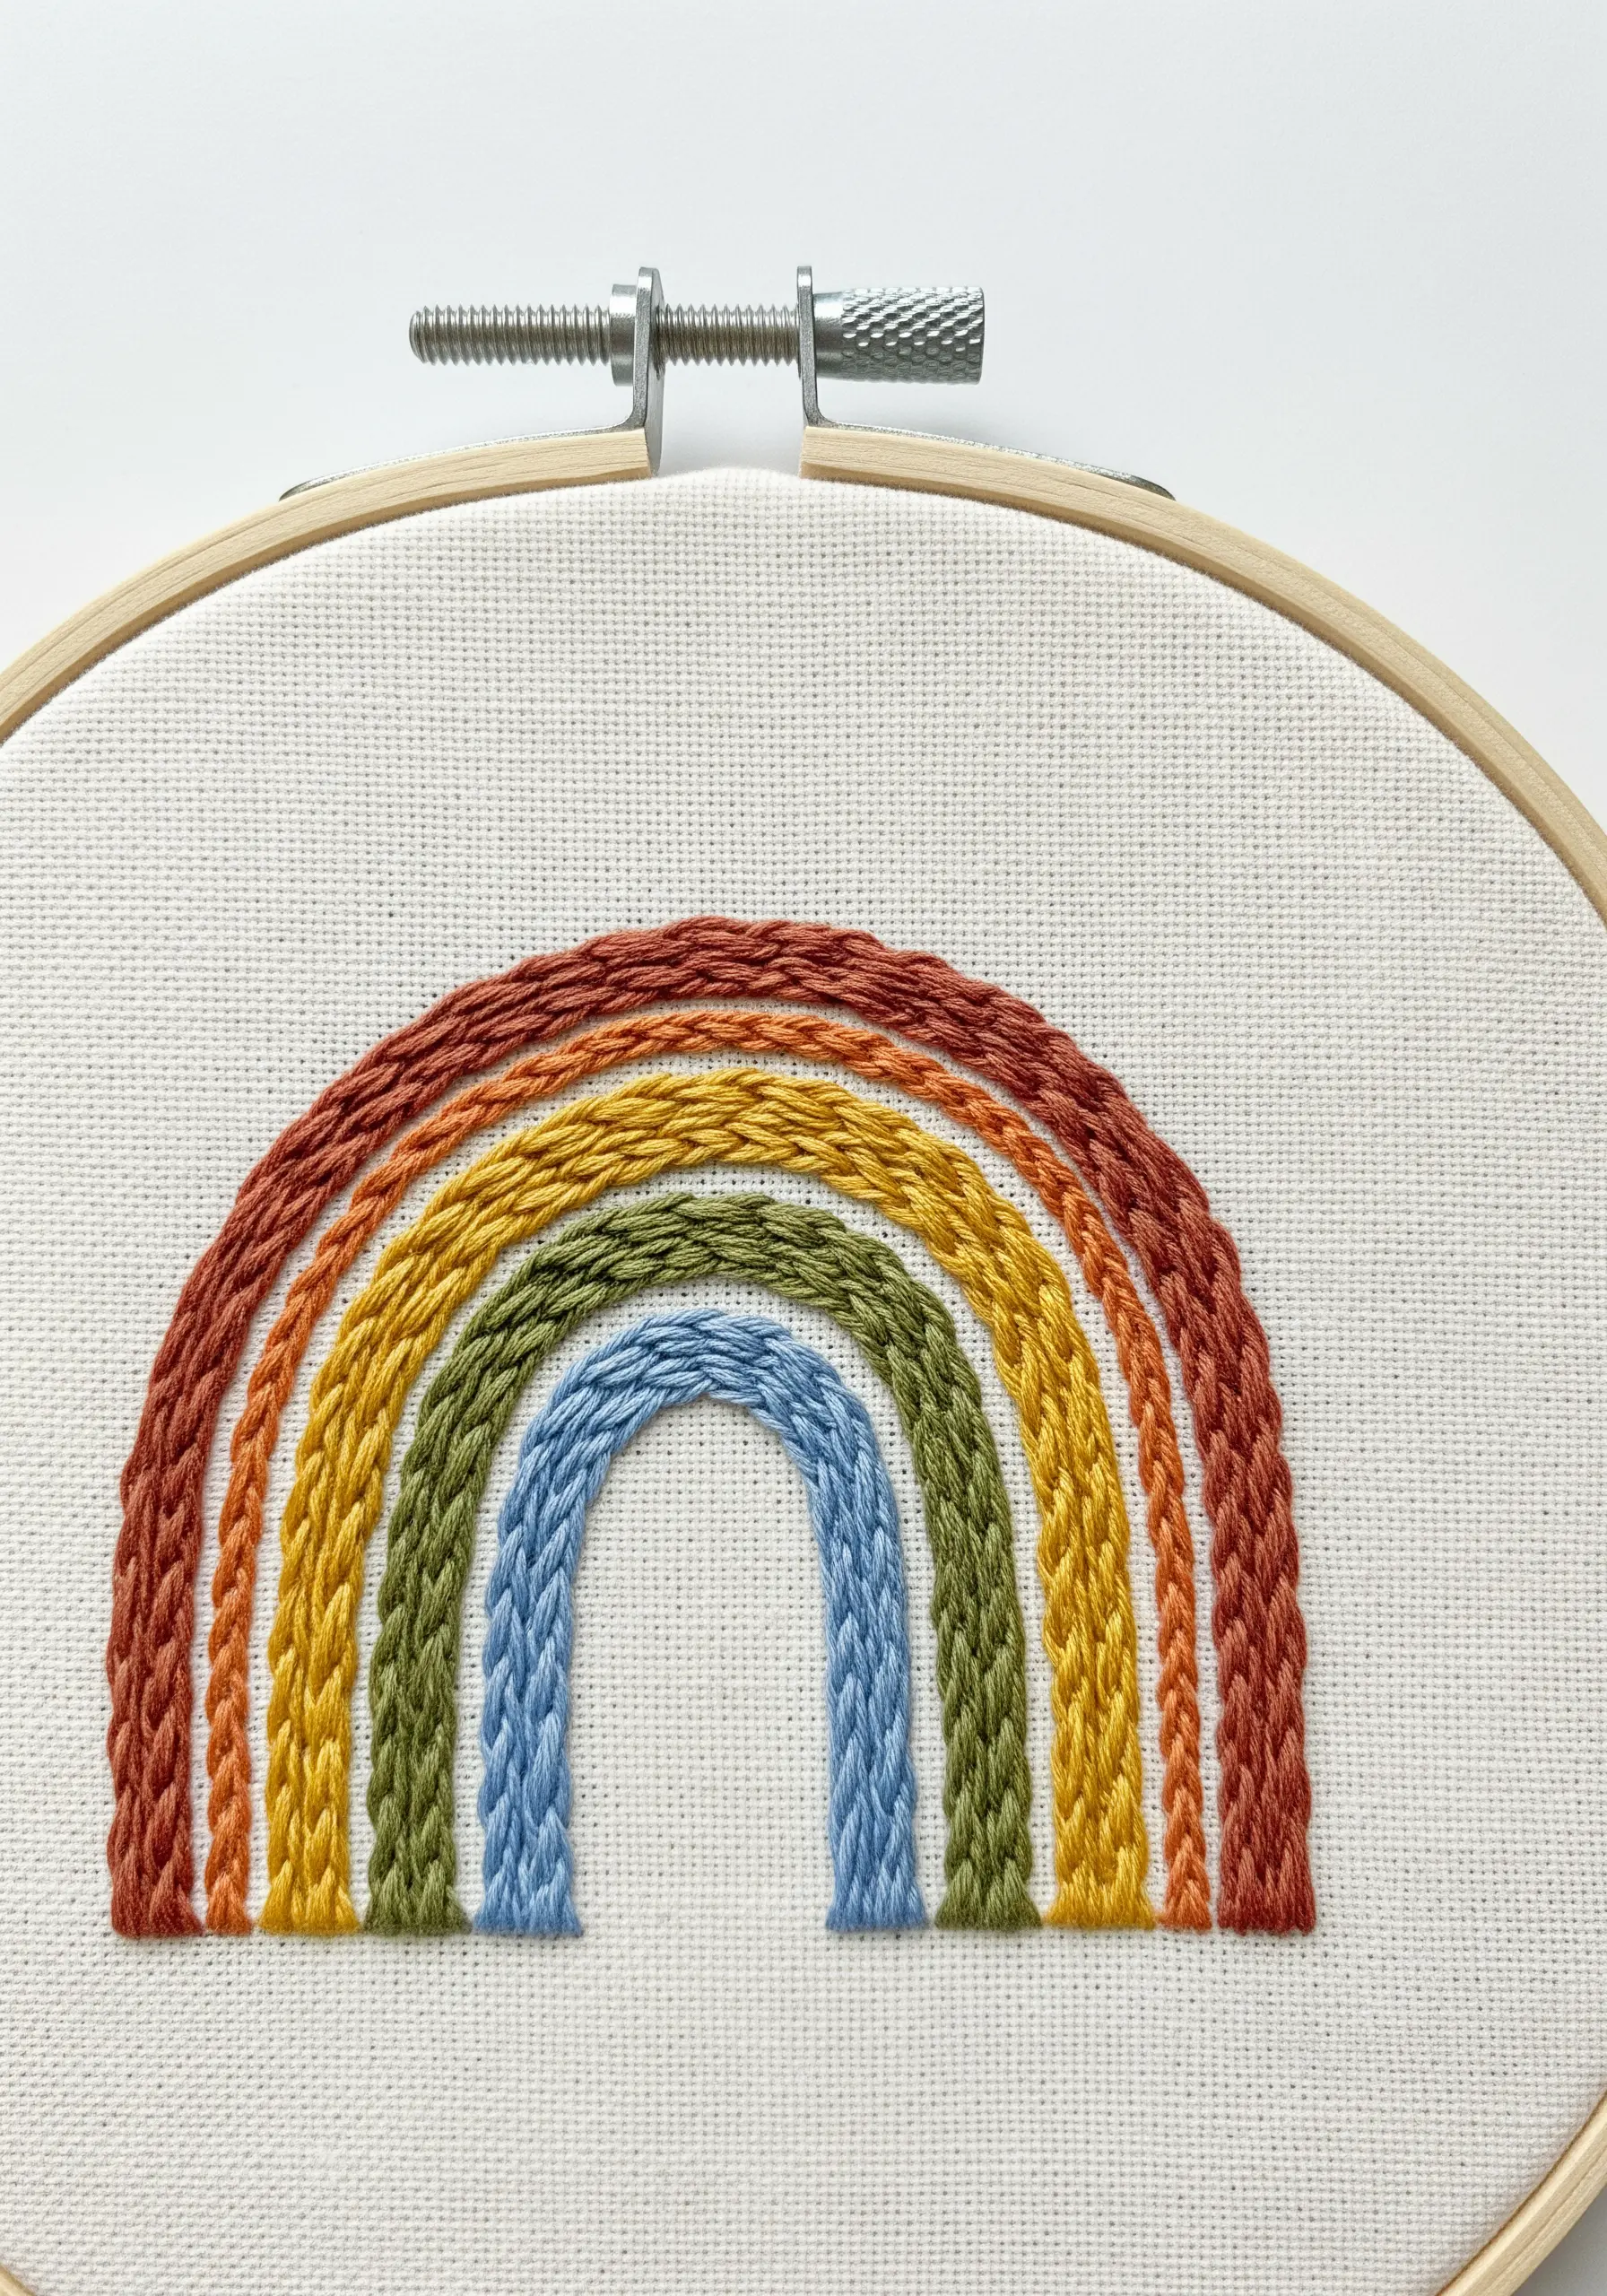
Instead of a flat satin stitch, fill your rainbow arcs with a chunky chain stitch for a braided, tactile finish.
Use all six strands of floss to maximize the texture and create a bold, graphic statement.
To keep your arcs perfectly parallel and evenly spaced, draw clear guidelines on your fabric with a removable marker before you start stitching.
This stitch is not only visually interesting but also wonderfully rhythmic and calming to execute.
9. Crafting a Flawless Floral Patch
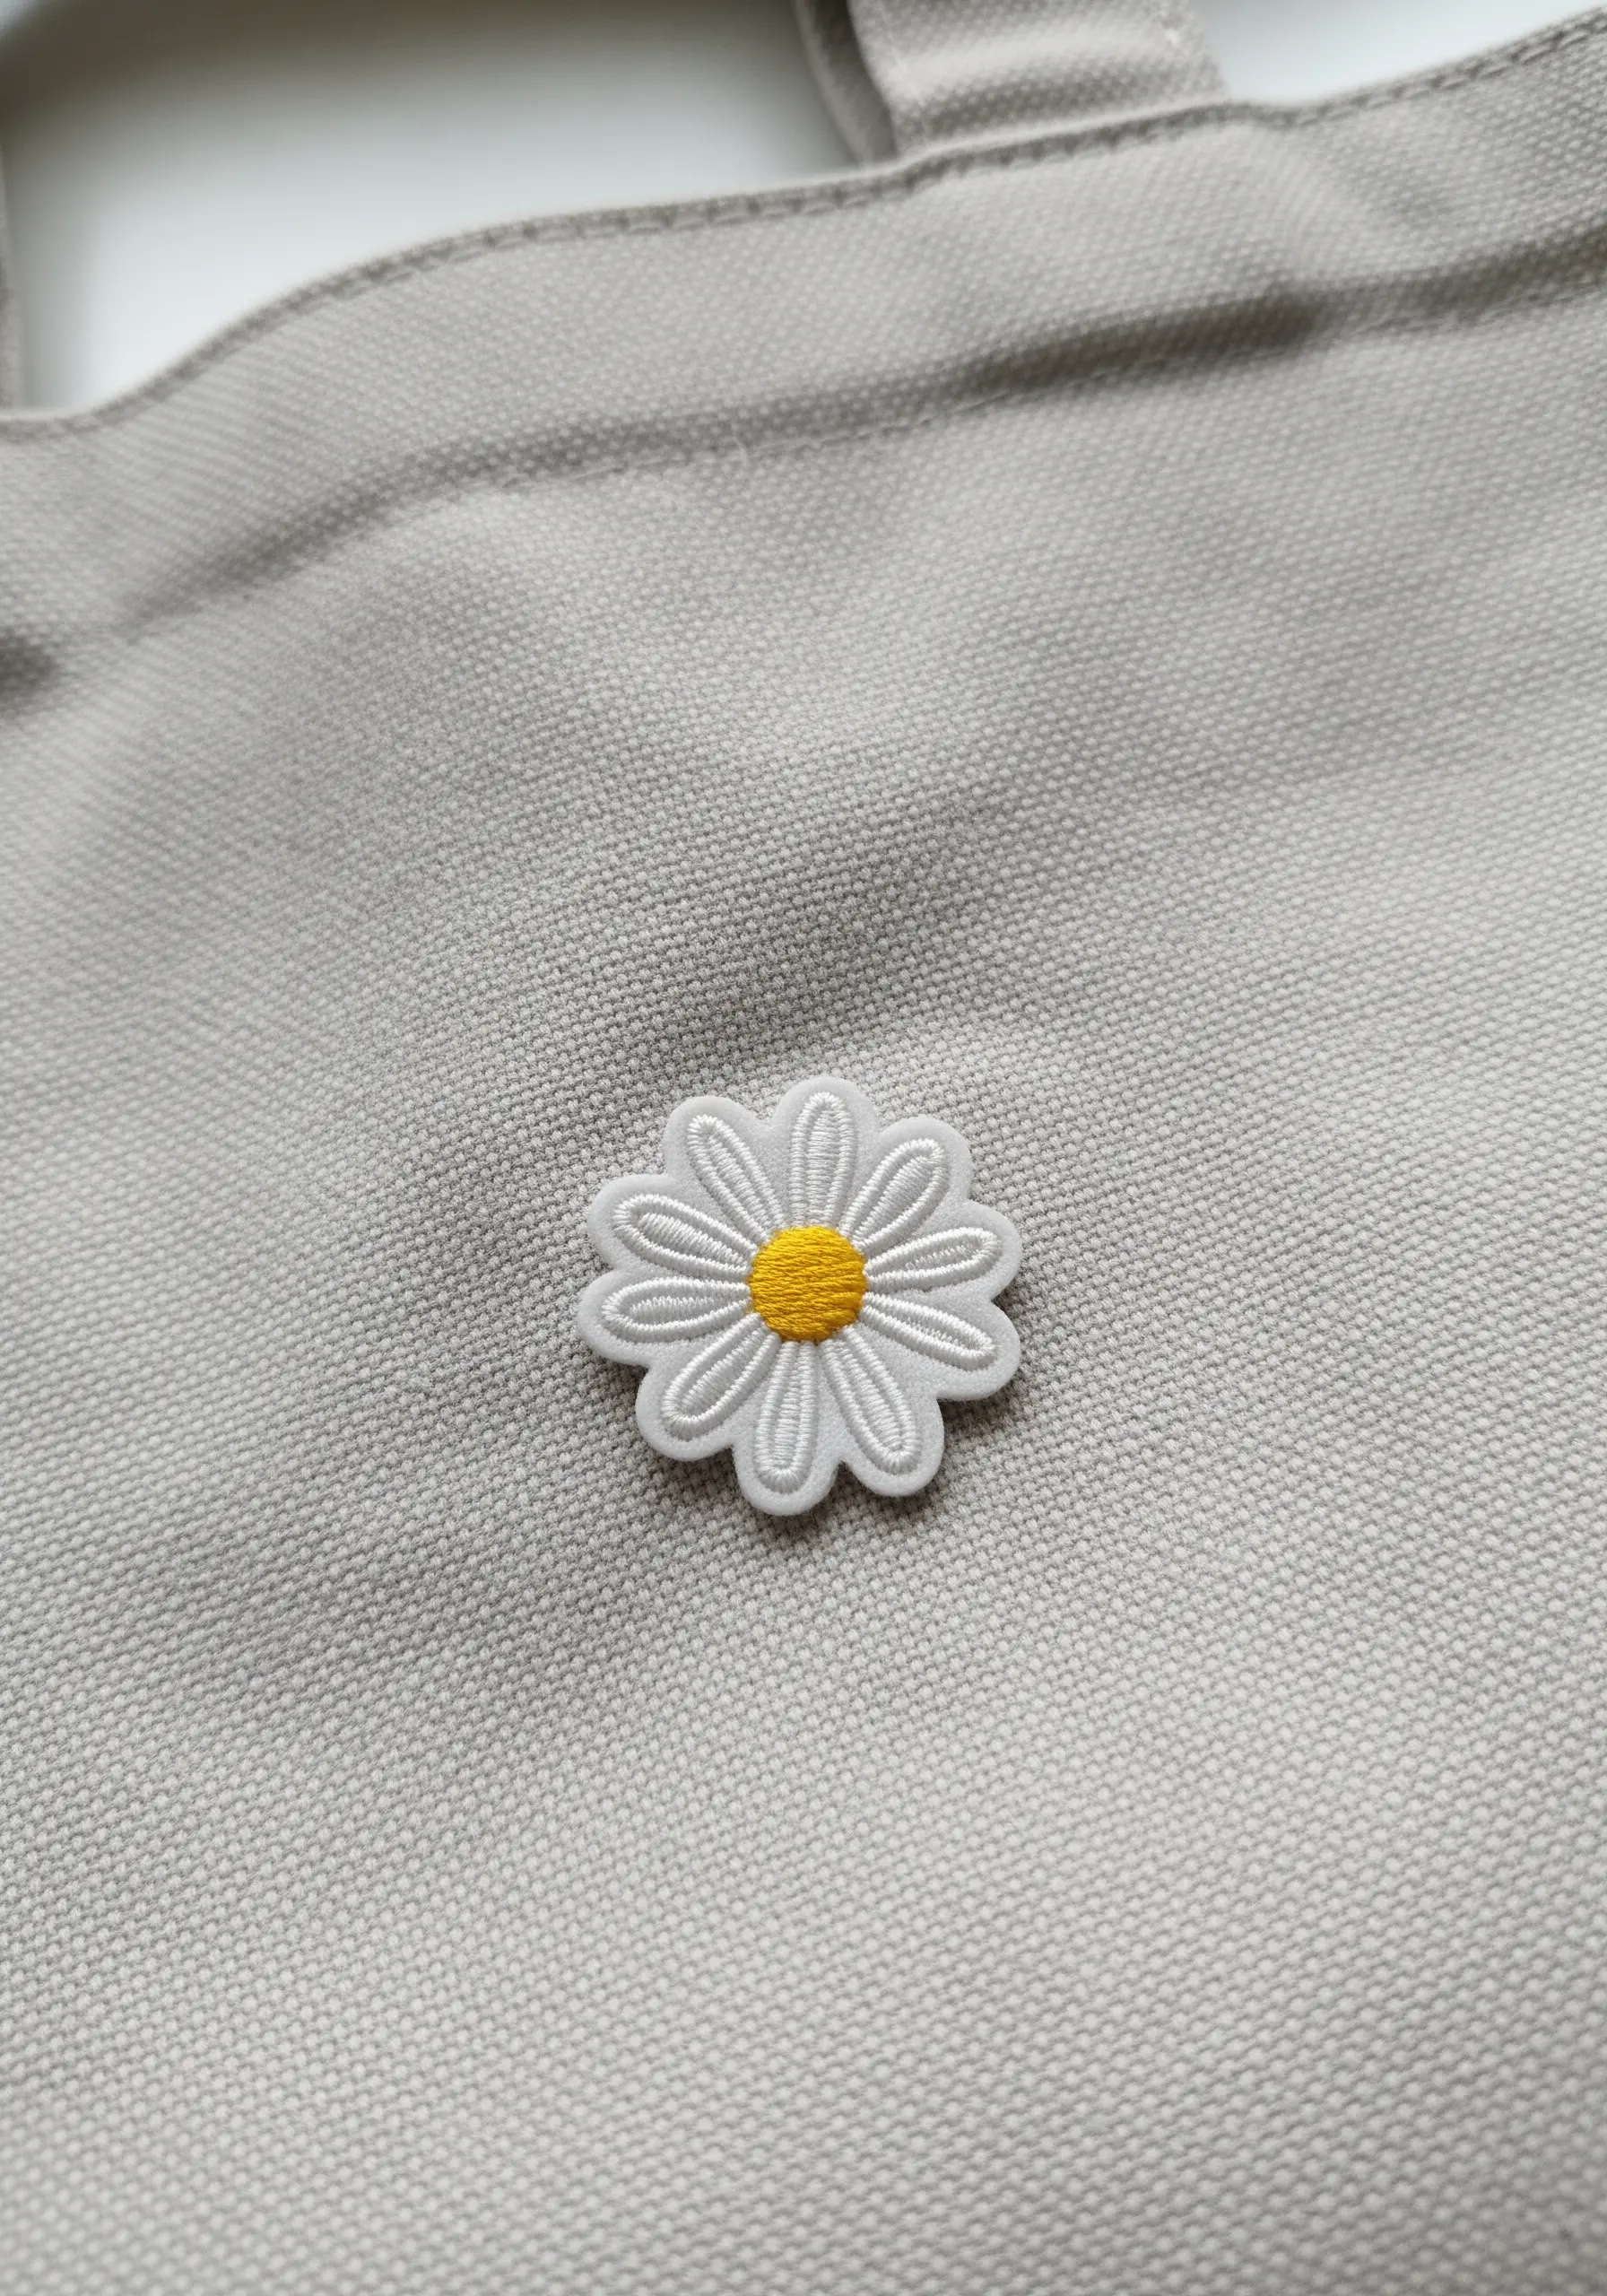
For a crisp, pucker-free motif on heavy canvas like a tote bag, embroider your design on a separate piece of felt or stabilizer first.
Use a tight satin stitch for the petals and a dense cluster of French knots for the flower’s center.
Once complete, carefully trim around the shape, leaving a tiny border for stability.
Attach it to your bag with a neat whip stitch using a matching thread for a professional, appliqué finish.
10. Gradient Raindrop Meditation
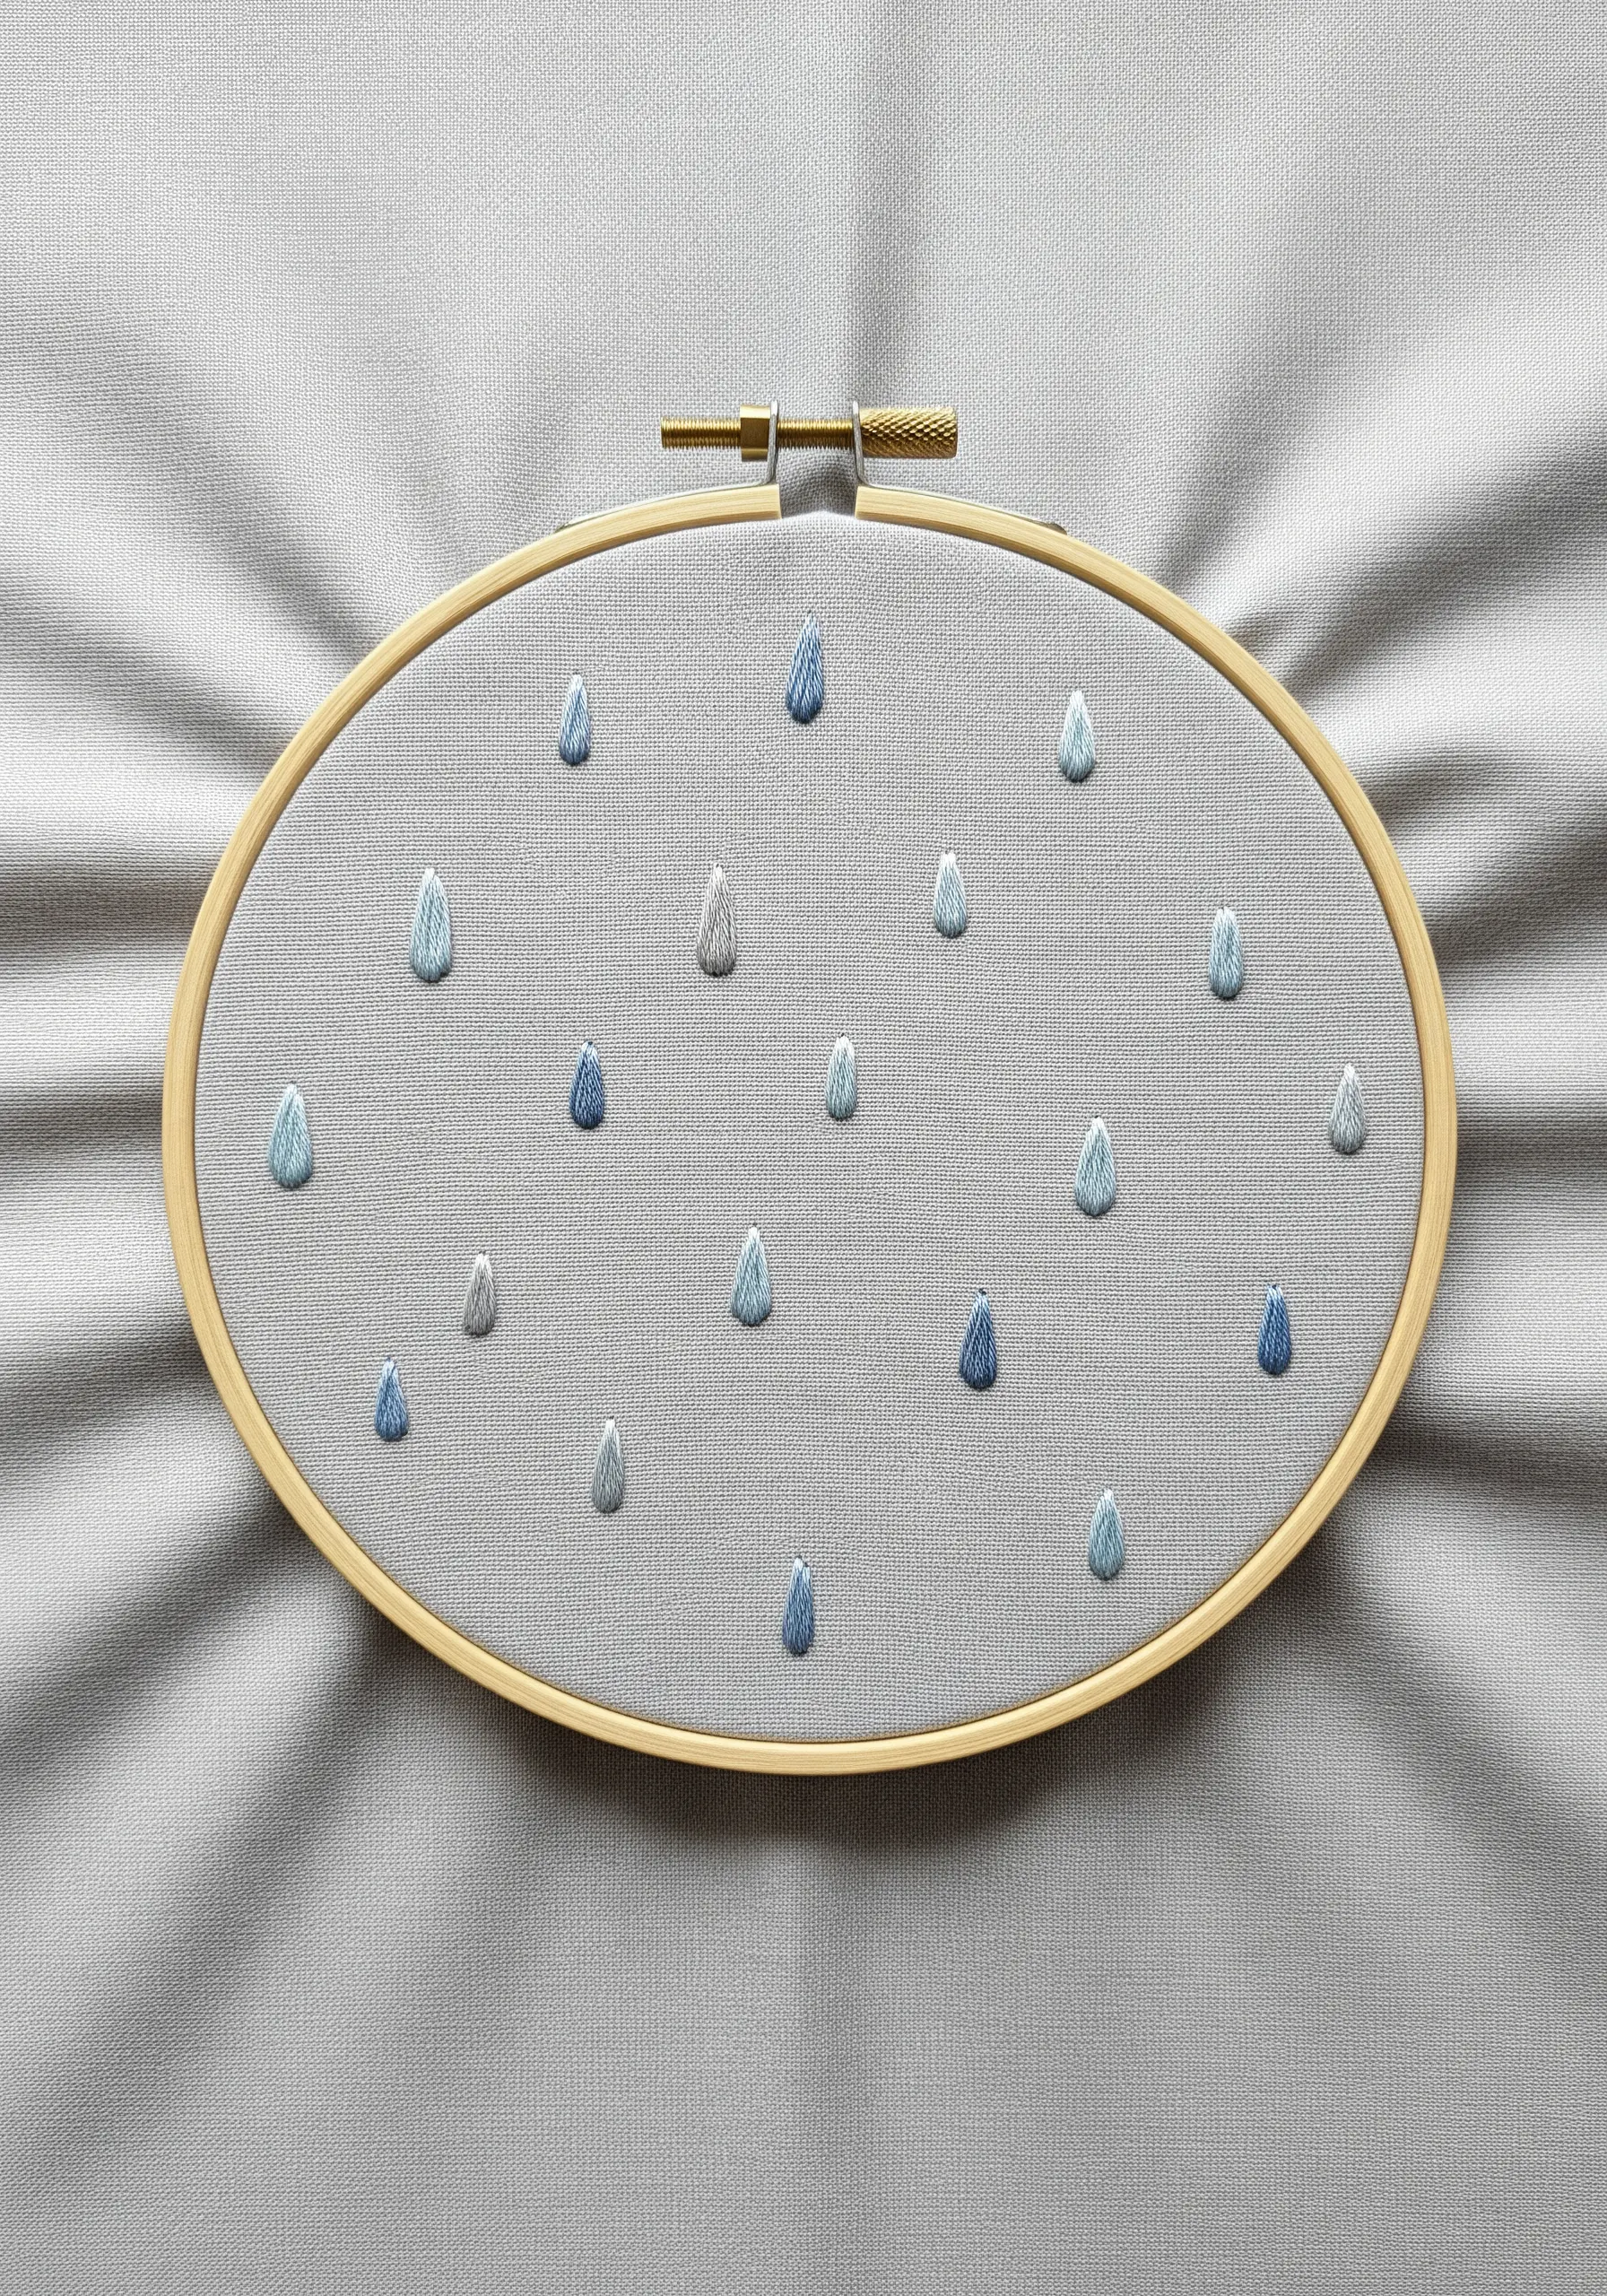
Give your satin-stitched raindrops a natural, rounded shape by slightly angling your stitches.
Start with short stitches at the very top point, then gradually lengthen them as you move downward, fanning them out to create the curve.
Use a palette of soft blues and grays, assigning a different shade to each drop to create a calming, atmospheric effect.
This repetitive pattern allows you to focus purely on the rhythm and precision of your stitching.
11. Celestial Constellation Stitching
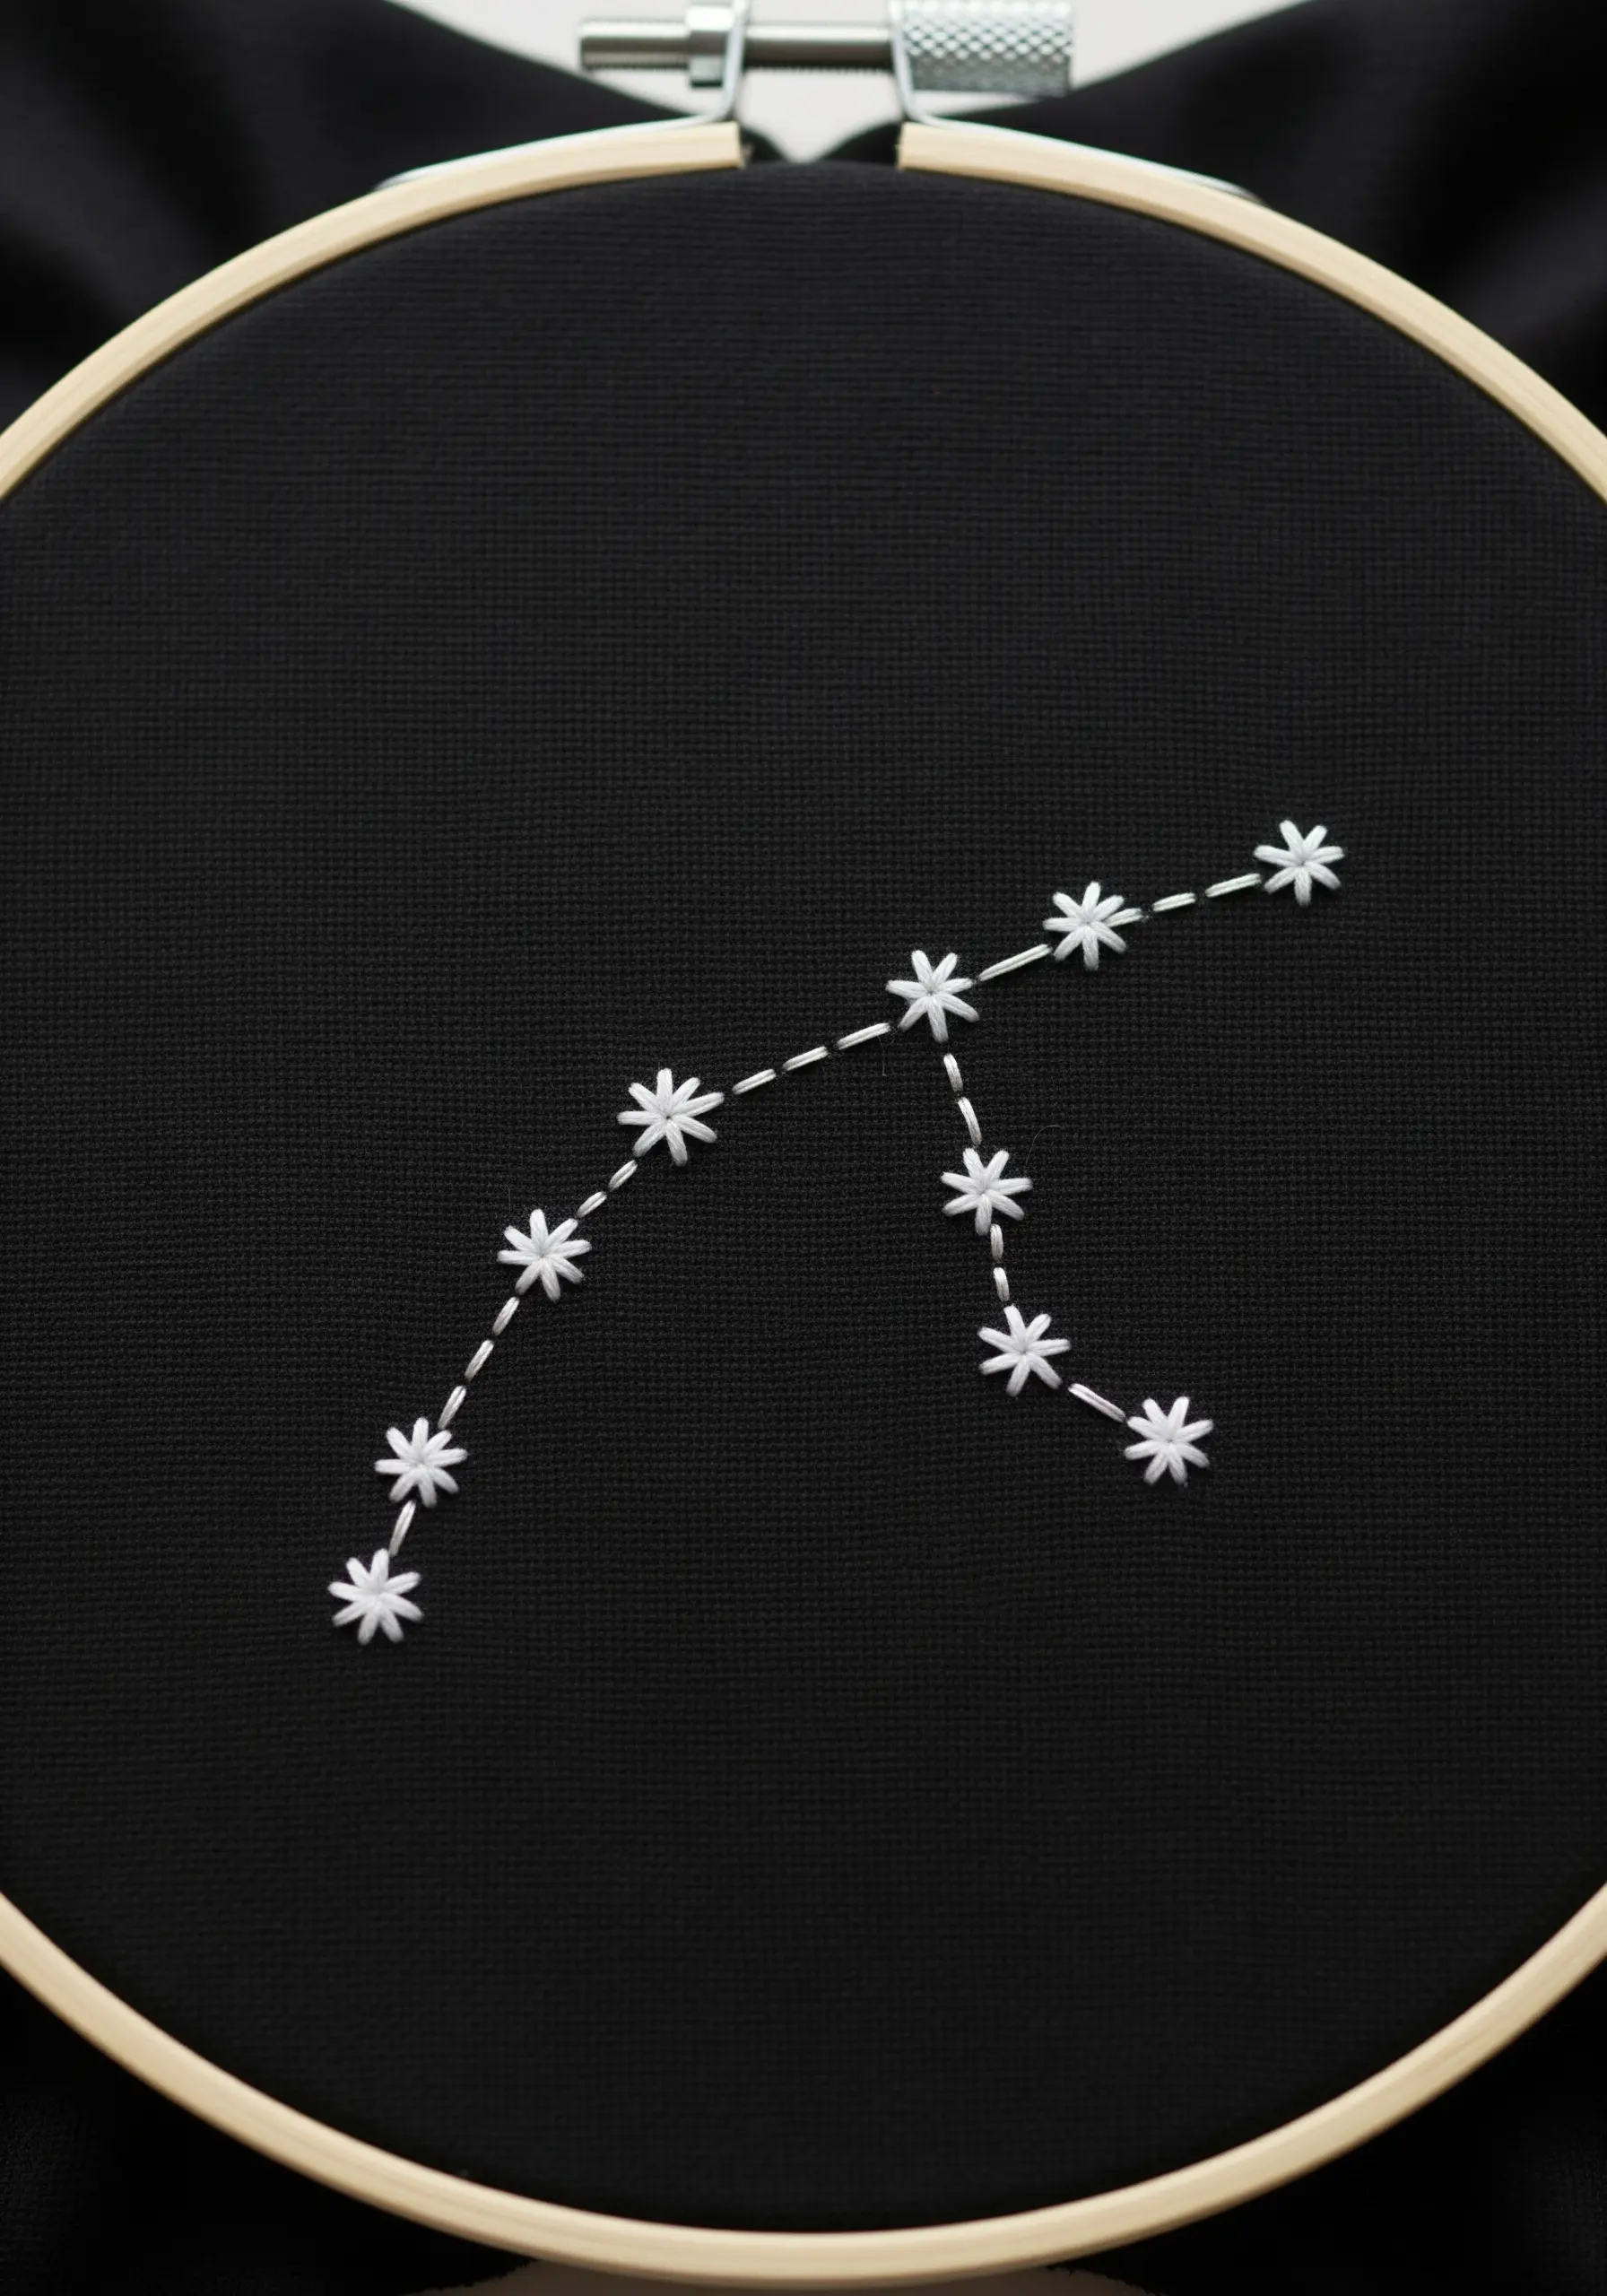
Create luminous stars against a dark fabric using a simple star stitch, which is just a series of straight stitches crossing at a central point.
For a crisp, graphic look, use a bright white or metallic silver thread with at least four strands to ensure it pops visually.
Connect the stars with a delicate, single-strand backstitch to keep the focus on the celestial bodies themselves.
The high contrast between the thread and the fabric is what gives this simple design its undeniable power.
12. Minimalist Ocean Waves
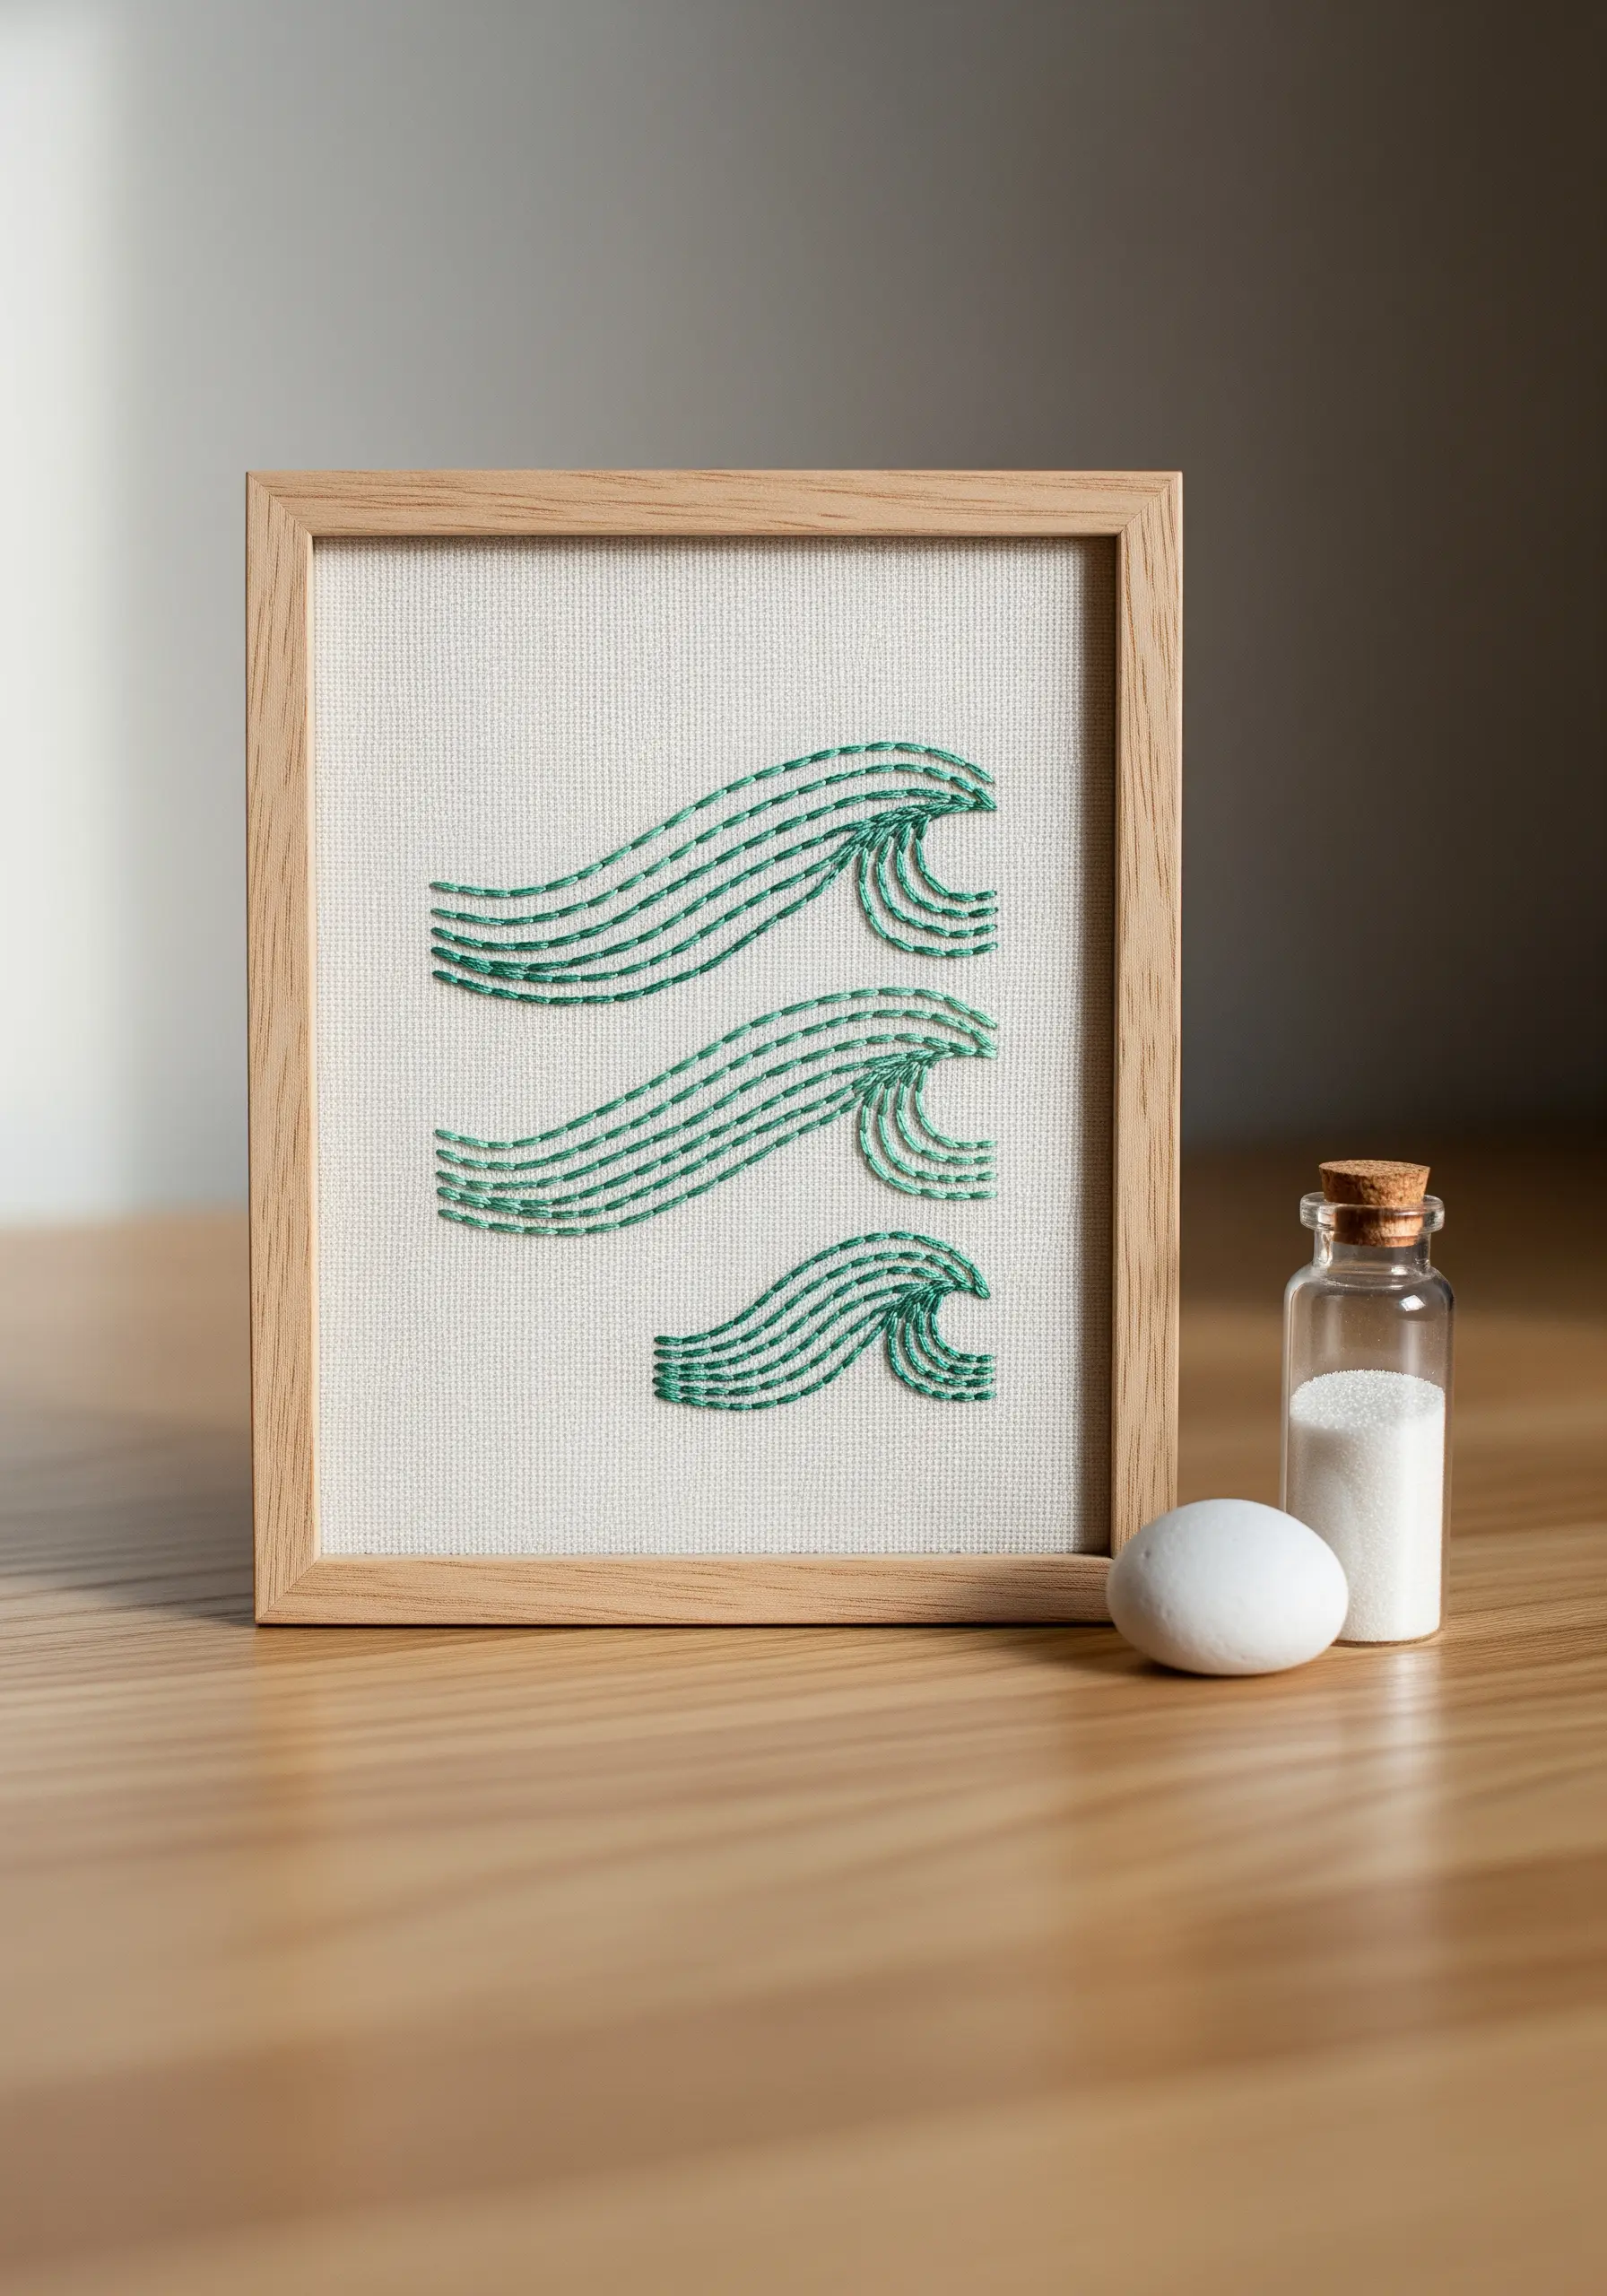
This calming wave pattern relies on the artistic power of negative space to define its form.
Instead of filling the shapes, you create them with parallel rows of a simple running stitch or a more solid backstitch.
Keep your stitch length consistent and the distance between each row even to achieve a hypnotic, rhythmic effect.
Framing the finished piece transforms this simple stitching exercise into elegant minimalist wall art.
13. A Simple Cup of Coffee
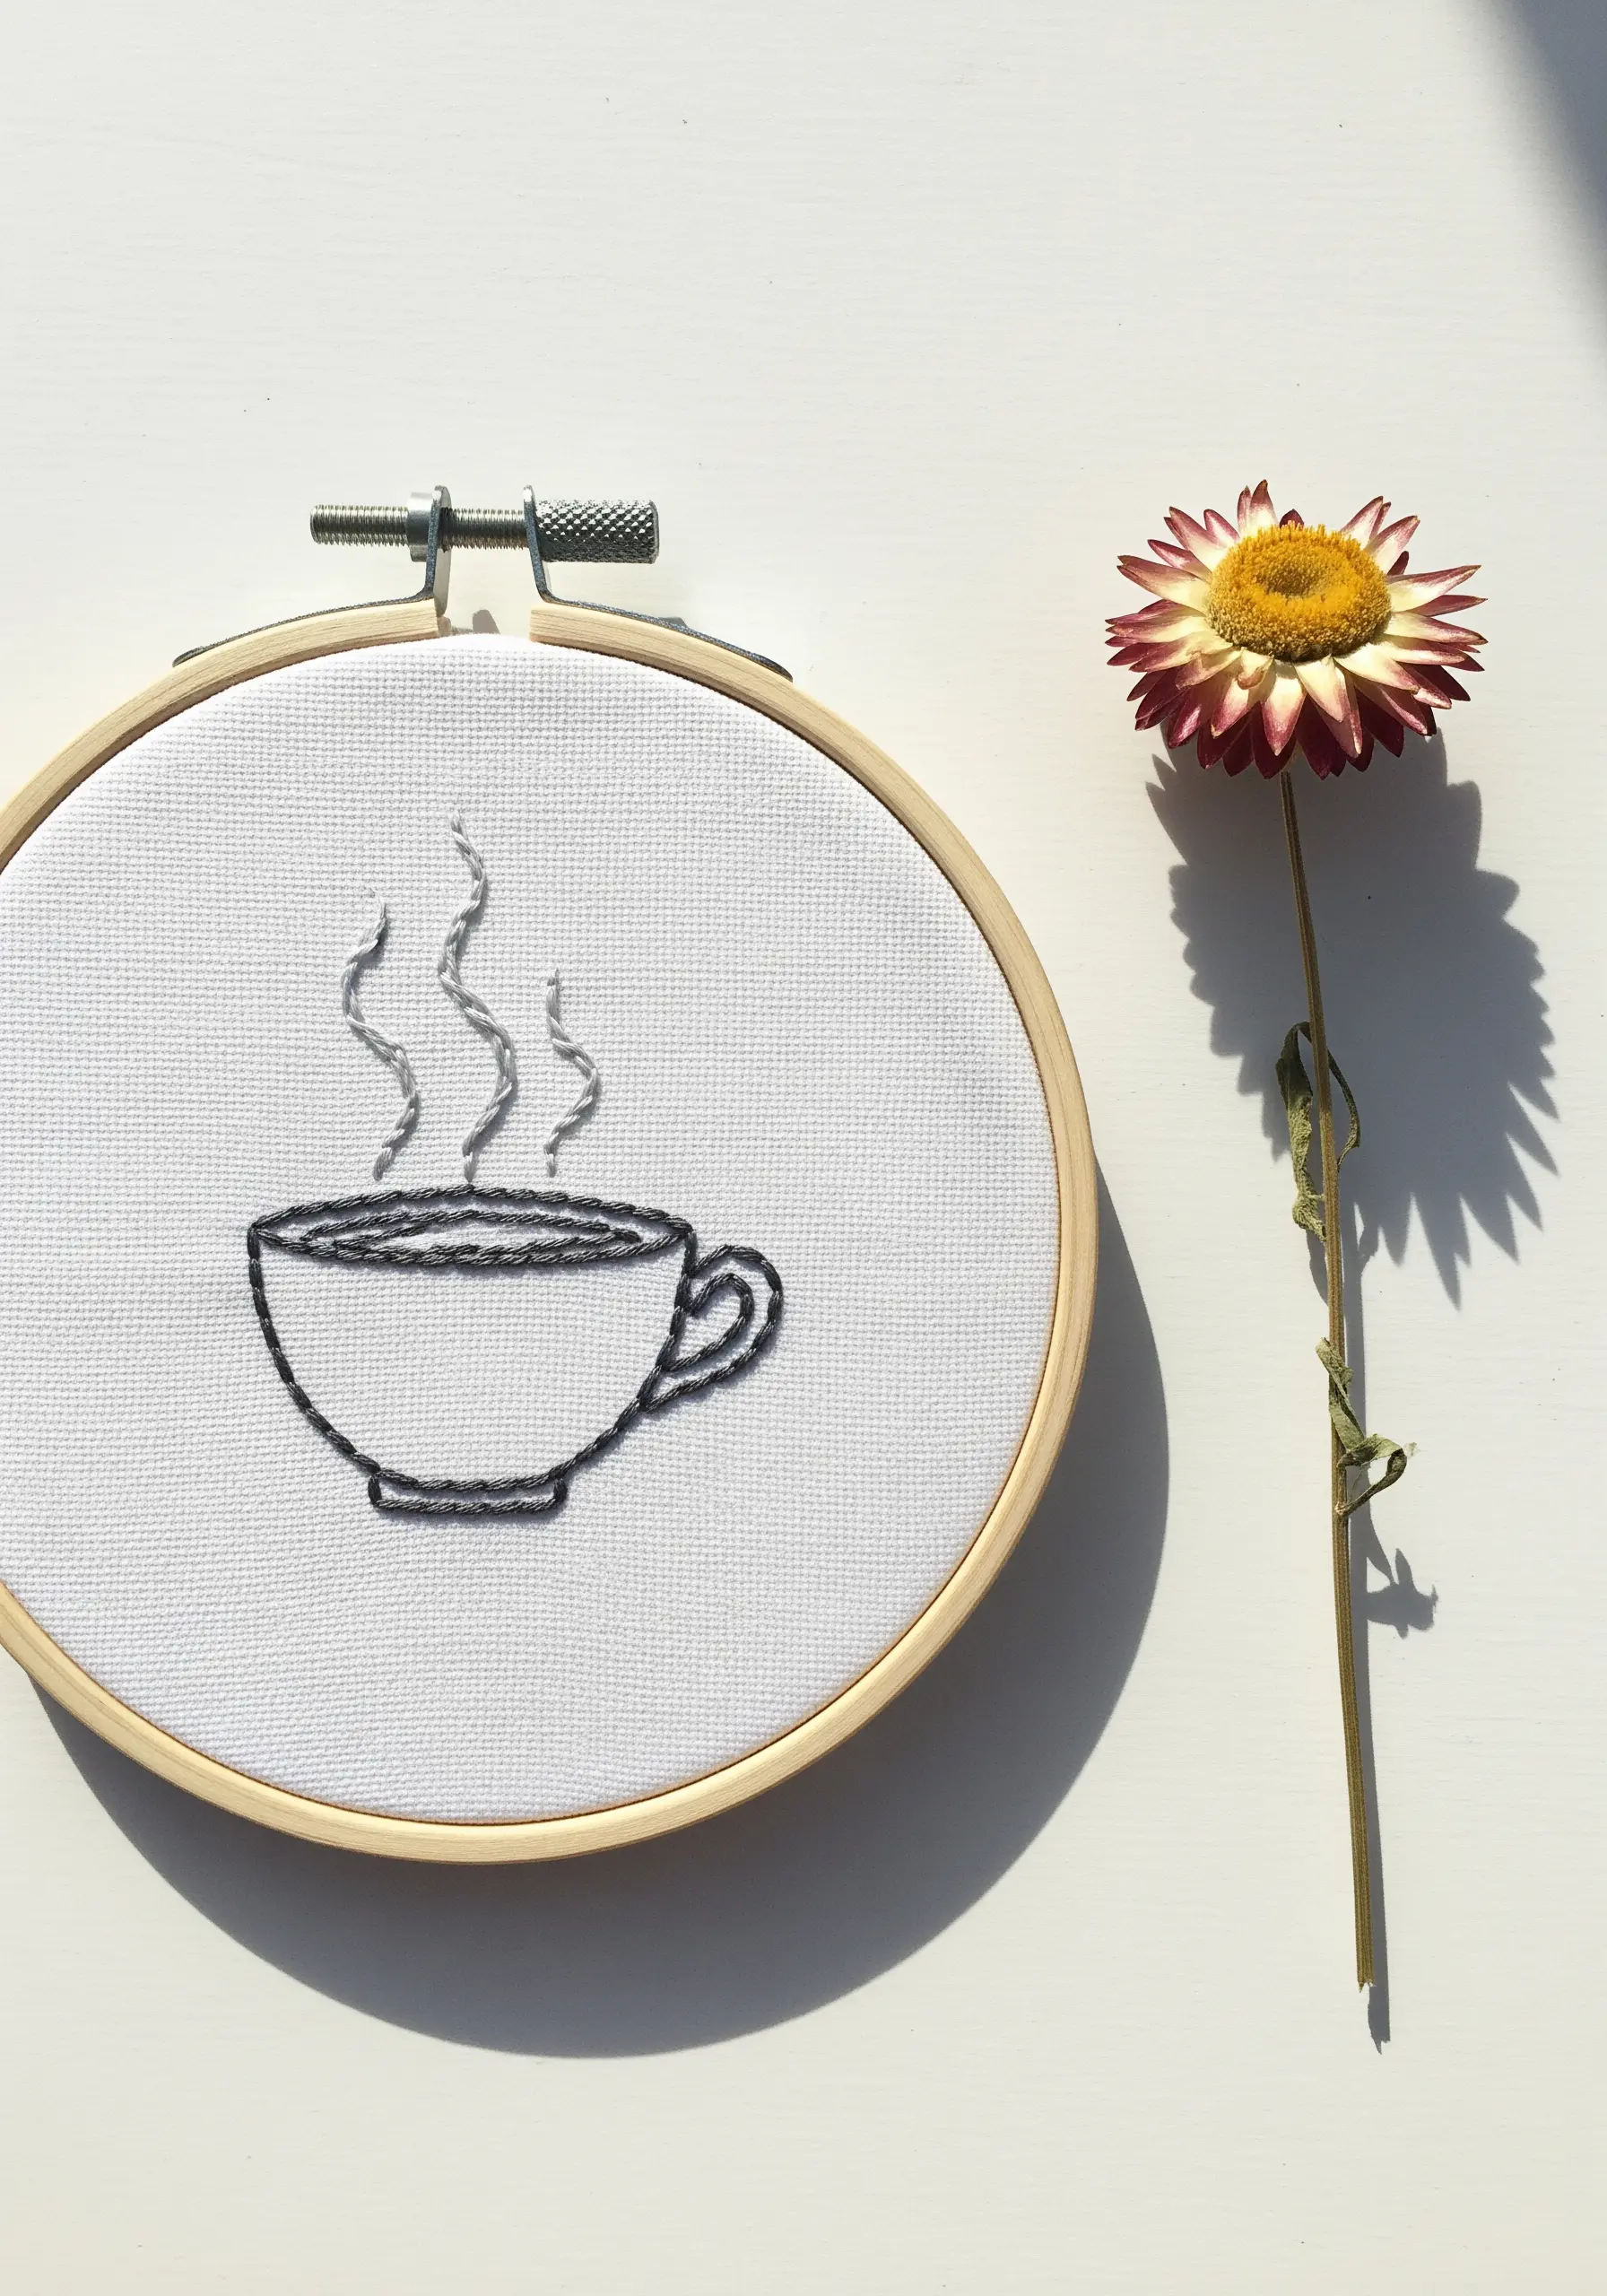
Add instant depth to a simple line-art design by strategically varying your thread weight.
Use three or four strands of floss for the main outline of the cup to give it visual presence and stability.
Then, switch to a single, delicate strand for the steam lines, creating a sense of lightness and ephemeral motion.
This subtle technical adjustment makes the design feel more dynamic and thoughtfully rendered.
14. Realistic Eucalyptus Leaves

To give your satin-stitched leaves a realistic central vein, use a split satin stitch technique.
Imagine a line down the center of each leaf and angle all your stitches on one side toward it.
Repeat on the other side, angling the stitches to meet the first set, creating a subtle ridge that catches the light.
Using a slightly darker shade on one half of a single leaf adds a touch of convincing, natural dimension.
15. Stitching an Elegant Key Tag
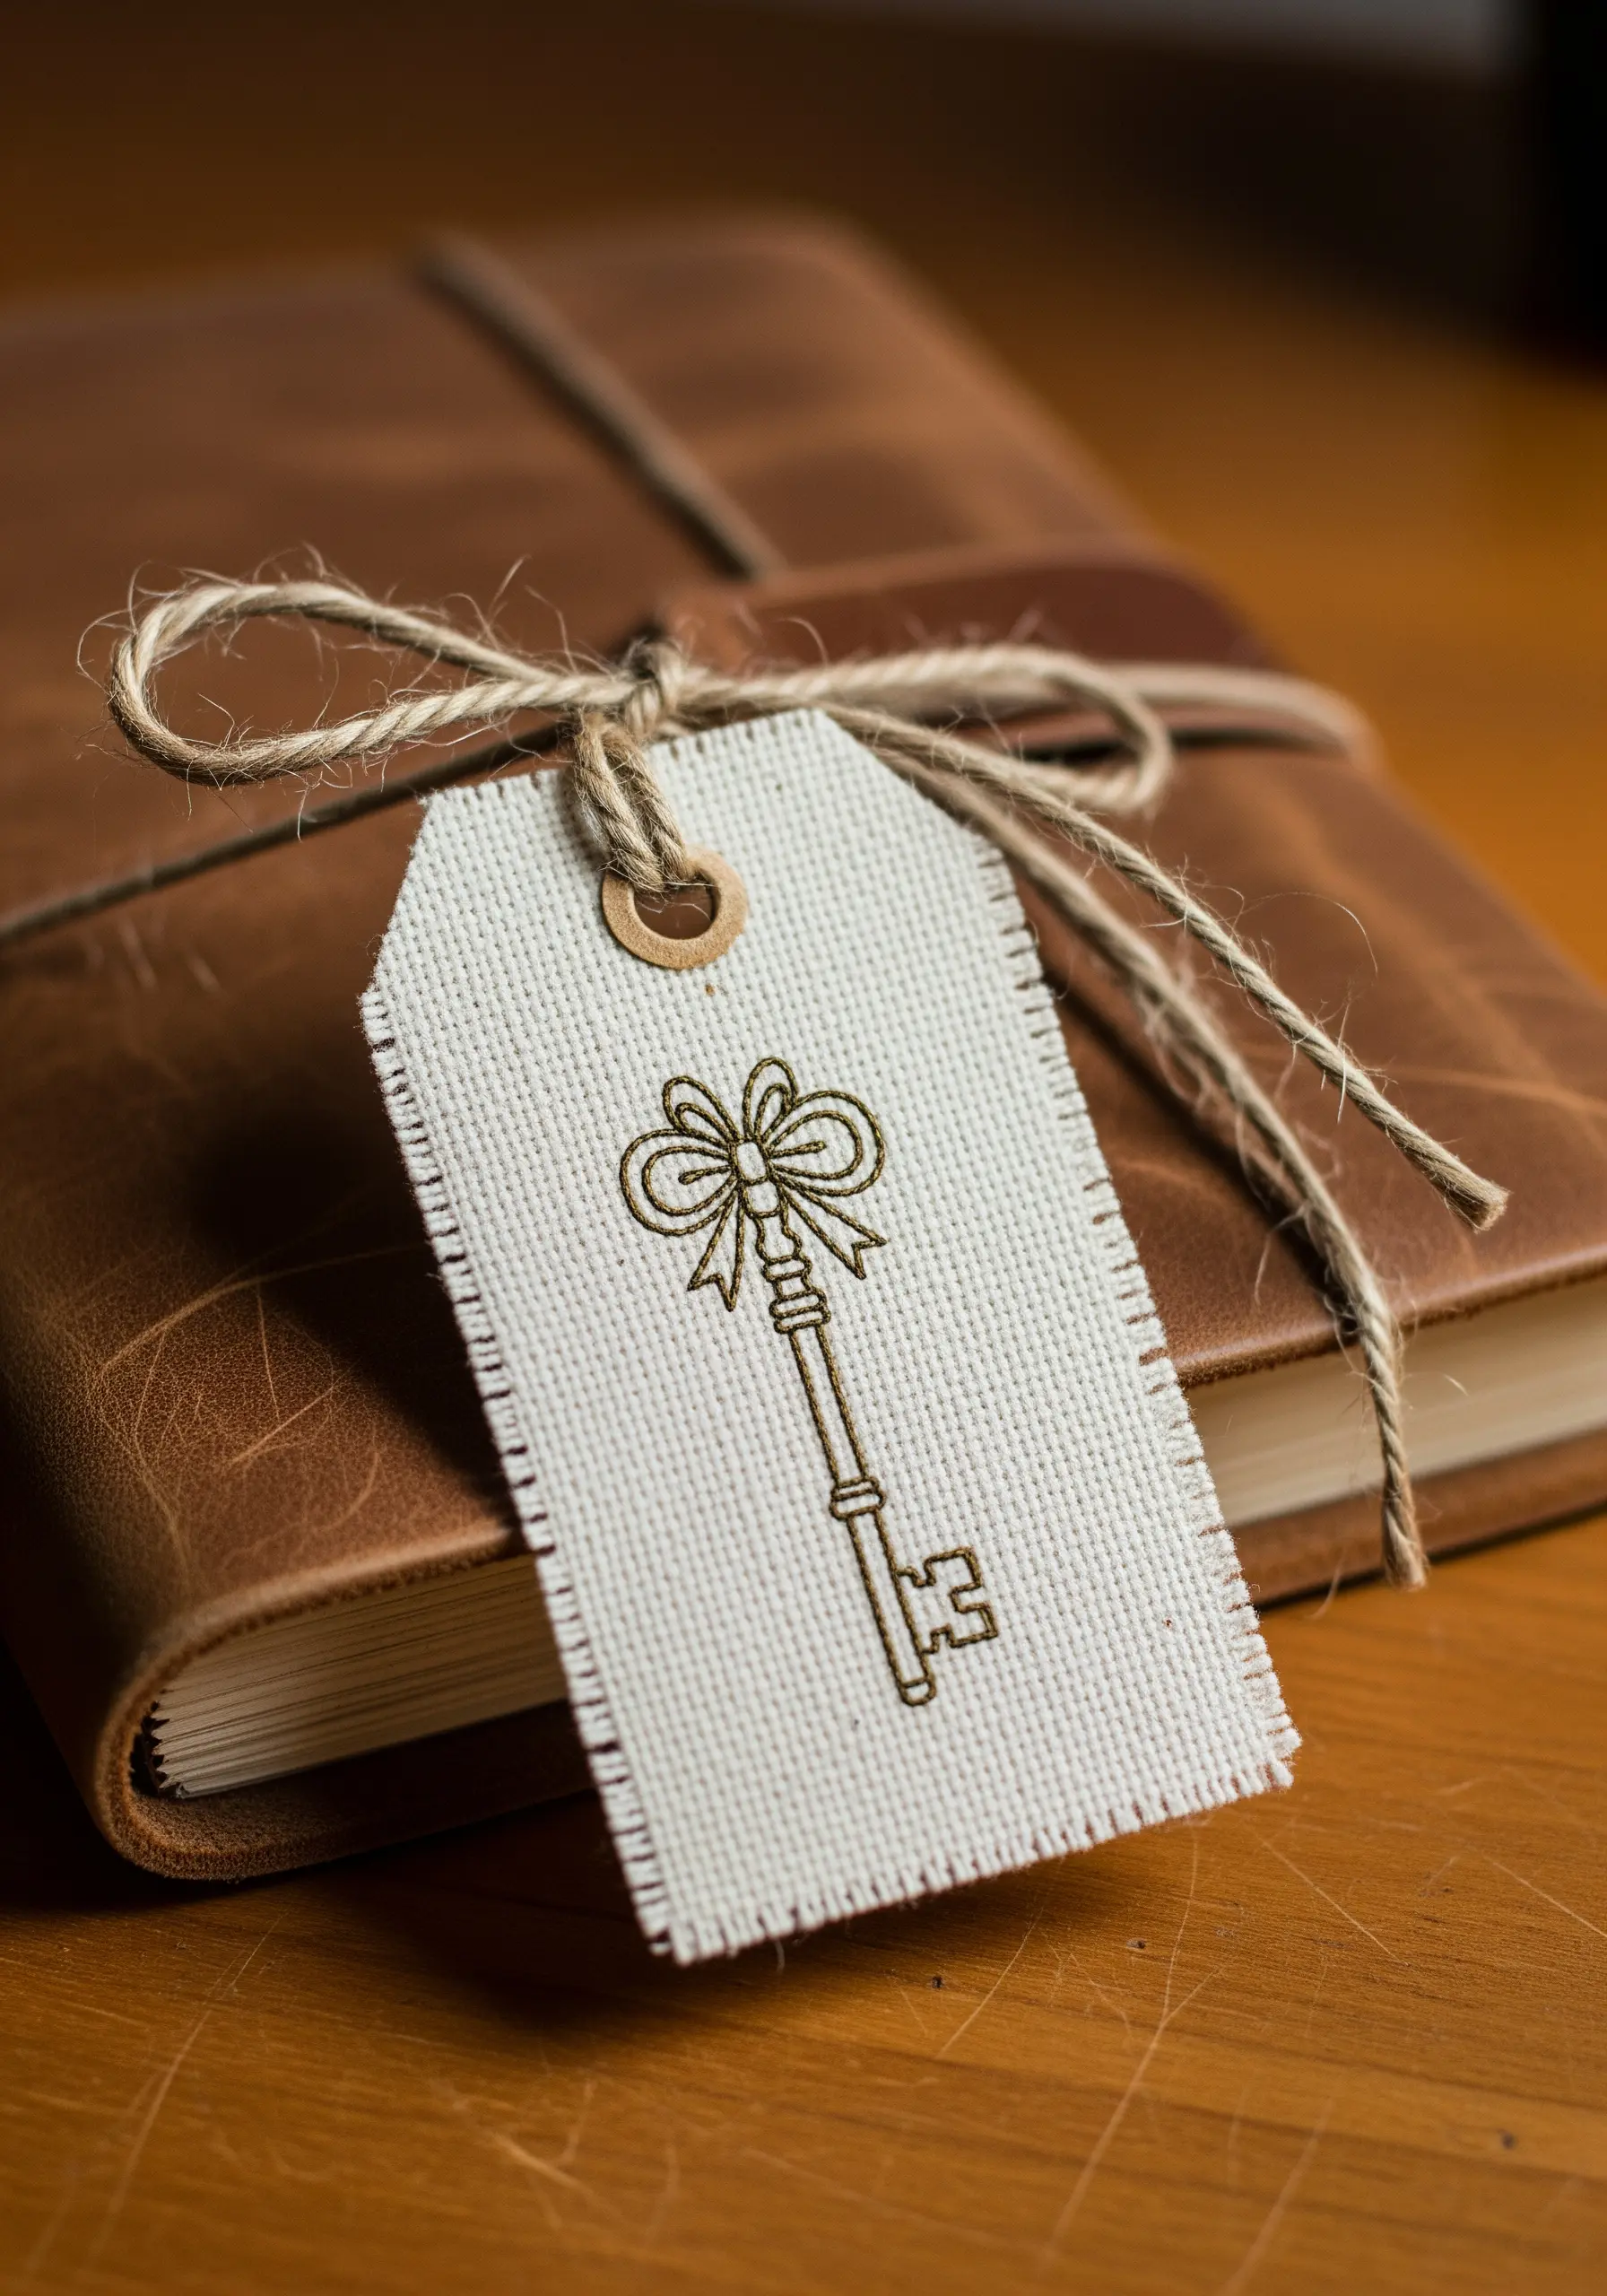
Elevate a simple gift tag or bookmark by stitching directly onto heavy cardstock or a tightly woven fabric like canvas.
To prevent tearing the paper, use a sharp, fine needle to gently pre-pierce the holes along your design before you begin stitching.
A simple backstitch using two strands of floss is perfect for creating clean, intricate line work that looks almost printed.
This technique transforms a simple motif into a treasured keepsake.
16. The Continuous Line Snail
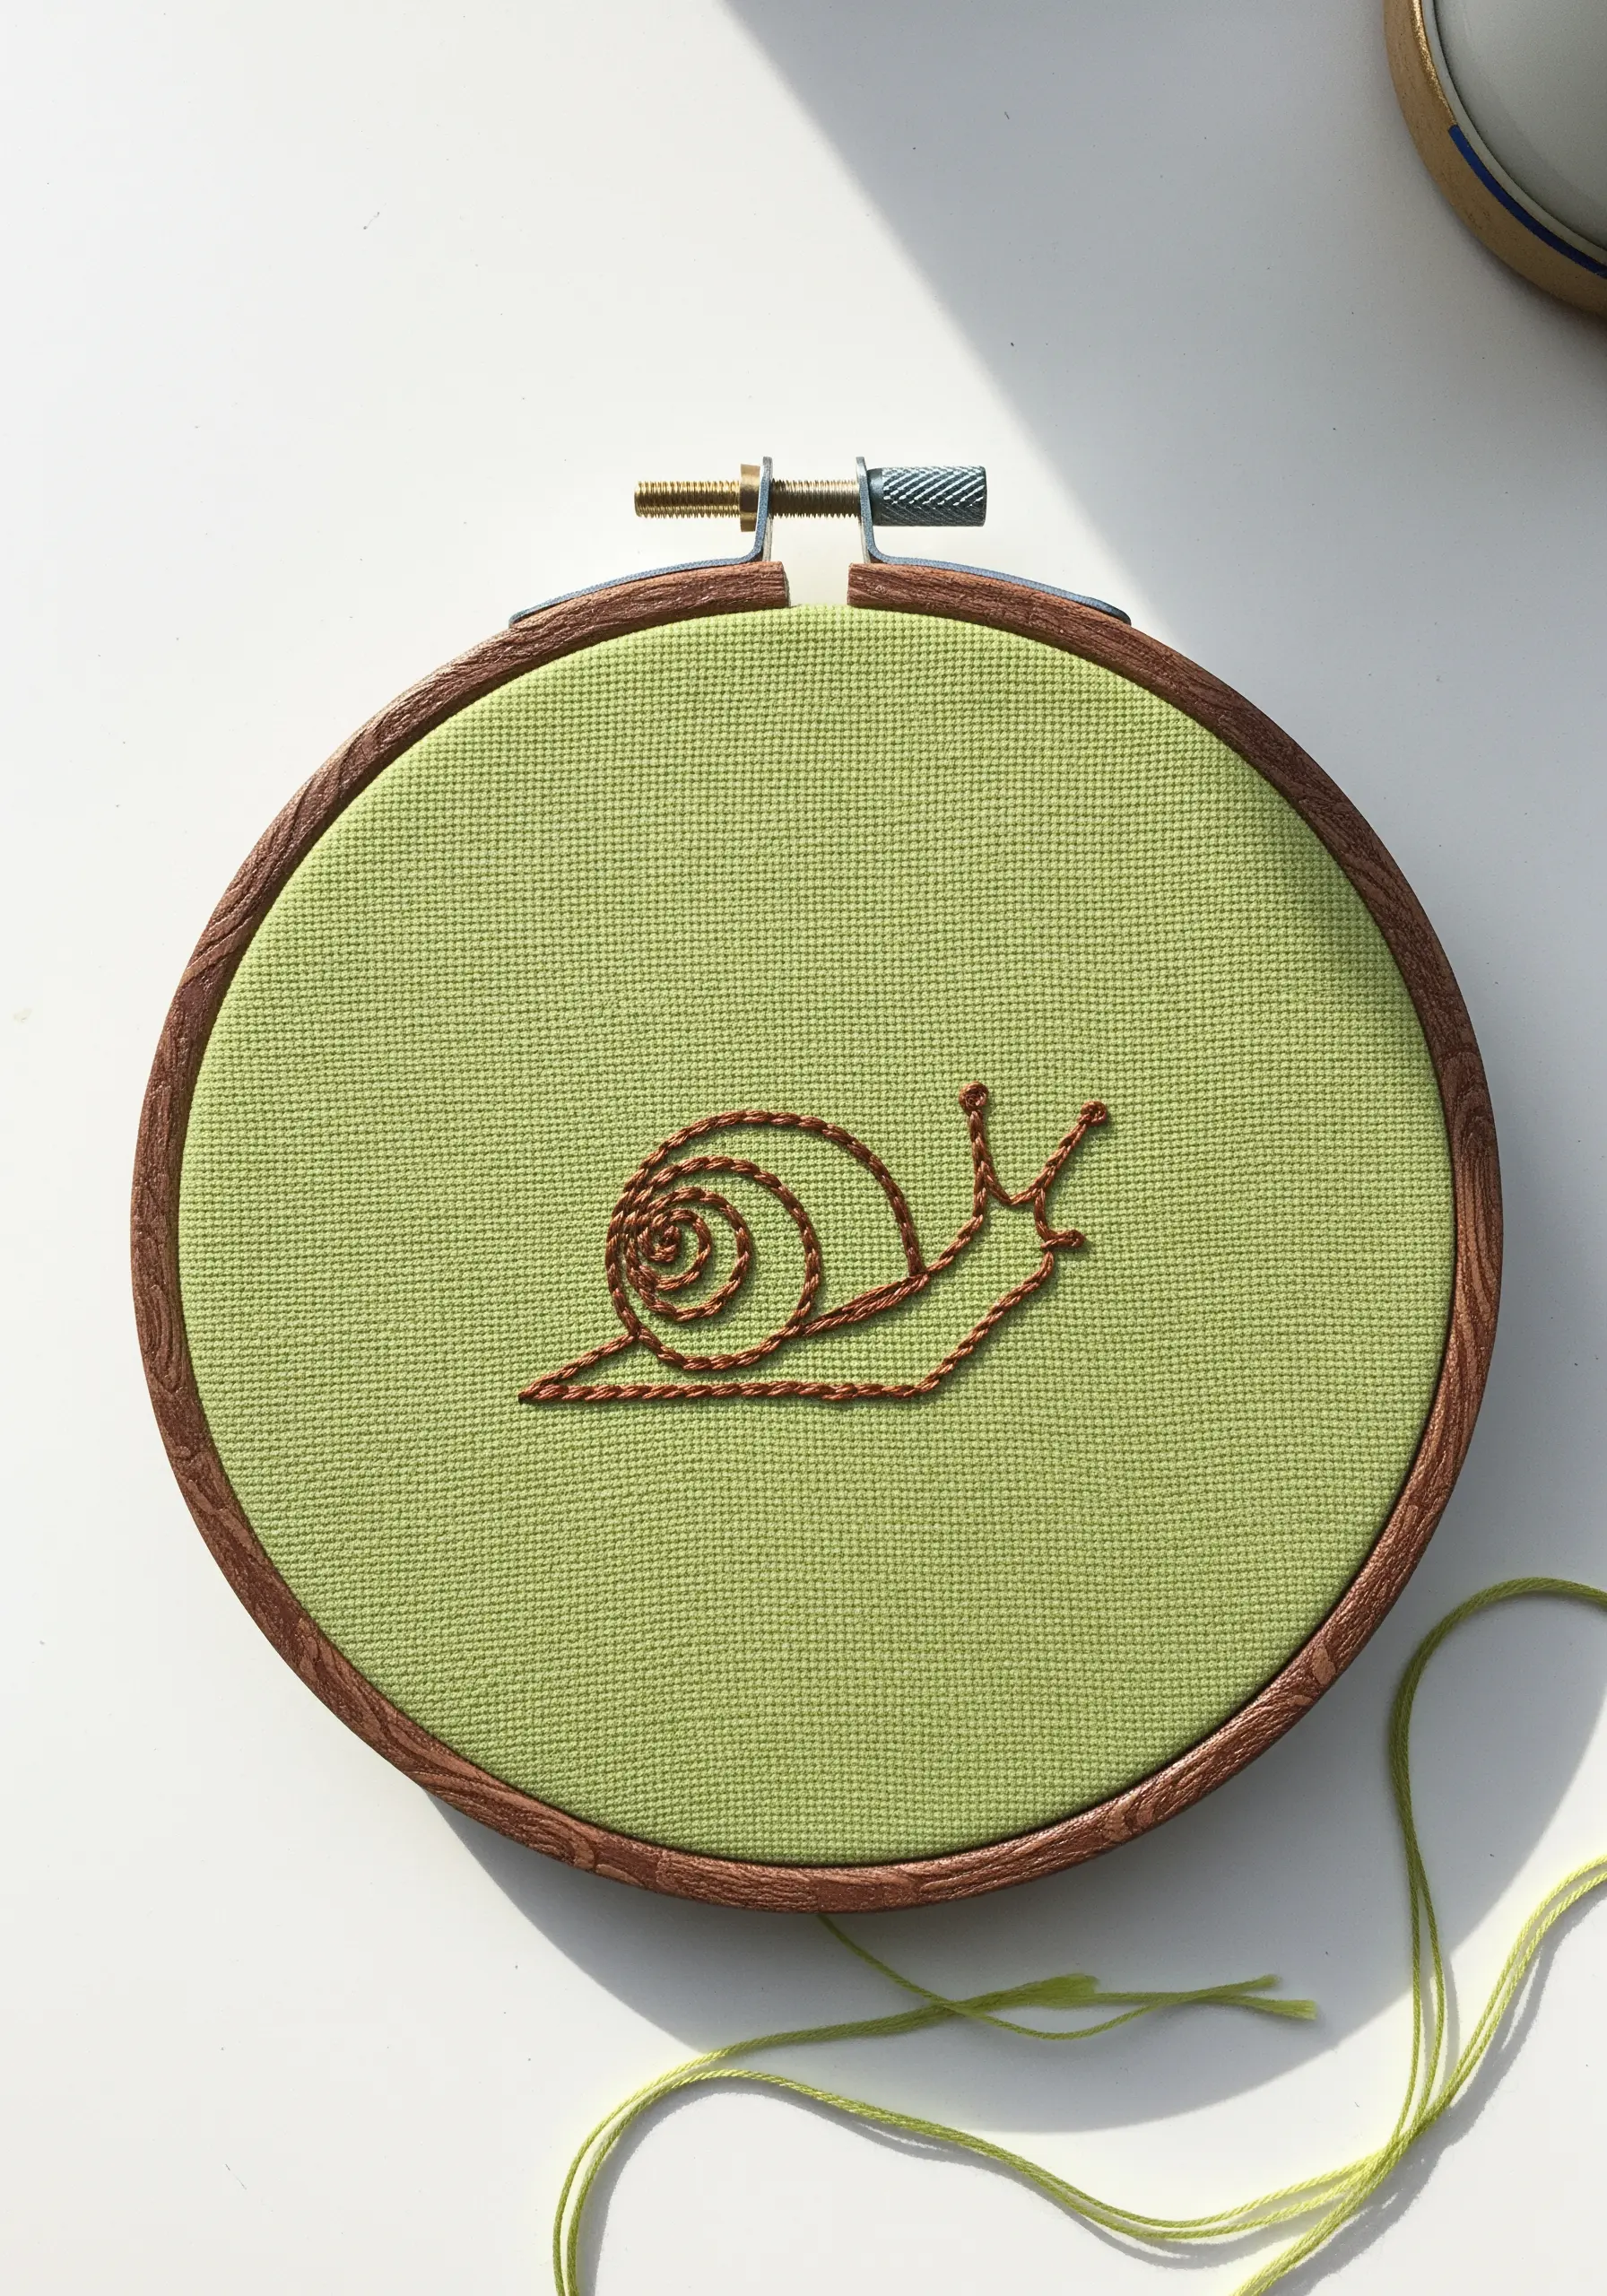
For a smooth, rope-like outline in your simple illustrations, choose a whipped backstitch over a standard one.
First, complete the entire outline of the snail with a basic backstitch.
Then, using the same thread, pass your needle under each backstitch without piercing the fabric, effectively wrapping the line.
This technique erases the segmented look of a backstitch, creating a single, fluid line perfect for minimalist art.
17. Mindful Lettering with Chain Stitch
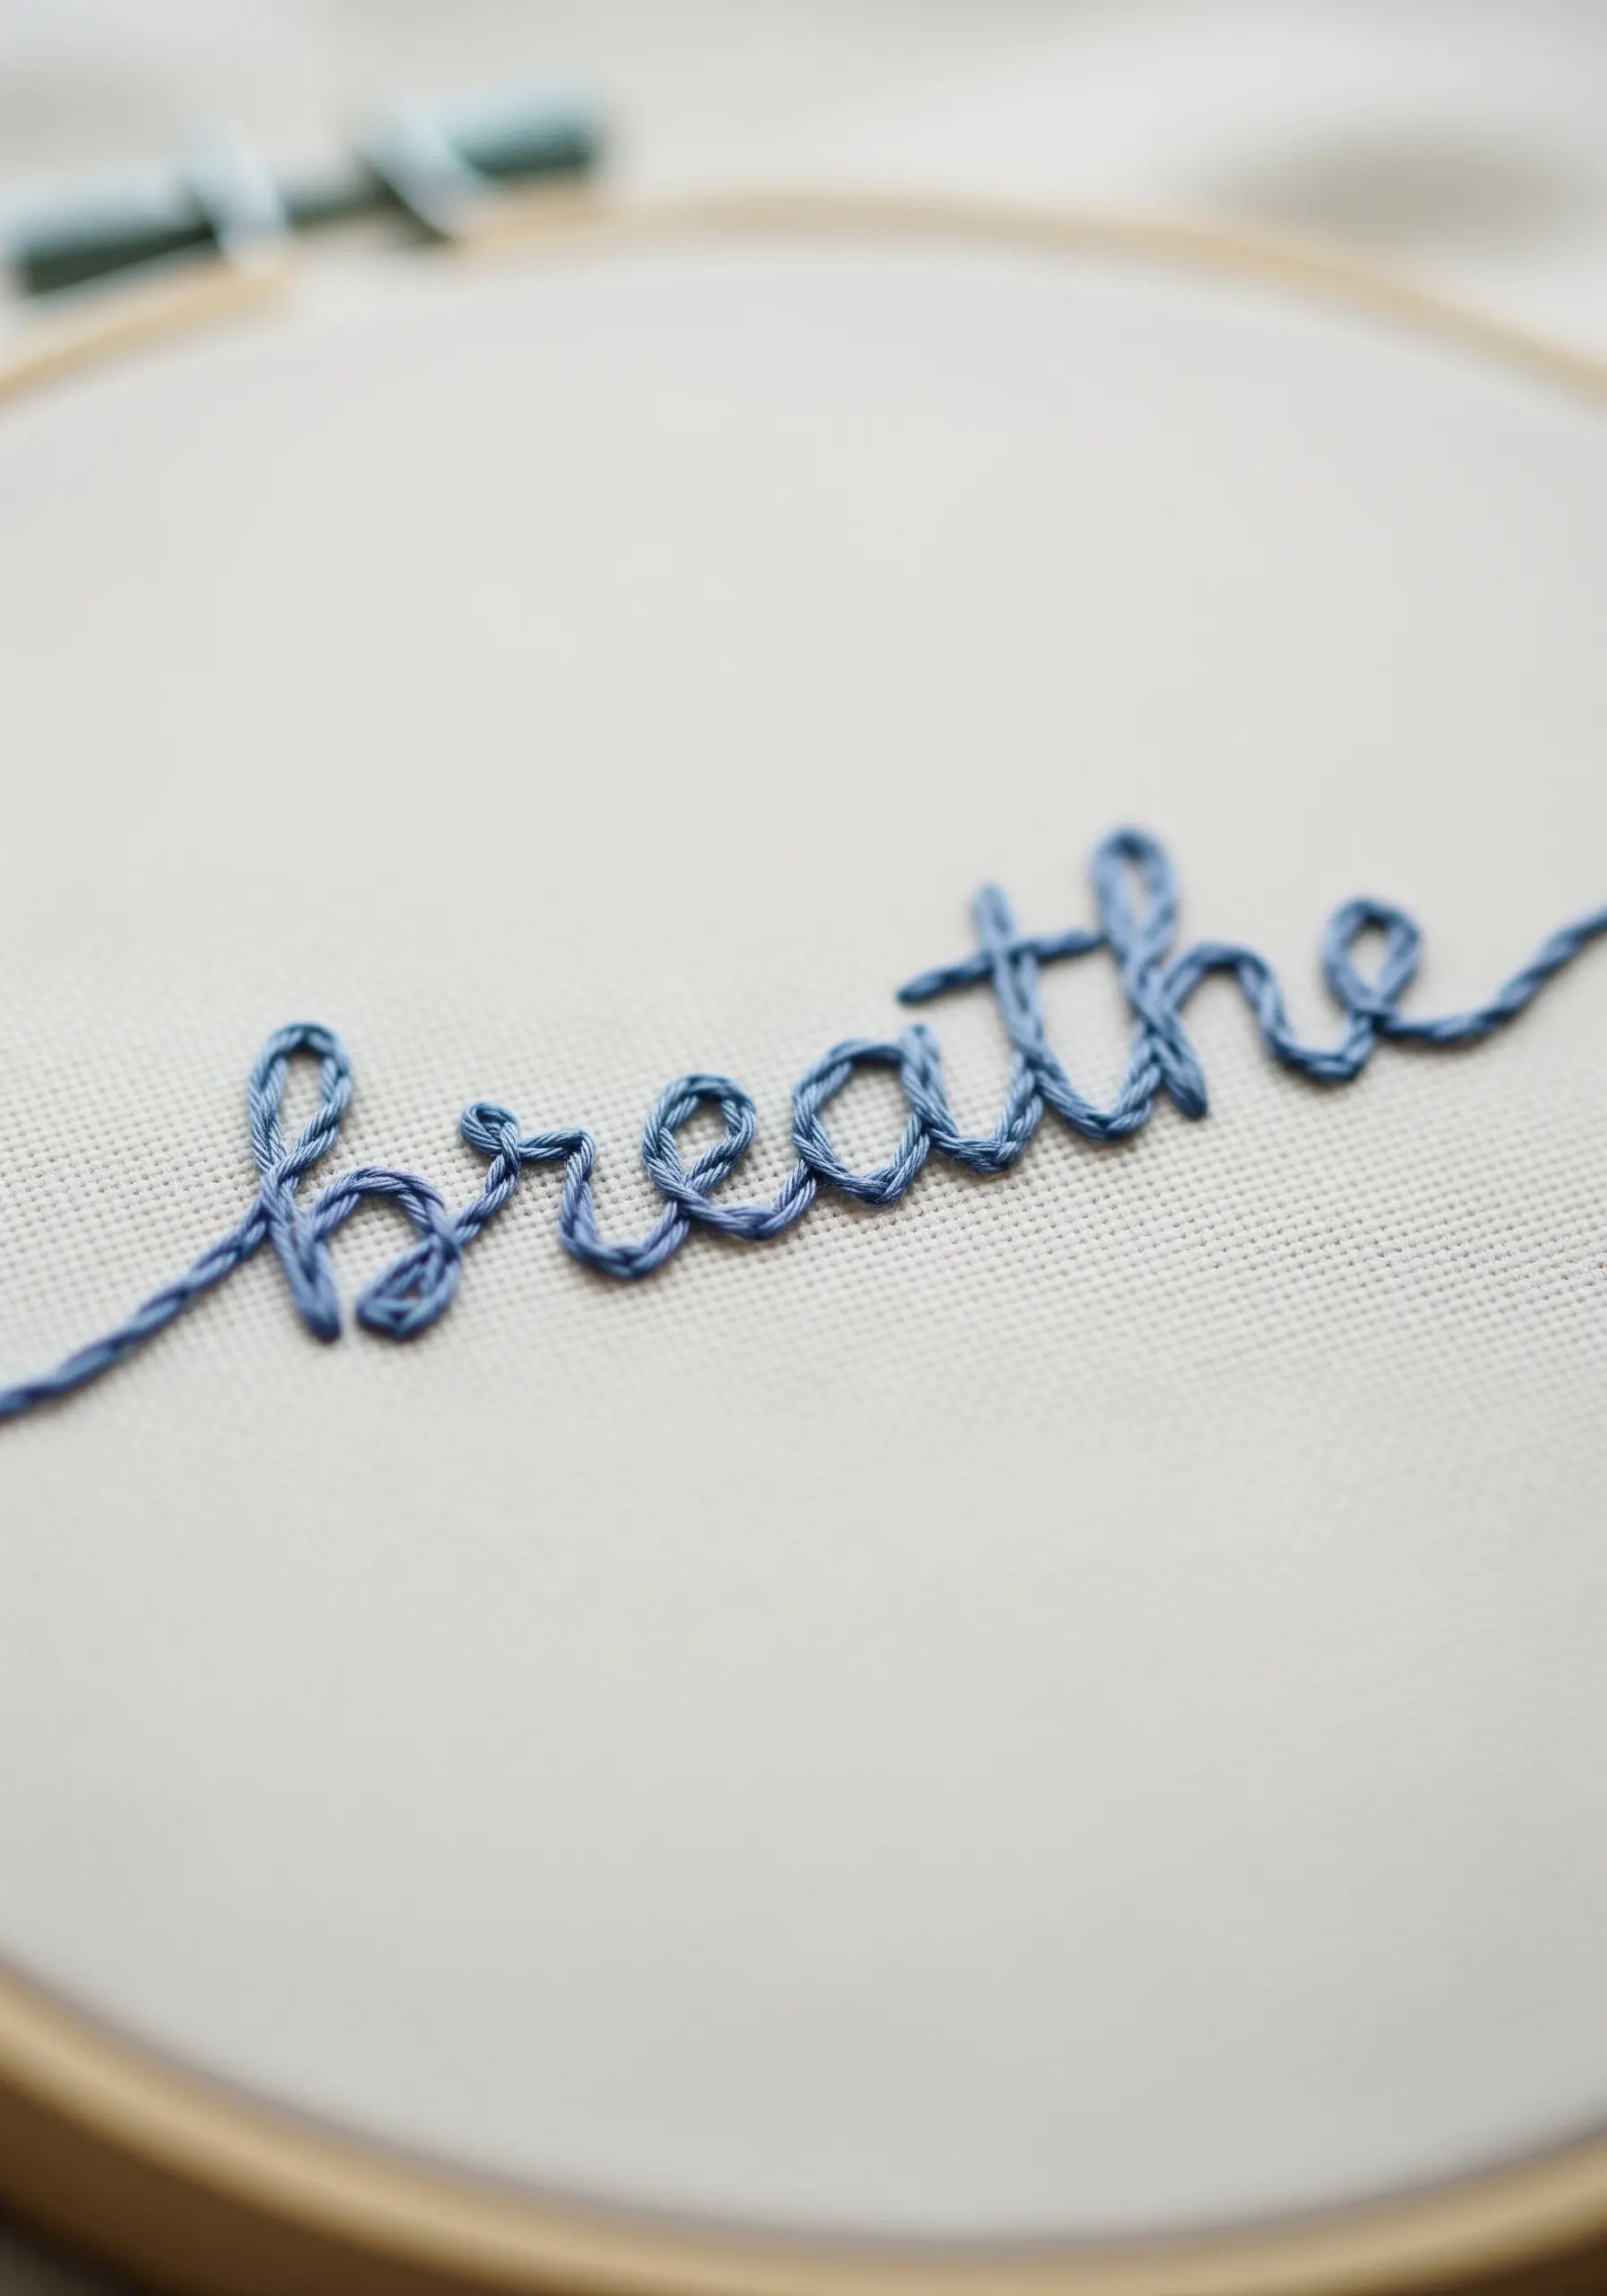
The chain stitch is ideal for cursive lettering, as it creates a substantial, textured line that follows curves beautifully.
To ensure your letters are uniform and well-proportioned, use a heat-erasable pen to trace your word onto the fabric first.
Focus on keeping each link in your chain the same size for a smooth, consistent, and professional-looking script.
The repetitive motion of this stitch makes it a wonderfully calming way to embroider a meaningful word.
18. A Serene Lotus Blossom
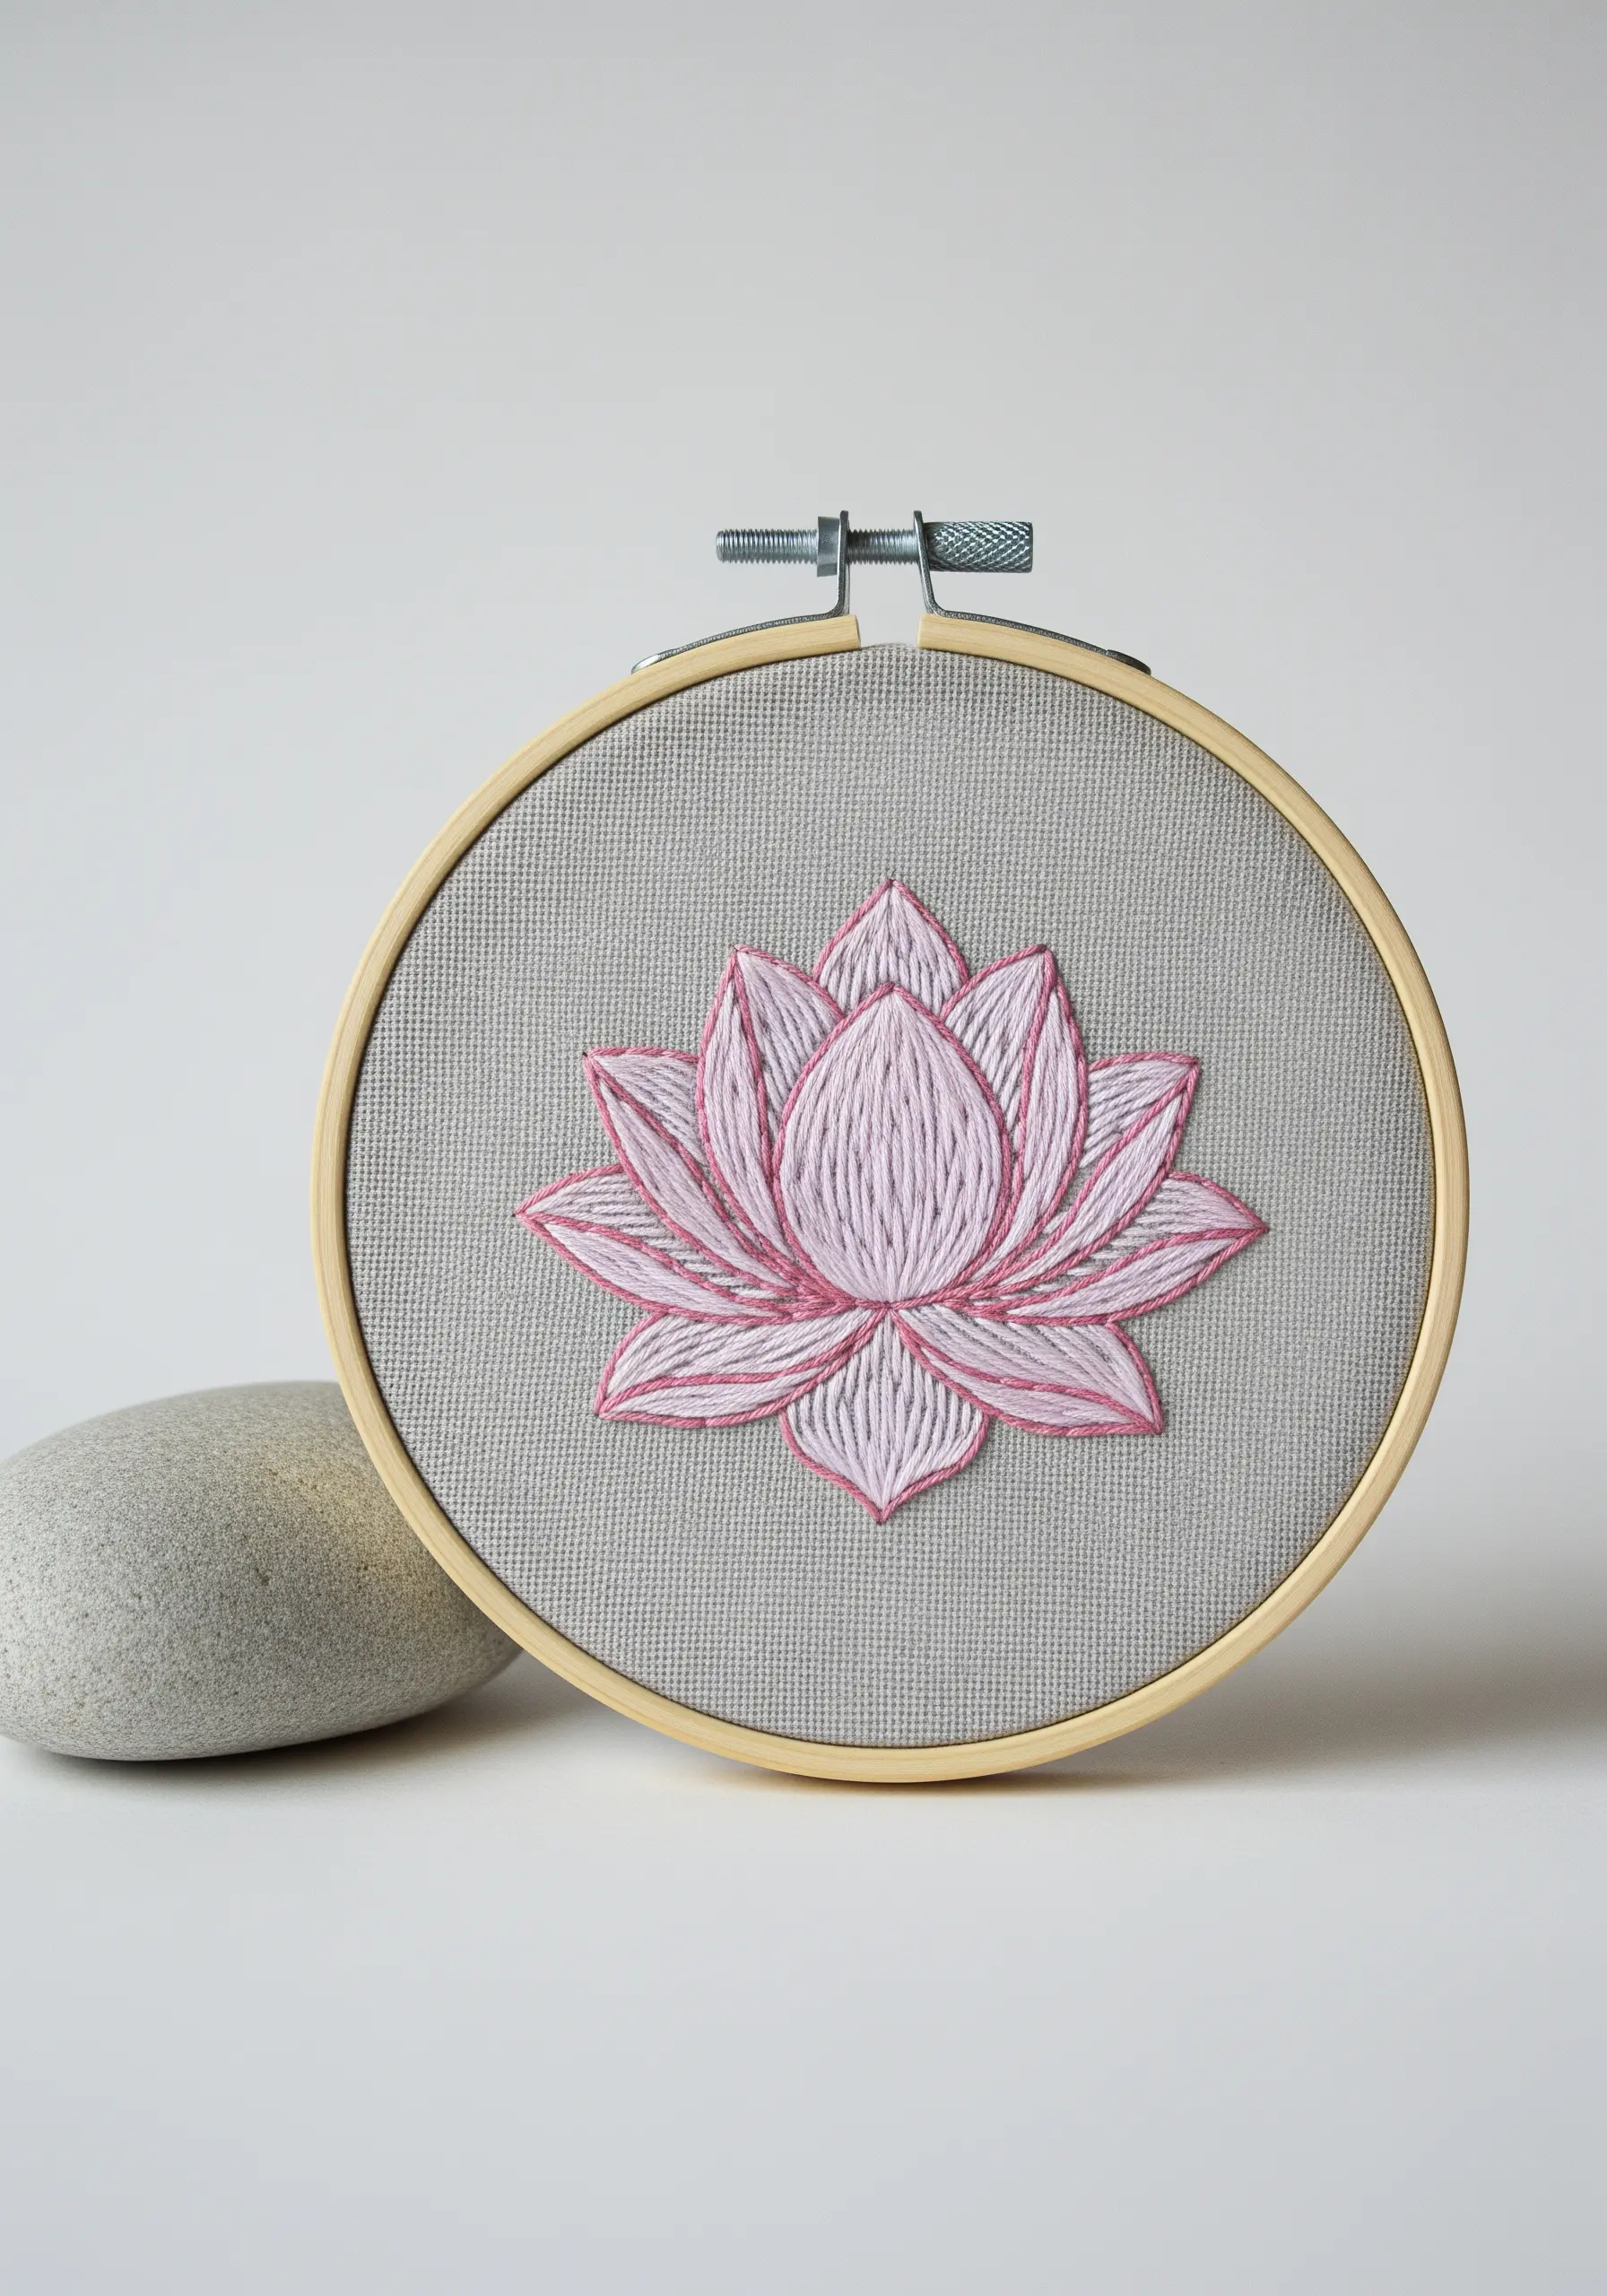
Create petal-like dimension in your lotus flower using a directional long-and-short stitch.
Instead of filling each petal with uniform vertical stitches, angle them to radiate outward from the base of the flower.
This simple shift in stitch direction creates an immediate sense of movement and natural form.
Use a darker thread for the outline and a lighter shade for the fill to make the shape pop against the fabric.
19. A Zesty Lemon Slice
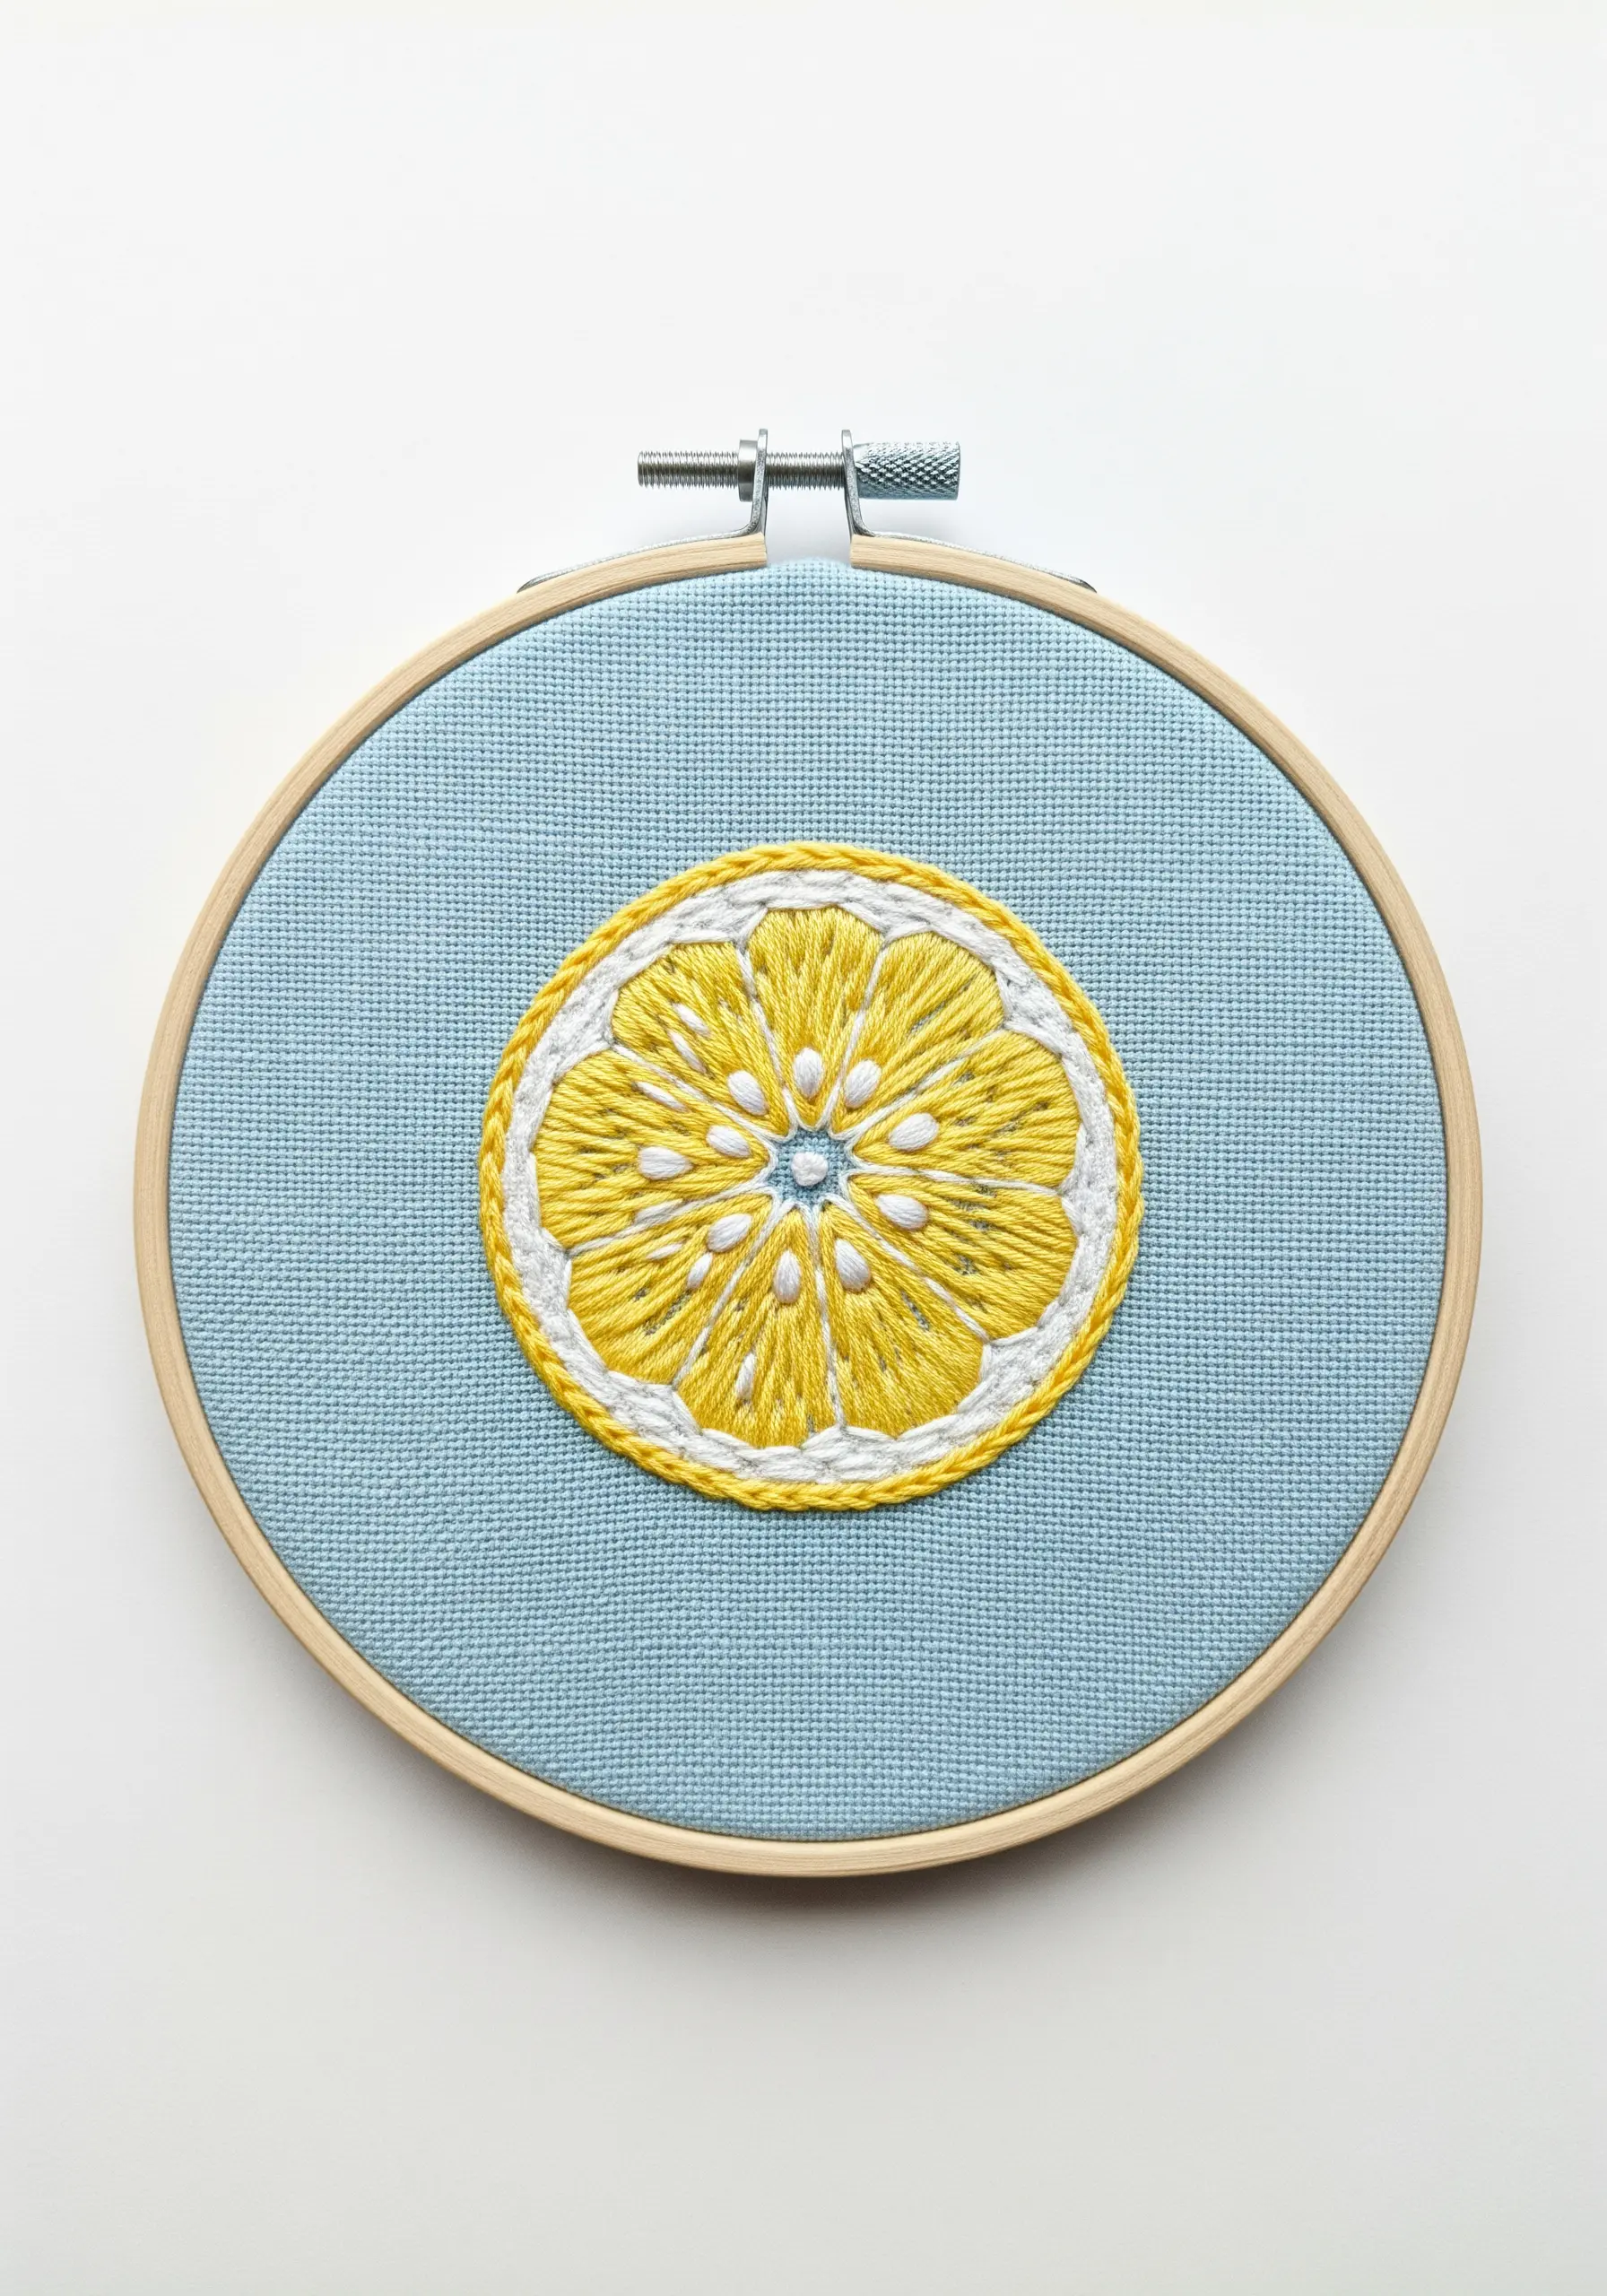
Capture the unique textures of a citrus slice by assigning a different stitch to each part of the fruit.
Fill the segments with satin stitch, angling the thread toward the center to create a juicy, pulpy look.
Use white French knots for the seeds and a thick, whipped backstitch for the textured rind.
This multi-stitch approach makes even a simple motif feel detailed, thoughtful, and engaging to stitch.
20. Raised Celtic Knot Design
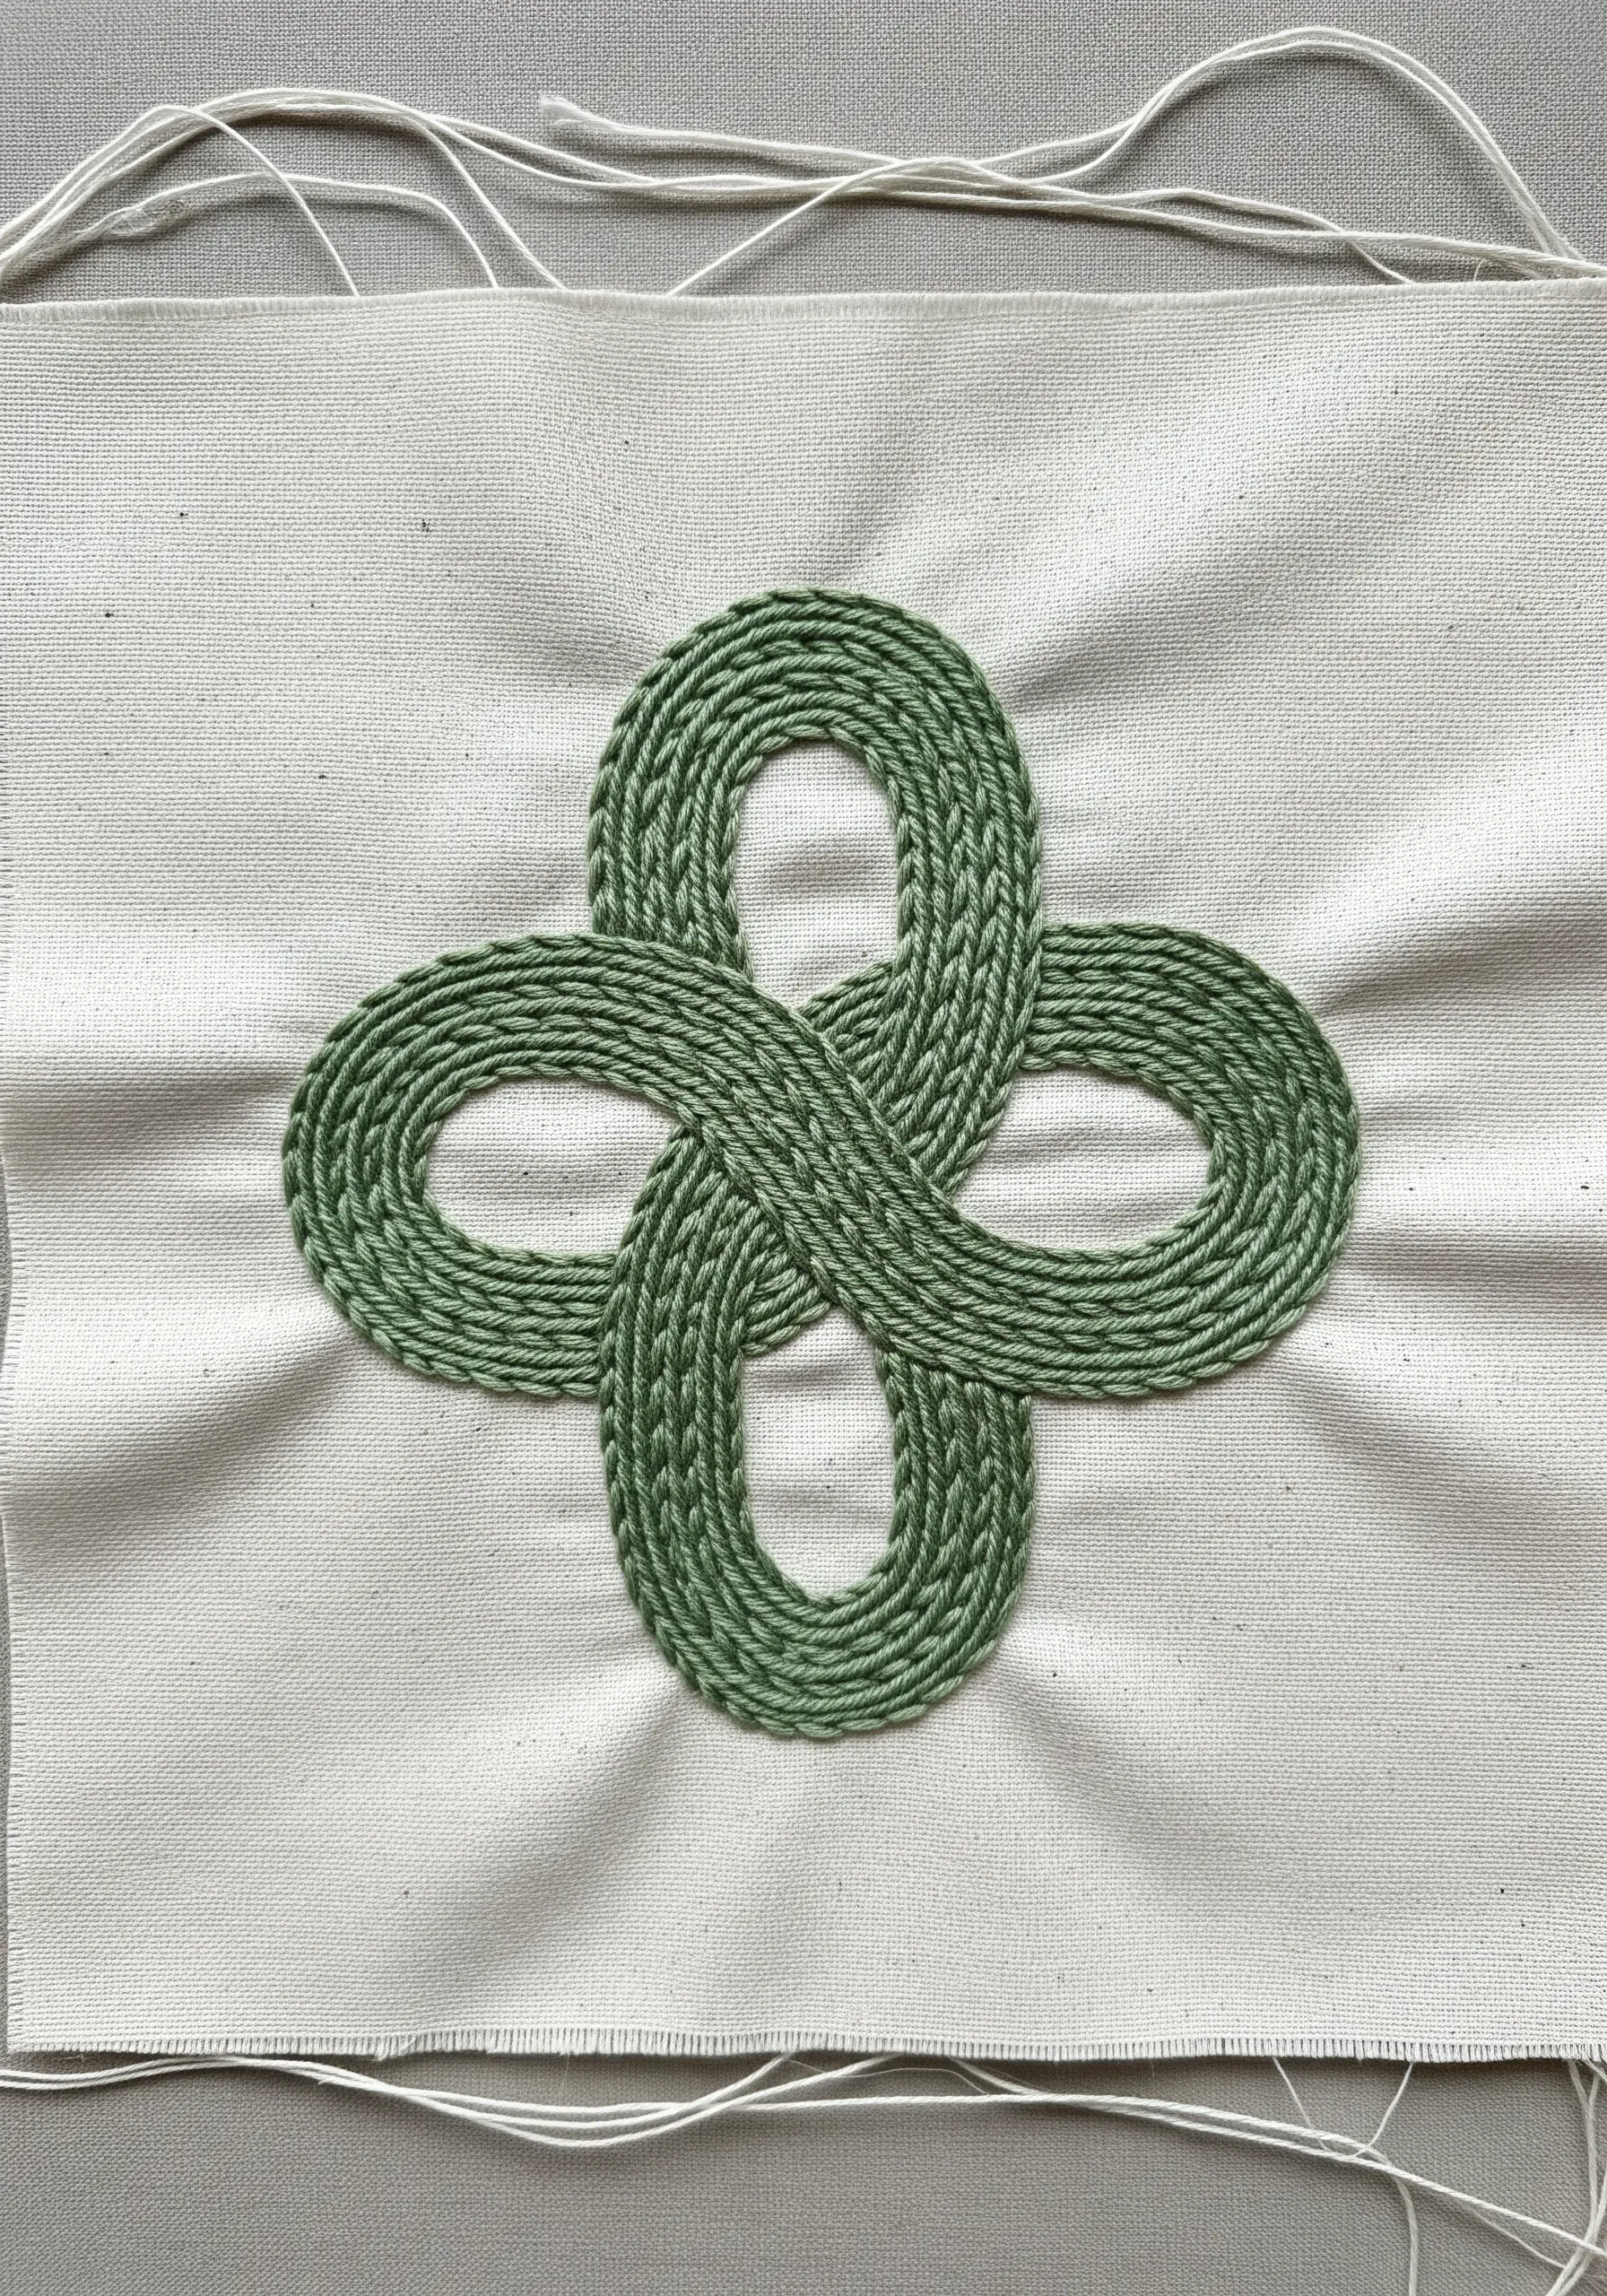
To give this Celtic knot a bold, three-dimensional feel, employ a padded satin stitch technique.
First, fill the entire shape with a foundation of simple straight stitches, running perpendicular to the direction your final stitches will go.
Then, cover this padding entirely with a tight, neat layer of satin stitch.
The underlying threads raise the surface, creating beautiful shadows and a satisfyingly tactile finish.


