
Have you ever felt that your love for embroidery could be expressed in new ways, beyond the familiar comfort of fabric and hoop? Sometimes, the path to elevating your craft isn’t about mastering a more complex stitch, but about changing the canvas itself.
This is an invitation to think like a mixed-media artist. Imagine combining the crisp, clean edge of paper with the soft, textural line of a thread. Think of your stitches not just as decoration, but as a way to connect, define, and bring dimension to collaged art.
Here, you will find ways to translate your skills onto paper, to blend collage with stitching, and to see your leftover scraps—both paper and thread—as the beginning of a beautiful, intentional piece of art. Let’s explore how these two worlds can meet, creating something entirely new and deeply personal.
1. Layered Paper Landscapes with Stitched Light
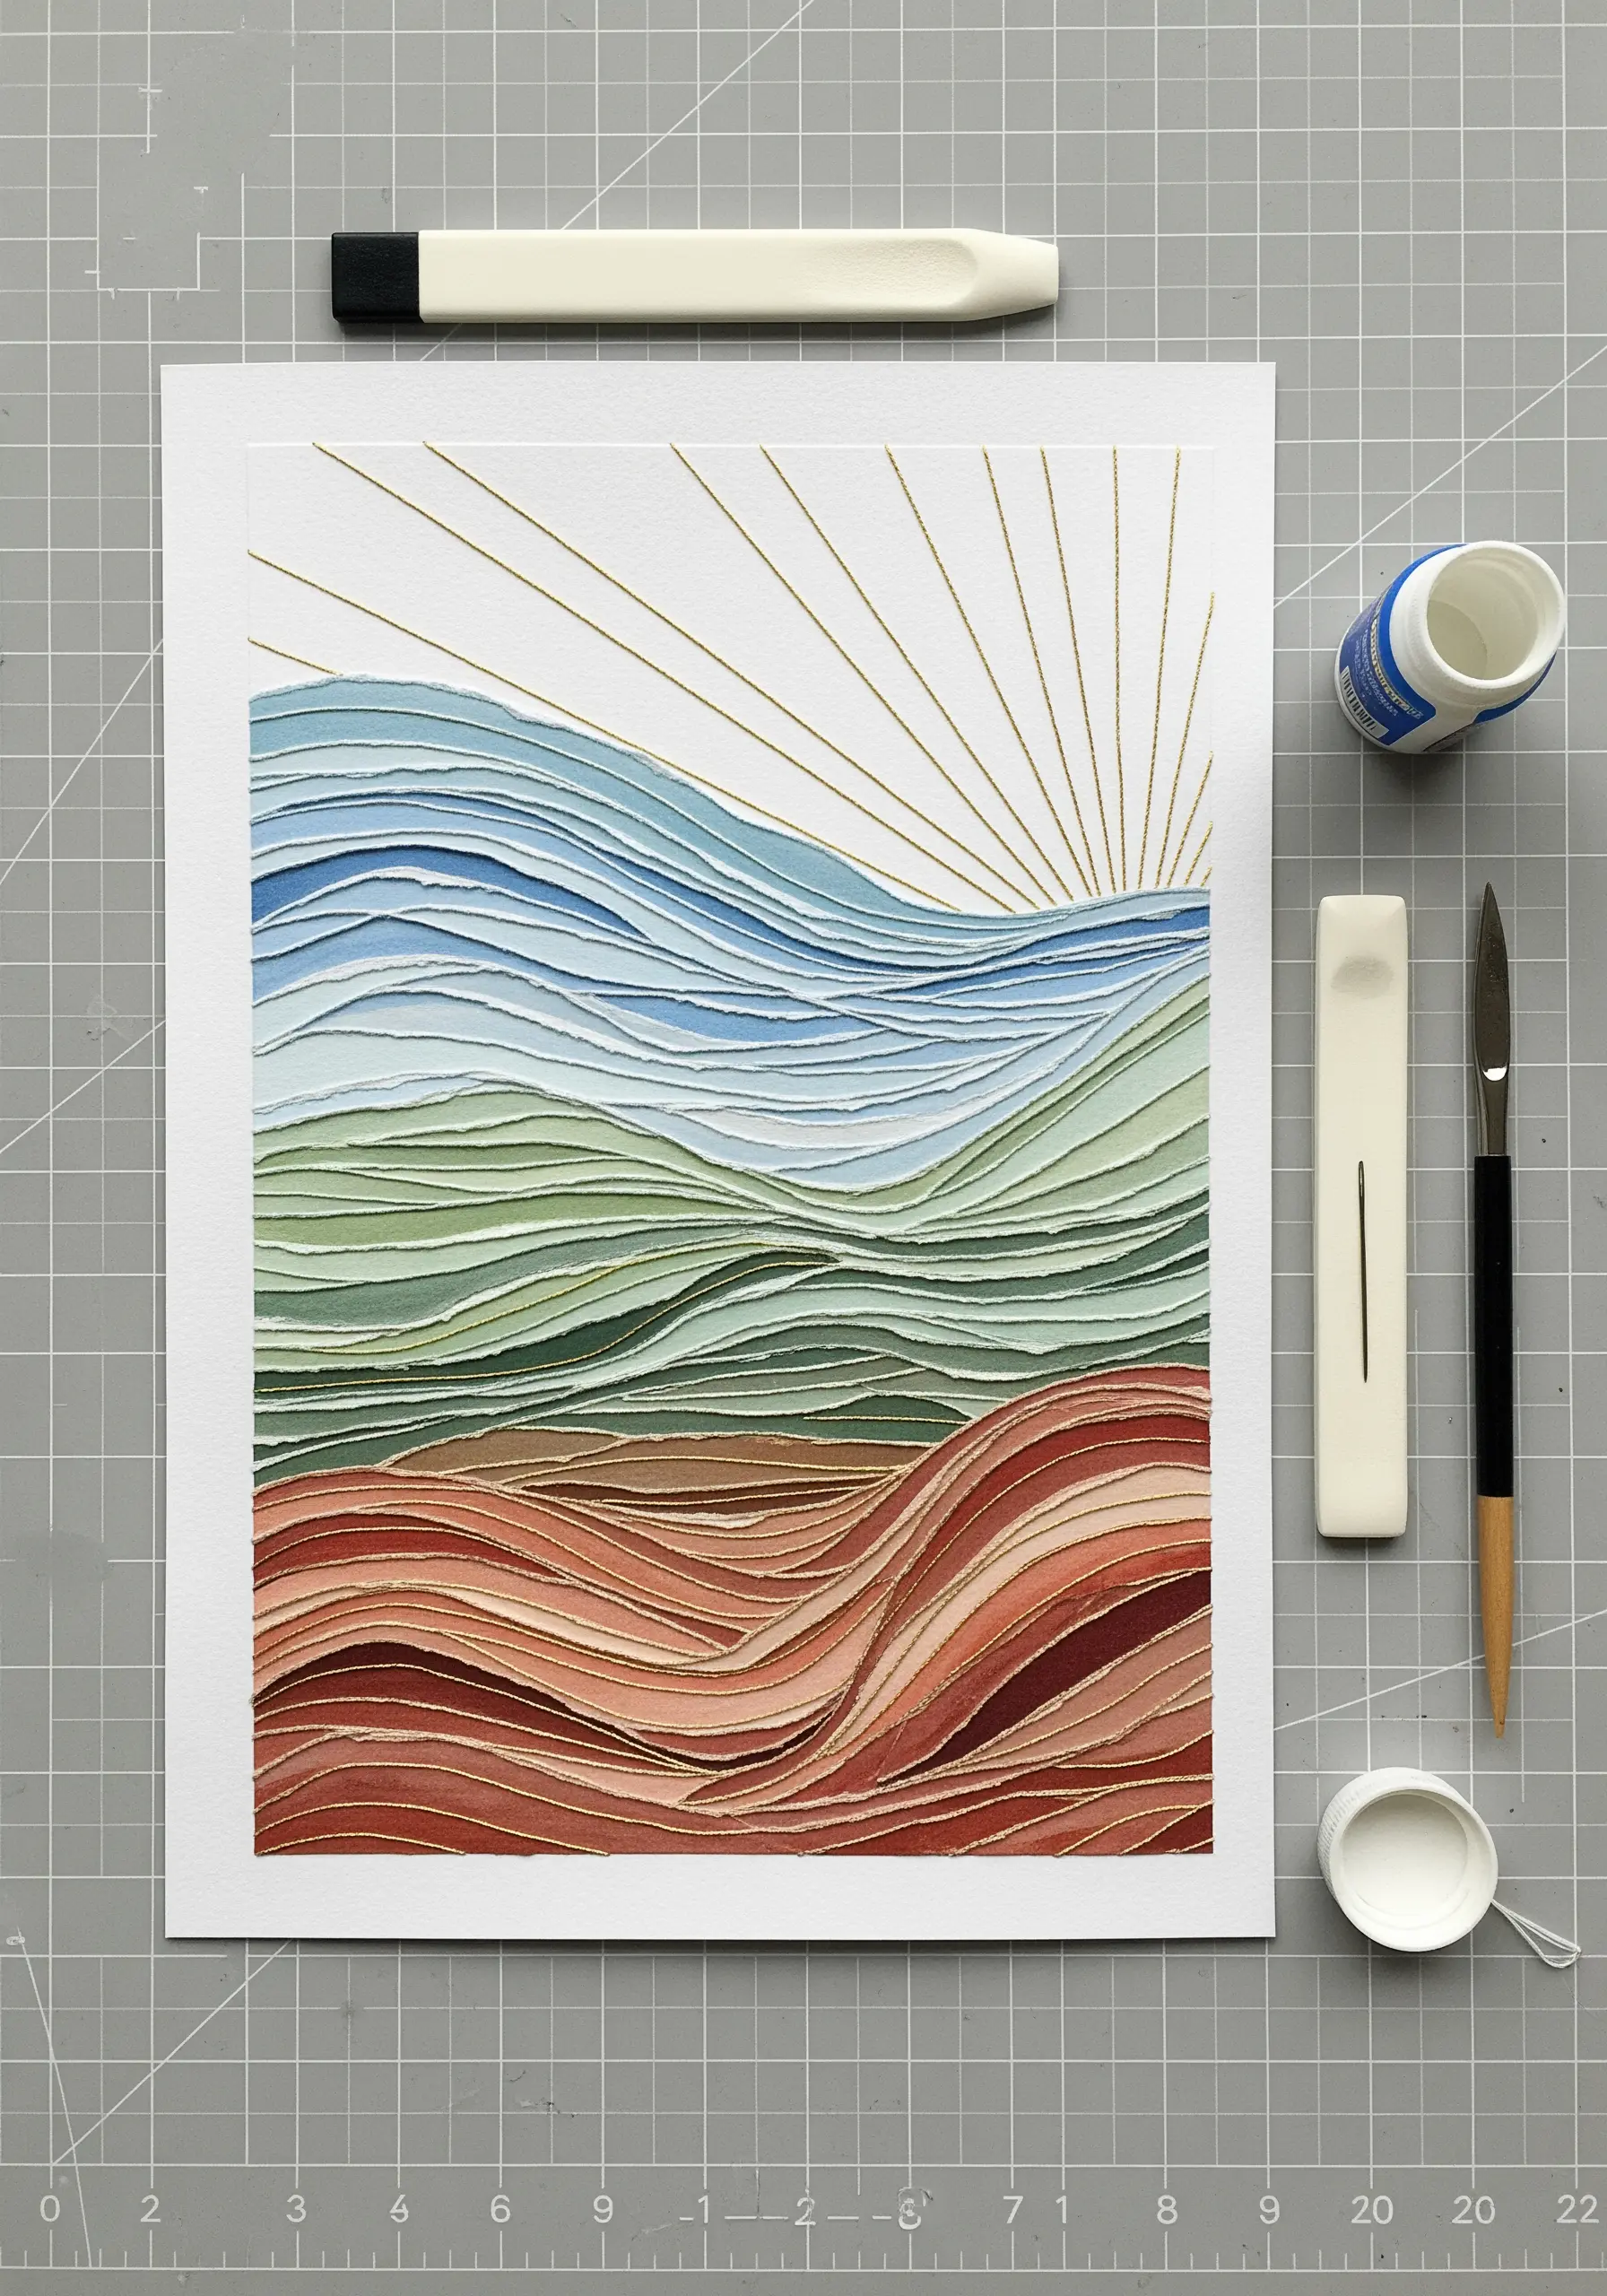
Create topographical depth by layering hand-torn or cut paper in graduated shades.
Use a single strand of metallic thread to stitch radiating straight lines for sun rays, piercing the paper carefully with a fine needle.
This technique contrasts the soft, matte texture of the paper with the sharp, reflective quality of the thread, turning a simple landscape into a dynamic composition.
The key is to keep the stitches taut but not so tight that they buckle the paper, which ensures a clean, professional finish for your paper art designs that pair beautifully with nature-inspired embroidery.
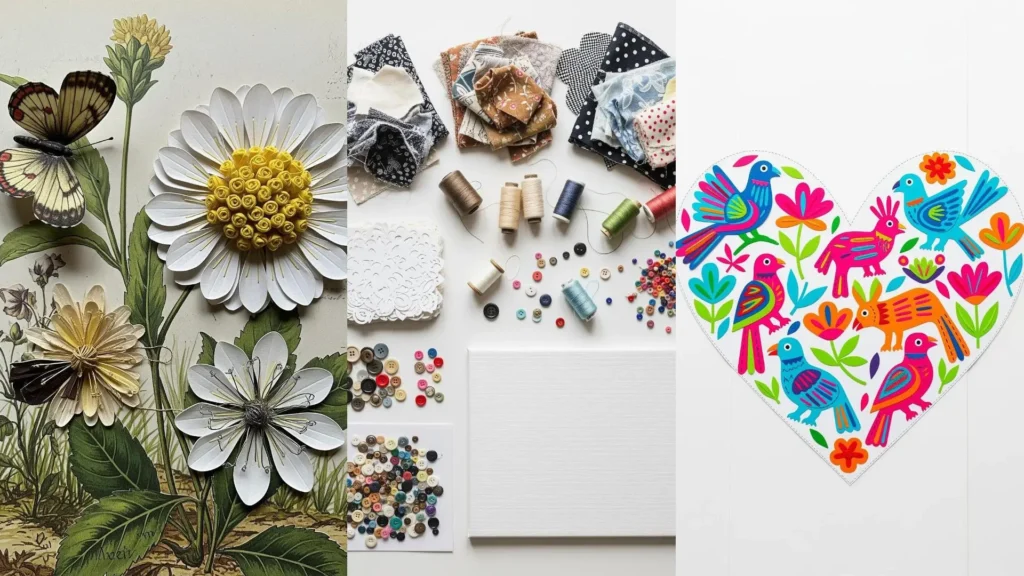
2. Accent Illustrations with Selective Stitching
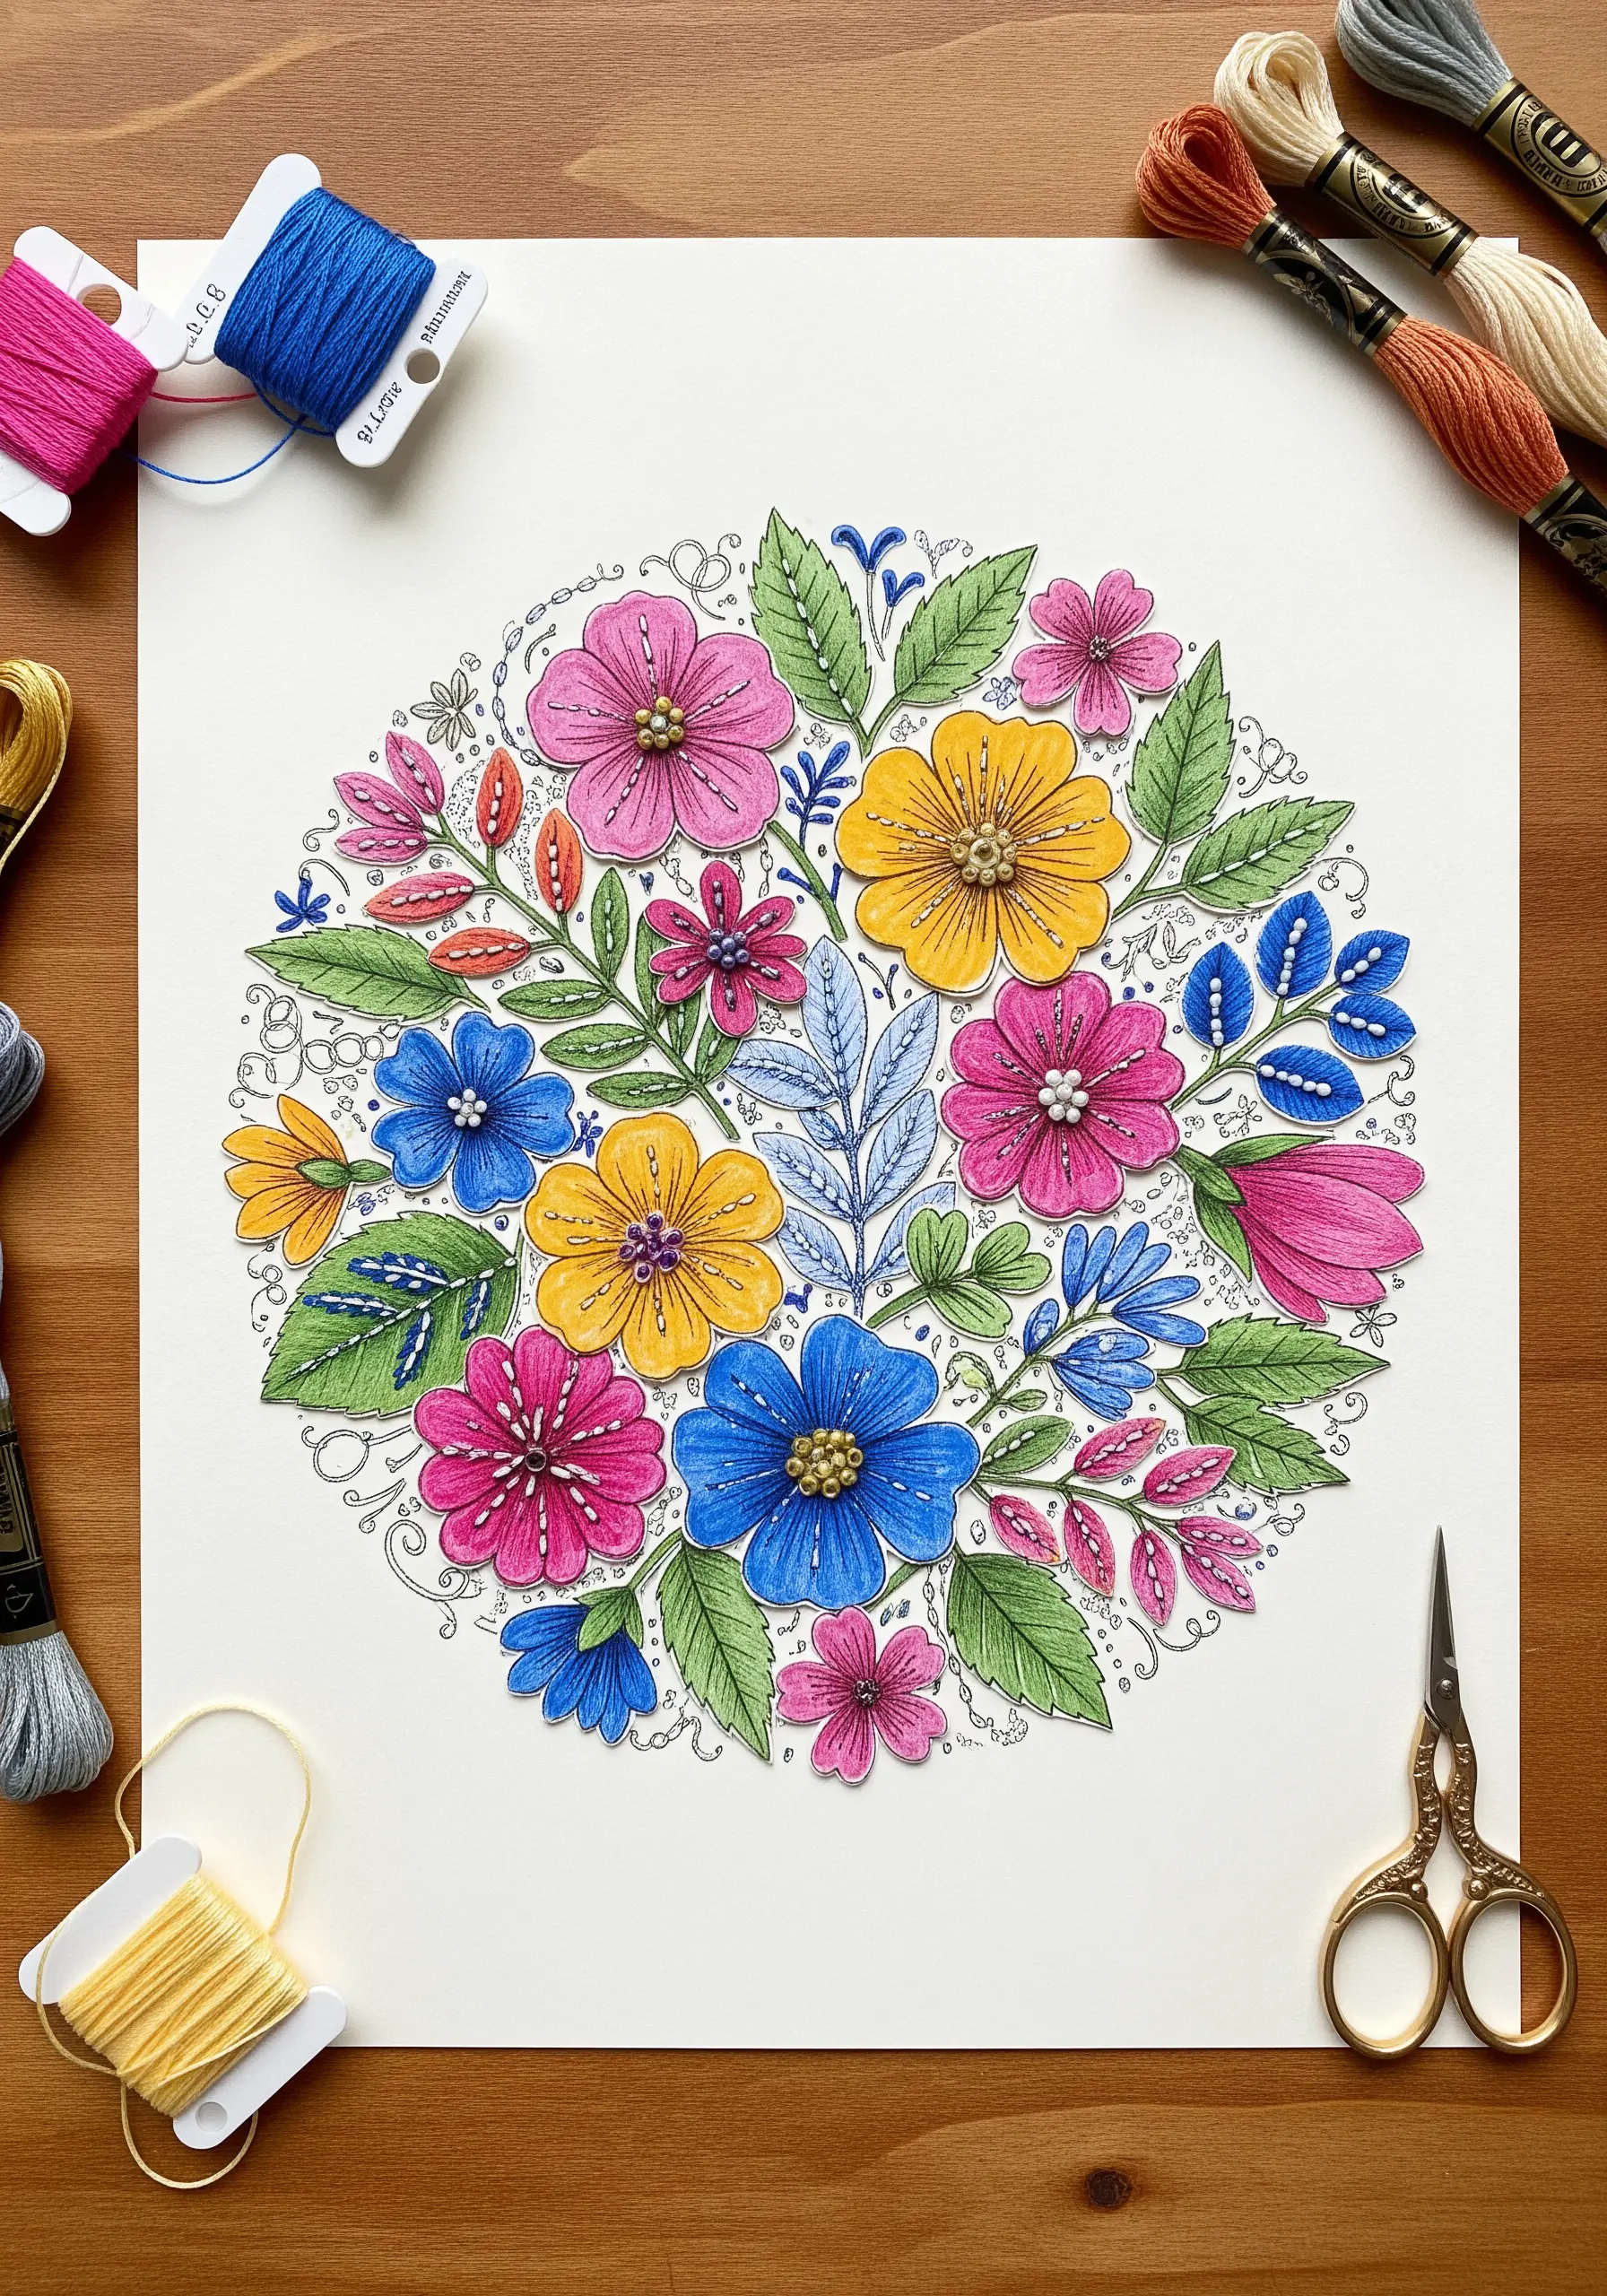
Elevate a simple drawing or watercolor painting by adding targeted embroidery.
Instead of filling entire shapes, use stitches to highlight specific details—a satin stitch for a flower’s center, French knots for texture, or a backstitch to define a single petal’s edge.
This approach adds tactile dimension without overwhelming the original artwork, creating a harmonious mixed-media piece.
By limiting the stitching, you make each thread a deliberate, impactful focal point in your floral mandala embroidery ideas for mindful stitching.
3. Connect Geometric Shapes with Graphic Threadwork
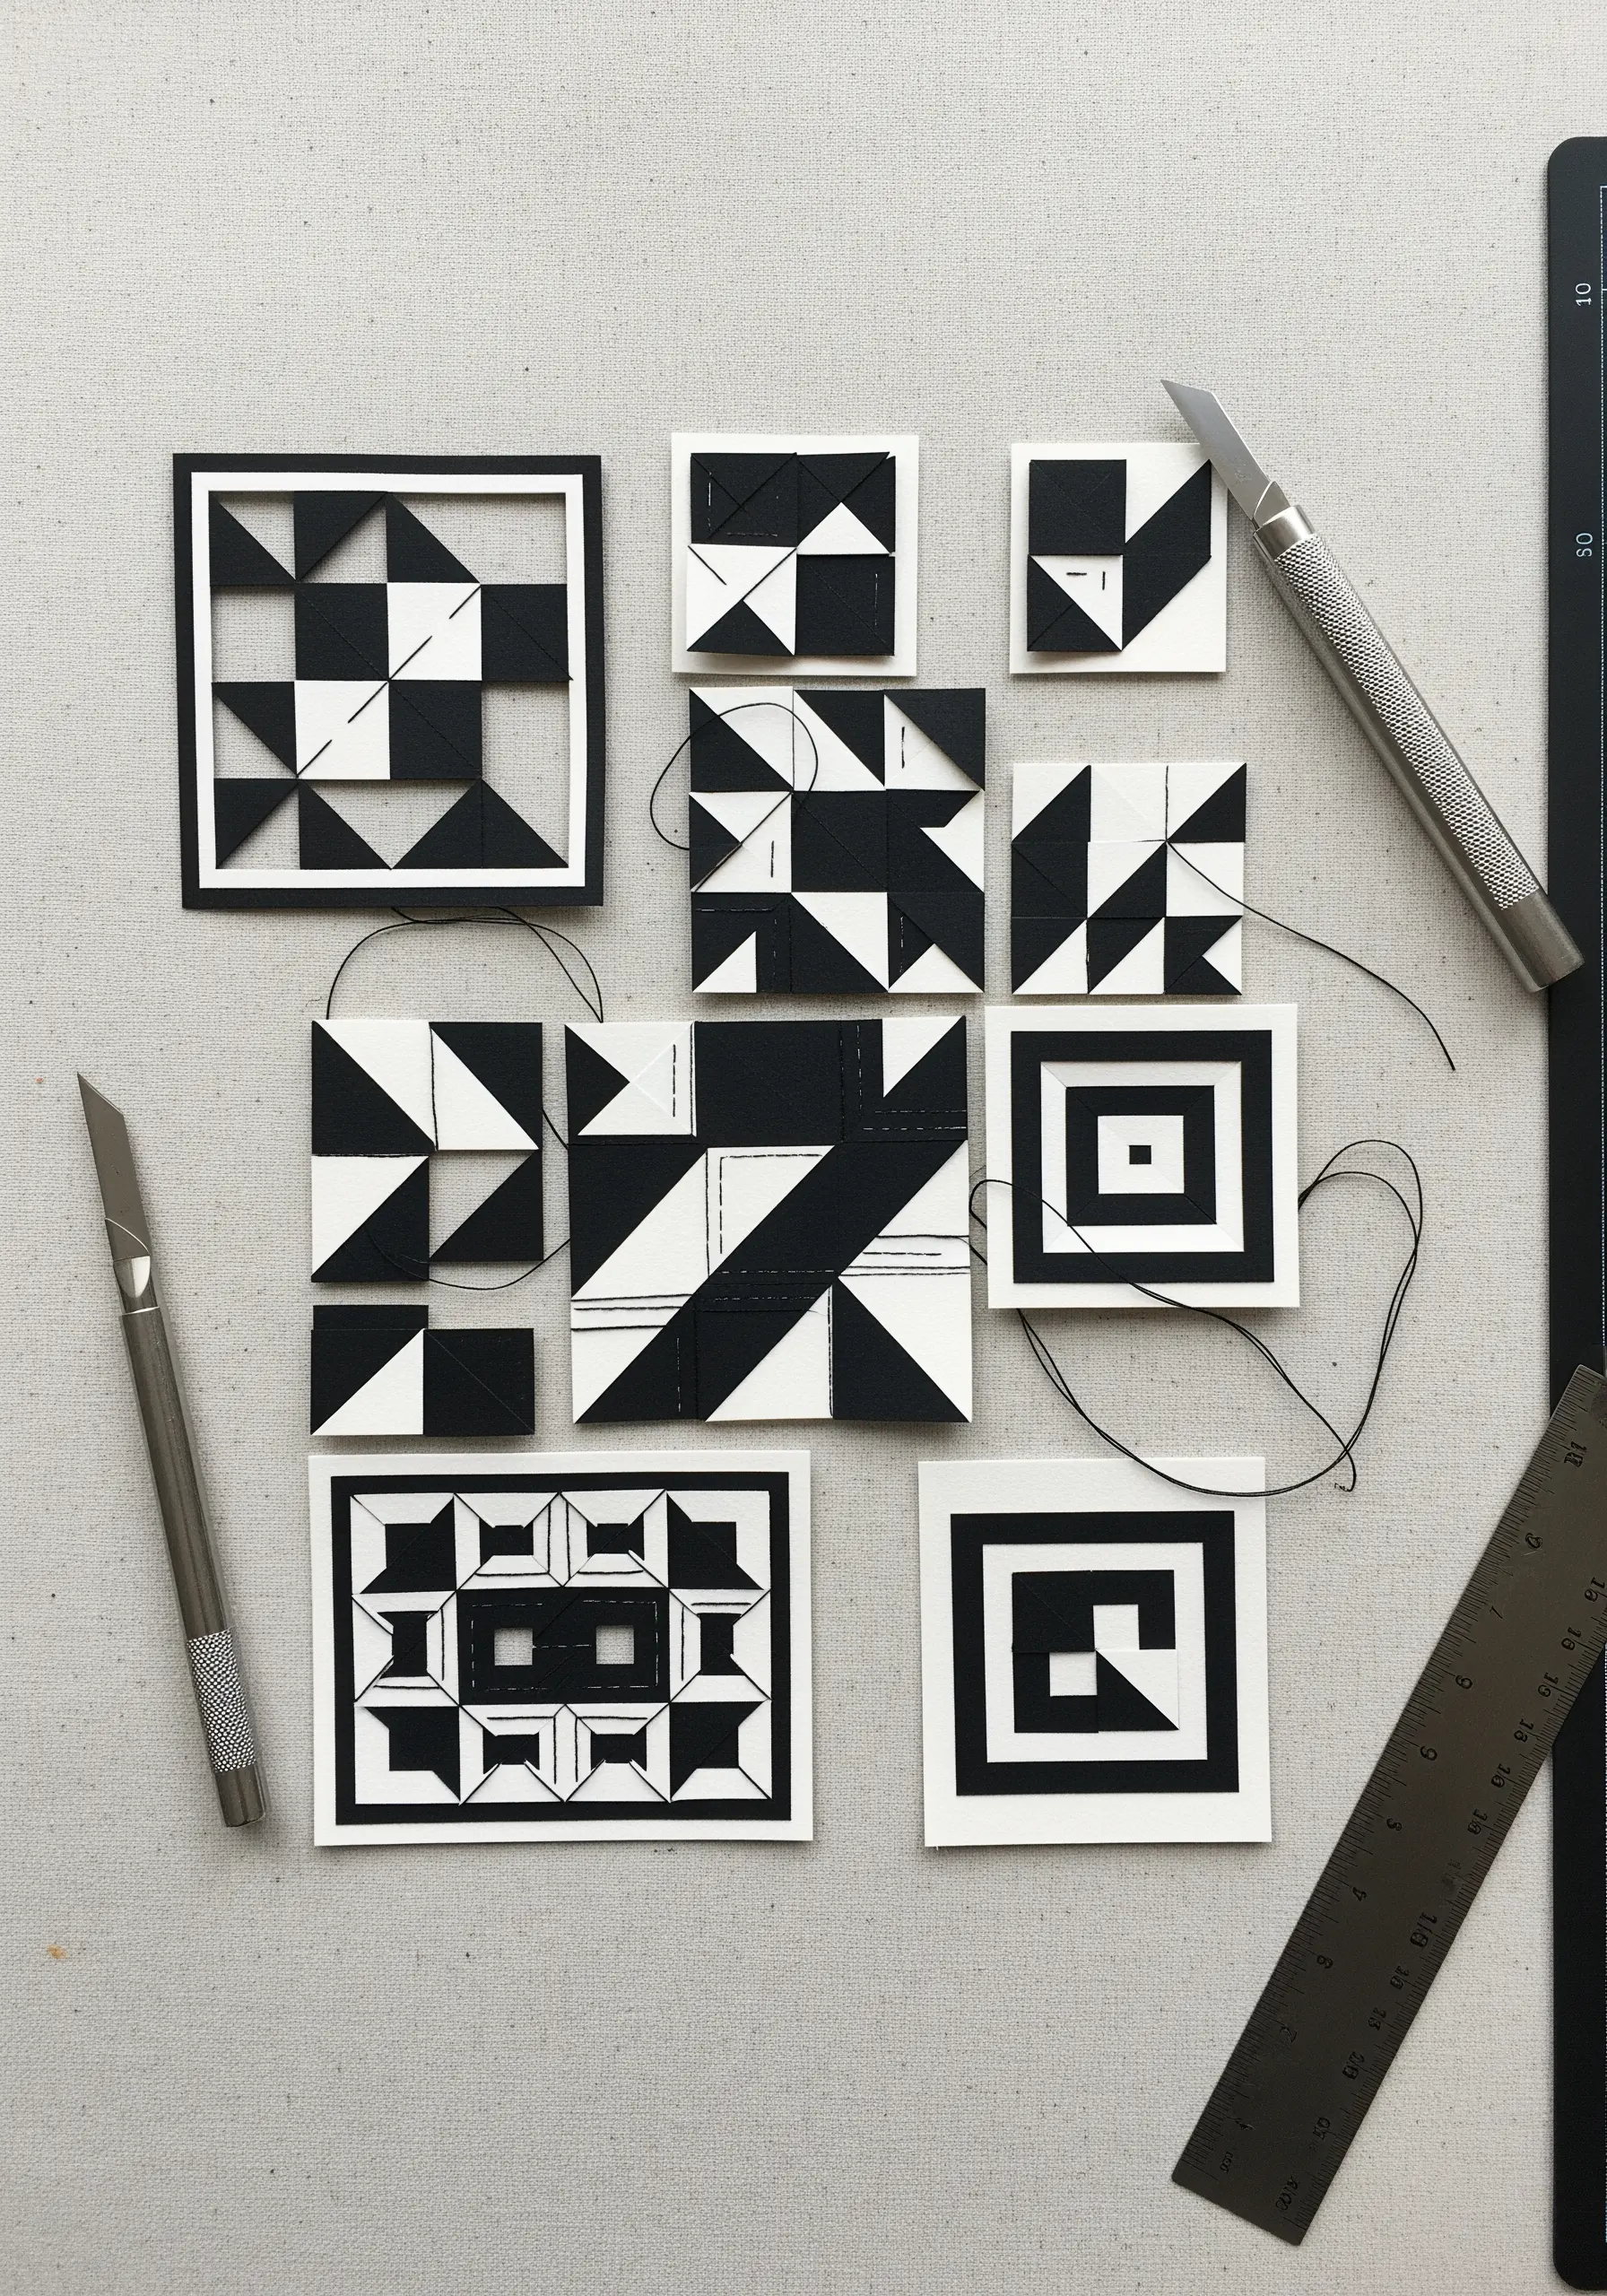
Arrange high-contrast paper shapes, like black and white geometric cutouts, into a balanced composition on a neutral background.
Instead of glue alone, use thread to physically and visually link the pieces.
A simple running stitch or a few strategically placed straight stitches can transform separate elements into a unified, cohesive artwork.
This technique turns the thread from a mere embellishment into a structural component, perfect for abstract framed embroidery patterns that feel intentional and modern.
4. Build Celestial Textures with Mixed Media
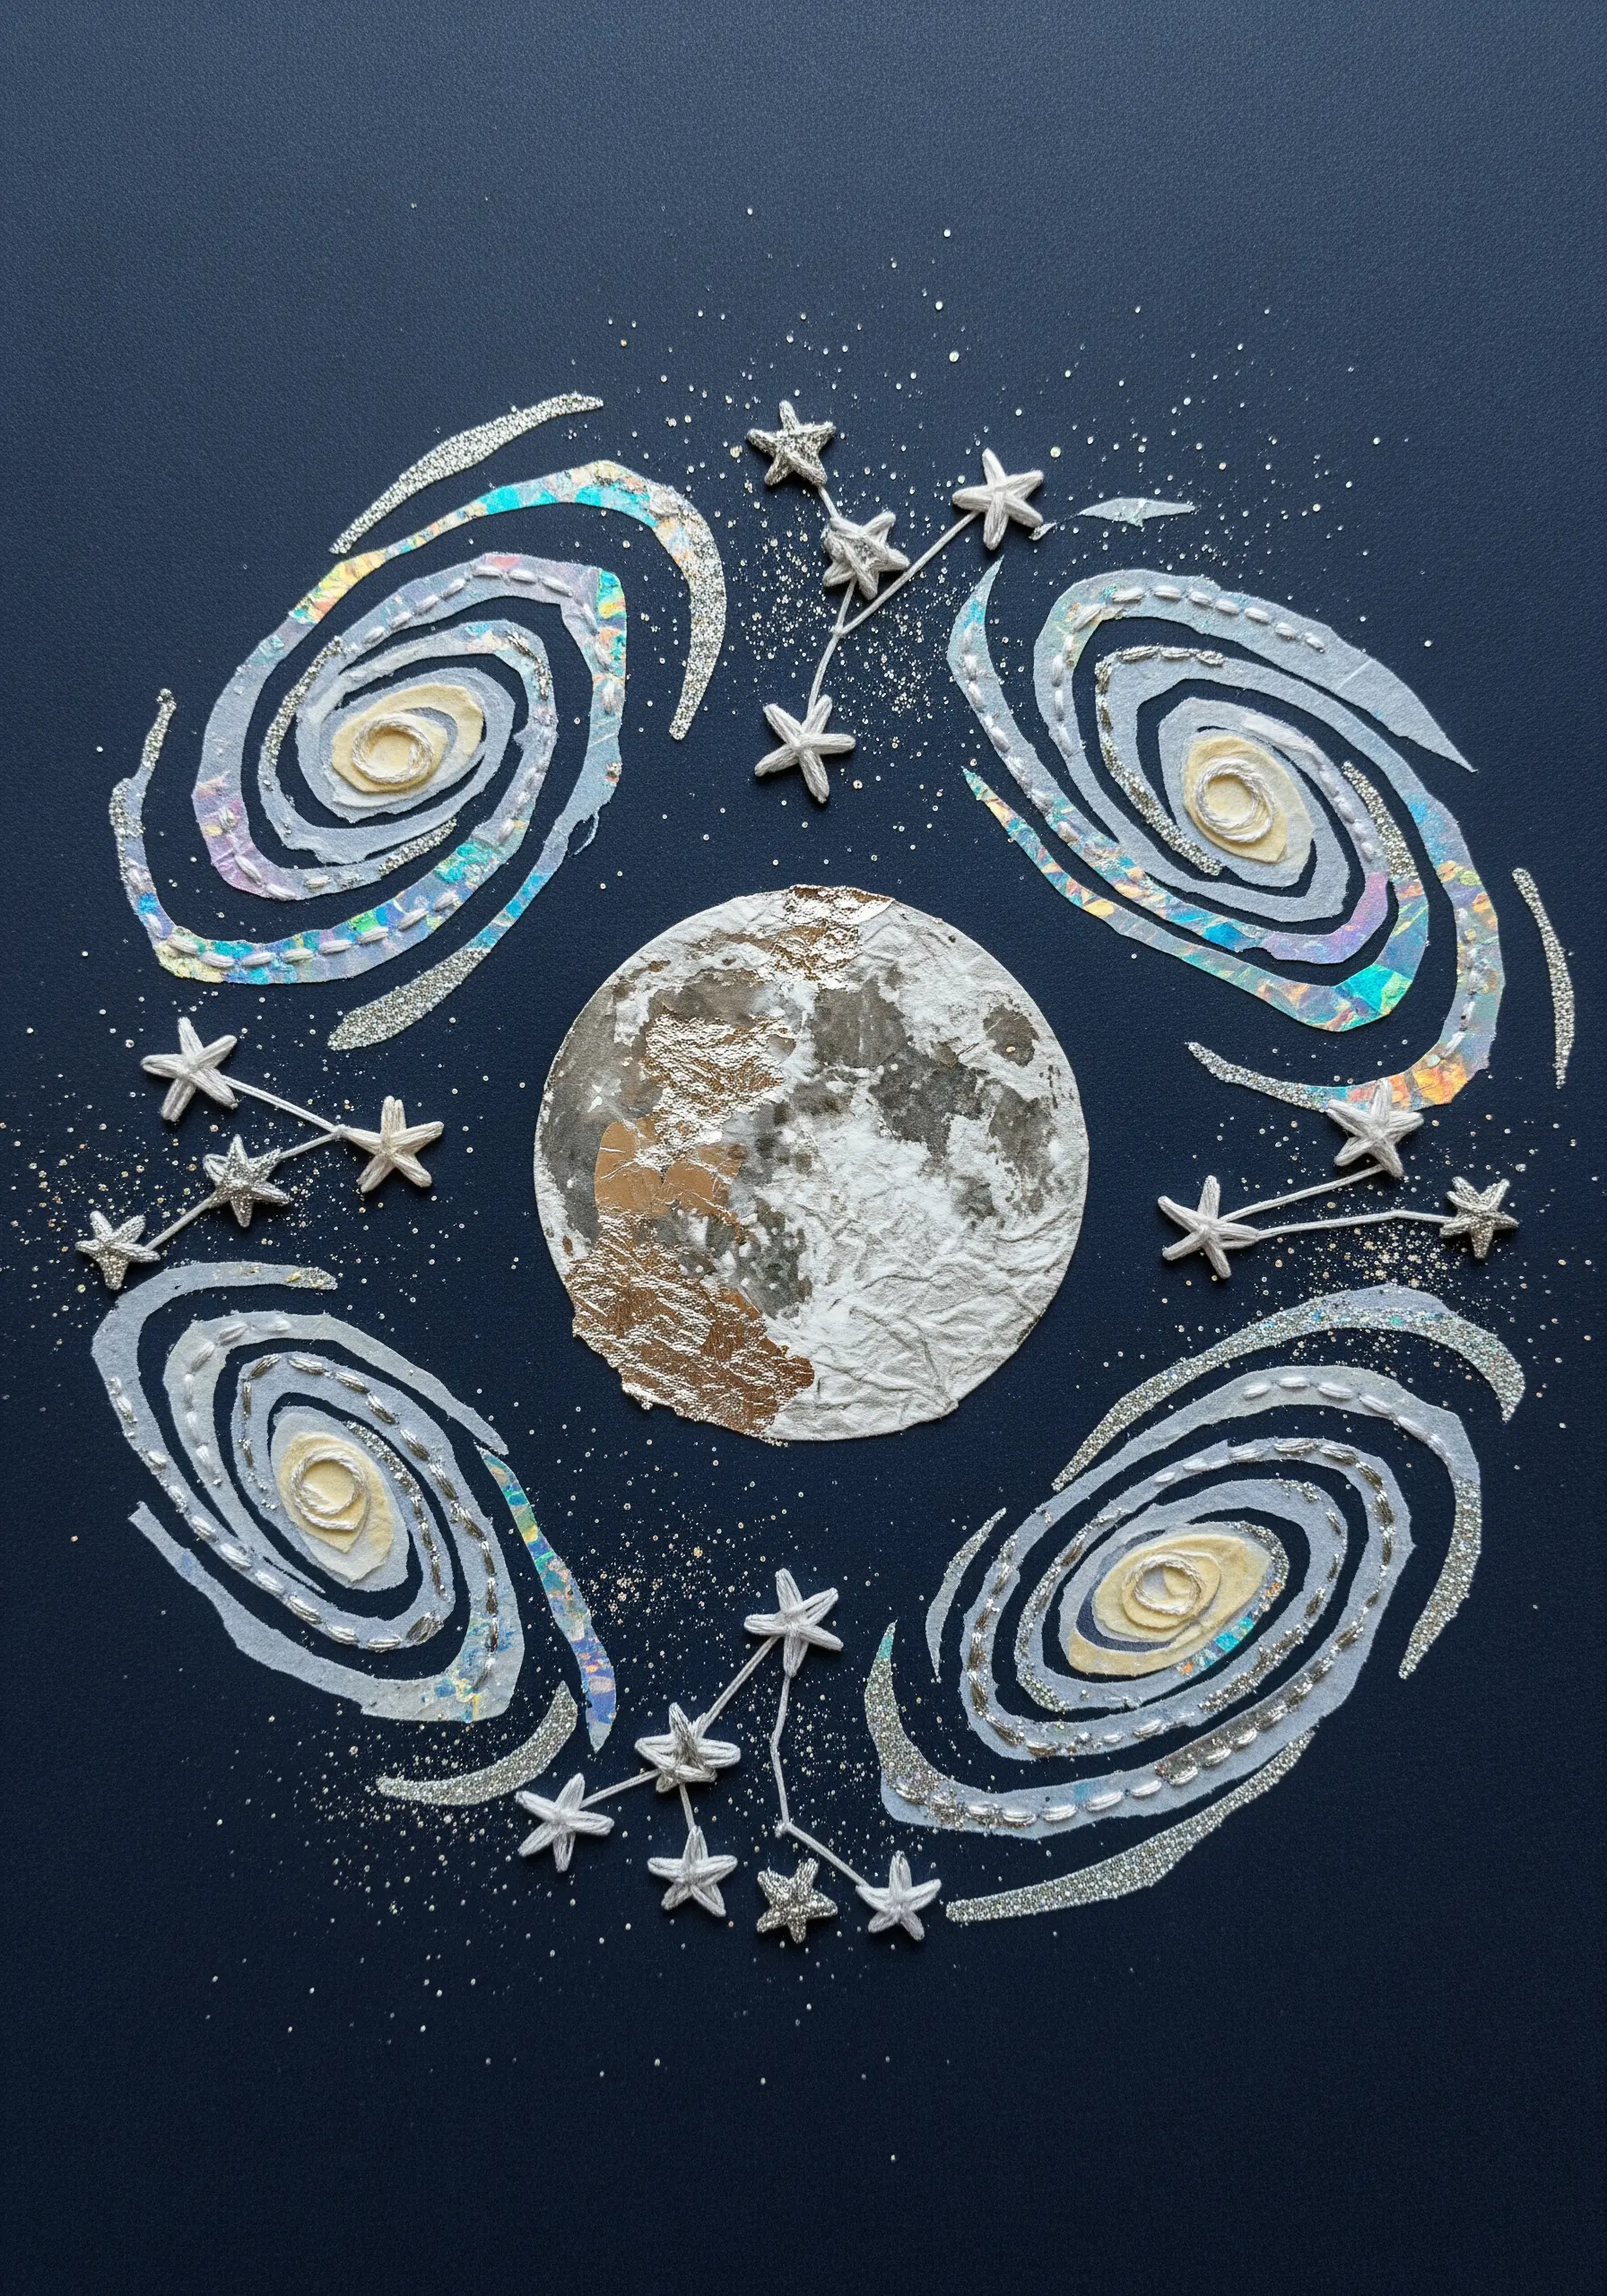
Combine iridescent paper, textured foil, and glitter to form the base of your cosmic collage.
Overlay these elements with simple stitches like seed stitch or couching to add definition and anchor the delicate materials.
The thread provides a soft, matte contrast to the sparkle of the other materials, creating a richer sensory experience.
This method is ideal for embroidered mixed media projects where you want to balance shine with handmade warmth.
5. Translate Weaving and Stitch Patterns into Paper
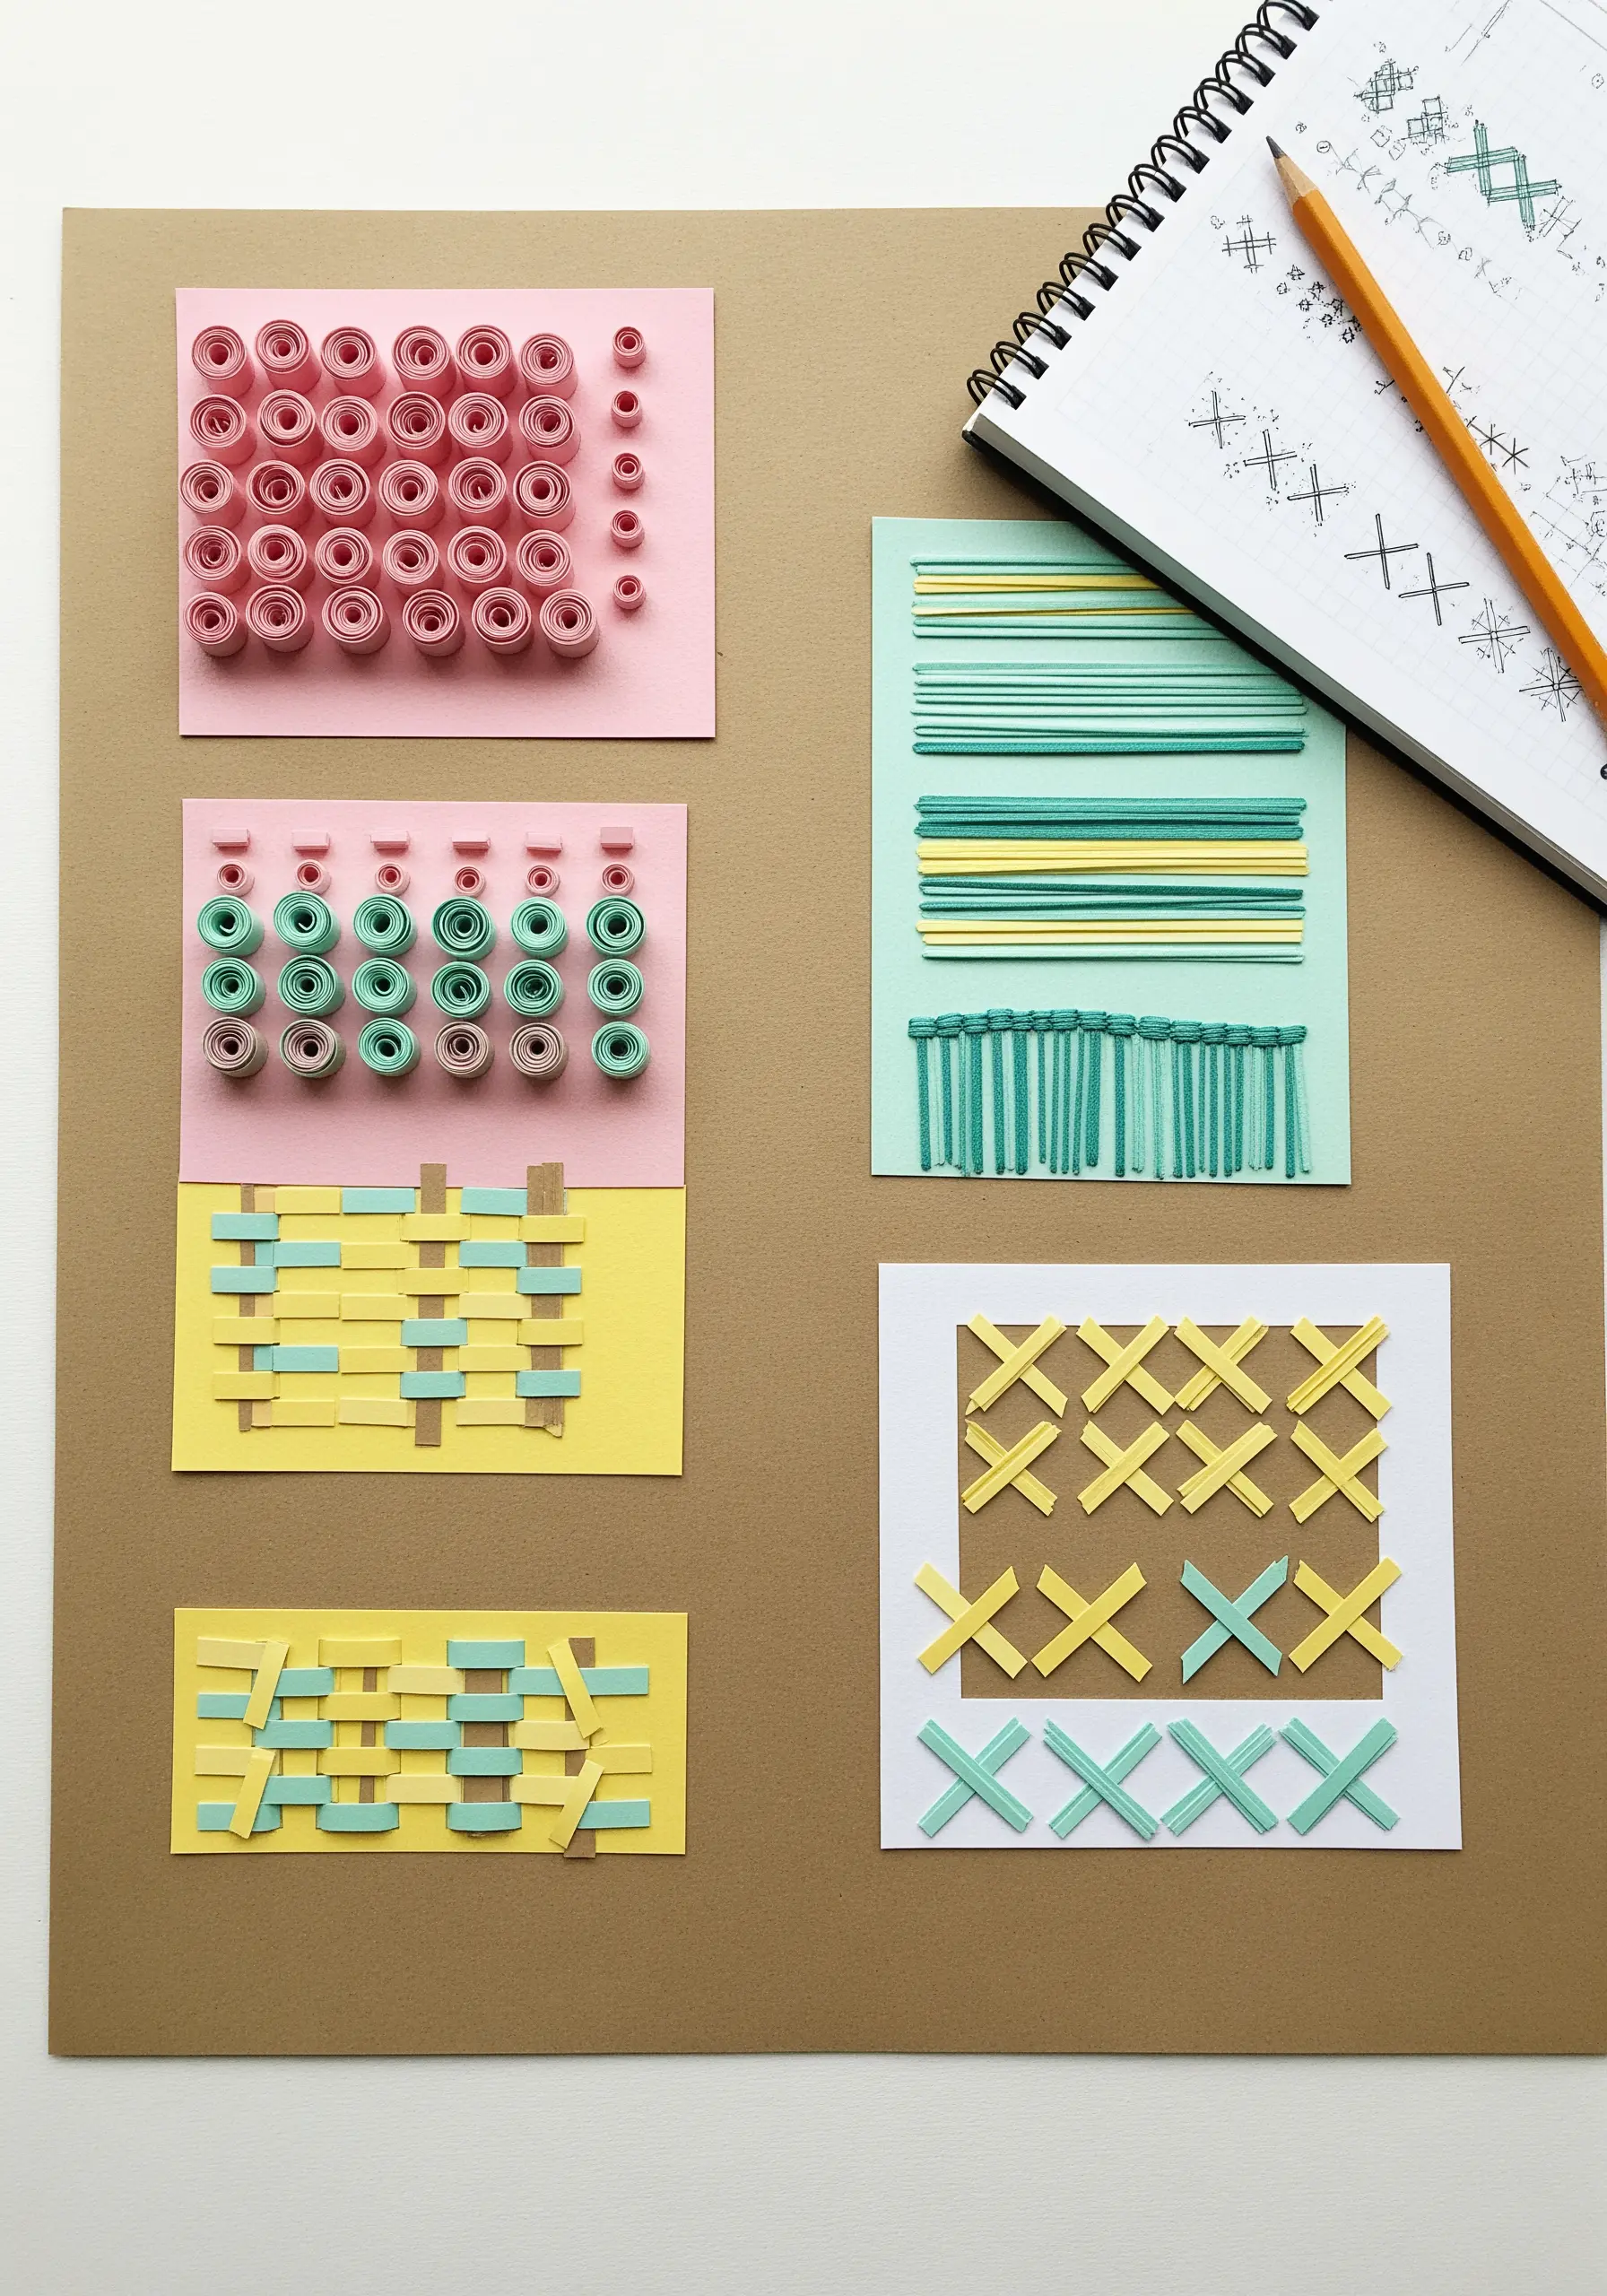
Recreate classic textile techniques using strips of colored paper instead of thread.
Practice paper quilling to mimic French knots or weave thin paper strips together to simulate a woven fabric texture.
You can even replicate cross-stitch patterns by arranging glued paper strips in ‘X’ shapes on a grid.
This exercise sharpens your understanding of pattern and structure, revealing how many unexpected embroidery techniques can be translated across different materials.
6. Create Portraits with Paper, Maps, and Thread
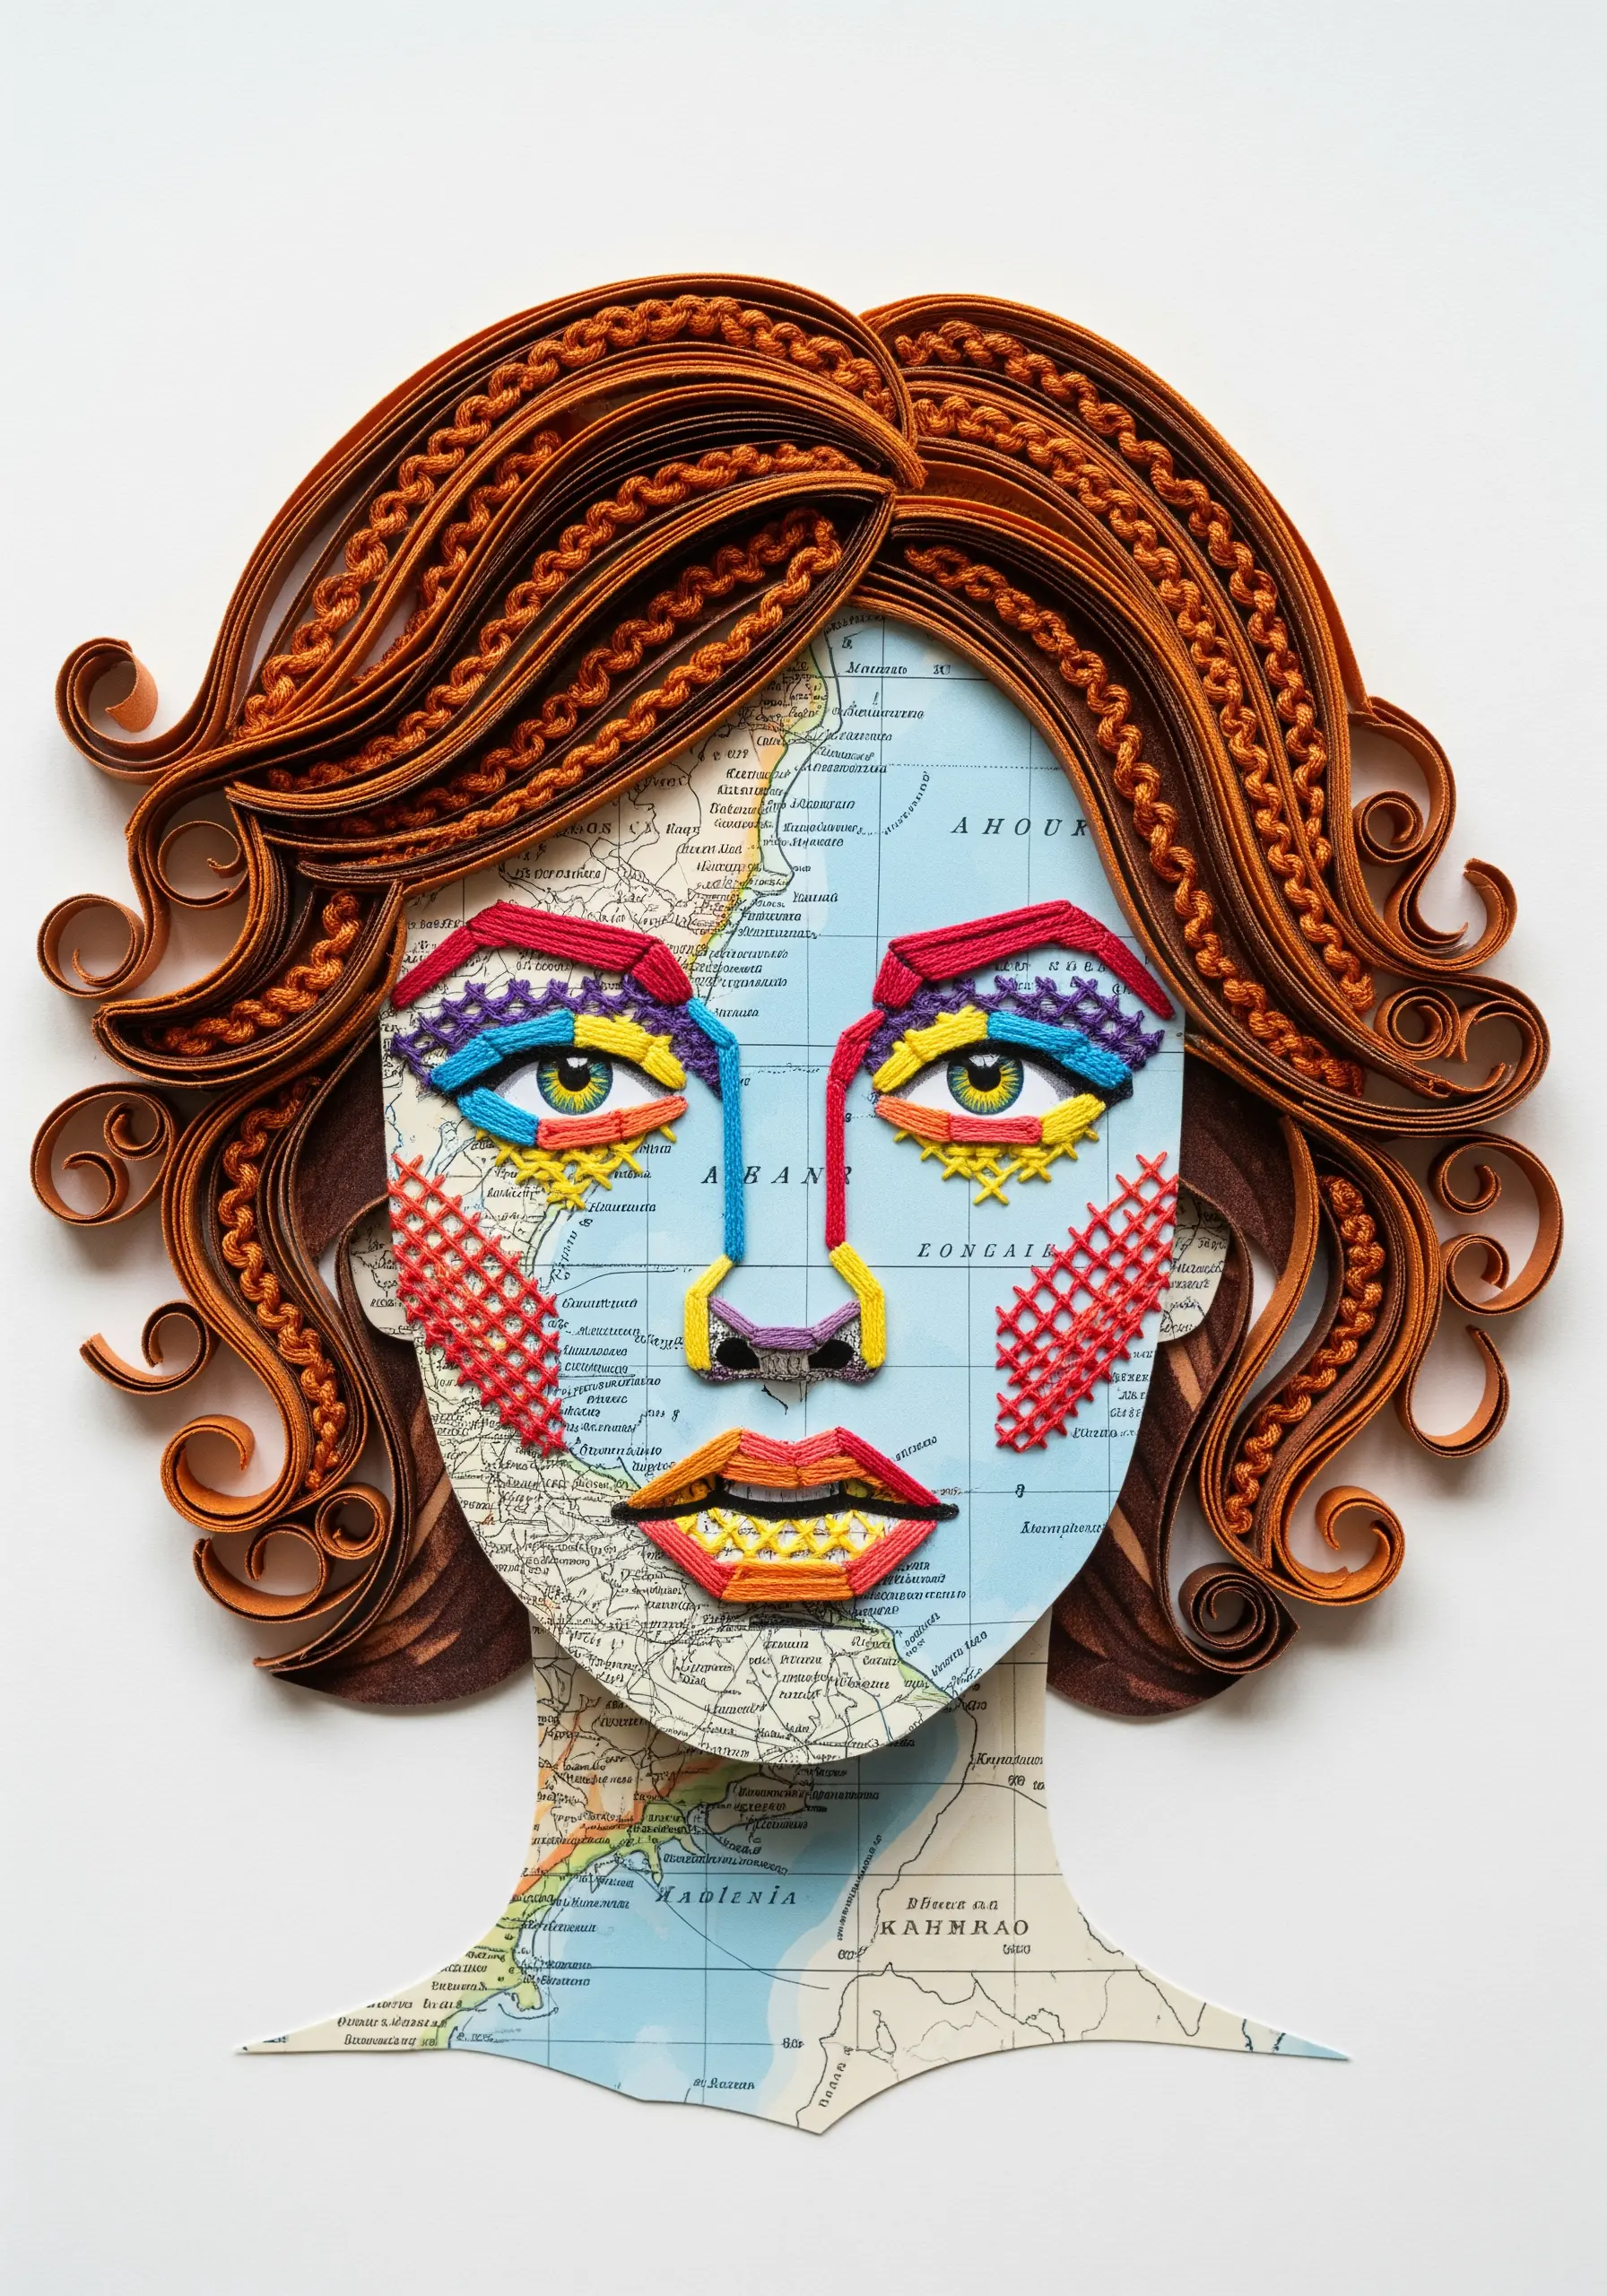
Use a vintage map as the foundation for a portrait, allowing its lines and colors to add an initial layer of complexity.
Add embroidered details for the facial features, using satin stitch for bold lips or cross-hatching for cheekbones.
For the hair, experiment with paper quilling techniques to create volumetric curls and braids, giving the piece a sculptural quality.
This combination of found paper and dimensional craft bridges illustration with contemporary thread painting techniques.
7. Define Paper Cutouts with Delicate Outlines
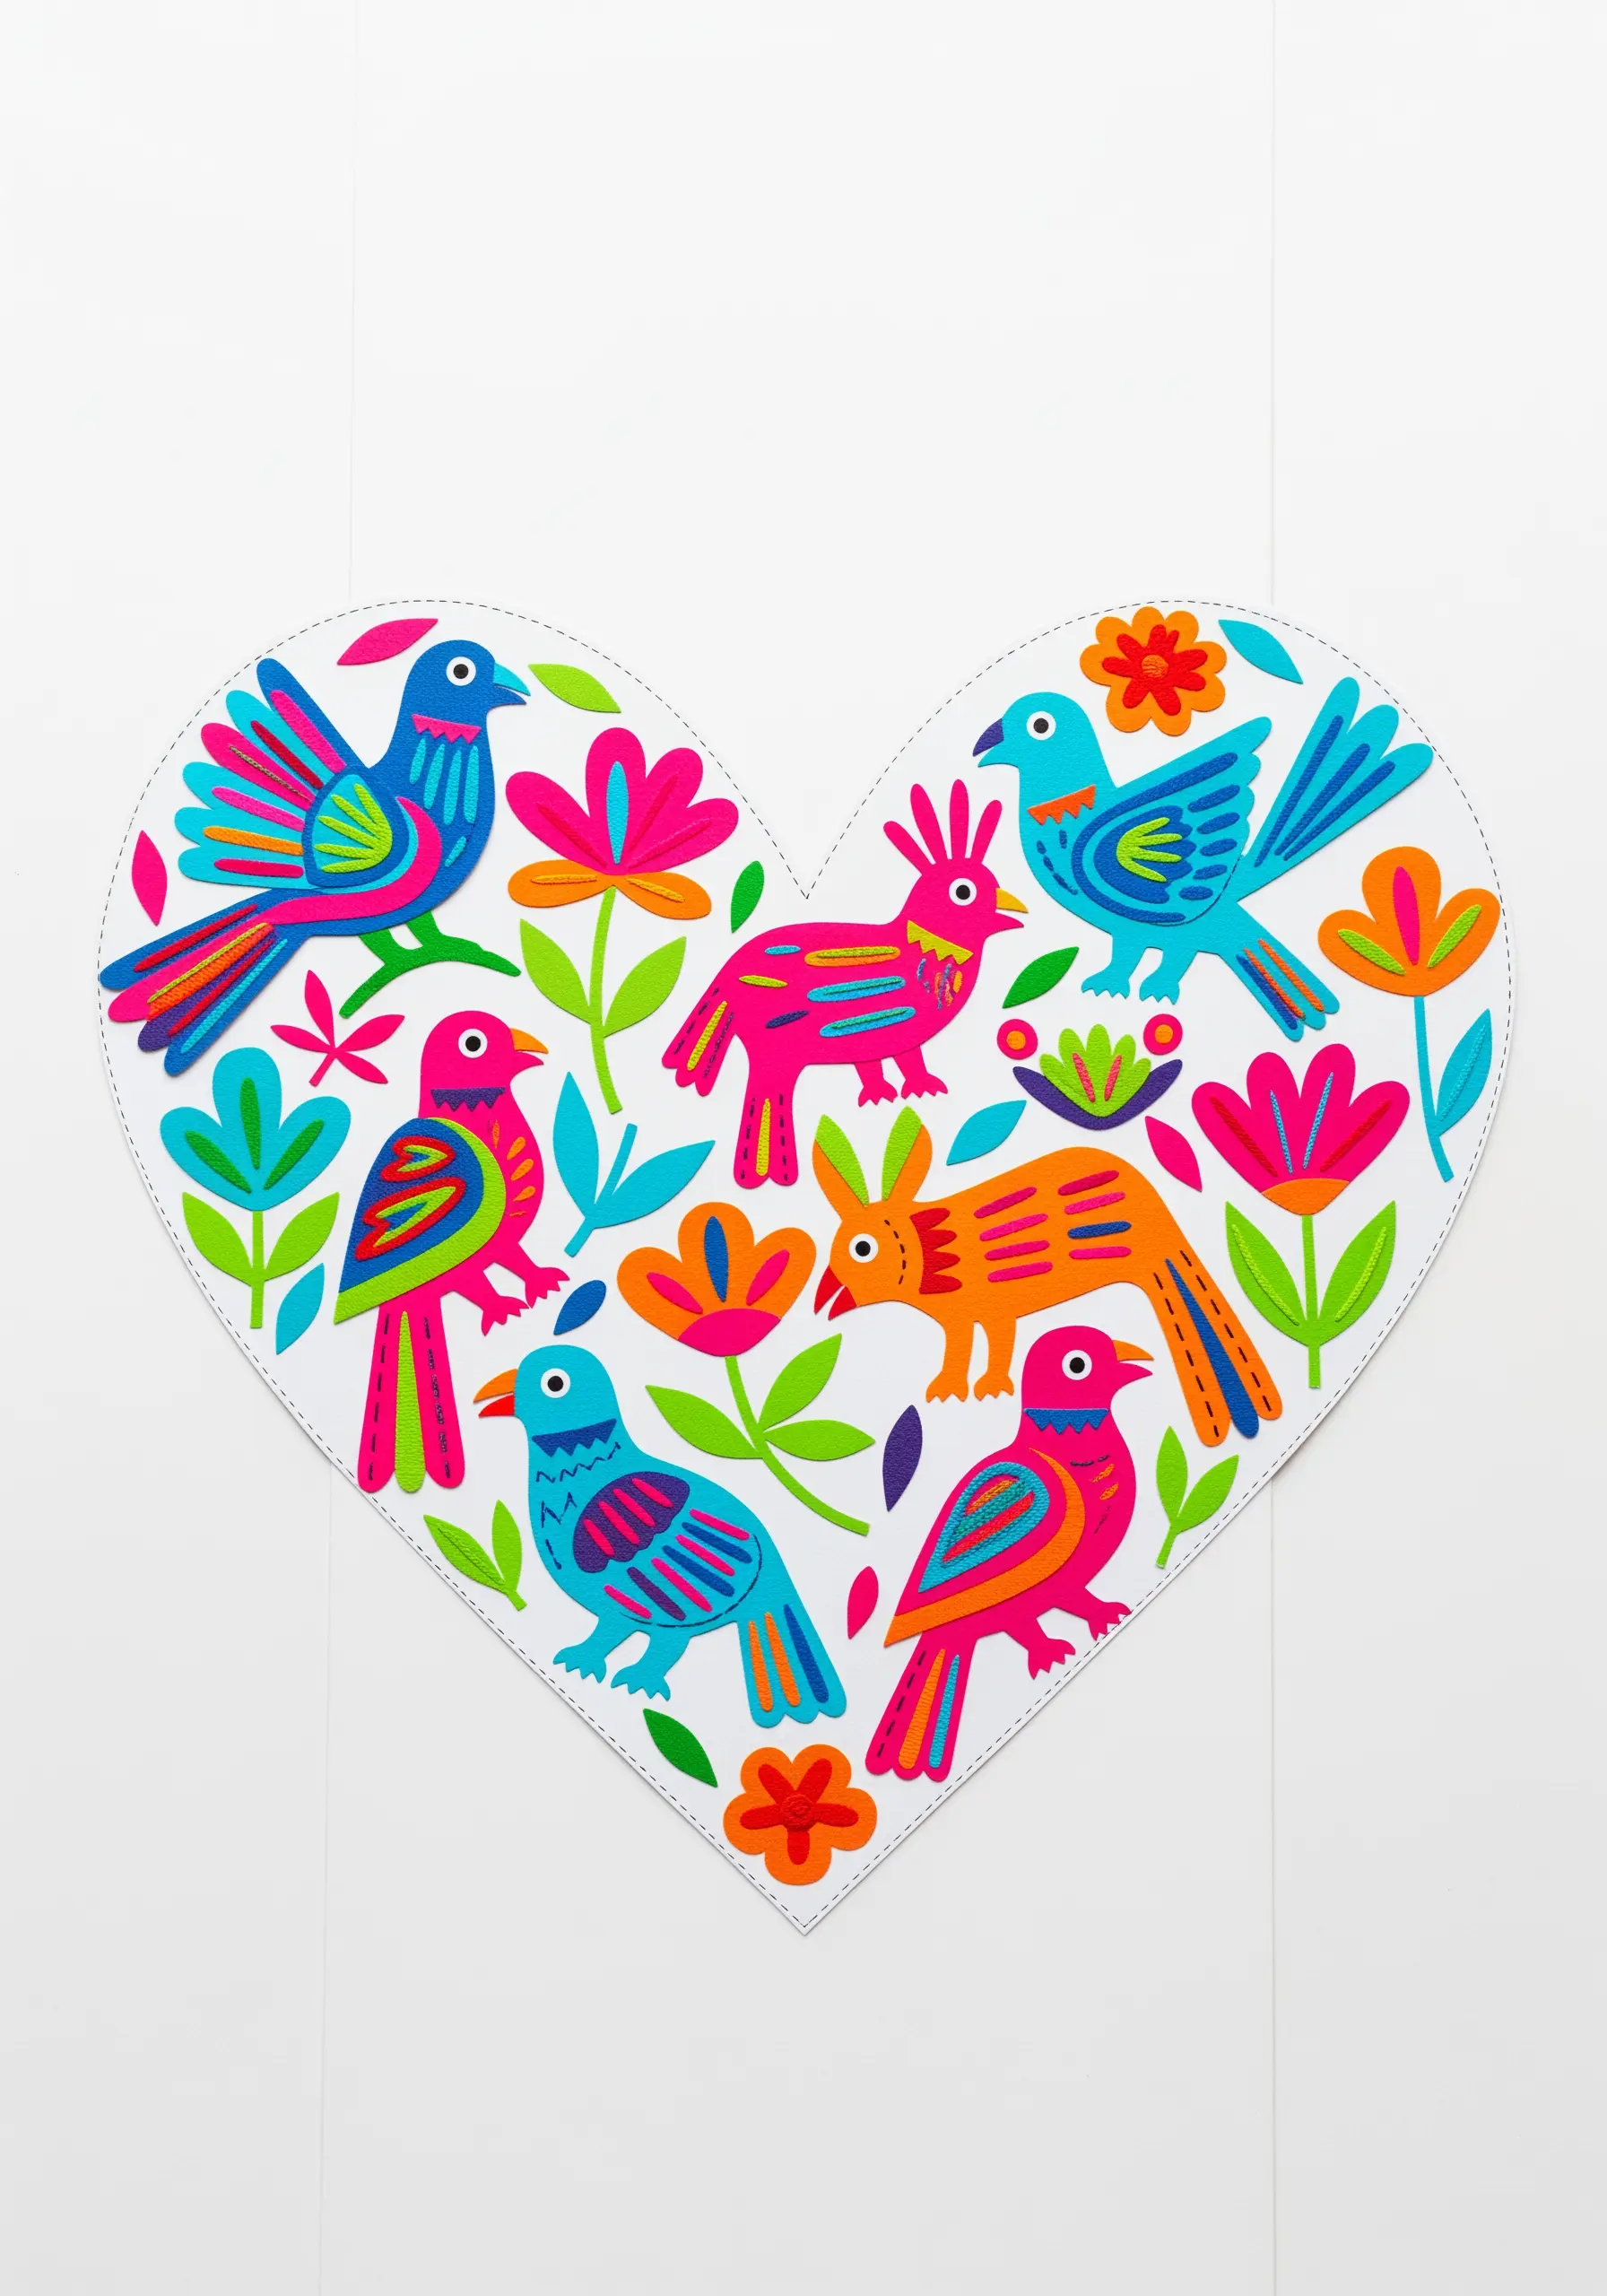
Arrange vibrant, folk-art-inspired paper cutouts to form a dense and colorful composition, like a heart filled with birds and flowers.
Before mounting, add a subtle stitched outline to a few key elements using a simple backstitch.
This fine detail doesn’t compete with the bold colors but adds a layer of handcrafted refinement that elevates the piece from simple papercraft to finished art.
It’s a quiet detail that makes a significant difference in the overall polish.
8. Emulate Sashiko Stitching on Paper Patches
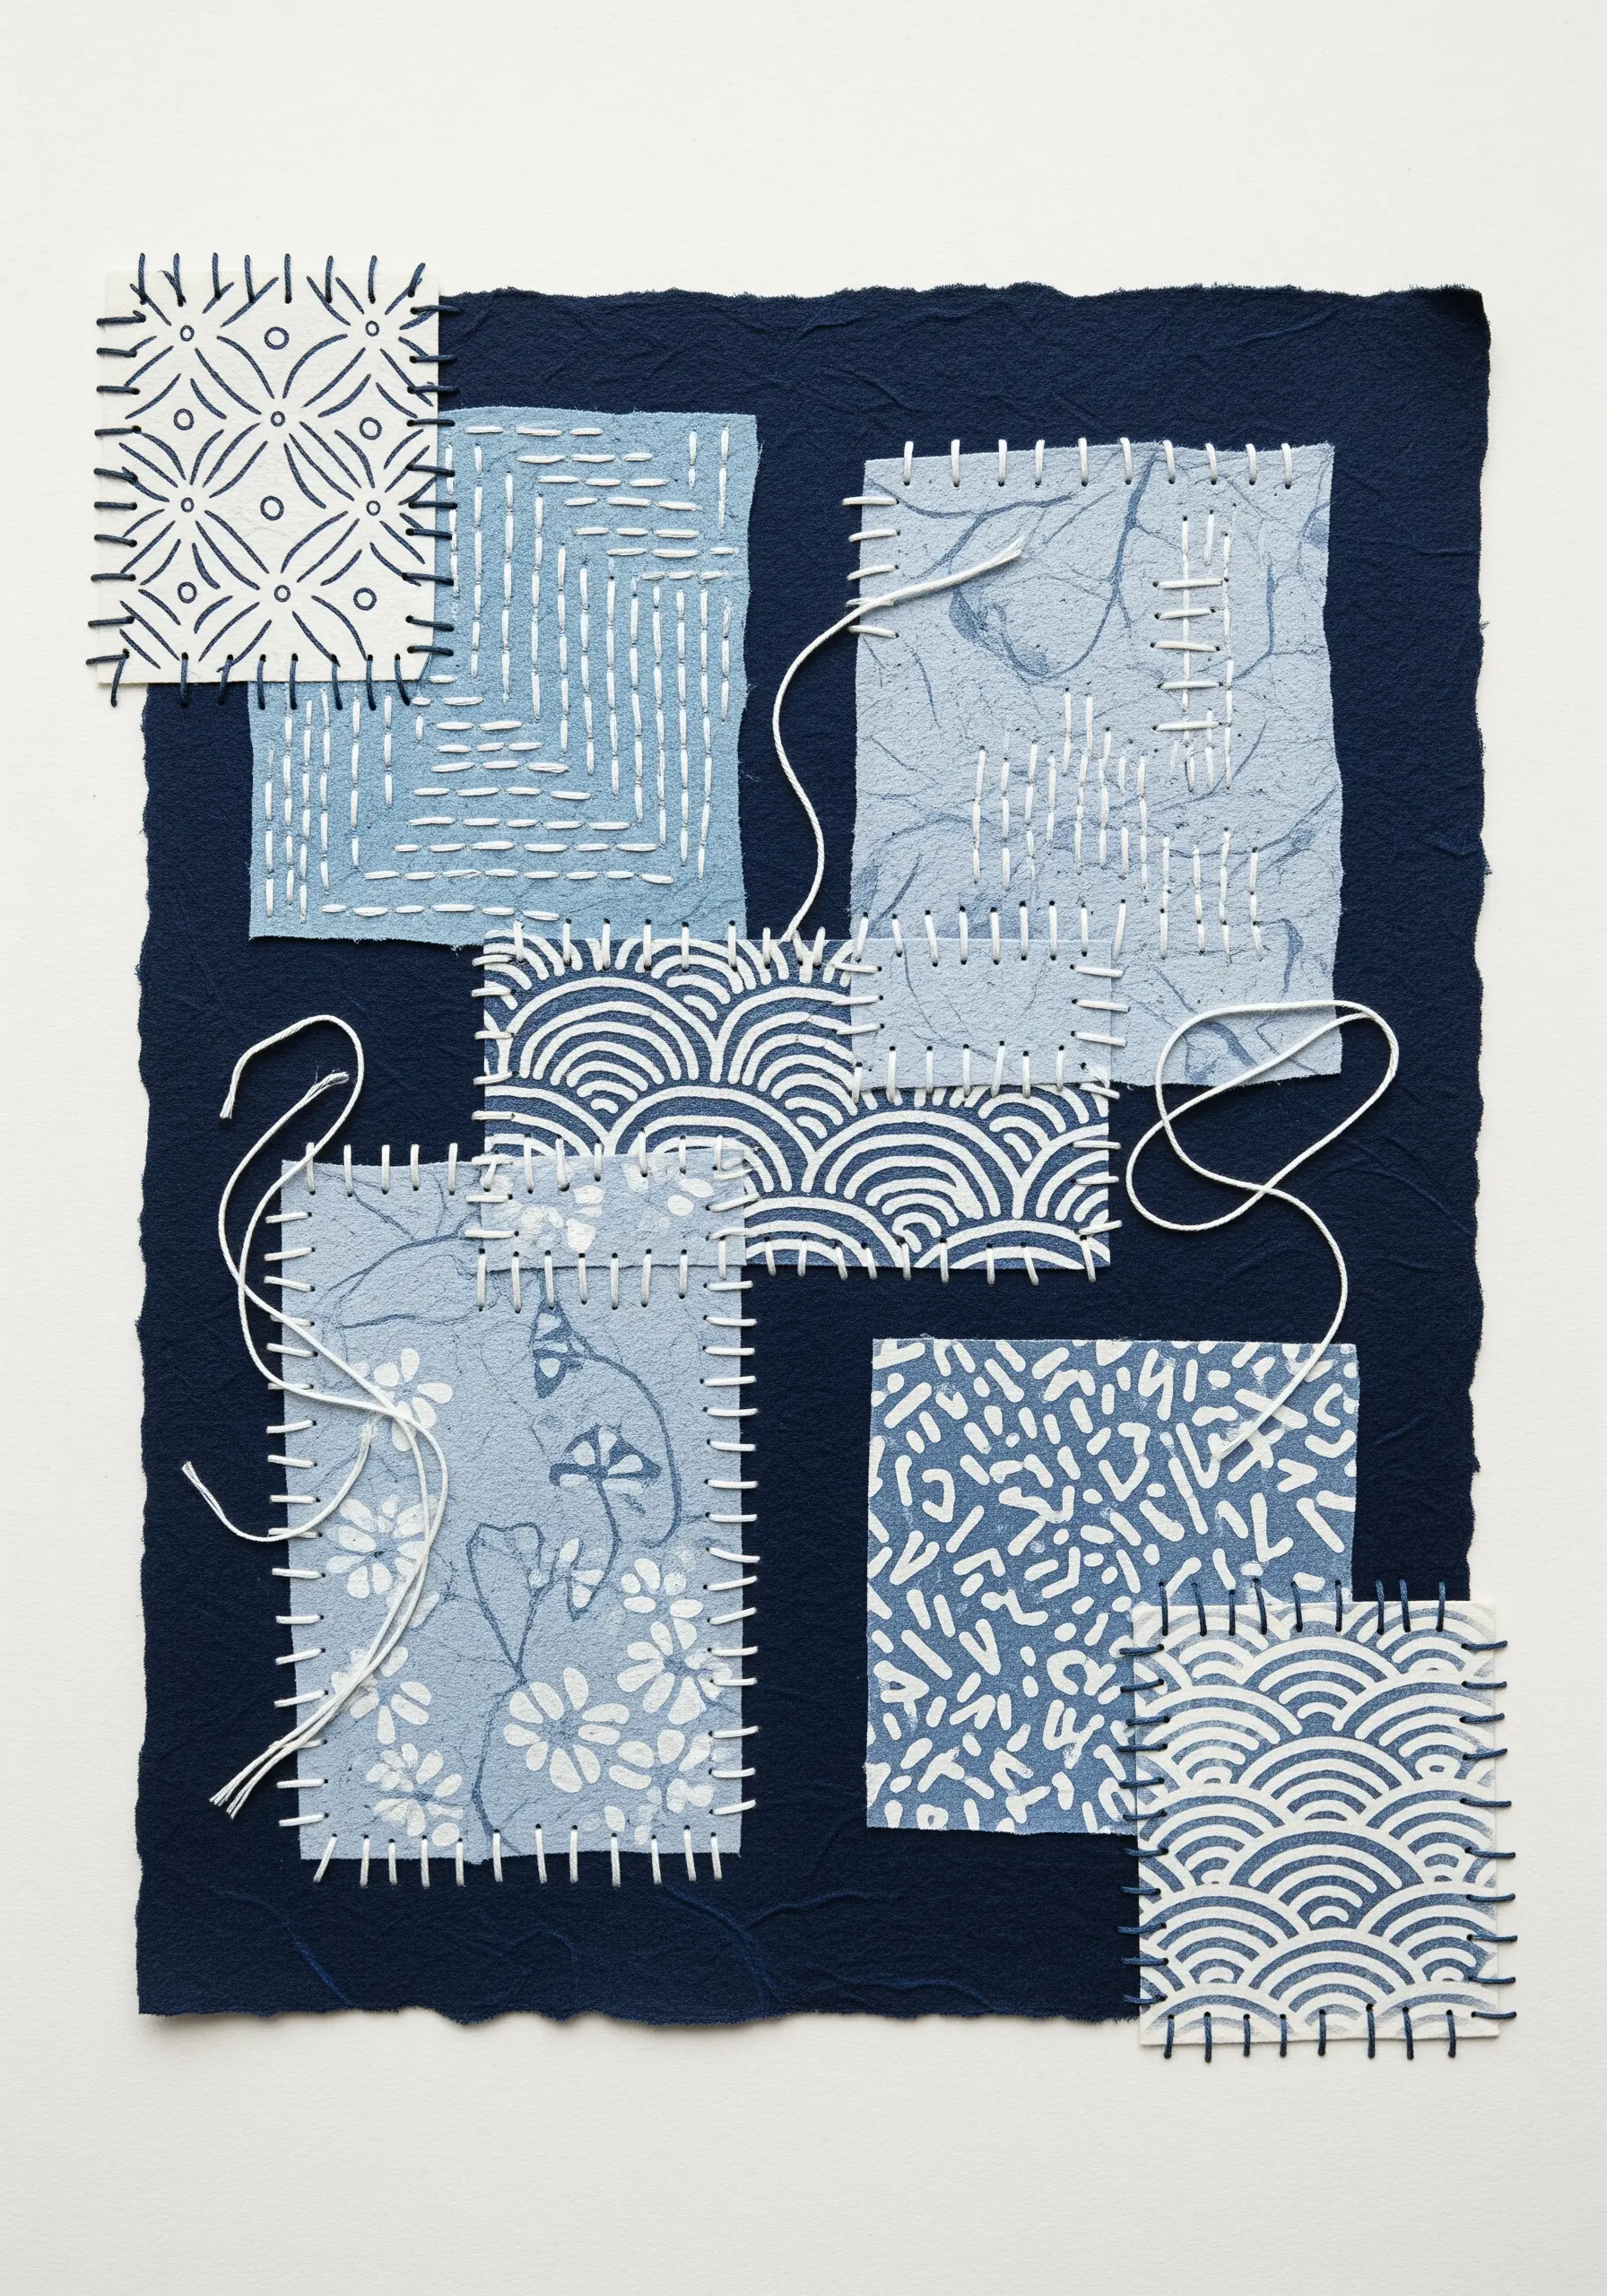
Recreate the look of Japanese Boro textiles by arranging patches of patterned paper on a contrasting background.
Instead of stitching through fabric, use a thick, soft cotton thread to add traditional sashiko-style running stitches over the paper.
Pre-piercing the holes with a needle will prevent the paper from tearing and ensure your stitches are even.
This meditative process combines the aesthetic of visible mending with the crispness of paper, much like many simple embroidery designs.
9. Construct 3D Insects on Mini Canvases
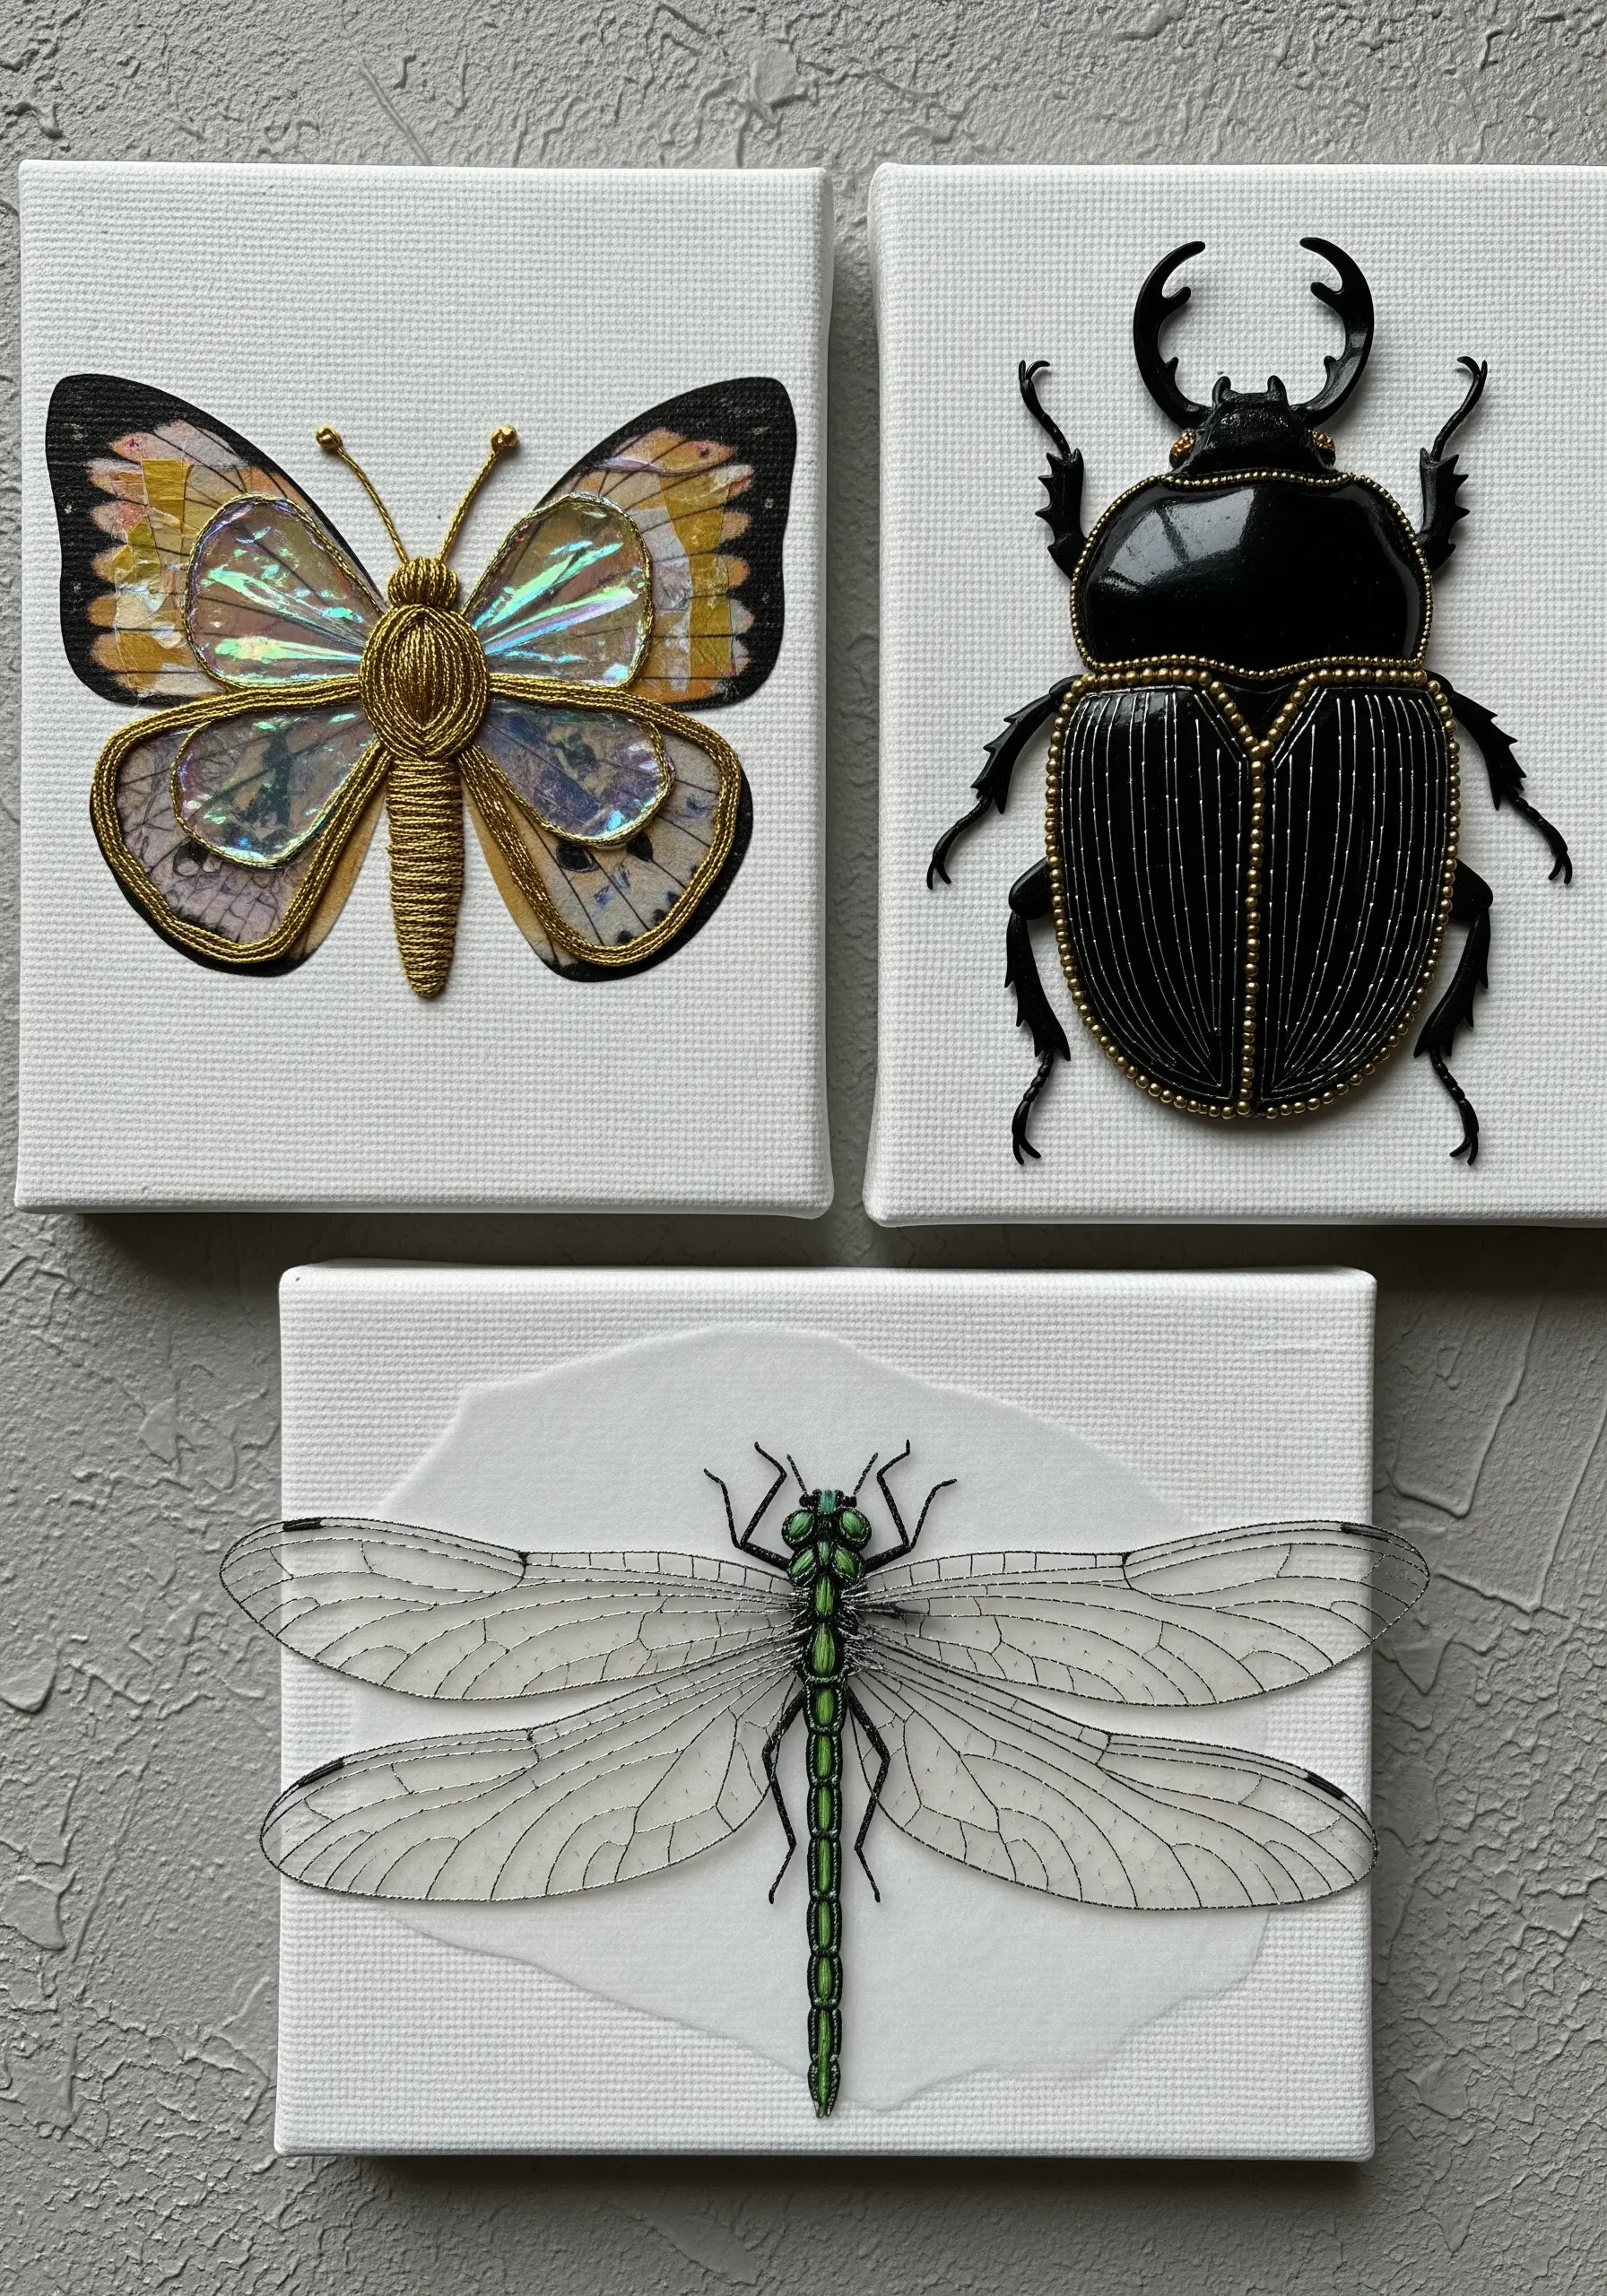
Create stunning, lifelike insects by layering materials on small, stretched canvases.
Use iridescent cellophane for transparent wings, glossy paper for a beetle’s carapace, and fine metallic cording for bodies and legs.
Couch the cording onto the canvas to create clean, raised outlines and add tiny beads for eyes.
This approach transforms your stitching skills into a form of miniature sculpture, yielding impressive realistic animal insect embroidery patterns.
10. Upcycle Paper and Buttons into a Textural Tree
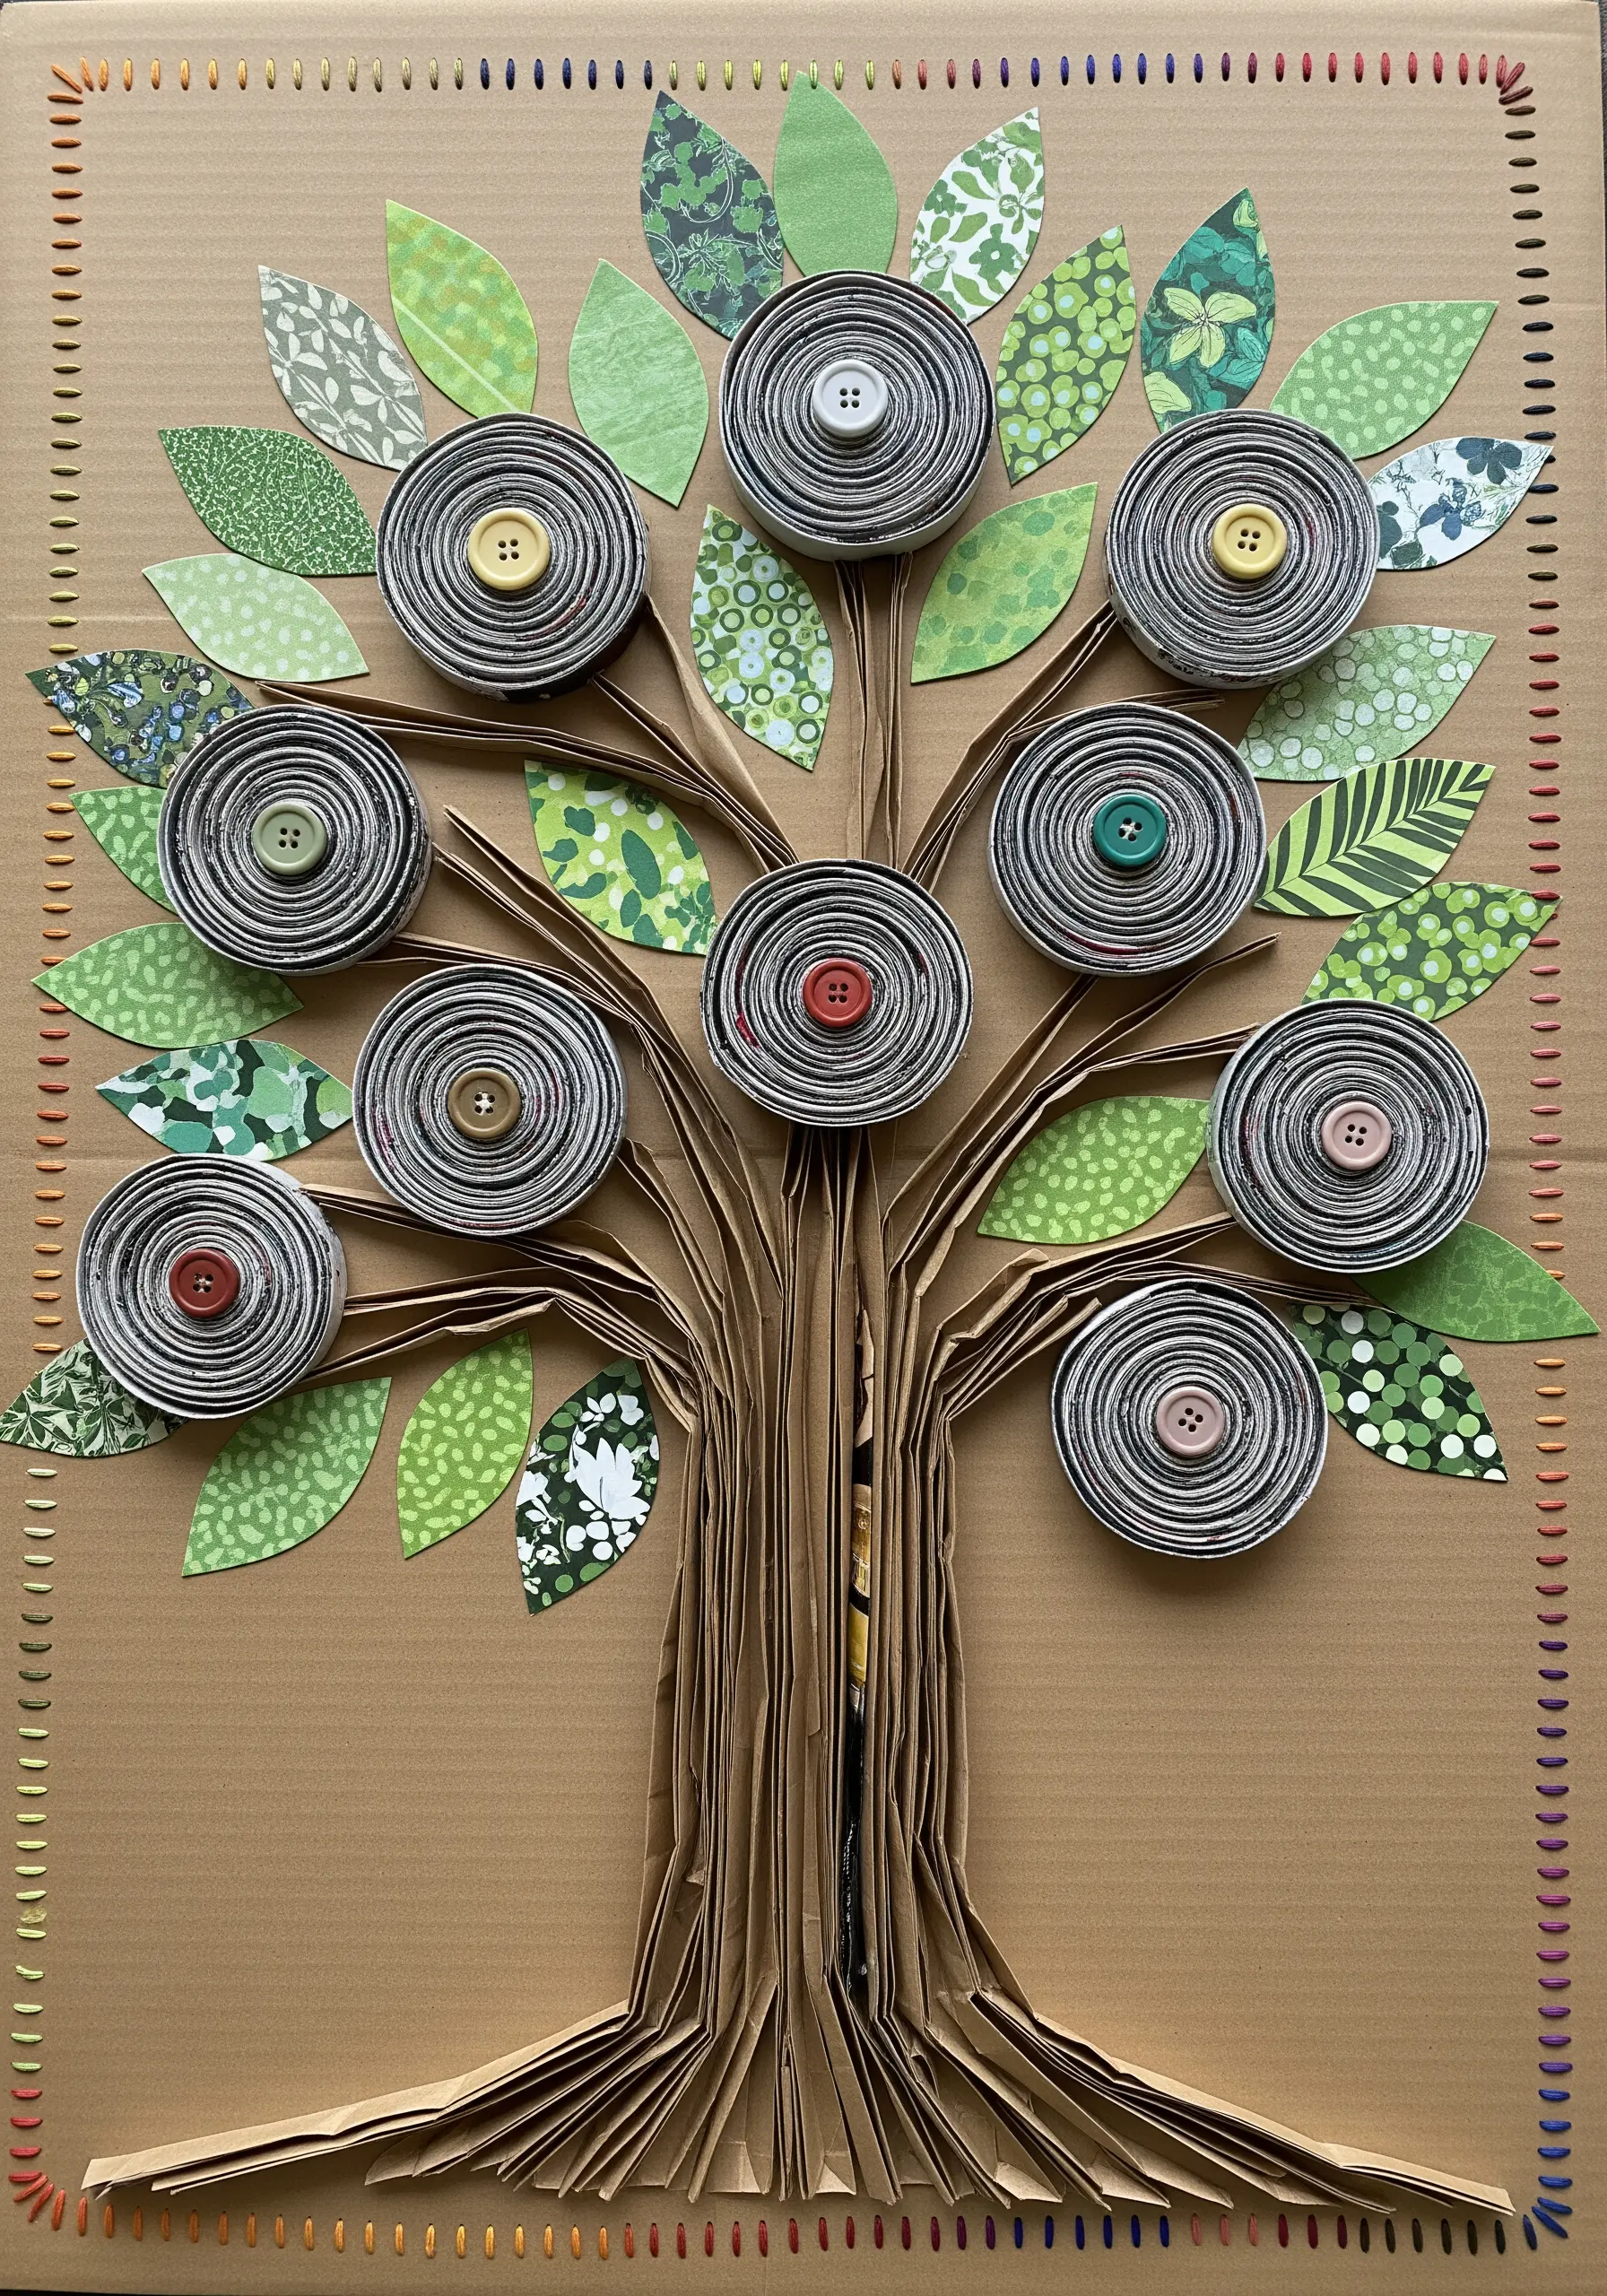
Transform discarded materials into a charming piece of art. Use rolled newspaper or magazine pages for the circular ‘flowers’ and corrugated cardboard for the tree trunk.
Secure a vintage button in the center of each paper roll with a few simple stitches.
Frame the entire piece with a colorful running stitch border directly onto the cardboard background.
This project is a beautiful example of how eco-friendly embroidery tips can guide you toward creating meaningful art from everyday objects.
11. Fashion a Dress from Torn Paper and Quilled Details
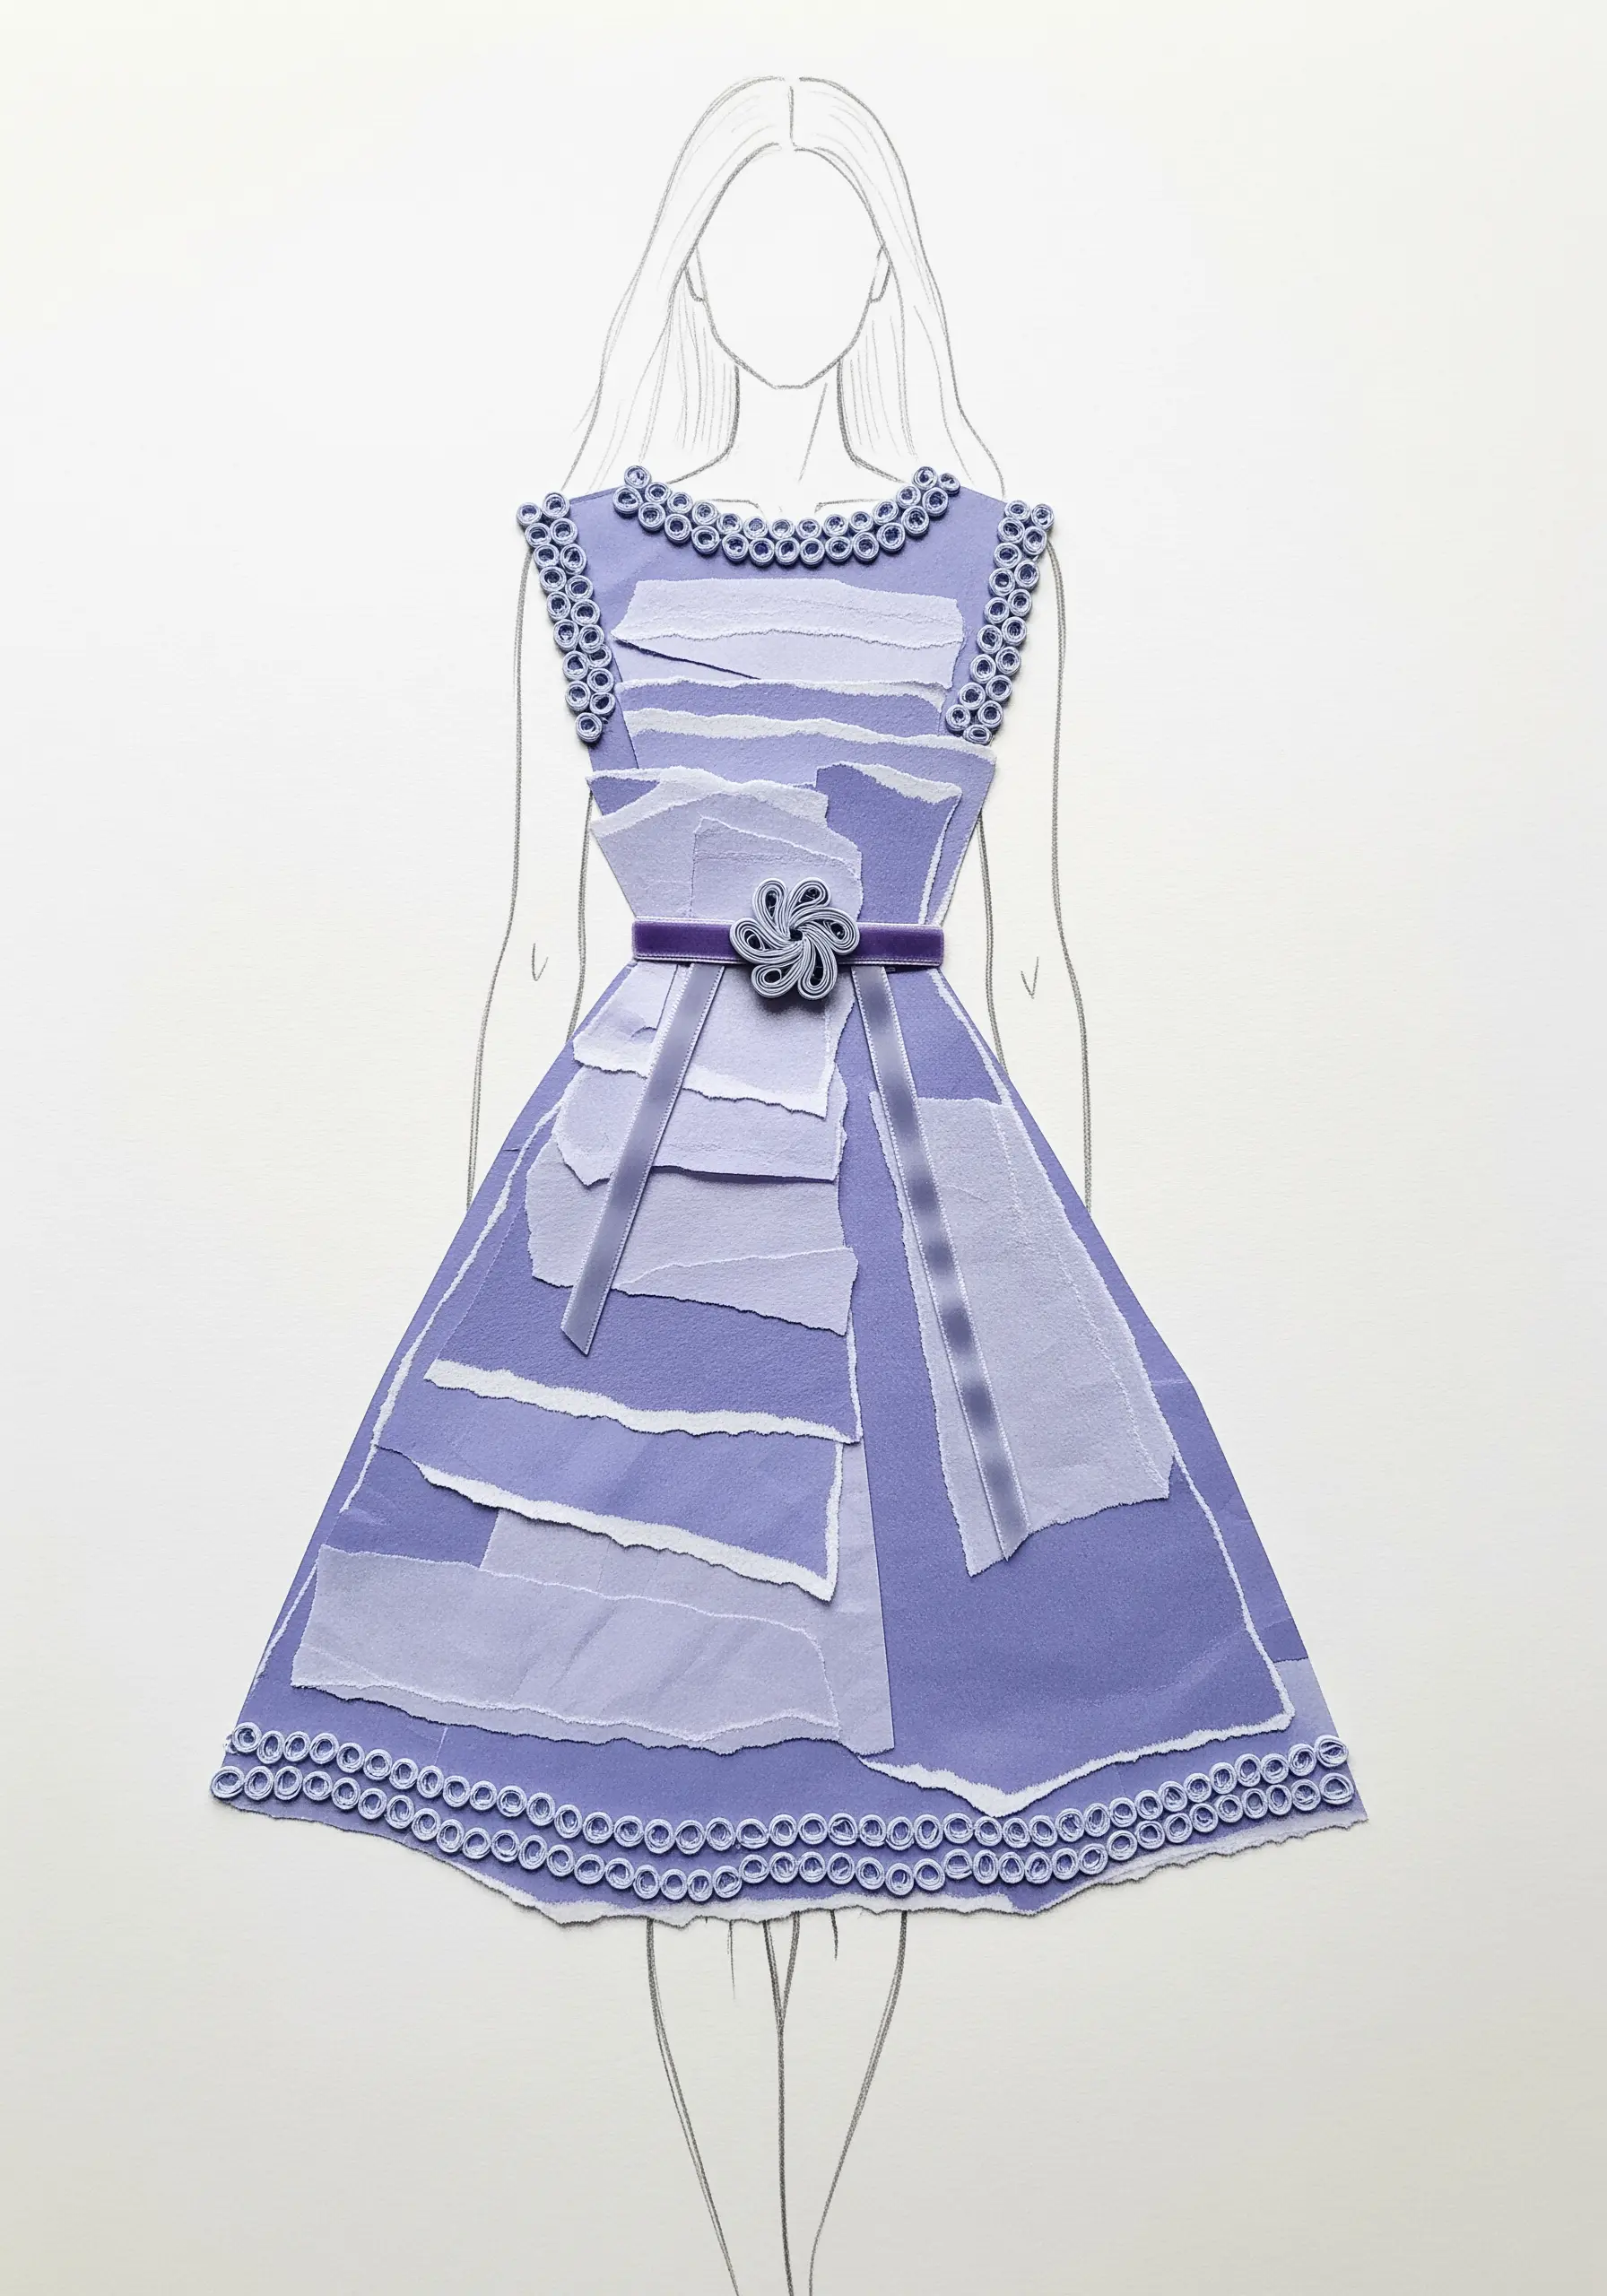
Sketch a simple figure and use it as a mannequin for a paper collage dress.
Layer torn strips of textured and colored paper to create the skirt, allowing the raw edges to add softness and movement.
For the trim, neckline, and belt, use paper quilling techniques to create intricate, dimensional details like loops and rosettes.
This project beautifully demonstrates how different paper manipulations can mimic the textures and structure of textiles.
12. Weave a Thread Net over a Layered Seascape
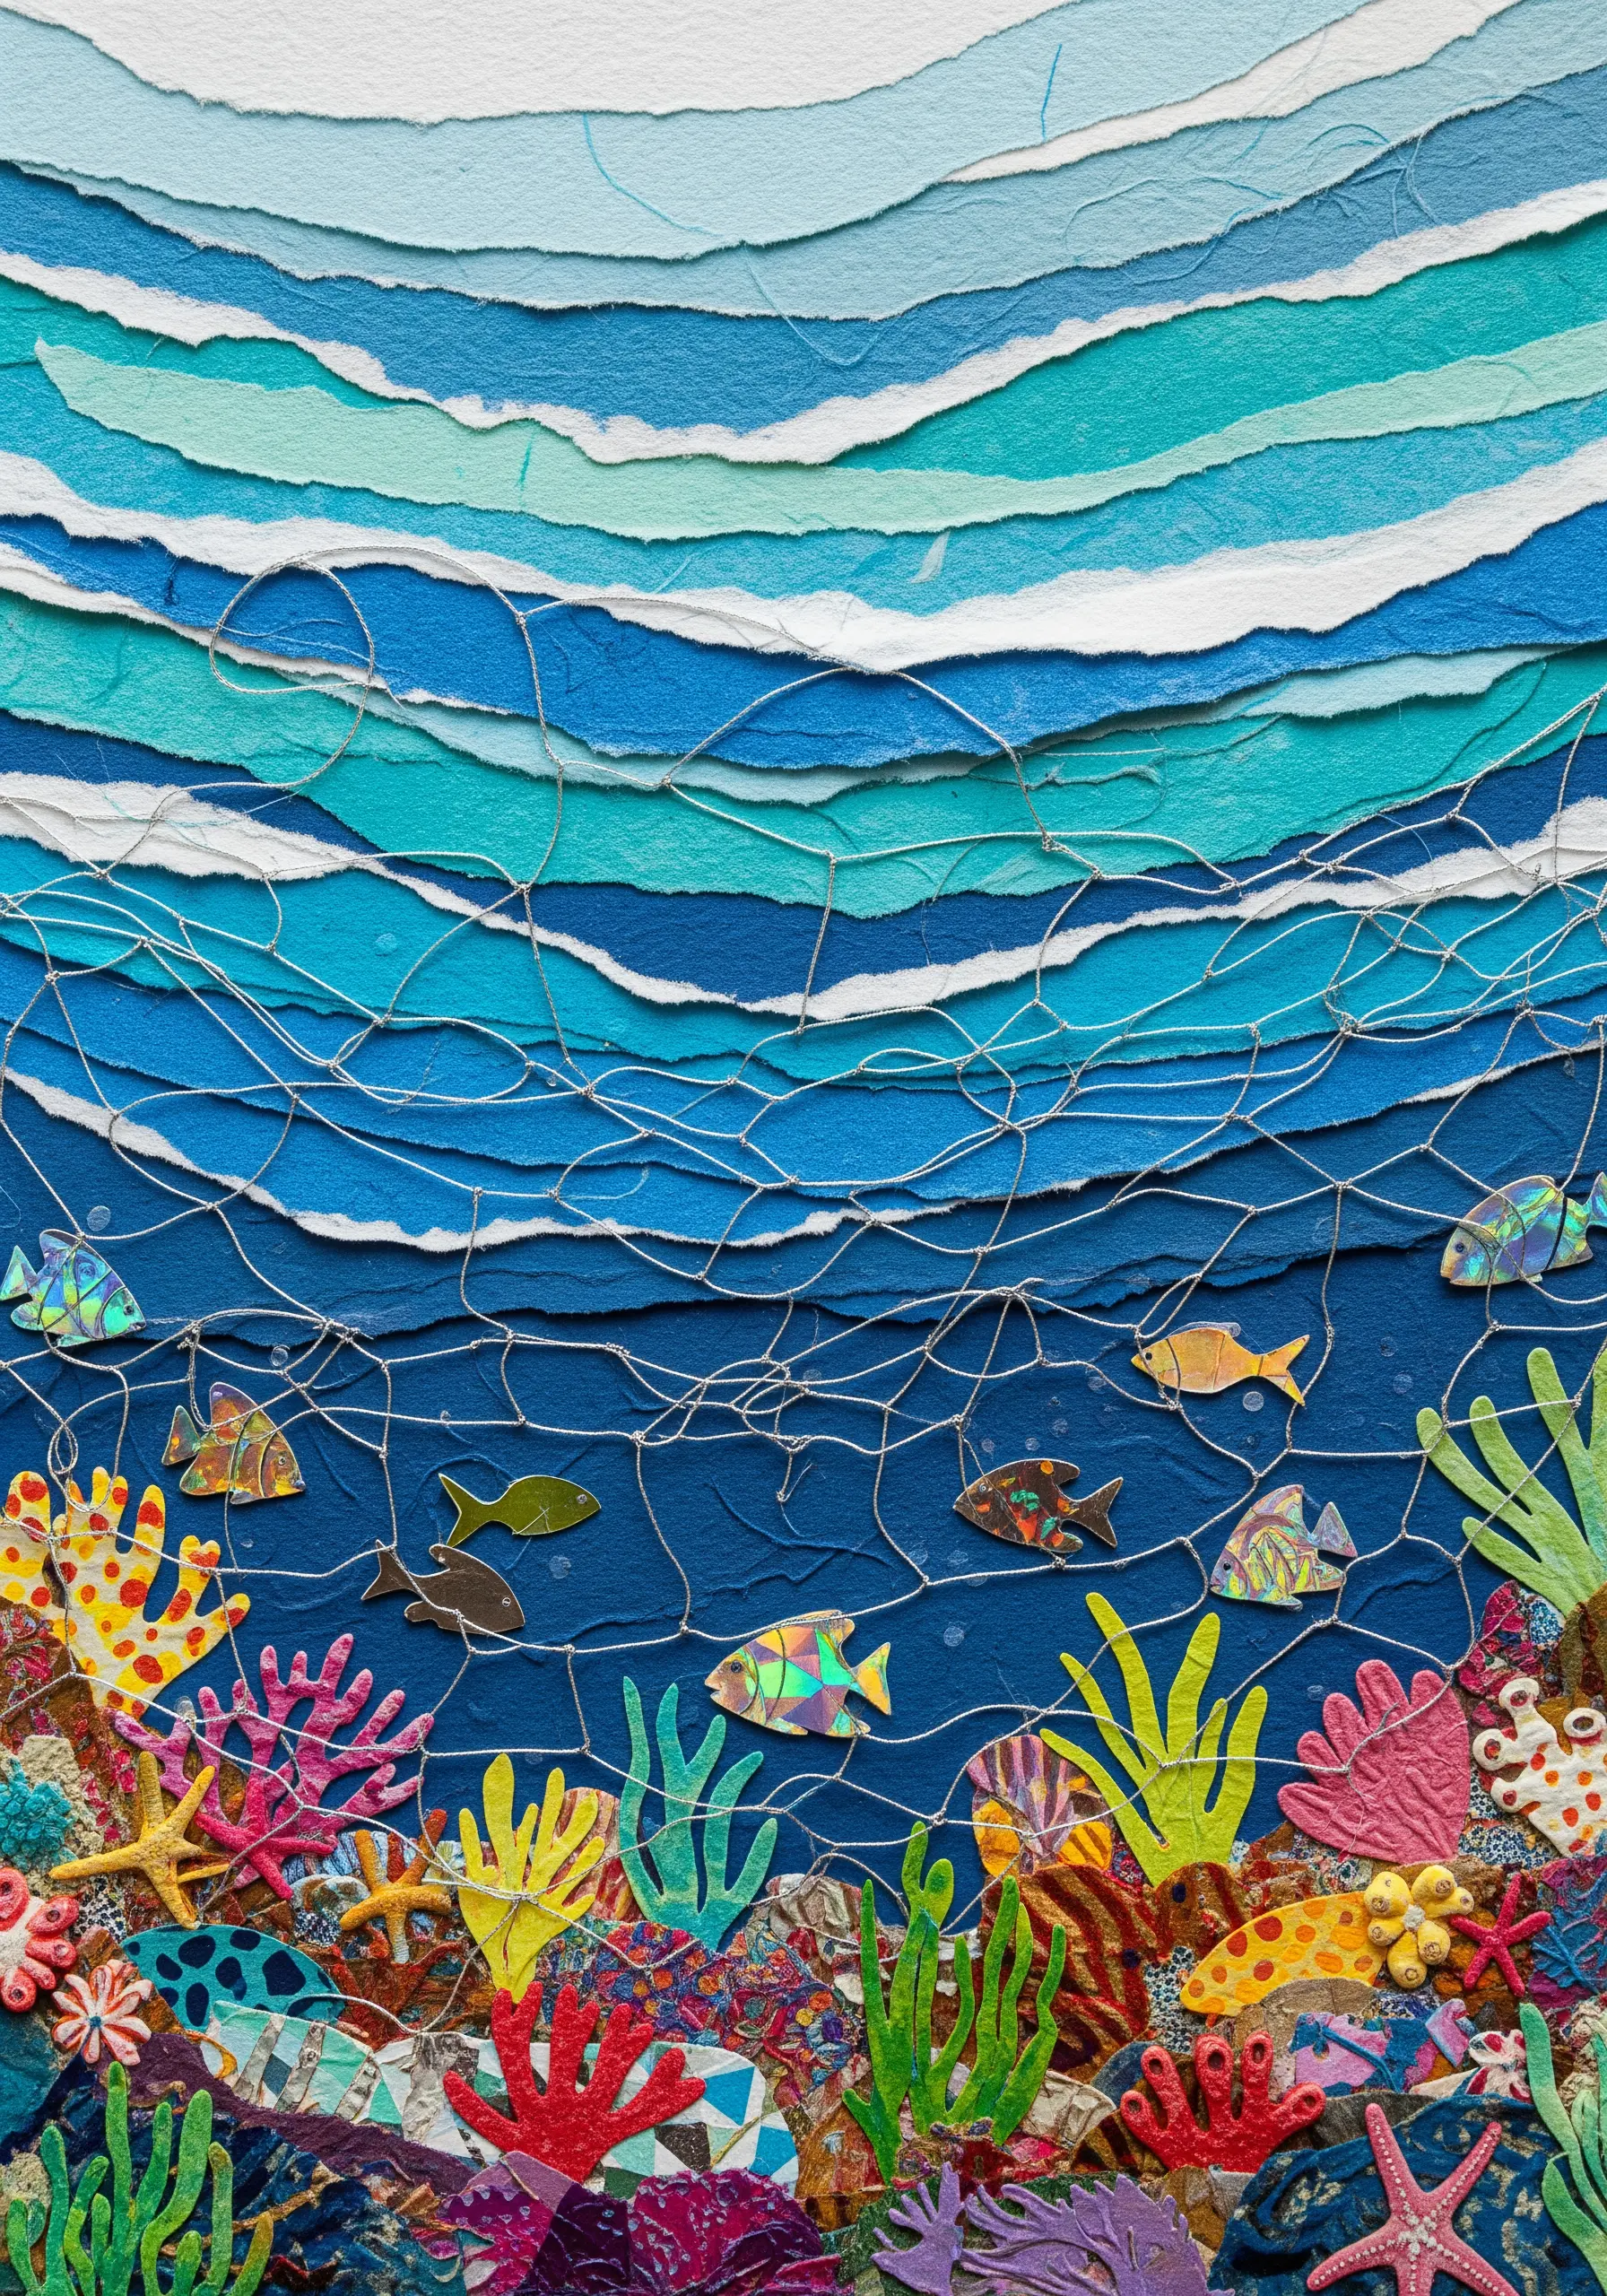
Build an ocean scene with depth by layering torn strips of blue and turquoise paper, creating an ombre effect from the surface to the sea floor.
Once your background is set, stretch a thin, light-colored thread across the upper portion of the scene, weaving it loosely to create a net-like structure.
This single element adds a narrative layer and a delicate textural contrast to the torn paper edges, turning a landscape into a story.
Consider this for other abstract thread embroidery ideas inspired by nature.
13. Design a Typographic Stitch Sampler

Turn the alphabet into your canvas. Cut out large letters from cardstock and fill each one with a different stitch, pattern, or fiber art technique.
One letter could be filled with satin stitch stripes, another with quilled paper circles, and a third with woven thread.
This approach allows you to practice a variety of techniques within a single, cohesive project.
It’s a creative way to build a reference library of stitches, much like our tiny lettering embroidery ideas, but on a larger scale.
14. Explore Monochrome Texture with Paper Lace
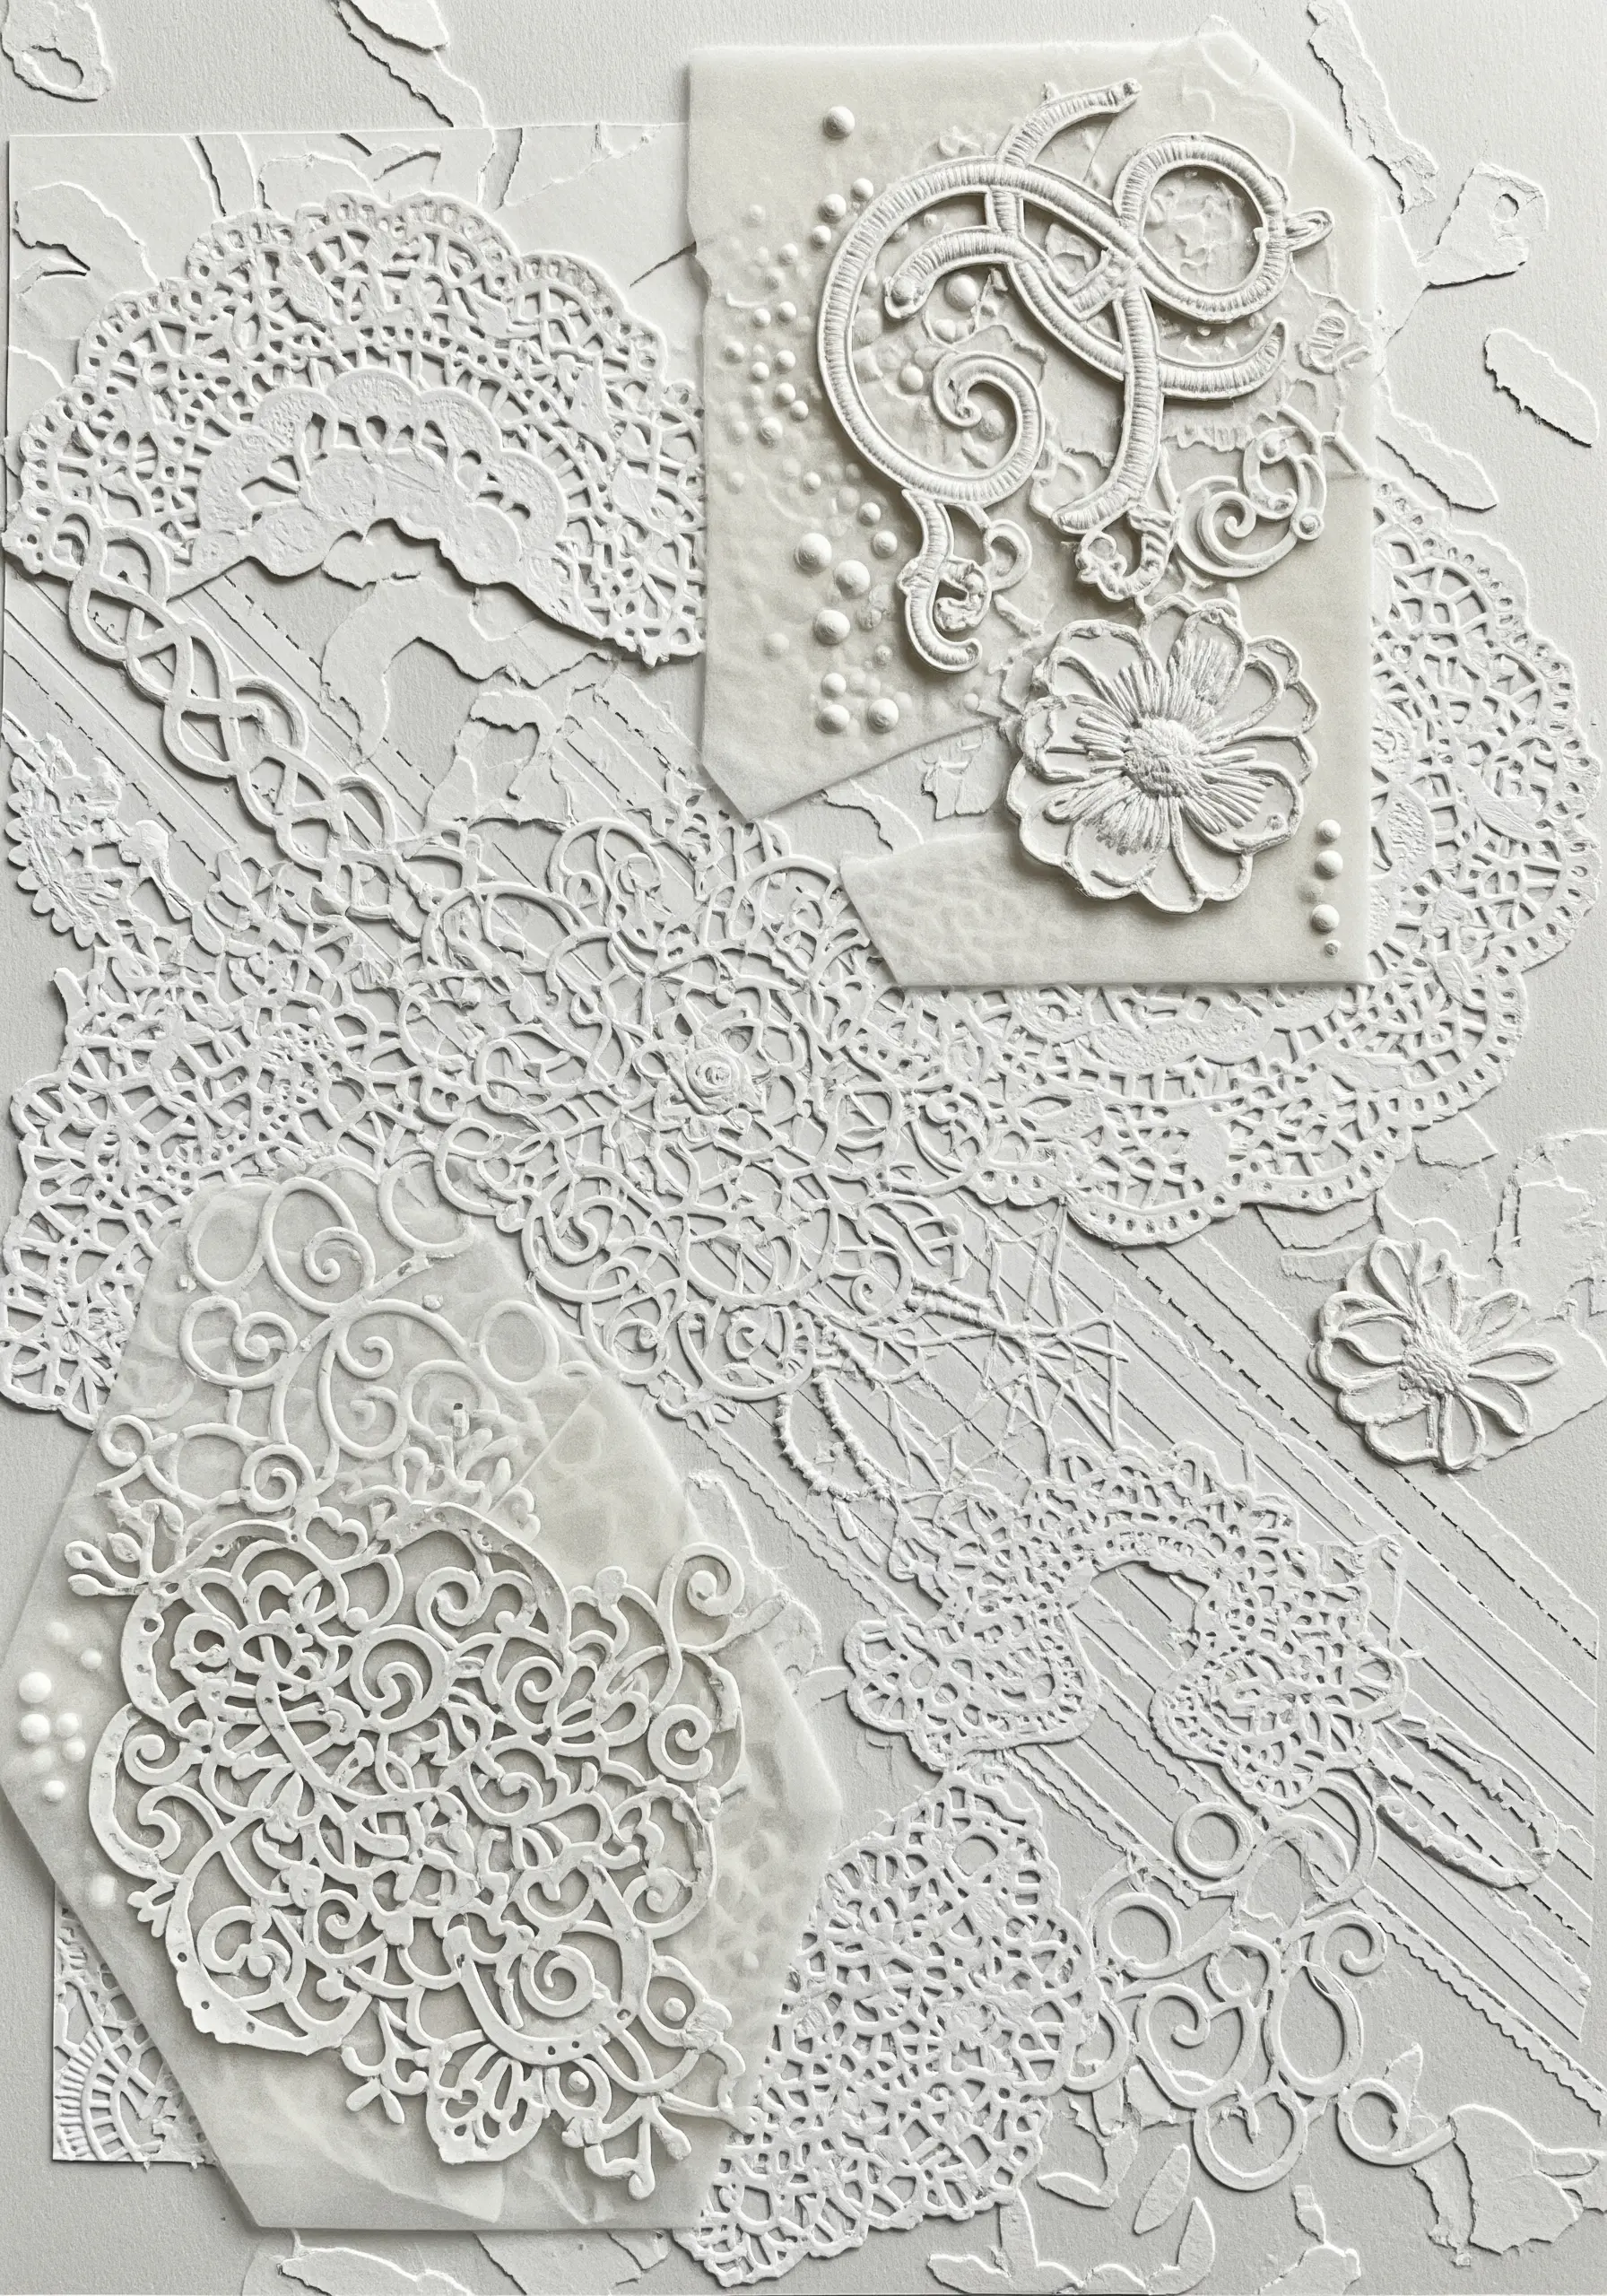
Create a sophisticated, all-white composition by focusing solely on texture and shadow.
Layer paper doilies, embossed paper, and even white-on-white embroidered fabric scraps.
The subtle interplay of different patterns and sheens creates a piece that is quiet yet incredibly detailed.
This exercise in restraint is a powerful way to understand how texture works, a key principle in monochrome floral embroidery ideas.
15. Combine Velvet and Paper for Avian Majesty

To create a regal bird like a peacock, use plush fabric for the body to convey softness and depth.
Contrast this by crafting the tail feathers from intricately cut and layered paper, adding fine stitched details to mimic the feather barbs.
This juxtaposition of soft velvet against crisp paper creates a dynamic tactile experience.
Mixing materials this way is the foundation of stunning fabric collage embroidery artworks.
16. Add a Single Stitched Detail to Line Art
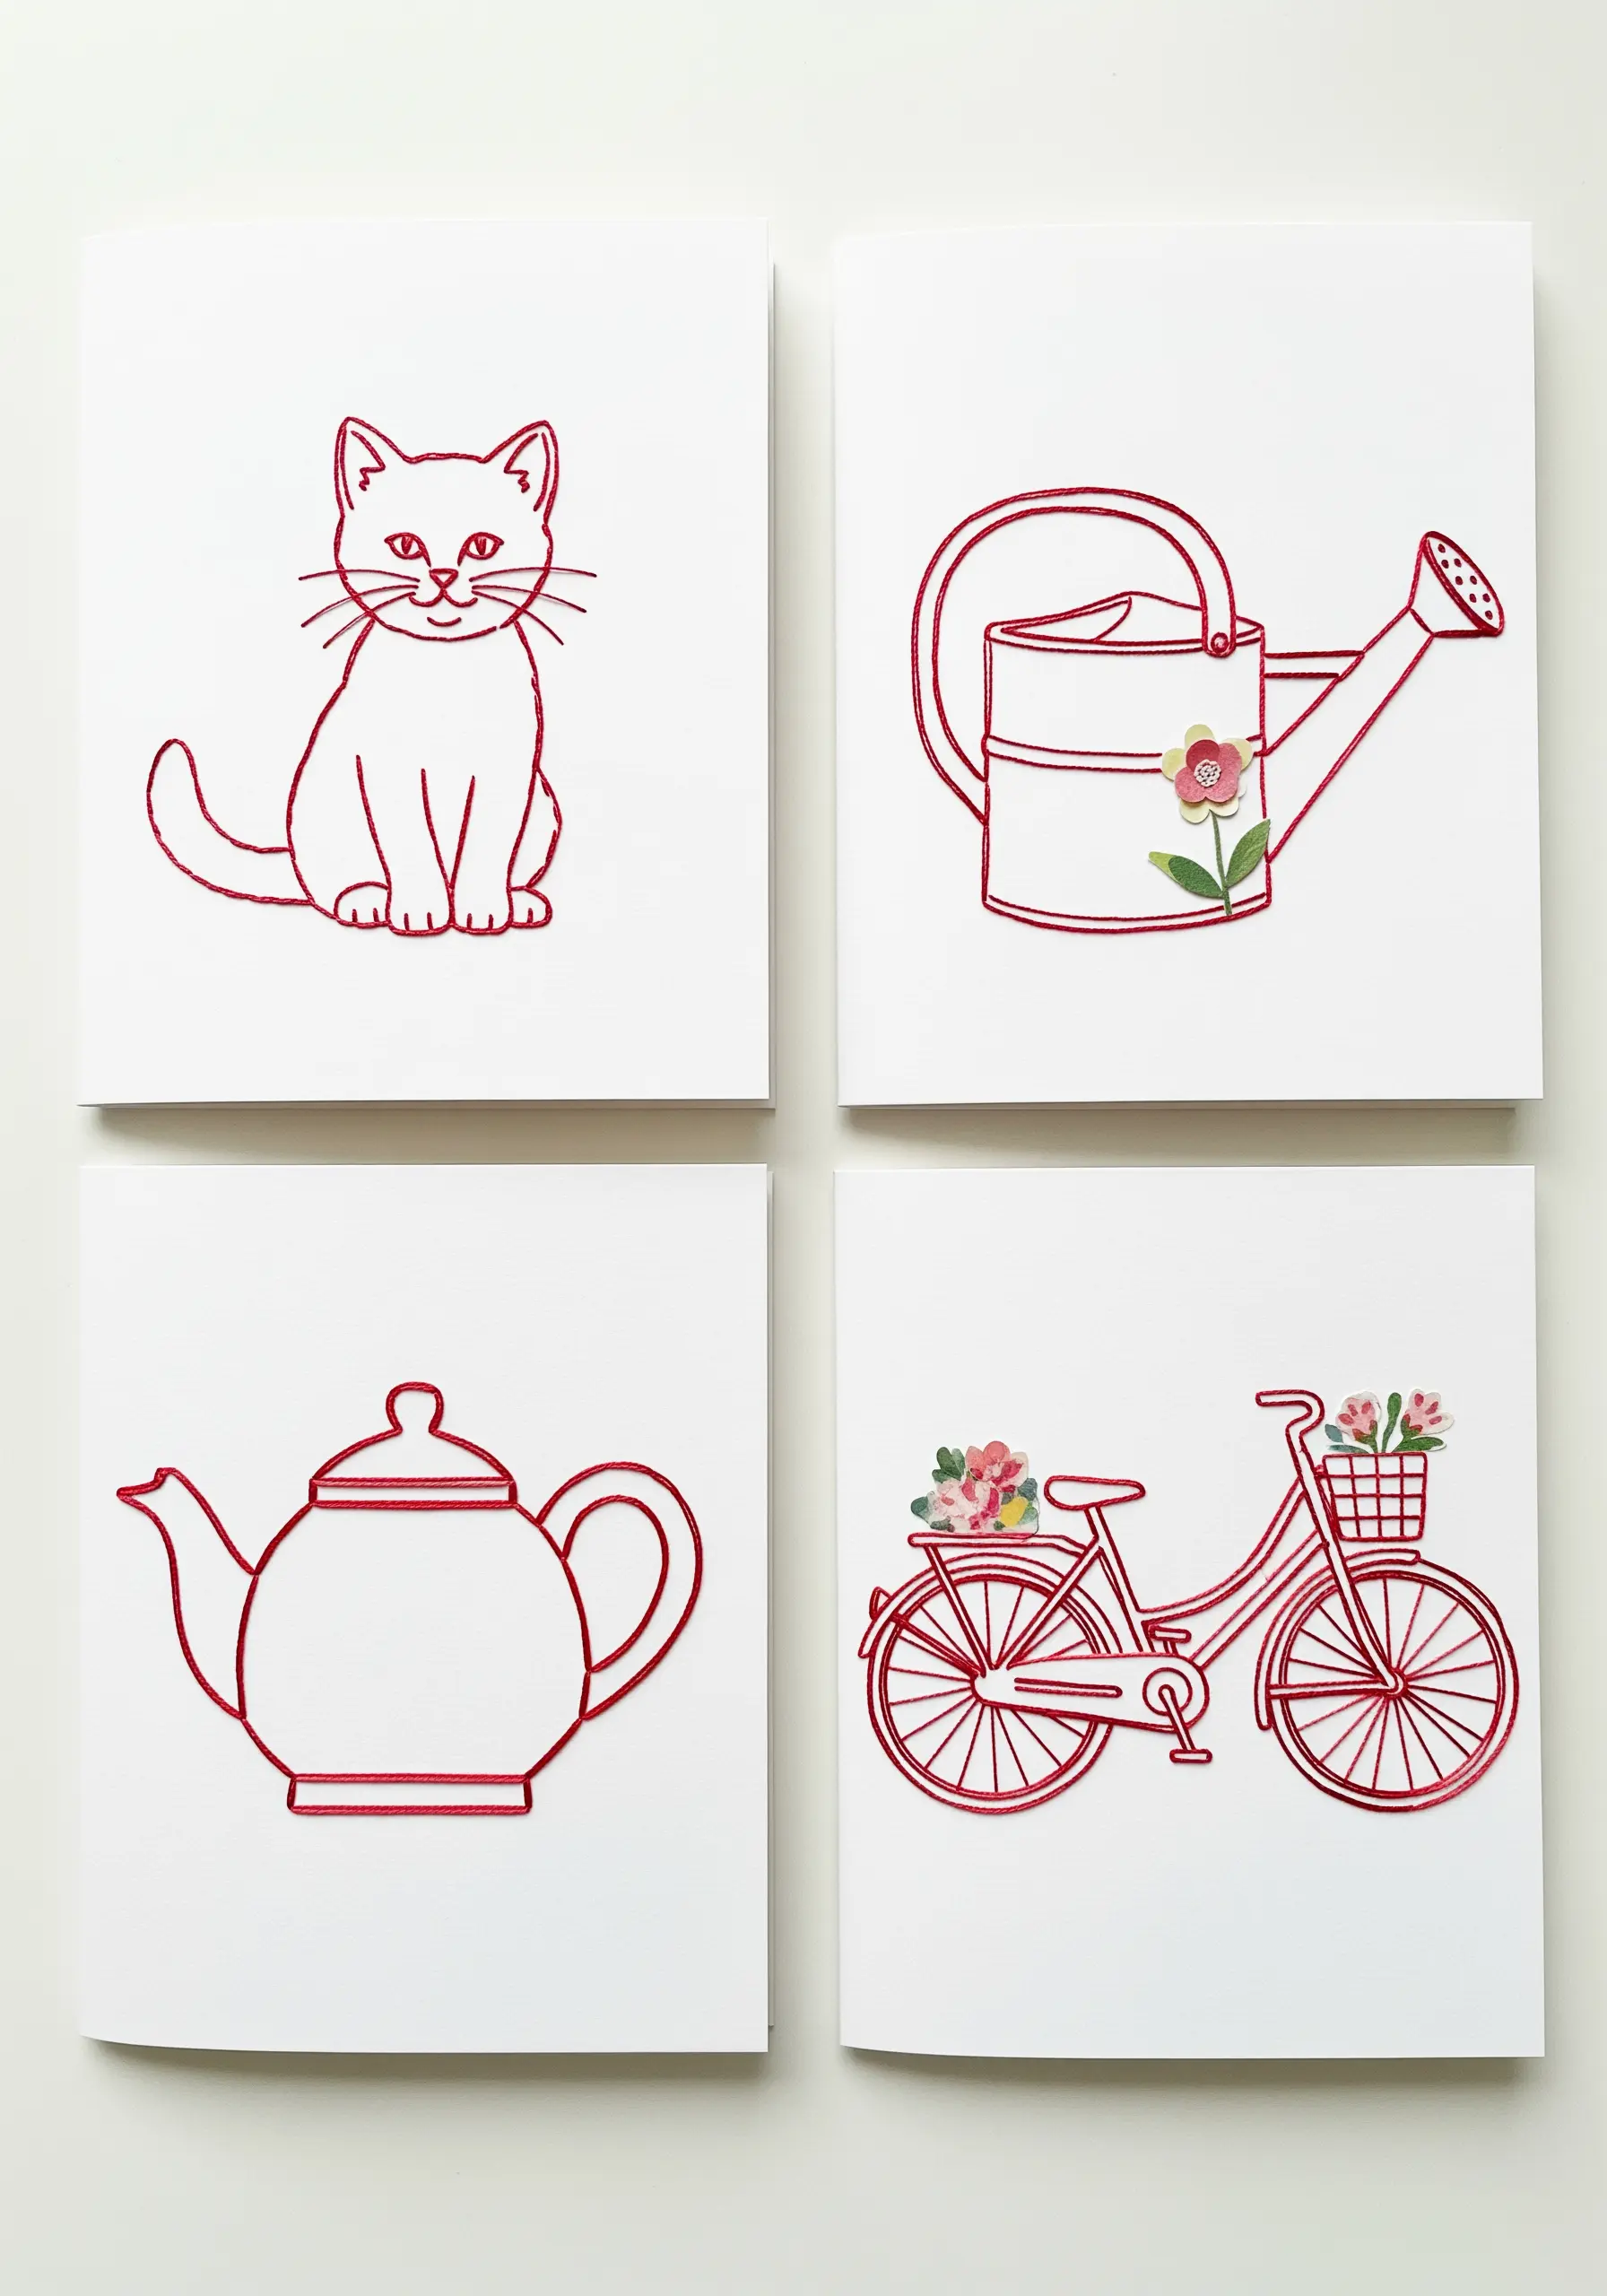
Elevate simple line drawings on paper cards with a tiny, unexpected touch of embroidery.
A single red-line illustration of a bicycle, for example, can be transformed by adding a small bouquet of French knot flowers in the basket.
This minimalist approach ensures the embroidery is a delightful surprise, not a distraction.
It proves that even the smallest minimalist stitch designs that fit in the palm of your hand can have a major impact.
17. Illuminate a Paper Diorama with Thread and Light
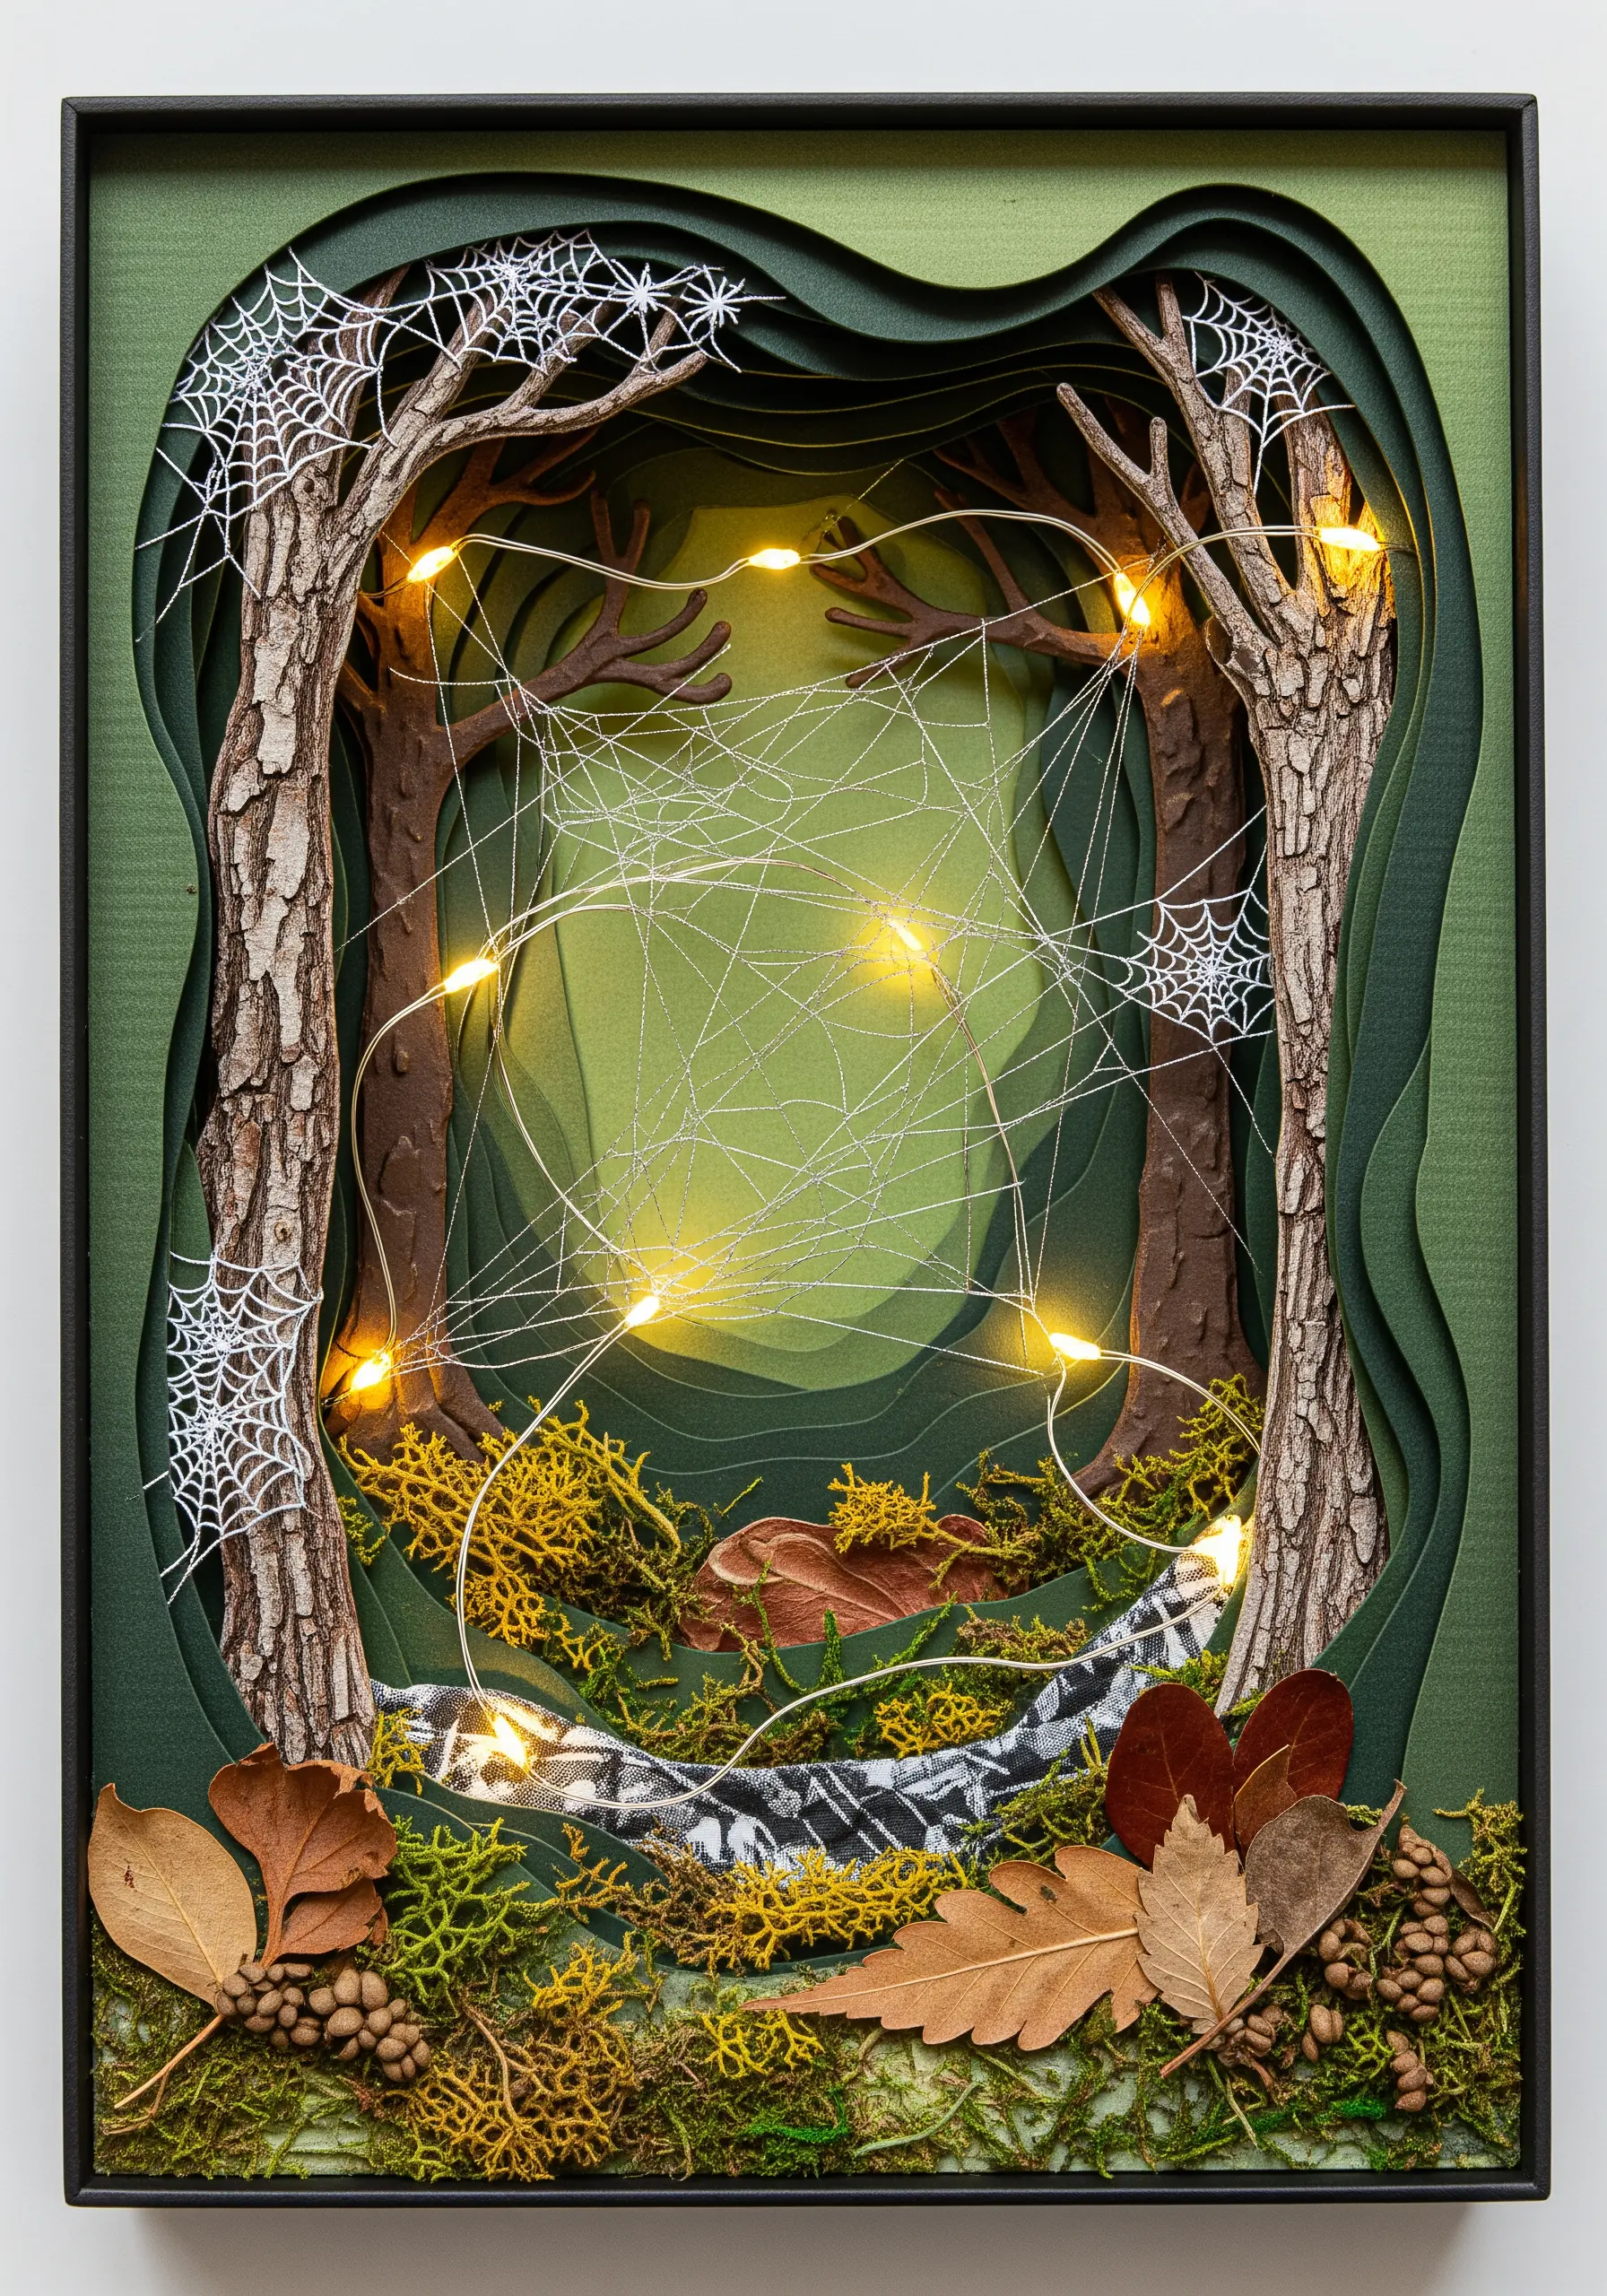
Build a shadow box or diorama using layers of cut paper to create a sense of deep perspective, such as a forest scene.
Use white or metallic thread to stitch intricate spiderwebs between the paper trees.
Finally, weave a string of tiny LED fairy lights through the scene to create a magical, illuminated effect.
The interplay of paper, thread, and light turns your collage into an enchanting, self-contained world.
18. Draw with Yarn over Abstract Paper Shapes
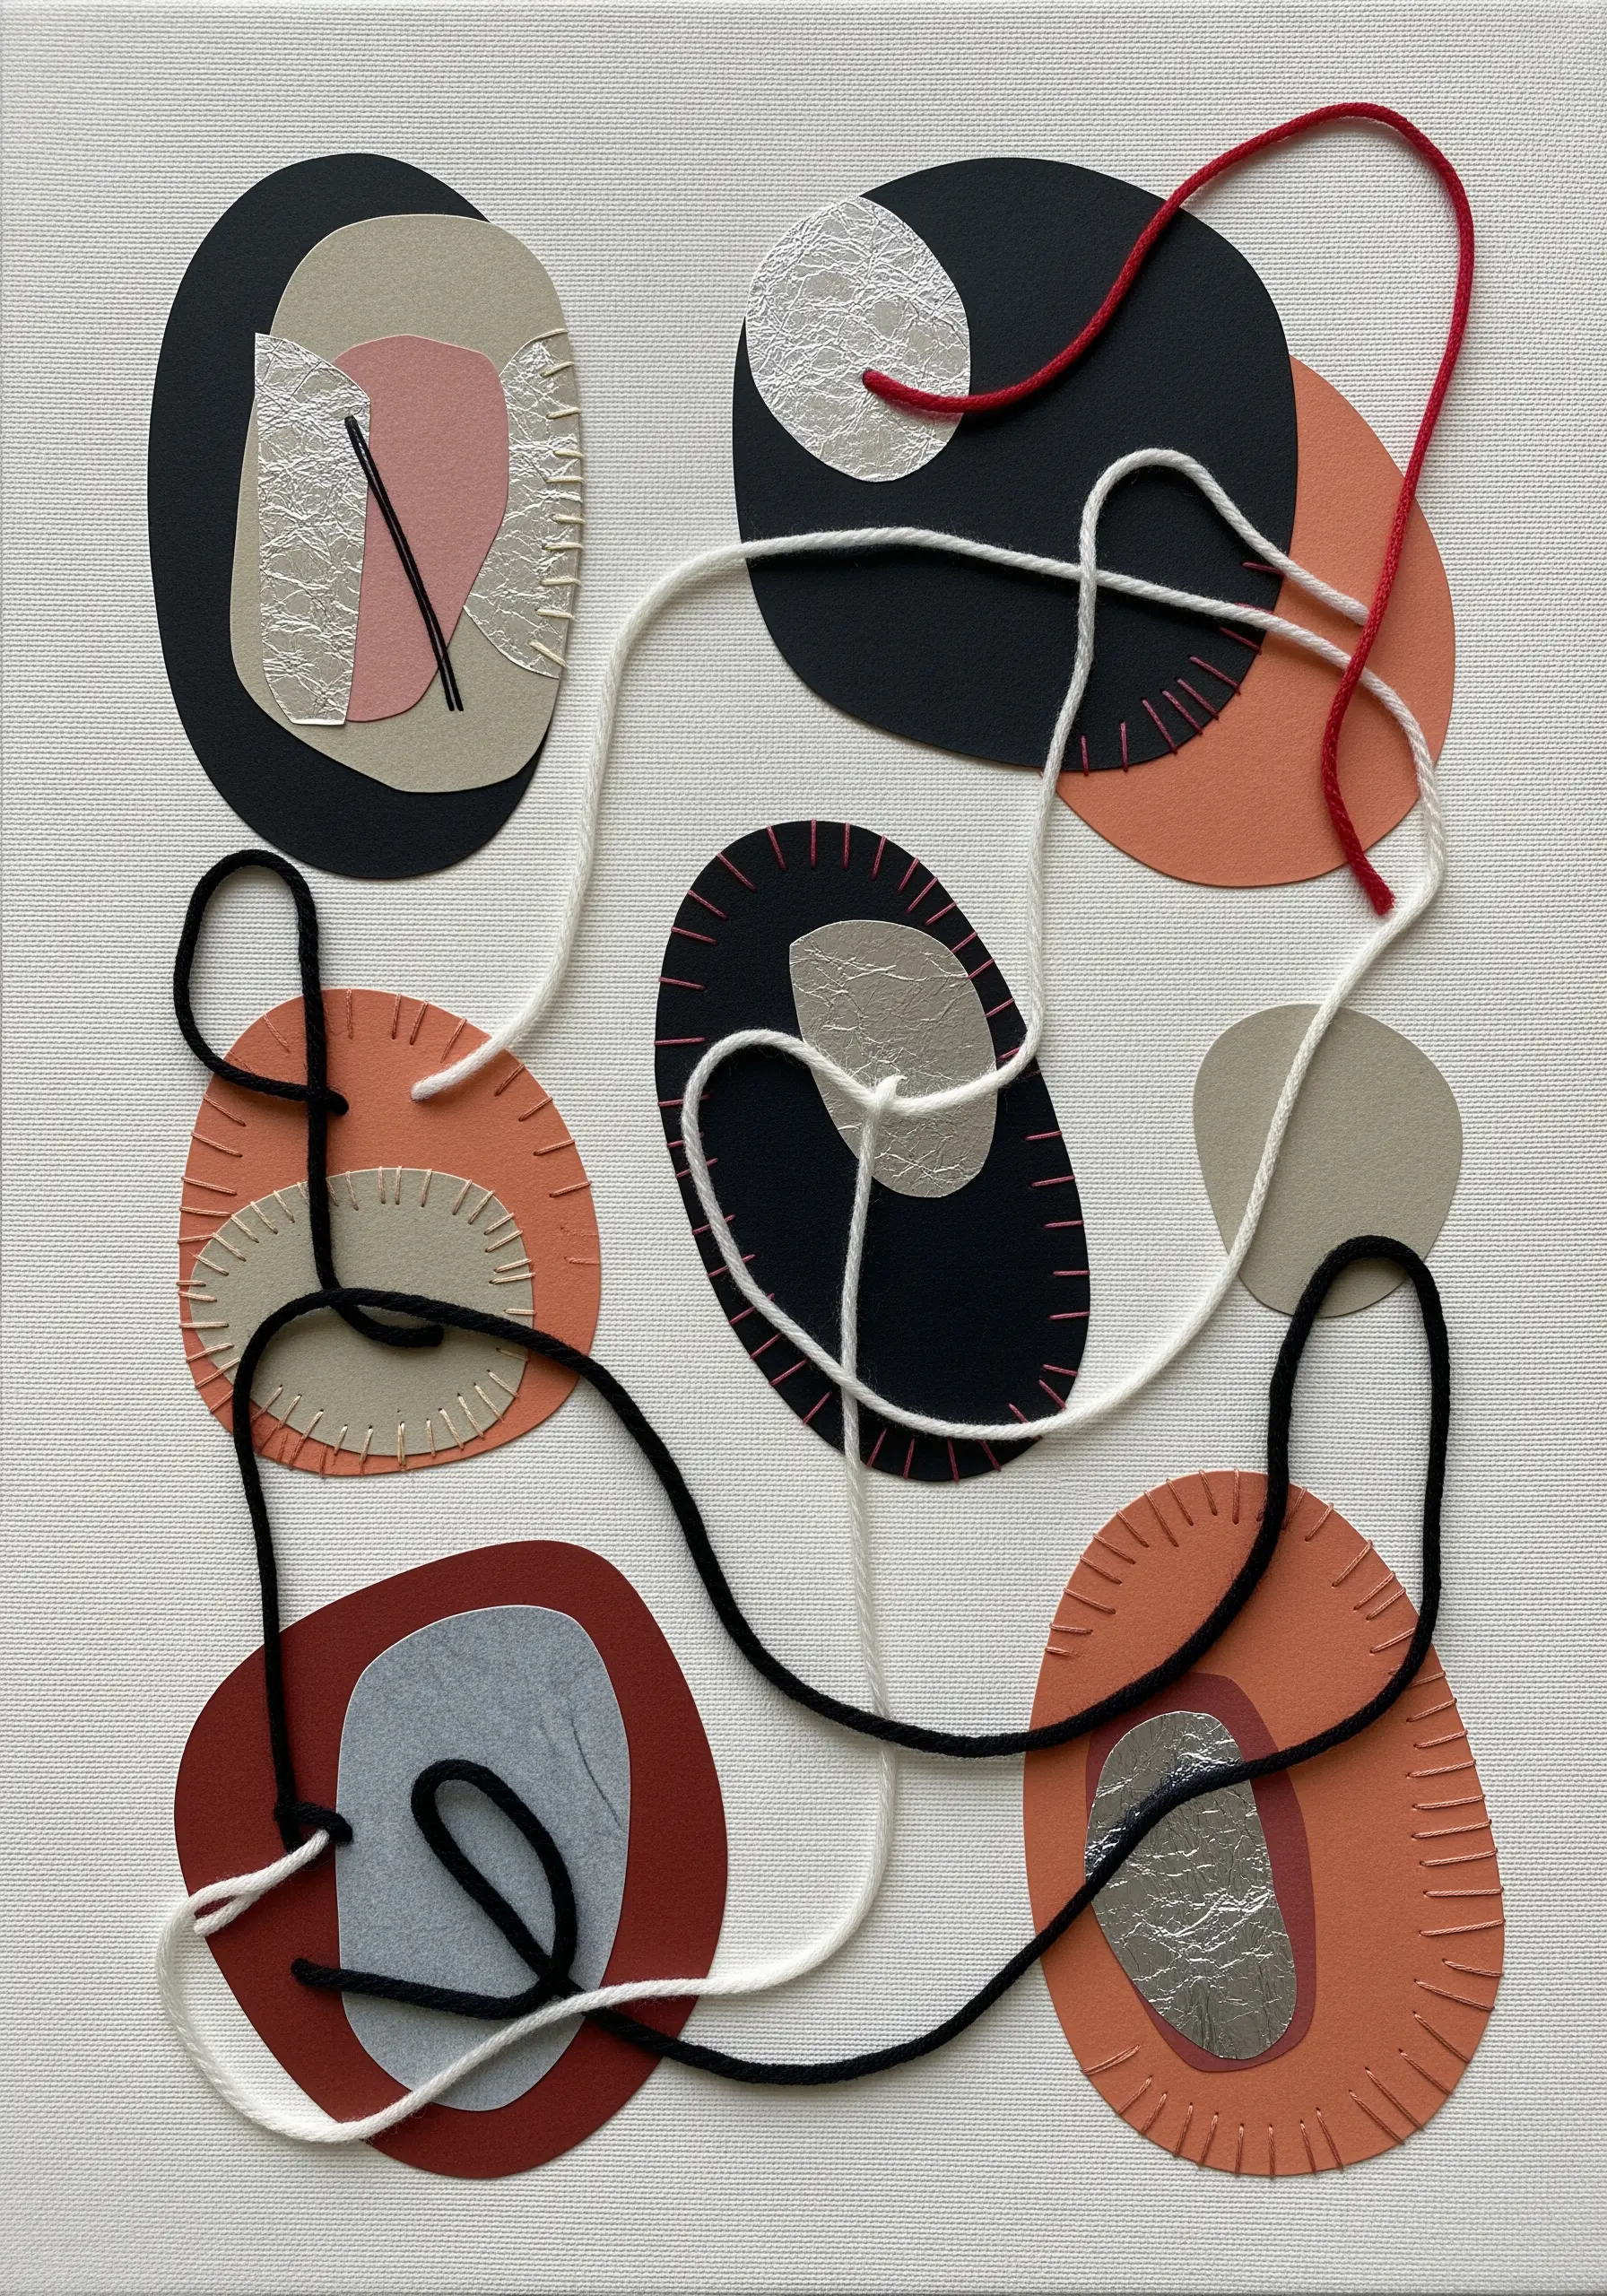
Instead of a needle and thread, use thick yarn as a bold, graphic line in your collage.
Arrange abstract, organic shapes of colored and textured paper on a canvas panel.
Then, couch a continuous piece of yarn over the composition, letting it loop and weave between the shapes to create movement and connection.
This technique is perfect for creating large-scale abstract mixed-media embroidery ideas with dynamic energy.
19. Stitch Directly onto a Collaged Journal Cover
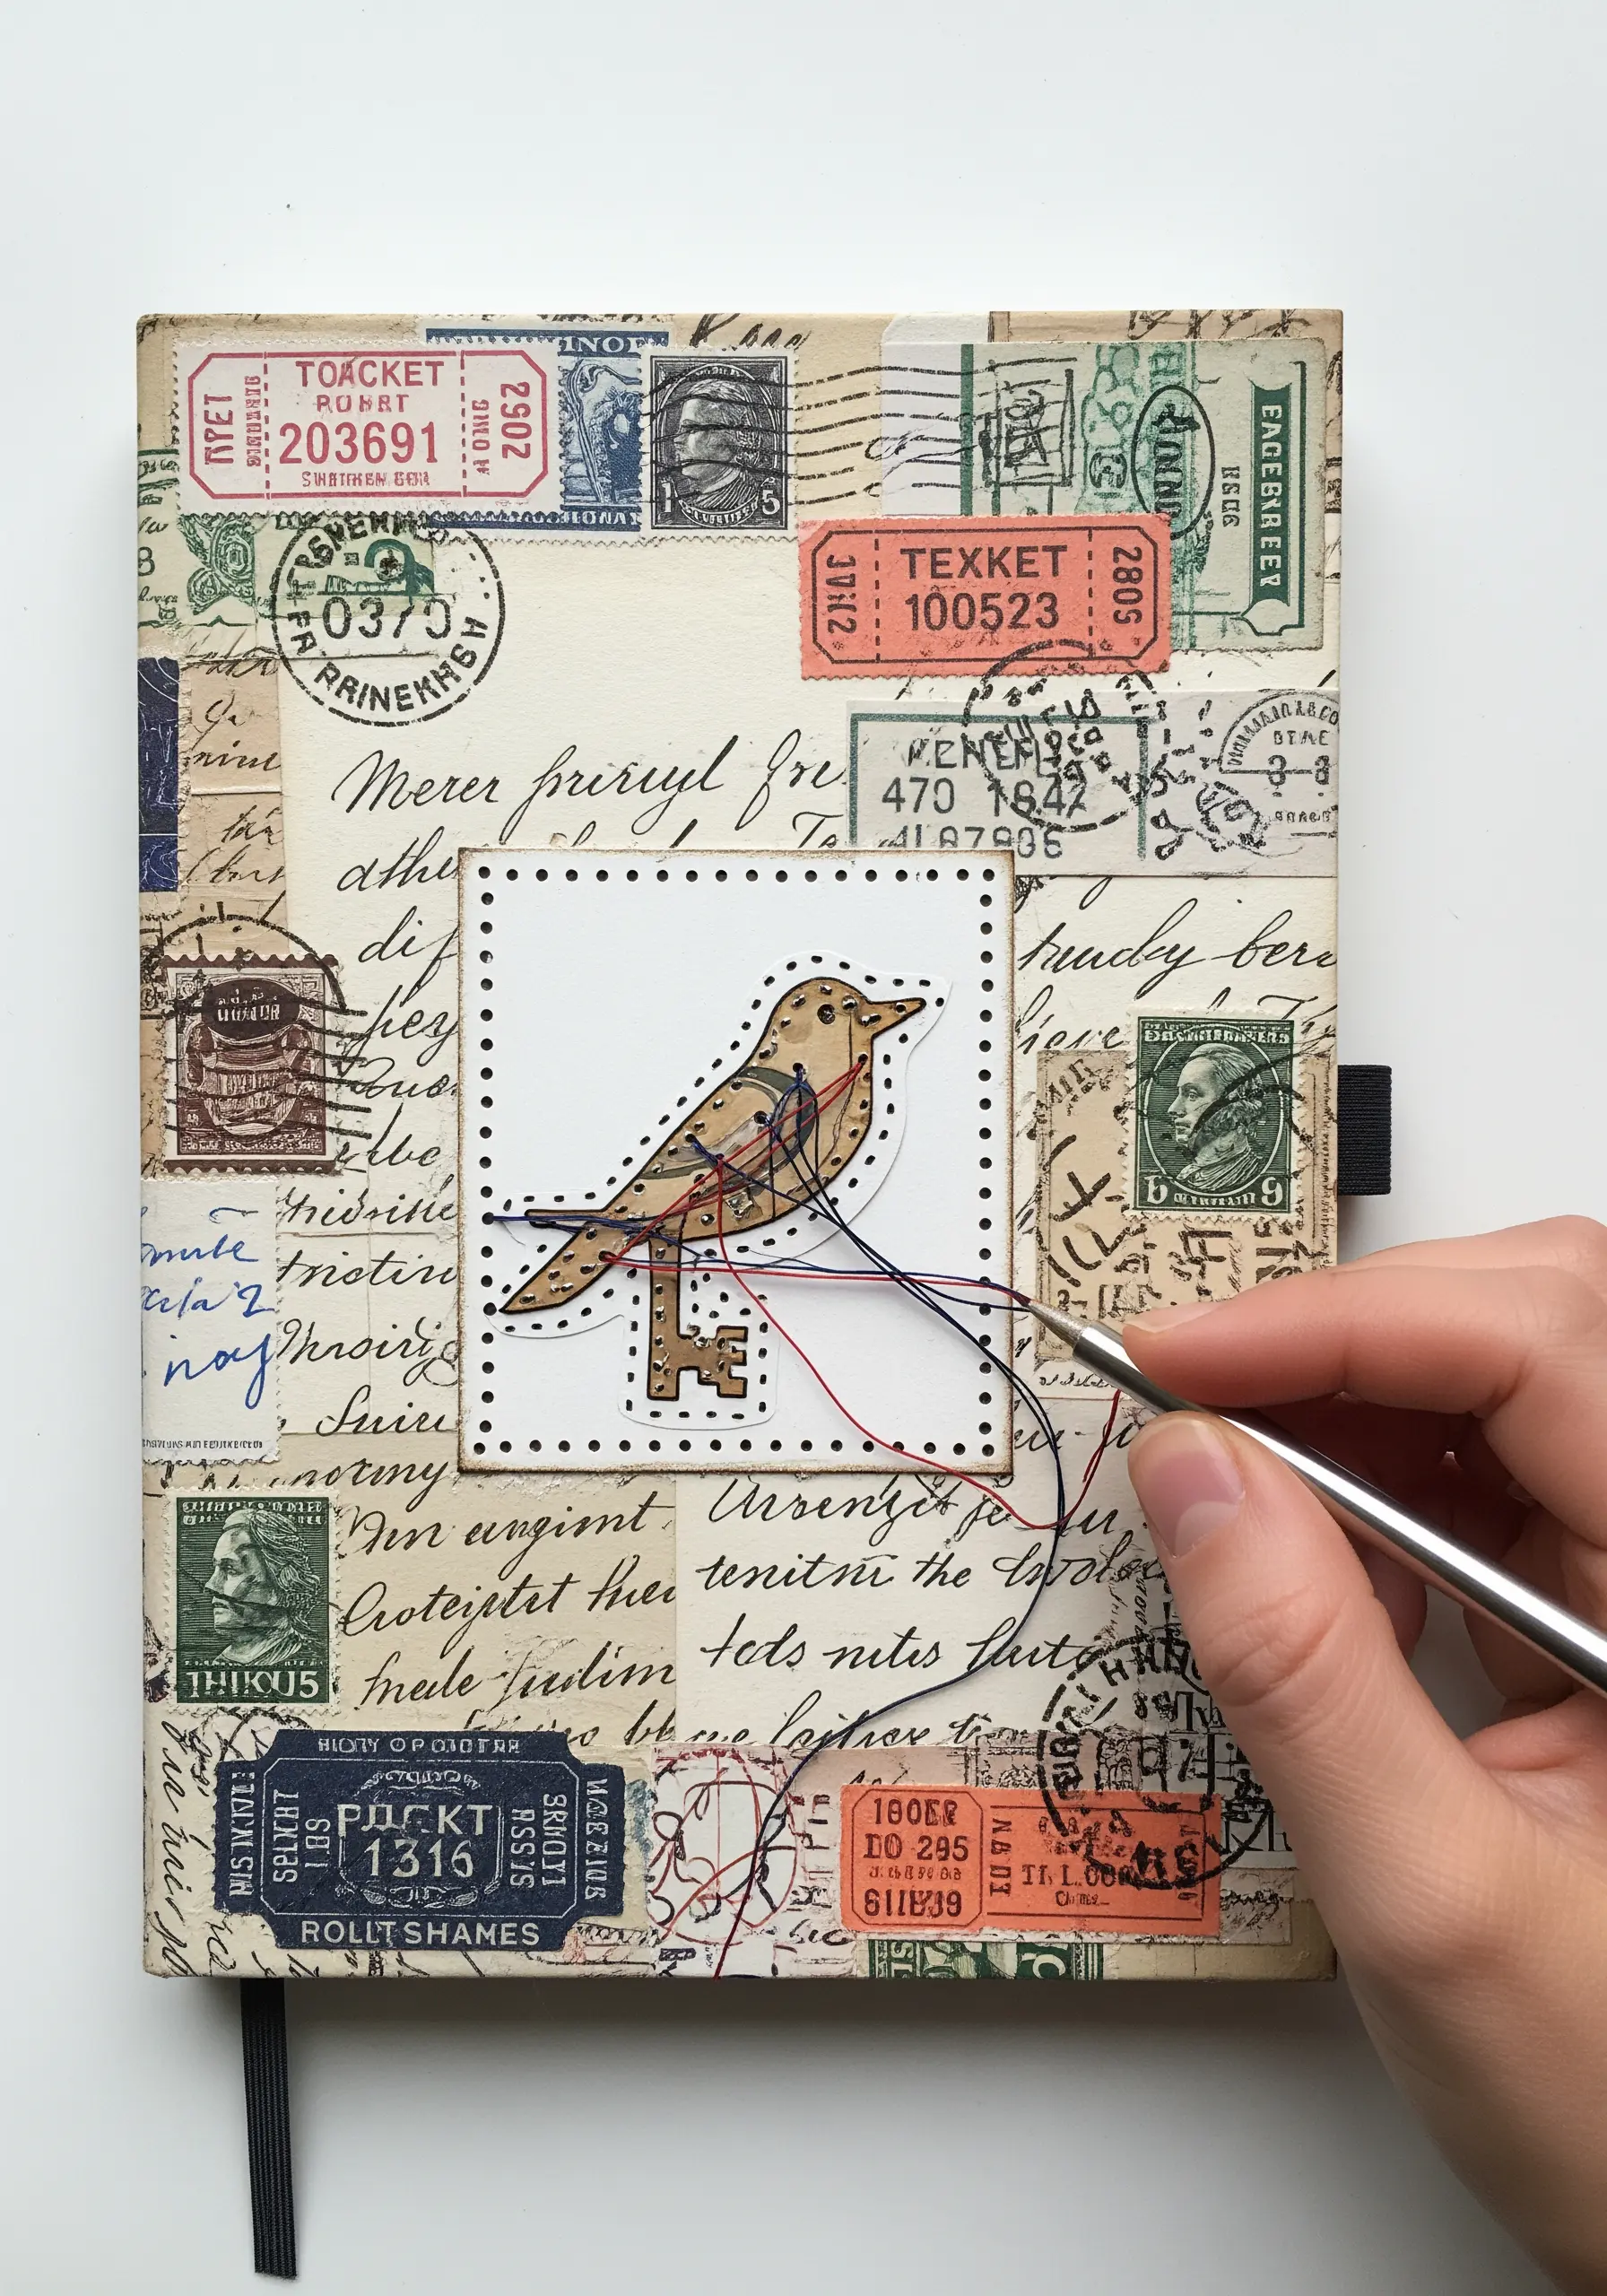
Personalize a notebook by creating a collage of vintage papers, stamps, and ephemera on its cover.
Select a central motif, like a simple bird, and stitch it directly through the paper layers and cover board.
Pre-punching your stitch holes is essential here to ensure a clean result without damaging your needle or the paper.
This method allows you to stitch over paper for unique results, creating a durable and deeply personal object.
20. Frame a Recipe with a Couched Twine Border
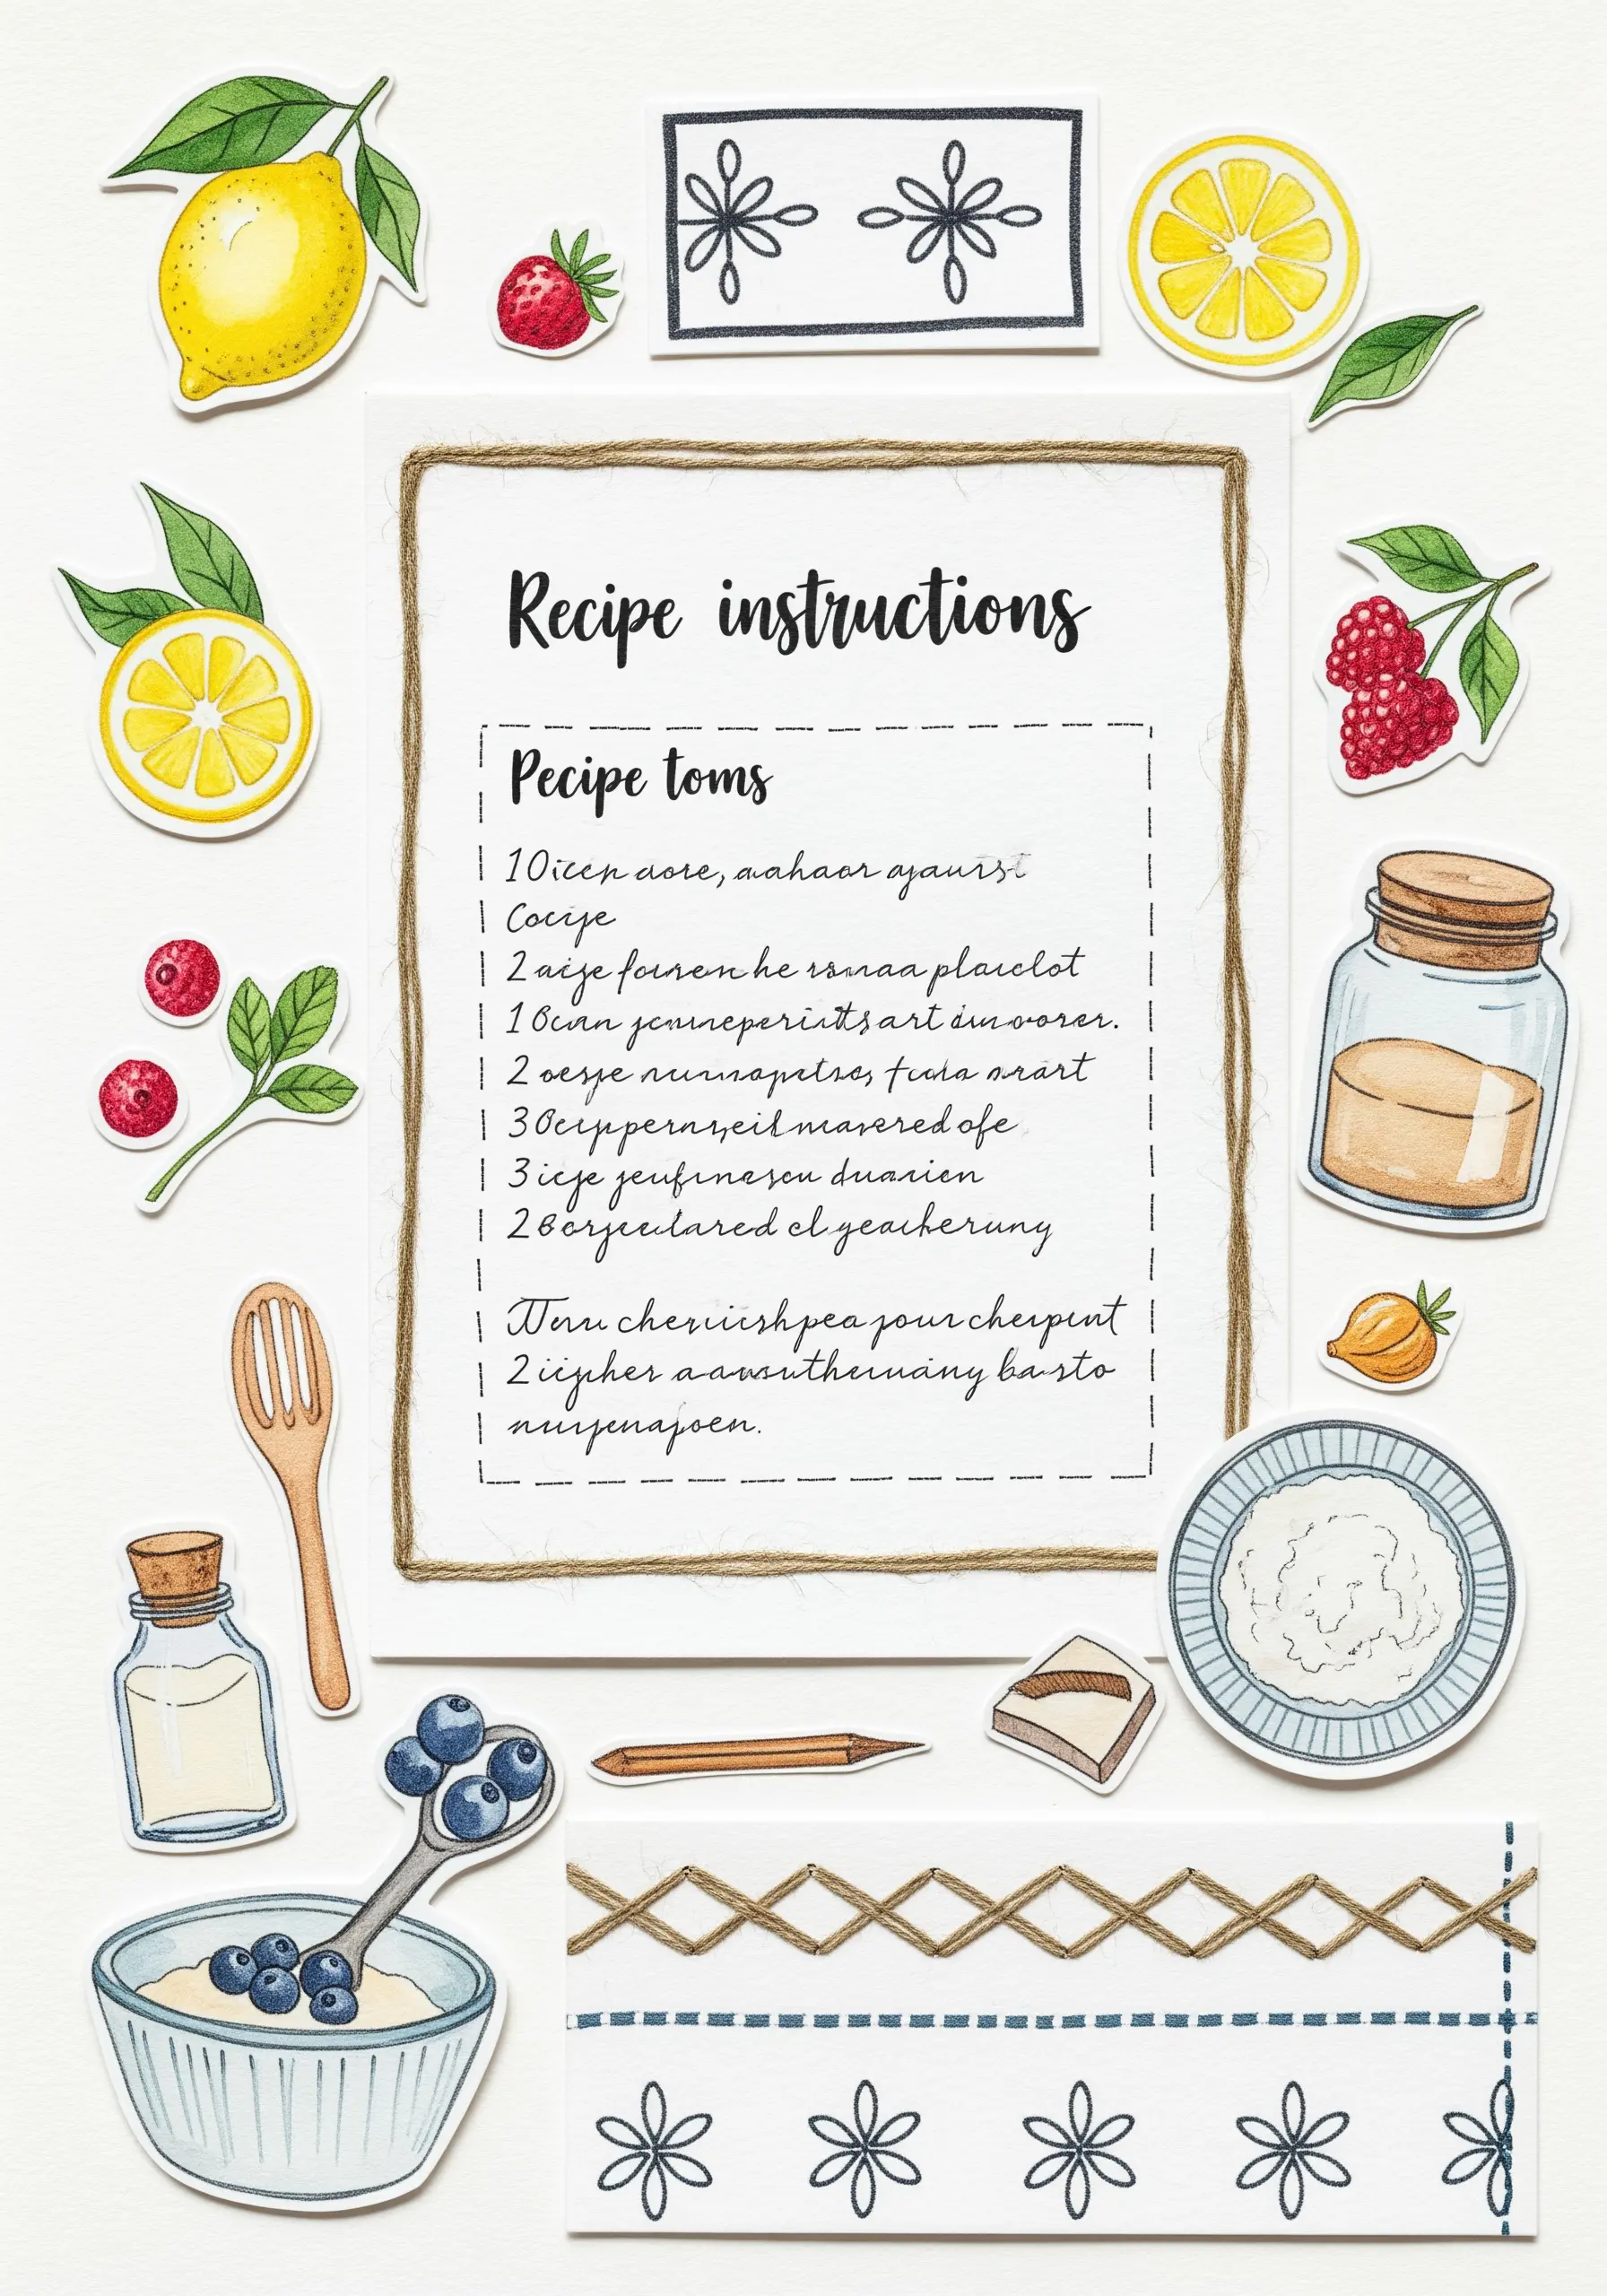
Elevate a handwritten recipe card or quote by giving it a rustic, textural frame.
Mount the paper onto a sturdy backing, like cardstock or fabric-covered board.
Then, use a simple couching stitch to attach a piece of natural twine or thick yarn around the edge of the paper.
This simple finishing technique adds a polished, handmade frame that feels both intentional and charming.
21. Create a Night Sky with Stitched Fireworks
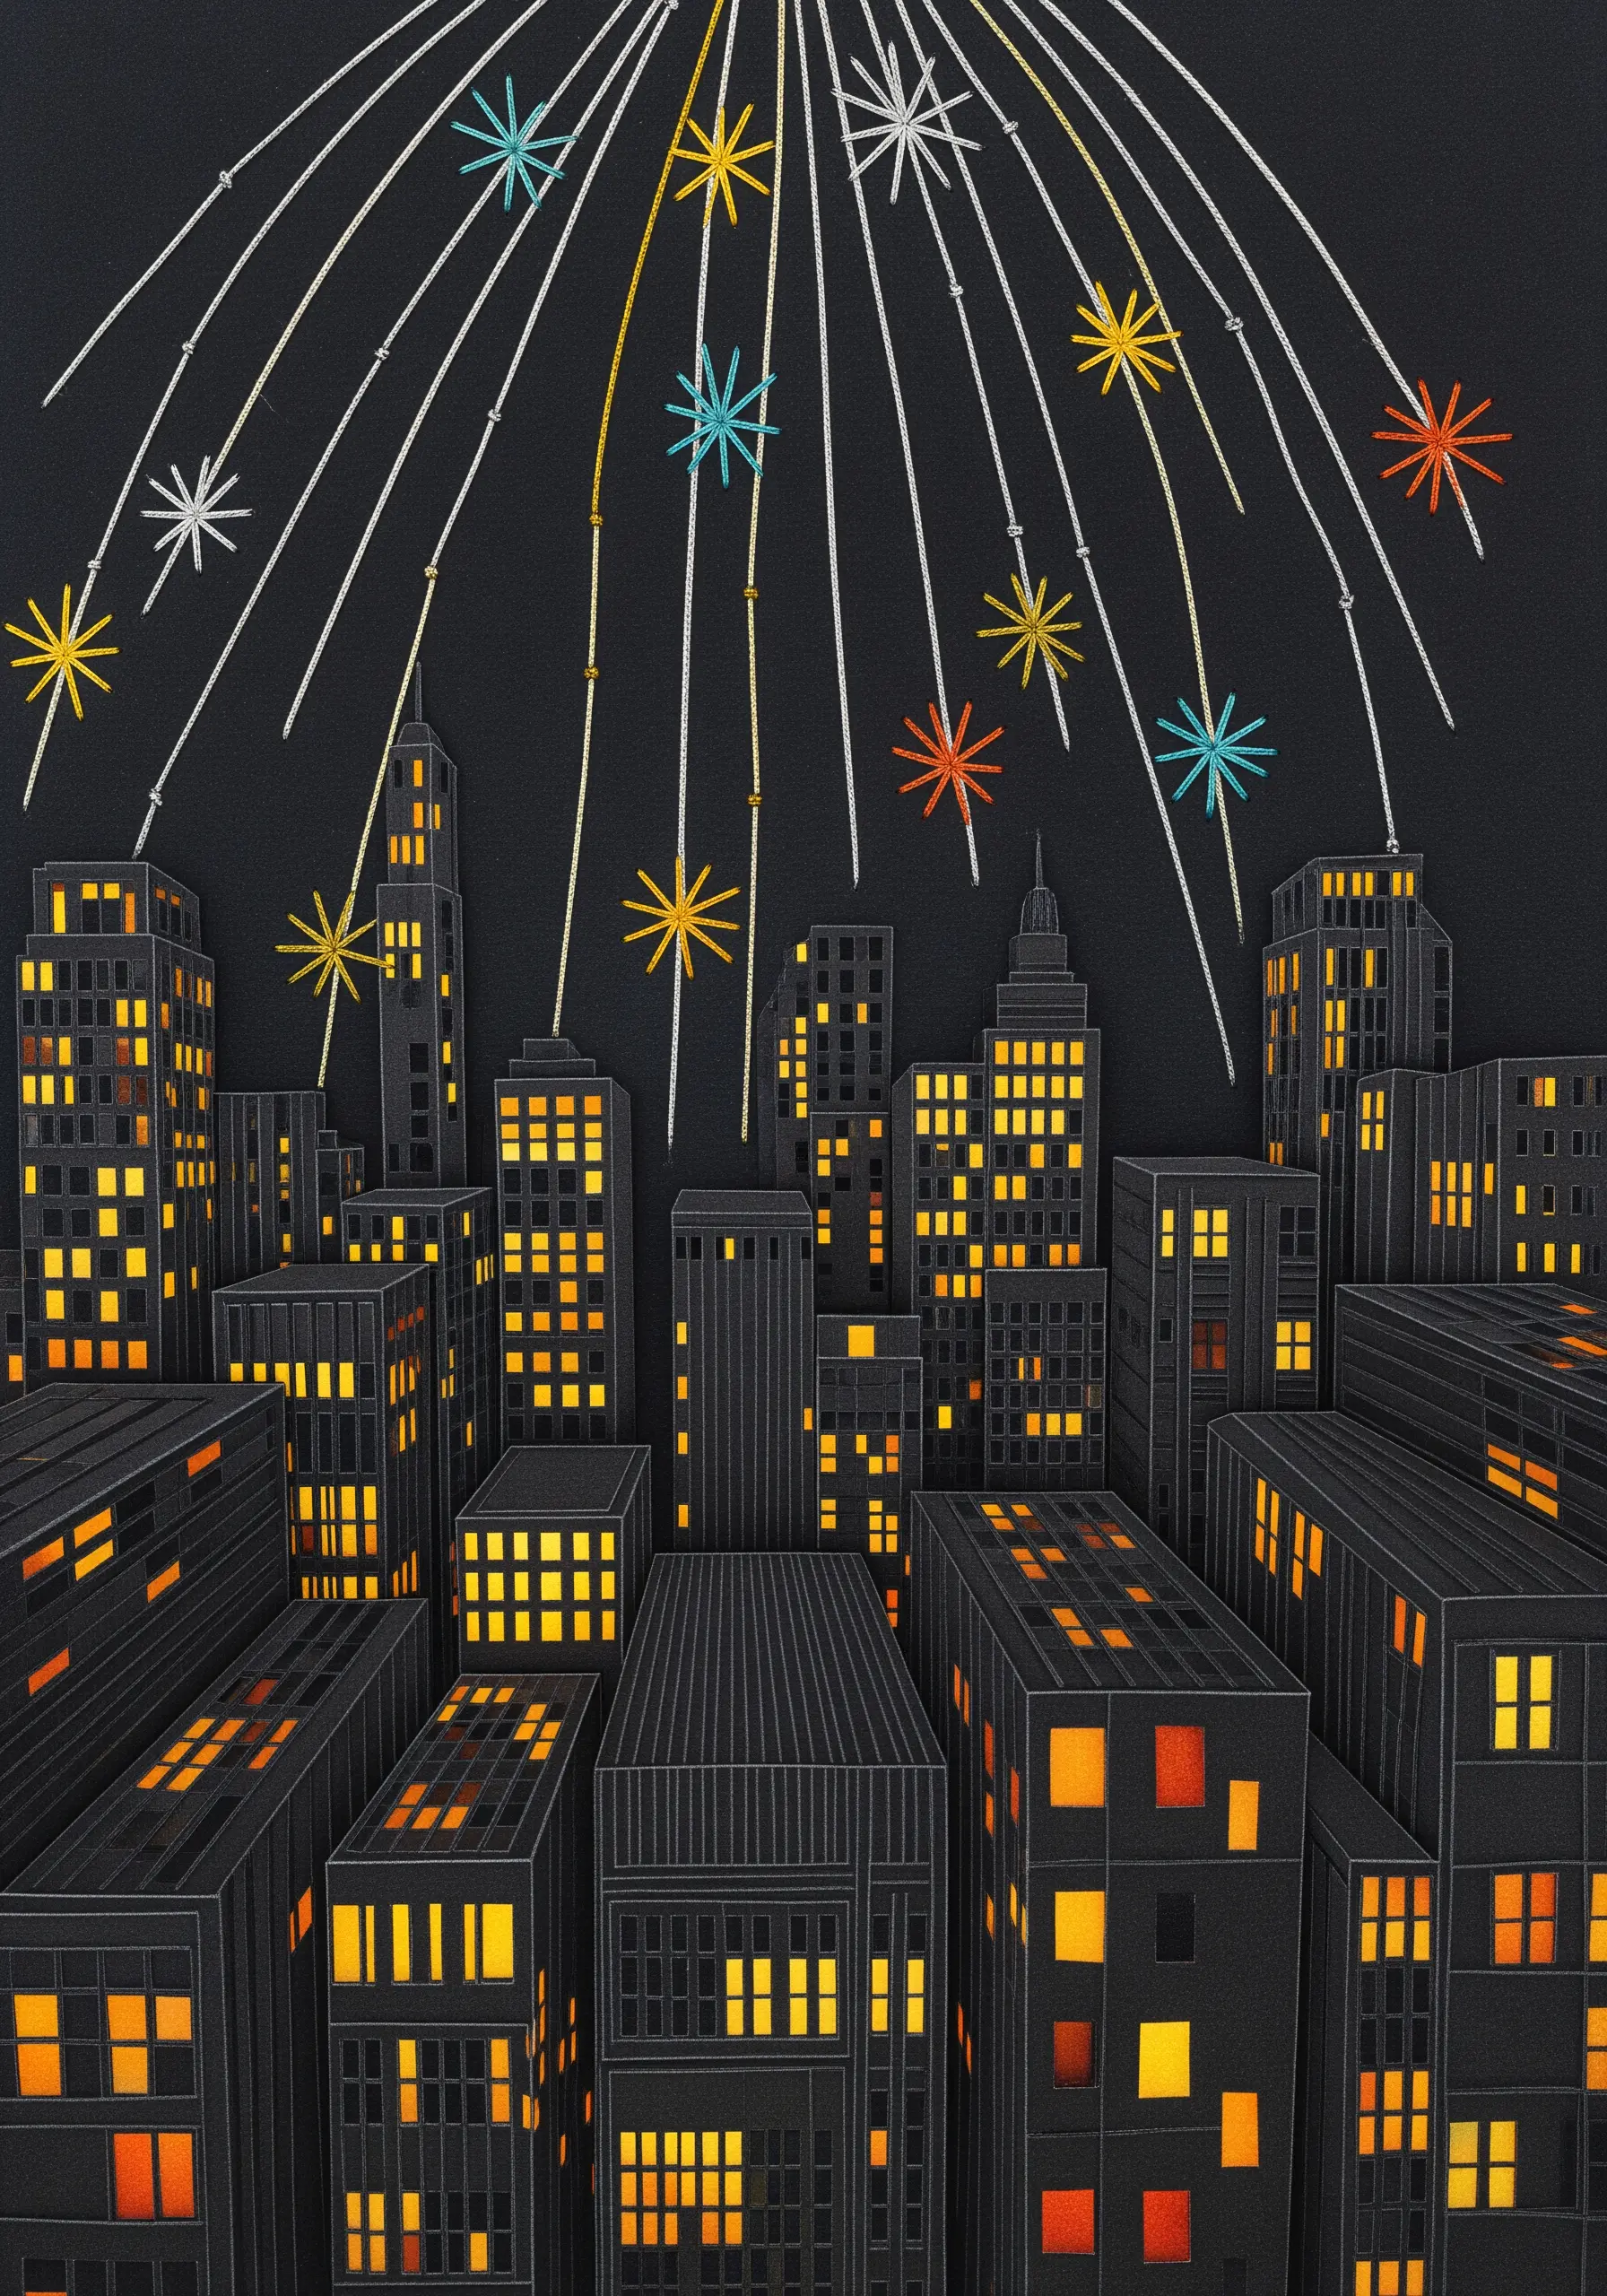
Use dark, heavy cardstock as your canvas to represent the night sky. Build a cityscape from layered black and grey paper, cutting out small windows to reveal a yellow paper backing for a lit-up effect.
For the fireworks, stitch radiating starbursts using bright, contrasting colors of thread.
Using metallic or variegated thread will add an extra sense of sparkle and movement against the dark background.
This is a dramatic take on embroided city skyline wall decor.
22. Add 3D Paper Elements to Botanical Prints
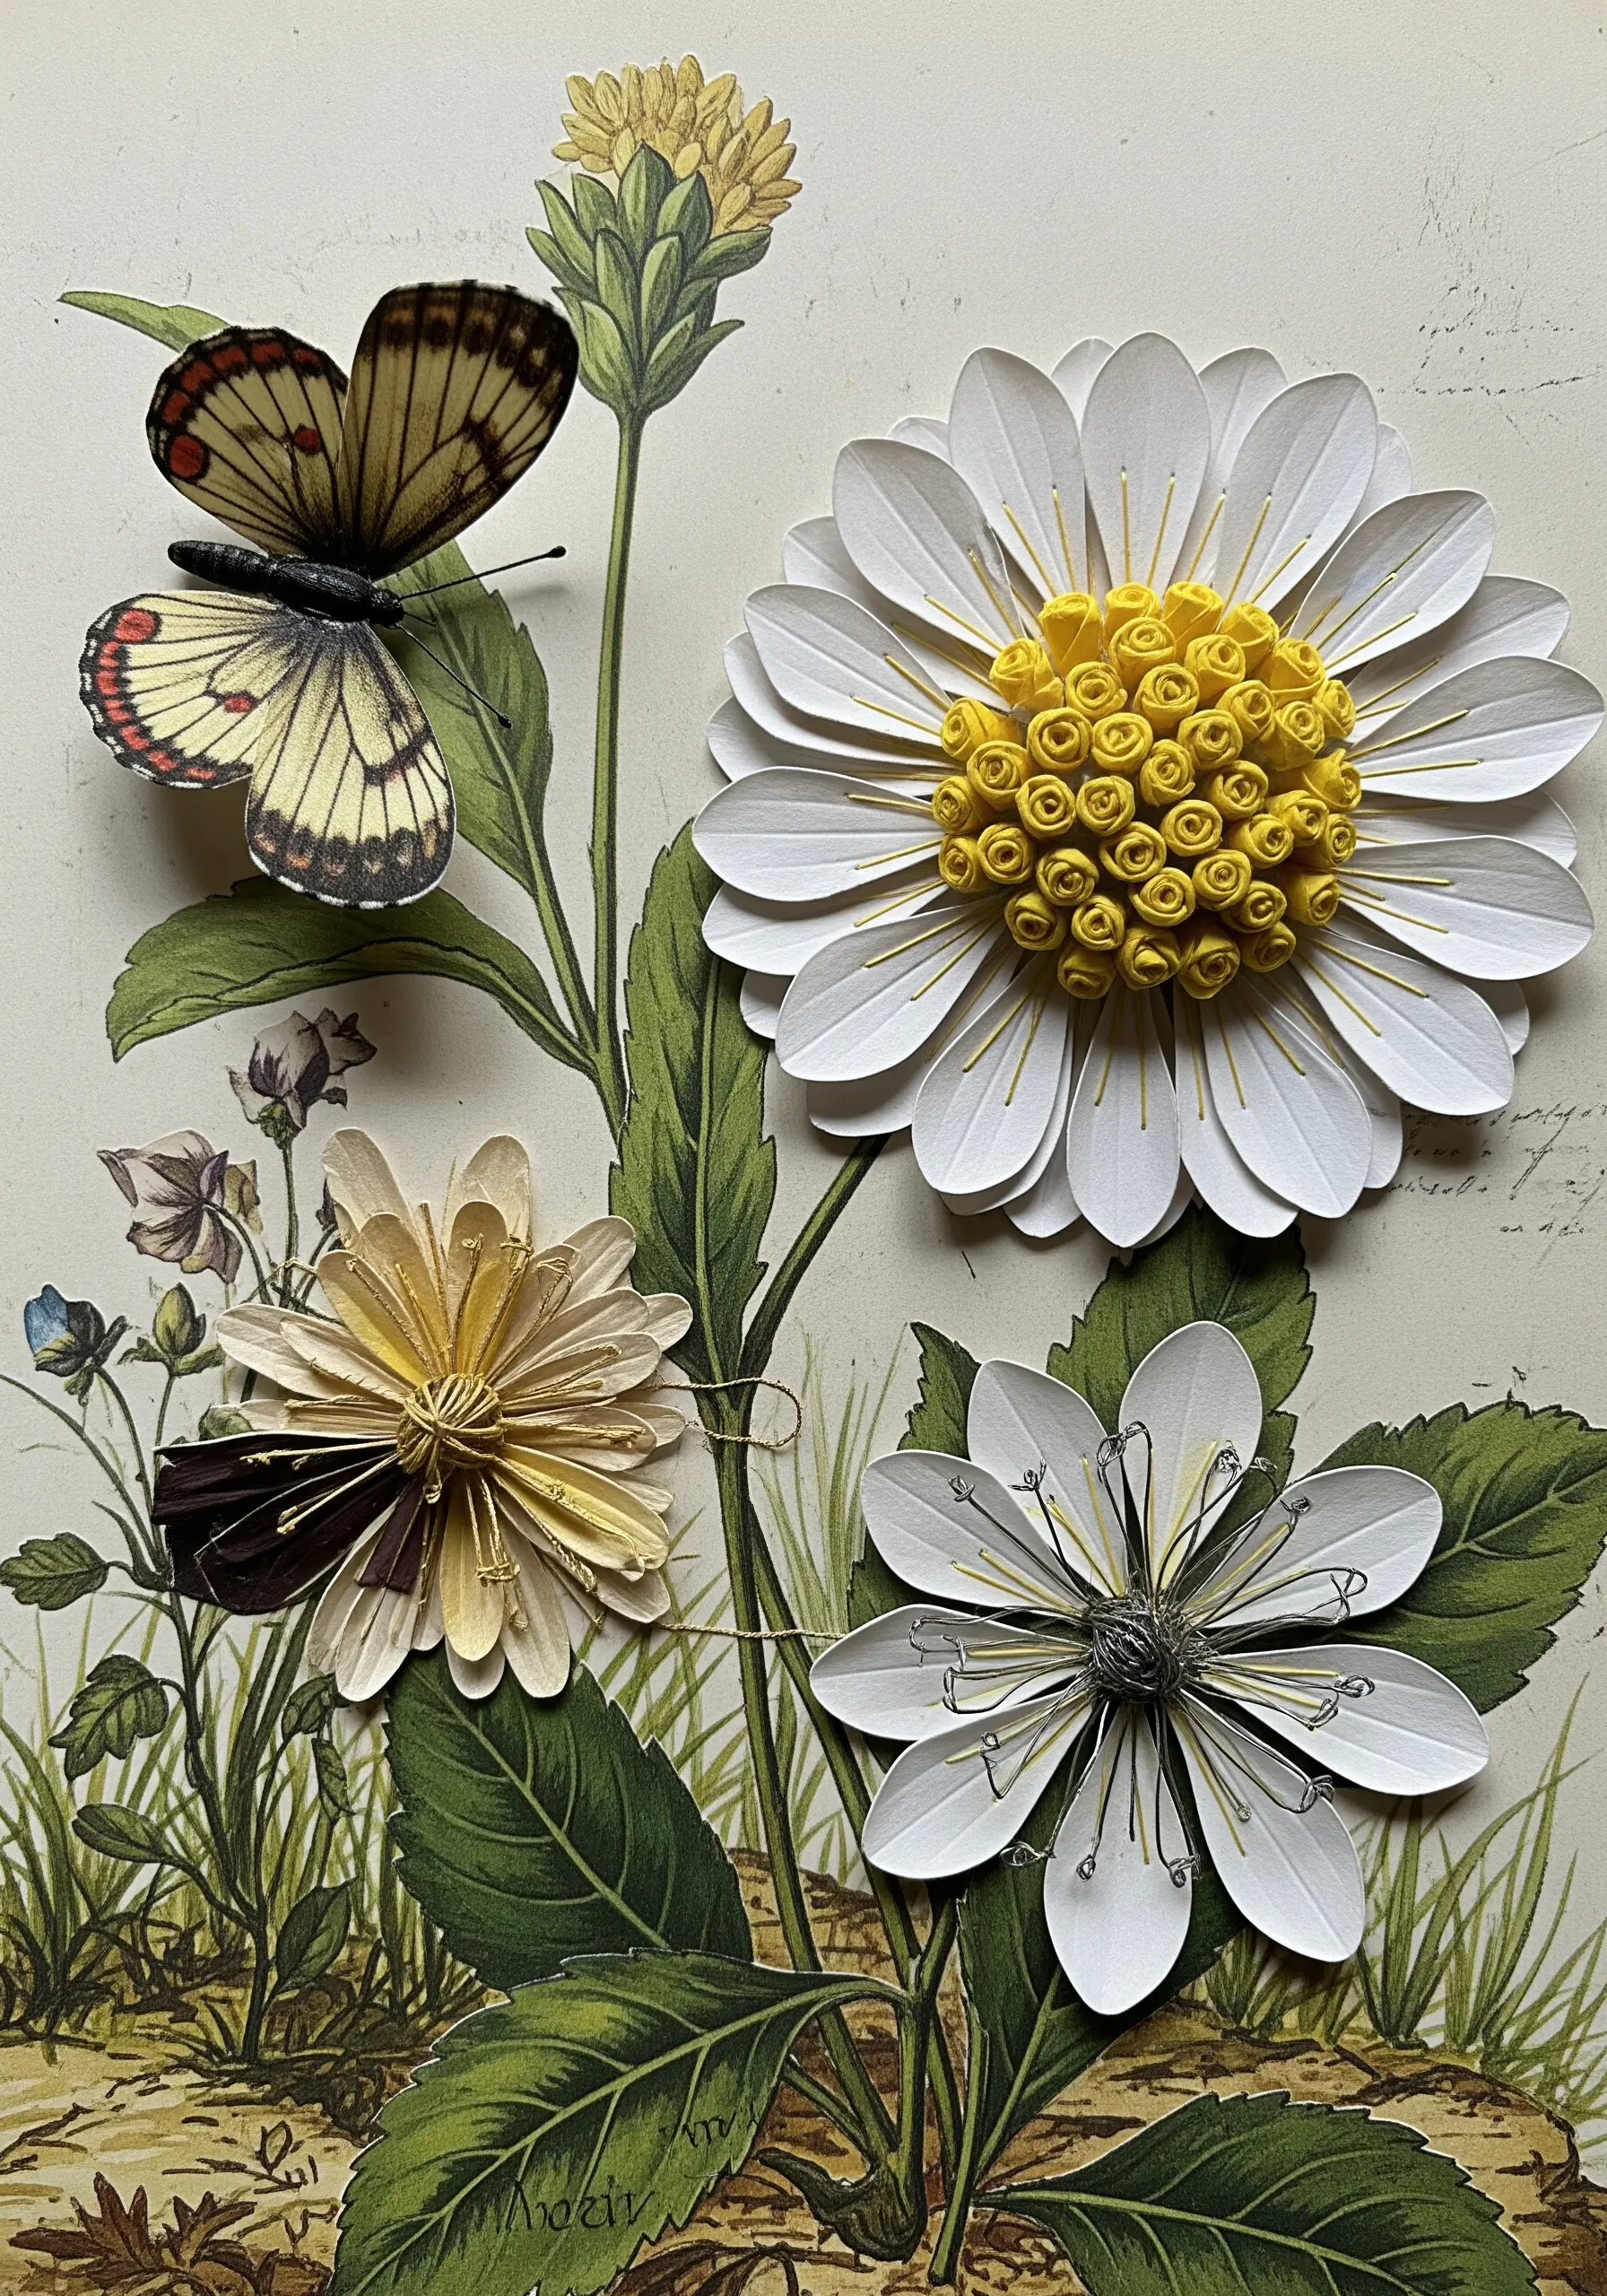
Start with a vintage botanical illustration as your base. Identify a few key flowers in the print to recreate in three dimensions.
Use paper quilling to form a dense, textured flower center or construct petals from individually cut and shaped paper.
Attach these dimensional elements directly onto their counterparts in the print.
This selective 3D layering creates a stunning piece that seems to grow right off the page.
23. Weave a Sun with Yarn and Paper Rays
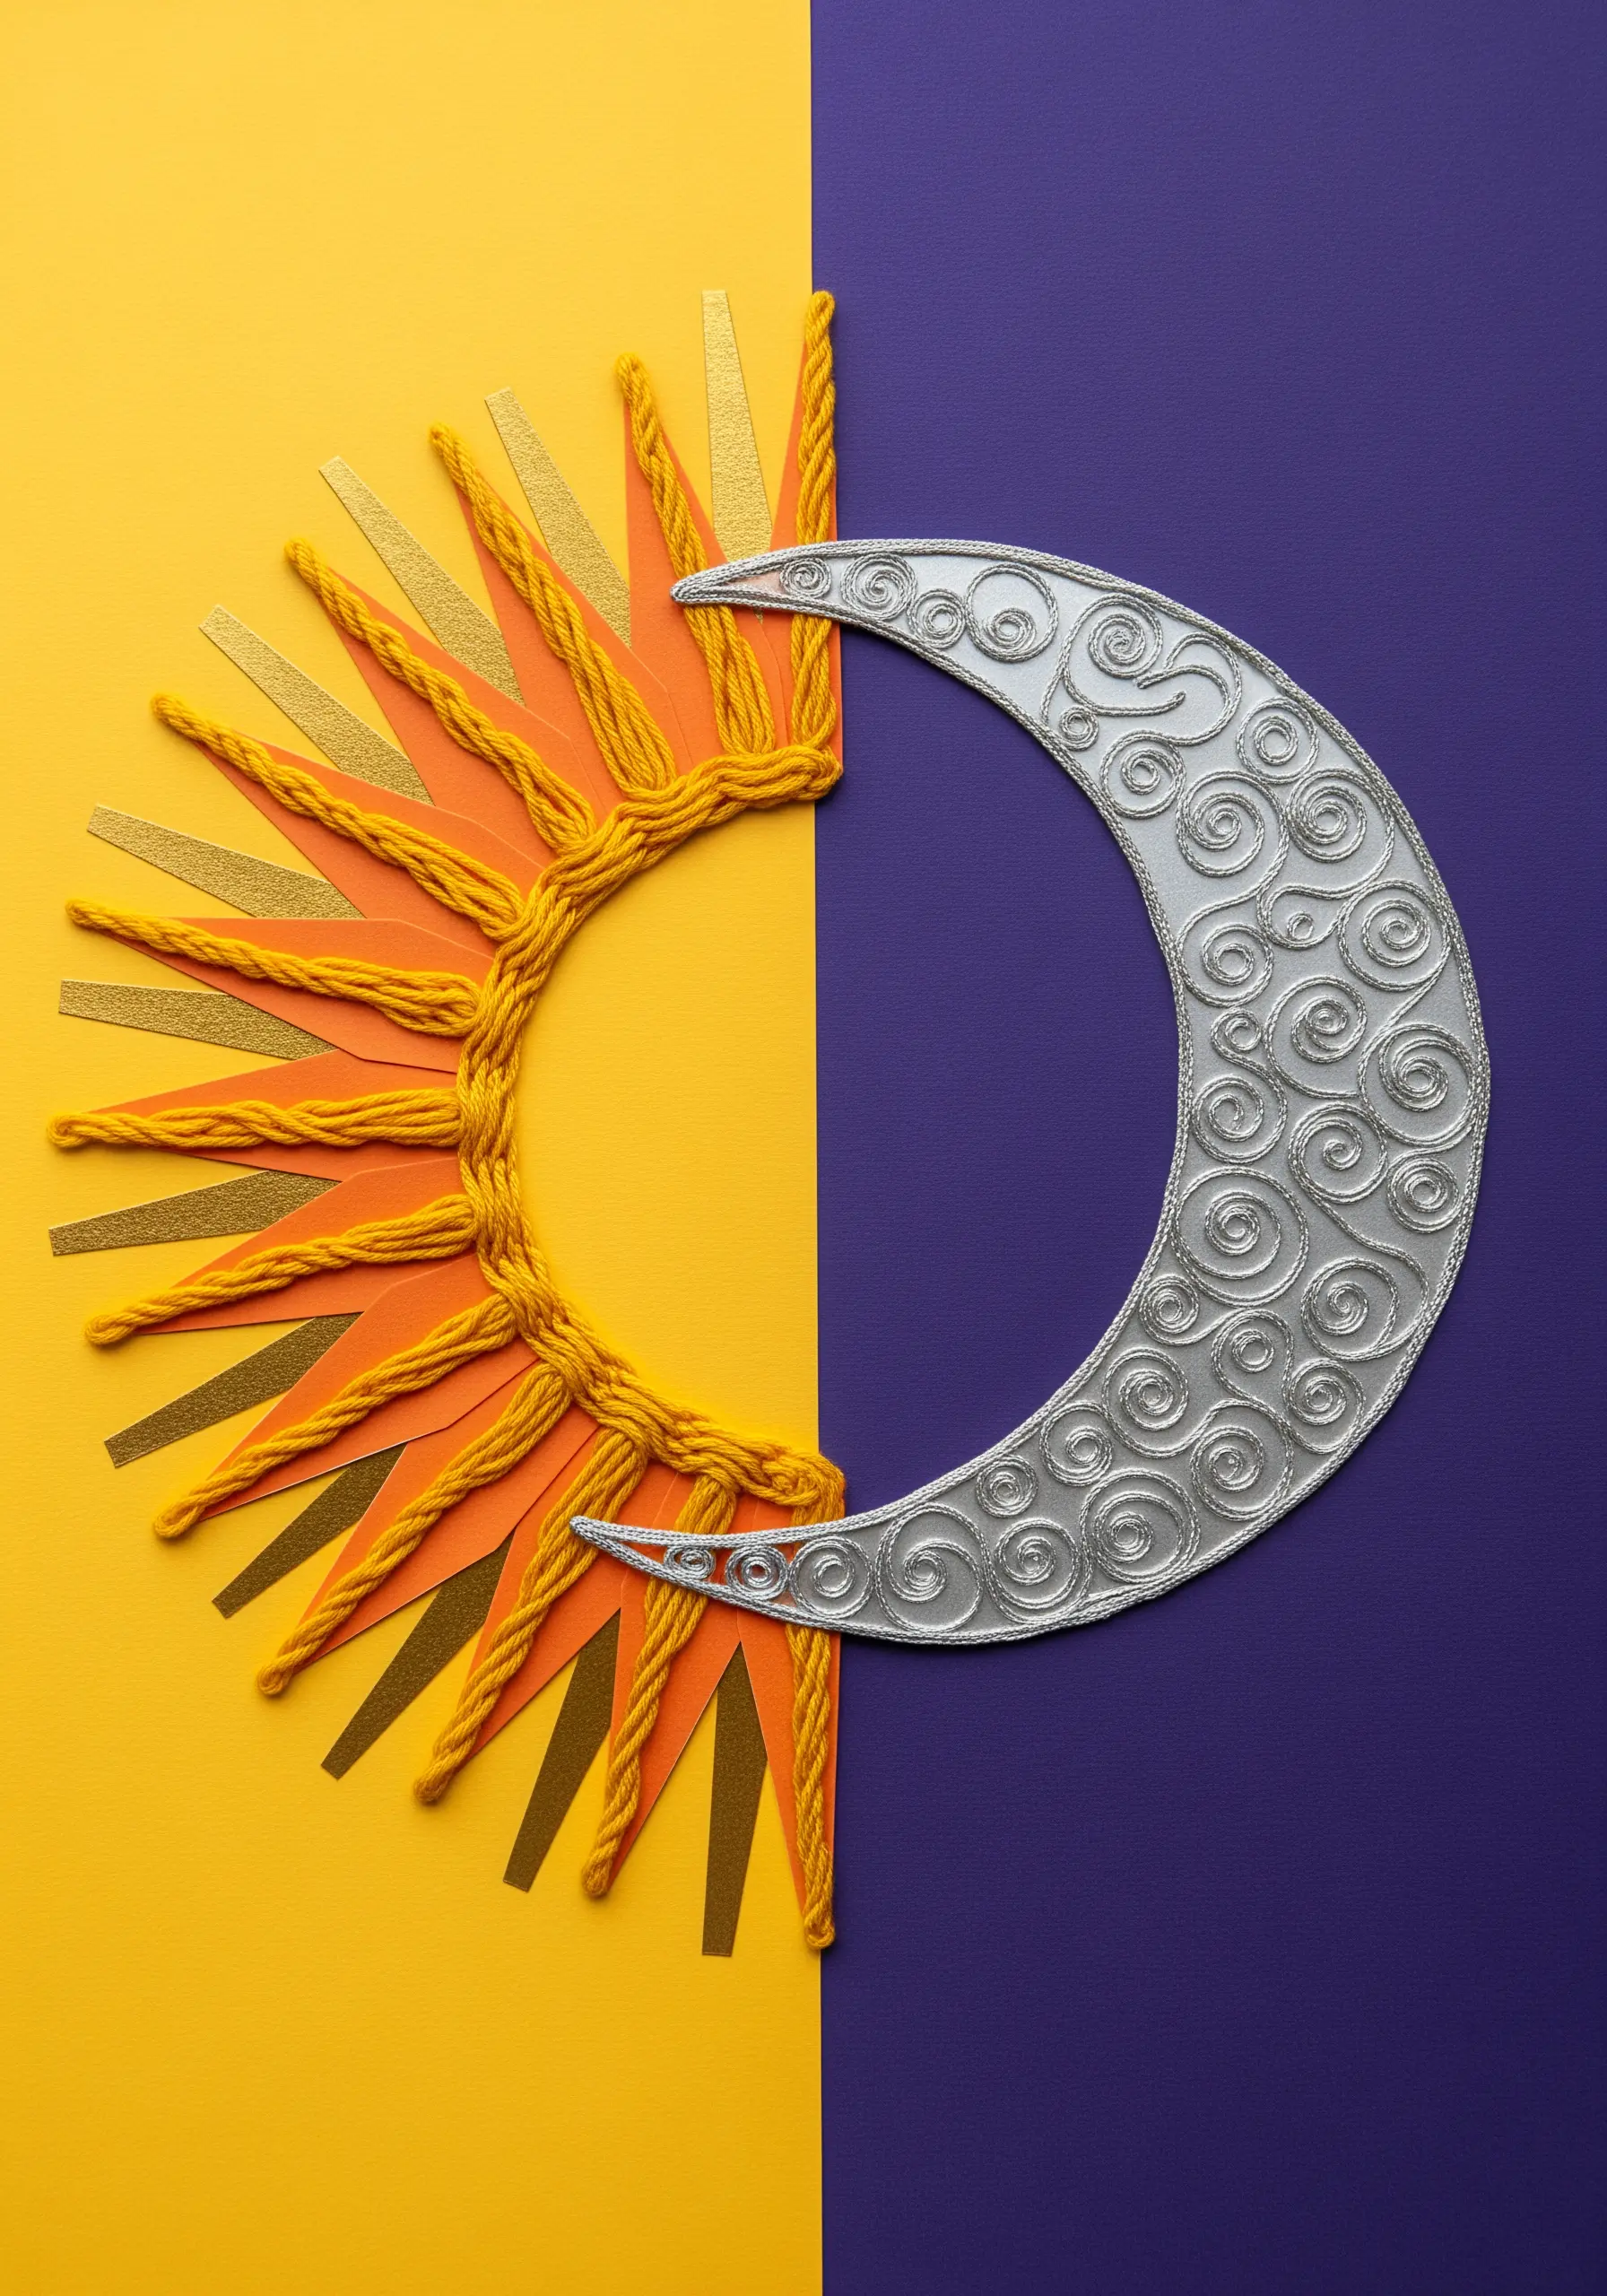
Create a high-contrast, symbolic artwork by dividing your background into two distinct colors, like yellow and purple.
On one side, craft a sun by weaving warm-colored yarn around a paper ring. Add pointed paper rays beneath the weaving.
On the other side, create a moon from embossed silver paper or fabric.
This project explores symmetry and contrast, blending fiber techniques like those found in yarn wall art projects inspired by geometric patterns with simple papercraft.
24. Curate Your Scraps Before You Begin
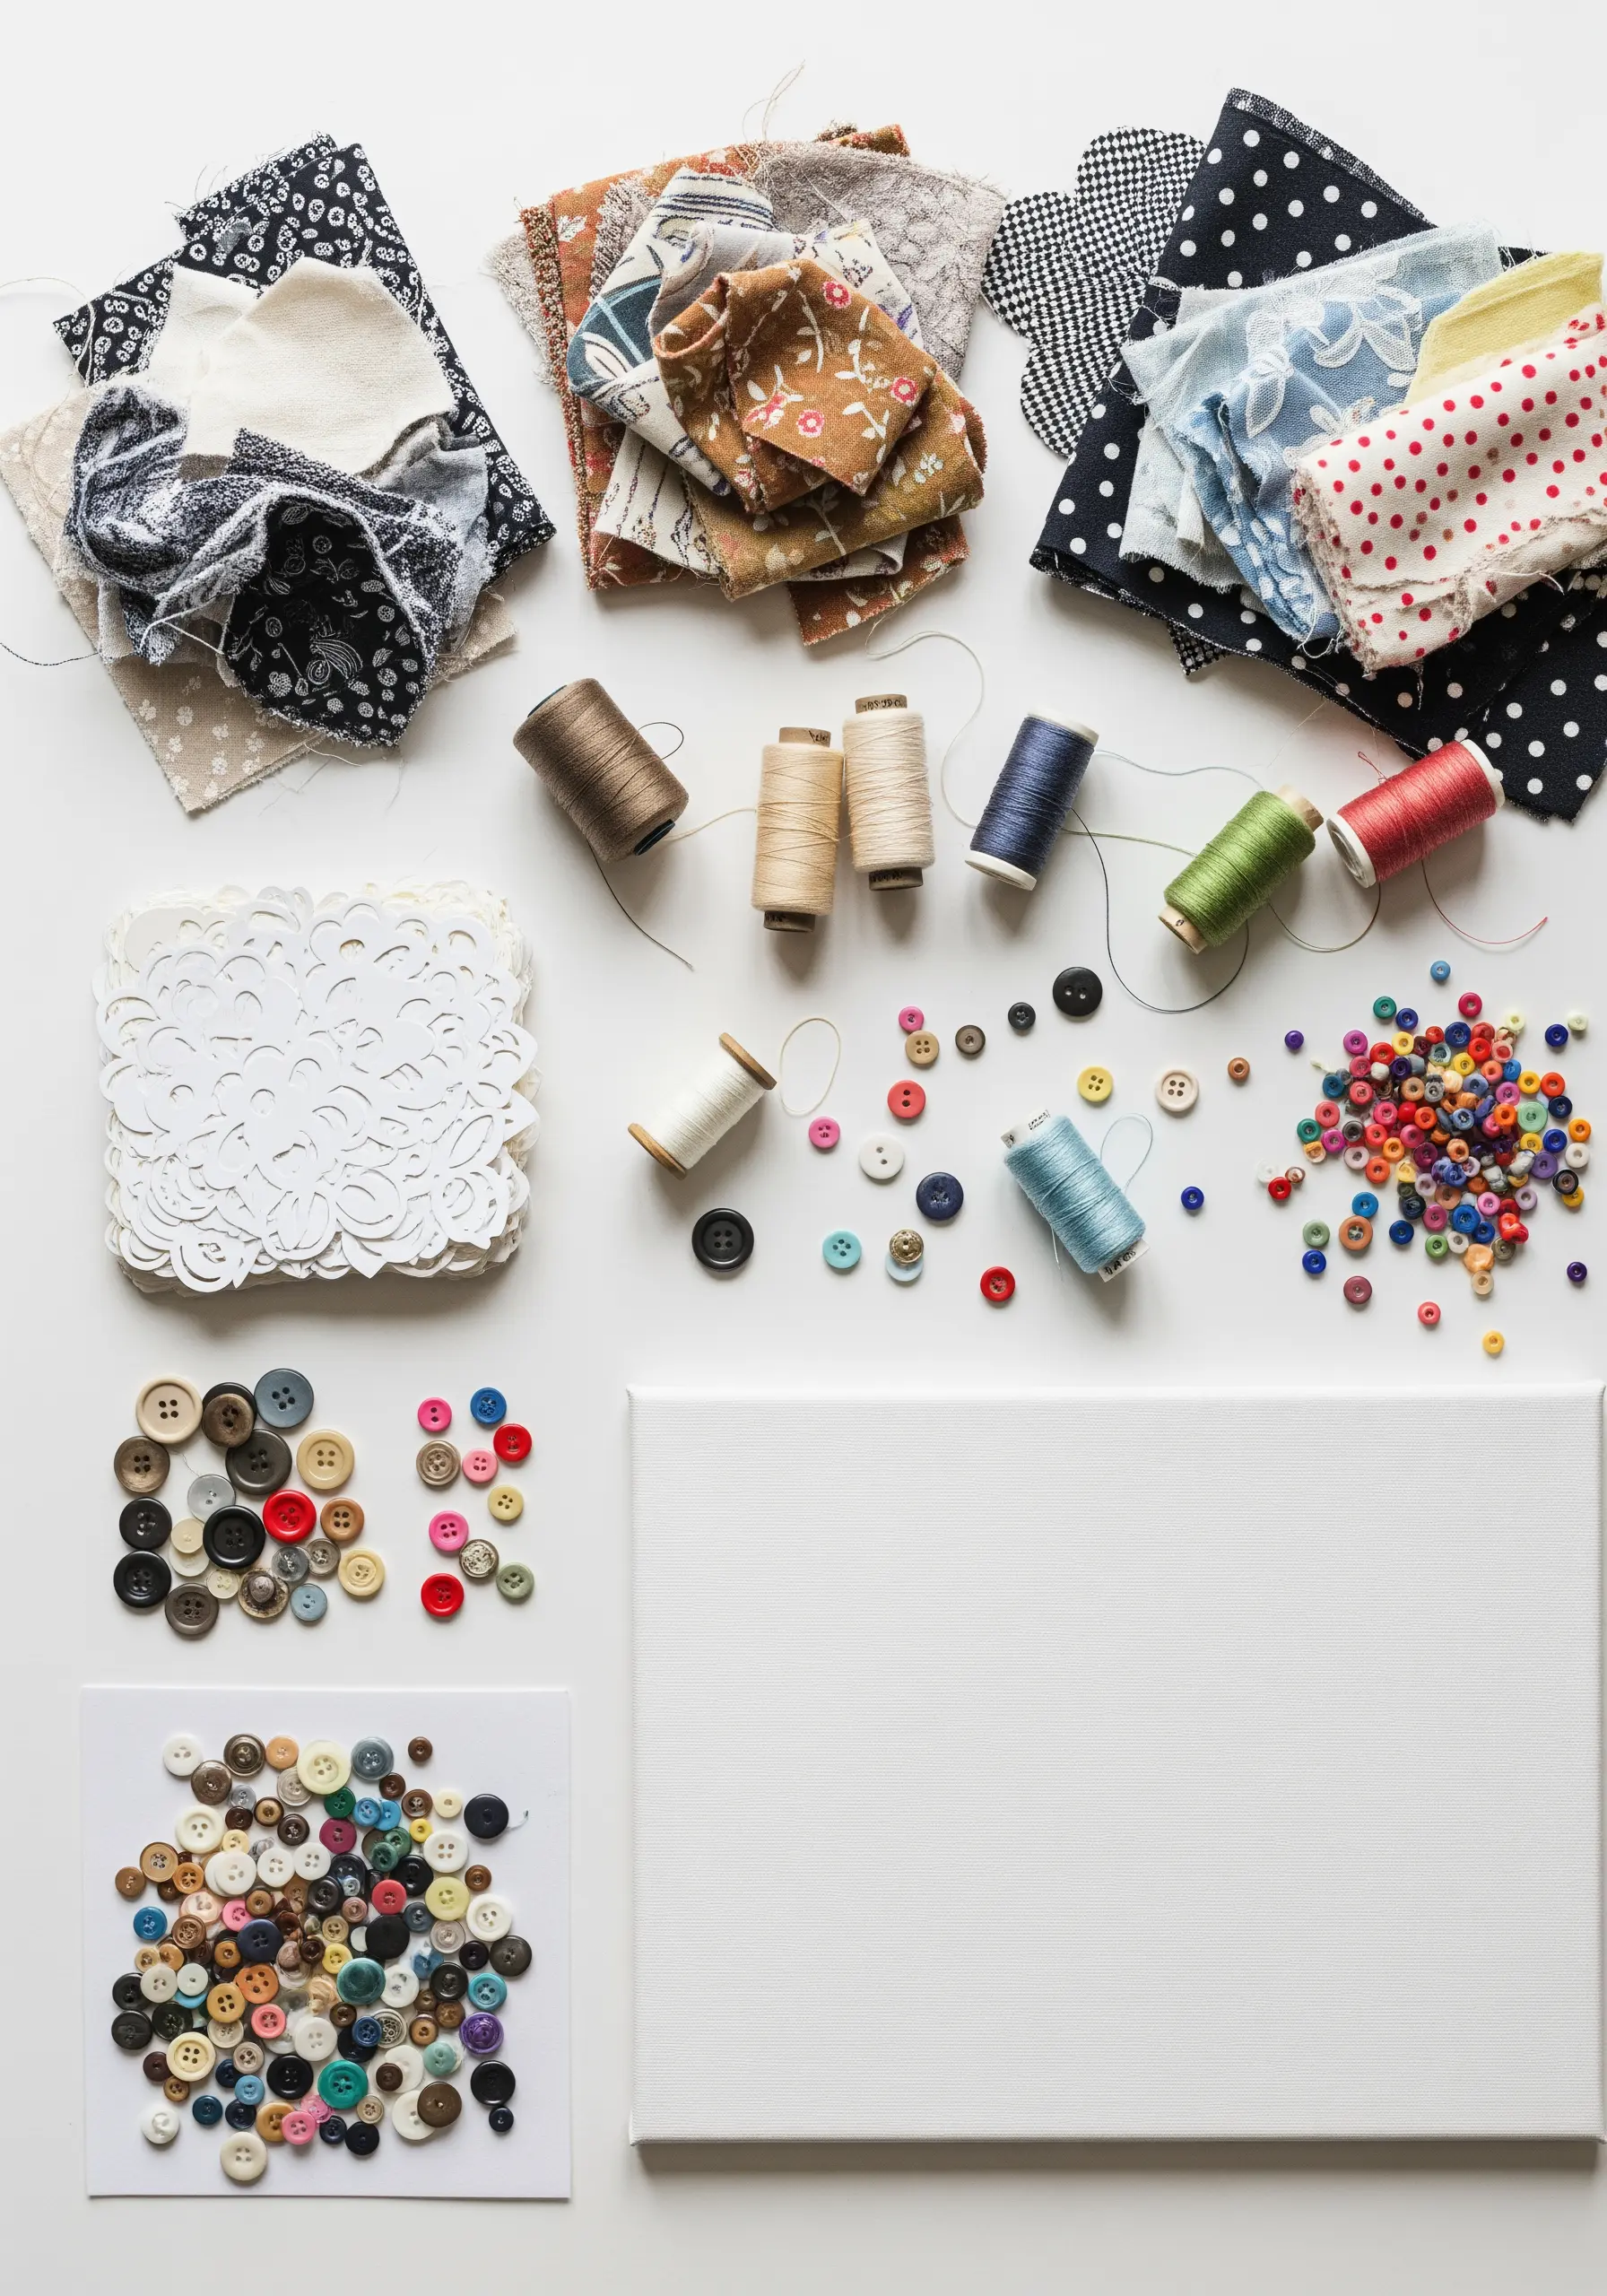
The first step in any collage project is gathering your materials. Don’t see them as leftovers; see them as a curated palette.
Arrange your fabric scraps, threads, buttons, and paper bits by color, texture, or theme.
This simple act of organizing will spark unexpected combinations and reveal the potential hiding in your stash.
It’s one of the best embroidery hacks for creative fabric lovers who hate waste, turning clutter into a source of inspiration.
25. Construct a Feather from Stitched Paper Strips
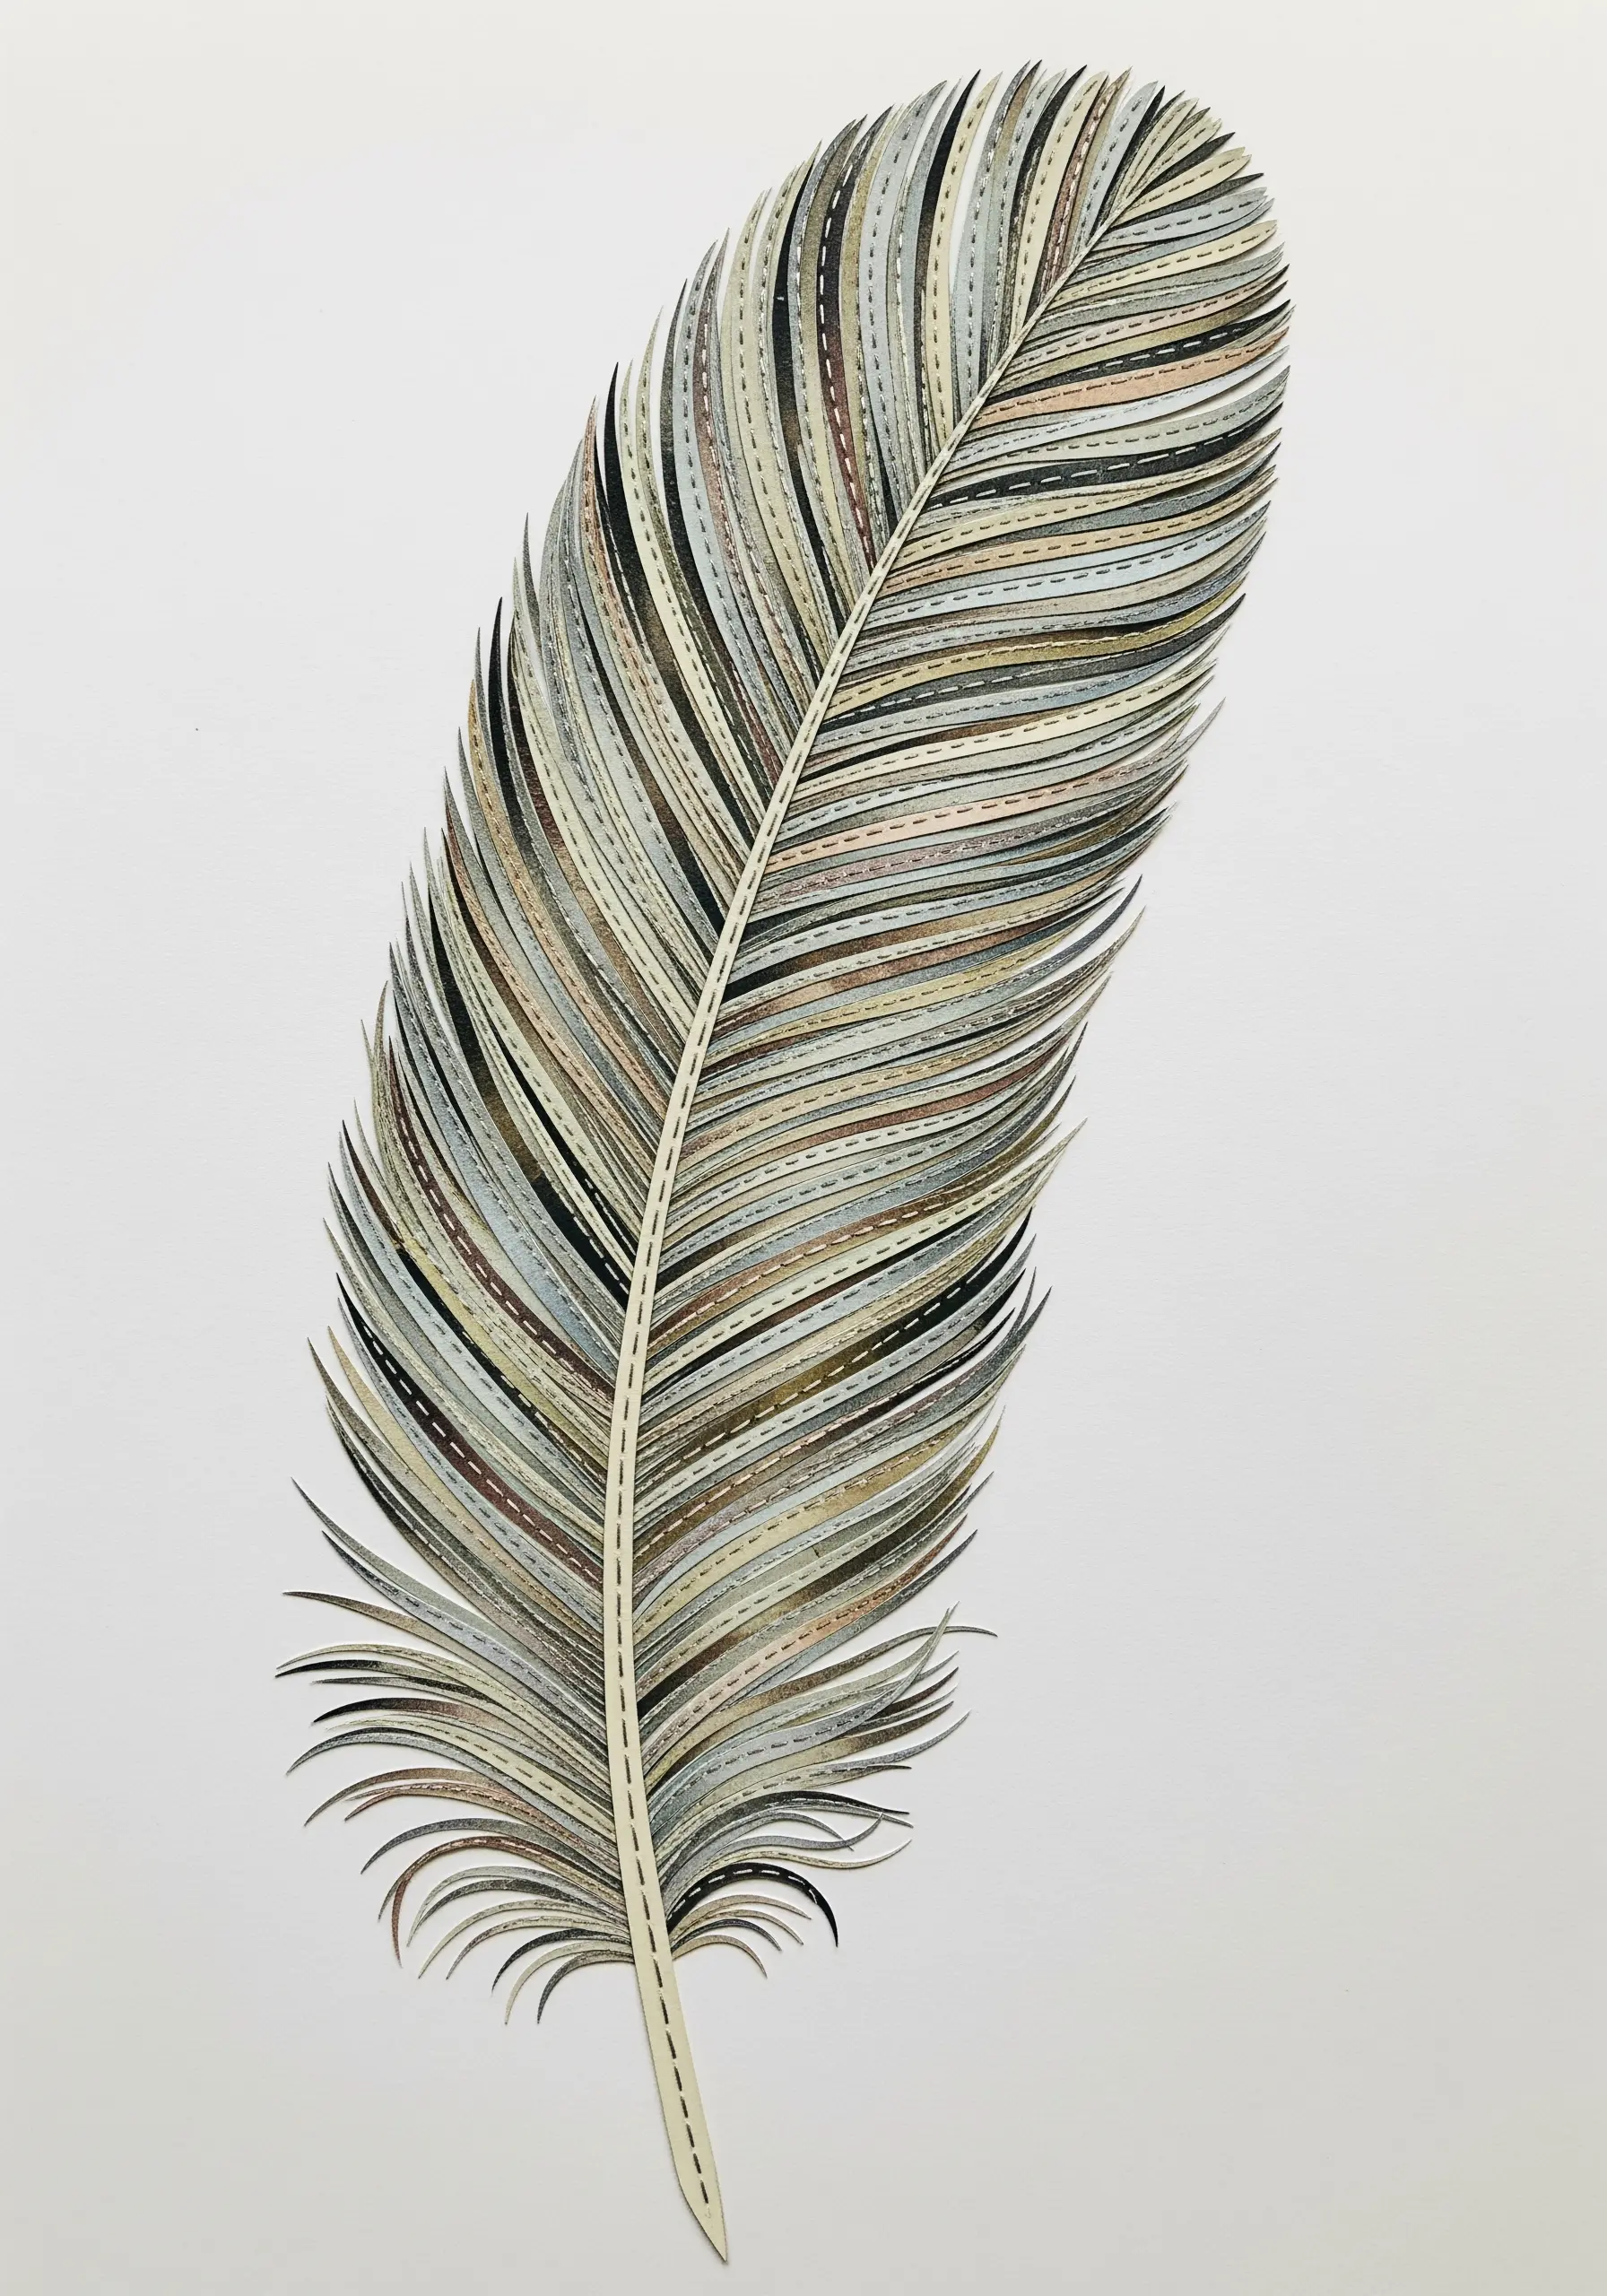
To achieve the delicate, variegated look of a real feather, cut thin strips from different textured and colored papers.
Arrange these strips along a central ‘quill’ made from a sturdier piece of cardstock.
Use a sewing machine or a simple running hand stitch down the center to secure all the pieces, mimicking the feather’s rachis.
This method is a brilliant way to achieve a look similar to realistic feather embroidery techniques using paper instead of thread.
26. Create Miniature Worlds on Gift Tags

Use heavy paper gift tags as tiny canvases for mixed-media vignettes.
Combine natural elements like sand, a tiny shell, a pressed leaf, or a twig with embroidered details.
A few simple seed stitches can represent falling snow, or a backstitched line can become a branch for a paper leaf.
This practice allows you to experiment with composition and capture nature’s textures in your next embroidery project on a small, manageable scale.
27. Paint with Paper to Create Animal Portraits
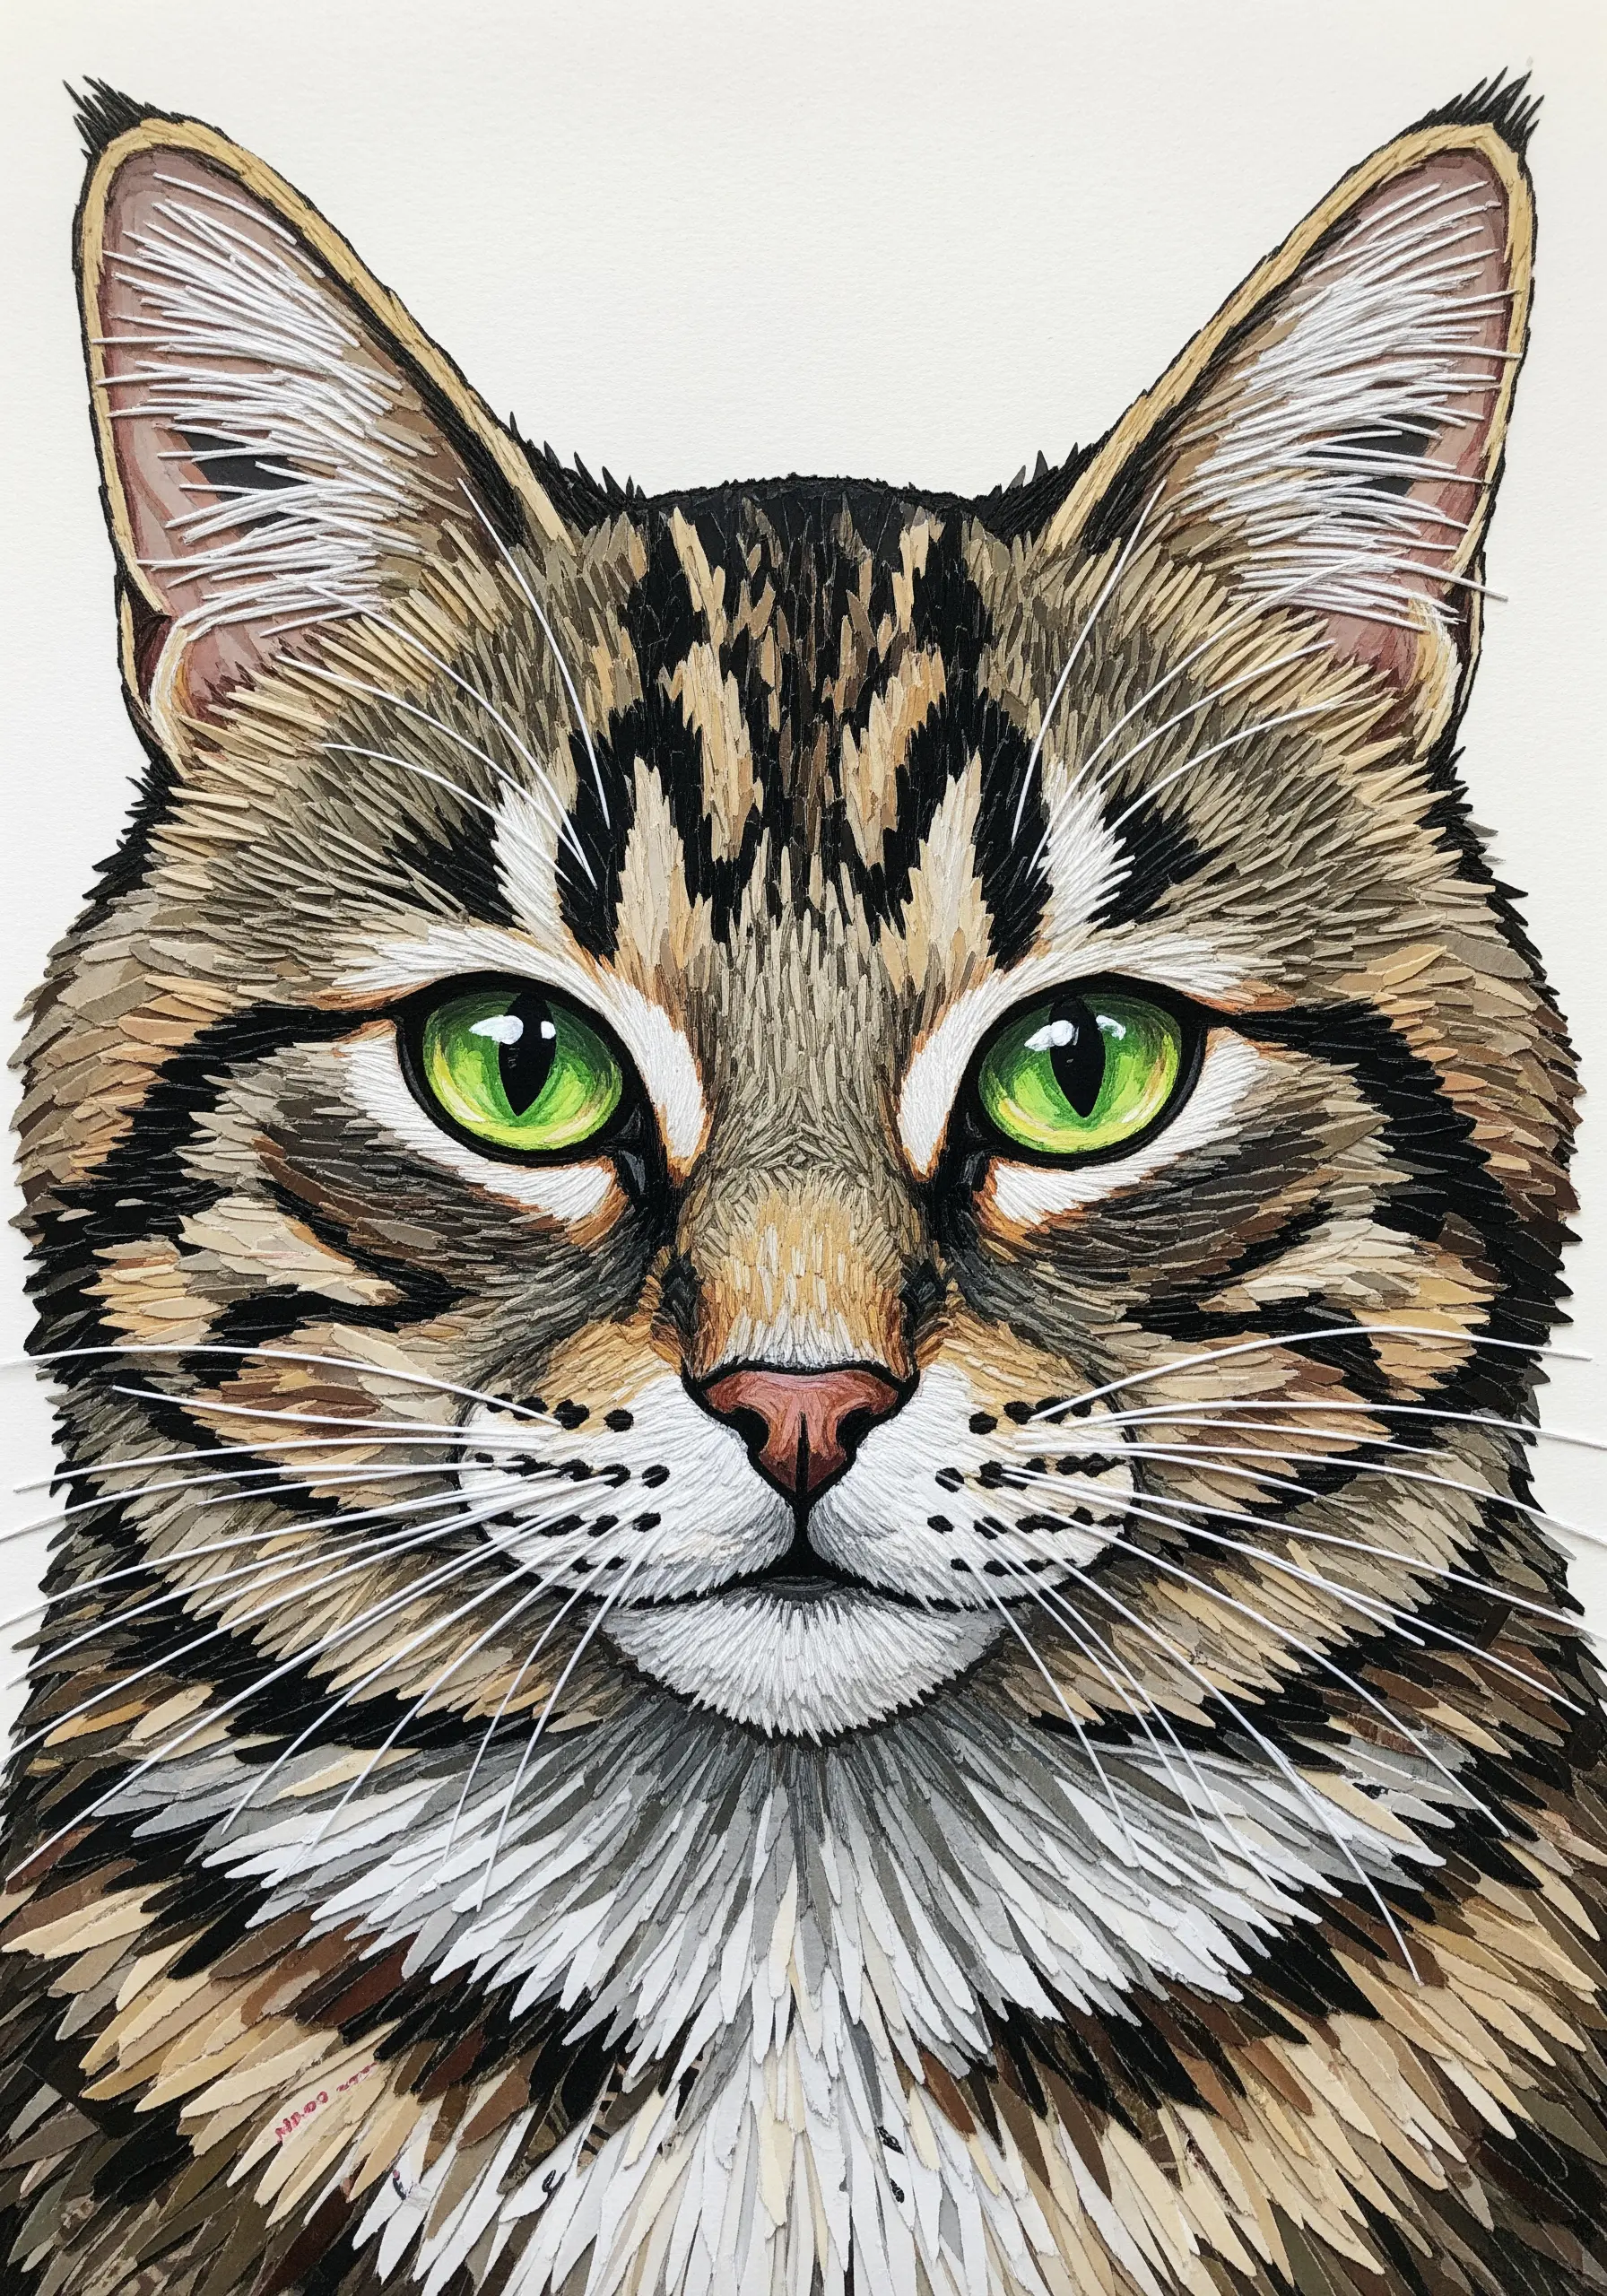
Instead of thread, use tiny, sliver-like pieces of paper to build up the texture and color of an animal’s fur.
Pay close attention to the direction of hair growth, layering the paper slivers just as you would place stitches in a thread-painted piece.
This meticulous technique allows for incredible realism and detail, creating a portrait with stunning depth and texture.
It’s a true fusion of collage and the principles of needlepainting.
28. Add Embroidered Greenery to an Architectural Illustration
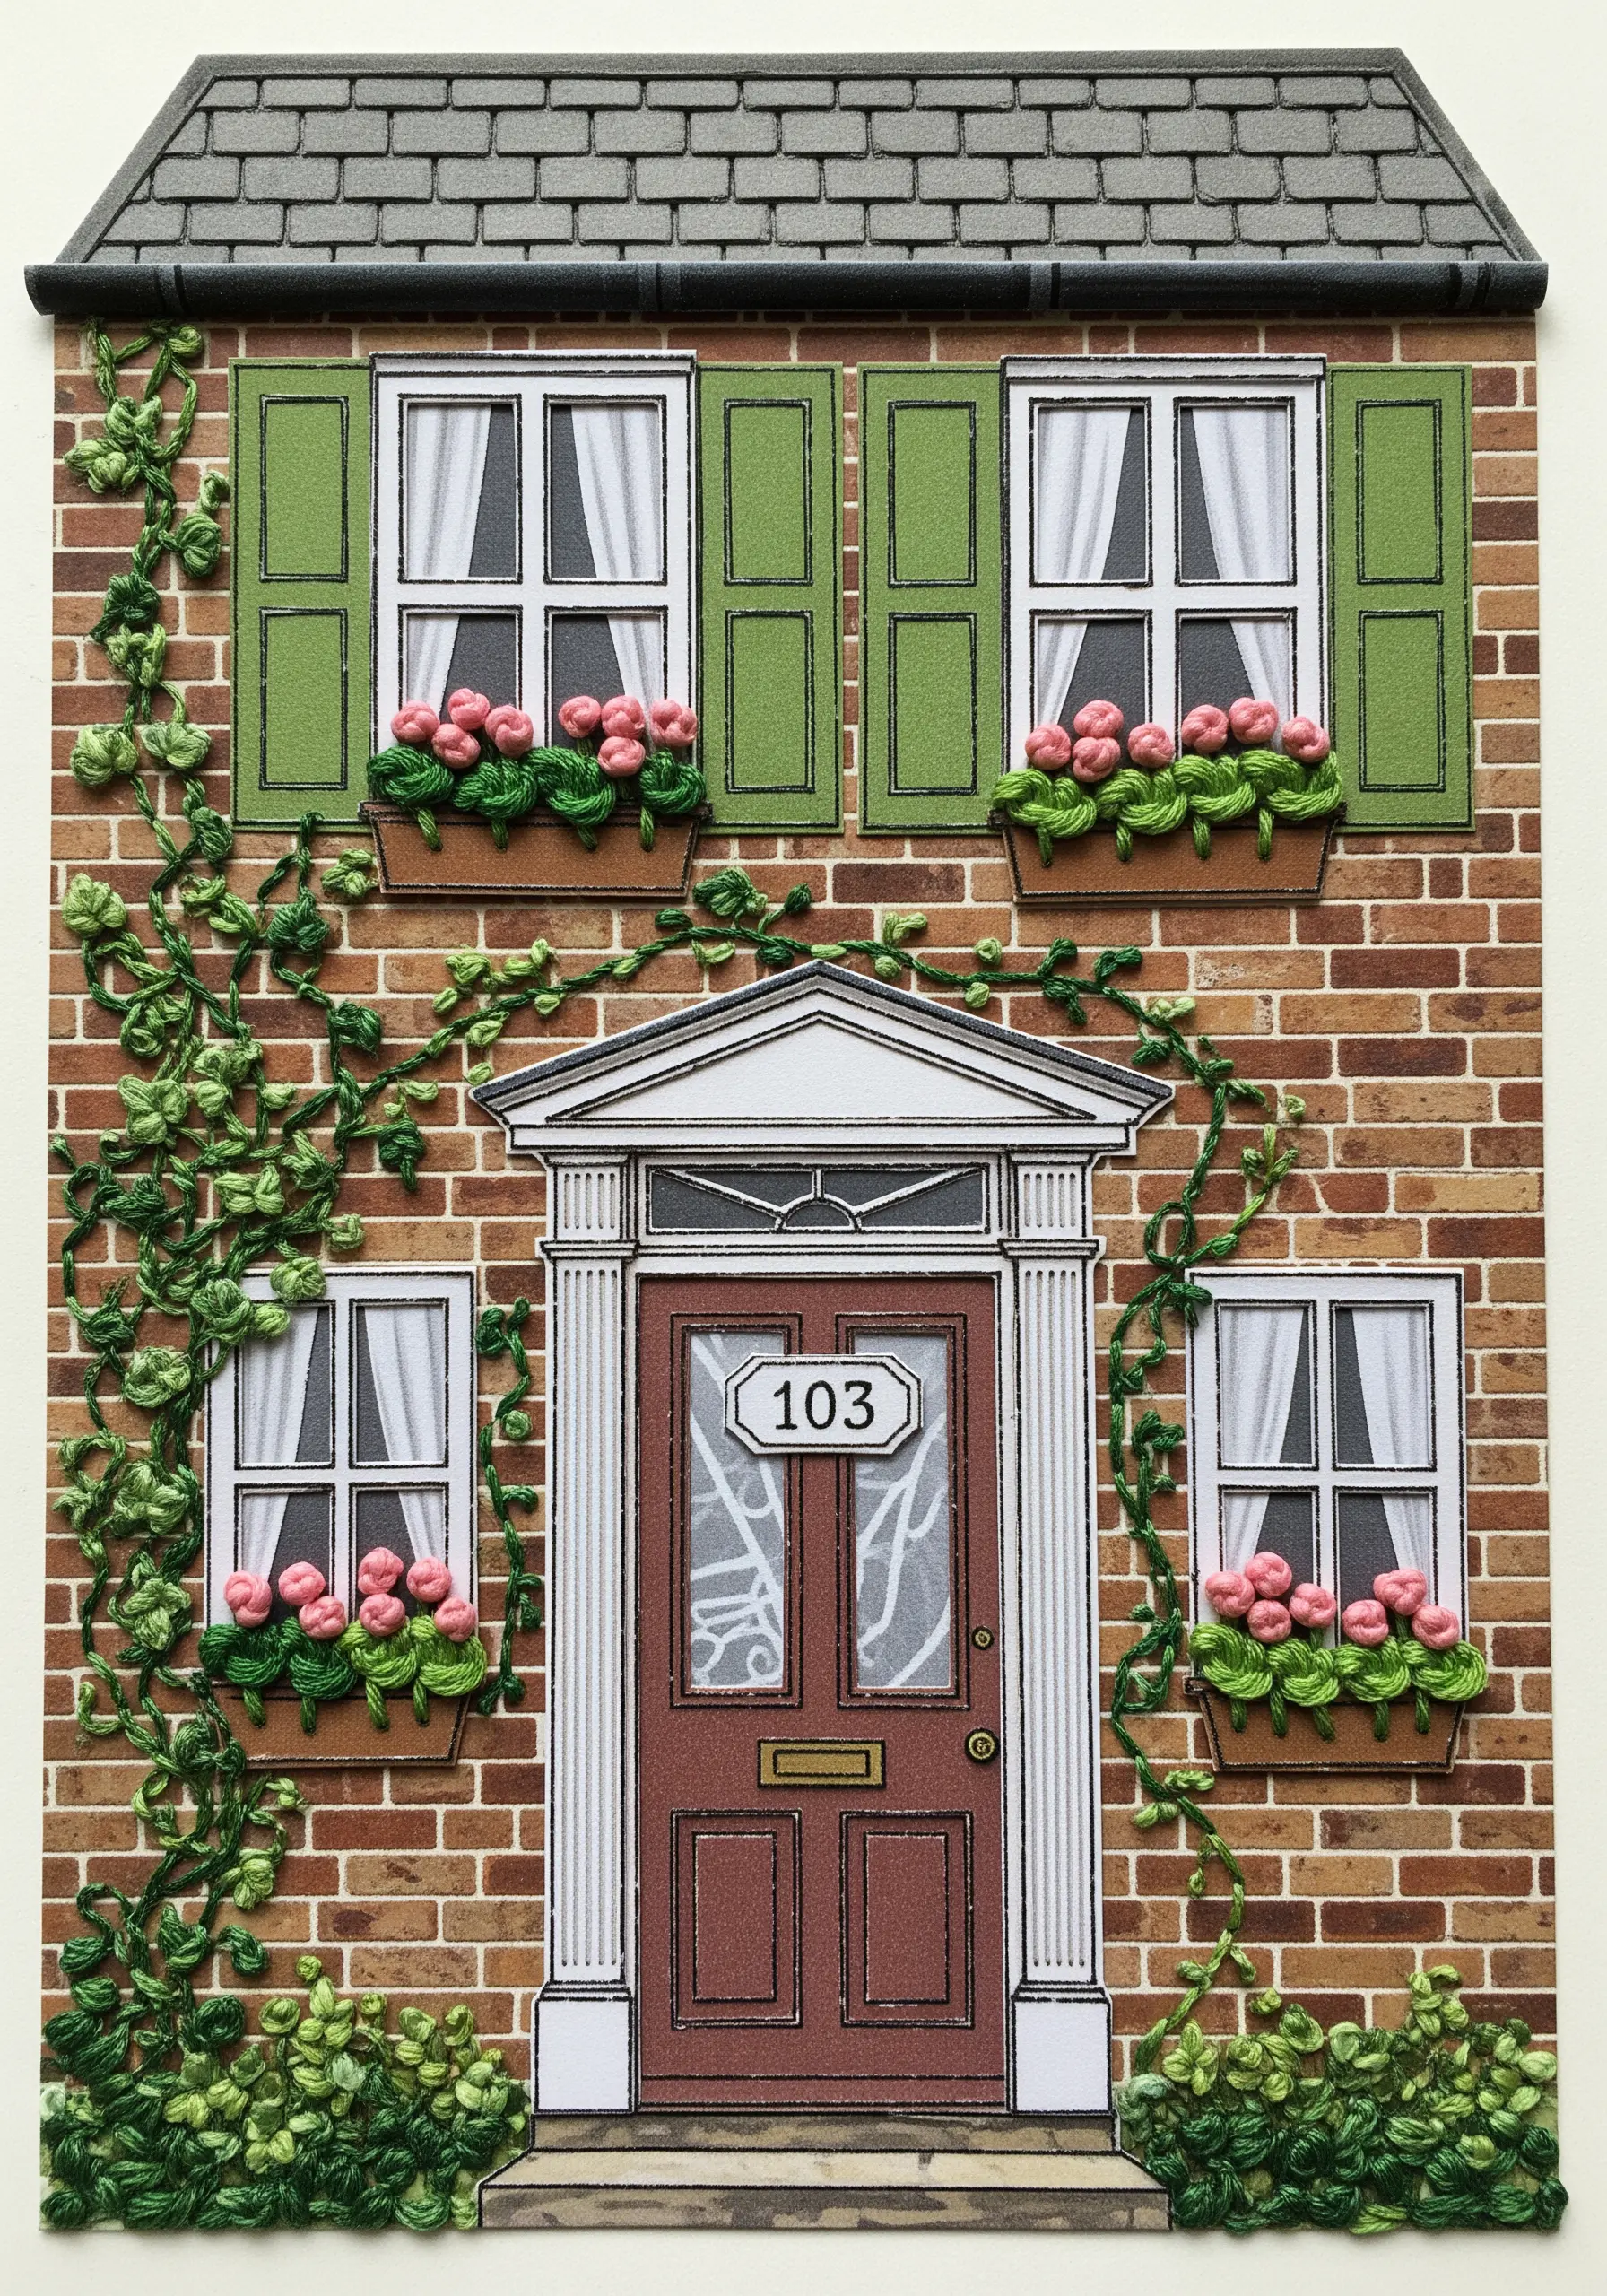
Start with a clean, architectural drawing of a house. Bring it to life by adding embroidered foliage.
Use tangled masses of green thread for leafy bushes, couched brown thread for sturdy vines, and tiny pink French knots for flowers in the window boxes.
The three-dimensional texture of the embroidery creates a wonderful contrast with the flat, graphic lines of the illustration, making the building feel inhabited and alive.
29. Chart a Stitched Cosmos on a Vintage Map
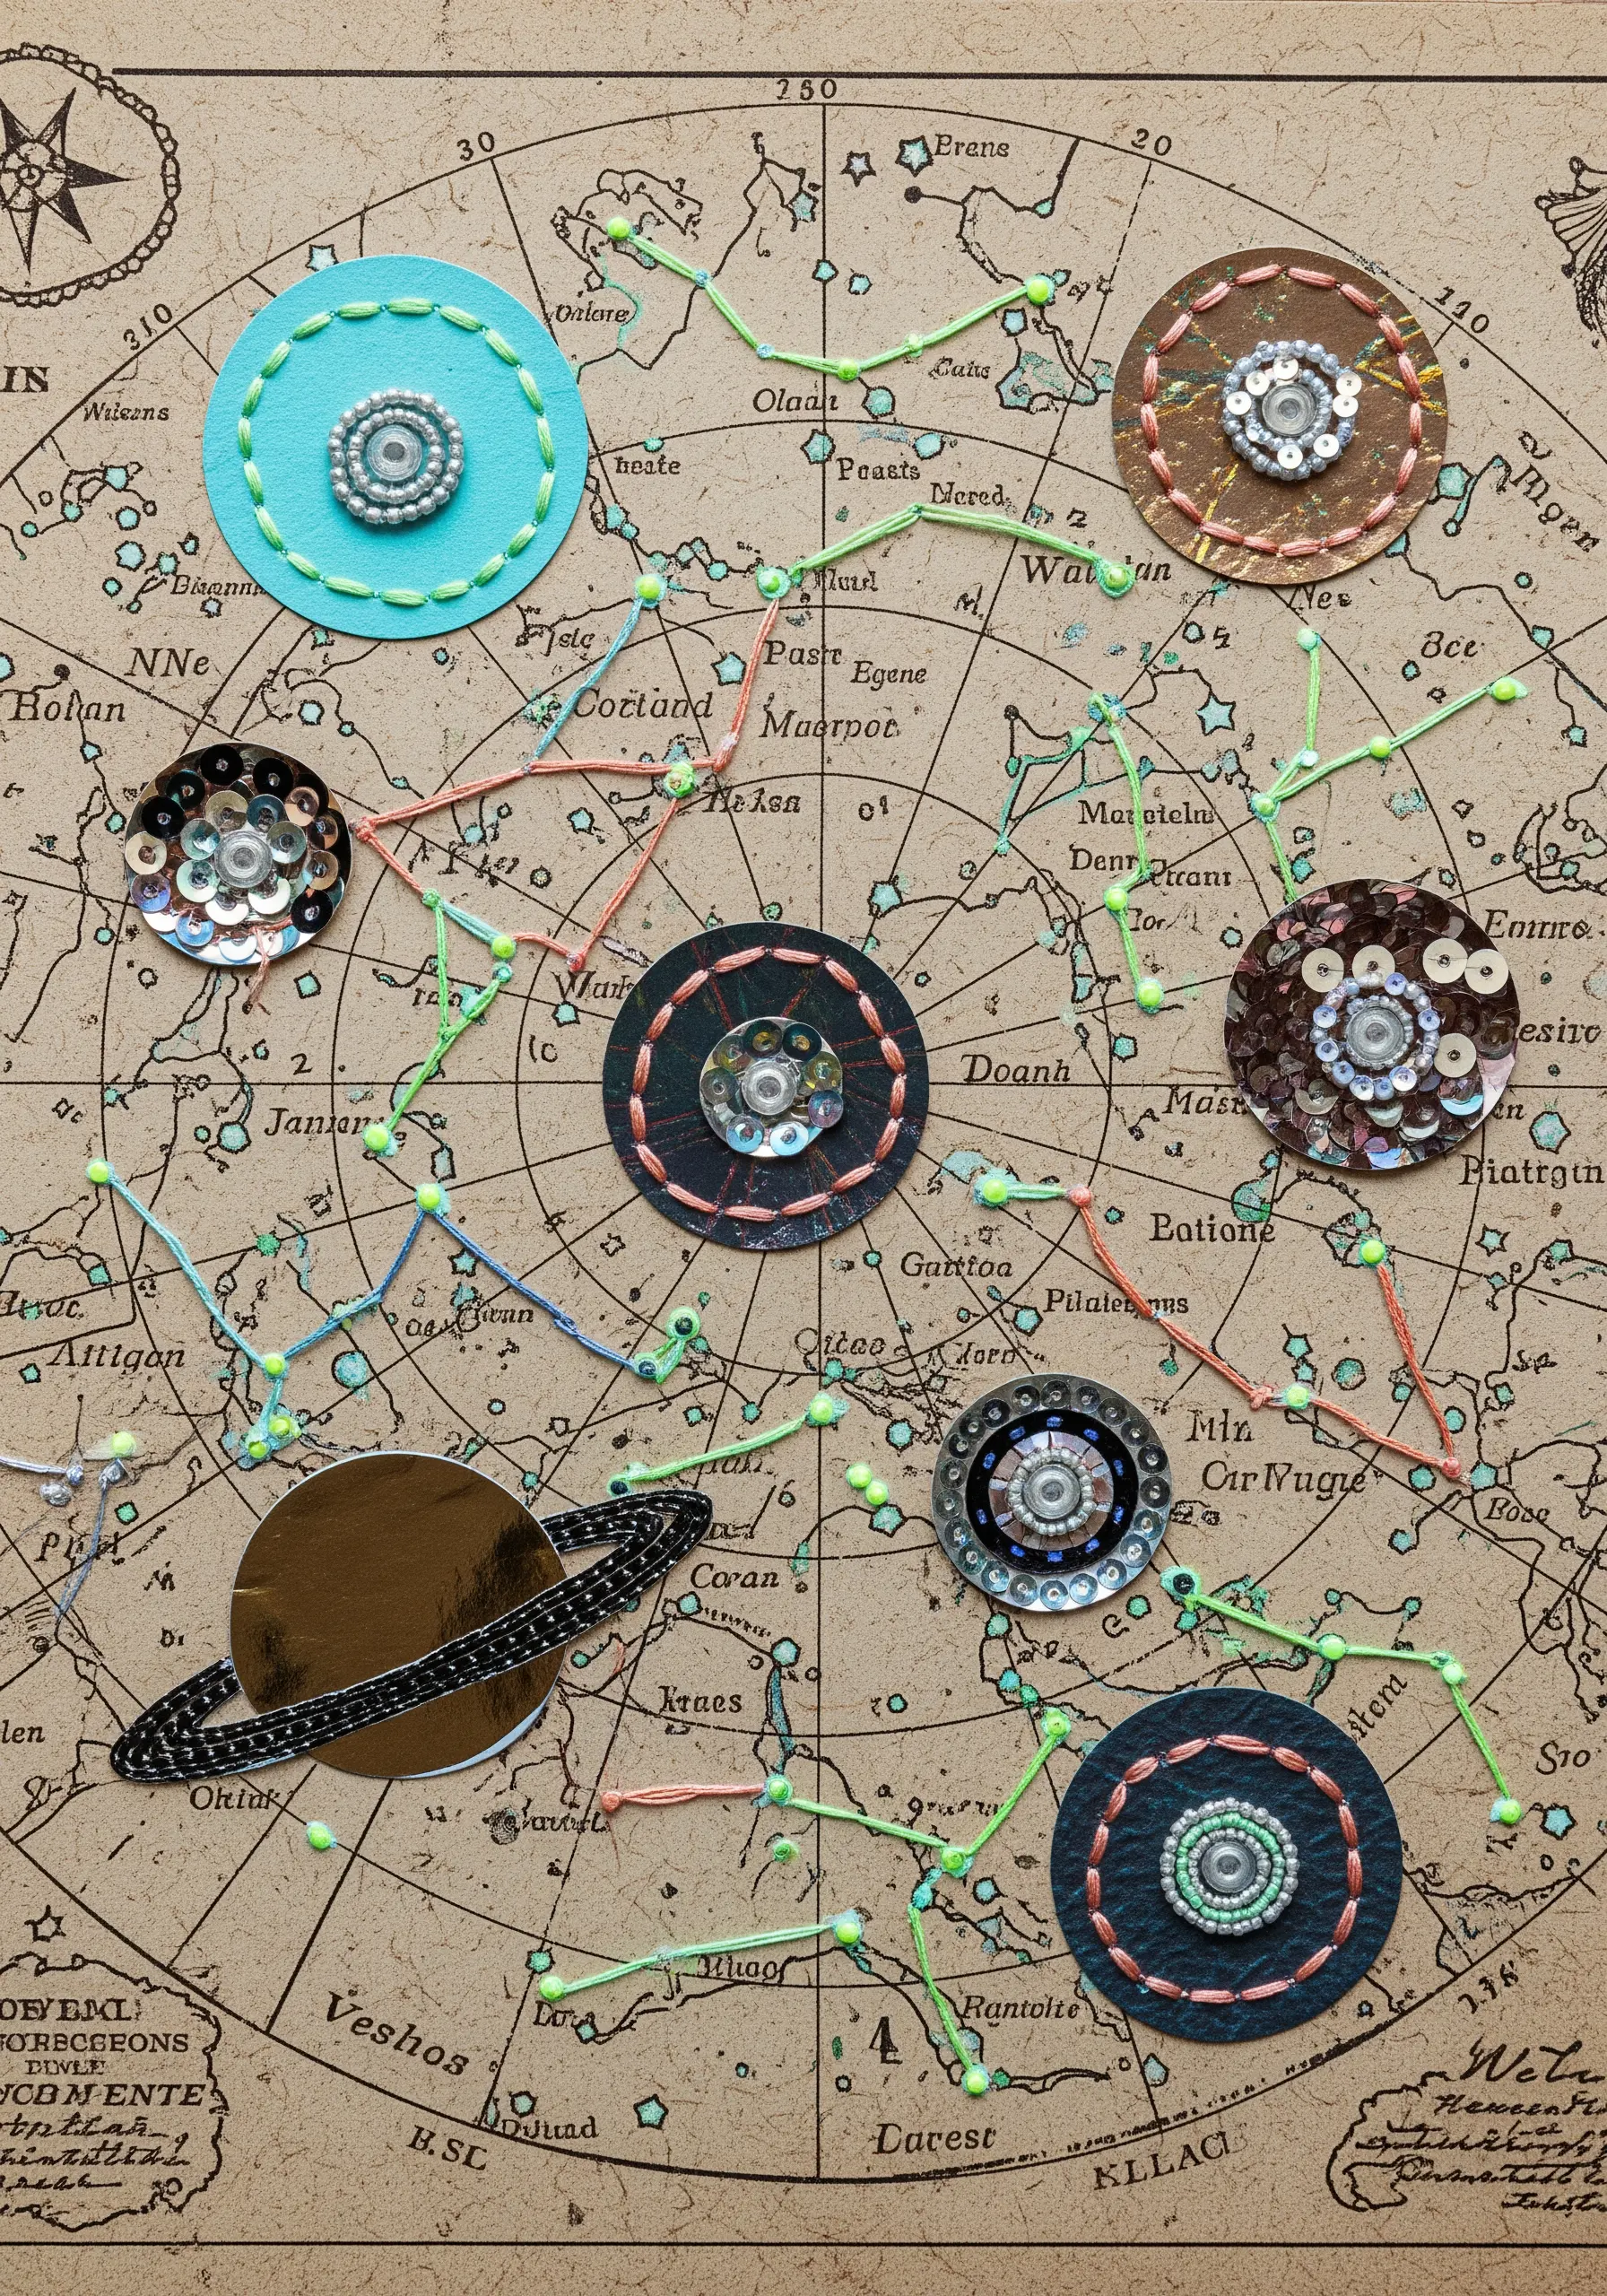
Use an old celestial map or a vintage nautical chart as your background. Create planets and stars from layered circles of paper, felt, and sequins.
Connect these celestial bodies with bright, contrasting thread, stitching constellations directly onto the map.
This project transforms a static document into a personal, tactile universe, blending scientific history with creative embellishment.
It is a perfect project for those who love celestial micro embroidery ideas.
30. Reinterpret Cross-Stitch with a Paper Mosaic
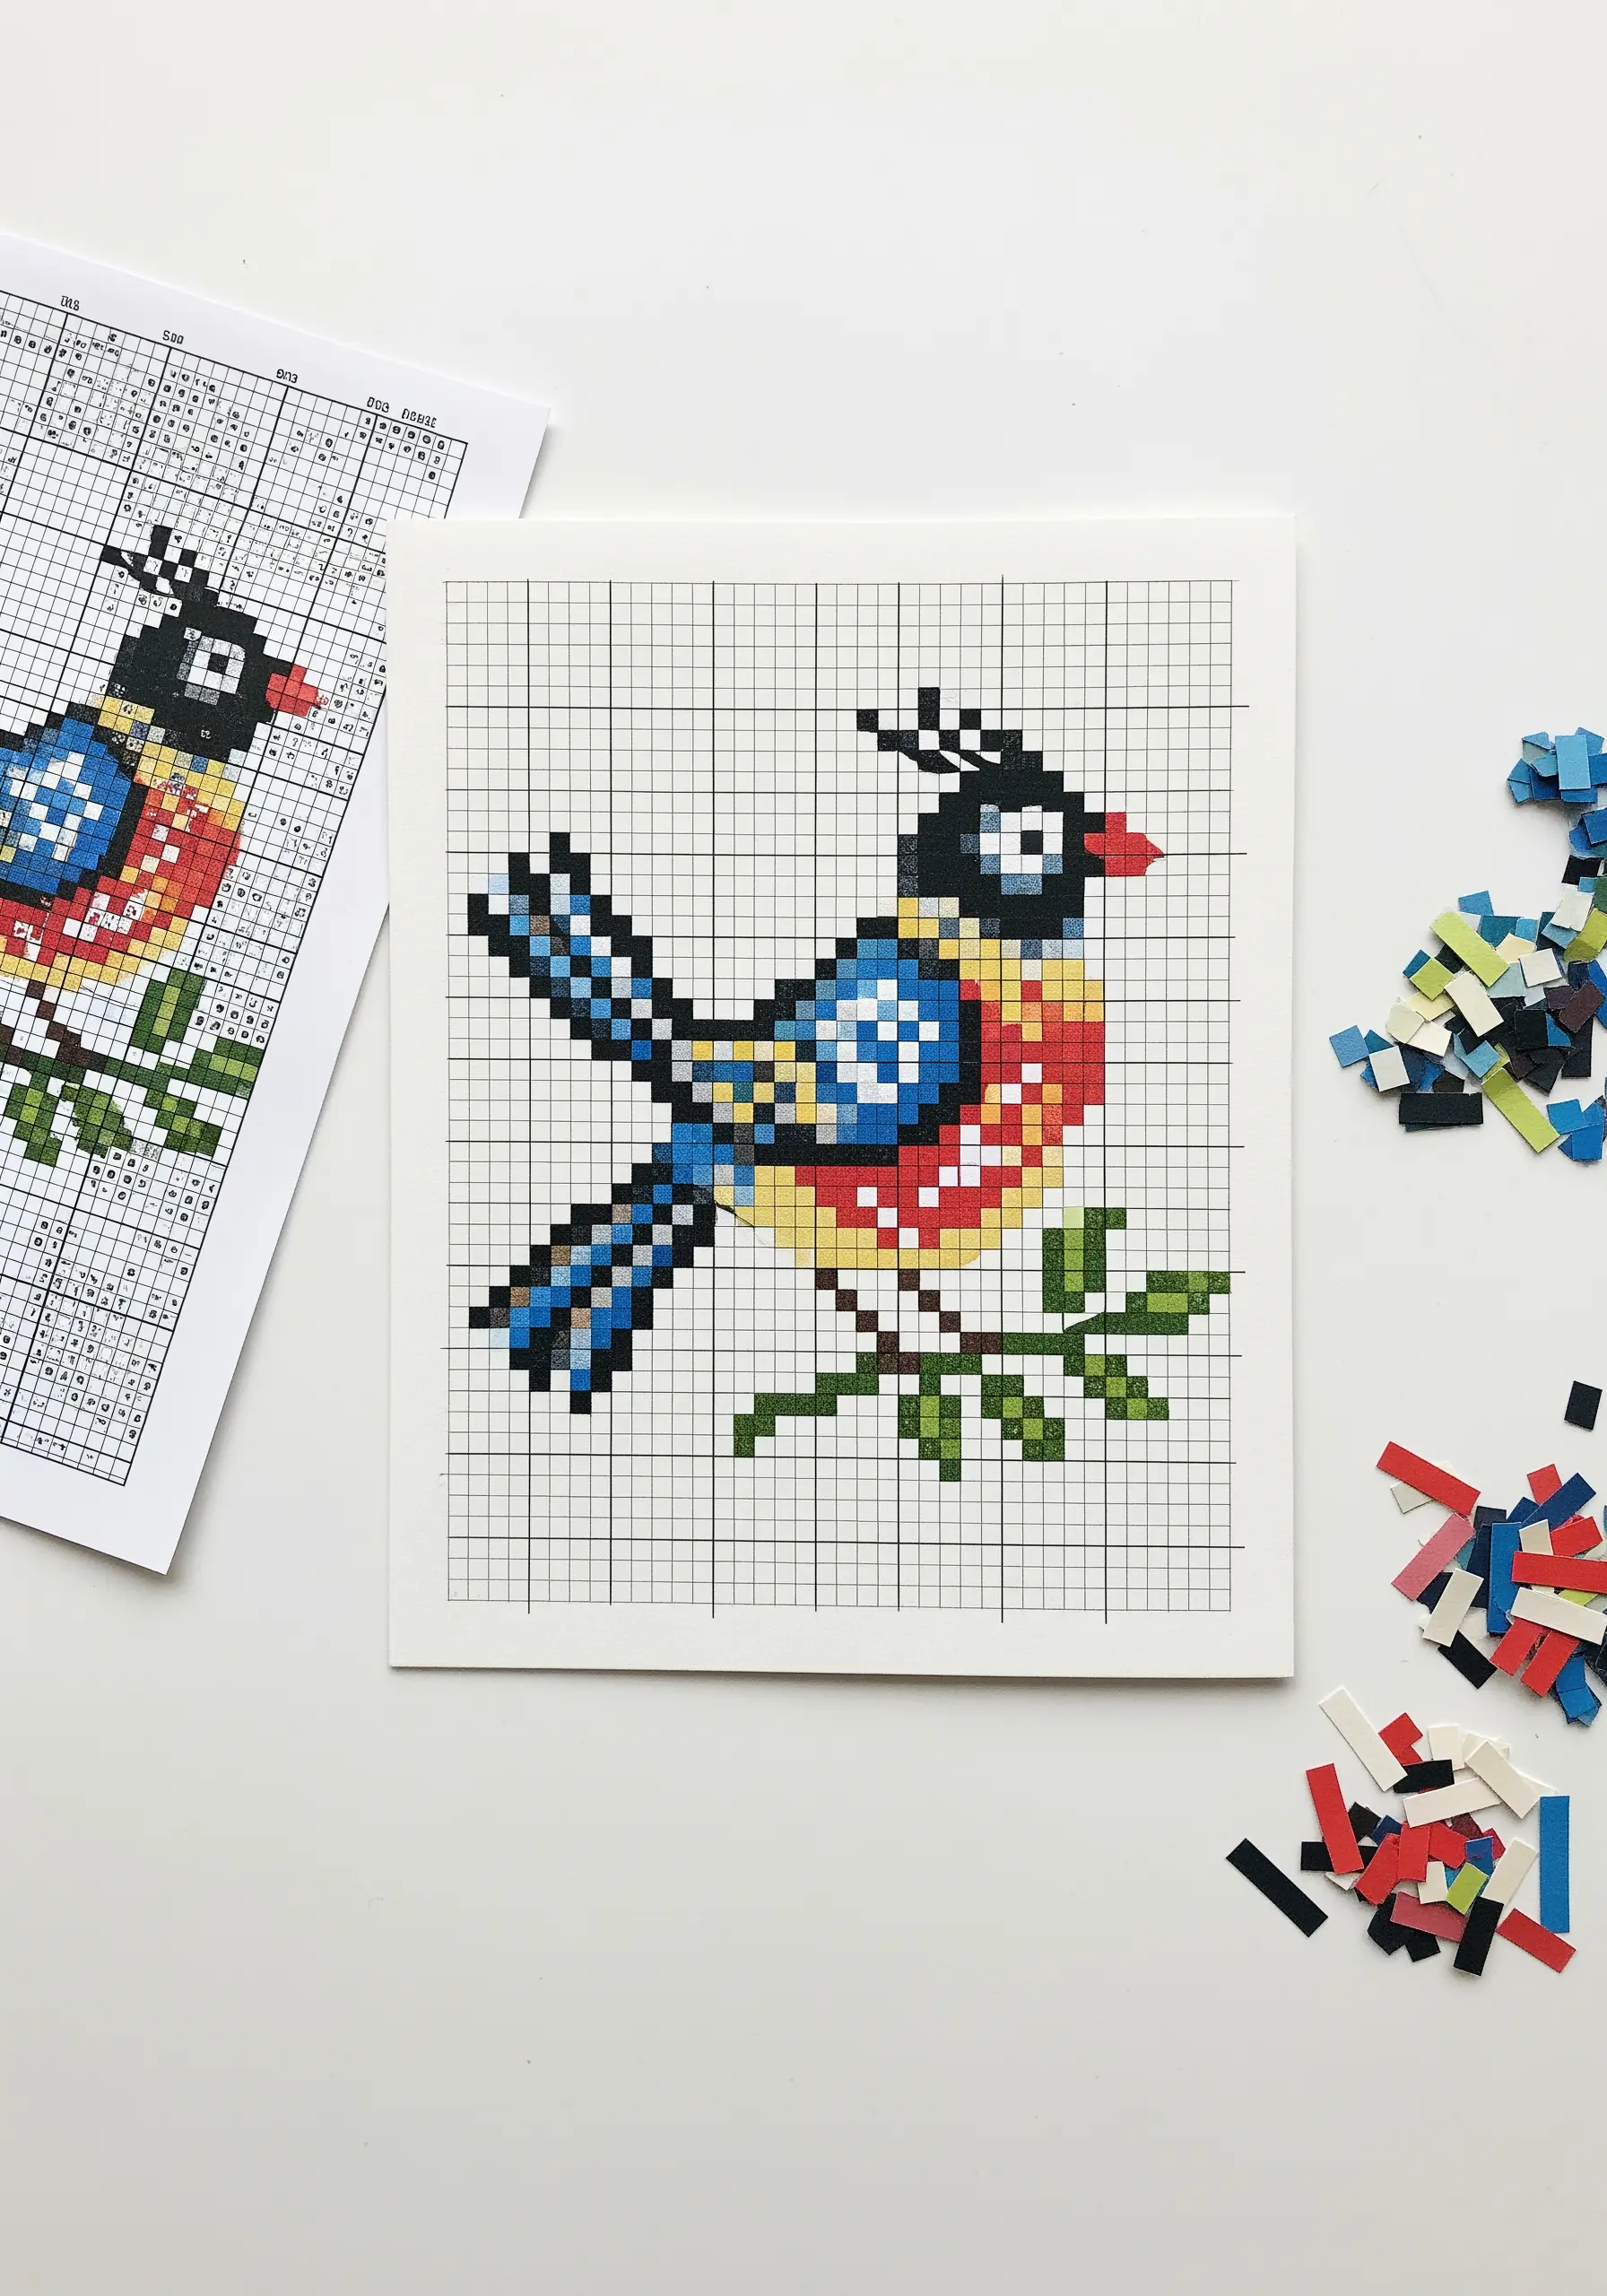
Translate a pixelated cross-stitch pattern into a new medium by using tiny squares of colored paper instead of stitches.
Draw a grid on your base paper and carefully glue each paper ‘pixel’ into place according to the pattern chart.
This meditative process offers the same satisfaction of watching an image emerge from a grid but results in a sharp, graphic piece with a unique texture.
31. Achieve a Goldwork Effect with Cord and Foil
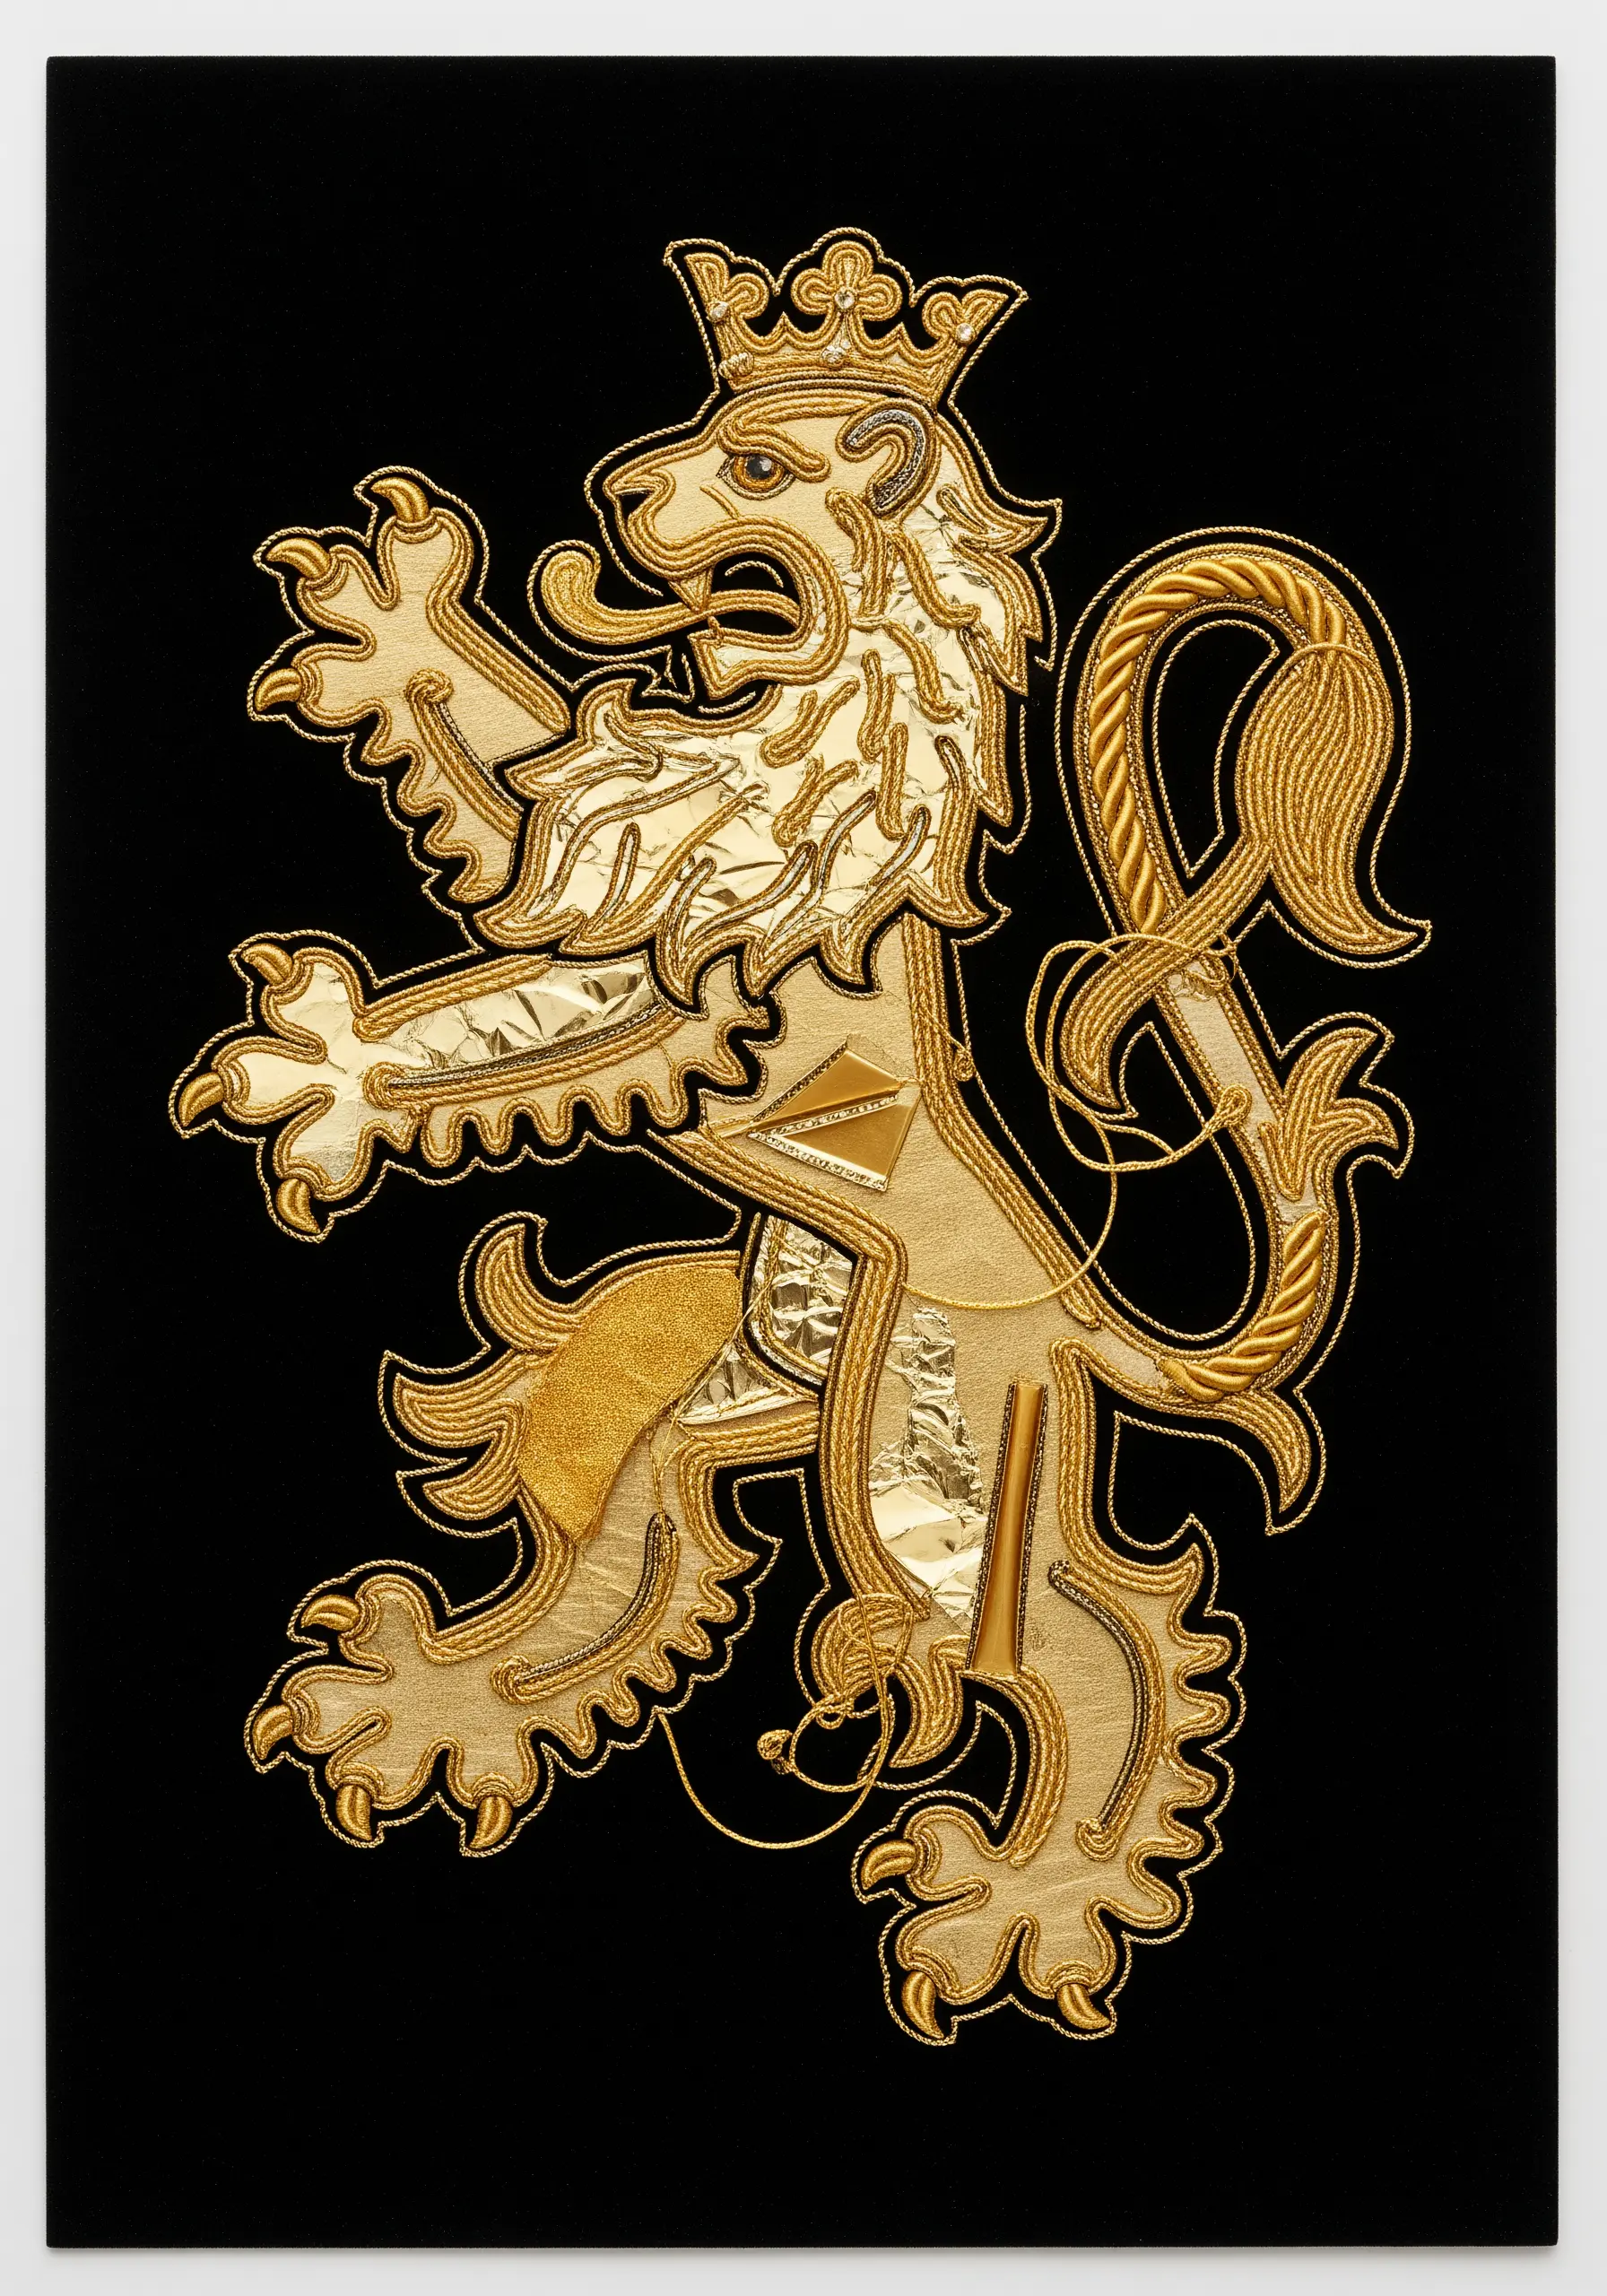
Mimic the opulence of traditional goldwork embroidery using more accessible materials.
Outline your design on a dark fabric background using couched metallic cord or soutache braid.
Fill in areas with patches of gold foil fabric or metallic paper, securing the edges with your stitched outlines.
This technique gives you the regal look of raised metal thread embroidery, making it ideal for dramatic metallic thread wall art projects.
32. Combine Stitched Felt and Paper for a Nursery Mobile

Create soft, pillowy shapes by cutting two identical pieces of felt, placing them together, and joining them with a simple running stitch or blanket stitch around the edge.
Lightly stuff them with poly-fil before closing for extra dimension.
Combine these soft felt clouds with crisp, glittery paper stars to create a mobile with contrasting textures that is visually and tactilely engaging.
This is a sweet and simple way to create beautiful embroidered nursery decor ideas.
33. Craft a Bouquet with Ribbon and Thread
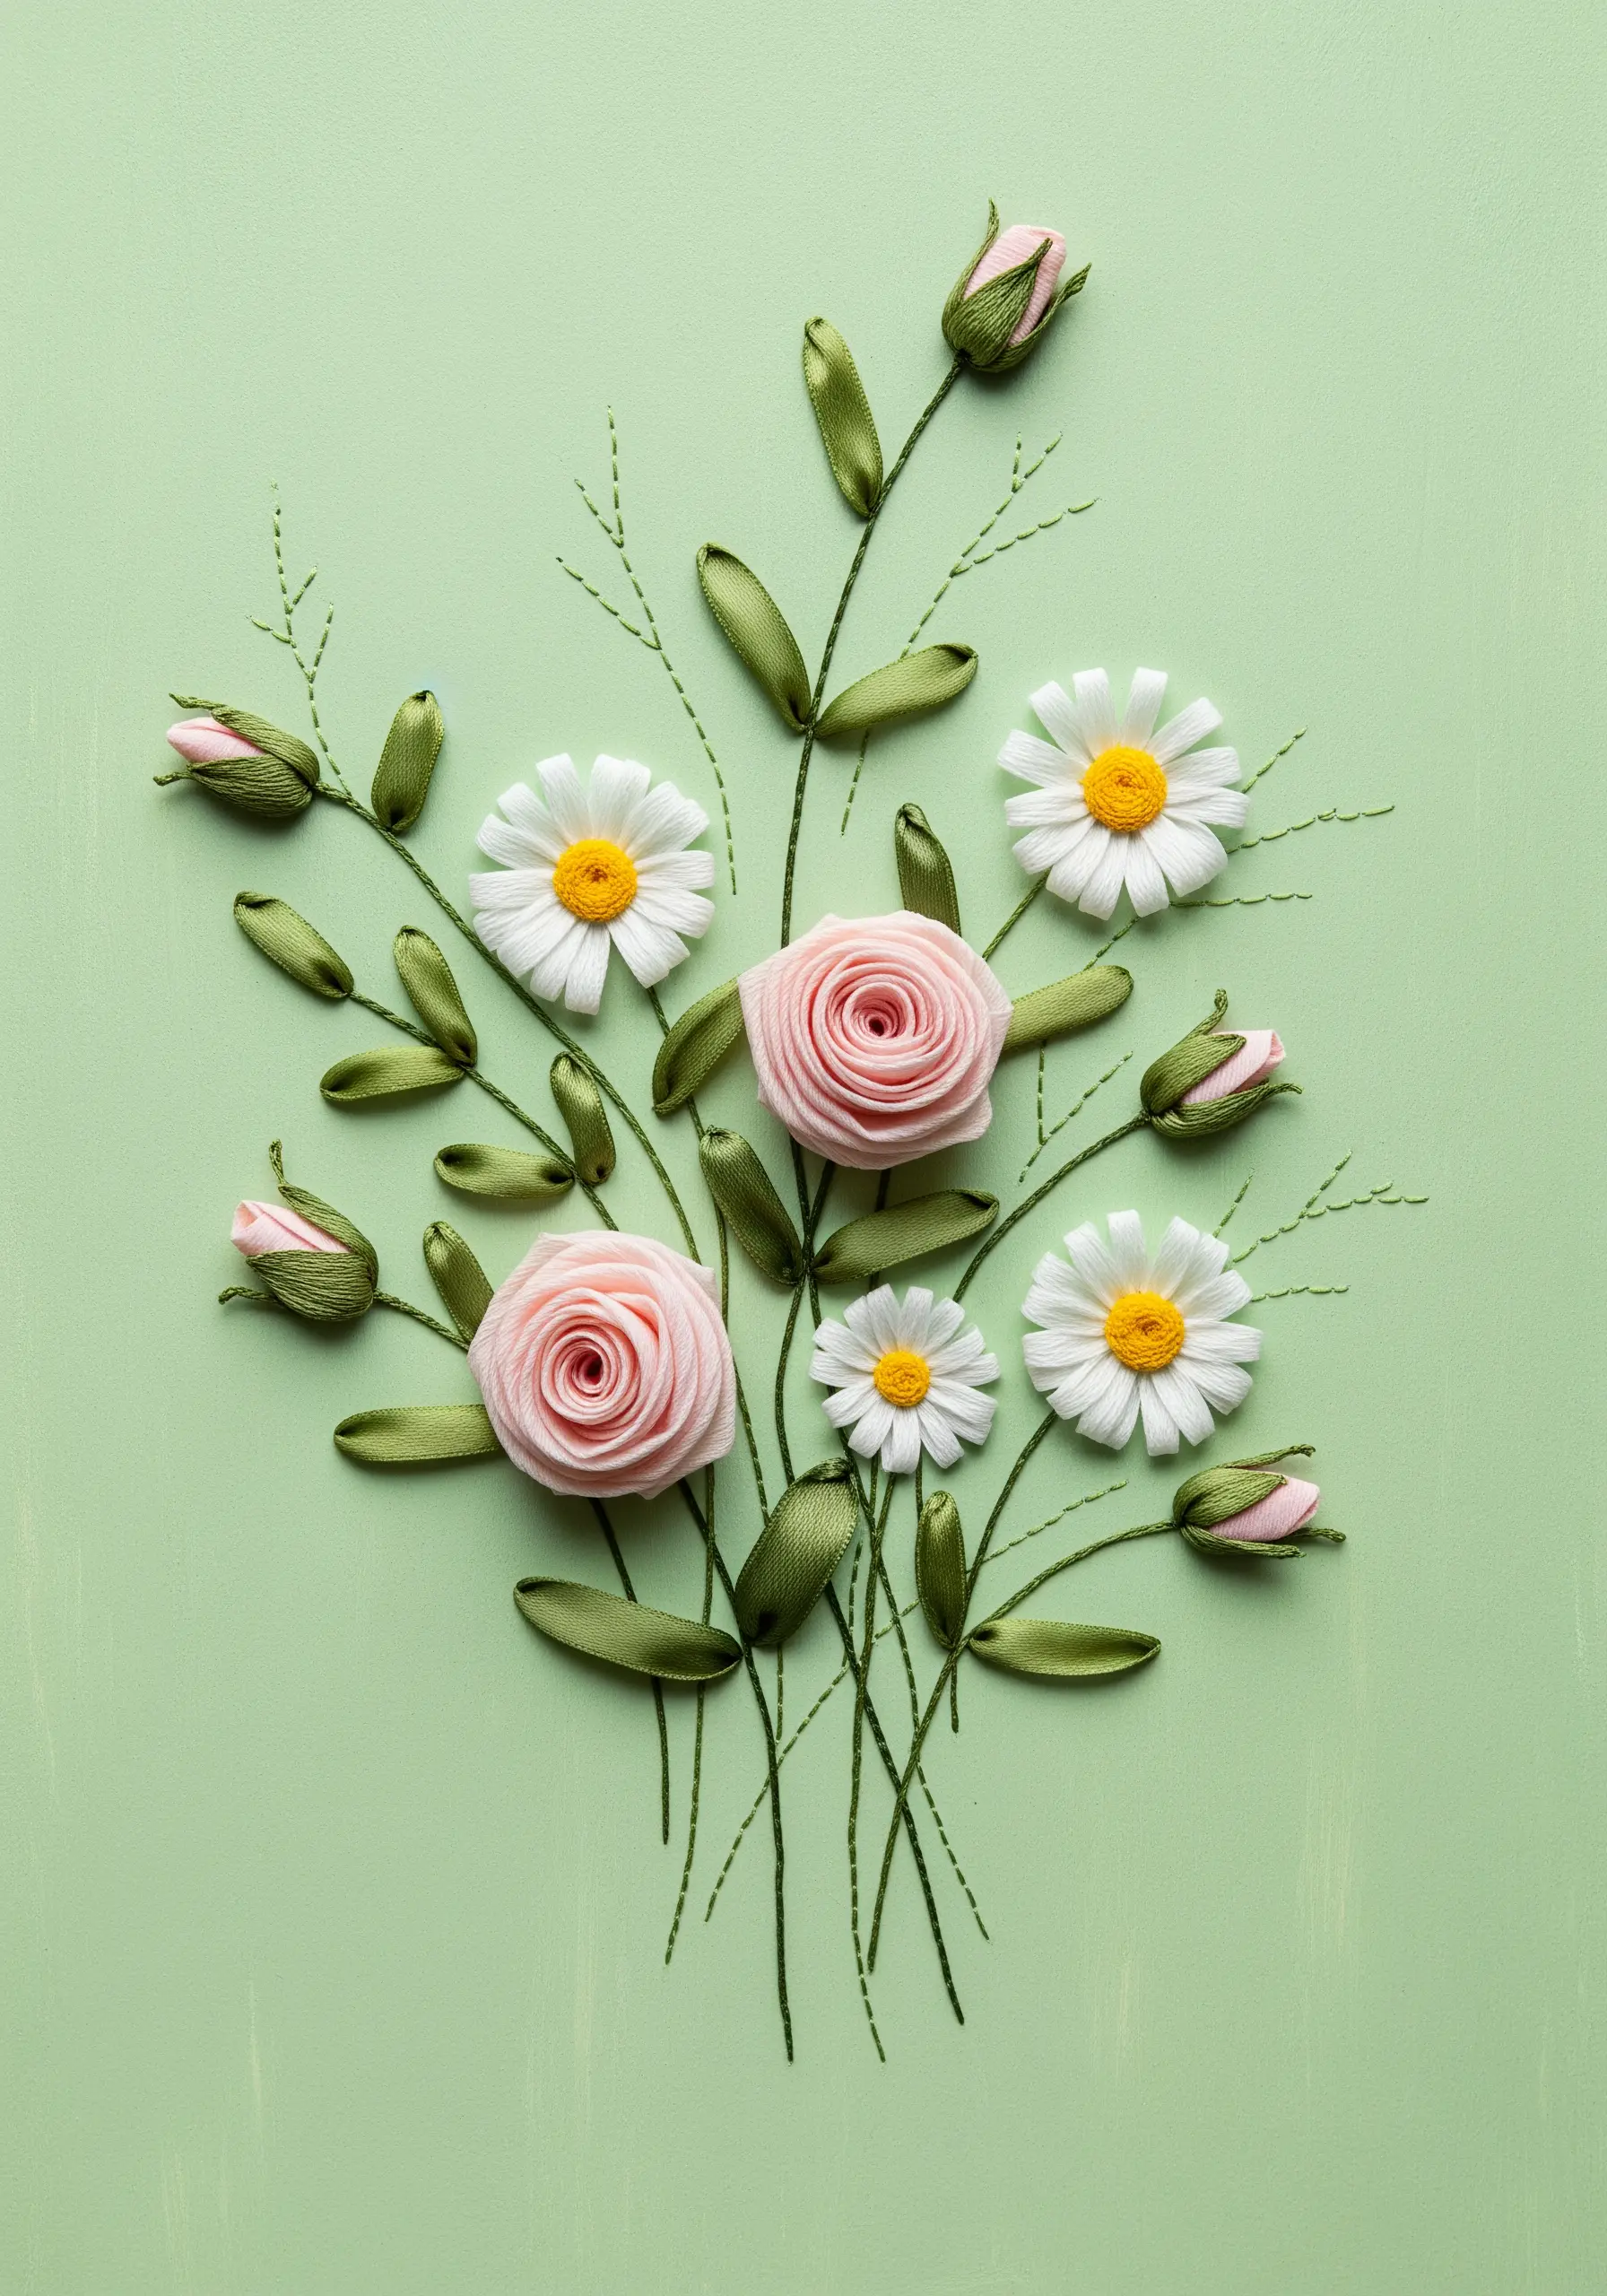
Explore the art of ribbon embroidery to create a stunning, dimensional floral arrangement.
Use silk or satin ribbon to form lush, rolled roses and simple folded-ribbon daisies. The ribbon’s width and sheen naturally create realistic-looking petals with minimal effort.
Add delicate stems and tiny leaves with standard embroidery floss in a contrasting texture.
This classic technique is perfect for adding a touch of romance and dimension to any surface.
34. Create String Art on a Paper Foundation
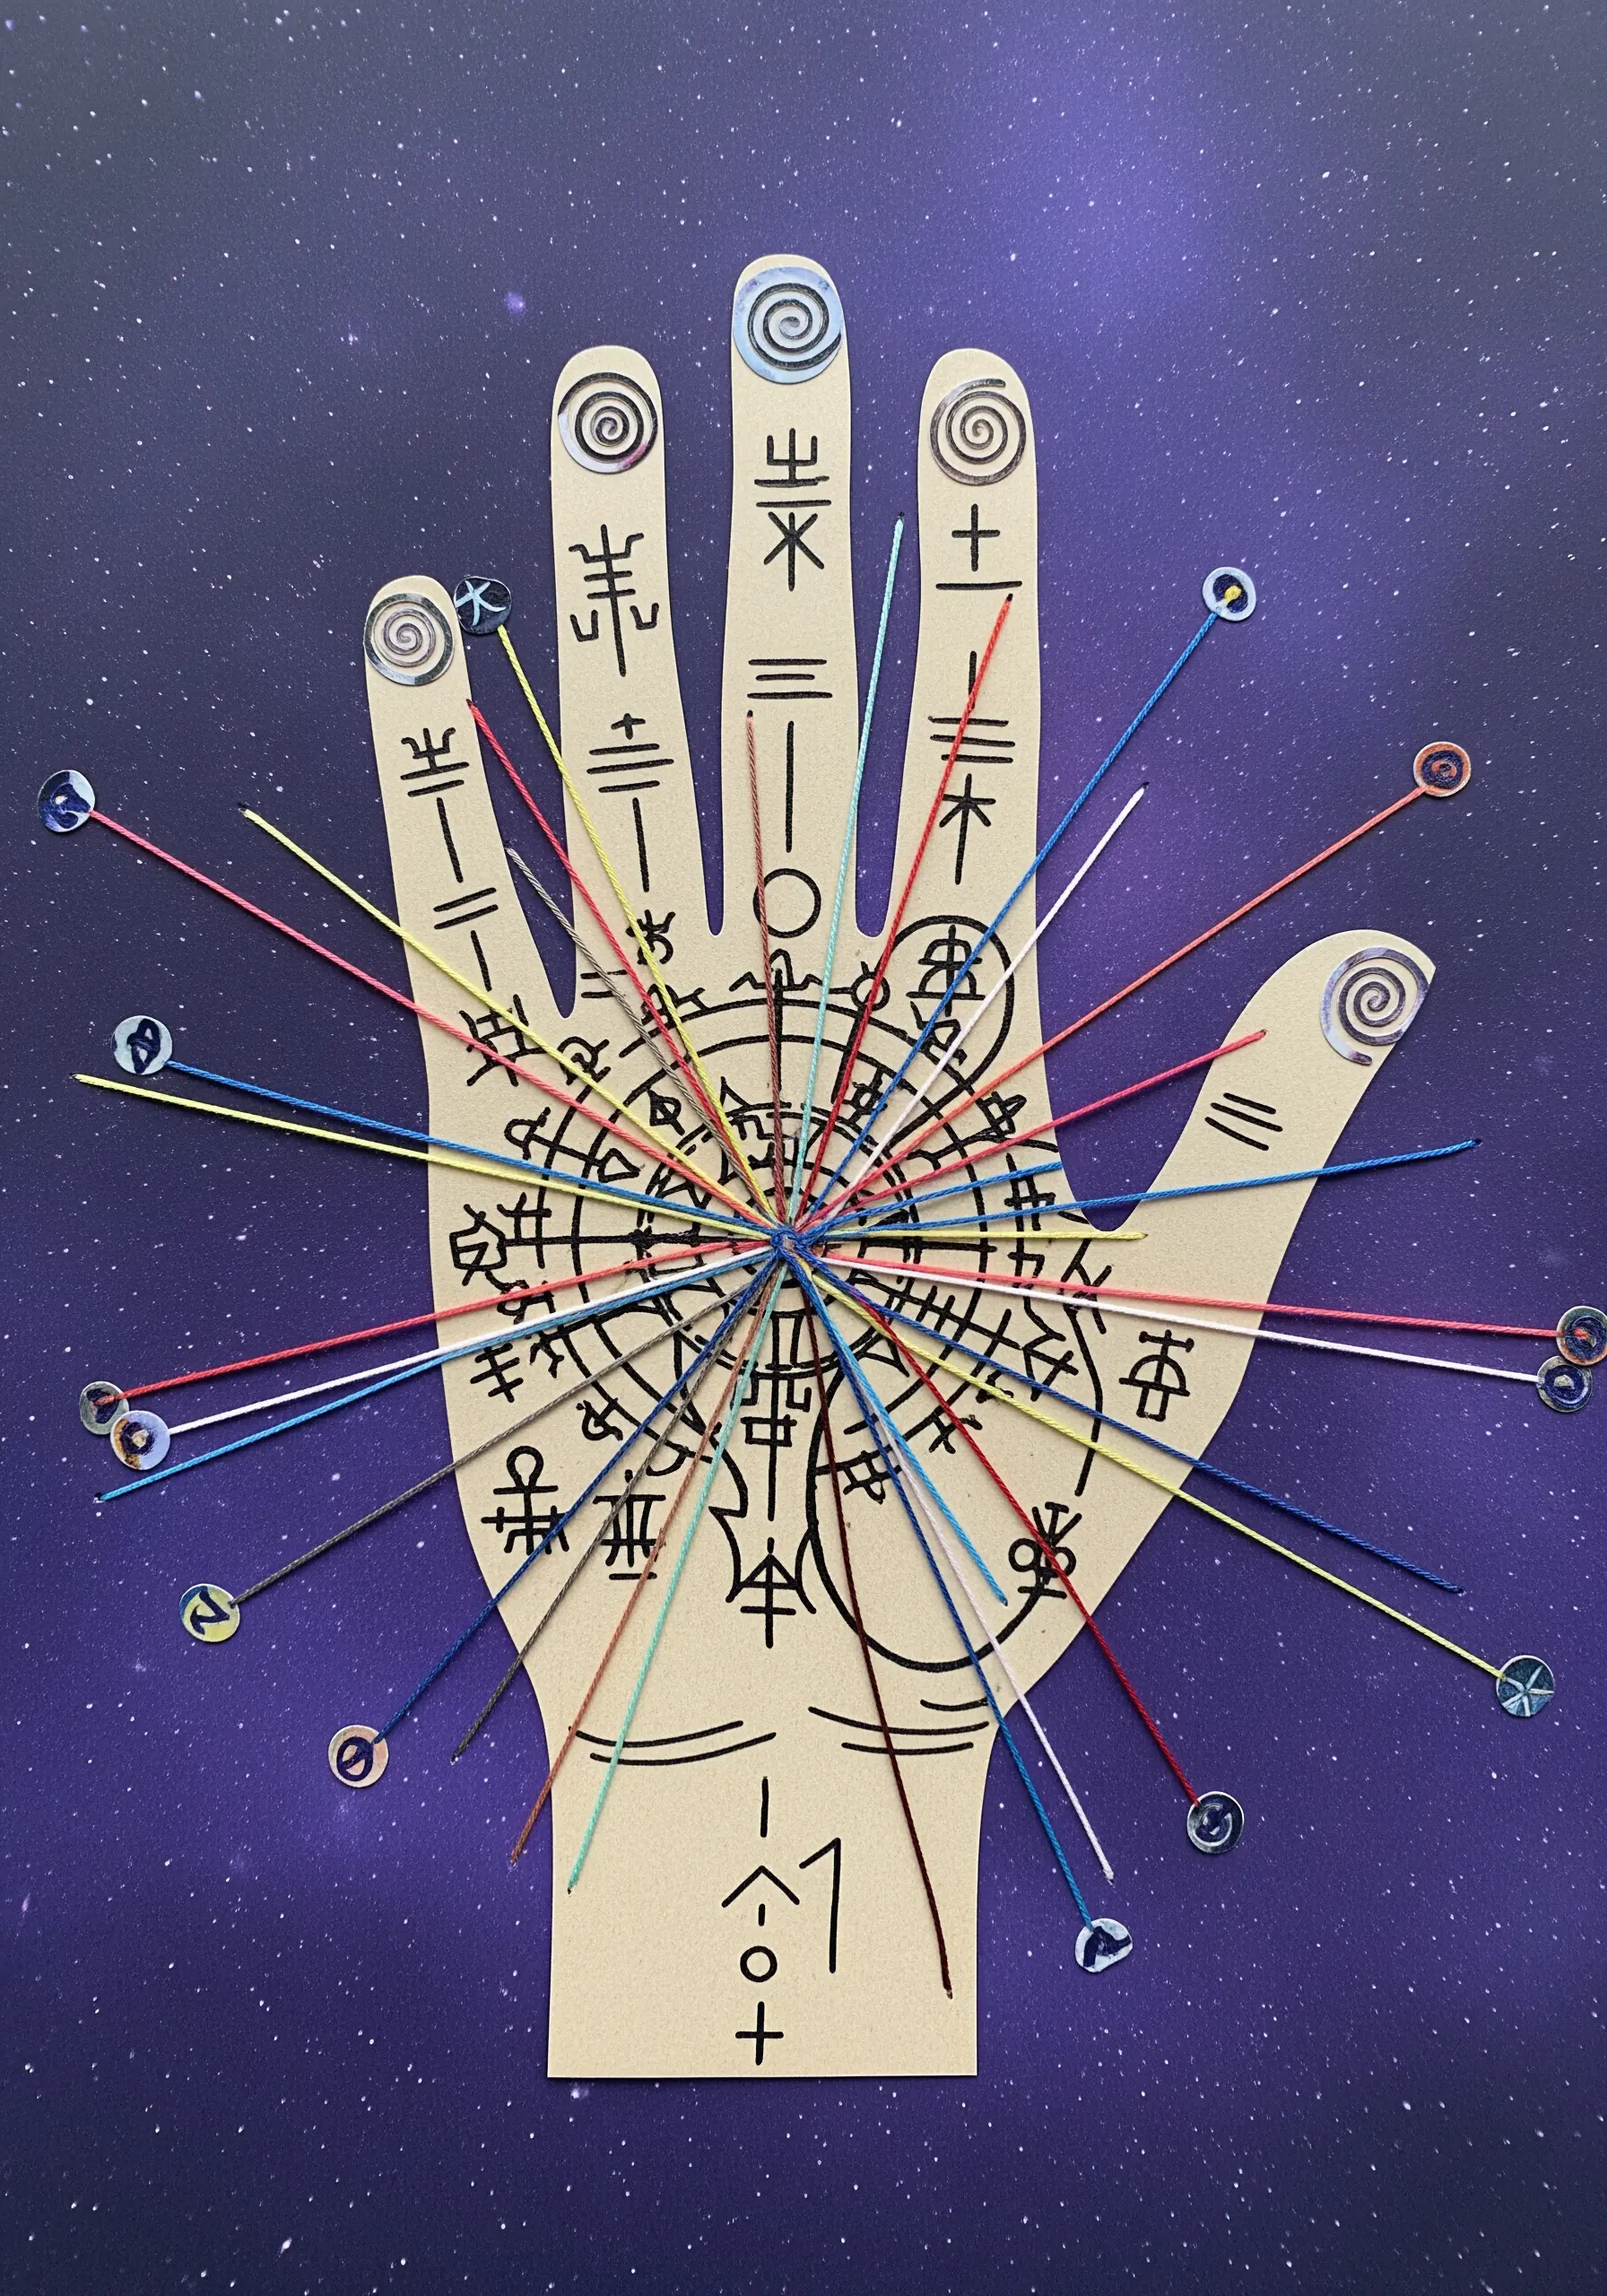
Combine drawing and fiber art by using a paper cutout, like a hand, as the base for a string art design.
Mark points along the perimeter of your design and in the center. Carefully pierce holes at each point.
Then, weave colorful thread between the points to create a web of intersecting lines.
This technique turns a simple cutout into a complex, energetic piece with geometric precision.
35. Edge Paper Shapes with a Blanket Stitch
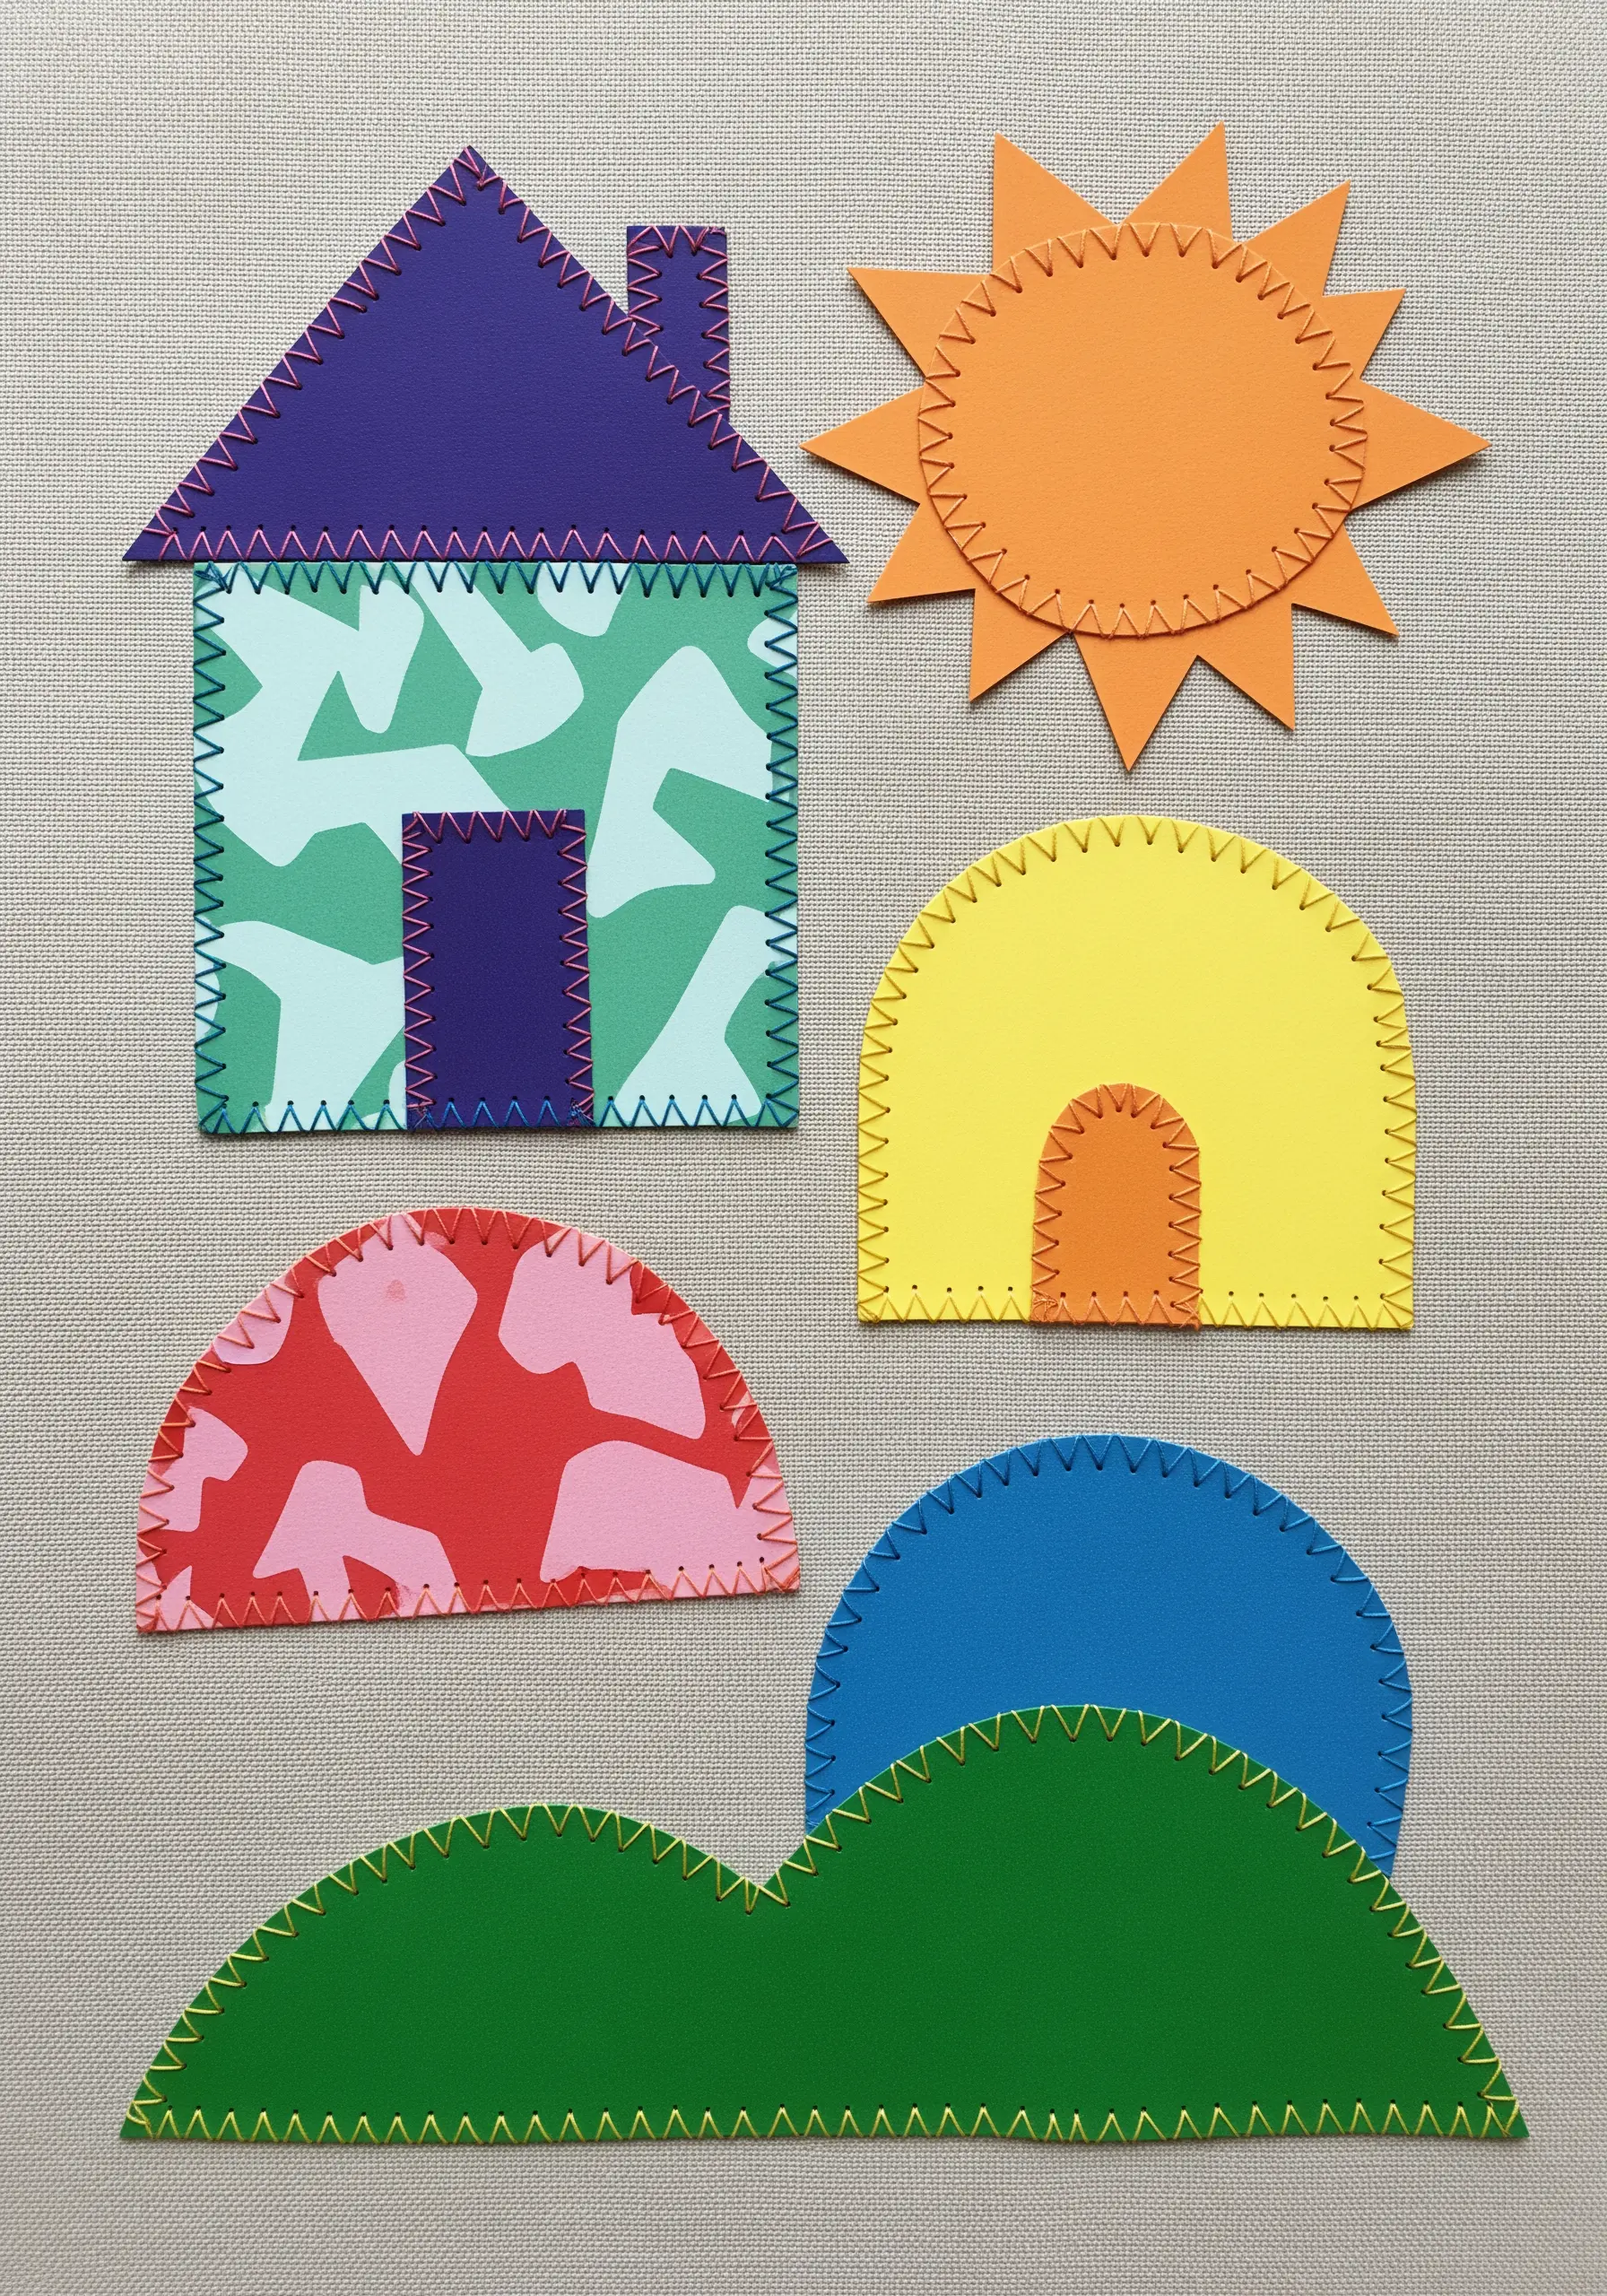
Give simple paper cutouts a charming, finished look by adding a decorative border stitch.
The blanket stitch is perfect for this, as it neatly wraps around the edge of the paper, creating a clean and durable finish.
Use a contrasting thread color to make the stitch pop. This technique is a wonderful way to join paper layers or simply add a touch of handcrafted detail to collage elements.
36. Add a Stitched Spine to Collaged Bookmarks
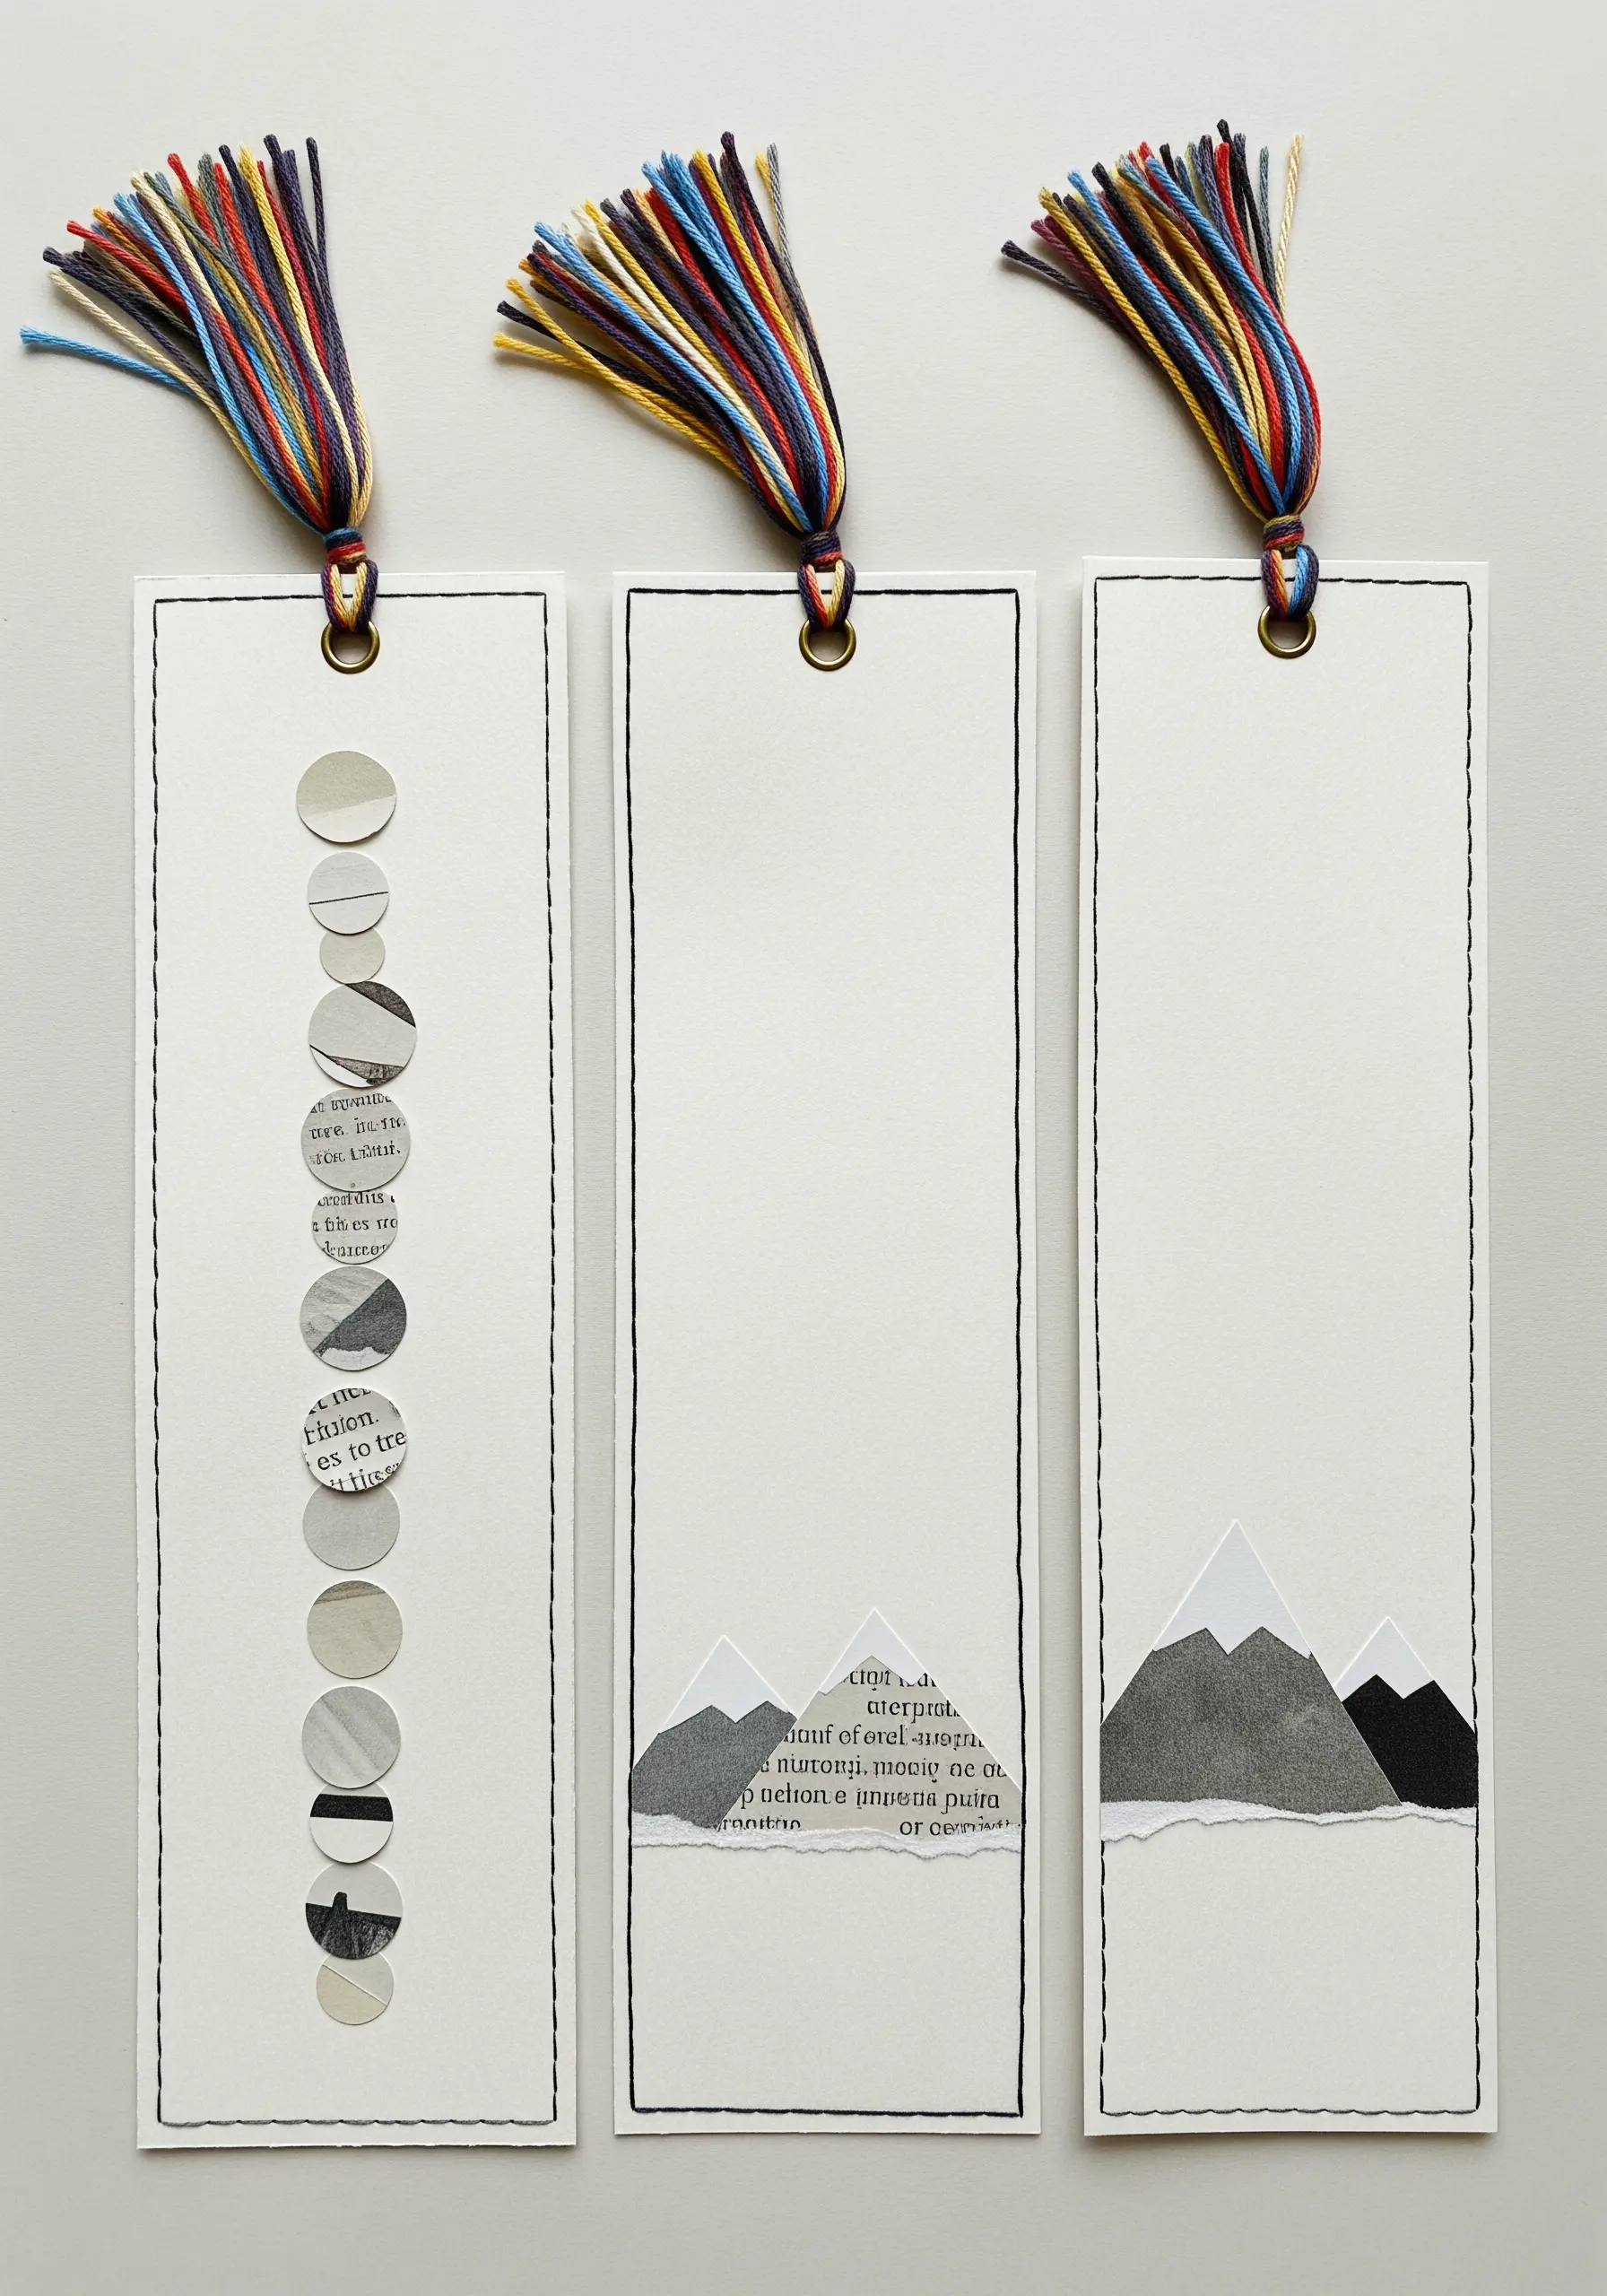
Elevate a simple paper bookmark by adding a touch of stitching. Create a minimal collage using scraps of newspaper or textured paper.
Then, use a sewing machine or a neat backstitch by hand to add a stitched line down each side.
This not only secures the collage elements but also gives the bookmark a satisfying structure and a professional, finished appearance.
Finish with a grommet and a handmade tassel for a final flourish.


