

You have the threads, the fabric, and the desire to create something beautiful. But perhaps you feel that your work, while neat, is missing a certain spark—that intentional touch that transforms a craft project into a piece of art.
The secret isn’t in mastering dozens of complex stitches. It lies in how you use the simple ones. It’s about seeing thread not just as a line of color, but as a sculptural element. It’s in the deliberate choice of texture, the subtle shift in thread direction, and the thoughtful use of the space you leave empty.
Think of these small abstract designs not as daunting projects, but as miniature studies in texture, color, and form. Each one is a quick, satisfying way to build your creative confidence and train your eye. They prove that the most impossibly detailed and expressive works are simply a series of small, mindful choices, made one stitch at a time.
1. Layered Fan Stitching for Dynamic Depth

Create this textured, overlapping effect by sectioning your design into fan shapes and filling each with satin stitch.
The key is to stitch the background layers first, allowing the foreground shapes to physically sit on top, which creates real depth.
Using Aida cloth provides a natural grid, making it easier to keep your satin stitches parallel and evenly spaced.
Vary the direction of your stitches in each fan to catch the light differently, enhancing the sense of movement.
Finally, scatter a few metallic seed beads between the shapes to add a touch of sparkle and textural contrast.
2. Galactic Swirls with Knots and Beads
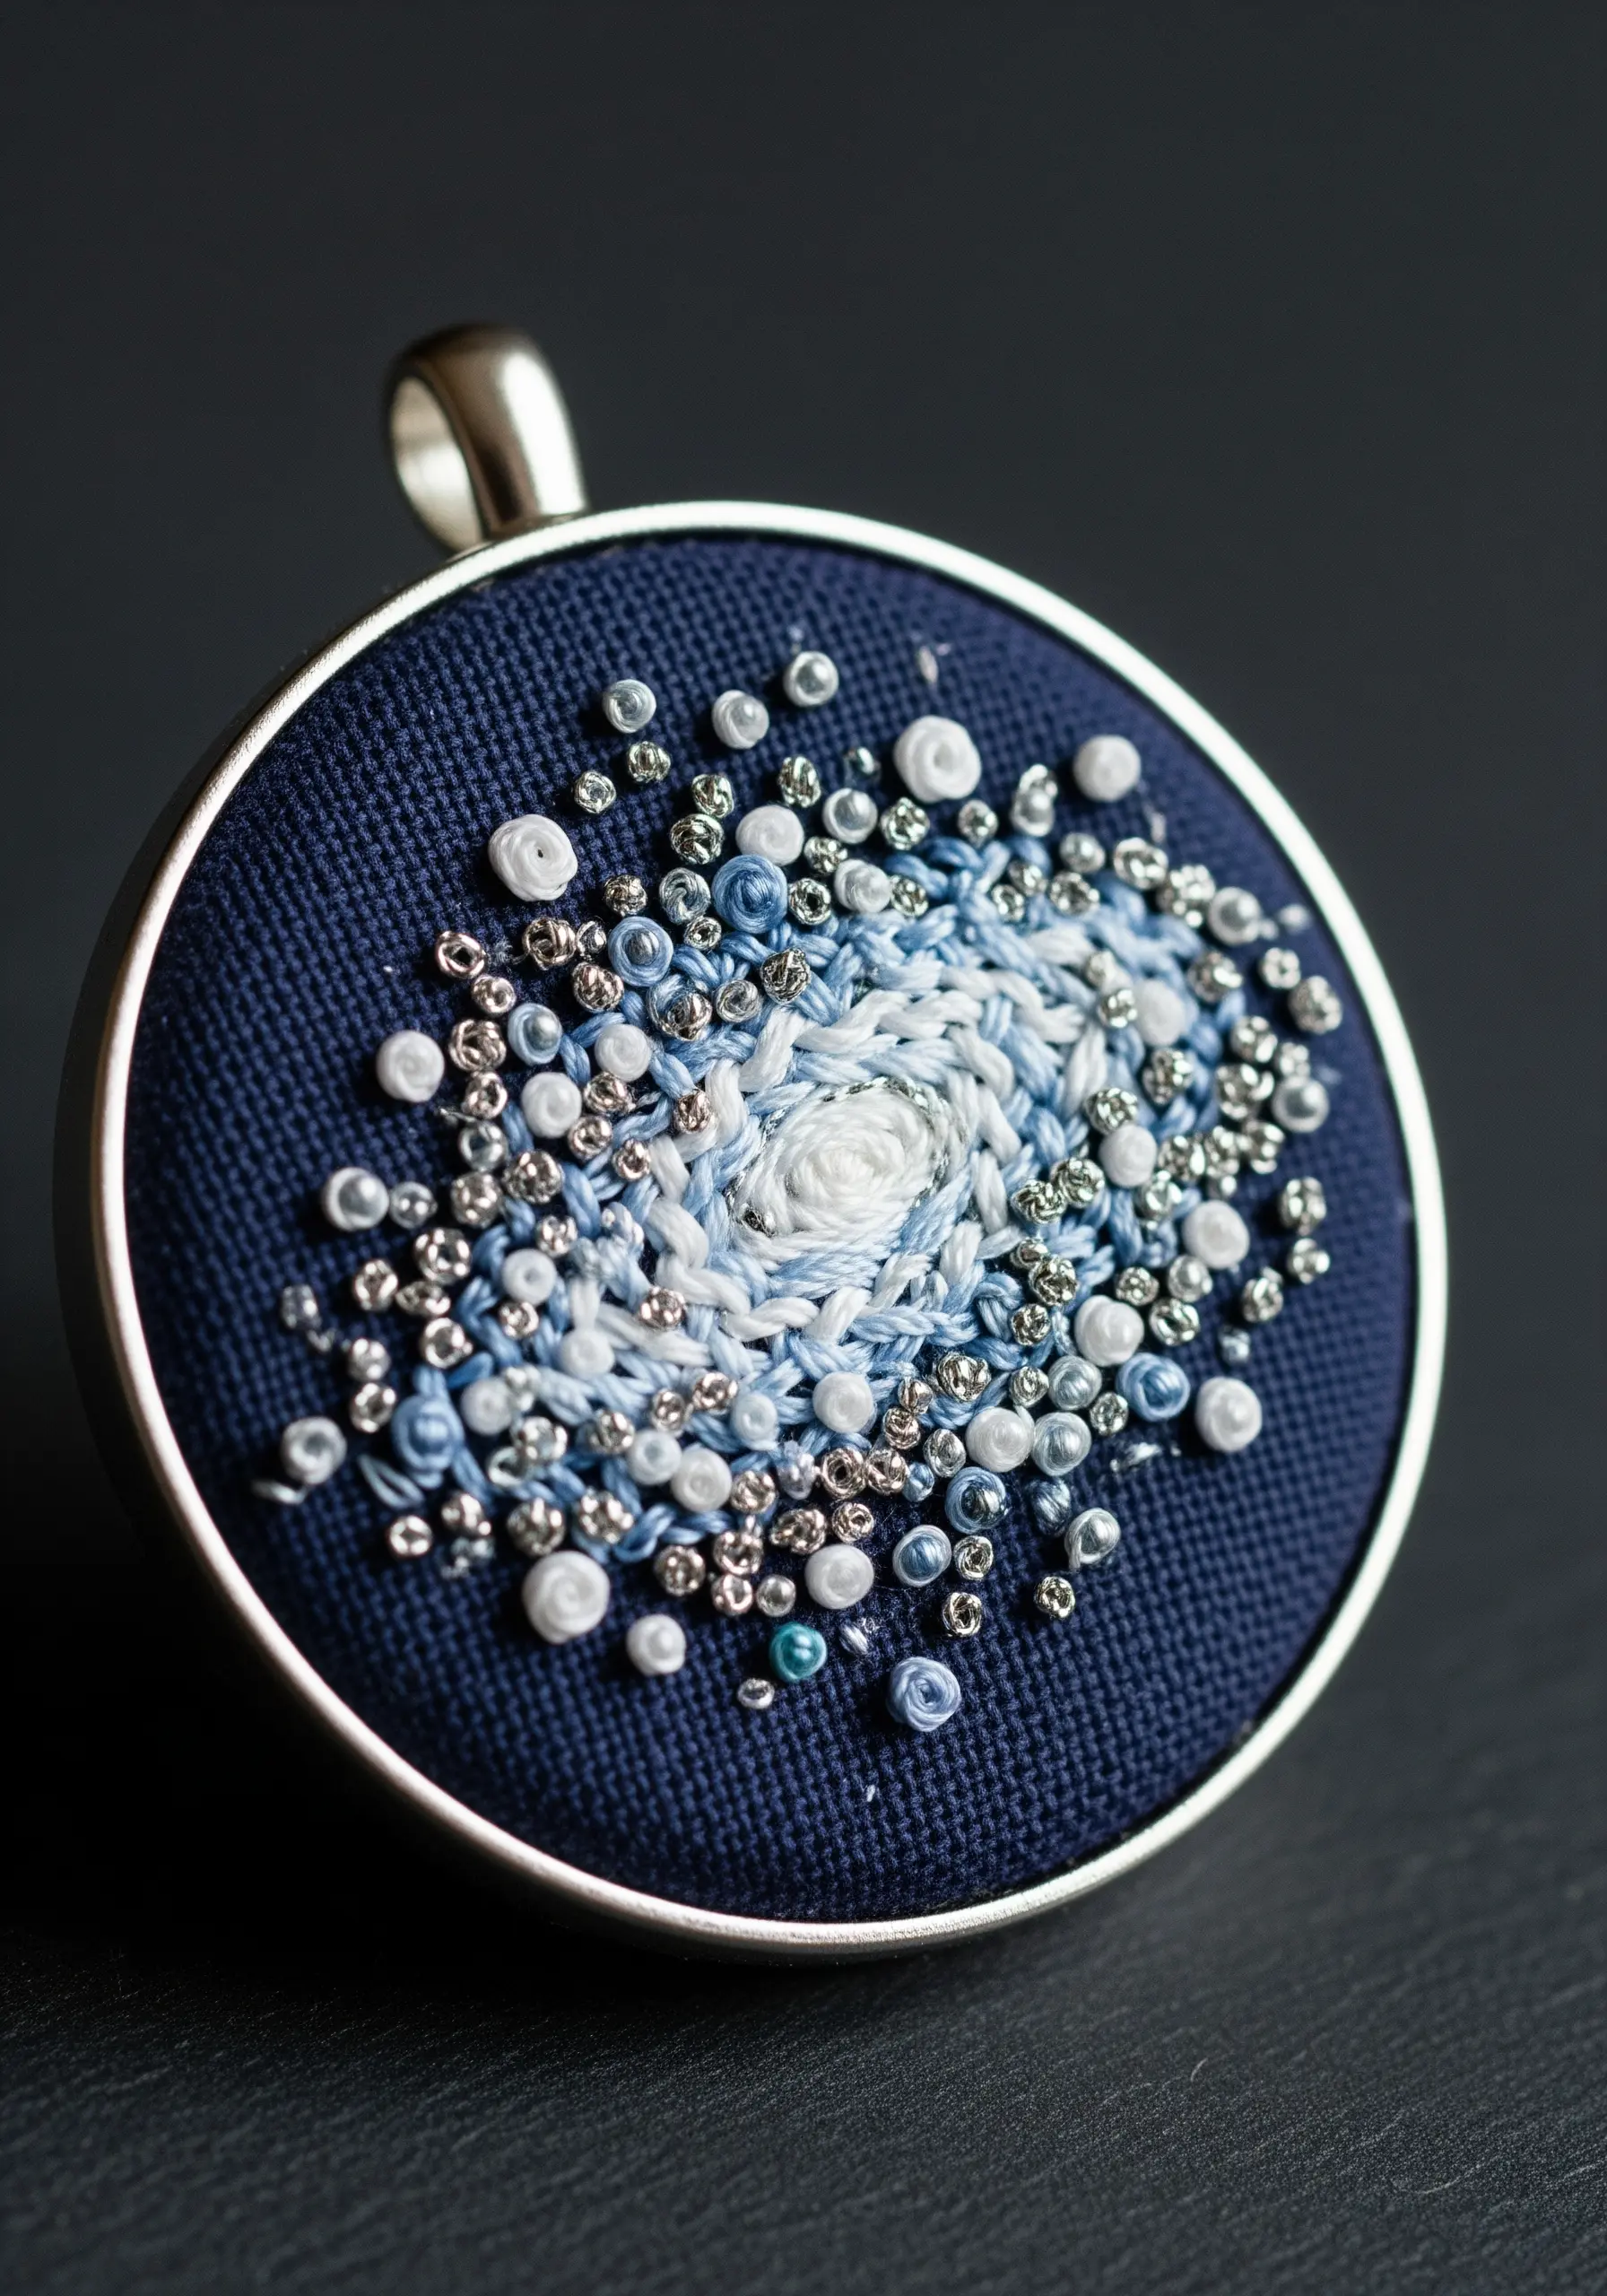
Build a miniature galaxy by combining simple stitches with beads for a rich, dimensional surface.
Start with a central swirl using a whipped backstitch in a light color to create a smooth, raised spiral.
Surround this core with French knots in varying sizes—wrap the thread once for tiny dots and two or three times for larger ones.
Fill the remaining space with metallic and pearlescent seed beads to mimic distant stars. The dark fabric is essential here, as it makes the light threads and shiny beads appear to glow.
3. Graphic Impact with Whipped Backstitch
This design’s power comes from the perfectly clean, bold lines of a whipped backstitch.
First, create a standard backstitch outline using all six strands of black floss for maximum weight.
Then, take a second thread and ‘whip’ it around the backstitches without piercing the fabric, creating a smooth, rope-like effect.
The color blocks are simply sections where you whip with a contrasting color instead of black, adding graphic pops without changing the core technique.
4. A Sampler of Dimensional Stitches on Felt
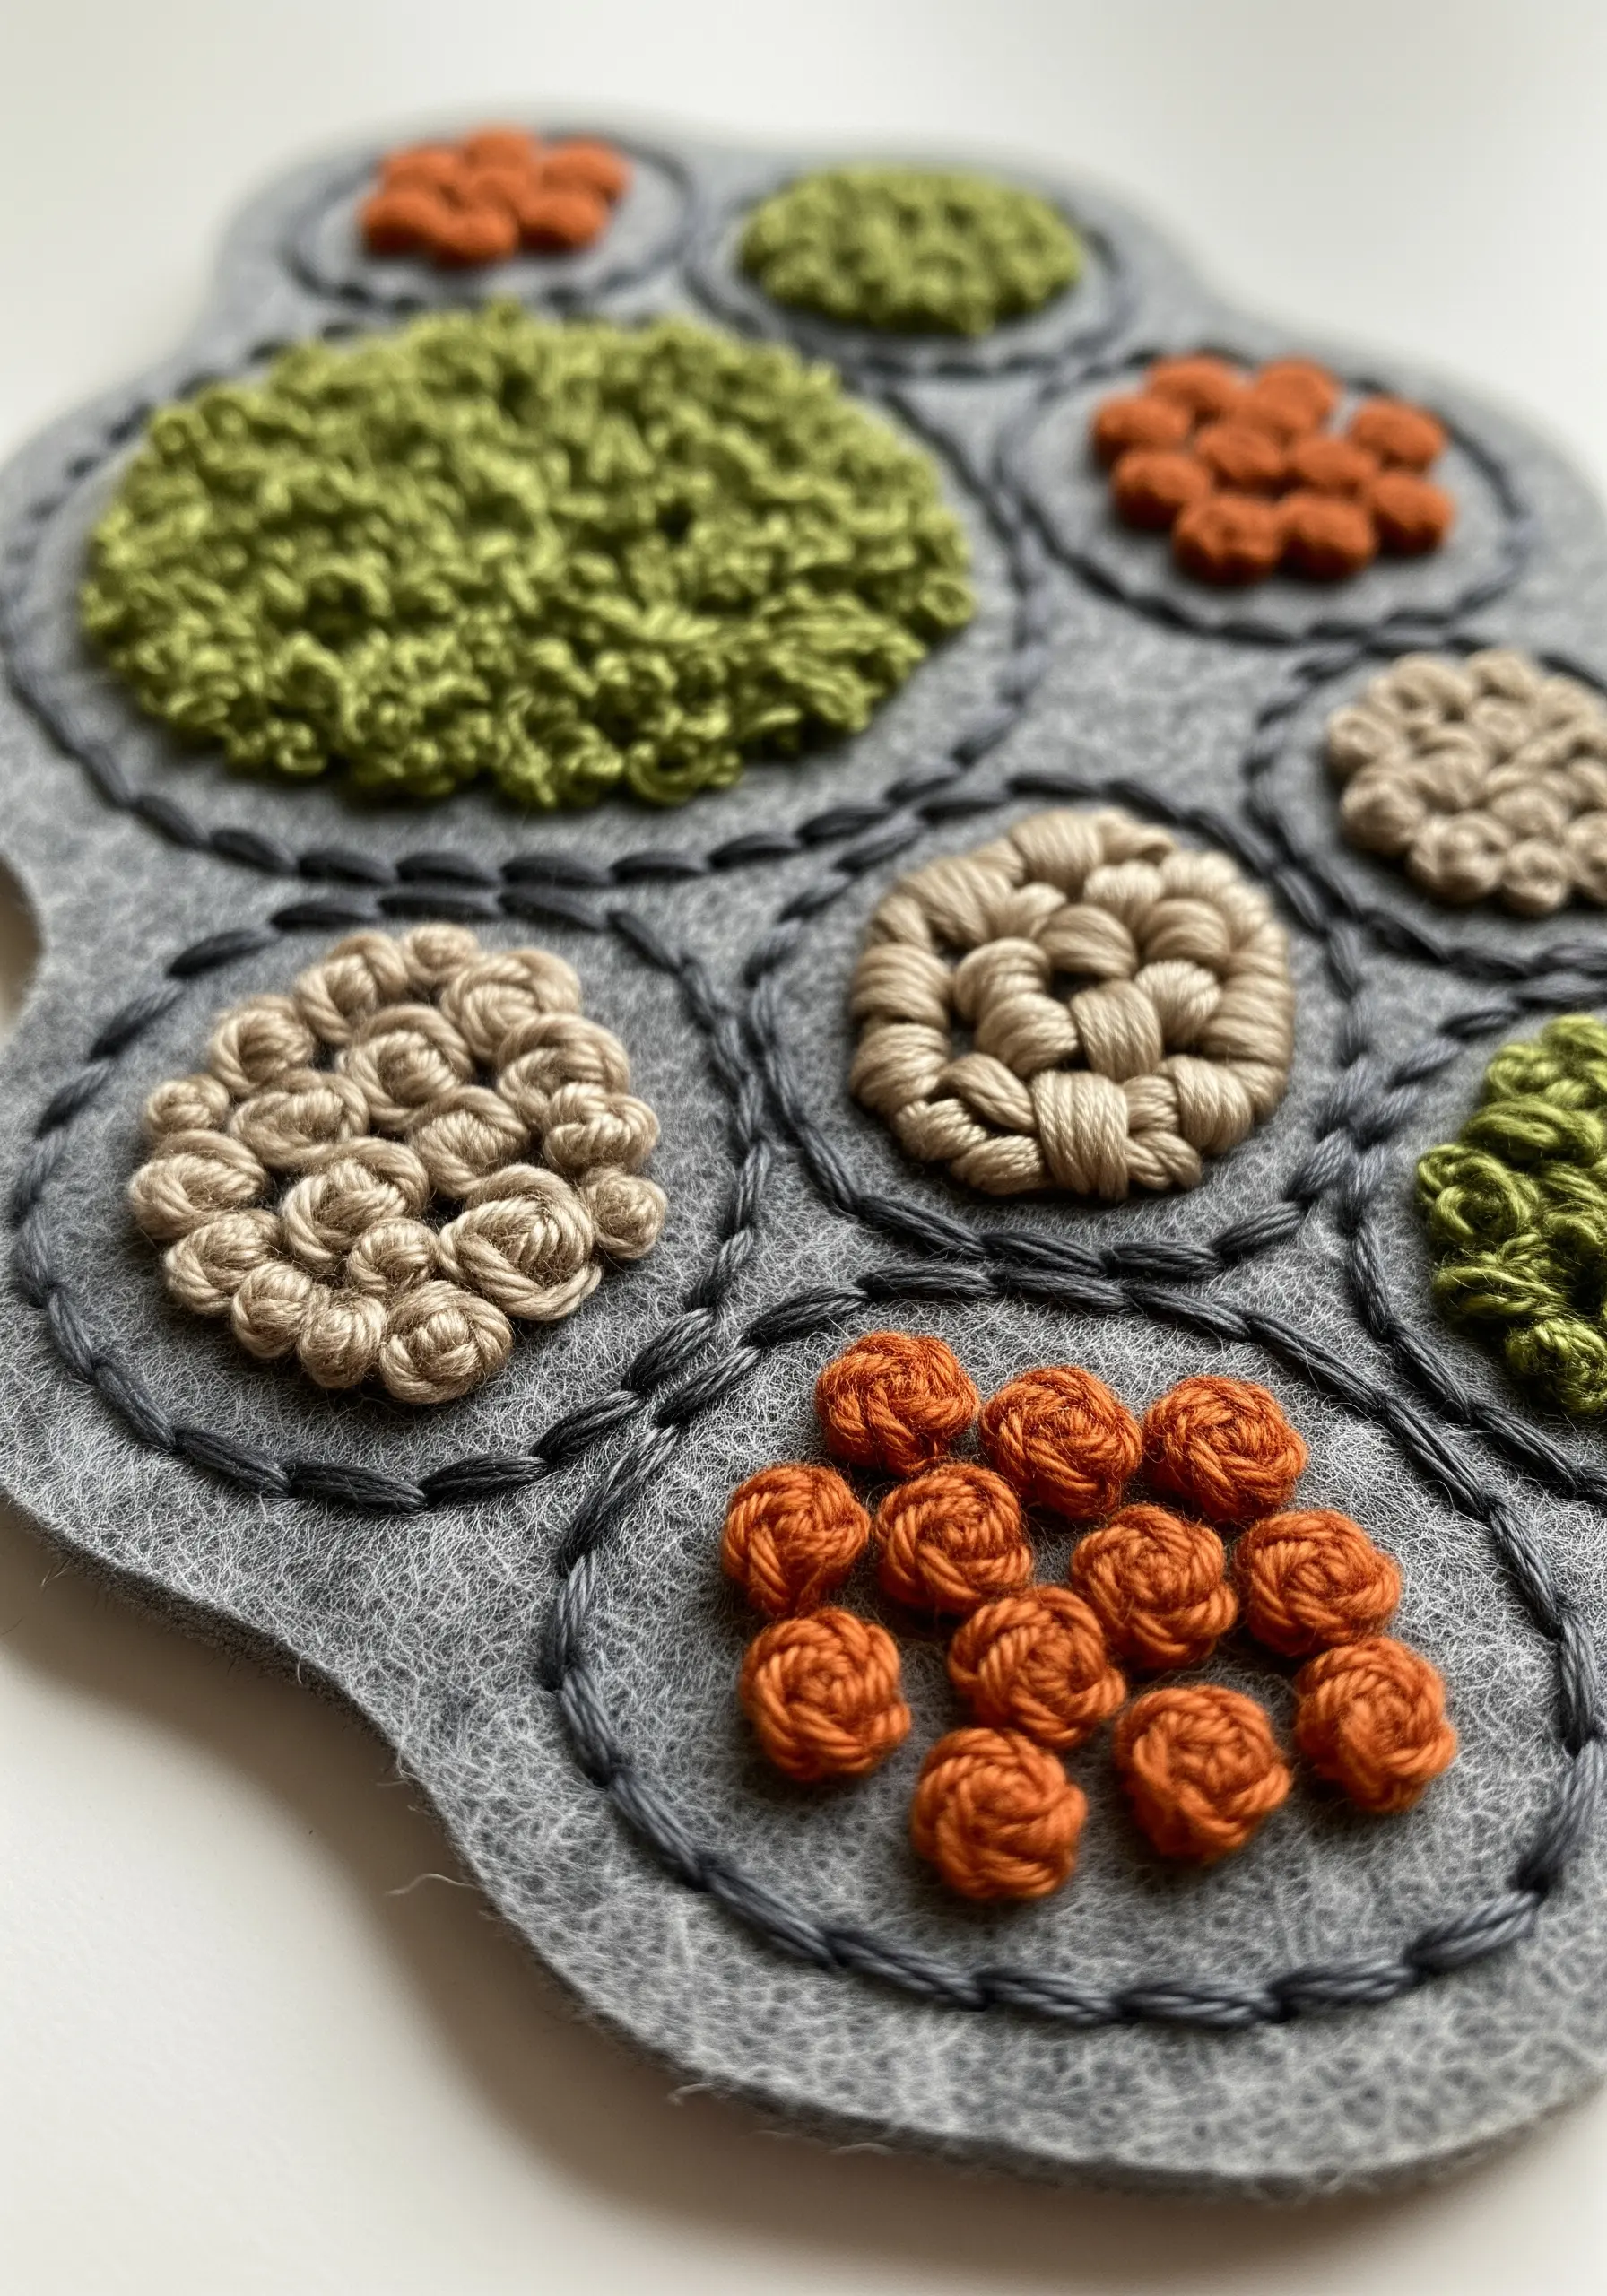
Use a piece of stiff felt as your base to create a wonderfully tactile and sculptural piece without needing a hoop.
Each circle is a miniature study in a different high-texture stitch.
Fill one area with dense French knots for a mossy effect, another with woven wheel stitches to create tiny rosettes, and a third with padded satin stitch for smooth, raised domes.
The felt’s soft surface complements the raised embroidery, resulting in a piece that invites touch.
5. Intersecting Gradients with Braid and Satin Stitch

Create compelling visual contrast by pairing a textured stitch with a smooth one.
The vertical lines use the braid stitch, which creates a beautiful raised, woven texture that stands off the fabric.
Arrange your green threads from light to dark before you begin to ensure the gradient flows naturally.
The horizontal bar is a simple satin stitch, whose flatness grounds the composition and makes the braided texture above and below it pop even more.
6. Radiant Energy with Neon and Metallics
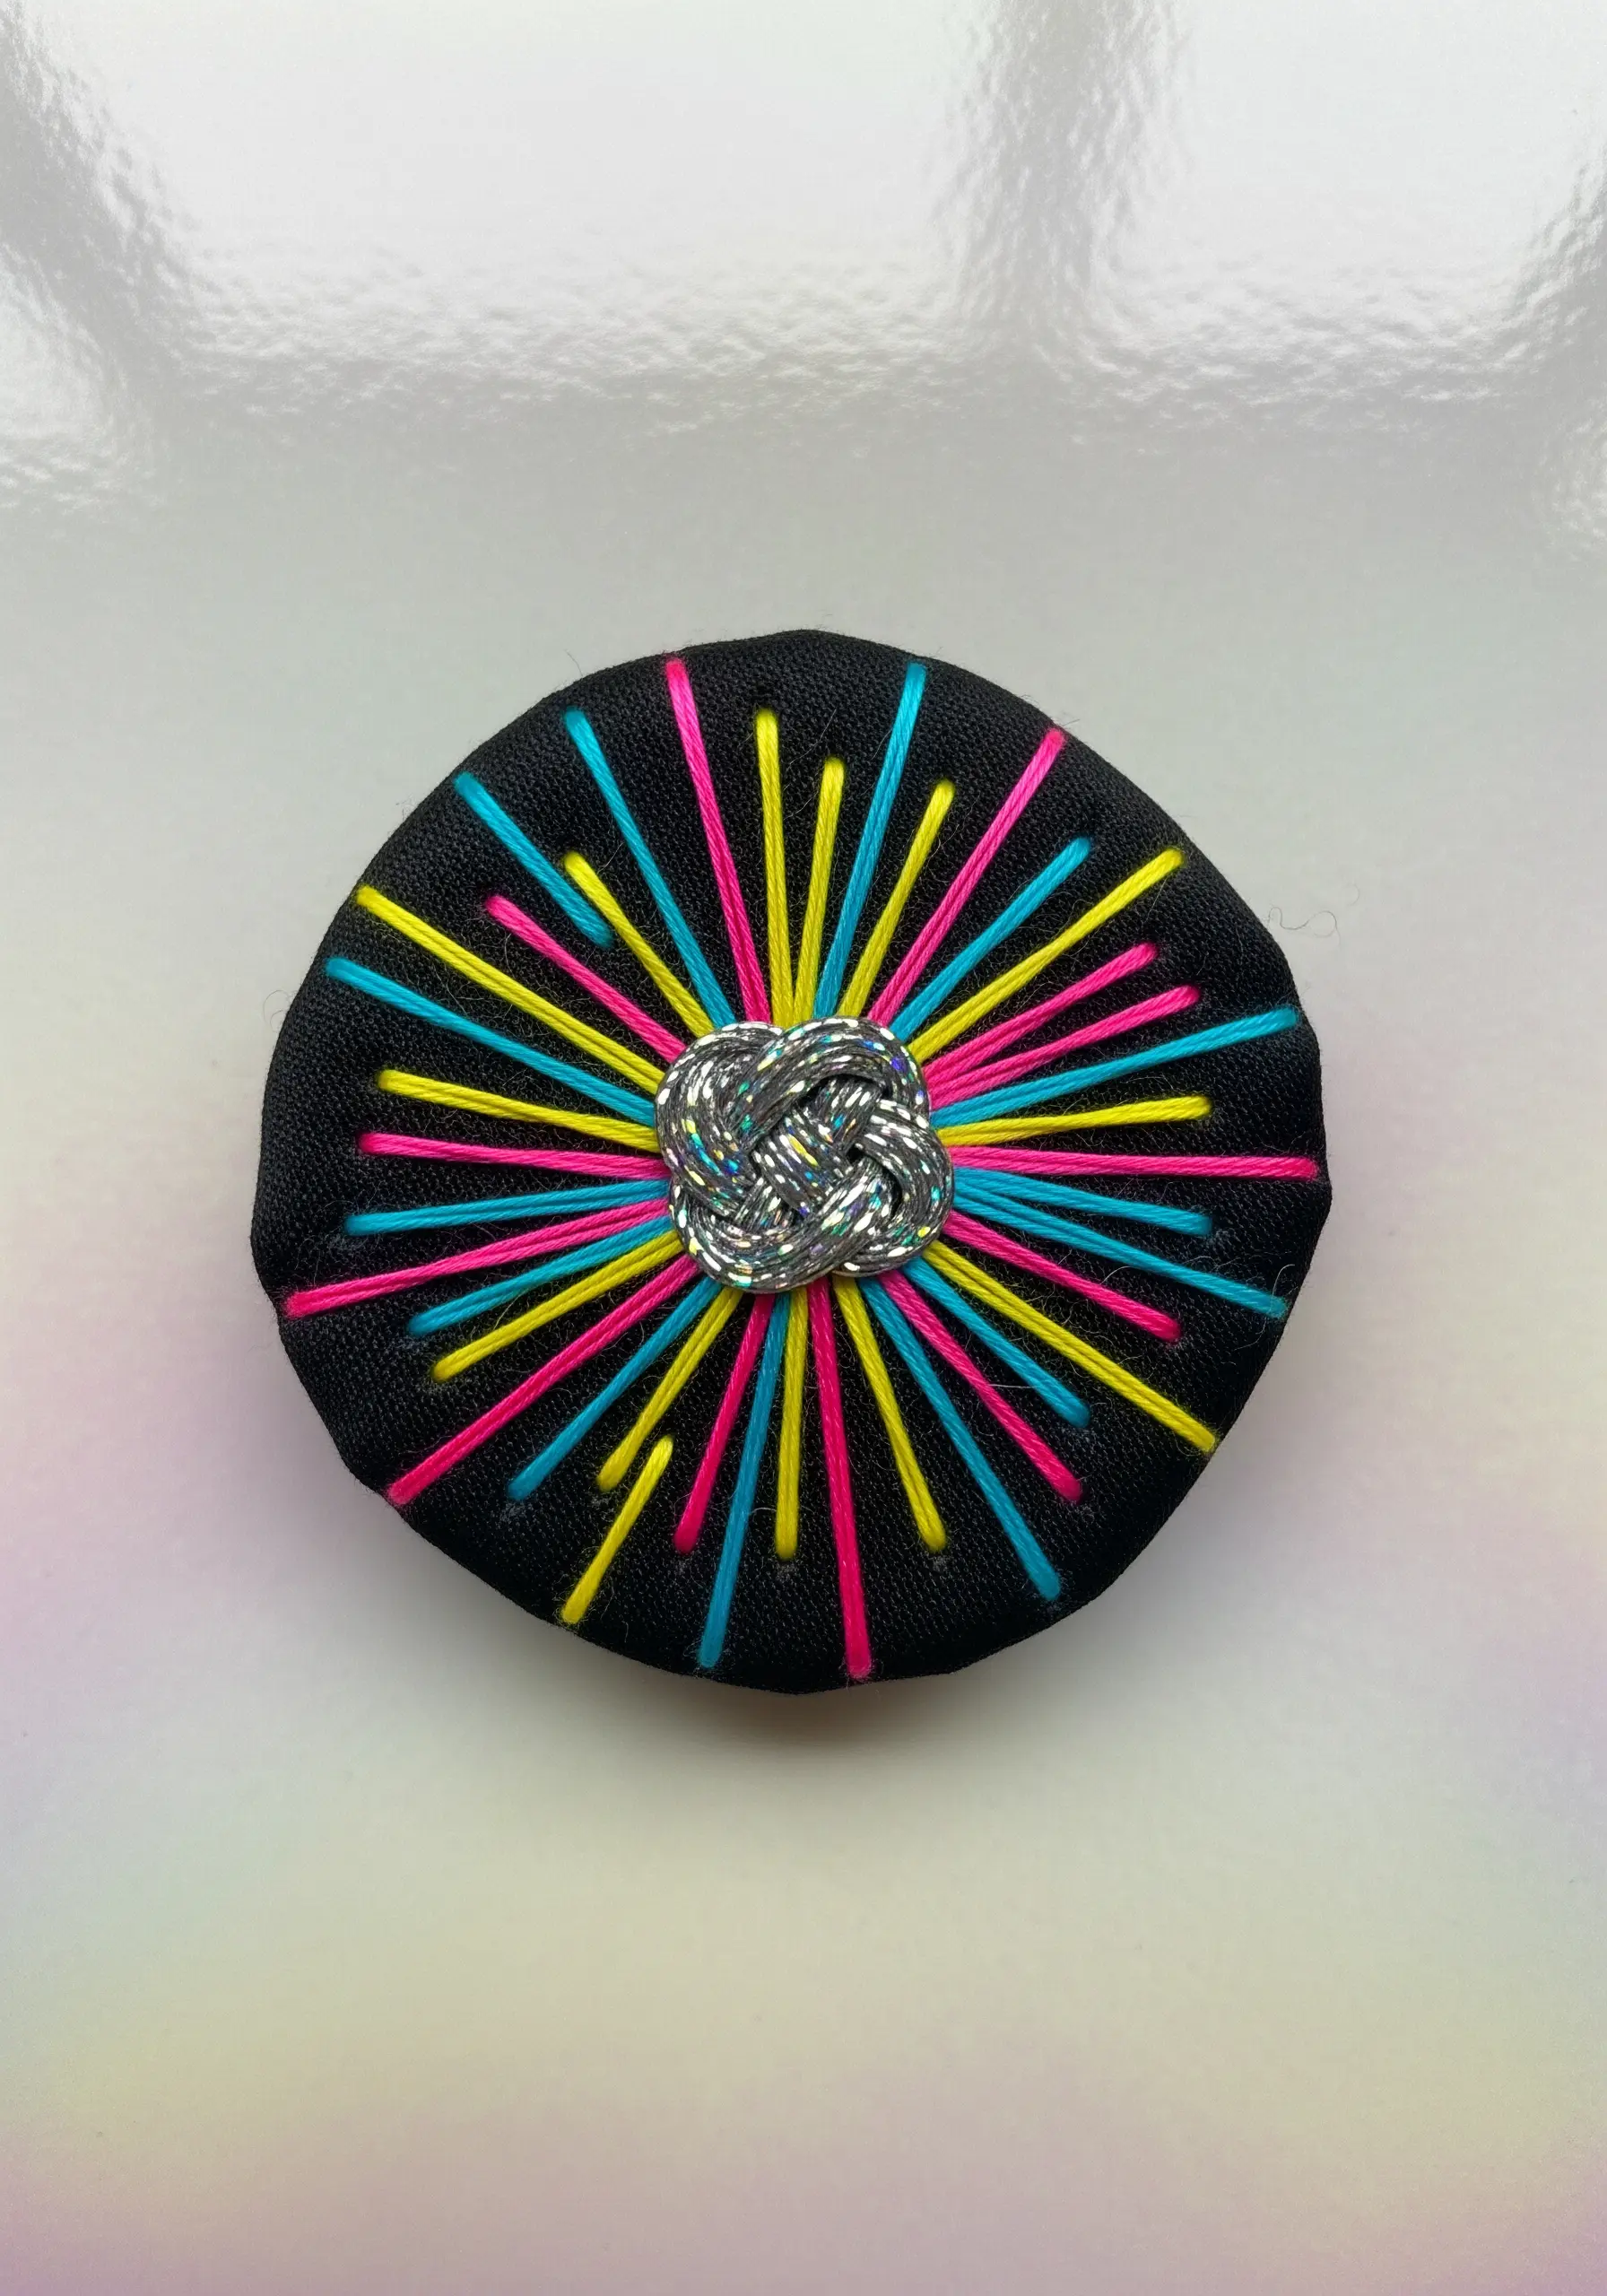
This explosive design proves that sometimes the simplest stitch—the straight stitch—can have the most impact.
Use a dark, tightly woven cotton fabric as your canvas to make the neon threads appear to vibrate with color.
Stitch long, straight lines radiating from a central point, keeping the tension taut but not so tight that it puckers the fabric.
For the center, tie a dimensional knot like a Josephine knot using a metallic thread to create a focal point that contrasts in both texture and sheen.
7. Earth-Tone Contours with Mixed-Media Chains
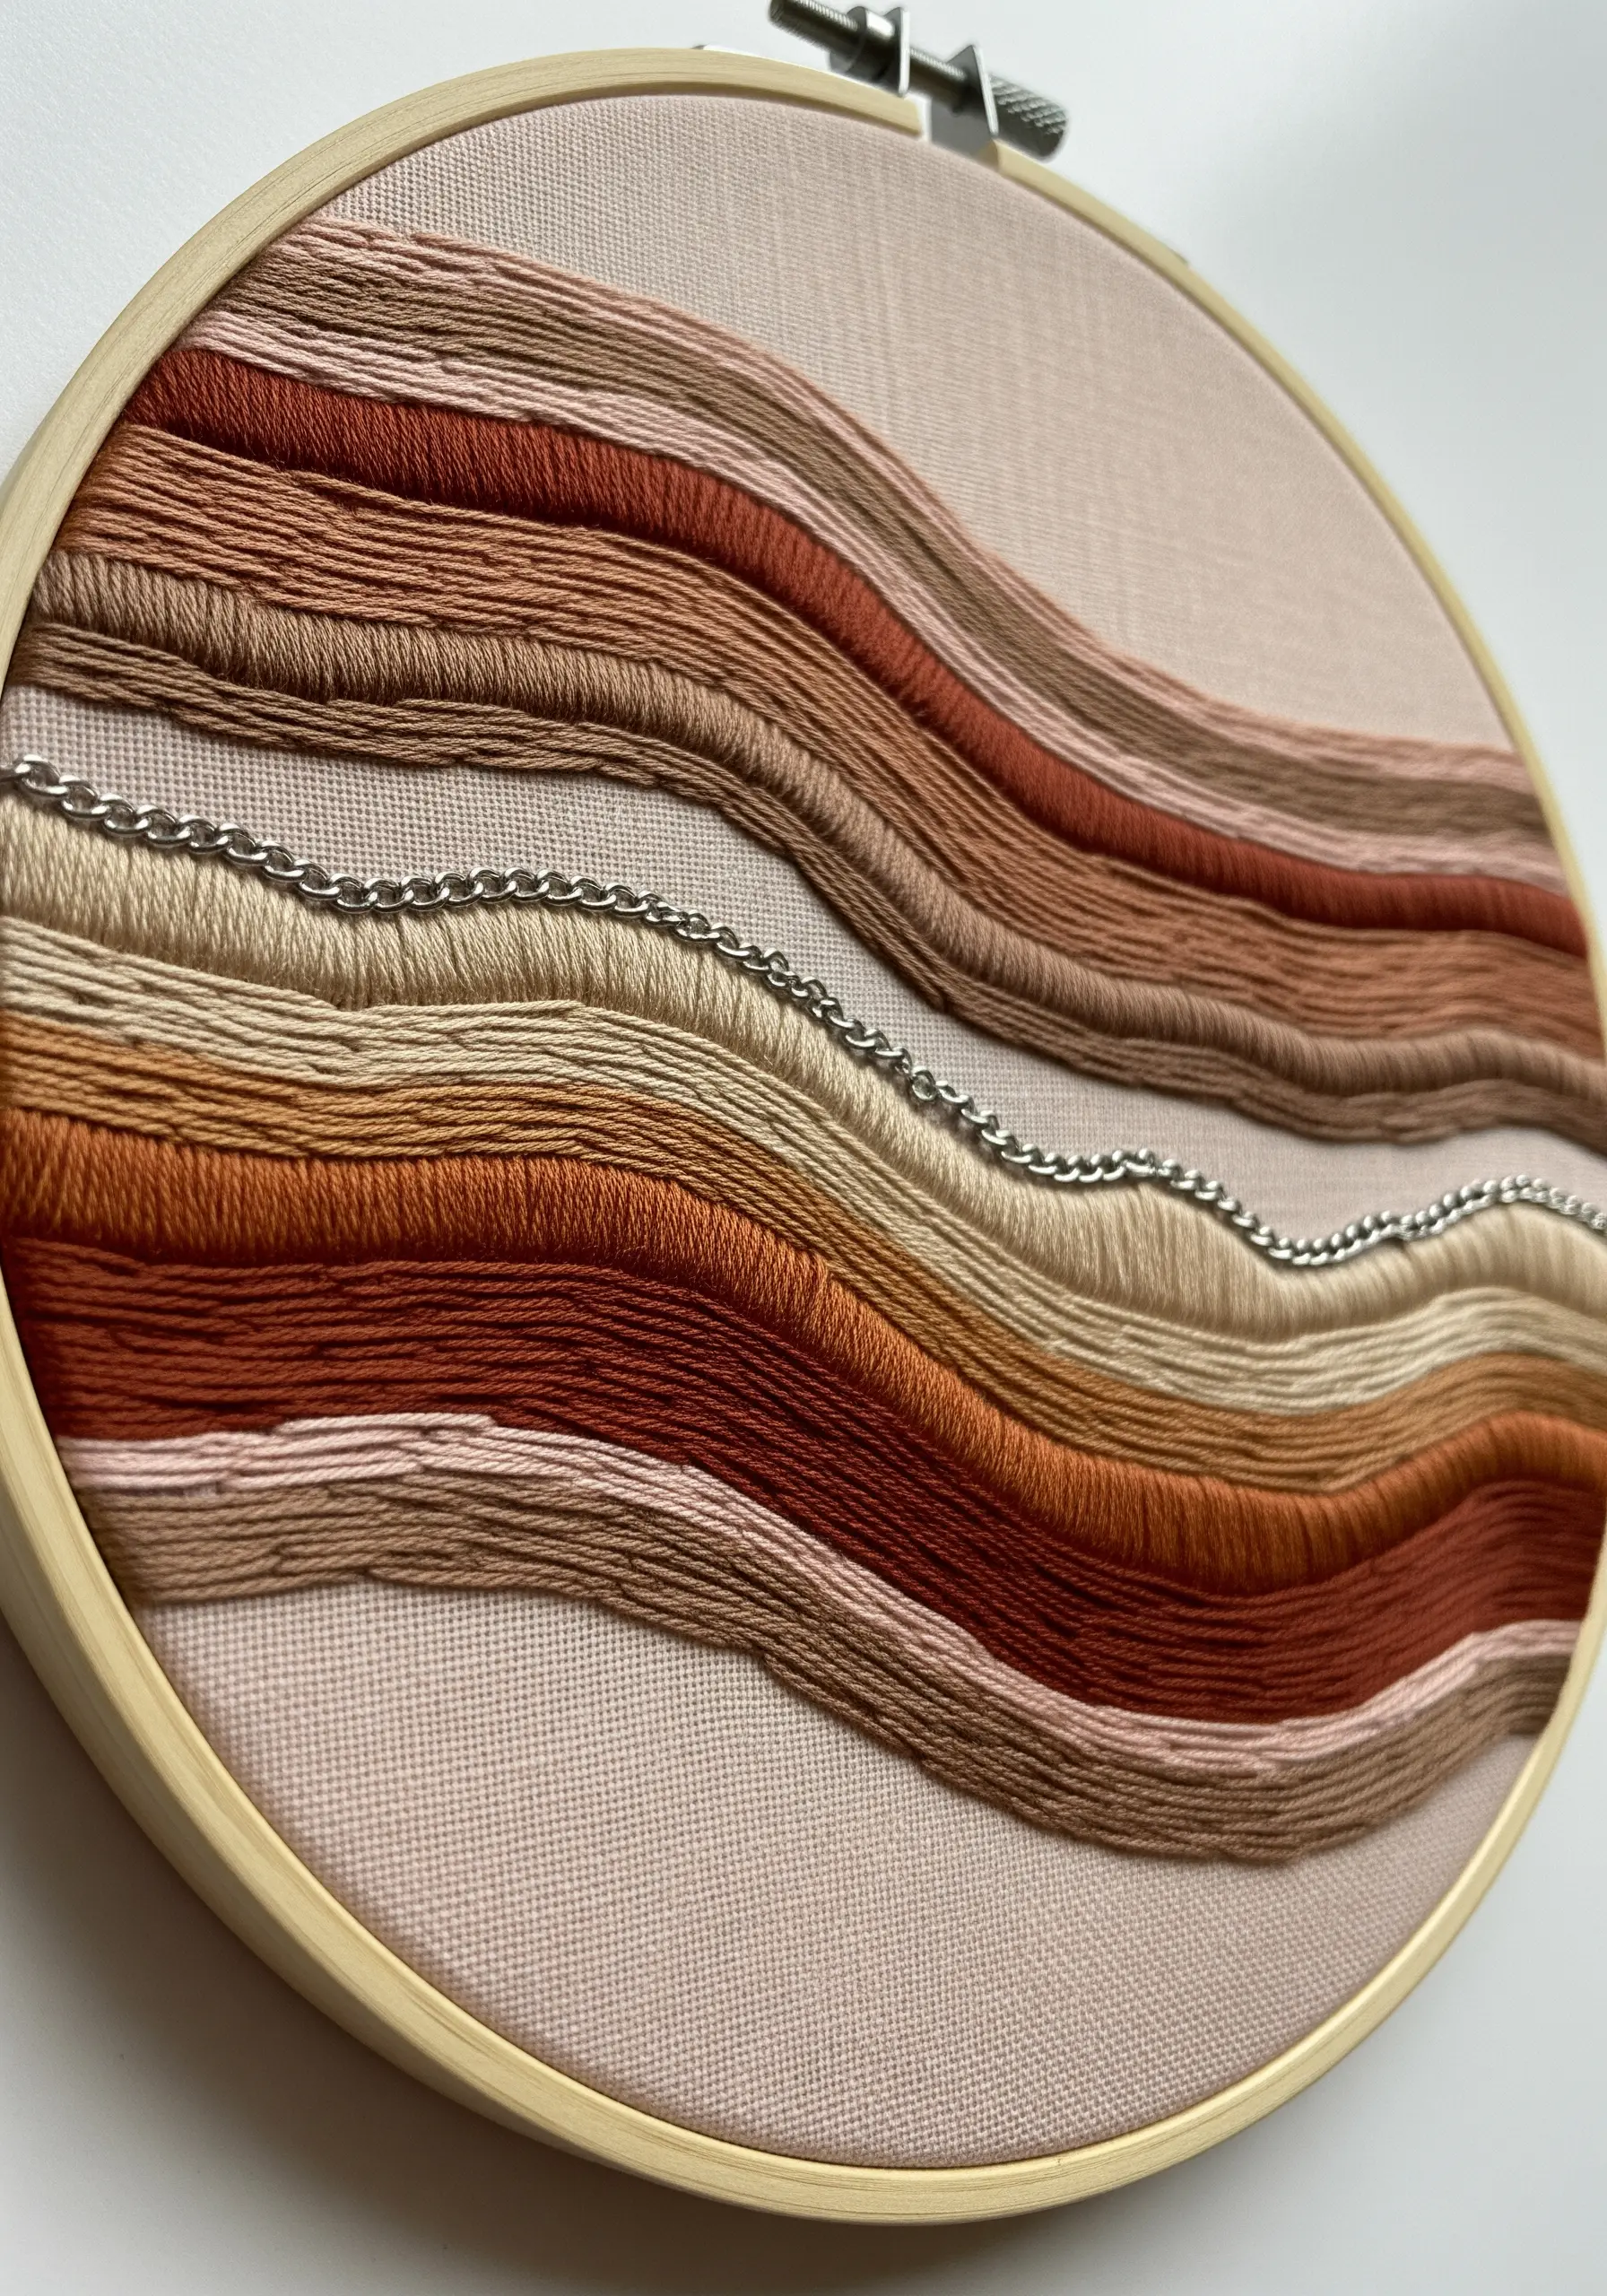
Mimic the organic lines of geological strata by stitching wavy bands of color in an earth-toned palette.
Use a simple backstitch or stem stitch with all six strands of floss to create thick, substantial lines.
Introduce an unexpected element by incorporating a fine metal chain. To do this, use a technique called couching: lay the chain on the fabric and secure it by making tiny stitches over it with a single, matching thread at regular intervals.
This mix of soft thread and hard metal creates a sophisticated, modern texture.
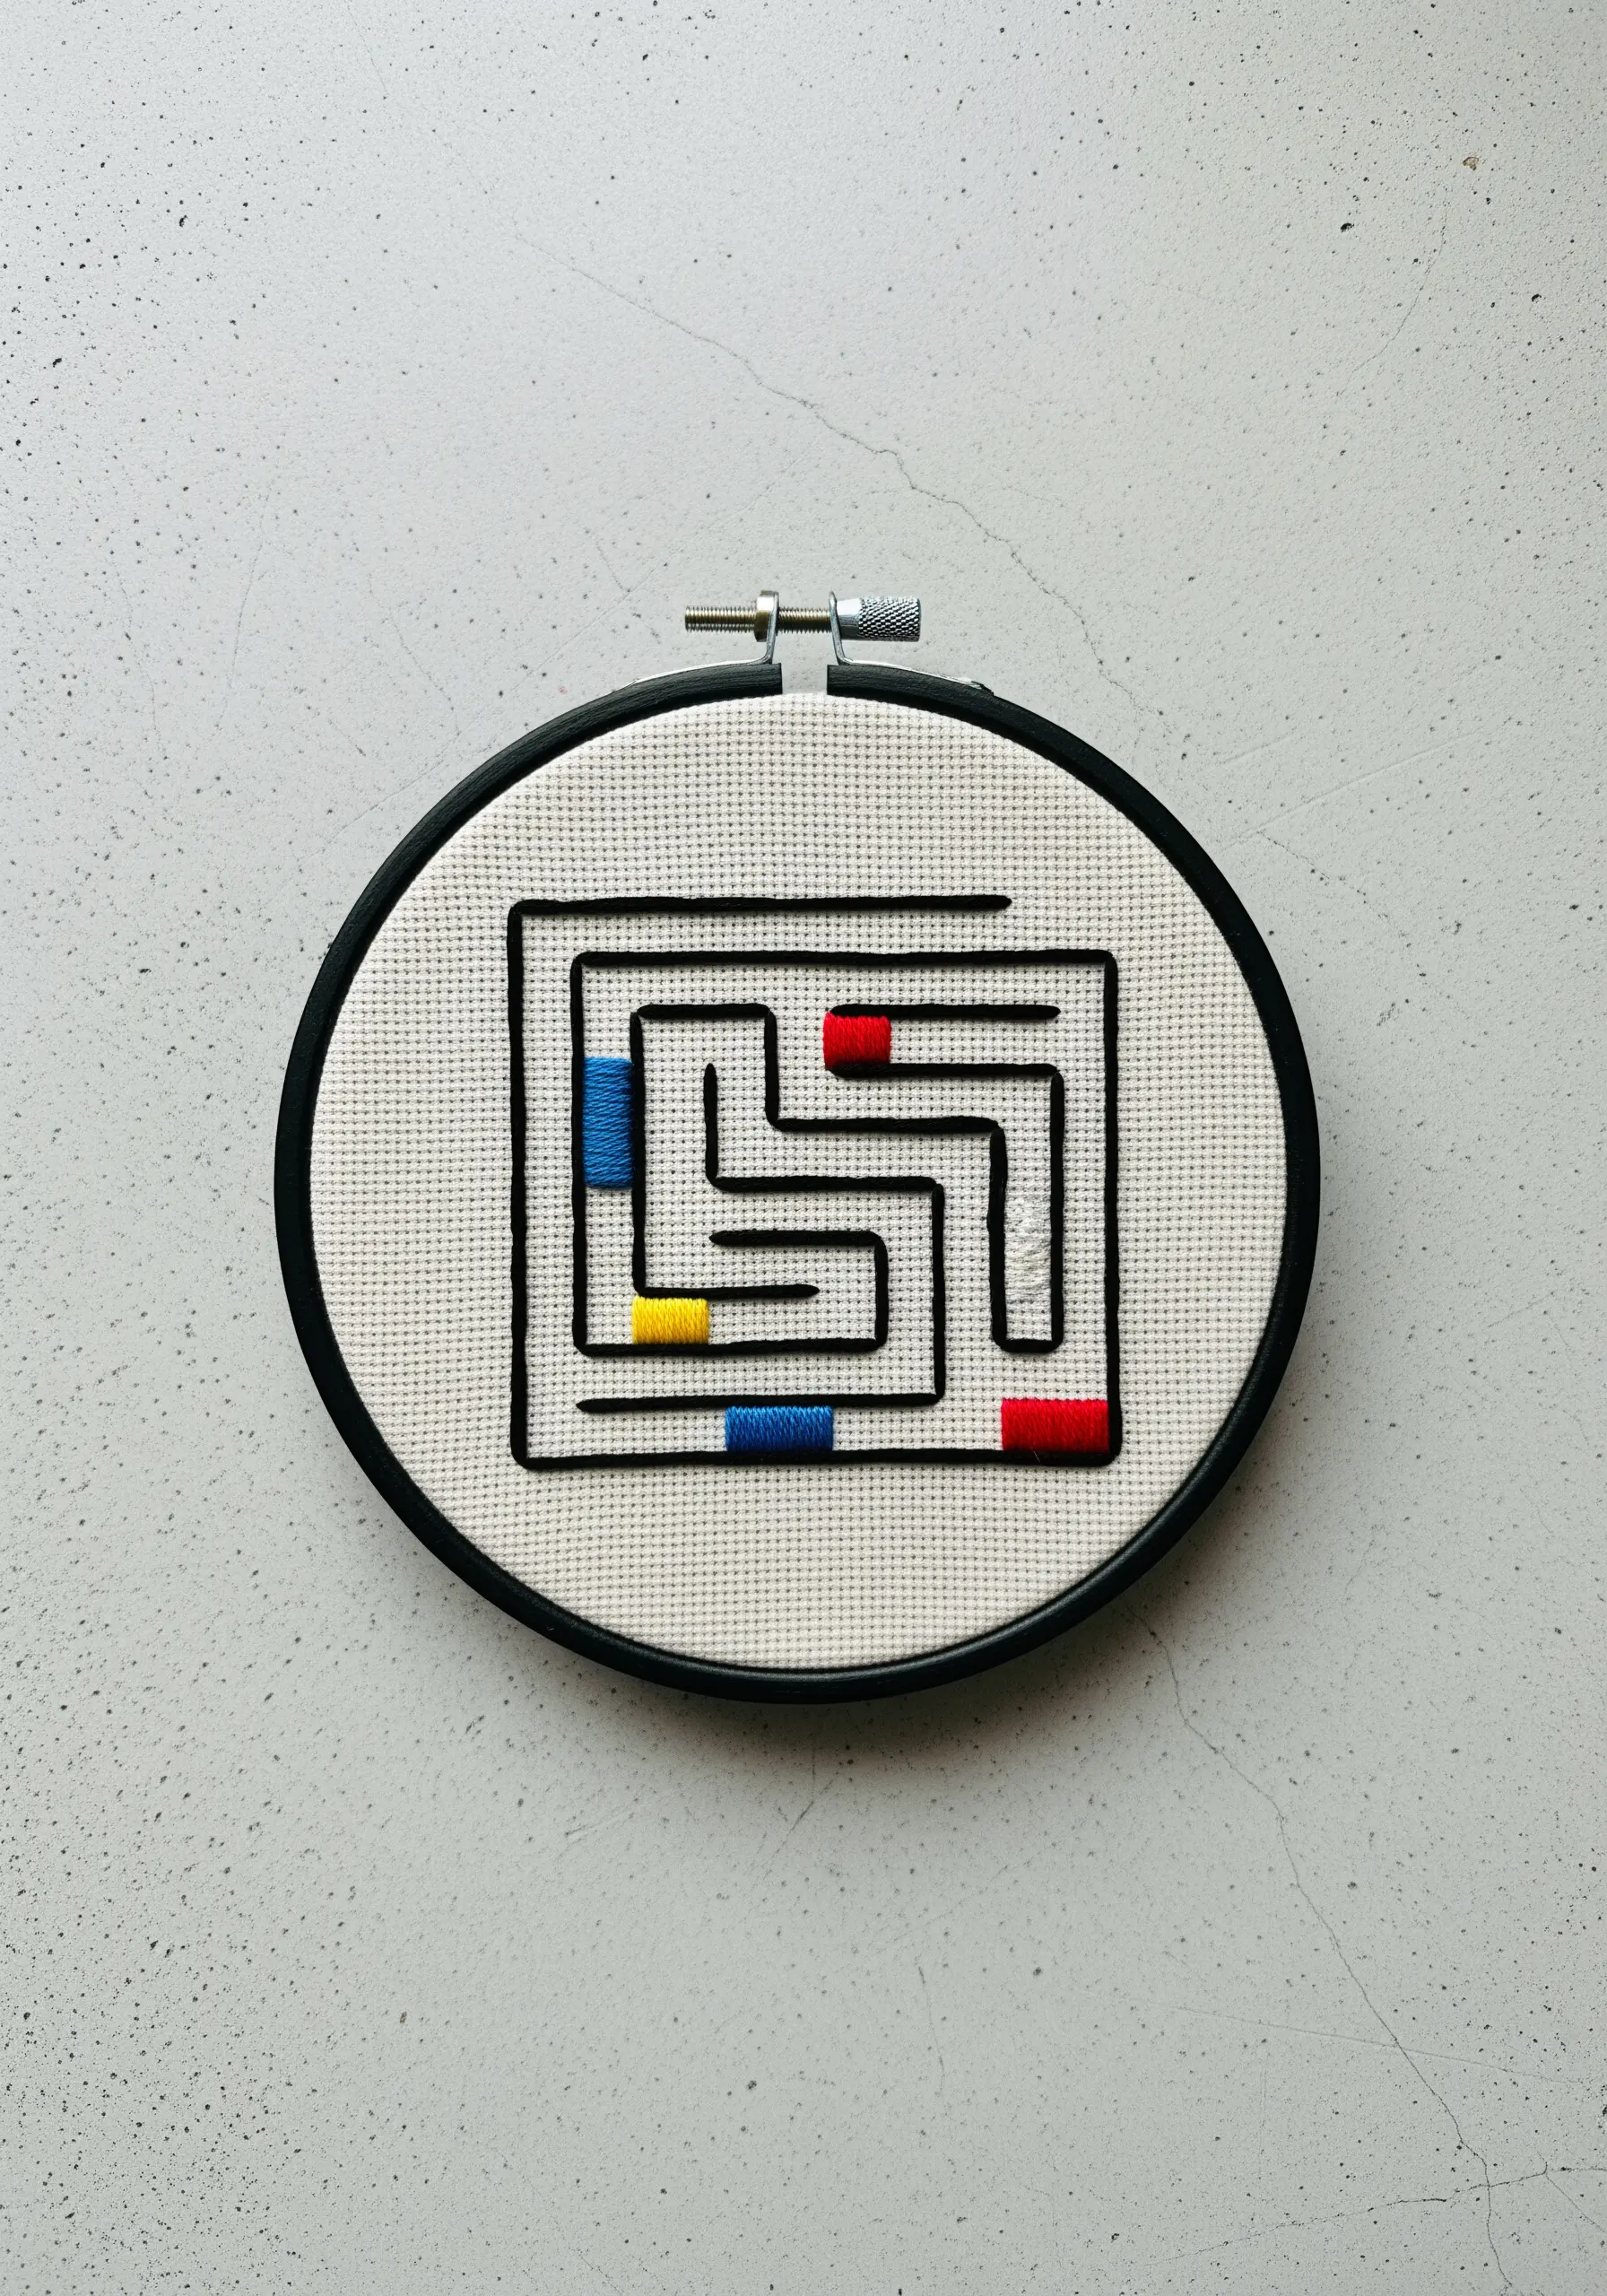
8. Architectural Precision on a Grid Canvas
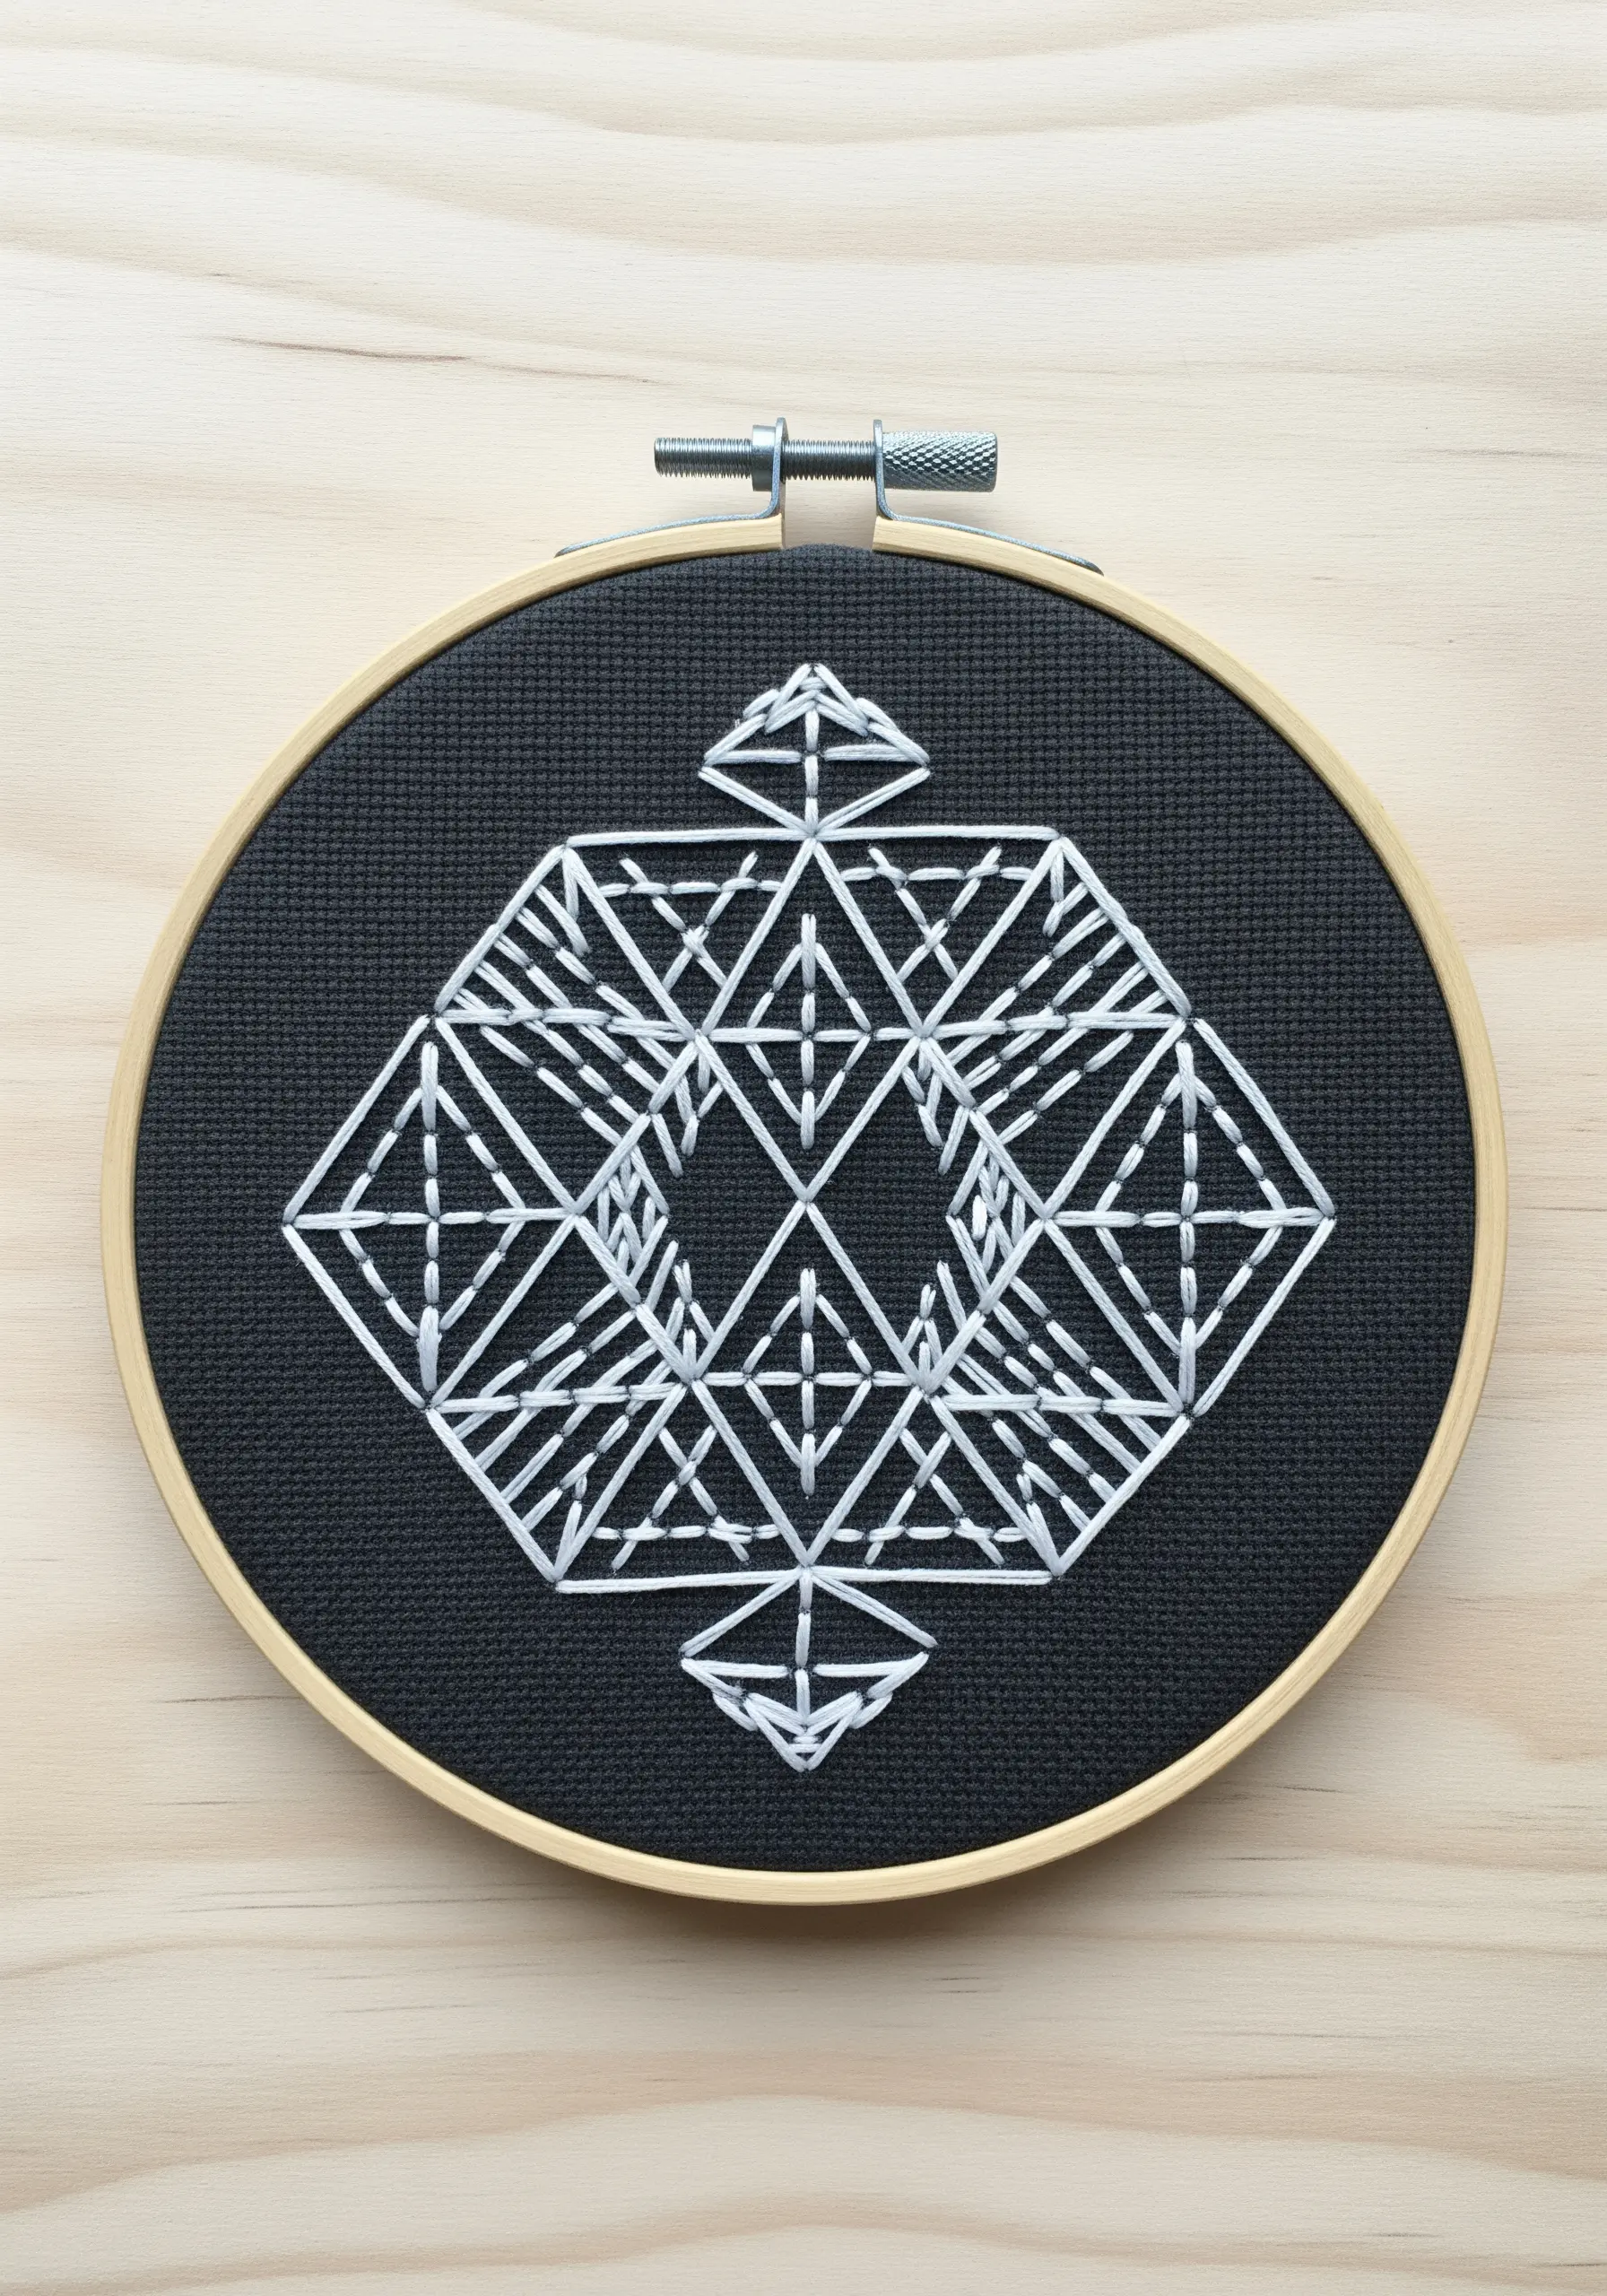
Use the built-in grid of Aida cloth to execute flawless geometric designs that look incredibly complex.
The entire piece is created with a simple backstitch using two or three strands of white floss.
The magic is in the high-contrast fabric choice and the careful planning of the lines to create an illusion of a 3D, crystalline structure.
Sketch your design on graph paper first to ensure every line starts and ends at the correct point, guaranteeing architectural precision.
9. Playful Confetti with Scattered Stitches

Embrace improvisation with this joyful, scattered design that feels like falling confetti.
Use a bright, cheerful fabric as your background to set a playful tone.
There’s no pattern here; simply stitch small, organic squiggles using a mix of basic stitches like chain stitch, stem stitch, and backstitch.
Alternate your thread colors randomly and vary the length and curve of each shape. This is an excellent exercise for using up scrap threads and loosening up your creative process.
10. Creating a Woven Illusion with Thread Wrapping
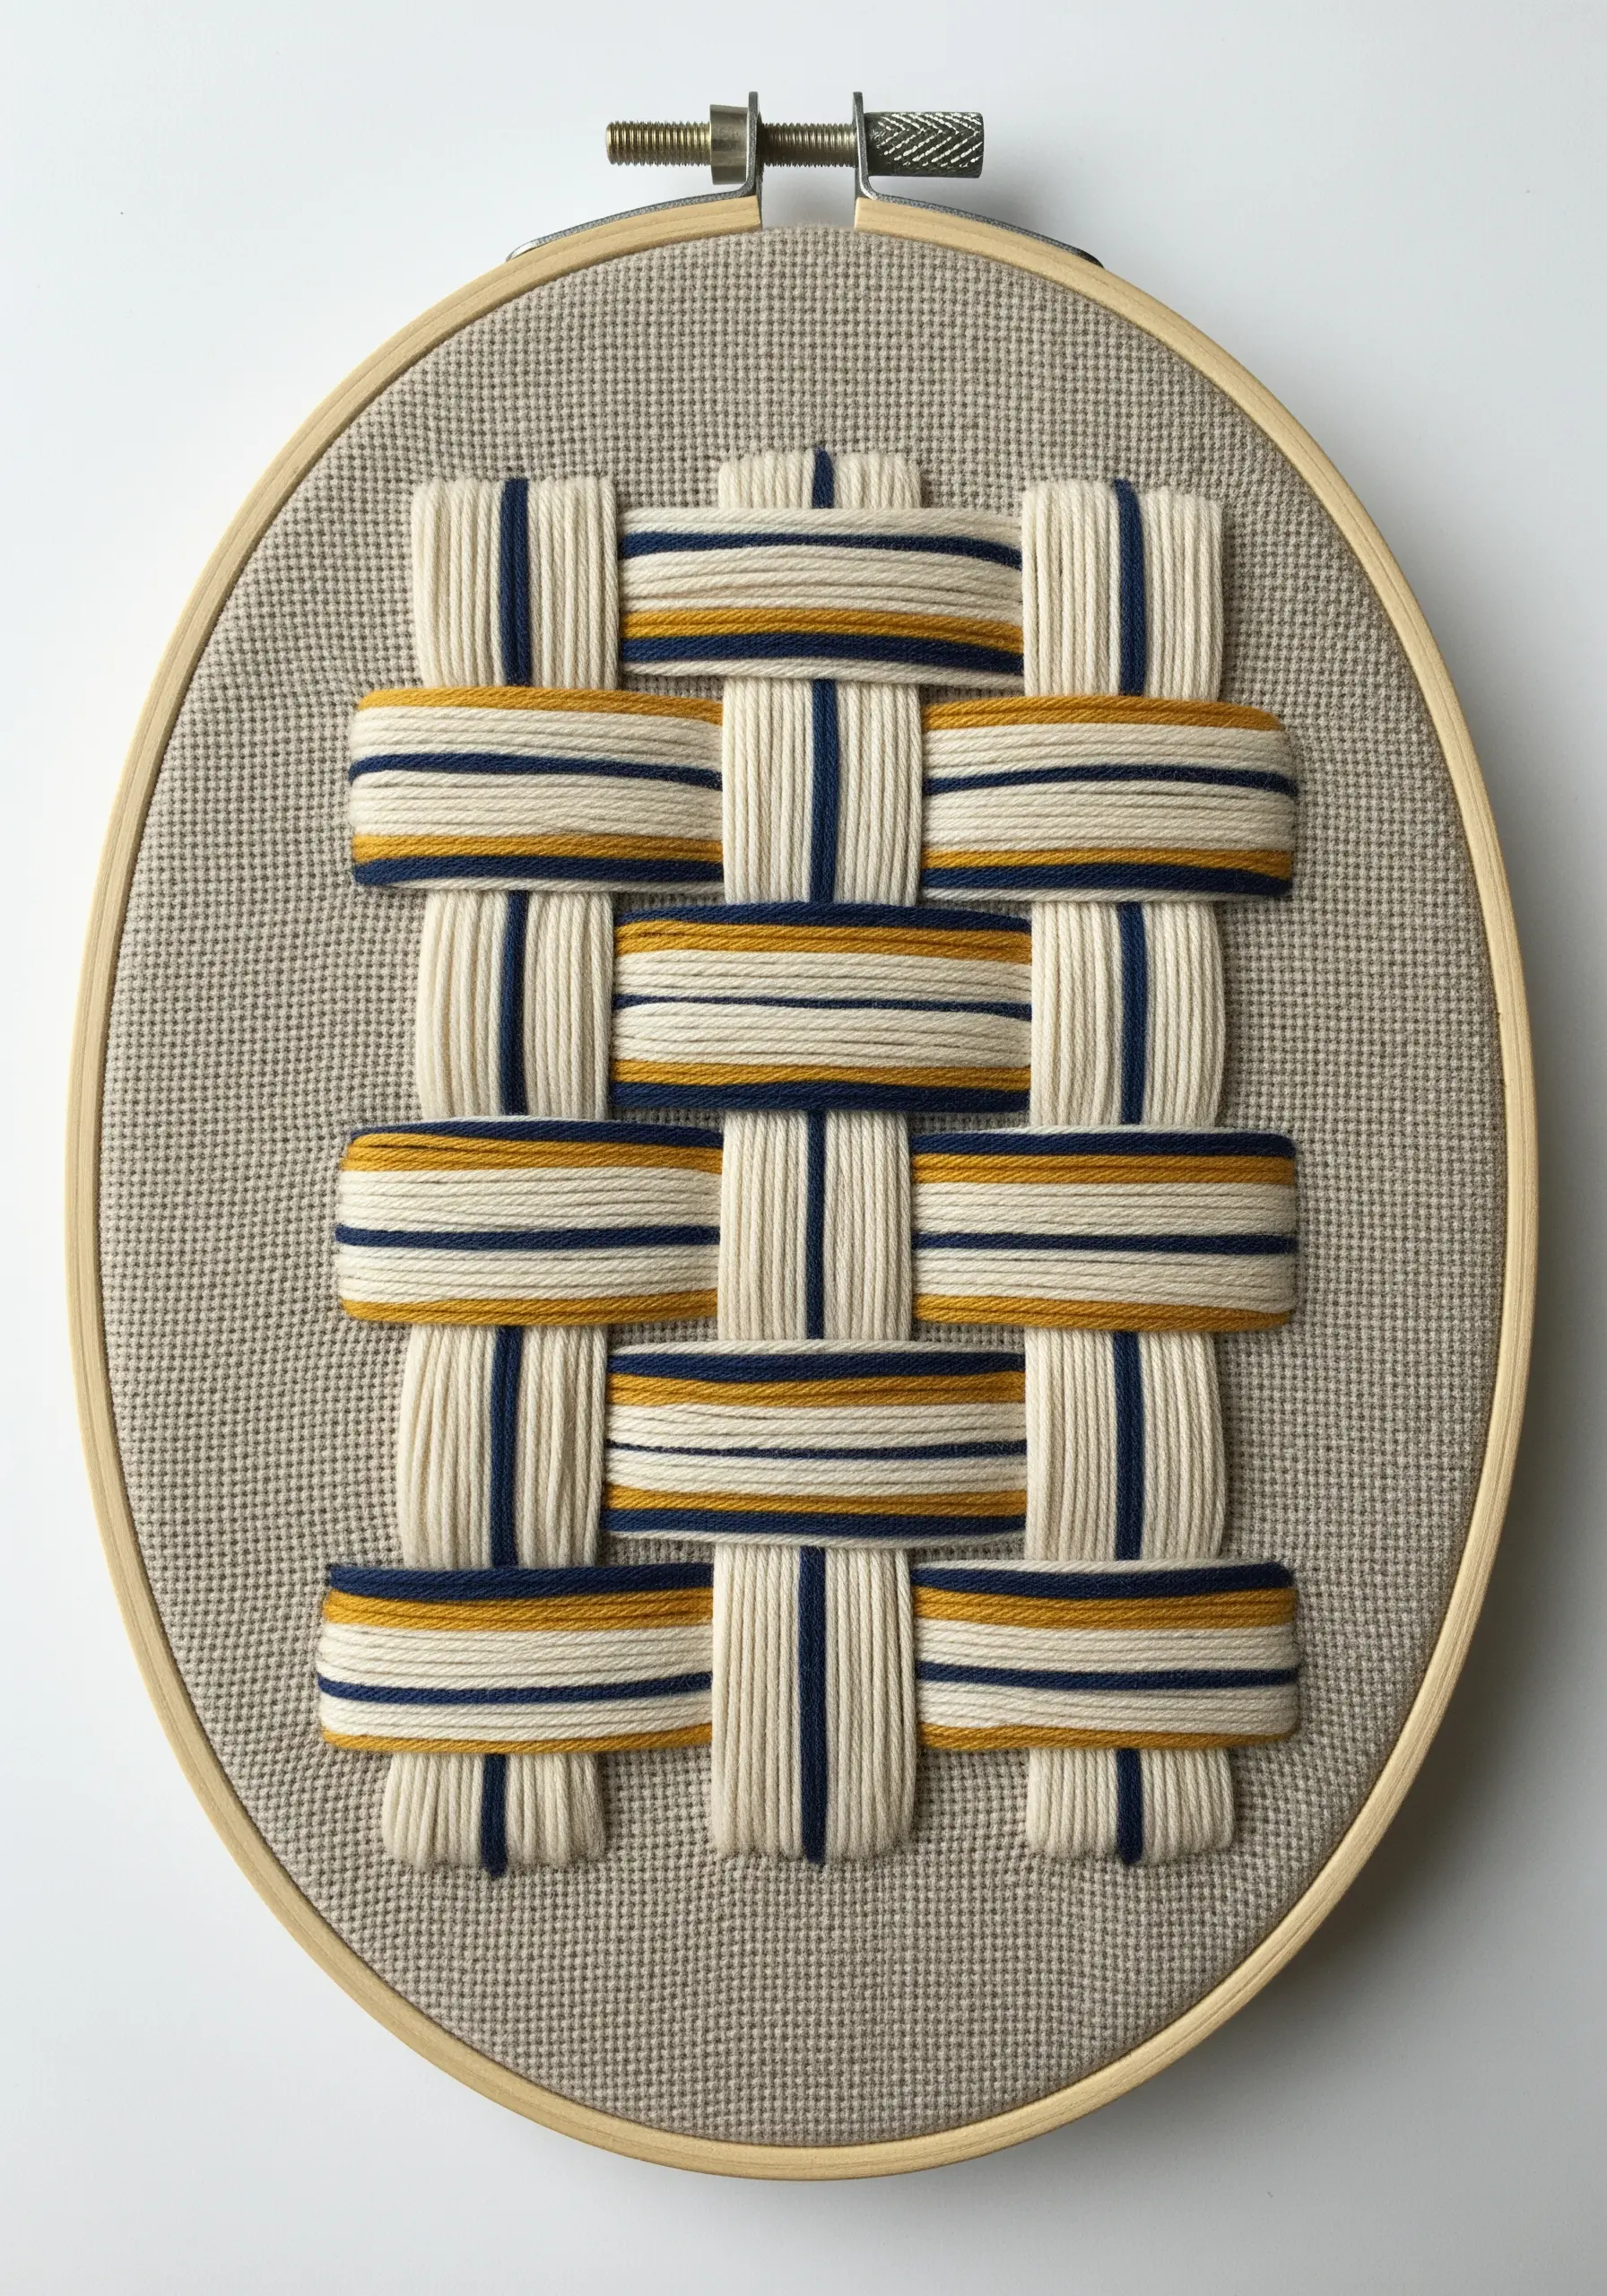
Achieve the look of woven fabric without a loom using a simple wrapping technique.
First, create the vertical ‘warp’ threads by making long straight stitches across your hoop. Use a thick yarn or multiple strands of floss for this.
Then, take your horizontal ‘weft’ threads on a blunt tapestry needle and weave them over and under the warp threads.
Gently pack the weft rows together as you go to create a solid, fabric-like block with a beautiful texture.
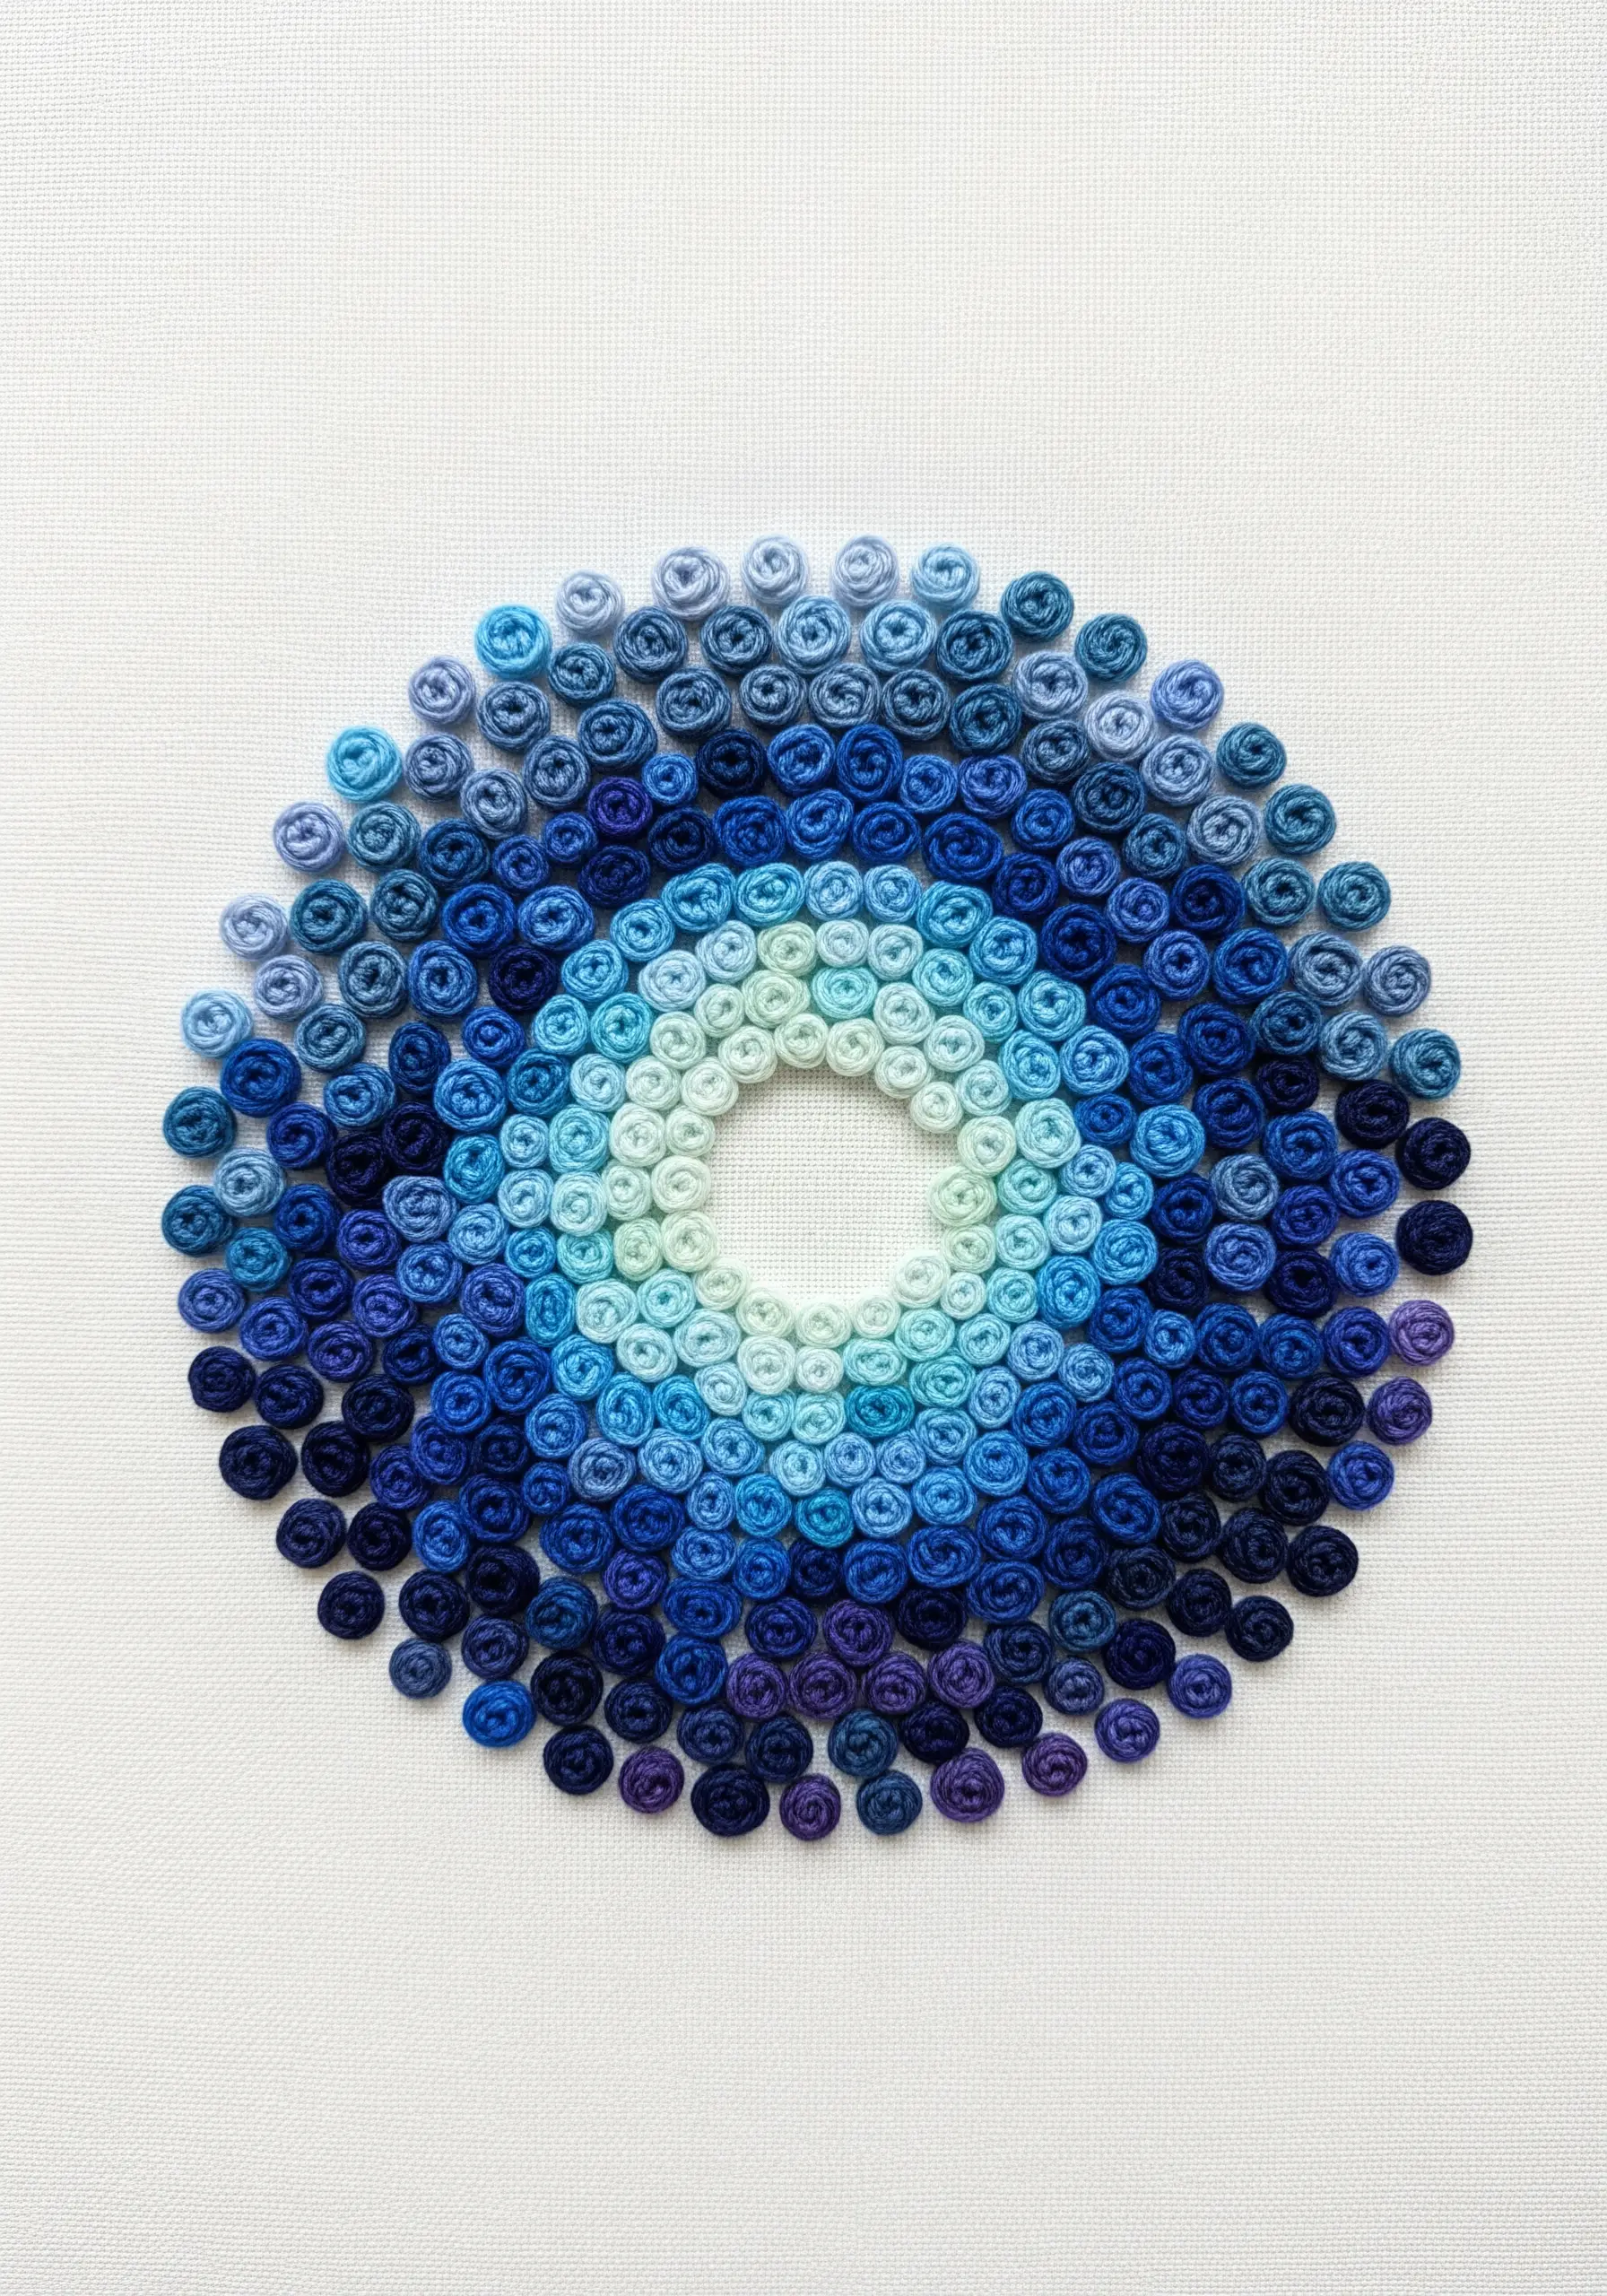
11. Monochromatic Texture Study with French Knots
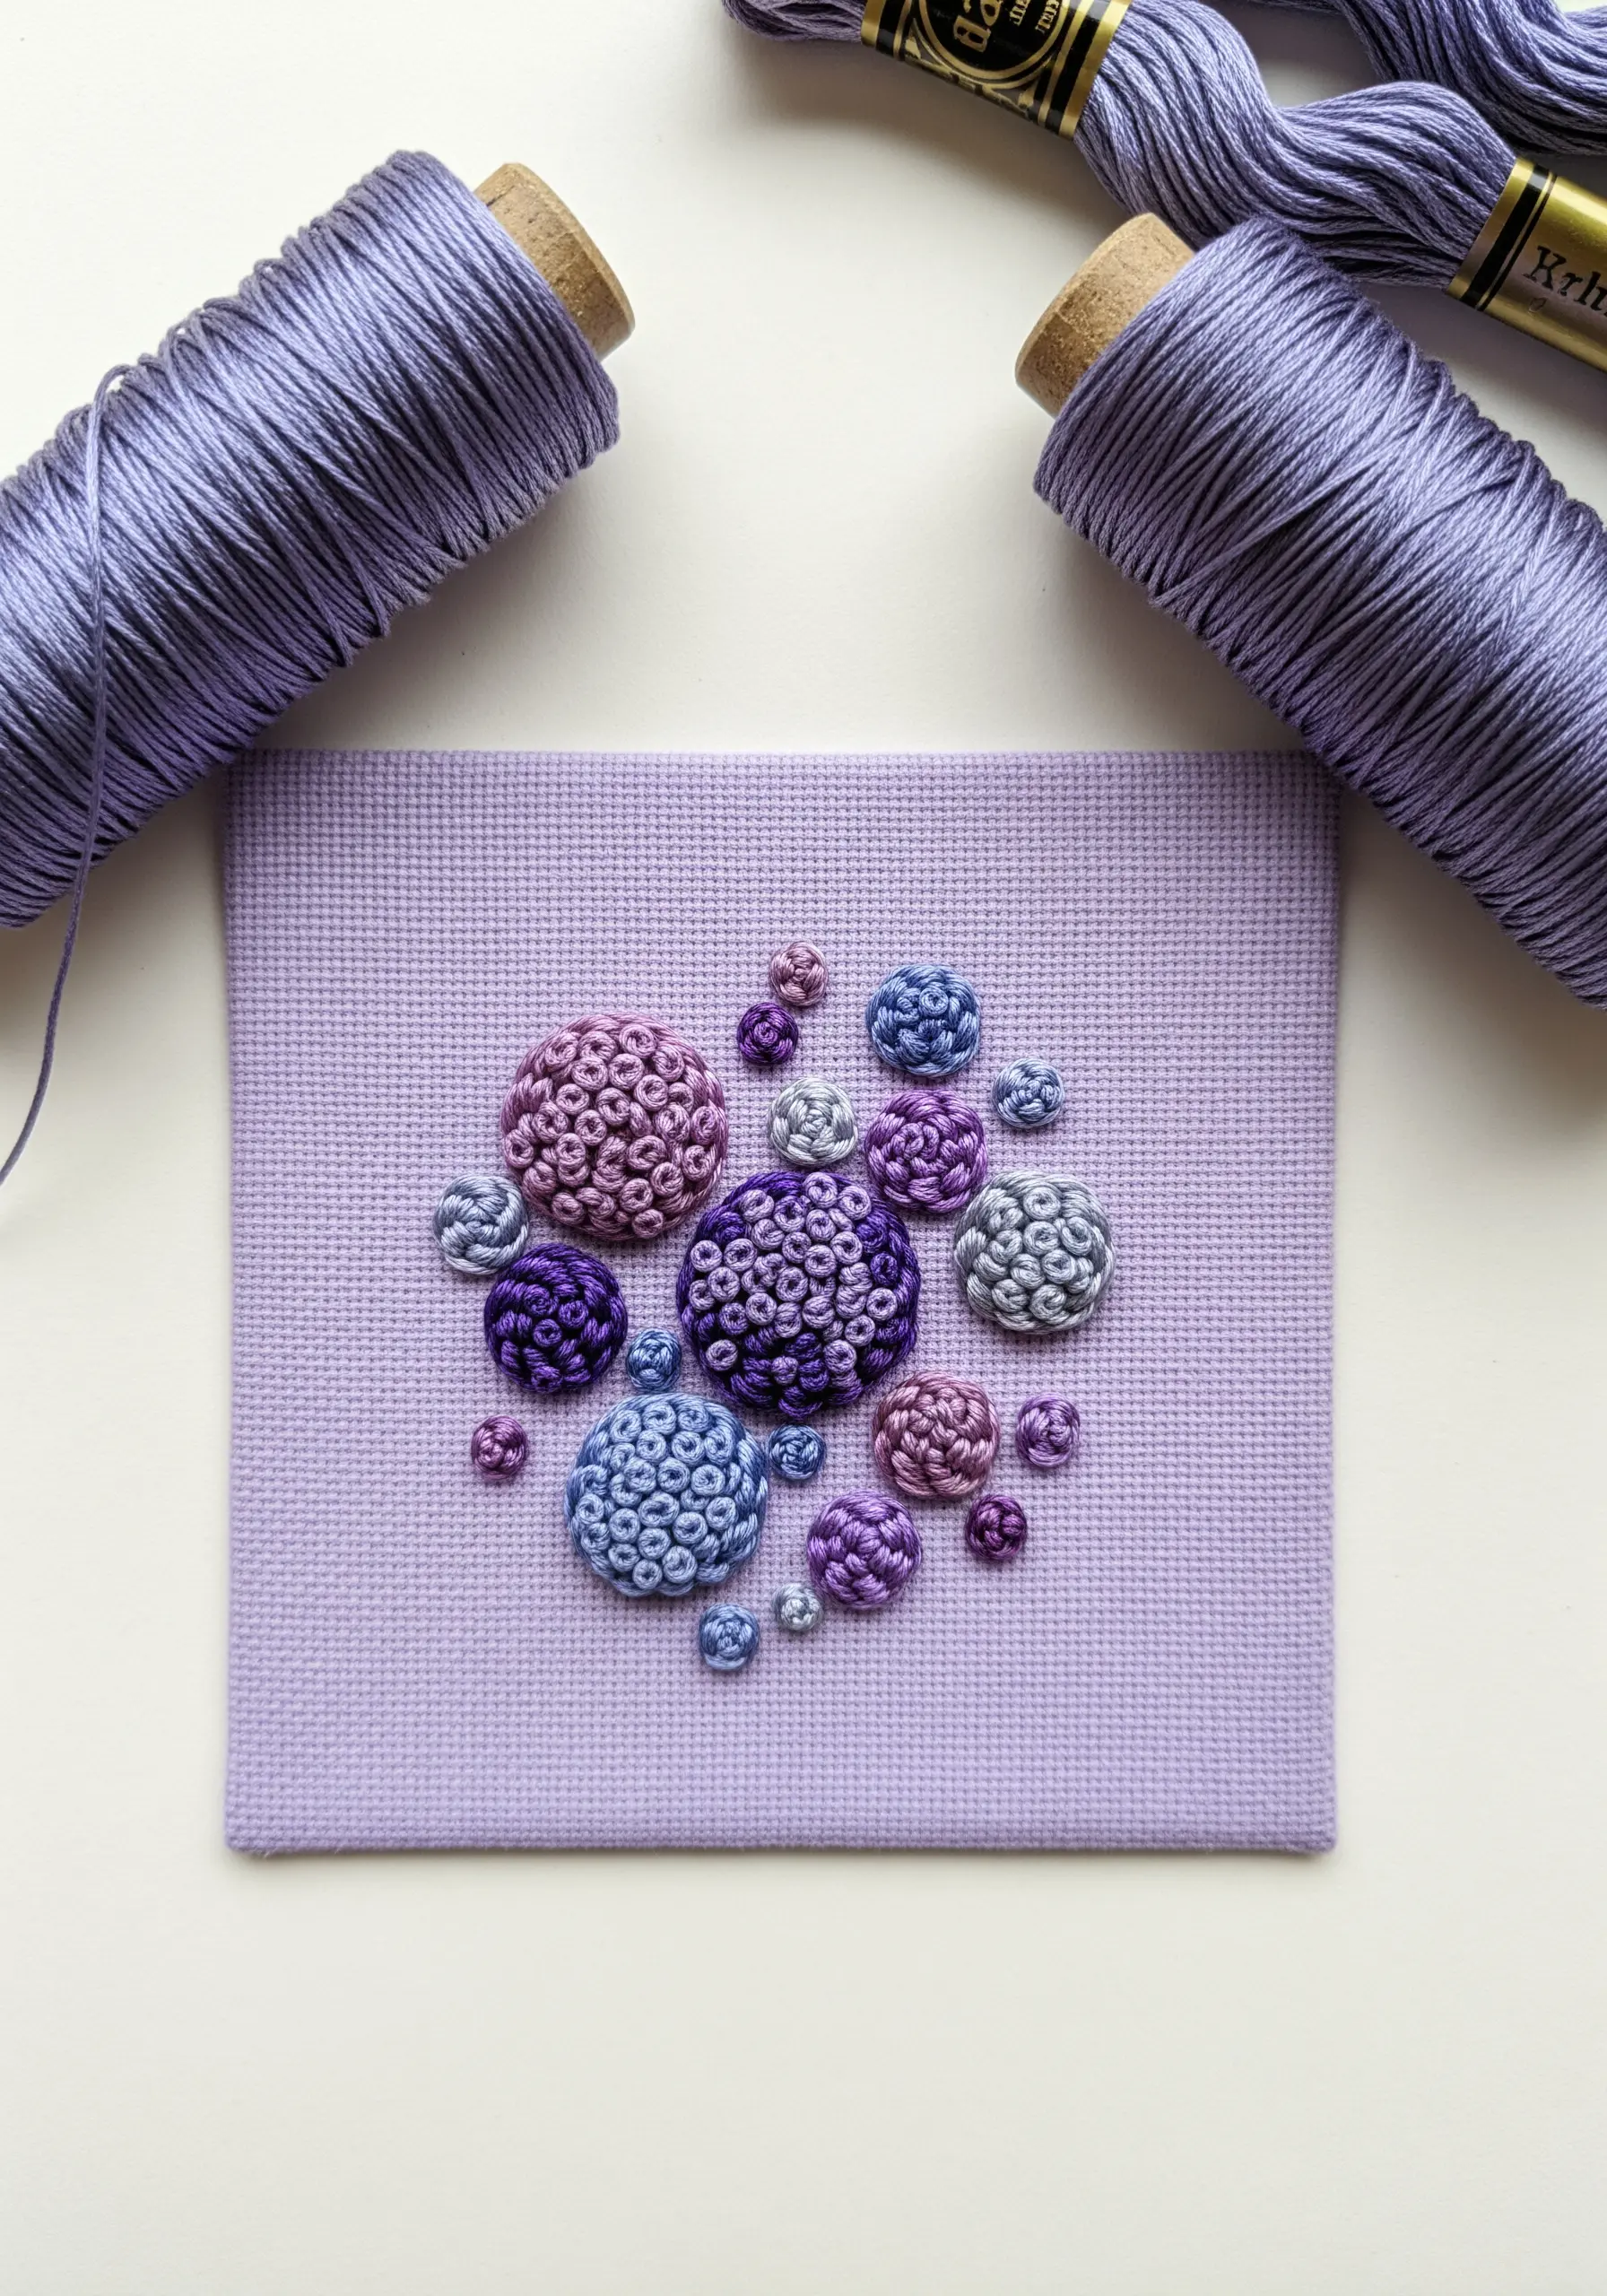
Explore the immense potential of a single stitch by dedicating an entire piece to it.
These textured circles are filled entirely with French knots, but the variation in color and size creates incredible depth.
Work within a monochromatic palette—here, shades of purple and blue—to maintain a cohesive, sophisticated feel.
Create smaller, tighter knots by wrapping the thread around the needle just once, and larger, fluffier knots by wrapping it twice.
12. Sculpting with Thread: The Floating Wave
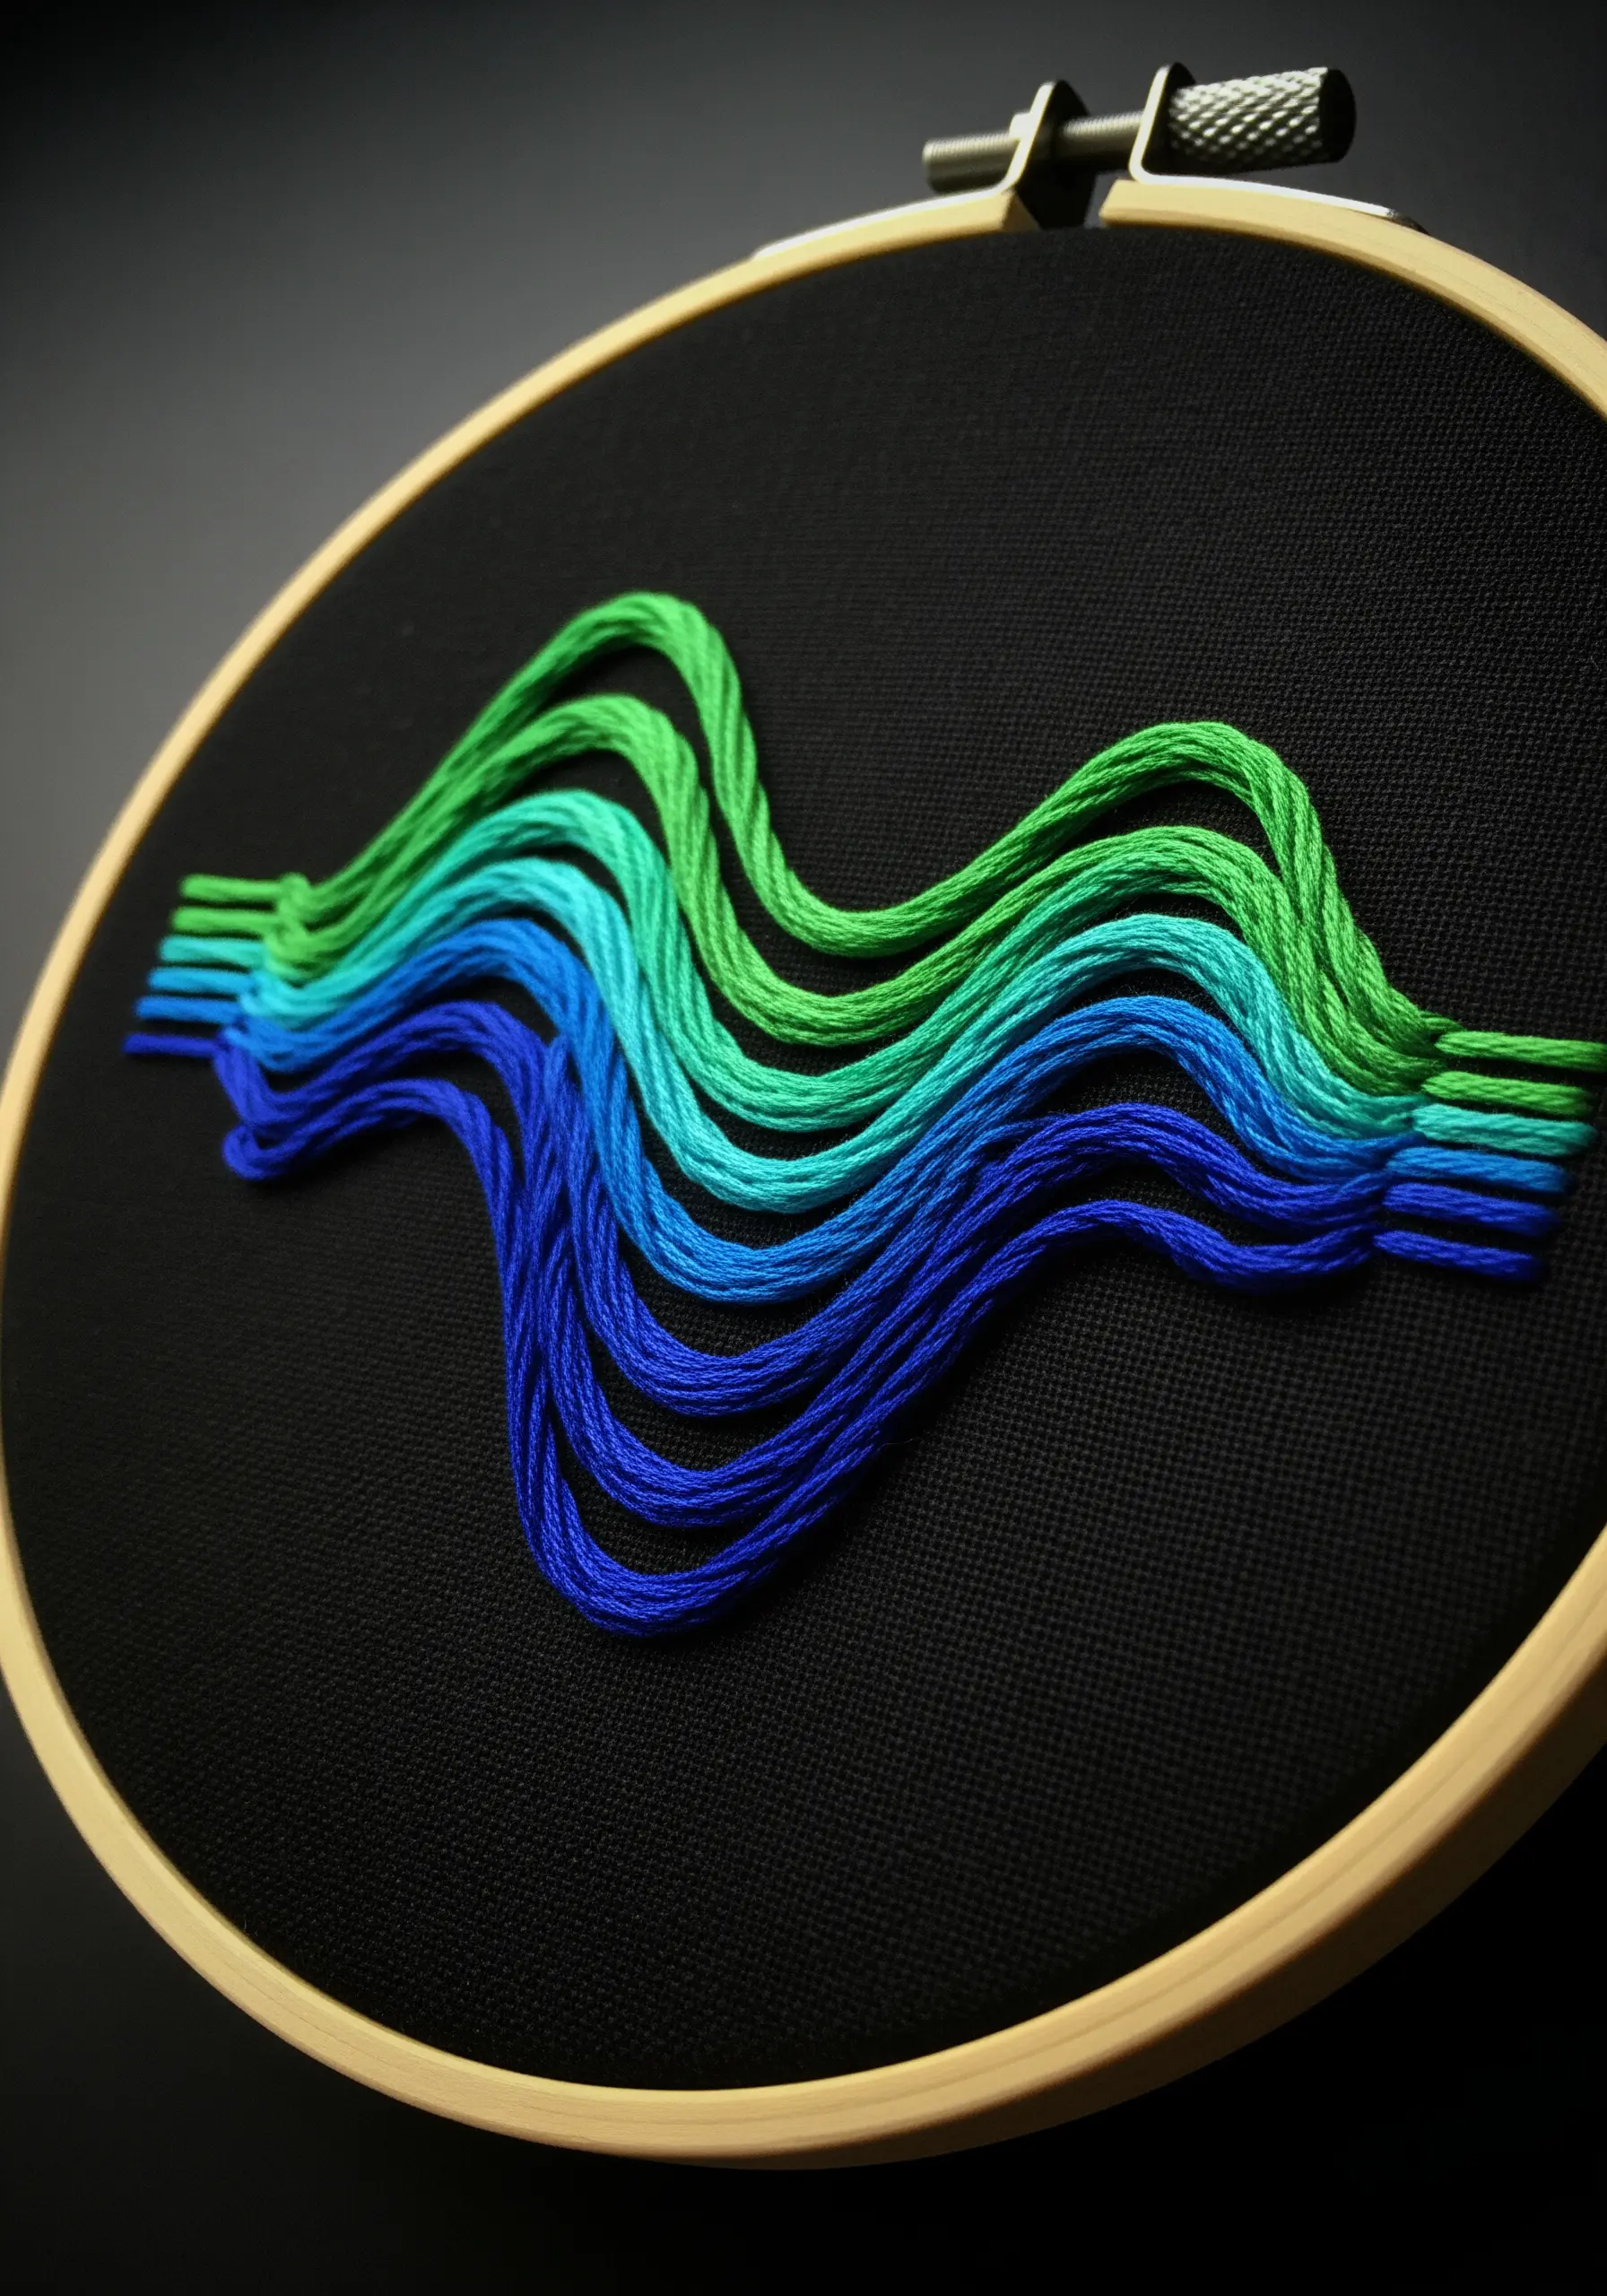
This advanced-looking piece relies on a simple trick: the threads are only anchored at the very top and bottom, allowing them to float in the middle.
Plan your gradient and stitch all the top anchor points in a straight line. Let the threads hang loose, then gently shape them into a wave before stitching the bottom anchor points.
Use a full six strands of floss for each line to give it enough volume and weight to hold its shape. The black fabric background creates the illusion of depth.
13. Bold Color Blocking with Graphic Florals
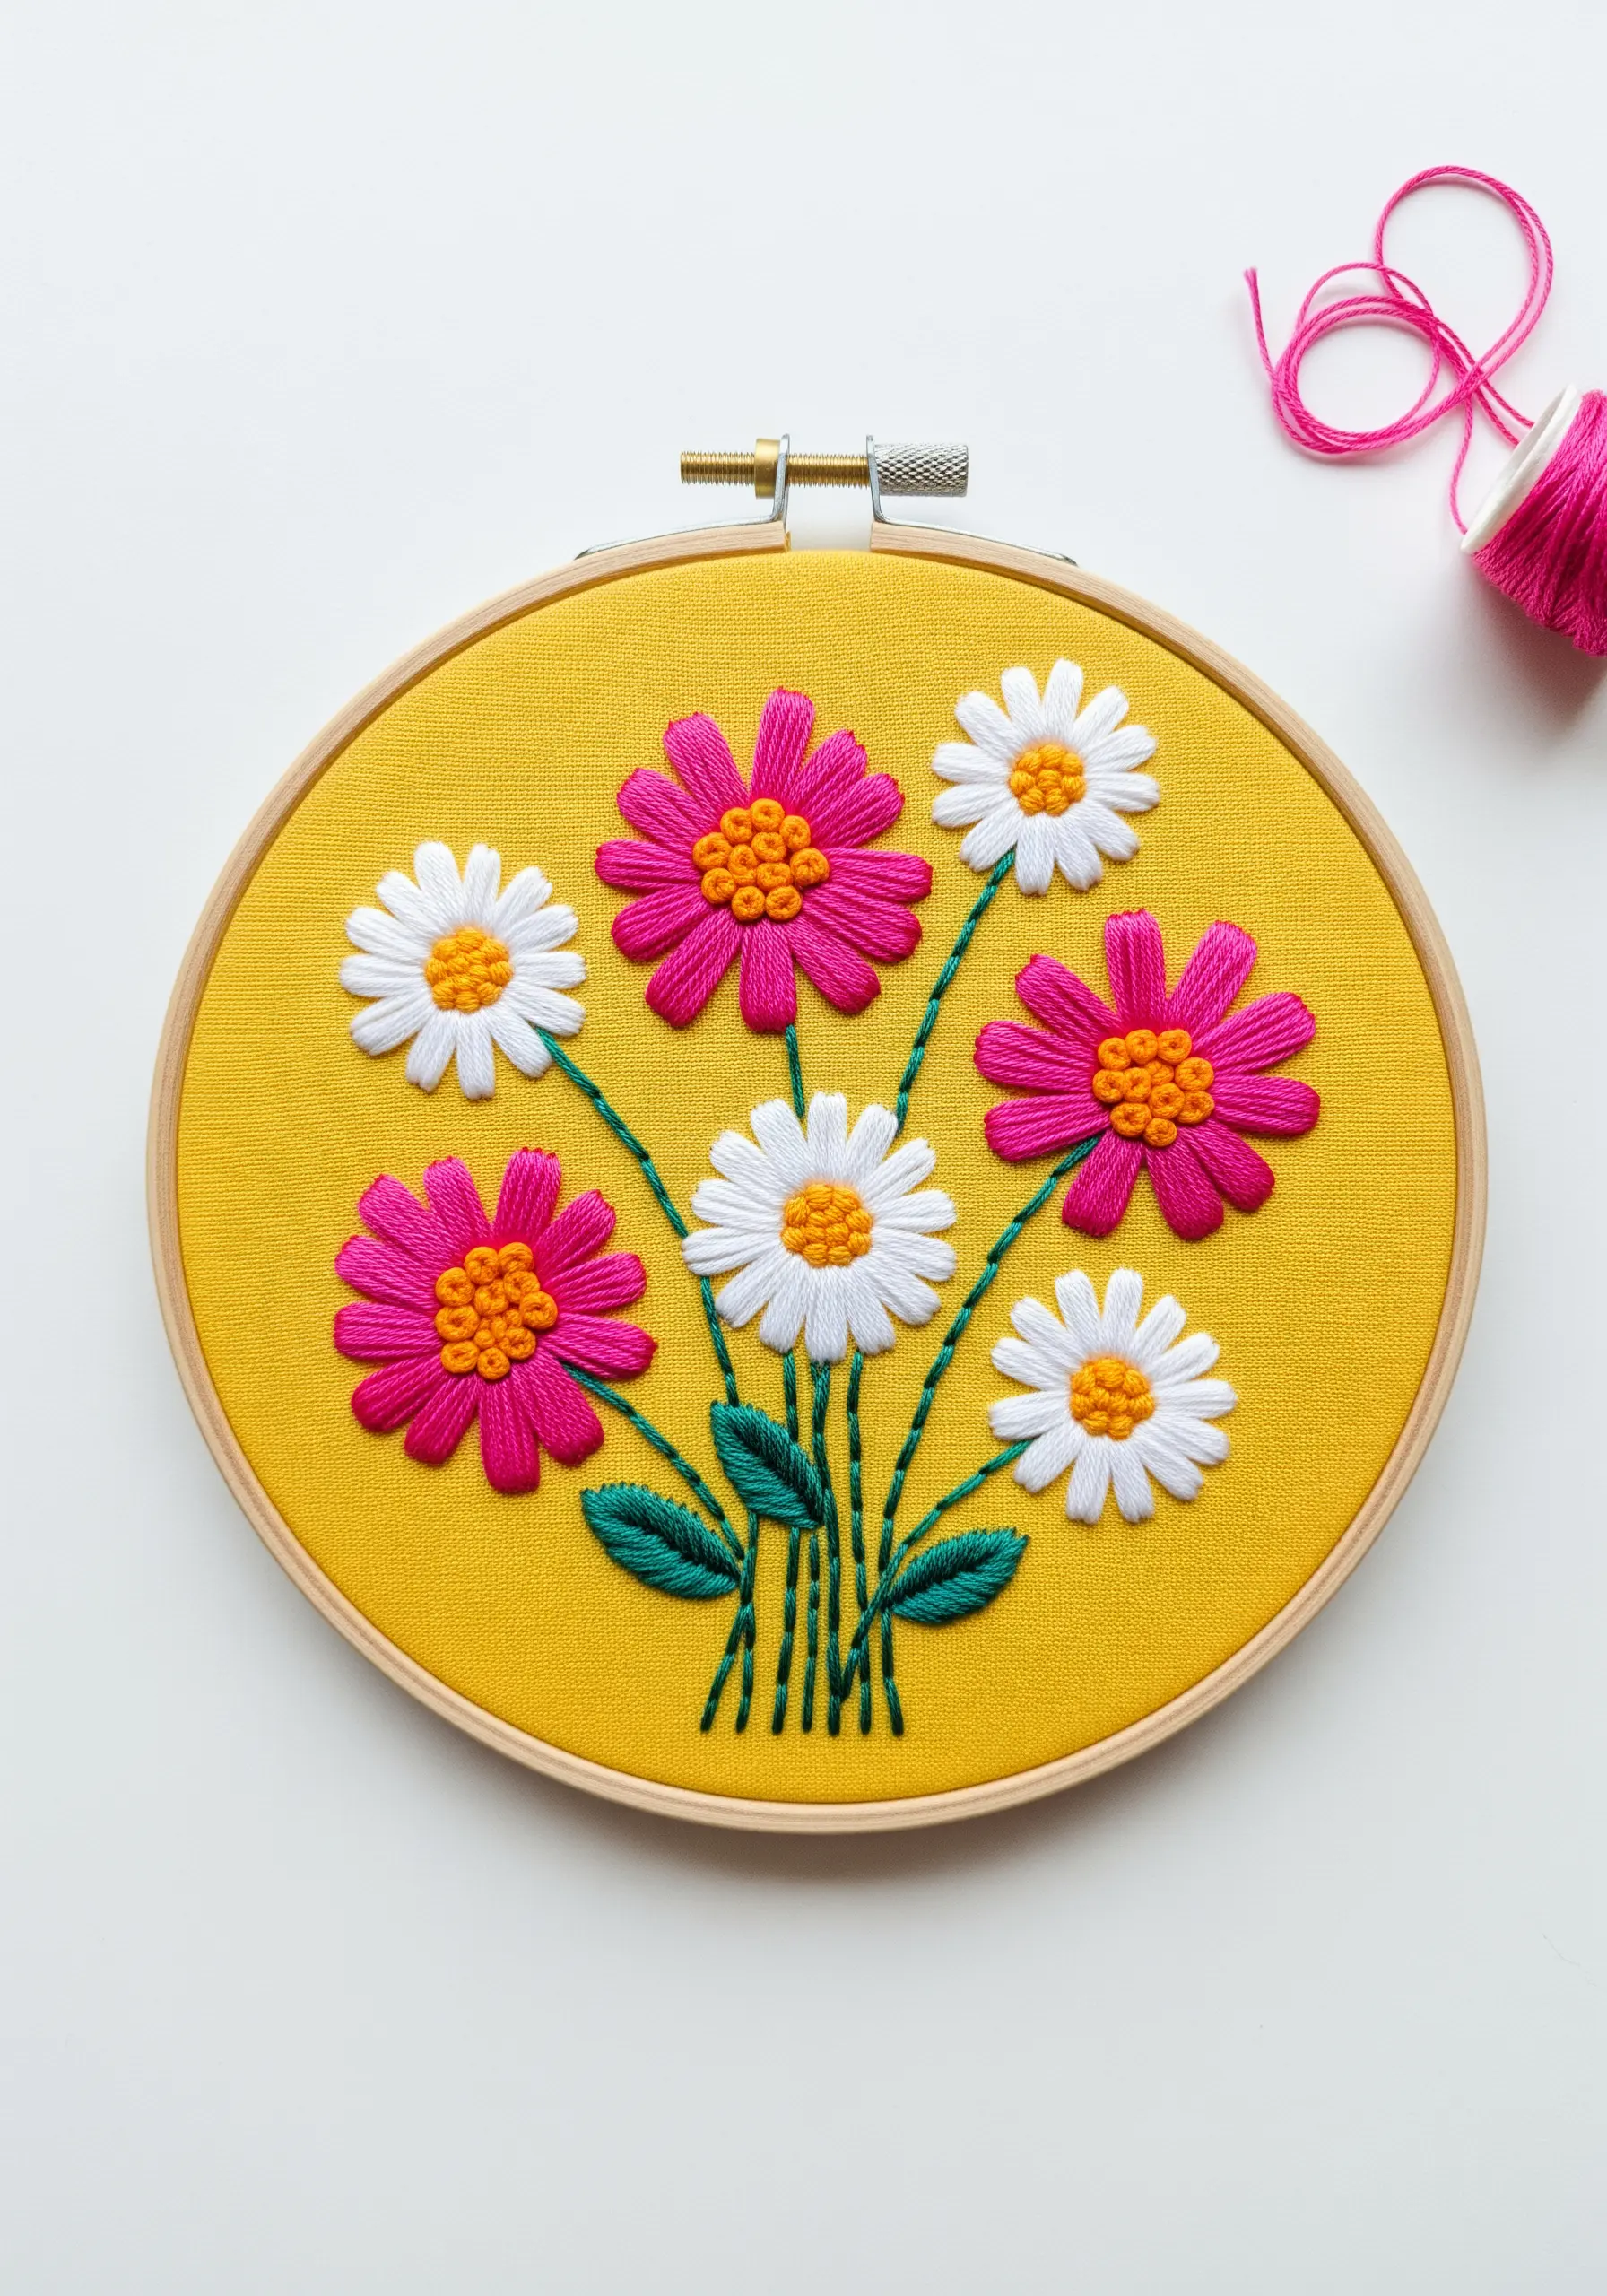
This design’s fresh, modern feel comes from its fearless use of high-contrast, saturated colors.
The daisy petals are formed with a simple lazy daisy stitch, but they are stitched close together and pulled taut for a clean, graphic shape.
For the flower centers, use a vibrant, contrasting color to fill the circle with tightly packed French knots, creating a raised, bobbled texture.
Placing these bold florals against an equally bold yellow background makes the entire piece vibrate with energy.
14. Celestial Geometry with Padded Satin Stitch

Elevate simple shapes by giving them a three-dimensional quality with padded satin stitch.
To do this, first fill your shape—in this case, the squares—with a base layer of small seed stitches.
Then, cover this padding completely with uniform, horizontal satin stitches. The underlying stitches will push the satin stitch up, creating a soft, raised effect.
Contrast these smooth, solid shapes with delicate, spiky starbursts made from metallic thread for a celestial touch.
15. Echoed Outlines for Graphic Definition
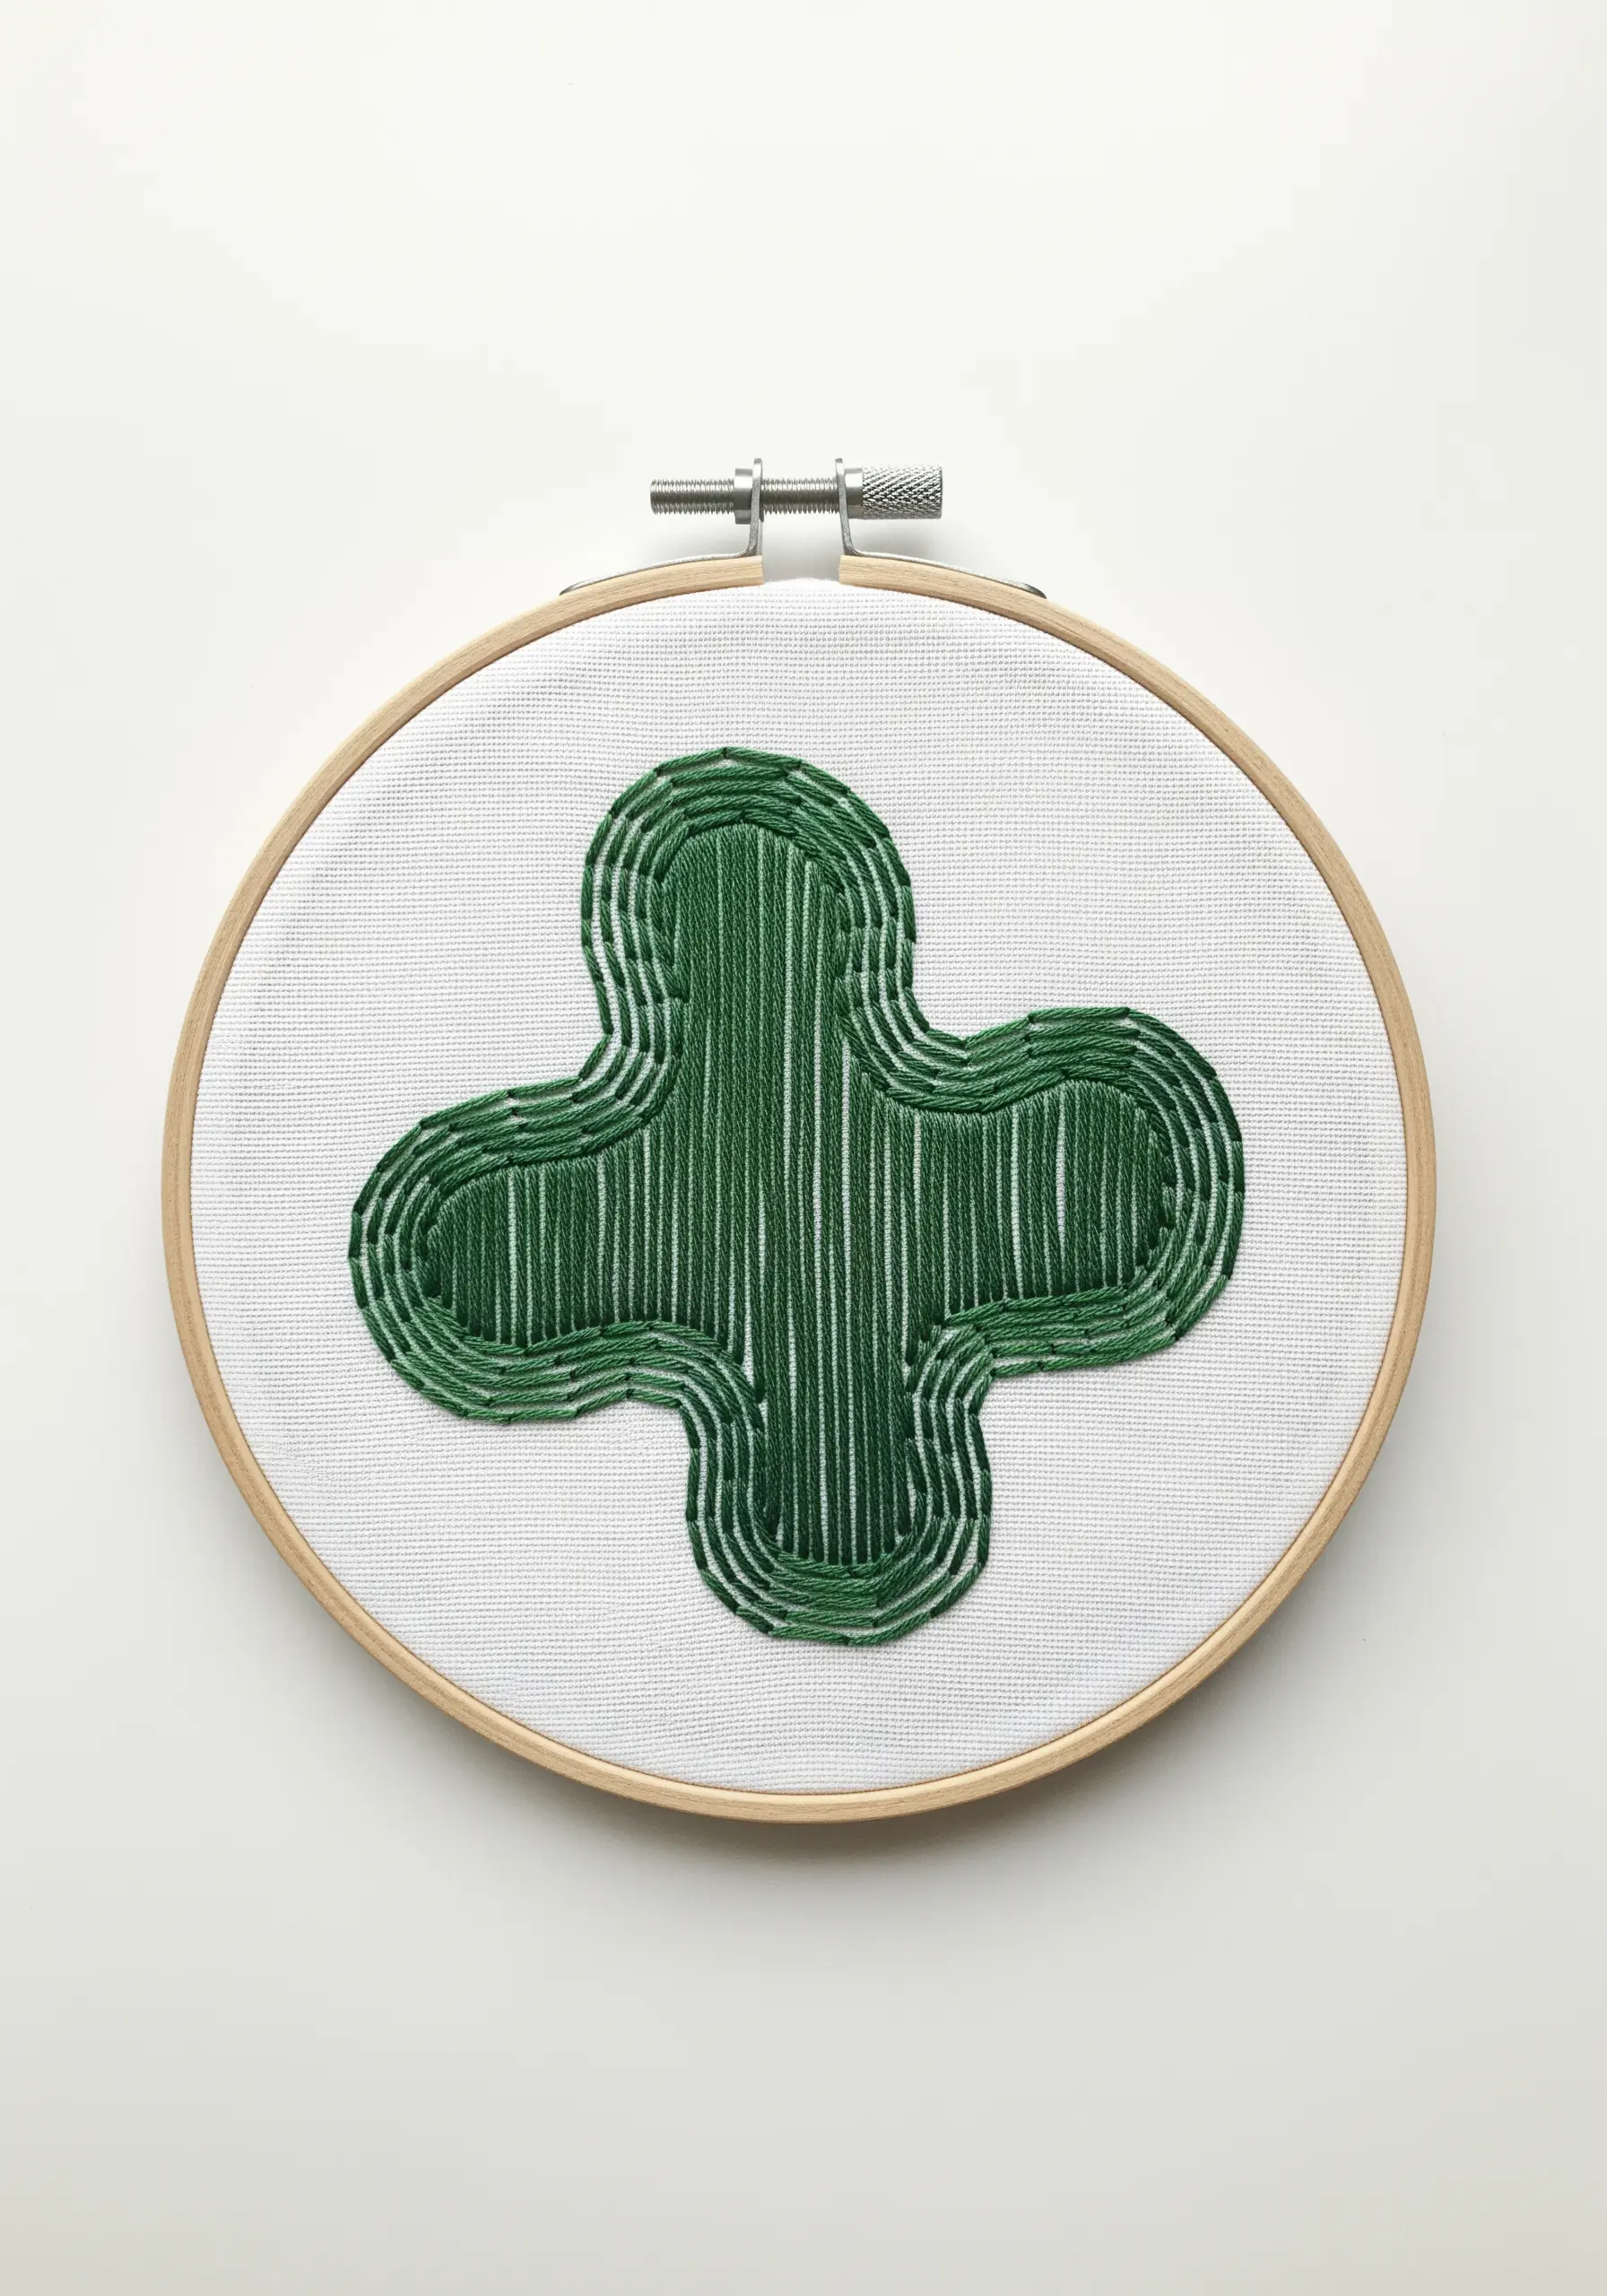
Give any simple shape immense power and rhythm by using echoed outlines and negative space.
First, fill the central shape with simple vertical straight stitches. The real artistry is in the outlines.
Using a clean backstitch or stem stitch, trace around your shape, leaving a consistent, small gap of unstitched fabric between each concentric line.
This technique creates a visual vibration and turns a static form into a dynamic one.
16. Weaving a Seascape with Thread and Yarn
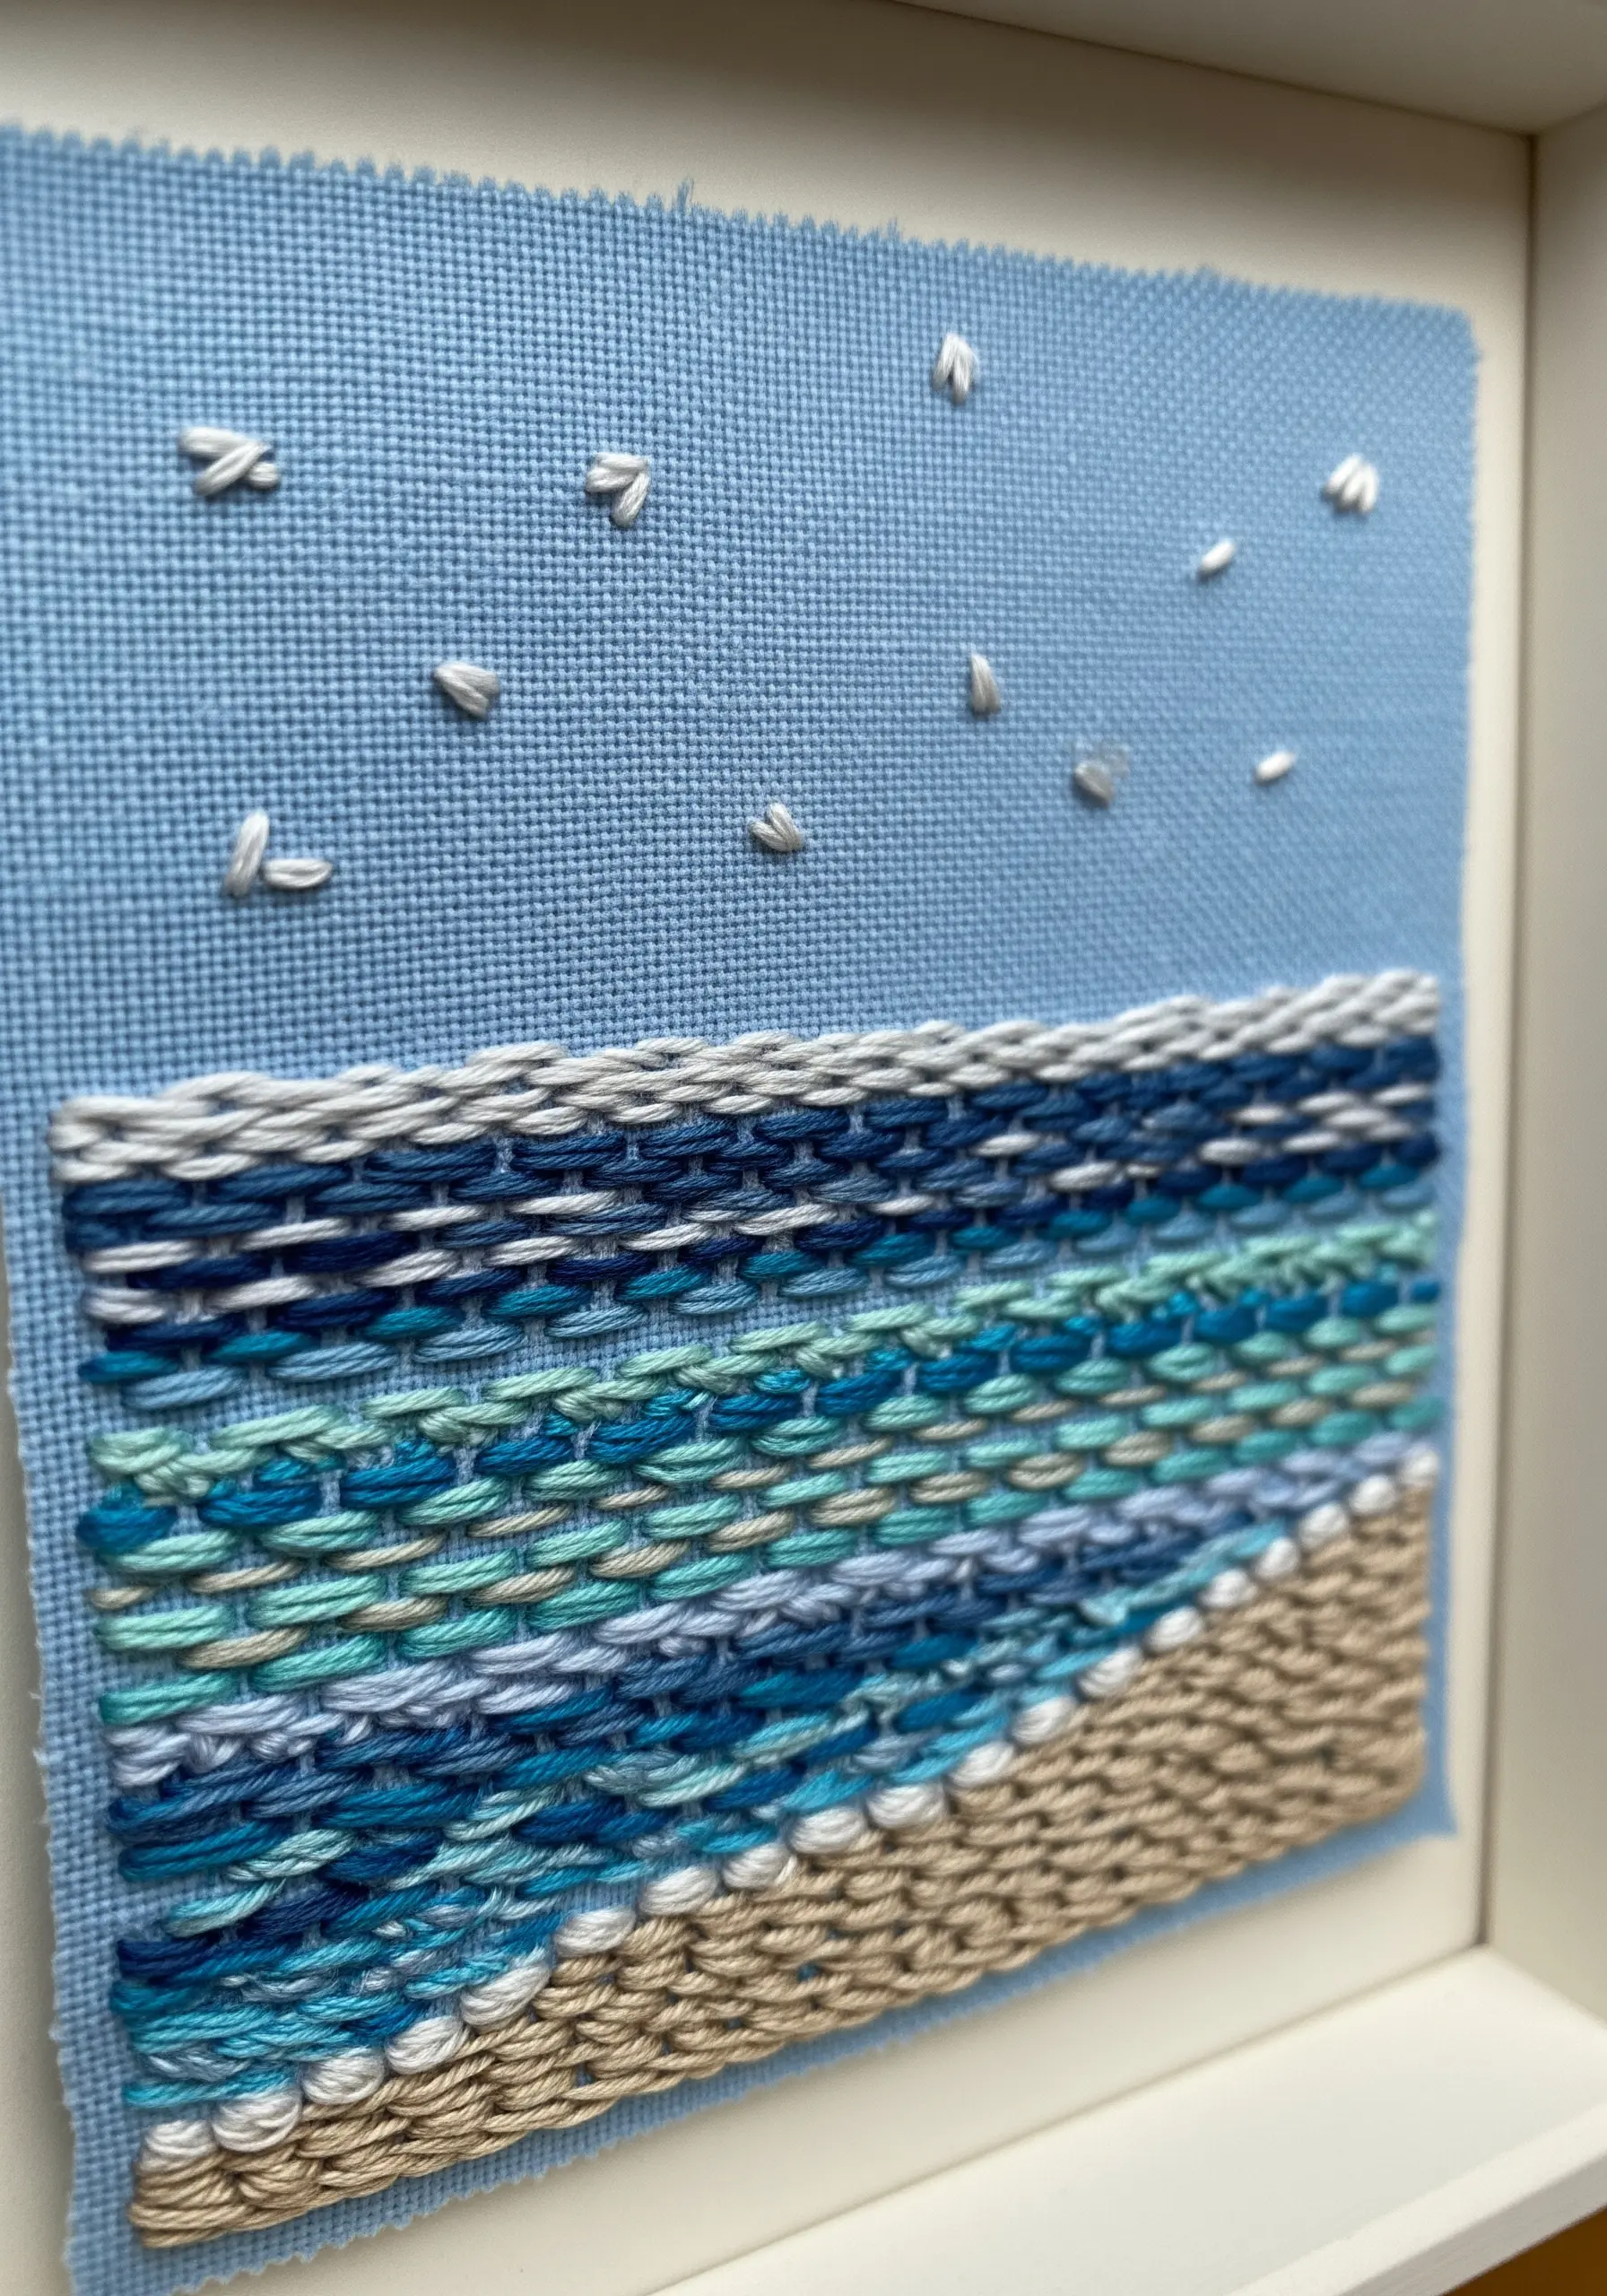
Go beyond traditional stitching and ‘paint’ a landscape by weaving directly onto your fabric.
Lay down vertical warp threads first, then use a blunt tapestry needle to weave your weft threads over and under them, row by row.
Blend different shades of blue and turquoise to create the ocean waves, and switch to a thicker, textured beige yarn for the sandy shore.
This technique turns your fabric into a miniature loom, allowing you to build color and texture in a completely new way.
17. A Quilted Effect with Directional Satin Stitch
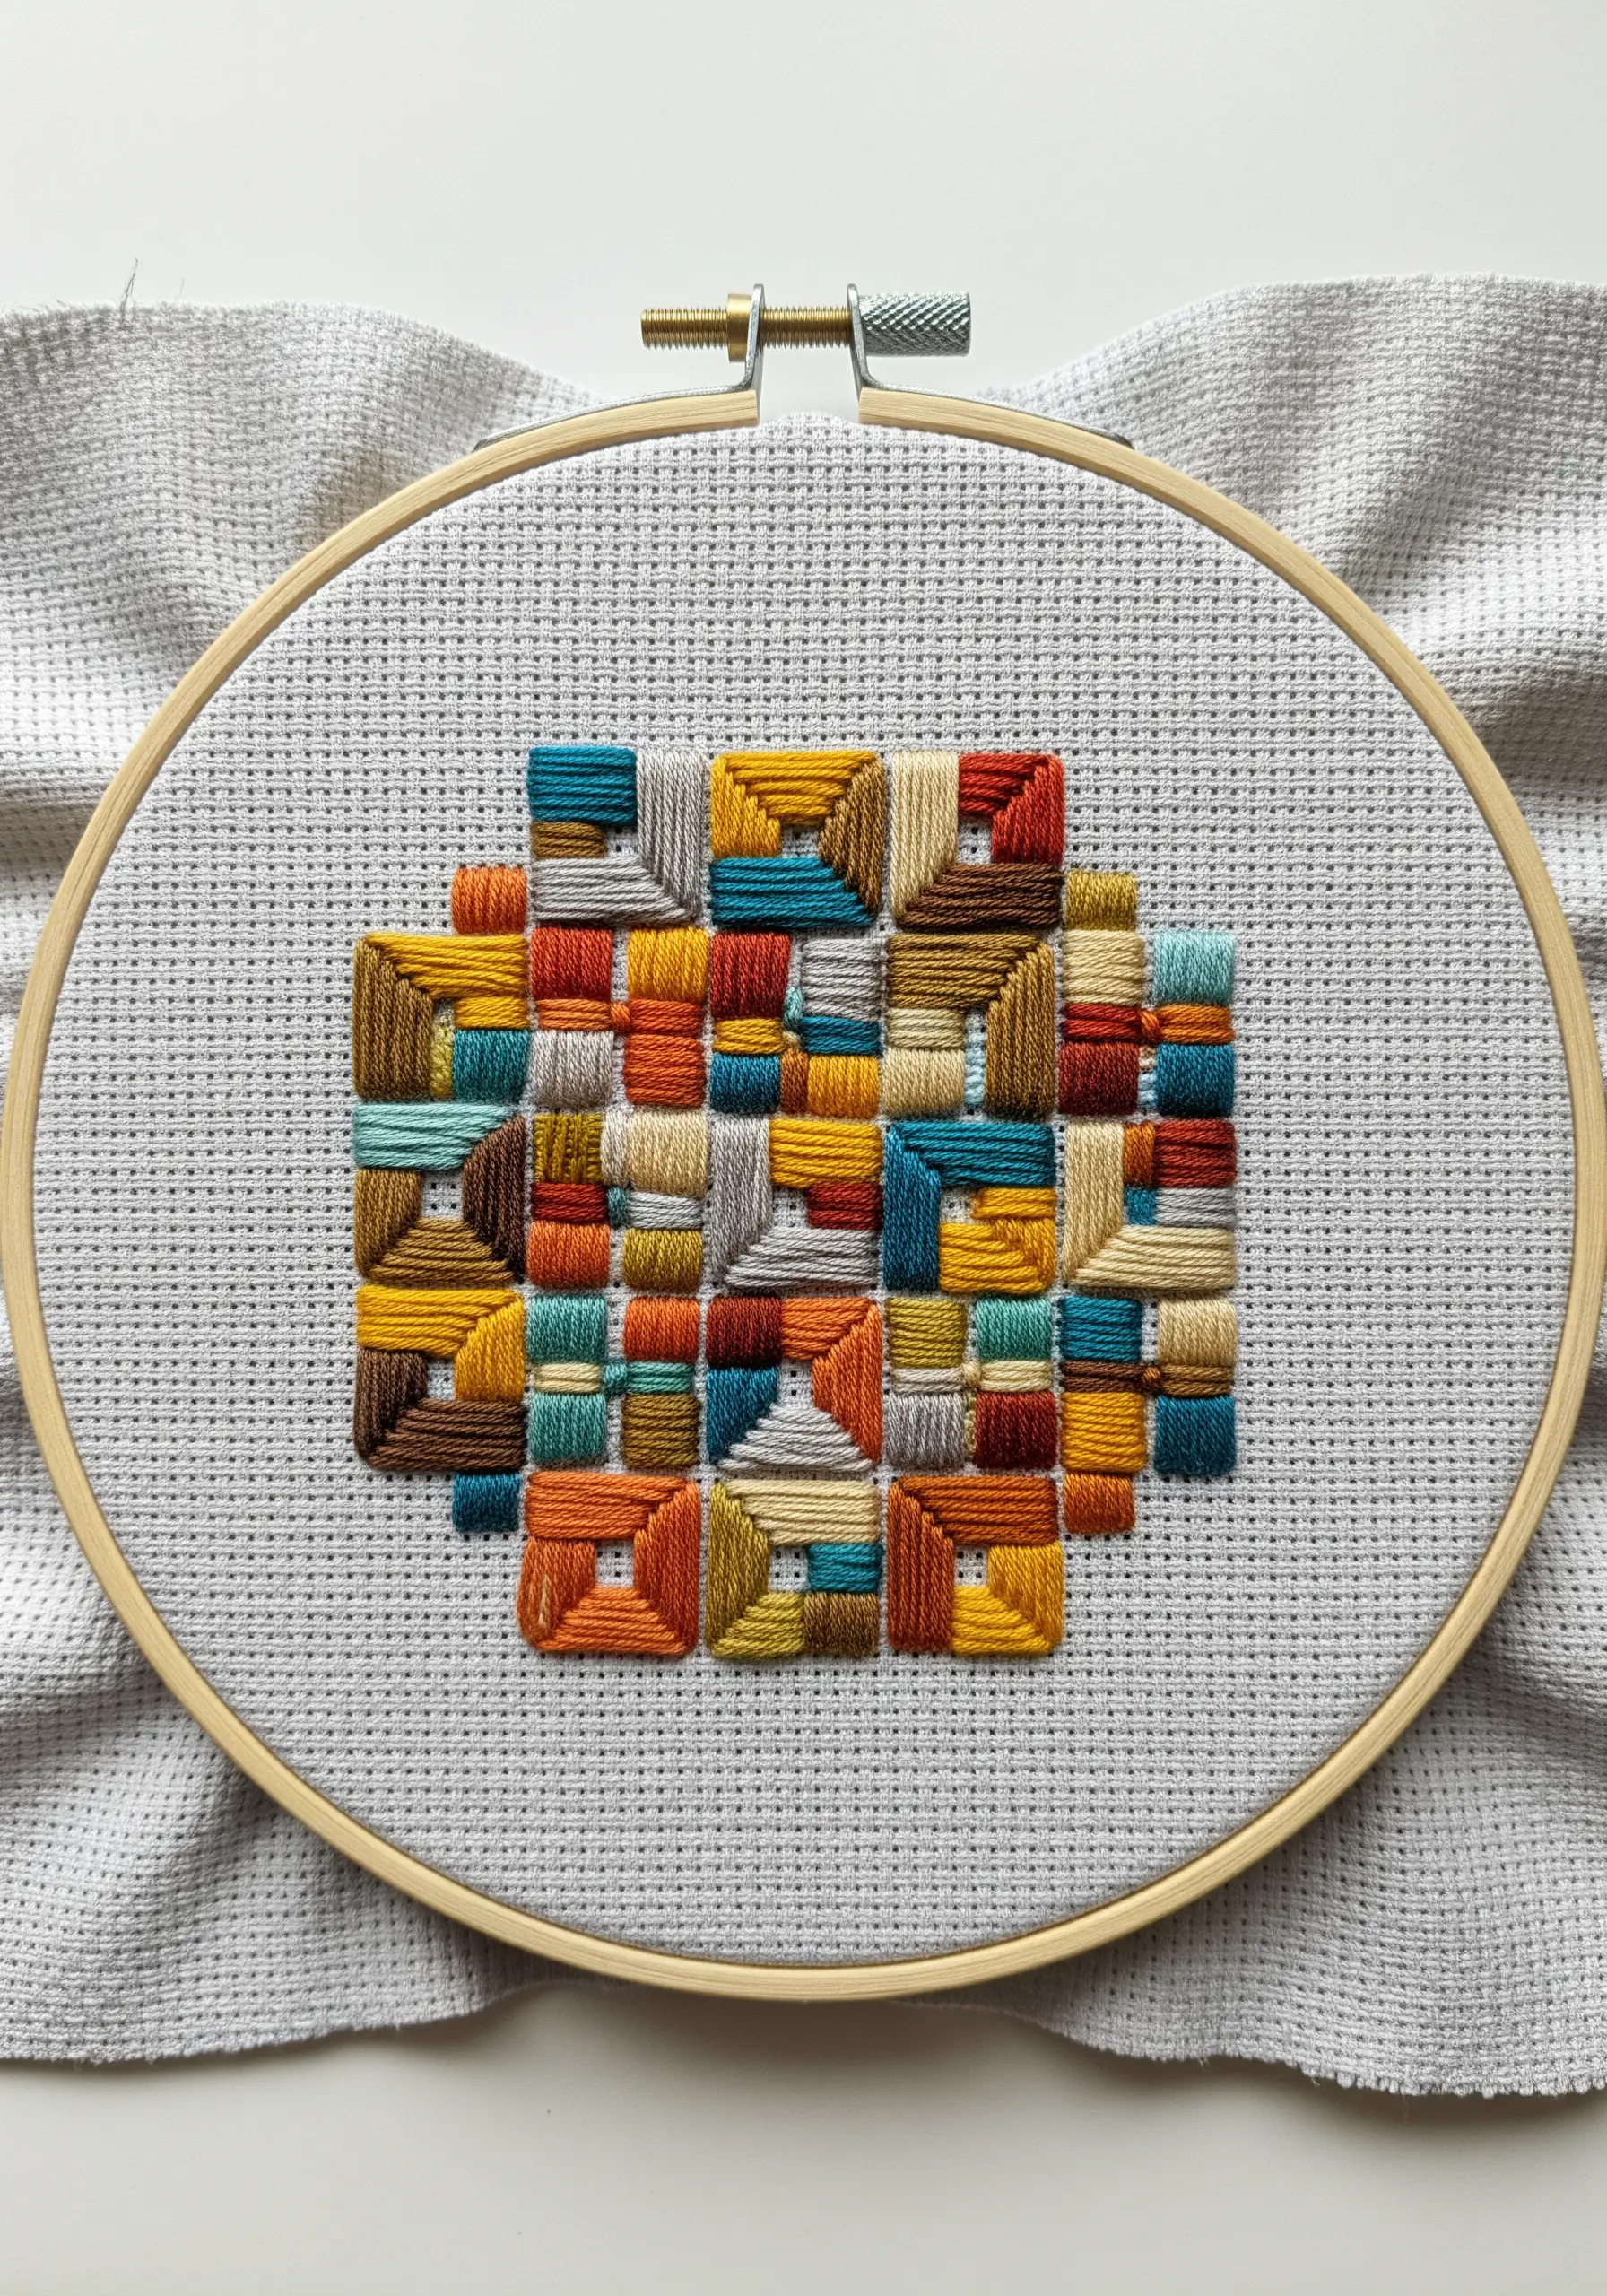
Create the illusion of a complex, quilted patchwork using only one stitch: the satin stitch.
Divide your design into a grid of small squares or geometric shapes. As you fill each shape, intentionally vary the direction of your satin stitches.
Stitch one block vertically, the one next to it horizontally, and another diagonally. This simple change causes the light to reflect differently off each block, creating a dynamic, shimmering effect that adds depth and interest.
18. Abstract Landscapes Through Textural Bands
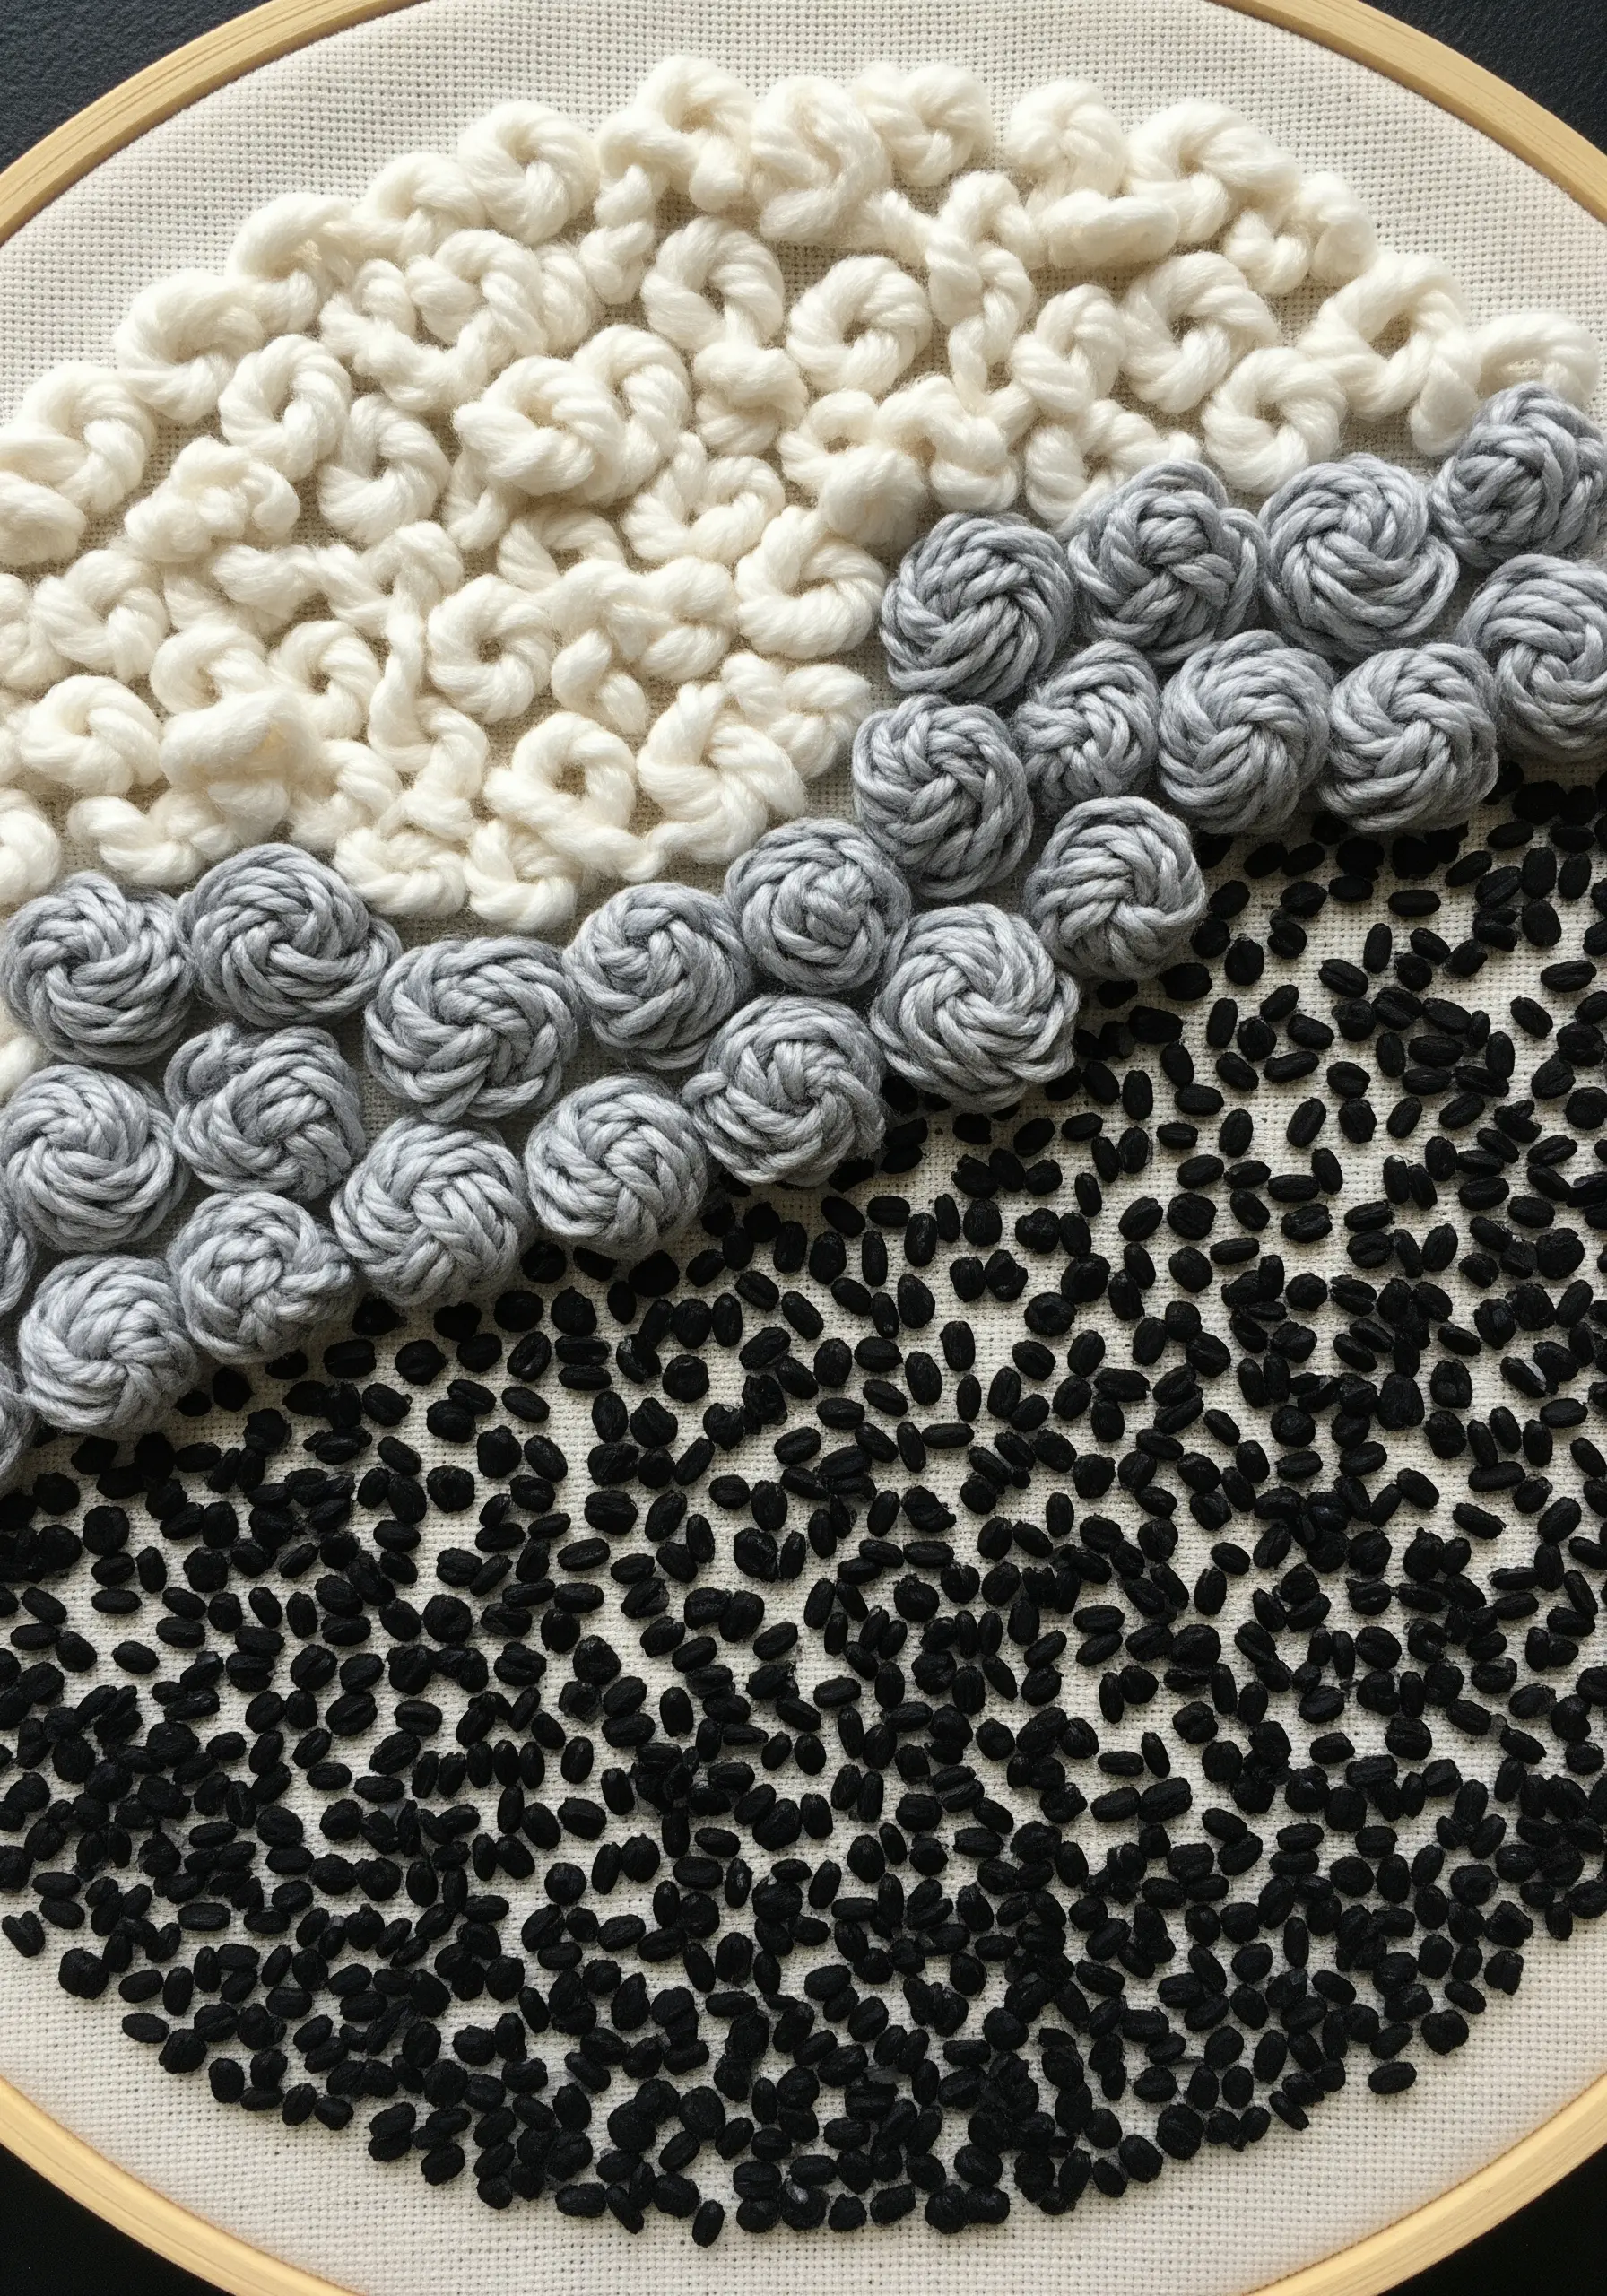
Tell a story not with shapes, but with texture alone. Divide your hoop into three distinct horizontal bands.
Fill the top band with loose, fluffy colonial knots or French knots to evoke clouds or sea foam.
Use tightly packed woven wheel stitches in the middle band for a dense, pebbled texture.
Fill the bottom with scattered seed stitches to create a sparse, sandy feel. By keeping the color palette neutral, you allow the different textures to become the focus of the piece.
19. Drawing on Air with Tulle and Backstitch
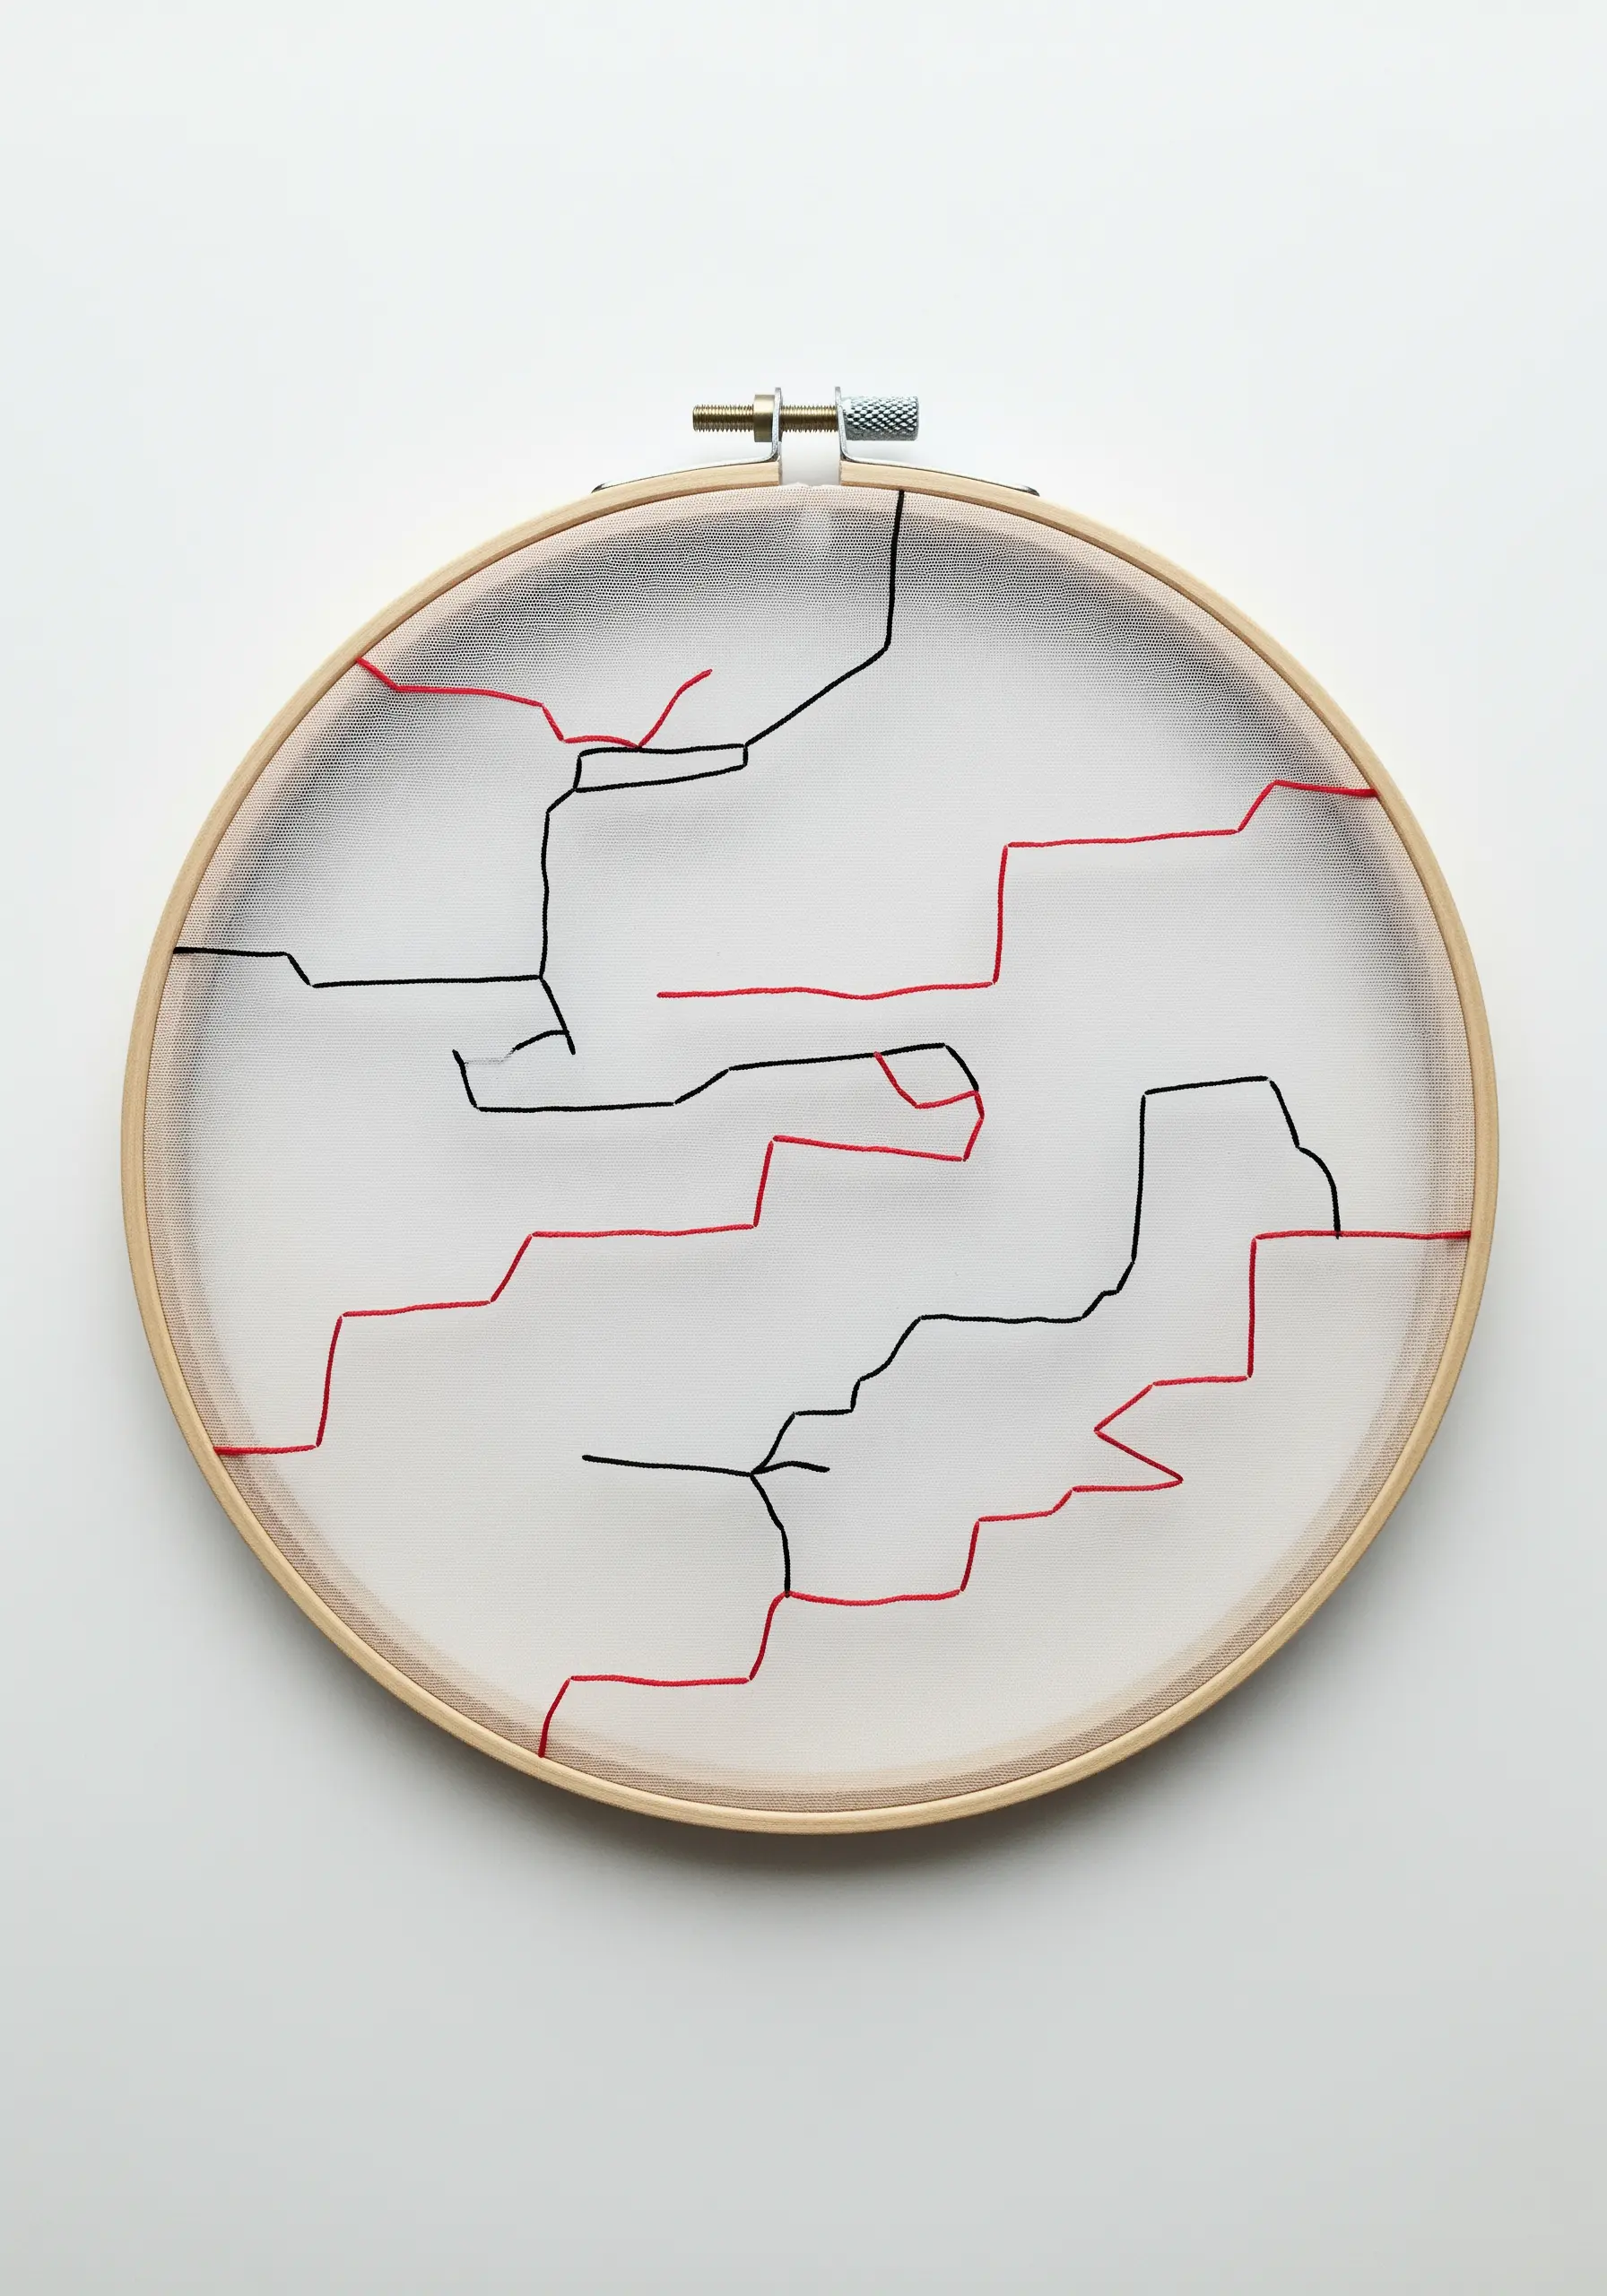
Create the stunning illusion of lines floating in mid-air by using sheer tulle or organza as your ‘canvas’.
A simple backstitch with just two strands of floss provides a clean, graphic line that stands out against the transparent background.
The key to success is using a water-soluble stabilizer behind the tulle while you stitch; it provides support and prevents puckering. Once you’re done, gently rinse it away to reveal your floating artwork. This is a perfect example of how powerful negative space embroidery techniques can be.
20. Illustrating Concepts with Color and Texture
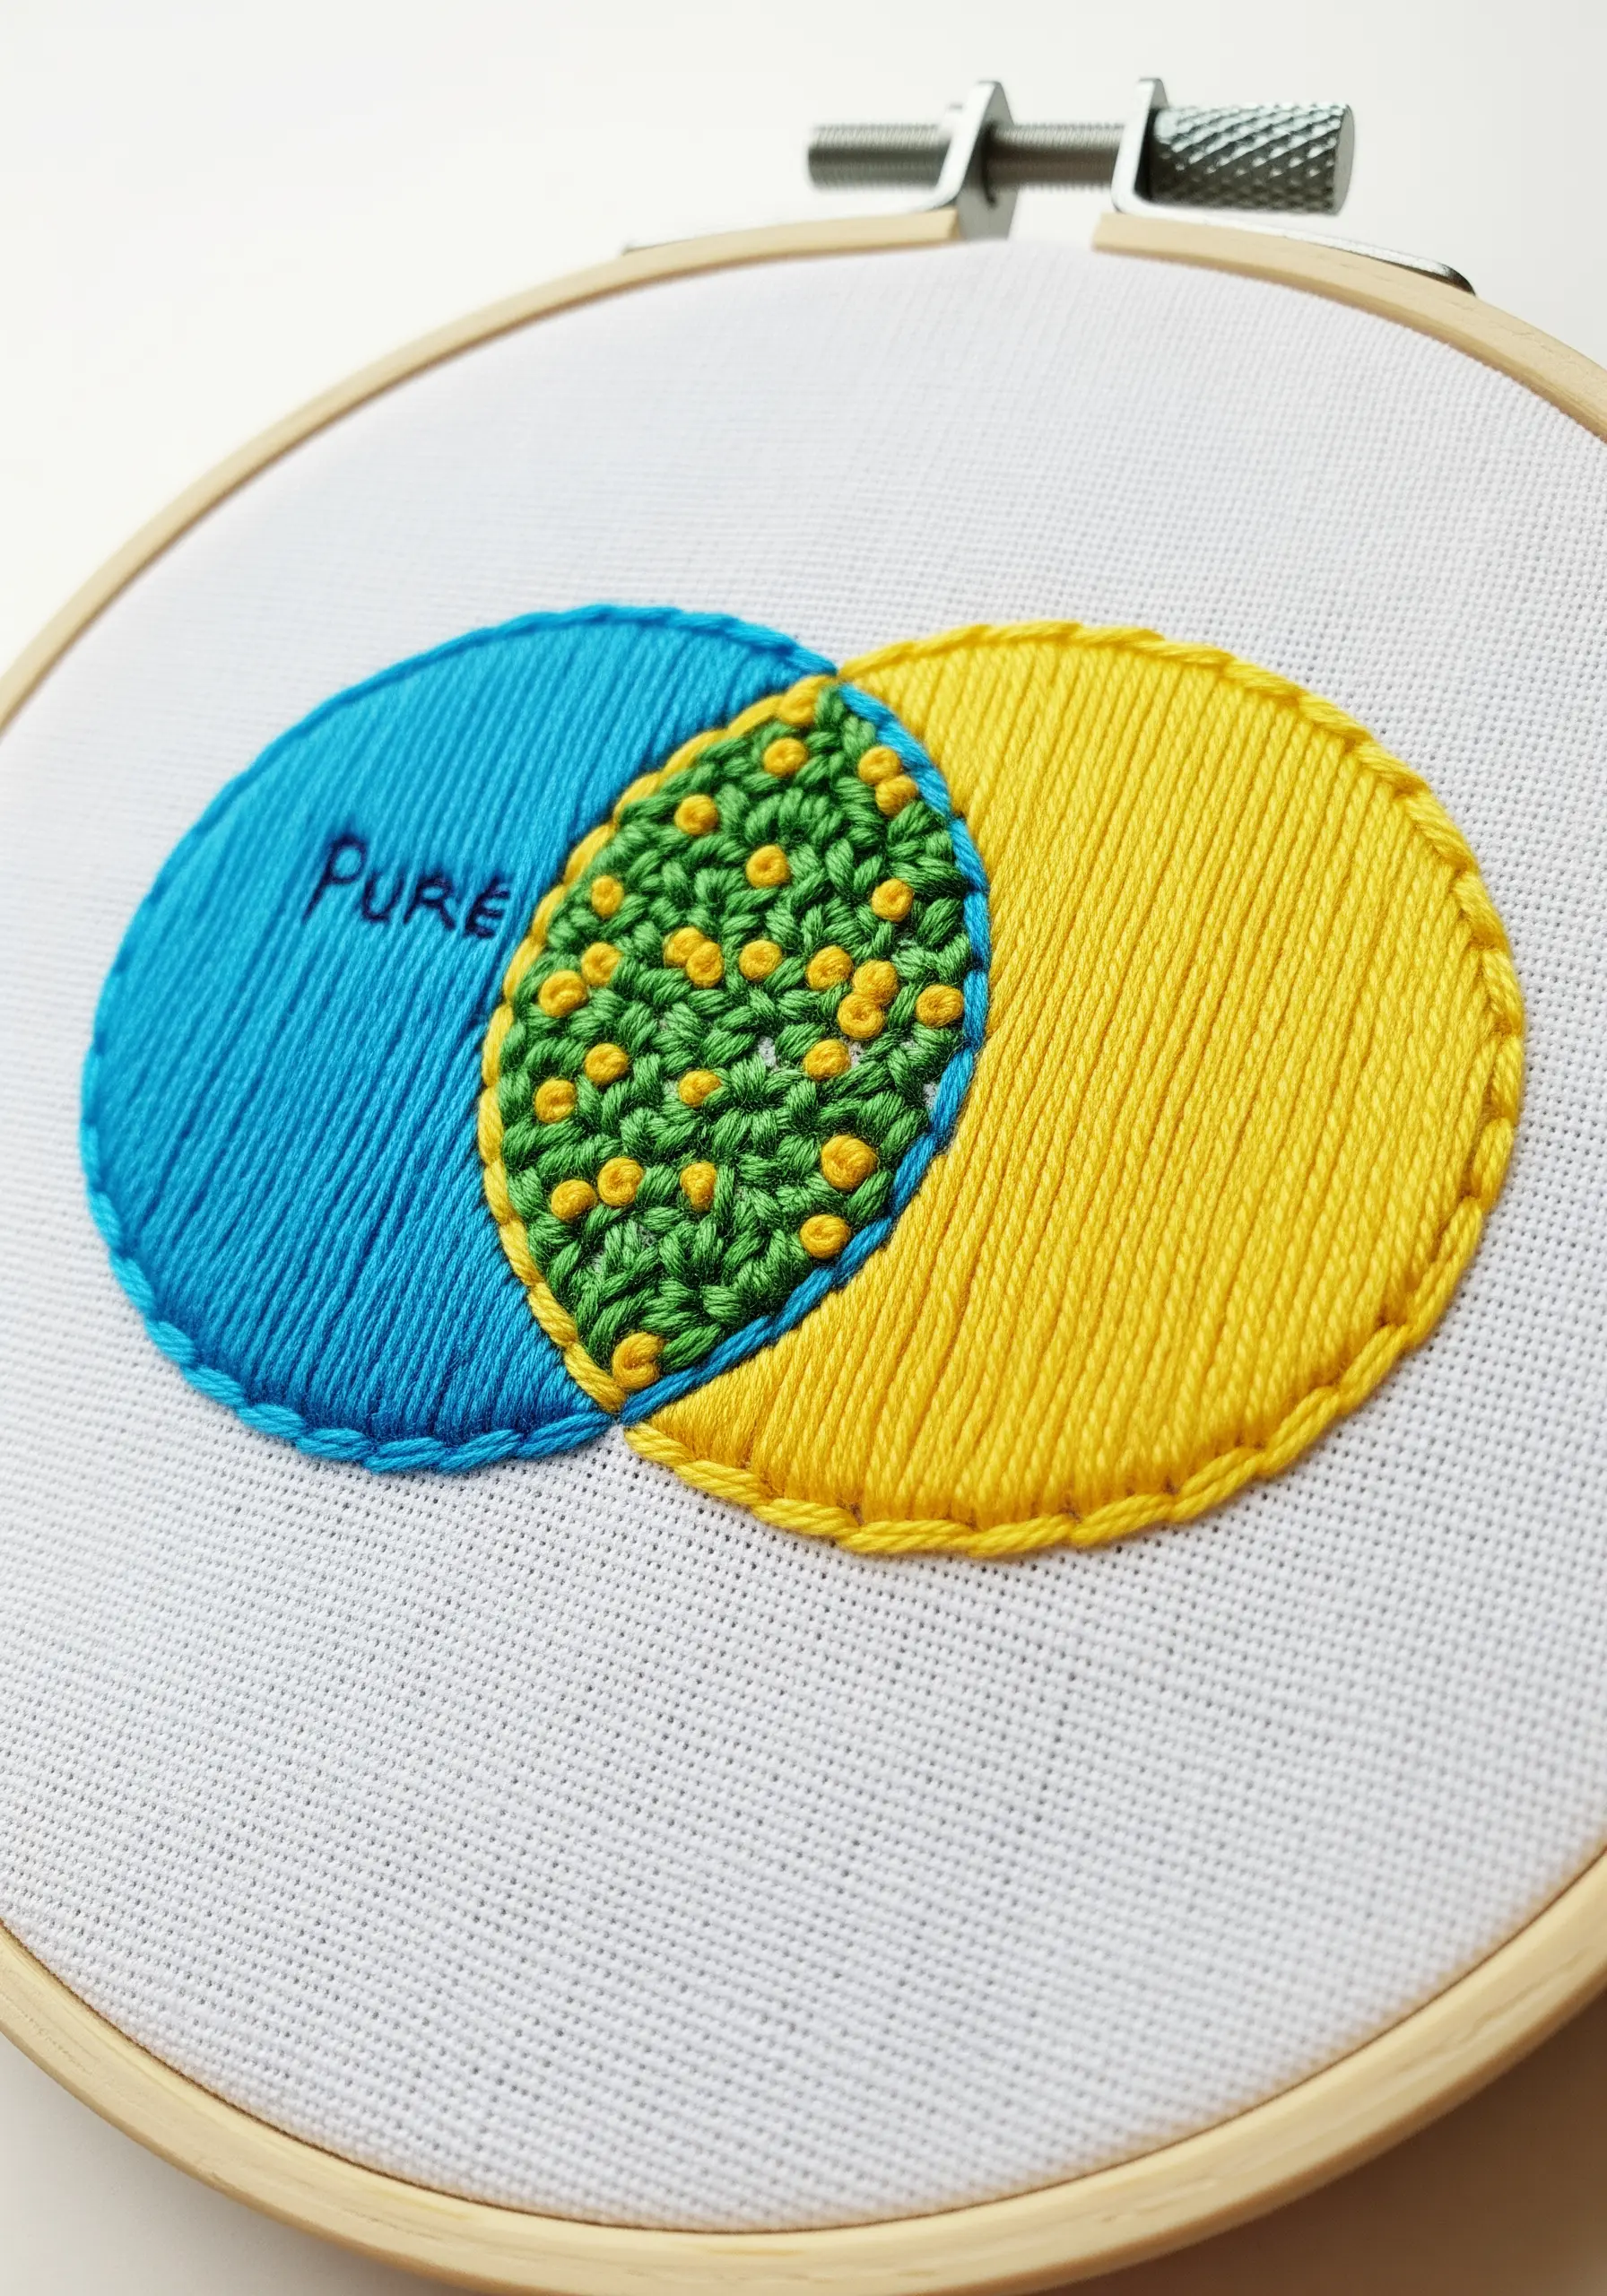
Elevate a simple graphic, like this Venn diagram, into a piece of tactile art by assigning different textures to each section.
Use a perfectly smooth, flat satin stitch for the two main circles, ensuring your stitches are parallel and even.
For the overlapping section, make a dramatic switch to a highly textured stitch, like dense French knots. This textural contrast draws the eye immediately and cleverly reinforces the concept of a new, combined entity.
A clean chain stitch outline gives the whole design a crisp finish.
21. Creating Movement with Cascading Threads
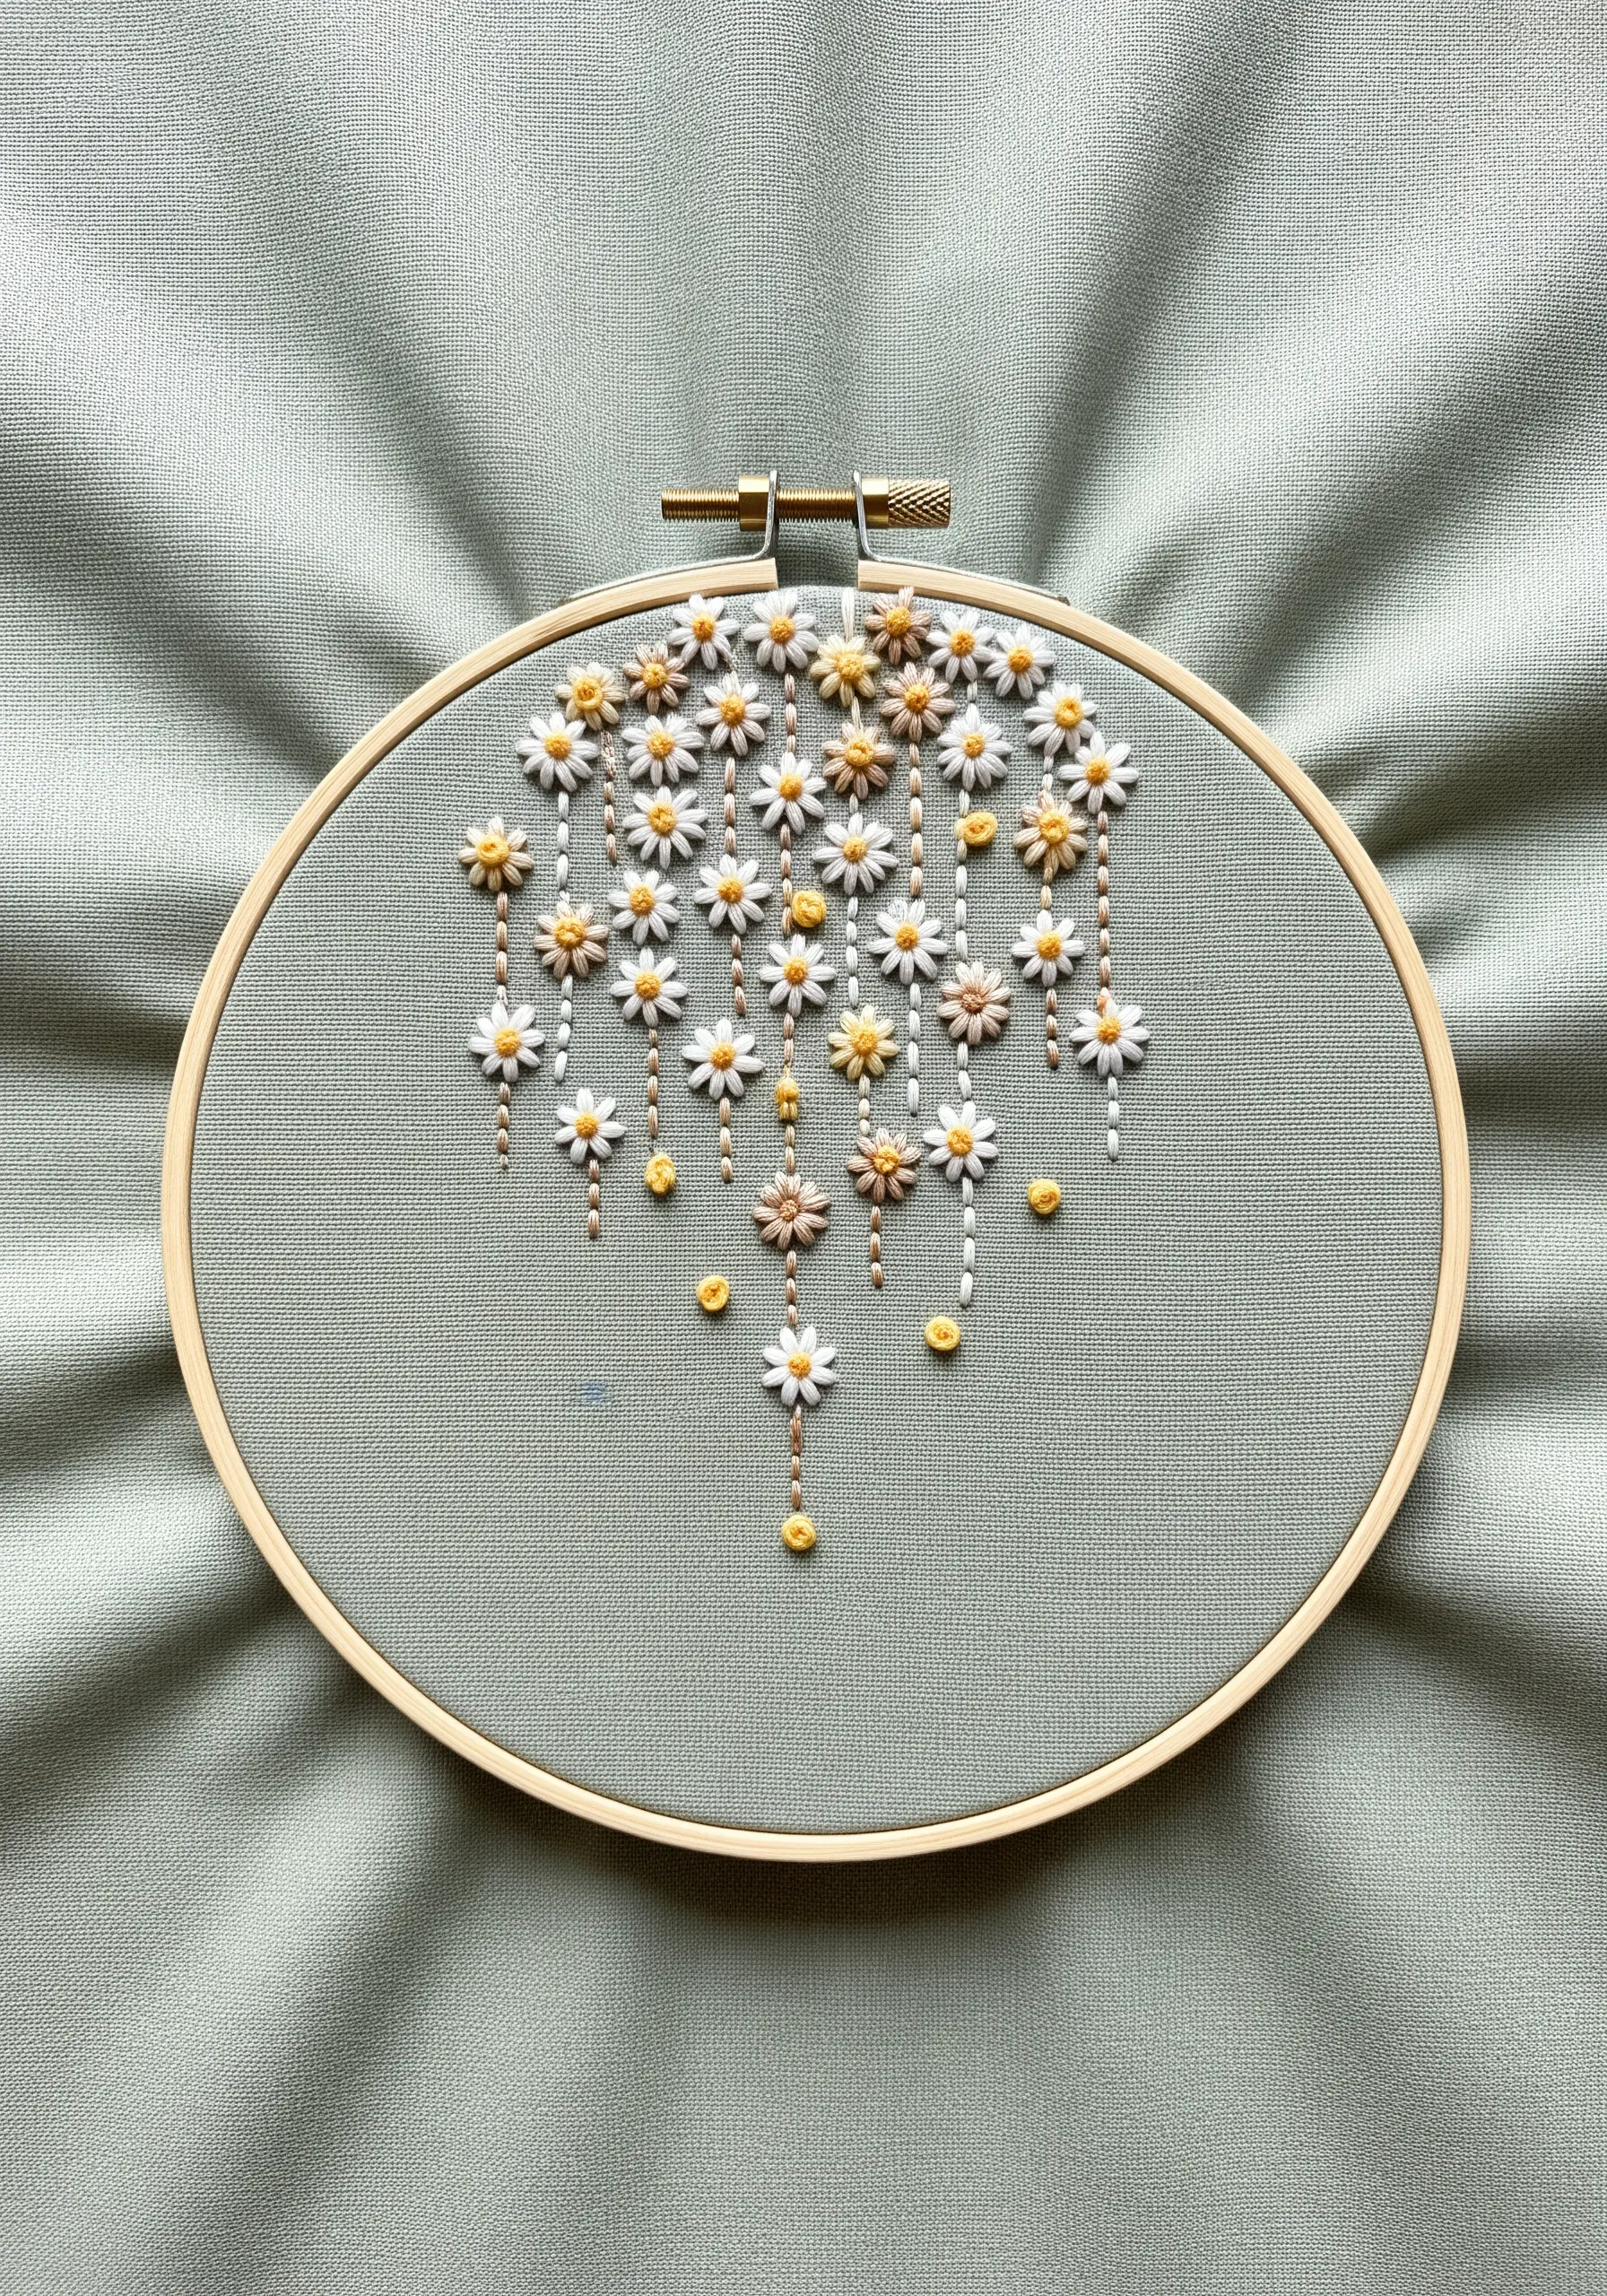
Give your embroidery a sense of delicate movement by incorporating hanging elements.
Stitch a cluster of lazy daisy flowers near the top of your design area.
Then, instead of ending your threads, let them hang down at varying lengths. You can secure the ends with a tiny seed bead or a single French knot to act as a weight.
This technique beautifully combines controlled stitching with a more freeform, sculptural approach, perfect for evoking rain, falling petals, or weeping willows.
22. High-Contrast Sculpting with Yarn and Cord
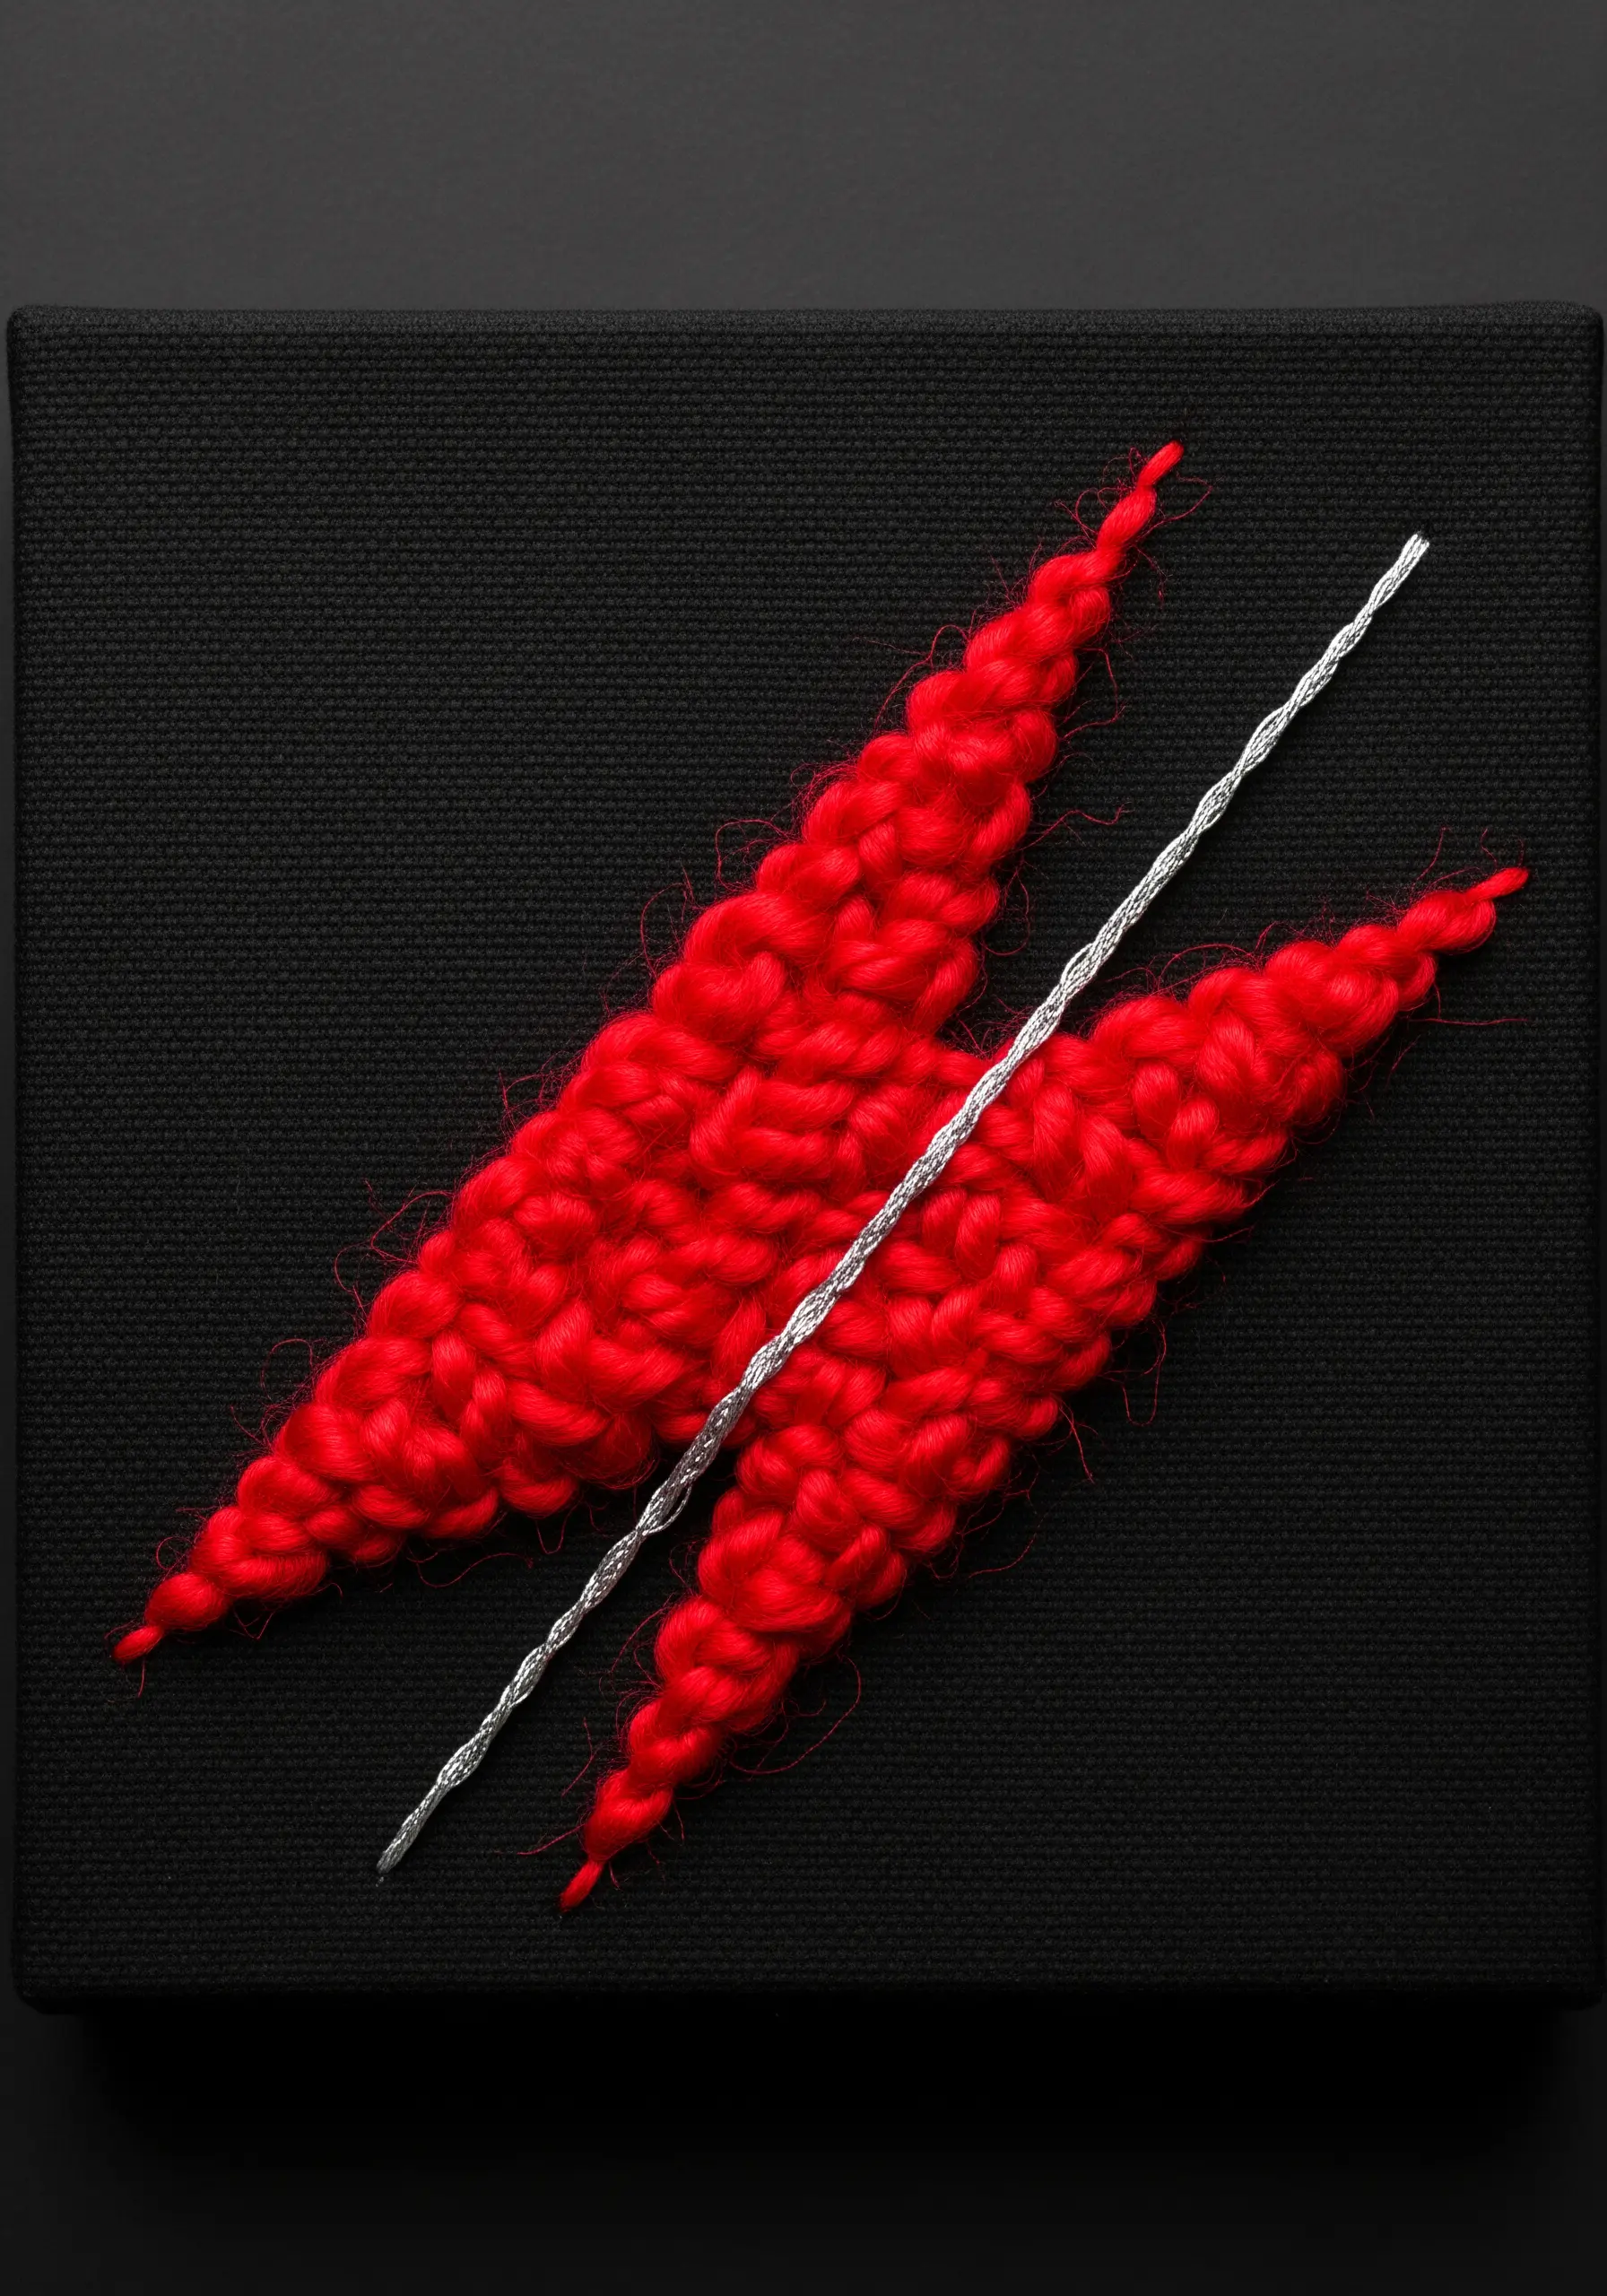
Move beyond standard embroidery floss and explore the textural possibilities of thicker materials.
The bold red shapes are created with a chunky yarn using a simple chain stitch, which gives it a thick, braided, and highly dimensional look.
This soft, matte texture is then split by a thin, tightly twisted silver cord that has been couched down the middle.
The dramatic juxtaposition of thick and thin, soft and hard, and matte and metallic creates a powerful and sophisticated abstract statement.
23. Controlled Chaos with Thread Looping
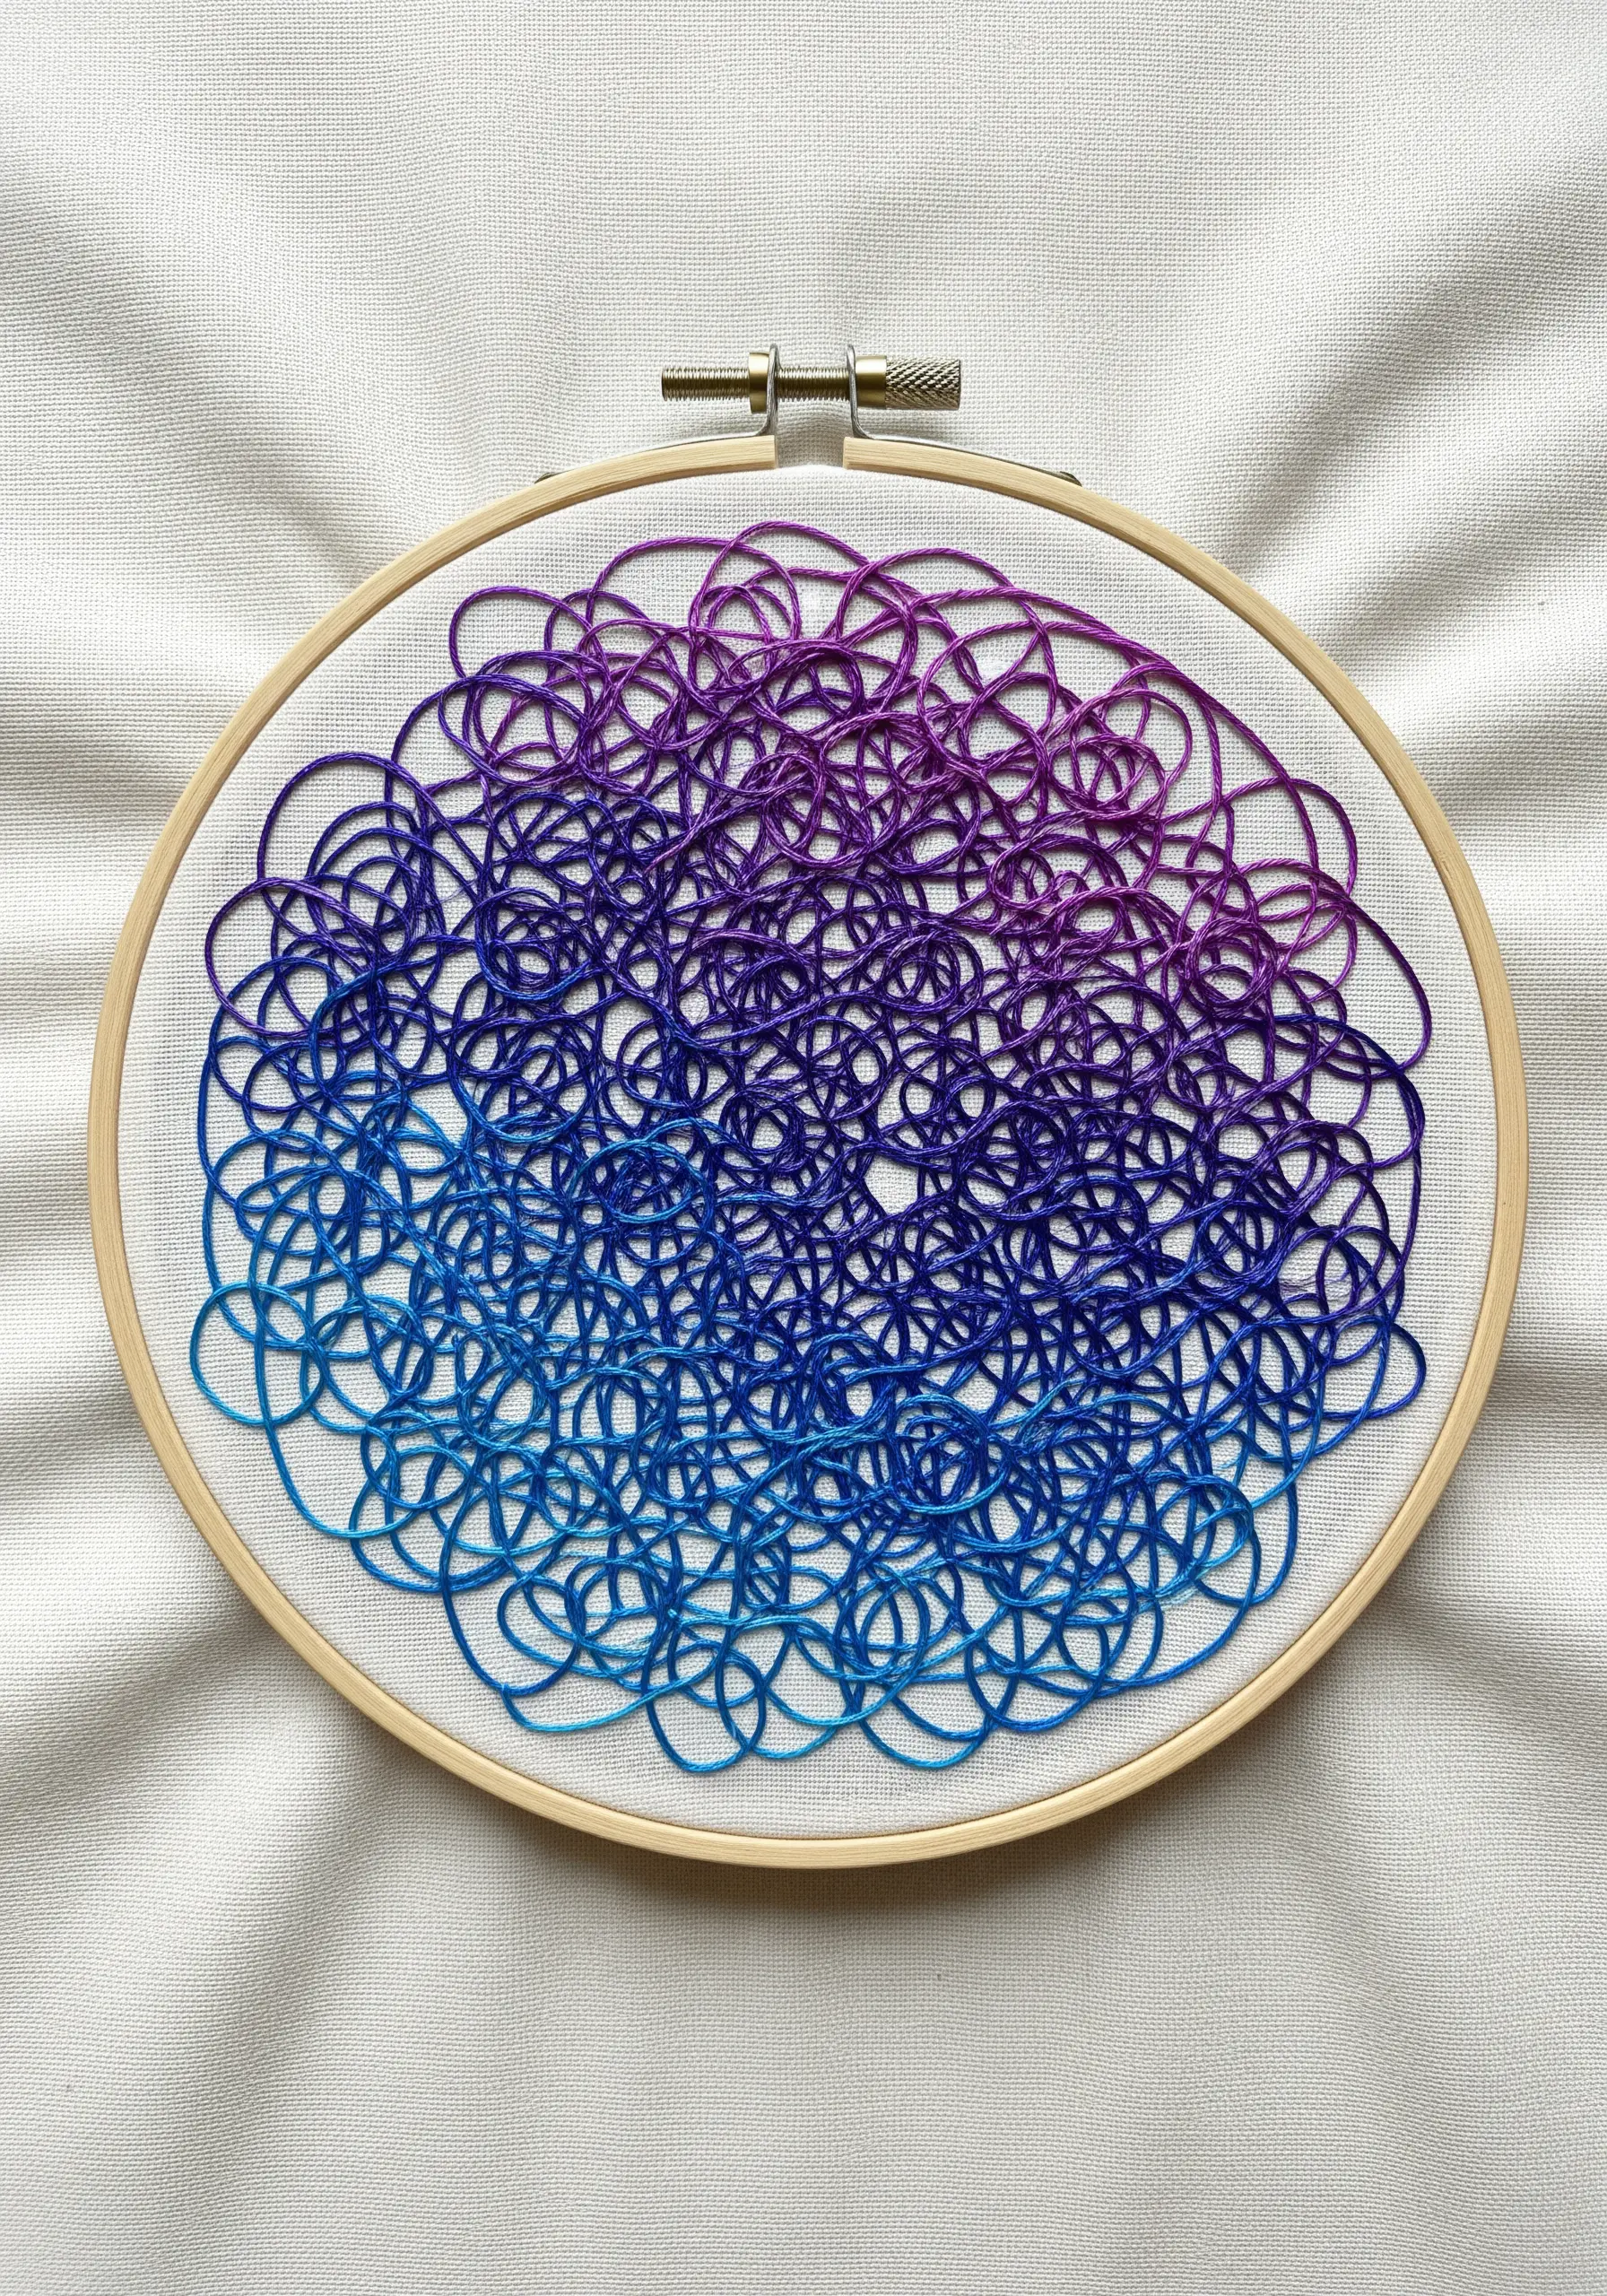
This intricate-looking texture is built from a very simple technique: creating and tacking down loops of thread.
Work with several shades at once to achieve a seamless gradient. Using one color, bring your needle up from the back and go back down nearby, leaving a loose loop on the surface.
Then, with a second thread, come up through the loop and make a tiny tacking stitch to hold it in place. Repeat this process, overlapping the loops randomly to build a dense, organic, and beautifully chaotic texture.
24. A Modern Terrazzo with Satin Stitch
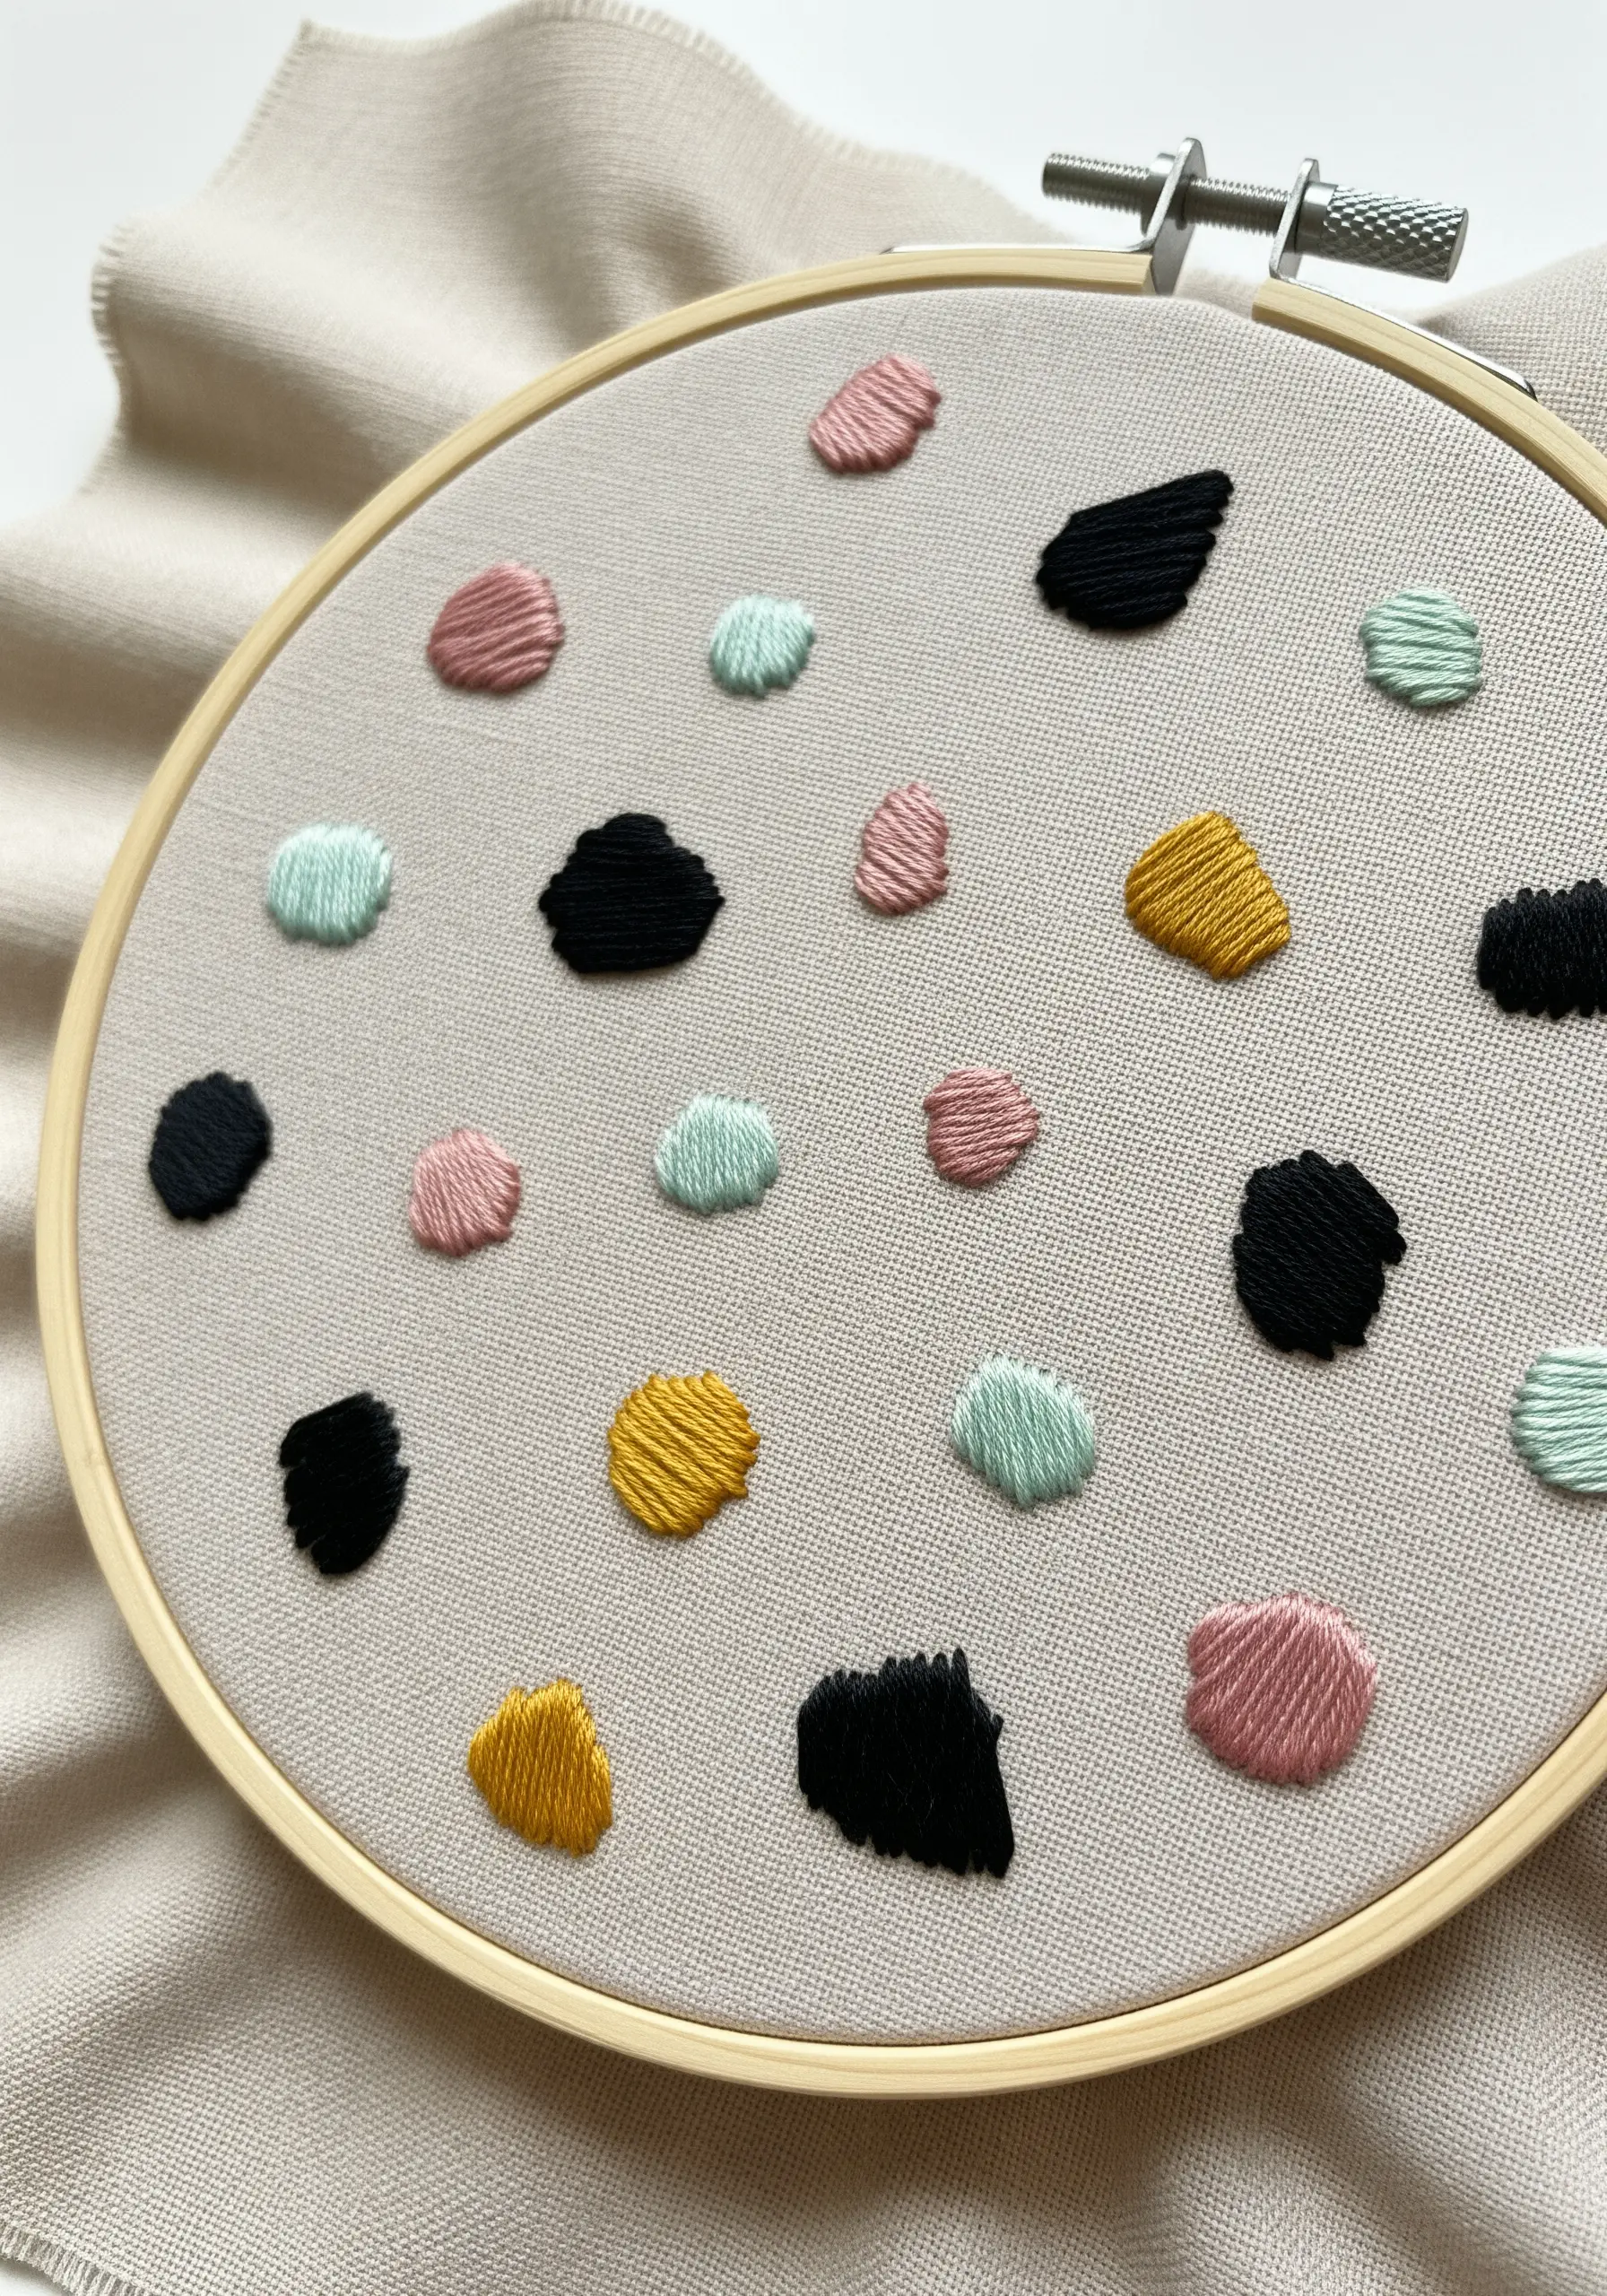
Mimic the chic, scattered look of terrazzo flooring with this simple satin stitch technique.
Lightly sketch small, irregular, organic shapes across your fabric.
Fill each shape with short satin stitches. The key to the modern aesthetic is using a sophisticated, muted color palette on a neutral background fabric.
For added subtlety and texture, vary the direction of your satin stitches in each chip—some vertical, some horizontal, some diagonal—to create gentle shifts in how the light hits the thread.
25. An Ombré Field of Woven Wheel Roses
The woven wheel stitch is a beginner’s secret weapon for creating perfectly round, dense, floral motifs with ease.
Start by creating a small star of straight stitches with an odd number of spokes (five is ideal).
Then, simply weave your working thread over and under these spokes until the entire shape is filled. You can create a stunning gradient effect by clustering wheels of different shades, moving from dark on the outside to light in the center, to form a single, cohesive mosaic.
26. Mastering the Thread-Painted Gradient
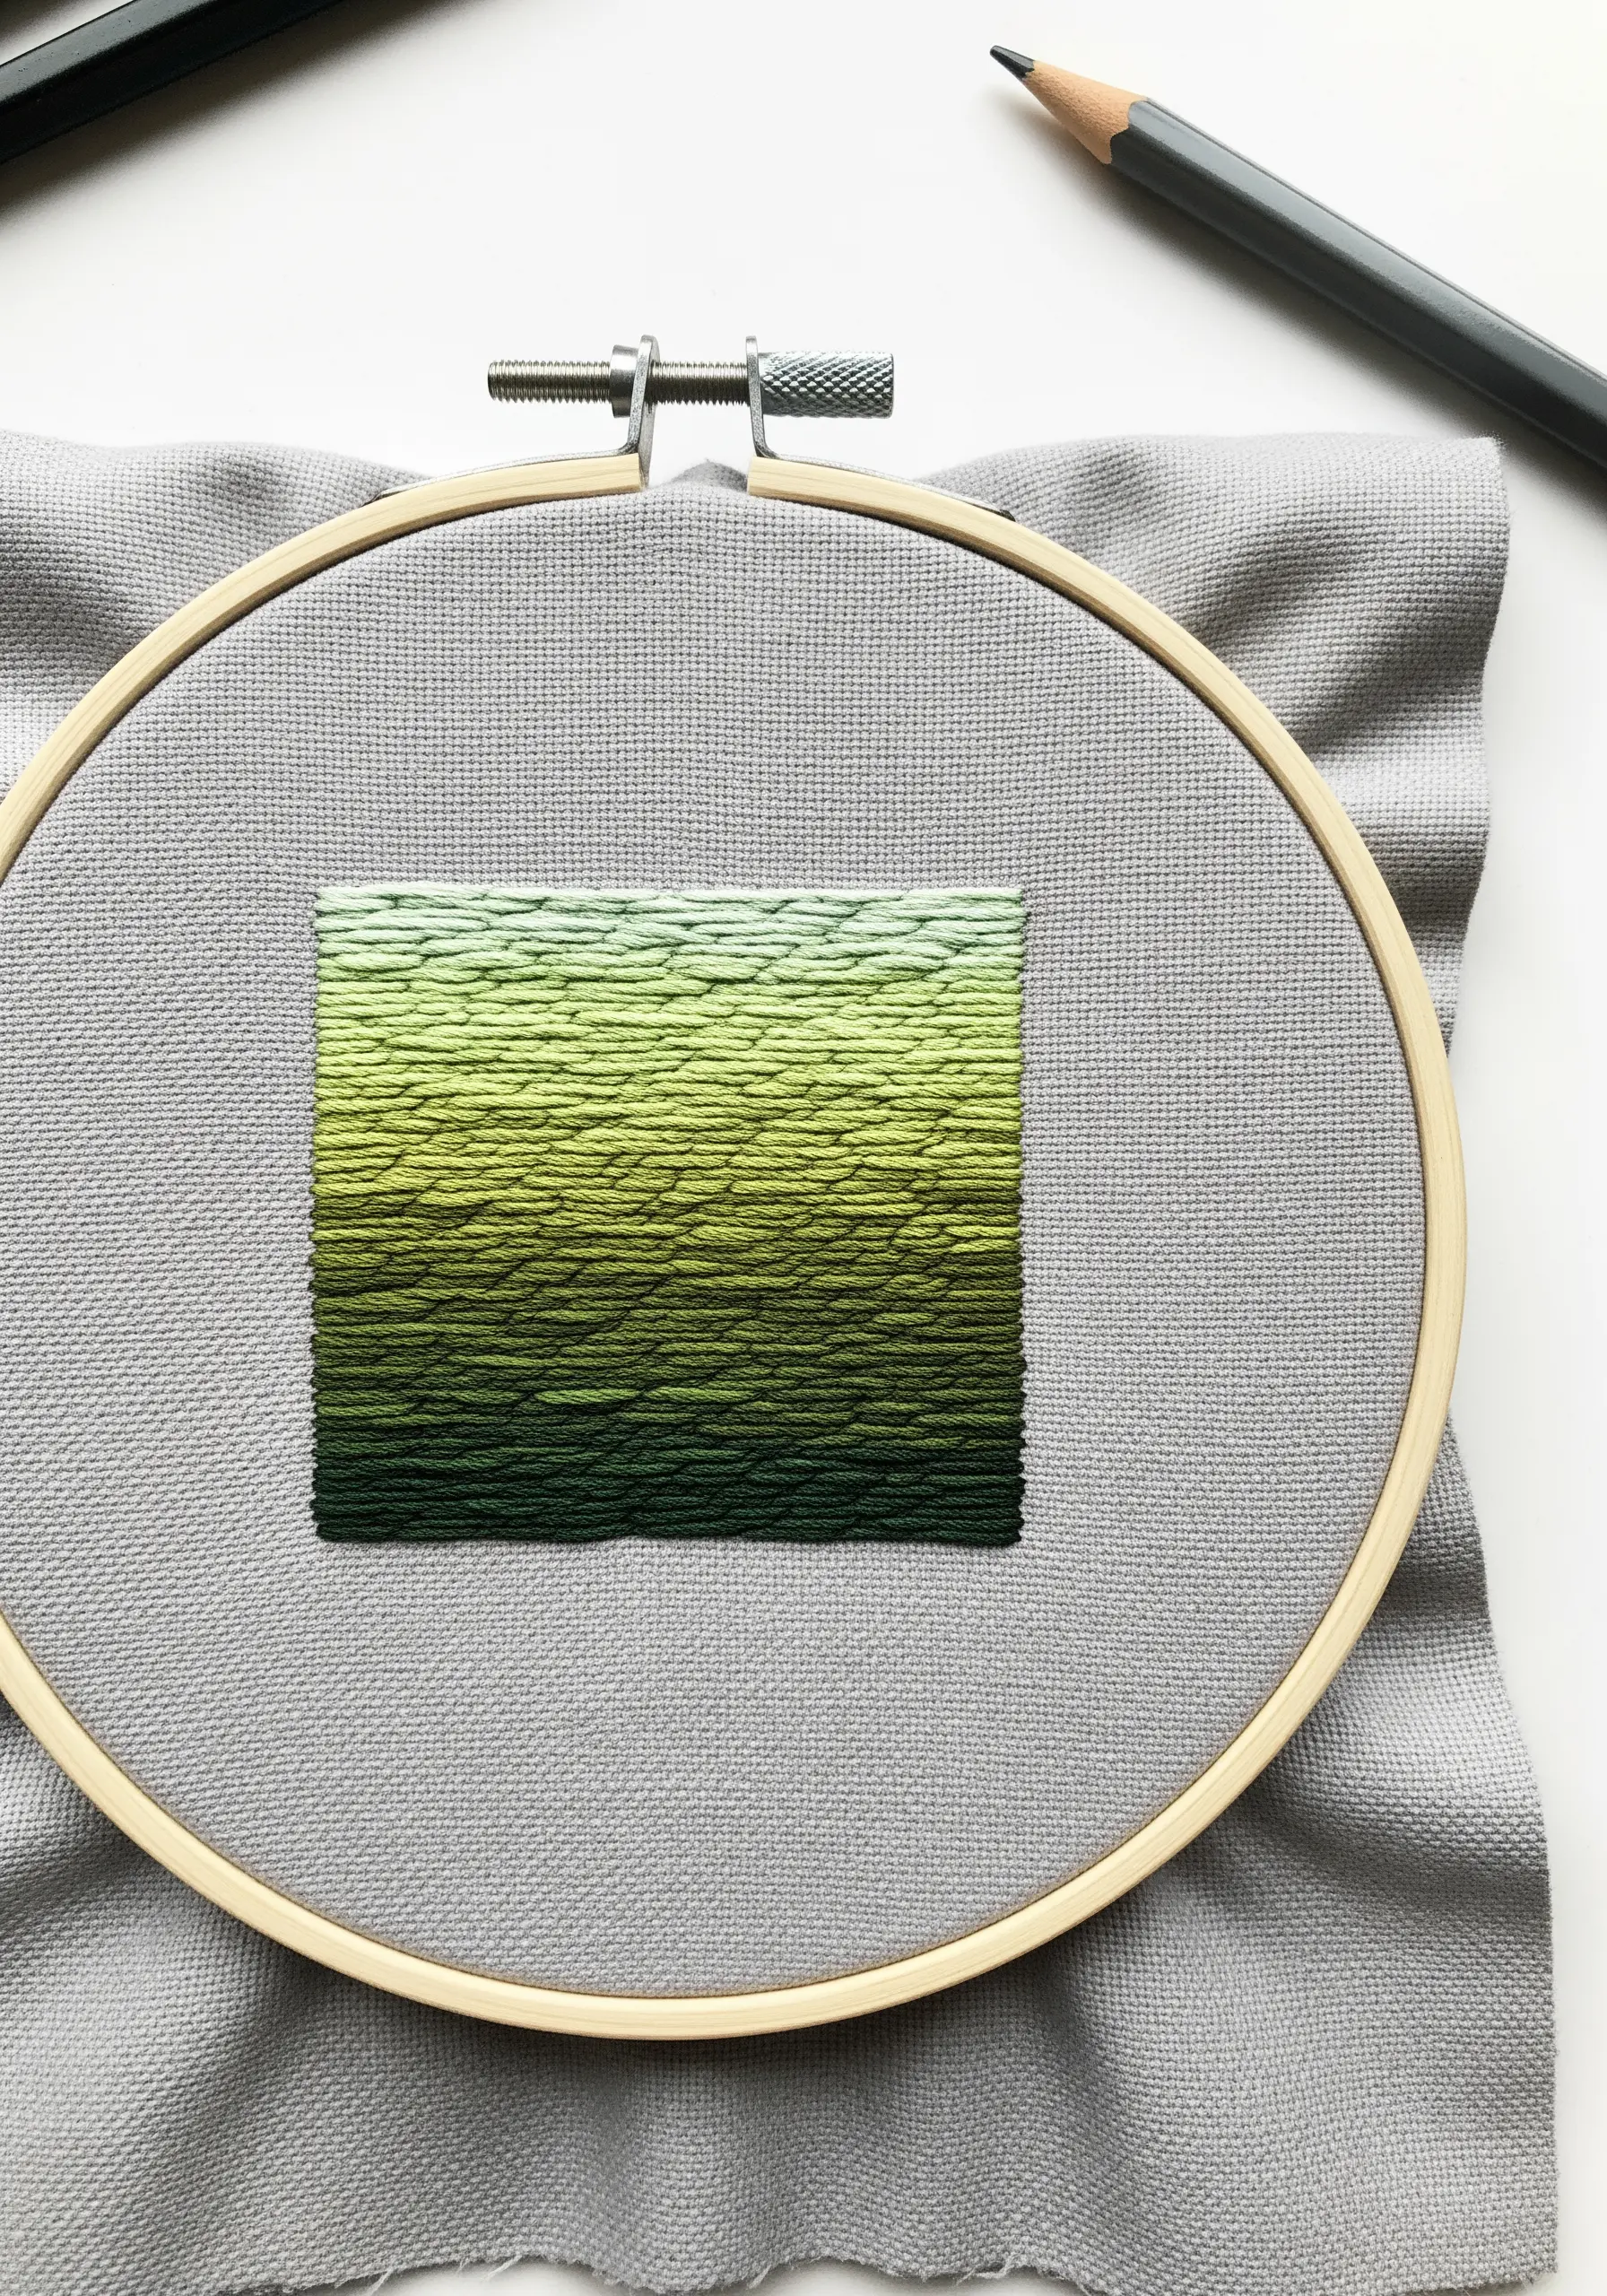
This perfectly smooth transition of color is the essence of thread painting, and it’s more accessible than it looks.
The technique is called the long-and-short stitch. You’ll work in rows, with the first row being stitches of alternating long and short lengths.
The next row of stitches comes up through the fabric and goes down into the previous row, interlocking the colors.
By blending your shades row by row, you eliminate the hard lines of color blocking and achieve a beautiful, painterly effect.


