

You have the threads, the fabric, and a love for the quiet rhythm of stitching. But sometimes, you look at your finished piece and feel a gap between what you imagined and what lies in the hoop. That desire for a more polished, more intentional result is what separates a pleasant hobby from true artistry.
This is where technique becomes your closest ally. It’s not about learning hundreds of complex stitches, but about understanding how and why a few well-chosen ones create depth, texture, and emotion. It’s in the choice to use one less strand of floss for a softer gradient, or the decision to add a layer of padding beneath a satin stitch to make a petal catch the light.
These vintage-inspired bouquets are more than just patterns; they are invitations to refine your skills. Each one holds a small secret to creating work that feels not just handmade, but heirloom-worthy. Let’s explore how to turn your stitches into lasting memories, one beautiful floral at a time.
1. Achieving Petal Depth with Thread Painting
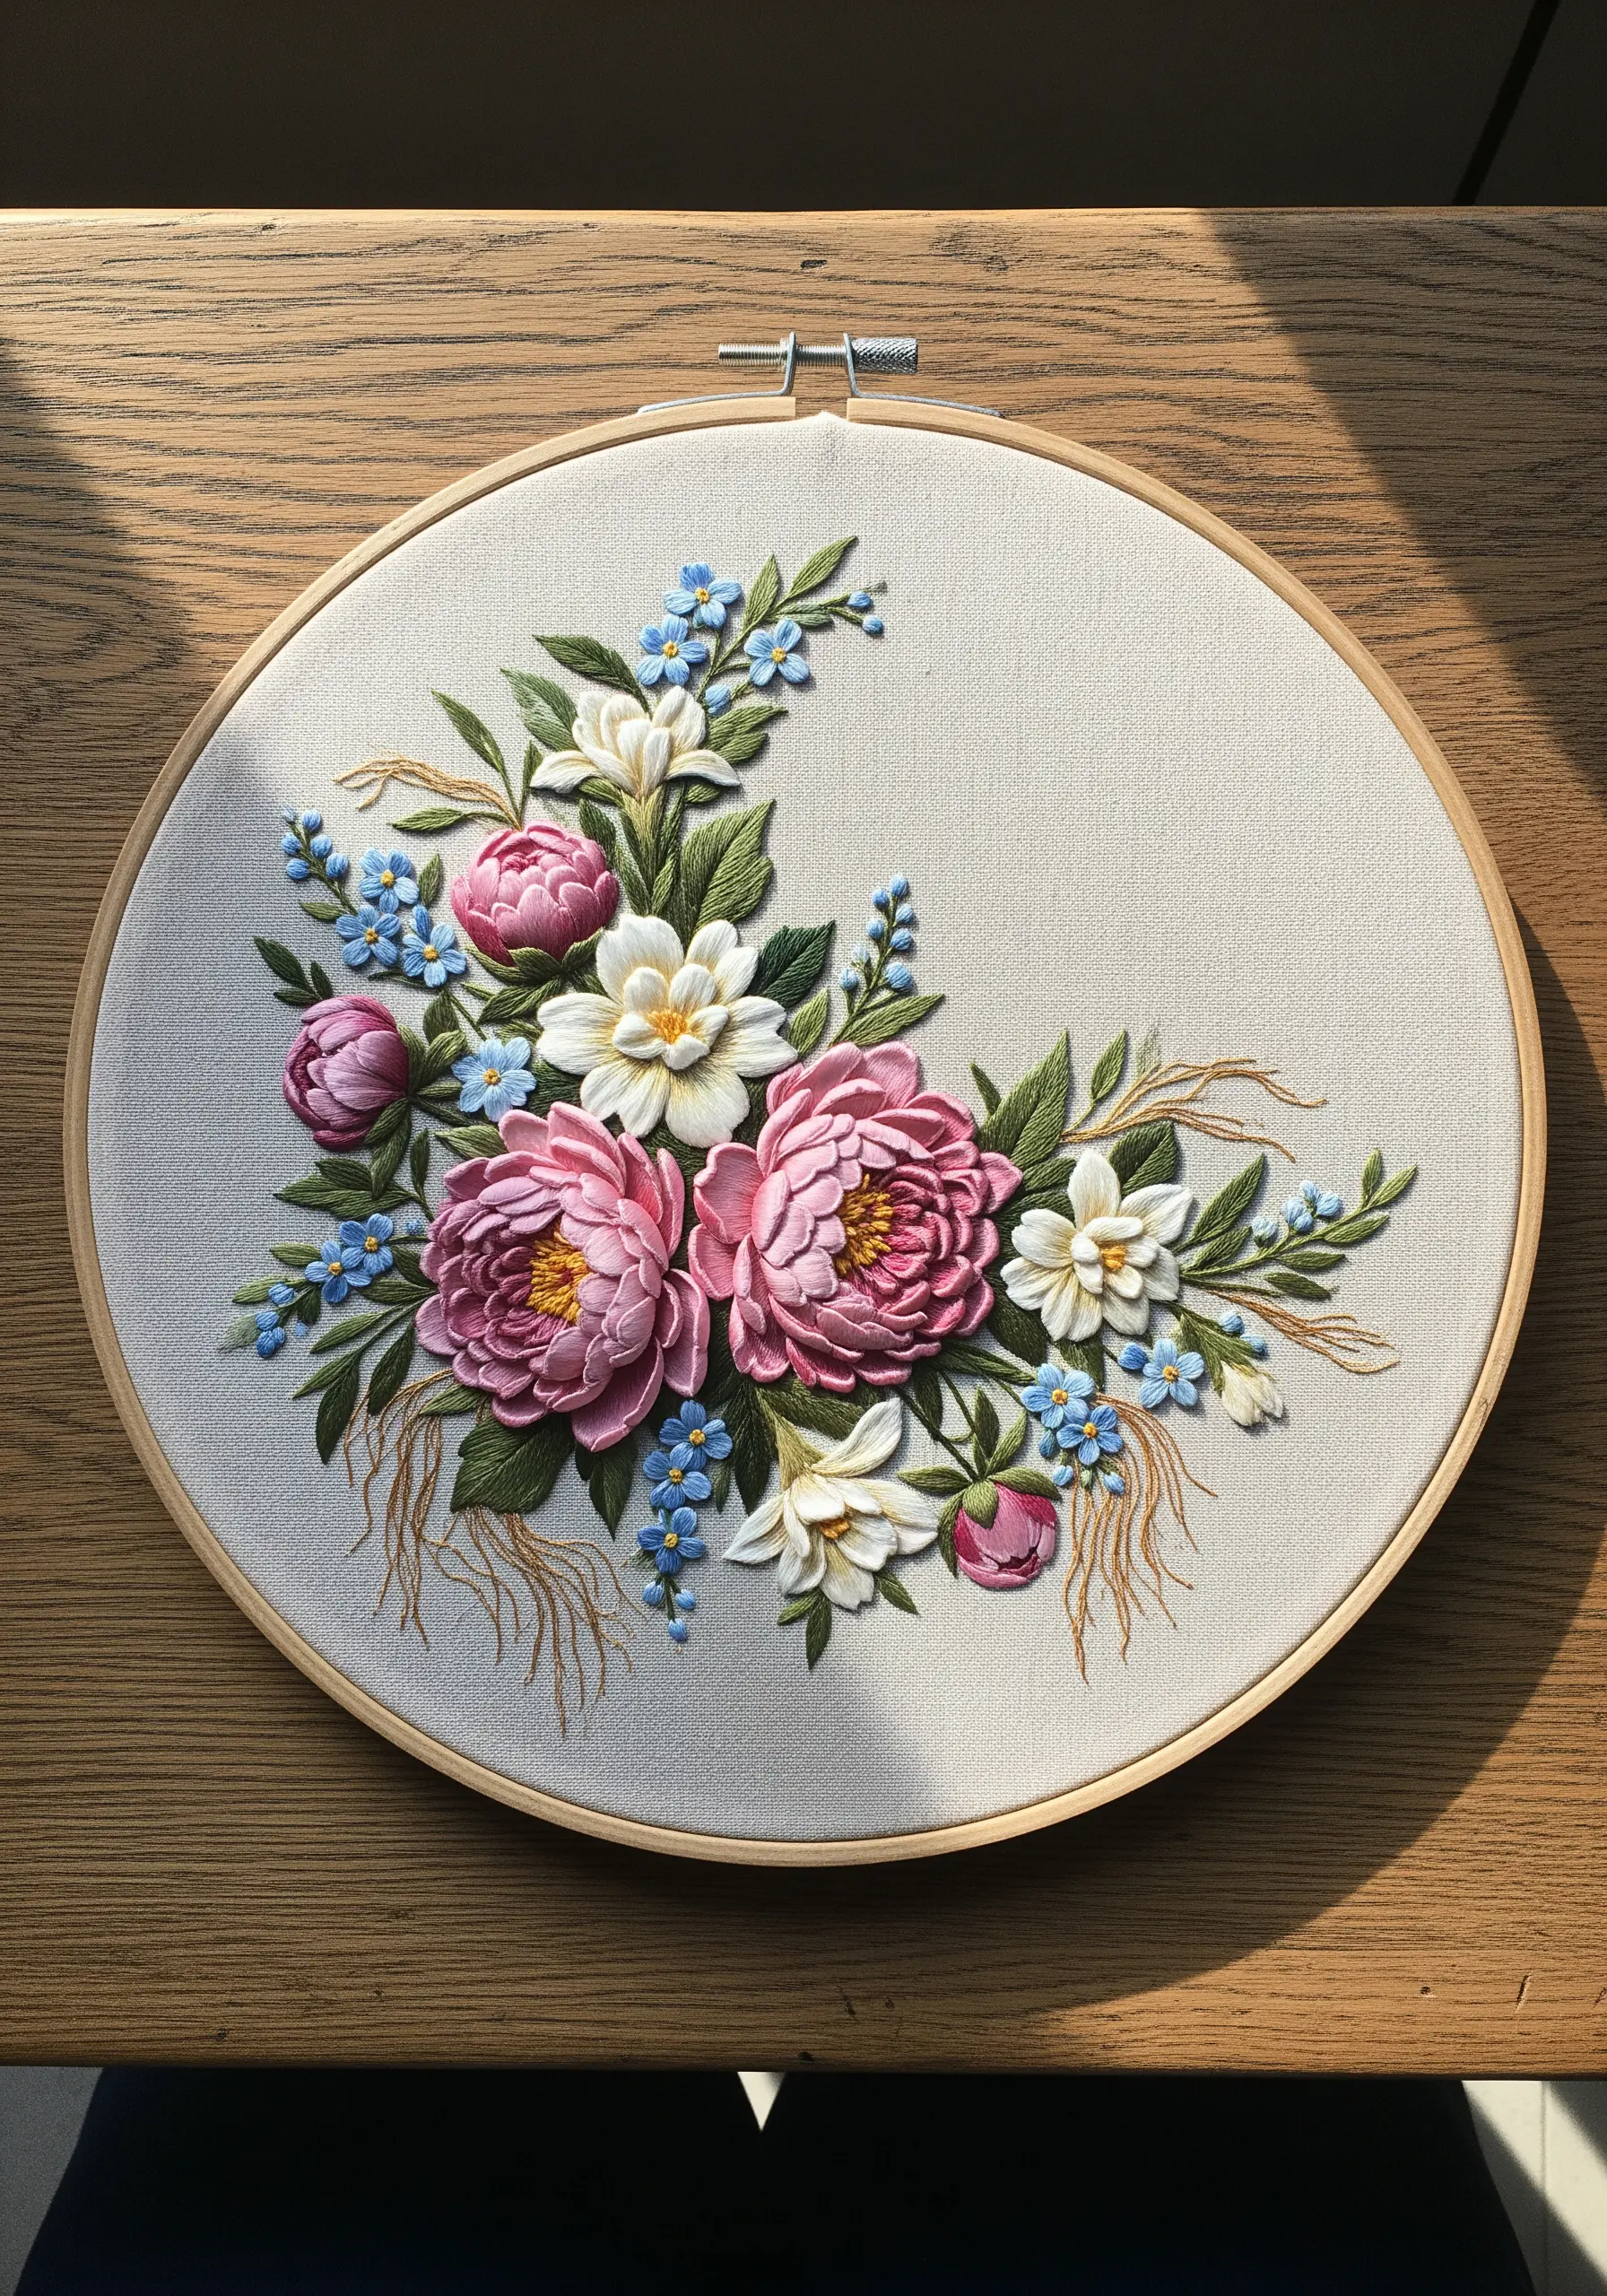
To create the lush, dimensional peonies, use the long-and-short stitch, often called thread painting.
Work with a single strand of floss to achieve subtle, smooth color gradients, blending three to four shades of pink from light to dark to mimic how light hits a real petal.
For the flower centers, use tightly packed French knots in a contrasting yellow to create a dense, pollen-like texture.
The airy, unstitched straight stitches at the base add a modern, deconstructed feel, balancing the classic realism of the flowers.
This is a perfect way to turn blank fabric into wild garden floral embroidery ideas that look like watercolor paintings.
2. Mastering Embroidery on High-Pile Fabrics
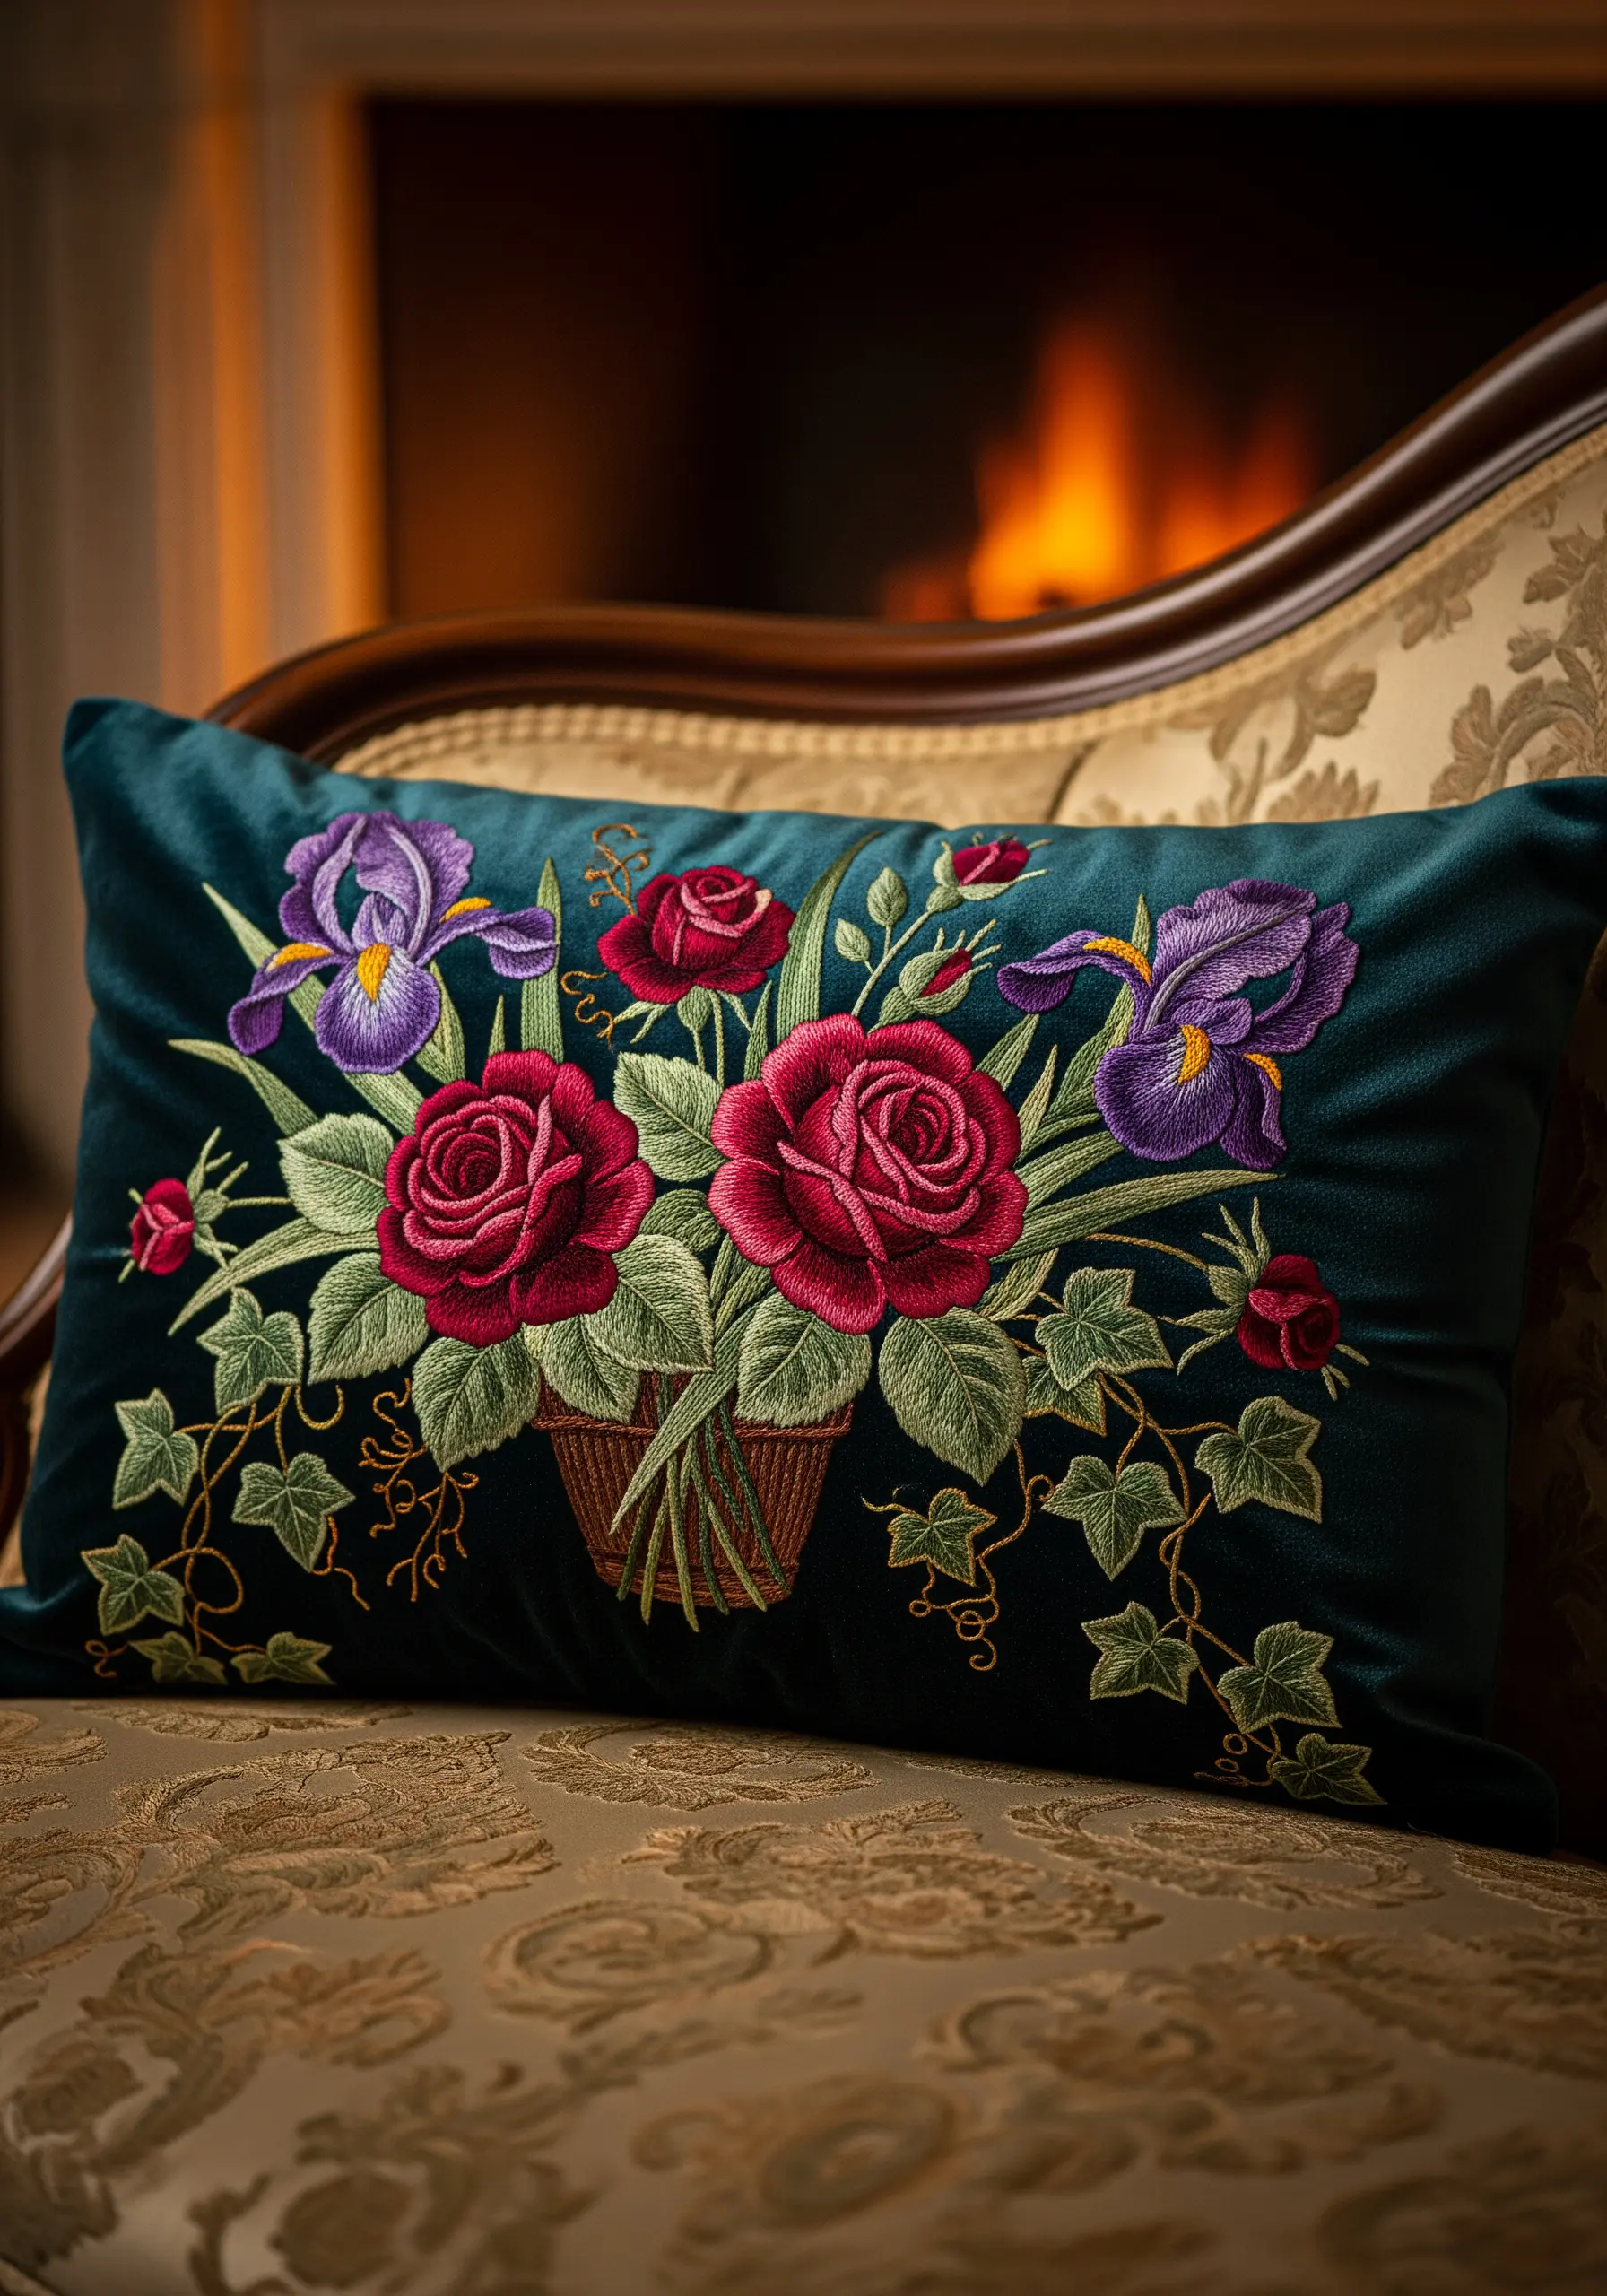
When embroidering on plush fabrics like velvet, your primary challenge is preventing the stitches from sinking into the pile.
Solve this by using a water-soluble stabilizer on top of your fabric; it provides a smooth surface for your stitches to sit on and dissolves away later.
Opt for stitches with strong coverage, like satin stitch, and use 3-4 strands of floss to ensure the design remains bold and visible against the rich texture.
The high contrast between jewel-toned threads and the dark velvet makes the entire composition feel luxurious and dramatic.
3. Delicate Stitches for Fine Linens and Accessories

For the tiny, bell-shaped Lily of the Valley flowers, use individual detached chain stitches or small, padded satin-stitched ovals.
Working with a single strand of white floss preserves their delicate, airy appearance against the fine fabric.
For the sweet peas, blend soft pinks and whites with a few thoughtfully placed long-and-short stitches to suggest the gentle curl of the petals.
This level of detail transforms simple items into tiny embroidery projects that make thoughtful DIY gifts fast.
4. Creating Cohesive Designs Across Large Textiles
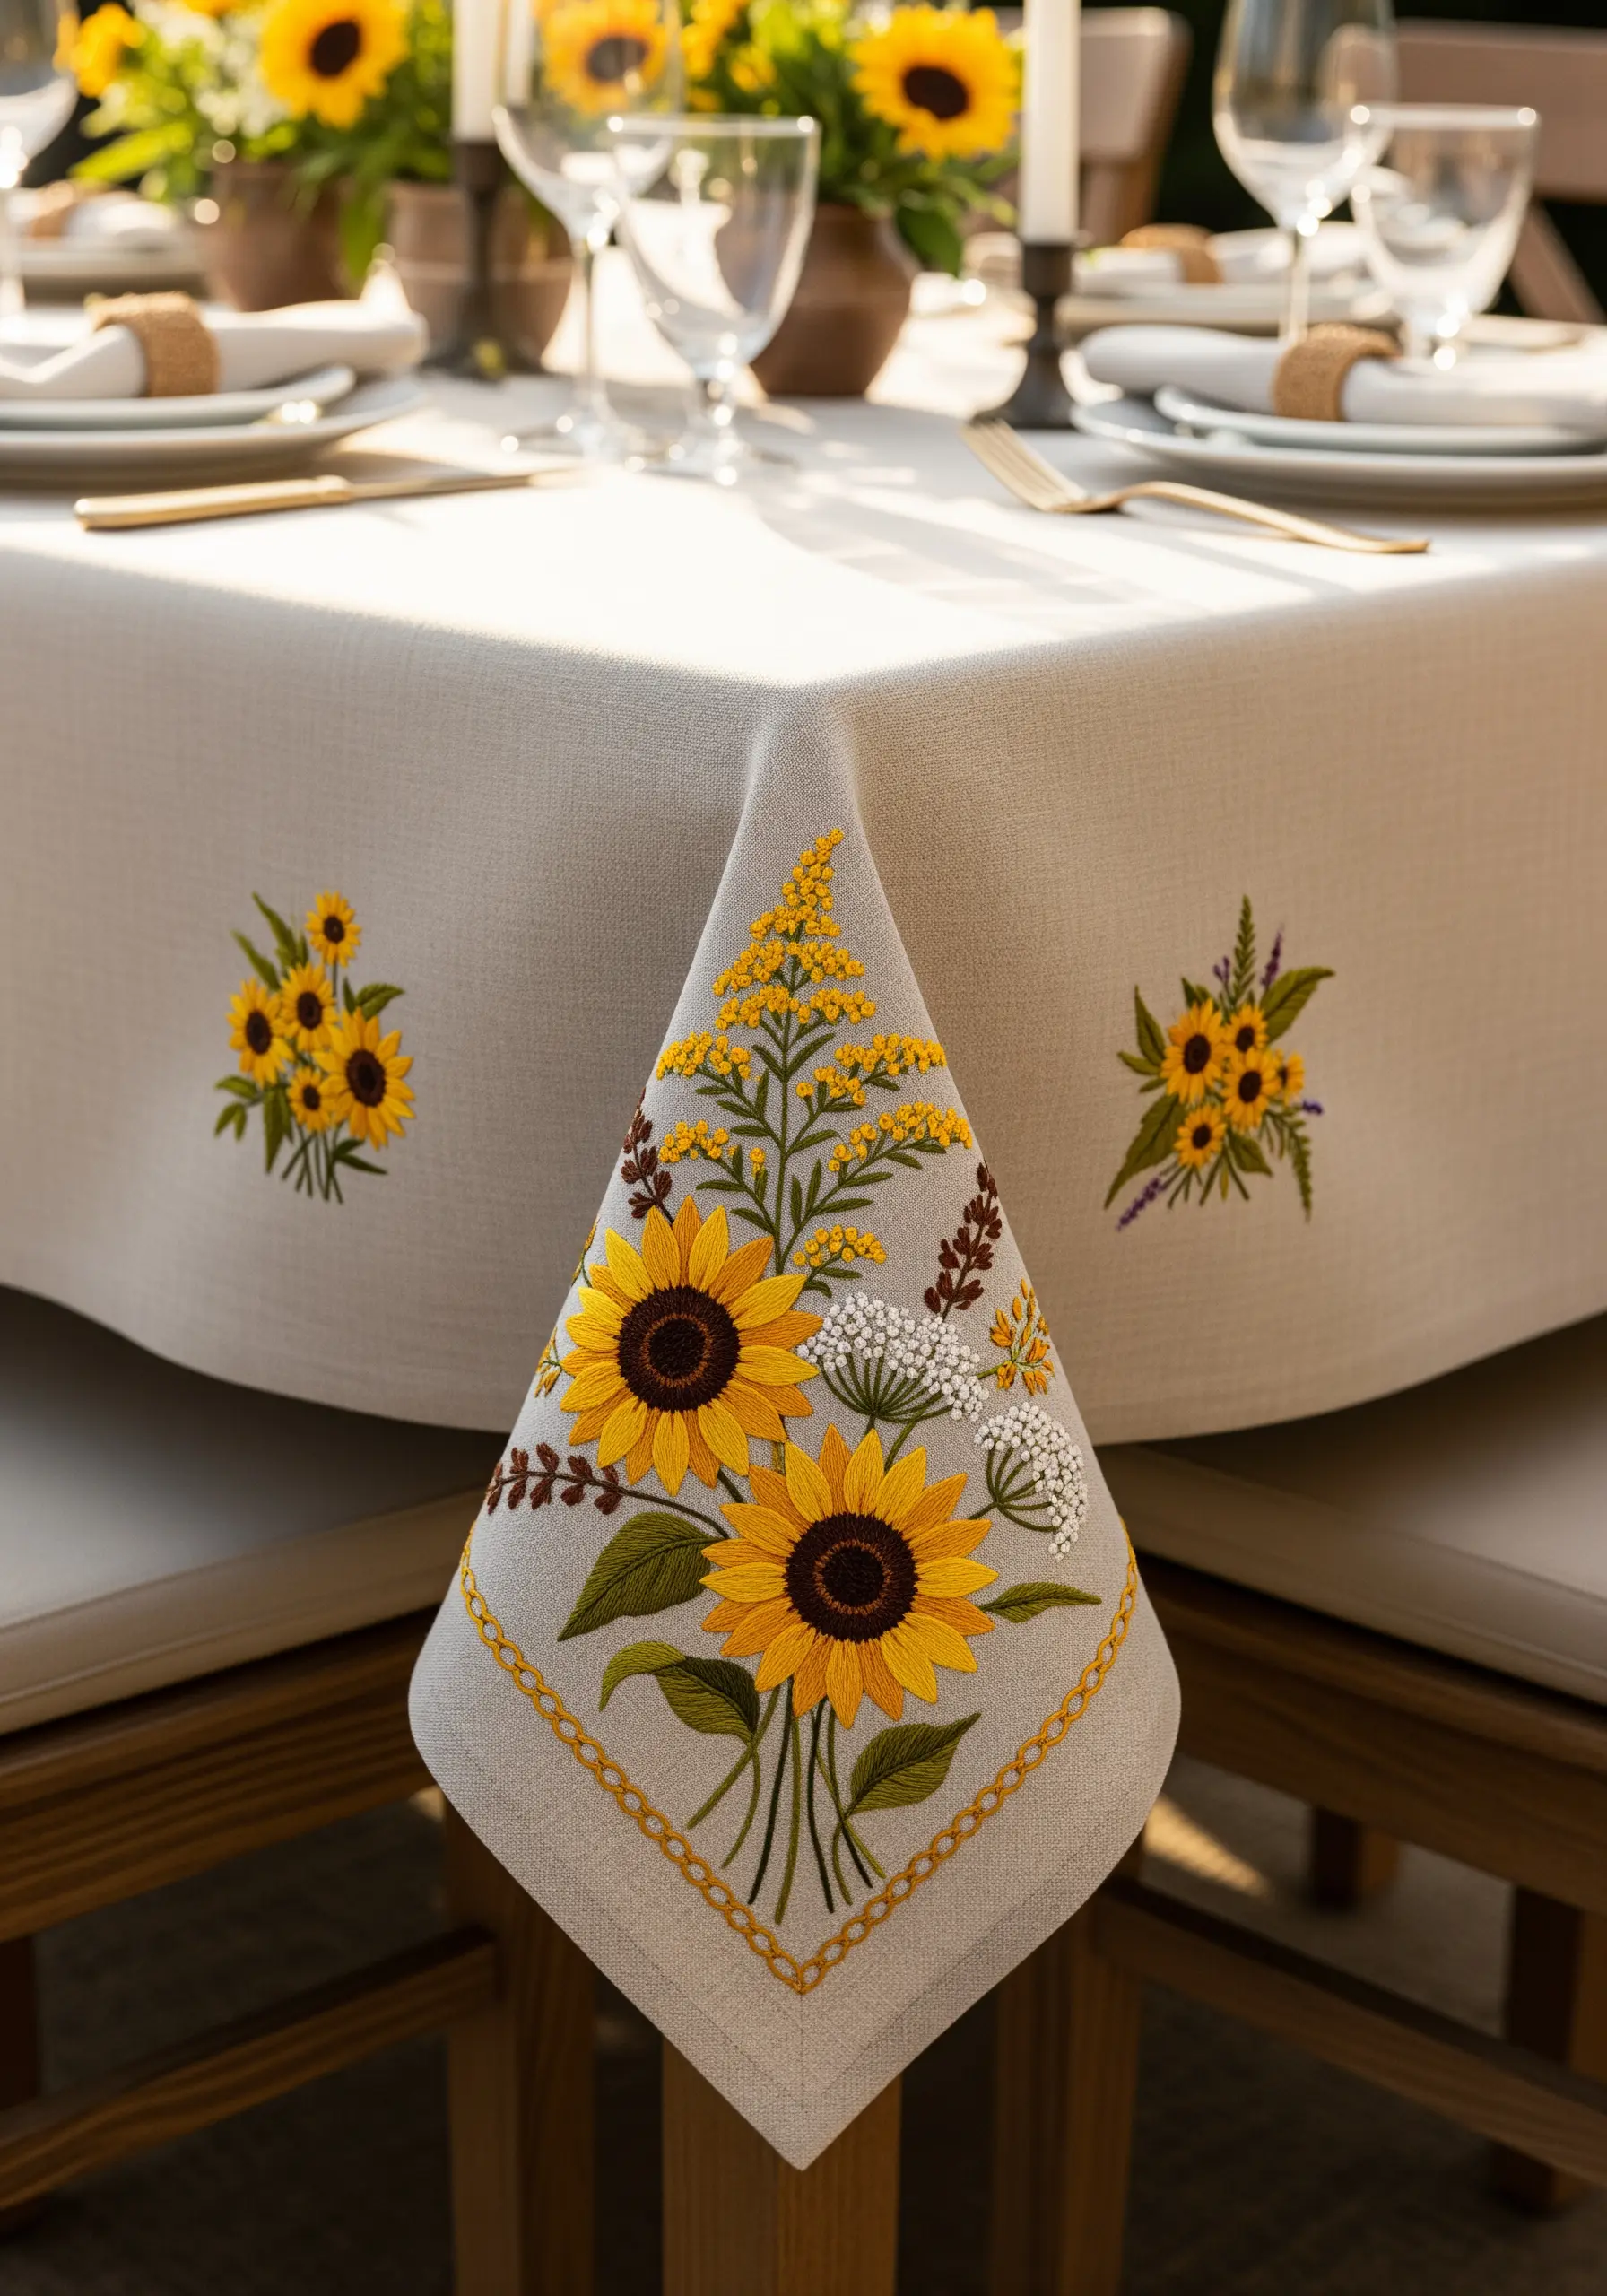
When decorating a large item like a tablecloth, create visual harmony by repeating a core motif with slight variations.
Anchor the design with a large, detailed bouquet on the corner—this becomes the focal point.
Then, scatter smaller, simplified clusters around the edges. This balances the composition without overwhelming the entire surface.
For the sunflower centers, combine French knots with seed stitches using dark brown floss to build a dense, realistic texture.
5. Simple Bouquets for Scented Sachets
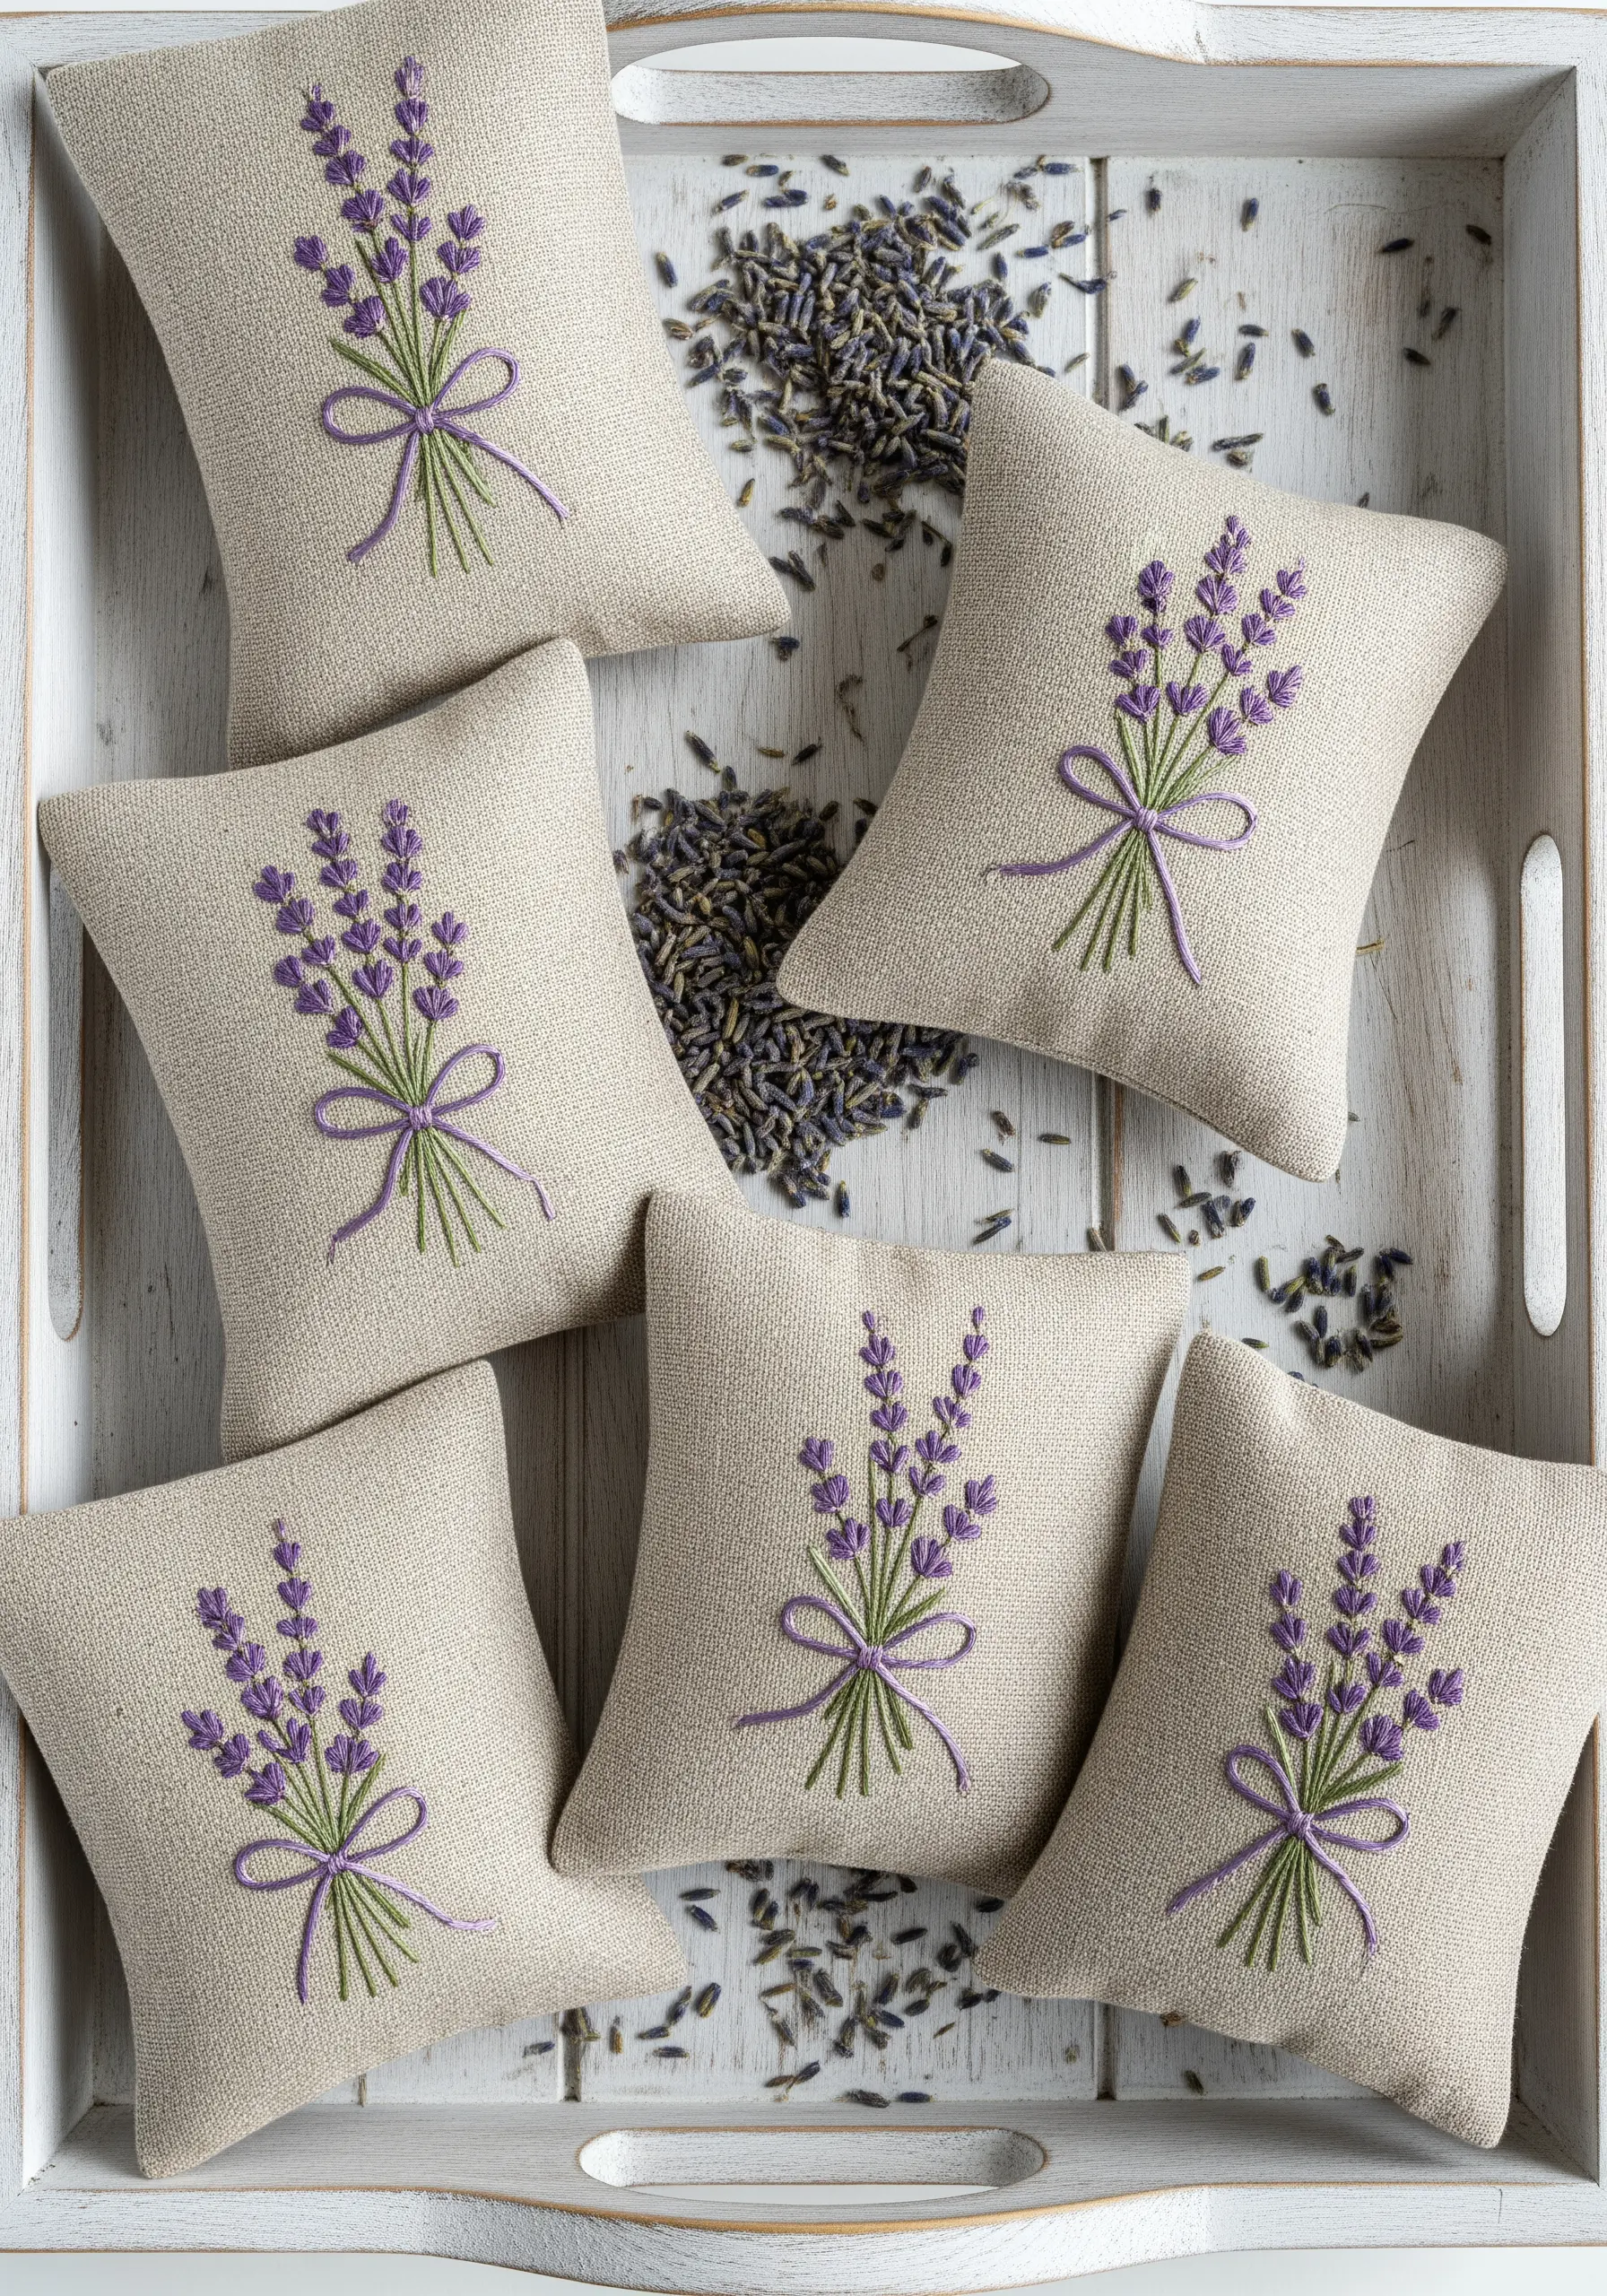
For a project that is both quick and elegant, stitch lavender sprigs using lazy daisy stitches for the blossoms and a simple stem stitch for the stalks.
Use two slightly different shades of purple floss and alternate them randomly to give the lavender sprigs natural-looking depth.
A small, neatly executed bow tied with stem stitch provides a classic, charming finish perfect for giftable sachets.
These make for lovely, calm, cozy embroidery projects to gift a loved one.
6. Blending Colors for Realistic Pansy Petals

Pansies are the perfect canvas for practicing your color blending skills.
Begin with a split stitch outline, then fill the petals with directional long-and-short stitches using single strands of floss.
This allows you to smoothly blend purples, yellows, and whites to mimic the flower’s natural variegation.
Add the signature dark center “whiskers” with just a few tiny, radiating straight stitches to give each flower its unique personality.
7. Whitework and Color for Heirloom Children’s Apparel
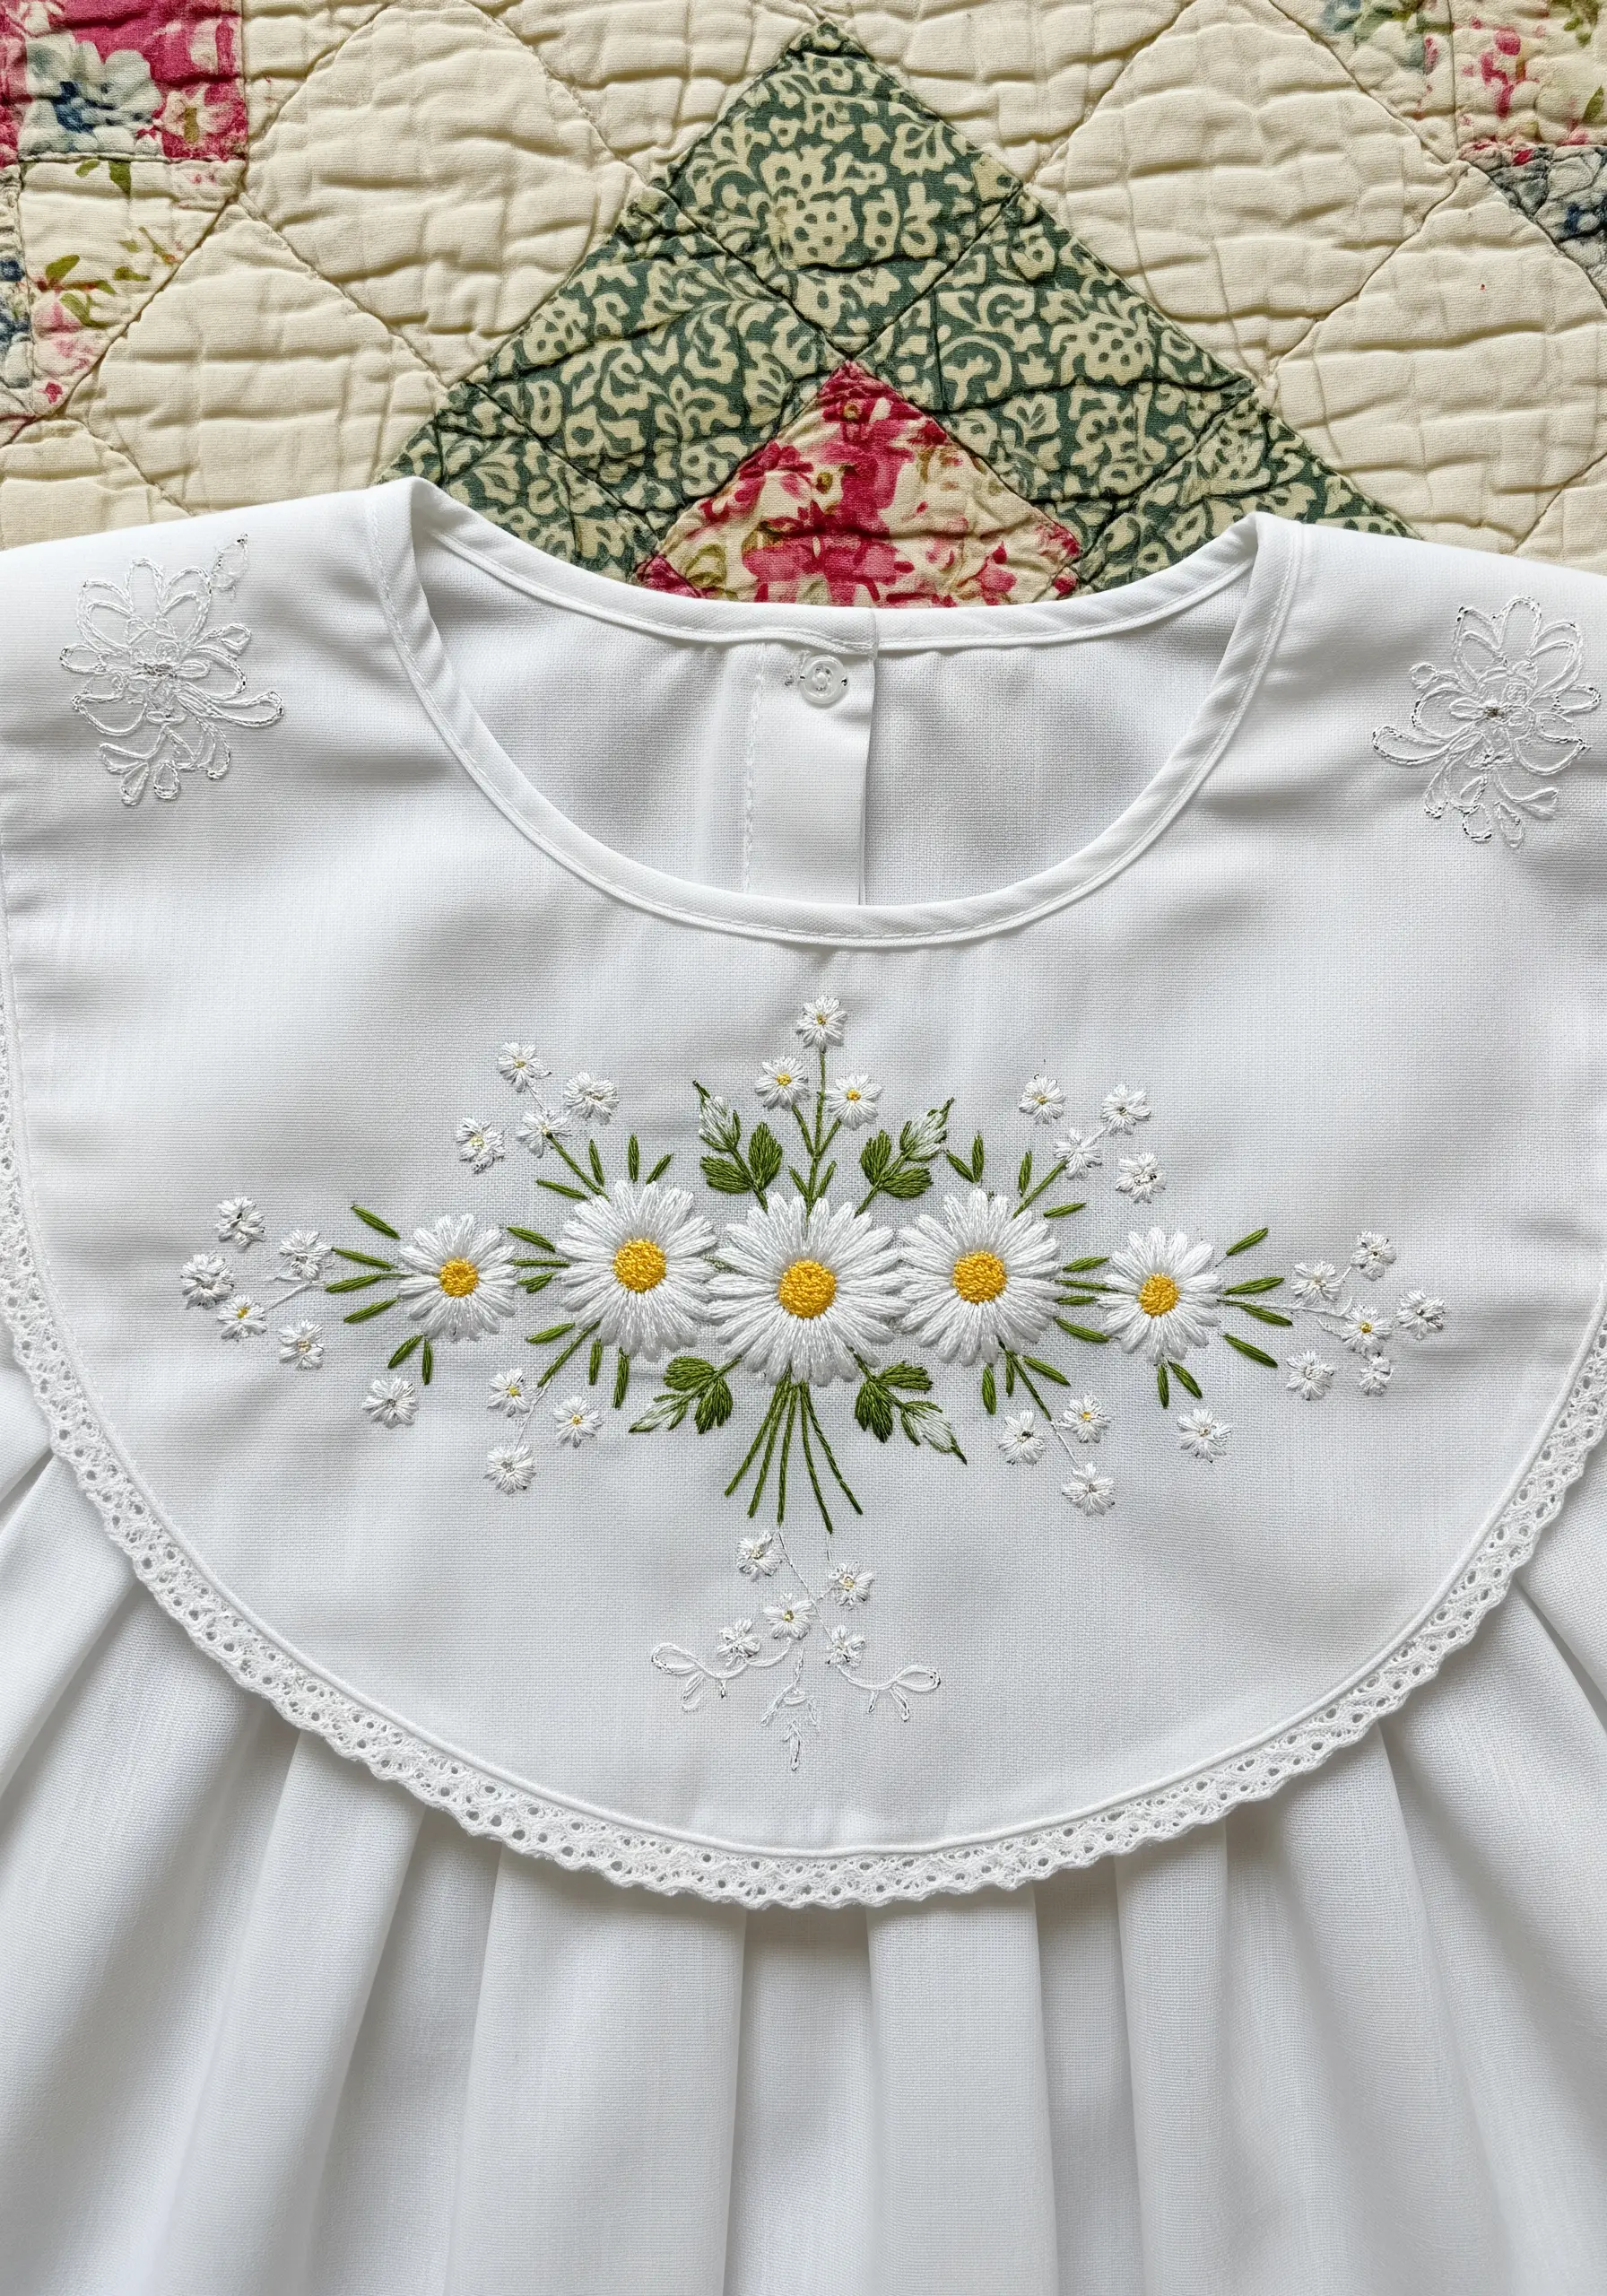
Combine the timeless elegance of whitework with subtle pops of color for a truly special heirloom piece.
Use a clean satin stitch for the daisy petals and dense French knots for the bright yellow centers.
The scattered whitework flowers on the collar add lace-like detail that feels both classic and delicate.
This approach elevates simple garments, turning them into tiny line-art icons that turn children’s clothing into adorable personalized keepsakes.
8. Integrating Embroidery on Quilted Surfaces
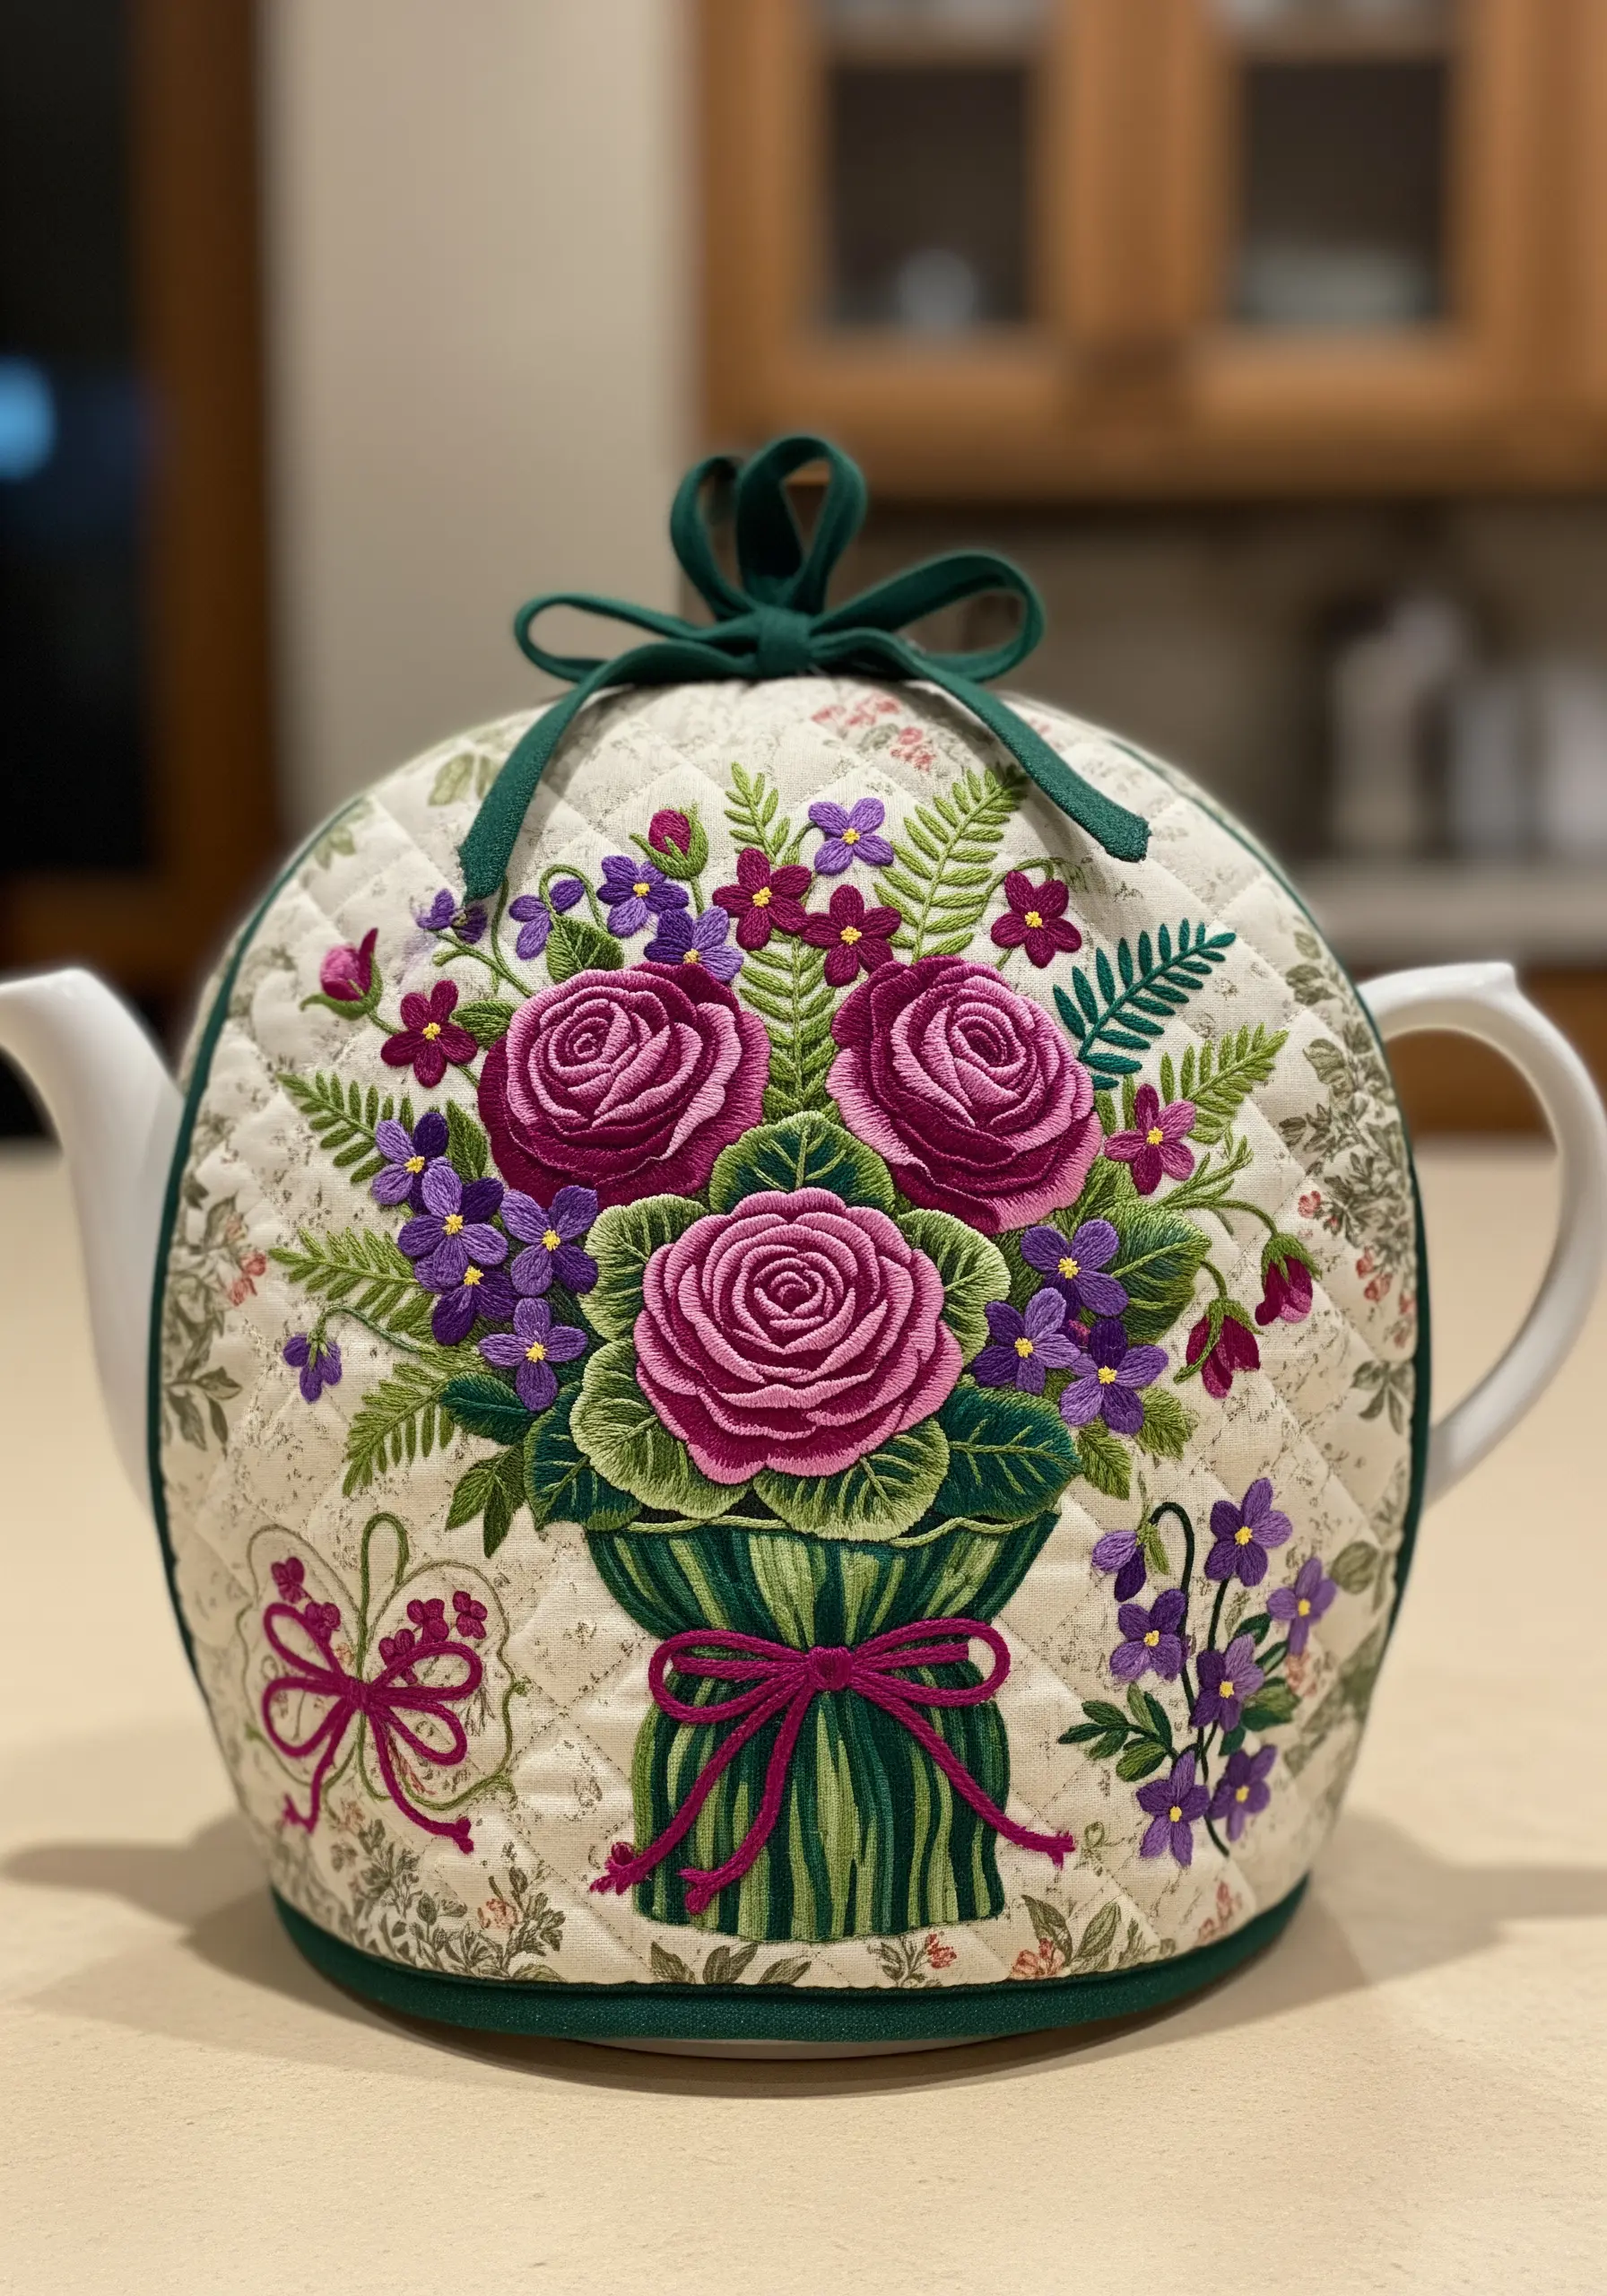
To prevent puckering when stitching on a pre-quilted item, contain your embroidery design within the quilted sections.
This technique works with the fabric’s existing structure rather than fighting against it.
Choose stitches with excellent coverage, like padded satin stitch for the roses and lazy daisy stitches for the filler violets, to ensure they stand out against the textured background.
A contrasting ribbon adds a functional and decorative final touch.
9. Creating a Thematic Set of Embroidered Linens
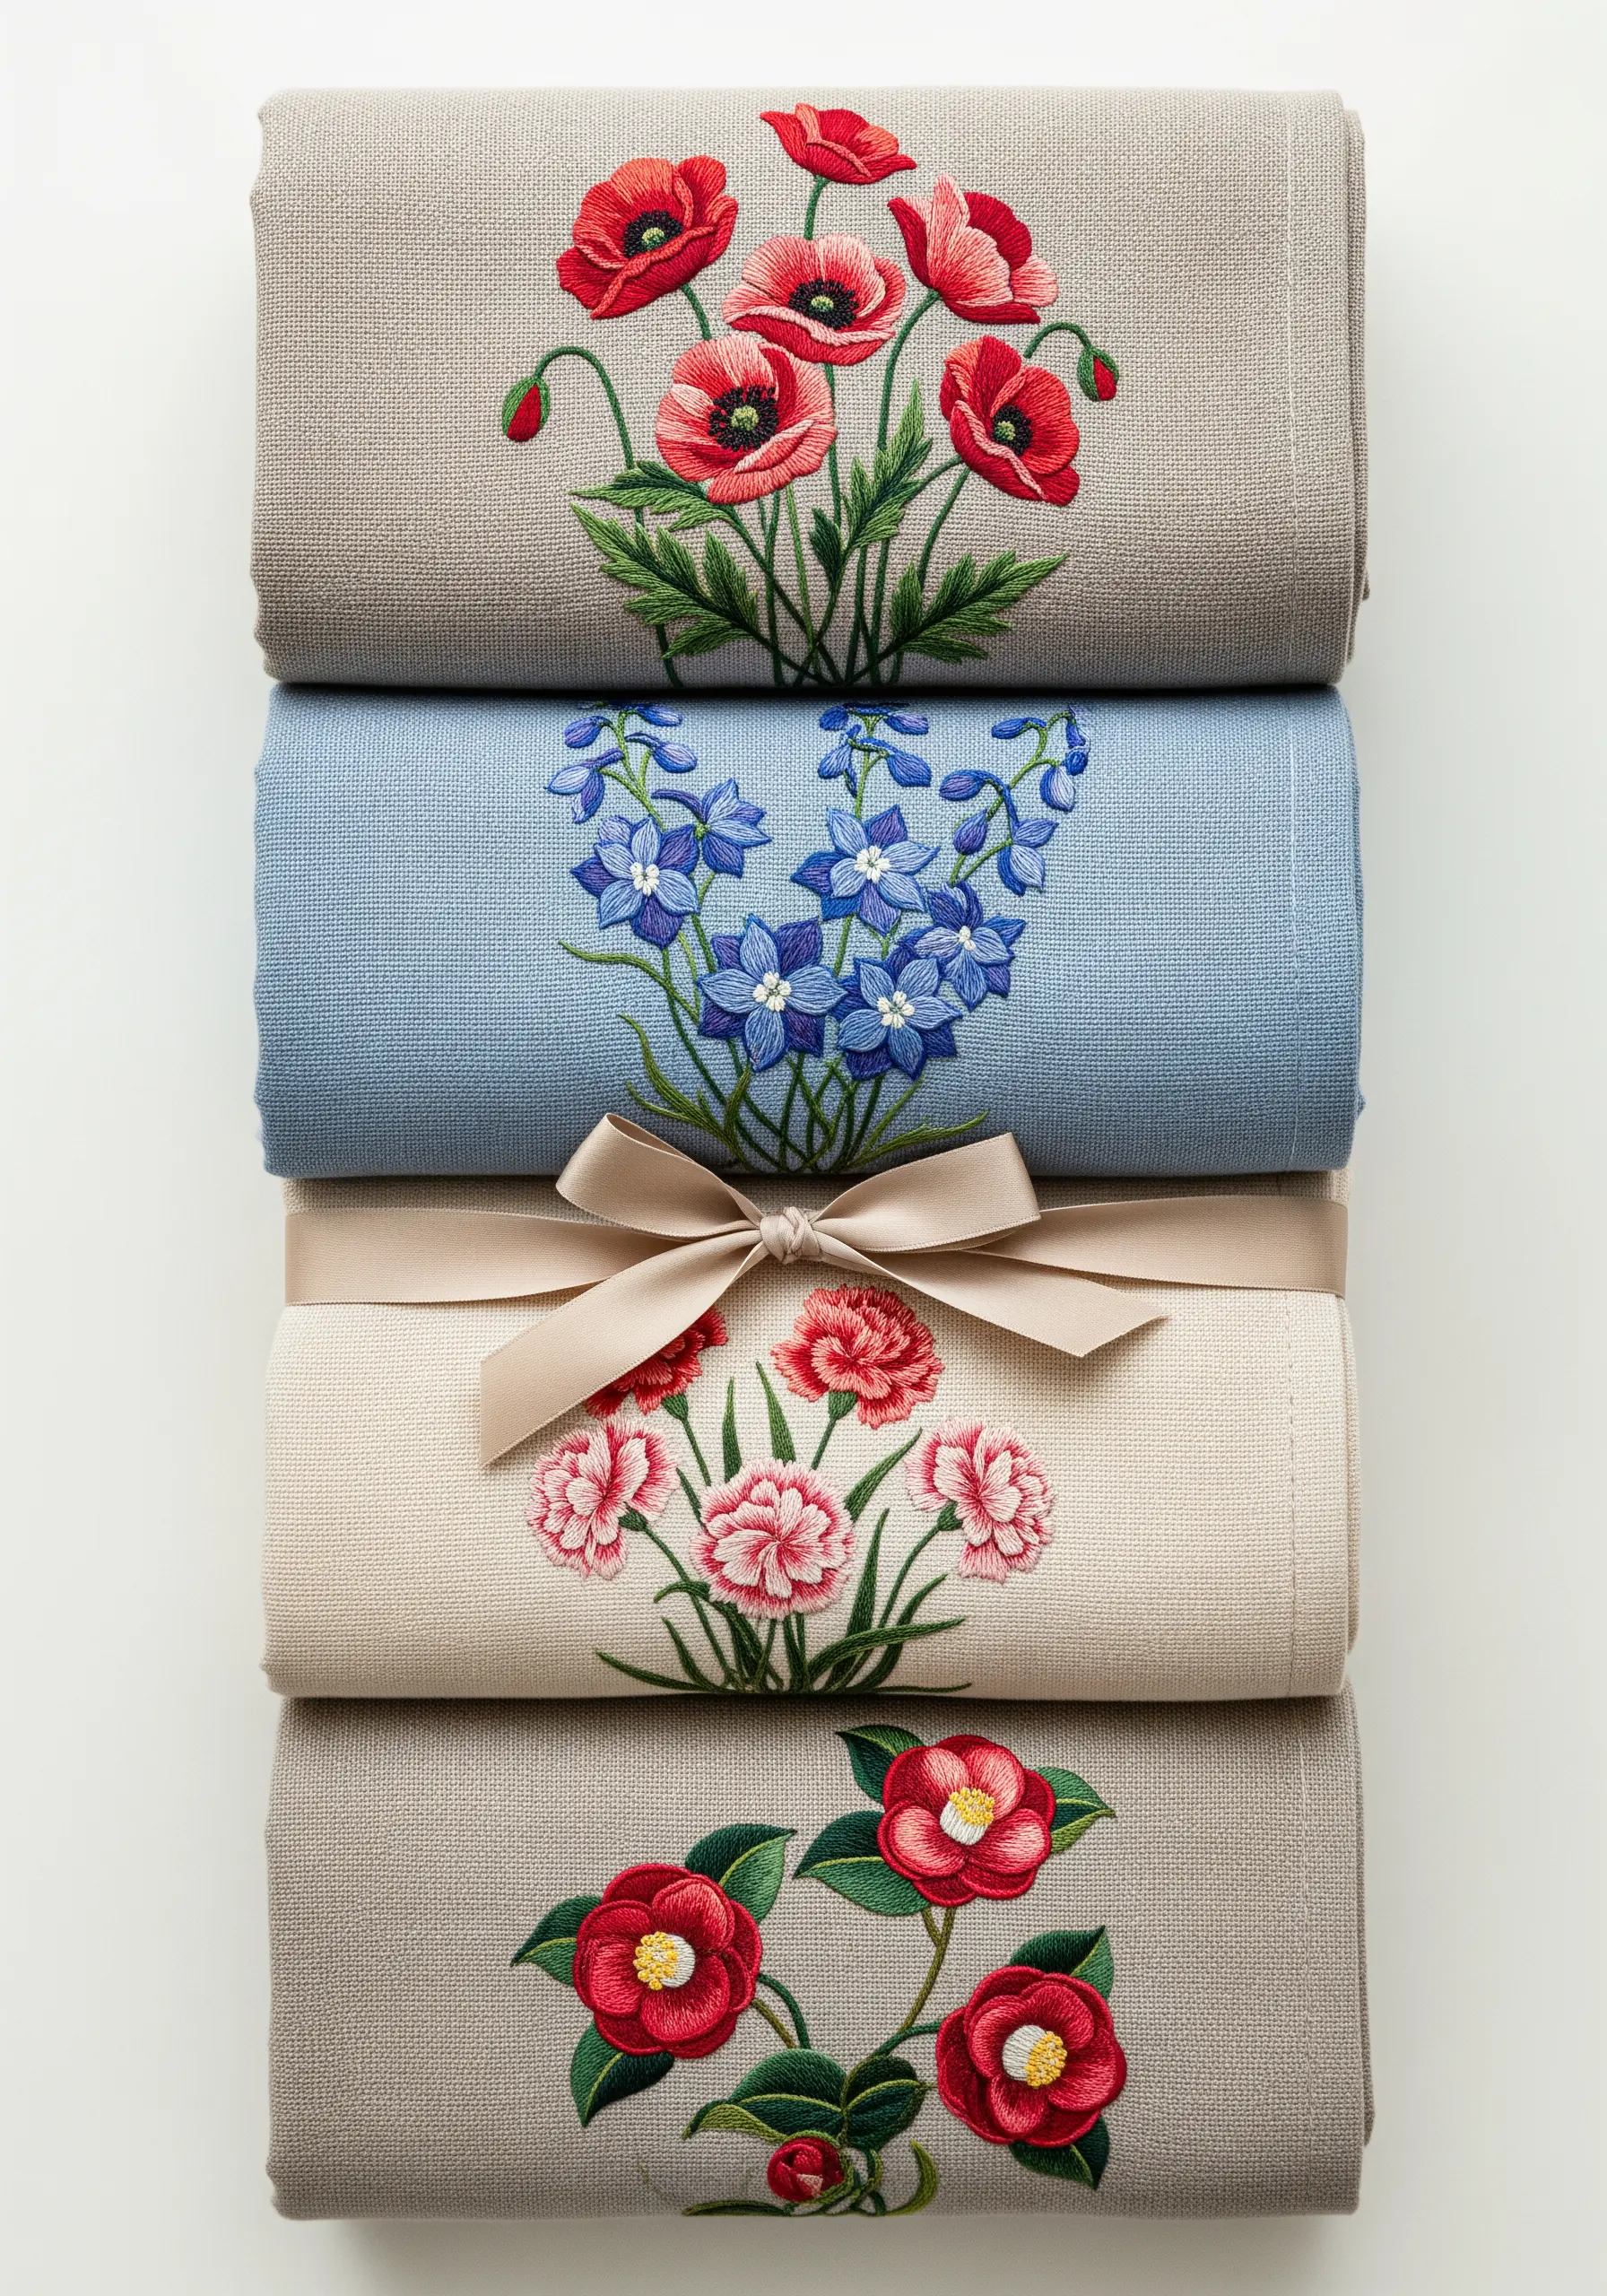
Design a coordinated set of table linens by choosing a unifying theme—like garden flowers—but giving each piece a unique motif.
Vary the main flower on each napkin (poppies, delphiniums, carnations) while keeping the color palette and compositional style consistent.
This approach makes each item feel individual and special, while ensuring the entire set looks beautifully cohesive when used together.
This method is perfect for heirloom-style table linen embroidery patterns.
10. Composing a Landscape Bouquet for Panoramic Art
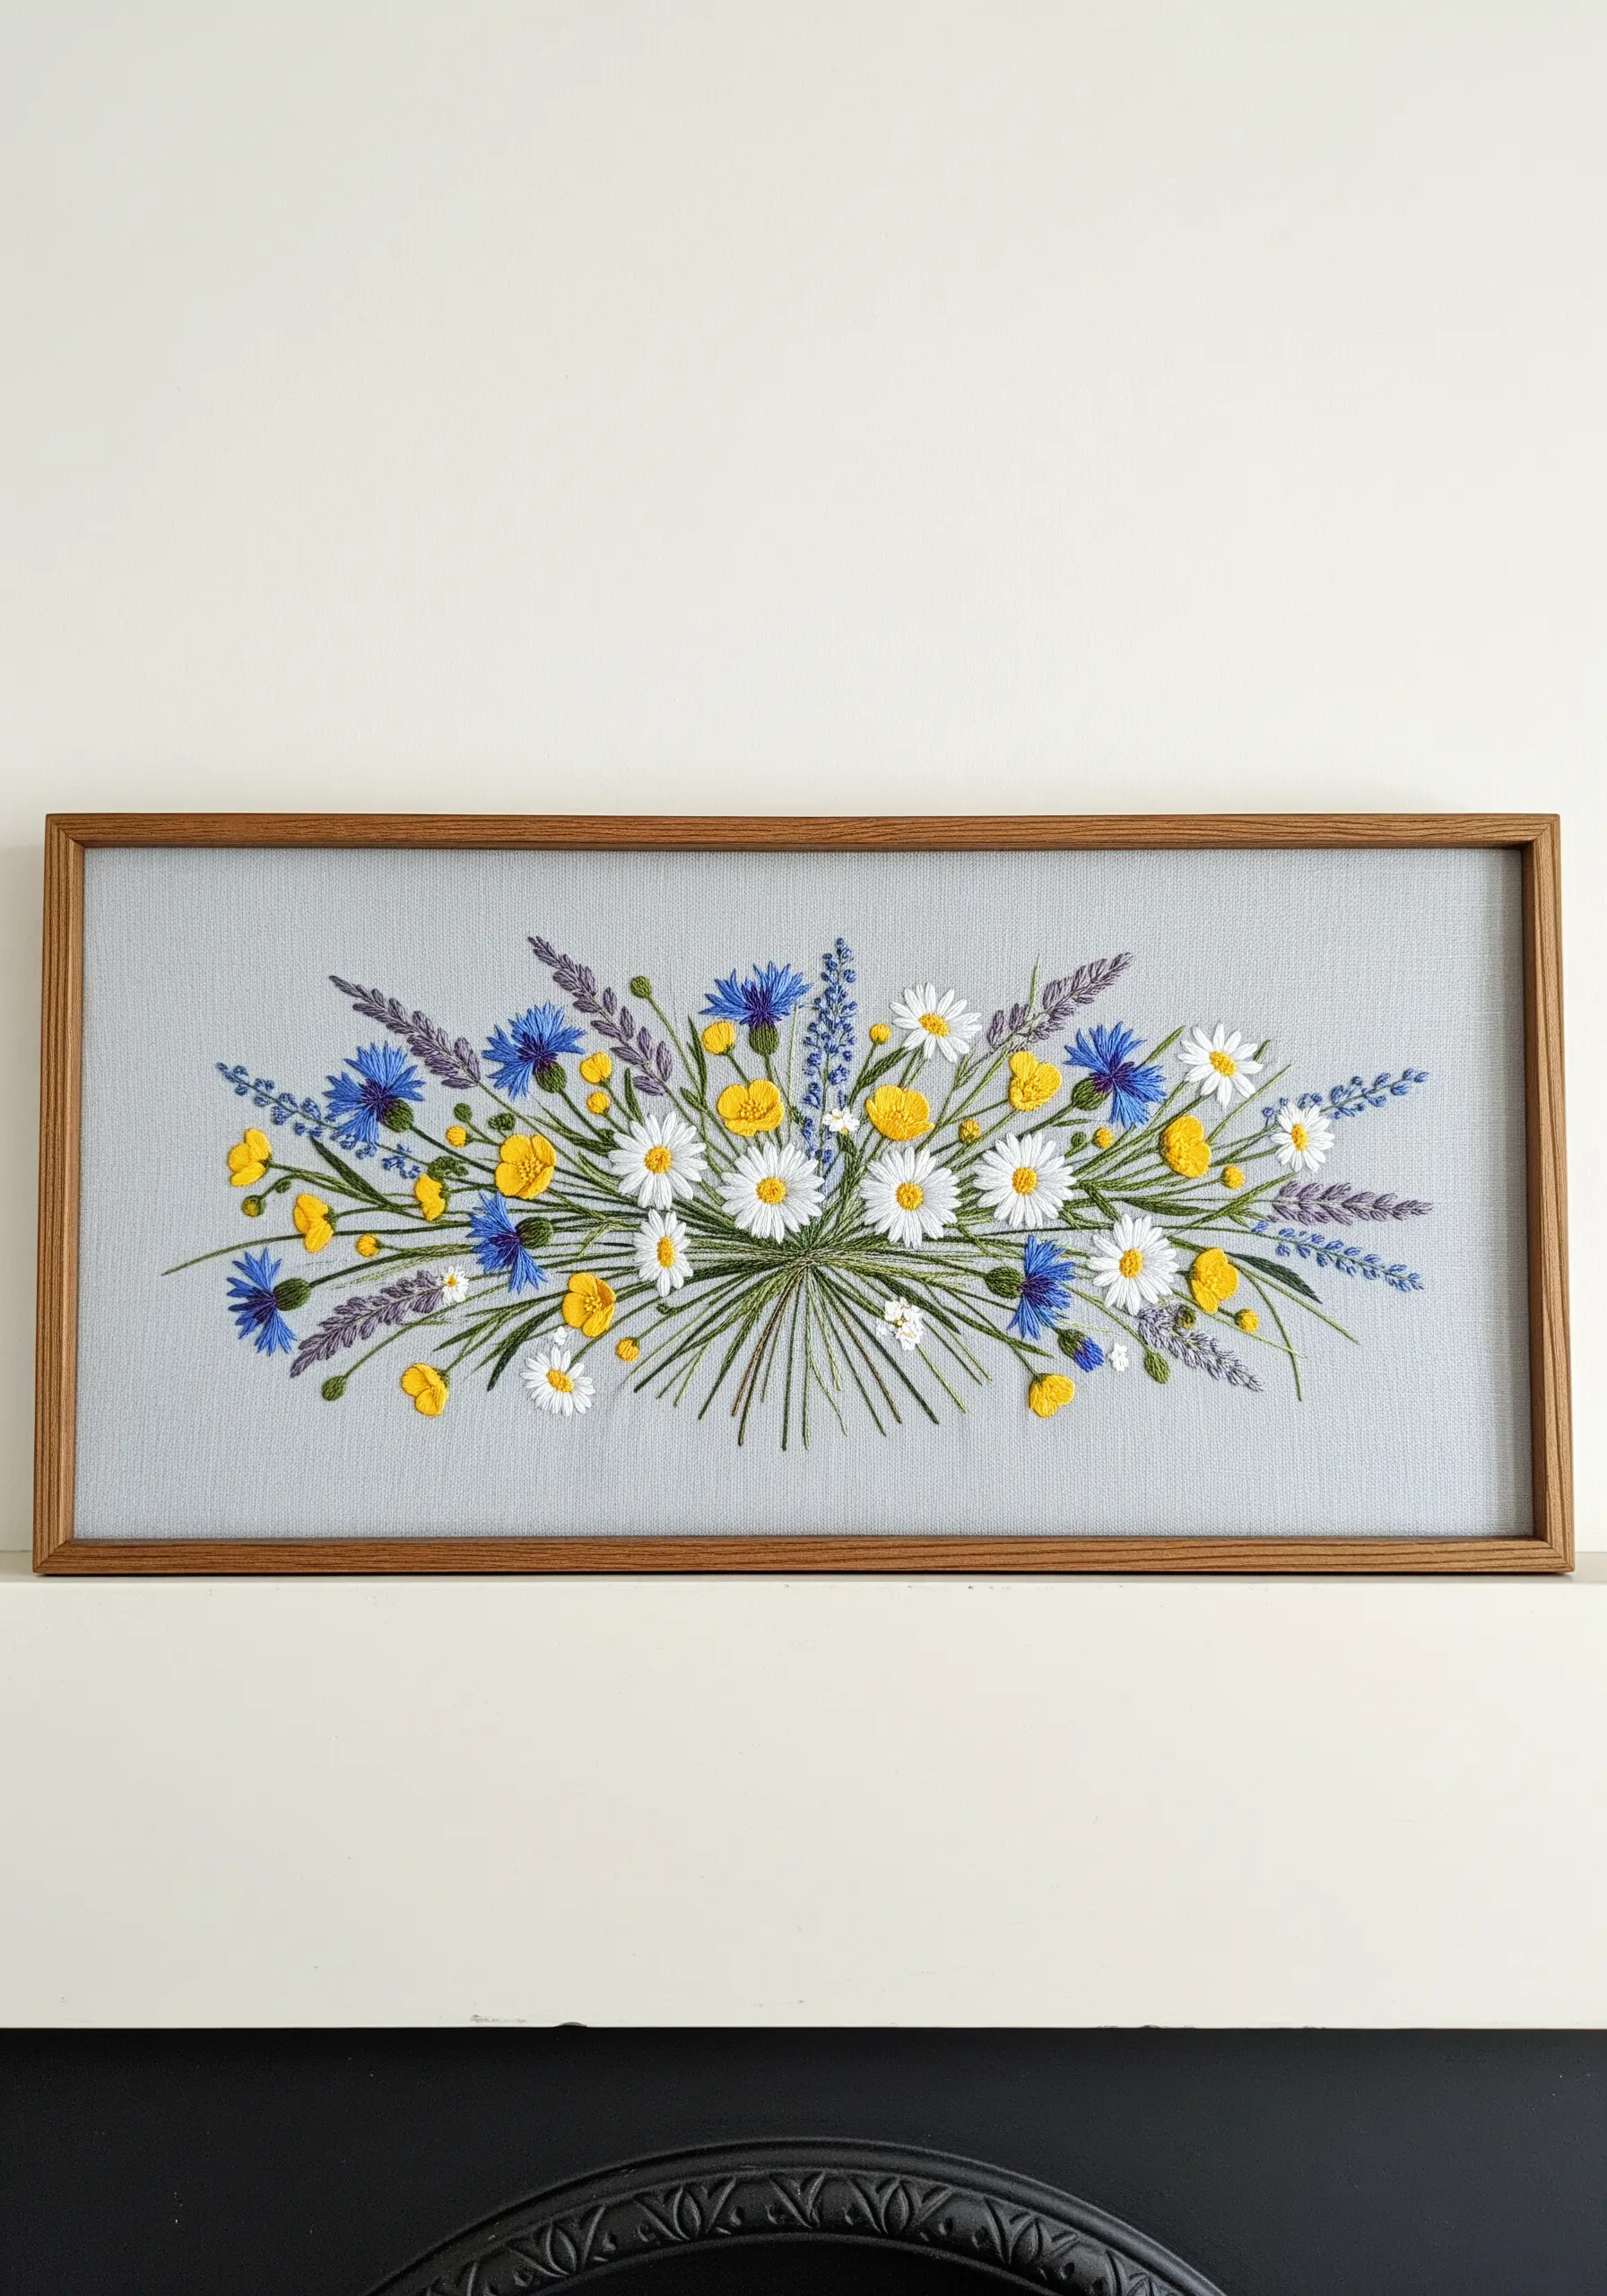
Create the feeling of a sprawling wildflower meadow by arranging your bouquet in a wide, horizontal composition.
Overlap stems and blossoms to build density in the center, and allow lighter elements like lavender and grasses to taper off at the ends.
Varying your stitch types—satin stitch for daisy petals, French knots for cornflowers, and simple straight stitches for grasses—builds a rich, realistic texture.
The final result feels like one of those wildflower hoop art projects that look like miniature meadow paintings for your wall.
11. Functional Art: Embroidering on Felt
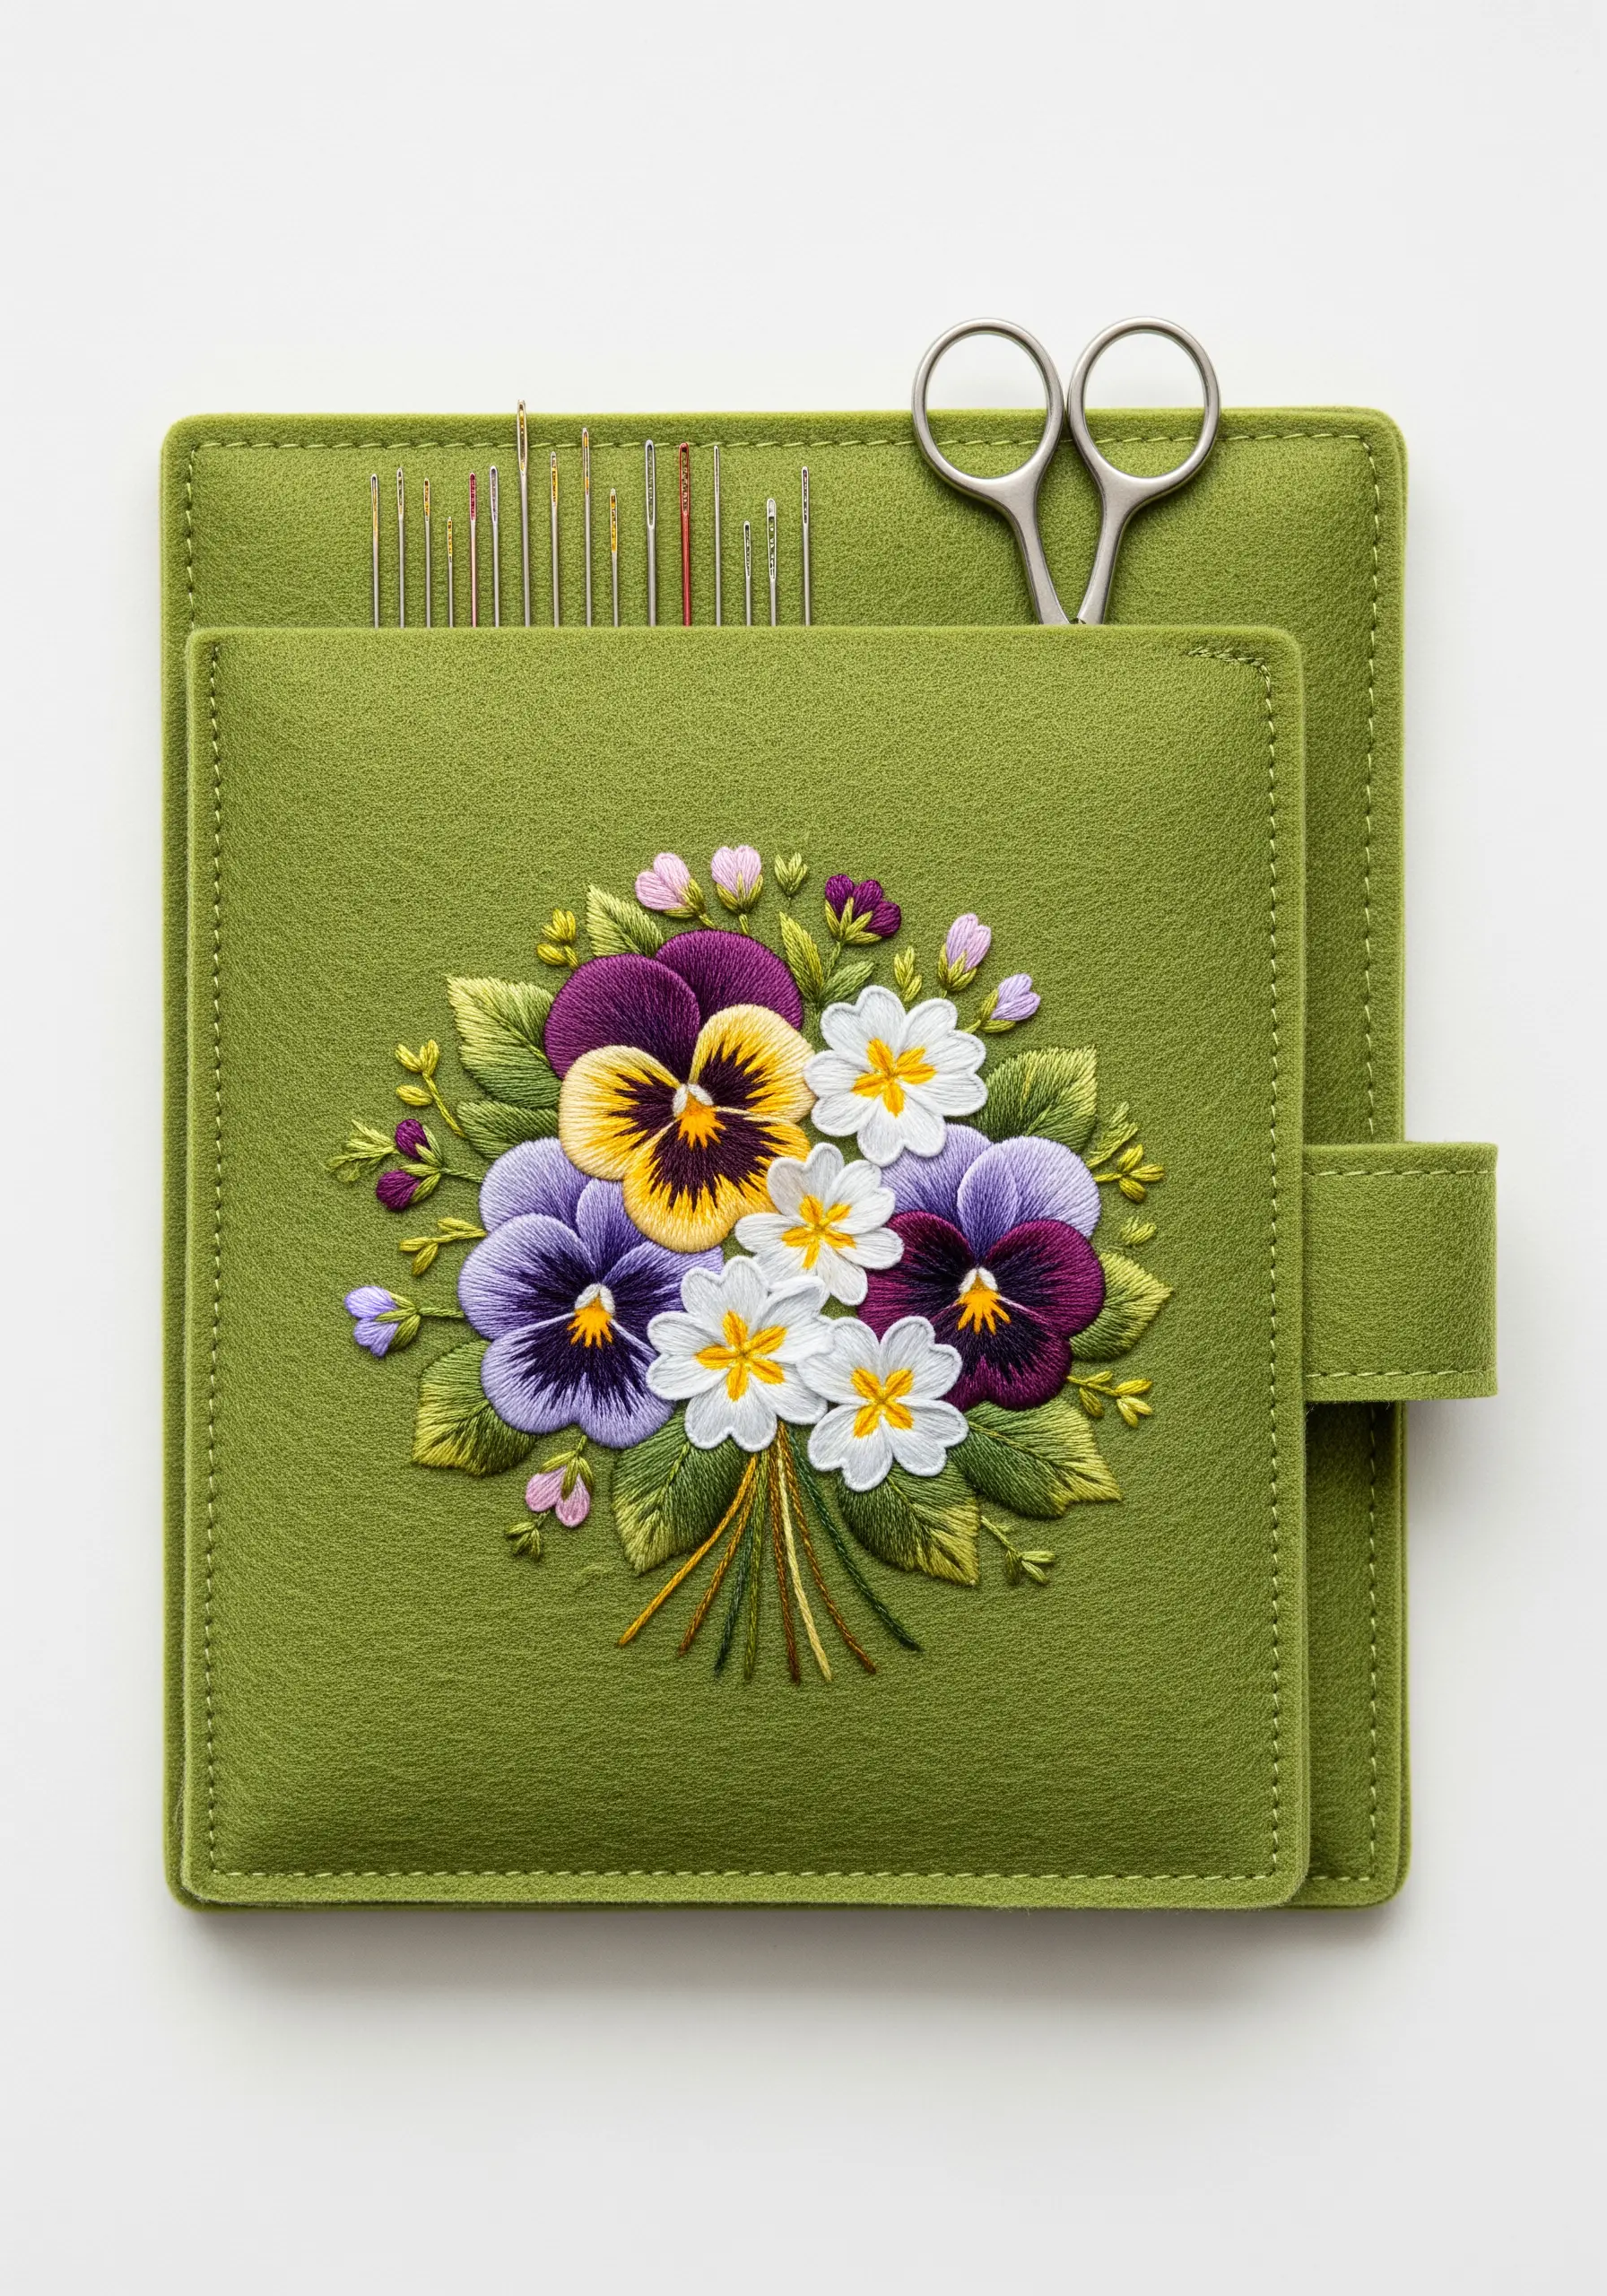
Felt offers a wonderfully stable, non-fraying base that is perfect for detailed embroidery.
Its soft, matte texture allows thread to sit beautifully on the surface, making satin stitches look particularly smooth and solid.
The key to success is to avoid pulling your stitches too tight, as this can compress and pucker the felt.
A clean, simple running stitch along the edge gives any functional felt item a professional finish.
12. Designing for Vertical Space with Cascading Florals
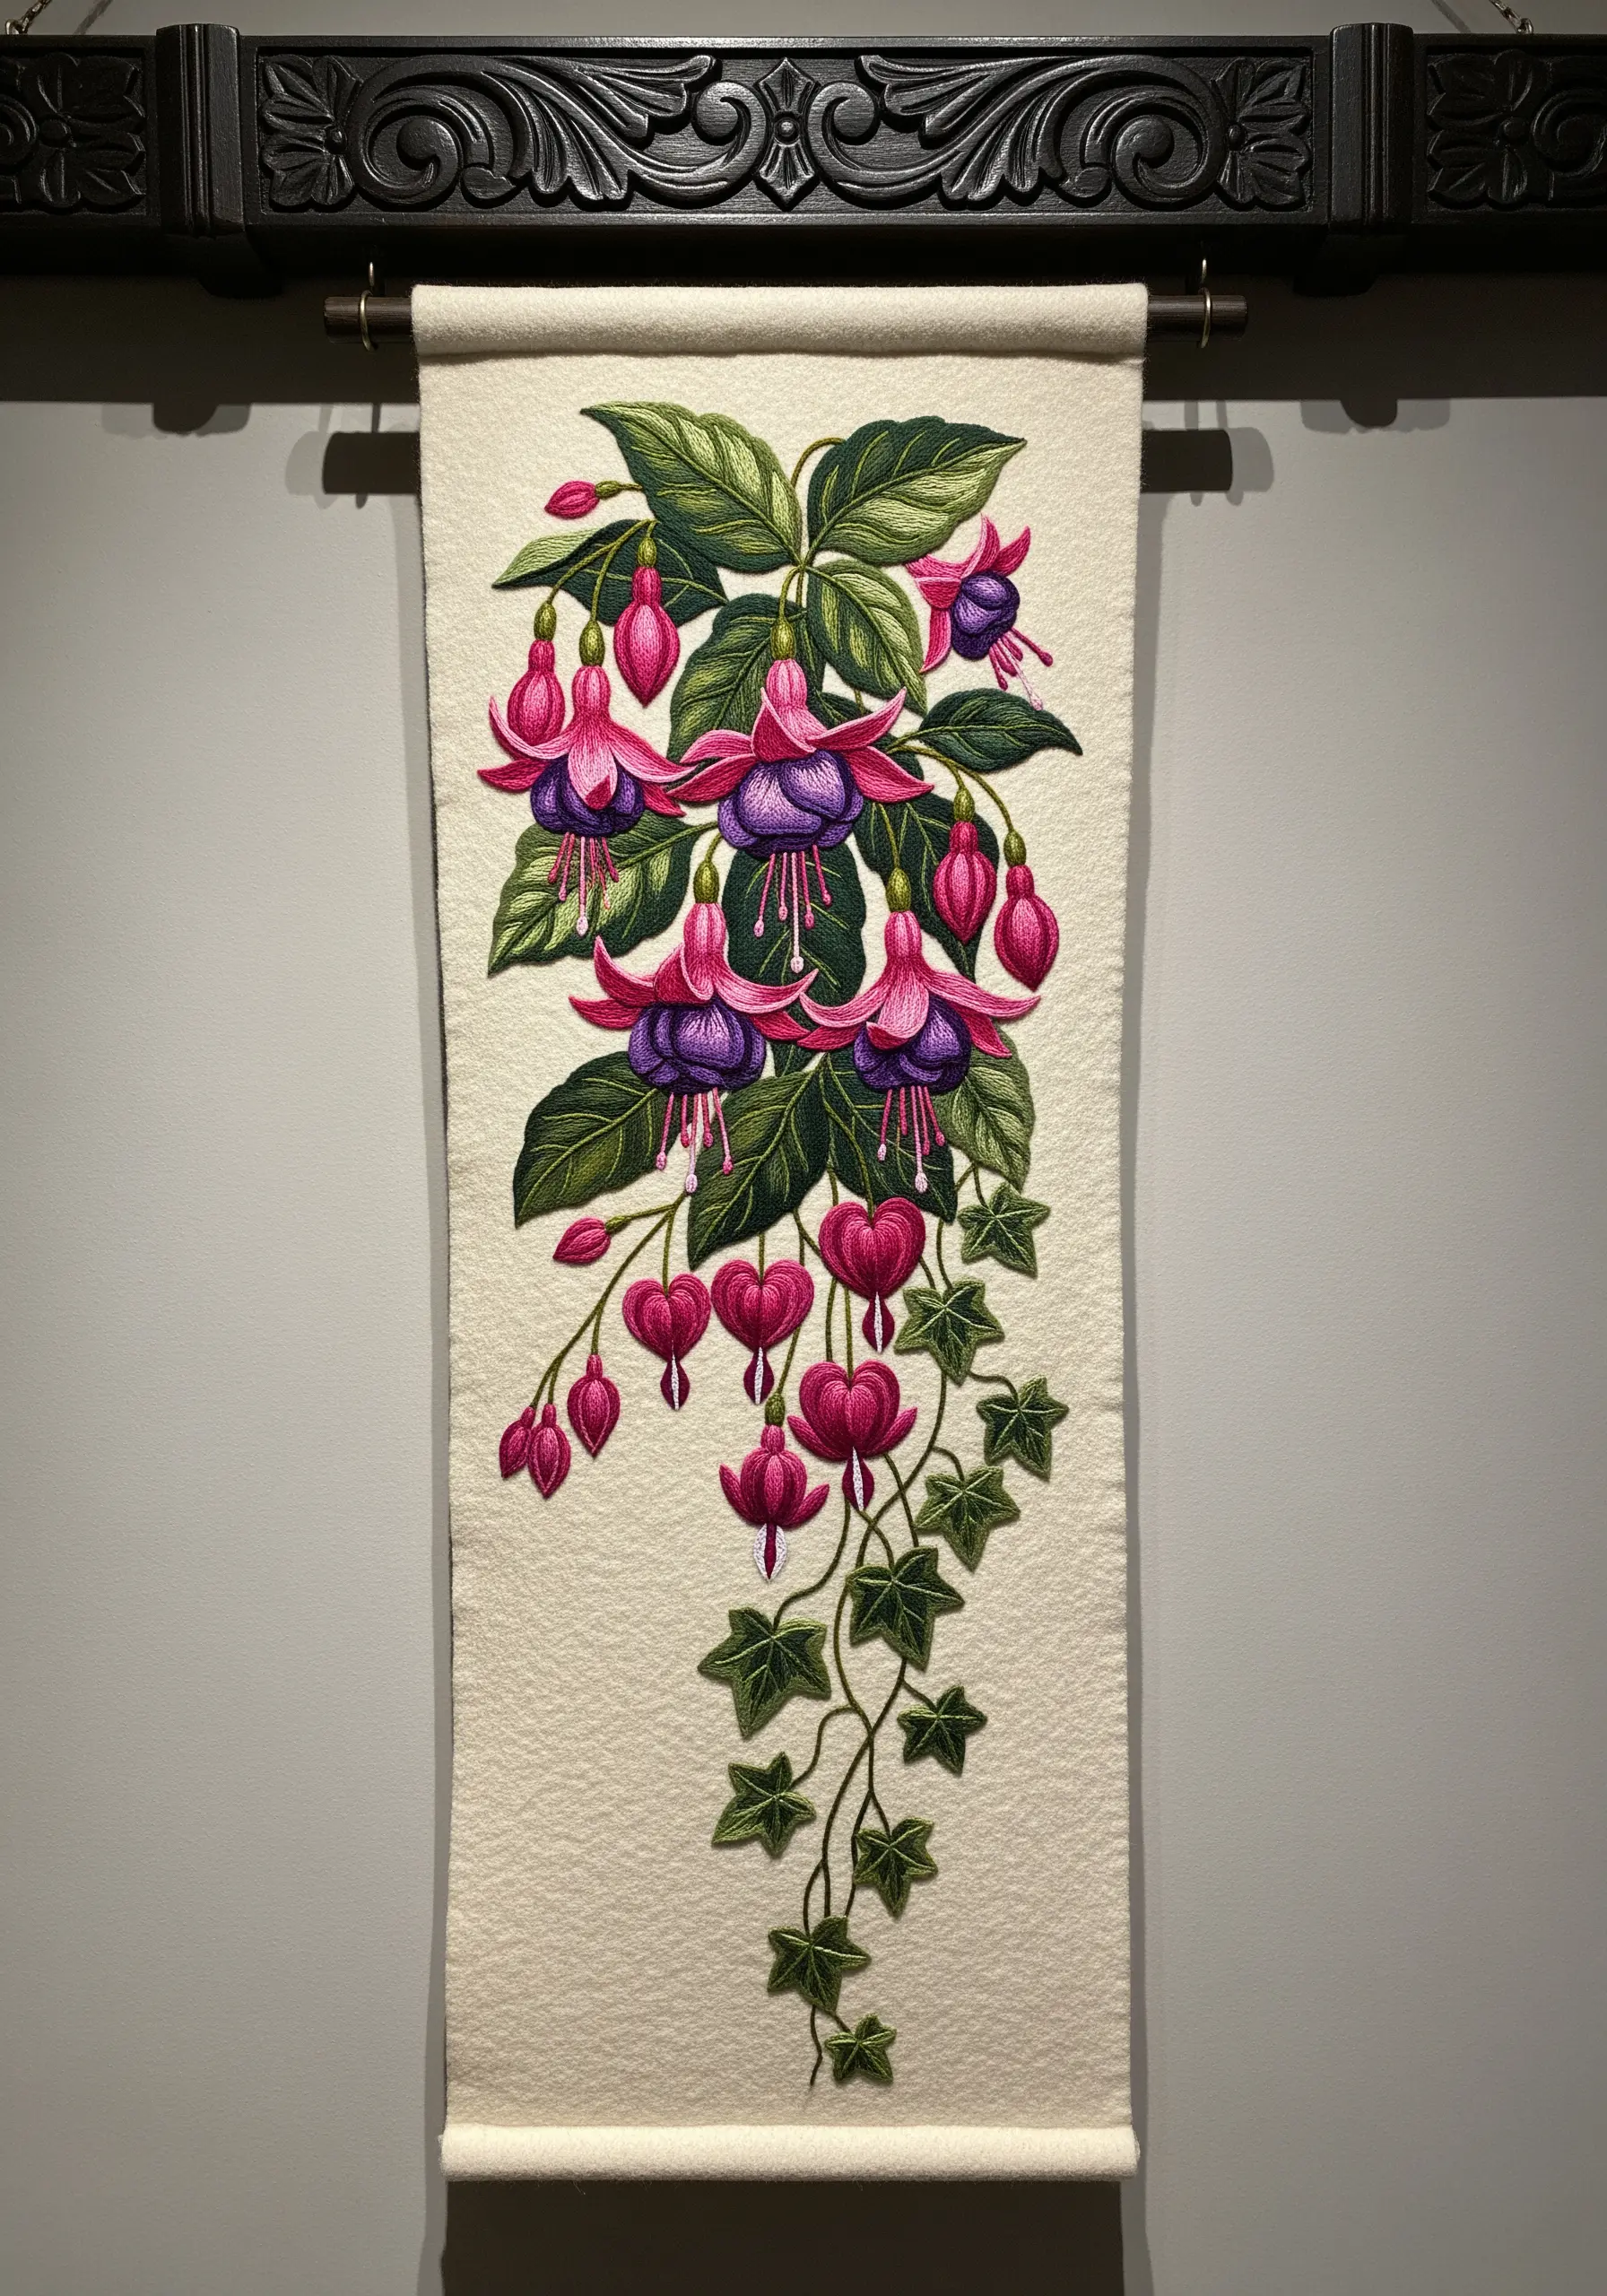
For a long, narrow wall hanging, select a plant with a natural downward drape, such as fuchsia, wisteria, or bleeding hearts.
Emphasize this vertical movement by arranging the design so the vine meanders gracefully down the length of the fabric.
Use a padded satin stitch for the flower petals to give them a raised, sculptural quality that catches the light and adds a subtle 3D effect.
These kinds of pieces become beautiful embroidery wall tapestries that add warmth to bare apartments on a budget.
13. Framing a Monogram with a Dainty Floral Wreath
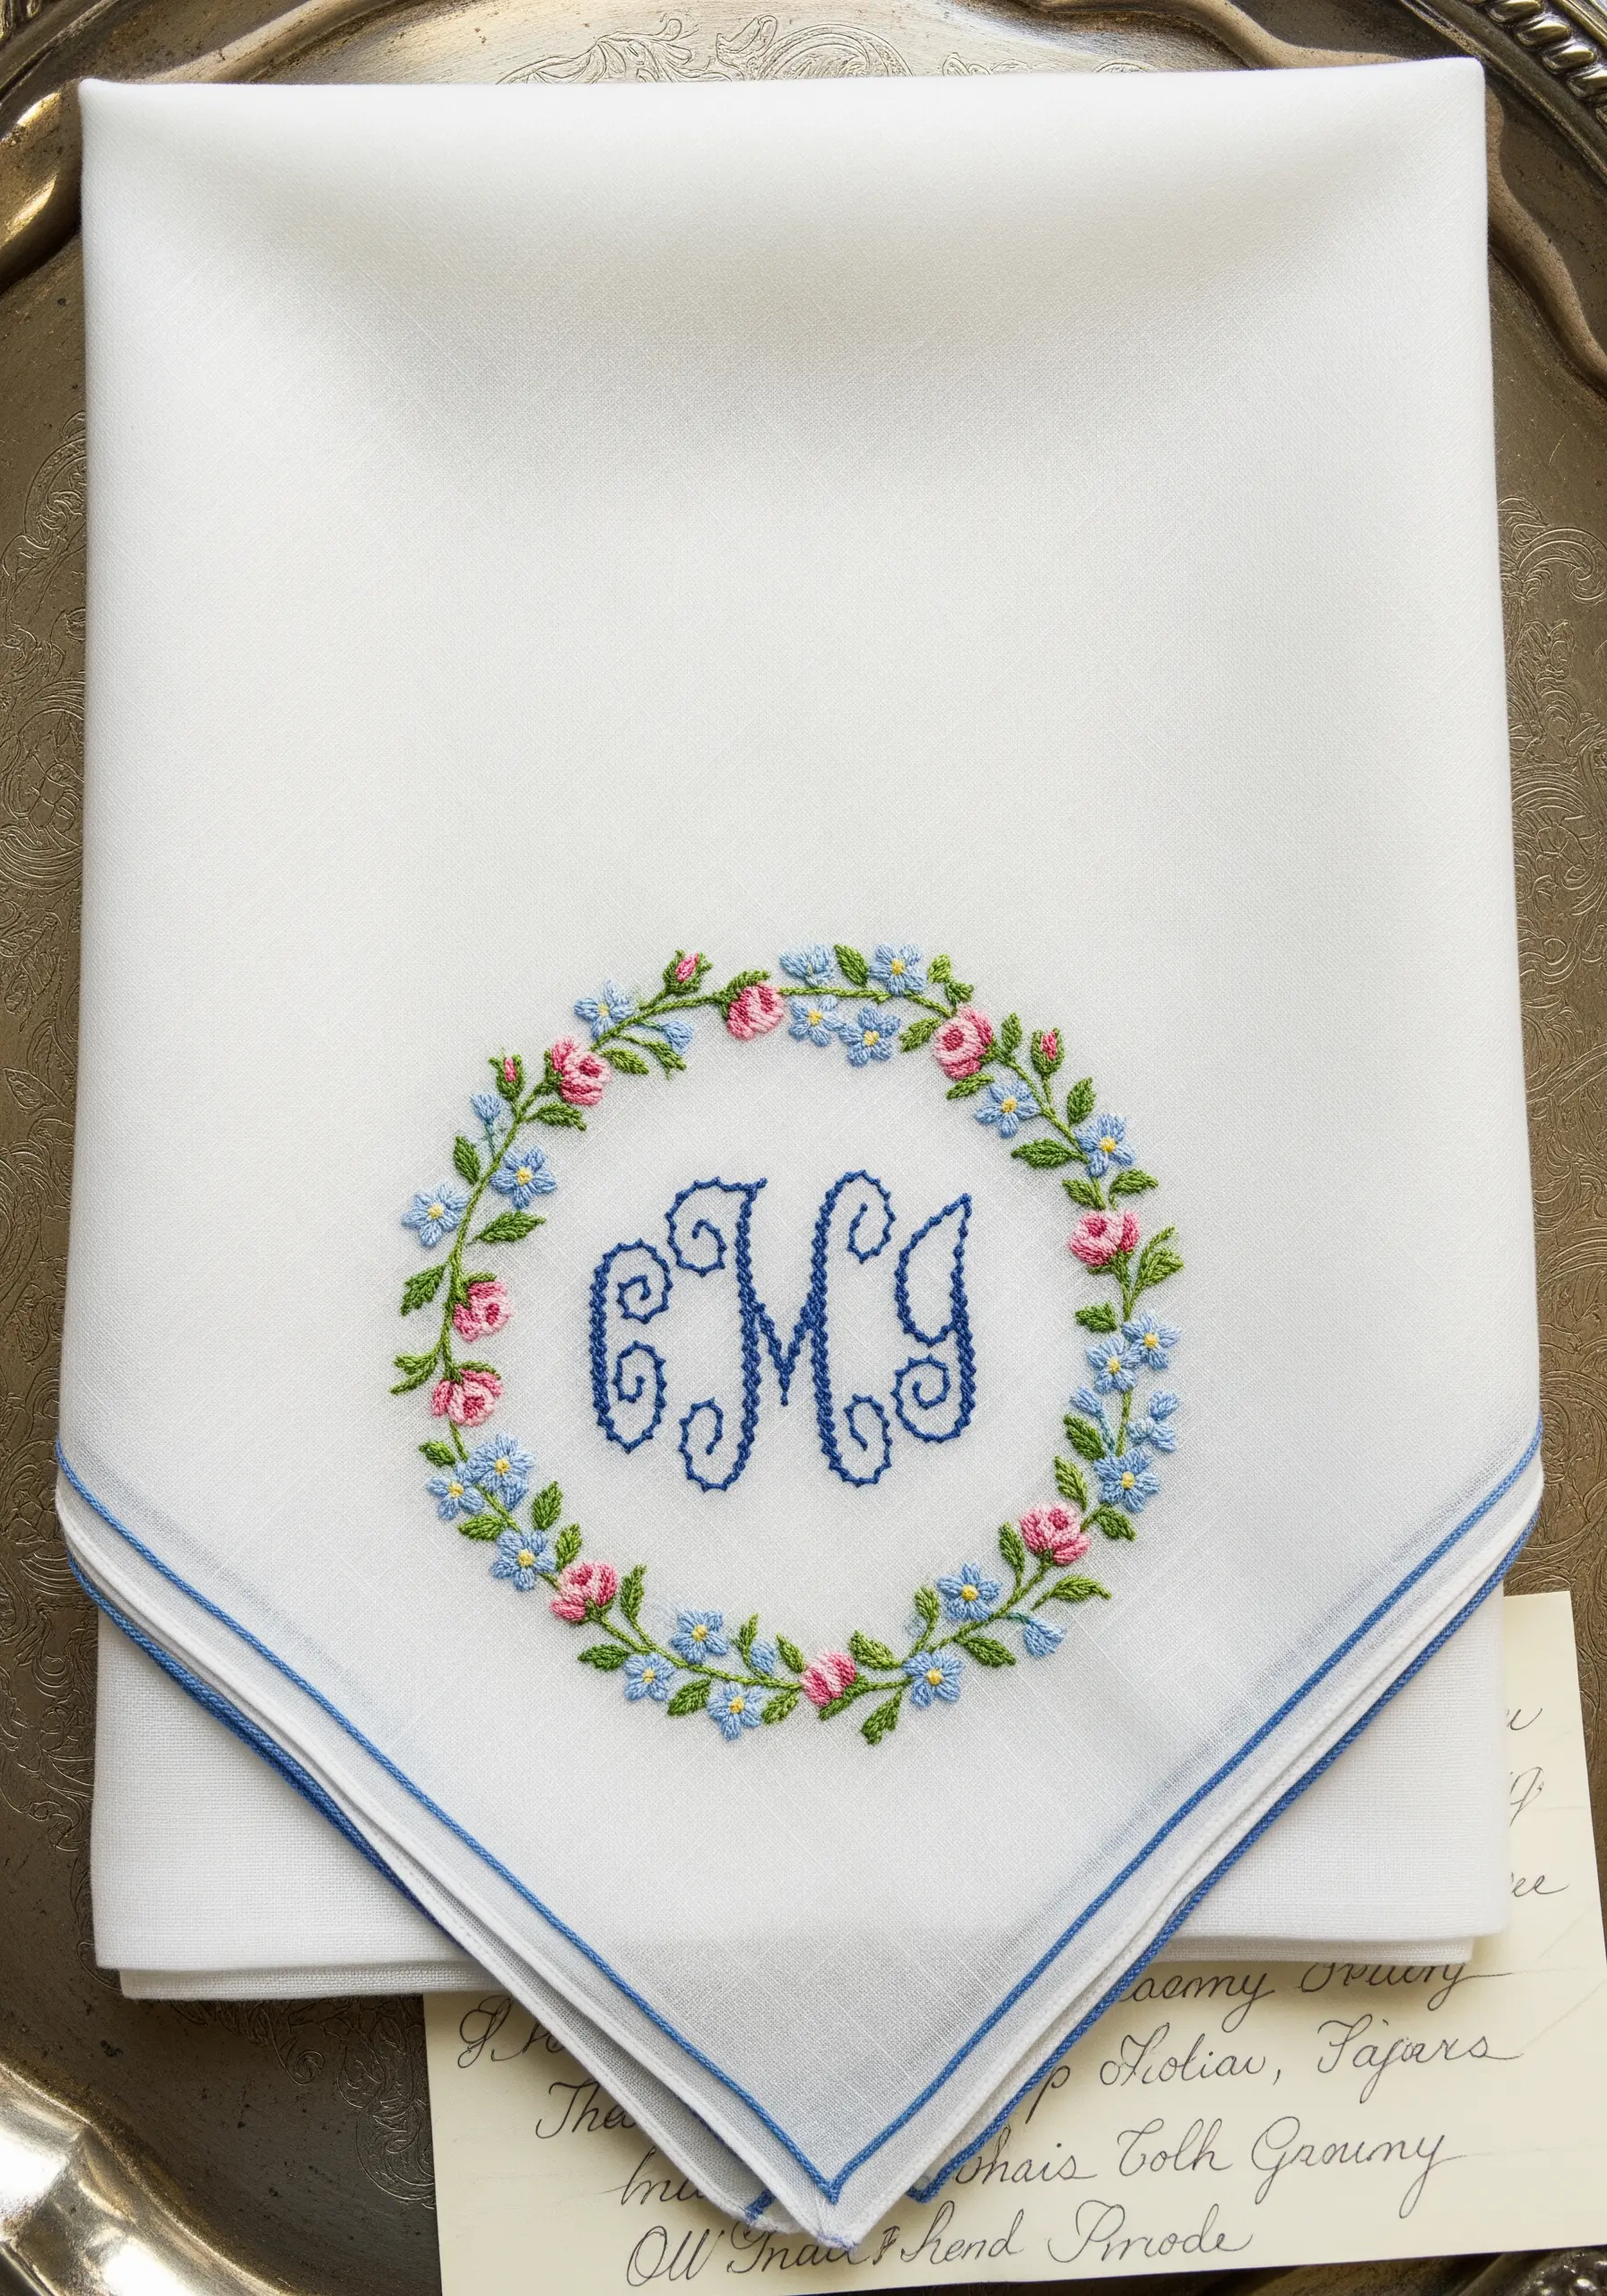
Create a delicate, decorative frame for a monogram by using miniature stitches.
Tiny bullion knots or satin-stitched buds make perfect roses, while lazy daisy stitches are ideal for forget-me-nots and other small filler flowers.
Always stitch the monogram first to ensure perfect centering and placement, then build the floral wreath around it for a balanced, heirloom-quality finish.
14. Upholstery Embroidery: Planning for Durability
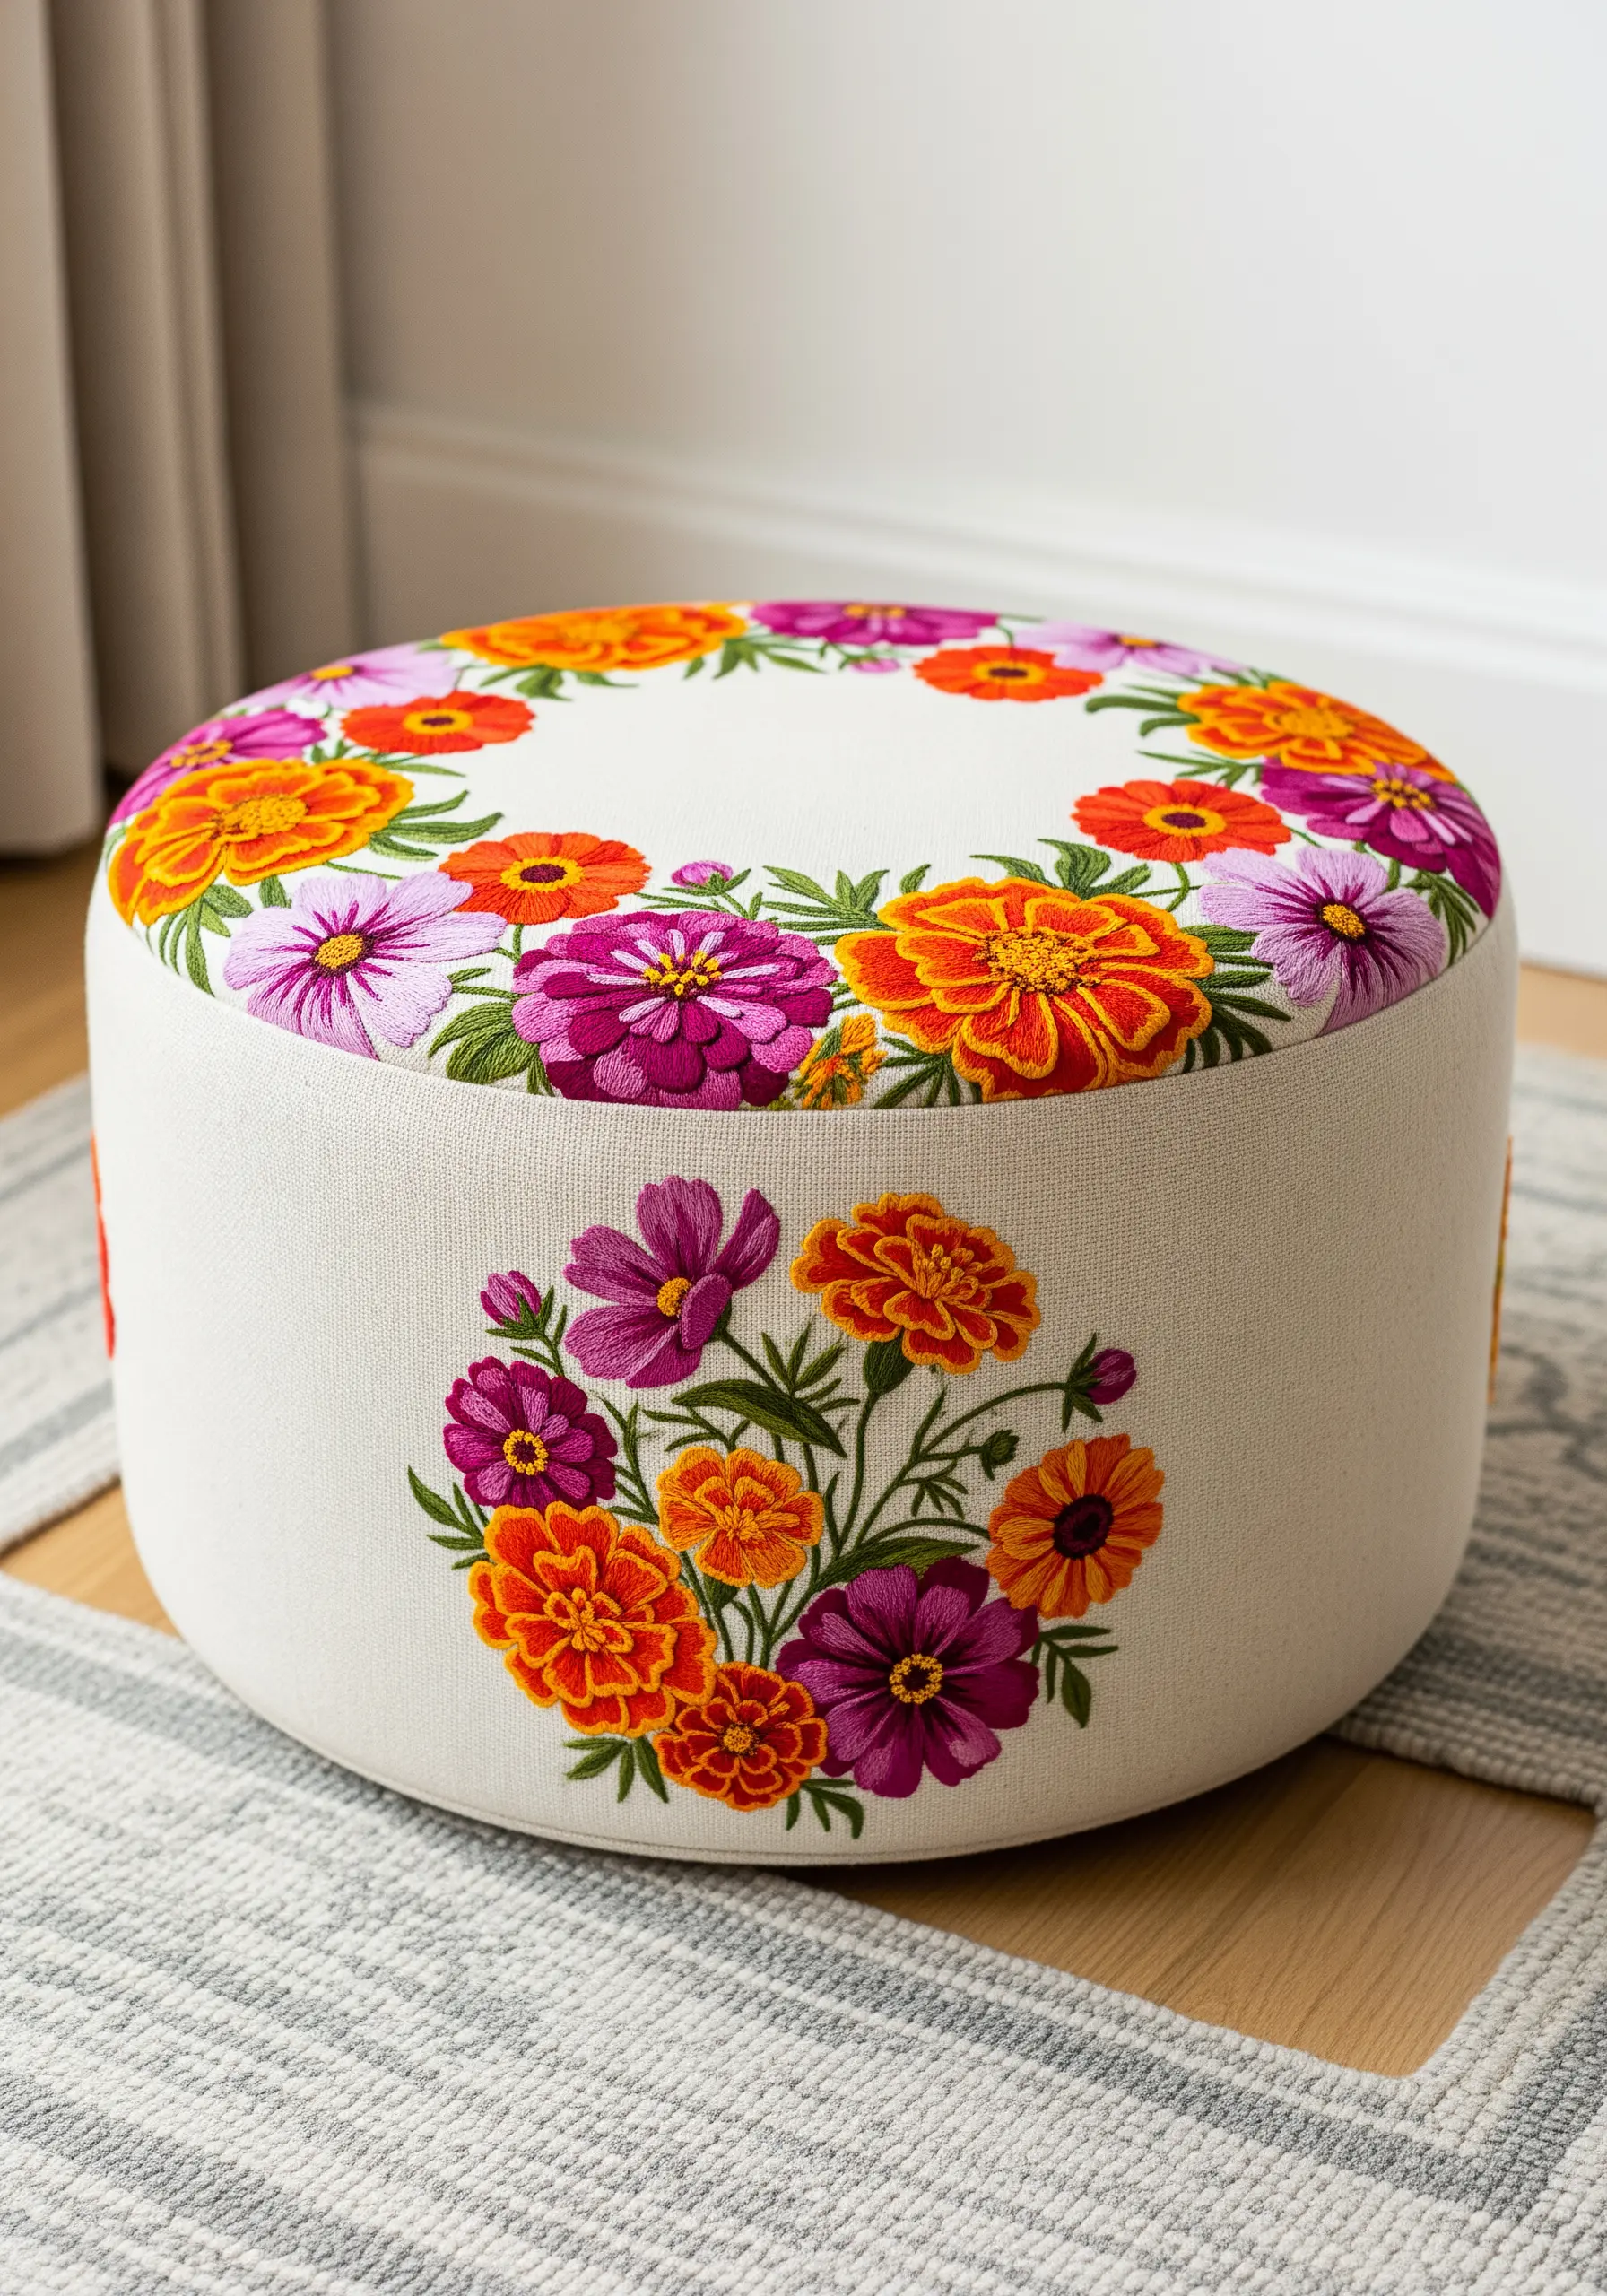
When embroidering items that will see daily use, such as furniture, durability is key.
Choose flat stitches like satin stitch, long-and-short stitch, and stem stitch, as they are less likely to snag than looped stitches like bullion knots.
Always use a high-quality, colorfast thread and a heavy-duty base fabric like canvas or a linen blend to ensure your beautiful work withstands wear and tear.
15. Creating Atmospheric Depth with Background Stitches
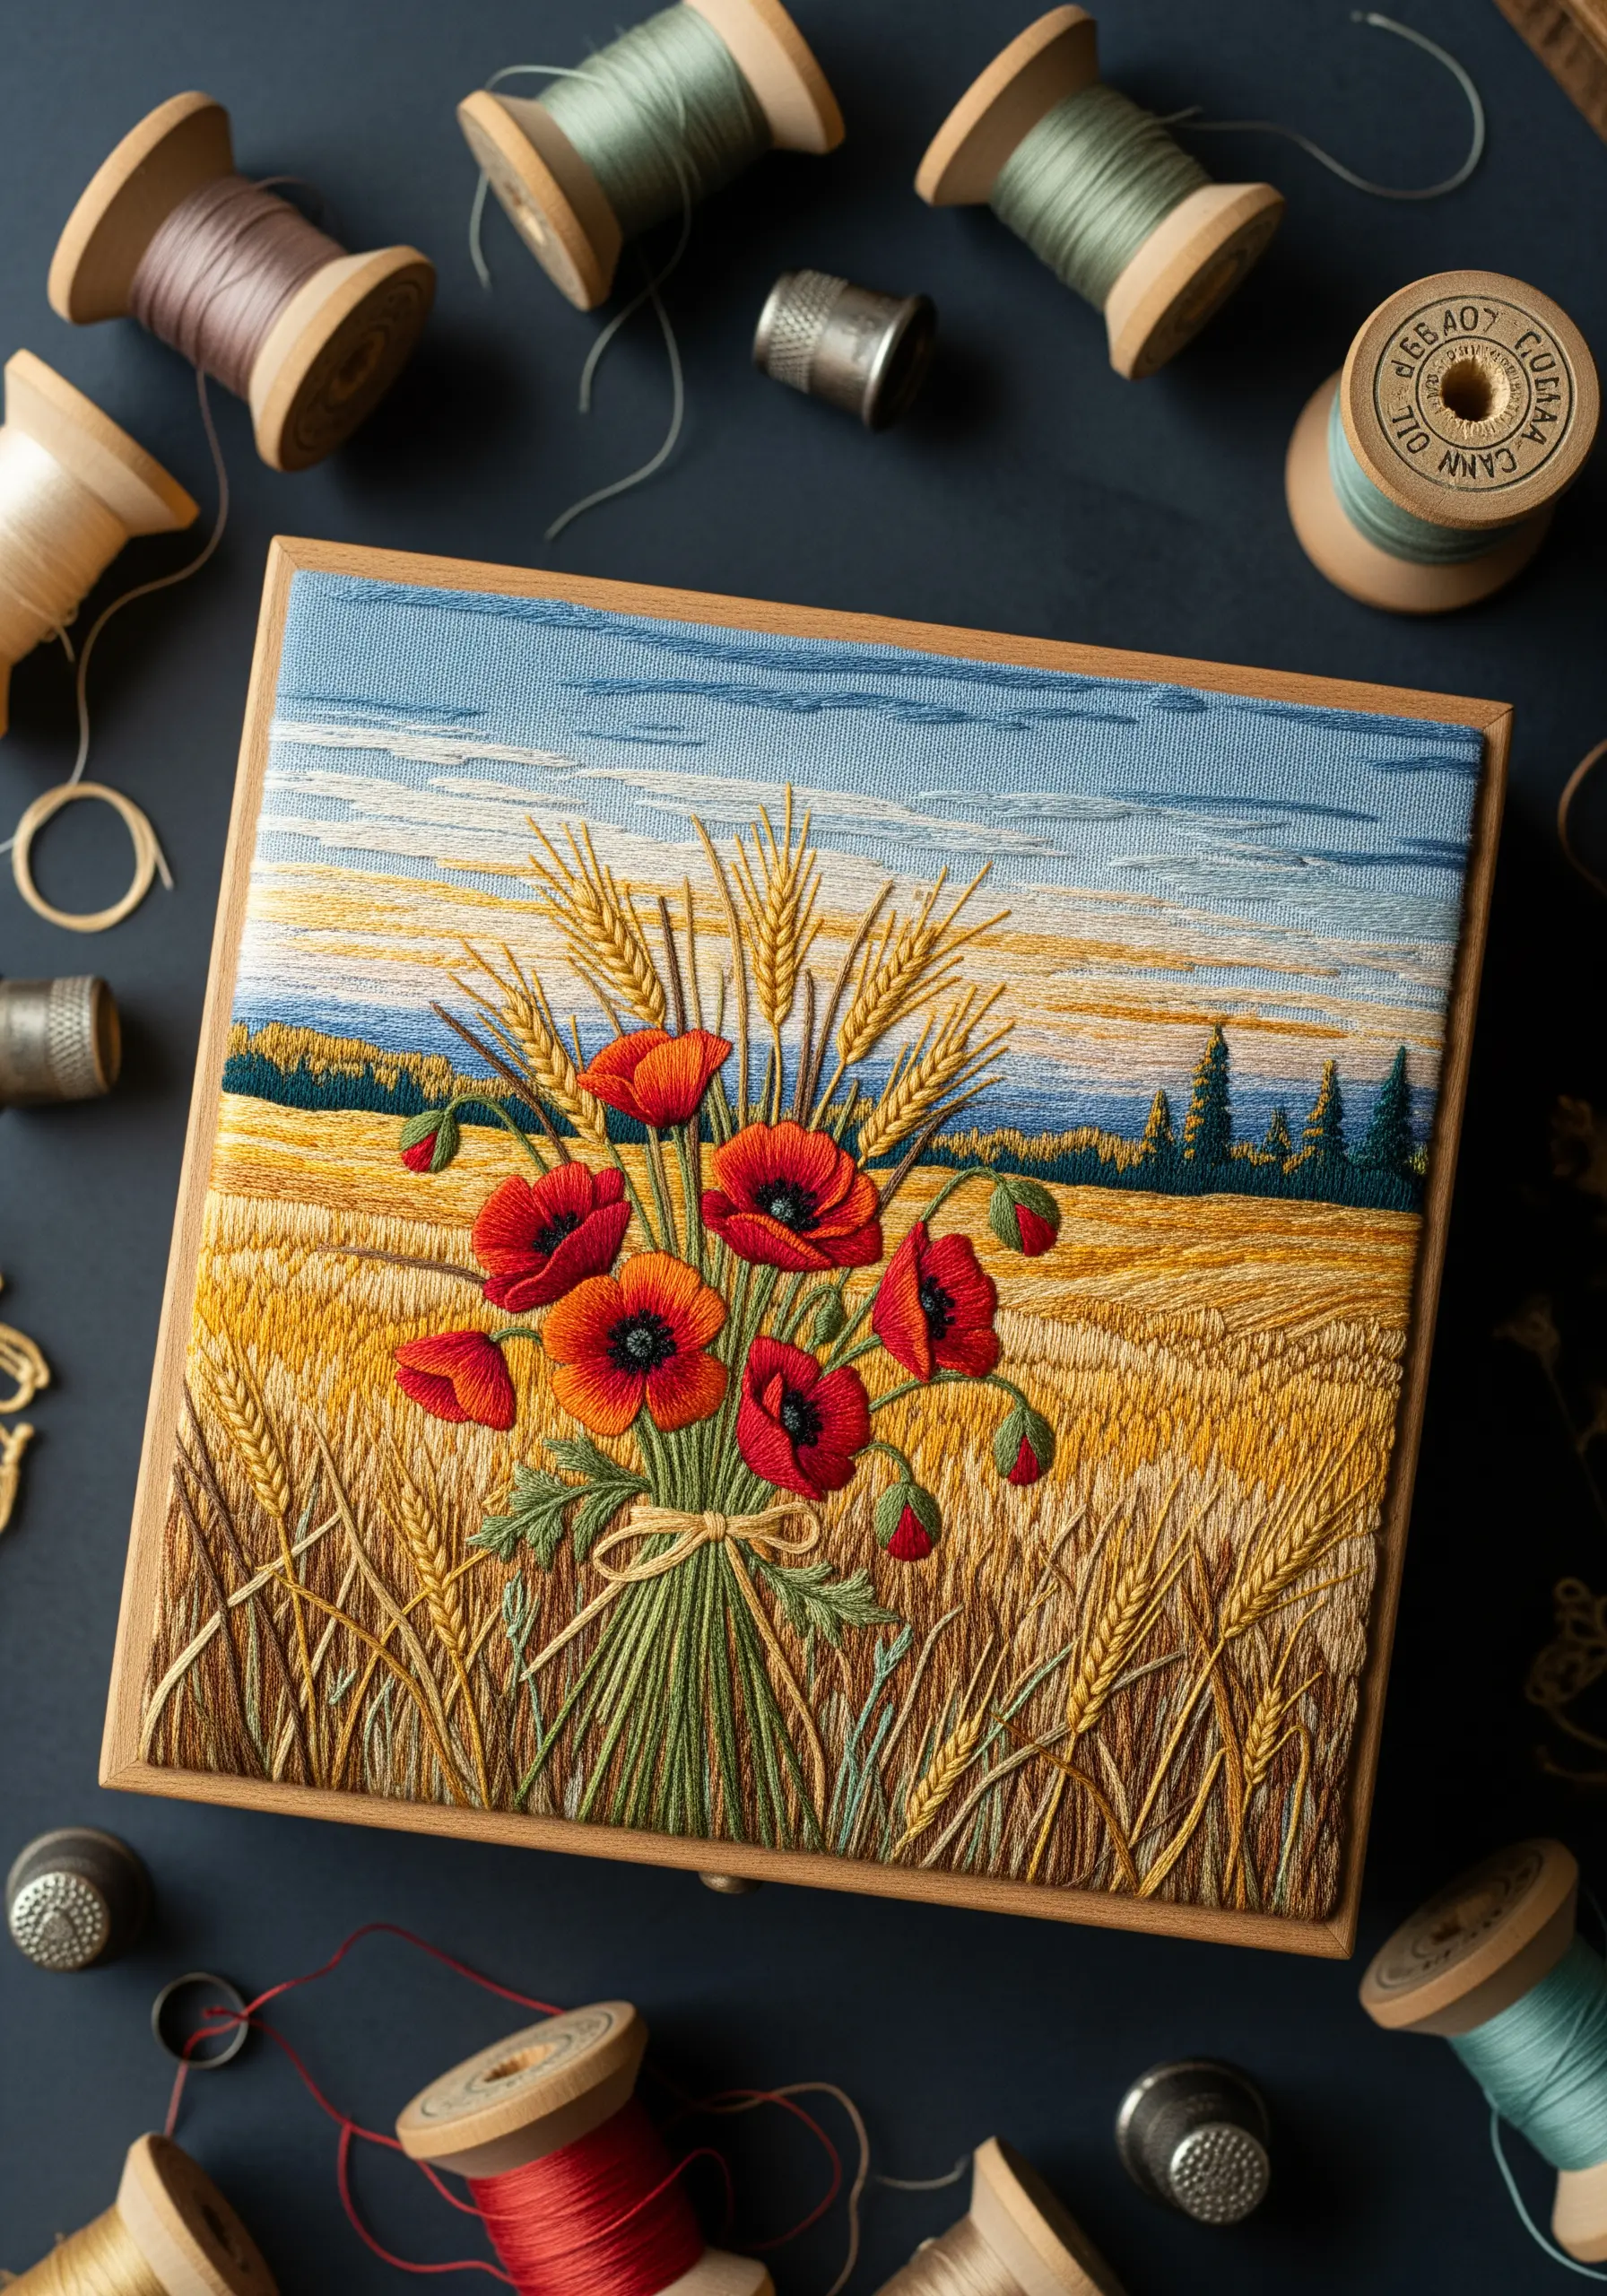
Give your floral bouquet a sense of place by adding a simple stitched background.
Use long, horizontal straight stitches in varying shades of blue and cream to suggest a sky with clouds.
For the field, use dense, vertical straight stitches in golds, browns, and ochres to mimic stalks of wheat.
This simple technique makes the vibrant red poppies in the foreground appear more dynamic and three-dimensional.
16. Designing Symmetrical Motifs for Functional Décor
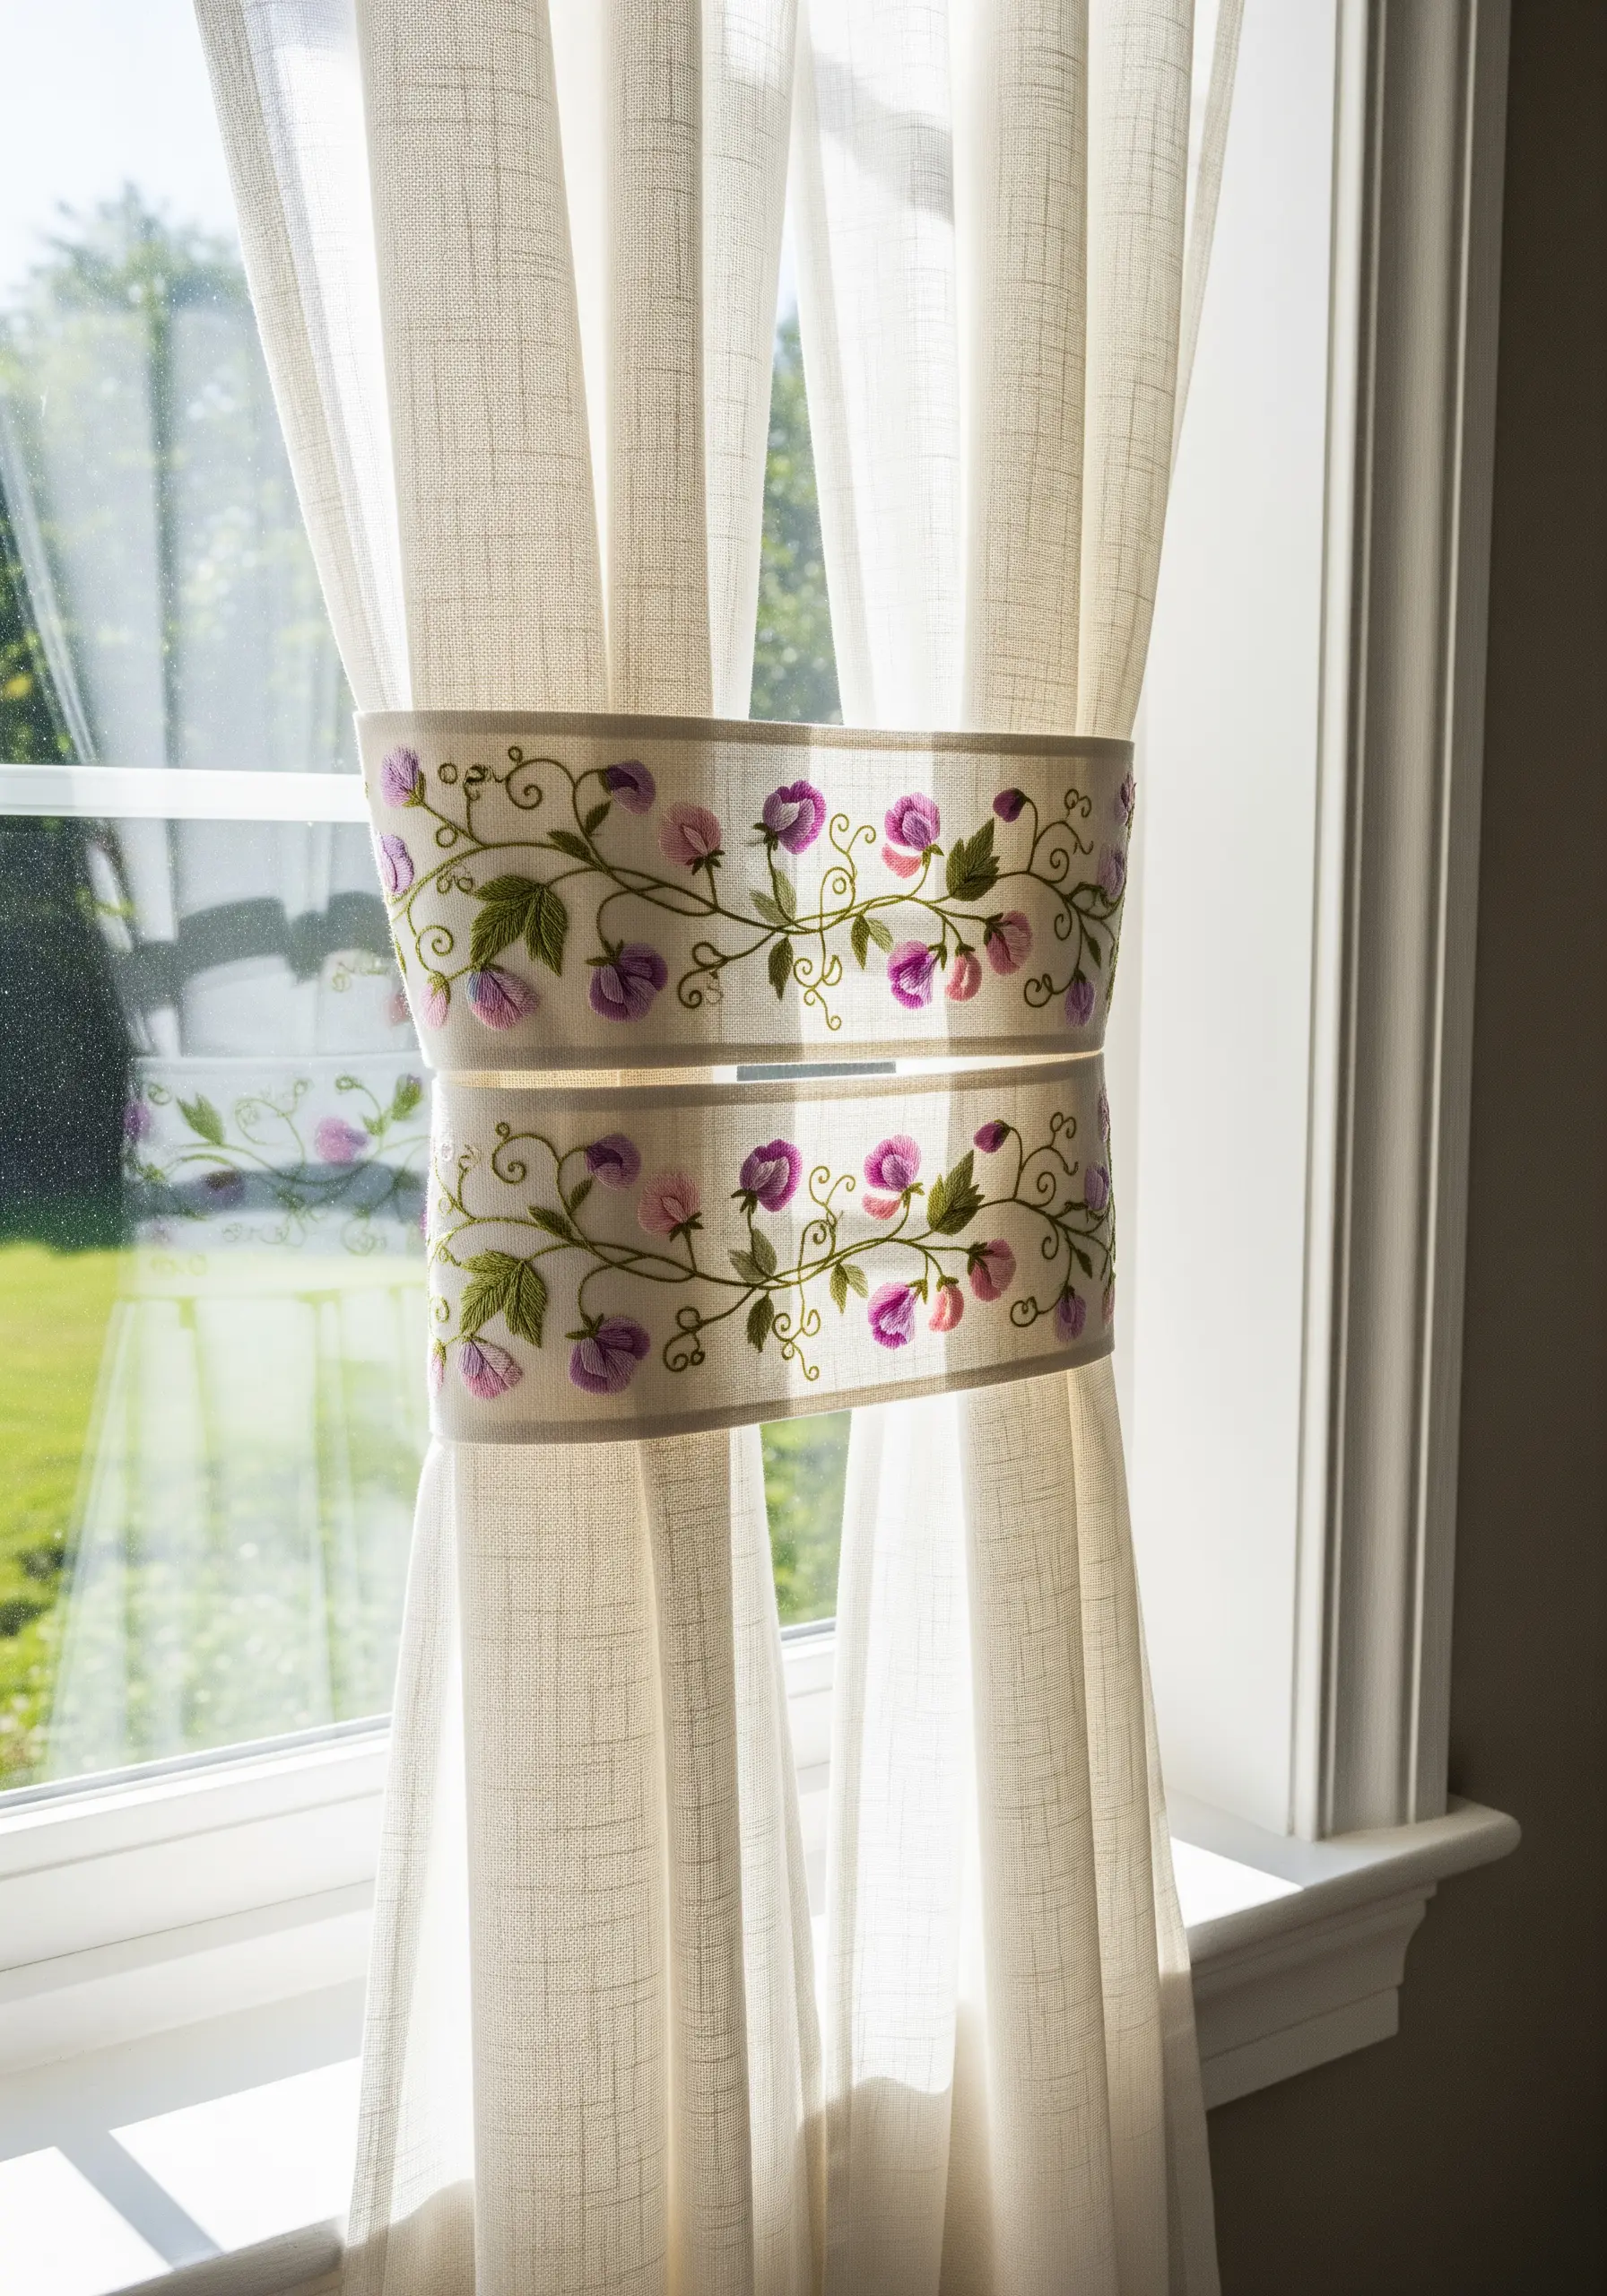
For paired items like curtain tie-backs, a mirrored or repeating pattern creates a polished, intentional look.
A meandering vine of sweet peas is an excellent choice for this, as it flows beautifully along a narrow band.
To create perfect symmetry, trace your pattern onto the first tie-back, then simply flip the pattern over to trace it onto the second.
17. Using Negative Space and Framing for Emphasis
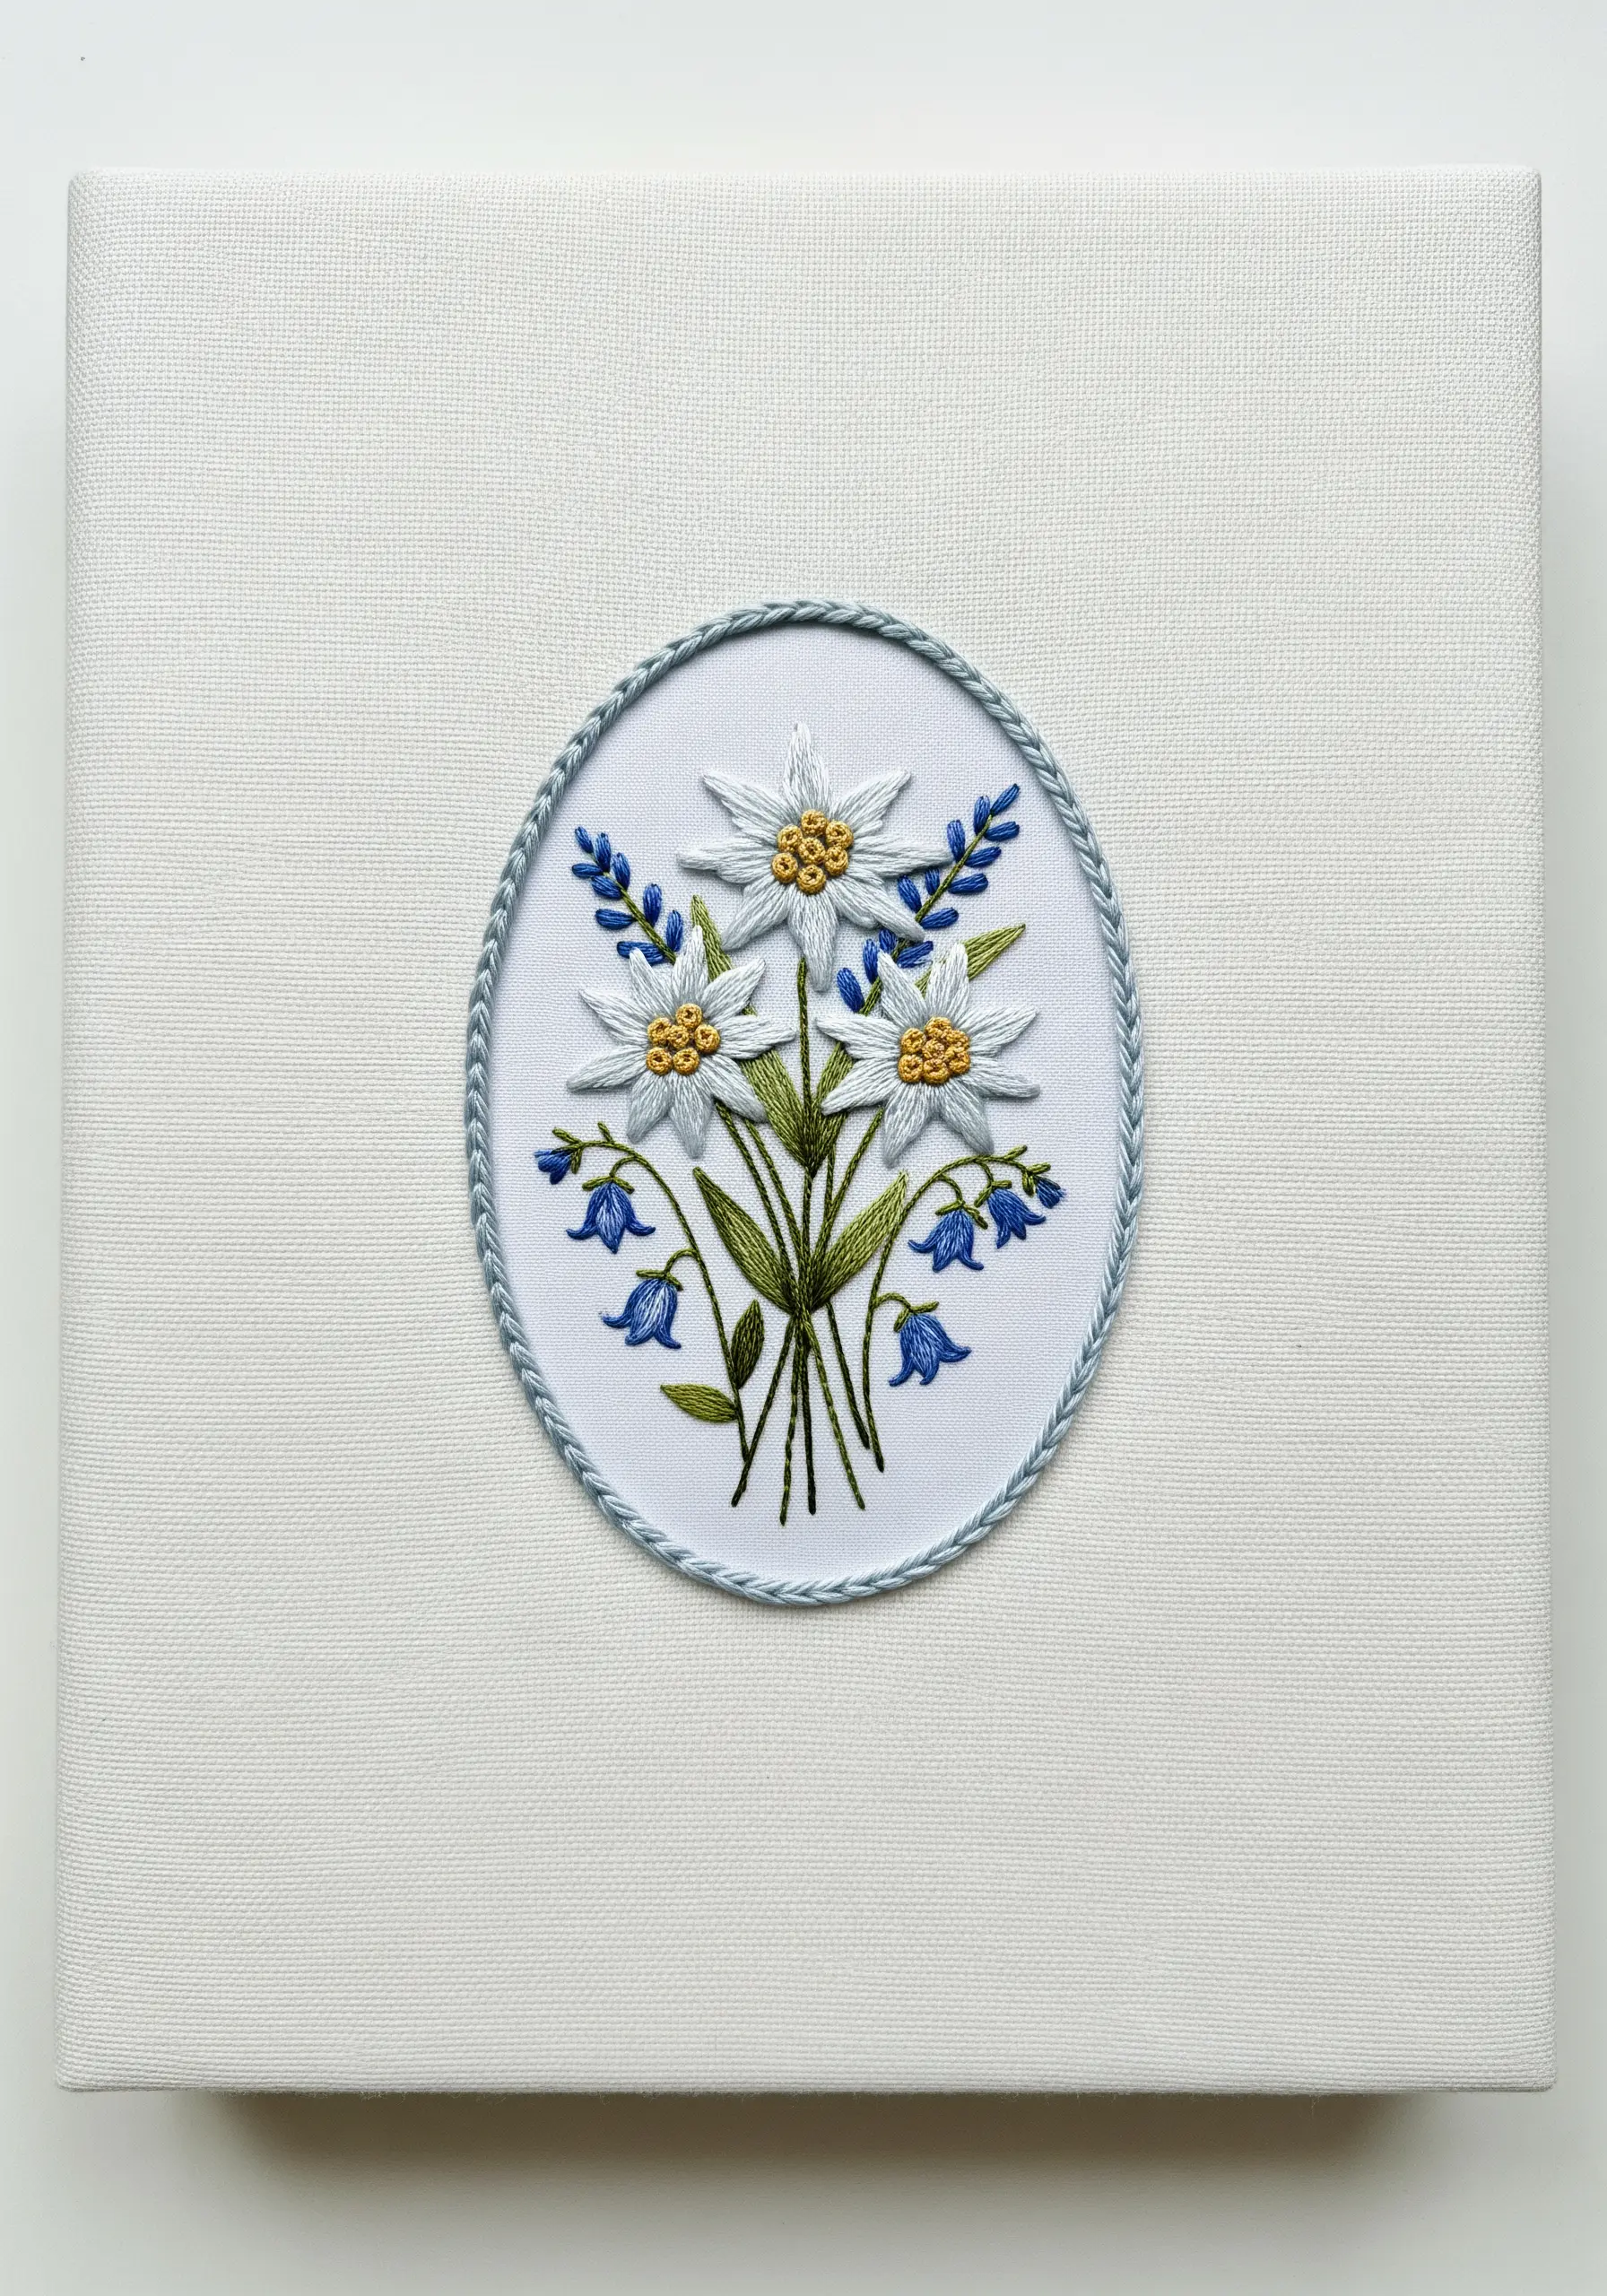
Arranging your bouquet in a distinct shape, like an oval, naturally draws the viewer’s eye inward and makes the design feel considered and complete.
You can enhance this effect by outlining the shape with a decorative border, such as a thick, twisted chain stitch or a neatly wrapped cord.
This technique elevates a simple bouquet into a formal piece of art, making it an excellent choice for personalized embroidered gifts you can make in a weekend.
18. Repeating a Pattern for Impactful Home Décor
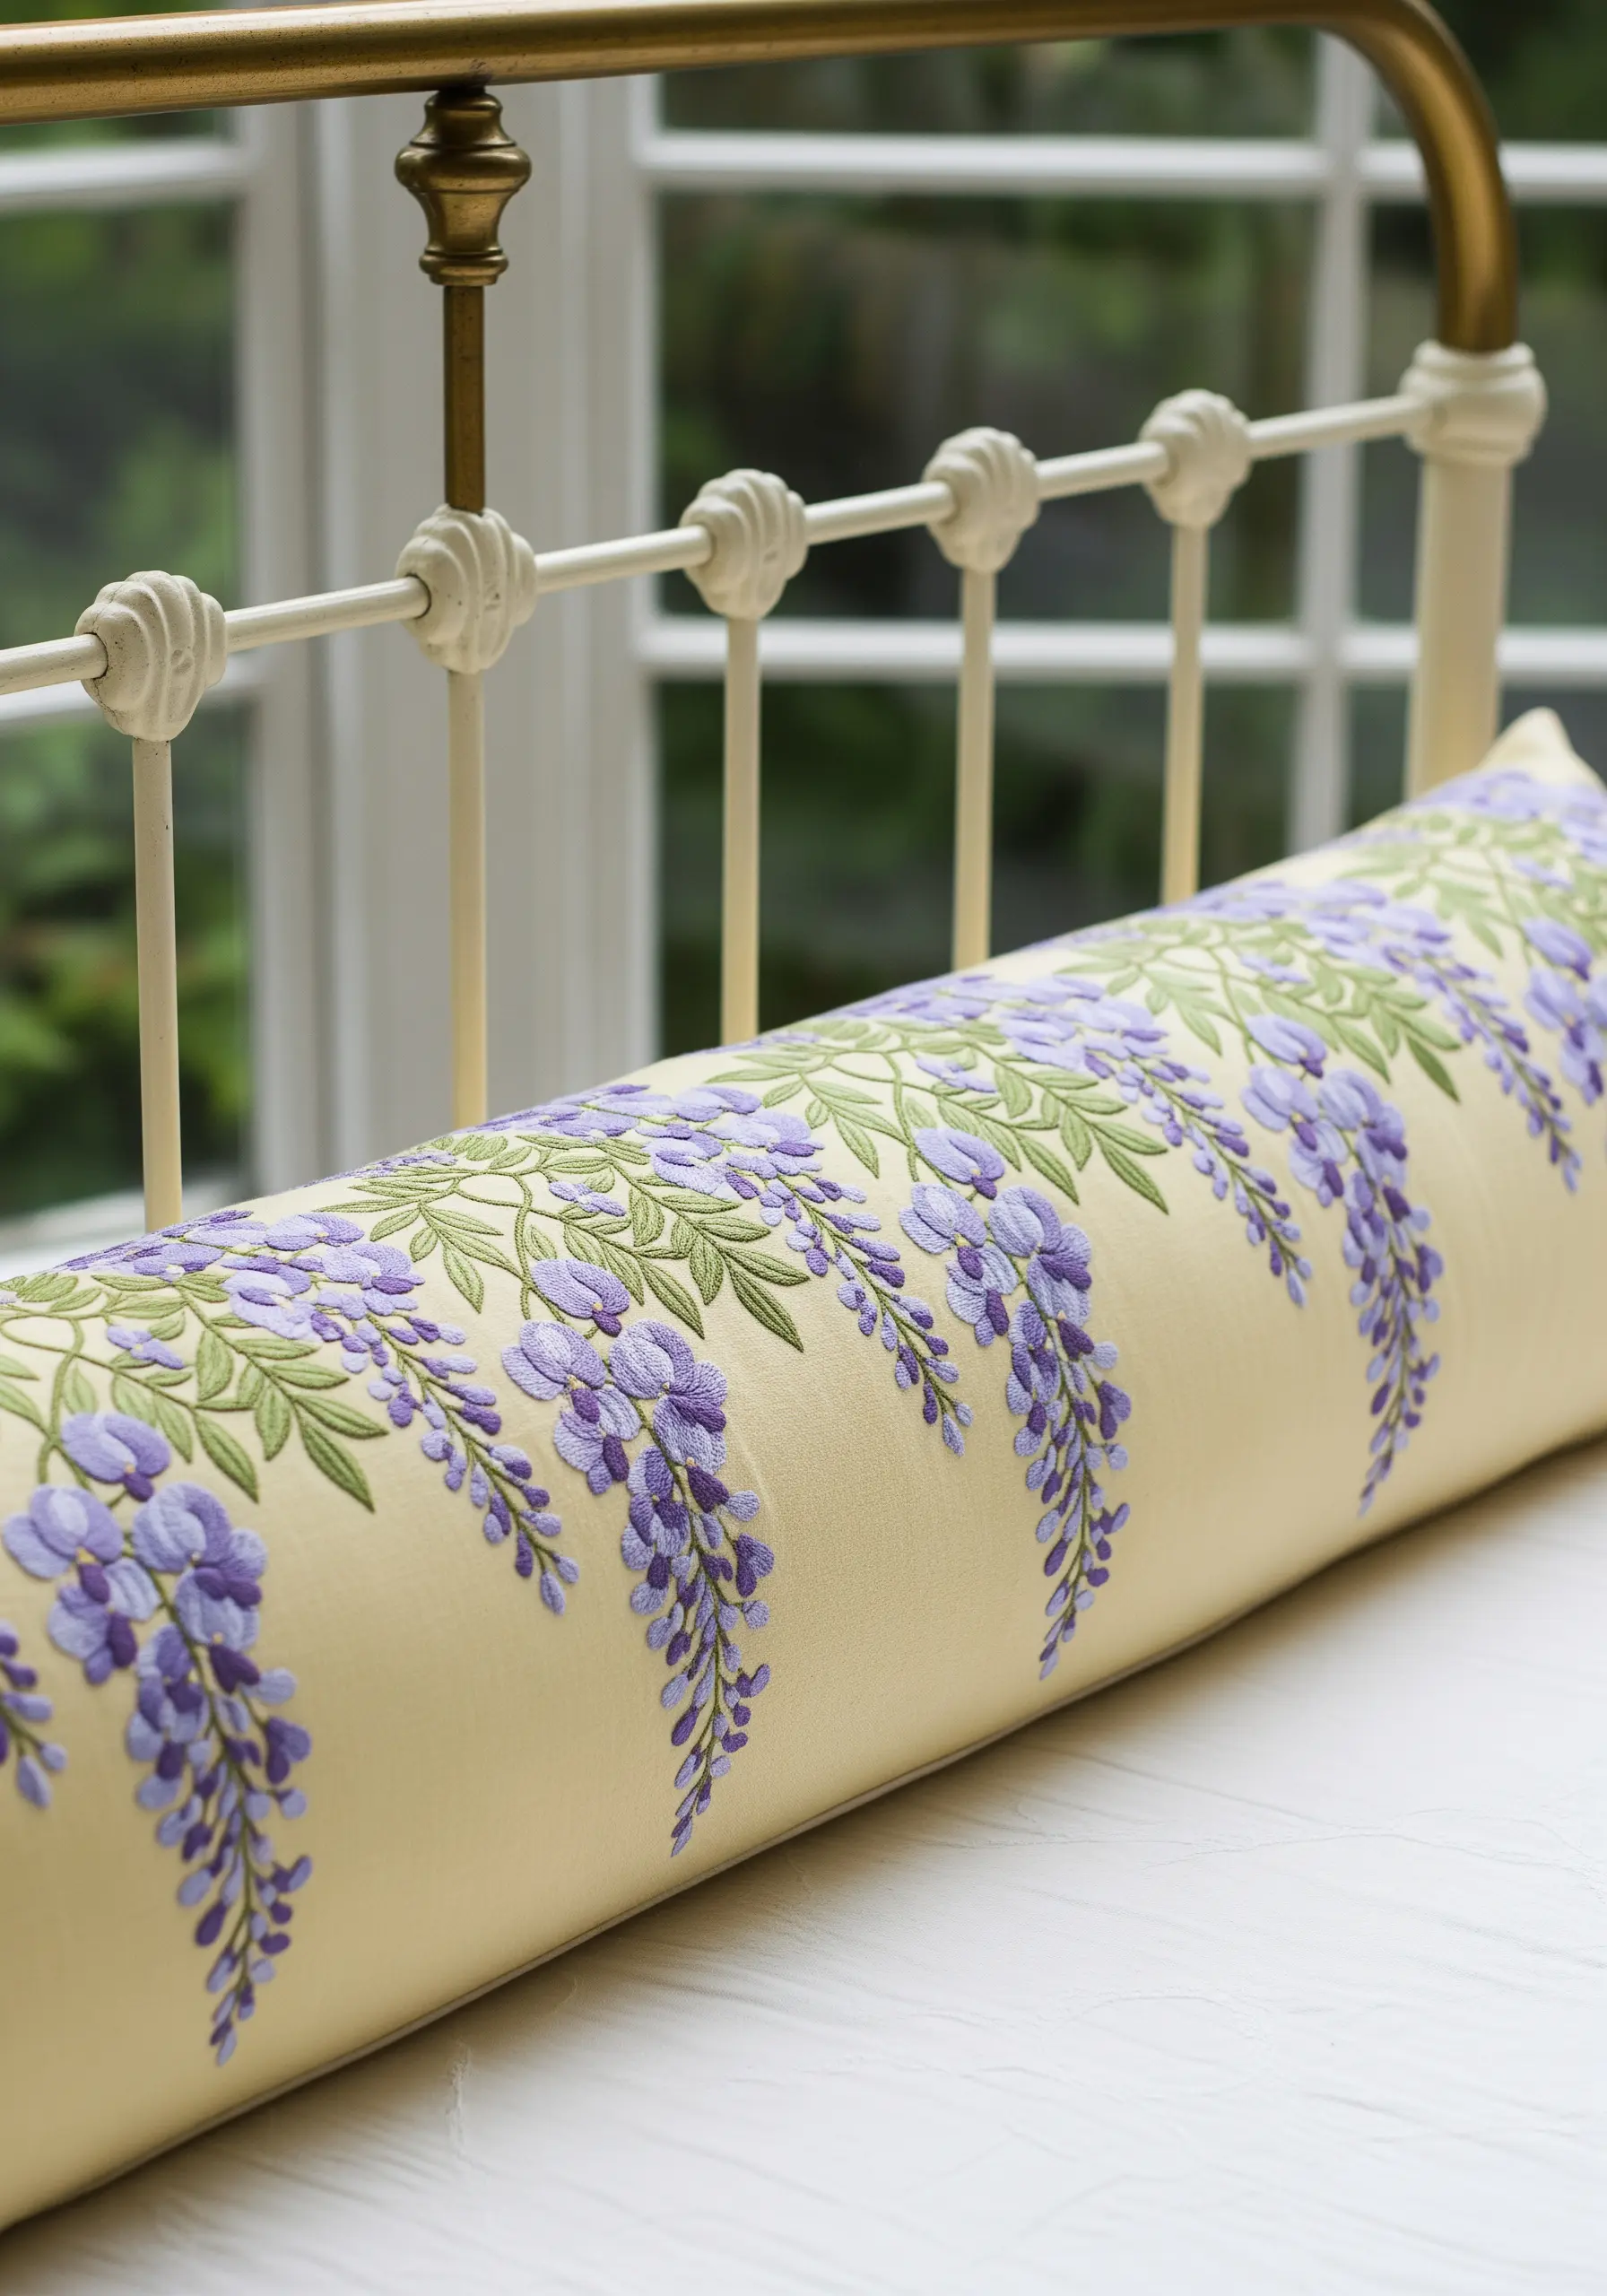
On a long surface like a bolster pillow, a repeating pattern creates a wonderful sense of rhythm and sophistication.
Instead of stitching a single, static bouquet, embroider a continuous border of cascading wisteria.
This design choice draws the eye along the entire length of the pillow, transforming a simple furnishing into a bespoke statement piece.
This is one of the best embroidery cushion & pillow ideas that turn small sofas into statement pieces.
19. Shading Tulip Petals for a 3D Effect
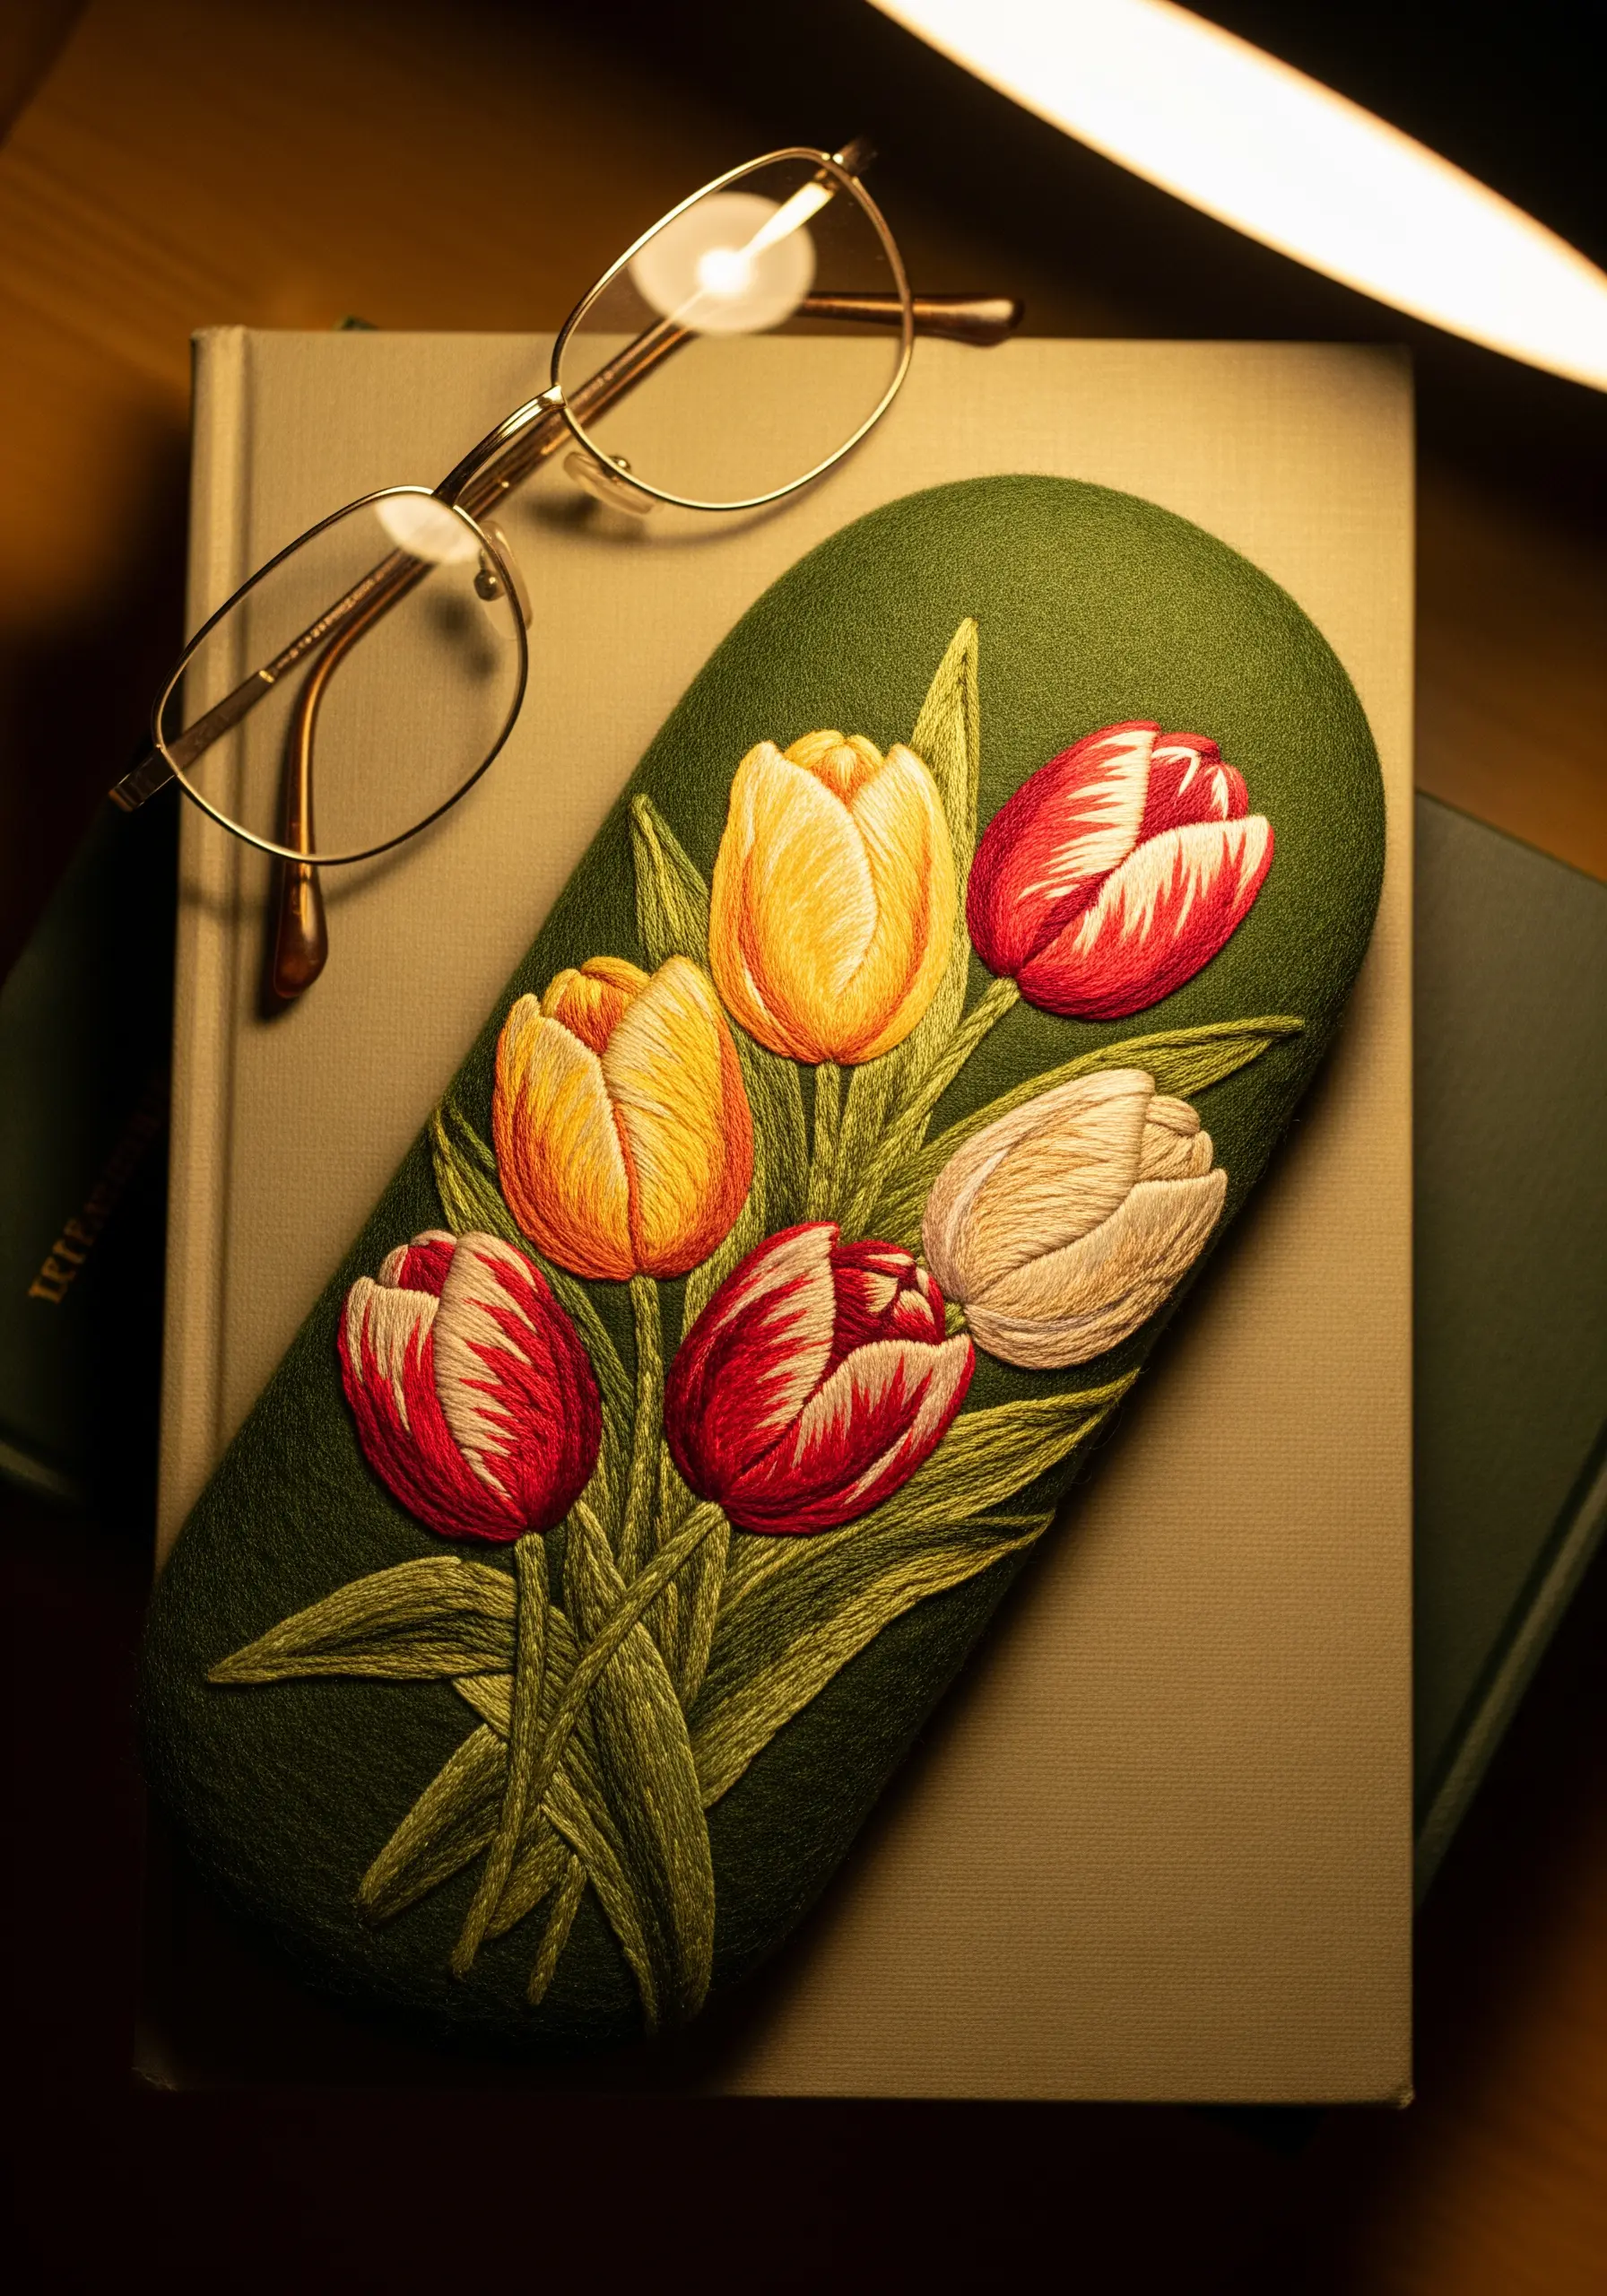
You can give stitched tulips a convincing sense of volume by using directional long-and-short stitch.
Angle your stitches to follow the natural curve of each petal.
Place the lightest shades on the fullest, most prominent part of the petal and use darker shades where the petal recedes or curls under.
Even with just two or three shades, you can create a beautiful illusion of depth, perfect for a small accessory.
20. Translucent Effects: Stitching on a Lampshade
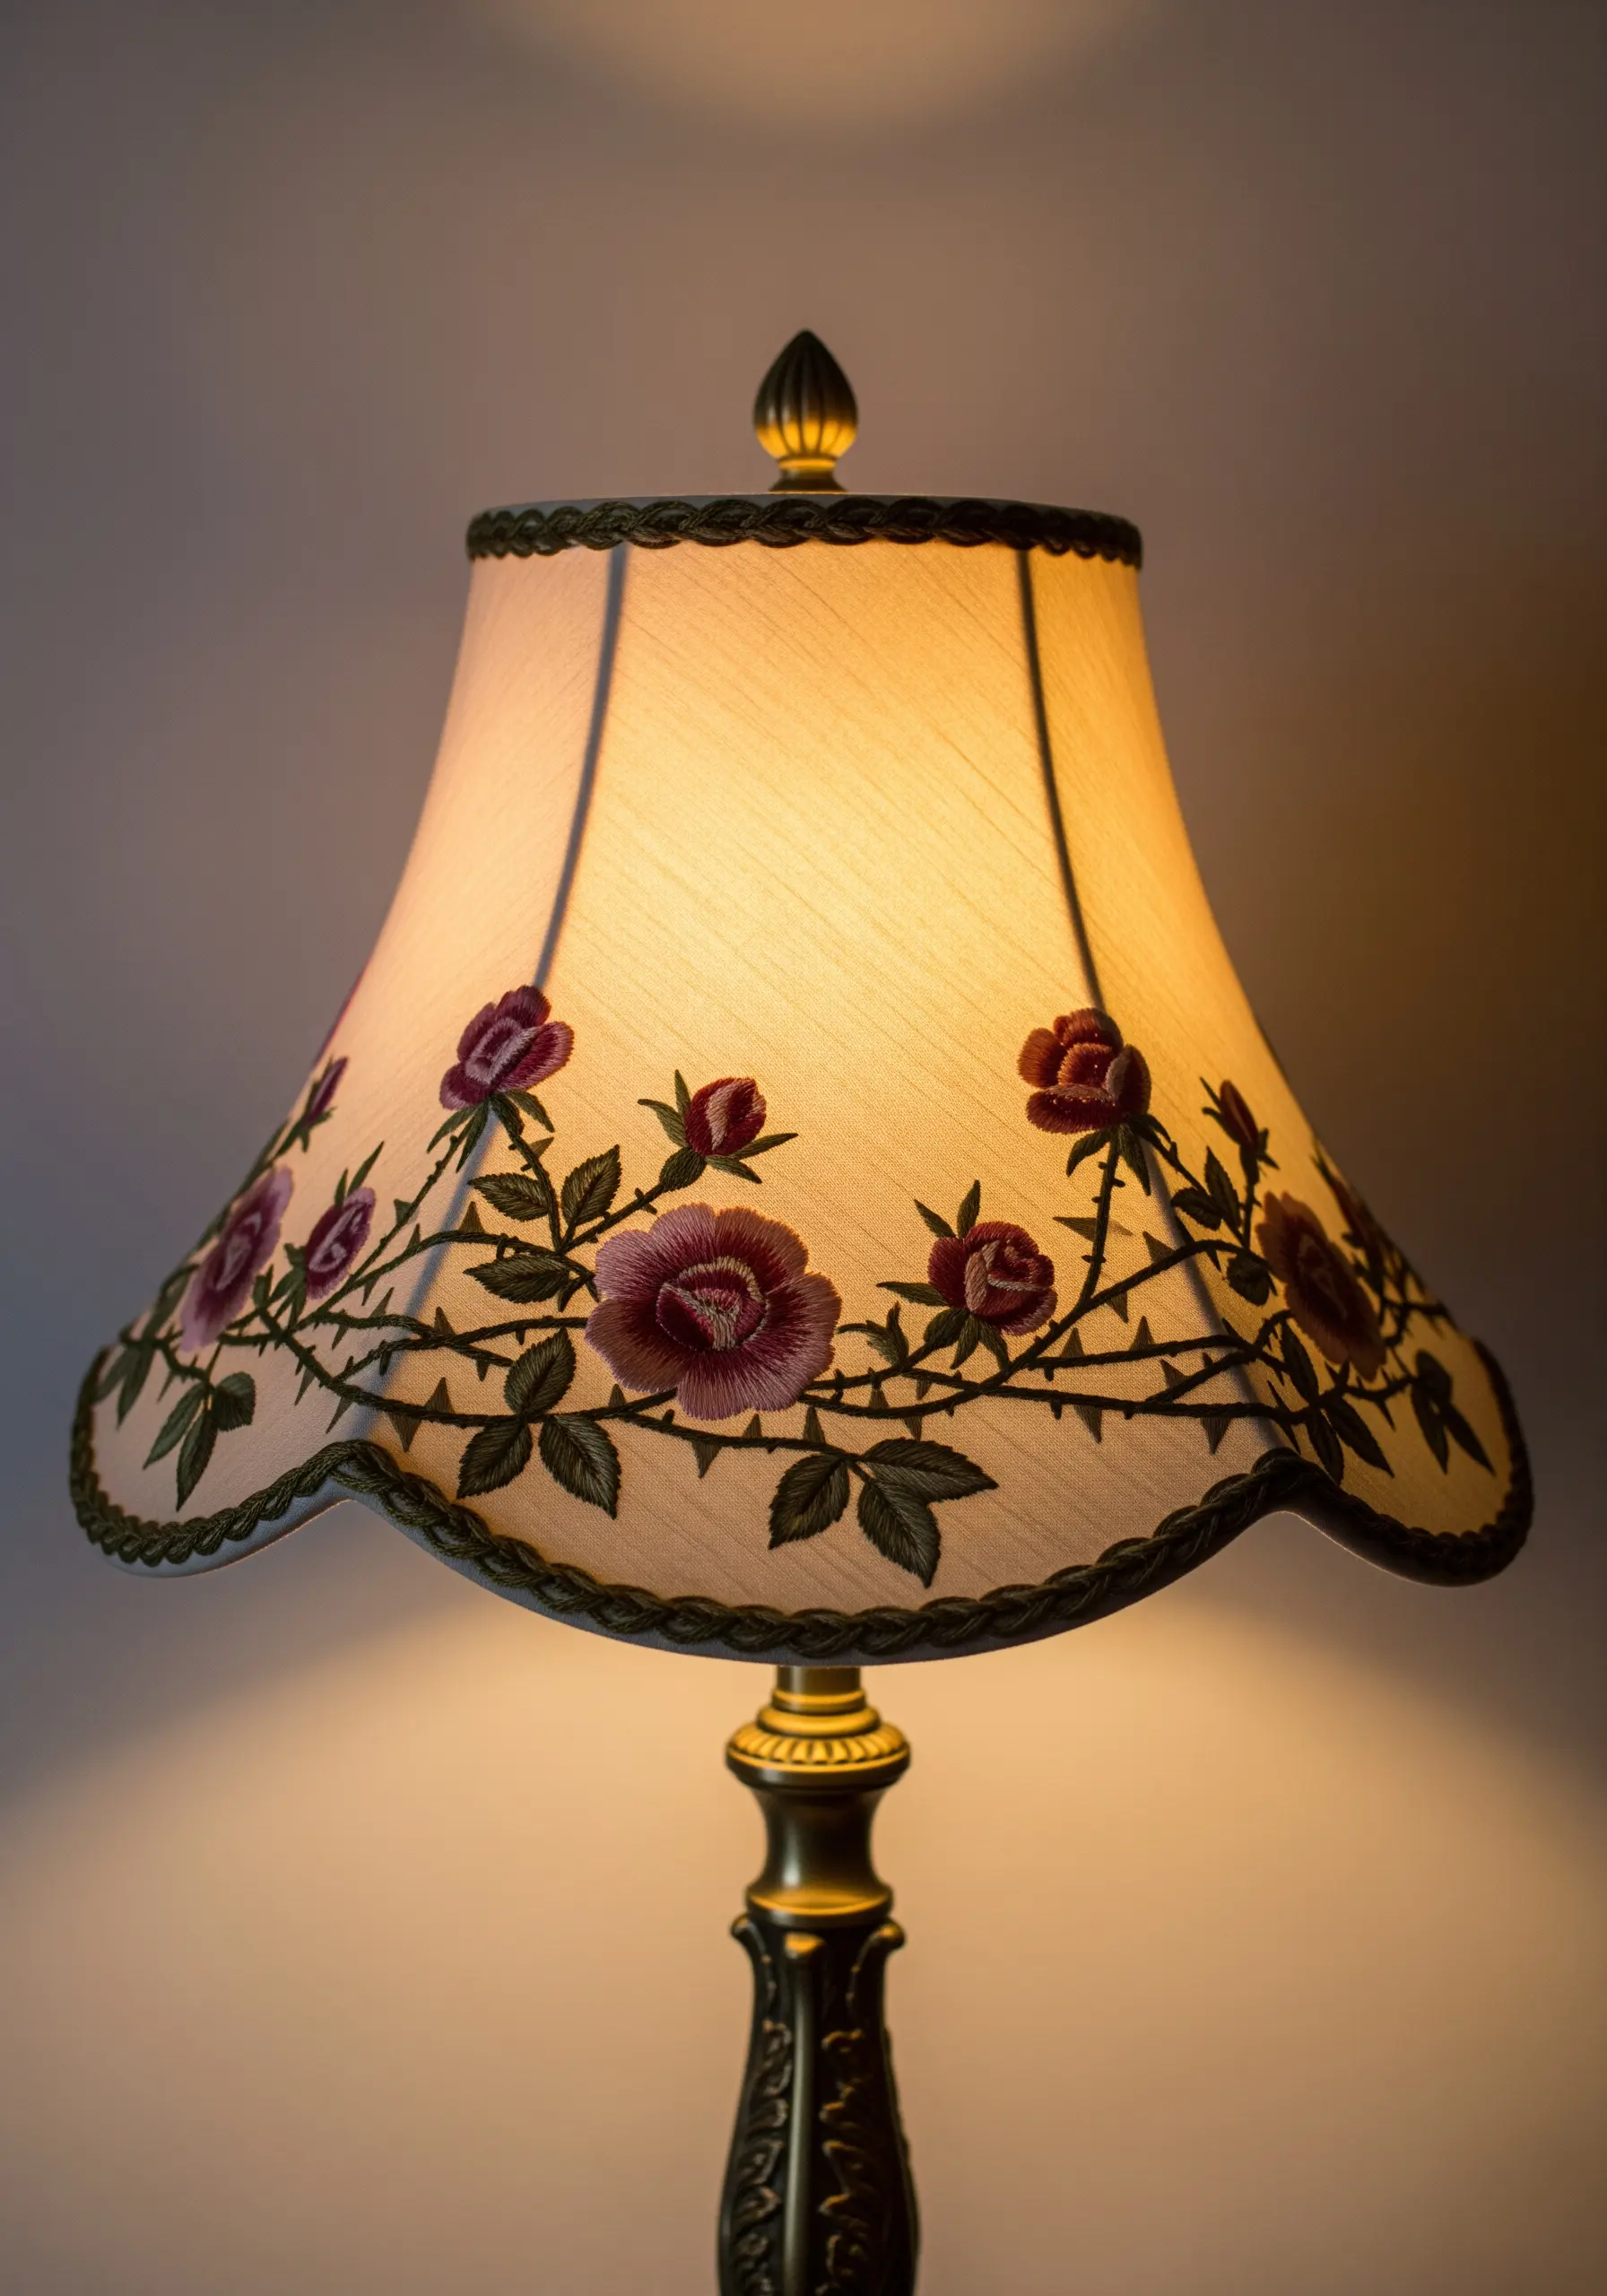
When embroidering a lampshade, always remember that your work will be backlit, revealing both the front and back of your stitches.
Keep the back of your work as neat as possible by securing threads carefully to avoid messy shadows.
Choose stitches that create a clean silhouette, such as stem stitch for vines and fishbone stitch for leaves, for a beautiful, glowing effect when the lamp is on.
21. Practical Art: A Kitchen Garden on an Apron
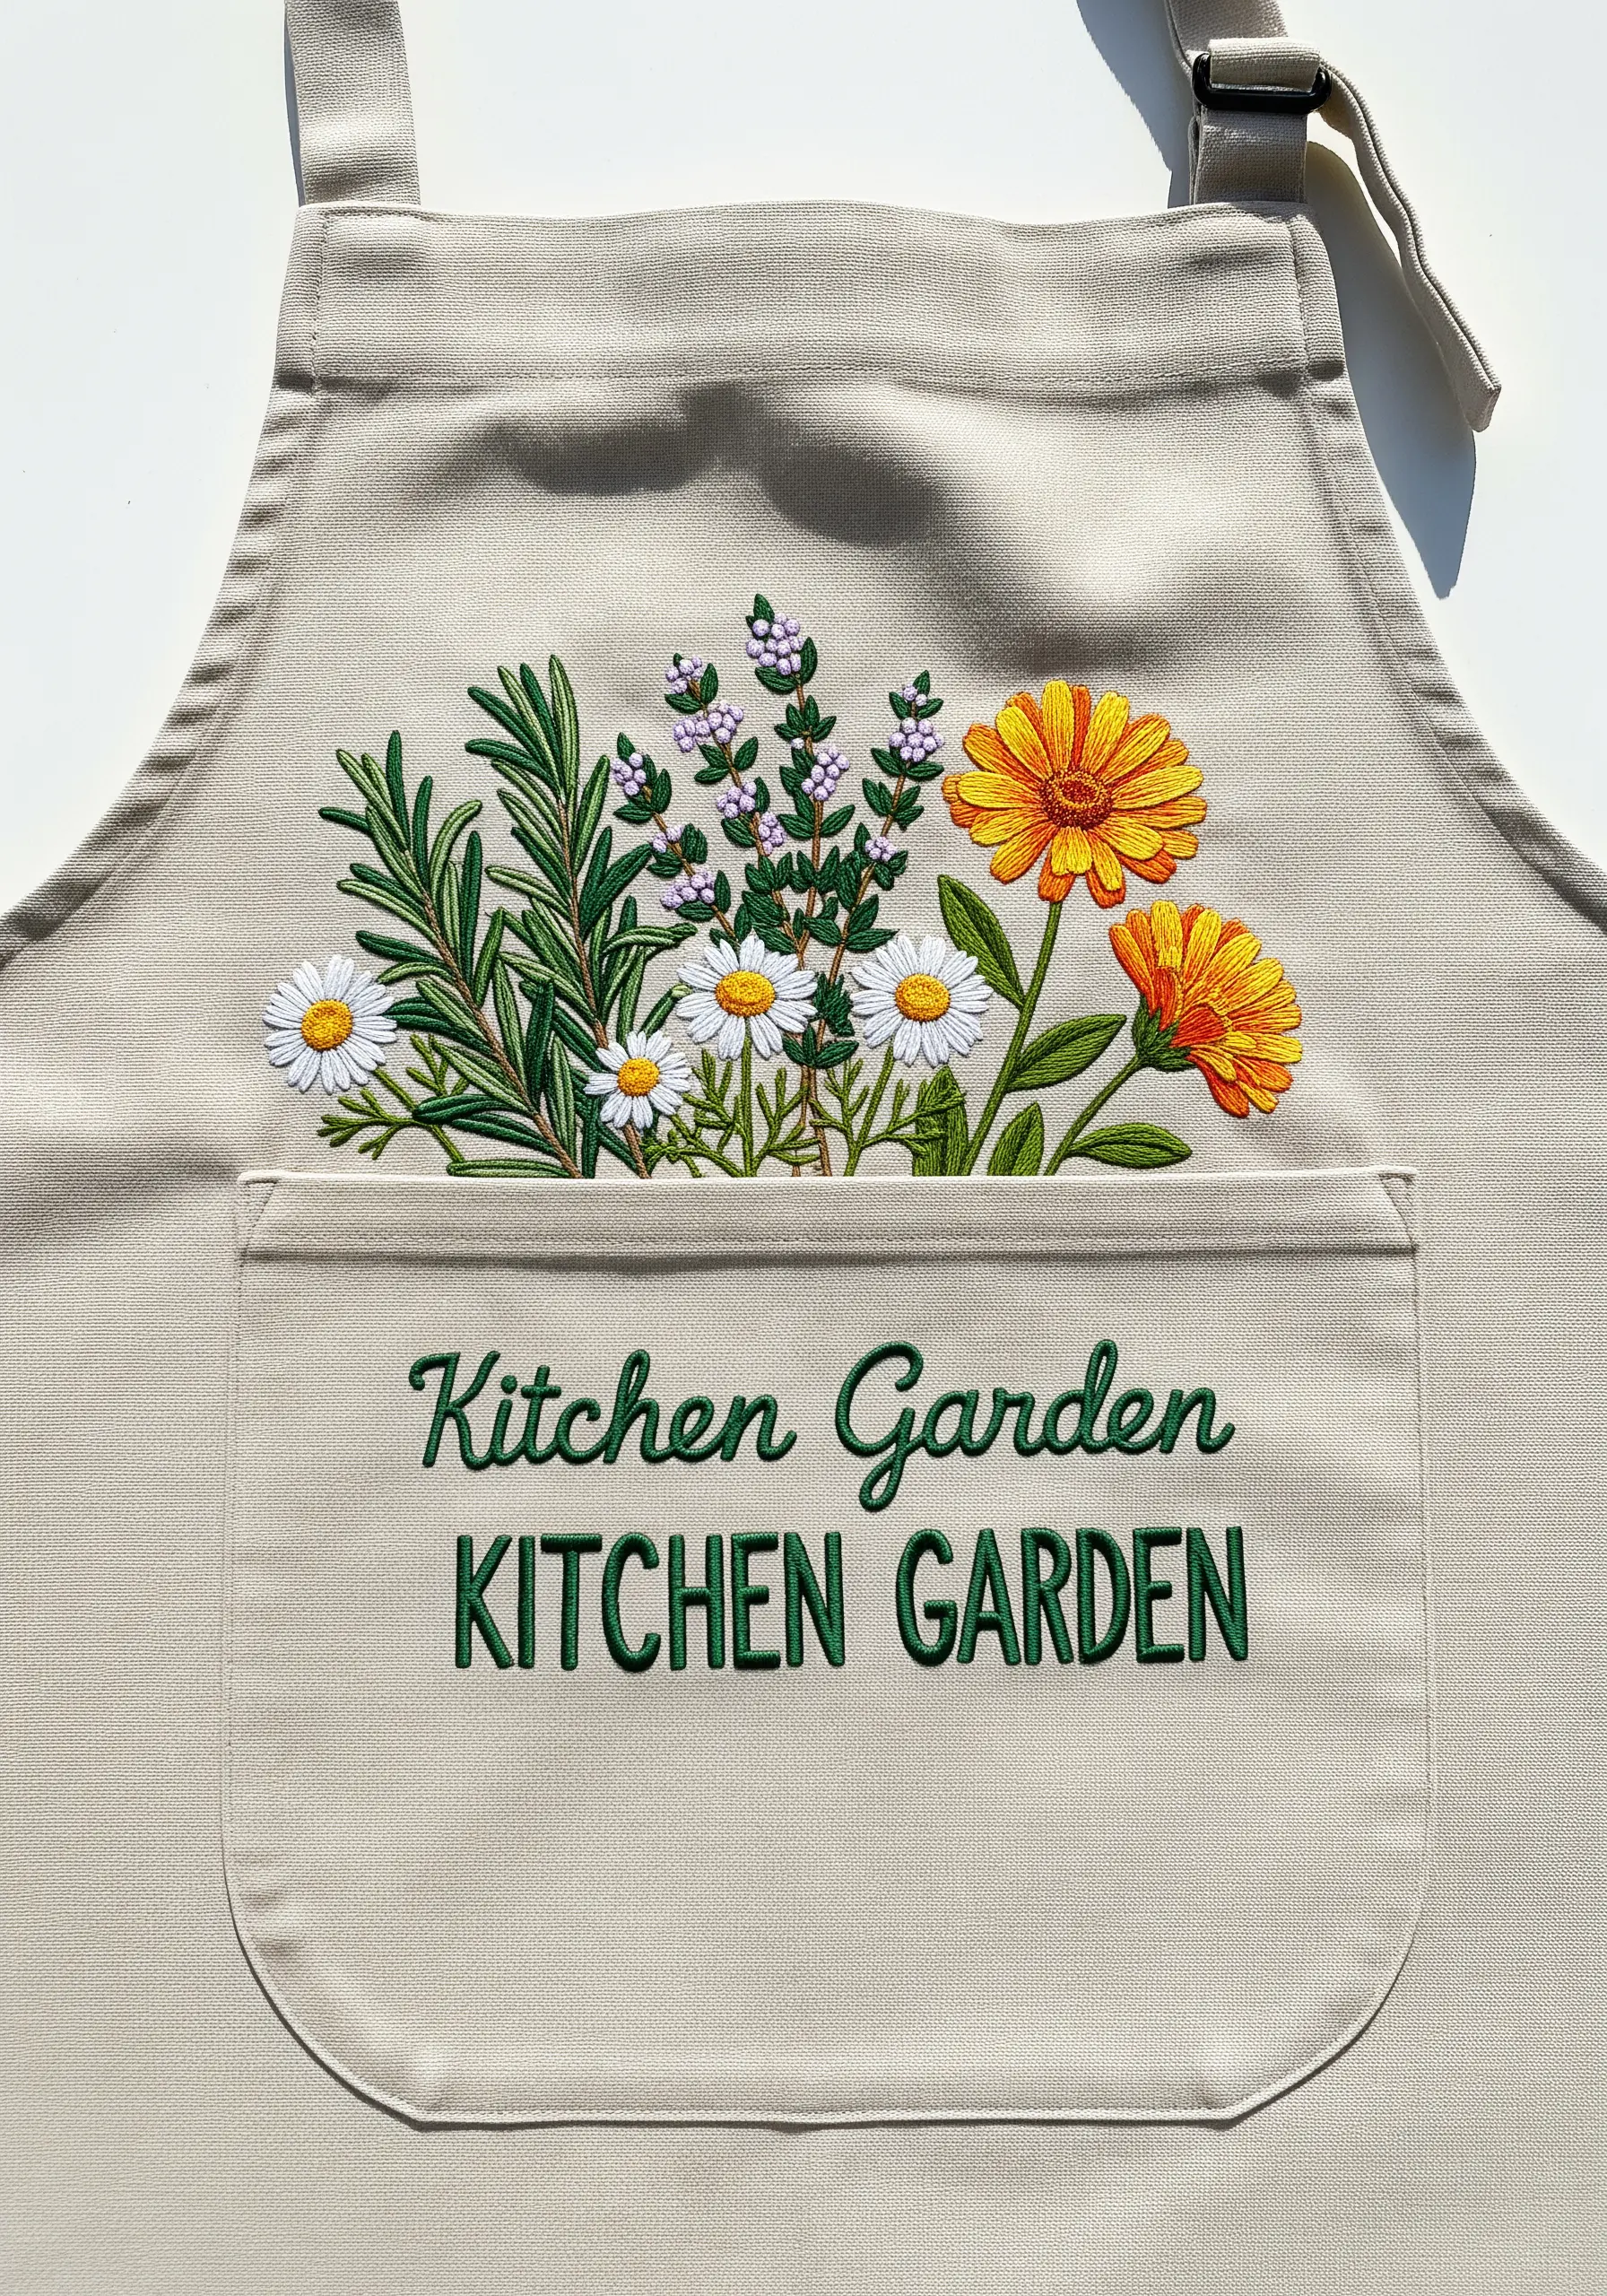
Create a charming and thematic “pocket garden” by combining different stitches to represent various herbs.
Use fern stitch for the needle-like texture of rosemary, lazy daisy stitches for chamomile blossoms, and tiny French knots for thyme flowers.
This mix of textures makes the design visually interesting and instantly recognizable.
Always choose a sturdy, washable fabric like cotton drill or a linen blend for practical items like aprons.
22. Large-Scale Embroidery for Statement Décor

When tackling a large-scale project like a fire screen, it’s essential to work on a scroll frame or large hoop to maintain even tension across the entire piece.
To cover large areas efficiently and create a bold, tapestry-like look, use multiple strands of cotton floss (4-6) or consider working with fine crewel wool.
Stitching on a dark background fabric, like navy or black, will make your thread colors appear exceptionally vibrant and luminous.
23. Capturing Whimsy with Dandelion Seed Heads

To create the delicate, airy structure of a dandelion seed head, use several long, detached straight stitches radiating from a central point.
For the whimsical floating seeds, use a single strand of floss to make a tiny fly stitch (a ‘V’ shape with a tail) and place a single French knot at the point where the seed would be.
This simple combination of stitches adds a beautiful sense of movement and lightness, perfect for a baby keepsake.
24. Embellishing 3D Objects with a Floral Border
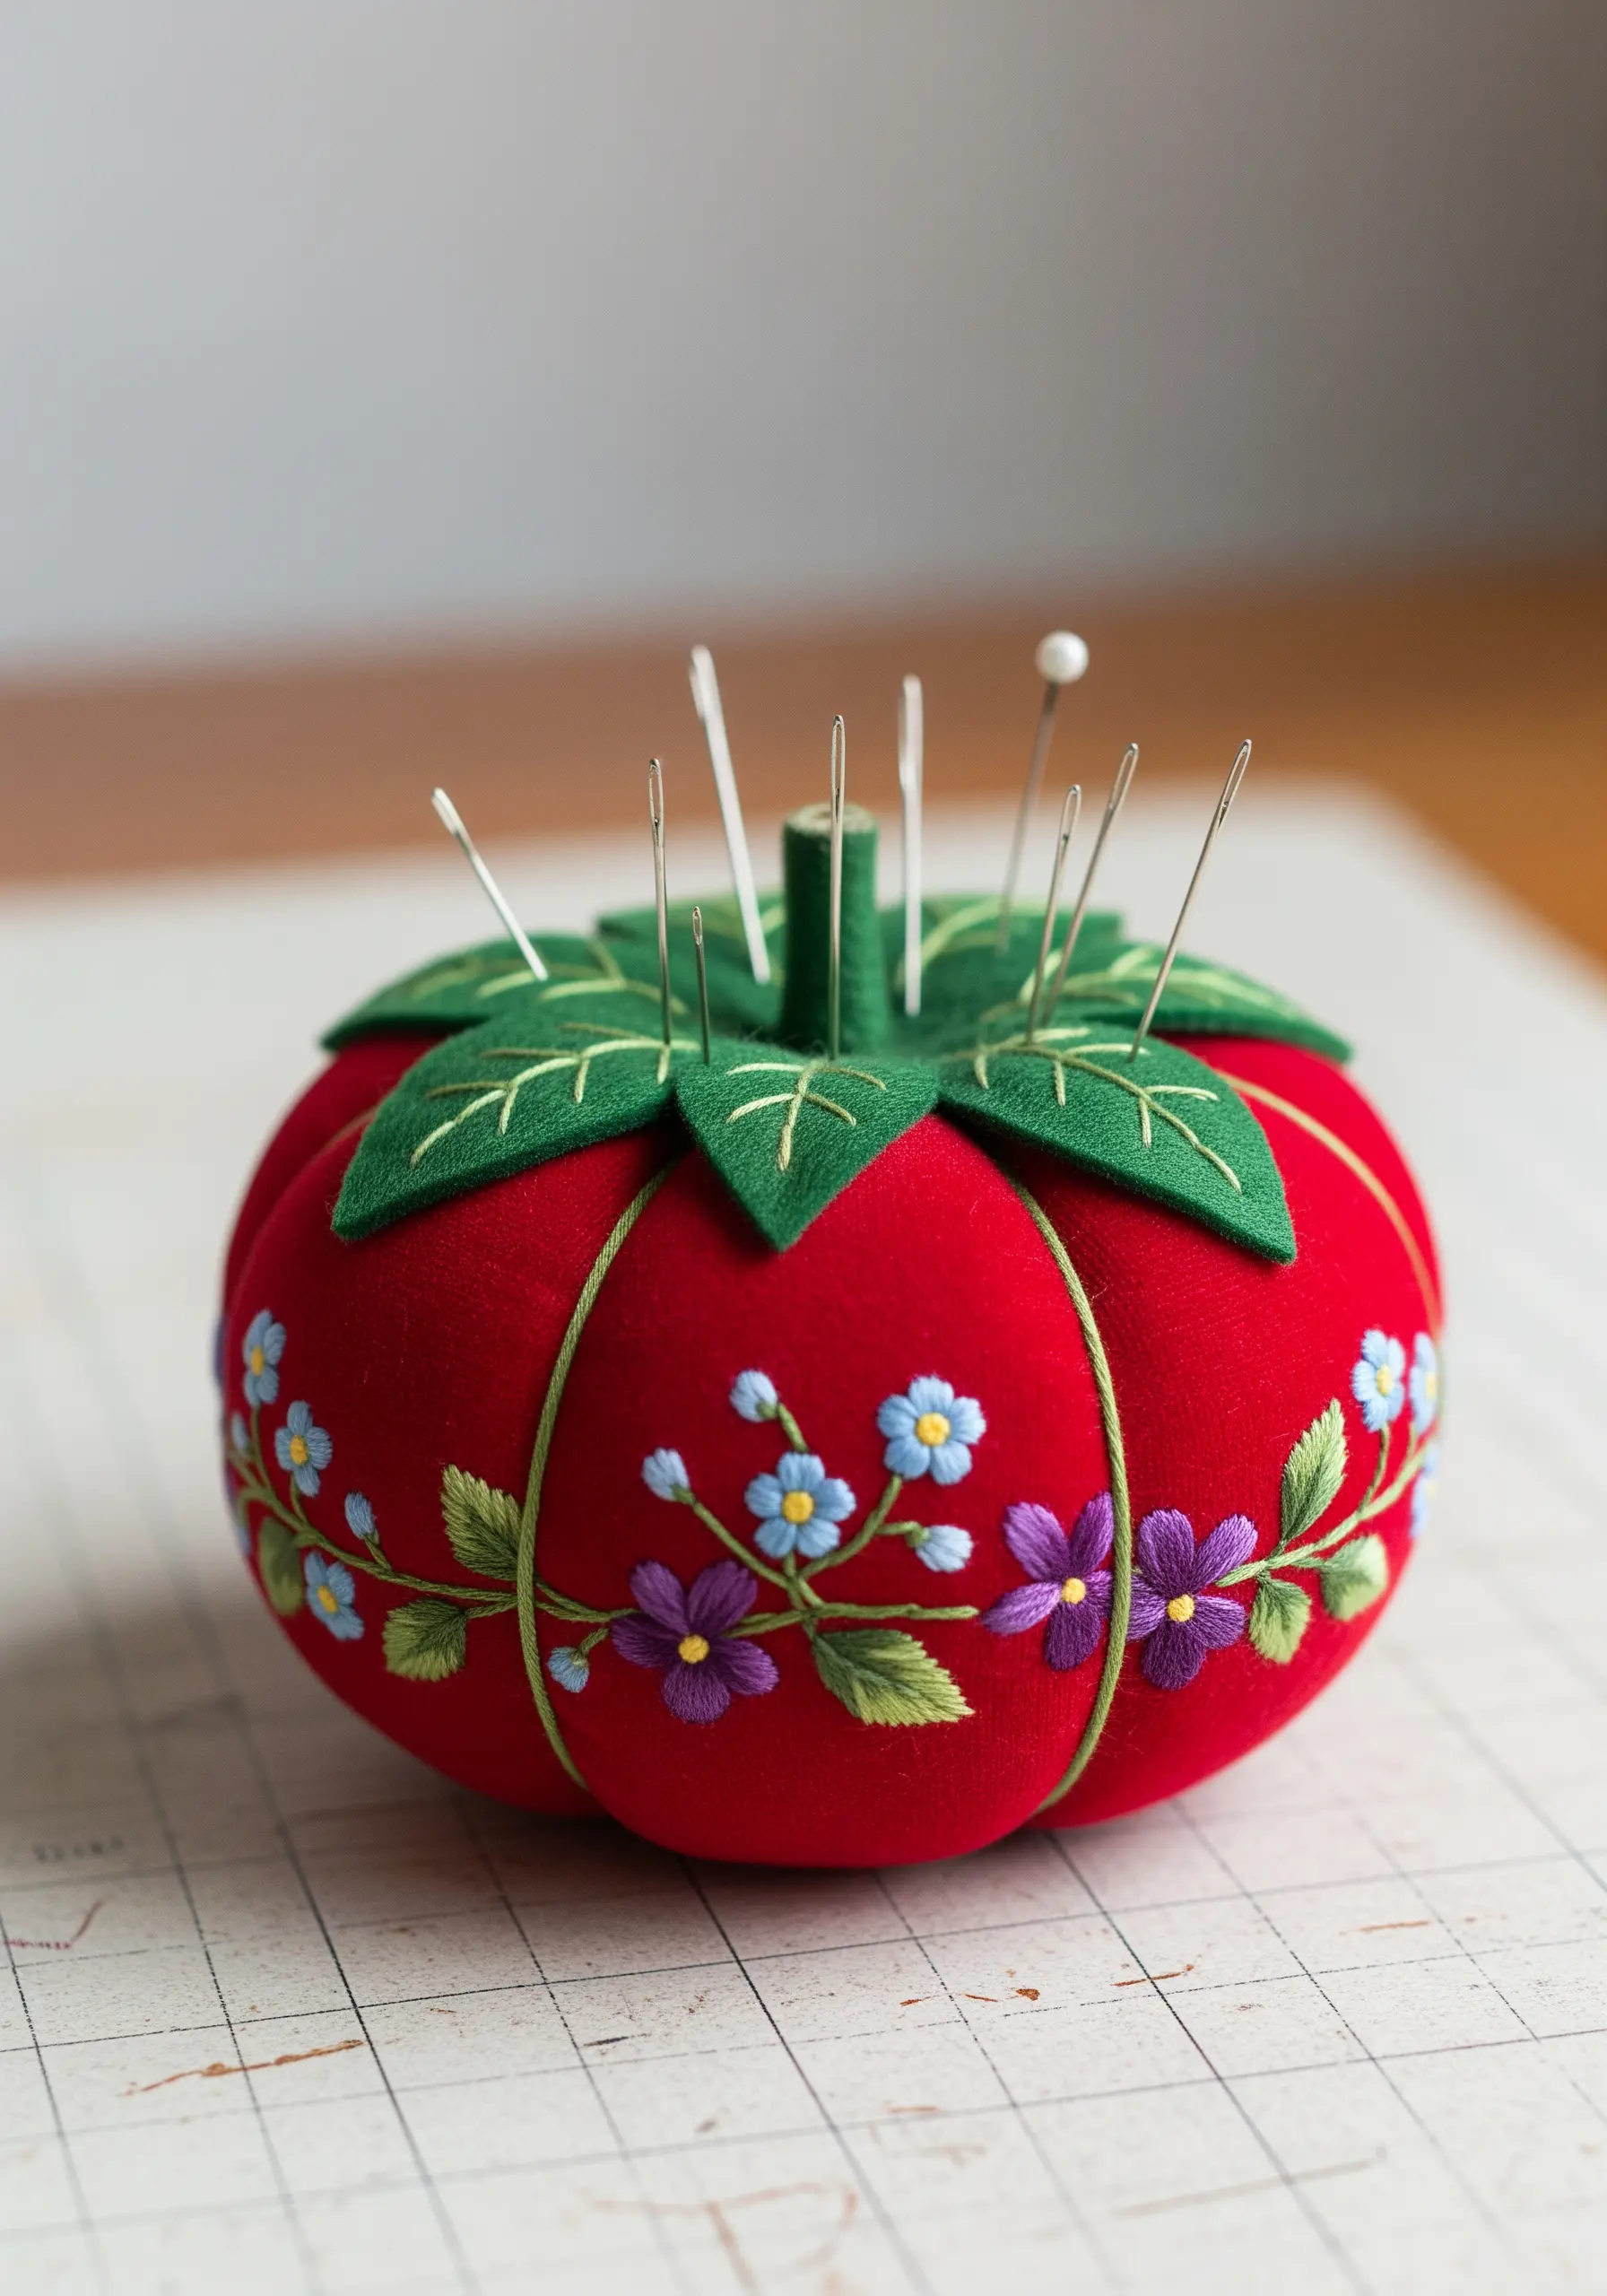
When embroidering a curved, three-dimensional object like a pincushion, design your motif to follow and enhance the object’s form.
A simple, meandering vine of small flowers stitched around the circumference is a perfect choice.
To manage the curved surface, you can either stitch in hand or use a small, flexible spring-tension hoop, adjusting it as you work your way around the design.
25. Combining Embroidery with Real Dried Flowers
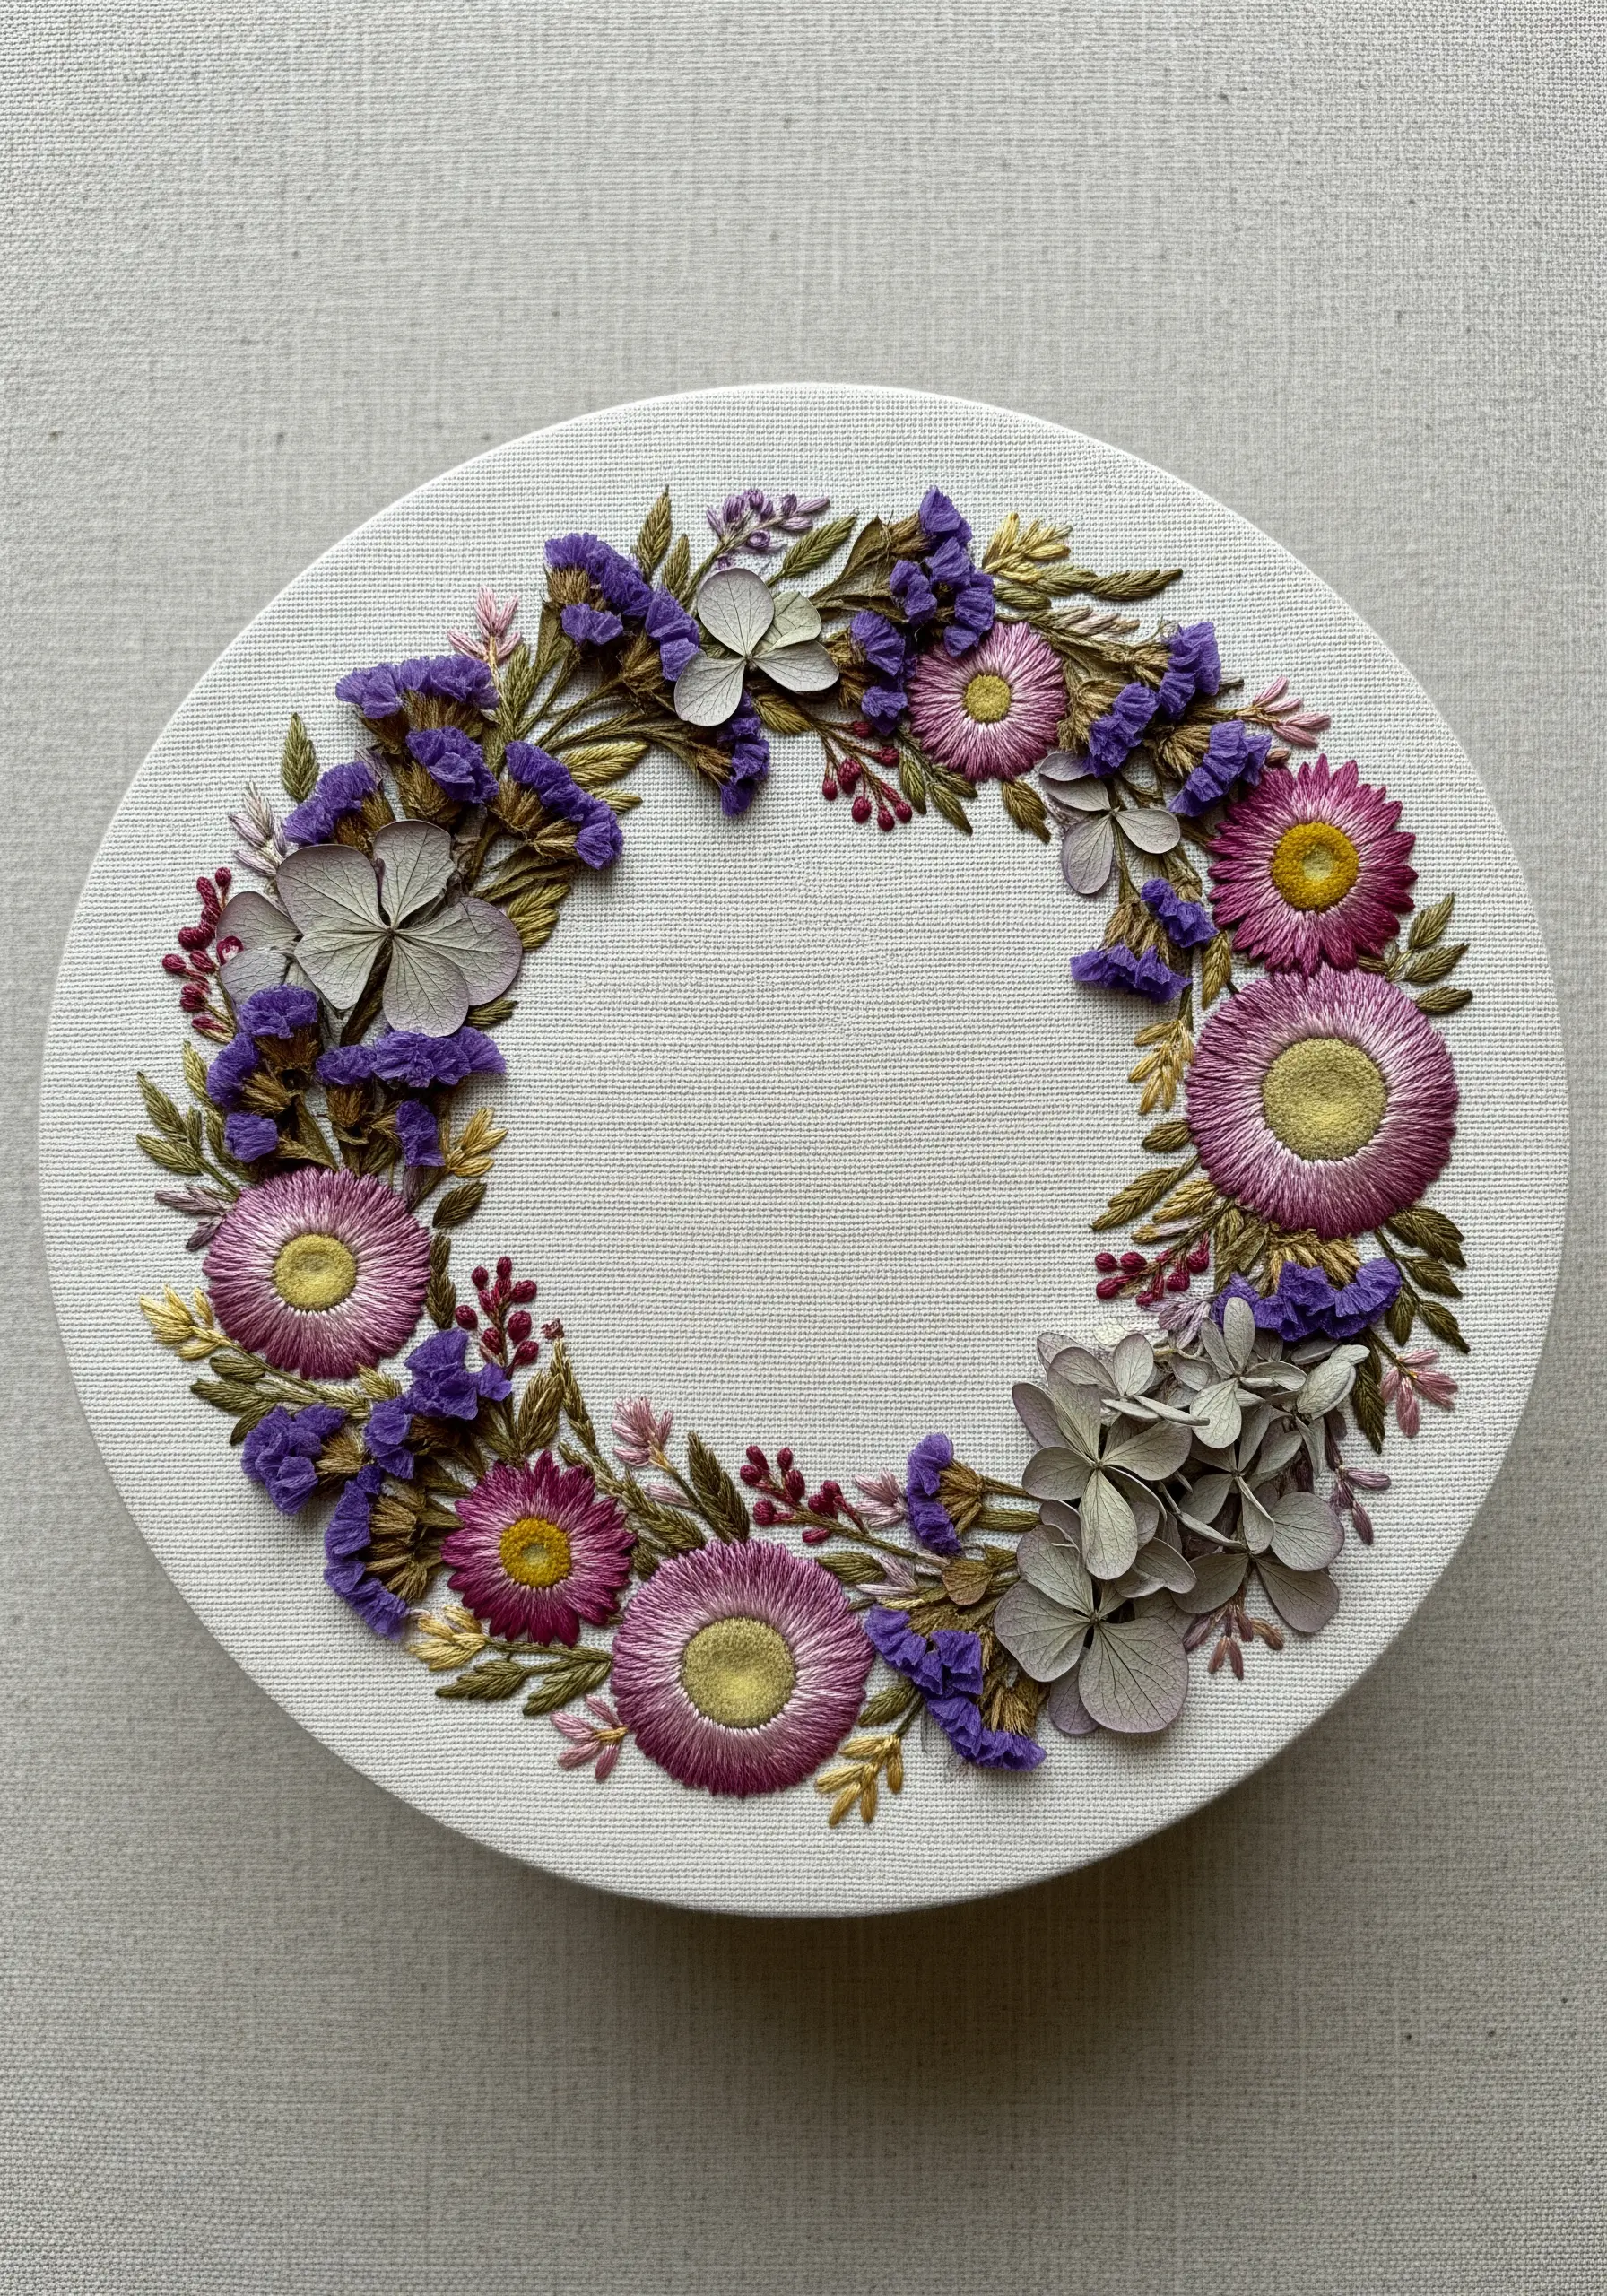
Create a breathtaking mixed-media piece by integrating real dried botanicals into your stitching.
First, embroider the leaves and smaller filler flowers to establish your composition.
Then, carefully couch your dried elements—like strawflowers, globe amaranth, or statice—by tacking them down with small, discreet stitches.
The result is a piece with incredible dimension and unique texture, like these pressed flower art & embroidery ideas that will make your friends envy you.
26. Building Hydrangea Blossoms with French Knots

To capture the full, cloud-like texture of a hydrangea, fill the entire flower head shape with densely packed French knots.
Use three to four shades of a color—from pale sky blue to a deeper cornflower—and scatter them randomly to create a natural, variegated effect.
Using just a single strand of floss for each knot keeps them tight, textured, and distinct, perfectly mimicking the tiny individual flowers that make up the whole.
27. Delicate Details for a Bleeding Heart Vine
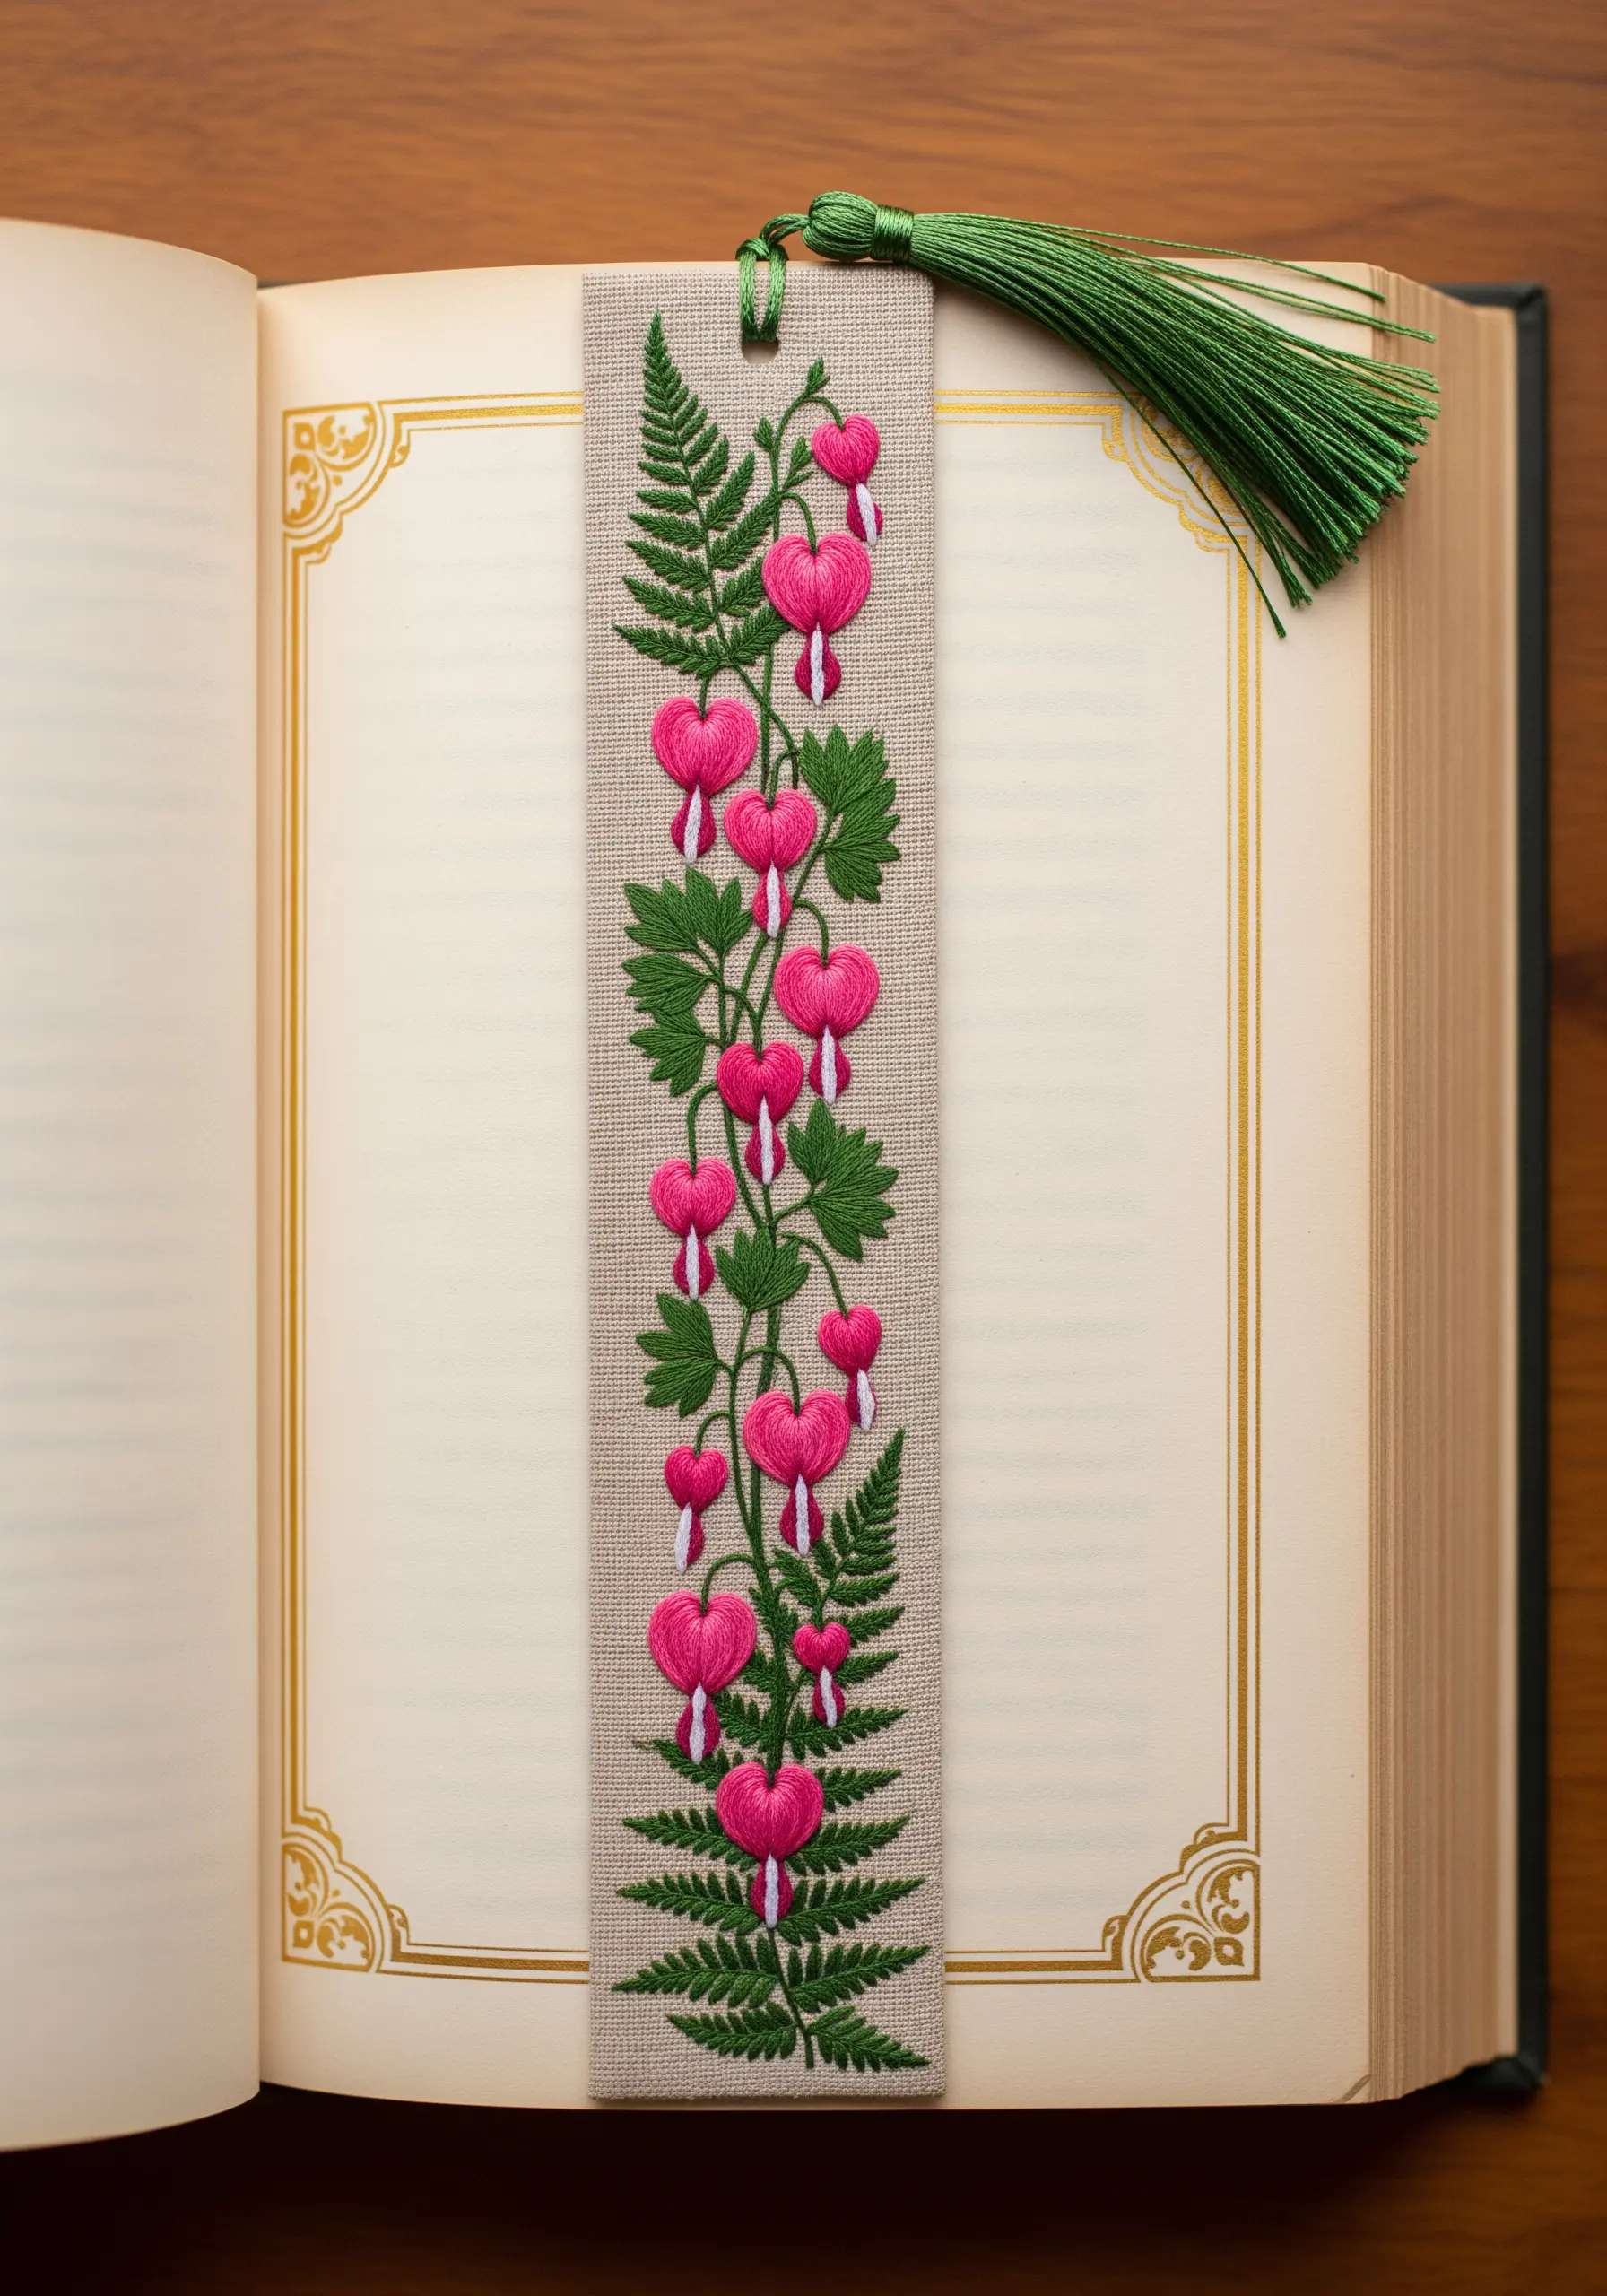
For the signature heart-shaped blossoms, use a padded satin stitch. This involves creating a base layer of small straight stitches before covering them with satin stitch, giving the final flower a puffy, dimensional look.
Add a single, tiny straight stitch in a contrasting color at the bottom to create the classic “droplet.”
Combine these flowers with delicate fern stitch for the leaves to create a balanced design that’s perfect for a narrow format like a bookmark.
28. Miniature Botanical Studies for Holiday Ornaments
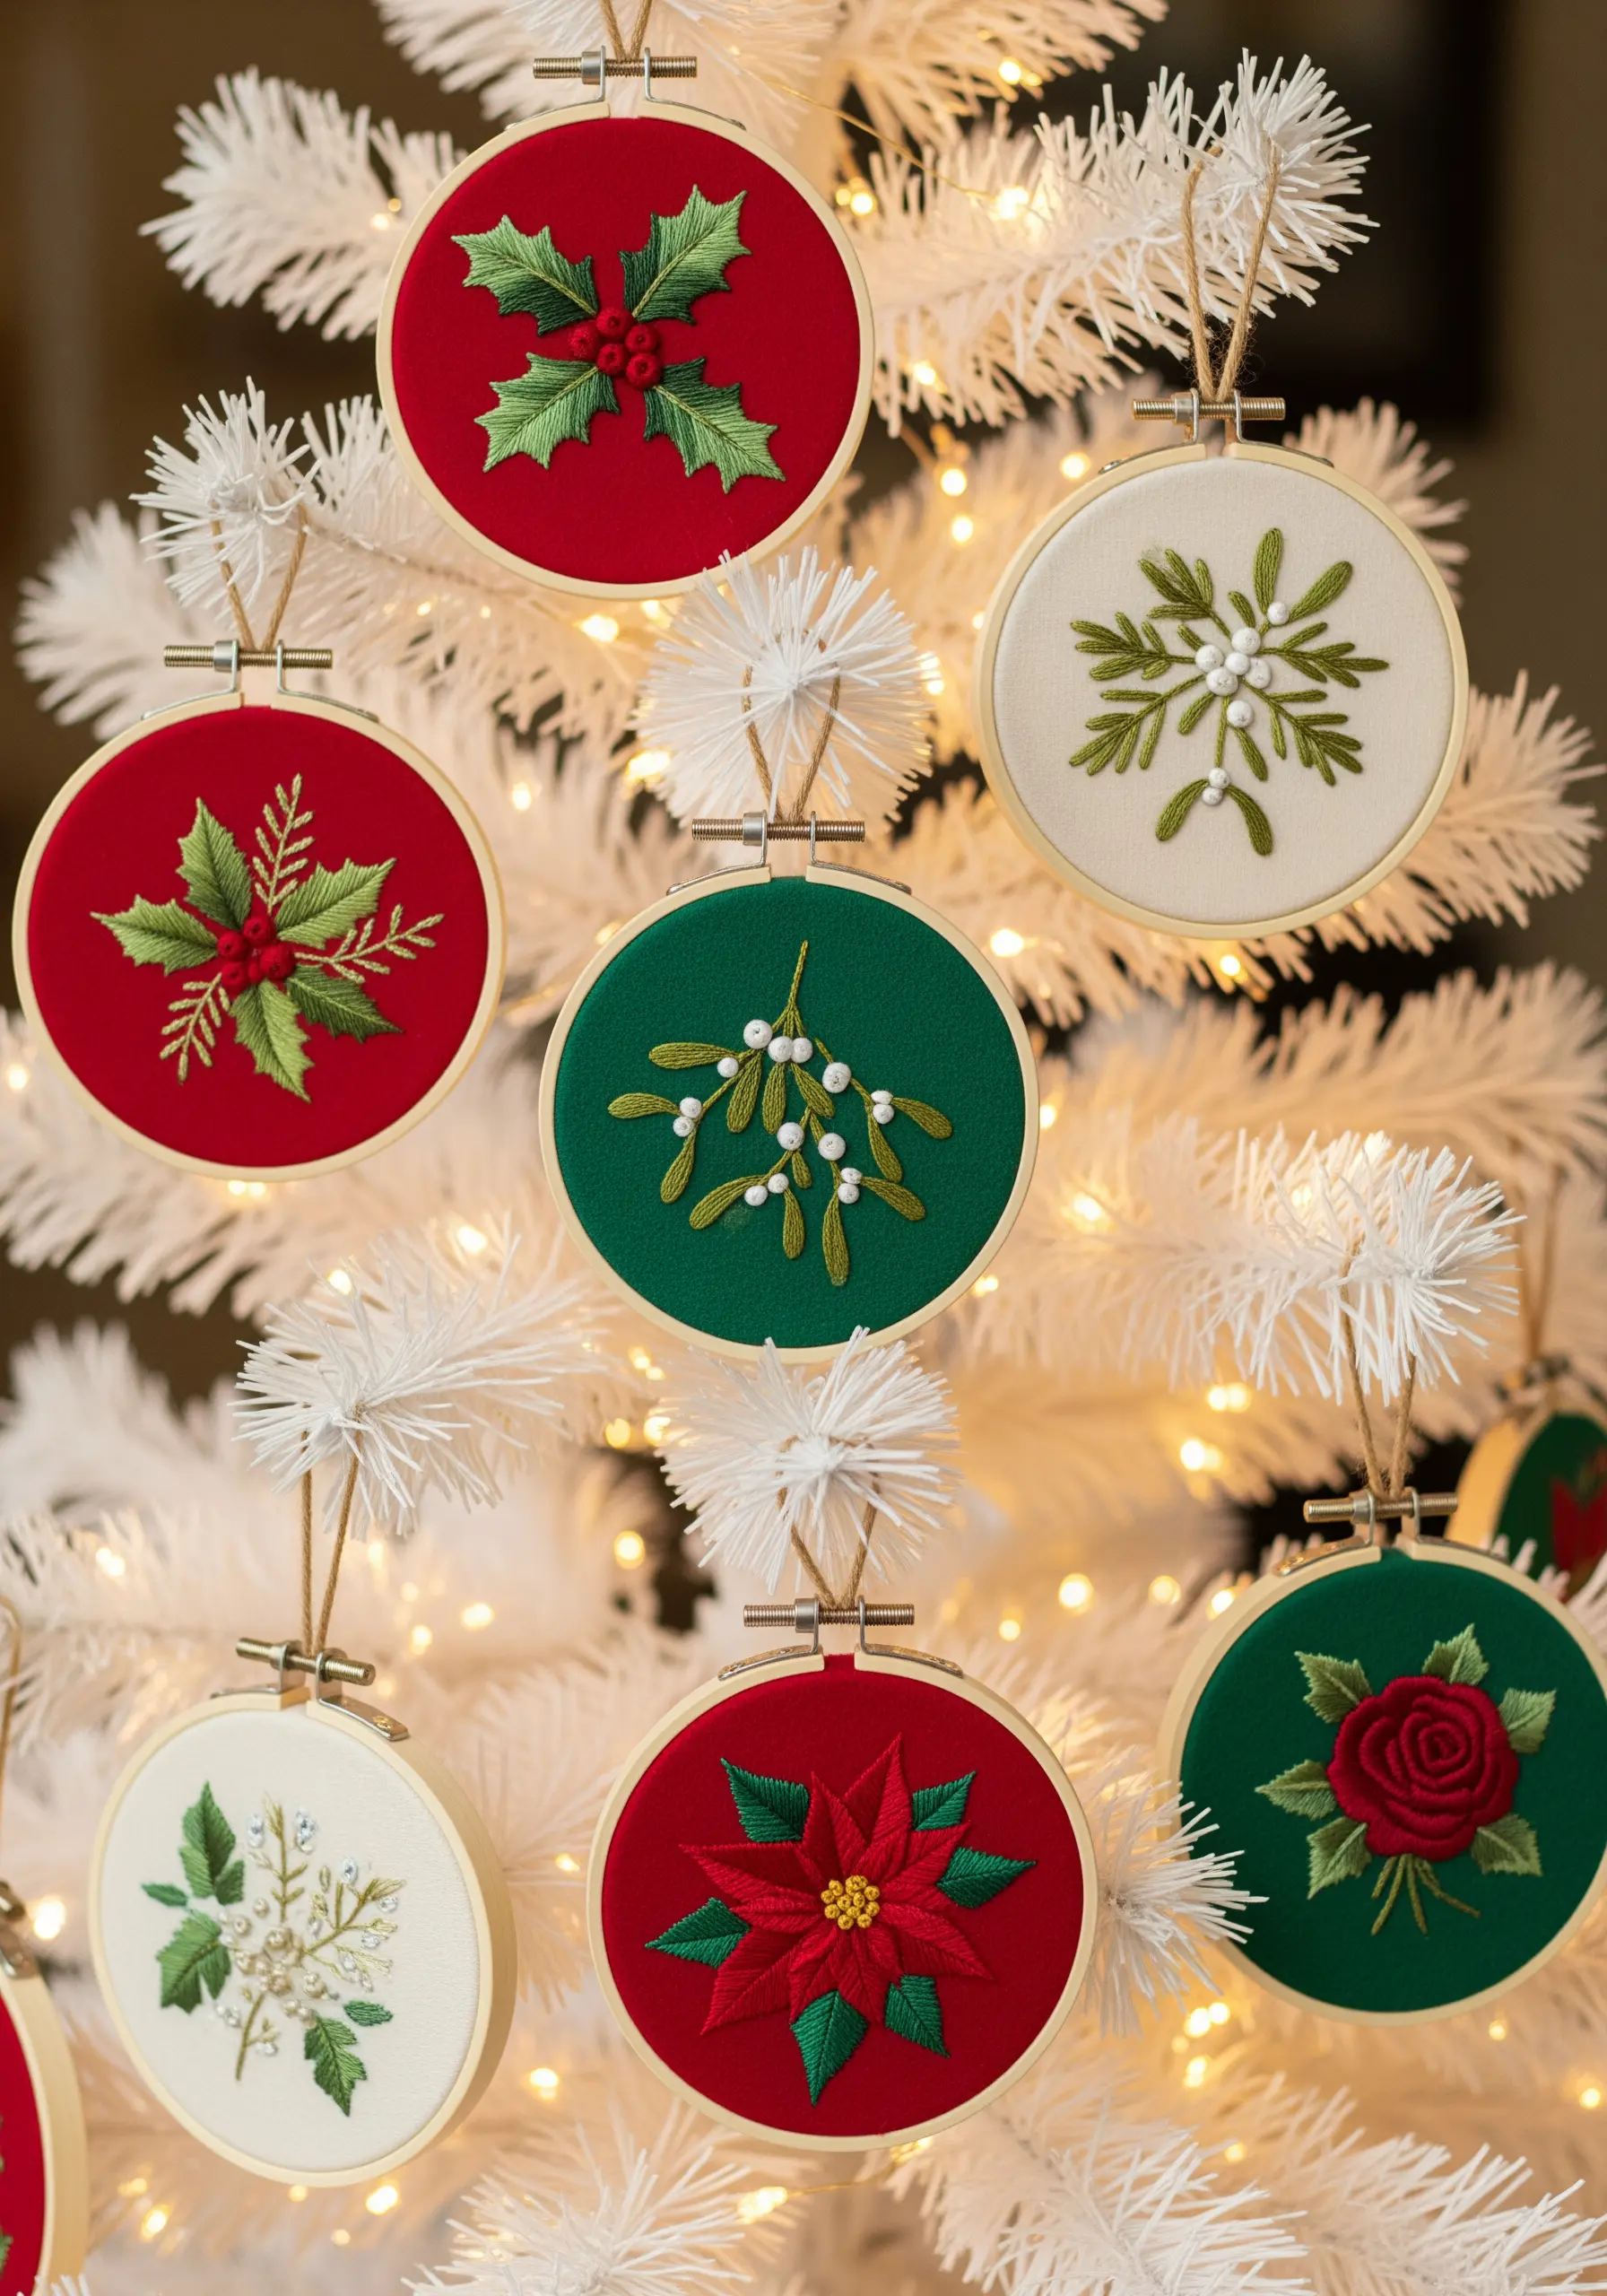
Create a set of timeless holiday ornaments by framing tiny, elegant botanical motifs in small embroidery hoops.
Focus on a single, iconic plant for each ornament—holly, mistletoe, a poinsettia, or a winter rose.
Using contrasting fabrics like red, green, or cream felt as your base will make the stitched designs pop.
A few well-placed French knots for berries or padded satin stitch for petals adds just the right amount of festive dimension.
These are truly small embroidery projects that make perfect handmade gifts.
29. Elegant Bouquets for Wedding Keepsakes
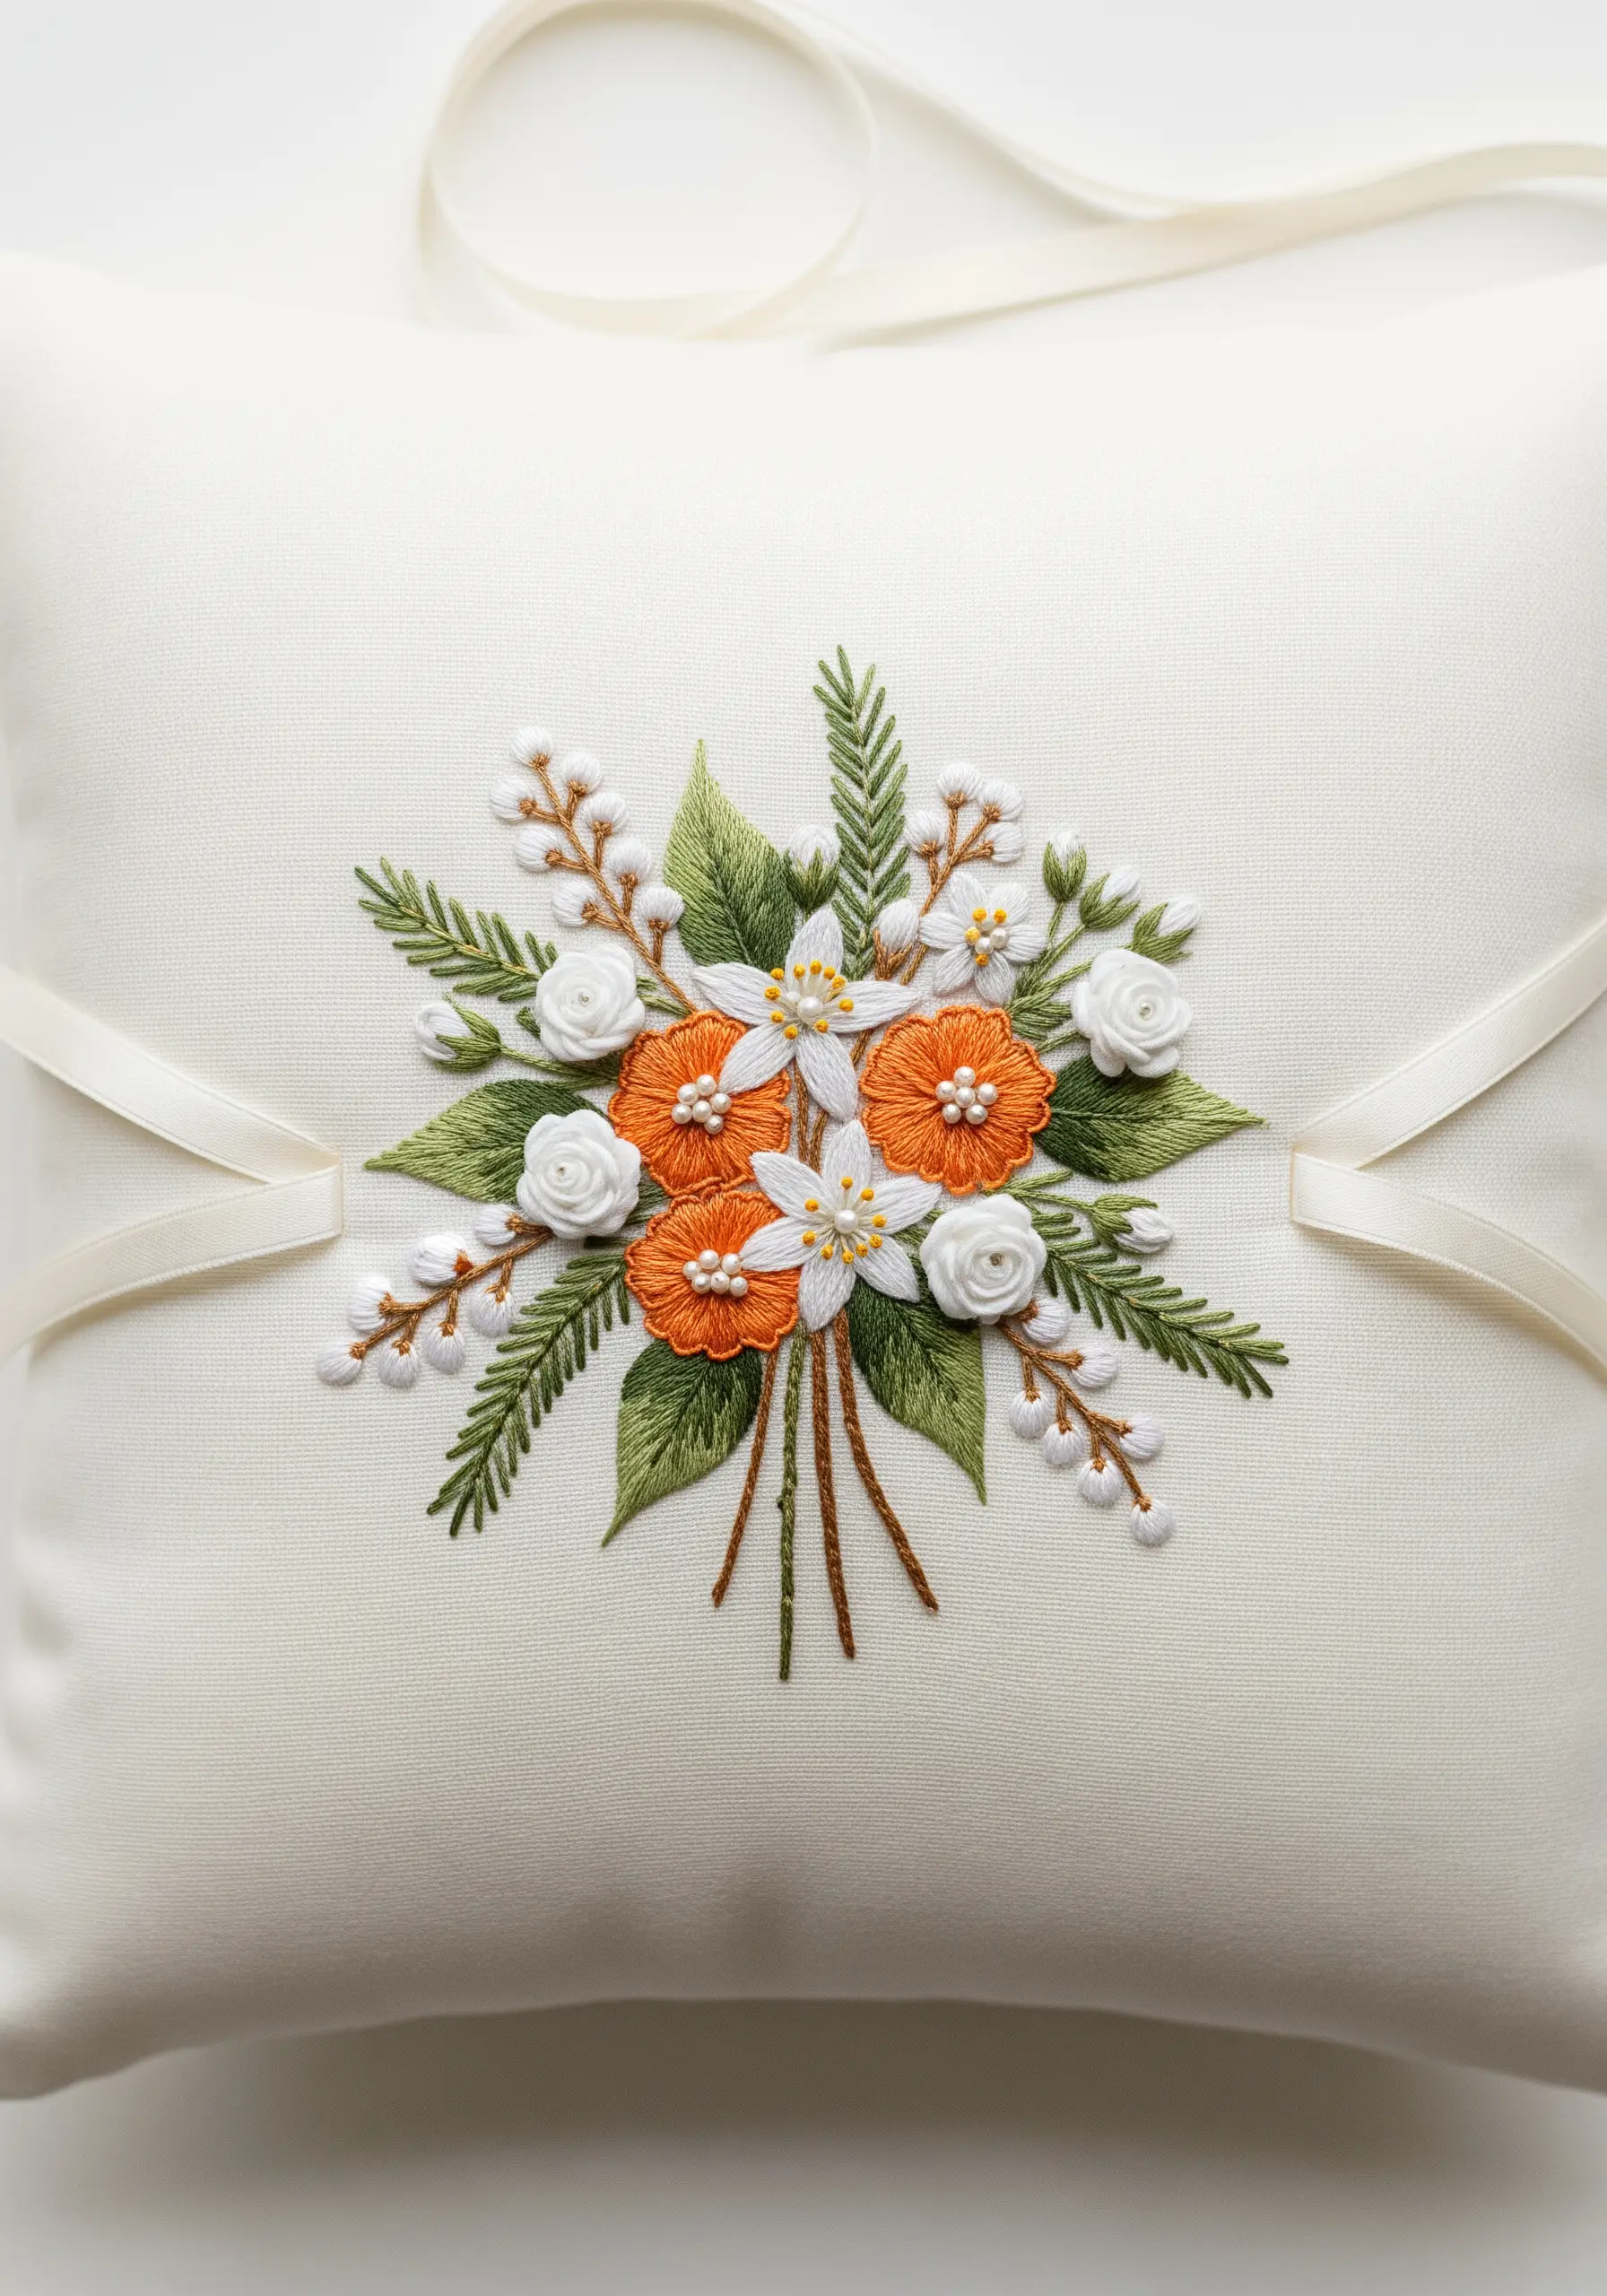
For a formal item like a ring bearer’s pillow, choose a classic, balanced bouquet composition and a sophisticated stitch palette.
Woven wheel stitches are an excellent choice for creating beautiful, dimensional roses quickly and easily.
Pair them with bullion knots for buds and simple satin-stitched leaves.
A limited, elegant color palette—such as white, soft orange, and green on an ivory satin fabric—ensures a timeless result.
30. Creating a Personalized Family Tree with Floral Details
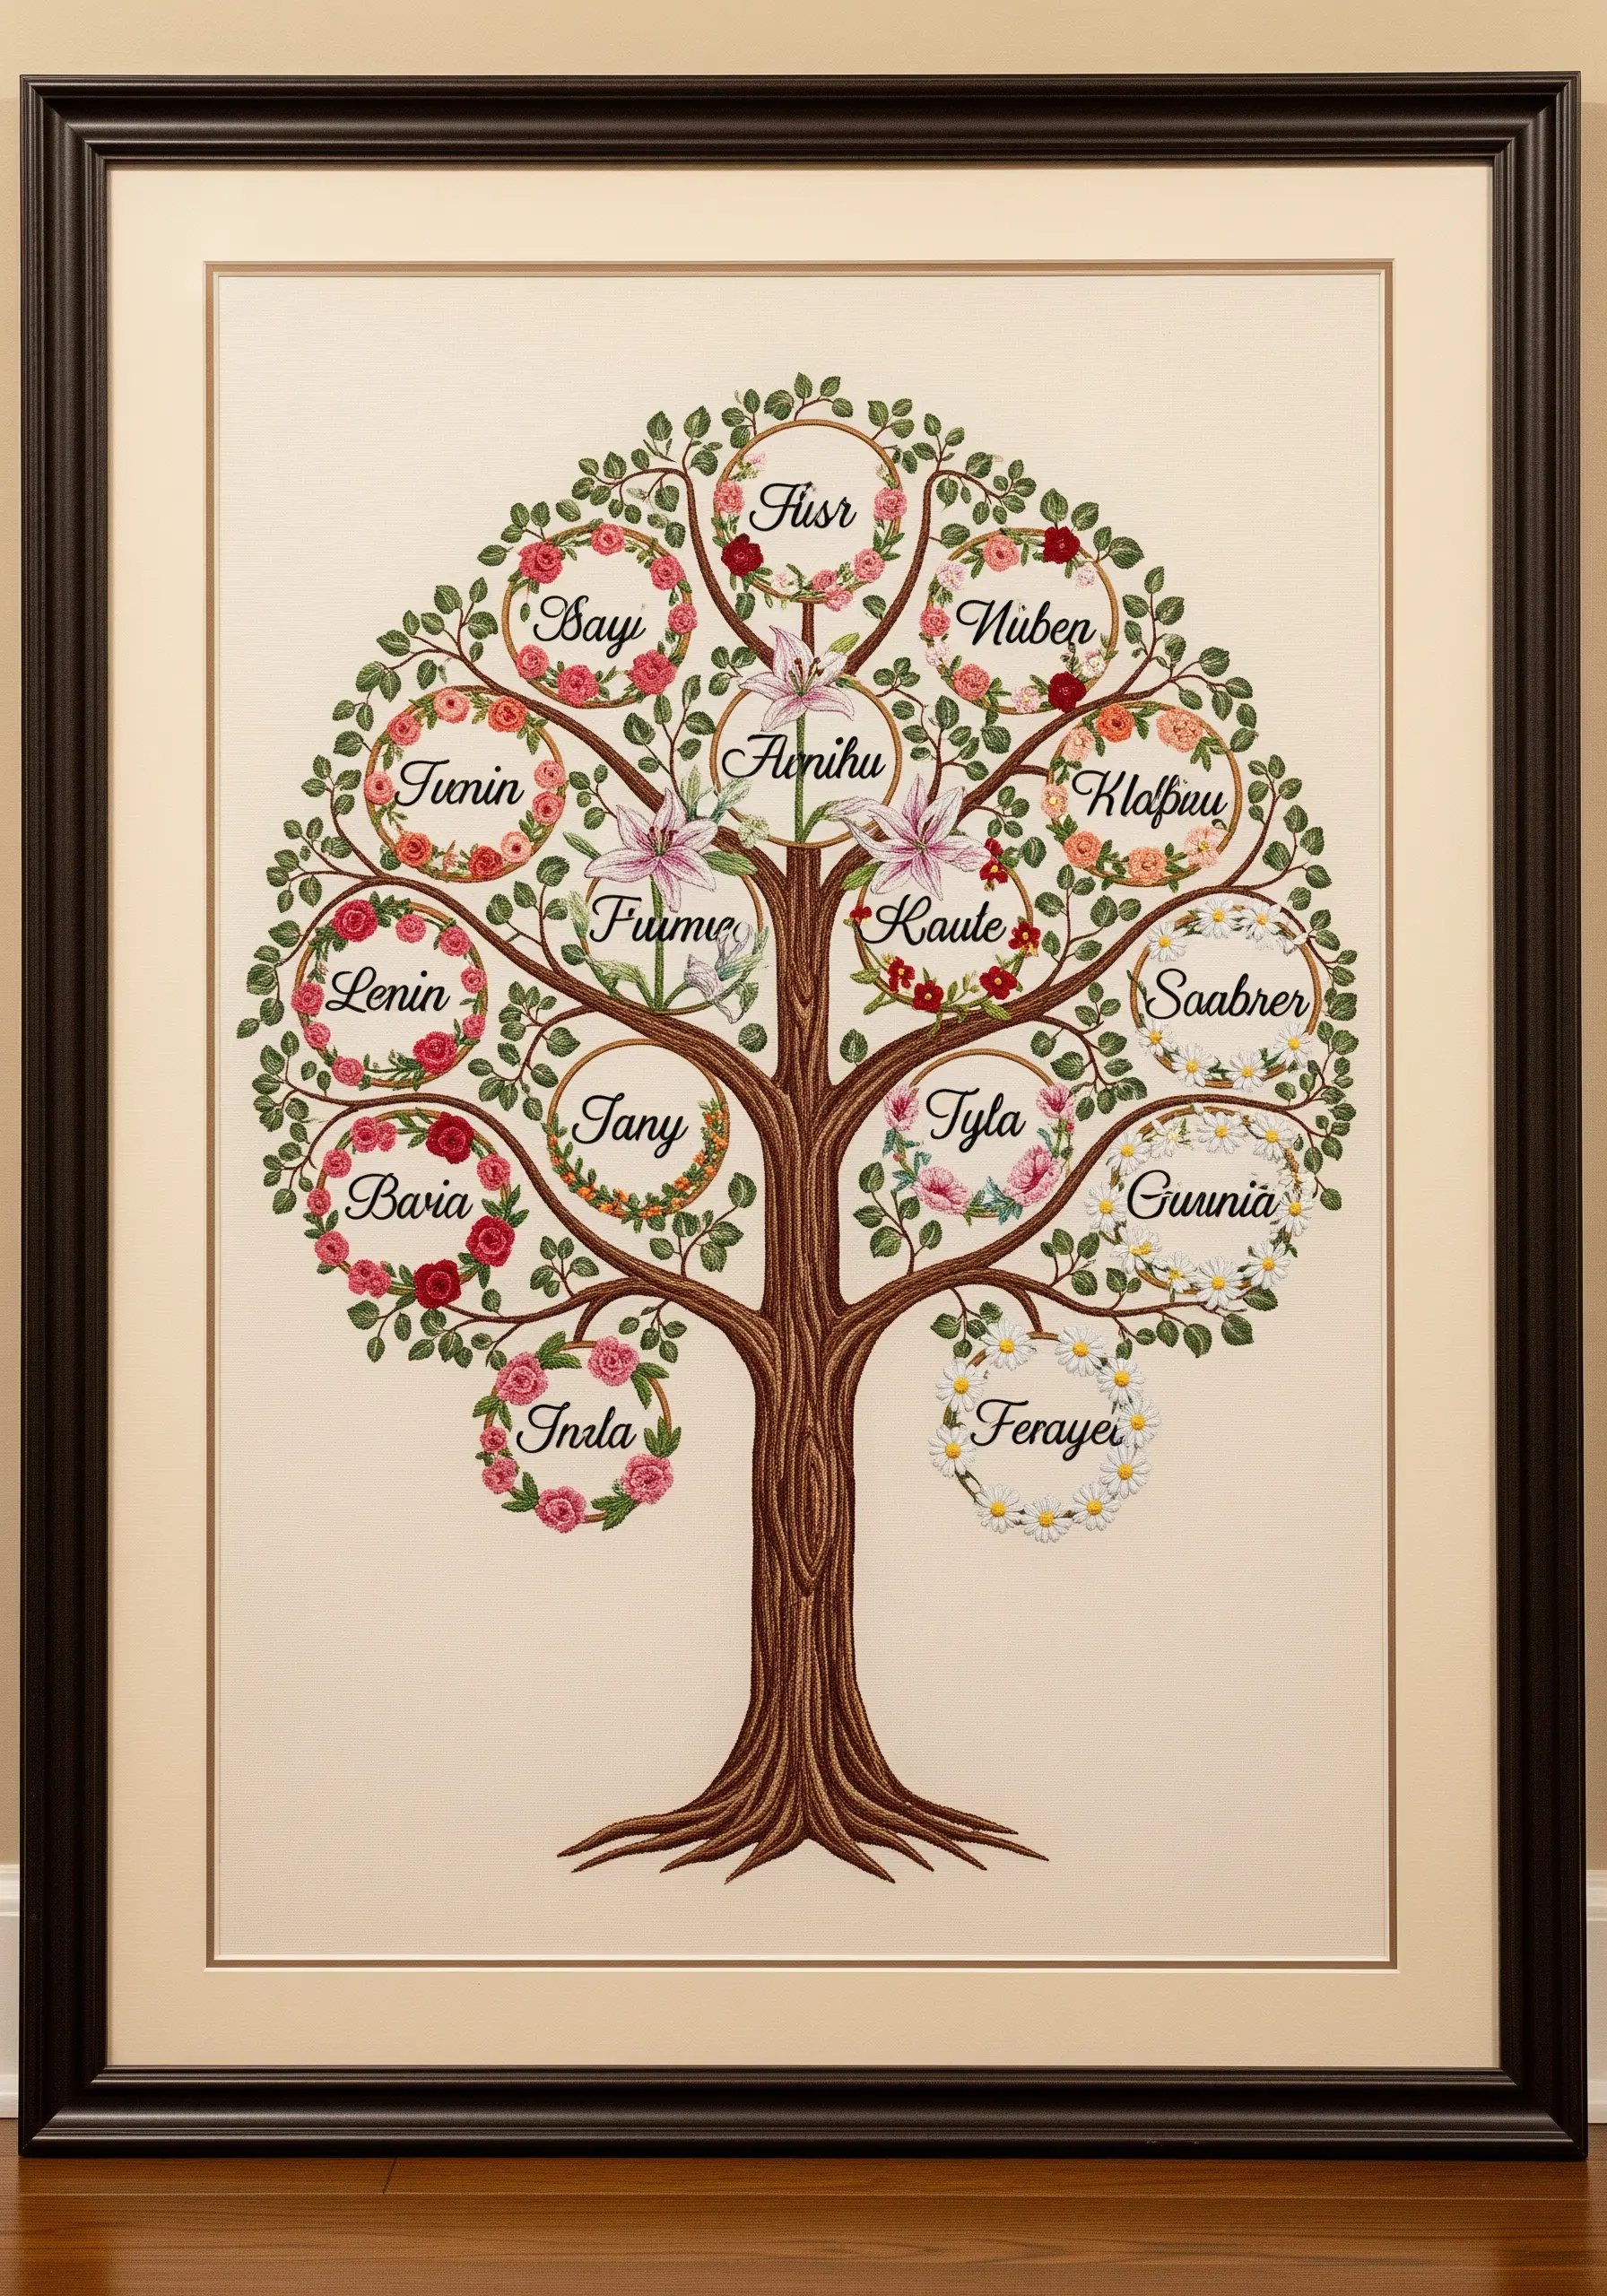
Transform a family tree pattern into a true family heirloom by personalizing it with detailed embroidery.
Represent each family member with a name stitched inside a unique floral wreath.
Vary the types of flowers and color palettes for each individual wreath to reflect different personalities, while using a consistent stitch, like a whipped backstitch, for the tree trunk and branches to unify the entire piece.


