

Before you pick up your needle for the next project, I want you to consider something: your stitches can do more than just fill in a shape. They can create emotion, depth, and a sense of intention that transforms a simple pattern into a piece of art you are truly proud of.
Often, the difference between a project you like and a project you love comes down to small, deliberate choices. It’s about selecting a whipped backstitch over a standard one for a smoother line, or using a padded satin stitch to give a flower petal a plump, lifelike curve. It’s about understanding not just how to make a stitch, but why you are choosing it.
These patterns are more than just guides; they are invitations to refine your technique. With each one, you’ll learn a small secret—a way to add texture, a method for creating depth, or a simple trick for making your work look more polished and professional. Let’s begin.
1. Render Lavender with Tactile Detail
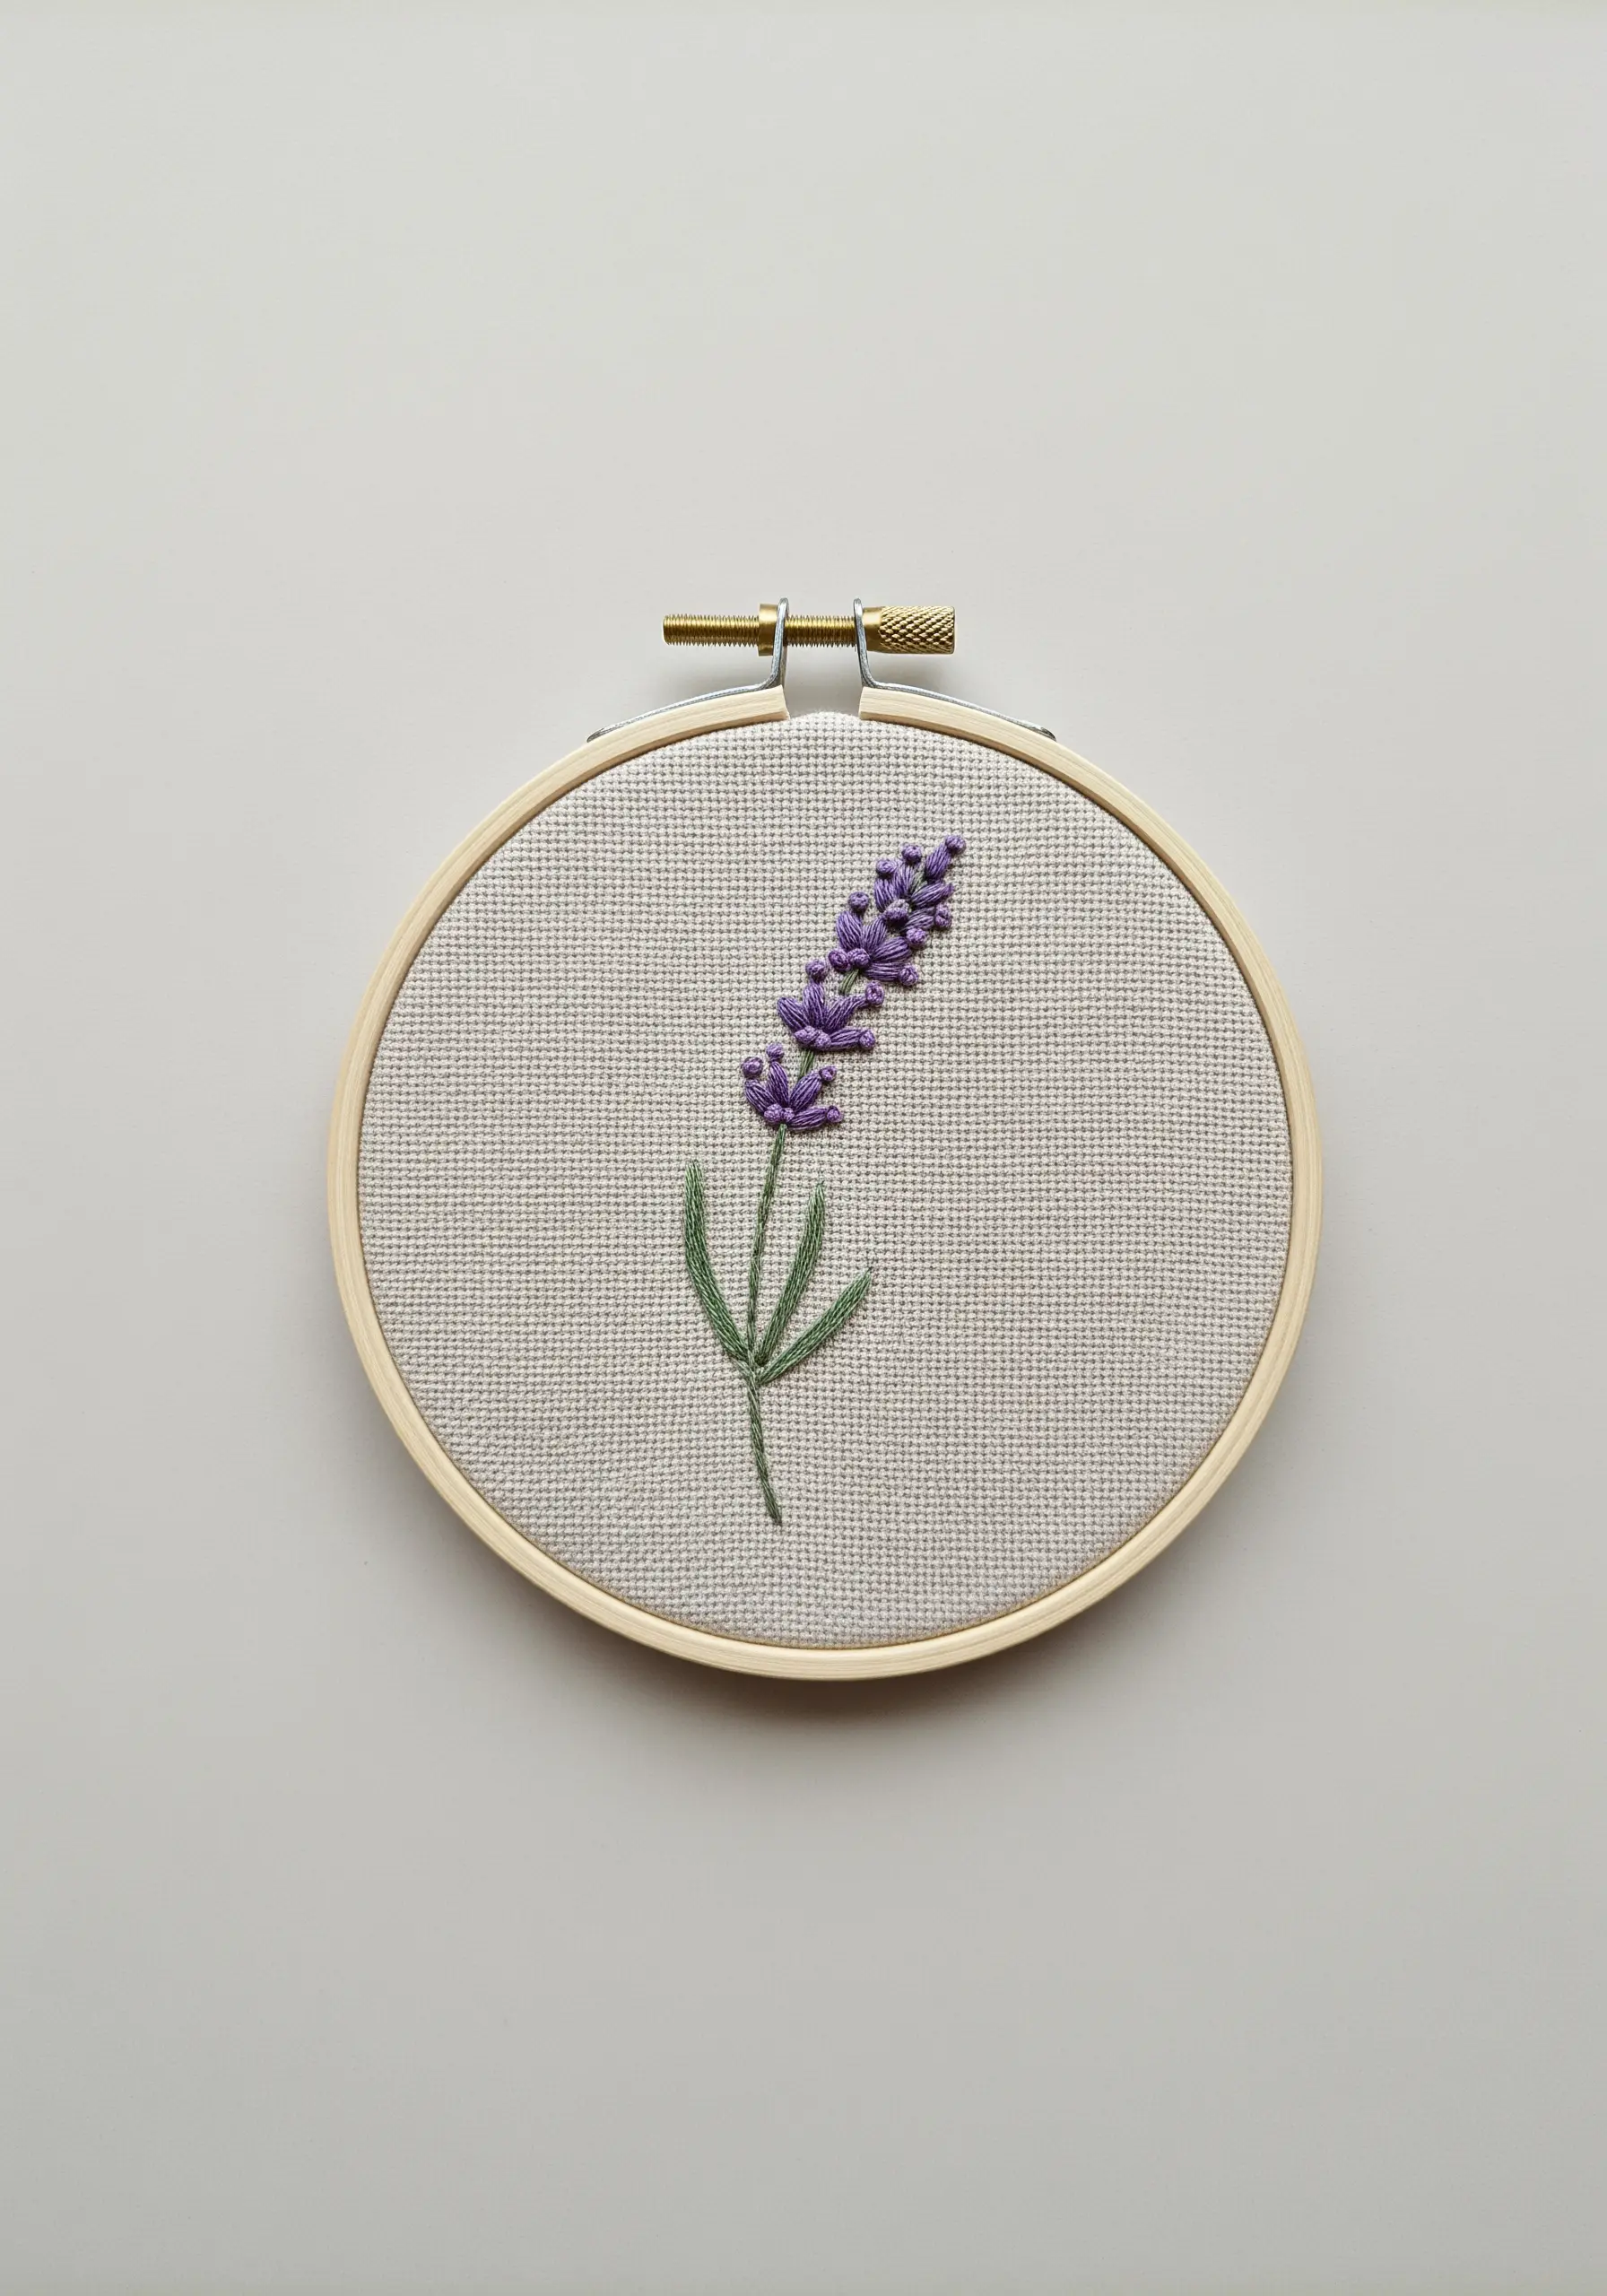
Create your lavender buds using French knots or colonial knots, varying the tightness and size to mimic a natural cluster.
For the stem, a simple stem stitch or whipped backstitch provides a smooth, raised line that contrasts beautifully with the textured buds.
Use two strands of floss for the flowers and a single strand for the stem to create a delicate visual balance.
This combination of textures elevates a simple botanical into a piece with satisfying depth.
2. Stitch a Bee with Polished Dimension
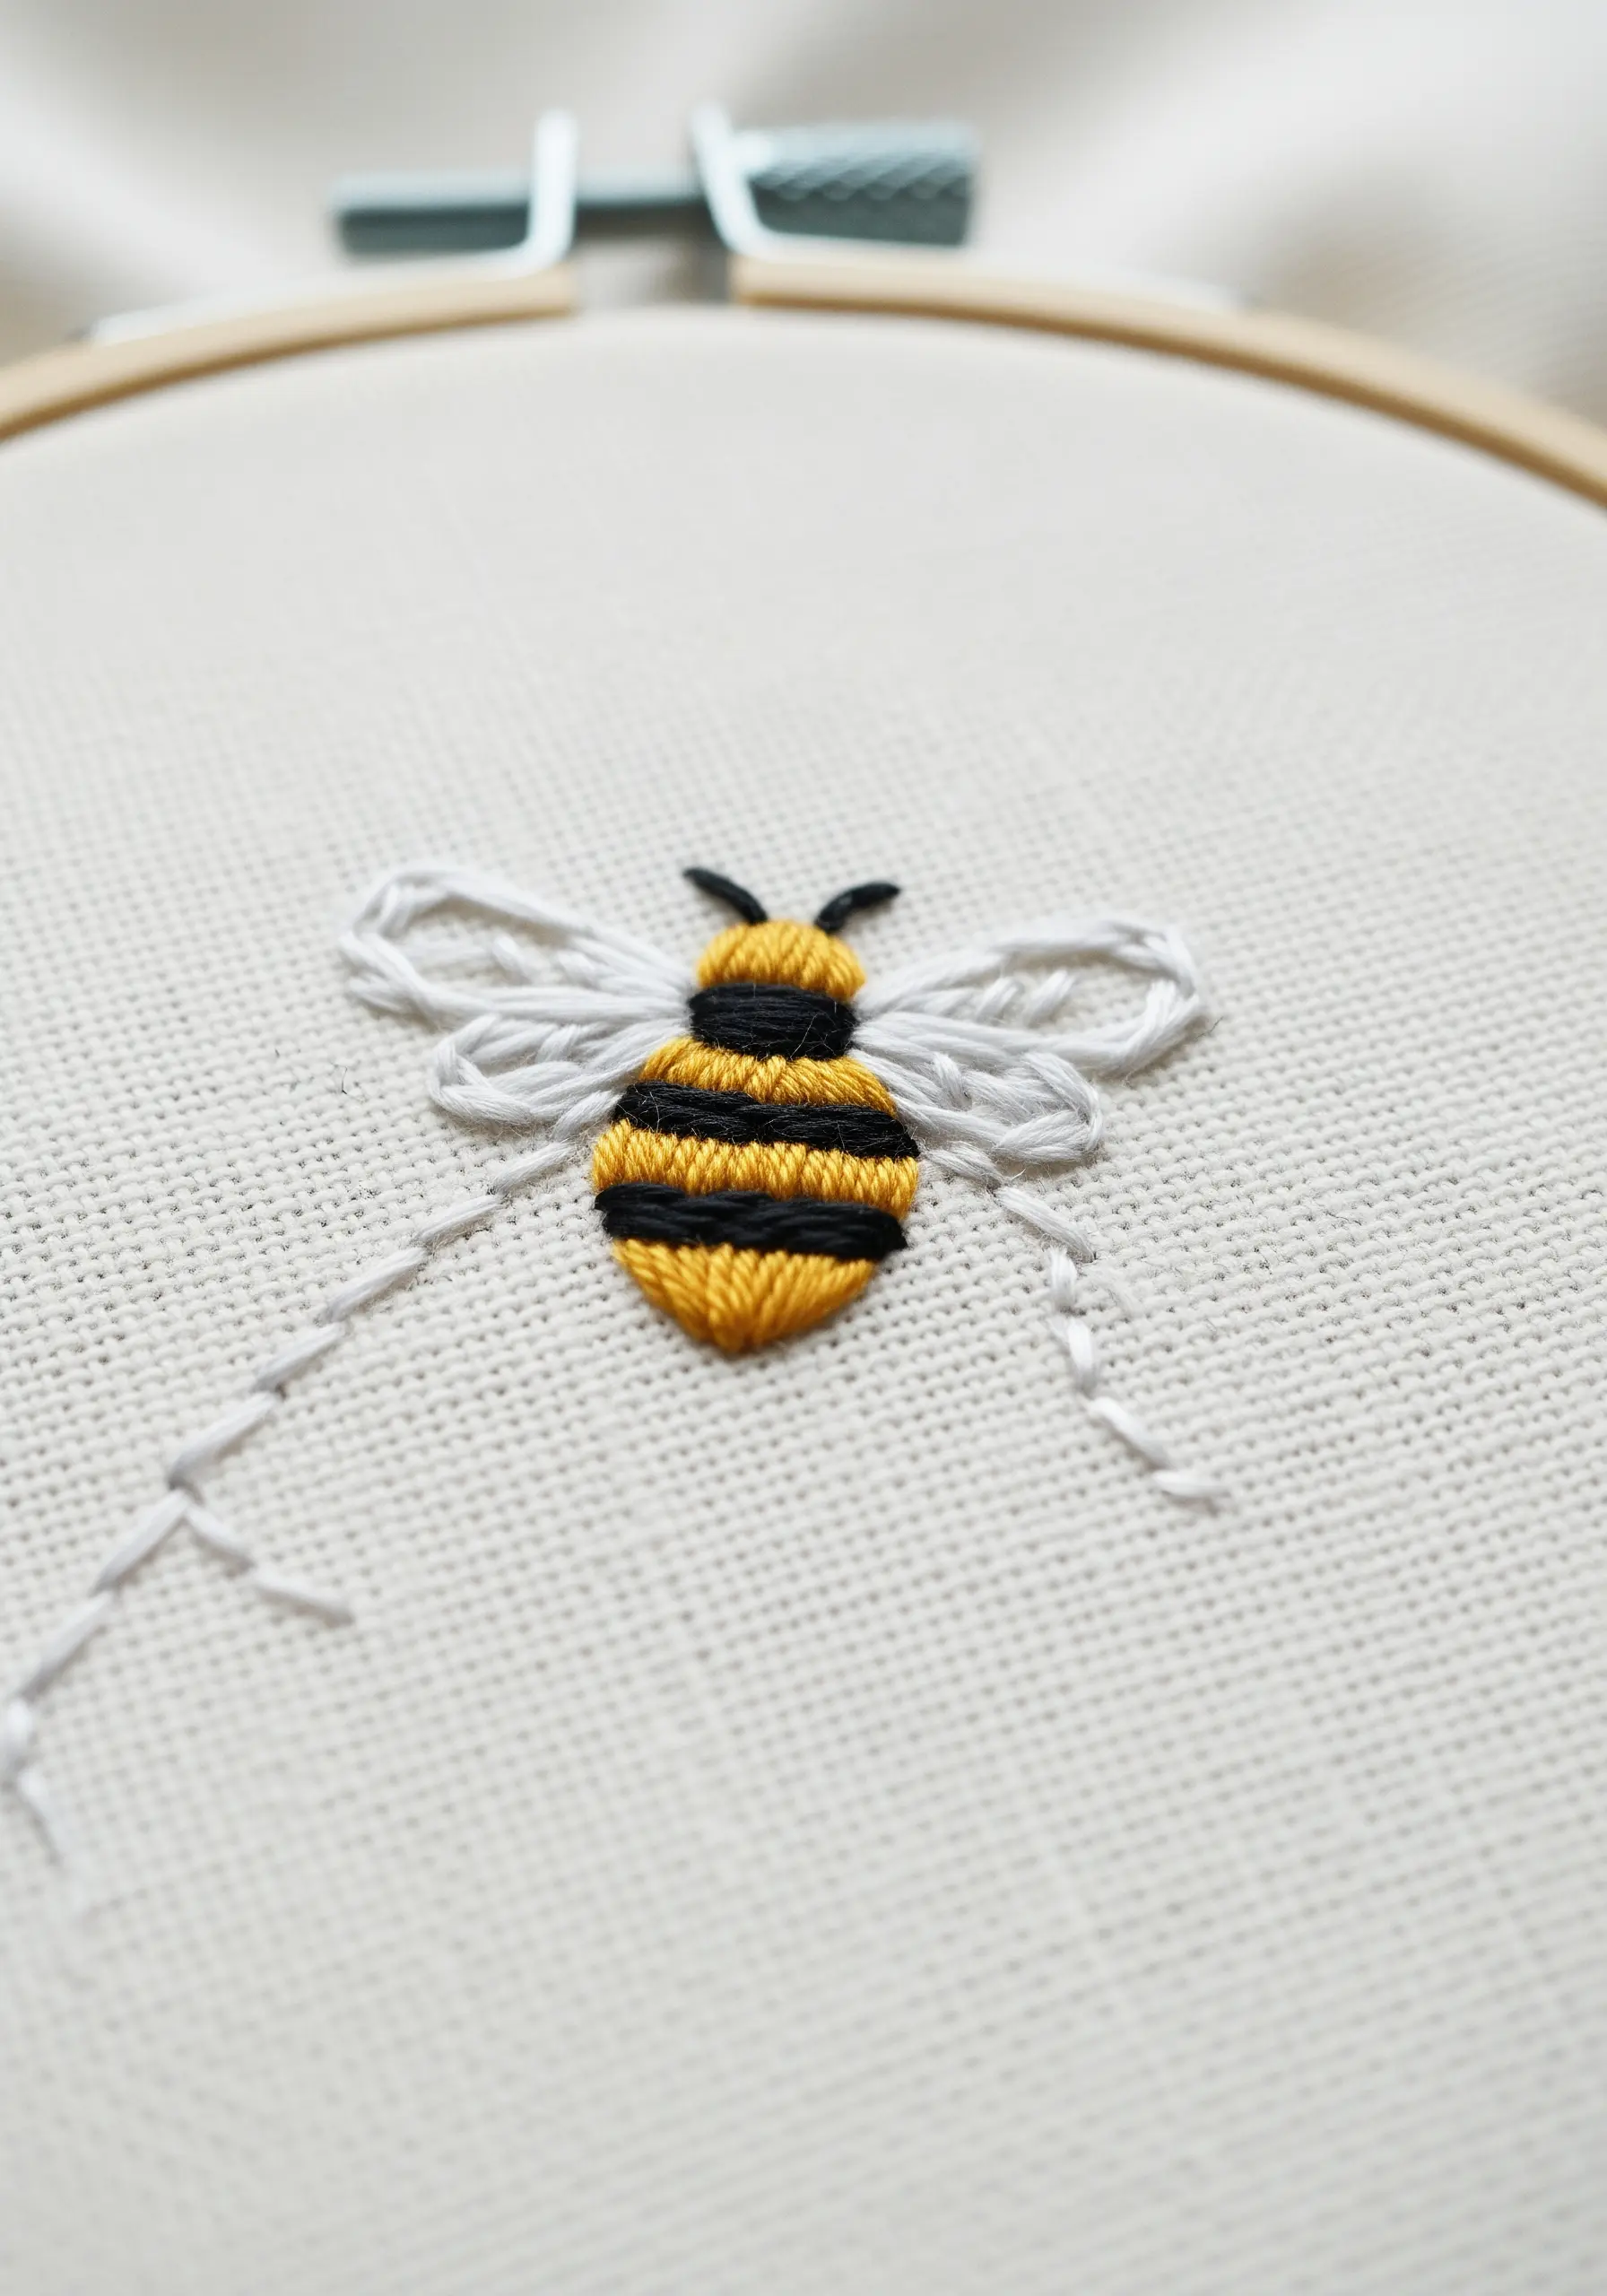
Achieve a plump, glossy body by using satin stitch, ensuring your stitches lay close together without overlapping.
Keep your stitches short and angled slightly toward the center to create a subtle curve that suggests volume.
For the wings, use a single strand of thread in a detached chain stitch (lazy daisy) or a simple outline stitch to maintain a light, airy feel.
This contrast between the solid body and delicate wings makes the bee feel lifelike and dynamic.
3. Create Depth in Minimalist Landscapes
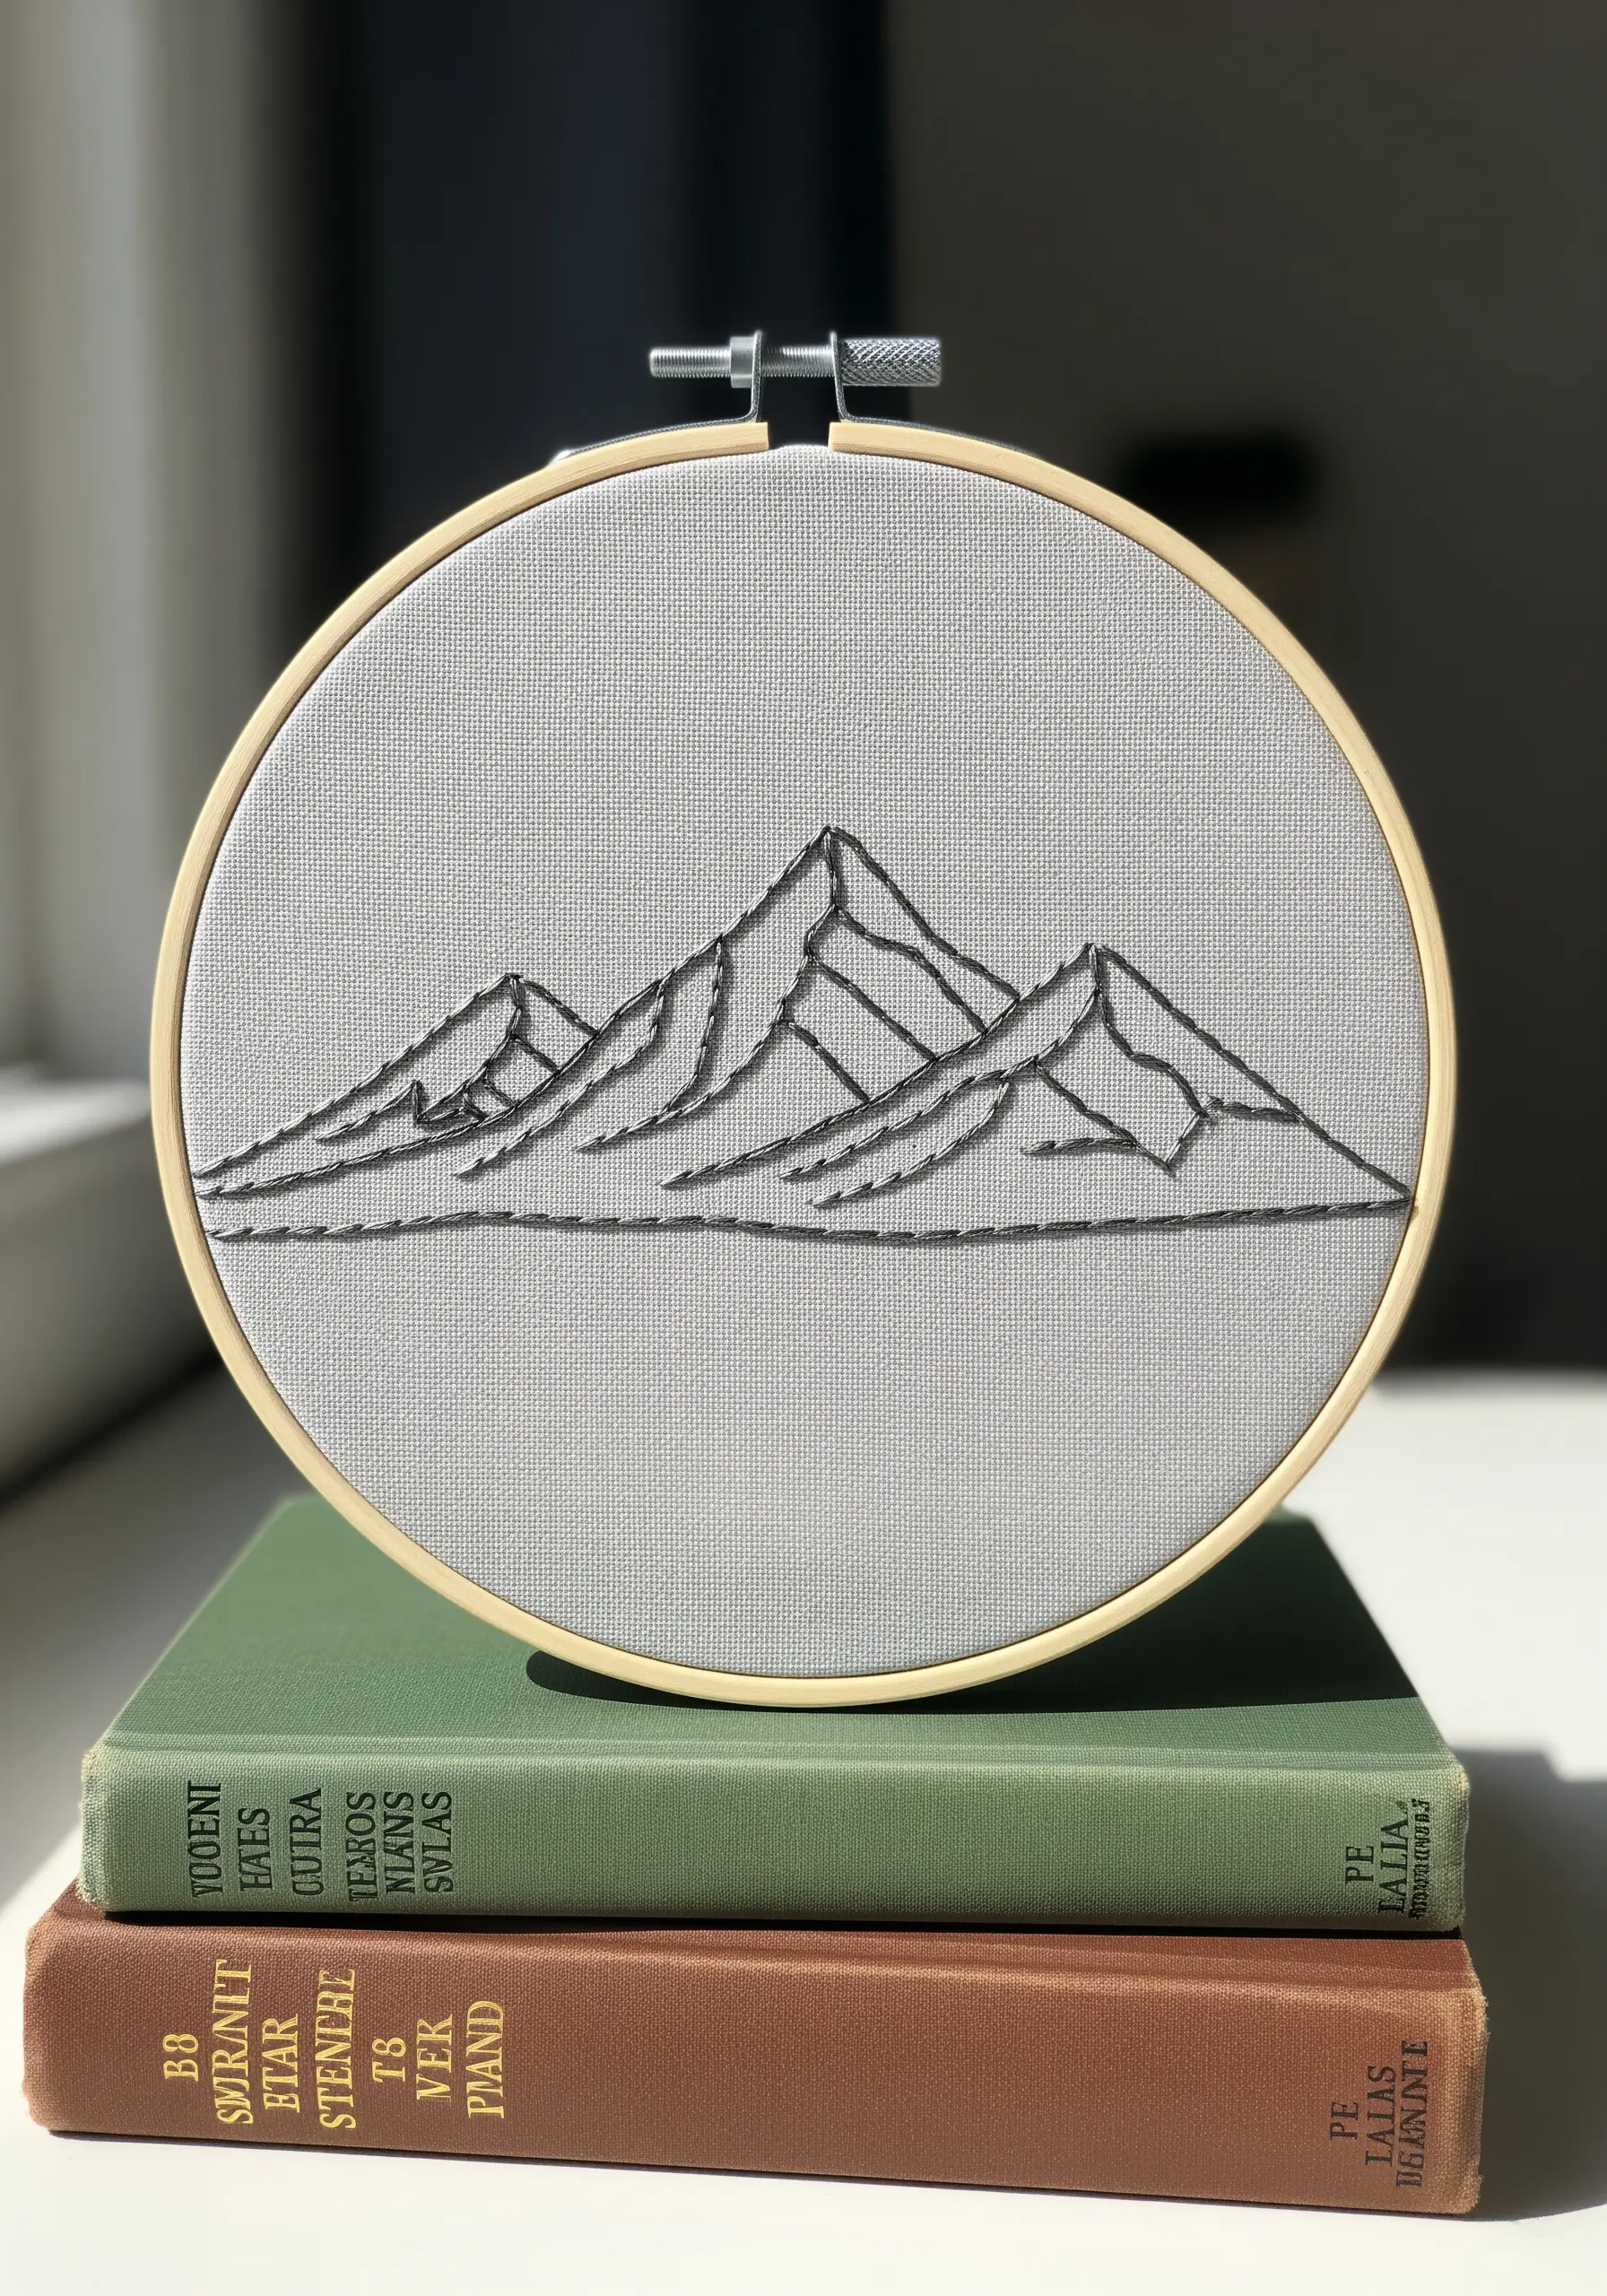
When embroidering a line-art mountain range, use different thread counts to create atmospheric perspective.
Use two or three strands for the foreground peaks to make them appear closer and bolder.
Switch to a single strand for the distant mountains; the finer lines will recede visually, adding instant depth to your composition.
A simple backstitch is all you need—the magic is in how you vary the weight of your lines.
4. Master the Architecture of a Fern Leaf
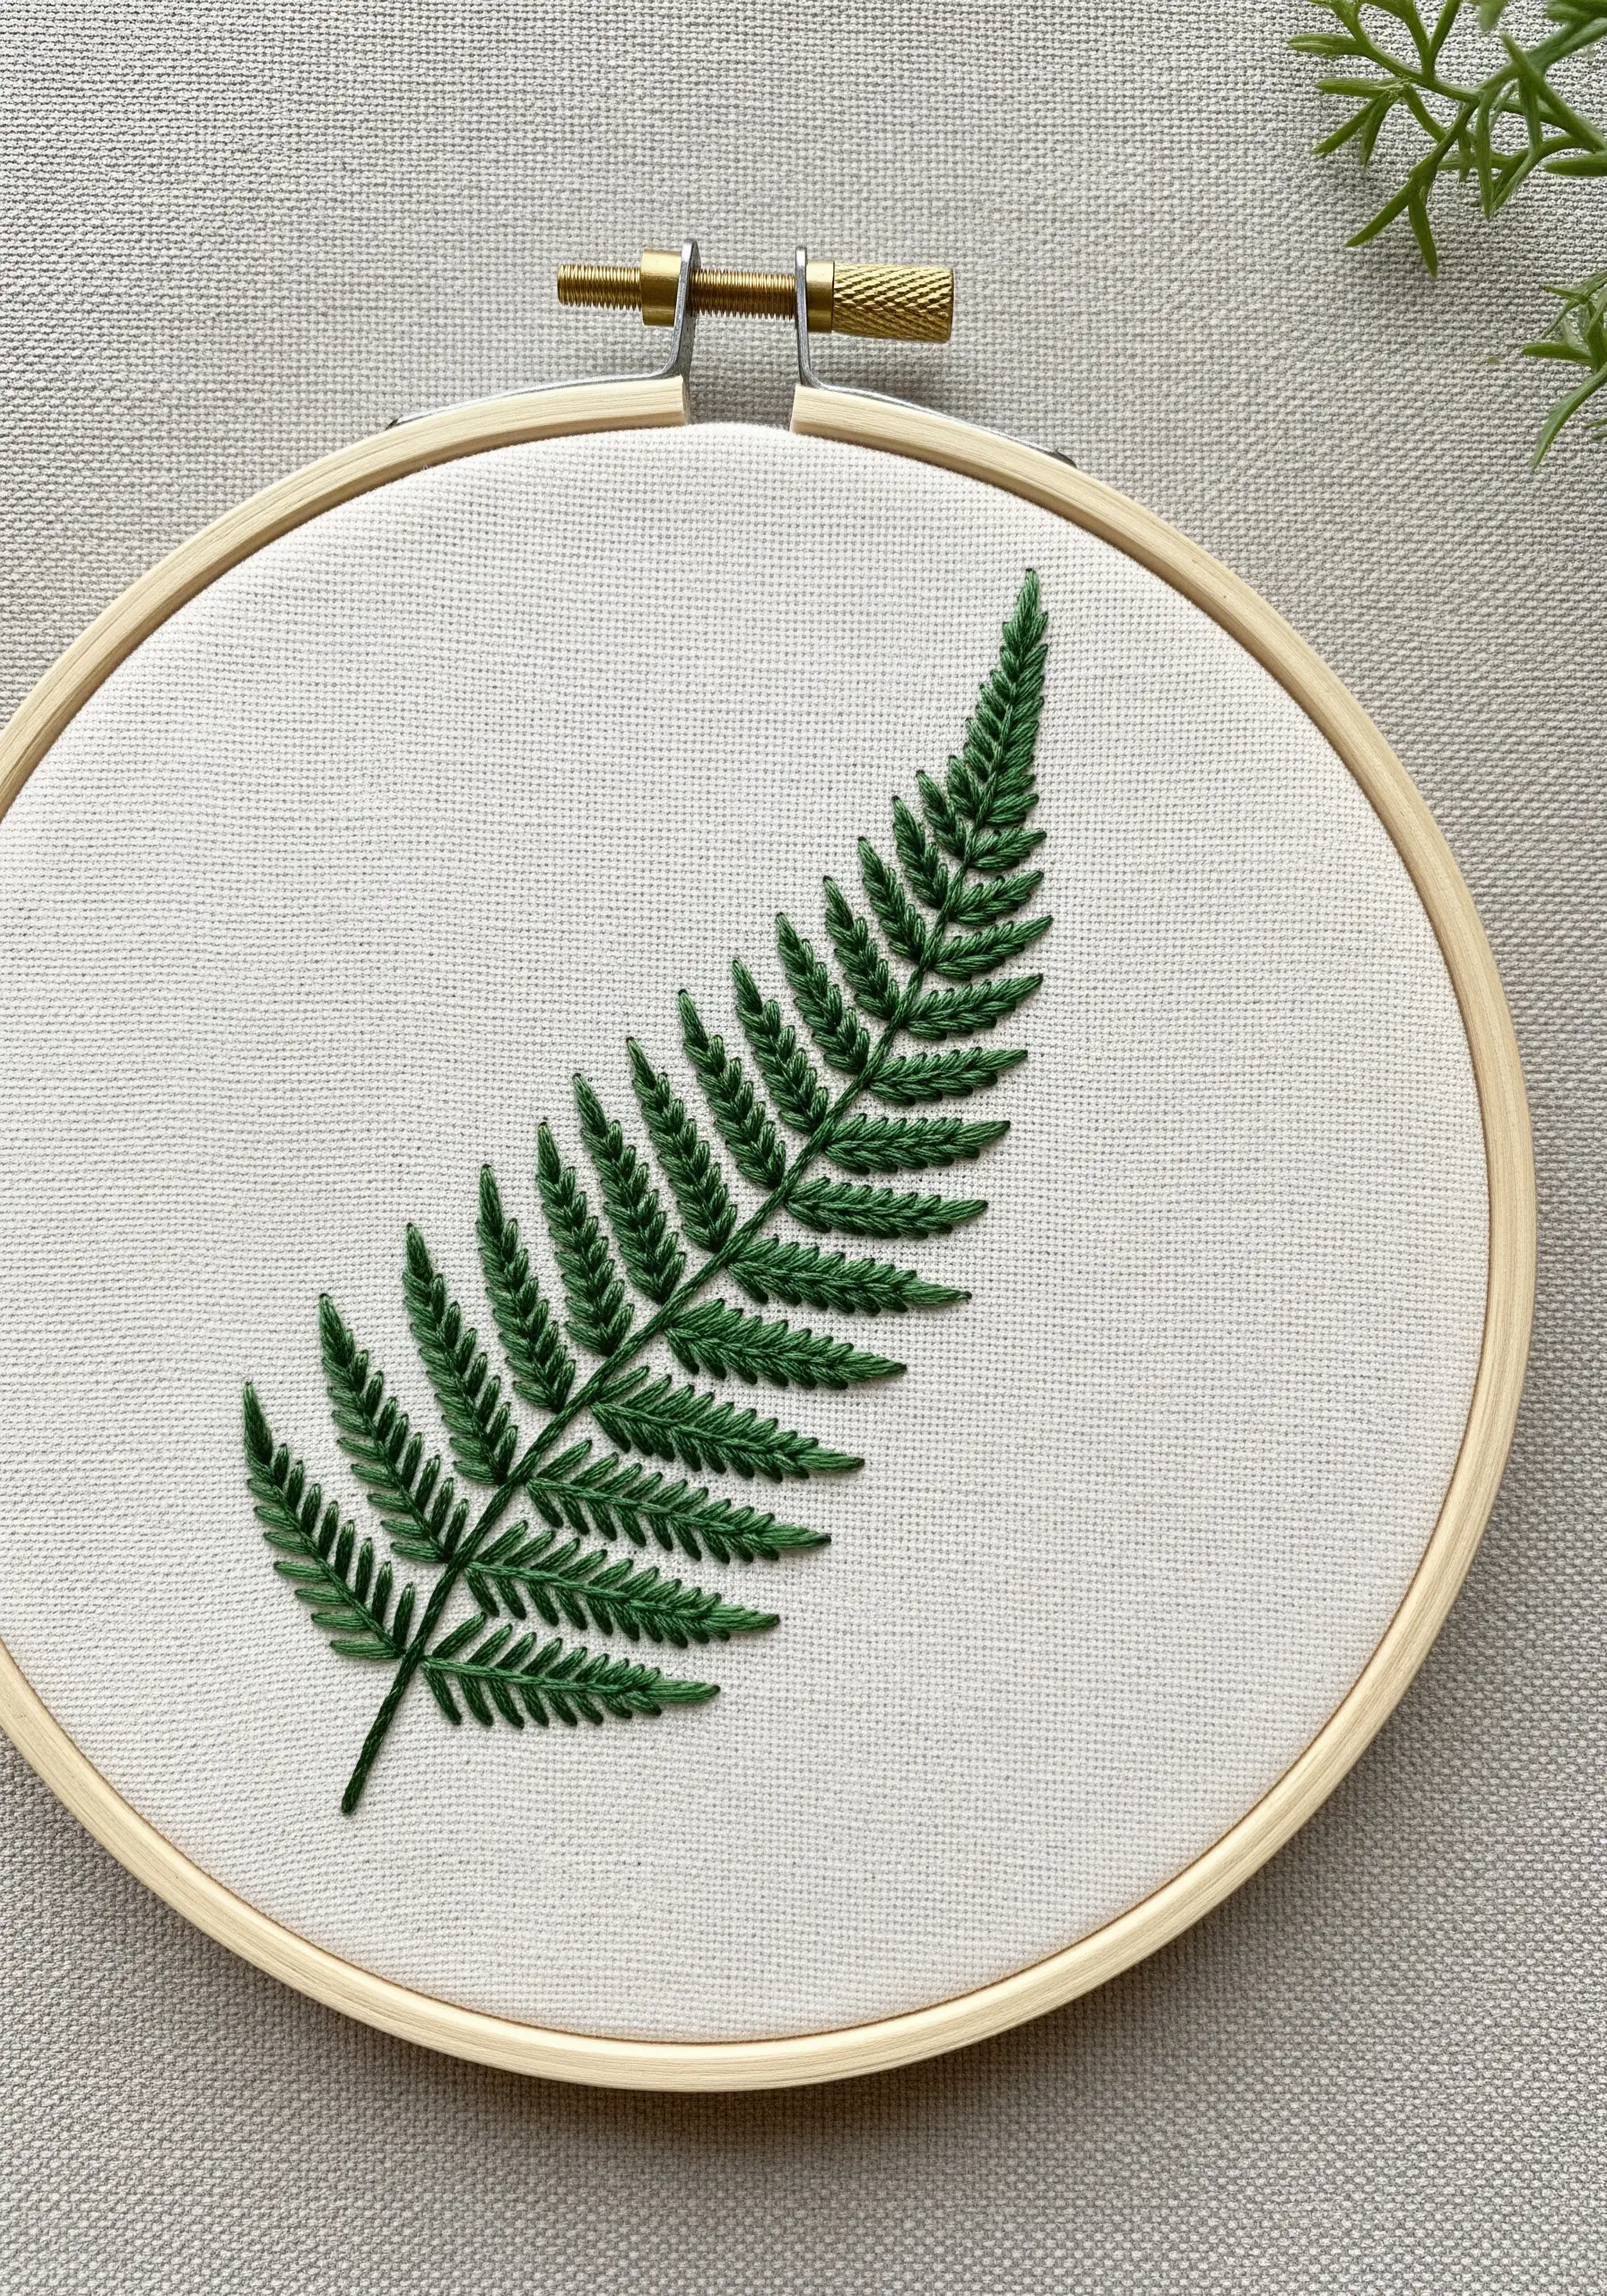
For a realistic fern, use the detached chain stitch for each individual leaflet, pulling the anchoring stitch tight to create a sharp point.
Work from the tip of the frond downwards, alternating sides to ensure the leaflets are evenly spaced and angled correctly.
A clean, single-line stem stitch or backstitch forms the central rachis, providing a strong spine for the delicate leaf structures.
This methodical approach results in a botanically accurate and visually striking design.
5. Form Perfect Tiny Hearts with Fly Stitch
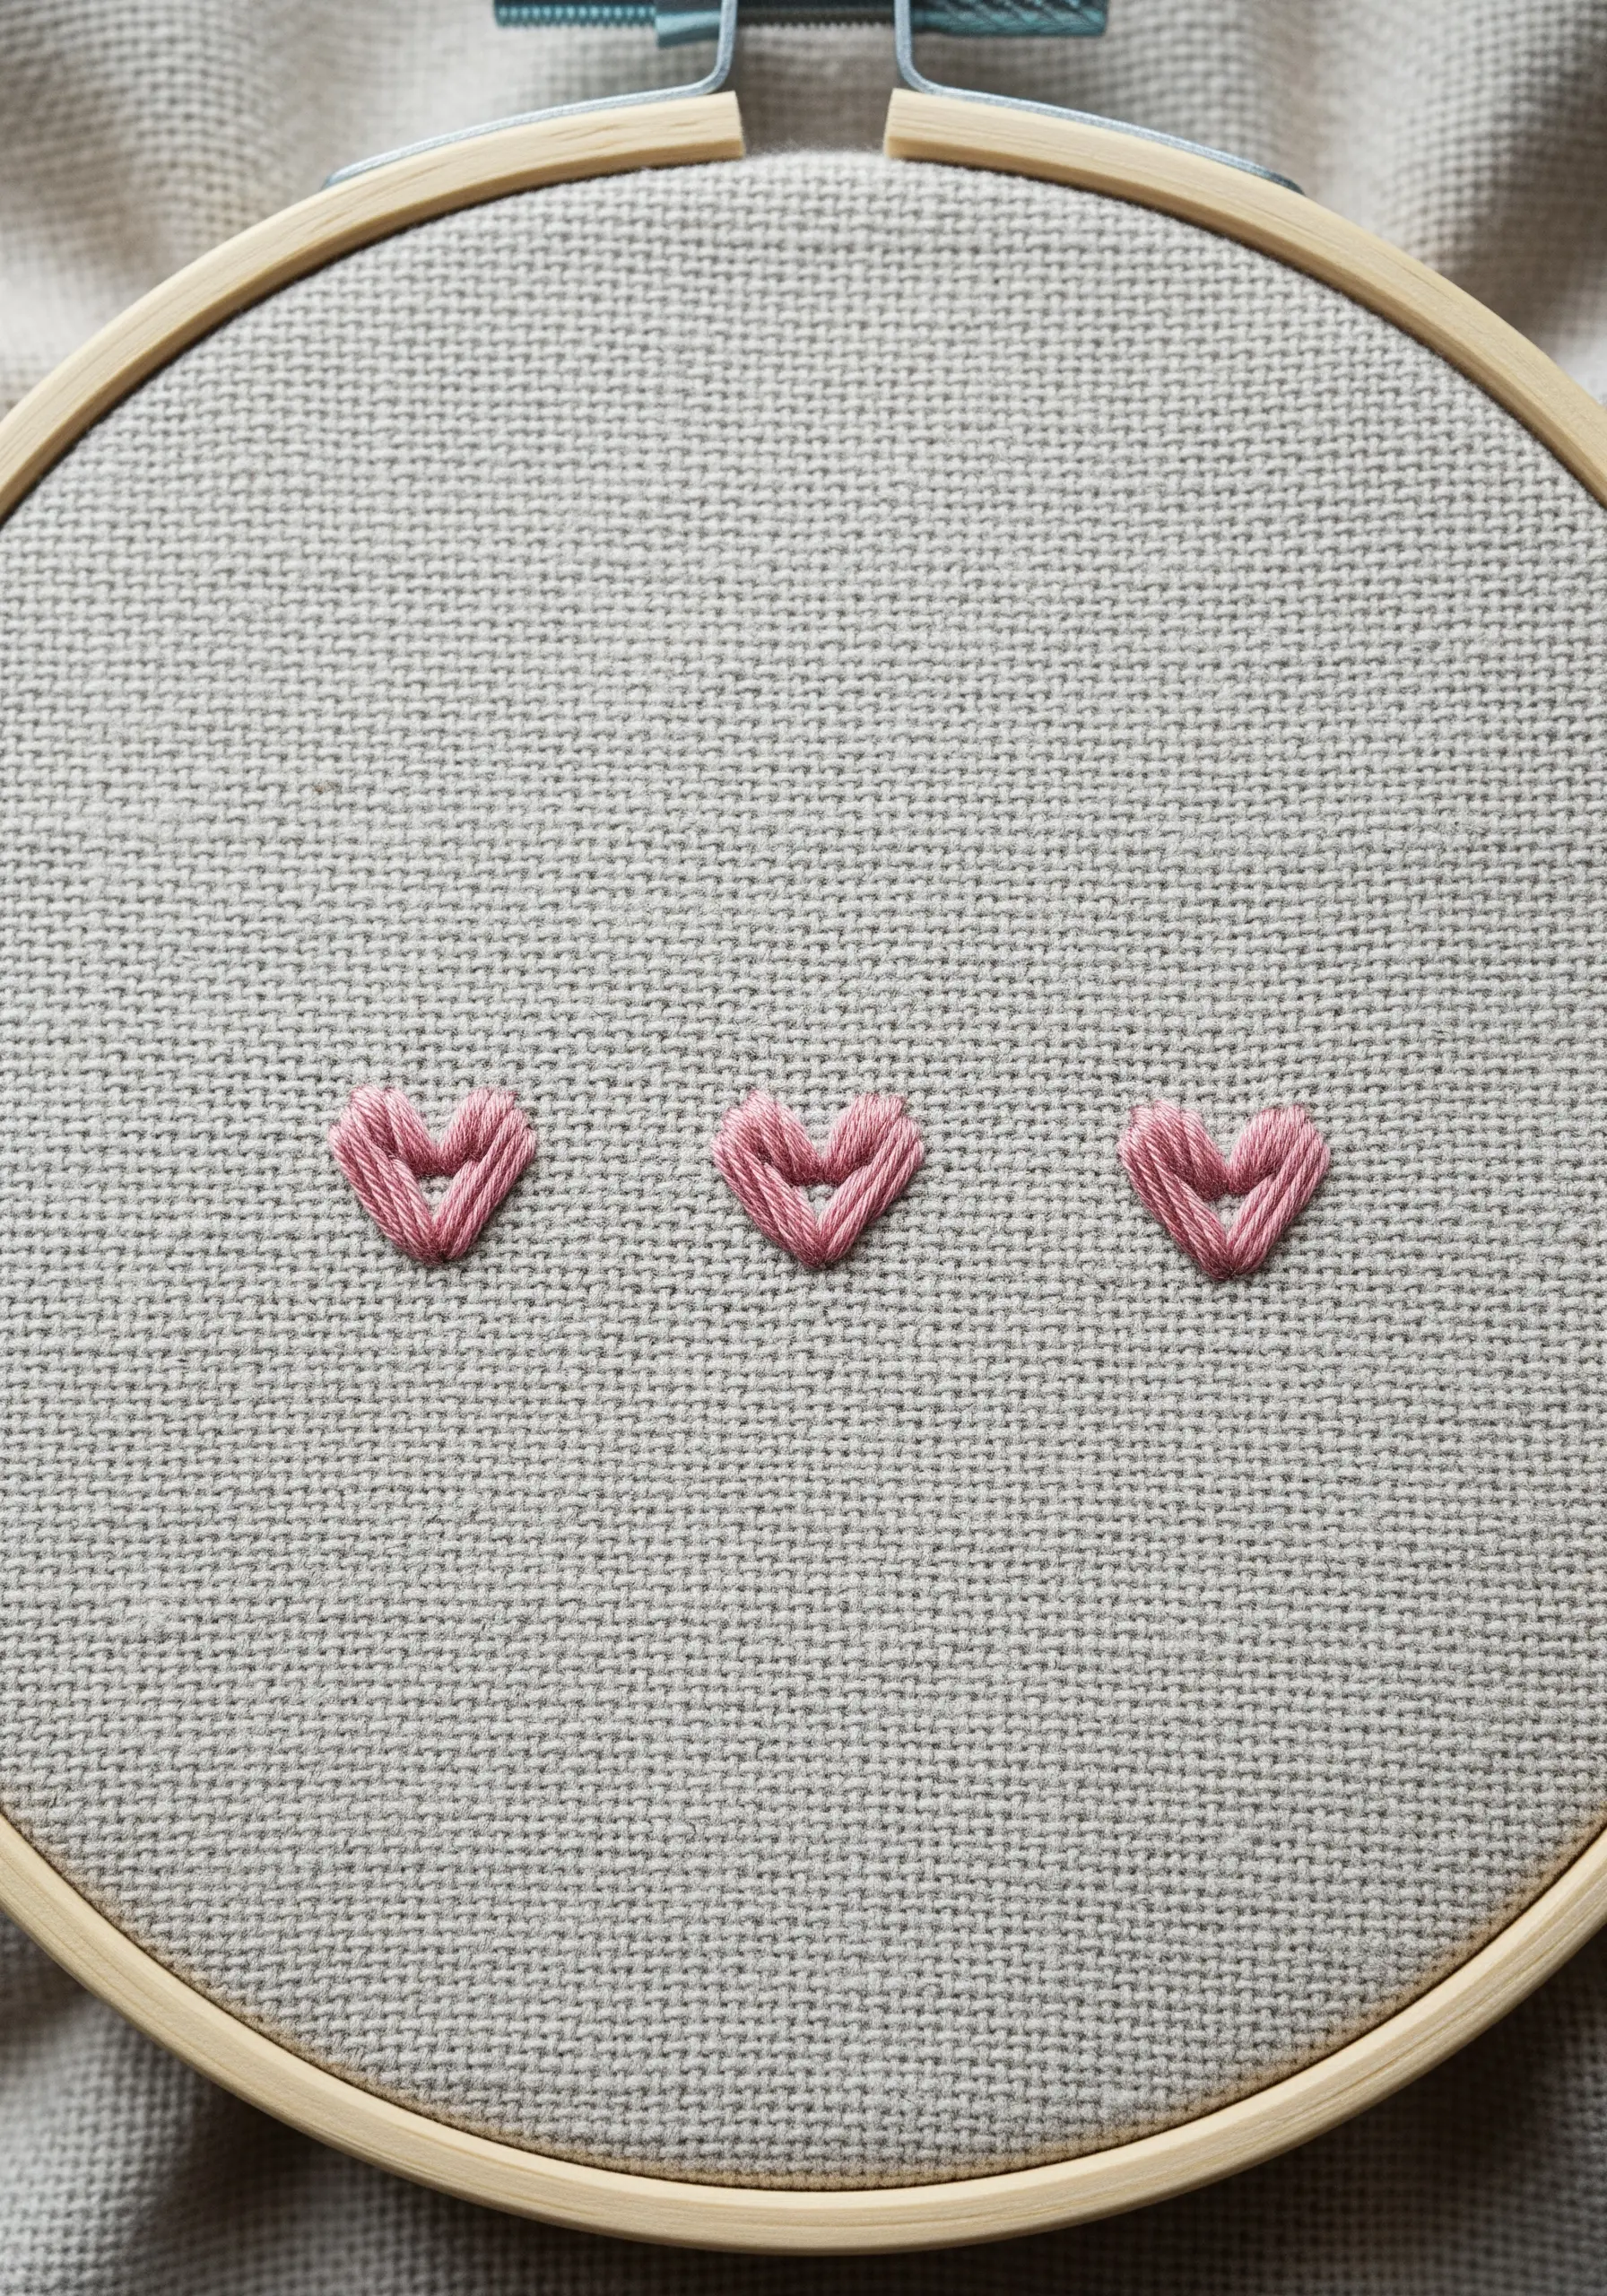
The fly stitch is the secret to creating quick, uniform hearts without the challenge of symmetrical satin stitching.
Create a single, wide V-shape, then anchor it at the bottom with a small straight stitch to form the point of the heart.
This technique uses just three movements per heart, making it ideal for creating repeating patterns, borders, or subtle accents on clothing.
Experiment with using two strands of floss for a slightly plumper, more defined shape.
6. Fill Shapes with Rhythmic Chain Stitch
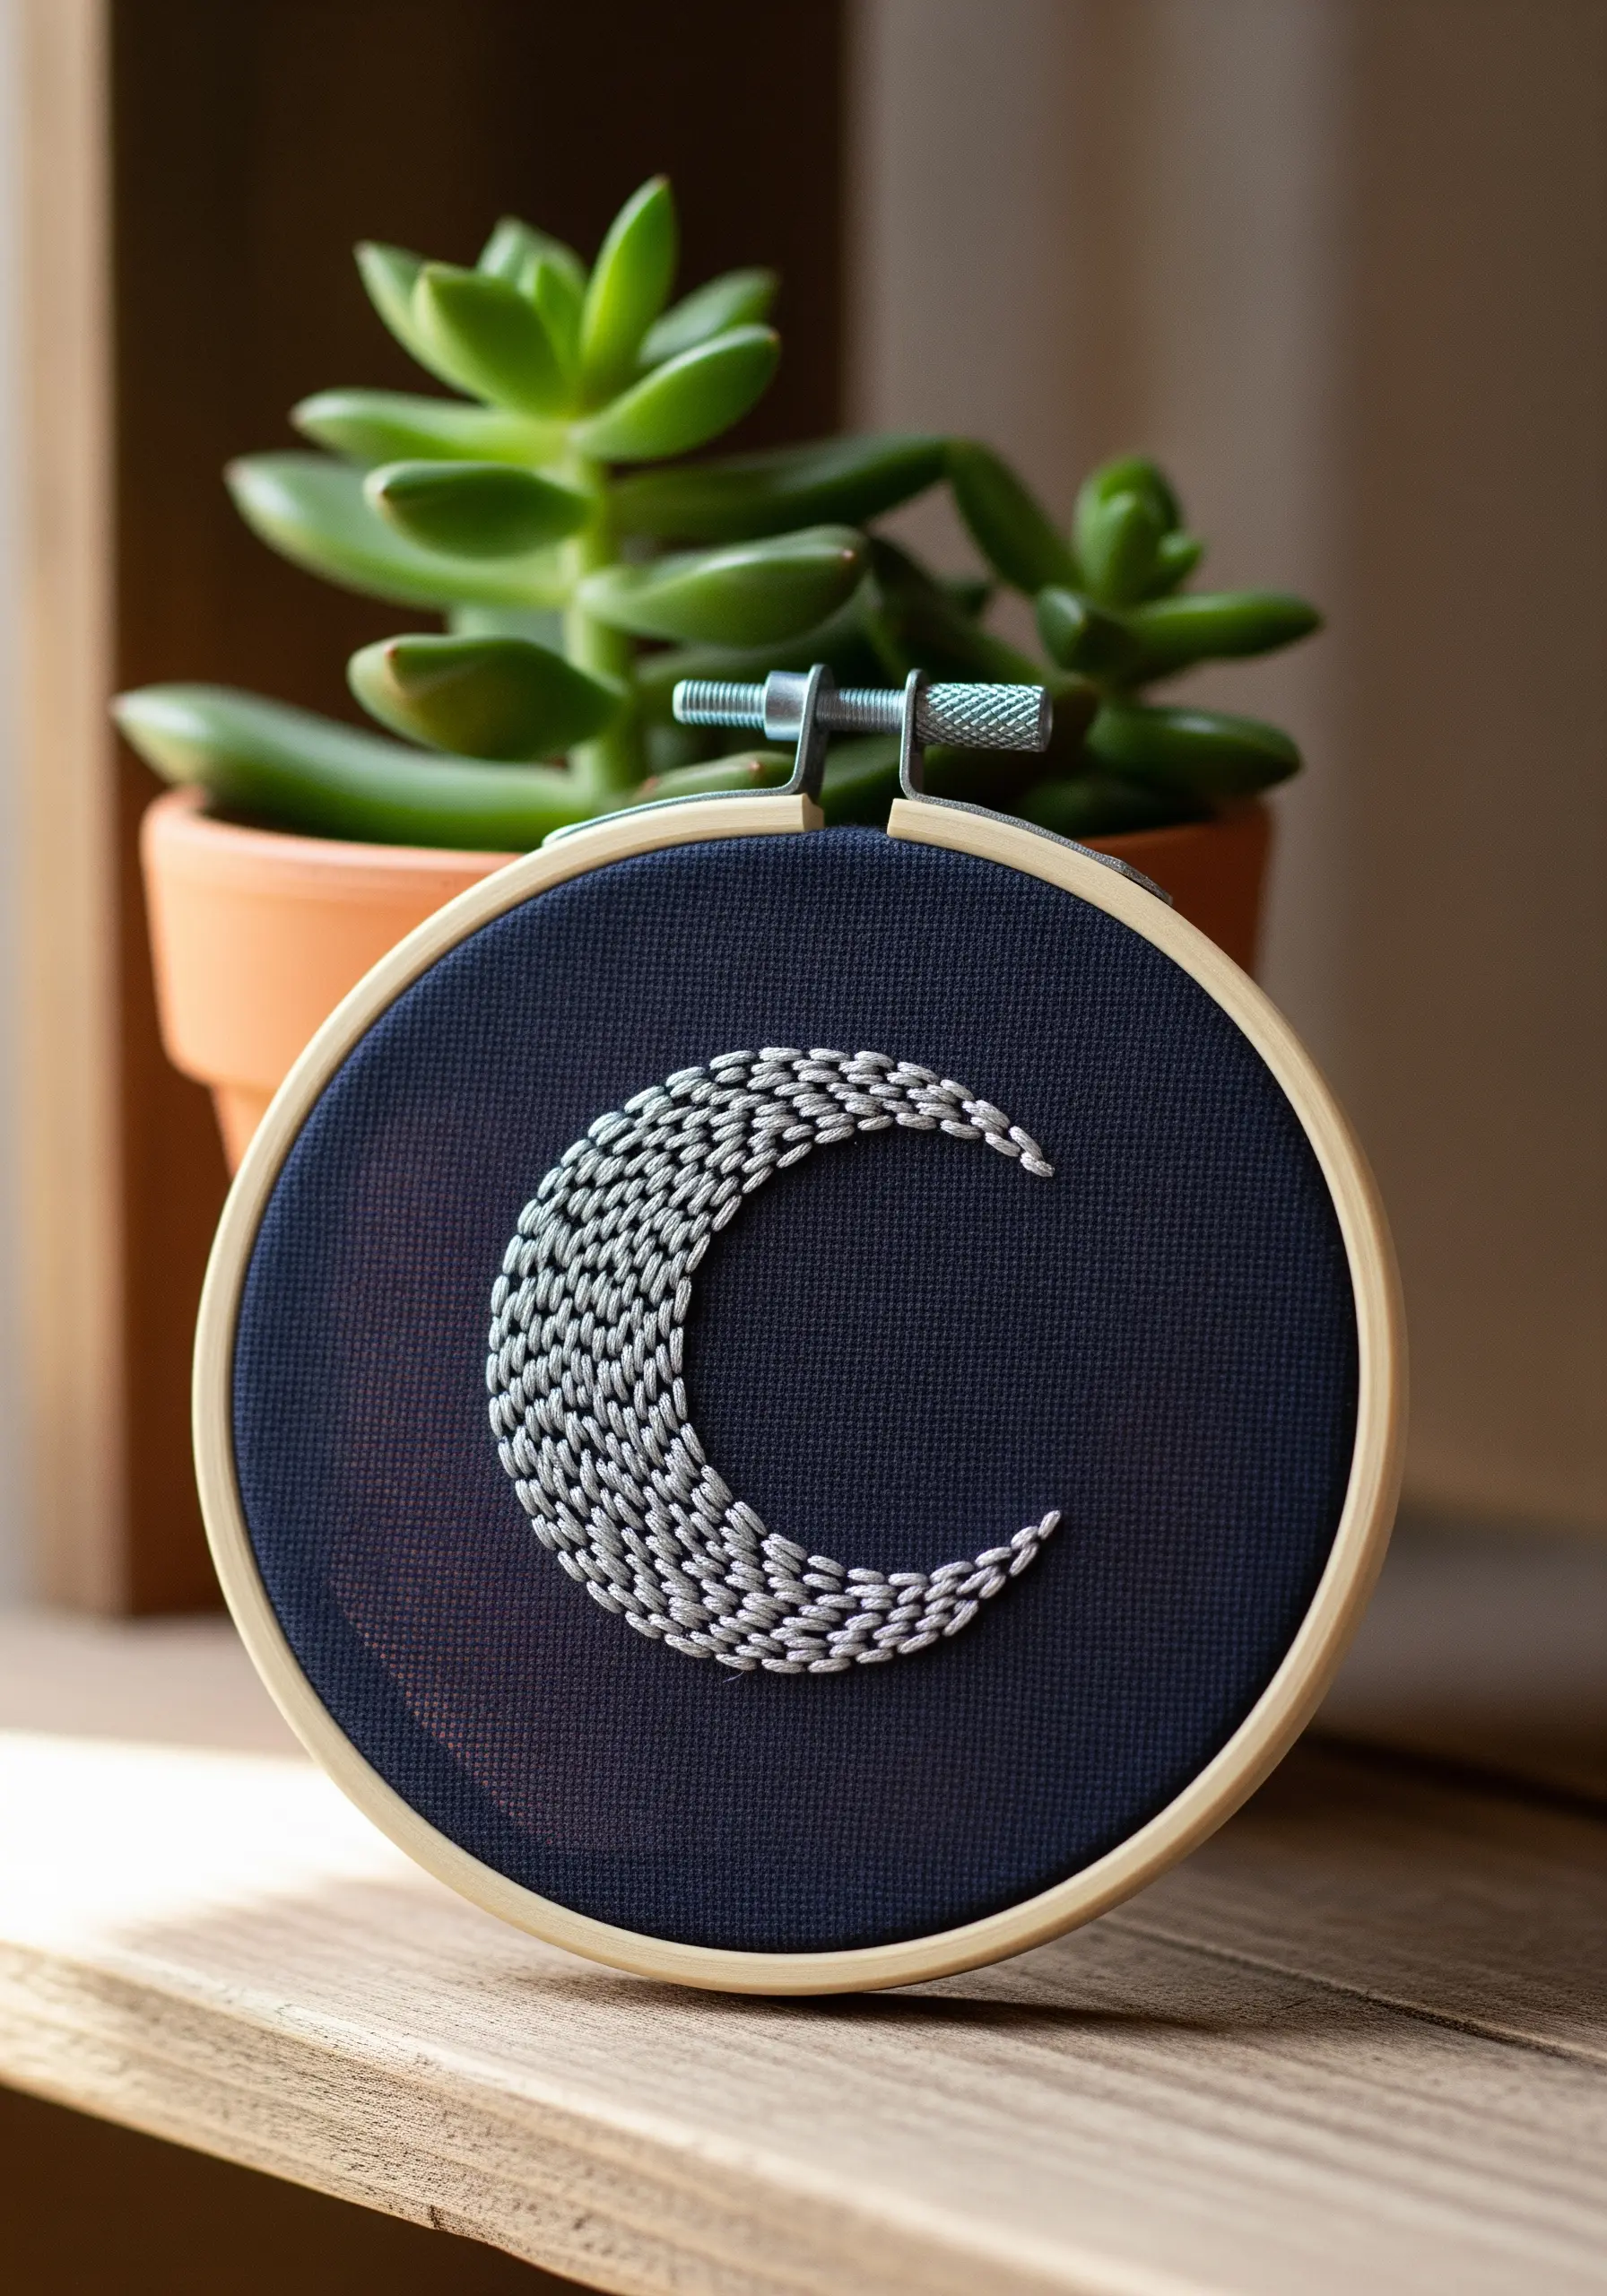
Instead of a flat satin stitch, fill this crescent moon with rows of chain stitch for a woven, textured effect.
Work in curved rows that follow the shape of the moon, which enhances its form and creates a sense of movement.
Using a high-contrast thread, like white on navy, makes the texture pop and turns a simple shape into a captivating focal point.
This is a wonderfully meditative filling technique that adds sophistication to minimalist small hoop designs.
7. Imply Motion with Radiating Stitches
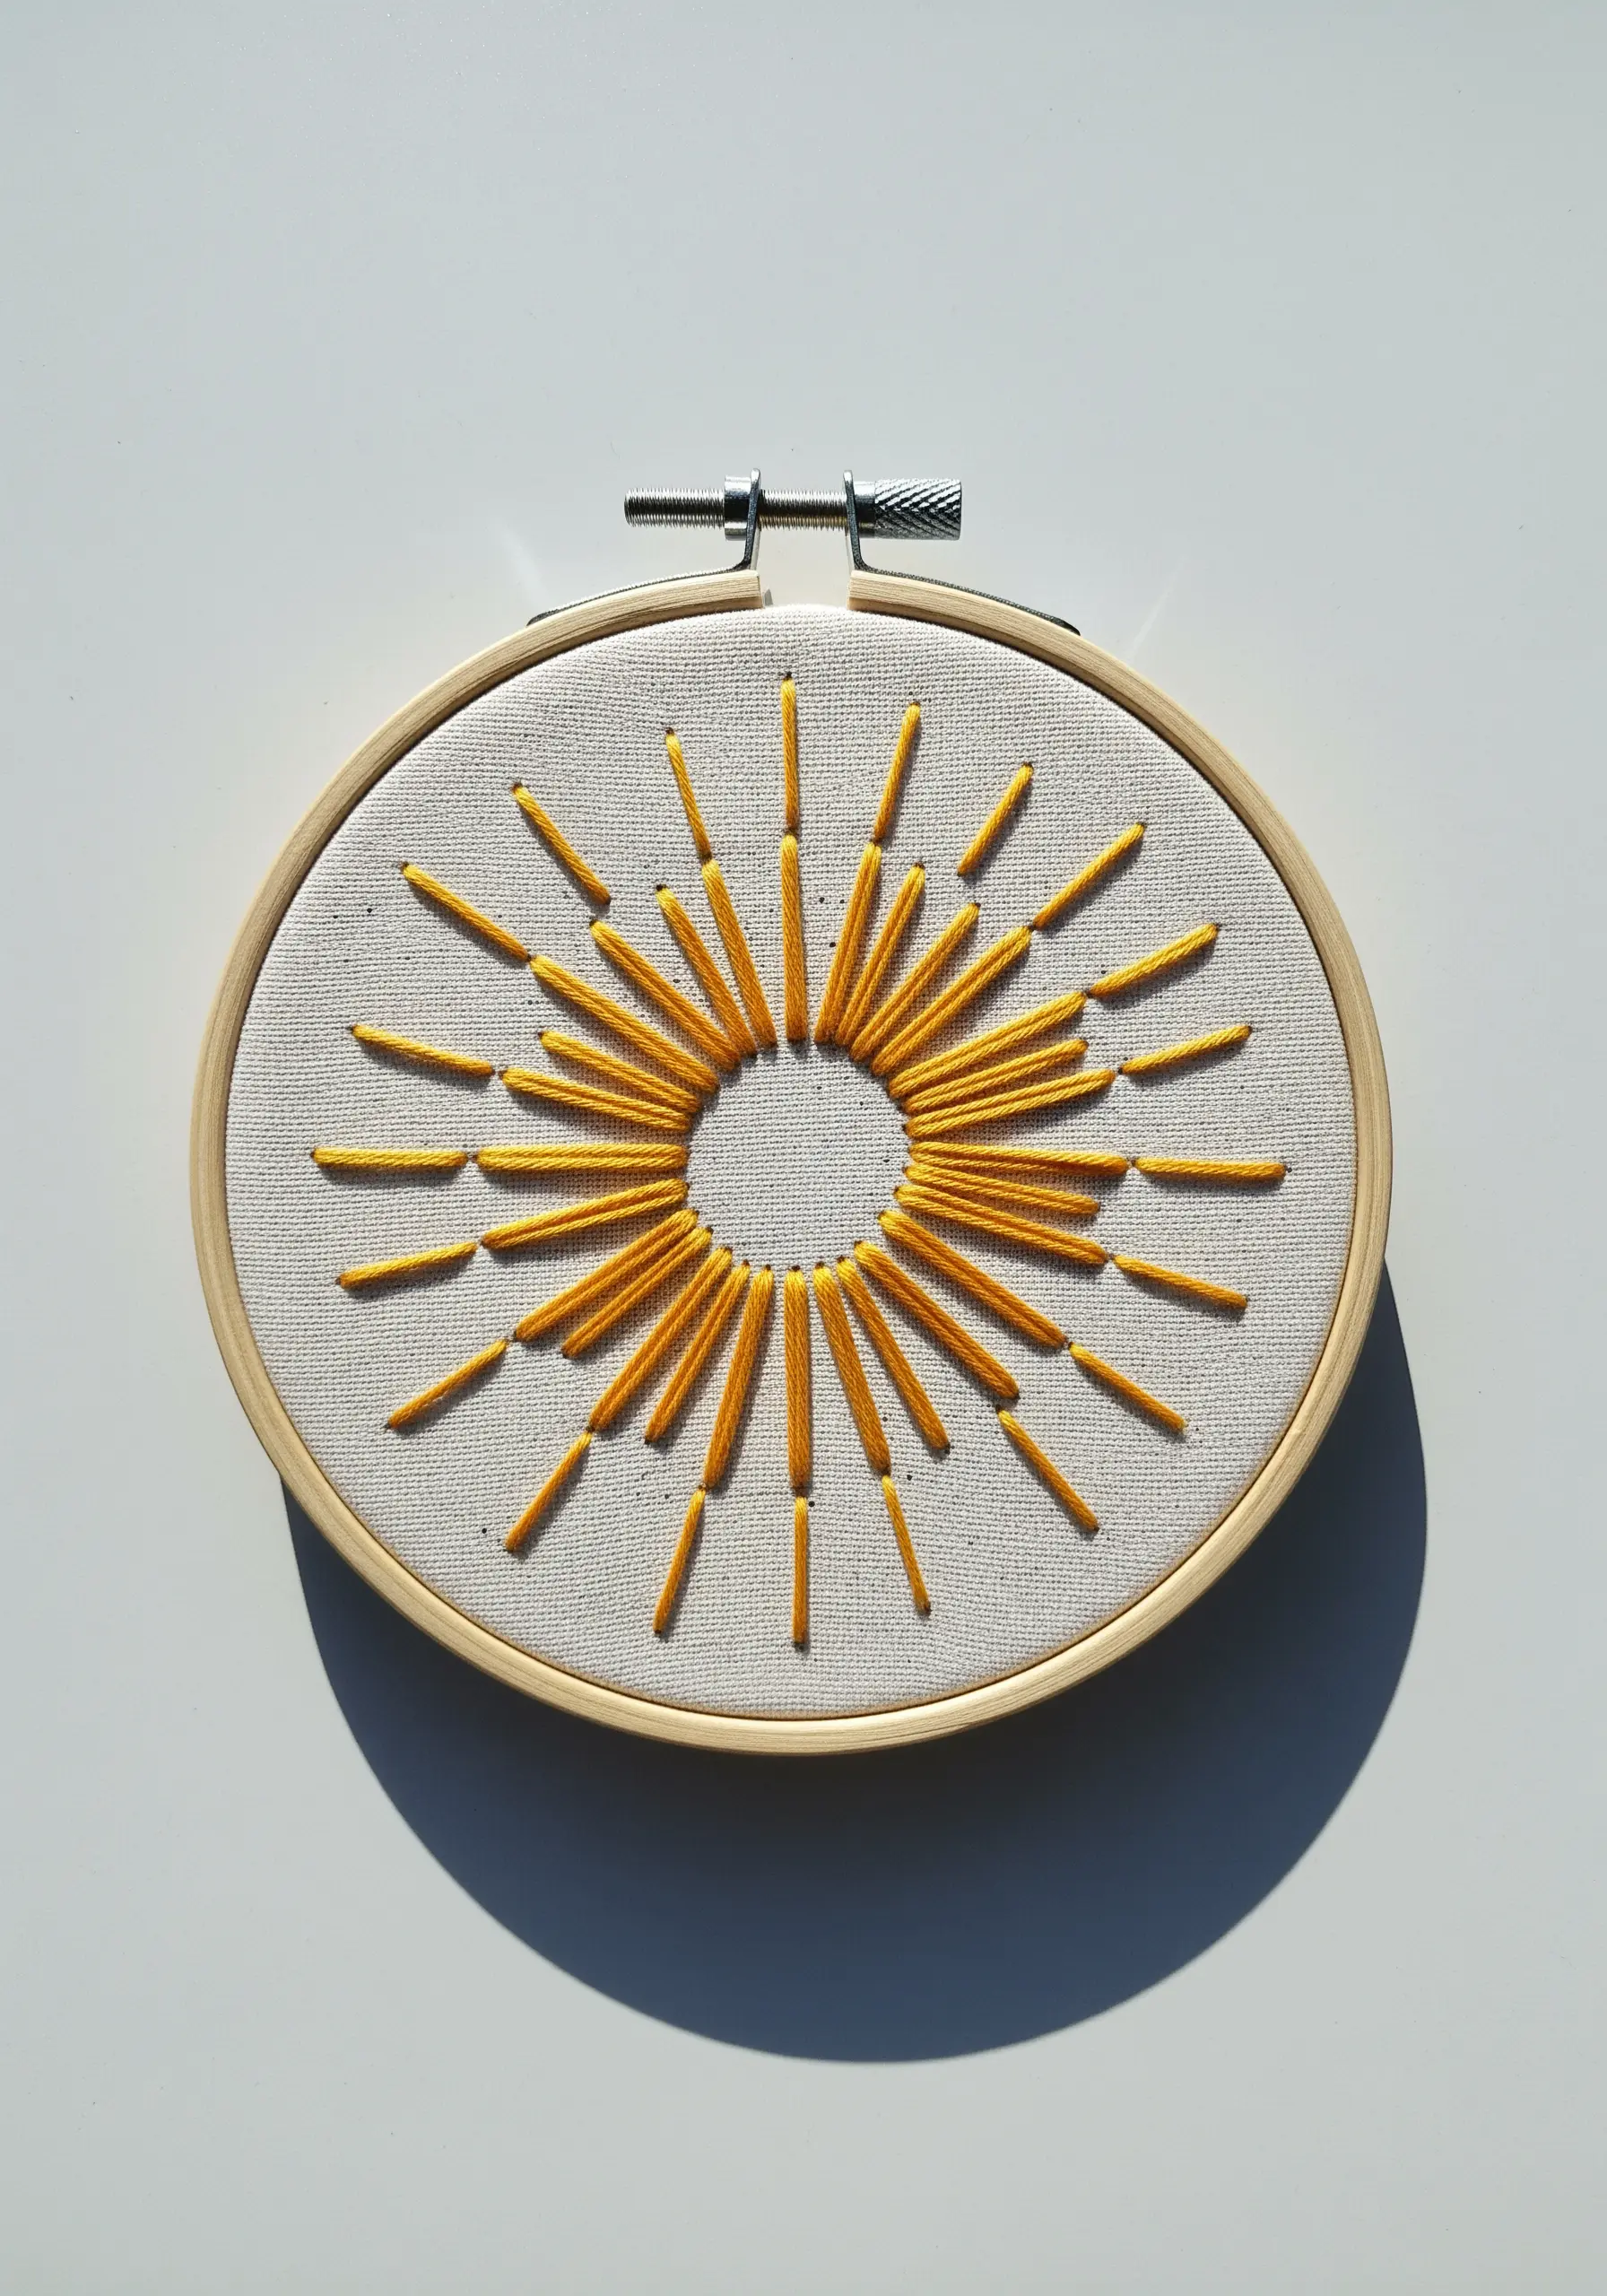
Capture the energy of a sunburst with simple straight stitches of varying lengths radiating from a central point.
The negative space in the middle acts as a quiet anchor, making the rays feel more dynamic and explosive.
To keep the composition balanced, stitch the longest rays first at the north, south, east, and west points, then fill in the gaps.
This design demonstrates how thoughtfully placed stitches can create powerful visual energy without complexity.
8. Elevate Line Art with a Whipped Backstitch
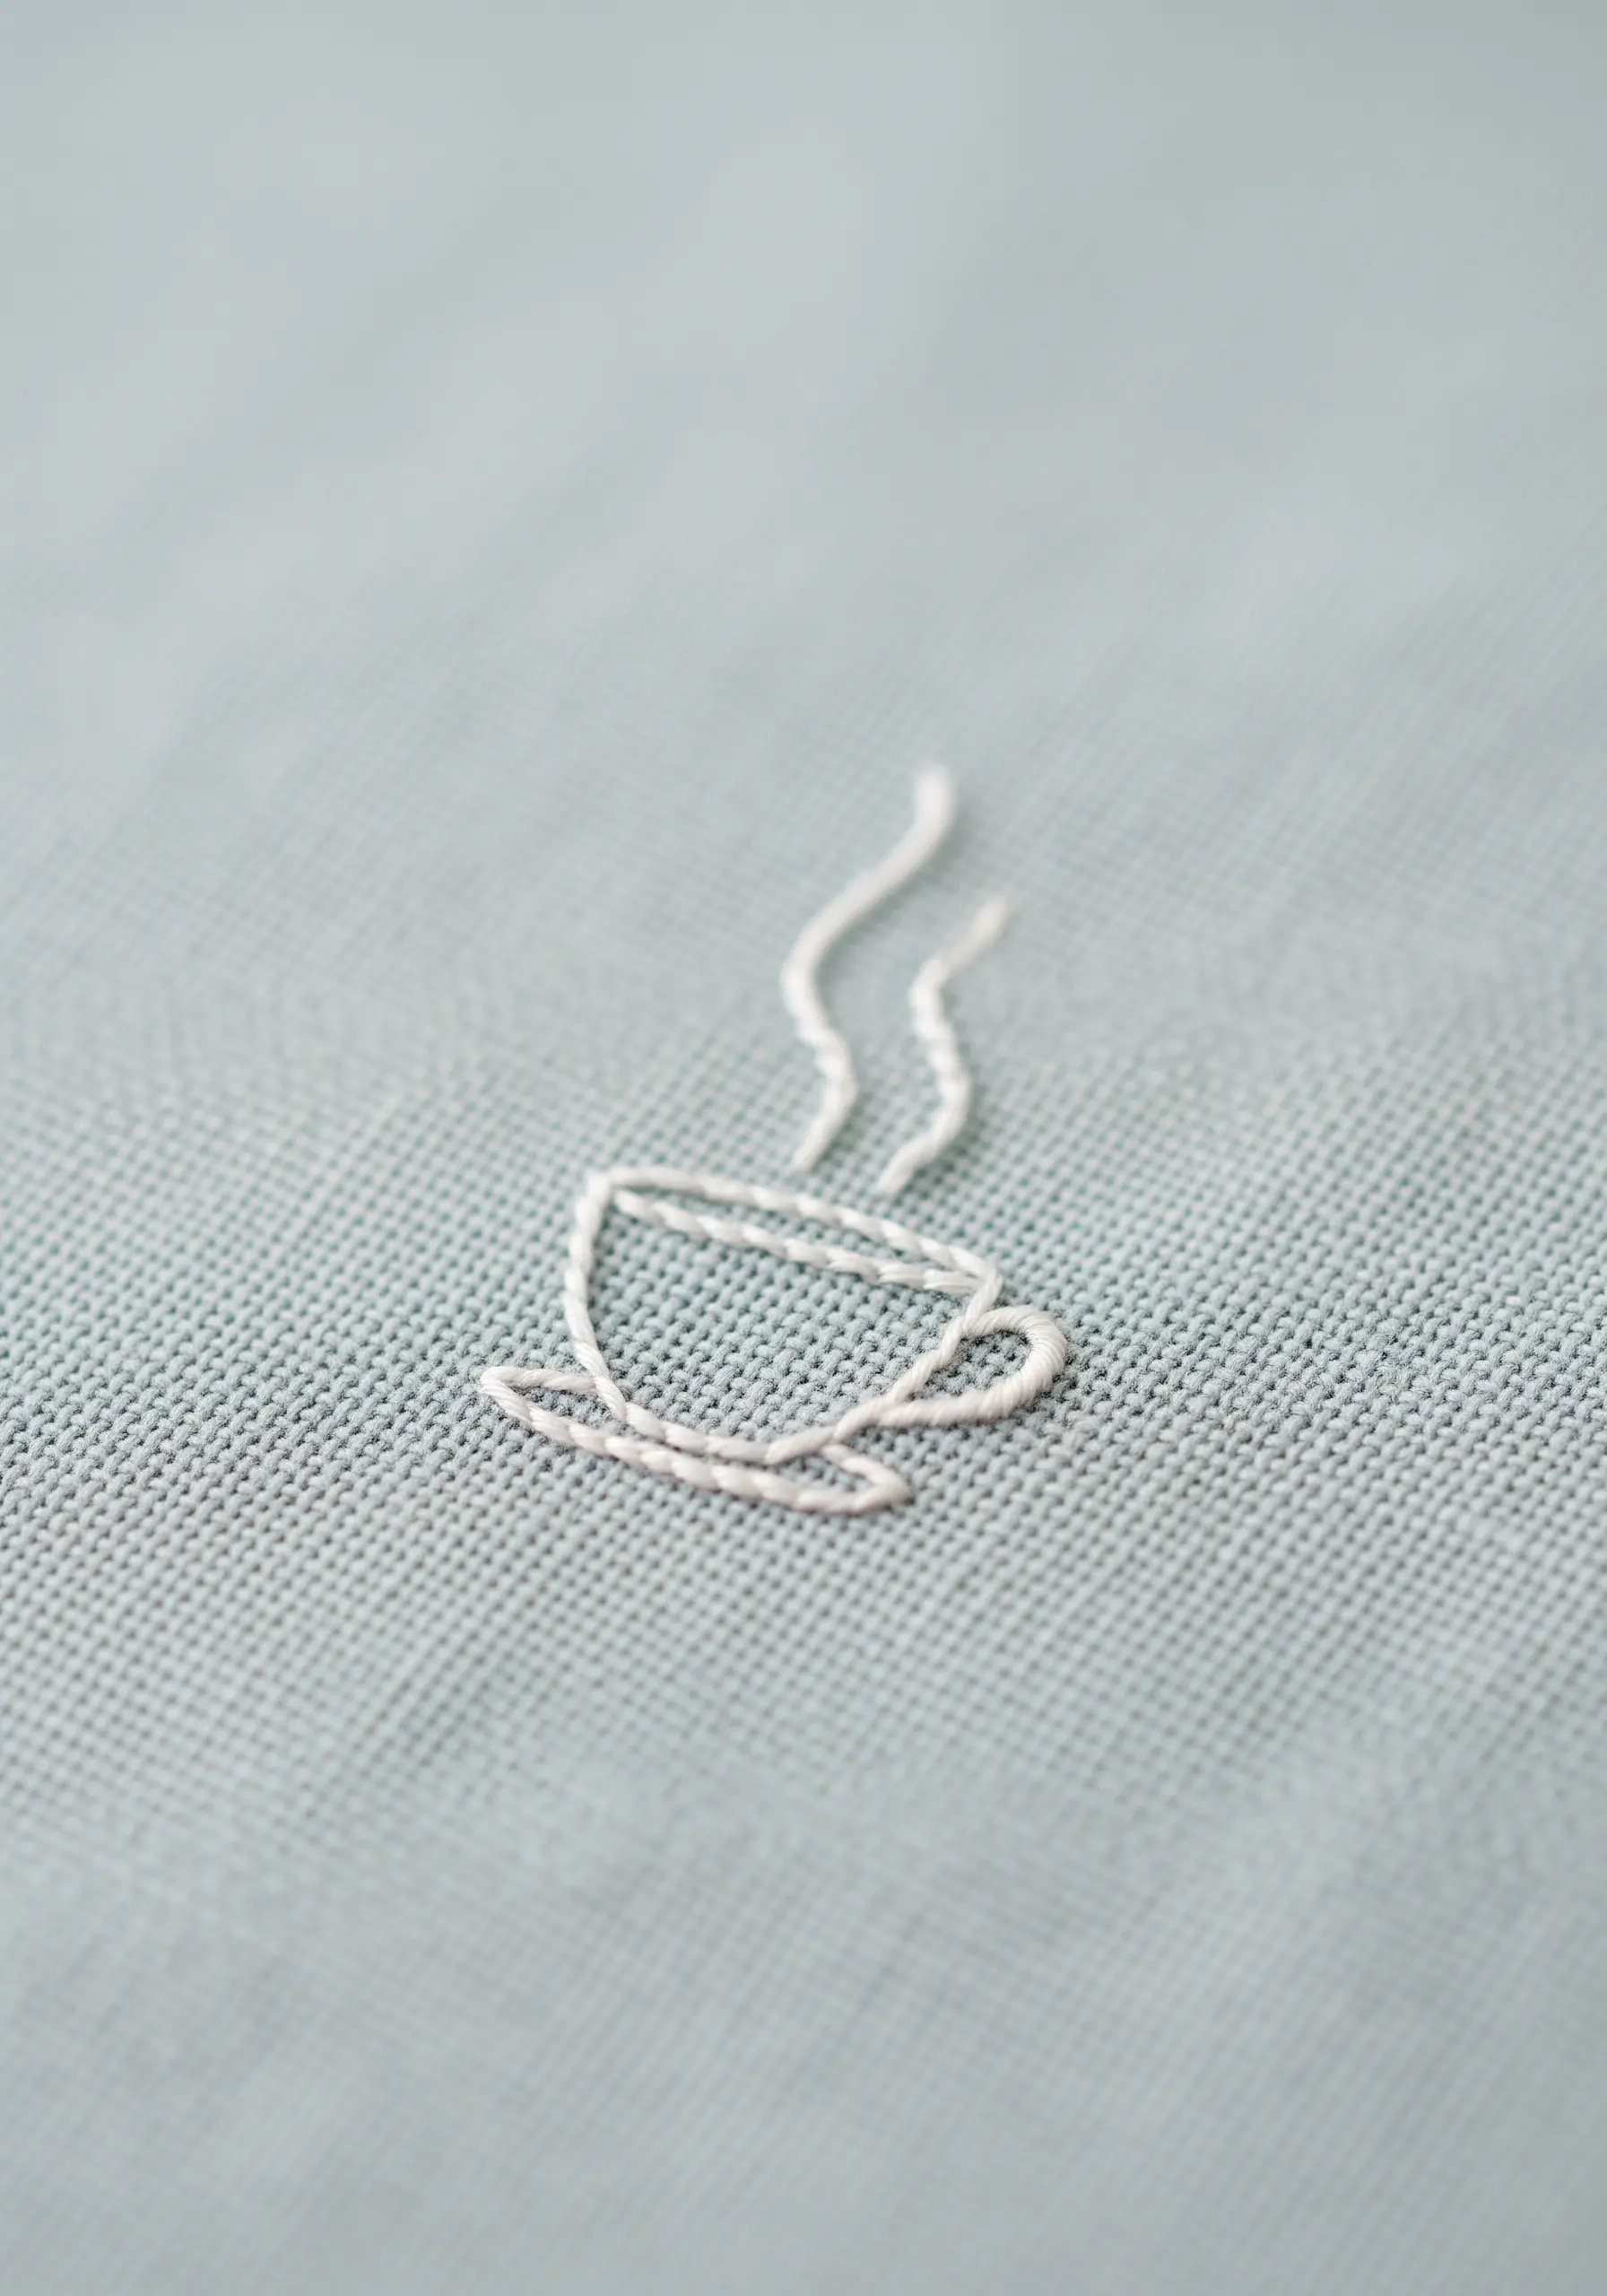
For delicate, continuous-line illustrations like this coffee cup, start with a standard backstitch.
Then, without piercing the fabric, whip your thread around each backstitch, always from the same direction (e.g., top to bottom).
This technique smooths out the segmented look of a backstitch, creating a single, clean, cord-like line perfect for minimalist designs.
Use a single strand of floss for the most refined and elegant result.
9. Create a Narrative with Stitch Variation
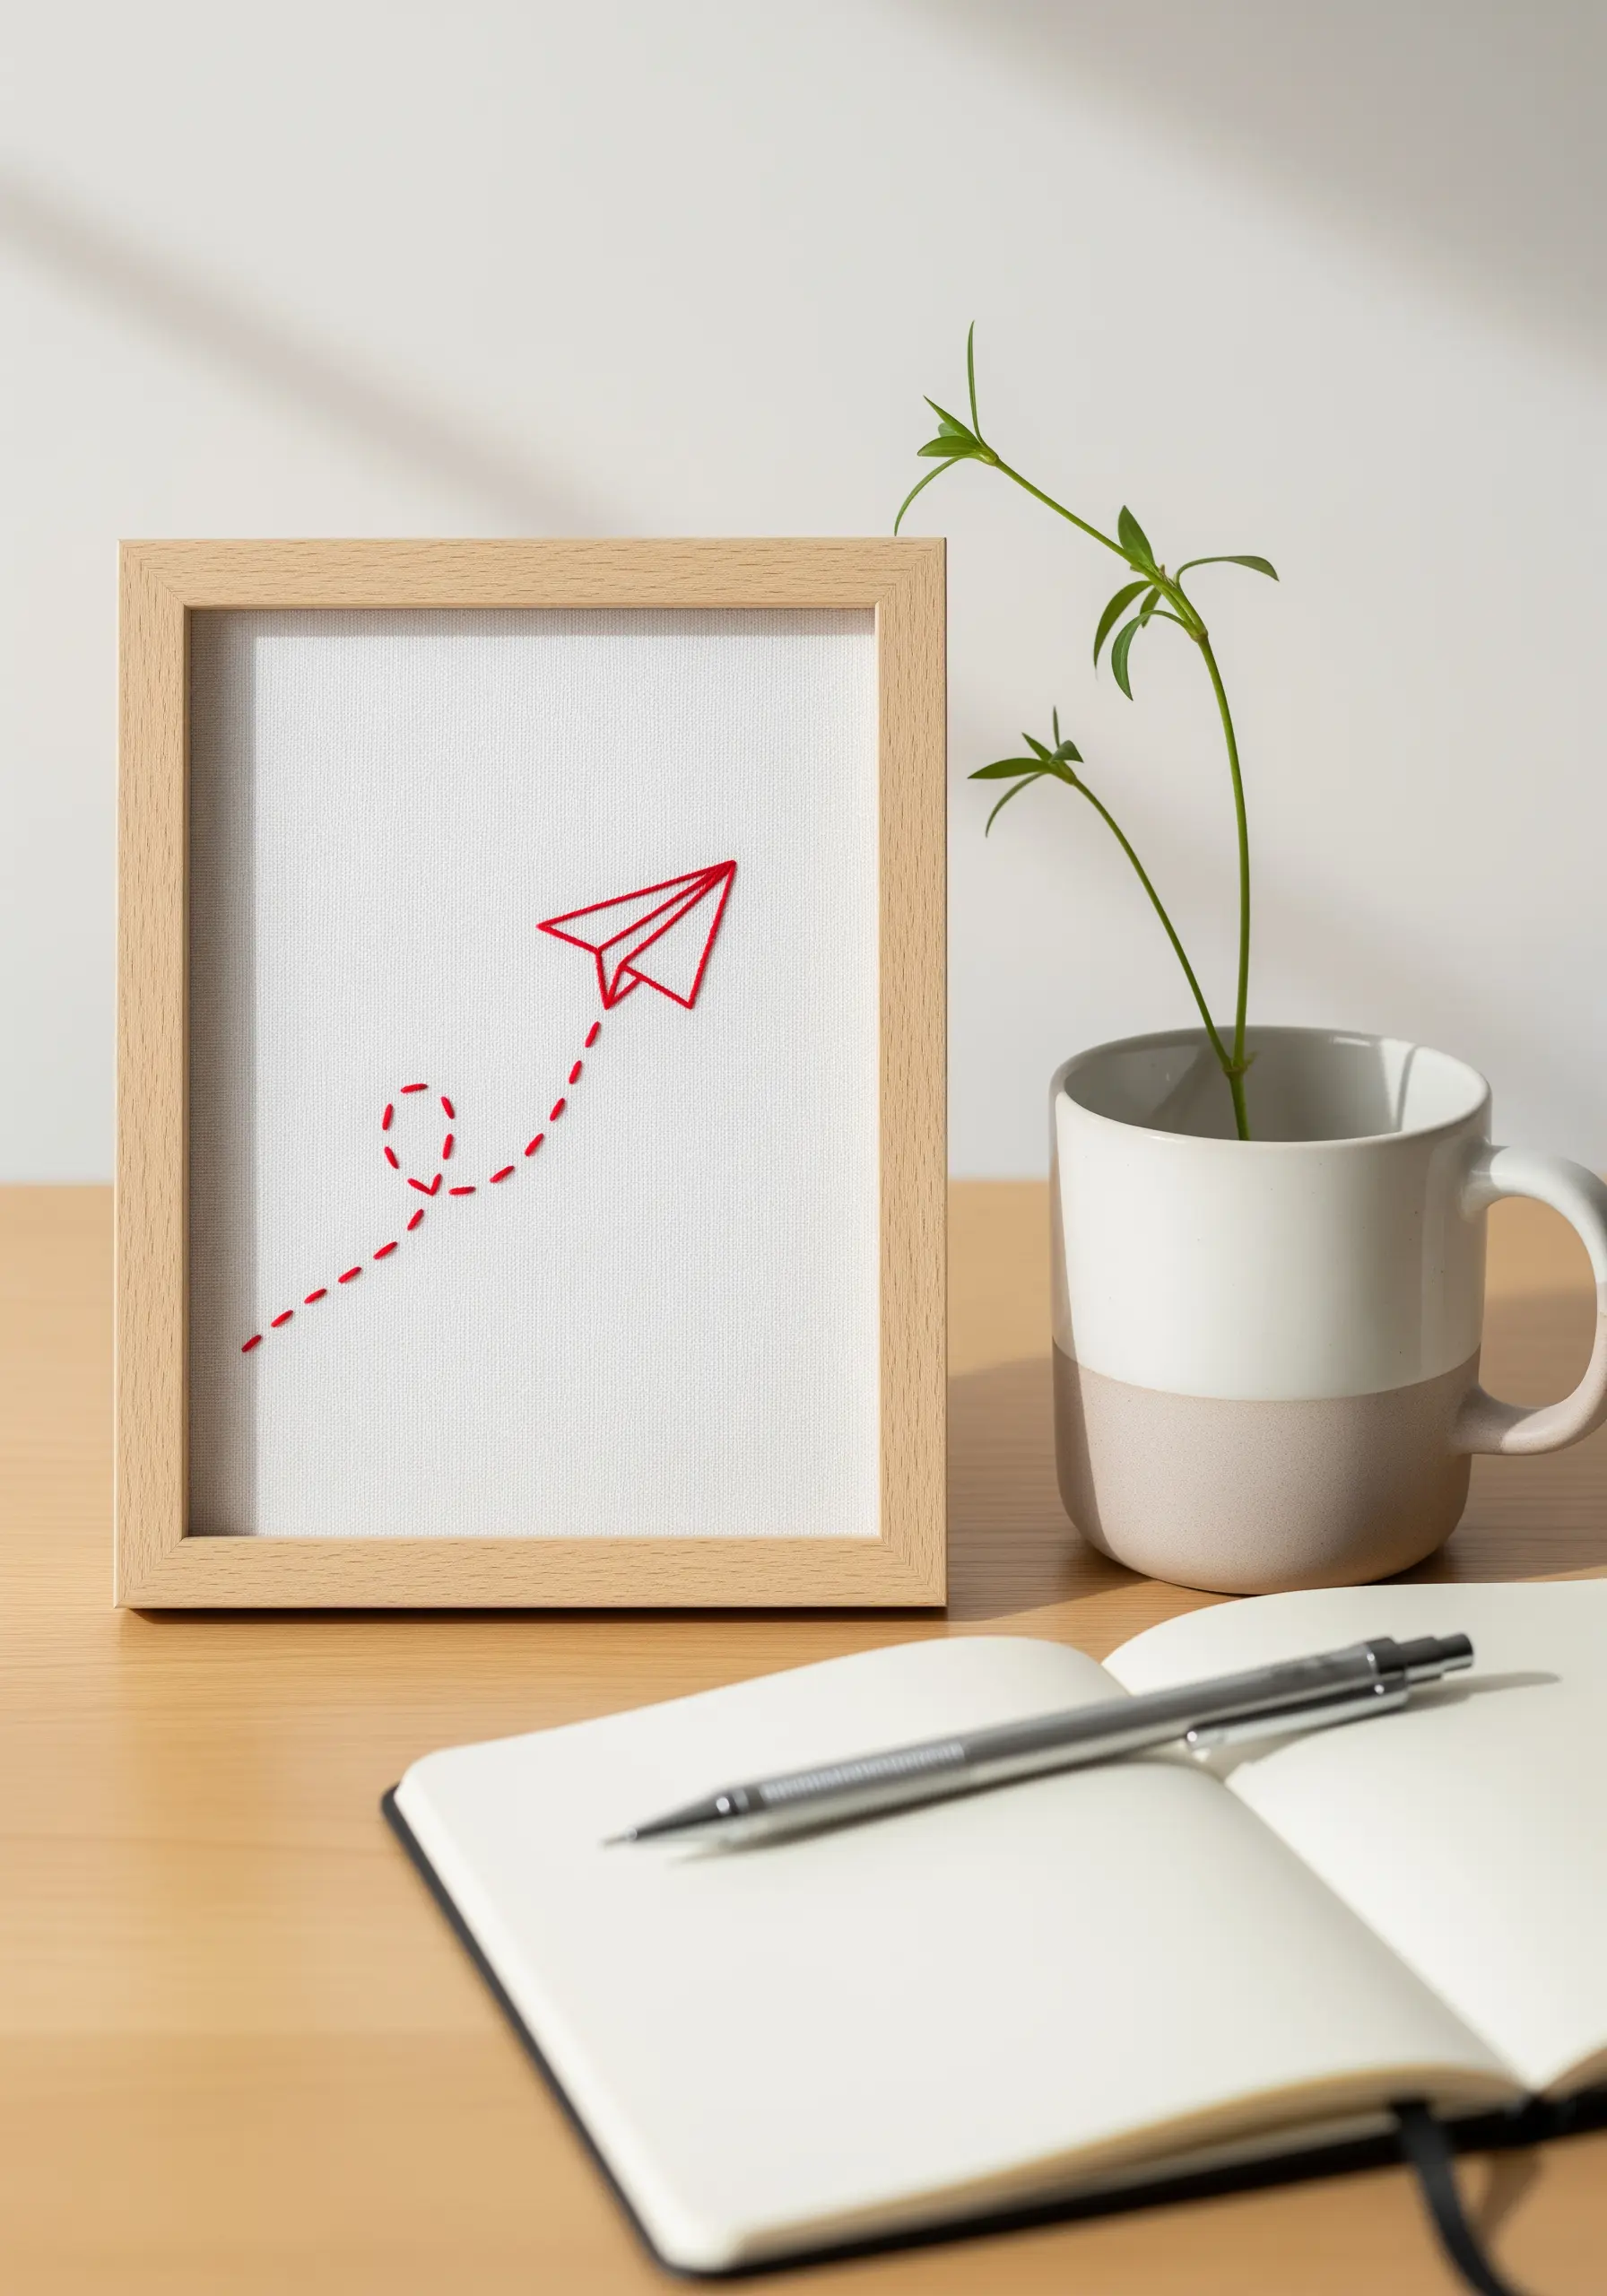
Tell a story in your embroidery by pairing different stitches to represent different ideas.
Here, a crisp backstitch or split stitch forms the solid, folded paper airplane, giving it structure and presence.
The flight path is stitched with a simple, spaced-out running stitch, which perfectly captures a sense of dotted movement and whimsy.
This intelligent combination turns two basic stitches into a charming piece of visual storytelling.
10. Define Outlines with a Split Stitch Base
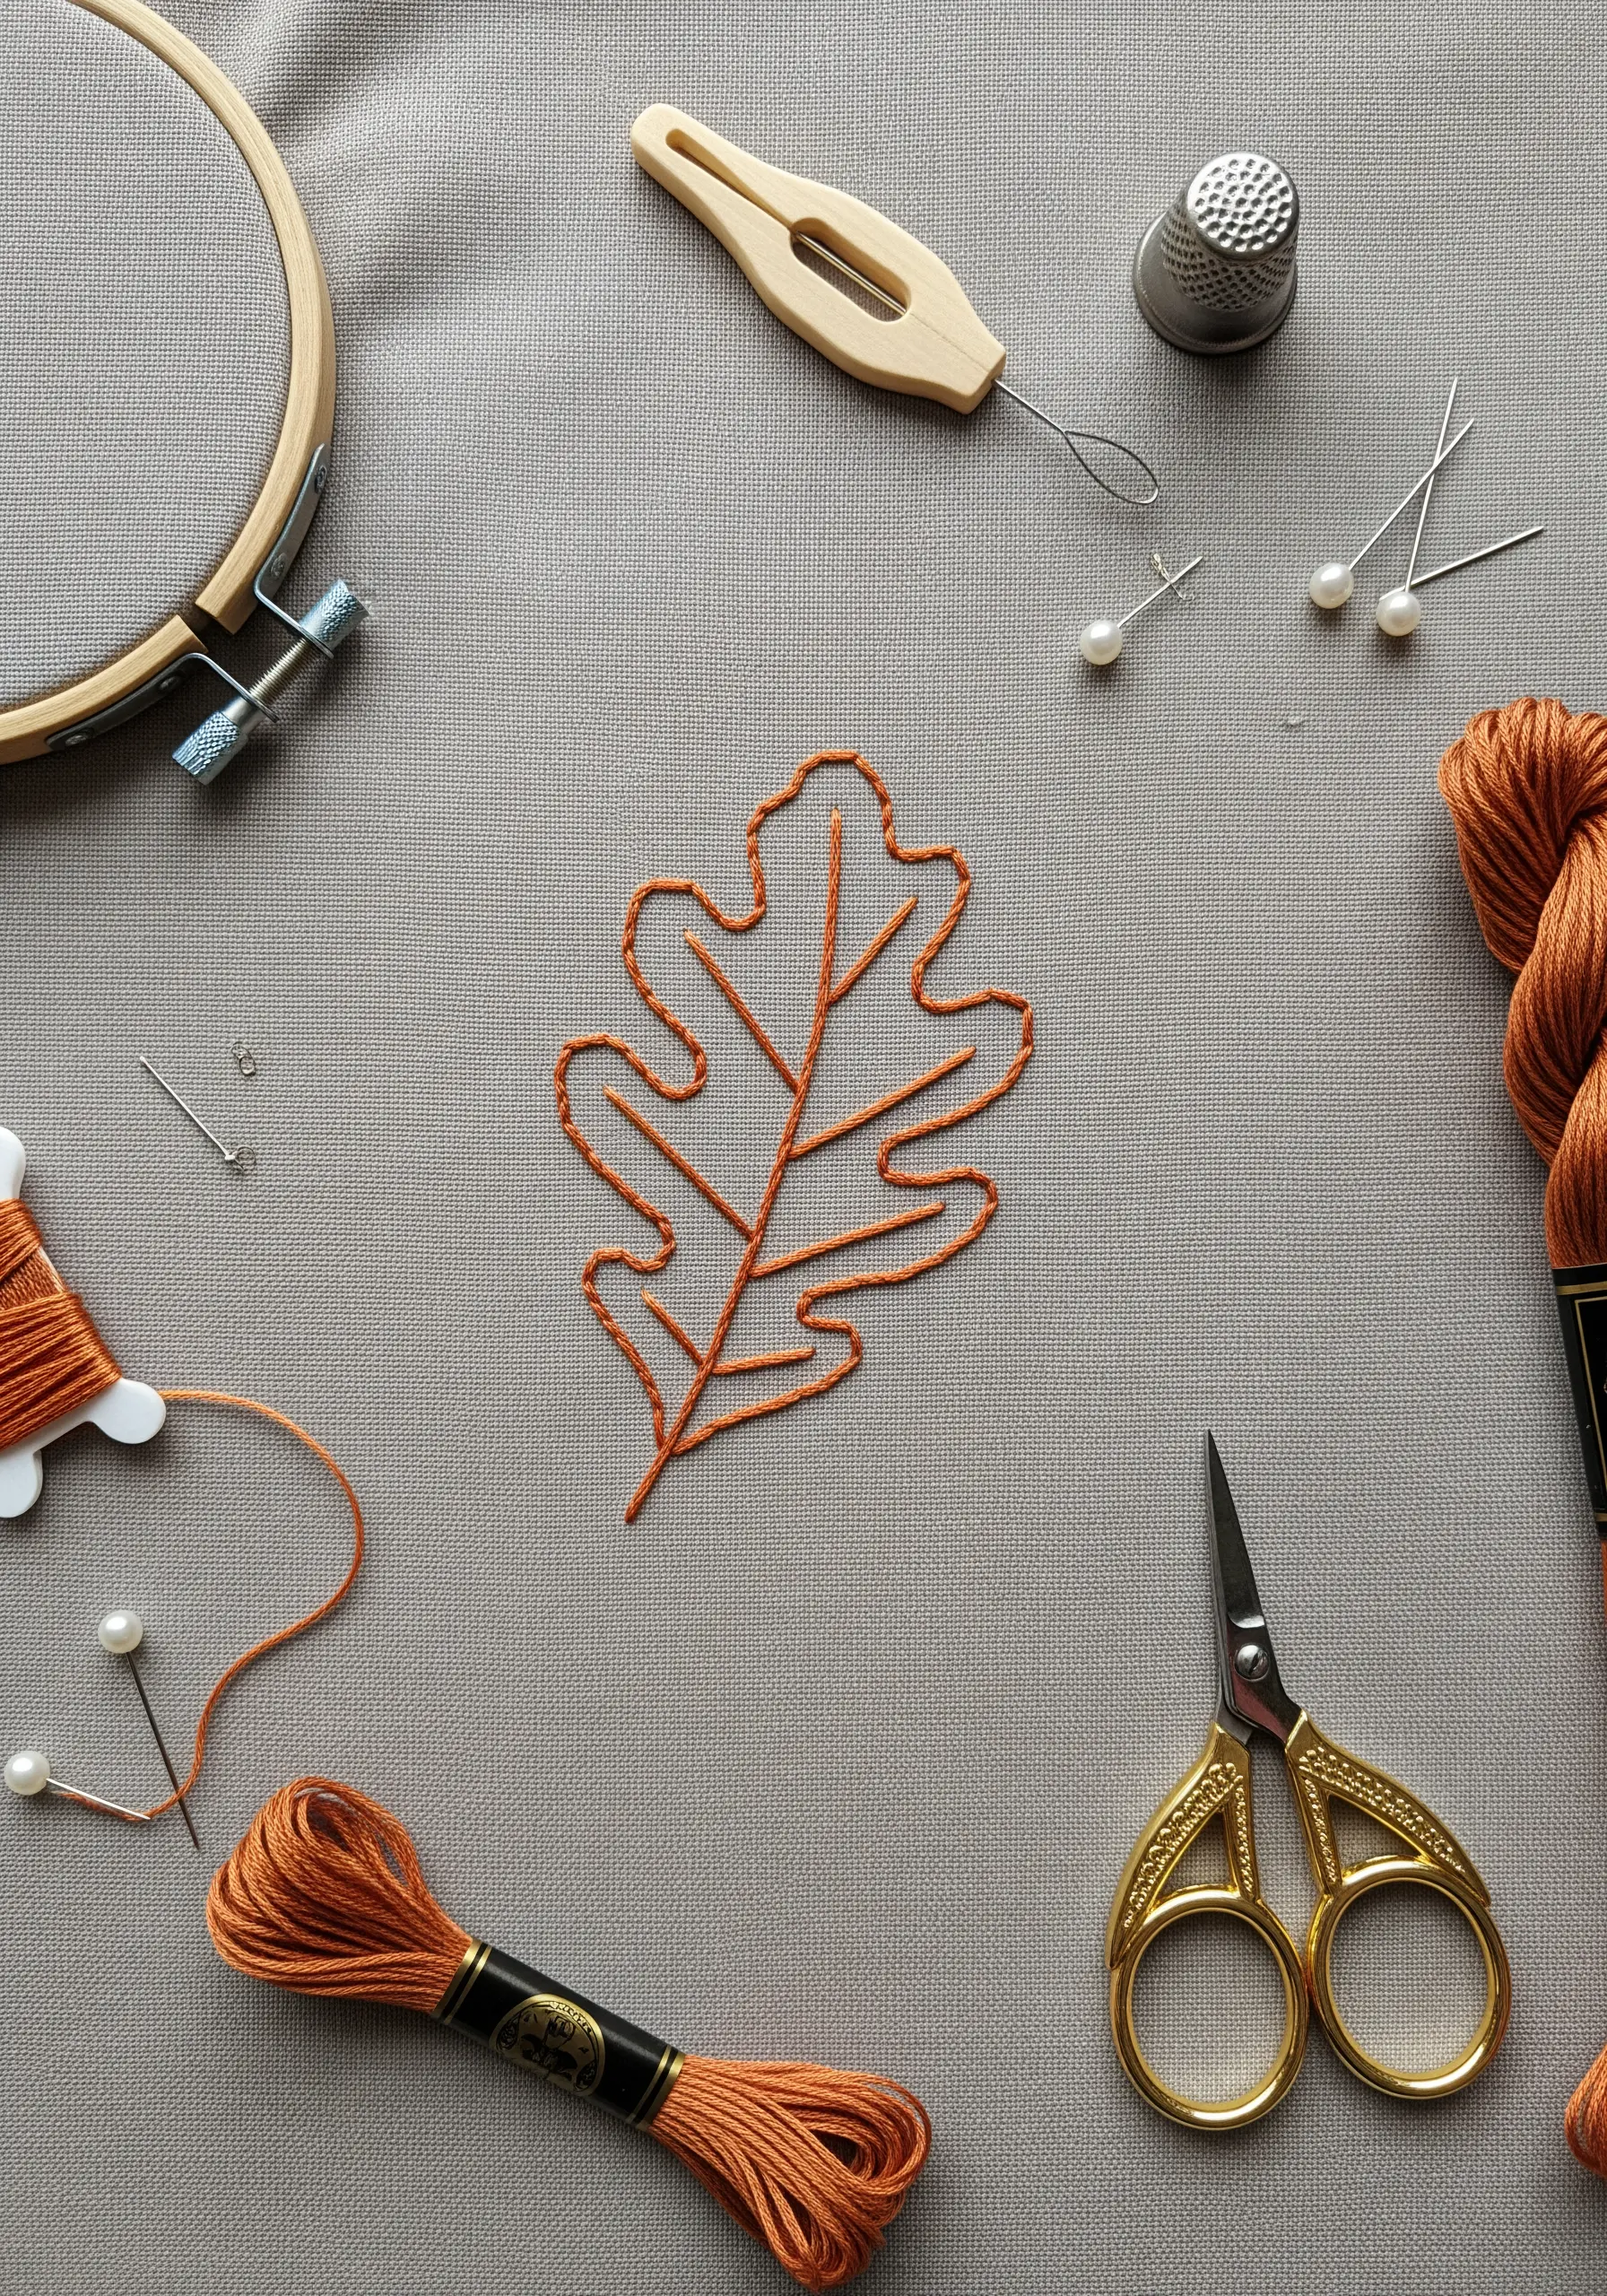
For clean, unwavering outlines on botanicals like this oak leaf, the split stitch is your most reliable tool.
Its interlocking nature creates a solid, almost chain-like foundation that prevents wobbling and keeps your curves smooth.
Unlike backstitch, which can look segmented on curves, split stitch provides a continuous line that gives your line art a professional, polished finish.
Use three strands of floss for a bold line that stands out against the fabric.
11. Stitch a Dandelion with Airy Straight Stitches
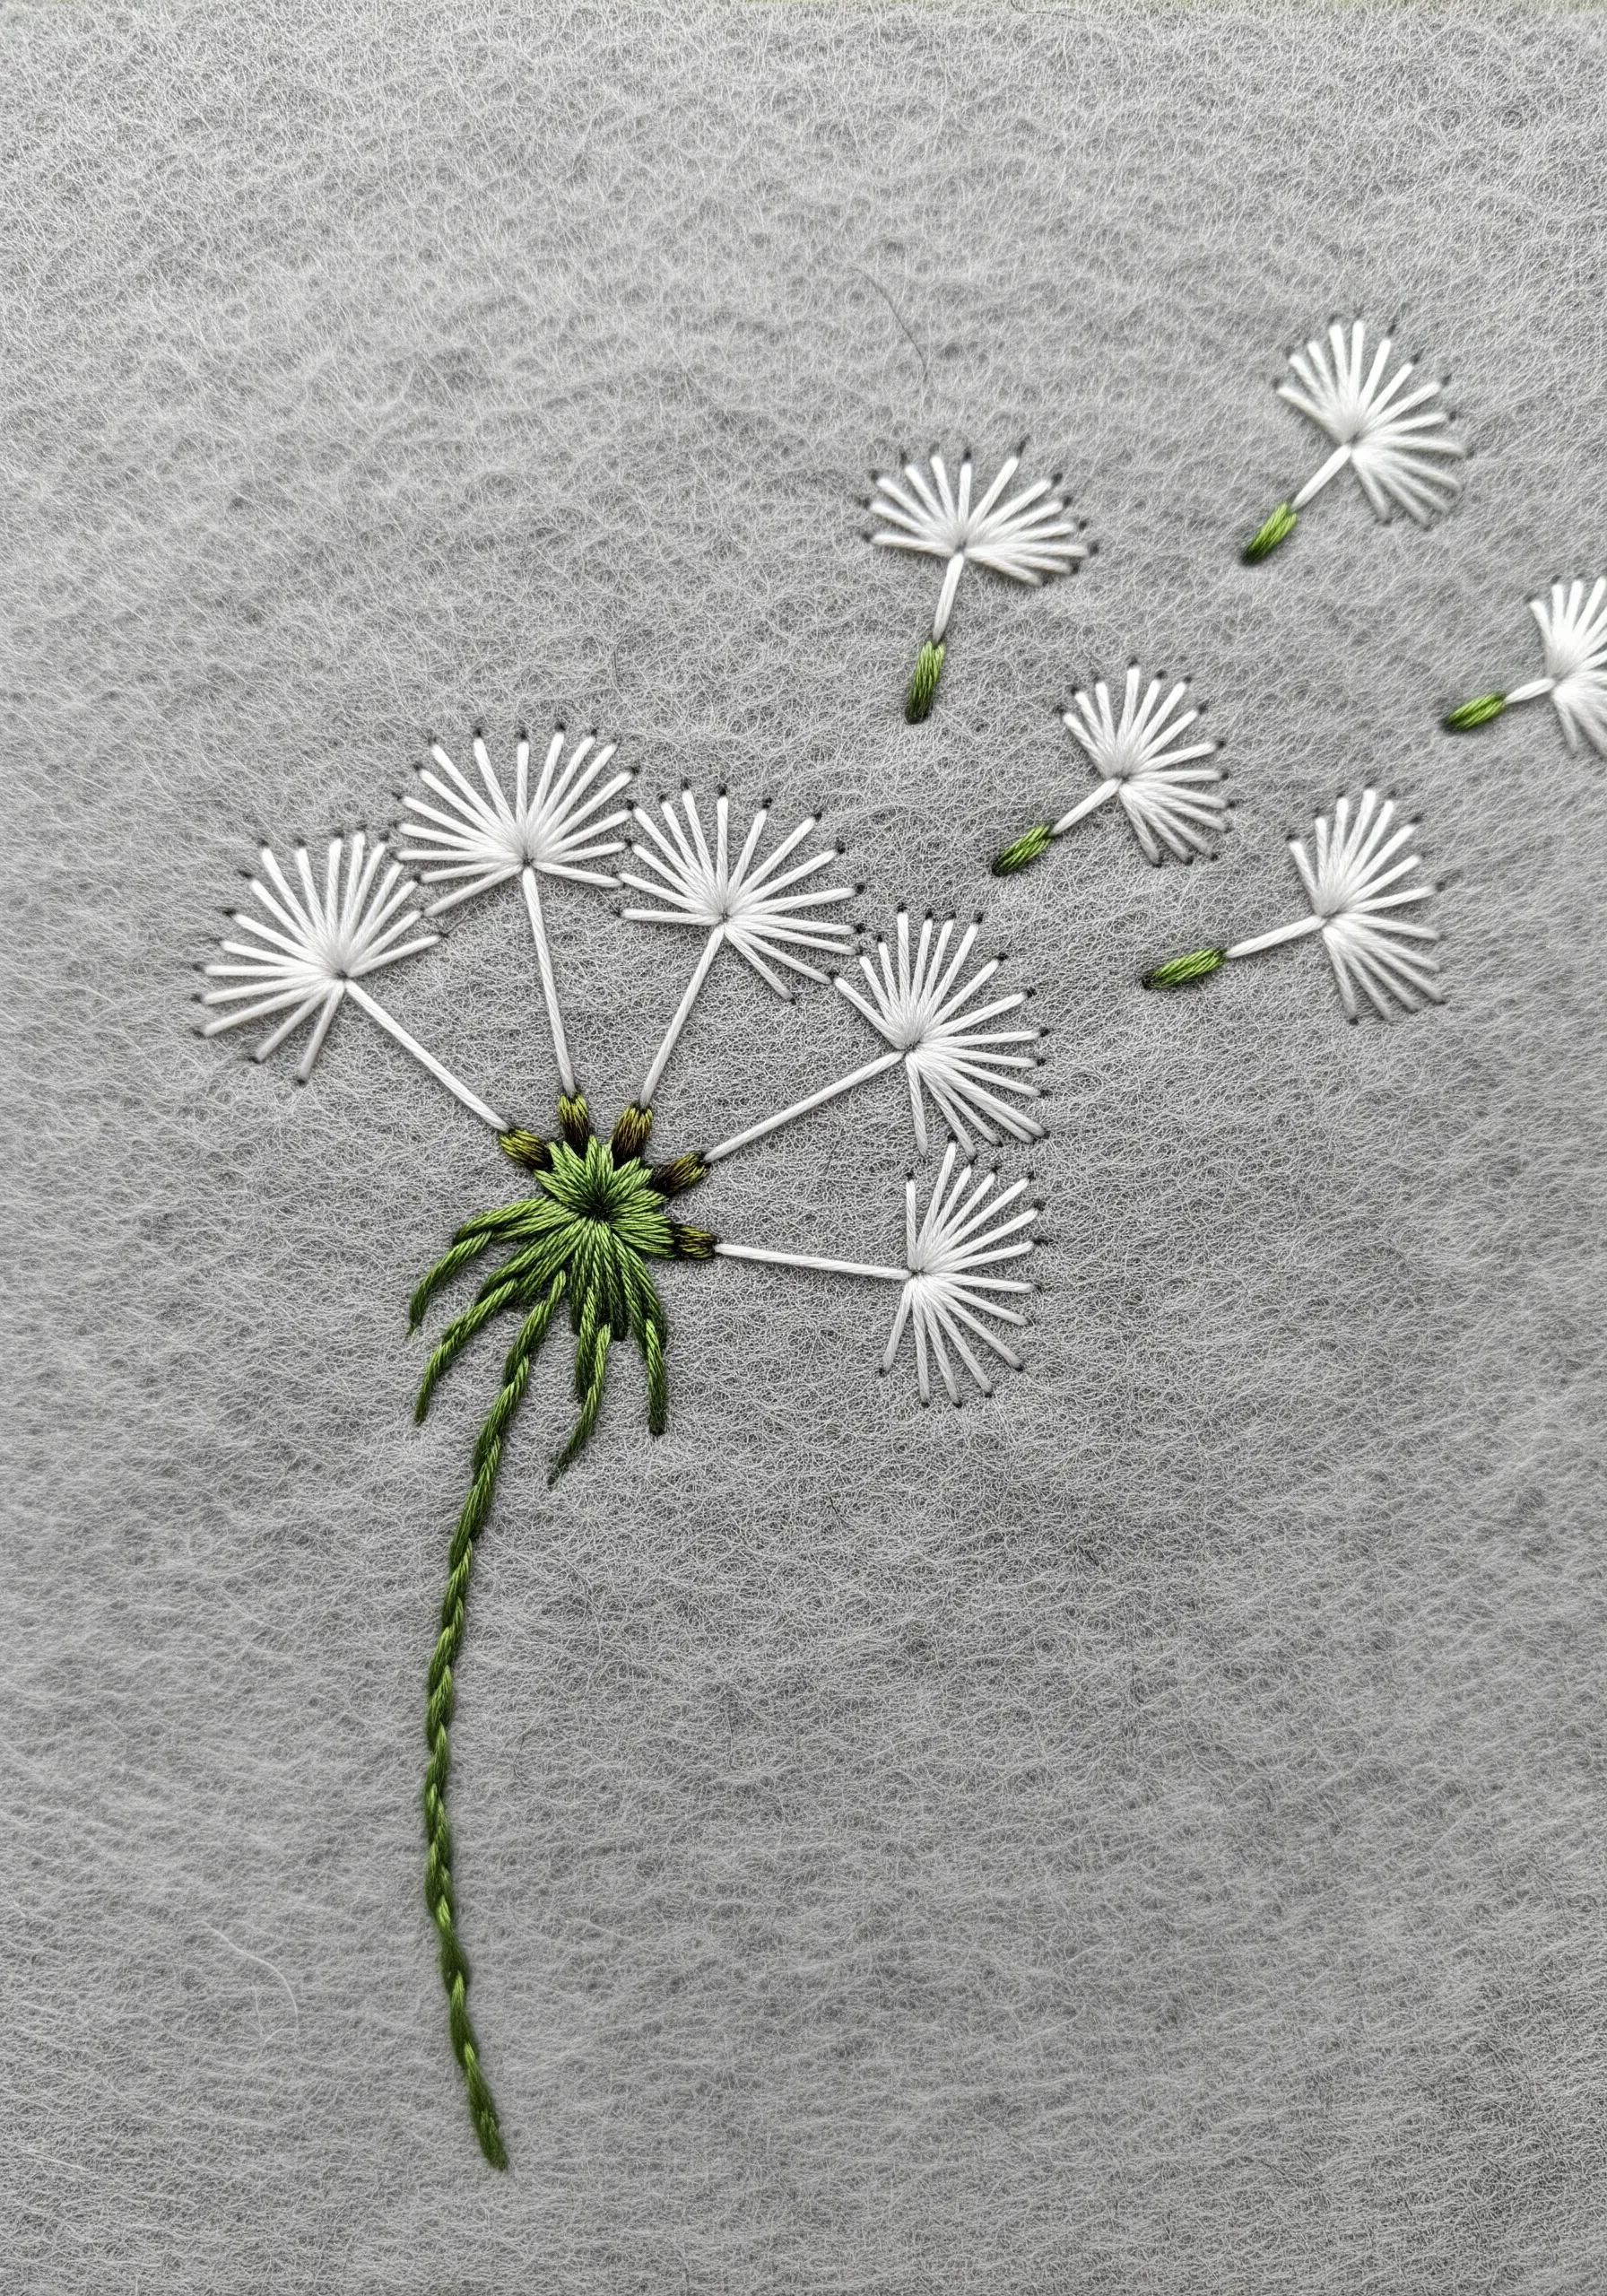
To create the delicate puff of a dandelion seed head, use radiating straight stitches.
Start from a central point for each floret and stitch outwards, keeping the tension light to avoid puckering the fabric.
For the flying seeds, stitch a single straight line for the stem and add a few smaller stitches at the top to form the pappus.
This pattern is a beautiful exercise in stitch direction and tension control, resulting in a design that feels light as air.
12. Capture Graphic Botanicals with Line Work
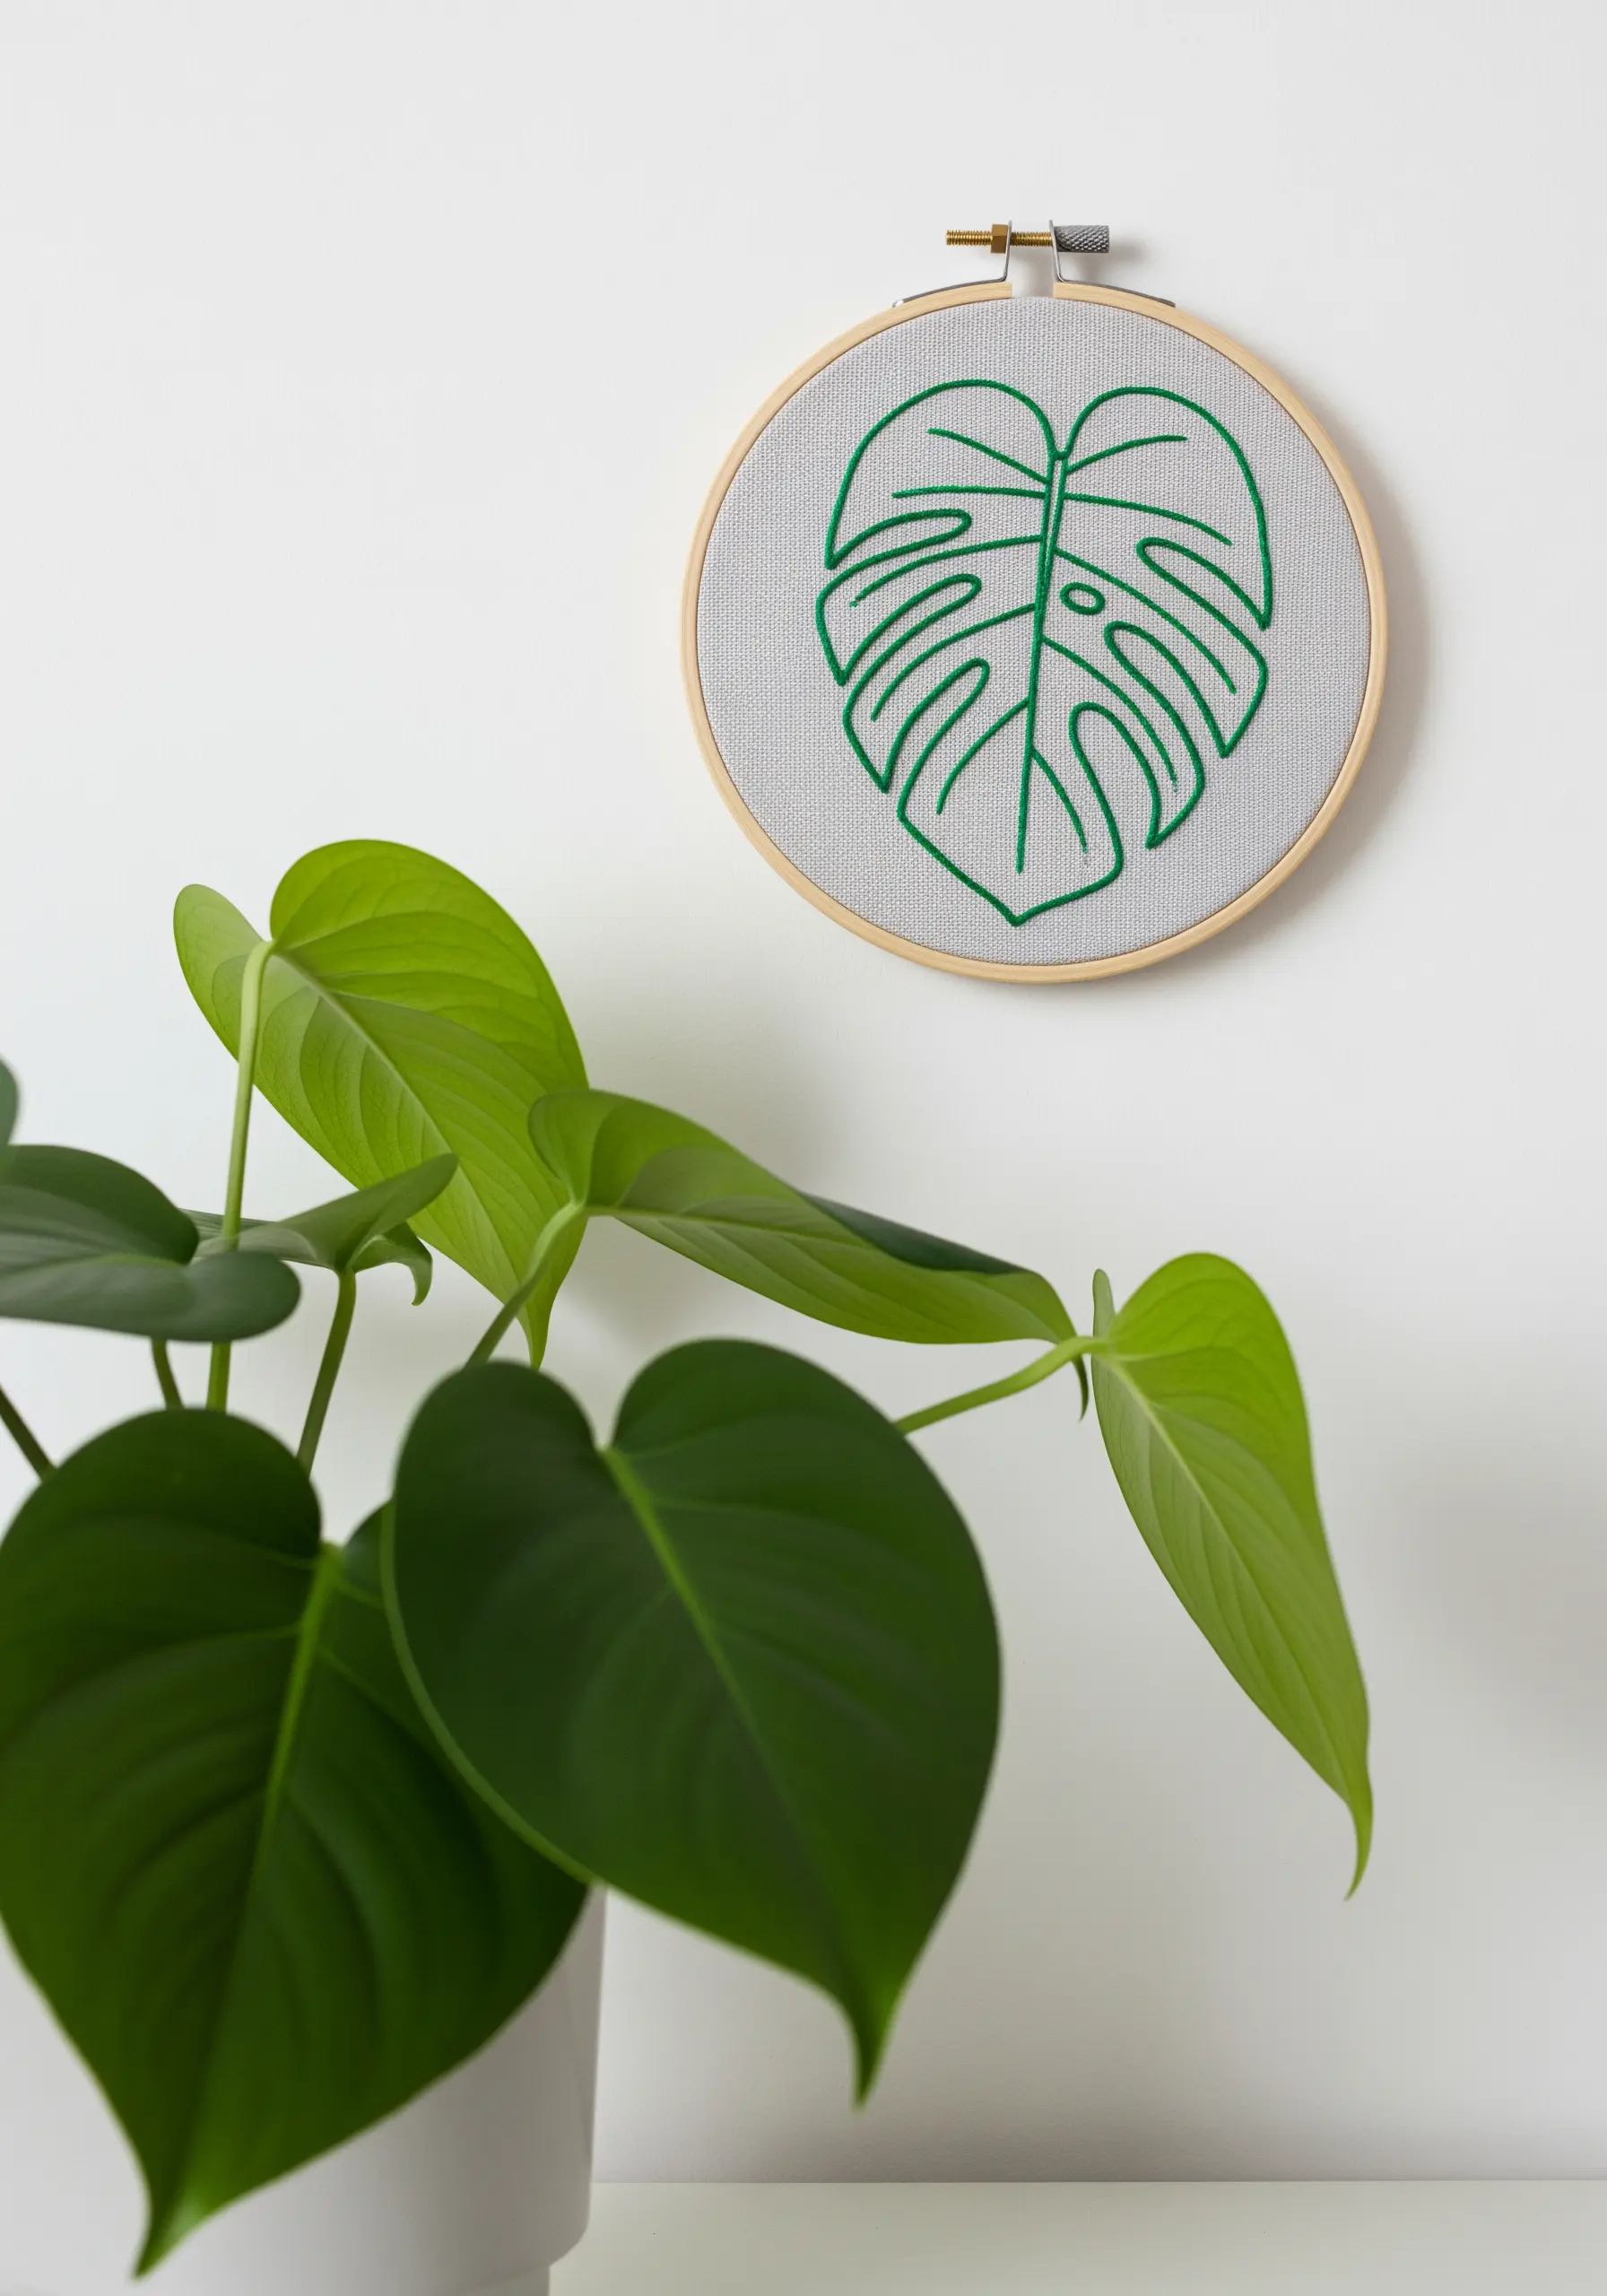
Translate the bold shapes of a Monstera leaf into a modern line art piece using a consistent backstitch or stem stitch.
Focus on maintaining smooth curves and sharp corners to preserve the iconic silhouette of the leaf.
Using a single, vibrant color on a neutral background turns the plant into a graphic statement, perfect for modern furniture pairings.
This project is less about realism and more about celebrating form and line.
13. Explore Geometric Fills and Outlines
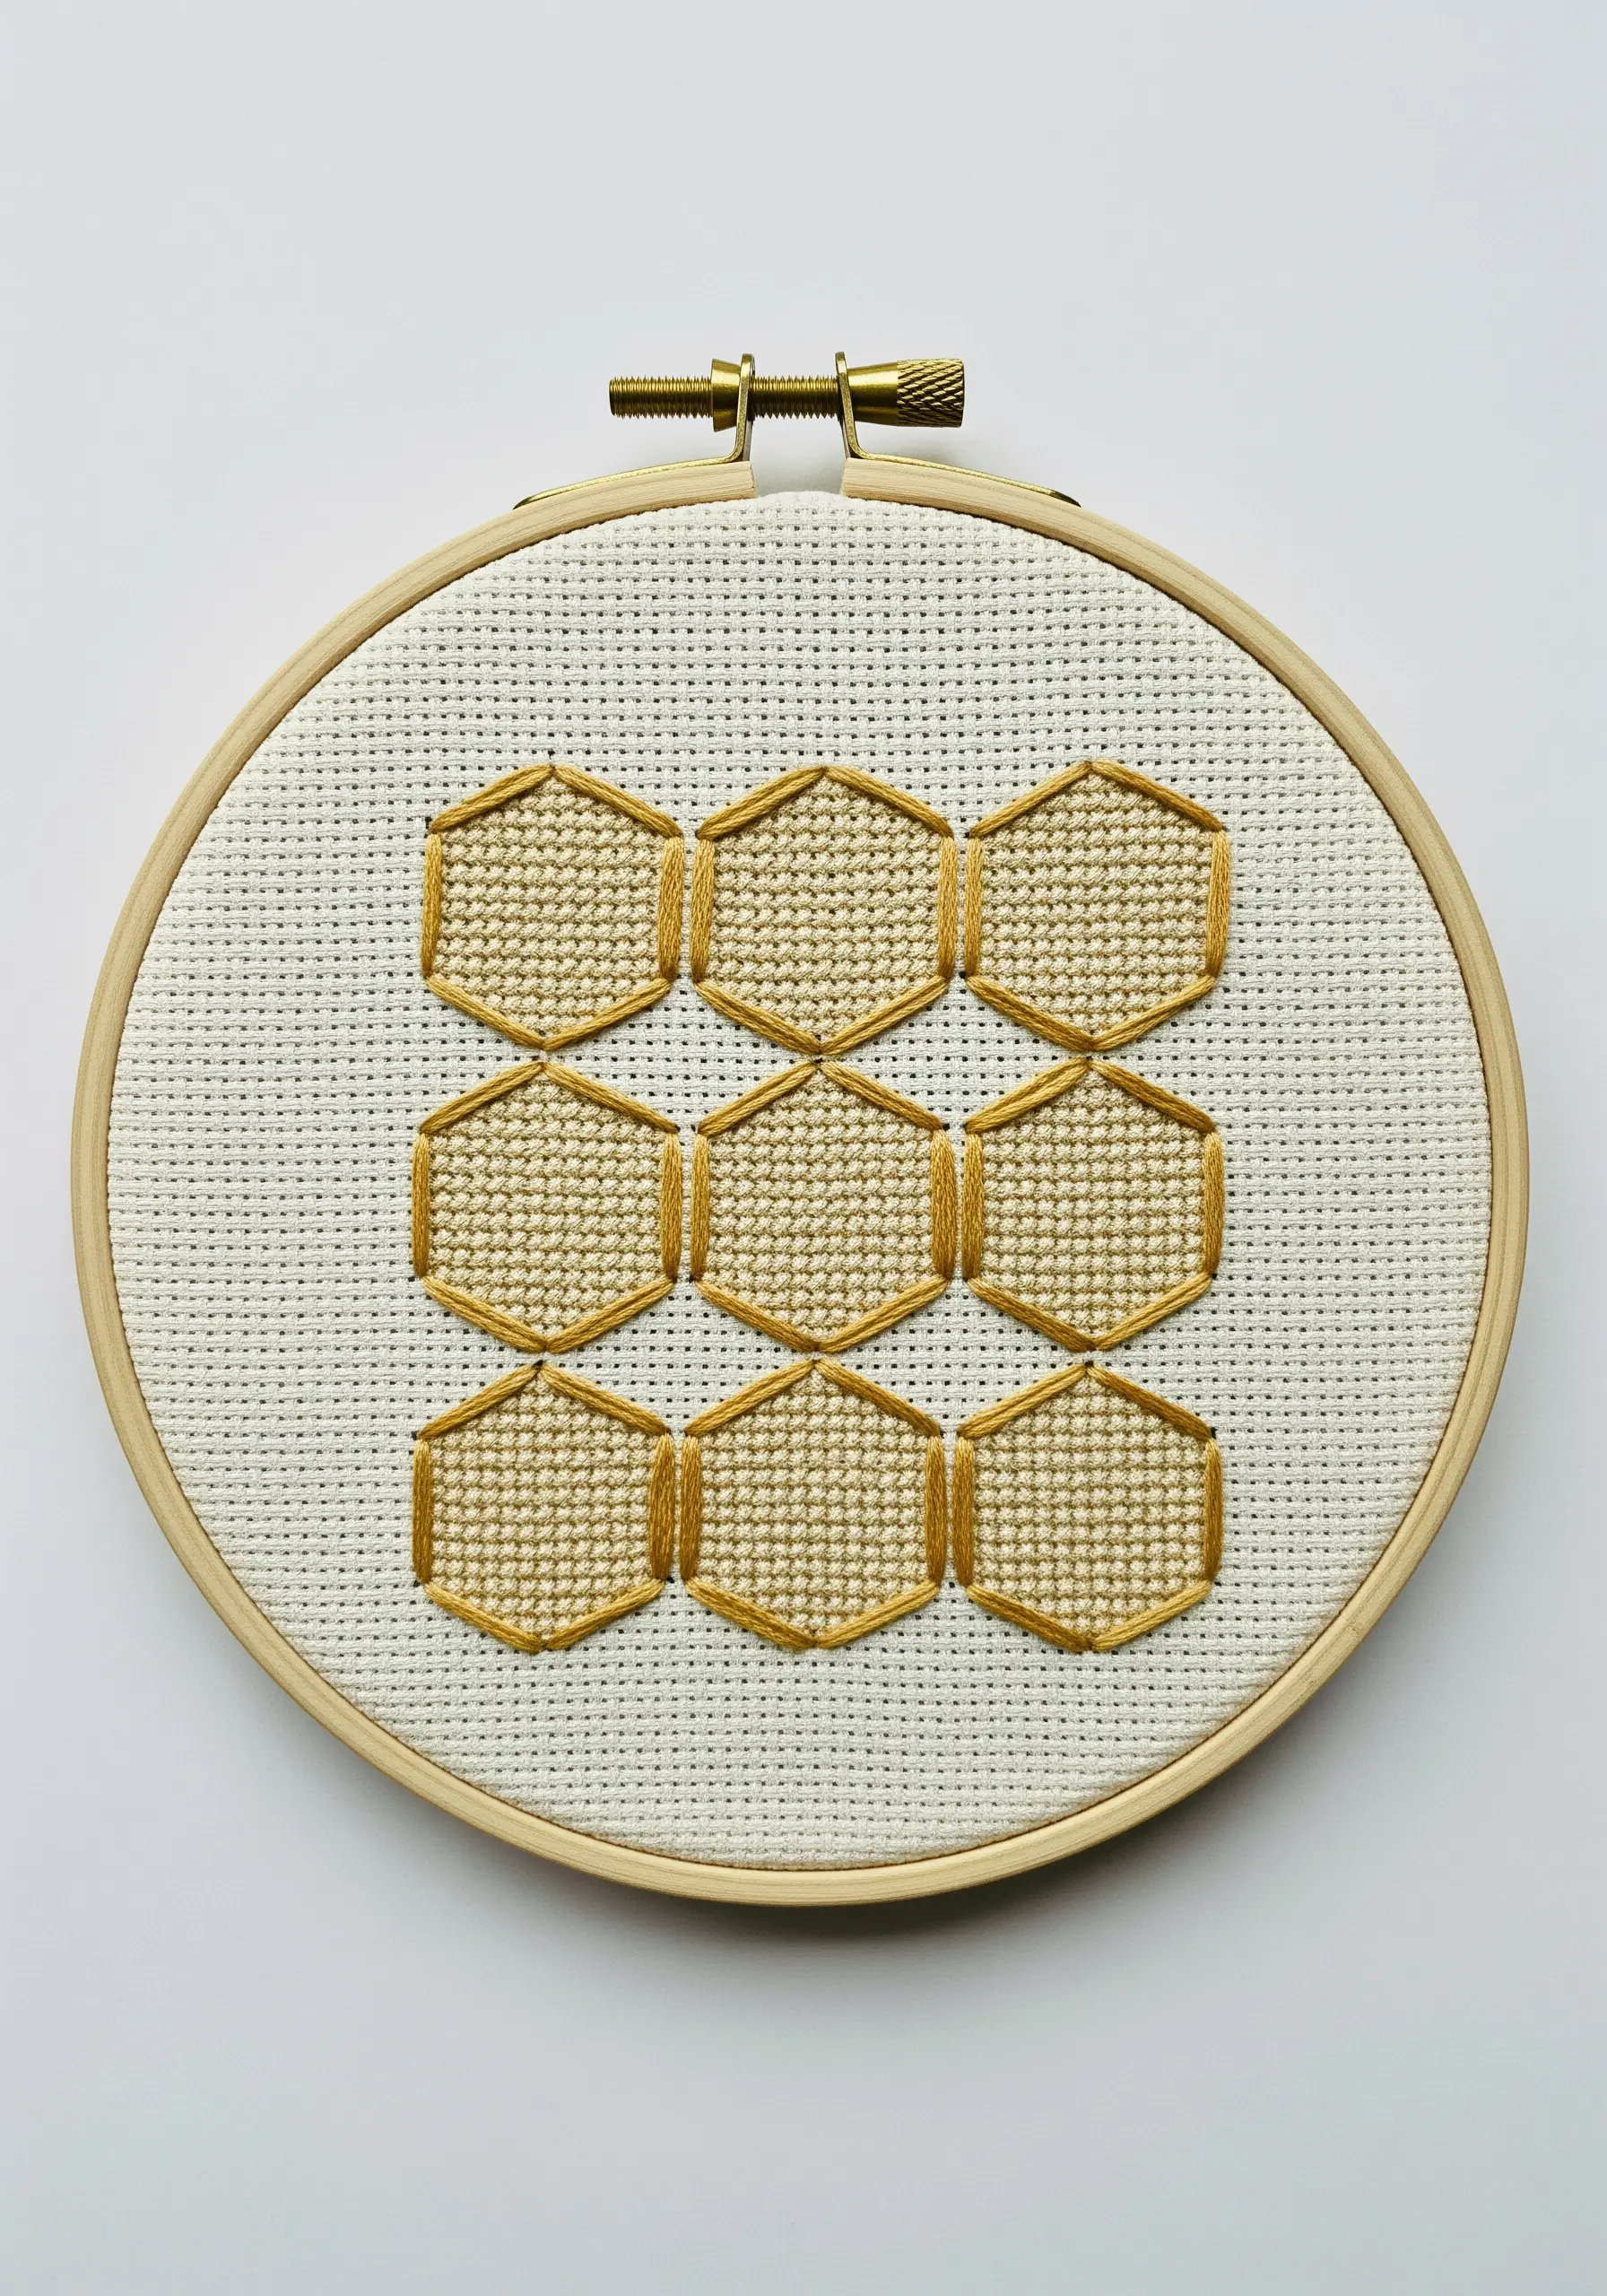
This honeycomb pattern is an excellent way to practice precision and consistency in your stitching.
First, create the hexagonal outlines using a neat backstitch in a darker thread for strong definition.
Then, fill each shape with horizontal straight stitches (a technique known as satin filling or darning stitch) using a lighter shade.
This creates a subtle textural contrast between the smooth fill and the defined border, making the geometric pattern visually engaging.
14. Add Playful Texture with Seed Stitch
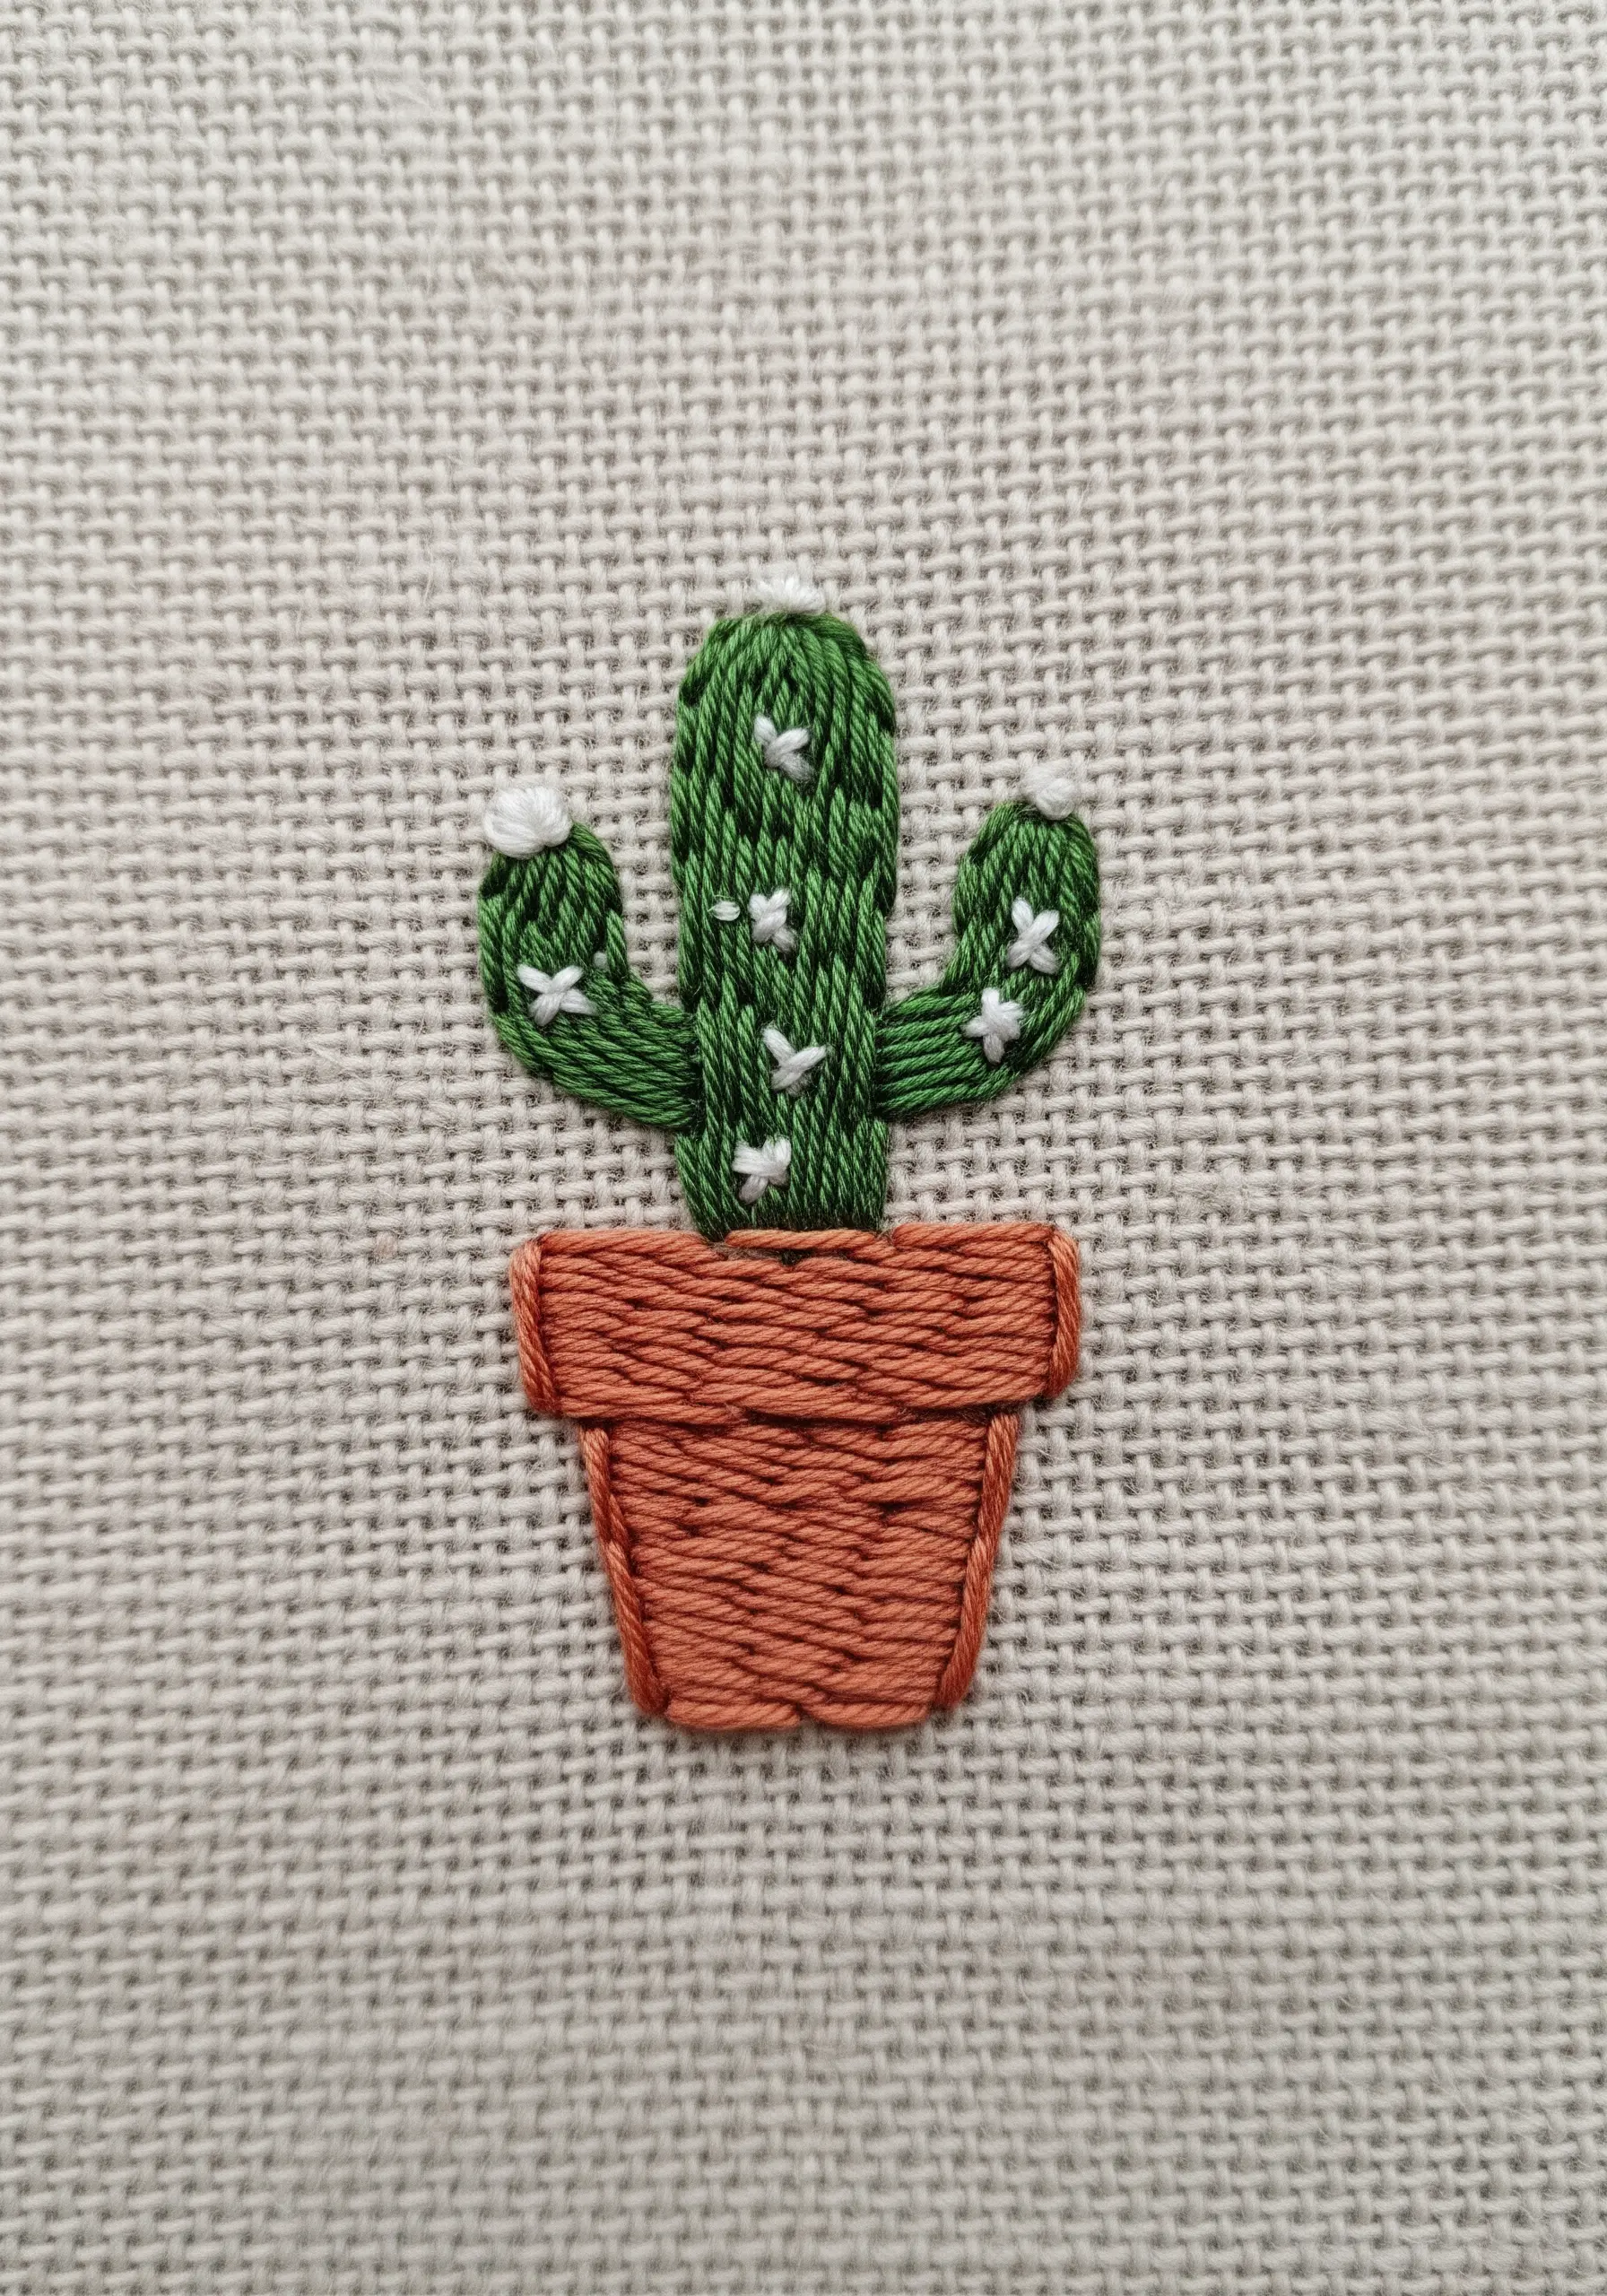
To give this cactus a classic, textured look, fill the body with vertical satin stitches.
Then, scatter tiny, randomly placed straight stitches—known as seed stitches—over the top using a contrasting color like white or silver.
This simple layering technique perfectly mimics the look of cactus spines without requiring complex stitches.
The terracotta pot is filled with horizontal satin stitch, and the change in direction adds another layer of subtle detail.
15. Use Directional Satin Stitch for Effect
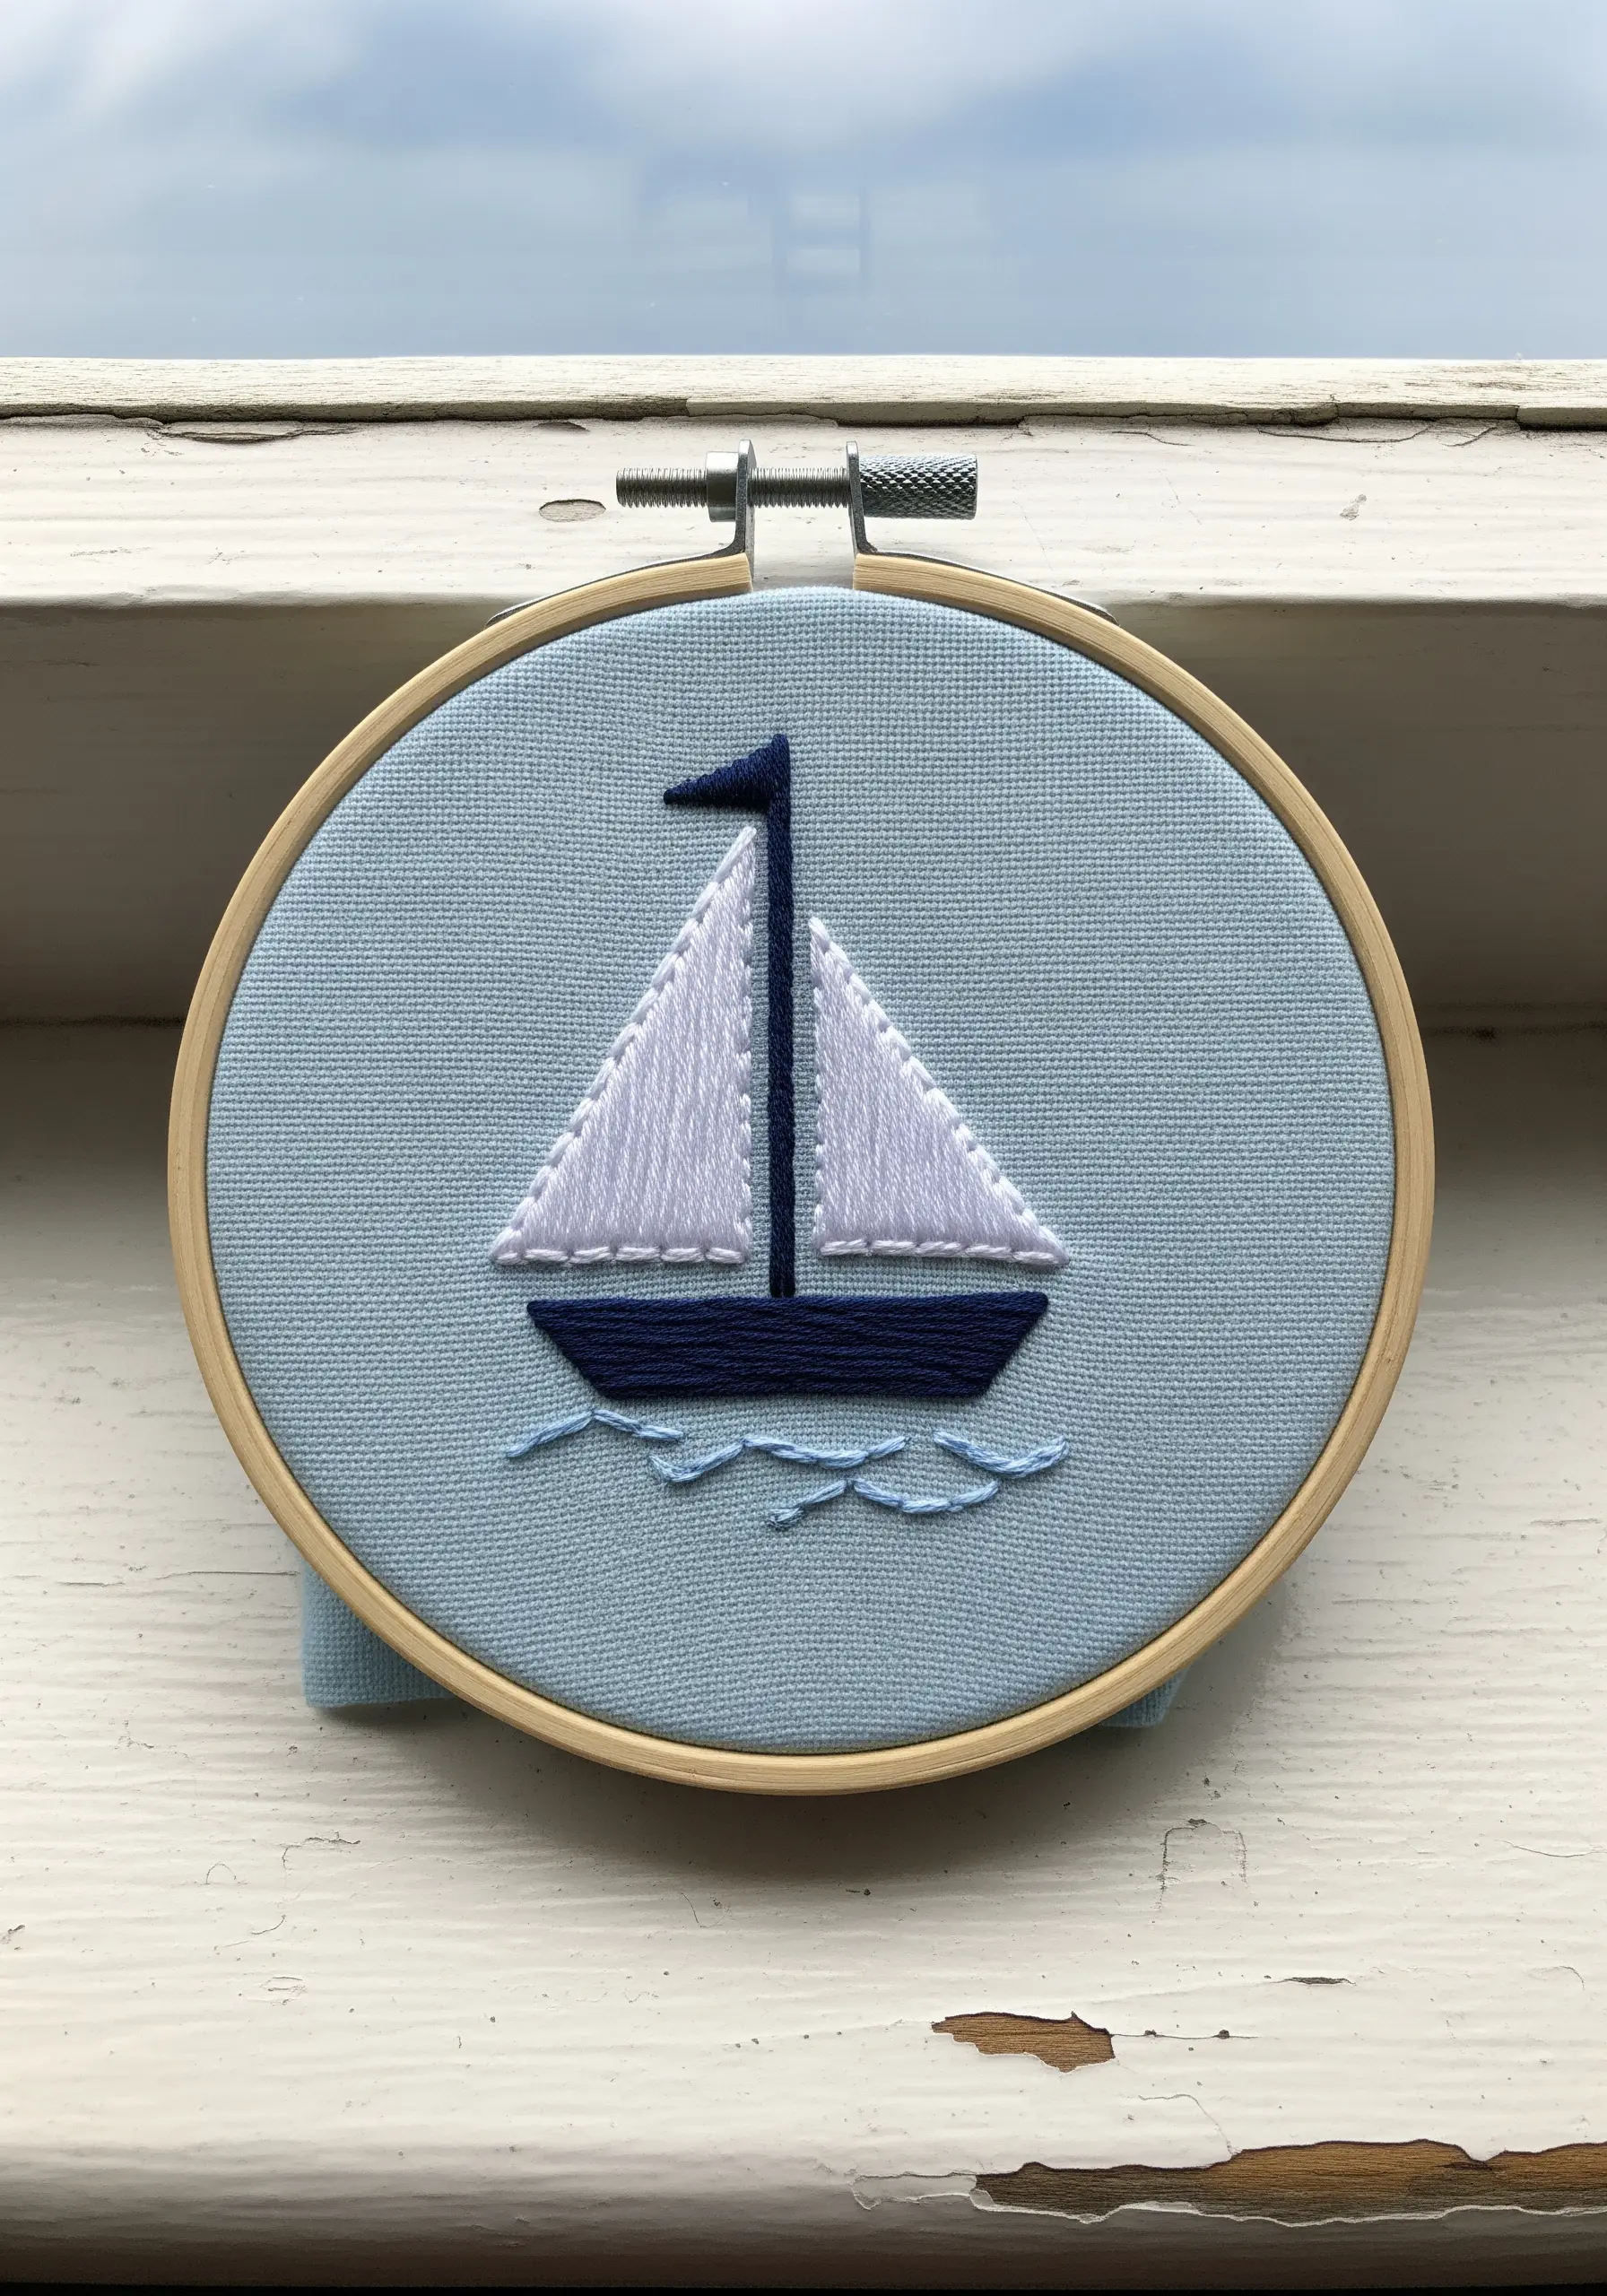
Bring a simple sailboat to life by paying attention to the direction of your satin stitches.
Fill the sails with angled vertical stitches to create a sense of fullness, as if they are catching the wind.
In contrast, fill the hull with horizontal stitches to make it feel stable and grounded in the water.
This intentional use of stitch direction adds subtle realism and dynamic energy to an otherwise static design.
16. Achieve a Braided Texture with Chain Stitch
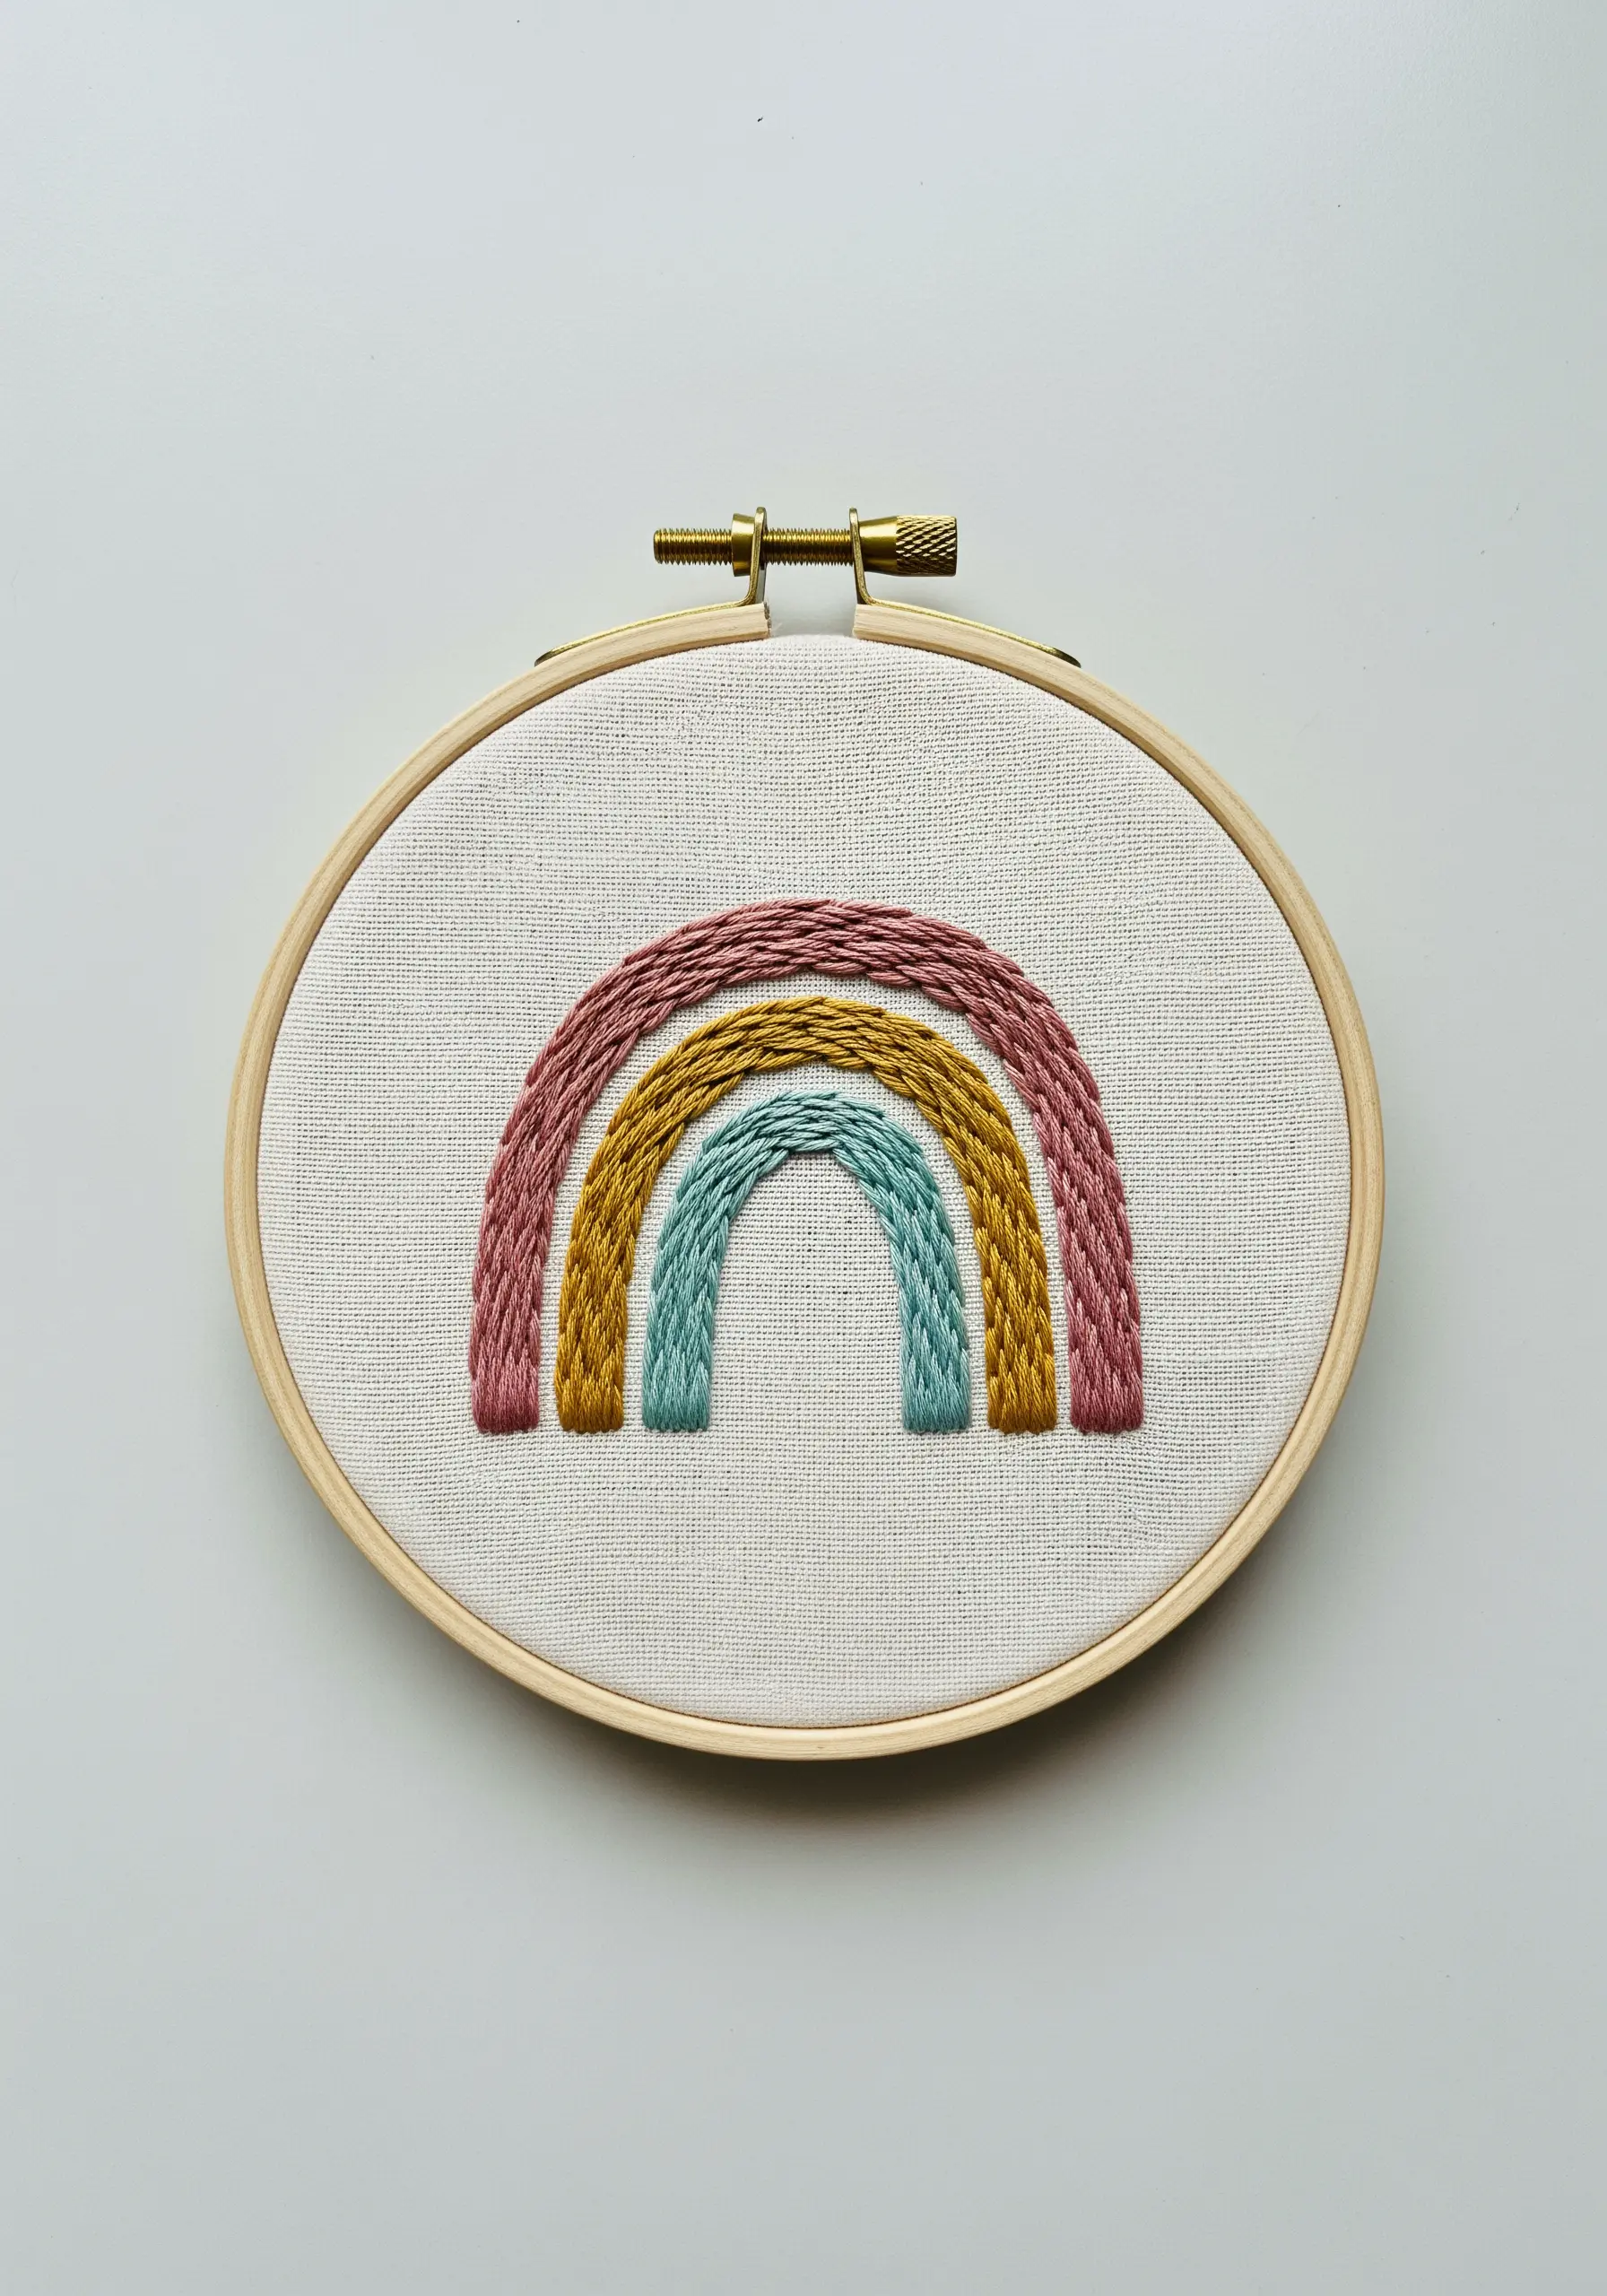
Give your rainbow a beautiful, rope-like texture by using chain stitch instead of satin stitch for the arcs.
Chain stitch creates a raised, braided line that adds tactile dimension and visual interest.
To create thicker bands, stitch multiple rows of chain stitch side-by-side, nestling them closely together.
This technique is not only forgiving for beginners but also produces a rich, handmade quality that feels both cozy and modern.
17. Create Realistic Leaves with Fishbone Stitch
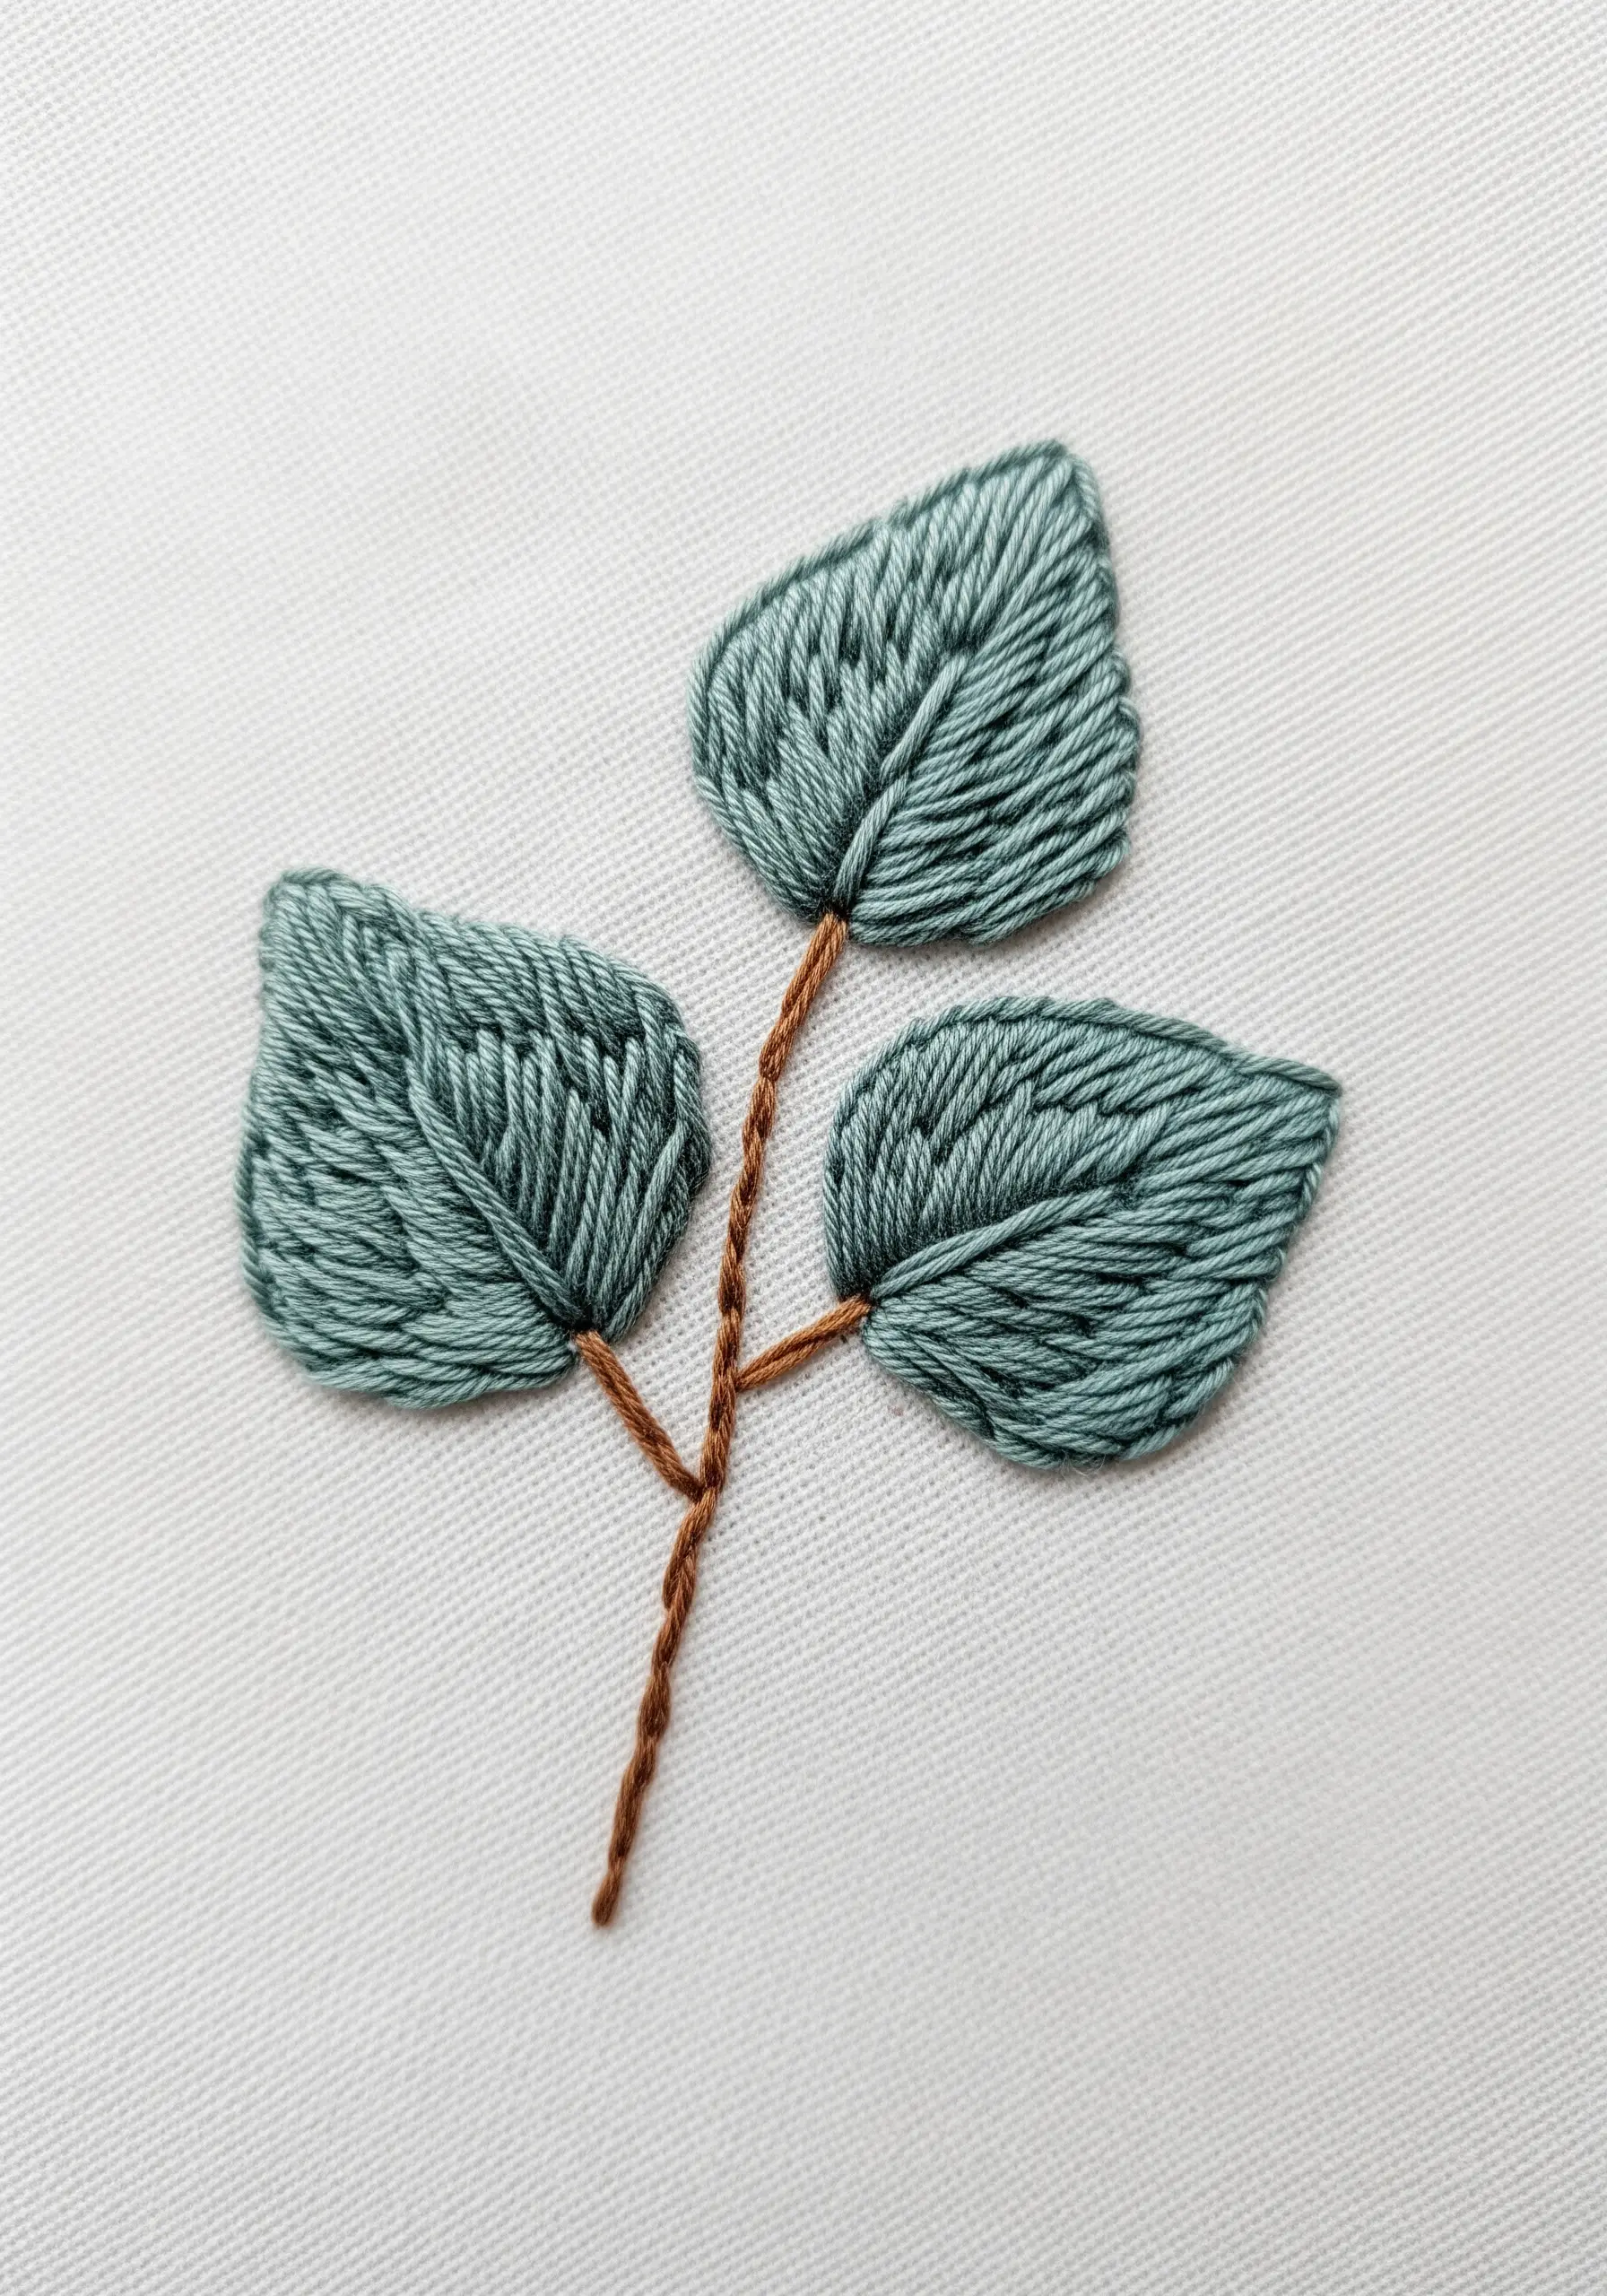
The fishbone stitch is the perfect choice for creating leaves with a natural-looking central vein.
Start with a single straight stitch at the tip of the leaf, then bring your needle up on one side of the outline and go down just over the center line.
Alternate sides as you work your way down the leaf, overlapping your stitches slightly in the middle.
This single, fluid motion builds both the fill and the vein simultaneously, resulting in beautifully shaded, realistic foliage.
18. Make Stars That Glimmer and Shine
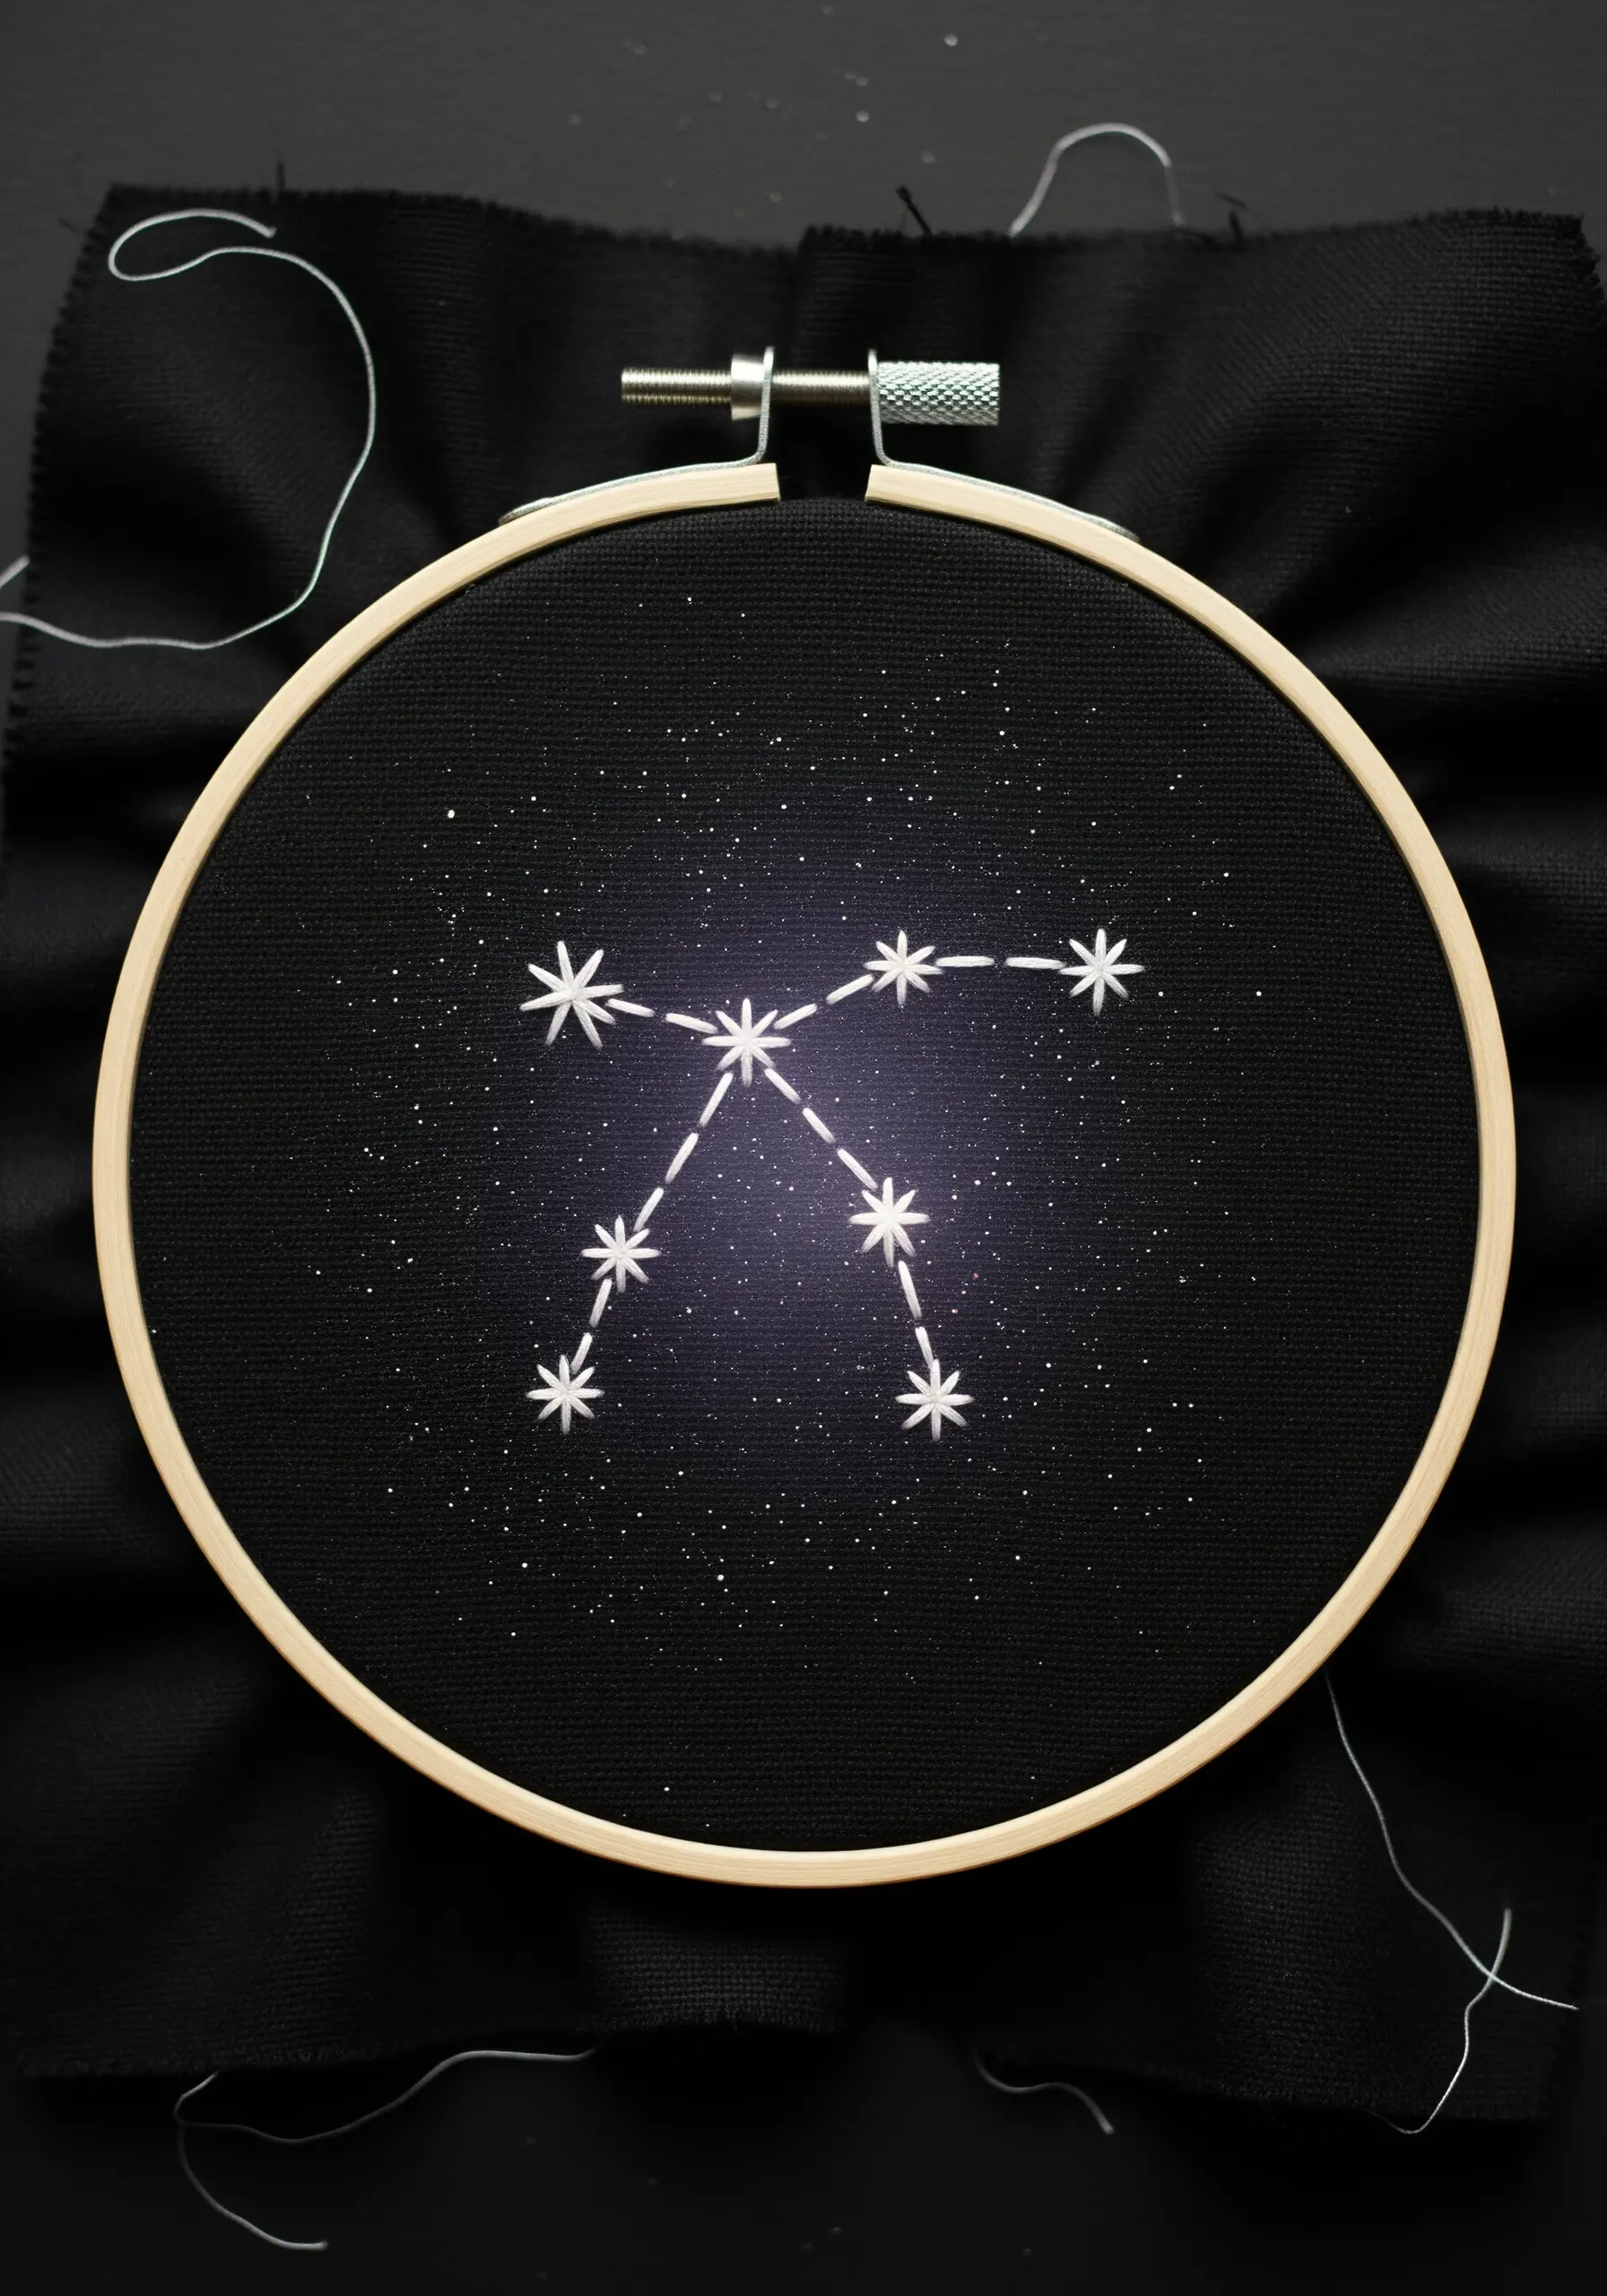
To embroider a constellation, create the stars using a star stitch or by making several straight stitches that cross over a central point.
For extra sparkle, use a metallic or variegated white thread that will catch the light, especially against a dark fabric.
Connect the stars with a simple, fine backstitch using a single strand of thread to keep the lines delicate.
A few scattered French knots in the background can represent distant stars, completing the celestial scene.
19. Use Padded Satin Stitch for Plump Shapes
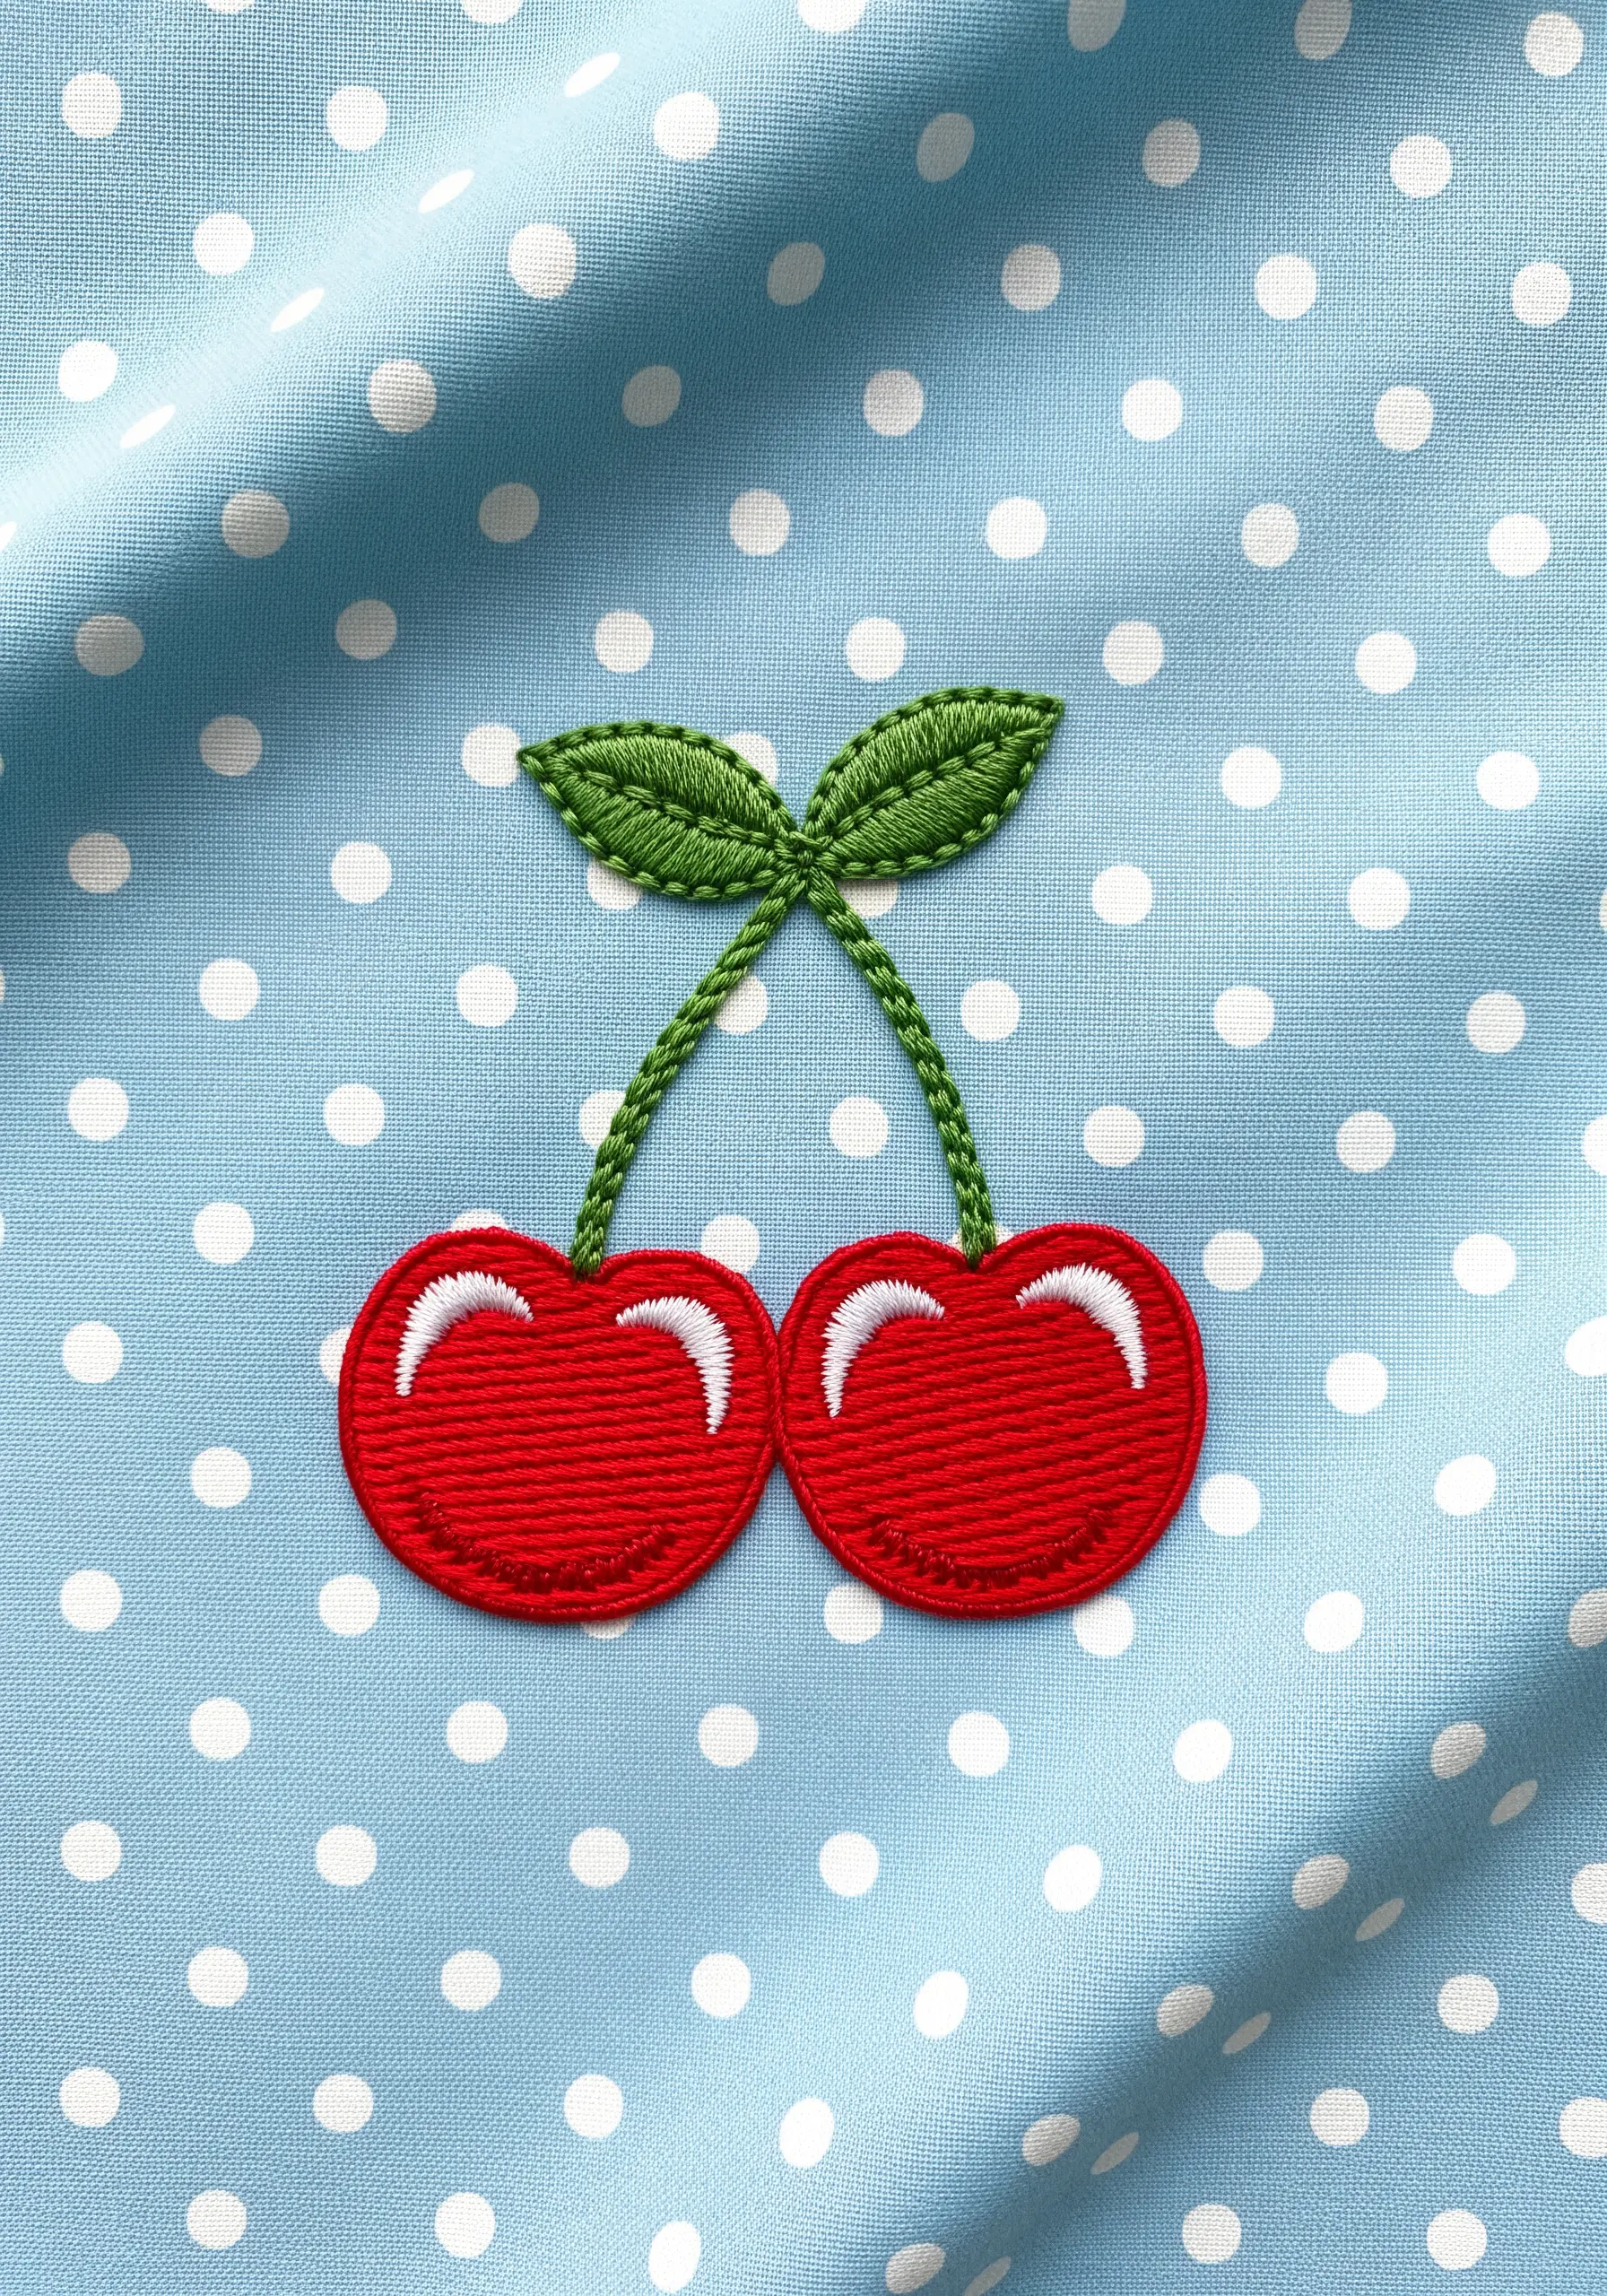
To make these cherries look round and three-dimensional, use a technique called padded satin stitch.
First, fill the cherry shape with a layer of small straight stitches or seed stitches in the same color.
Then, cover this padding with your final layer of satin stitches, working perpendicular to the padding stitches.
This underlayer physically raises the satin stitch, creating a smooth, domed surface that looks wonderfully plump and realistic.
20. Capture Elegance in a Single Line
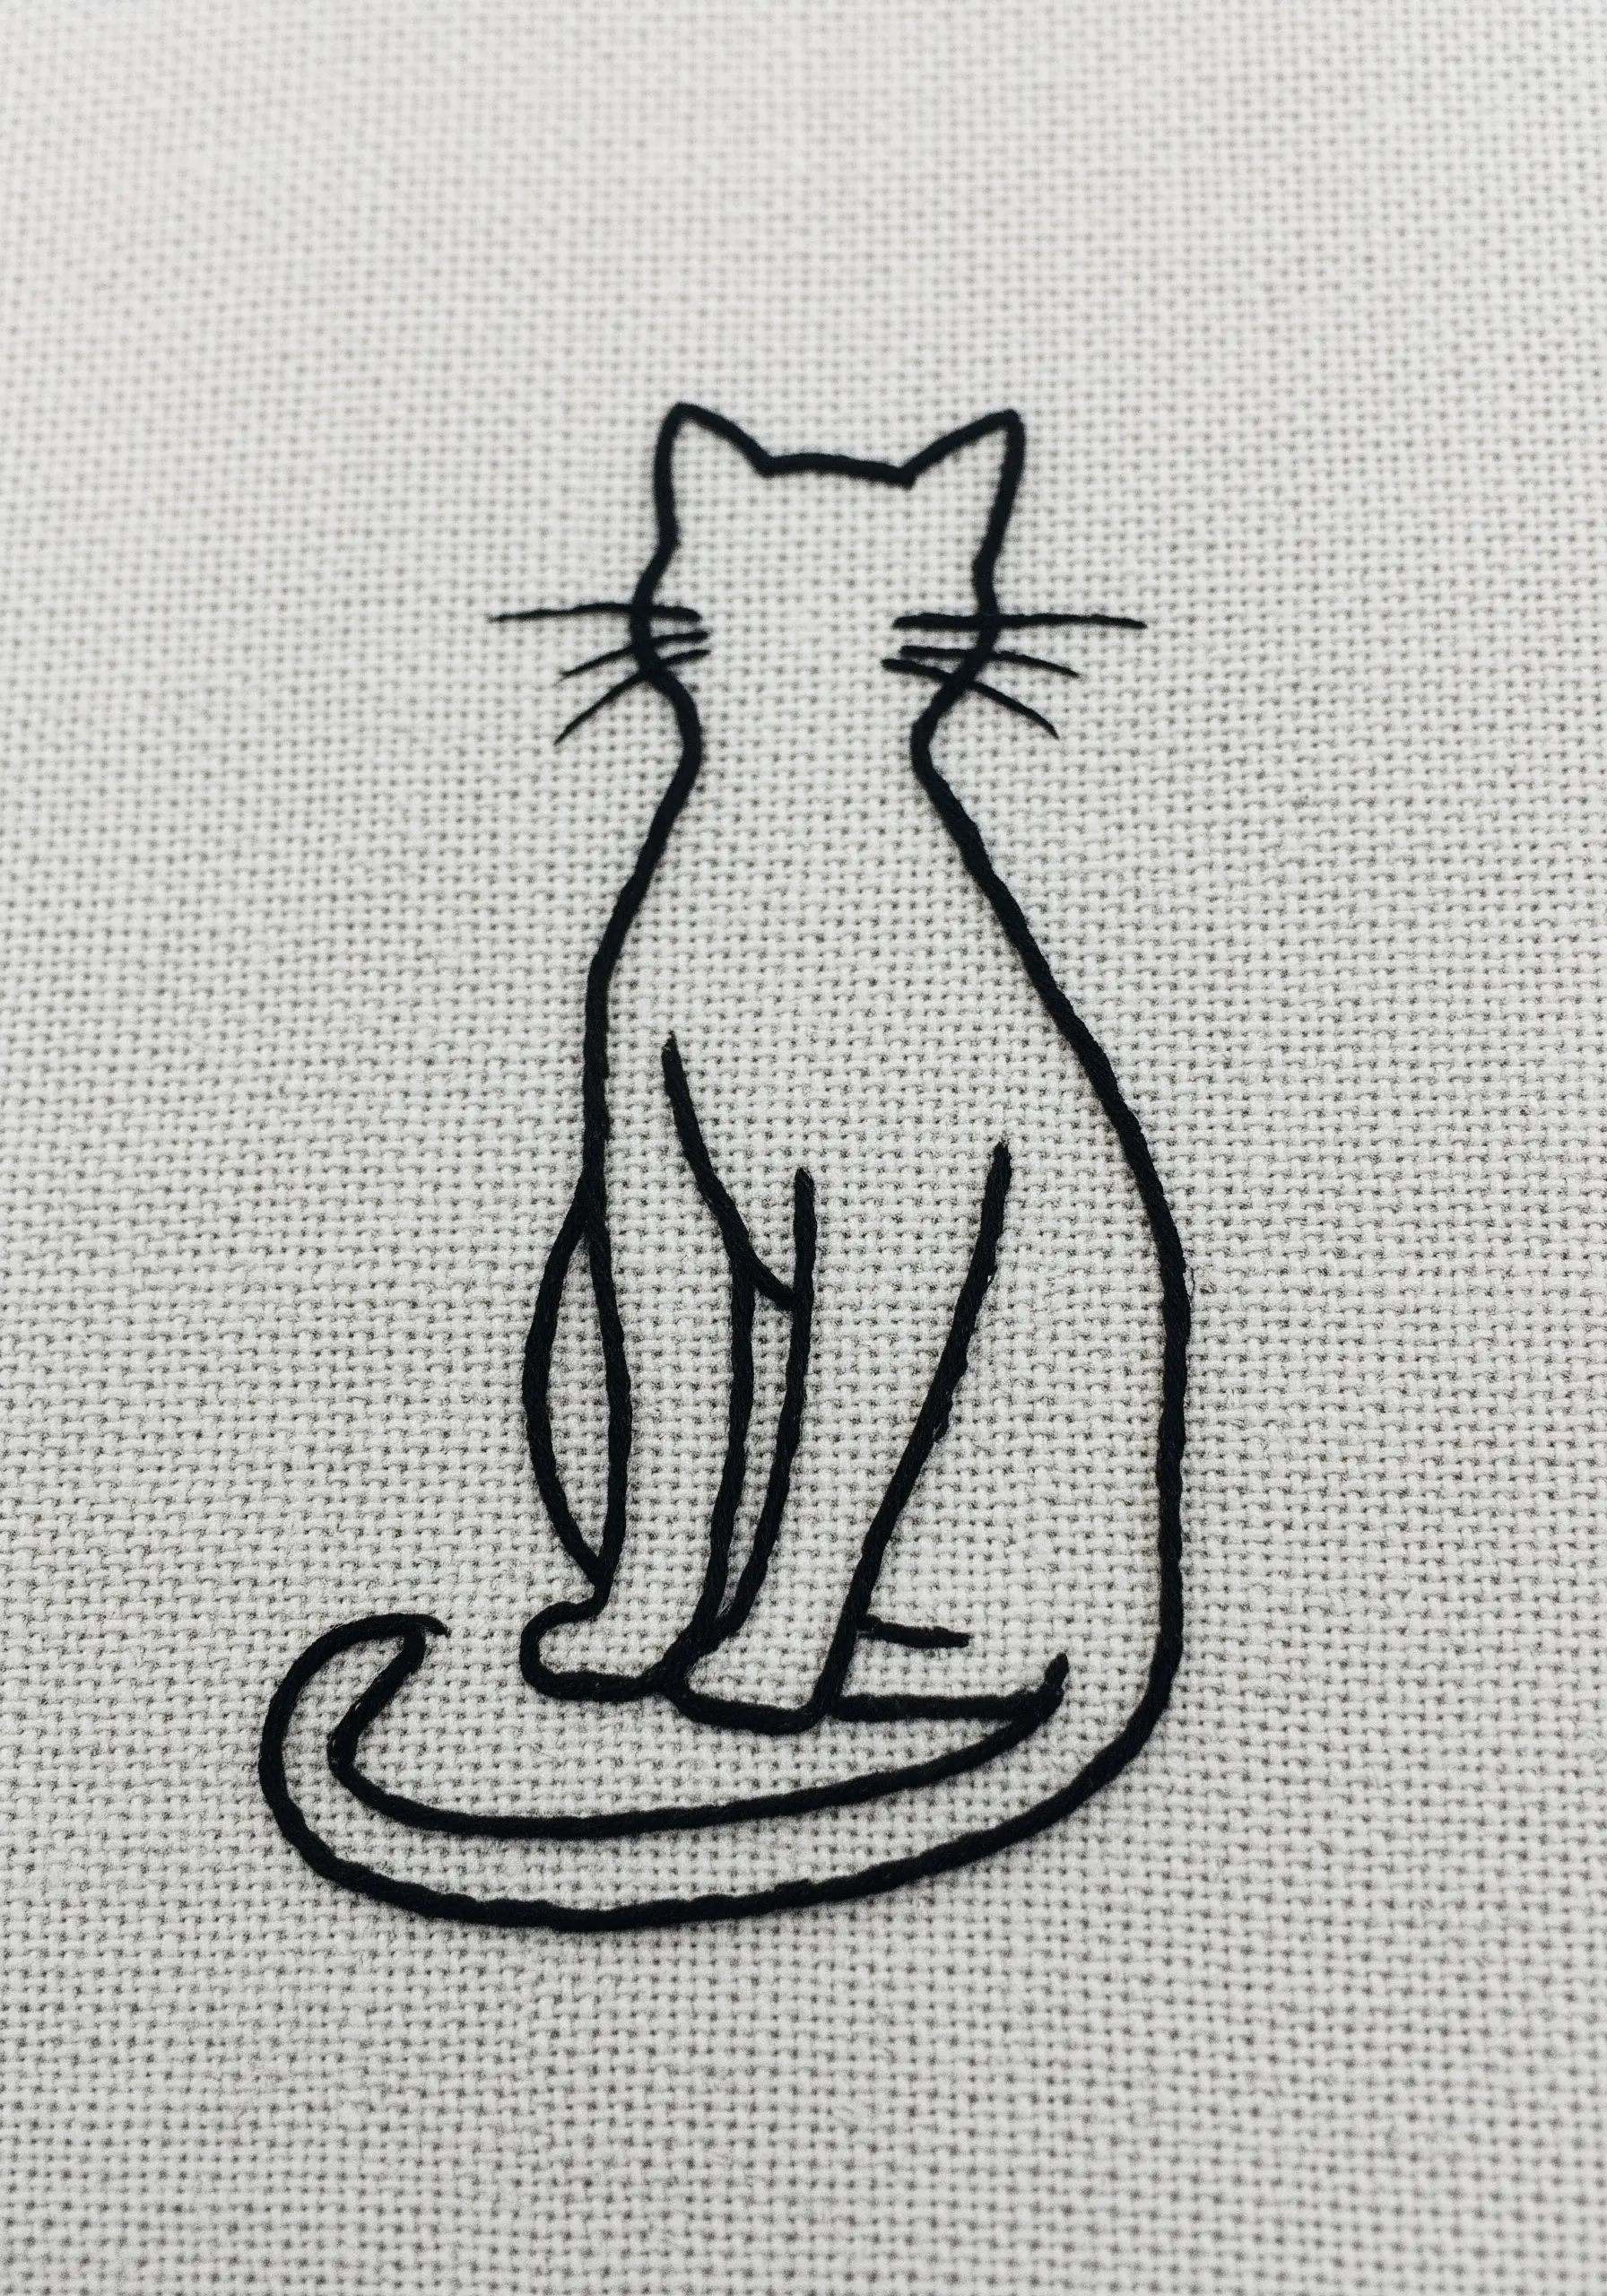
This minimalist cat proves that a single, well-executed line can be more impactful than a fully filled design.
Use a stem stitch or a whipped backstitch to achieve a smooth, consistent line that flows gracefully around the curves.
Choose a high-contrast thread color, like black on a light fabric, to make the silhouette crisp and defined.
This project is a perfect exercise in mastering line control and celebrating the beauty of simplicity.
21. Suggest Warmth with Gradient Threads
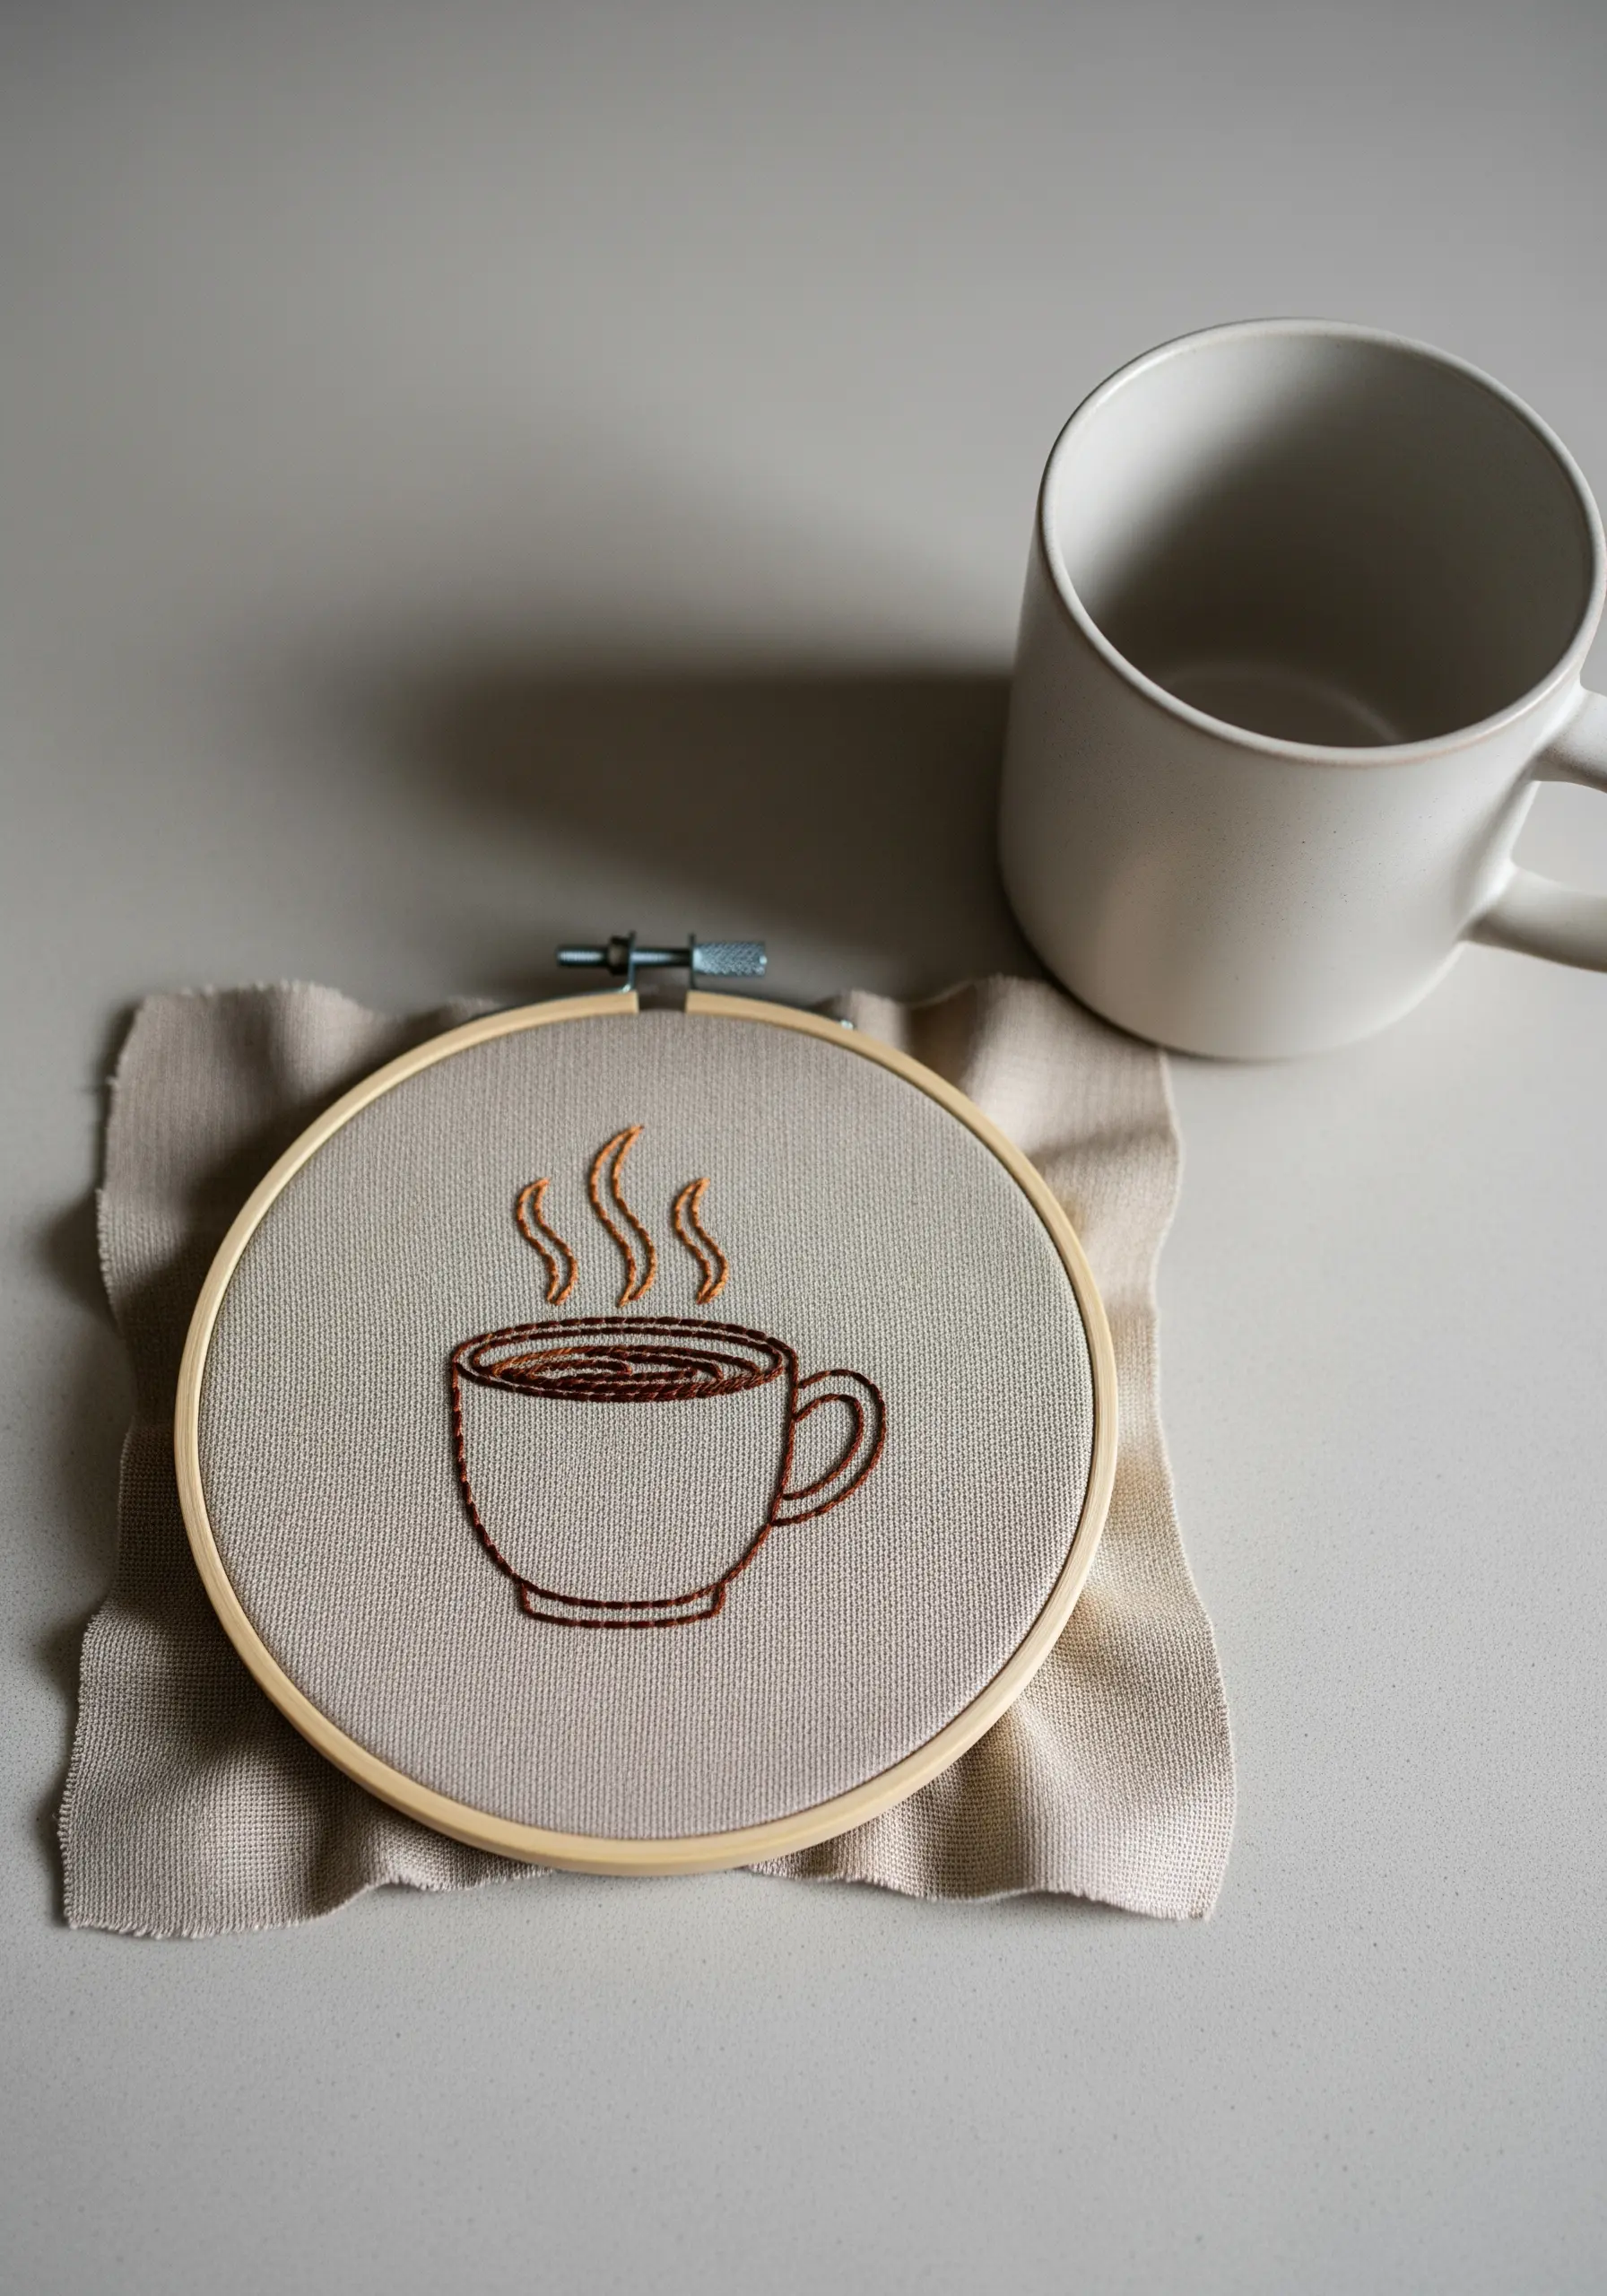
To make the coffee in this mug look hot and inviting, use two or three shades of brown thread together on your needle.
Stitch the outline and the steam with this blended thread to create a subtle, natural-looking color variation.
The slightly irregular color mix gives the piece a painterly quality and adds more visual warmth than a single, flat color could achieve.
This is a simple way to add depth and sophistication to your line work.
22. Weave Dimensional Woven Wheel Roses
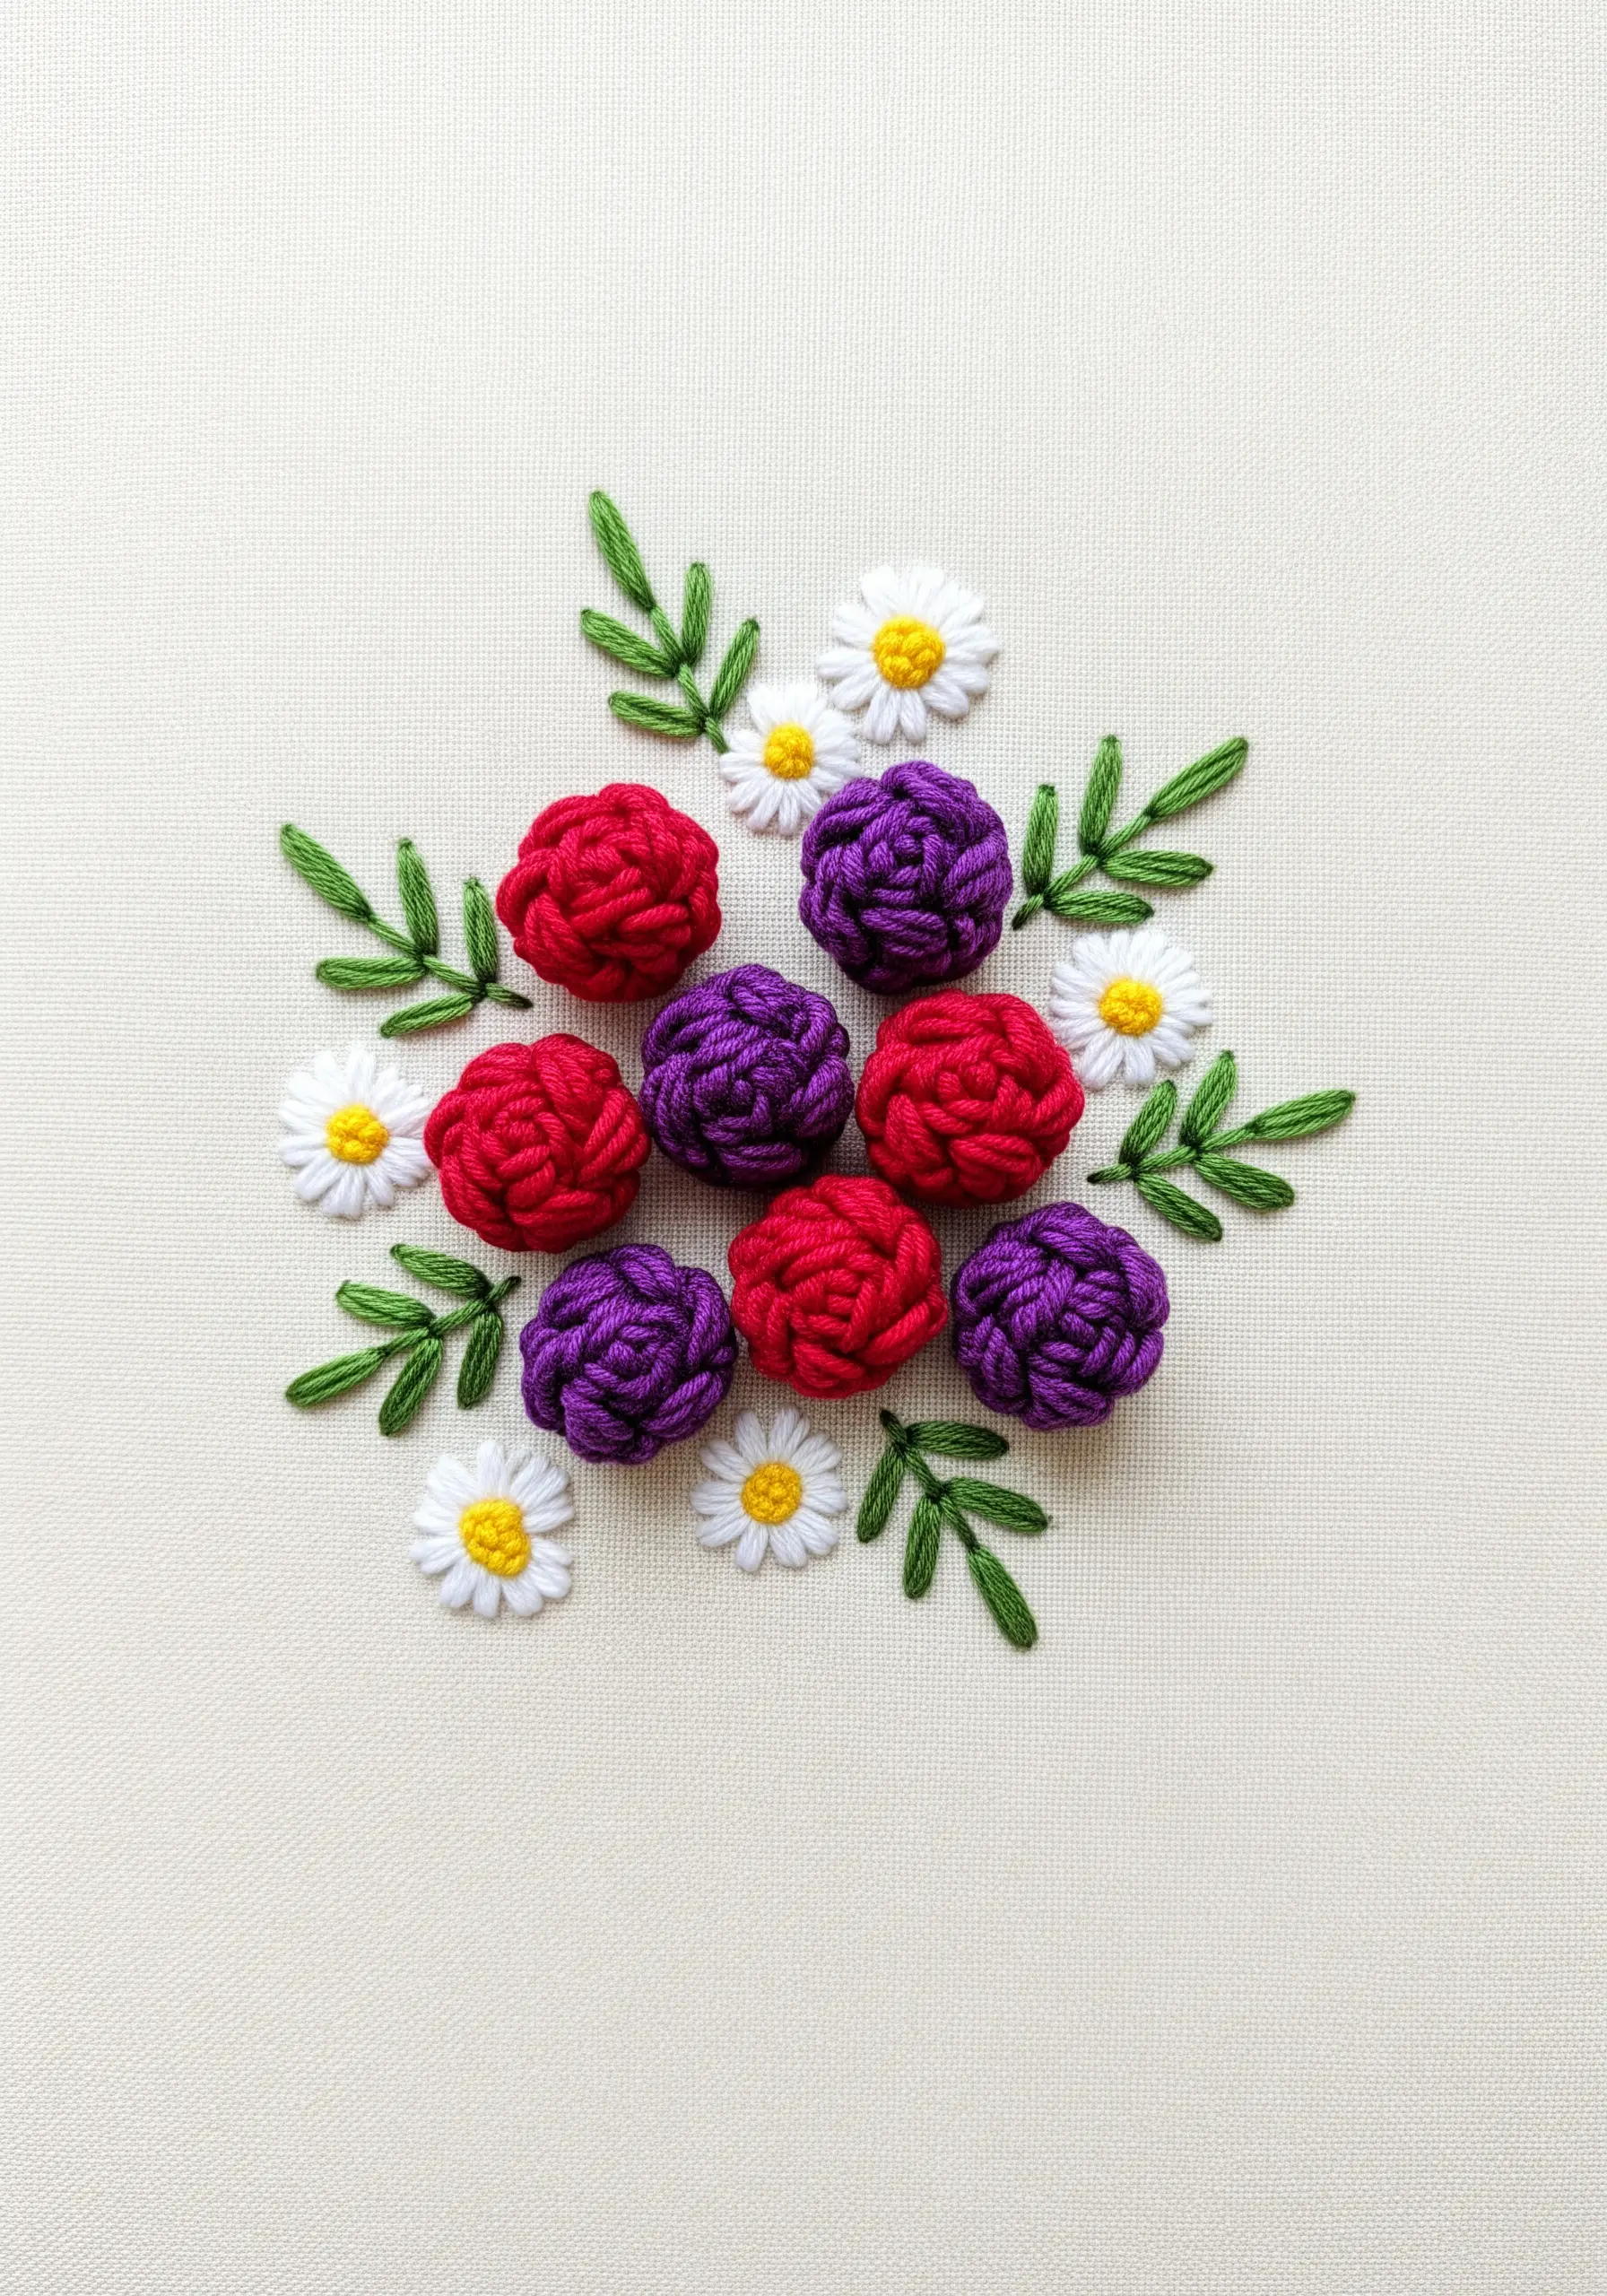
For stunningly textured, 3D florals, master the woven wheel stitch (also known as the spider web rose).
Start by creating a star-shaped foundation with an odd number of straight stitches (five or seven is ideal).
Then, bring your thread up near the center and weave it over and under the foundation spokes without piercing the fabric.
Continue weaving until the spokes are completely covered, forming a dense, beautiful rose that stands out from the surface.
23. Create a Feather with Angled Stitches
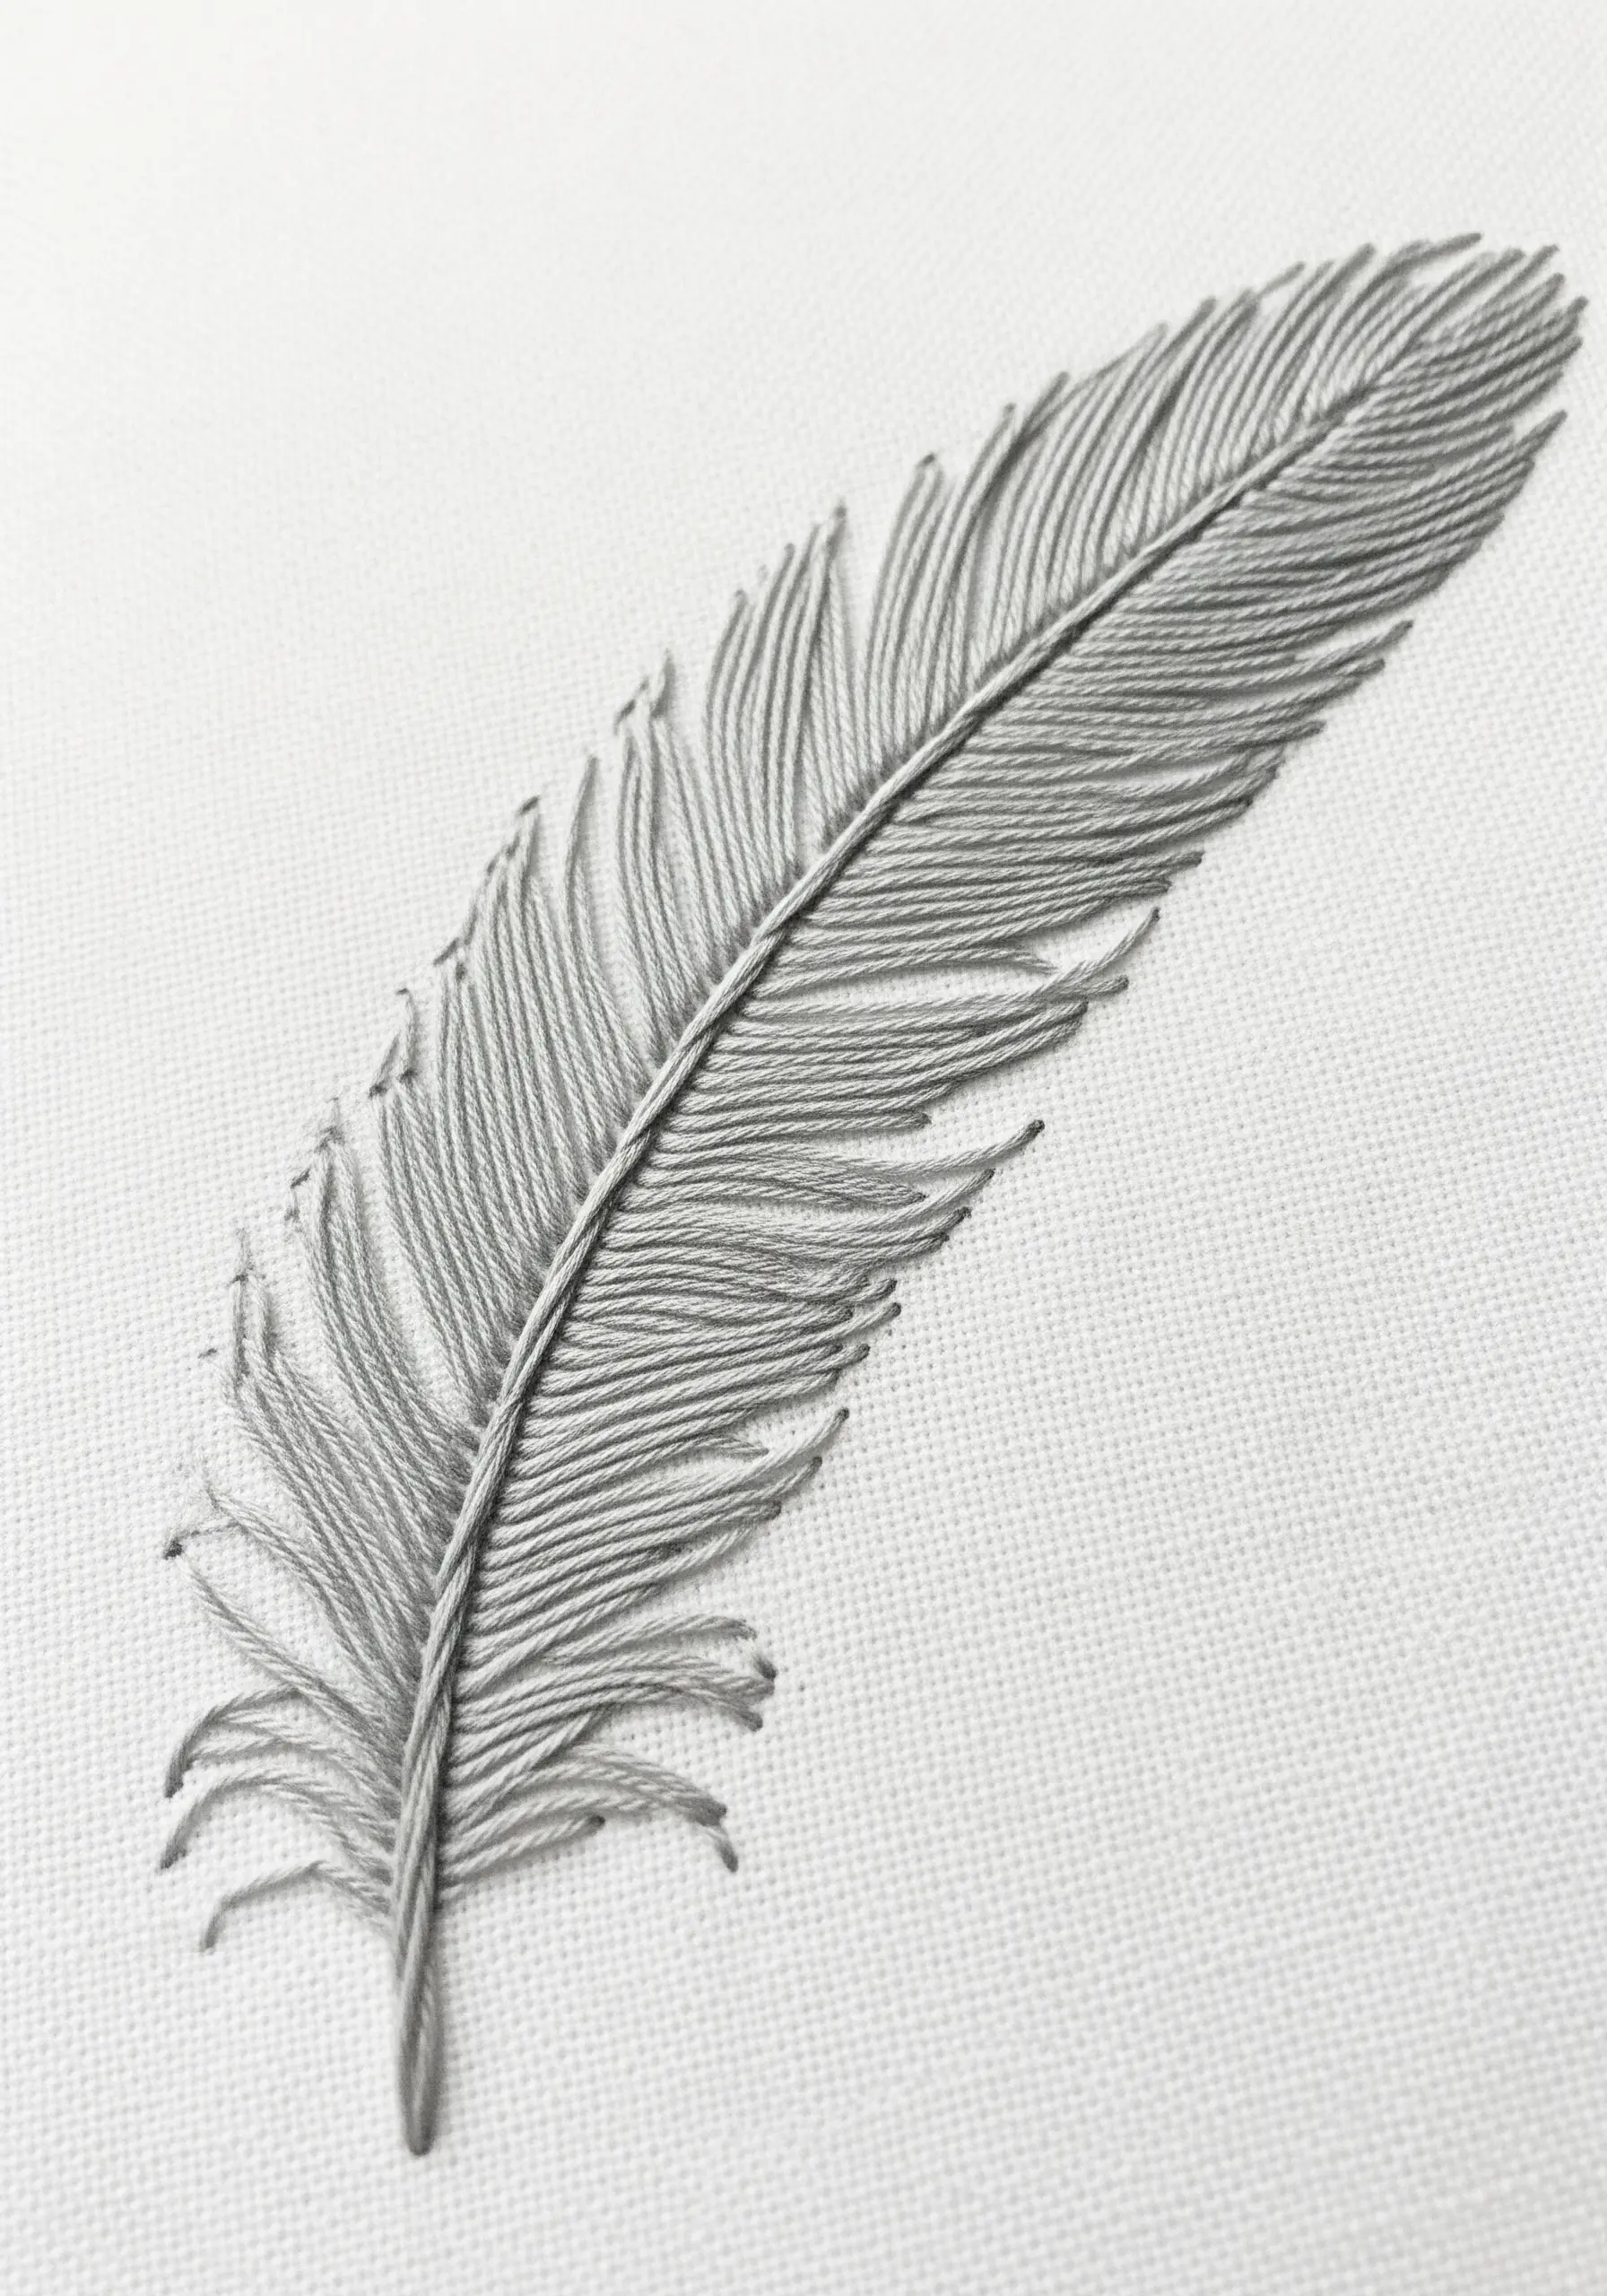
To achieve the delicate structure of a feather, begin with a single, straight line for the central shaft using a stem stitch.
Next, add the barbs by stitching long, angled straight stitches from the shaft out to the feather’s edge.
Allow some stitches to be slightly irregular in length and spacing, and leave small gaps to mimic the natural look of a real feather.
This technique beautifully balances structure and delicacy, making it a meditative project in line work.
24. Maintain Precision on Geometric Shapes

When stitching a design with precise geometric components like a bicycle, consistency is key.
Use a backstitch for the entire outline to ensure clean lines and sharp angles.
For the wheels, draw a perfect circle guideline and take small, even stitches to maintain a smooth curve.
Using three strands of floss gives the outline enough weight to feel substantial and graphic without becoming bulky.
25. Stitch a Classic Daisy with Two Simple Stitches
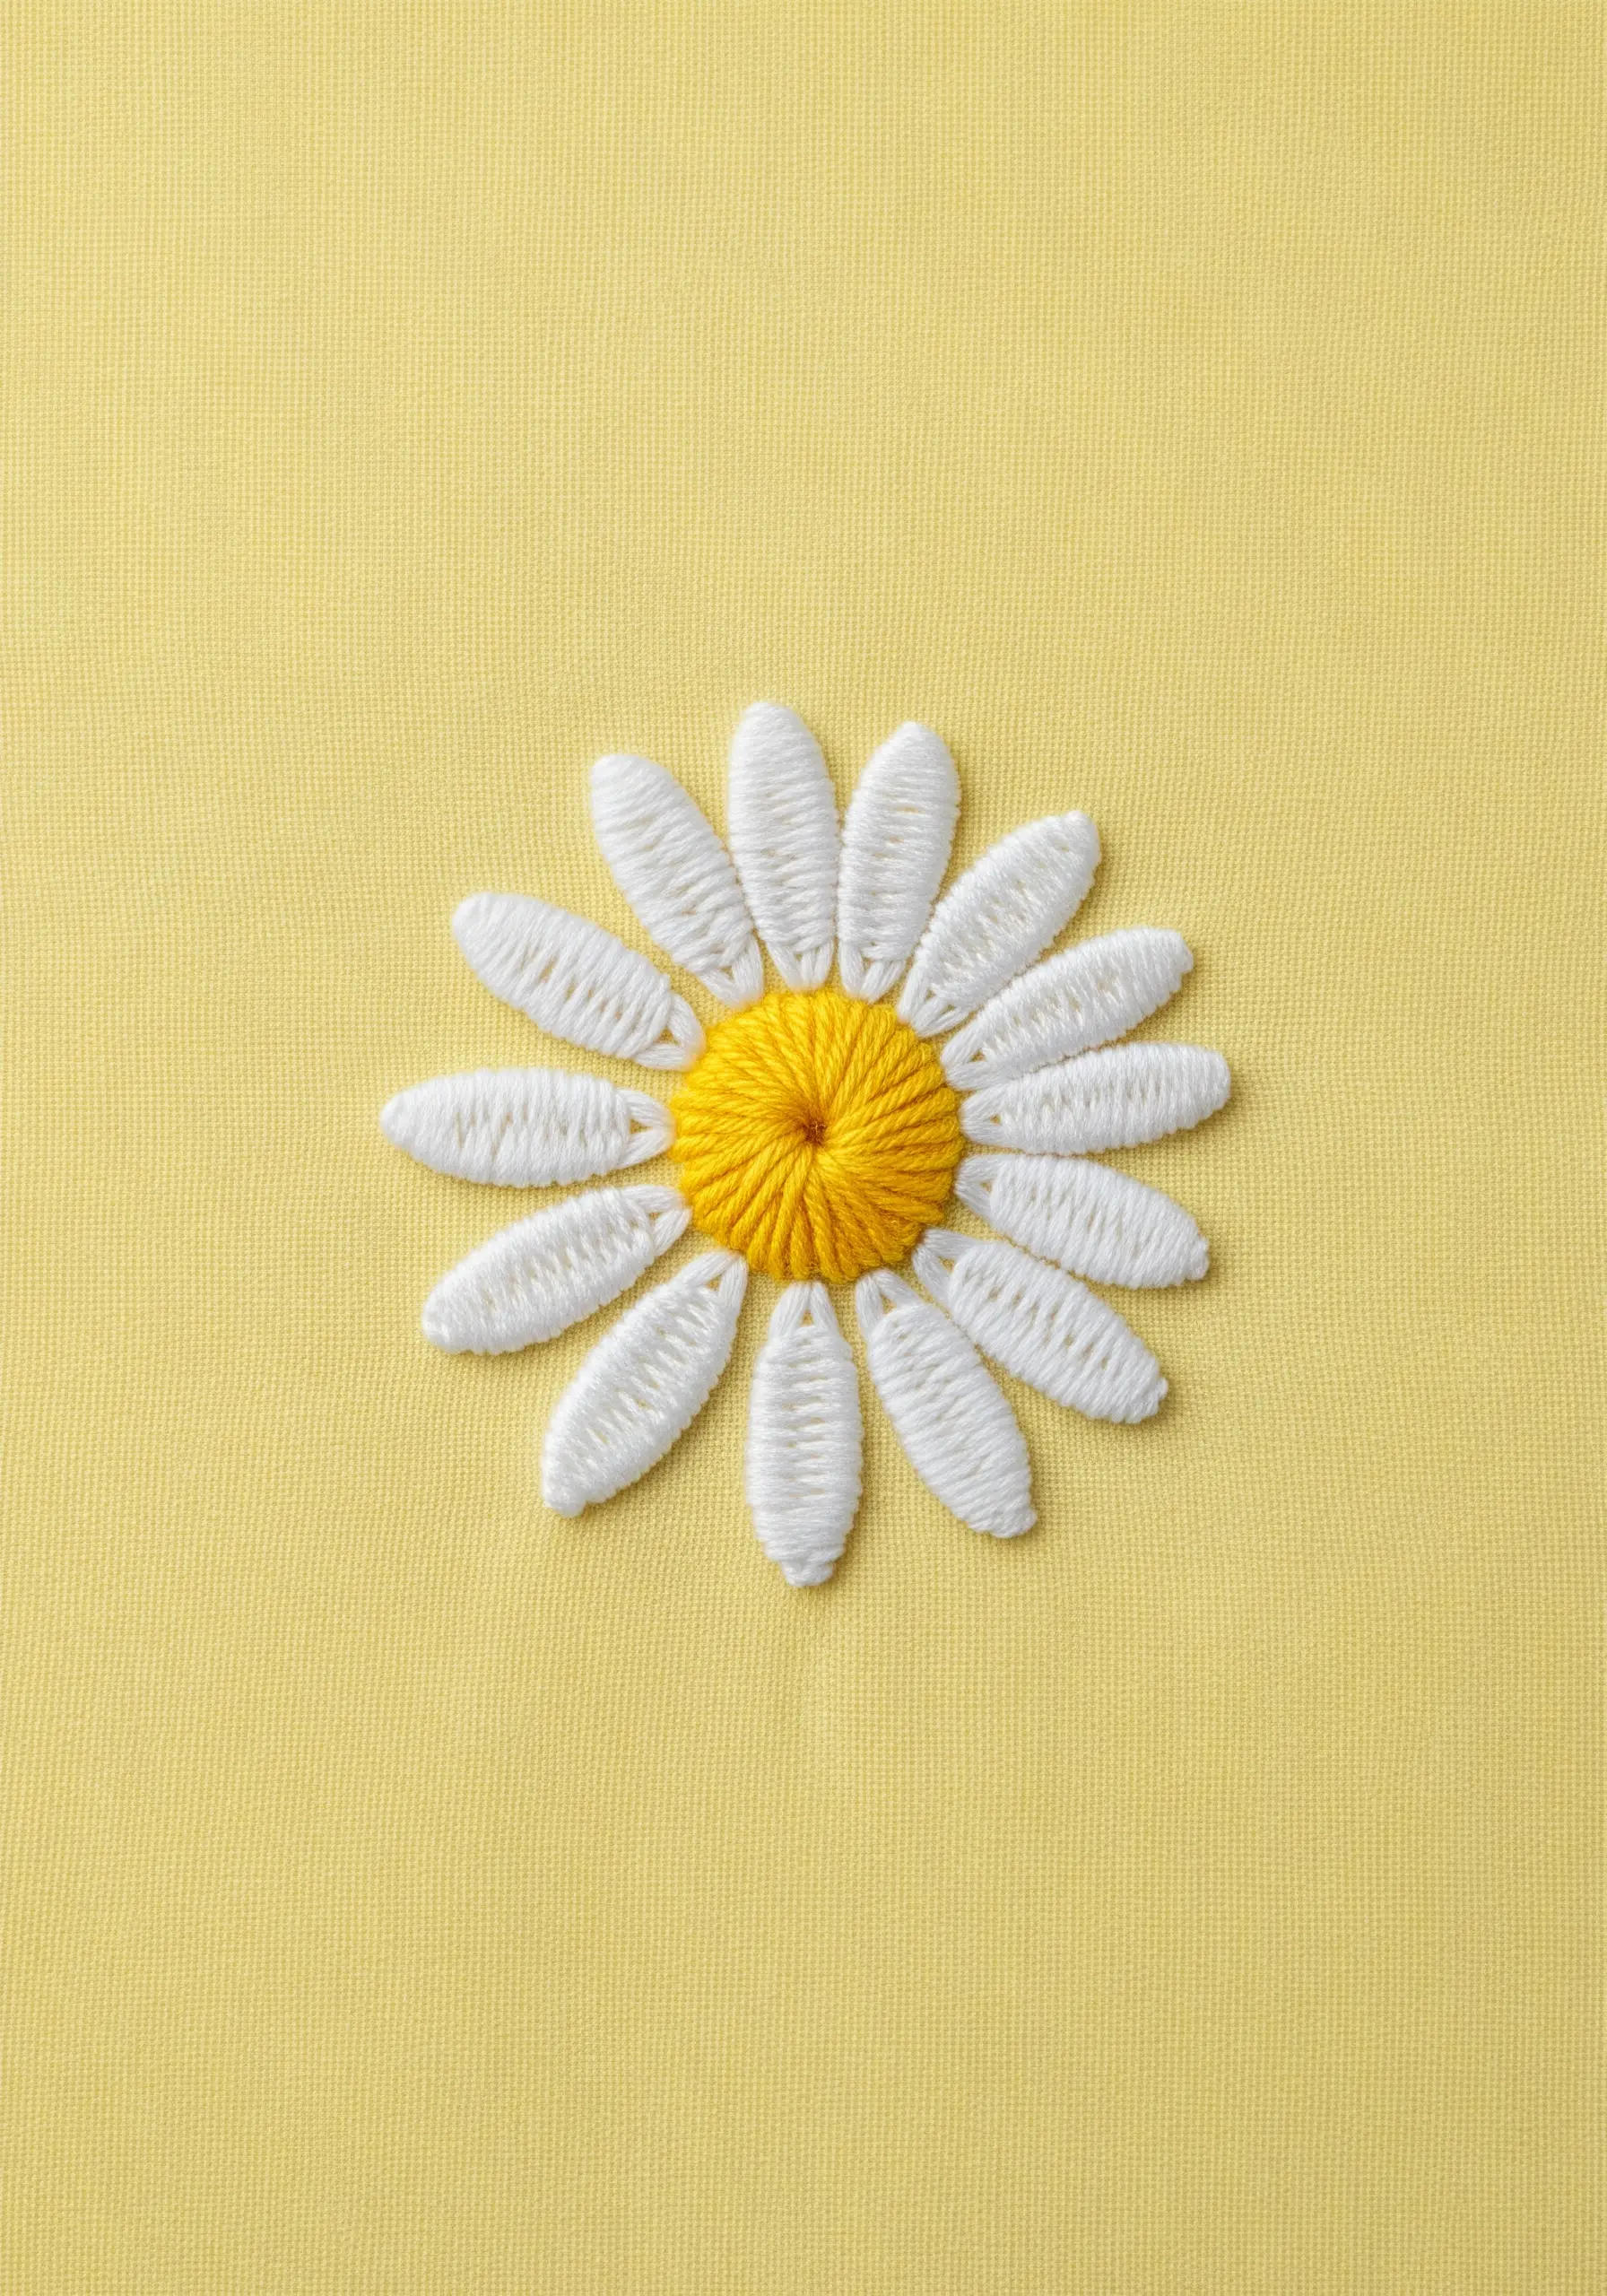
The classic daisy is the perfect motif for practicing two fundamental stitches: the detached chain stitch and French knots.
Use the detached chain stitch (lazy daisy) to create the oval-shaped petals, arranging them in a circle.
Fill the center with a cluster of tightly packed French knots in a contrasting color, which adds a wonderful, bumpy texture.
This timeless combination is versatile enough for hoop art, apparel, and home decor.
26. Create a Pattern with a Single Stitch
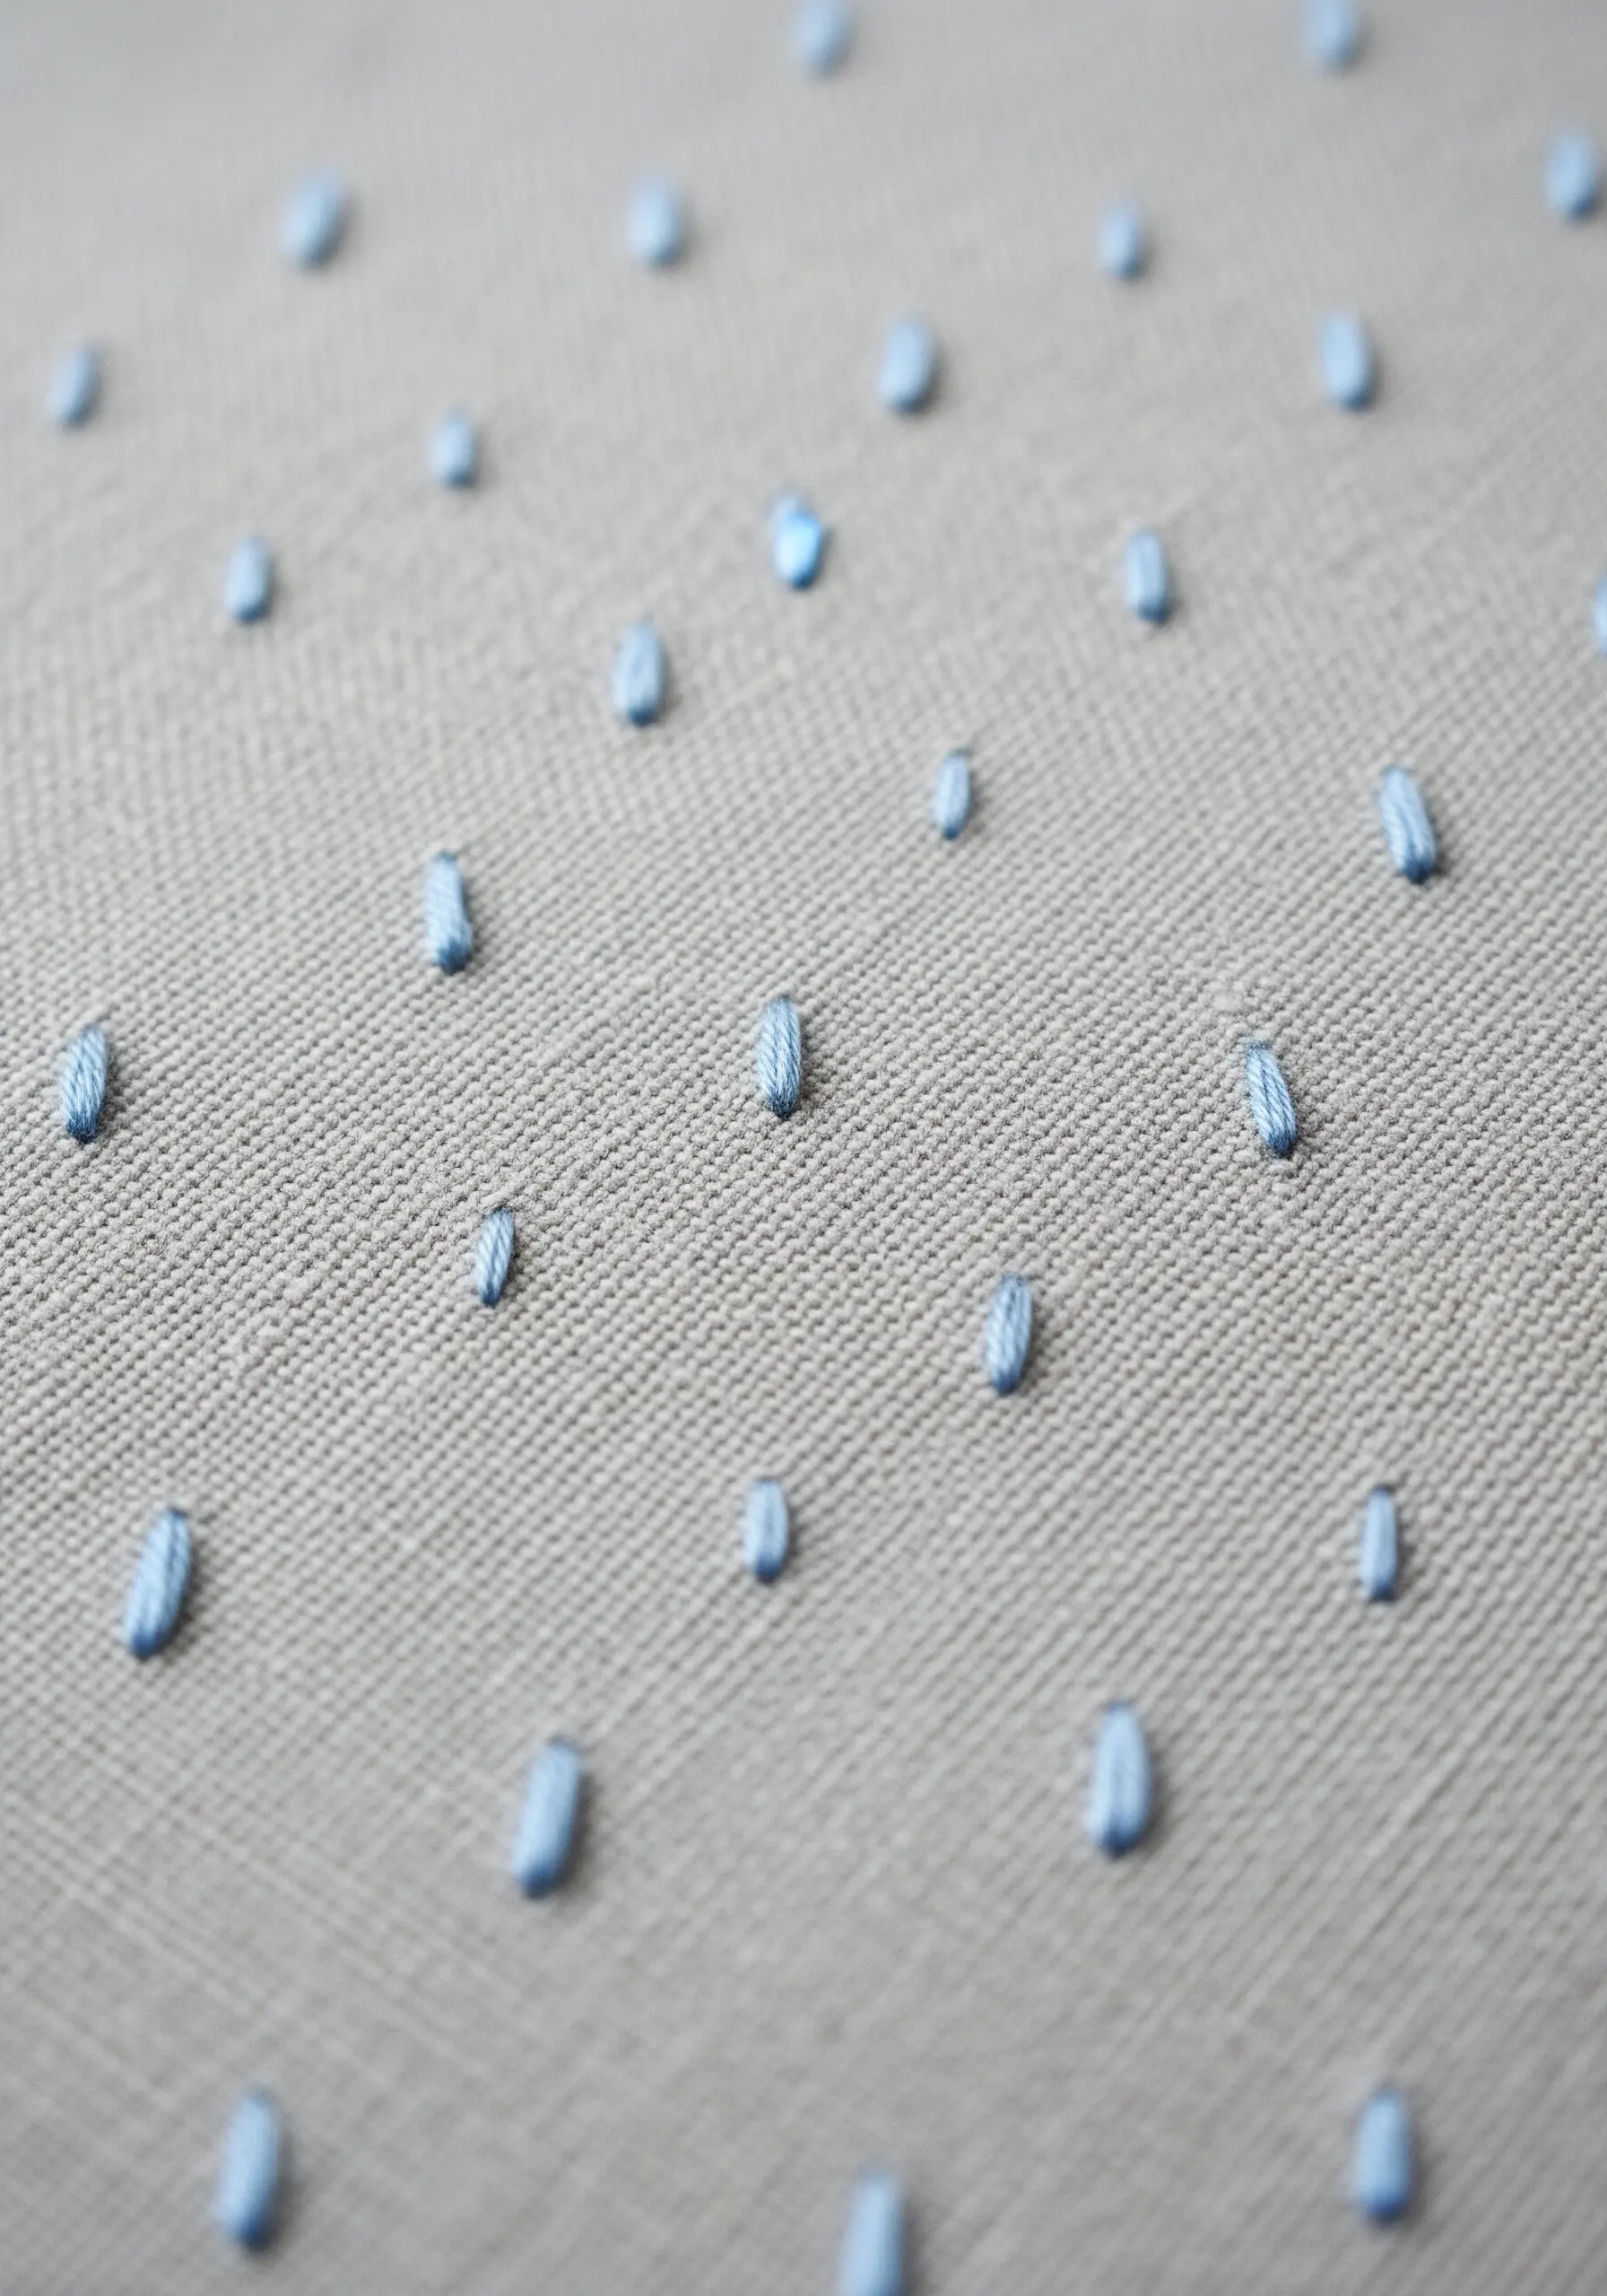
Turn a single, simple stitch into an elegant all-over pattern.
These small dashes are created with a single straight stitch, sometimes called a seed stitch when scattered randomly.
You can arrange them in a grid for a more formal look or scatter them for an organic feel.
This is a wonderfully simple way to add texture and a subtle pop of color to a fabric surface, perfect for pillowcases or napkins.
27. Outline with Chain Stitch for a Vintage Look
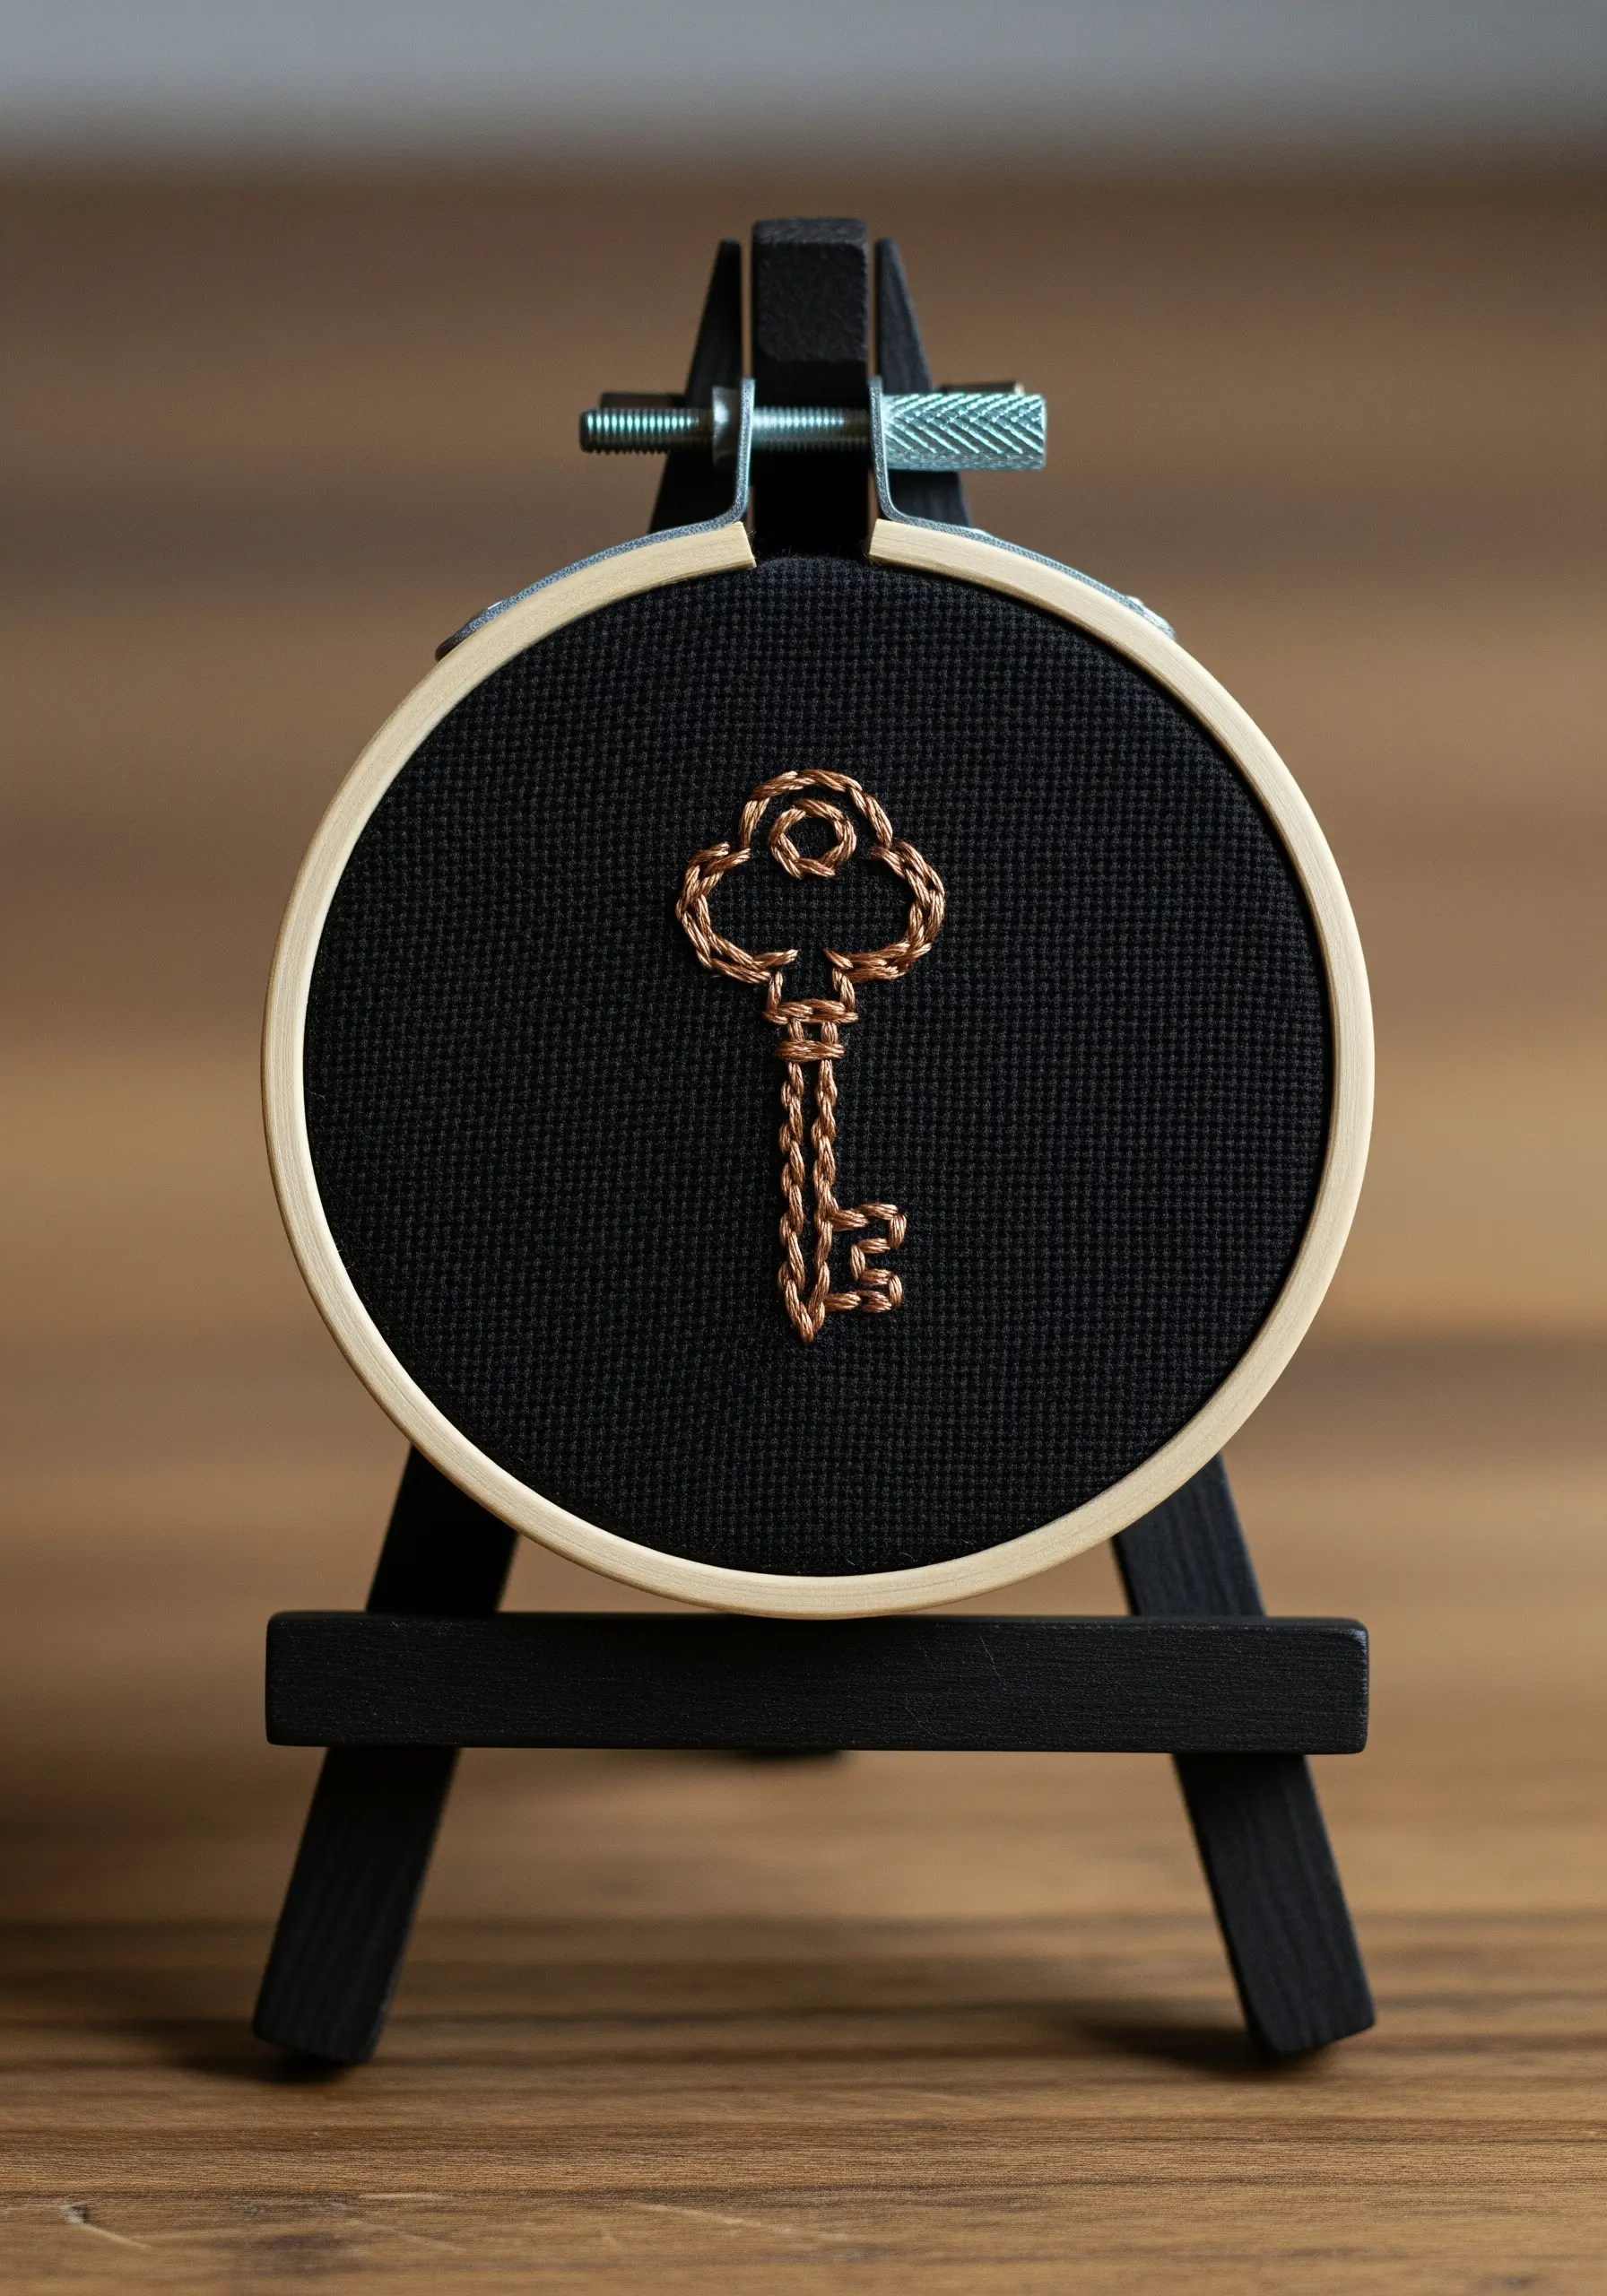
Instead of a simple backstitch, use a chain stitch to outline this vintage key.
The connected loops of the chain stitch create a texture that resembles an old, ornate metal casting, adding character and a sense of history.
Using a metallic or copper-colored thread enhances this effect, giving the key a warm, antique glow against the dark fabric.
This is a great example of how your choice of stitch can completely define the mood of a piece.
28. Define Shapes with Negative Space
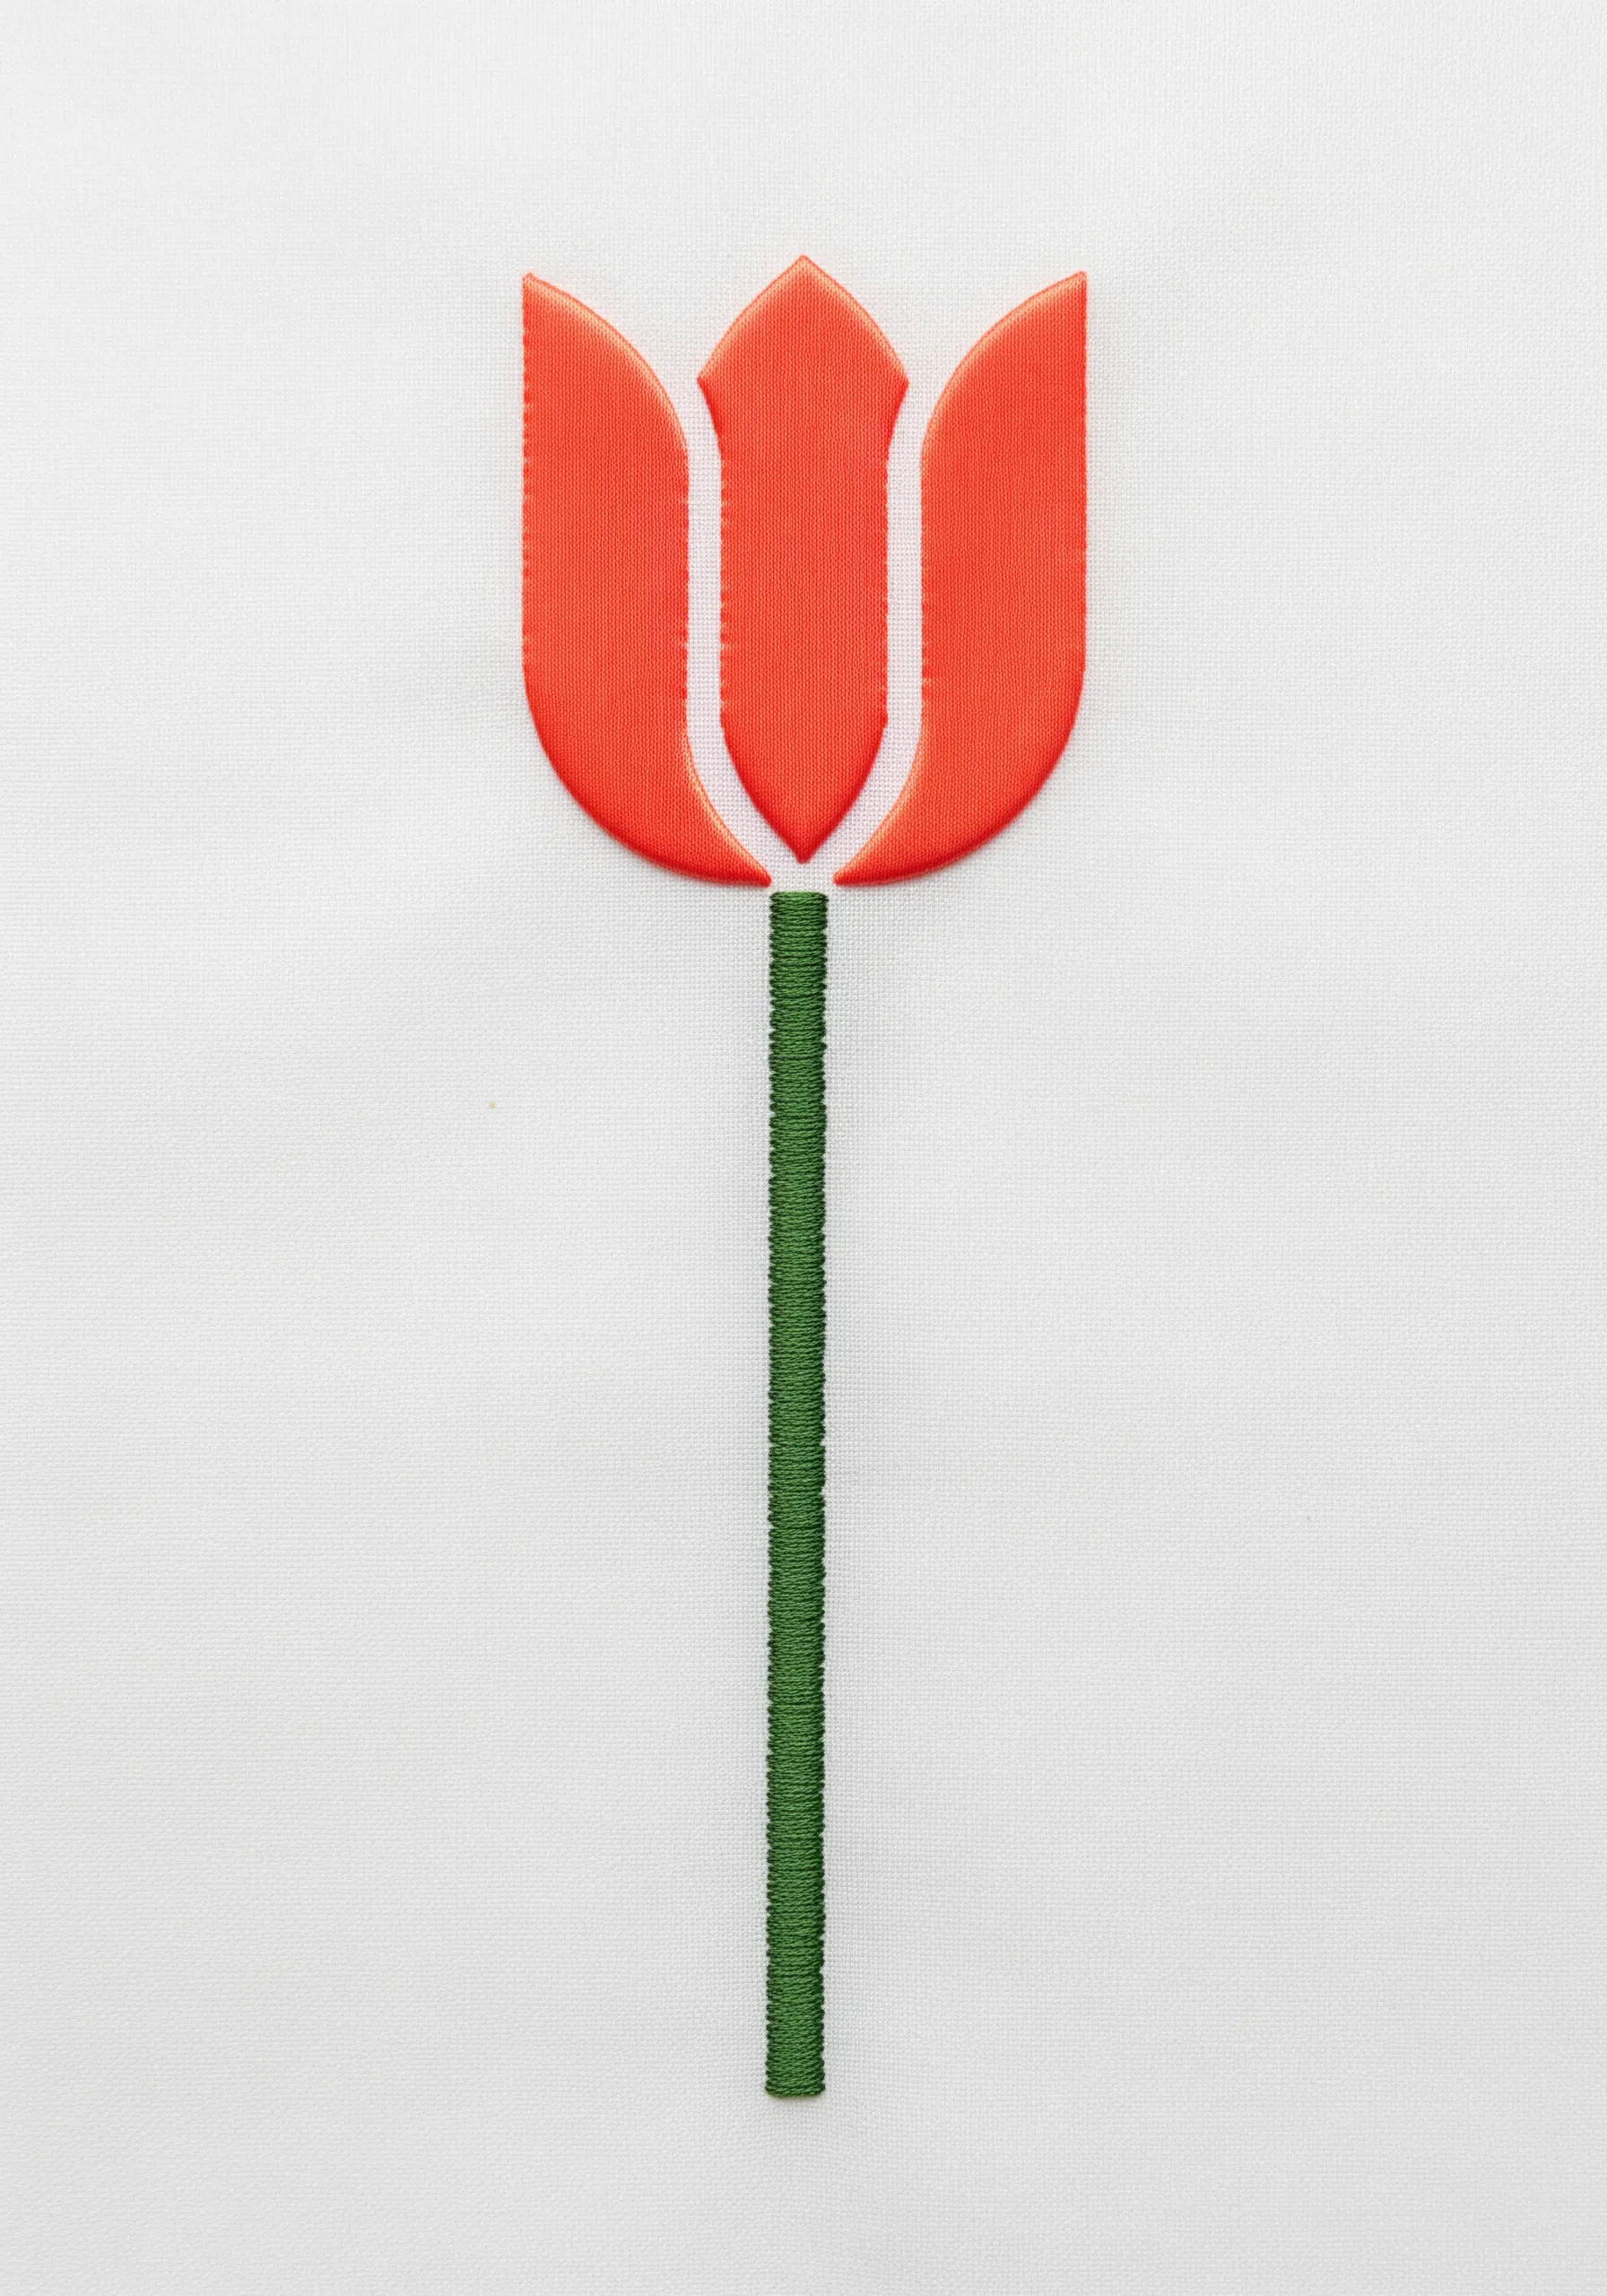
This modern tulip is defined not just by the stitches, but by the slivers of unstitched fabric between the petals.
Fill each petal with clean, vertical satin stitches, but leave a tiny, deliberate gap between each section.
This negative space acts as an outline, creating crisp definition and a sophisticated, graphic look.
It’s a powerful design technique that relies on precision and restraint for a striking result.
29. Combine Stitches for Whimsical Designs
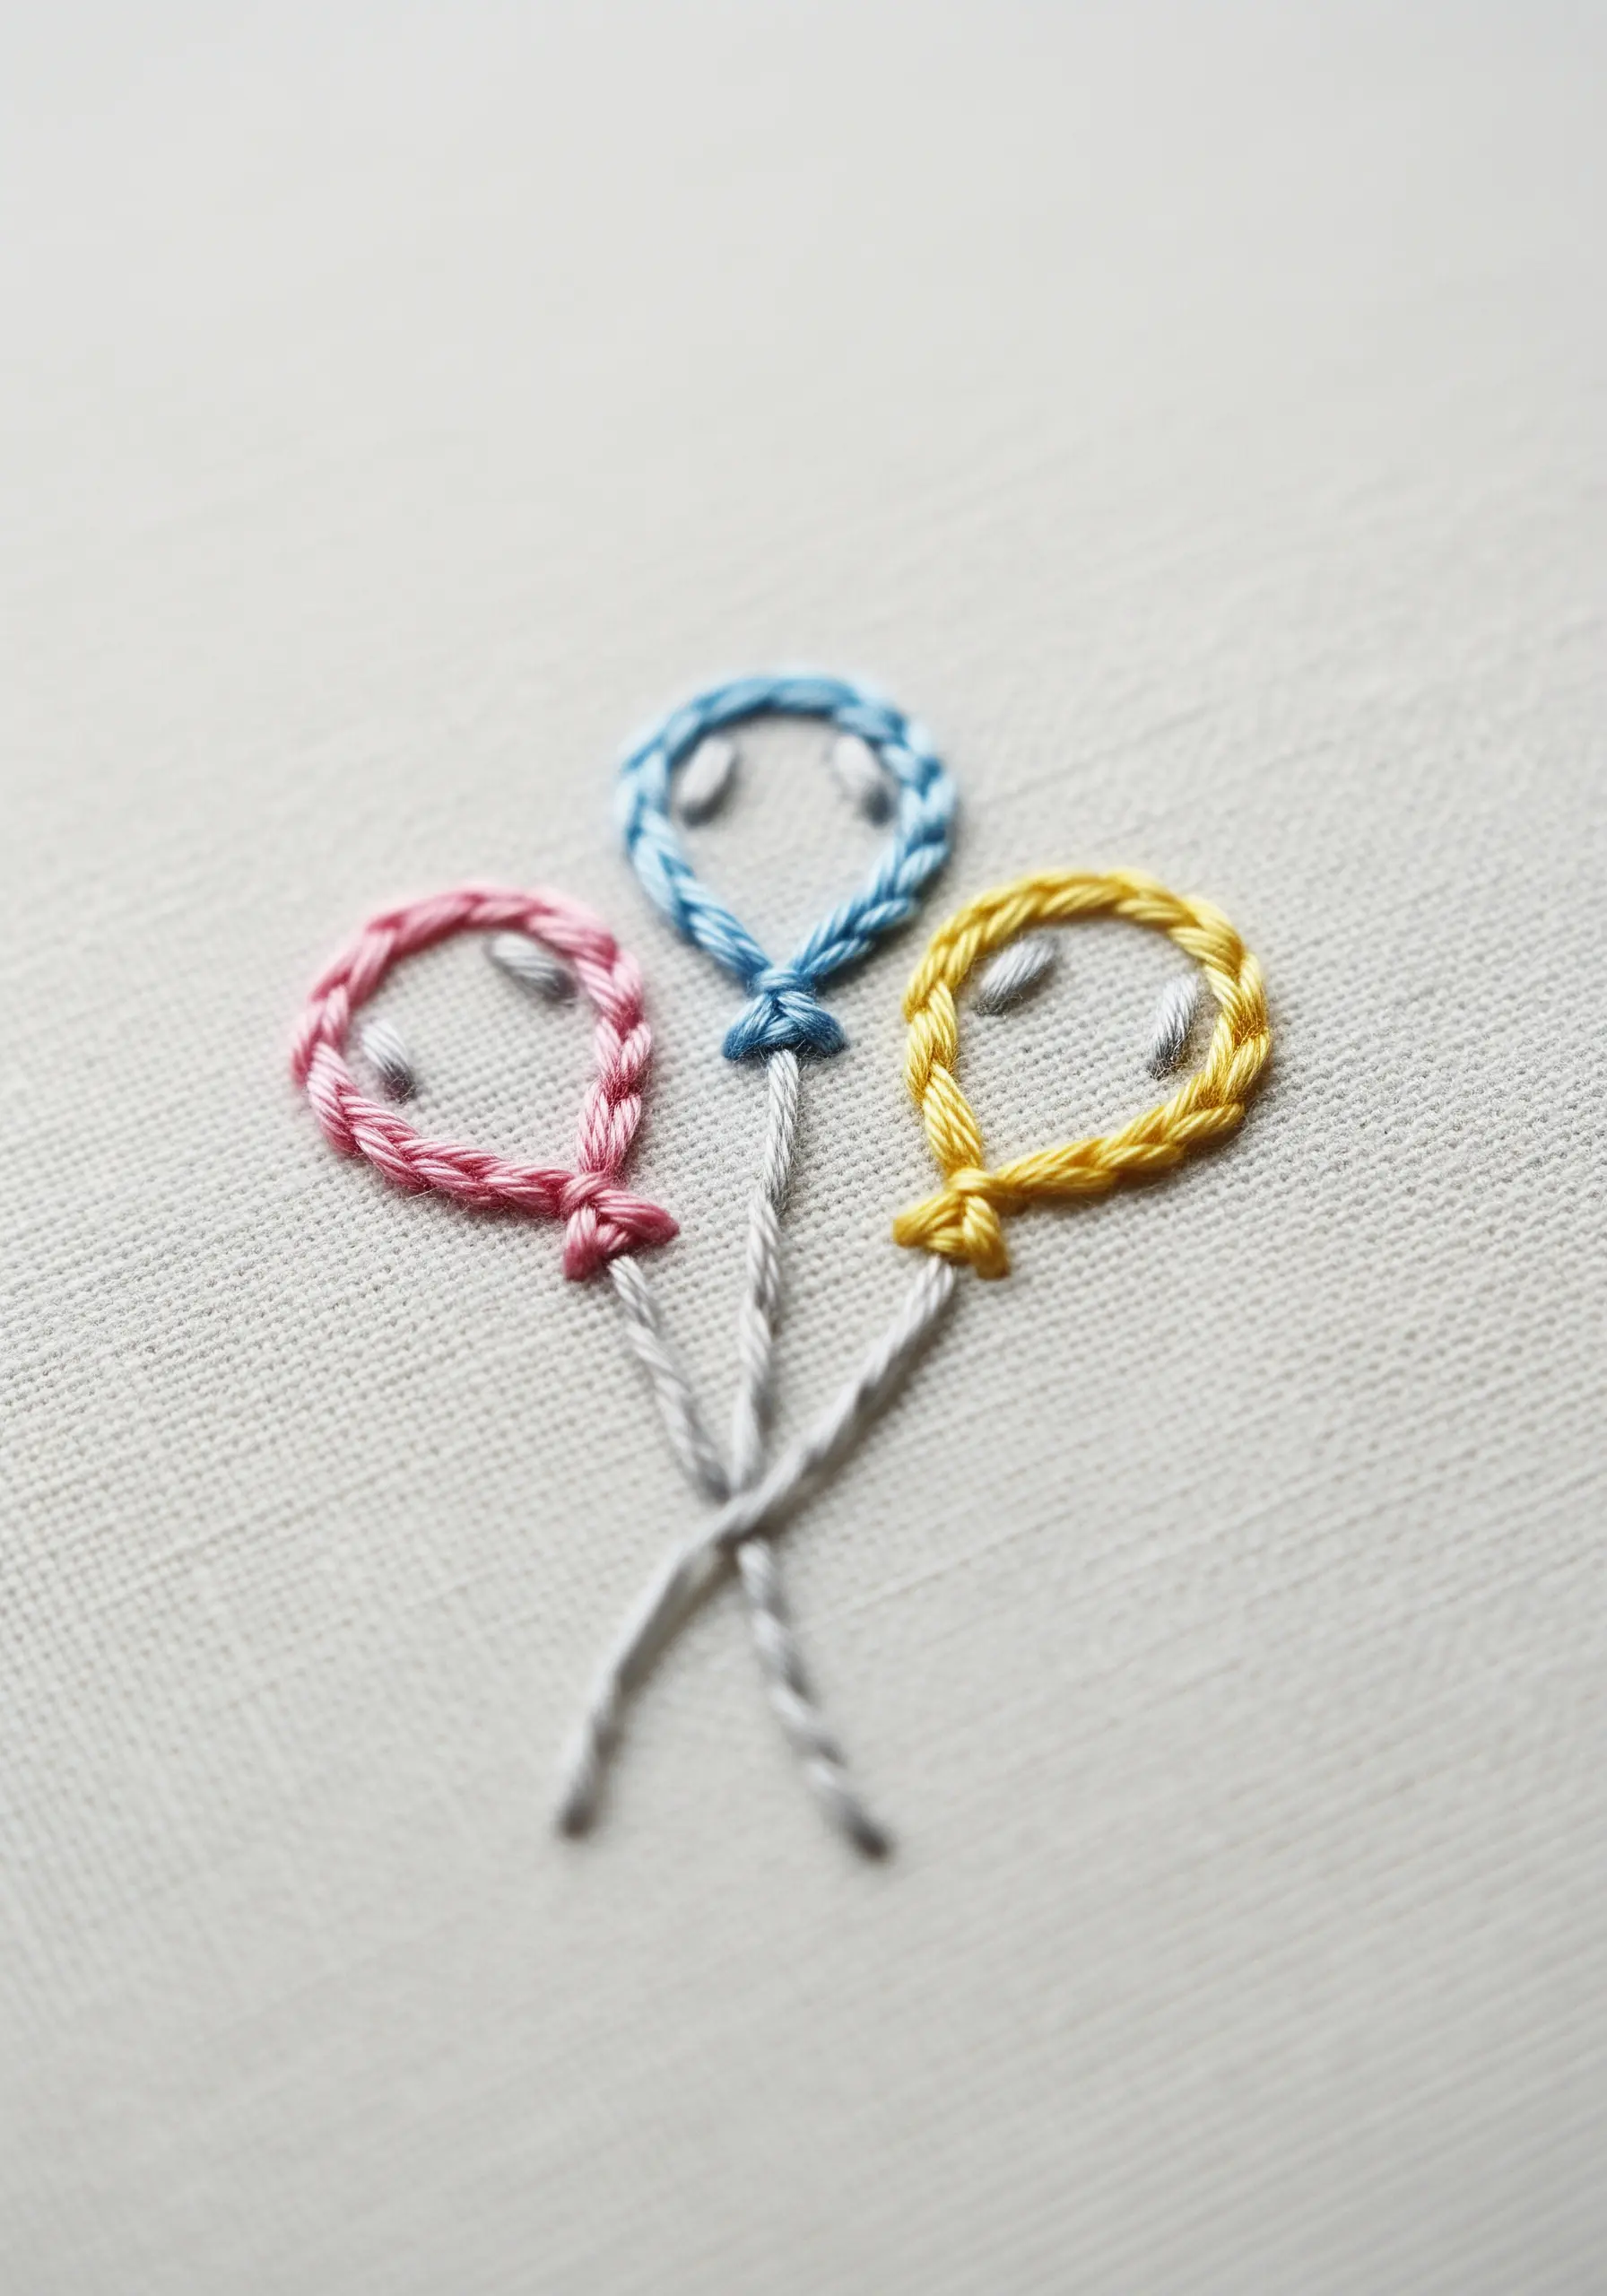
Create these charming balloons by combining two simple, textured stitches.
Use a chain stitch for the colorful balloon outline, which gives it a lovely braided or twisted appearance.
For the strings, use a whipped backstitch to create a smooth, cord-like line that flows down from the knot.
This playful mix of textures adds a delightful handcrafted feel to the design.
30. Build Abstract Art with Textured Fills
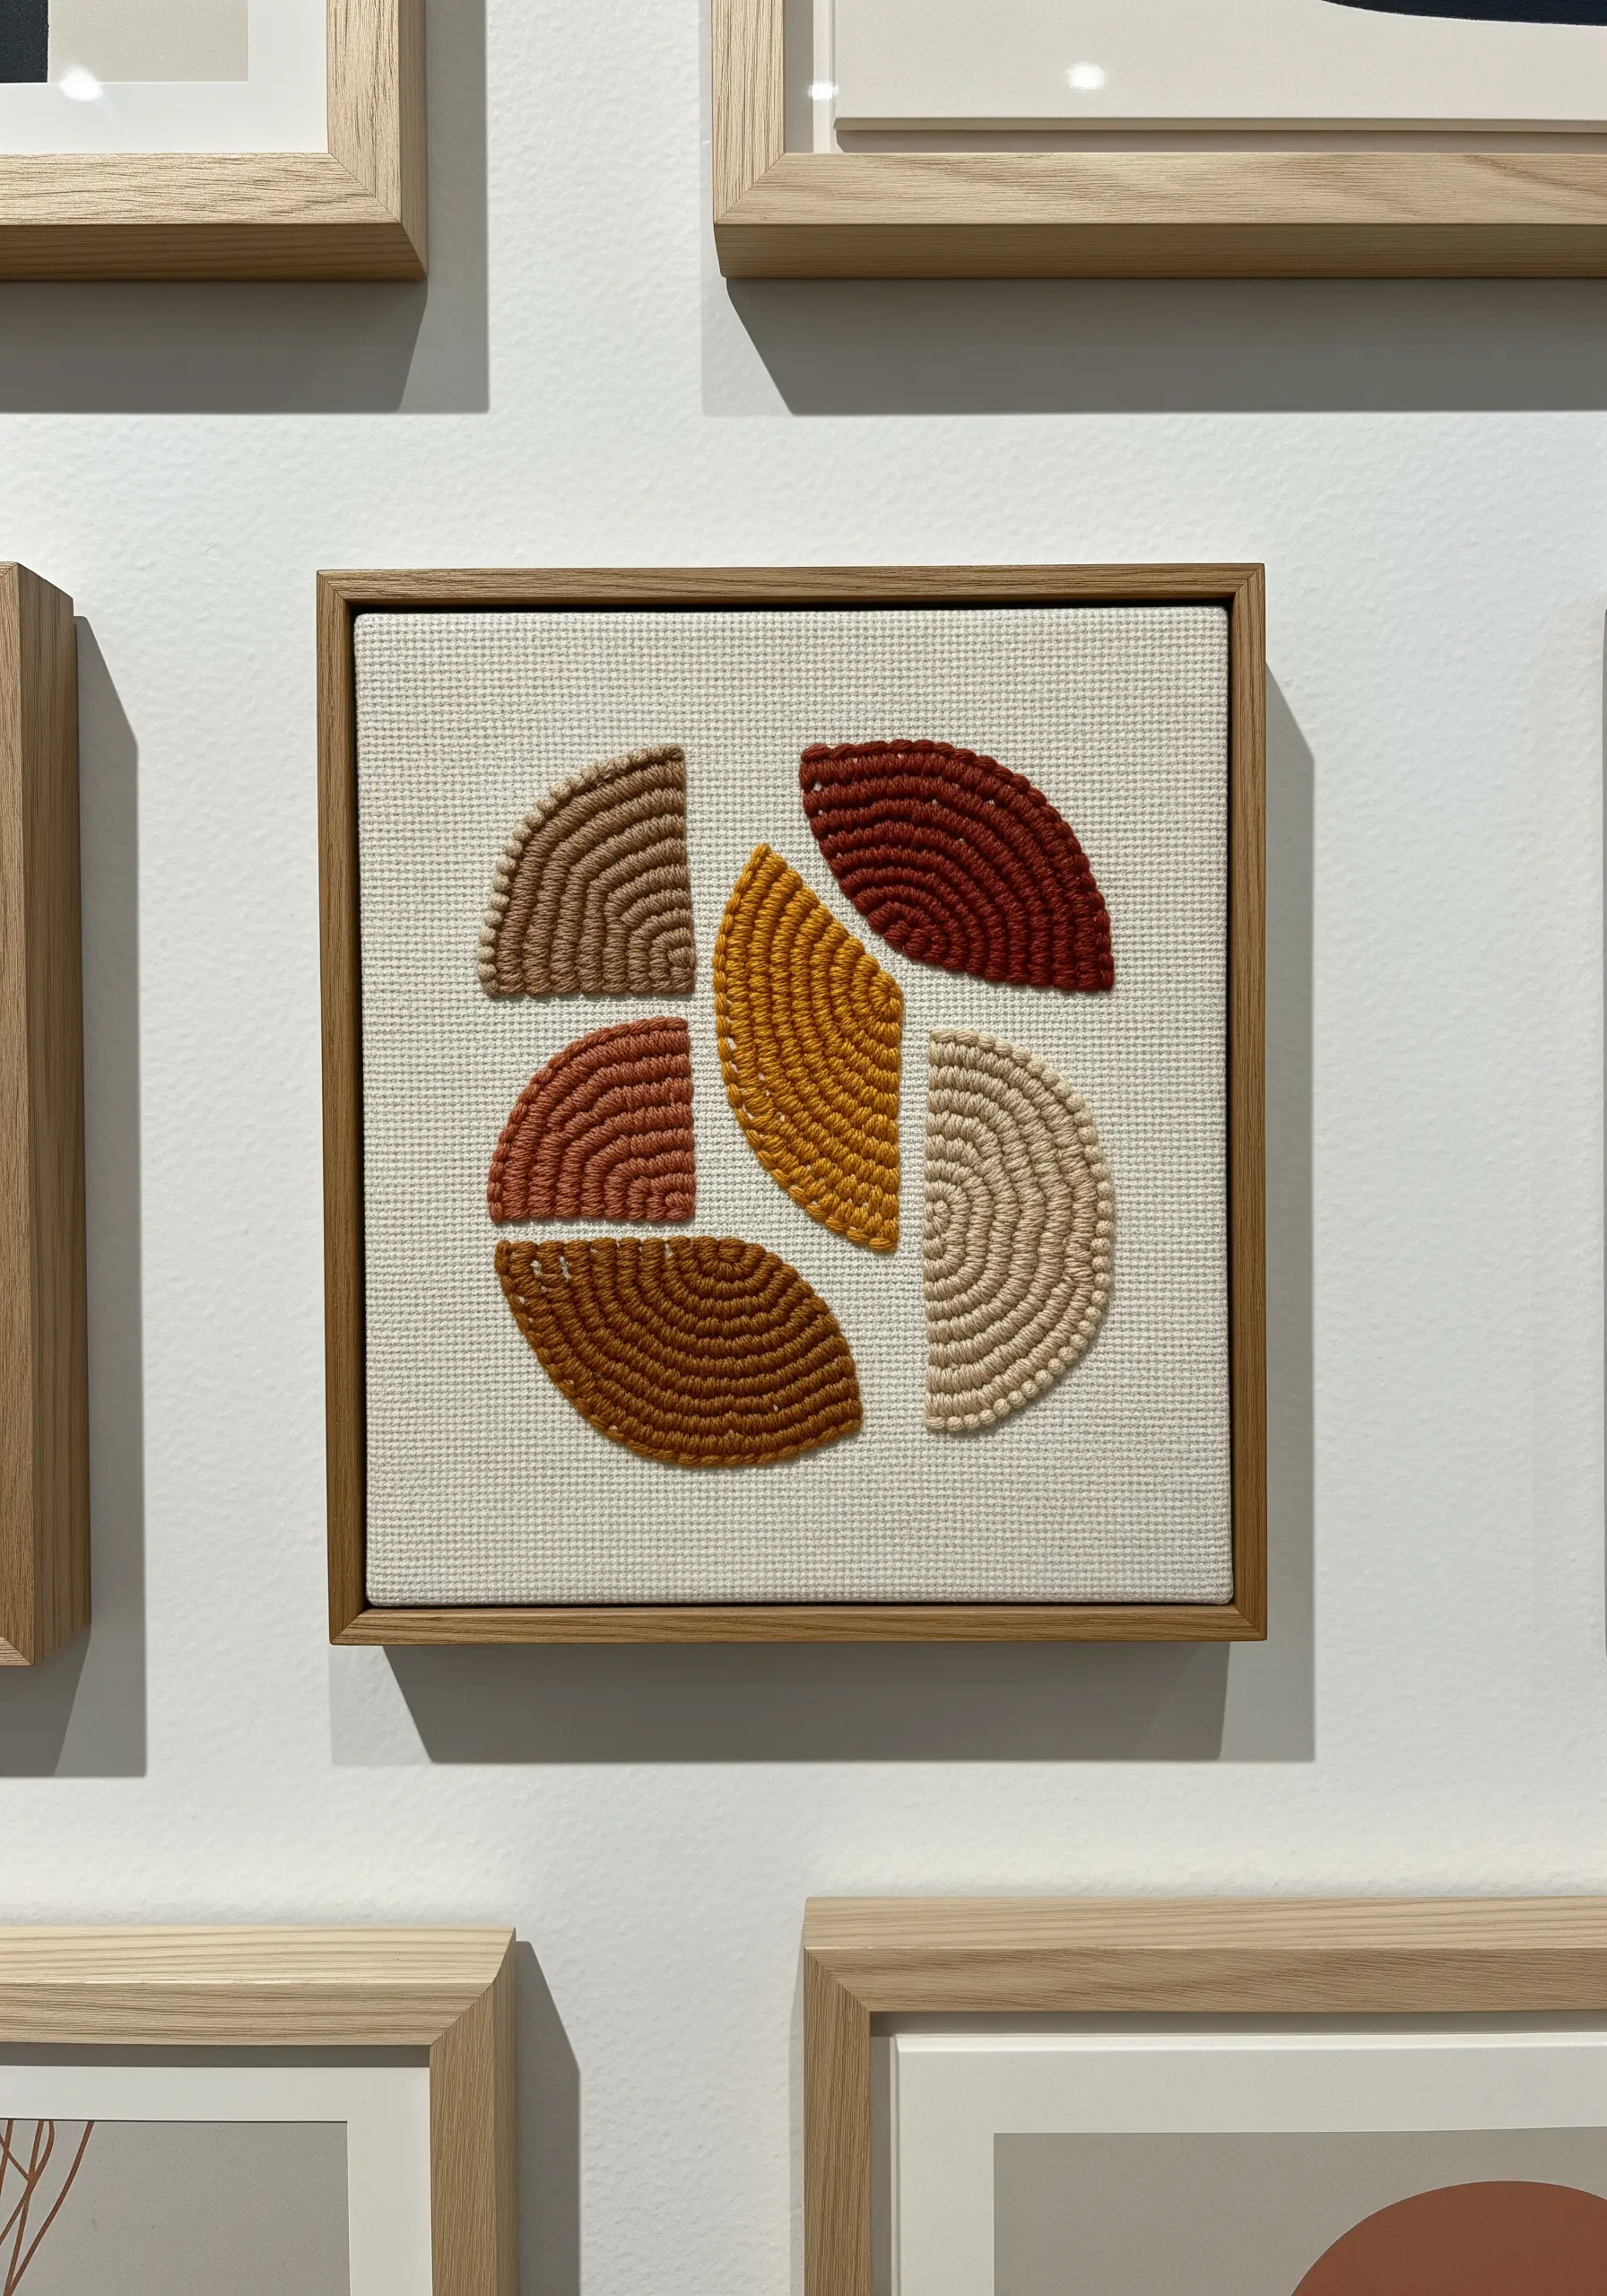
Explore abstract composition by filling simple shapes with dense, satisfying texture.
These semi-circles are filled with concentric rows of chain stitch, creating a pattern that mimics the lines of a fingerprint or wood grain.
Arranging these textured blocks in a balanced composition turns a stitch sampler into a piece of modern art.
This is an excellent way to play with color theory and abstract thread texture without the pressure of a realistic design.


