

Embroidering a leaf can be simple, but capturing its soul—the way it catches the light, the subtle shift in color, the delicate network of its veins—is an art form. It’s here, in these quiet details, that your work transforms from a craft into a delicate, living portrait.
Forget flat, one-dimensional fills. We’re going to explore how stitch direction, color blending, and texture can breathe life into your botanicals. You don’t need dozens of complex stitches; you need to understand how to use a few simple ones with intention.
Think of your needle as a paintbrush and your thread as the pigment. Each of these techniques is a different brushstroke, ready to help you create foliage that feels not just realistic, but alive. Let’s begin.
1. Master the Autumnal Gradient with Thread Painting
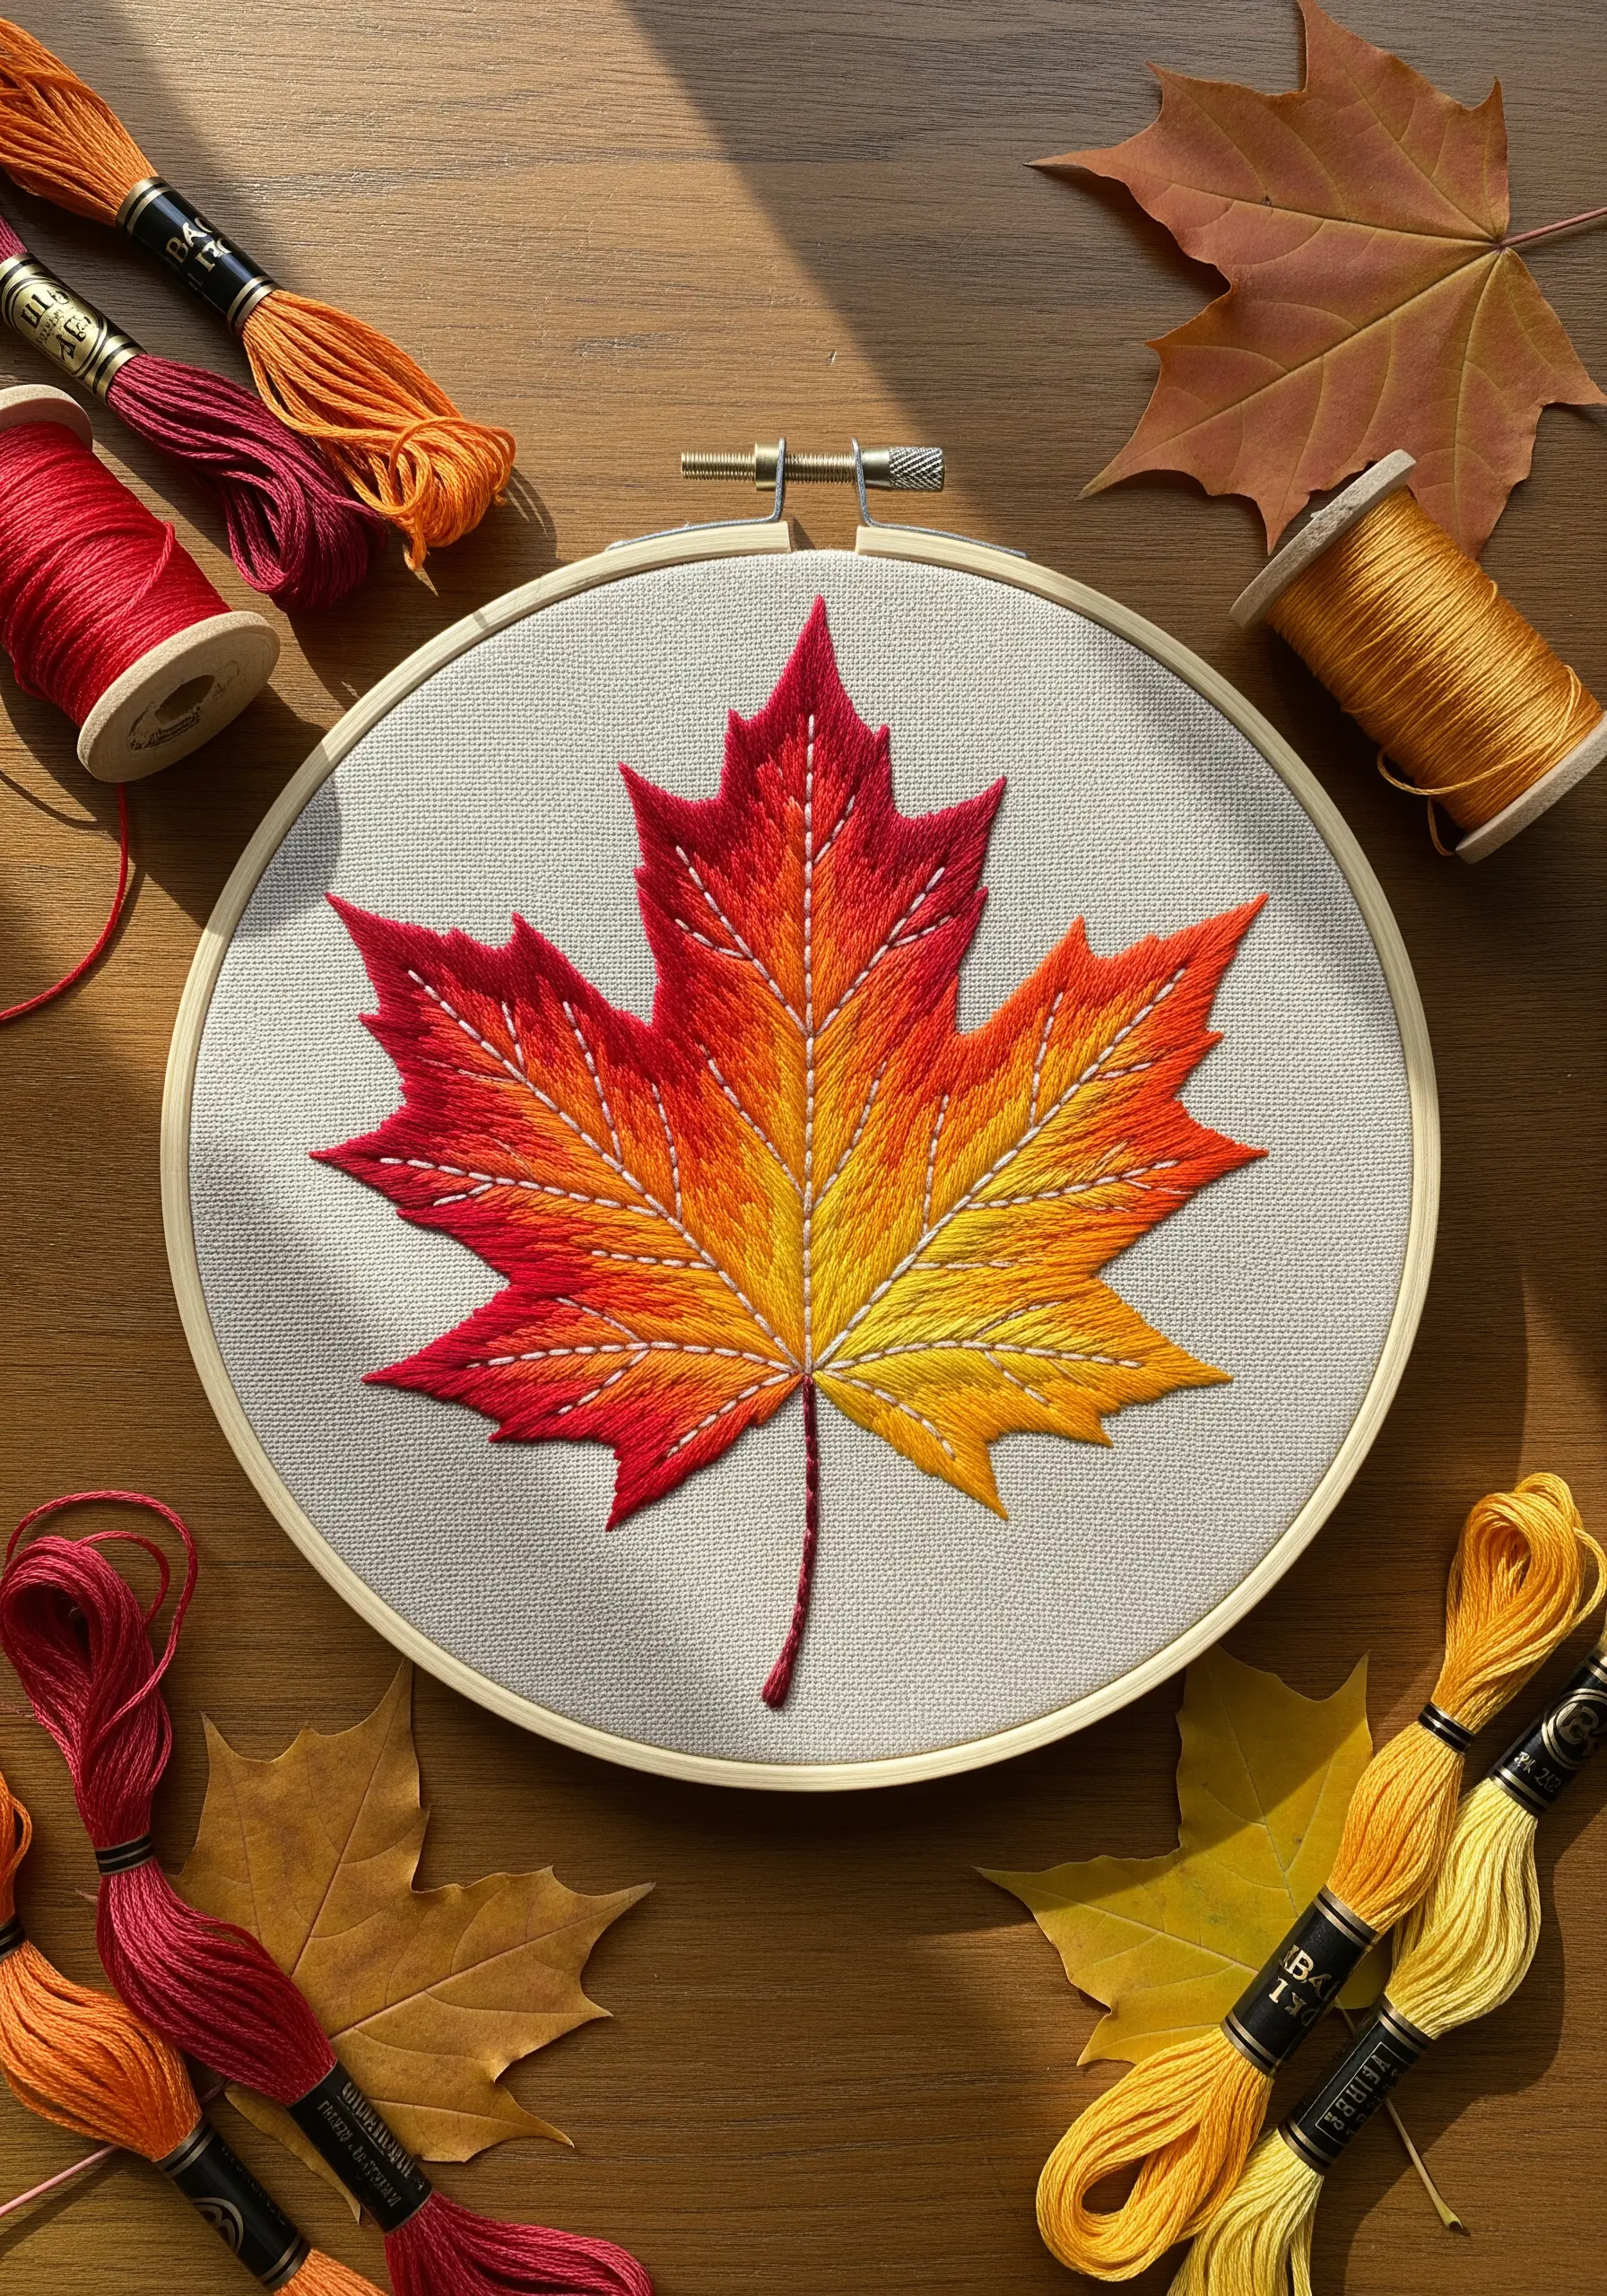
Create a vibrant maple leaf by dividing the shape into color zones—deep red at the tips, fiery orange in the middle, and golden yellow at the base.
Use long-and-short stitch, allowing your stitches to overlap and interlock where the colors meet to create a seamless, painted effect.
Vary the length and angle of your stitches slightly to mimic the natural flow of the leaf’s structure.
For the final touch, add veins with a contrasting white running stitch; this detail not only adds definition but also suggests light reflecting off the surface.
2. Build Depth with Directional Satin Stitch on Ferns
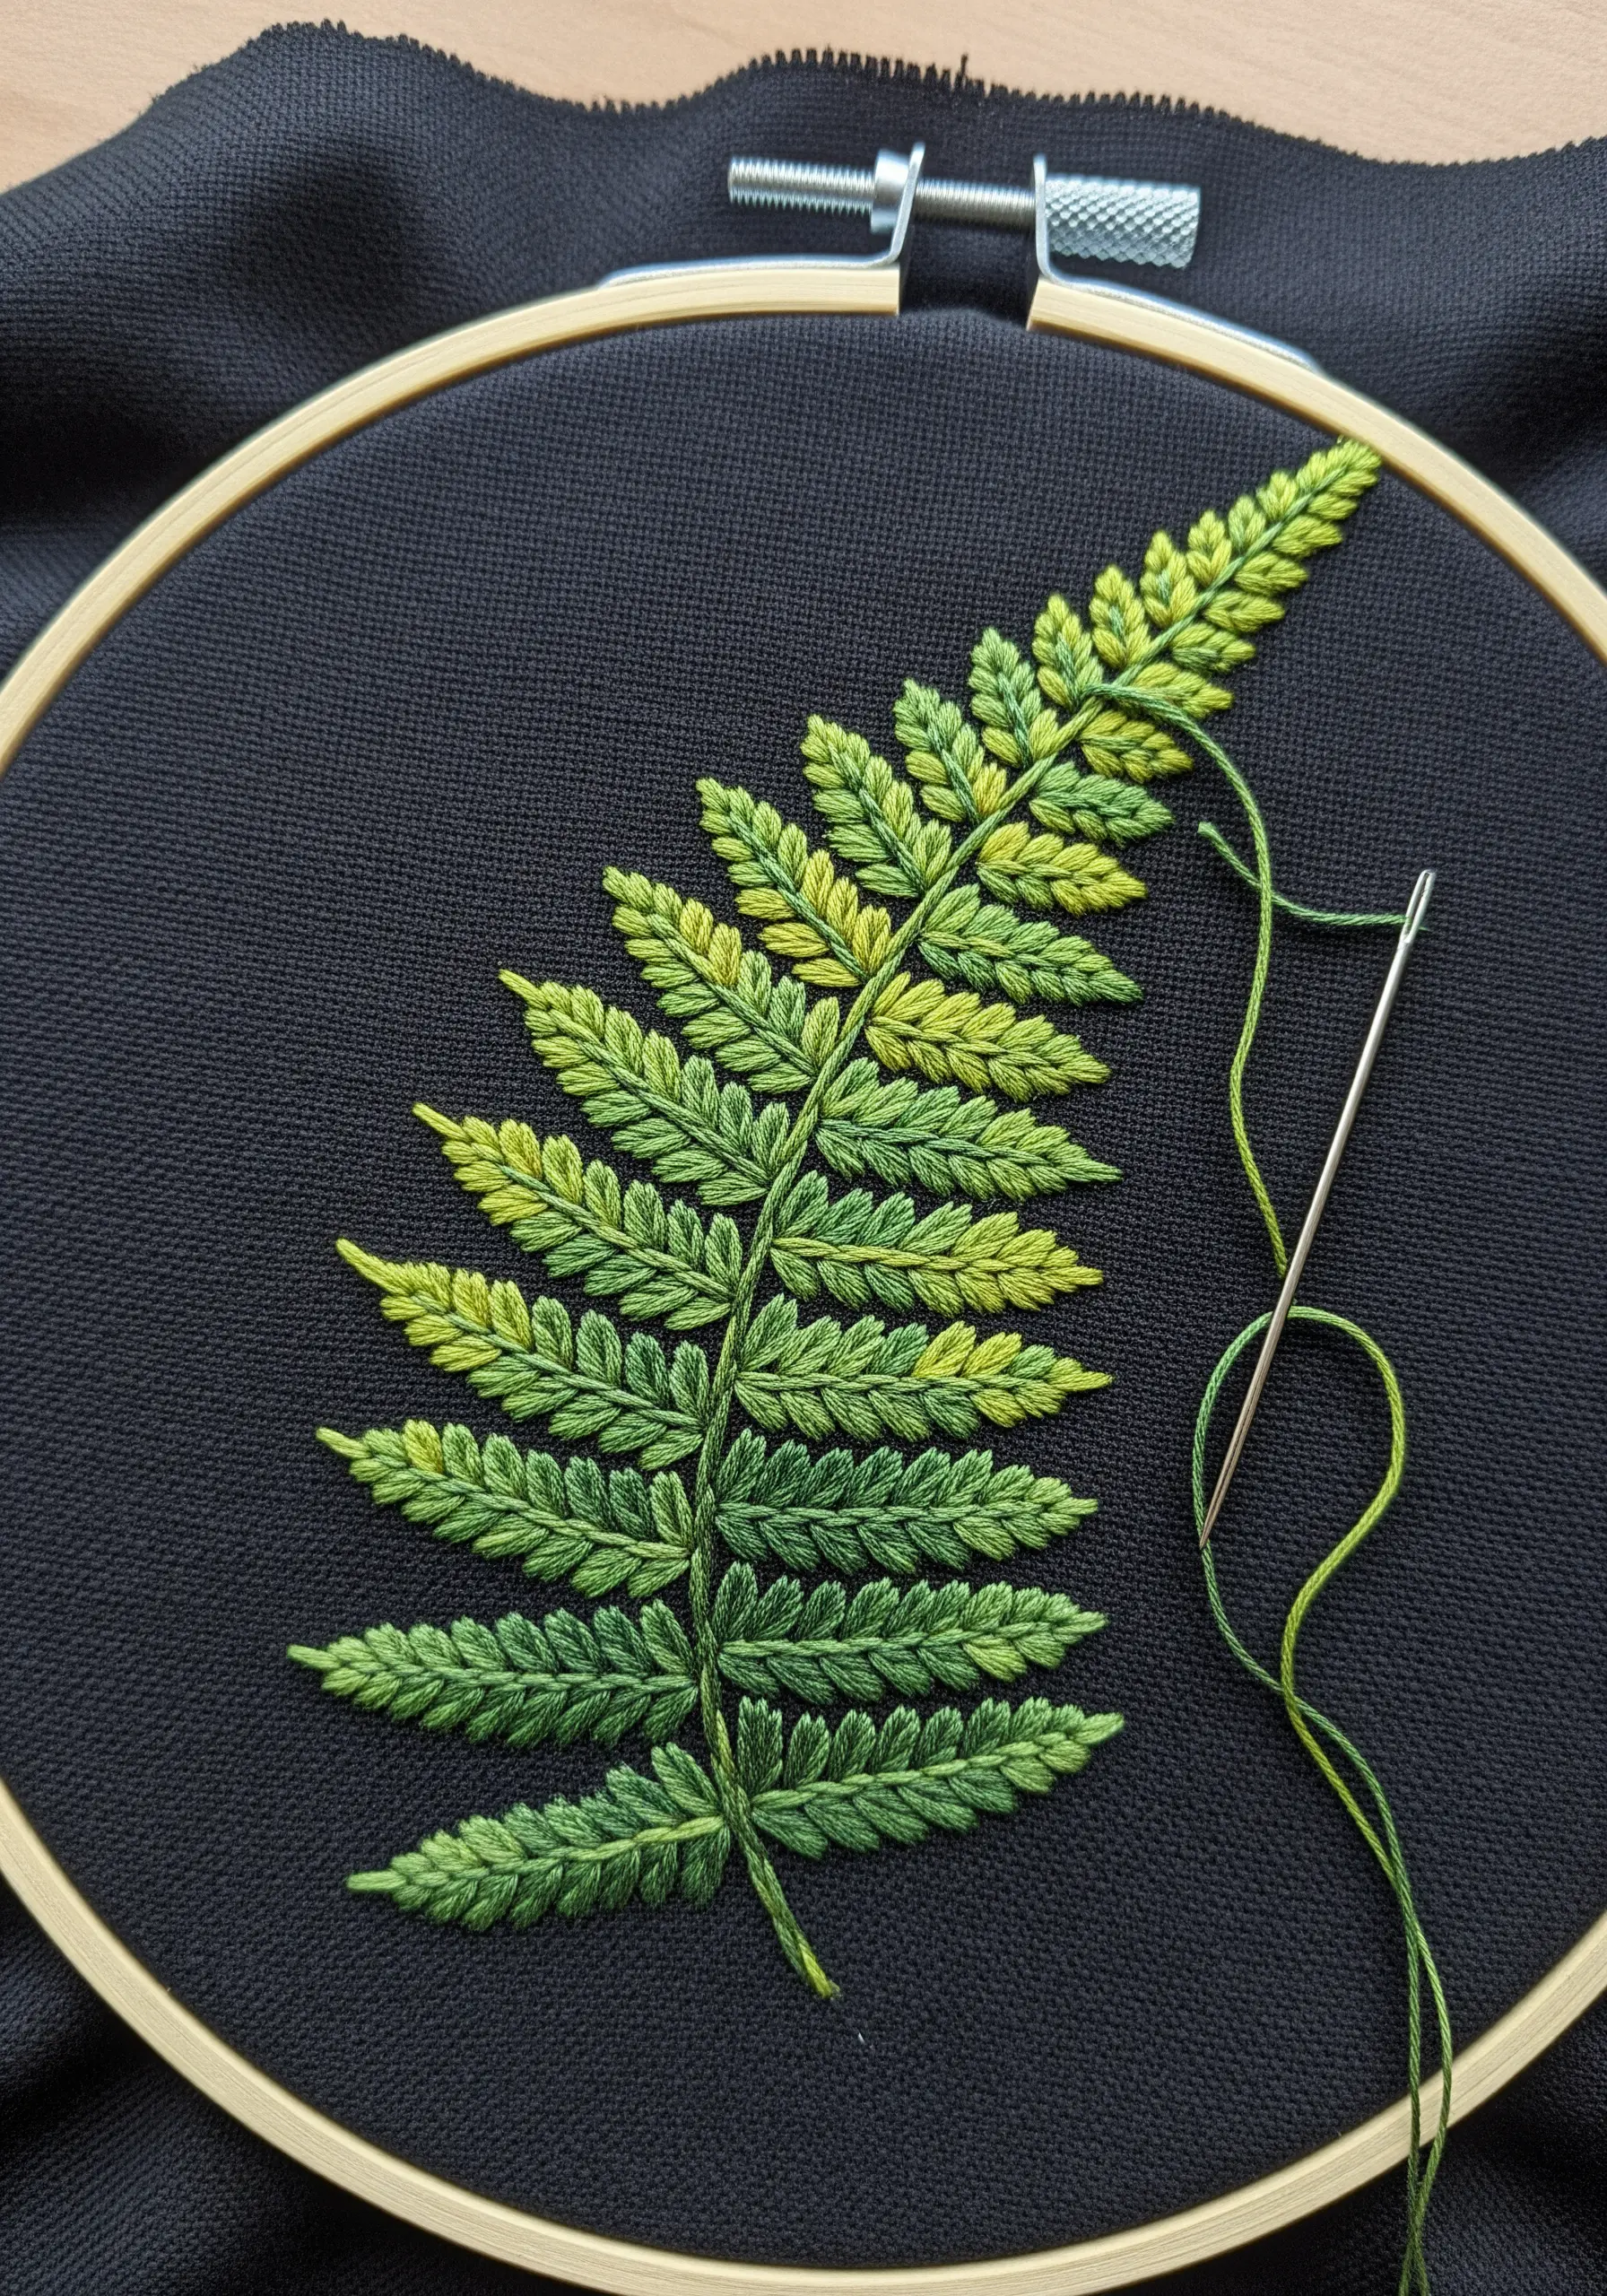
For intricate plants like ferns, stitch each individual leaflet with directional satin stitches angled away from the central stem.
Use at least three shades of green—a dark tone for the base, a mid-tone for the body, and a bright, almost yellow-green for the tips.
This subtle color shift creates the illusion of new growth and sunlight hitting the fronds.
Stitching on a dark fabric, like black cotton twill, makes these greens appear more luminous and alive.
3. Capture the Soft Sheen of Eucalyptus Leaves
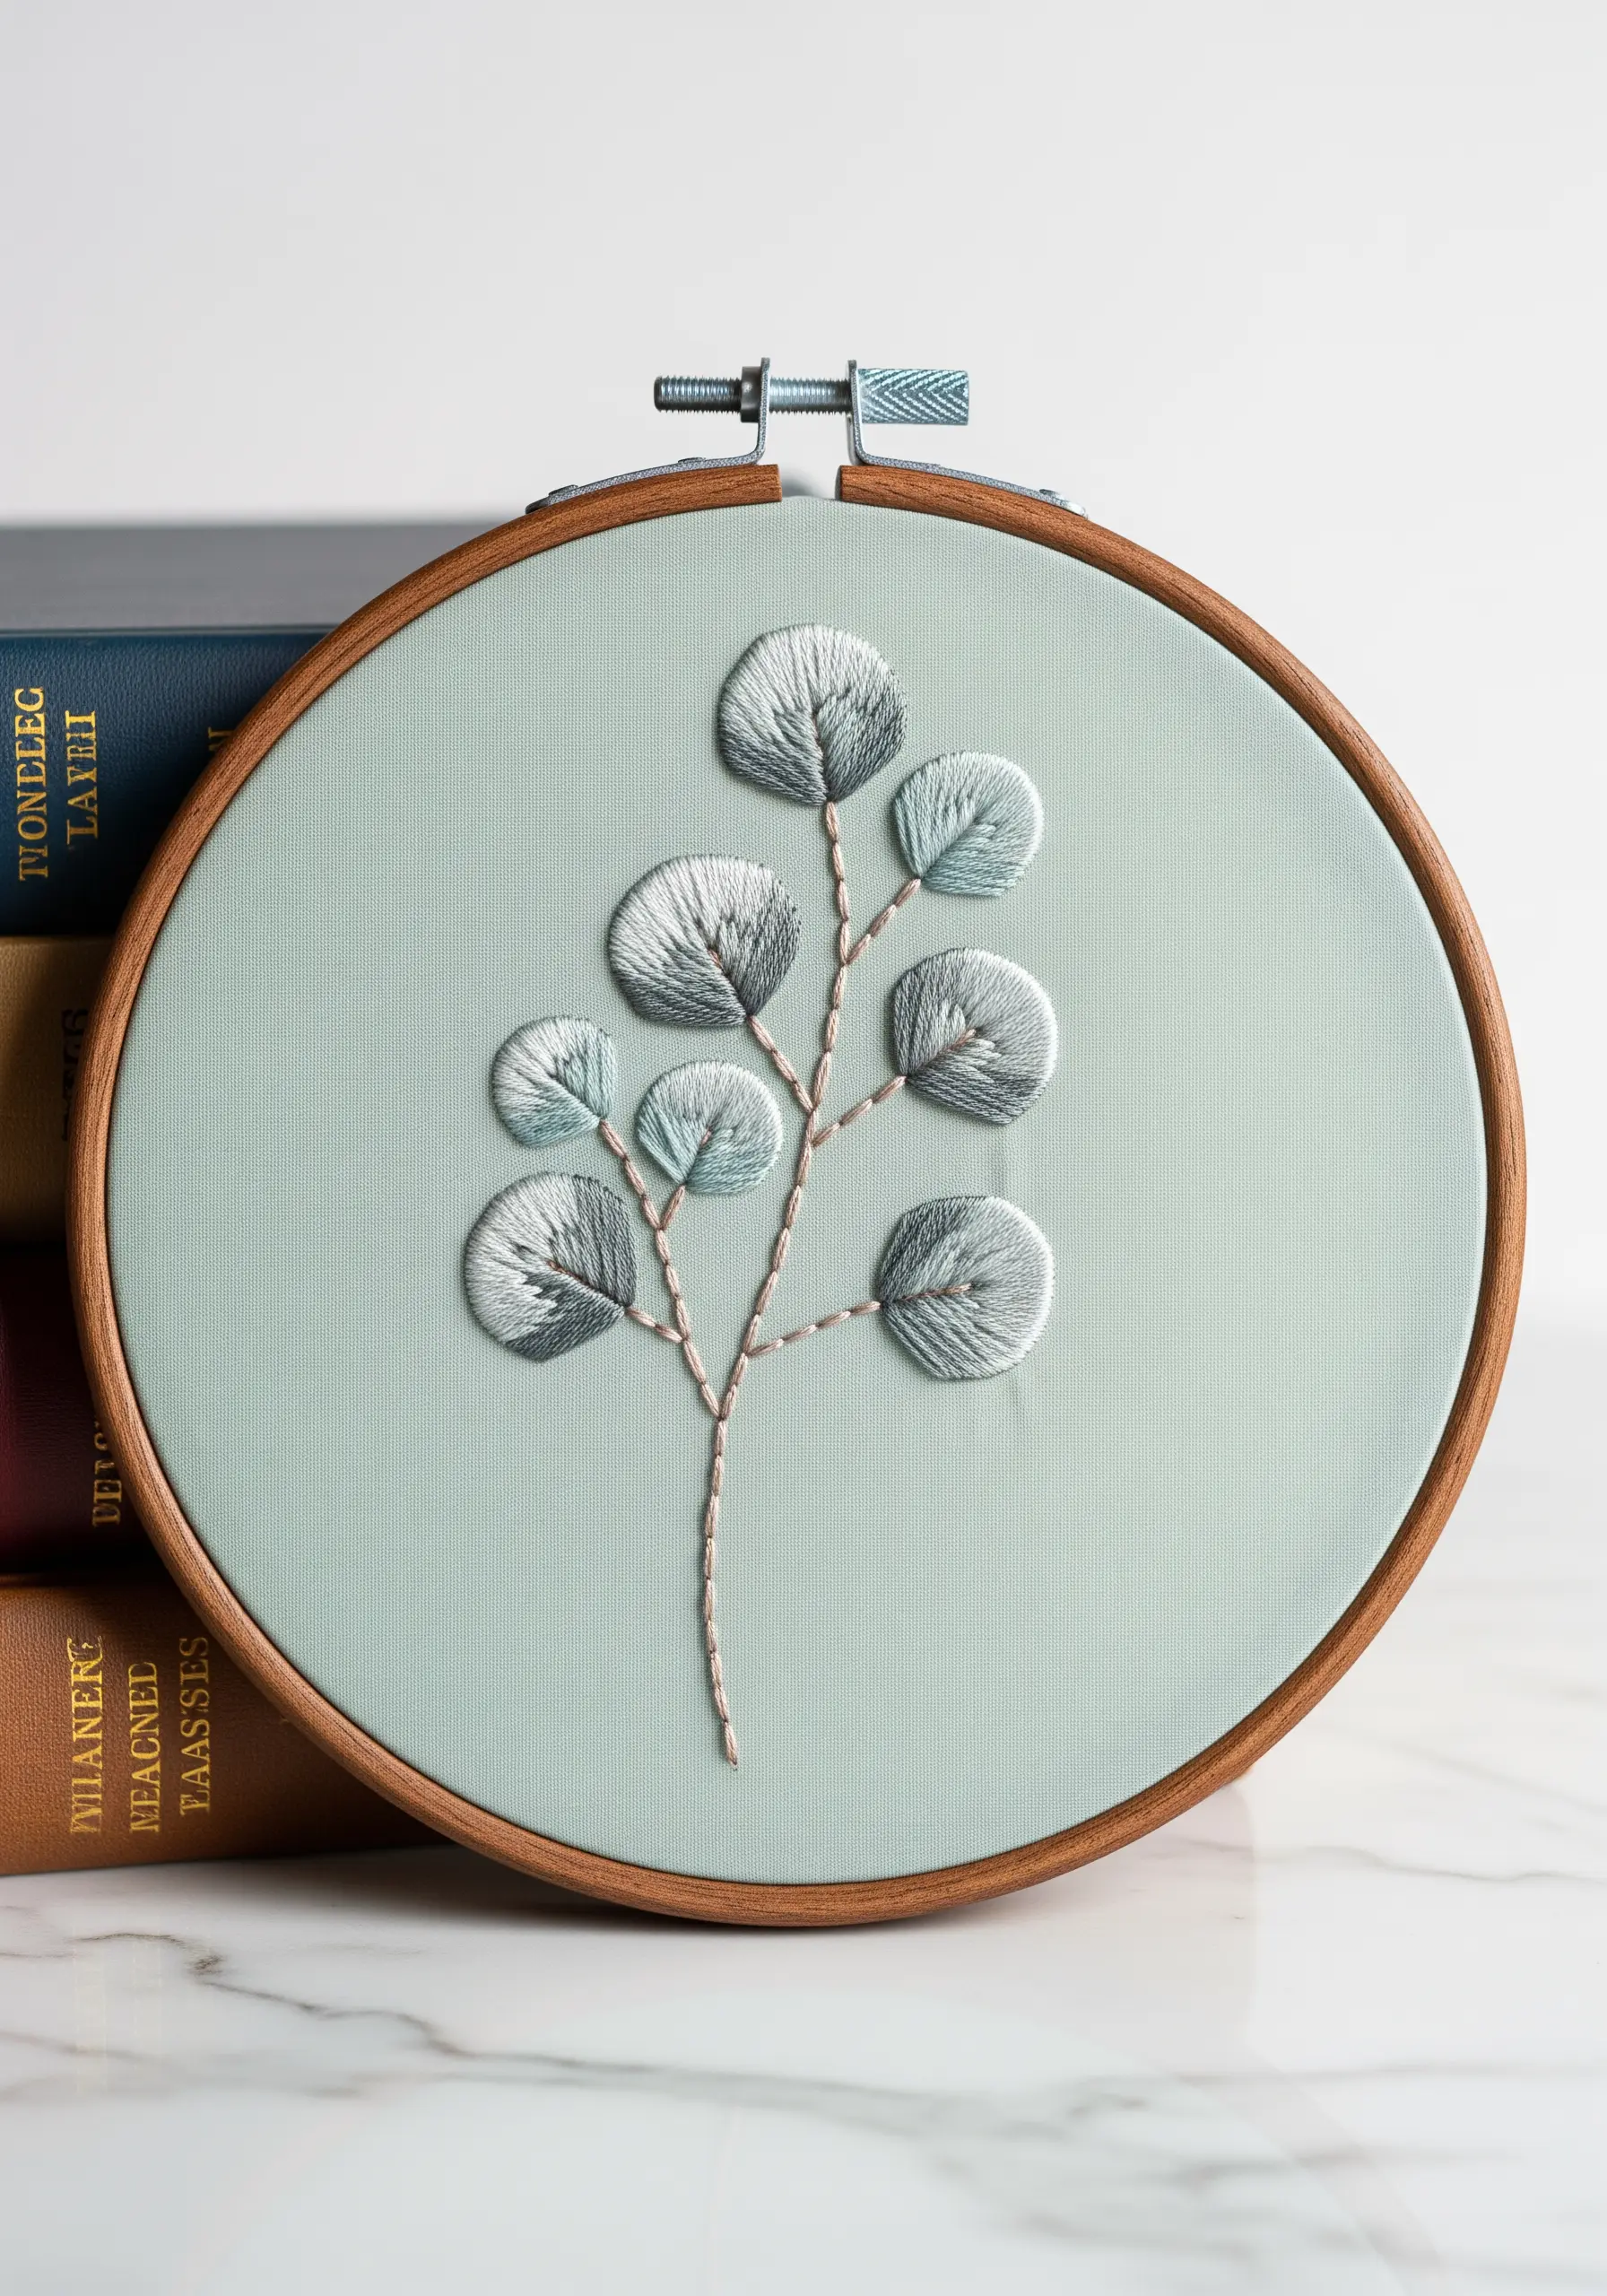
Recreate the dusty, silvery-green of eucalyptus by using a palette of muted blues, greys, and off-whites alongside a soft sage green.
Fill each leaf with slightly curved long-and-short stitches that follow the rounded shape, creating a gentle contour.
Use a single strand of cotton floss to achieve a smooth, matte finish that absorbs light, perfectly mimicking the leaf’s waxy surface.
A delicate whipped backstitch for the stem in a warm beige adds a touch of organic contrast.
4. Achieve Realistic Monstera Shading
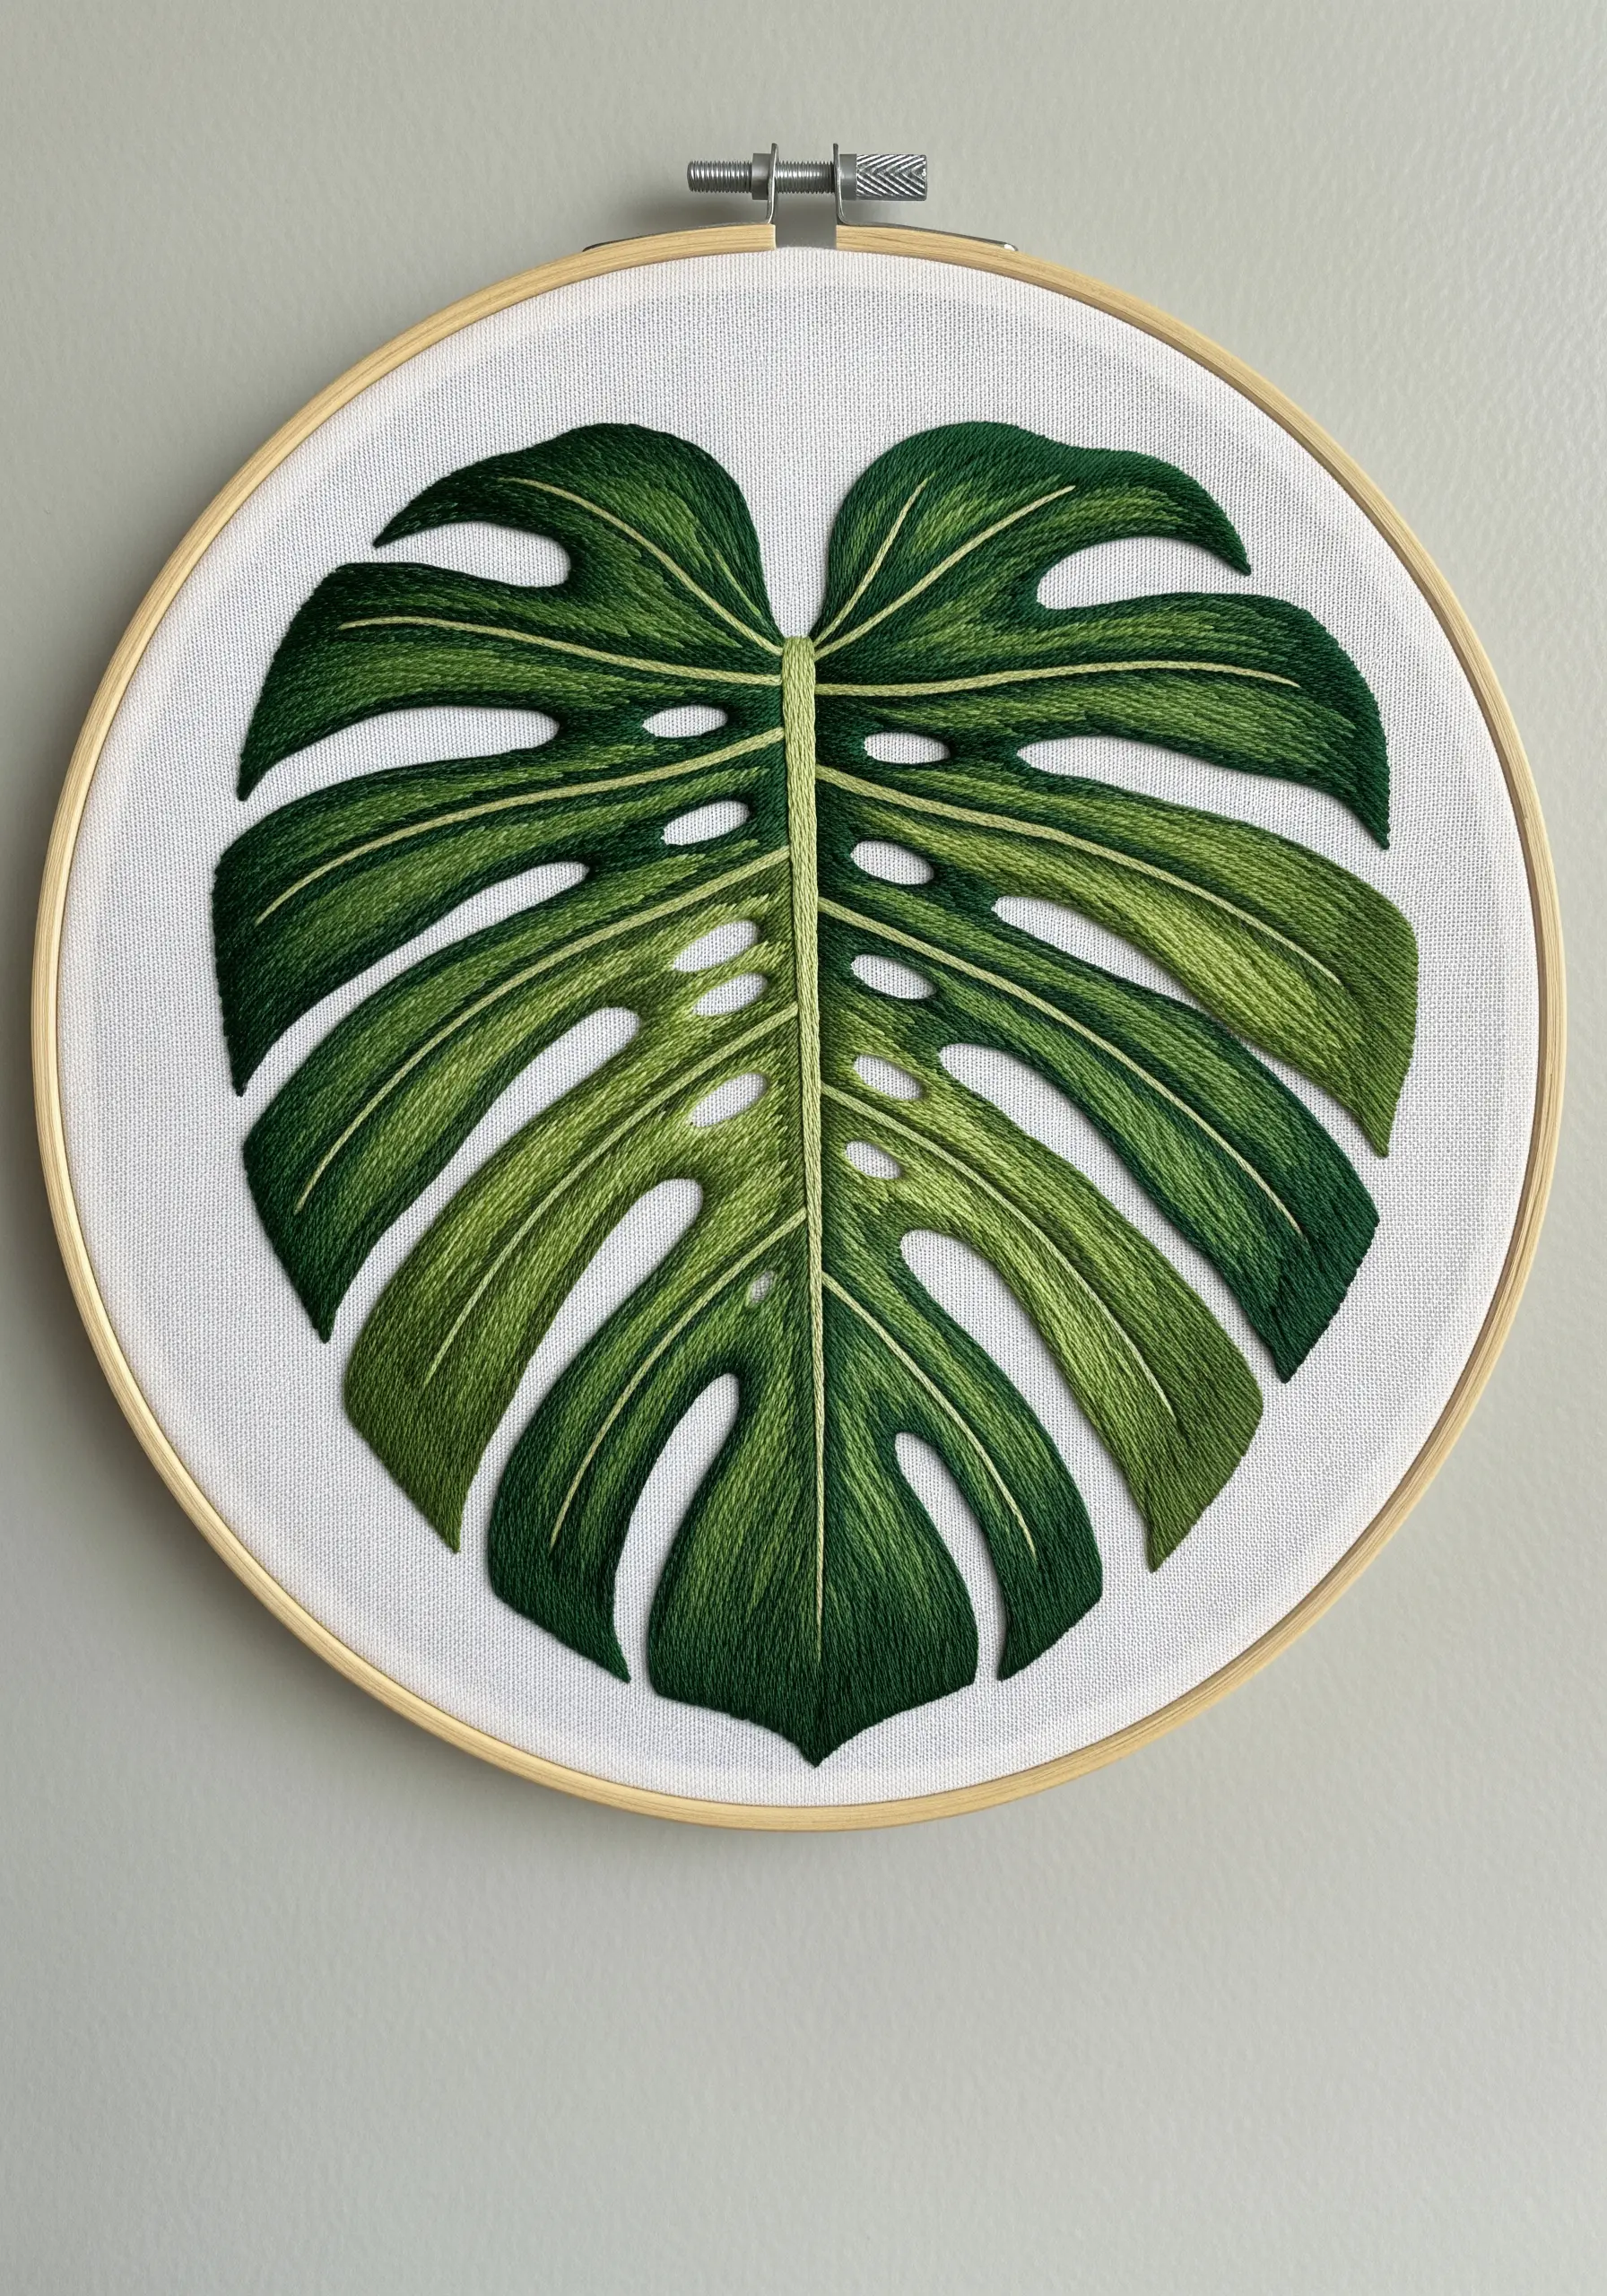
To make your monstera leaves look three-dimensional, focus on blending multiple green tones with meticulous thread painting.
Map out where highlights and shadows fall, using lighter greens for raised areas and darker shades for recessed sections and edges.
Ensure your long-and-short stitches follow the direction of the leaf’s veins, radiating outward from the central stem.
This directional stitching is the key to creating a realistic, glossy texture seen in many houseplant embroidery motifs.
5. Combine Texture and Appliqué for a Hyperrealistic Oak Leaf
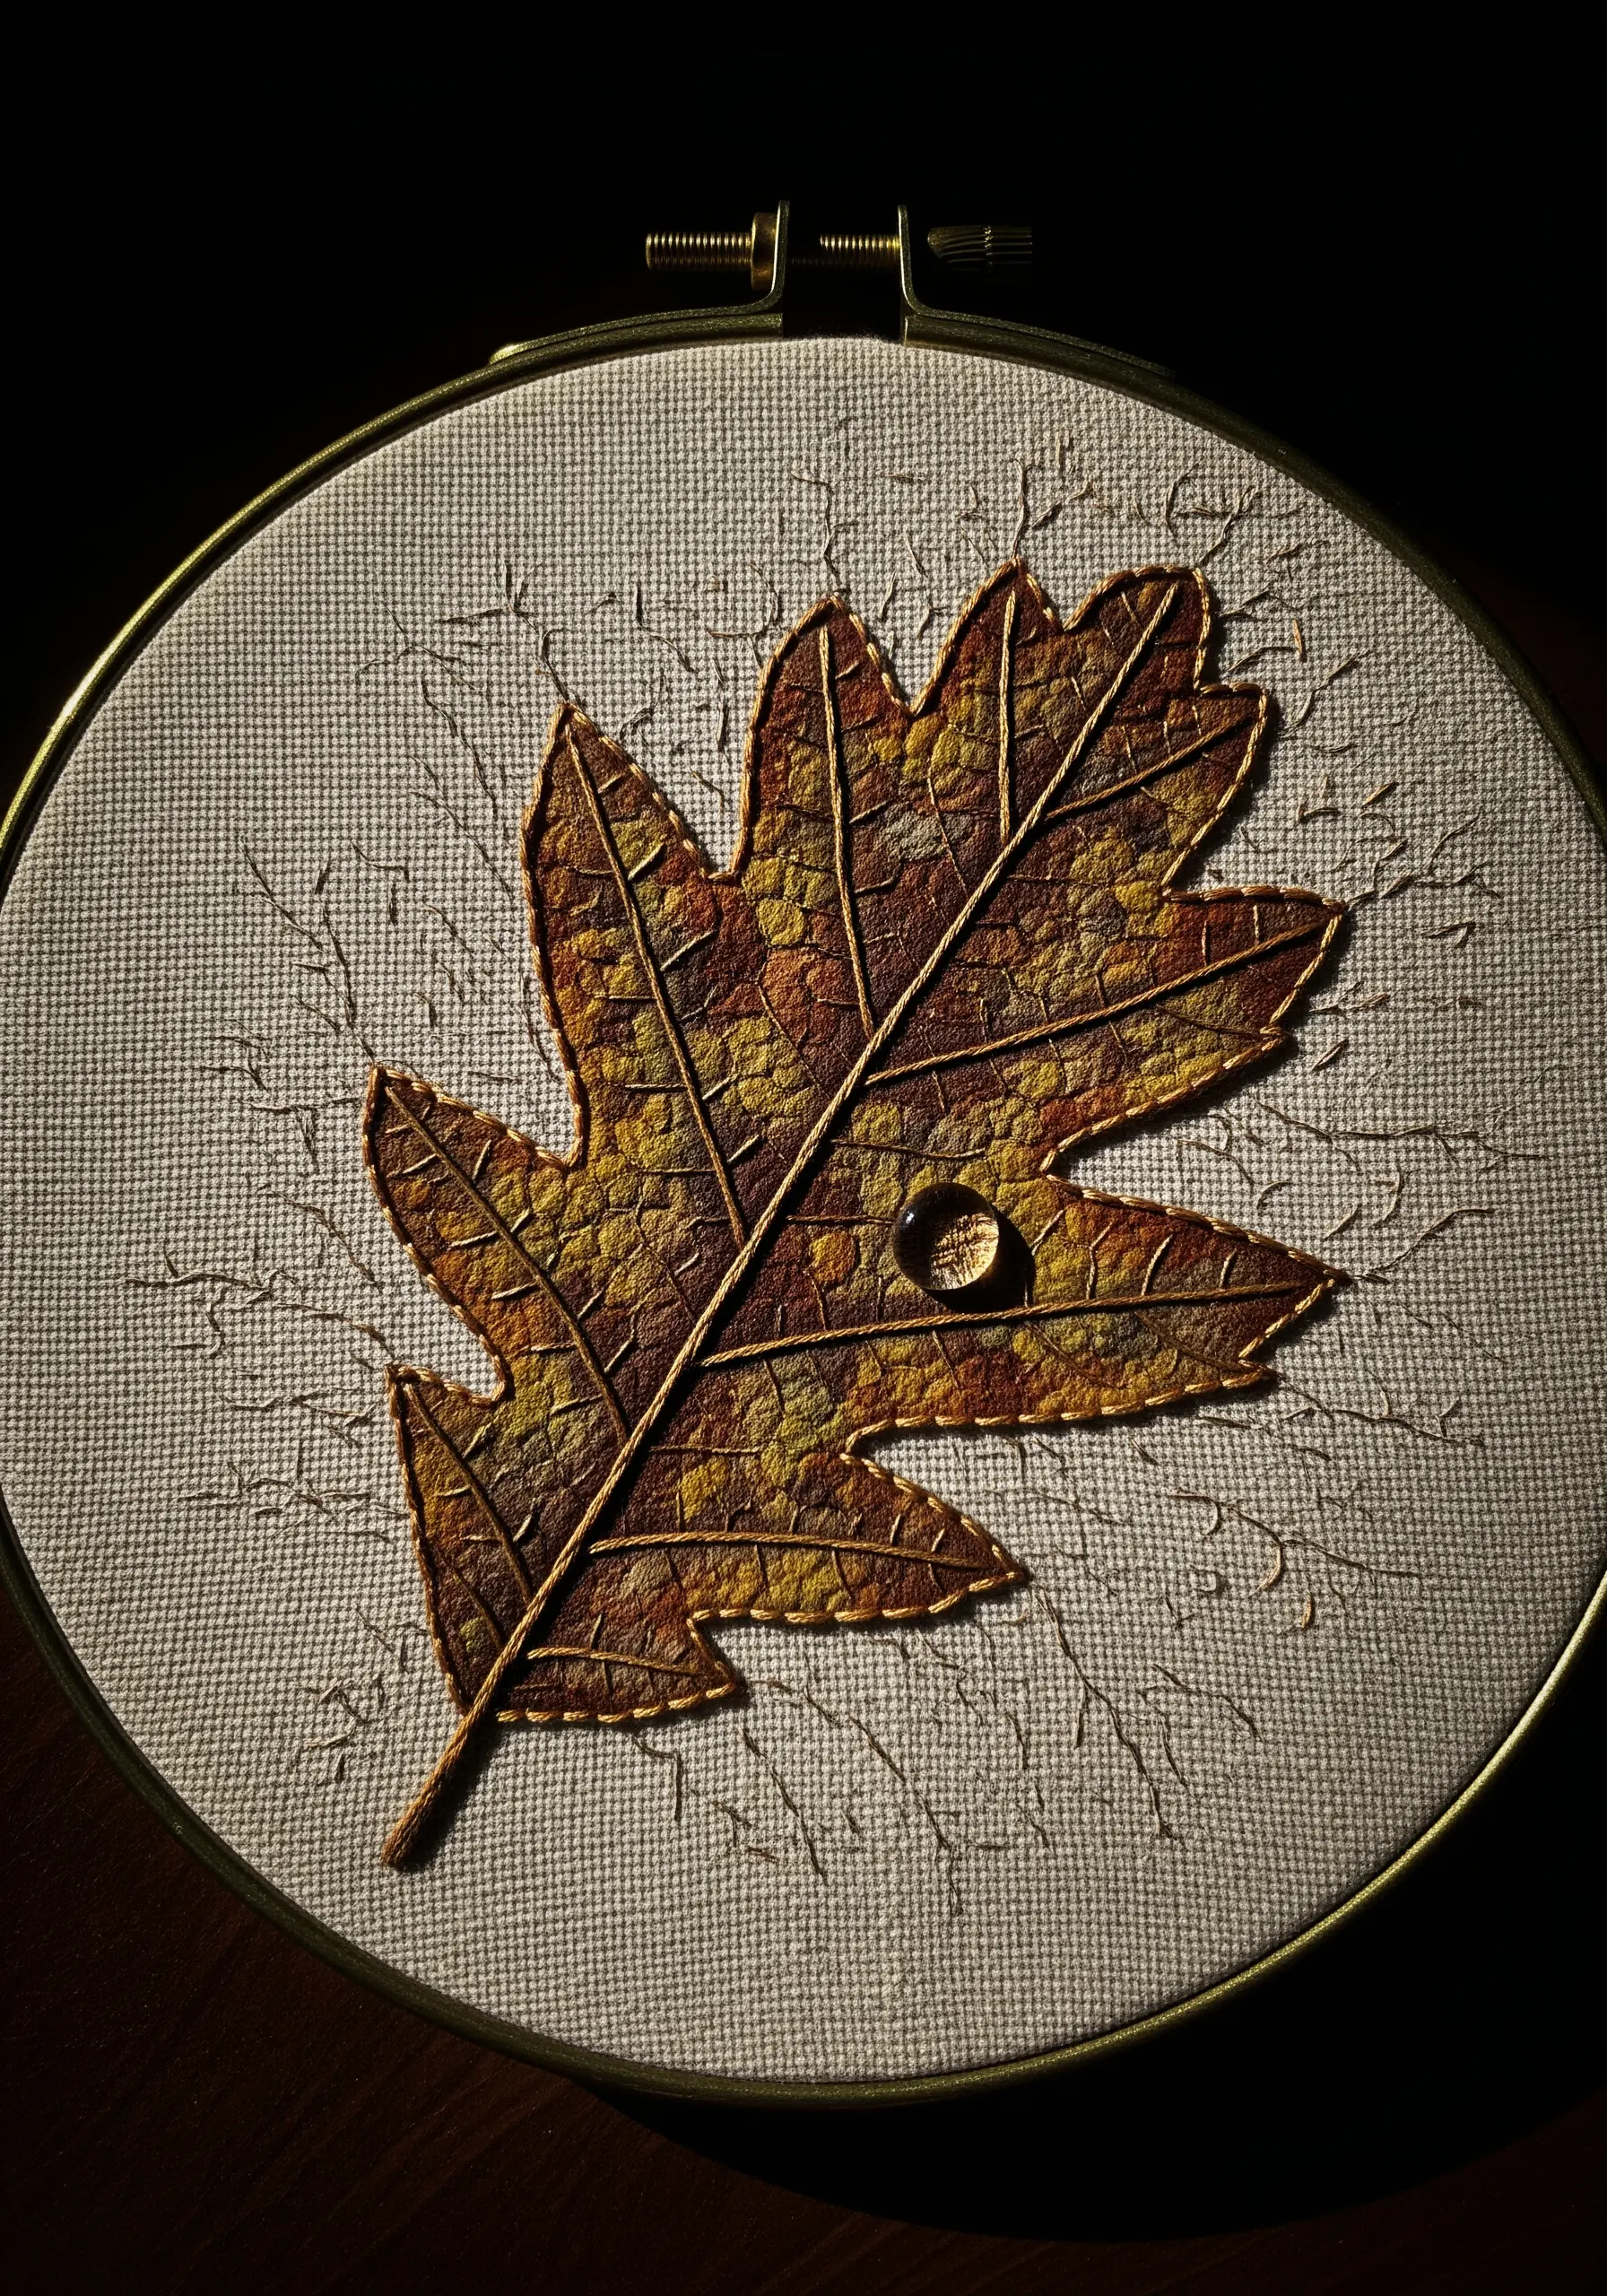
For a weathered, autumnal look, start with a leaf shape cut from painted fabric or a thin piece of felt and appliqué it onto your background fabric.
Cover the surface with a dense layer of seed stitches and French knots in mottled browns, yellows, and ochres to replicate a decaying texture.
Stitch the veins over the top using a darker brown stem stitch for definition.
This mixed-media approach allows you to build layers of color and texture that thread alone cannot achieve.
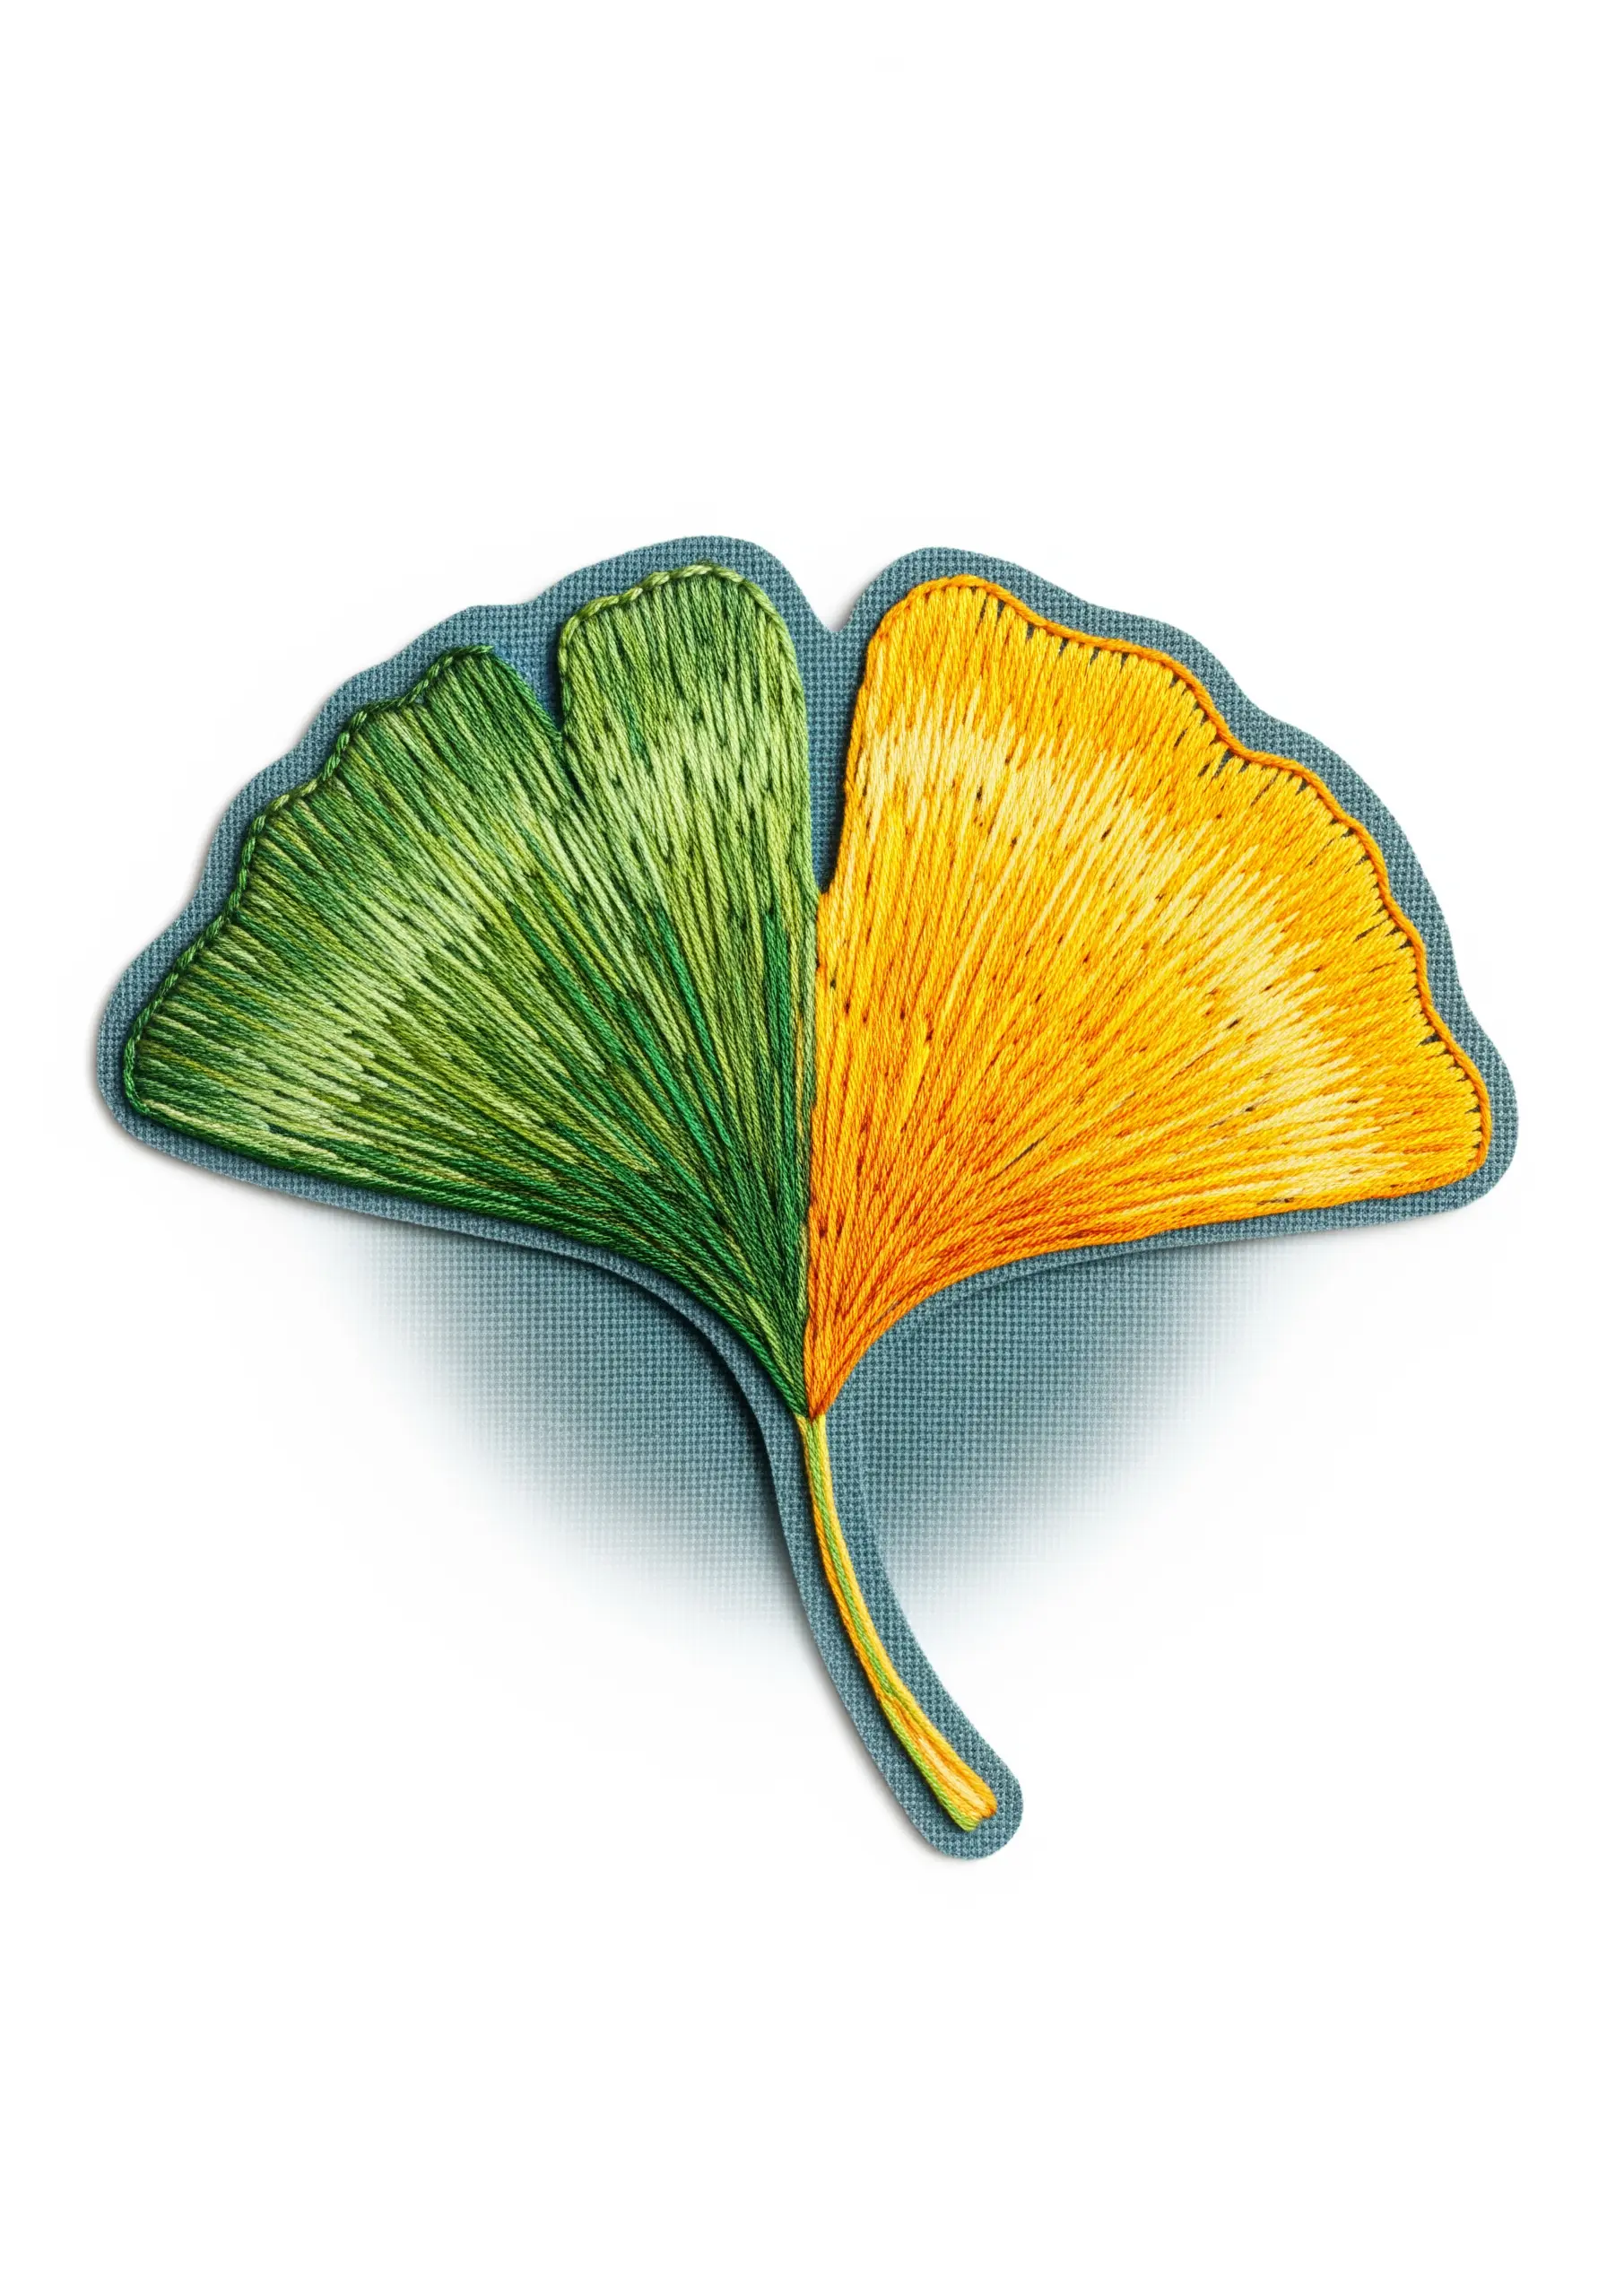
6. Use Radiating Stitches for Fan-Shaped Ginkgo Leaves
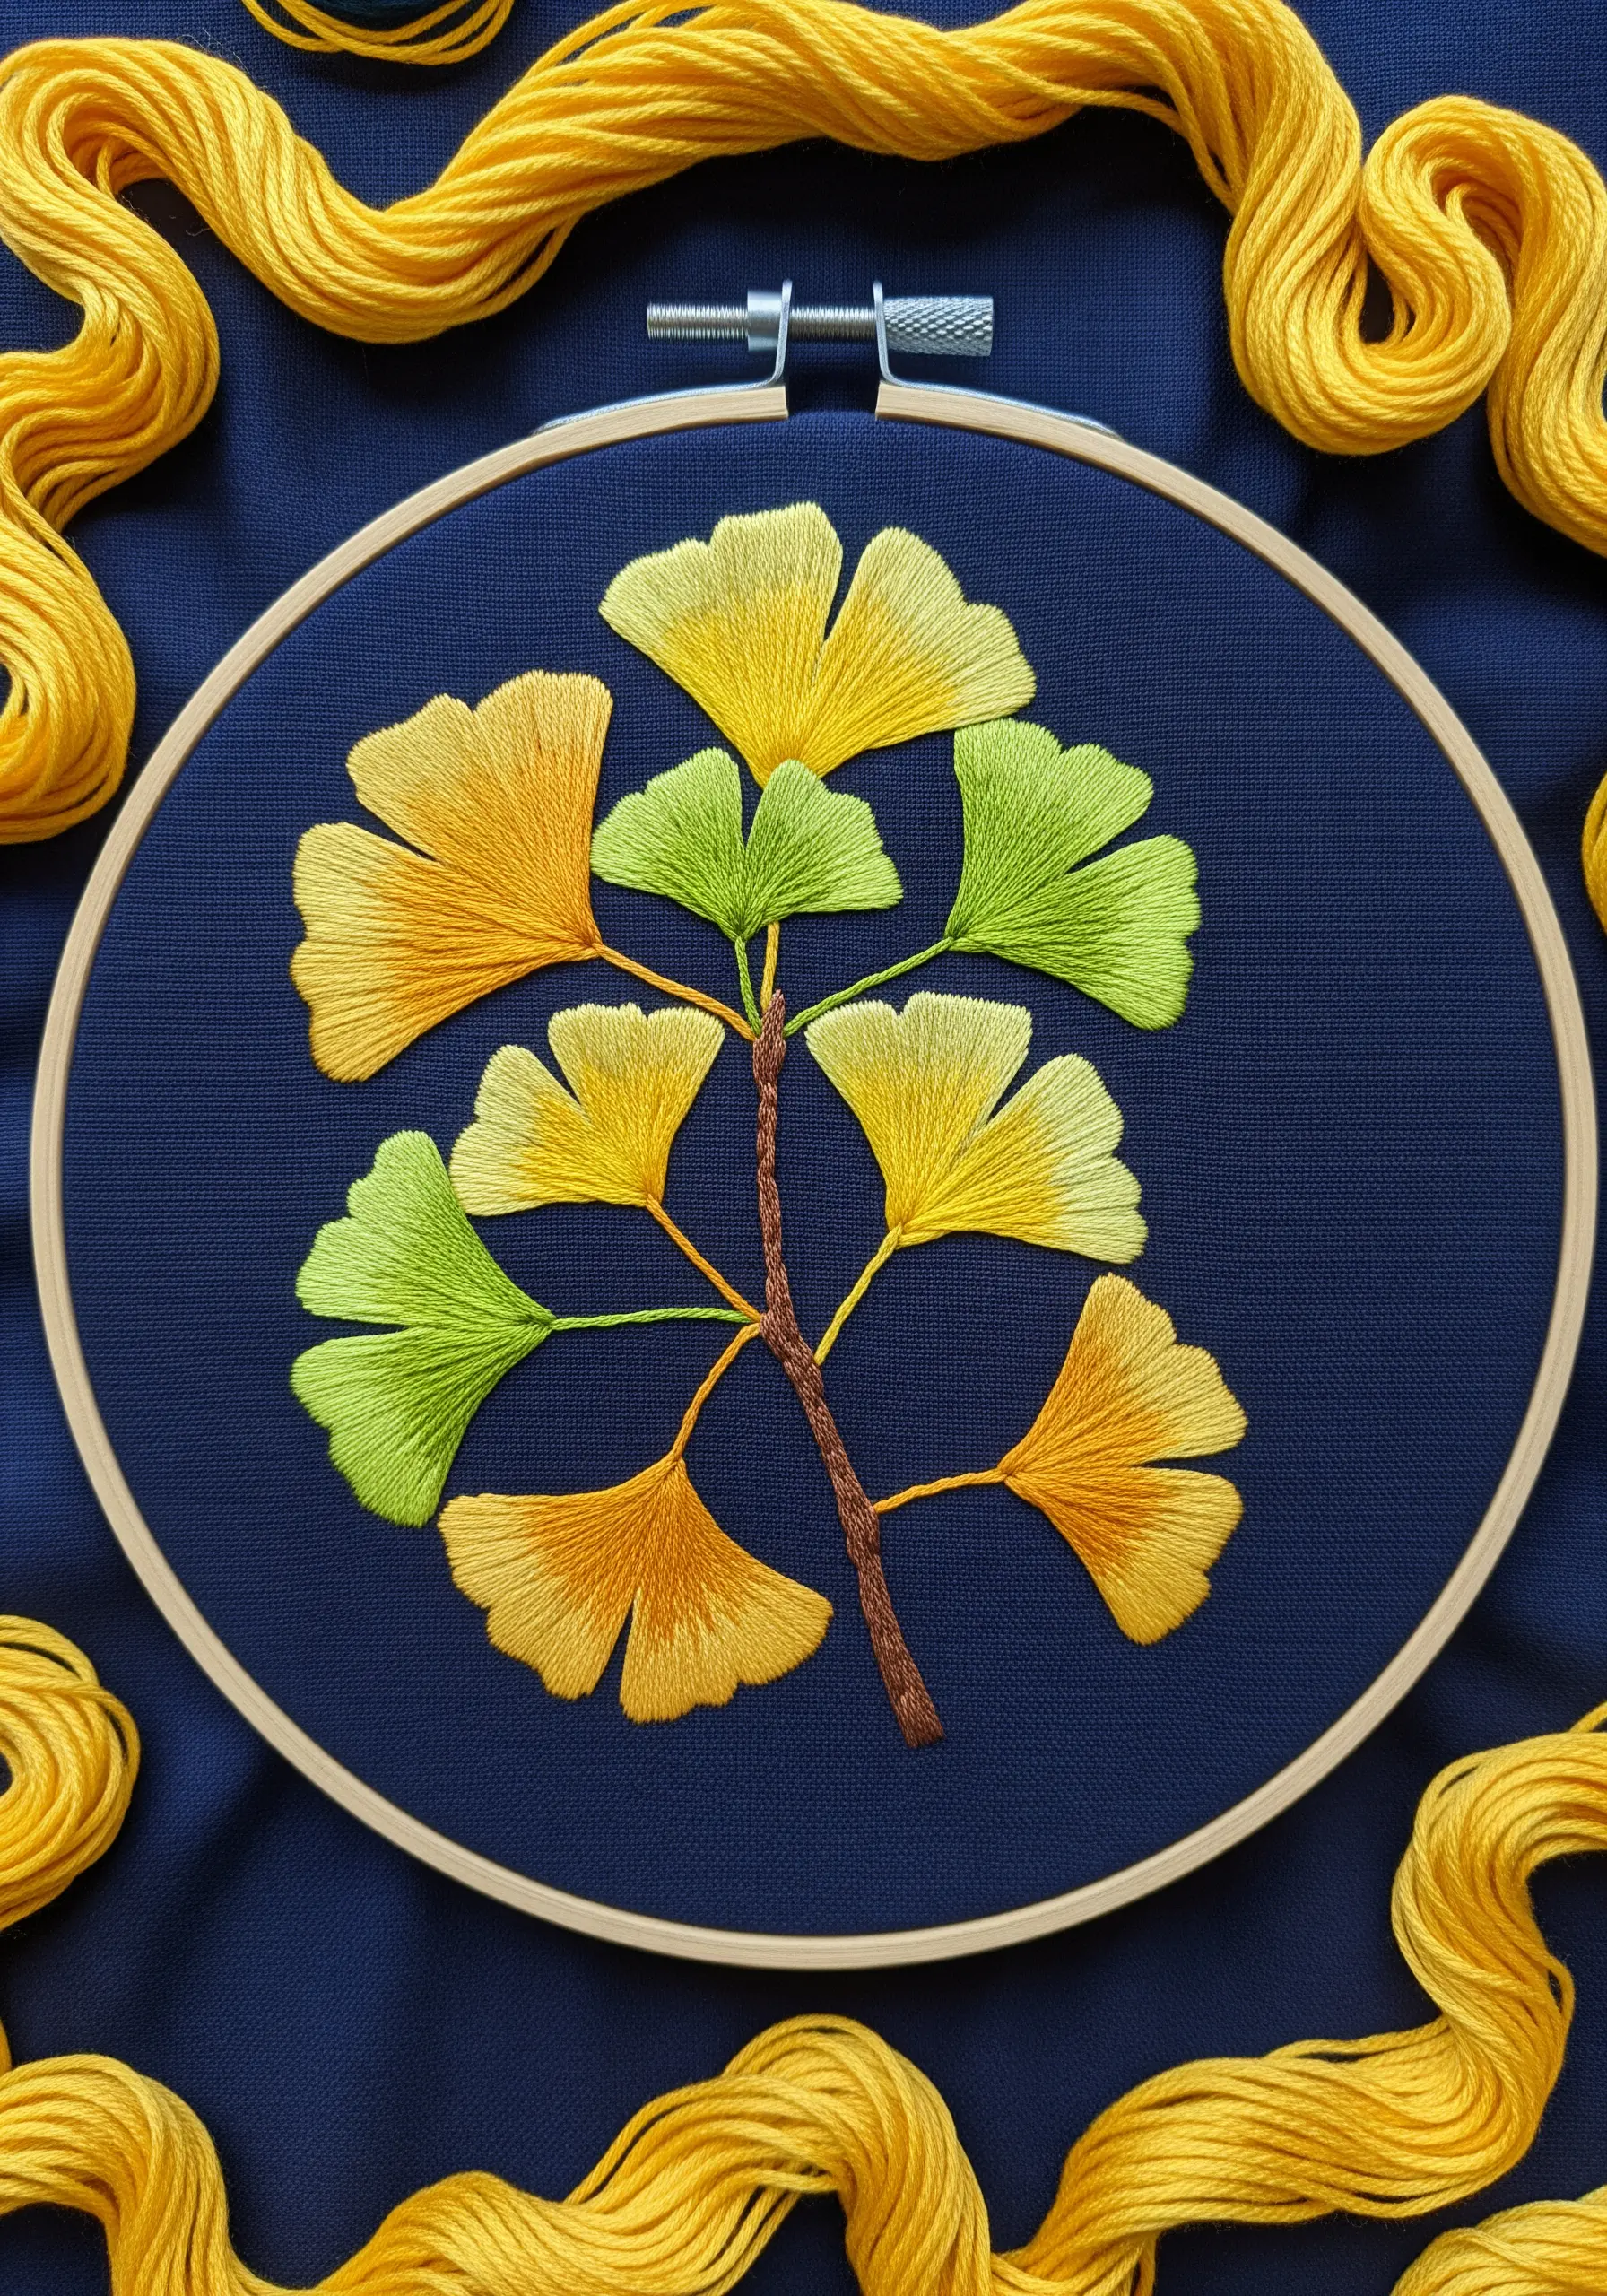
The unique shape of a ginkgo leaf requires a specific stitch direction to look authentic.
Begin your long-and-short stitches at the base of each leaf segment, fanning them out towards the wavy top edge.
This radiating pattern perfectly captures the delicate, paper-like structure of the ginkgo.
Blend two distinct colors, like lime green and golden yellow, within a single leaf to represent the seasonal transition.
7. Define Olive Leaves with the Fishbone Stitch
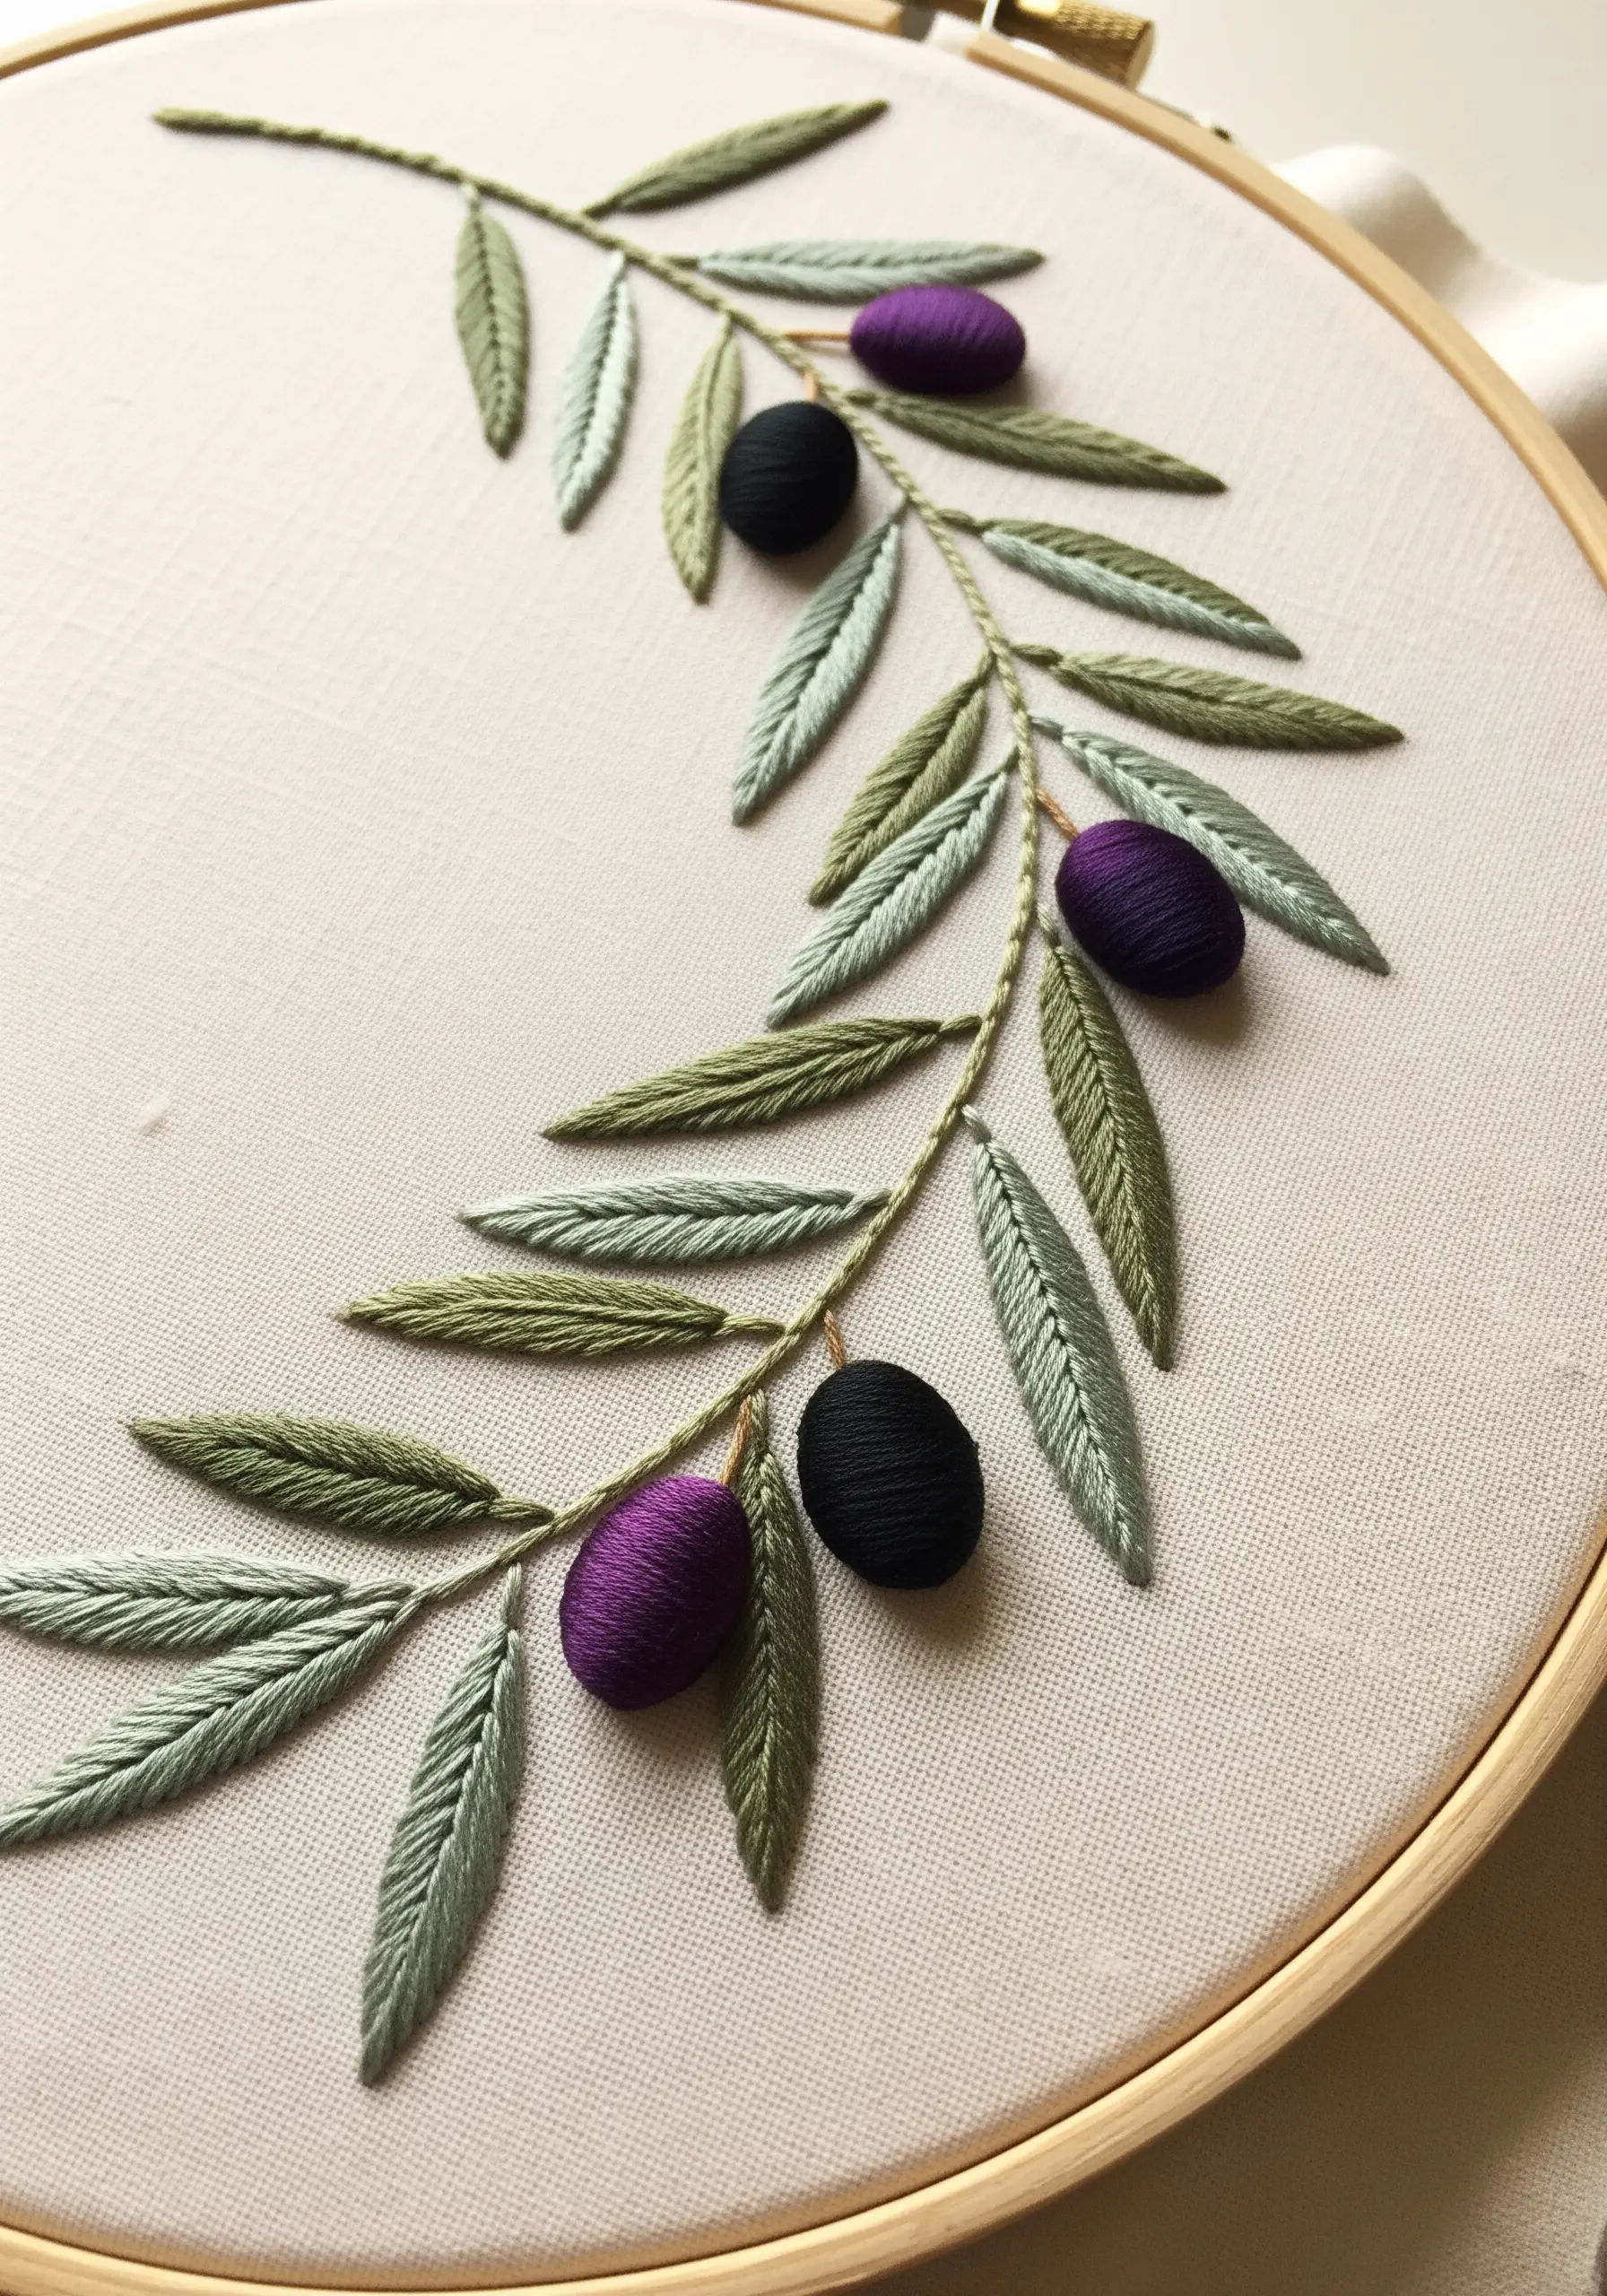
The fishbone stitch is ideal for long, slender leaves like those of an olive branch, as it creates a central vein automatically.
Work each half of the leaf in a slightly different color—a muted sage green for one side and a silvery grey-green for the other.
This two-tone method mimics the way light hits the leaf and hints at its pale underside, adding instant realism.
Create plump olives with padded satin stitch, using a few foundation stitches underneath to give them a rounded, dimensional form.
8. Embellish with Beads for a Frosted, Icy Effect
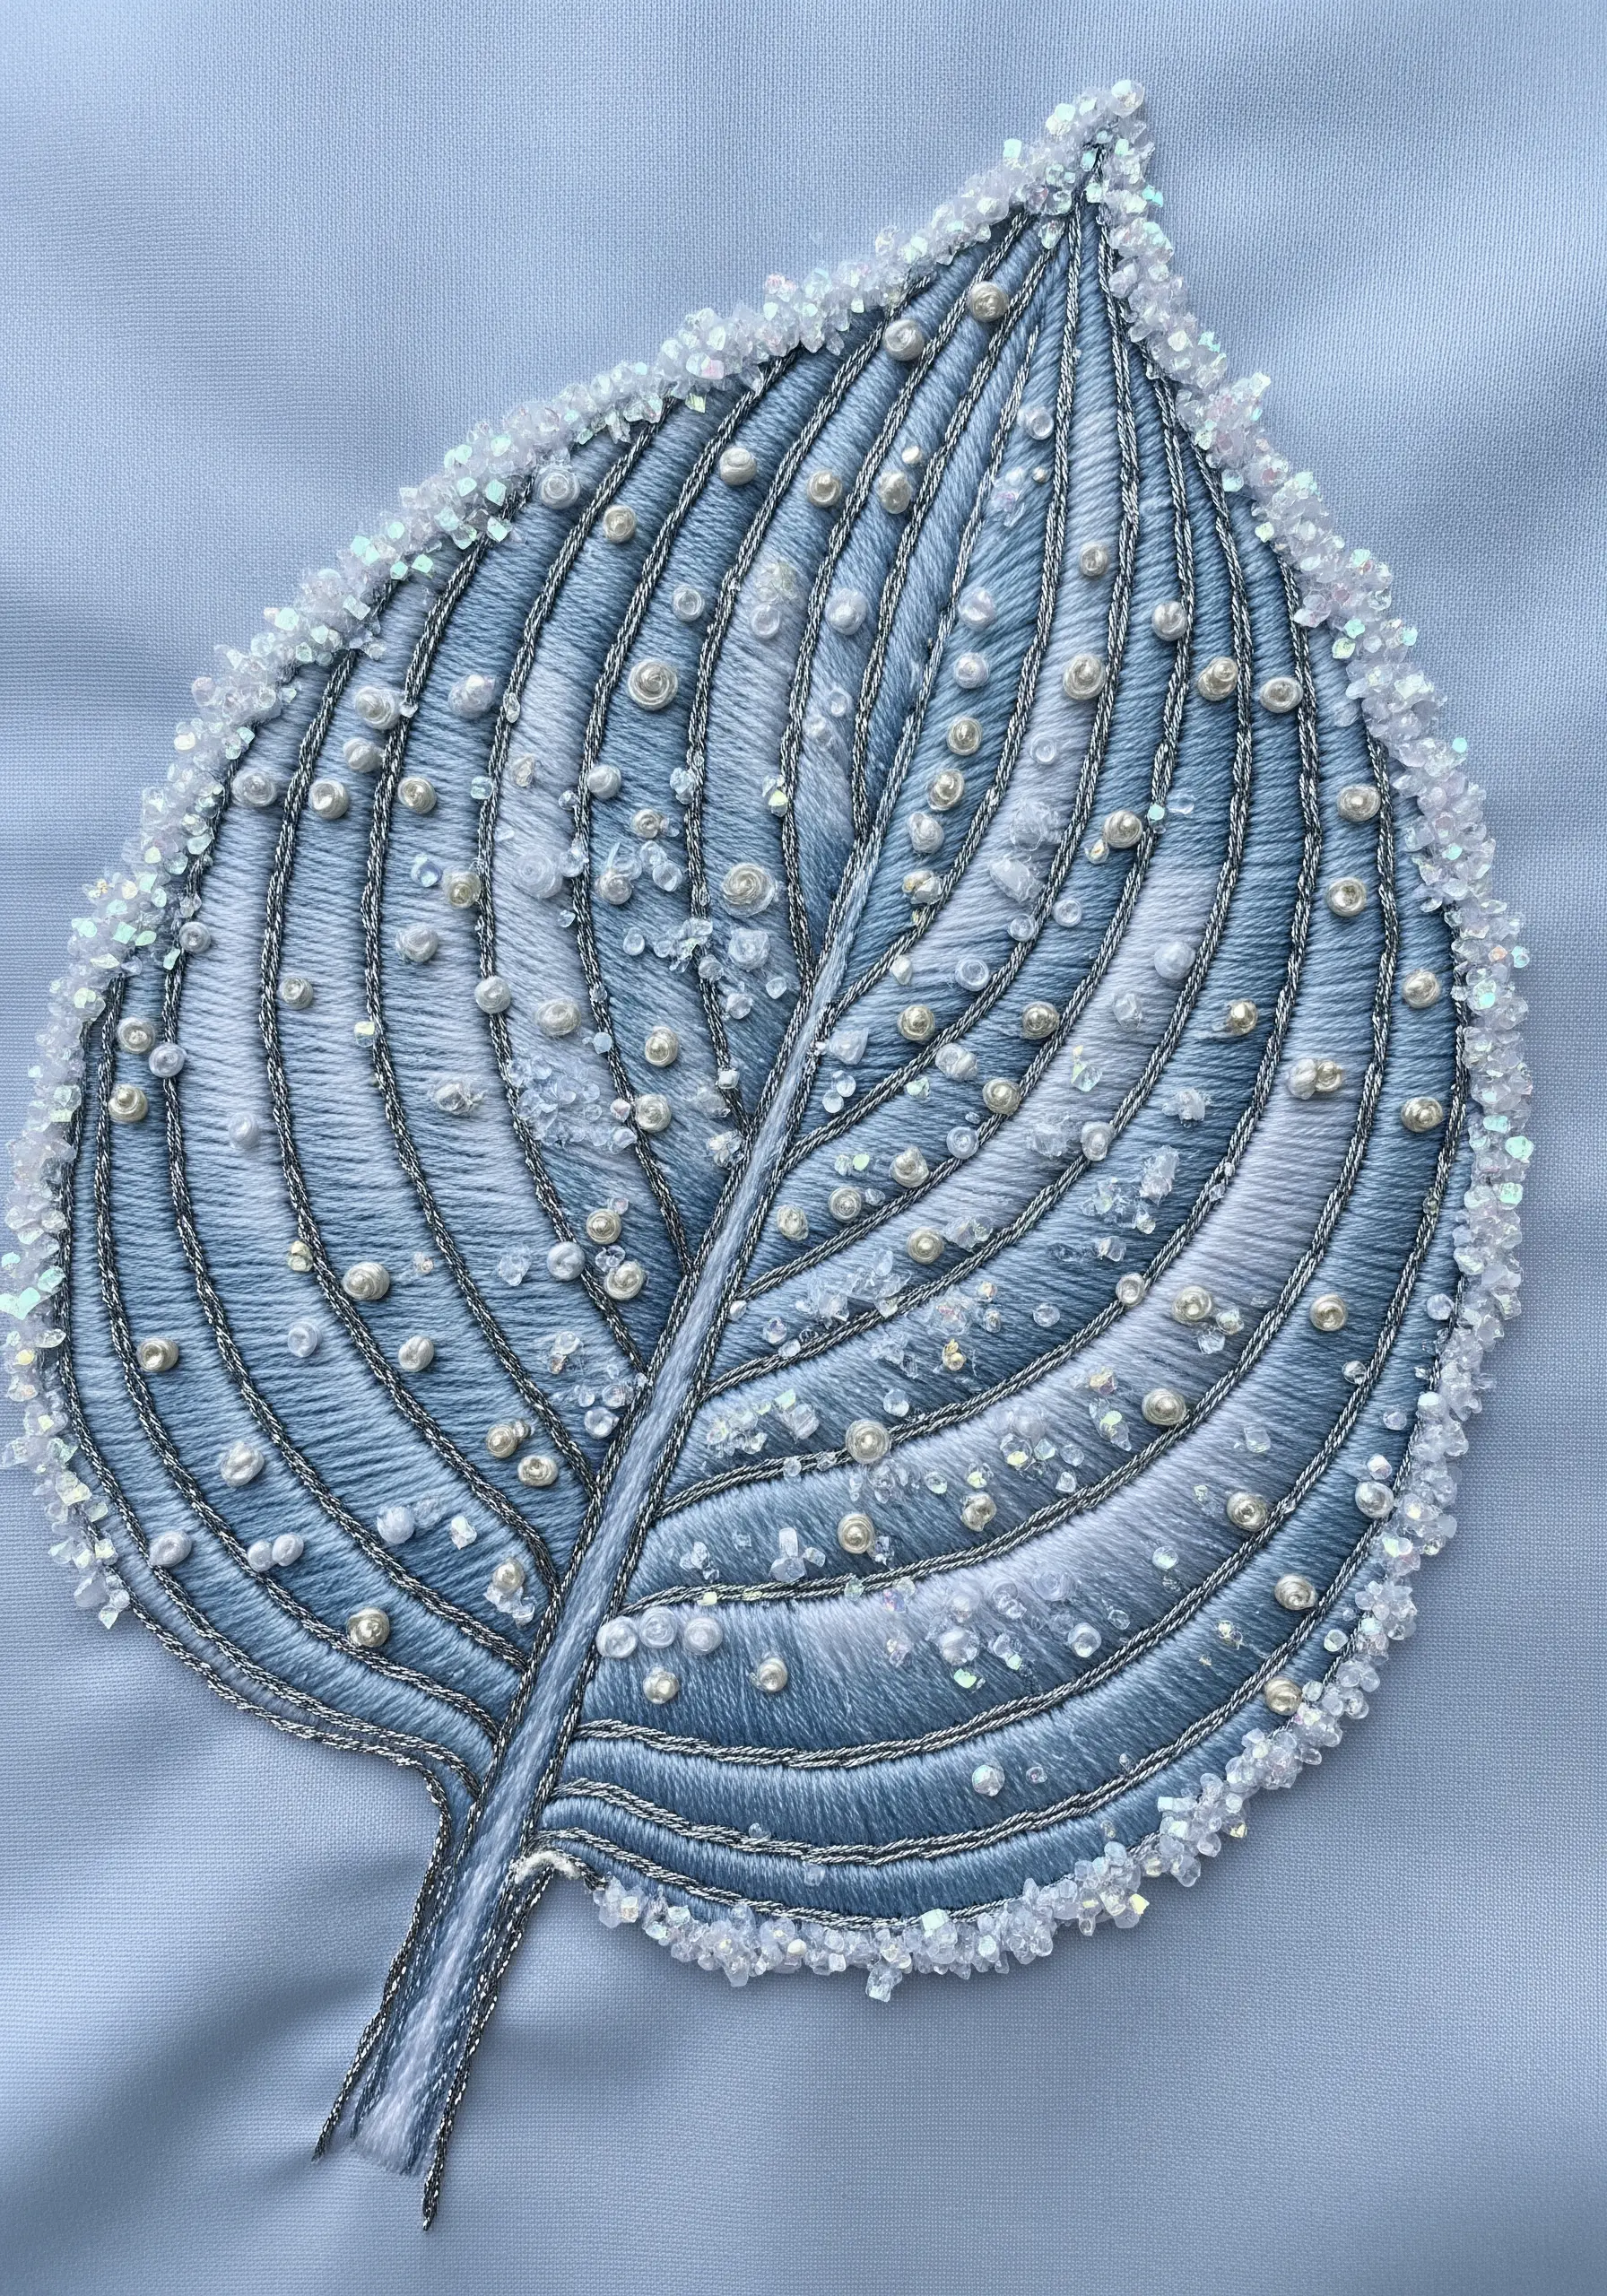
Transform a simple leaf into a winter marvel by incorporating beads and metallic threads.
First, fill the leaf sections with a cool-toned satin stitch, then outline the veins by couching a thin silver metallic thread.
Strategically scatter tiny seed beads, pearls, and iridescent sequins across the surface to simulate ice crystals or morning frost.
This technique turns a flat design into a sparkling piece of metallic thread wall art that reflects light beautifully.
9. Stitch Intricate Caladium Veins Over a Color-Blocked Base
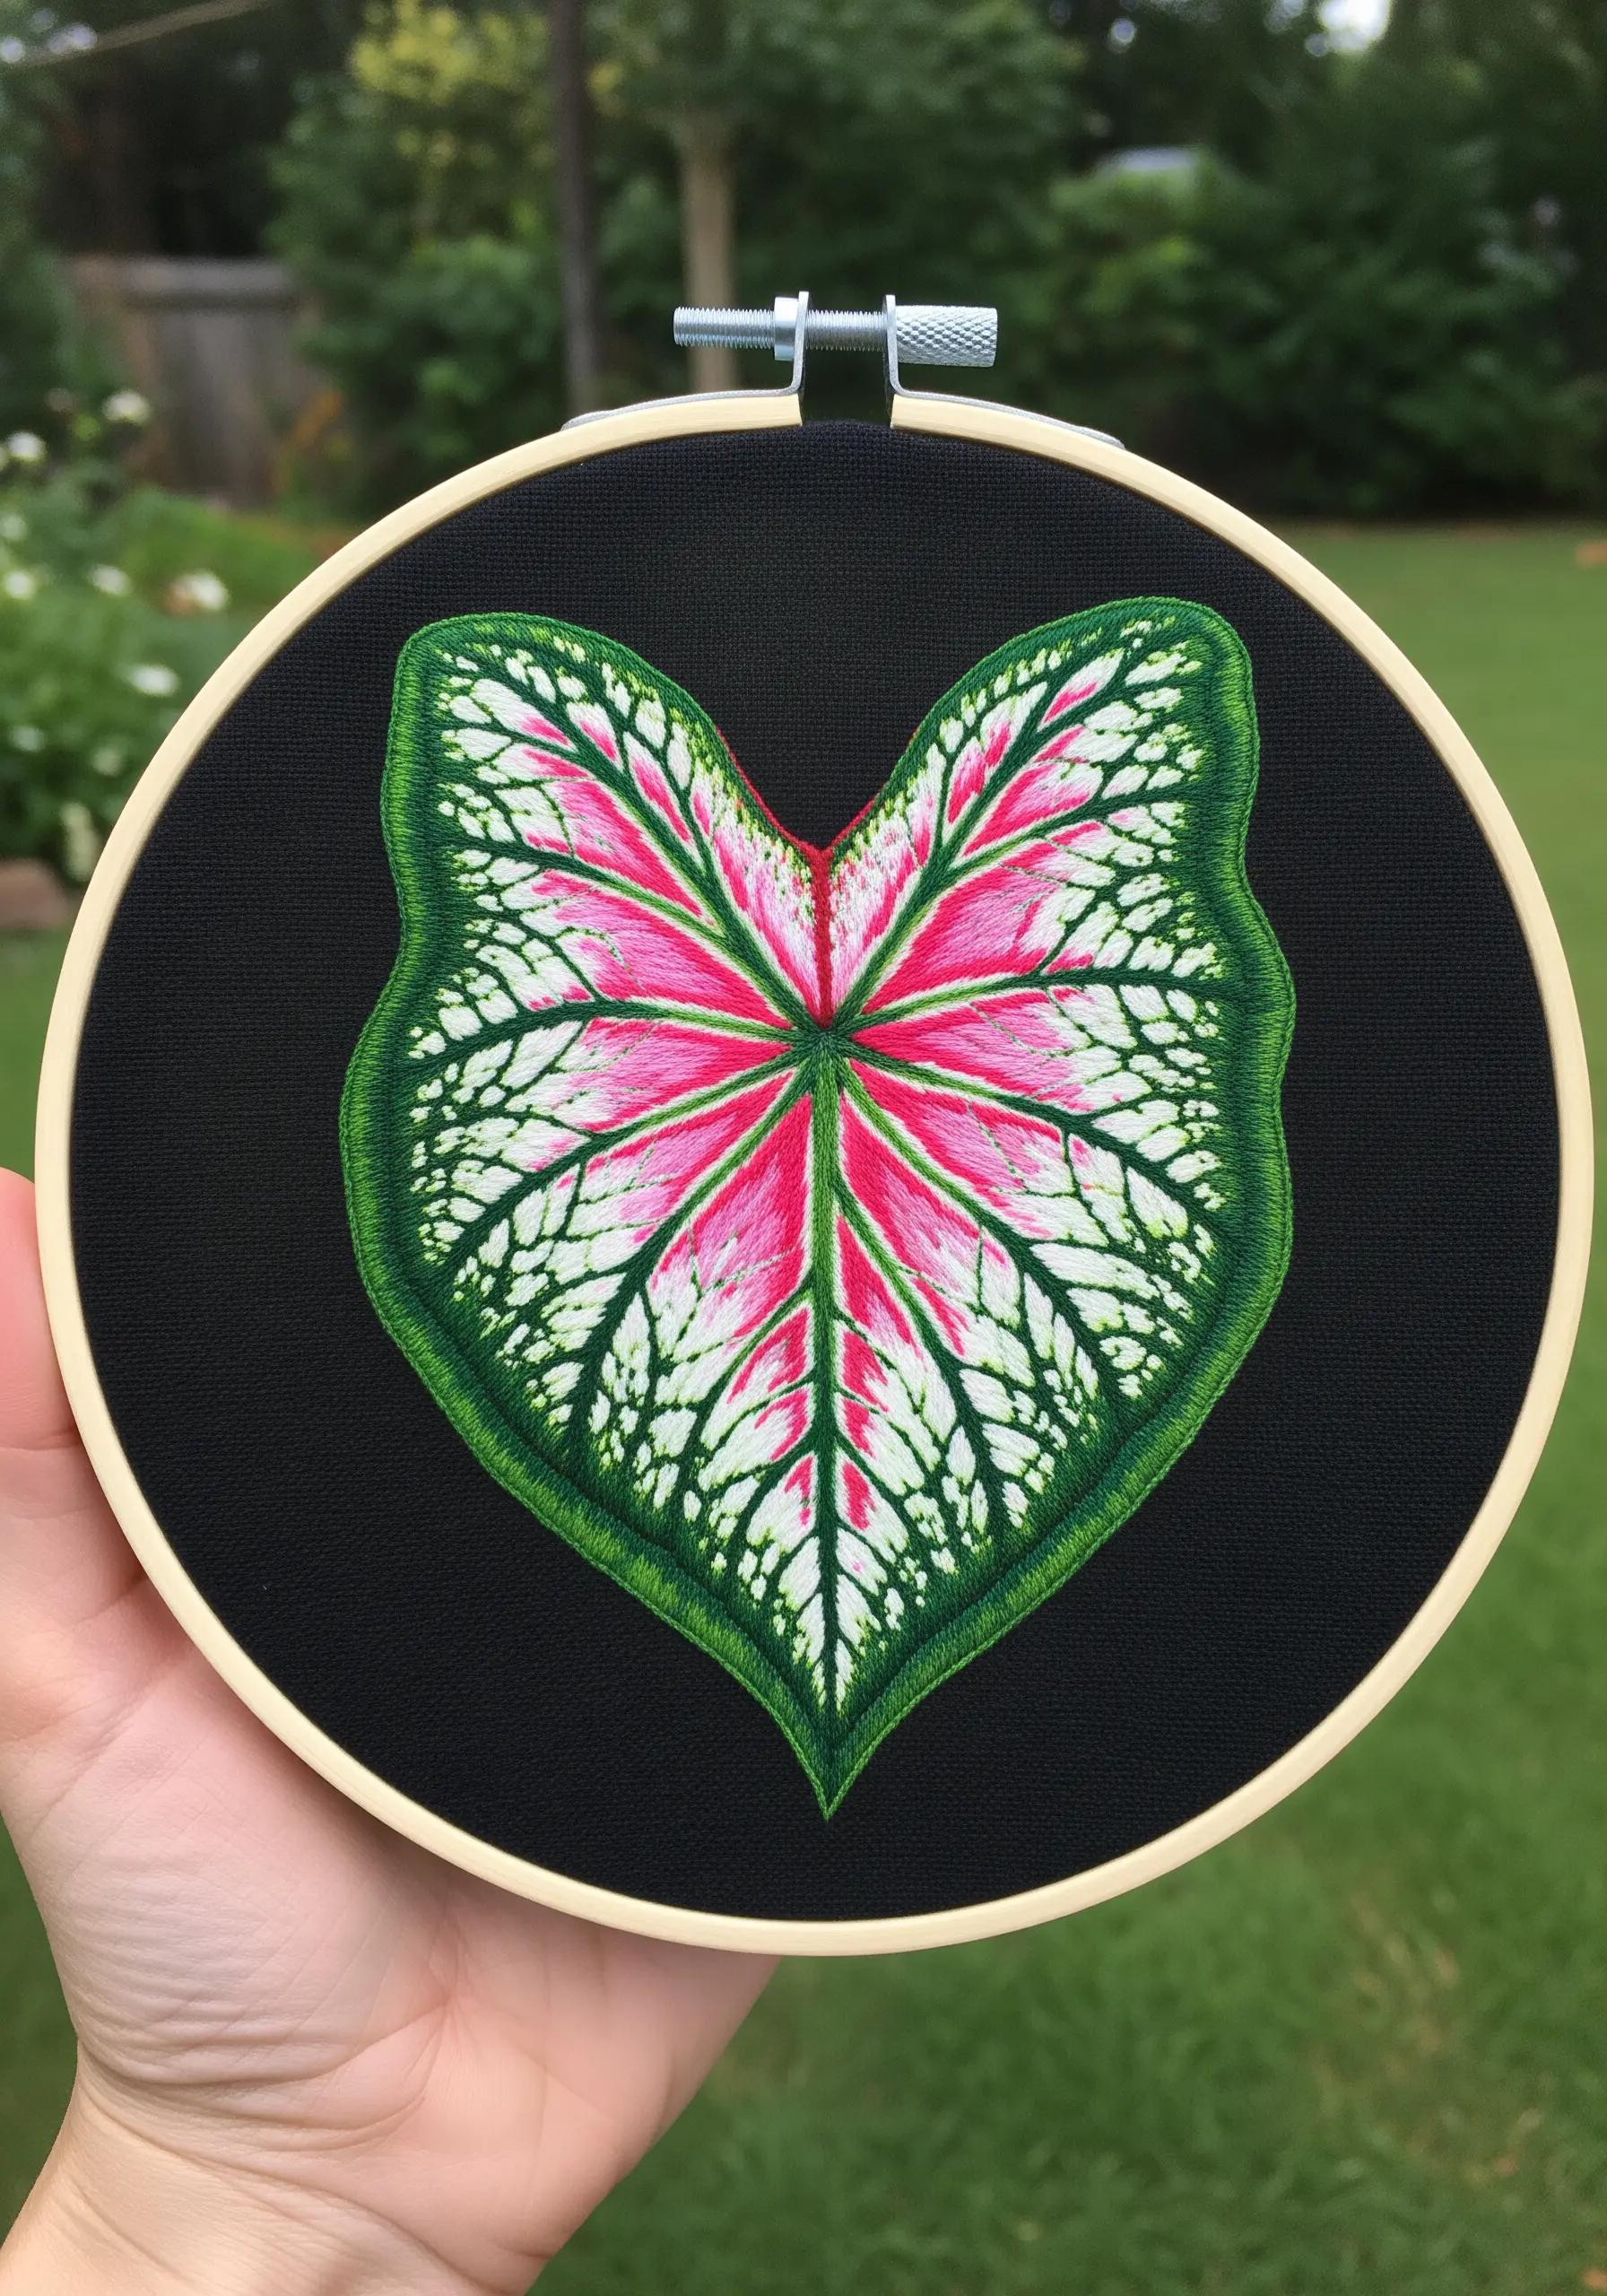
To tackle the complex patterns of a Caladium leaf, work in layers. First, map out and fill the large pink and white areas using long-and-short stitch.
Don’t worry about perfect edges; focus on creating a smooth, solid color base.
Once the base is complete, use a single strand of dark green thread to add the network of fine veins over the top with a simple backstitch.
This layering method gives you ultimate control and ensures the delicate veins remain sharp and defined.
10. Create Raised Leaves with a Detached Satin Stitch
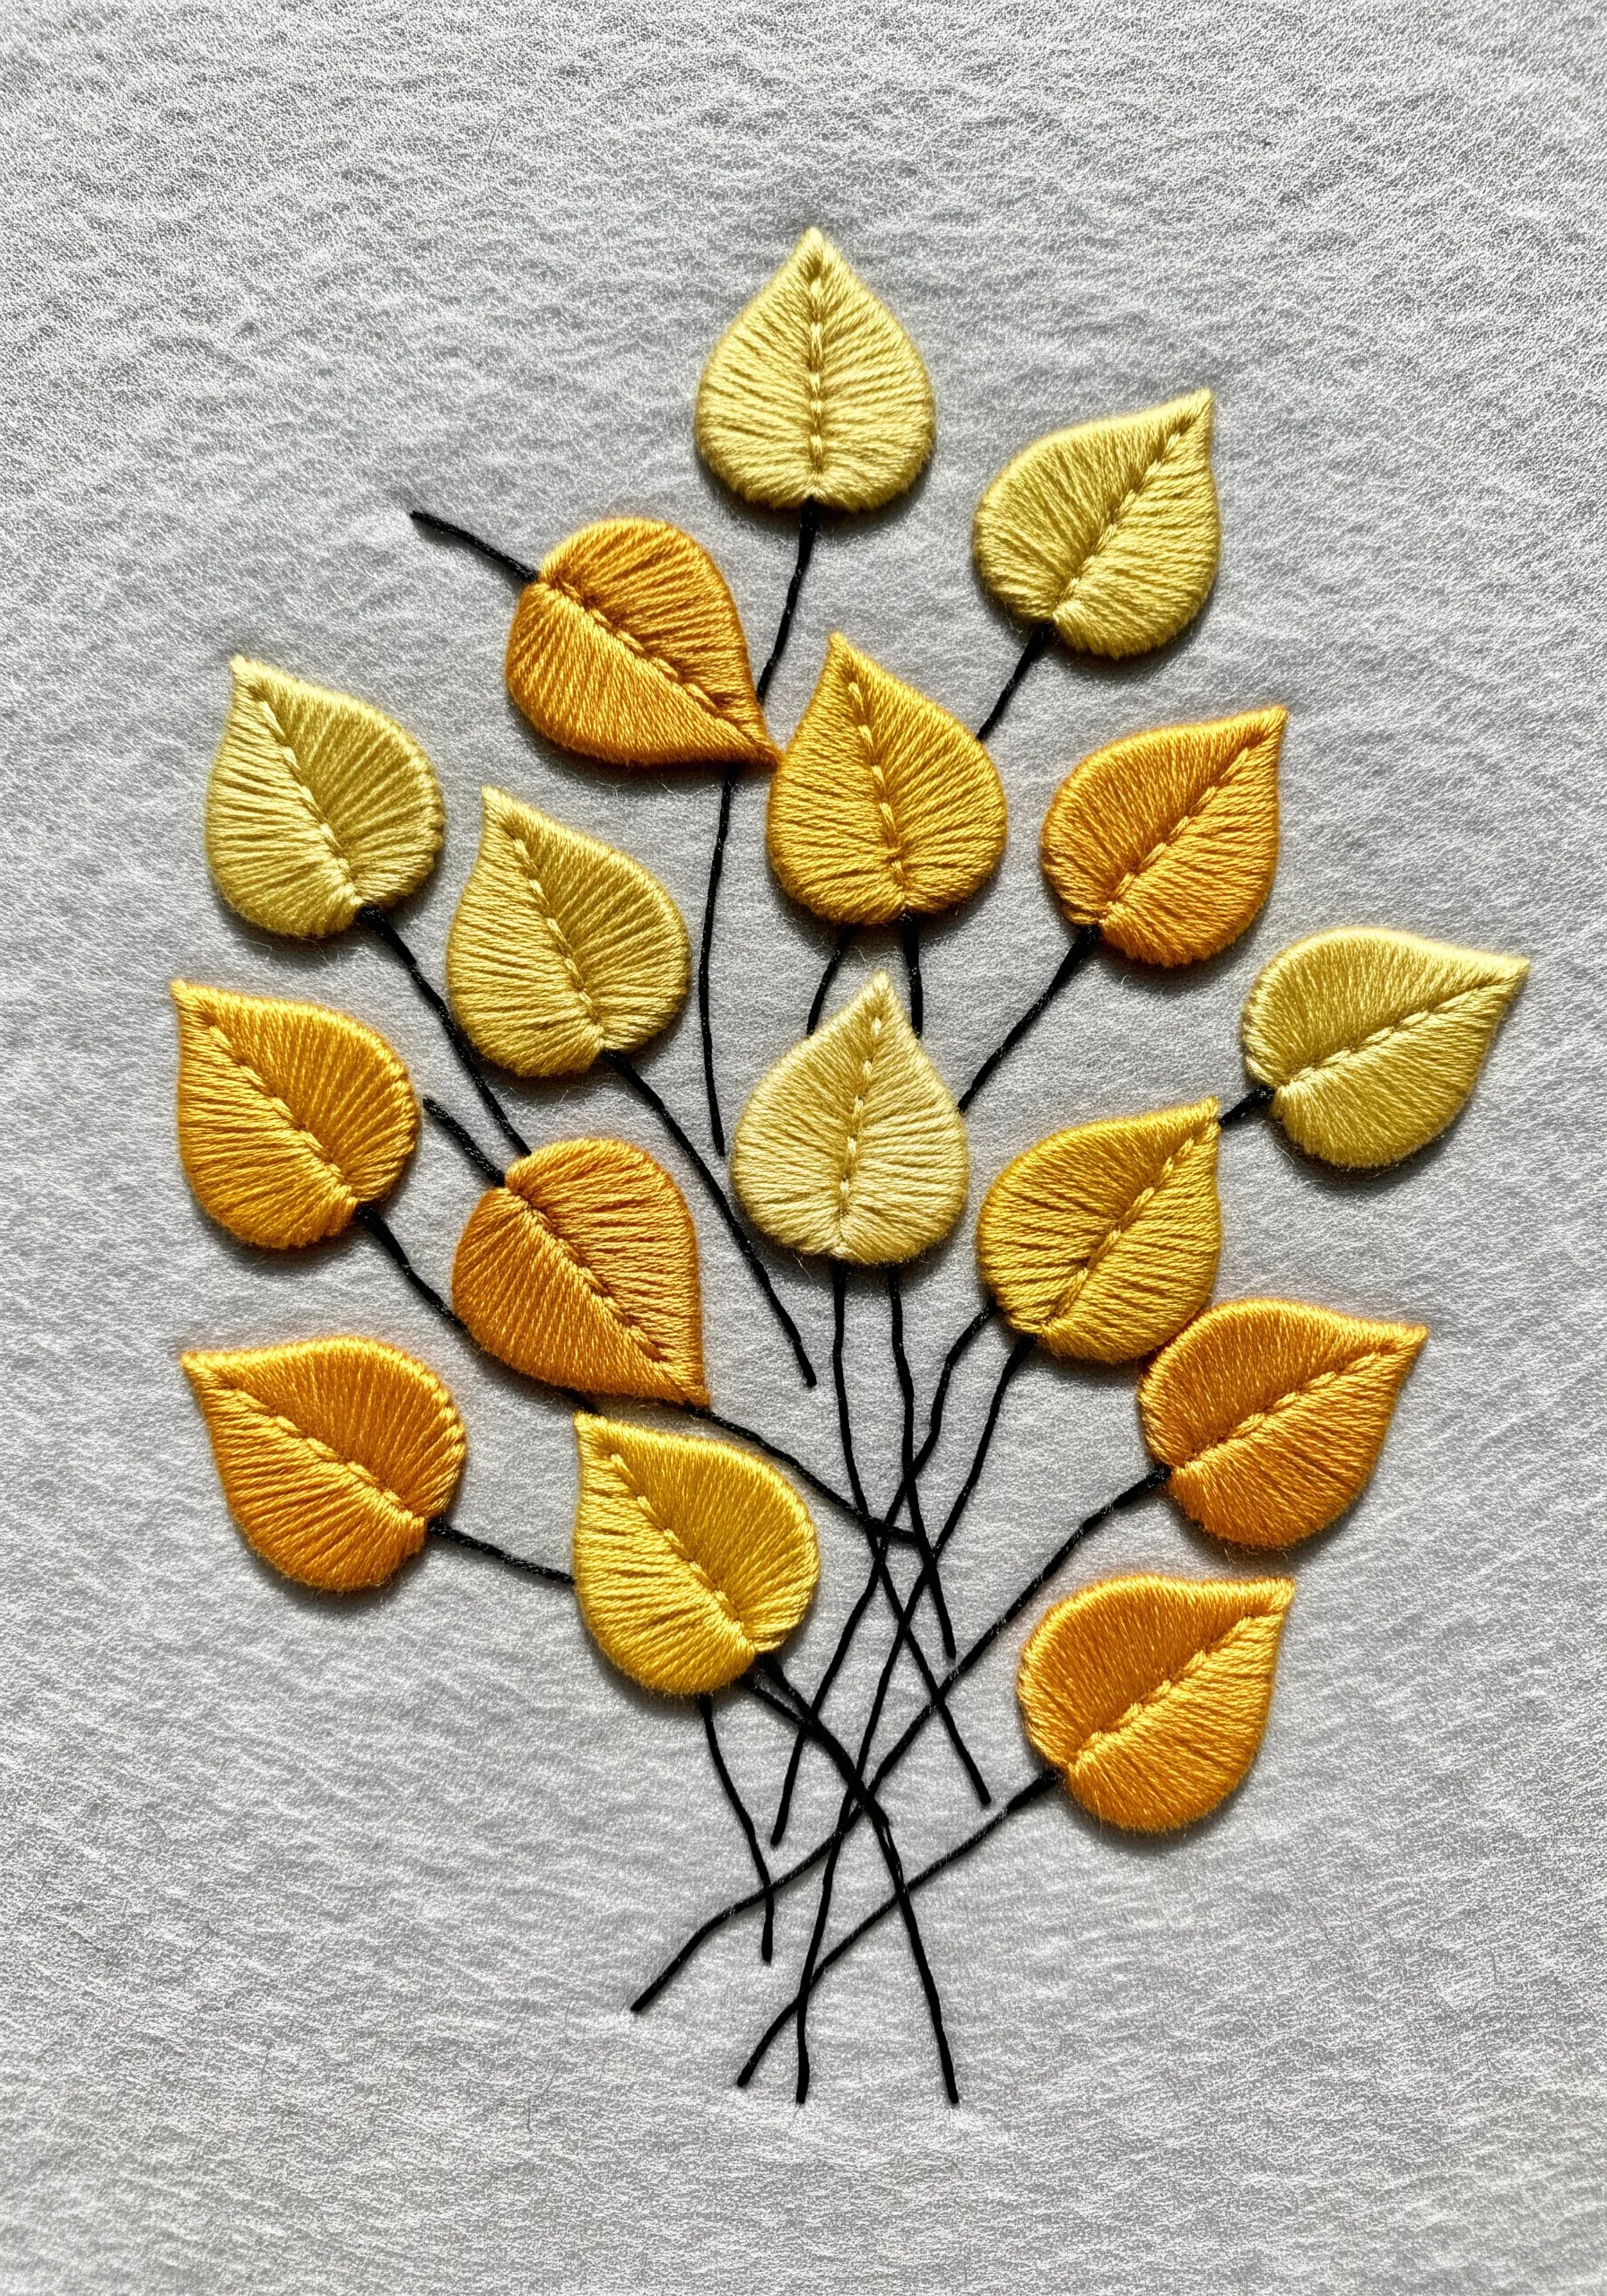
For a bouquet of small leaves that appear to float above the fabric, use a detached satin stitch technique.
First, create a single straight stitch to act as the central vein and spine for the leaf.
Then, work satin stitches over that spine, from one side to the other, without piercing the fabric underneath the main body of the stitch.
This lifts the leaf slightly, creating a subtle 3D effect and beautiful shadows.
11. Mimic Rough Leaf Textures with Dense French Knots
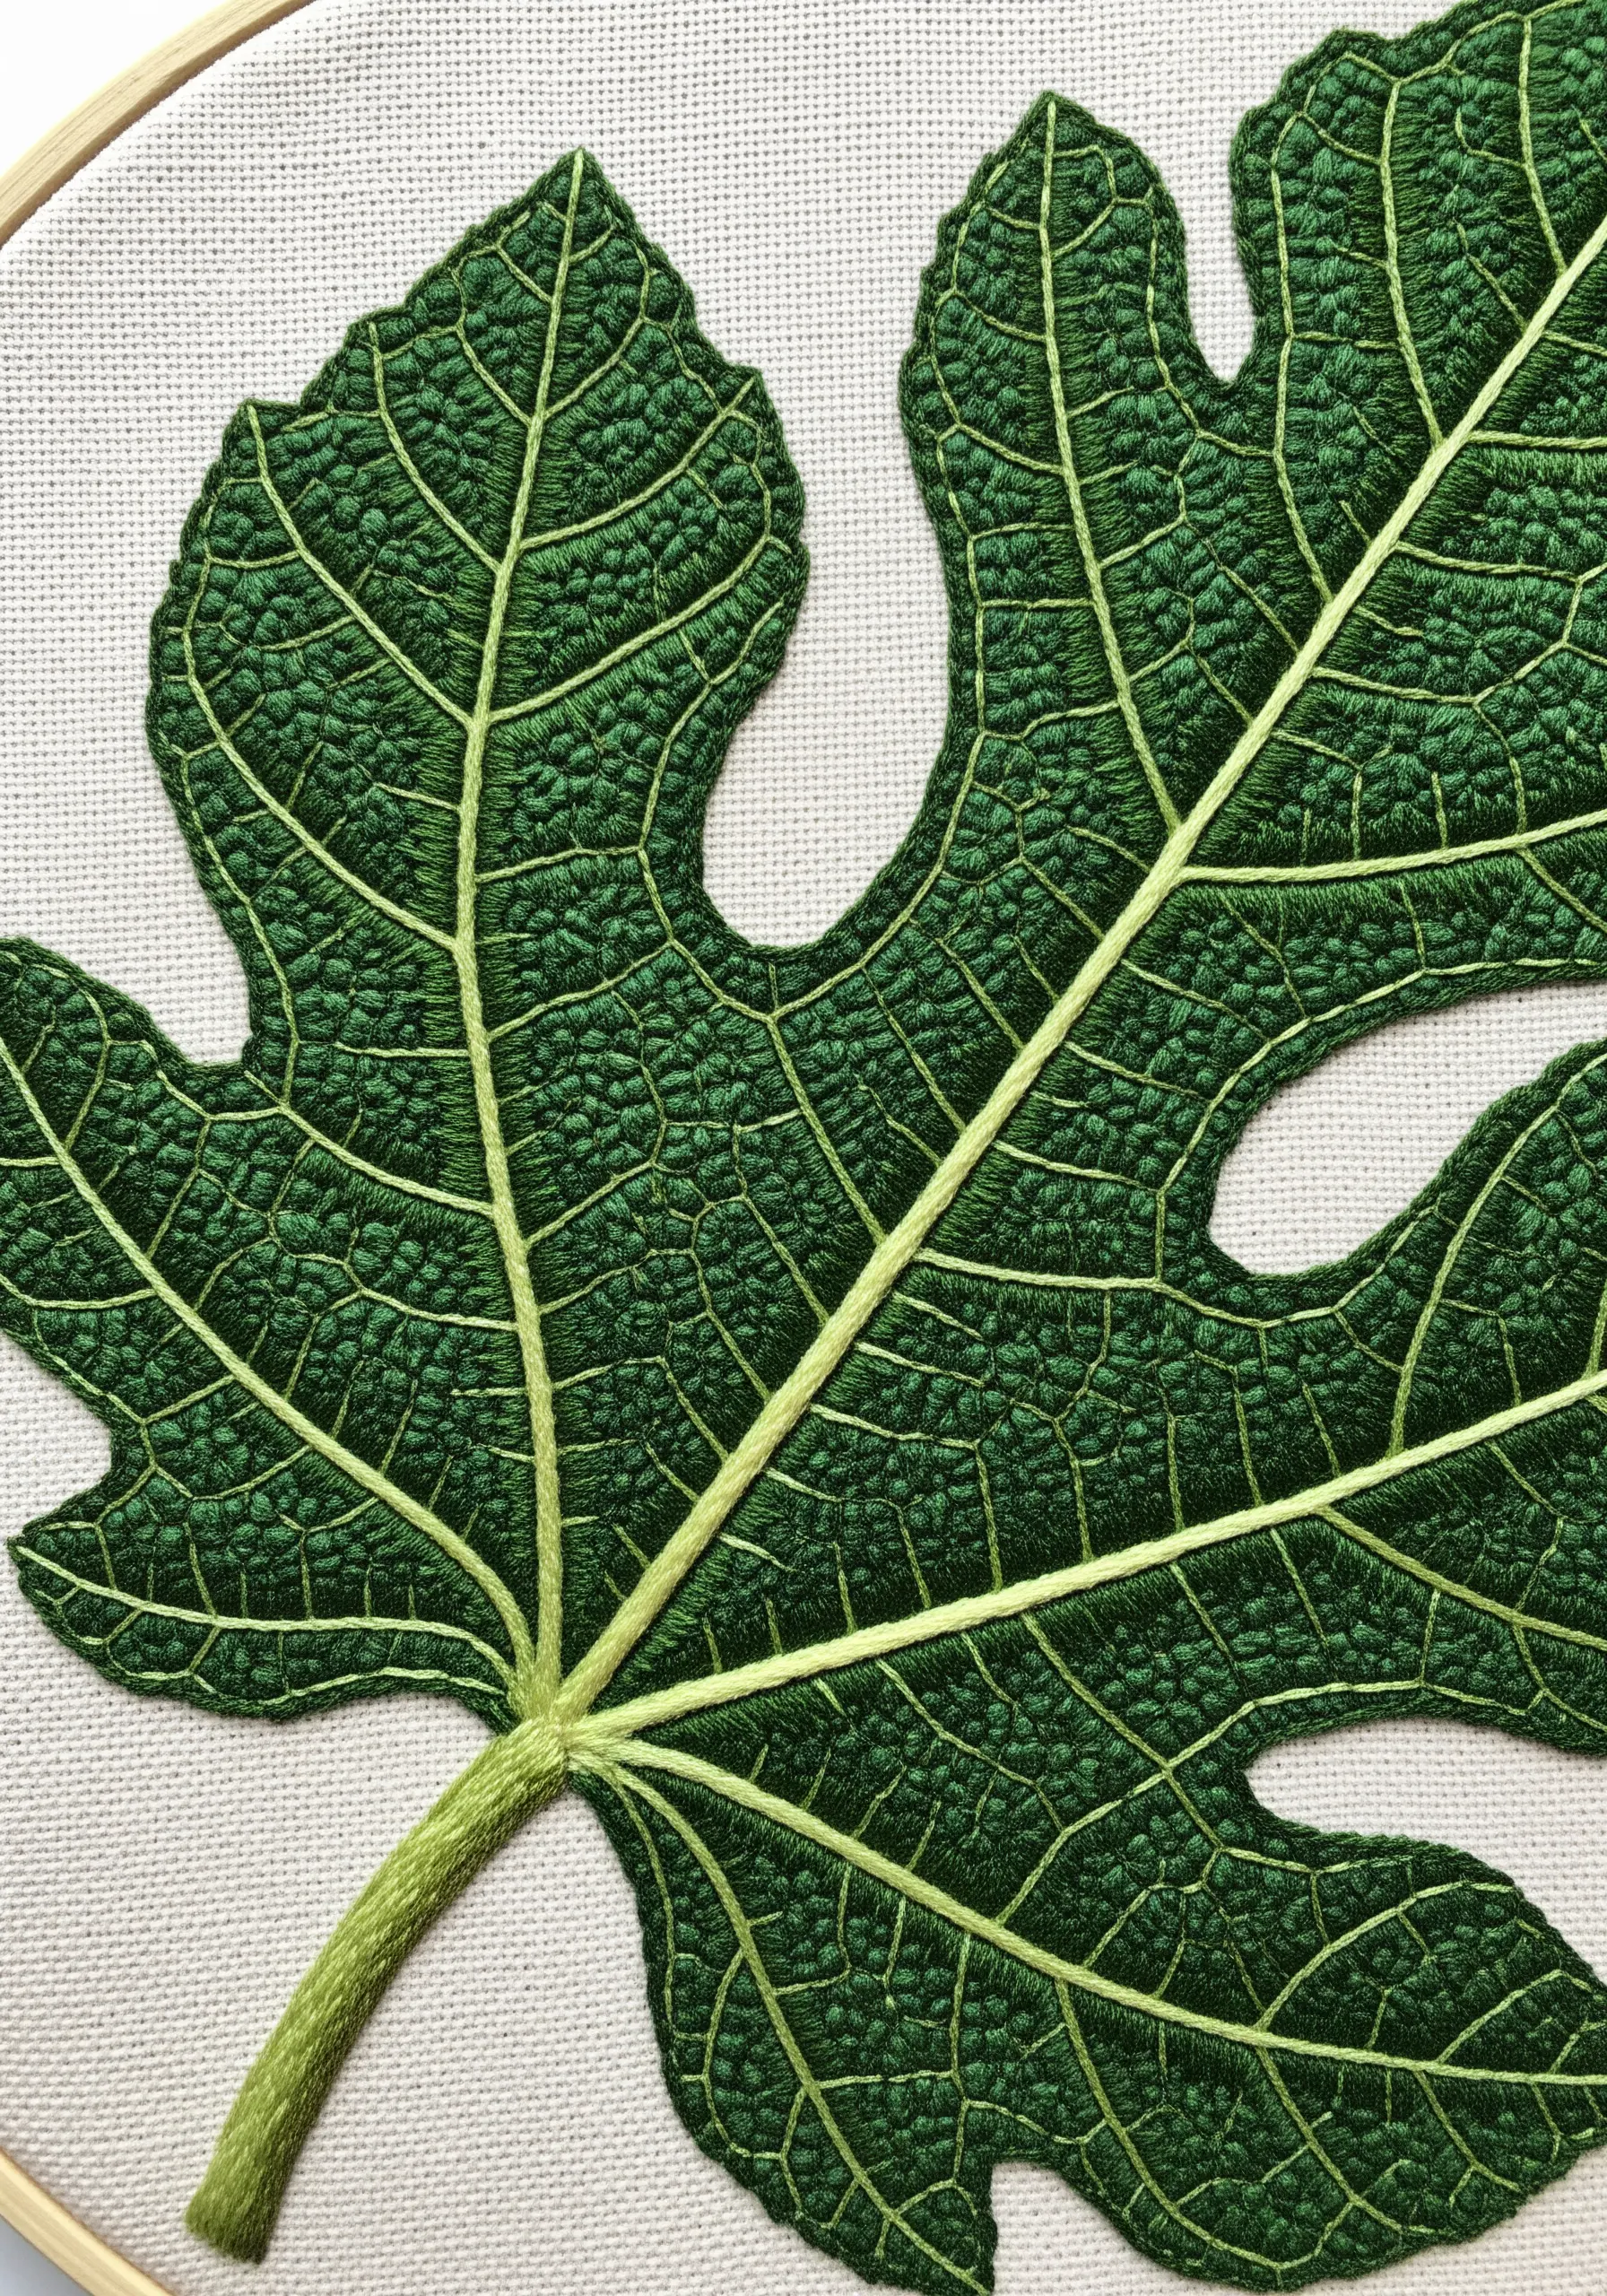
For leaves with a naturally rough or pebbled surface, like a fig leaf, filling the entire area with a dense layer of French knots is incredibly effective.
Use several shades of green and vary the tightness of your knots to create an organic, uneven surface.
Once the textured fill is complete, add the veins using a contrasting lime green stem stitch that sits visibly on top of the knots.
This technique results in wonderfully tactile natural texture embroidery patterns.
12. Layer Simple Stitches to Build a Lush Clover Patch
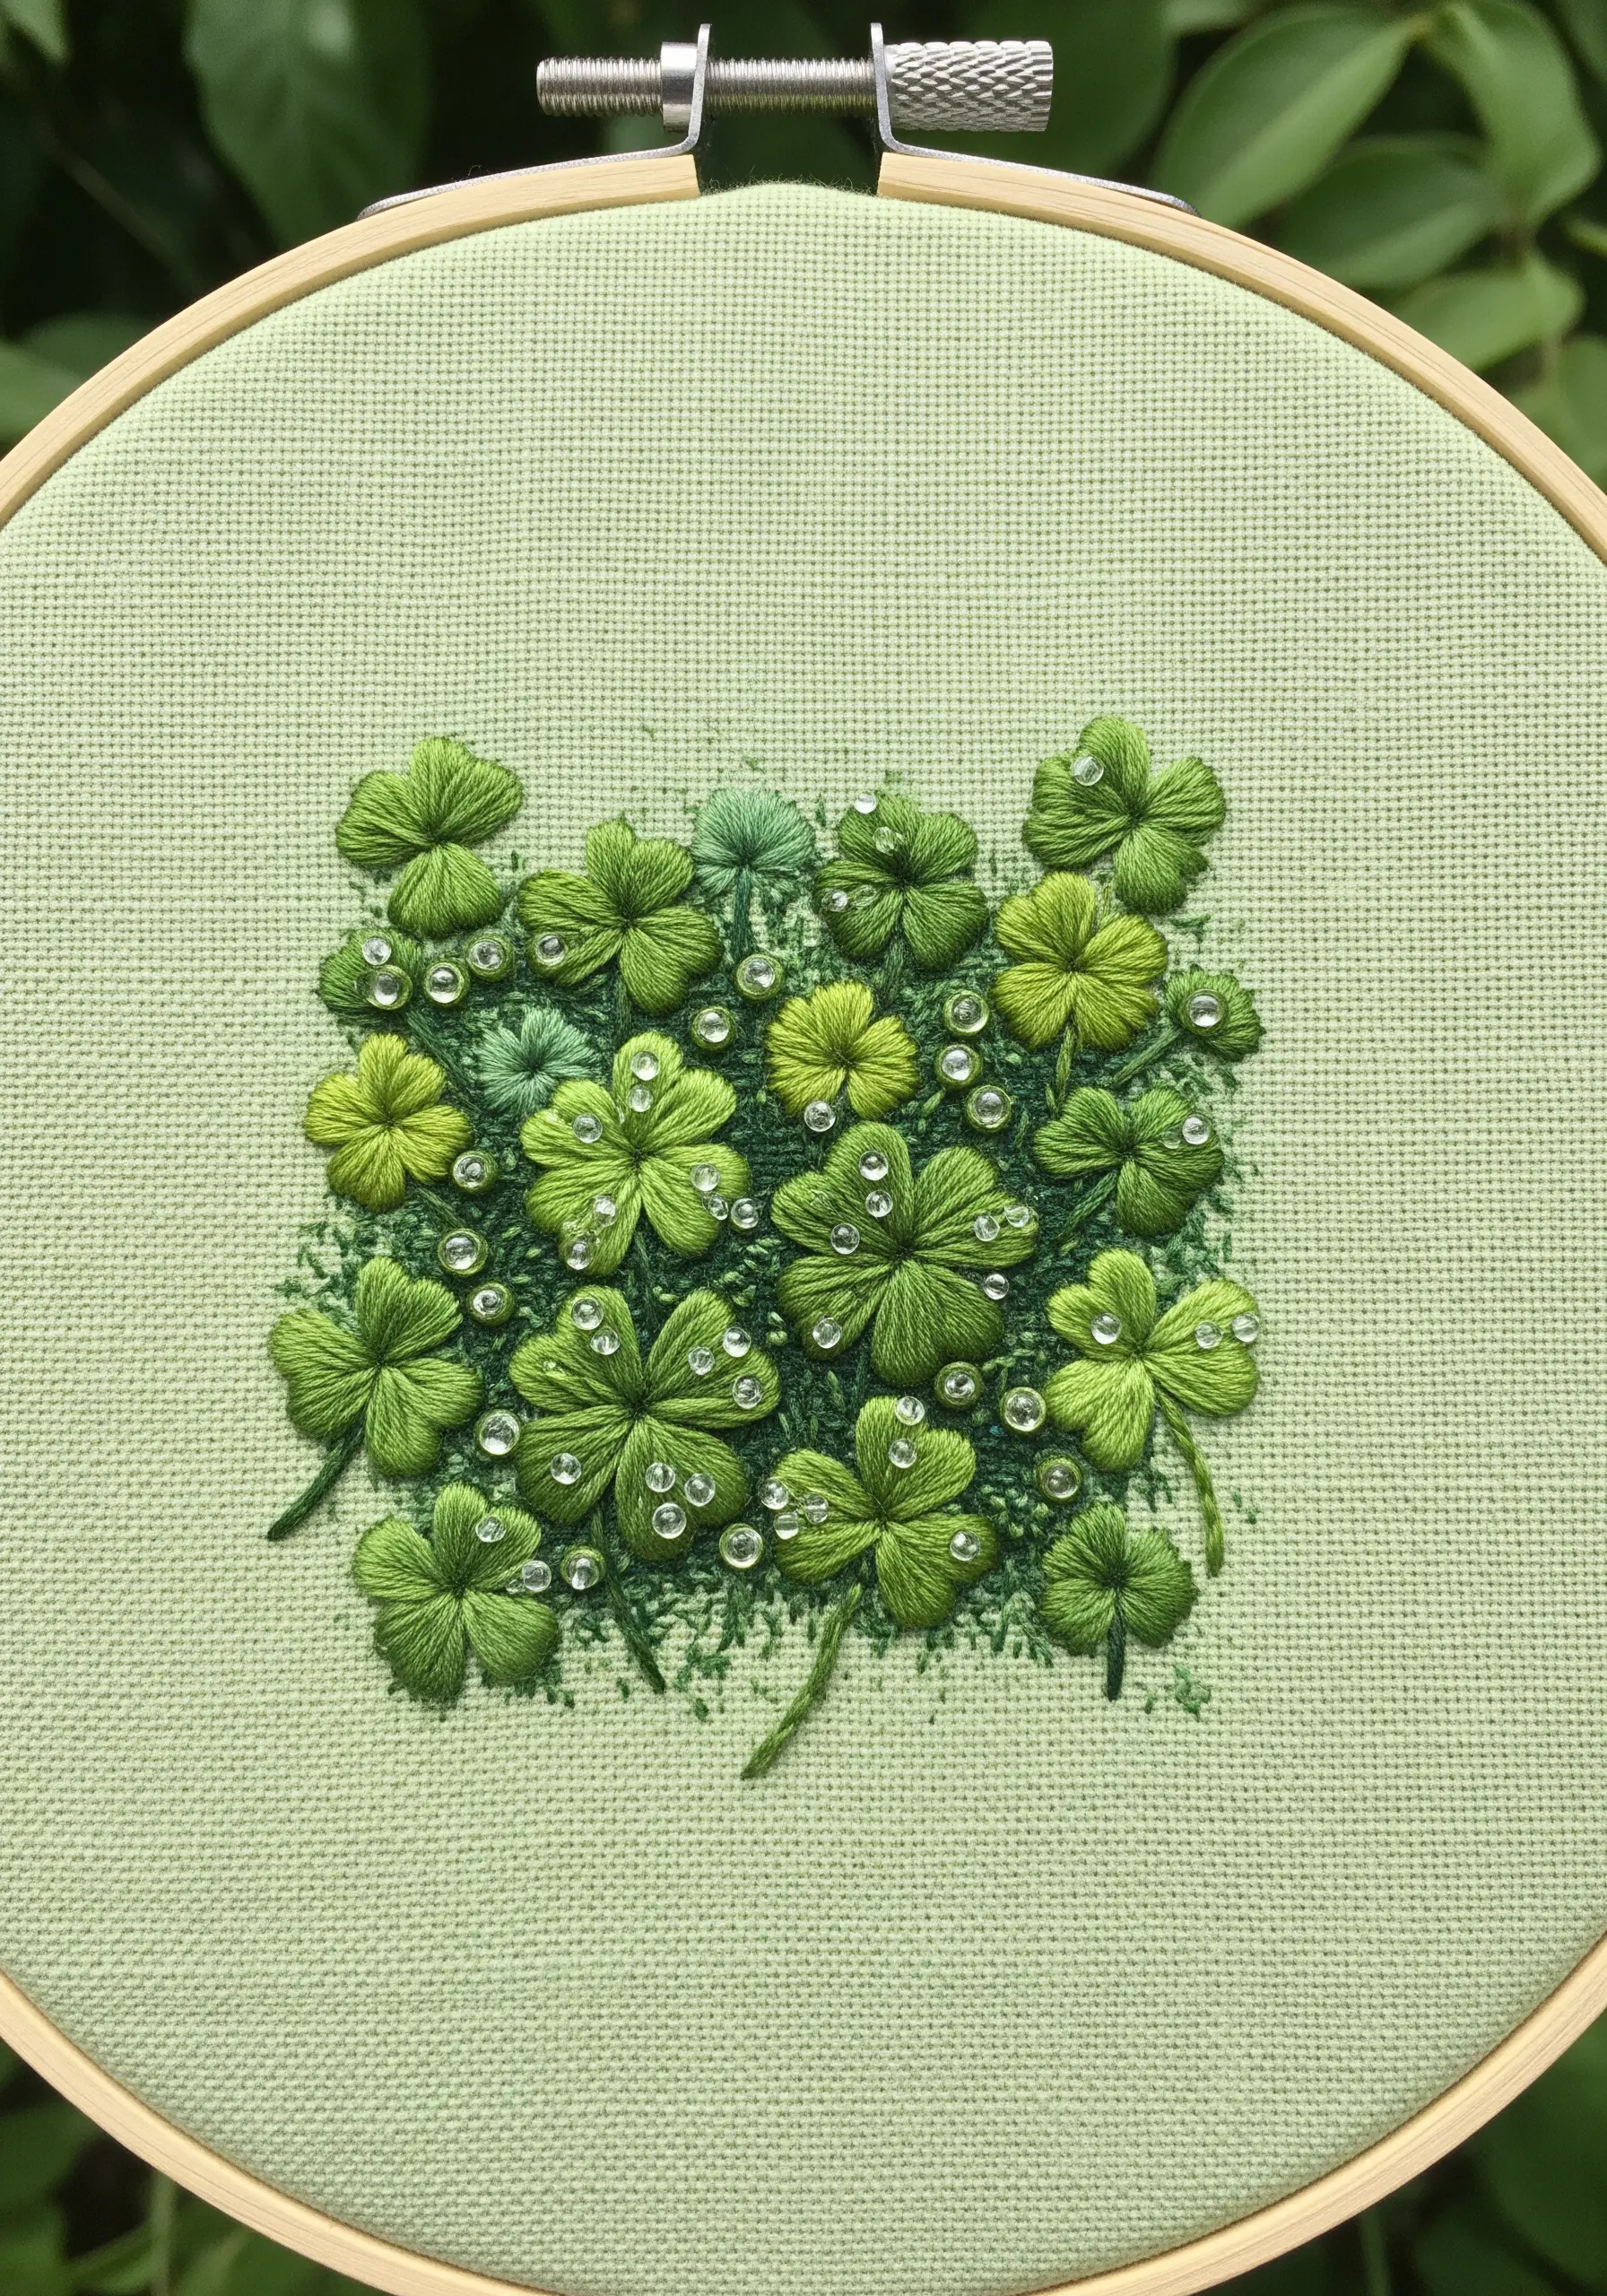
Create a dense field of clover by layering simple shapes. Each leaf is made of four tiny, heart-shaped satin stitches pointing toward a central point.
Vary the size and orientation of the clovers, and use multiple shades of green to prevent the design from looking flat.
Slightly overlap some of the clovers to build a sense of depth and density.
A sprinkle of clear seed beads adds a convincing touch of morning dew.
13. Capture Delicate Tendrils with Whipped Stem Stitch
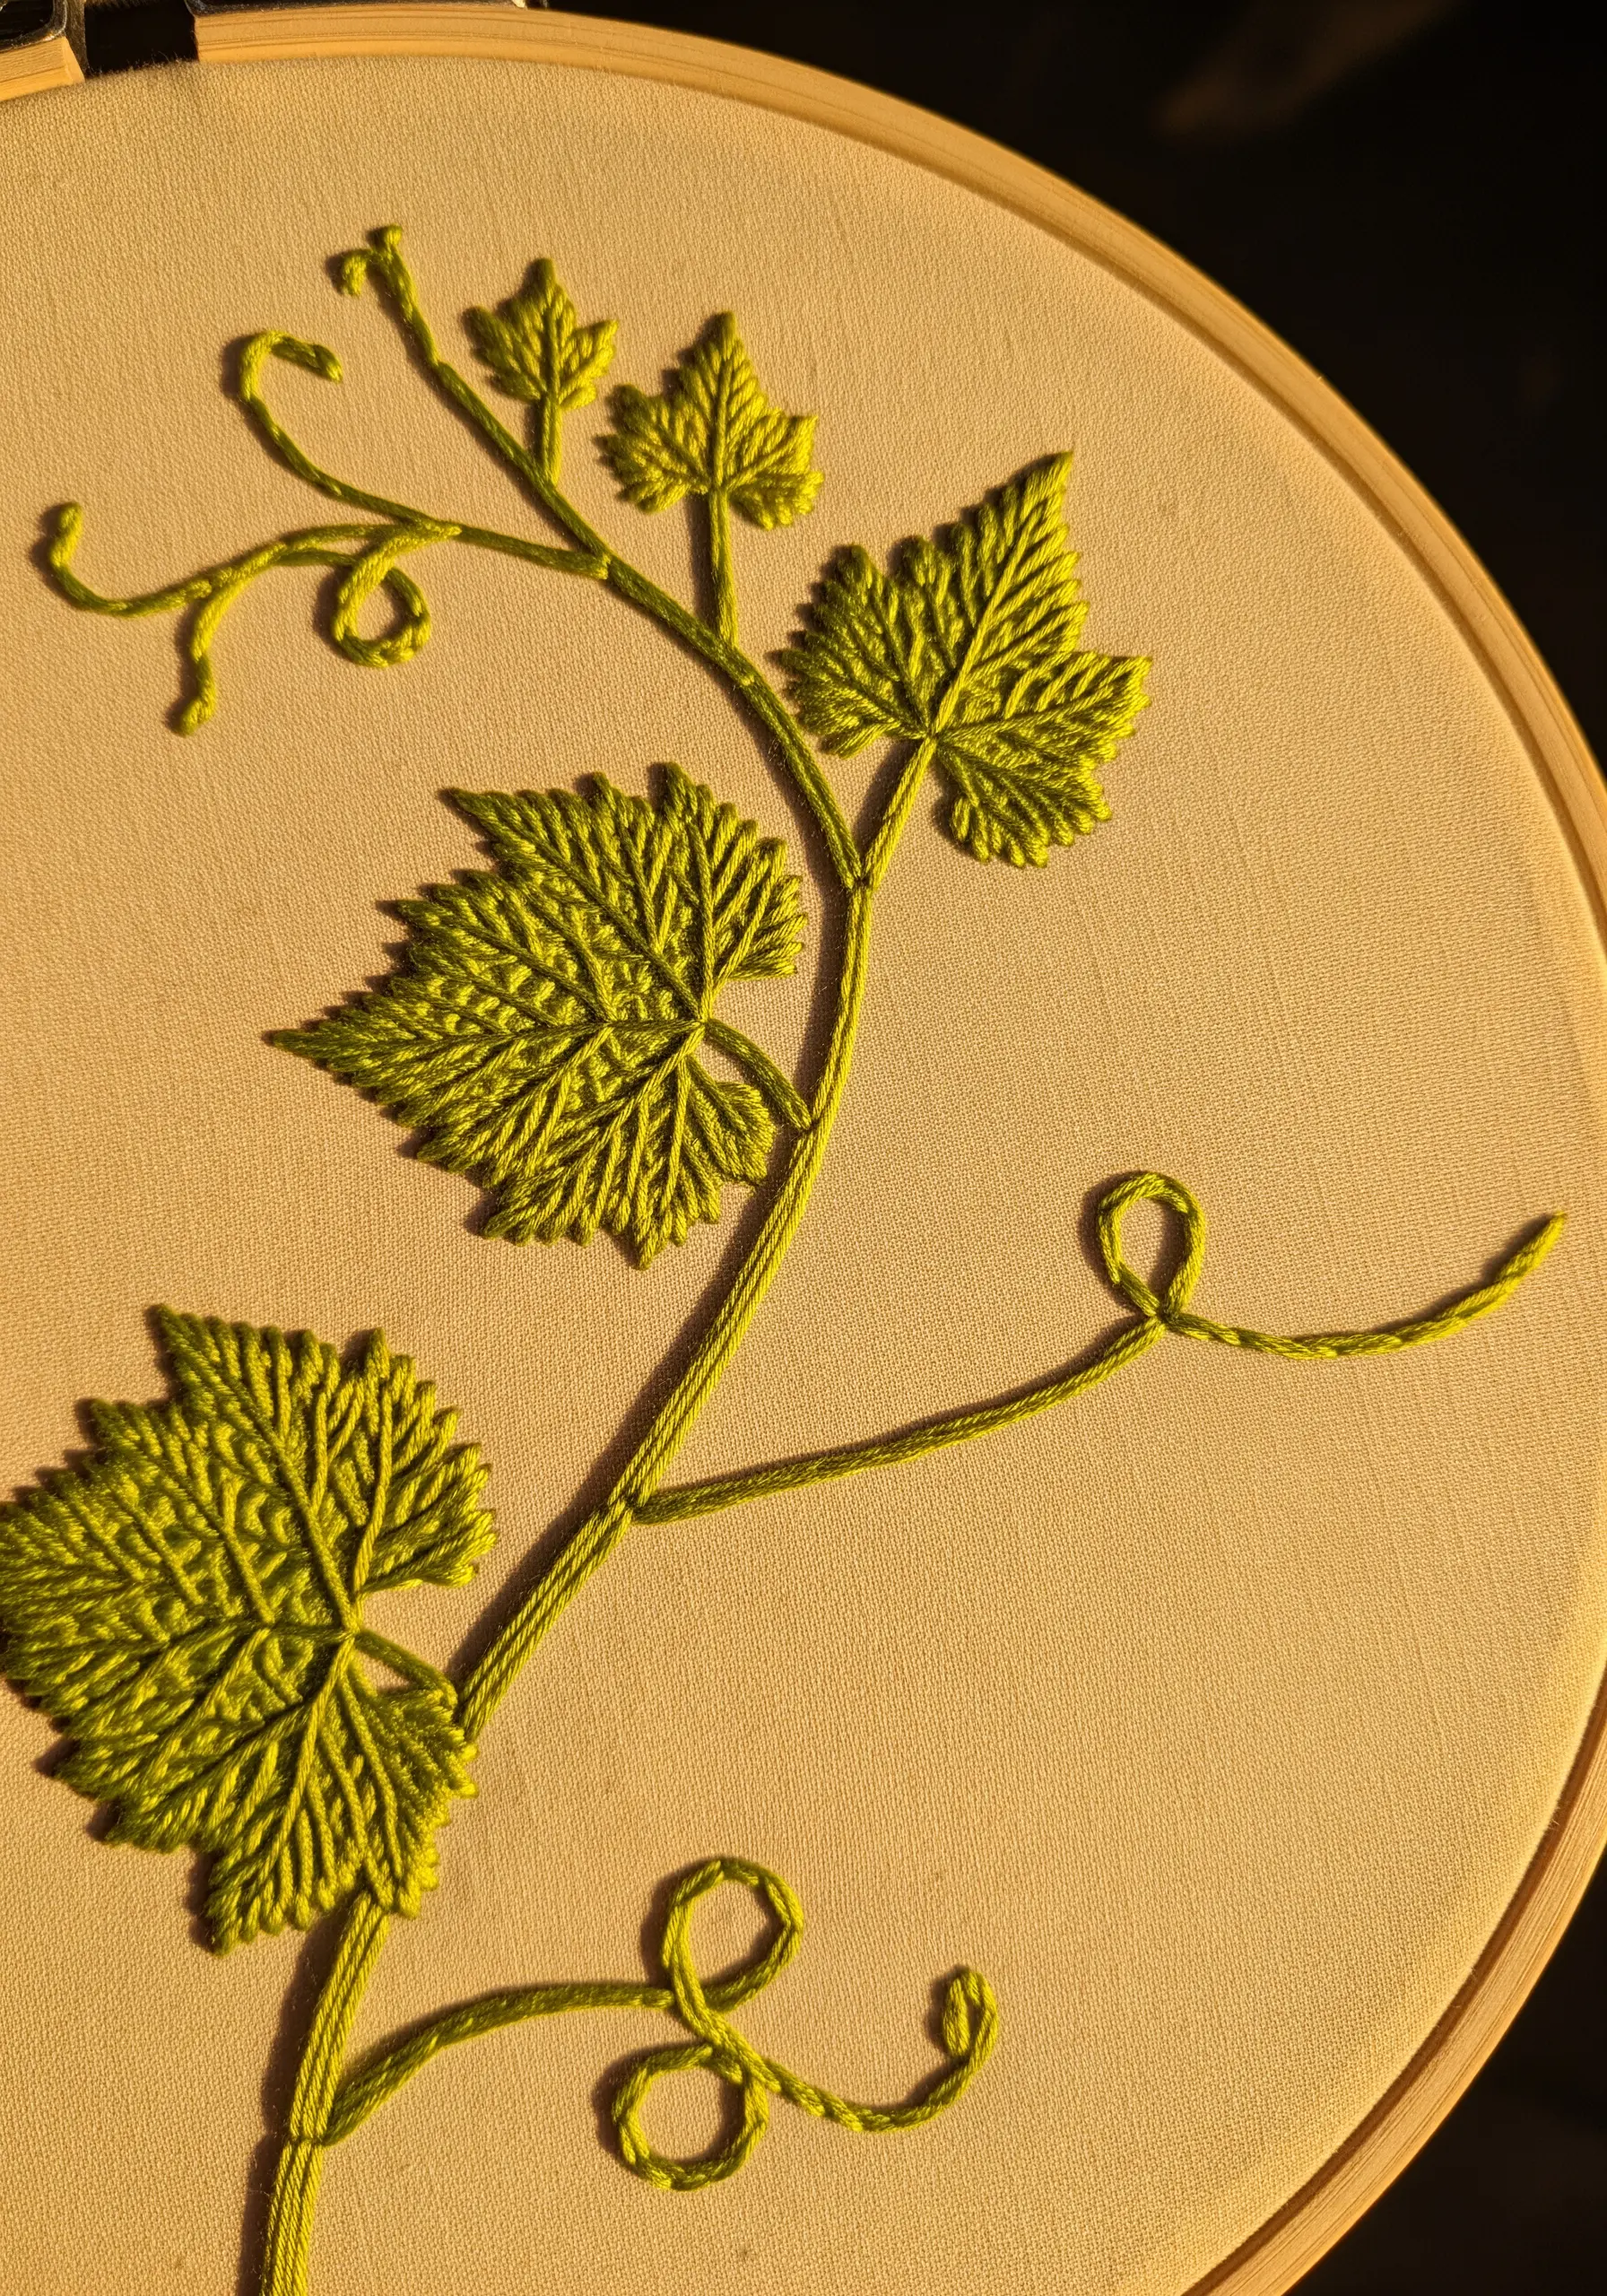
When embroidering vines, the fine details make all the difference. Use an open fishbone stitch for the leaves to keep them feeling light and airy.
For the main stems, a standard stem stitch provides a solid, rope-like line.
To create the whimsical, curling tendrils, use a single strand of thread and a whipped backstitch or a simple, curved stem stitch. This gives them a delicate, three-dimensional twist.
14. Define with Negative Space Using Cutwork Embroidery
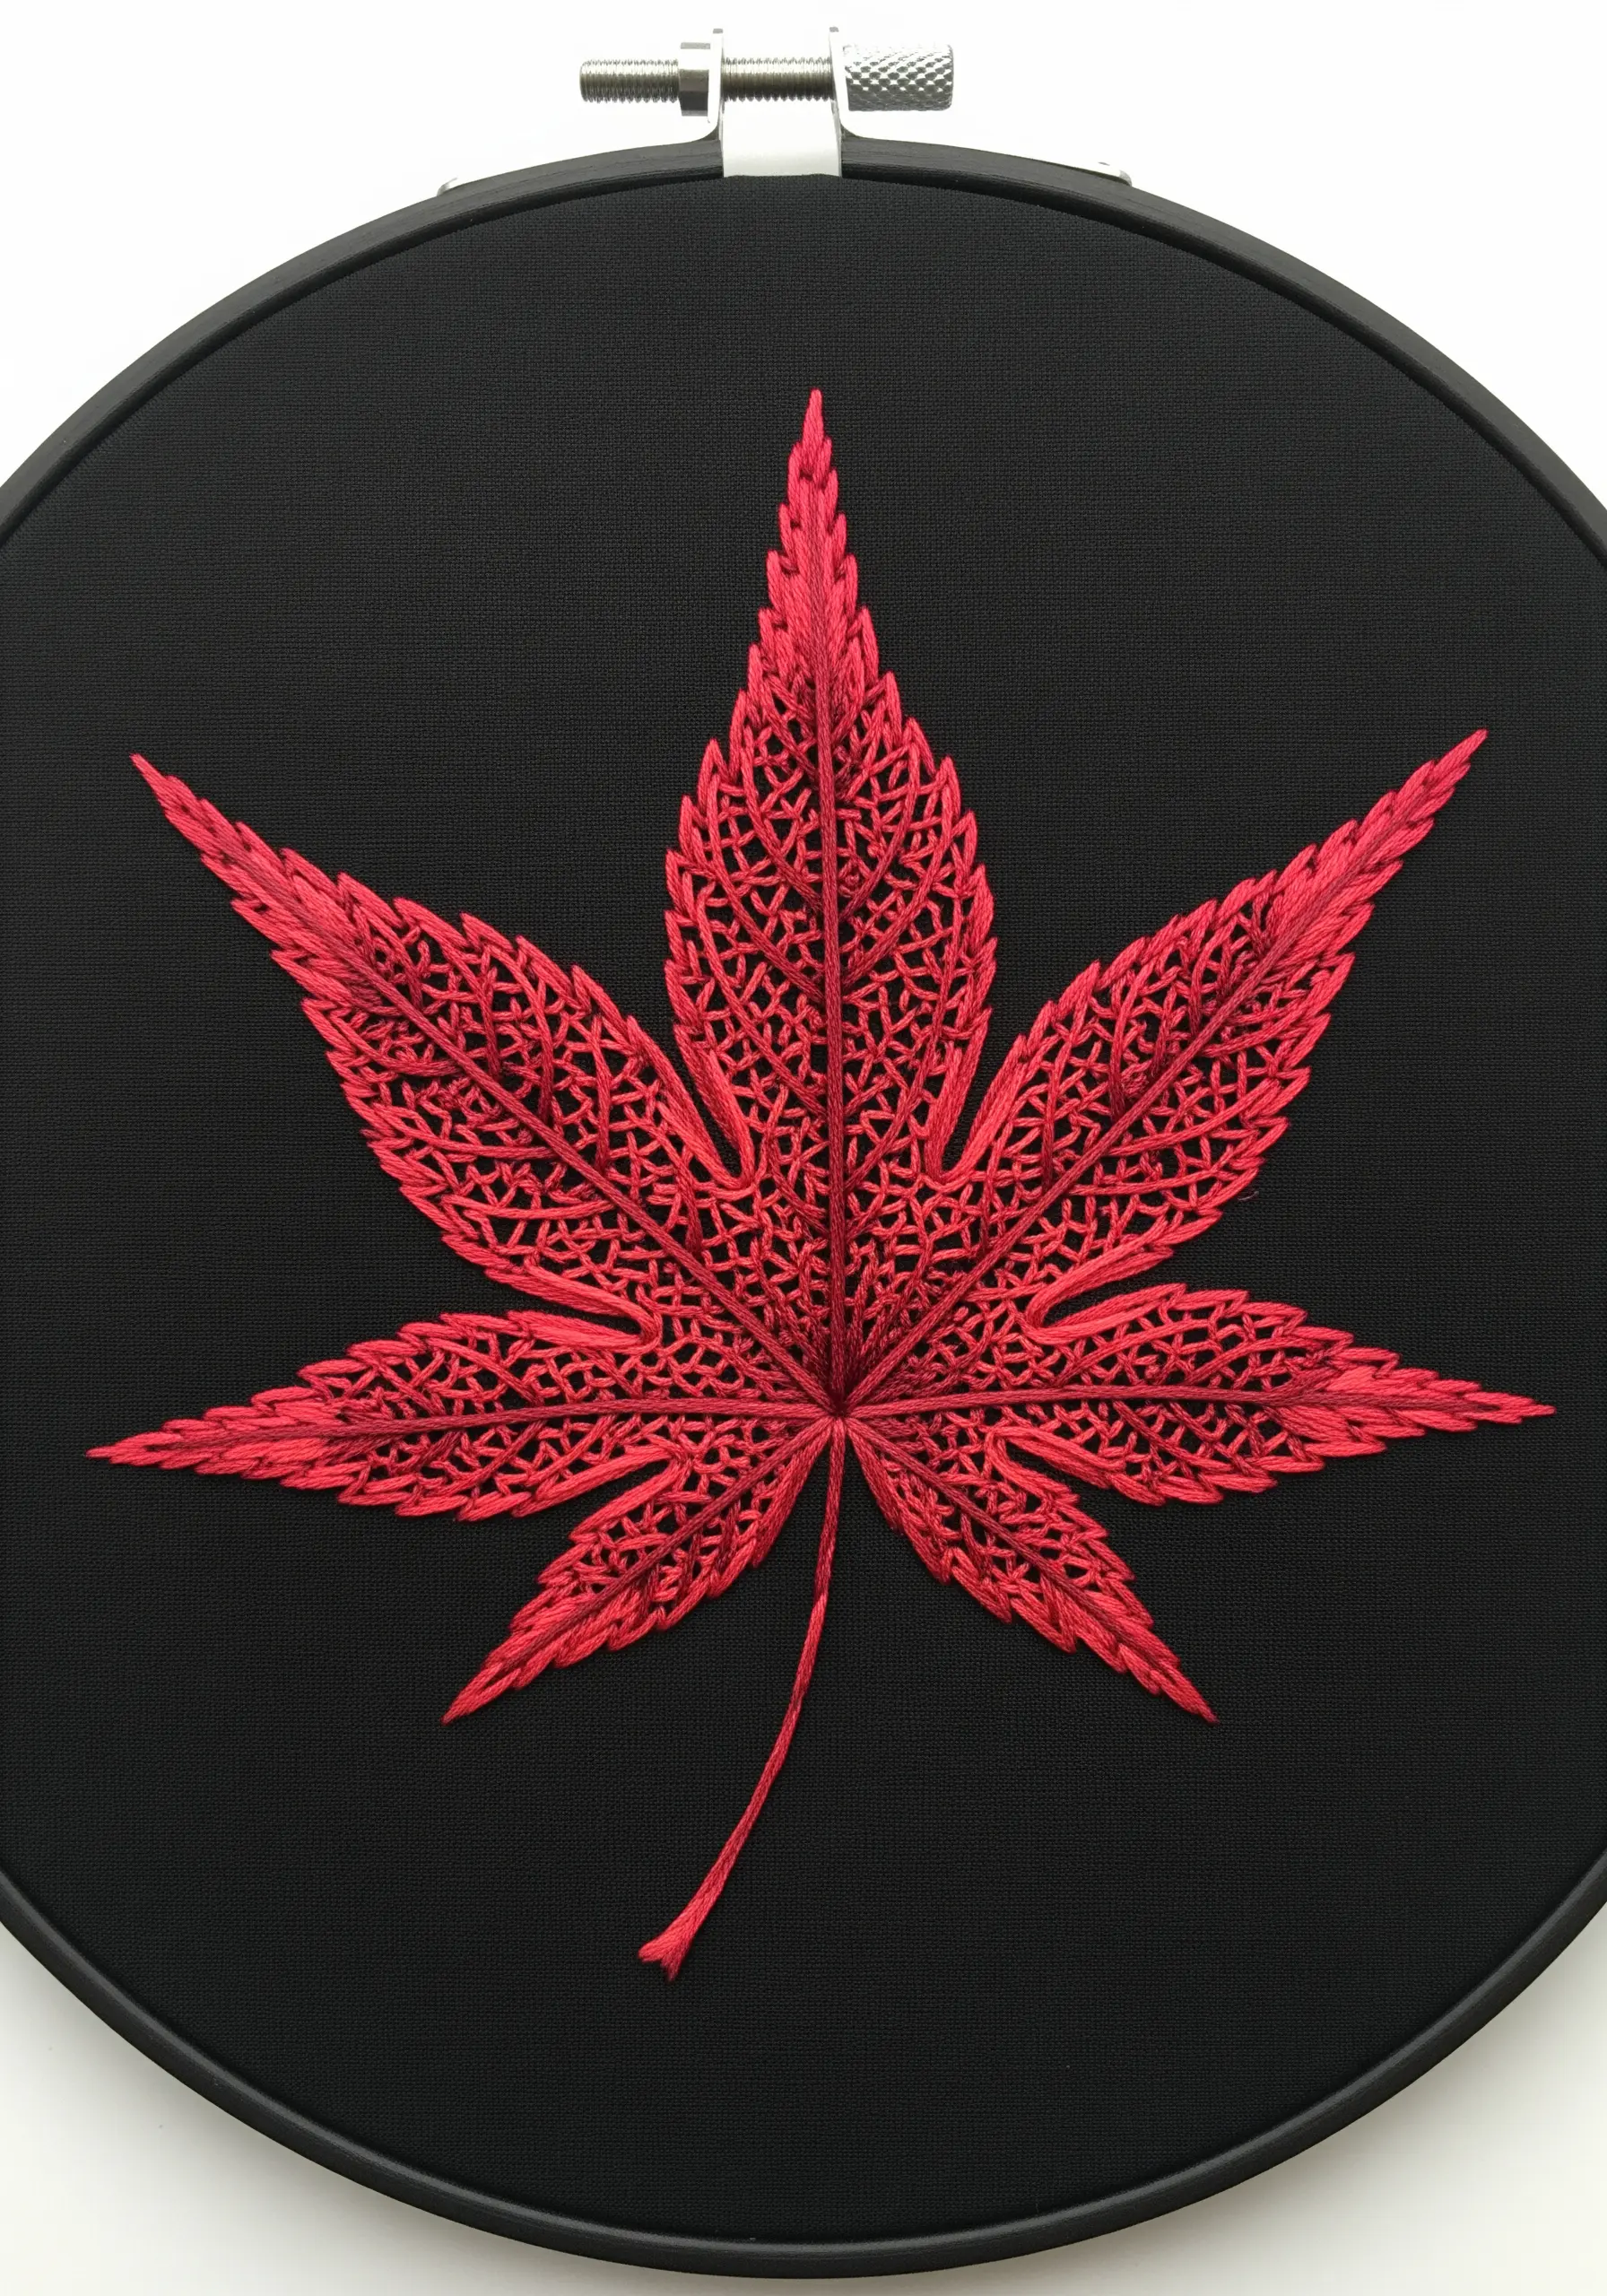
For a dramatic, lace-like effect, explore cutwork embroidery. This advanced technique involves creating a framework of stitches and then cutting away the fabric inside.
Outline the entire leaf and its internal vein structure with a dense, reinforcing border of buttonhole stitches.
Once the stitching is secure, carefully snip away the unstitched fabric from within the tiny sections.
The contrast between solid thread and empty space is visually stunning, especially on dark fabric.
15. Sculpt a Fuzzy Fiddlehead Fern with Turkey Work
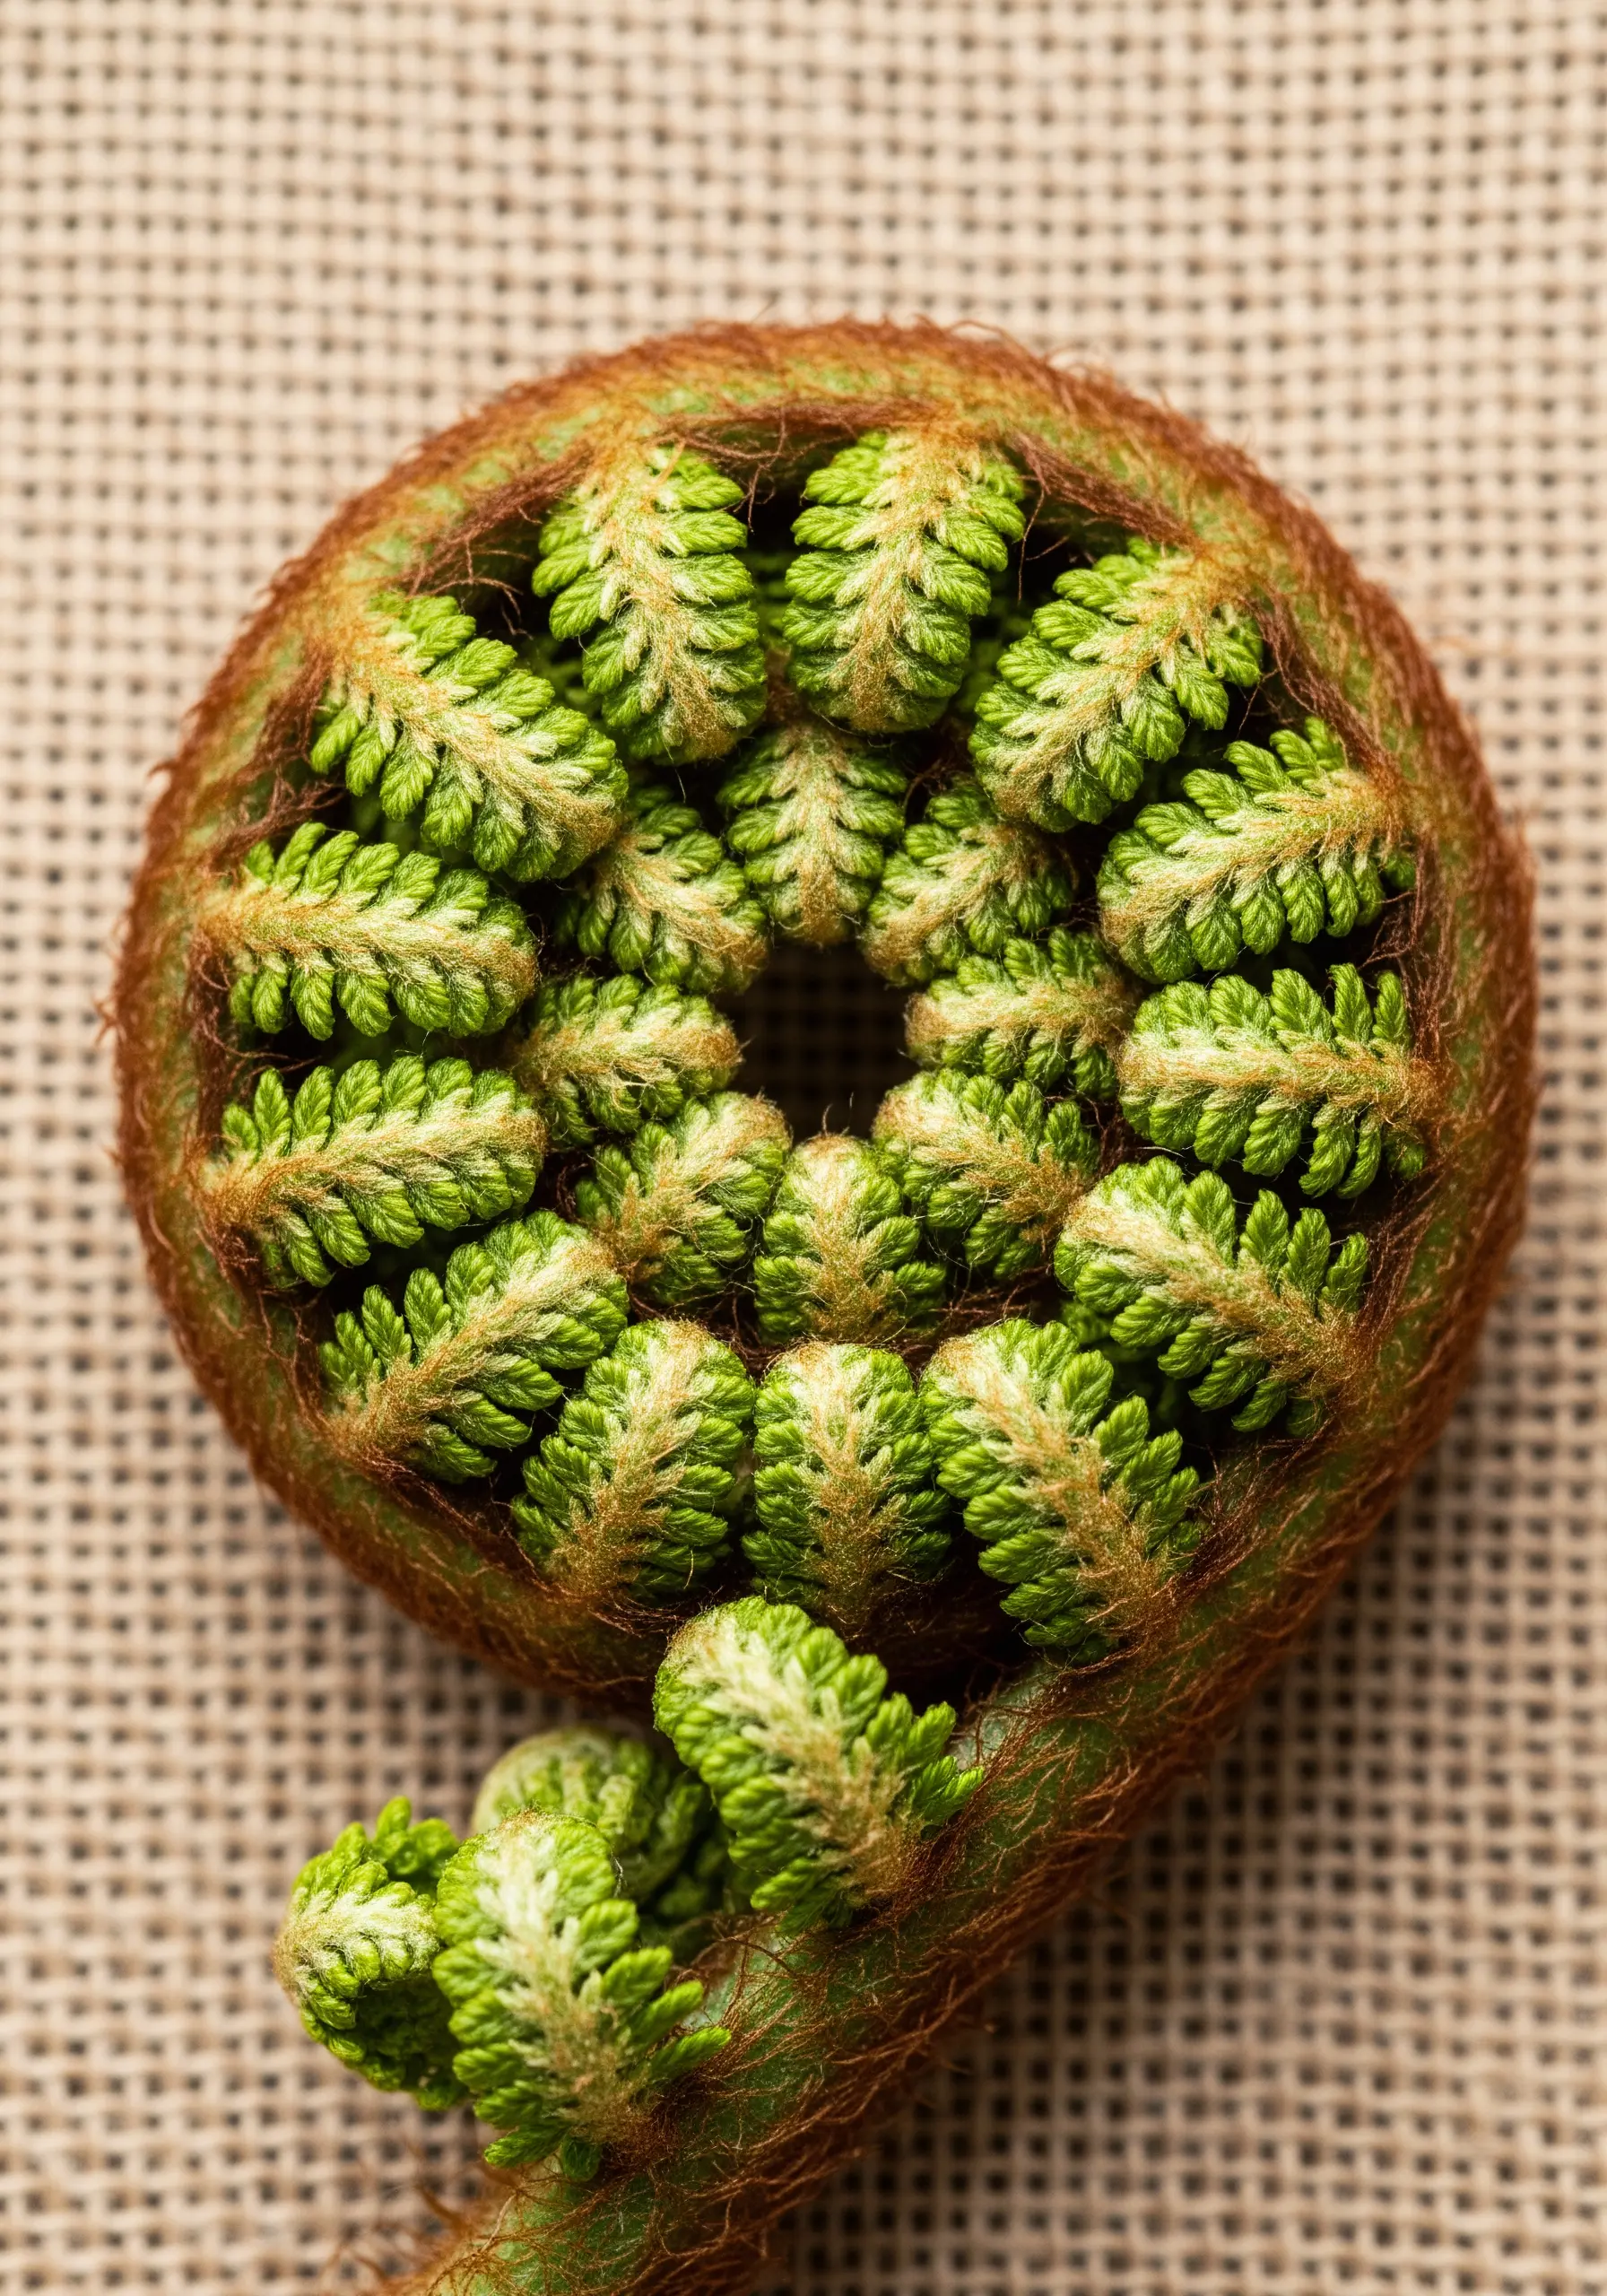
To capture the unique, fuzzy texture of an unfurling fern, you need a three-dimensional stitch like Turkey work.
Create rows of loops in shades of brown and ochre for the outer coil, then trim them short and fluff them to create a velvety pile.
For the green, unfurling fronds, you can use shorter, untrimmed loops or dense French knots.
This sculptural approach brings a tactile realism that flat stitches cannot replicate.
16. Add Hyperrealistic Detail with Beaded Appliqué
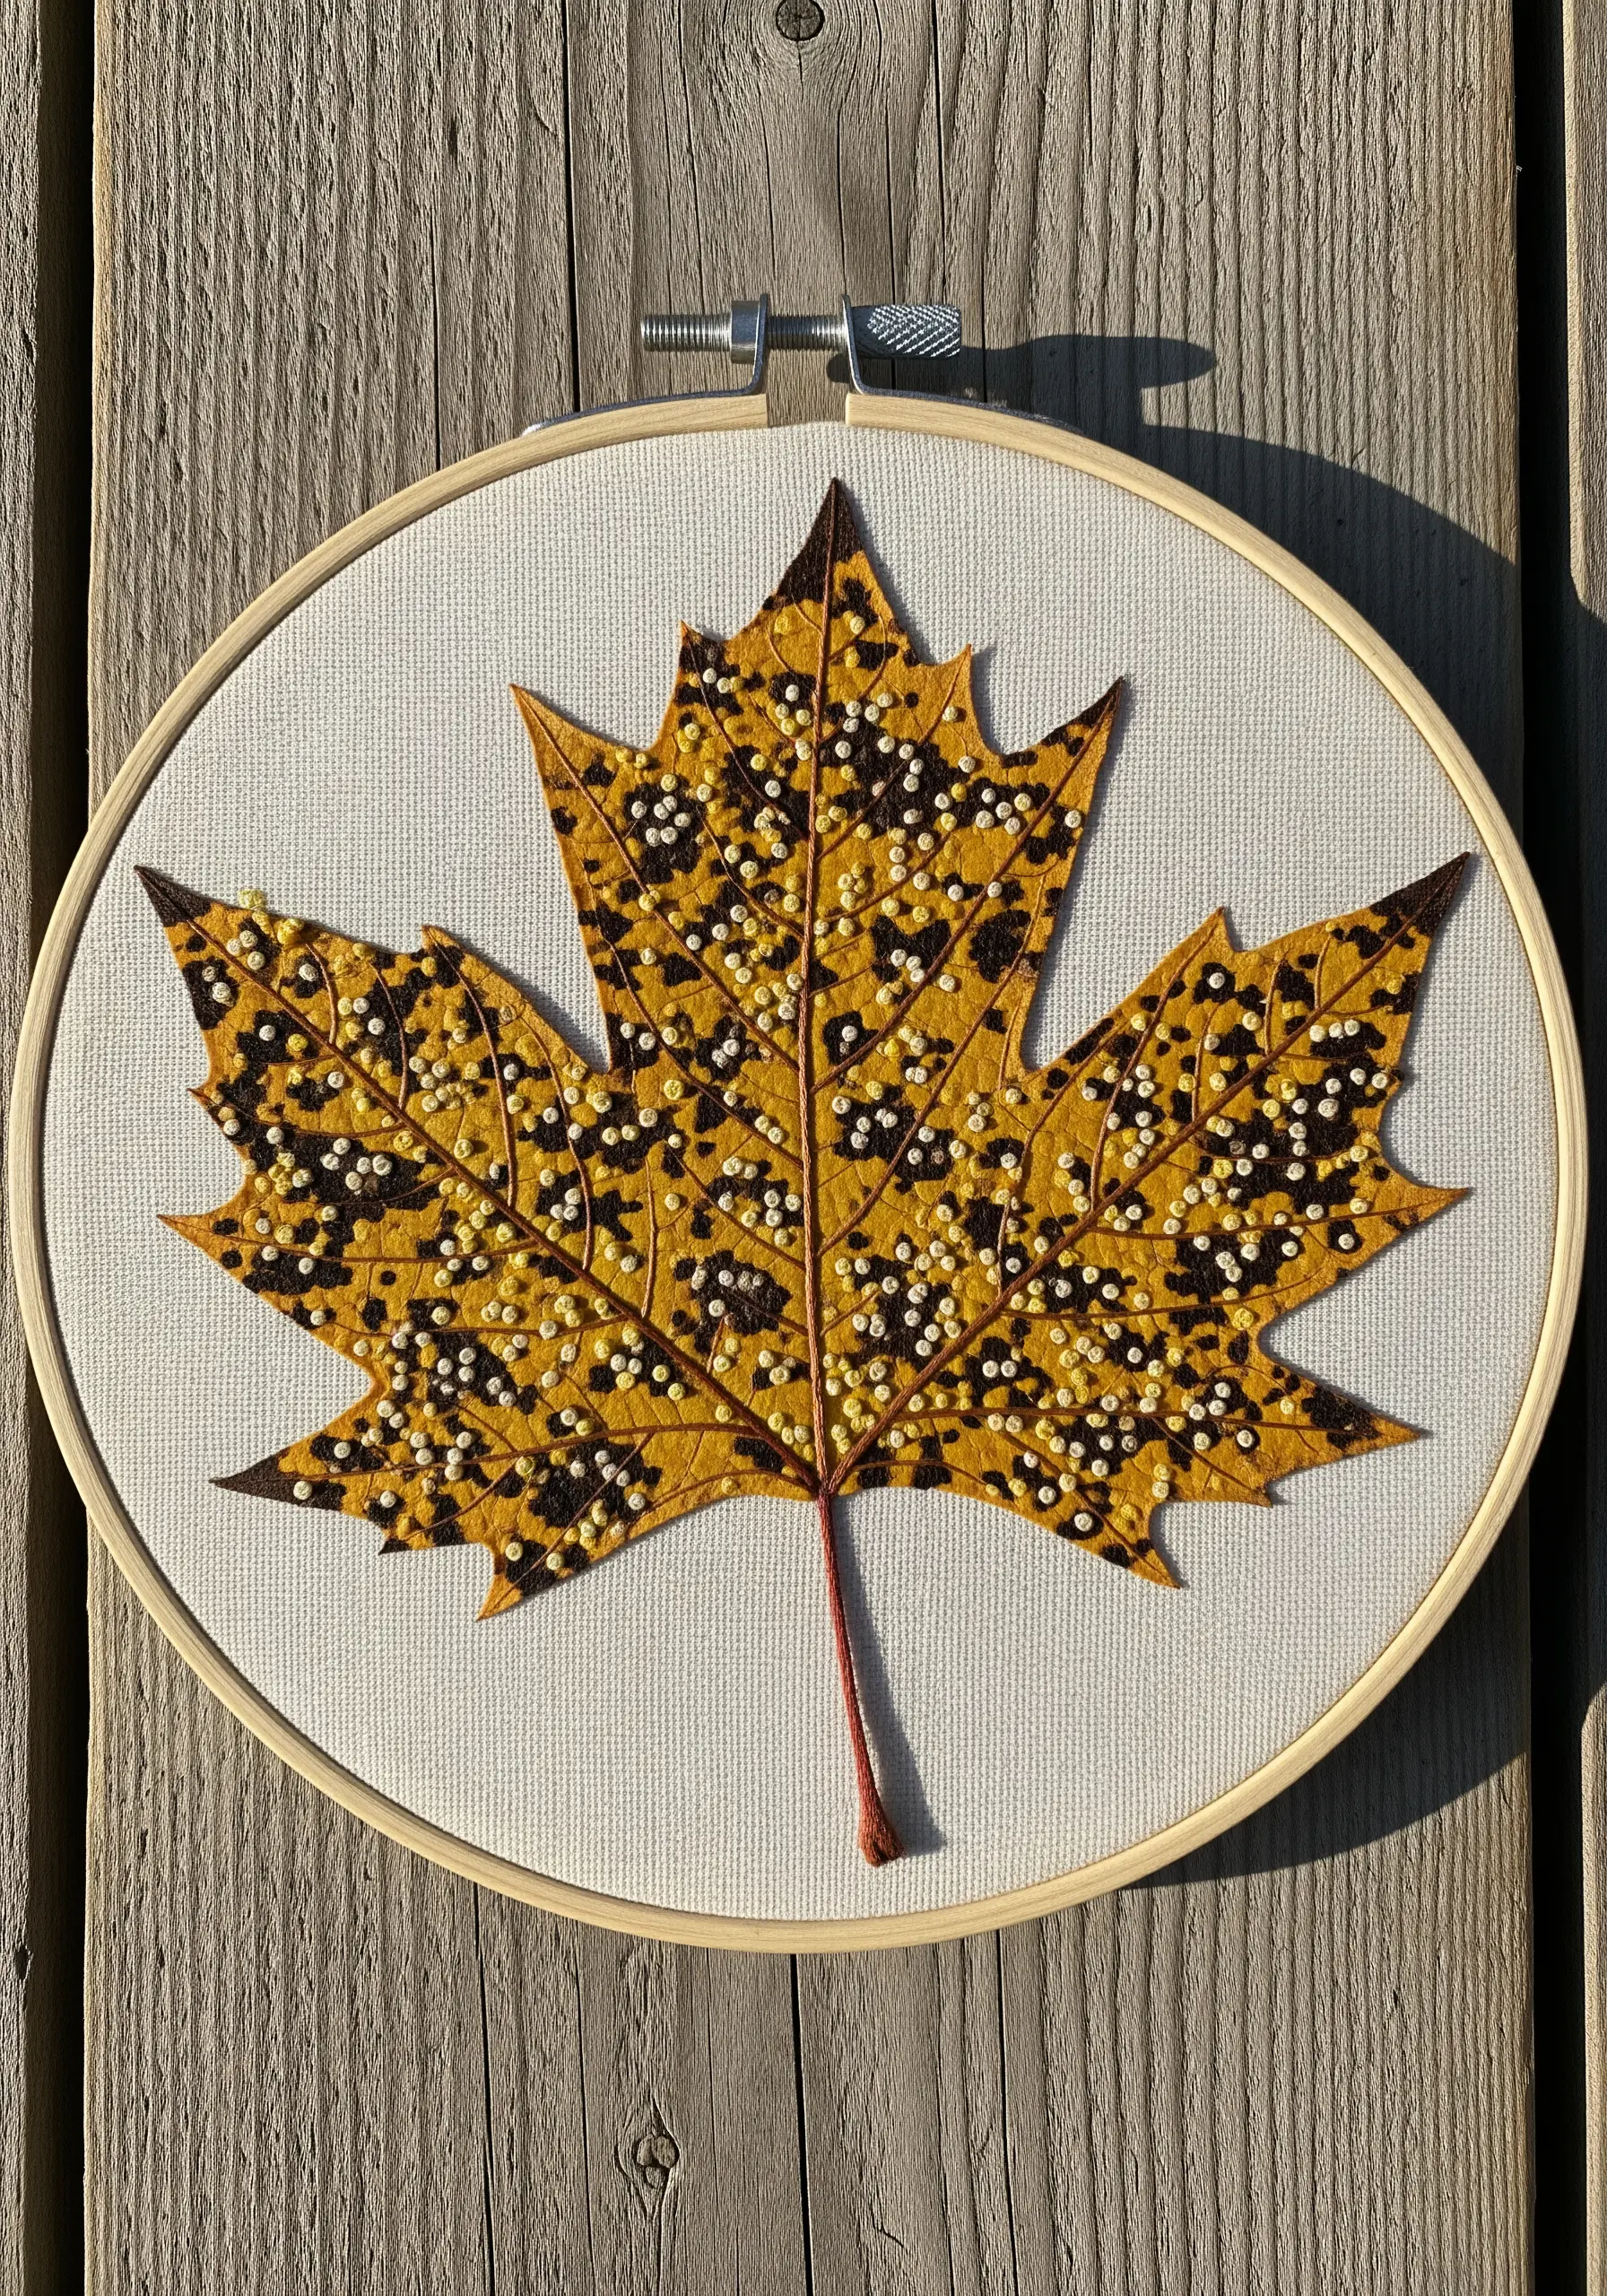
Create a stunningly realistic leaf by starting with a fabric appliqué base. Cut the leaf shape from a piece of felt or tightly woven cotton.
After attaching it to your hoop, use a random scattering of black and white seed stitches or tiny beads to replicate natural imperfections like tar spots.
This combination of materials adds a layer of detail and authenticity that elevates the piece from a simple embroidery to a botanical study.
17. Create Bold Holly with Dimensional Berries
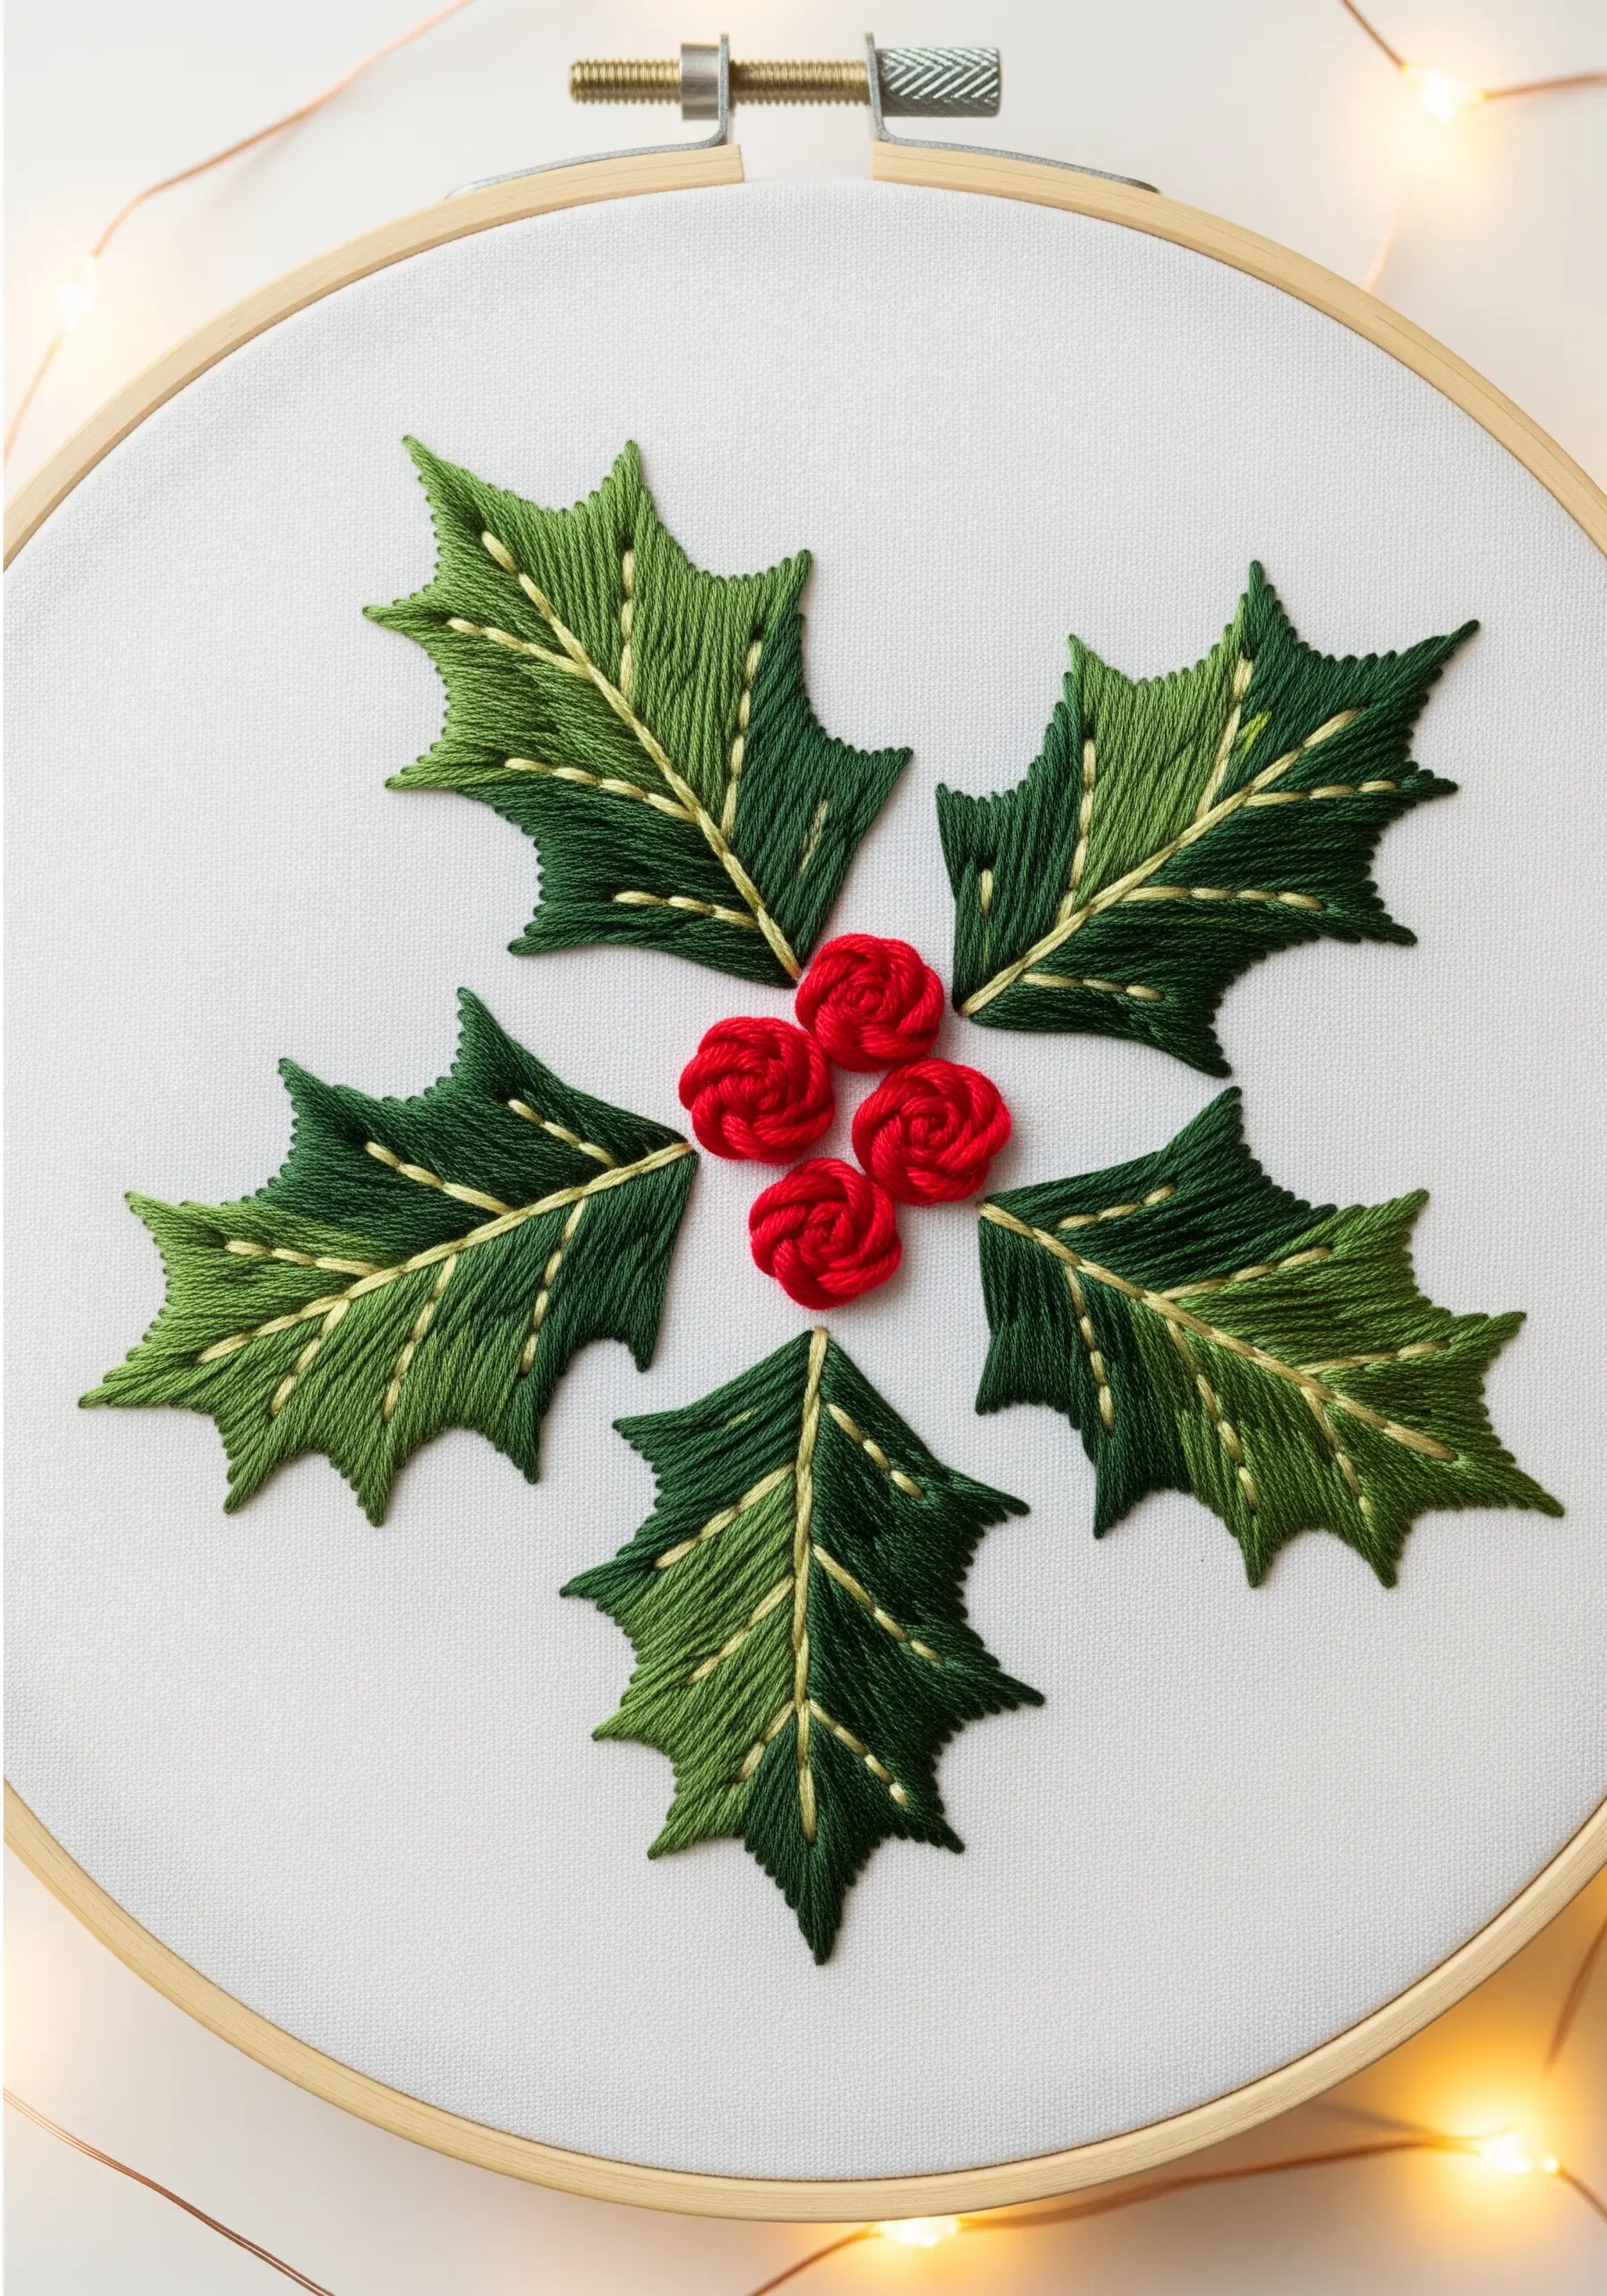
Make your festive holly leaves pop by using two shades of green, split down the middle with a bold vein of metallic gold thread.
Fill each half of the leaf with a clean satin stitch, ensuring the stitches are angled towards the pointed tips.
For the berries, use a woven wheel stitch. This technique builds up thread in a circular pattern, creating a perfectly round, raised berry that stands out from the fabric.
18. Blend Seamlessly with Single-Strand Thread Painting
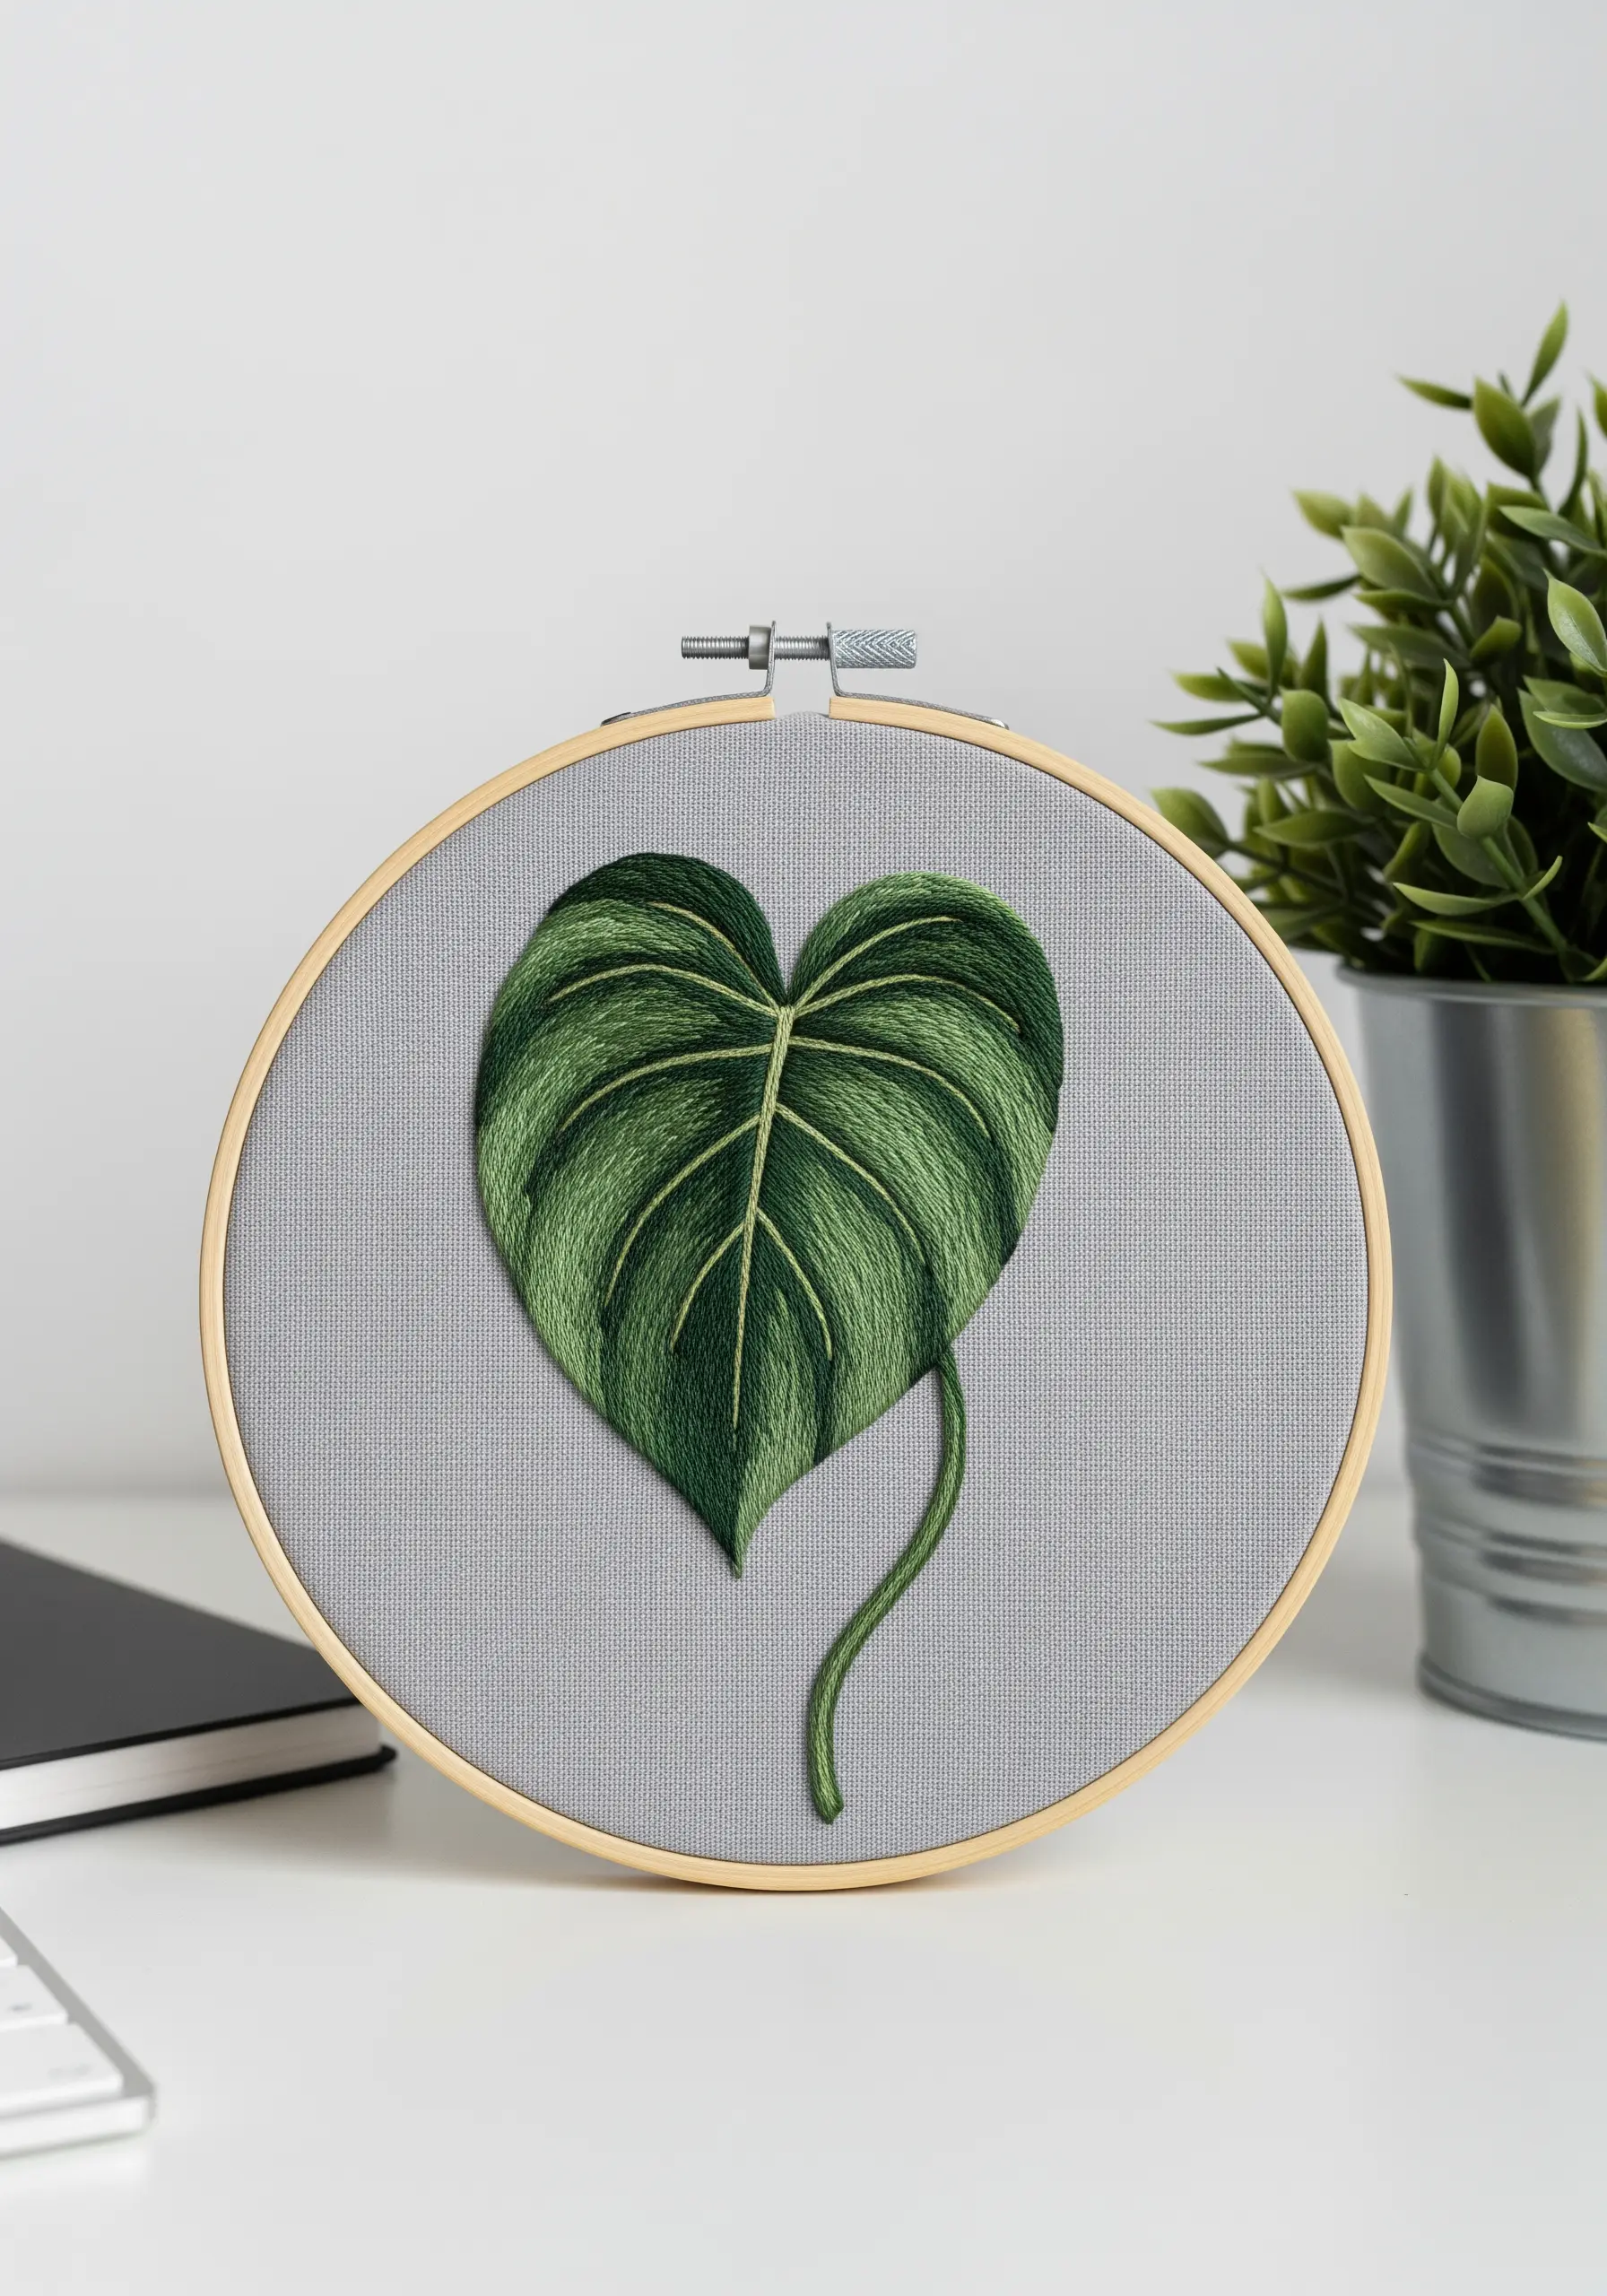
For the smoothest and most realistic gradients, as seen on this Philodendron leaf, work with only a single strand of embroidery floss.
While it takes more time, using one strand allows you to blend colors with incredible precision, eliminating any visible lines between shades.
Angle your long-and-short stitches to follow the natural curves and veins of the leaf, creating a finish that looks more like a painting than a series of stitches.
19. Deconstruct Your Design with Loose Threads
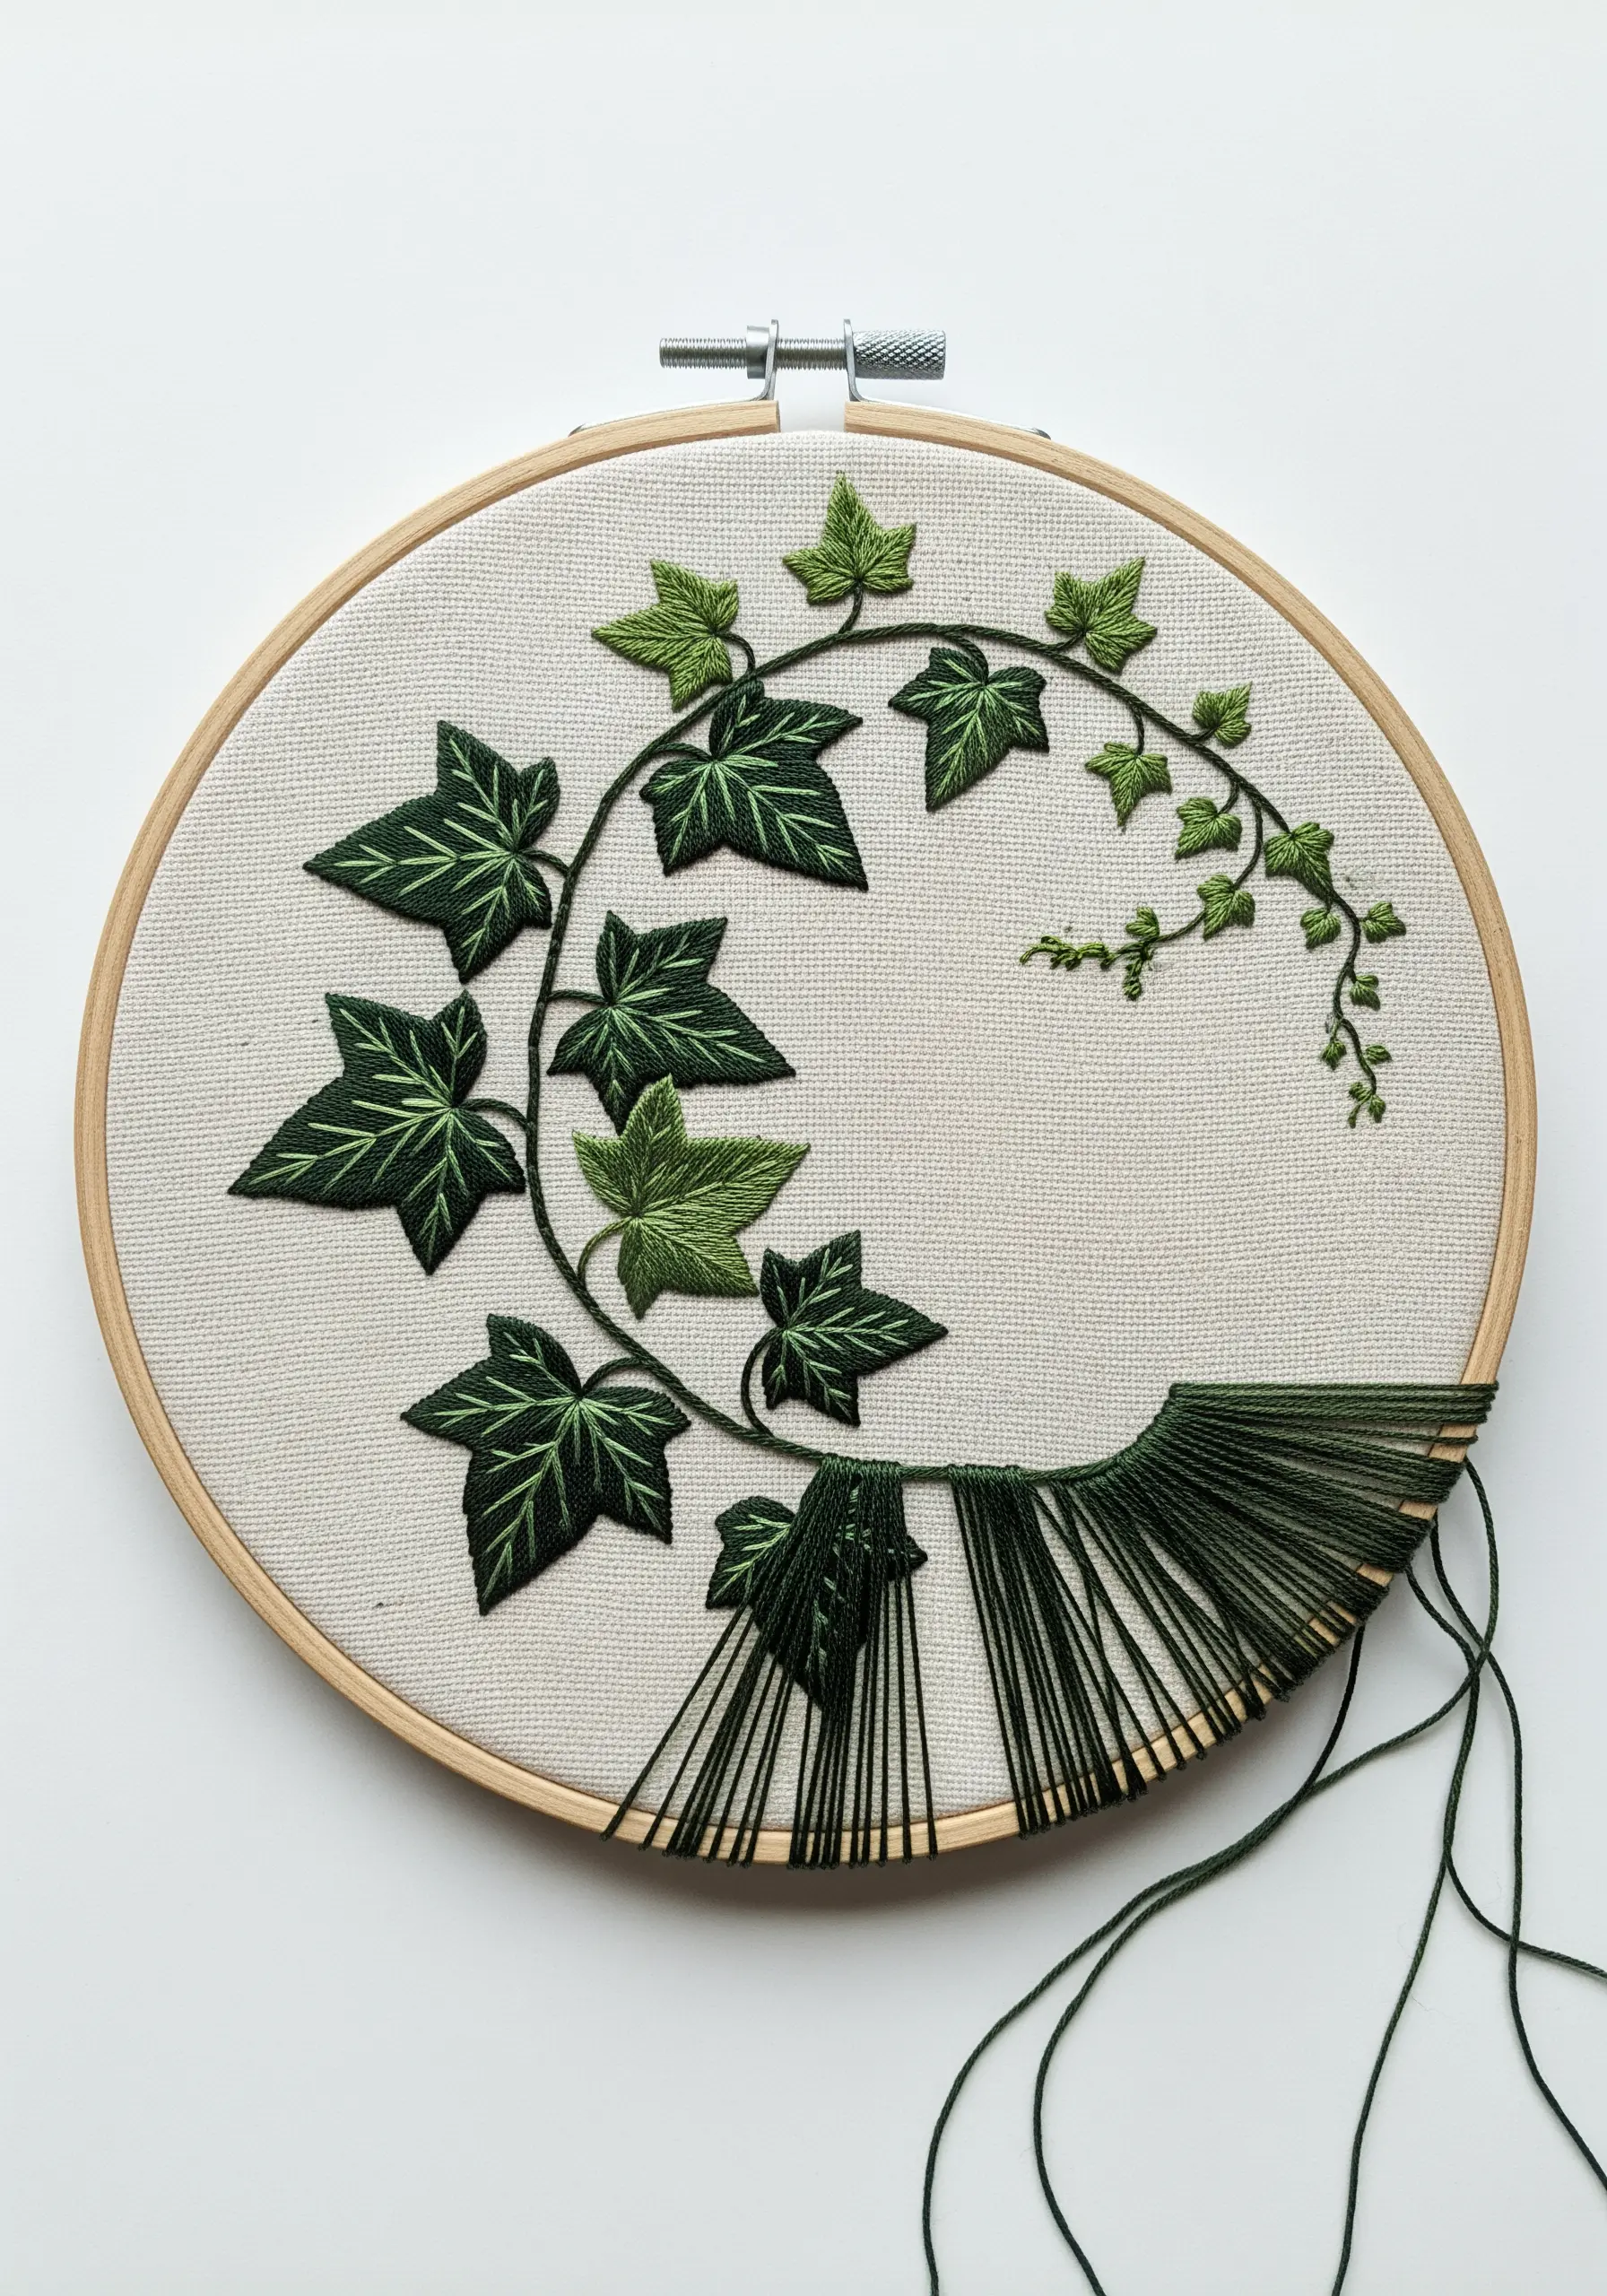
Introduce an element of abstract art into your botanical work by letting the design unravel.
Stitch a portion of the ivy vine with traditional satin stitches, using varied green tones for depth.
Then, allow the design to fade away by transitioning into long, loose threads that stretch across the hoop.
This technique explores abstract thread designs using negative space and creates a dynamic, modern composition that feels both complete and unfinished.
20. Add Energy with Radiating Accent Stitches

Elevate a simply stitched leaf by adding an aura of radiating straight stitches around its perimeter.
First, fill the leaf shape with a classic fishbone or satin stitch in a vibrant yellow.
Then, using the same color, add sparse, long straight stitches that shoot out from the edges of the leaf.
This simple addition creates a sense of movement and energy, as if the leaf is glowing or rustling in the wind.
21. Trace Nature’s Blueprint with Skeleton Veins
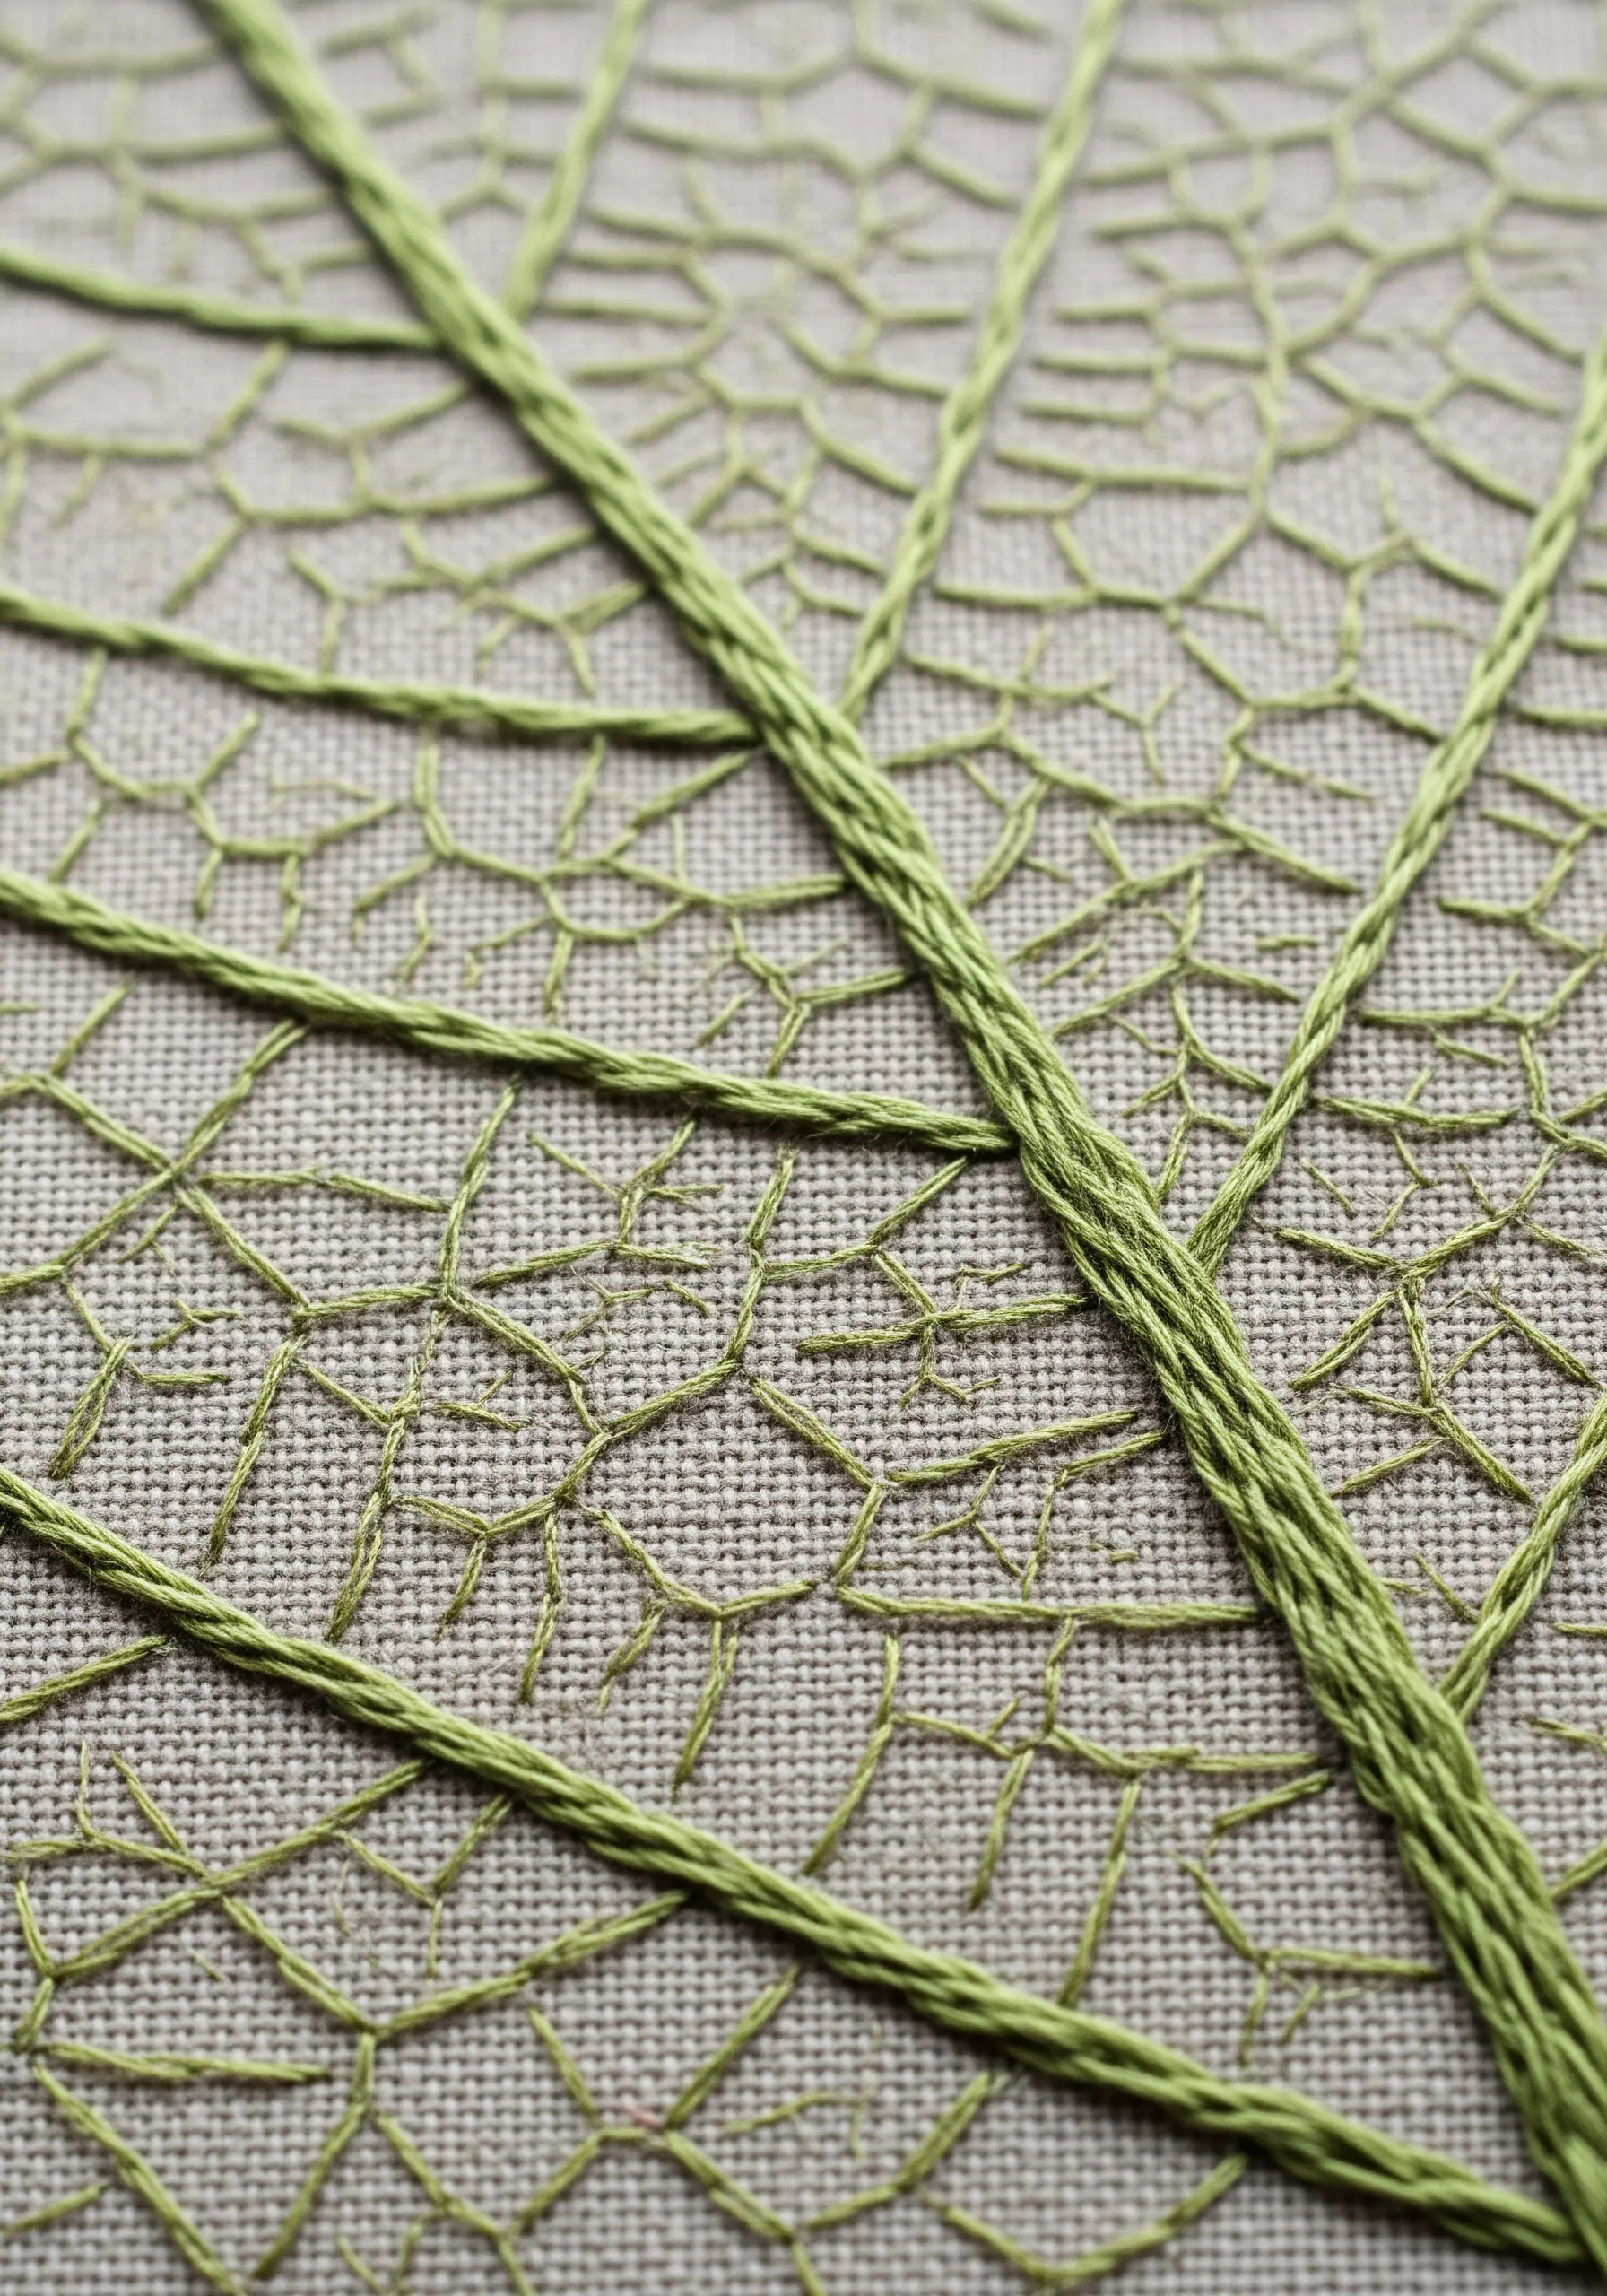
Capture the delicate, lace-like structure of a skeleton leaf by focusing only on the veins.
Use a single strand of thread and a fine backstitch or whipped backstitch to trace the intricate network of lines.
For the main central veins, use two strands or a slightly heavier stem stitch to give them more prominence.
This minimalist approach highlights the beautiful geometry of nature and works exceptionally well on linen or other natural-toned fabrics.
22. Block and Blend Colors for a Stylized Spectrum
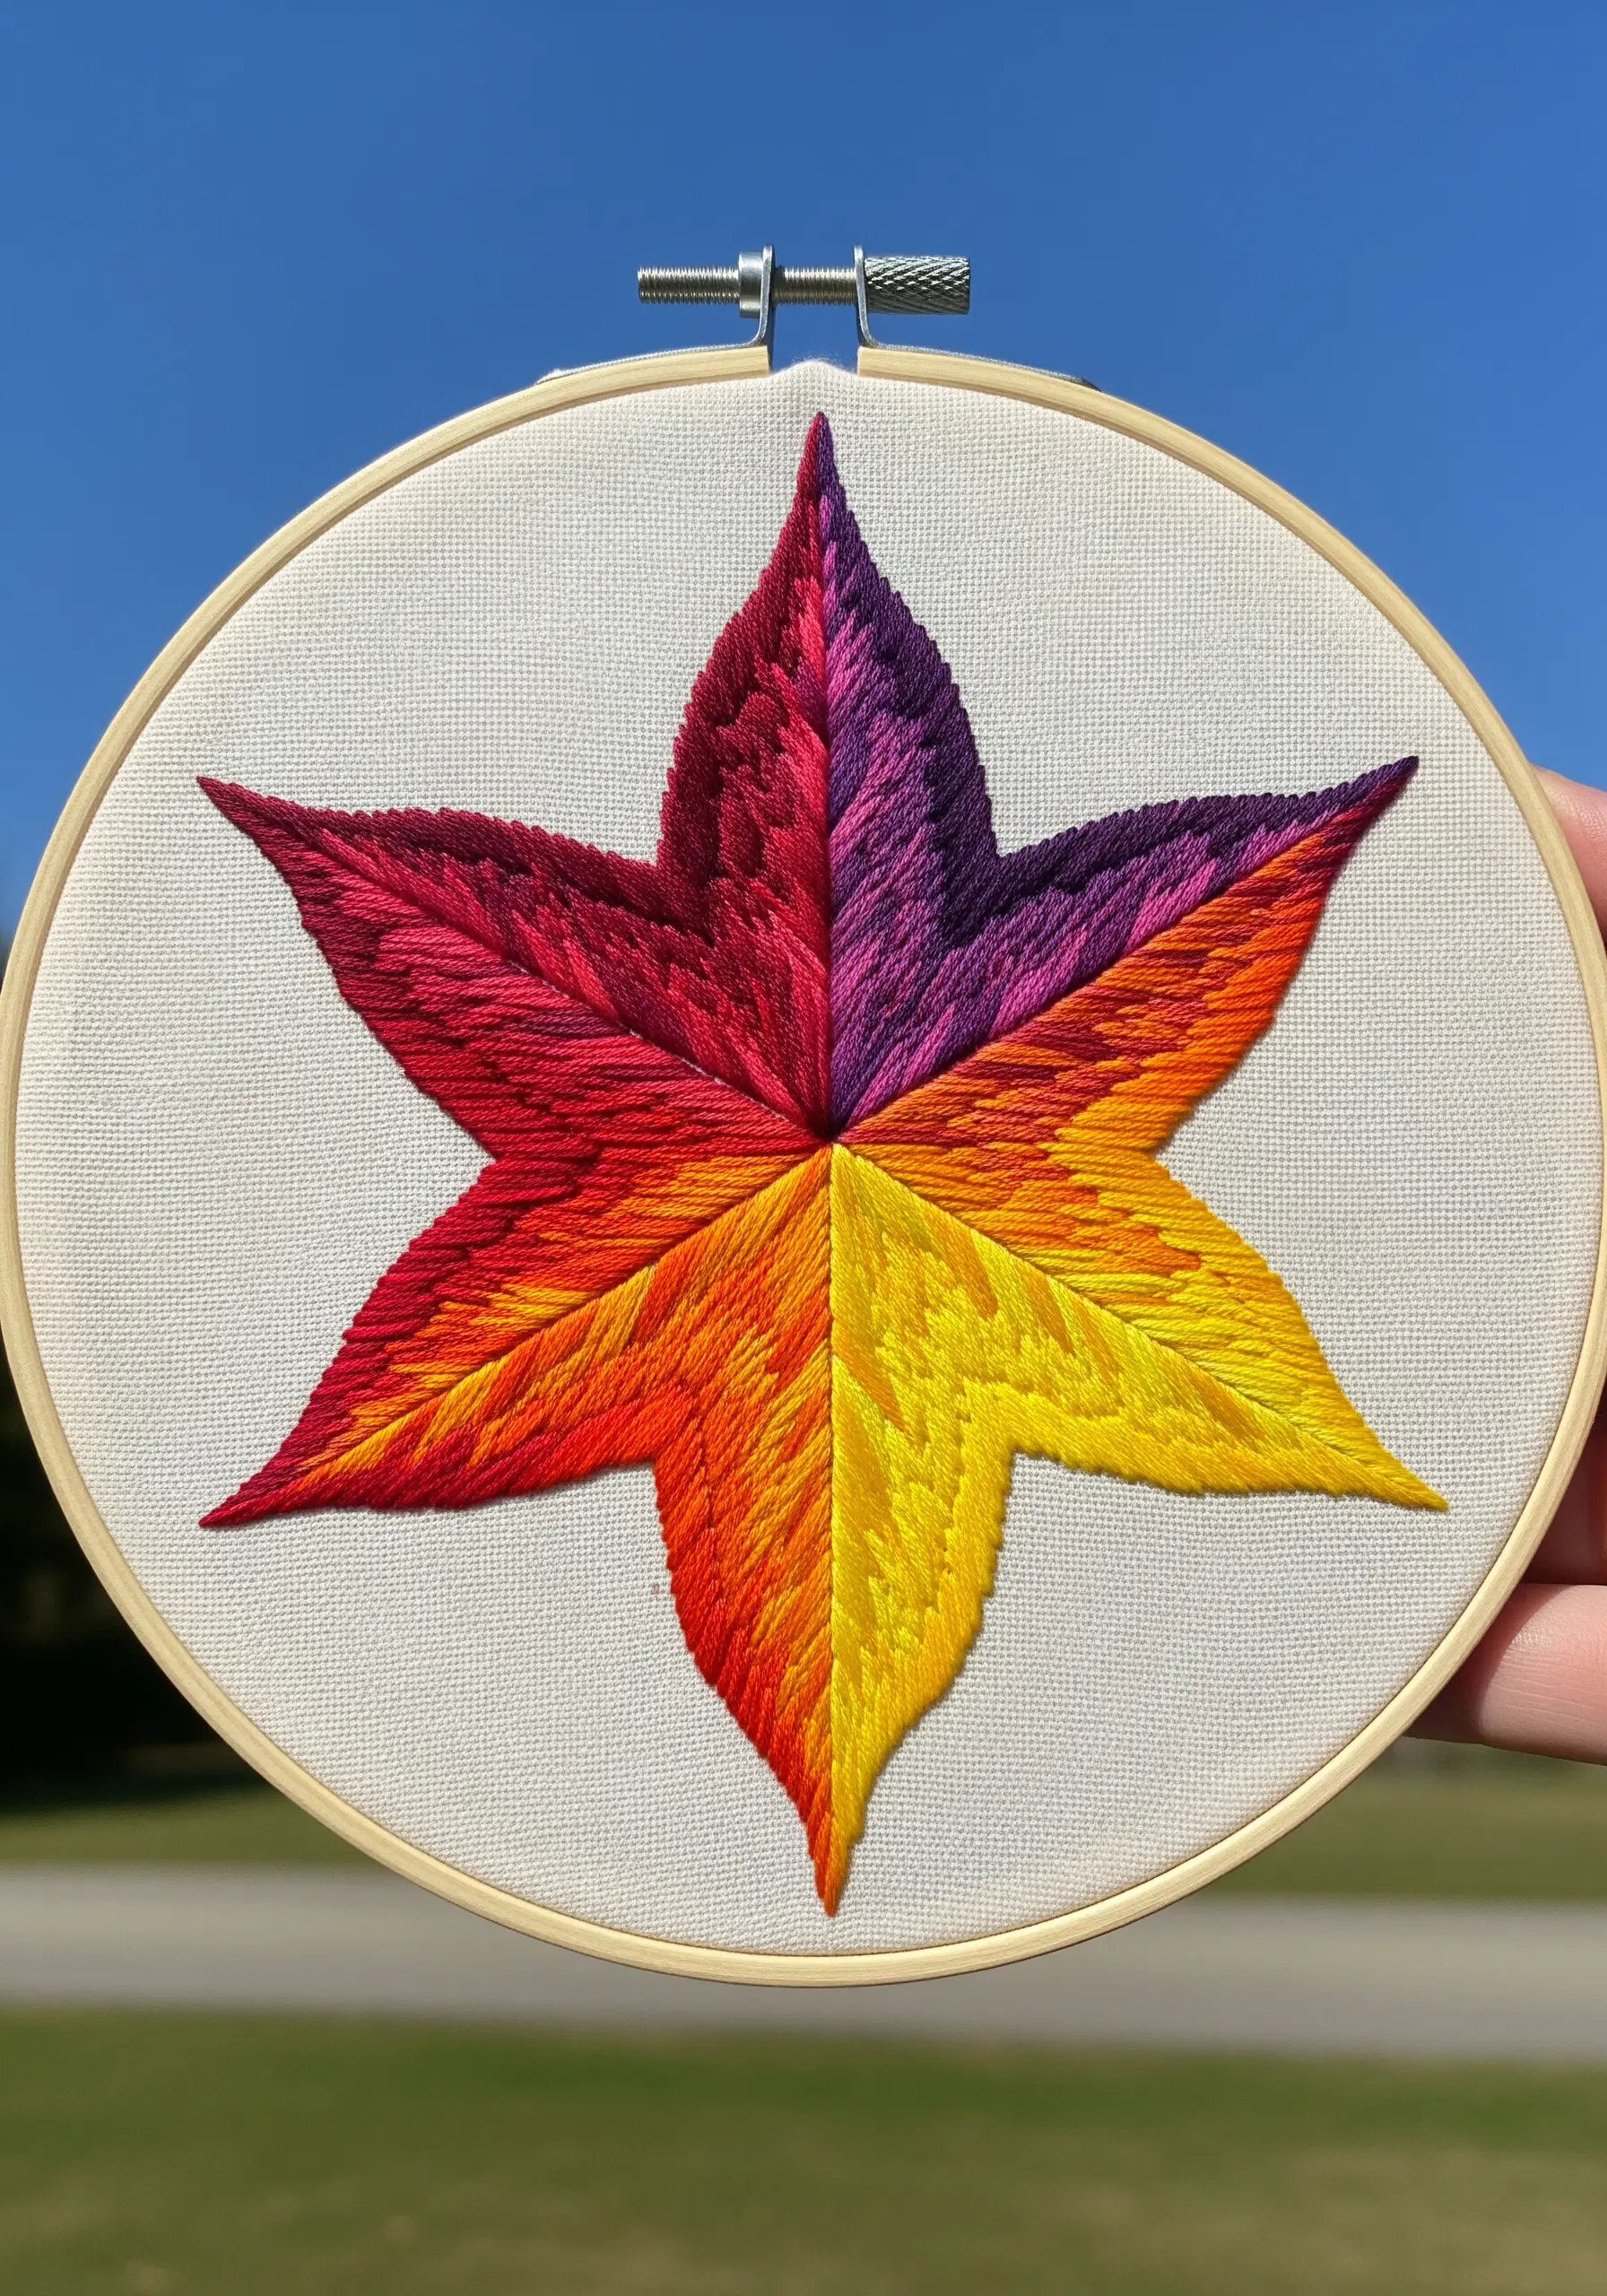
Create a modern, graphic leaf by dividing the shape into distinct, color-blocked segments.
Within each segment, use long-and-short stitch to blend a small family of related colors—like reds into oranges, or purples into pinks.
The key is to keep the dividing line between each color-blocked section sharp and intentional. You can achieve this by outlining each segment with a split stitch before filling it in.
23. Convey Age and Texture with Varied Stitching
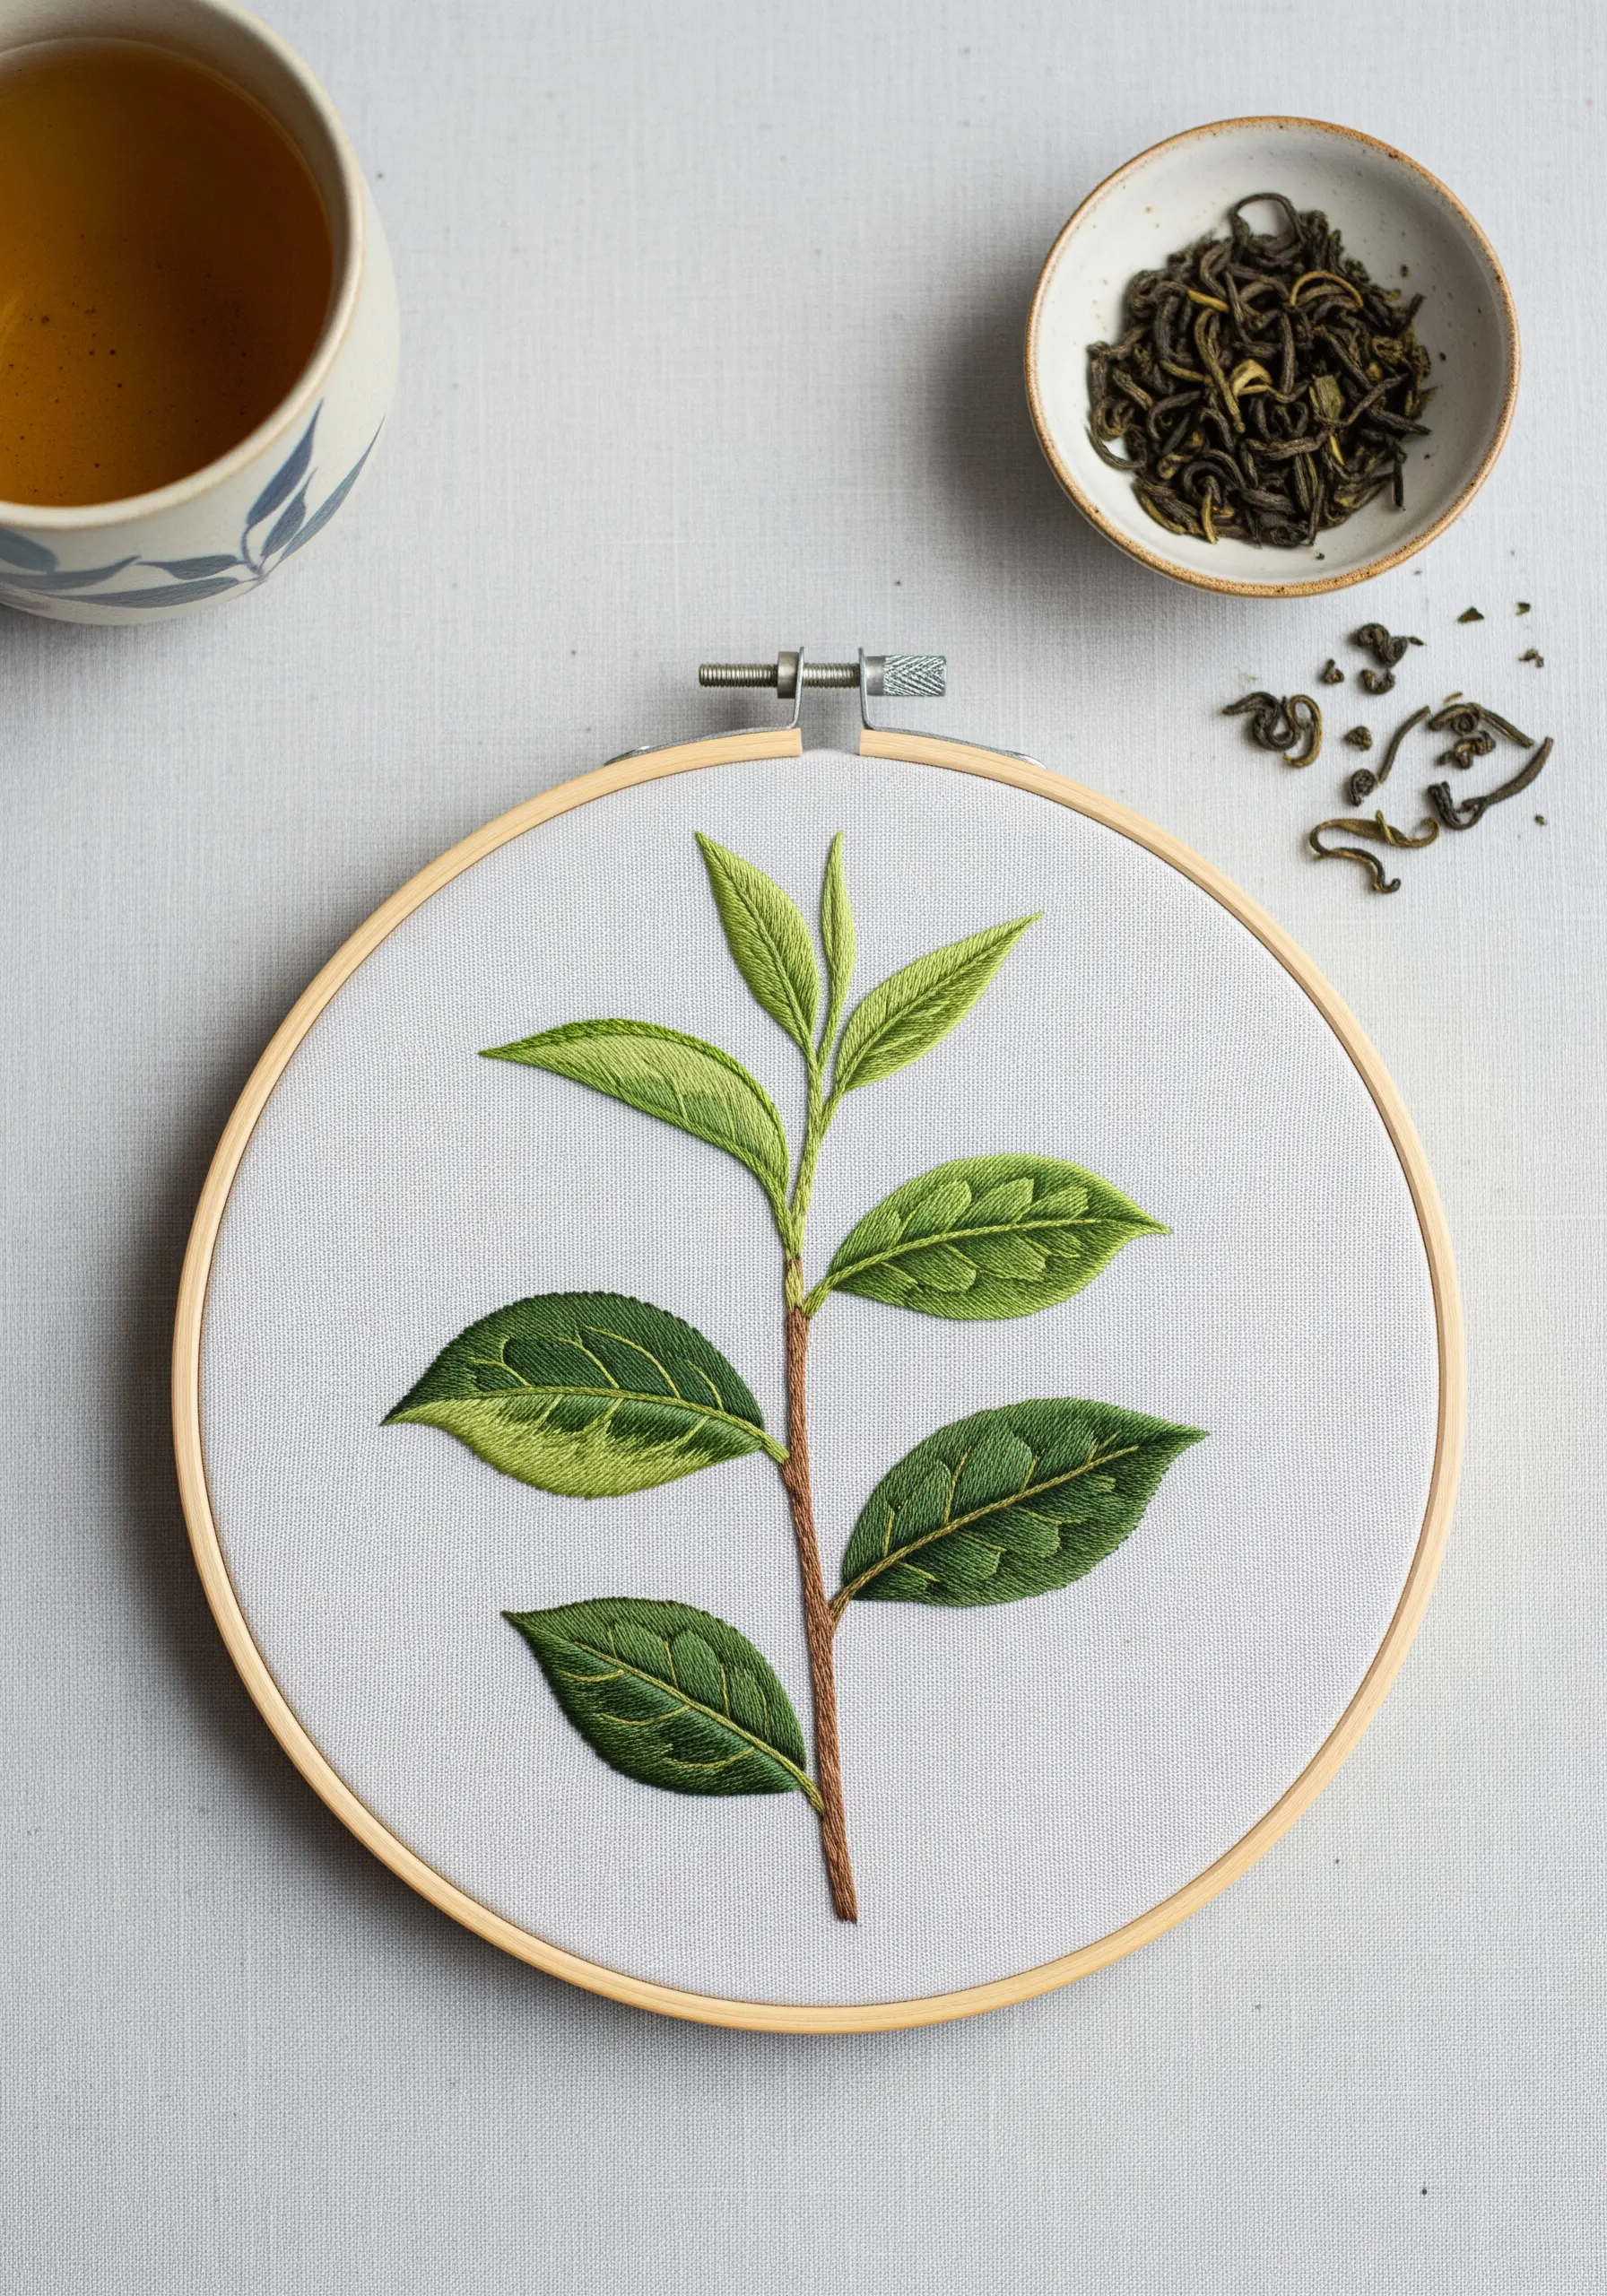
To depict a branch with leaves of varying ages, like these tea leaves, you must adjust your stitching technique for each one.
Use smooth, tight satin stitches for the young, glossy leaves at the top of the stem.
For the larger, more mature leaves, switch to a slightly more open long-and-short stitch to give them a softer, more textured appearance.
This subtle shift in technique is key to achieving realistic ways to layer leaf stitching for three-dimensional botanical texture that pops.
24. Replicate Variegation with Color Blocking
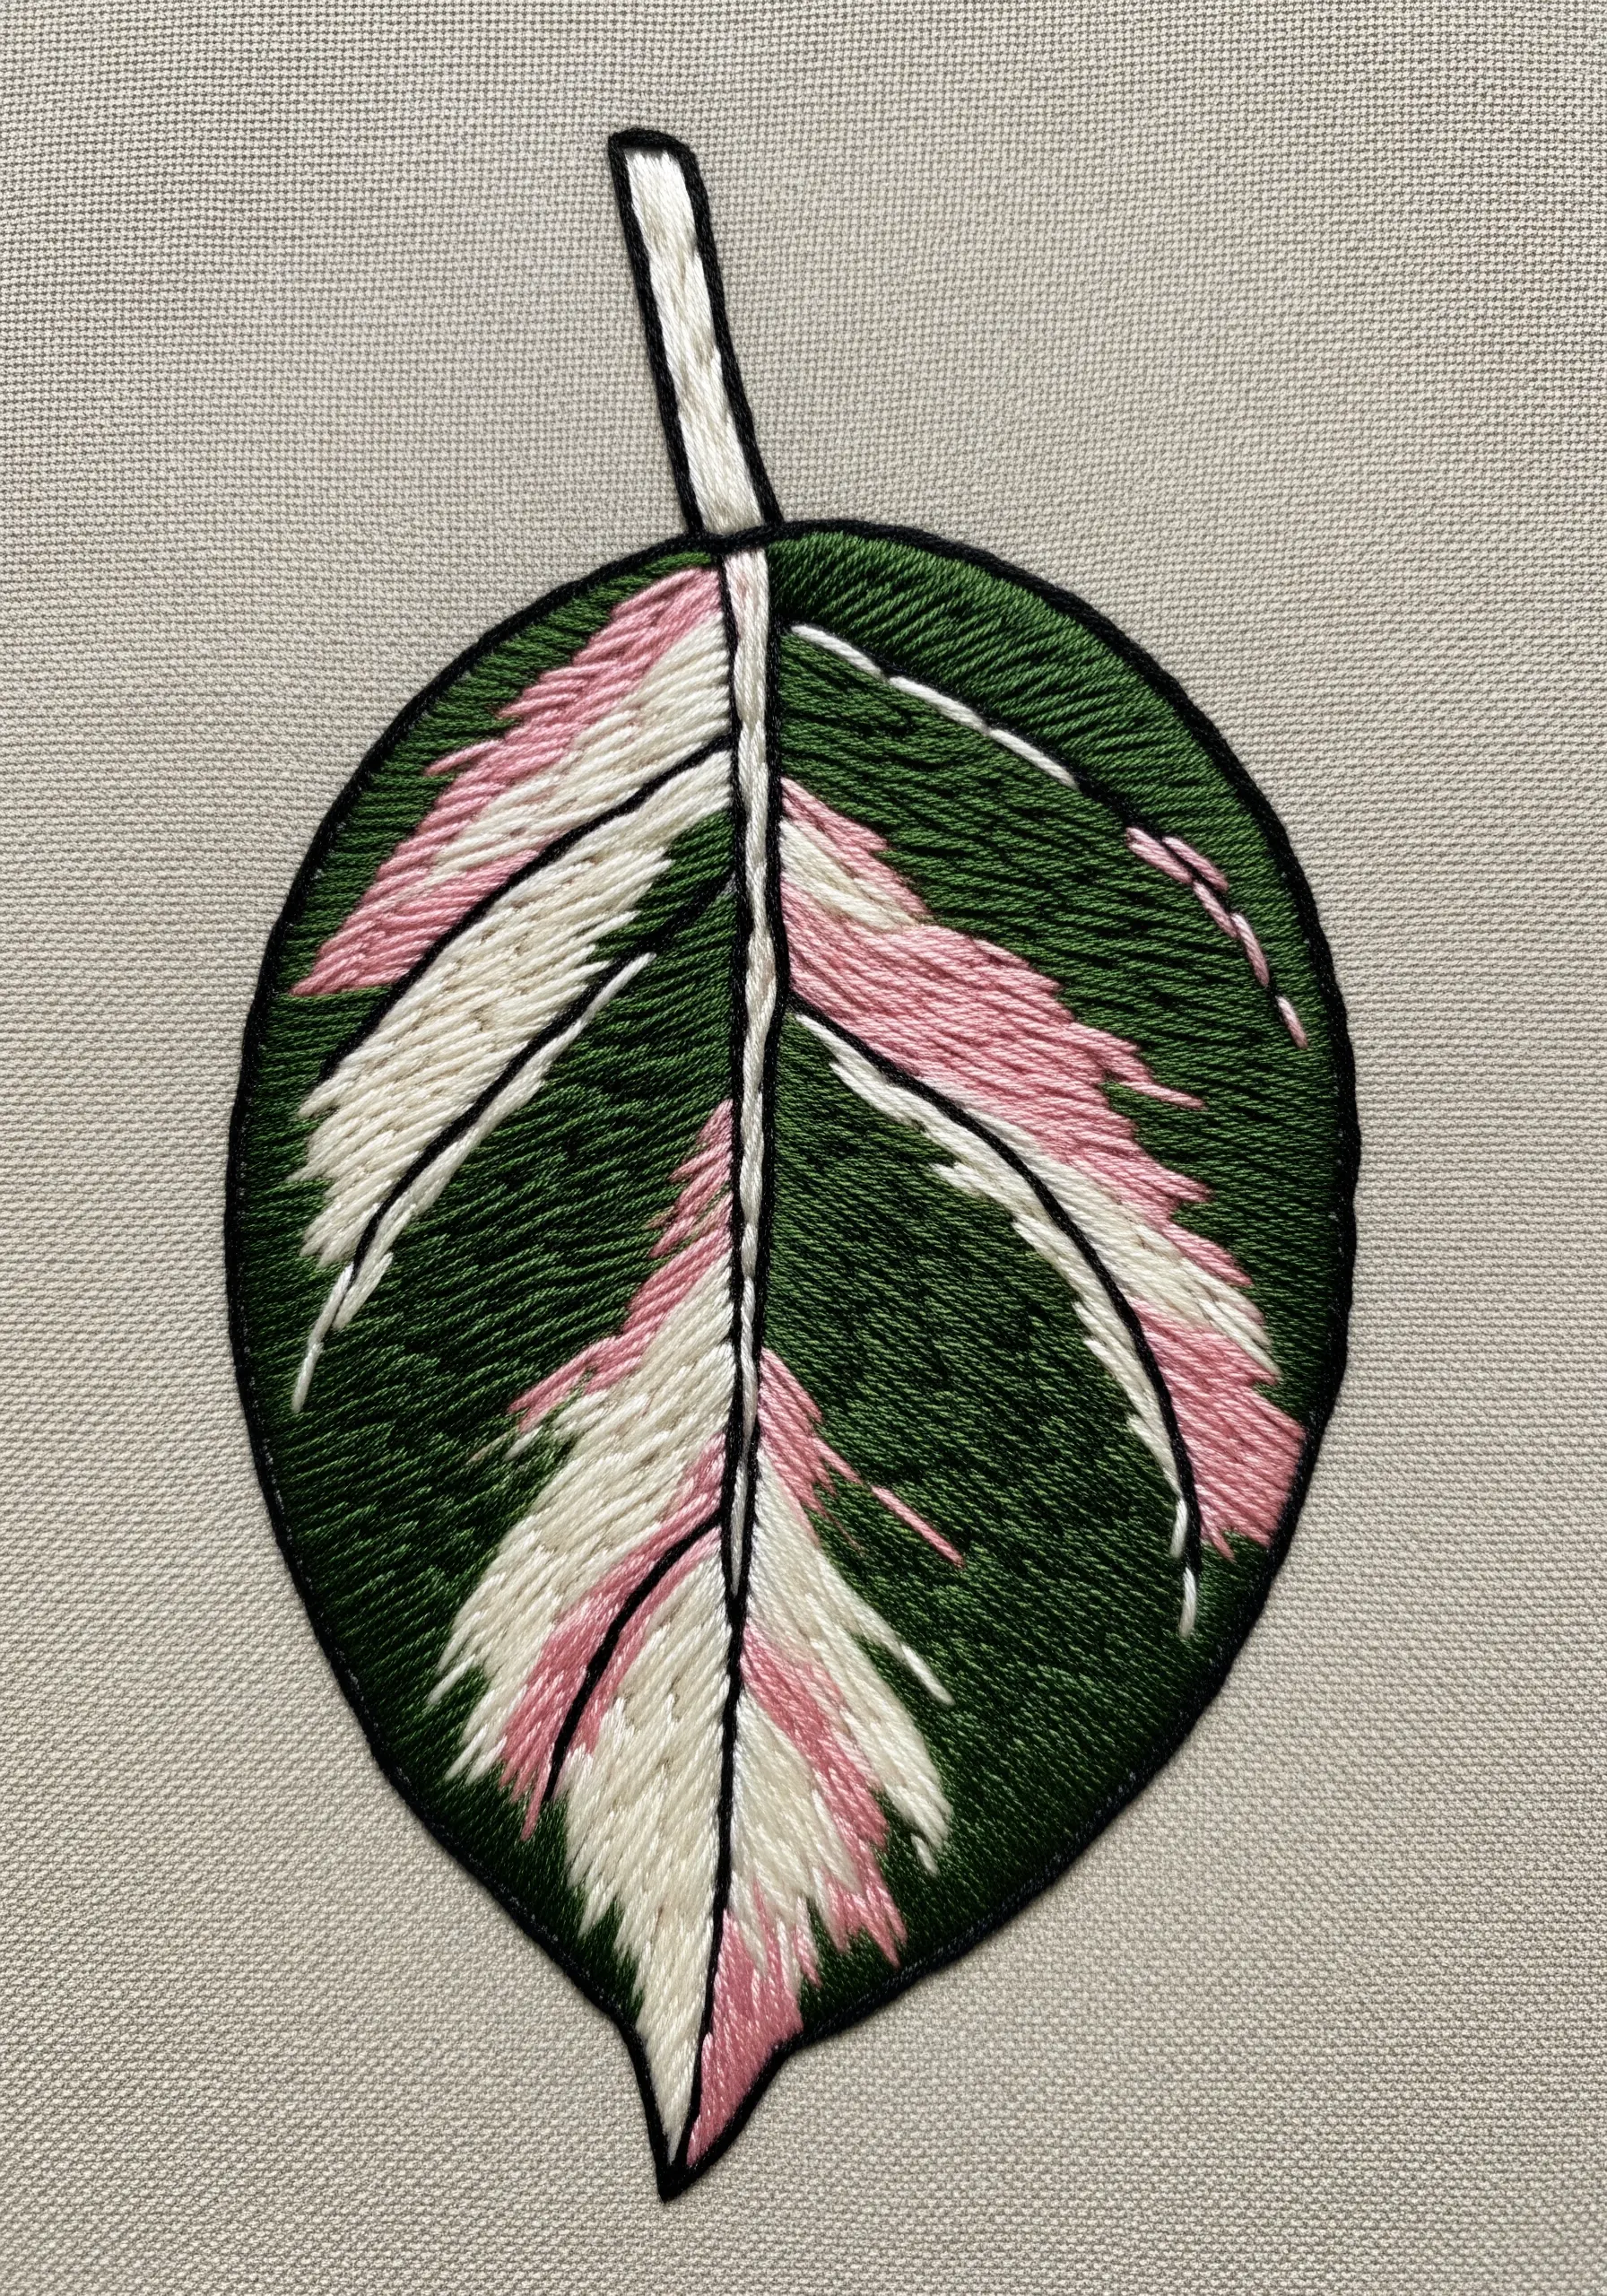
To capture the beautiful, random patterns of a variegated leaf, think in terms of color shapes rather than uniform shading.
Lightly sketch the patches of pink, white, and green onto your fabric. Fill each color block with directional satin stitch or long-and-short stitch.
Allow the stitches at the edges of each color block to interlock slightly, creating a soft, natural transition instead of a hard line.
Finish with a bold split stitch outline to contain the design and give it a clean, patch-like appearance.
25. Create Ethereal Leaves on Sheer Fabric
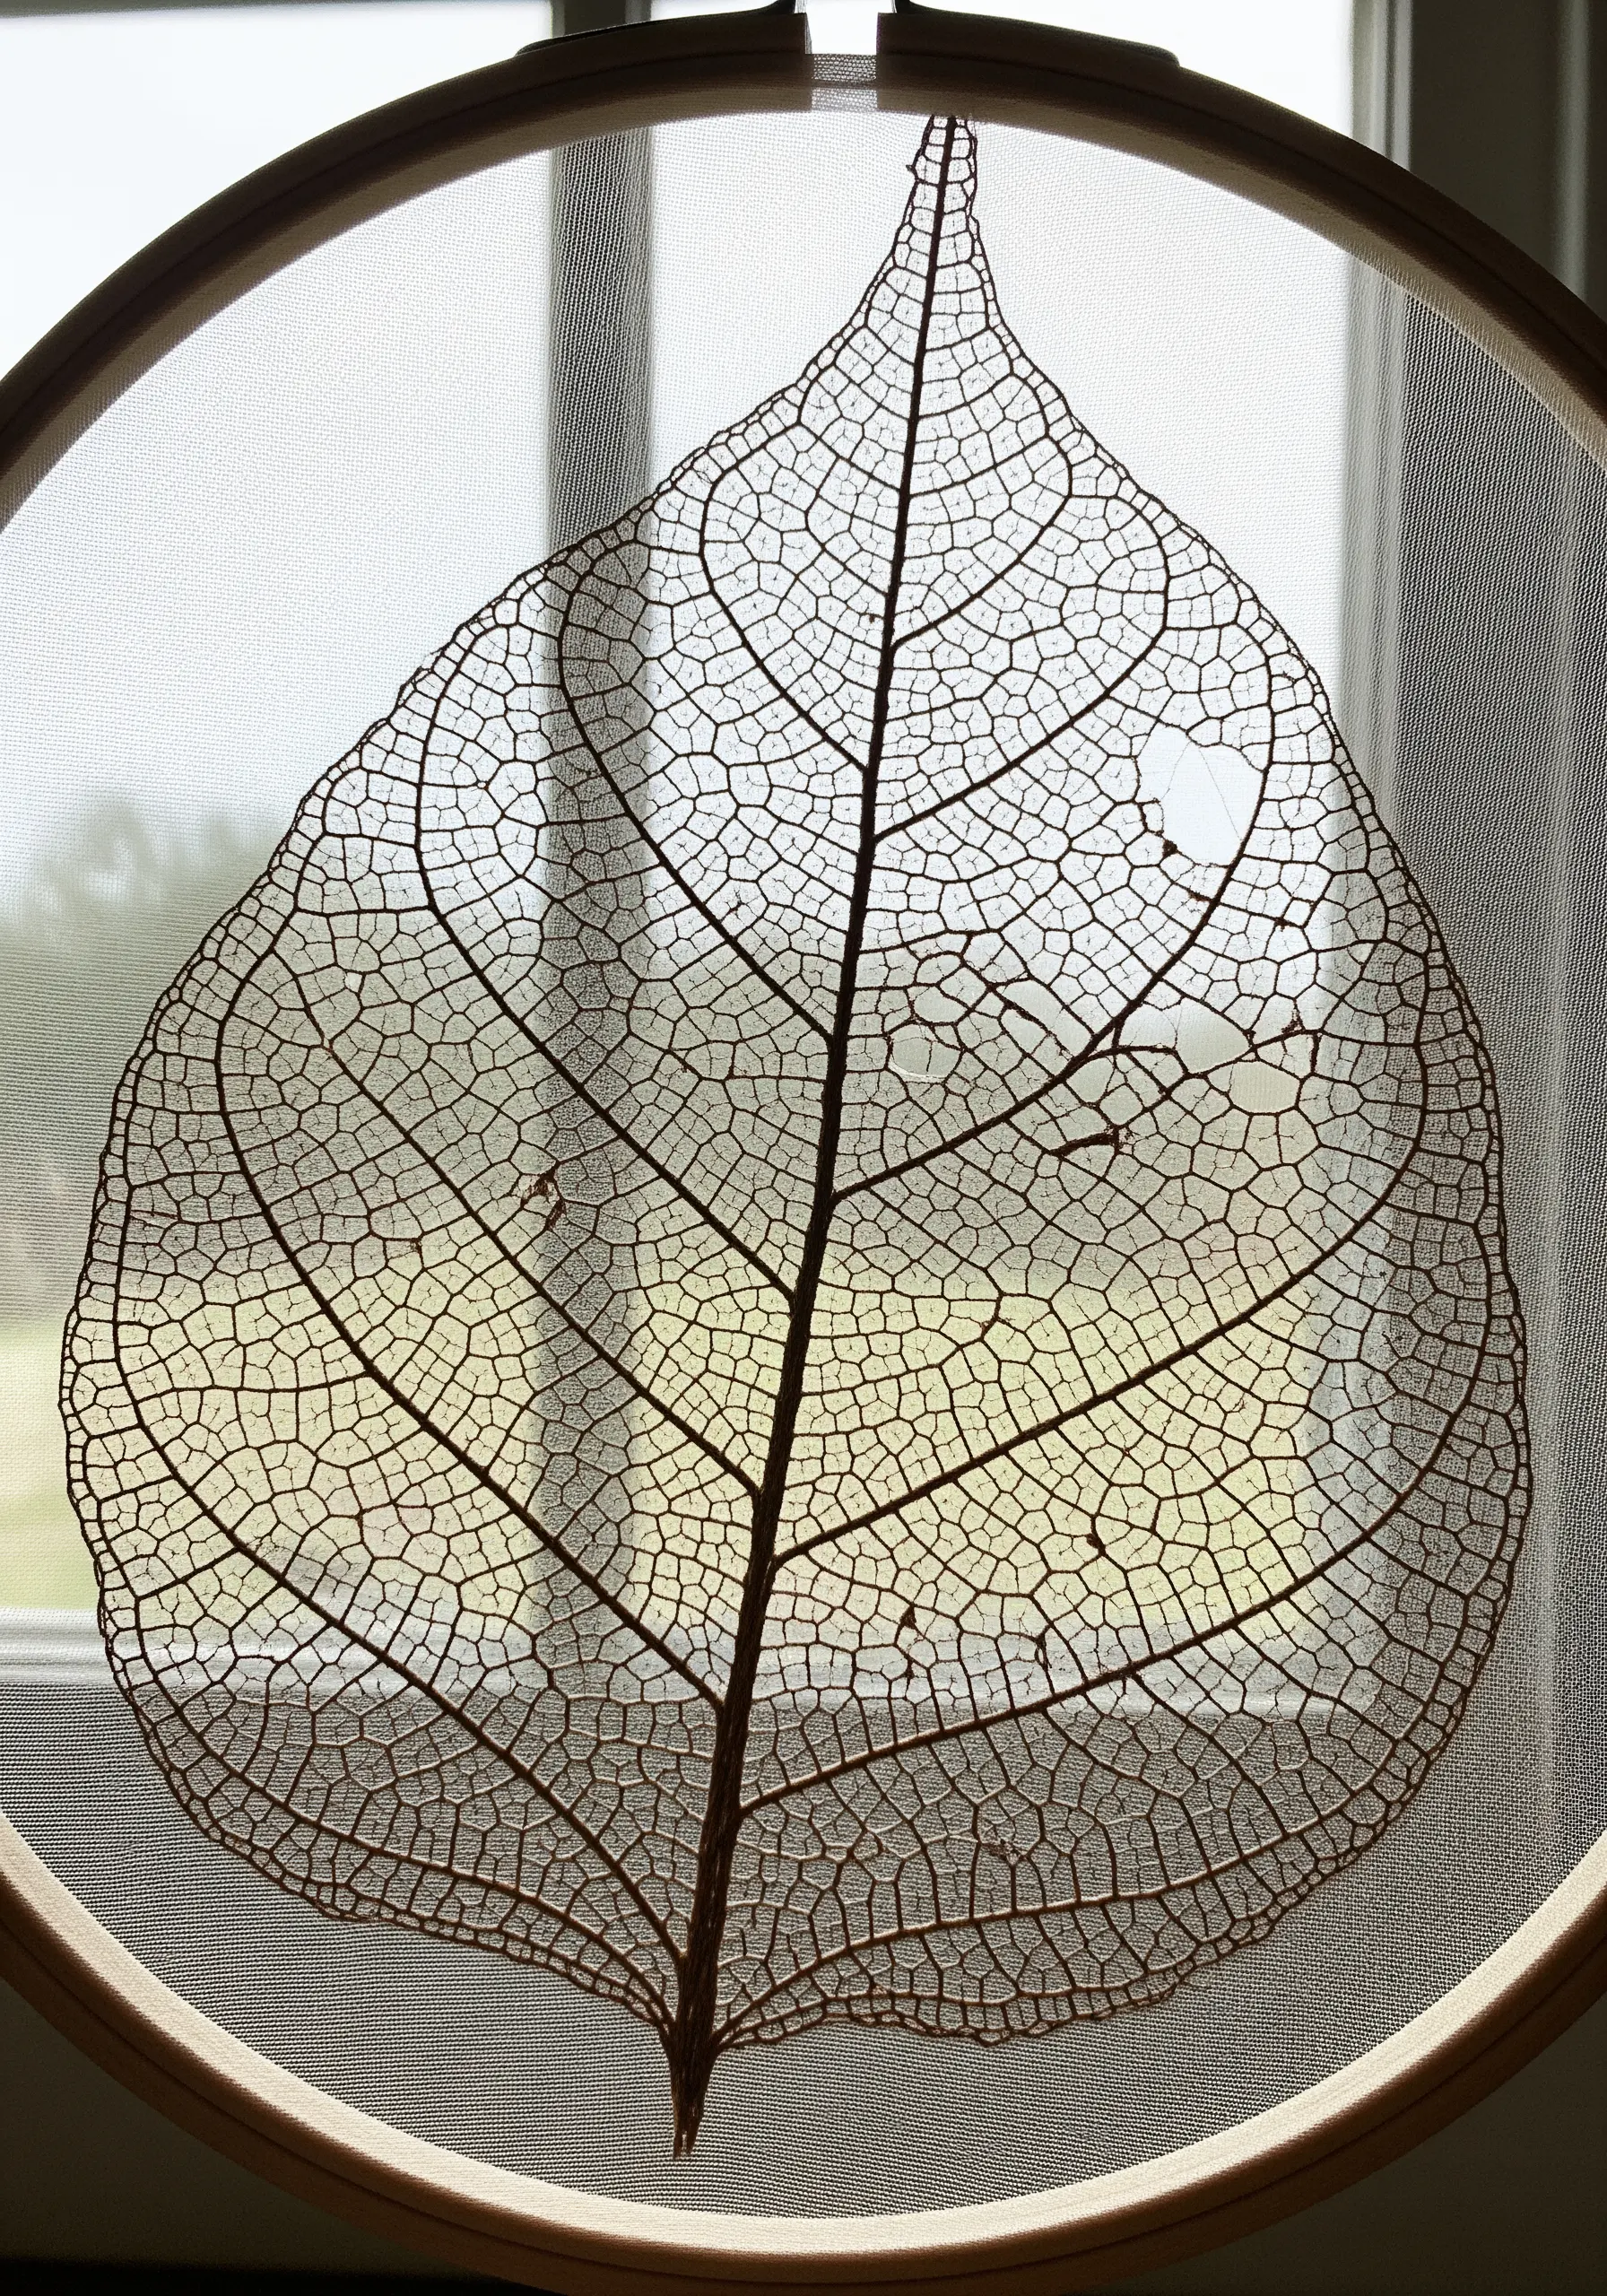
Stitching on a transparent fabric like tulle or organza creates a breathtaking, floating effect.
By embroidering only the delicate veins of a skeleton leaf, the design appears to be suspended in mid-air within the hoop.
Use a simple backstitch or stem stitch with a dark, contrasting thread for maximum impact.
This technique is all about the interplay between the delicate thread work and the transparent negative space.
26. Finish Your Work as a Professional Appliqué Patch
Turn your embroidered leaf into a versatile appliqué patch you can add to jackets, bags, or other projects.
Complete your stitching on a piece of fabric, then carefully cut it out, leaving a small 3-4mm border.
Tuck the raw edge under and secure it with a dense, tight buttonhole stitch around the entire perimeter of the leaf.
This not only prevents fraying but also gives your work a clean, professional edge, perfect for creating botanical patch ideas.


