
Your table linens are more than just functional; they are a canvas waiting for a personal touch. Forget fleeting trends and focus on creating pieces with intention, texture, and a quiet confidence that reflects your own style.
Here, you’ll find ways to elevate simple stitches into sophisticated designs, blend colors like a painter, and play with texture in ways that feel both rustic and modern. It’s about transforming a simple napkin or runner into a piece of art that feels deeply connected to your home.
Let’s move beyond just following a pattern and start making thoughtful choices about thread, fabric, and composition. These small adjustments are what will make your embroidery feel truly special, turning every meal into an occasion.
1. Create a Meadow Border with Layered Stitches
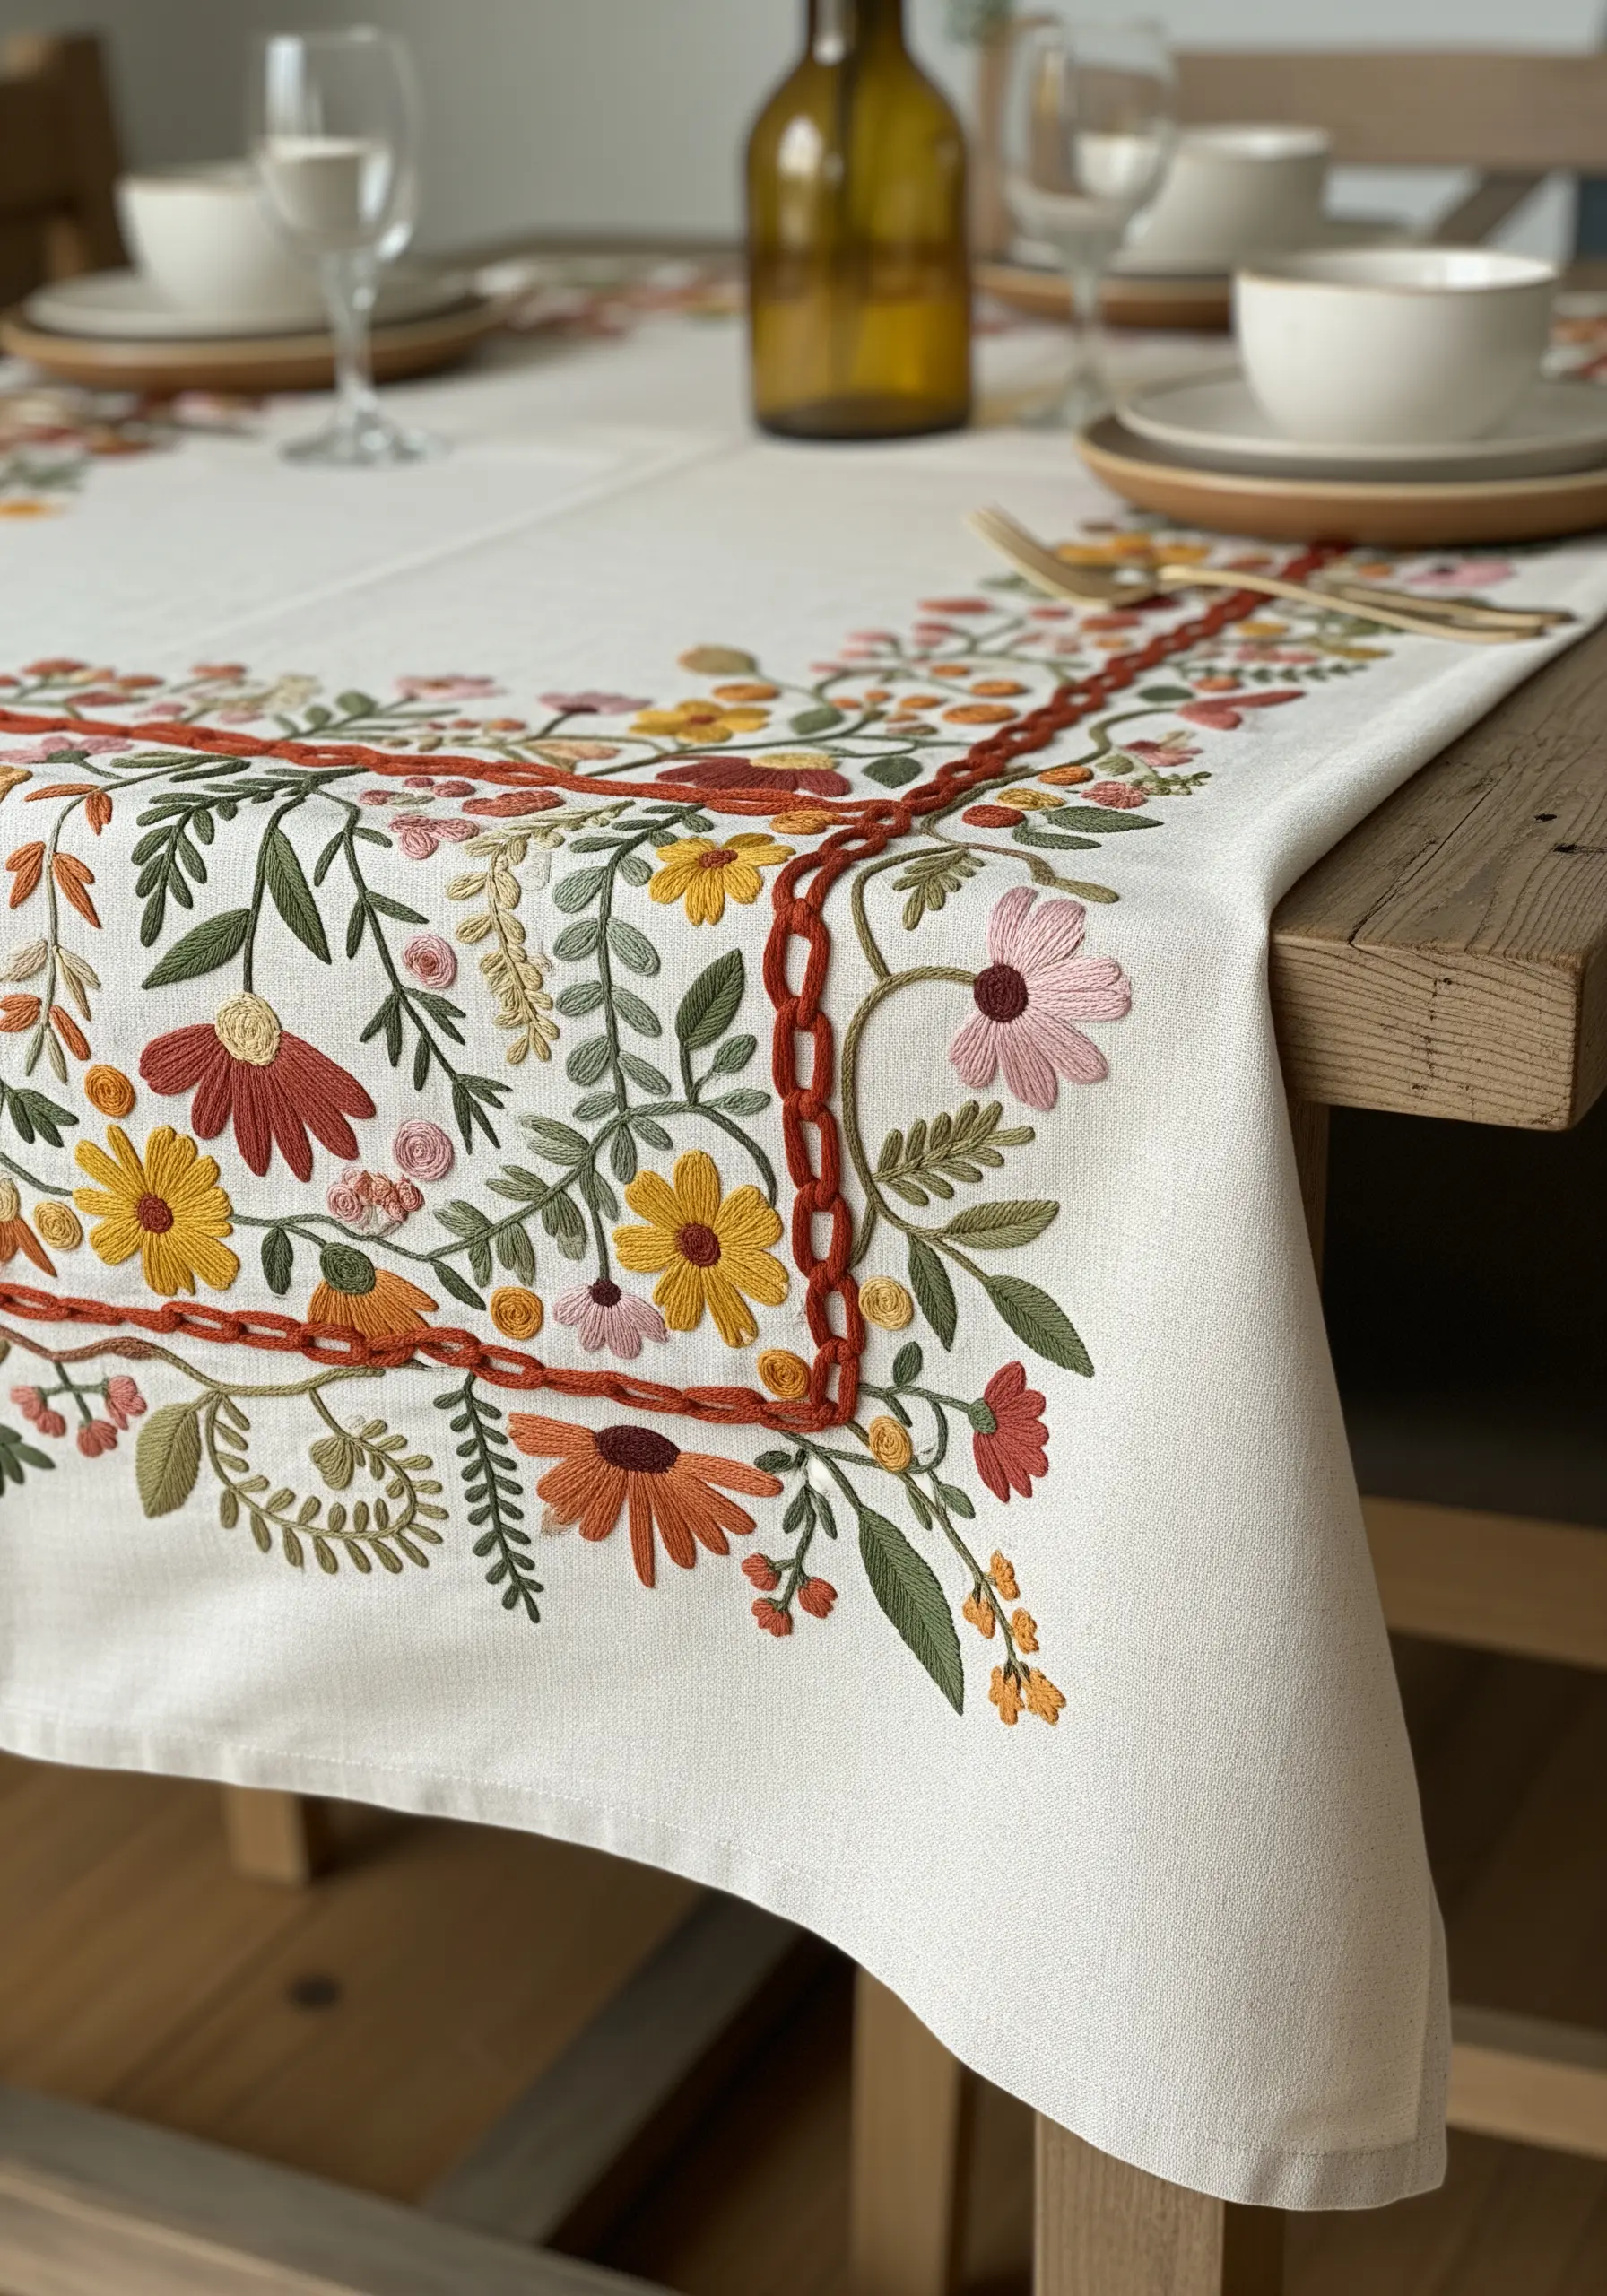
Frame your tablecloth with a dense, sprawling floral border that feels alive with texture.
Instead of just one stitch type, layer your work: use satin stitch for bold petals, tiny French knots for flower centers, and detached chain (lazy daisy) stitches for small buds and leaves.
The key is to vary the height and density of the stitches, which mimics the organised chaos of a wildflower field.
Use a heavy, 4-strand chain stitch for the framing border itself—this gives the entire composition a strong, graphic anchor and contains the floral design beautifully.
2. Stitch a Radiant Sunburst with Simple Lines
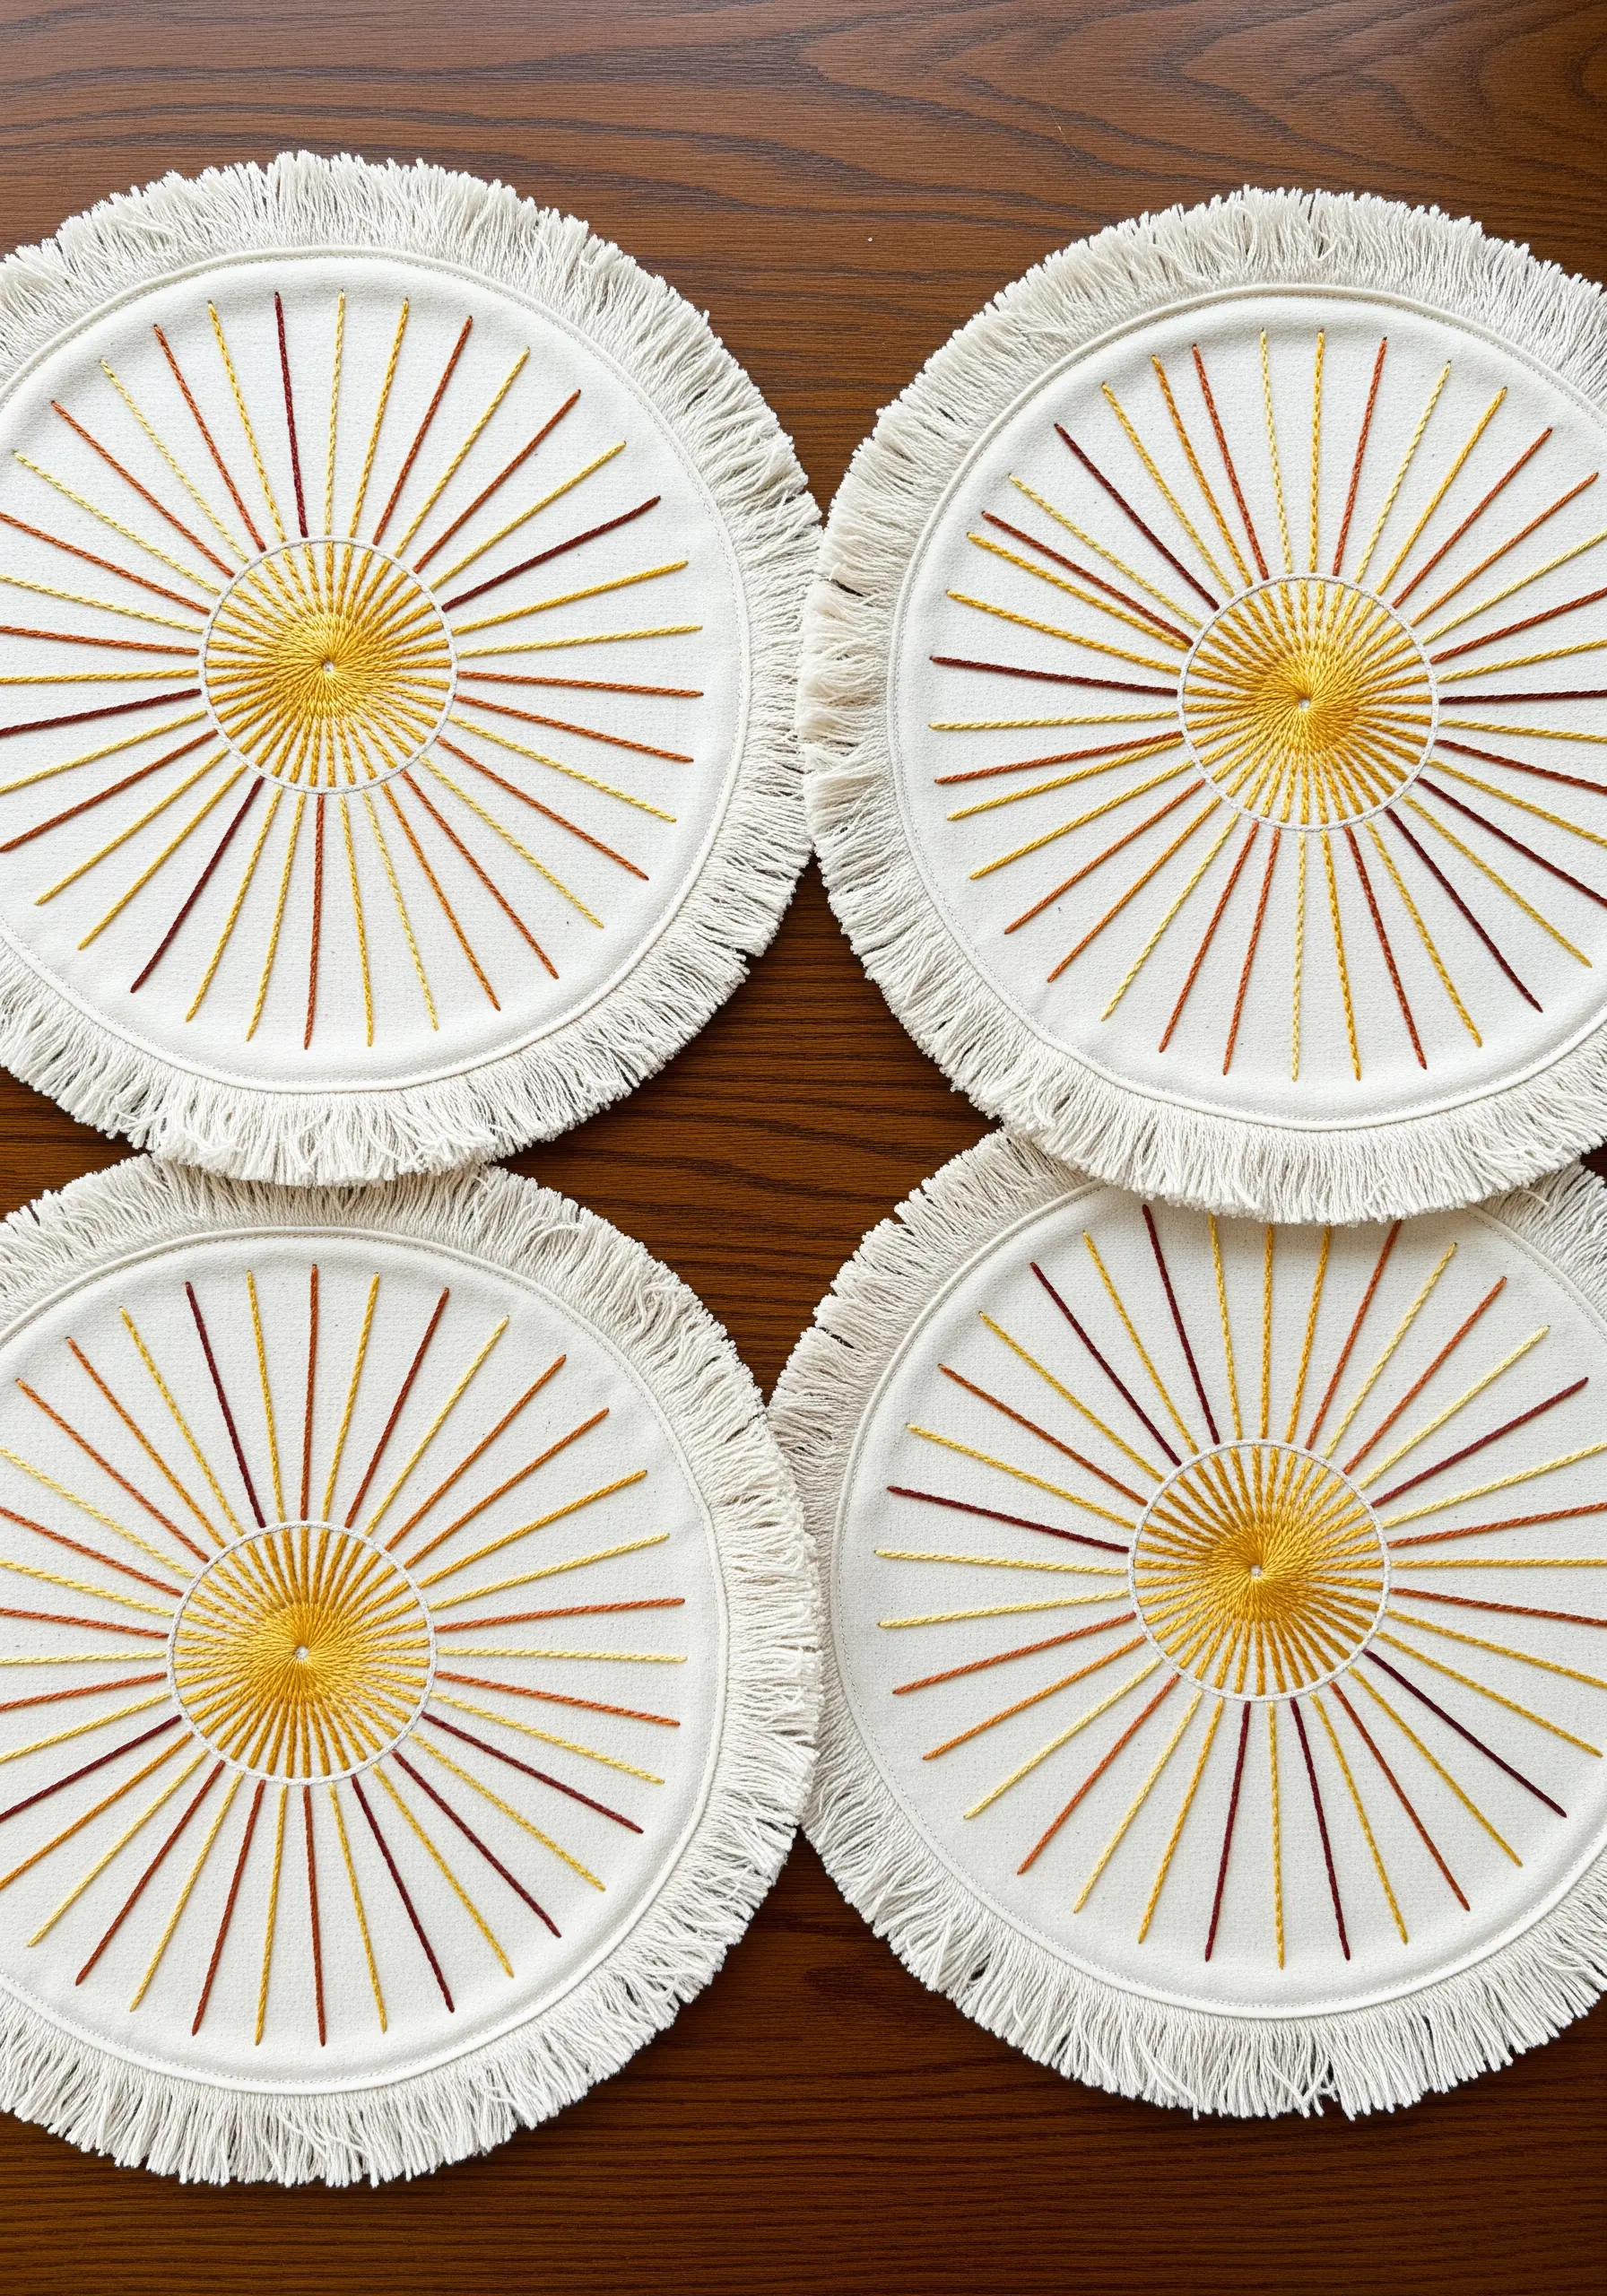
Transform a simple placemat or coaster with a graphic sunburst that celebrates simplicity.
Use a basic straight stitch, radiating from a central woven wheel stitch.
The magic is in the color variation—alternate between two or three complementary shades, like gold, rust, and cream, to give the rays depth and warmth.
For a clean finish, mark your radiating lines with a water-soluble pen before you begin to ensure perfect symmetry and spacing.
The frayed edge of the fabric adds a soft, boho contrast to the sharp geometry of the stitches.
3. Master Realistic Foliage with a Single Stitch
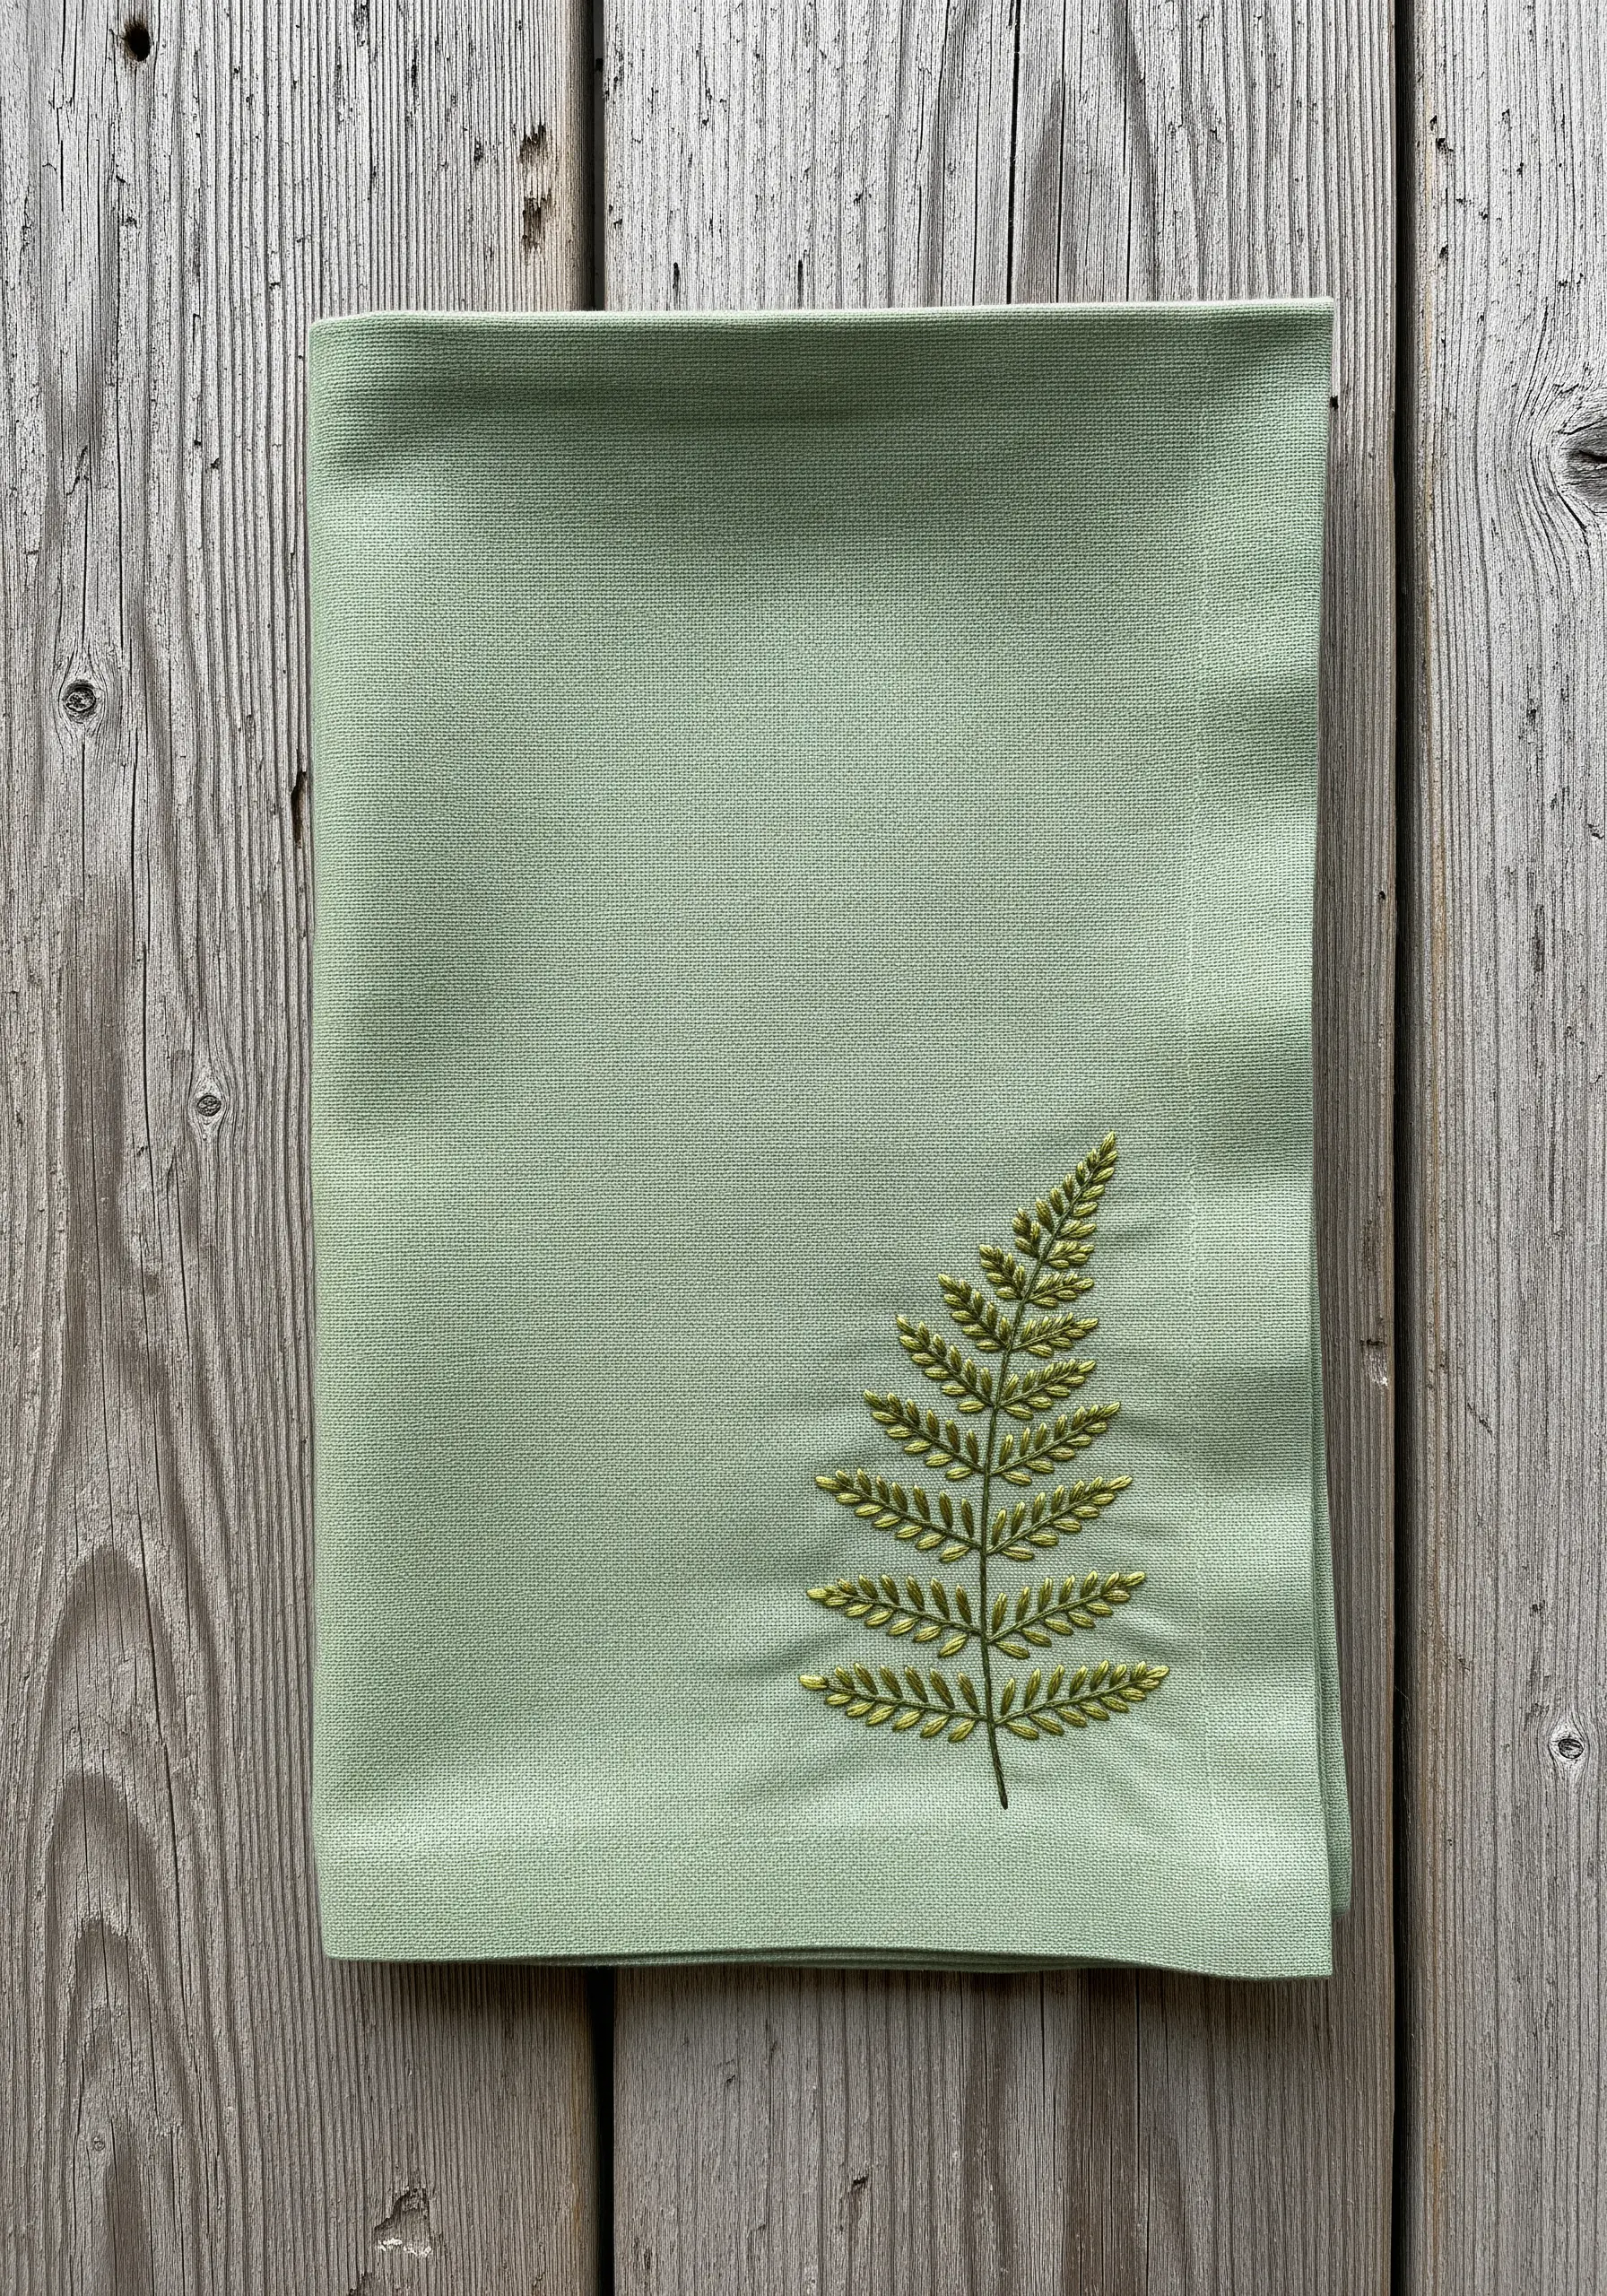
To embroider a realistic fern leaf, rely on the fishbone stitch for a clean, natural form.
This stitch creates a central spine automatically as you work, giving the leaf an organic structure without needing a separate outline.
Work your stitches at a slight diagonal, overlapping them at the center to build up the gentle texture of the fronds.
Choosing a thread color just a few shades darker or lighter than your fabric creates a subtle, tone-on-tone effect that feels both modern and timelessly elegant.
4. Embrace Bold Texture on Burlap Runners
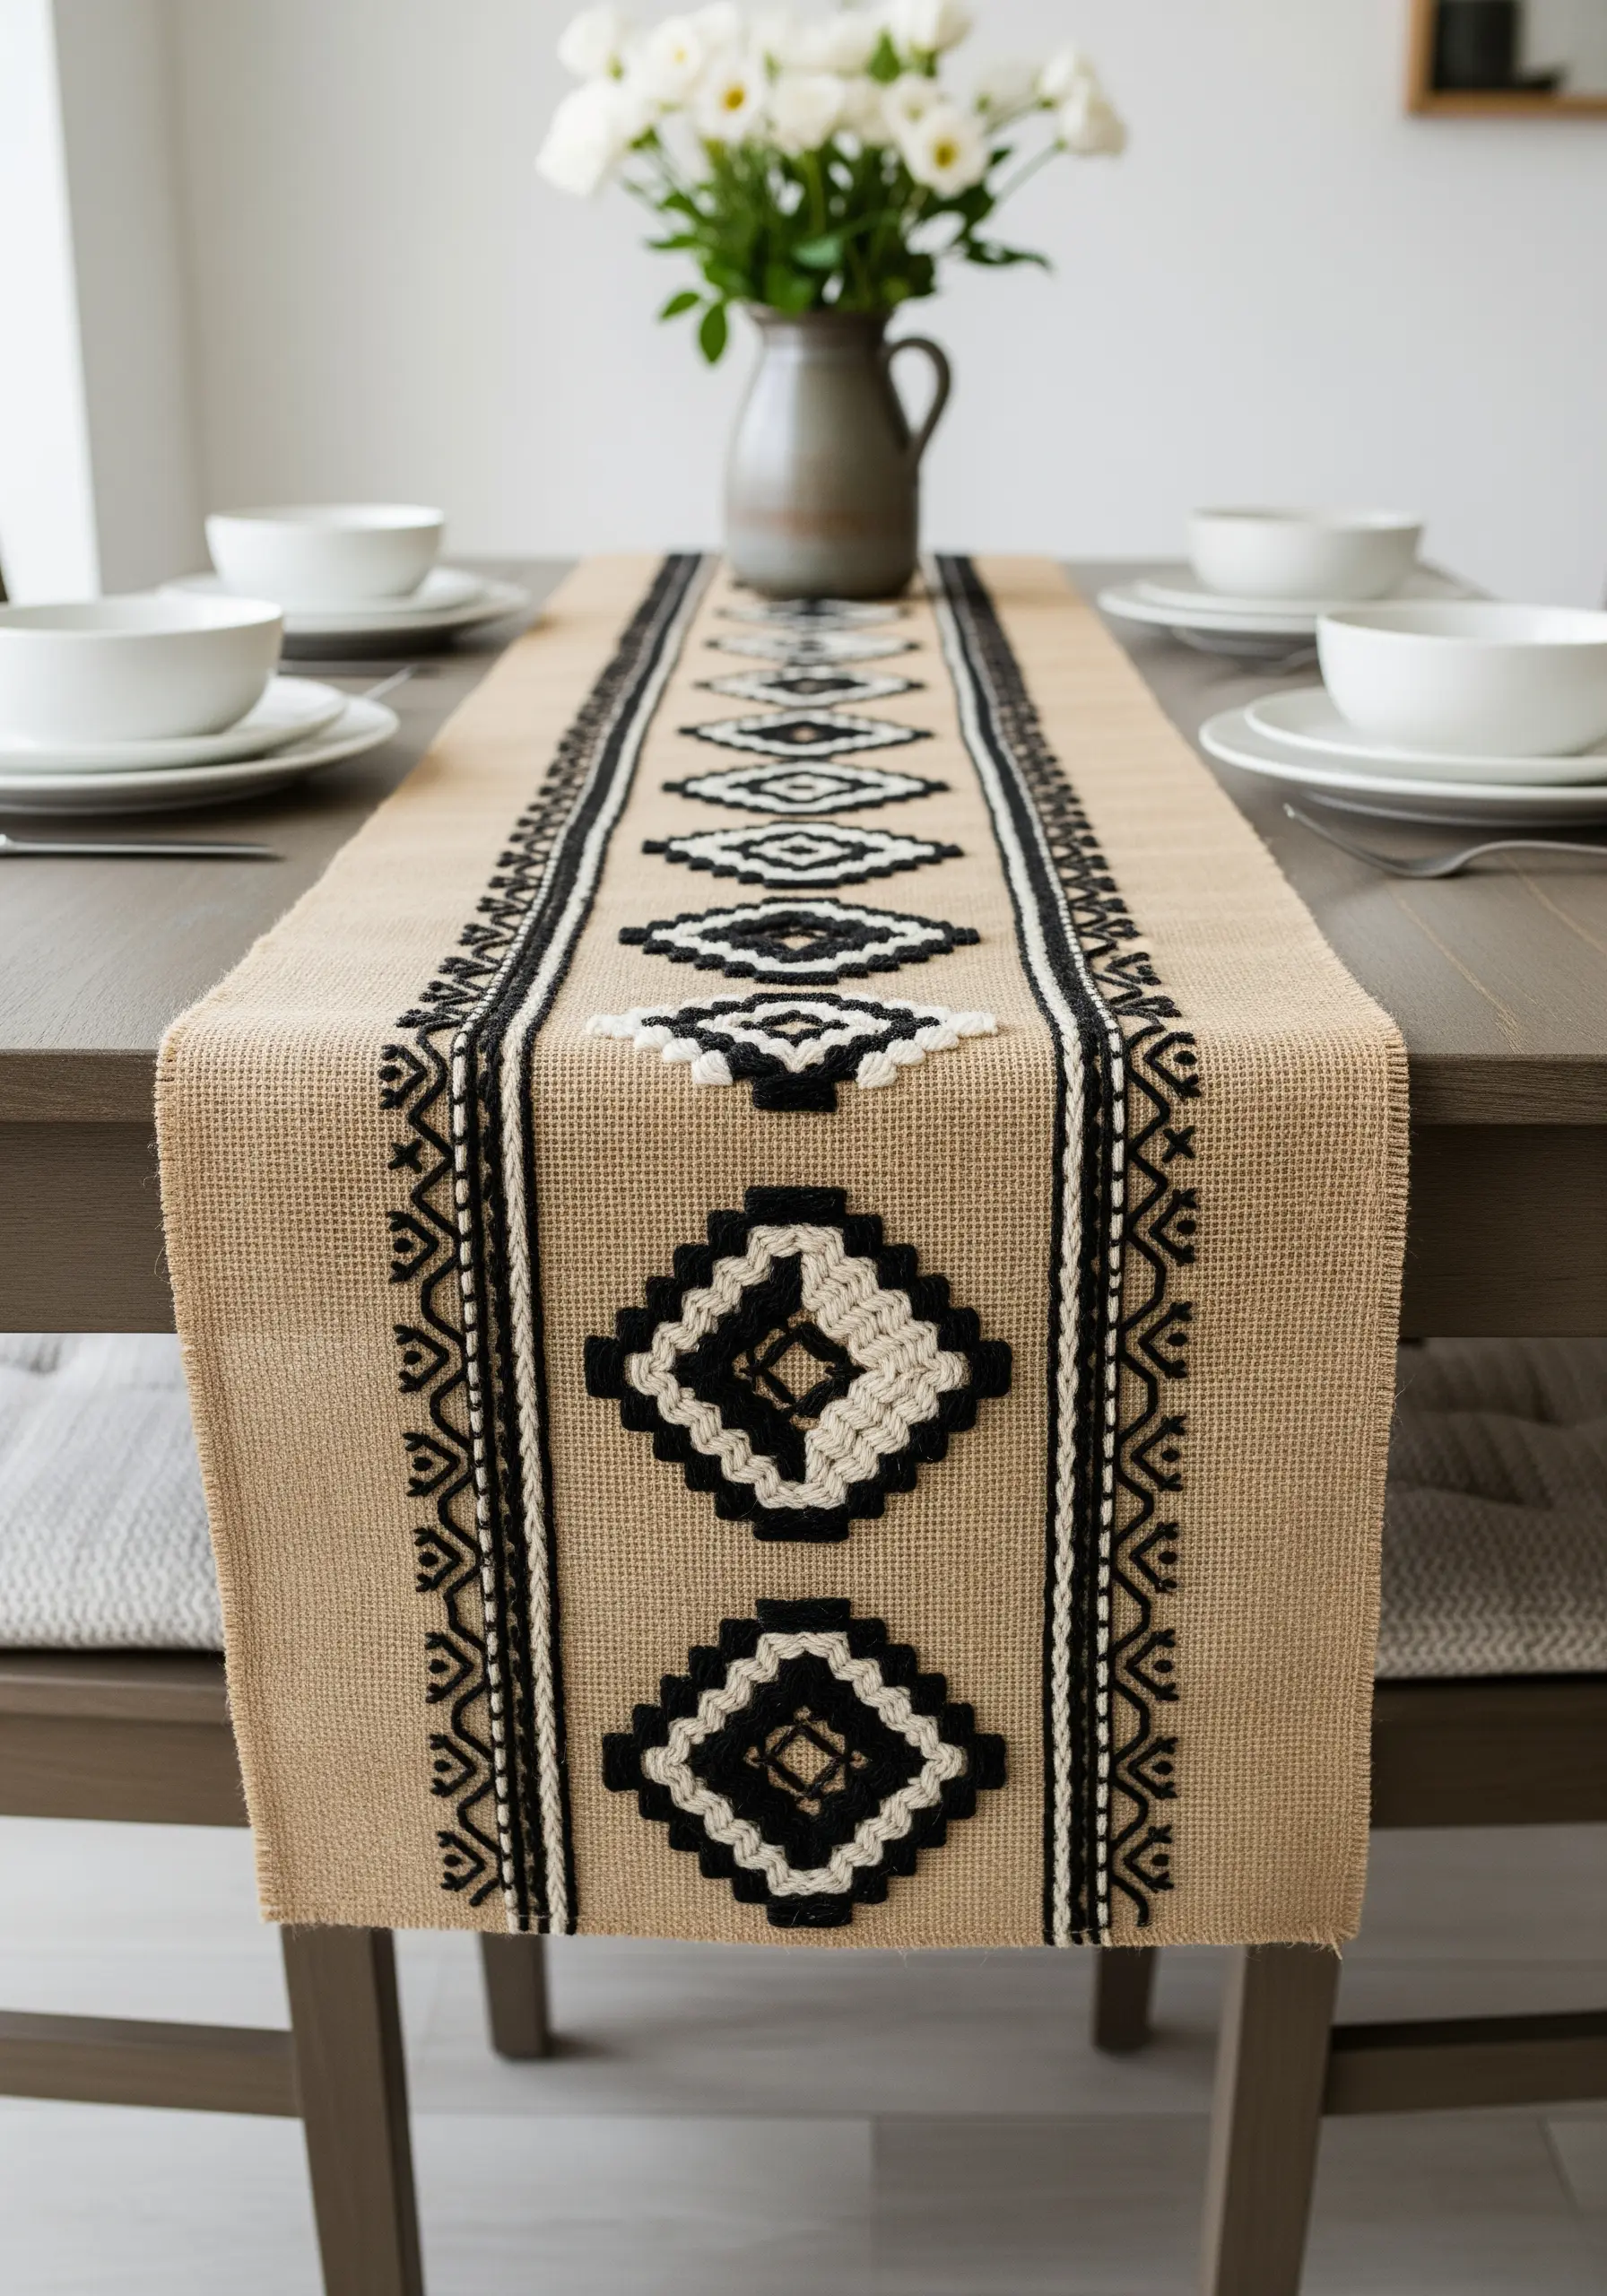
Working on a coarse fabric like burlap requires a shift in technique—instead of fine floss, opt for chunky tapestry wool or yarn to make a statement.
Create these bold geometric shapes using a raised stem stitch or by couching down thick cords of yarn with a thinner, matching thread.
This method not only provides excellent coverage on the open-weave fabric but also creates a highly tactile, three-dimensional effect.
The high contrast of black and cream against the natural jute color gives the runner a powerful, graphic presence that defines the tablescape.
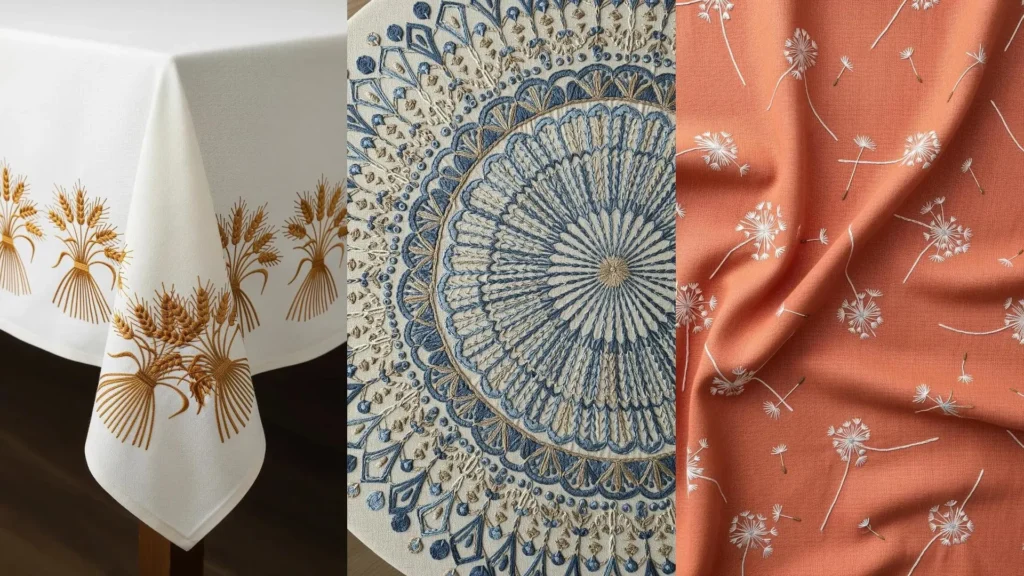
5. Capture Whimsical Movement with Scattered Dandelions
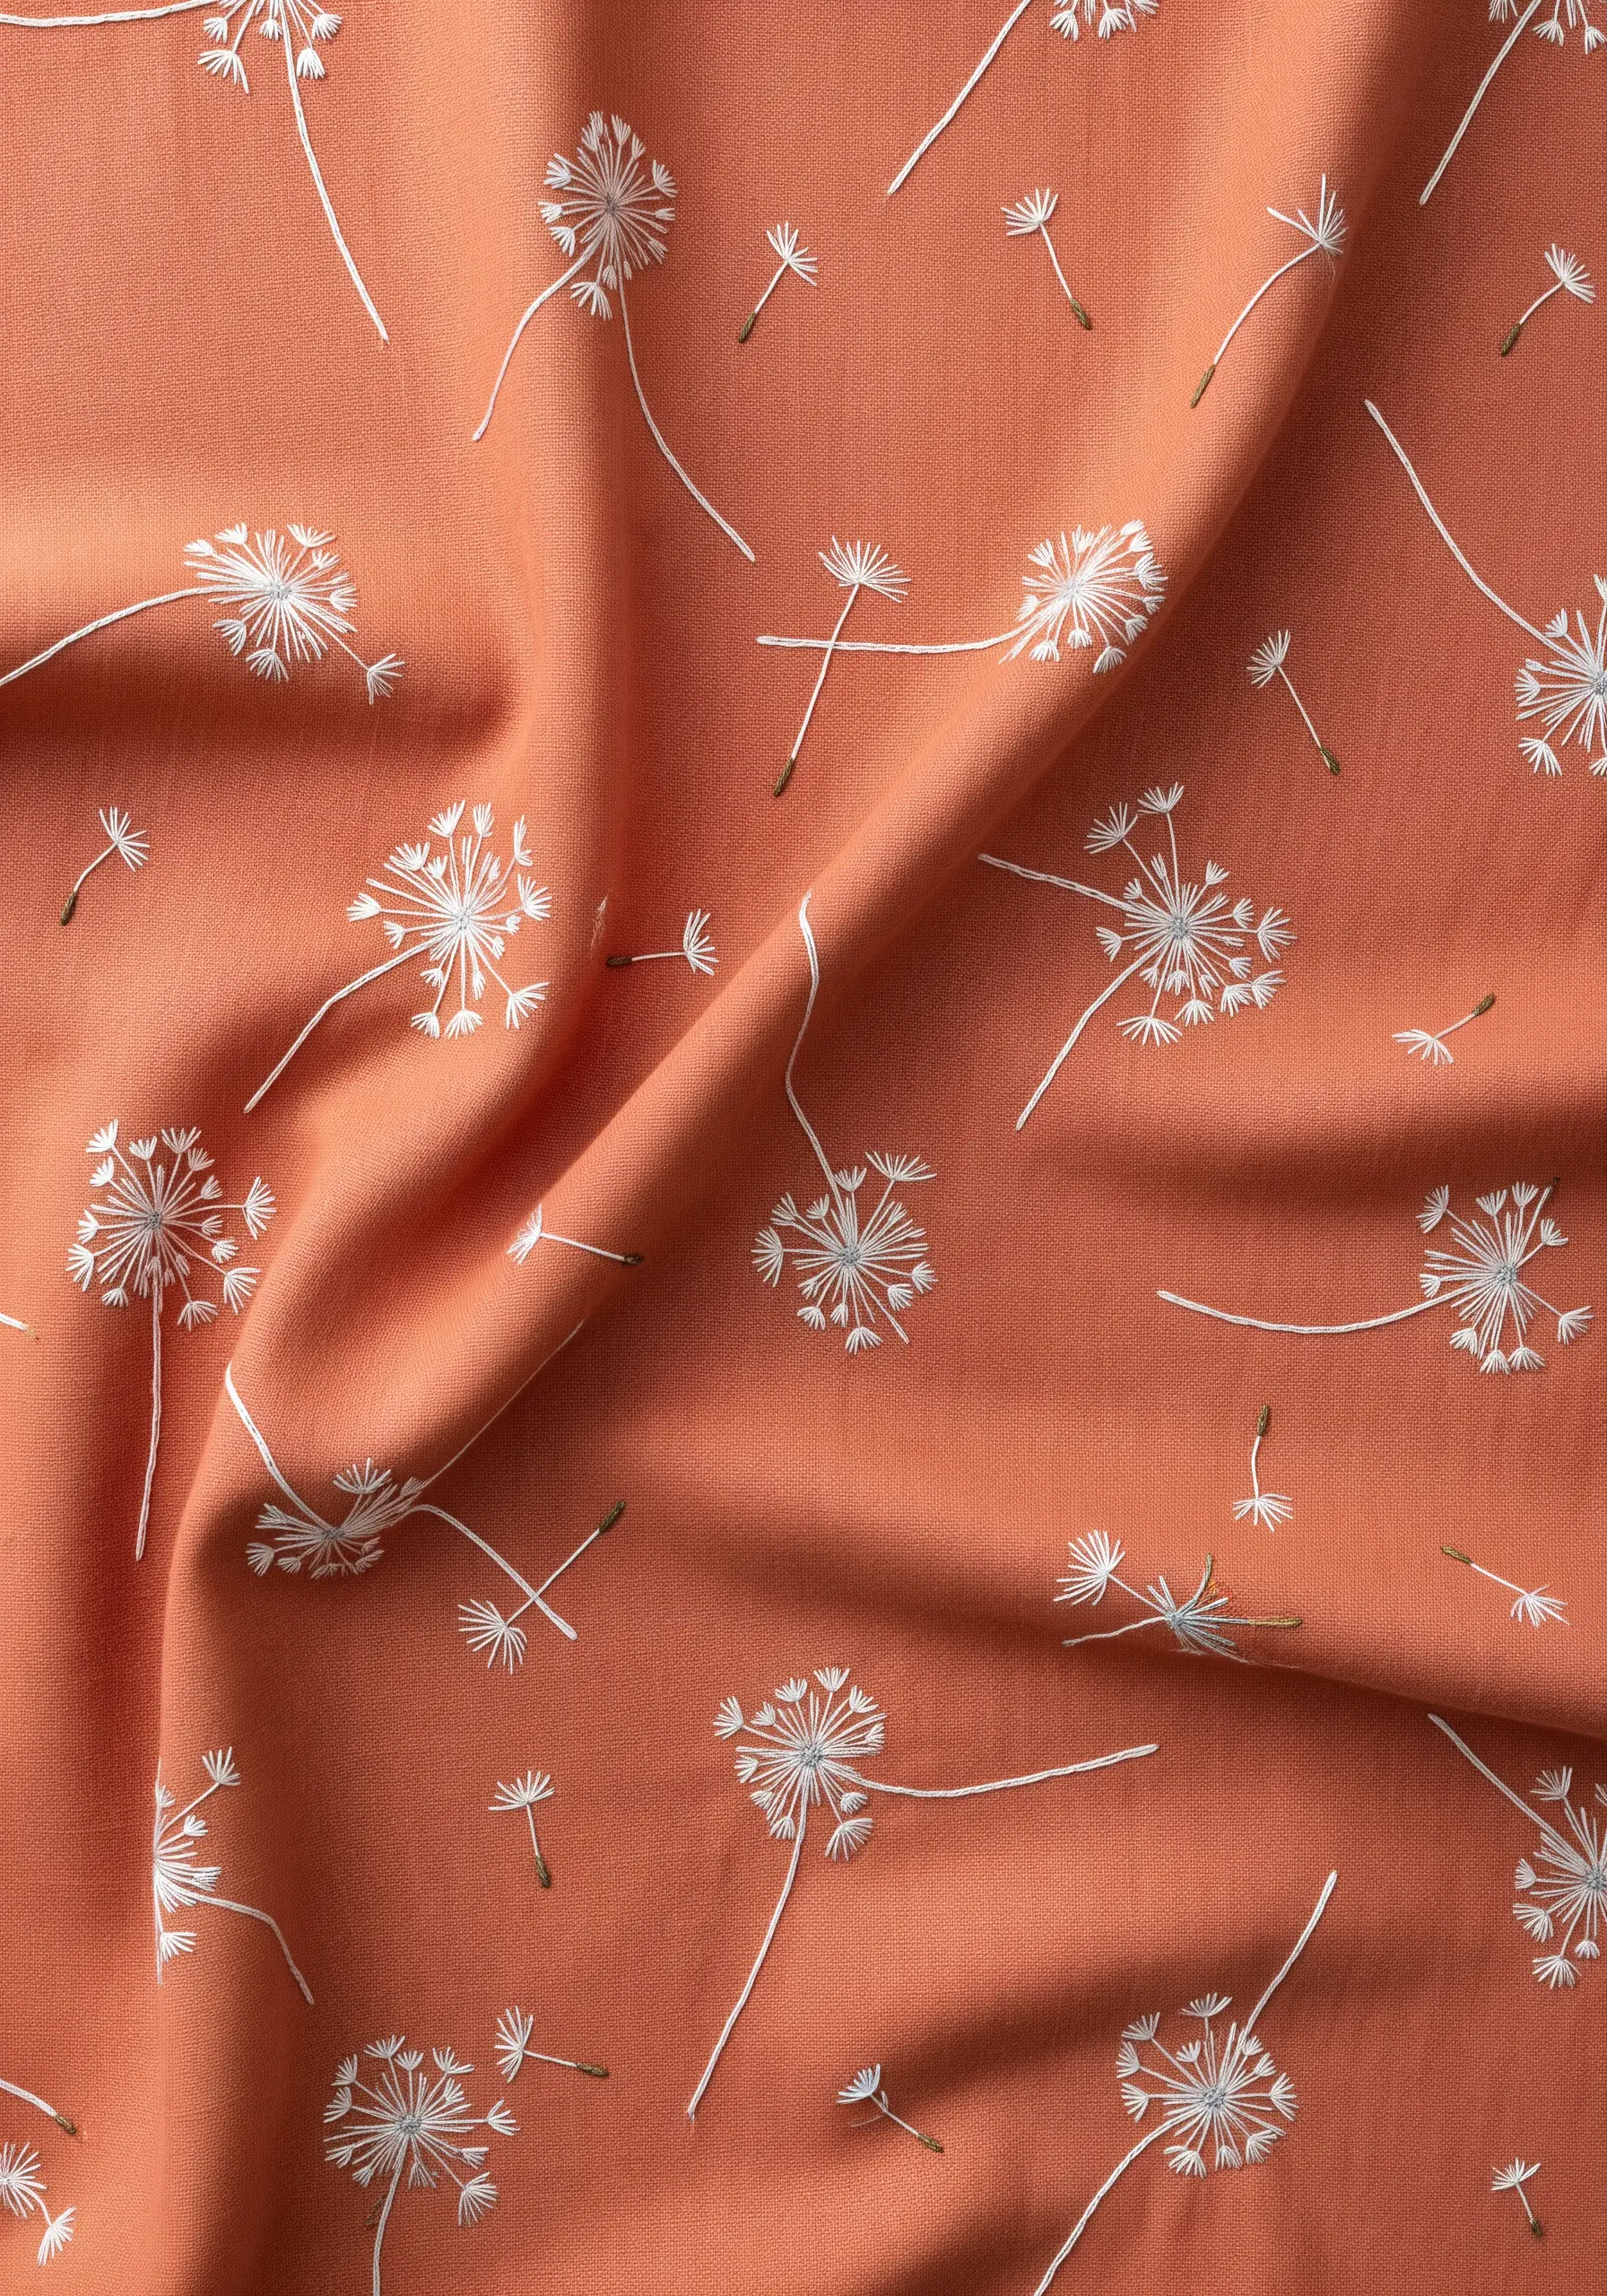
Create the delicate, airy feel of dandelion seeds floating across your fabric by varying your stitch and thread weight.
For the main seed head, use a starburst of fine straight stitches, anchored with a single French knot in the center.
For the tiny drifting seeds, use a single strand of floss to stitch a ‘V’ shape with a trailing straight stitch—this keeps them looking light and ethereal.
Scatter the motifs randomly across the entire cloth rather than containing them in a border; this creates a beautiful sense of organic movement and playfulness.
6. Combine Fill Stitches and Outlines for a Graphic Look
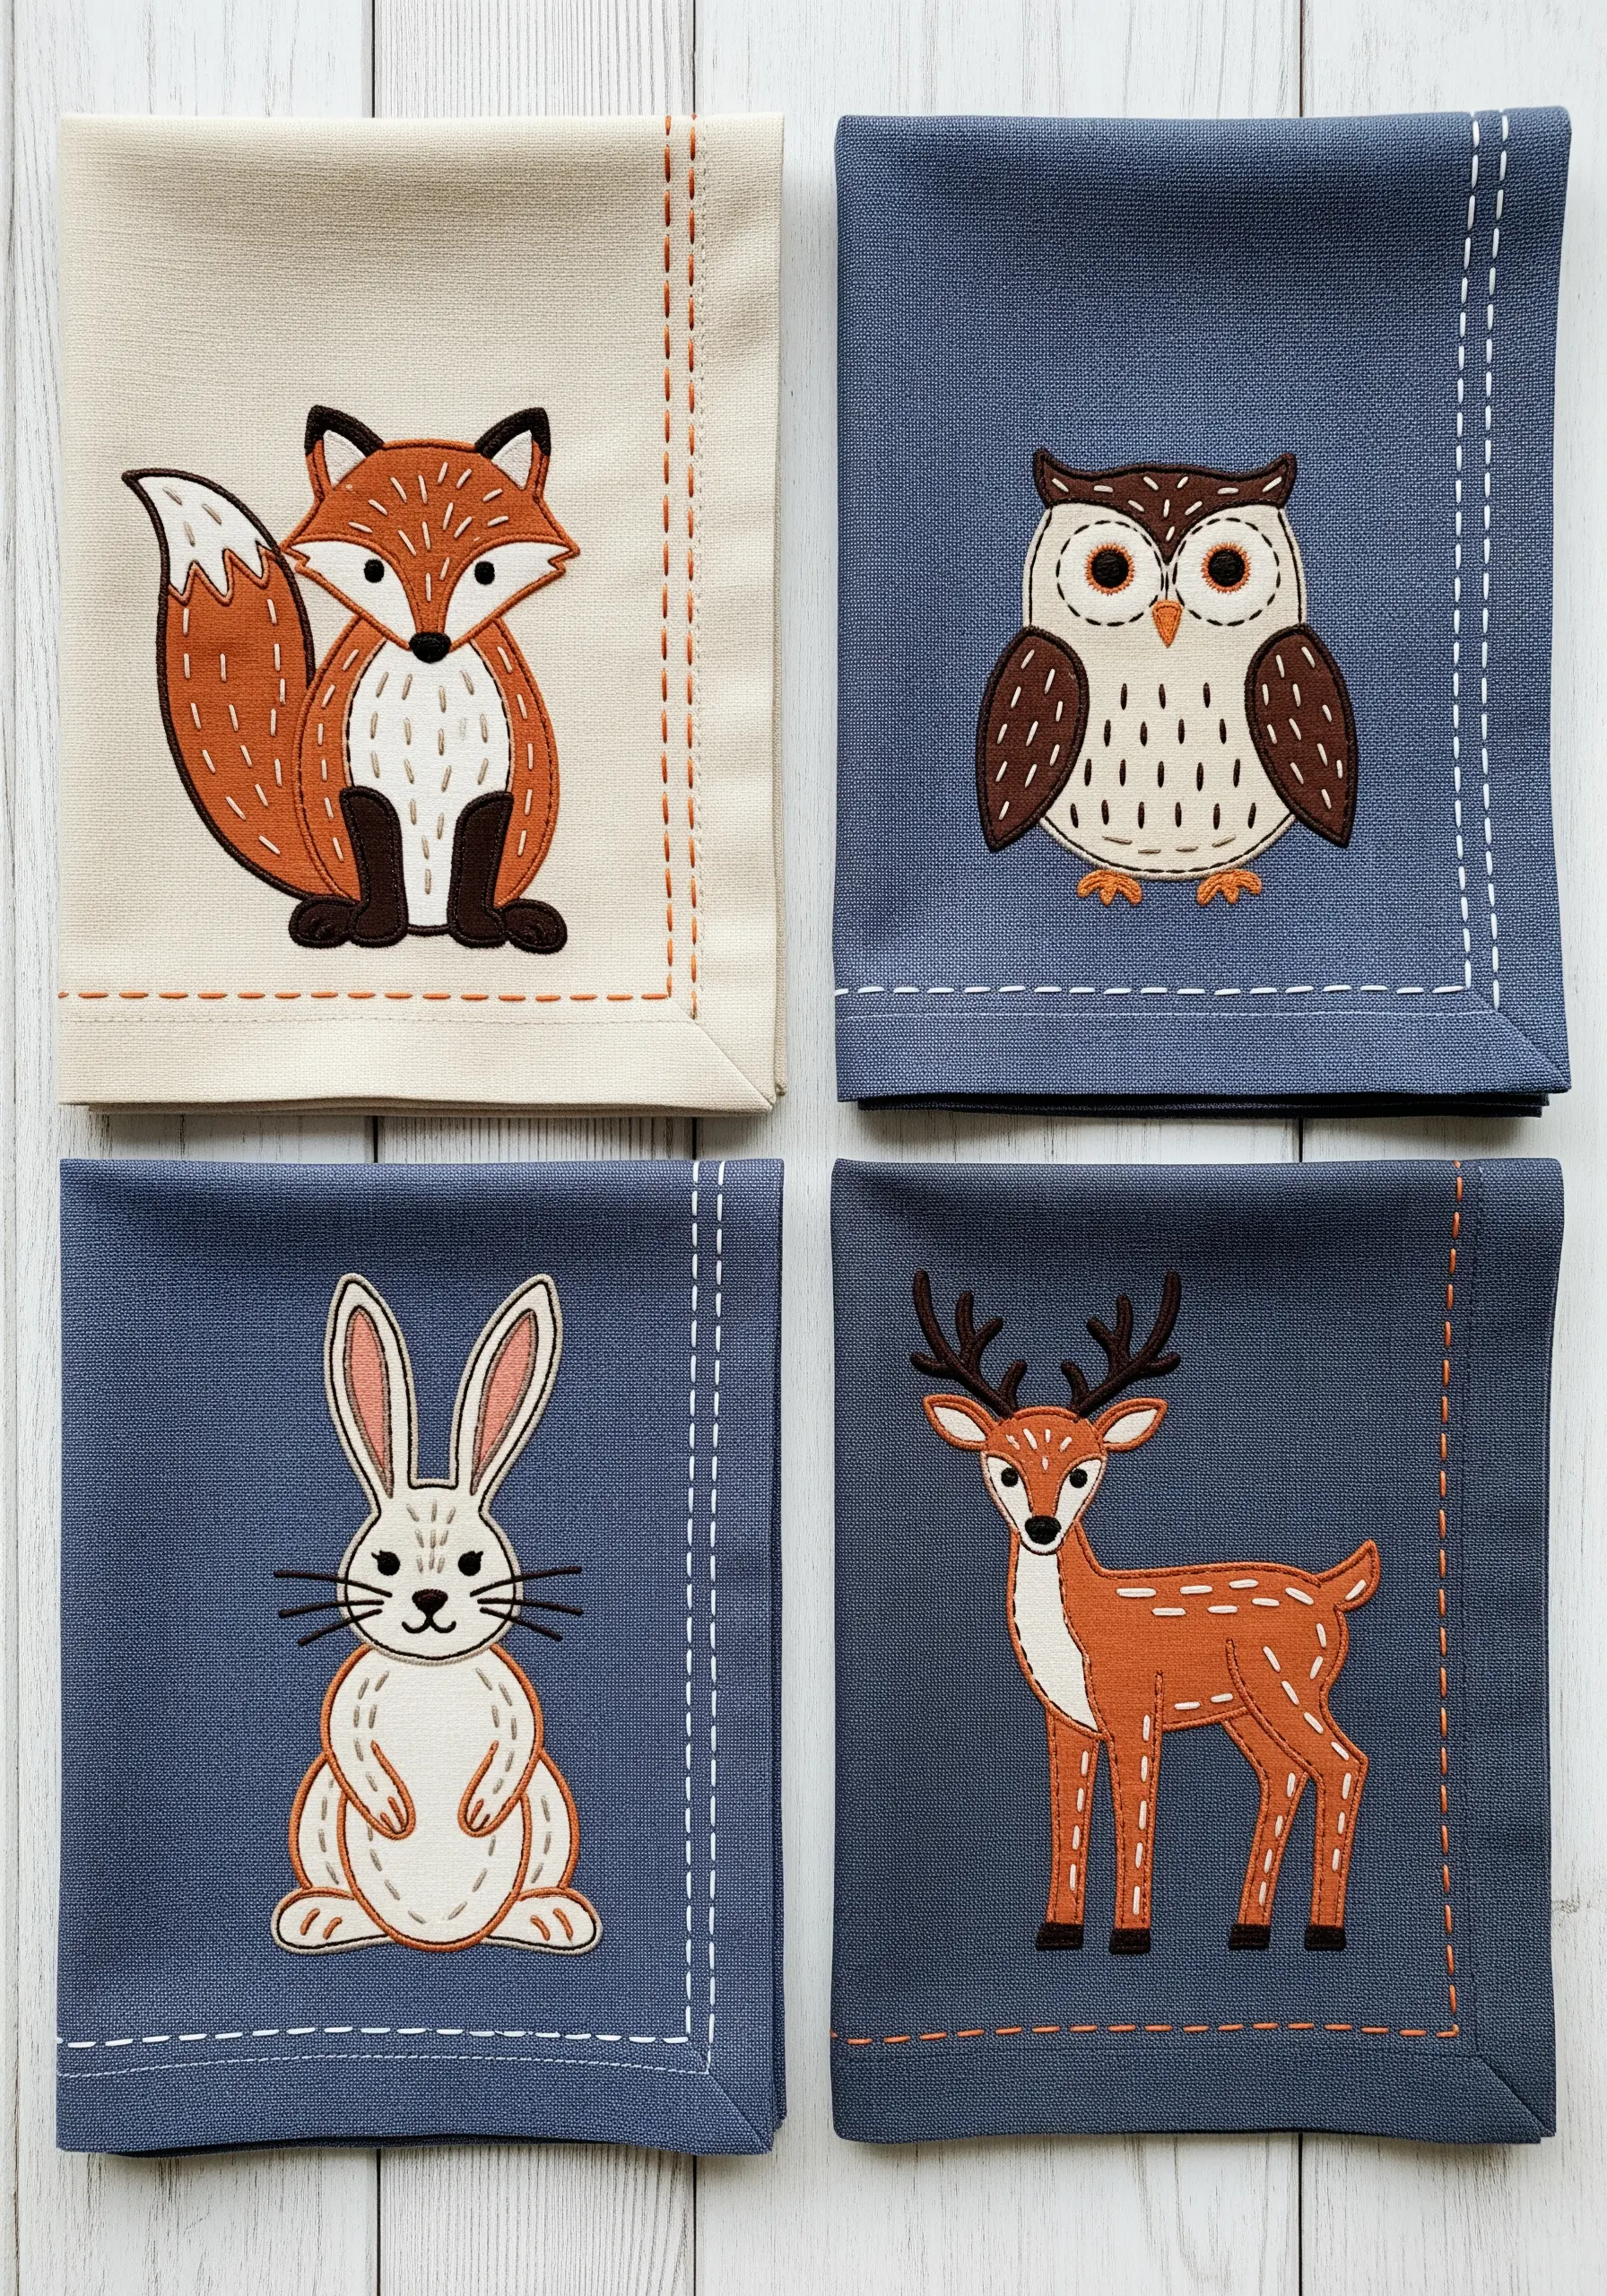
Achieve this clean, illustrative style by treating your embroidery like a coloring book.
First, create a crisp outline for your woodland animal using a two-strand backstitch or split stitch for ultimate precision.
Then, fill the larger areas with a smooth satin stitch, making sure all your stitches lie in the same direction for a uniform, almost-printed finish.
Adding a simple running stitch border to the napkin edge ties the motif to the linen and gives the piece a polished, cohesive feel.
7. Create Celestial Magic on Dark Linen
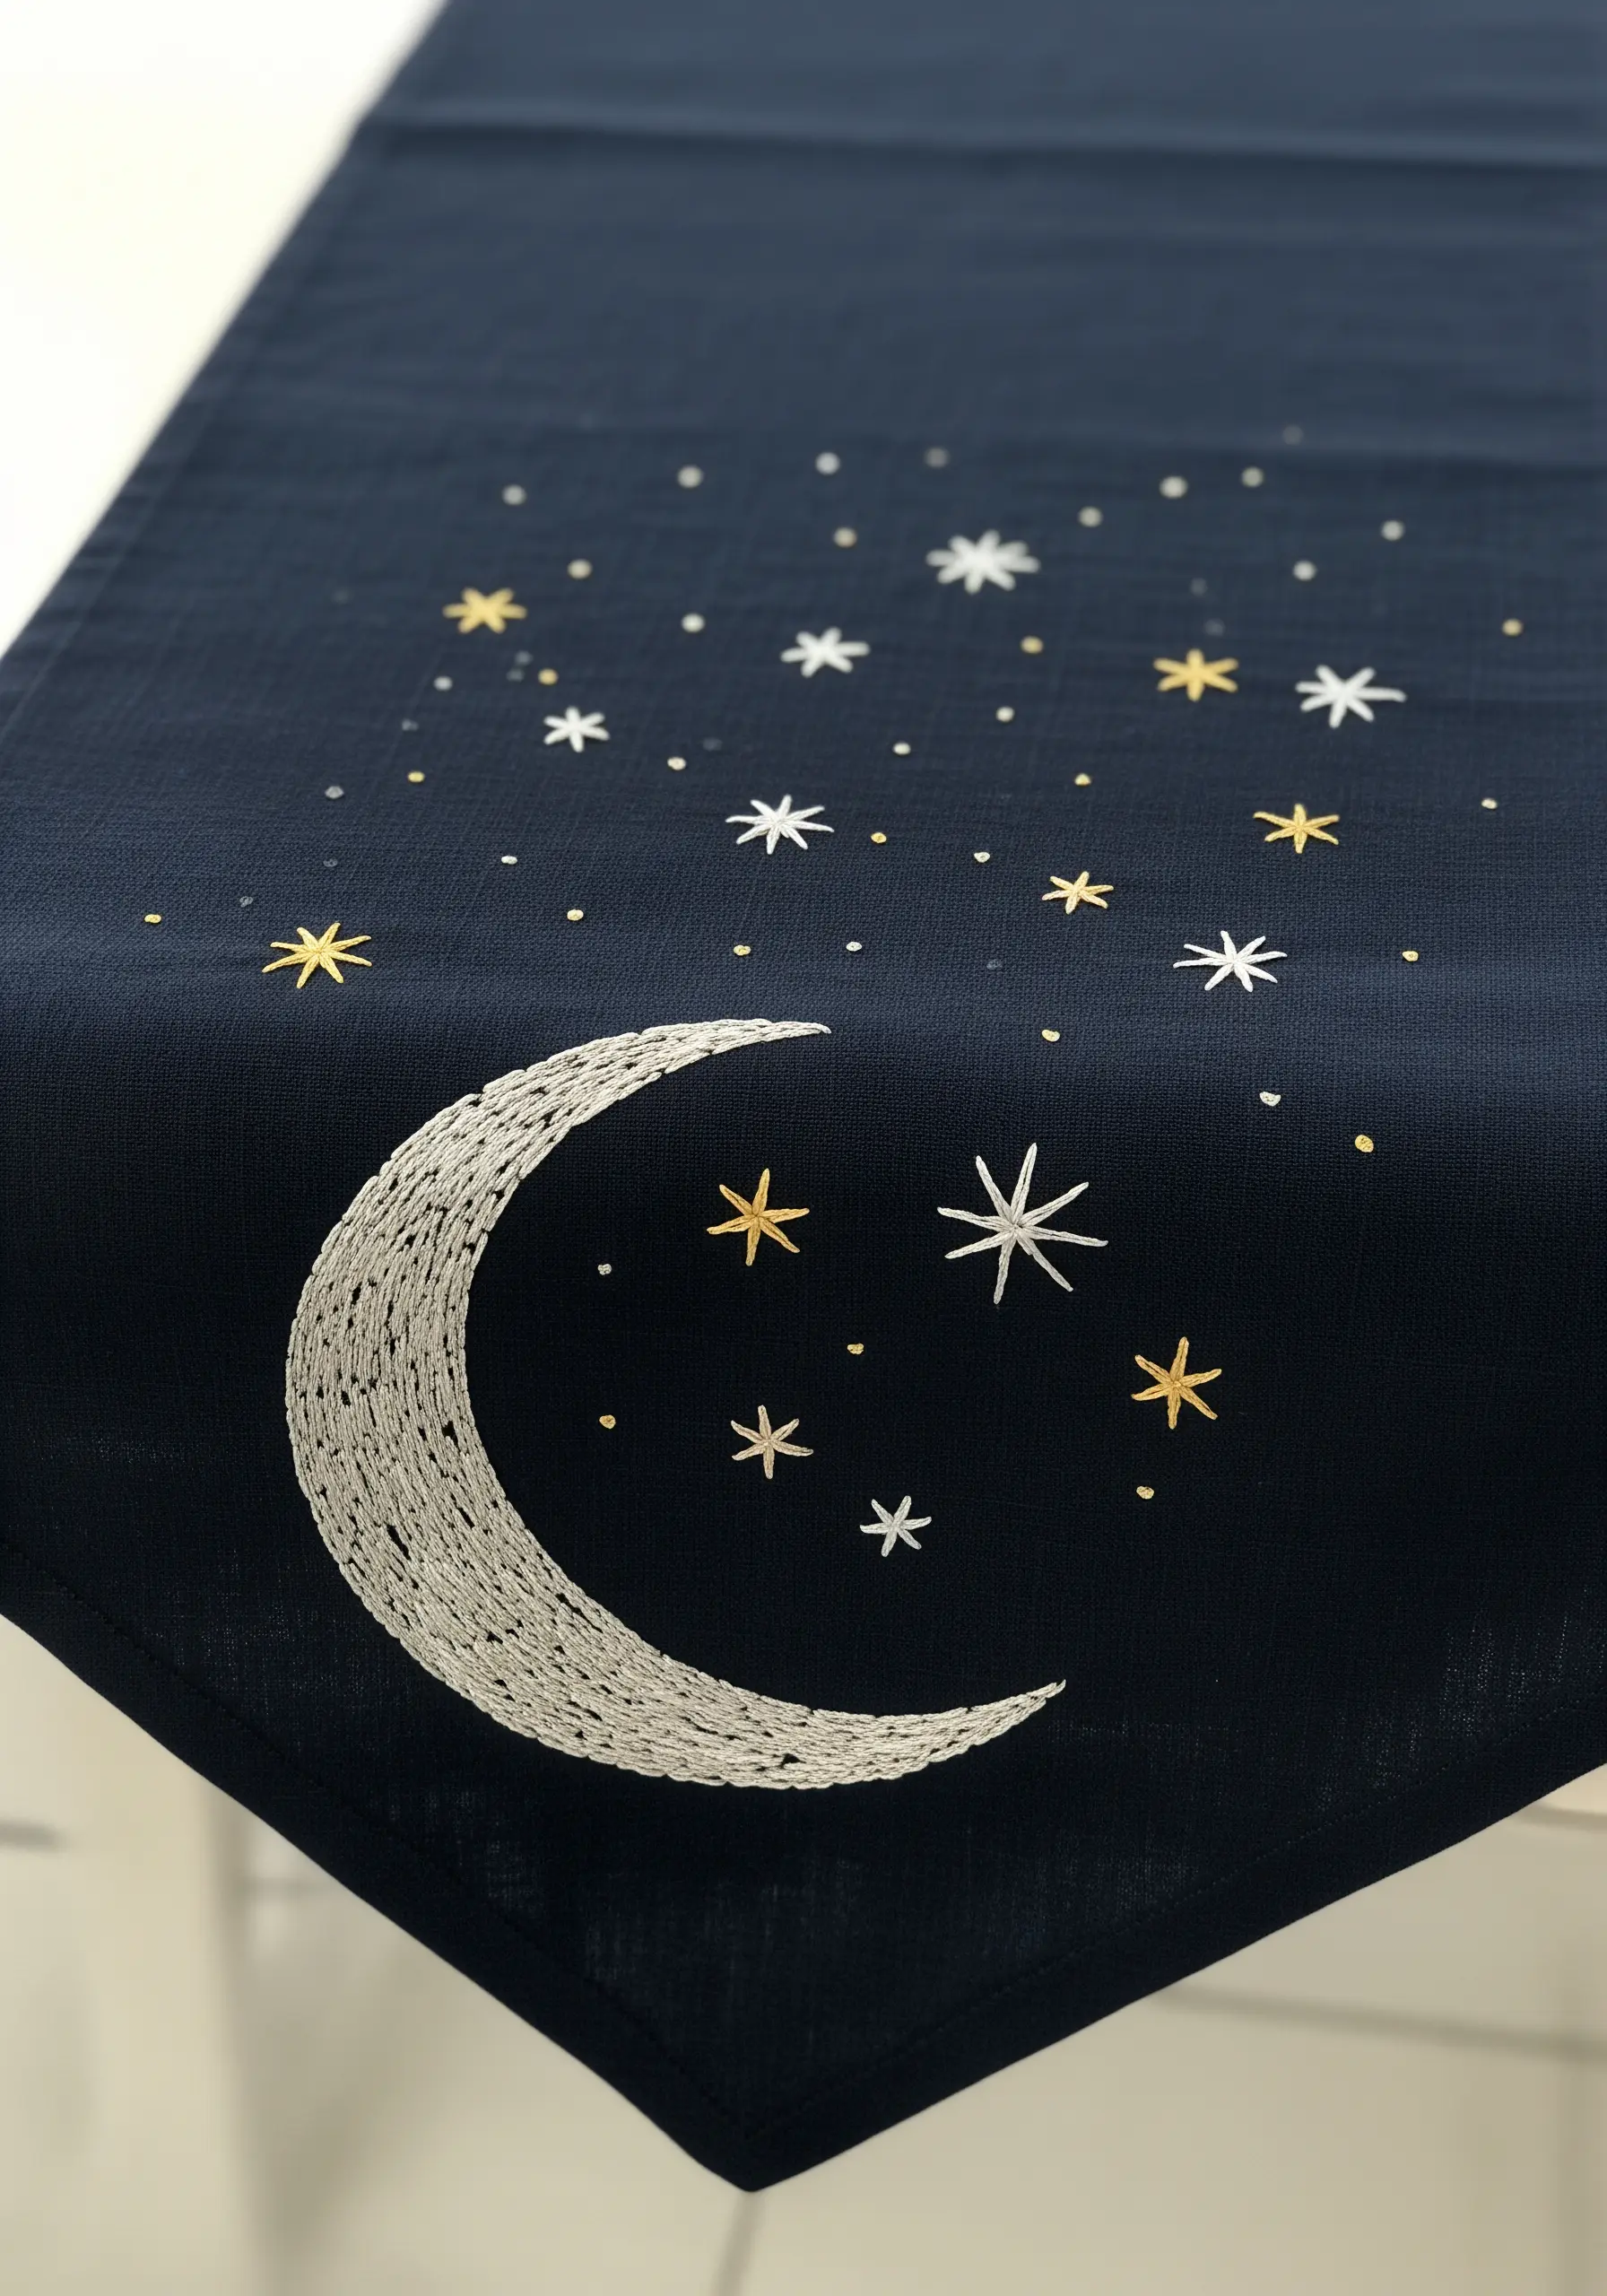
Make stars and moons pop by stitching them on a dark, moody fabric like navy or charcoal linen.
To give the crescent moon a woven, tactile texture, fill it with rows of chain stitch worked closely together.
Use a variegated or metallic silver thread to add a subtle shimmer that catches the light.
For the stars, mix simple star stitches with scattered single straight stitches and French knots in gold and silver to create a varied, twinkling night sky that doesn’t feel uniform.
8. Stitch a Flowing Vine with Color Blending
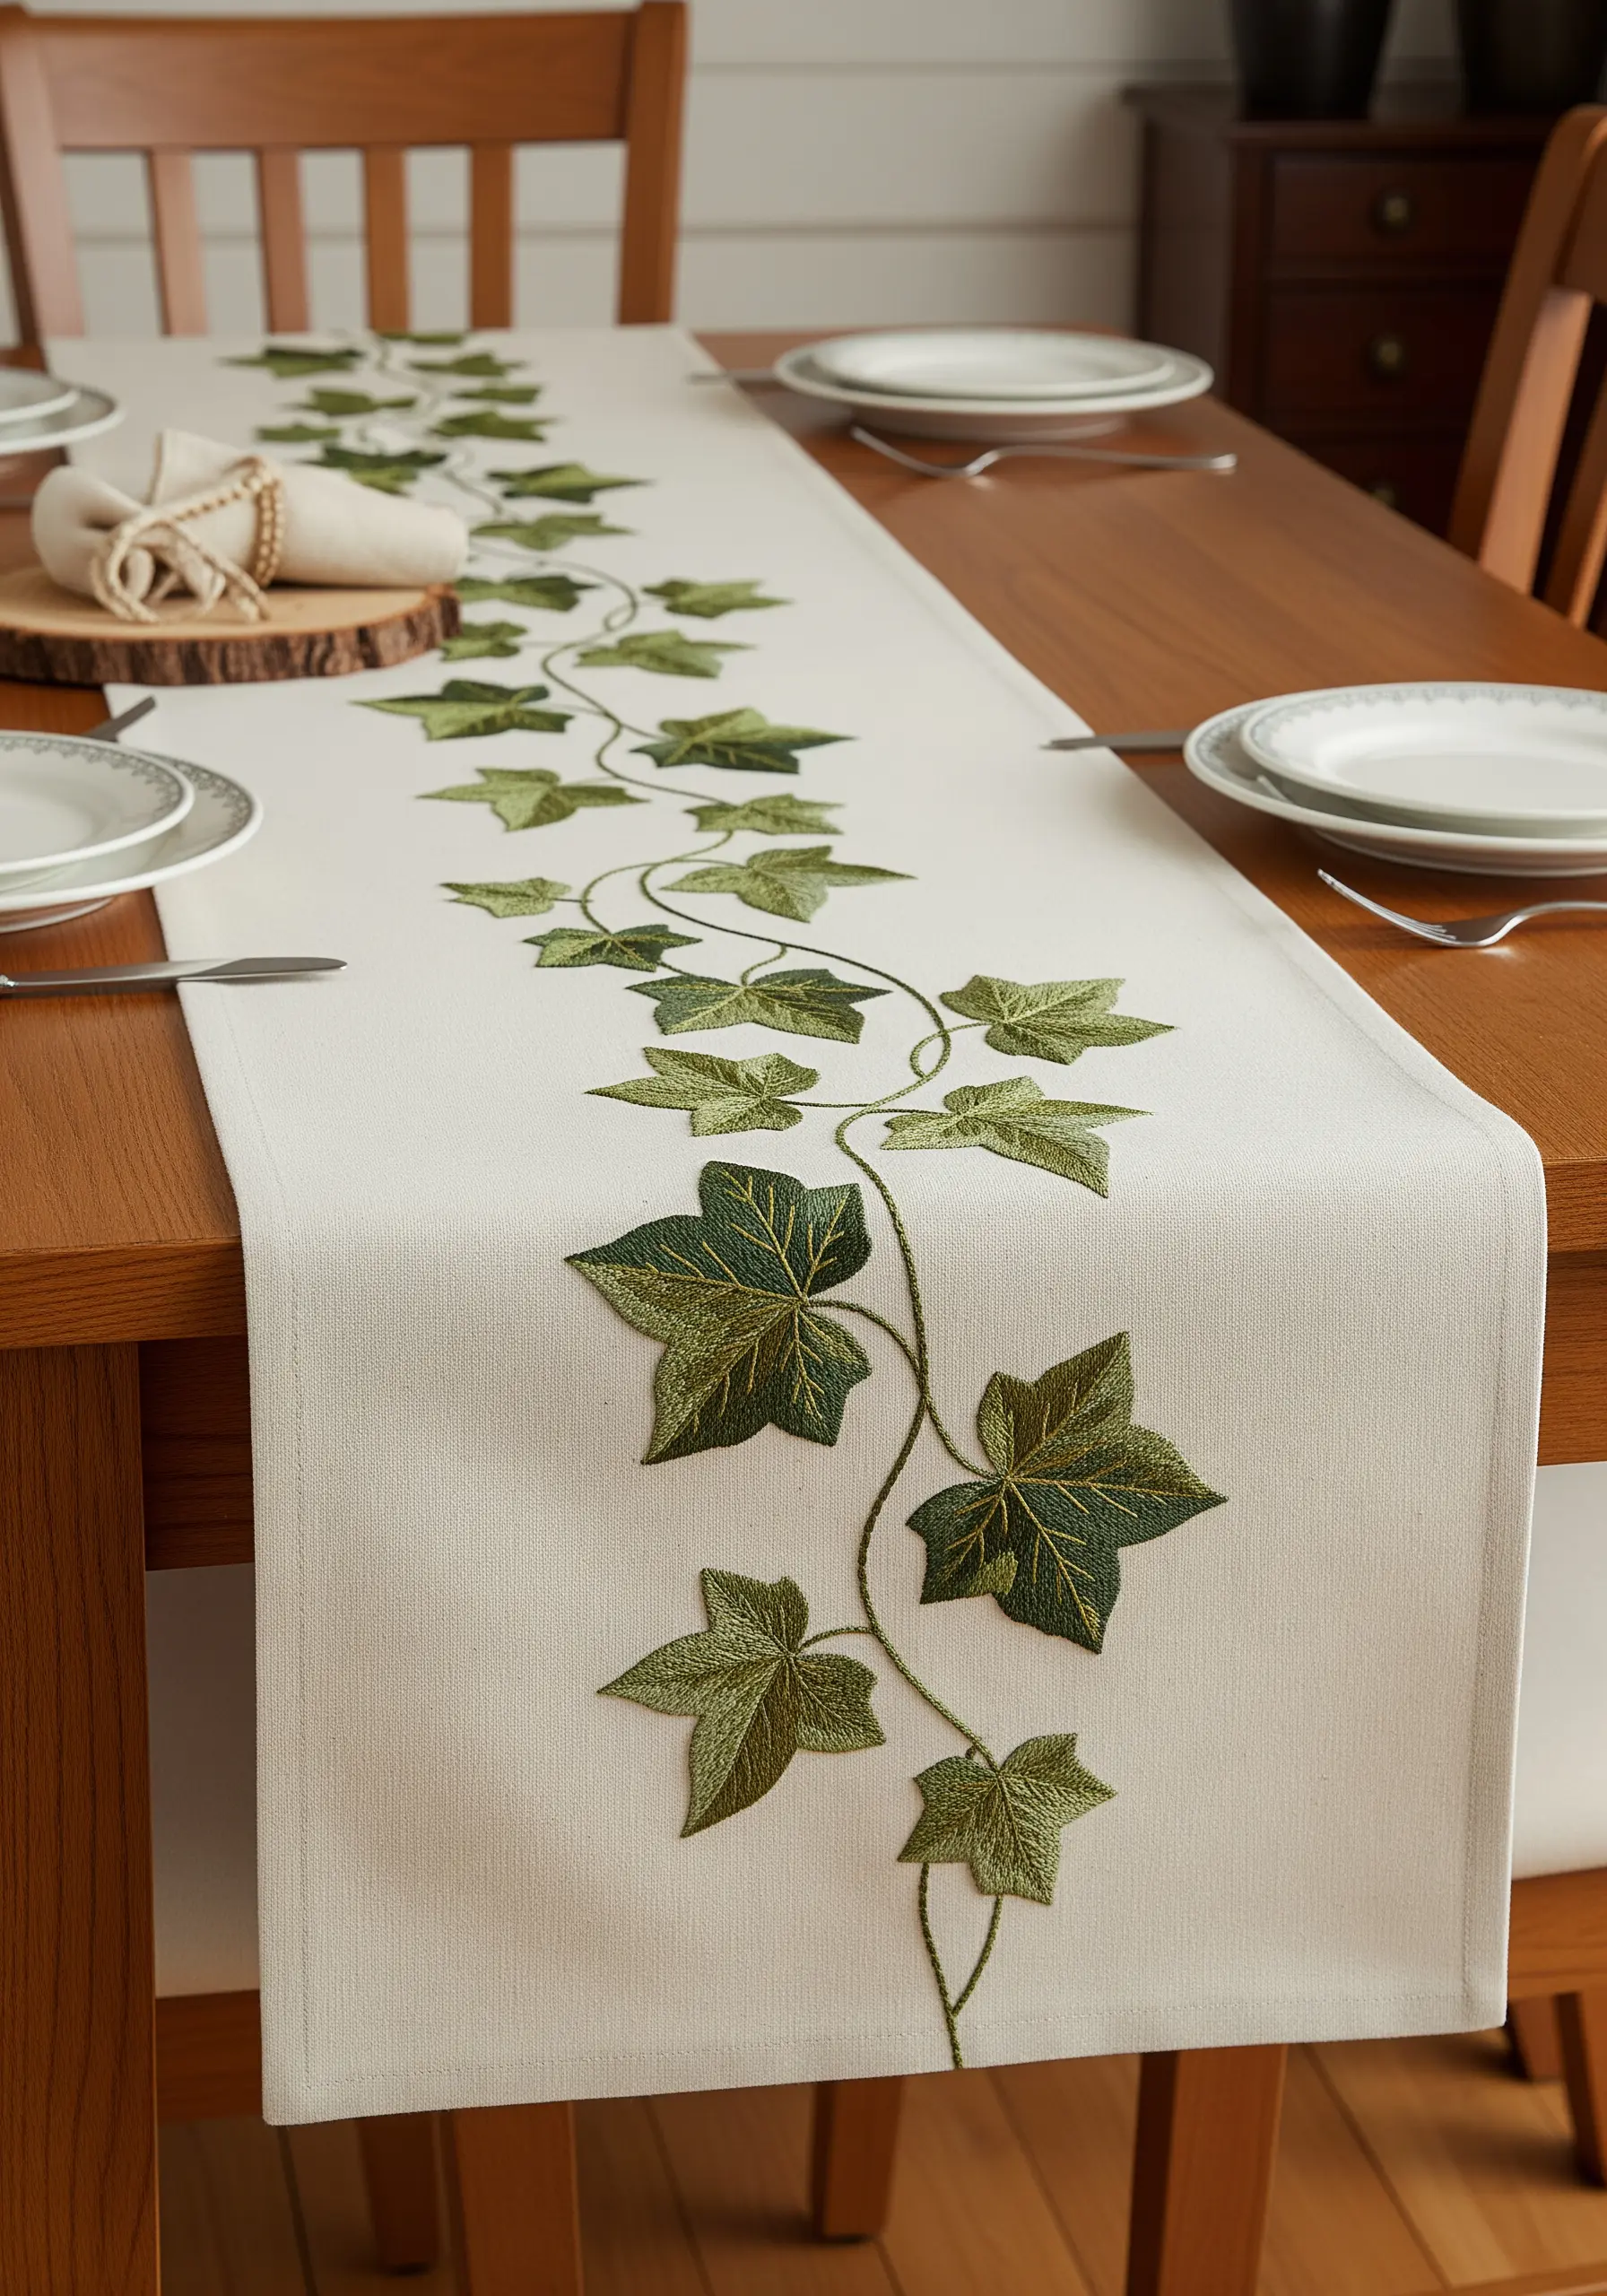
To make this ivy runner look truly natural, focus on subtle color variation within the leaves.
Use a long-and-short stitch to fill each leaf, blending two or three shades of green to create realistic highlights and shadows.
This technique eliminates harsh lines and gives the foliage a soft, painterly quality.
For the vine itself, use a sinuous stem stitch that meanders organically down the center of the runner, connecting the leaves in a graceful, flowing line.
9. Build Intricate Mandalas with Simple, Repetitive Stitches
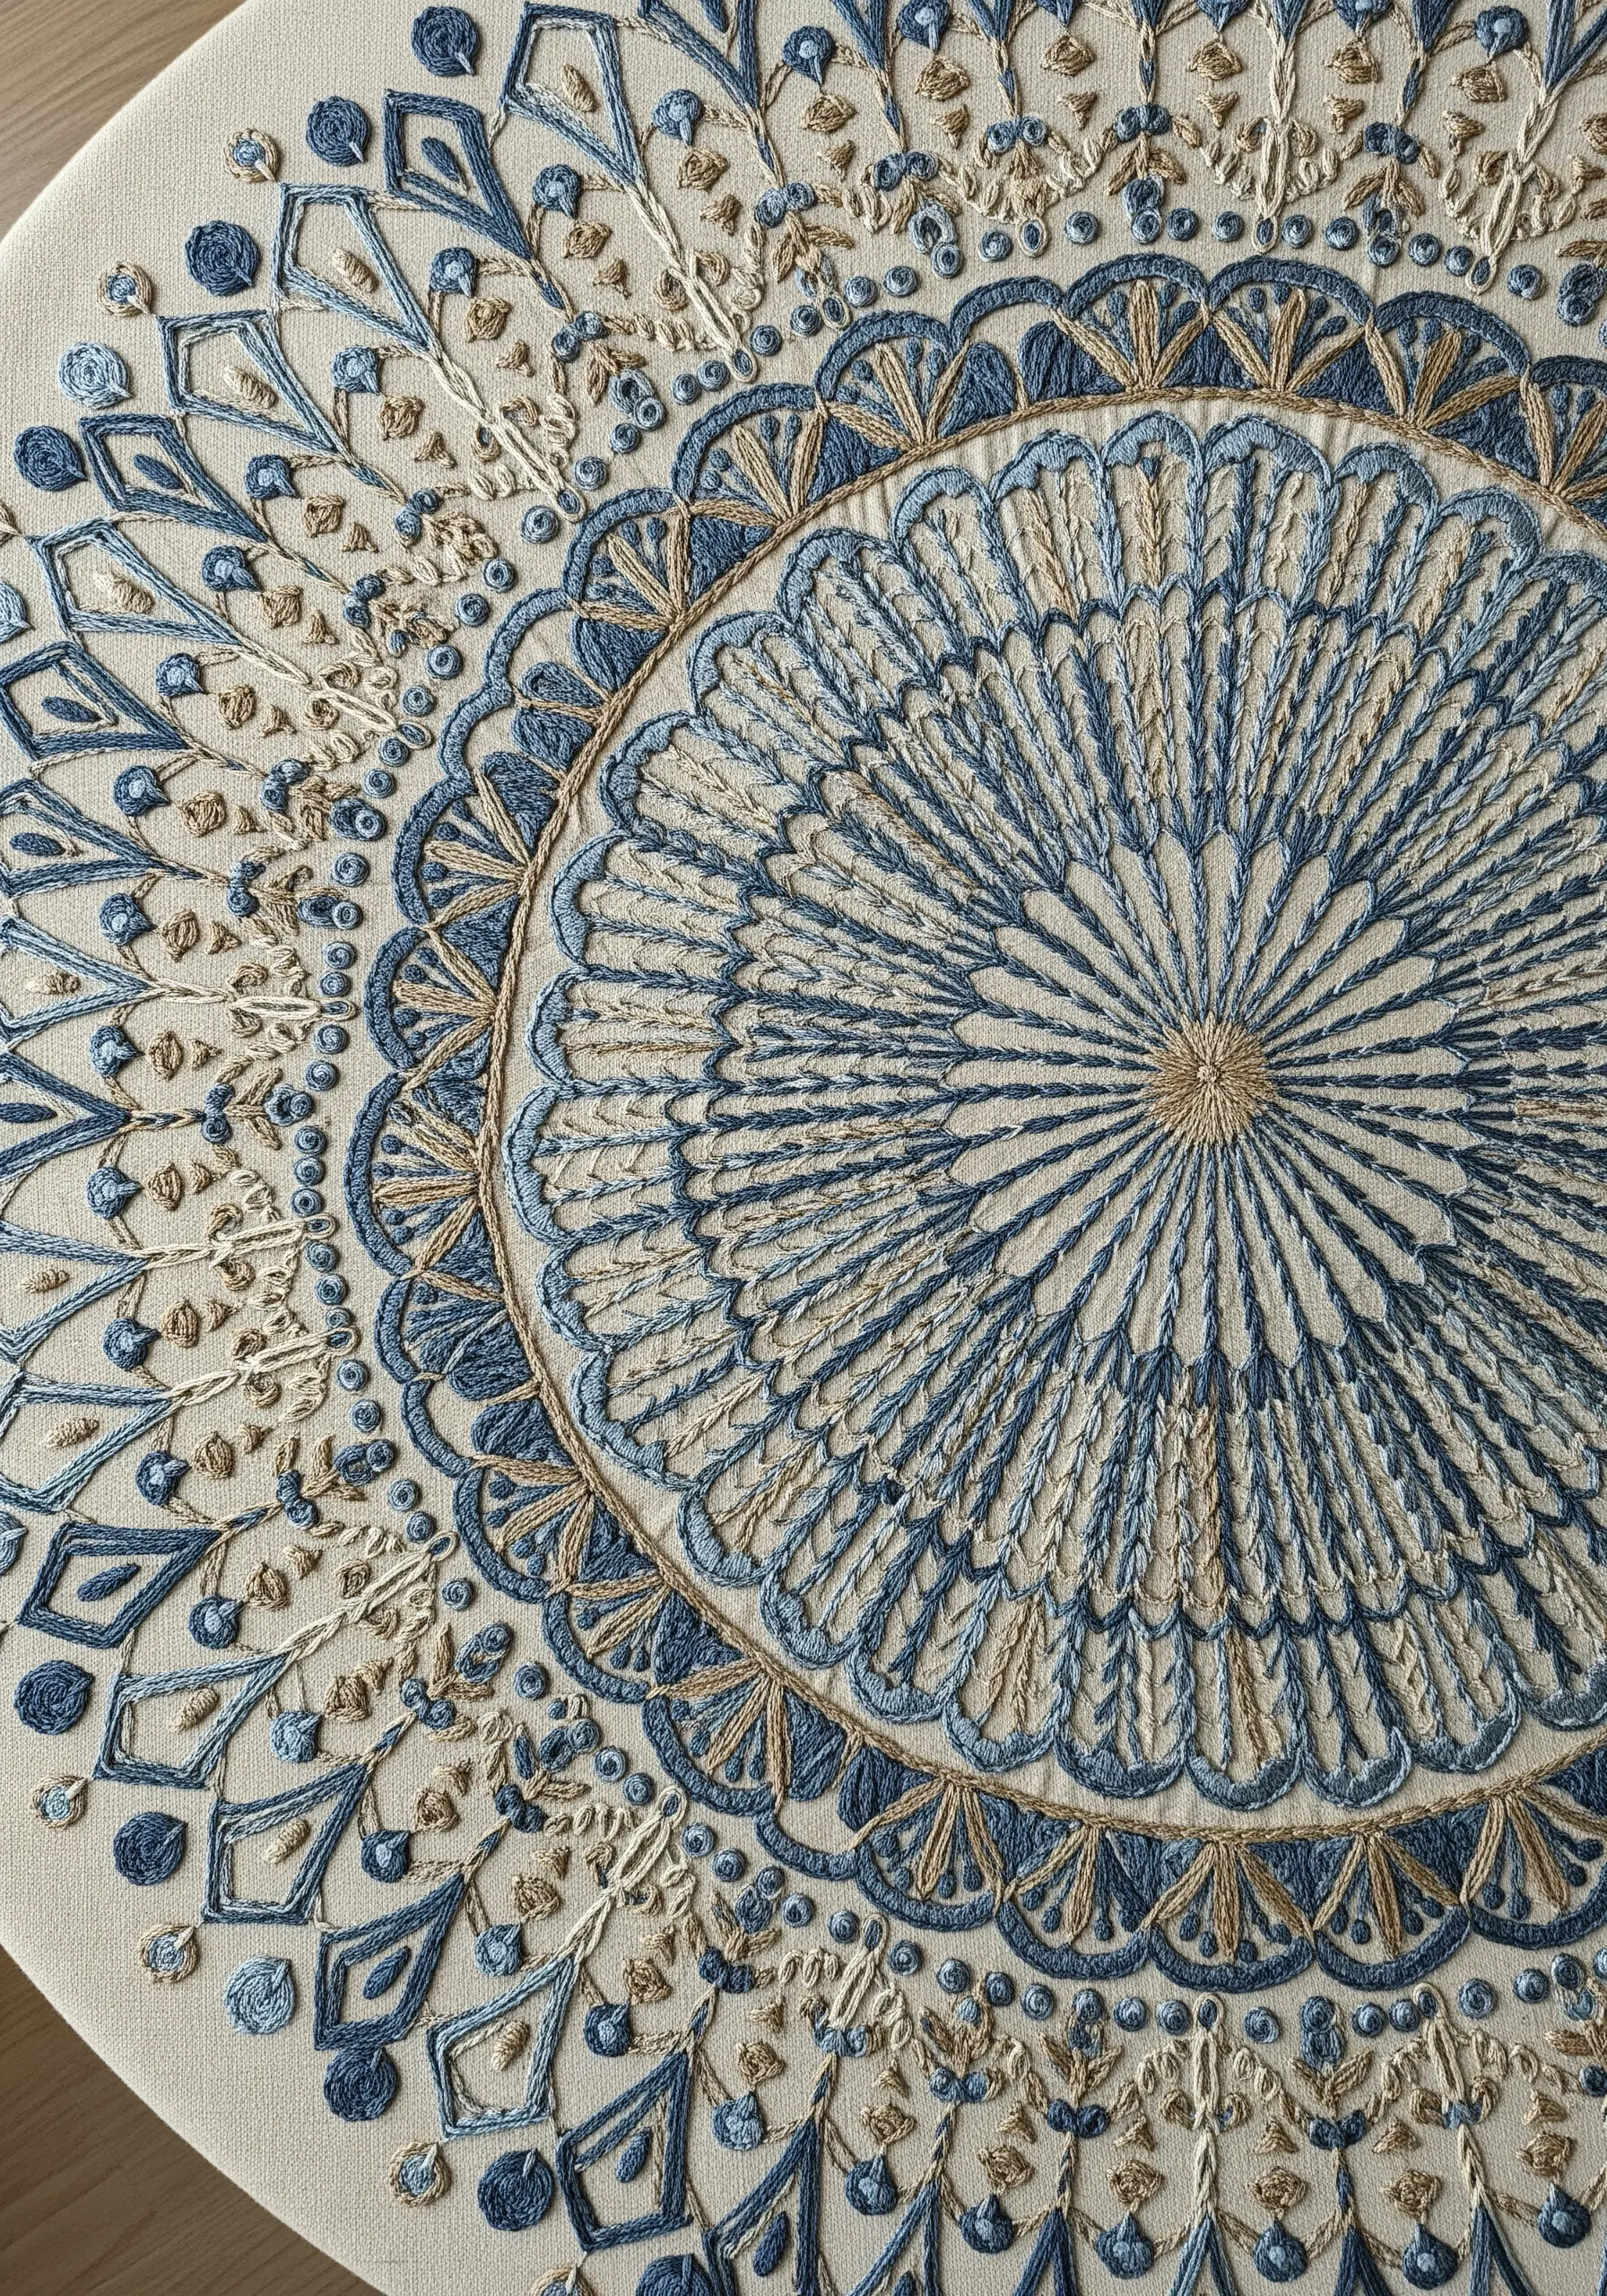
A complex mandala is just a series of simple stitches repeated in a circular pattern. Don’t be intimidated; focus on one ring at a time.
Create texture by combining different stitches: use whipped backstitch for raised outlines, satin stitch for small solid shapes, and French knots for dotted details.
Stick to a limited, harmonious color palette—like blues, creams, and golds—to ensure the final piece feels cohesive and meditative, not chaotic.
The repetition is what builds the visual richness, turning simple stitches into a stunning whole.
10. Define Modern Motifs with Precision Outlines
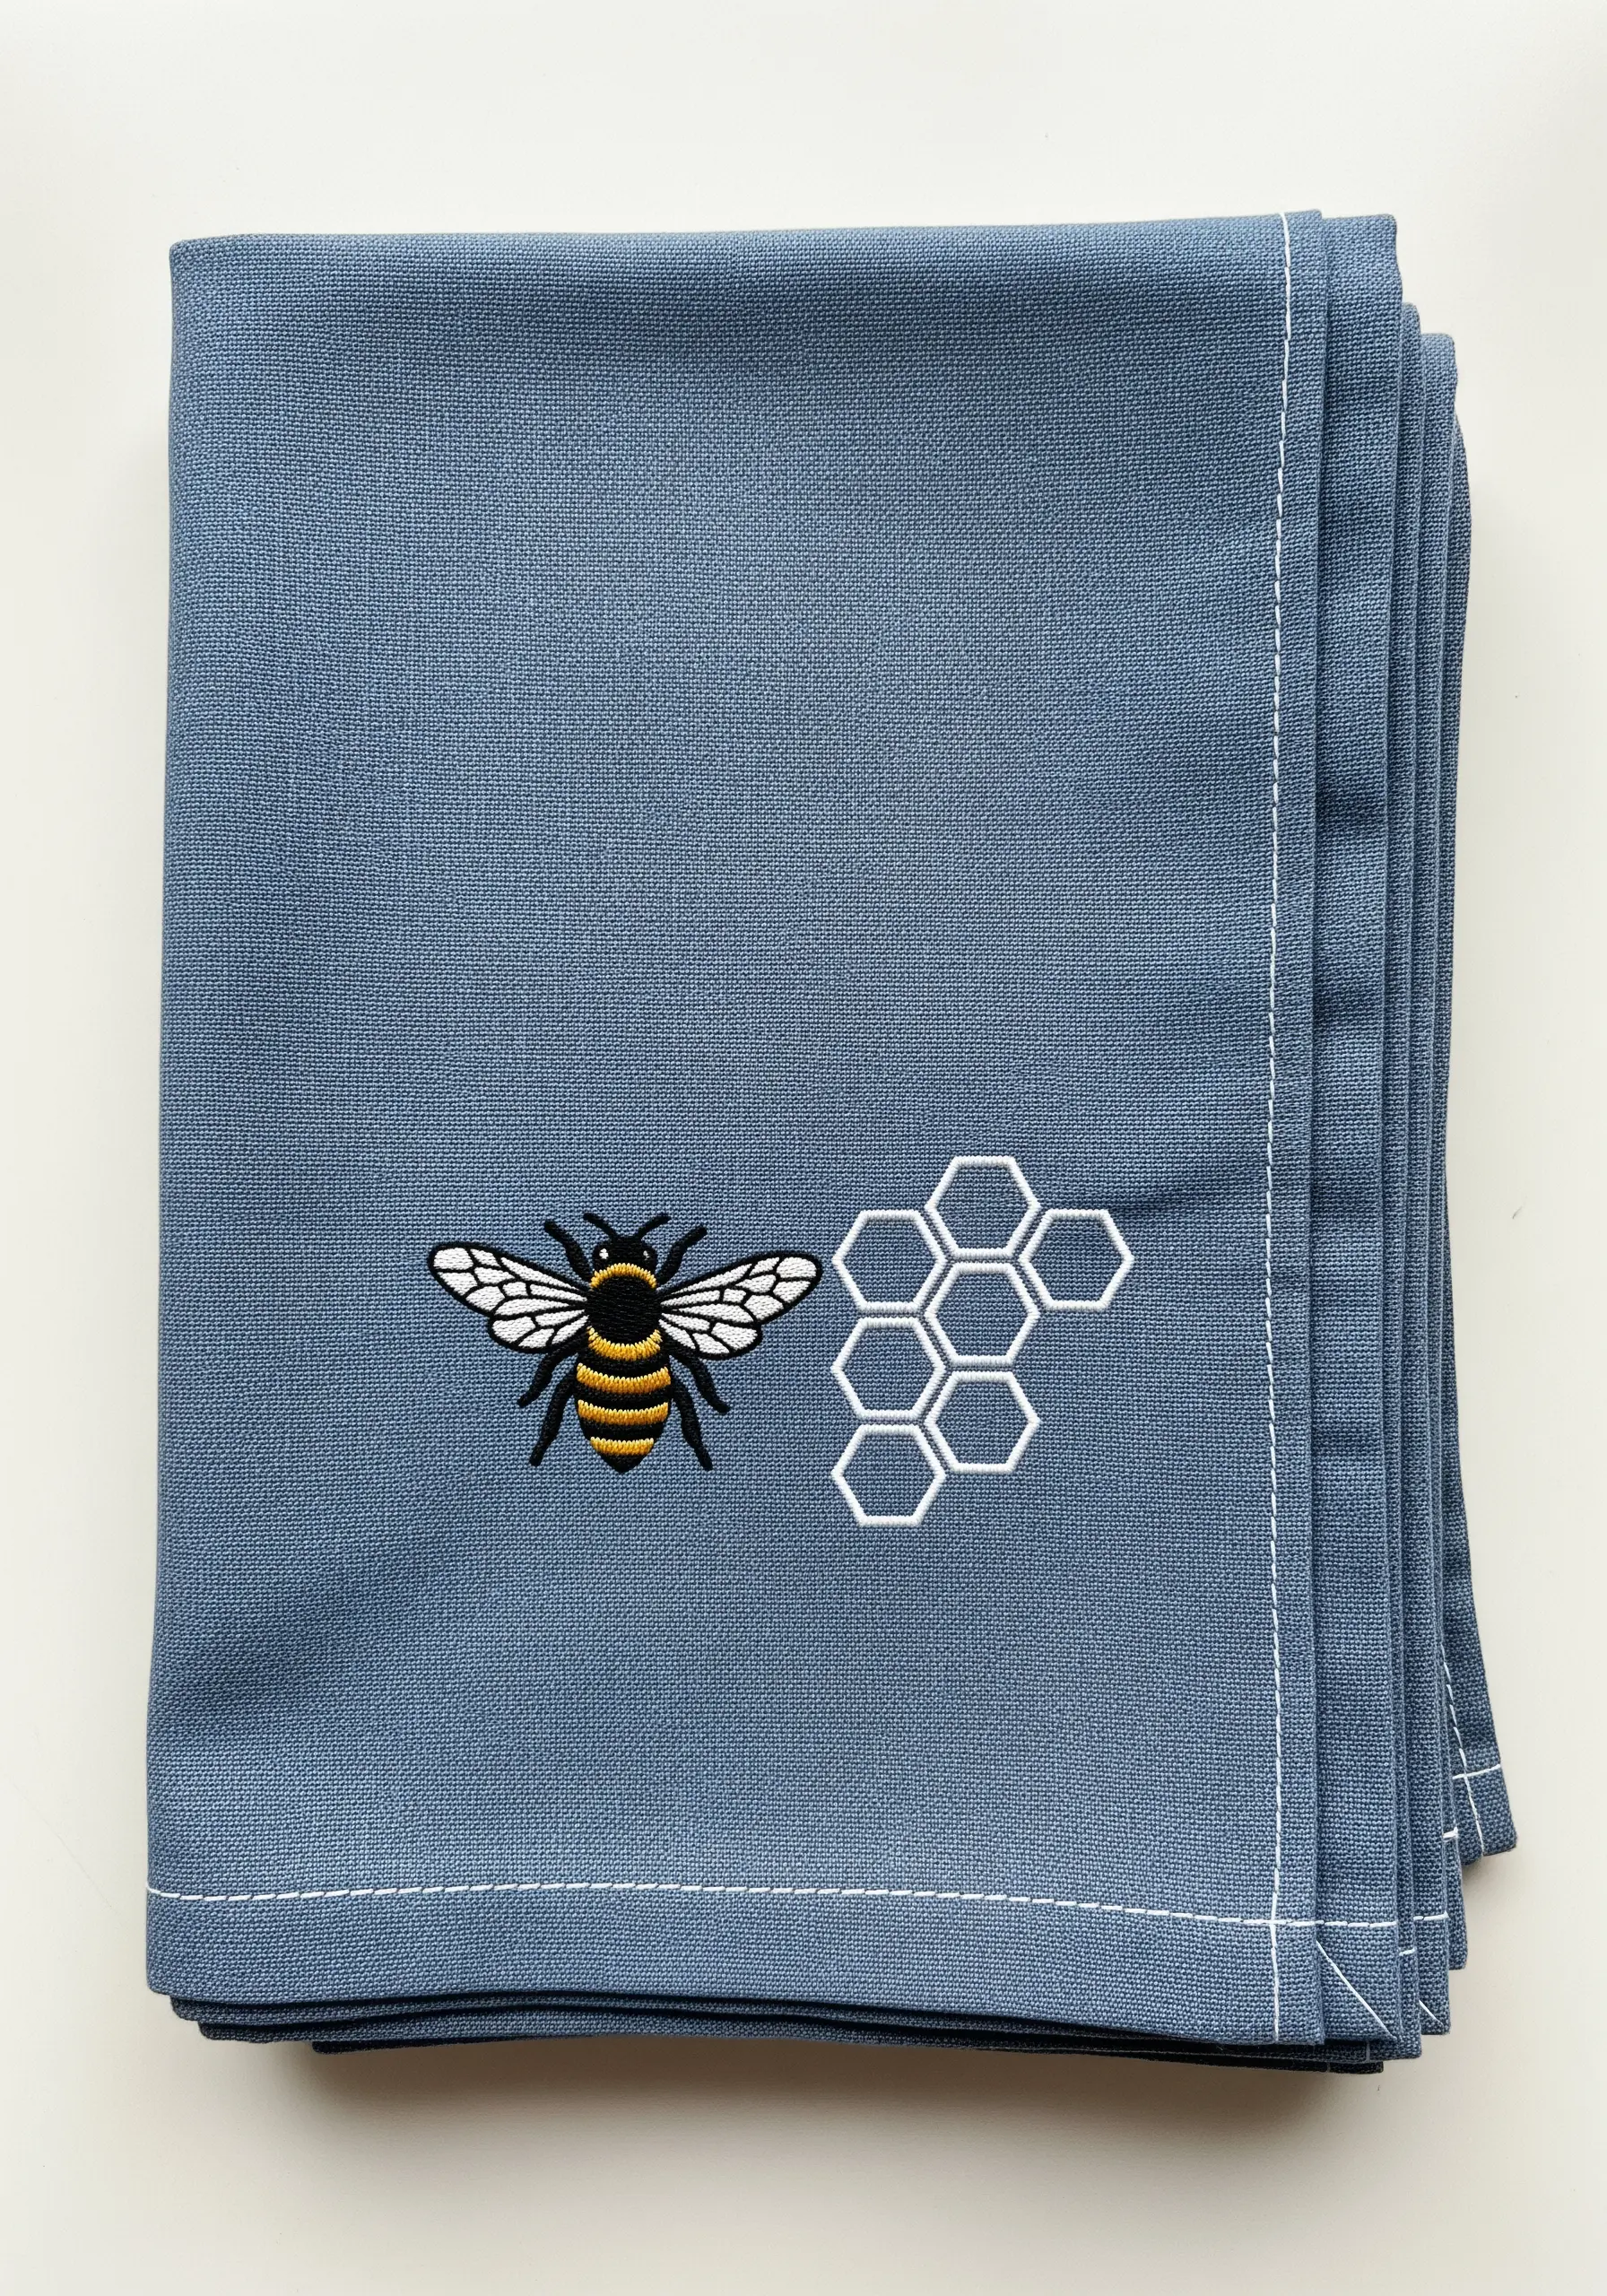
For a crisp, contemporary motif like this bee, the outline is everything. Before you begin filling, stitch the entire outline with a precise split stitch.
This creates a slightly raised edge that contains your fill stitches, resulting in a much cleaner and more professional-looking shape.
Fill the sections with a dense satin stitch, alternating the direction of your stitches (horizontal for stripes, vertical for the body) to add subtle dimension.
The geometric honeycomb, stitched in a simple backstitch, provides a perfect graphic counterpoint to the organic bee.
11. Achieve a Painterly Effect with Thread Blending
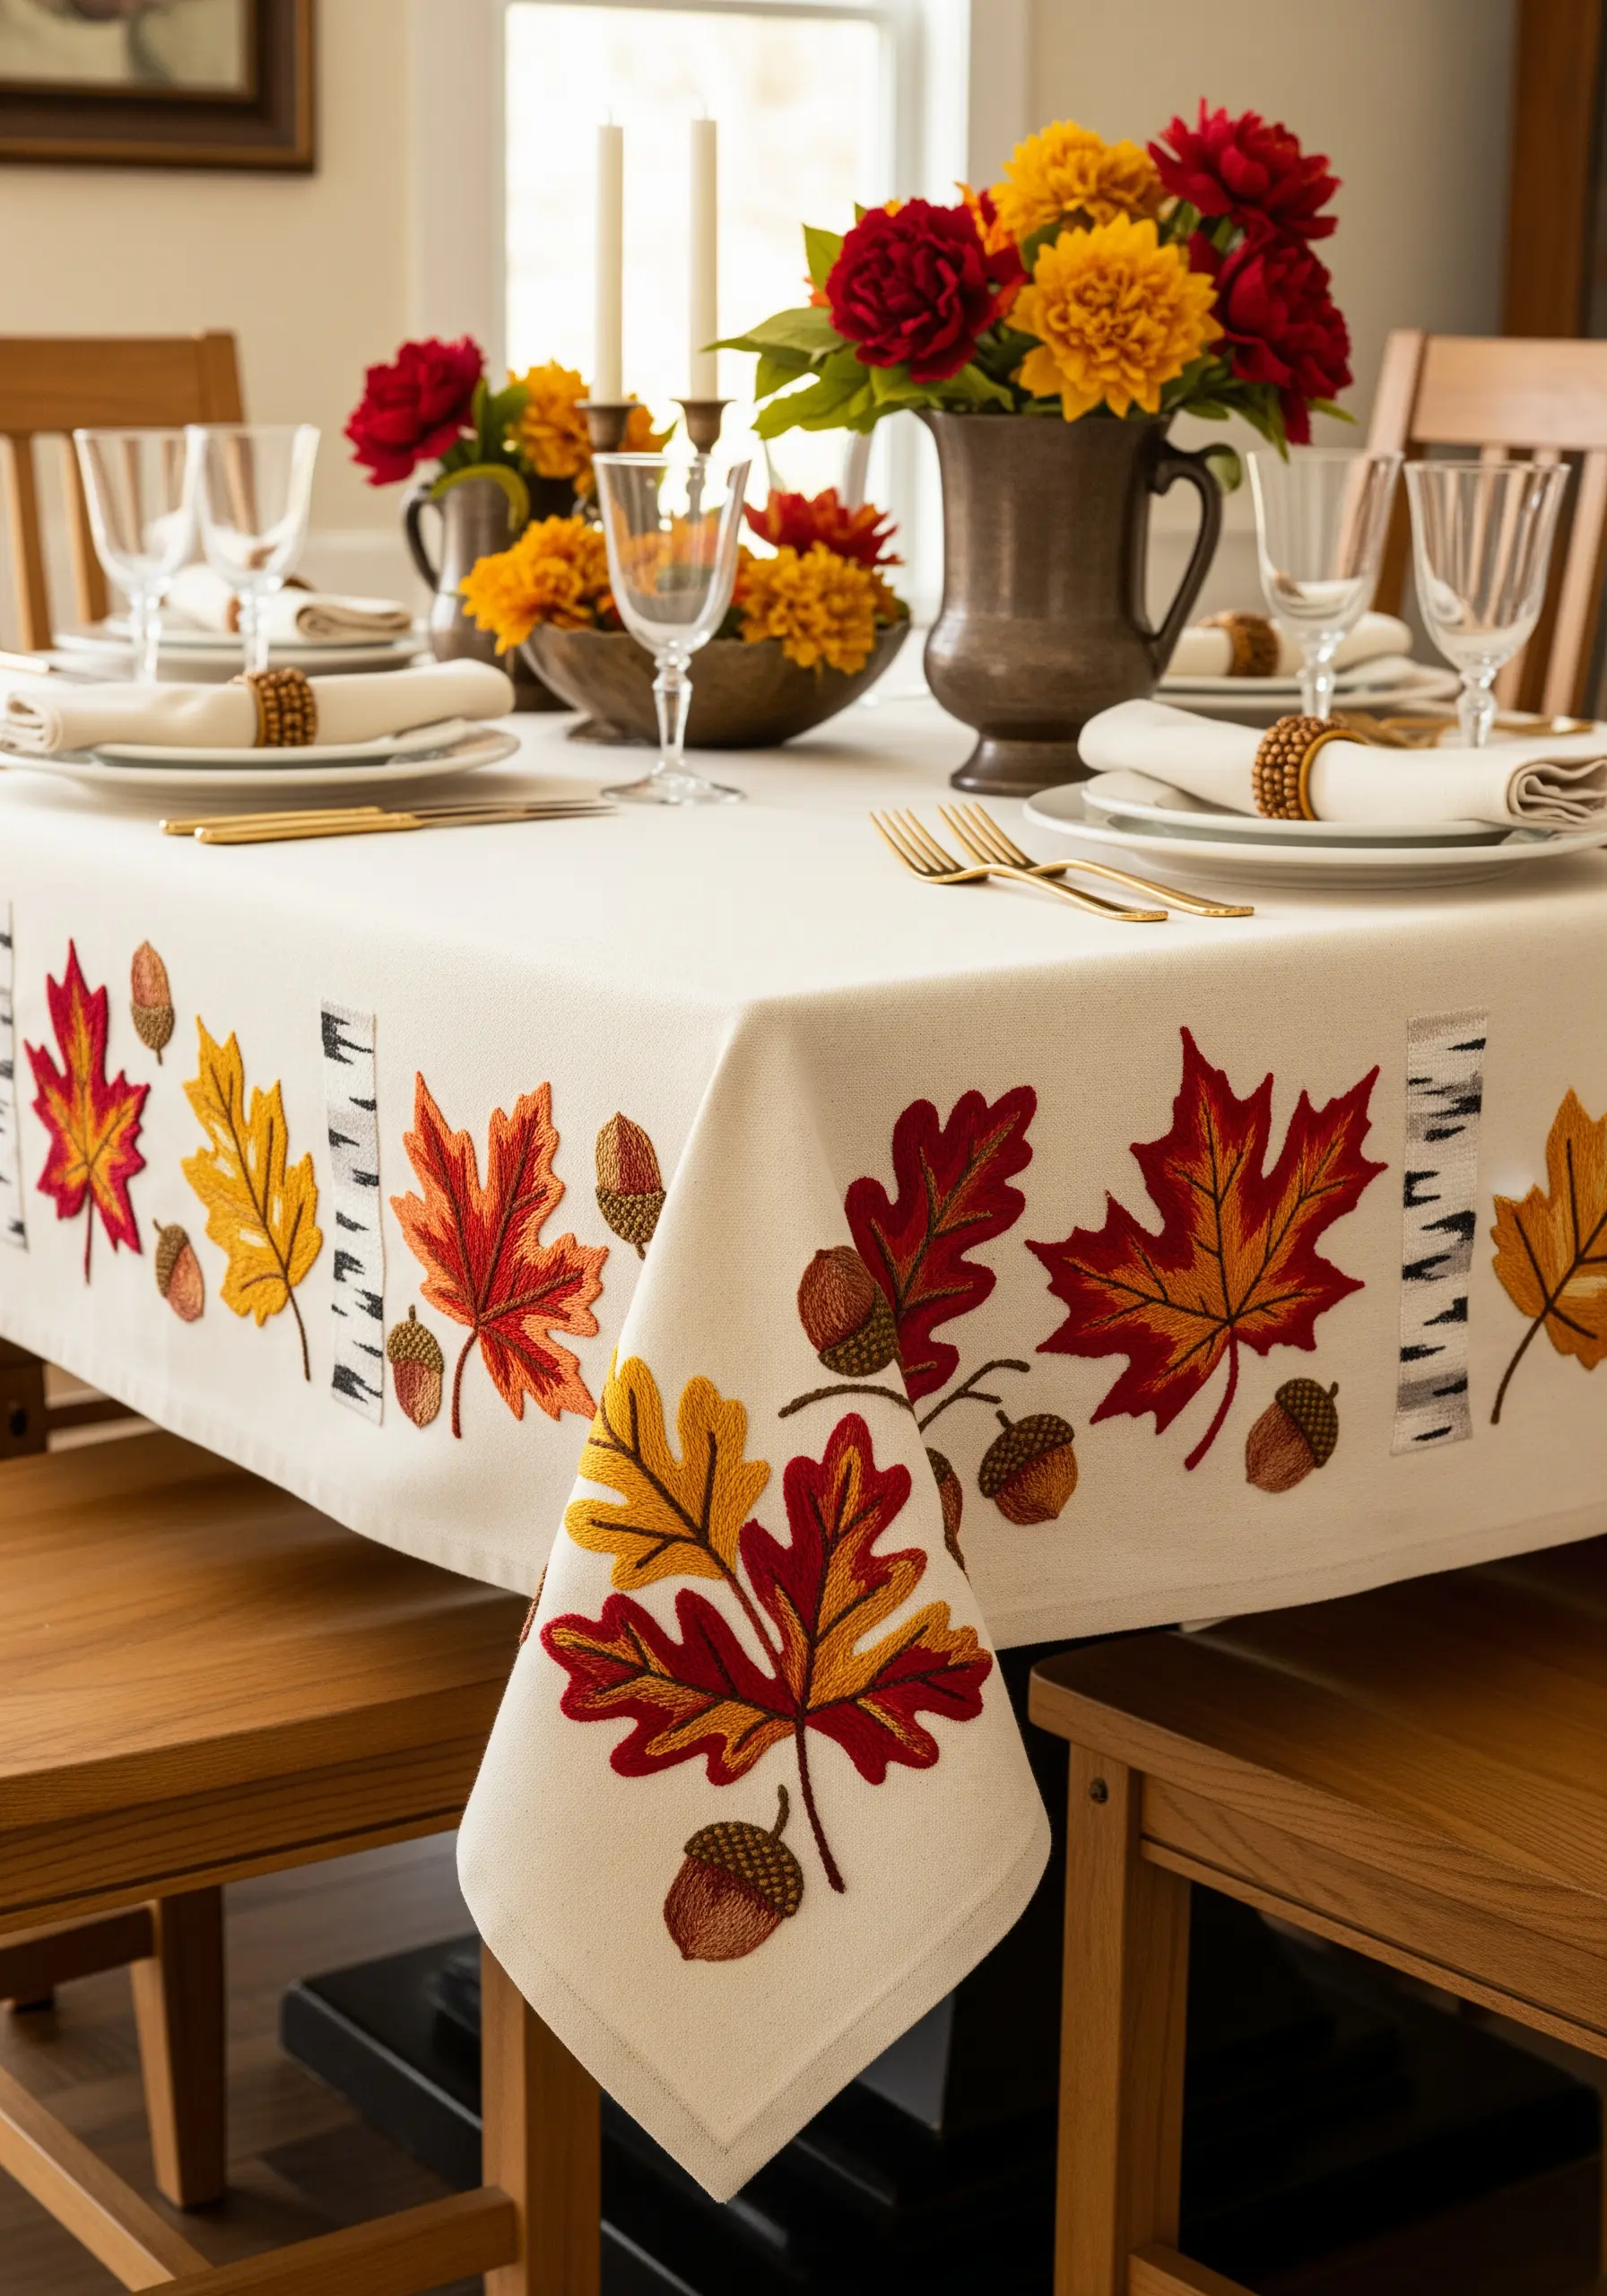
Capture the beauty of autumn leaves by blending threads within your needle.
Instead of using one solid color per leaf, combine two different strands—like one red and one orange—in your needle at the same time.
As you fill the leaf with a long-and-short stitch, the colors will mix randomly, creating a variegated, painterly effect with incredible depth.
For the birch tree details, use horizontal satin stitches in black and grey over a white base to mimic the texture of bark, adding a wonderful rustic touch.
12. Paint a Landscape with Directional Stitches
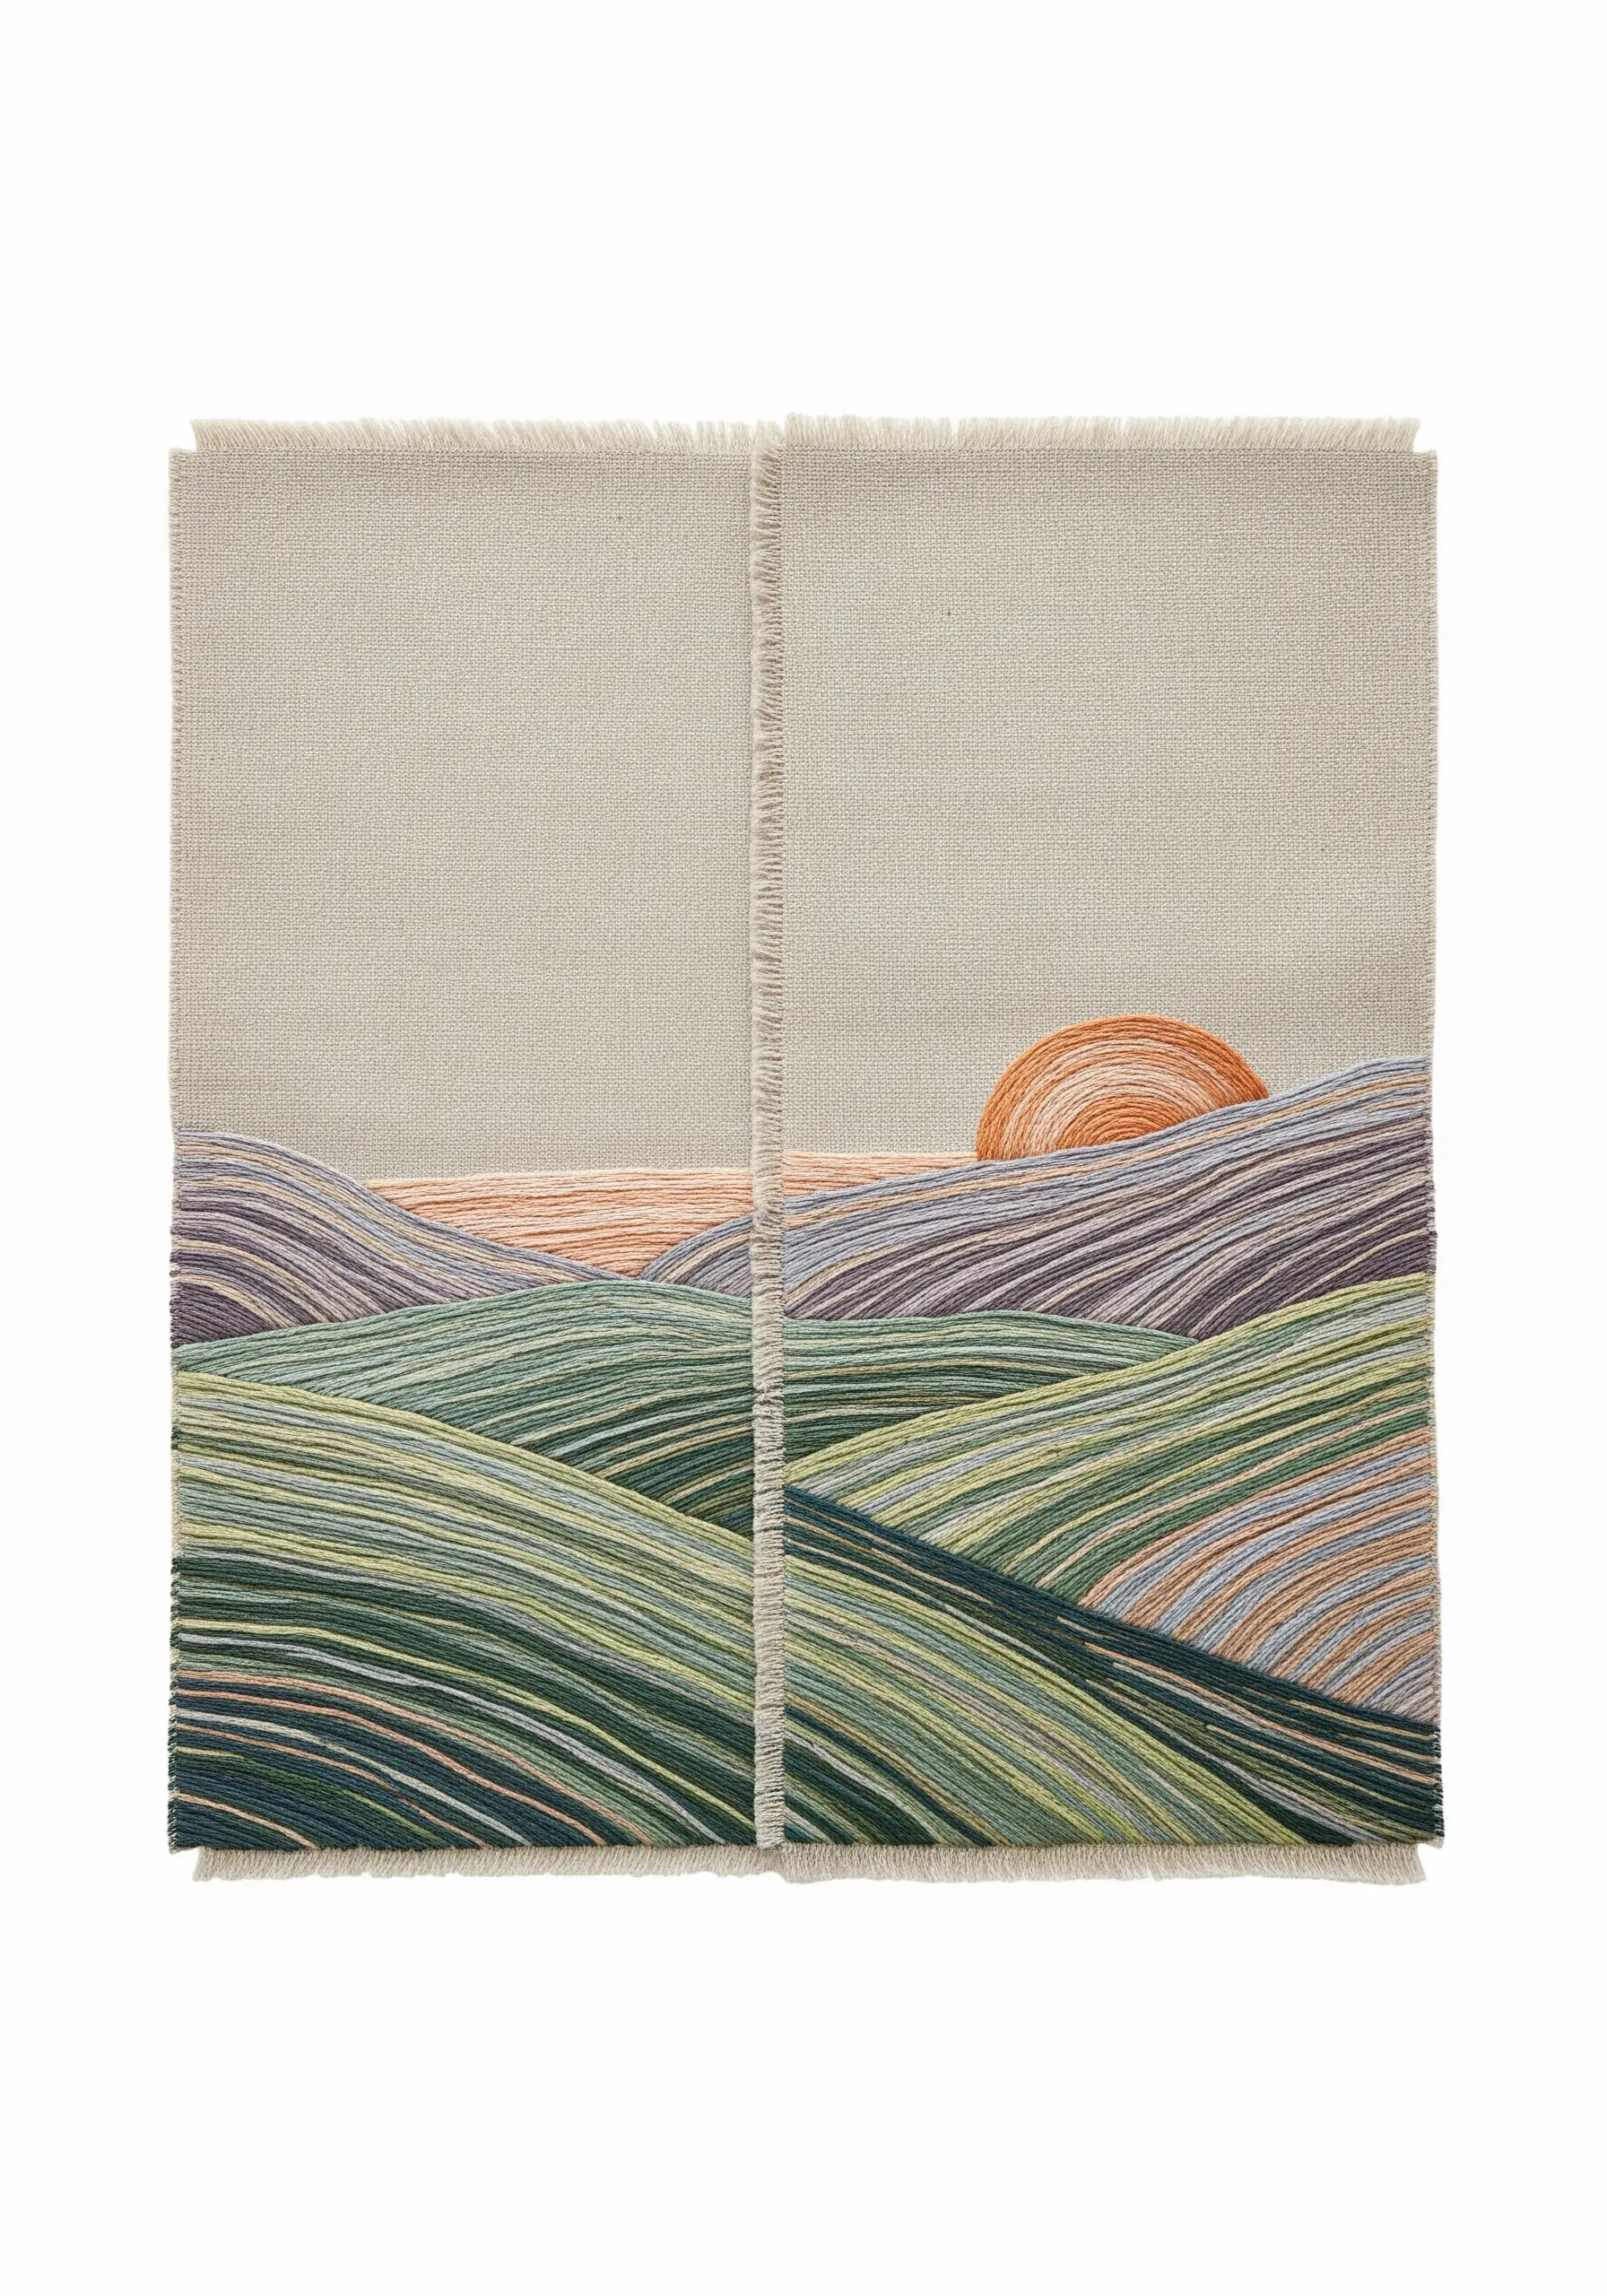
Create the illusion of rolling hills and a setting sun by using thread painting techniques on your placemats.
Fill each section of the landscape with long, straight stitches, paying close attention to their direction.
Angle the stitches to follow the curve of the hills, which creates a sense of contour and movement.
Use a mix of analogous colors (like greens, blues, and purples) to define each hill, blending them slightly where they meet to create atmospheric depth.
These mountain landscape thread painting techniques turn simple stitches into evocative art.
13. Add Dimension to Lavender with Bullion Knots
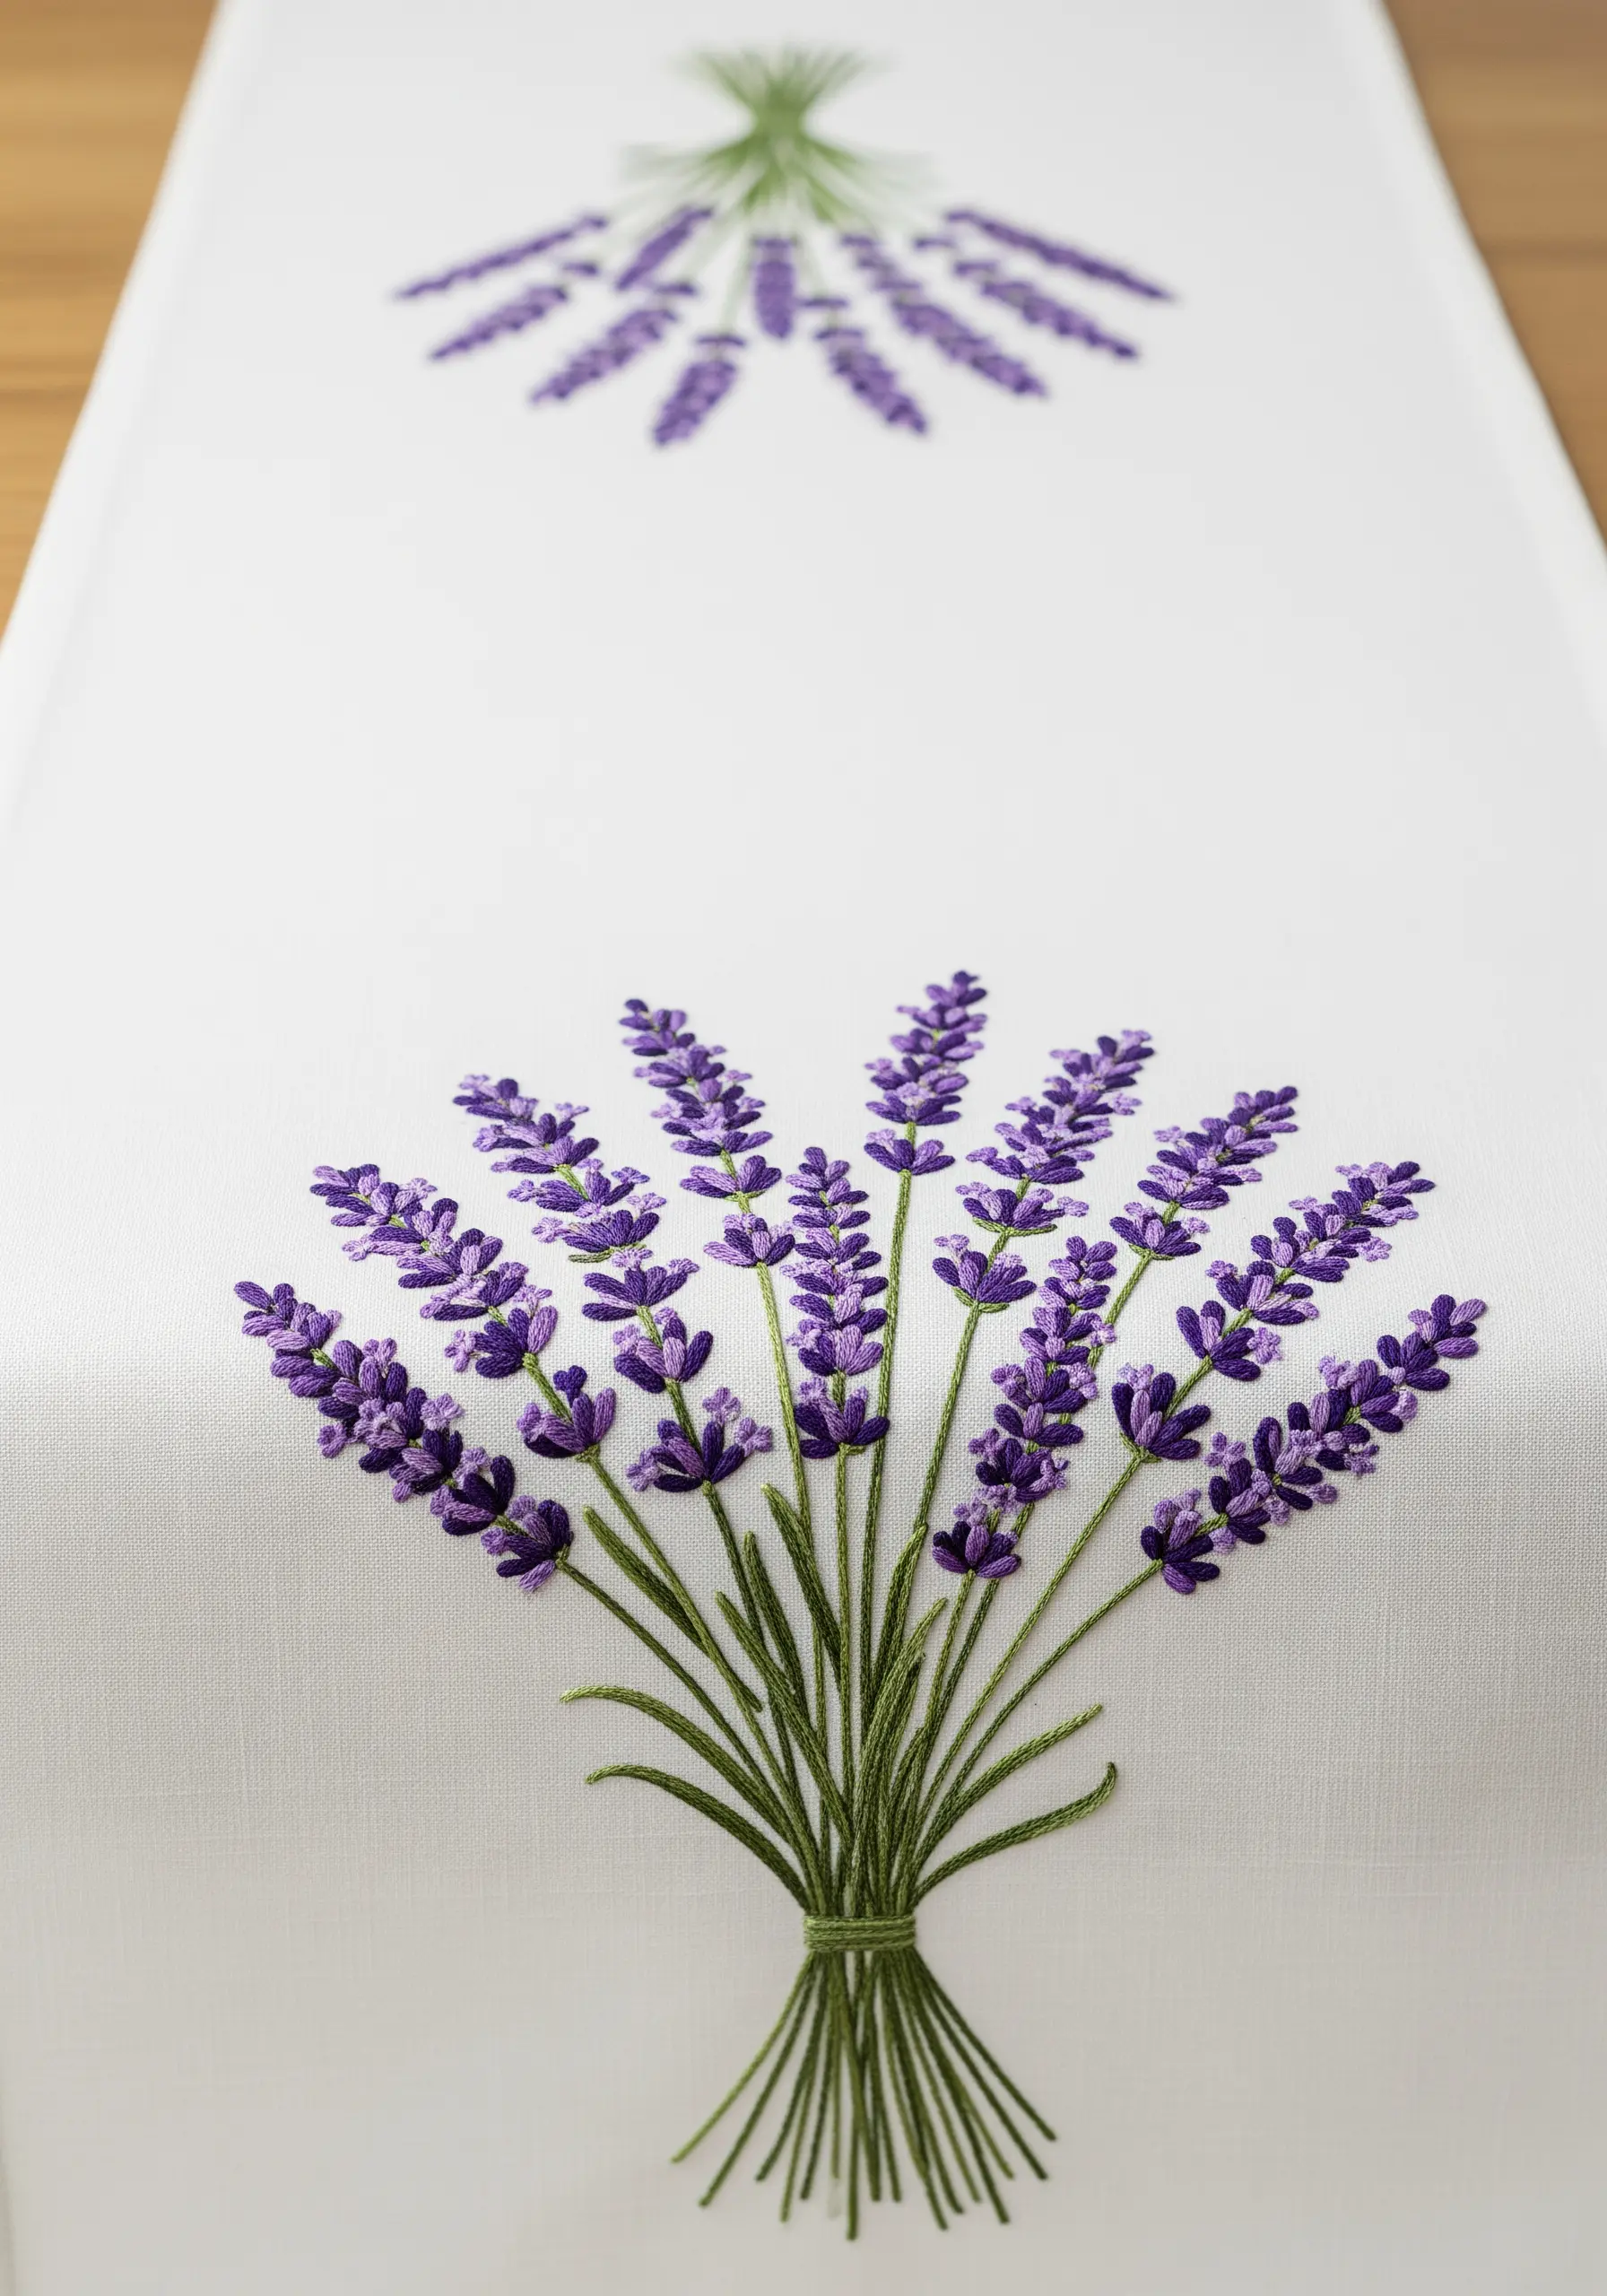
To give your lavender bouquets a lush, three-dimensional feel, move beyond simple French knots.
Use bullion knots for the individual lavender buds. This stitch creates a small, raised tube that perfectly mimics the shape of a real flower bud.
Vary the number of wraps around your needle to create knots of different lengths, adding to the naturalistic effect.
Keep the stems simple with a clean, green stem stitch, allowing the textured purple blossoms to be the star of the show.
14. Use Stitch Direction to Create Form and Texture
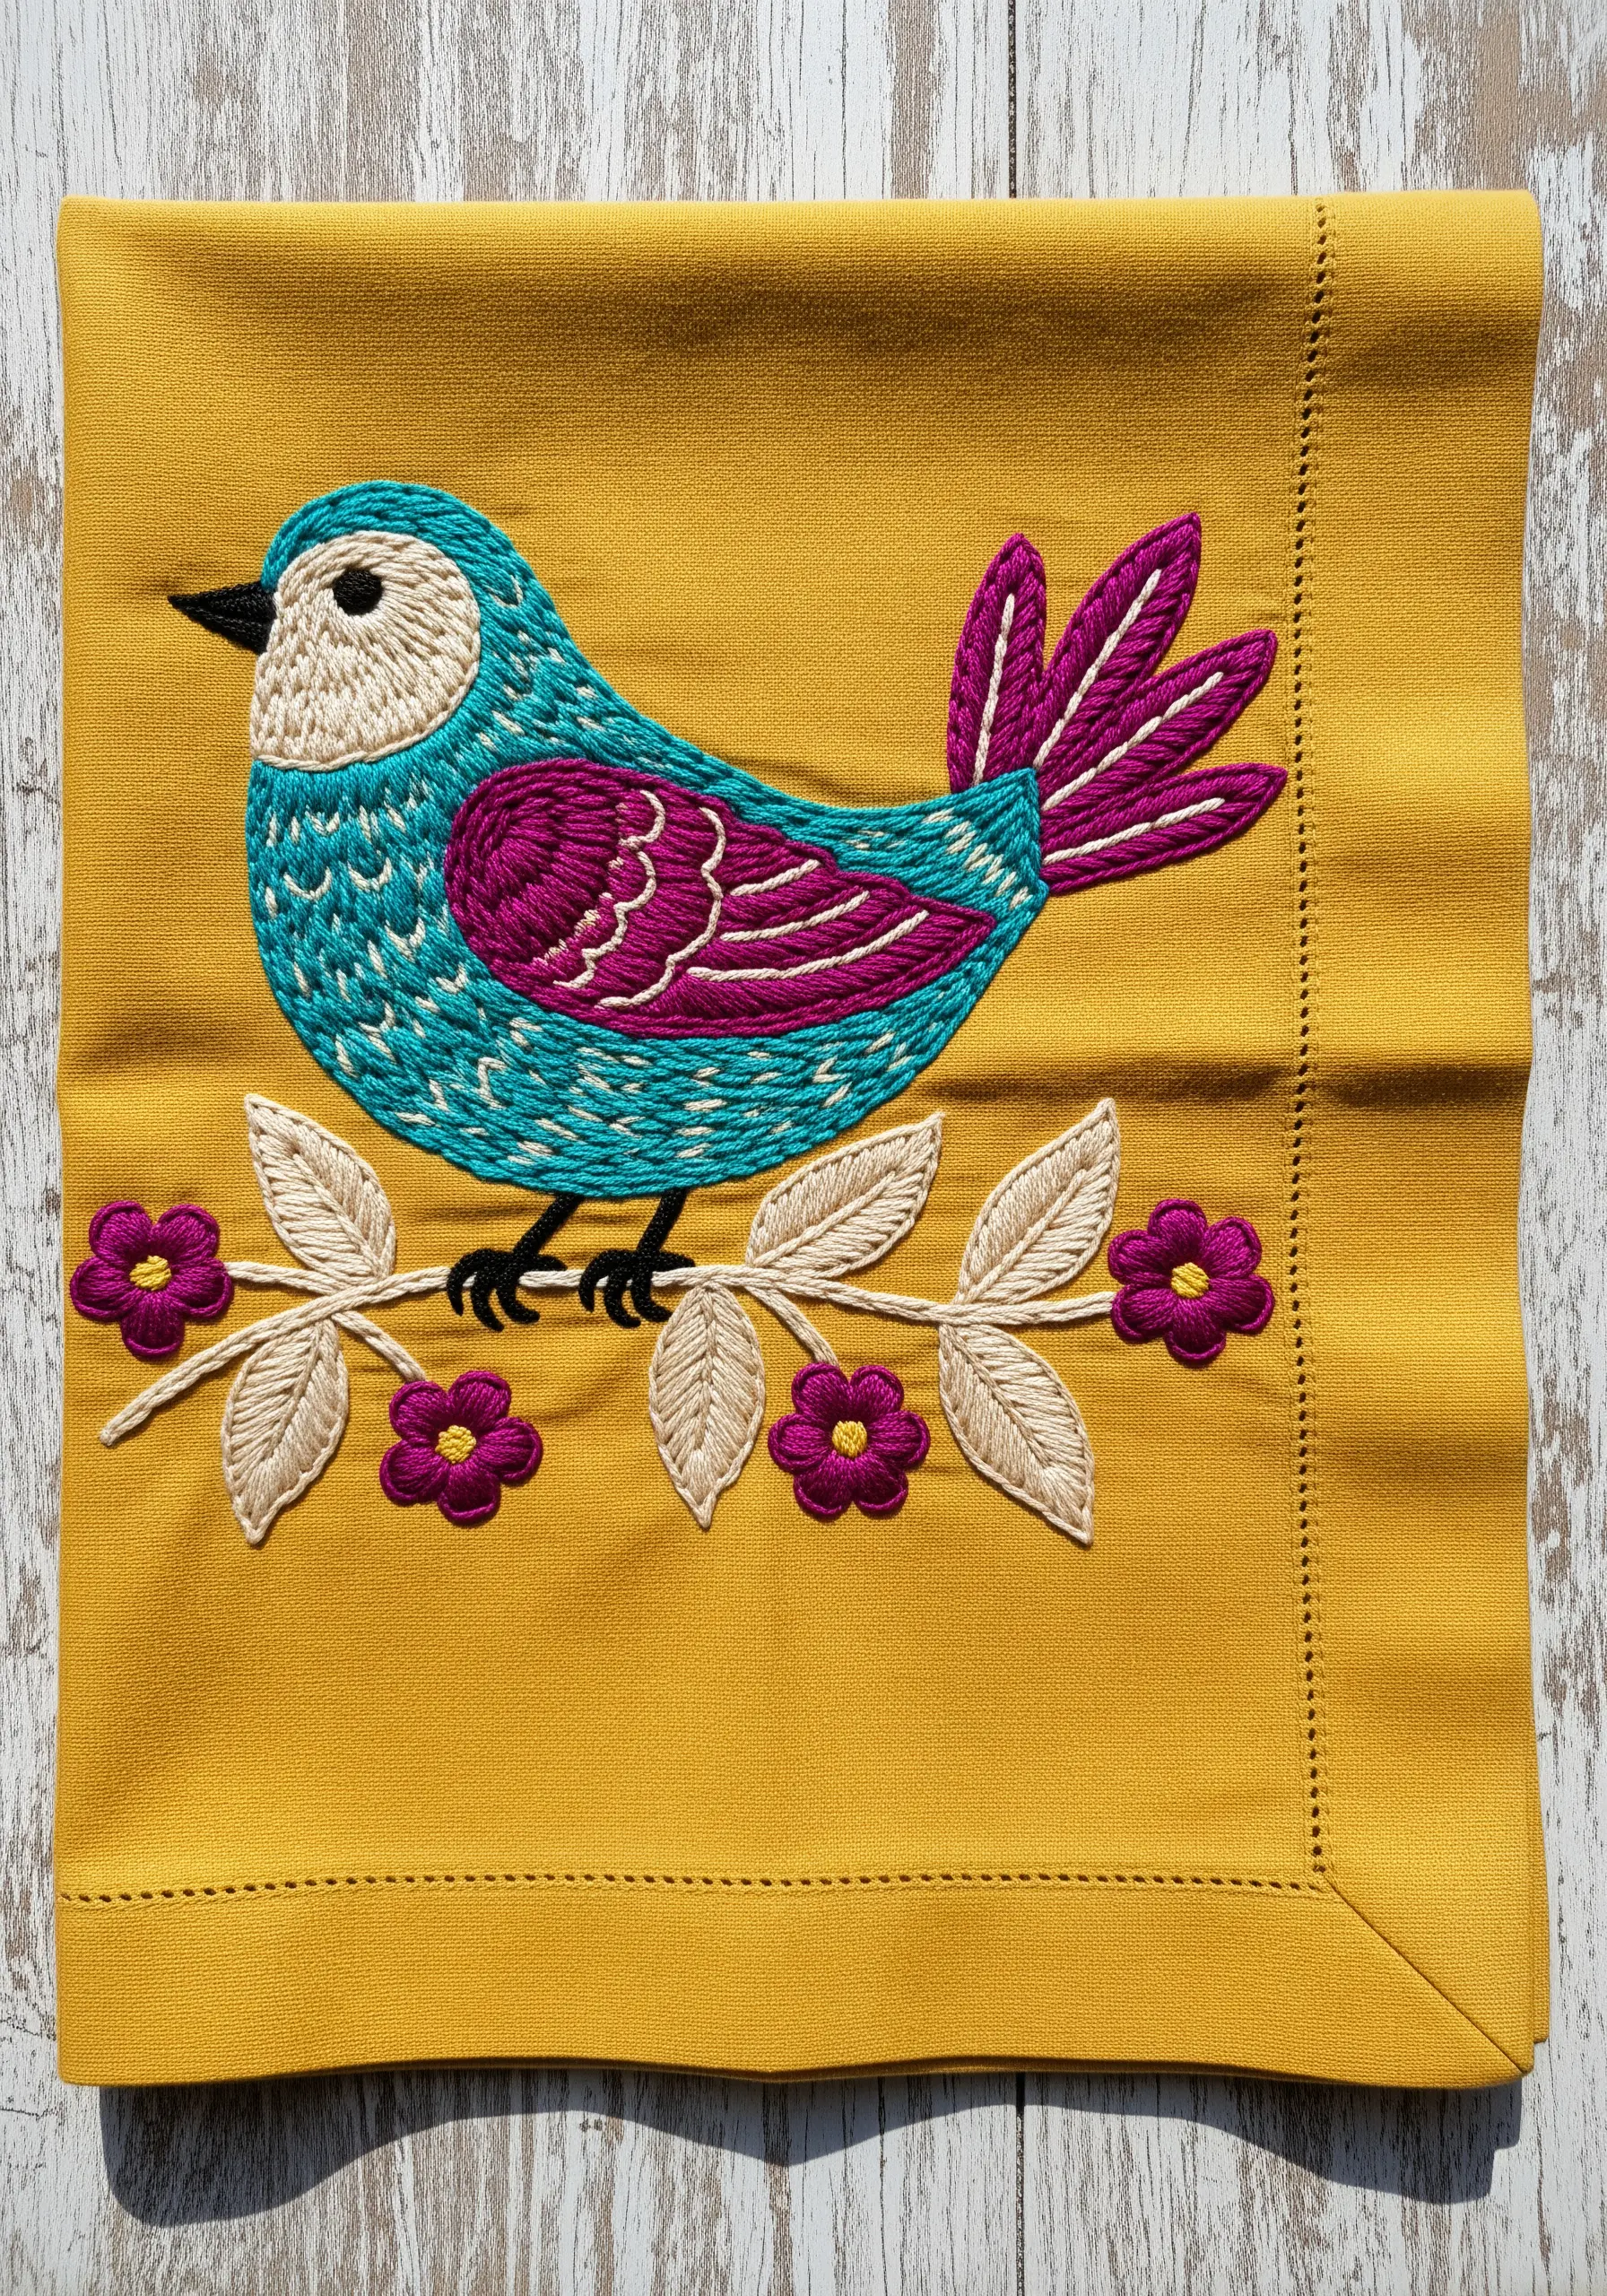
Bring a simple bird motif to life by using the direction of your fill stitches to suggest feathers and contours.
On the bird’s breast, use a brick stitch—staggered rows of short satin stitches—to create a pattern that looks like layered feathers.
For the wing, angle your stitches to follow the natural sweep of the feathers, and for the tail, use long satin stitches that fan outwards.
This thoughtful application of stitch direction turns a flat shape into a dynamic, textured creature, all without changing your thread or stitch type.
15. Create High-Impact Lines with Couching Stitches

For bold, graphic patterns that cover a large area, couching is an incredibly efficient and effective technique.
Instead of stitching the thick white lines directly, lay a piece of thick yarn or cord onto your fabric in the desired pattern.
Then, use a single strand of matching floss to tack it down with small, perpendicular stitches at regular intervals.
This creates a perfectly uniform, raised line with incredible texture and dimension, ideal for geometric and tribal-inspired designs on table linens.
16. Add a Touch of Luxury with Metallic Accents
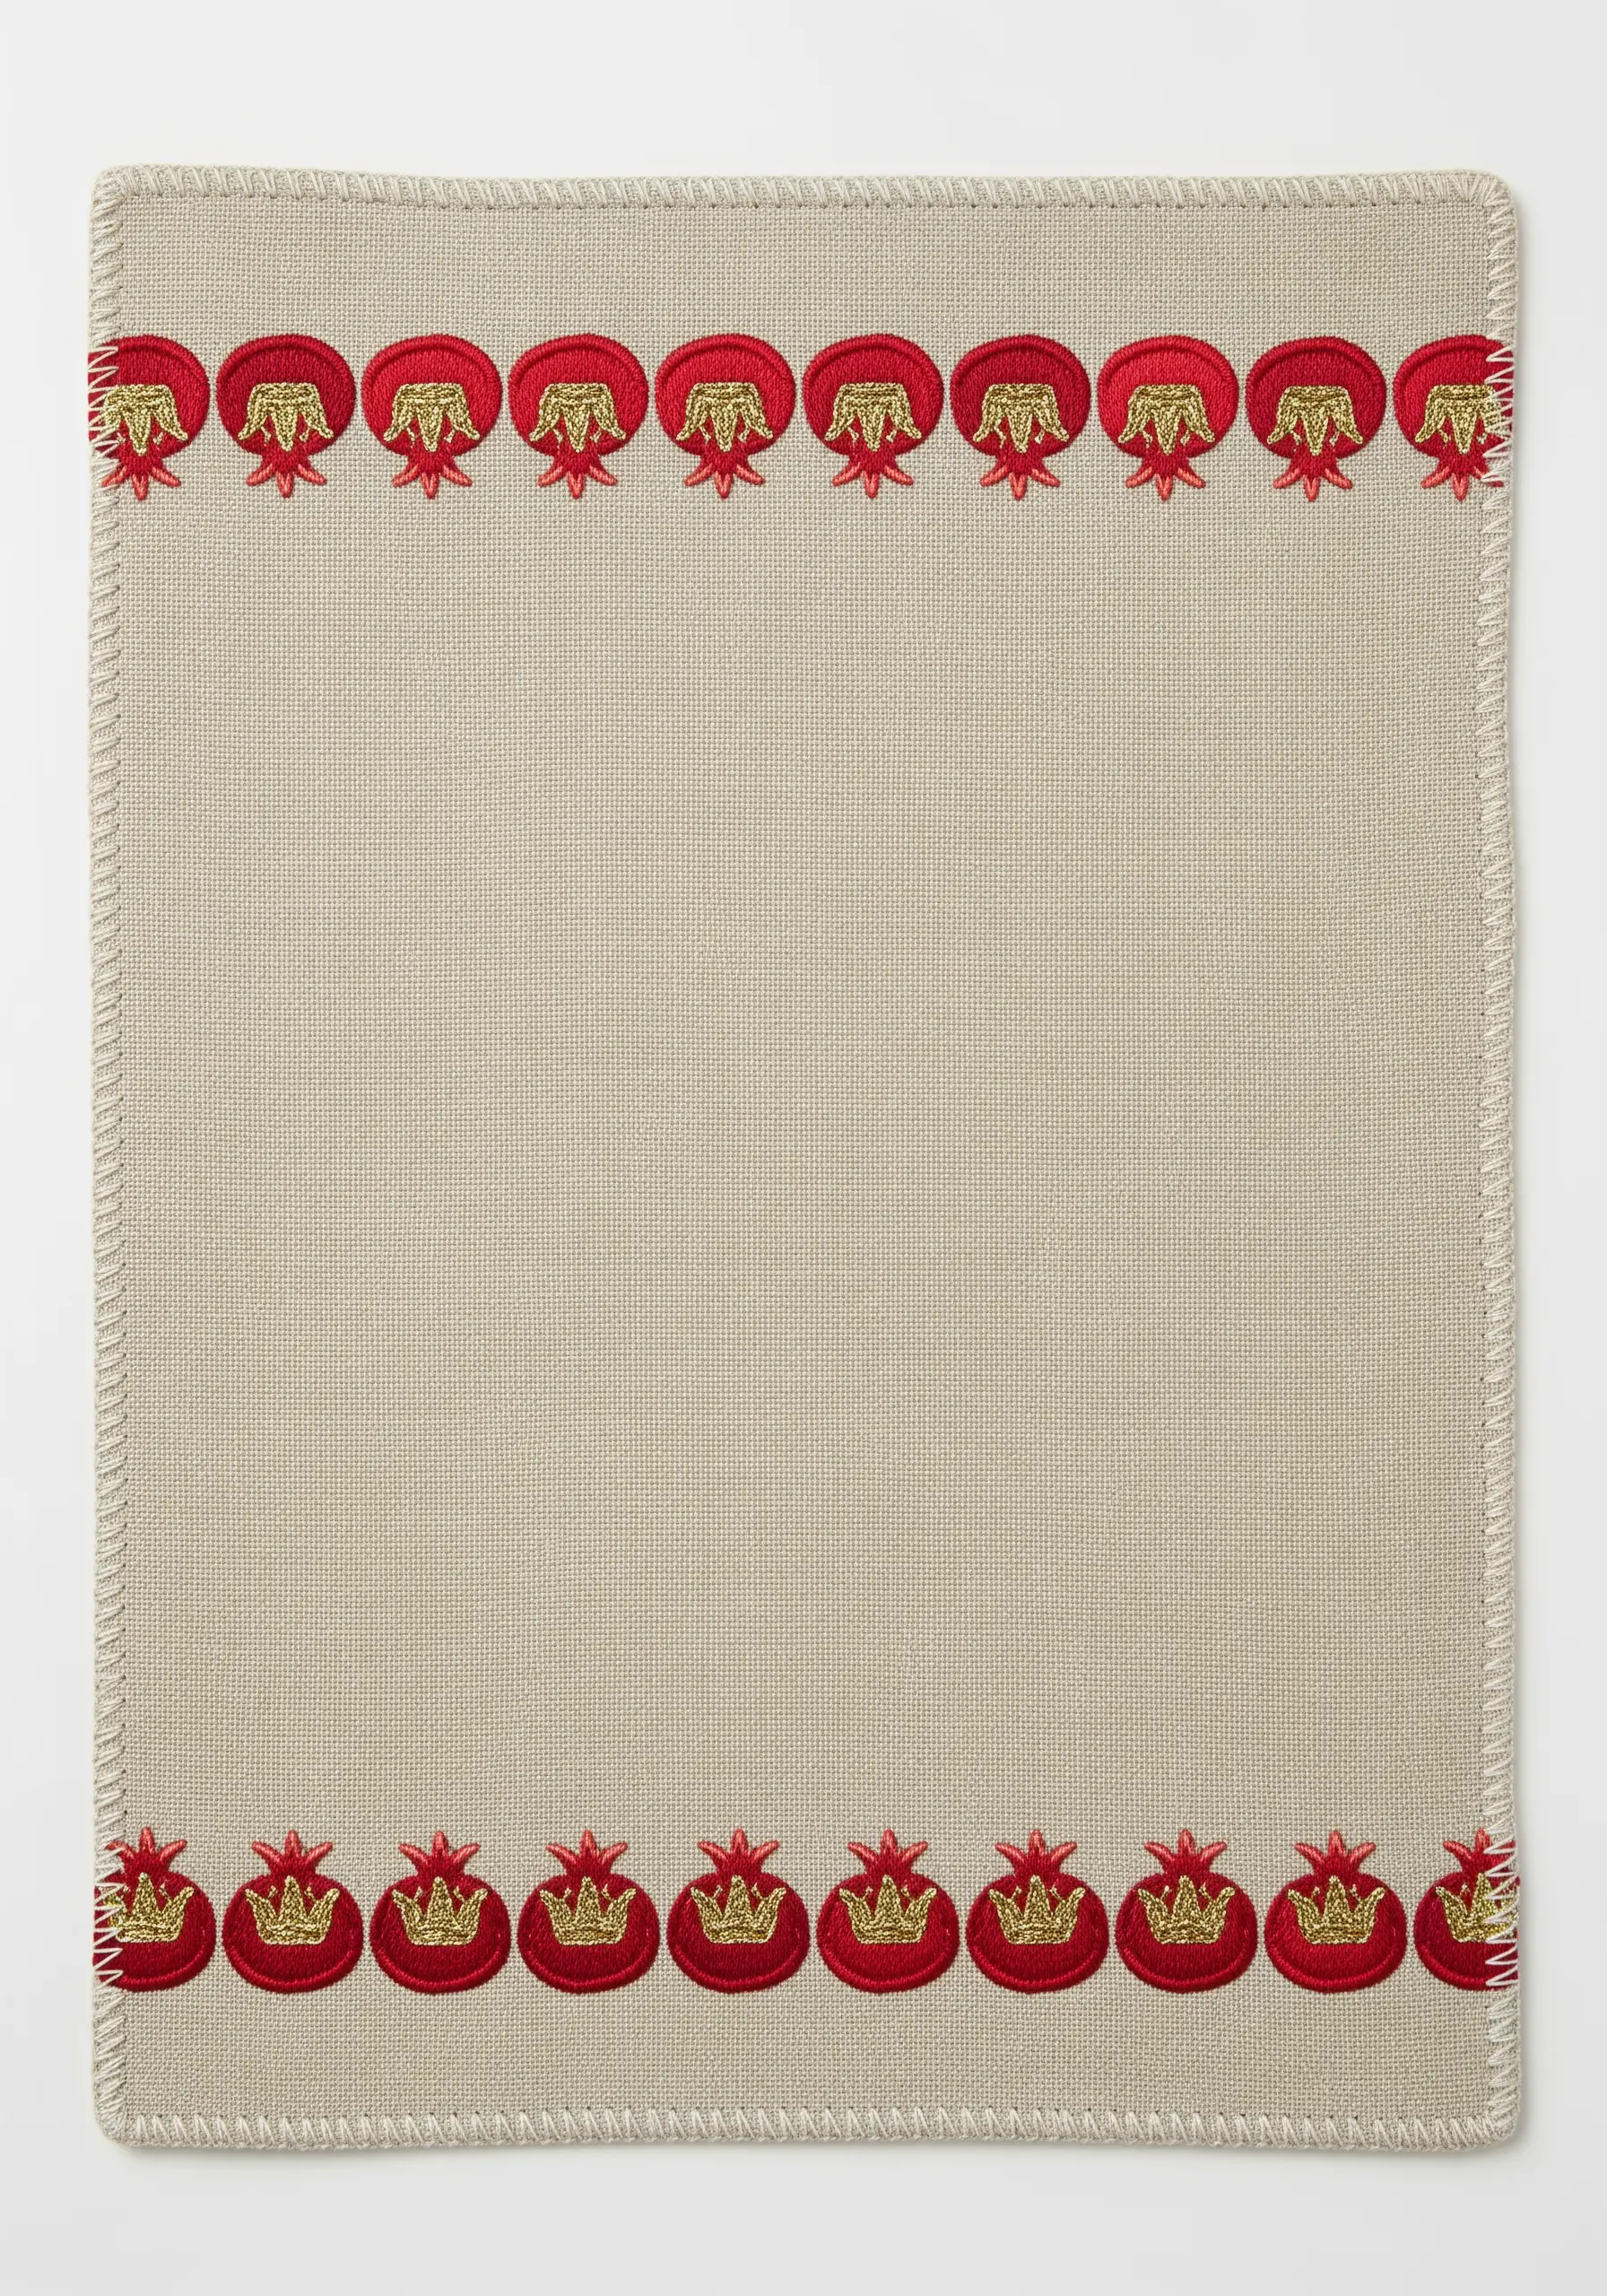
Elevate a simple pomegranate border by incorporating a hint of metallic thread.
Use a rich red satin stitch to fill the main body of the fruit, keeping your stitches tight and uniform for a smooth finish.
Then, switch to a shimmering gold metallic thread to stitch the crown. The contrast in texture and sheen immediately draws the eye and adds a touch of opulence.
Work with shorter lengths of metallic thread to prevent tangling and use a needle with a larger eye to reduce friction and fraying.
17. Achieve Sculptural Effects with Braided Stitches
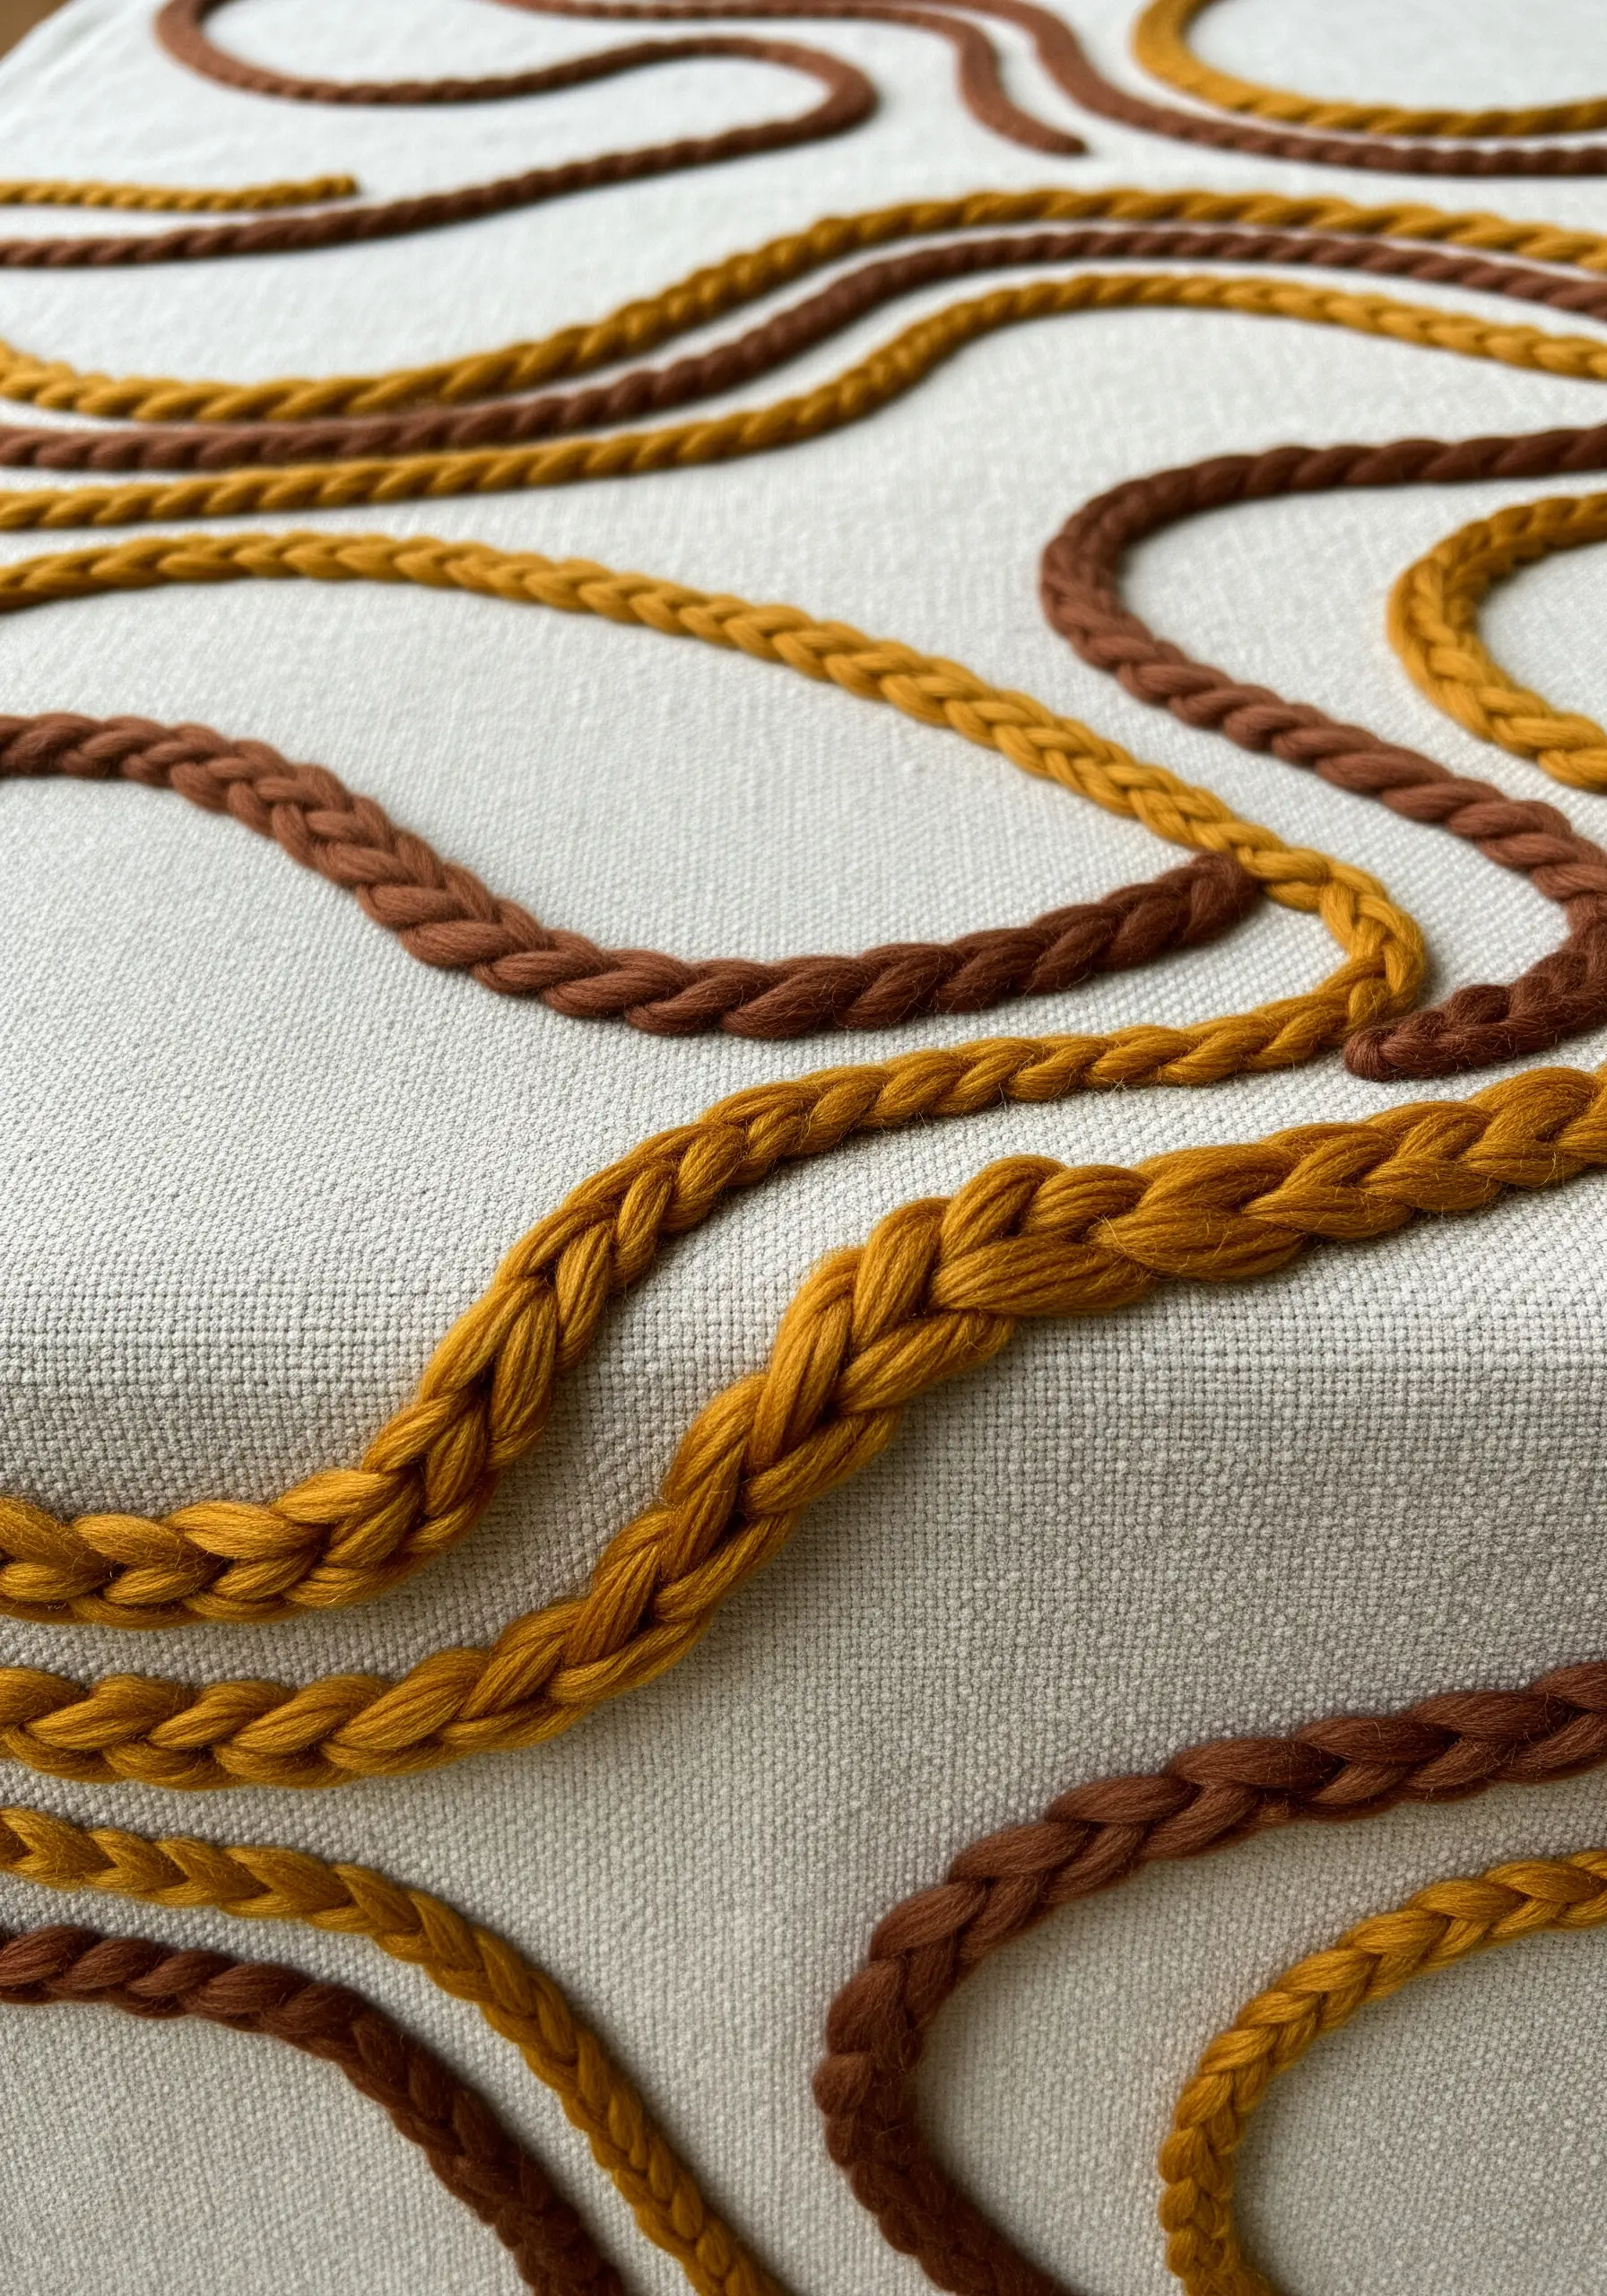
Create these stunning, high-relief lines by using a thick, dimensional stitch like the plaited braid stitch.
This stitch is worked with a tapestry needle and a soft, bulky yarn, and it builds a raised, woven line directly onto the fabric surface.
Arrange the stitched braids in organic, flowing waves across a linen runner for a modern, sculptural piece of textile art.
The contrast between the smooth linen and the chunky, woolen braids creates a powerful tactile and visual experience.
18. Tackle Complex Florals with Sectional Stitching
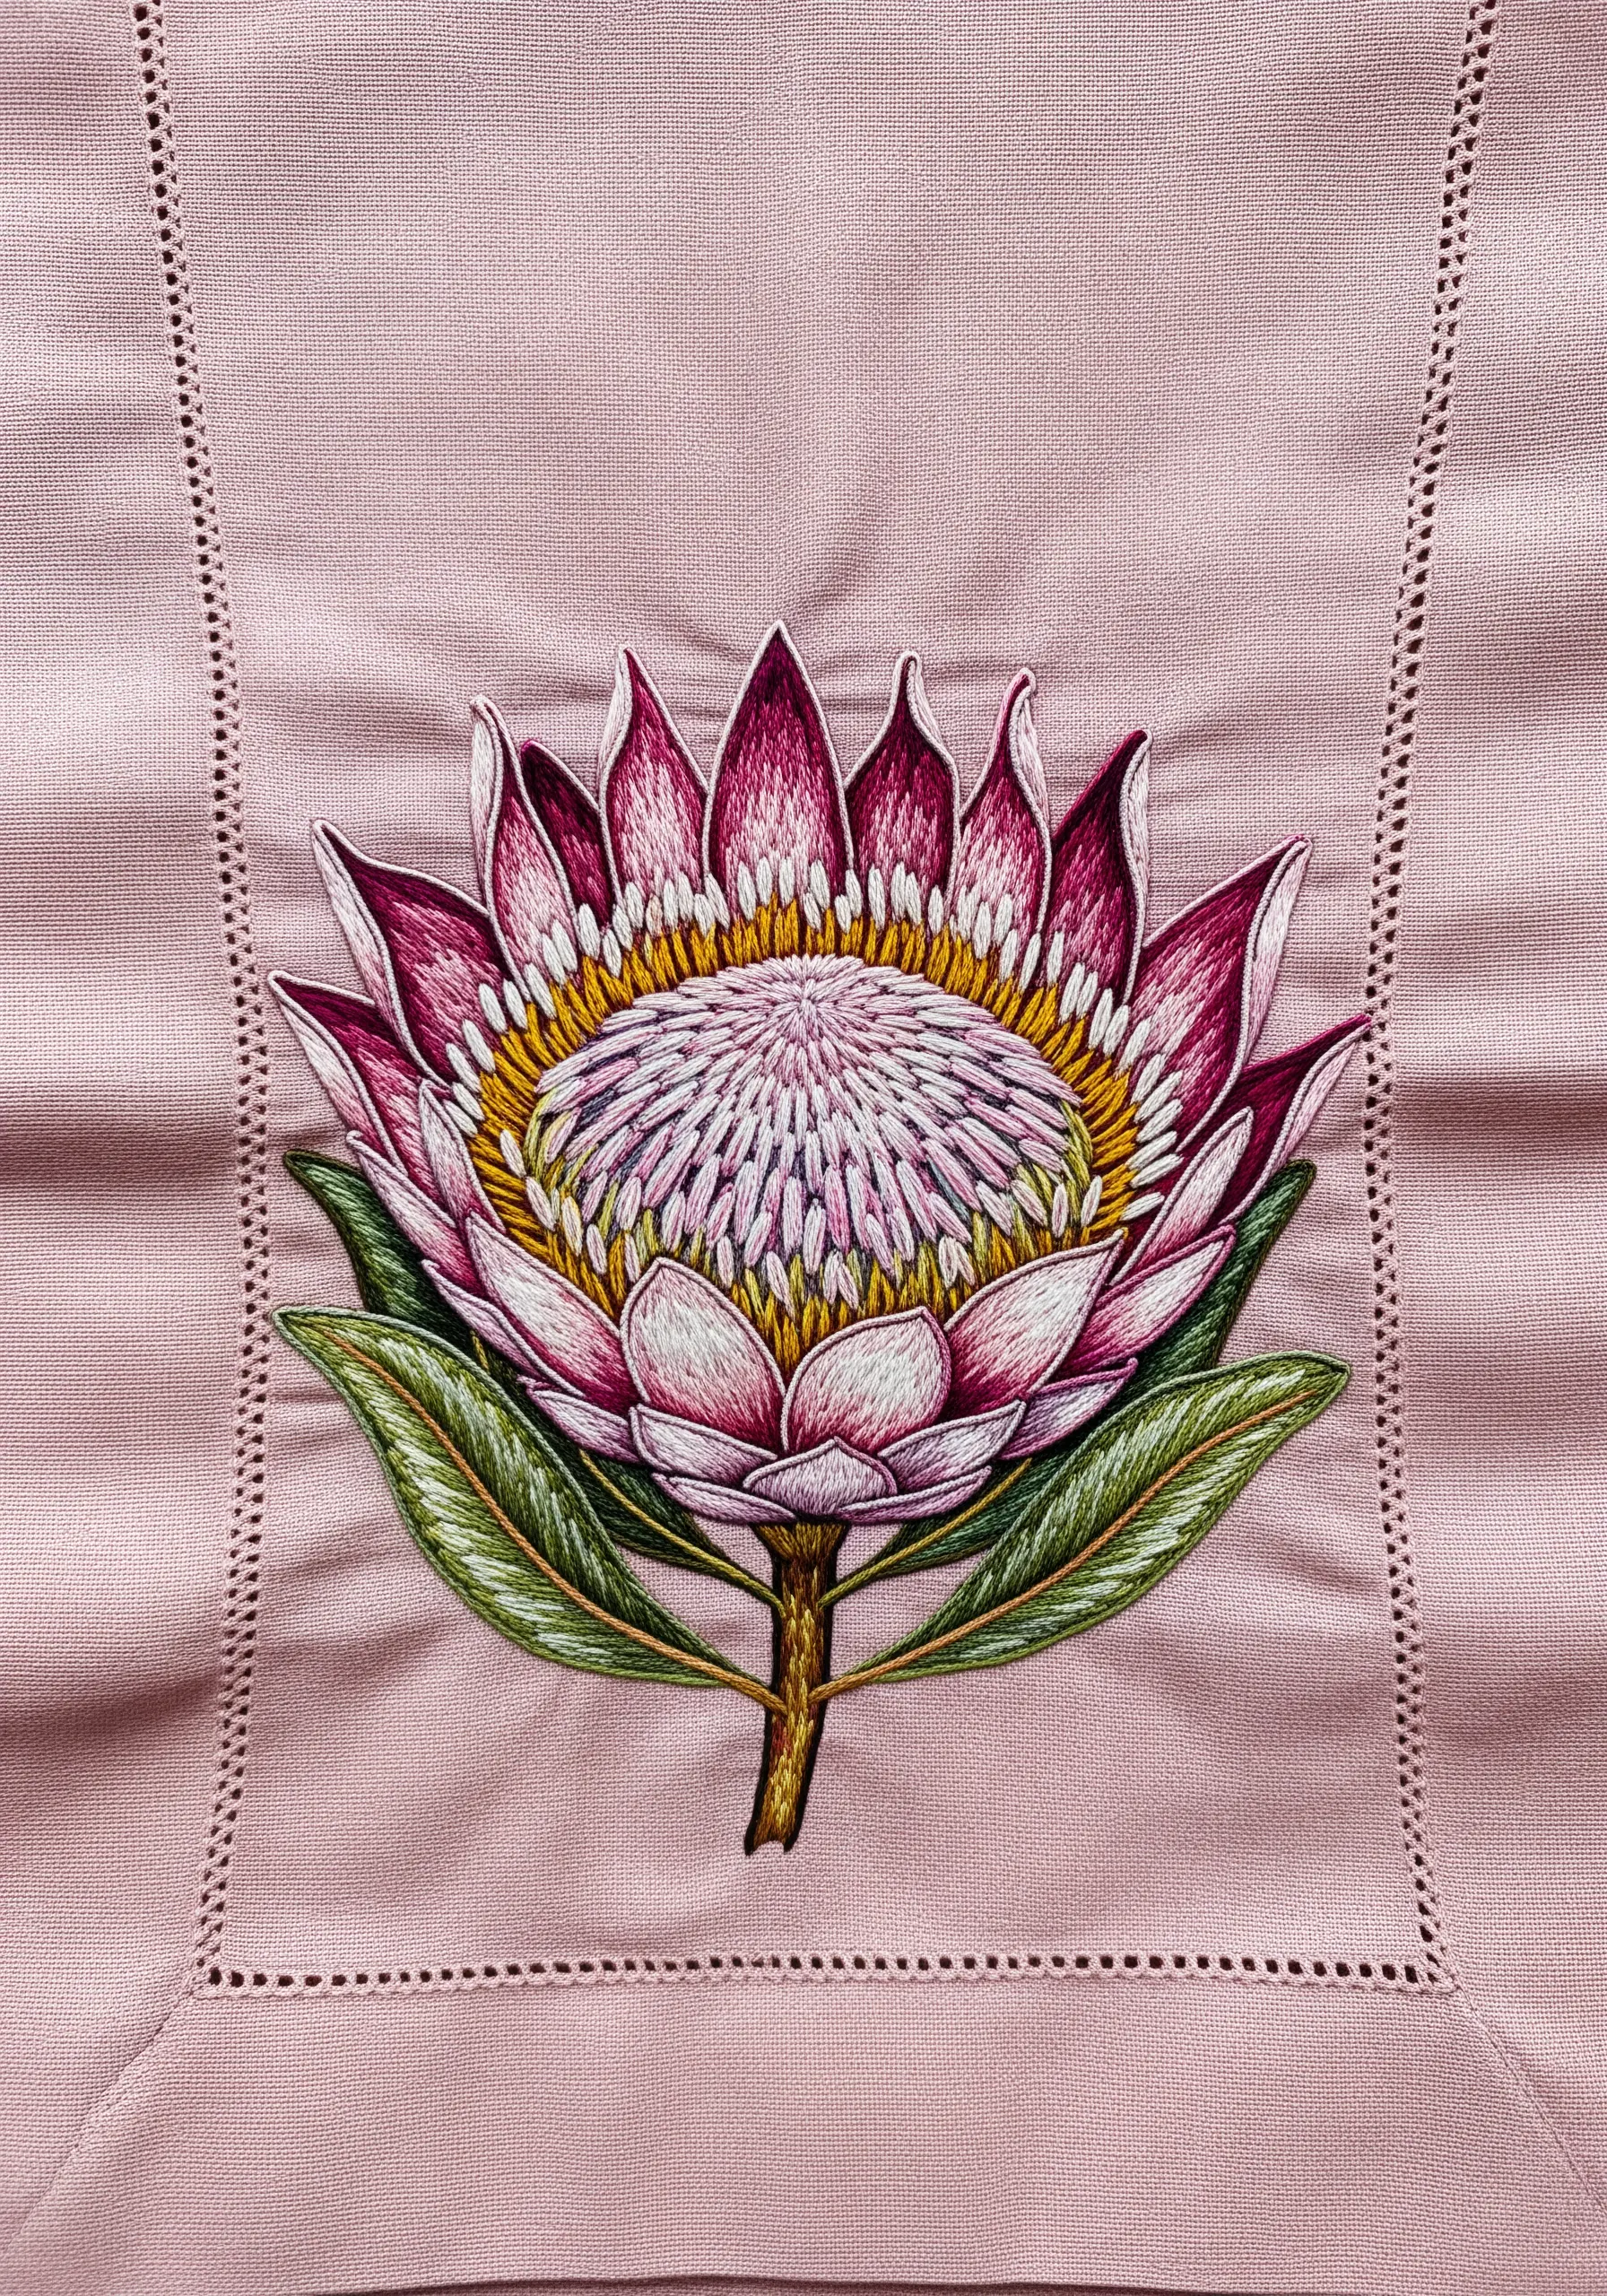
A complex flower like a protea becomes manageable when you approach it in sections.
For the outer petals, use long-and-short stitch, blending pinks and whites to create soft gradients. Outline each petal with a single backstitch to give it crisp definition.
For the dense center, switch to a field of tightly packed French knots or colonial knots in white and pale yellow to replicate the unique texture.
By breaking the flower down into its component parts and assigning a specific technique to each, you can create a stunningly realistic botanical masterpiece.
19. Capture Rustic Elegance with Line Work
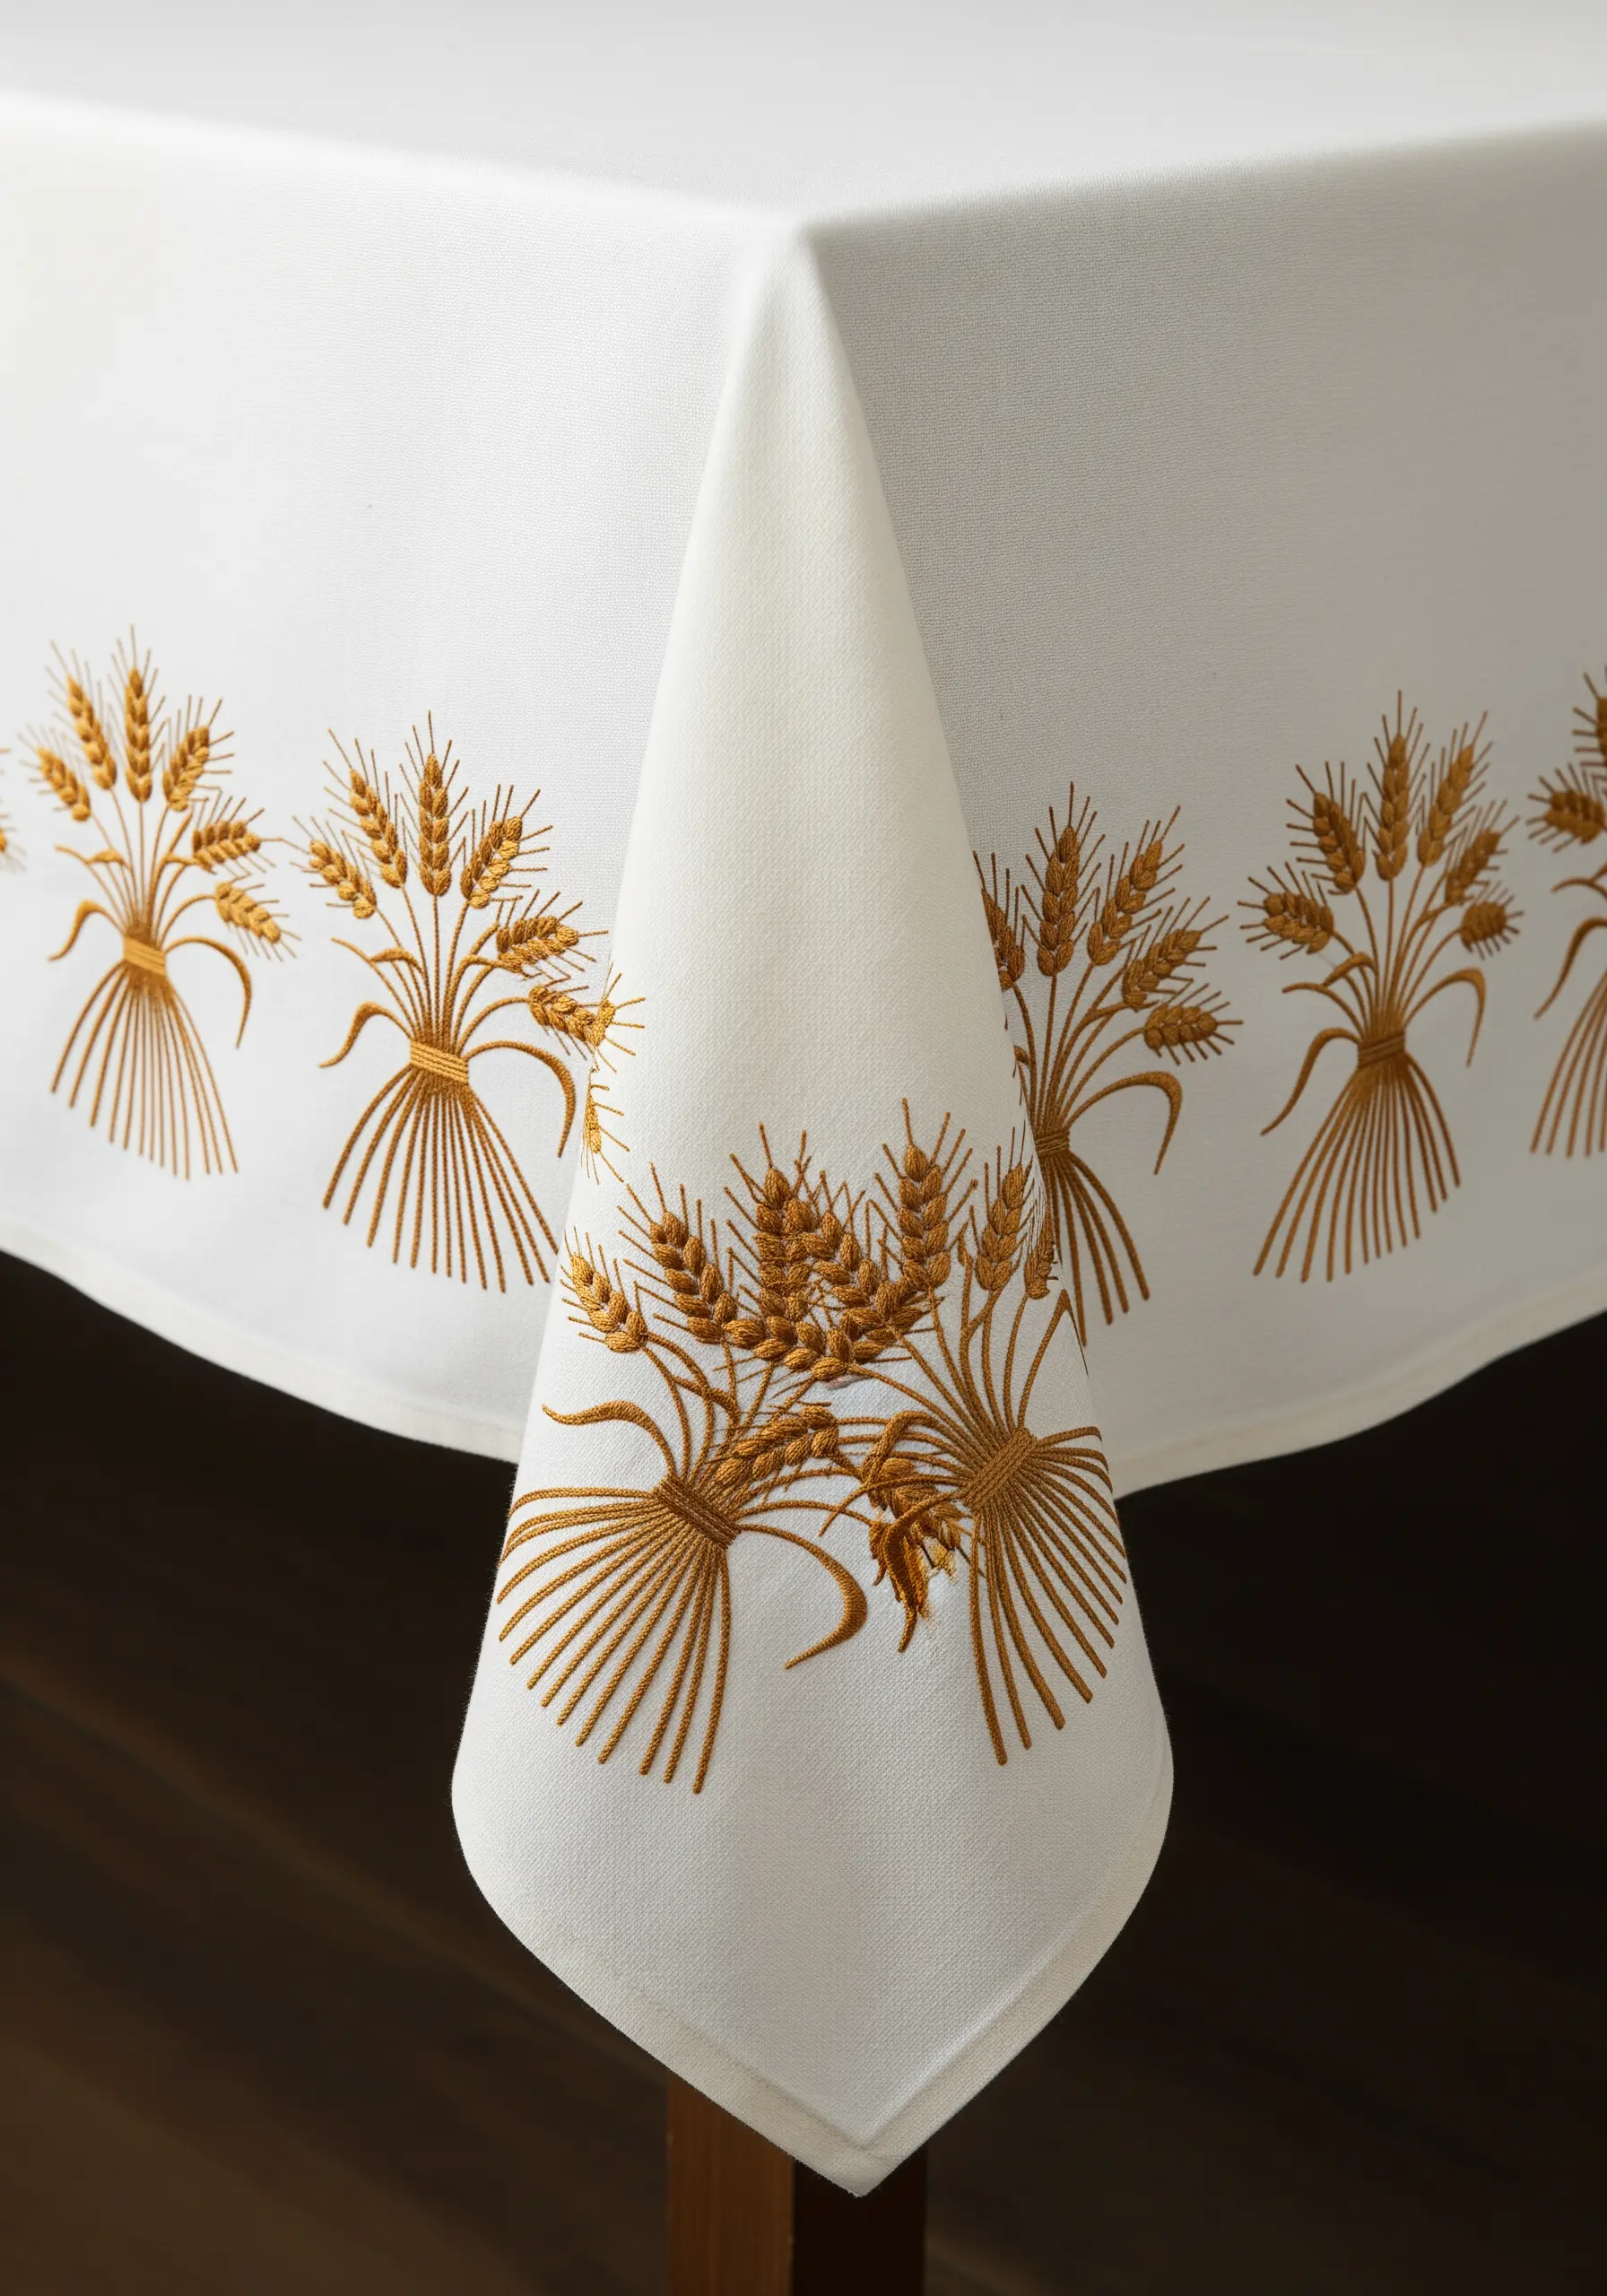
This classic wheat sheaf design proves that you don’t need complex fill stitches to create an impactful border.
The beauty of this motif lies in its elegant lines. Use a combination of straight stitches and stem stitches for the wheat stalks, varying their length and angle for a natural look.
For the tied ribbon, use a smooth, tight satin stitch to create a contrast in texture.
Stitching this monochrome design in a warm golden-brown on crisp white linen is the essence of rustic farmhouse charm.
20. Form Bold Graphics with Coiled Rope
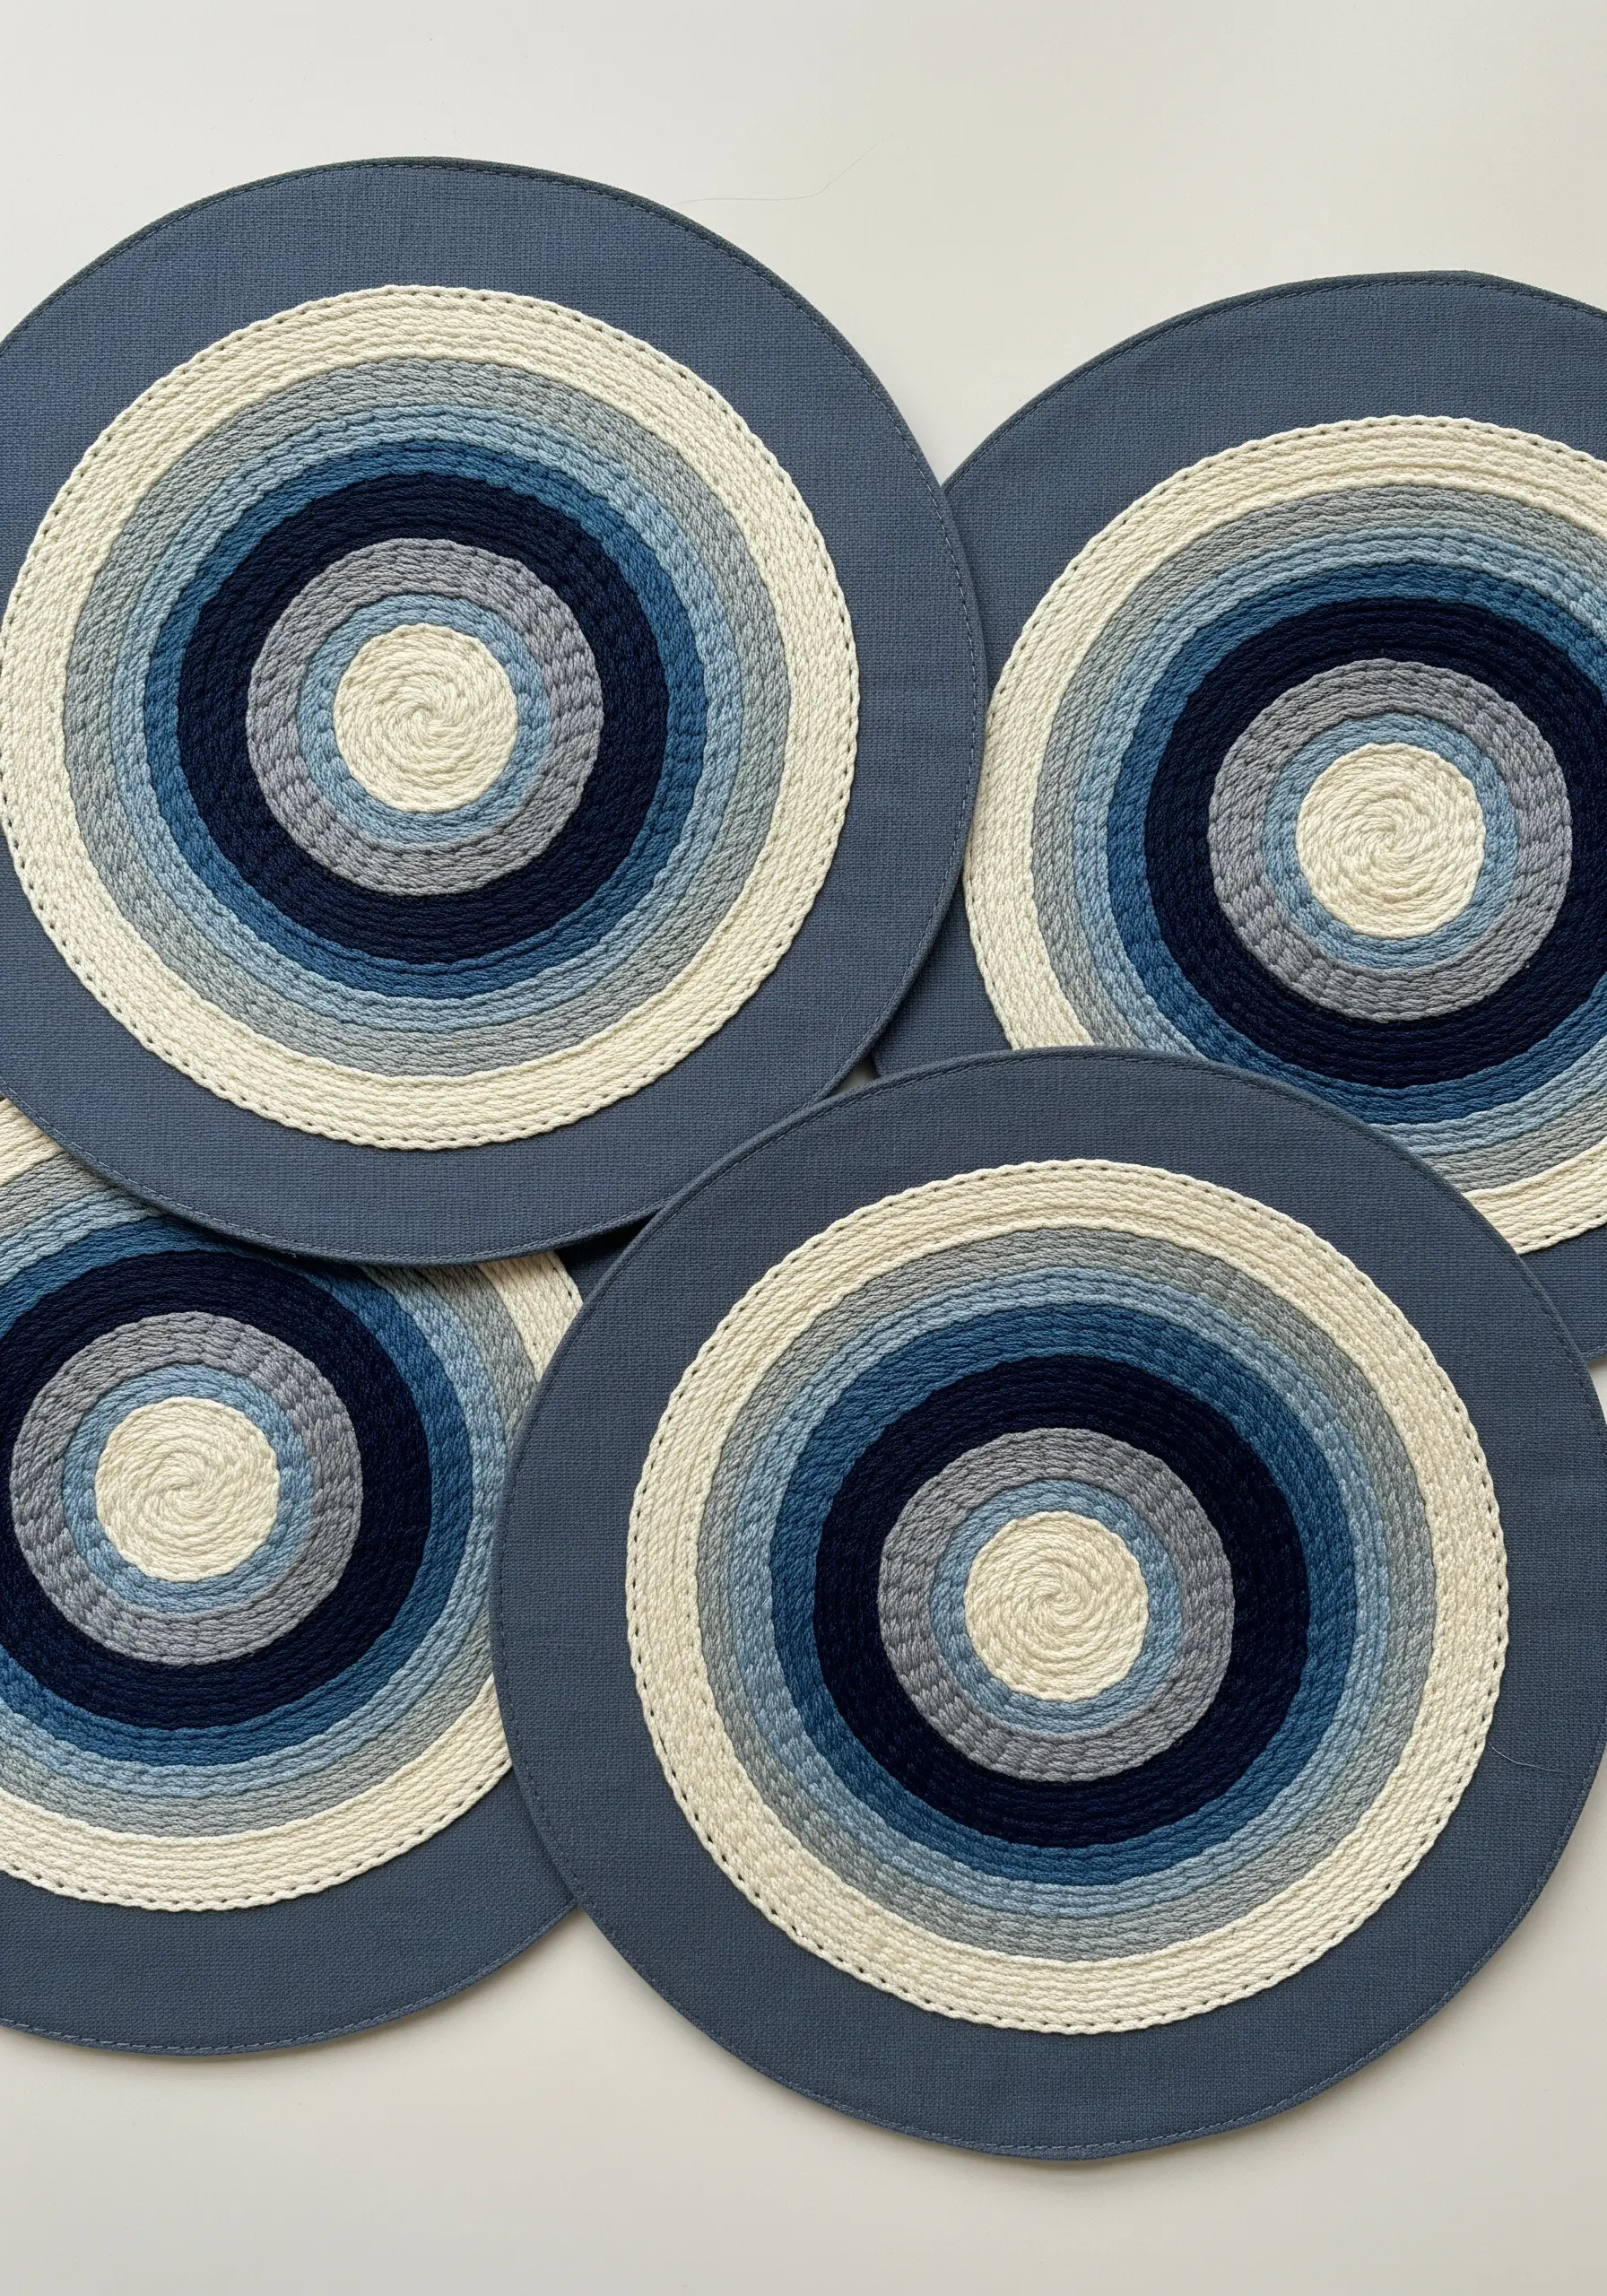
For an ultra-textured, modern boho look, use couching to apply thick rope directly to your placemats.
Starting from the center, coil a thick cord or rope onto the fabric, securing it in place with a strong, invisible thread (like a nylon monofilament) every half-inch or so.
Alternate rope colors to create the concentric rings. This technique is much faster than stitching and results in a durable, high-impact design that has a wonderfully weighty and substantial feel.
21. Play with Scale and Texture for a Whimsical Scene
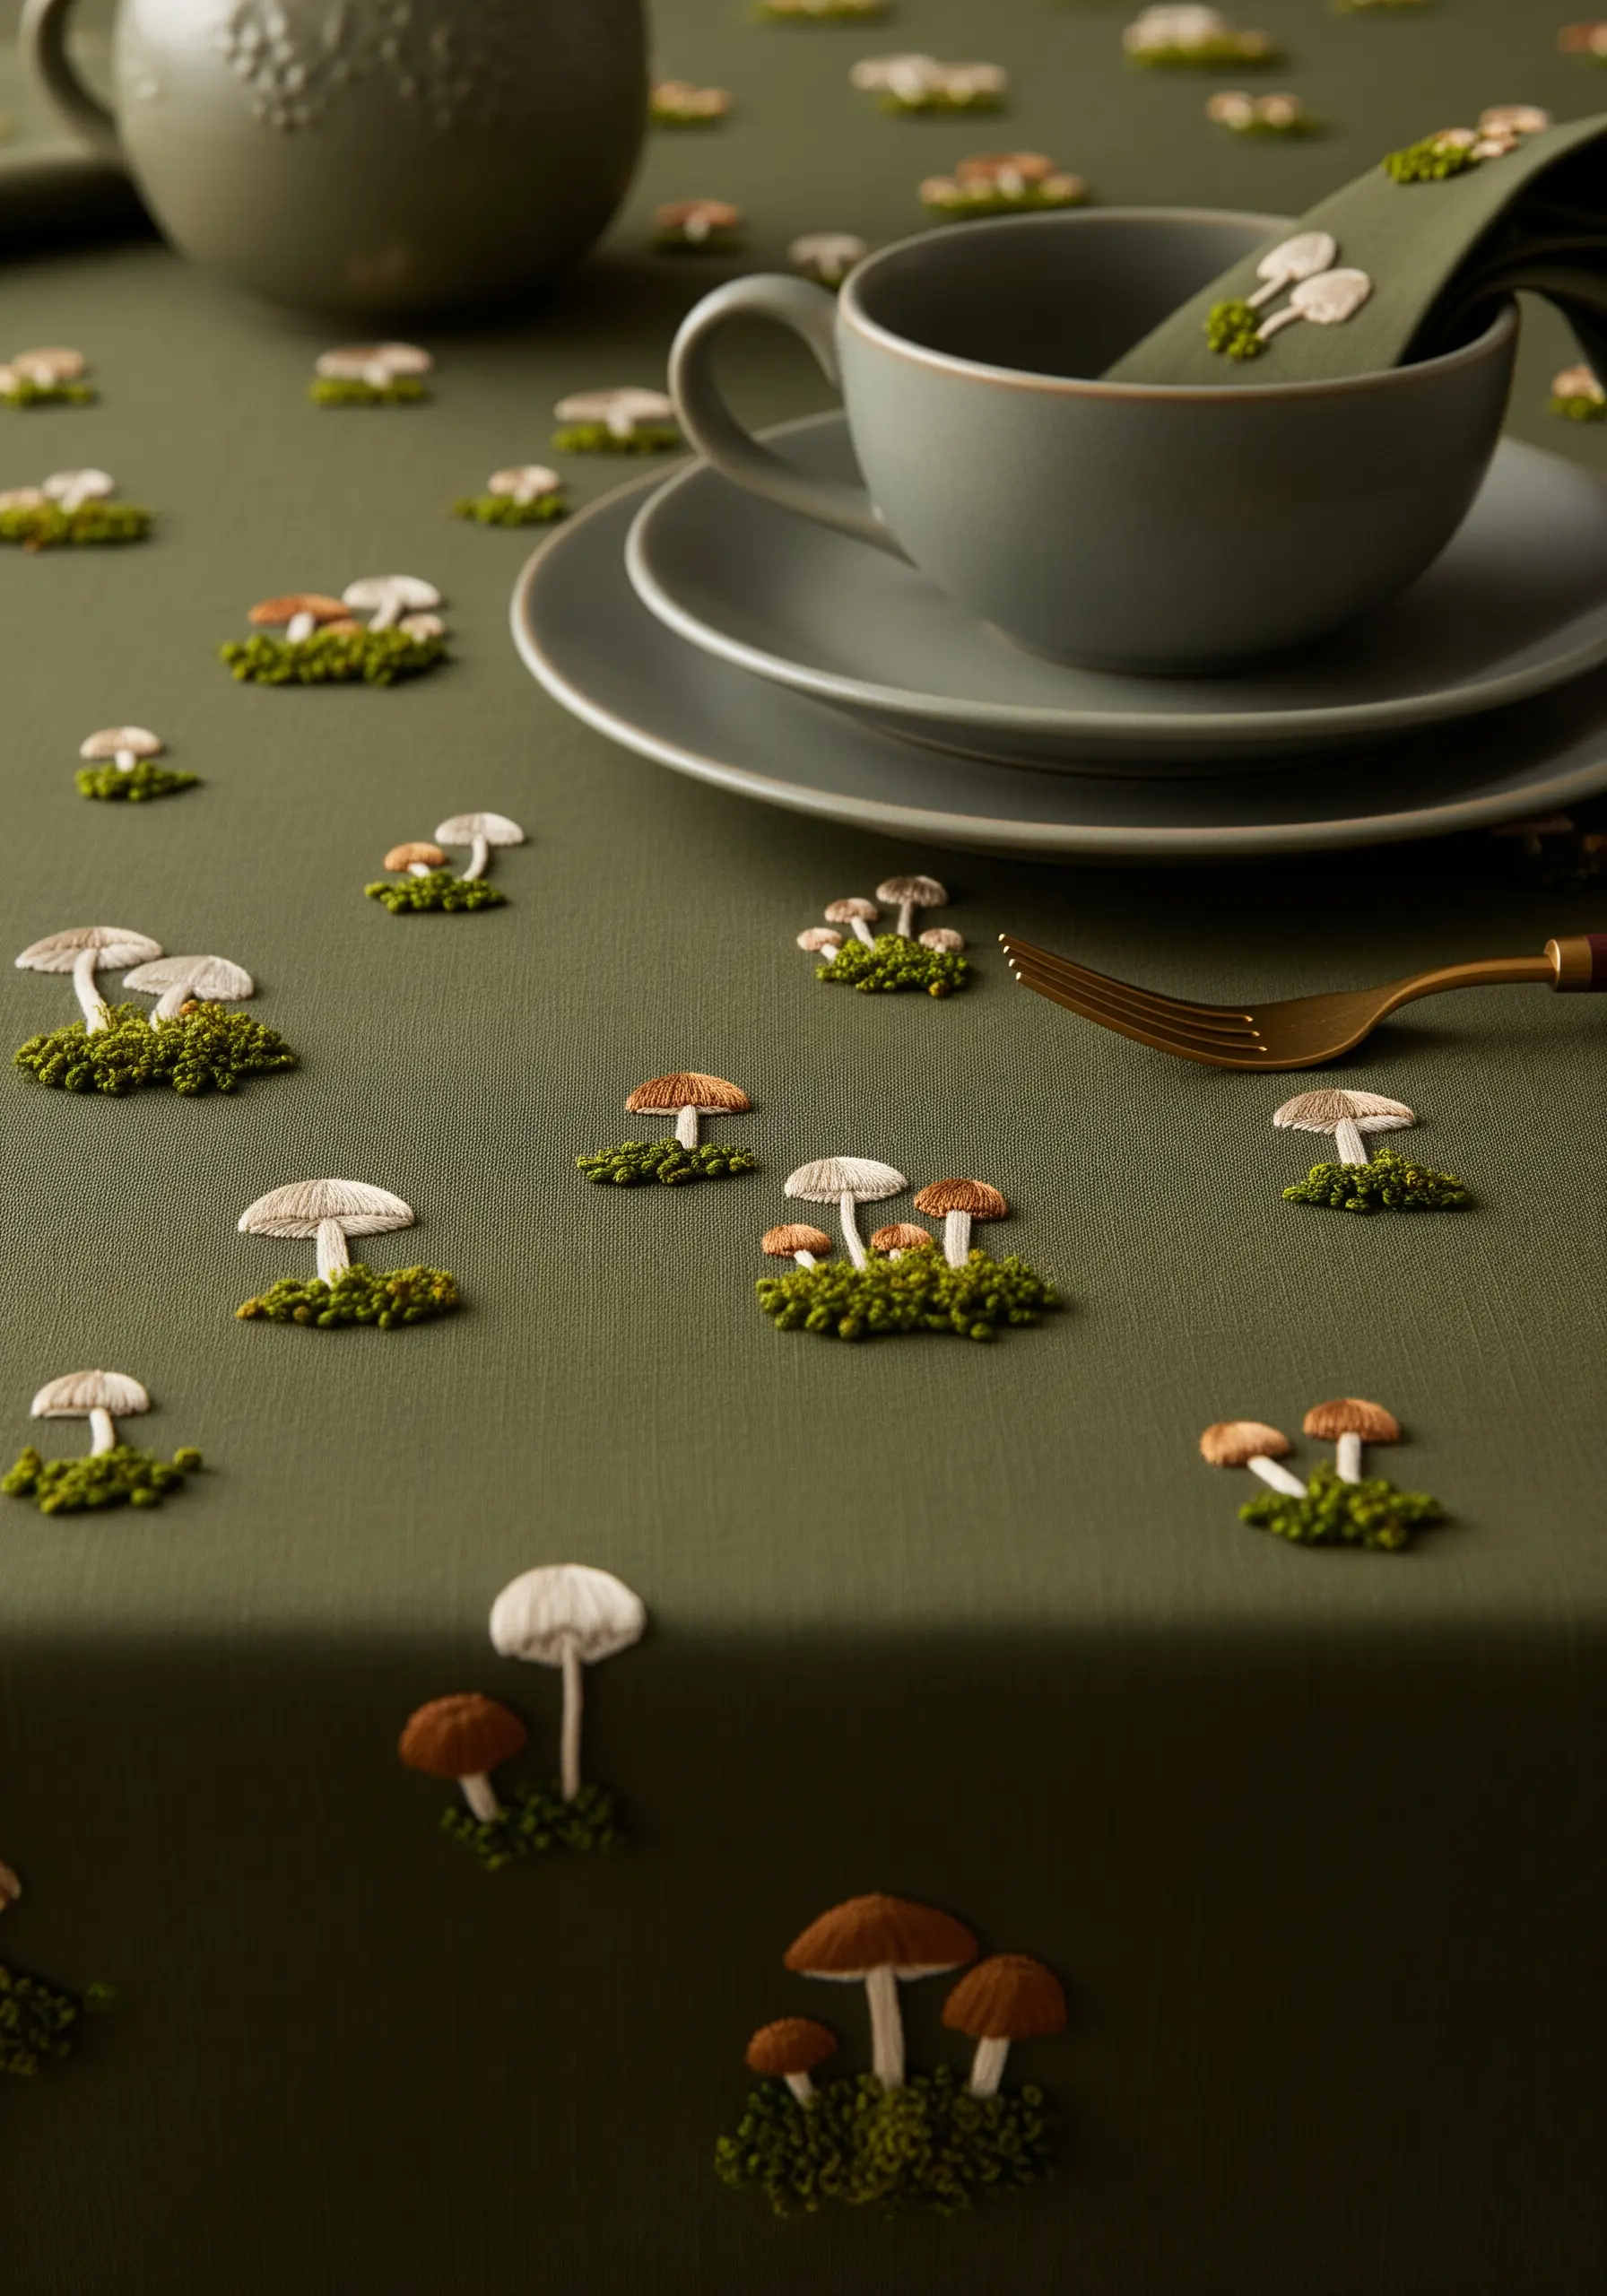
Create a charming, scattered mushroom pattern by focusing on 3D textures.
For the mossy ground, use turkey work (or ghiraza stitch) and trim the loops to create a velvety, raised pile that you can actually feel.
Use a padded satin stitch for the mushroom caps—place a few small straight stitches as a base layer before covering them with satin stitch to make them pop off the fabric.
This combination of textures transforms a simple tablecloth into a miniature woodland floor.
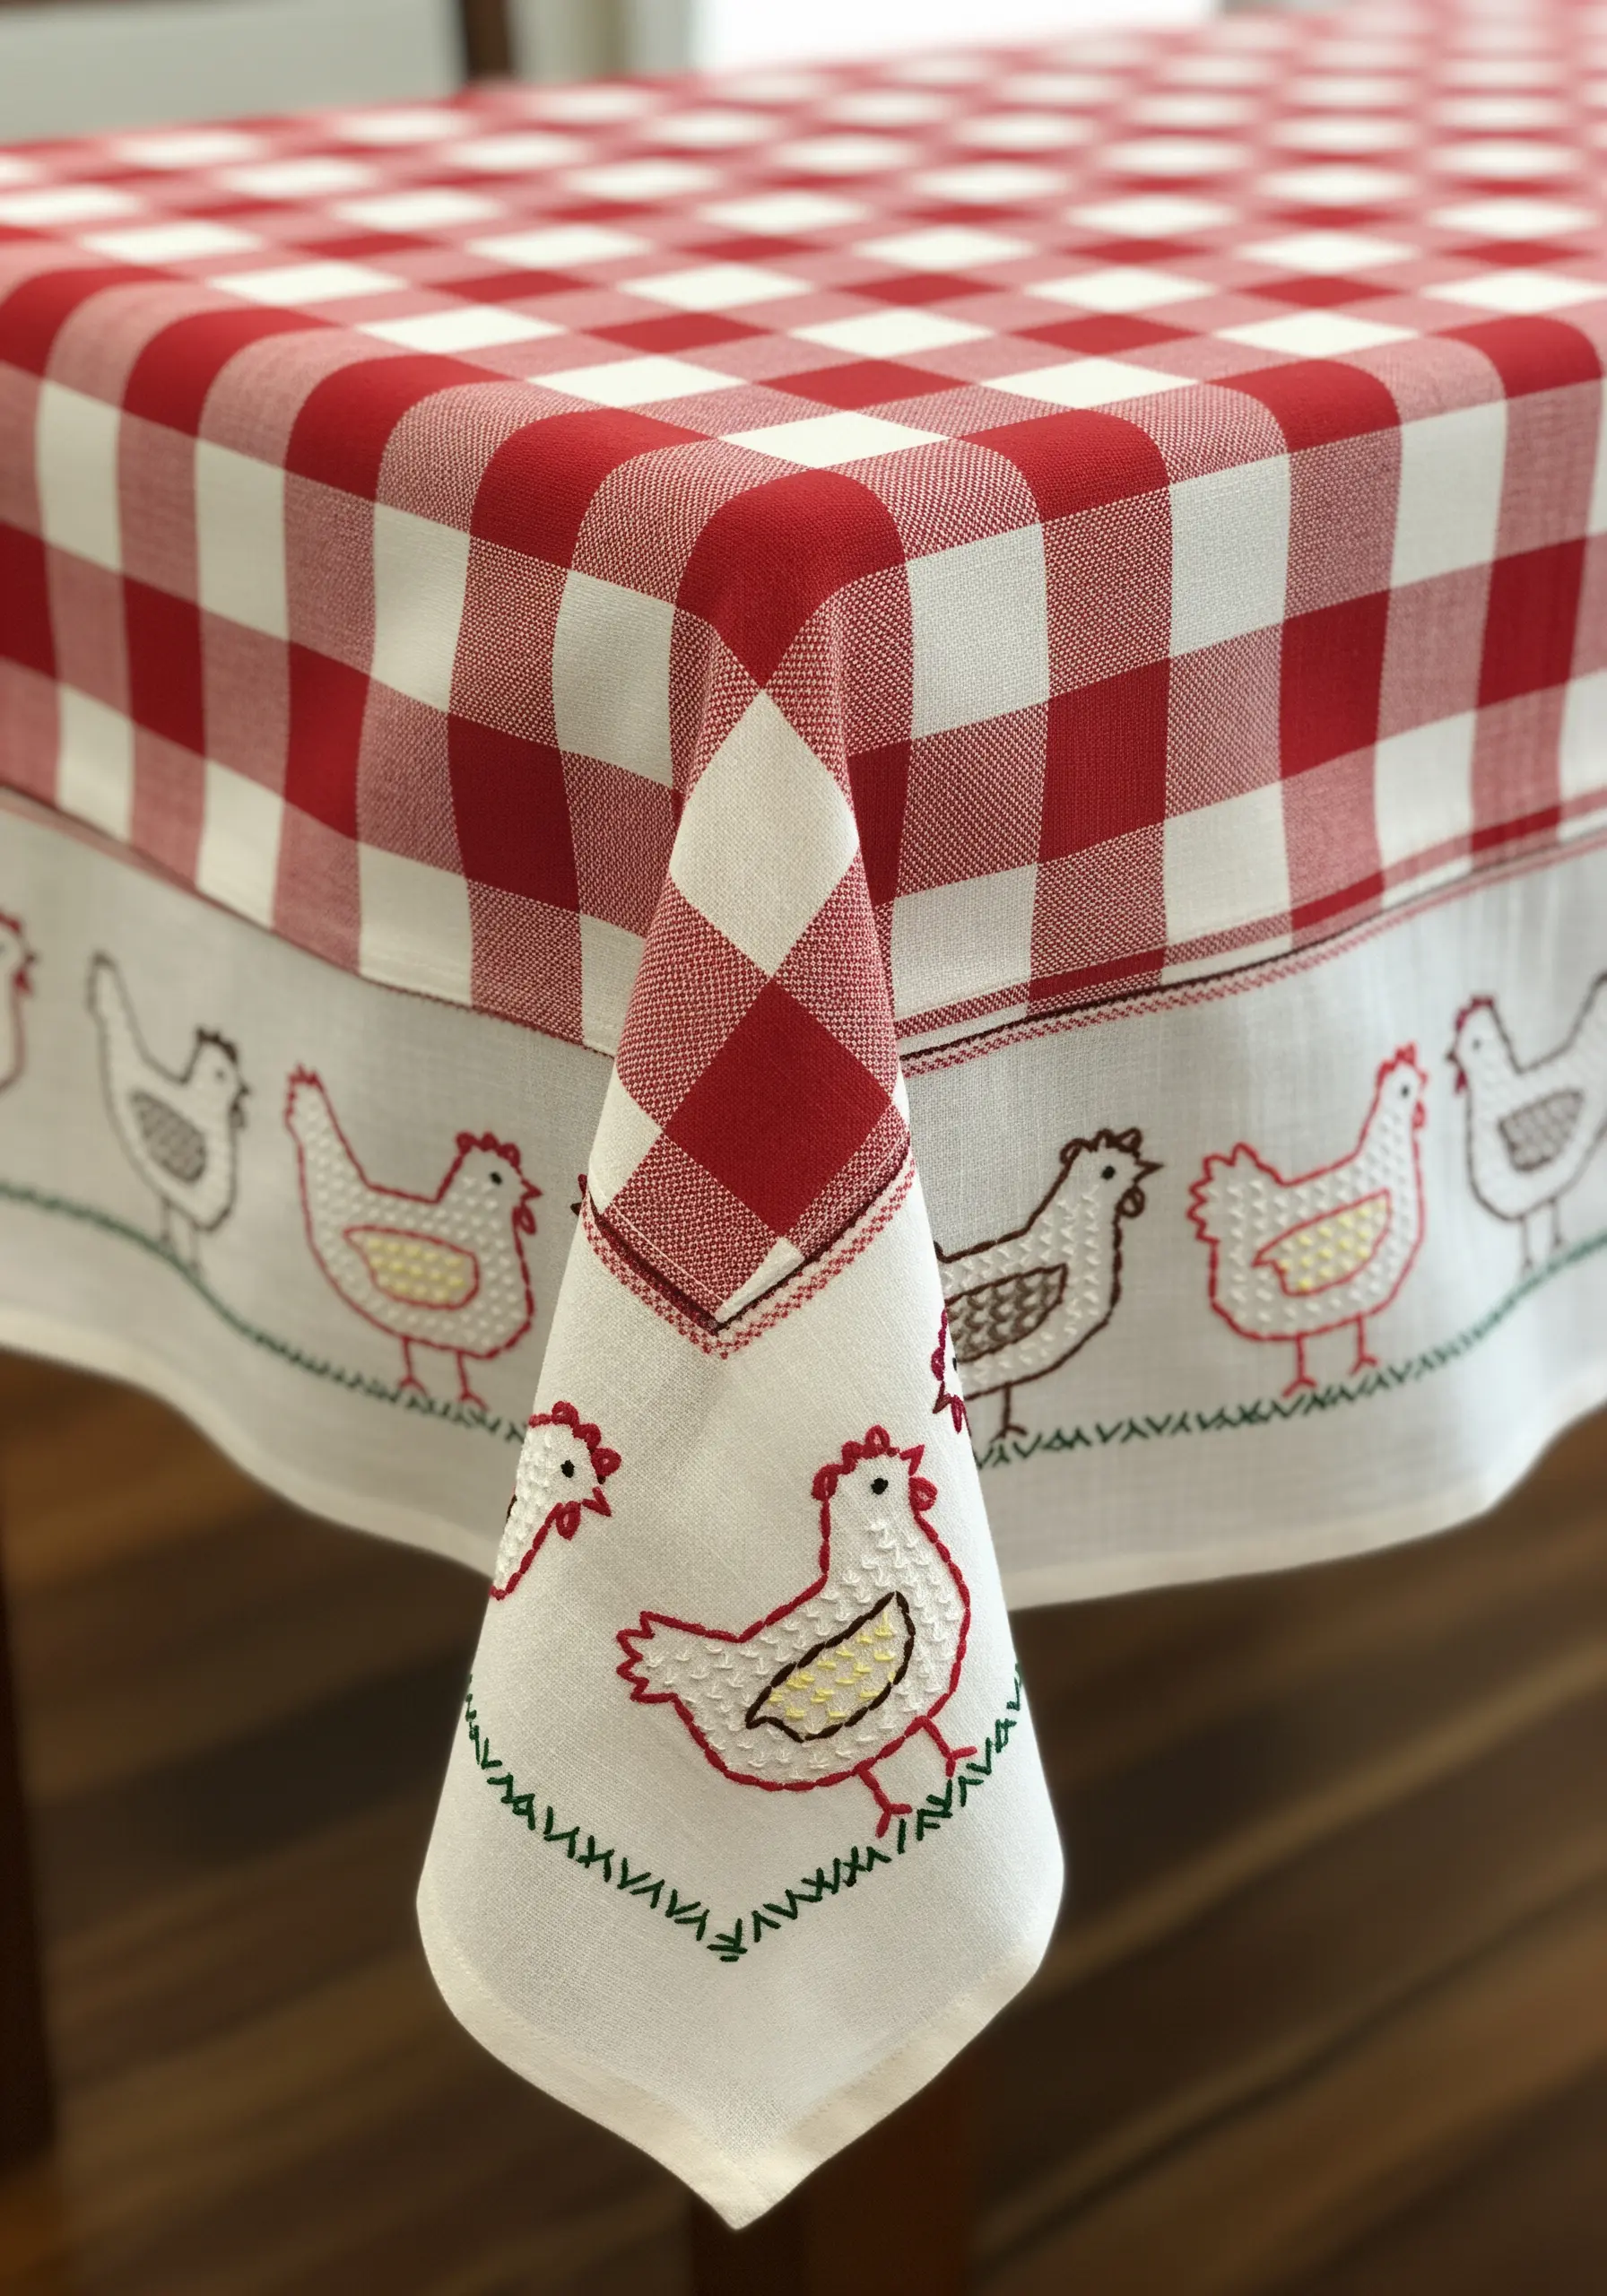
22. Make Embroidery Pop on Patterned Fabric

Stitching on a busy pattern like gingham requires bold choices to ensure your work stands out.
Select high-contrast, fully saturated thread colors that don’t appear in the fabric’s pattern, like this vibrant red and yellow against the blue and white check.
Use a dense satin stitch to create solid blocks of color that command attention and won’t get lost in the background.
Outlining your shapes with a dark backstitch also helps to visually separate the embroidery from the fabric underneath, giving it definition and presence.
23. Master Delicacy on Sheer Fabrics
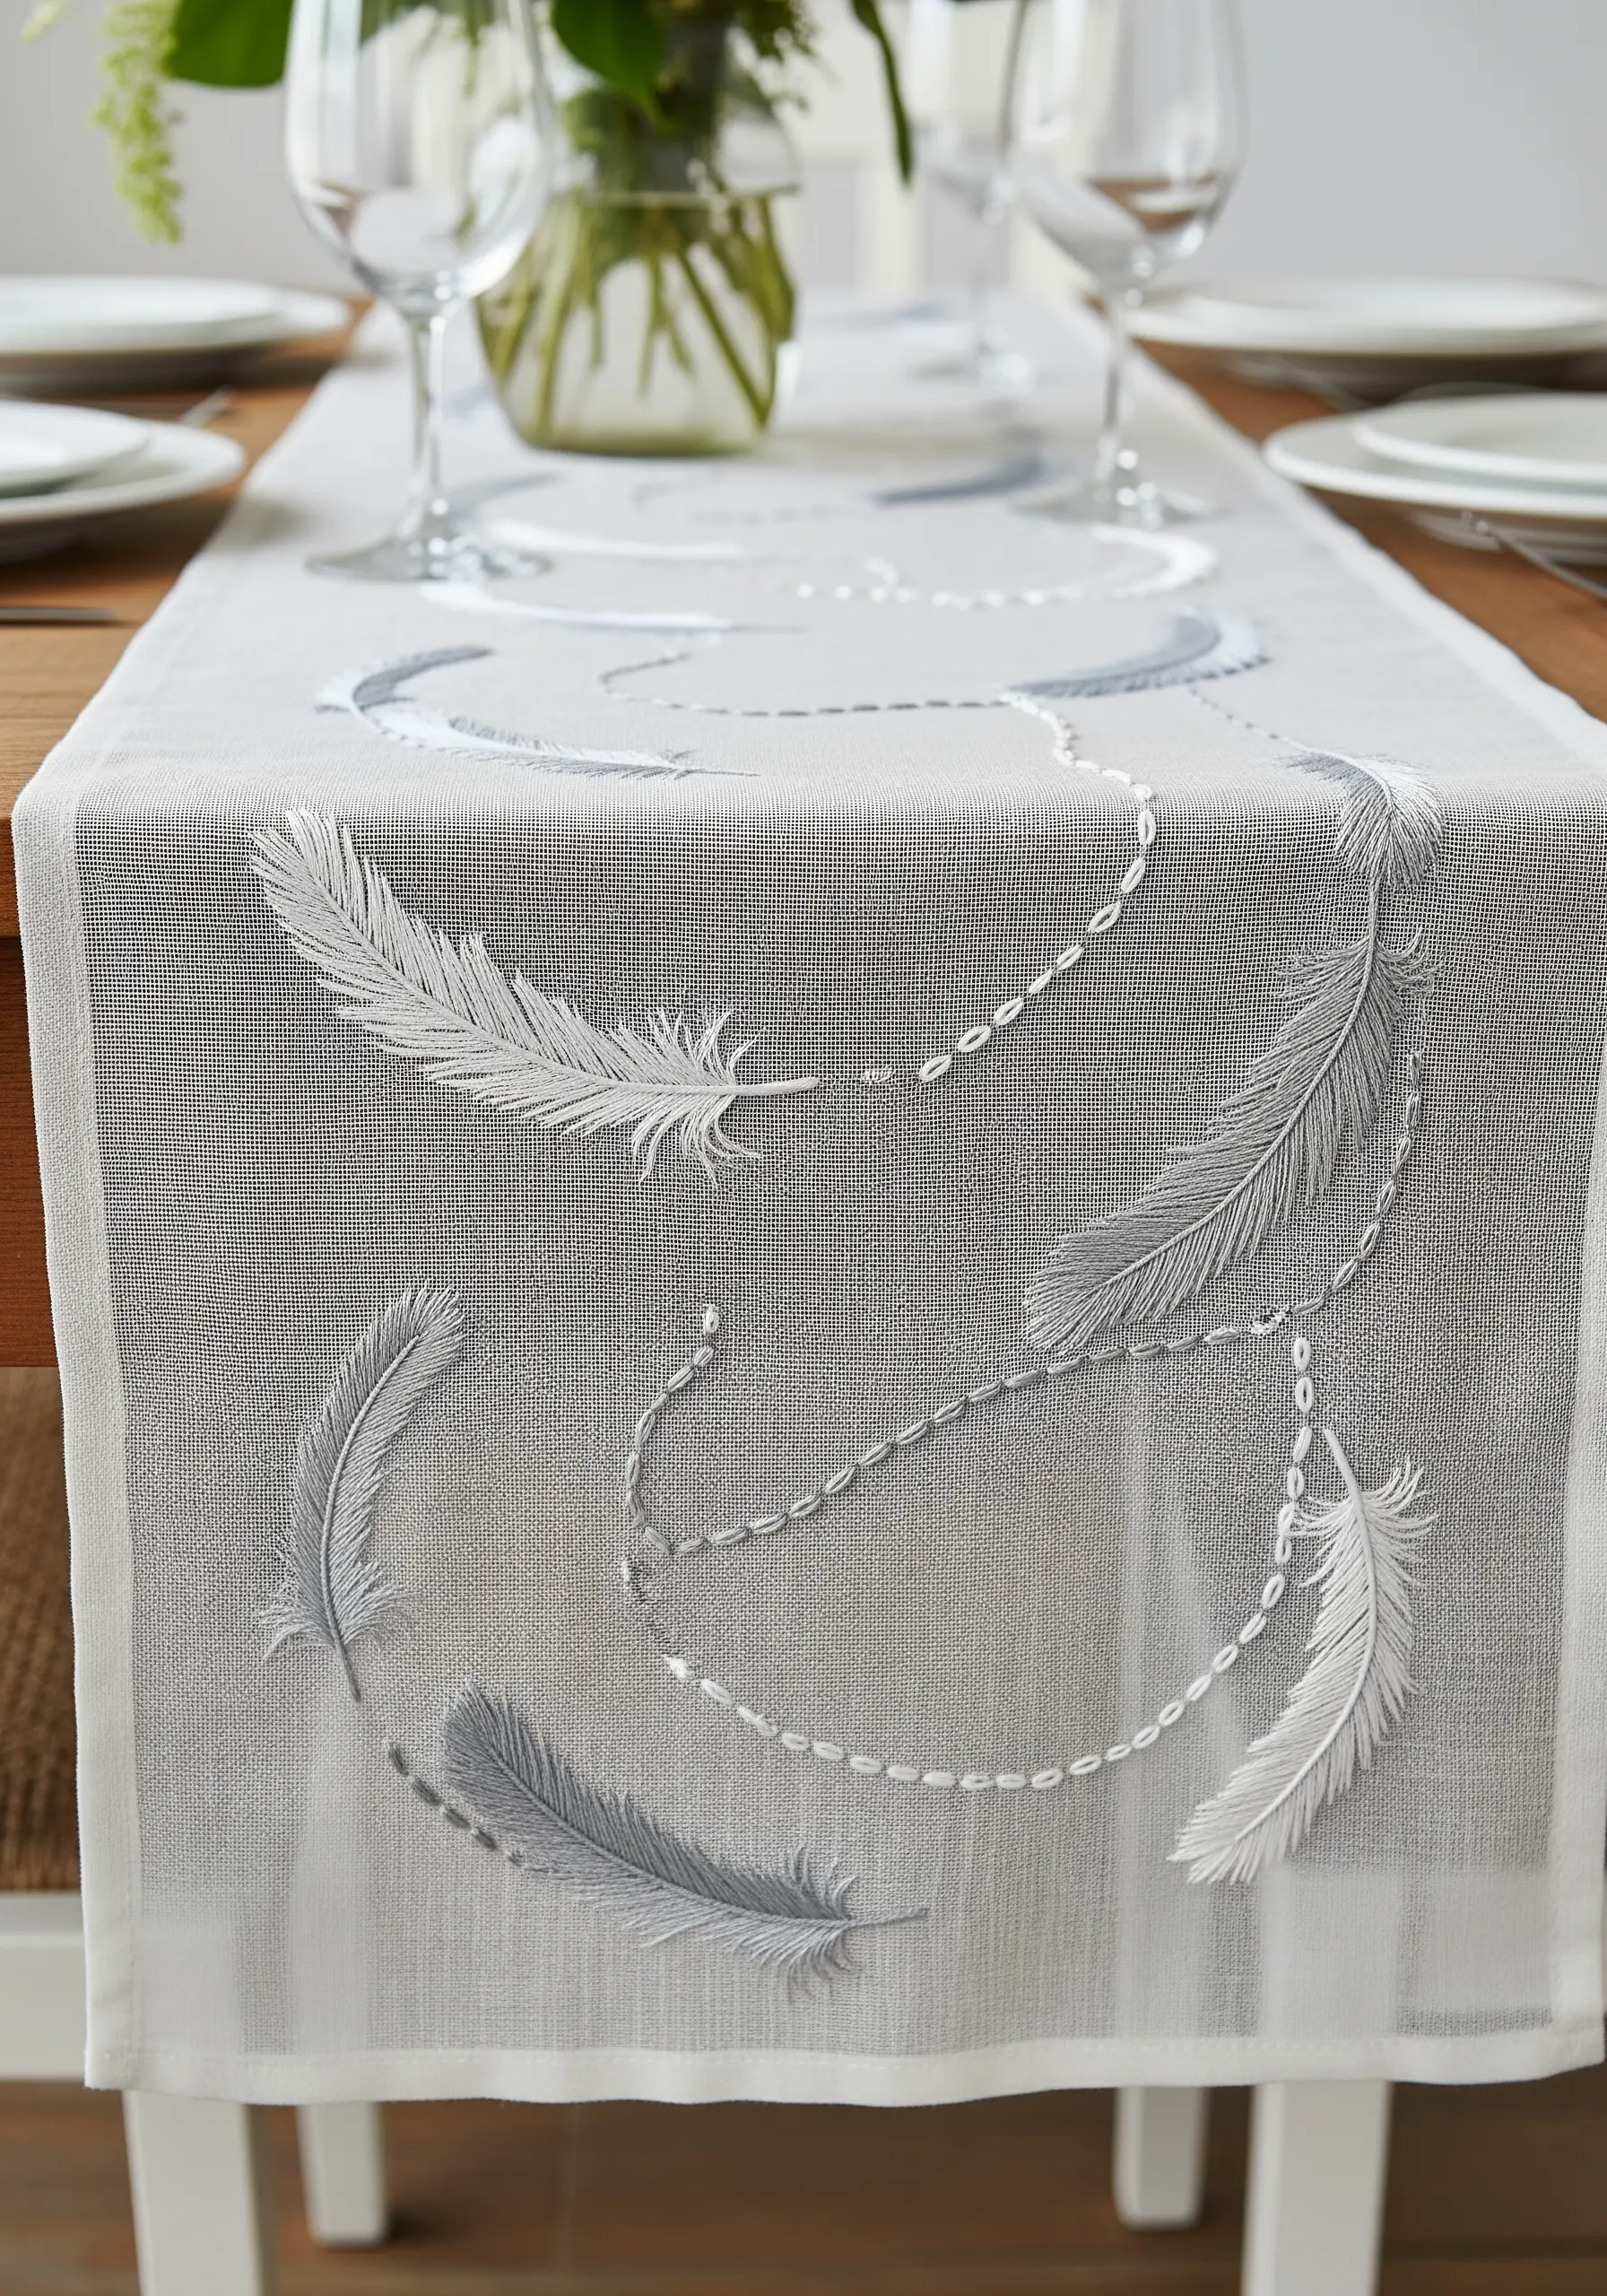
Embroidering on sheer or lightweight fabric requires a gentle touch and the right stabilizer.
Use a water-soluble or heat-away stabilizer on the back to support your stitches and prevent puckering. Once you’re finished, it will disappear, leaving the embroidery floating on the transparent fabric.
For the delicate feathers, use a light fishbone stitch for the main vane and single, detached chain stitches for the soft, fluffy barbs at the base.
The open, airy quality of the fabric perfectly complements the lightness of the feather motif.
24. Combine Weaving and Satin Stitch for a Bold Sun
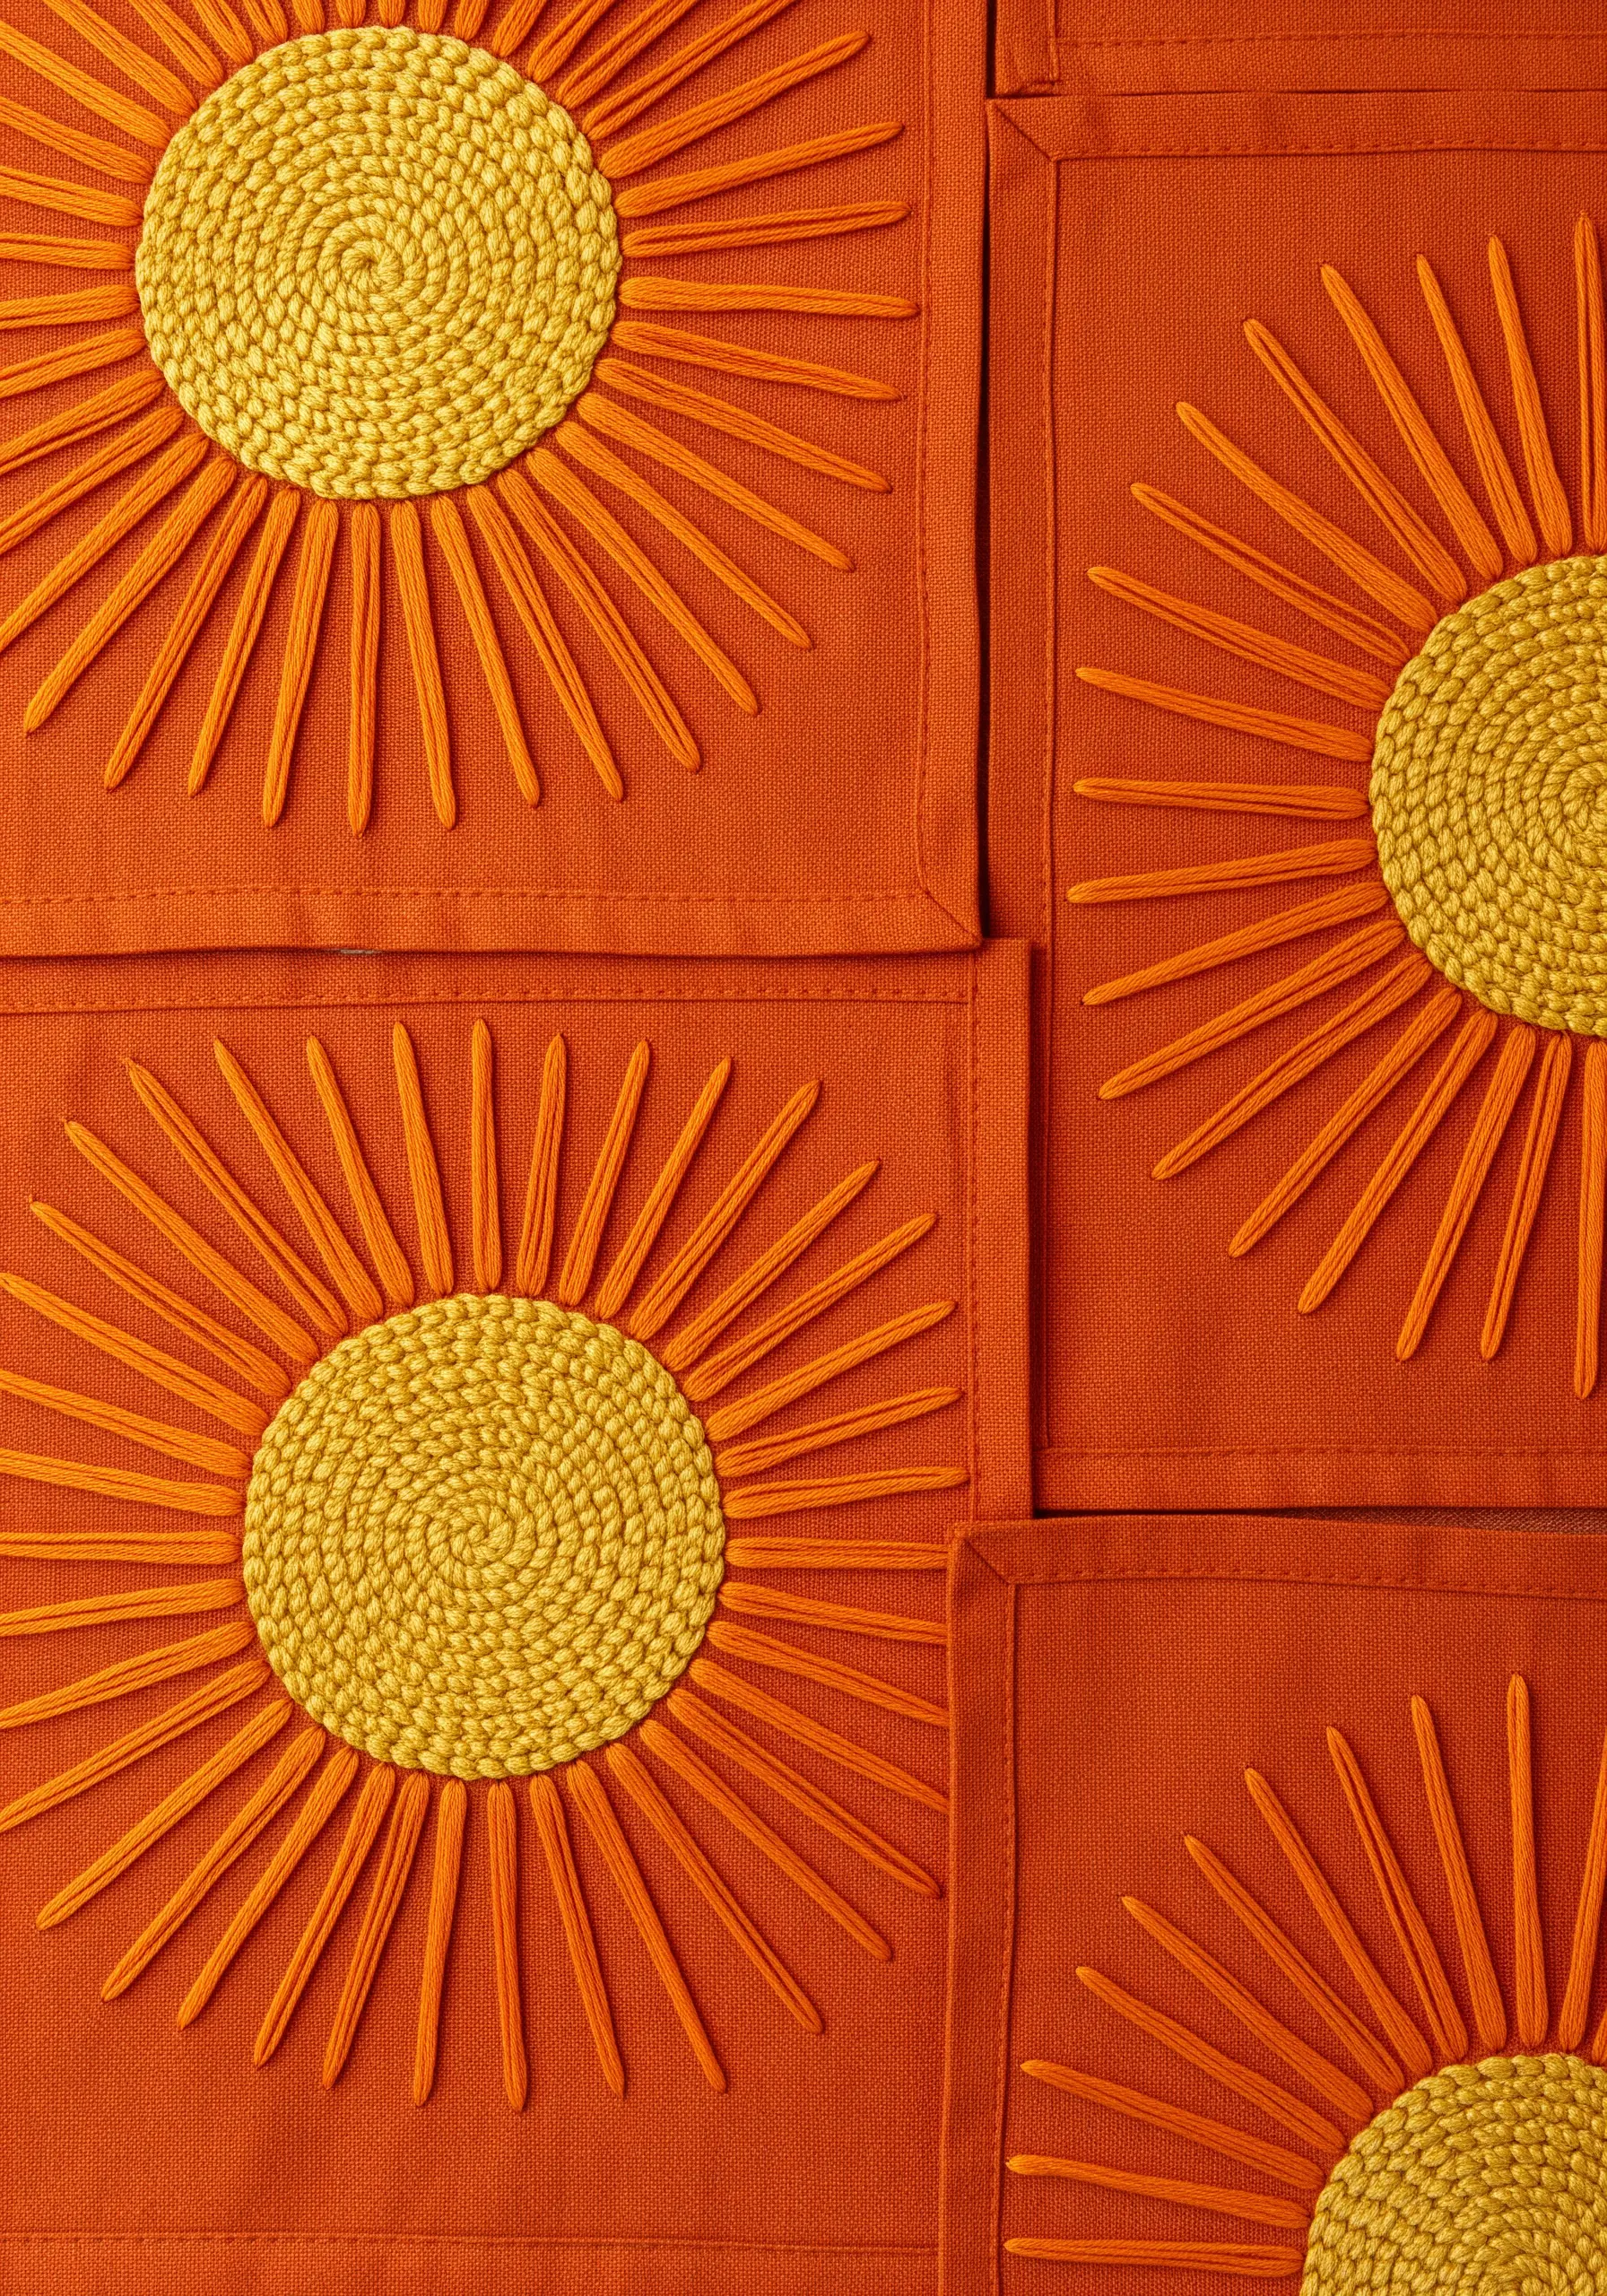
Create a sun motif with intense texture by combining two powerful stitches.
For the center, use a woven wheel stitch. This stitch creates a dense, raised circle with a beautiful woven texture that becomes the focal point.
For the rays, use a padded satin stitch. Lay down a foundation of straight stitches and then cover them with satin stitches going in the opposite direction. This gives the rays a raised, dimensional quality that makes them stand out dramatically.
25. Achieve Subtle Elegance with Tone-on-Tone Stitching
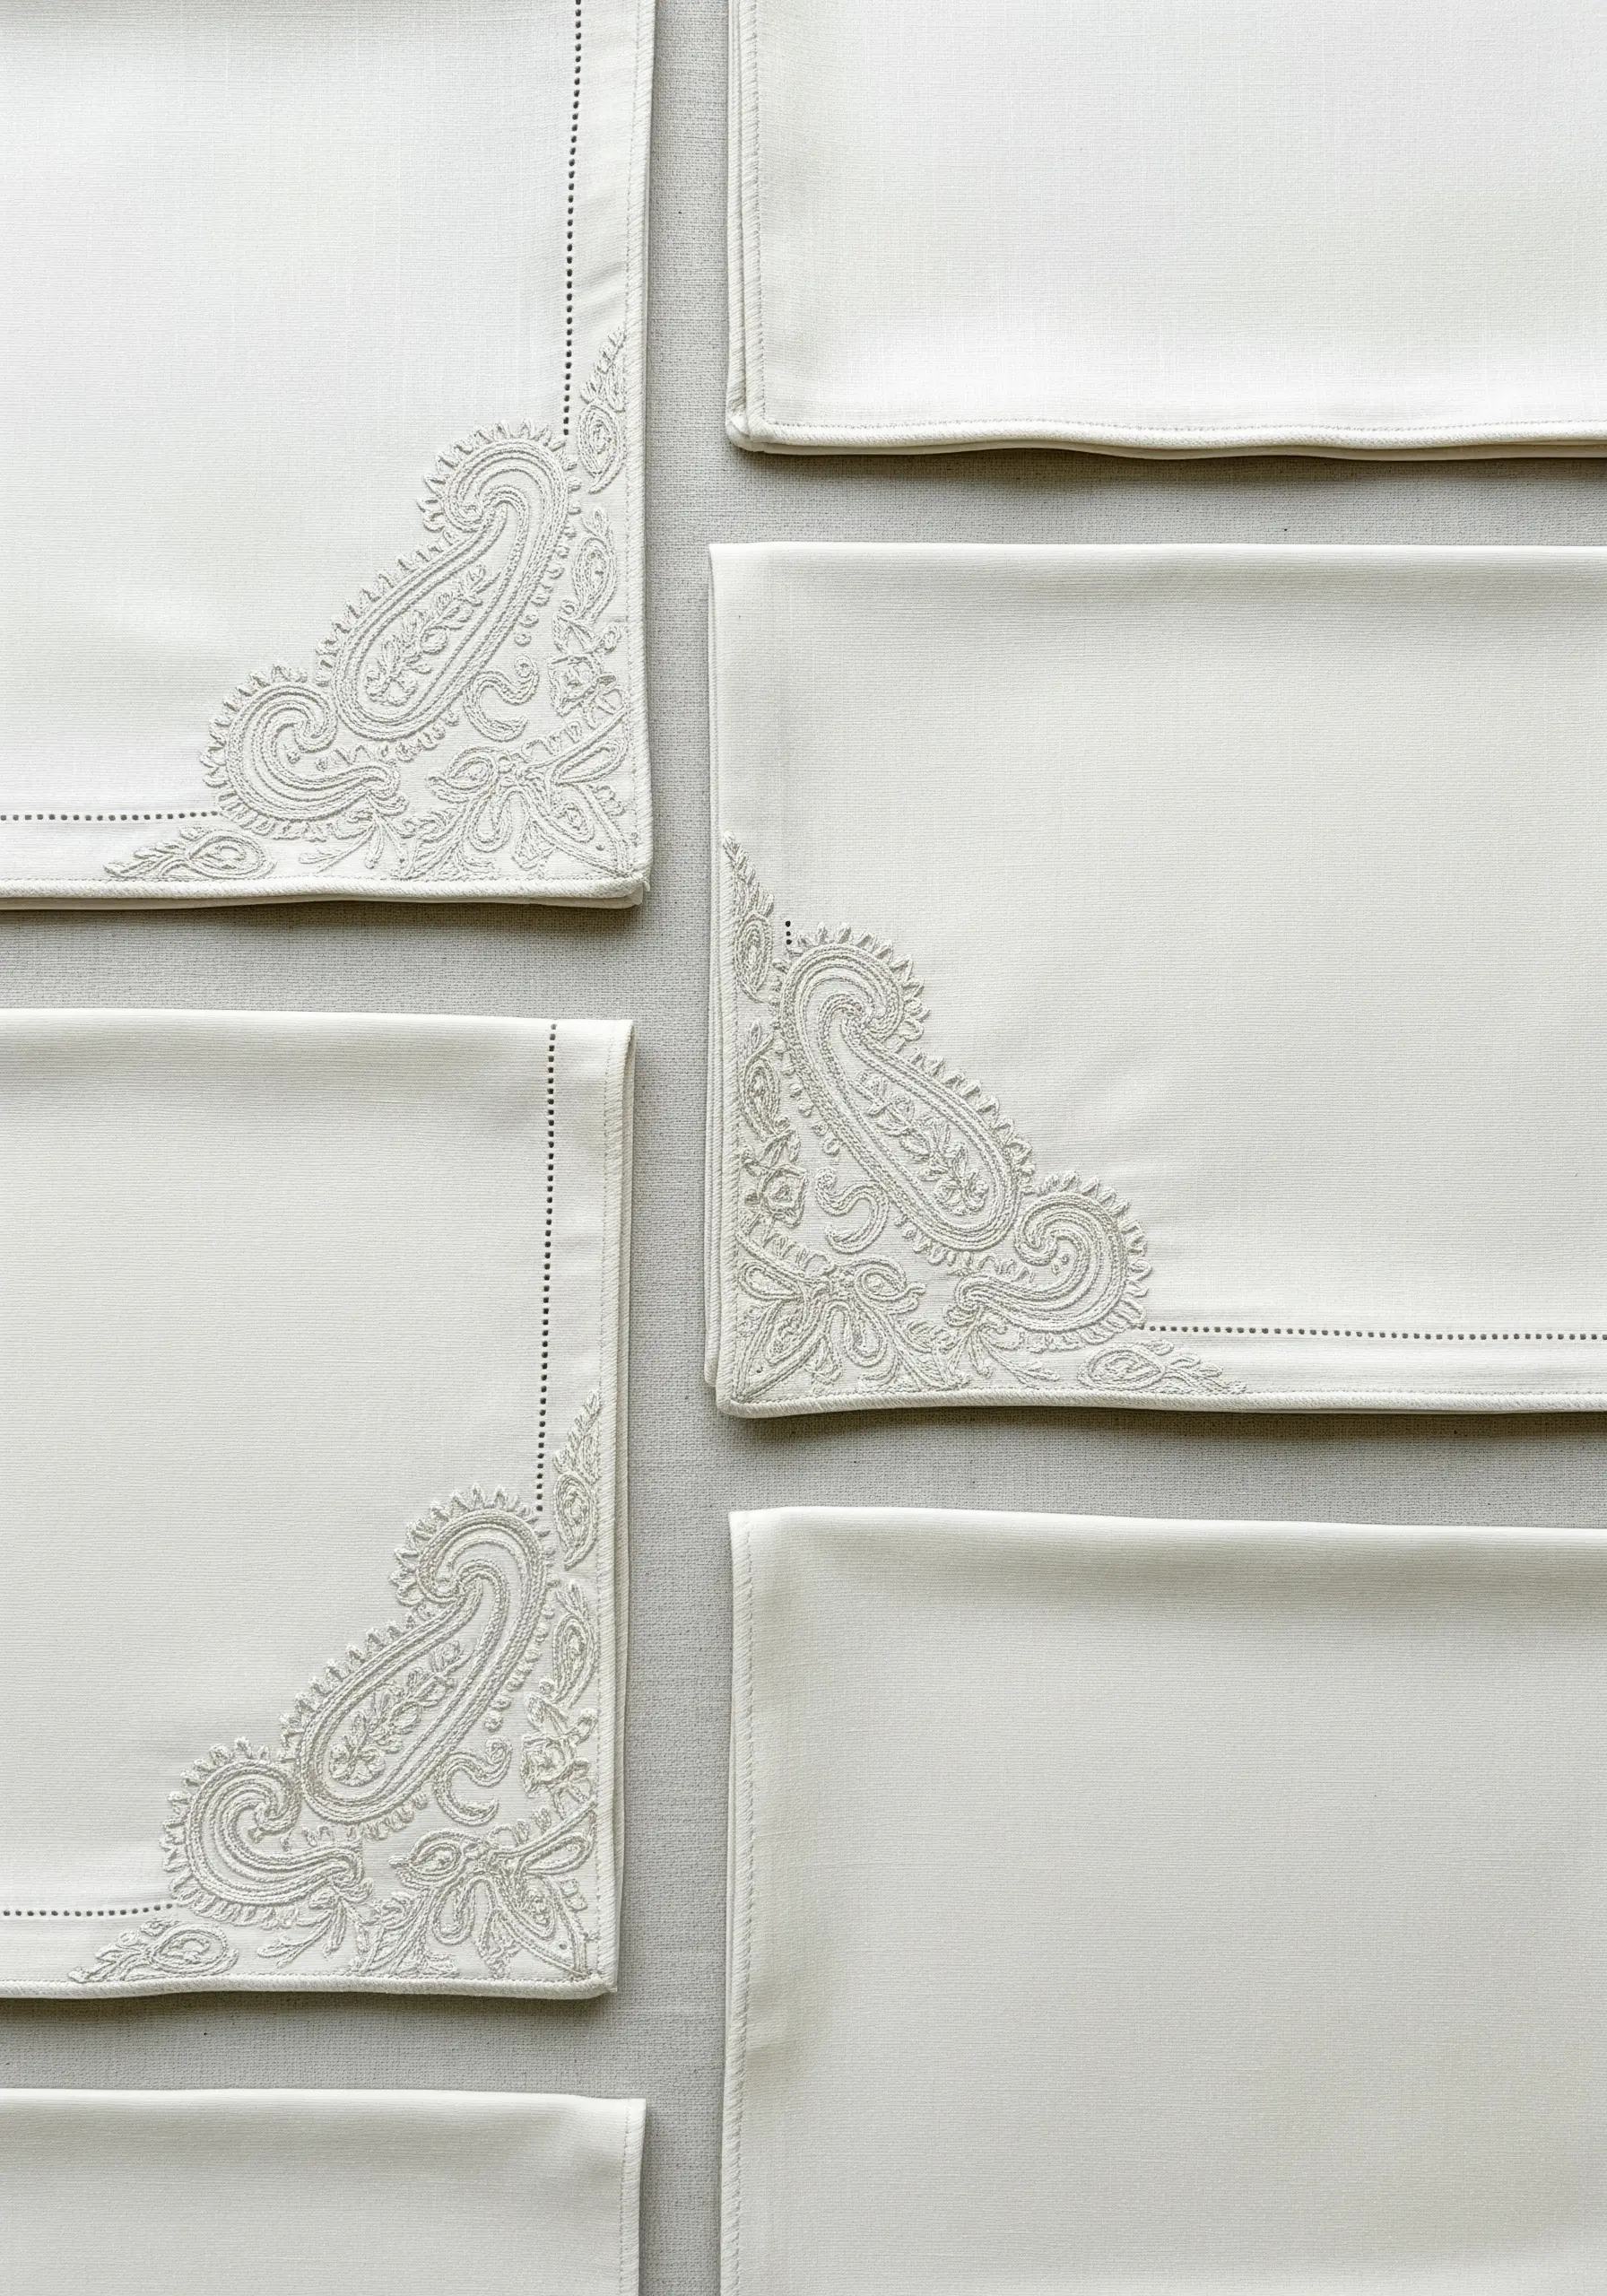
For a look of quiet luxury, embroider your linens using a thread that is only one or two shades different from your fabric.
This tone-on-tone technique creates a subtle, textural effect that looks and feels incredibly high-end, almost like an embossed pattern.
Use classic, clean stitches like satin stitch and backstitch to create an intricate design like this paisley corner.
The beauty is in the quiet detail that reveals itself slowly, adding sophistication without shouting for attention. It’s perfect for neutral, earth-toned decor.
26. Add Farmhouse Charm with Simple Redwork
Capture the essence of classic farmhouse style with simple, characterful line drawings.
This style, often called redwork when done in red thread, relies on basic outline stitches like backstitch, stem stitch, or even a simple running stitch.
Don’t worry about perfect realism; the goal is charm. Use a slightly thicker thread (3 strands) to give your lines a bit of weight.
Add small areas of fill with a simple seed stitch (scattered straight stitches) to provide a hint of color and texture without the density of satin stitch.
27. Create Modern Color Blocks with Smooth Fill
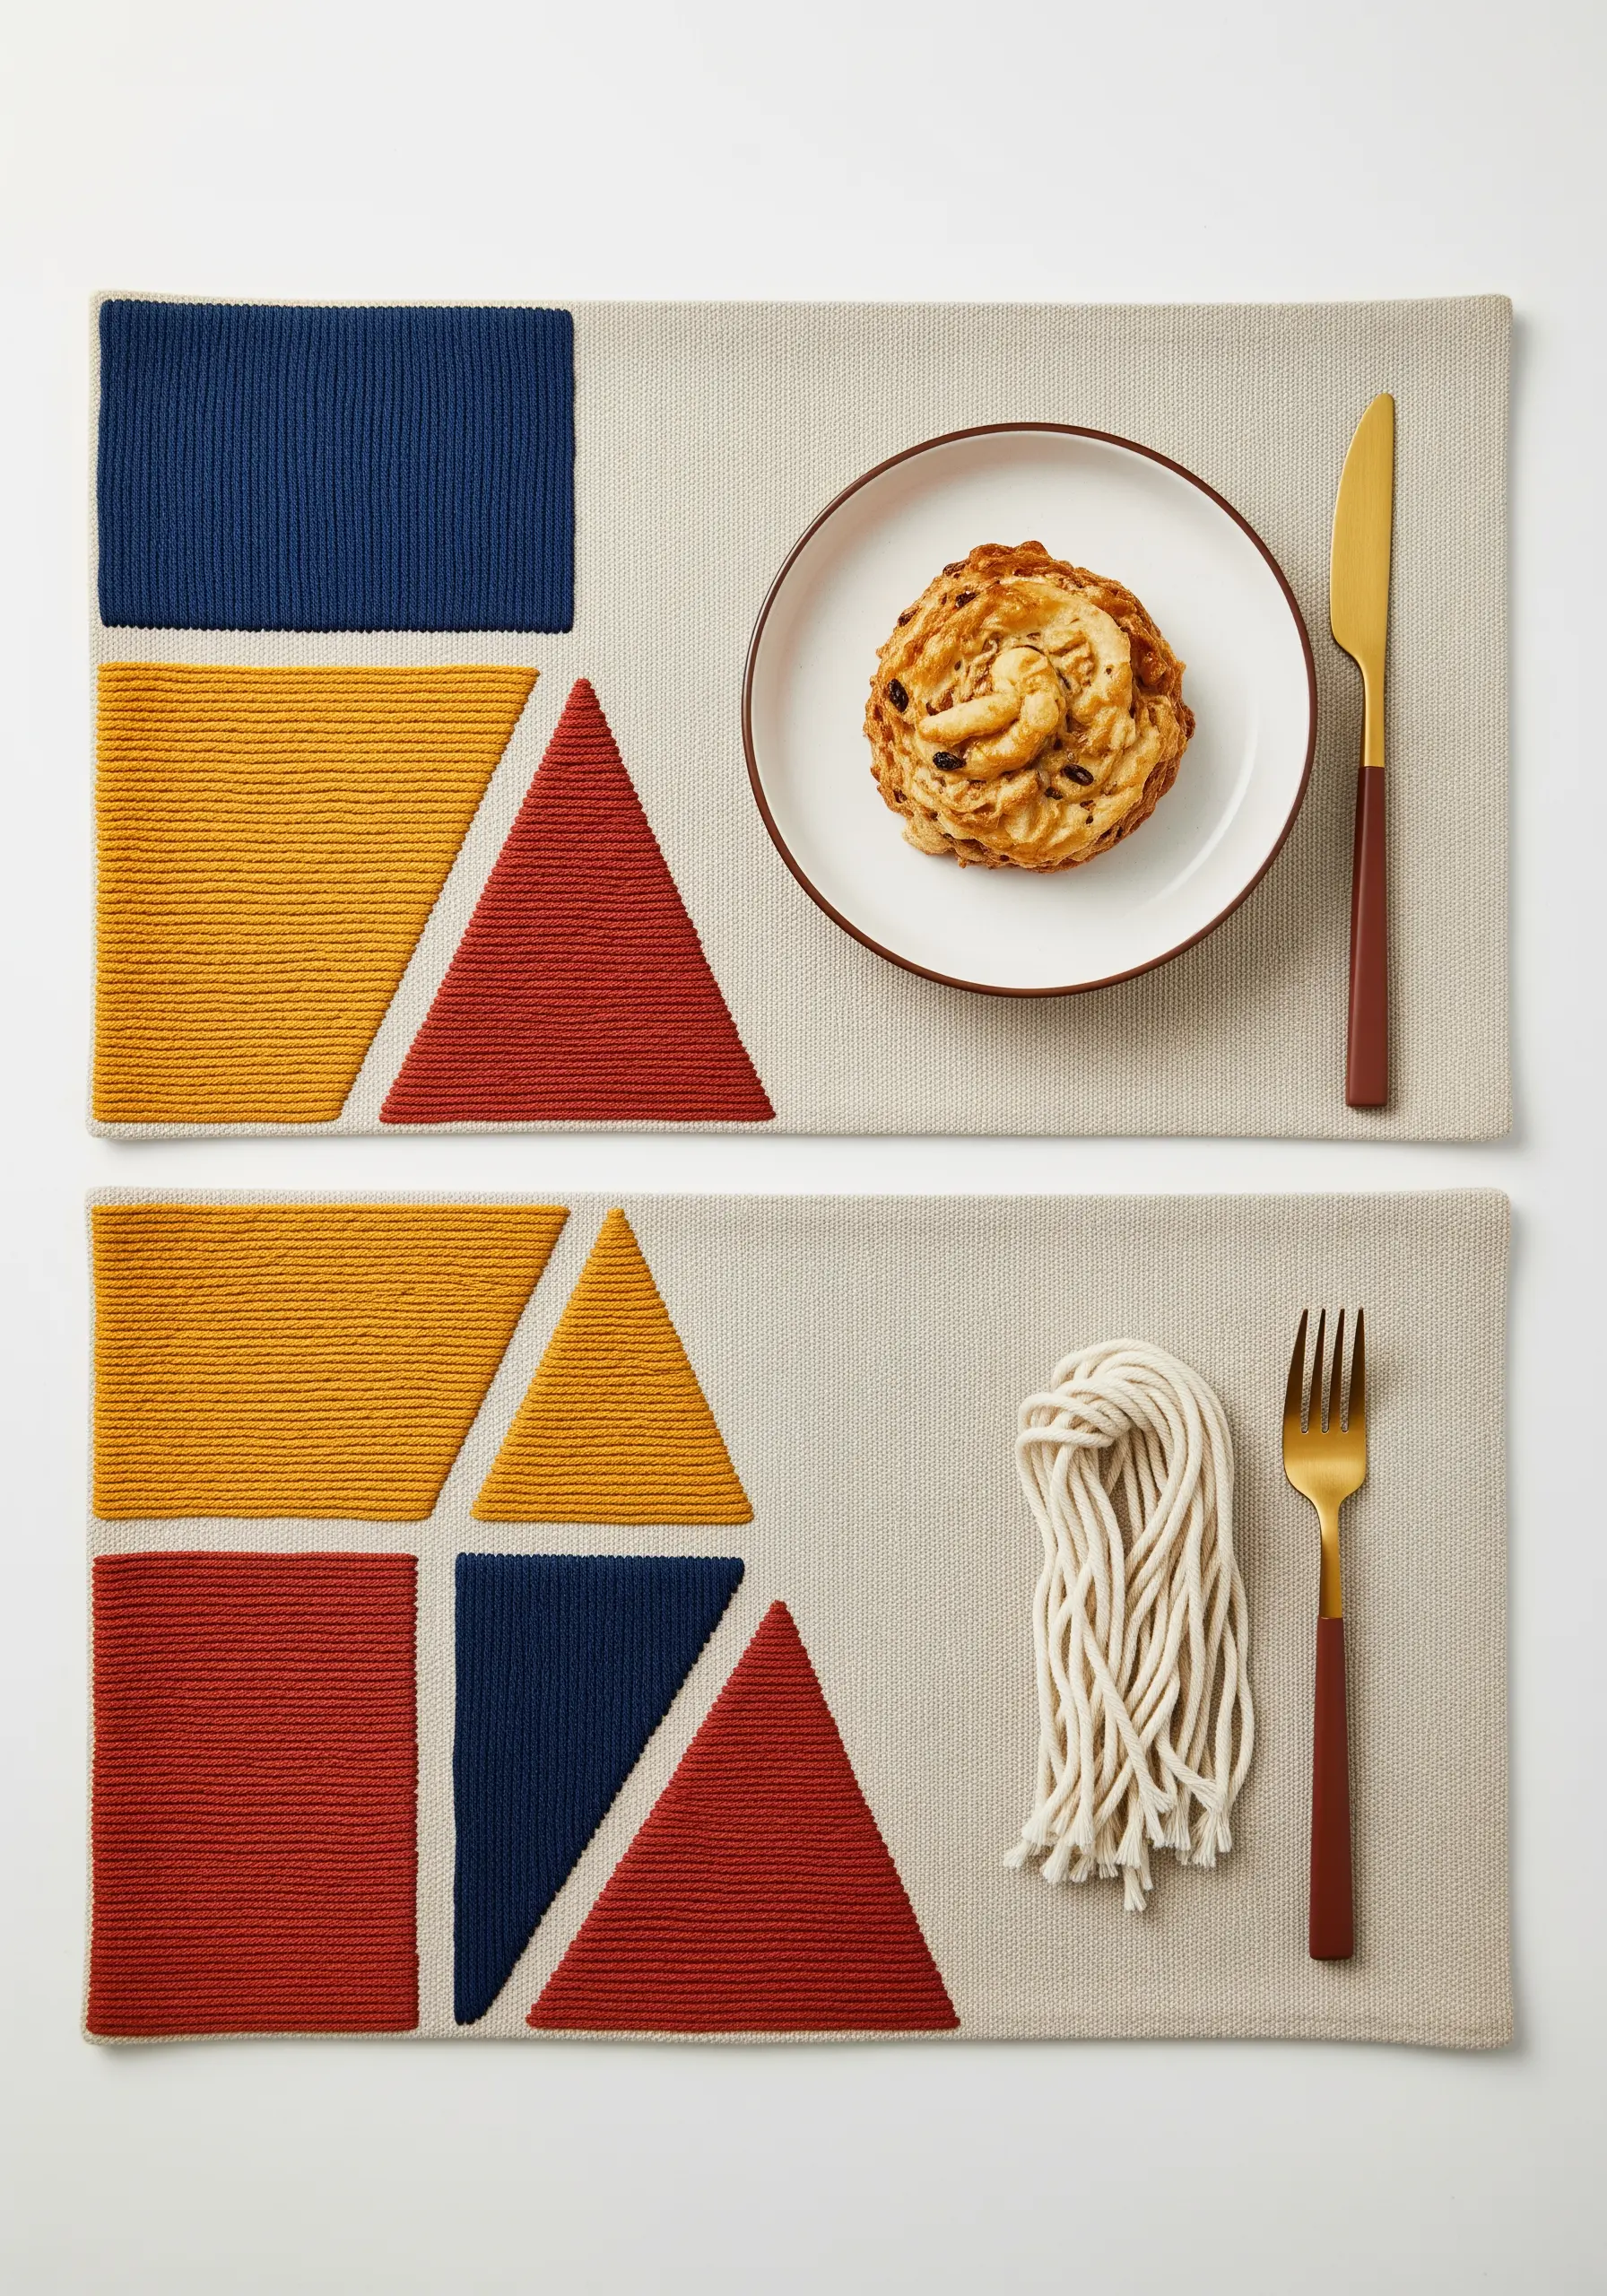
Achieve a bold, contemporary look on your placemats by focusing on clean geometric shapes and perfectly smooth fill.
Use a long-and-short stitch to fill each color block. This stitch is ideal for covering large areas without the puckering that can sometimes happen with satin stitch.
Ensure every stitch within a single shape lies in the exact same direction to create a uniform, seamless block of color with a beautiful, subtle sheen.
The key is a clean, sharp edge between colors, so outline your shapes first with a split stitch for precision.
28. Suggest Texture with Layered Stitches
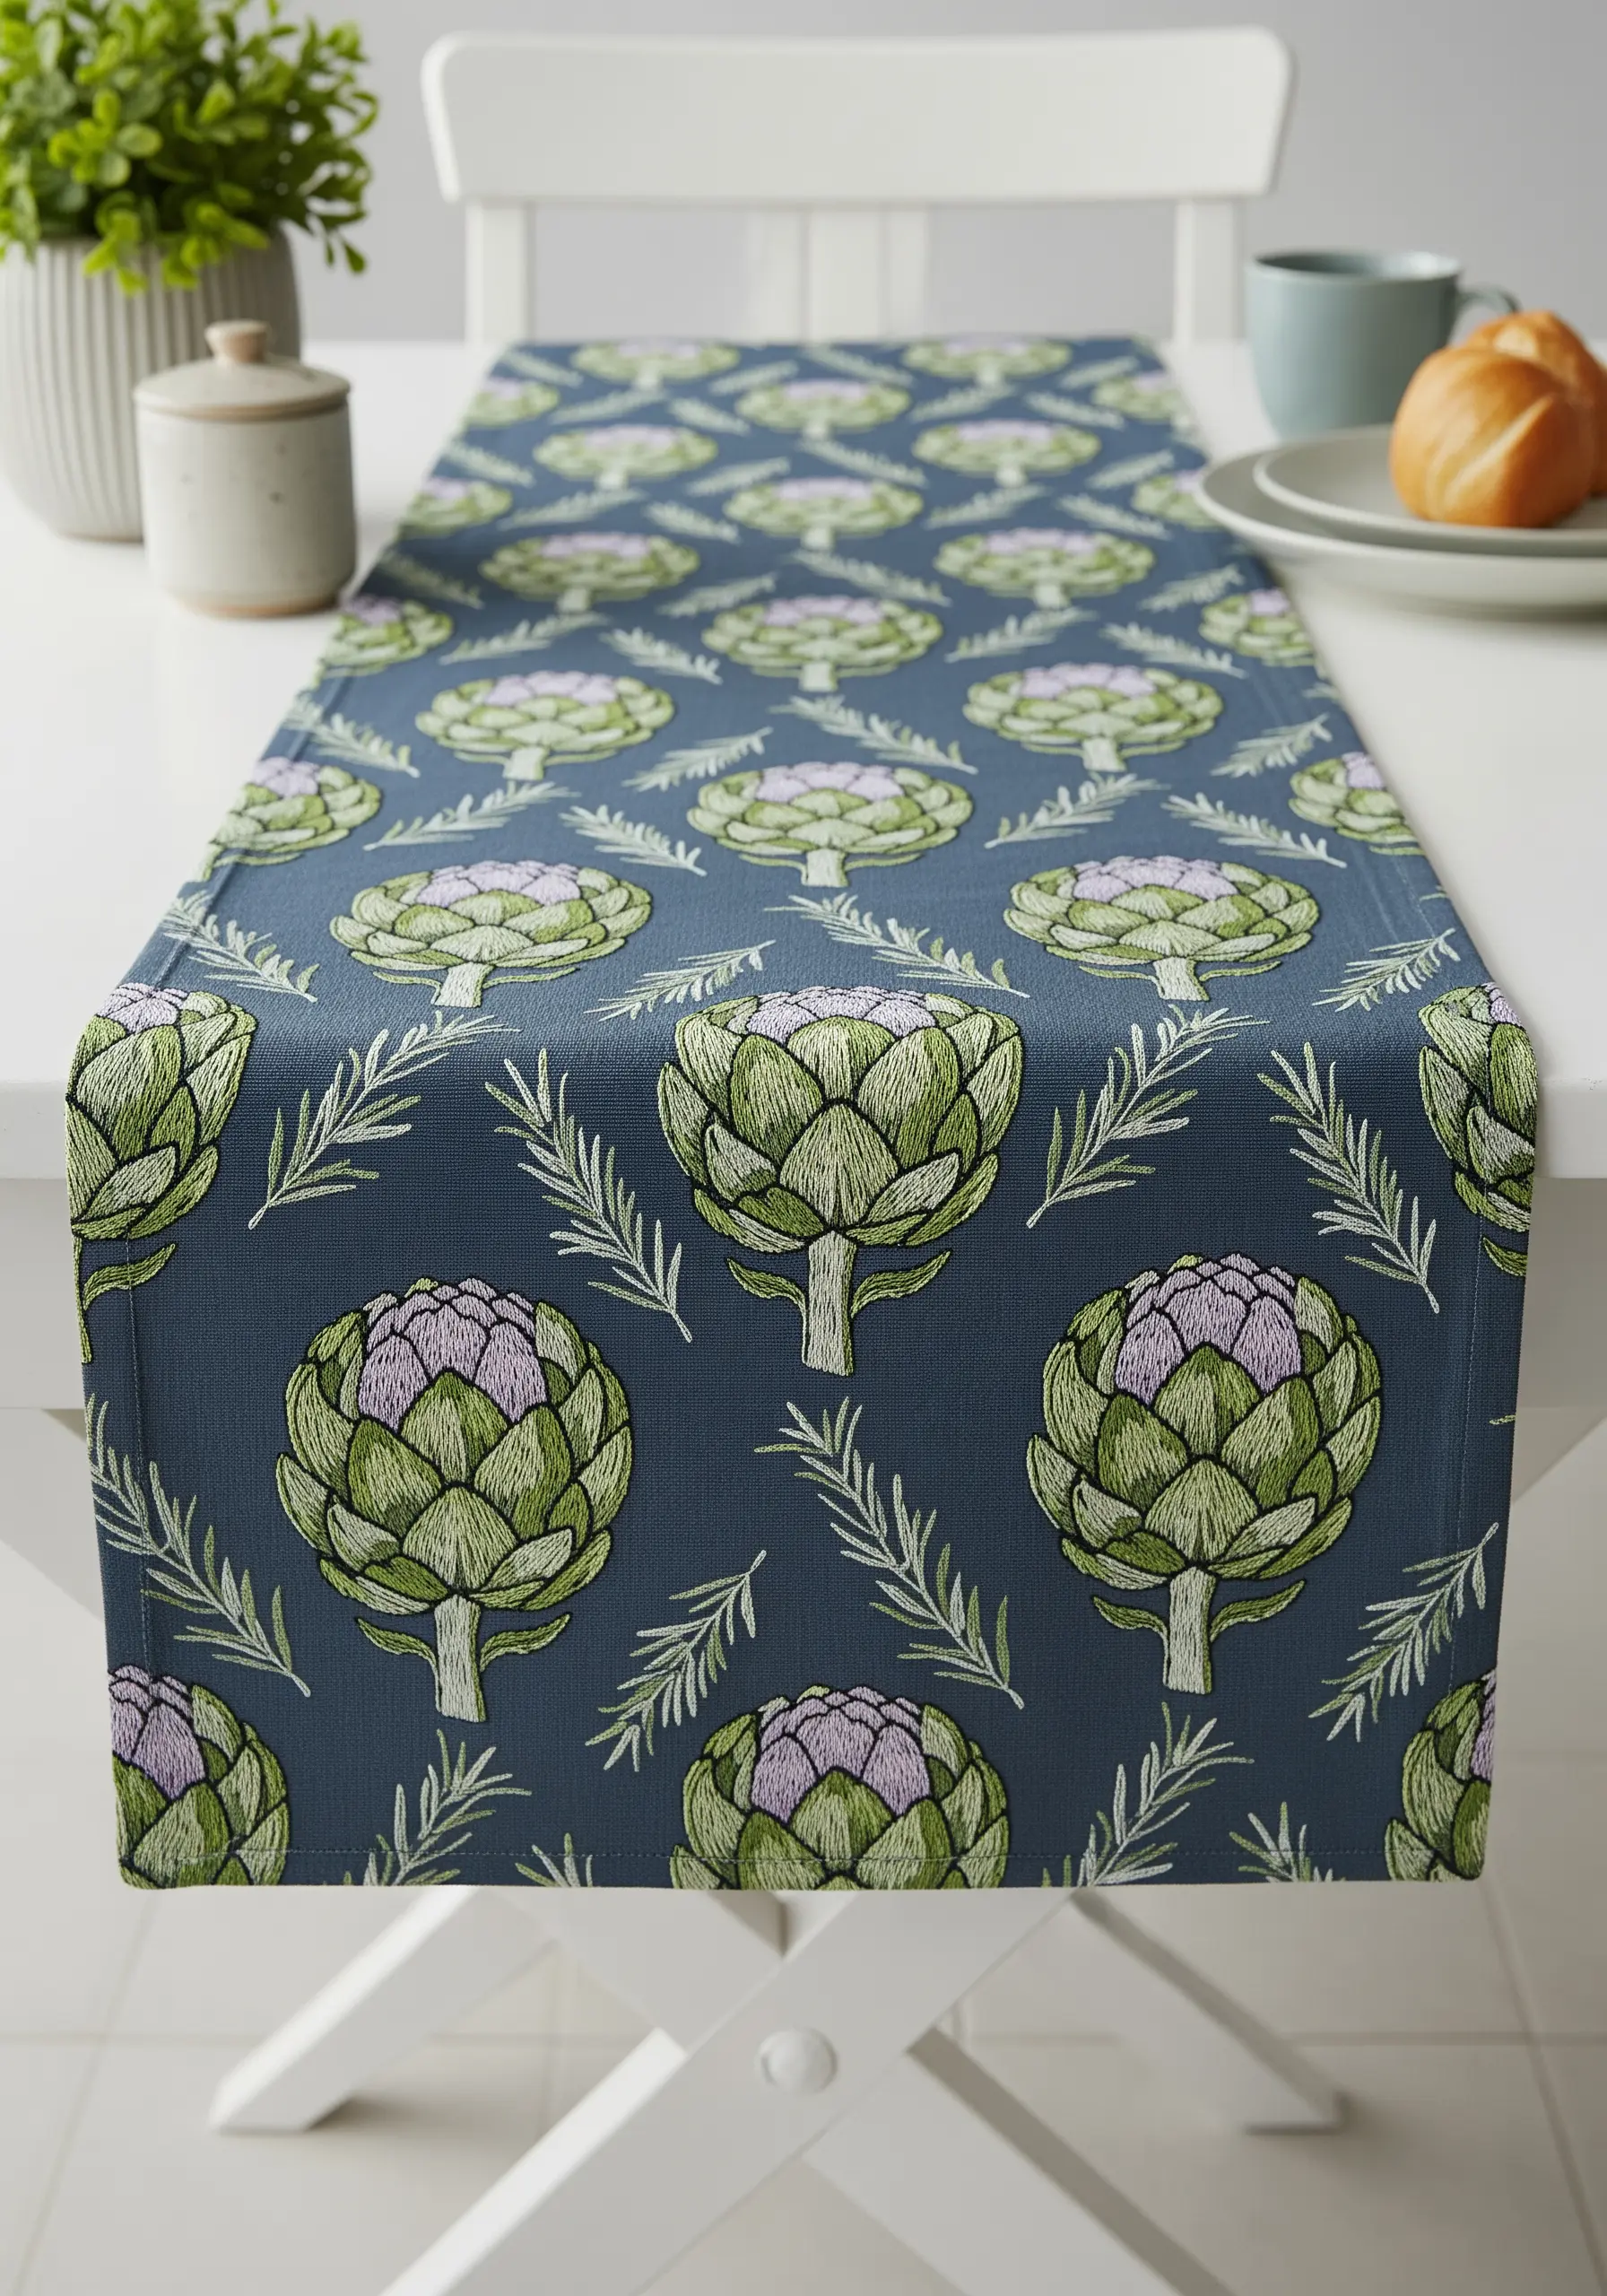
To embroider a complex vegetable like an artichoke, suggest its leafy texture through clever layering.
Work from the bottom layer of leaves up. Fill each leaf with directional satin stitch, angling the stitches to mimic the way the real leaves grow.
For the upper leaves, allow your stitches to slightly overlap the ones below them. This creates a sense of depth and dimension.
Use a lighter shade for the top-most, tender leaves to draw the eye and create a focal point.
29. Build Realistic Pinecones with Woven Stitches

Give your pinecones incredible dimension by using a woven stitch, like the woven picot stitch, for each individual scale.
This 3D stitch creates a small, raised loop that you can shape and layer to build the form of the pinecone.
Alternatively, use overlapping satin stitches in graduating shades of brown to create a similar, albeit flatter, effect.
Pair the textured pinecones with simple satin-stitched holly leaves and bright red French knot berries for a classic, festive design that feels both rustic and refined.
30. Elevate Monograms with Padded Satin Stitch
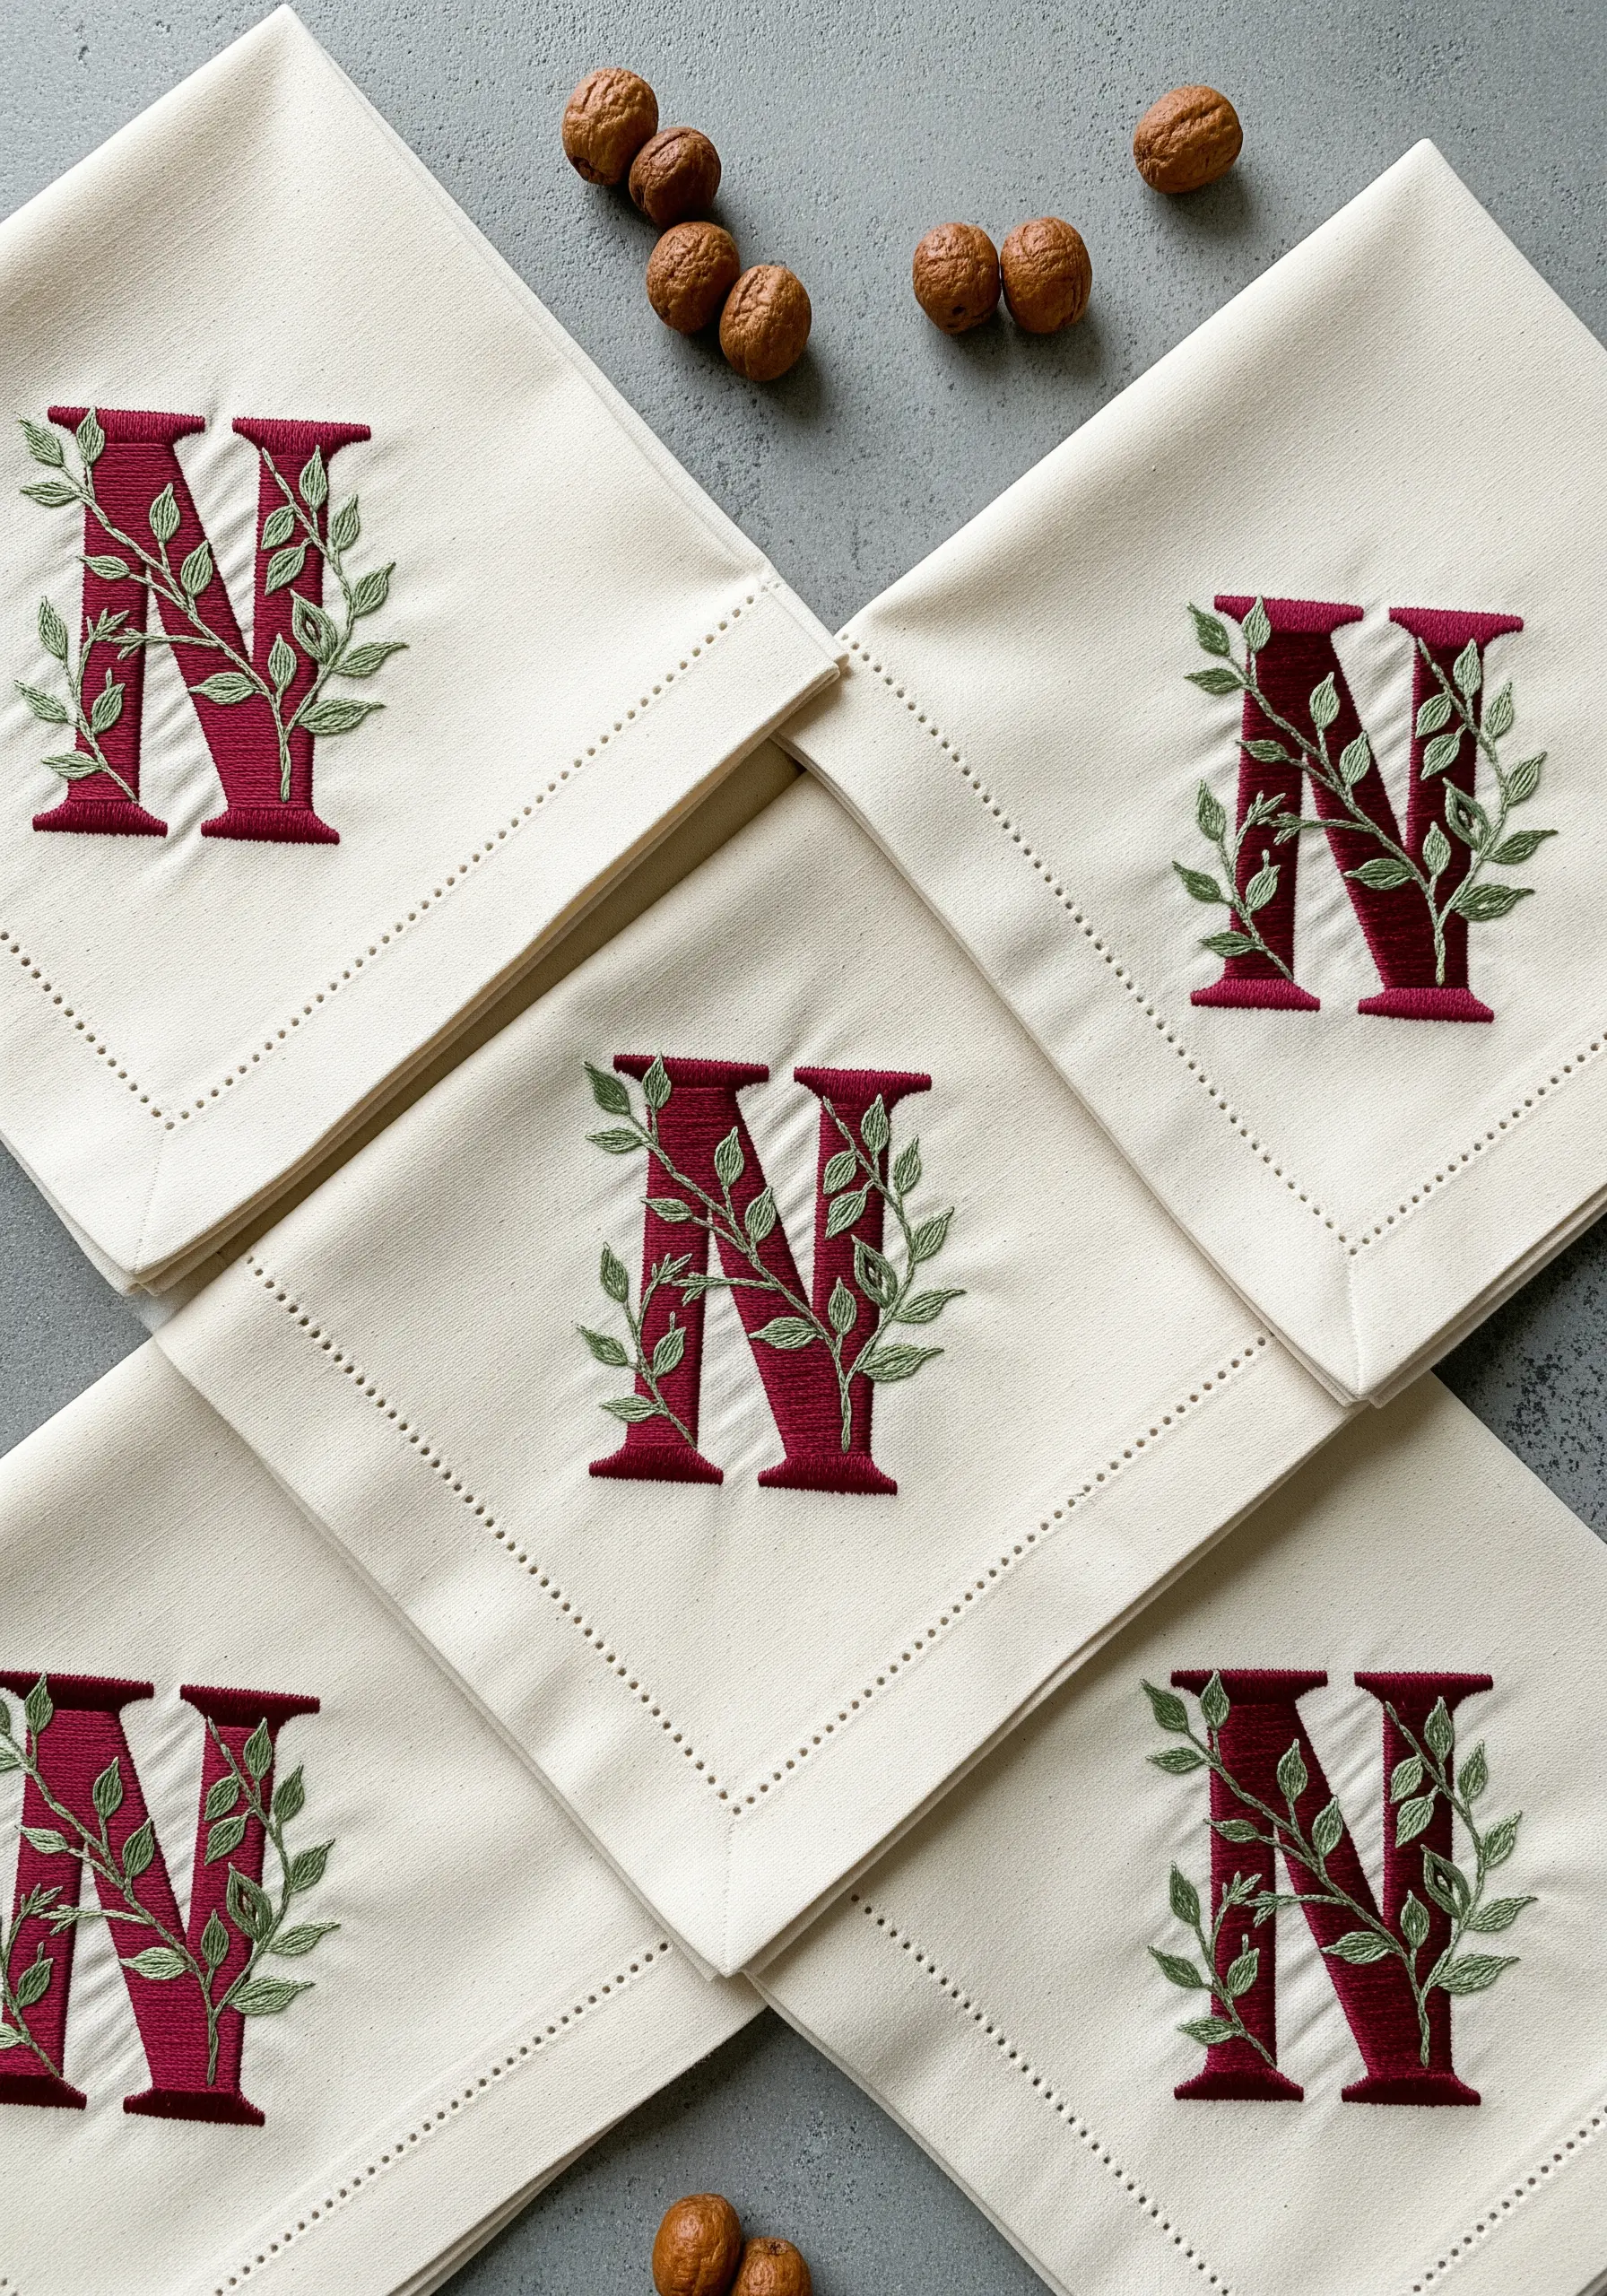
Make your embroidered monograms stand out with a professional, raised effect.
Before you begin the main letter, stitch a small underlay of straight stitches or seed stitches within the shape of the letter.
Then, work your final satin stitch over this padding. The extra layer underneath pushes the top stitches up, creating a beautiful, beveled look with noticeable dimension.
Frame the bold monogram with delicate, trailing vines in a simple stem stitch to soften the design and add a touch of botanical elegance.
31. Frame Your Runner with a Geometric Border
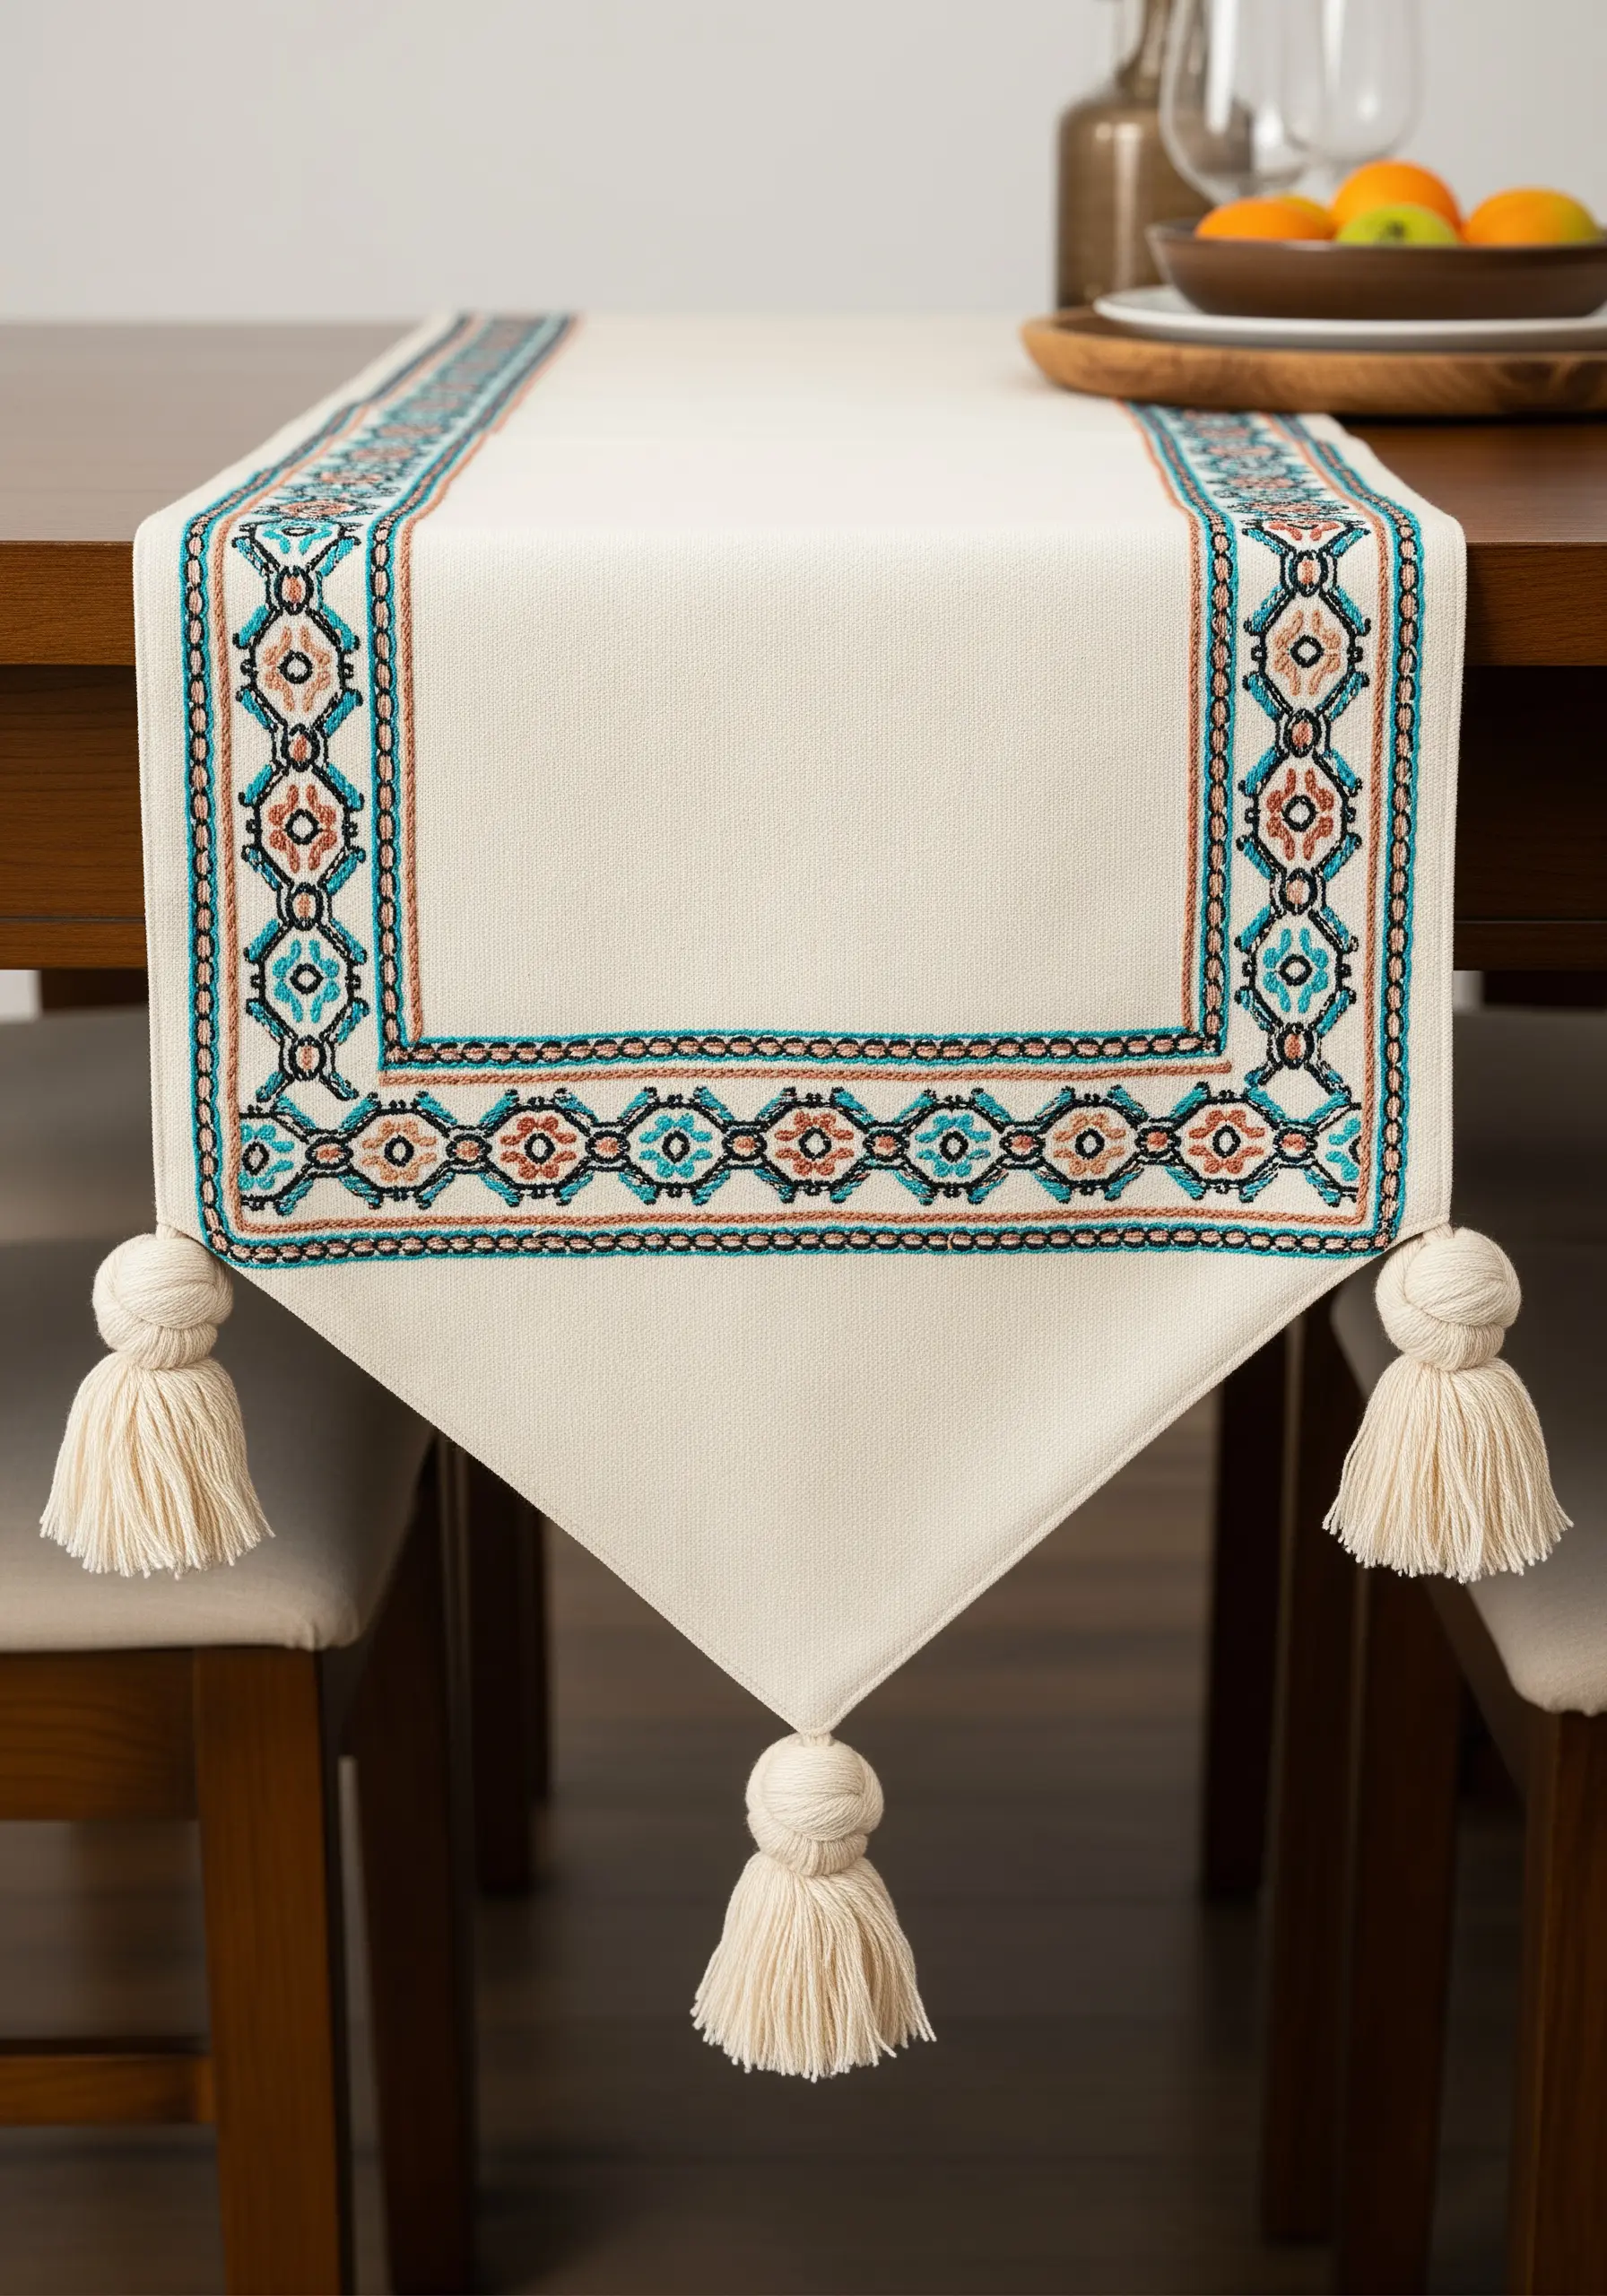
A geometric border adds a touch of global-inspired elegance to a simple table runner.
Create this intricate look by combining just a few basic stitches: backstitch for the main lines, satin stitch for the small solid diamonds, and cross stitches for textural accents.
Use a consistent color palette with one or two accent colors to maintain harmony.
Finish the runner by making and attaching your own tassels from the same embroidery floss—this ties the entire piece together and completes the boho-chic aesthetic.
32. Capture Iridescence with Blended Metallic Threads
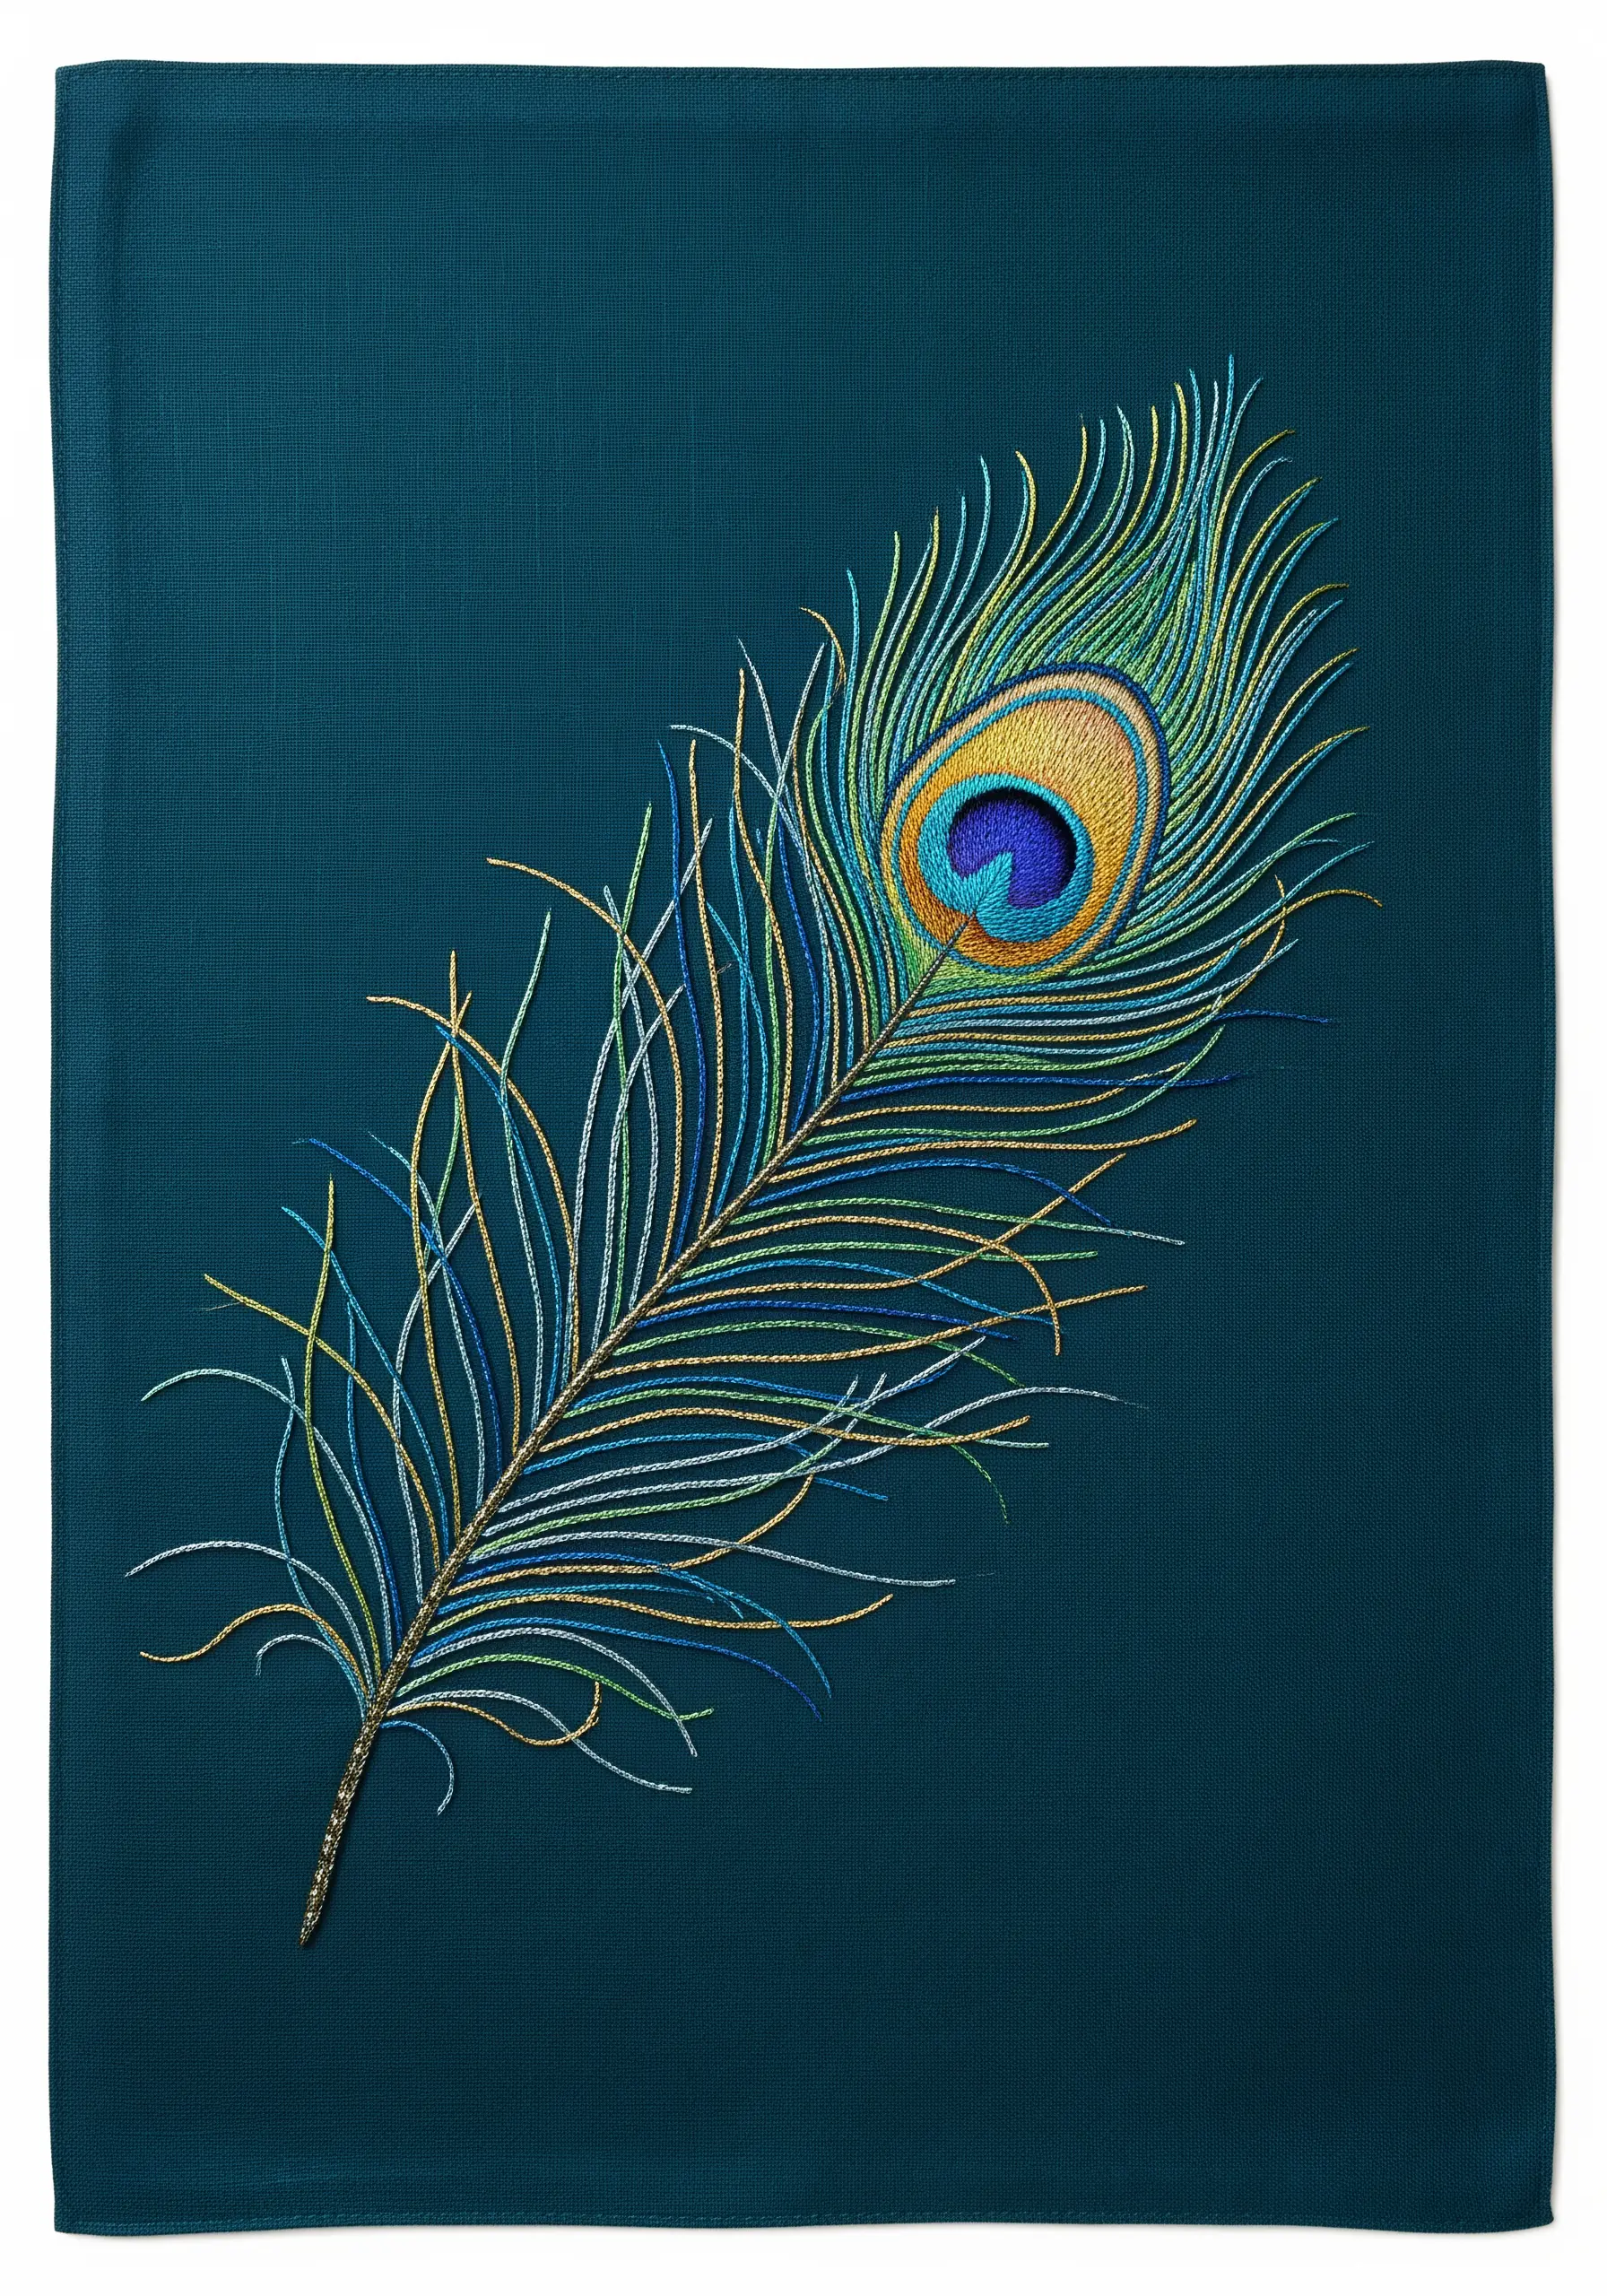
Recreate the shimmering, iridescent quality of a peacock feather by carefully blending your threads.
For the fine barbs of the feather, use single, long straight stitches, but alternate your colors frequently—use blues, greens, golds, and even a touch of copper.
Incorporate a fine metallic thread along with your regular floss to add a hint of sparkle that catches the light.
The key is to let the colors mix organically, creating a design that feels fluid and alive, just like the real thing.
33. Stitch Delicate Florals with French Knots
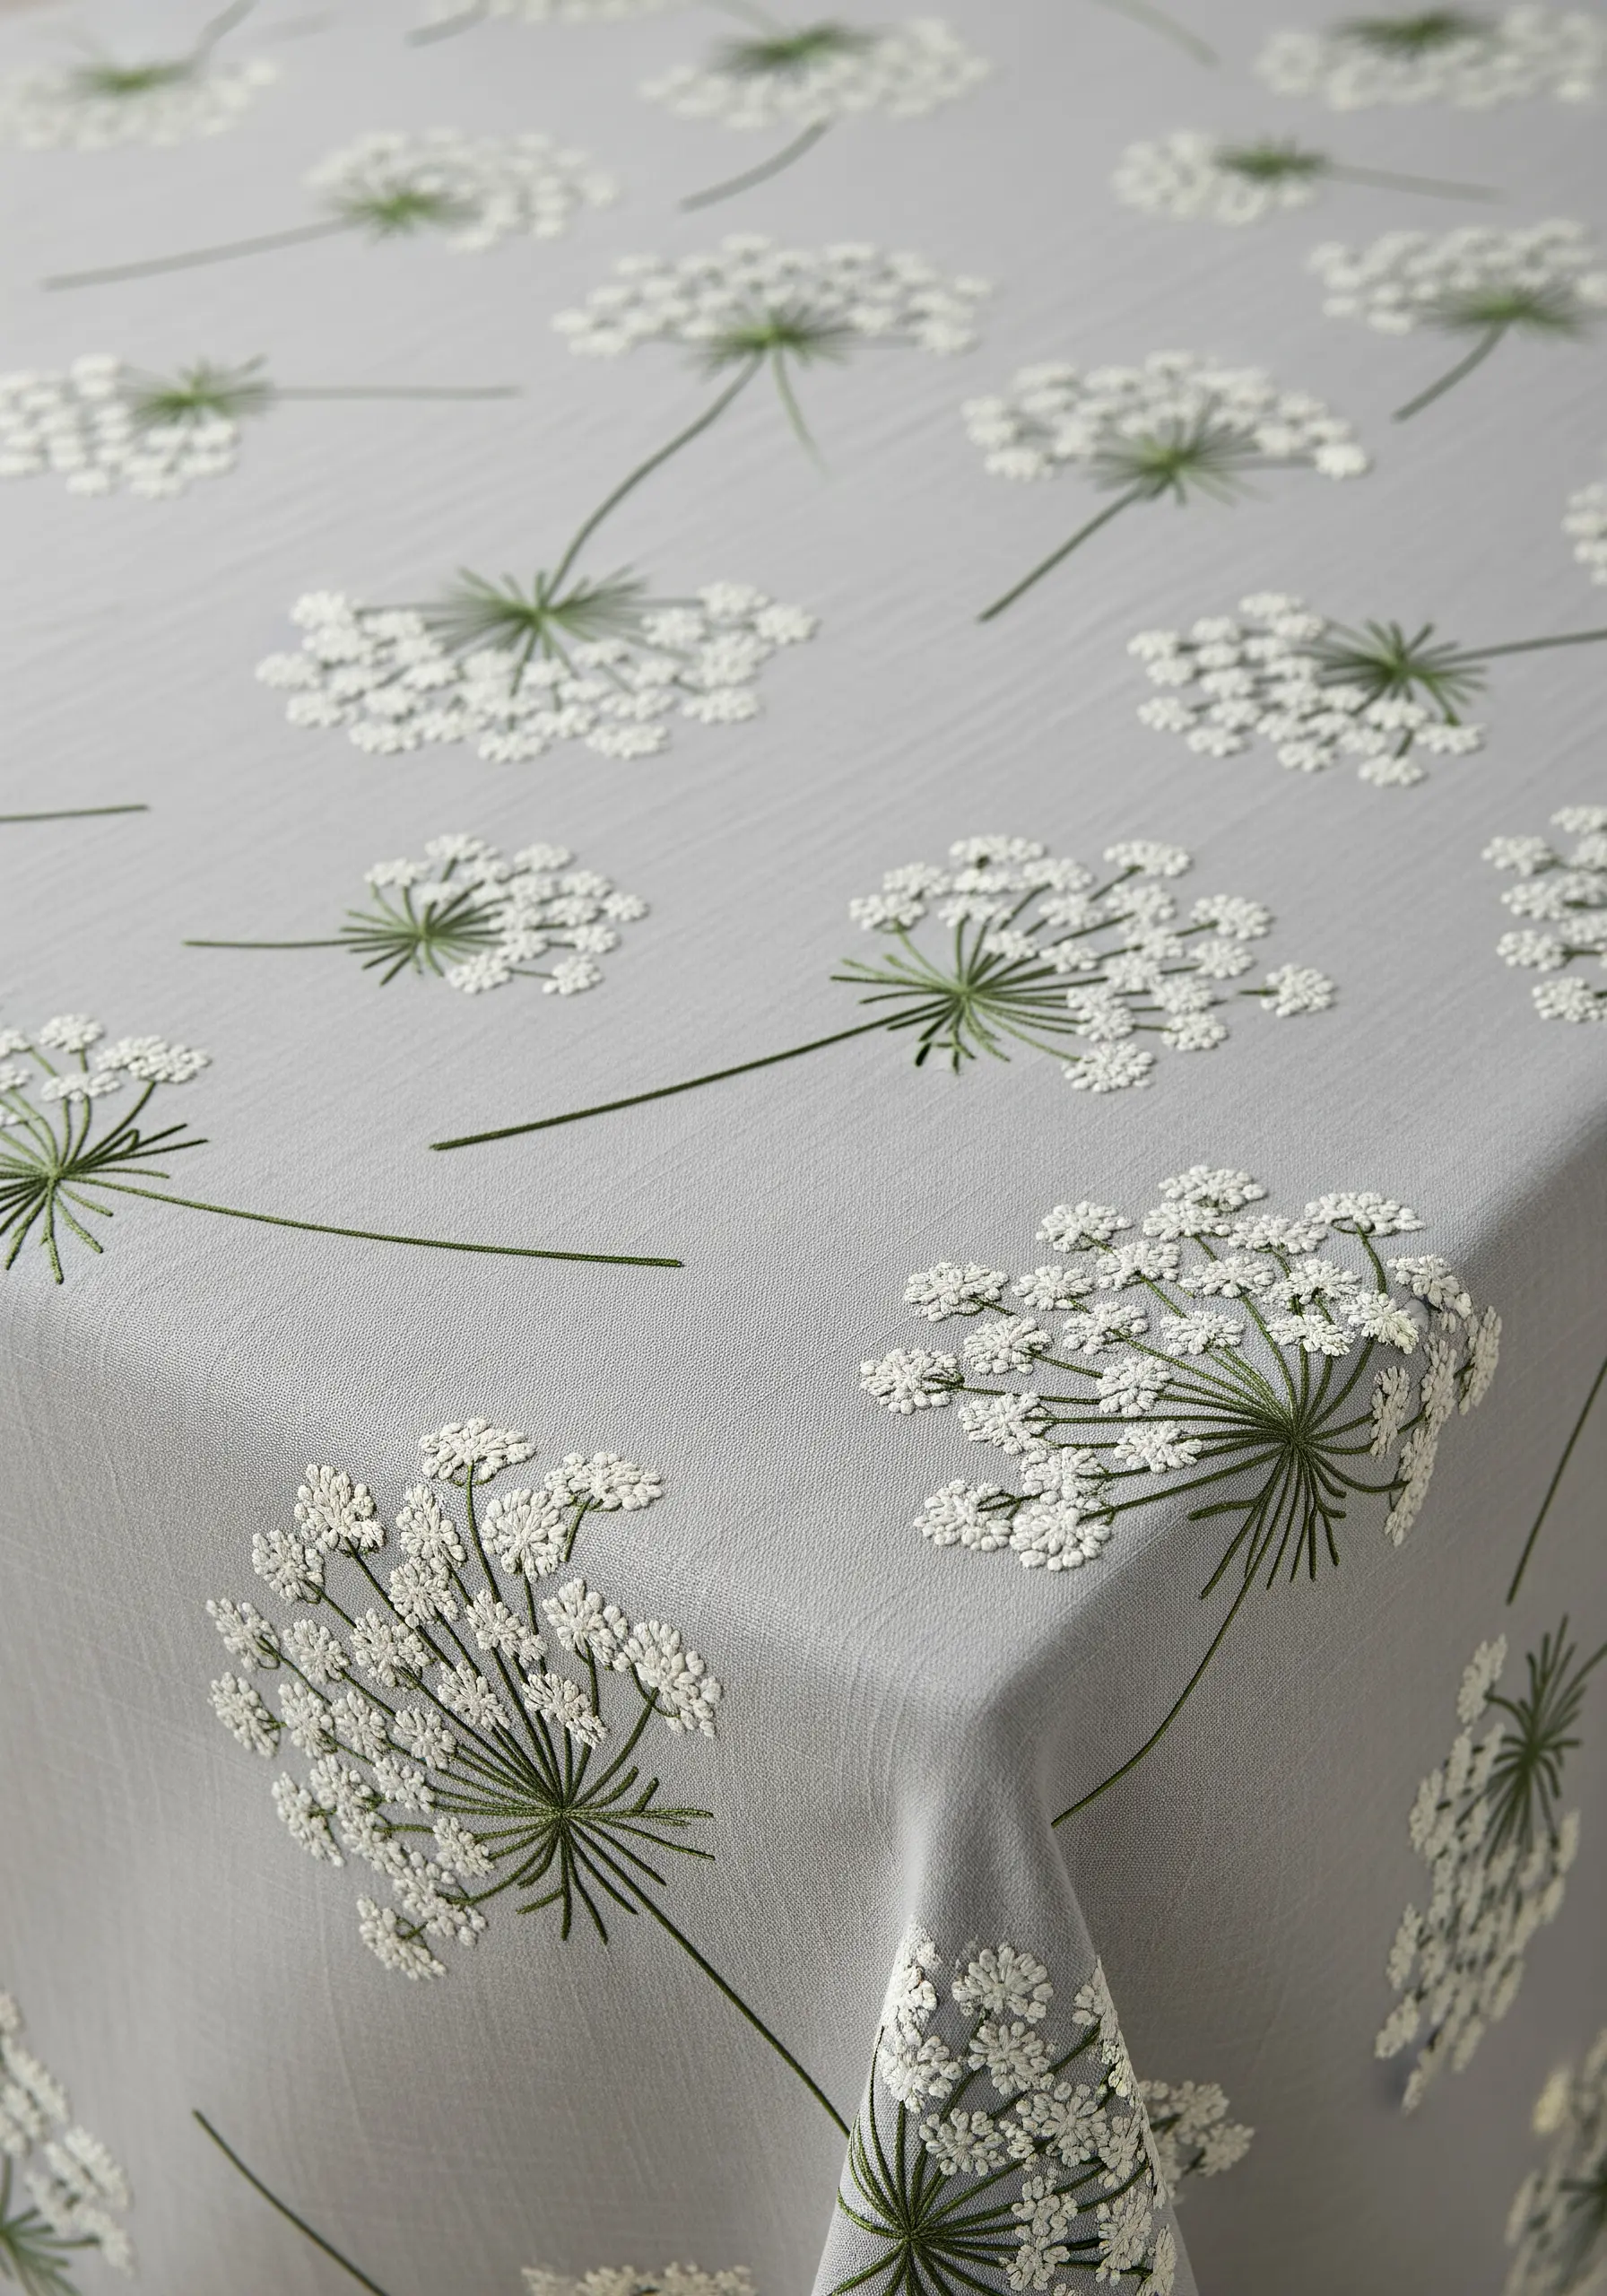
To create the airy, lace-like clusters of Queen Anne’s lace, rely on the humble French knot.
Group dozens of tiny, single-wrap French knots together to form the flower heads, using an off-white or pale cream thread.
For the delicate stems (umbels) that hold the clusters, use a single strand of green floss to stitch fine, radiating straight stitches.
The contrast between the textured knots and the fine lines is what gives this design its incredible delicacy and realism, turning your tablecloth into a summer meadow.
34. Weave Chunky Fibers for a Sculptural Statement
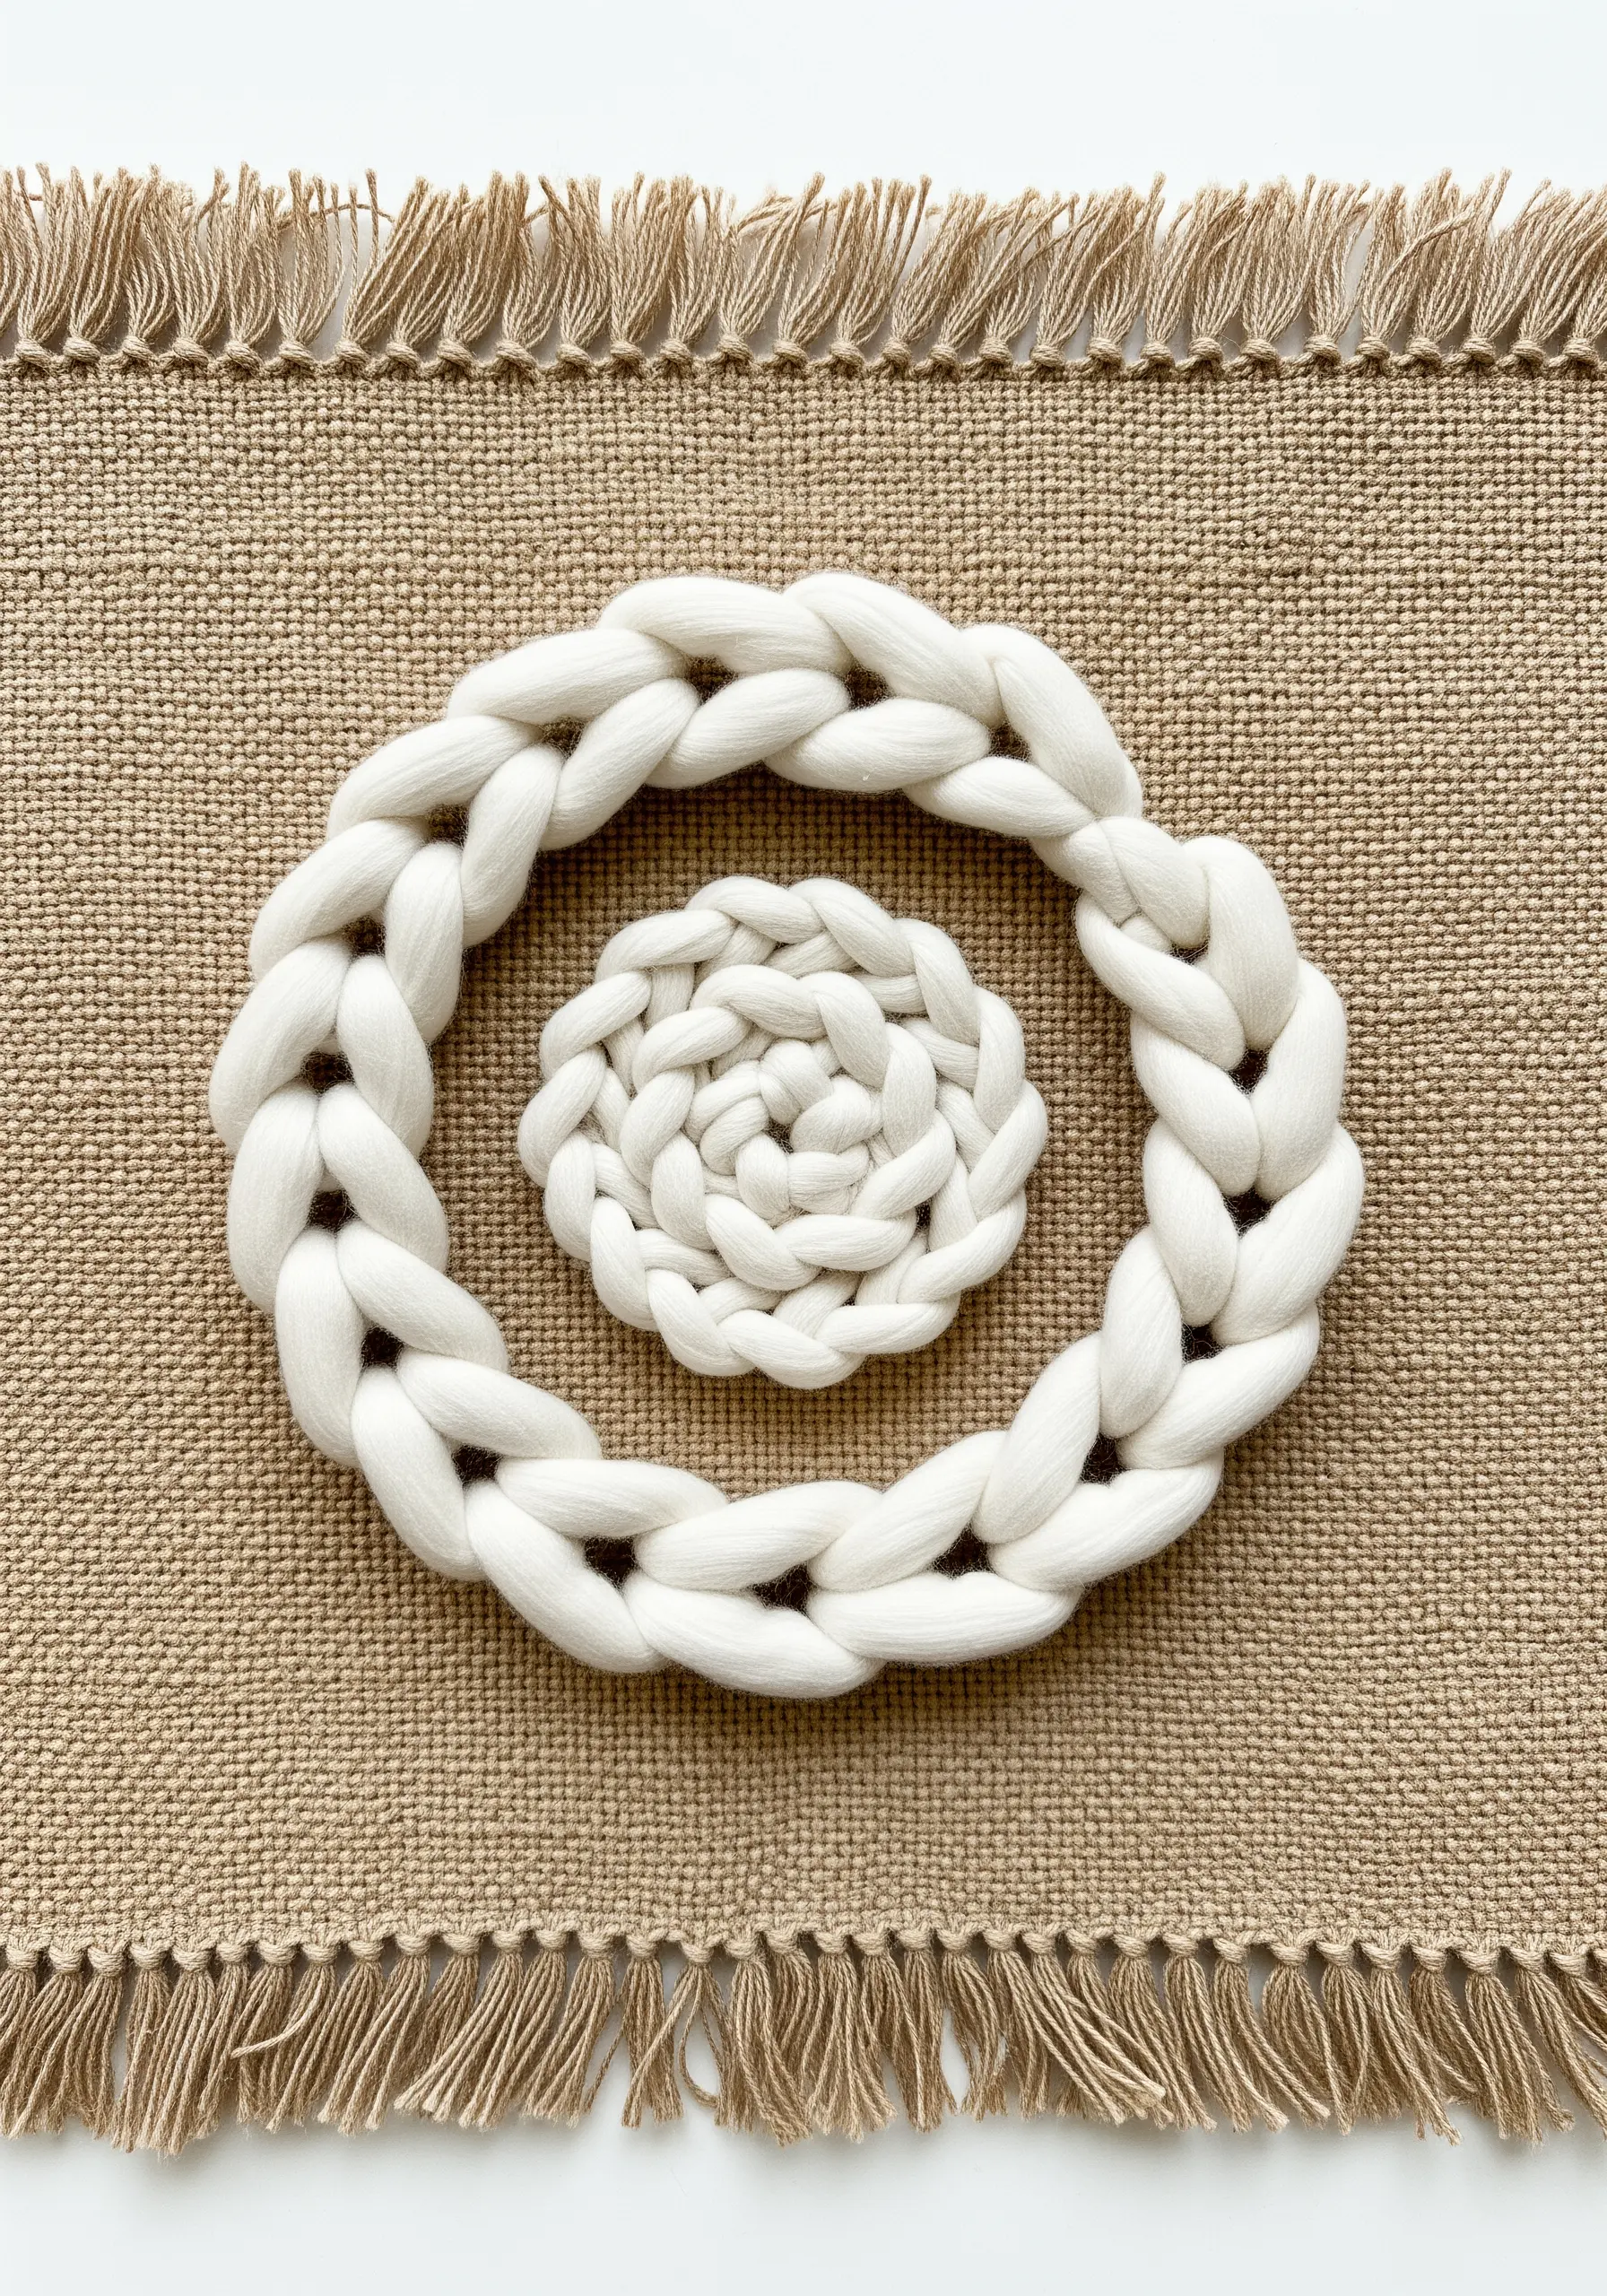
Move beyond thread and embrace chunky, unspun wool roving for a truly sculptural piece.
On a rustic base like burlap, you can either couch down a pre-braided length of wool or use a large tapestry needle to create stitches directly on the fabric.
Try a giant chain stitch or a Dutch braid to form these tactile, three-dimensional rings.
This technique blends macrame and embroidery, resulting in fiber art installations that transform a simple placemat into a modern art object.


