

Have you ever finished an embroidery piece and felt it was missing a certain spark? You followed the pattern, you used the right colors, but it doesn’t quite have the life you envisioned for it on your wall. That feeling is the starting point for transforming your craft into art.
The secret isn’t about learning hundreds of complicated stitches or buying expensive threads. It’s about learning to see thread as a design element—a tool for creating texture, depth, and emotion. It’s about understanding how the direction of a single stitch can change the way light hits the fabric, or how leaving a space empty can make your subject feel more powerful.
This collection is your guide to making those subtle but impactful shifts. You’ll find techniques to make your colors vibrate, your lines flow, and your textures invite touch. Let’s move beyond just stitching and start designing with thread, creating bold, intentional pieces that don’t just decorate your walls—they energize them.
1. Master the Radiant Satin Stitch Sunburst
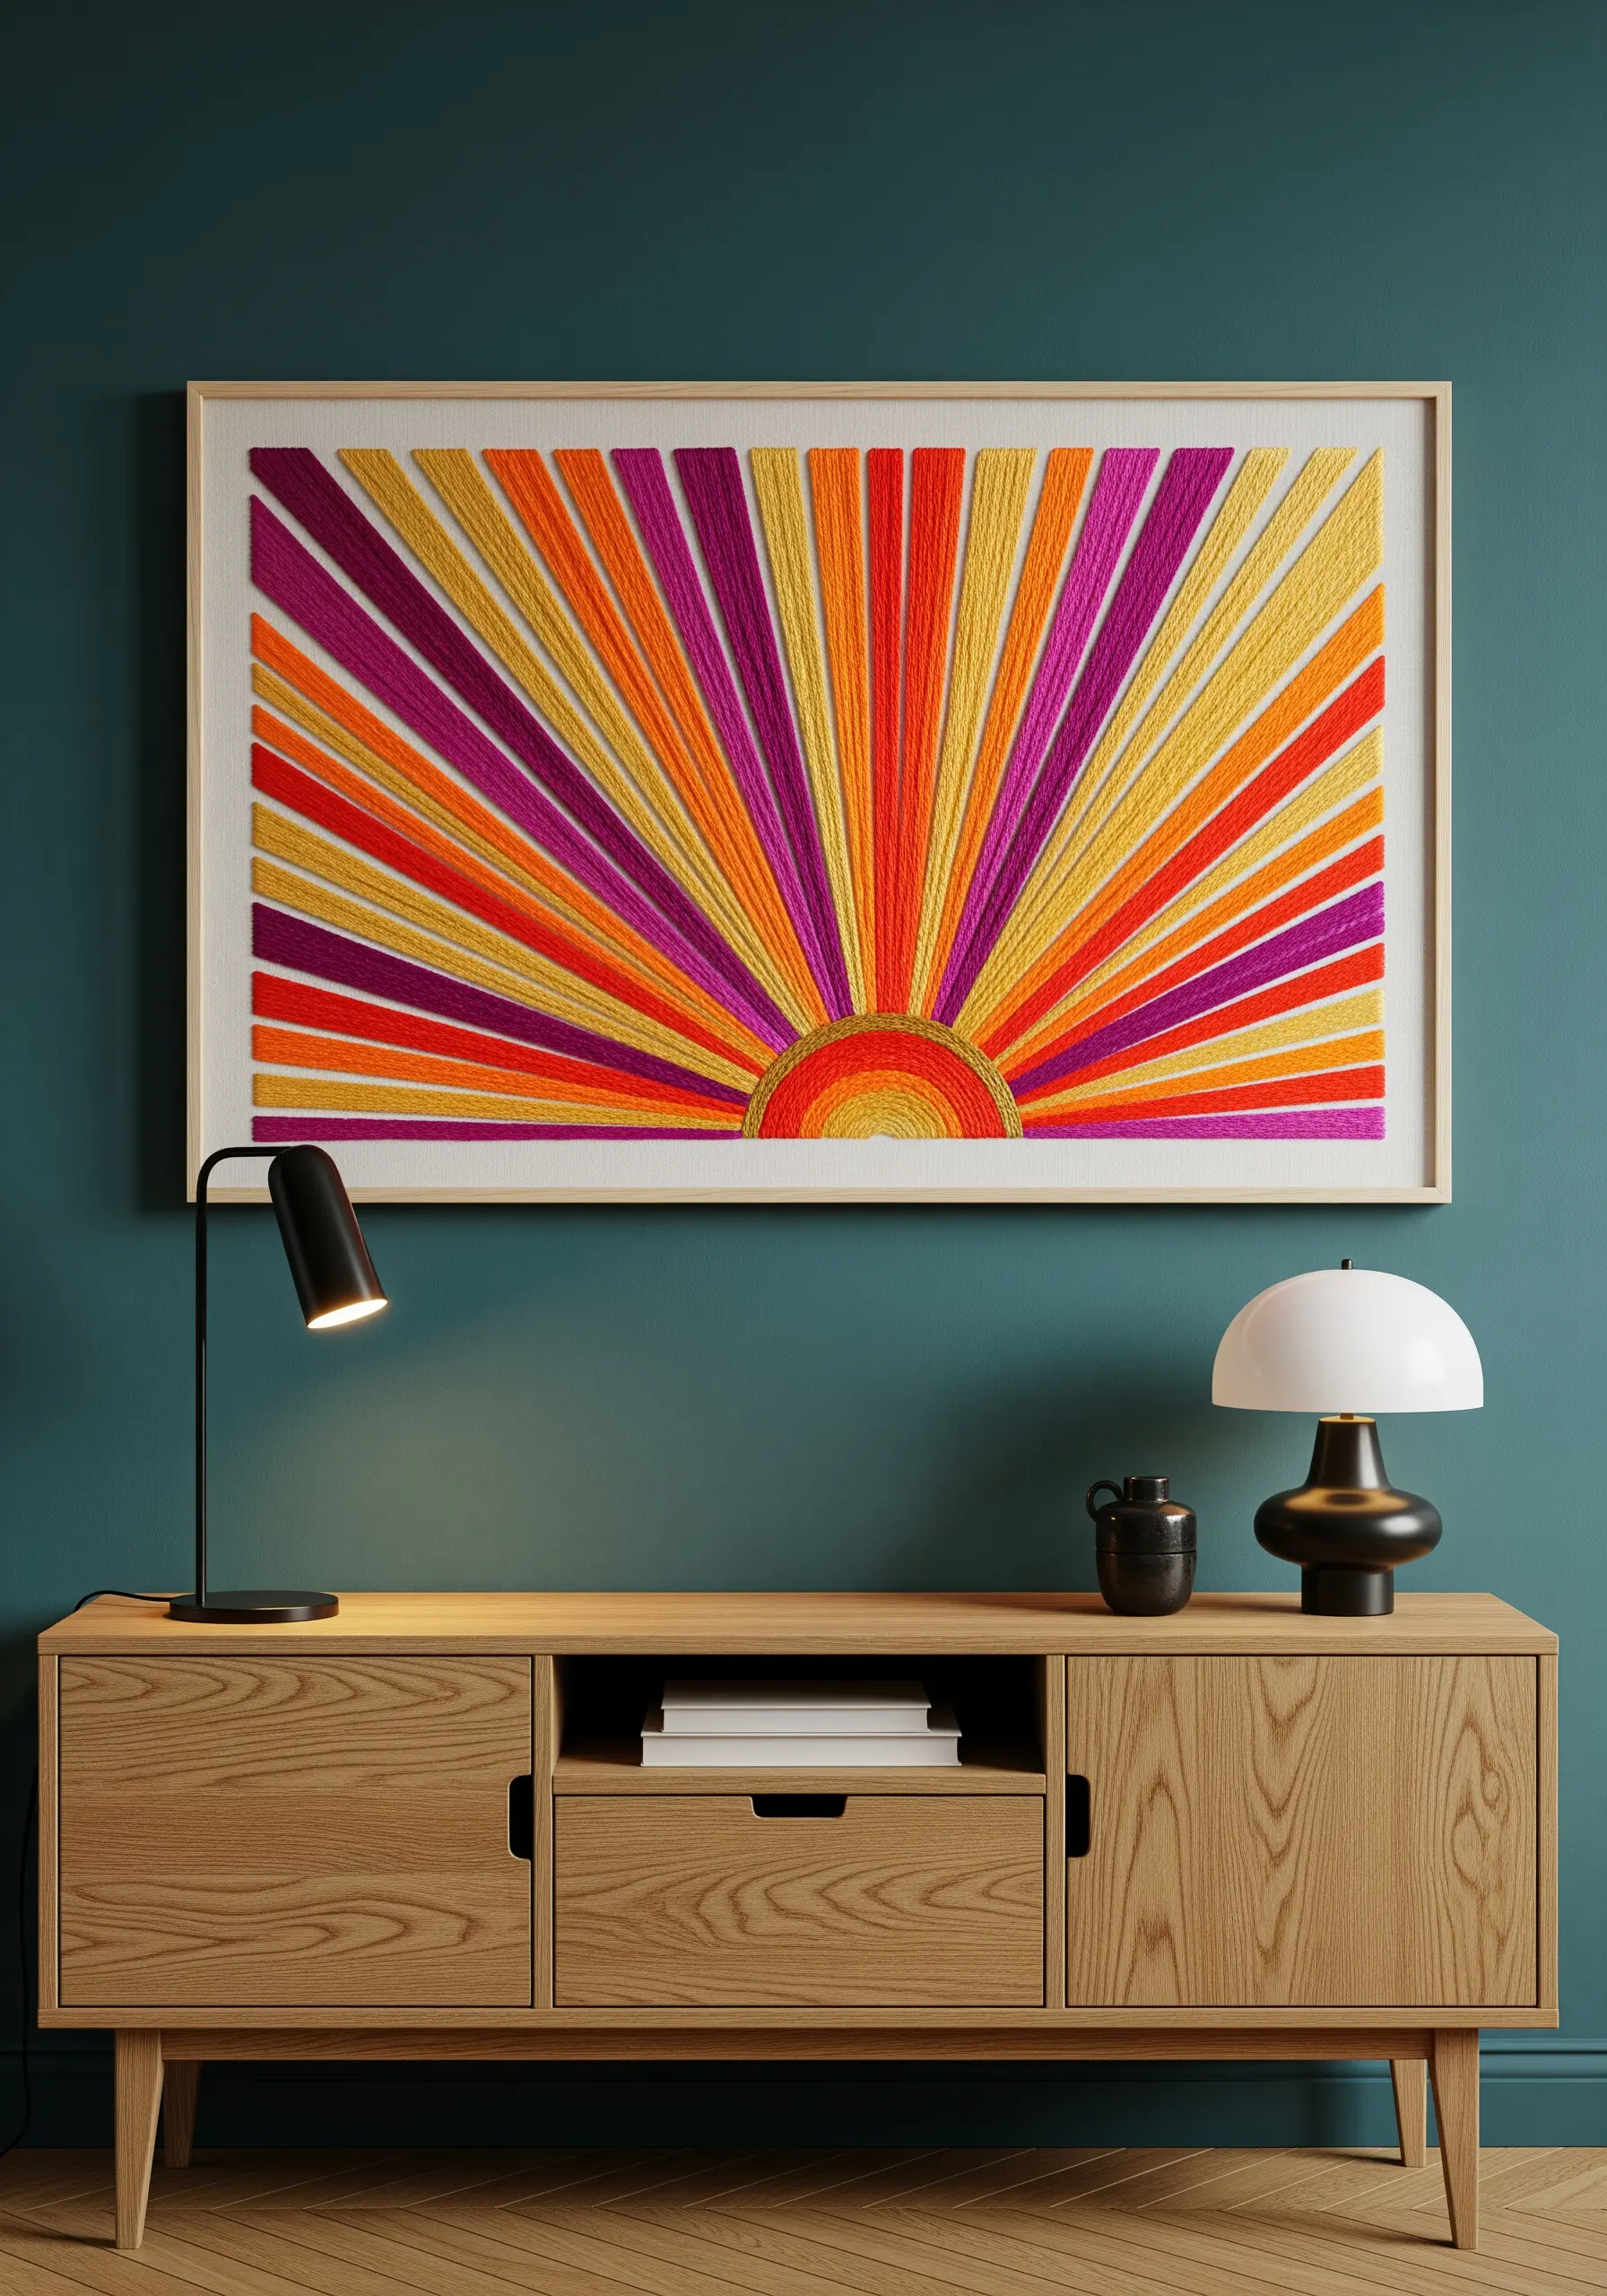
To prevent a large satin-stitched piece from puckering, you must manage your thread tension with absolute consistency.
Stretch your fabric drum-tight on a scroll or slate frame, which provides more even tension for large-scale work than a hoop does.
Use a laying tool or a larger tapestry needle held flat to guide each strand of floss, ensuring every stitch lies perfectly smooth and parallel to its neighbor.
This meticulous approach transforms simple straight stitches into a flawless, light-reflecting surface that gives your artwork a professional, graphic quality.
2. Create a Cohesive Botanical Triptych
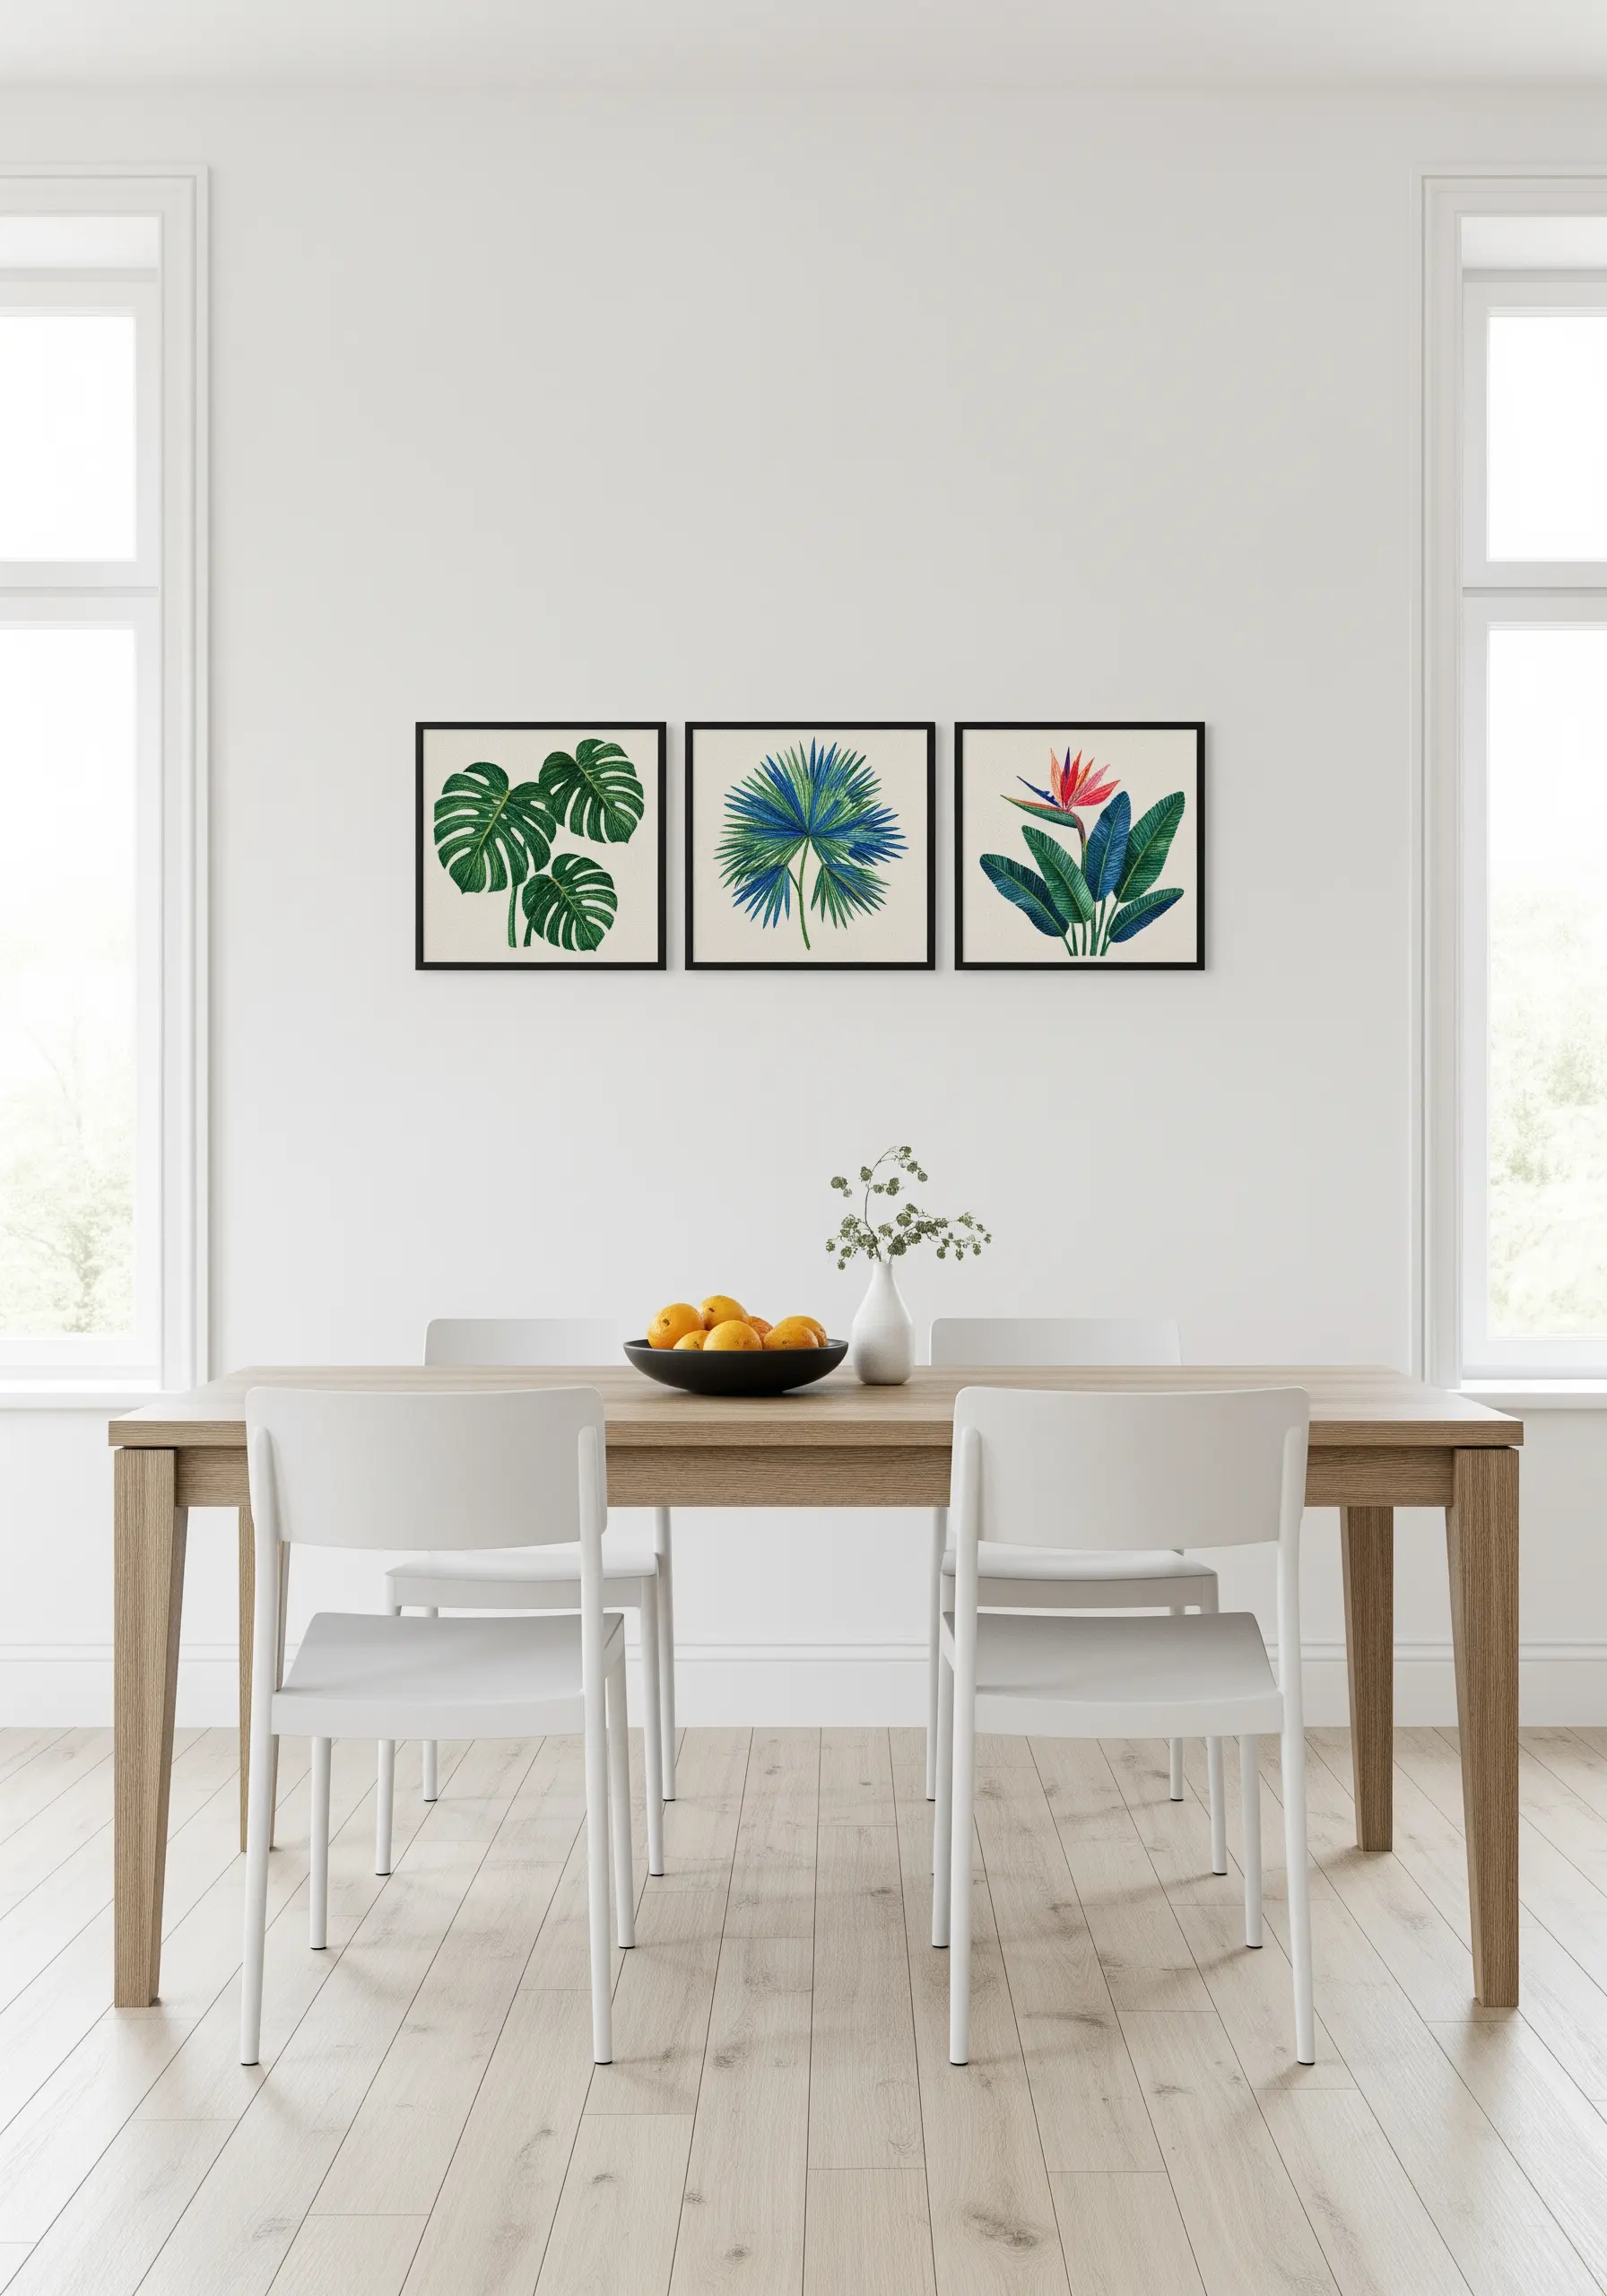
When creating a set of framed pieces, unity is key.
Choose a single stitch for the main element—like the long-and-short stitch—and use it across all three designs to create a consistent visual texture.
To give each leaf realistic dimension, map out the direction of your stitches to follow the natural curve and veins of the plant.
Using the exact same color palette and frame style ties the individual pieces together, turning them into a sophisticated and intentional botanical gallery wall.
3. Electrify Dark Fabric with Geometric Neon

Make your designs radiate energy by stitching with high-contrast neon thread on black fabric.
To ensure your geometric lines are perfectly crisp, use a sharp needle and keep your stitches small and even, especially around corners.
A simple backstitch or stem stitch works beautifully here, as the focus is on the bold color and clean lines rather than complex textures.
Arranging multiple hoops of varying sizes creates a dynamic, gallery-style installation that feels modern and personal.
4. Stitch Pop-Art Portraits with Color Blocking
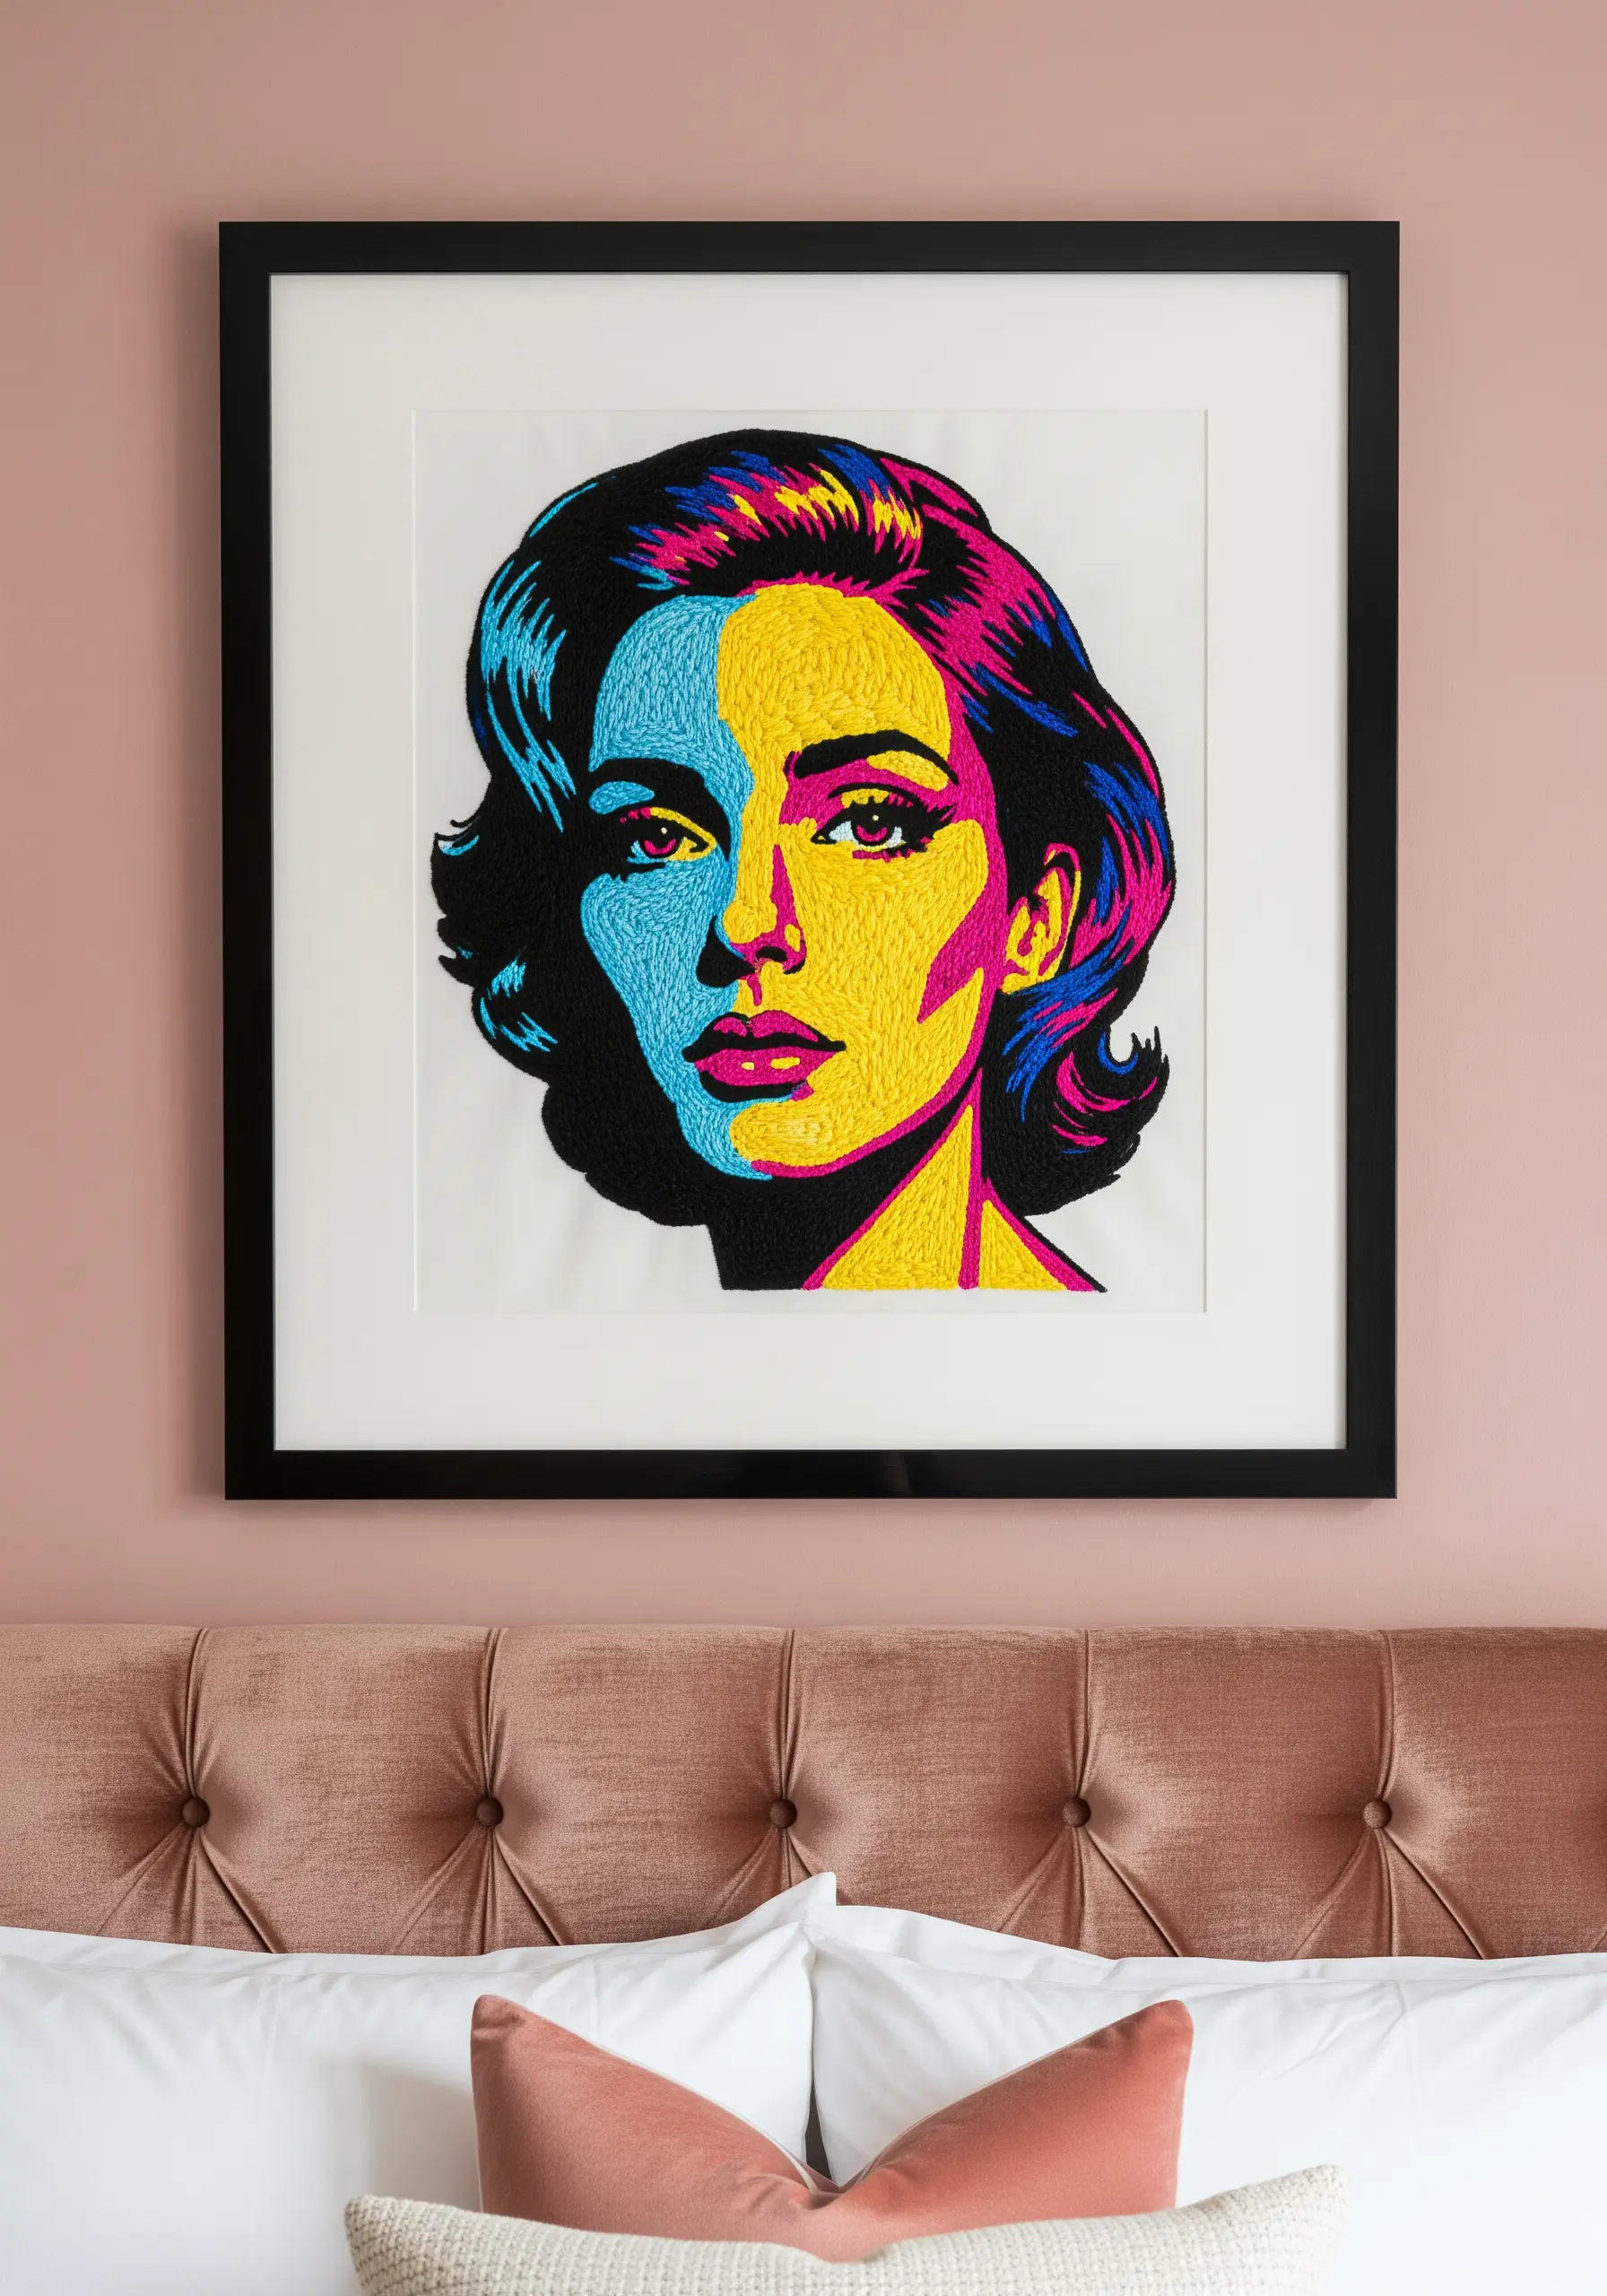
Create a graphic, posterized effect in your portraits by using thread to color-block sections of the face and hair.
First, outline each color section with a precise split stitch. This raised edge acts as a barrier, allowing you to fill the shape with satin stitch for a clean, sharp boundary between hues.
Pay close attention to the direction of your satin stitches; having them follow the contours of the face will create a subtle sense of form and depth.
This technique elevates a simple portrait into a bold, stylistic statement piece perfect for a modern bedroom.
5. Design a Cyberpunk Cityscape with Luminous Thread
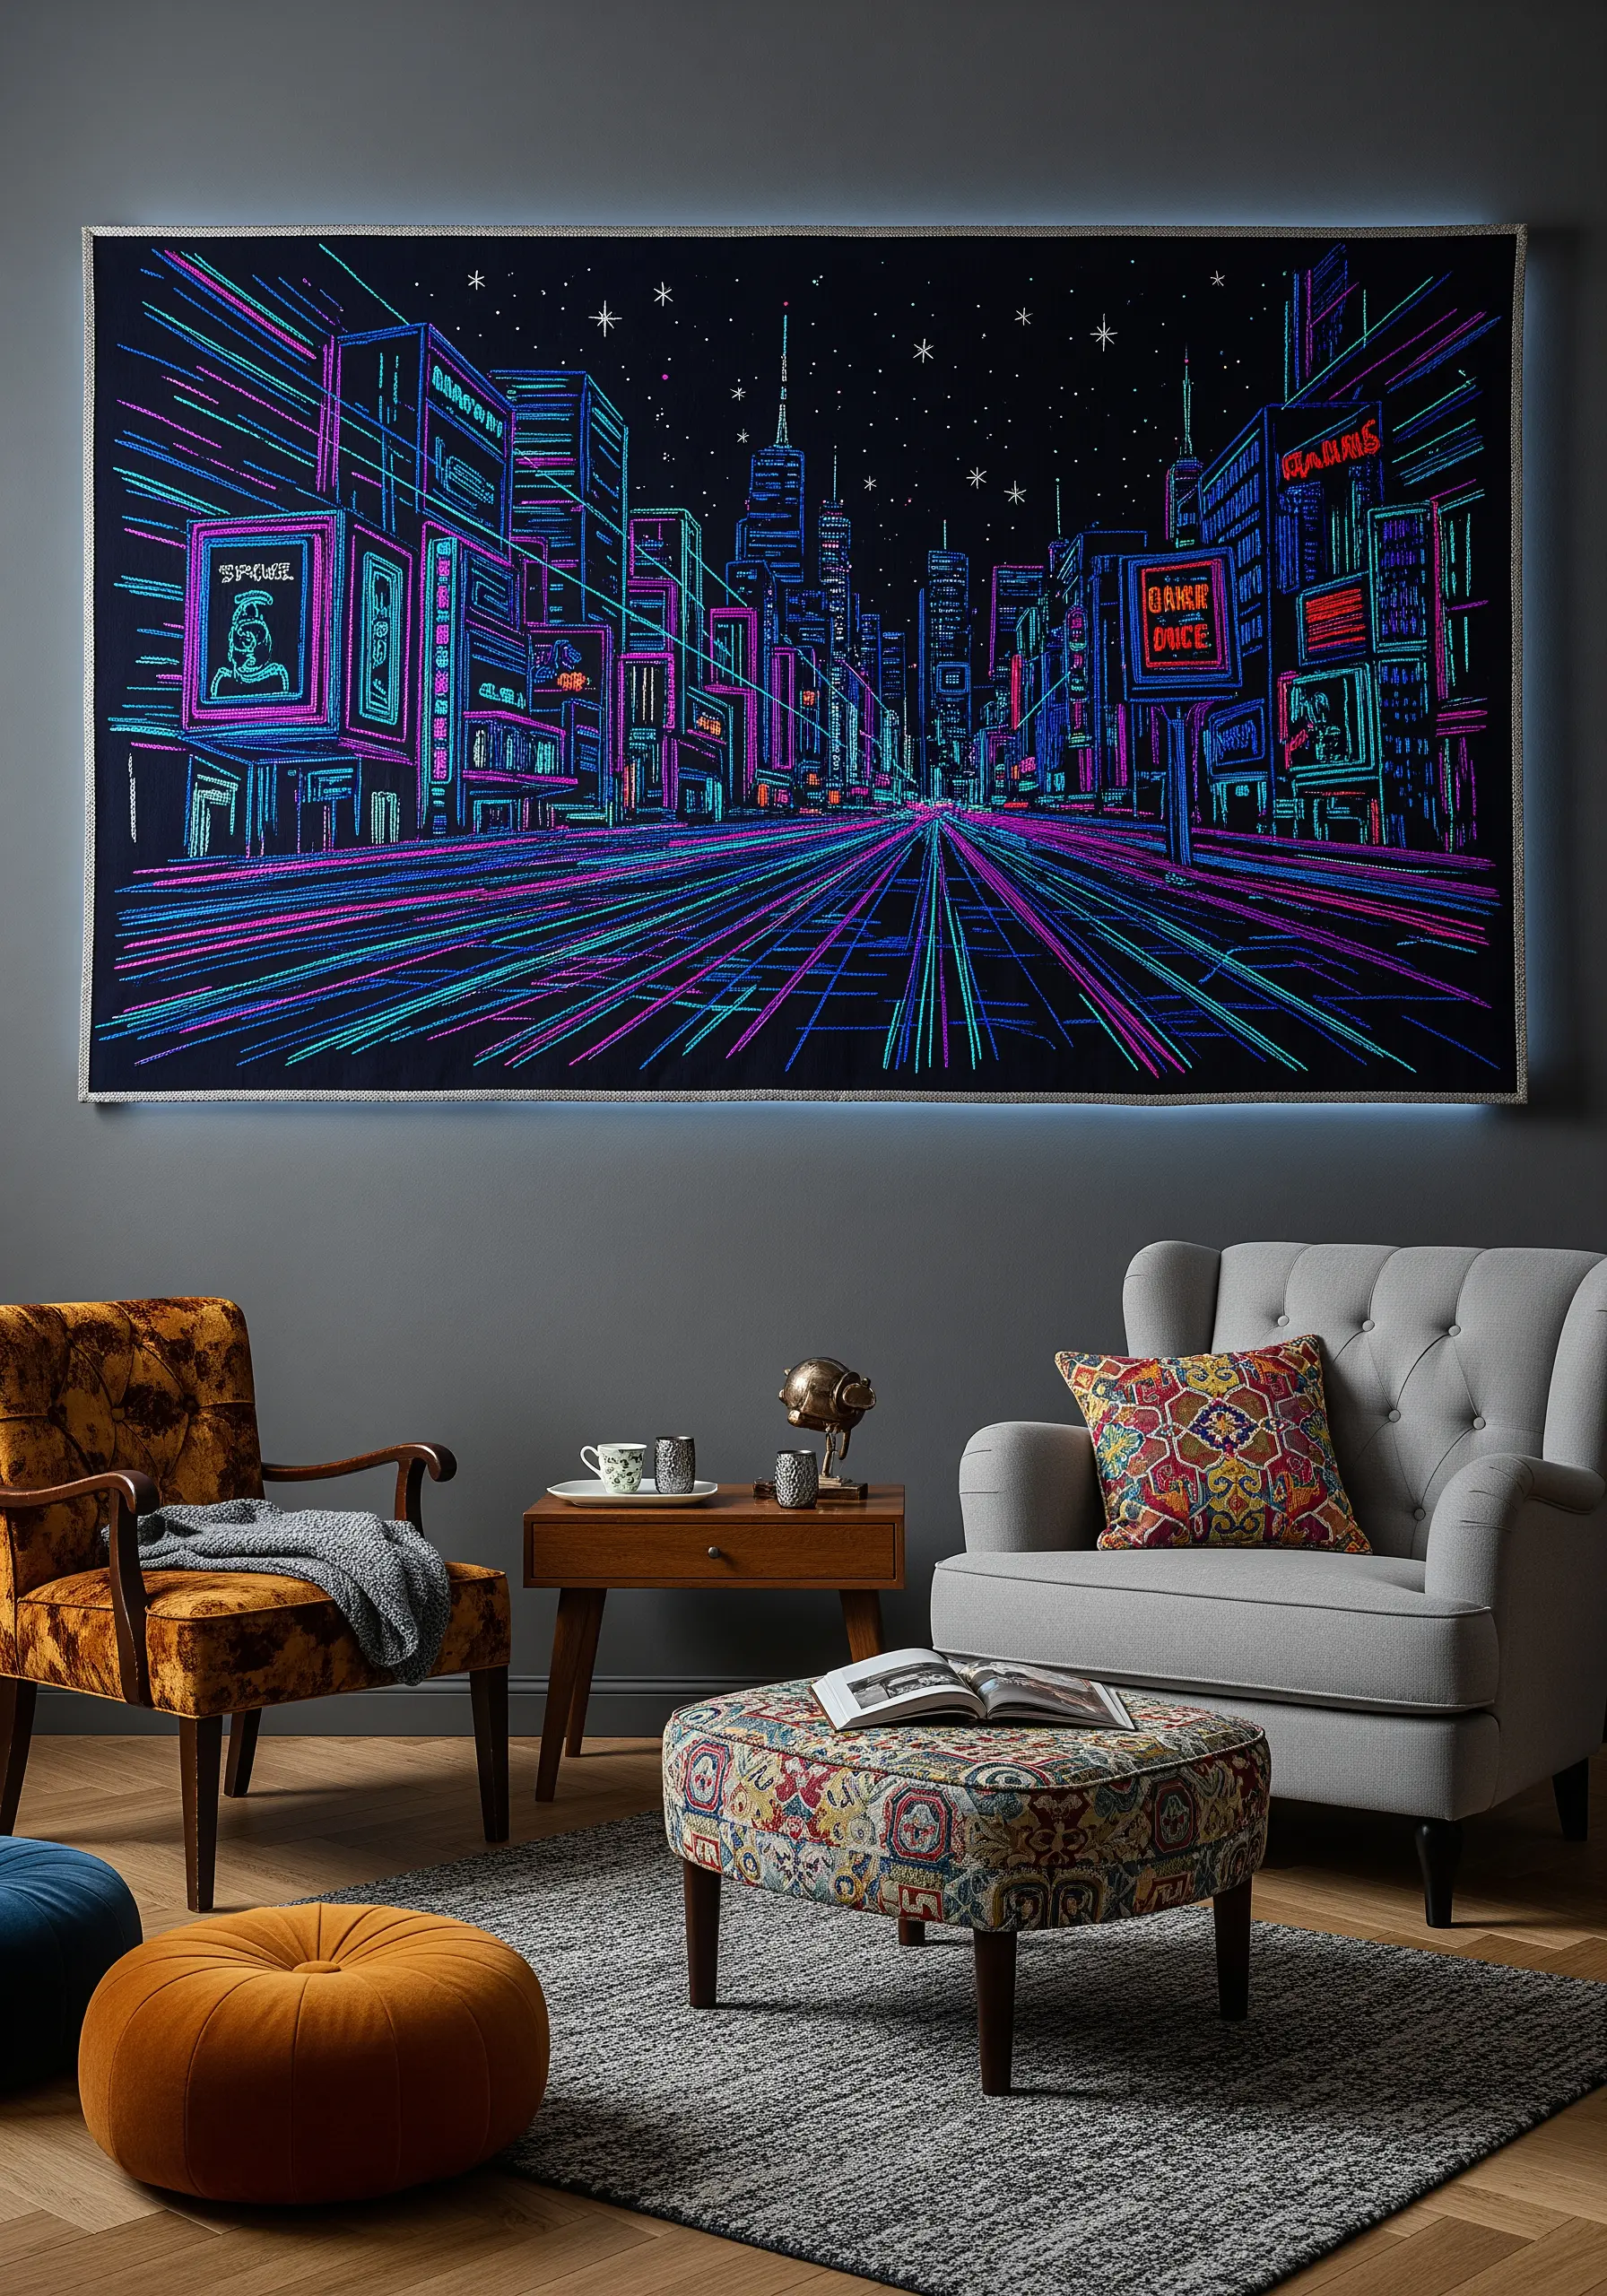
Capture the vibrant energy of a futuristic city by stitching with neon threads on a dark background.
Use a single strand of floss and a simple backstitch for the finest architectural details and perspective lines, creating a sense of immense scale and distance.
For the glowing signs and light trails, switch to a thicker thread or more strands of floss to make them pop.
Framing the piece with integrated LED backlighting will dramatically enhance the glowing effect, turning your embroidery into an immersive art installation.
6. Achieve Perfect Symmetry in Mandala Designs
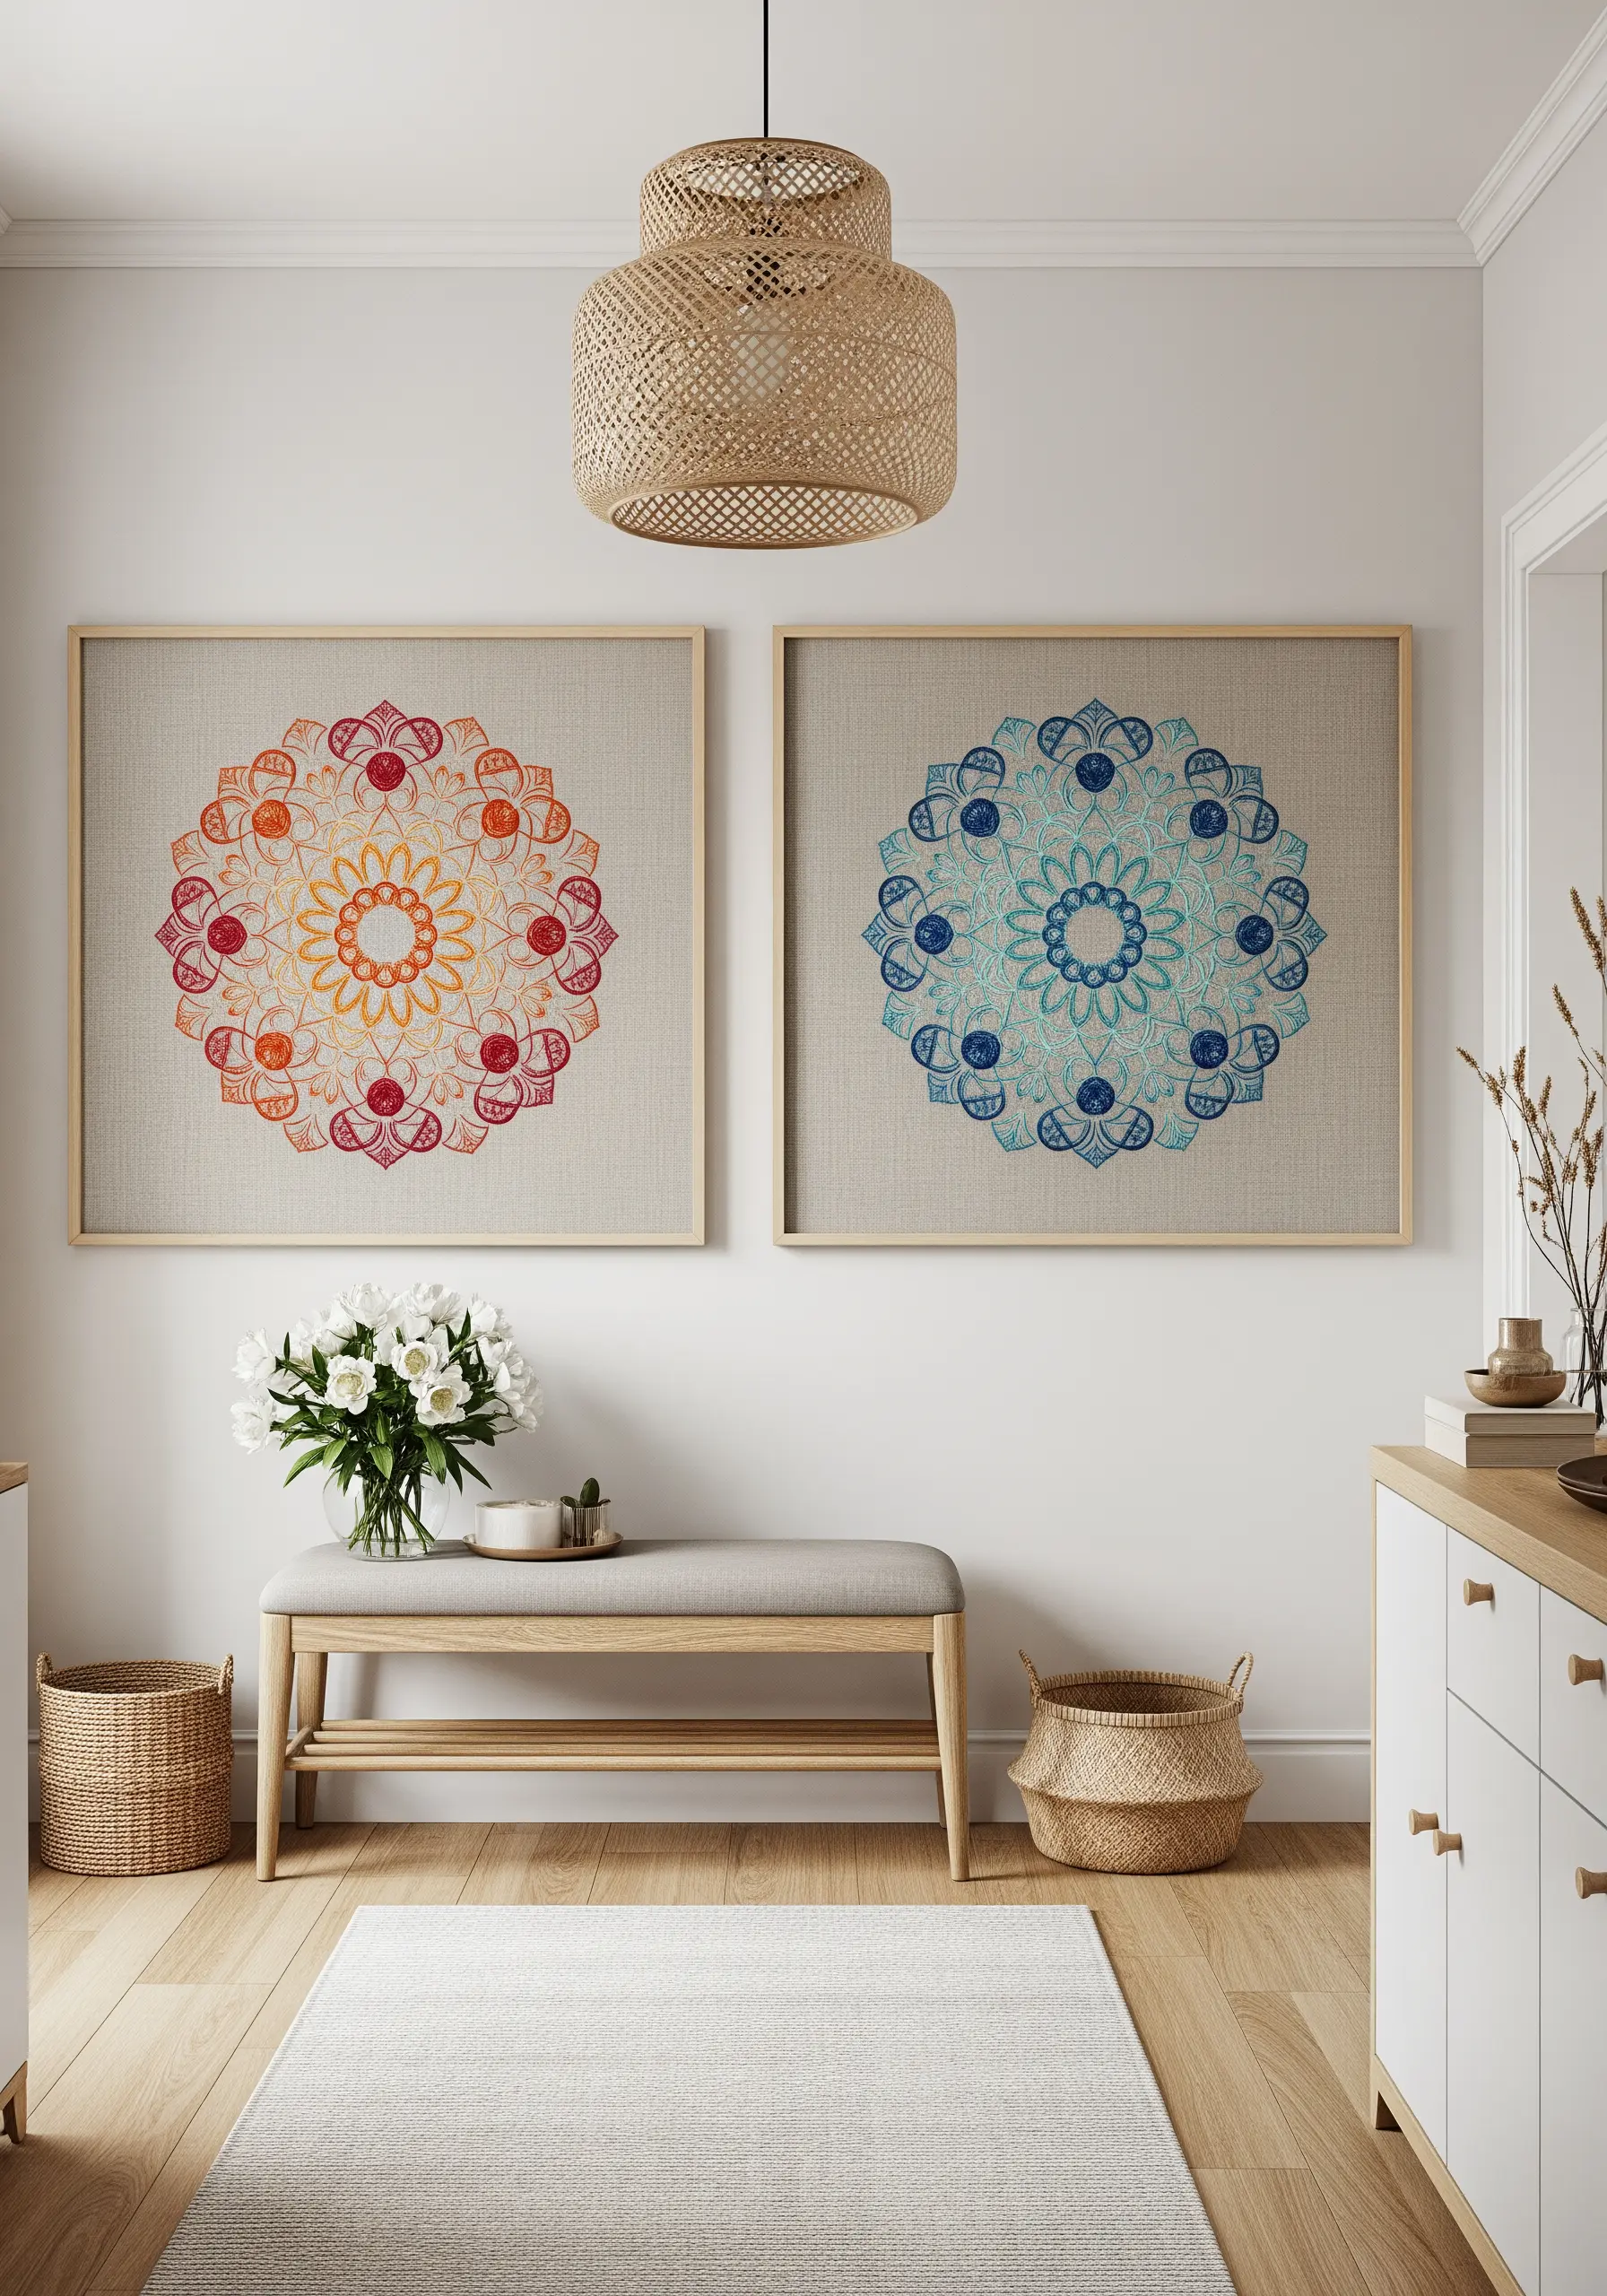
The calming, meditative quality of a mandala depends on its symmetry. Ensure a perfect result by transferring your pattern meticulously using a water-soluble stabilizer.
Use a crisp stem stitch or chain stitch for the primary outlines to give them definition and weight.
Introduce texture and detail with smaller elements like French knots or seed stitches, but apply them symmetrically across the design to maintain balance.
Stitching on a neutral, textured fabric like linen allows the vibrant colors and precise geometry of the mandala to take center stage.
7. Compose a Large-Scale Embroidered Mural
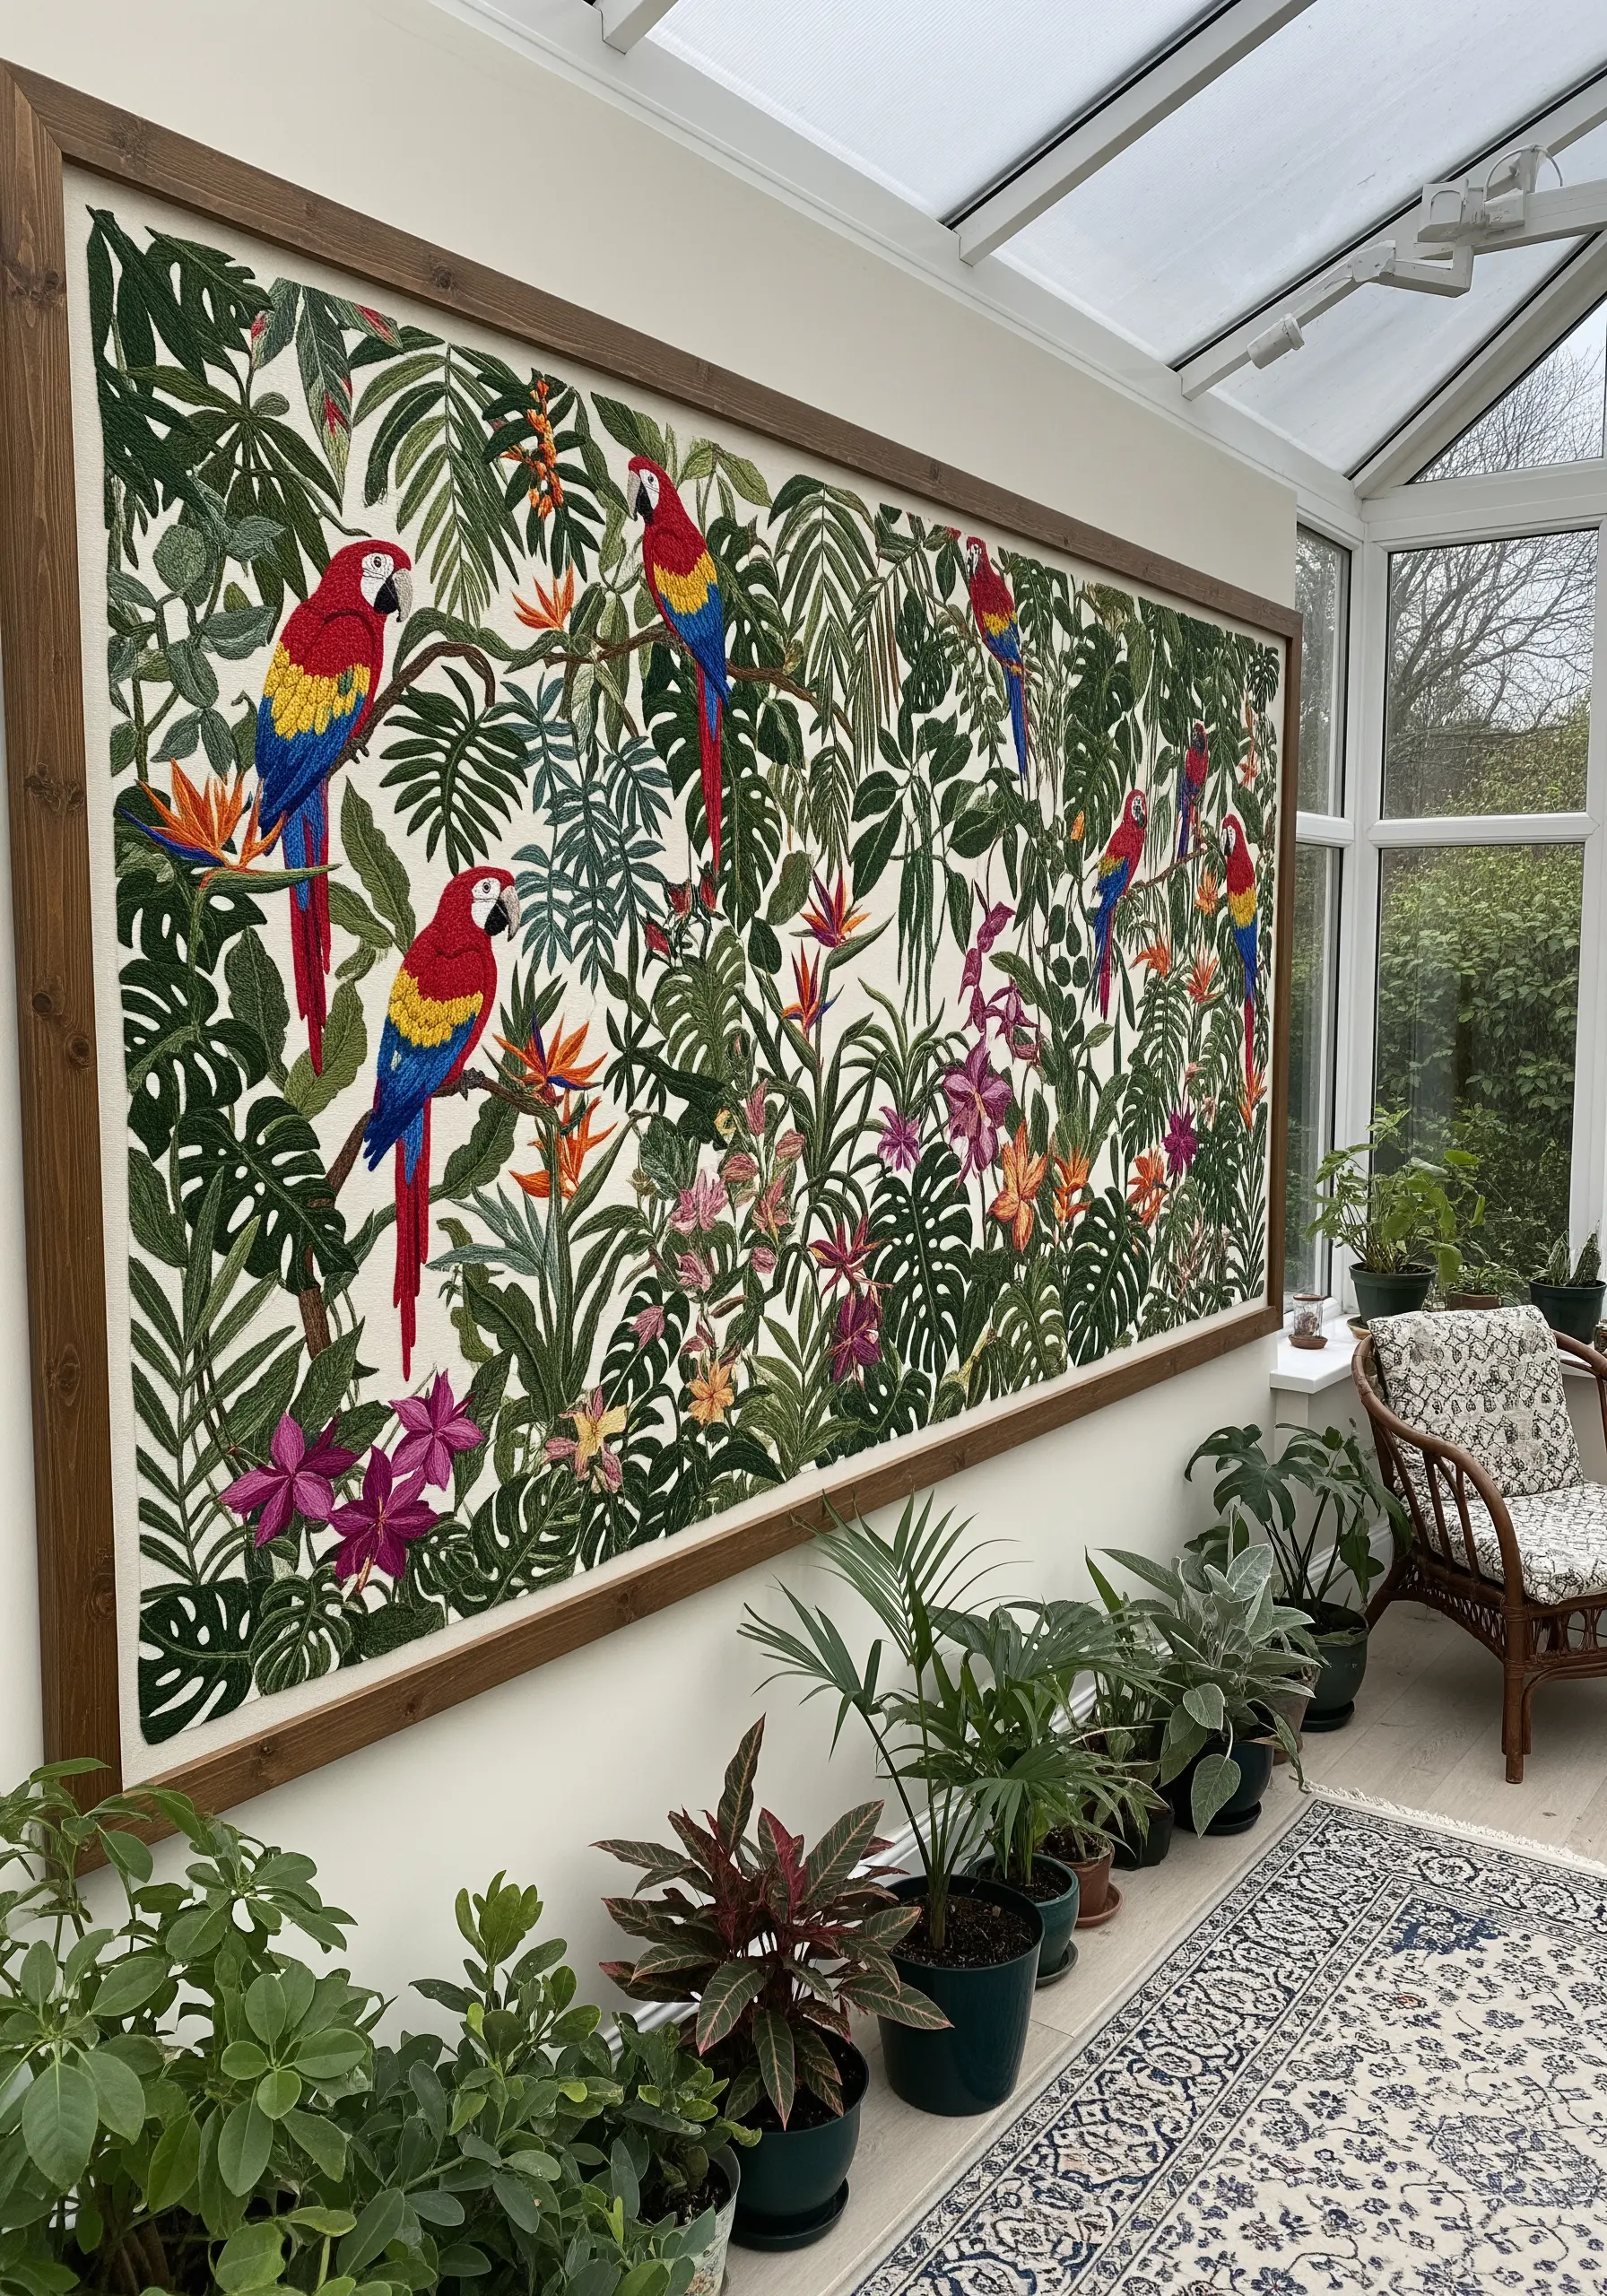
Tackling a massive piece like a jungle mural requires a strategic approach to avoid feeling overwhelmed.
Break the design into smaller, manageable sections, focusing on one plant or animal at a time.
Create visual interest and depth by varying your stitches: use satin stitch for broad leaves, long-and-short stitch for blended flower petals, and French knots for textural centers.
This approach, known as a sampler, not only makes the project more achievable but also results in a rich, textured tapestry that invites closer inspection.
8. Paint a Landscape with Thread
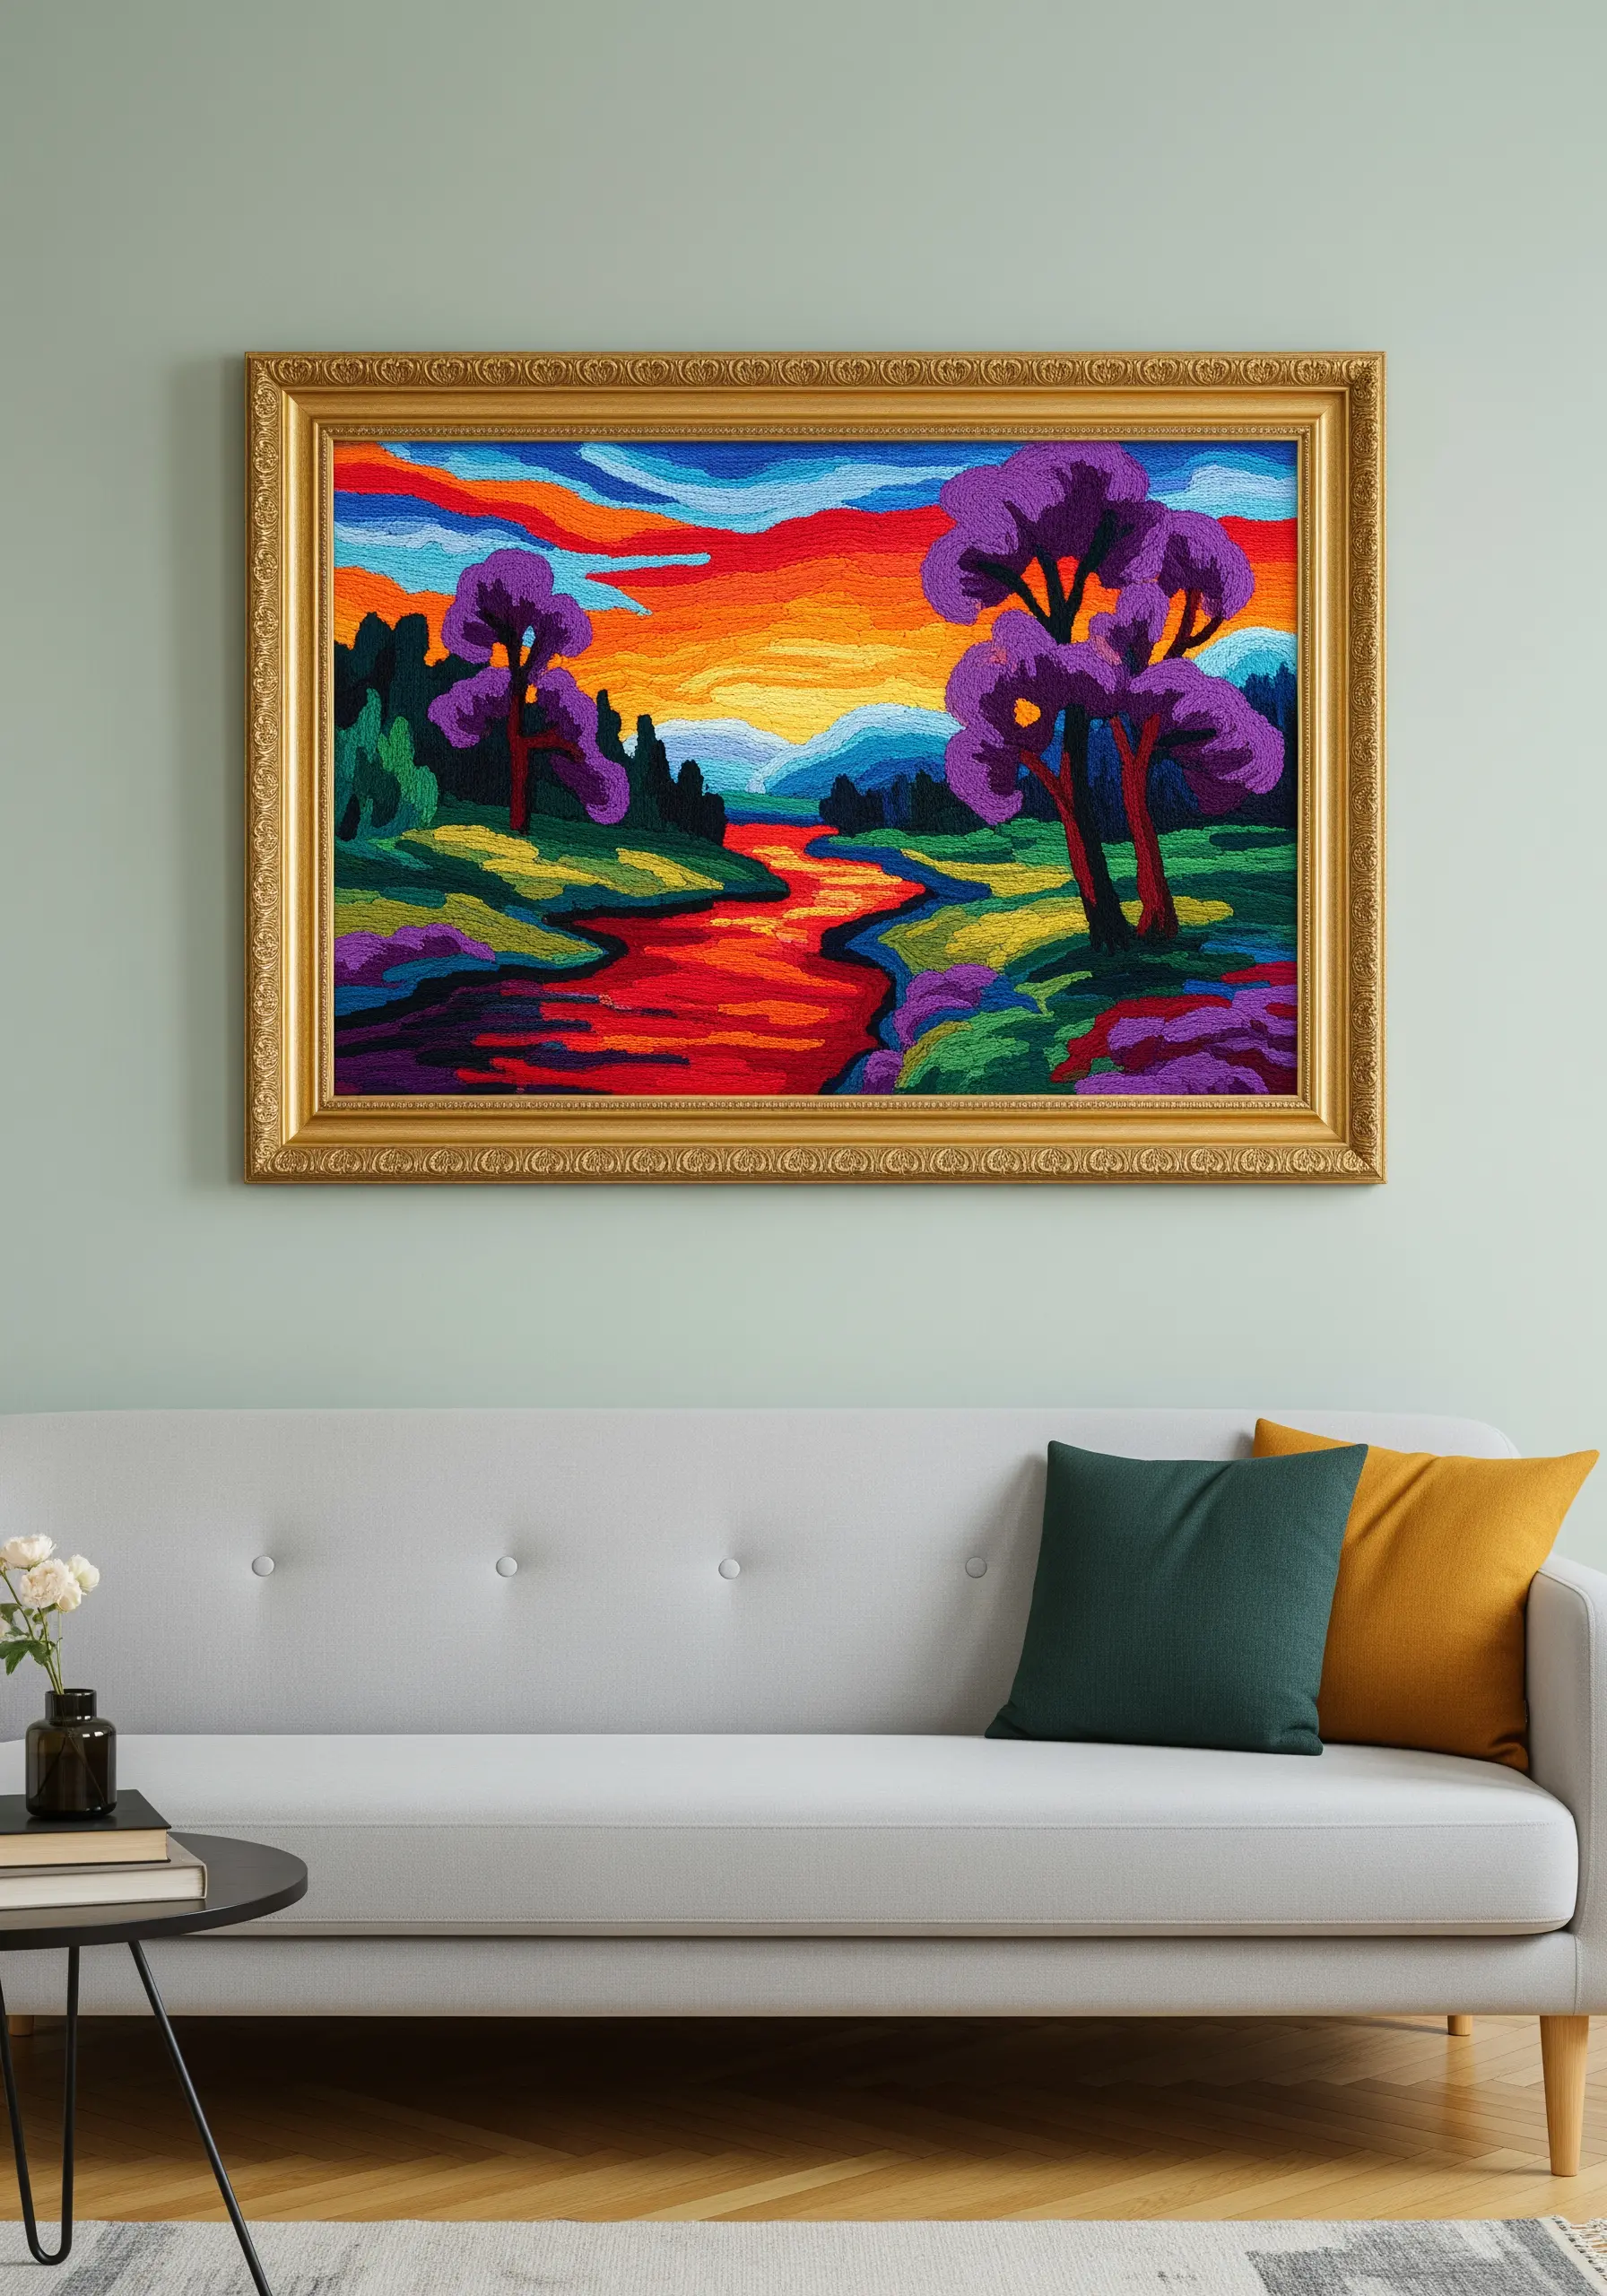
Move beyond simple fill stitches and use thread like paint to create a vibrant, expressive landscape.
Employ the long-and-short stitch, often called thread painting, to seamlessly blend colors and create soft gradients in the sky and water.
Vary the direction of your stitches to mimic the natural textures of the scene—vertical for trees, horizontal for water, and curved for rolling hills.
Don’t be afraid to use unexpected, non-realistic colors; this painterly approach is about capturing emotion and energy, not just replicating a scene.
9. Create an Illusion of Transparency with Layered Stitches
To replicate the effect of overlapping, transparent shapes, you need to think about stitch density and direction.
In the areas where colors overlap, switch to a sparser fill, like a seed stitch or a light cross-hatching of straight stitches using a single strand of floss.
Alternatively, change the direction of your satin stitch in the overlapping section by 90 degrees. This shift in how the thread reflects light creates a subtle but effective illusion of a new, blended color.
10. Elevate Line Art with a Perfect, Unbroken Stitch
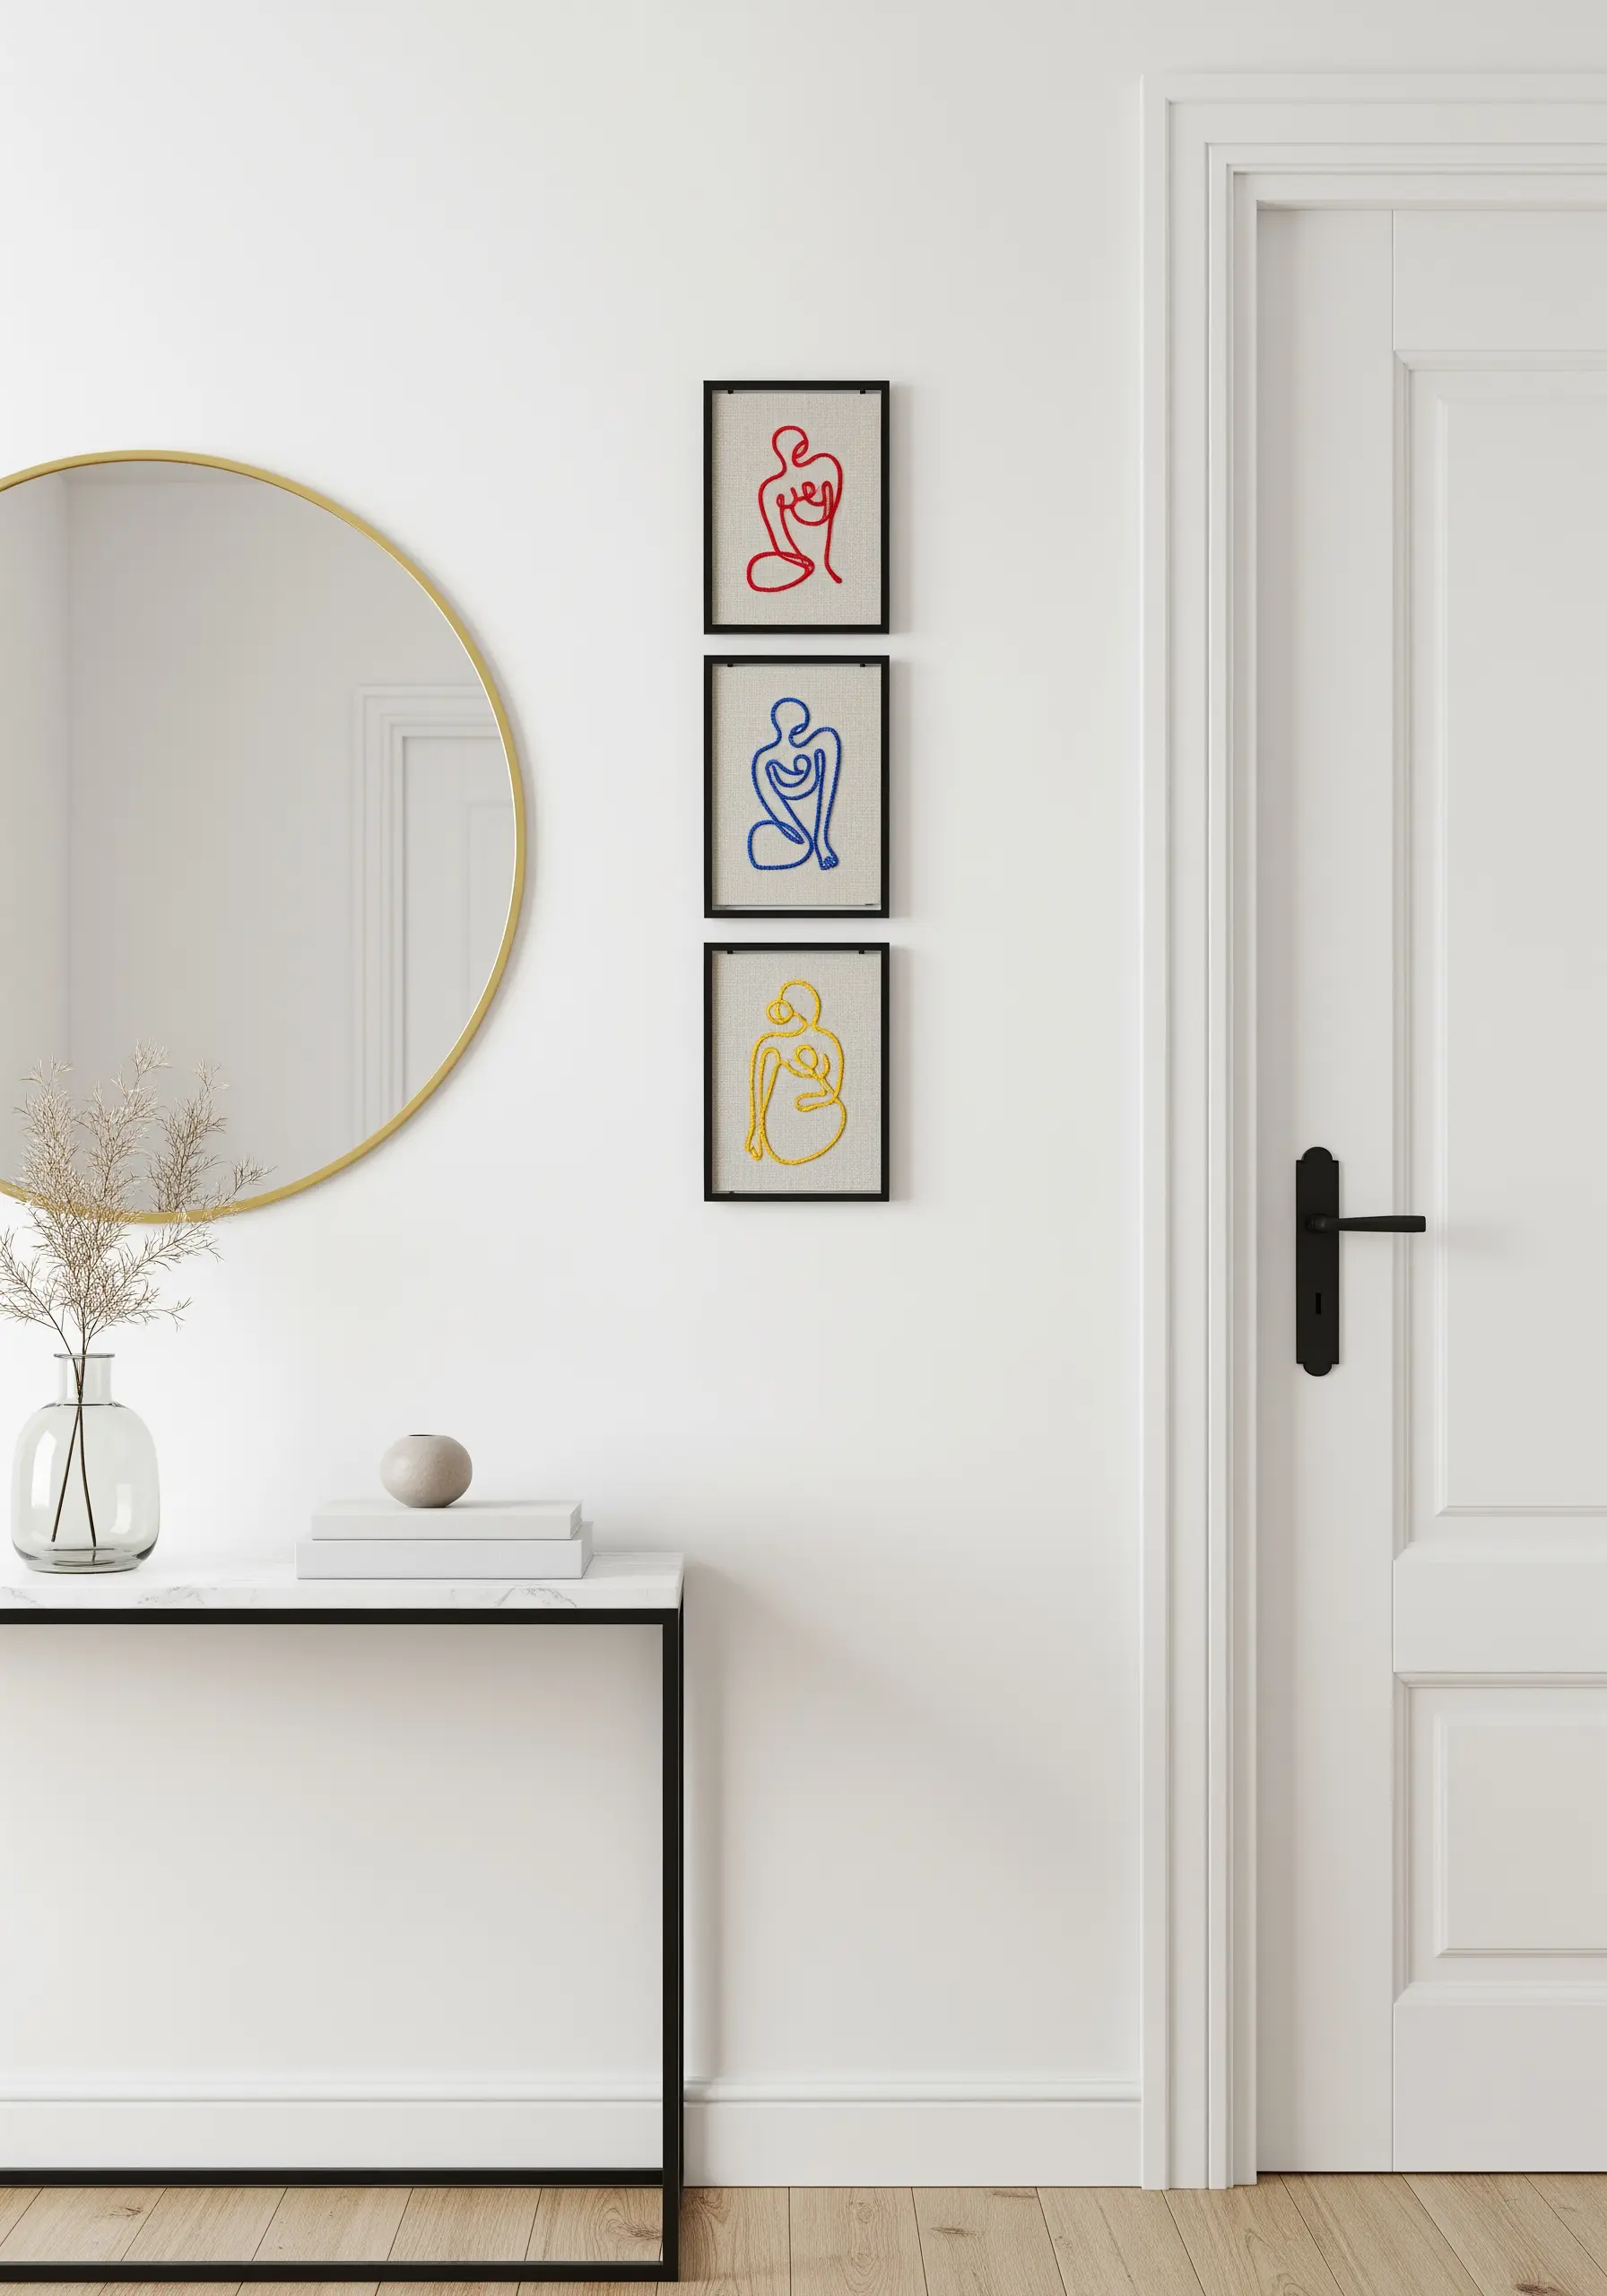
For minimalist figures, the quality of the line is everything. Achieve a smooth, continuous look by using a whipped backstitch or a stem stitch.
A standard backstitch can appear segmented, but whipping the thread through the stitches closes those gaps for a fluid, ink-like line.
Choose your thread weight carefully: a single strand creates a delicate, ethereal feel, while using three or four strands makes a bolder statement.
Grouping these simple figures as a triptych on neutral linen fabric creates an elegant, modern art installation.
11. Build an Underwater World with Textural Stitches
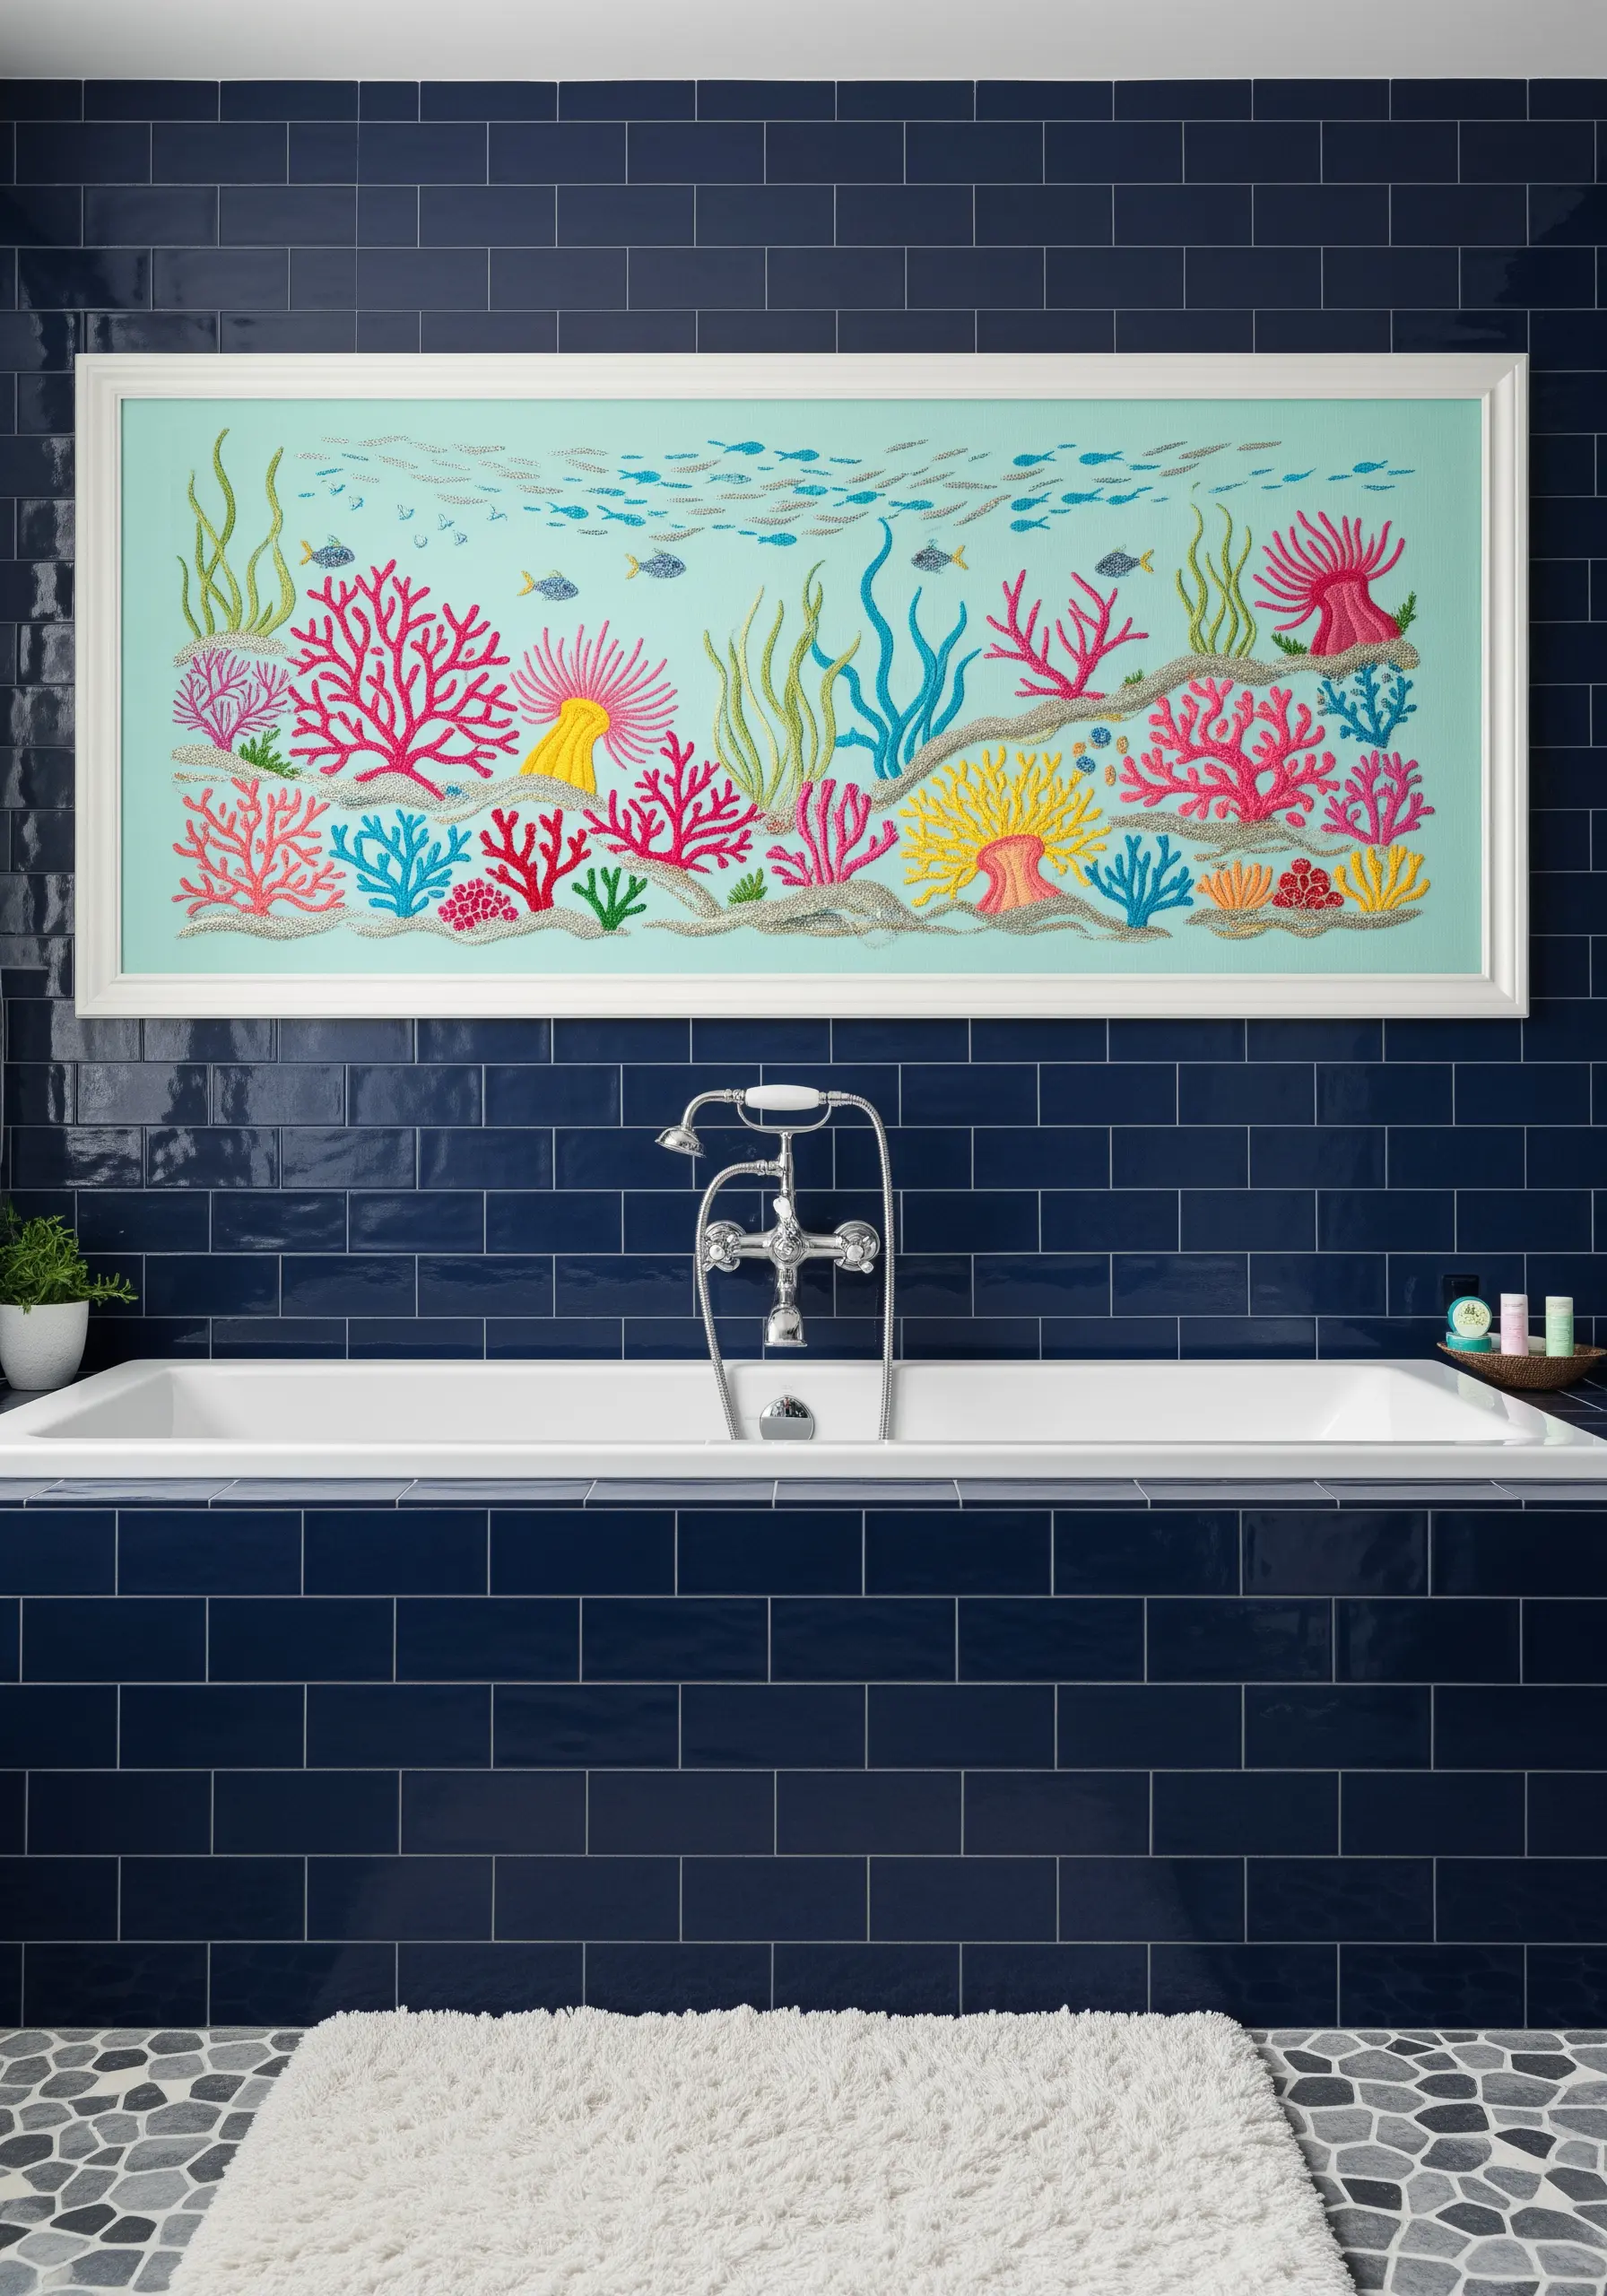
Bring a coral reef to life by choosing stitches that mimic the organic textures of the sea.
Use bullion knots to create worm-like coral shapes and clusters of French knots for bumpy anemones and sea sponges.
For the flowing seaweed, a detached chain stitch (lazy daisy) or a simple fishbone stitch will give you a natural, leaf-like shape and movement.
This tactile approach turns a flat image into a vibrant, three-dimensional seascape that begs to be touched.
12. Achieve Graphic Precision with Geometric Fills
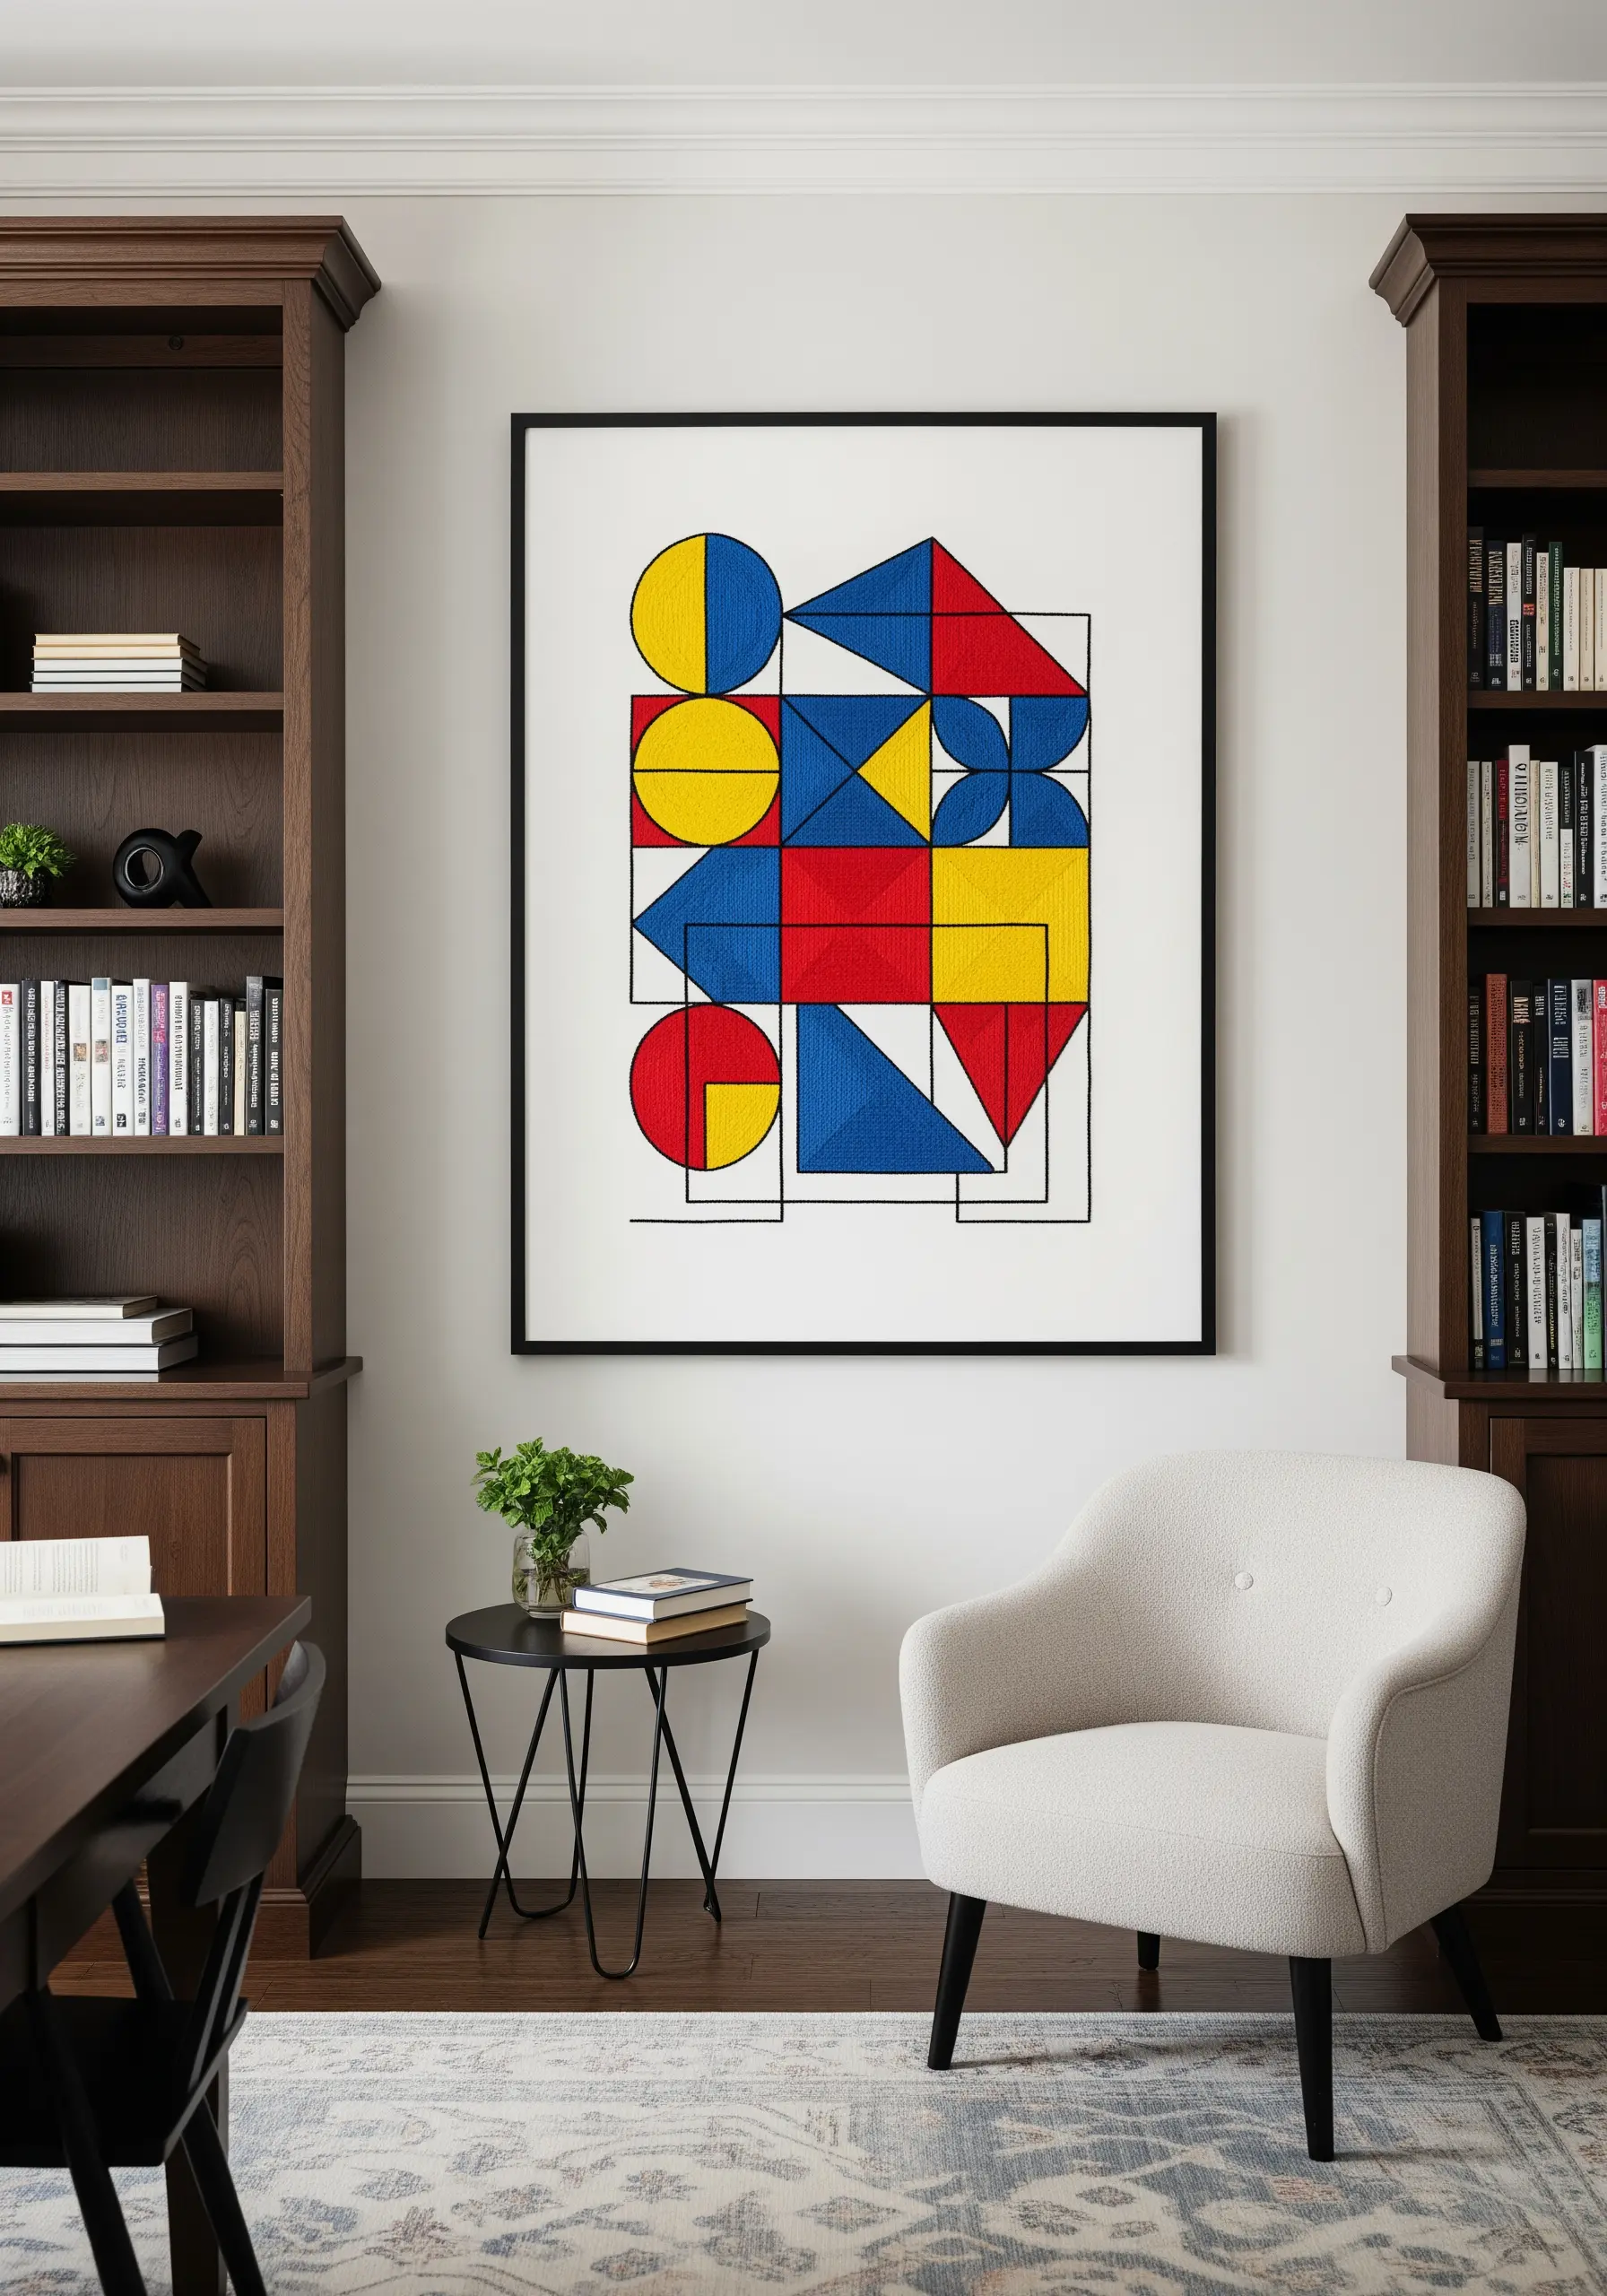
For bold, Bauhaus-inspired geometric art, your fill stitches must be perfectly flat and contained within sharp lines.
Before you begin, outline each shape with a tiny split stitch. This creates a slightly raised edge that your satin stitches can tuck up against, resulting in an incredibly clean, defined border.
Work your satin stitches in a consistent direction within each shape, using the primary colors and black outlines to create a powerful, graphic composition that feels both playful and structured.
13. Add Opulence with Metallic Thread
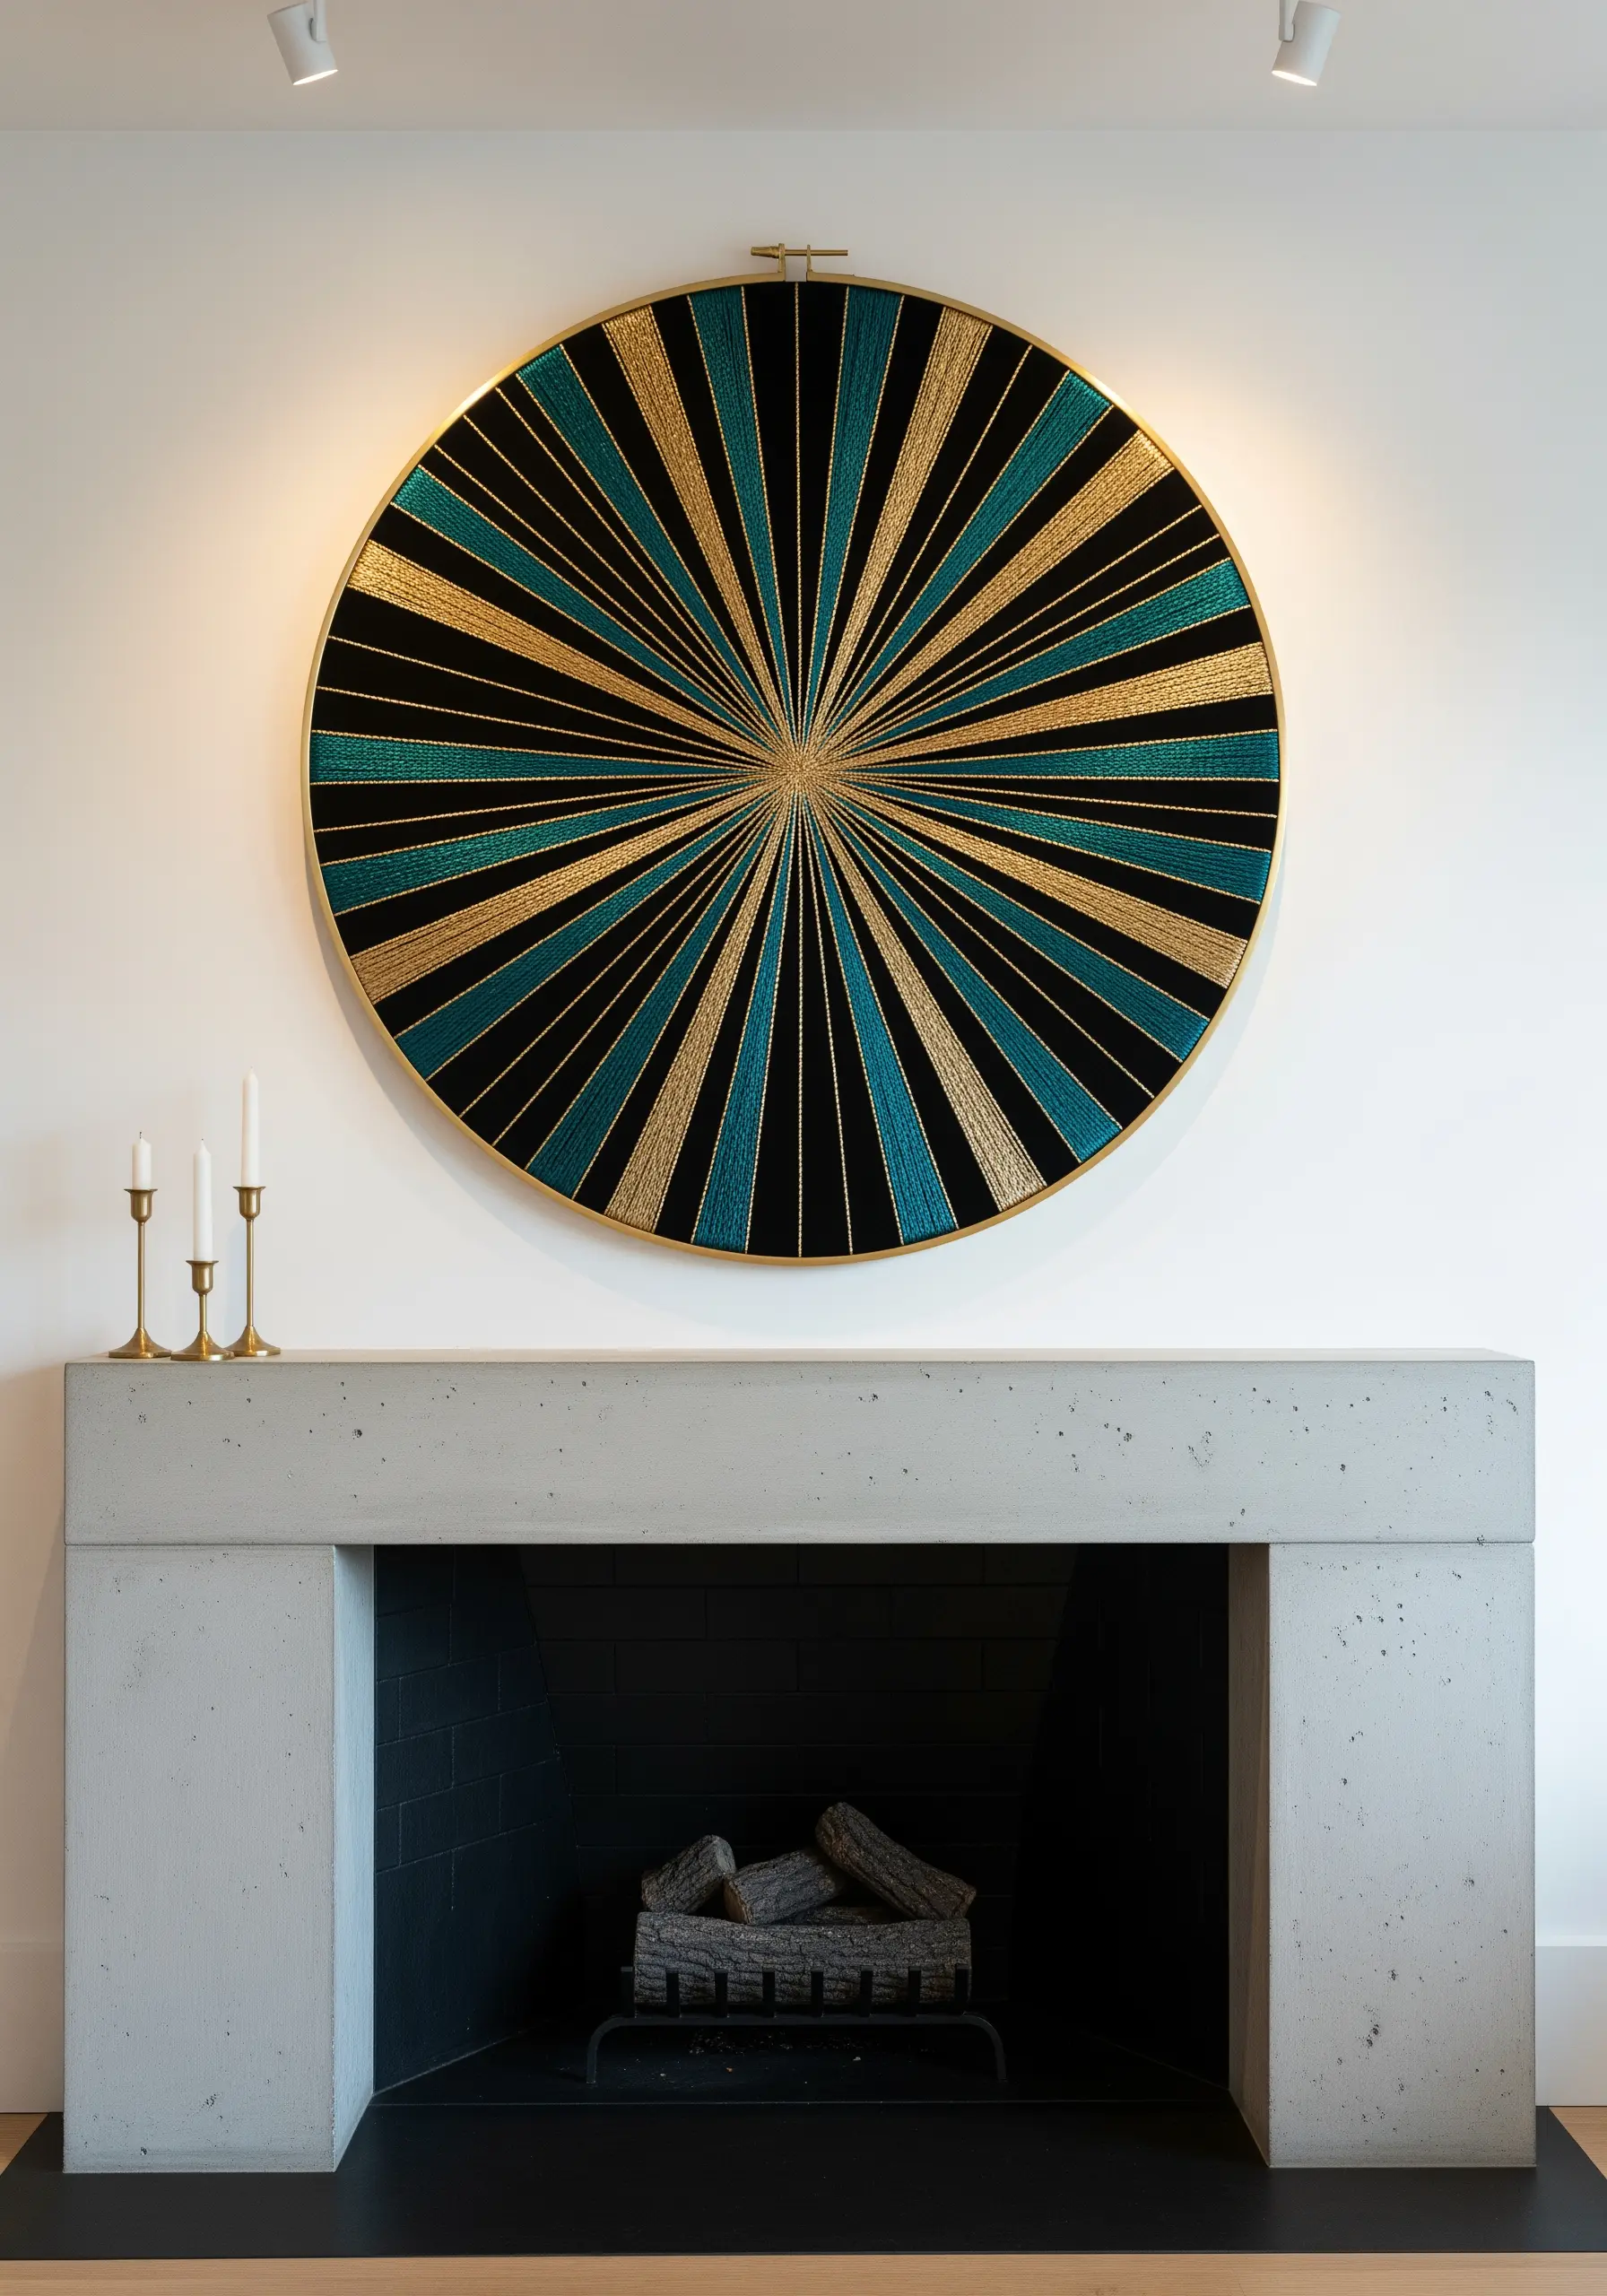
Stitching with metallic thread can be challenging, but the luxe result is worth the effort.
To prevent fraying and tangling, use shorter lengths of thread (no more than 12 inches) and work with a needle that has a larger eye, which reduces friction.
A thread conditioner like beeswax can also make the metallic floss glide more smoothly through the fabric.
Combining metallic gold with a rich teal on a black background creates a dramatic, Art Deco-inspired piece that feels incredibly glamorous.
14. Capture Fluid Motion with Variegated Thread
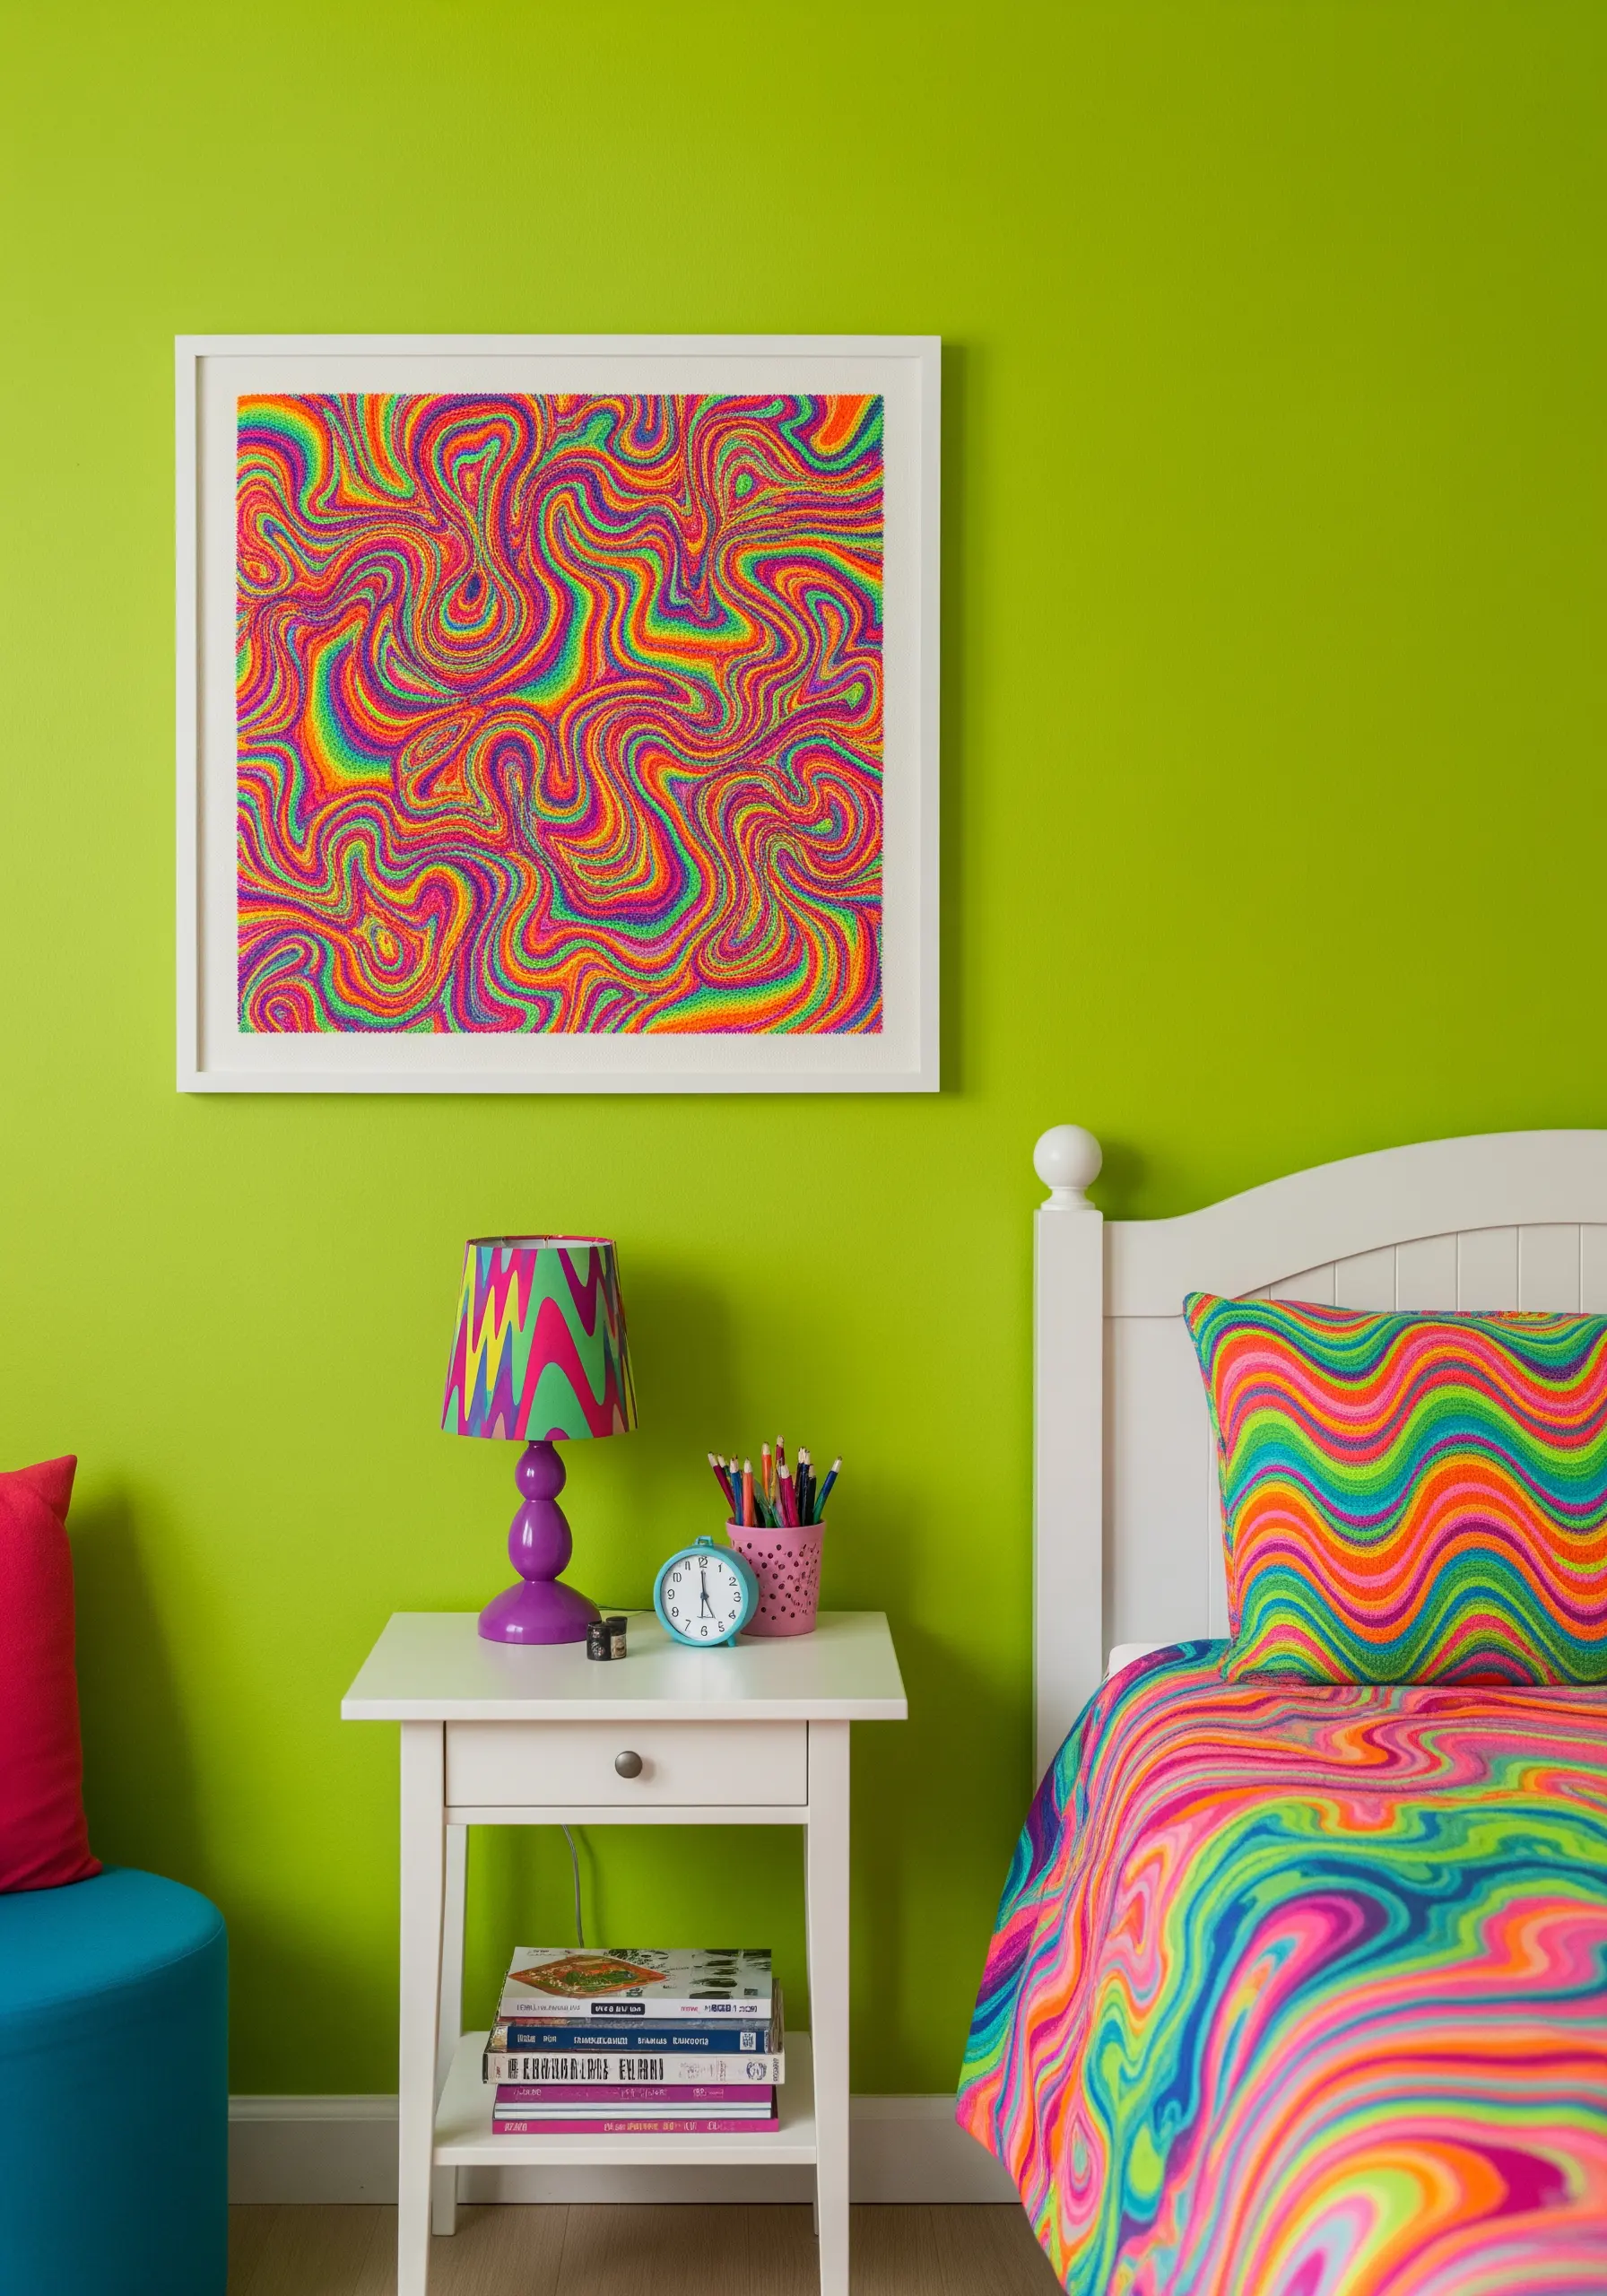
To create a swirling, psychedelic pattern with seamless color transitions, let variegated or overdyed floss do the heavy lifting for you.
Use a simple, repetitive stitch like the seed stitch or French knot, and allow the thread’s natural color changes to create the organic, marbled effect.
By filling the entire surface with these tiny, dense stitches, you build a pointillist-style texture where colors blend and flow into one another effortlessly, creating a piece with incredible depth and movement.
15. Create Hyper-Realistic Florals with a Single Strand
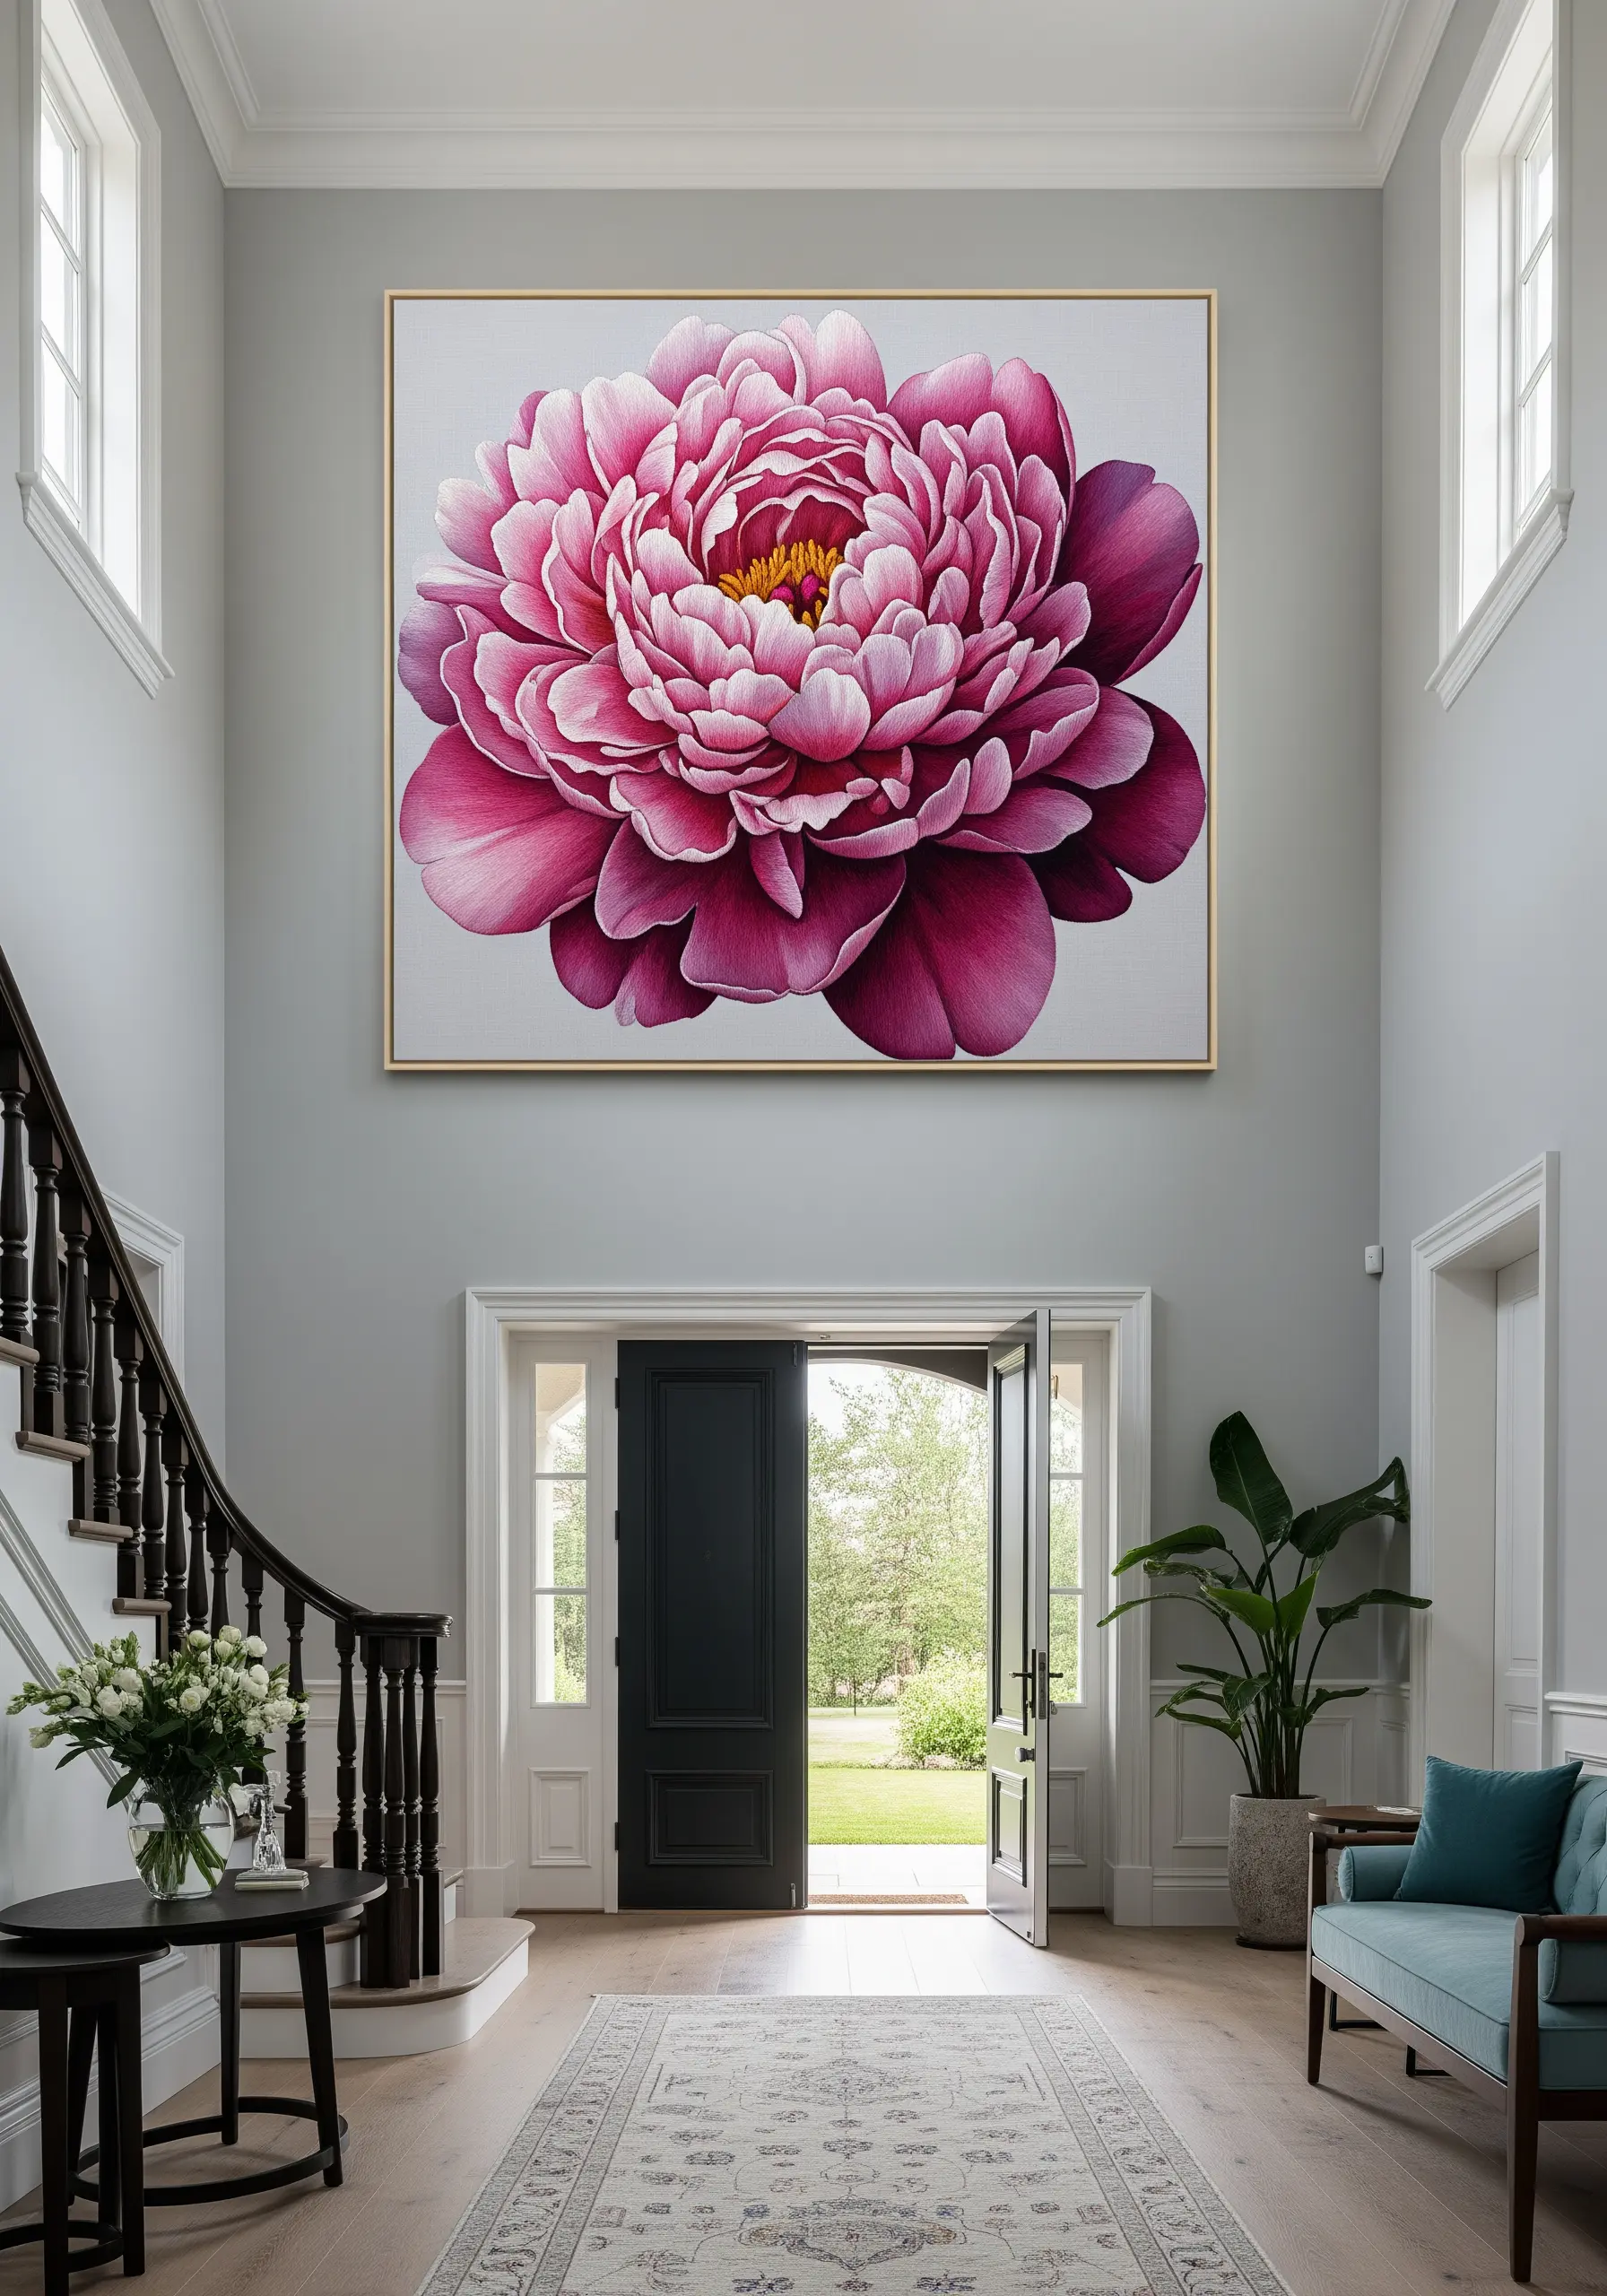
The secret to breathtakingly realistic flowers is in the subtle details, achieved by working with a single strand of embroidery floss.
Using just one strand allows you to blend dozens of shades of a color seamlessly with the long-and-short stitch, capturing the delicate gradients of each petal.
Always direct your stitches to follow the natural growth pattern of the flower—curving outward from the center—to create a convincing sense of shape and volume.
This meticulous technique transforms your embroidery from a simple craft into a work of botanical art.
16. Craft a Celestial Gallery Wall
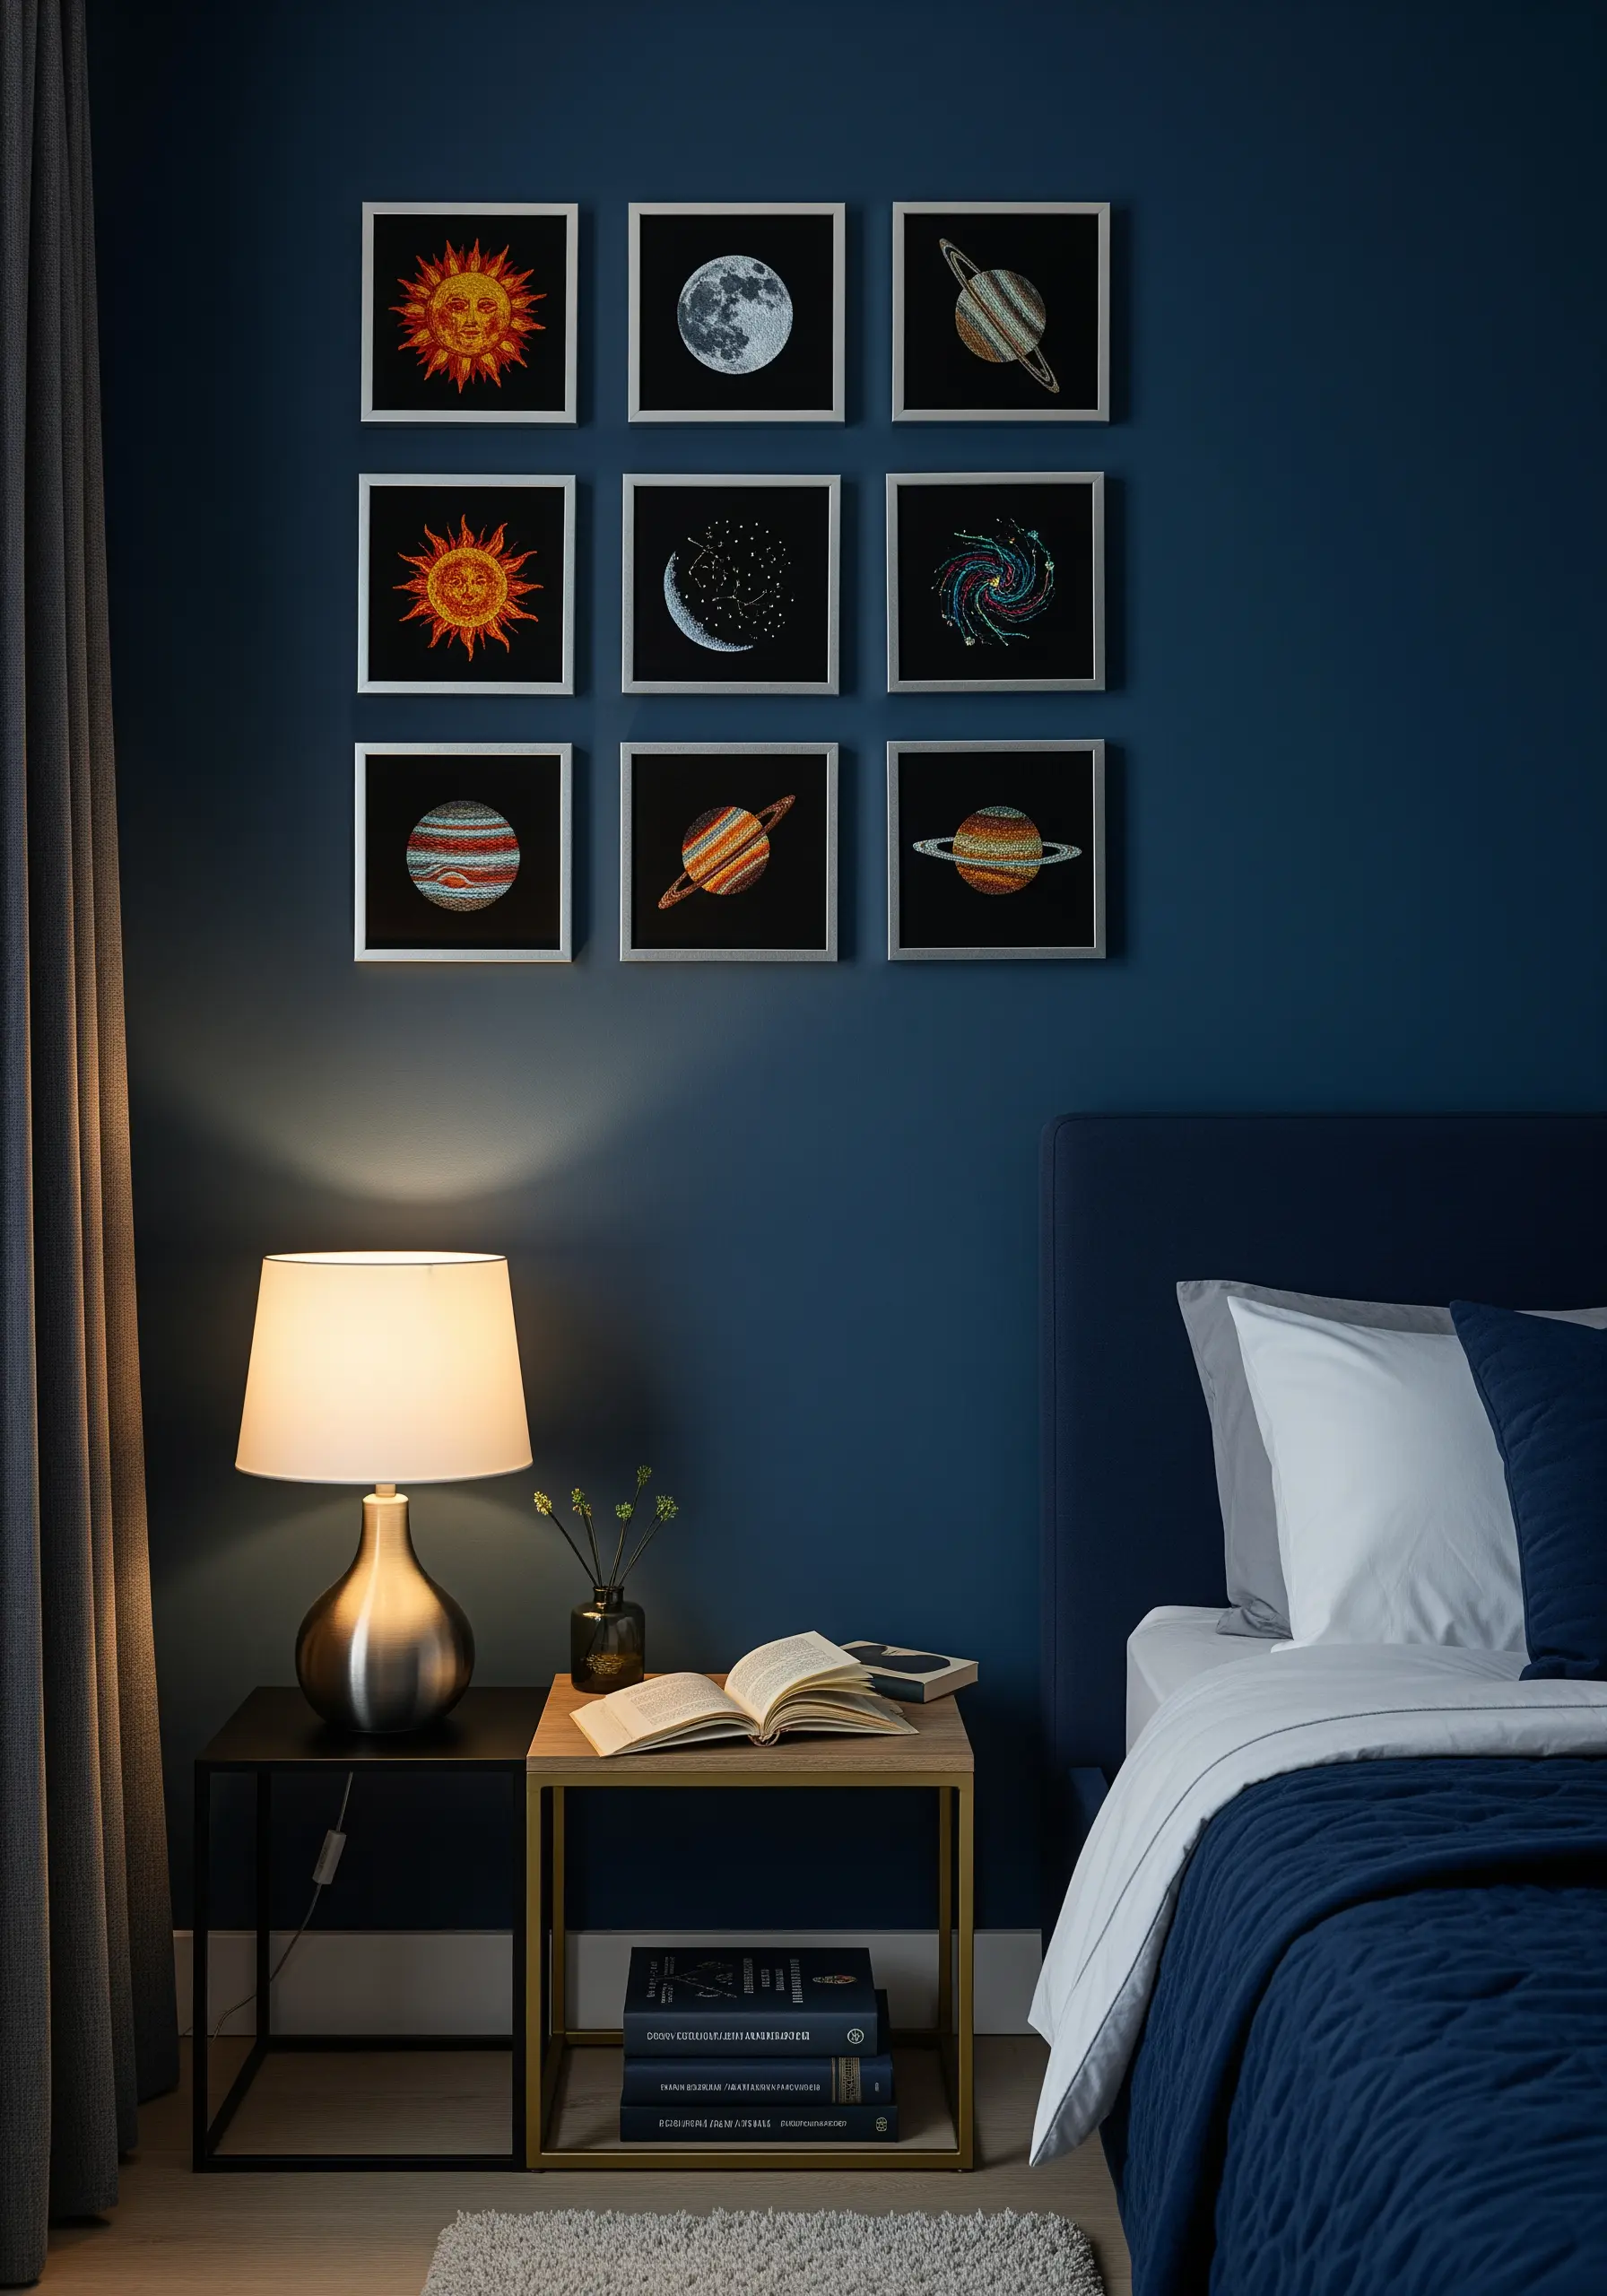
Turn your bedroom into a cosmos by creating a gallery of embroidered planets.
Assign a unique stitch or texture to each celestial body: use metallic thread and couching for Saturn’s rings, dense French knots for a cratered moon, and smooth satin stitch for a gaseous Jupiter.
Using black fabric as your base makes the vibrant colors of the planets and stars appear to glow in the darkness.
Grouping these small, individually framed pieces creates a sophisticated and educational display.
17. Render Architecture with Minimalist Line Work
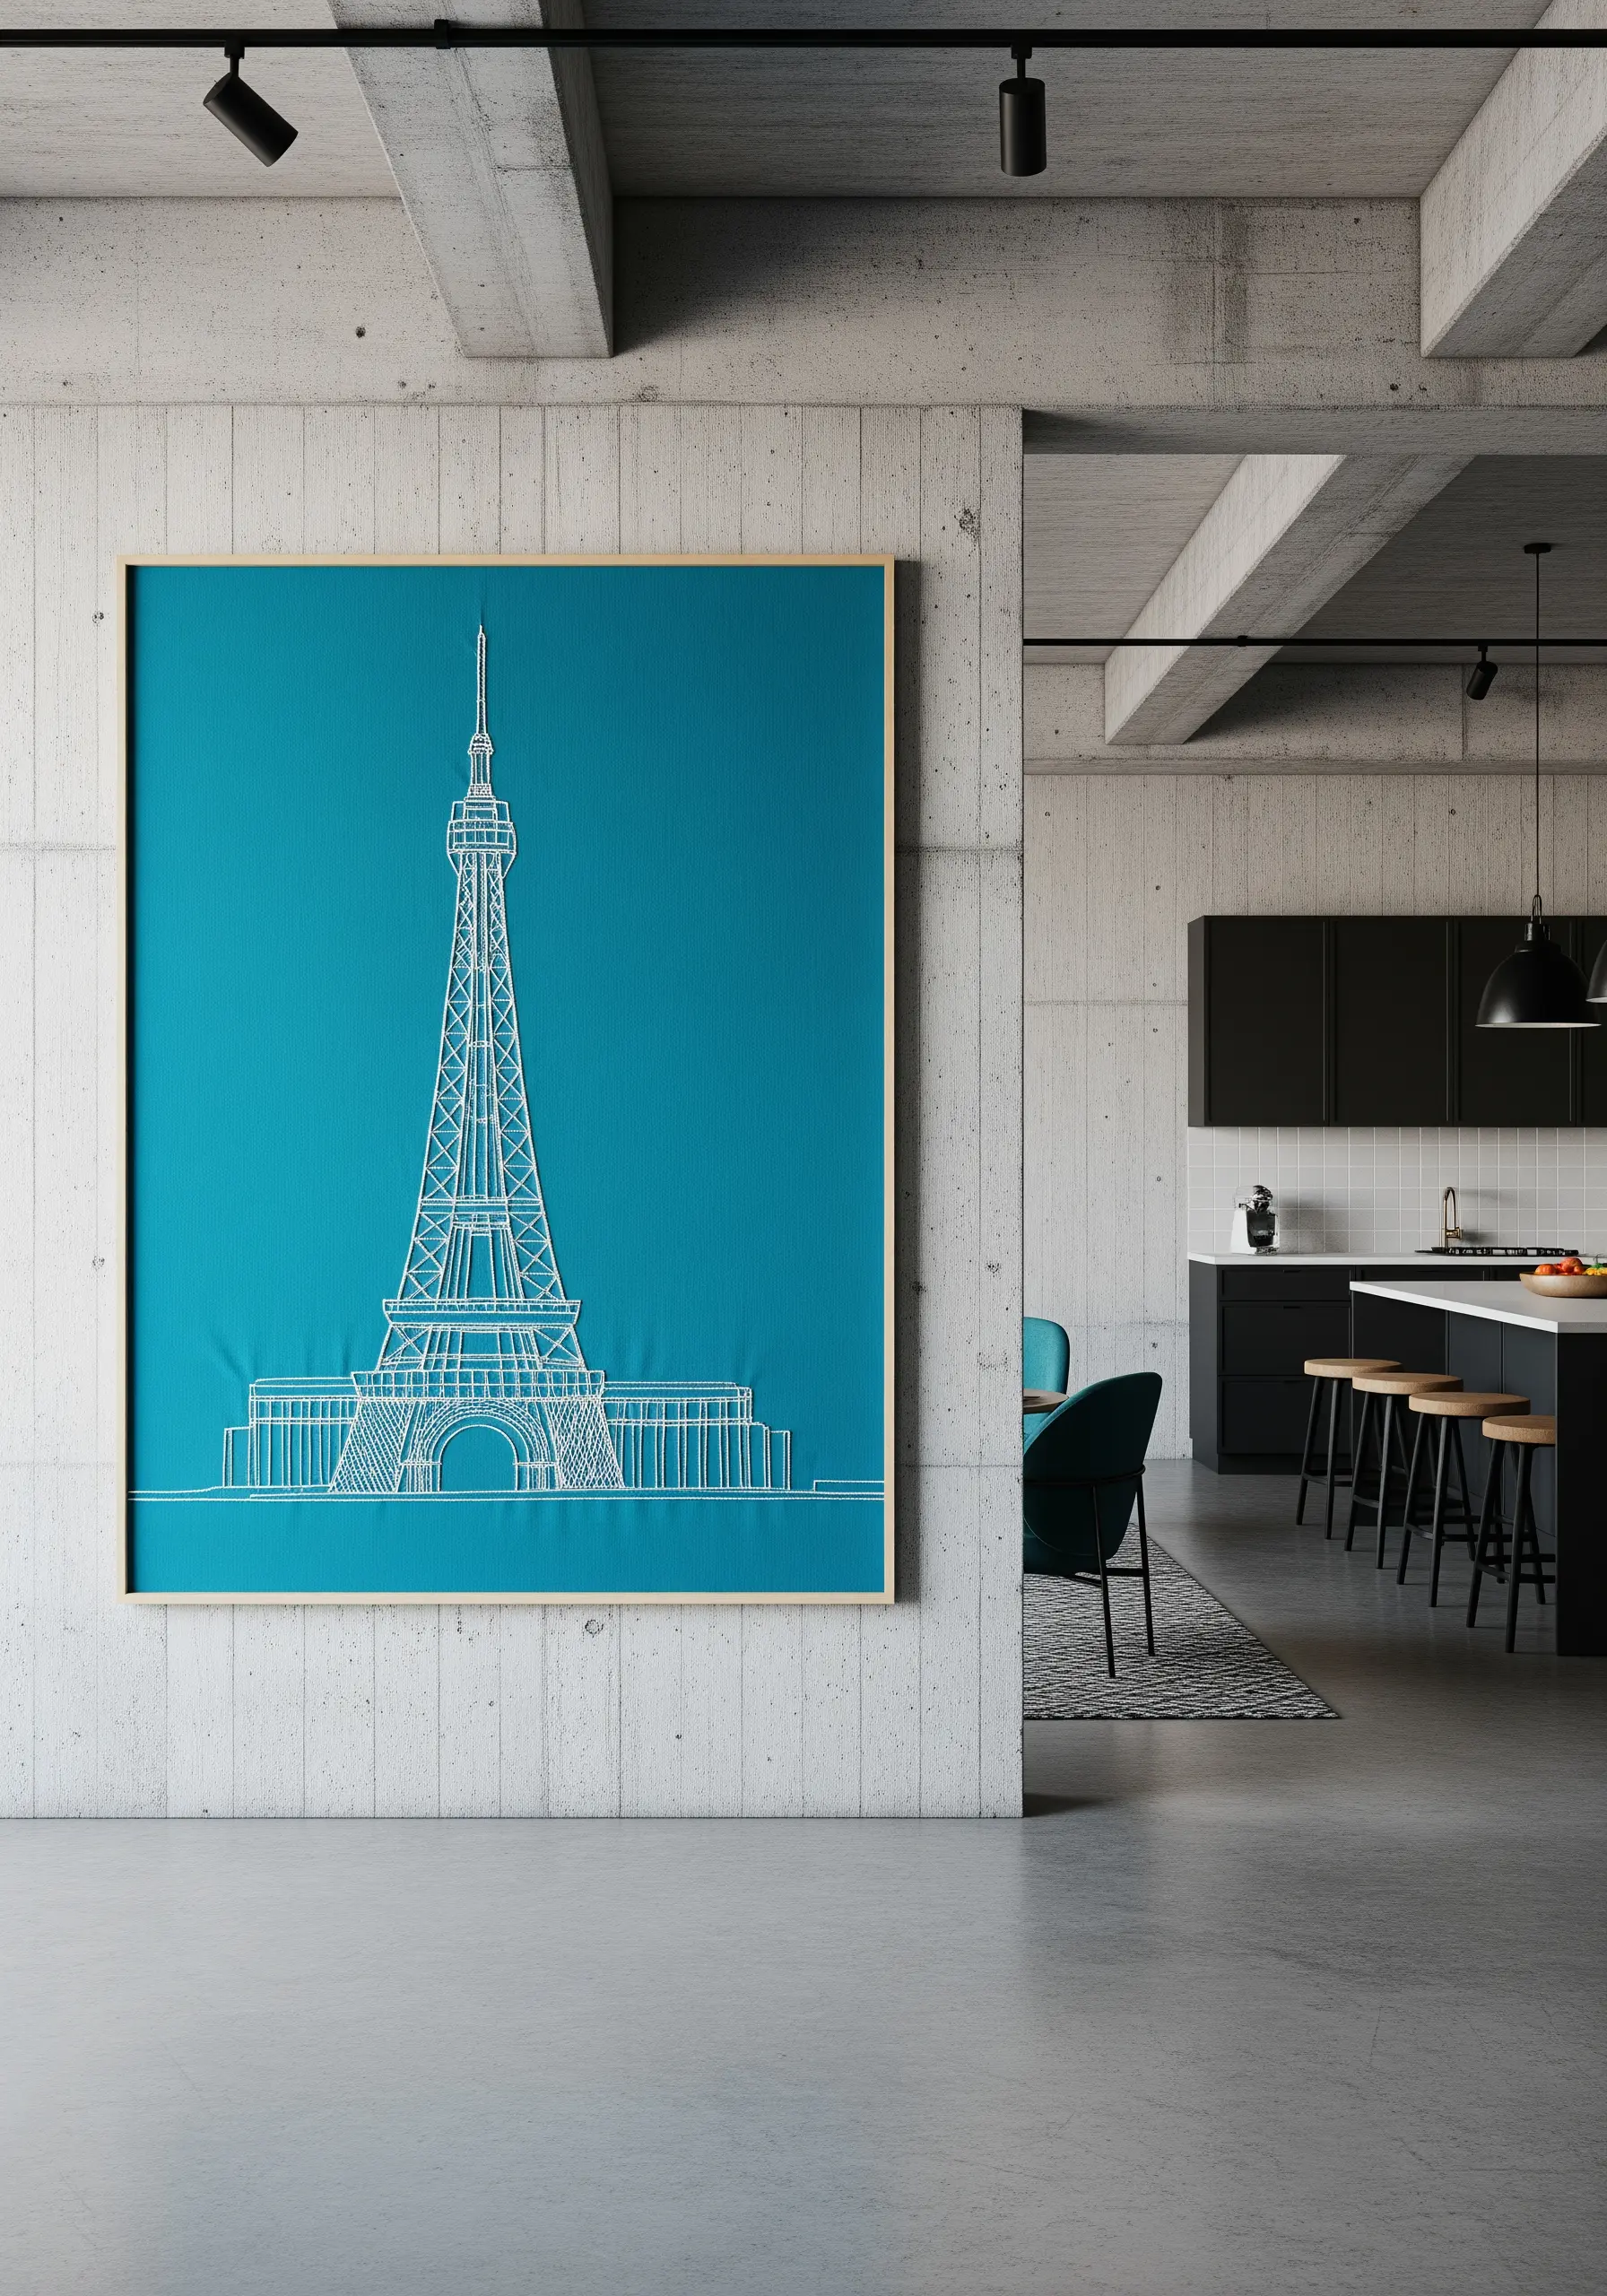
Capture the essence of an architectural landmark with the elegance of a single-color line drawing.
Use a fine backstitch with one or two strands of floss to achieve the clean, precise lines of an architectural blueprint.
Choose a high-contrast combination, like white thread on a bold teal fabric, to make the design stand out.
This minimalist approach emphasizes form and structure, turning a complex subject into a serene and sophisticated piece of art that complements modern, industrial interiors.
18. Make Lettering Pop with Padded Satin Stitch
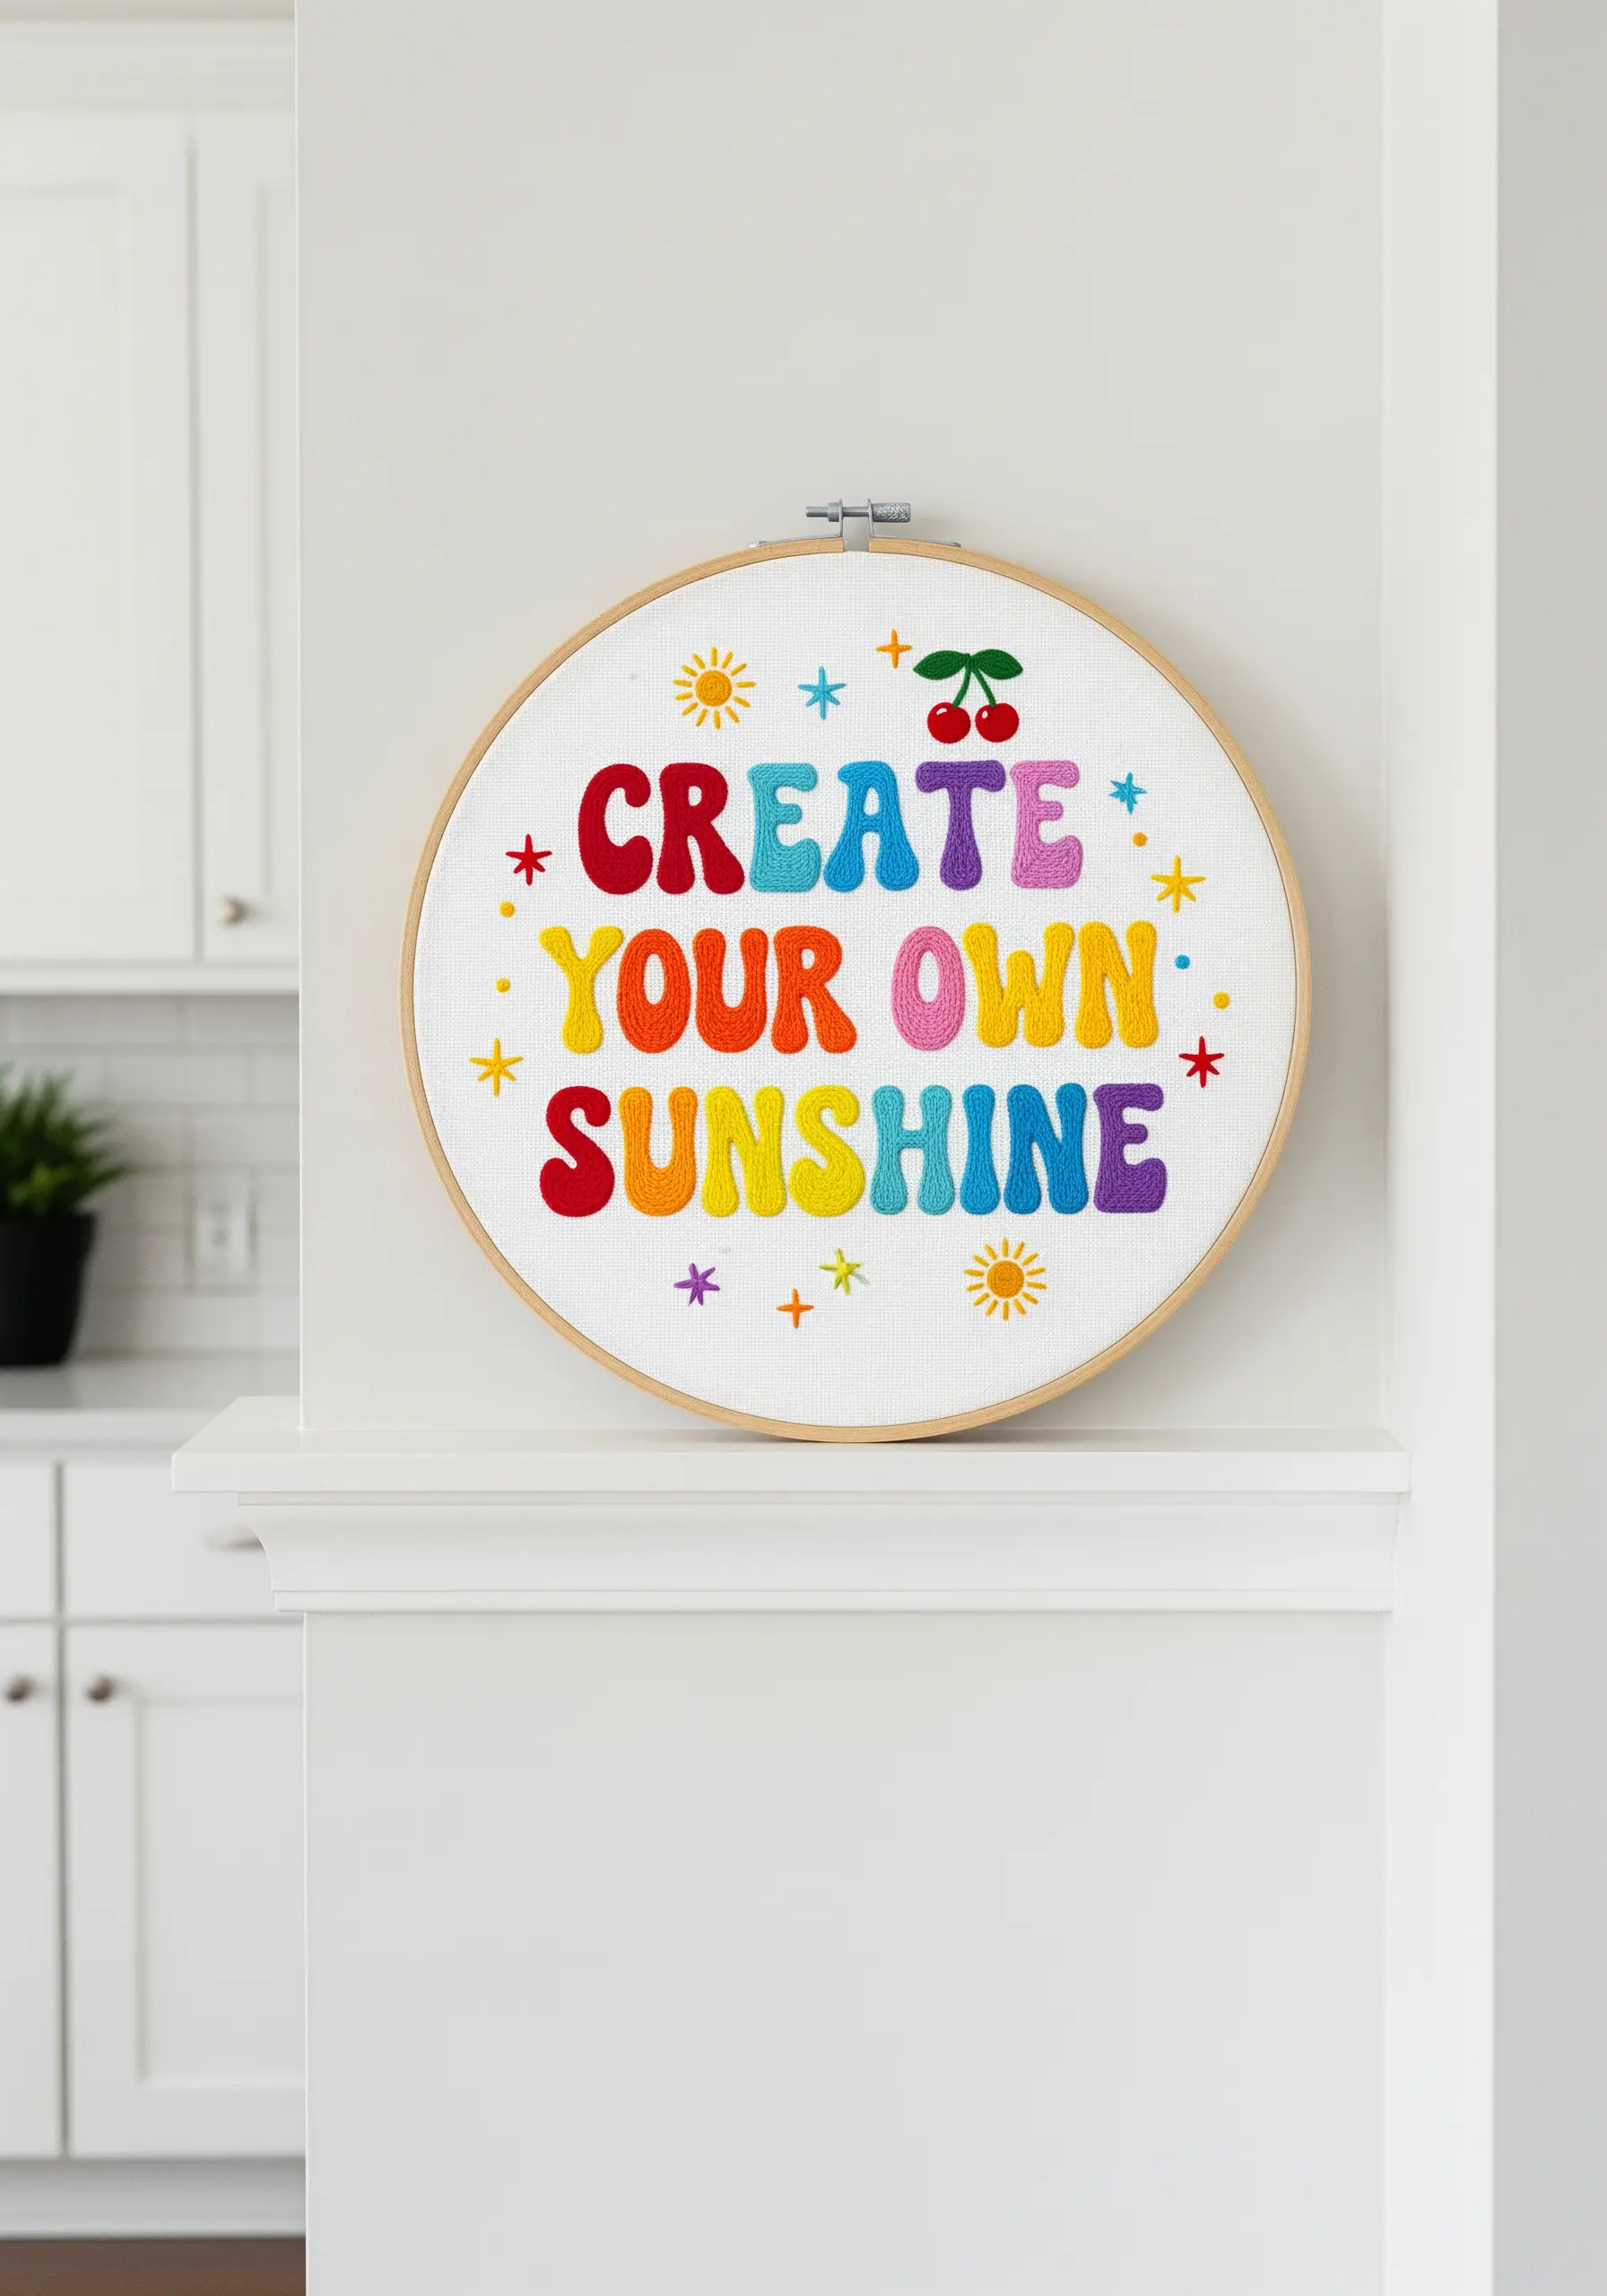
To give your embroidered text a raised, three-dimensional quality, use the padded satin stitch technique.
First, fill the inside of each letter with a foundation of small running stitches or a layer of satin stitches worked in the opposite direction.
Then, cover this padding with your final layer of satin stitches. This underlayer lifts the top stitches, making the letters look full, rounded, and much more prominent.
This simple trick instantly gives your lettering a professional, polished look.
19. Illustrate the Seasons with Textural Knots
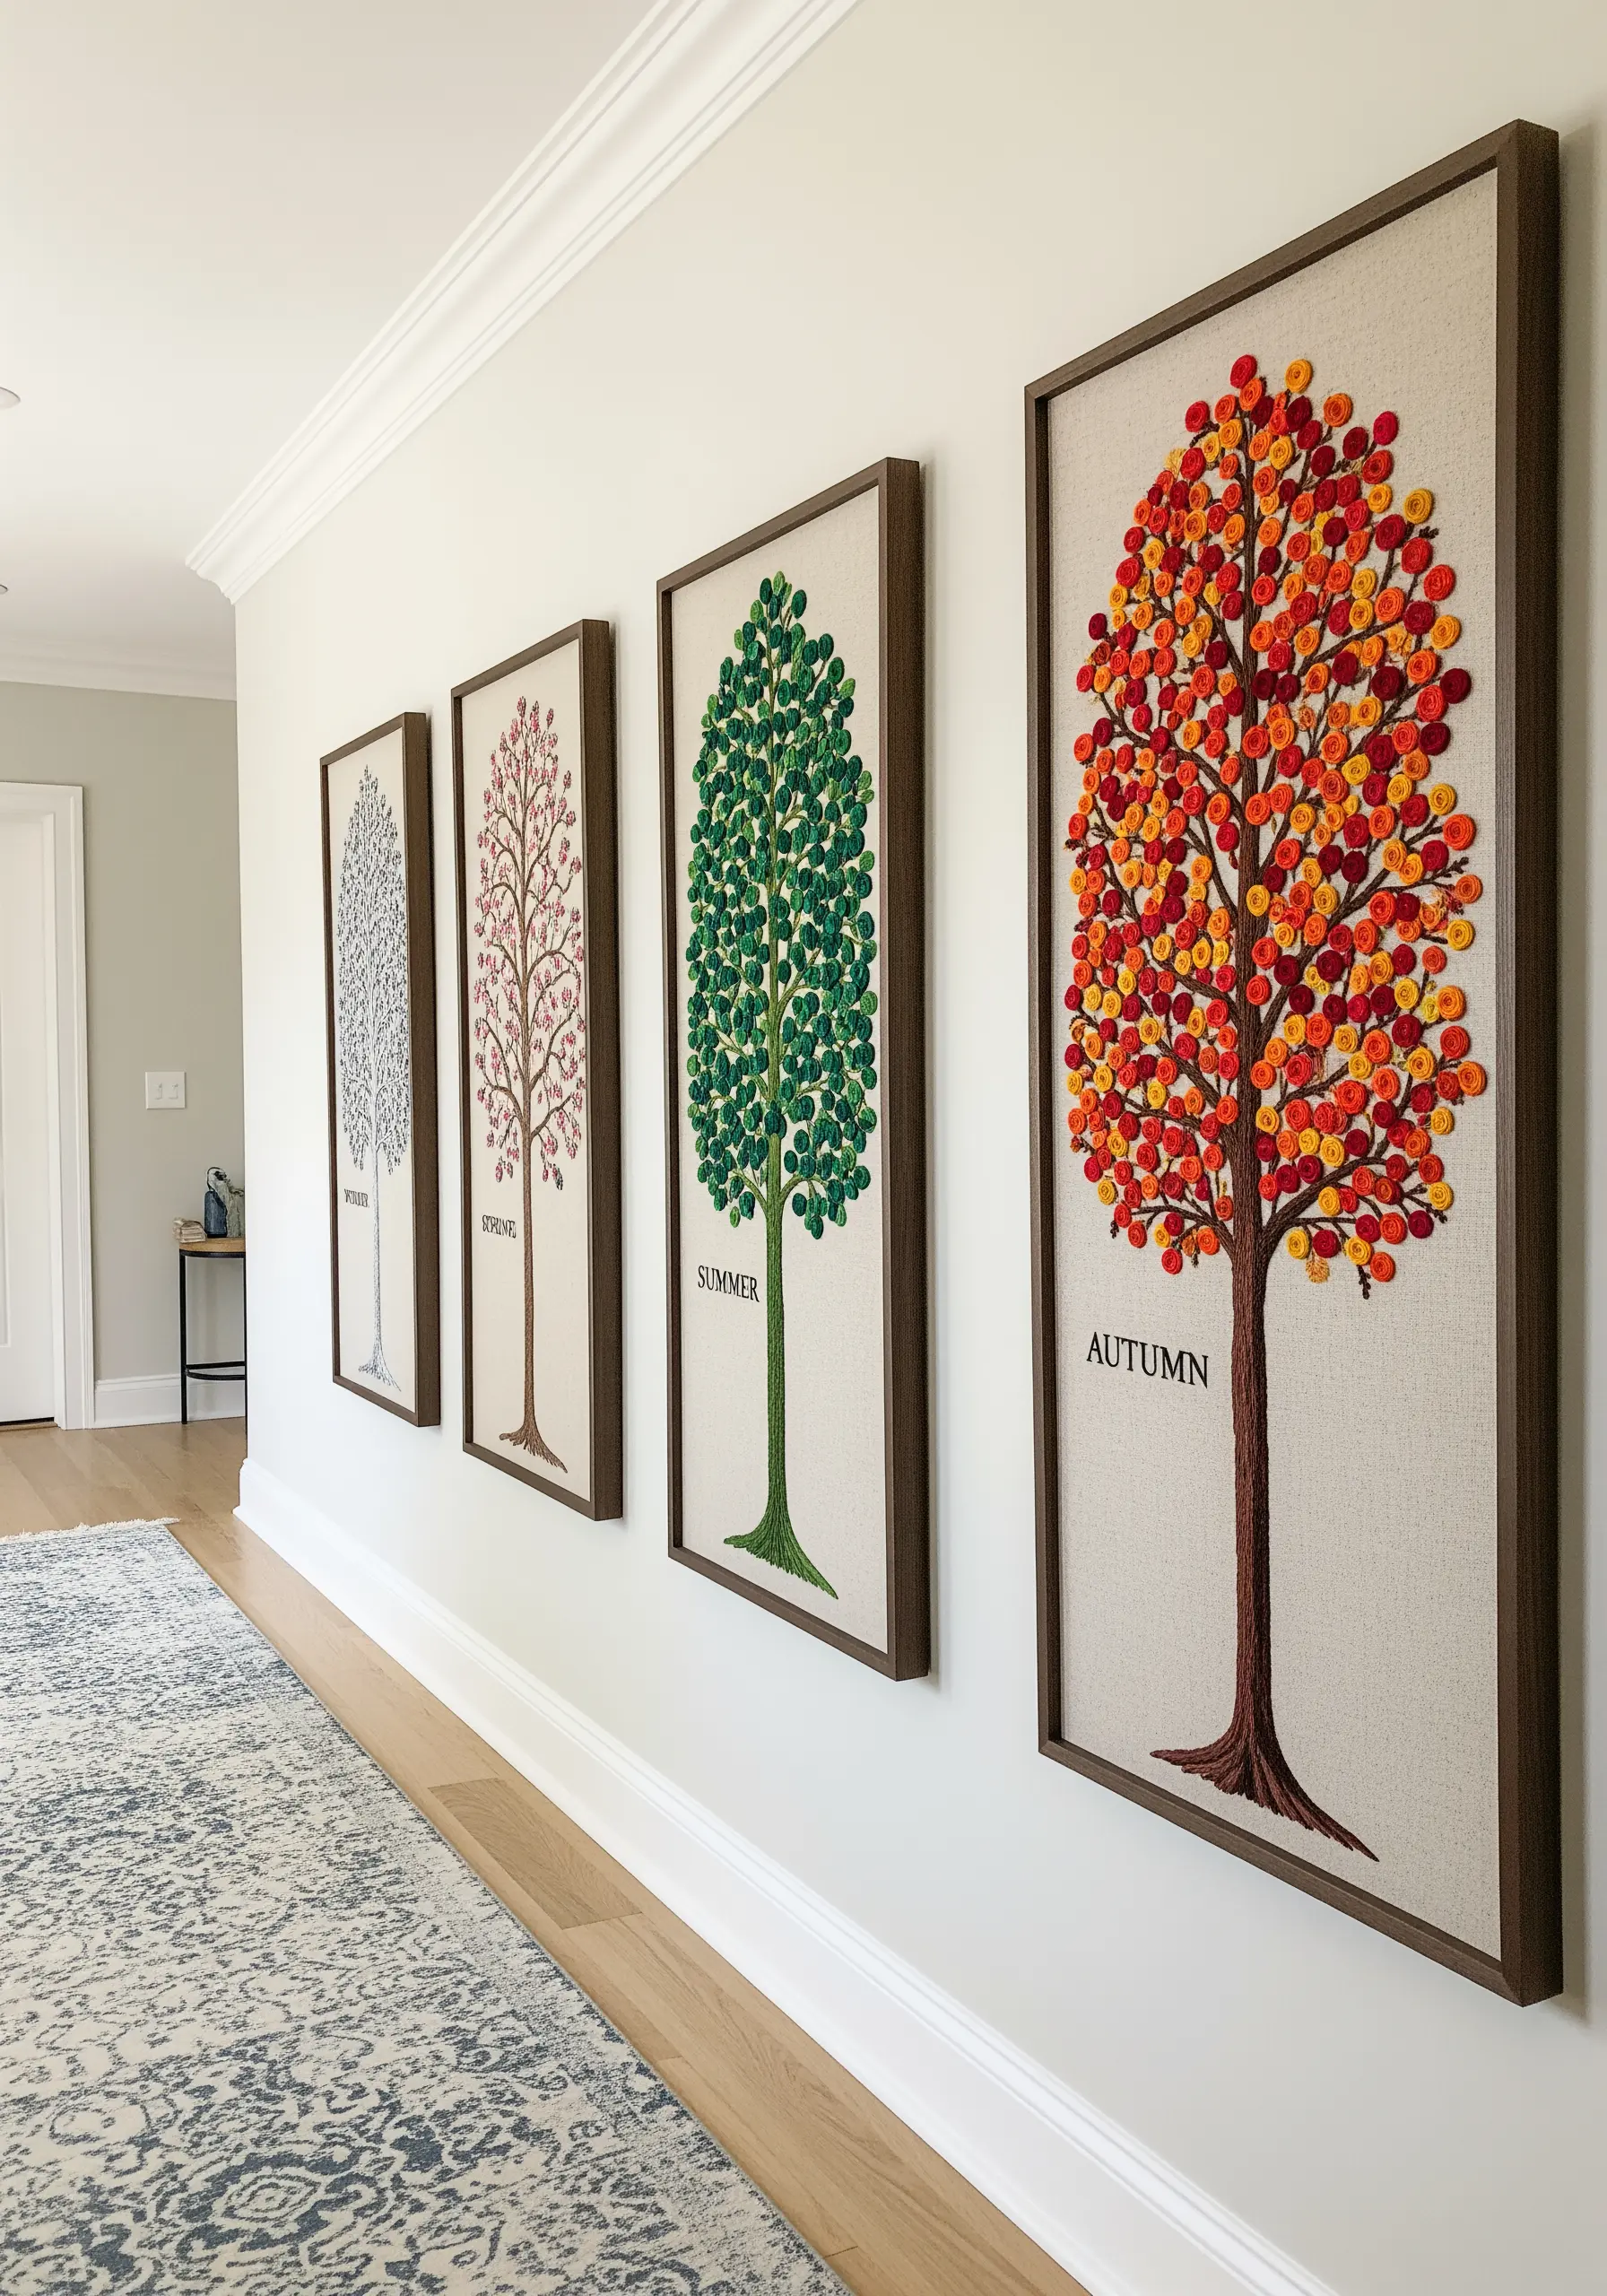
Represent the changing seasons in a series of tree embroideries by focusing on texture and color.
Create the lush canopy of leaves using dense clusters of French knots or the slightly taller colonial knot.
For spring, use pale pinks and whites; for summer, vibrant greens; and for autumn, a rich mix of reds, oranges, and yellows.
A sparse scattering of white knots on bare branches perfectly captures the feeling of winter, turning a simple motif into a year-long story.
20. Define Mountain Ranges with Directional Stitching
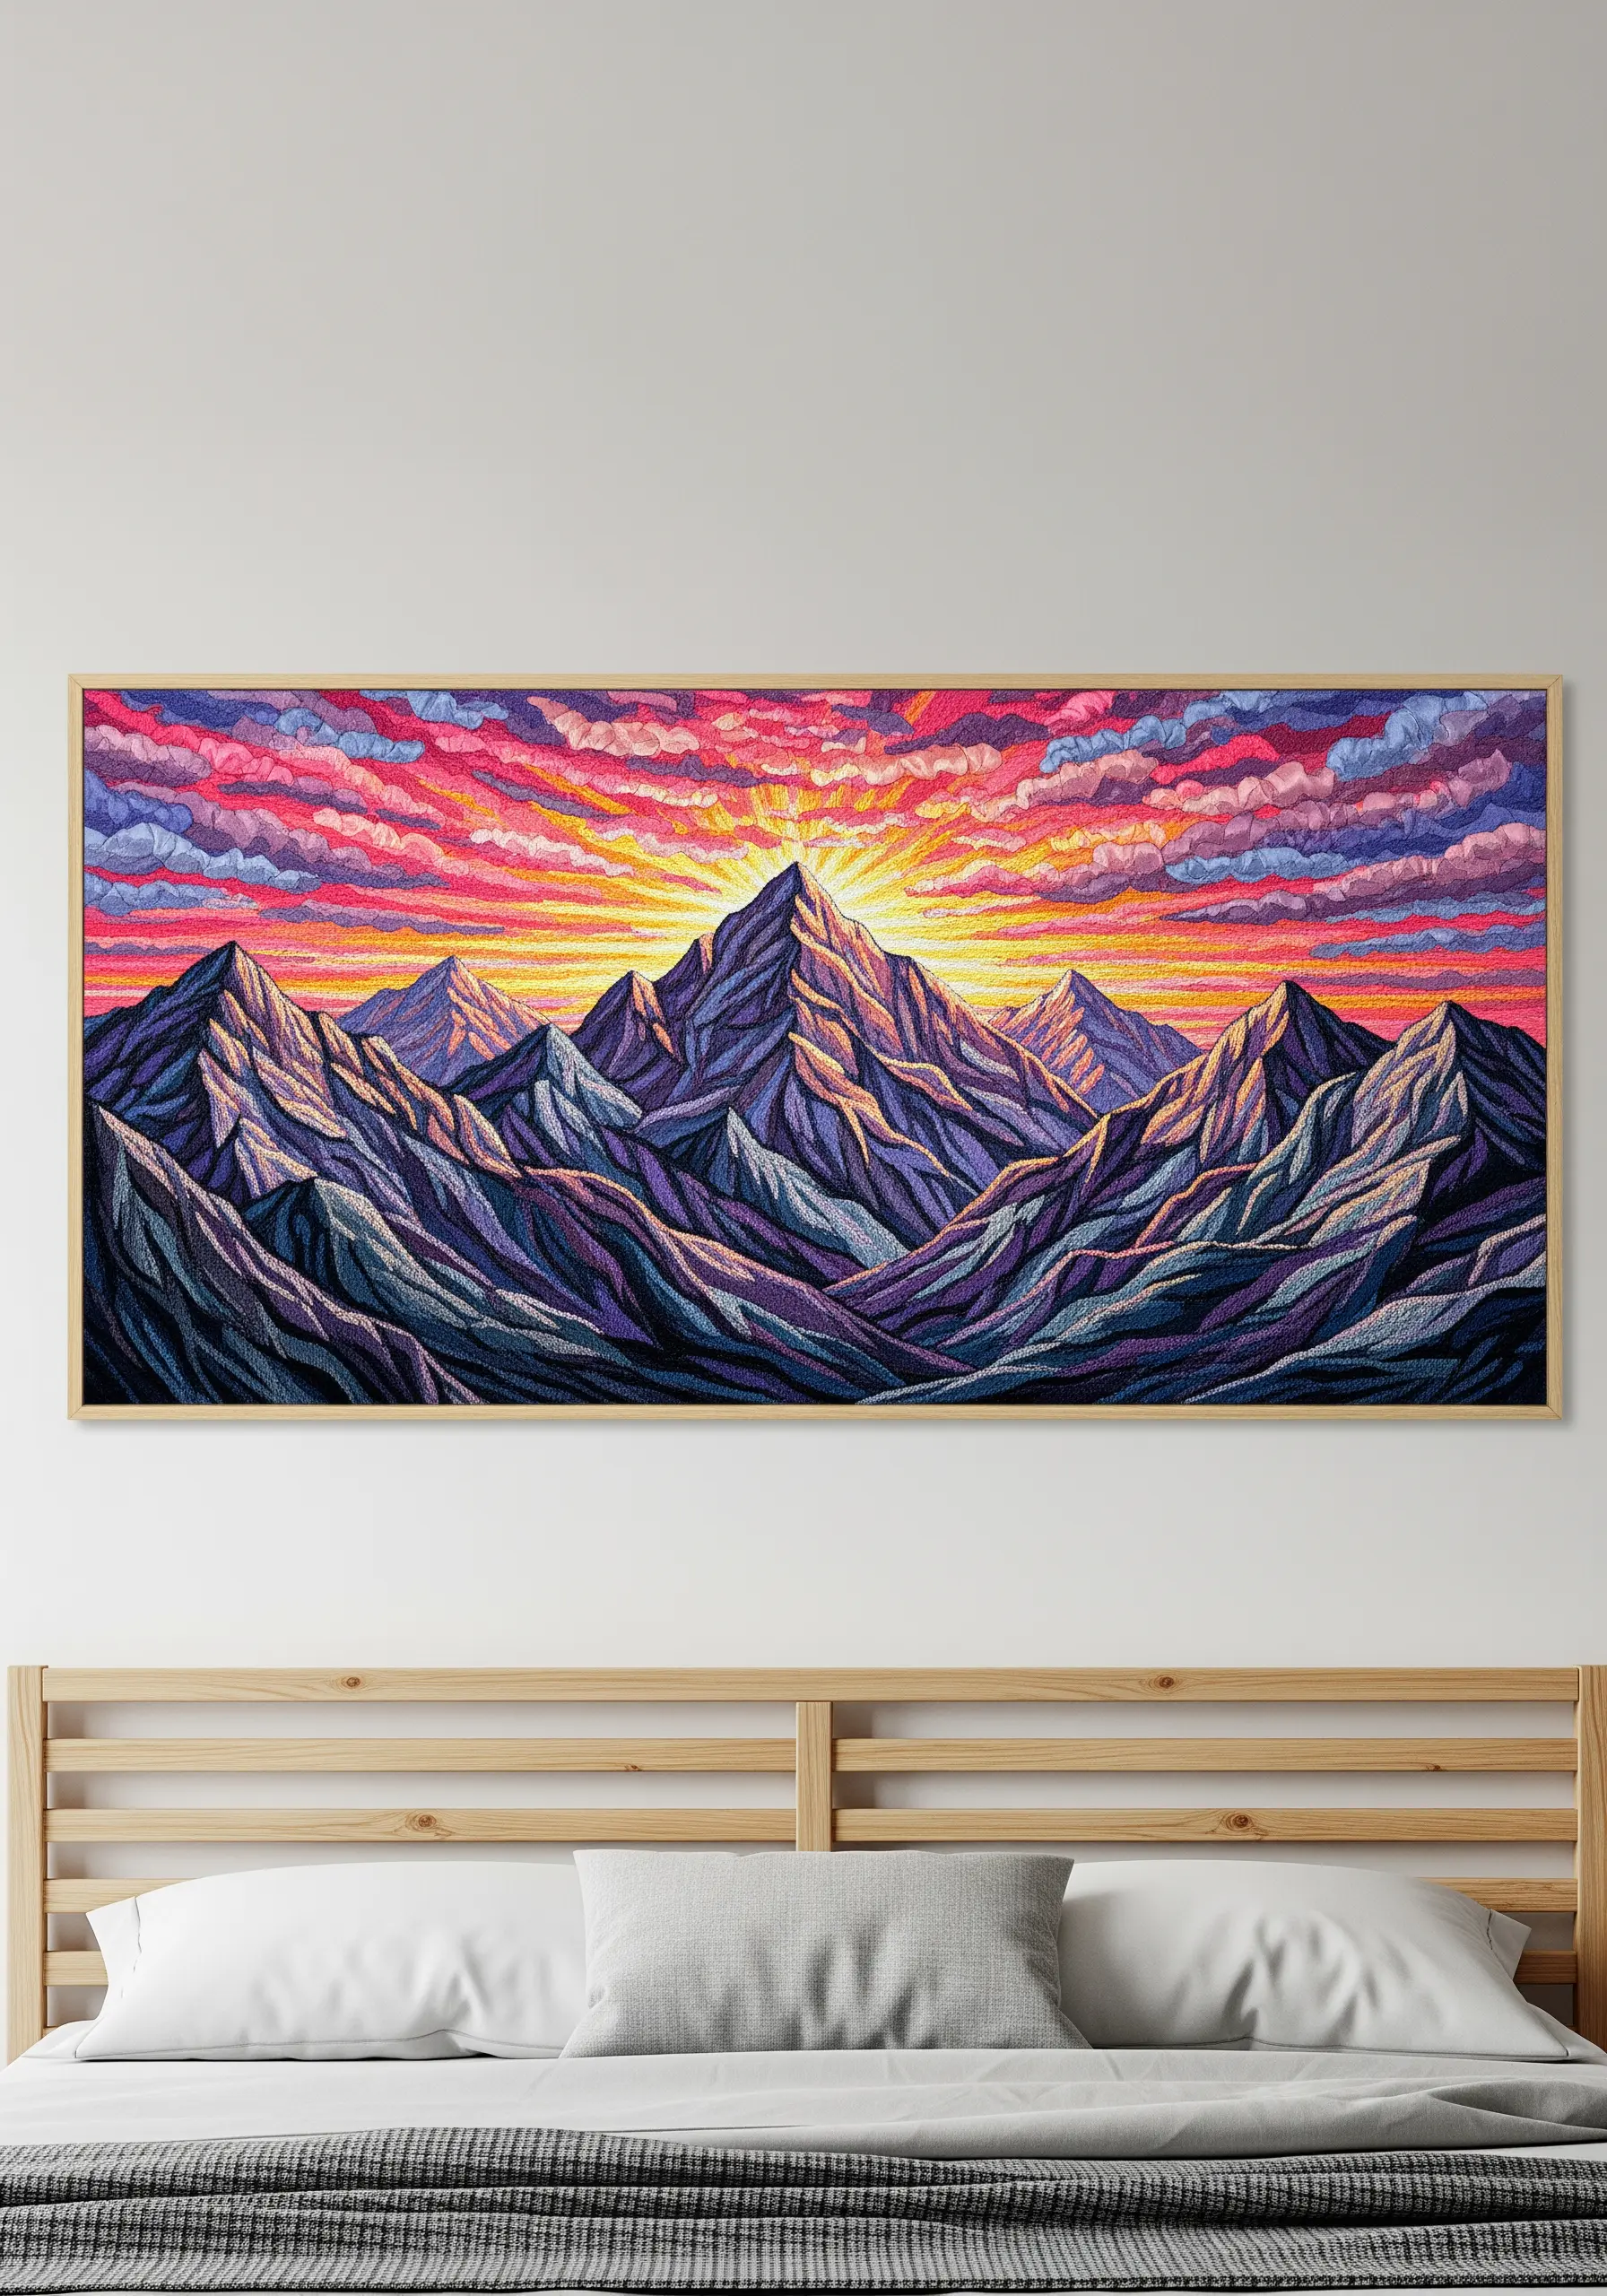
When stitching a mountain landscape, the direction of your stitches is just as important as the color.
Use long, directional fill stitches that follow the jagged angles and planes of the mountain peaks to create a strong sense of form and shadow.
Let the stitches in the sky flow horizontally to suggest clouds and atmosphere, creating a clear contrast with the angularity of the mountains.
This thoughtful application of stitch direction will make your landscape feel dynamic and three-dimensional.
21. Capture Animal Personalities in Thread
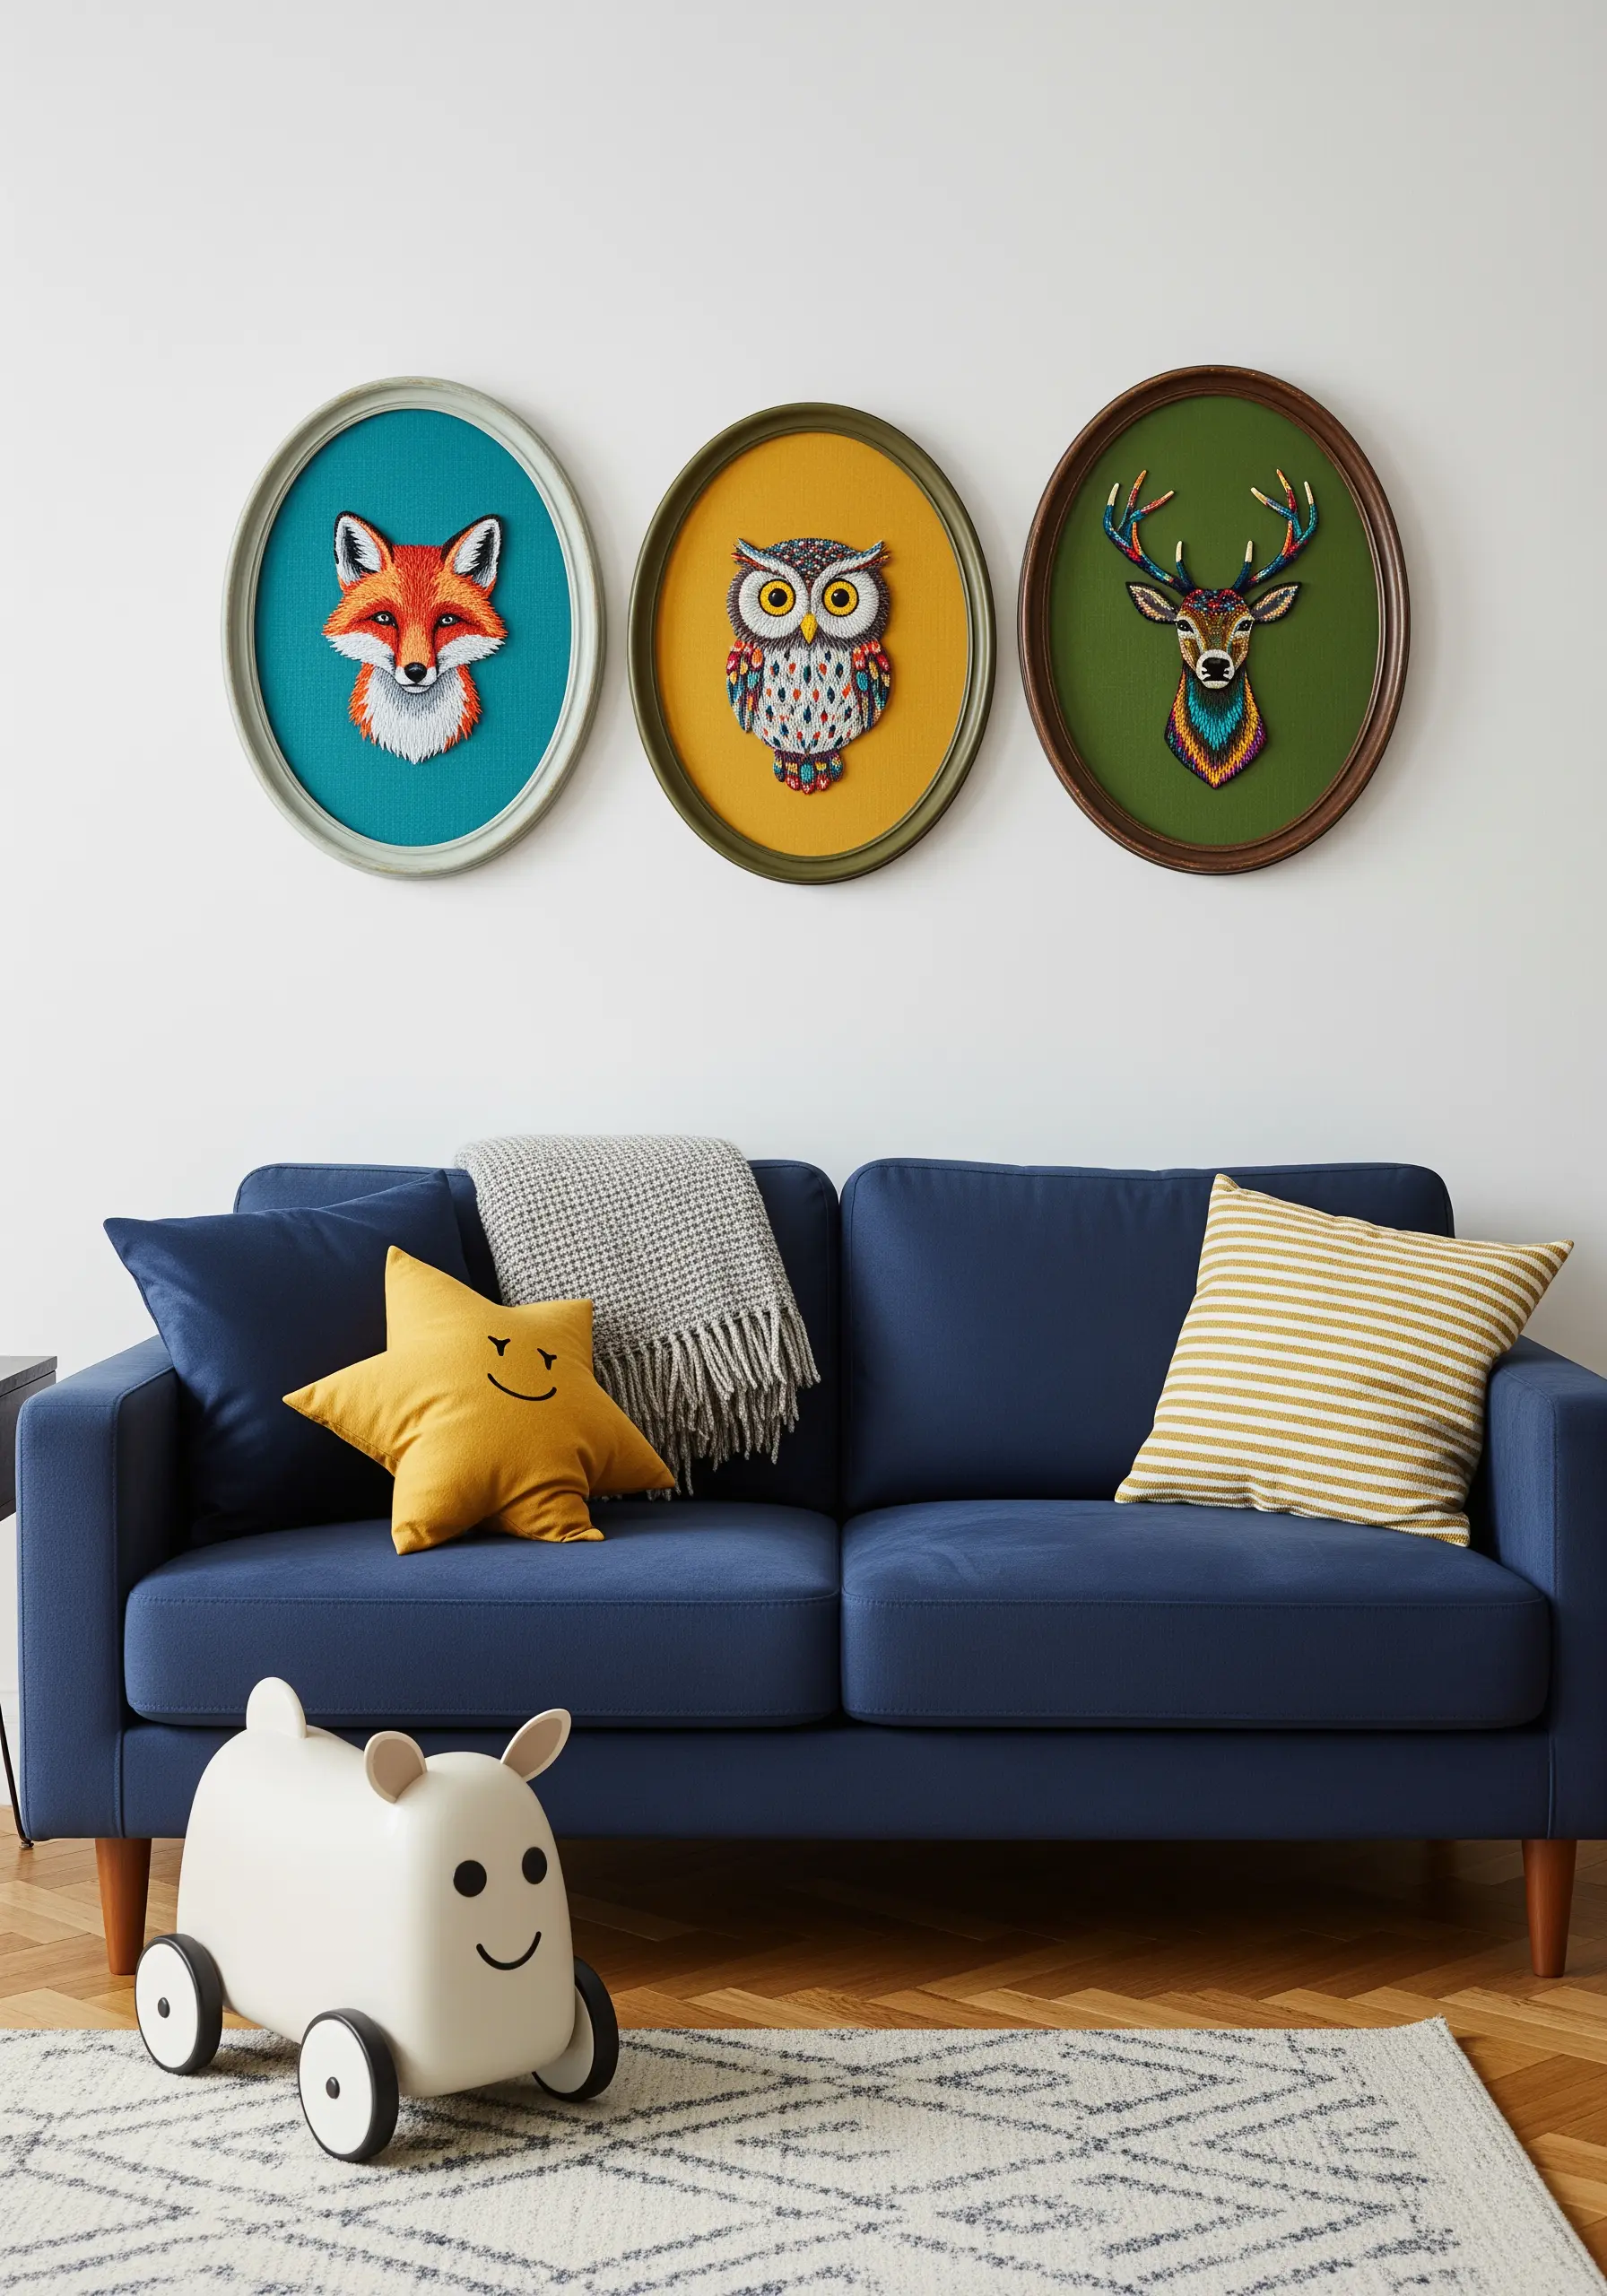
To embroider animals that feel alive, focus on capturing the texture of their fur and the expression in their eyes.
Use short, layered long-and-short stitches that follow the direction of hair growth to create a realistic fur effect.
For the eyes, a single satin stitch with a tiny white French knot for a catchlight can instantly bring your creature to life.
Placing these portraits against a solid, bold color background makes the detailed stitching stand out beautifully.
22. Design a Personal Embroidered World Map
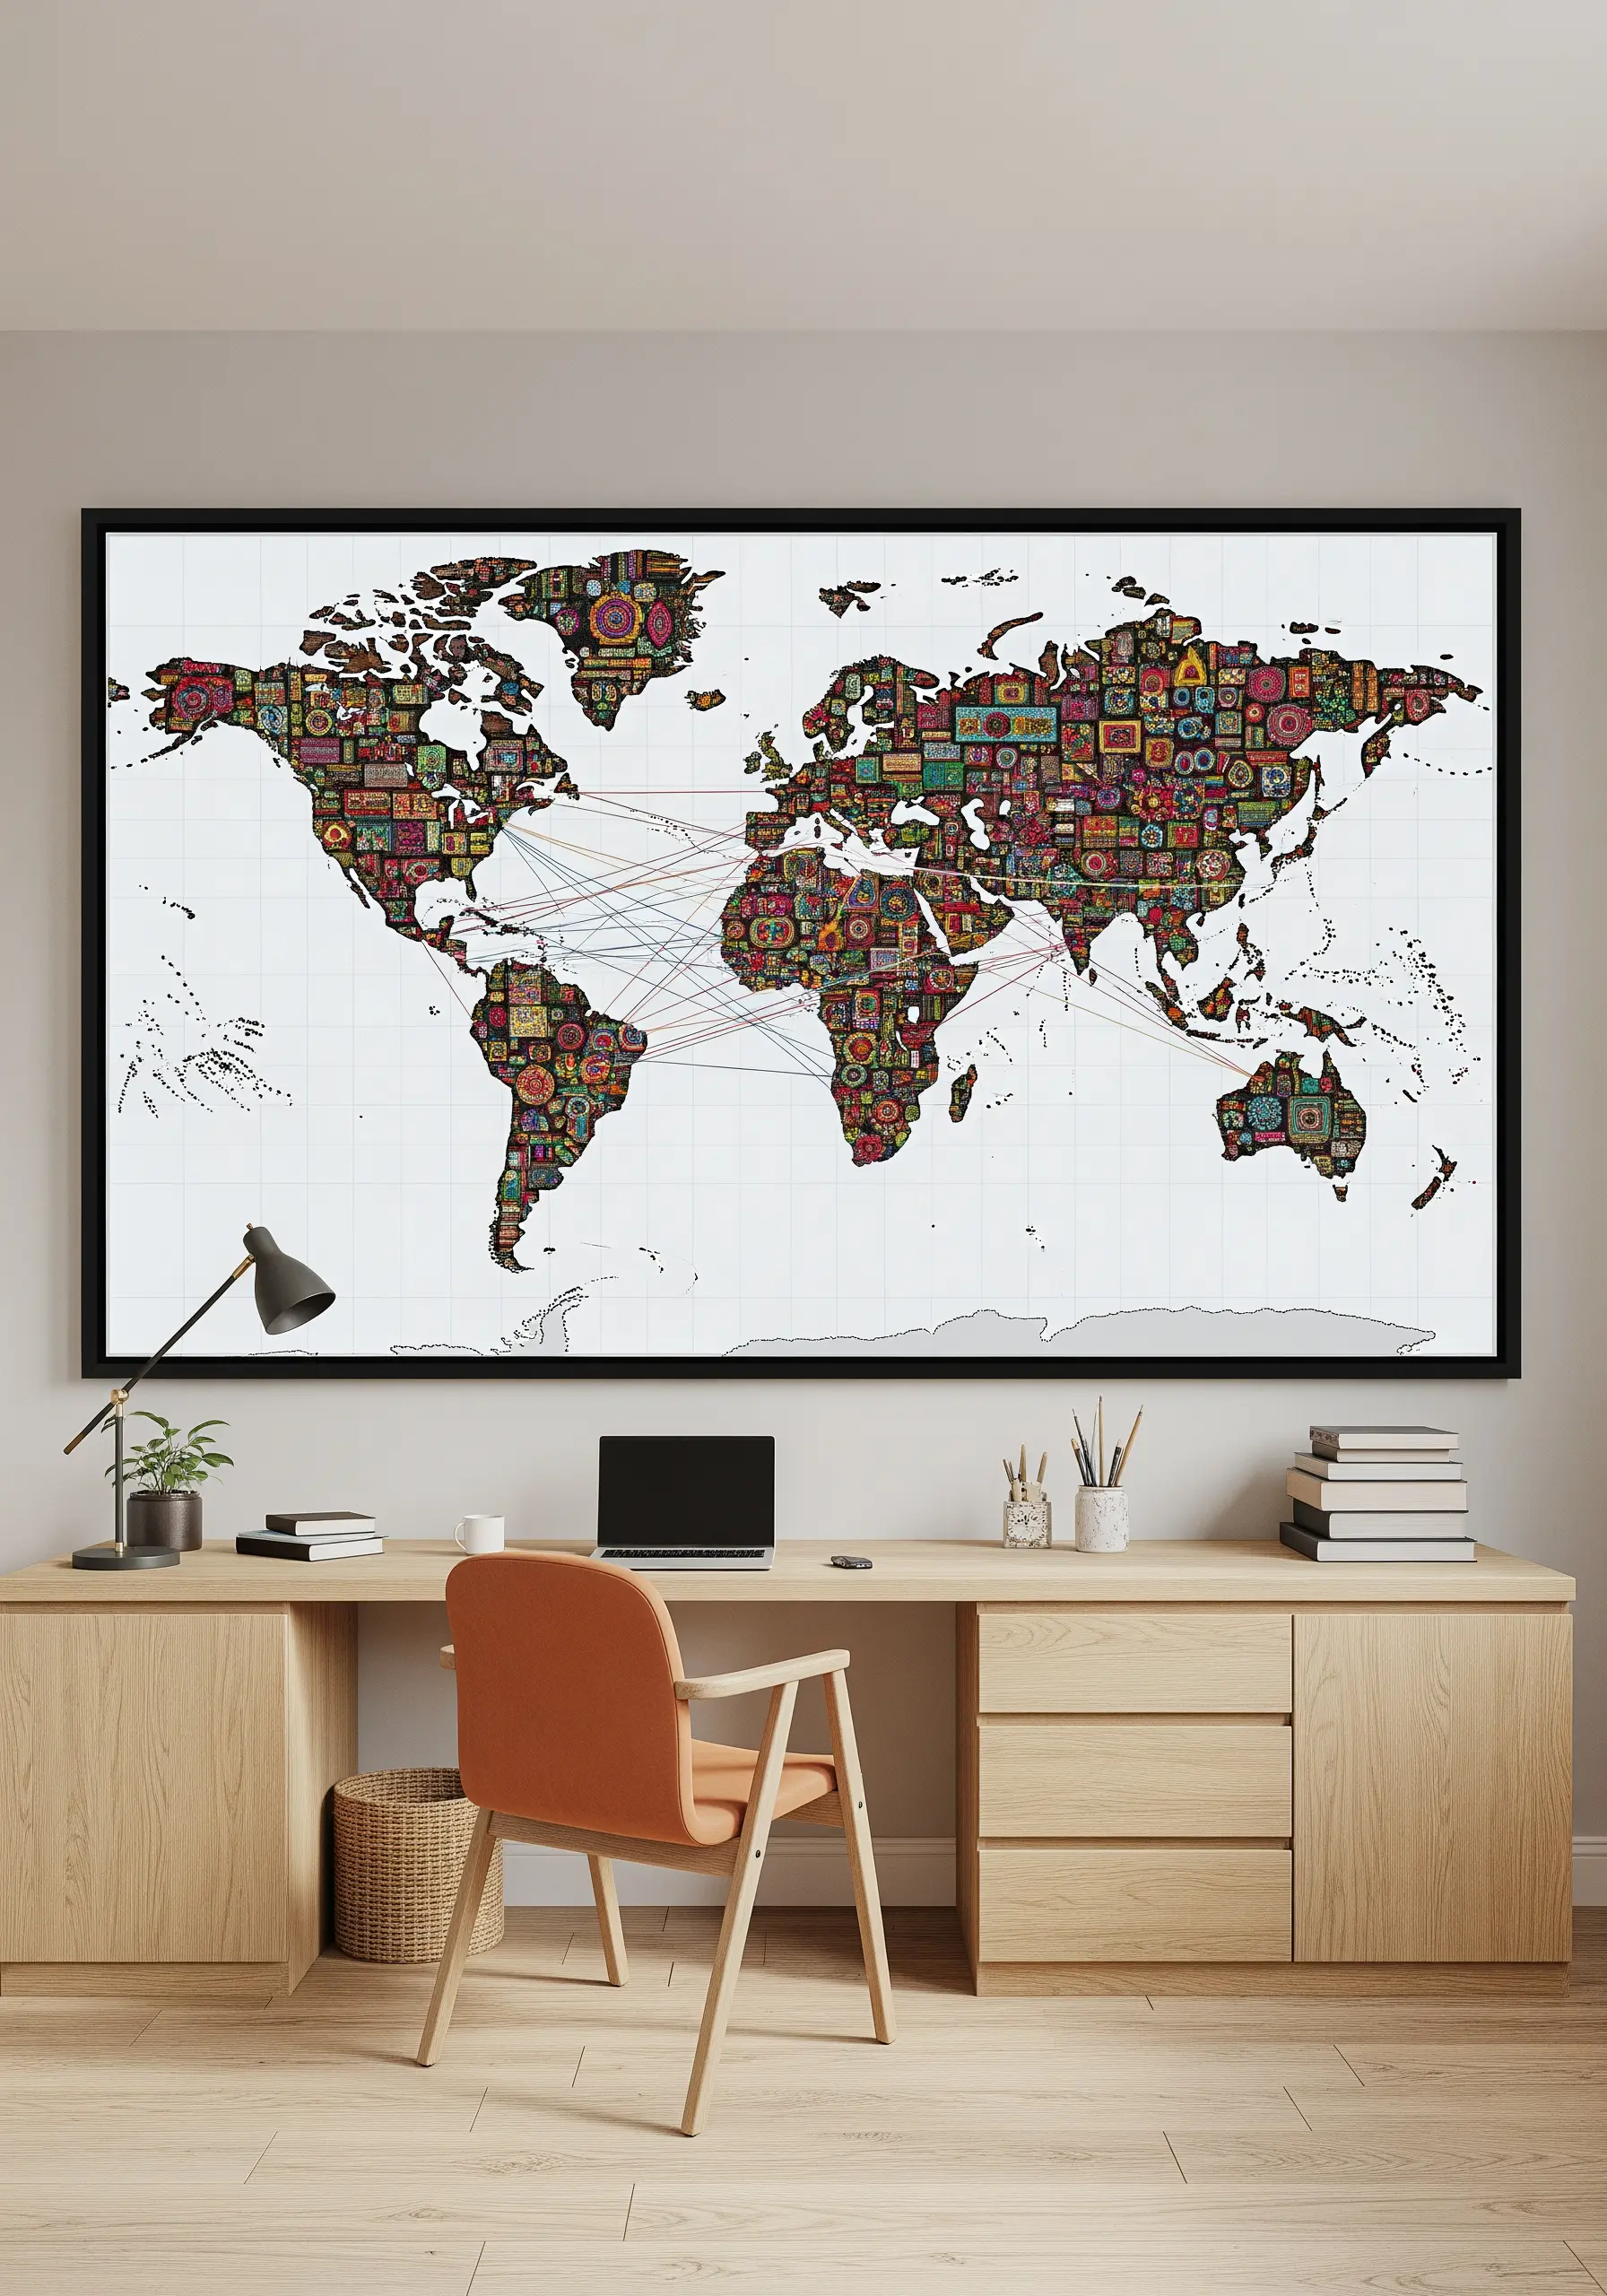
Transform a world map into a personal story by filling the continents with intricate patterns and connecting meaningful locations with thread.
Use each country or region as a mini-sampler to practice different fill stitches, from satin stitch to French knots to woven wheels.
Stretch single strands of a contrasting thread between places you’ve lived, visited, or dream of seeing.
This project becomes more than just wall art; it evolves into a beautiful, visual record of your life’s journey.
23. Visualize Sound with an Embroidered Waveform
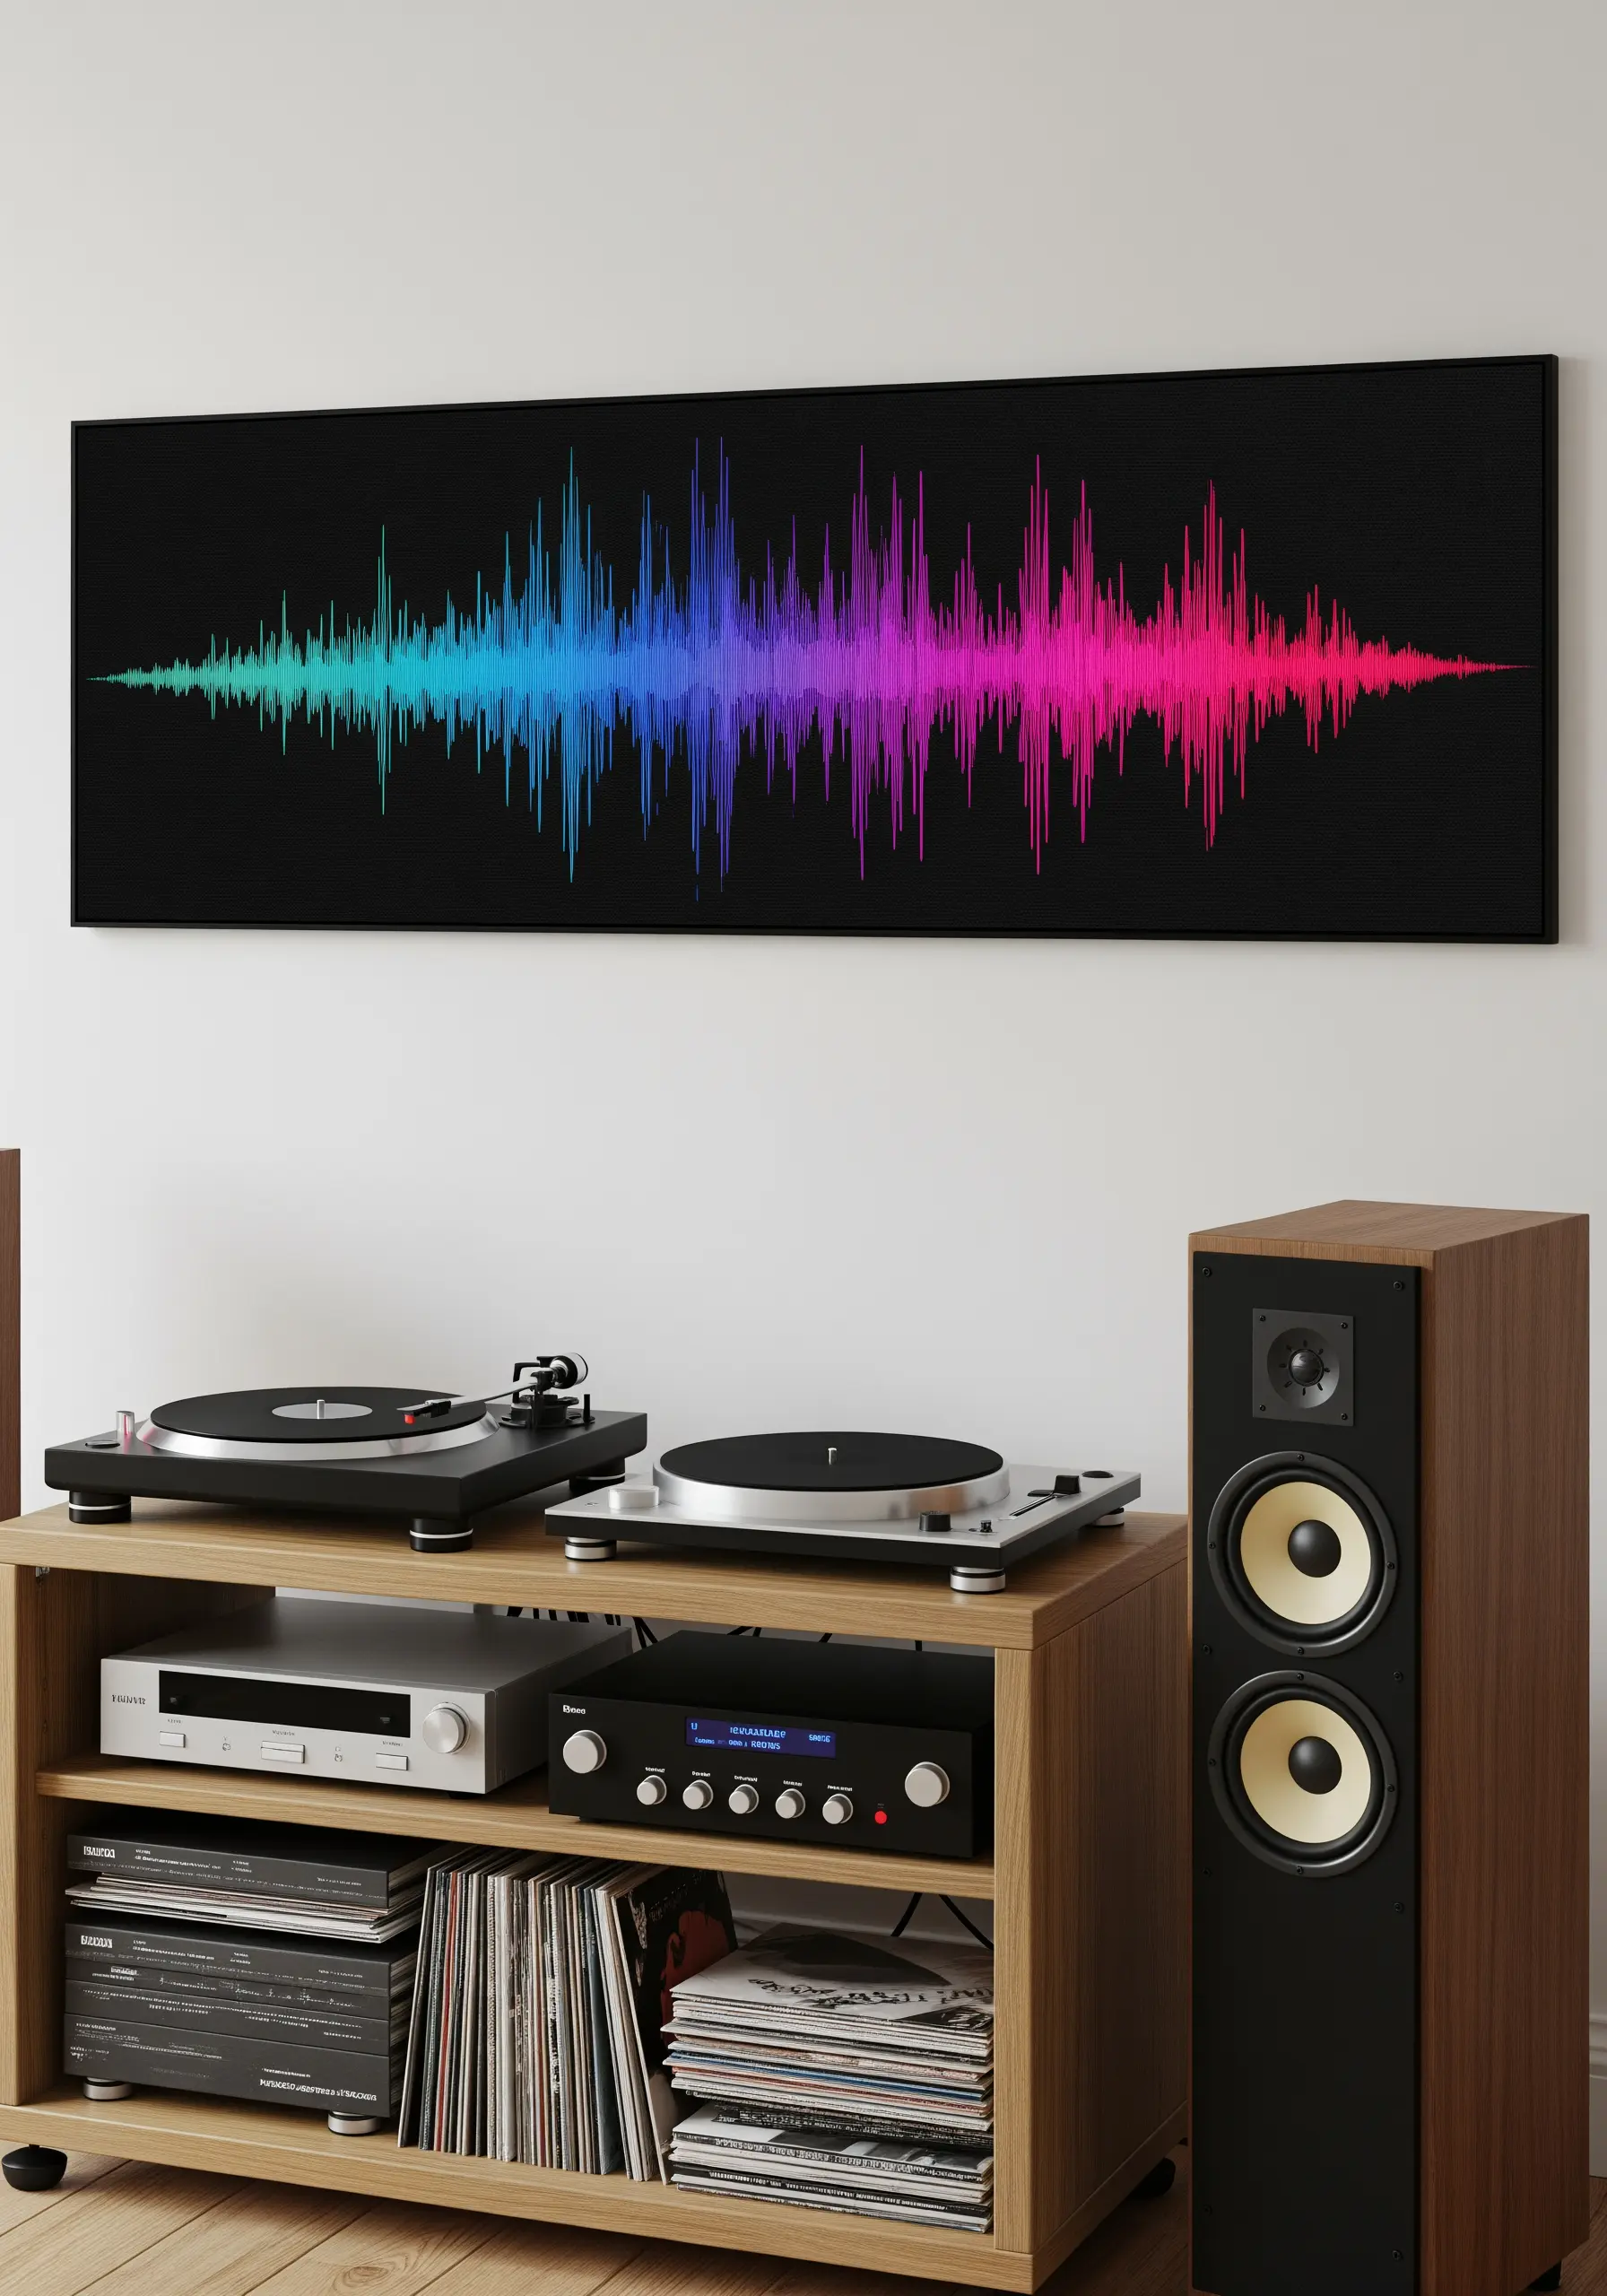
Stitch a meaningful piece of audio—like a favorite song, a laugh, or a message—by translating its soundwave into an abstract thread design.
Use vertical satin stitches of varying heights to represent the peaks and valleys of the audio waveform.
Create a stunning visual effect by stitching an ombré gradient, transitioning from one color to another across the length of the soundwave.
The result is a deeply personal and modern piece of art that holds a hidden meaning.
24. Combine Paint and Thread for a Mixed-Media Piece
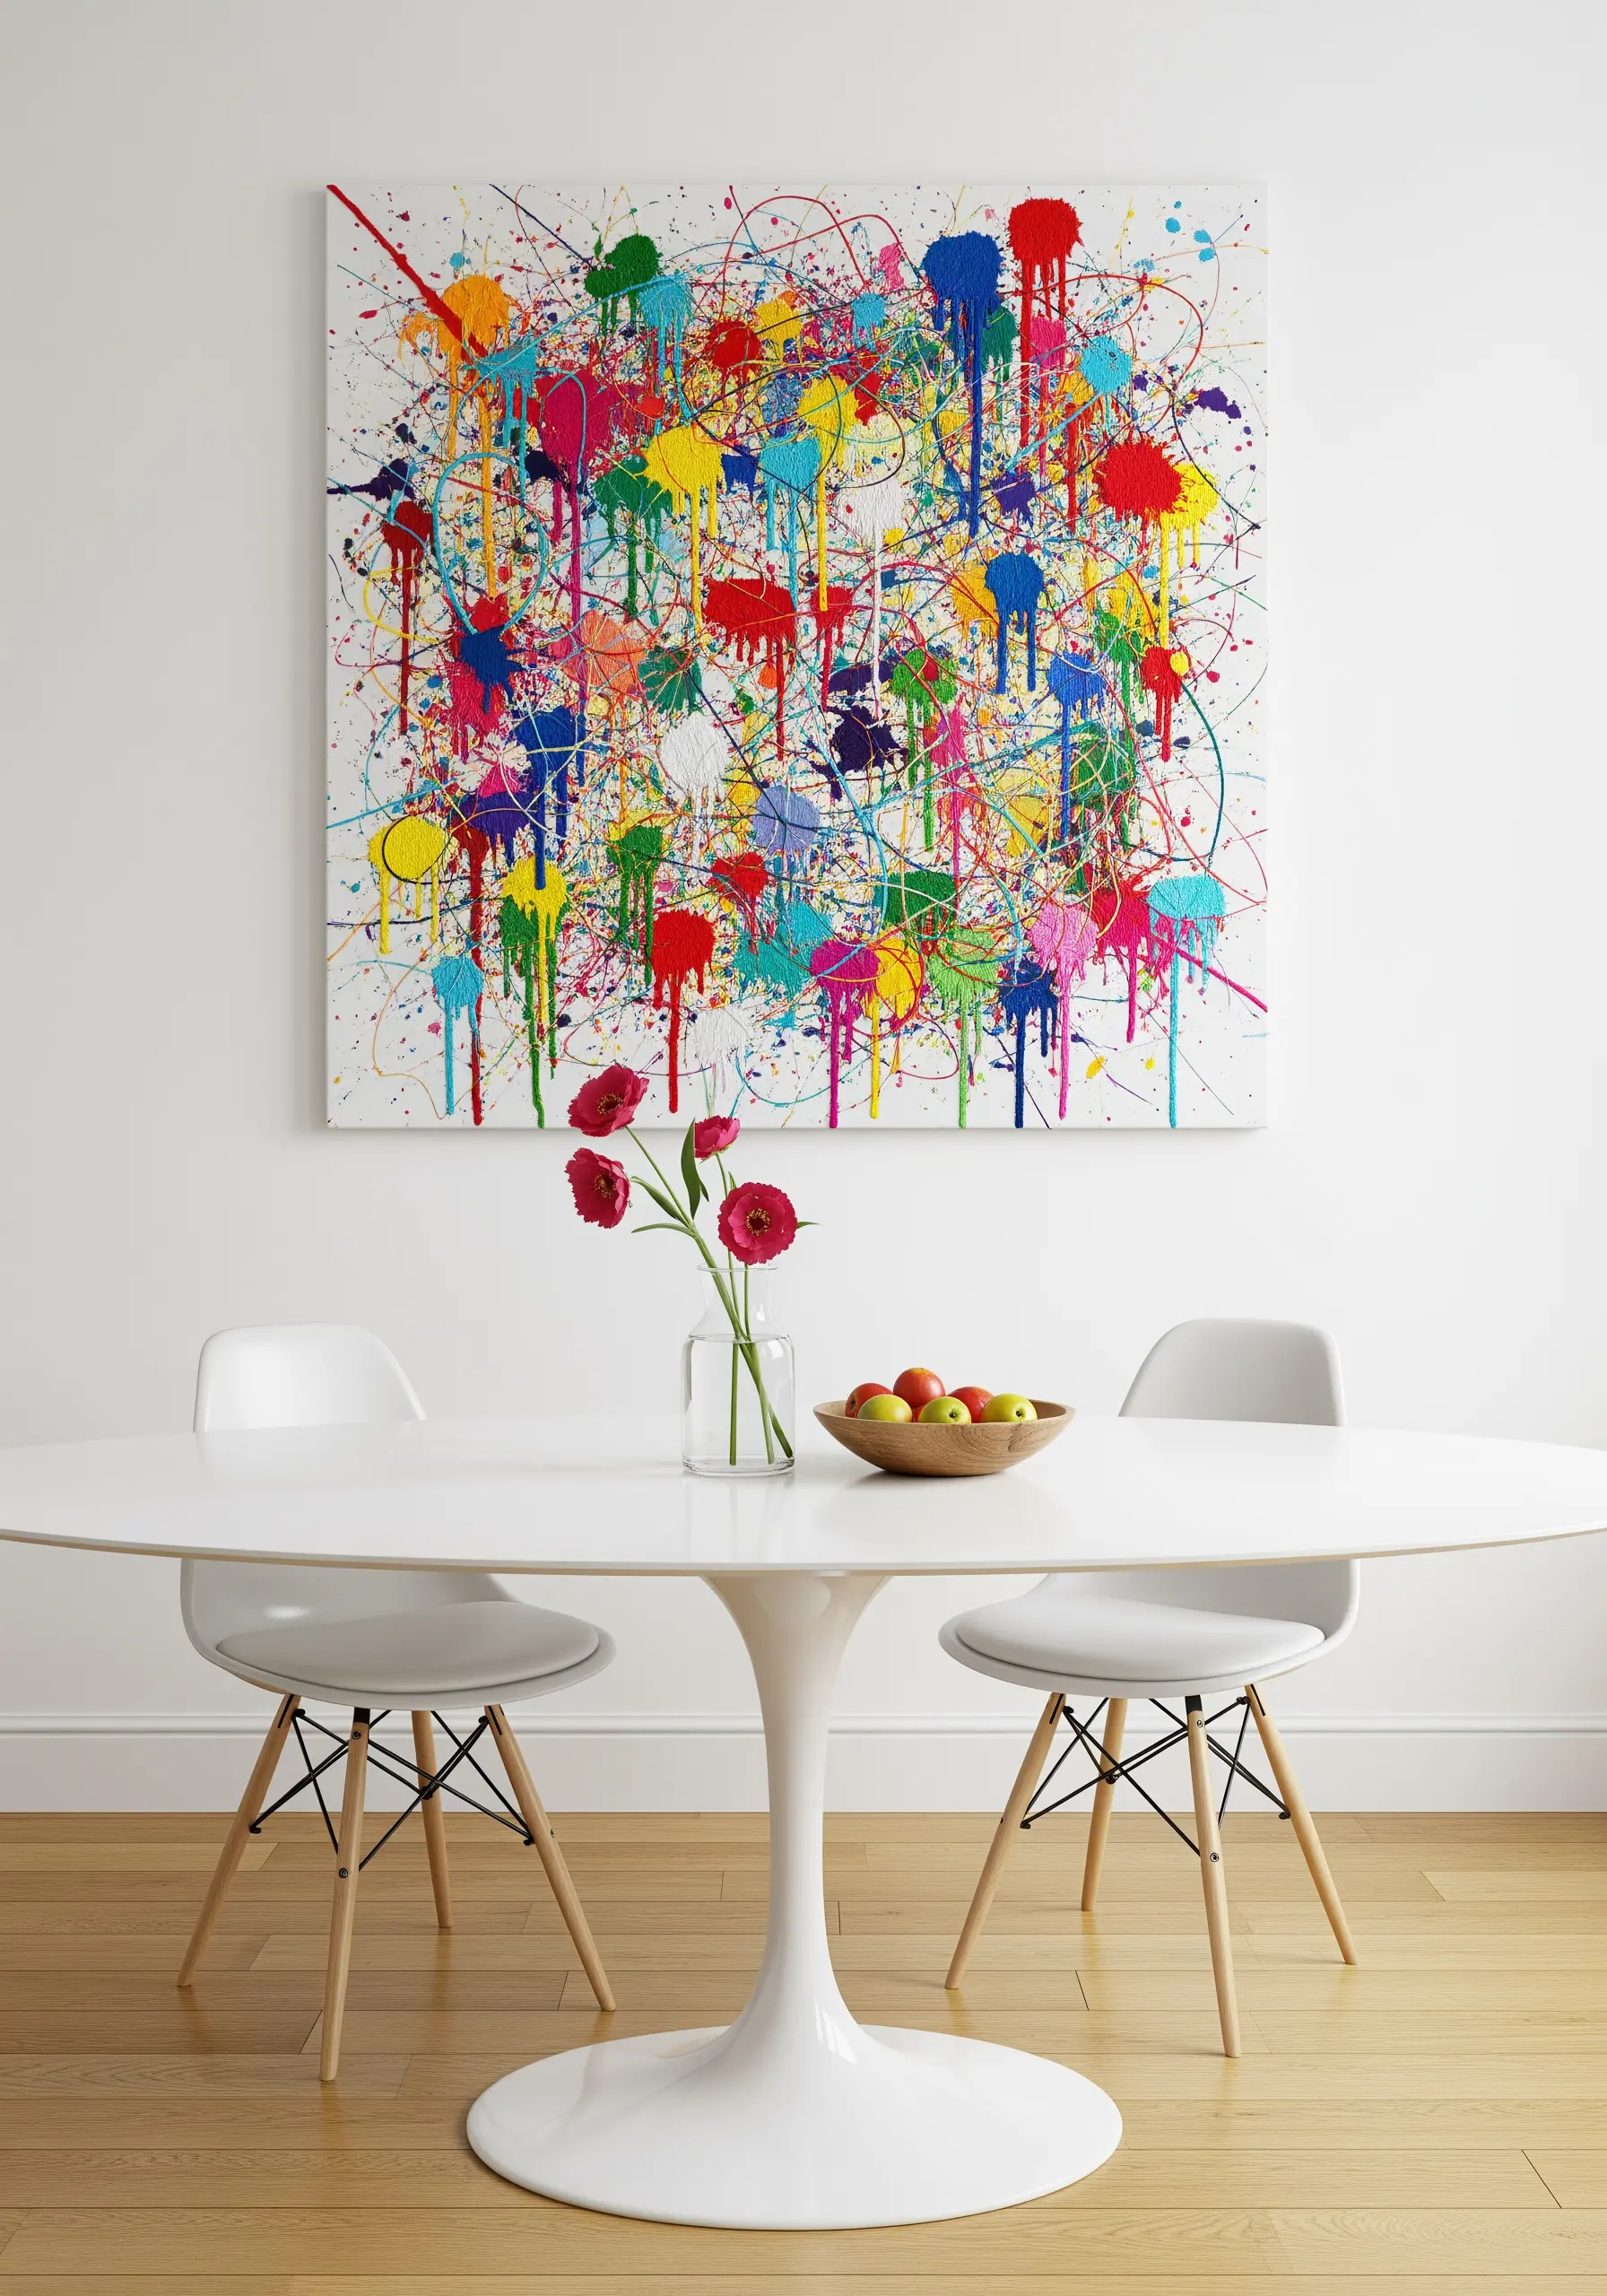
Create a dynamic, abstract expressionist piece by blending the fluidity of paint with the texture of thread.
Start by creating a canvas with colorful paint drips and splatters. Once it’s dry, use embroidery to add another layer of detail.
You can outline the splatters with a simple backstitch to give them definition, or add clusters of French knots for a burst of texture.
This mixed-media approach yields a vibrant, energetic artwork that is impossible to replicate exactly.
25. Recreate Stained Glass with Bold Outlines

Capture the luminous beauty of a stained-glass window by using thread to mimic glass and lead.
First, create the dark outlines, or “lead lines,” using a thick, bold stem stitch or chain stitch in black or dark grey thread.
Fill in each section with vibrant, jewel-toned satin stitches. To enhance the glassy illusion, choose a high-sheen thread like silk or rayon, as its light-reflecting properties will make the colors glow.
26. Stitch Abstract Bursts of Cosmic Energy

Create a feeling of explosive energy by stitching abstract patterns that radiate from a central point.
Use a dense combination of straight stitches and French knots, layering different colors and thread weights to build up texture and depth.
Working on a black fabric background will make your fiery reds and cool blues appear to burst forth like a nebula or supernova.
This free-form technique is incredibly liberating, allowing you to focus purely on color and texture to create a dynamic composition.
27. Explore Cubism with Directional Fill Stitches

Embrace a cubist aesthetic by using the direction of your stitches to define the different planes and facets of your subject.
Divide your still-life objects into geometric shapes, and fill each shape with satin stitches.
The key is to change the angle of the stitches for every adjacent shape. This simple shift in direction creates a subtle change in how the light hits the thread, effectively sculpting the objects and giving them a three-dimensional, fragmented appearance.
28. Use Negative Space to Make Your Motif Pop
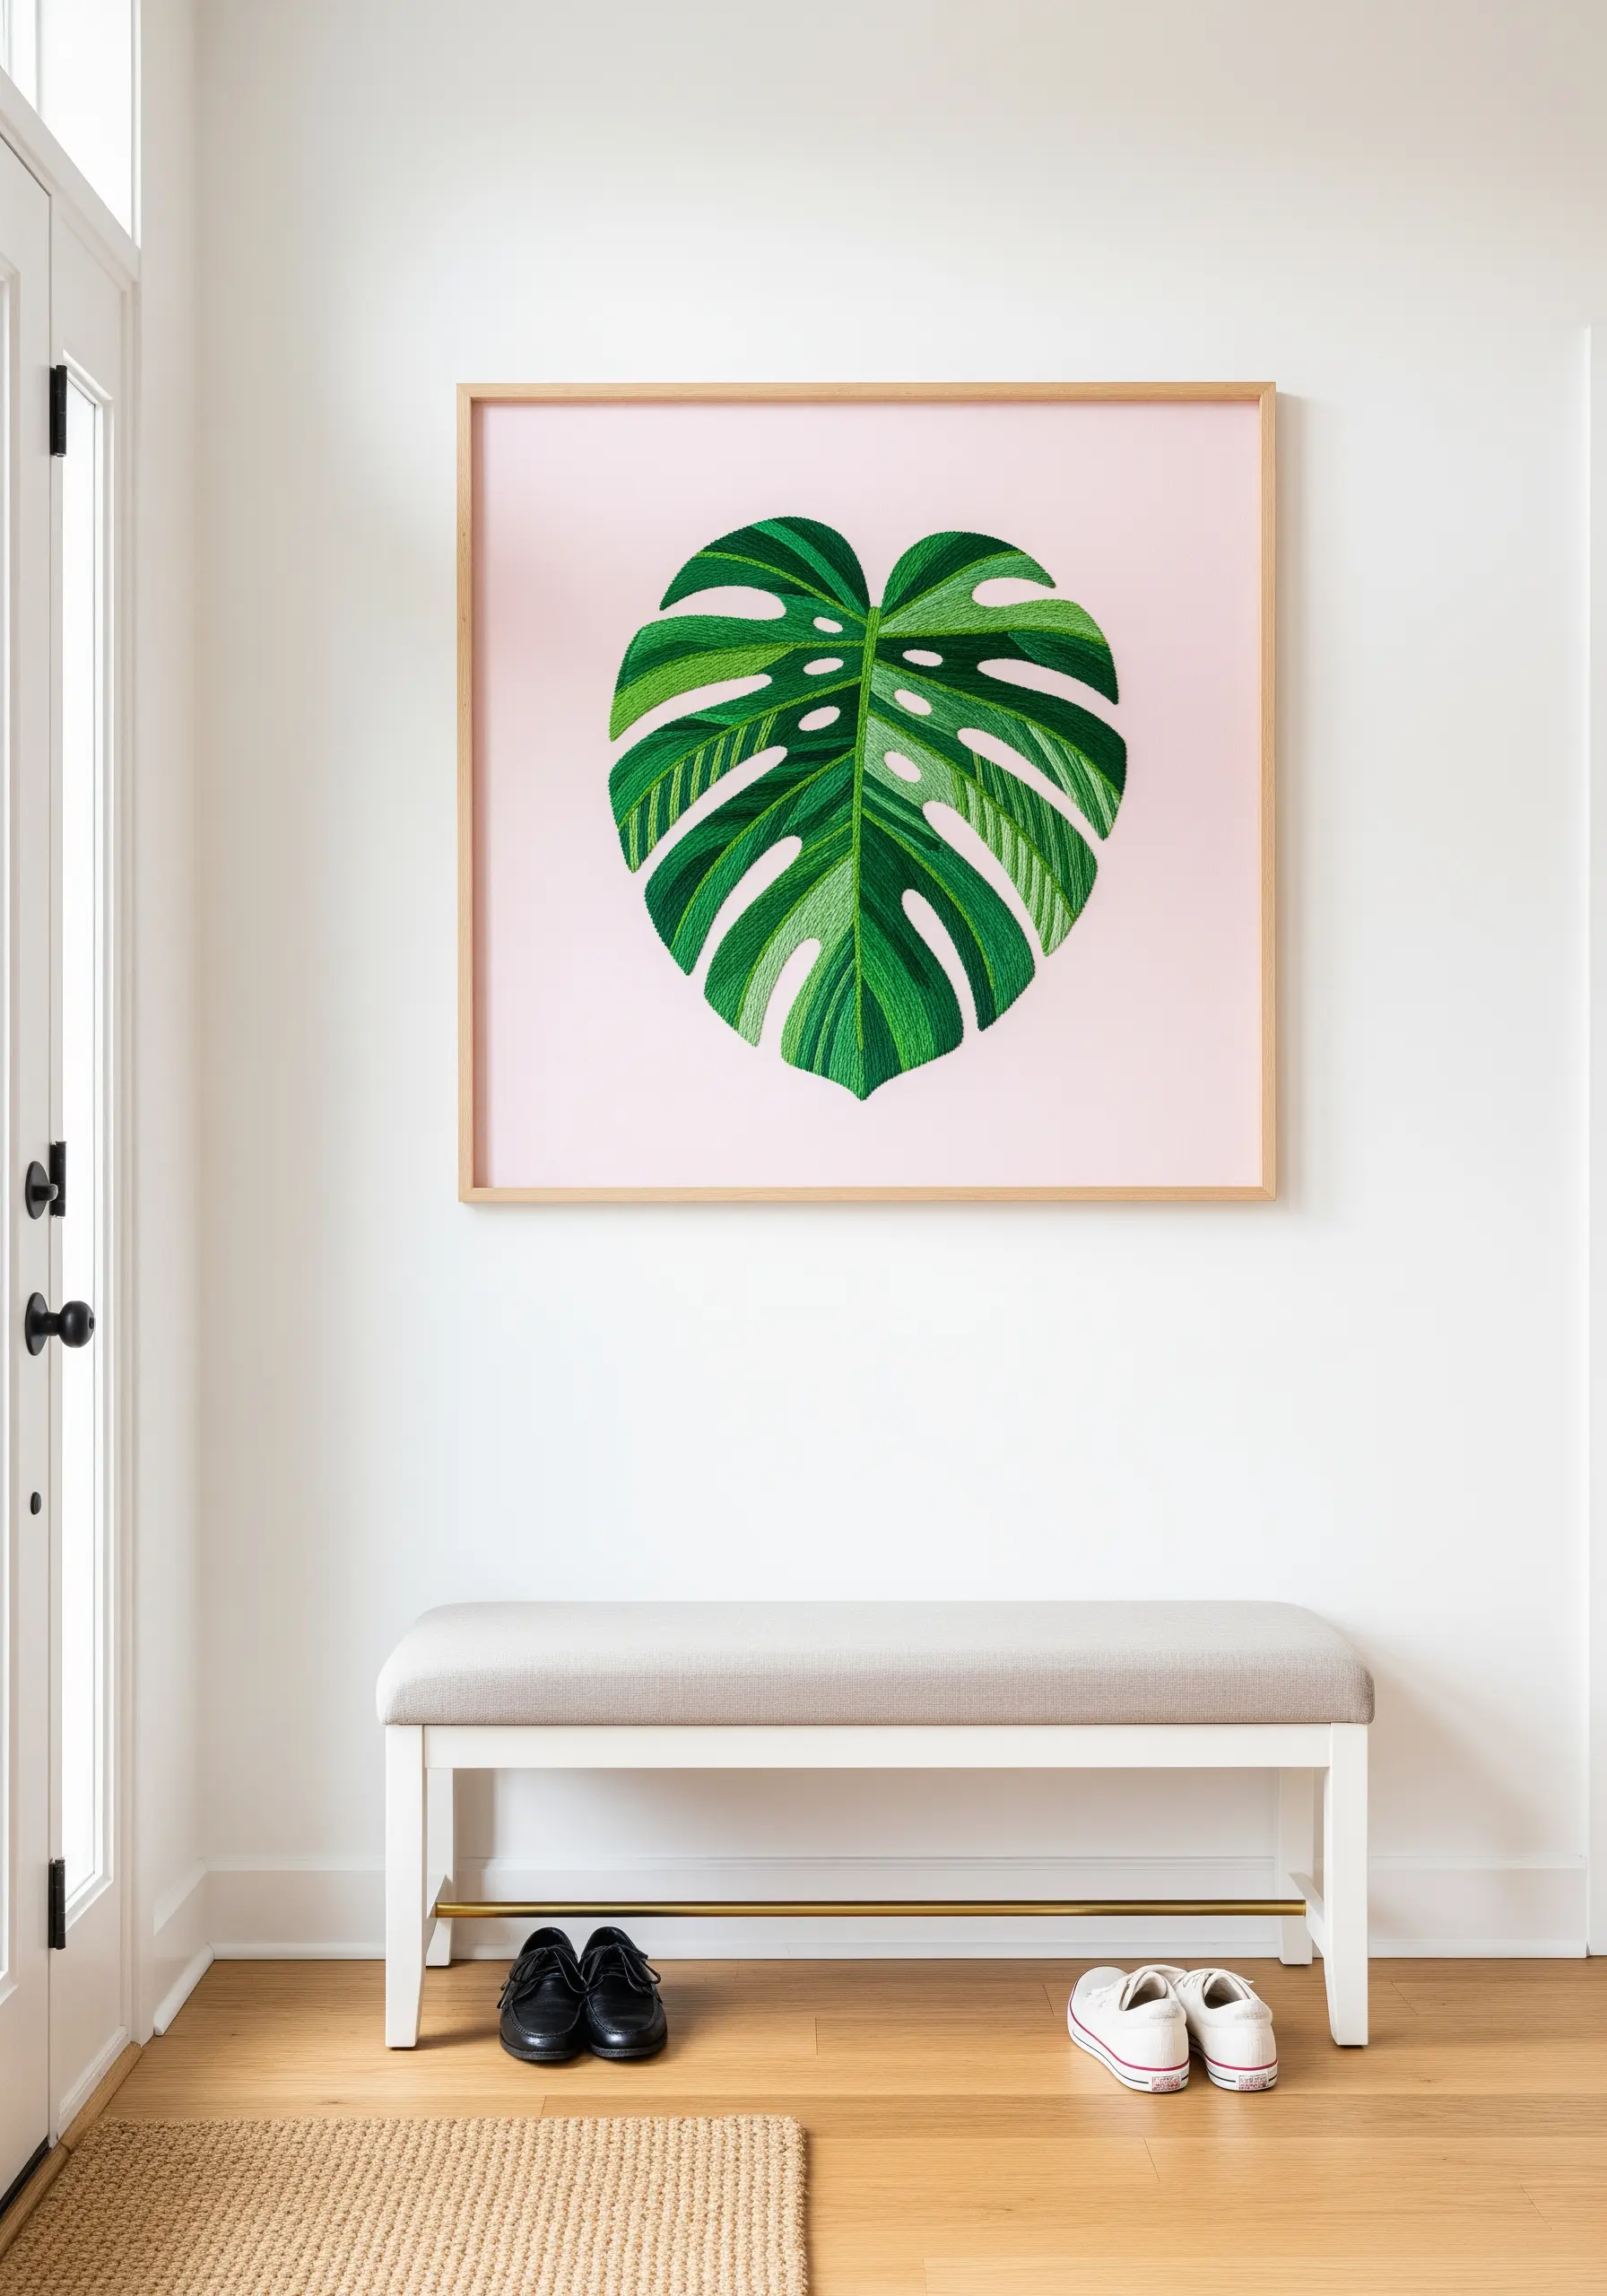
Sometimes, the most powerful element in your design is the space you leave empty.
By placing a single, meticulously stitched botanical element against a solid block of color, you create a striking focal point.
The simplicity of the composition draws the viewer’s eye directly to the detail and texture of your thread painting.
Choosing a contrasting background color, like this soft pink, makes the vibrant greens of the leaf feel even more lush and alive.
29. Curate a Charming Folk-Art Gallery Wall
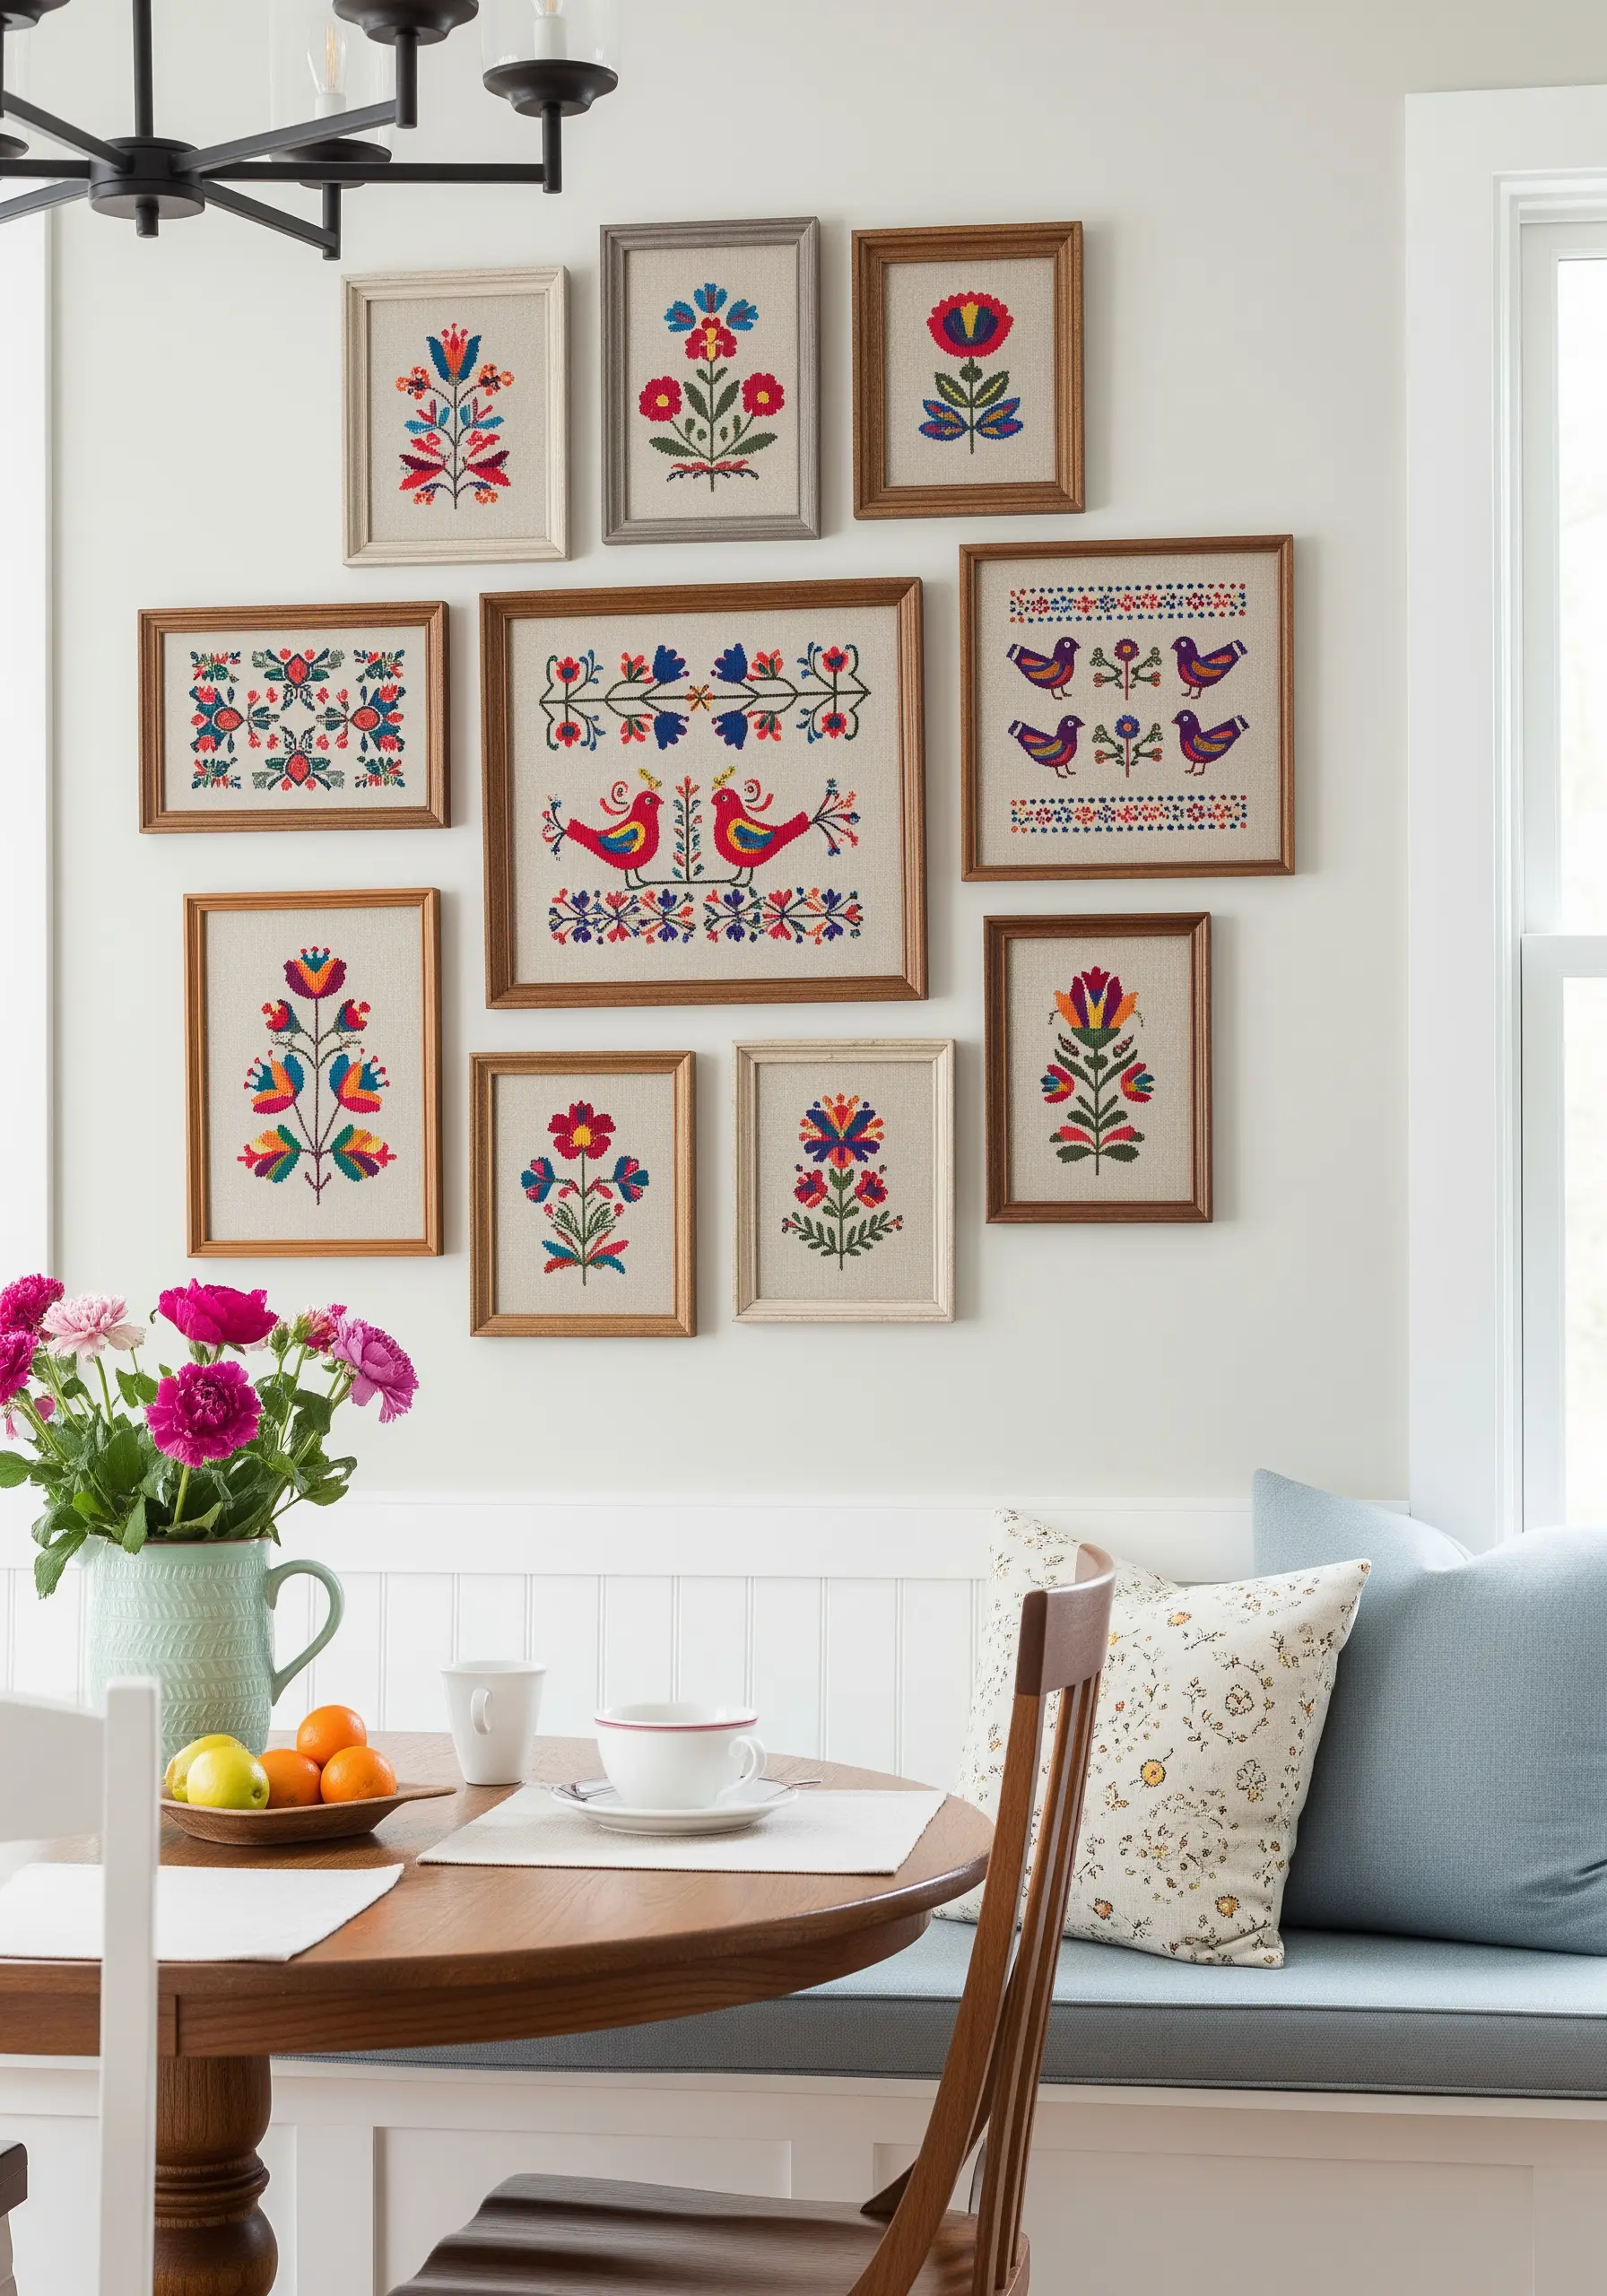
Create a warm and inviting display by grouping together several smaller, folk-art-inspired pieces.
Embrace the charm of this style by using simple, bold stitches like satin stitch, chain stitch, and French knots. The beauty lies in the stylized shapes and vibrant color combinations, not in perfect realism.
Varying the size and orientation of the frames, while keeping the style consistent, creates a curated collection that feels both personal and thoughtfully designed.
30. Add Dimension with High-Texture Fibers
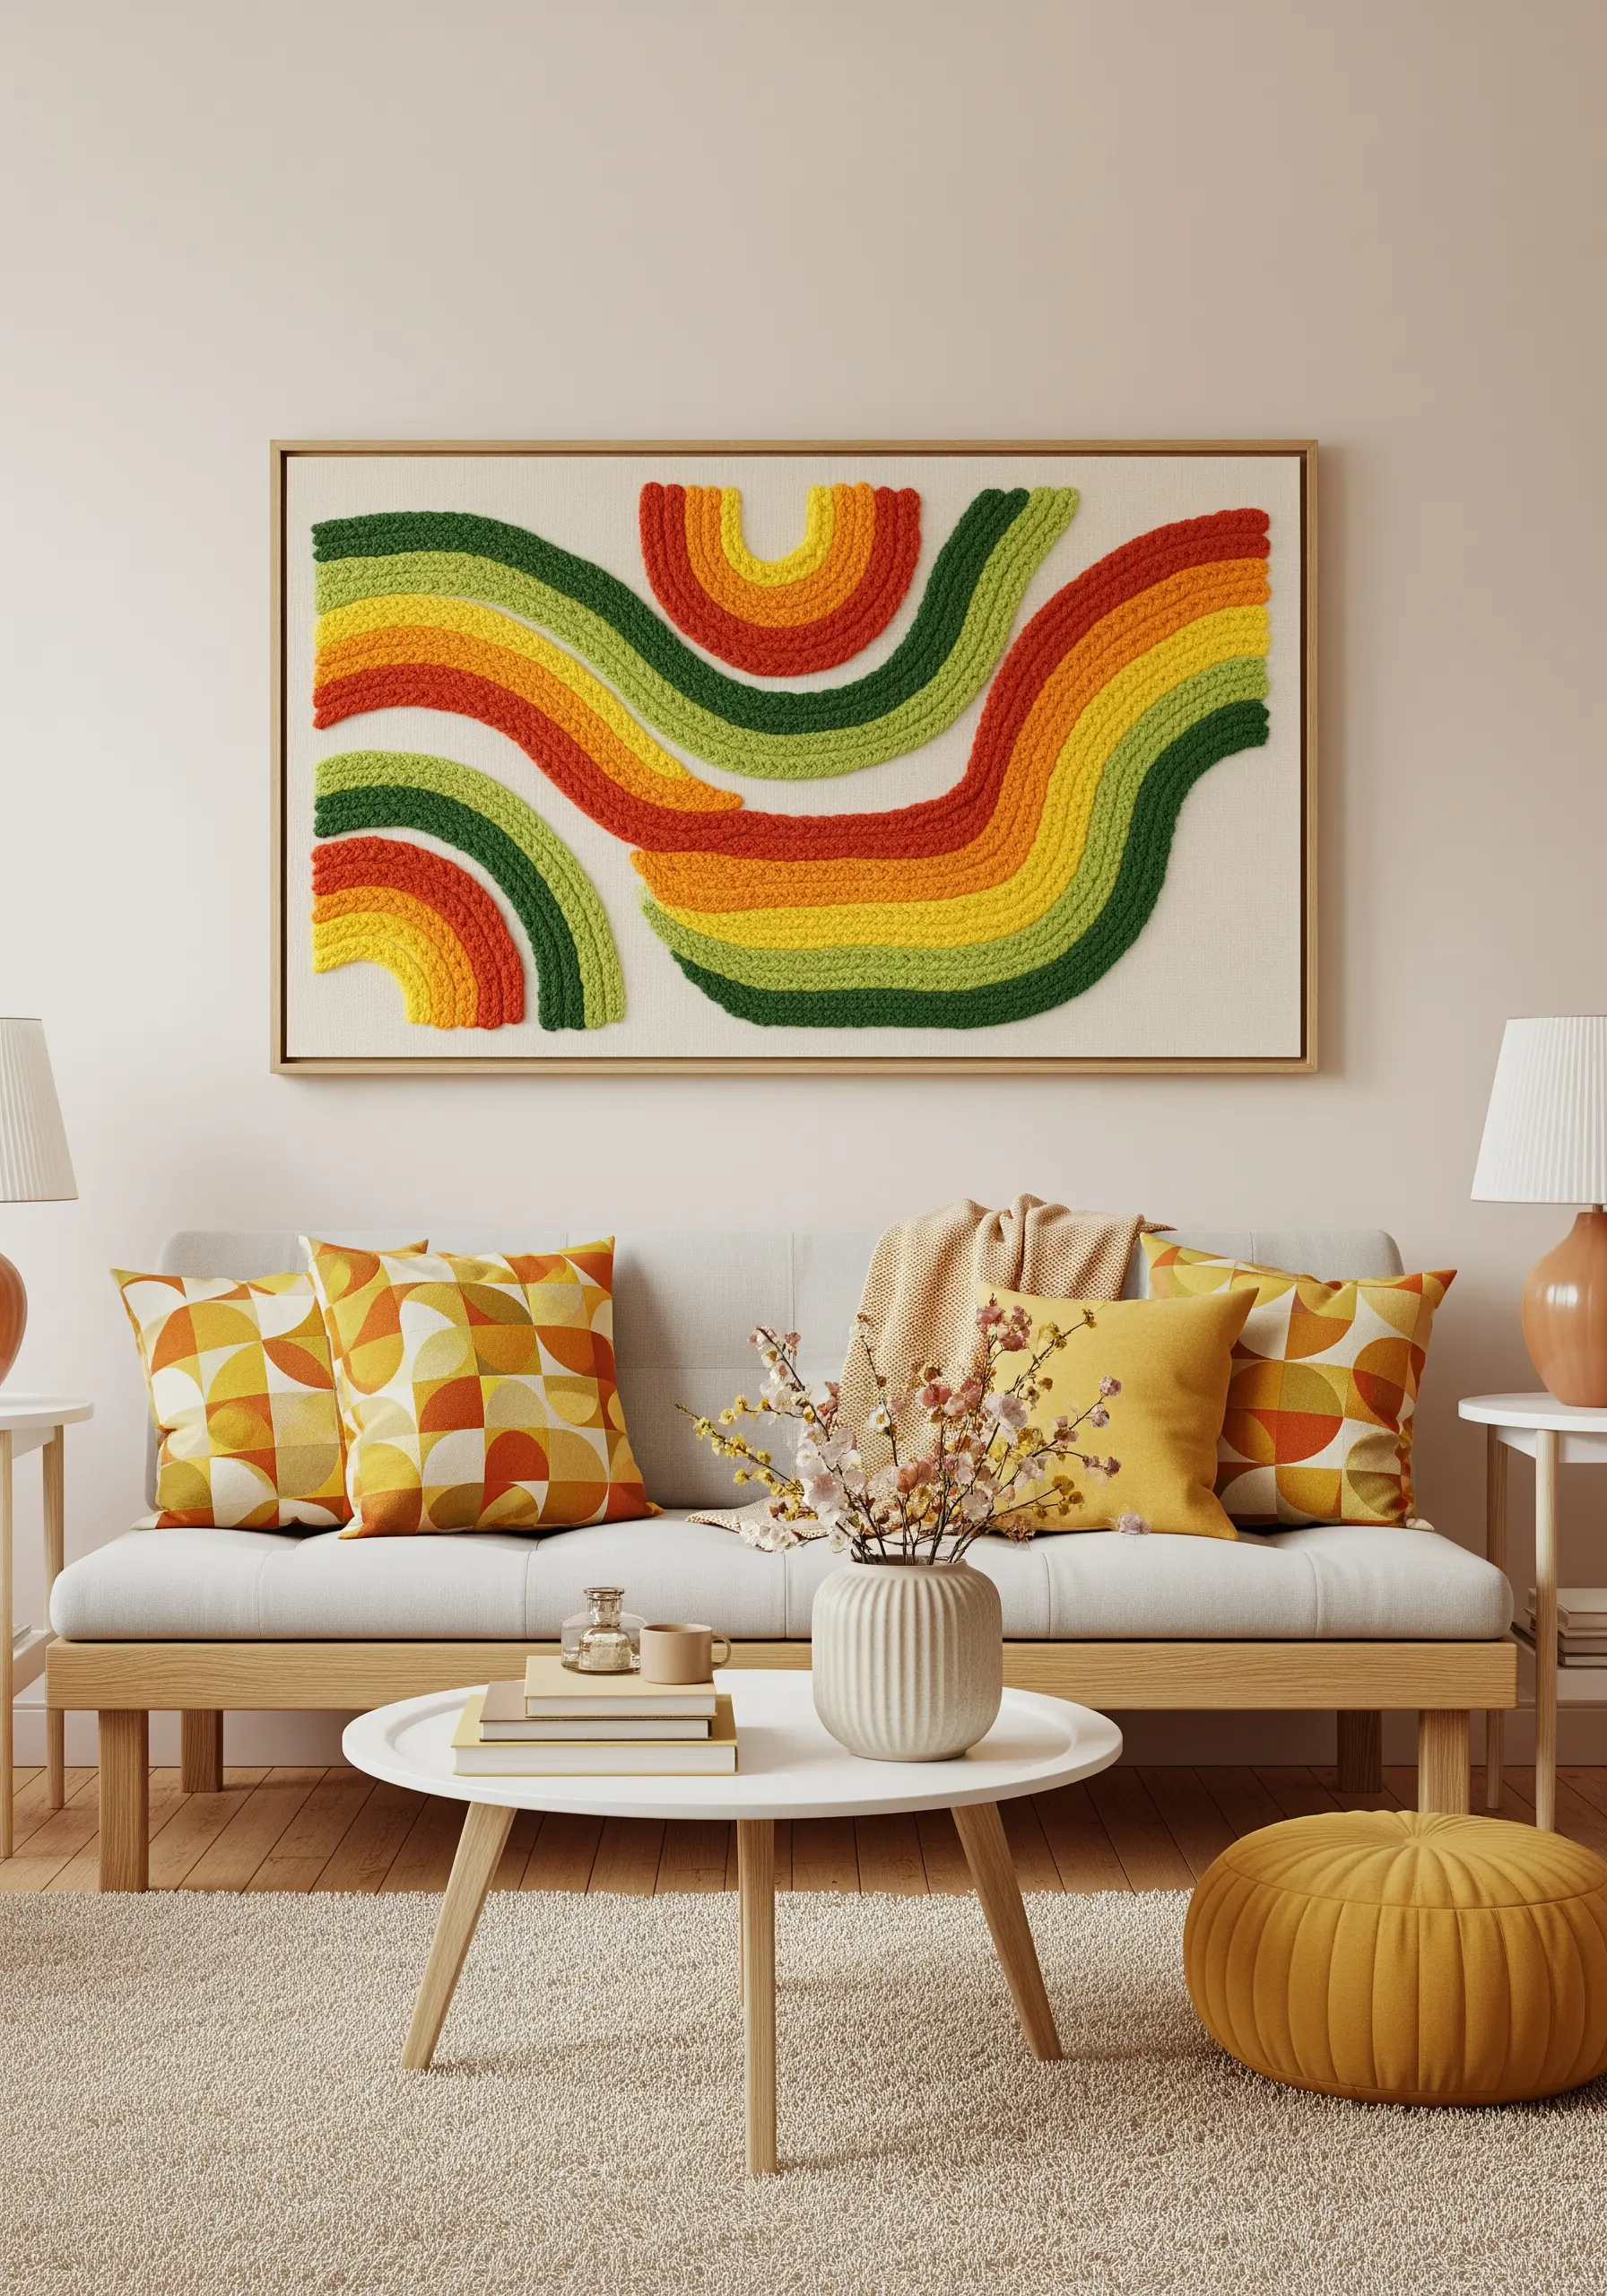
For a bold, sculptural effect that literally comes off the canvas, incorporate thick yarns and fibers into your work.
Since chunky yarn is too thick to be stitched conventionally, use the couching technique: lay the yarn on the surface of your fabric and tack it down with a thinner, matching thread.
This method allows you to create highly textured, raised lines and shapes, adding a powerful tactile dimension to your abstract designs.
31. Capture Fluidity and Motion in Water Scenes
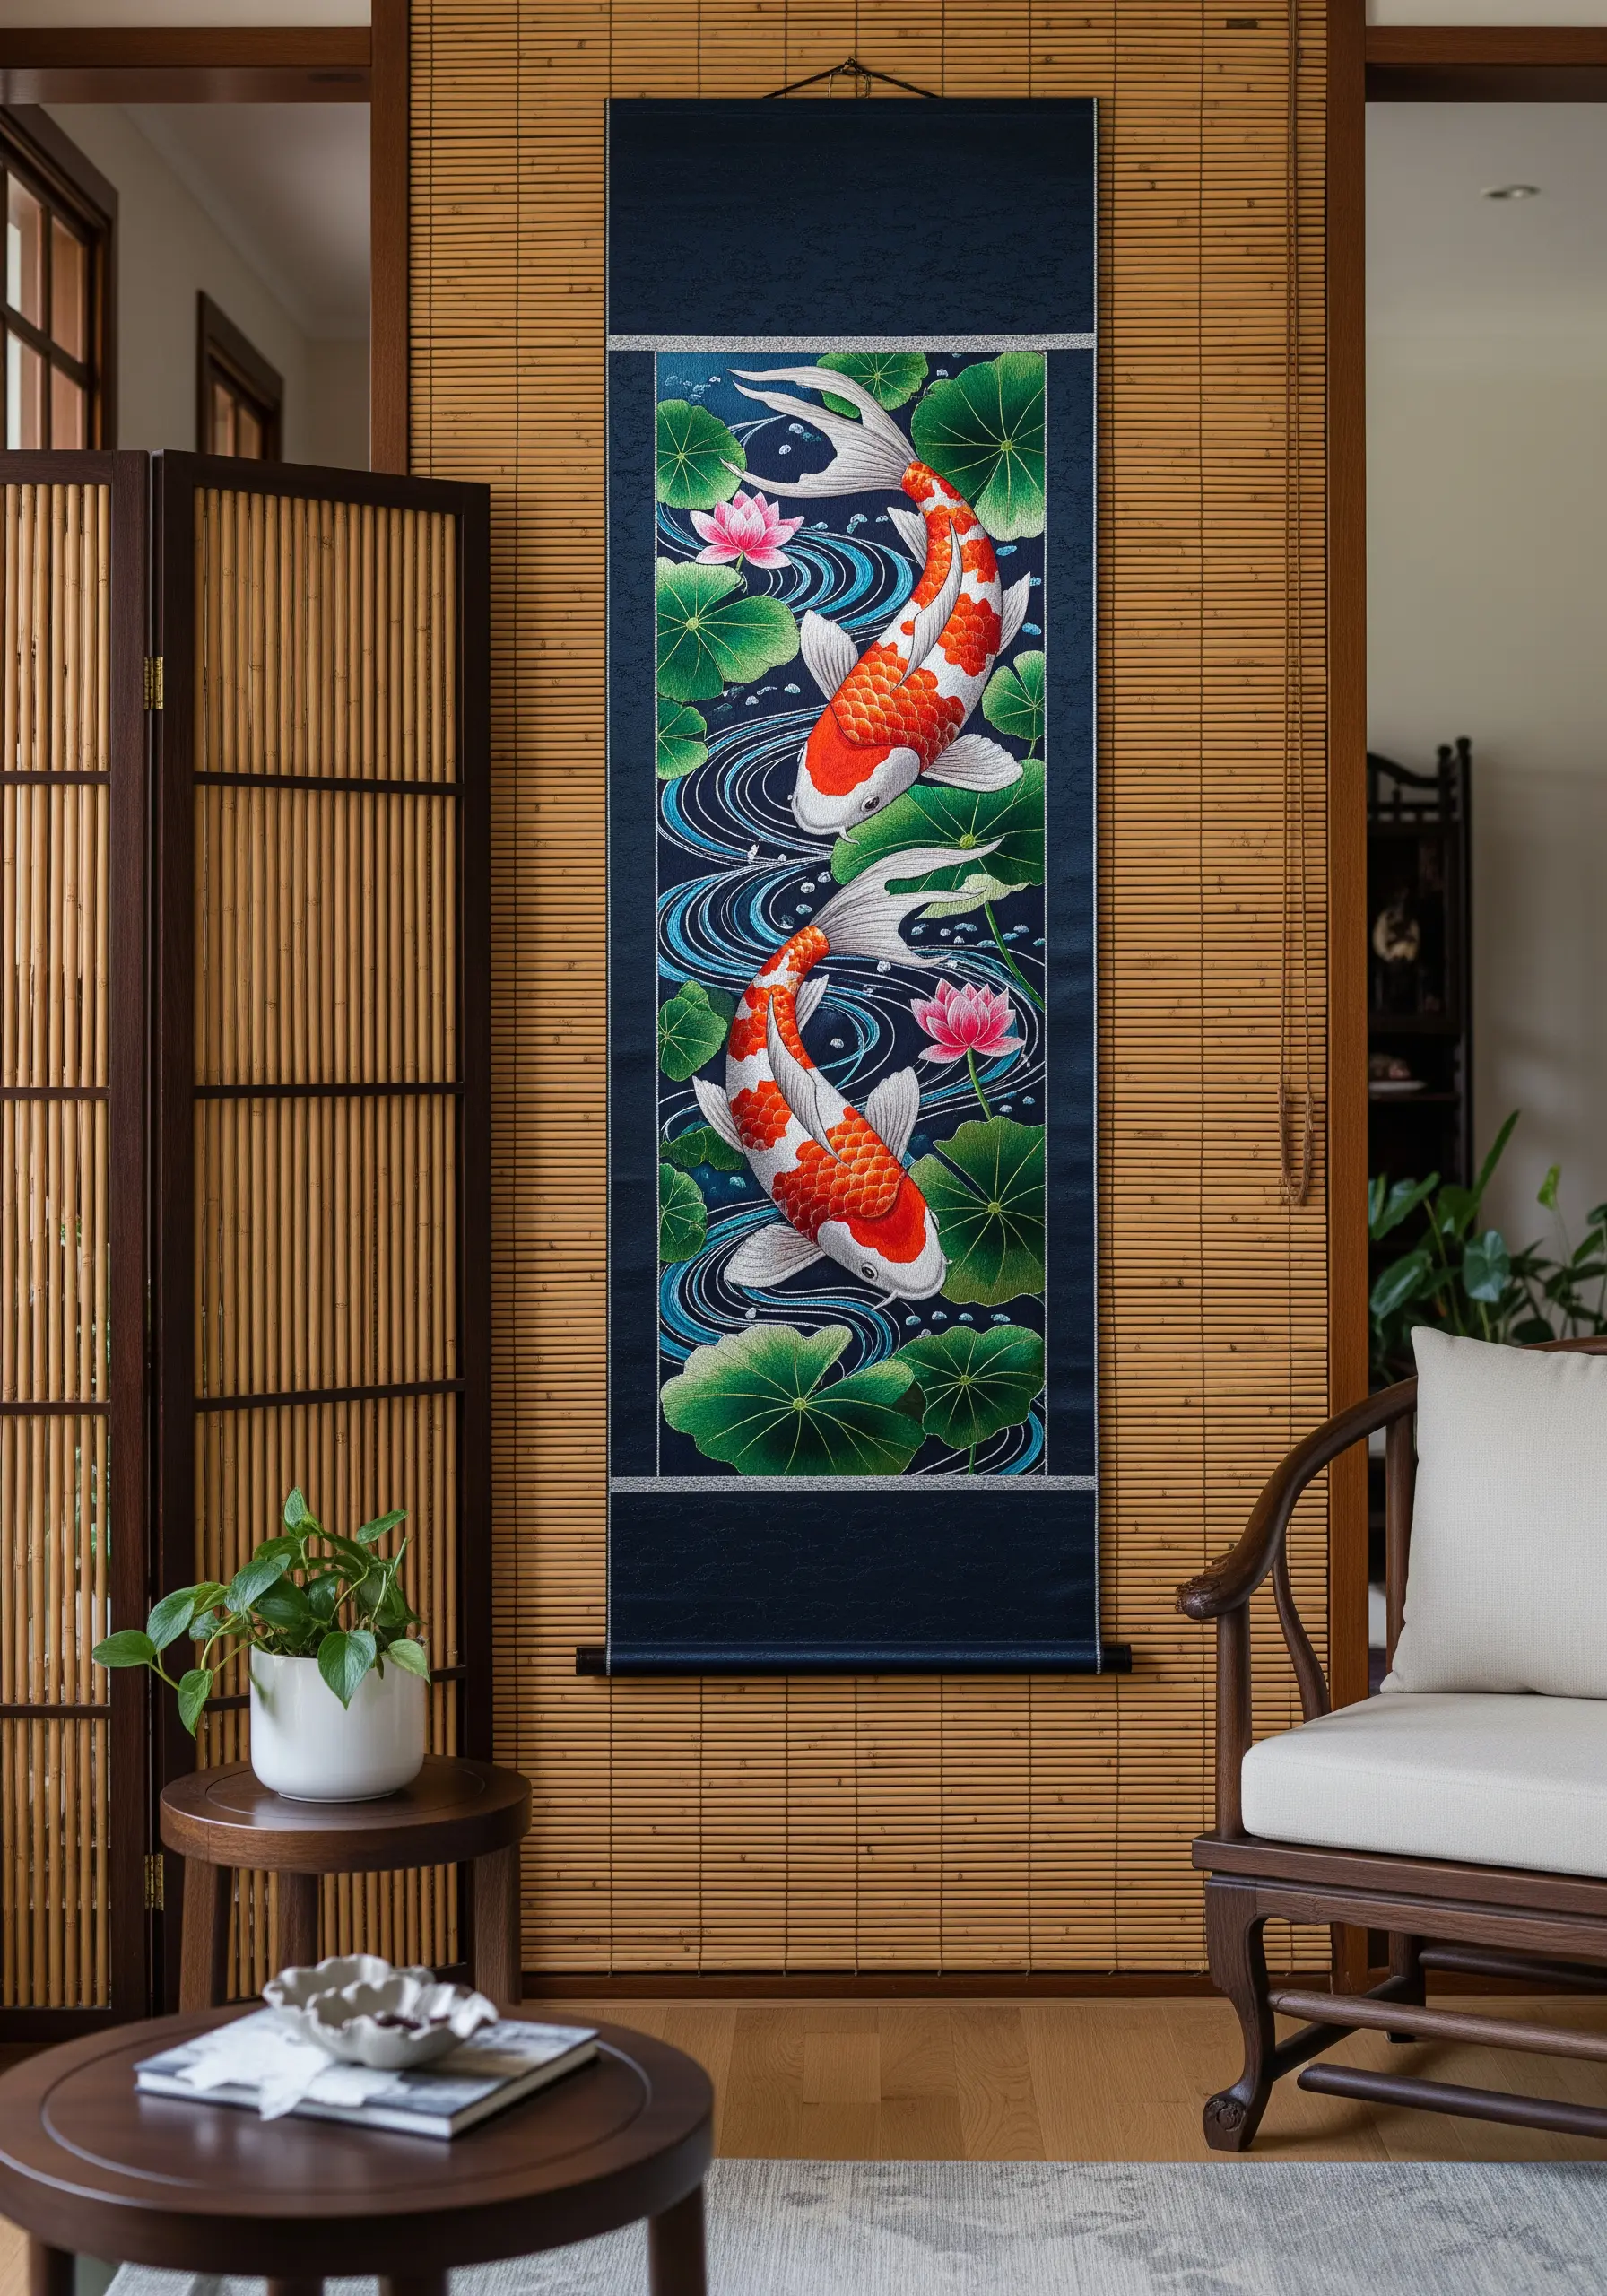
To embroider water that looks like it’s actually moving, your stitch choice and direction are crucial.
Use a flowing stem stitch or split stitch for the ripples, working in concentric curves to create the illusion of movement spreading outwards.
For the koi fish scales, you can use a fishbone stitch or small, overlapping satin stitches to mimic their natural pattern and sheen.
Finishing the piece as a wall scroll adds to the traditional, elegant aesthetic.
32. Create an Explosion of Color with Straight Stitches
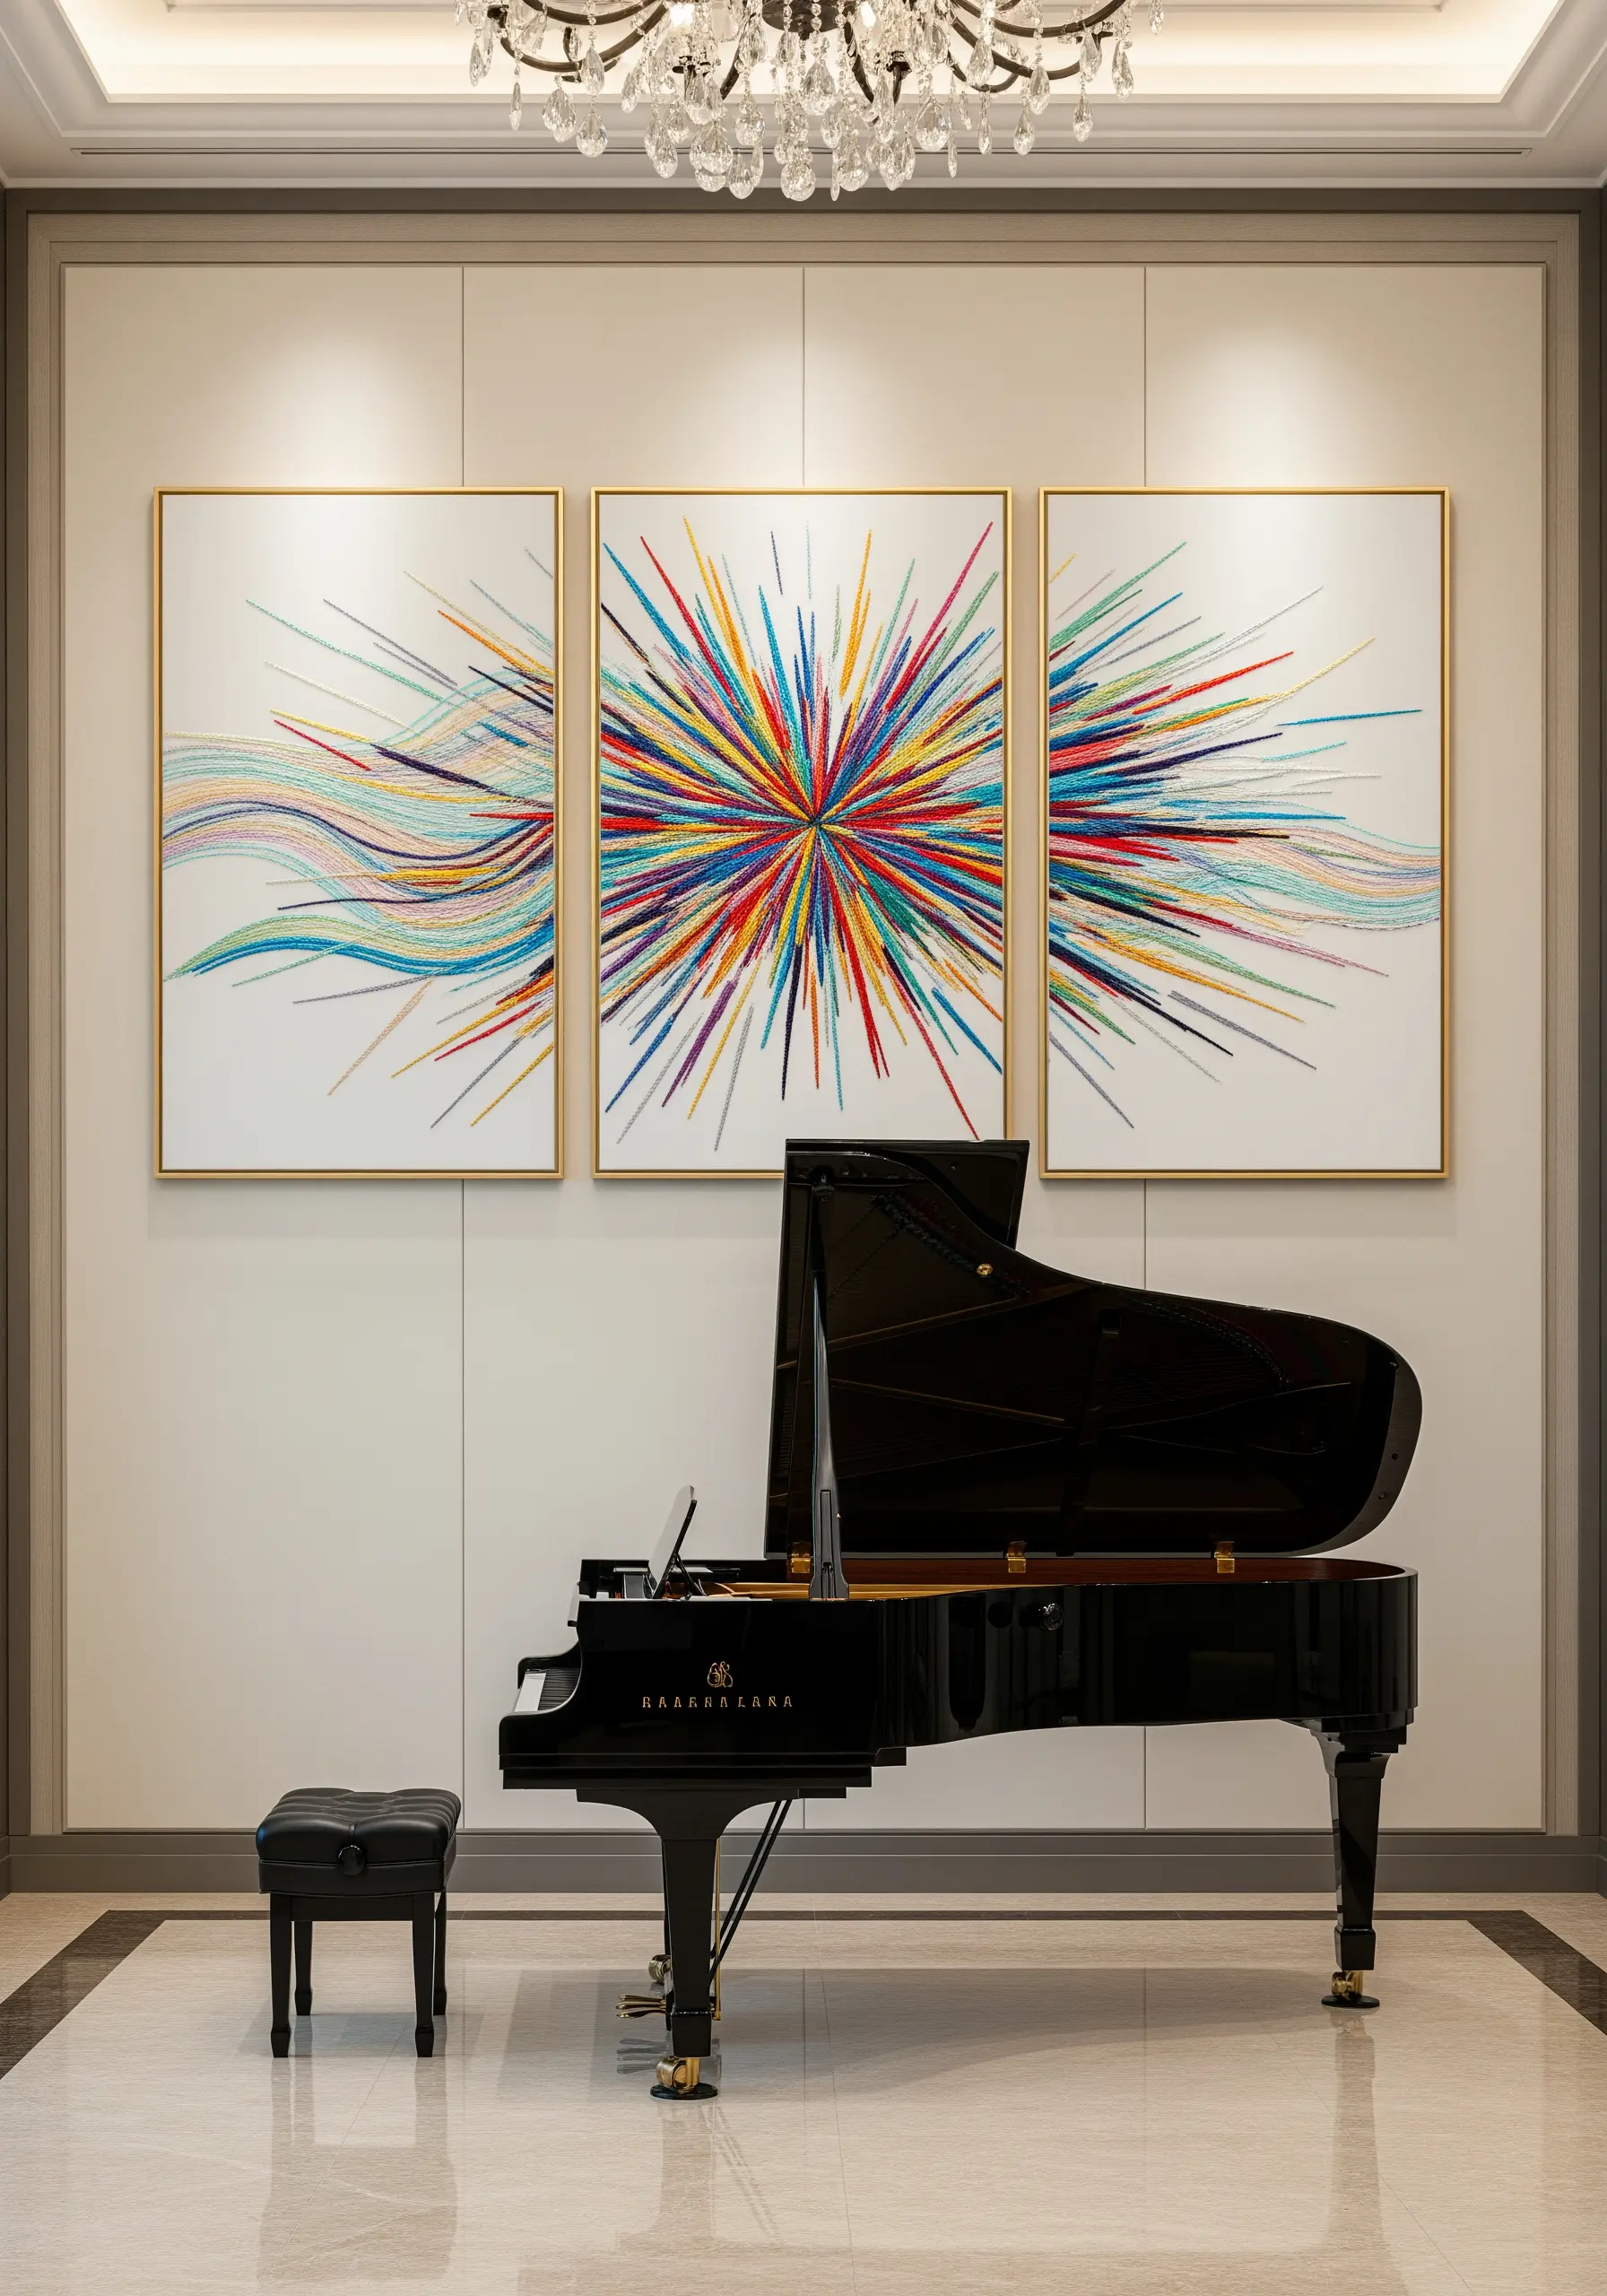
You don’t need complex stitches to create a dramatic, high-energy artwork. A simple straight stitch is all it takes.
Radiate hundreds of individual straight stitches from a central point, densely layering colors to build a vibrant, explosive effect.
By varying the length of the stitches and allowing them to overlap freely, you create a sense of chaotic, beautiful movement.
Displaying it as a triptych amplifies the impact, filling a large wall with a burst of pure energy.
33. Integrate Embroidery into a Wall Mural
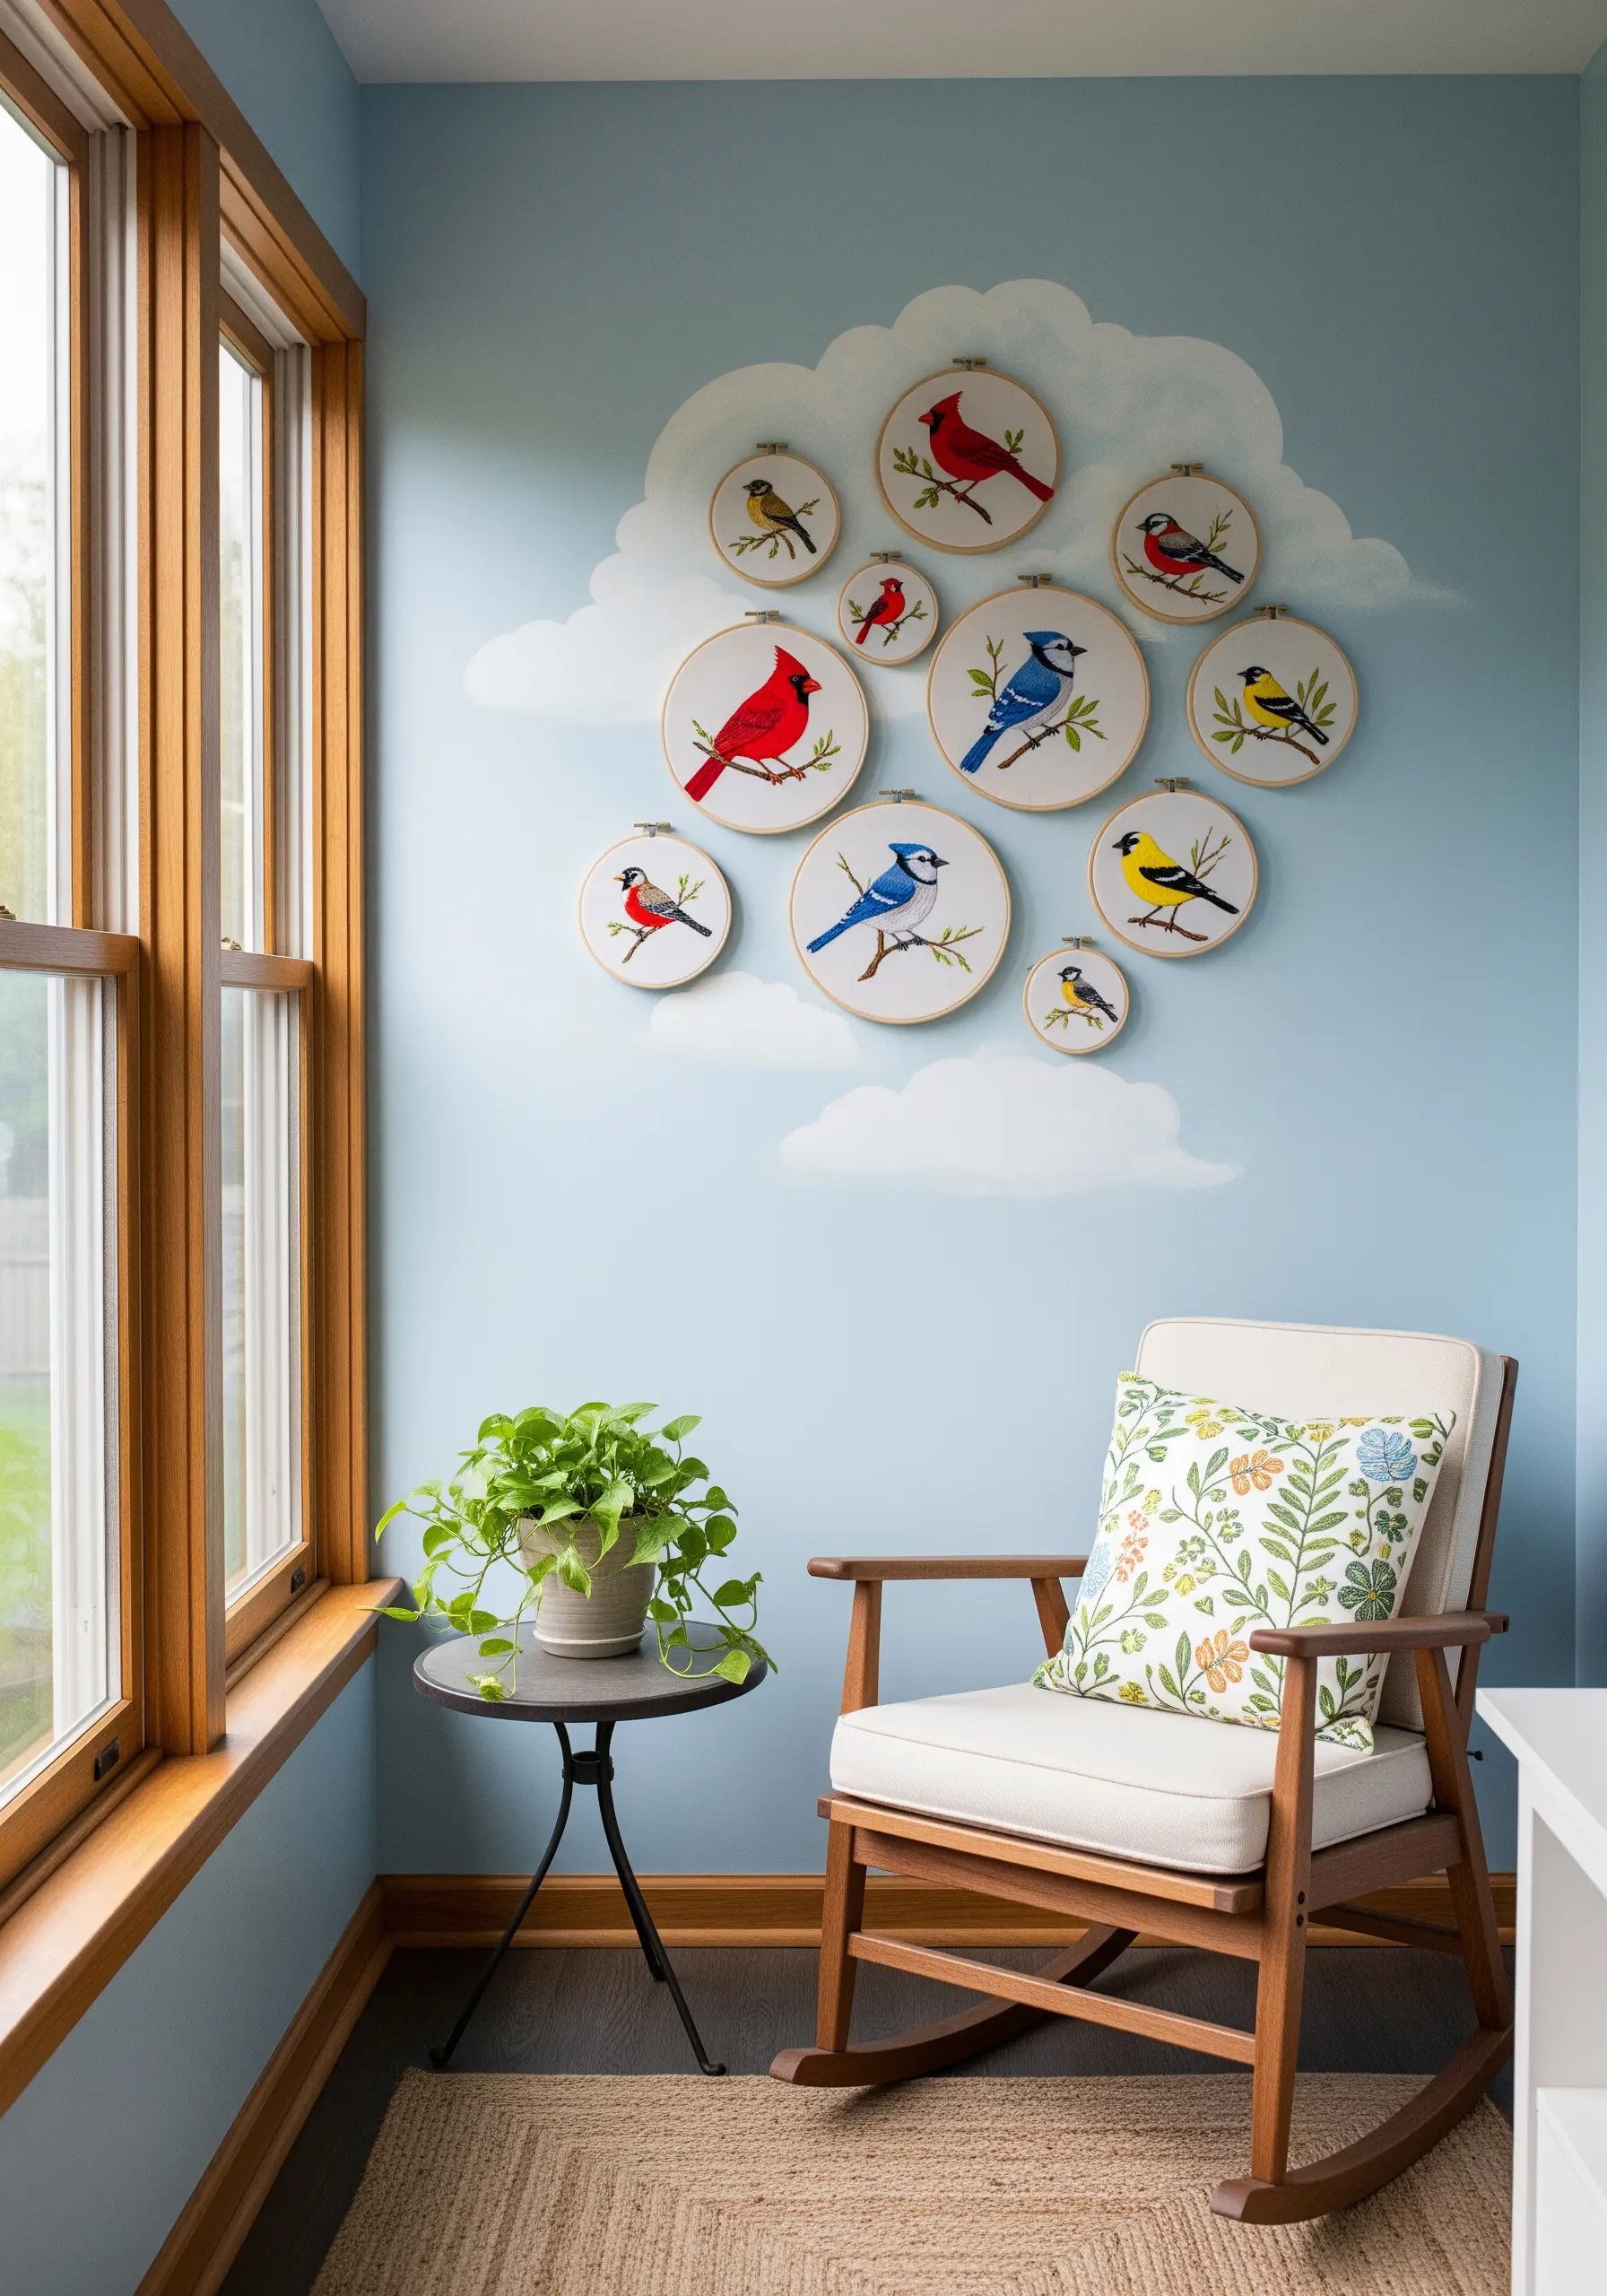
Take your embroidery off the fabric and make it part of the room itself by creating a mixed-media installation.
Paint a simple background element, like a cloud, directly onto your wall.
Then, arrange your finished embroidery hoops within the painted shape, making it seem as if the embroidered birds are flying through the painted sky.
This clever display technique turns a collection of individual hoops into a single, cohesive and imaginative piece of art.
34. Stitch Dazzling Fireworks on a Night Sky
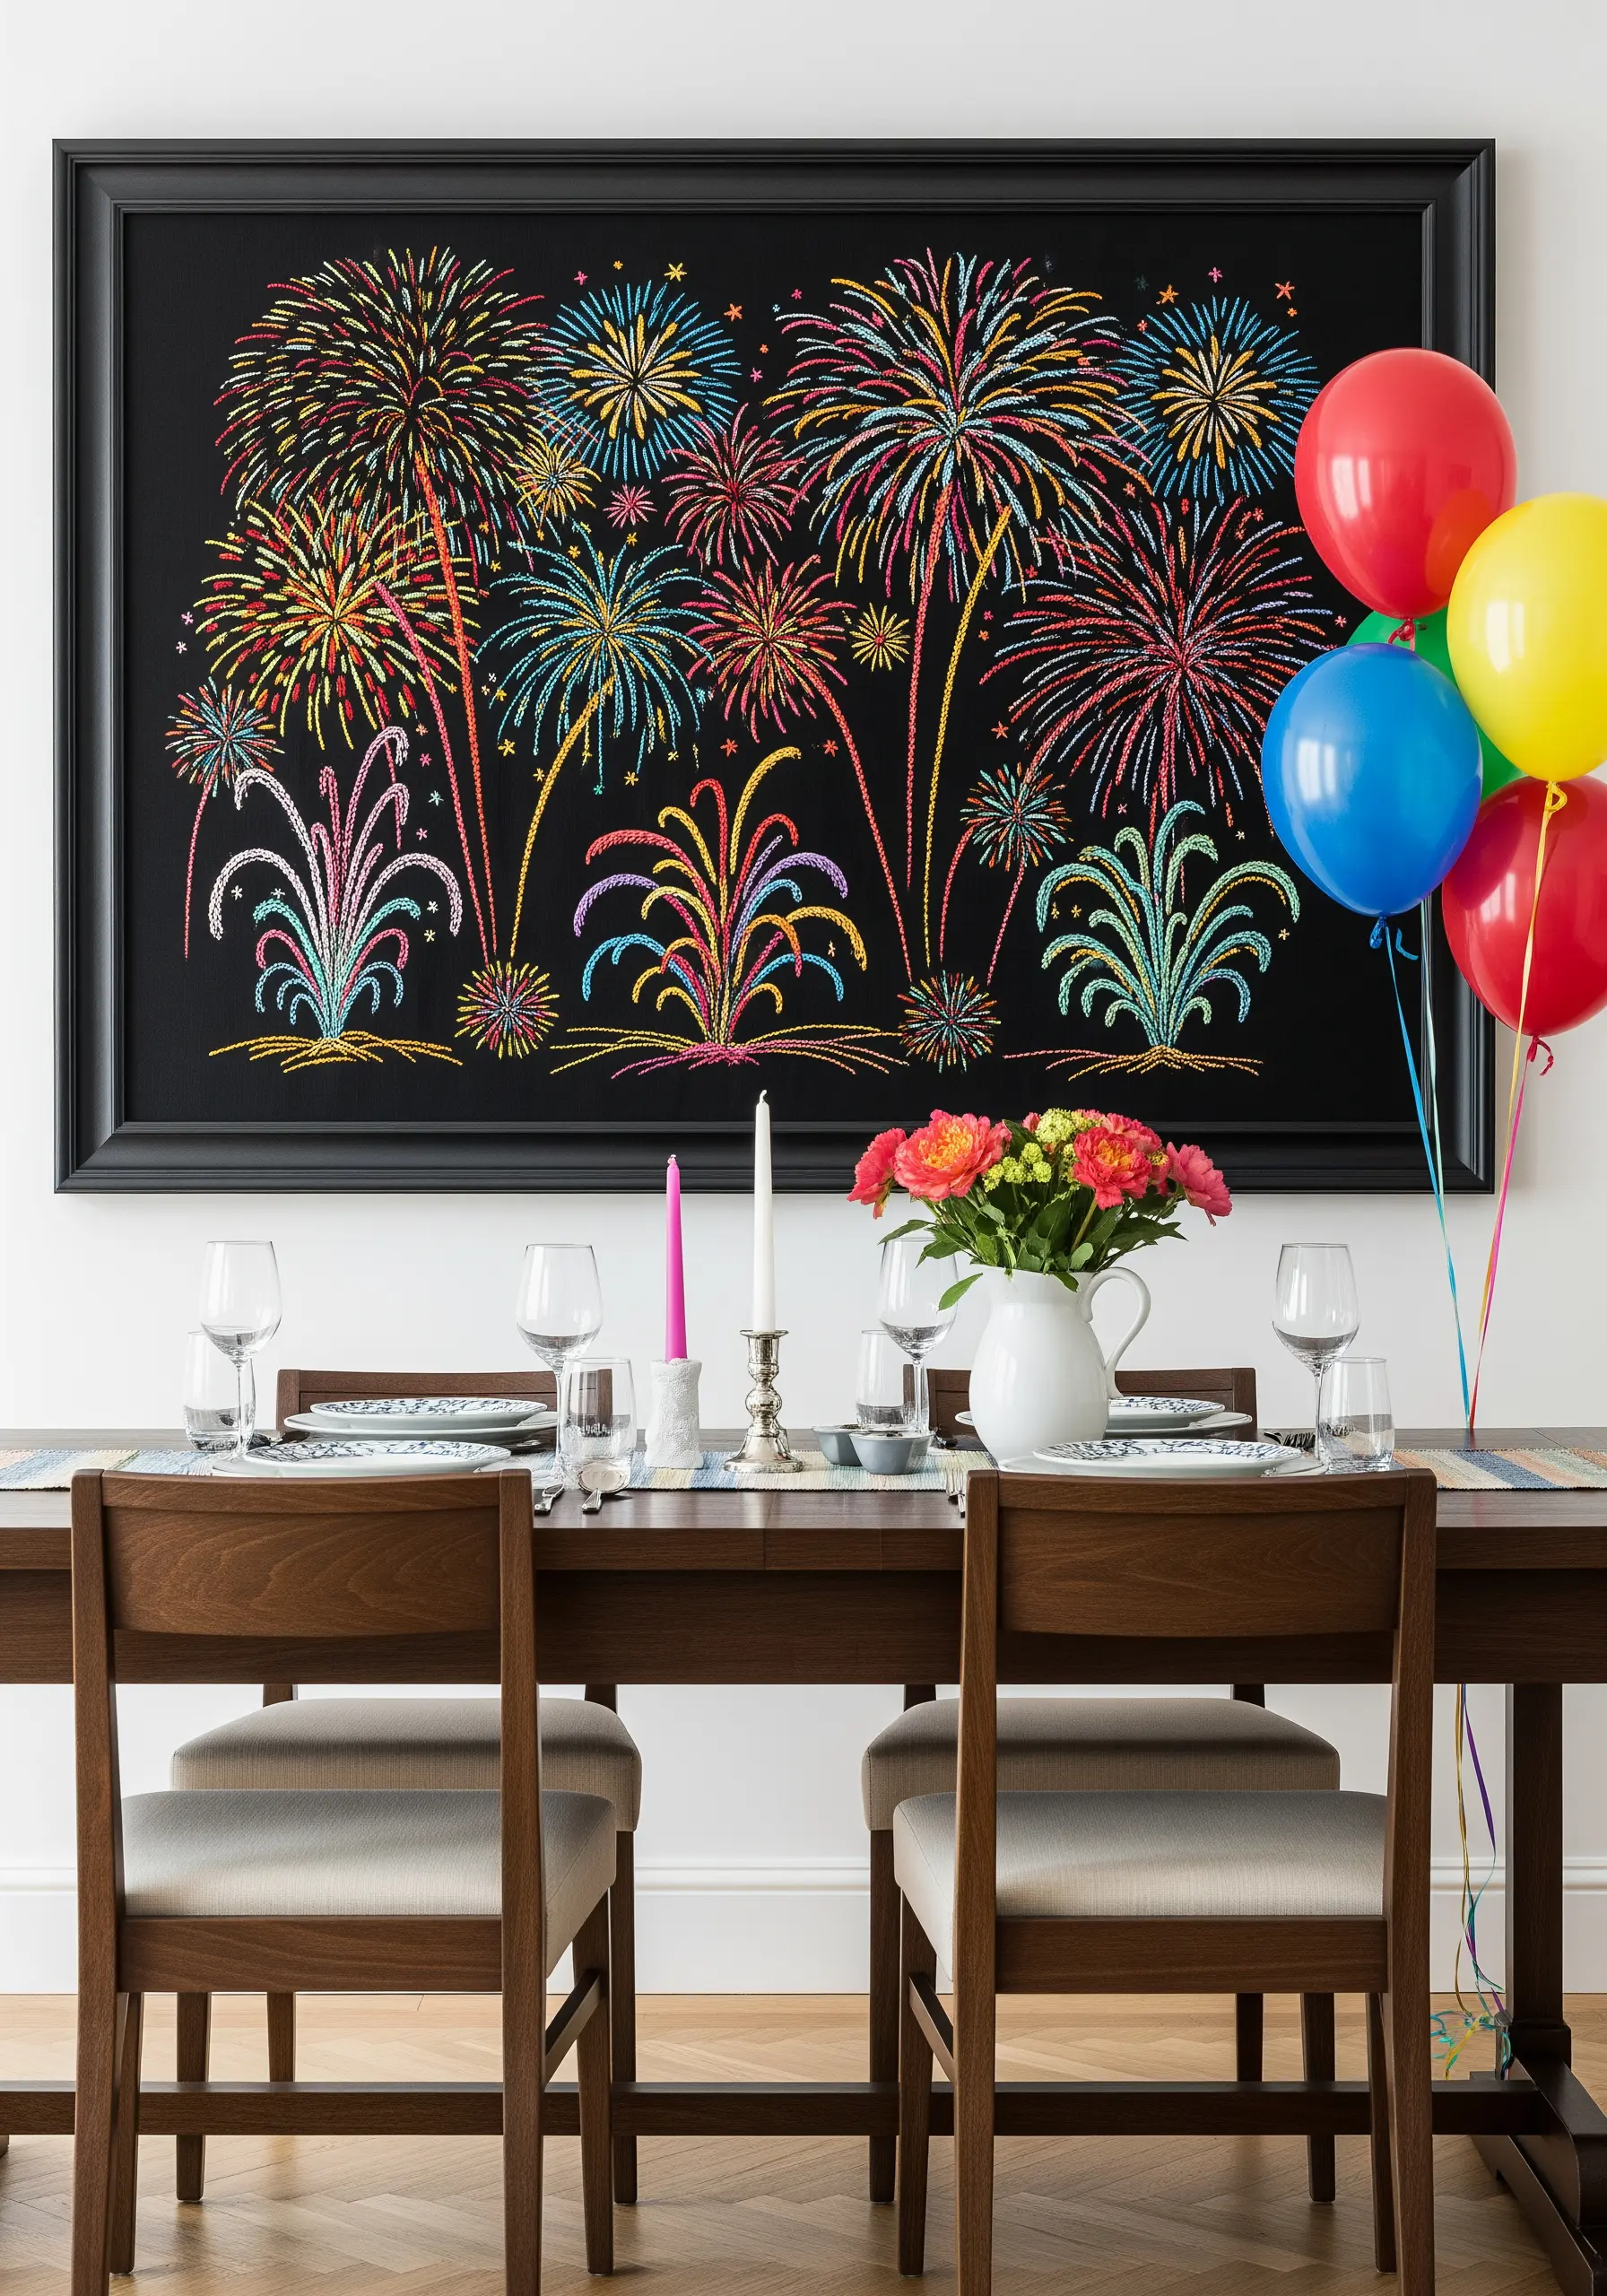
Capture the fleeting magic of a fireworks display using bright threads on a dark canvas.
Use a foundation of radiating straight stitches for the main burst of each firework. Add dimension by layering different colors and lengths.
For that final sparkling touch, scatter French knots at the tips of the straight stitches or use a single strand of metallic thread to add a shimmering overlay.
This technique creates a festive, celebratory piece that feels full of light and motion.
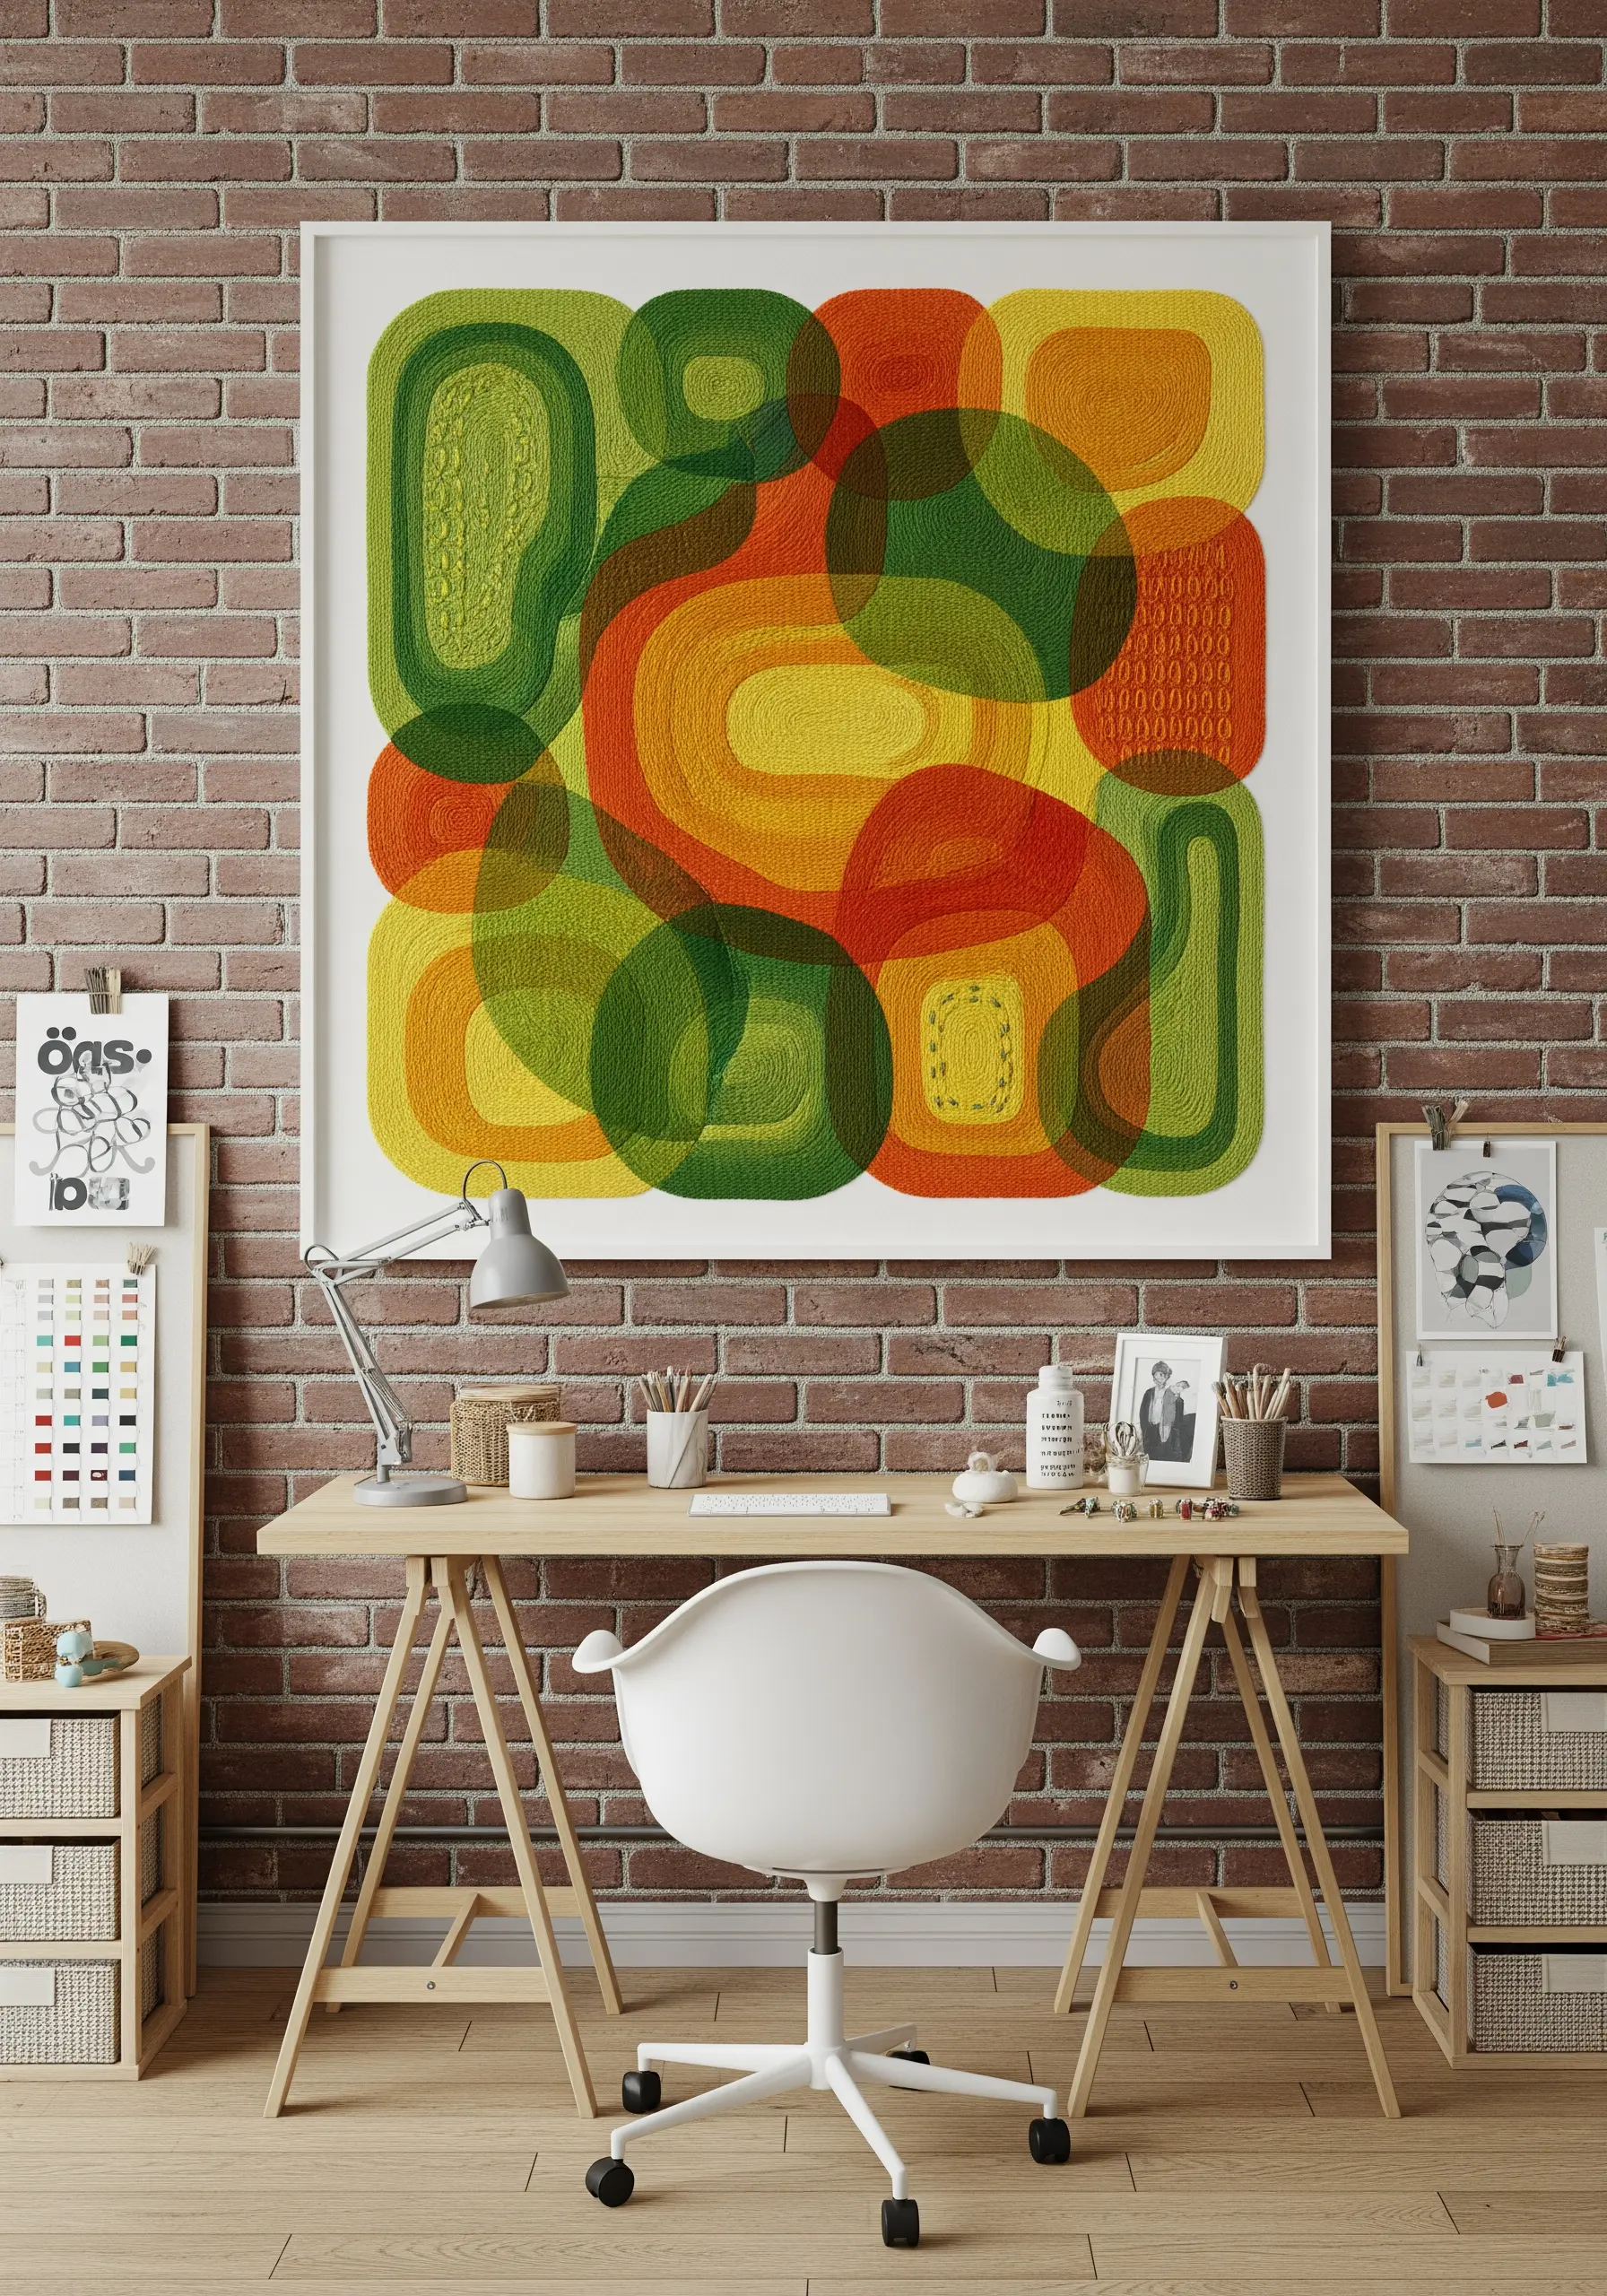
35. Play with Color Theory and Overlapping Shapes
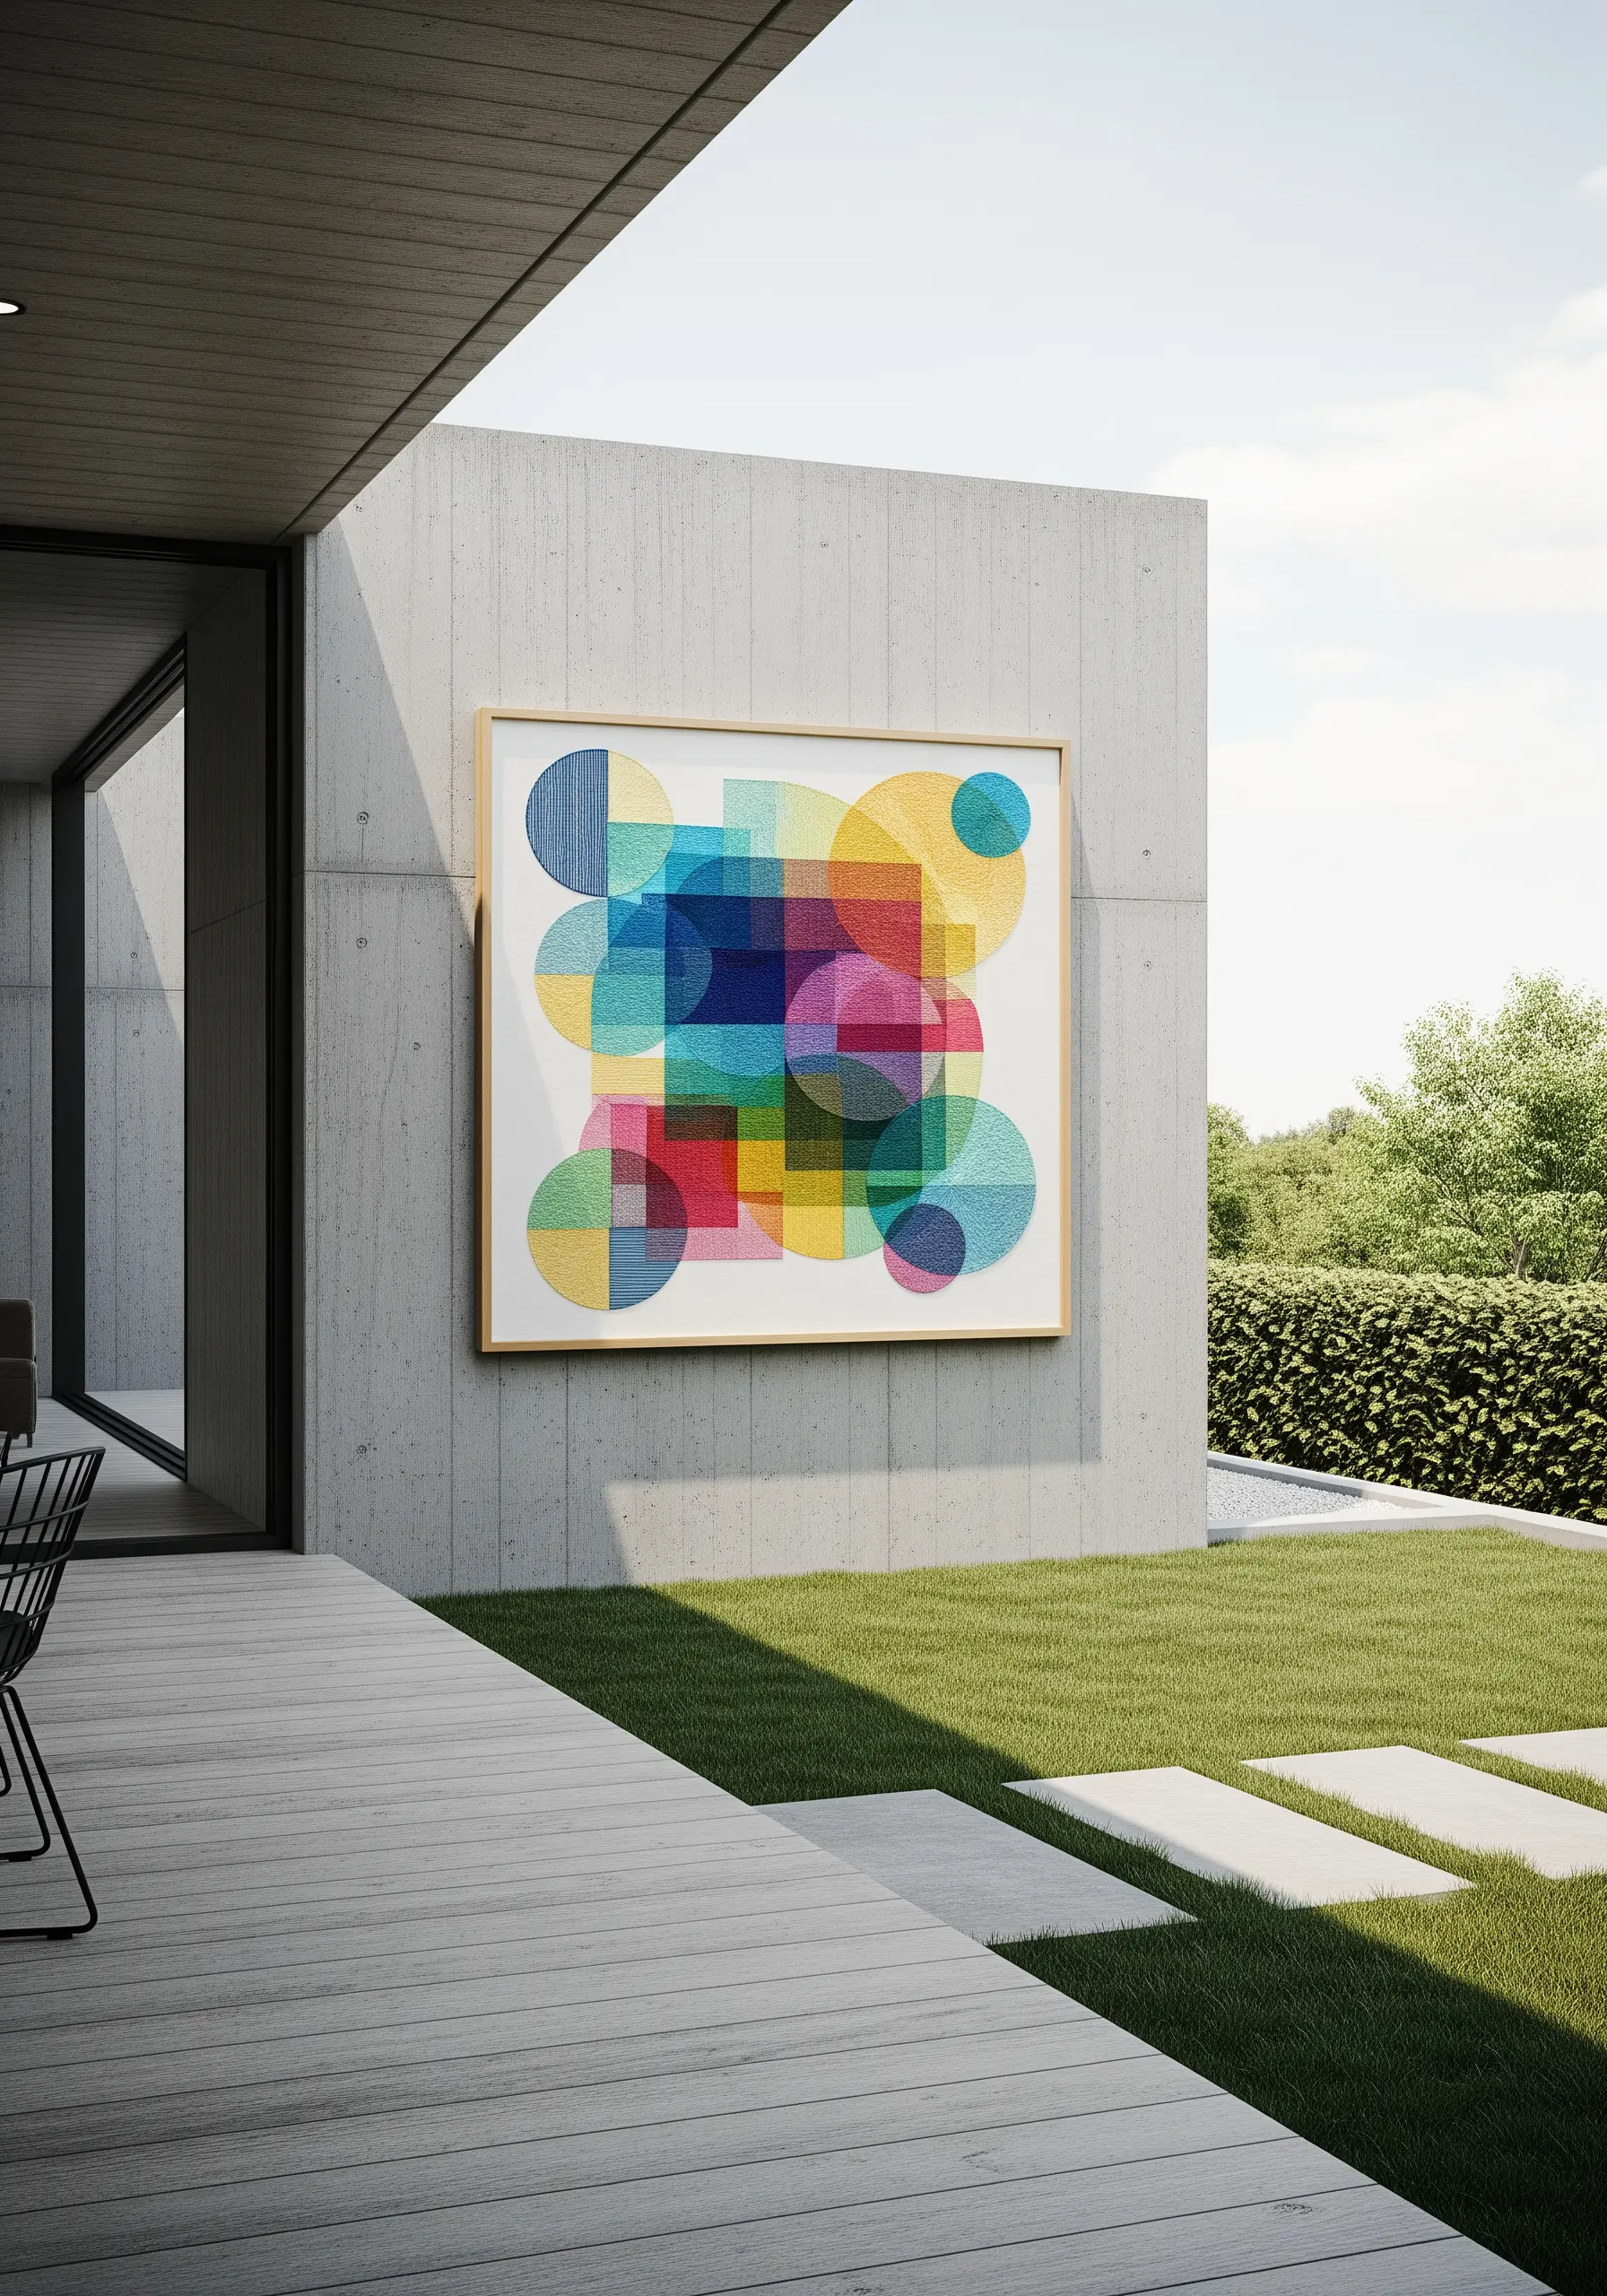
Explore the principles of color theory by creating an abstract piece based on overlapping geometric shapes.
To create the illusion that the shapes are transparent, you must stitch the overlapping areas in the color that the two primary colors would create when mixed (e.g., where yellow and blue overlap, stitch with green).
Using a consistent fill stitch, like a simple seed stitch or vertical straight stitches, across the entire piece unifies the composition and enhances the graphic, color-study effect.


