

Your bedroom is more than just a place to sleep—it’s your sanctuary. And the embroidery you create for it should feel just as personal and intentional.
It’s time to move beyond random projects and start thinking like a textile artist. How can a simple stitch on a pillowcase echo the texture of a throw blanket? How can a color palette on a headboard bring the whole room into harmony?
These twenty ideas aren’t just patterns to follow; they are techniques and thoughtful applications designed to elevate your craft. They will show you how to turn thread and fabric into details that make your space feel considered, cohesive, and completely your own.
1. Transform a Headboard into a Statement Tapestry
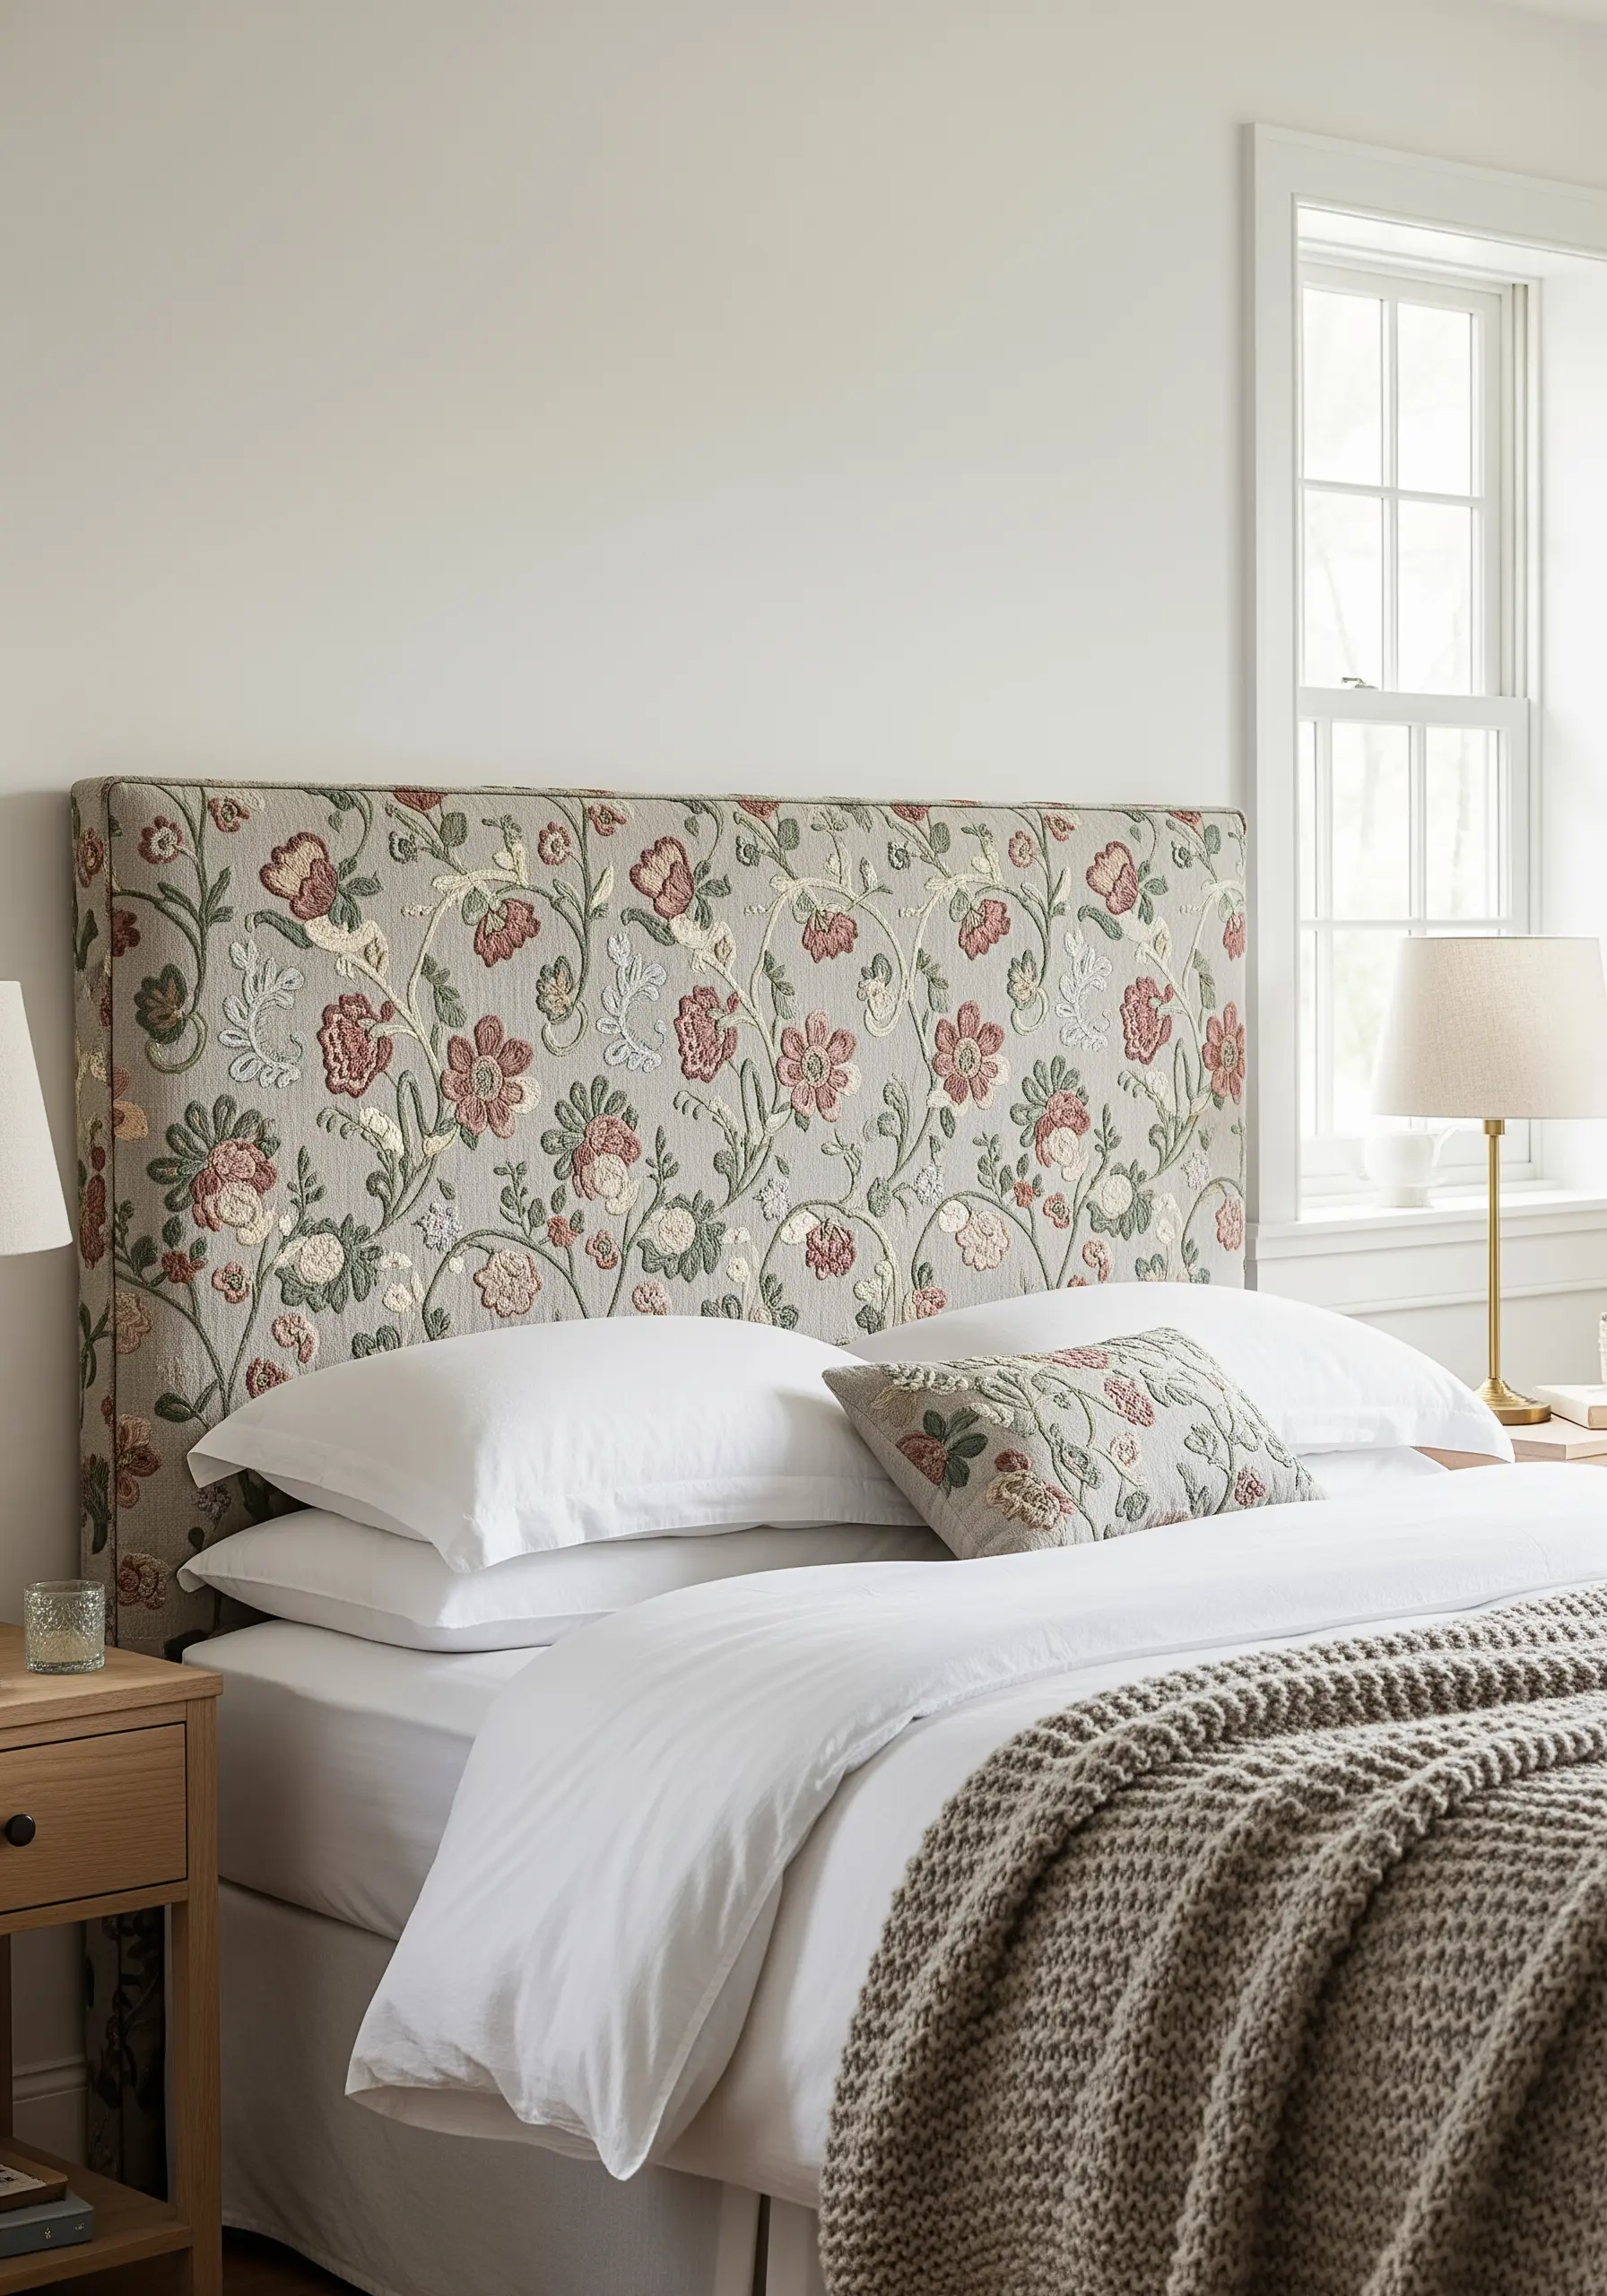
Instead of a plain headboard, consider it a canvas for large-scale embroidery that can anchor the entire room.
Choose a durable, medium-weight upholstery fabric like linen-cotton blend, which holds stitches without puckering.
For the long, flowing stems, use a couching stitch with a thicker yarn—this technique is faster than satin stitch and adds a beautiful, raised textural line.
Build your color palette from the existing tones in your room—pulling colors from curtains or rugs creates an instantly cohesive and professionally designed look.
This is one of the best headboard hacks for creating a truly bespoke bedroom centerpiece.
2. Add Graphic Detail with Abstract Lampshade Stitching
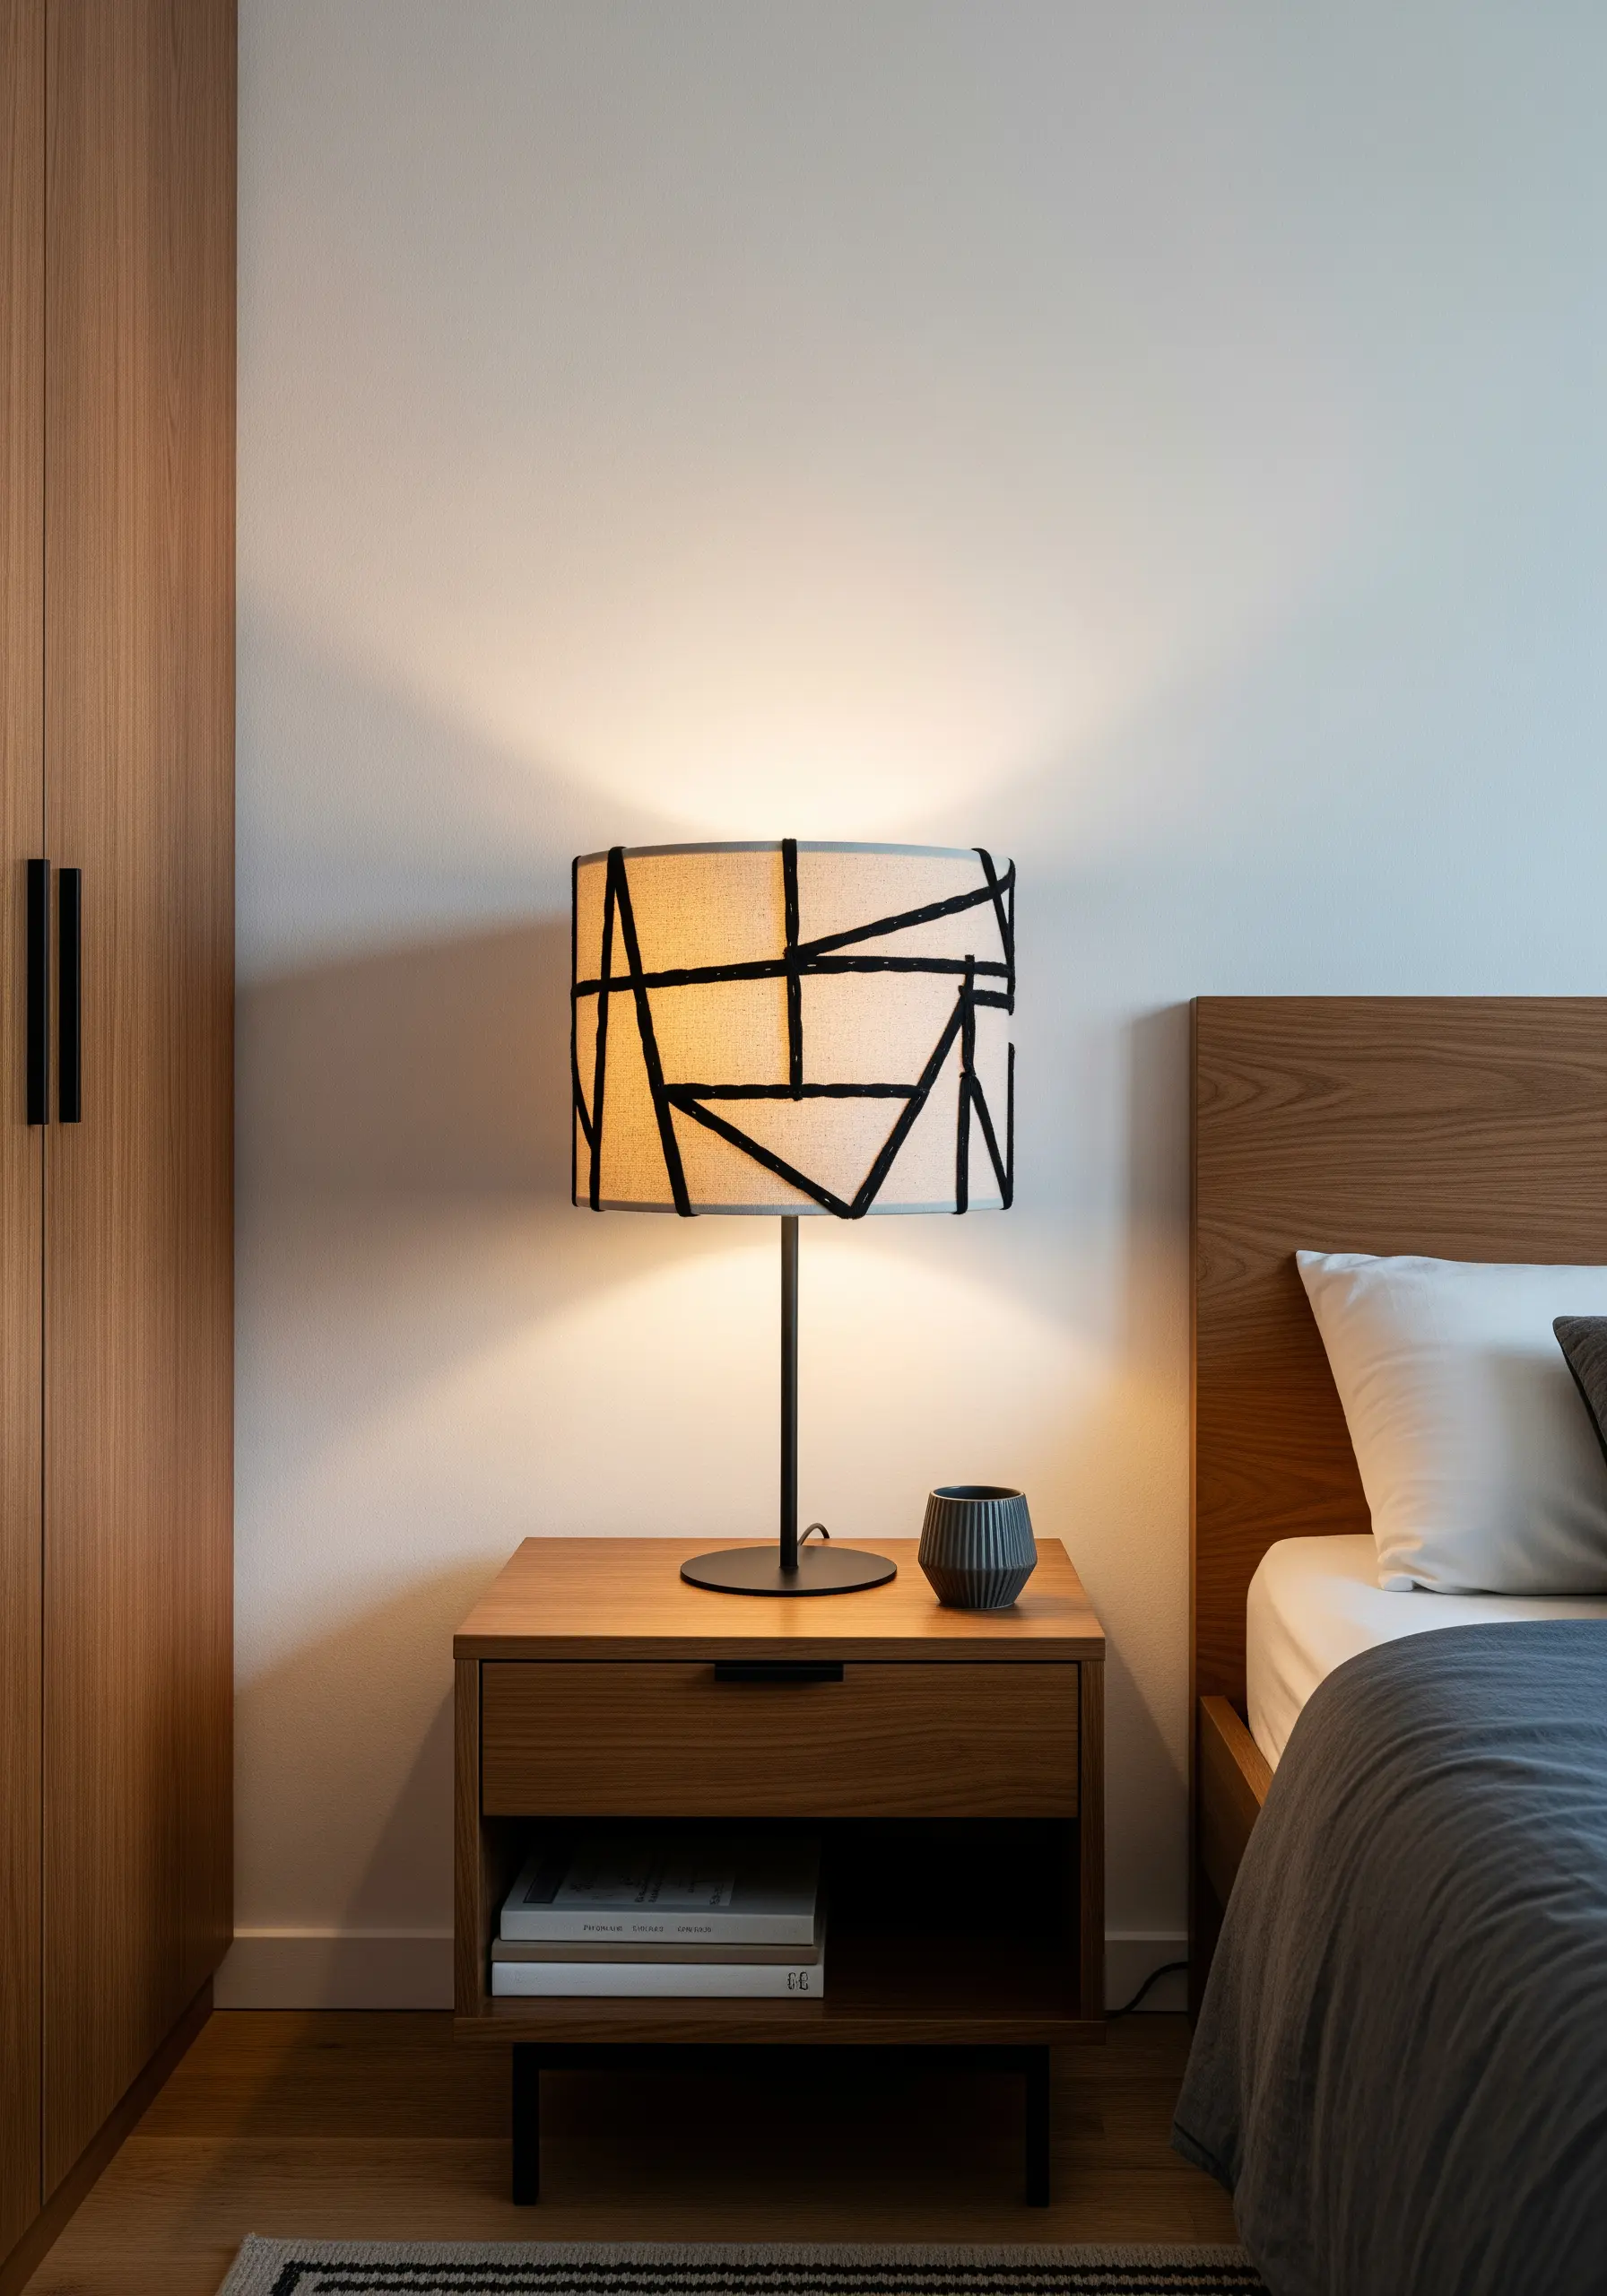
Elevate a simple drum lampshade by adding bold, graphic lines with thick black yarn or narrow cotton ribbon.
Use a simple couching stitch to tack down the yarn, allowing you to create sharp angles and overlapping shapes without pulling the fabric.
The beauty of this technique is how it transforms when the light is on, casting dynamic shadows and highlighting the texture of your stitches.
This approach turns a purely functional object into a piece of modern, minimalist sculpture.
You can create similar effects with line art geometry-based stitches on other home decor items.
3. Stitch a Narrative with a Landscape Bed Runner
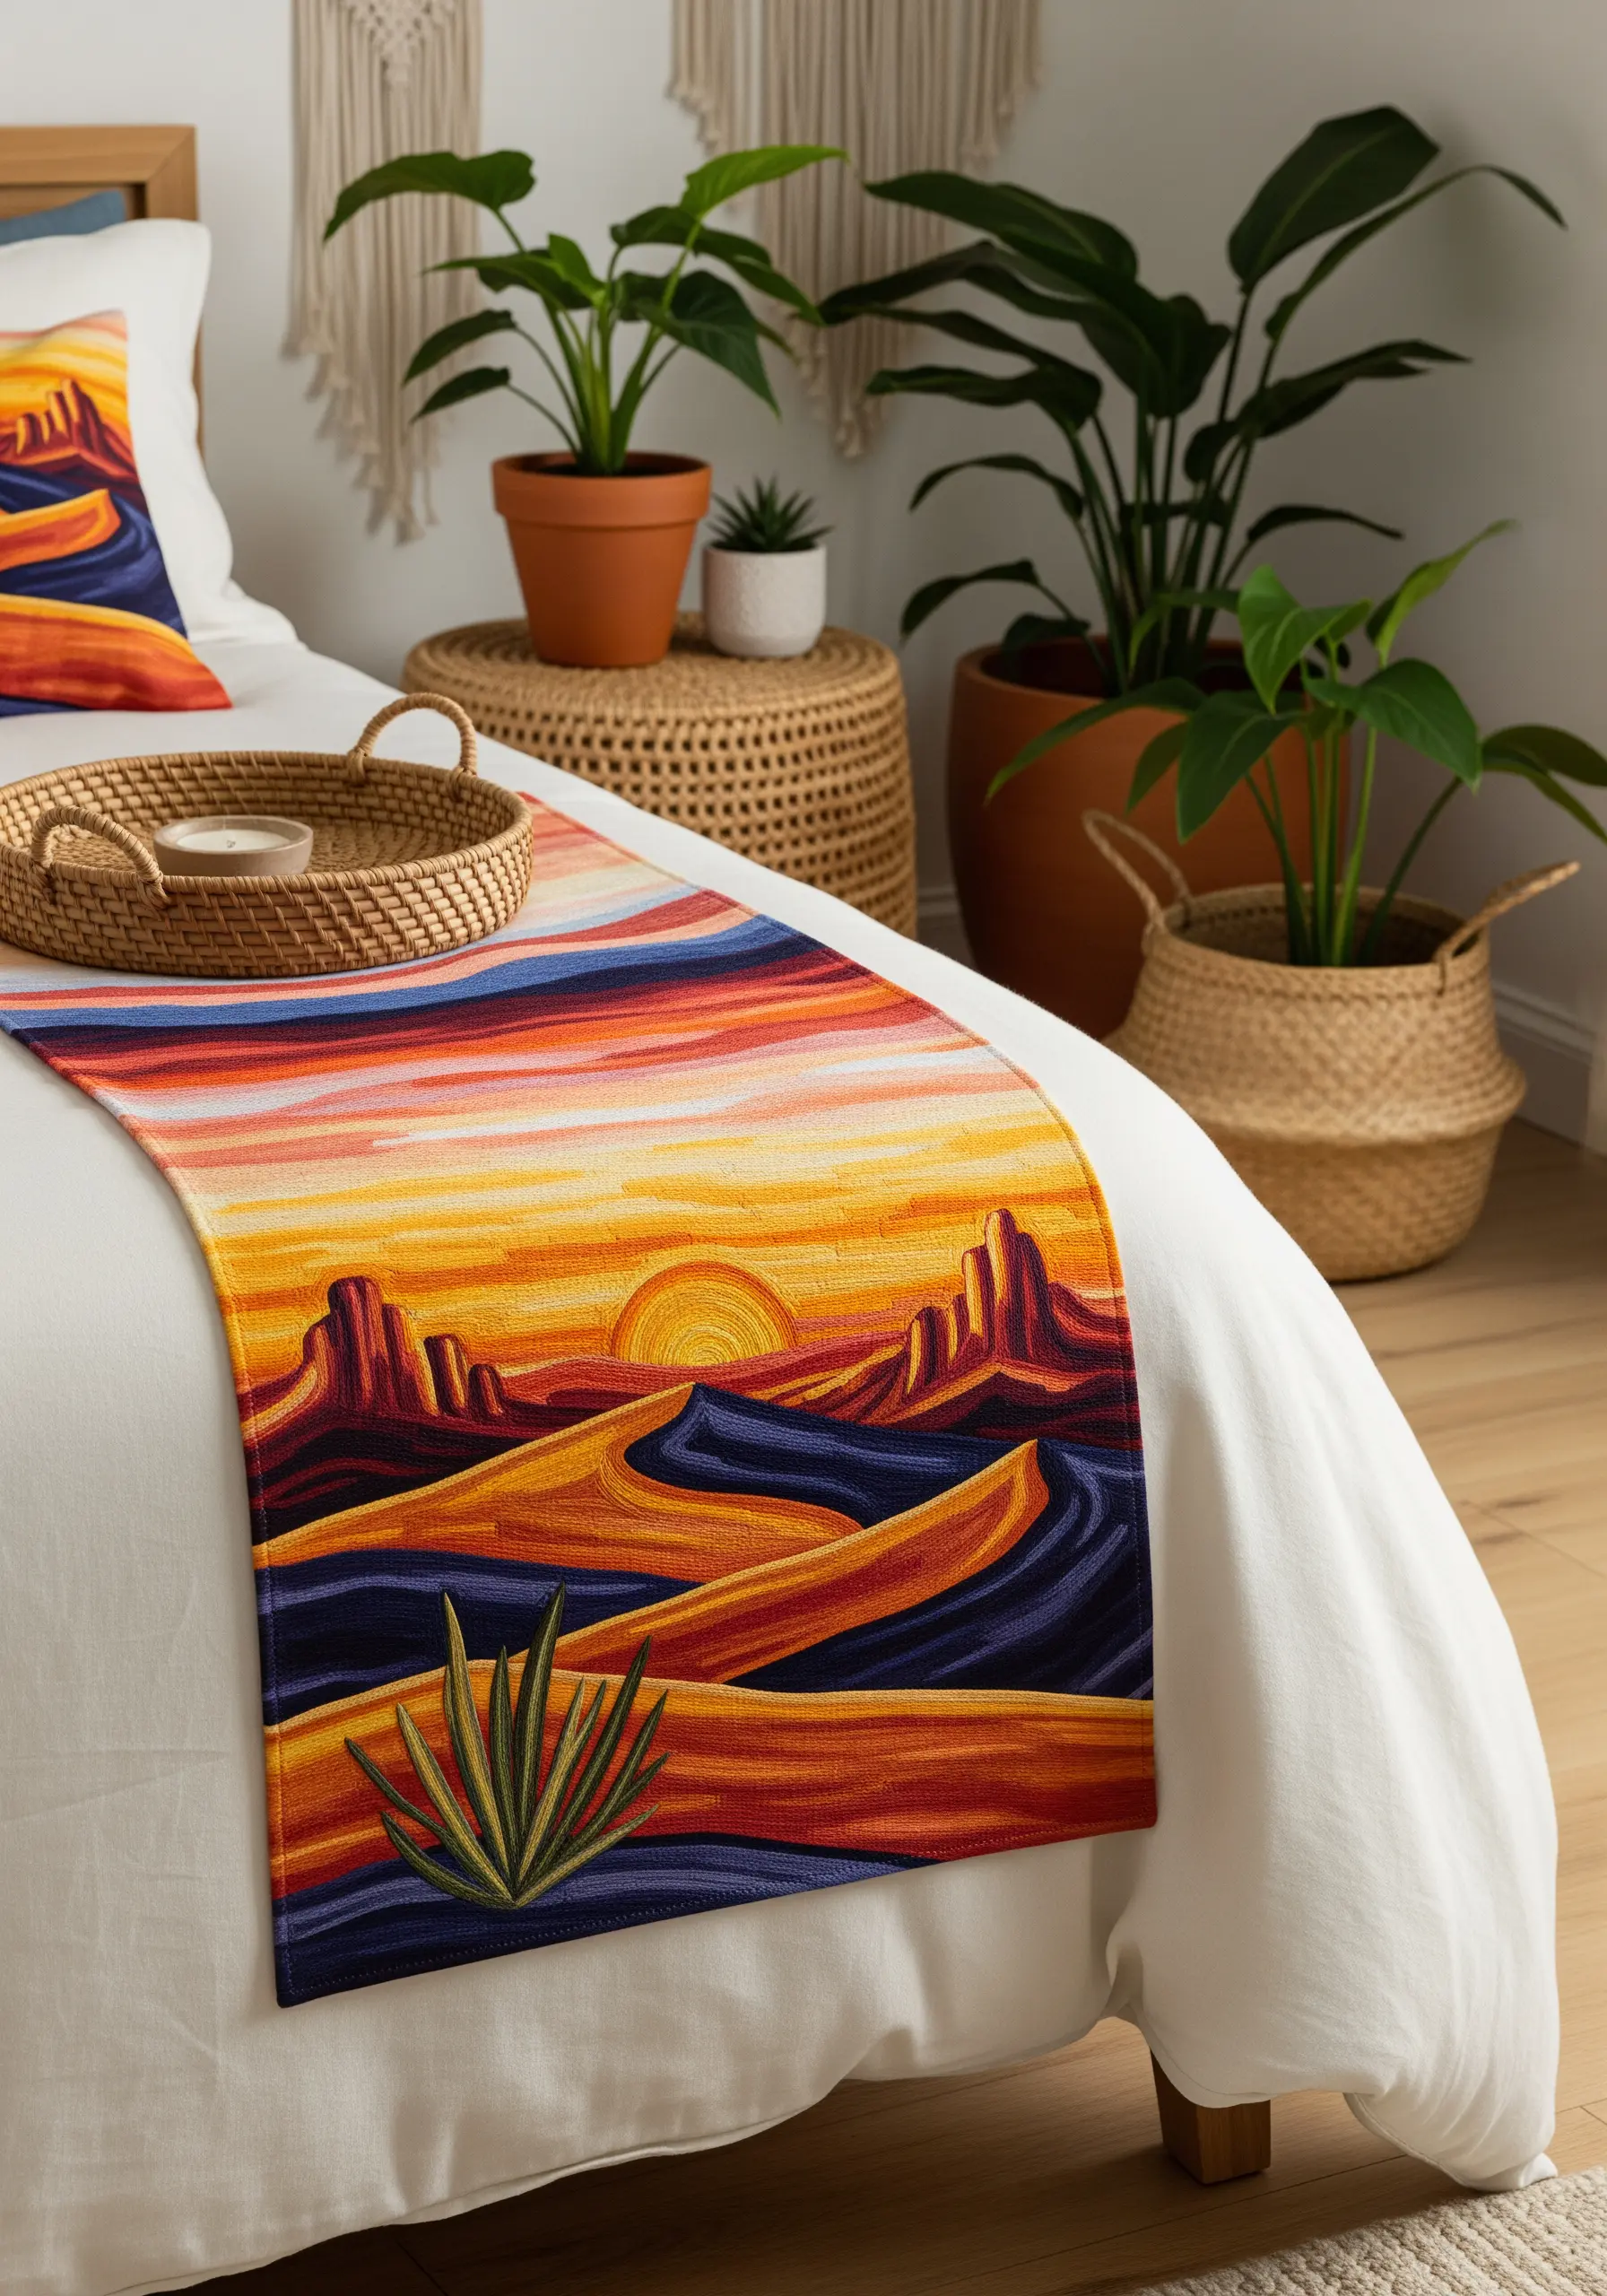
Move beyond small motifs and tell a story across the foot of your bed with a thread-painted bed runner.
Create a sense of atmospheric depth by using color gradients—place your darkest, most saturated threads in the foreground and transition to lighter, paler shades for the background elements.
Employ the long-and-short stitch to blend your colors seamlessly, achieving a smooth, painterly effect that mimics a sunset or a rolling landscape.
This project becomes a personal mural that adds warmth and character to your bedding.
Explore more nature scene pillow embroidery ideas to complement the look.
4. Frame a View with Embroidered Curtain Tie-Backs

Transform your embroidery hoops from simple wall decor into functional, light-catching accents.
By stitching onto a sheer fabric like organza or tulle and leaving the finished piece in the hoop, you can create delicate medallions to use as curtain tie-backs.
The sunlight filters through the sheer fabric, illuminating your stitches and making the design appear to float.
Use textured stitches like French knots for lavender buds or bullion knots for small insects to add dimensional detail that catches the light beautifully.
These botanical hoop embroidery projects work perfectly for this.
5. Personalize Linens with a Tone-on-Tone Monogram
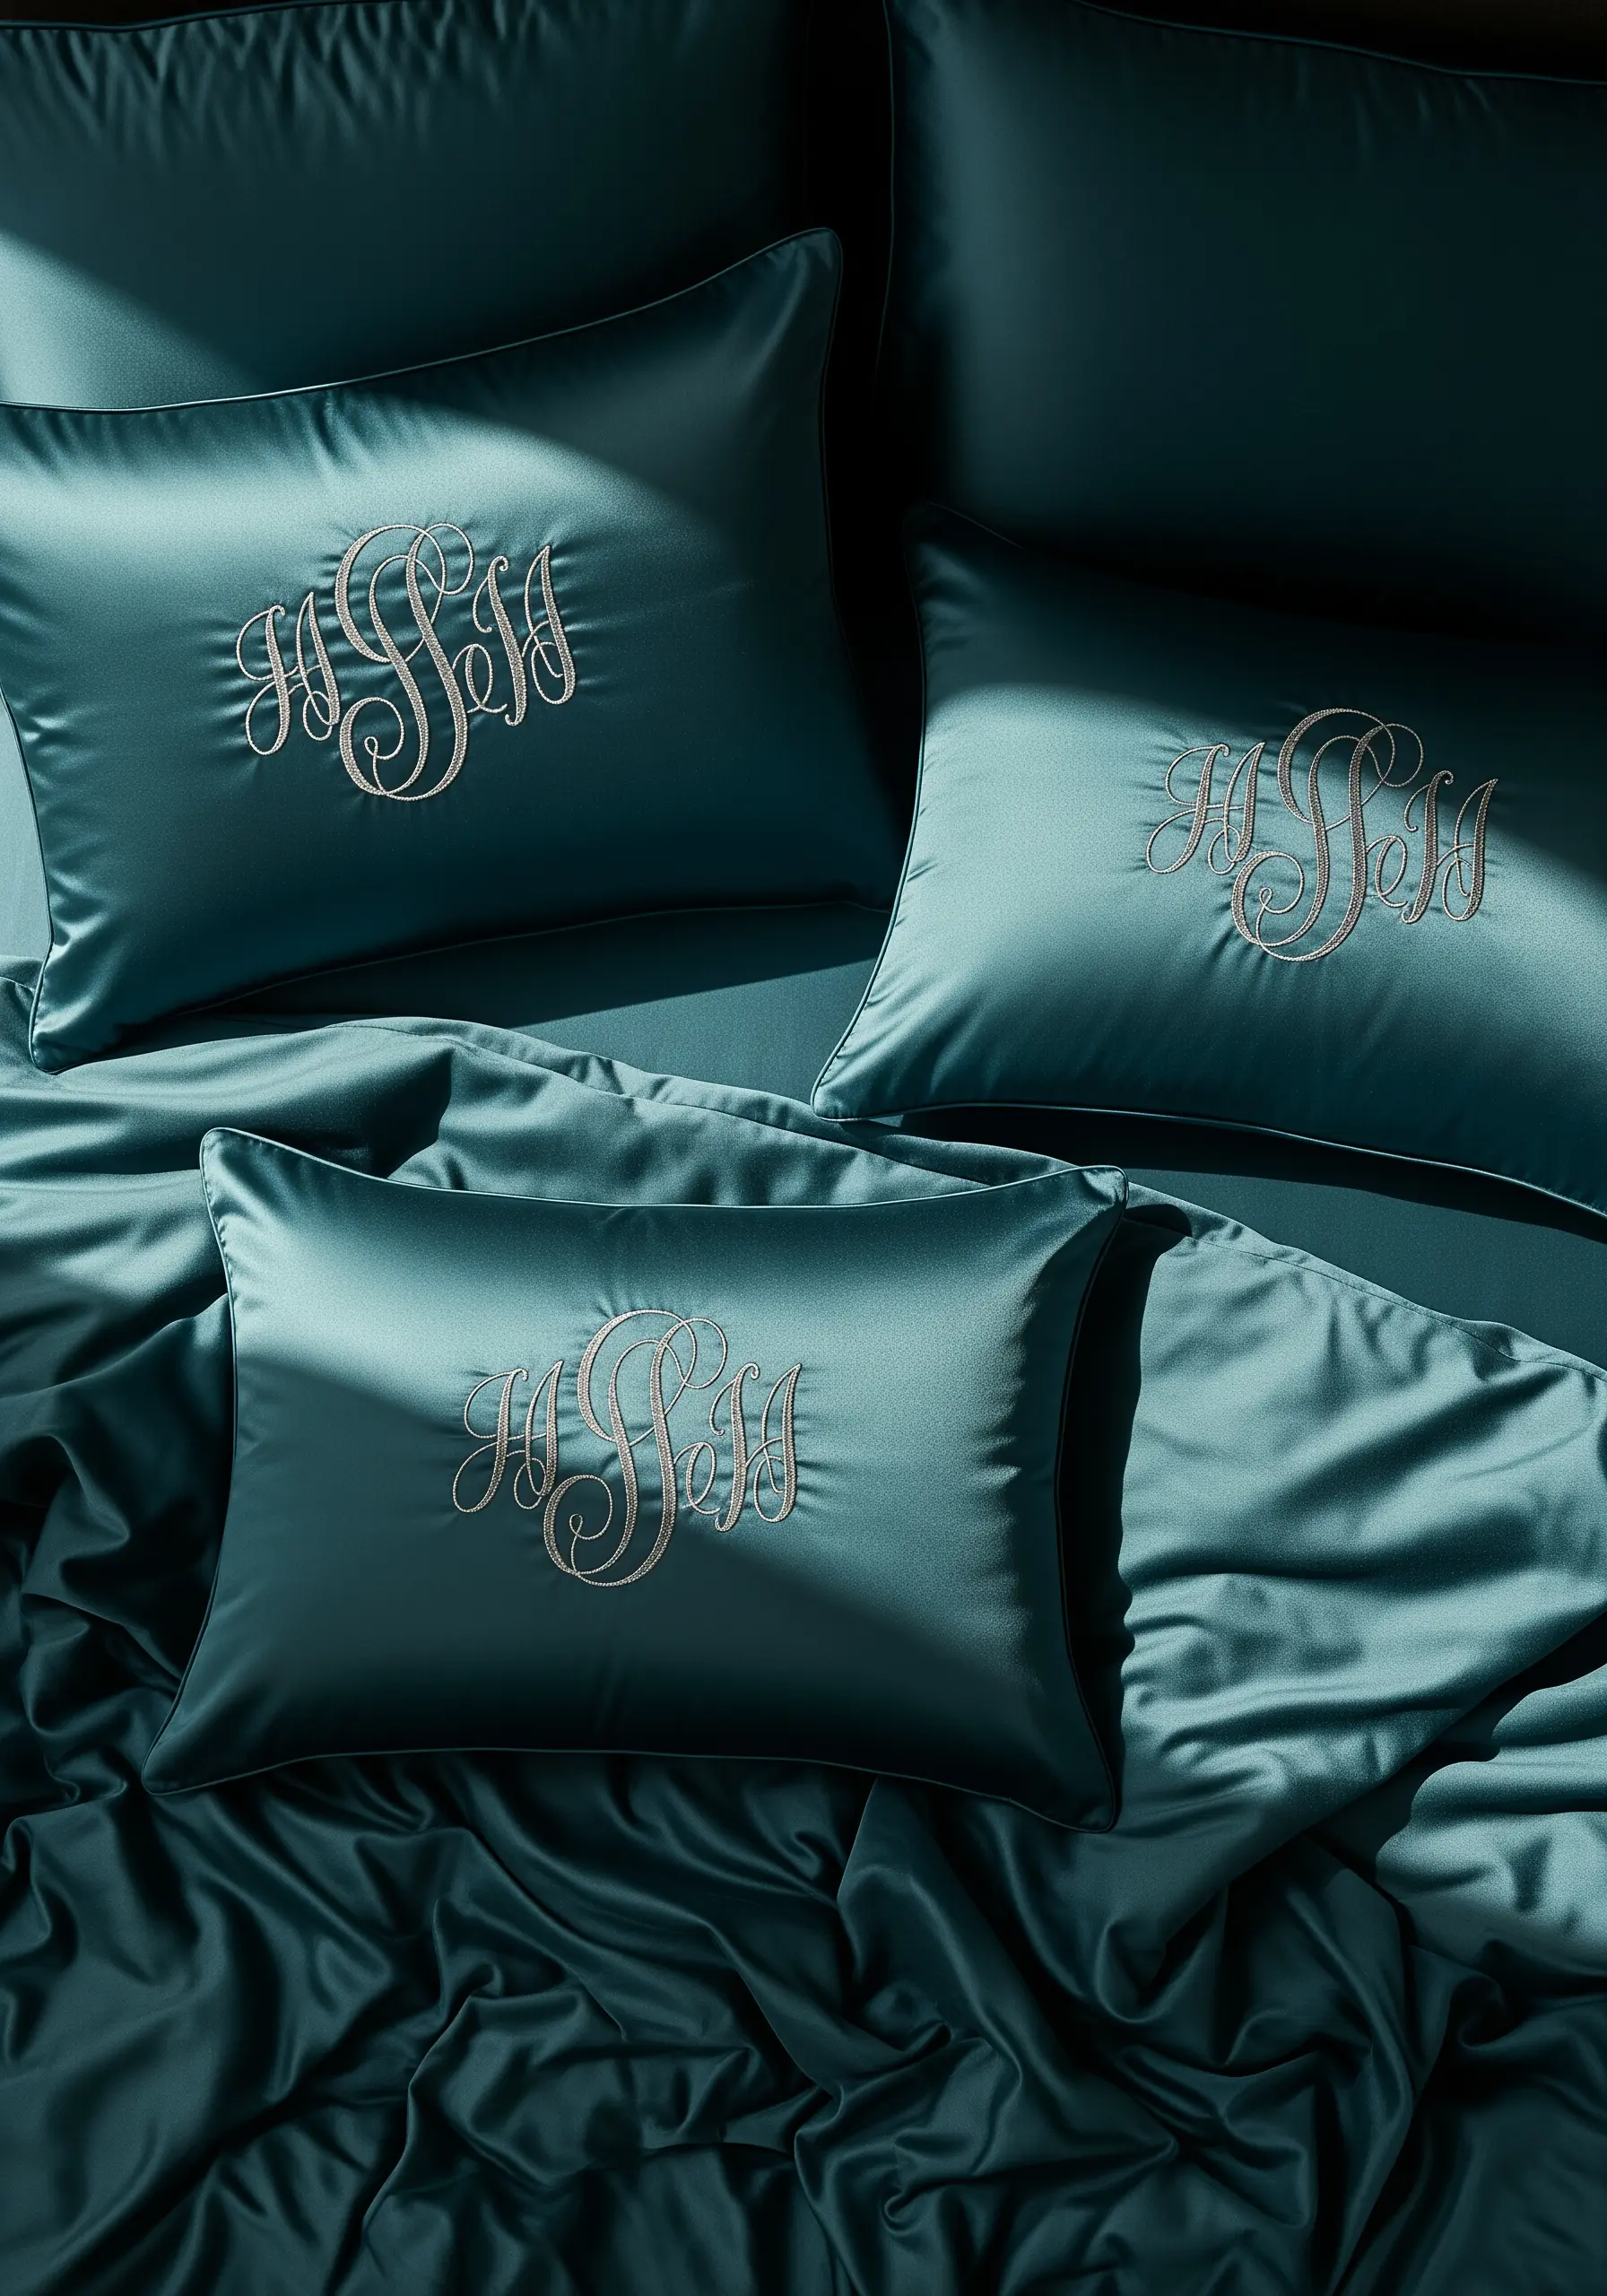
For a touch of quiet luxury, embroider pillowcases using a thread that is only one or two shades different from the fabric.
This tone-on-tone technique emphasizes texture and shadow over bold color, resulting in an elegant, high-end finish.
On slick fabrics like silk or sateen, use a tear-away stabilizer on the back to prevent any puckering and ensure your stitches remain smooth.
Elevate the monogram by first creating a base of split stitches, then working your satin stitch over it for a raised, padded effect that feels exceptionally refined.
These neutral tone monogram embroidery ideas are perfect for creating a sophisticated space.
6. Create a Focal Point with Large-Scale Line Art
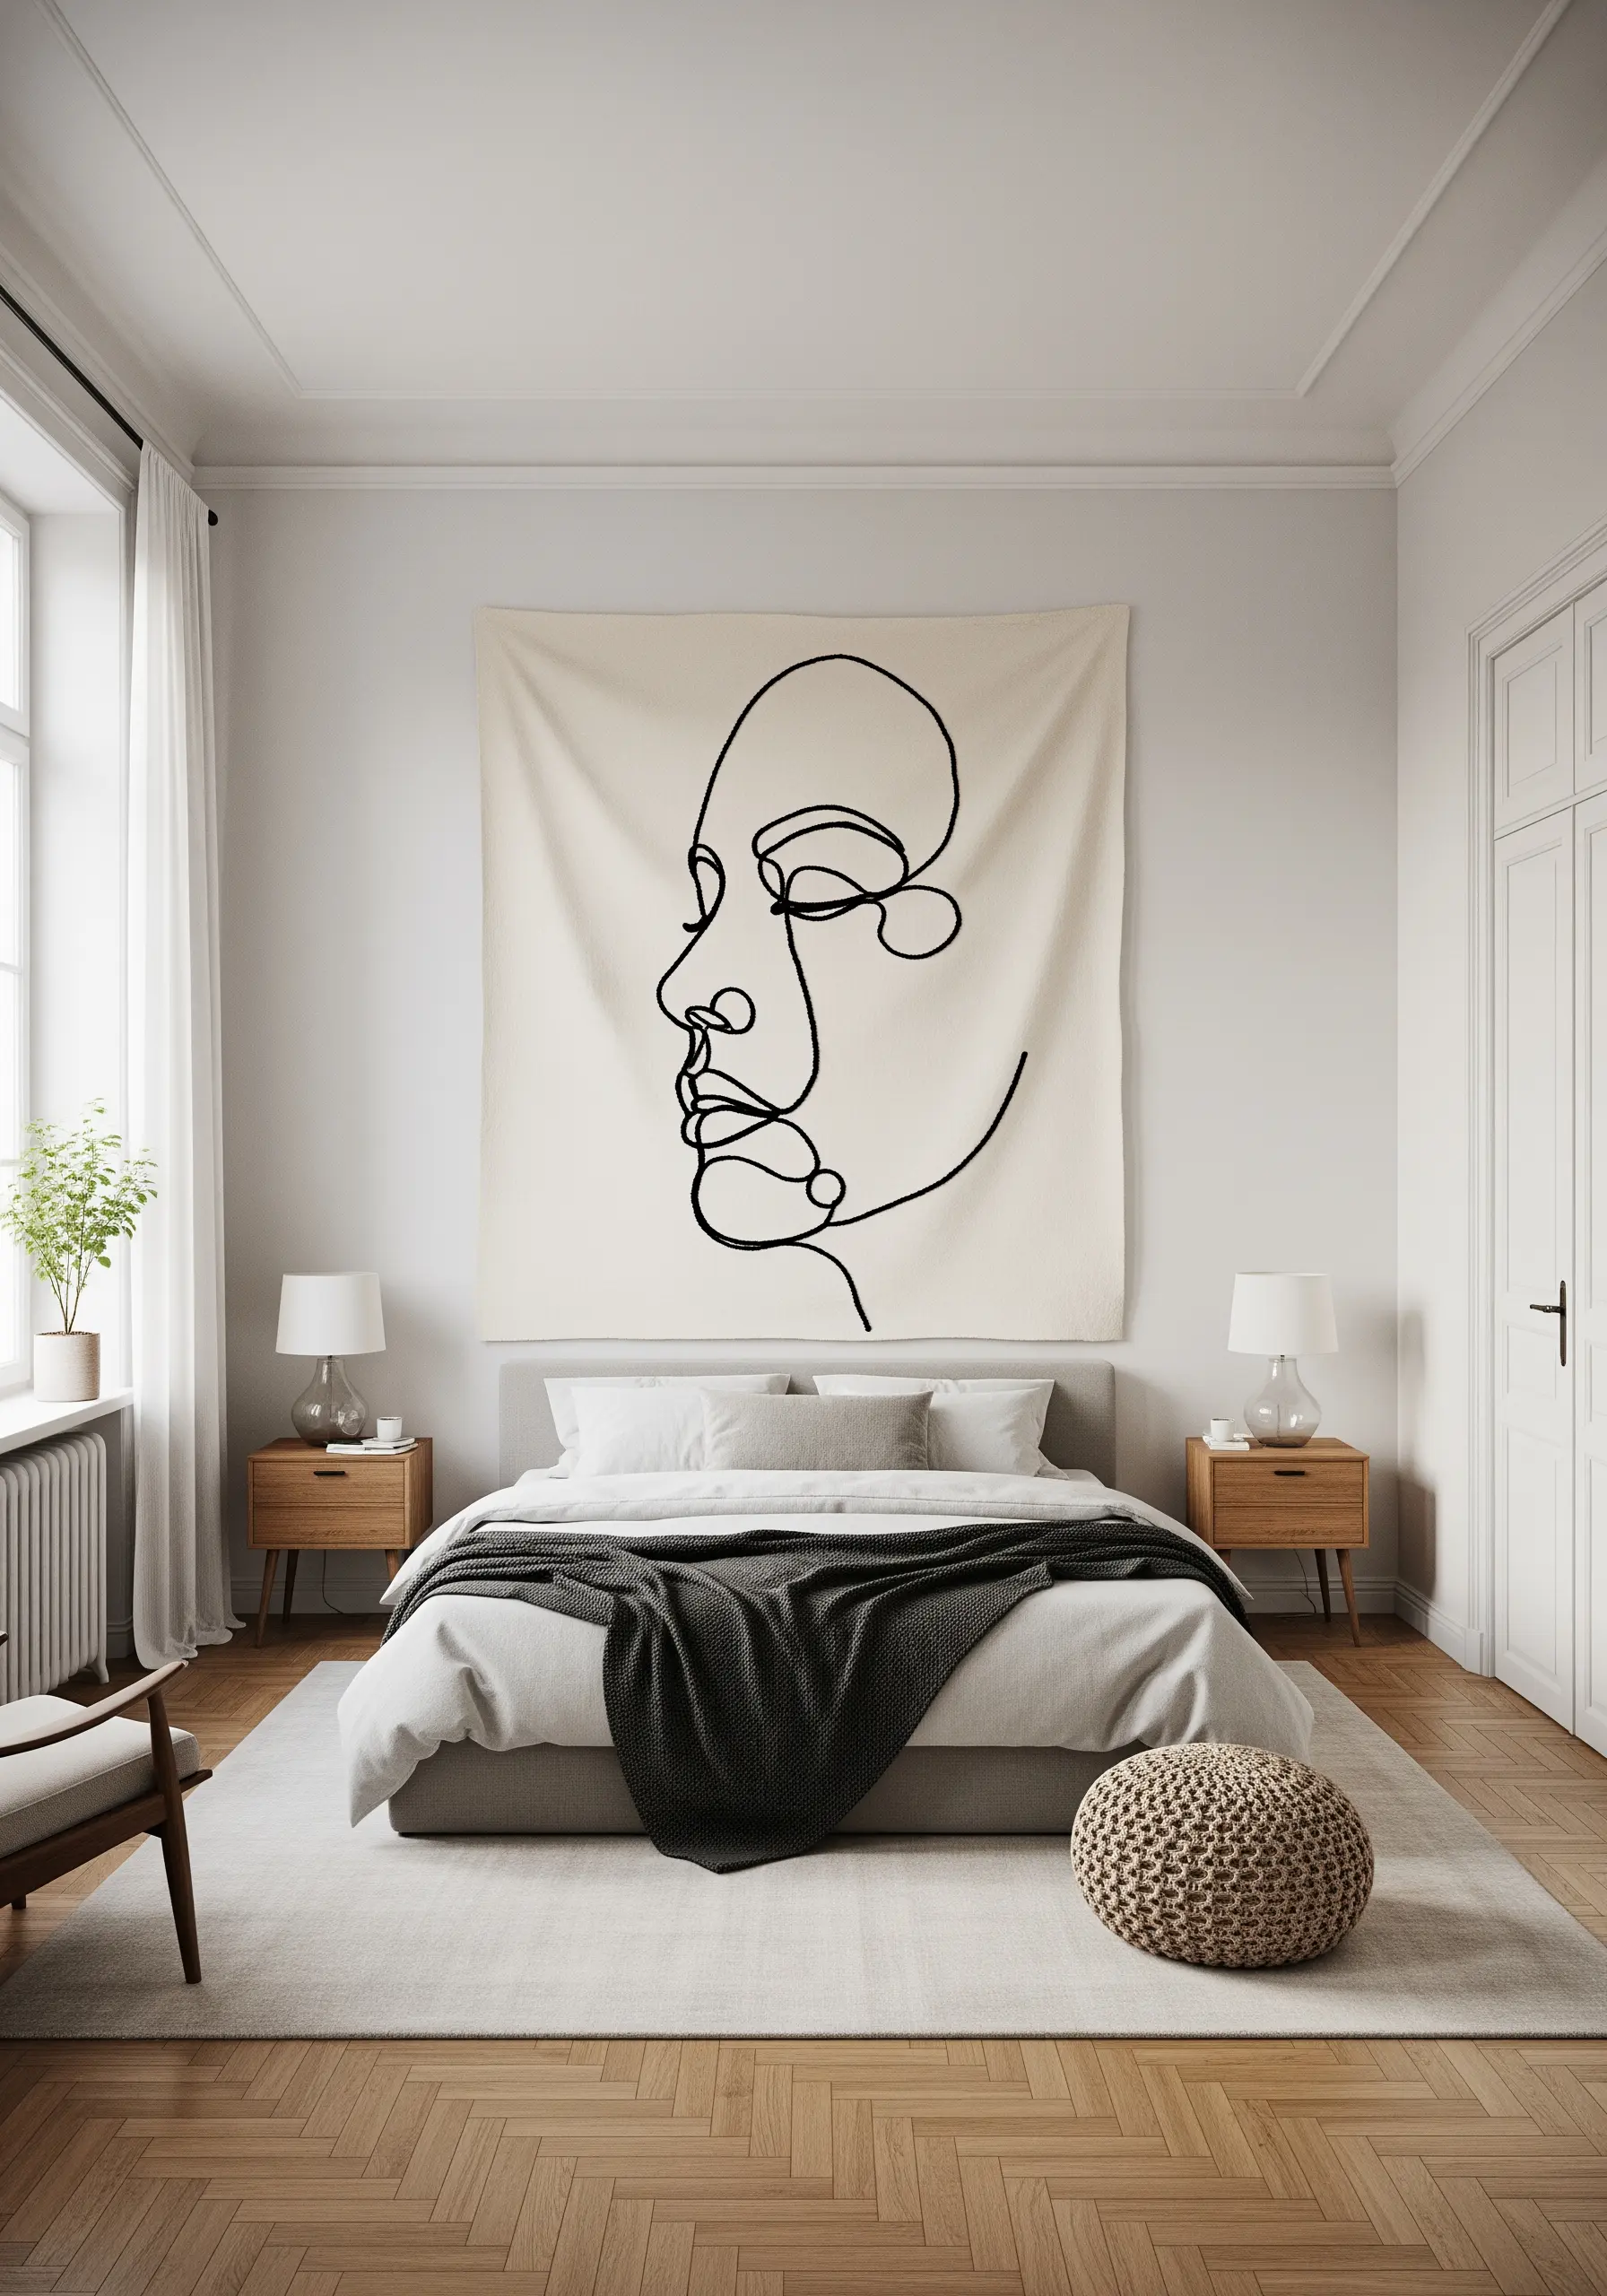
Make a dramatic statement above your bed by transforming a simple line drawing into large-scale textile art.
Project your chosen design onto a large piece of unbleached canvas or heavy linen and trace it lightly with a pencil.
Instead of standard floss, use a heavier thread like cotton perle or even a fine yarn to give your lines presence and weight.
A simple but perfectly executed chain stitch or stem stitch will create a clean, continuous line that gives the artwork a graphic, modern feel.
Explore other minimalist line art embroidery hoops for smaller-scale inspiration.
7. Upgrade Furniture with Soft, Embroidered Drawer Pulls
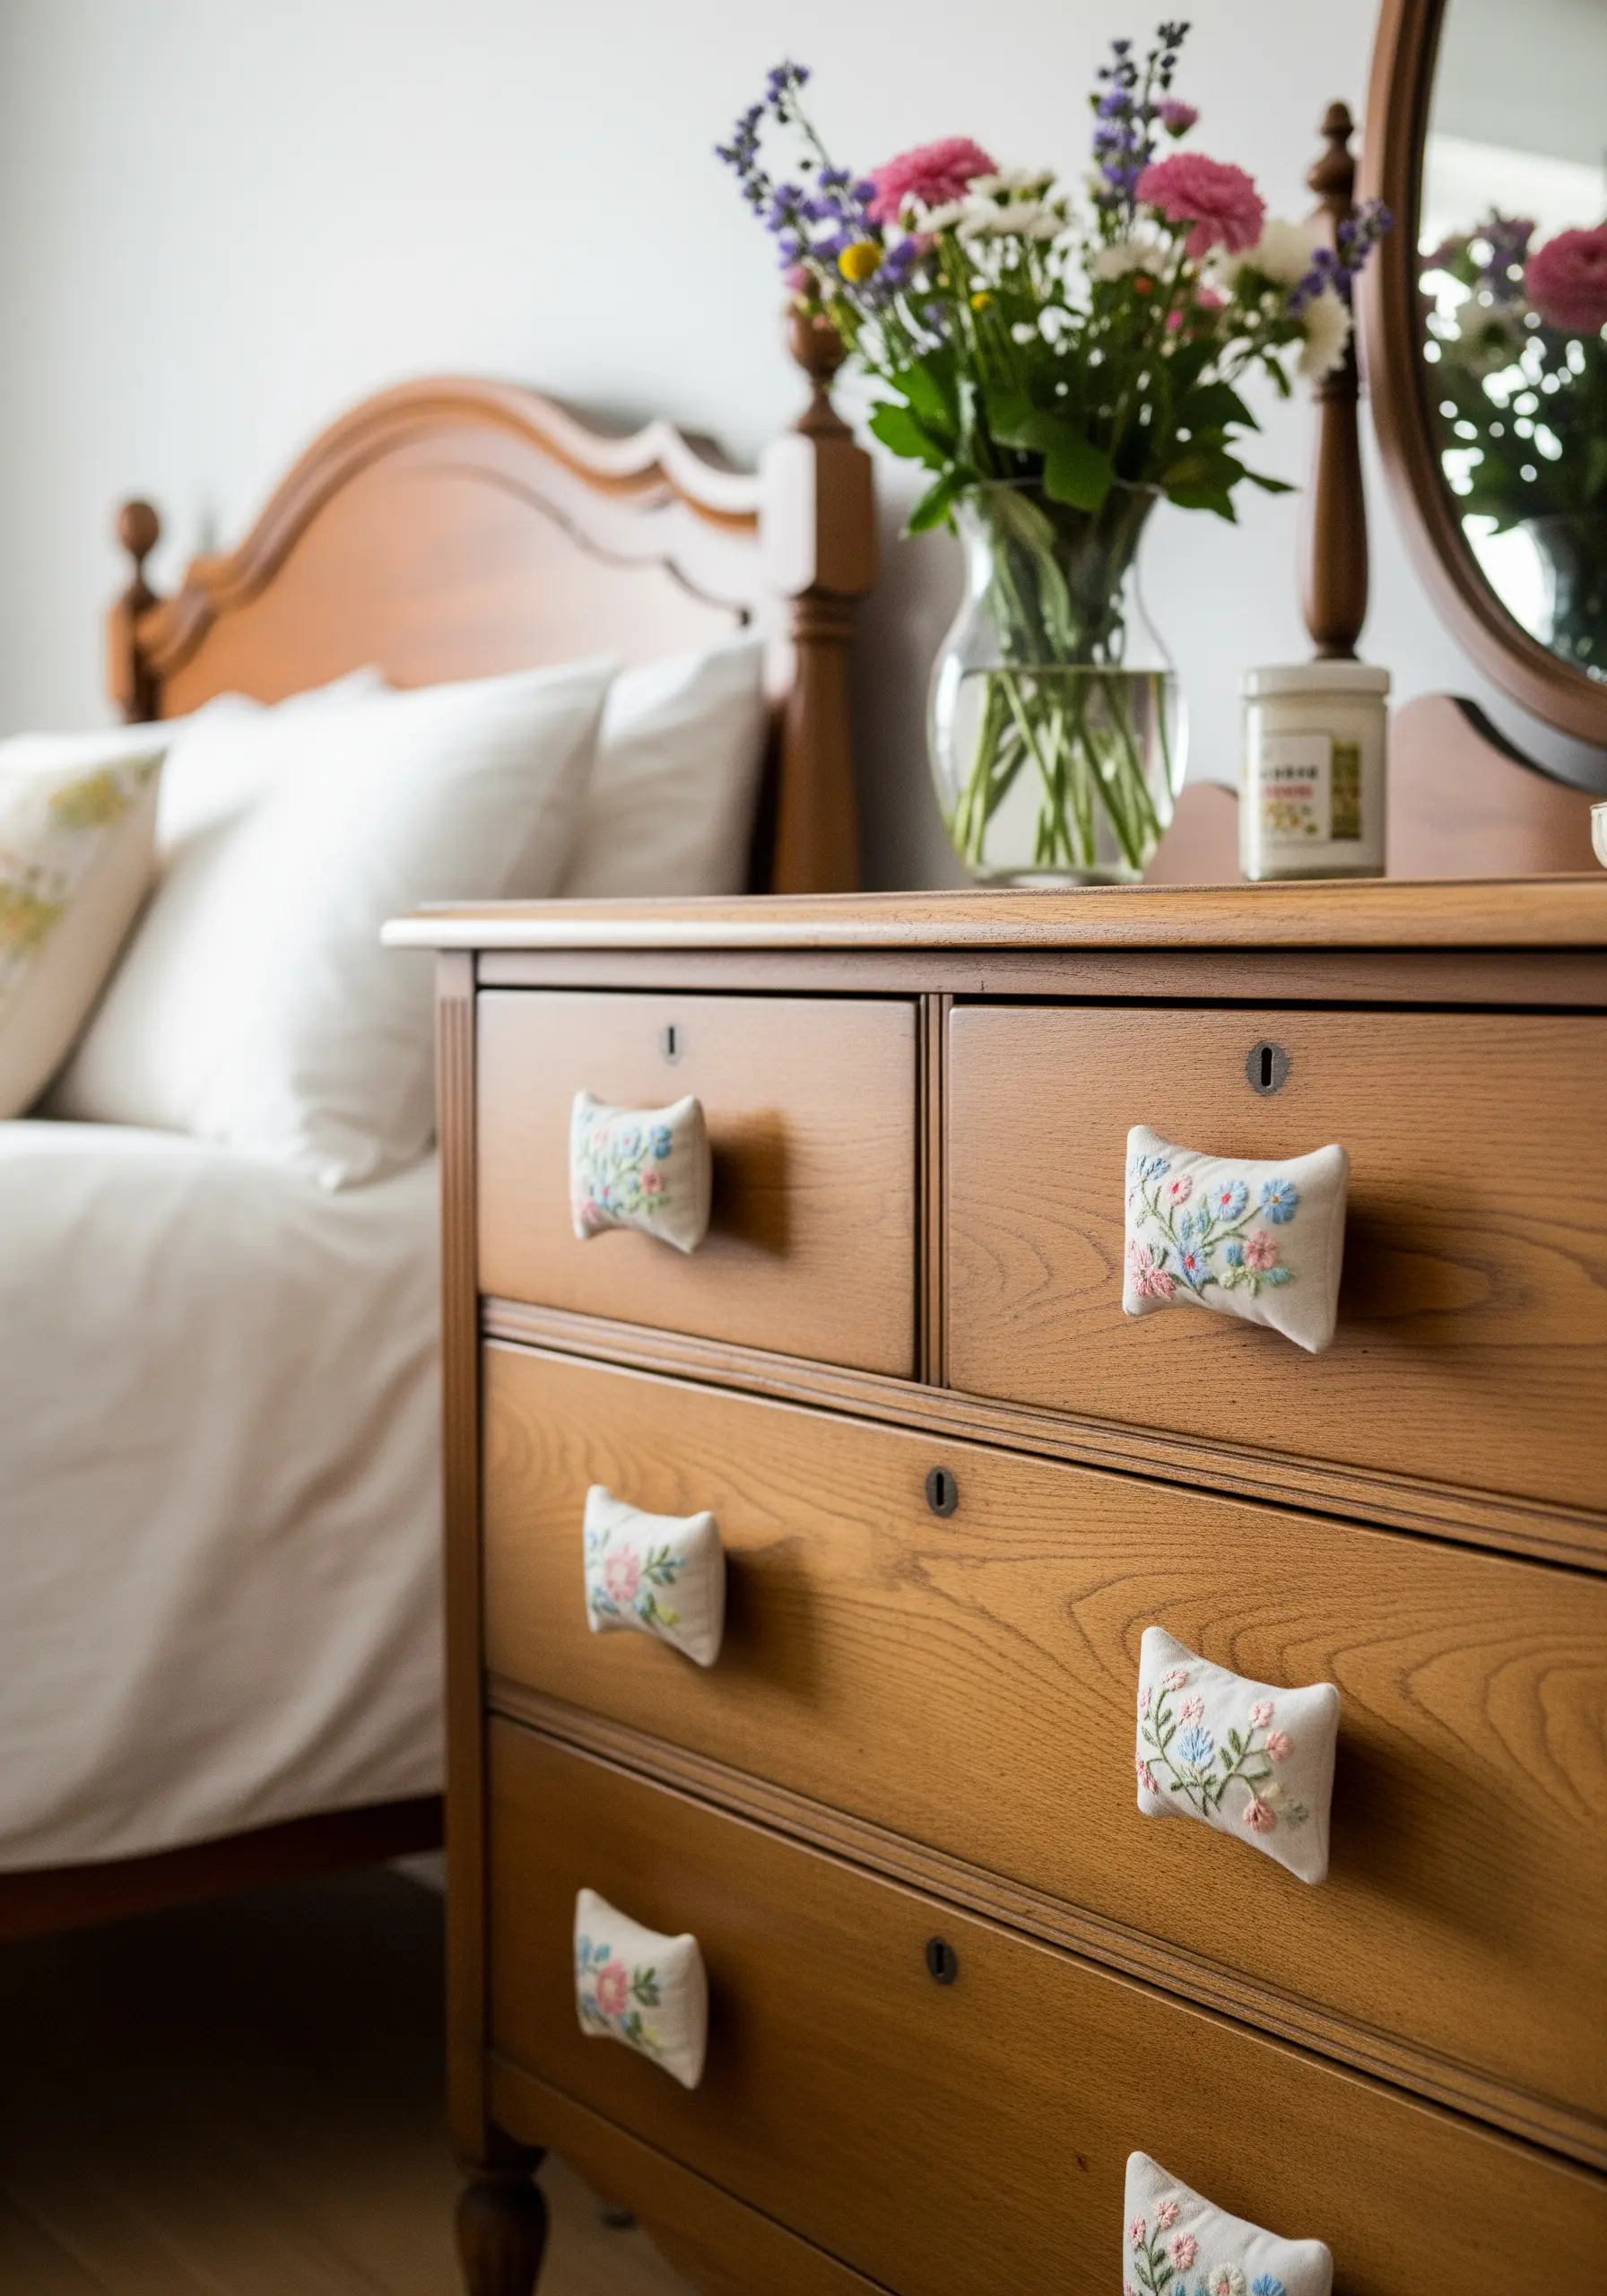
Add a soft, unexpected detail to a wooden dresser by creating custom fabric-wrapped drawer pulls.
Embroider small floral motifs onto durable linen scraps—this is a perfect project for using up leftover materials.
Wrap the embroidered fabric around a simple wooden drawer pull, securing it tightly on the back with a strong fabric glue and a few hidden stitches.
This small change softens the hard lines of furniture and introduces a unique, handcrafted element into your bedroom decor.
It’s one of those tiny stitching ideas that makes a huge difference.
8. Embellish Functional Items like a Canvas Hamper
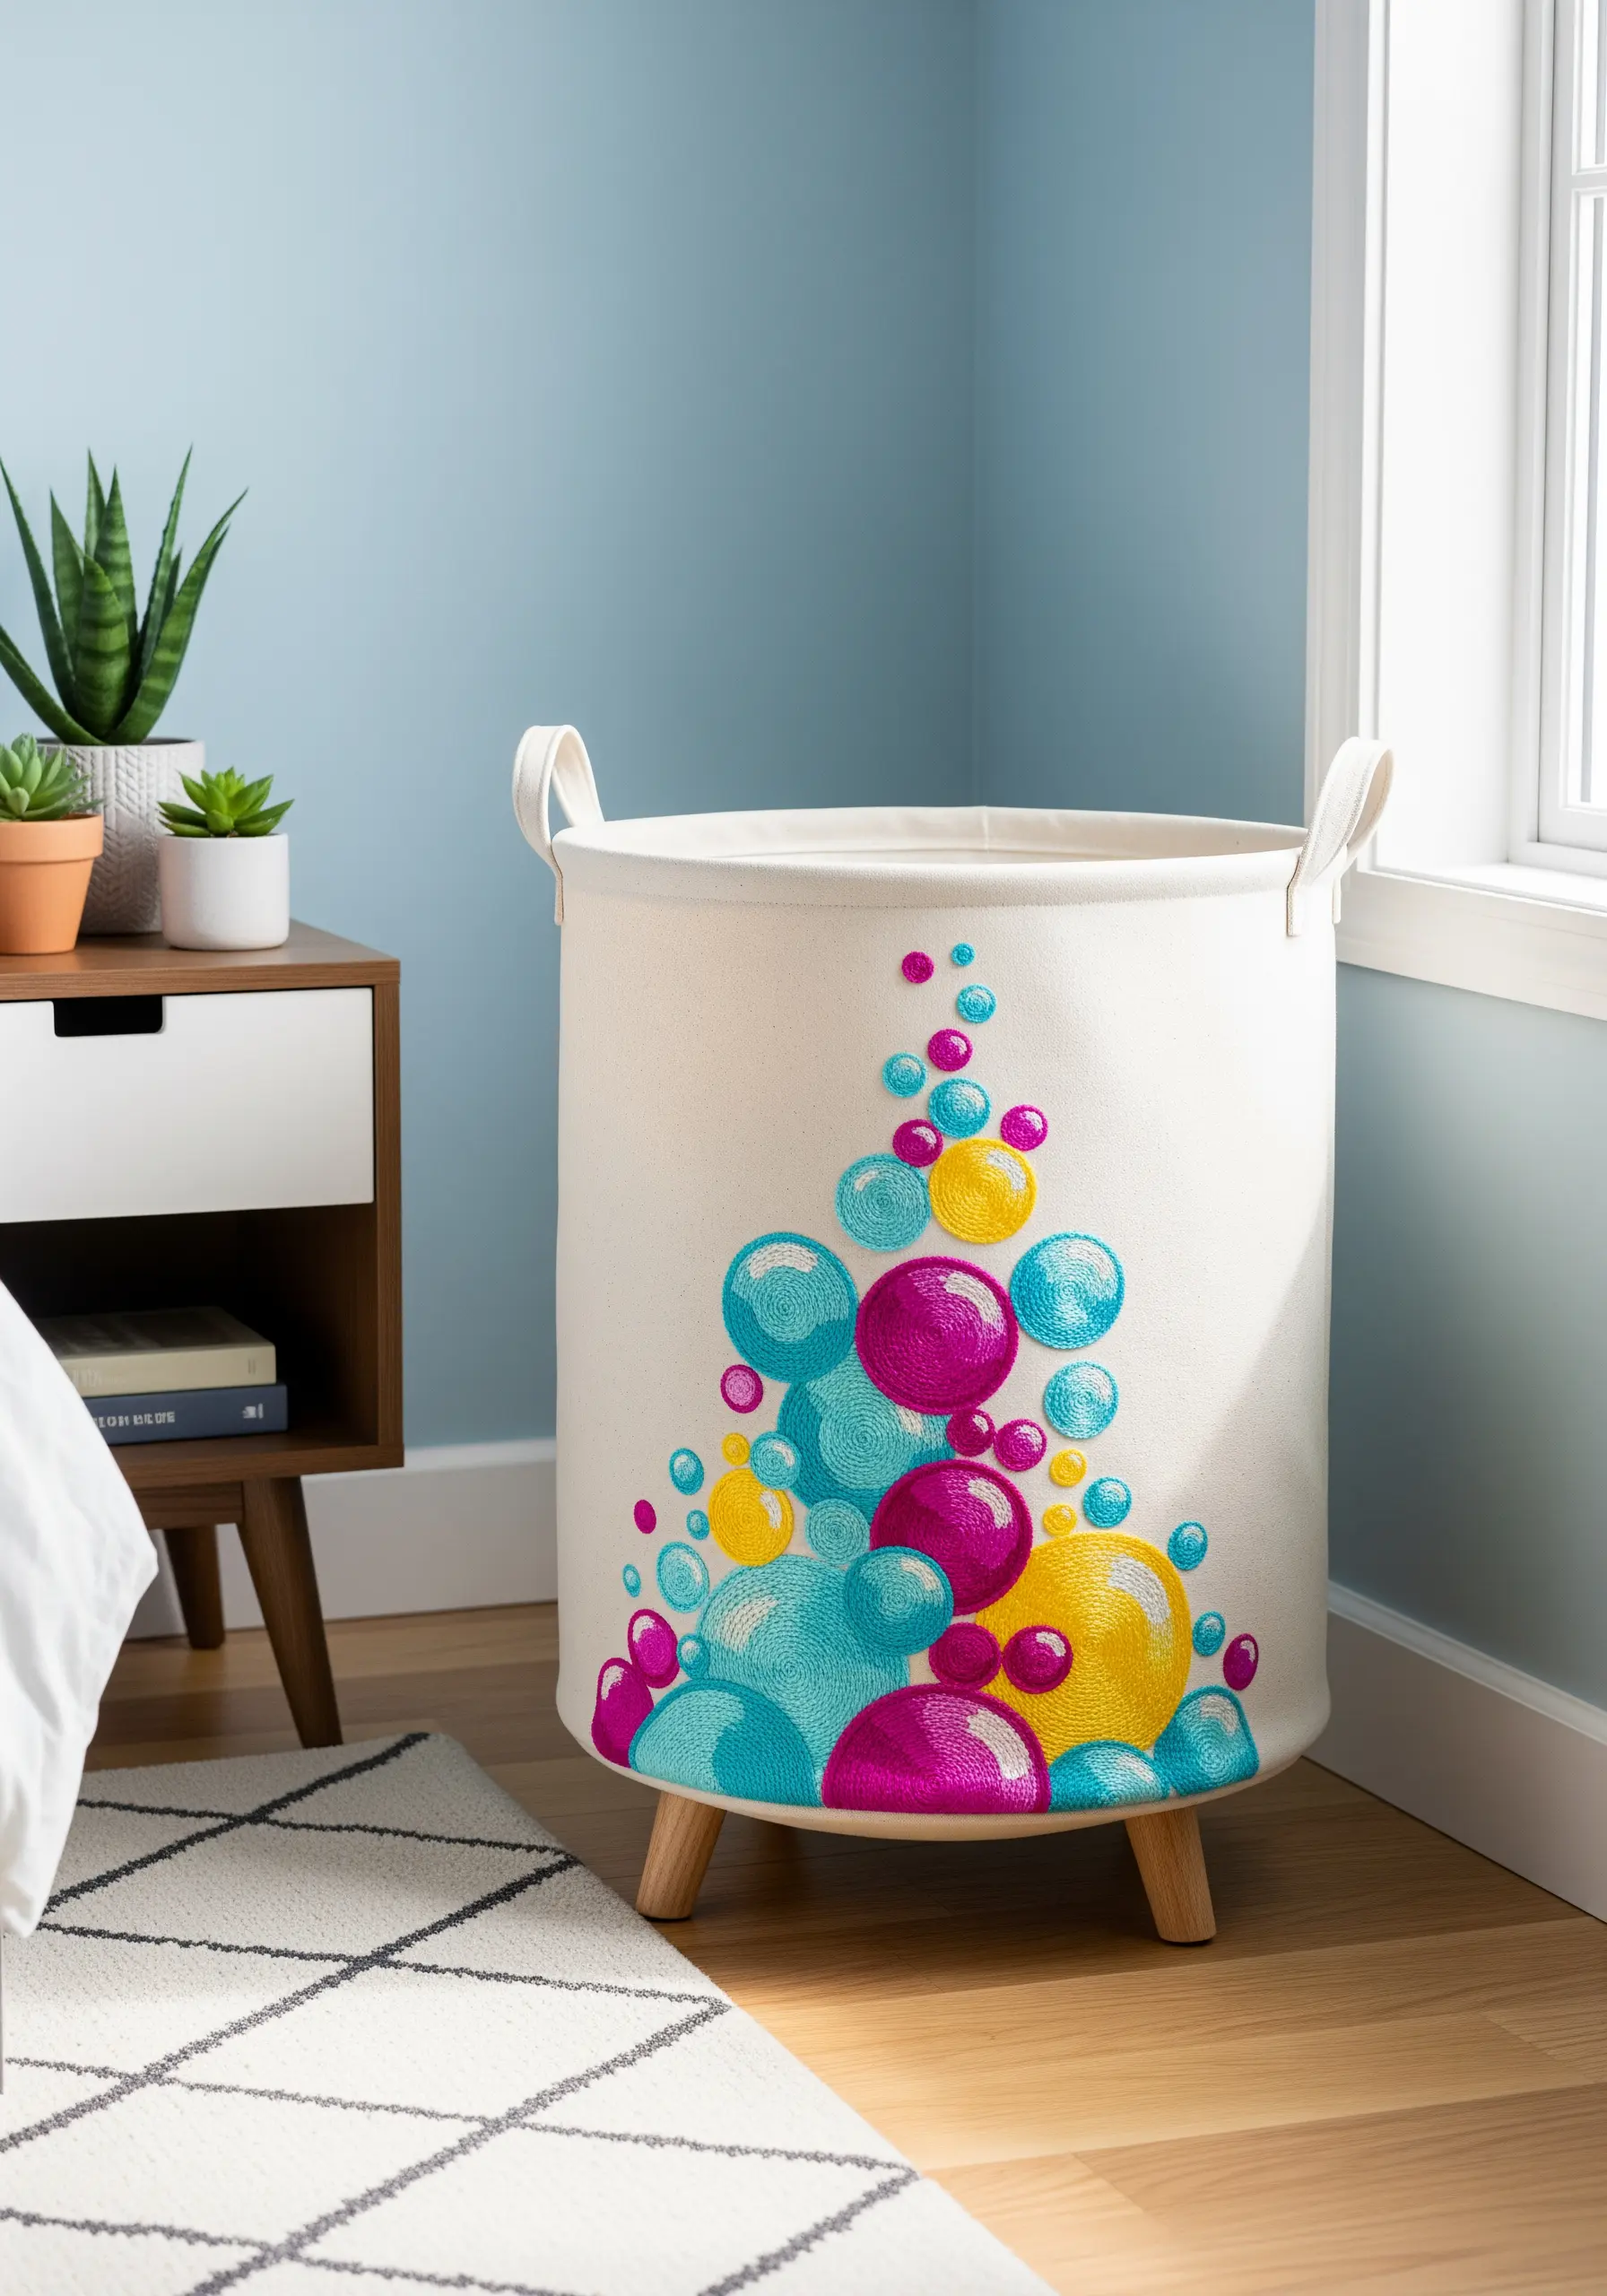
Prove that even the most practical bedroom items can be beautiful by adding embroidery to a plain canvas laundry hamper.
Use a high-sheen rayon thread to stitch your design; its gloss will contrast beautifully with the matte texture of the canvas, making your colors pop.
To give motifs like these bubbles a plump, 3D appearance, use a padded satin stitch. This involves laying down a foundation of straight stitches before covering them with the final satin stitch, creating a raised surface.
You can apply these techniques to other creative embroidery projects that transform ordinary fabric.
9. Stitch a Celestial Canopy with Glow-in-the-Dark Thread

Create a magical and immersive sleeping environment by embroidering a bed canopy with glow-in-the-dark thread.
Choose a dark navy or black tulle fabric, which will disappear at night and let the stars shine.
Map out real constellations using simple straight stitches for stars and a delicate backstitch to connect them.
This design offers dual beauty: a subtle, delicate pattern during the day and a glowing celestial map at night, perfect for inspiring wonder.
This is one of the most enchanting moon and stars embroidery ideas for a truly unique bedroom.
10. Paint with Texture Using Dense French Knots
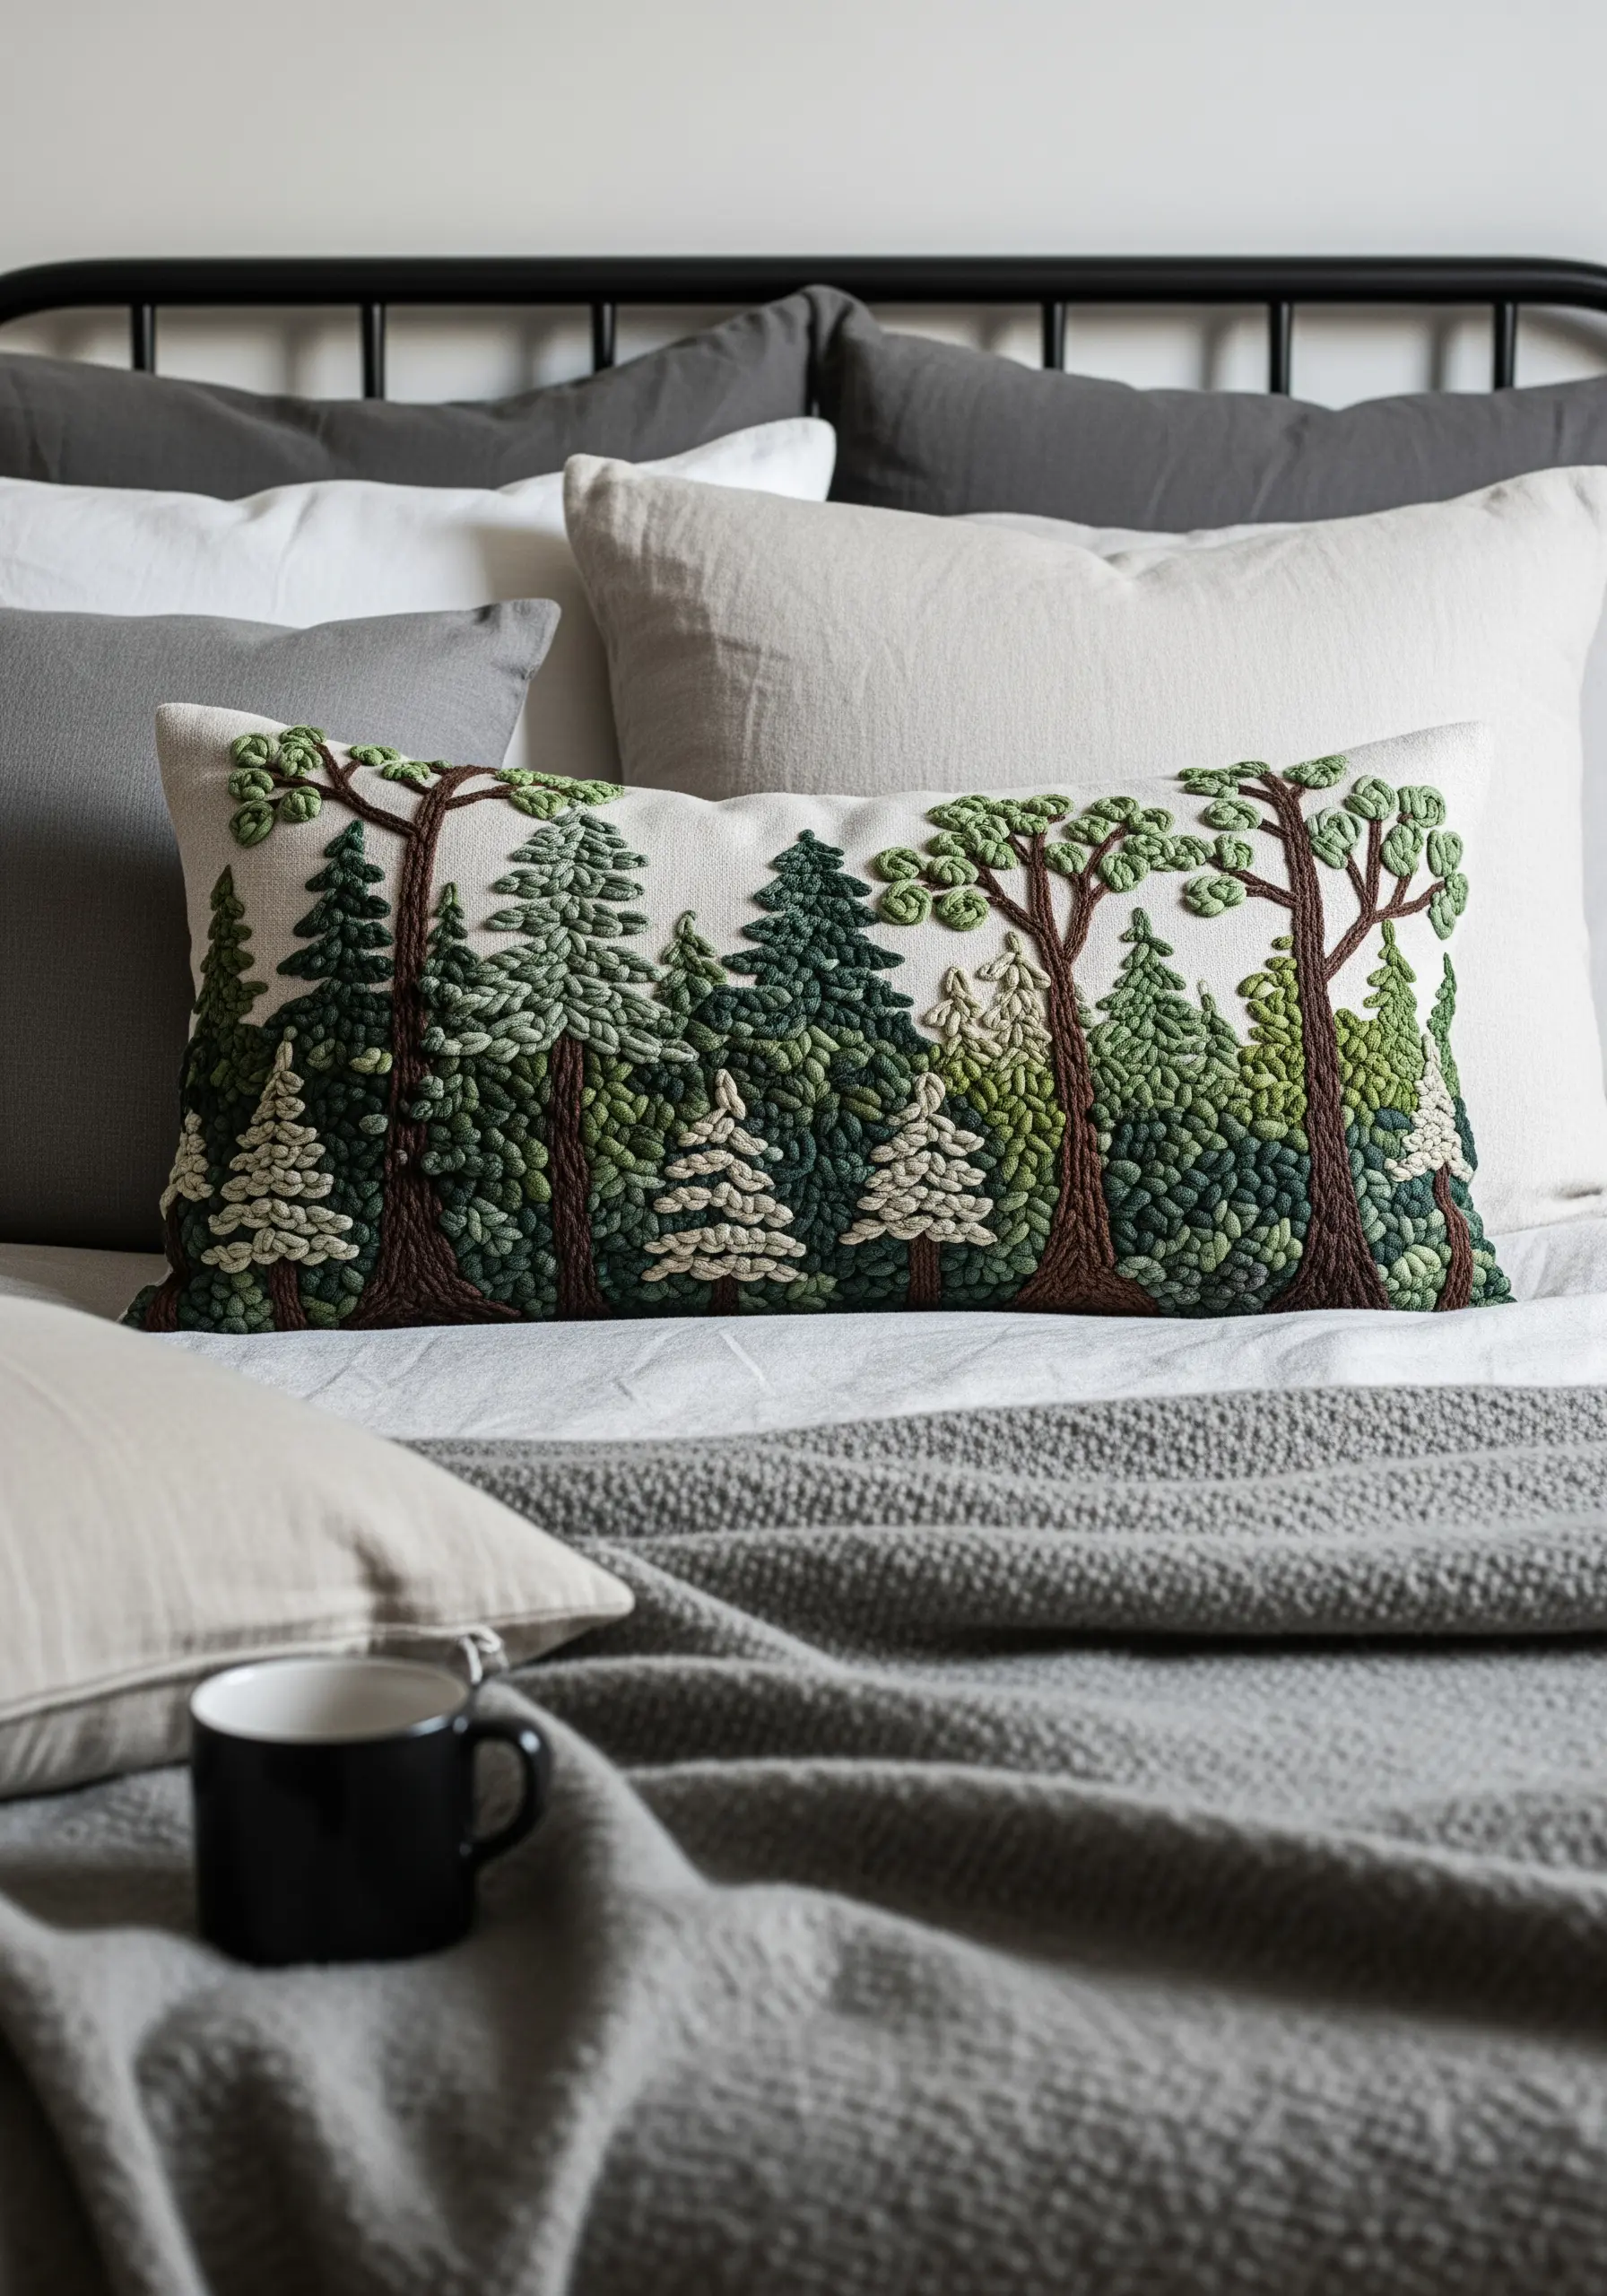
Instead of filling shapes with flat satin stitch, create a deeply textural landscape on a lumbar pillow using only French knots.
Build layers and create dimension by varying your technique: use single-wrap knots for finer details and double or triple-wrap knots for lush, dense areas like treetops.
Work with at least three to five different shades of green to mimic the natural variation of a forest, clustering colors together to create highlights and shadows.
The result is a tactile piece of art that invites touch and adds cozy depth to your bedding.
These soft texture embroidery projects can transform any textile.
11. Frame a Mirror with Art Deco-Inspired Stitches
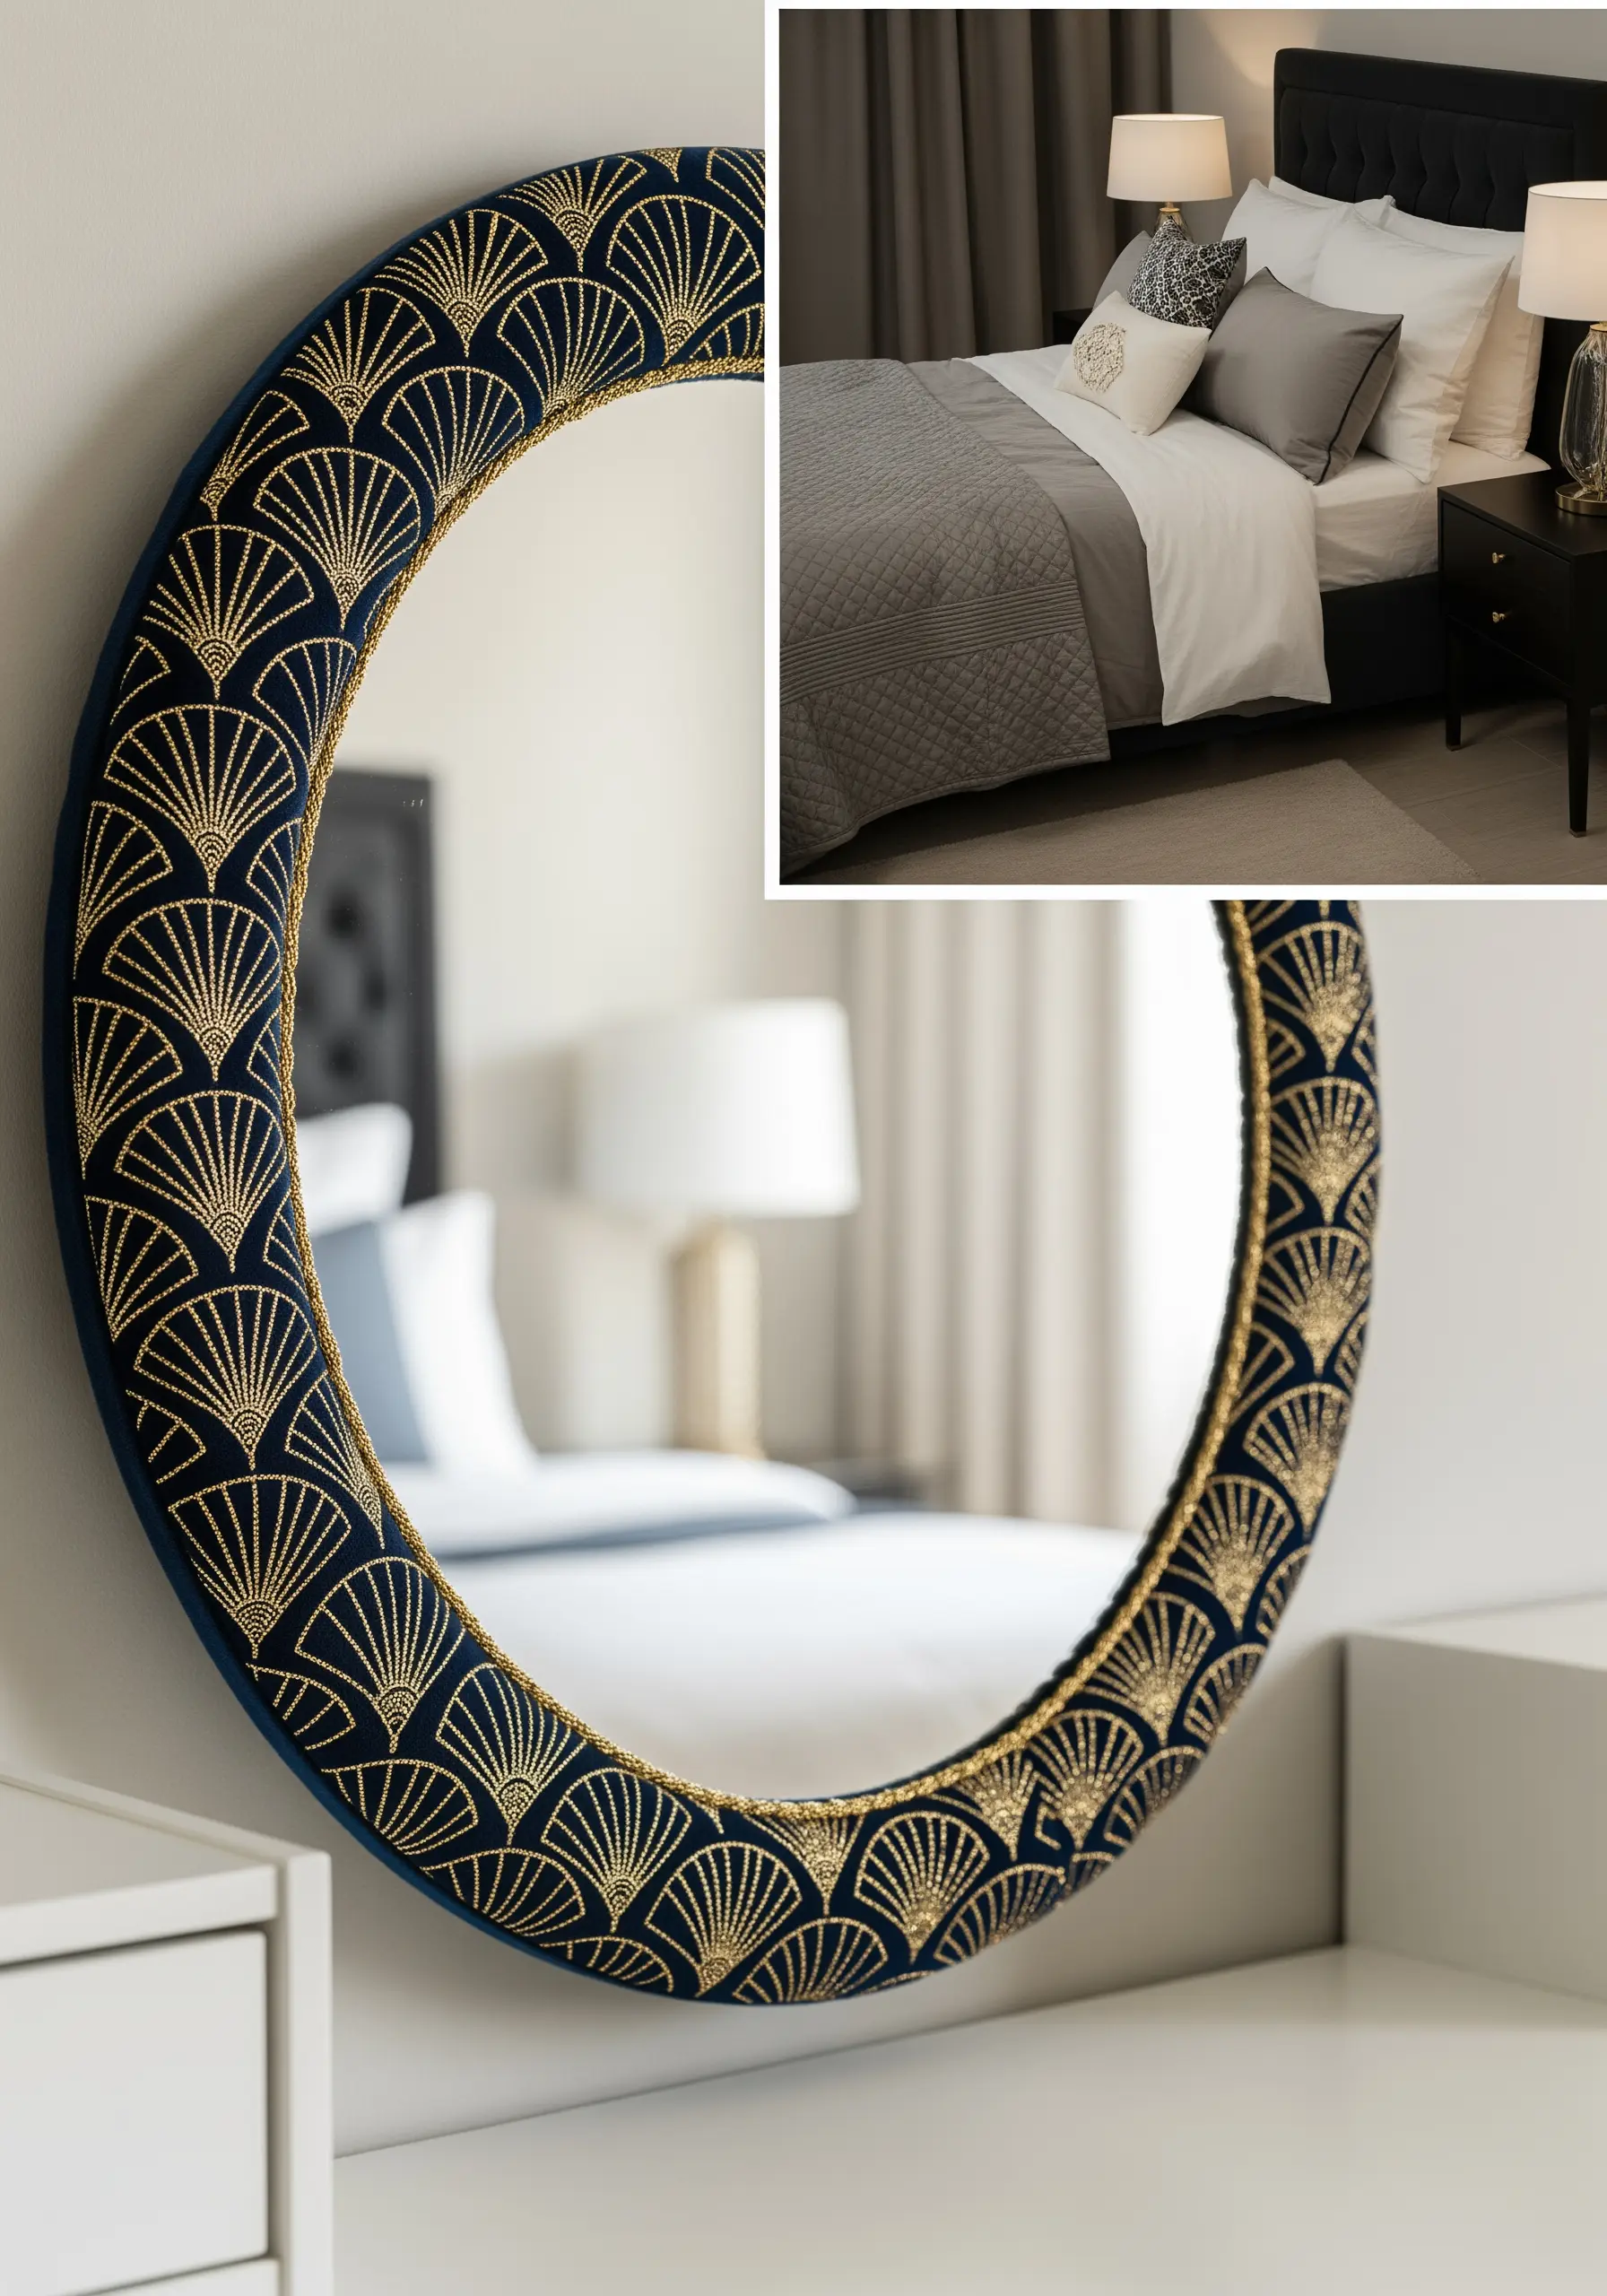
Turn a plain mirror into a piece of glamorous decor by creating a custom embroidered frame.
Start by wrapping a simple wooden mirror frame in a rich fabric like navy velvet or black linen. This provides a luxurious base for your stitching.
Use a bright metallic gold thread to embroider a repeating Art Deco fan pattern. A combination of satin stitch for the solid rays and a fine backstitch for the outlines will create a clean, graphic, and elegant effect.
Try more minimal gold accent embroidery designs to add sparkle to your space.
12. Define Your Bedding with a Geometric Stitched Border
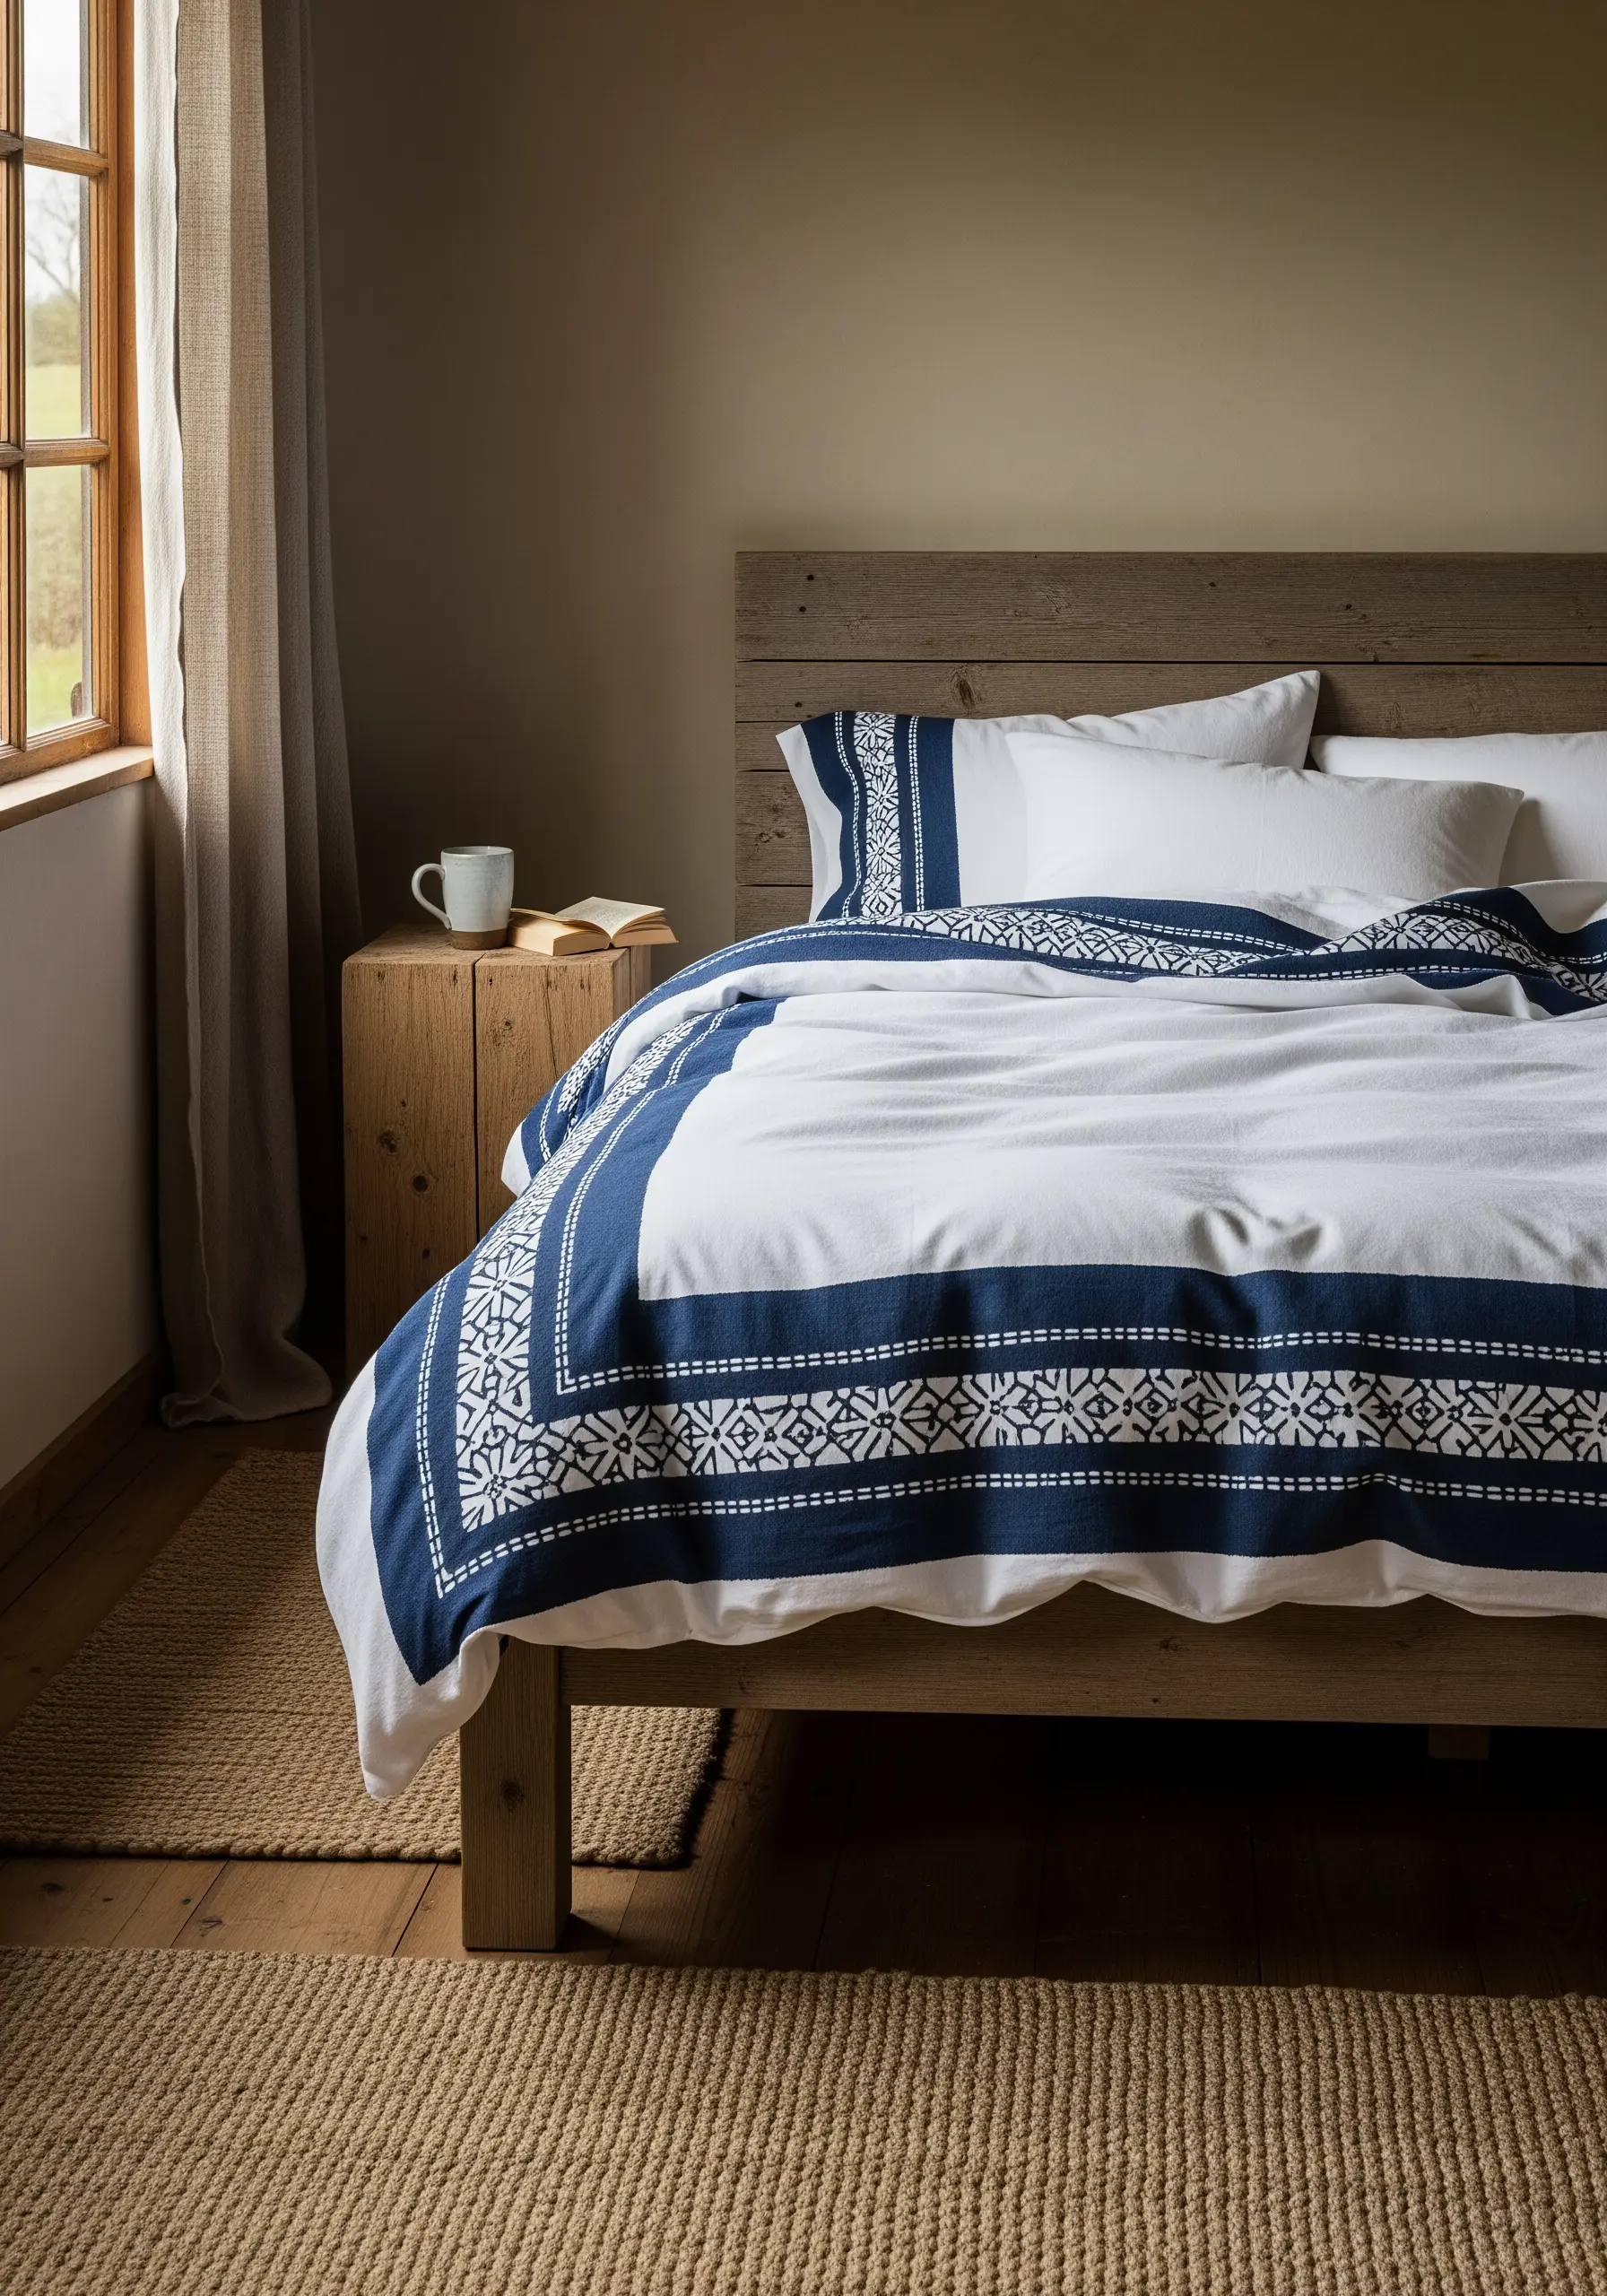
Give a standard duvet cover a bespoke, high-end feel by adding a simple but precise embroidered border.
First, use a water-soluble fabric marker and a ruler to draw your geometric pattern directly onto the fabric. This ensures your lines will be perfectly straight and evenly spaced.
Choose a contrasting, heavier-weight thread like a #8 cotton perle and use a simple running stitch or a bold chain stitch for a clean, graphic impact.
This small addition provides a tailored finish that instantly elevates the entire bed.
This technique works well for many geometric stitch patterns.
13. Organize in Style with Embroidered Labels
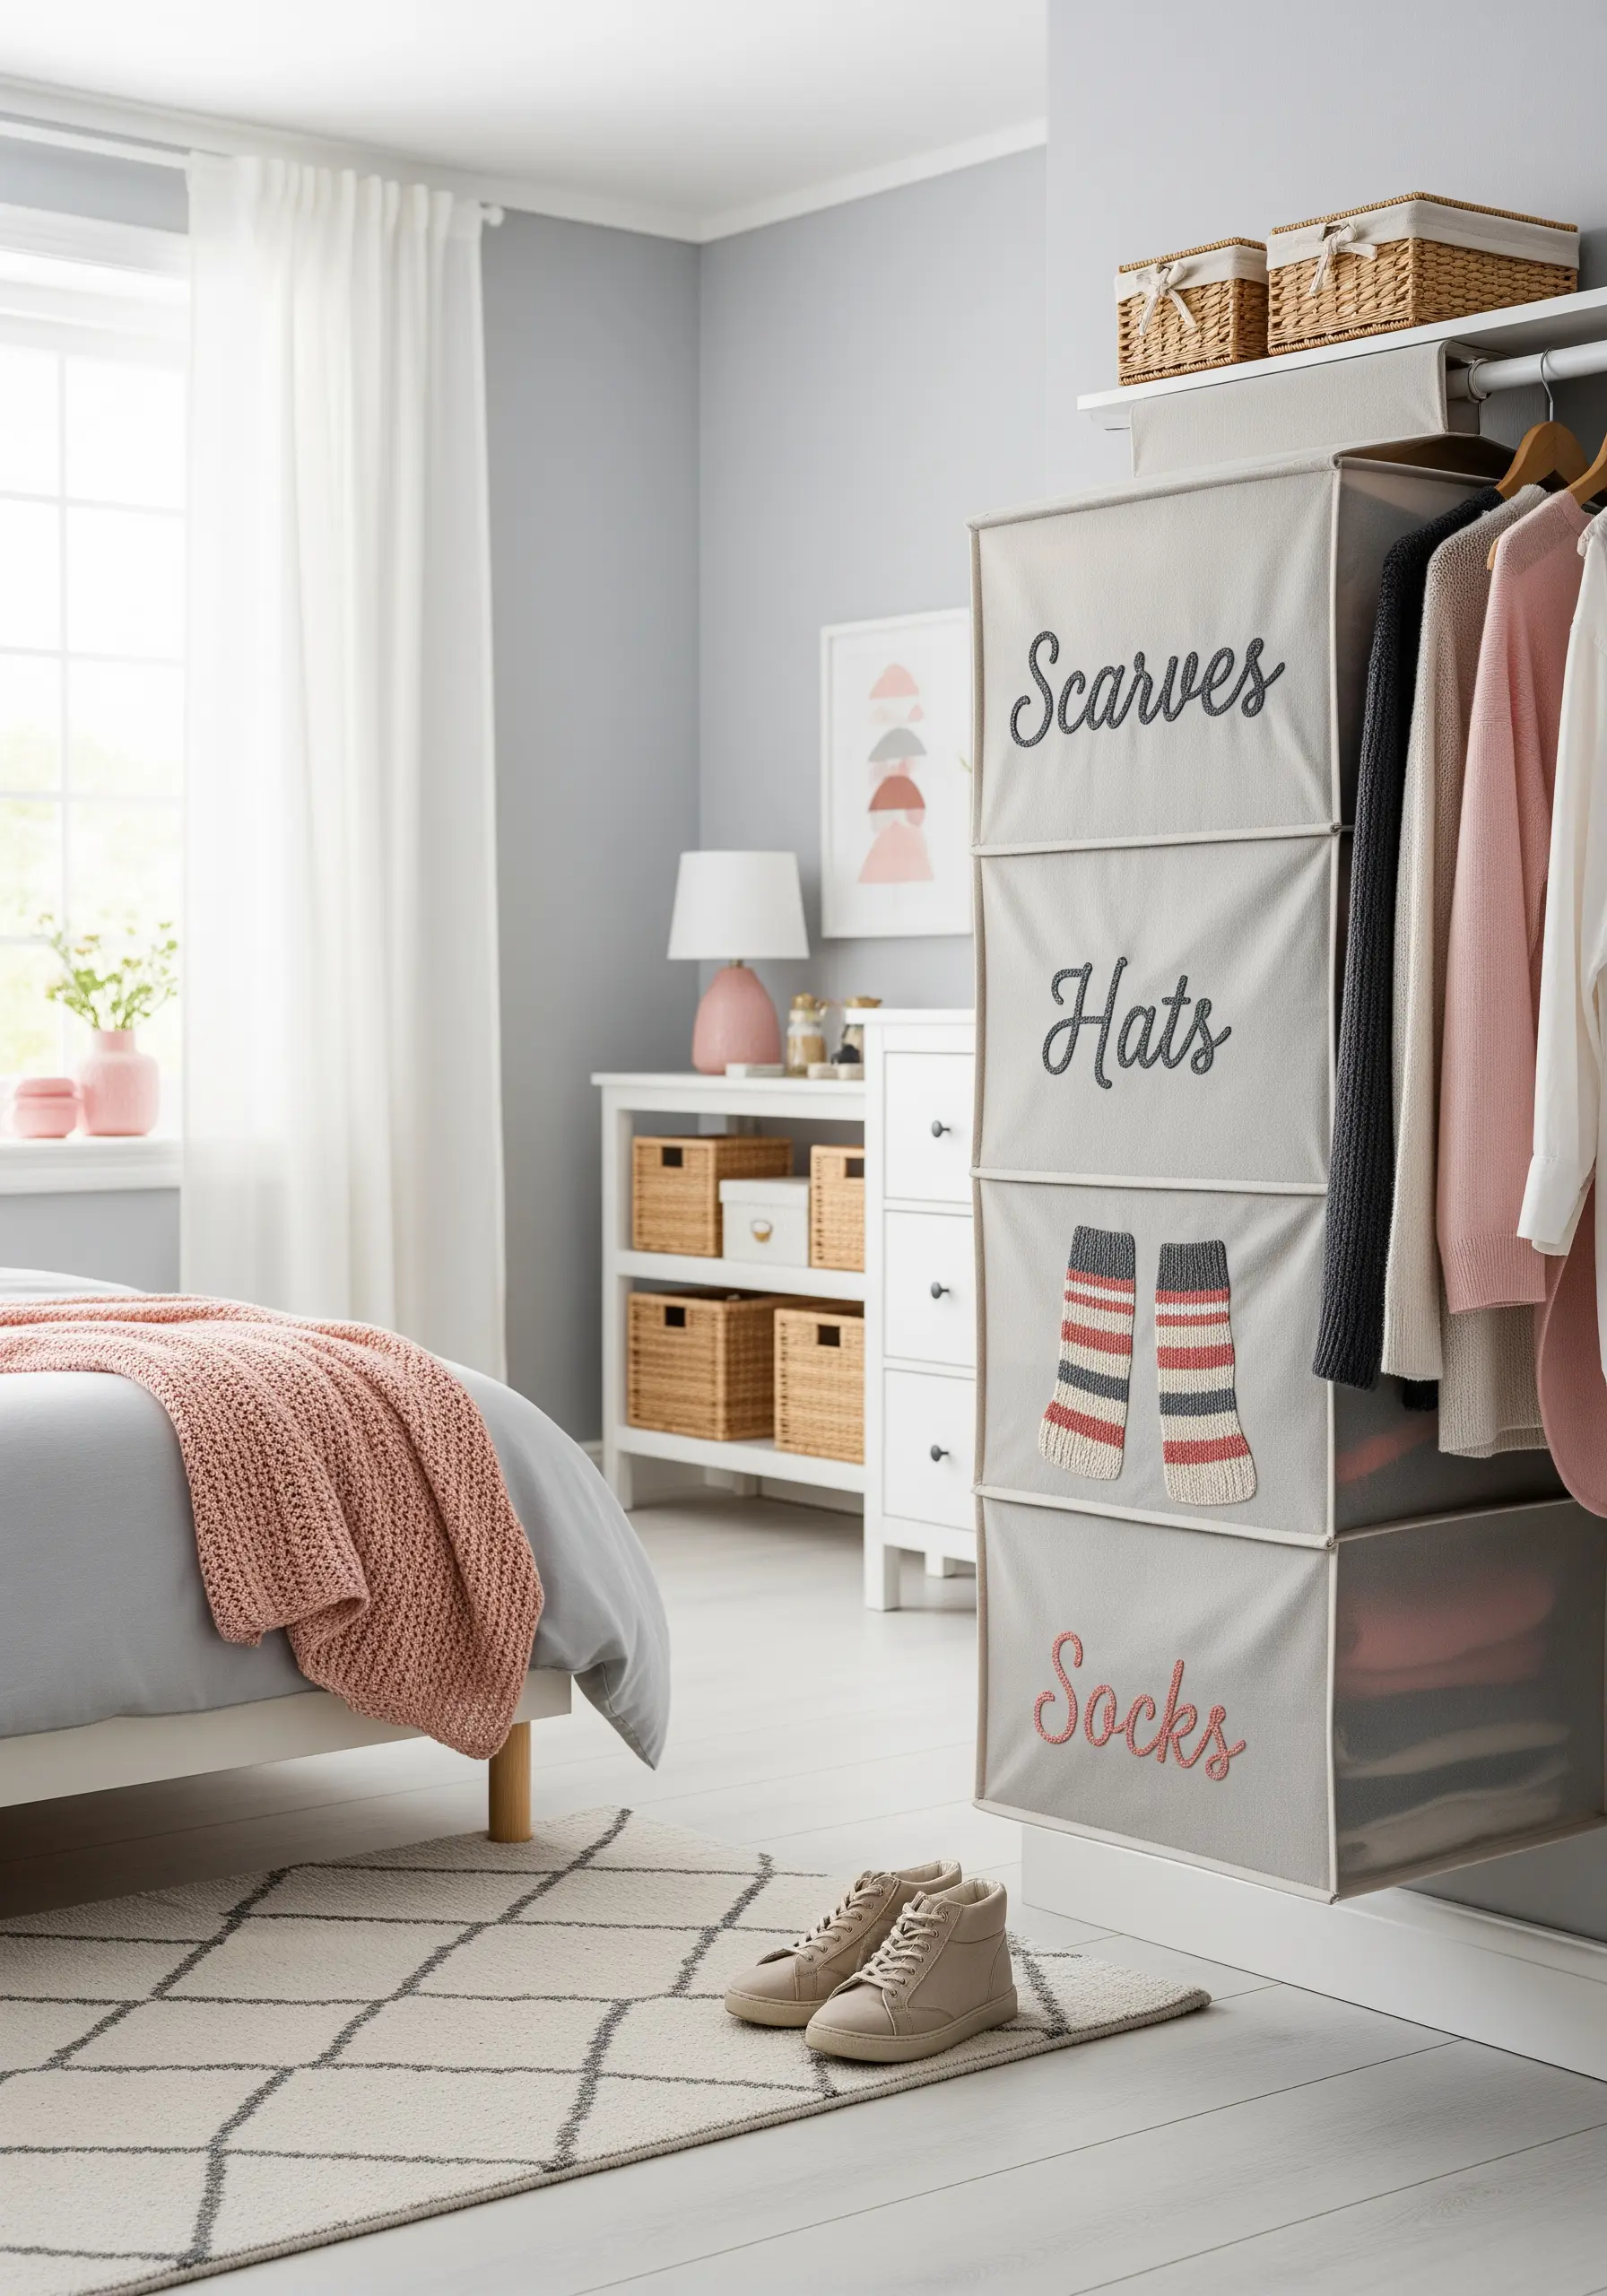
Merge organization with artistry by embroidering labels onto fabric storage bins or hanging closet organizers.
To ensure your script is smooth and legible, use a whipped backstitch. This stitch covers the gaps in a standard backstitch, creating a solid, raised line.
For an extra touch of charm, add a small, simple icon next to the word—like a pair of striped socks—to make organization both beautiful and intuitive.
This hack turns cluttered corners into thoughtfully curated spaces.
Even micro typography embroidery art can make a big organizational impact.
14. Craft a Soft Catch-All Tray for Your Nightstand
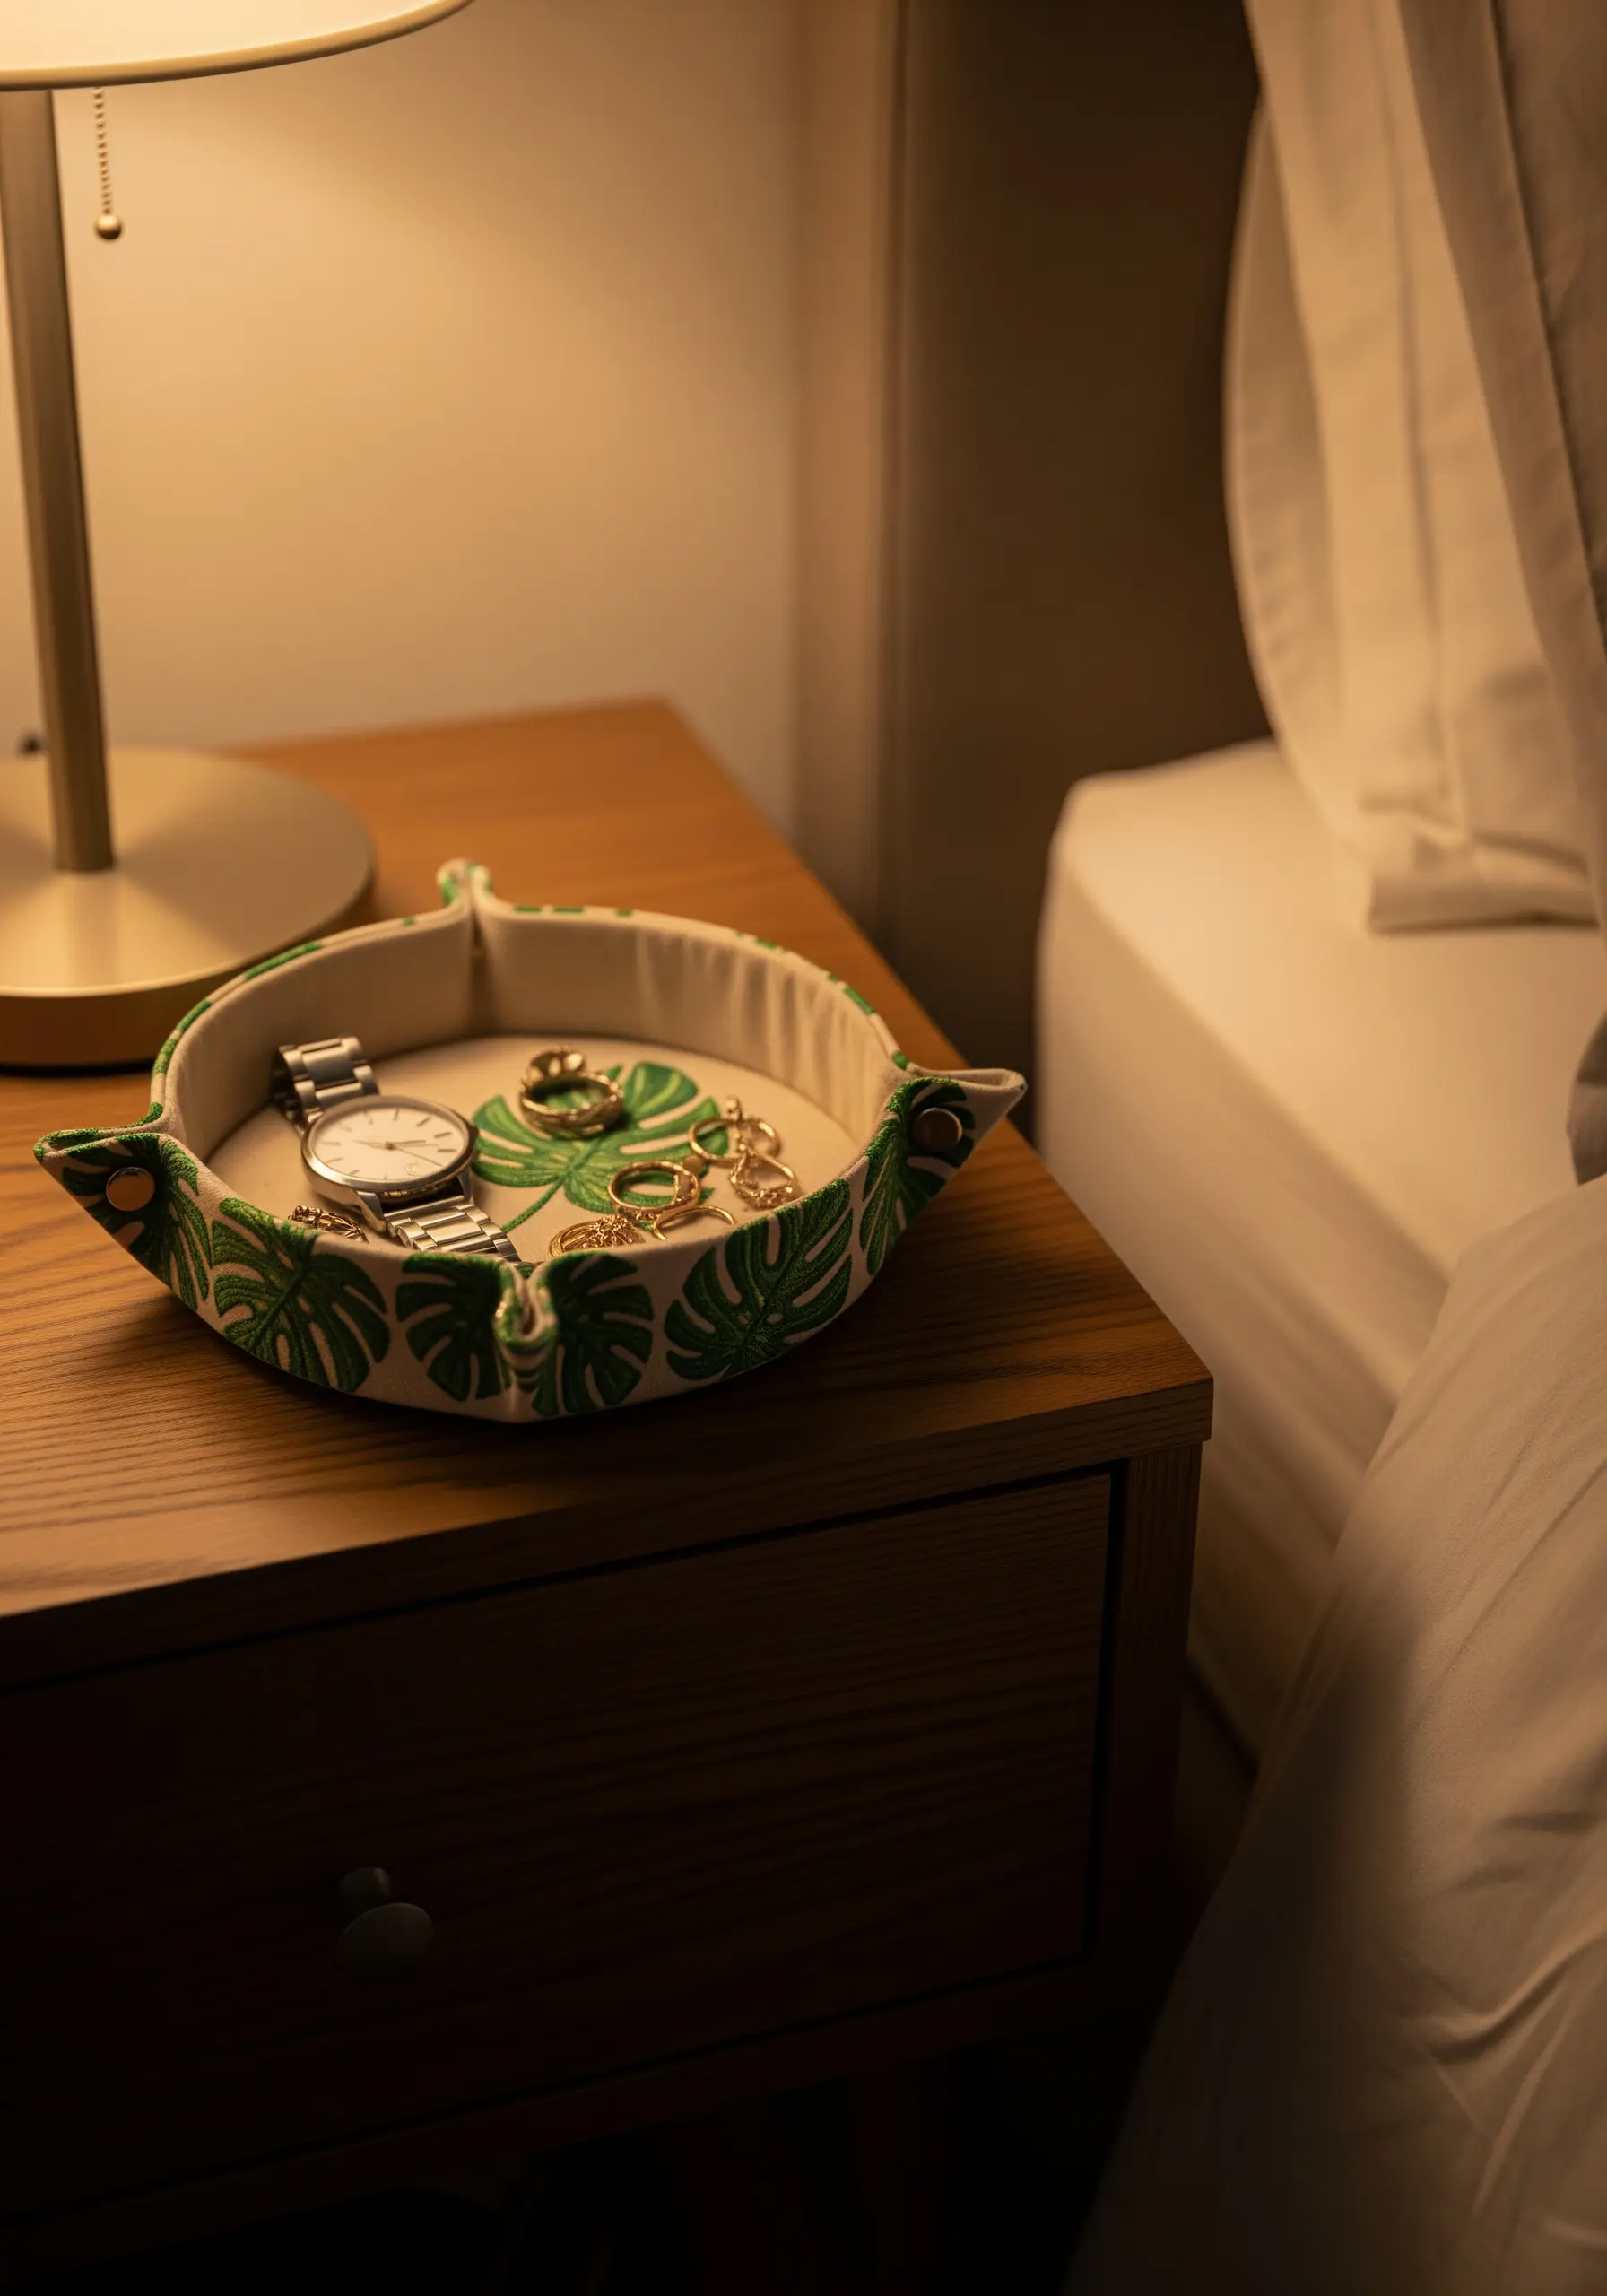
Create a custom valet tray to protect both your furniture and your precious items like watches and rings.
This project combines simple sewing and embroidery. Before you stitch the corners to form the tray, embroider your design on the flat inner piece of fabric.
A simple leaf motif using fishbone stitch adds a touch of nature and is quick to complete.
This handmade tray becomes a designated, soft landing spot that keeps your bedside table tidy and scratch-free.
Many nature-inspired leaf clusters are perfect for this project.
15. Curate a Themed Hoop Art Gallery Wall

Instead of one large piece, create a dynamic focal point by grouping multiple embroidery hoops together.
Choose a cohesive theme, like mushrooms or botanicals, but vary the details within it—different species, sizes, and compositions—to keep the collection interesting.
Incorporate a variety of textured stitches, such as turkey work for mossy effects or bullion knots for slugs, to give each piece a unique, tactile quality.
Arranging them in an organic cluster creates a stunning, curated display that feels personal and artistic.
These hooped wall collage layouts show you how to arrange them perfectly.
16. Stitch a Modern Pennant with a Bold Motto

Add a touch of vintage-inspired, modern decor with a personalized felt pennant hanging above the bed.
For clean, bold lettering, skip the satin stitch and opt for appliqué instead. Cut your letters from a contrasting color of felt and attach them with a neat, simple blanket stitch around the edges.
This method is faster, ensures perfectly uniform letters, and creates a graphic, dimensional look.
Finish the edges of the pennant with a decorative rope stitch to complete the classic, collegiate feel.
It’s an ideal format for inspirational quote embroidery wall hangings.
17. Finish a Simple Throw with a Colorful Edge
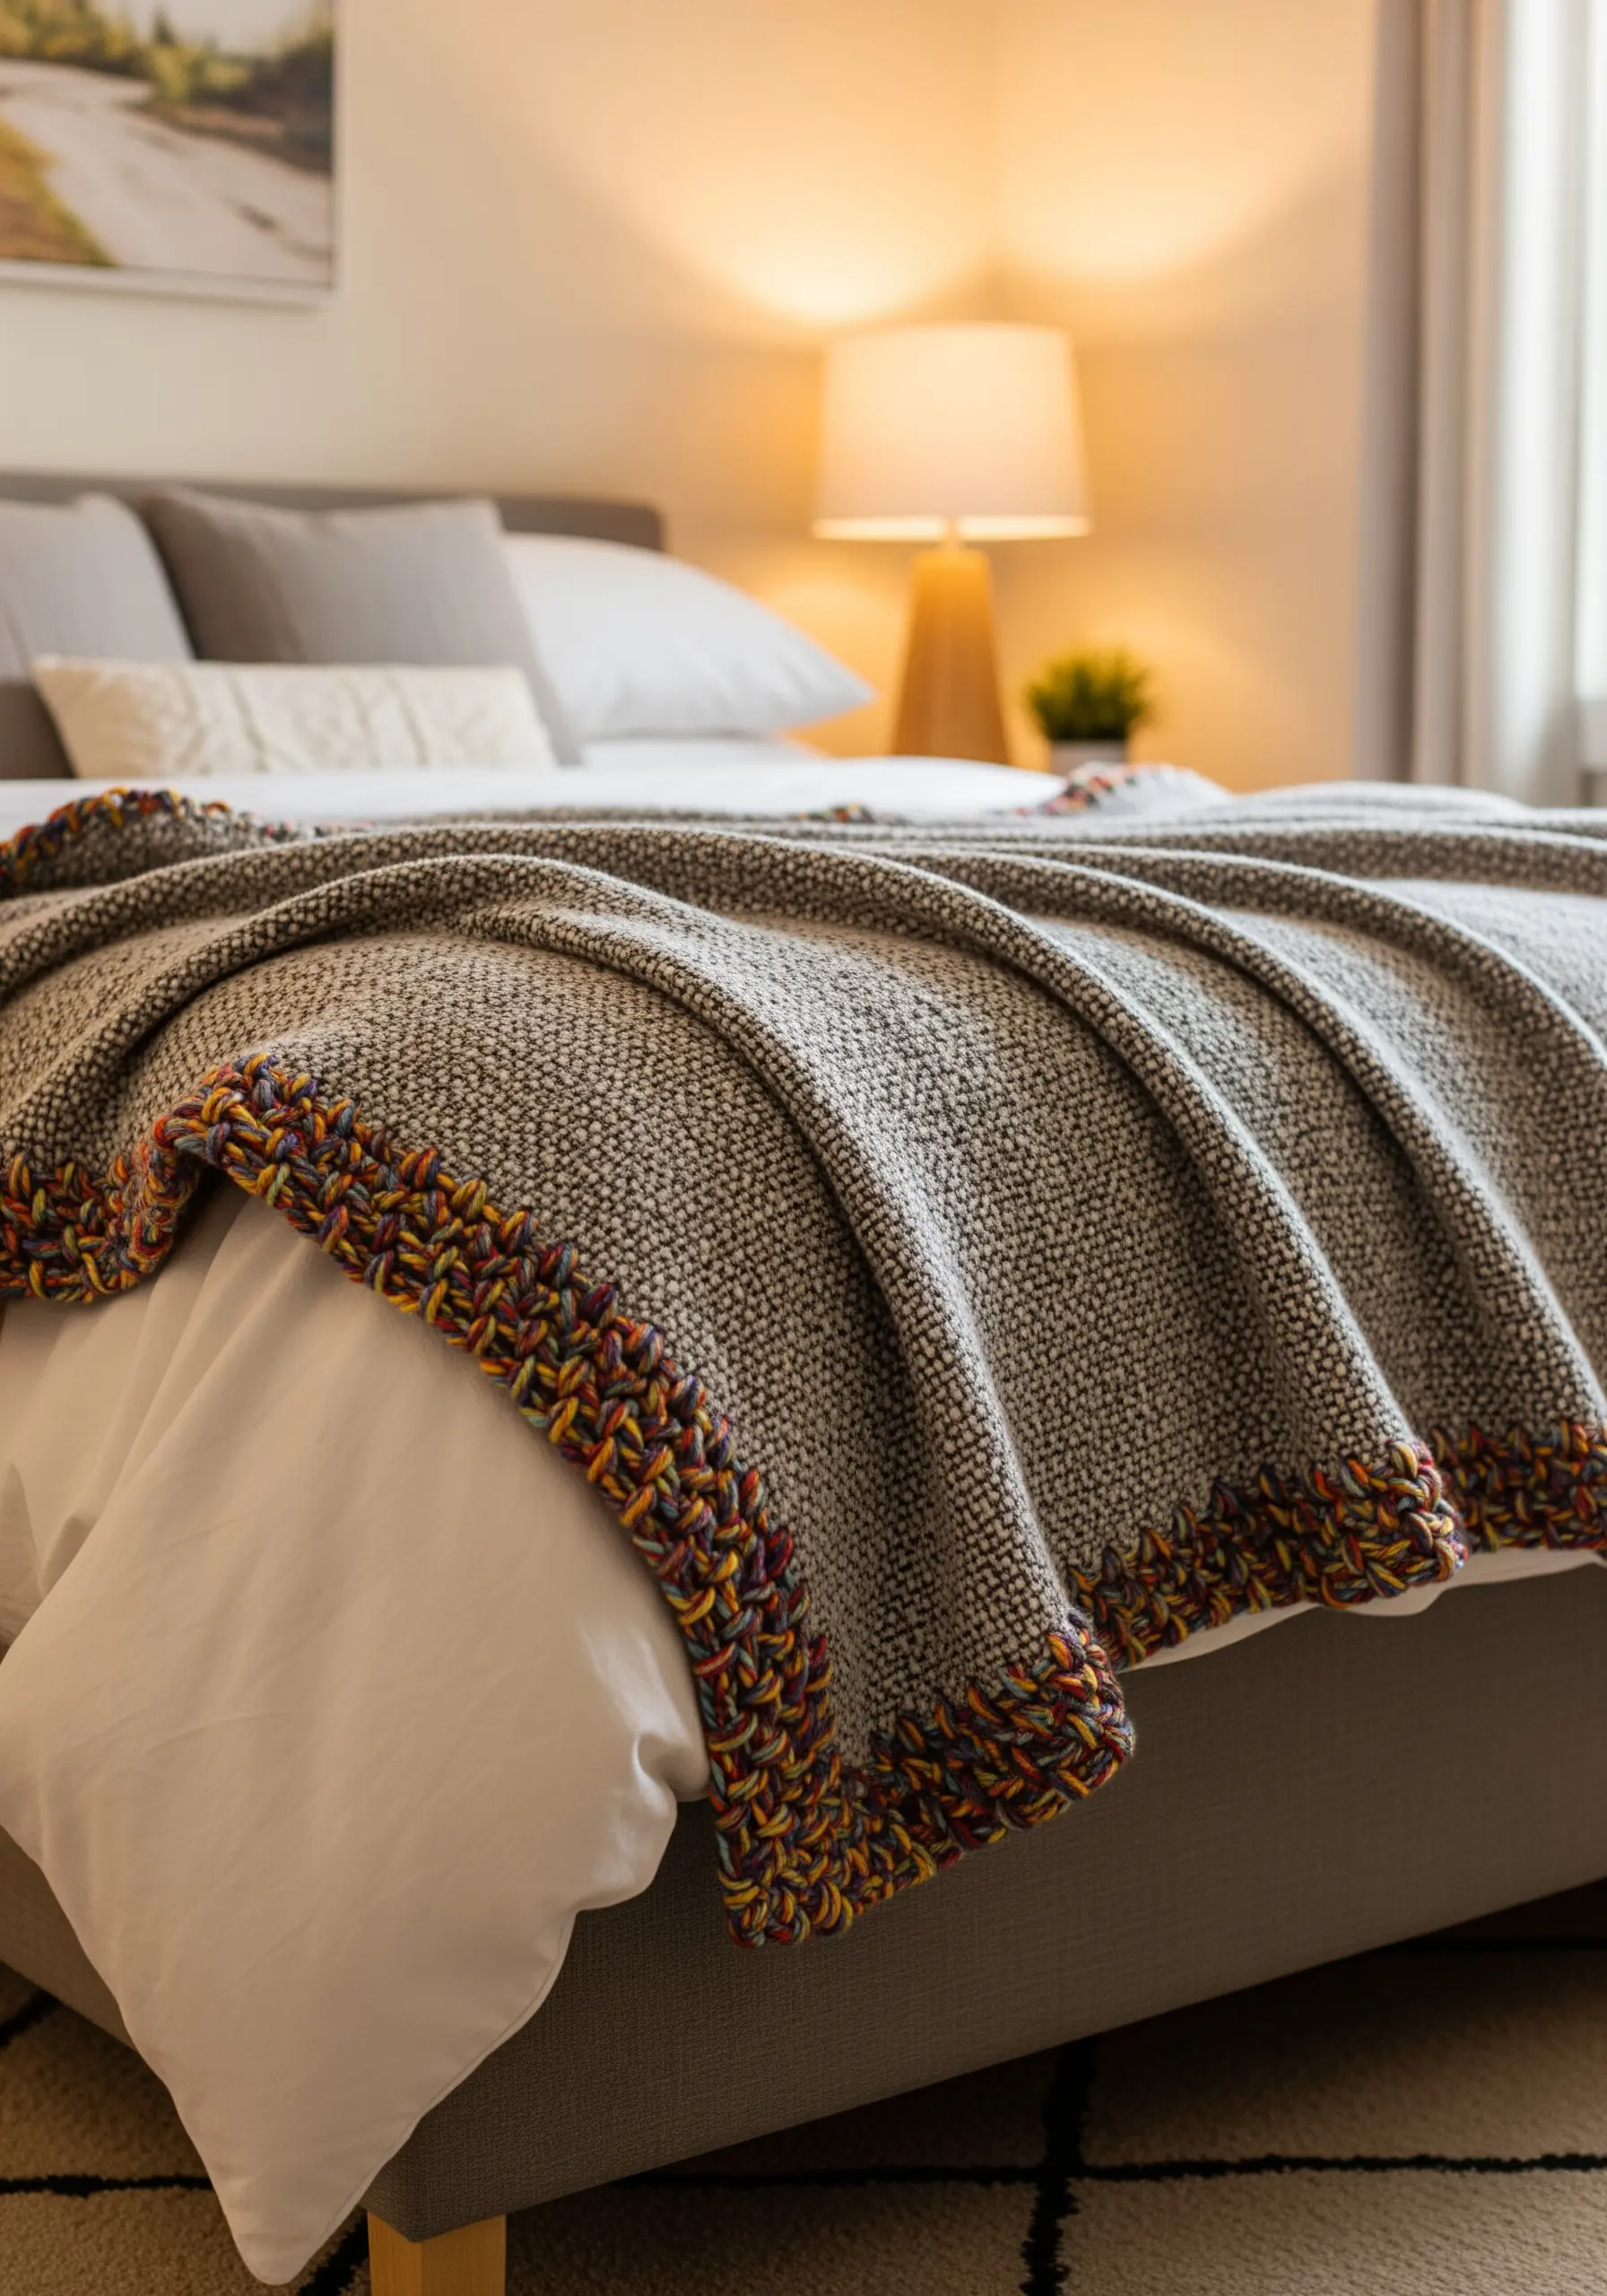
Instantly customize a store-bought throw blanket by adding a decorative, handcrafted edge.
Use a thick, variegated yarn and a large-eyed needle to work a blanket stitch all the way around the hem.
This not only adds a vibrant pop of color and texture but also reinforces the edges of the blanket, adding durability.
It’s a simple, meditative project that transforms a generic item into a cozy, one-of-a-kind piece with a warm, handmade feel.
These colorful mixed fiber ideas are perfect for adding personality.
18. Add a Whimsical Touch to a Fabric-Wrapped Light Switch
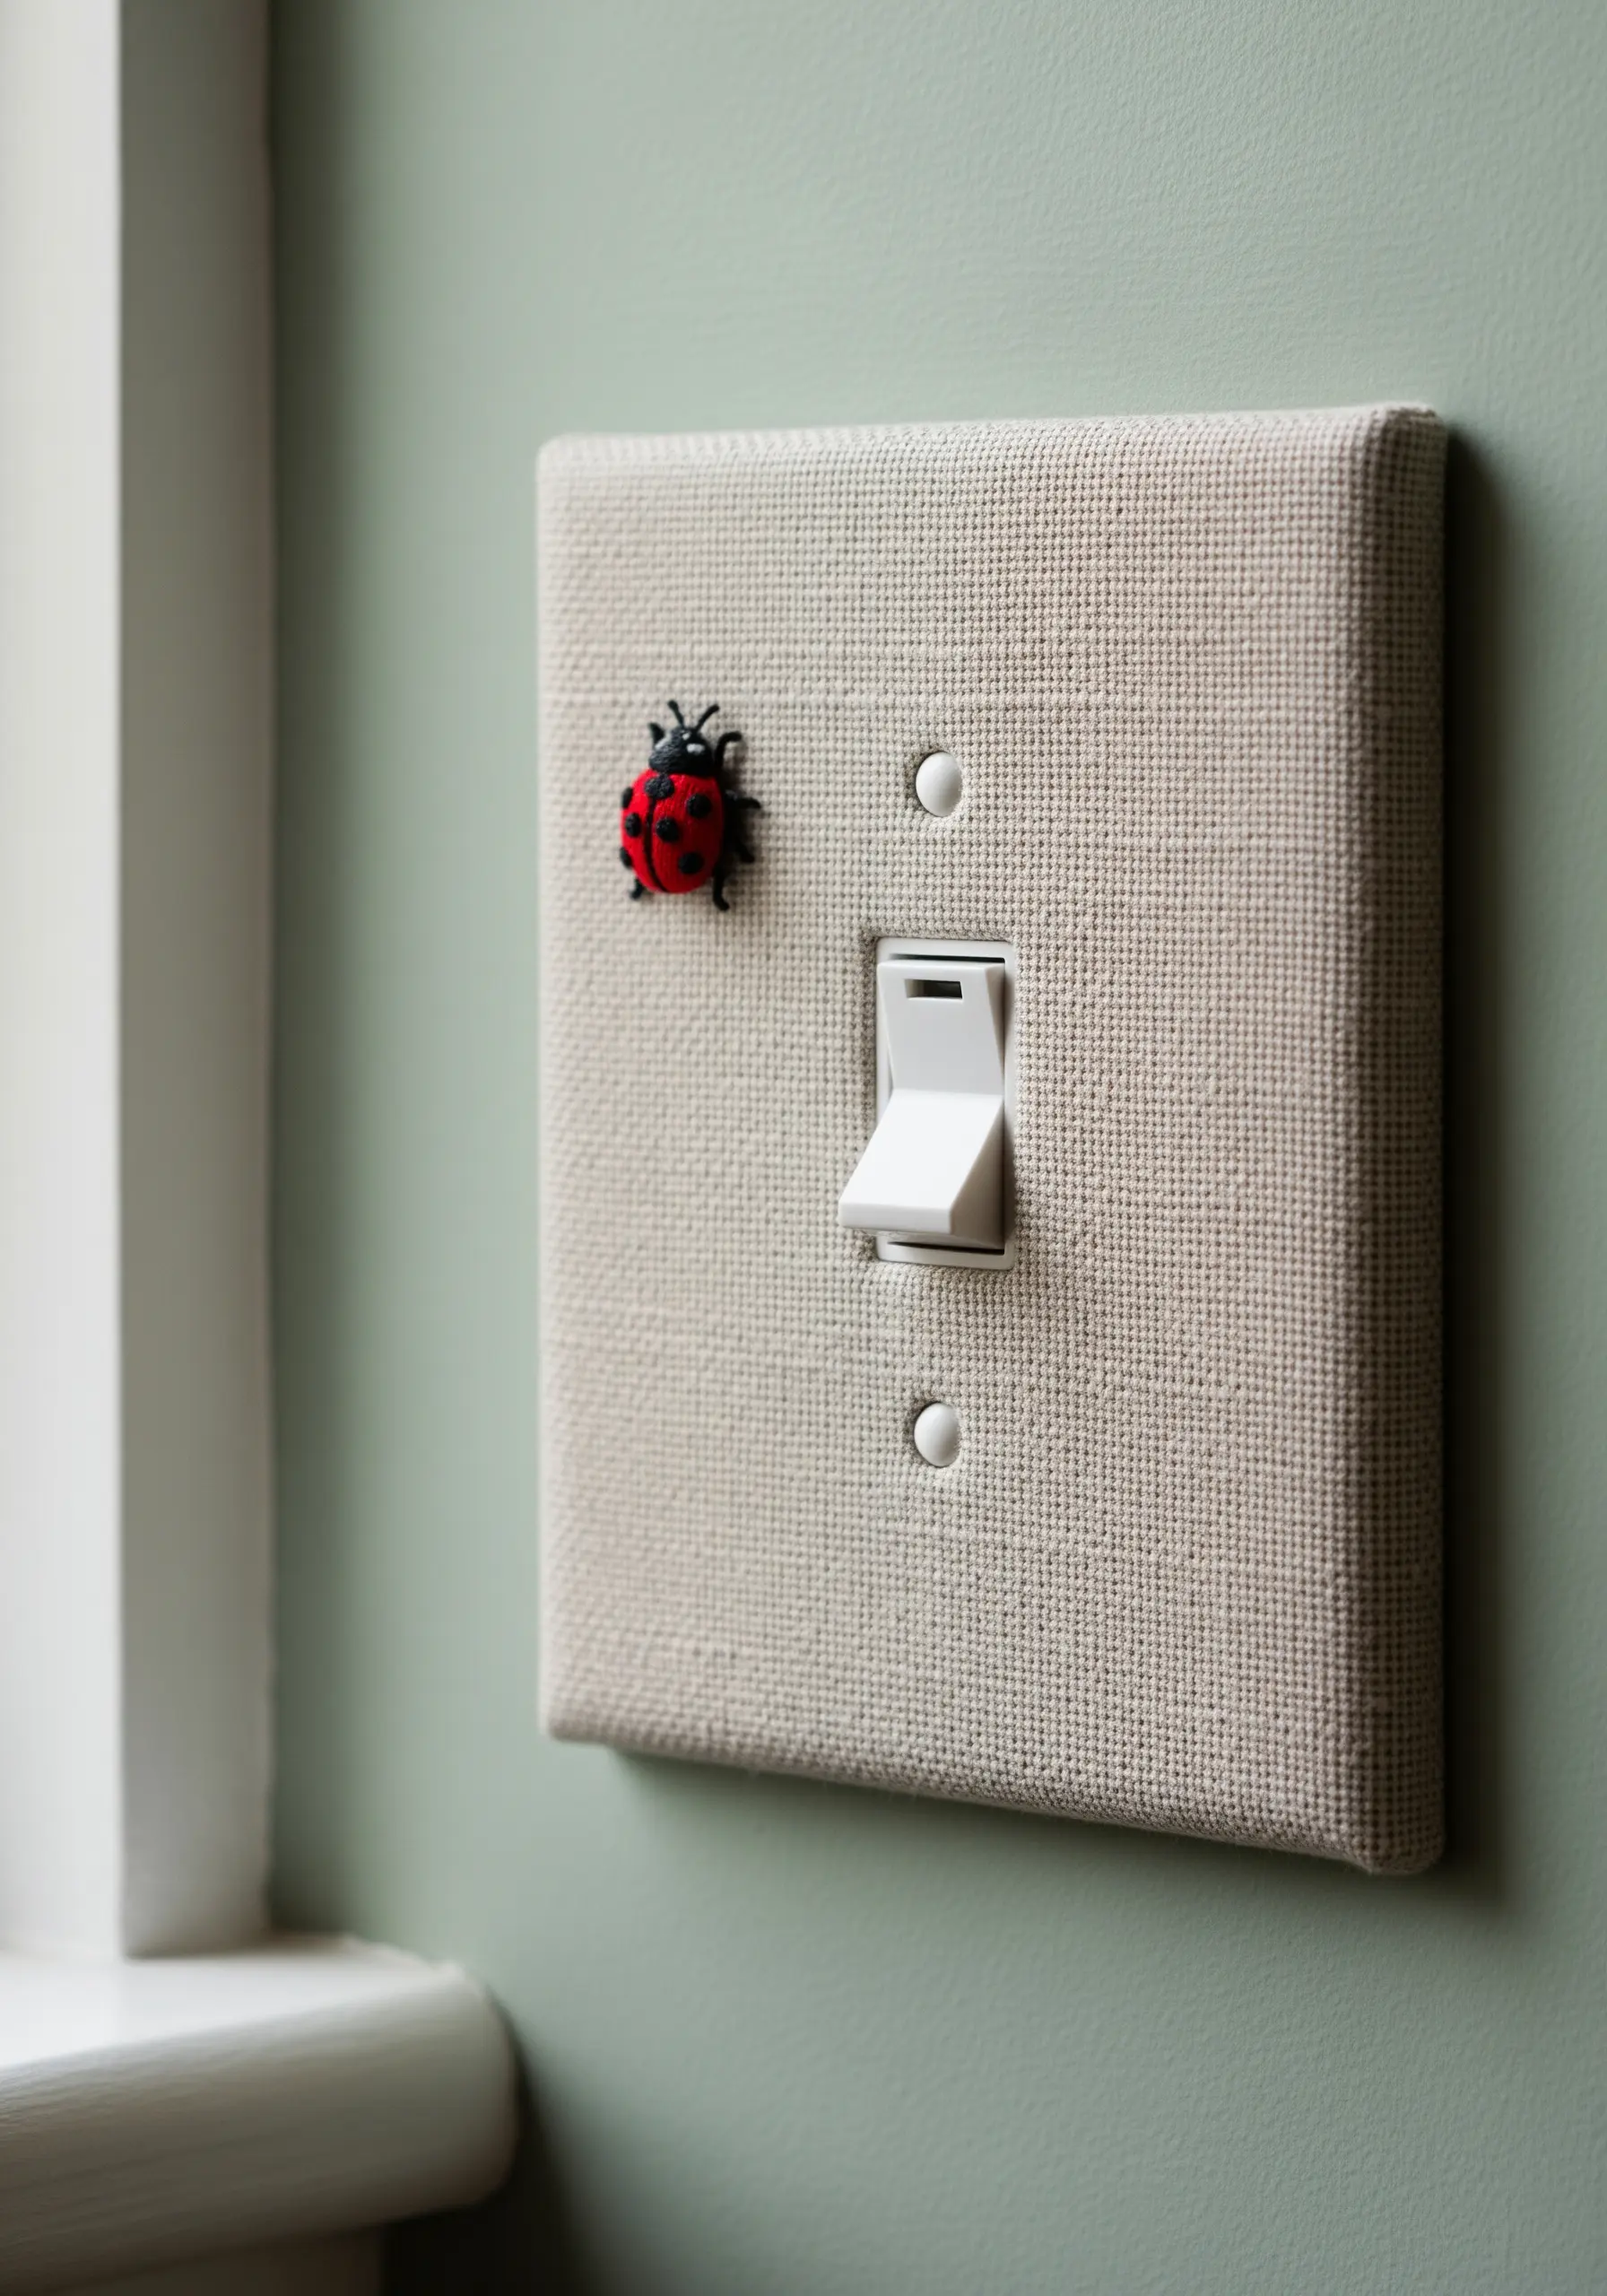
Elevate the smallest details in your room by transforming a plain light switch plate into a tiny canvas.
Use a strong spray adhesive to wrap the plastic plate smoothly in a neutral, textured fabric like linen or burlap.
The magic is in adding a single, unexpected embroidered element—a tiny, three-dimensional stumpwork ladybug or a French knot bee. This detail invites closer inspection and adds a touch of playful charm to an often-overlooked spot.
These tiny embroidery details are what make a space feel truly special.
19. Conceal Storage with Embroidered Fabric Panels

Turn functional closet doors into a breathtaking piece of floor-to-ceiling art.
Create custom fabric panels to fit inside or slide over your existing doors. On a light-colored linen, a large-scale tree motif can create a serene, mural-like effect.
For the thousands of hanging leaves, use a simple fishbone stitch. This stitch naturally creates a central vein and allows the leaves to hang with a sense of movement and grace.
Use multiple shades of green randomly to give the foliage a more realistic, light-dappled appearance.
This is the ultimate way to create stunning embroidered fabric wall panels.
20. Personalize a Throw with an Embroidered Book Cover
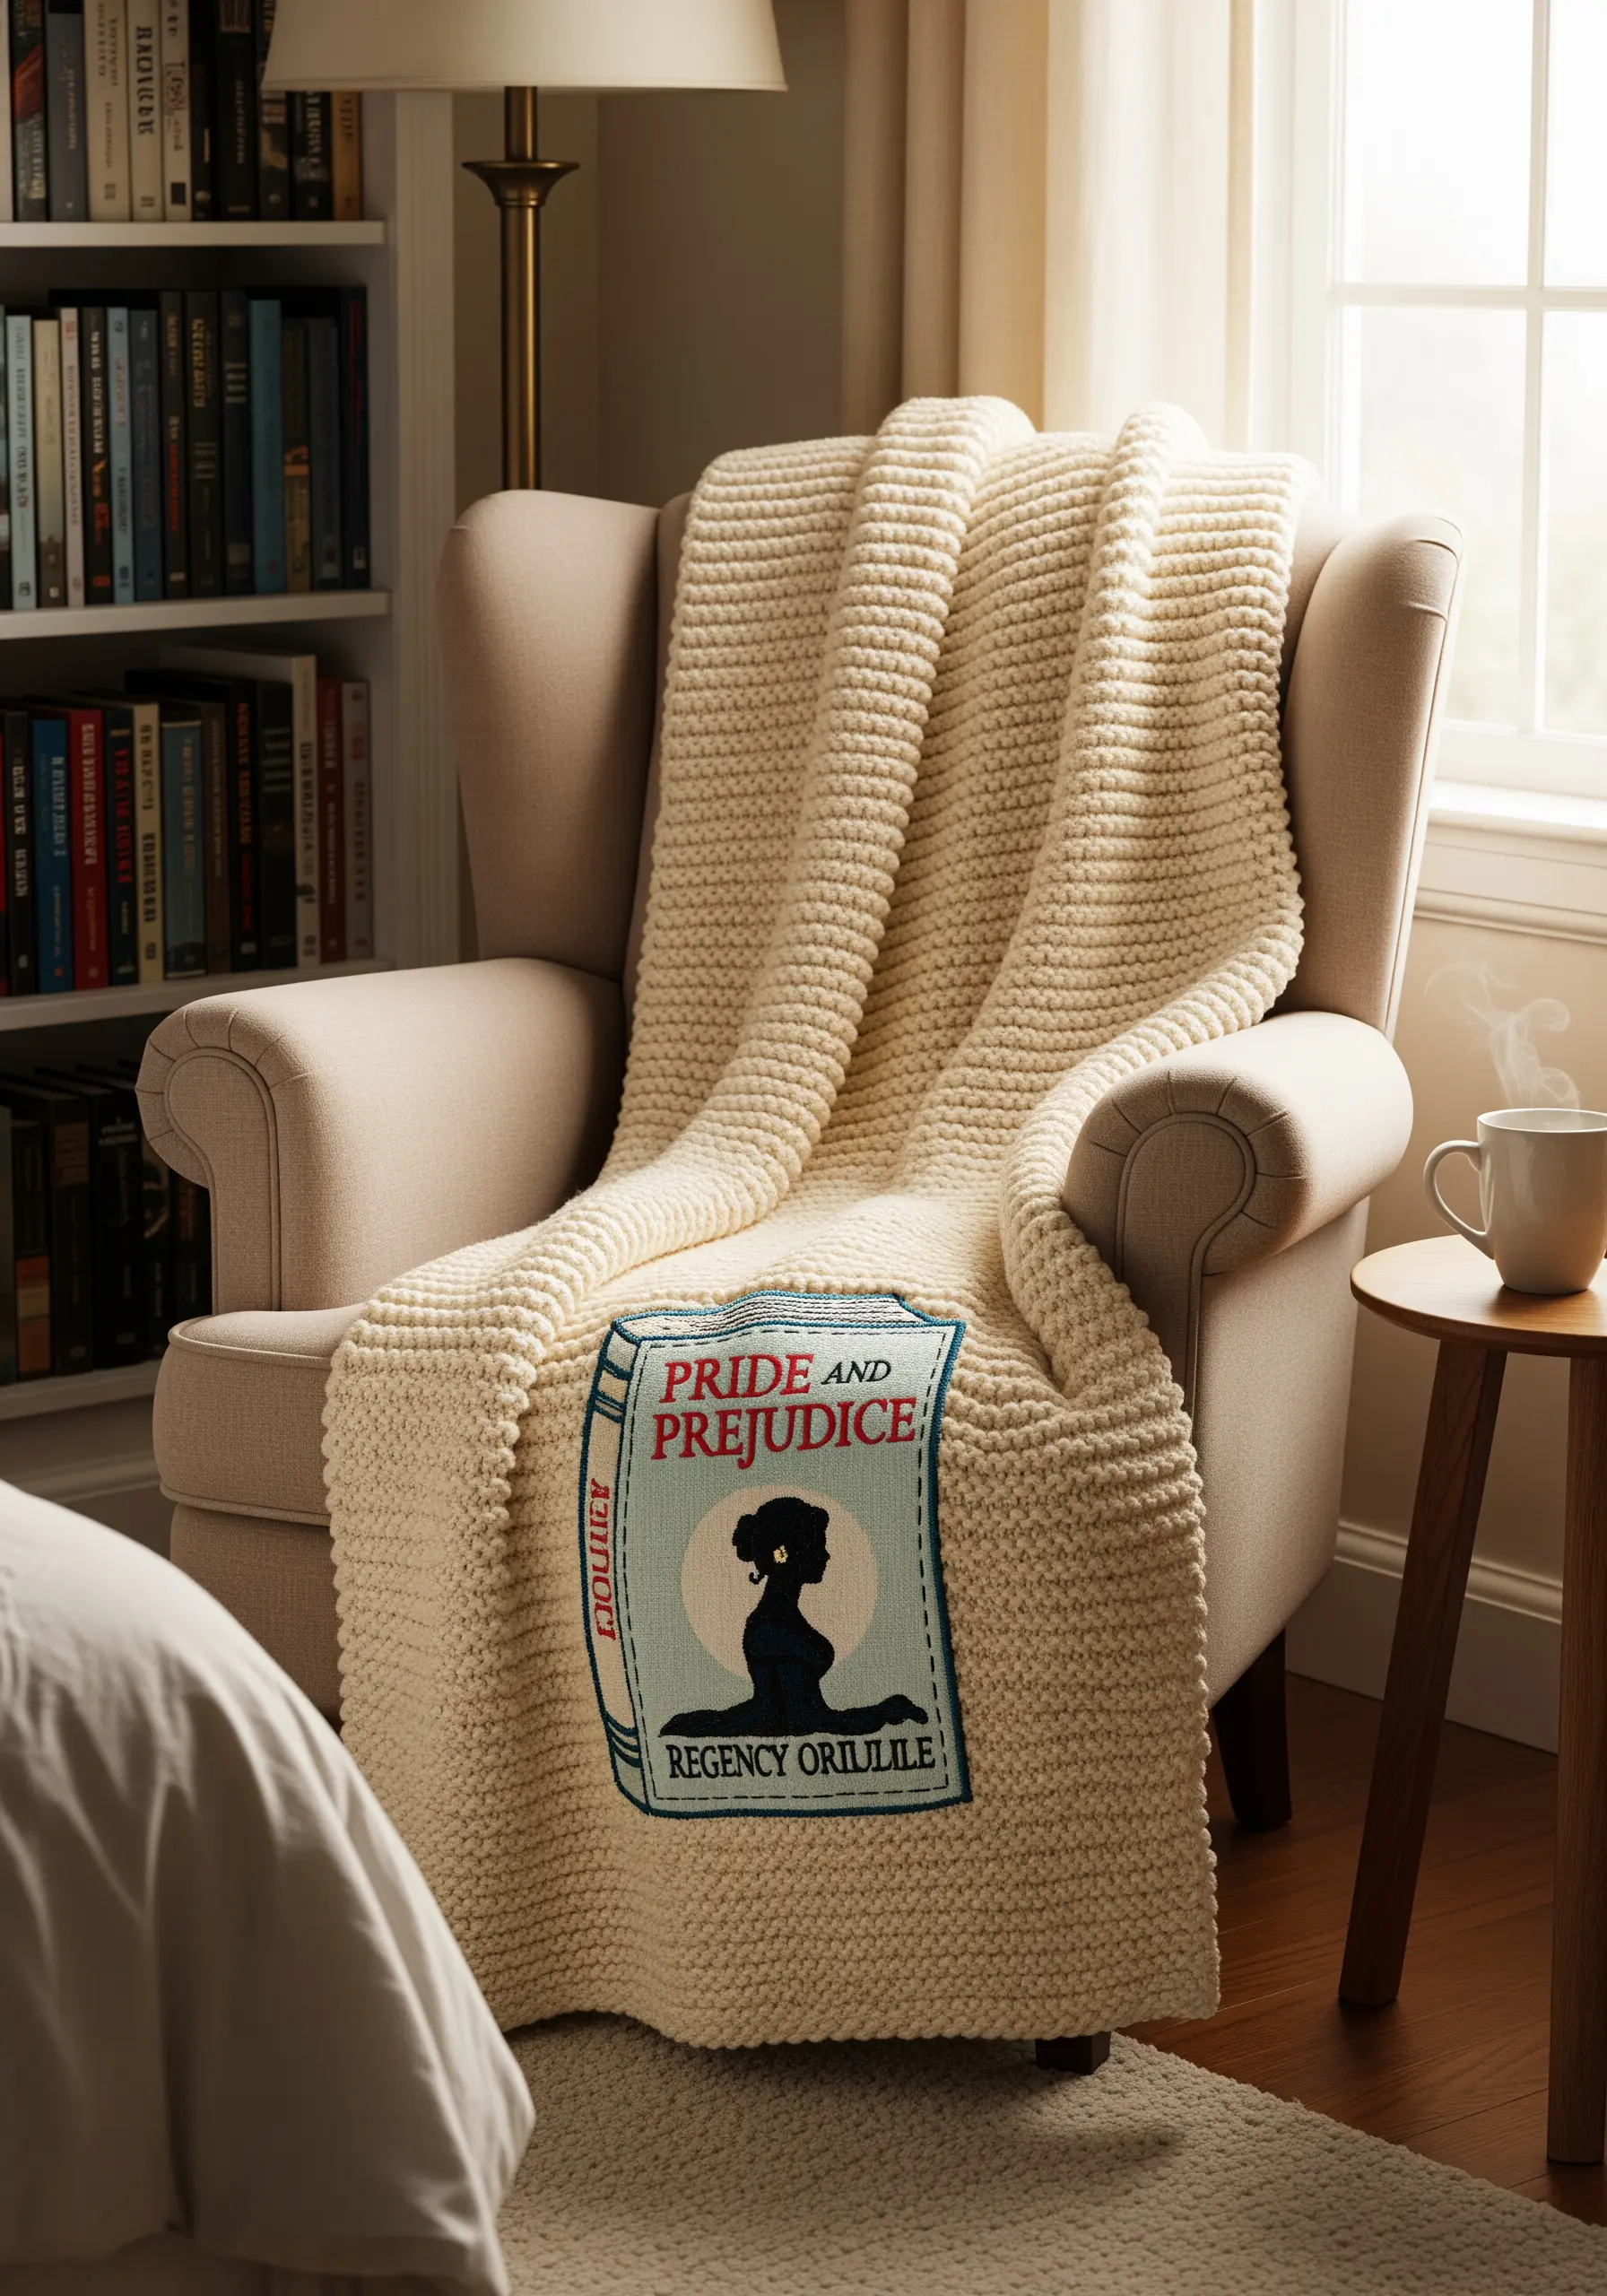
Celebrate your favorite story by creating a detailed, embroidered patch of the book cover.
This project is perfect for a cozy reading blanket. Work the design on a separate piece of sturdy fabric, like felt or canvas, which will make it easier to handle the small details.
Use a single strand of floss for any fine text or delicate lines to ensure clarity. Once complete, neatly apply the patch to the corner of the throw with a tidy blanket stitch.
It transforms a simple blanket into one of the most meaningful embroidered gifts you can make for yourself or a fellow reader.


