

Embroidery is more than a craft; it’s a quiet practice that allows you to translate the calm of the natural world into something you can hold. But how do you move beyond simply following a pattern and begin creating pieces that feel truly intentional and artful?
The secret lies not in complexity, but in precision. It’s in the way you blend two shades of green to capture the light on a leaf, or the specific stitch you choose to give a petal its soft, curved edge. It’s about making thoughtful choices that elevate your work from a hobby to a form of personal expression.
Here, you’ll discover techniques that offer immediate, visible improvements. These ideas are designed to help you create embroidered art that not only looks beautiful in a frame but also brings a tangible sense of peace and intention to your space—and to your stitching practice.
1. Render Ferns with Botanical Precision
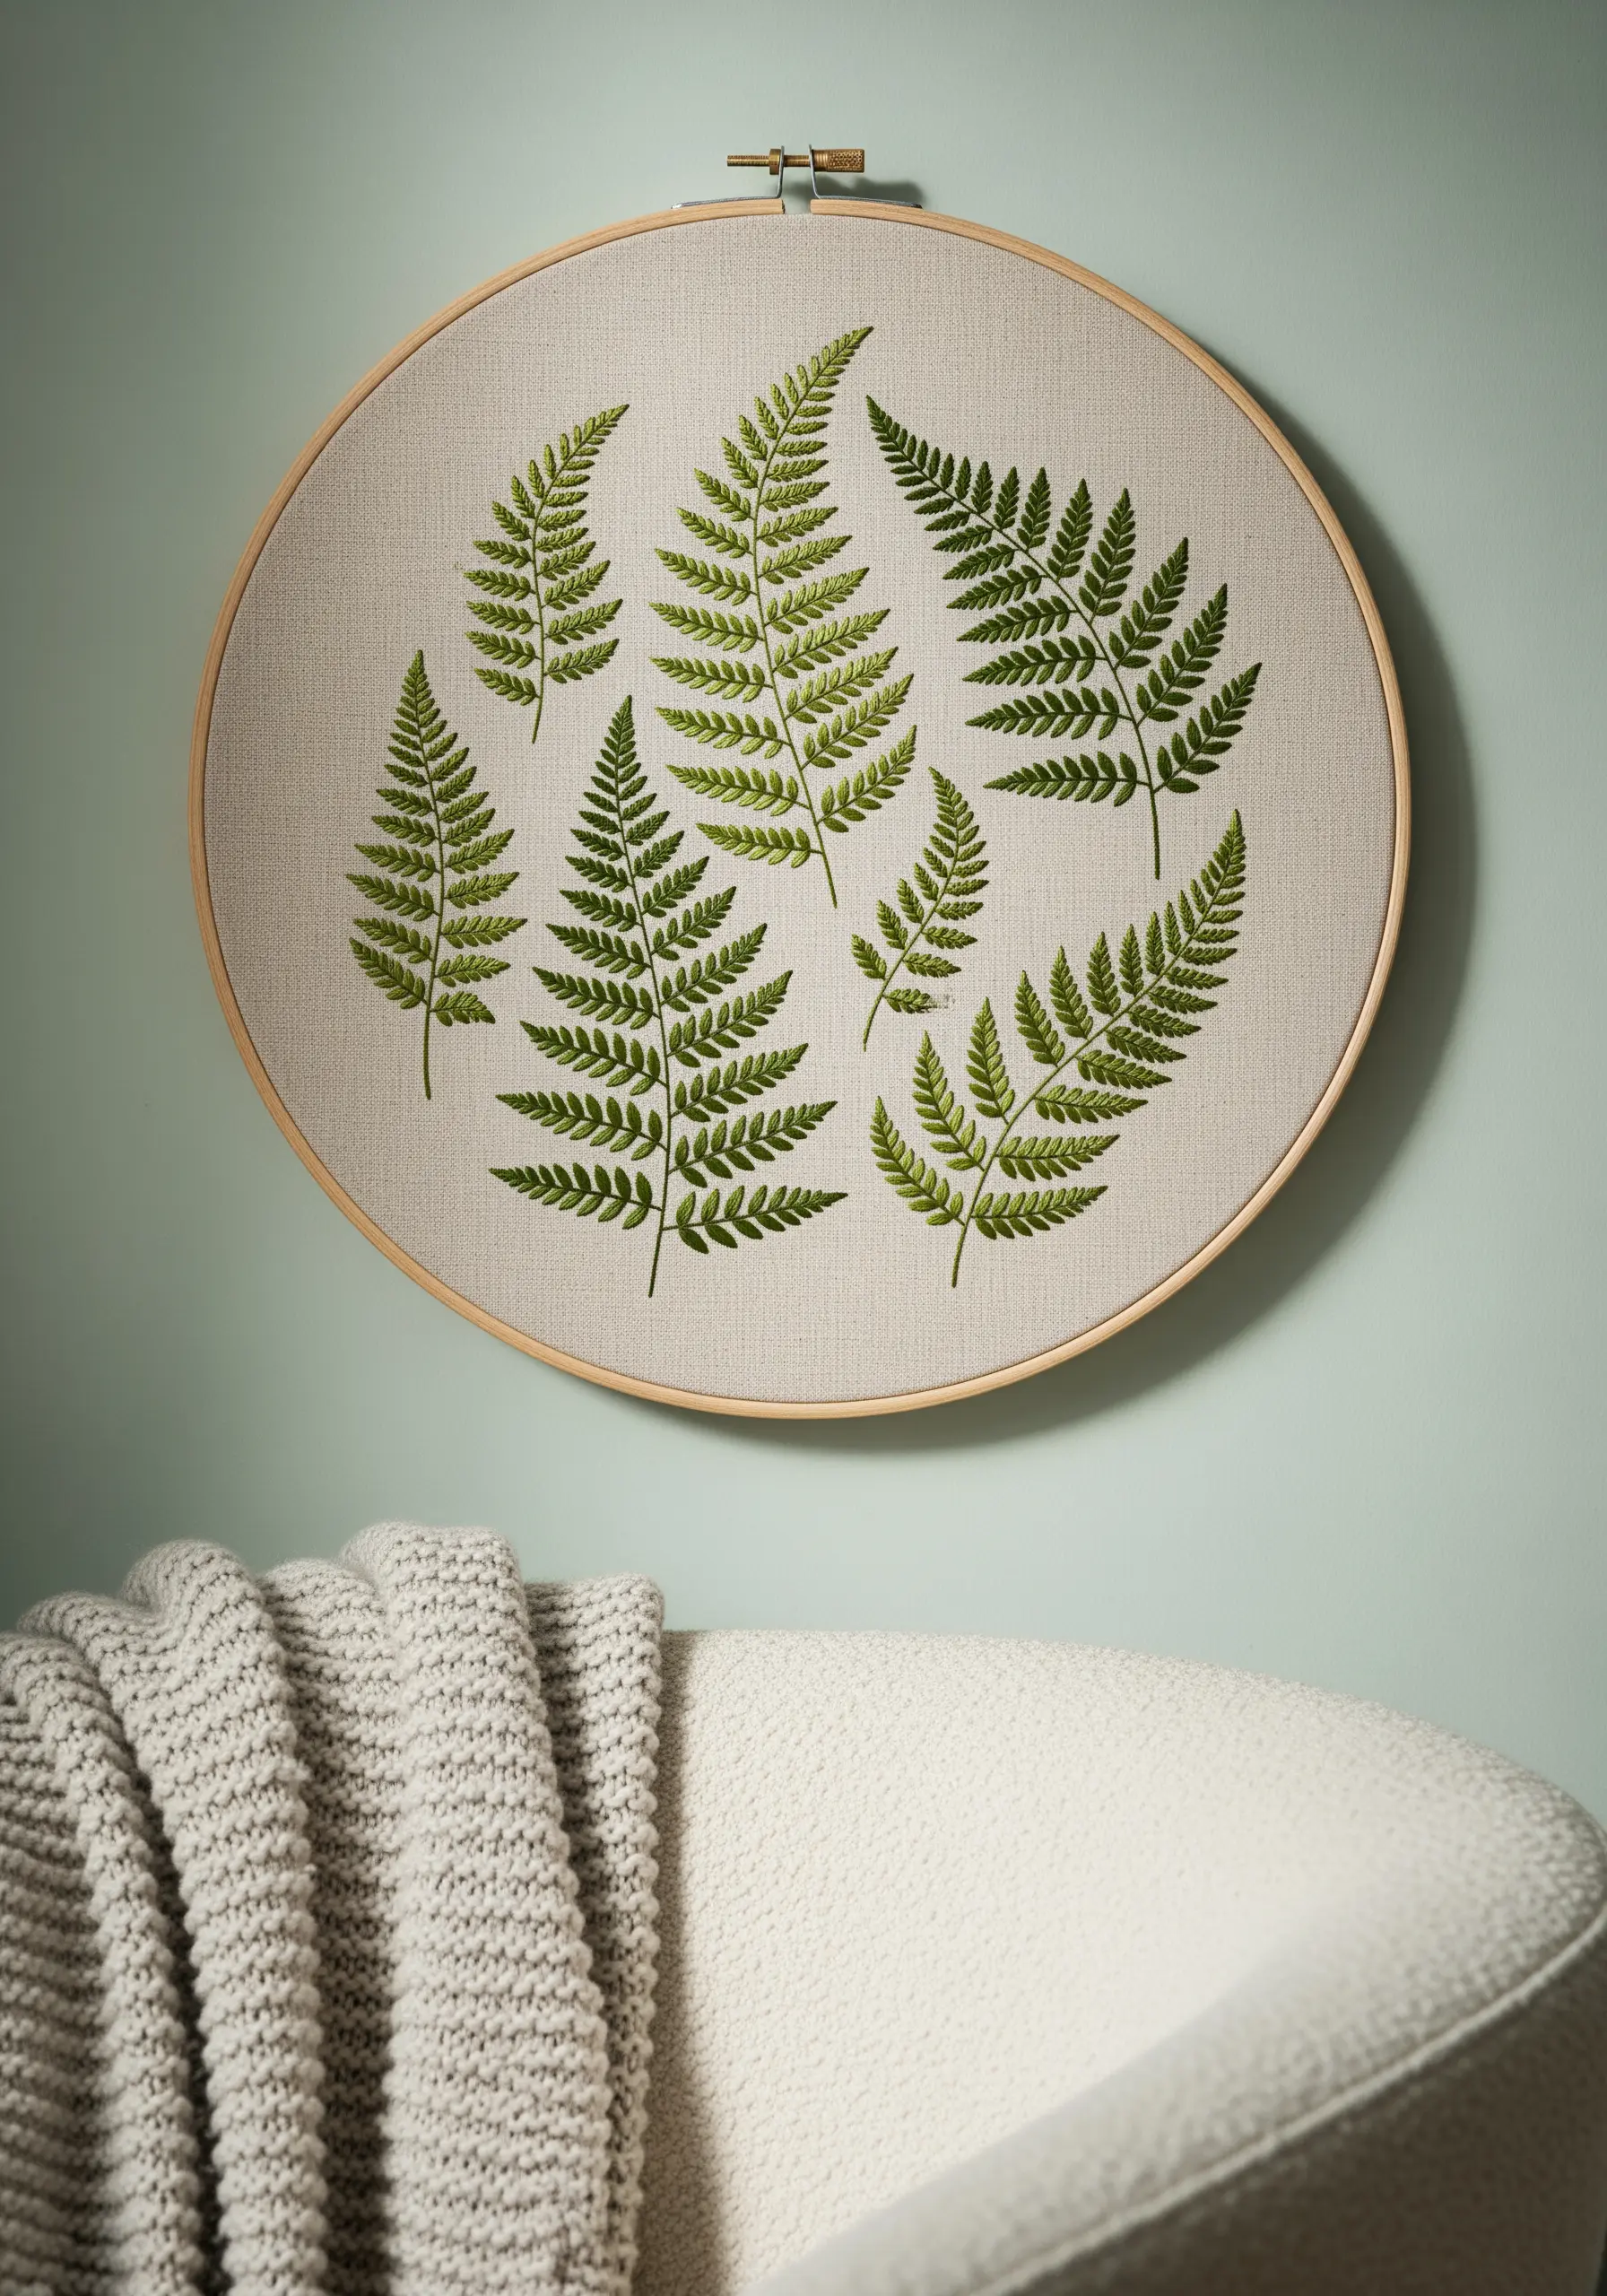
To capture the delicate structure of fern fronds, use a fishbone stitch for each individual leaflet, allowing the angled stitches to create a natural center vein.
For the central stem, a split stitch provides a solid, raised line that grounds the airy leaflets.
Work with two or three closely related shades of green floss, randomly assigning them to different fronds to mimic the subtle variations found in nature.
This method adds incredible depth and realism without complicating the stitching process, making your botanicals feel alive.
For an even more refined look, try these leaf-vein stitch methods to add another layer of detail.
2. Stitch Abstract Mountain Layers
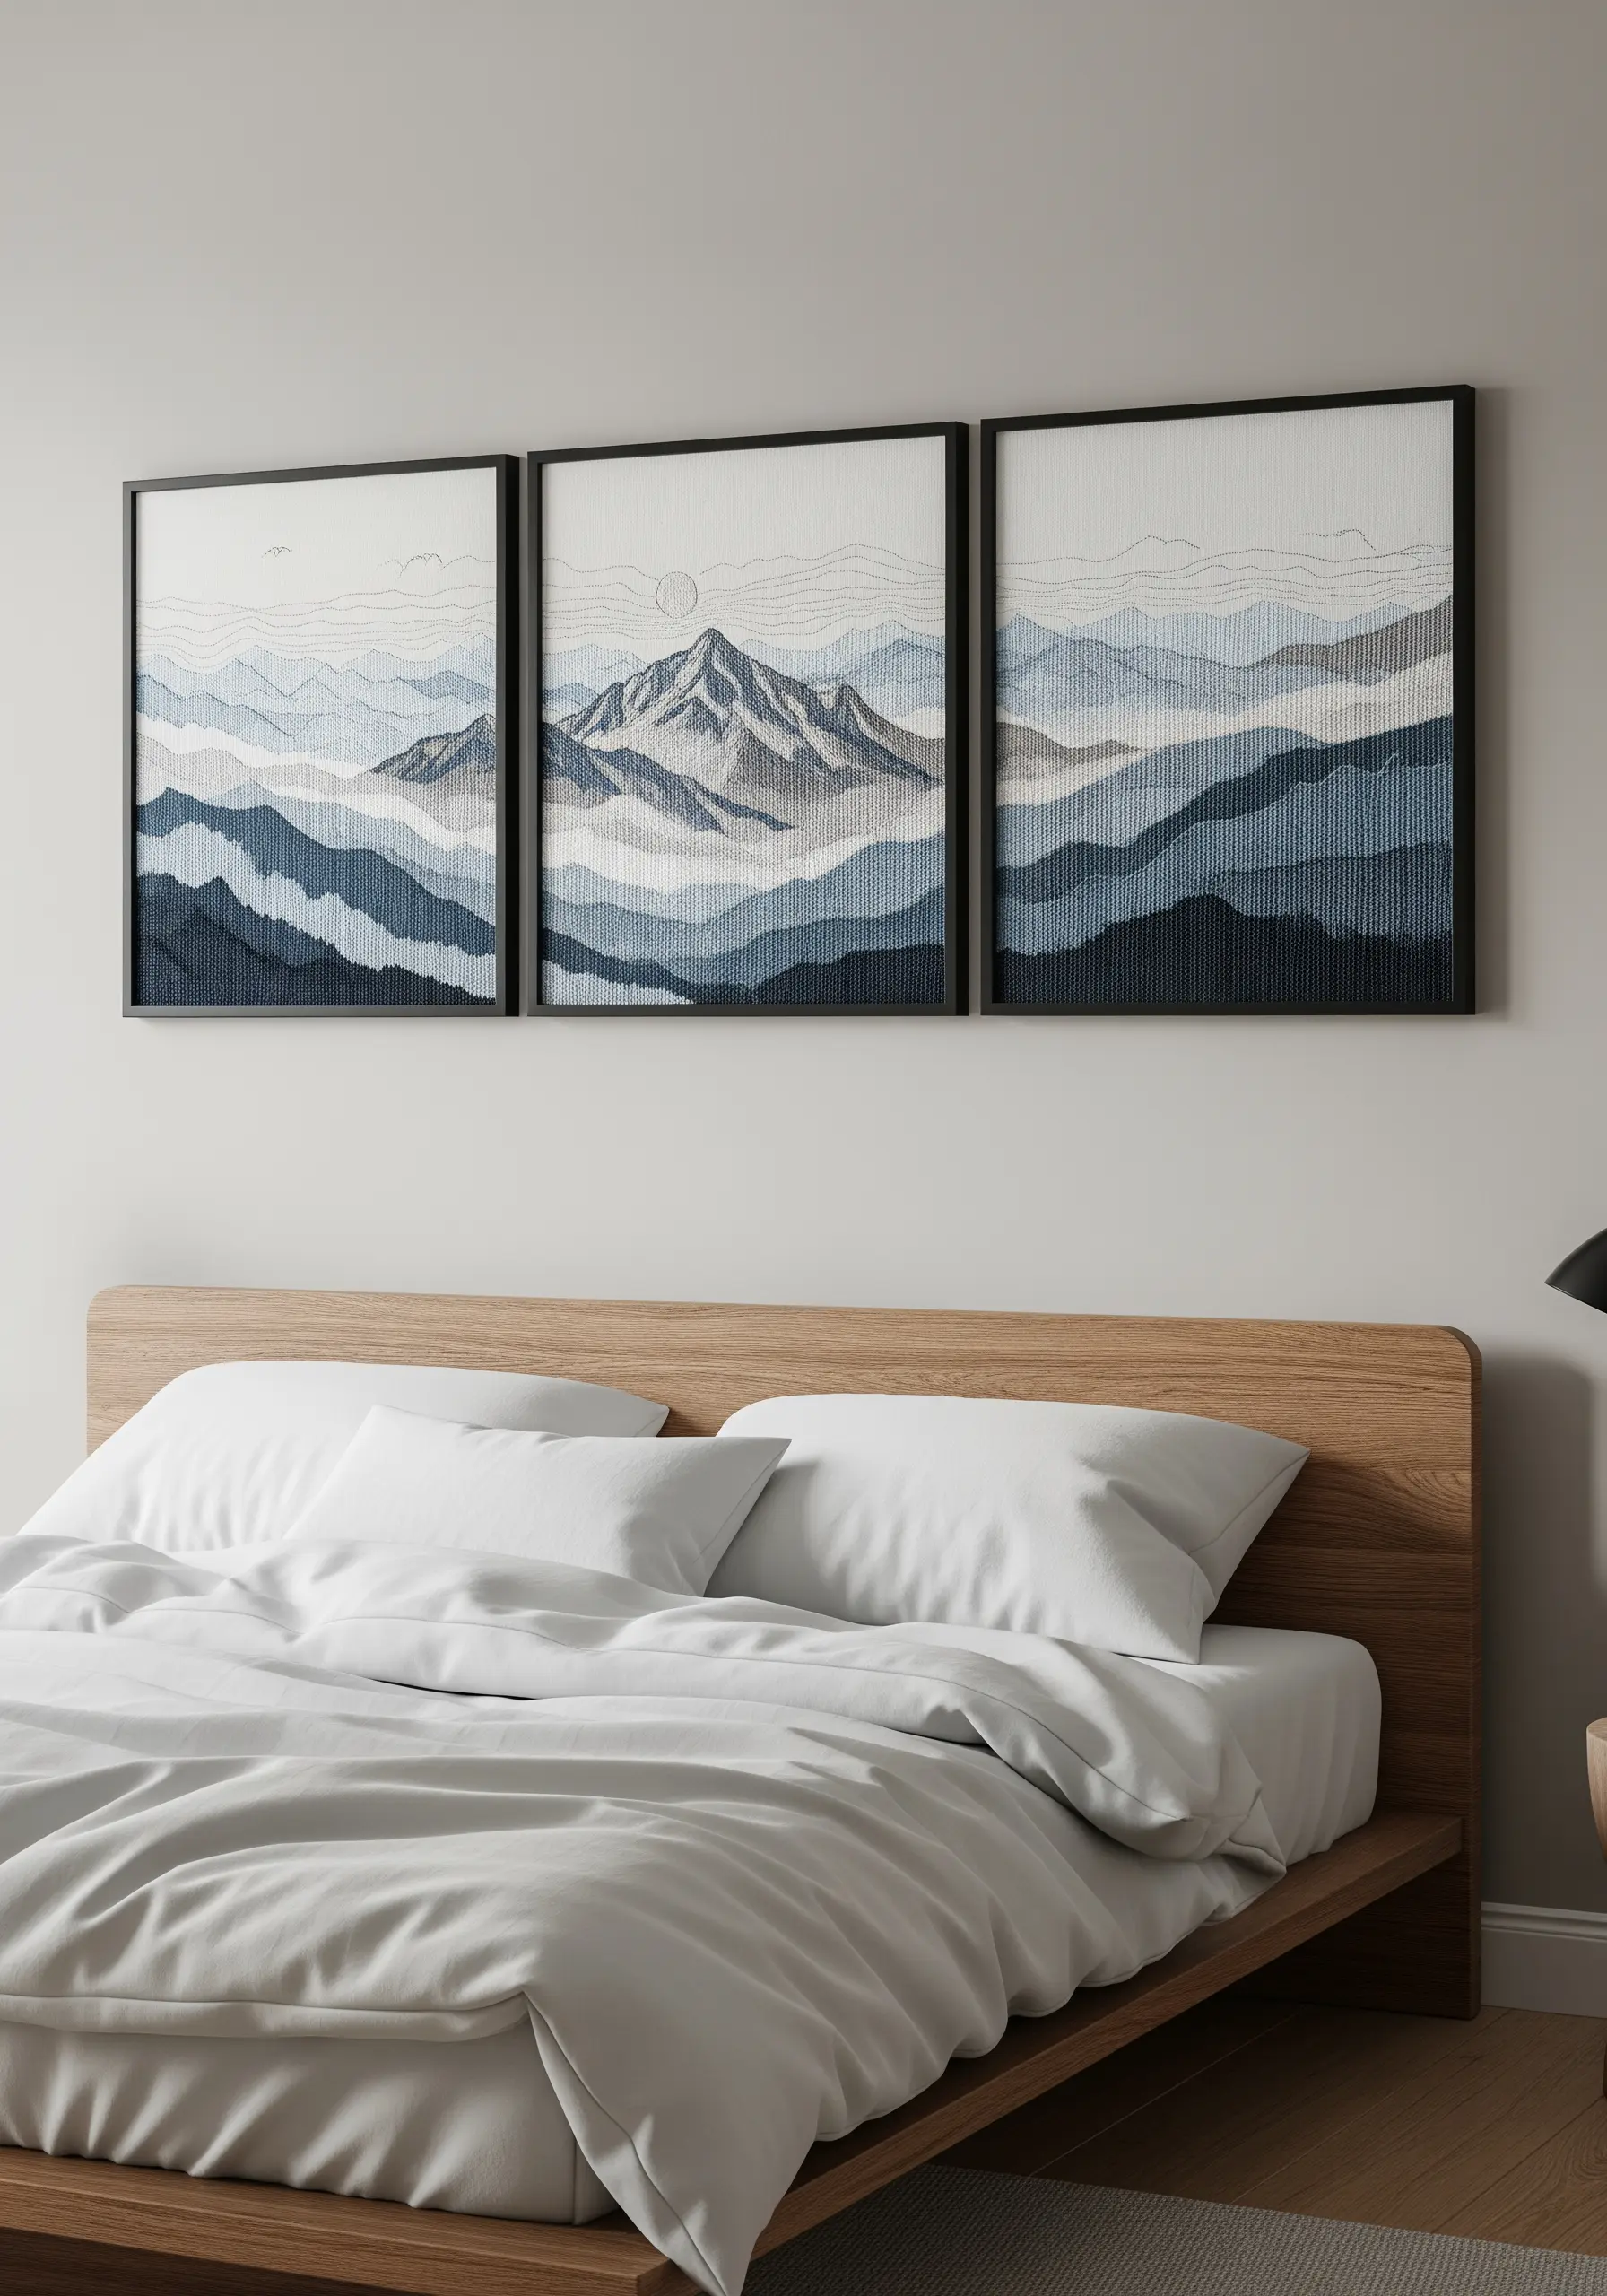
Create a serene mountain landscape by translating atmospheric depth into stitched layers.
Use simple running stitches in horizontal bands, varying the color and density to define each mountain range.
Place darker, more densely stitched threads in the foreground and lighter, sparser stitches in the background to create a powerful illusion of distance.
This technique turns a simple stitch into a sophisticated tool for composition, proving you don’t need complex fills for dramatic results.
Explore other mountain landscape thread painting techniques to bring even more dimension to your work.
3. Capture Avian Iridescence with Thread Painting

Bring a hummingbird to life using long-and-short stitch, the key to seamless color blending.
Work with single strands of floss to create smooth gradients on the wings and body, mimicking the soft texture of feathers.
For the gorget (throat feathers), introduce a single strand of iridescent or metallic thread into your color mix for a subtle flash of light that captures the bird’s unique shimmer.
Finish with a few delicate straight stitches for the flower’s stamens to add a final touch of realism. If you enjoy this blending method, you’ll love these abstract thread painting ideas.
4. Build Fungi with Tactile Stitching
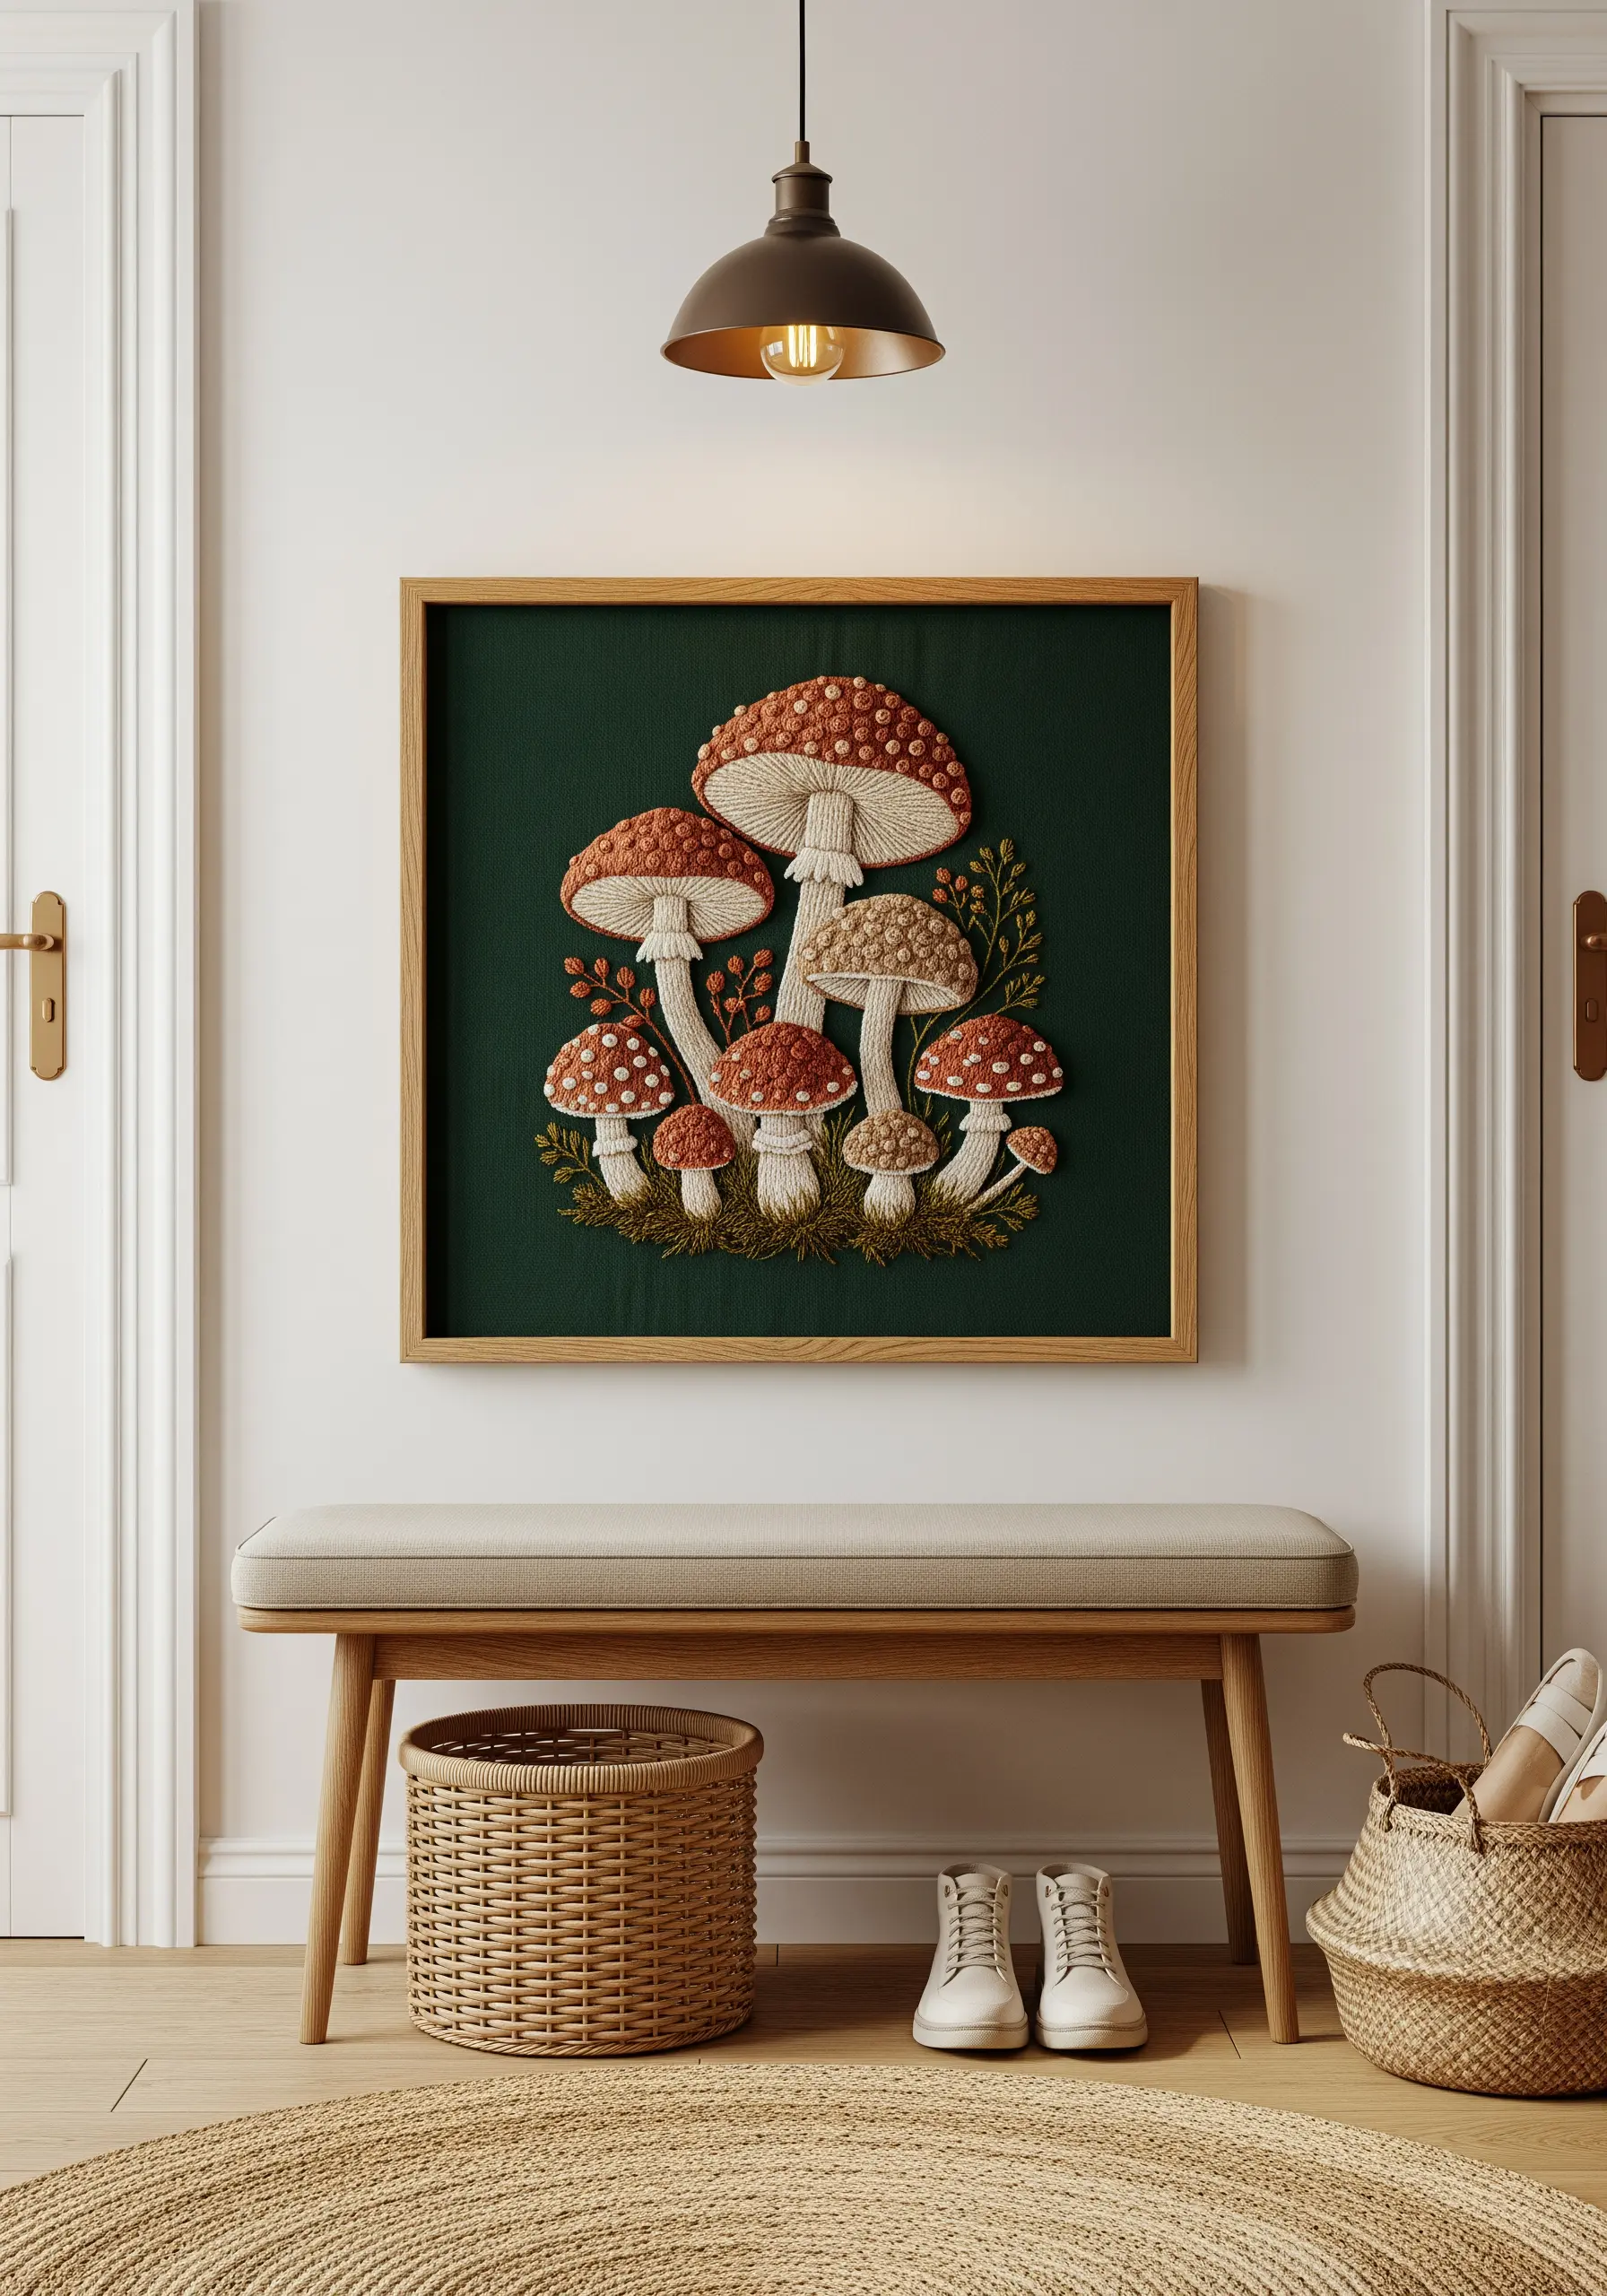
Give your mushroom embroidery dimensional, earthy texture by combining different stitch techniques.
Use dense French knots or turkey work for the spots on the caps to create a raised, bumpy surface you can’t help but touch.
For the gills underneath, stitch radiating straight stitches or a satin stitch, ensuring your stitches are perpendicular to the stem to create a sense of structure.
Stitching on a dark, rich fabric like forest green or deep brown makes the earthy tones pop, adding to the woodland feel.
Discover more forest floor botanical stitch ideas inspired by nature’s textures.
5. Illustrate Movement with Delicate Seeds

To capture the feeling of a dandelion seed head catching the wind, focus on lightness and negative space.
Use a single strand of white floss for the seeds to maintain a delicate, airy quality.
Form each floating seed with a single detached chain stitch for the seed body and two tiny straight stitches for the pappus, or ‘parachute’.
Varying the spacing and direction of the floating seeds creates a believable sense of movement and prevents the composition from feeling static.
You can use these tiny floral motifs to fill empty spaces in other compositions, too.
6. Design a Gentle Nursery Collection

When embroidering for a nursery, soft textures and clean lines create a calming atmosphere.
Choose a simple backstitch or stem stitch for the outlines to keep the illustrations feeling gentle and clear.
Fill the shapes with a light satin stitch, using just two or three strands of floss to avoid creating a heavy, stiff finish on the fabric.
A cohesive, muted color palette across several hoops ties the collection together, making the art feel intentional and serene.
Find more inspiration with these adorable forest animal embroidery ideas.
7. Recreate the Soft Haze of Eucalyptus
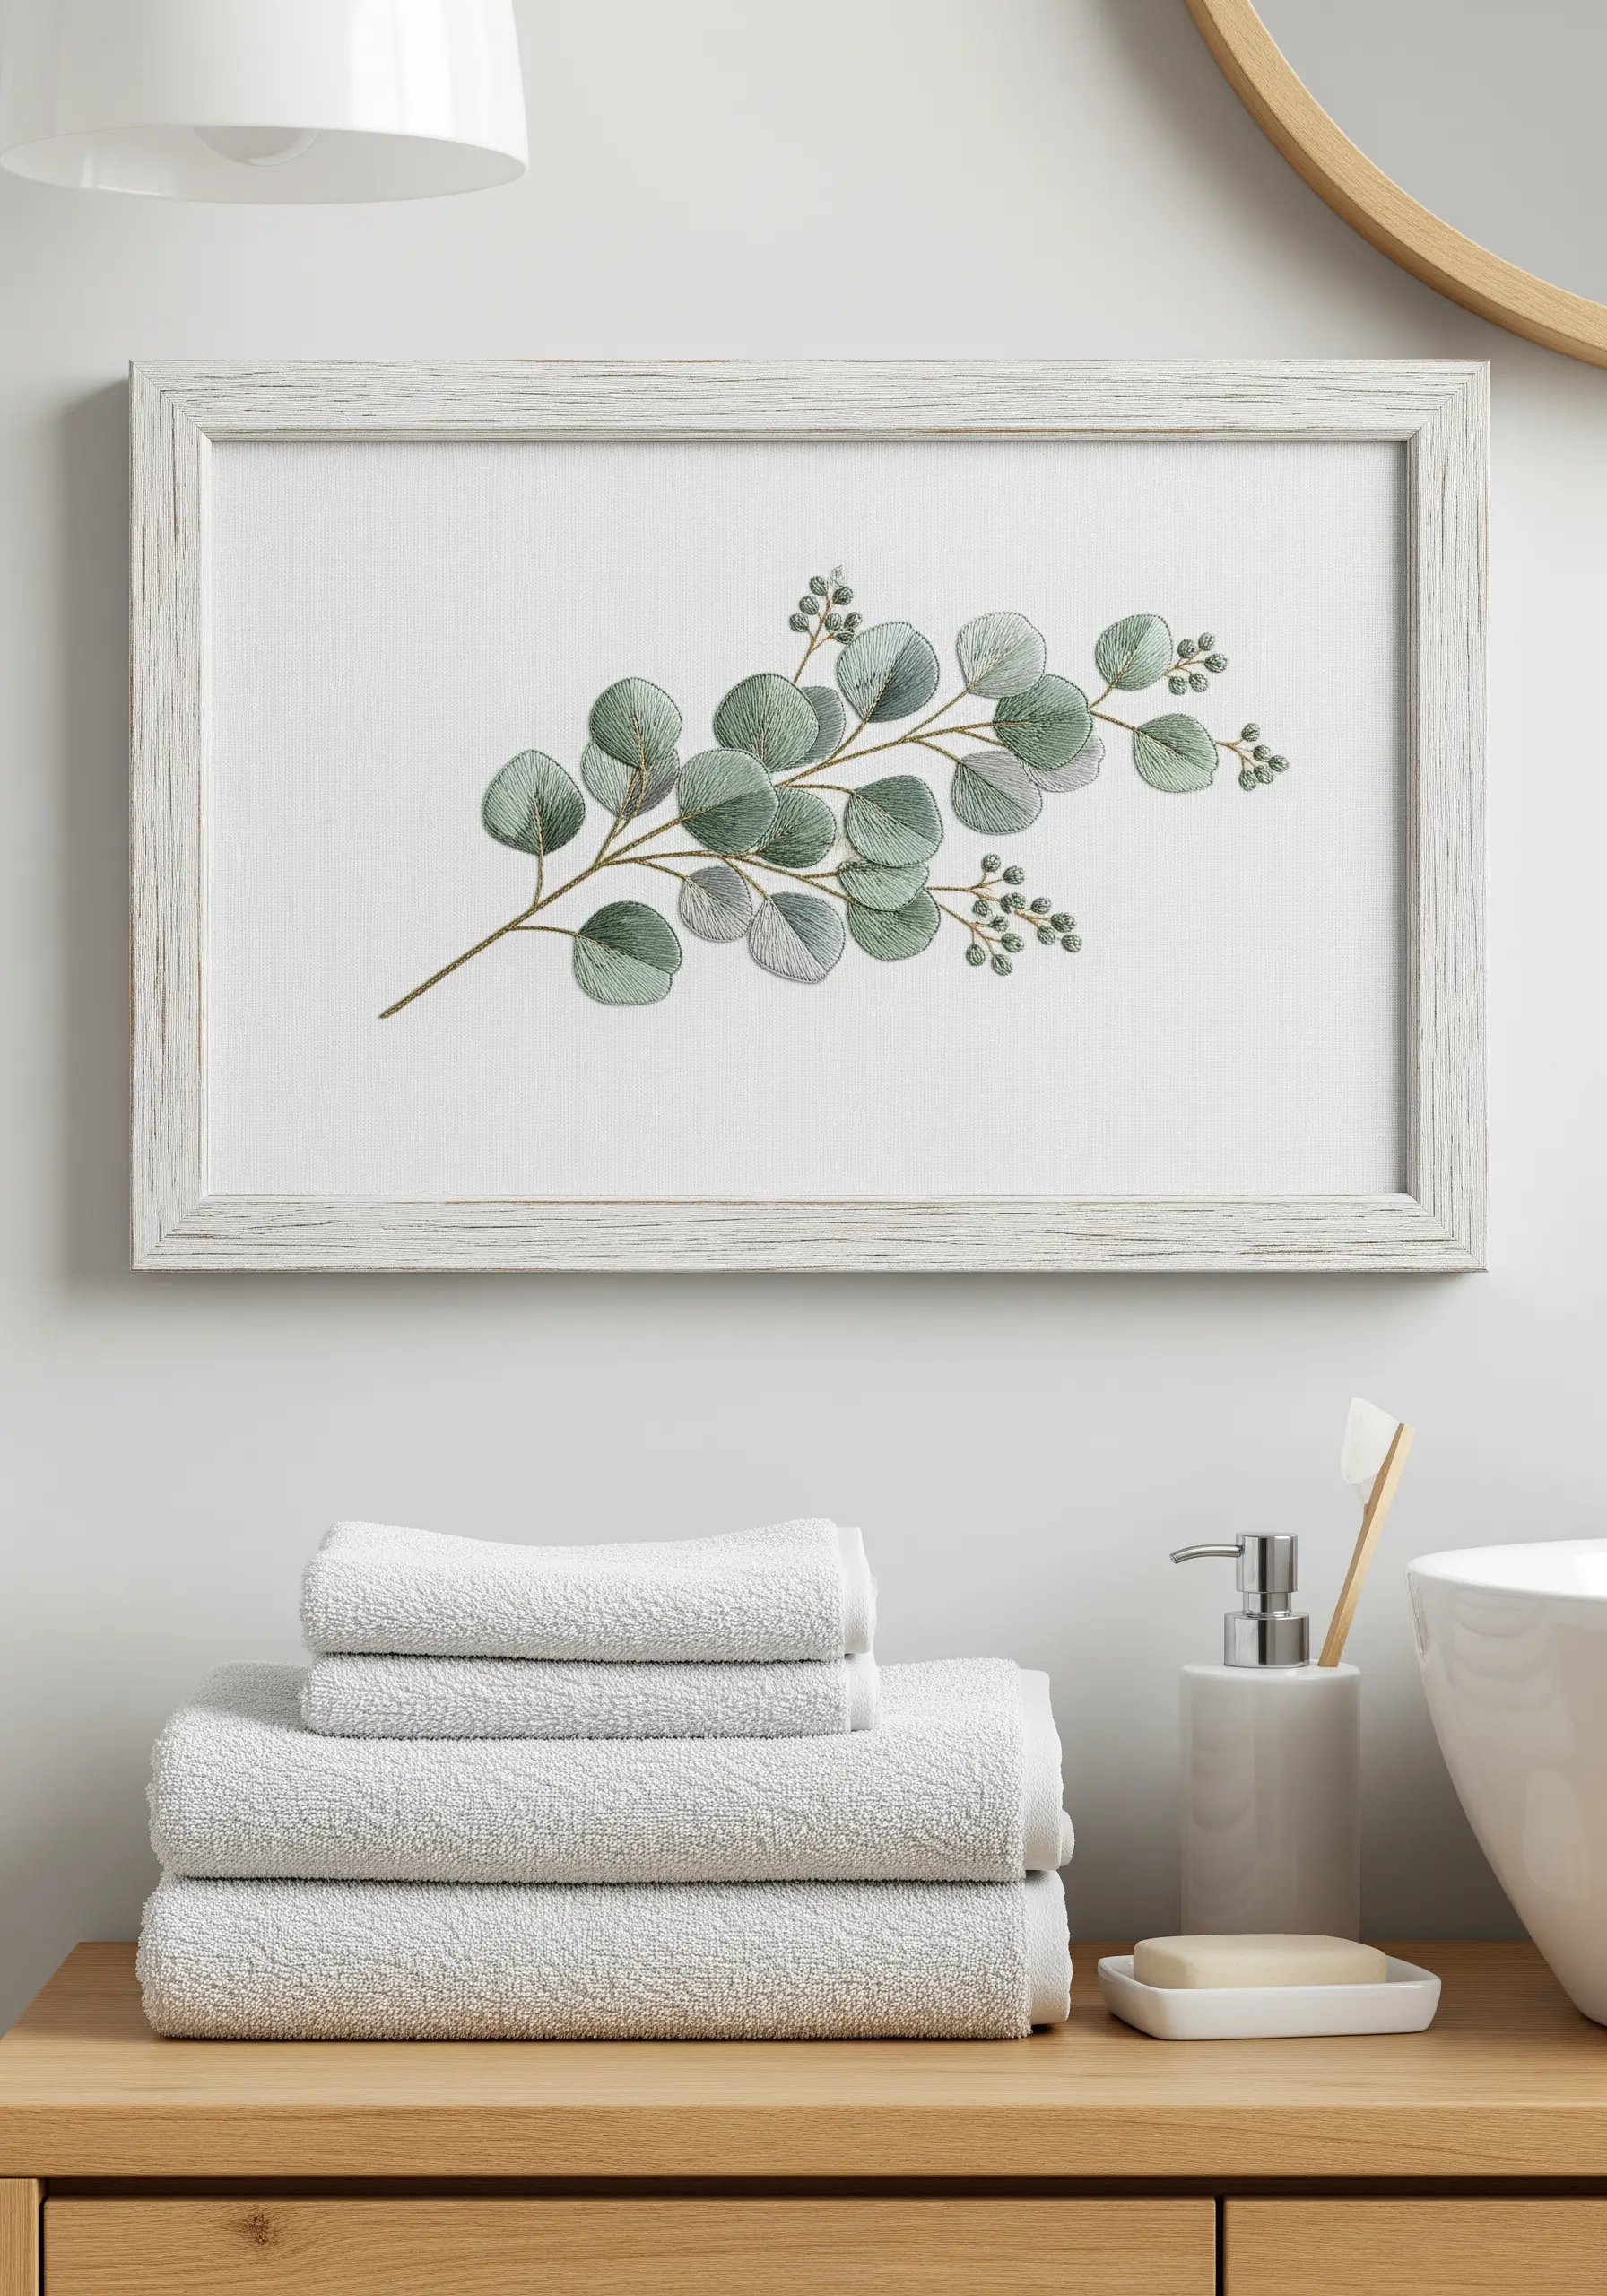
The beauty of eucalyptus is its soft, matte appearance, which you can replicate with careful color blending.
Use a long-and-short stitch with single-strand floss to avoid harsh lines and create a painterly effect.
Select a palette of dusty greens, muted teals, and silvery greys, blending them subtly within each leaf to capture that signature powdery finish.
For the seed pods, a cluster of French knots in a slightly darker shade adds a final touch of realistic texture.
These gentle botanical embroidery stitches are perfect for creating a calm atmosphere.
8. Stitch a Lavender Bouquet with Simple Texture

You can create a full-looking lavender bouquet without dense, time-consuming stitches.
Use lazy daisy stitches for the individual lavender buds, clustering them tightly at the top of the stem and spacing them out as you move down.
This technique is faster than French knots and gives a lovely petal-like shape to each bud.
Stitch the stems with a simple stem stitch and tie the bouquet with a few rows of backstitch for the ribbon, keeping the focus on the floral texture.
Explore more lavender-inspired embroidery designs to bring tranquility to your space.
9. Capture Birch Bark with Graphic Marks
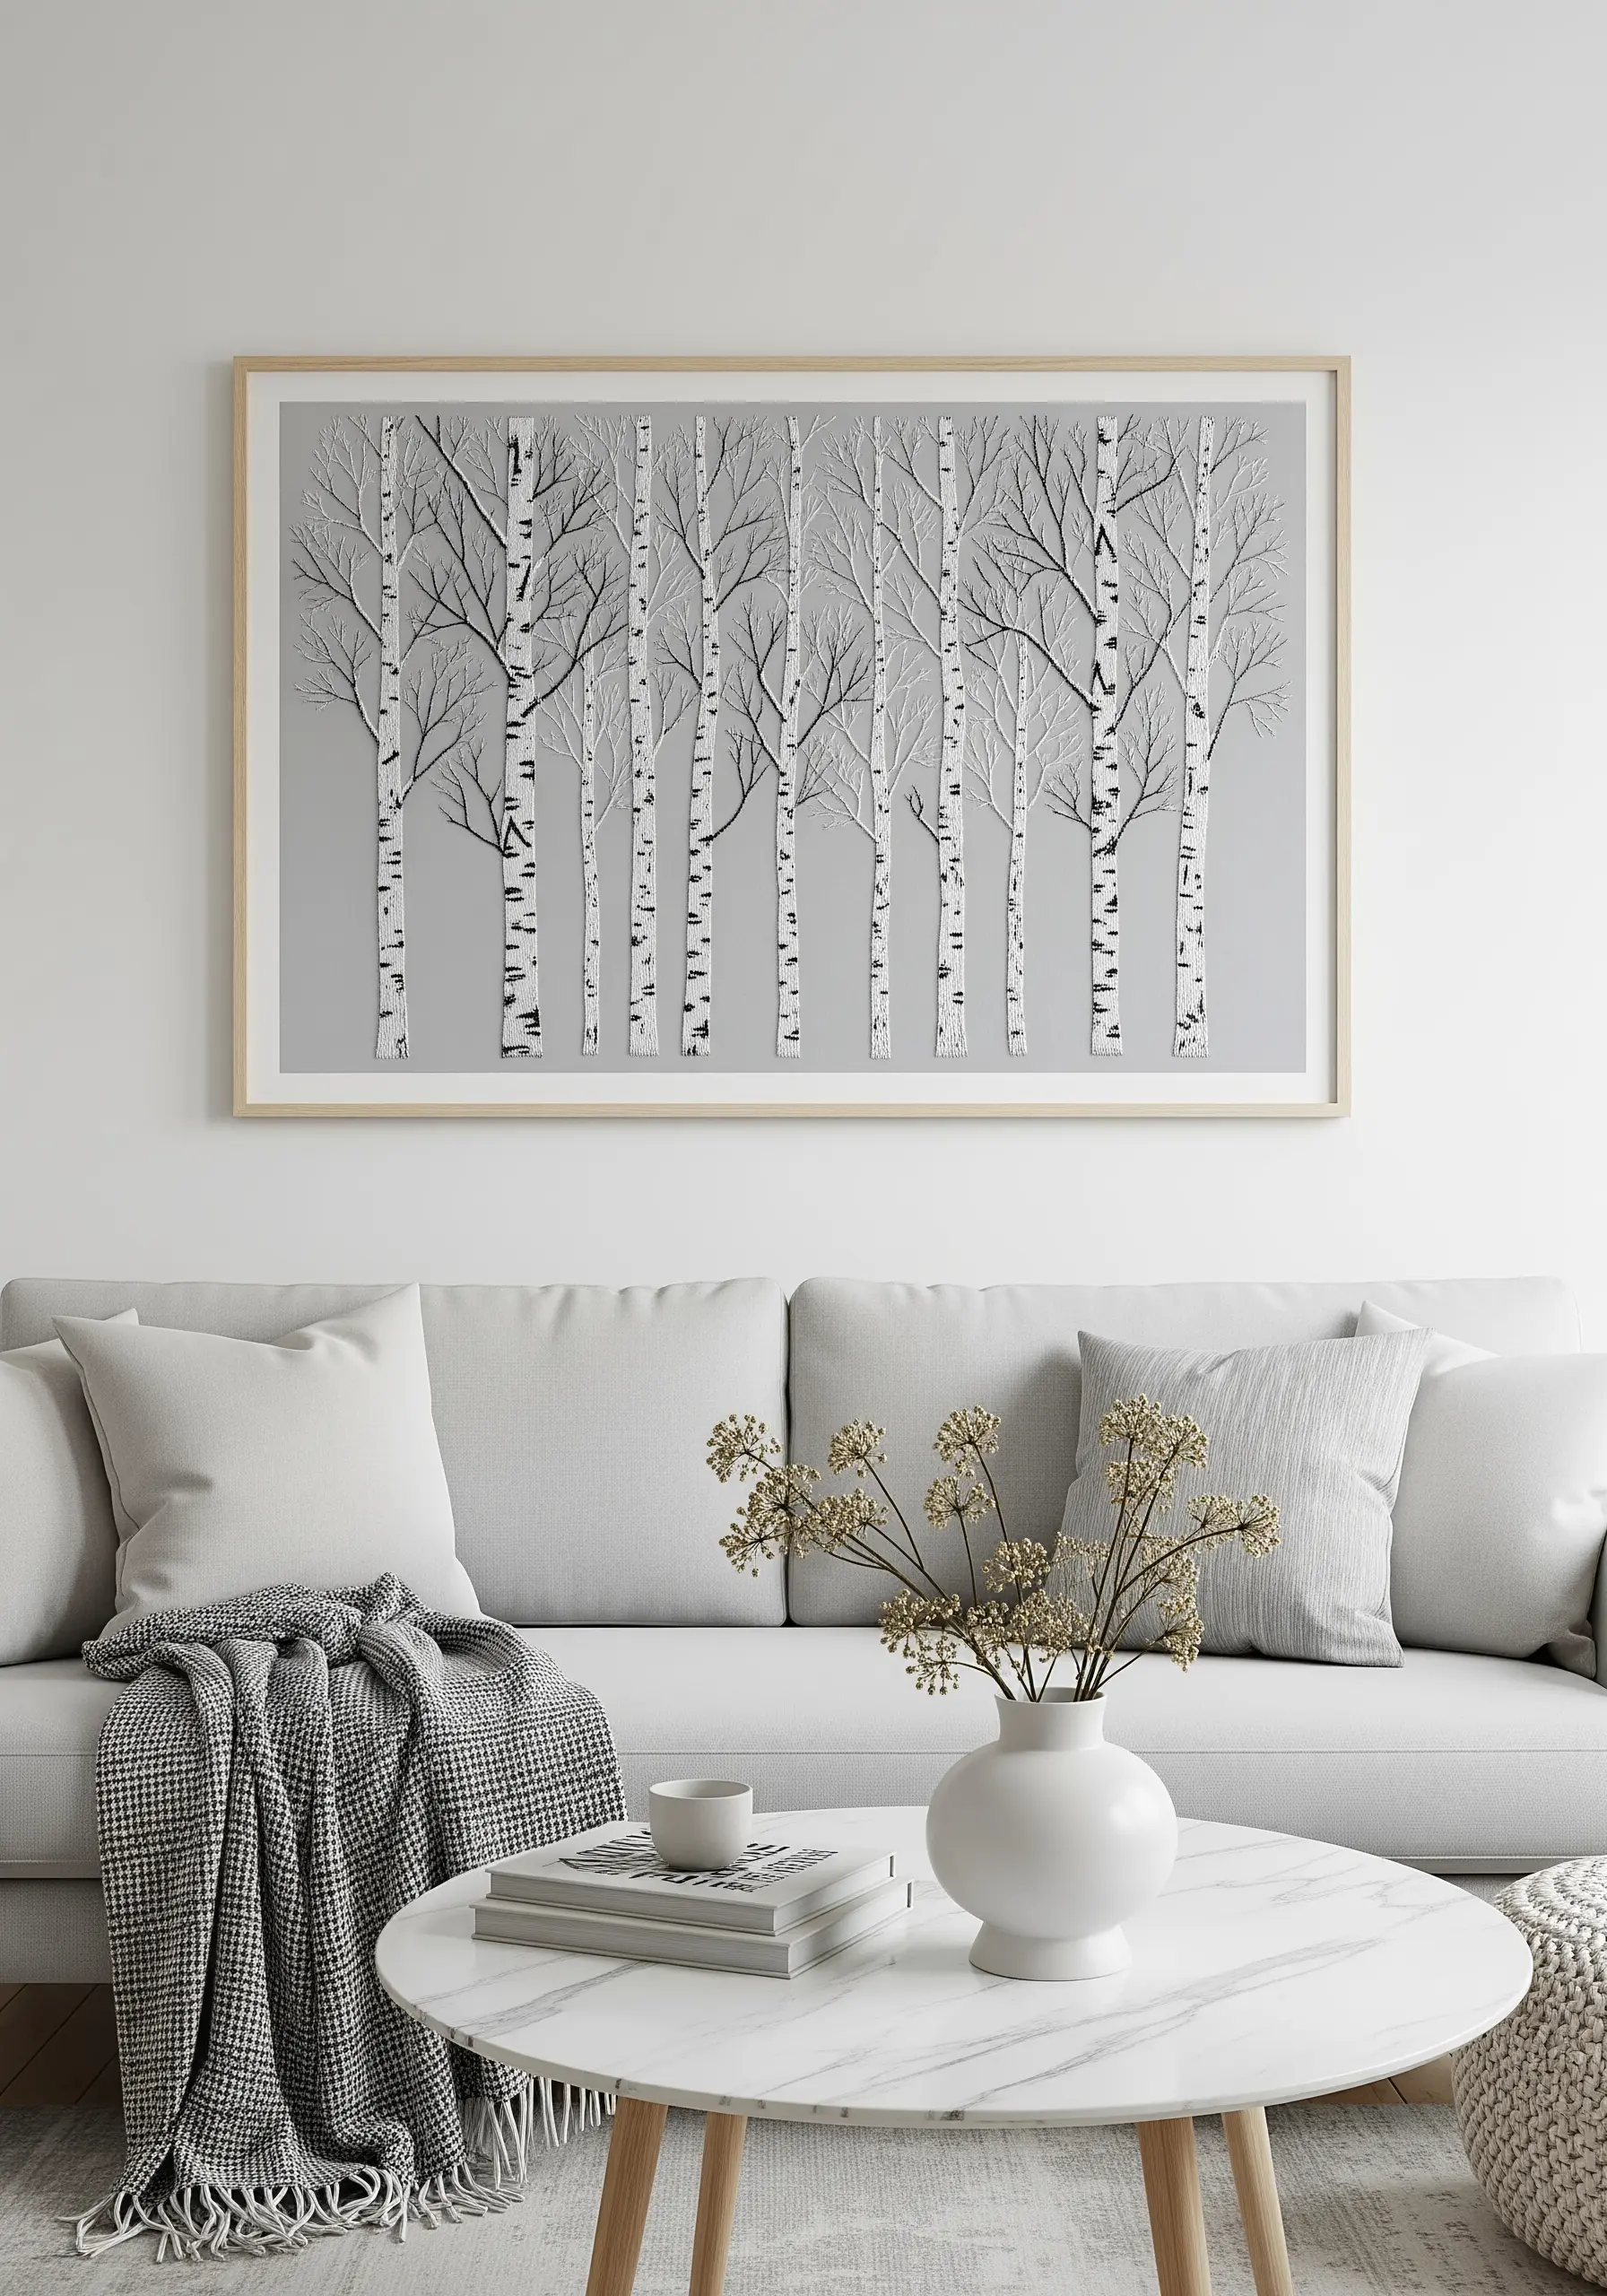
The key to realistic birch trees is capturing the graphic quality of their bark.
Fill the trunks with vertical satin stitches using an off-white or very light grey thread—pure white can look too stark.
Then, use a single strand of black or dark grey floss to add the characteristic horizontal lines and knots with simple straight stitches.
Vary the thickness and length of these marks to make each tree unique, creating a piece that feels both illustrative and true to nature.
These tree ring bark texture embroidery patterns offer more ways to stitch natural details.
10. Achieve Bold Symmetry in Butterfly Wings
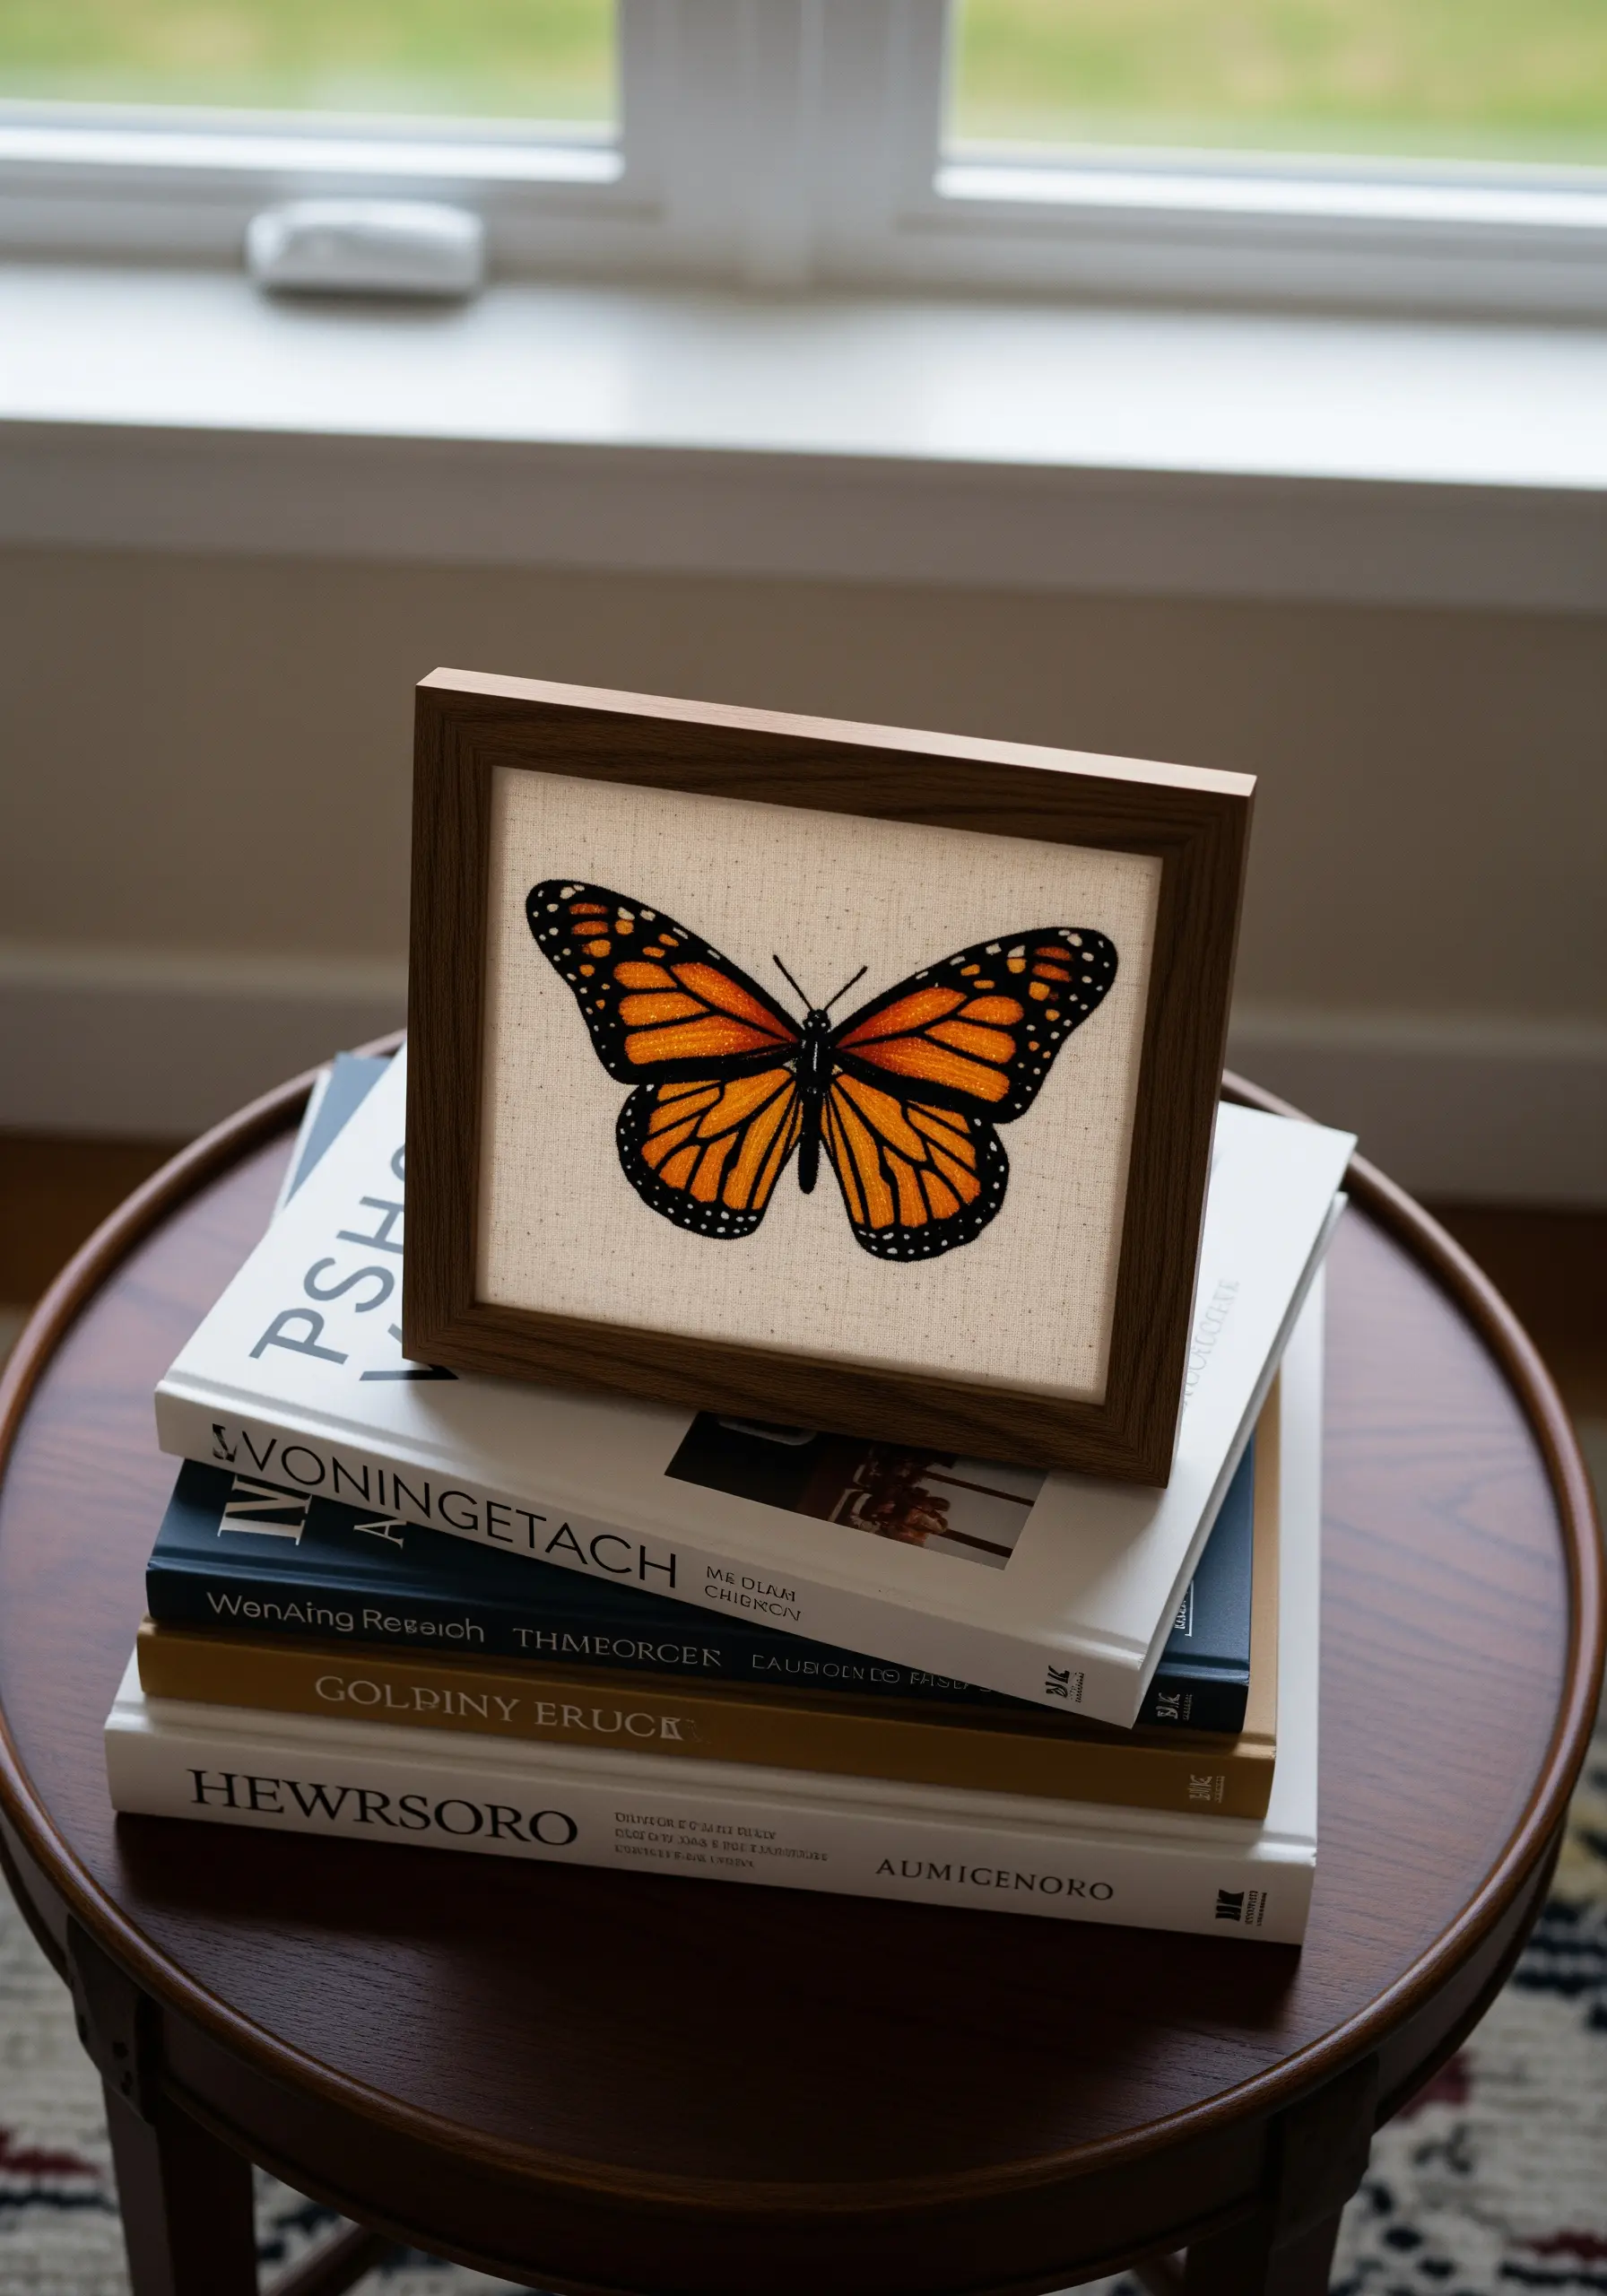
For a striking monarch butterfly, precision and color saturation are paramount.
Use a split stitch for the black outlines to ensure they are crisp and uniform. This stitch creates a solid line that contains your fill stitches perfectly.
Fill the orange sections with a brick stitch, as its interlocking nature prevents gaps and creates a smooth, woven appearance.
Work on both wings simultaneously, mirroring your stitches from one side to the other to maintain perfect symmetry.
Discover more bird & butterfly embroidery patterns that bring fabric to life.
11. Create a Luminous Night Sky

To give your moon a gentle, cratered glow, avoid a flat satin stitch.
Instead, fill the crescent shape with a dense scattering of seed stitches using a light grey or silver thread. This technique adds subtle texture and diffuses light beautifully.
For the stars, use a sparkly metallic floss and stitch them as tiny French knots or star stitches in varying sizes. The contrast between the matte moon and sparkling stars creates a magical effect.
Learn more unexpected ways to use metallic thread to make your work shimmer.
12. Unify a Seasonal Collection with Style

To create a cohesive set of four seasonal embroideries, establish a consistent artistic language across all pieces.
Use the same base fabric, frame style, and stitch vocabulary for each design. For example, decide that all fills will be satin stitch and all outlines will be backstitch.
This stylistic consistency allows the distinct seasonal color palettes—bright pinks for spring, sunny yellows for summer, warm oranges for autumn, and cool blues for winter—to be the main story.
The result is a harmonious gallery wall that feels like a single, unified work of art.
Get inspired by these seasonal embroidery wall decor ideas for year-round stitching.
13. Convey Fluid Motion in Ocean Waves
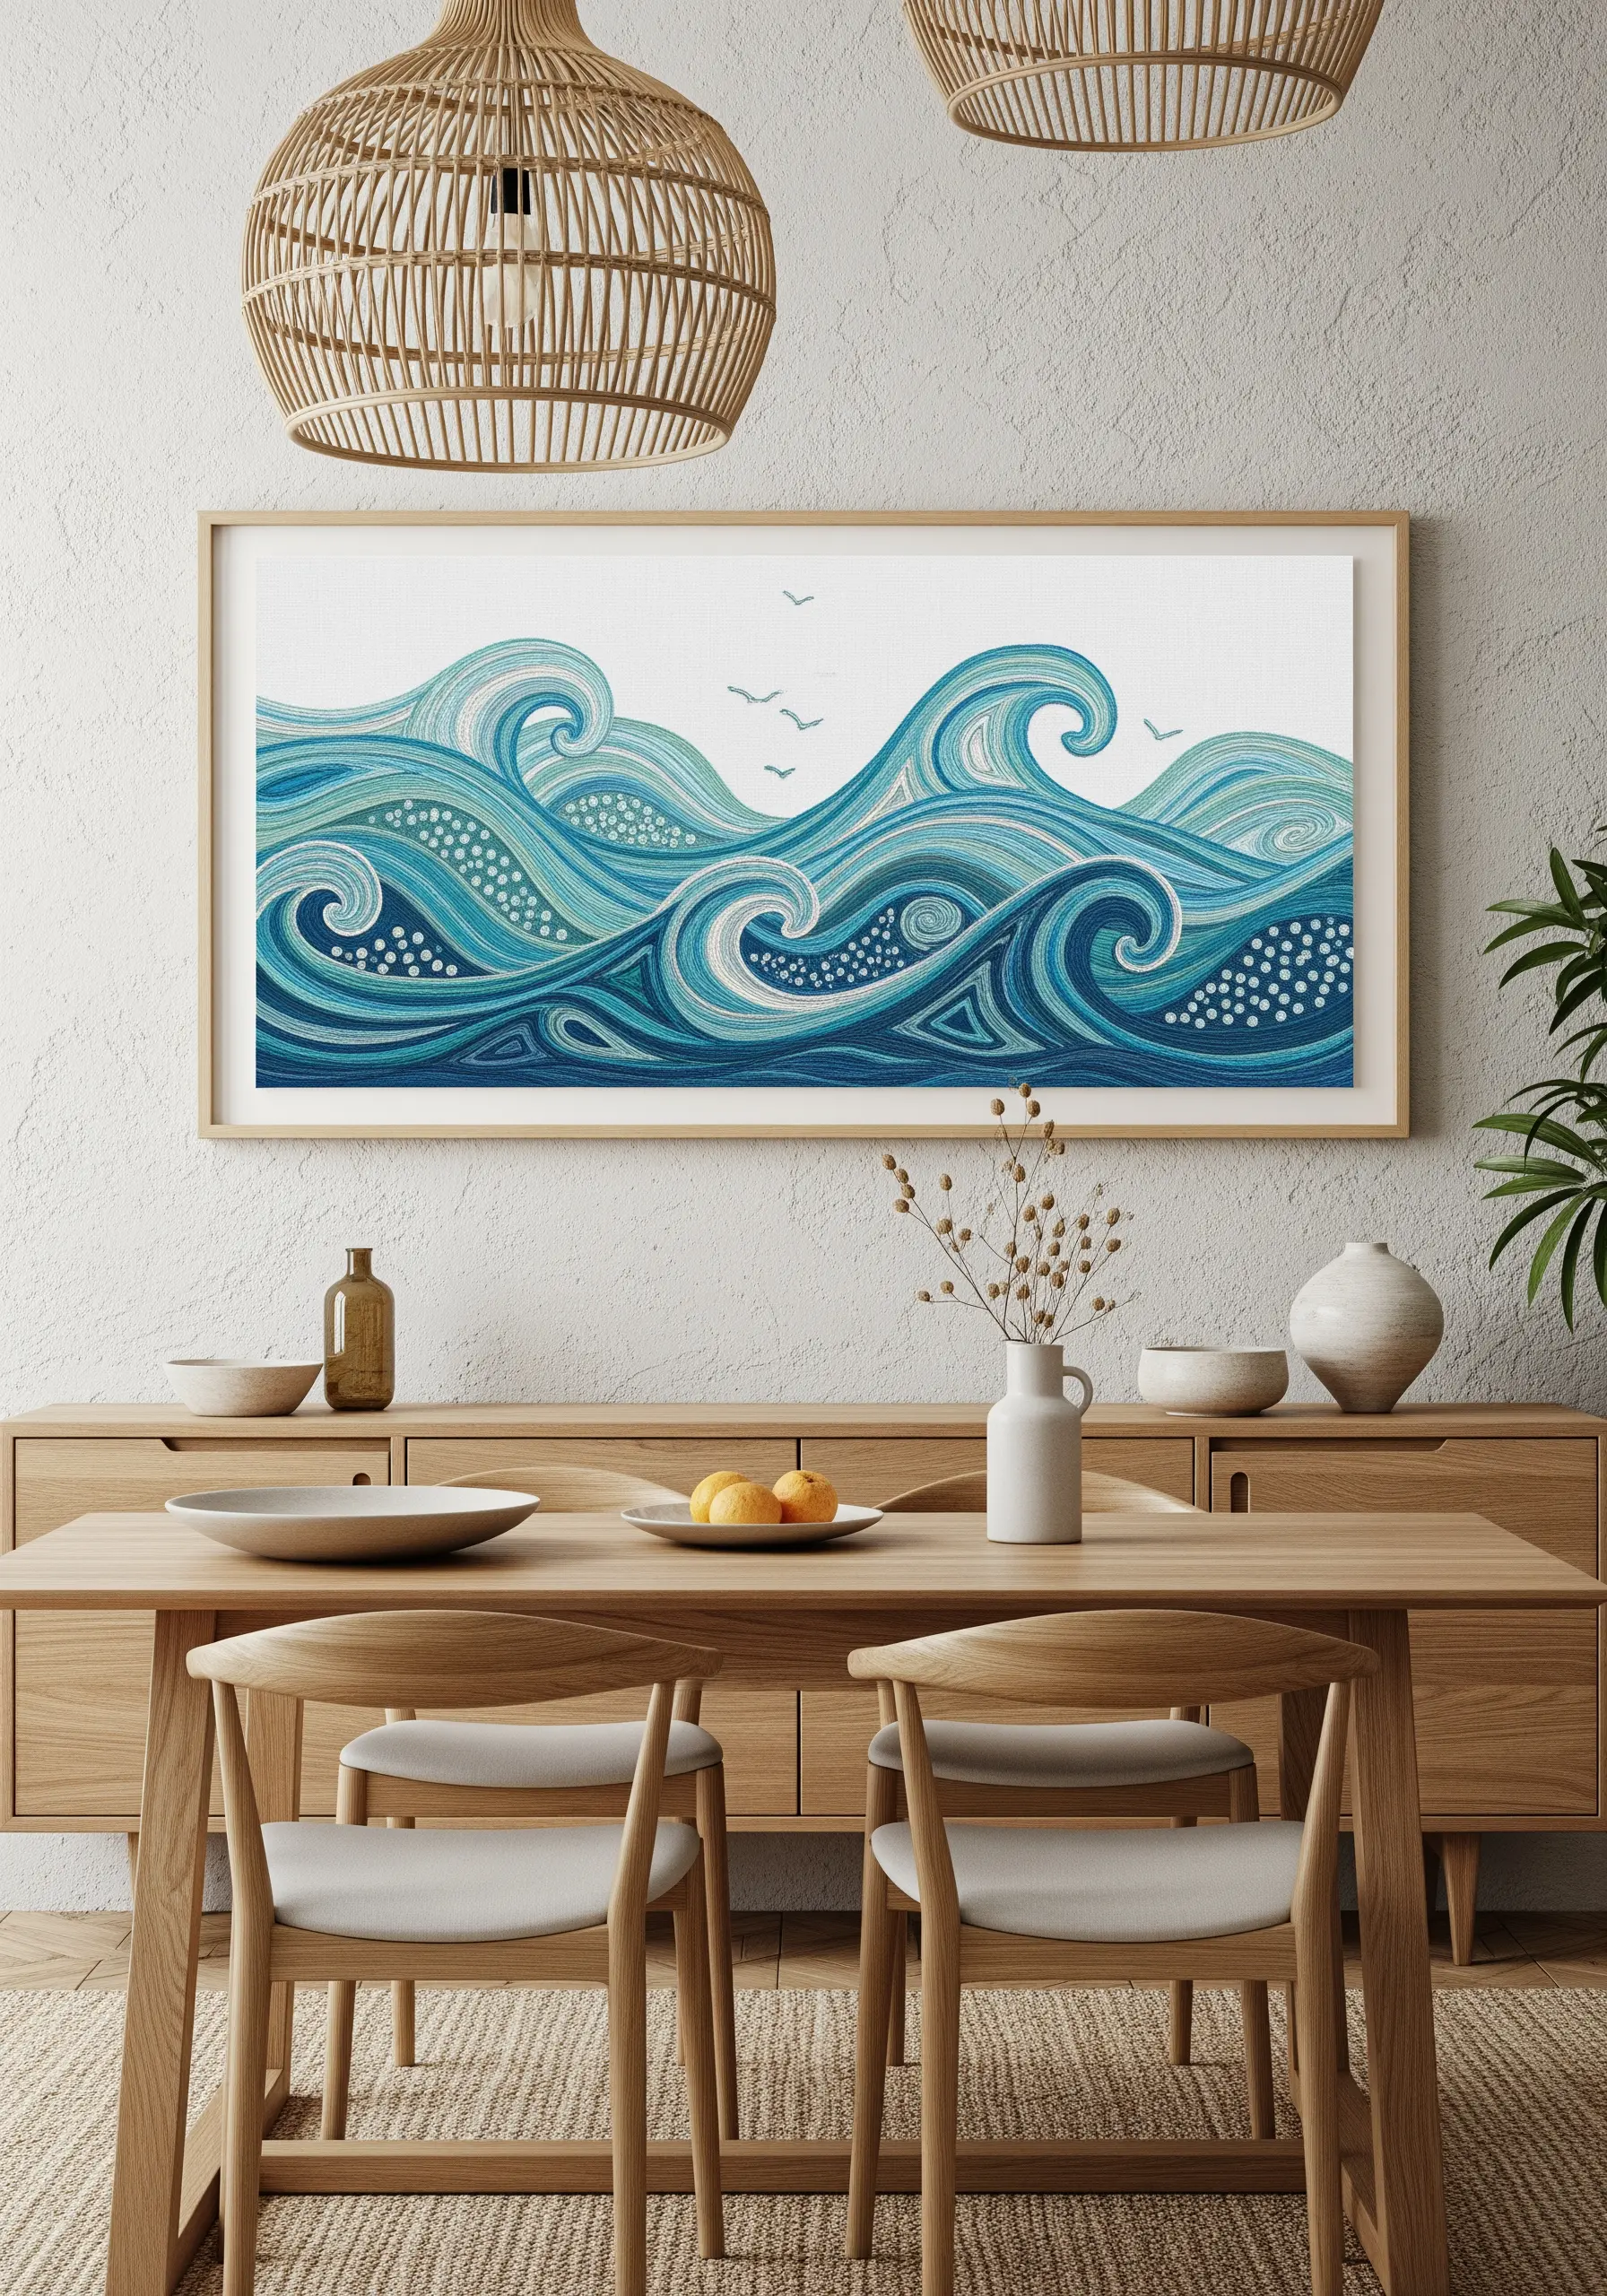
Capture the dynamic energy of the ocean by emphasizing the curves of the waves with your stitch choice.
Use a whipped backstitch or chain stitch to outline each swirl of water. These stitches create flowing, rope-like lines that guide the eye and enhance the sense of movement.
Incorporate several shades of blue and aqua, and scatter clusters of white French knots to represent sea foam, adding texture and a point of visual interest.
The combination of directional stitches and textural details makes the water feel alive.
Dive into more ocean-inspired hoop embroidery ideas for your next coastal project.
14. Define Petals with a Metallic Outline

For a modern, graphic floral like this lotus, the outline is just as important as the fill.
First, fill the petals with a smooth, shimmering satin stitch using a rayon or silk thread for extra luster.
Then, outline each petal with a fine, single-strand metallic gold thread using a sharp backstitch. This technique creates a clean, crisp edge that defines the shape and adds a touch of luxury.
The contrast between the soft fill and the hard metallic line is what gives the piece its striking, contemporary feel.
Explore more gold thread luxury wall art projects for a high-end finish.
15. Evoke Grace with Cascading Stitches
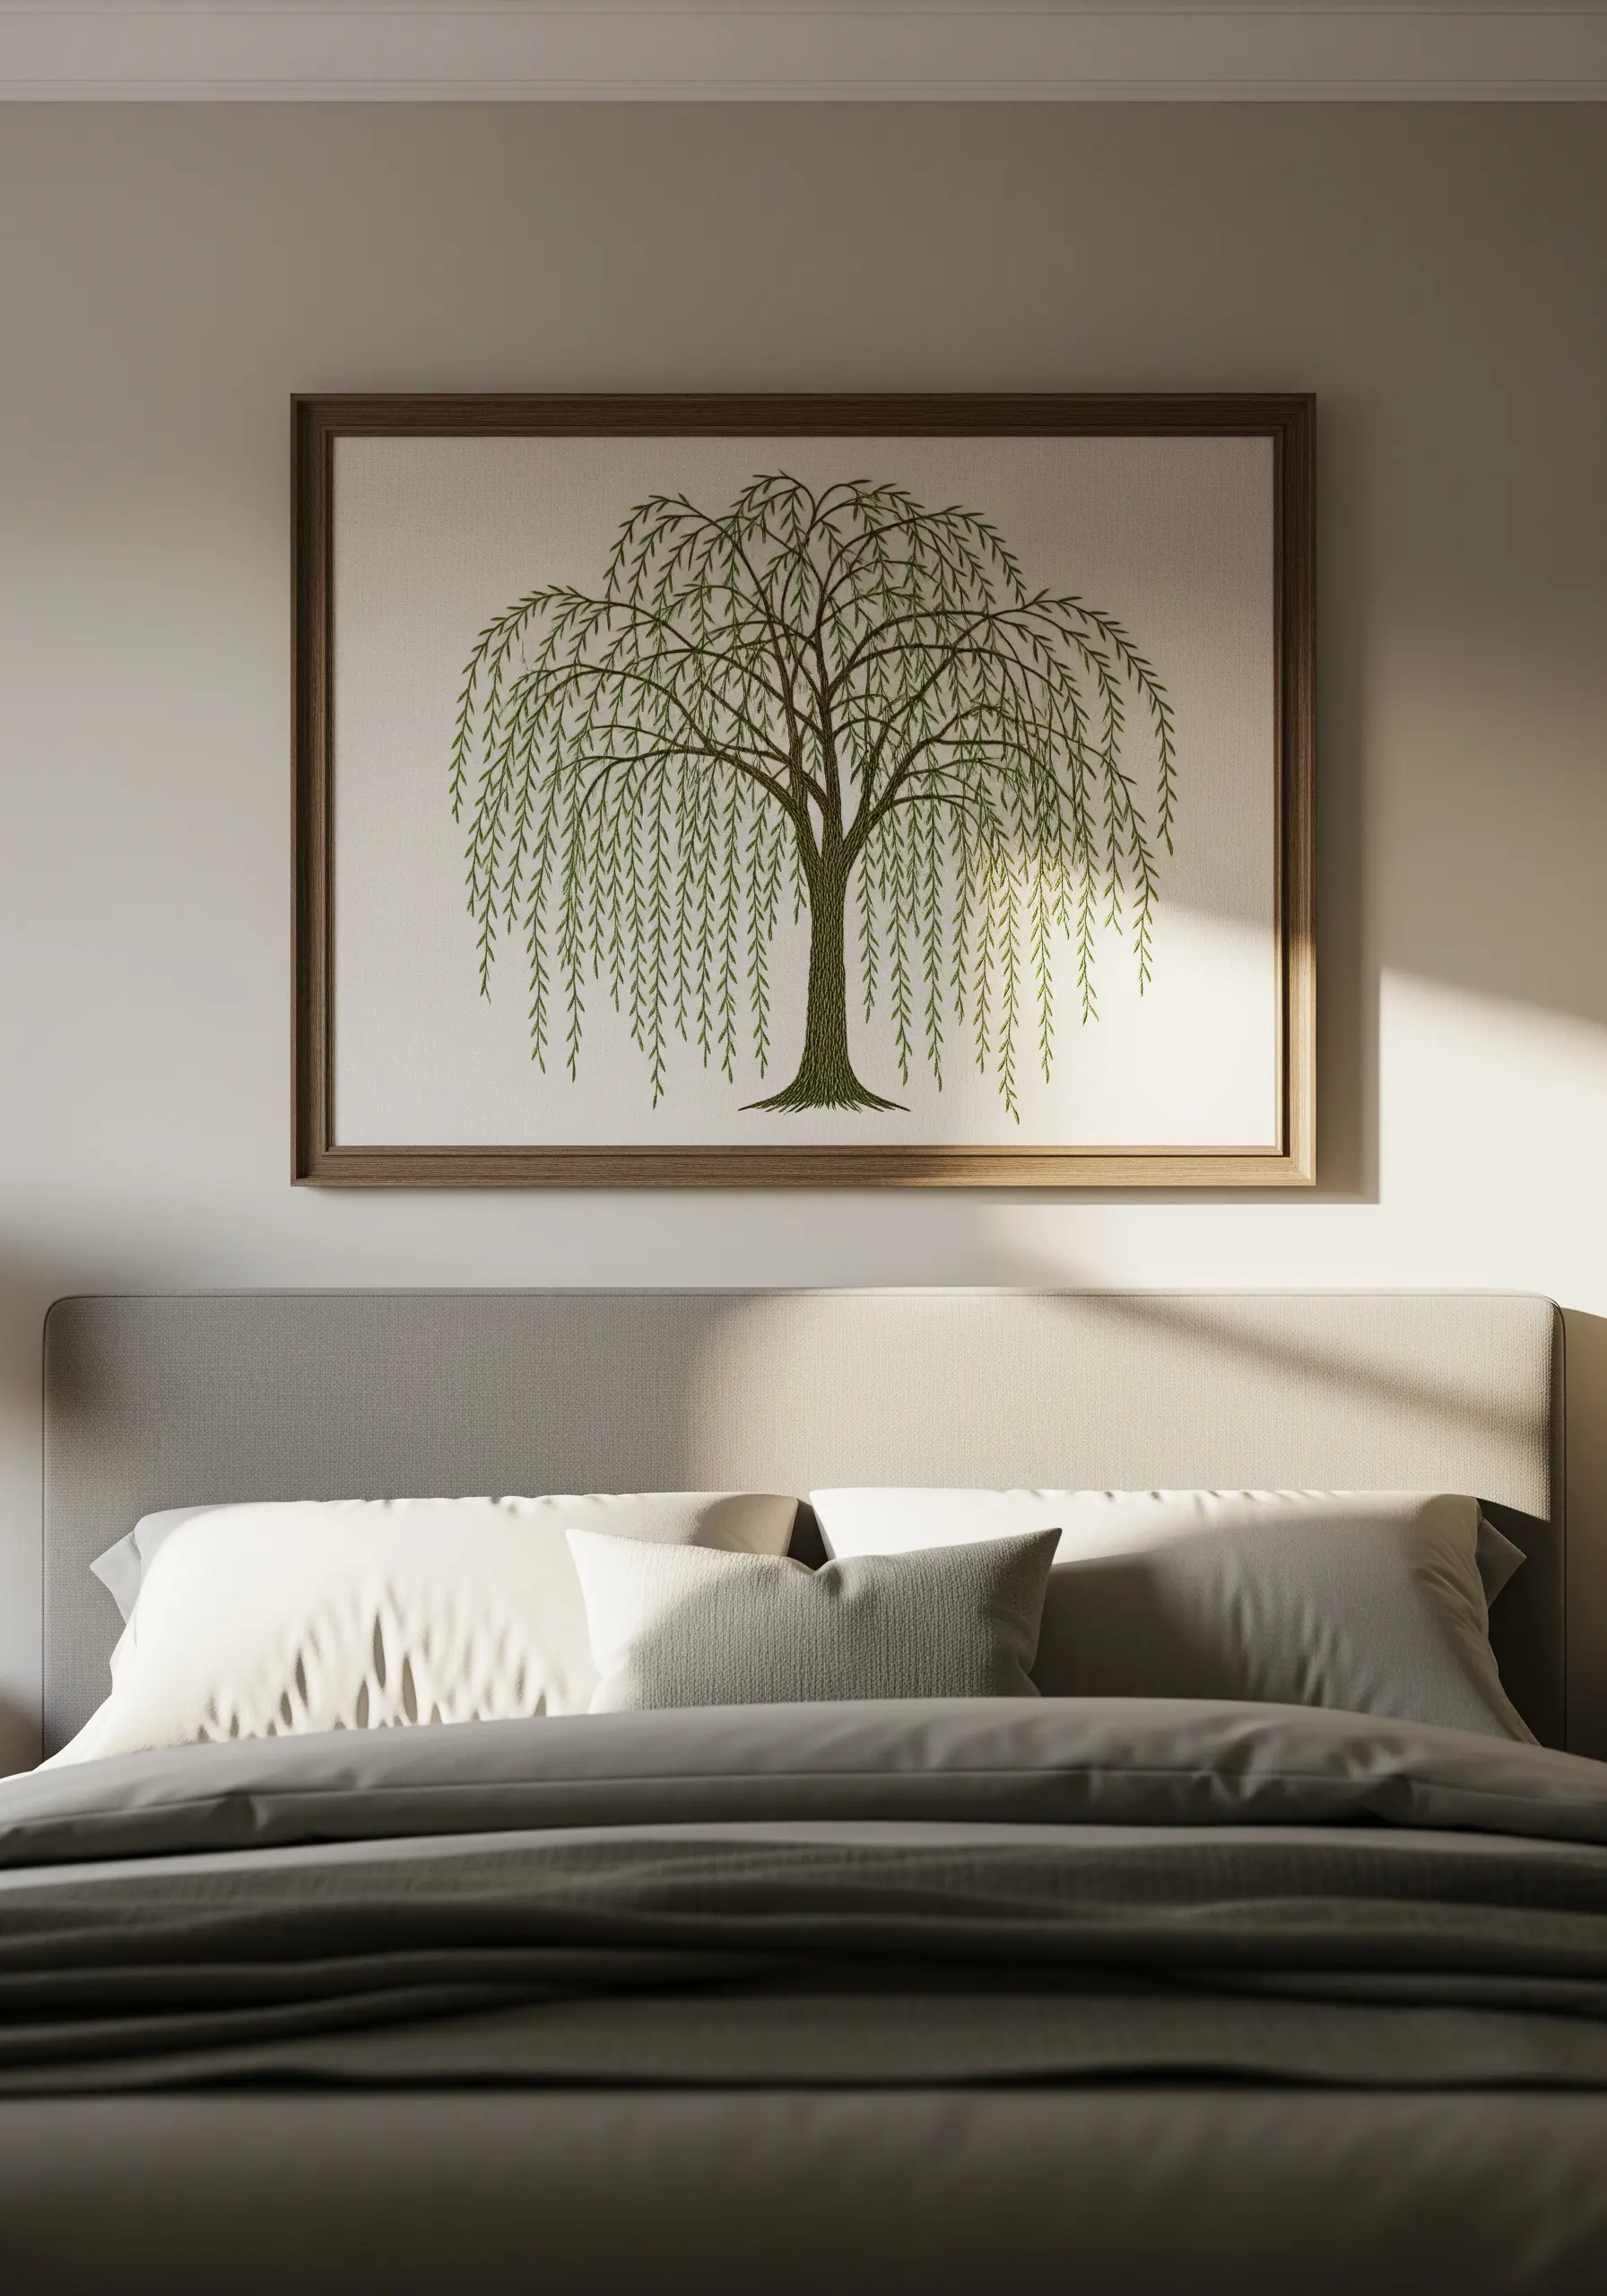
The essence of a weeping willow is its graceful, cascading foliage, which can be beautifully suggested with one simple stitch.
Use long, vertical straight stitches for the hanging leaves, allowing them to drape naturally. Don’t pull the thread too tight; a little looseness enhances the weeping effect.
Work with three to four shades of green, stitching them in random vertical lines to create depth and the illusion of light filtering through the branches.
This minimalist approach captures the tree’s spirit without needing to stitch every single leaf.
Master delicate leaf stitch techniques for all your botanical projects.
16. Add Fuzzy Dimension with Turkey Work
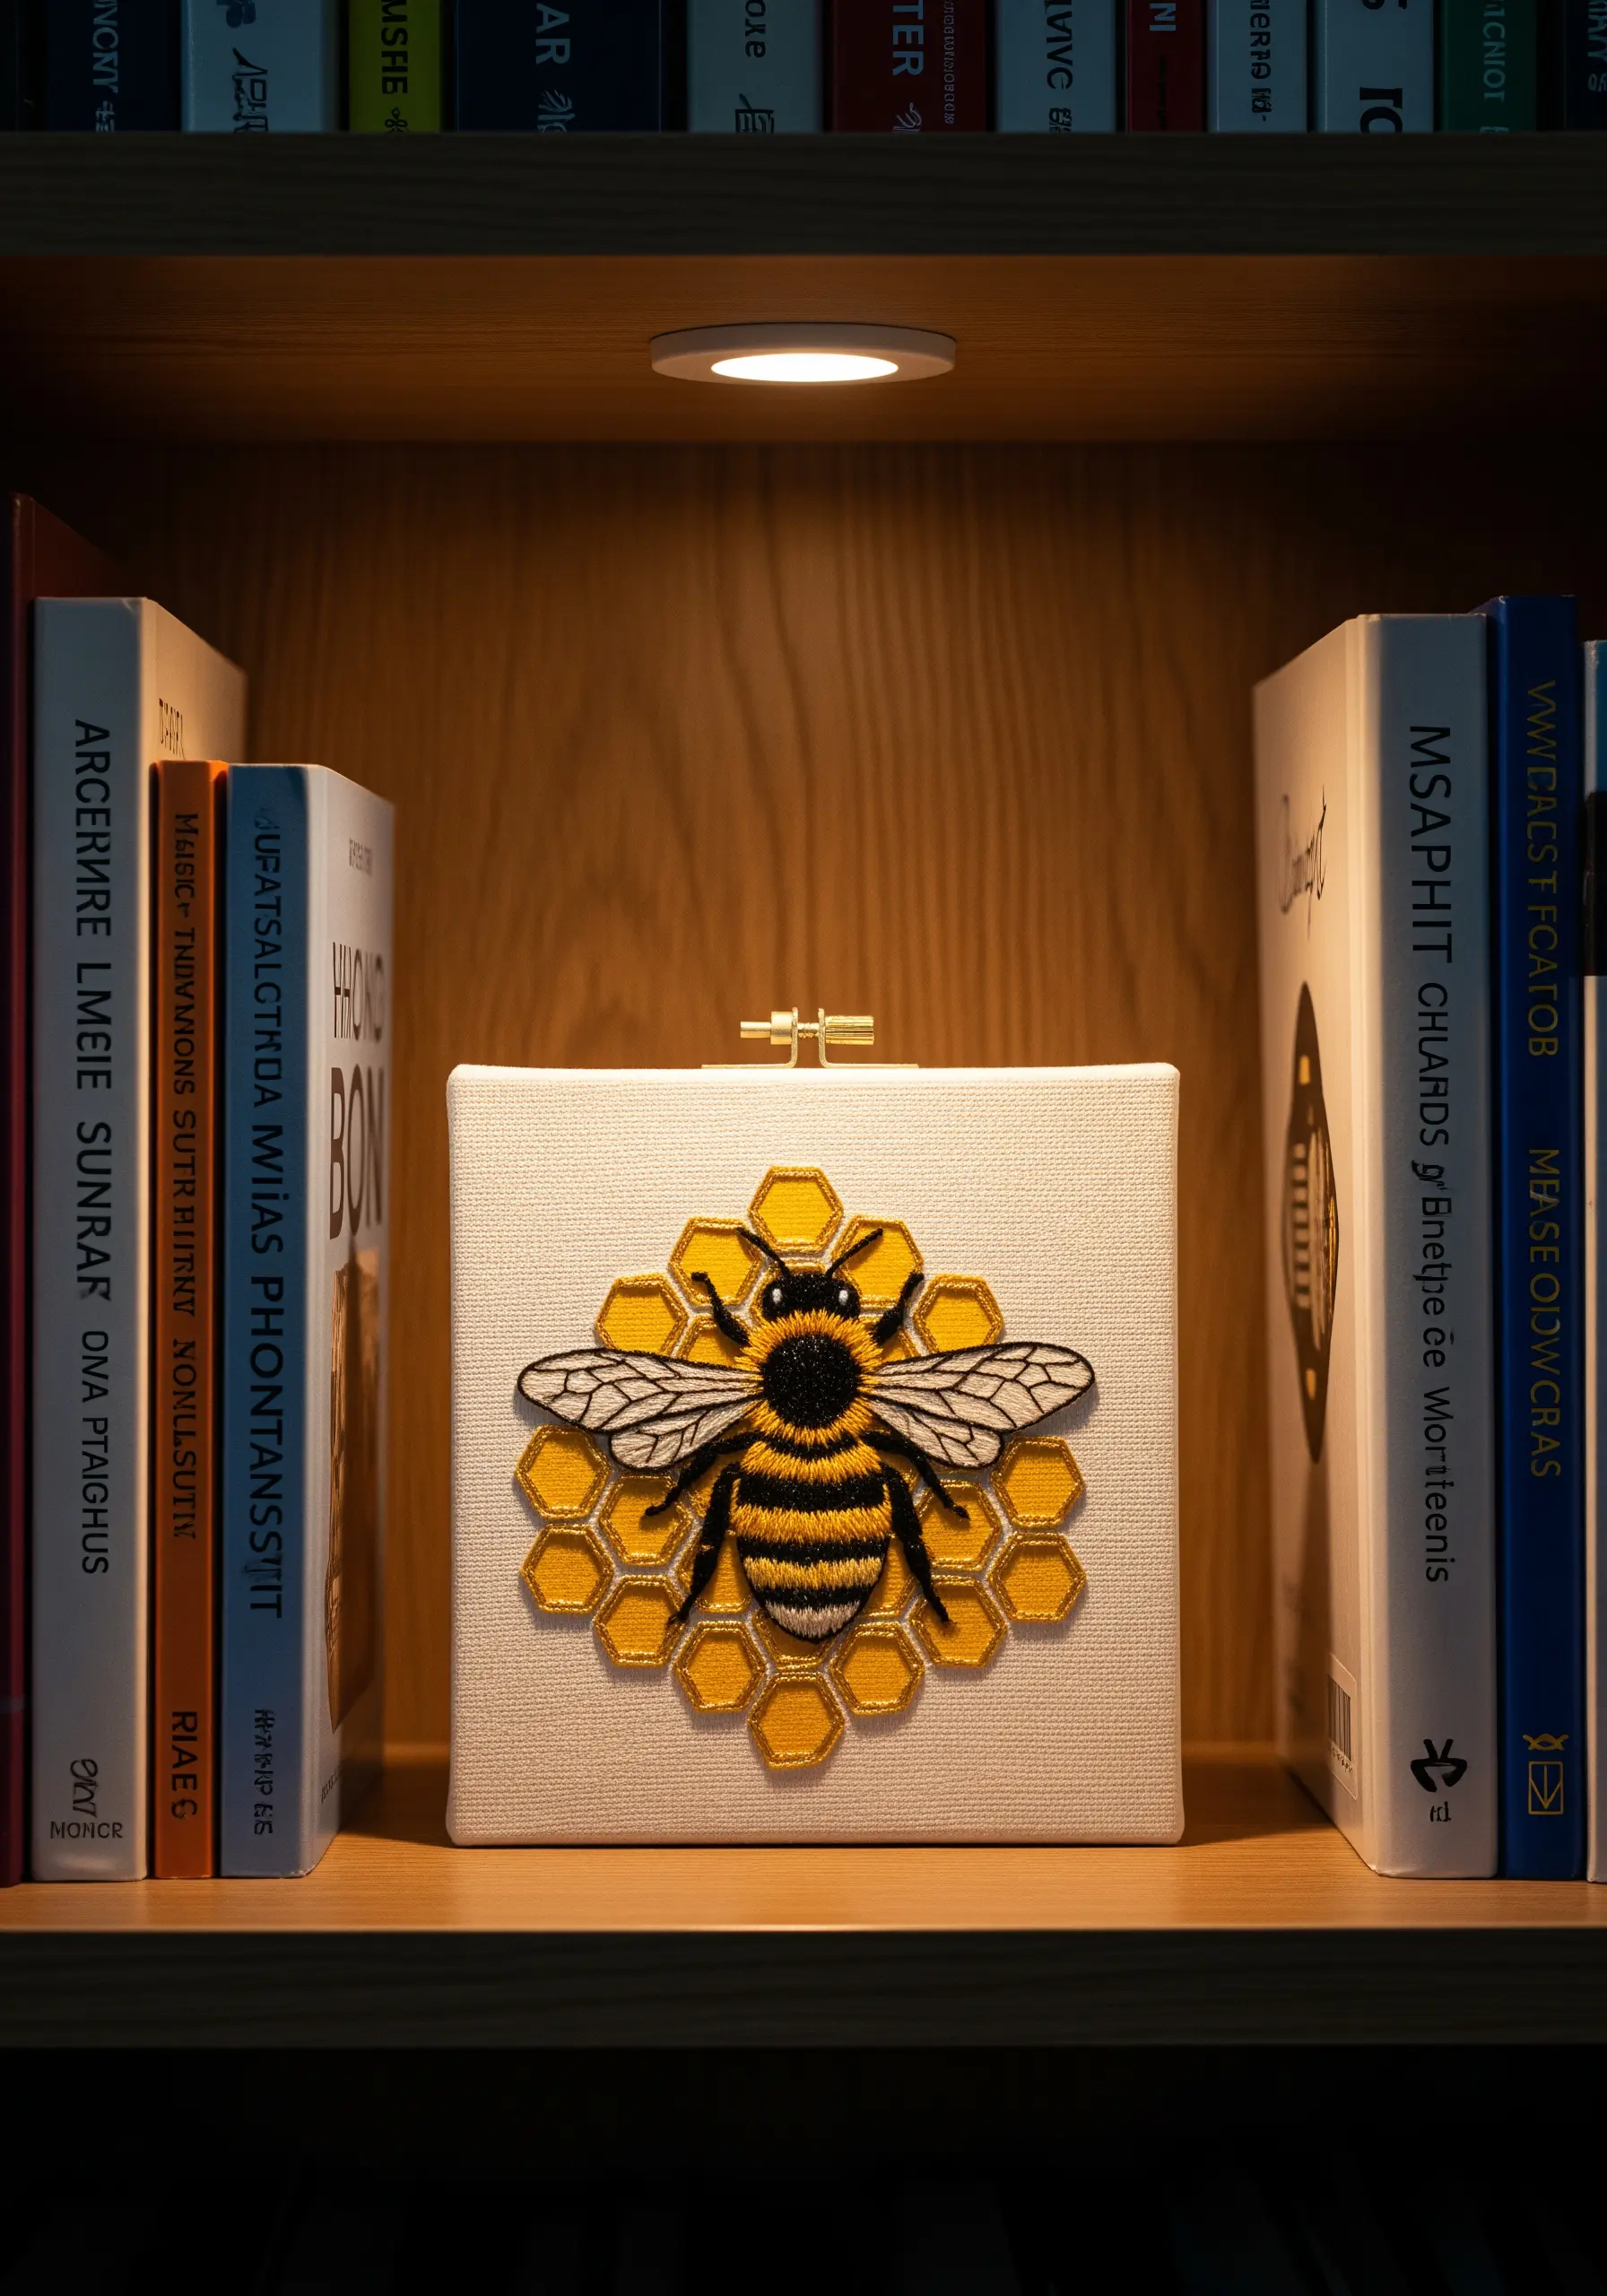
To make your embroidered bee feel truly lifelike, give its body a fuzzy, three-dimensional texture.
Use turkey work for the yellow and black stripes on the thorax. This looped stitch can be trimmed to your desired length, creating a soft, plush pile that mimics the bee’s natural fuzz.
Contrast this soft texture with a smooth satin stitch for the head and sheer organza appliqué for translucent wings, making the fuzzy body the star of the show.
Learn more creative ways to stitch natural textures and bring your subjects to life.
17. Master Leaf Shading with Color Blocking
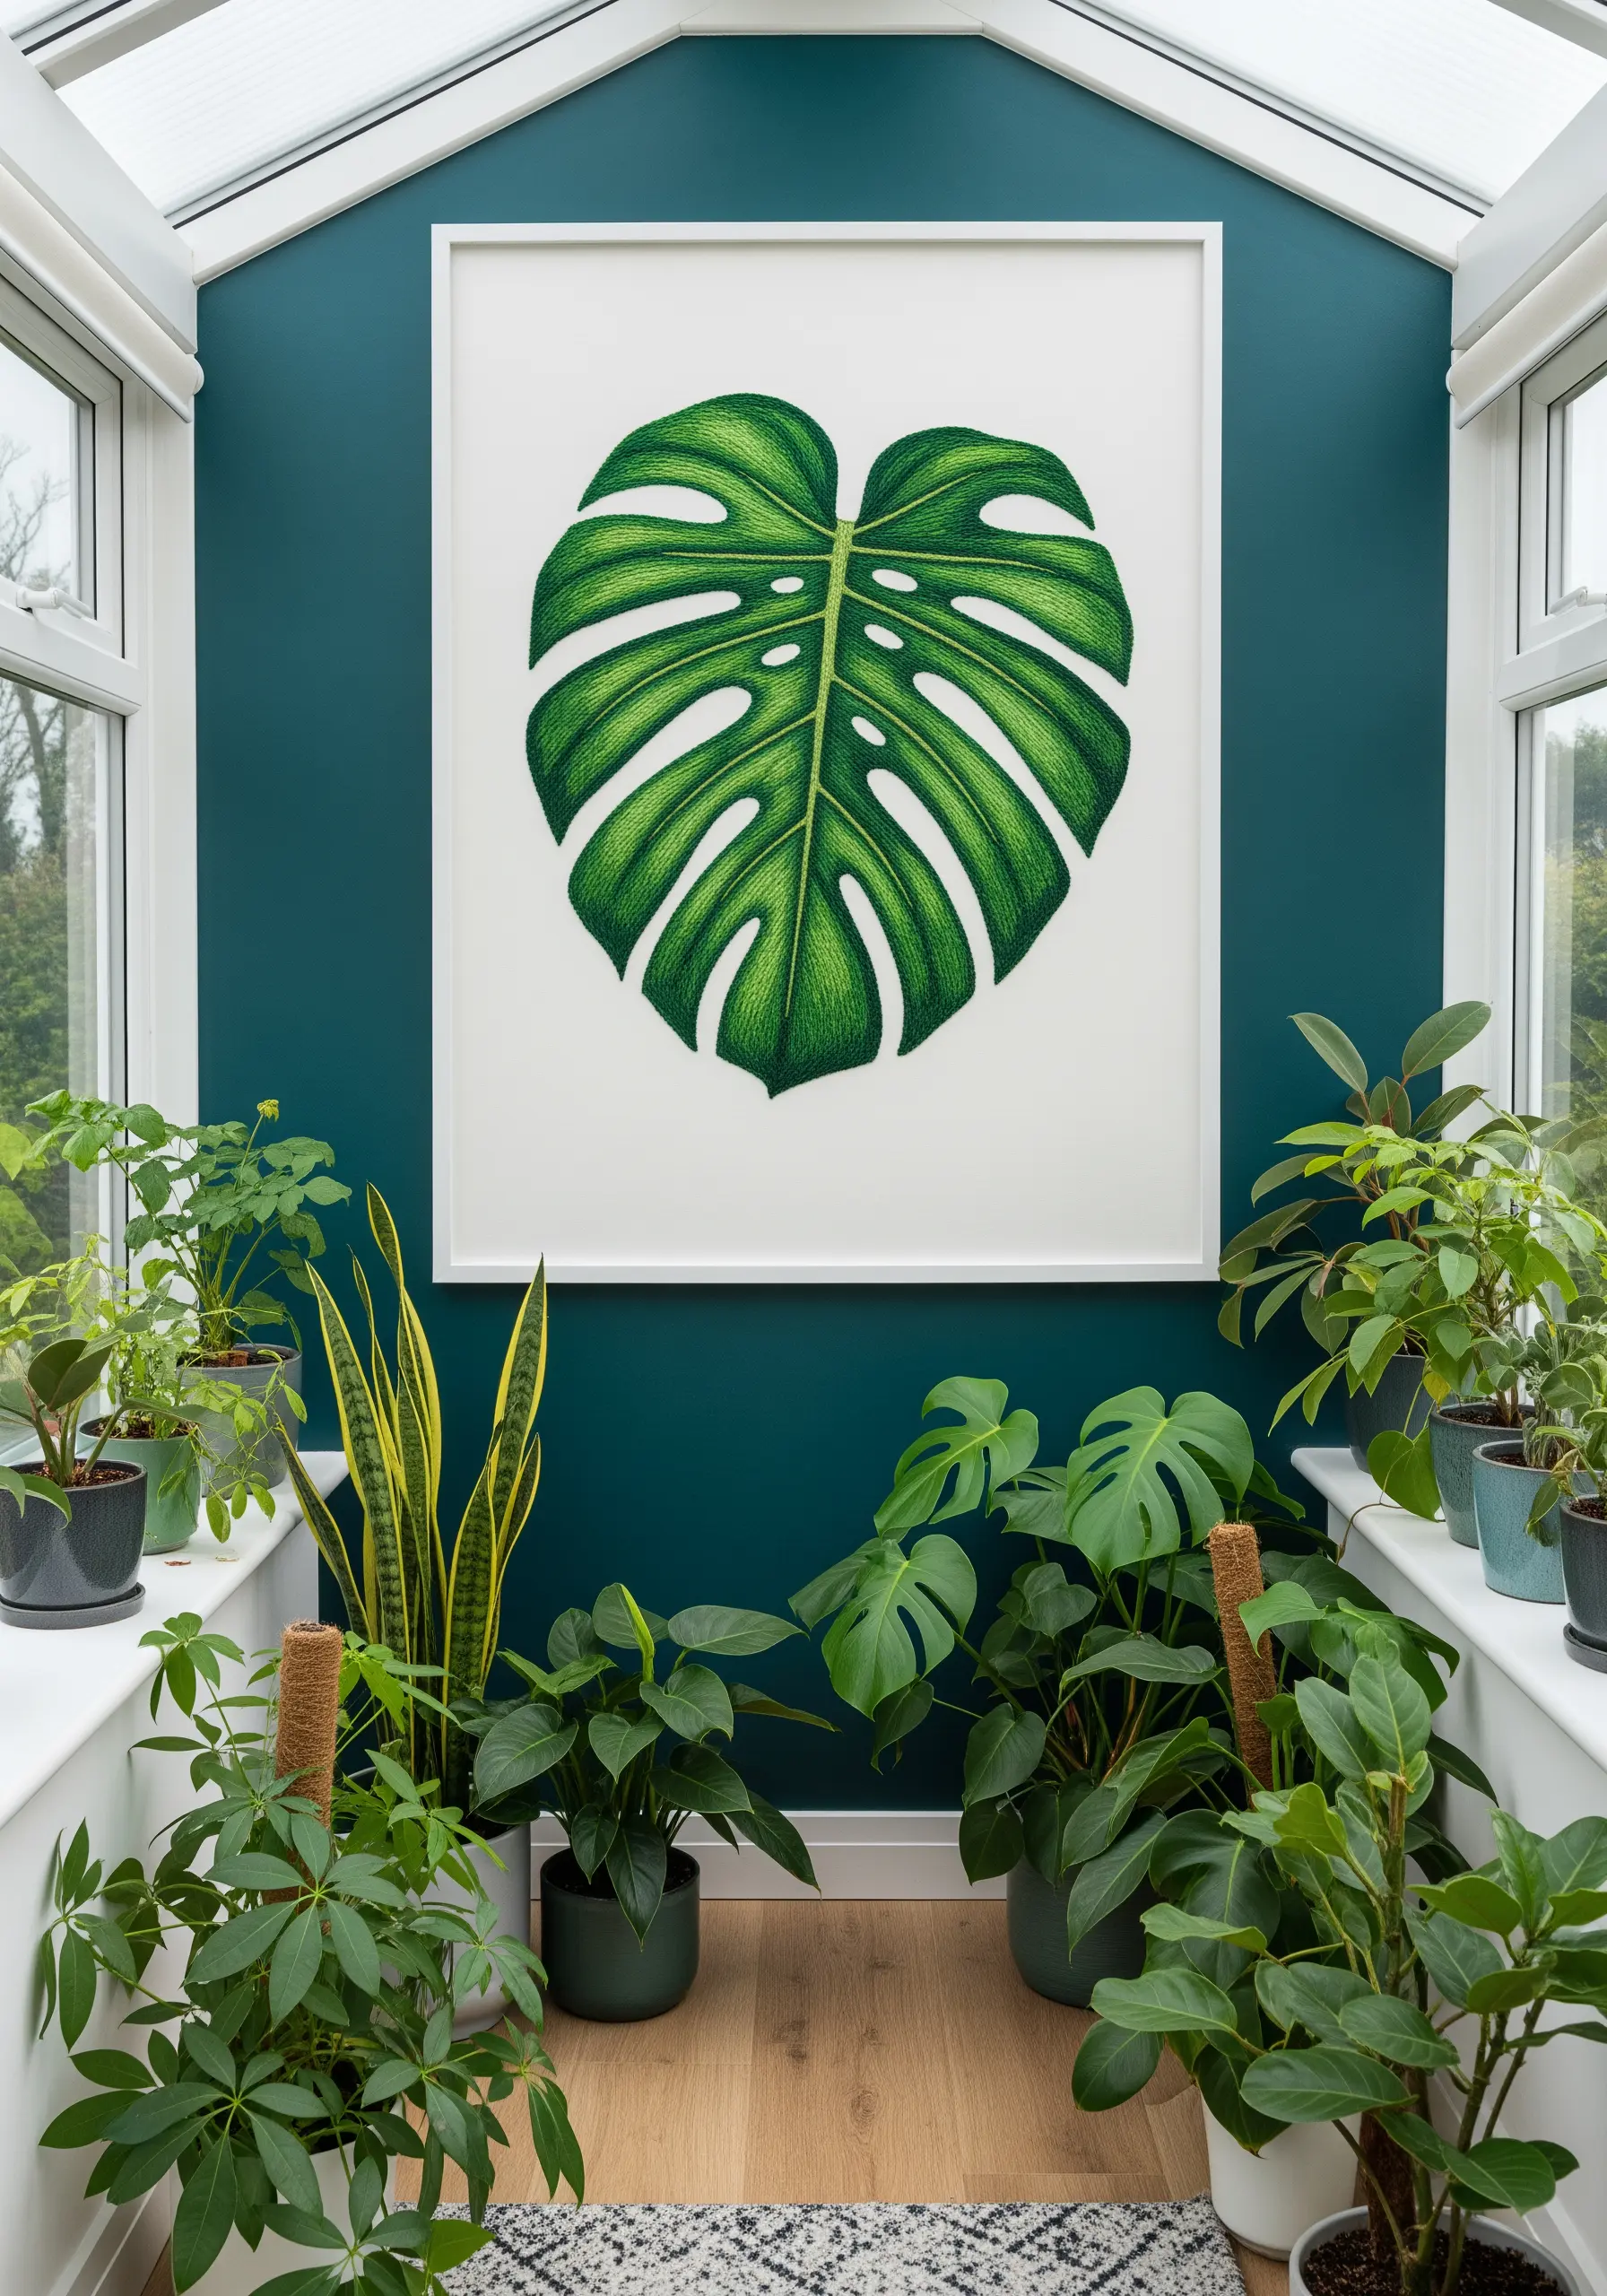
A large leaf like a Monstera is the perfect canvas for practicing realistic color blending with long-and-short stitch.
Before you start, lightly sketch out the areas of light, mid-tone, and shadow on your fabric.
Work one color section at a time, using at least three different shades of green to create smooth, believable gradients.
Ensure your stitches follow the natural direction of the leaf’s veins. This small detail will make your final piece incredibly dynamic and lifelike.
Explore more leaf shape ideas for embroidering realistic foliage for your next project.
18. Create an Ethereal, Foggy Forest

The secret to stitching an atmospheric, misty forest is embracing negative space.
Use sparse, vertical straight stitches in muted tones of grey, green, and brown for the tree trunks. The fabric showing through becomes the fog, creating an ethereal, hazy effect.
Add a few denser trees in the foreground with darker thread to establish depth and perspective.
This technique is a beautiful exercise in minimalism, proving that what you choose *not* to stitch is as important as what you do.
Bring the outdoors in with more stunning natural texture embroidery patterns.
19. Stitch Organic Forms with Concentric Lines

Mimic the natural, layered beauty of agate stones by focusing on concentric, organic shapes.
Use a simple backstitch or stem stitch to create the rings, varying the colors to build up the layers. A variegated thread can do this work for you, creating subtle shifts in tone automatically.
Alternatively, couch thicker yarn or multiple strands of floss onto the fabric to create bold, raised lines that add a powerful textural element.
Stitching on a black background makes the earthy and neutral tones stand out, creating a dramatic focal point.
Turn simple lines into art with these abstract thread embroidery ideas.
20. Define Feathers with Stitch Direction
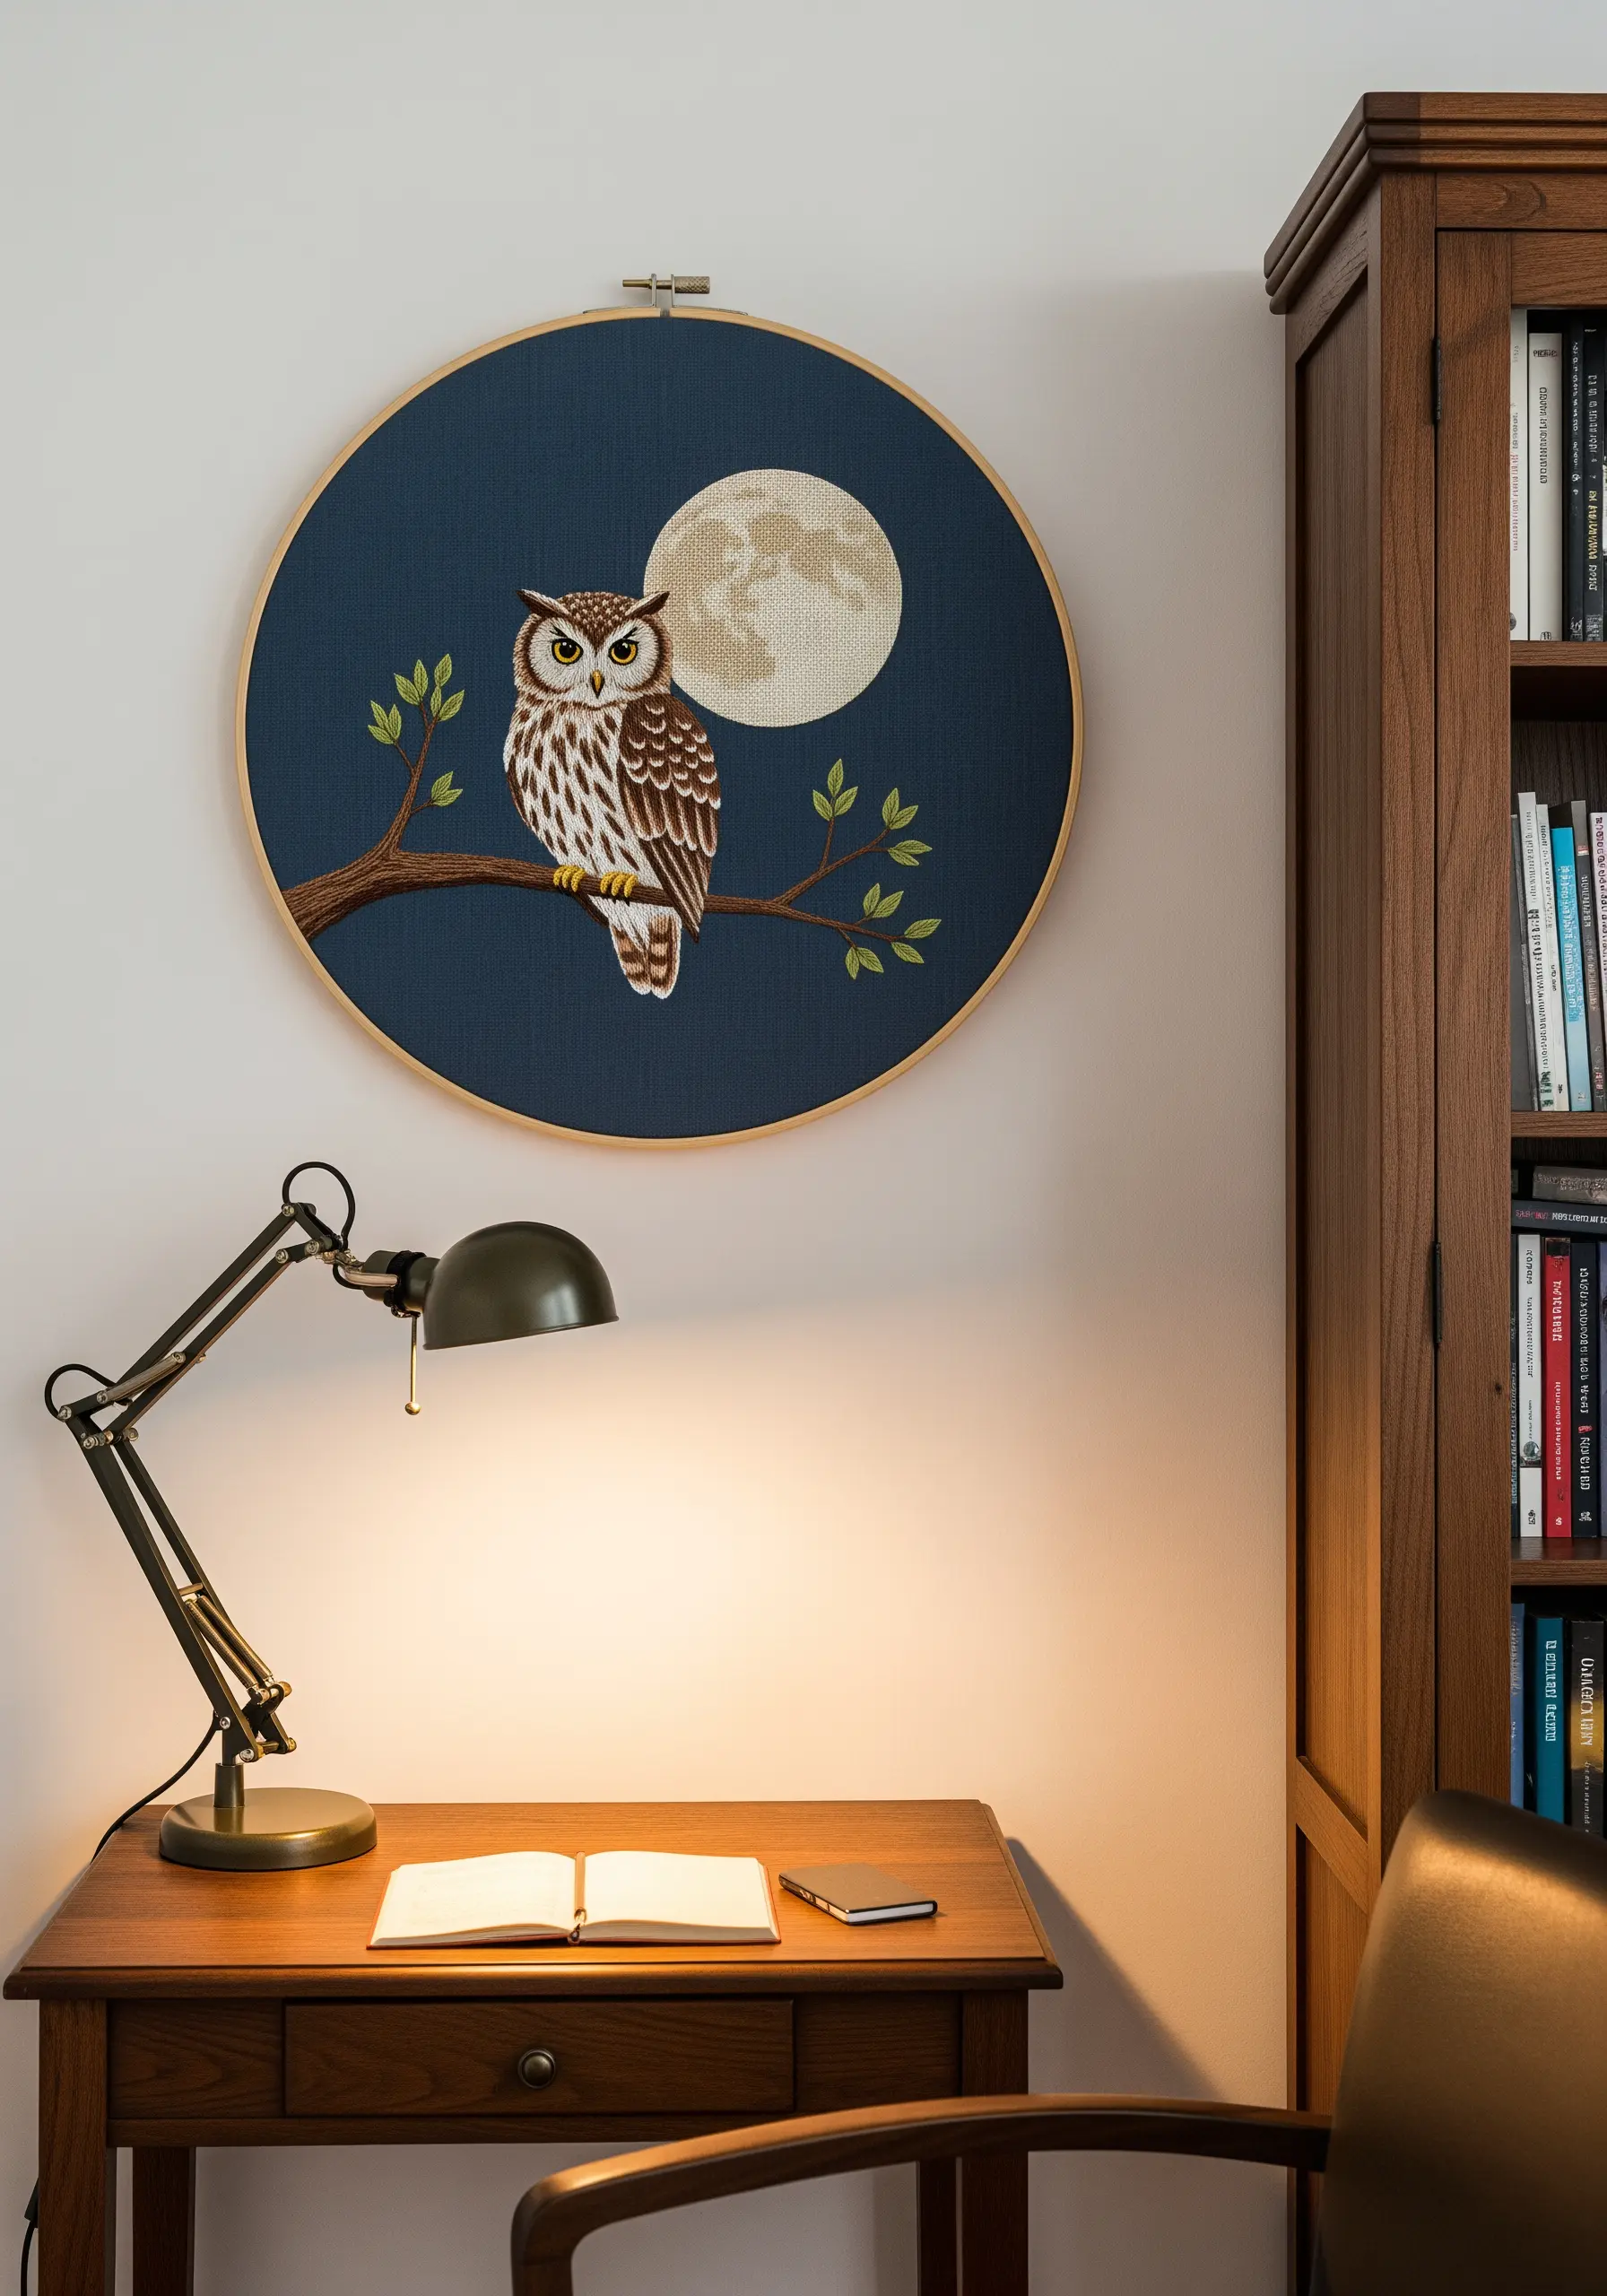
When embroidering a detailed bird like an owl, the direction of your satin stitches is crucial for creating definition.
Instead of filling the entire body with stitches going in one direction, map out the different feather groups—wings, breast, face—and change your stitch angle for each section.
This technique creates subtle shadows and highlights that define the owl’s form, making it look three-dimensional without needing dozens of colors.
For the moon, a field of simple seed stitches provides a gentle, textured backdrop that doesn’t compete with the detailed subject.
These stunning owl embroidery patterns will inspire your next nocturnal creation.
21. Emphasize Form with Minimalist Line Art
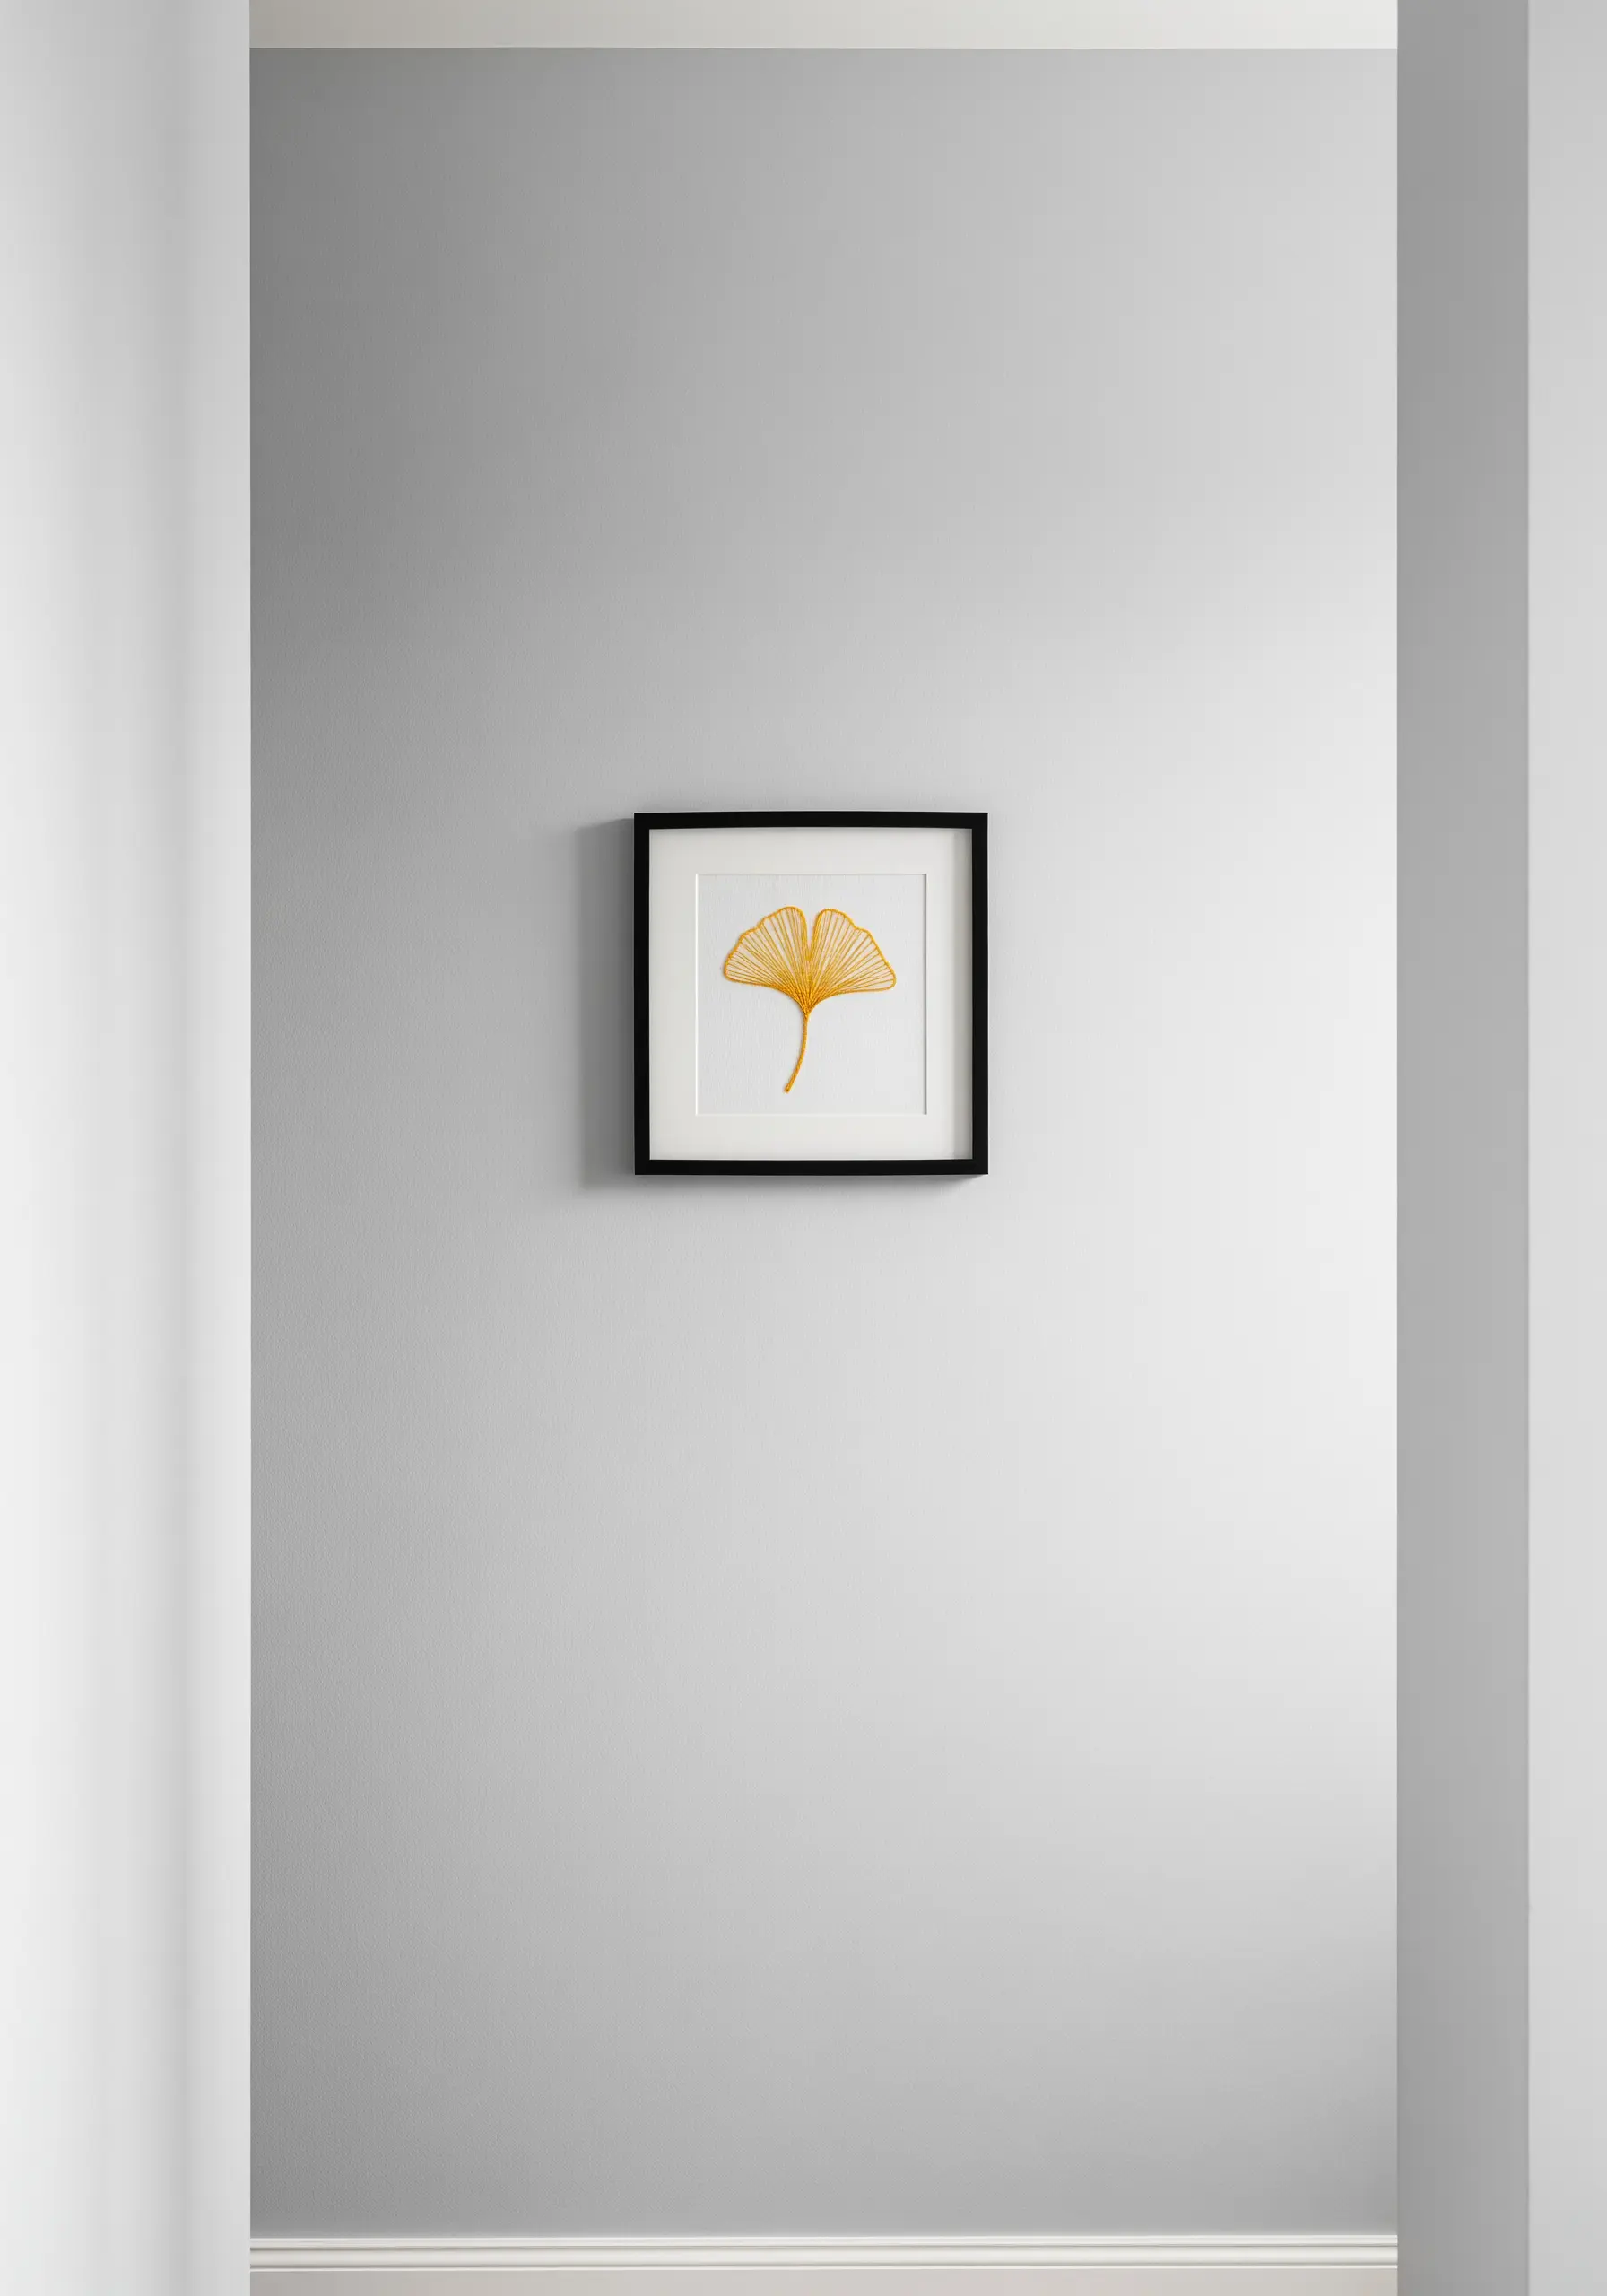
A single, elegant ginkgo leaf demonstrates the power of minimalism in embroidery.
To achieve this clean, graphic look, transfer a simple line drawing onto your fabric. Then, use a smooth, continuous stitch like a whipped backstitch or stem stitch to trace the lines.
Using a bold, high-contrast color—like marigold yellow on a crisp white background—ensures the iconic shape is the sole focus.
This approach transforms a simple leaf into a piece of modern art, perfect for a calm and uncluttered space.
Try more minimalist line art nature embroidery for a contemporary feel.
22. Build Intricate Coral with Knotted Stitches
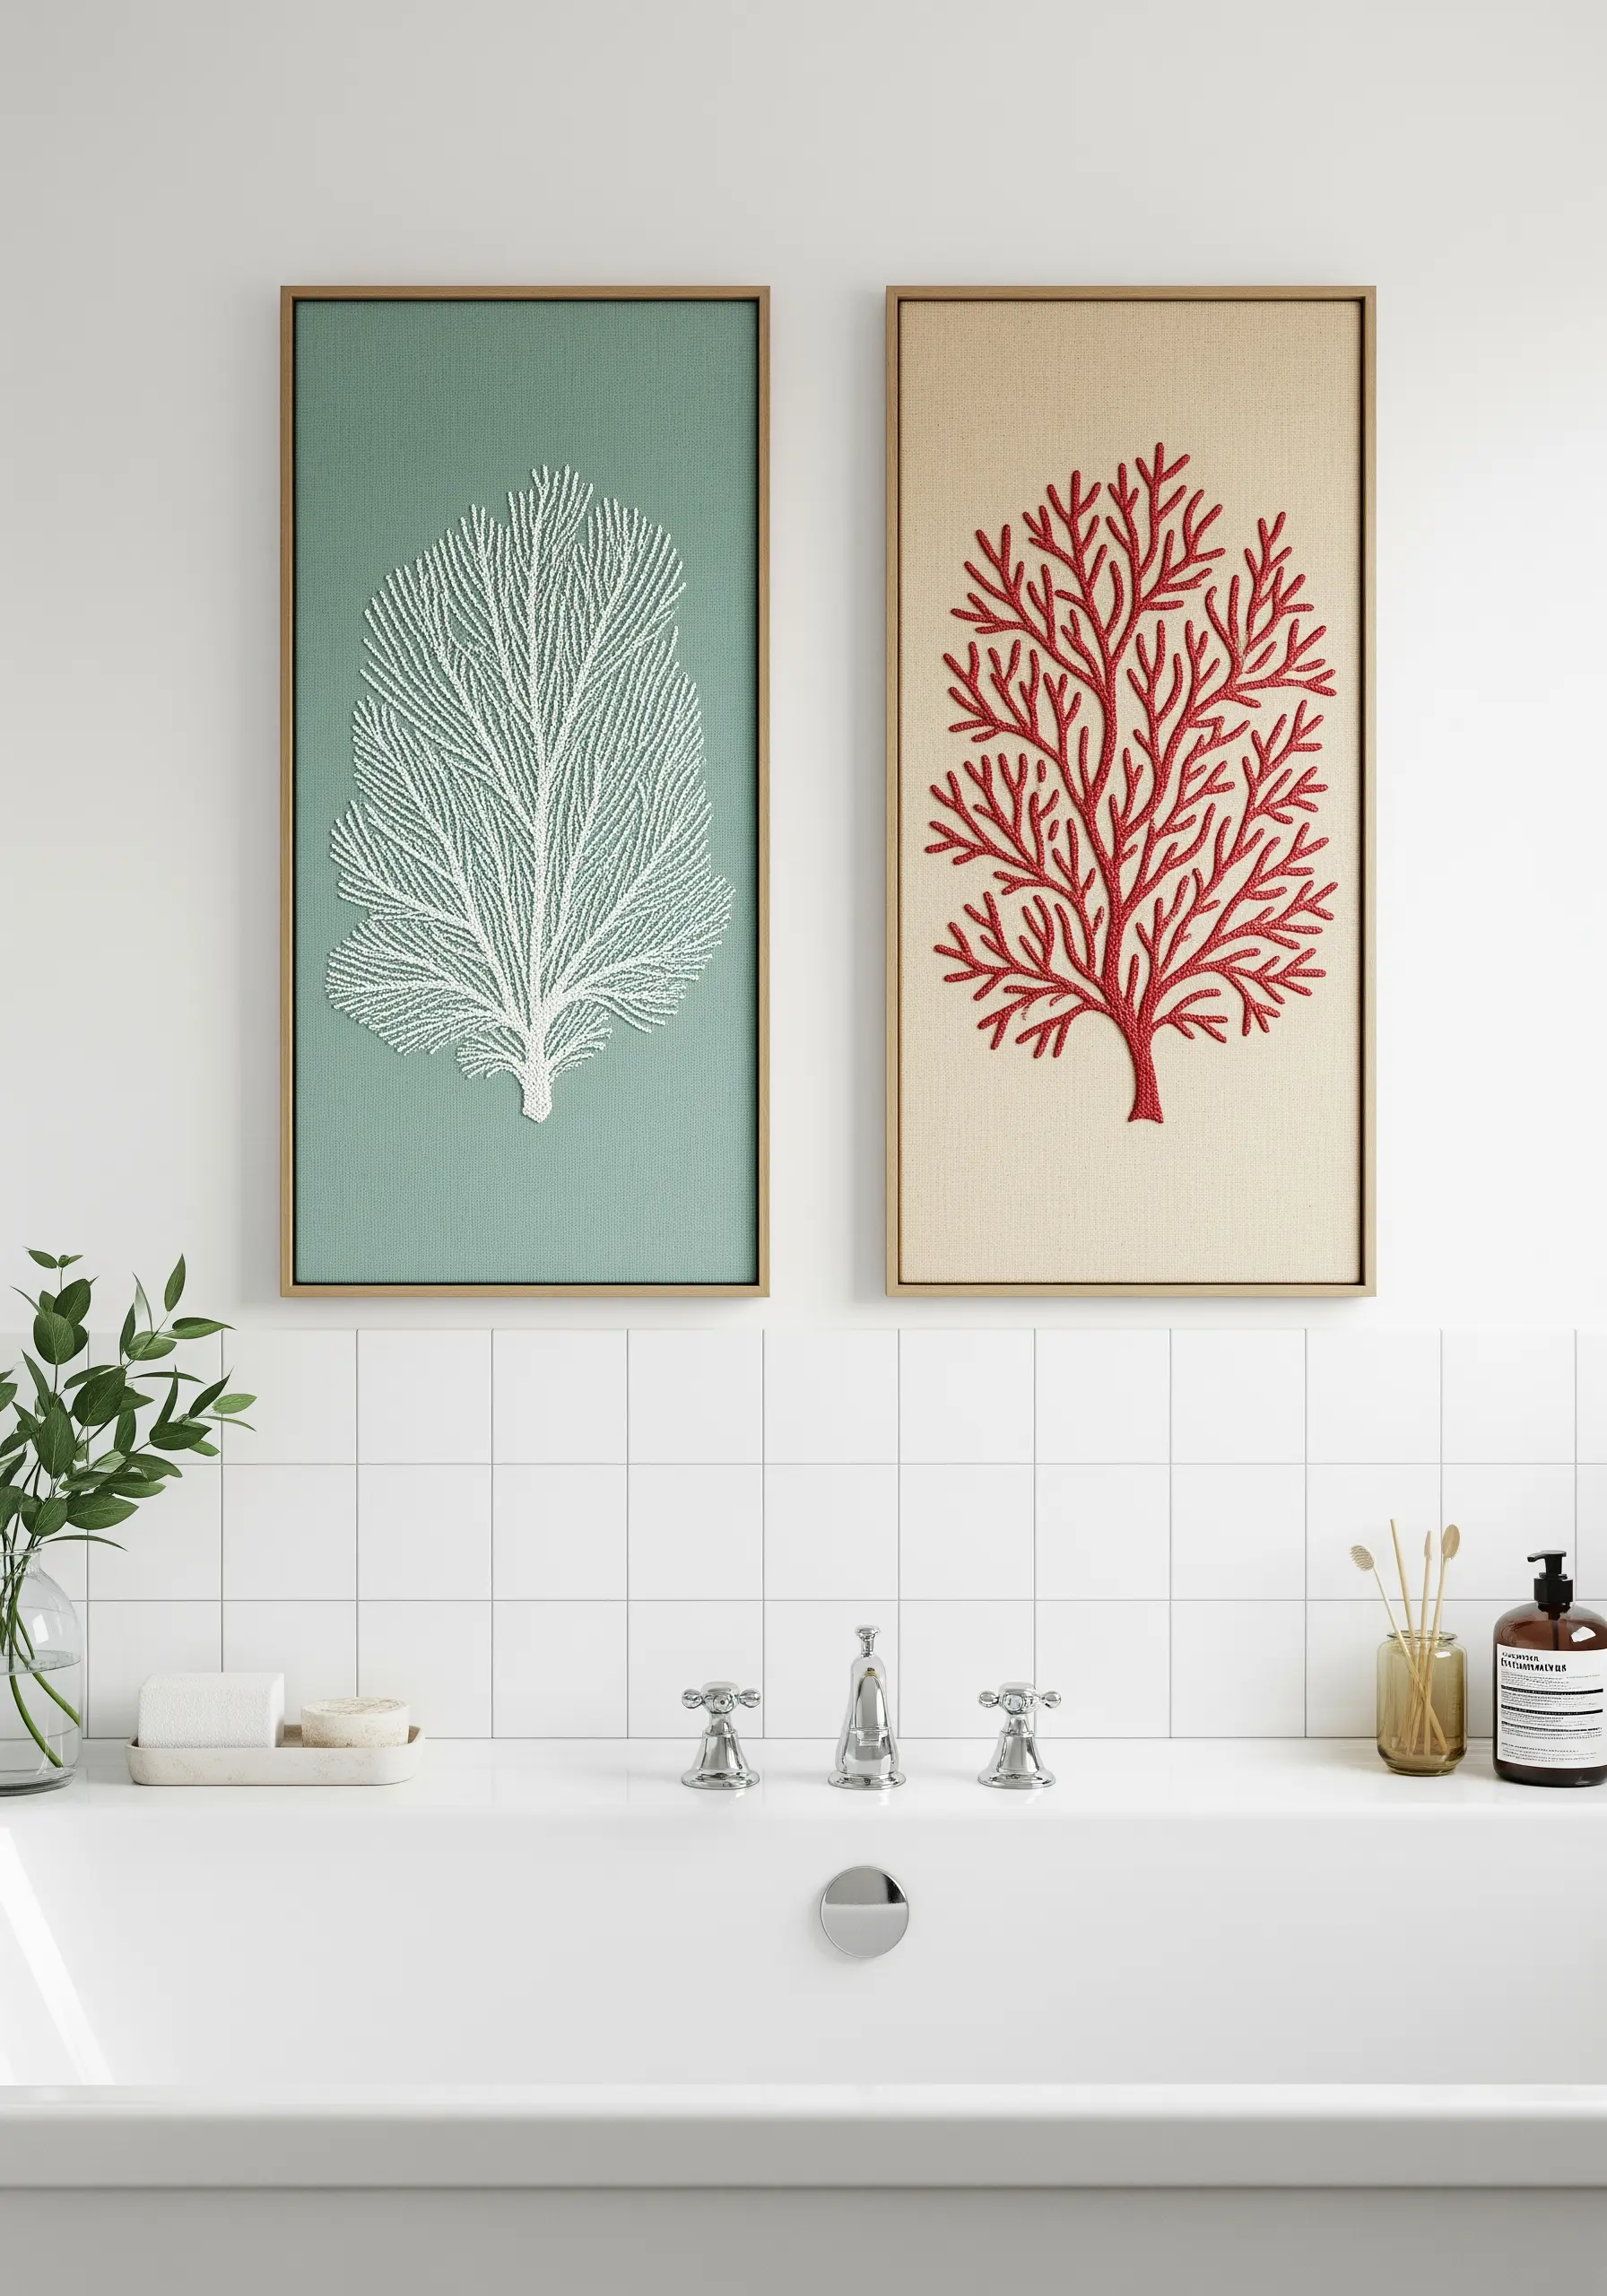
Create the complex, organic texture of sea fan coral using one of the most satisfying stitches: the French knot.
Densely pack French knots, varying the number of wraps to slightly alter their size, to form the intricate branches.
Working in a monochromatic color scheme—all white on a seafoam green background, or all red on a neutral linen—transforms the natural shape into a bold, contemporary art piece.
This repetitive, textural stitch work is both meditative to create and stunning to display.
These sea animal embroidery ideas are perfect for a coastal-inspired bathroom.
23. Create Plush Catkins with Padded Satin Stitch
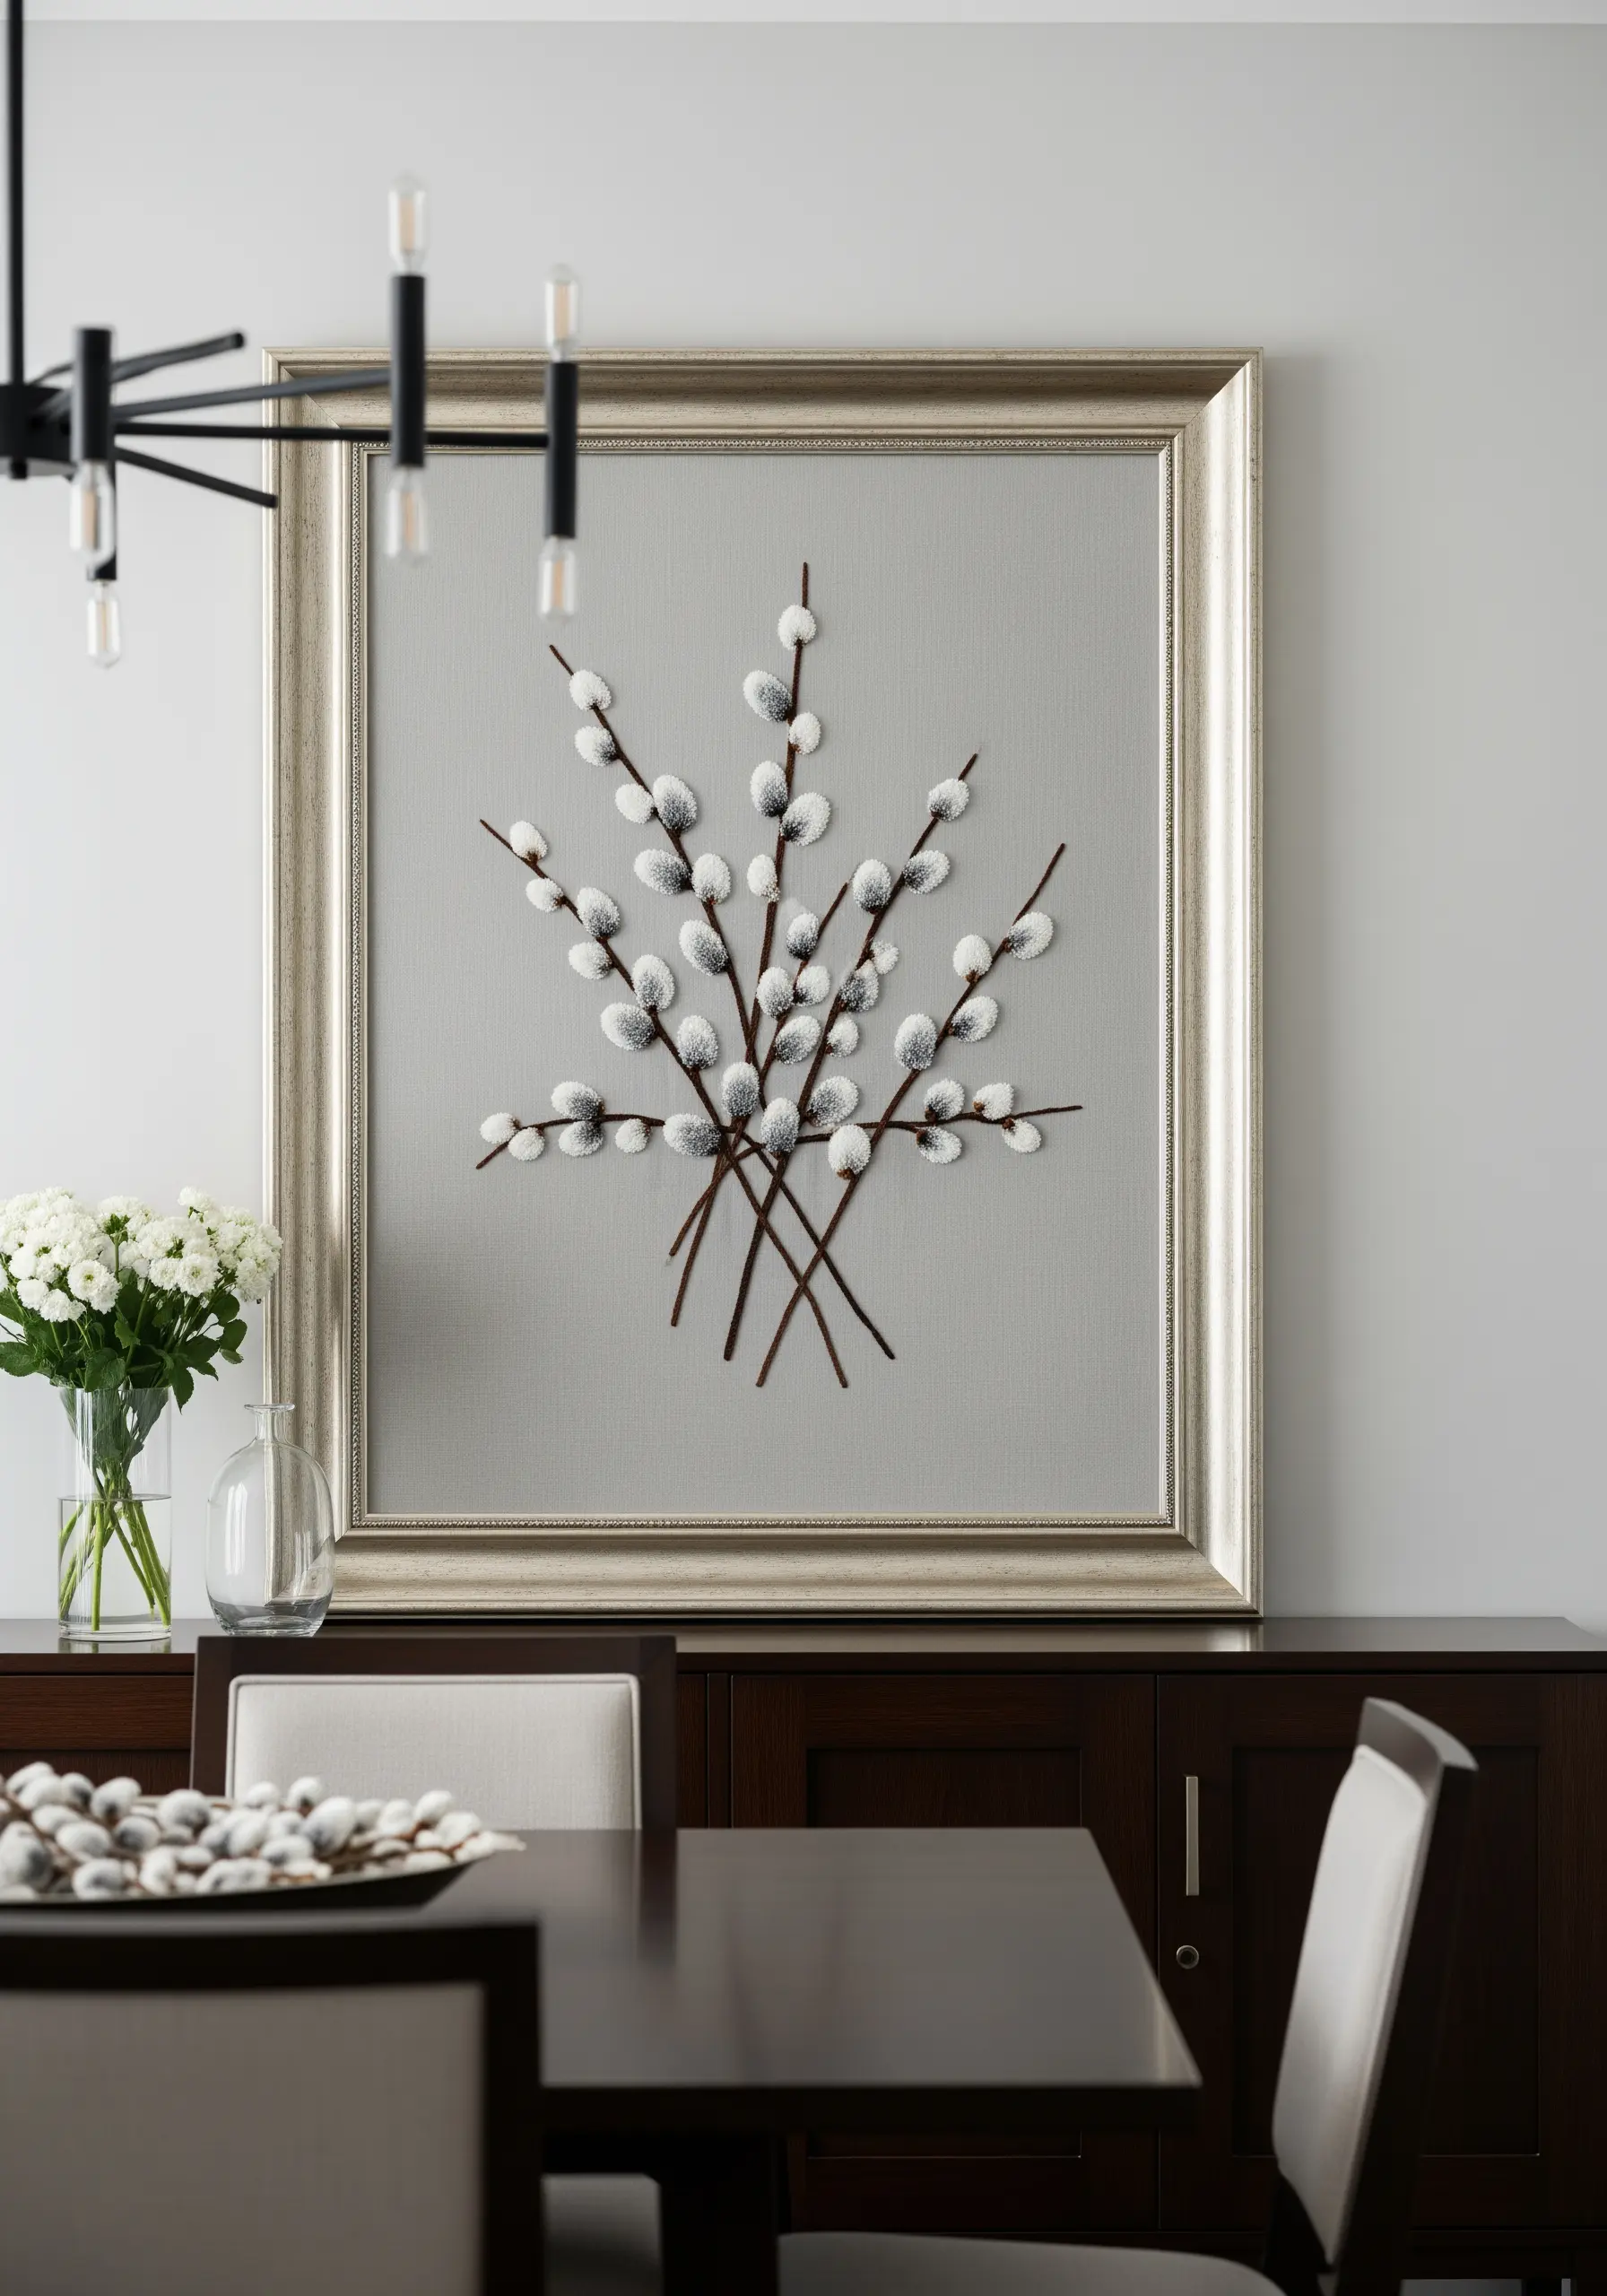
To give your pussy willow branches a soft, touchable dimension, use the padded satin stitch technique.
Before you stitch the grey catkins, lay down a small cluster of foundation stitches (like short straight stitches or a seed stitch) in the same shape.
Then, work your final satin stitches directly over this padding. The extra layer underneath raises the surface, creating a plush, three-dimensional effect that perfectly captures the fluffy texture of early spring buds.
Explore more soft, textured embroidery patterns for your cozy spaces.
24. Stitch a Magical Glow with Specialty Thread

Capture the enchanting light of fireflies on a summer evening by incorporating glow-in-the-dark thread.
Use this specialty floss to create small satin-stitched ovals or tight French knots for the glowing part of each insect.
Stitch the surrounding grass with standard green cotton floss. During the day, it looks like a simple meadow scene, but at night, the fireflies come to life with a soft, magical luminescence.
It’s a wonderful surprise that adds an interactive element to your artwork.
For more glowing projects, check out these modern neon on black thread art ideas.
25. Illustrate Kitchen Herbs with Clean Stitches

For a series of kitchen herbs, adopt a clean, illustrative style that feels both fresh and timeless.
Use a simple stem stitch for the stalks to create a smooth, defined line. For the leaves, a fishbone stitch works beautifully for broader leaves like basil, while tiny detached chain stitches are perfect for thyme.
Keeping the stitch vocabulary simple and consistent across each herb creates a cohesive, botanical-print look that’s perfect for a kitchen space.
These minimal fruit & botanical embroidery patterns are perfect for kitchen art.
26. Form Delicate Forget-Me-Nots with Lazy Daisies
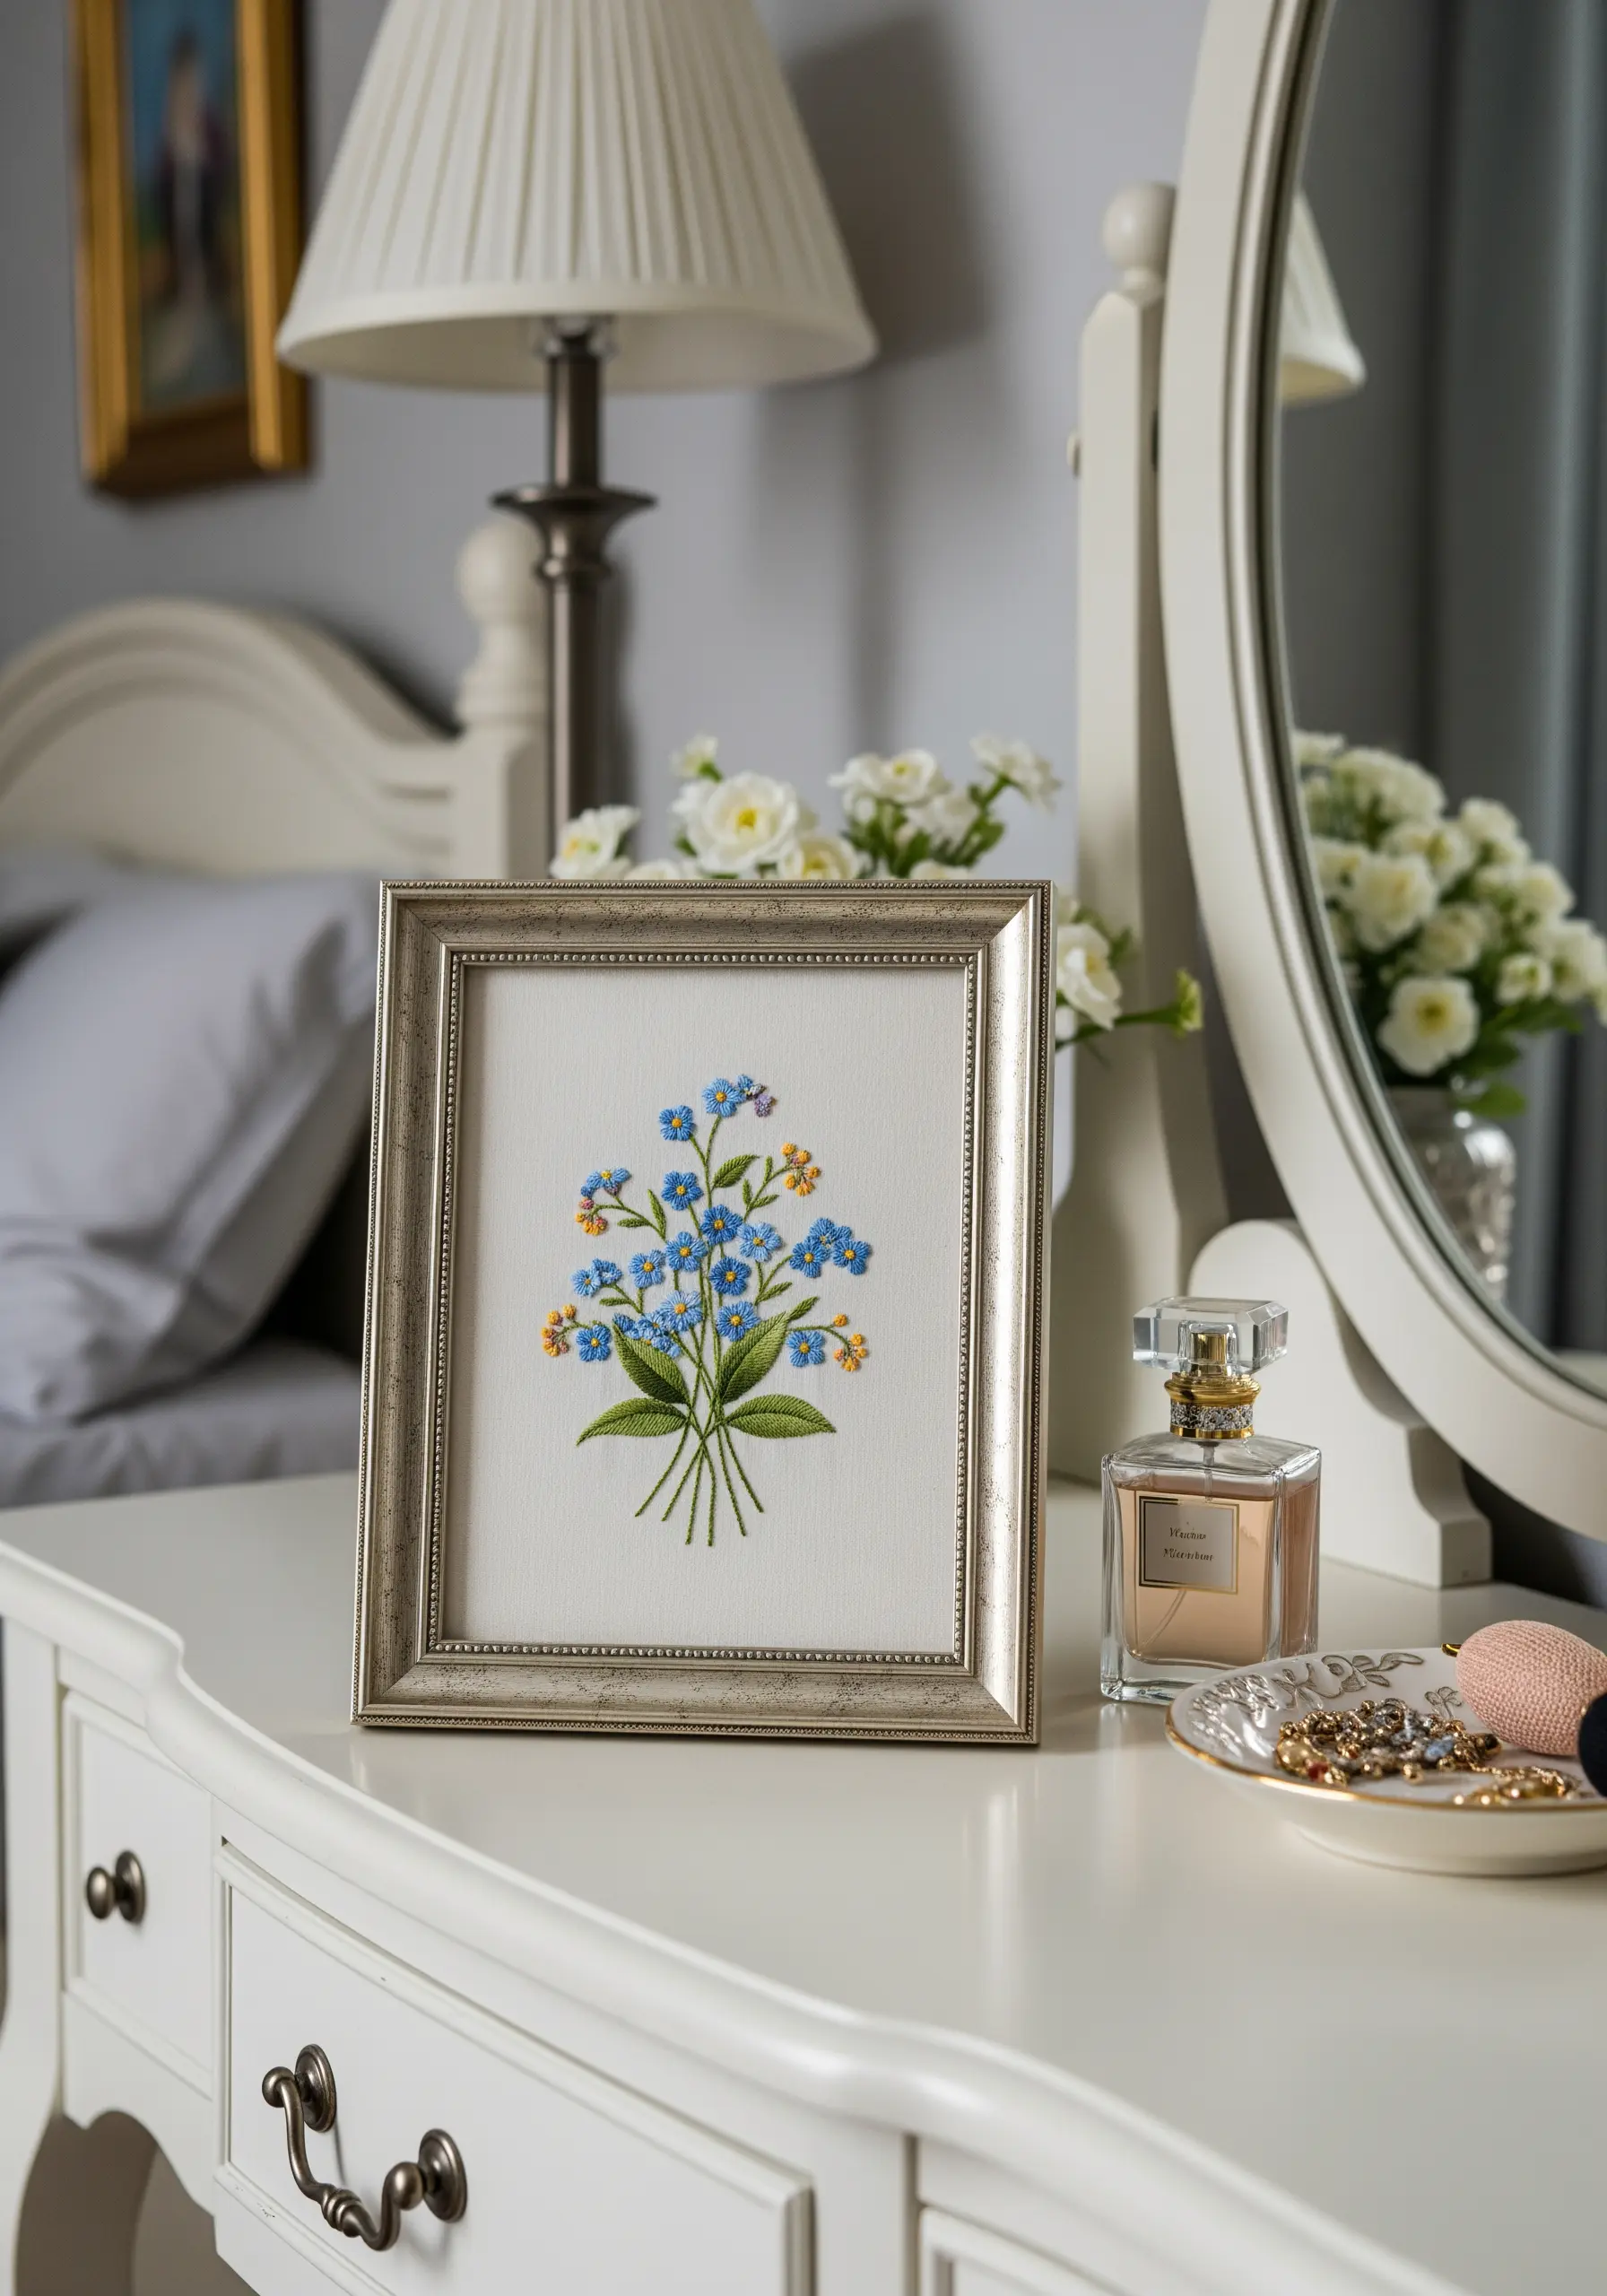
Instead of struggling with tiny satin-stitched petals, create perfect forget-me-nots using the lazy daisy stitch.
Arrange five small lazy daisy stitches in a circle to form the blue petals of each blossom. This method is not only faster but also ensures each flower is uniform in shape and size.
Add a single yellow French knot in the center of each flower to complete the look.
This technique is a game-changer for stitching any type of micro-floral, allowing you to build up dense, delicate bouquets with ease.
Fill your home with more gorgeous floral embroidery ideas.
27. Weave a Tapestry with Thread Painting

For a large-scale, abstract landscape, think like a painter and a weaver simultaneously.
Work in broad sections of color using long-and-short stitch to create flowing, organic bands of color.
Don’t be afraid to let your stitches be a little imperfect; the subtle variations in length and angle will contribute to a rich, tapestry-like texture.
Choose a vibrant, saturated color palette to make a bold statement. The sheer scale and immersive color will turn any wall into a stunning focal point.
Create your own statement-size embroidered textile hangings to transform a room.


