You have a deep appreciation for the patient art of embroidery, but perhaps you’re feeling the pull to move your needle beyond the familiar comfort of fabric.
Consider paper your new canvas. The relationship between thread and paper is one of beautiful contrast—the soft, pliable thread brings warmth and texture to the crisp, flat surface of the paper. It’s a medium that rewards precision and offers a distinctly modern, graphic quality to your stitched work.
These ideas are not about mastering complex new skills. They are about shifting your perspective and seeing the artistic potential in combining these two simple materials. Let these examples give you the confidence to pierce that first hole and discover the unique voice that emerges when paper and thread come together.
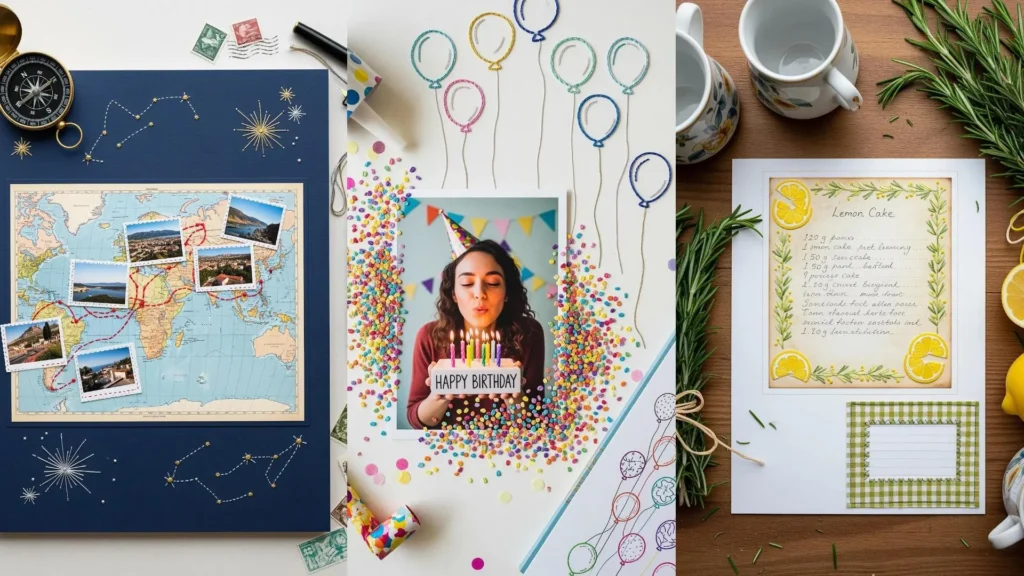
1. Use Metallic Thread to Map Celestial Lines

When stitching on dark paper, choose a high-sheen metallic thread to create dramatic contrast that mimics starlight.
Instead of a traditional backstitch, use long, clean straight stitches to connect your collaged ‘stars’, keeping the thread taut but not so tight that it buckles the paper.
To ensure clean entry points, pierce each hole with a sharp needle or awl before you begin stitching. This prevents tearing and results in a much more professional finish.
The combination of matte paper, glitter paper, and metallic thread creates a rich, multi-layered texture that feels both graphic and delicate.
2. Define Paper Collage with a Graphic Backstitch

Give your paper-on-fabric appliqué a clean, illustrative edge by outlining it with a contrasting backstitch.
Use a full six strands of embroidery floss for a bold, cartoon-like border that makes the paper elements pop against the fabric background.
This technique secures the collage pieces while integrating them into a cohesive textile artwork, blurring the line between papercraft and embroidery.
For the most polished look, ensure your stitches are uniform in length, treating the outline as a deliberate design element, not just a functional one.
3. Create Organic Textures with Directional Stitching

Transform a flat paper illustration by using thread to mimic the flow and texture of organic forms, like the muscle fibers of a heart.
Use couching—tacking down a thicker yarn with a finer thread—to create the bold lines of arteries. This adds dimension and visual weight.
For the smaller vessels, switch to a single strand of floss in a wandering stem stitch or split stitch to create delicate, vein-like patterns.
This approach turns the thread into a drawing tool, adding depth, direction, and a powerfully tactile quality to your paper art.
4. Punctuate Geometric Shapes with Radiating Stitches

Elevate simple paper shapes by adding stitched details that introduce texture and direction.
Create dynamic sunburst effects using precise straight stitches that radiate from a single point. This adds energy and a focal point to minimalist compositions.
A simple running stitch along the edge of a paper shape transforms it from a flat cutout into an object with perceived depth and structure.
Pre-piercing your holes on a self-healing mat ensures every stitch is perfectly placed, which is essential for creating clean, graphic minimalist embroidery wall art ideas.
5. Sculpt High-Volume Hair with Yarn Couching

Move beyond floss to create dramatic, sculptural effects with thicker fibers like yarn.
Instead of stitching *through* the paper for every strand, lay down loops of colorful yarn and tack them in place with small, discreet stitches using regular floss.
This technique, called couching, allows you to build incredible volume and texture without perforating the paper to shreds.
The contrast between the smooth, printed paper face and the wild, three-dimensional yarn hair makes for compelling mixed-media crafts with embroidery that invite touch.
6. Add Dimension to Landscapes with Chain Stitch

Use a highly textural stitch to create a focal point that contrasts with the flat planes of your paper collage.
A raised chain stitch is perfect for representing snowy paths or glacial ridges on a mountain range. Its linked structure creates a tangible line that sits on top of the paper surface.
Choose a thick, soft cotton thread in a contrasting color, like white against gray mountains, to emphasize the stitch’s three-dimensional quality.
This method adds topographical detail and guides the viewer’s eye through the landscape you’ve created.
7. Use French Knots for Bursts of Concentrated Texture

Add small, intense pops of color and texture to an illustrated or collaged scene using dense clusters of French knots.
Group the knots tightly in window boxes to simulate lush, overflowing flowers. This creates a wonderful tactile contrast against the flat illustration and paper map background.
Use a vibrant, contrasting color like red to draw the eye immediately to these small but powerful details.
Vary the number of times you wrap the thread around the needle (once or twice) to create subtle variations in the size of the ‘blossoms’.
8. Emulate Water’s Movement with Couching and Beads

Capture the fluidity of water by couching long, wavy lines of thread or yarn onto your fabric background.
Lay multiple strands of thread side-by-side and tack them down with small, perpendicular stitches. This creates smooth, unbroken lines that are perfect for representing waves.
For an extra touch of realism, scatter a few clear seed beads to represent air bubbles. Secure each one with a tiny stitch, allowing them to catch the light.
These texture-rich thread art ideas combine thread and embellishments to bring your underwater scene to life.
9. Transform Typography into a Stitch Sampler

Use letters as individual canvases to experiment with different fill stitches, turning a simple word into a textural masterpiece.
Assign a unique stitch and color palette to each letter: fill one with French knots, another with satin stitch, and a third with seed stitch.
This approach allows you to explore how different stitches create varied surfaces—from the bumpy texture of knots to the smooth sheen of satin stitch.
Working on a dark, plain background makes the colors and textures of your stitched letters the undisputed hero of the piece.
10. Add Delicate Wisps of Steam with Fine Thread

When combining embroidery with delicate media like watercolor, your stitching should be a subtle accent, not an overpowering element.
Use a single strand of white or silver thread to stitch ethereal wisps of steam rising from a painted teacup.
A simple, flowing backstitch or stem stitch works perfectly. The key is to keep the stitches light and airy to maintain the delicate illusion.
These paper art designs that pair beautifully with nature-inspired embroidery show how a few thoughtful stitches can enhance, rather than compete with, your original artwork.
11. Use Thread as a Bold Graphic Element

In abstract compositions, thread can function as a powerful line that intersects and unifies disparate paper elements.
Wrap thread across the entire surface of your artwork, securing it on the back. This technique treats the piece as a single object and introduces a layer of graphic tension.
Choose a thread color that provides high contrast against your paper collage to make the lines a dominant feature.
This approach is less about decorative stitching and more about using thread as a structural and compositional tool, reminiscent of retro string art patterns.
12. Integrate Paper Collage with Detailed Stitches

Use embroidery to seamlessly blend collaged paper elements with a fabric background, making them feel like a natural part of the textile.
Stitch fine details directly onto the paper, like the feathers on a bird’s wing, using a delicate satin stitch or long-and-short stitch.
Outline the paper elements with a neat backstitch to secure them and give them a defined edge.
By adding stitched details both on and around the paper, you create a cohesive piece where collage and embroidery are fully integrated.
13. Embellish Paper Leaves with Metallic Veins

Enhance the natural beauty of paper leaf shapes by adding a touch of embroidered detail.
Use a single strand of gold metallic thread to stitch a simple backstitch or running stitch down the center of each leaf, mimicking the central vein.
This subtle addition catches the light and adds a hint of elegance and structure to the flat paper cutouts.
It’s a perfect nature-calm stitching project that combines the repetitive motion of stitching with organic forms for a meditative effect.
14. Create Playful Texture with Turkey Work

Incorporate highly tactile stitches to make specific elements in your collage literally stand out.
Use Turkey work (or loop stitch) to create the fluffy, three-dimensional fleece on sheep. After making the loops, you can trim them for a dense, plush texture.
This technique is perfect for adding a whimsical, touchable quality to your work, creating a delightful contrast with the flat fabric and paper pieces.
It’s an ideal way to bring cartoon-style embroidery ideas for kids wear to life on paper or fabric art.
15. Outline Intricate Layers with a Metallic Chain Stitch

When working with complex, layered paper designs, use a decorative stitch to highlight the intricate contours.
A silver chain stitch acts like a delicate, jewelry-like border, accentuating the shapes within your mandala without overpowering them.
The continuous, linked nature of the chain stitch creates a smooth, unbroken line that is perfect for outlining curves and geometric patterns.
This technique elevates layered papercraft into a sophisticated piece of mixed-media art, perfect for floral mandala embroidery ideas.
16. Embellish Illustrations with Subtle Beading

Enhance a fashion illustration by adding beads for a touch of texture and shimmer that mimics luxurious fabric.
Use a fine needle and a single strand of thread that matches the paper to attach tiny seed beads. This makes the stitches nearly invisible, allowing the beads to float on the surface.
Scatter the beads in a gradient pattern, clustering them more densely at the waist and spacing them out towards the hem to create a sense of movement and light.
This restrained approach adds a sophisticated, couture feel without overwhelming the original illustration.
17. Stitch a Botanical Skeleton on a Paper Leaf

Use embroidery to create the delicate internal structure of a botanical element, adding a layer of realism and artistry.
For a ginkgo leaf, use a whipped backstitch or stem stitch for the main stalk to give it a smooth, solid line.
Create the branching veins with a series of open fly stitches, which perfectly capture the fan-like structure of the leaf’s venation.
This transforms a simple paper cutout into a detailed study, making it ideal for delicate botanical line art embroidery patterns on paper.
18. Add Minimal Stitched Accents to Paper Bookmarks

Elevate simple paper goods like bookmarks with small, thoughtful embroidered details.
Choose minimal motifs—a small crescent moon, a few stars, or a simple geometric pattern—that can be stitched quickly but add a personal, handmade touch.
Use an eyelet stitch to reinforce the hole where the ribbon goes. This is not only decorative but also functional, preventing the paper from tearing with use.
On paper with existing text or patterns, select a thread color that complements the background to create a harmonious design.
19. Explore Texture by Couching Yarn on Cardboard

Combine humble materials like cardboard and yarn to create surprisingly sophisticated abstract art.
Create bold, concentric circles by couching thick, natural-fiber yarn onto layered paper and cardboard discs. This method adds immediate dimension and a rustic, organic feel.
Contrast the thick couched lines with delicate running stitches made with fine embroidery floss to create a dynamic interplay of textures.
This is one of the most accessible high-texture fabric collage embroidery projects, proving that compelling art can be made from simple supplies.
20. Use a Simple Running Stitch for an Illustrative Touch

Sometimes the simplest stitch is the most effective. Use a clean, white running stitch to add a charming, hand-drawn quality to your paper collages.
Outlining the edge of the fruit bowl with this stitch adds definition and a sense of volume without adding complexity.
It also serves as a unifying element, connecting the different colors and patterns of the paper pieces into a single, cohesive image.
Keep your stitches evenly spaced to maintain a clean, polished look that feels intentional and artistic.
21. Create Atmosphere with Vertical Straight Stitches

Use thread to create a visual filter or atmospheric effect over a photograph or collage element.
Stitch long, parallel vertical lines across your composition. The density of these lines will determine the effect—sparse lines create a subtle texture, while dense lines can obscure the image like rain or a curtain.
Maintain even tension for each stitch to prevent the paper from buckling, ensuring the lines remain straight and parallel.
This is one of the most effective creative collage inspirations for combining paper layers with subtle embroidery, transforming the mood of the entire piece.