
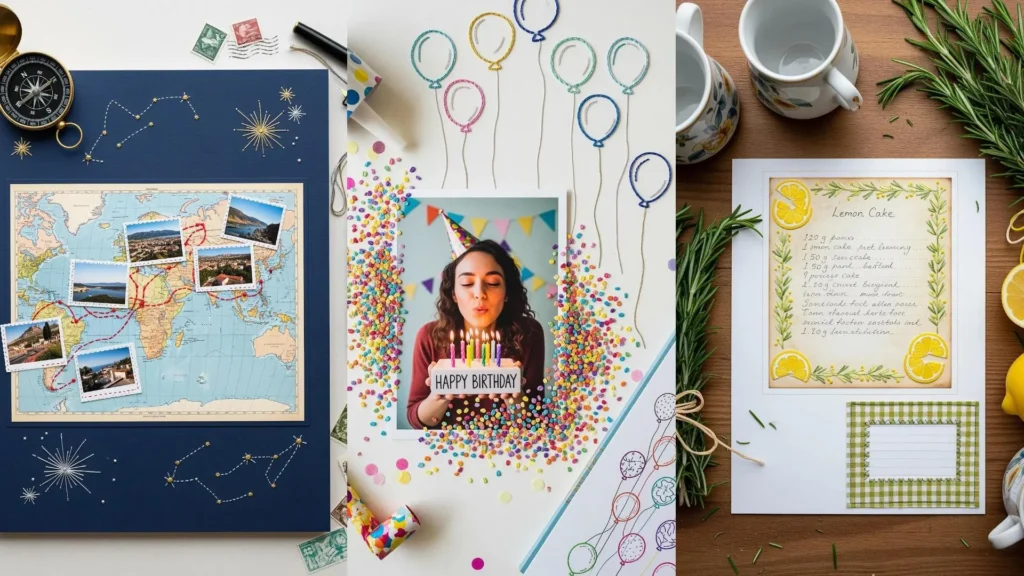
You already know the quiet magic of pulling a threaded needle through paper or fabric. But what if you could turn that simple motion into something more dimensional, more narrative, and deeply personal? This is where mixed media comes in—not as a complicated new skill to learn, but as a way to expand what your stitches can do.
Think of your scrapbook pages, photos, and paper ephemera not as flat surfaces, but as foundations for texture and story. A single, well-placed line of thread can trace a journey on a map. A cluster of French knots can become a vibrant floral crown on a vintage portrait. This isn’t about overwhelming your work; it’s about adding intentional, tactile details that draw the eye and connect with the heart.
Forget the pressure to create a masterpiece. Instead, focus on a single technique. Try adding a stitched border to a photograph, or embroidering a single word onto a collage. You’ll find that these small, thoughtful additions are what transform a simple craft into a meaningful work of art.
1. Embellish Vintage Portraits with Dimensional Florals
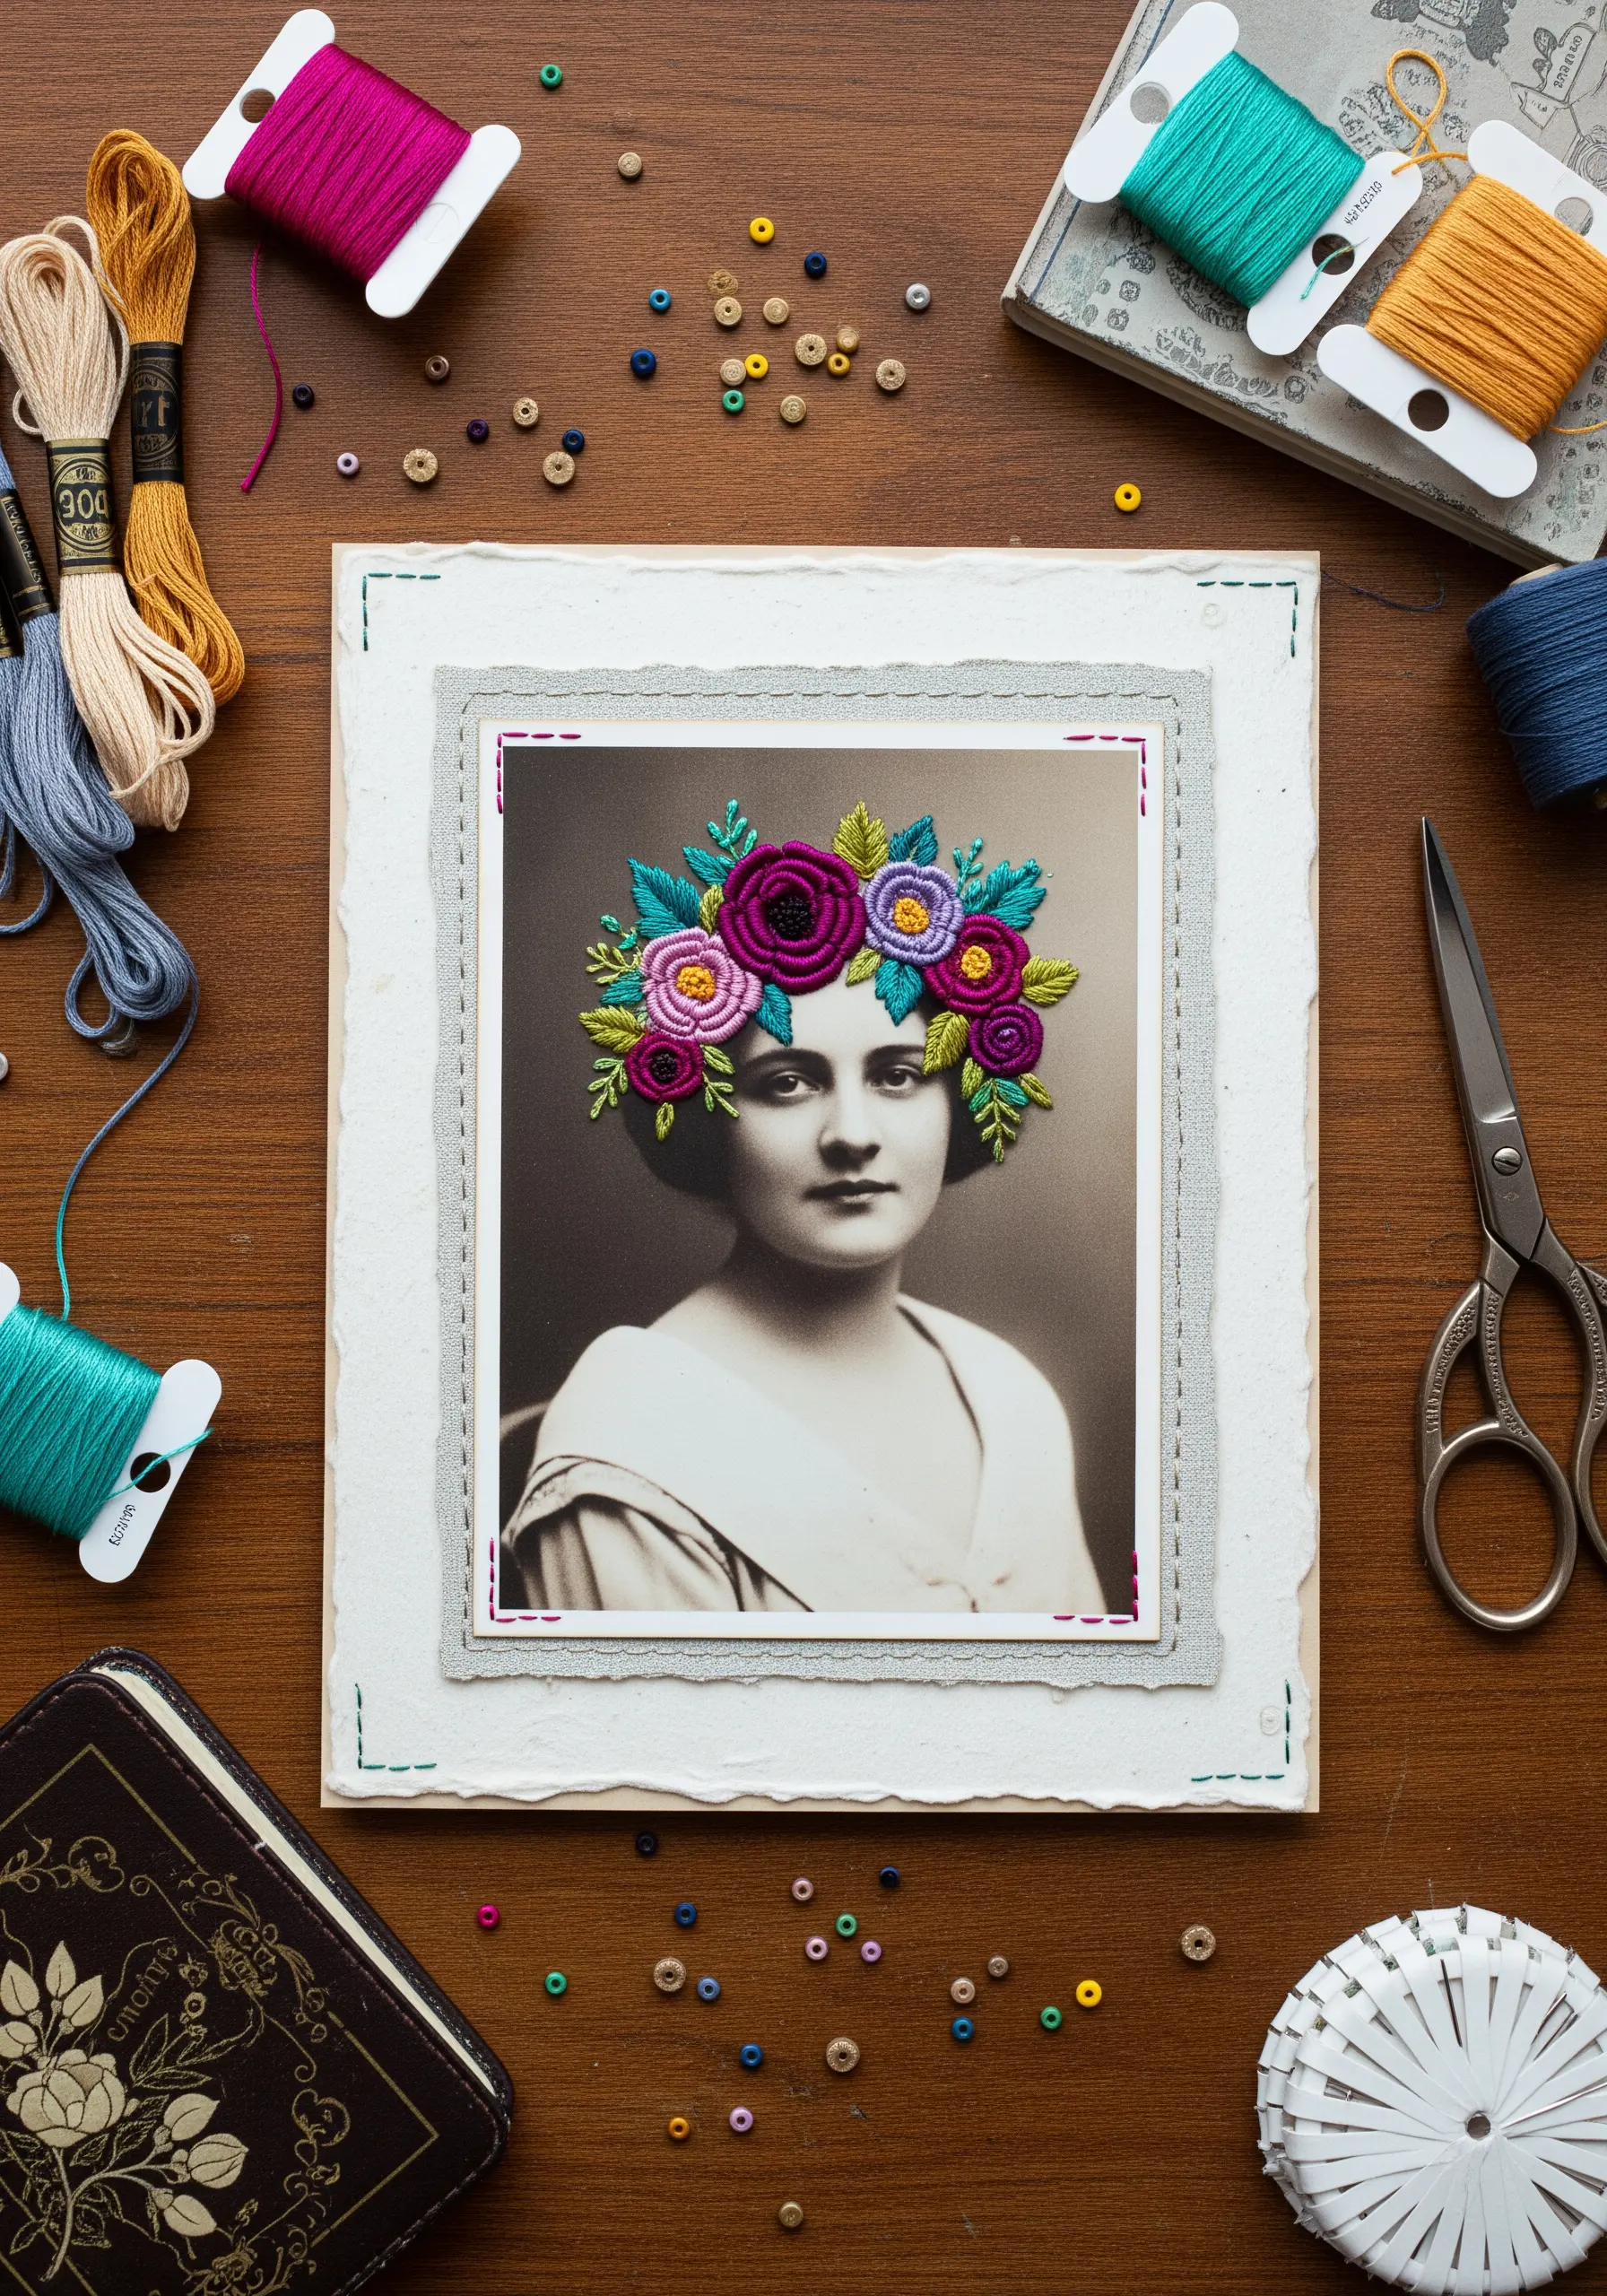
Stitch directly onto a high-quality photo print to give an ancestral portrait new life.
To avoid tearing the paper, first pierce your stitch holes with a fine, sharp needle before passing the thread through.
Use woven wheel stitches and French knots with 6-strand cotton floss to create voluminous, textured flowers that contrast beautifully with the flat, monochrome image.
Frame the portrait with a simple running stitch to add a final, handmade touch that ties the entire piece together.
2. Chart Your Travels with Stitched Pathways and Celestial Guides
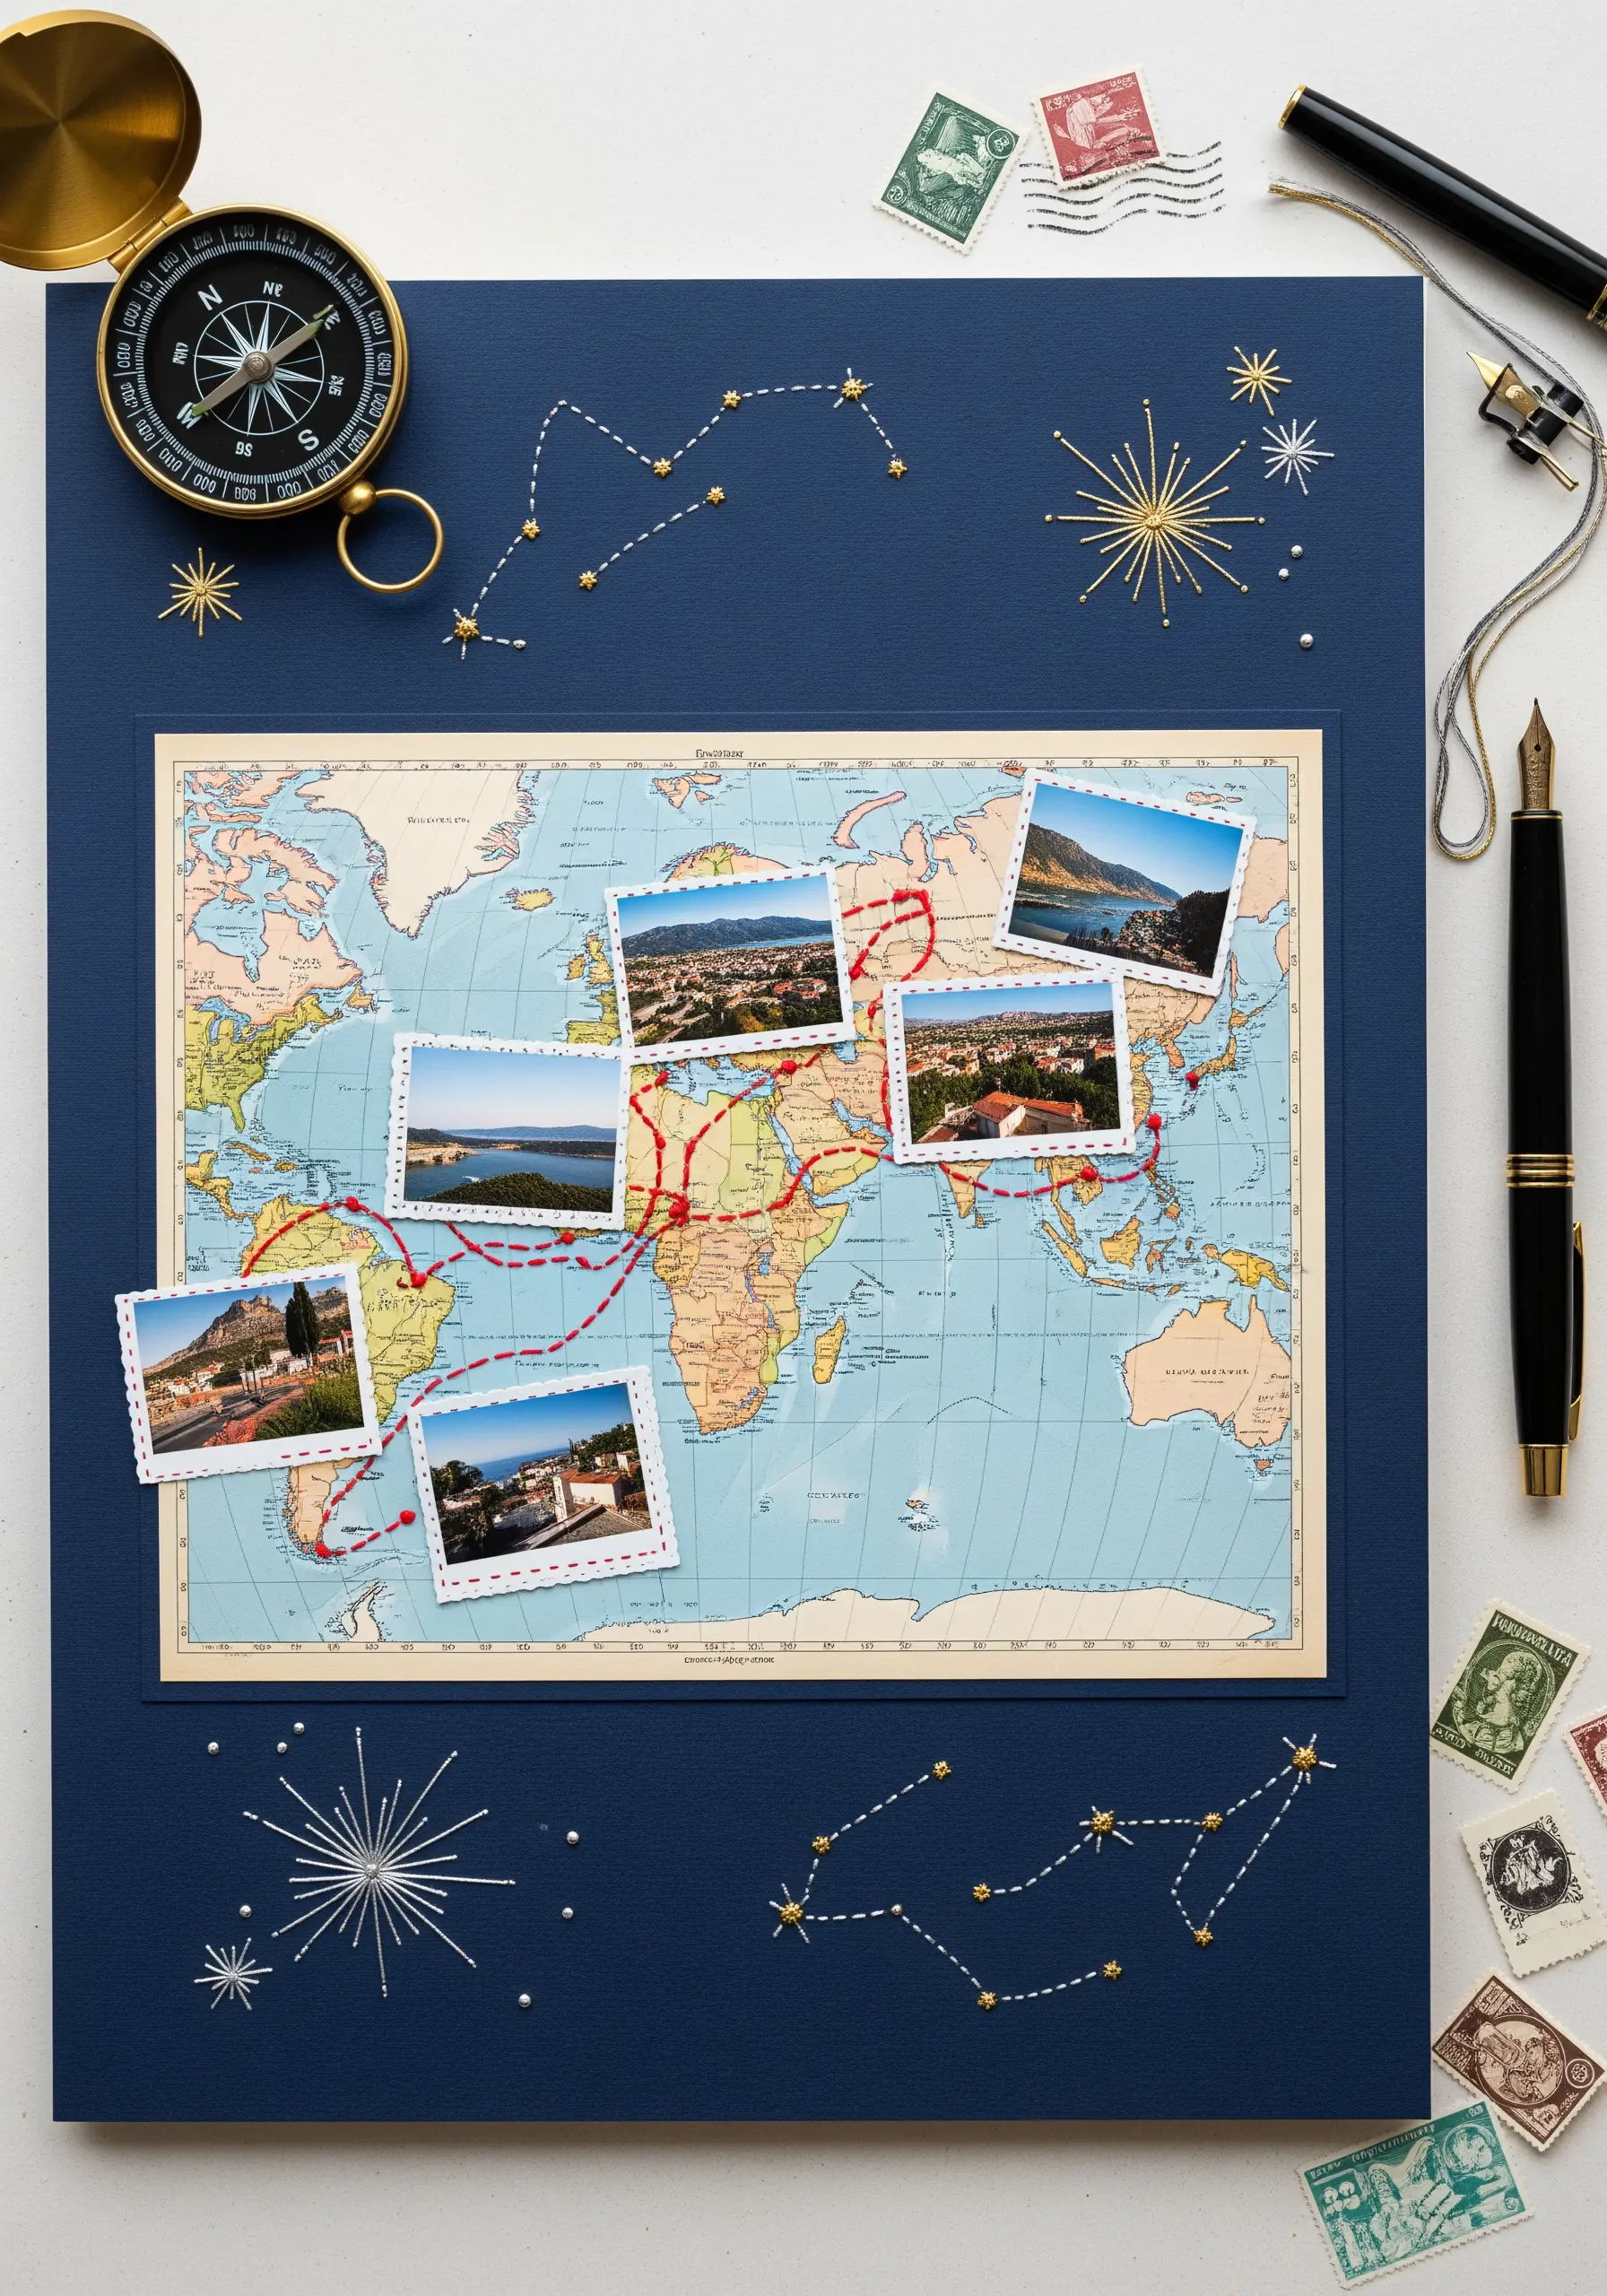
Use thread to trace a personal story onto a vintage map, turning a document into a narrative keepsake.
Mark your travel route with a clean backstitch or running stitch in a bold, contrasting color like red to make the path clear and graphic.
For the constellations and starbursts, switch to a metallic or silk thread to add a subtle shimmer that catches the light.
Always pre-pierce your holes with a needle or awl along your stitch lines; this prevents the paper from buckling and ensures every stitch is clean and precise.
3. Frame Pressed Botanicals with Watercolor Washes and Ghost Stitches
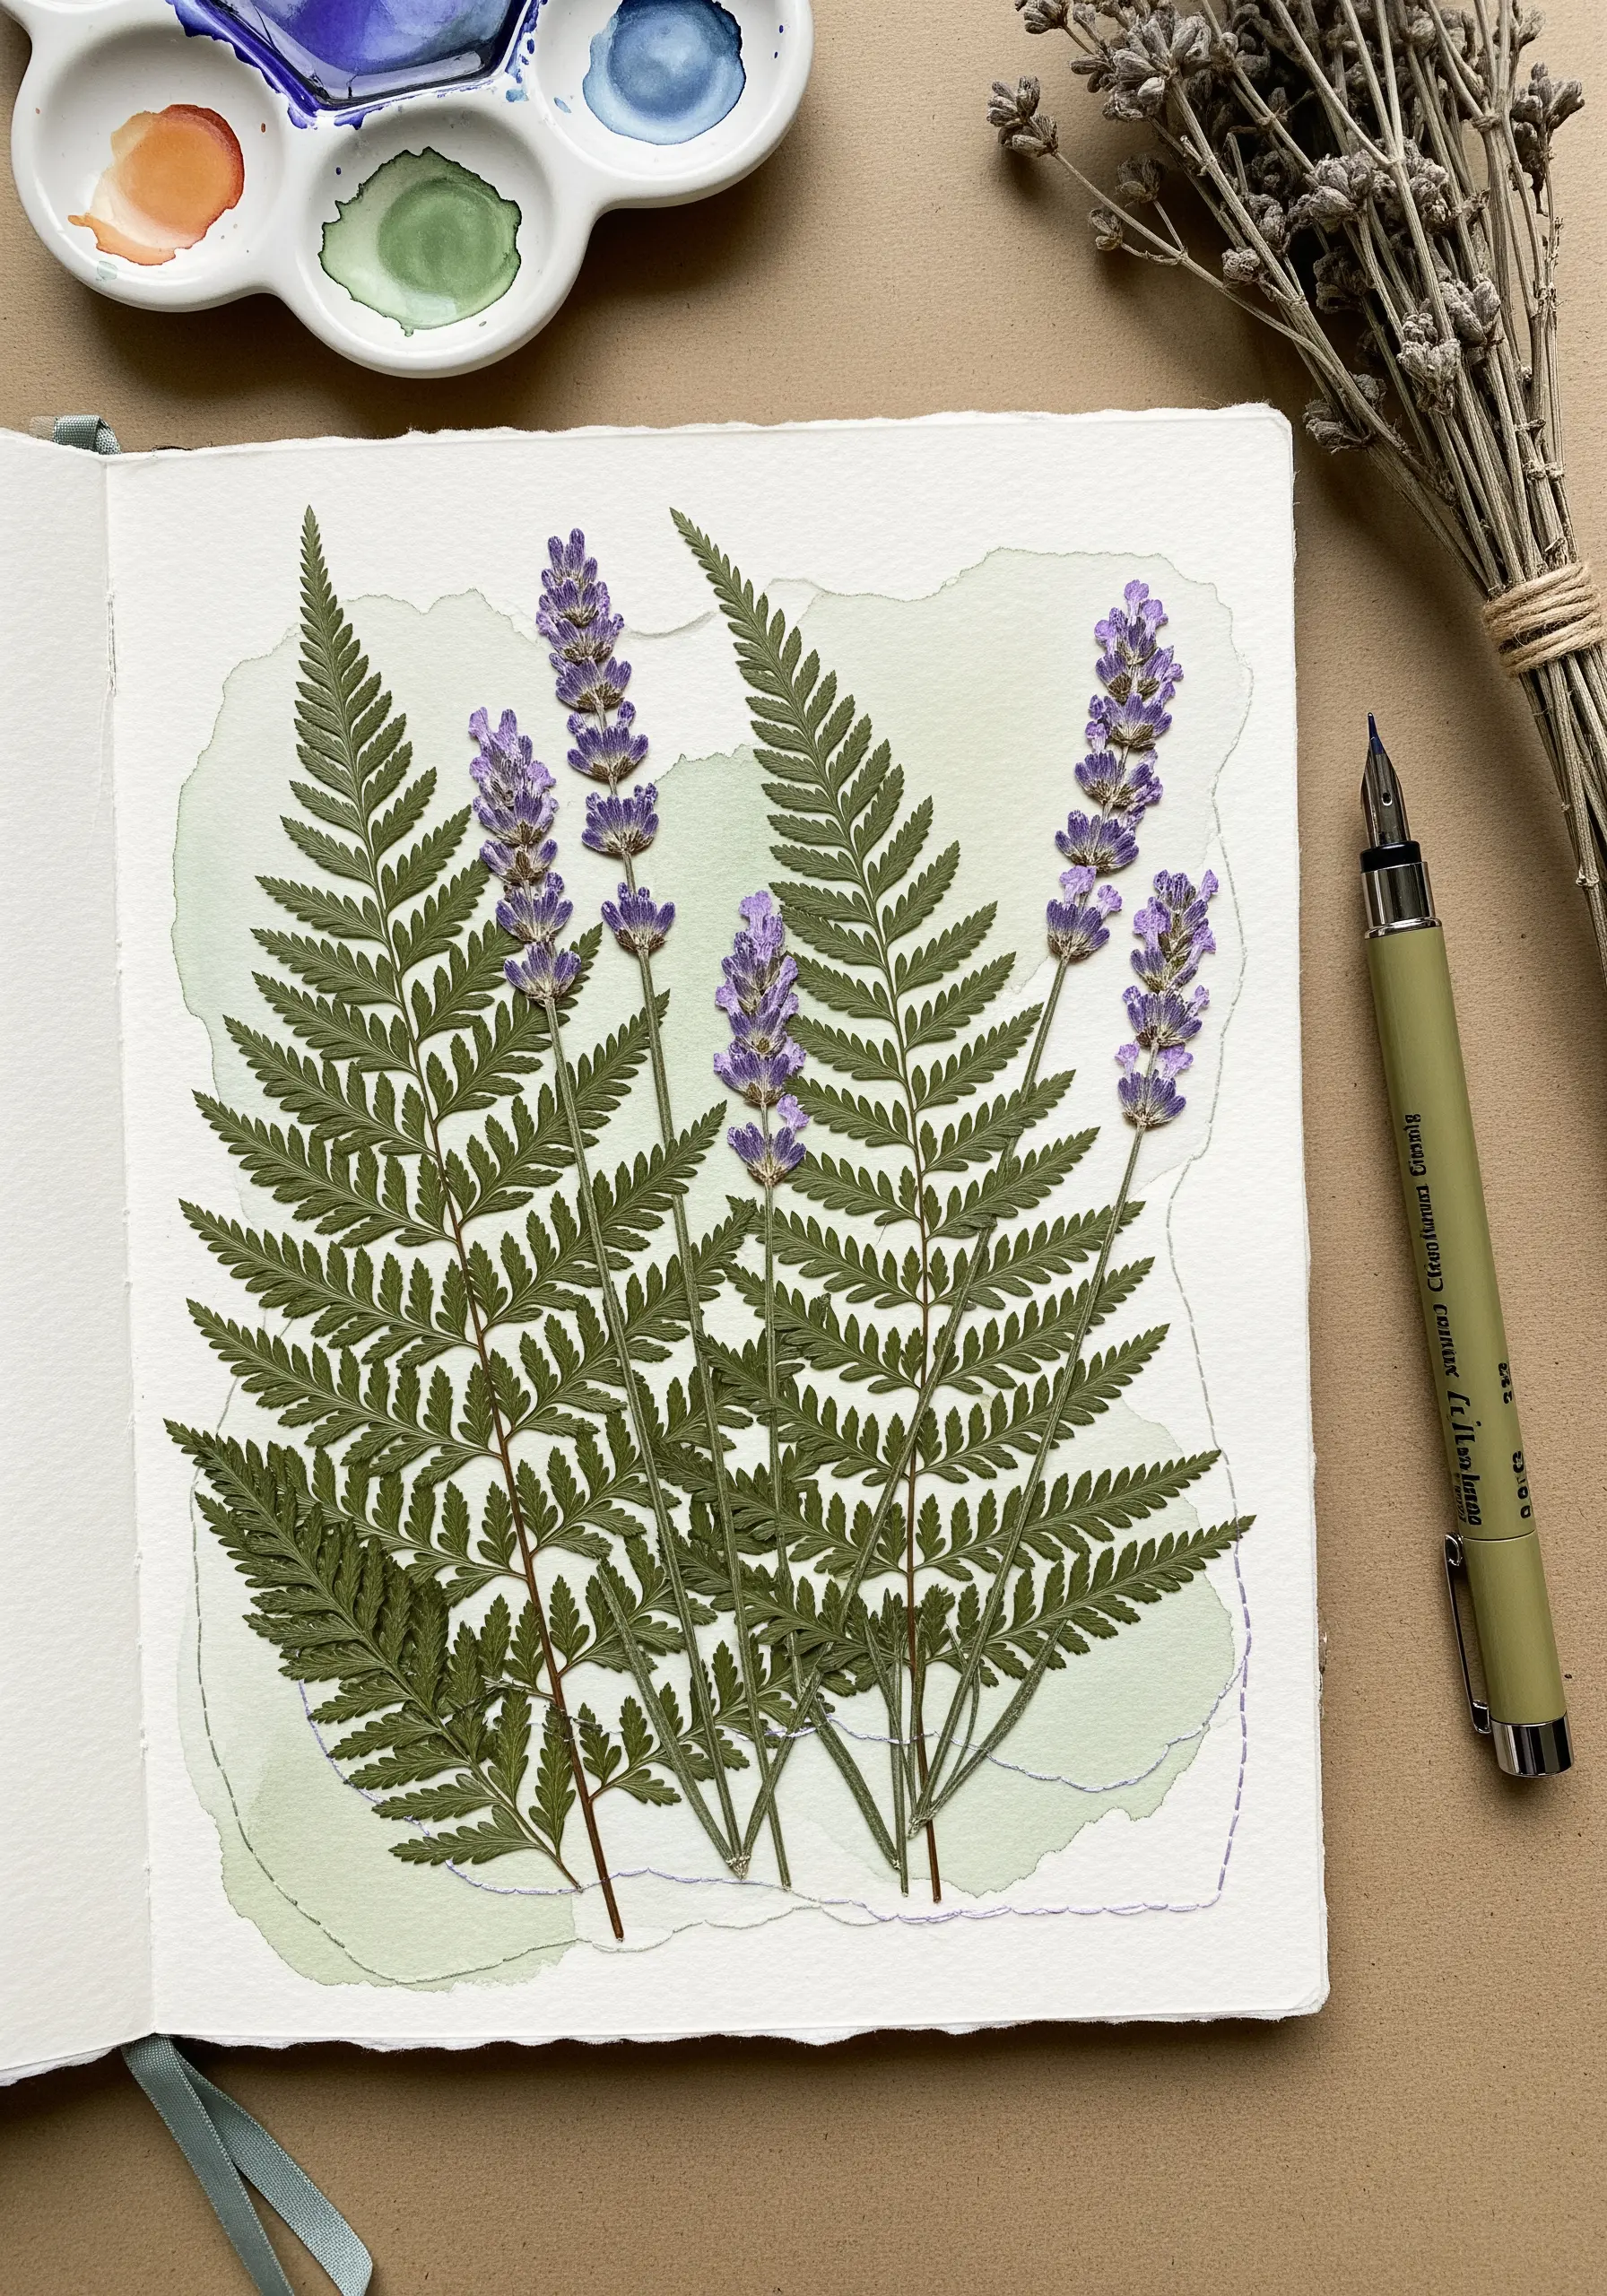
Combine three delicate media for an elegant, layered composition that celebrates nature.
Start by applying a light watercolor wash to heavyweight paper and let it dry completely before arranging your botanicals.
Carefully secure dried pressed flowers or ferns with a tiny dot of archival glue.
Your embroidery should be minimal—just a few tiny holding stitches or a subtle running-stitch outline in a single strand of thread. This adds texture and secures the specimen without overpowering its natural beauty.
4. Create Cosmic Art with String-Art Stars and a Painted Galaxy
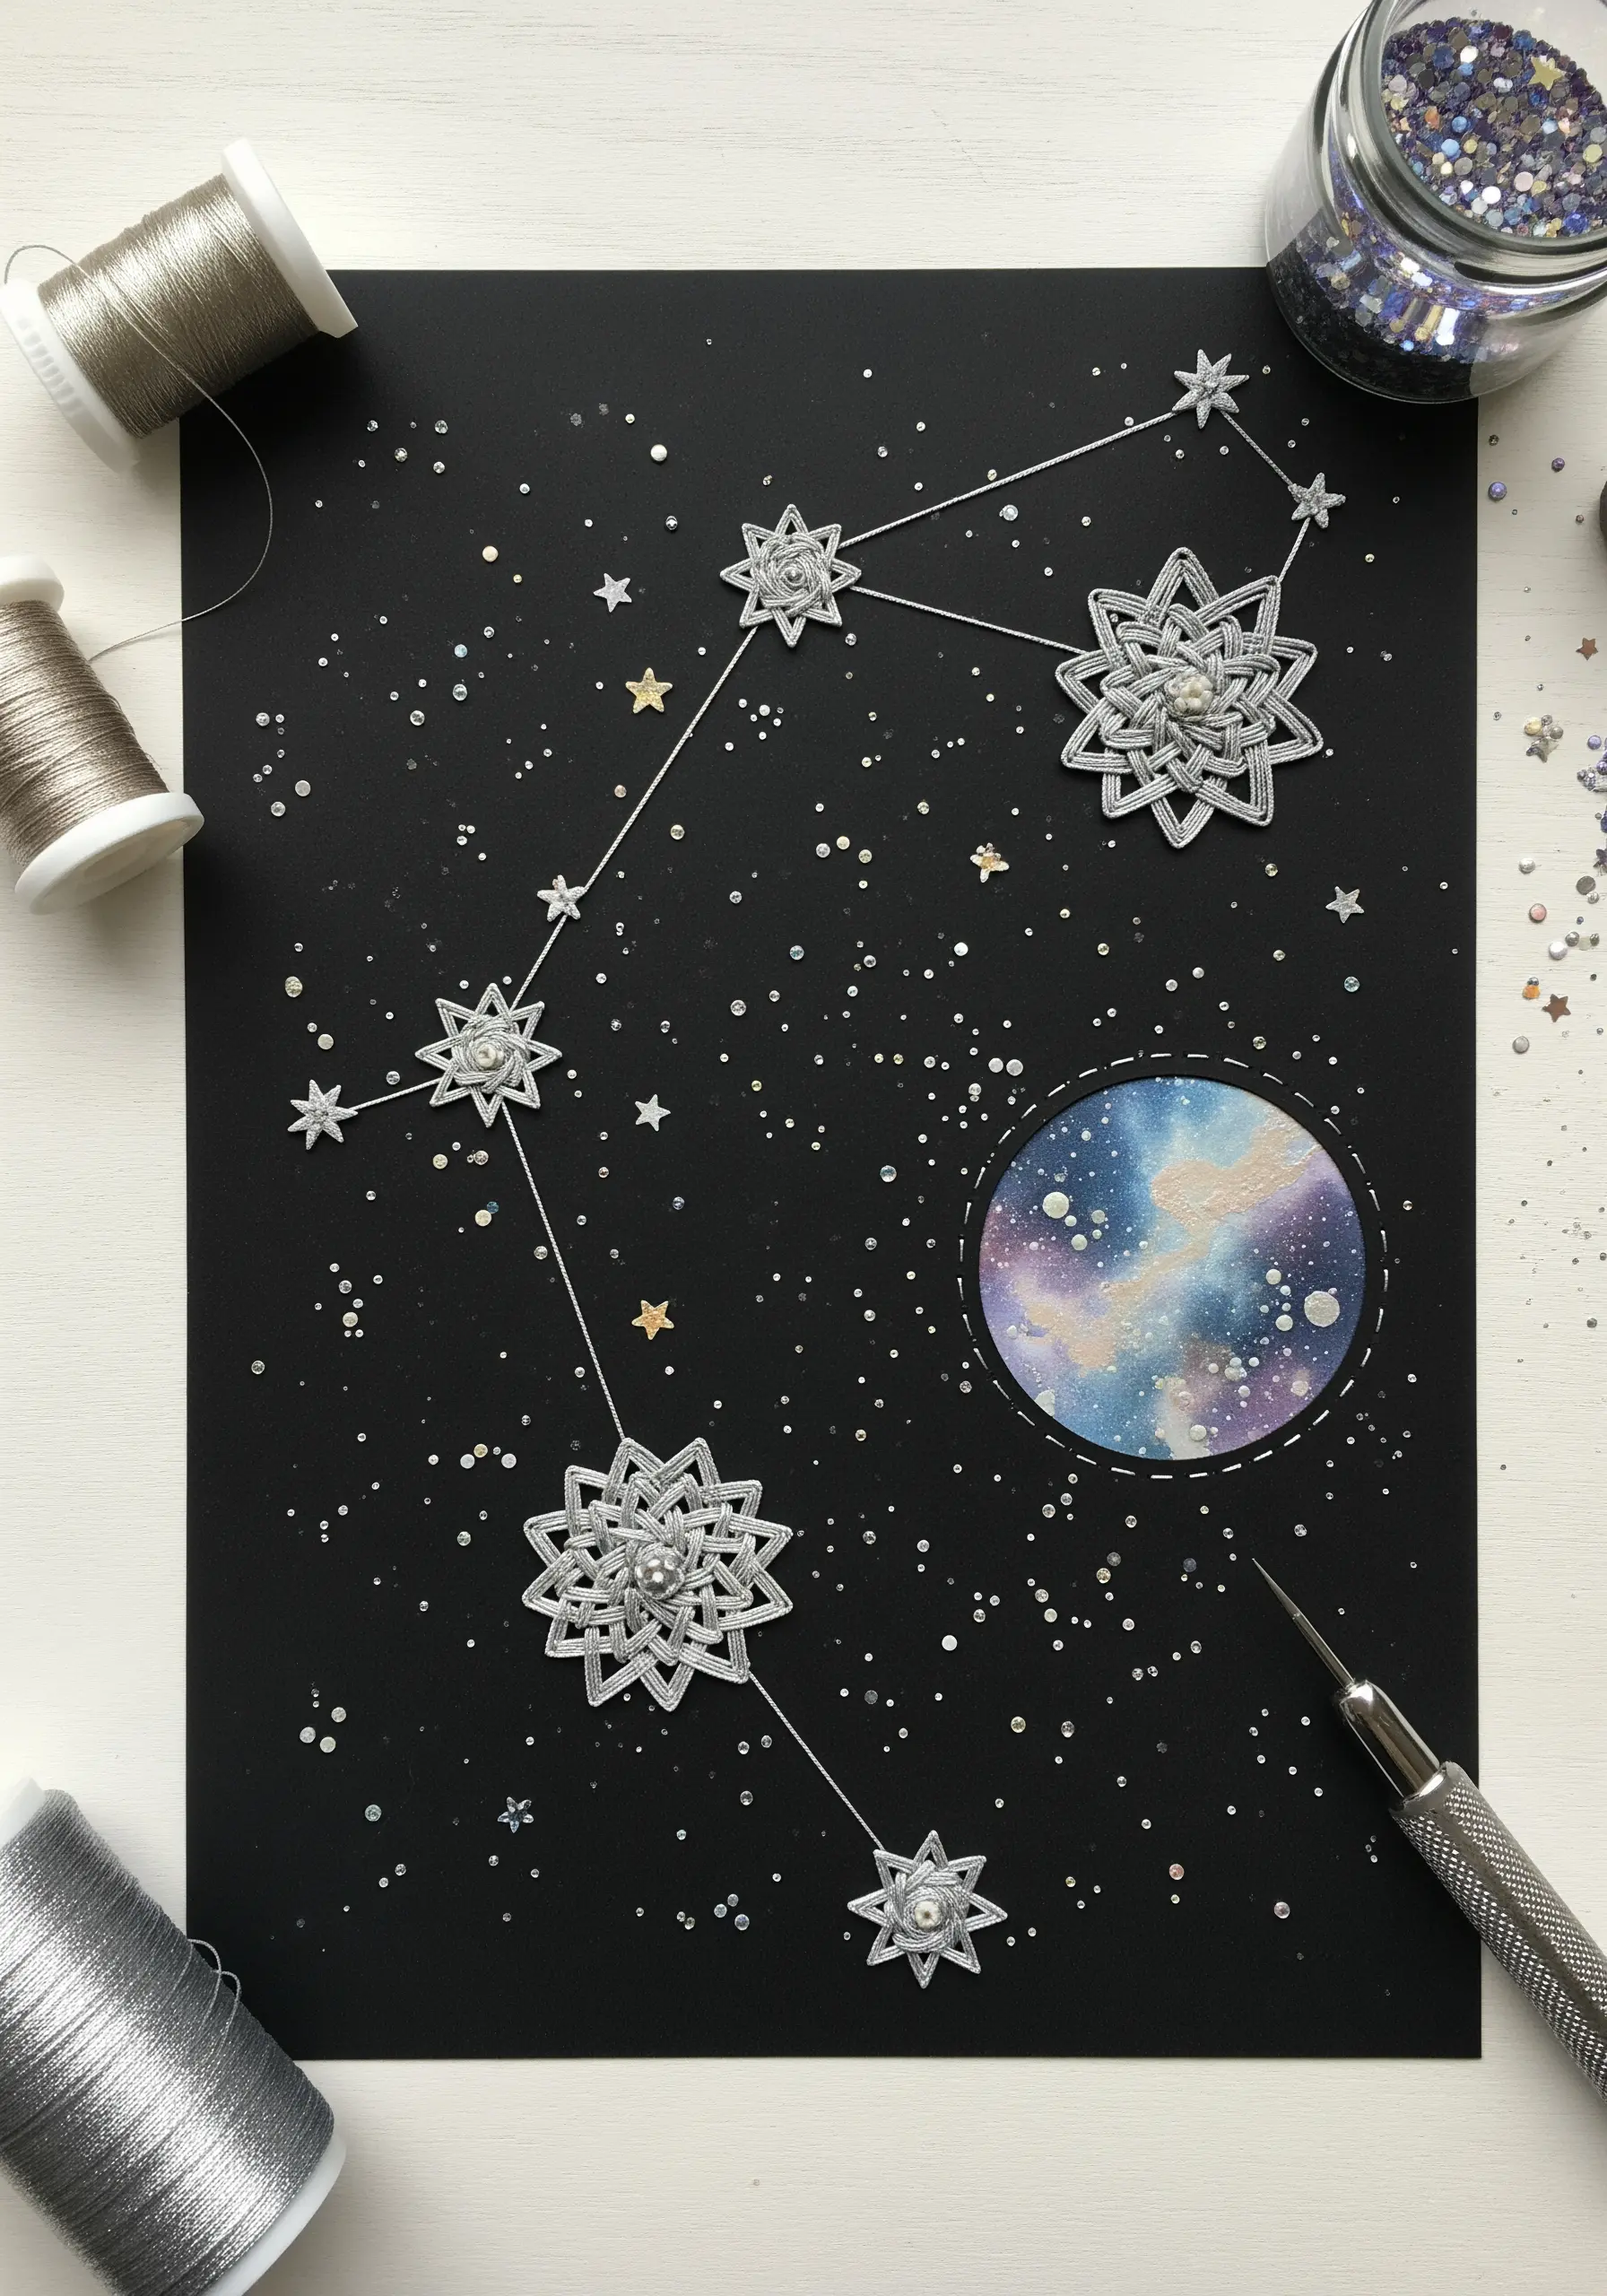
Transform a simple sheet of black cardstock into a luminous starscape using thread and paint.
For the geometric constellations, plot your points in pencil and pre-pierce the holes. Then, wrap a bright metallic thread around the points to build up the star shapes, creating a string-art effect.
Create the central galaxy by painting a swirling circle with metallic watercolors before you begin stitching.
Finally, scatter tiny seed beads or isolated French knots across the background to represent distant stars, adding depth and sparkle to your cosmic scene.
5. Integrate Bold Thread Lines into Abstract Paper Collage
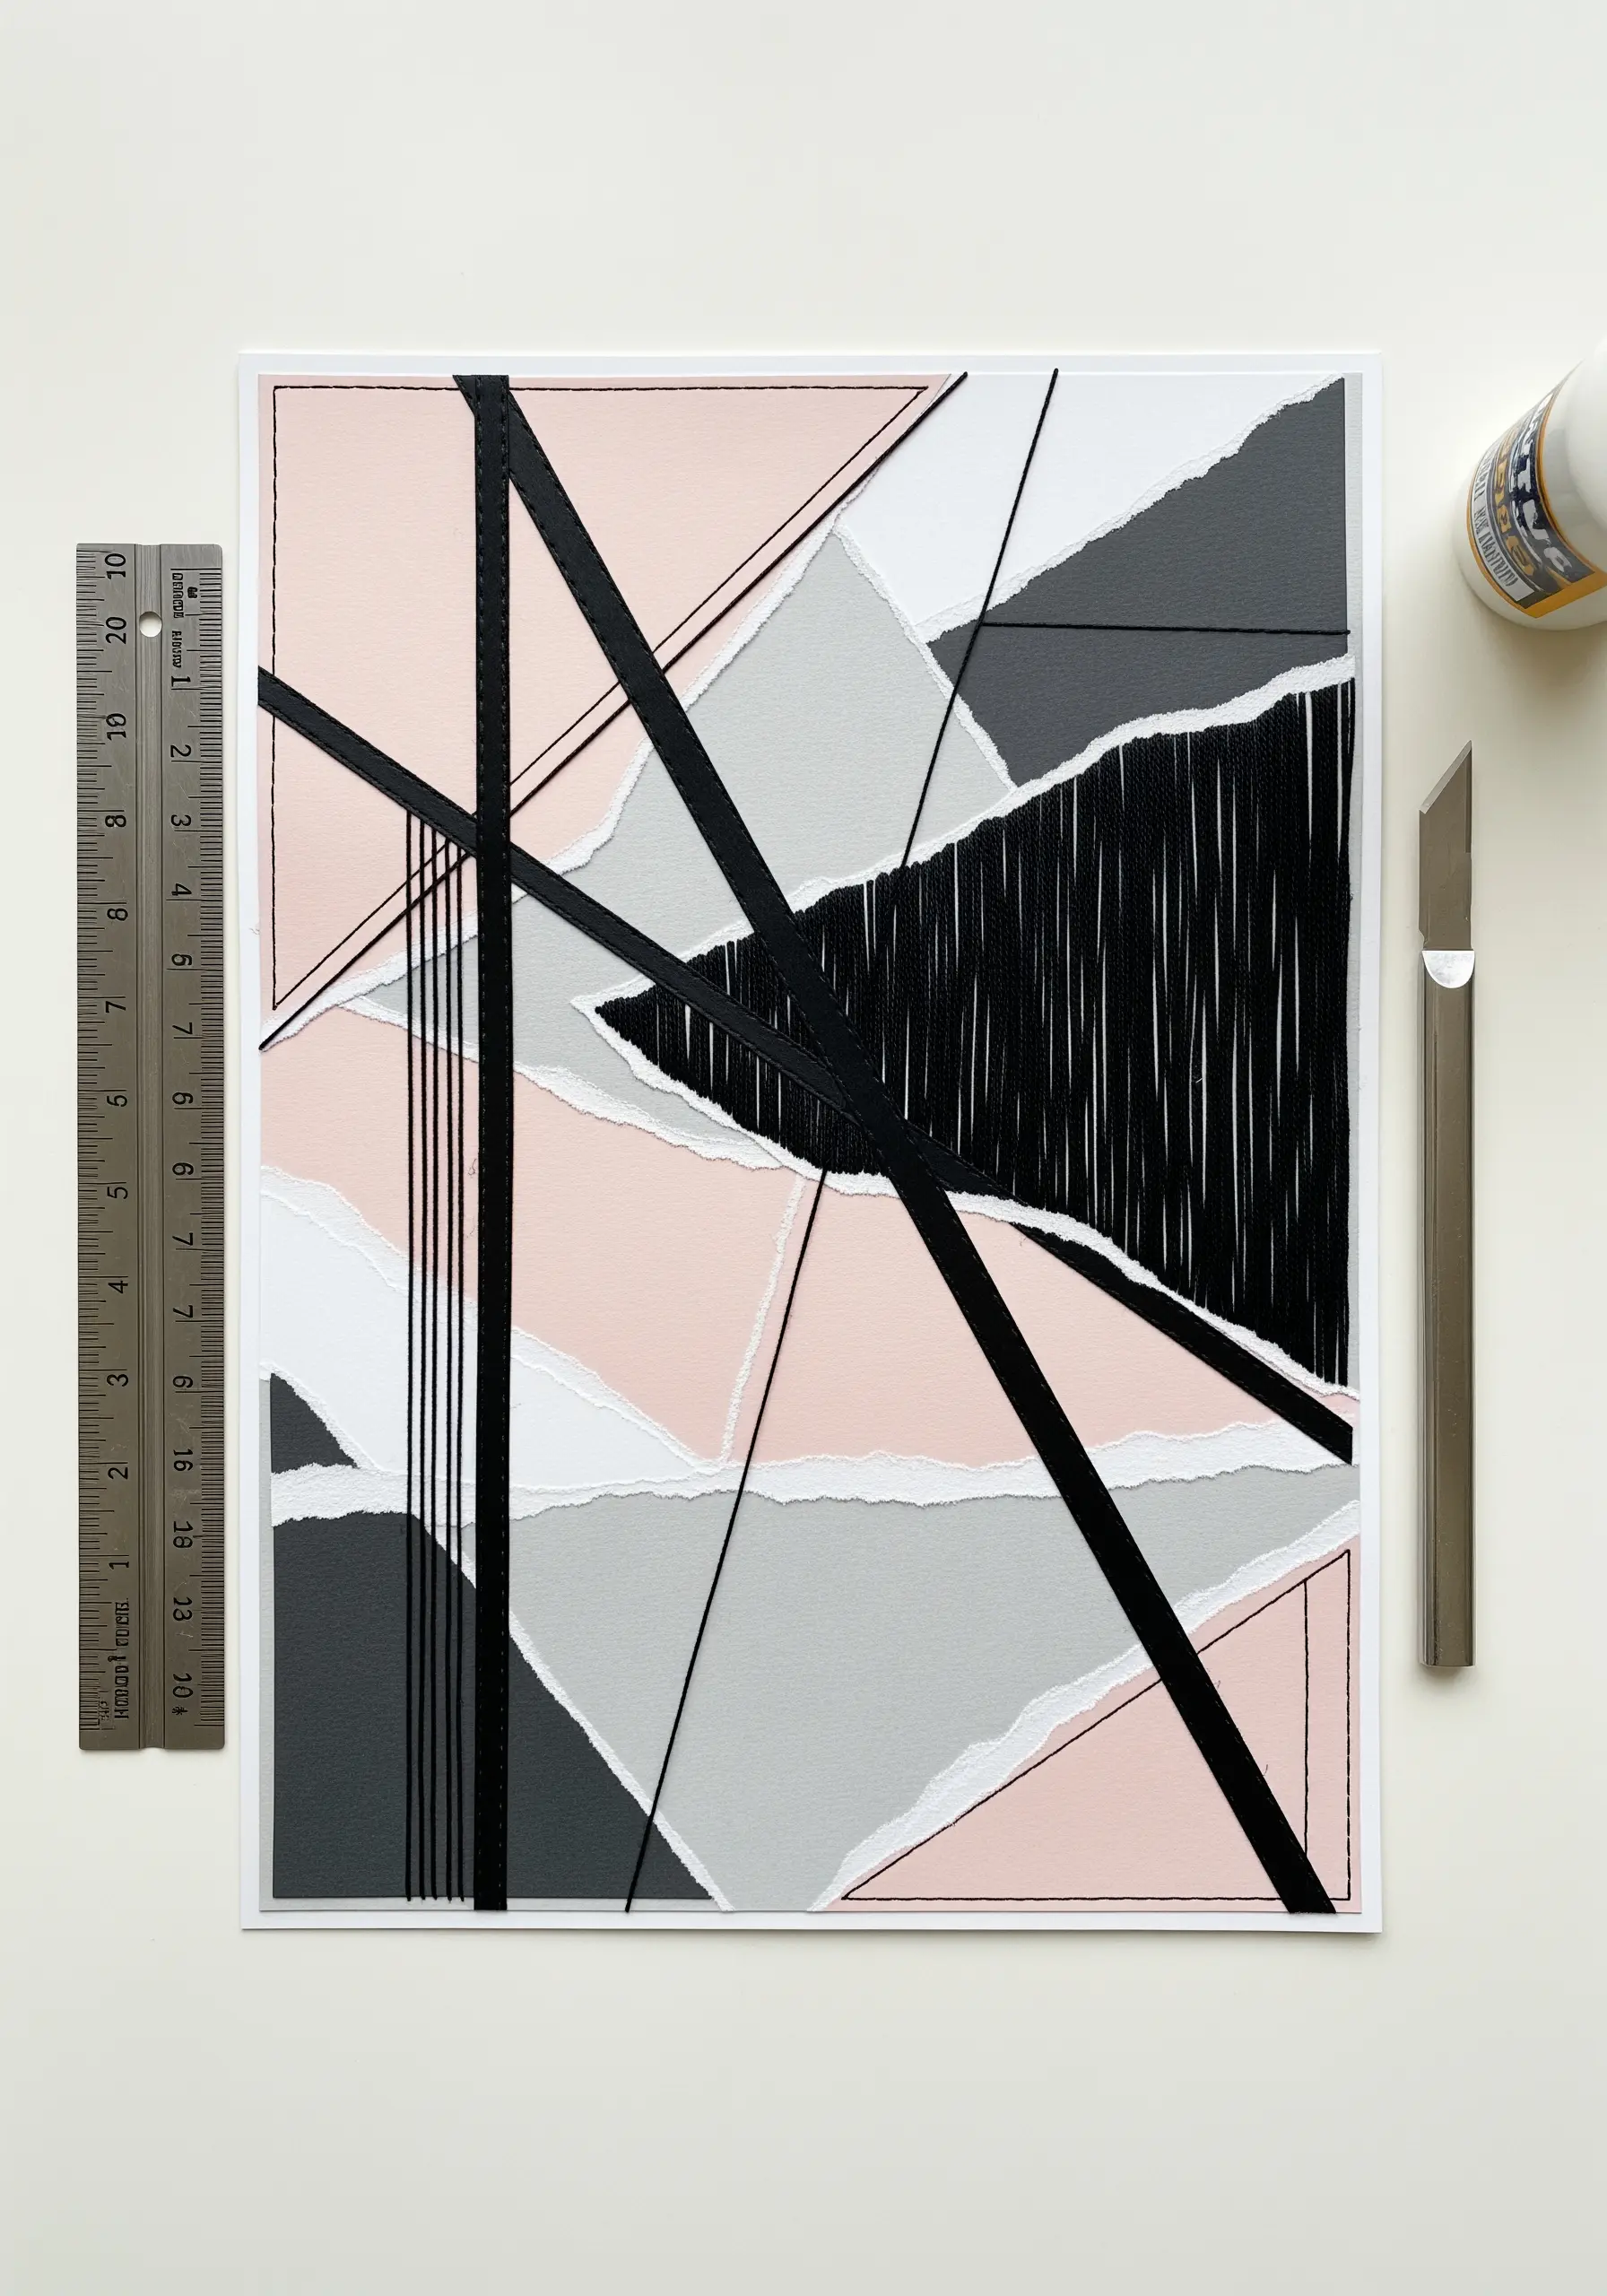
Use embroidery thread as a powerful graphic element to unify an abstract paper collage.
After assembling your collage from torn and cut paper, introduce stitched lines that travel across the different shapes and colors, connecting disparate parts of the composition.
Use a bold, single-color thread, like black, to maintain a strong graphic quality.
Vary the density of your stitches—from single straight lines to dense blocks of satin stitch—to create rhythm, texture, and visual interest.
6. Embellish Illustrated Recipes with Delicate Botanical Stitches
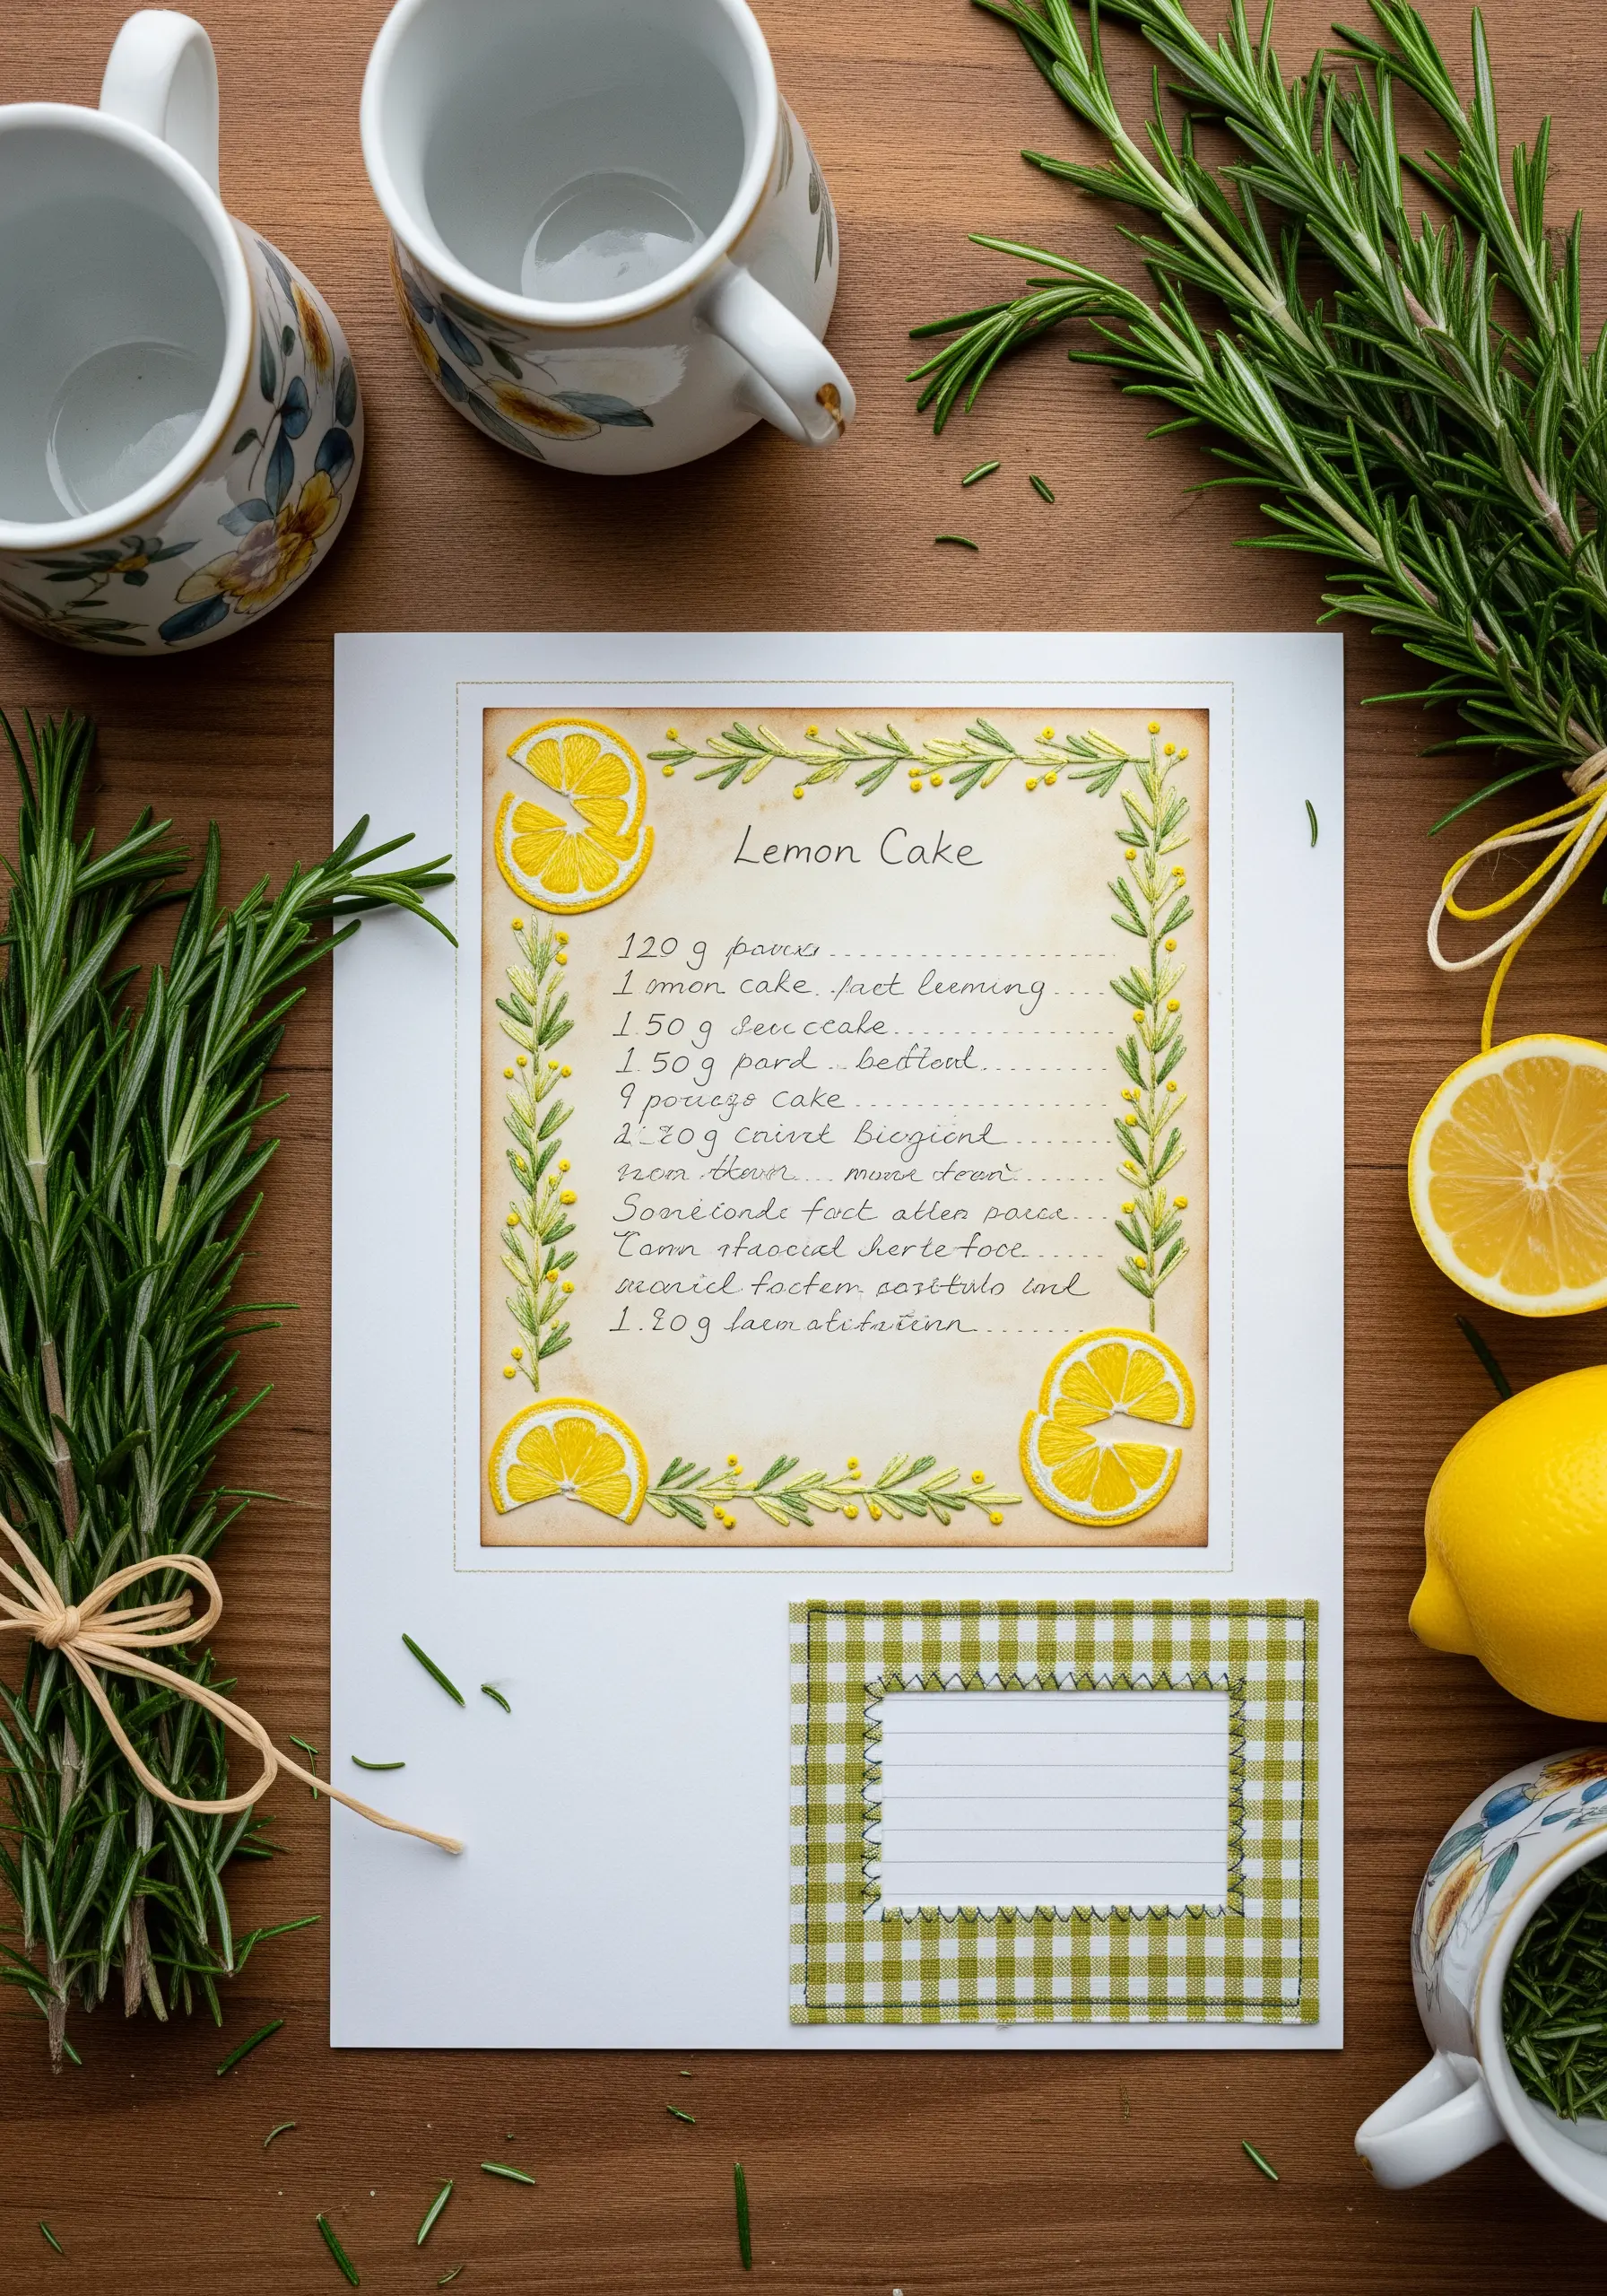
Elevate a meaningful family recipe by transforming it into a piece of illustrated art.
Print or write your recipe on heavyweight, textured paper that can handle a needle and thread.
Use just one or two strands of floss to add small, refined details, like satin-stitched lemon slices or tiny leaf stitches for herbs.
This technique is about subtlety; the goal is to add a touch of color and handmade texture that enhances the recipe without obscuring the text.
7. Add Tactile Motion to Landscapes with Layered Thread Waves
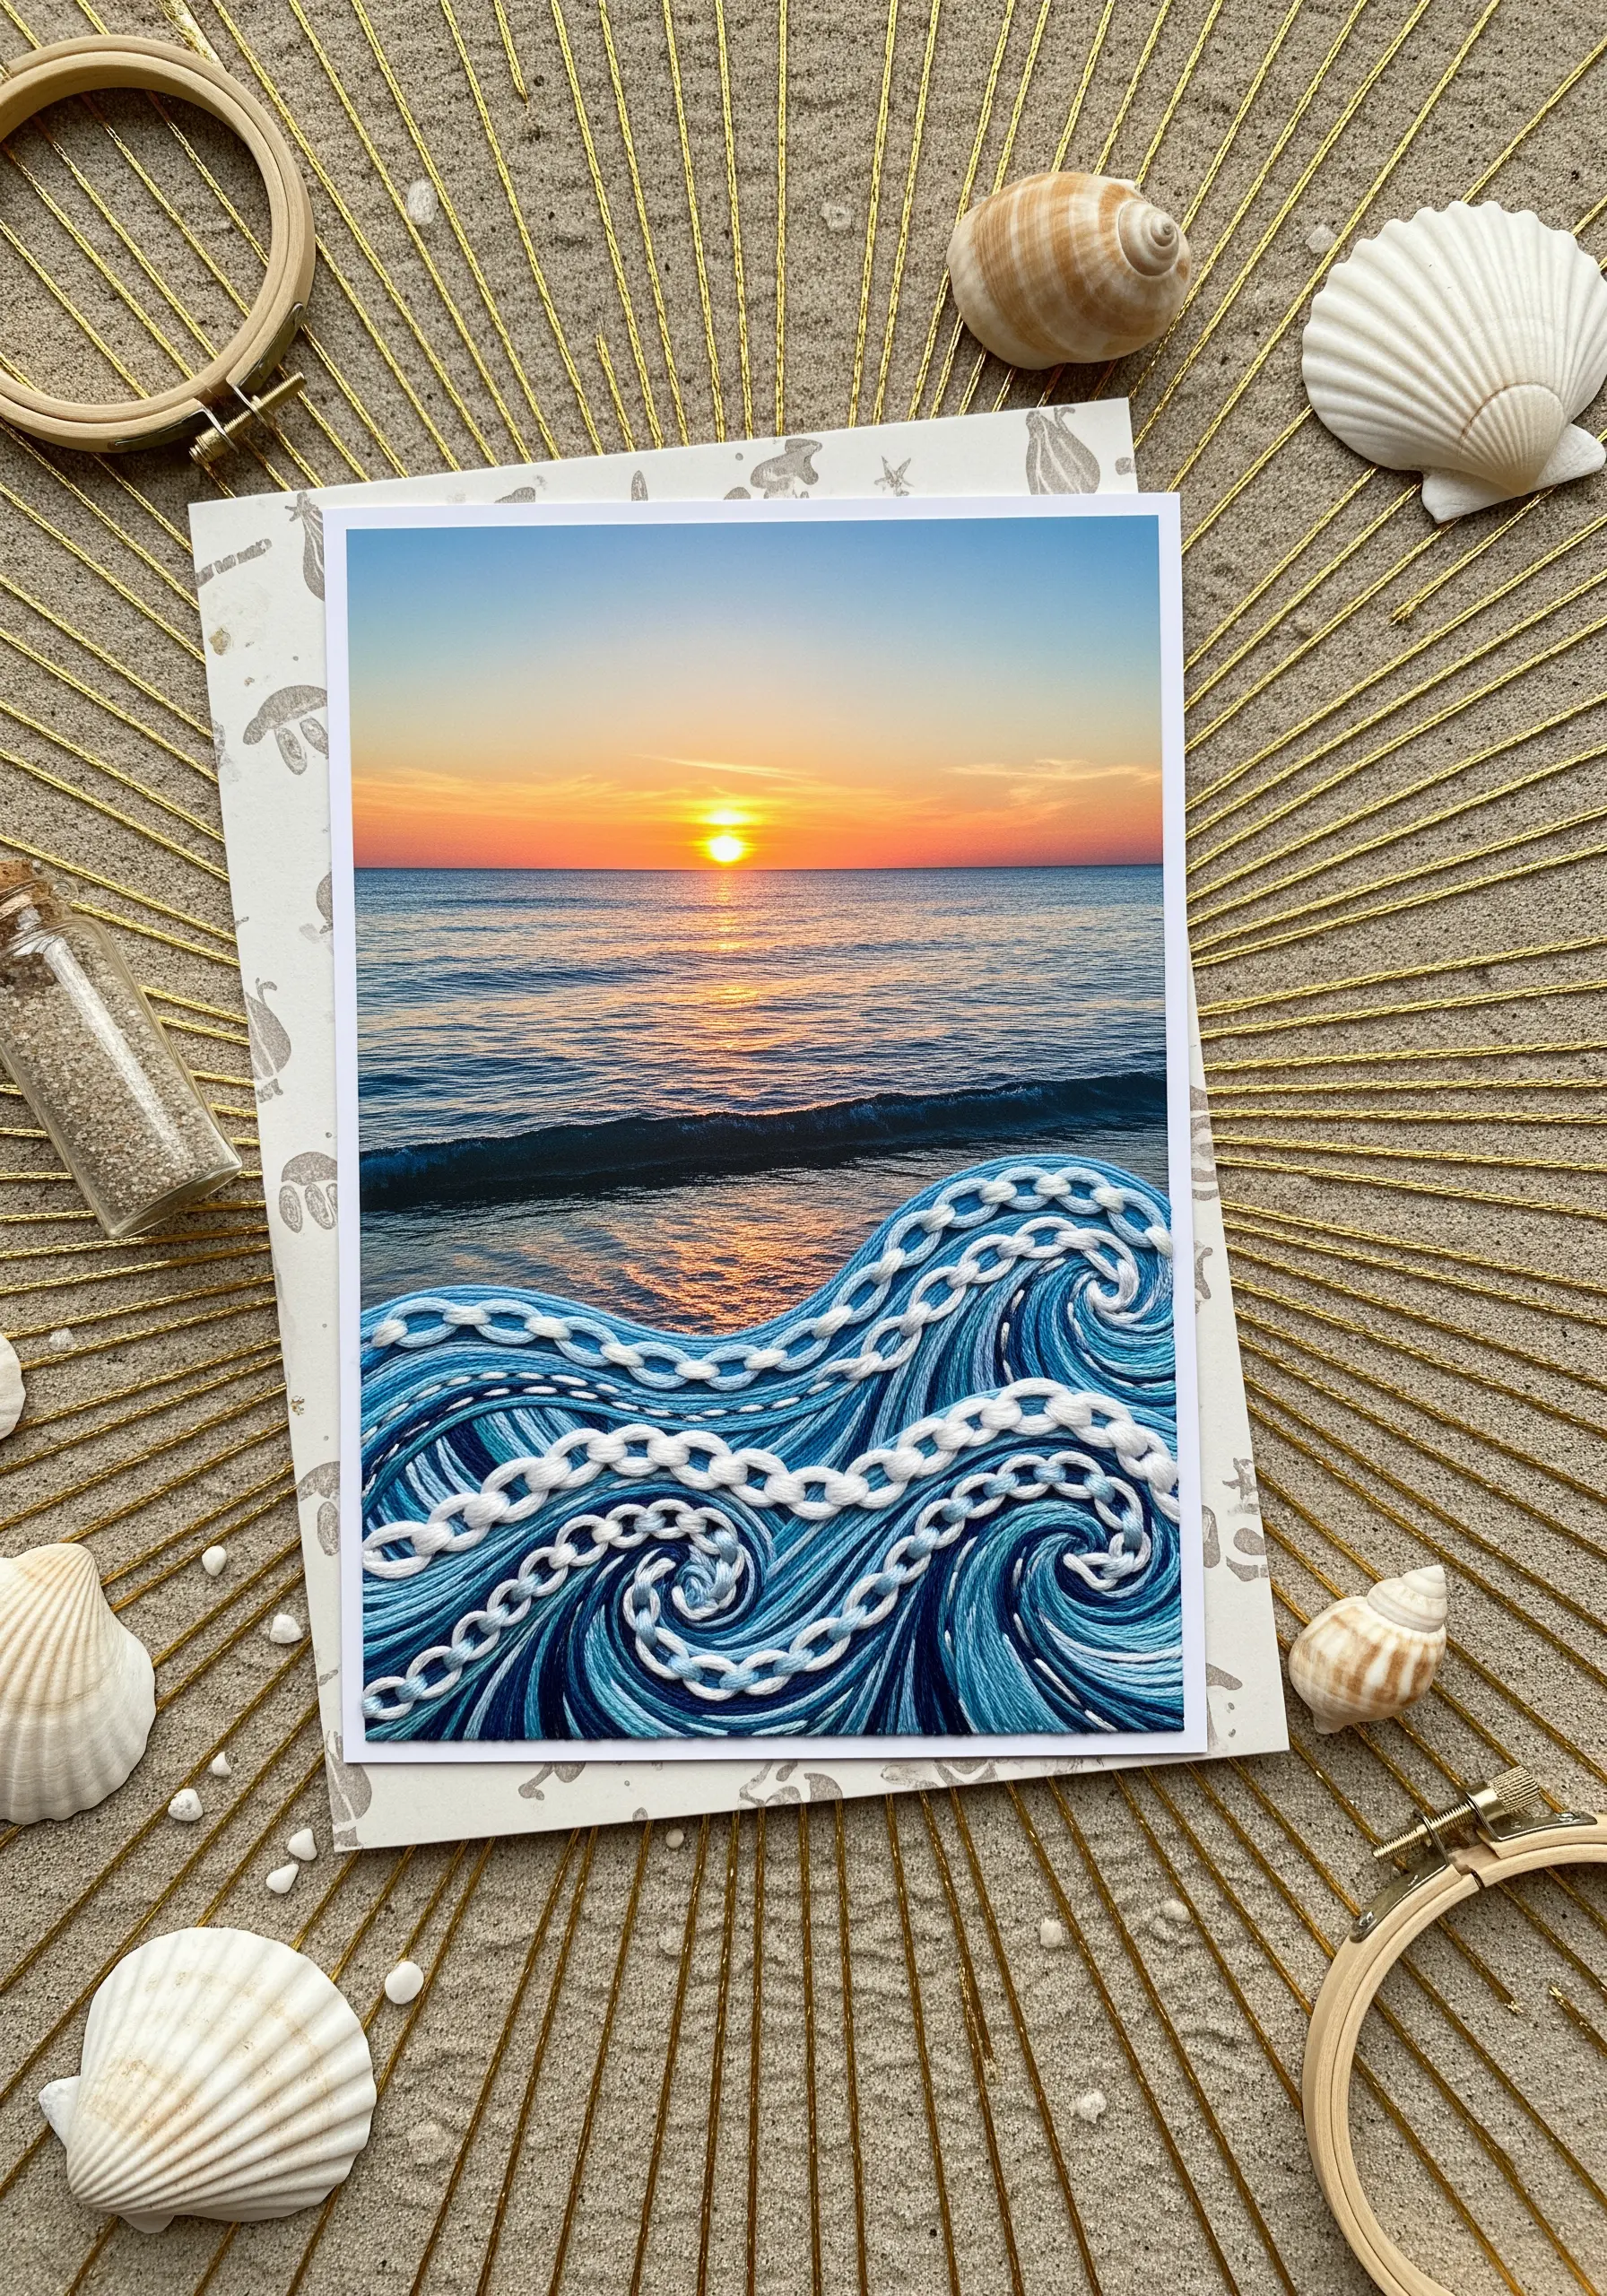
Bring a static photograph to life by stitching dimensional texture directly onto its surface.
To capture the movement of water, use a variegated blue and white thread to naturally create highlights and shadows.
Work in chain stitch or use a couching technique to lay down thick, flowing lines that mimic the shape of waves.
By layering your stitches and varying their thickness, you create a tangible sense of depth and motion that transforms the original image.
8. Illuminate Cityscapes with Thread-Based String Art Lights
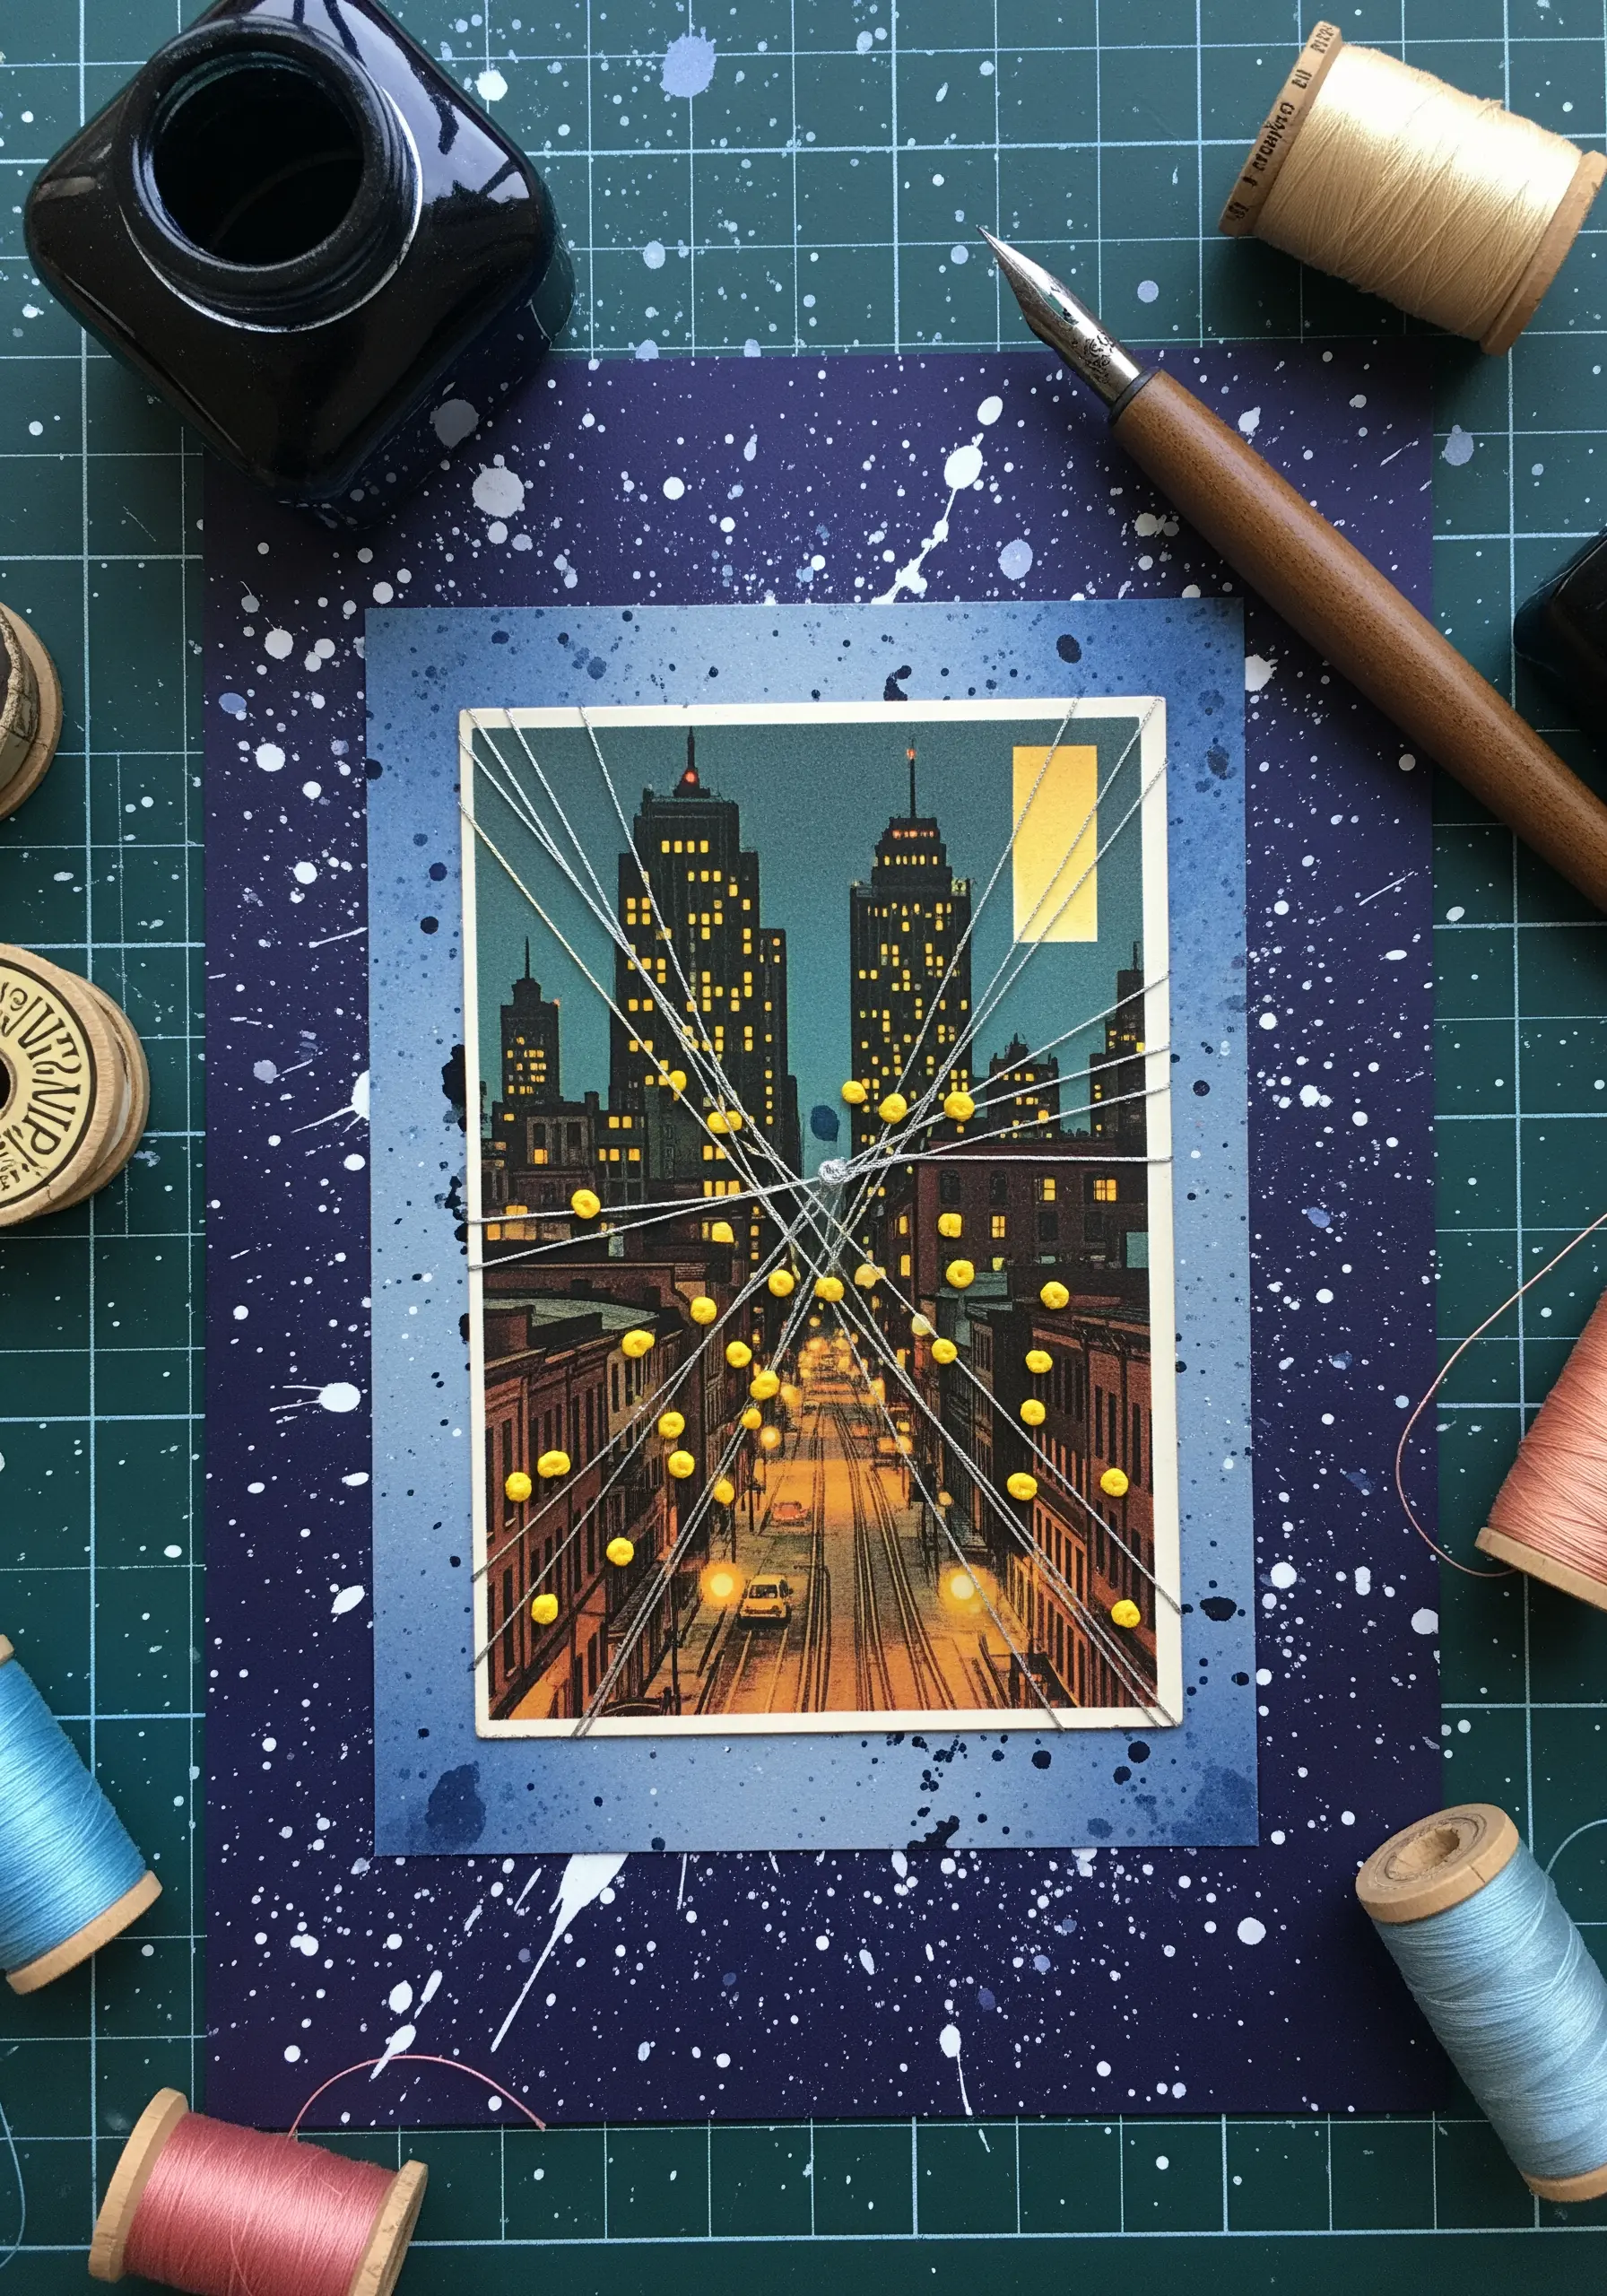
Create a stunning illusion of light and dimension on a printed cityscape using a simple string-art method.
Mark anchor points on your image and pre-pierce them with a pin.
String a fine, light-colored thread—like a metallic silver or pale yellow—between these points to suggest draped lights.
Add small French knots where the threads intersect or at the anchor points to enhance the glowing effect and give the piece a finished, dimensional quality.
9. Blend Real and Embroidered Leaves for a Hyper-Textural Autumn Collage
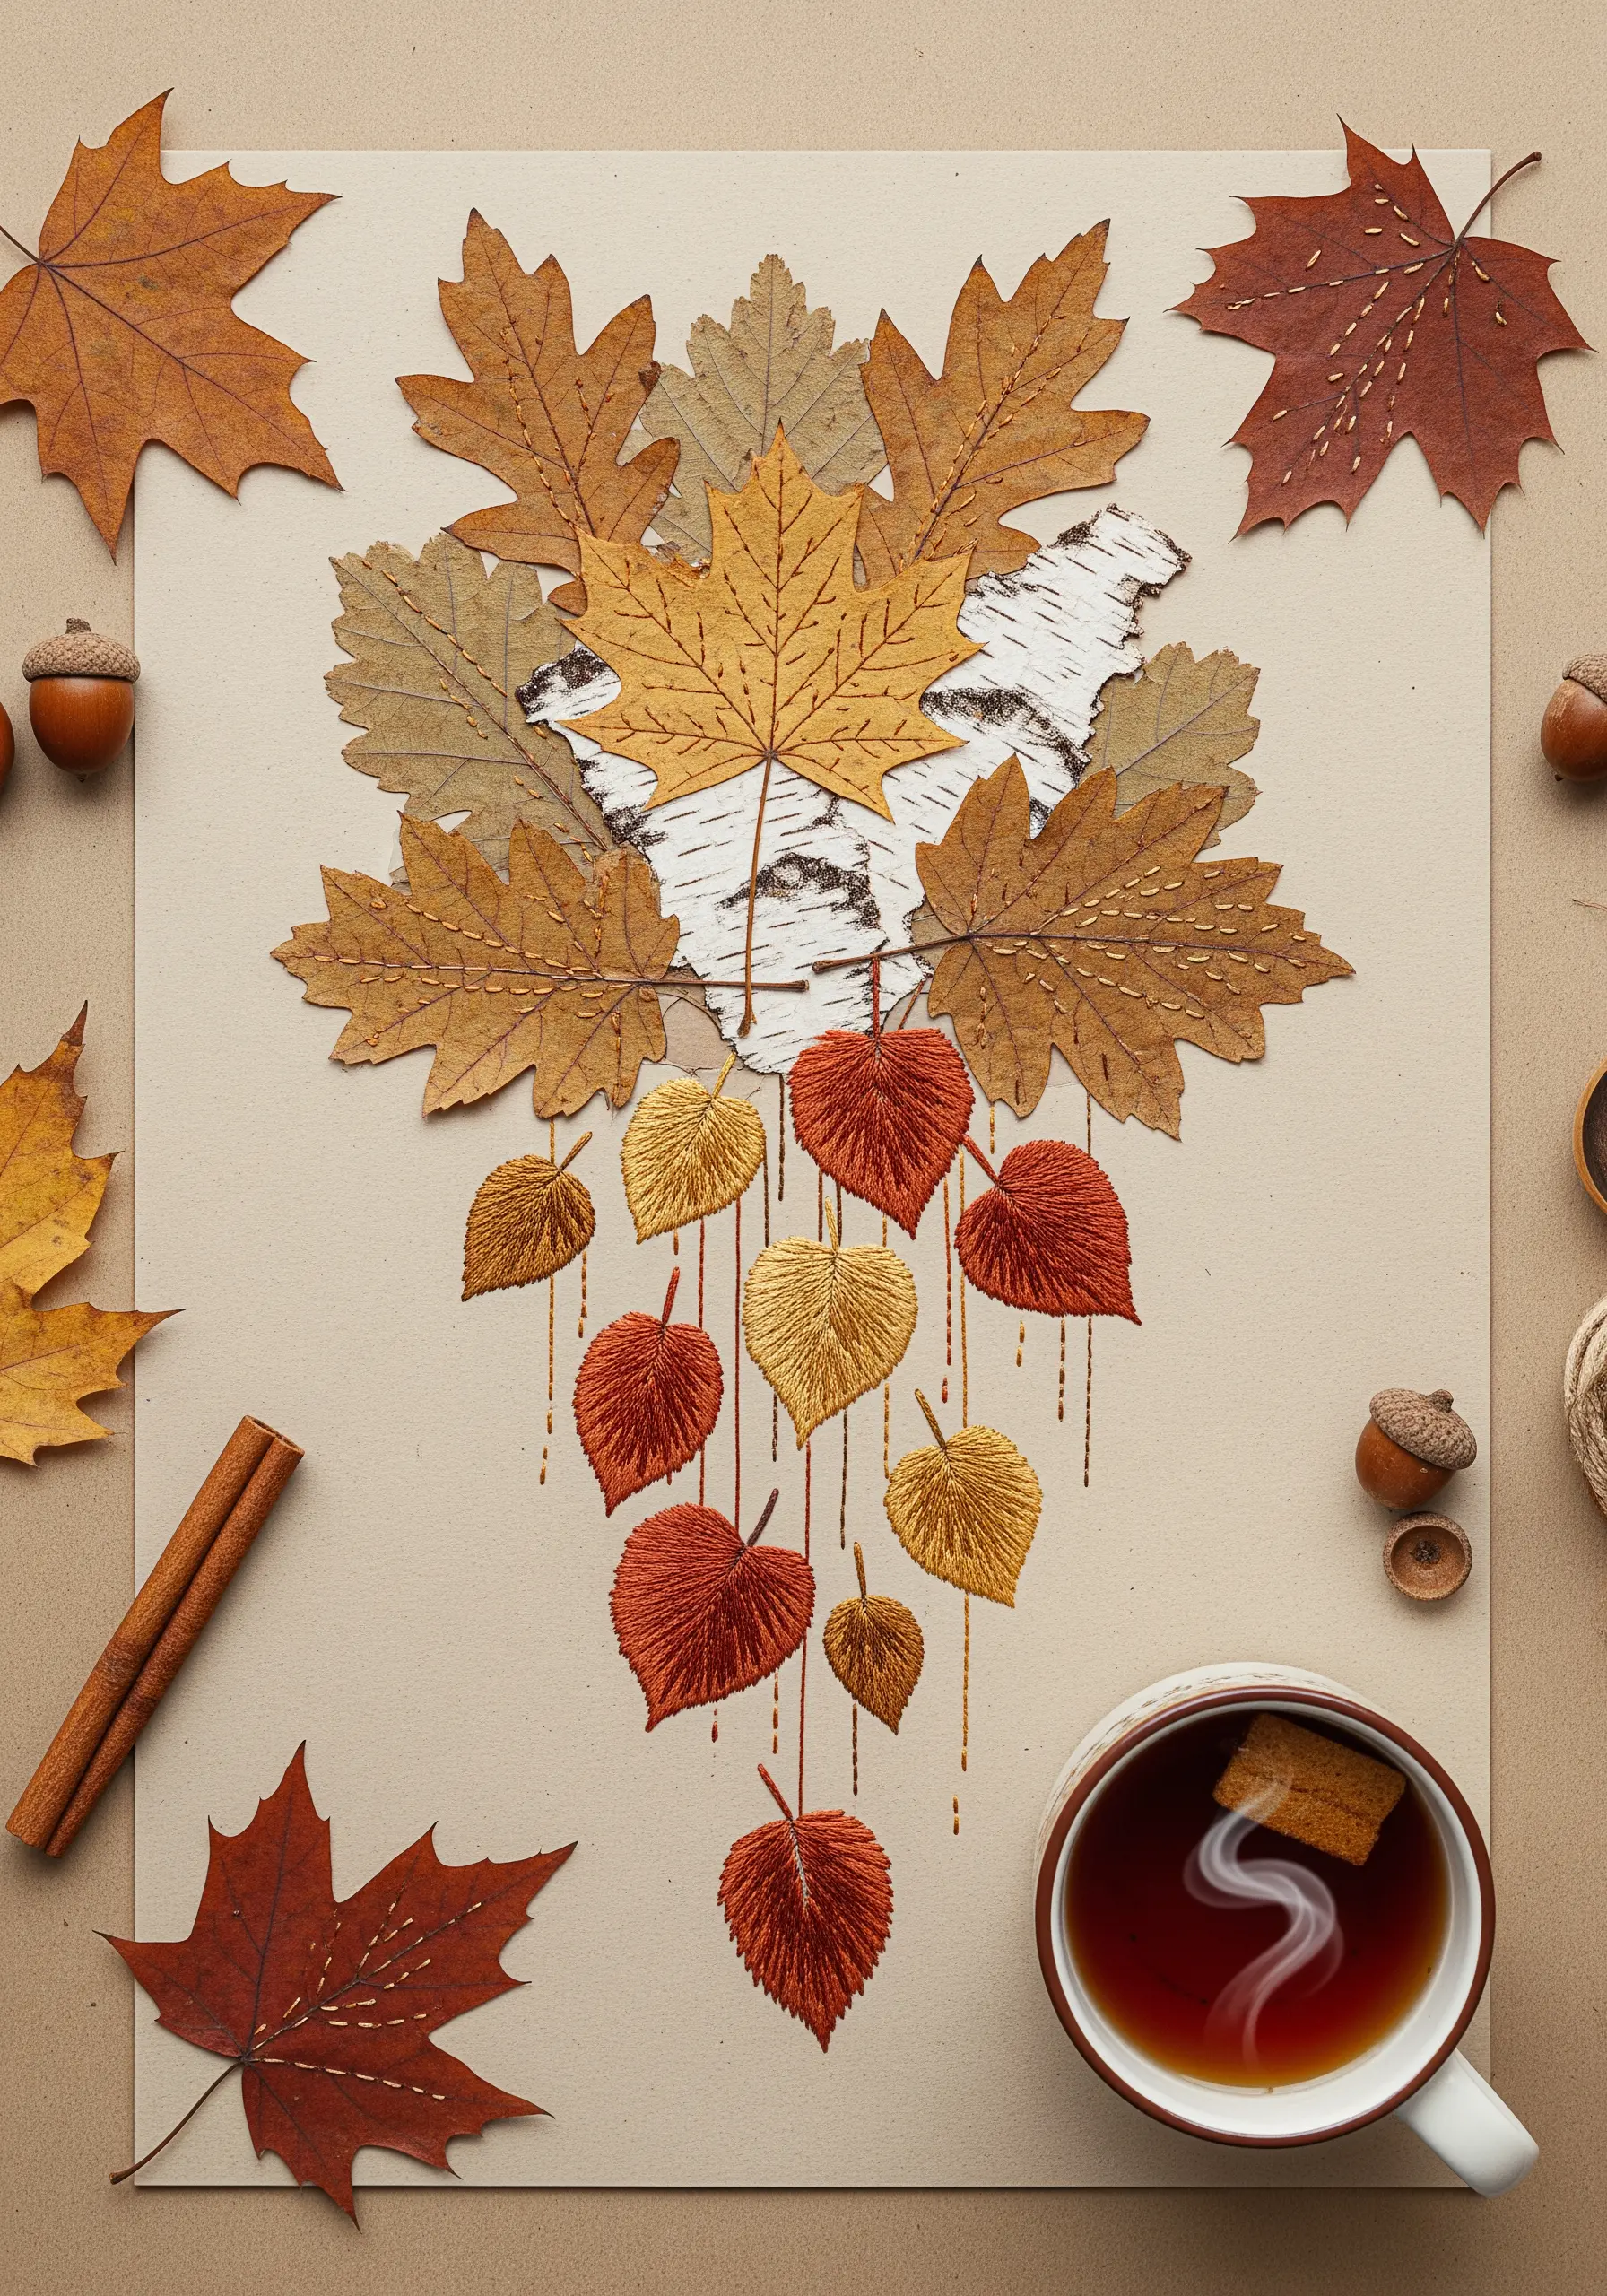
Create a composition that plays with perception by mixing natural objects with their stitched counterparts.
First, arrange and adhere real, pressed autumn leaves to your paper base.
Next, embroider additional leaves directly onto the paper, using satin stitch or long-and-short stitch to replicate the colors and vein textures.
This mixed-media approach results in a rich, tactile piece where it becomes difficult to tell where the real object ends and the art begins.
10. Construct a Whimsical Scene with Fabric Appliqué and 3D Felt
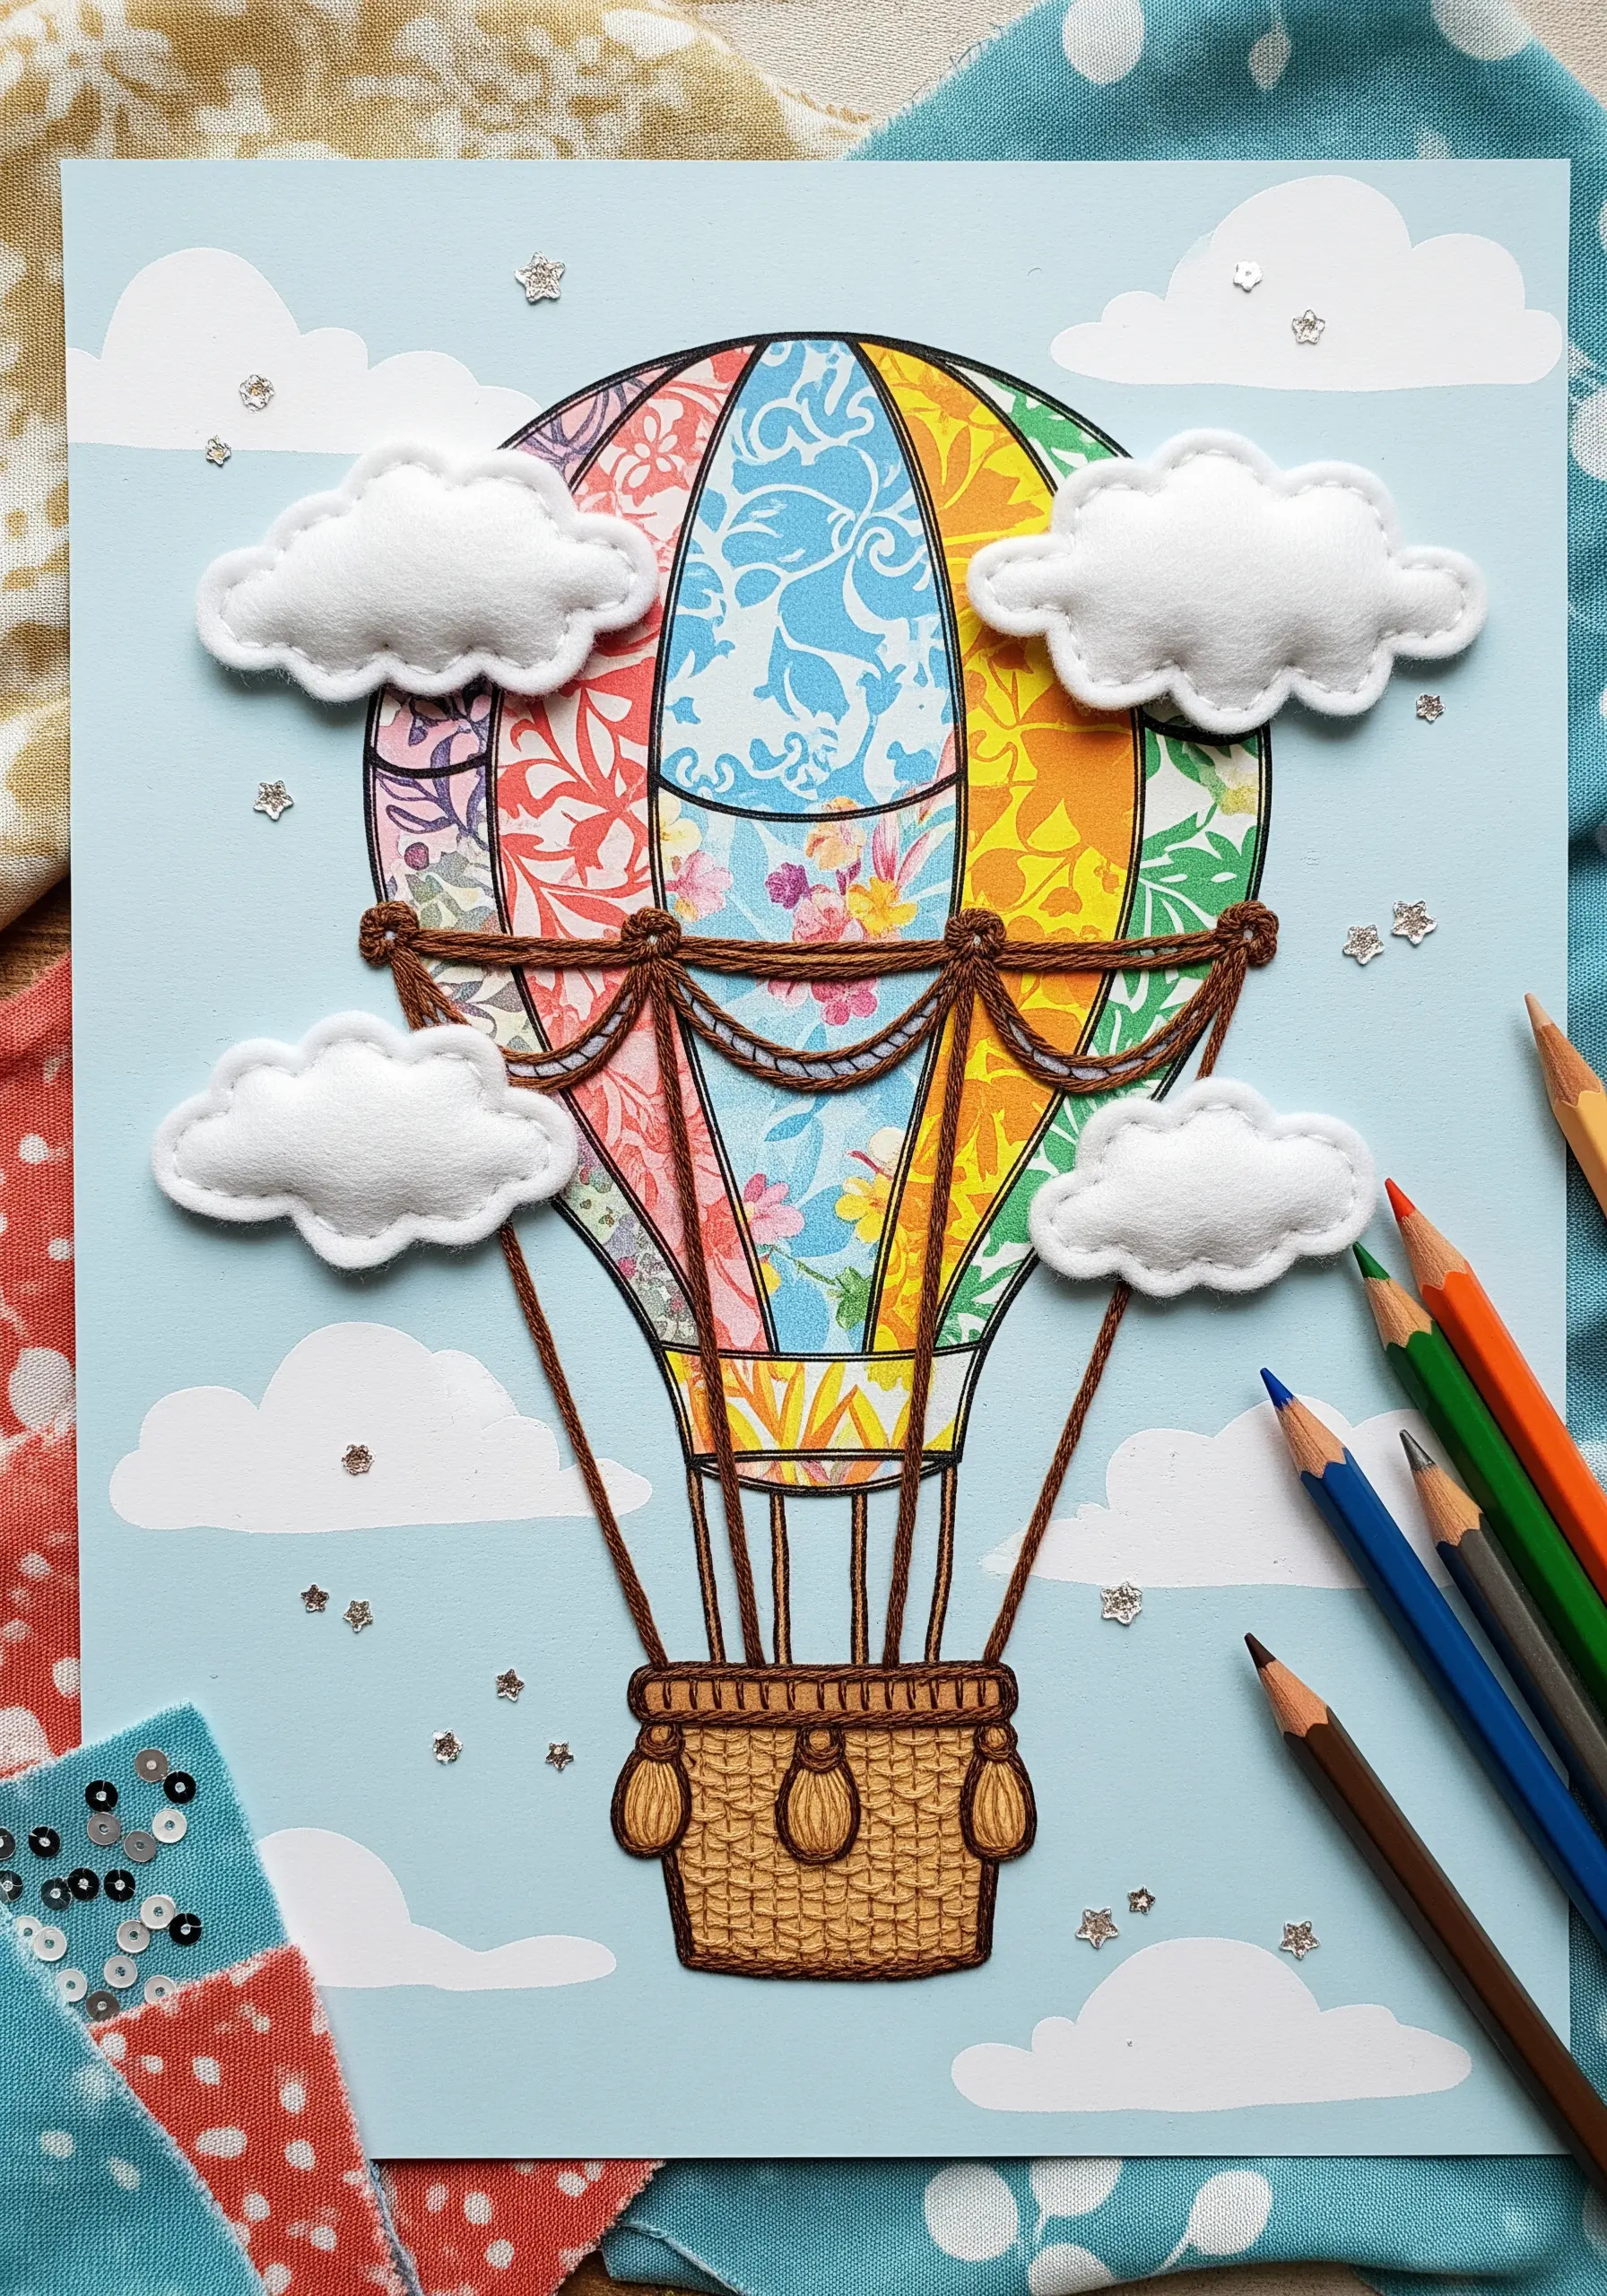
Build a playful, storybook scene by layering fabric and felt onto an illustrated background.
Cut small pieces of patterned fabric for elements like the balloon panels and use a neat backstitch to appliqué them onto the paper.
For the clouds, use thick white felt. Secure them with just a few stitches in the center, allowing the edges to remain loose and lift off the page for an authentic, puffy 3D effect.
This technique adds softness and dimension that makes the entire image feel more dynamic and alive.
11. Frame Cherished Pet Photos with Patchwork and Accent Stitches
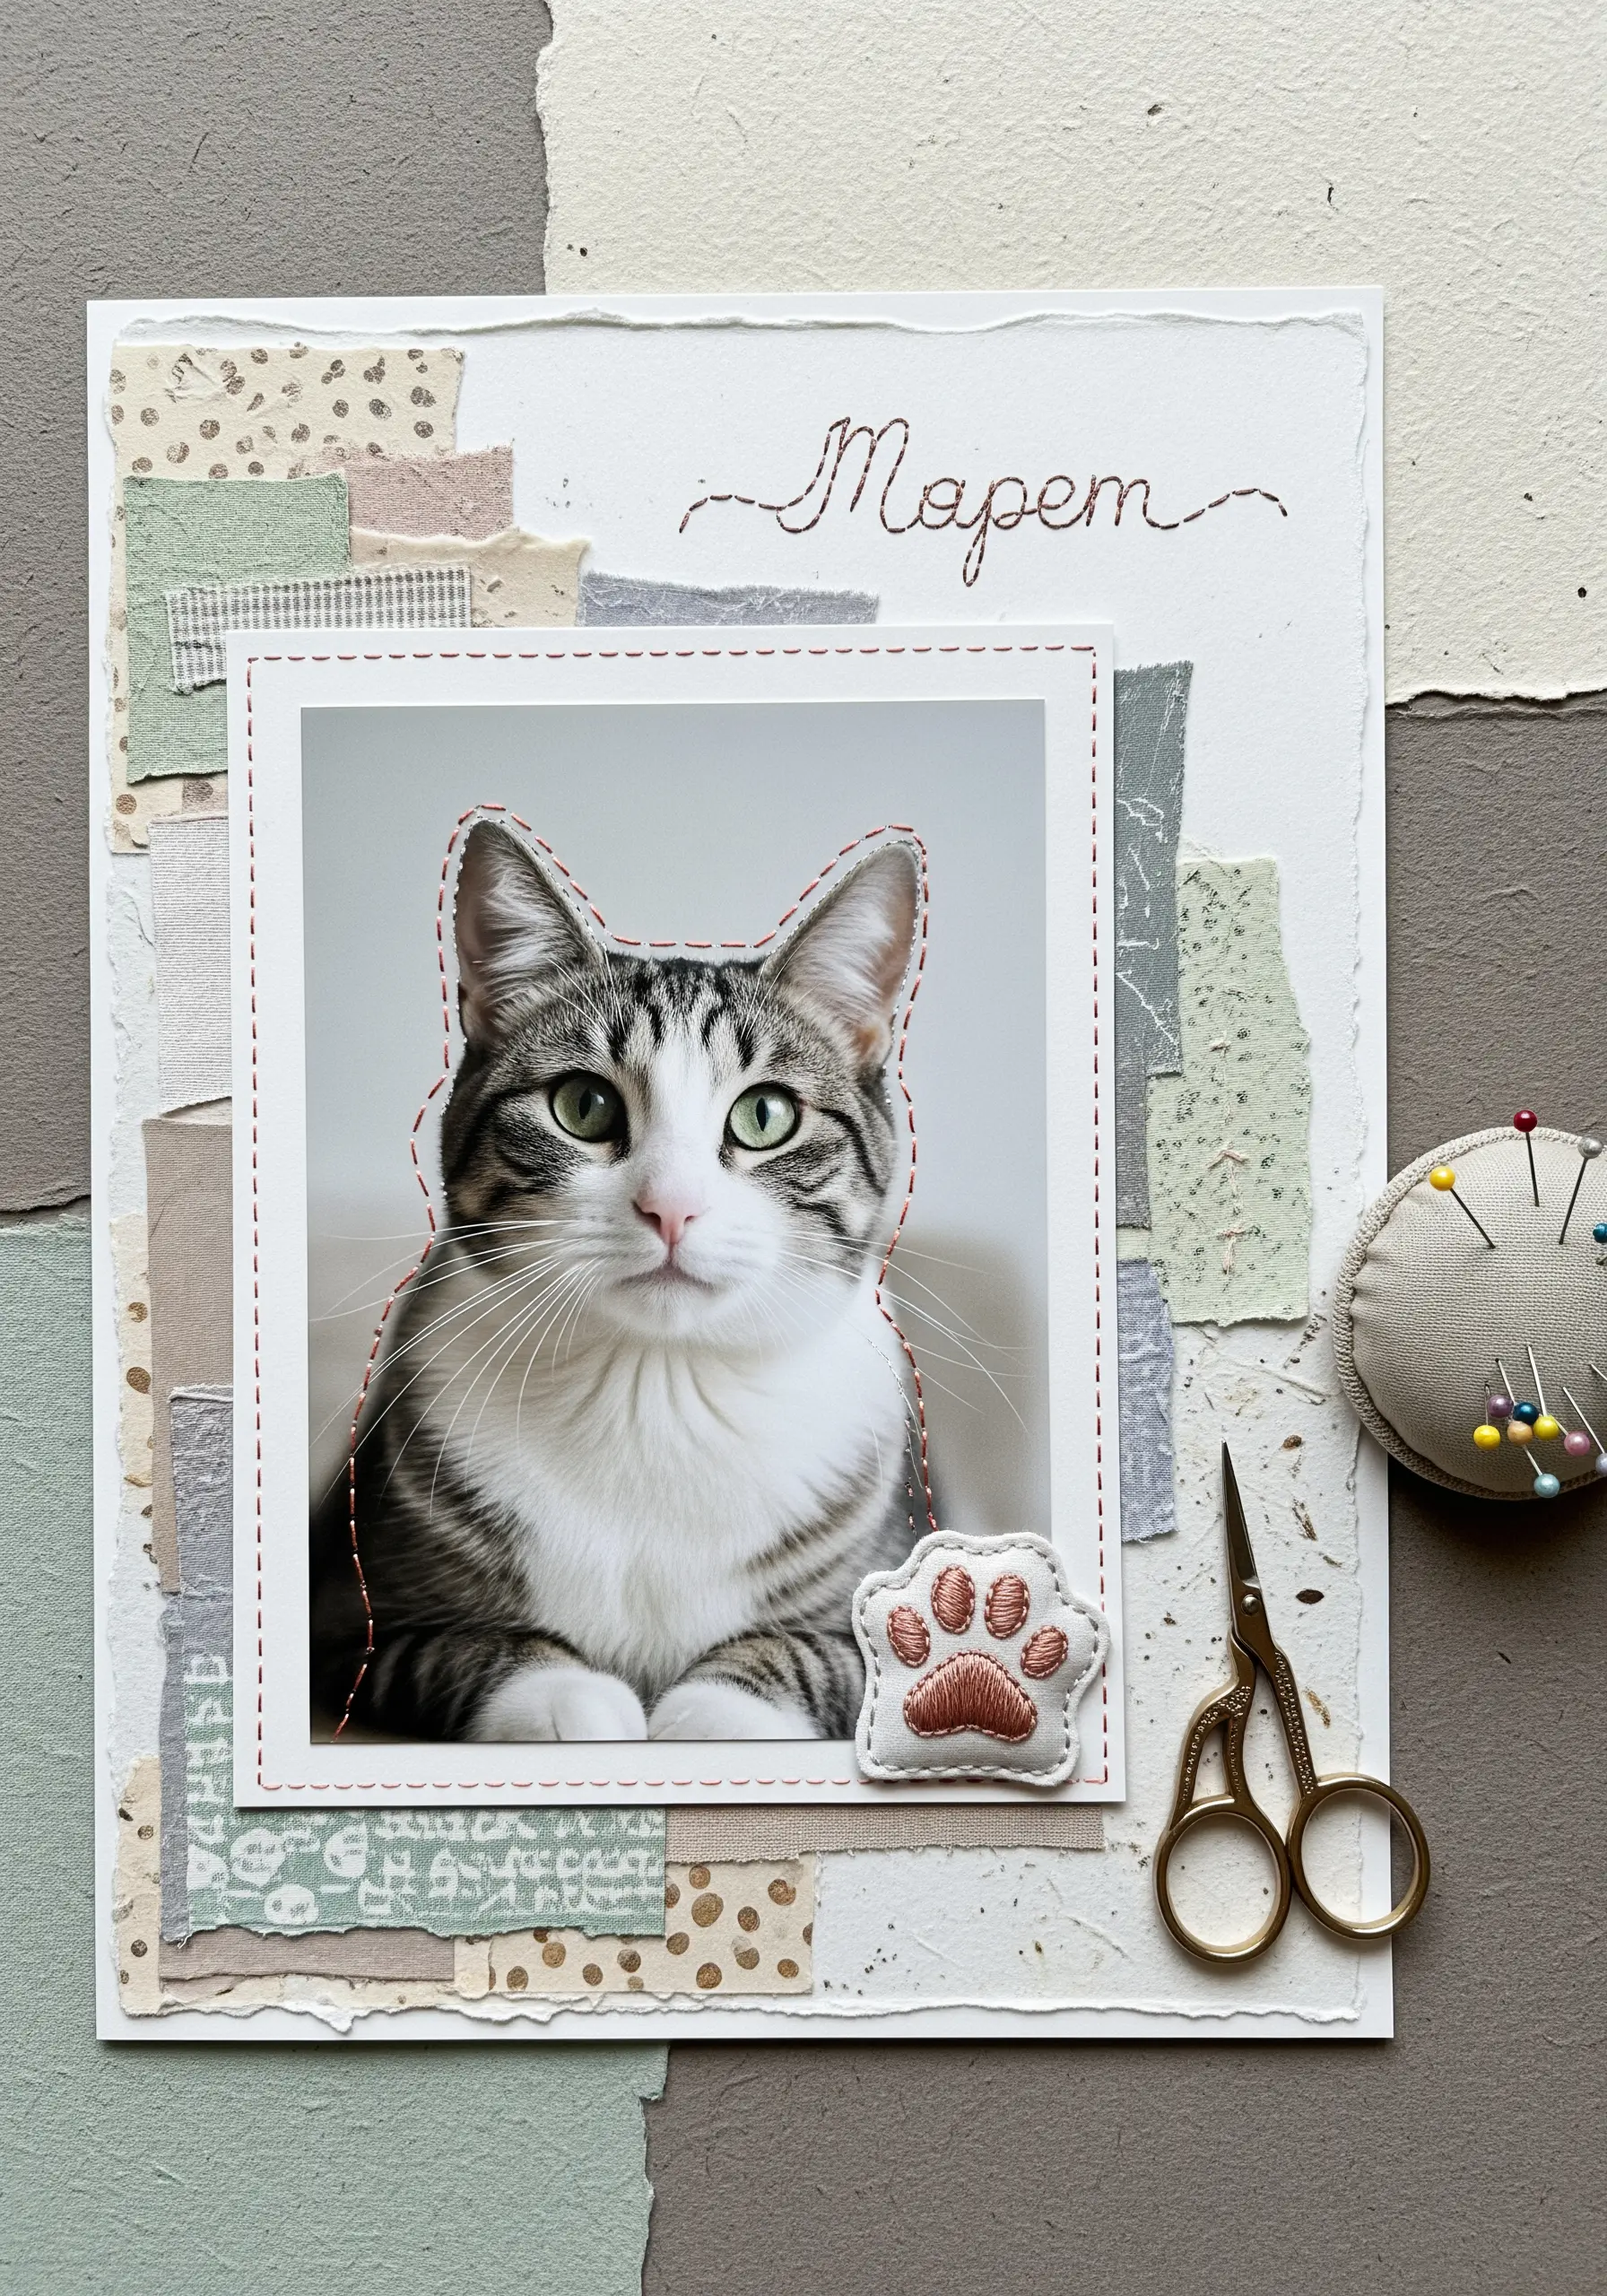
Create a warm, tactile tribute to a beloved pet by combining photography with soft, textural elements.
Build a background by creating a simple patchwork of muted fabric scraps, handmade paper, and linen.
Mount the photo, then use a simple running stitch in a contrasting thread to create a stitched frame directly around the image.
You can add a final touch by stitching a small motif, like a paw print, onto a separate piece of fabric and applying it as a dimensional embellishment.
12. Explore Abstract Expressionism with Paint, Paper, and Textural Stitches
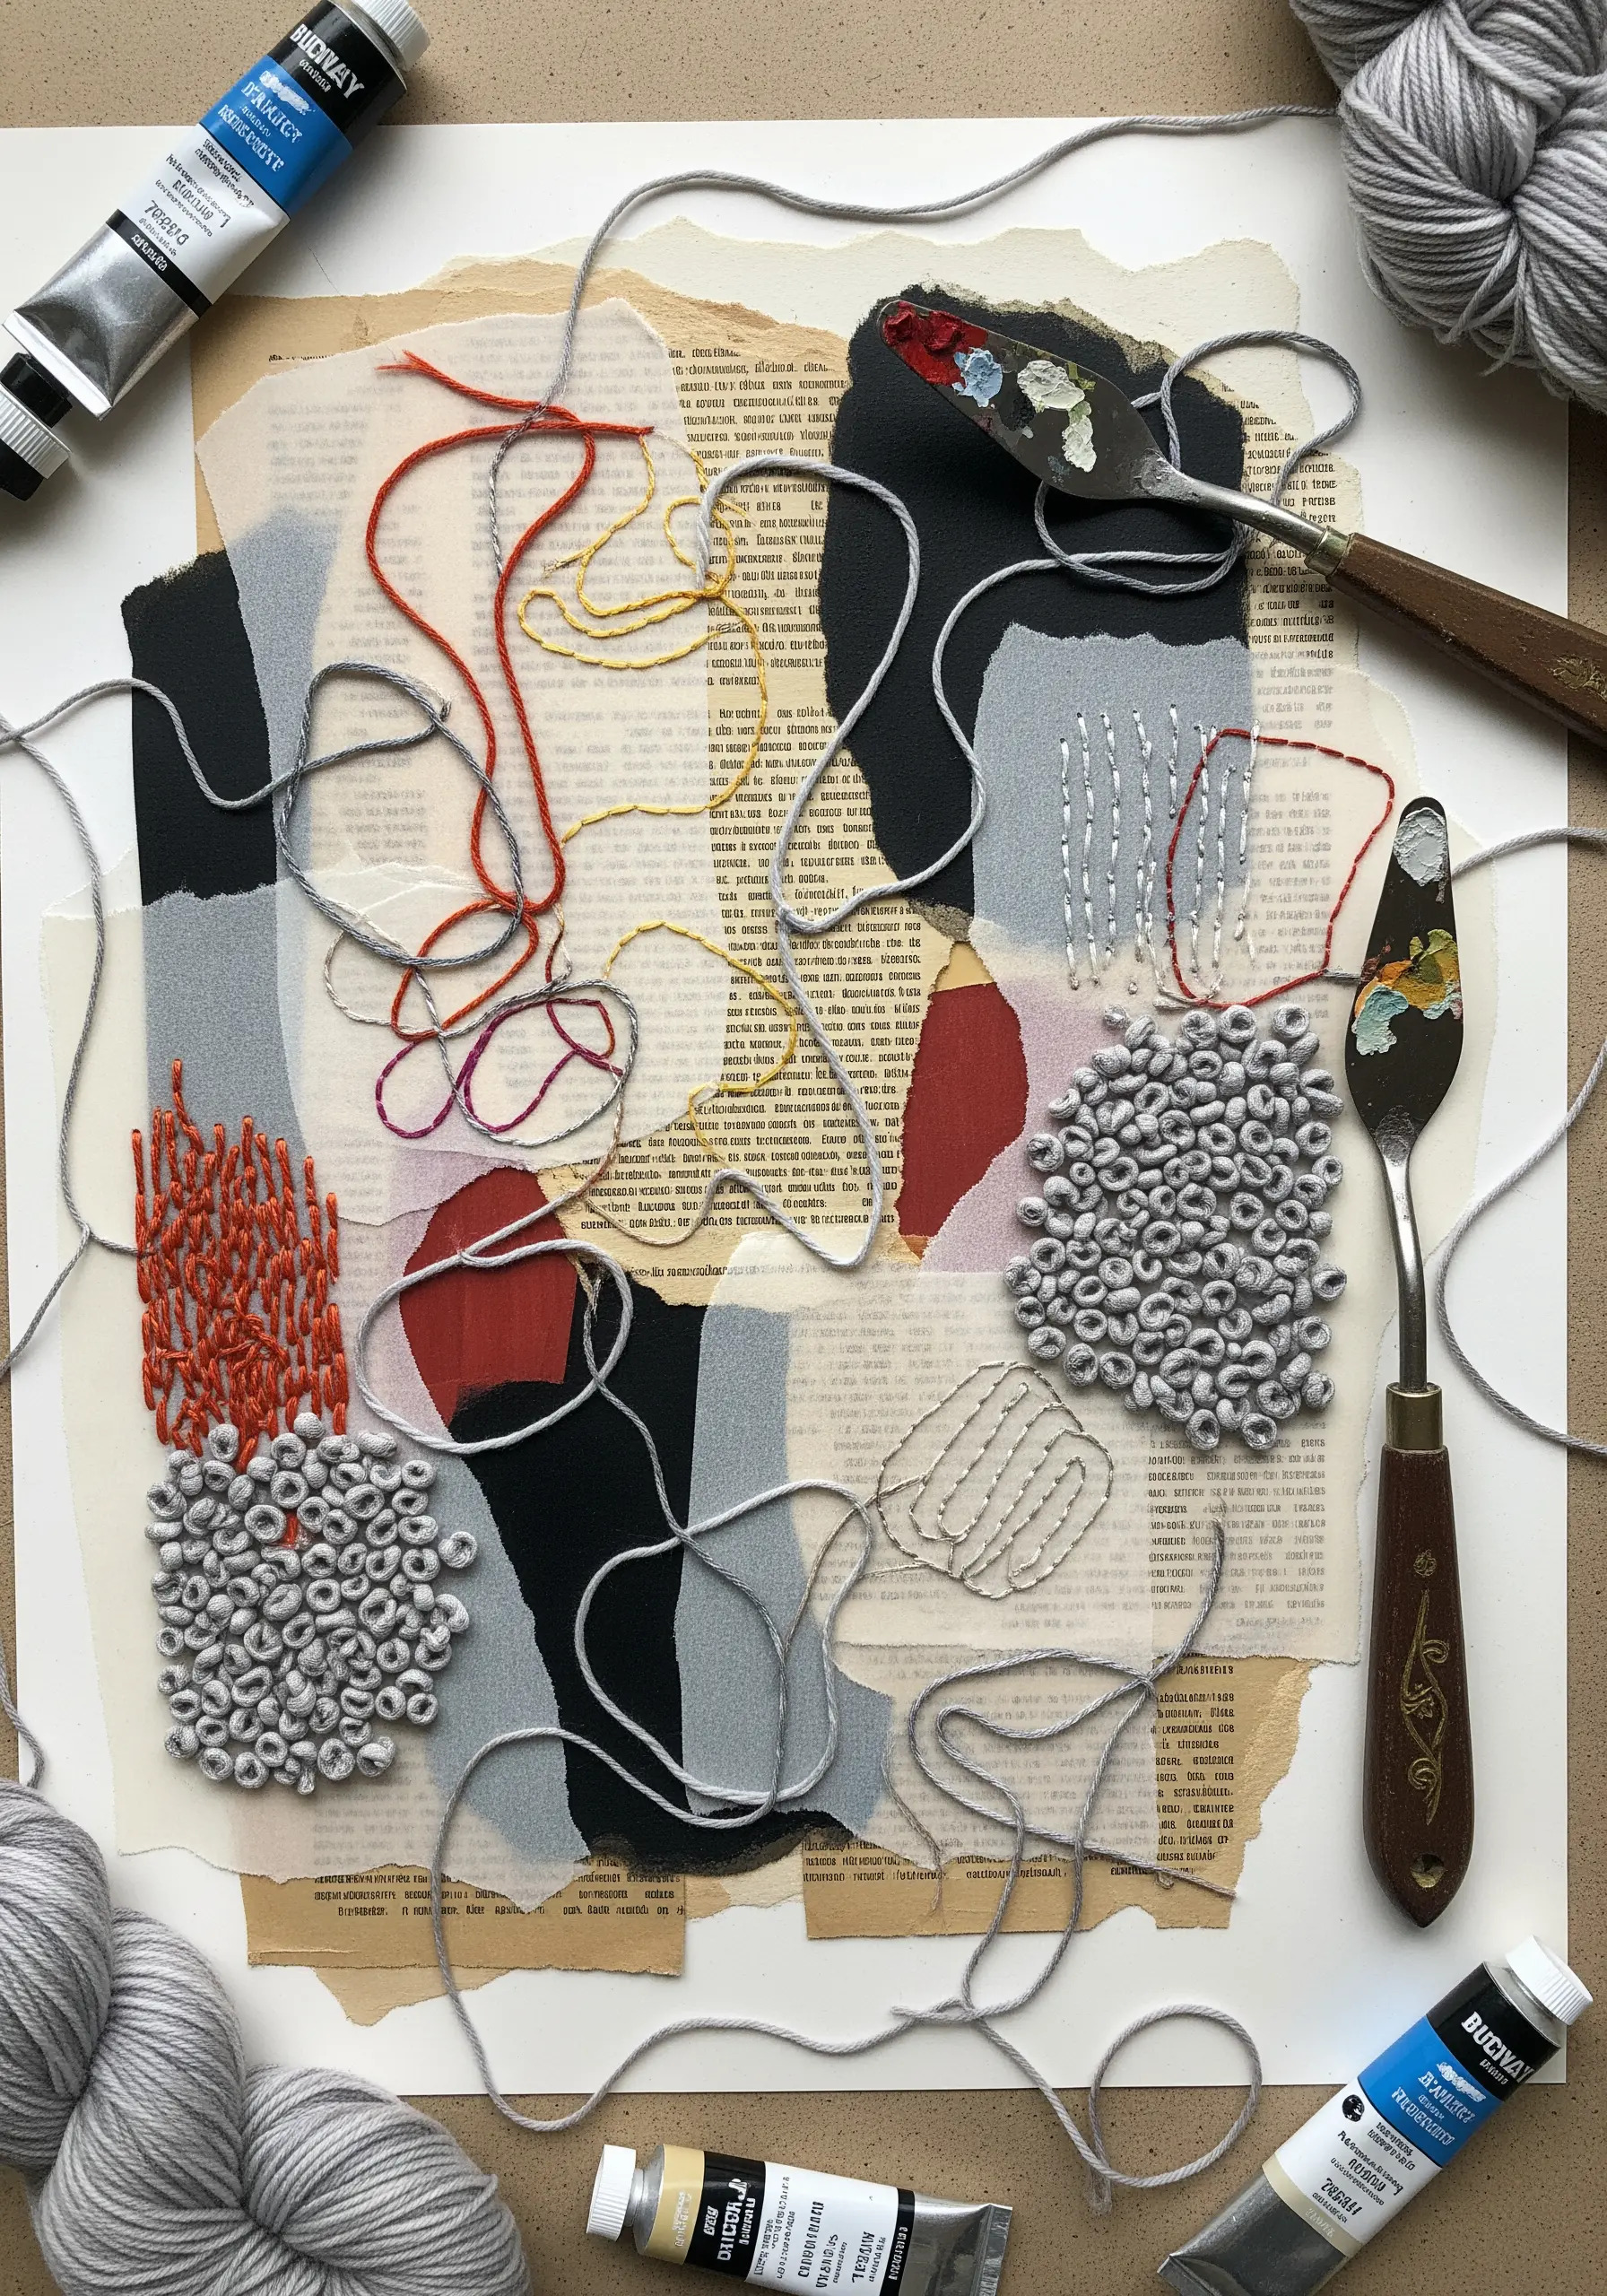
Move beyond representation and focus on pure texture, color, and form in this expressive technique.
Start by creating a layered collage using painted paper, book pages, or fabric scraps as your canvas.
Introduce areas of dense stitching to create focal points. Try clusters of French knots made with chunky yarn for a highly textured surface, or use directional satin stitches to create blocks of color.
Couch down loose threads and yarns to add organic, flowing lines. This process is about creating a compelling abstract fabric collage by balancing different tactile elements.
13. Grow a Stitched Garden from Vintage Illustrations
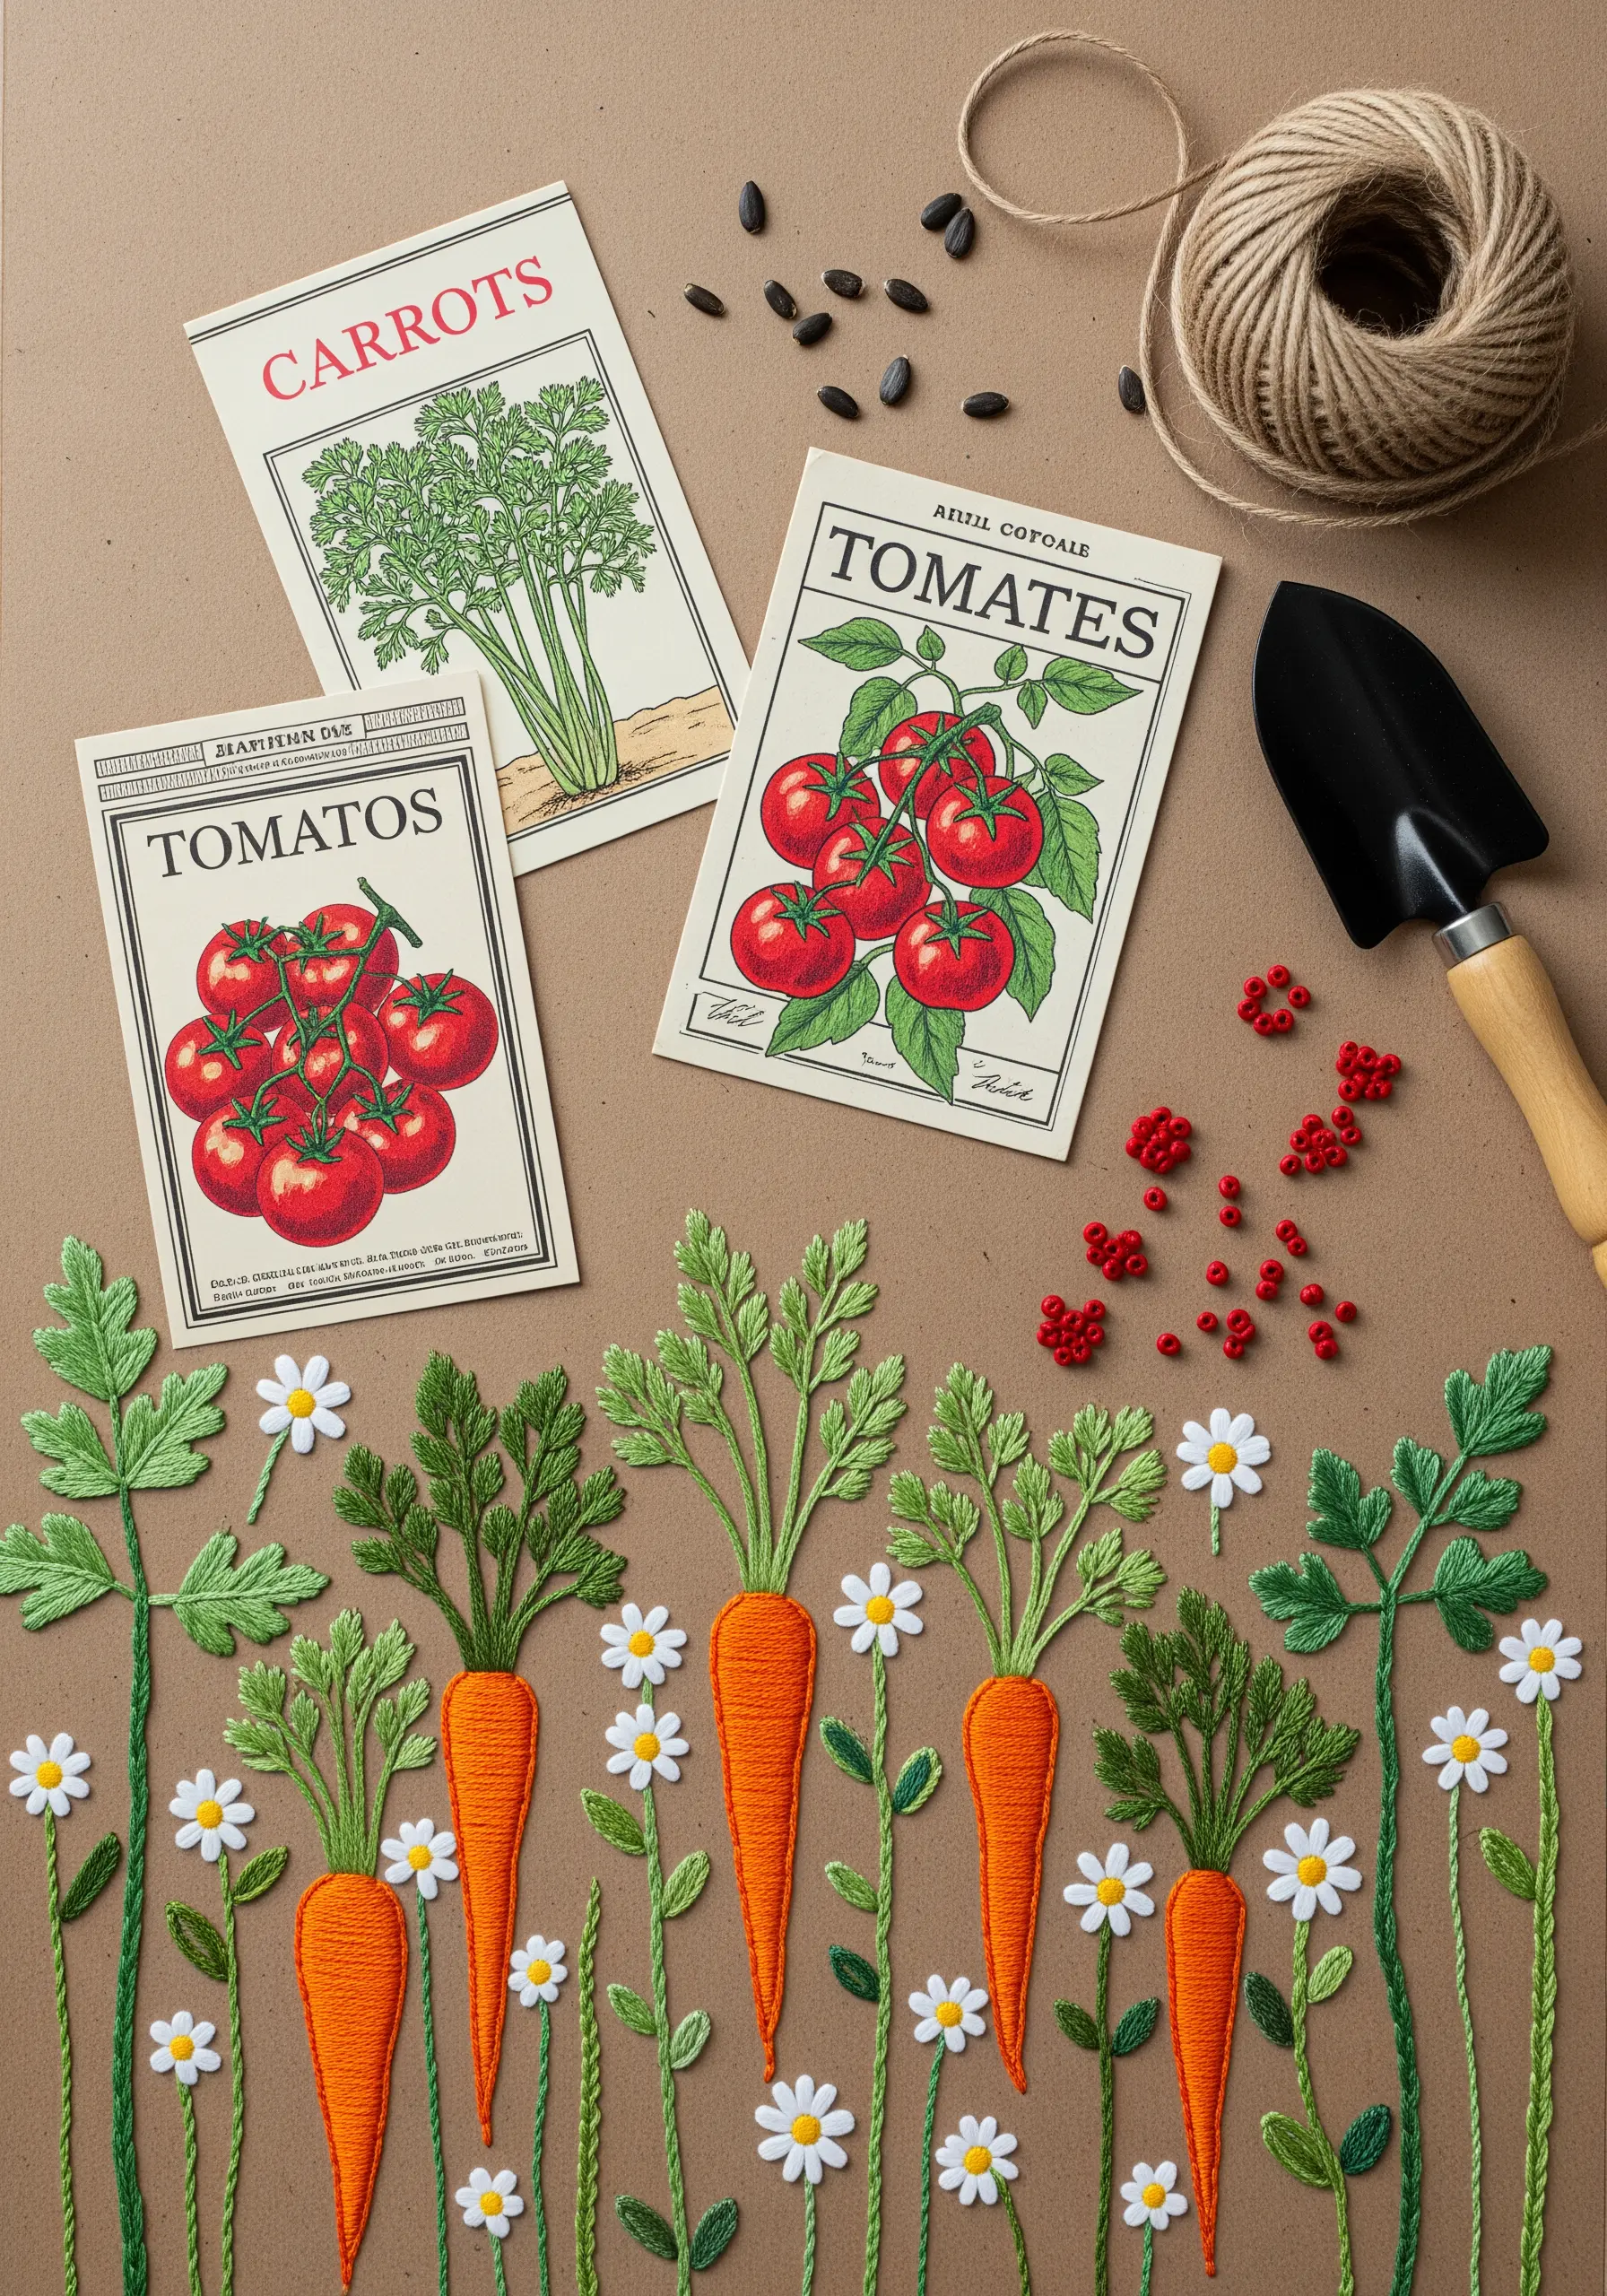
Use vintage ephemera, like old seed packets, as the narrative starting point for a charming stitched scene.
Mount the seed packets at the top of a sheet of heavy cardstock.
Embroider the corresponding vegetables directly below, as if they are growing in a garden. Use satin stitch for the solid roots and a mix of straight stitches and French knots for the leafy green tops.
This storytelling approach transforms simple illustrations into a complete and whimsical visual narrative.
14. Add Playful Energy with Stitched Accents and Real Confetti

Make a celebratory memory page feel truly interactive by incorporating three-dimensional elements.
Frame your photograph with a border of real confetti, securing it with a thin layer of clear-drying craft glue.
For the balloons, cut shapes from glitter cardstock and use a fine metallic thread to stitch the strings, letting them float up the page.
The combination of tactile confetti and delicate stitched lines adds a dynamic, festive feel that perfectly captures a moment of joy.
15. Weave Memories into Fabric with Photo Transfers and Stitched Florals
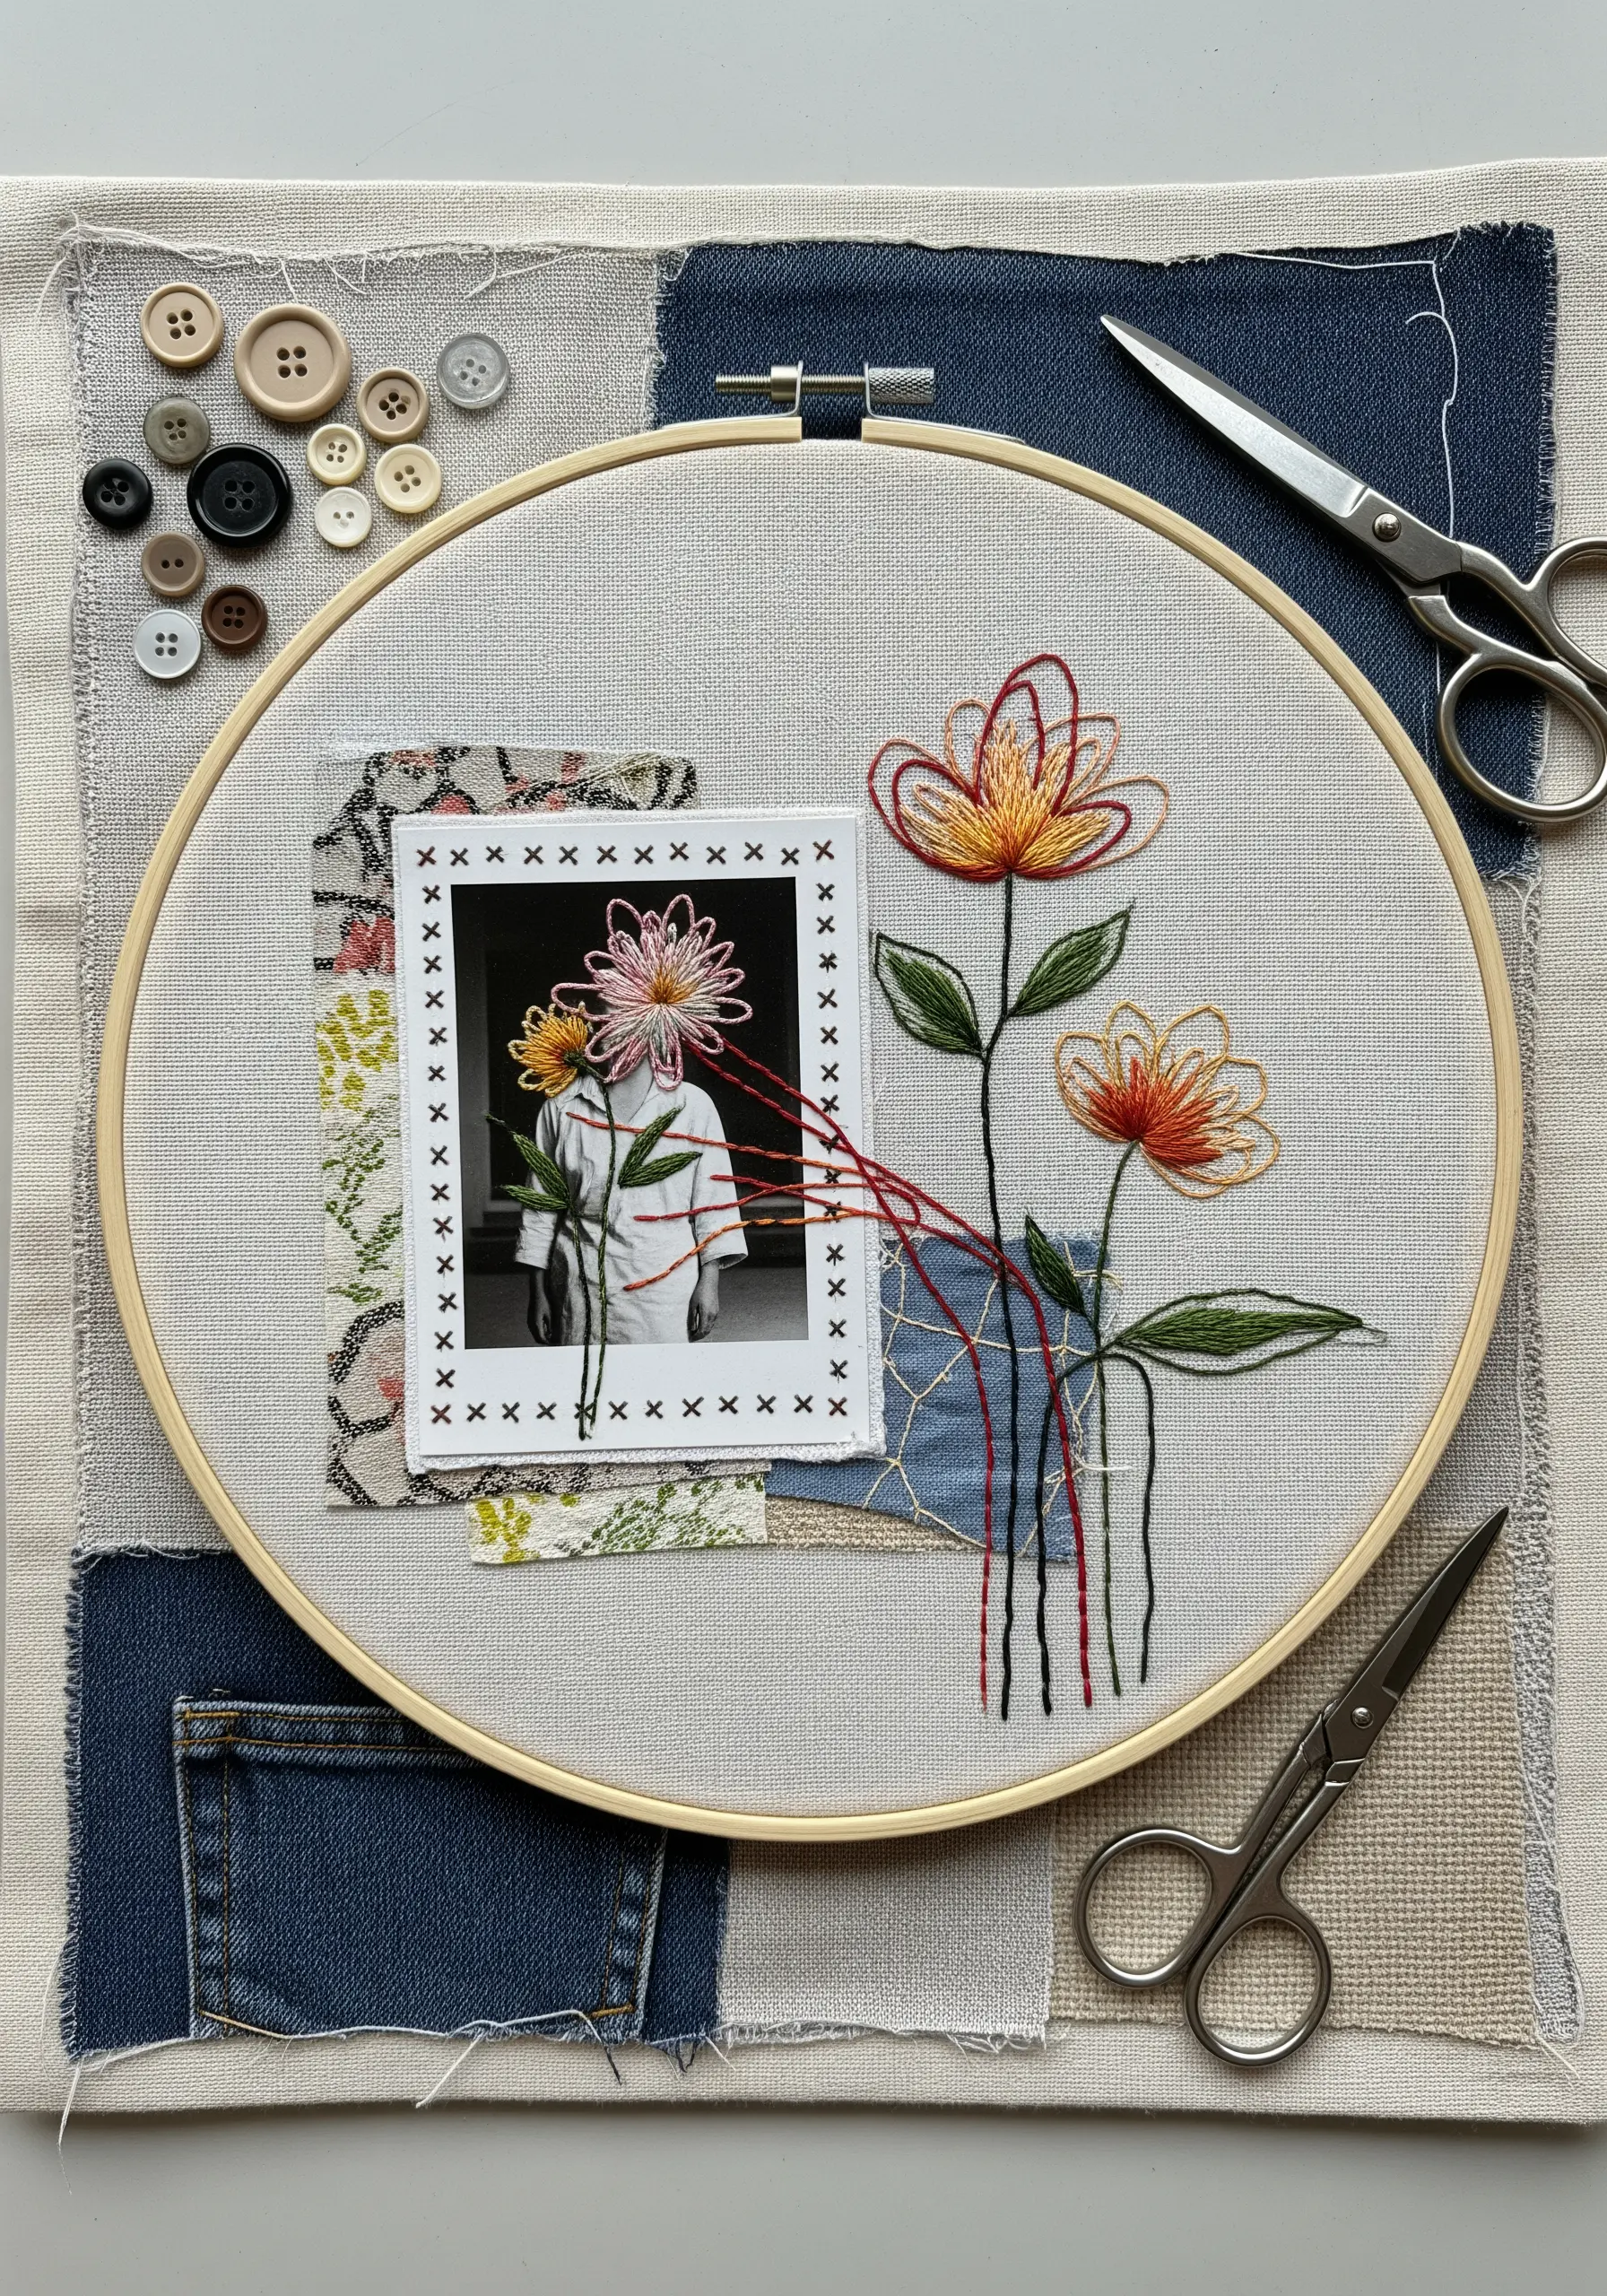
Use an embroidery hoop as a frame to contain a deeply personal mixed-media story.
Create a patchwork background from meaningful fabric scraps—denim from old jeans, a piece of a favorite shirt—and stretch it in the hoop.
Transfer a photograph onto a piece of white cotton fabric, then appliqué it onto your background.
Finally, use embroidery to connect the elements. Stitch flowers that seem to grow out from the photo, letting the threads physically link the image to the fabric world around it.
16. Craft Dimensional Padded Lettering with Yarn and Couching

Create typography that has a soft, tactile presence by stitching over a padded foundation.
Lay down your letters using a thick yarn or several strands of floss held together.
Using a single, contrasting strand of thread, tack down the yarn with small, evenly spaced couching stitches that wrap over the top.
This technique gives your words a raised, 3D effect that stands out beautifully against a minimal paper background, making them both seen and felt.
17. Capture Ephemeral Steam with Wispy Stitches and Seed Beads
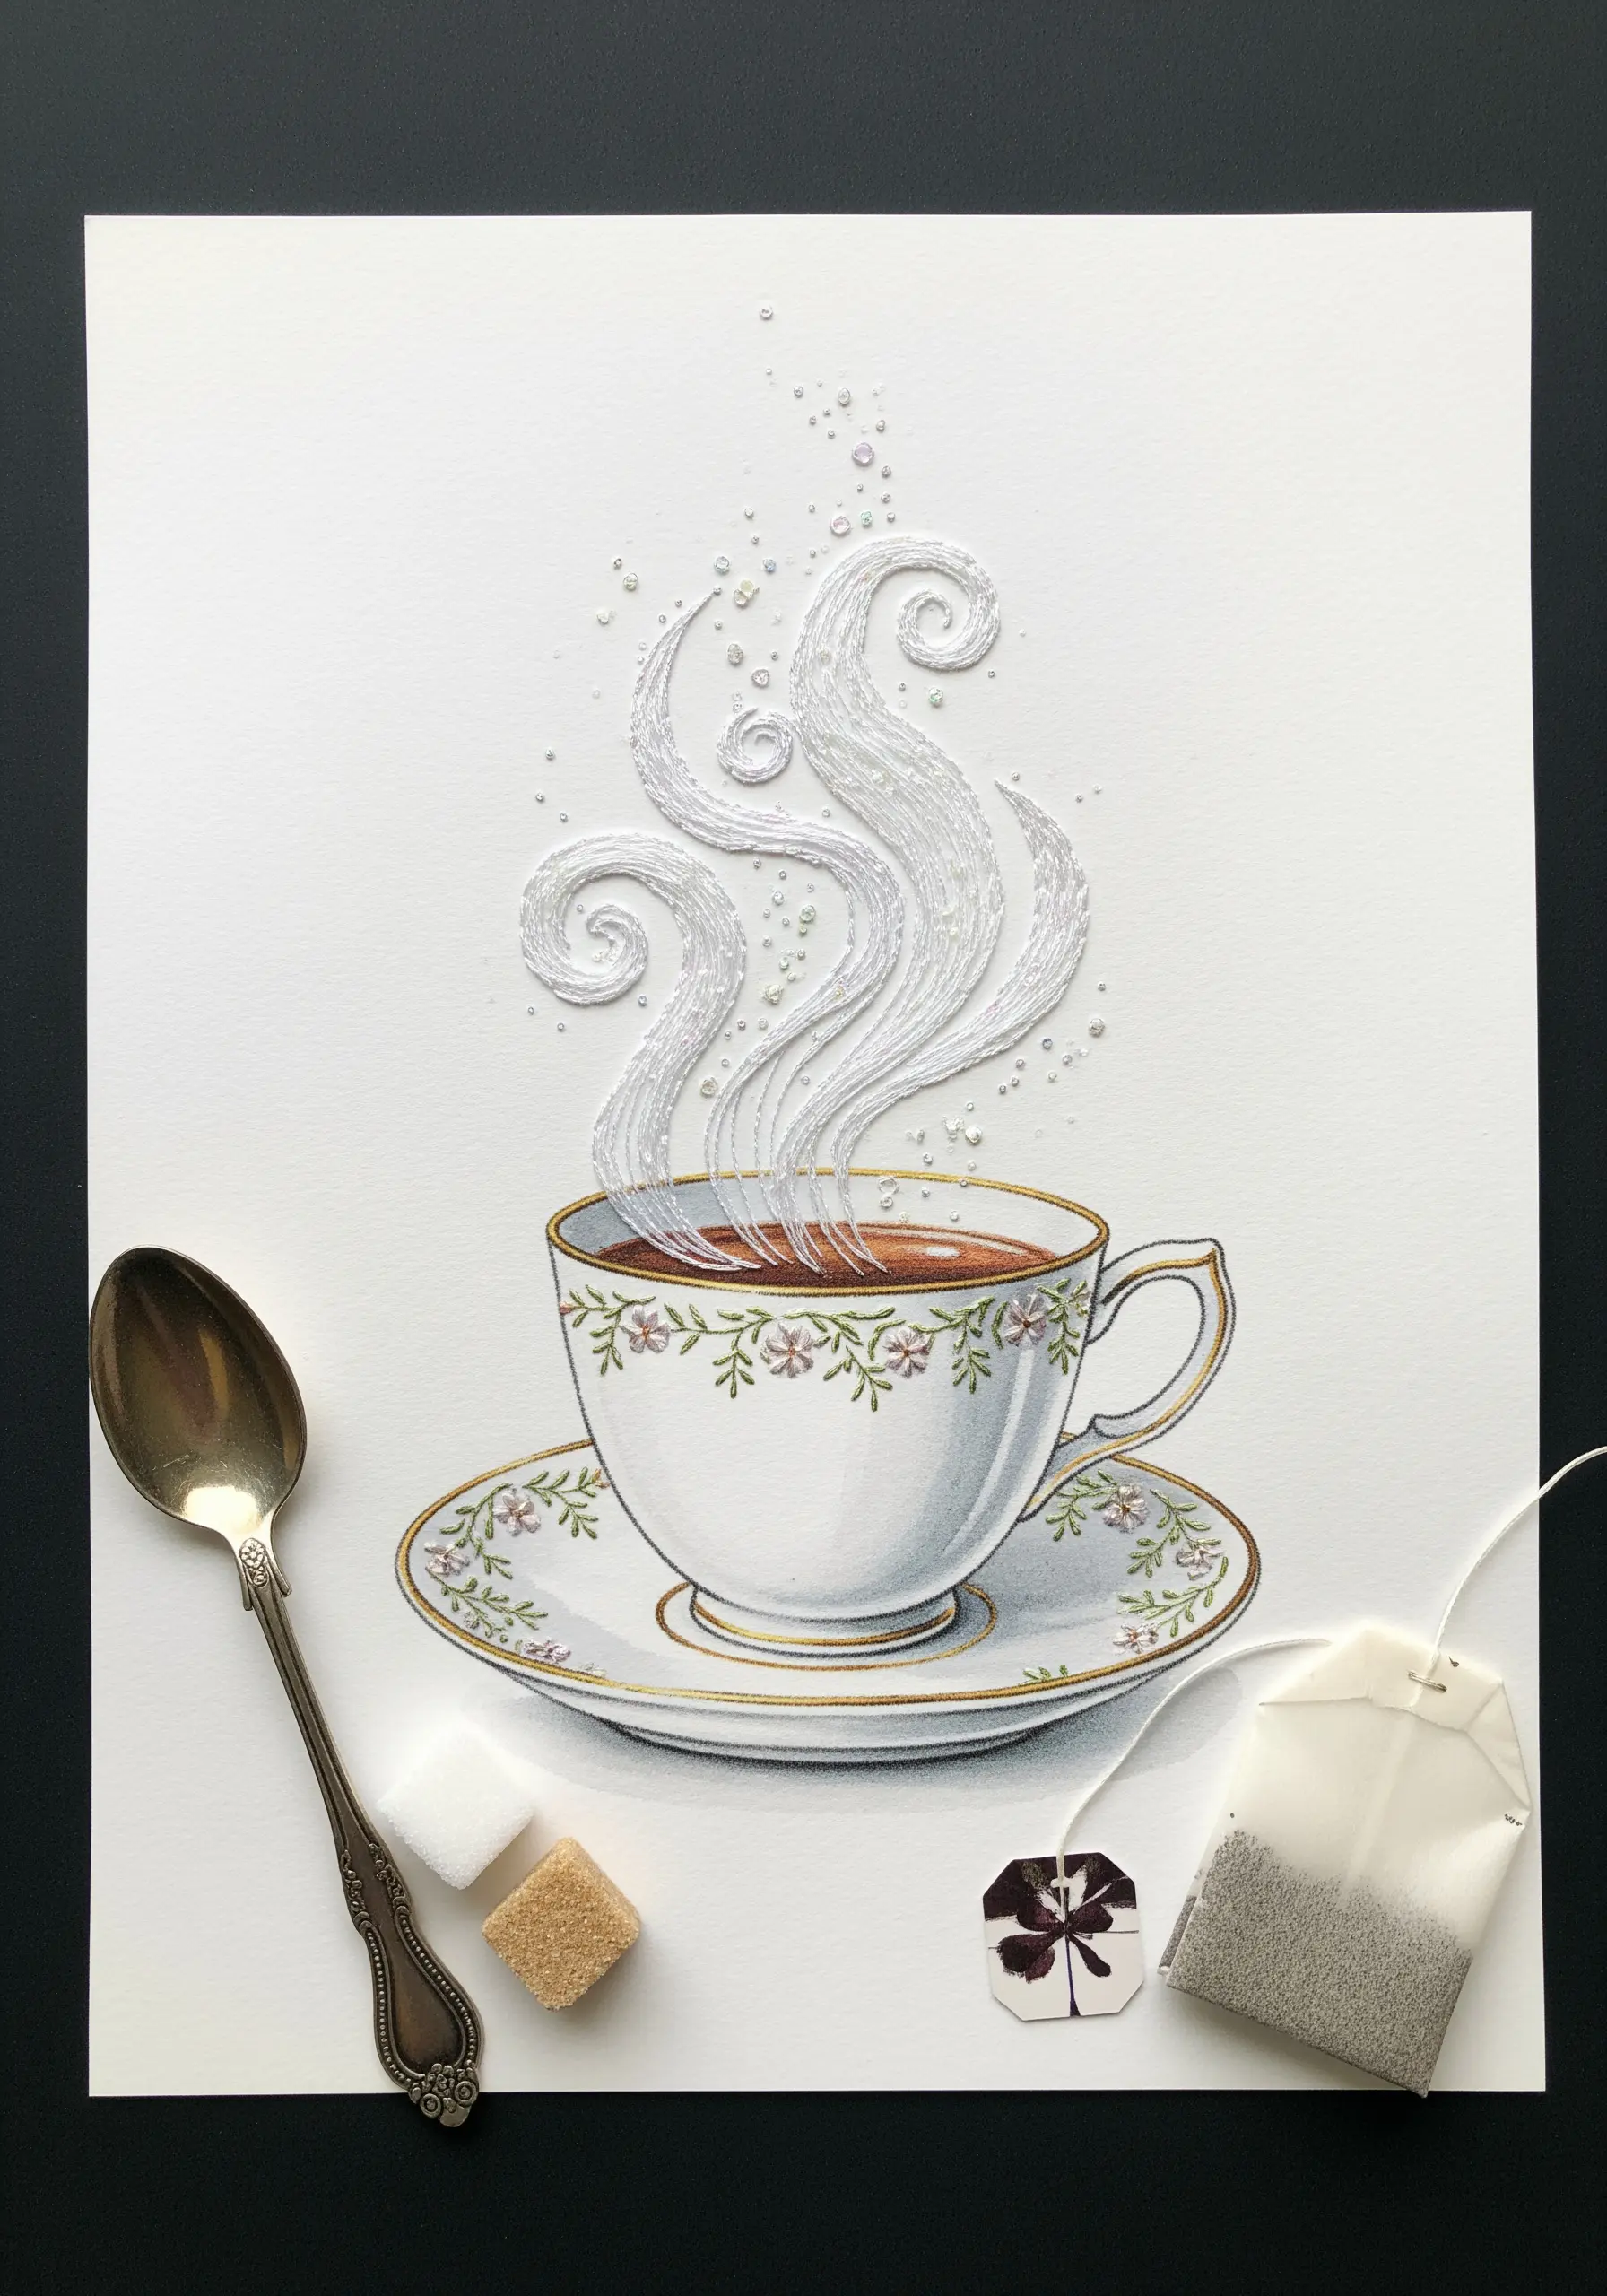
Give an illustration an ethereal quality by using thread to represent something as intangible as steam.
On a drawing or print of a teacup, use a single strand of fine, wispy thread—like a white silk or a pale metallic floss—to stitch swirling lines of steam.
A simple stem stitch or split stitch works perfectly to create smooth, elegant curves.
For a final touch of magic, scatter a few tiny, clear seed beads among the stitches to mimic glistening water droplets that catch the light.
18. Animate Sheet Music with Textured Thread and Sequin Notes

Add a layer of visual and tactile rhythm to a piece of sheet music through embroidery.
Use a thick black thread or fine yarn to stitch over the lines of the musical staff, giving it a raised, touchable quality.
Instead of leaving the notes as ink, cover them with small black sequins or create dense, chunky French knots.
This multi-sensory approach transforms a flat page of music into a dynamic piece of art that you can experience visually and texturally.
19. Cultivate an Embroidered Family Tree with Photos and Stitched Names
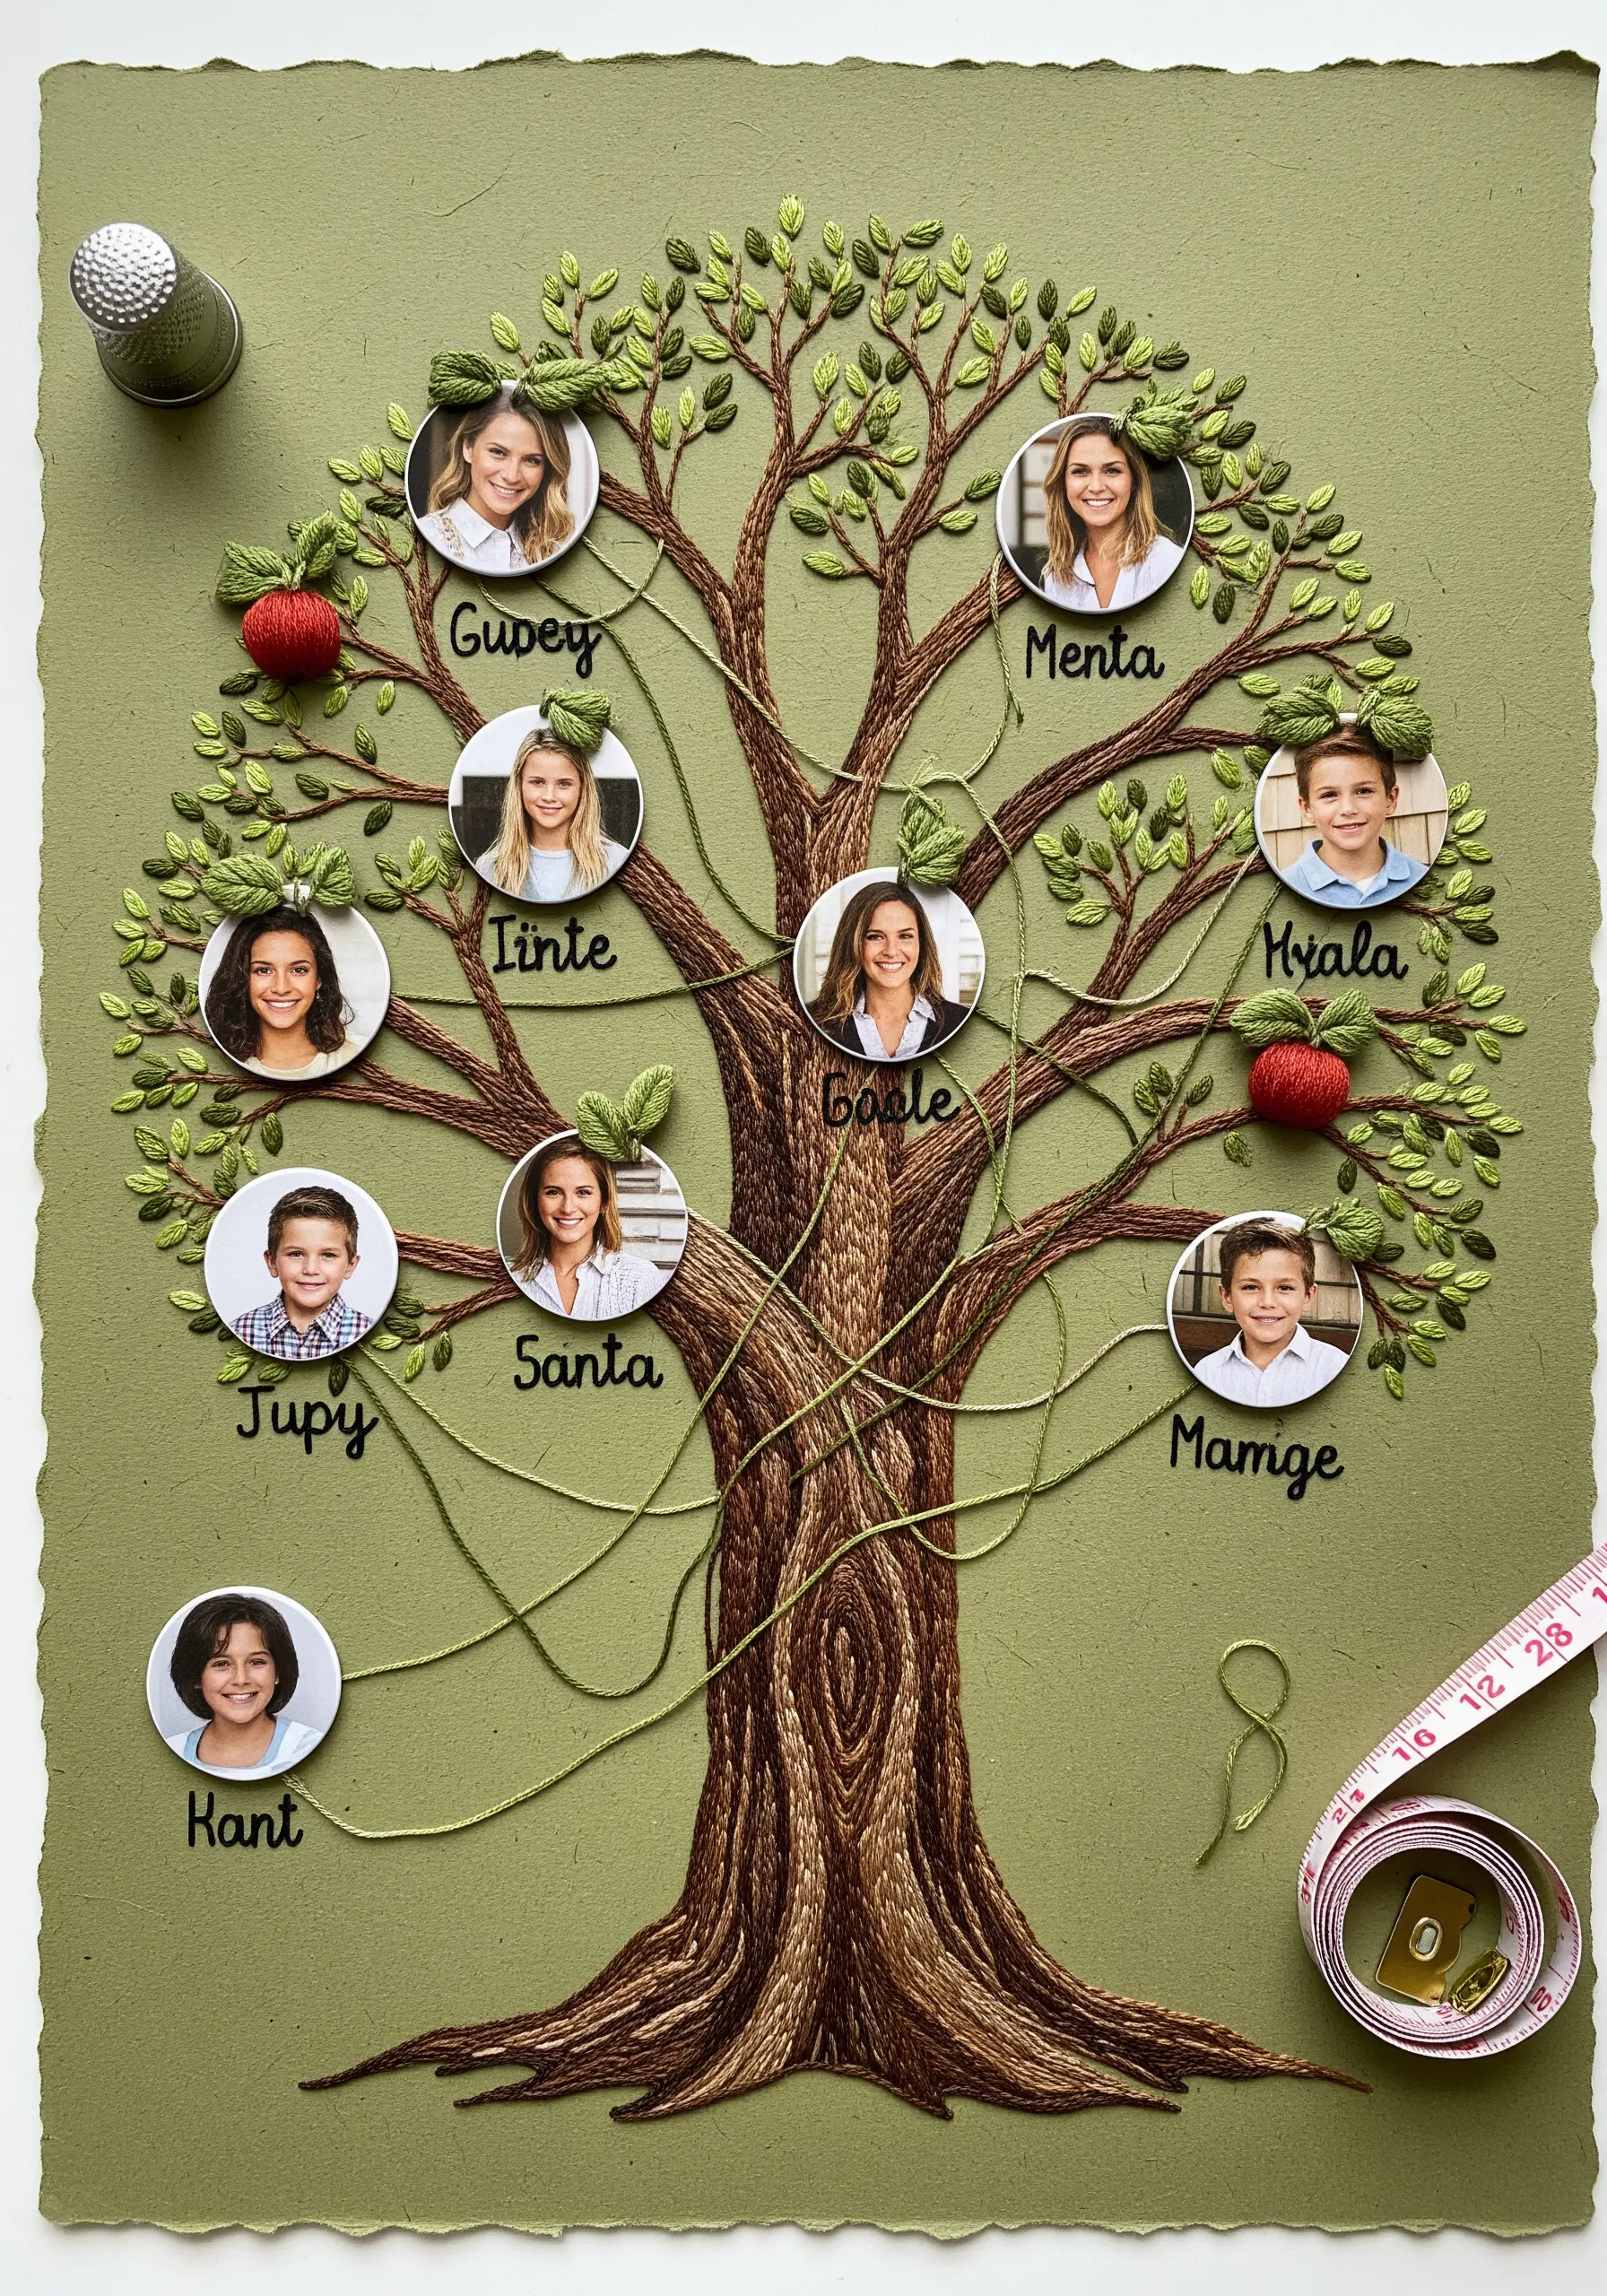
Create a living heirloom by combining portraiture, paper, and embroidery in a meaningful family tree.
Use a dense satin stitch or a more organic long-and-short stitch to create a textured tree trunk and branches on heavyweight cardstock.
Print small, circular photos of your family members and arrange them among the branches.
Finally, use a simple, clean backstitch to embroider each person’s name. The threads physically connect the generations, making it a beautiful and deeply personal work of art.


