

Your table linens are more than just functional; they are a canvas waiting to tell a story of comfort, care, and the small joys of home. You already have the desire to make them beautiful, but perhaps you’re looking for that specific technique that transforms a simple motif into a piece of touchable art.
The secret isn’t in complexity, but in intention. It’s in choosing the right stitch to make frosting look fluffy, or angling your thread to make a macaron look perfectly rounded. It’s about understanding how a change in thread sheen can mimic the gloss of a cherry filling or the delicate surface of a glass jar.
These ideas are your guide to stitching with purpose. They will show you how small adjustments in technique can elevate your work, giving you the confidence to turn every napkin, placemat, and table runner into a cherished detail that welcomes everyone to your table.
1. Achieving 3D Macaron Texture with Satin Stitch
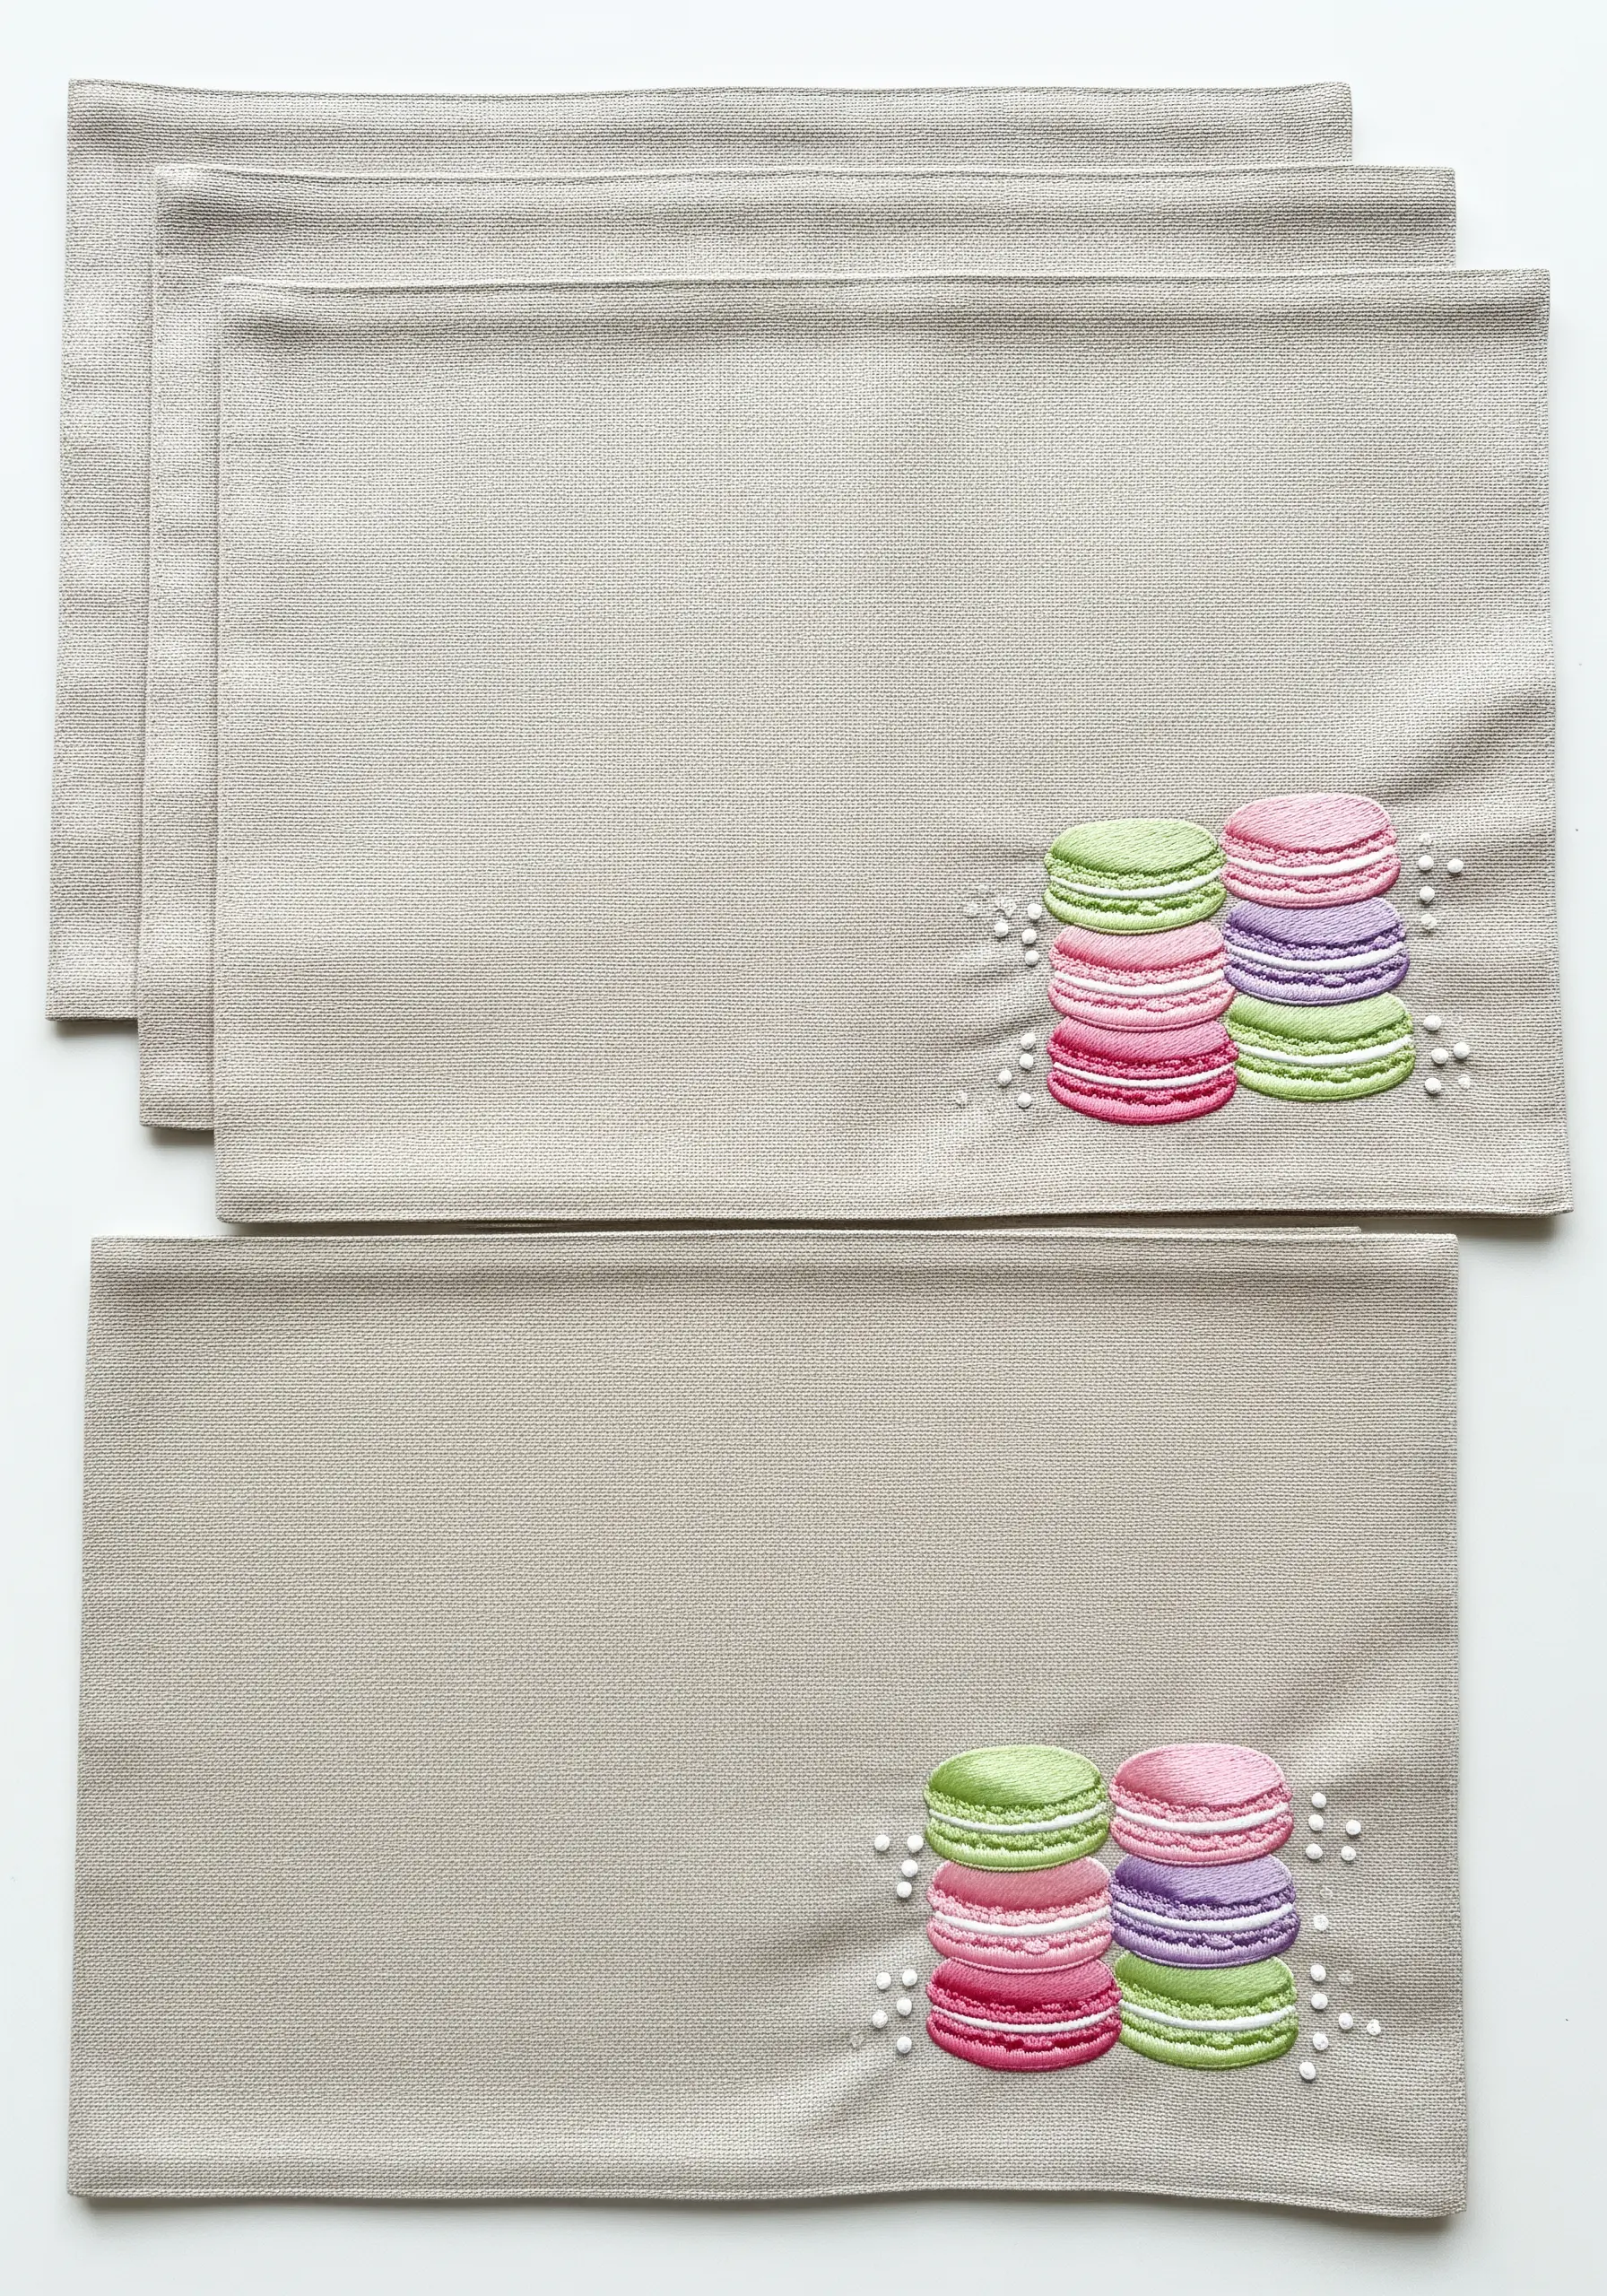
To give your macaron shells a realistic, domed appearance, angle your satin stitches to follow the cookie’s curve.
Start stitches at the outer edge and end them along the center line, creating a subtle highlight where the light would naturally hit.
For the ruffled ‘feet,’ use a series of tightly packed French knots or a couching stitch with a textured thread to mimic its airy structure.
A few scattered seed stitches in white or silver metallic thread can add a delicate, sugary sparkle to the design, making these tiny embroidered accents feel truly special.
2. Modernizing Cross-Stitch with Graphic Outlines

Elevate traditional cross-stitch motifs by enclosing them in a crisp, modern outline.
Use a two-strand backstitch or stem stitch in a contrasting color, like black or a darker shade of the main fill, to define the teapot’s shape sharply.
This technique separates the design from the background fabric, giving it a clean, graphic quality that feels contemporary.
Varying the fill patterns within the teapots adds personality and visual interest to the overall composition, turning simple stitches into mini embroidery designs inspired by vintage patterns.
3. Crafting Realistic Frosting Swirls with Directional Stitching
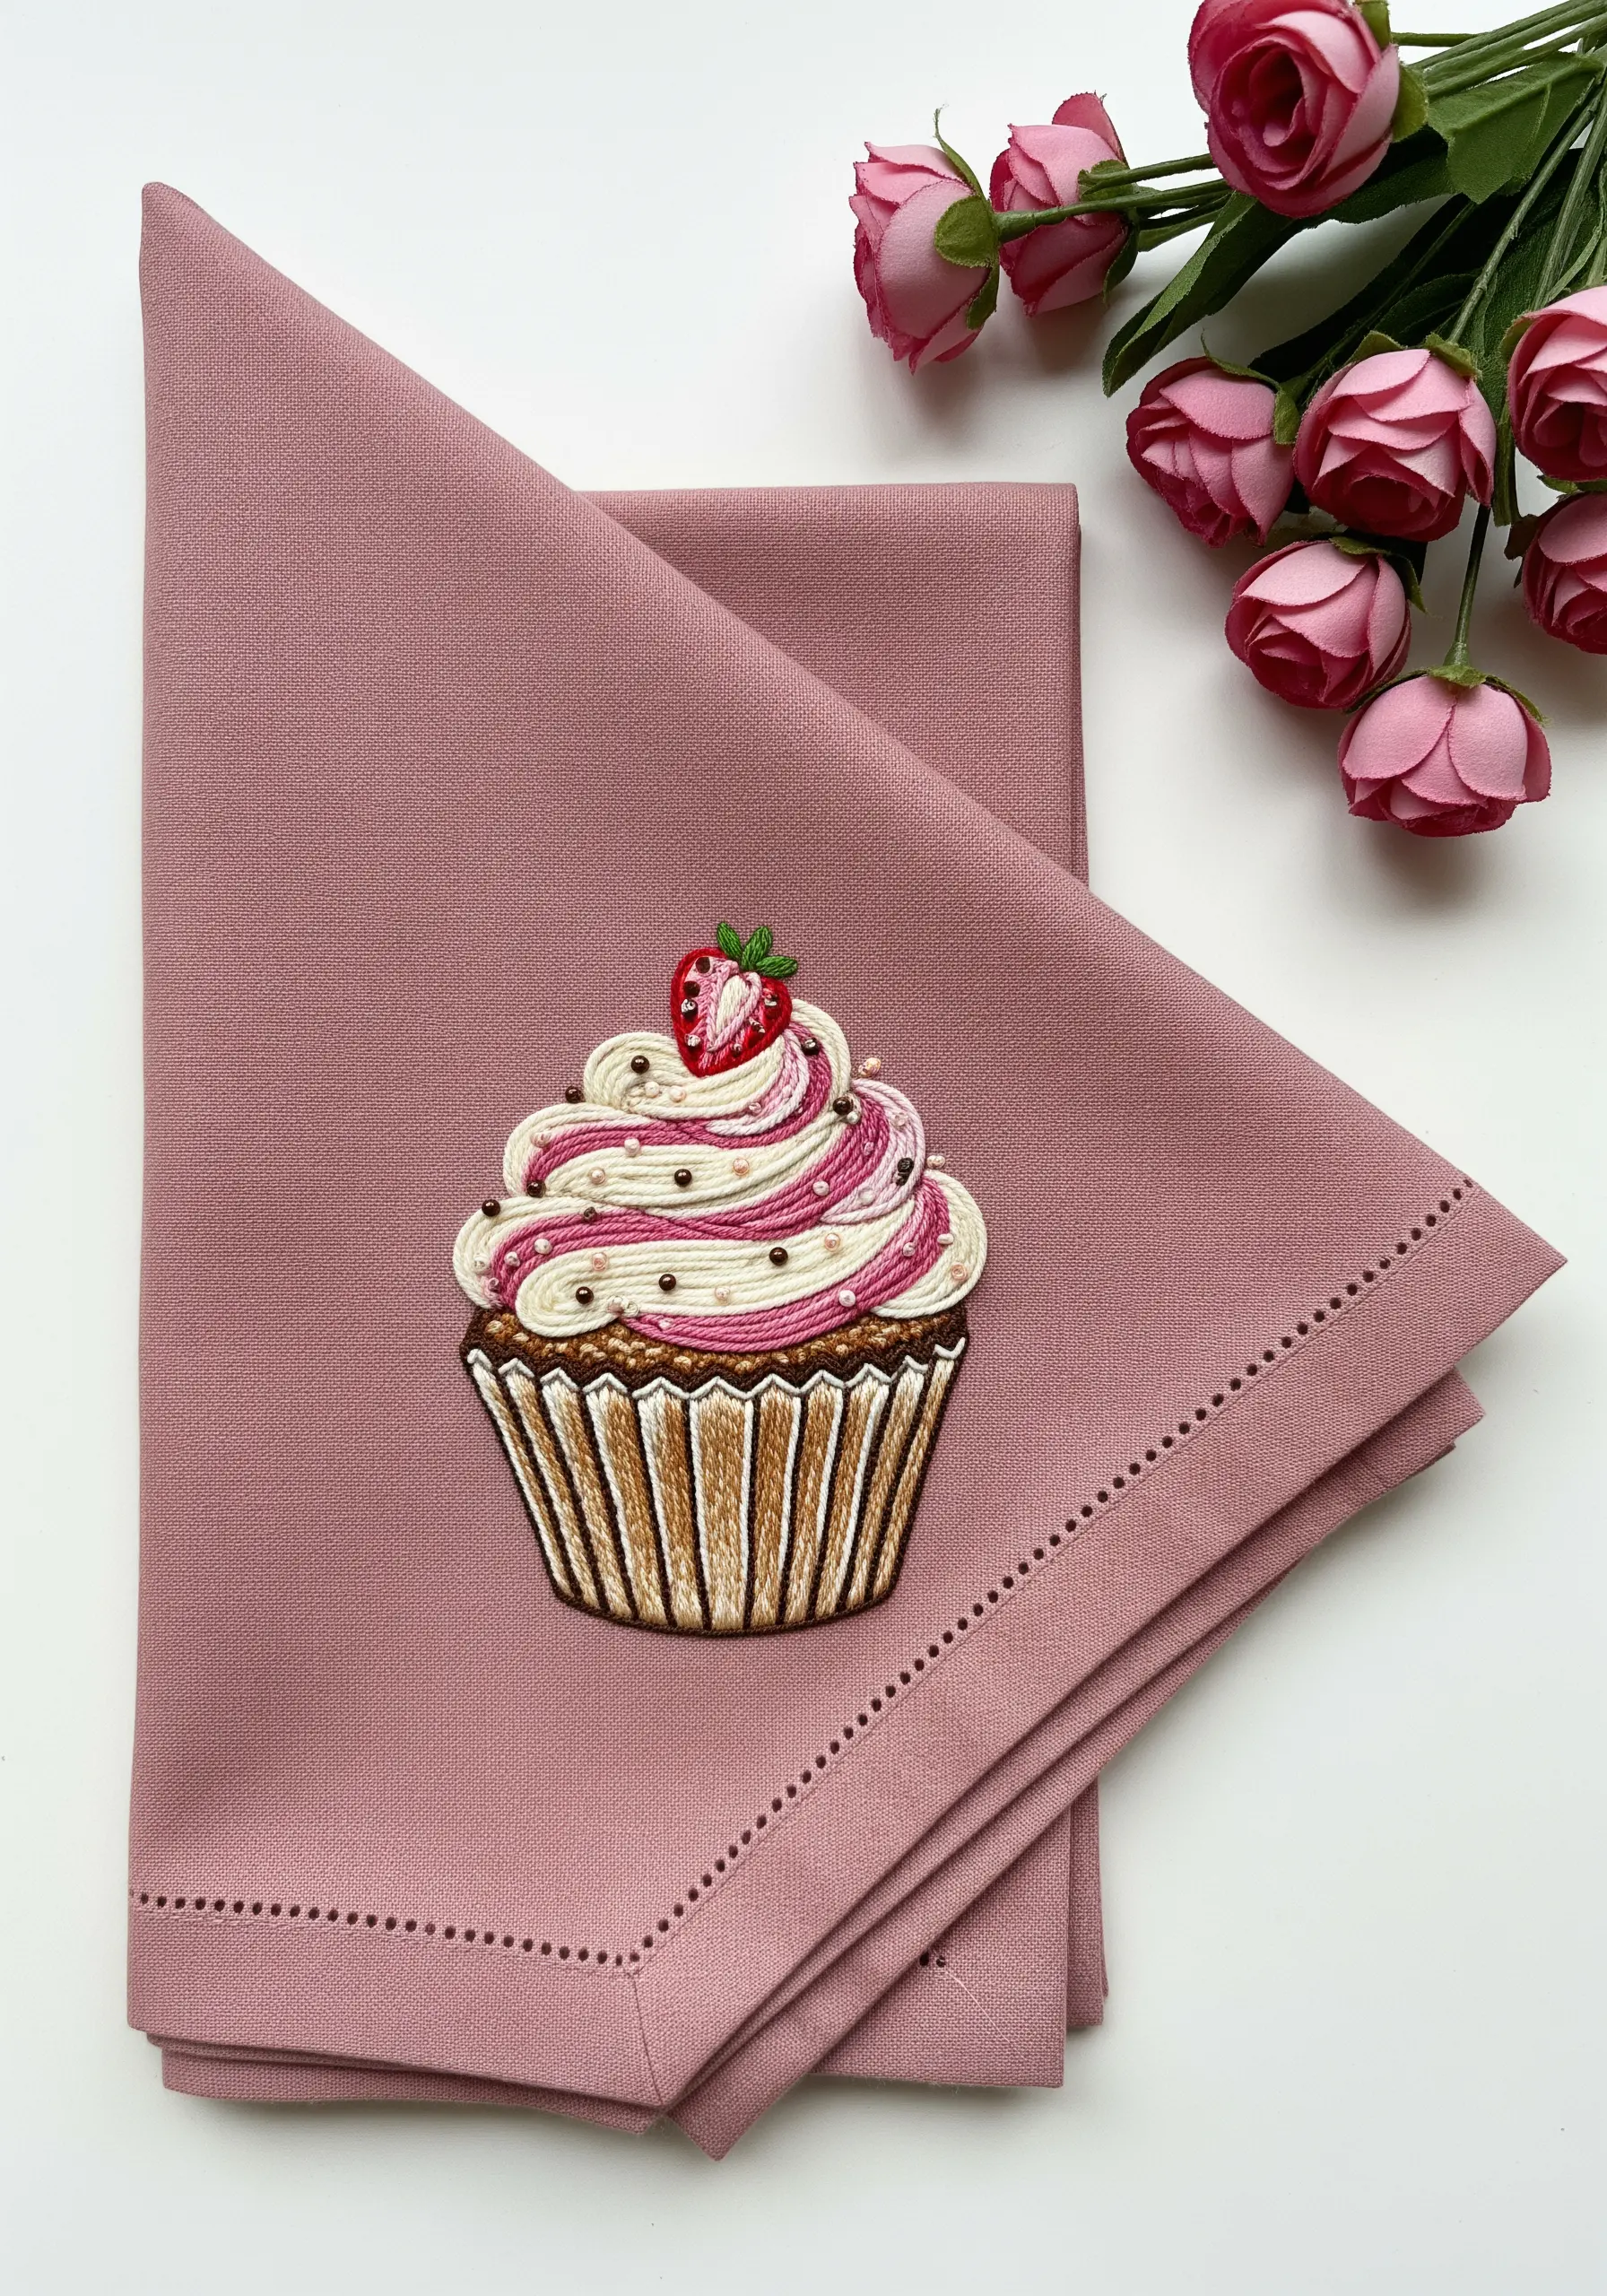
The key to luscious-looking frosting is using long and short stitch, with each stitch following the direction of the swirl.
This creates a sense of movement and helps define the highlights and shadows naturally.
Blend two or three closely related shades—like ivory, cream, and a hint of blush—to give the frosting believable depth.
For the cupcake liner, keep your satin stitches perfectly vertical to create a structured, pleated look that contrasts with the soft icing above.
Tiny seed stitches or single straight stitches make perfect, non-bulky sprinkles.
4. Blending Threads for a Flaky, Golden-Brown Pastry Effect
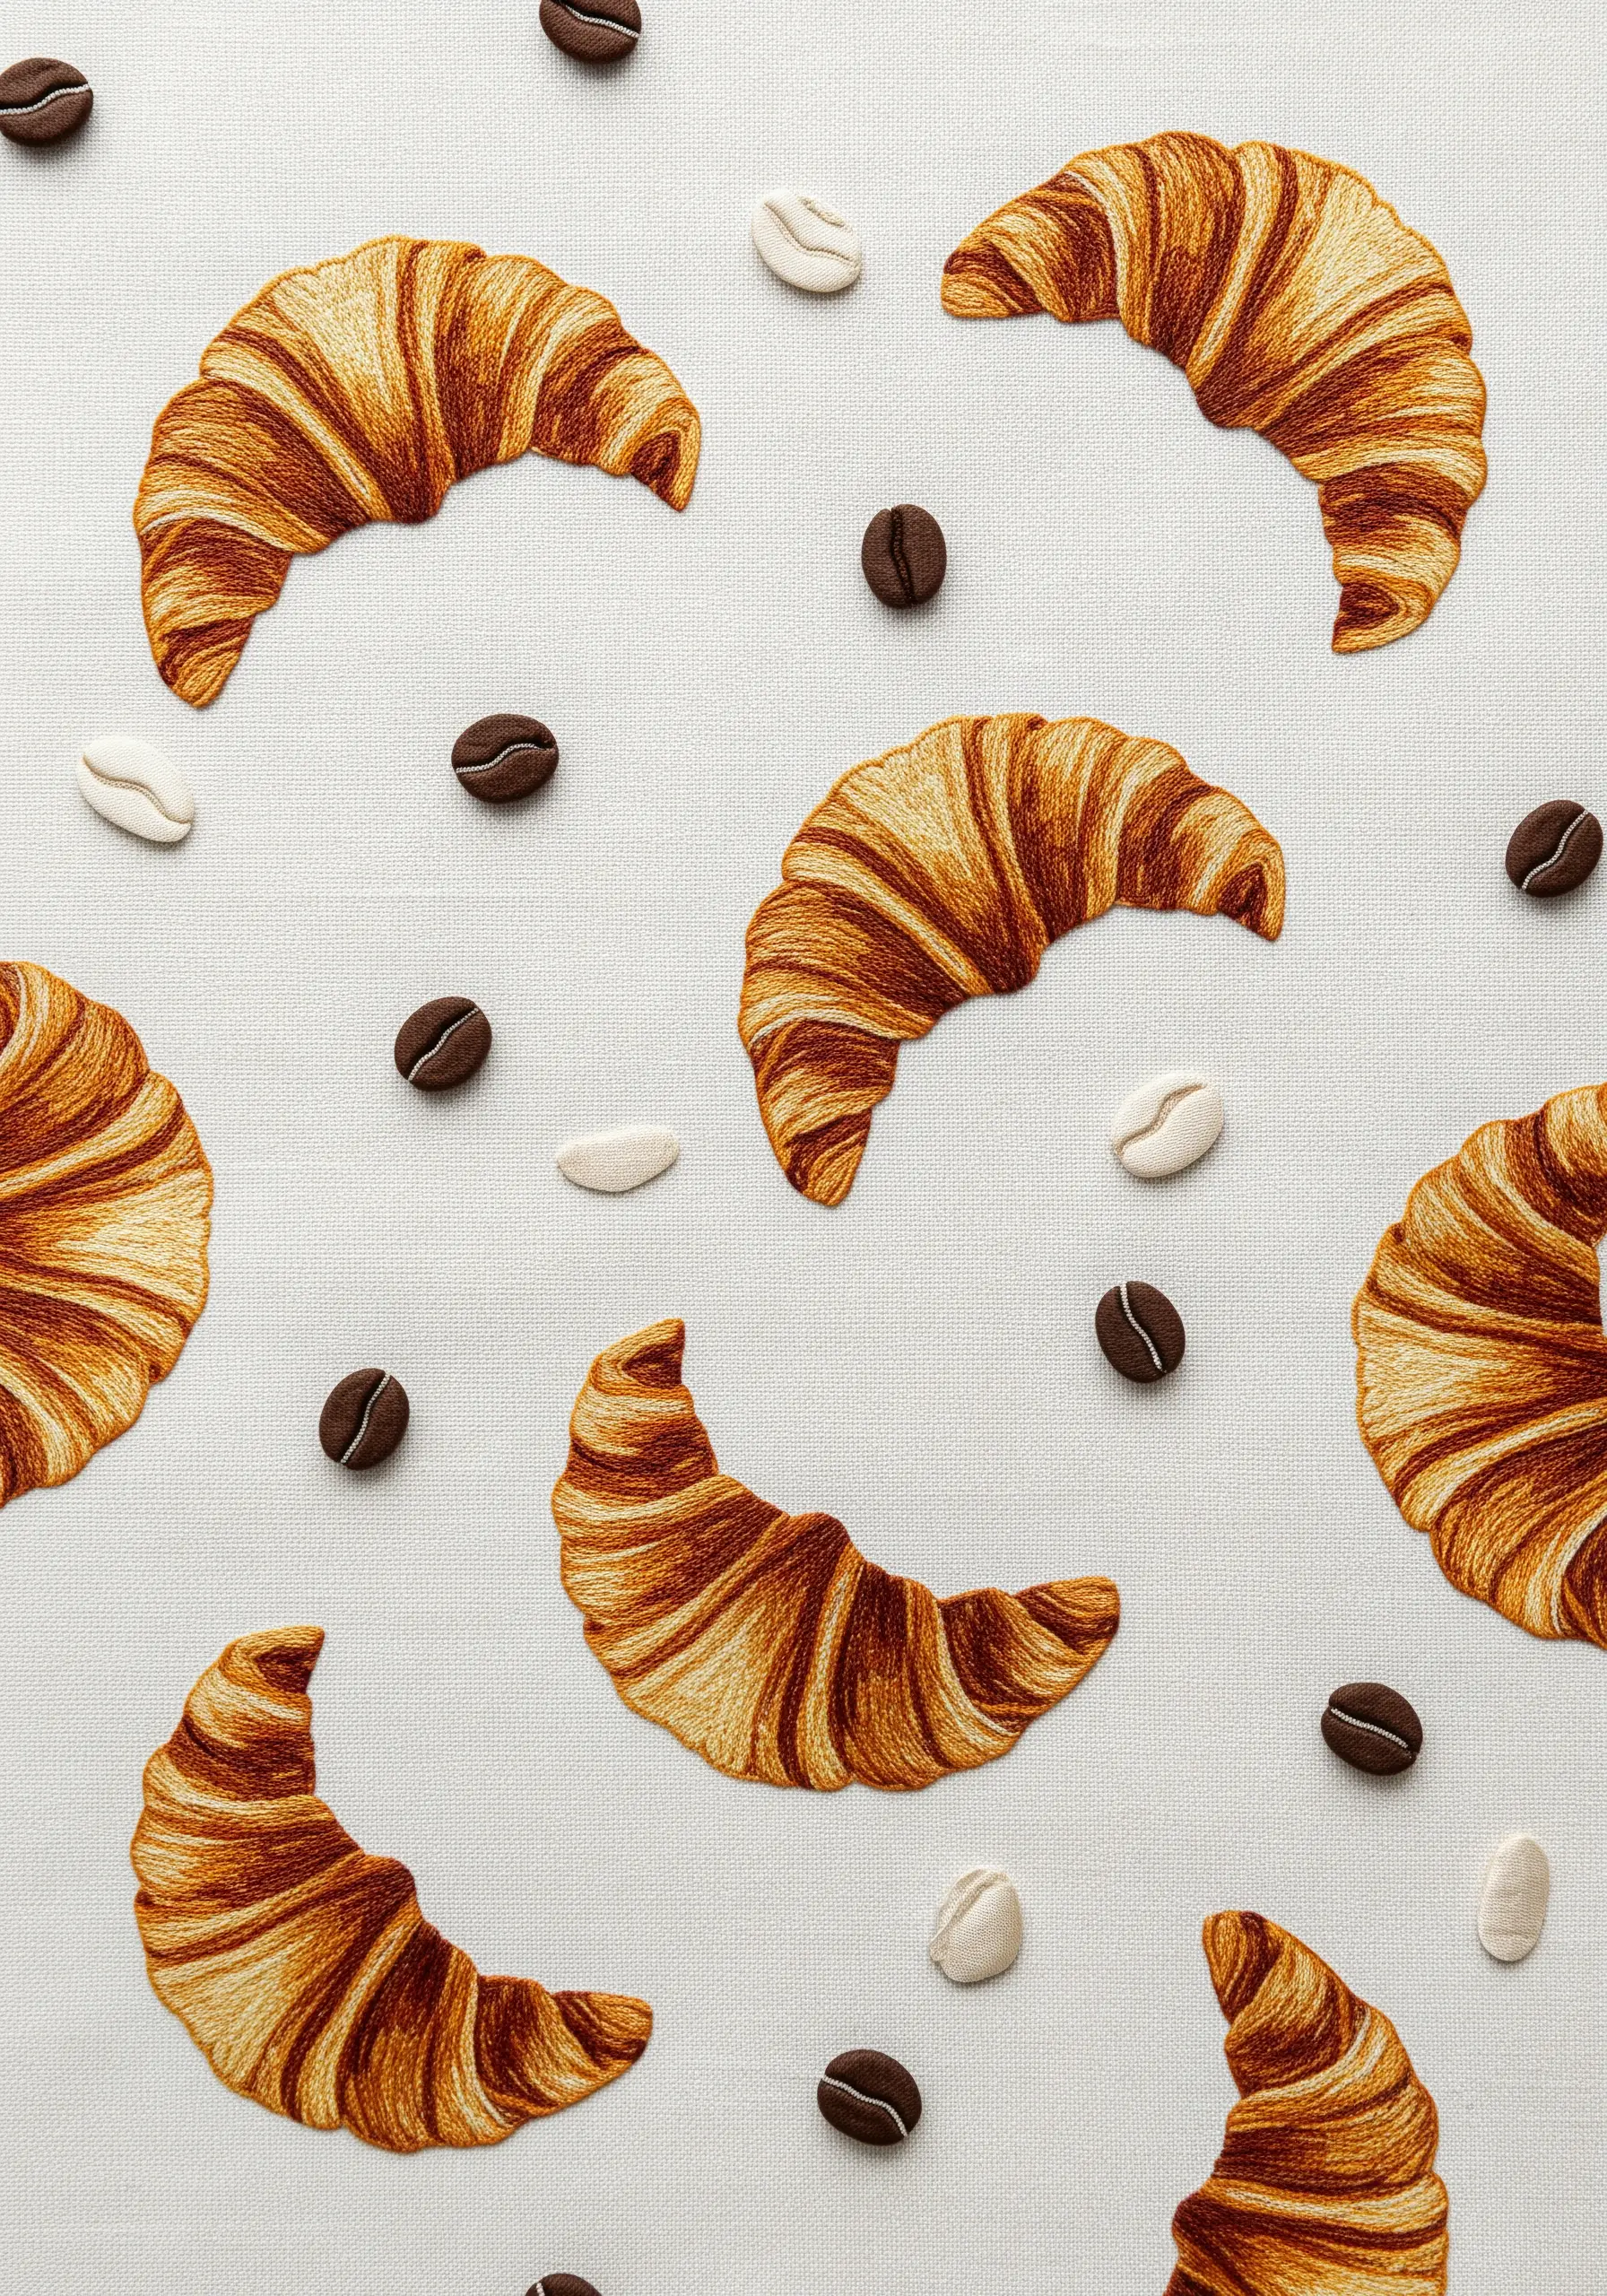
To achieve the flaky, buttery layers of a croissant, your best tool is thread painting with a thoughtful color palette.
Work with at least four shades, from a dark brown for the deepest crevices to a pale yellow for the highlights.
Use a long and short stitch, ensuring your stitches follow the curved direction of the pastry’s layers to enhance its shape.
These texture-rich thread art ideas come to life when you slightly vary the stitch length, which breaks up the surface and mimics delicate, flaky layers.
5. Creating Graphic Elegance with Couching and Line Art
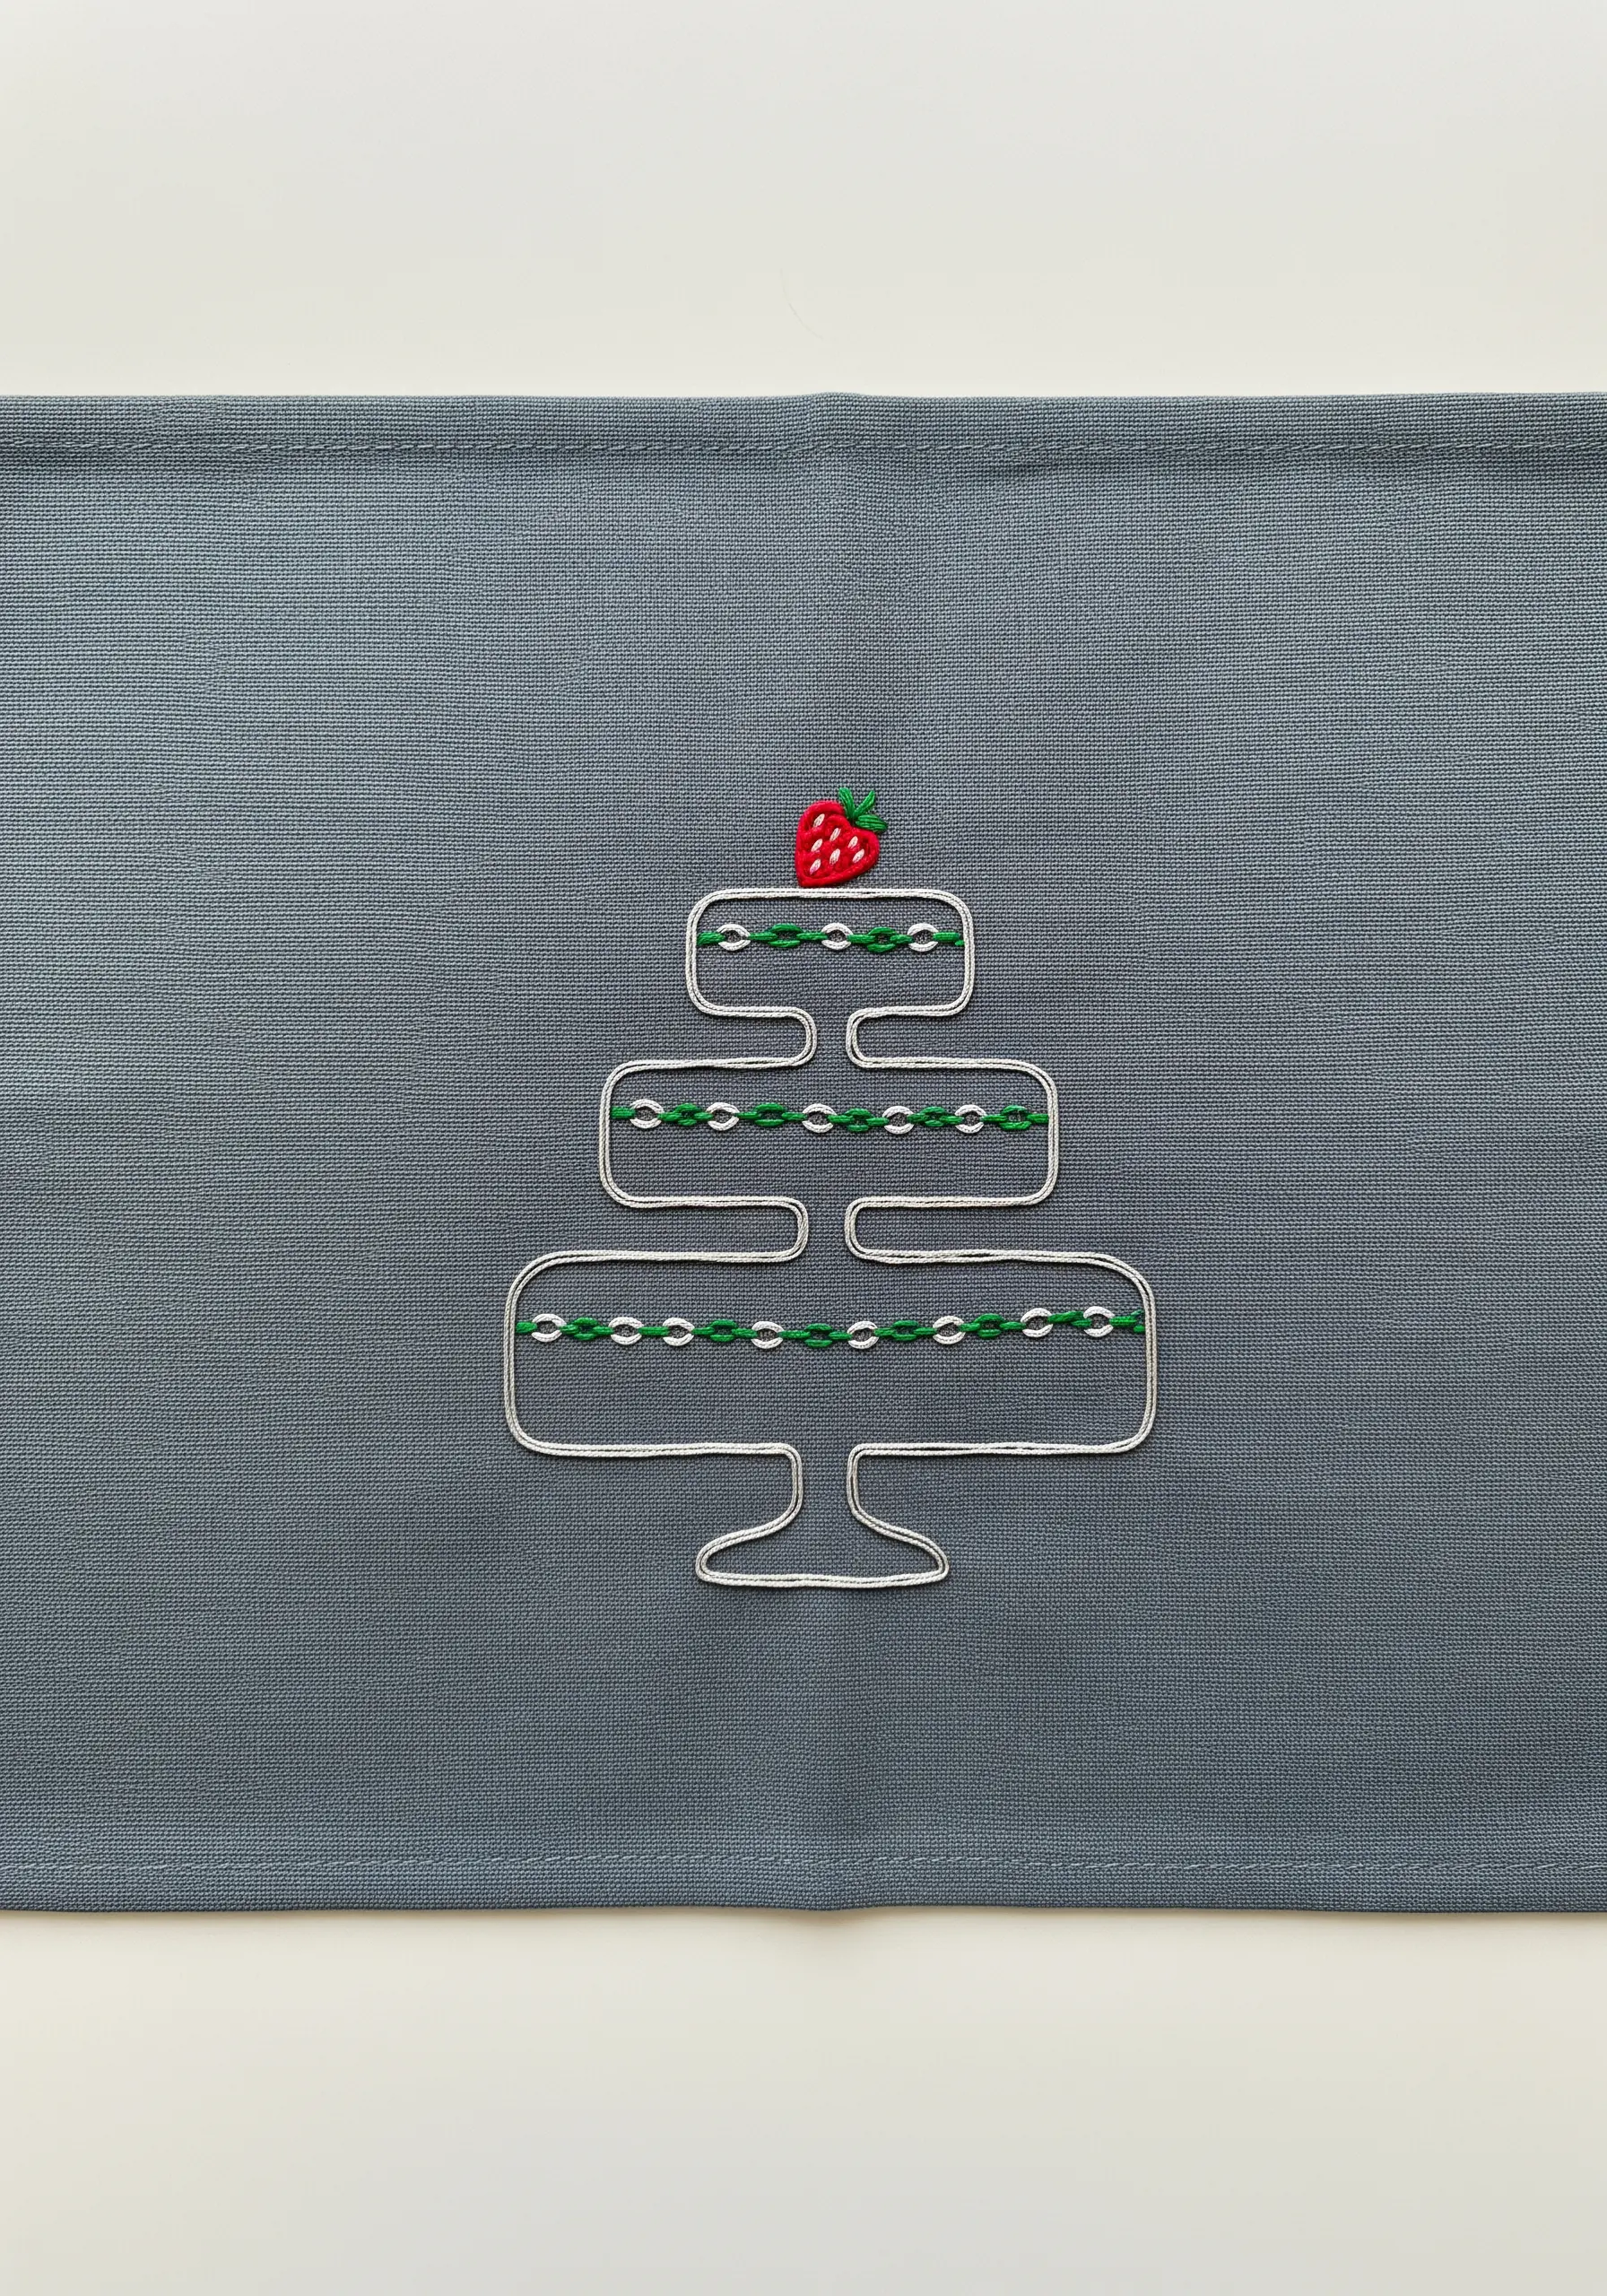
This minimalist design makes a powerful statement with clean lines, a technique perfectly suited for couching.
Lay down a thicker thread, like a pearl cotton or multiple strands of floss, along your design line.
Then, use a single, thinner thread to tack it down at regular intervals, creating a perfectly uniform, raised outline.
The simple running stitch in the center adds a touch of color and detail without overwhelming the delicate line art embroidery idea.
6. Playful Texture: Layering Stitches for Icing and Sprinkles
To give embroidered icing that thick, glossy look, use a padded satin stitch.
First, fill the icing area with a foundation of small running or split stitches, then cover this padding with a dense satin stitch using a high-sheen rayon thread.
This simple step physically raises the icing from the fabric surface, making it look much more realistic.
For the sprinkles, scatter single straight stitches in various directions and colors—the randomness is what makes them look so joyful and authentic.
7. Simulating Glass and Liquid with Thread Sheen and Density
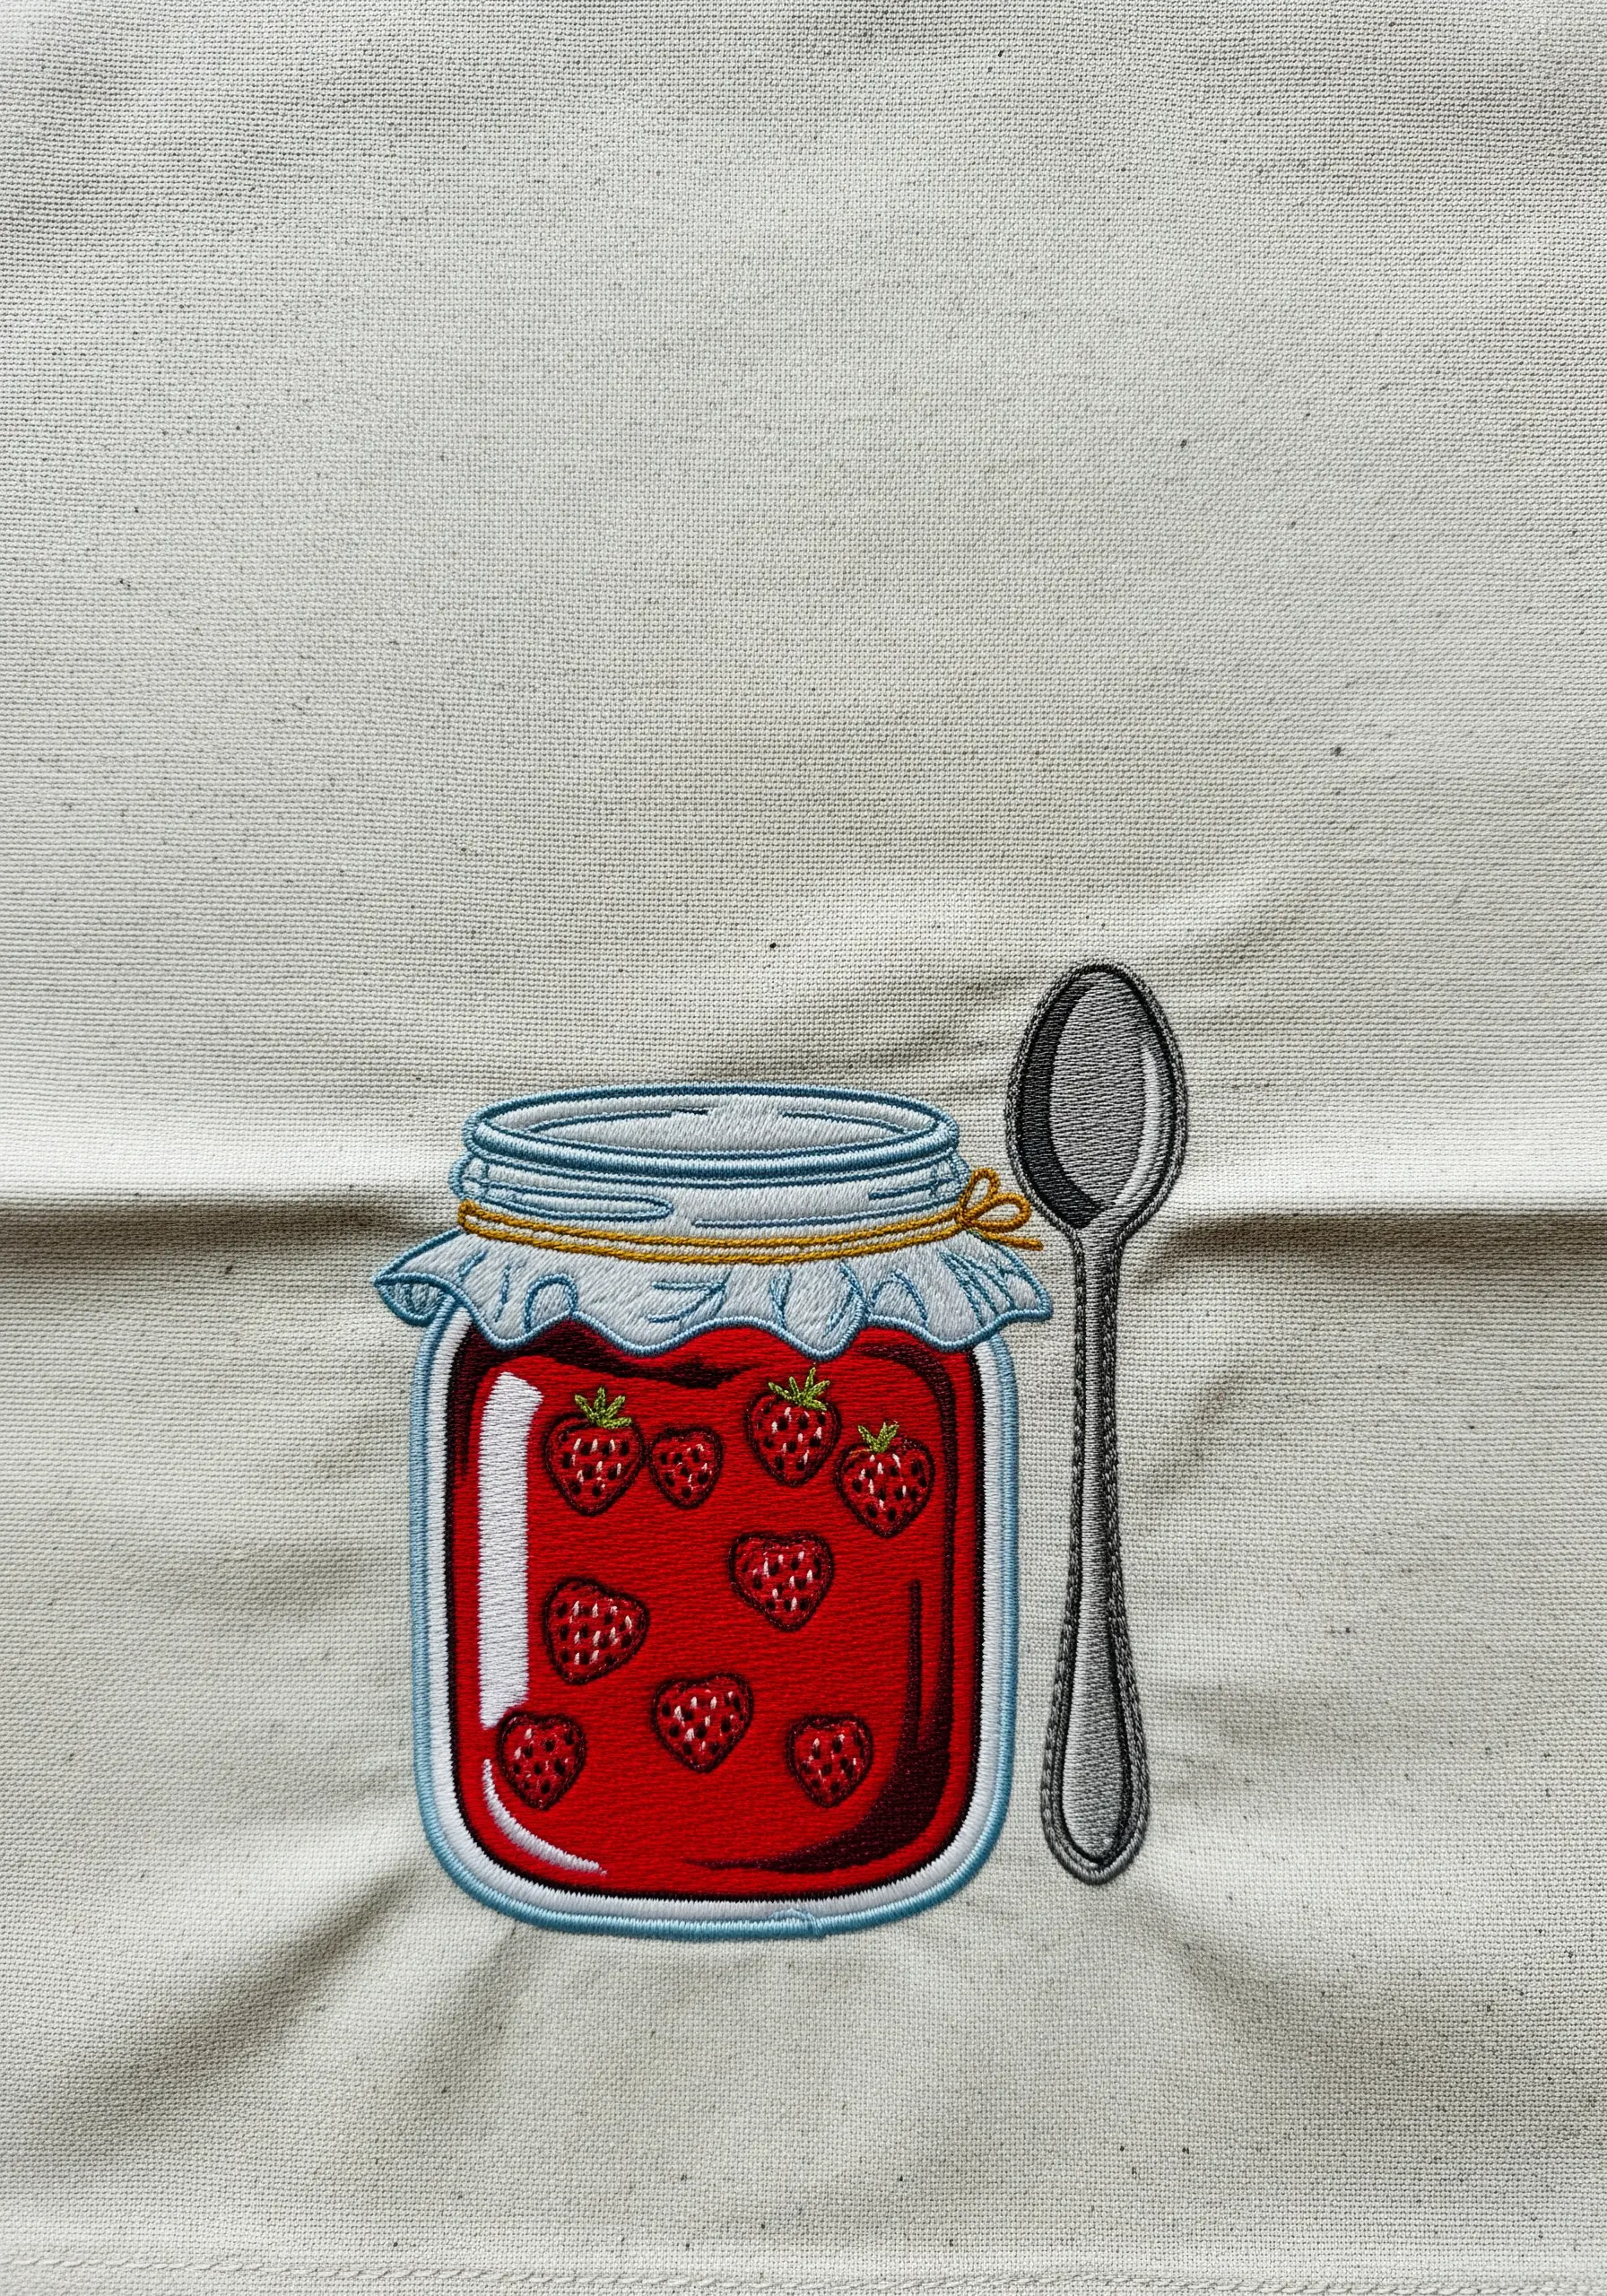
Creating the illusion of a glass jar is all about subtle highlights and thread choice.
Use a single strand of light grey or pale blue backstitch to outline the jar and add a few highlight lines.
For the jam itself, a dense satin stitch in a high-sheen red thread provides the perfect liquid gloss.
Tiny French knots in a contrasting yellow create perfect strawberry seeds, turning an everyday object into charming modern thread art.
8. Grounding Motifs on Patterned Fabric with Bold Outlines
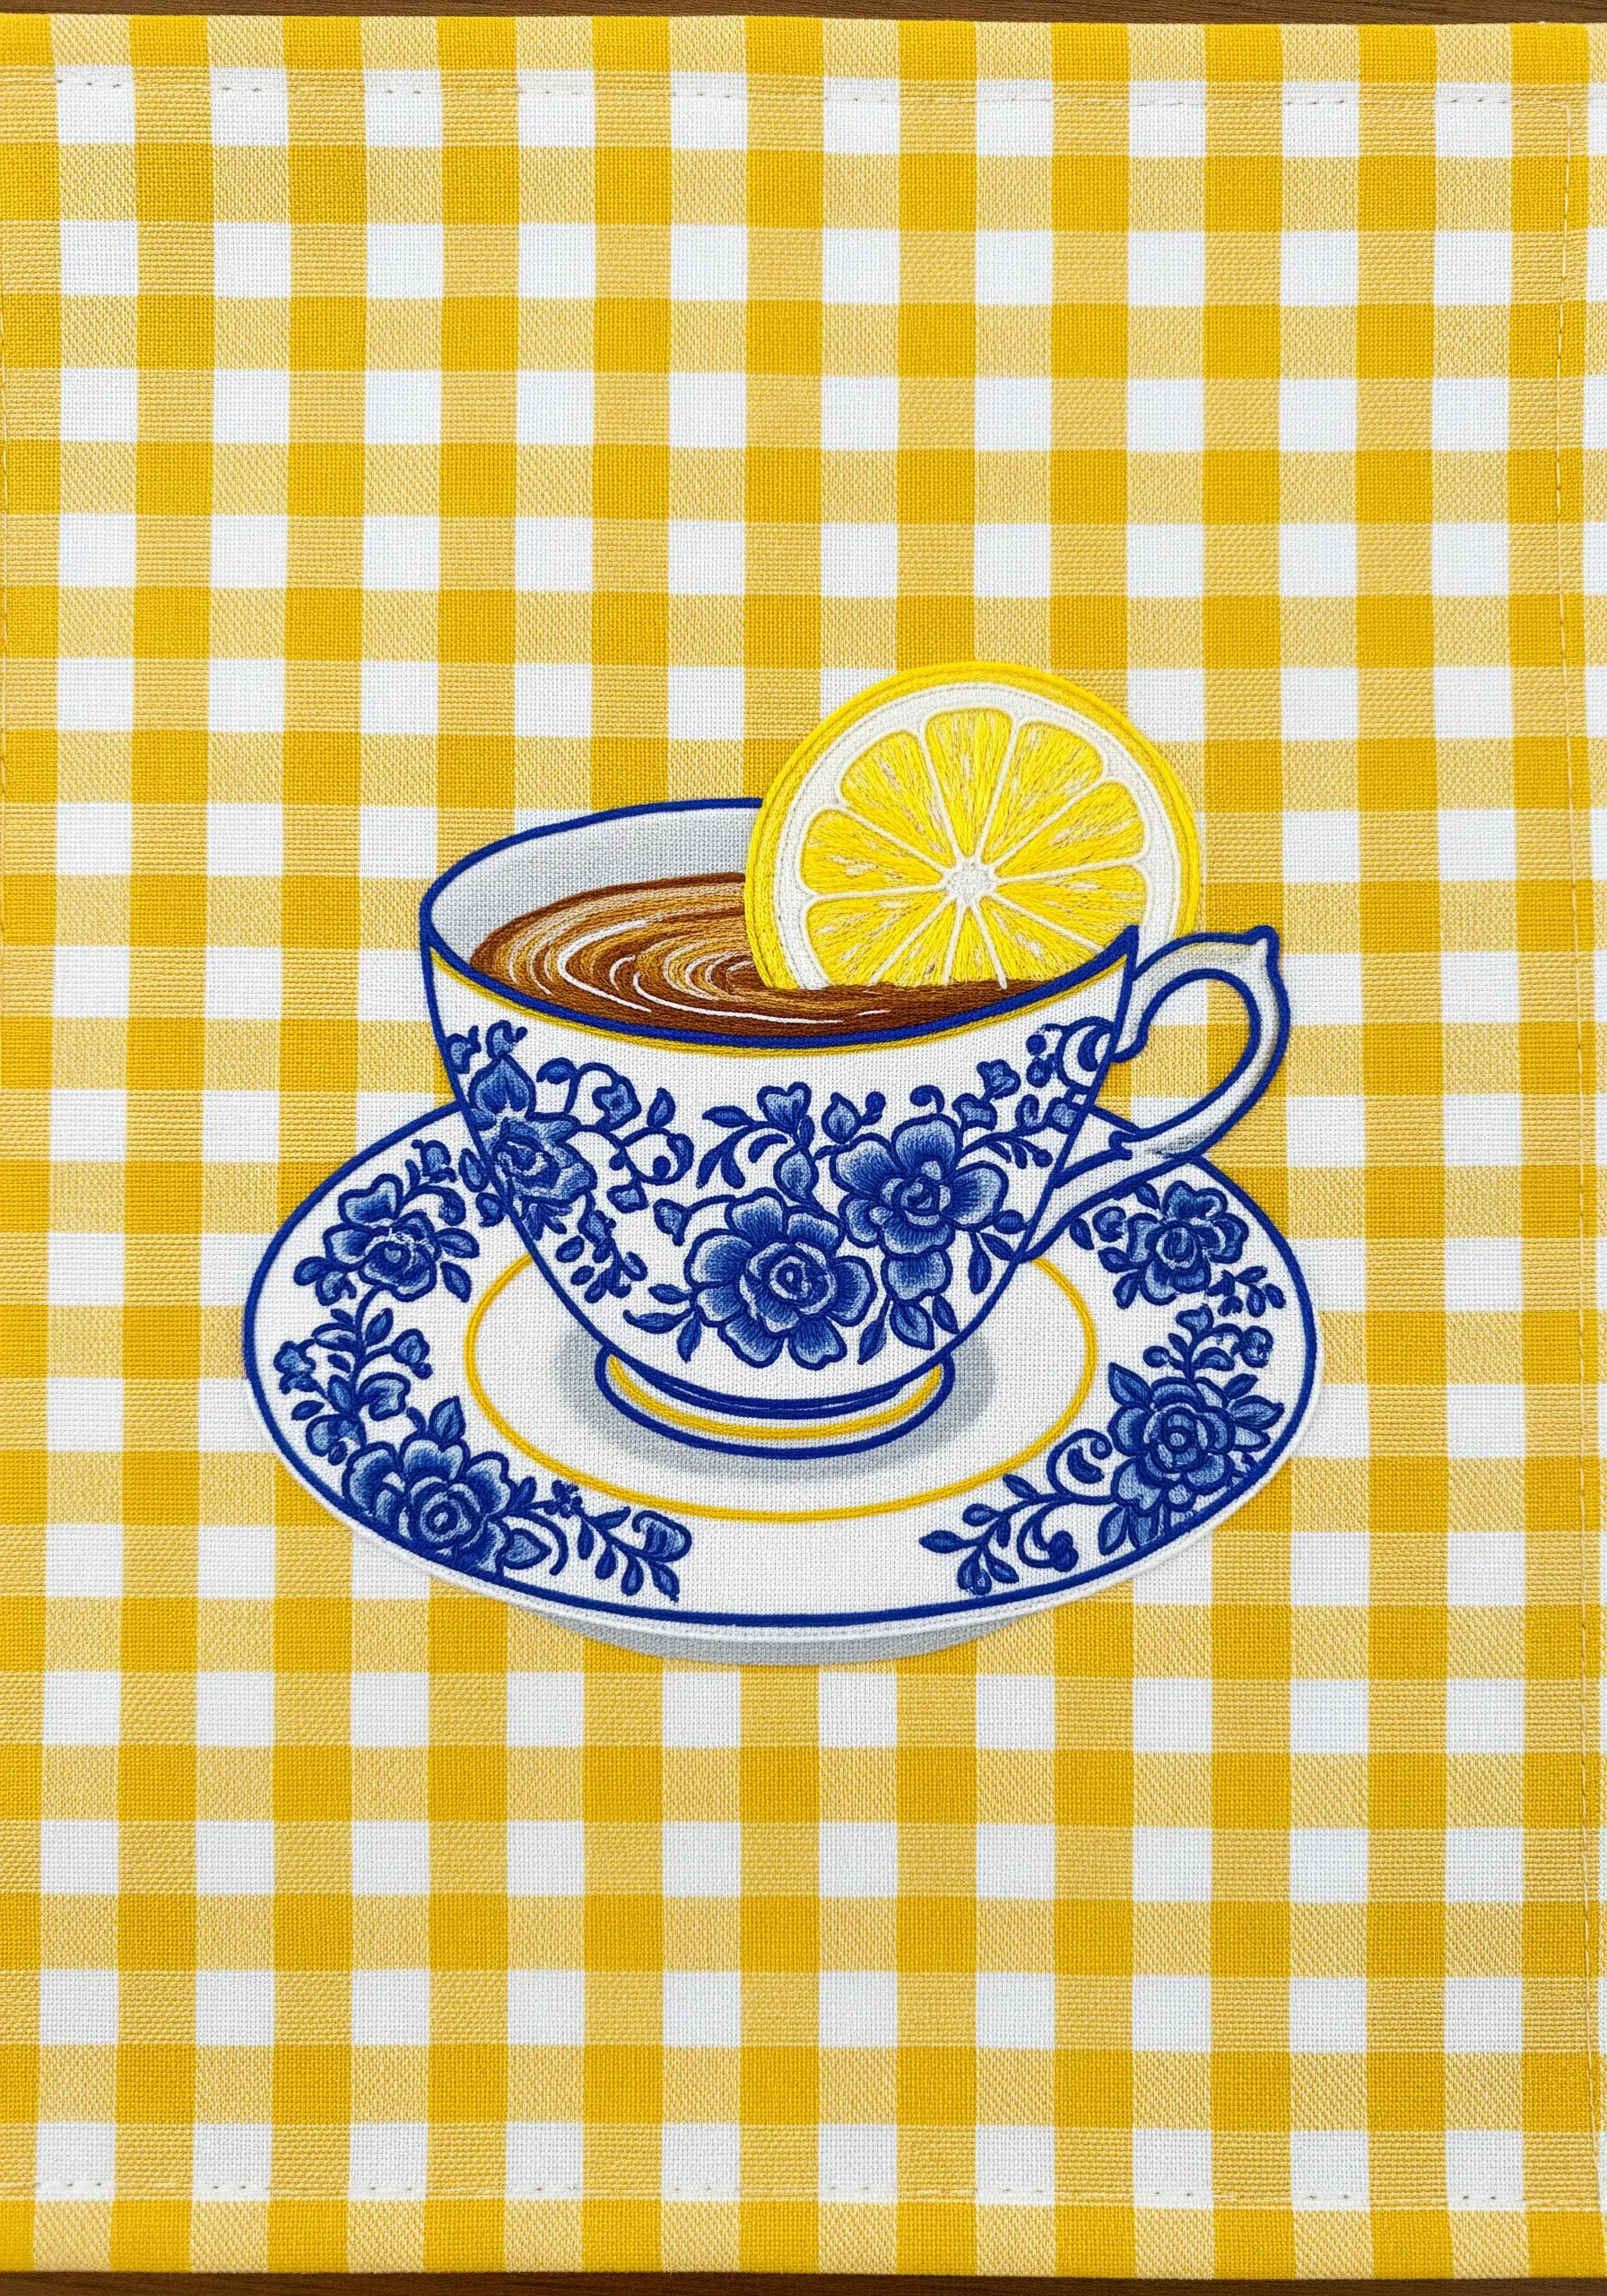
When stitching on a busy fabric like gingham, your motif needs a strong anchor to avoid getting lost in the pattern.
A bold outline, worked in a three-strand stem stitch or split stitch, acts as a visual frame for your design.
Choose a color that contrasts sharply with the fabric, like this classic delft blue against yellow, to ensure the teacup stands out.
This technique gives your embroidery presence and clarity on any patterned background.
9. Minimalist Motifs: Using Negative Space and Texture

This design demonstrates the power of restraint, using texture and negative space instead of solid color.
The horizontal satin stitches on the rolling pin cleverly suggest wood grain without needing complex shading.
To elevate this look, use a whipped backstitch for the outlines; it creates a smooth, raised, cord-like line that feels refined and intentional.
This elegant simplicity is the hallmark of minimal embroidery patterns that look harder than they are.
10. Weaving a Lattice Crust with Raised Stitches
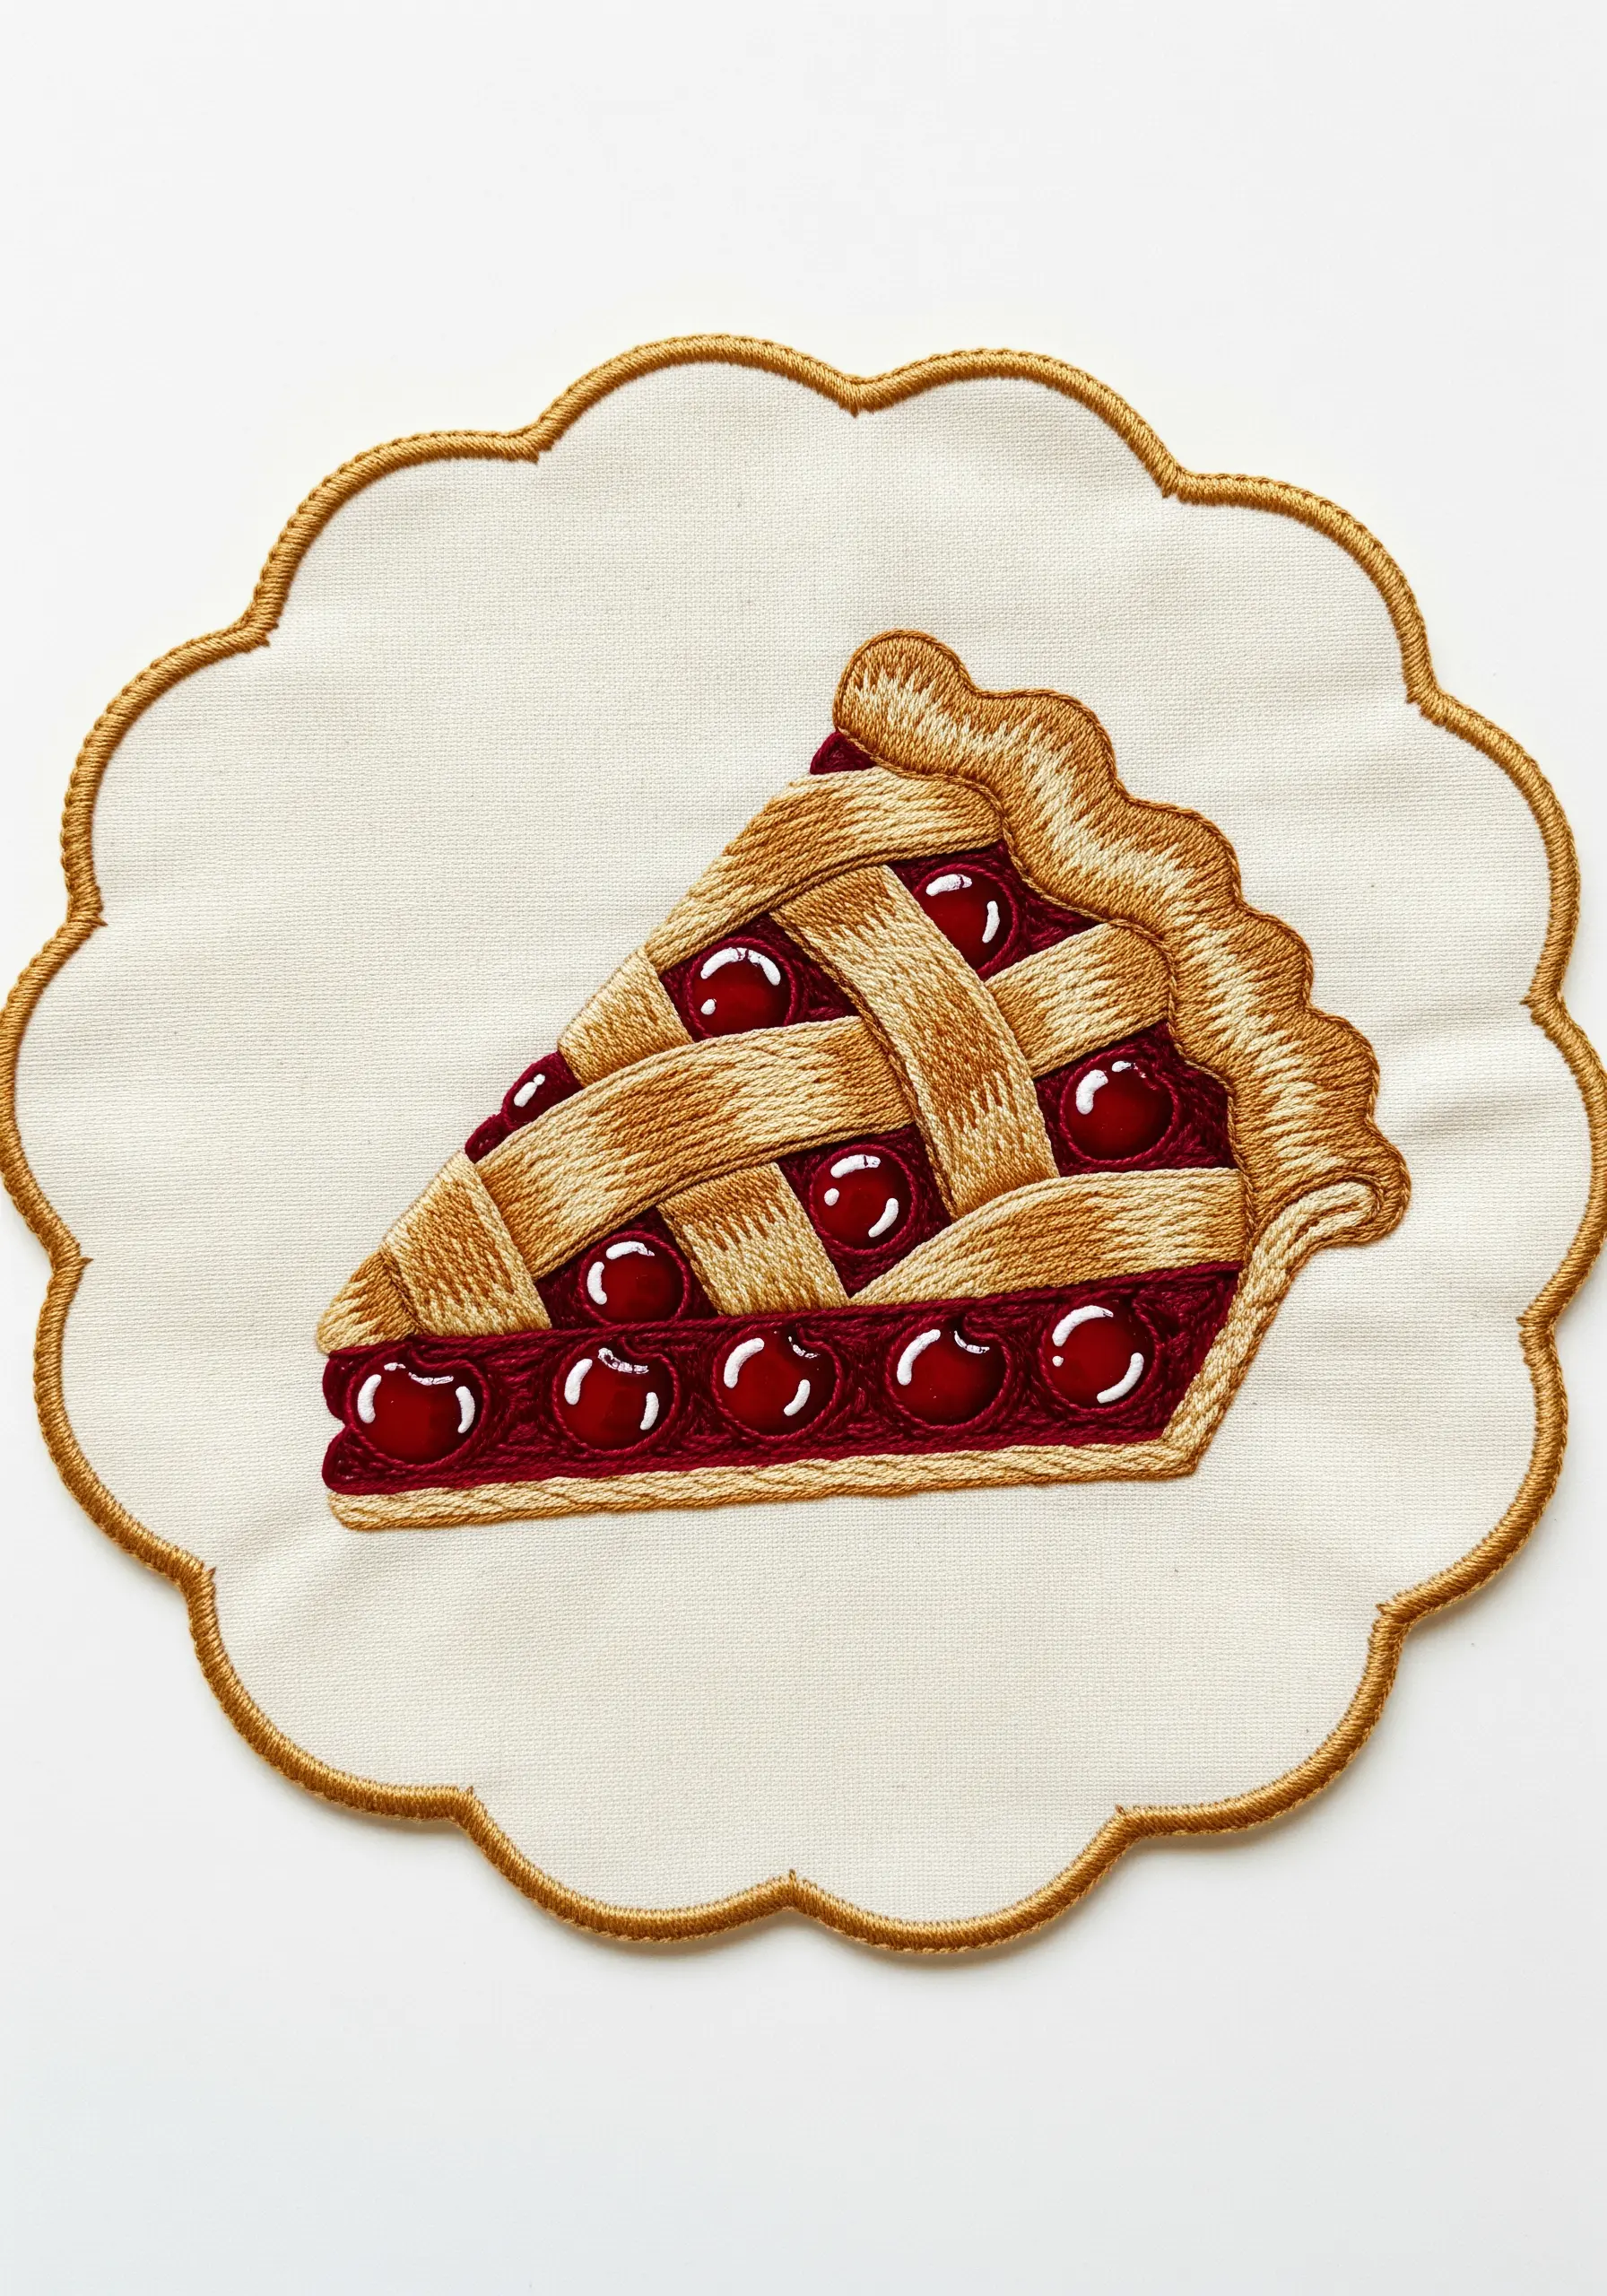
For a truly three-dimensional lattice crust, go beyond simply overlapping stitches.
First, lay down your foundation stitches in one direction (the bottom strips of the lattice).
Then, use a tapestry needle to literally weave your thread over and under those foundation stitches in the perpendicular direction.
For the cherries, use a padded satin stitch with a high-gloss red thread to make them look plump, shiny, and ready to eat.
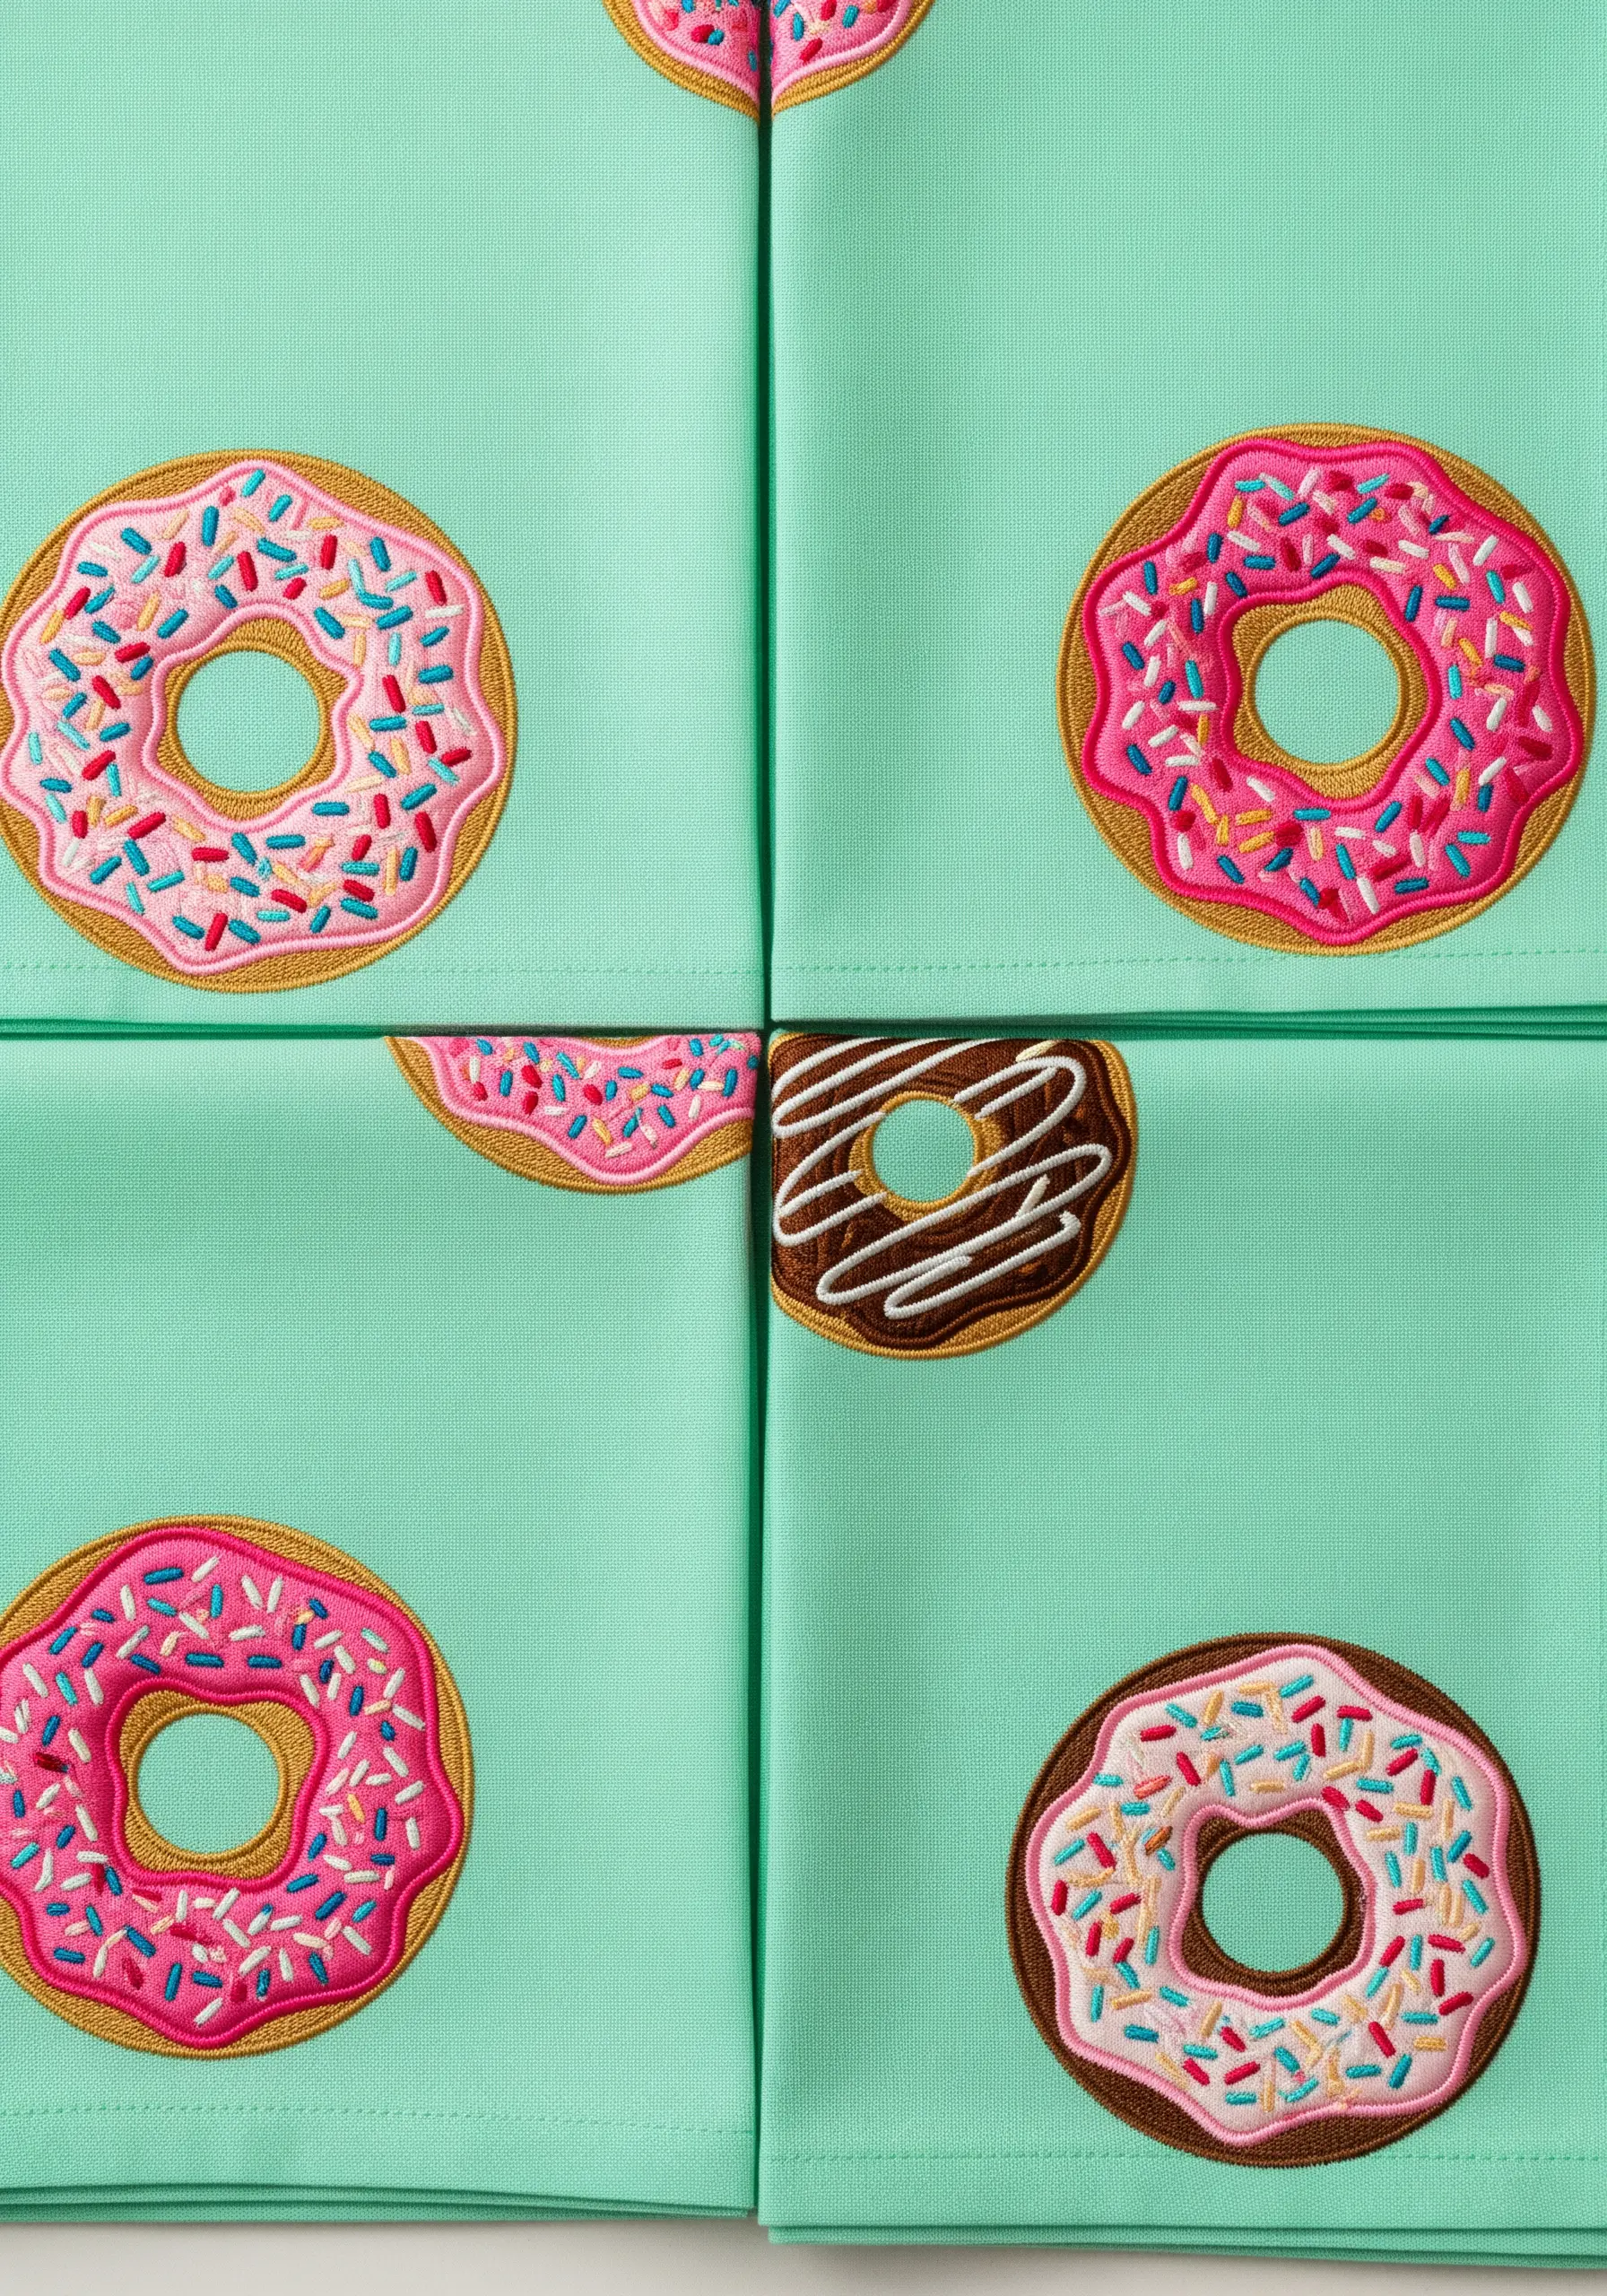
11. Creating Cohesive Borders with Repeated Motifs

Transform a simple table runner by creating a playful border of repeating motifs.
The key to a polished look is consistency: use the same stitch density and direction for each similar cookie shape.
Use satin stitch for the main fill, then add delicate details like French knots or seed stitches for ‘icing’ or ‘sprinkles’.
Framing the entire scene with a simple backstitch or running stitch provides a clean edge and turns your linen into a beautiful centerpiece.
12. Designing an Airy Scatter Pattern with Line and Detail
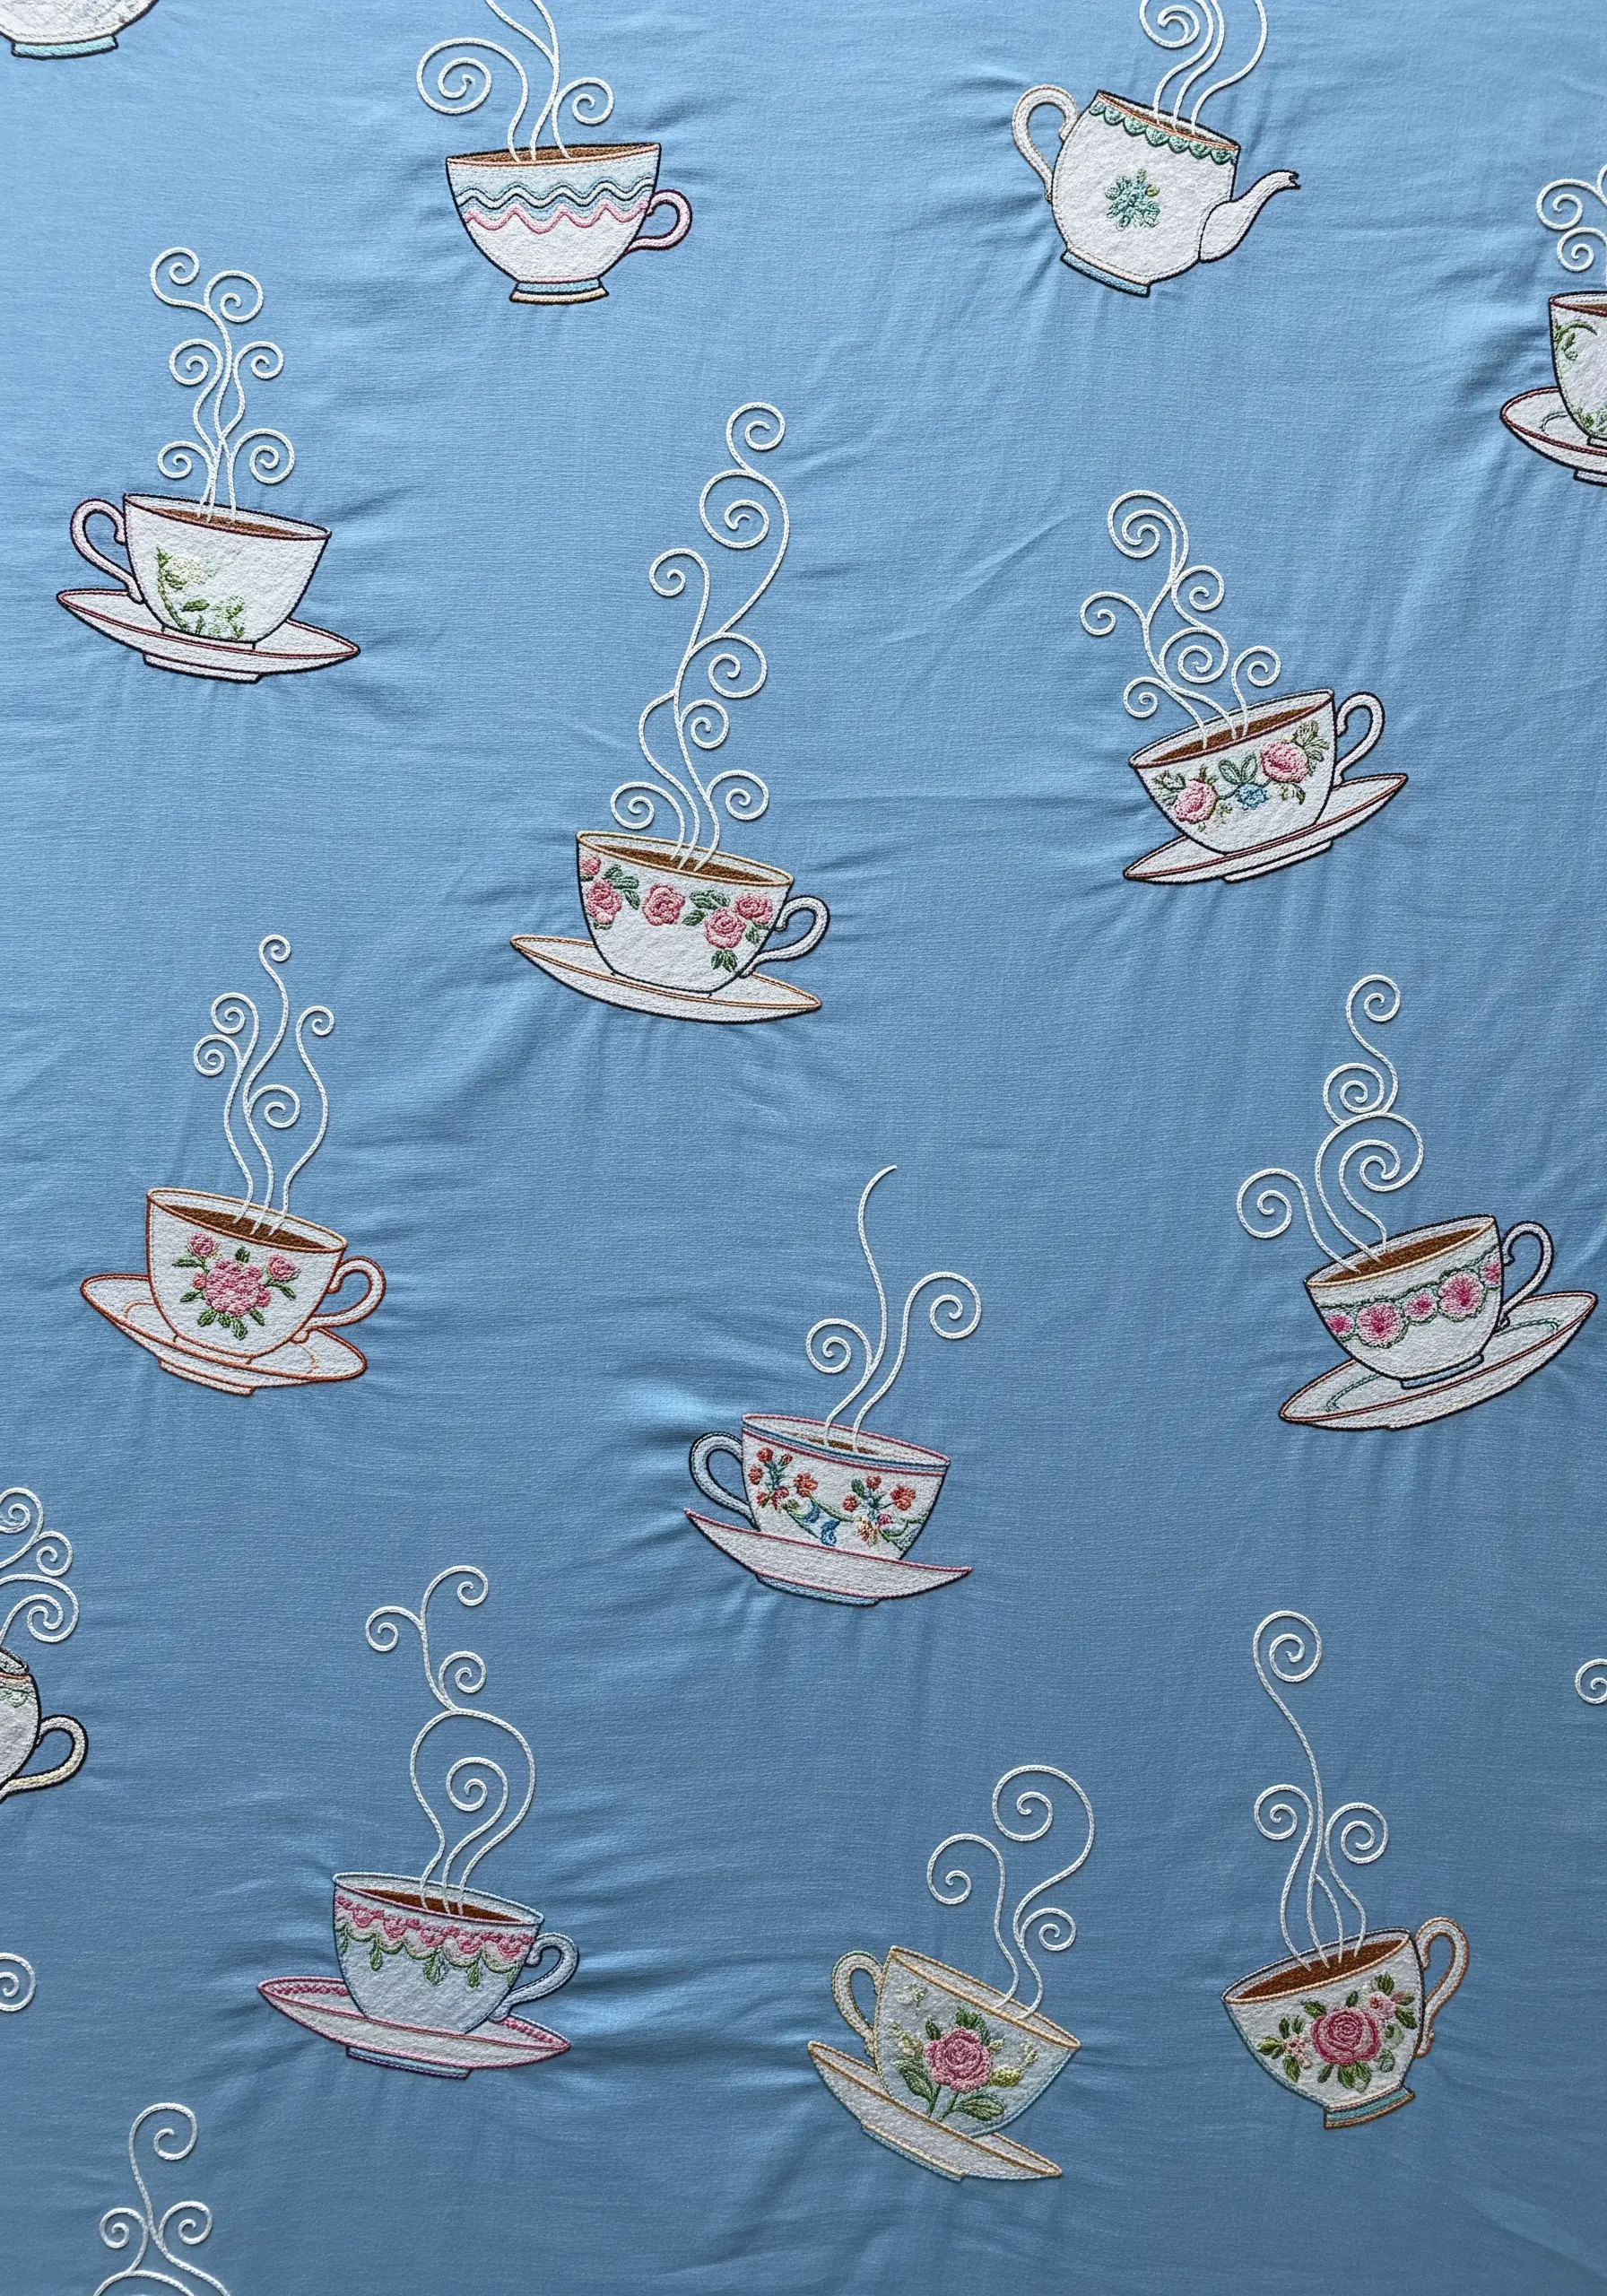
To create a successful scatter pattern, you need to balance areas of detail with open space.
Keep the main motifs—the teacups—relatively small and detailed, but let the swirling steam connect them across the fabric.
A simple, flowing backstitch or stem stitch for the steam creates a sense of movement and lightness.
By slightly varying the floral designs on each cup, you encourage the eye to dance across the surface without it feeling cluttered.
13. Capturing Gloss and Cream with Thread Choice and Stitch Style
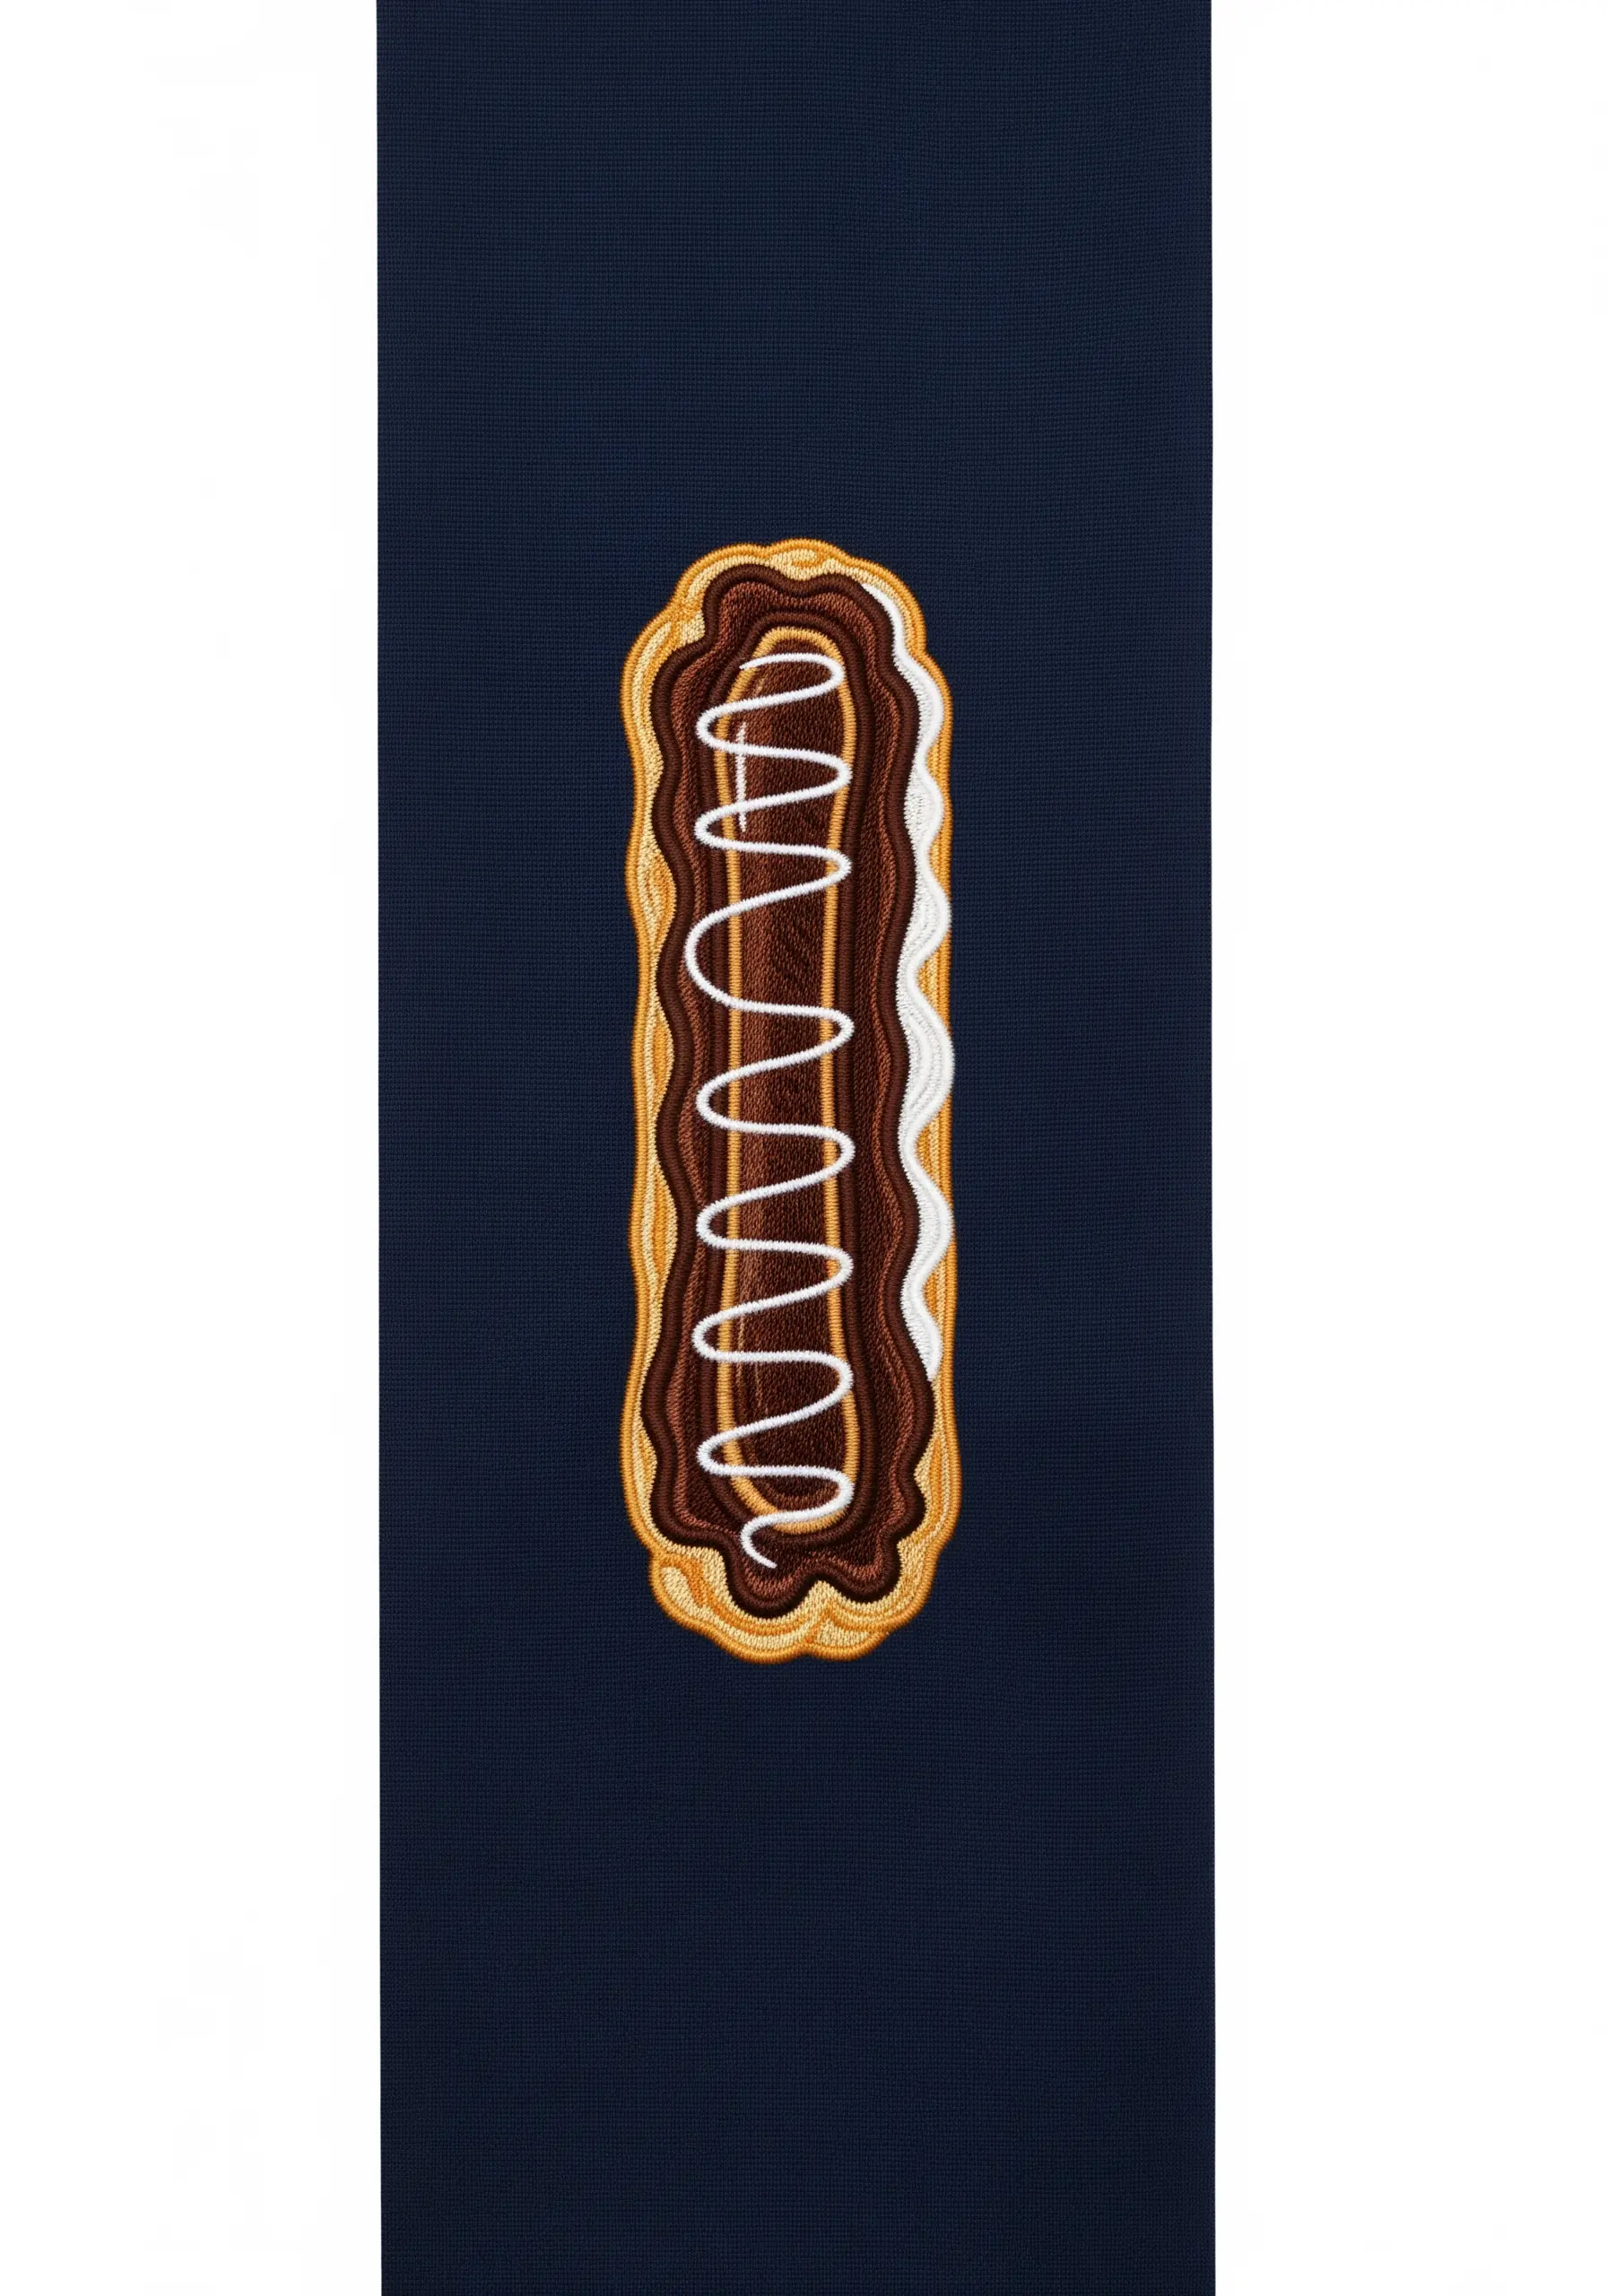
The realism of this eclair comes from the contrast in textures, which you can achieve with thread selection.
For the glossy chocolate ganache, use a high-sheen rayon or silk thread in a dense, smooth satin stitch.
For the fluffy whipped cream, switch to a matte cotton floss and use bullion knots or a series of loops to create airy volume.
The final zigzag of white icing, worked in a whipped backstitch, provides a sharp, graphic detail that completes the illusion.
14. Building Bold Graphic Patterns with Couching Stitch
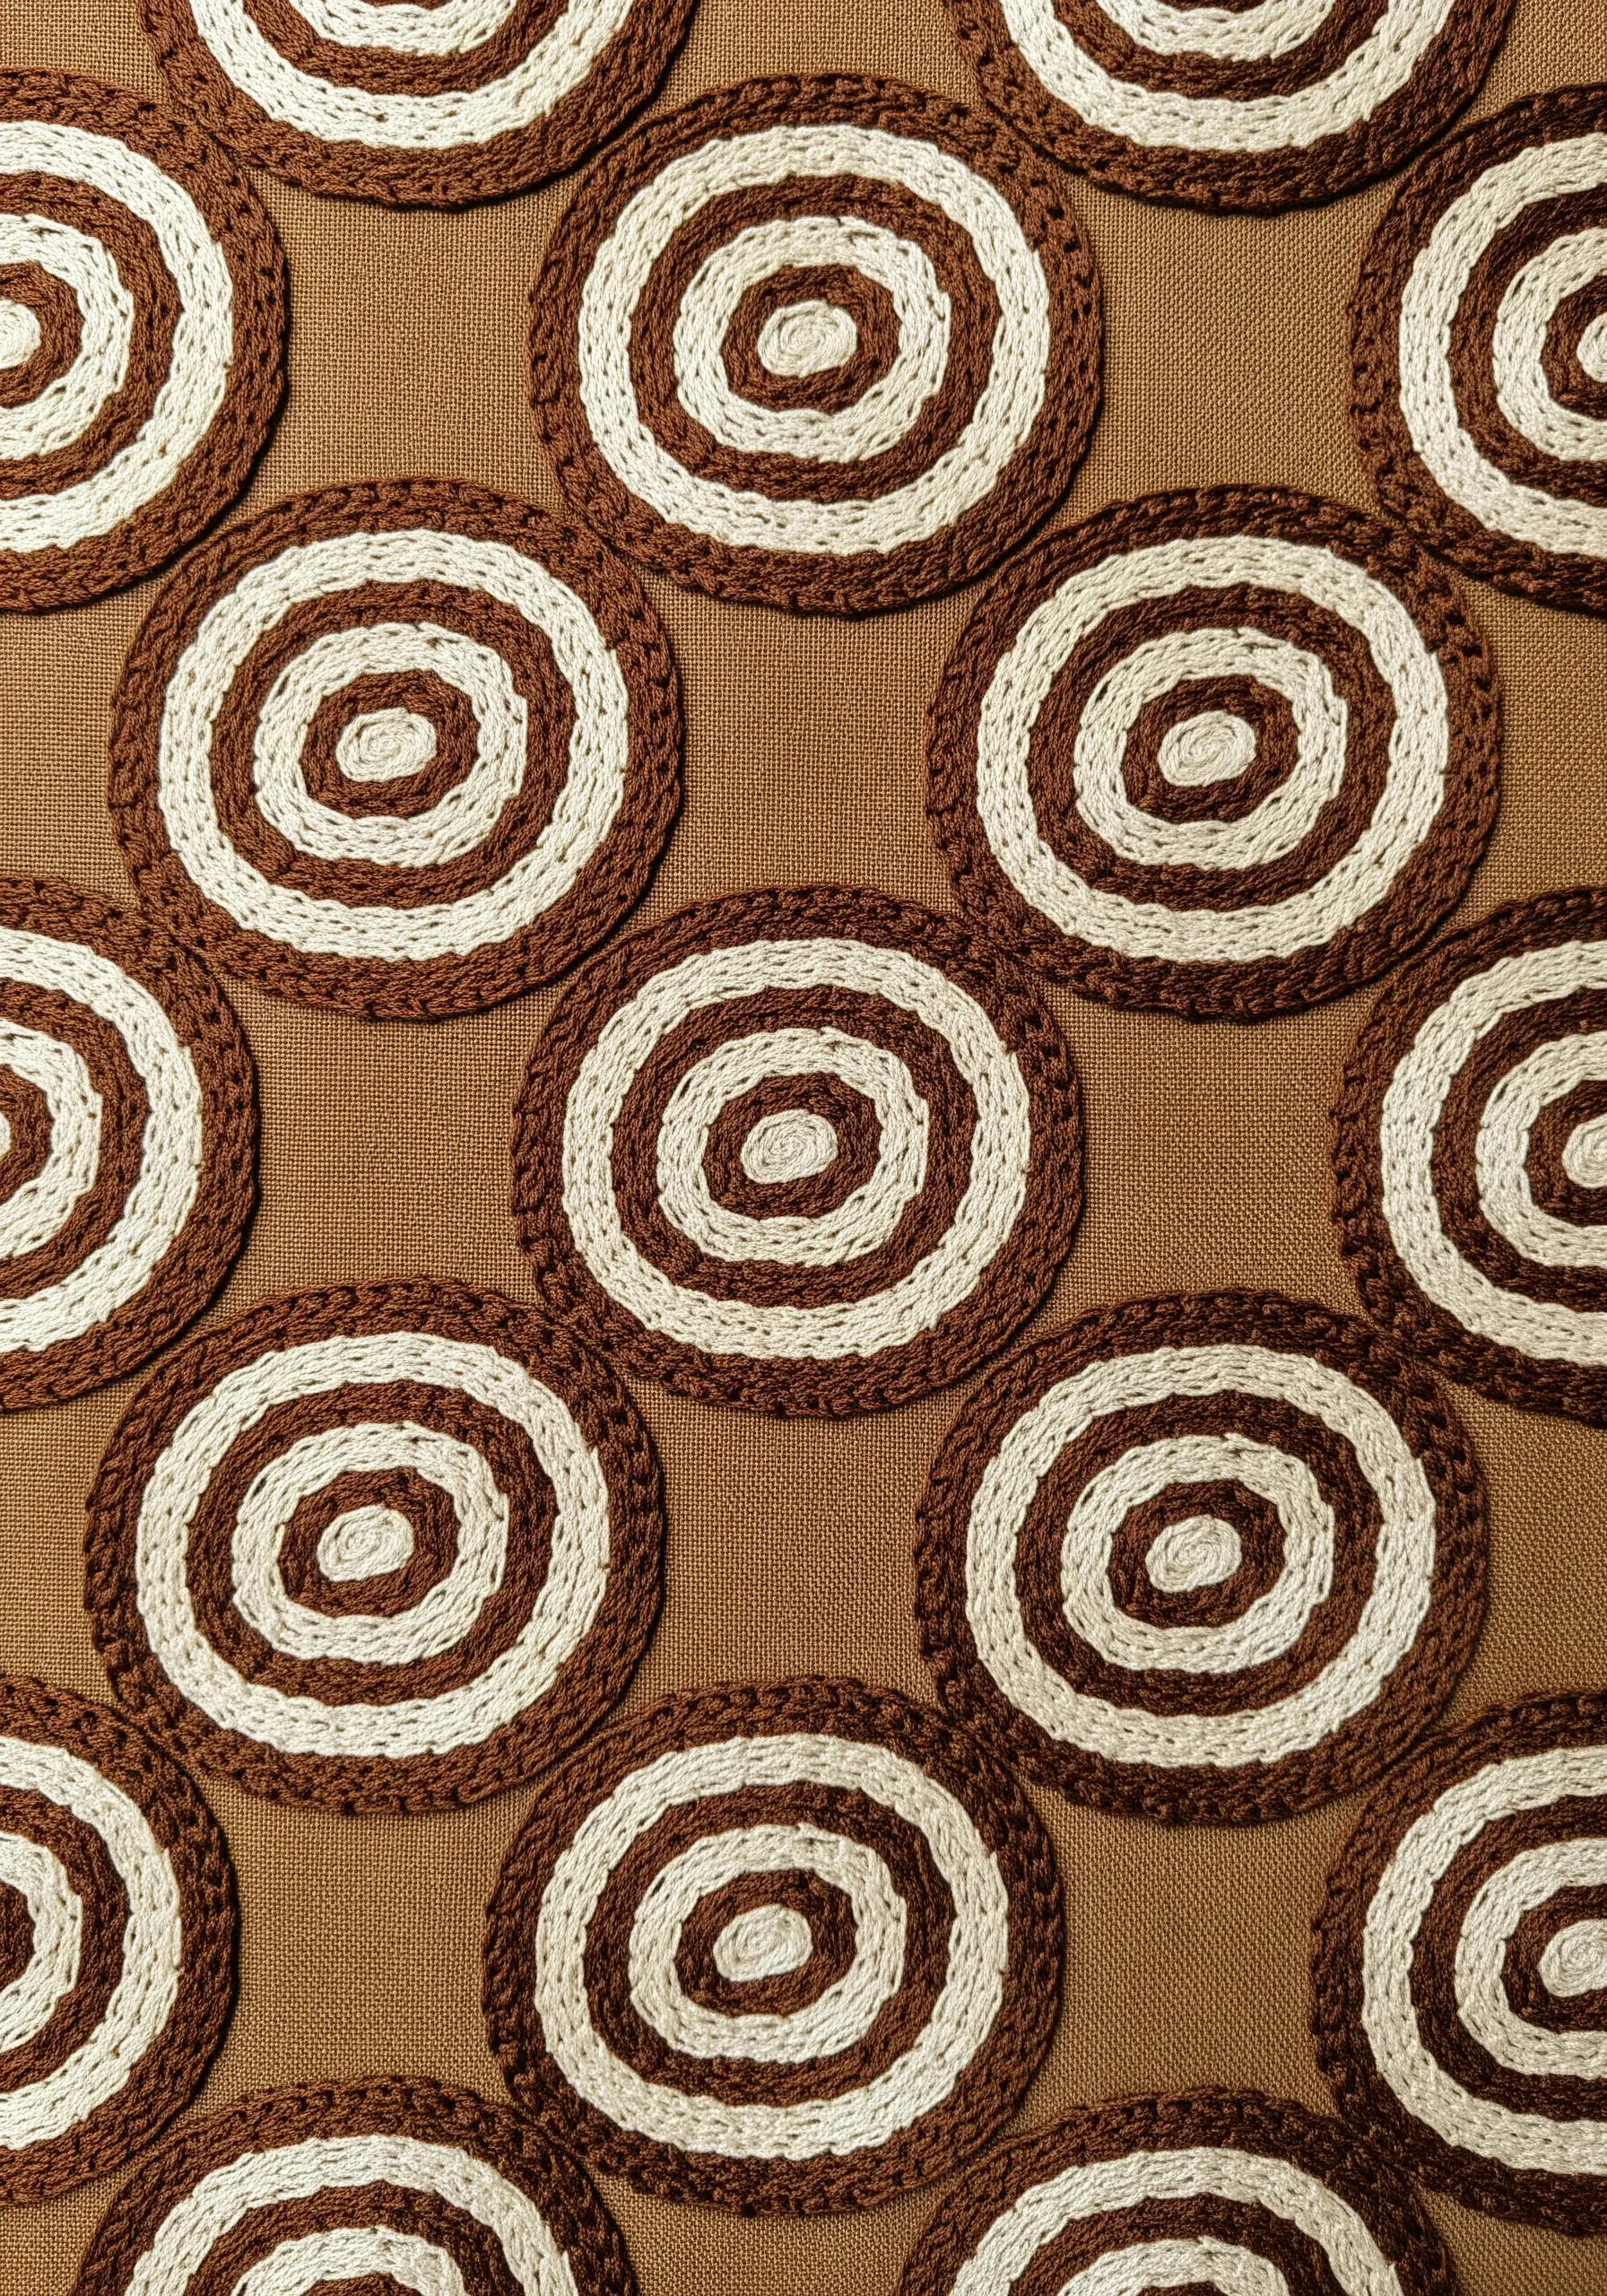
This eye-catching design is a perfect candidate for couching, a technique that creates clean, raised lines with beautiful texture.
Lay a thick bundle of thread or yarn along your design’s circular path.
Then, use a single, contrasting strand to tack it down to the fabric at regular intervals.
This method is much faster than satin stitch for filling a graphic area and results in a wonderfully tactile, almost woven finish, reminiscent of retro string art patterns.
15. Creating Geometric Dimension with Satin Stitch Direction
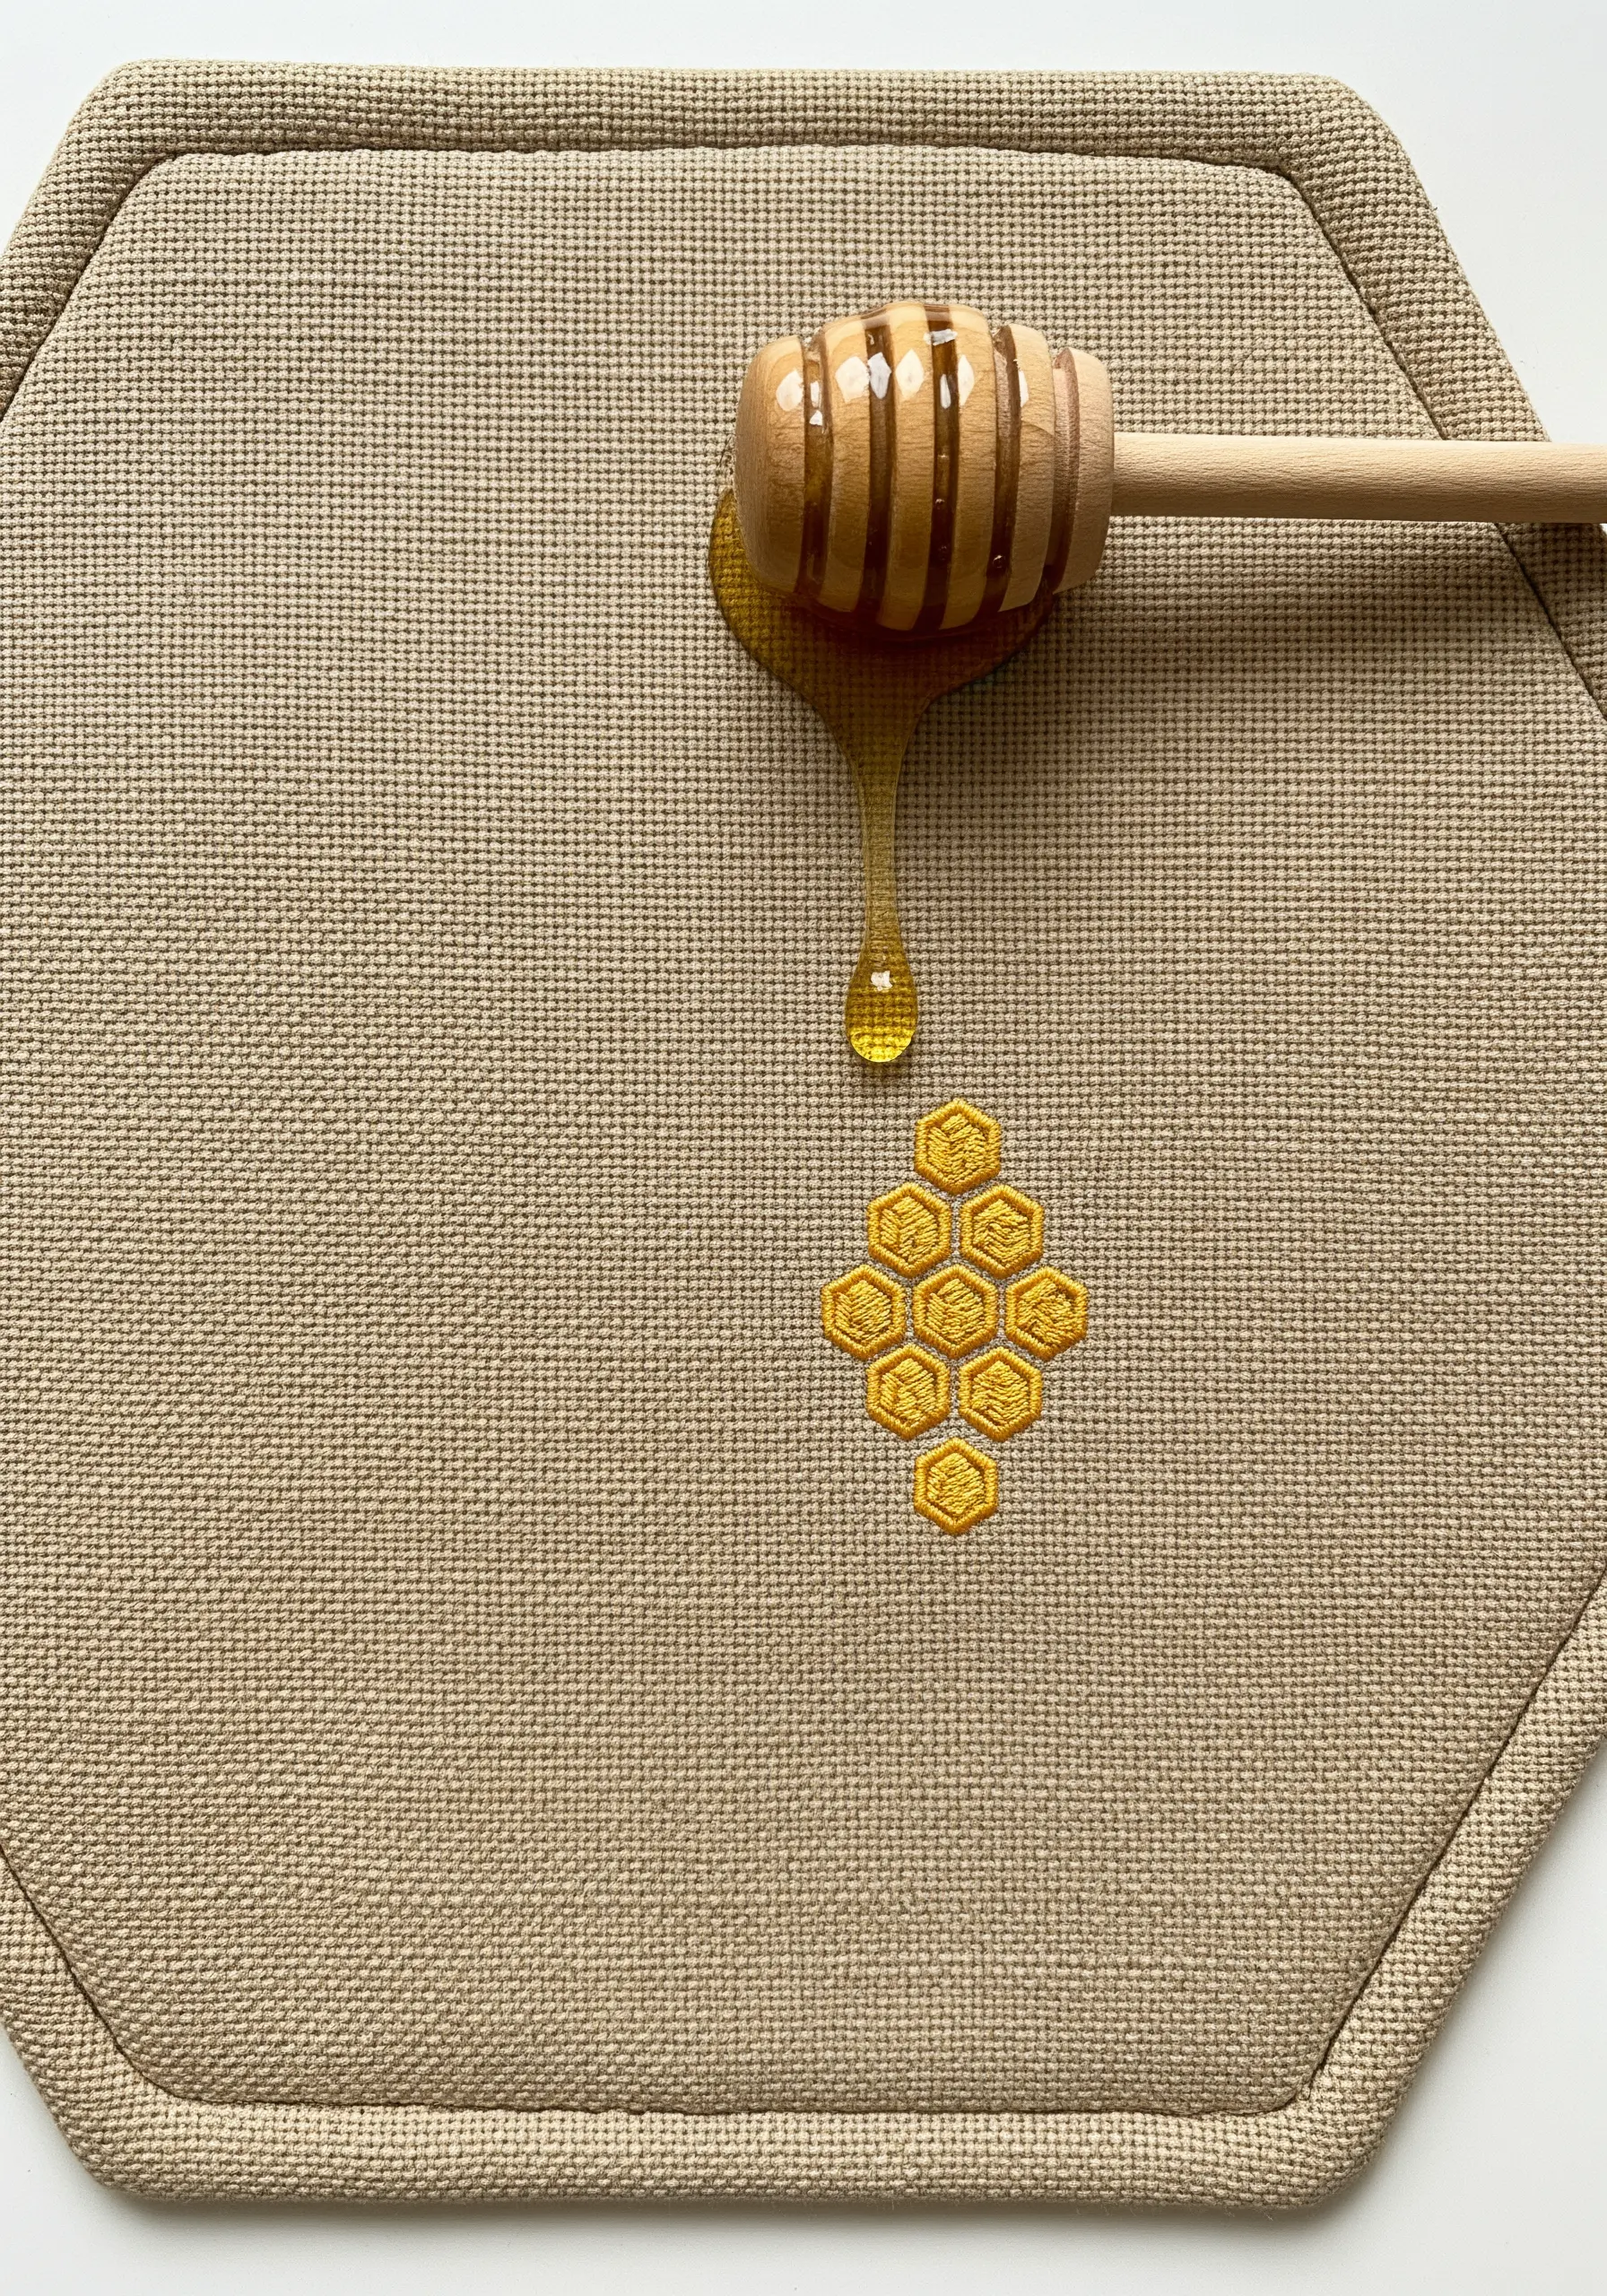
To give this simple honeycomb its gem-like quality, you don’t need multiple colors—you just need to change your stitch direction.
For each of the six facets of a hexagon, angle your satin stitches differently.
This simple change makes the light reflect from each section in a unique way, creating the illusion of planes and depth.
A clean backstitch outline in a slightly darker shade will make the geometric shape pop.
16. Exploring Dimensional Stitches: The Raised Satin Stitch Block
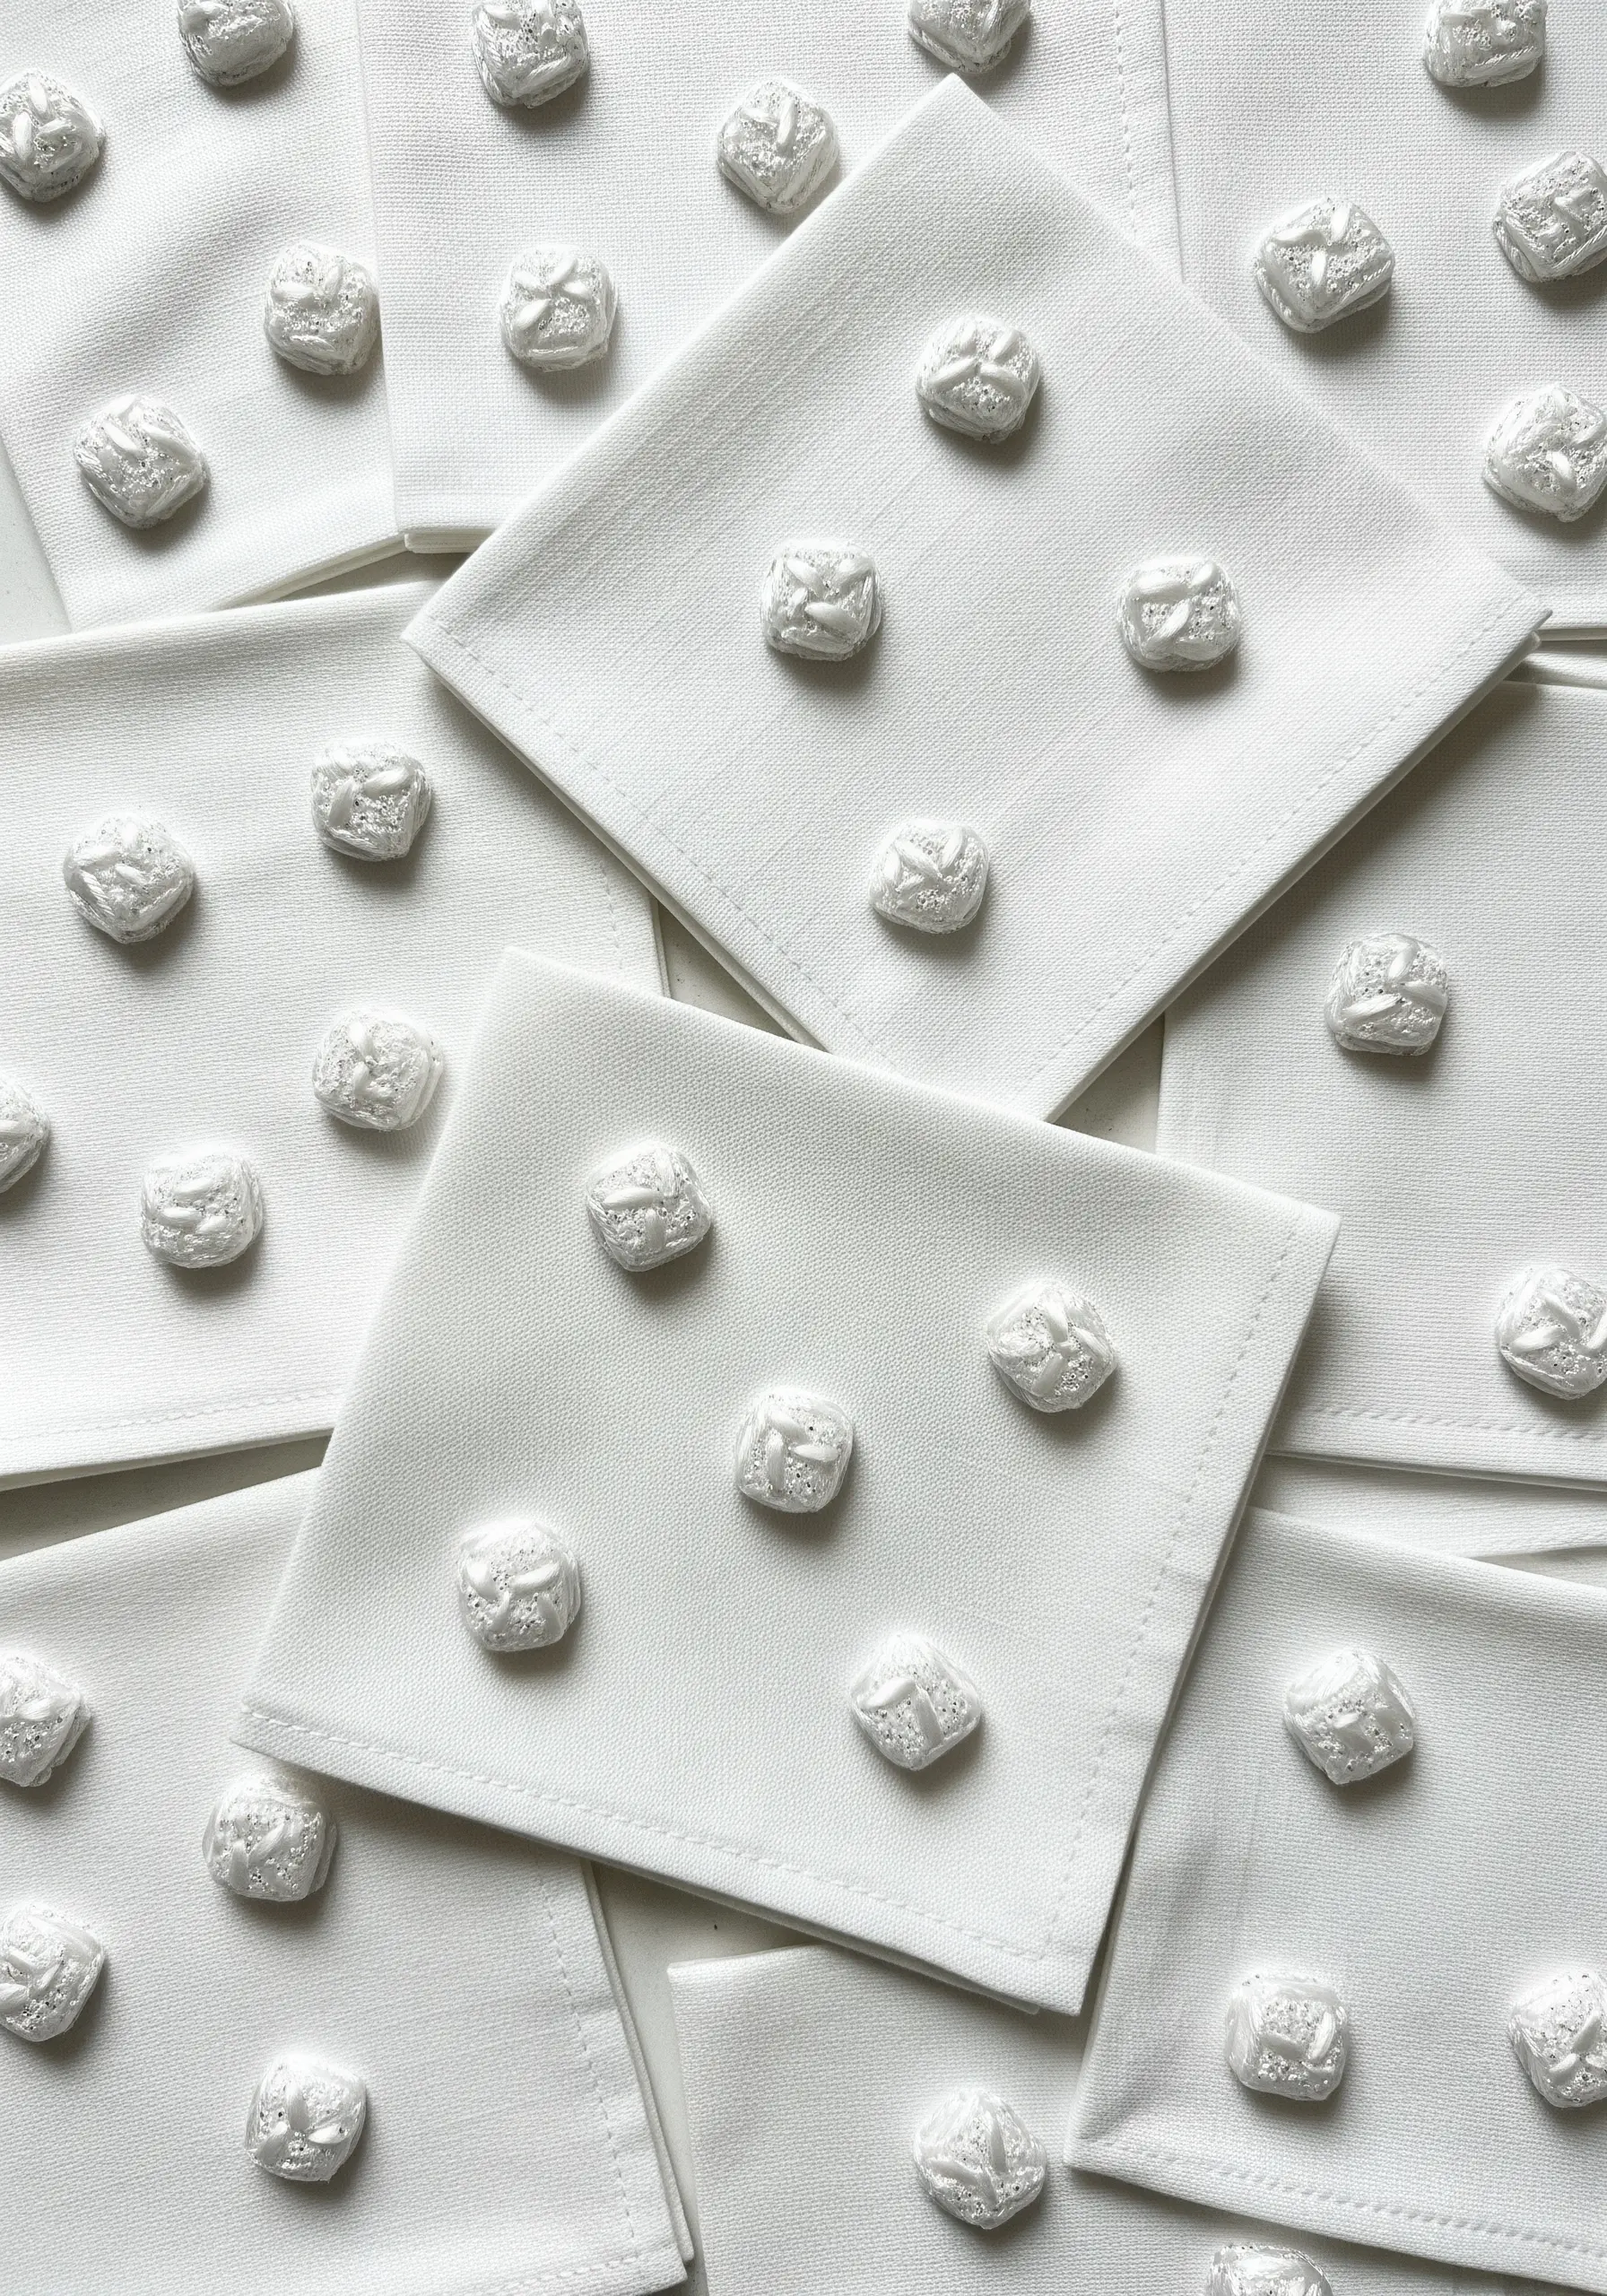
This elegant, tactile effect is created with a dimensional technique like the raised satin stitch.
First, you create a padded foundation within the square’s outline by laying down a grid of straight stitches.
Once you have a small, raised ‘pillow,’ cover it completely with neat, uniform vertical satin stitches.
Using a thread that matches the fabric creates a subtle, textural pattern that reads as pure luxury—a perfect example of beautiful greige & ivory embroidery.
17. Thread Painting Delicate Latte Art with Blended Shades
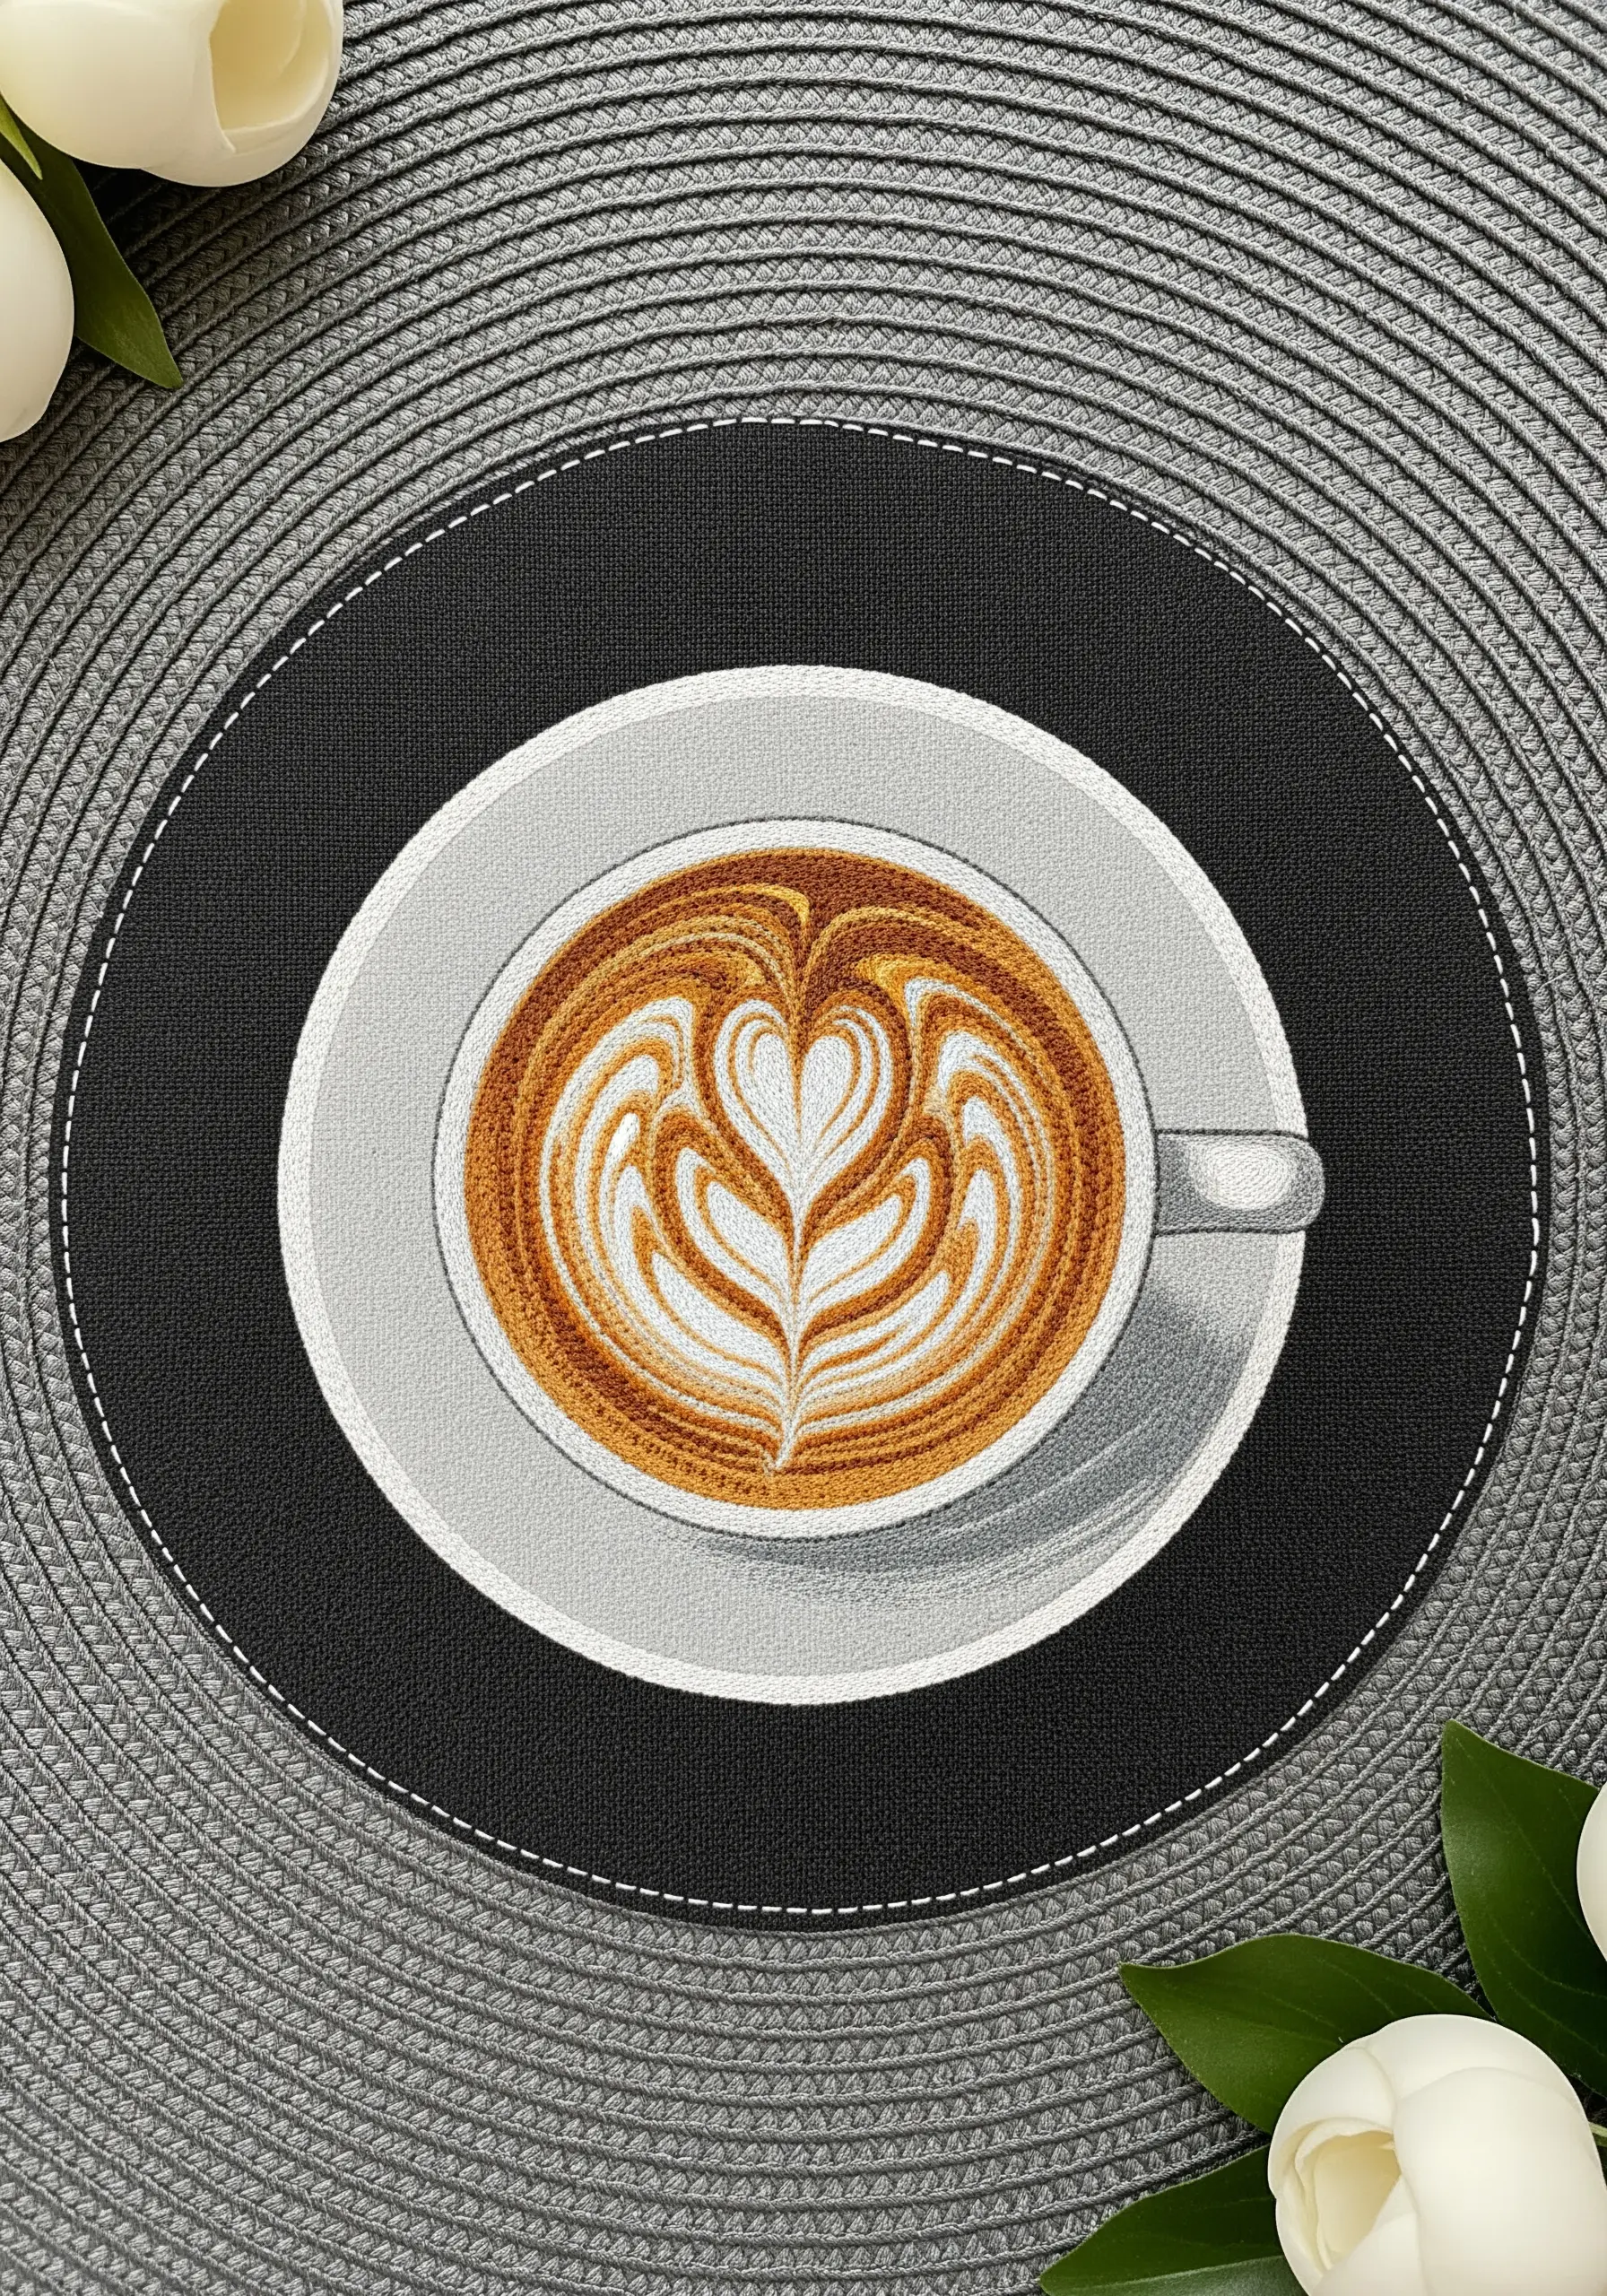
To capture the soft, feathered look of latte art, you’ll need patience and a delicate hand with thread painting.
Use a single strand of floss and at least five shades, from a dark espresso brown to a creamy white.
Your long and short stitches should flow in the direction the milk would be poured, creating soft, organic lines.
The goal is to make the color transitions seamless, which is the secret to embroidering realistic shadows and highlights.
18. Pairing Satin Stitch with Whipped Backstitch for Contrast
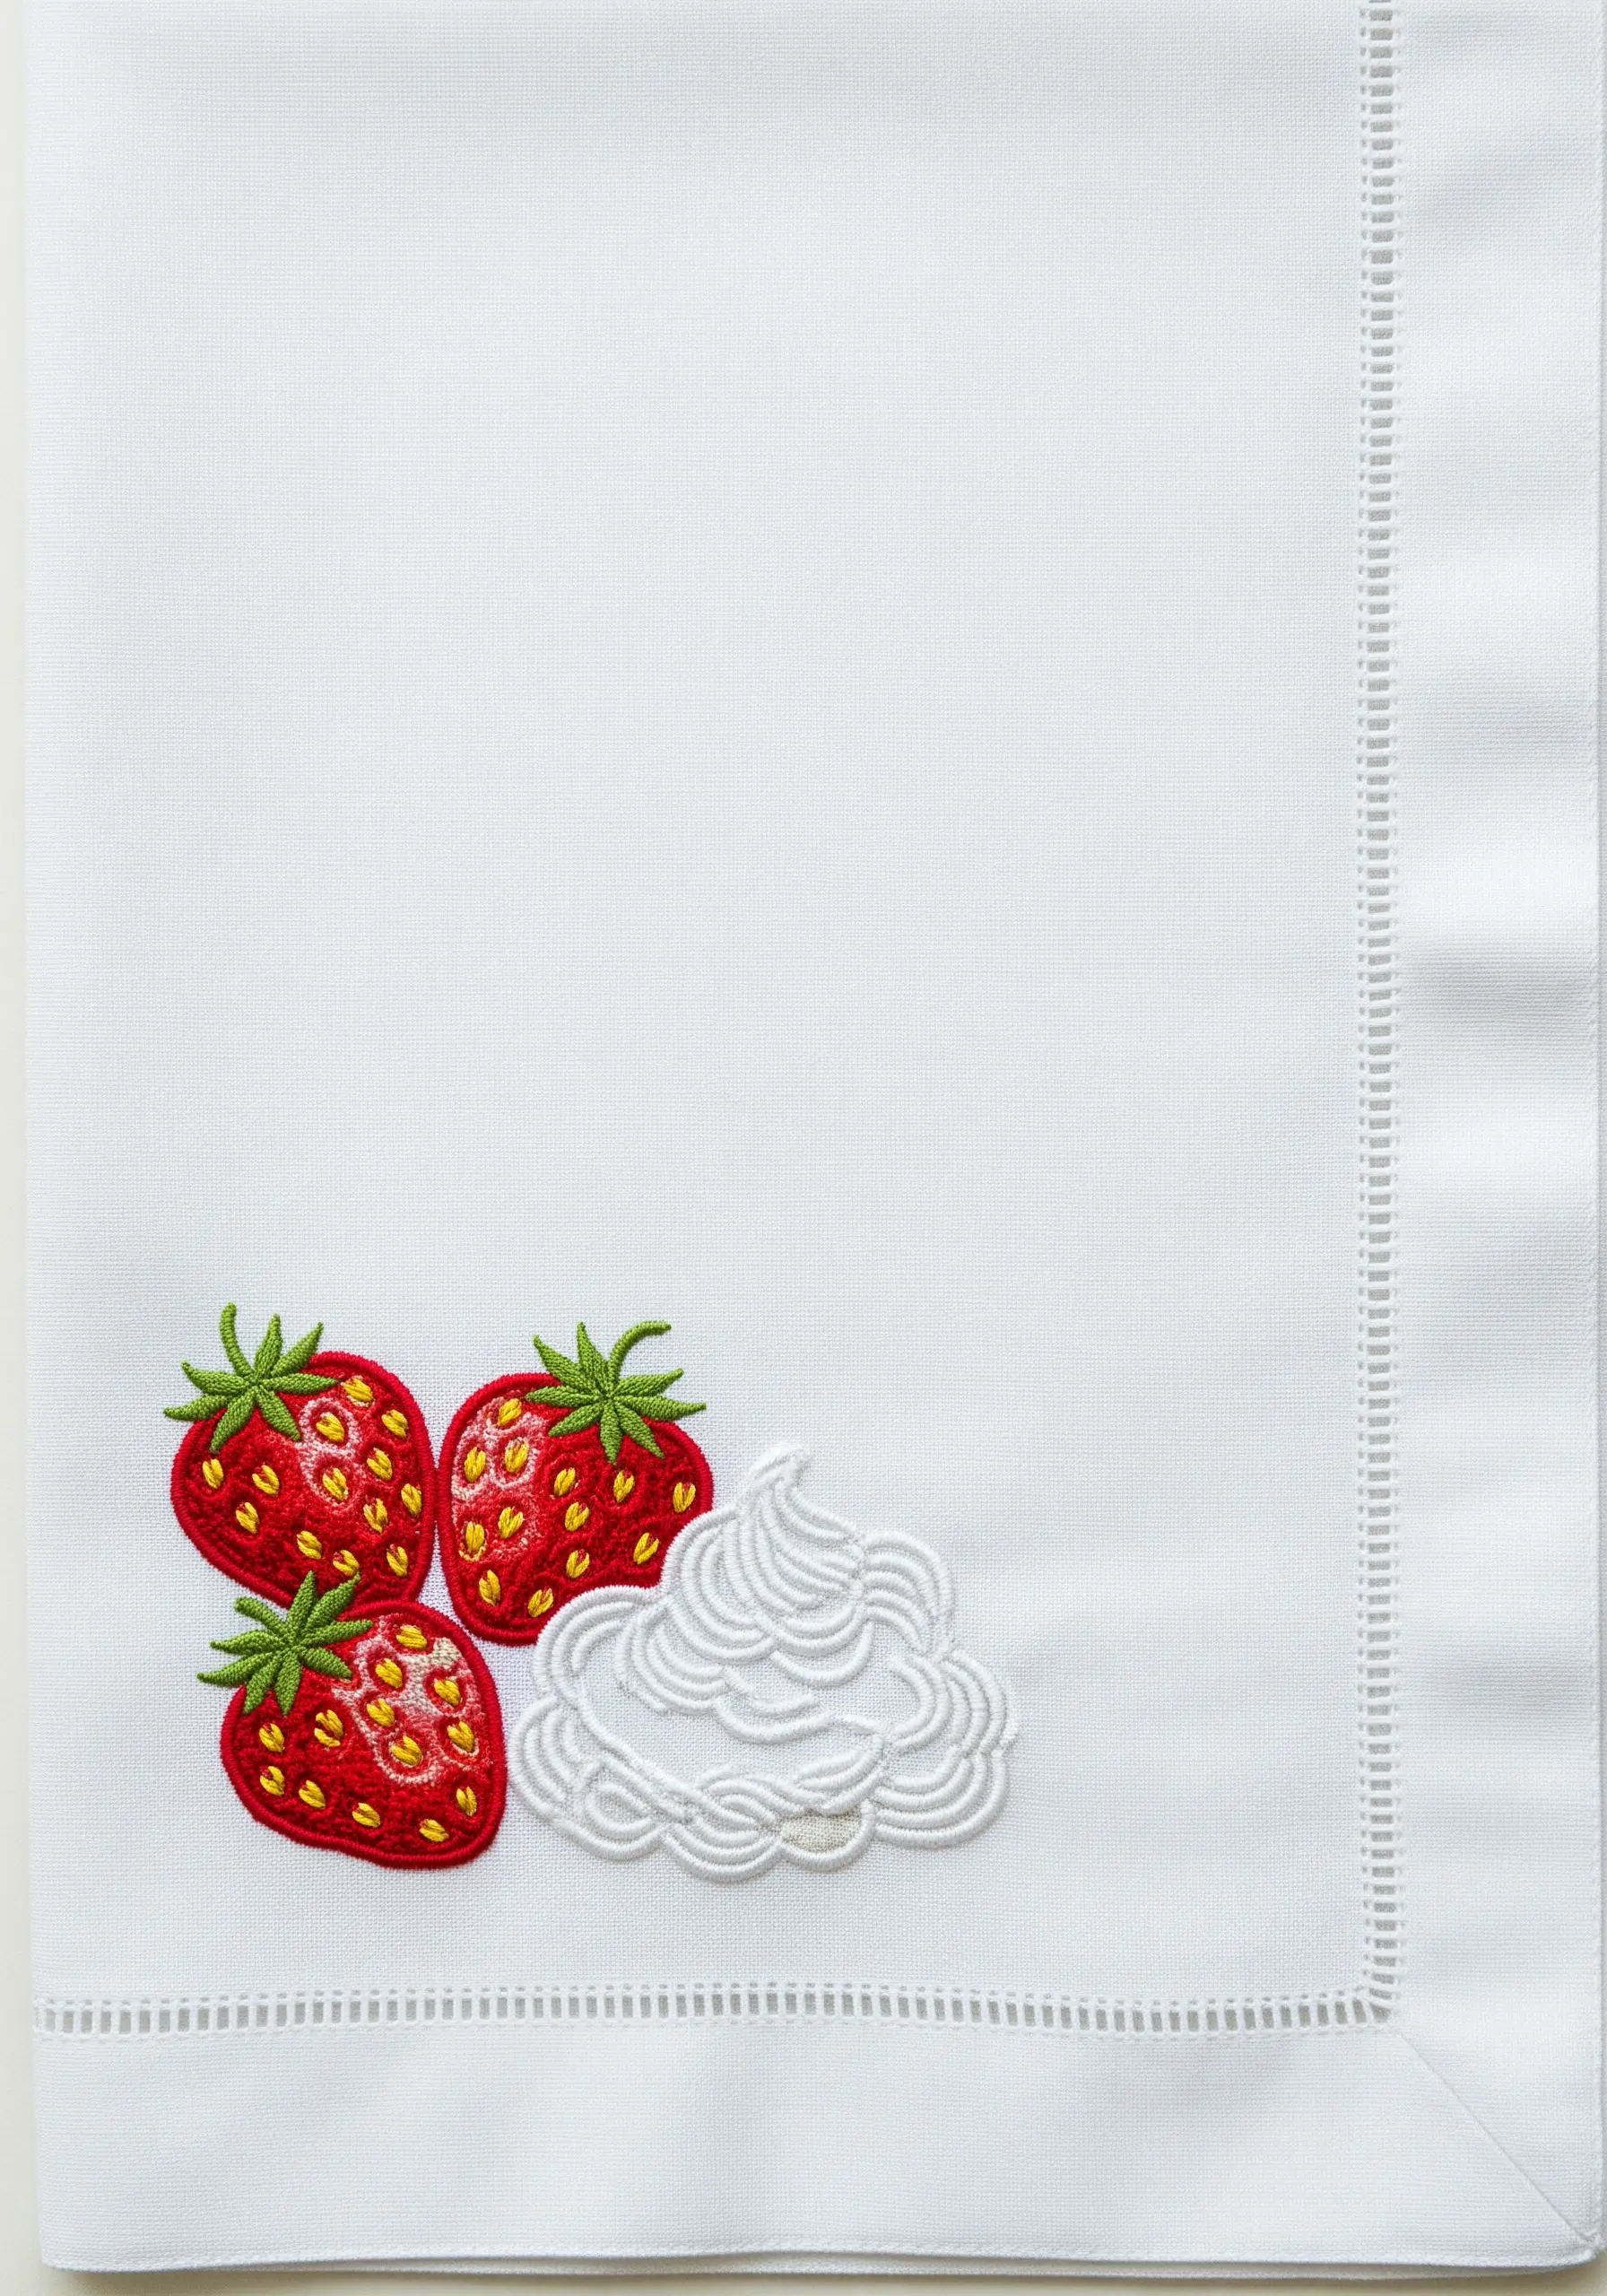
This design is a masterclass in textural contrast, pairing a smooth, dense fill with a sharp, rope-like outline.
Render the strawberries in satin stitch, angling your threads to enhance their round shape, and add tiny yellow seed stitches.
For the whipped cream, use a whipped backstitch for the outlines of the swirls.
This stitch creates a raised, corded effect that perfectly mimics piped cream and feels wonderful to the touch.
19. Incorporating Appliqué for Playful Realism
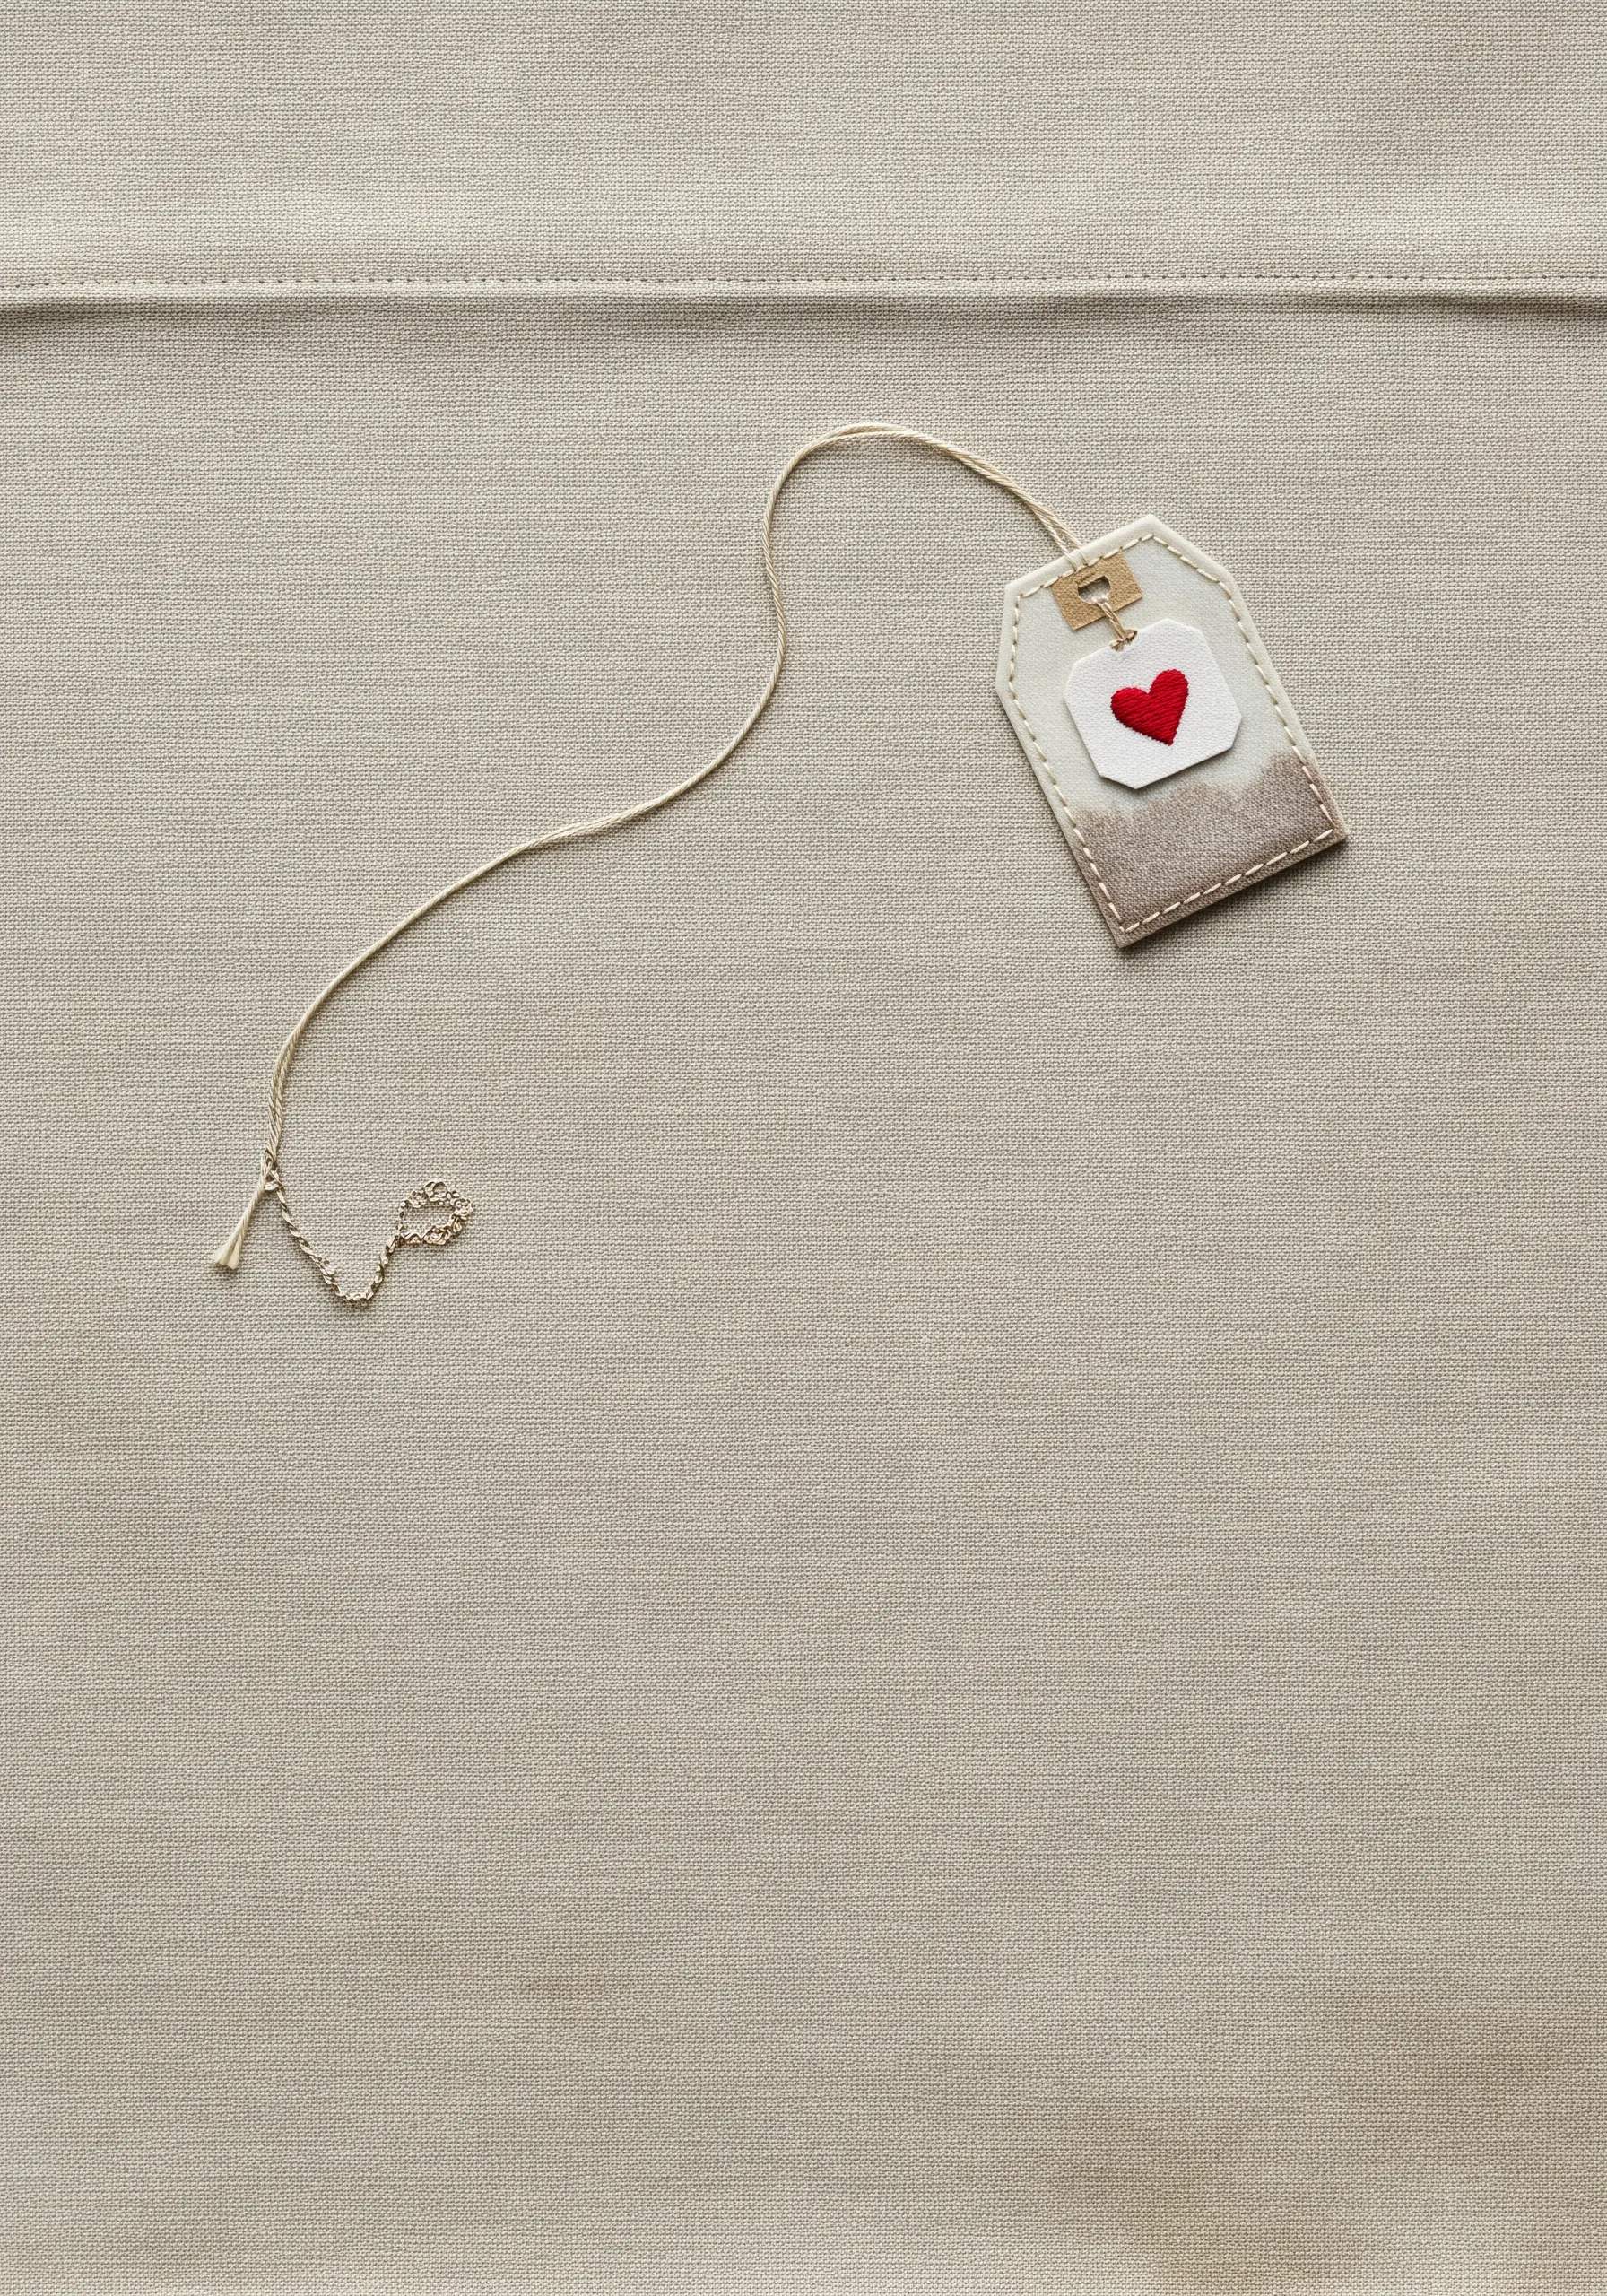
Combine the softness of embroidery with the clean shapes of appliqué for a charming, mixed-media design.
Cut the main tea bag shape from a scrap of felt or linen and secure it to your napkin with a simple running stitch around the edge.
Embroider smaller details, like the tiny satin-stitched heart, directly onto the appliqué piece before you attach it.
These tiny handmade decor ideas become heirlooms with small, thoughtful details.
20. Building a Tiered Cake with Dimensional Icing Techniques
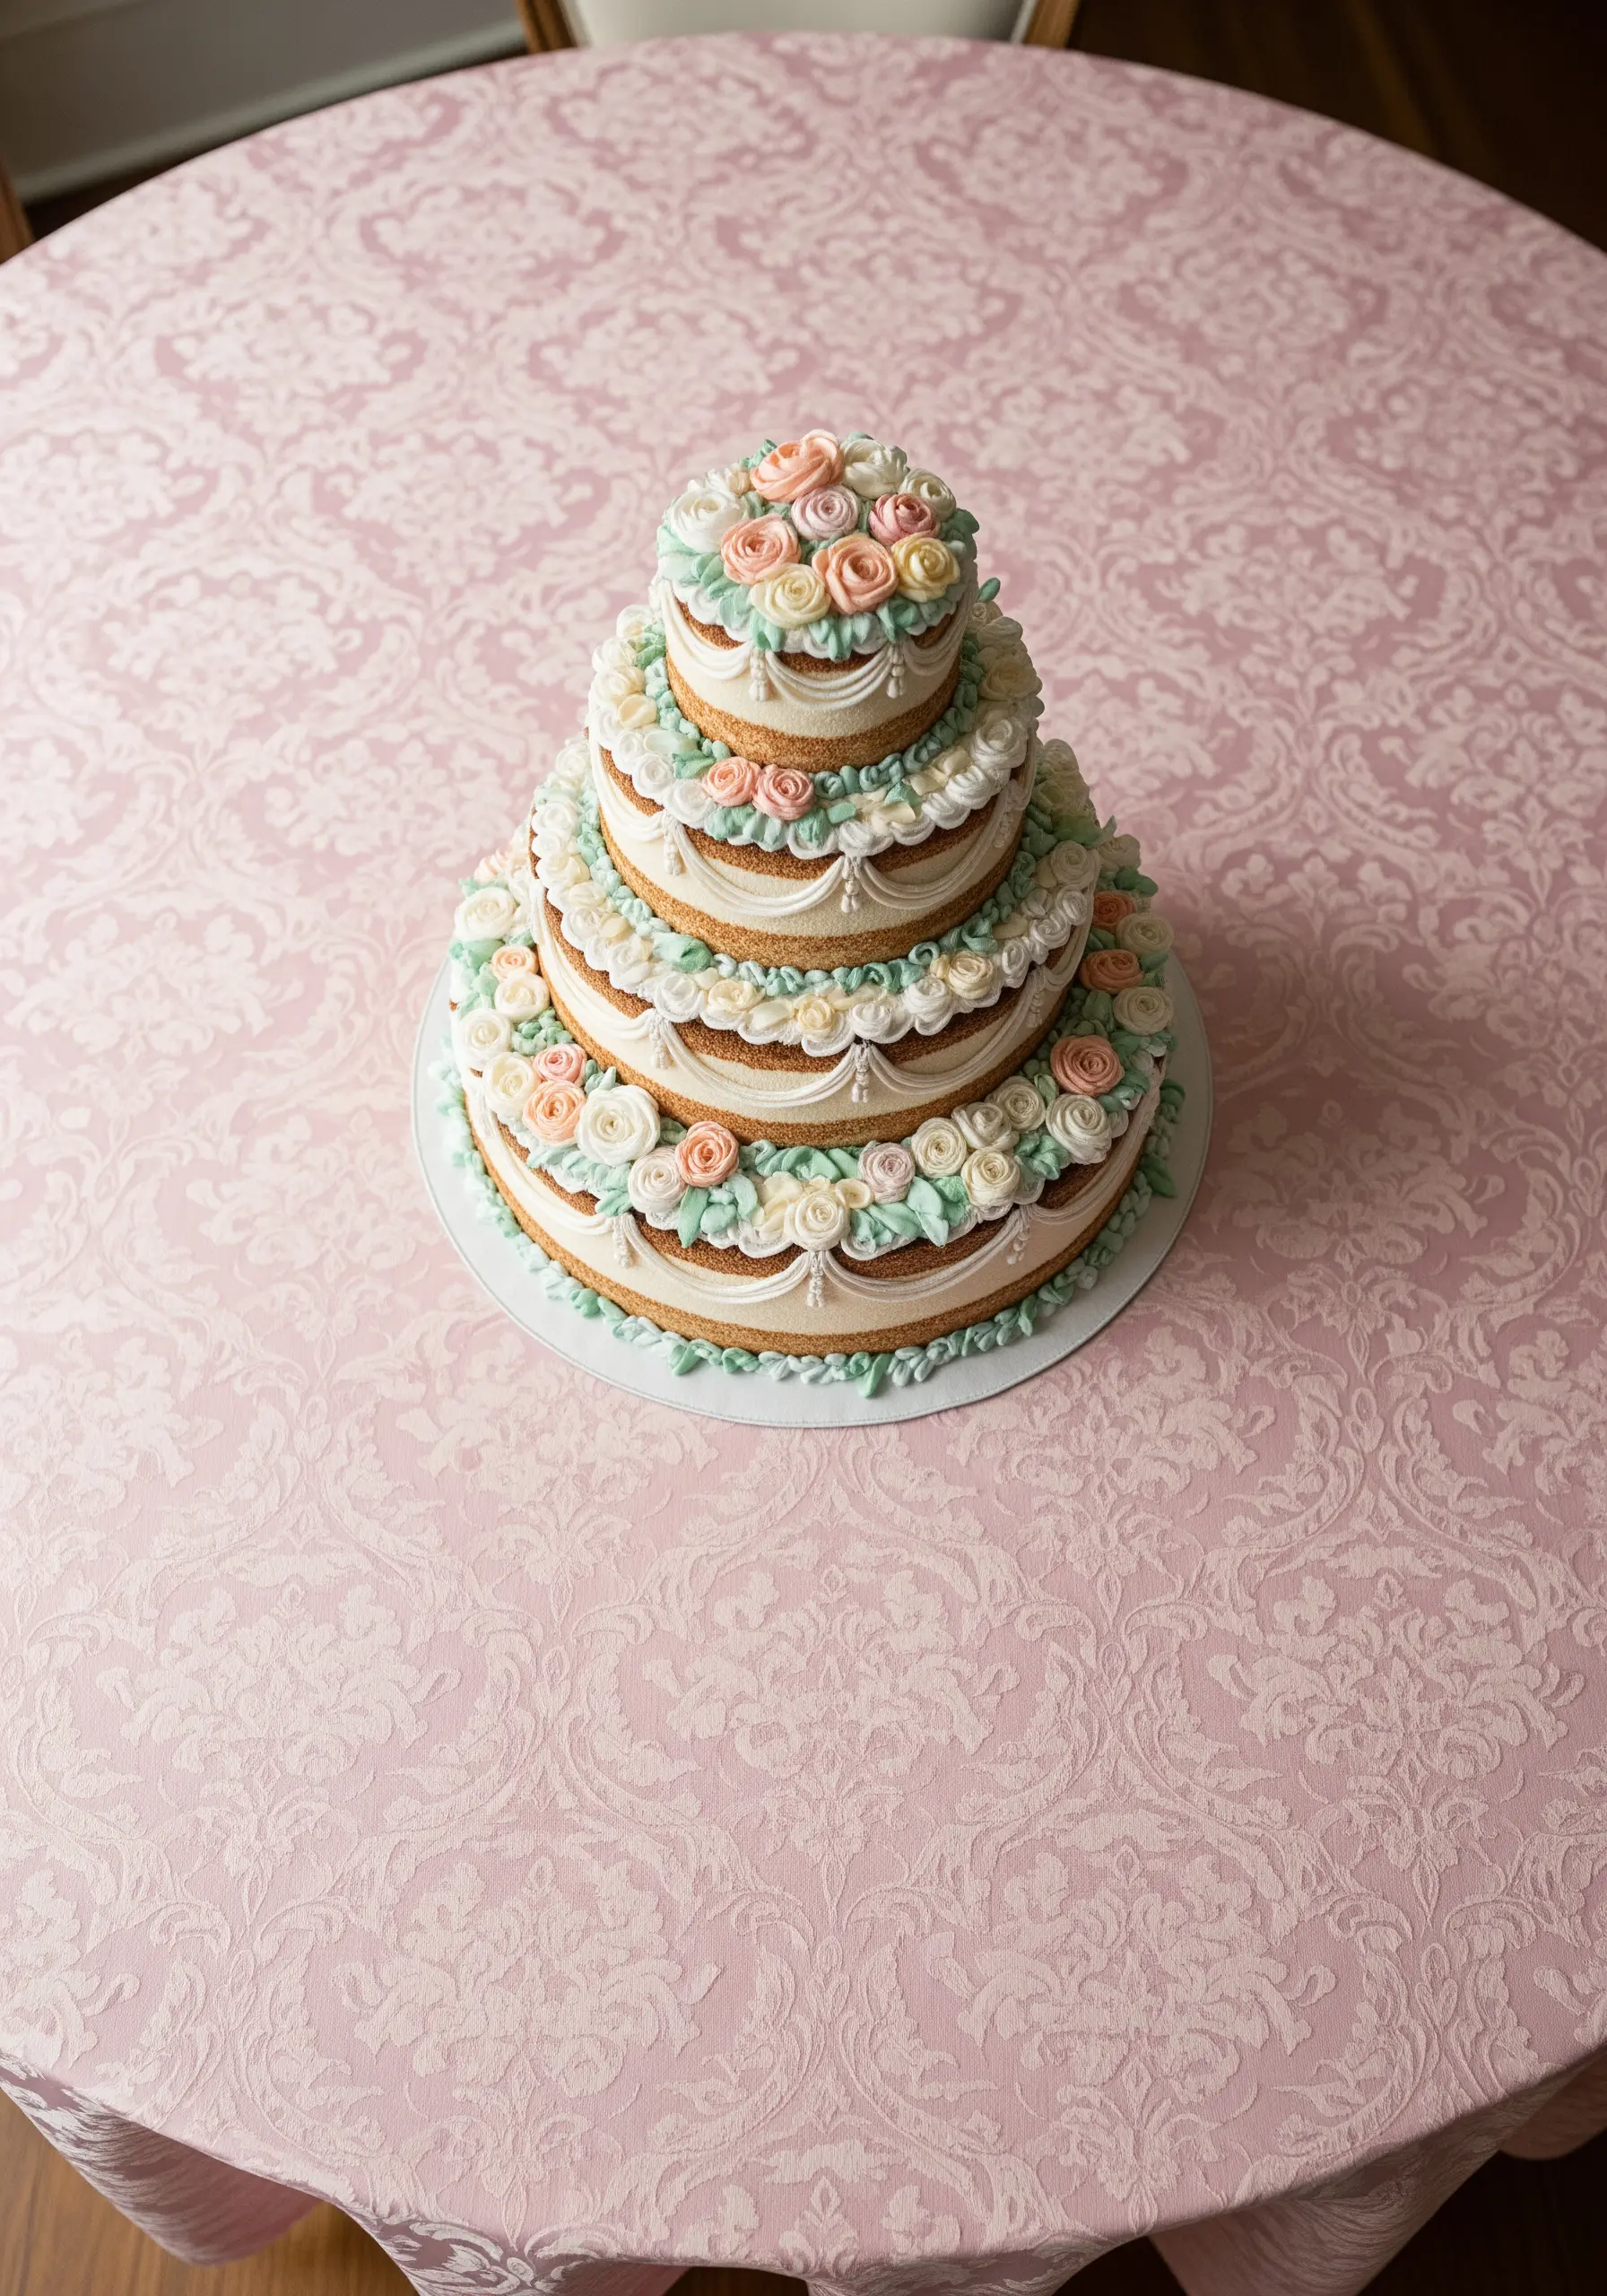
An ornate cake like this requires you to think and stitch in layers to create true dimension.
Use bullion knots or clusters of French knots to form the delicate roses, making them pop from the surface.
For the draped icing and scalloped edges, a padded satin stitch is essential to give it the necessary height and volume.
Stitch the flat cake layers first, then add all the intricate ‘piping’ details on top for a stunningly realistic effect.
21. Using French Knots for a Perfect Sprinkle Effect
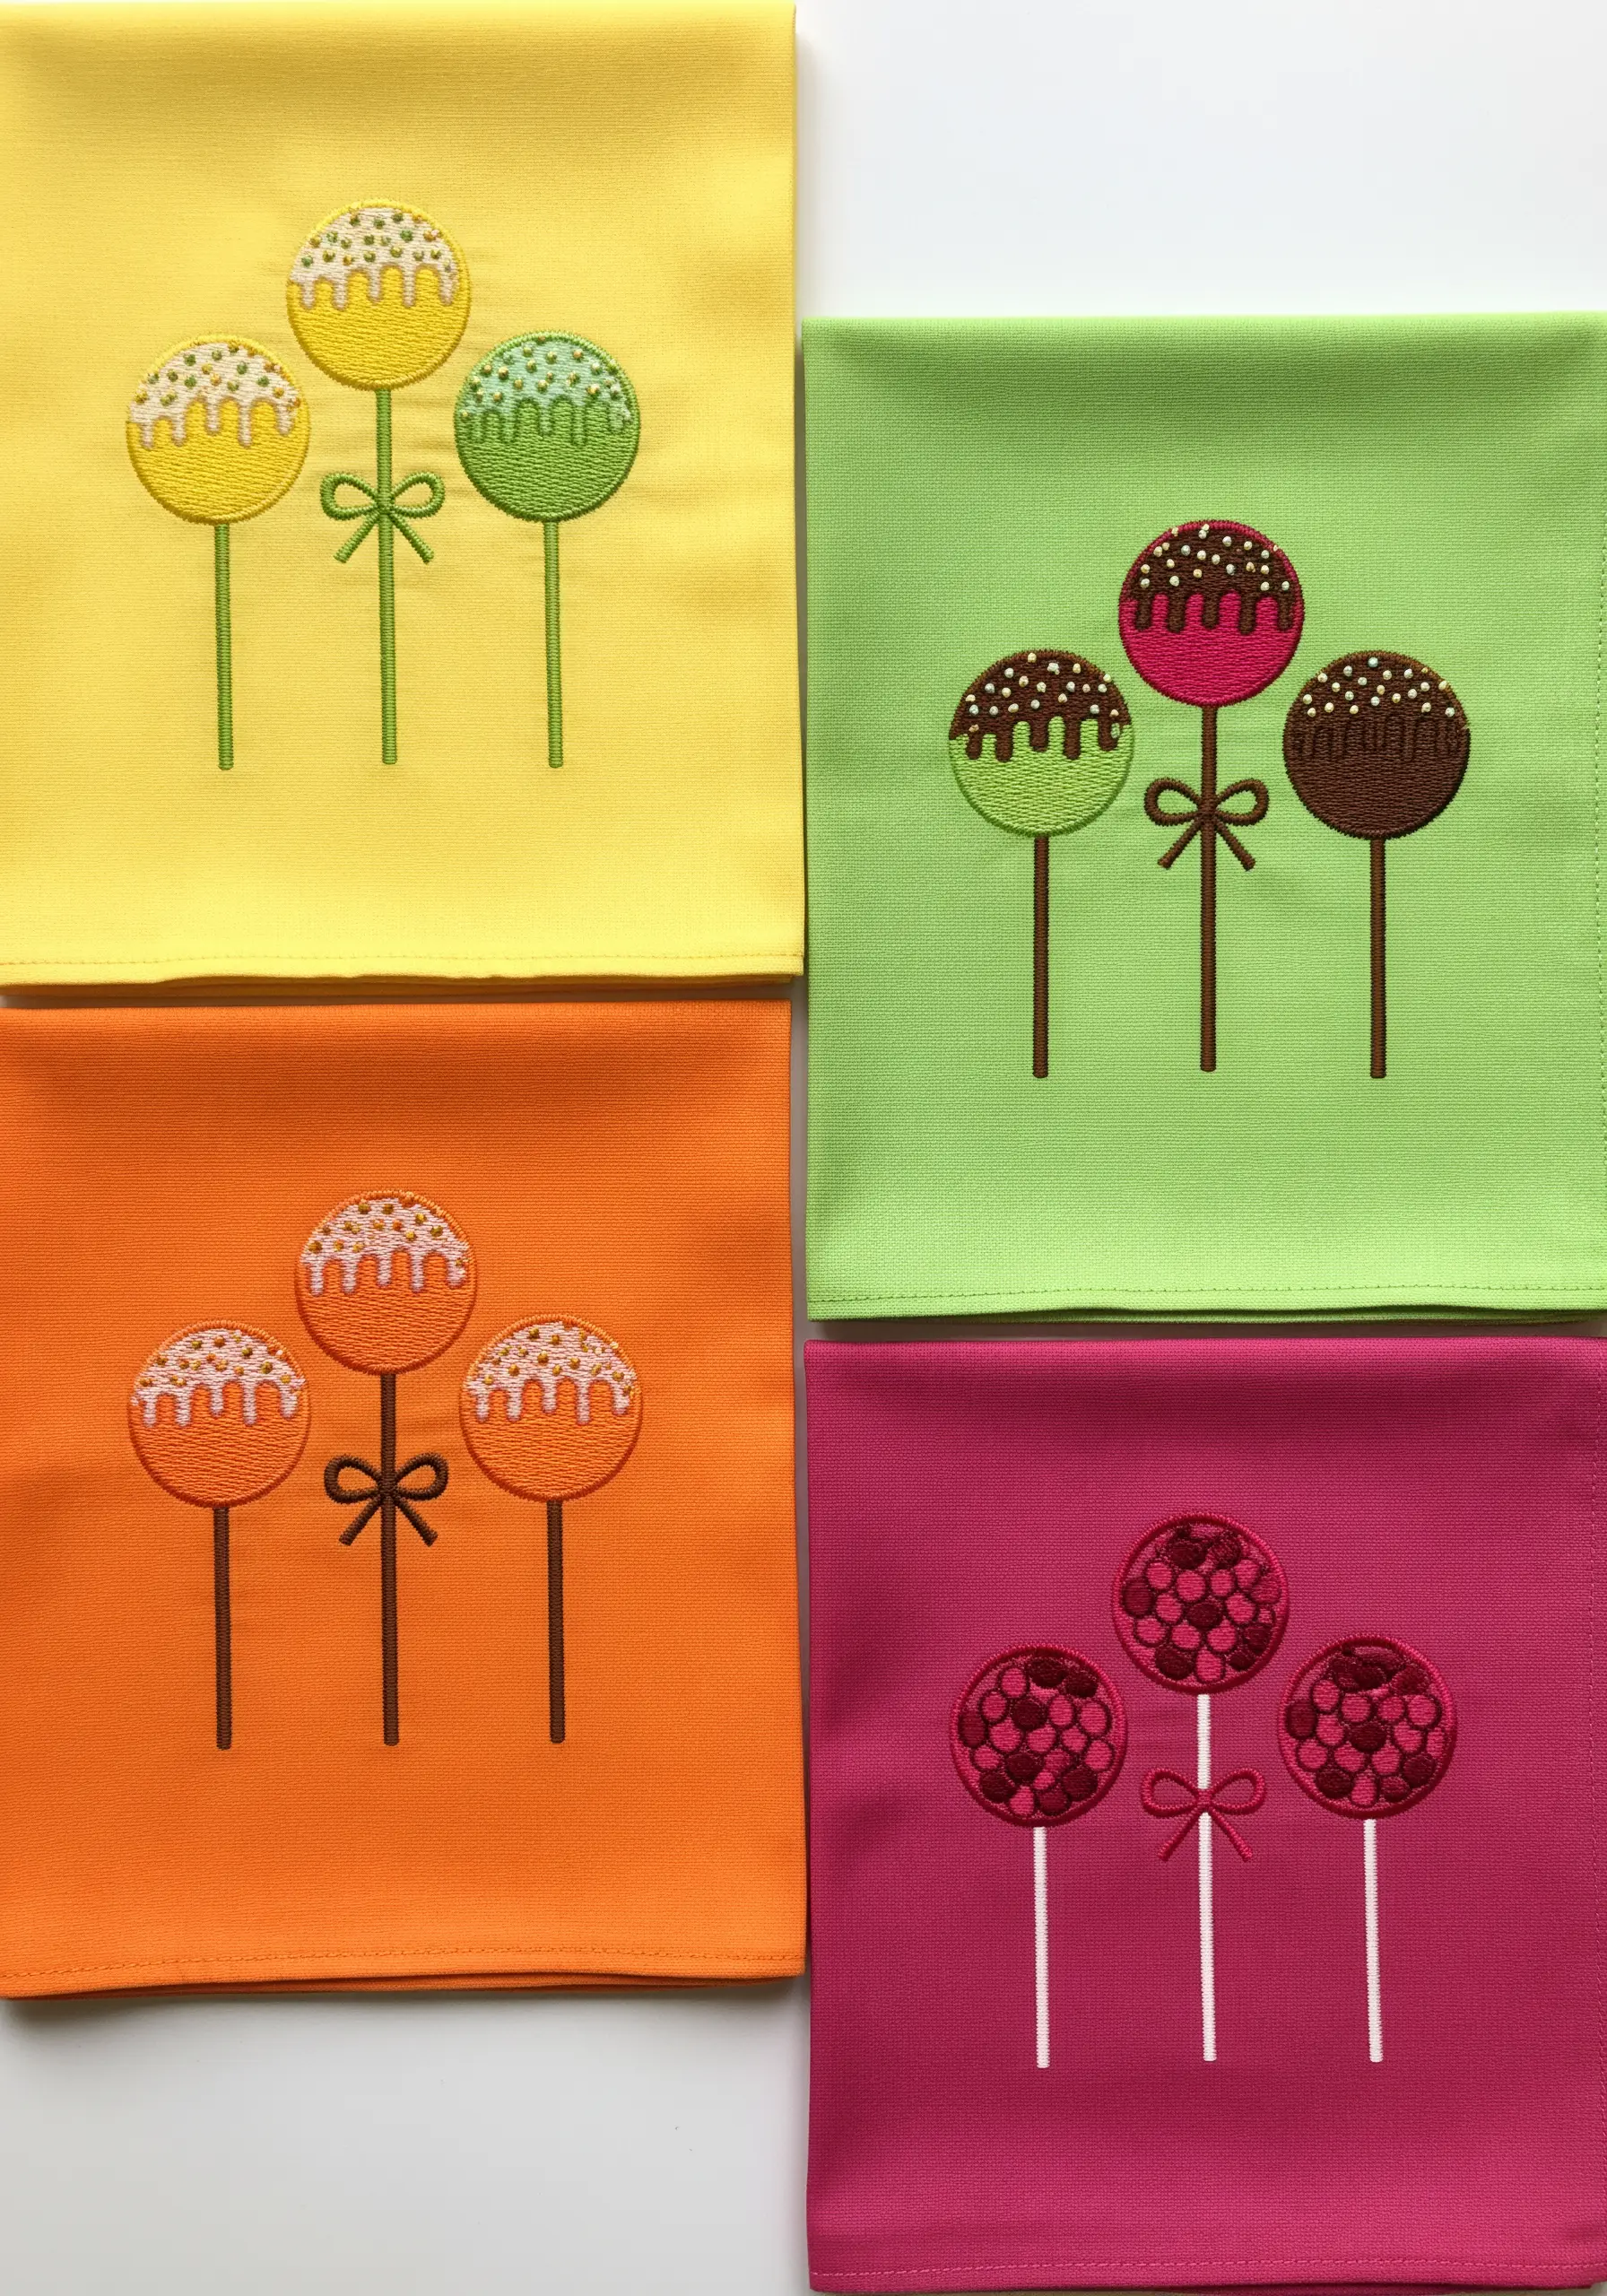
French knots are the ultimate stitch for creating the delightful texture of sprinkles.
To create the ‘drizzle’ effect, first outline the shape with a backstitch, then fill the area with densely packed French knots.
For a uniform look, wrap the thread around your needle the same number of times for each knot.
The clean, smooth satin stitch of the cake pop provides the perfect canvas, making the textured sprinkles the star of the show.
22. Creating an Elegant Vertical Design with Flowing Lines
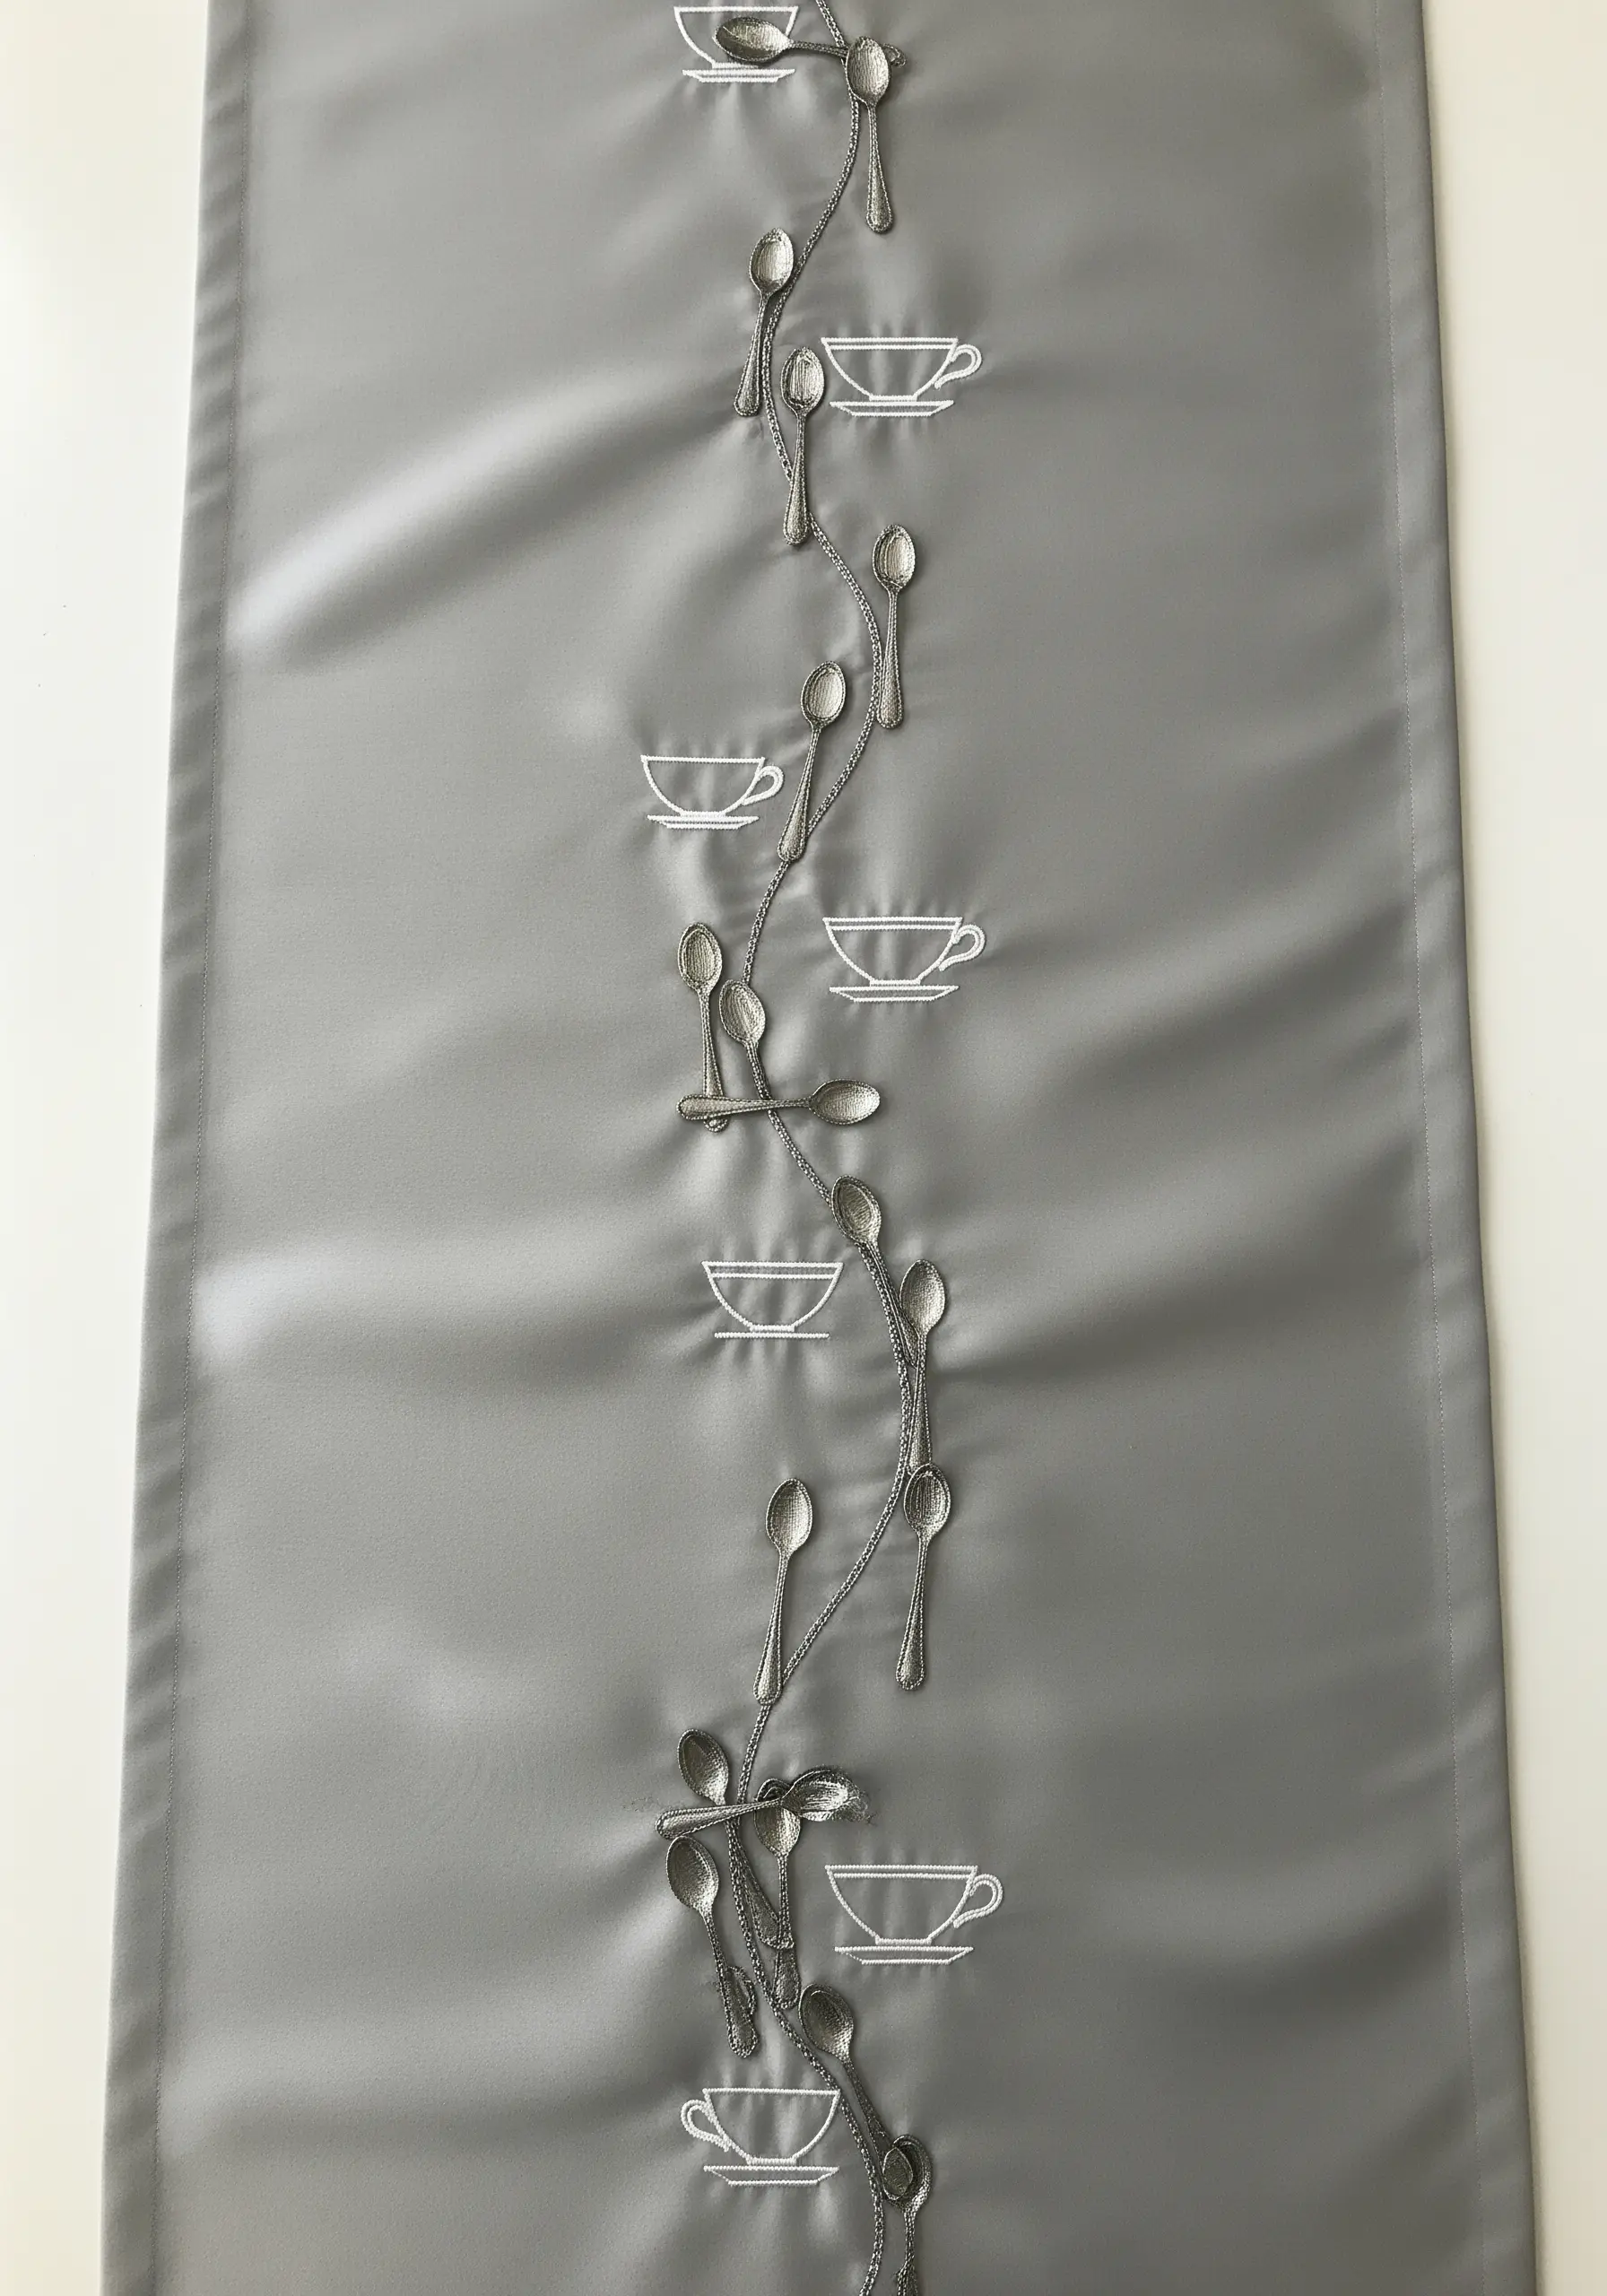
This table runner uses a single, flowing line to transform separate motifs into one cohesive, elegant composition.
Achieve this graceful connector with a smooth, unbroken stitch like a stem stitch or a whipped backstitch.
Keep the teacup motifs as simple line art using a backstitch to maintain a light, airy feel.
This vertical orientation is incredibly effective, drawing the eye down the length of the table and creating a sophisticated, unified look.


