

You already understand the language of thread. You know how a single strand can create a line, how tension can define a shape, and how color can evoke emotion. String art is simply a new canvas for those skills you’ve spent so much time refining.
Instead of stitching through fabric, you’ll be wrapping thread around pins, but the core principles remain the same. Think of it as embroidery in three dimensions, where you can explore line, texture, and geometry in a bold new way.
These festive projects don’t require expensive tools—just your intuition for color, your steady hand, and your love for creating something beautiful one strand at a time. Let’s translate your embroidery expertise into stunning holiday ornaments that feel both fresh and familiar.
1. Layered Greens for a Natural Pine Tree
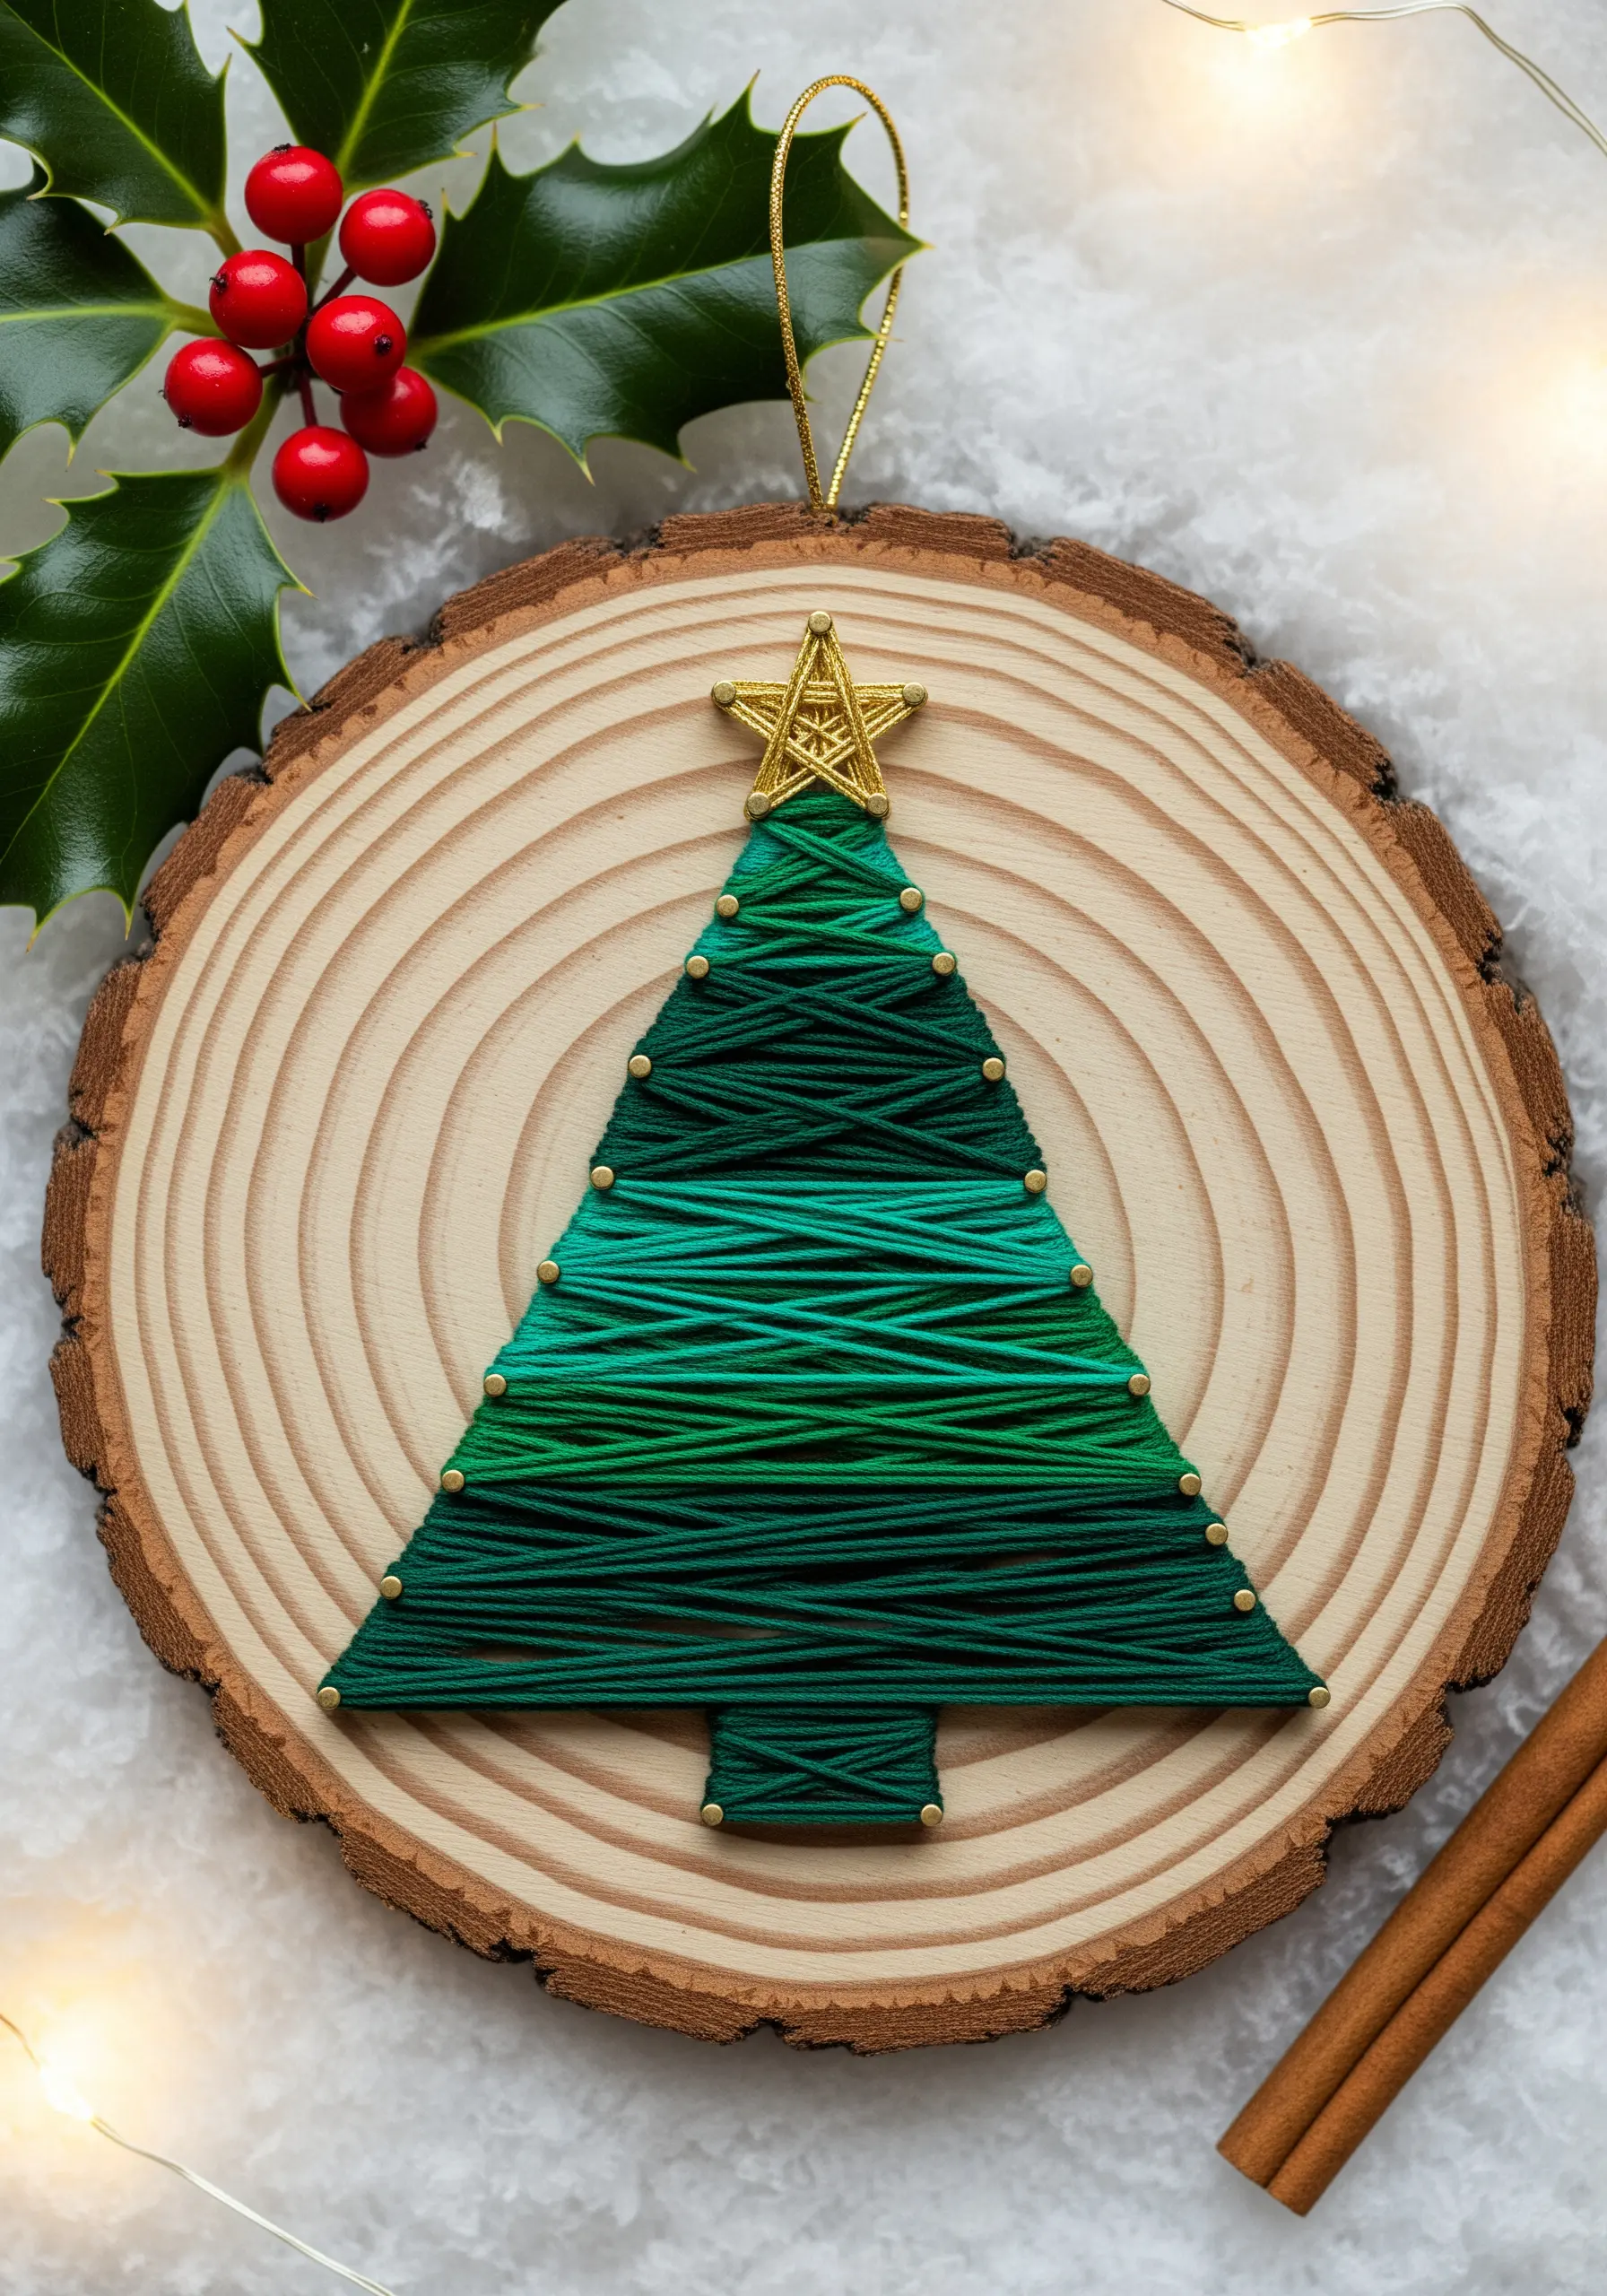
Create a subtle gradient by first winding a darker forest green thread, then layering a brighter emerald green over it.
This technique mimics the way light hits pine needles, giving your tree a sense of depth and realism without needing complex patterns.
Using a natural wood slice as your base enhances the rustic, organic feel of the ornament.
Finish with a metallic star bead for a refined focal point that contrasts beautifully with the matte threads.
2. Metallic Threads for a Crystalline Snowflake
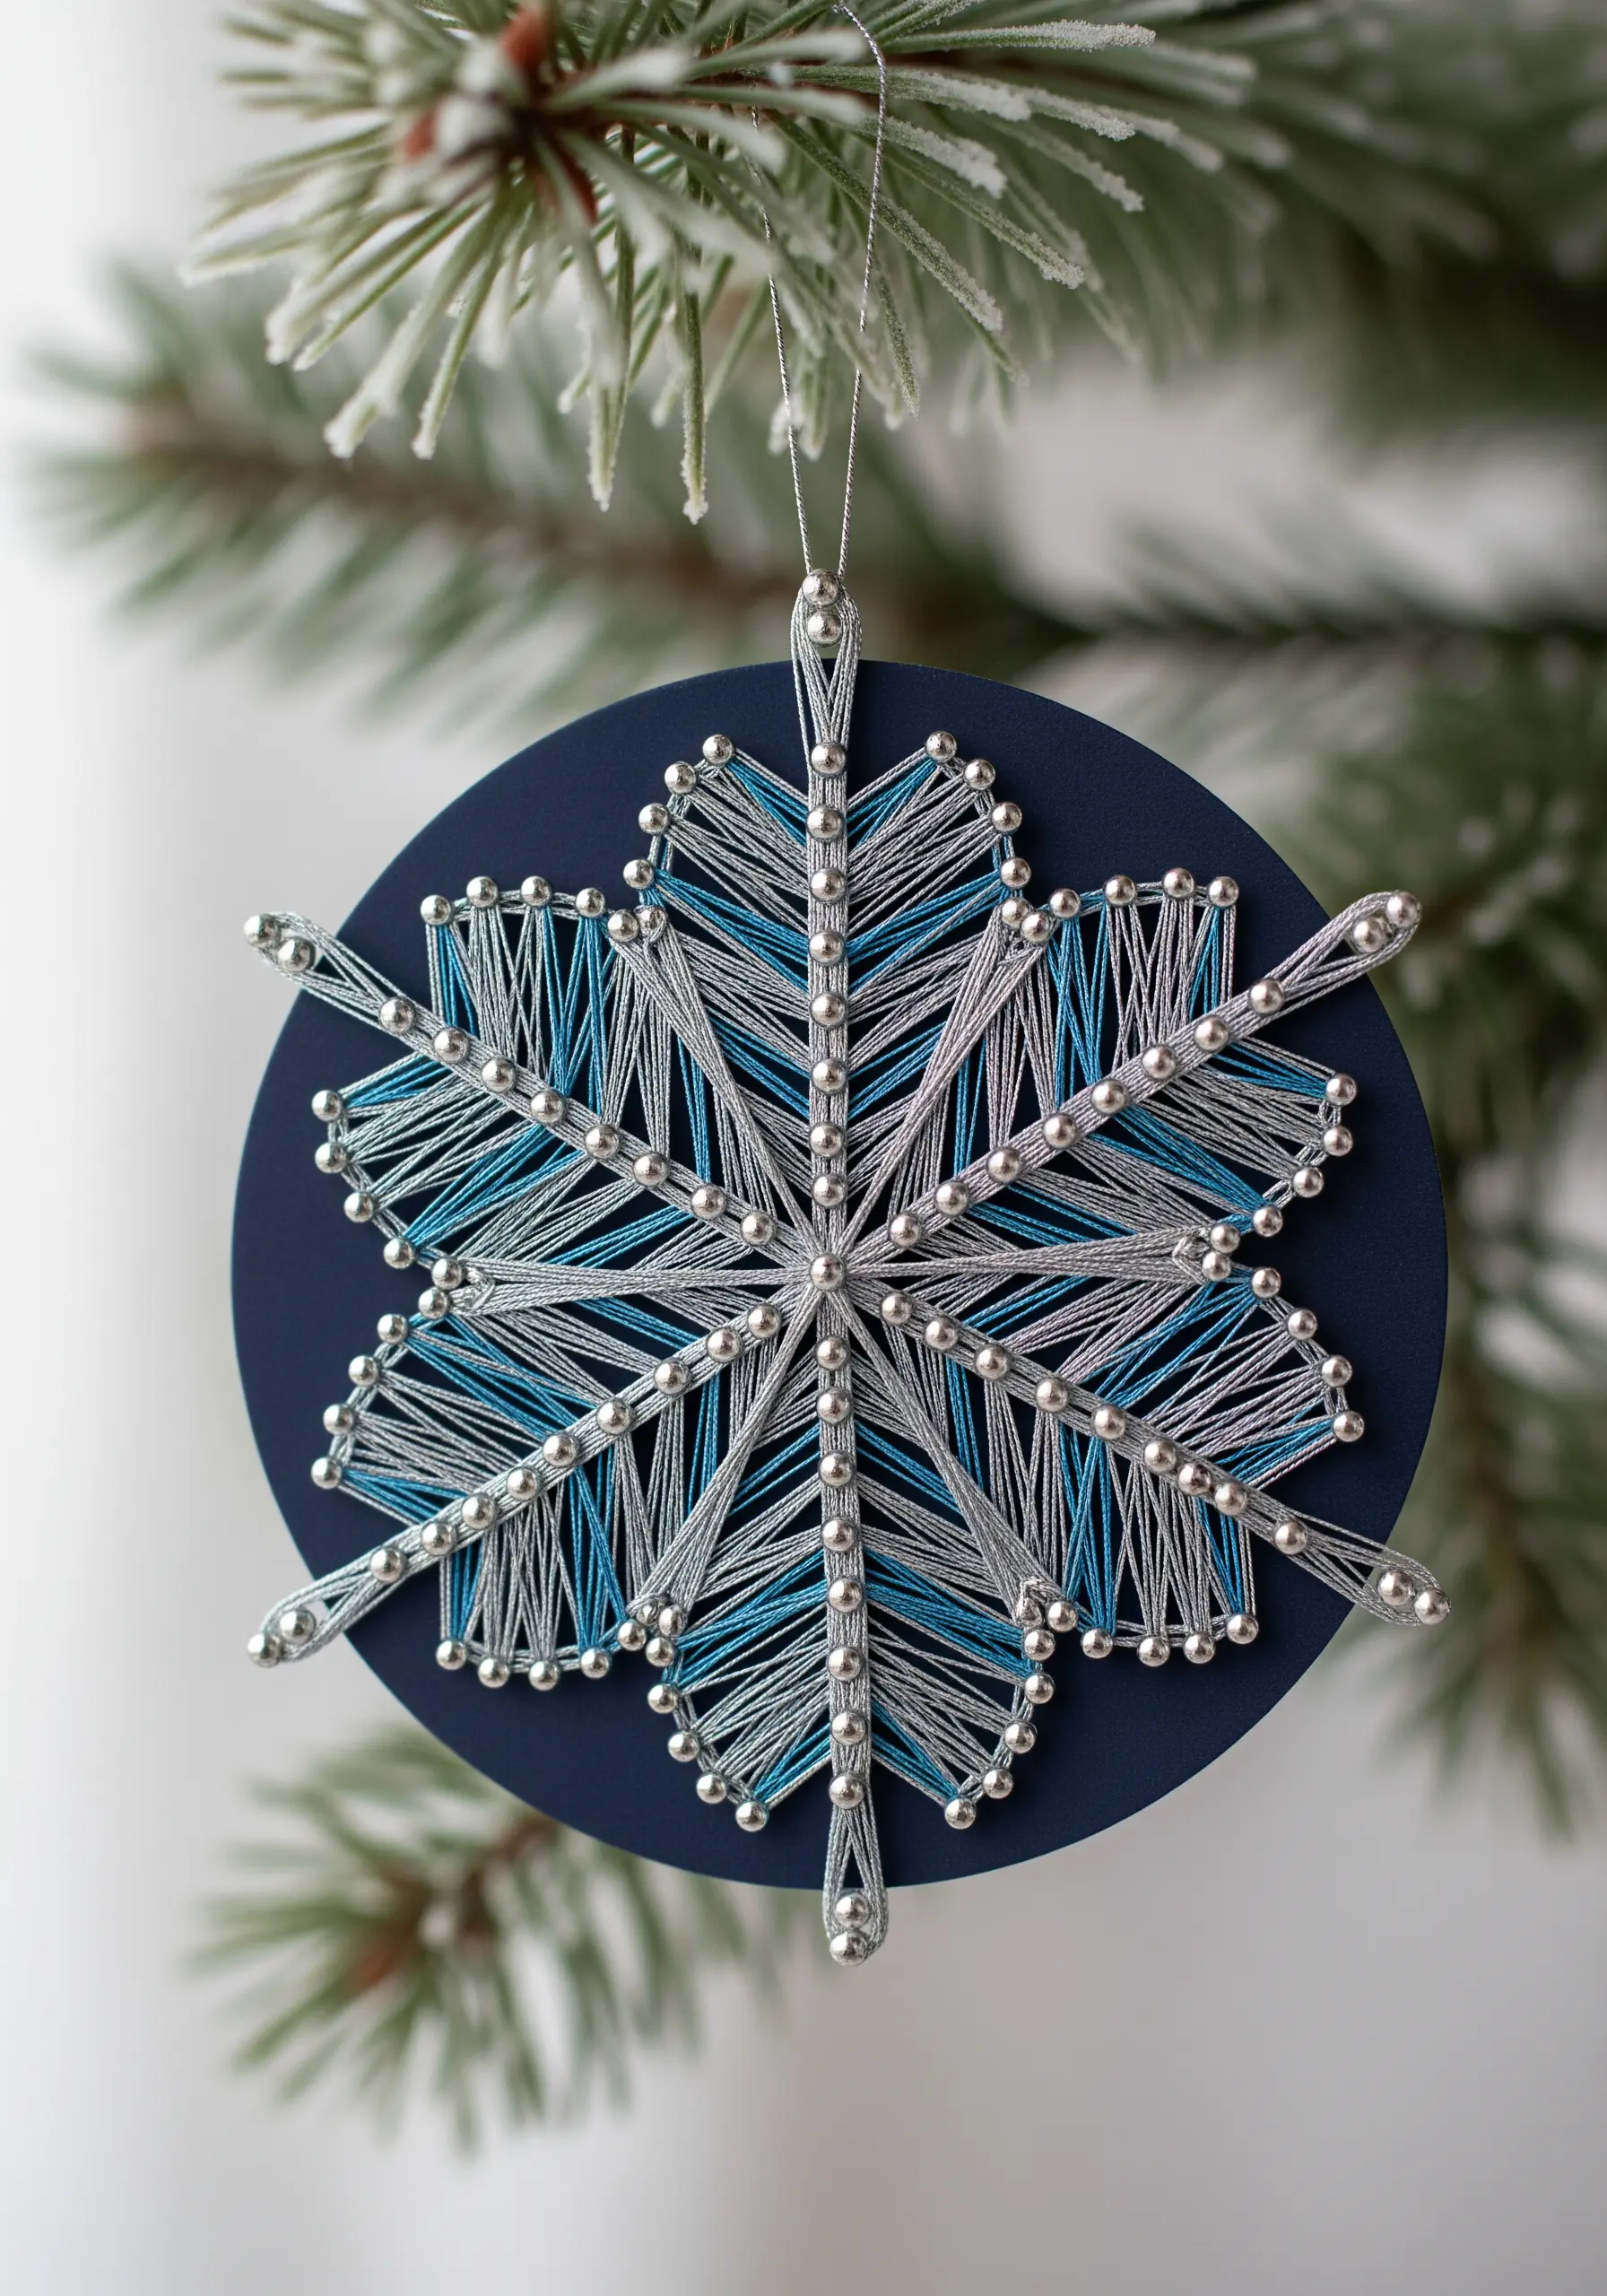
Combine a high-sheen silver metallic thread with a soft sky blue to give your snowflake an icy, light-catching quality.
The metallic thread adds structure and sparkle, while the blue adds a cool, frosty depth.
Wrap the arms of the snowflake first to establish the primary structure, then fill the smaller sections for a clean, geometric finish.
Using small silver pins or beads instead of nails adds a delicate, polished touch that complements the fine threads.
3. Negative Space to Define a Reindeer Silhouette
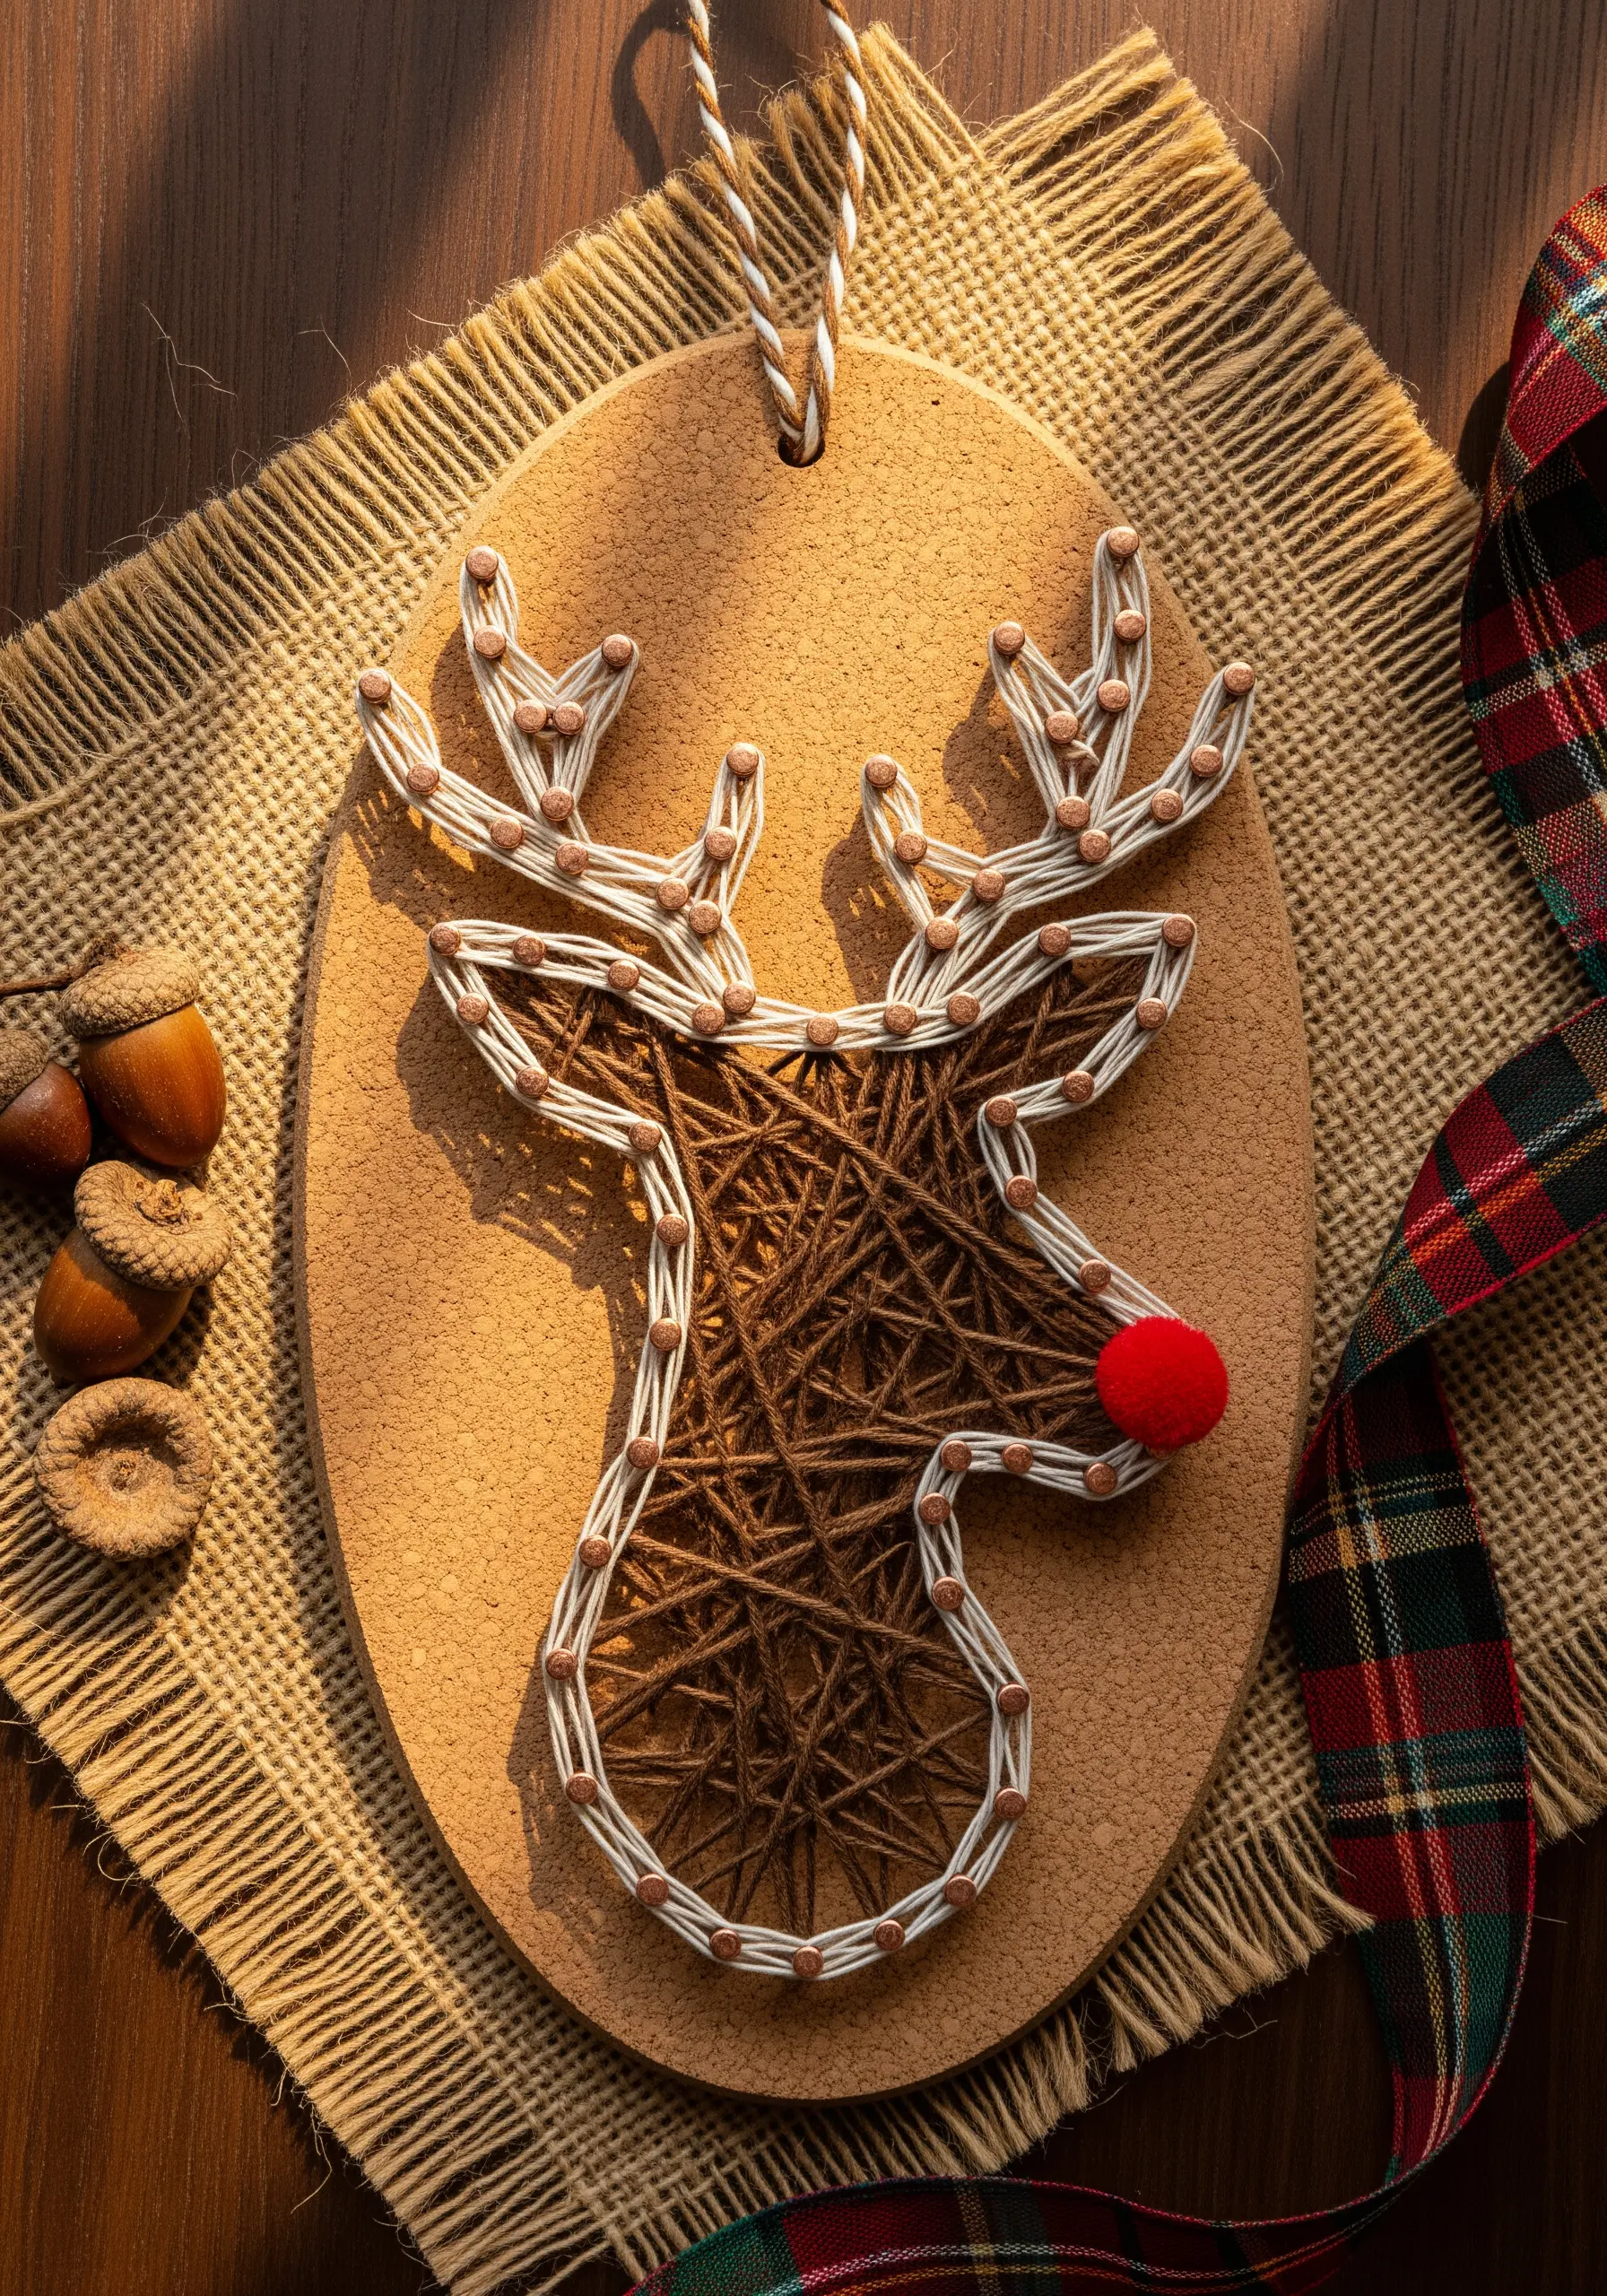
Instead of completely filling the reindeer’s body, use a looser, more abstract wrapping pattern.
This allows the cork background to show through, creating texture and interest while keeping the silhouette clear.
Define the form with a crisp, clean outline using a contrasting white thread—this makes the entire shape pop.
A tiny pom-pom for the nose adds a whimsical, tactile element that completes the character.
4. Bold Color Blocking for a Modern Bauble
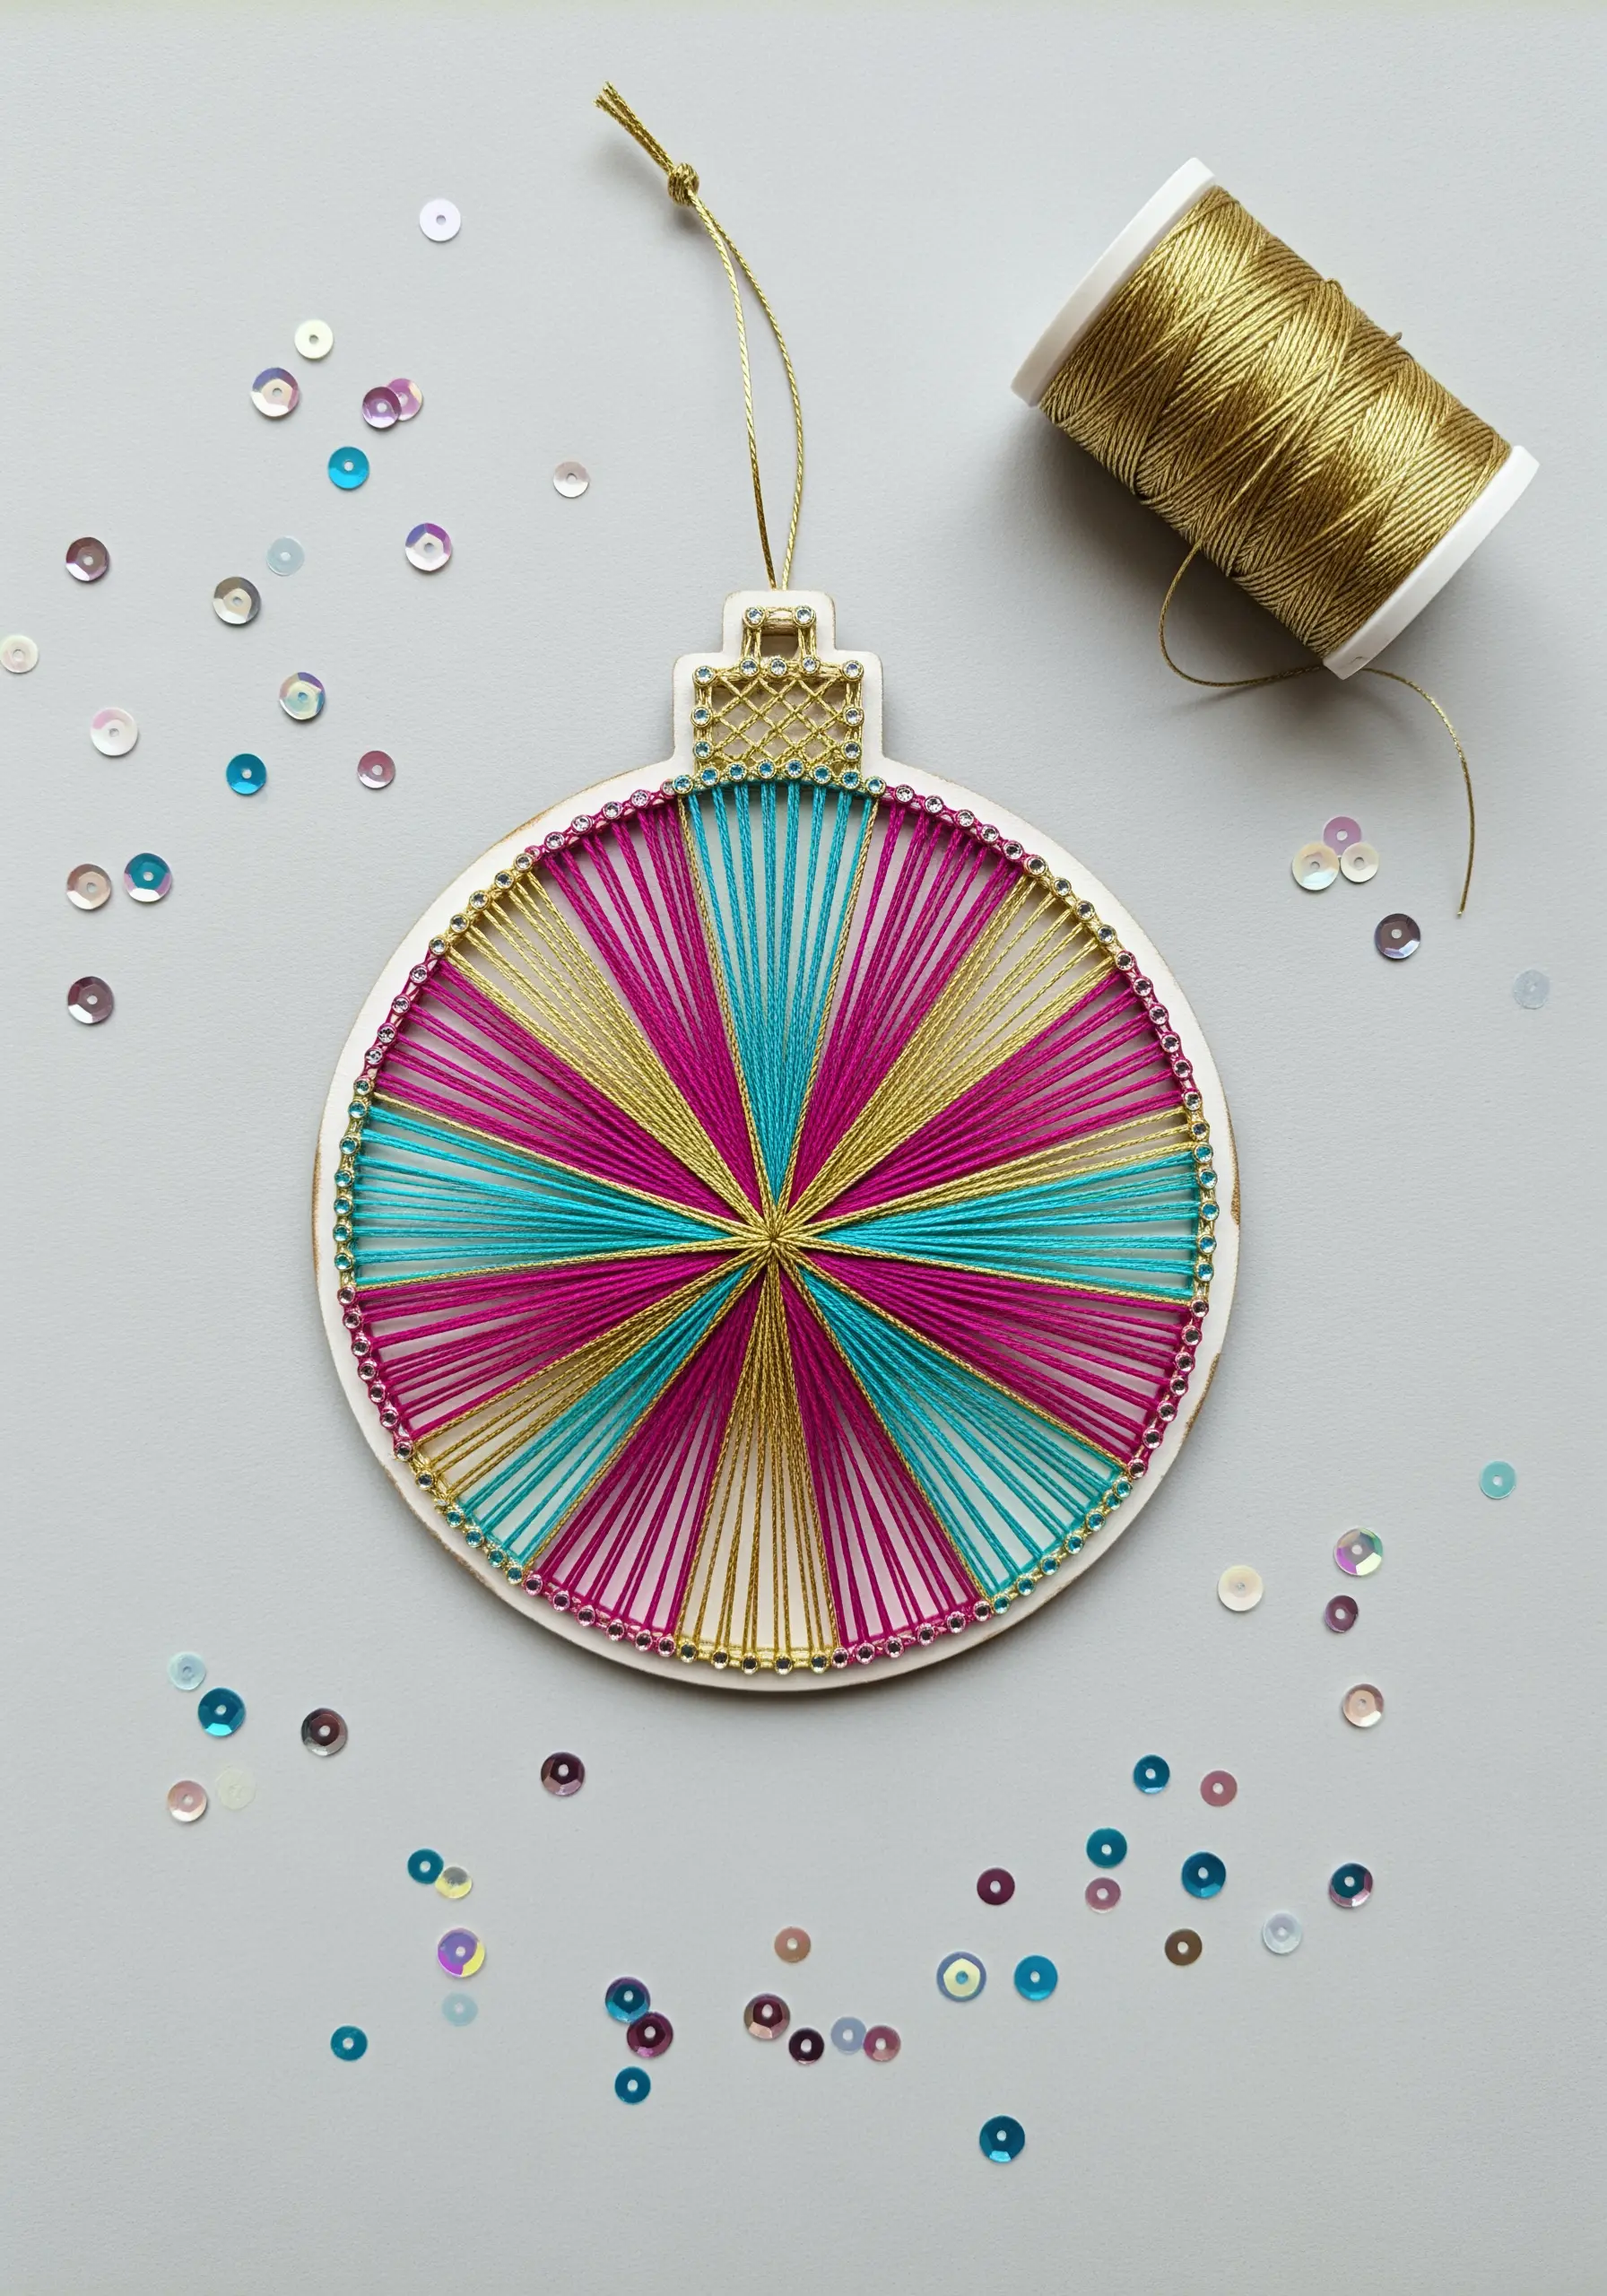
Divide your ornament shape into clean, geometric sections to create a vibrant color-blocked effect.
Choose high-contrast colors like magenta, turquoise, and gold to make the design feel energetic and contemporary.
Wind each color section tightly and evenly, ensuring the lines meet precisely at the center point for a sharp, graphic look.
The gold outline not only ties the colors together but also adds a touch of festive luxury.
5. Mastering Tension with a Simple Star
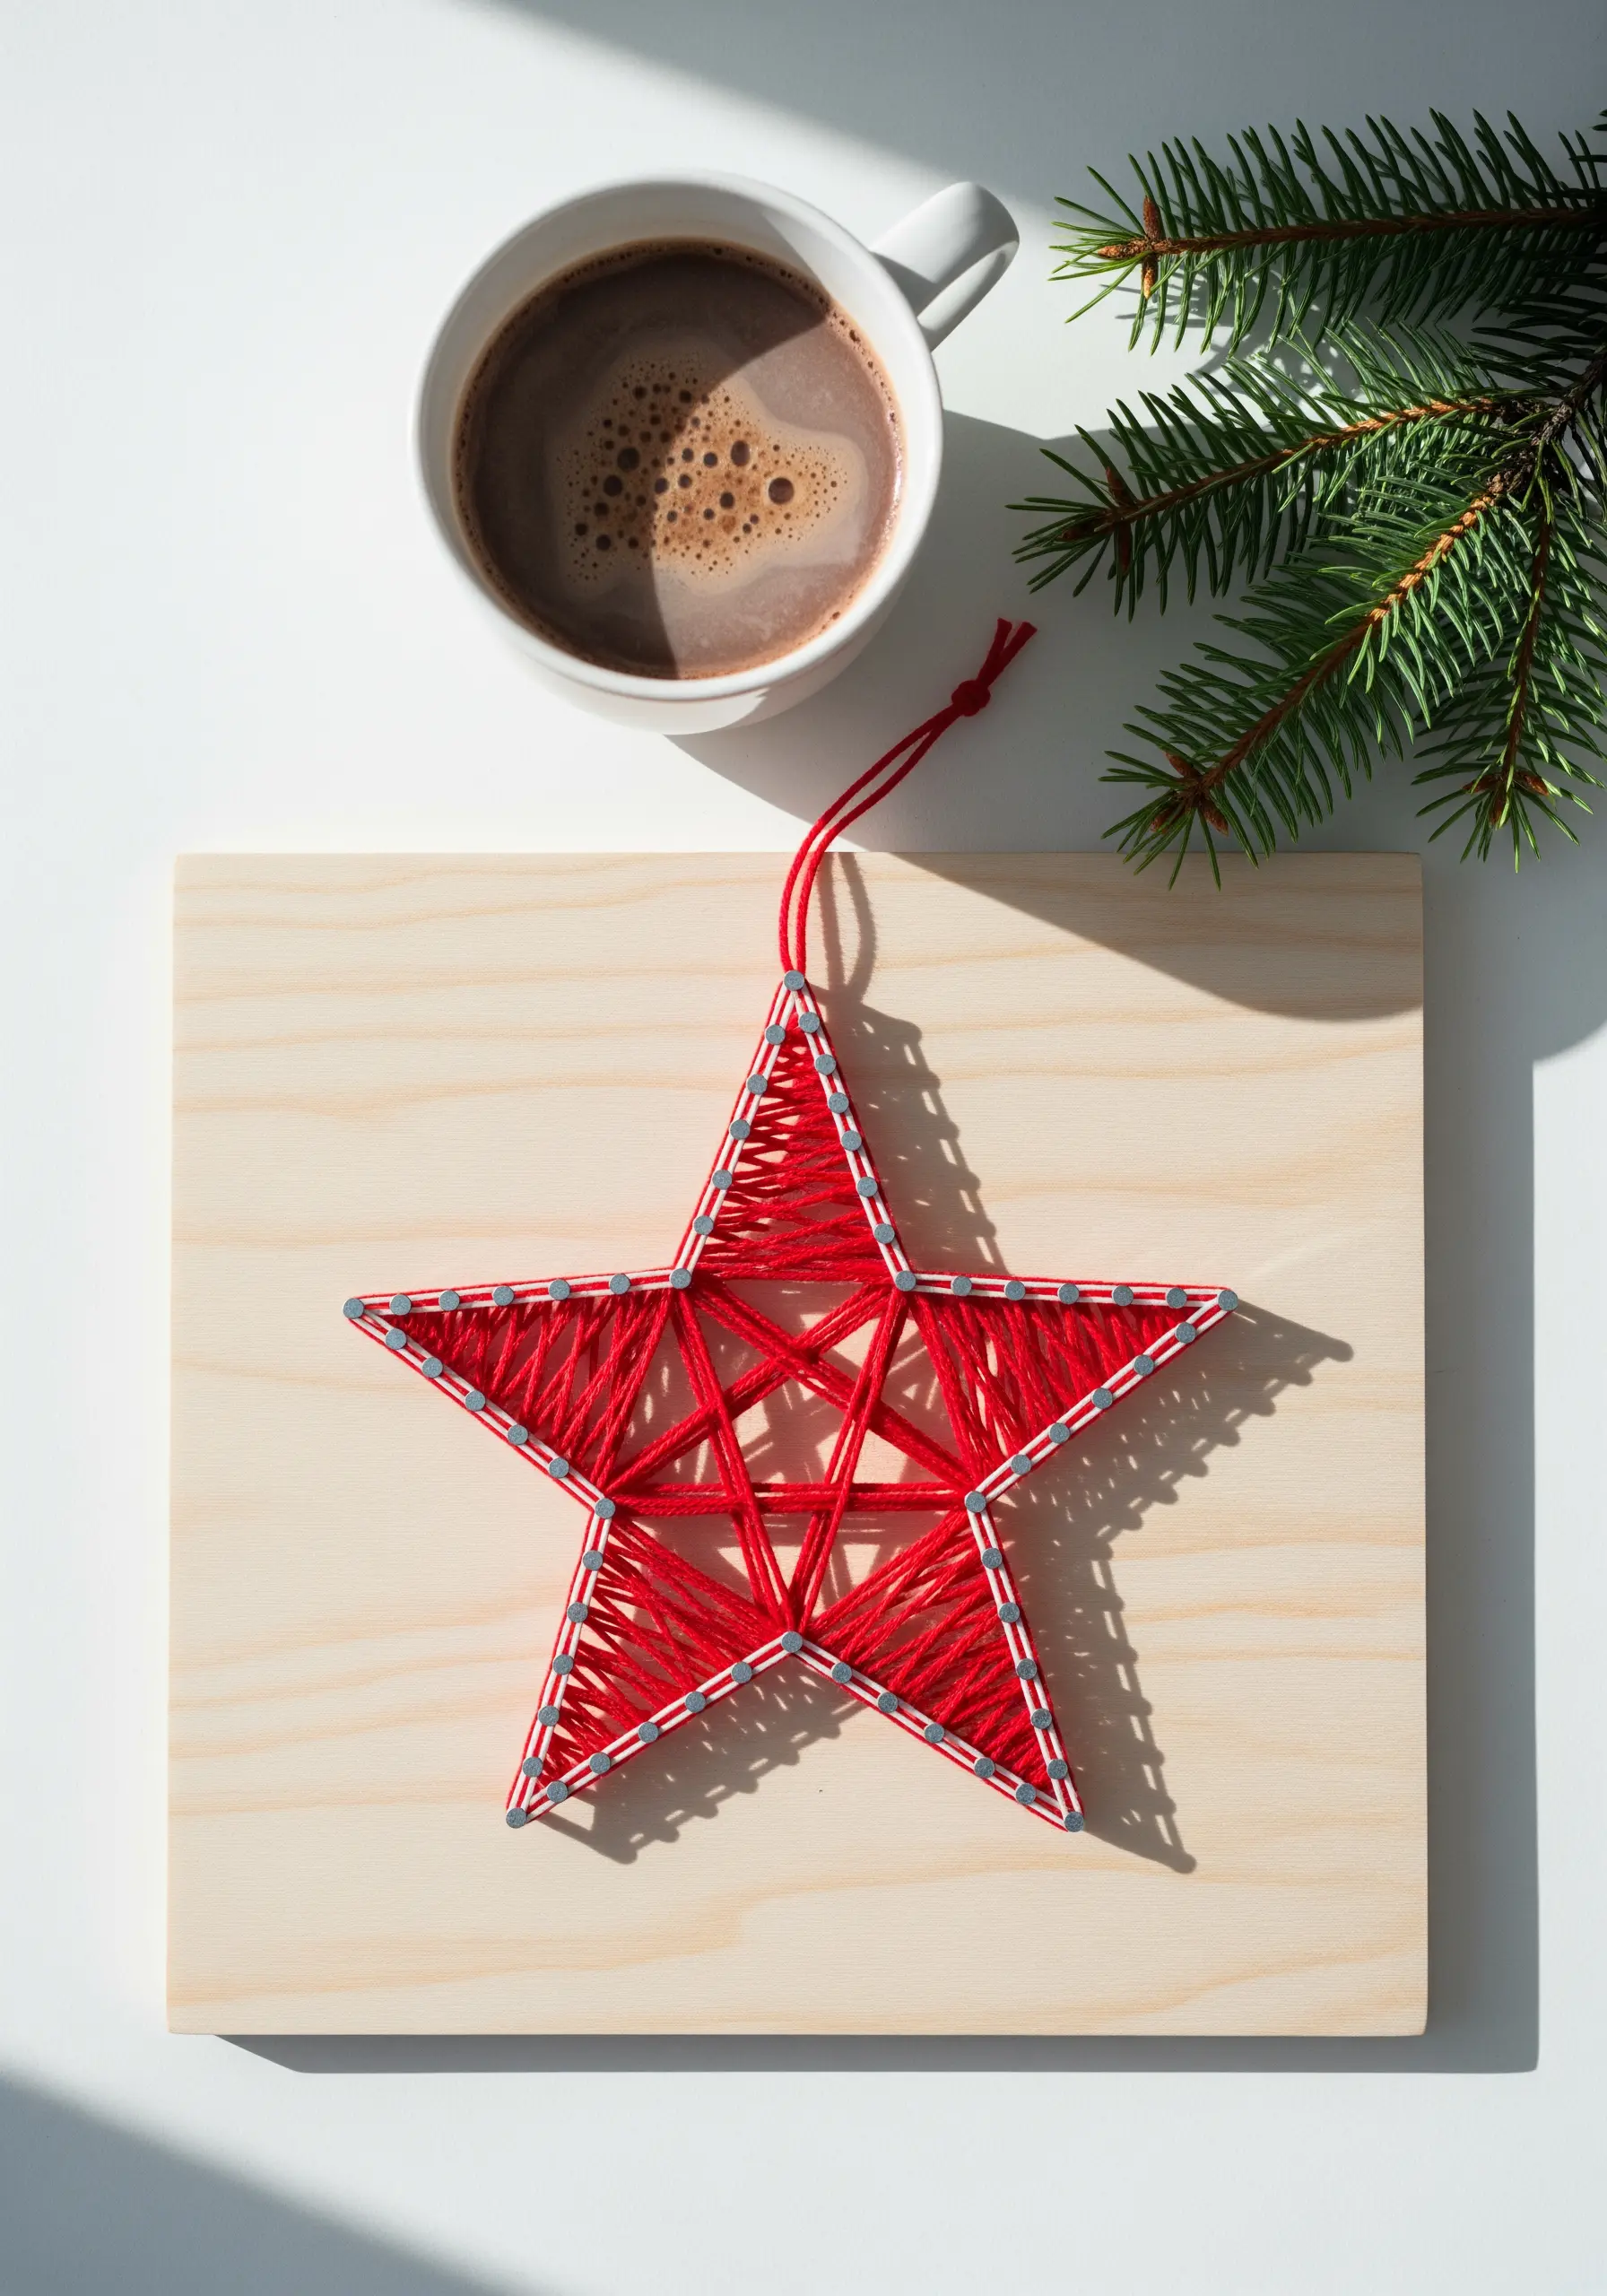
A five-point star is the perfect project to practice achieving consistent thread tension—the key to sharp, clean lines in string art.
Pull each strand taut as you wrap, but not so tight that it bends your pins or board.
Use a single, bold color like classic Christmas red to keep the focus purely on the geometric form.
This minimalist approach proves that a simple shape, executed with precision, can have a powerful visual impact.
6. Creating Stripes with Alternating Threads
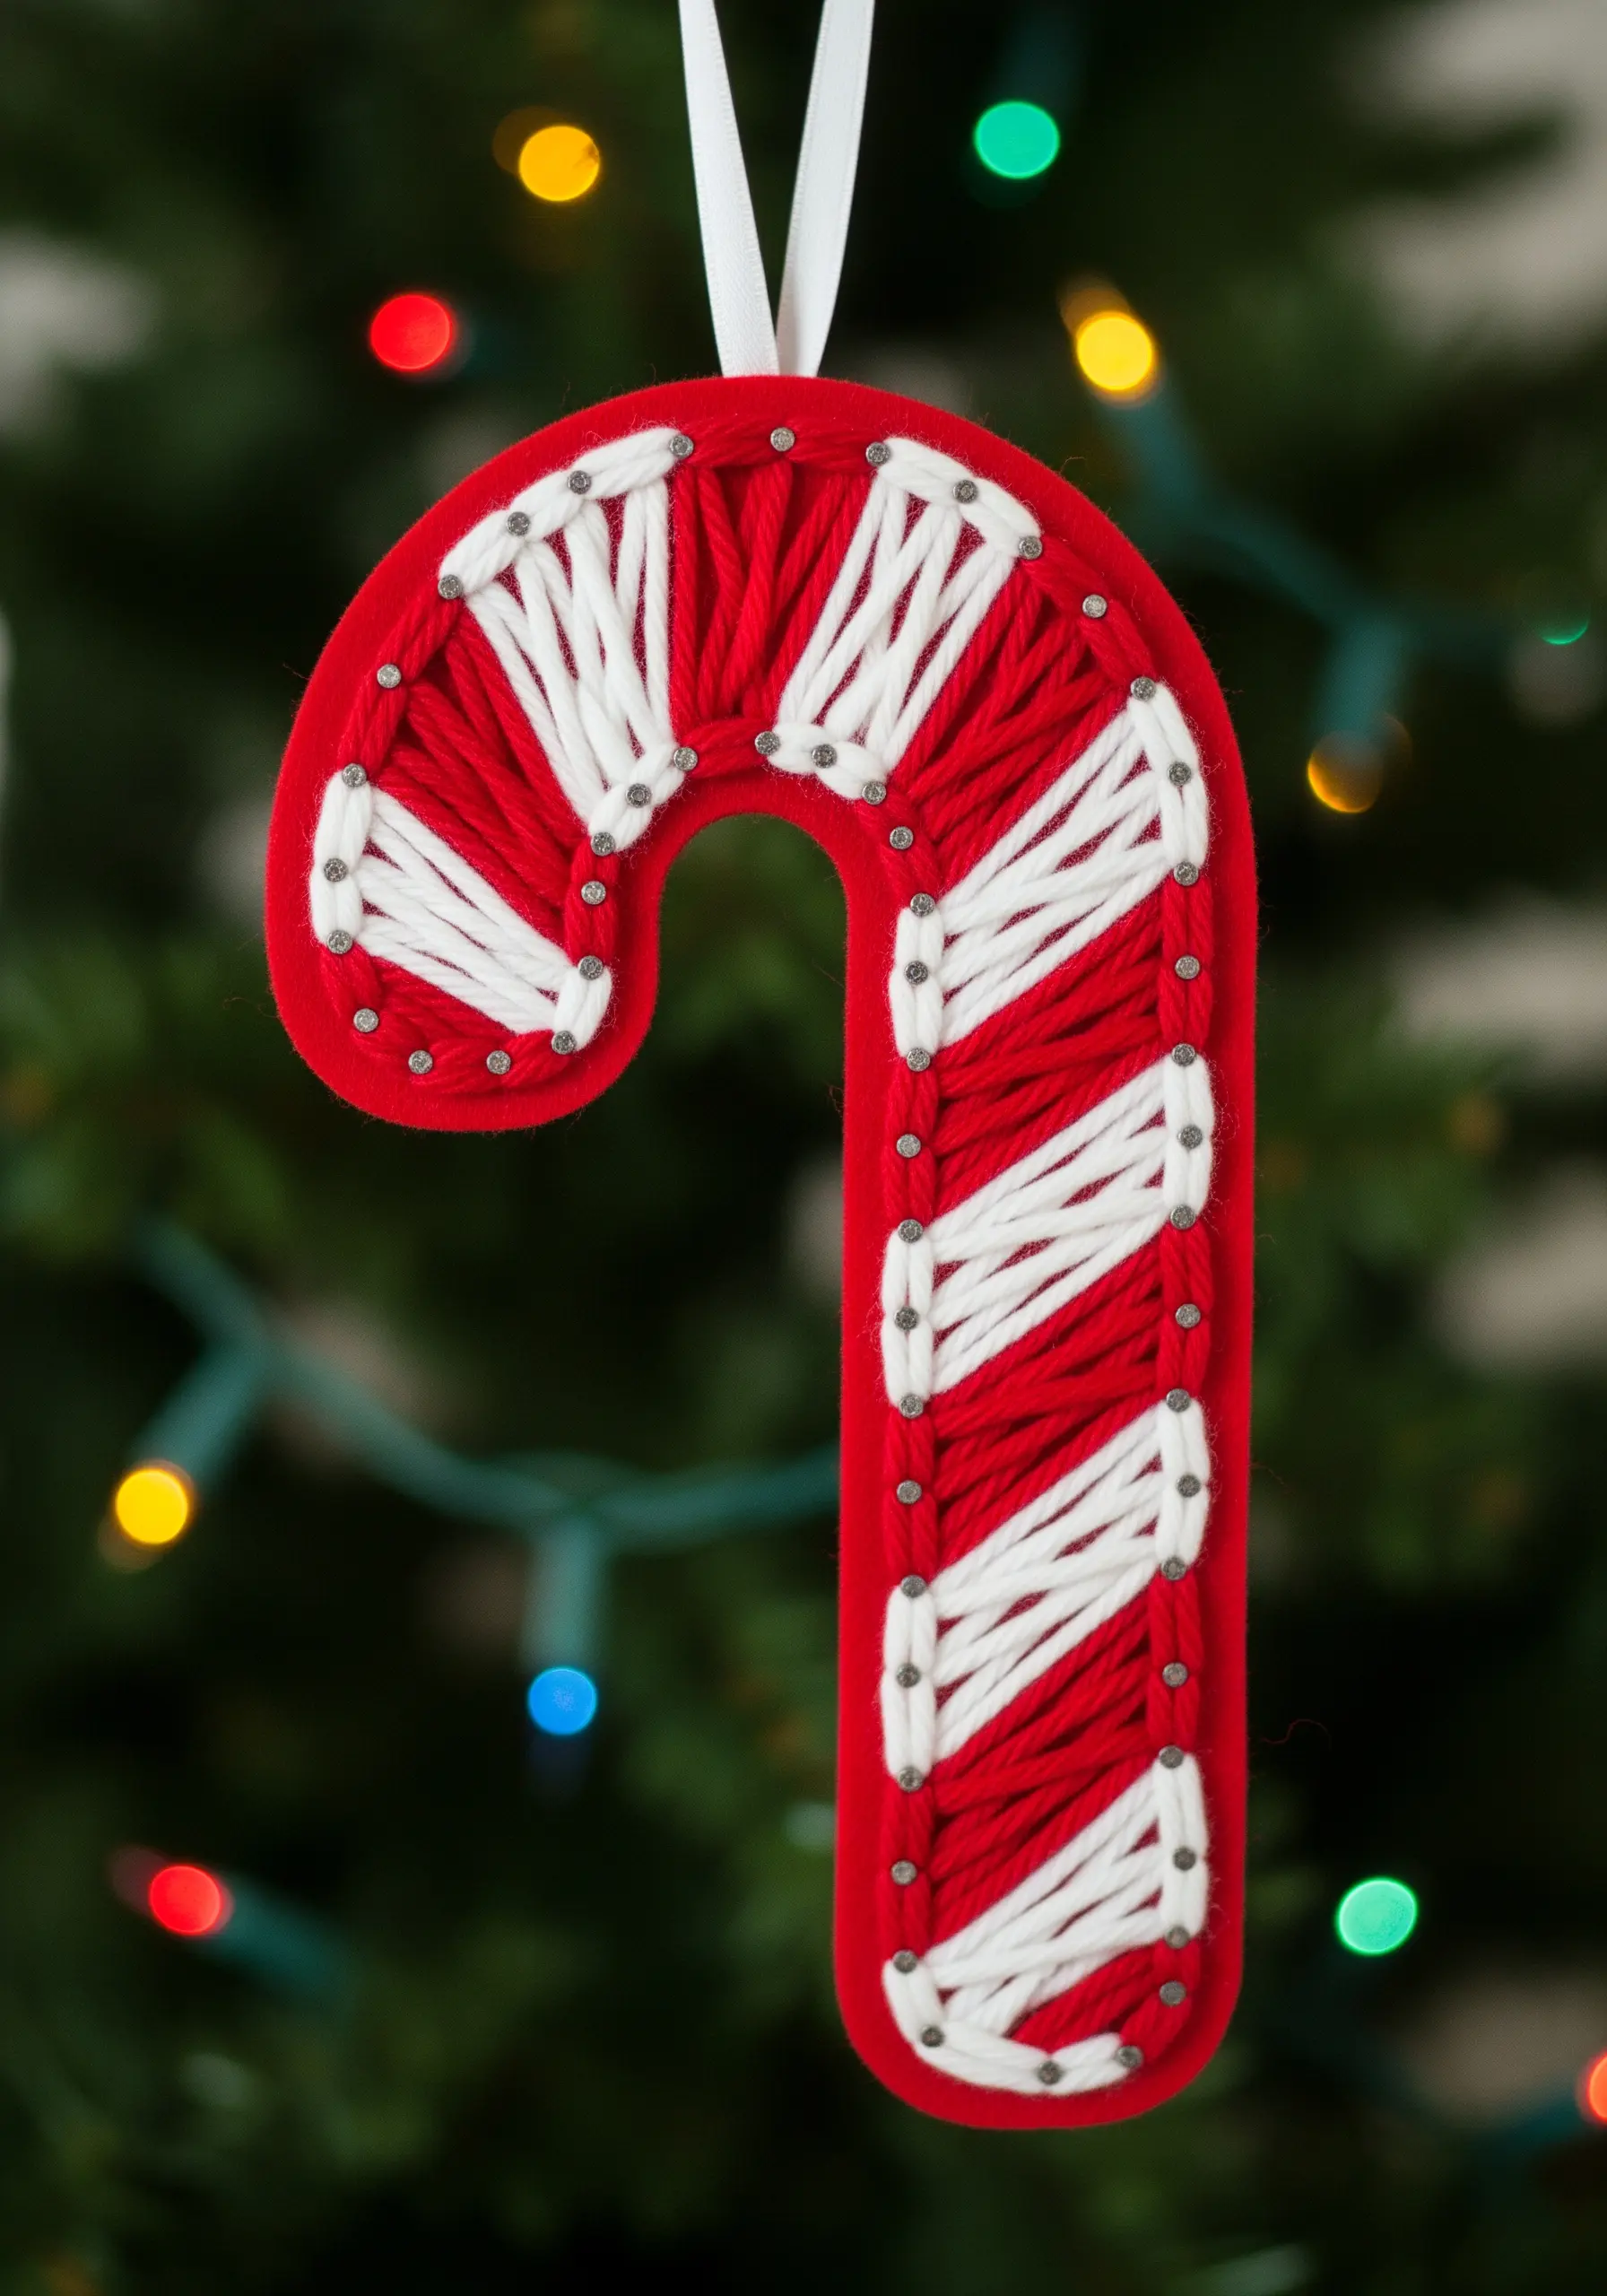
Build the iconic candy cane stripes by wrapping thick sections of white yarn over a solid red base.
The contrast between the tight red background wrap and the diagonal white stripes creates a clean, graphic pattern.
Using a soft felt cutout as your base gives the ornament a cozy, handmade feel and is easy to work with—no drilling required.
Space your pins evenly to ensure your white stripes are uniform in width and angle.
7. Designing Cohesive Ornament Sets
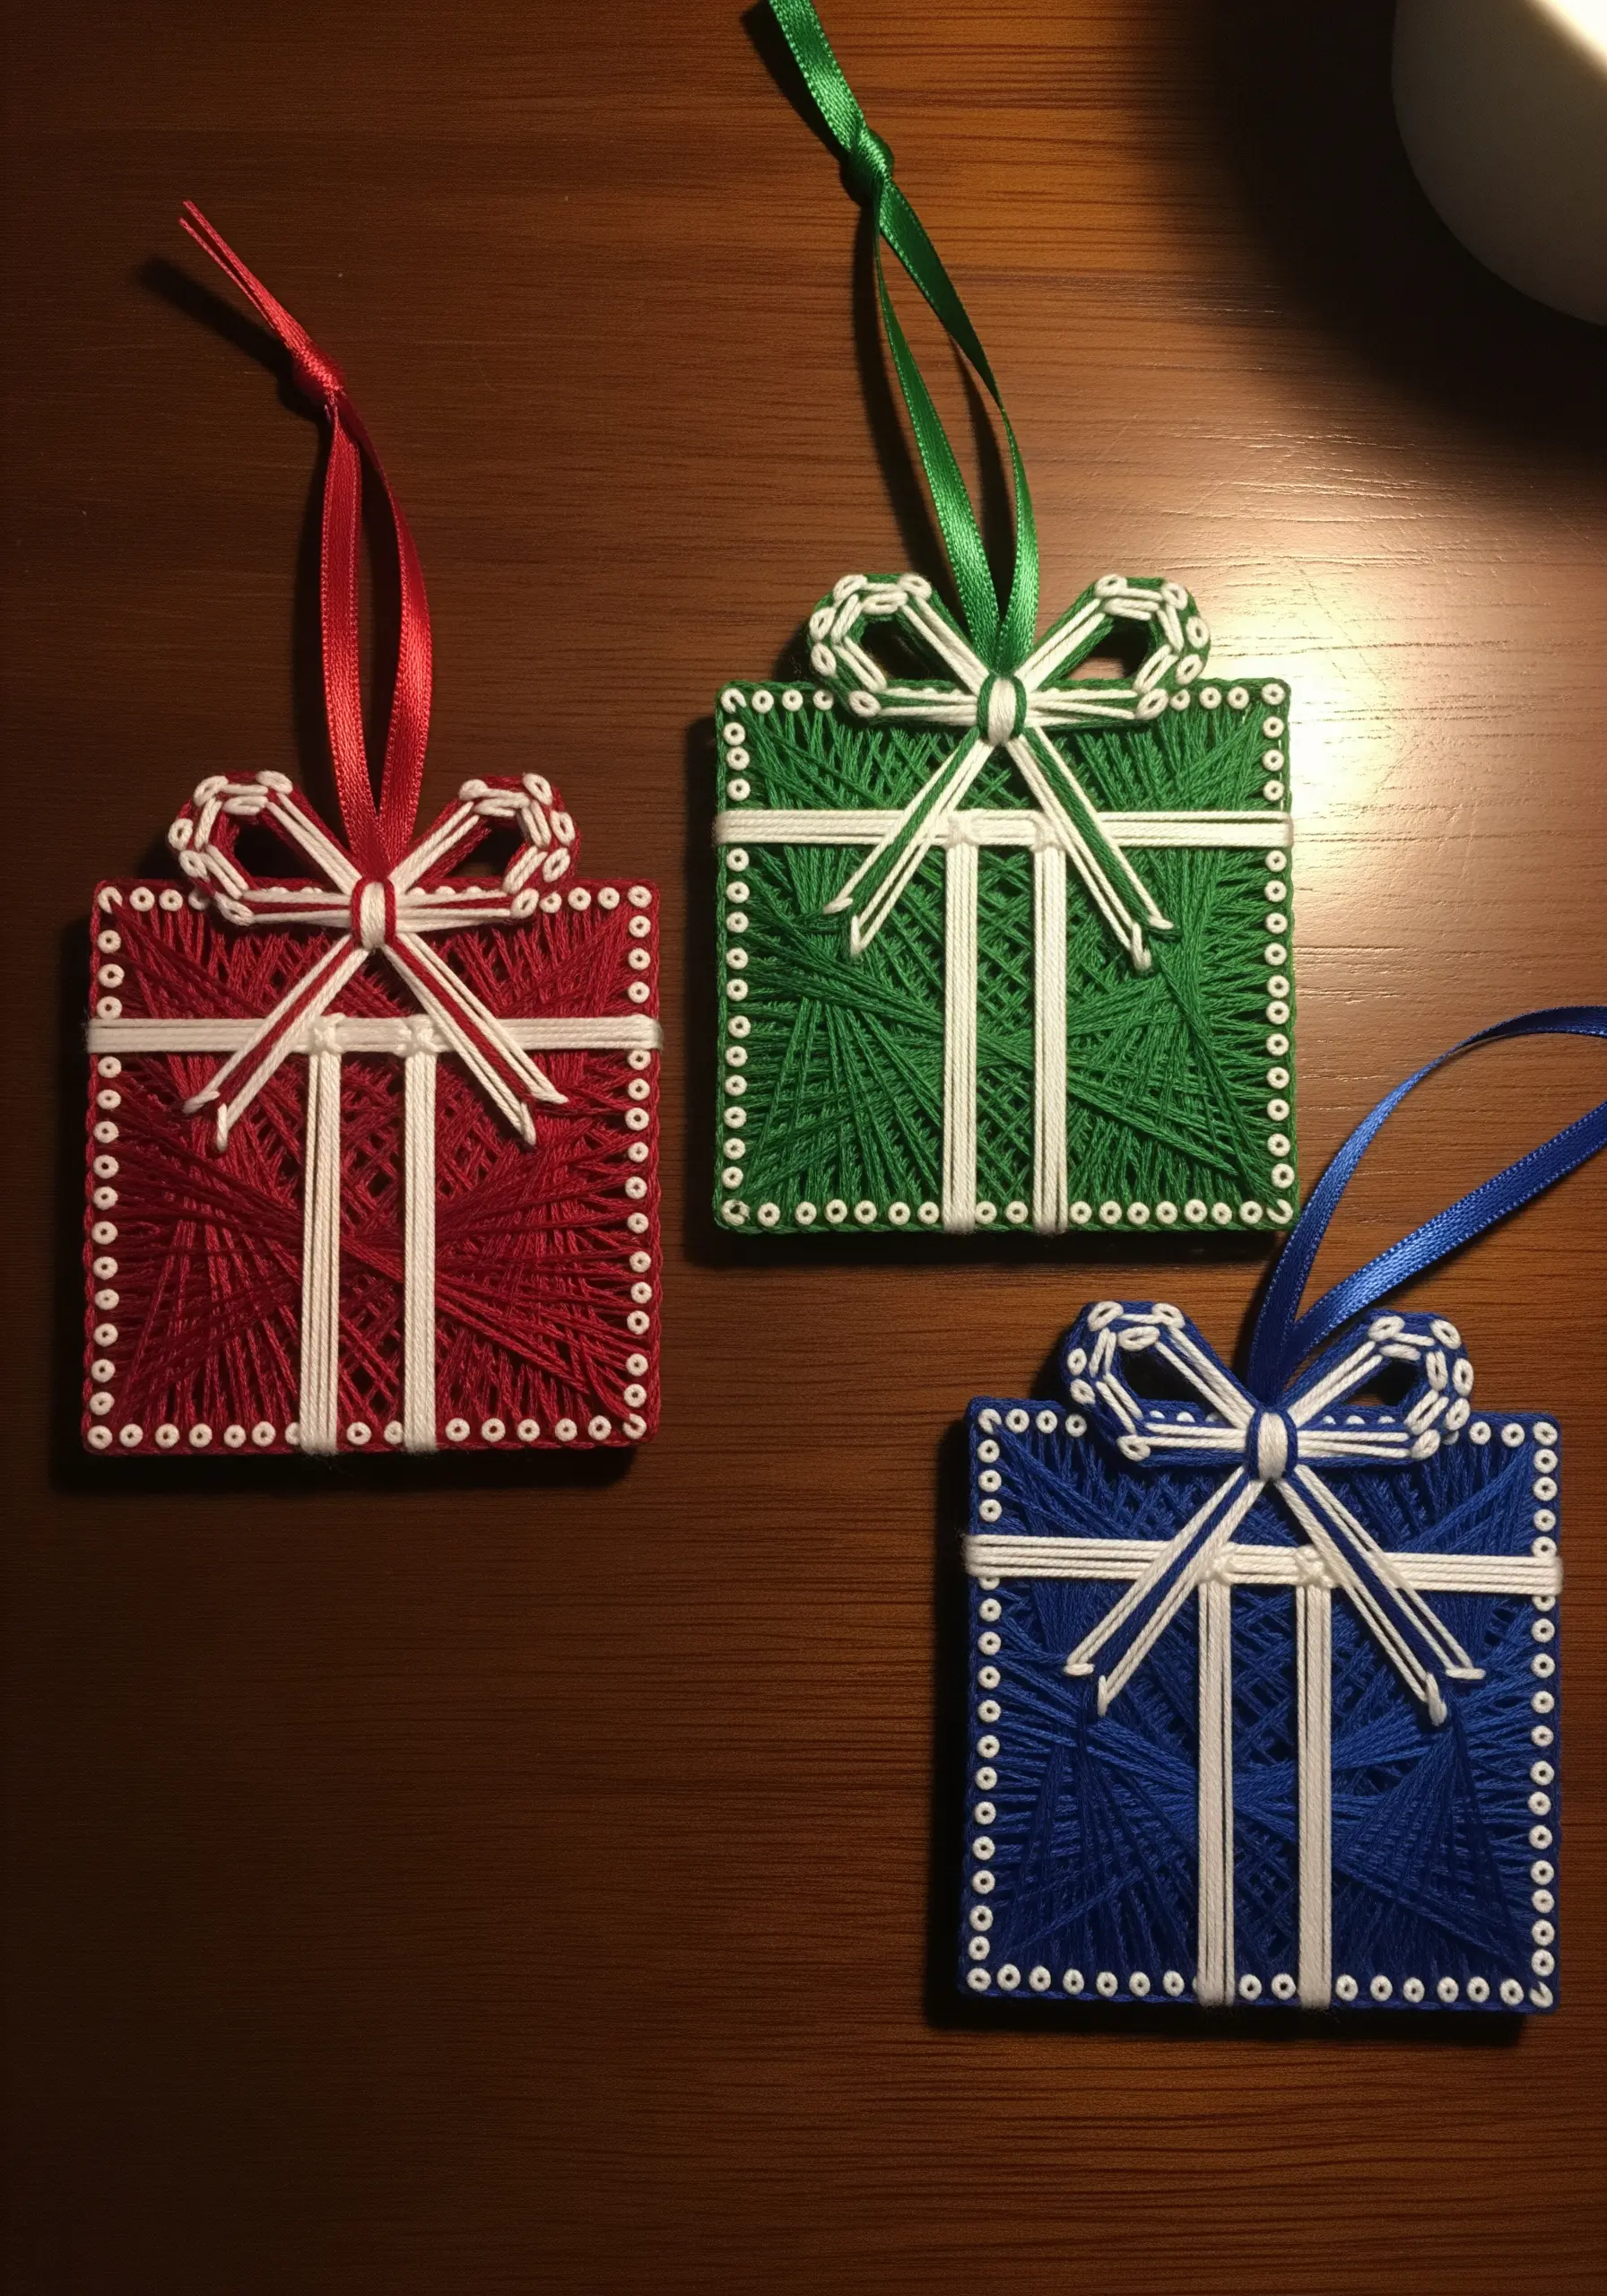
Create a coordinated set of ornaments by using a strict color palette—in this case, red, green, blue, and white.
Even though the wrapping patterns may vary, the consistent colors and white ‘ribbon’ detail make them feel like a family.
Leave the ribbon area as negative space first, then add the white thread last to ensure it sits cleanly on top.
This is a wonderful way to create a batch of handmade gifts that look beautifully intentional.
8. Blending Metallics for an Ethereal Angel
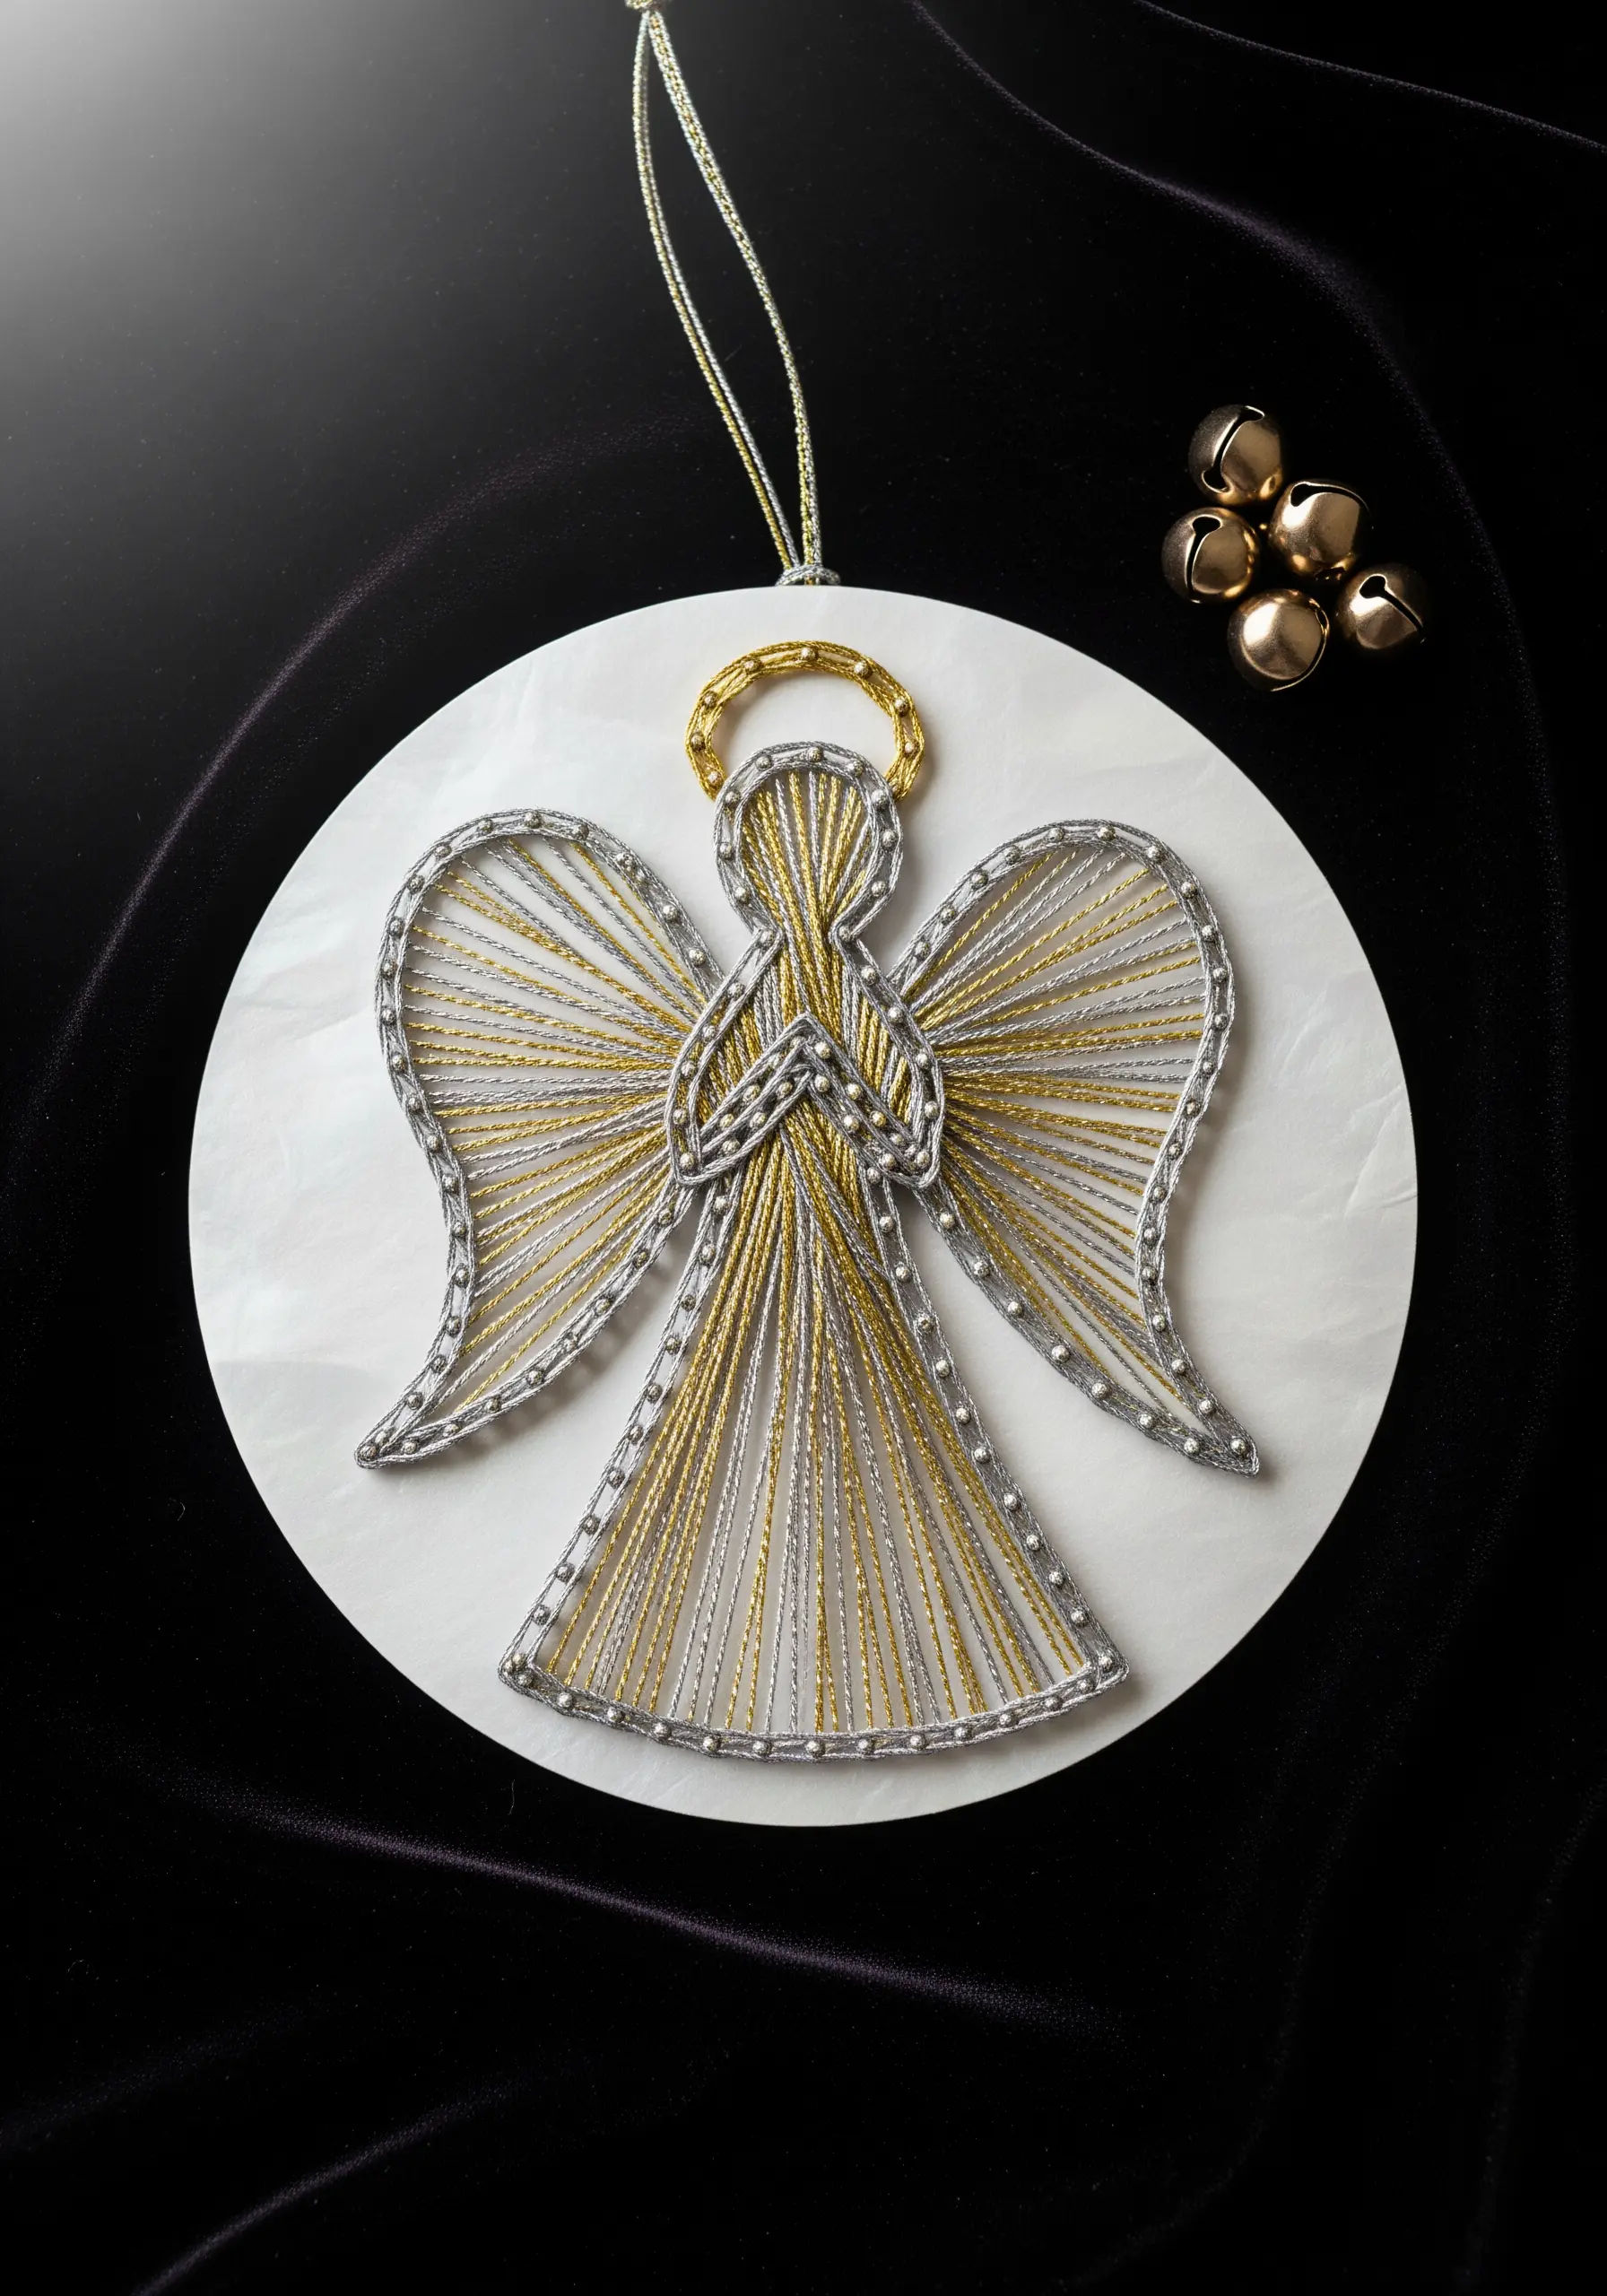
Weave gold and silver threads together to create a celestial shimmer that feels both warm and cool.
Fill the main body with gold to ground the figure, then use silver to create delicate, light-catching highlights on the wings and gown.
Direct your threads to follow the form—outward from the center on the wings, and downward on the gown—to create a sense of graceful movement.
A simple gold ring for the halo provides a perfect, elegant finish.
9. Incorporating Soft Textures for a Cozy Mitten
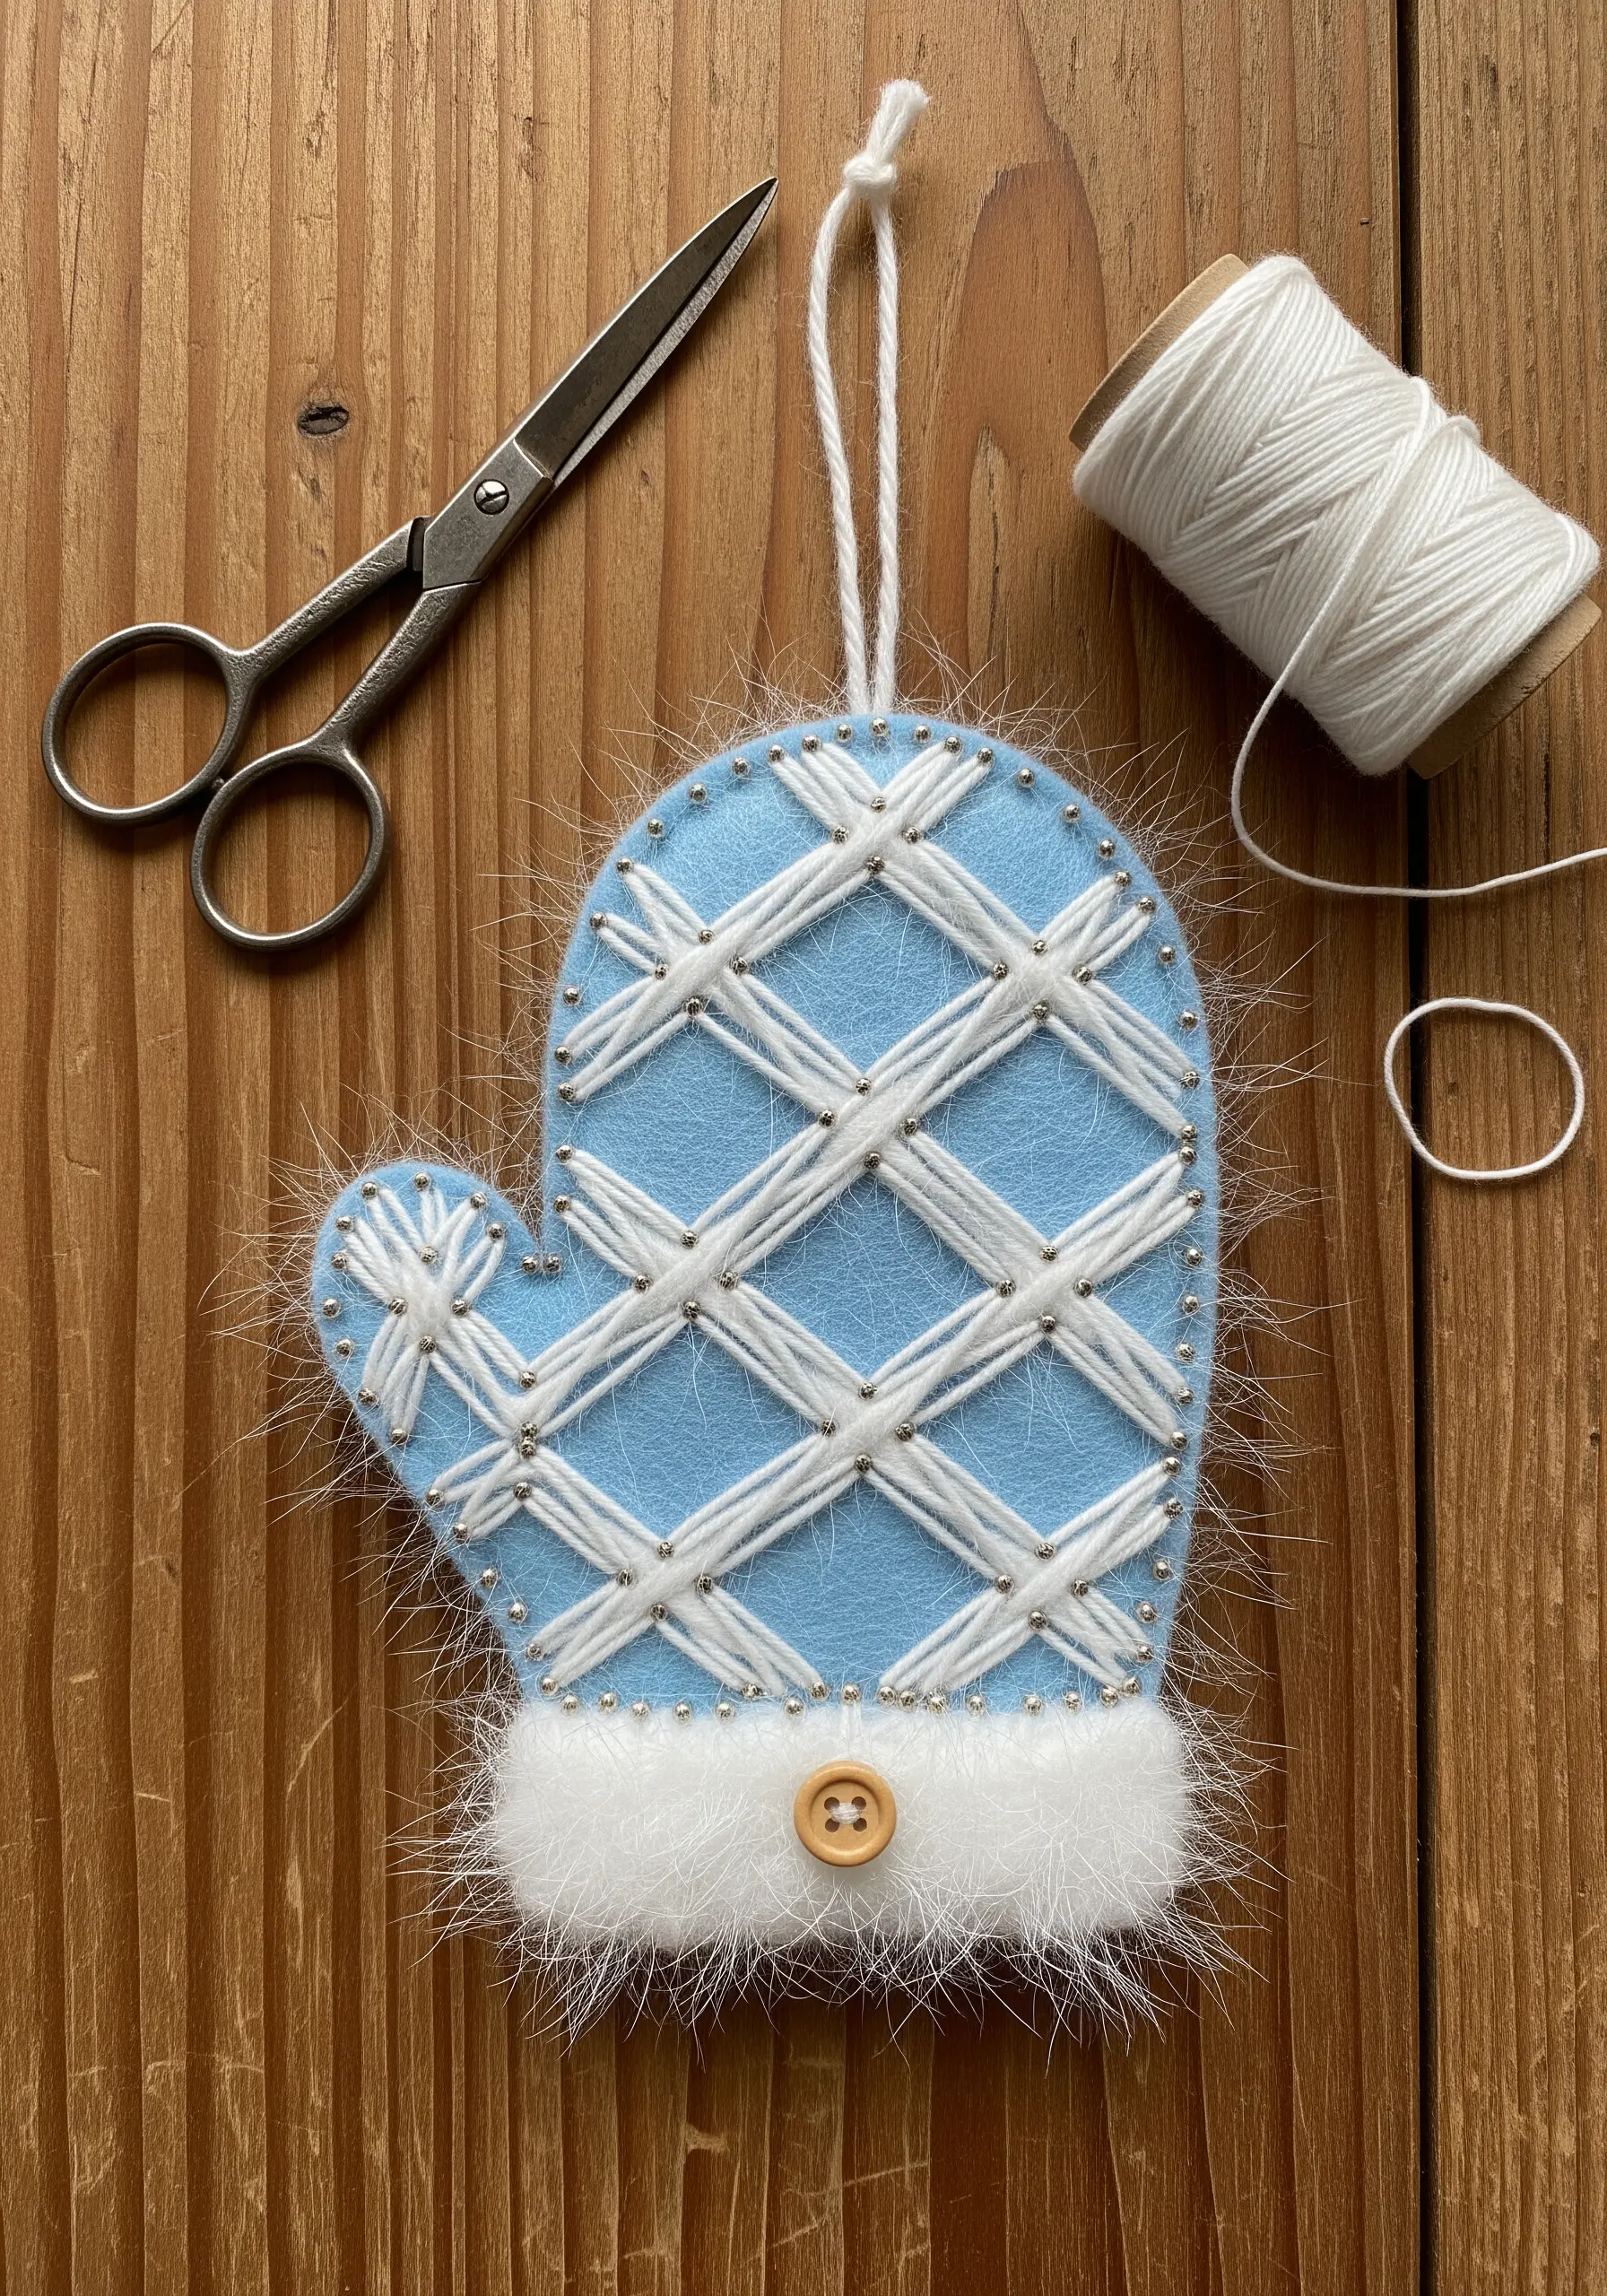
Combine traditional string art with soft, tactile materials for a charming mixed-media piece.
Use a simple cotton string to create the quilted pattern on the mitten, keeping the lines straight and geometric.
Then, add a fluffy faux fur or chenille yarn trim for the cuff to introduce a delightful textural contrast.
A small wooden button adds a final handmade detail that makes the ornament feel extra special and cozy.
10. Designing with Light in Mind
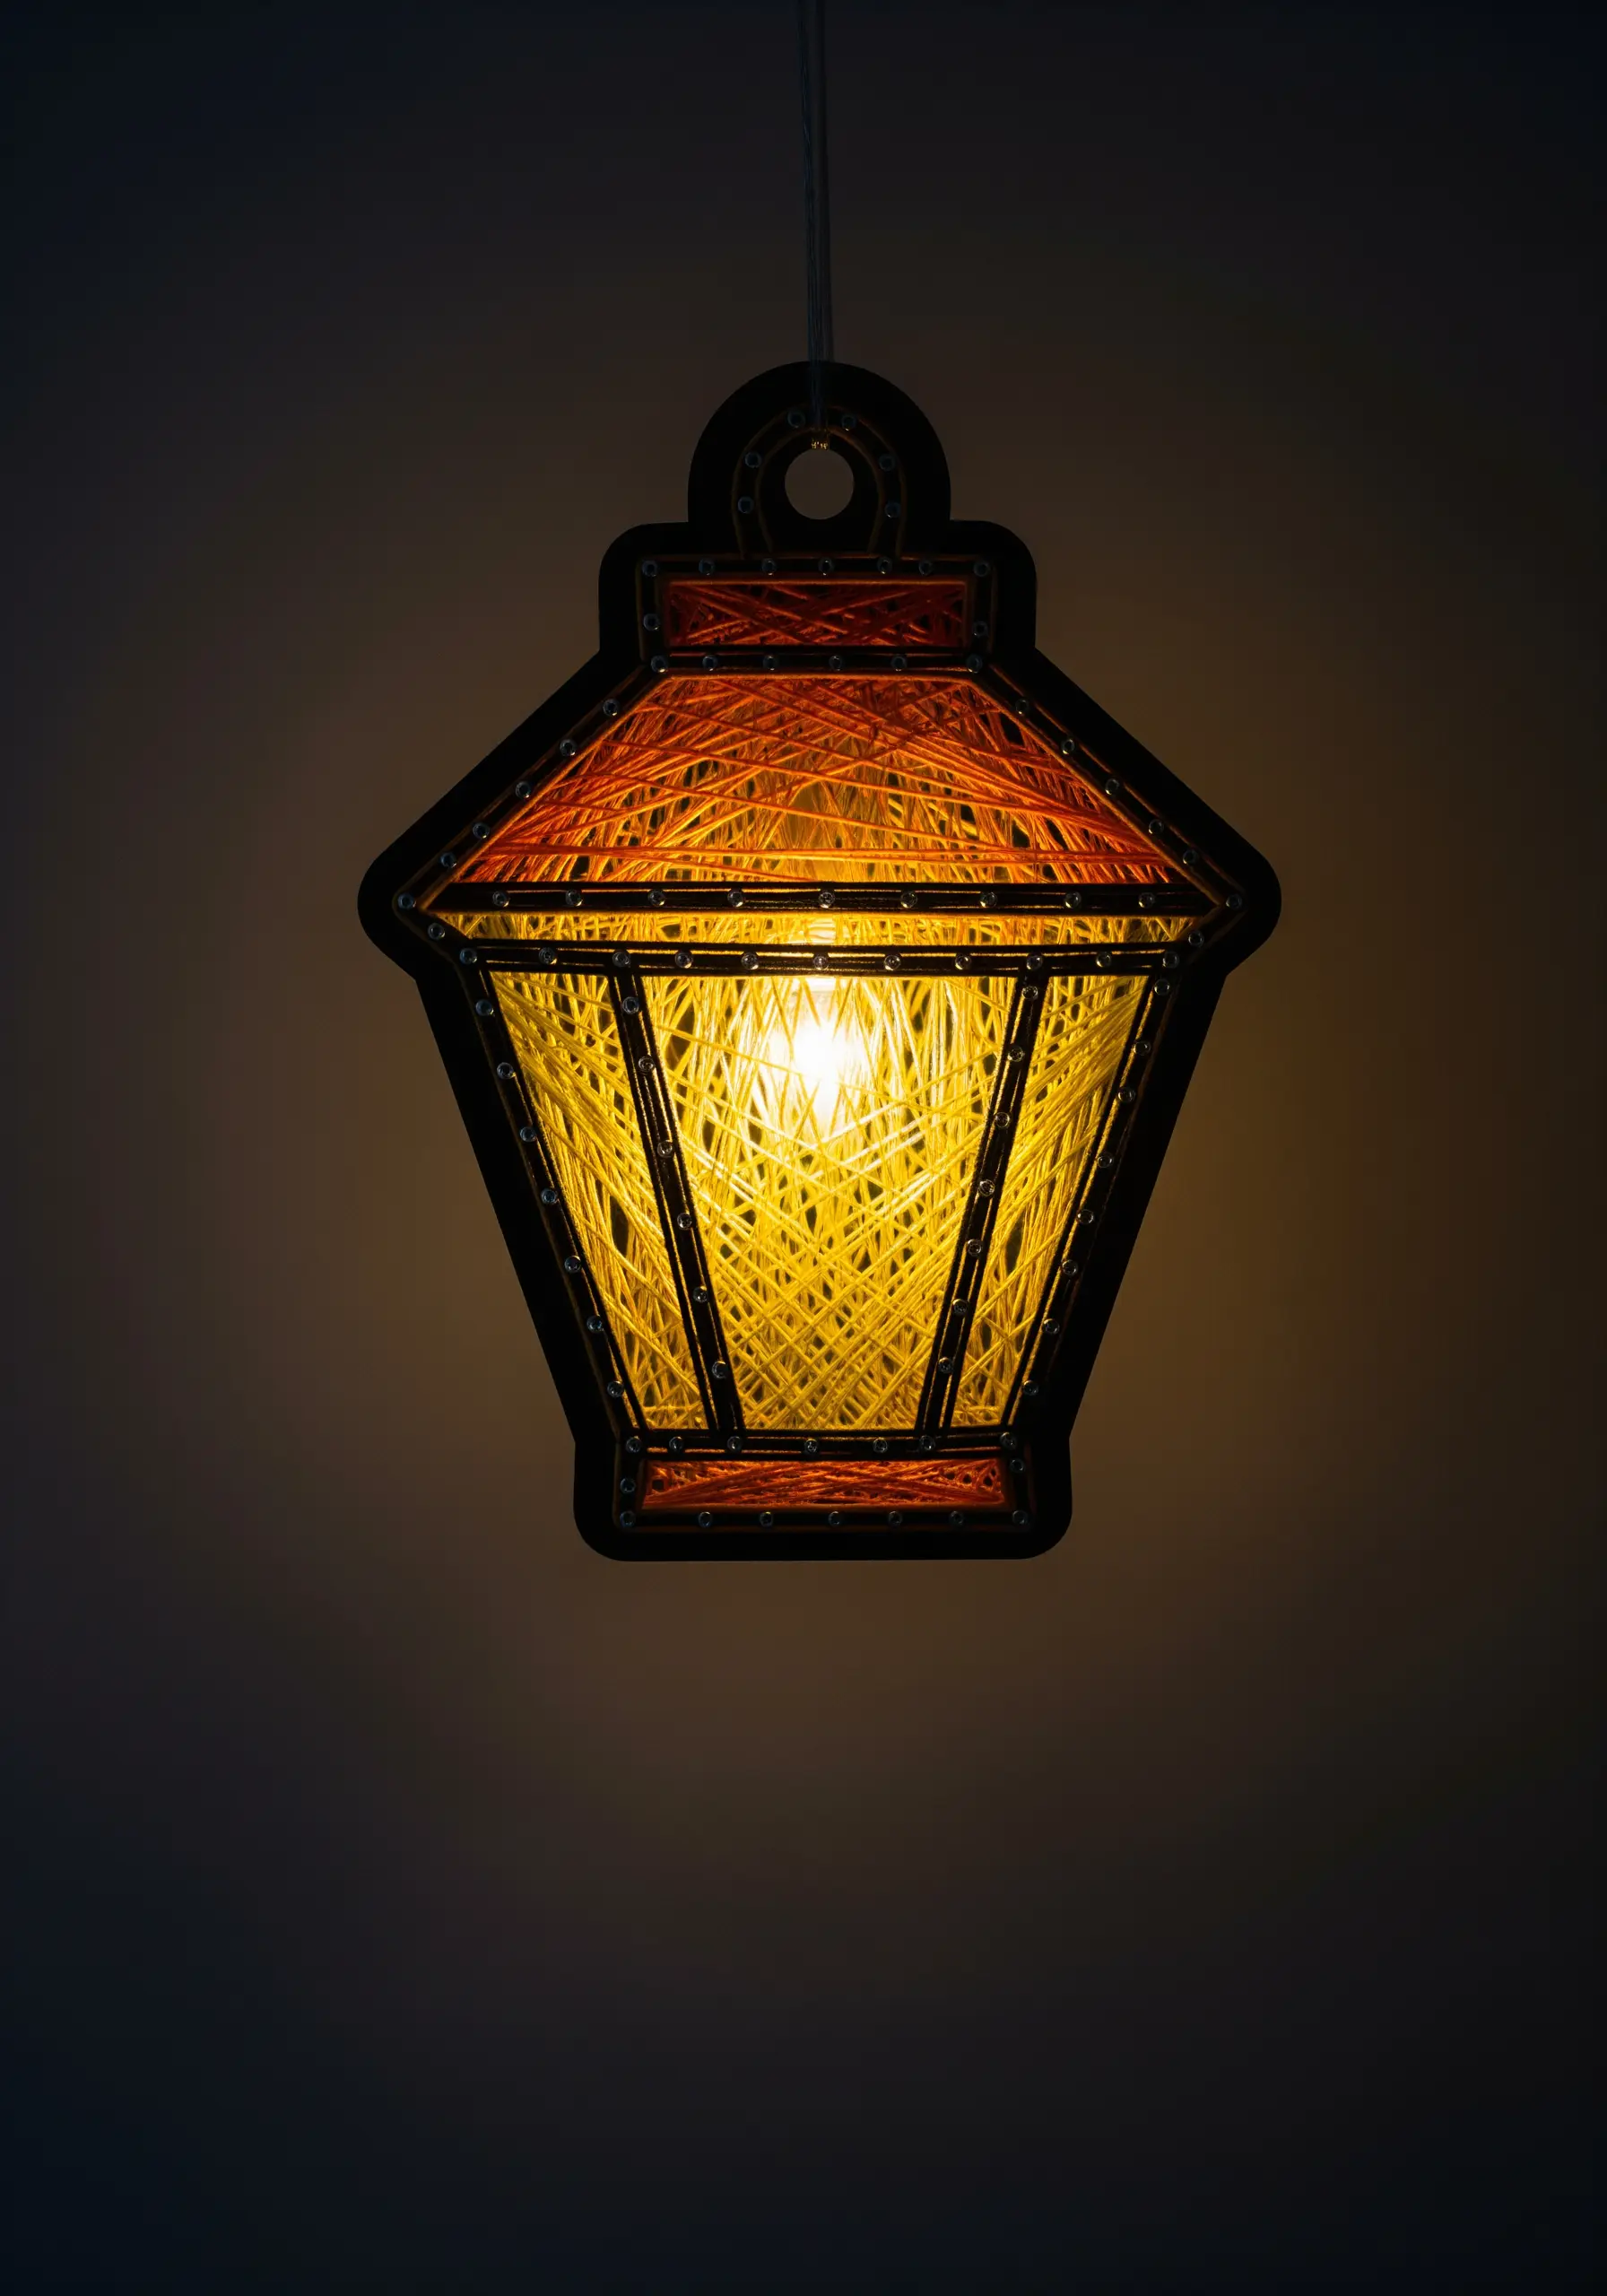
If you’re creating a lantern or any piece that might be backlit, choose your thread density carefully.
A moderately dense wrap, as seen here with yellow and orange threads, allows light to filter through, creating a warm, ambient glow.
A darker frame helps to define the shape and makes the illuminated colors appear even more vibrant.
This approach transforms a simple ornament into a functional piece of miniature mood lighting.
11. Geometric Interpretations of Organic Shapes
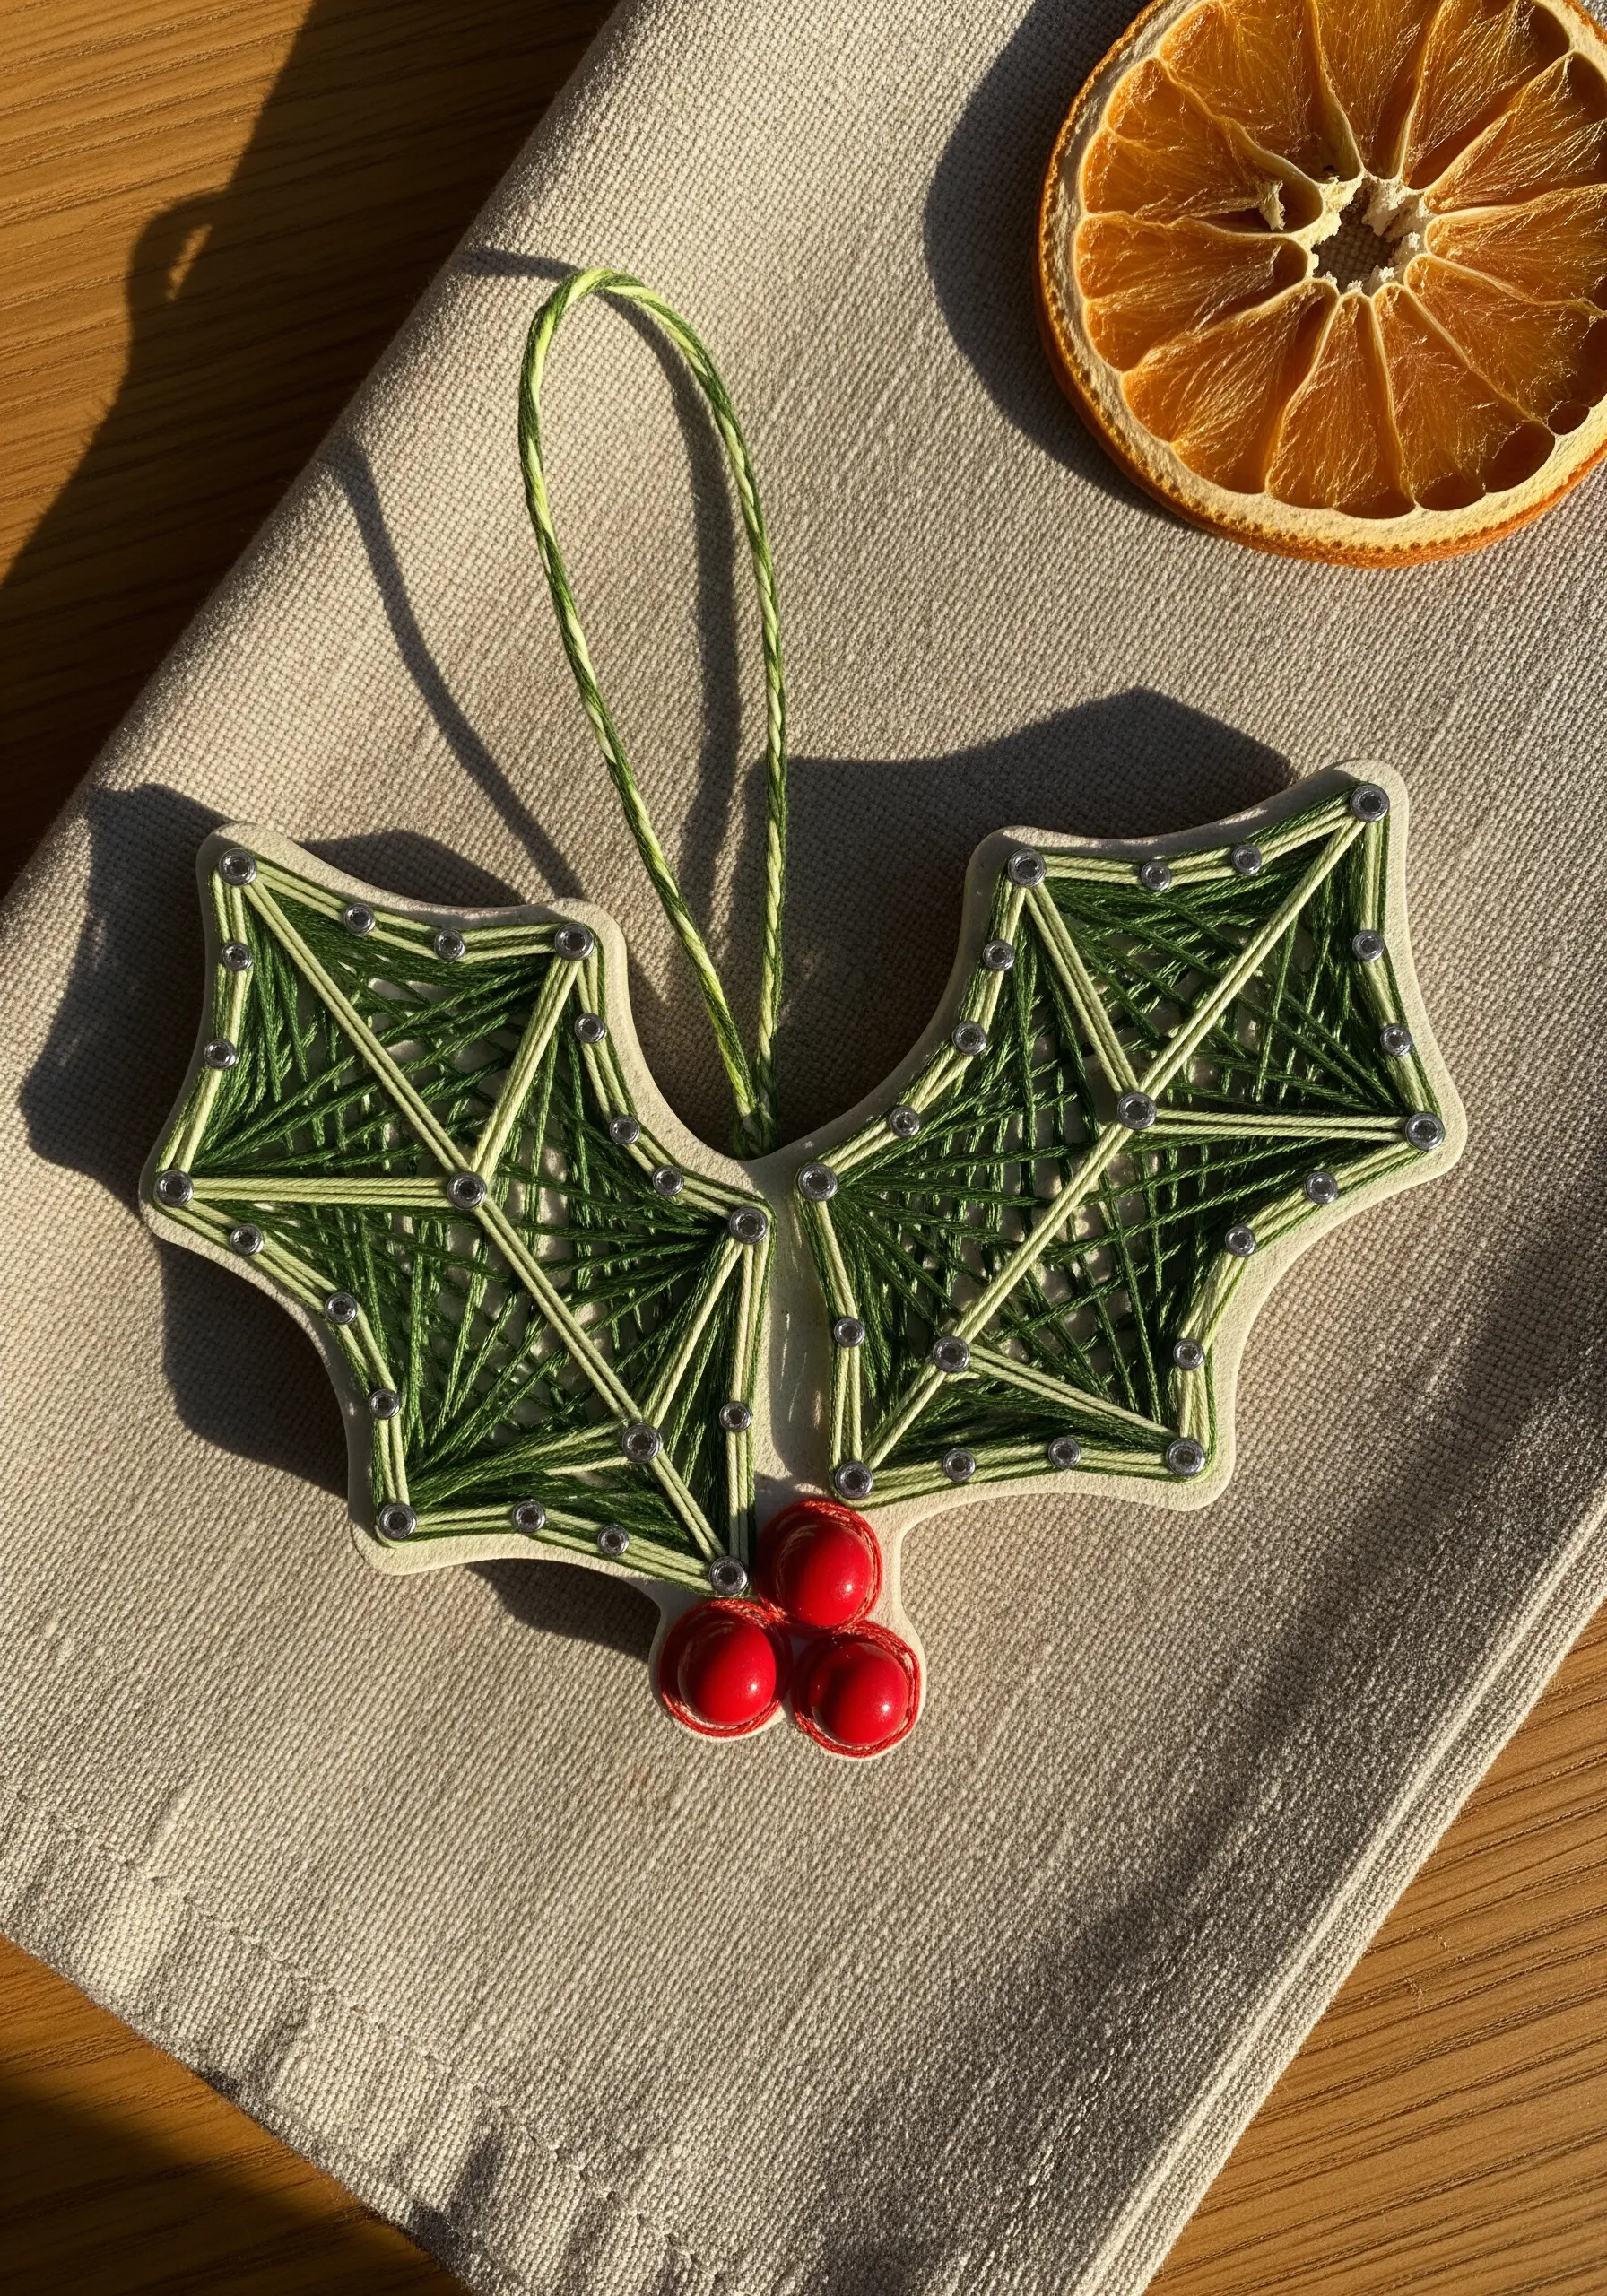
Translate a natural shape, like a holly leaf, into a compelling geometric design by focusing on its essential lines and angles.
Use straight lines to create the illusion of curves, which adds a modern, stylized feel to a traditional holiday motif.
Incorporate a lighter green thread to mimic the leaf’s veins, adding detail and structure to the interior of the shape.
Pairing the finished piece with small red beads completes the classic holly-and-berry look.
12. Mimicking Petals with Layered Threads

Build the rich, velvety look of a poinsettia by layering threads to mimic petals and leaves.
Use a vibrant red for the petals and a classic pine green for the leaves, wrapping from the outer edge toward the center to create radiating lines.
Add thin white lines within each petal to represent veins, a subtle detail that adds significant realism.
Create the center with yellow French knots—a perfect way to incorporate your embroidery skills for a bit of raised texture.
13. Adding Character with ‘Icing’ Details
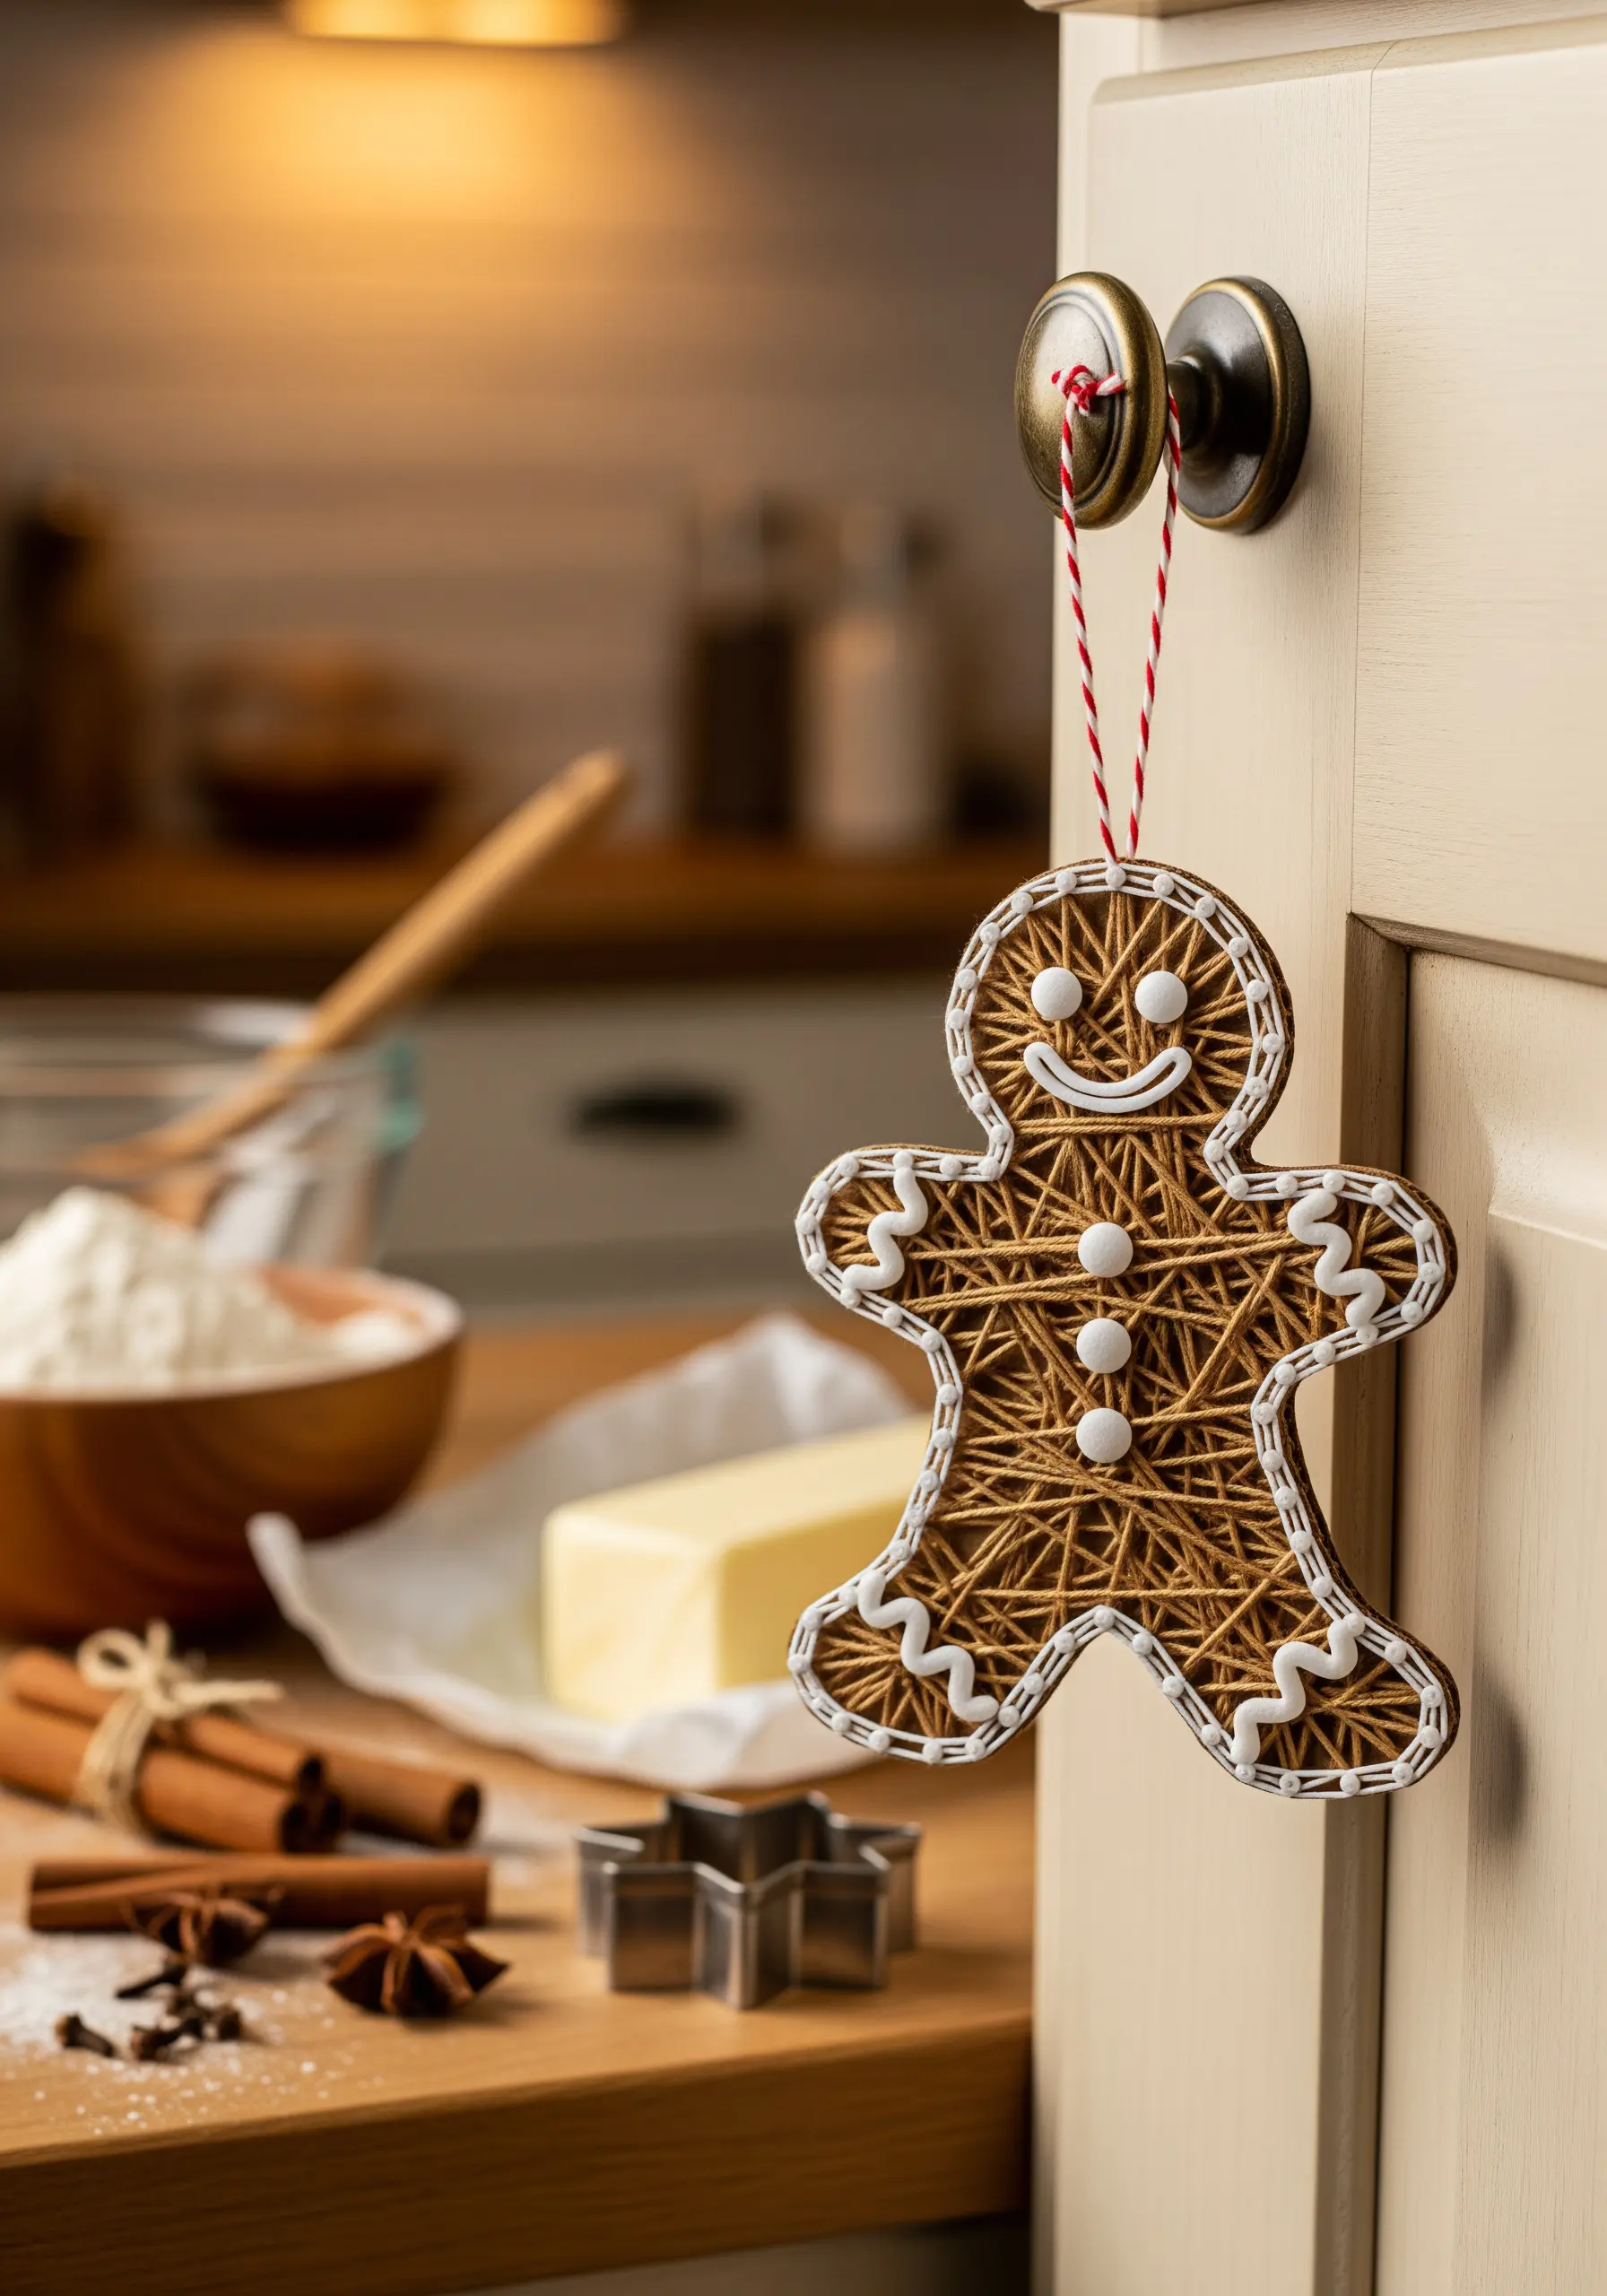
After filling the main body with a warm brown thread, use a contrasting white thread to add playful ‘icing’ details.
Create the squiggly lines on the arms and legs by wrapping the white thread back and forth between just two or three pins at a time.
This technique allows you to ‘draw’ with thread, adding personality and fine details without needing a complex pin layout.
Tiny white pins for the eyes and smile complete the charming, edible-inspired look.
14. Interlocking Shapes for a Balanced Design
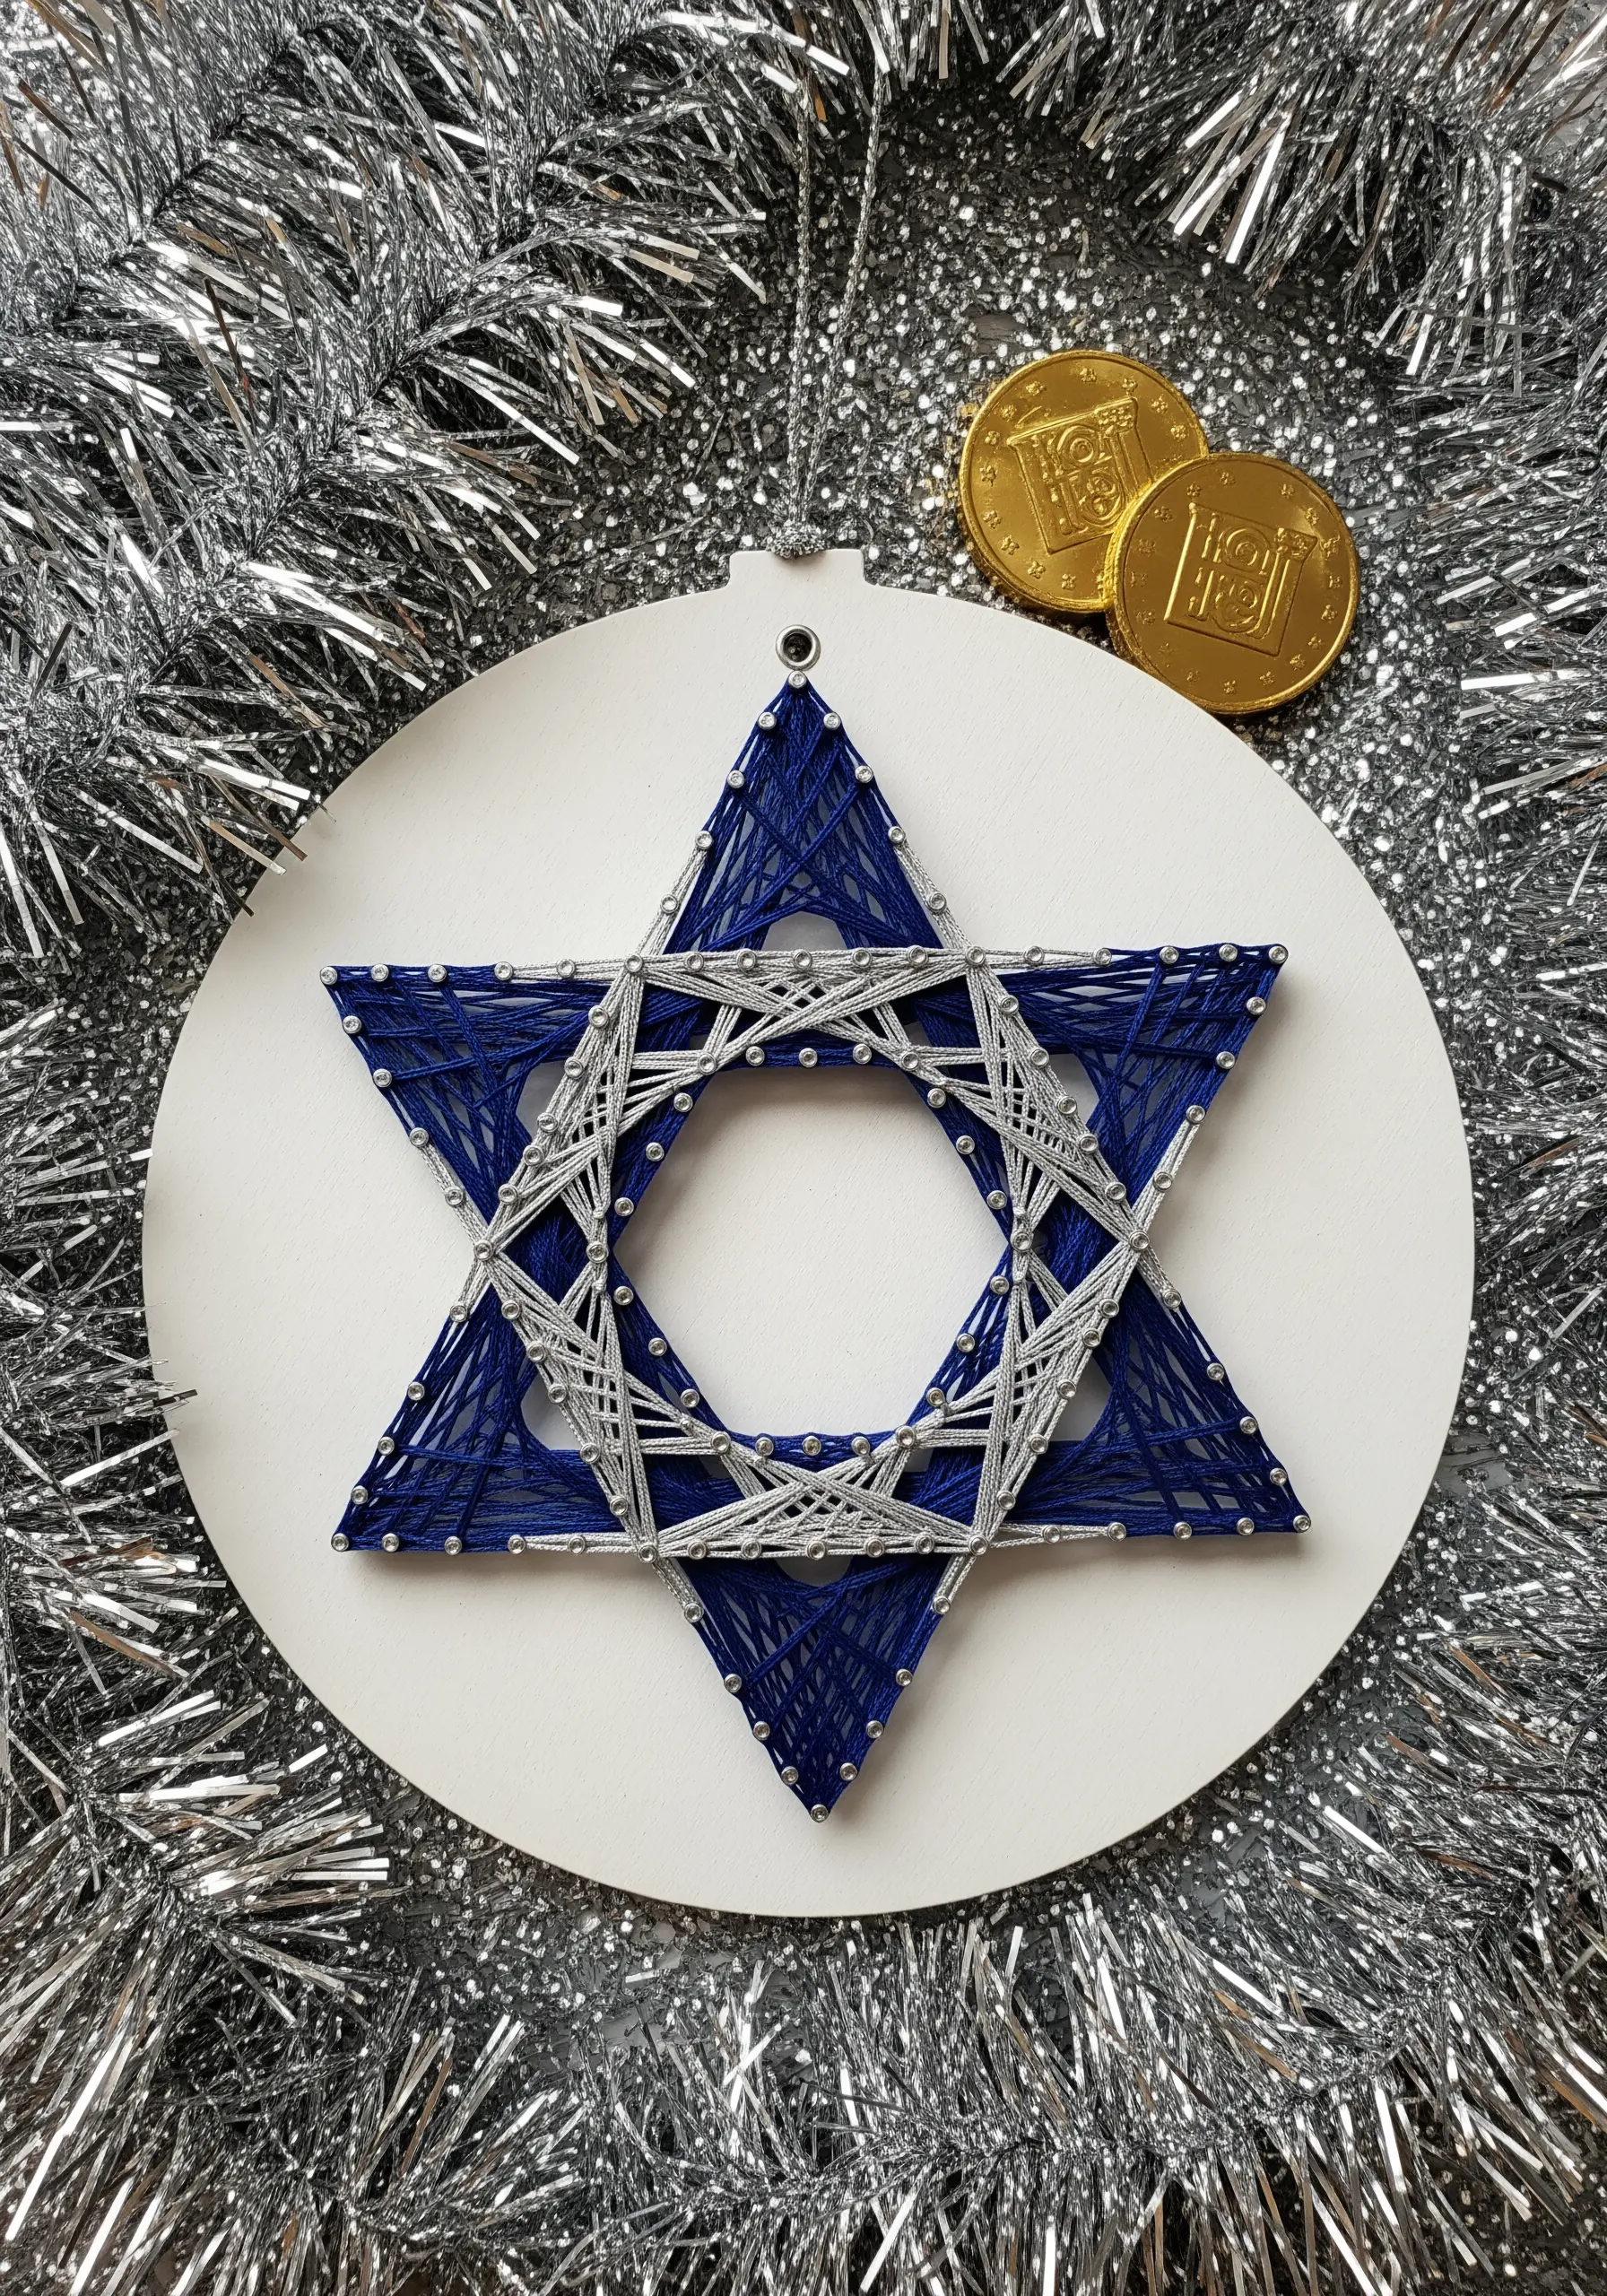
Create a visually balanced Star of David by treating it as two interlocking triangles.
Fill the main star shape with a deep royal blue, then outline and accent with a bright silver metallic thread.
Wrapping the silver thread around the outer blue points and then across the center neatly integrates the two colors and shapes.
This method ensures the geometric integrity of the symbol remains clear and striking.
15. Suggesting Form with Minimalist Lines

You don’t need to fill a shape completely to define it. Use sparse, directional lines to suggest the form of a dove in flight.
By wrapping threads primarily from the wings and tail toward the body, you create a powerful sense of movement and lightness.
The strategic use of empty space is just as important as the thread itself, allowing the simple silhouette to feel graceful and airy.
A single pin for the eye is all that’s needed to bring the peaceful creature to life.
16. Building a Character from Stacked Circles
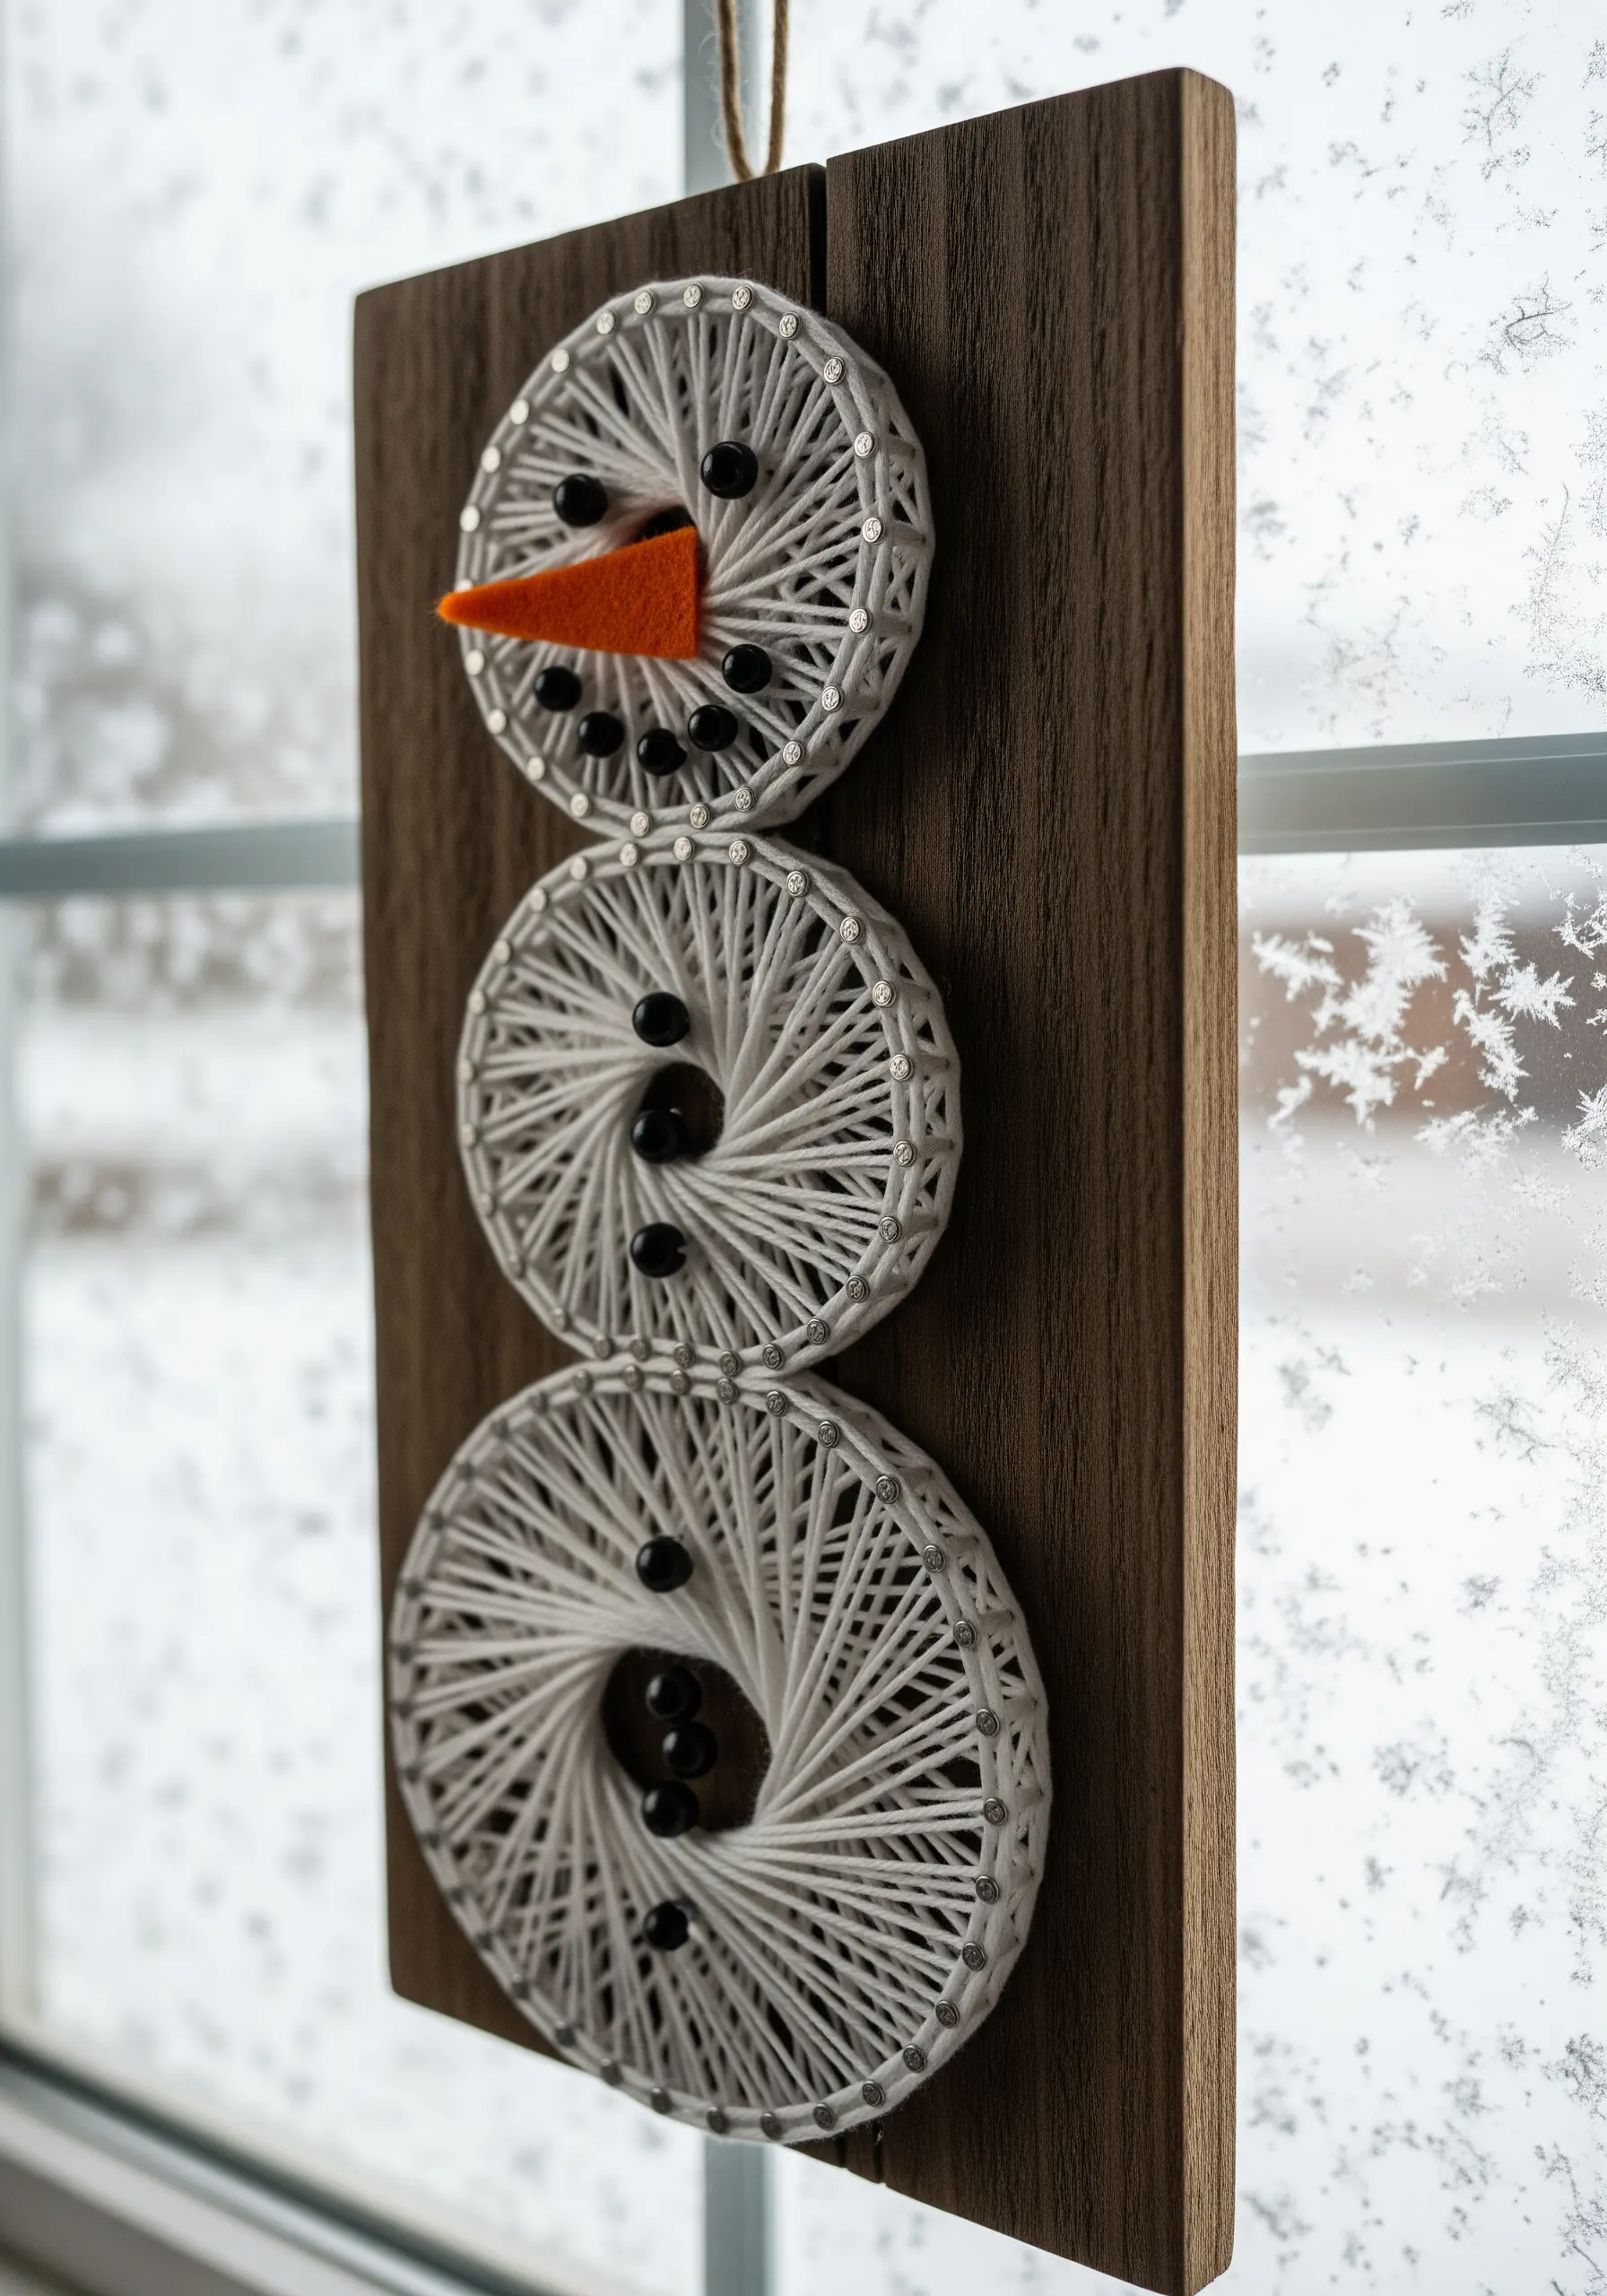
Construct a classic snowman by creating three distinct circular sections of string art.
Wrap each circle from the outer edge toward the open center, which creates a satisfying spiral pattern that looks like a snowball.
Embellish with black beads for the eyes and buttons, and a small piece of orange felt for the carrot nose.
Mounting the finished circles on a rustic wood plank adds a warm, contrasting backdrop to the cool white of the snowman.
17. Creating a Scene with Multiple Colors
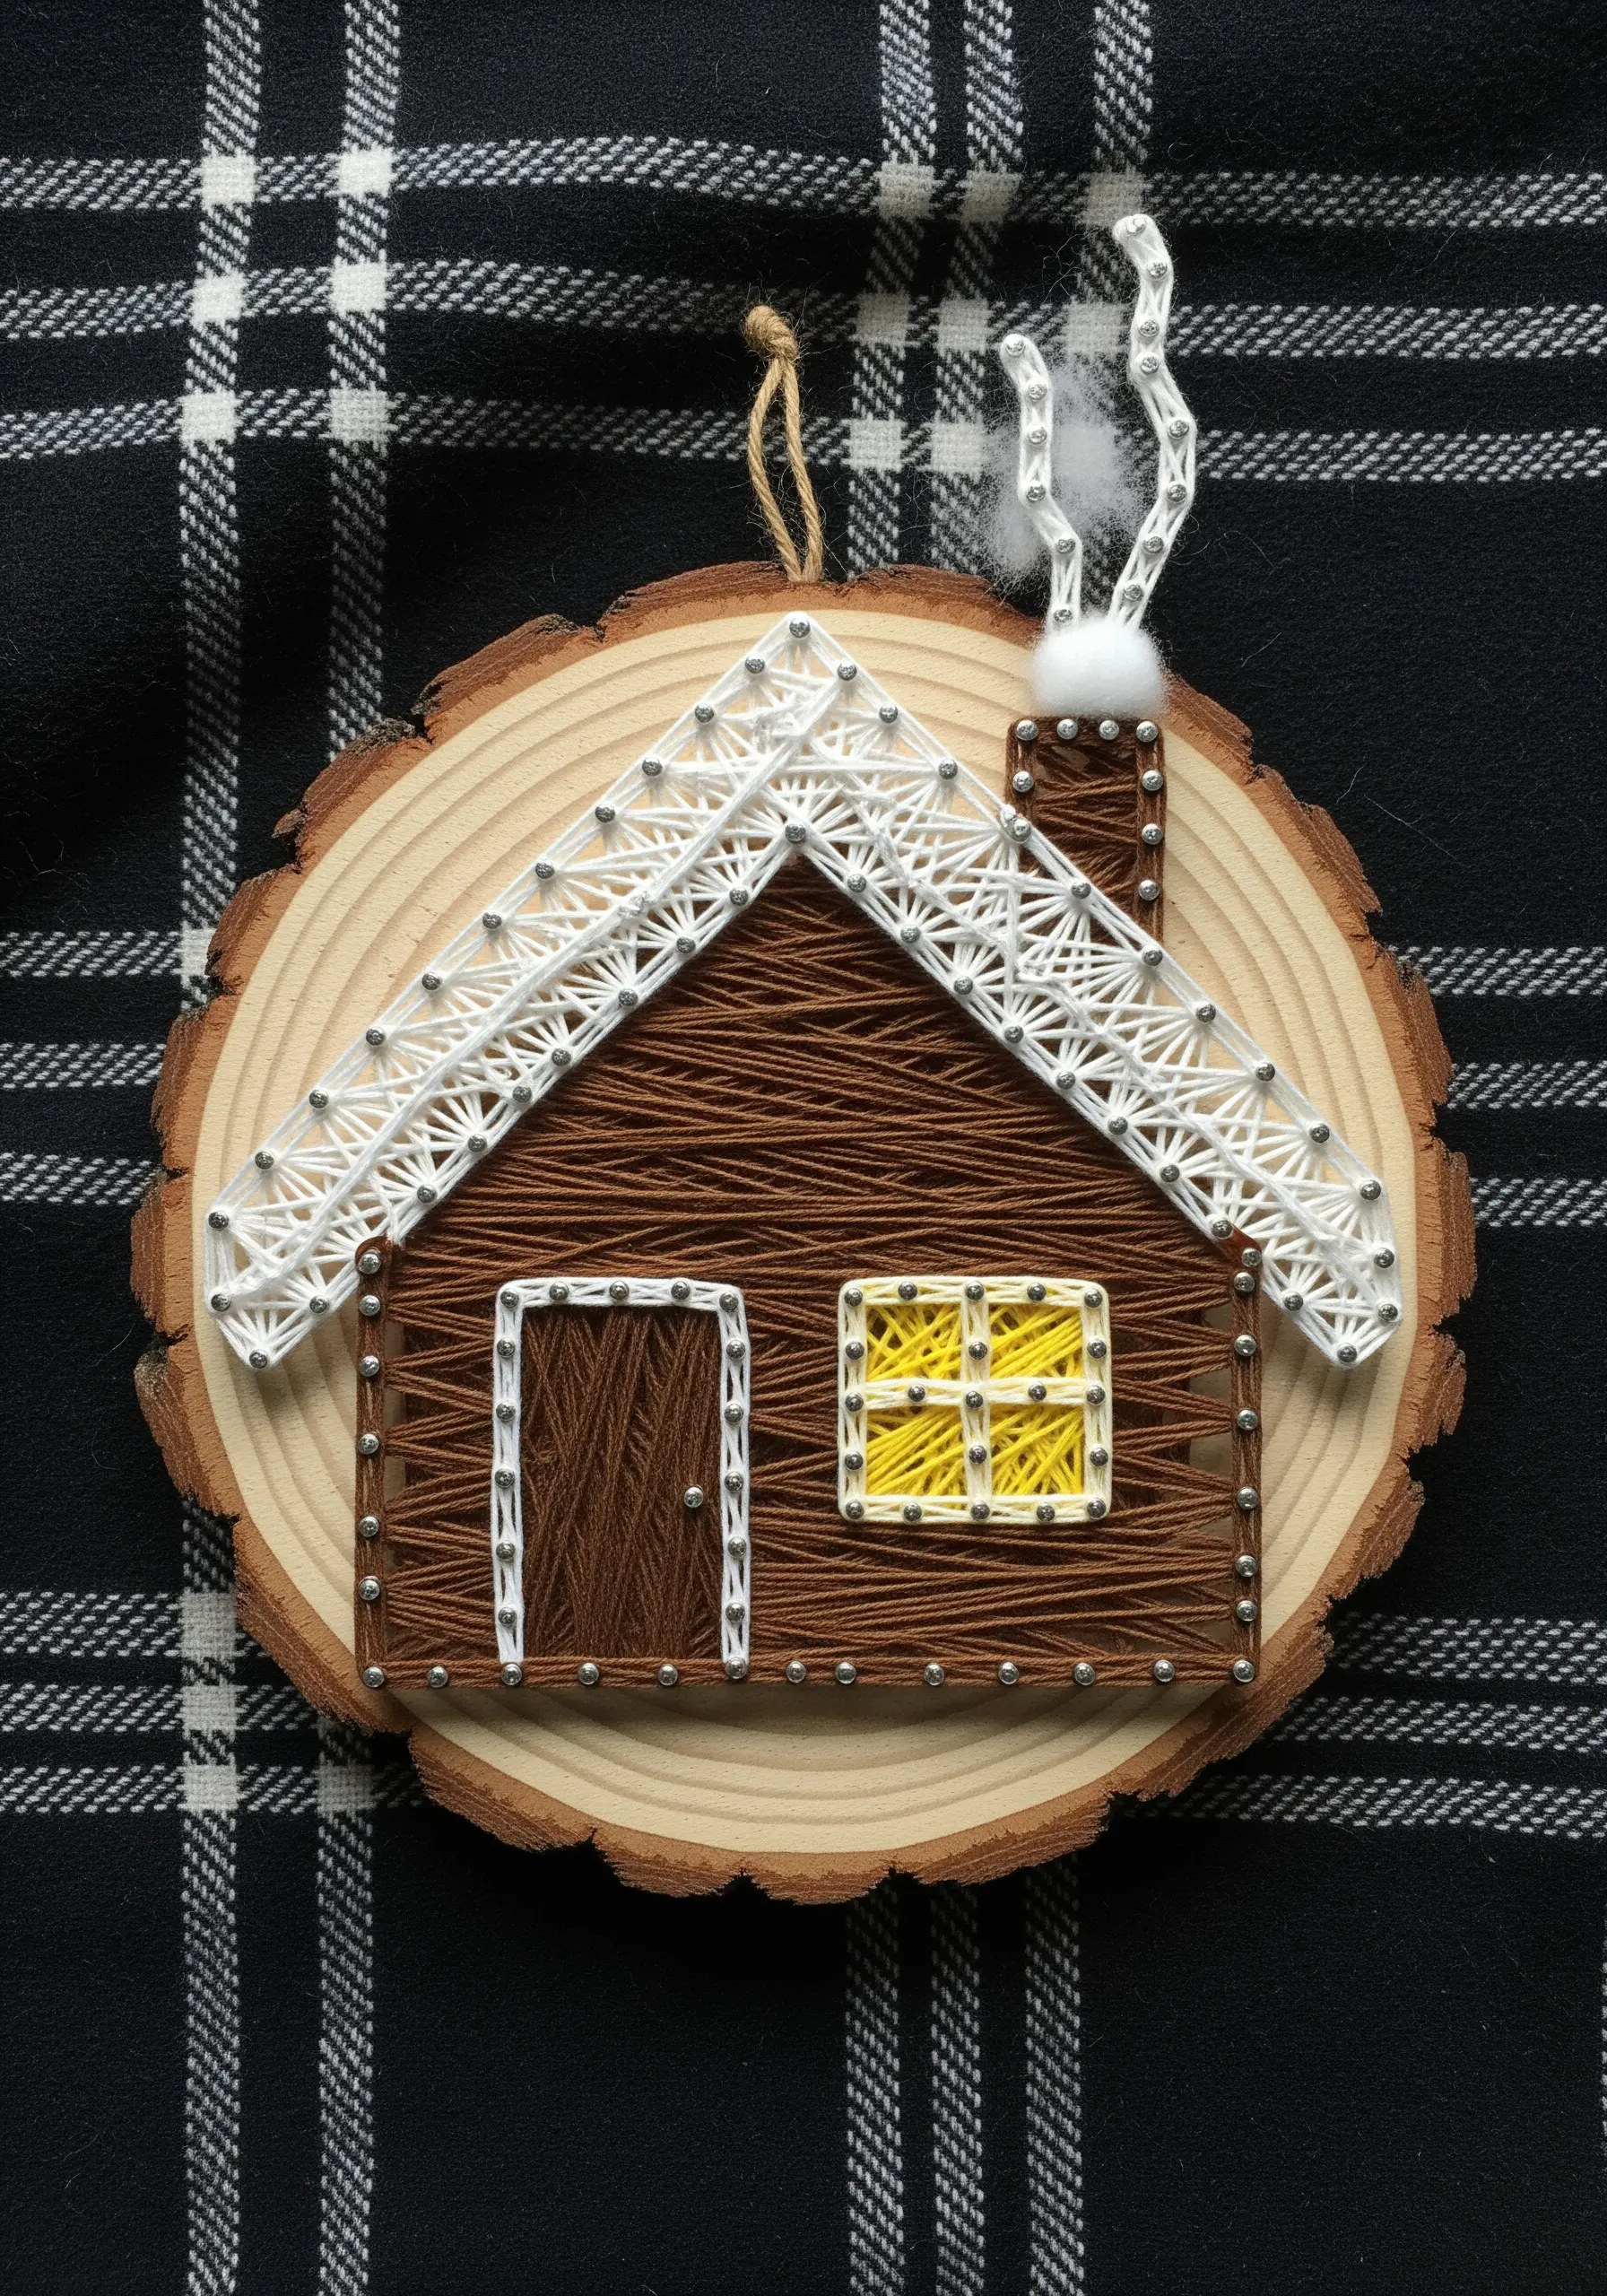
Tell a story with your ornament by using different thread colors to define separate elements of a scene, like a cozy house.
Use a warm brown for the walls, a crisp white for the roof and doorframe, and a sunny yellow for a welcoming window light.
Fill each section with straight, uniform lines to maintain a clean, architectural look.
A tiny pom-pom for smoke adds a final touch of whimsy and makes the scene feel alive.
18. A Cohesive Collection with a Limited Palette
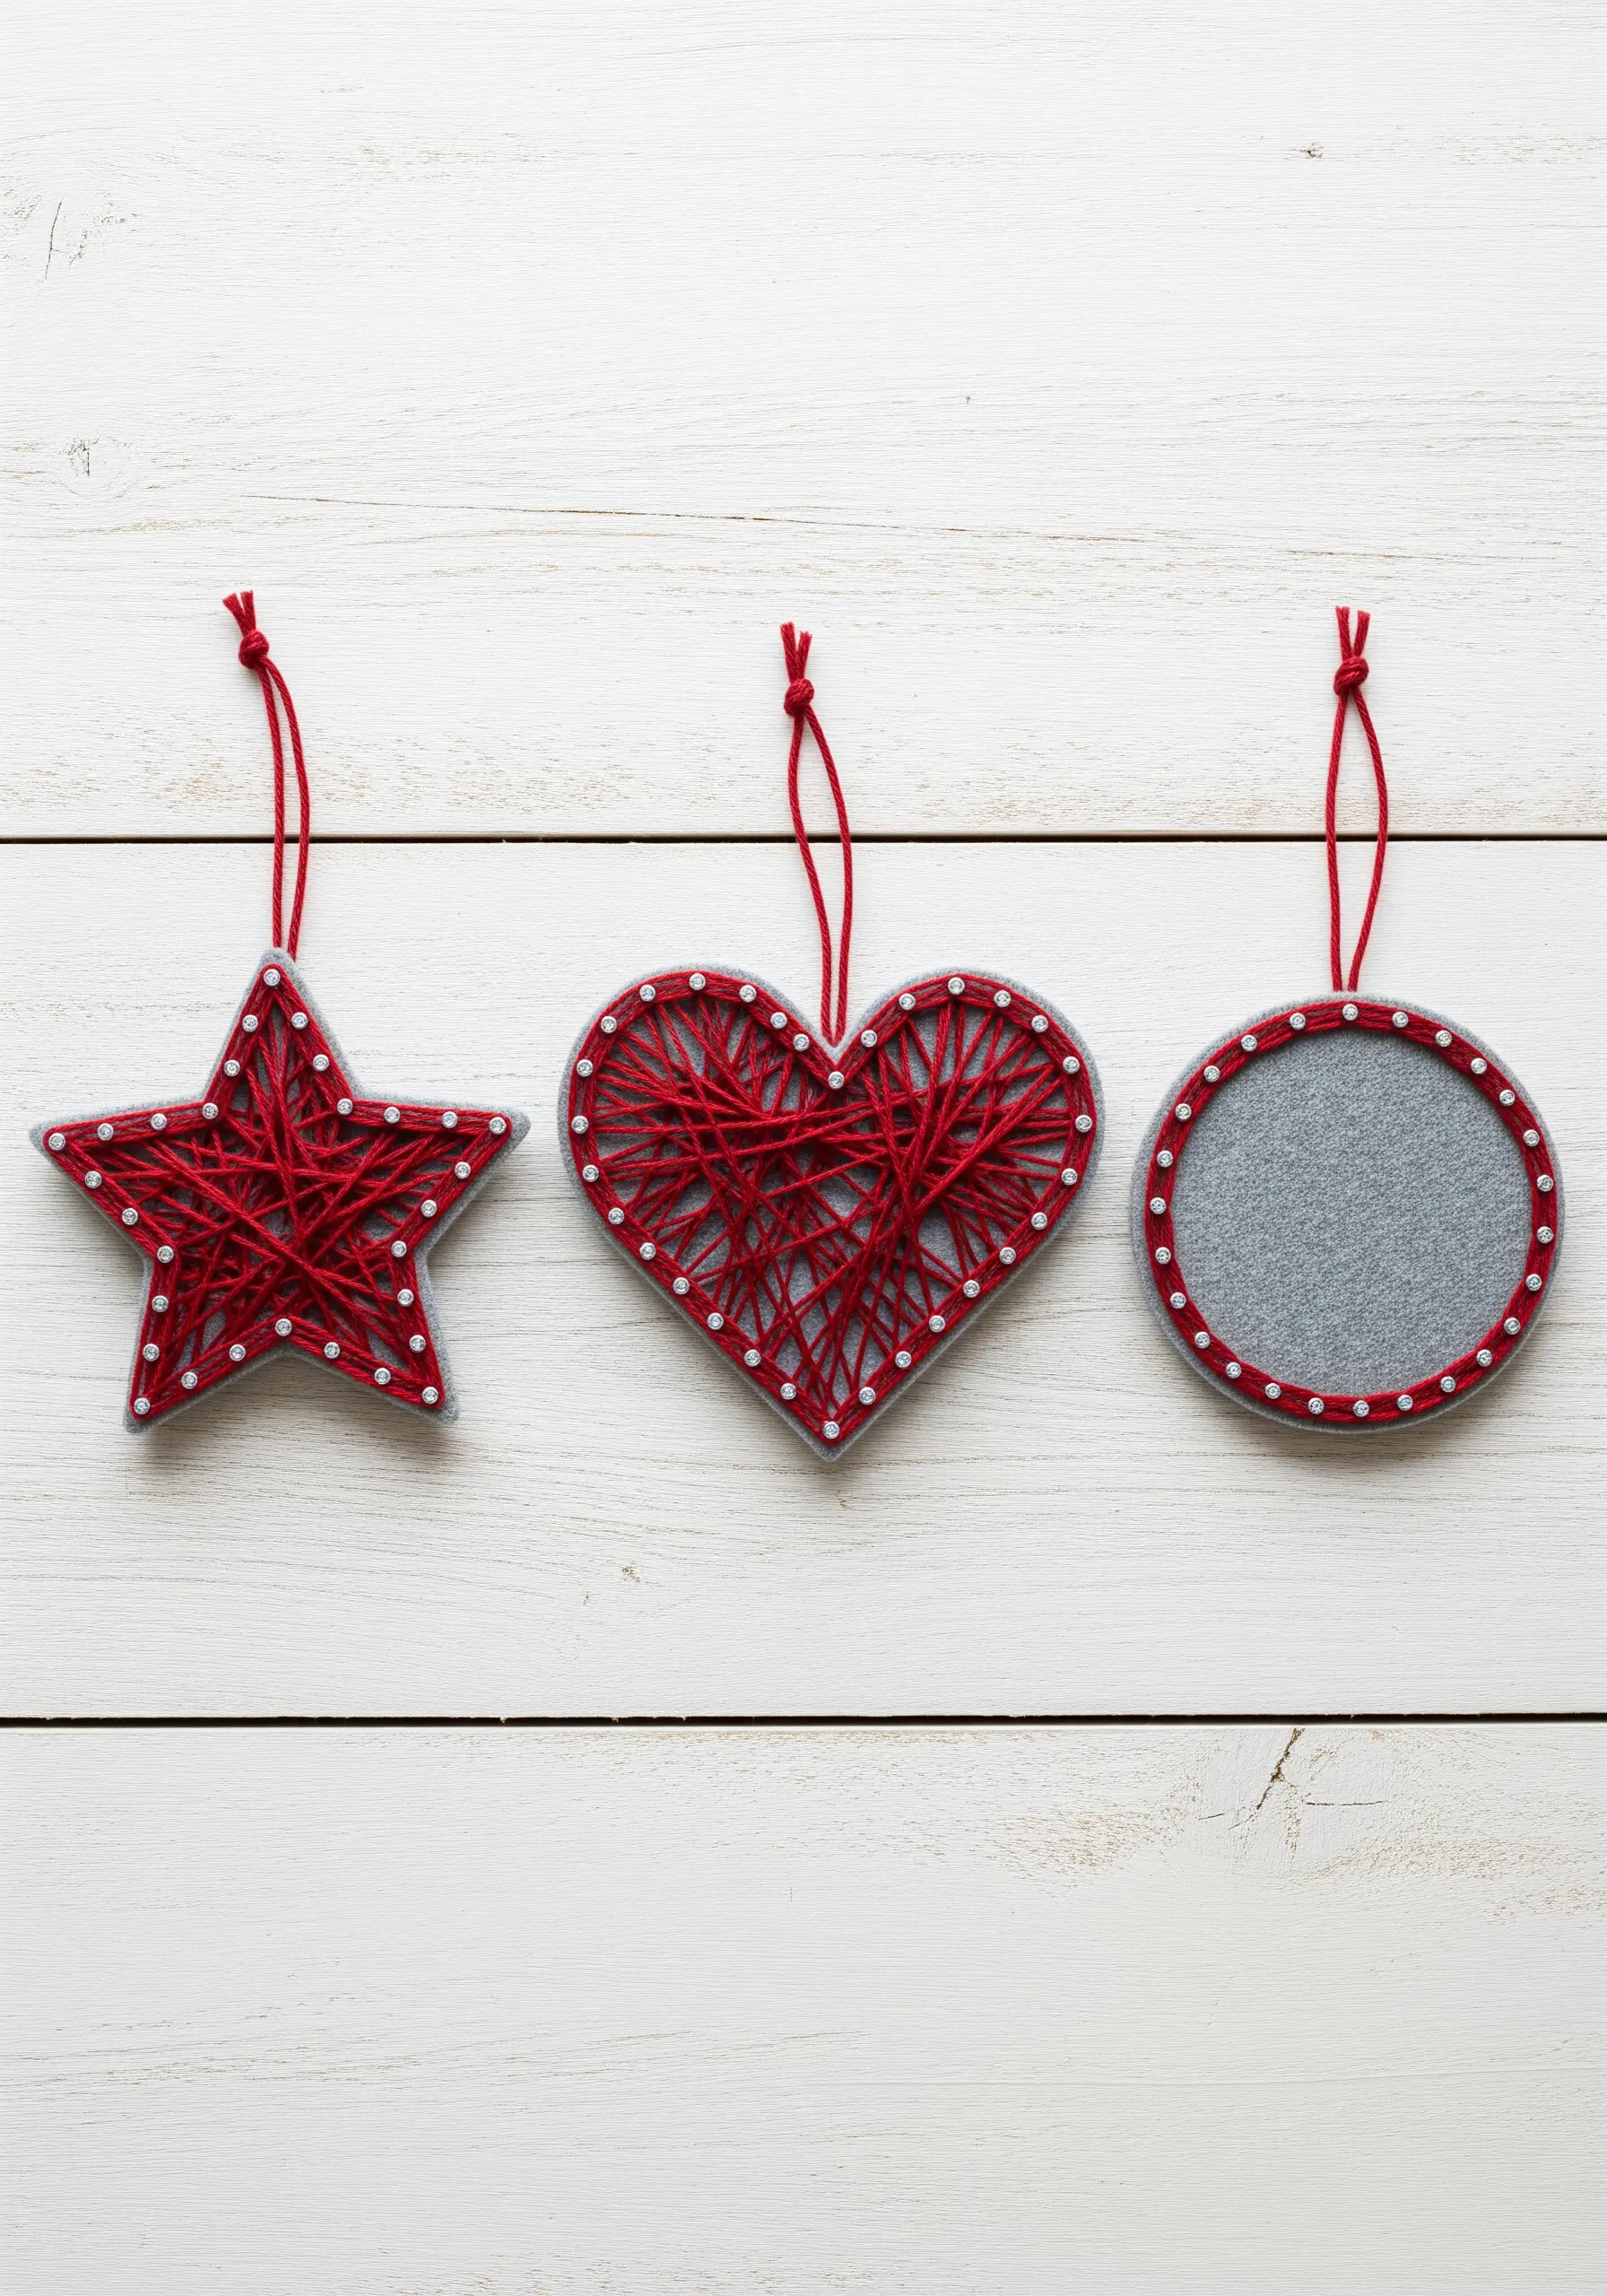
Design a stunningly simple set of ornaments by restricting yourself to just two colors: a bold red and a neutral grey.
The grey felt base acts as a calm, modern canvas that makes the vibrant red thread pop.
Use small white pins as a unifying decorative element, outlining each shape for a clean, dotted border.
Even with varied shapes—a star, a heart, a circle—the consistent materials ensure the set looks polished and harmonious.
19. Typography with Thread and Tension
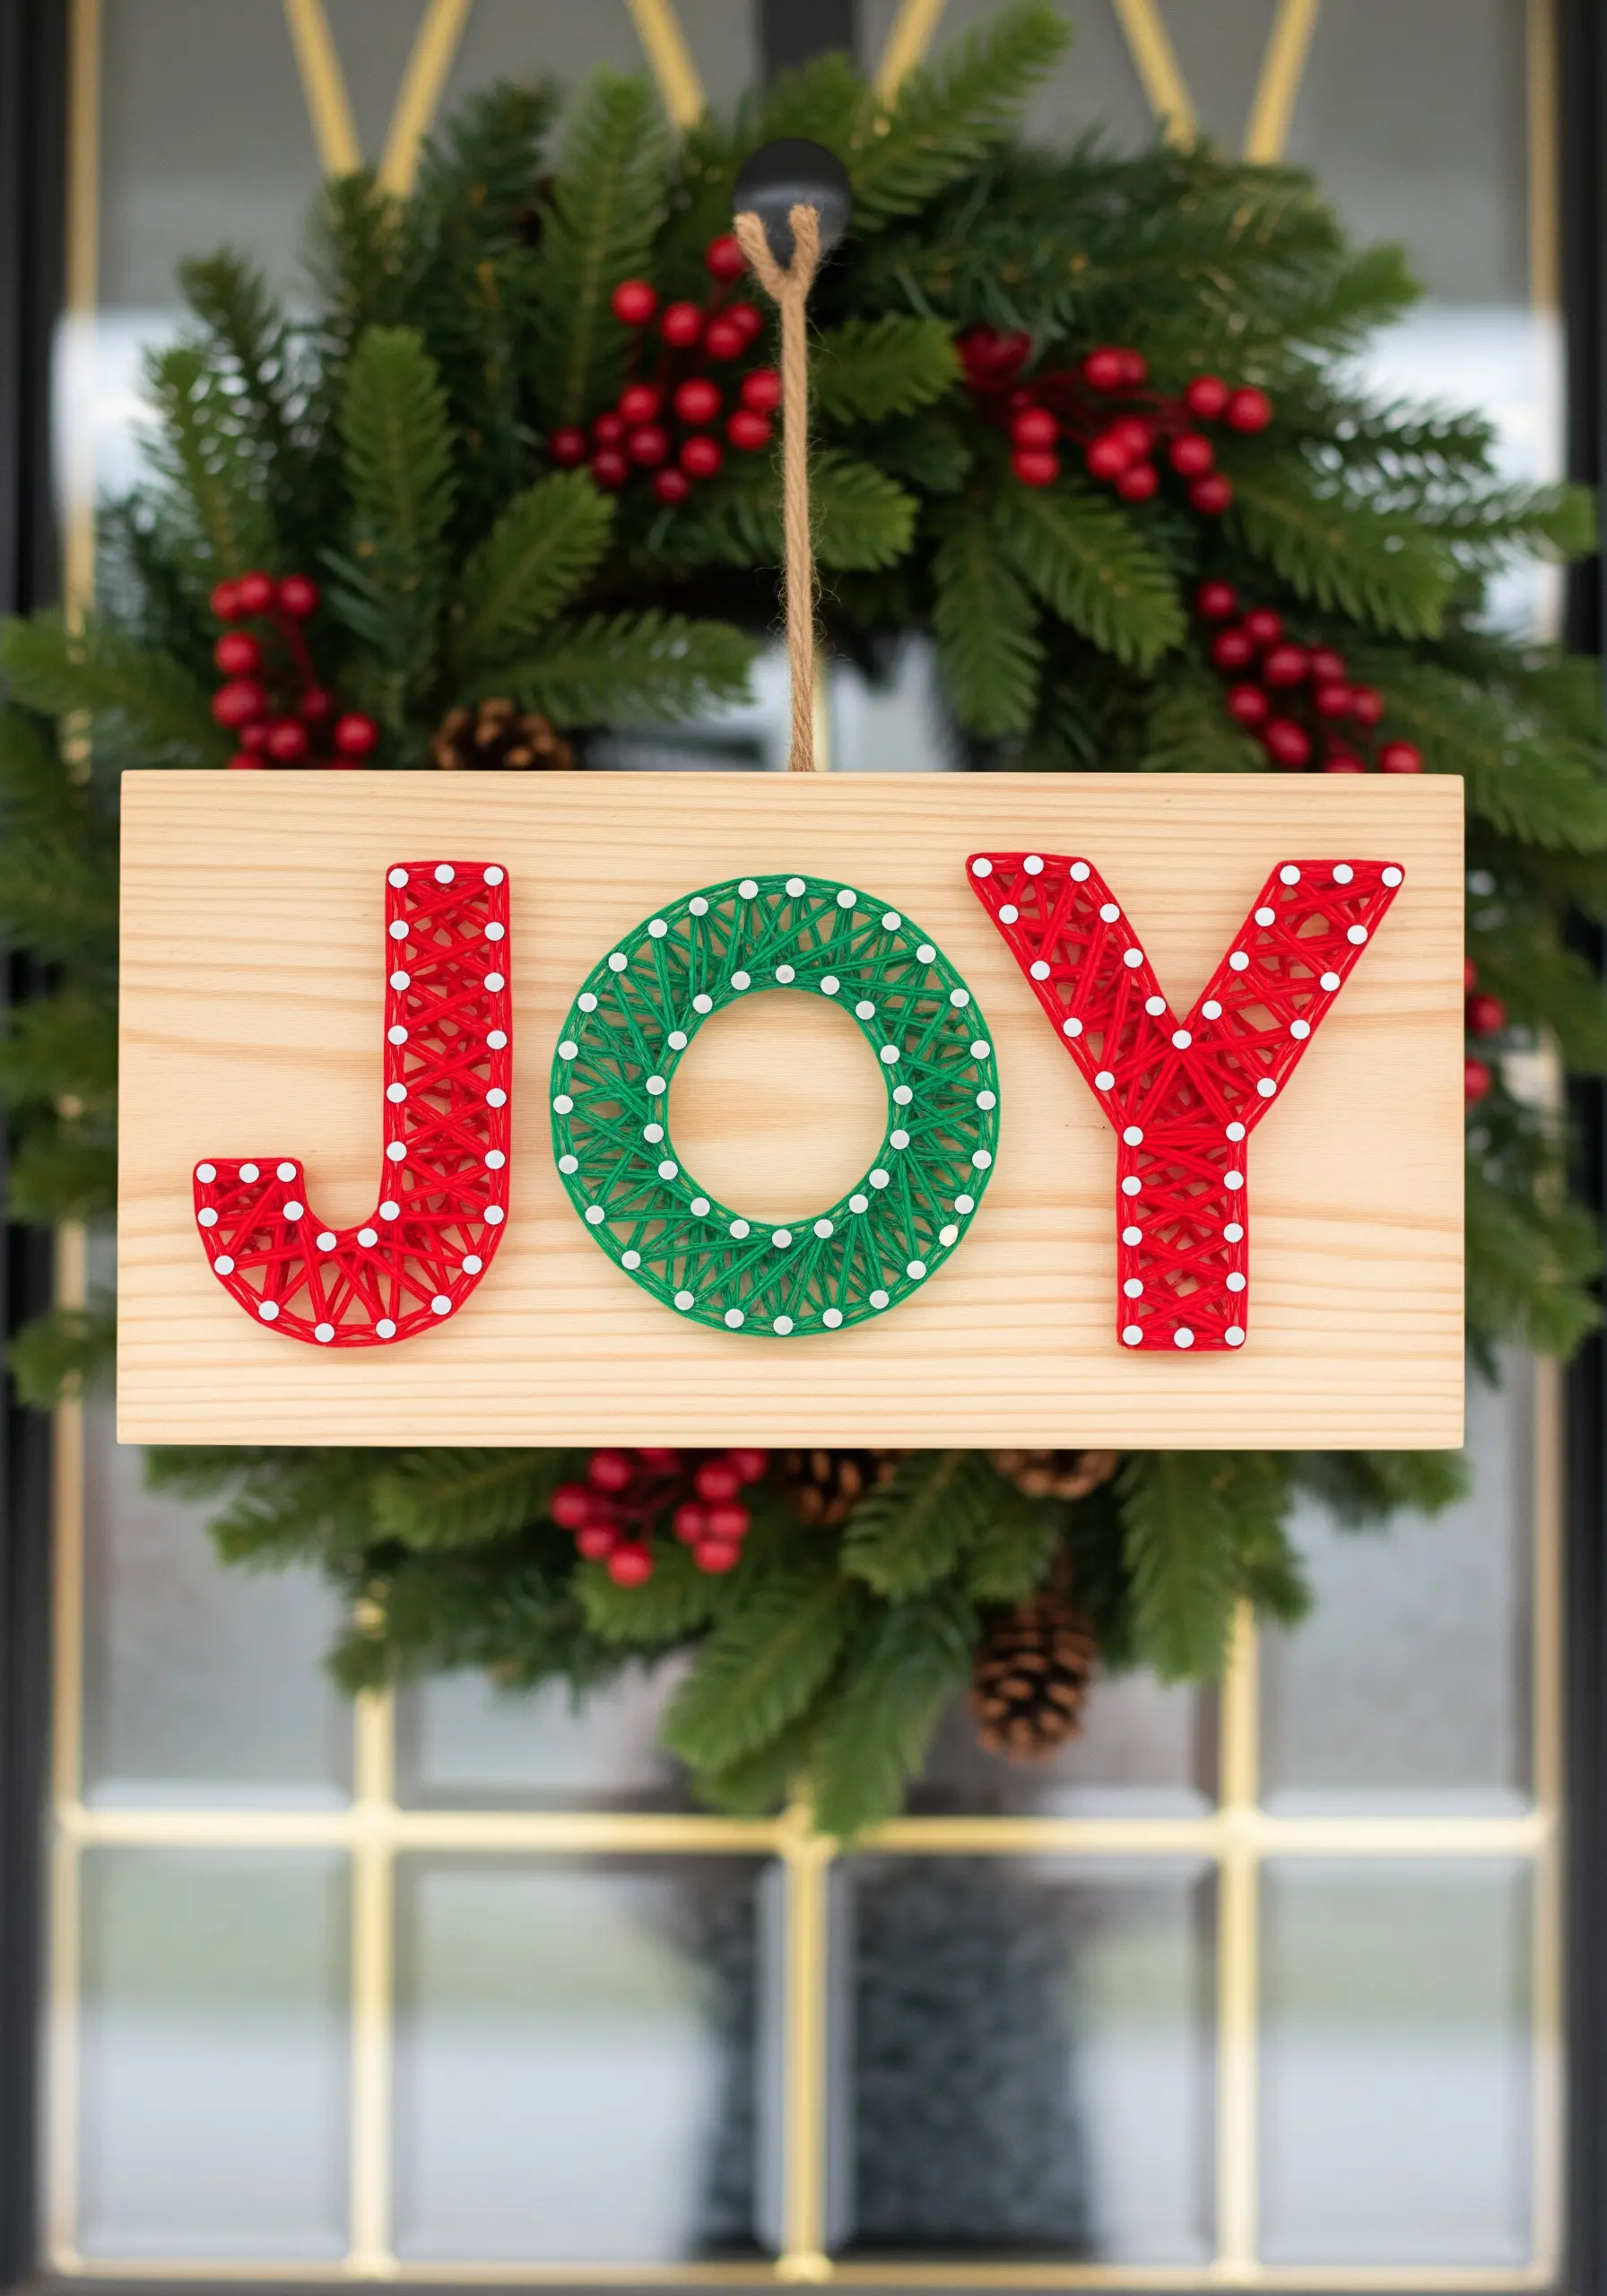
String art for typography requires clean lines and even density to ensure readability.
For curved letters like ‘O’, place pins closely together to create a smooth, rounded shape. For straight letters like ‘J’ and ‘Y’, focus on sharp corners.
Use a different color for each letter to create a joyful, festive message that is easy to read from a distance.
A simple wood plank provides a neutral, unobtrusive background that lets the colorful letters take center stage.
20. Intricate Details on a Complex Figure
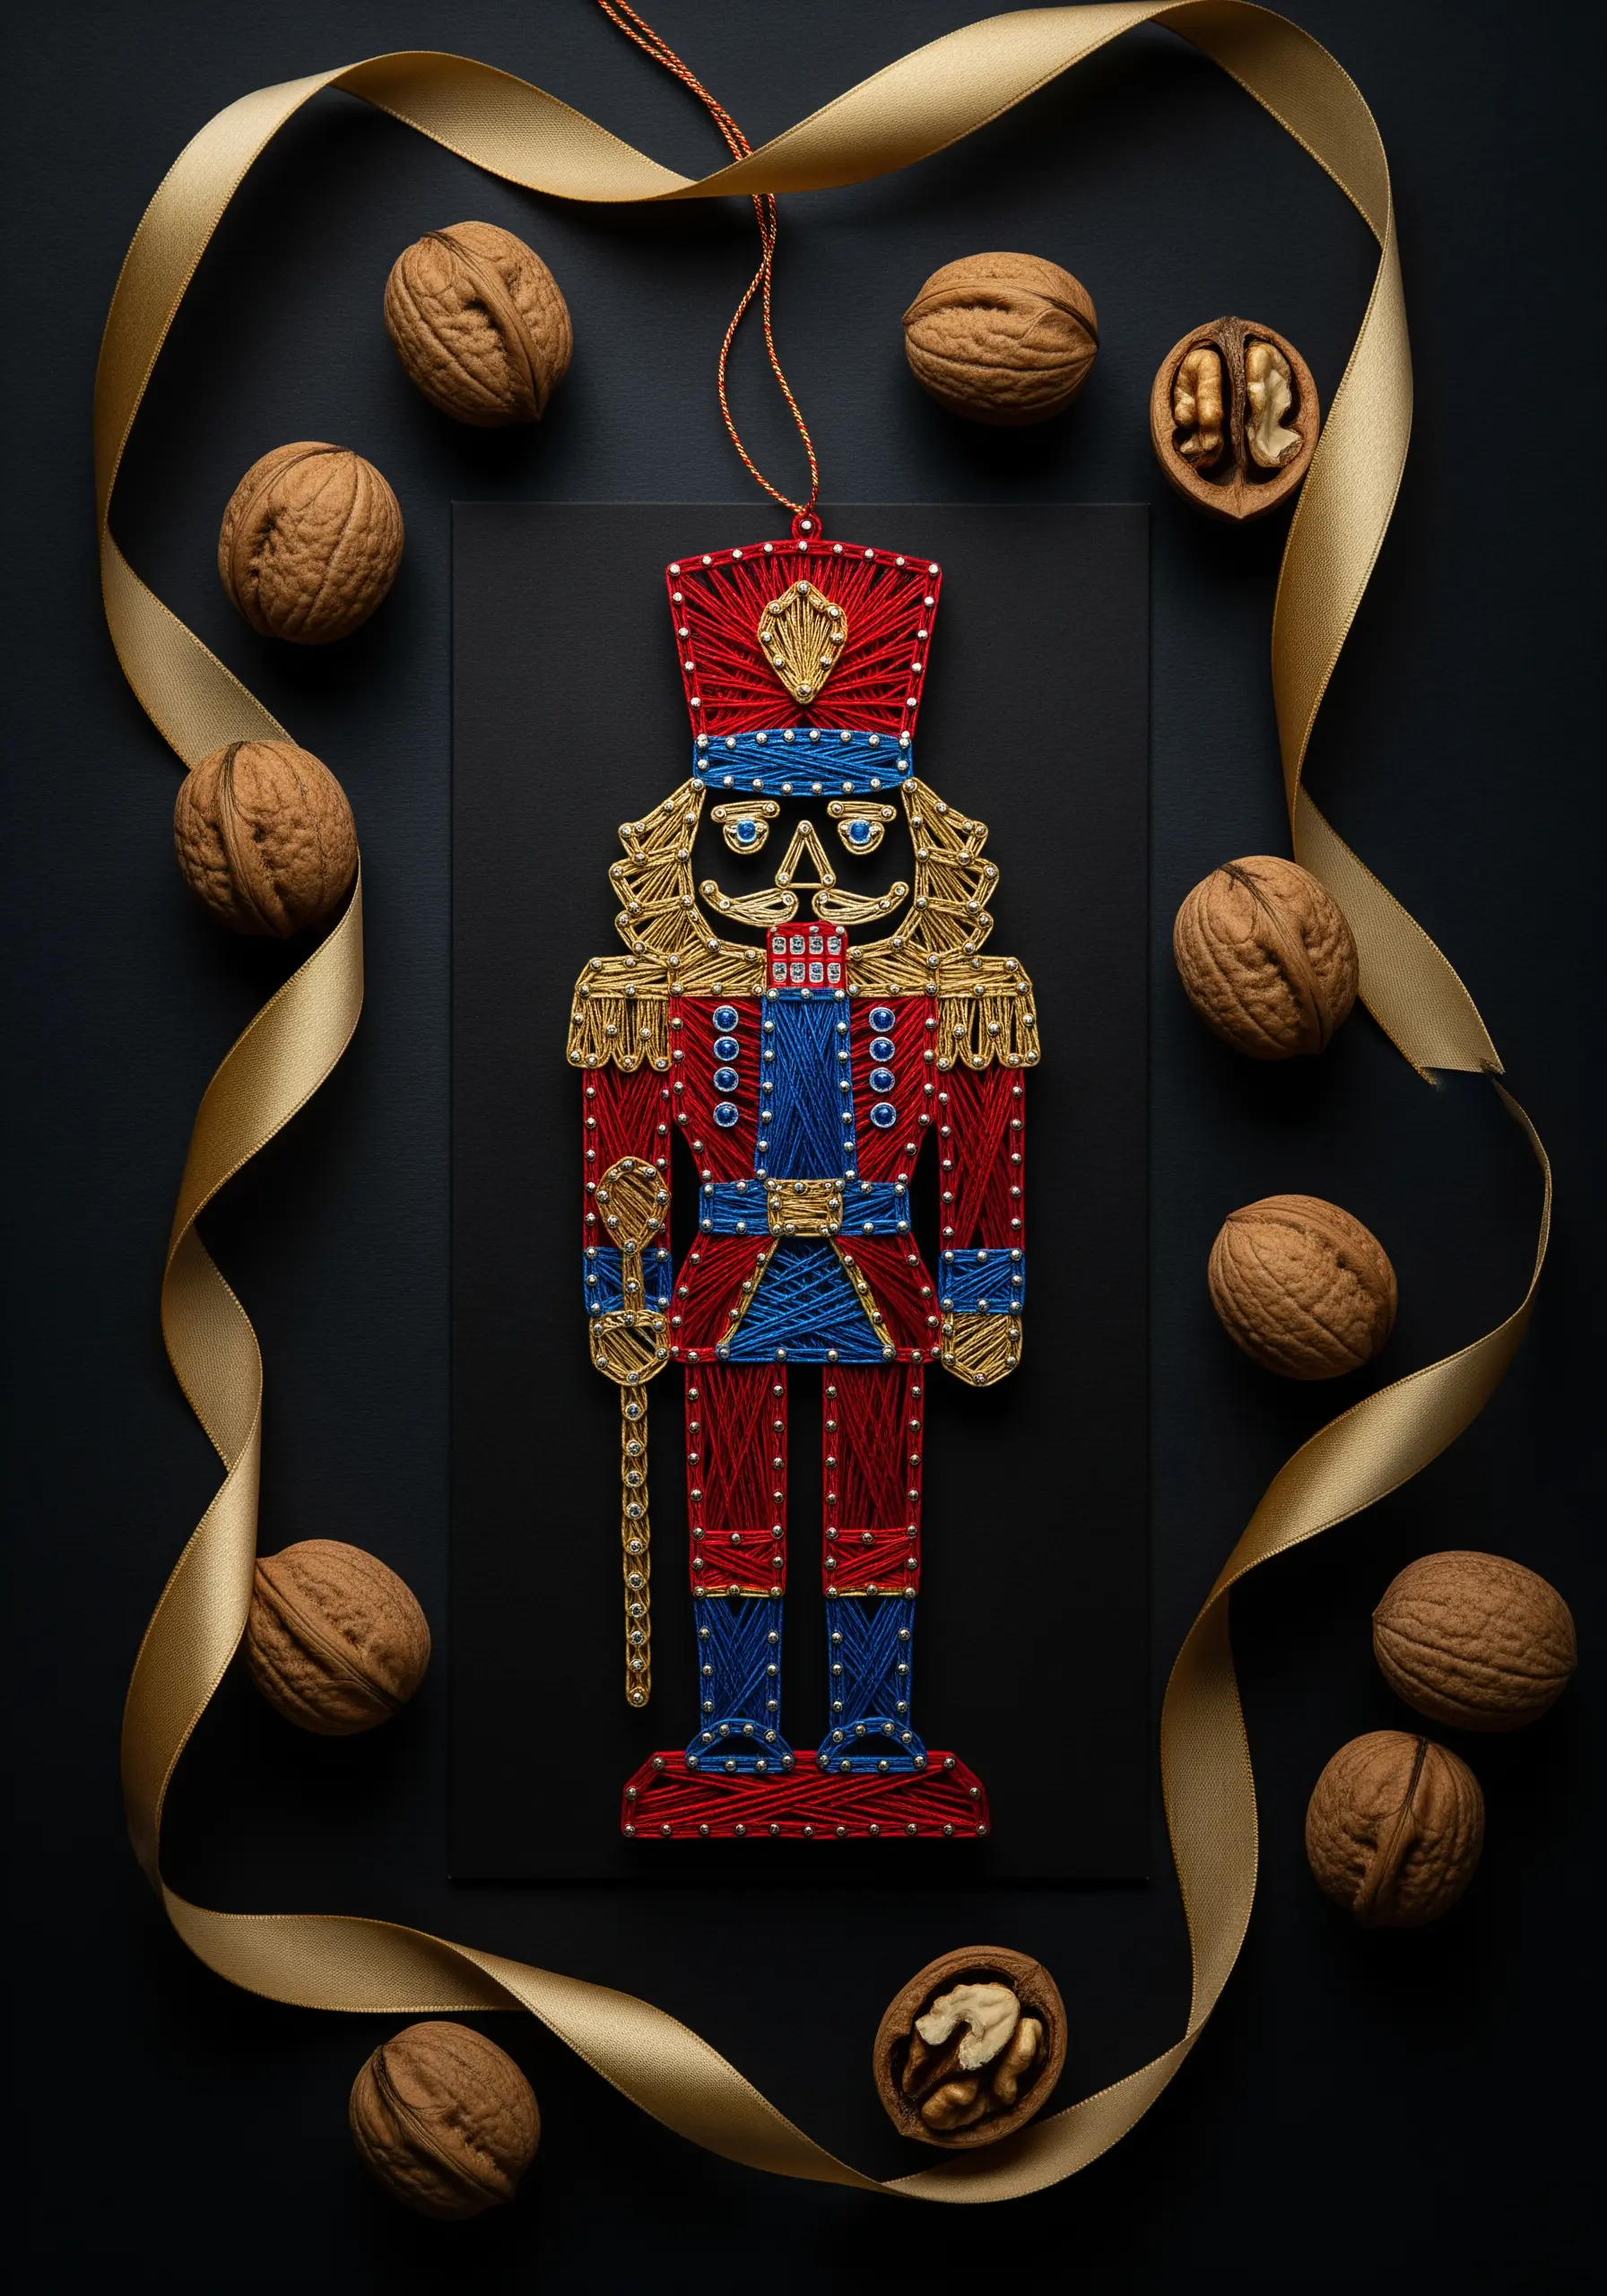
Tackle a detailed design like a nutcracker by breaking it down into small, manageable color sections.
Focus on one area at a time—the red coat, the blue trousers, the gold hat—filling each one completely before moving to the next.
Use a thinner, finer thread, like a metallic embroidery floss, to achieve crisp details in small areas like the face and hands.
Outlining key features with a contrasting color, like the gold on the coat, helps define the intricate parts of the uniform.
21. A Celestial Scene with Sequins and Thread
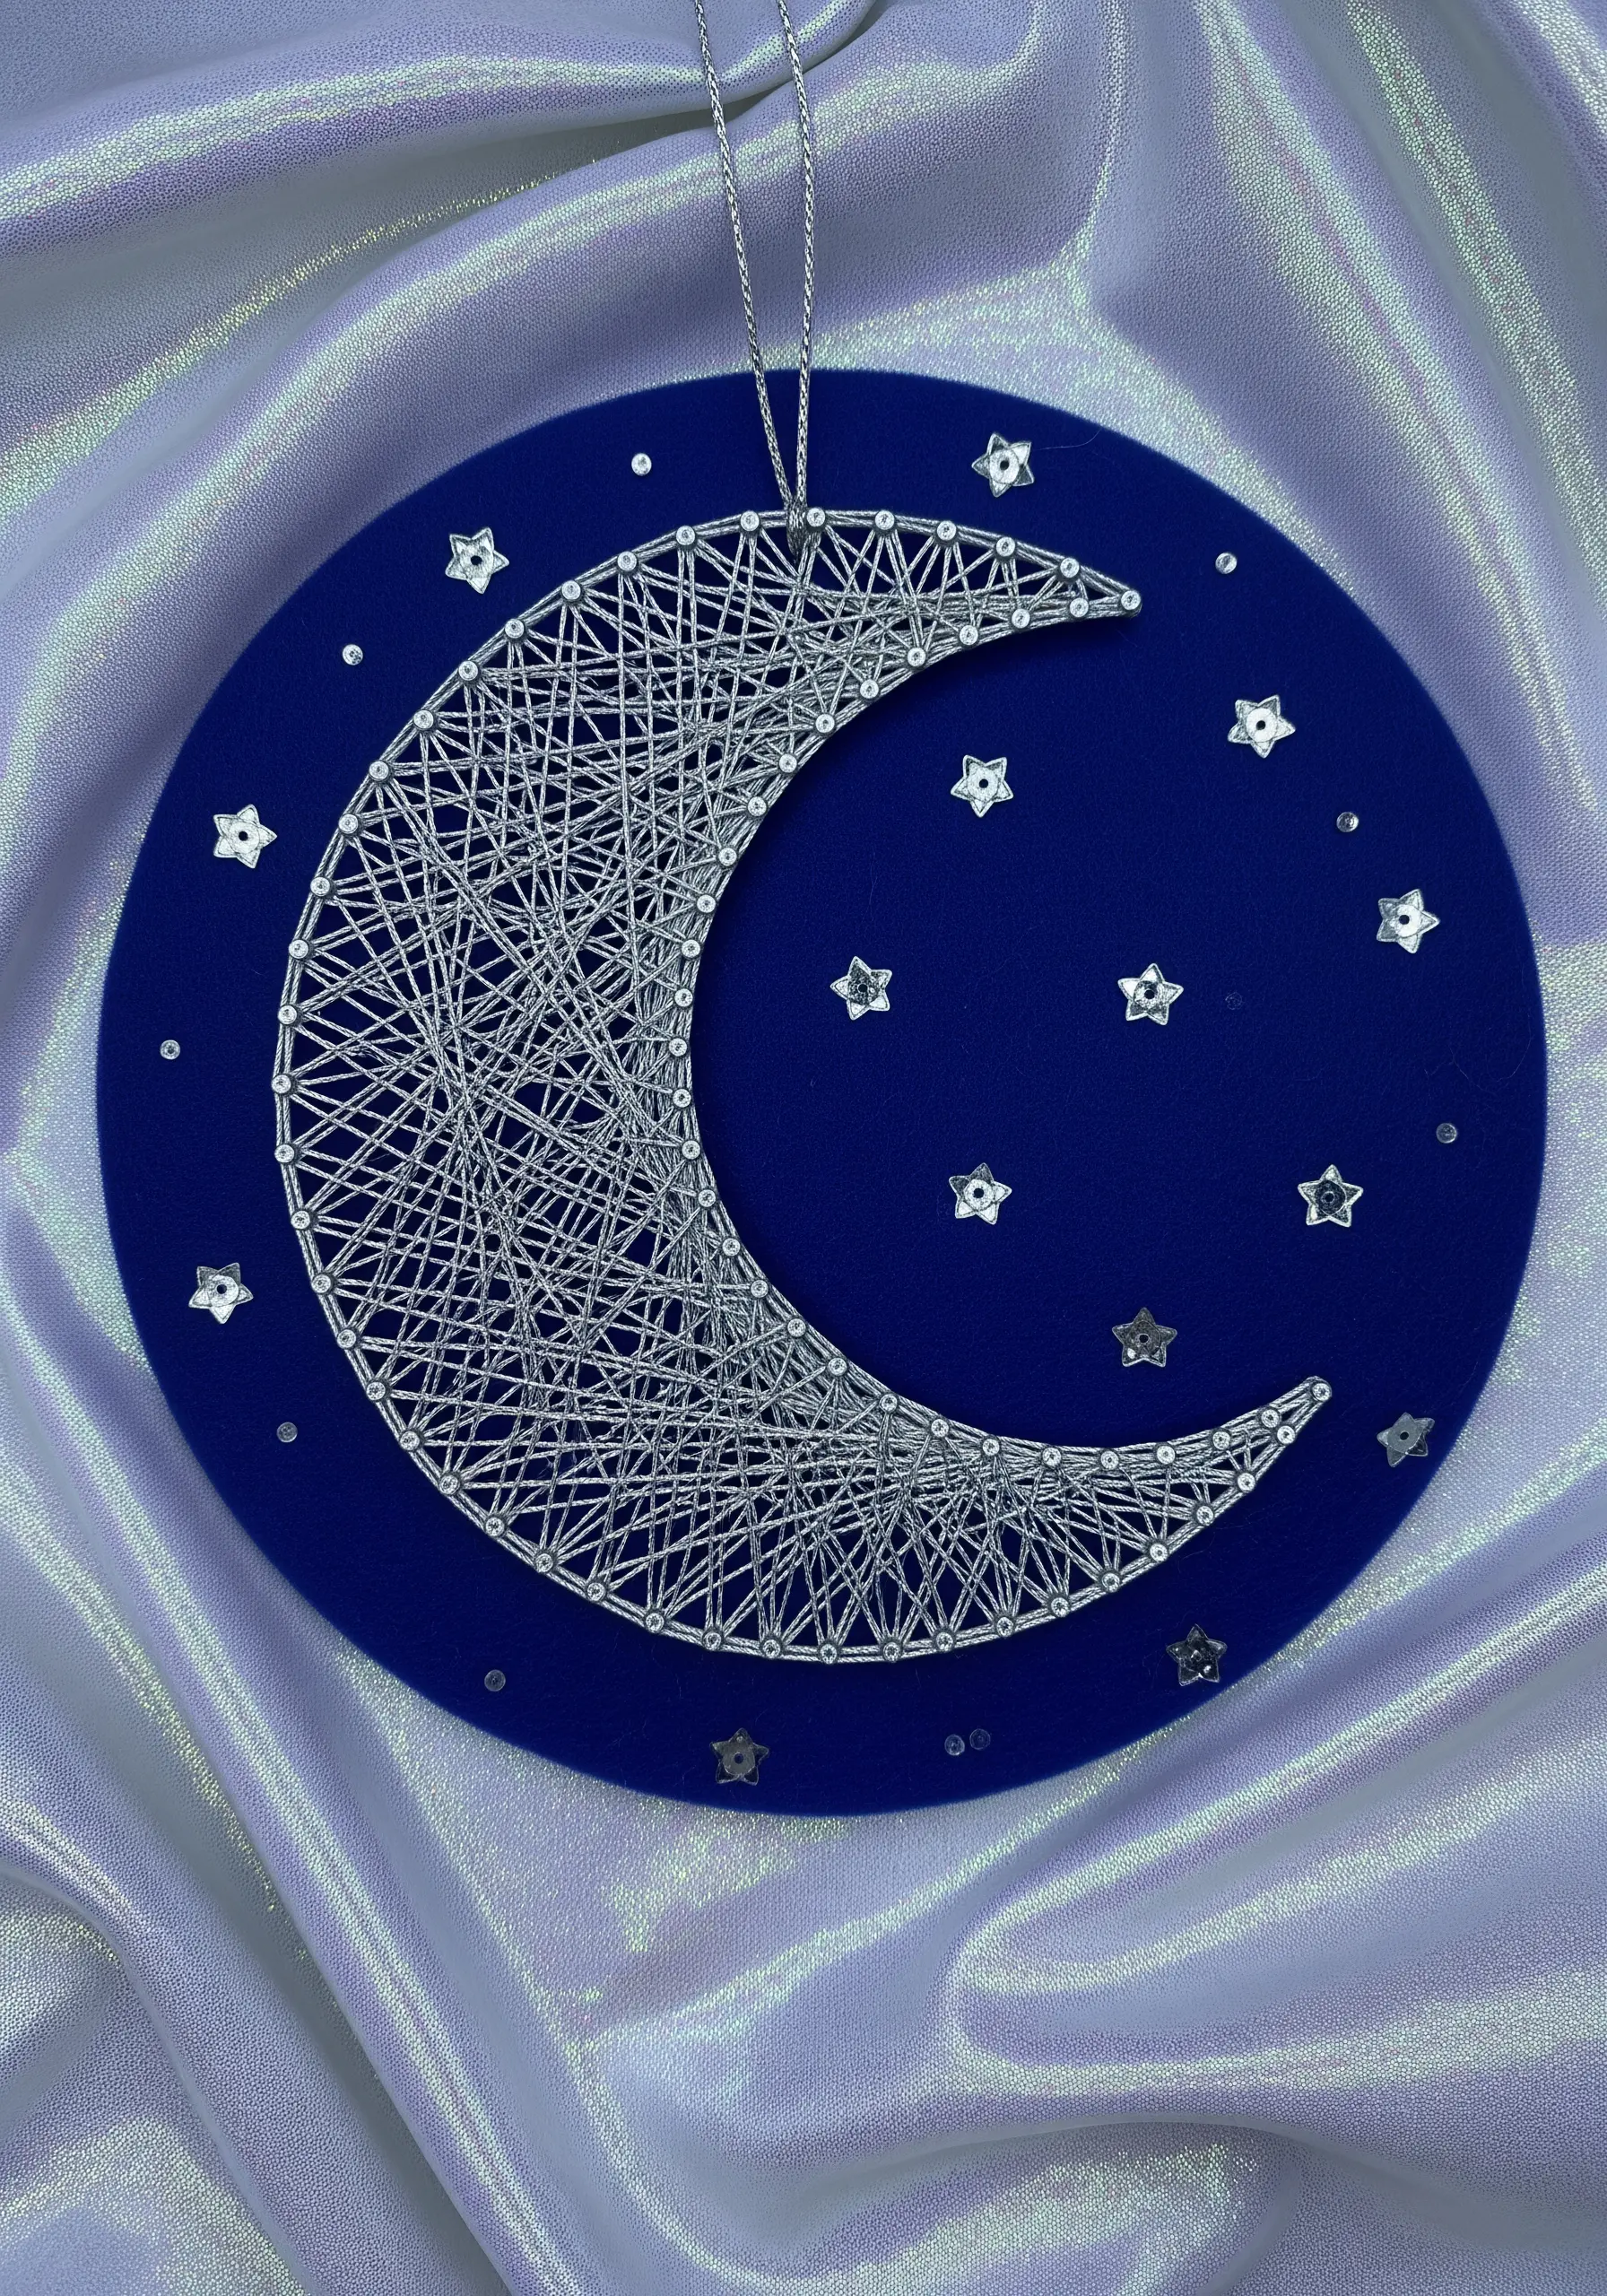
Create a shimmering night sky by combining metallic silver thread with scattered star-shaped sequins.
Fill the crescent moon shape with a dense wrap of silver thread to make it the focal point of your design.
Before you start wrapping, glue a few sequins to the dark blue felt background to create a starry field that has depth.
This mixed-media approach adds a touch of magic to a simple celestial theme, making it feel dynamic and dreamy.
22. Using an Embroidery Hoop as a Frame
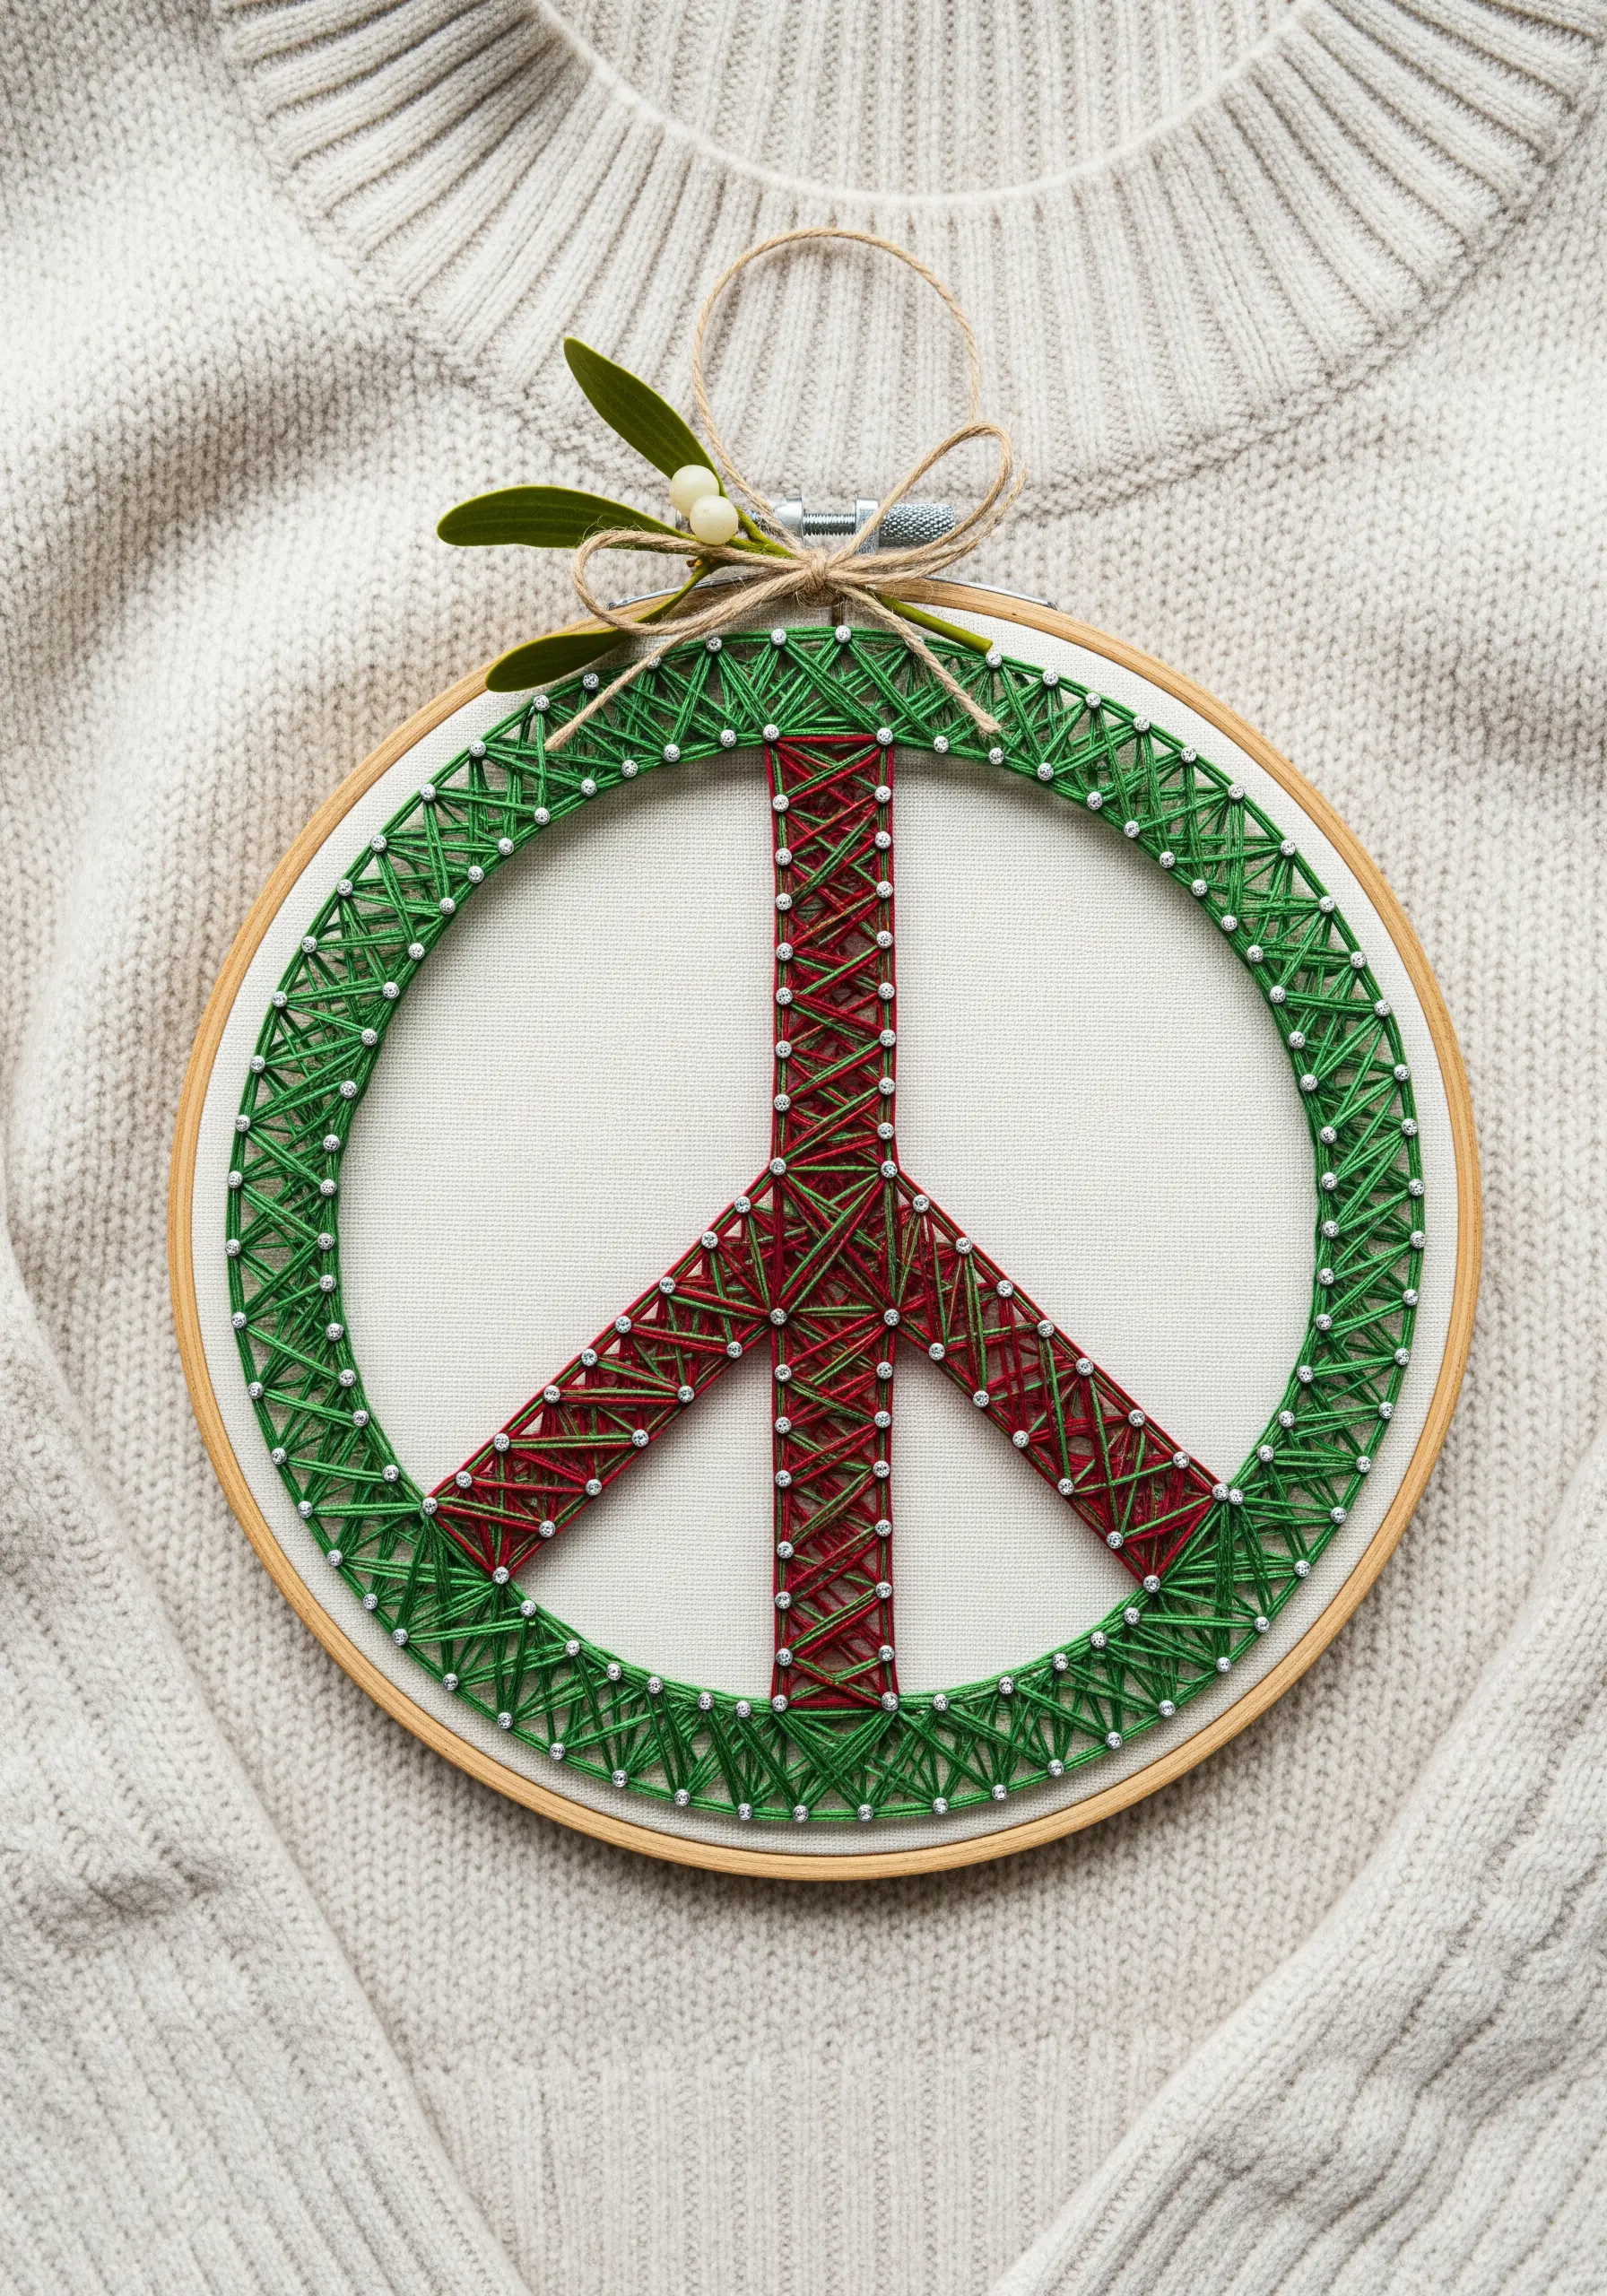
Bridge the gap between your crafts by using a standard embroidery hoop as the frame for your string art.
Instead of hammering pins into wood, stitch small beads securely onto the fabric where your pins would normally go. These beads will act as your anchors.
This technique allows you to work on linen, cotton, or any of your favorite embroidery fabrics, opening up a world of new background possibilities.
The combination of soft fabric, taut threads, and a warm wood hoop creates a beautiful blend of textures.
23. Smooth Transitions with a Rainbow Gradient
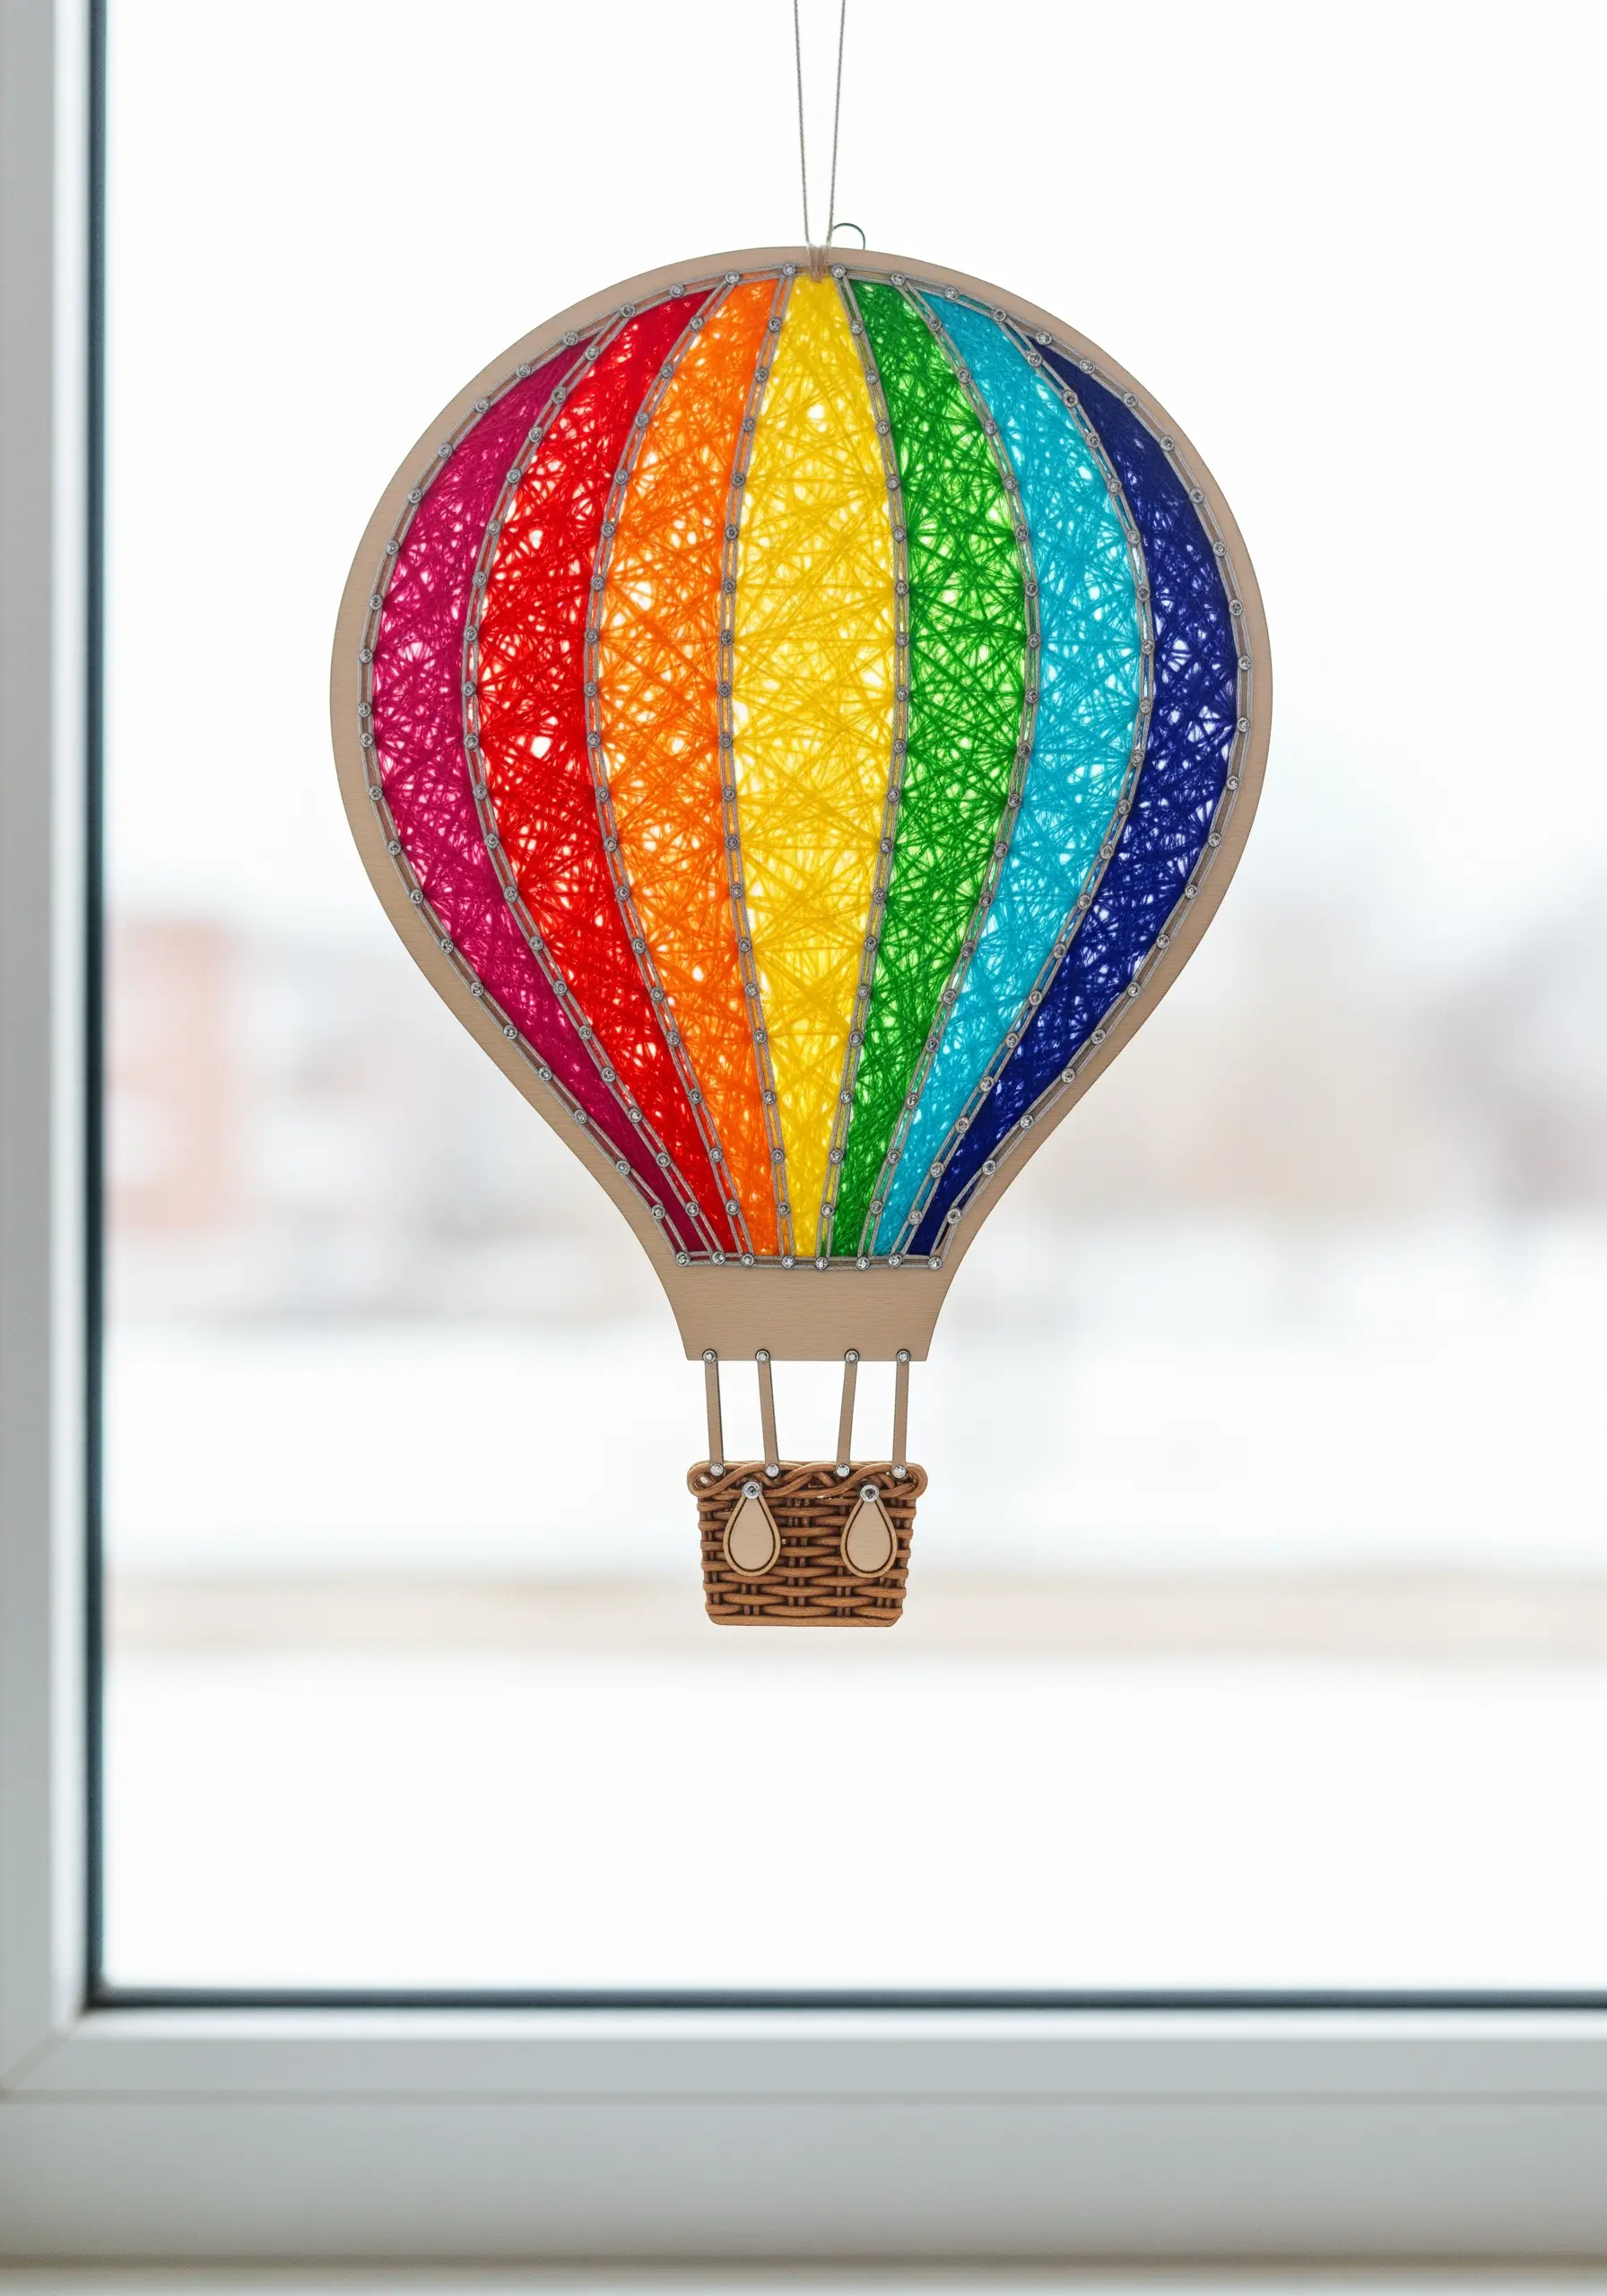
Create a seamless rainbow effect by dividing your shape into vertical segments for each color.
Wrap each color within its designated section, allowing it to slightly overlap with the next color to soften the transition.
Rainbow gradients work best when you use colors that are adjacent on the color wheel, like moving from yellow to green to blue.
The vertical wrapping pattern enhances the feeling of height and buoyancy in a hot air balloon design.
24. Elegant Monograms on a Velvet Background
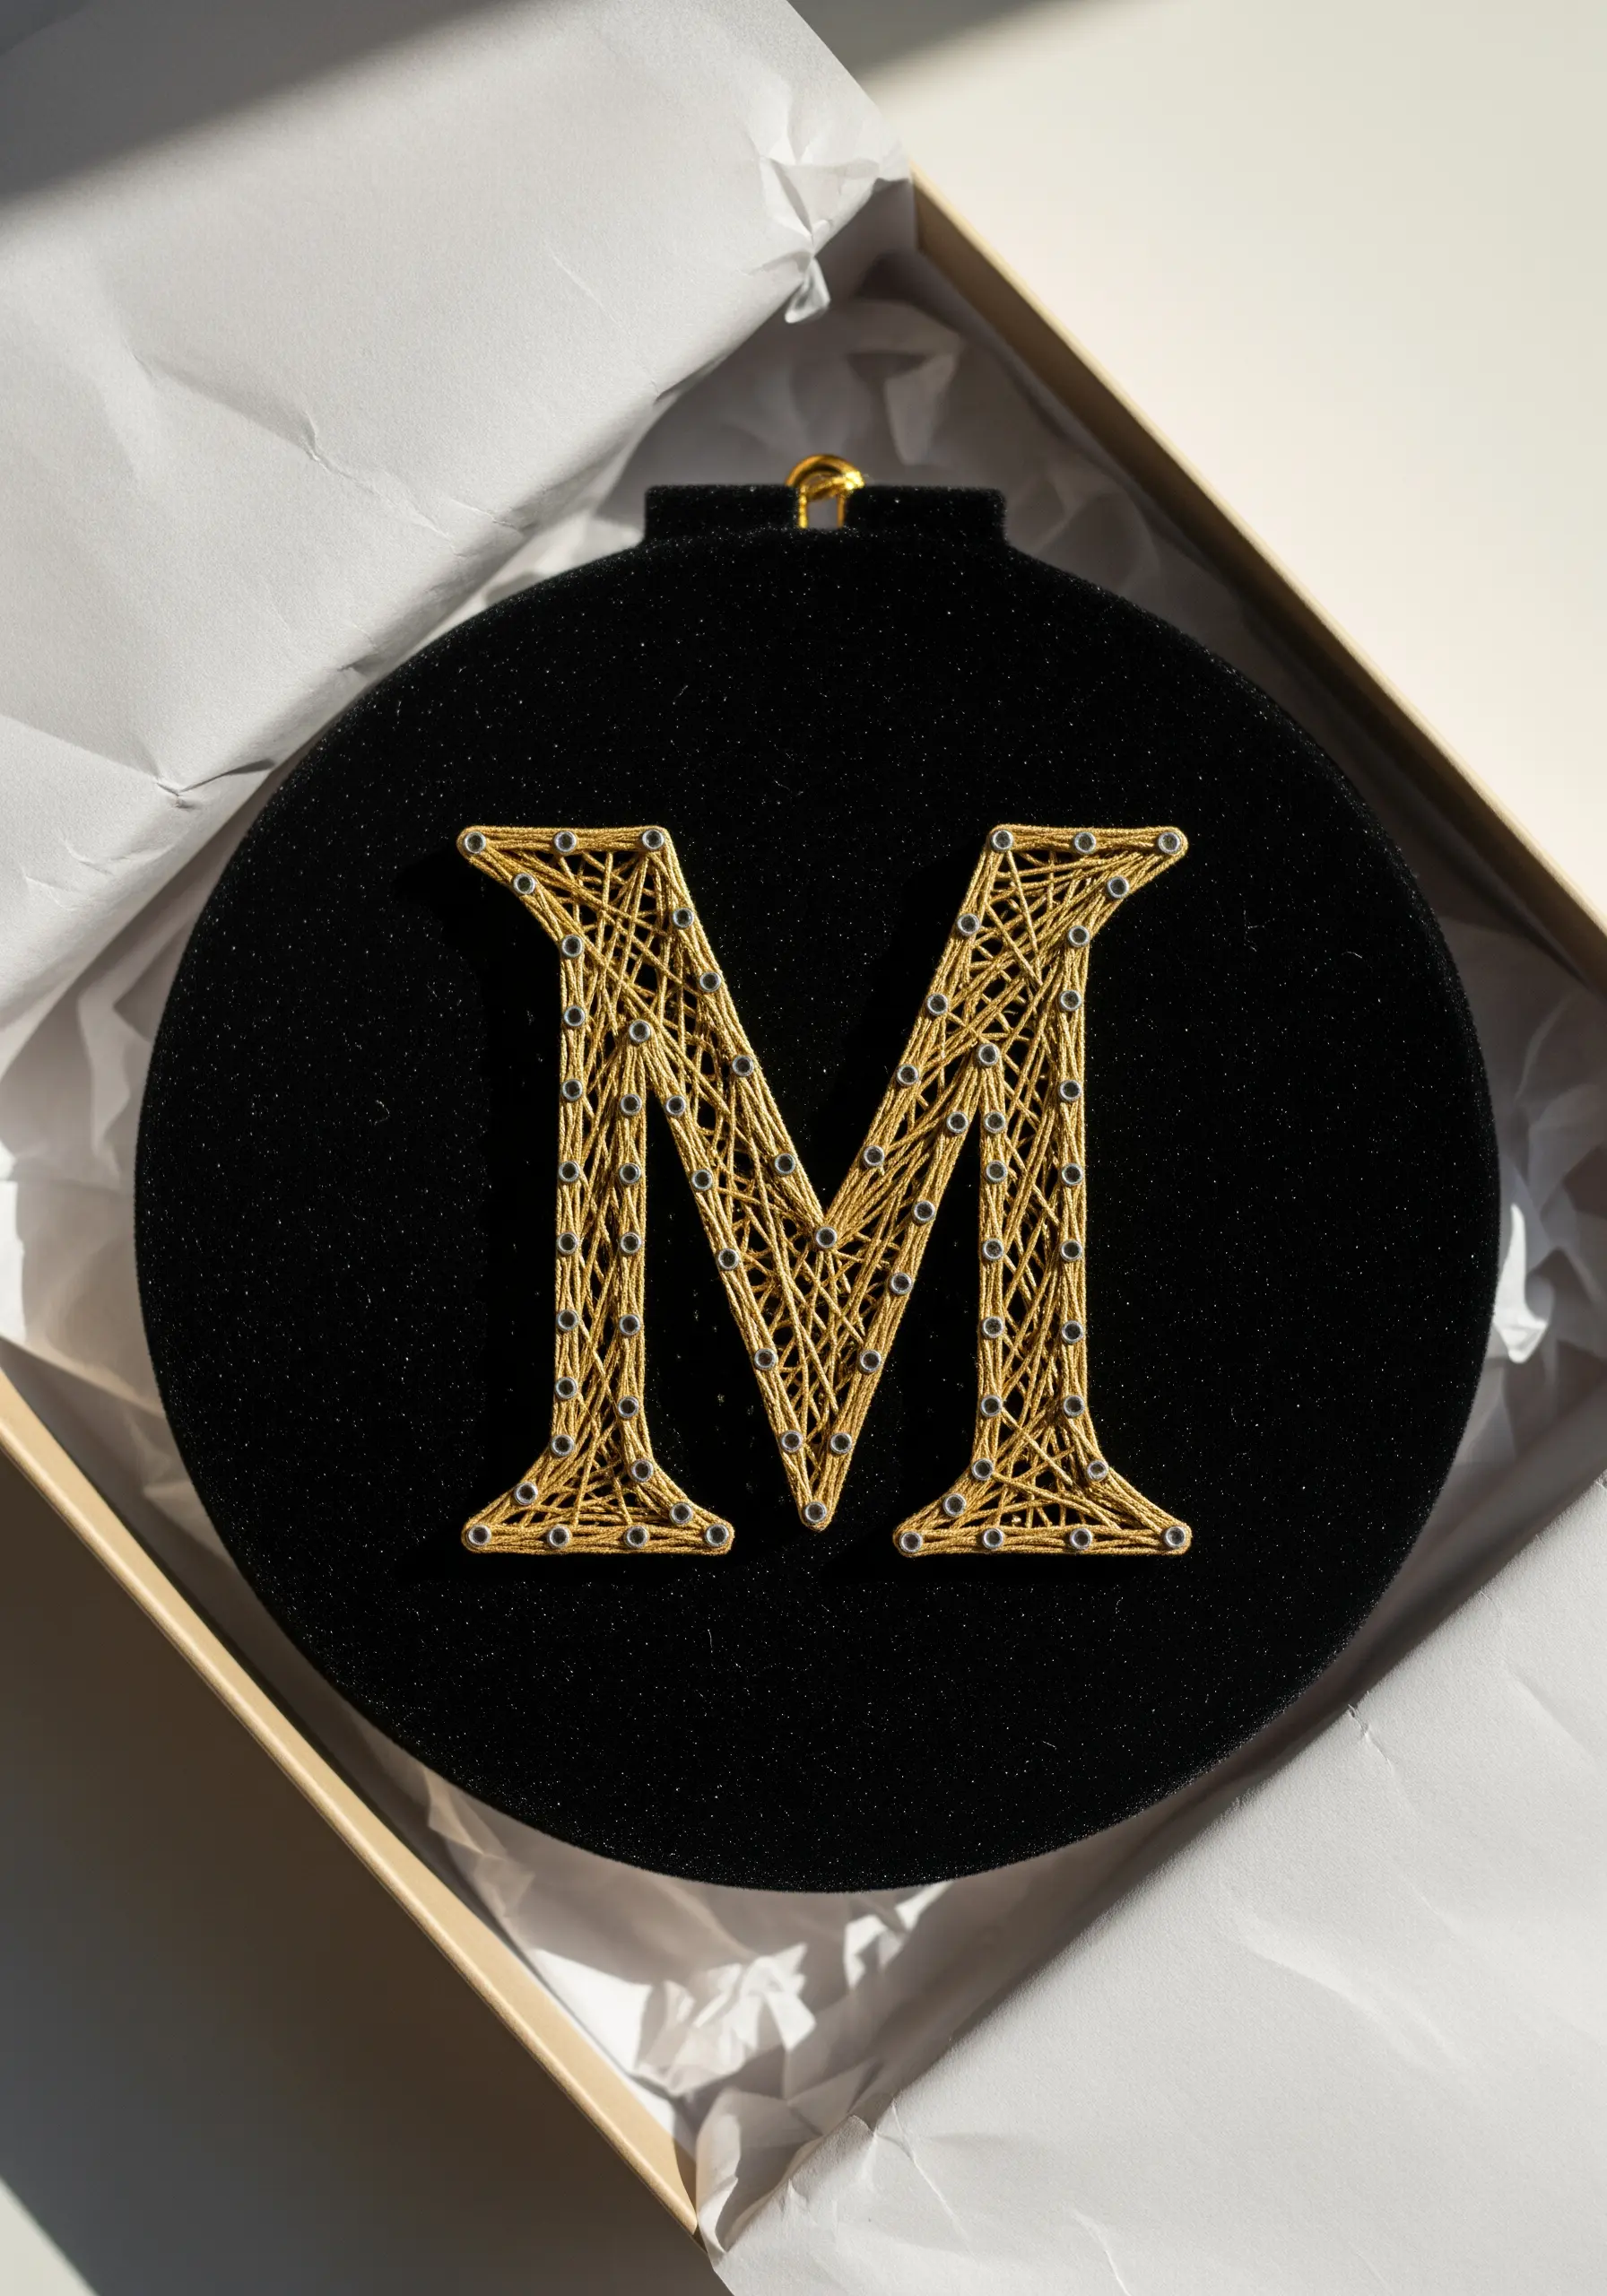
Elevate a simple monogram by using a plush, dark fabric like velvet for your background.
The deep, light-absorbing texture of the velvet makes a high-sheen metallic thread, like this gold, appear incredibly luminous.
This combination of textures creates a sense of quiet luxury, making it one of the most sophisticated personalized gifts you can create.
Ensure your lines are taut and precise to contrast with the softness of the fabric.
25. Directional Wrapping to Suggest Texture
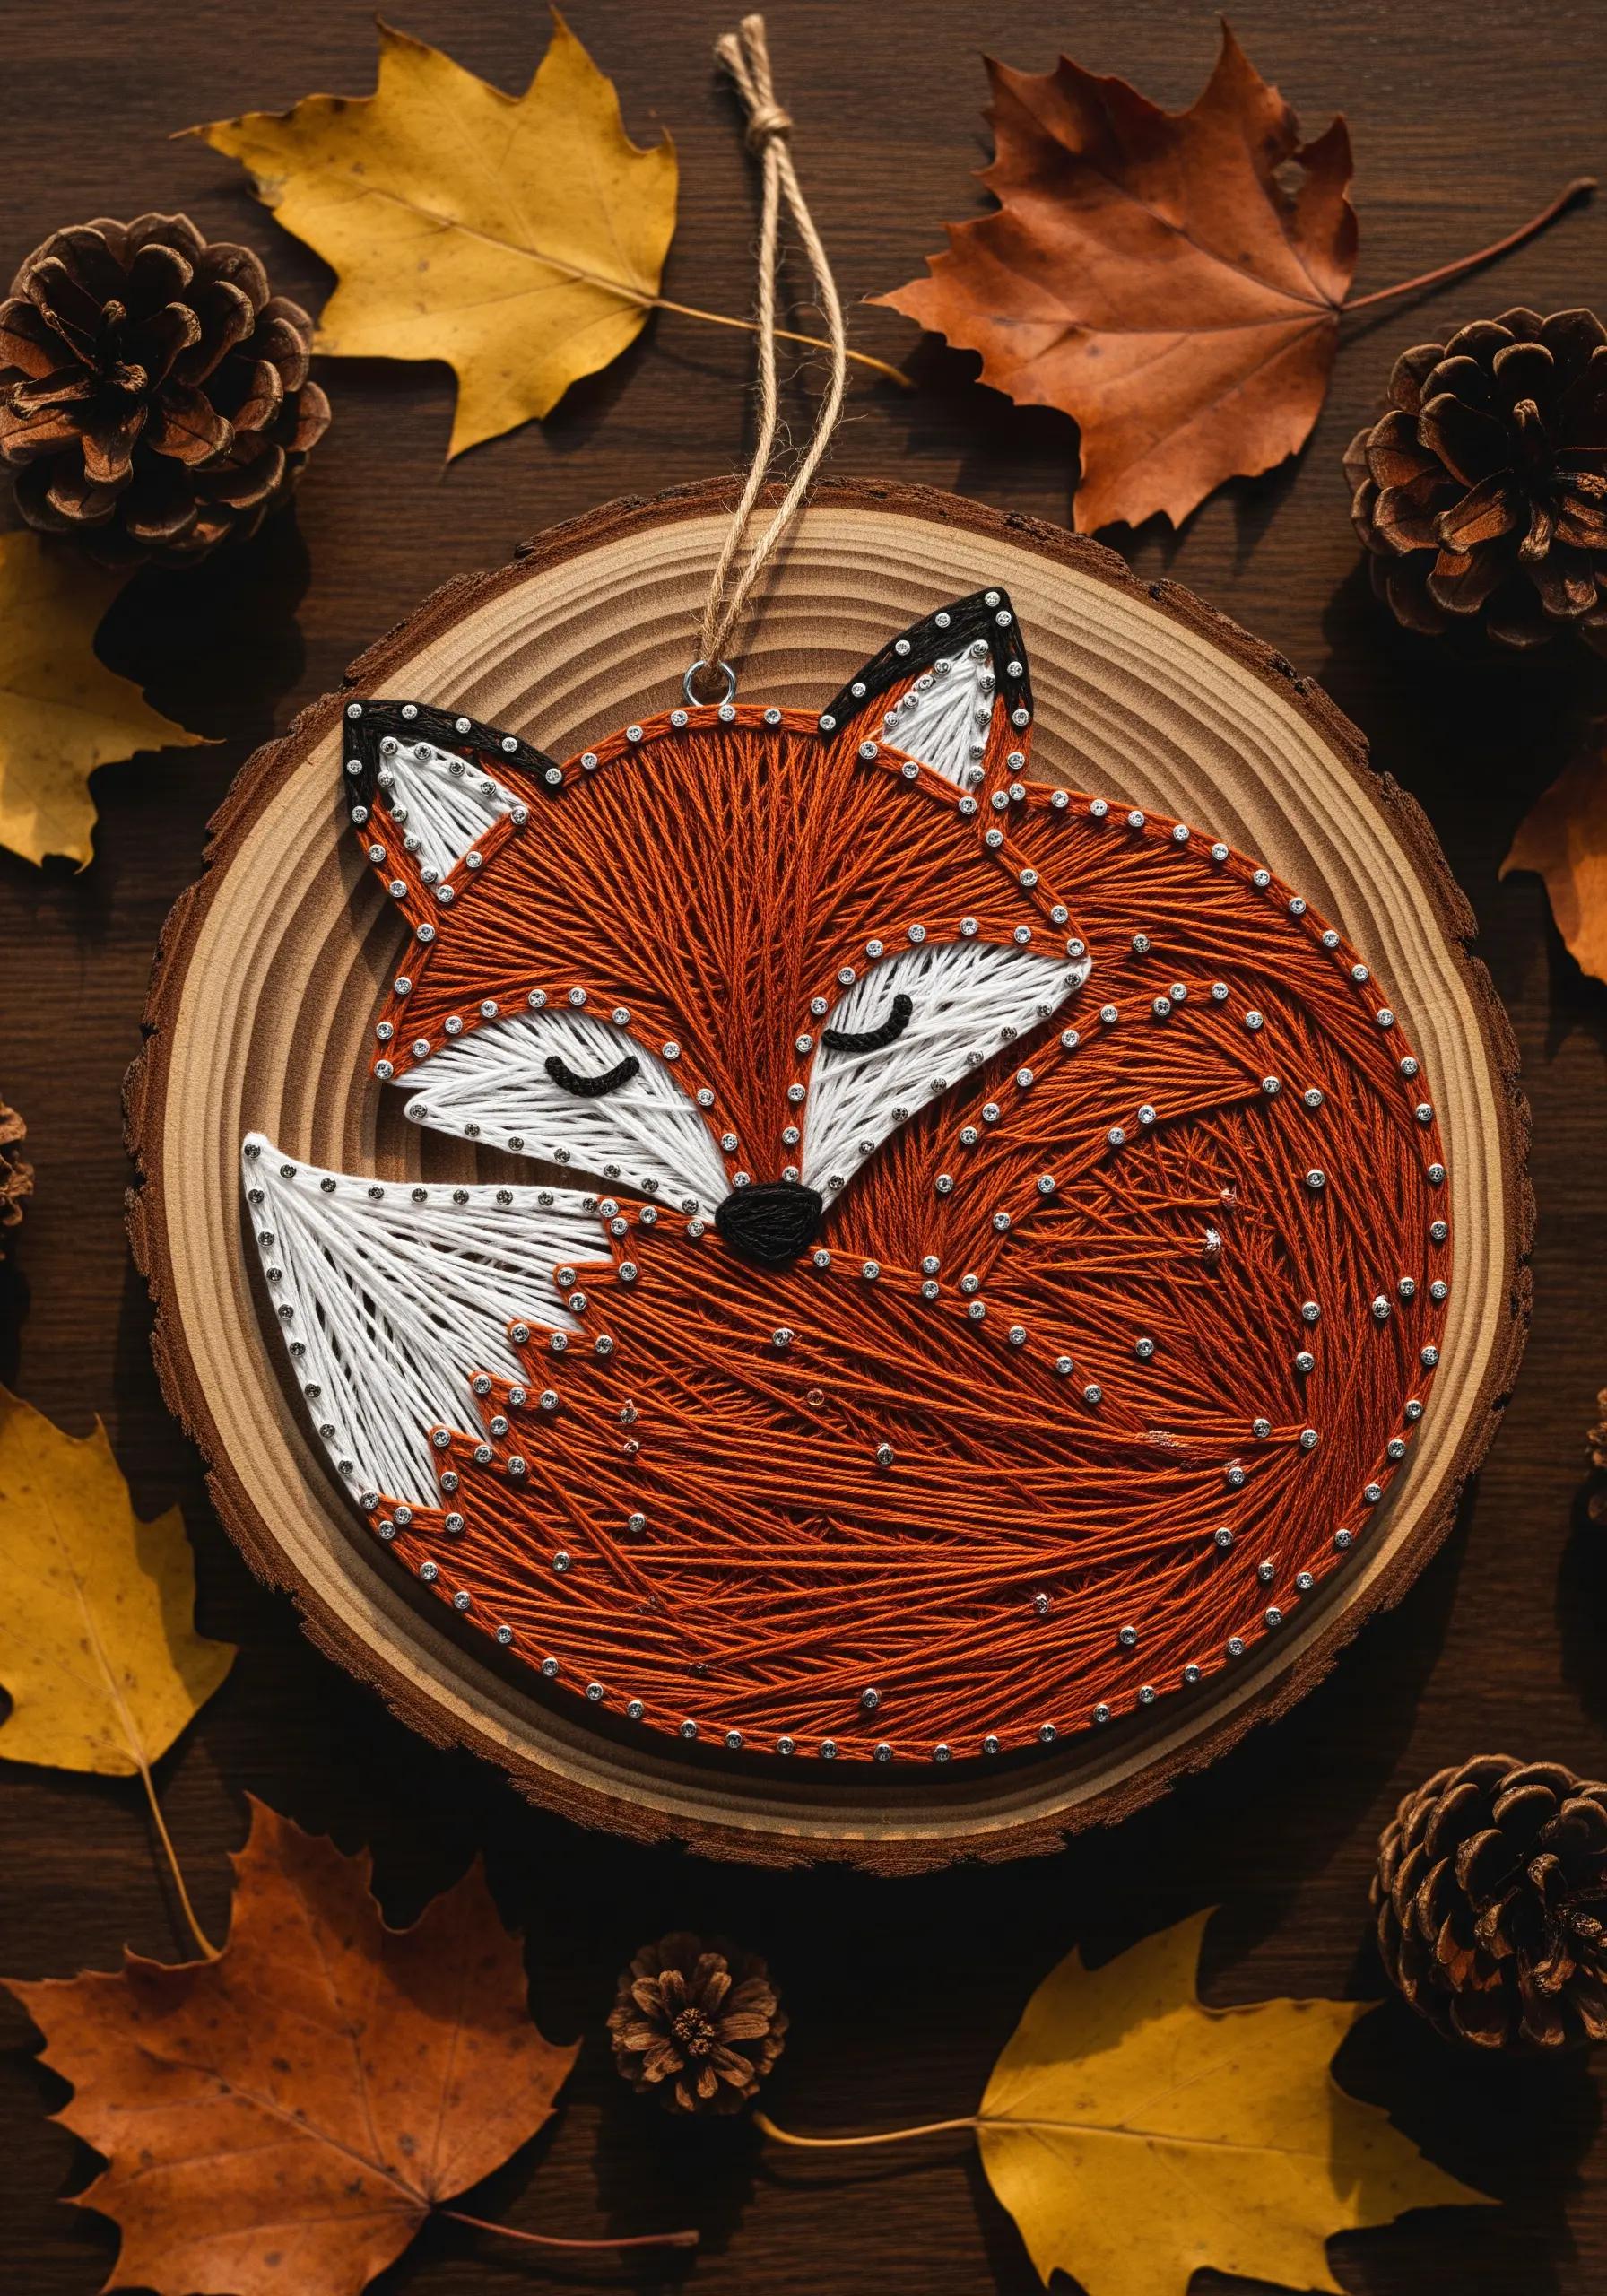
Create the impression of fur on an animal motif by being intentional with the direction of your thread.
Wrap the thread to follow the curves of the fox’s body, creating swirling patterns that mimic the way fur grows.
Contrast the flowing lines on the body with straight, simple fills on the ears and tail to differentiate the textures.
Using a natural wood slice as a base connects the woodland creature to its habitat.
26. Abstract Filling for a Glimmering Bell
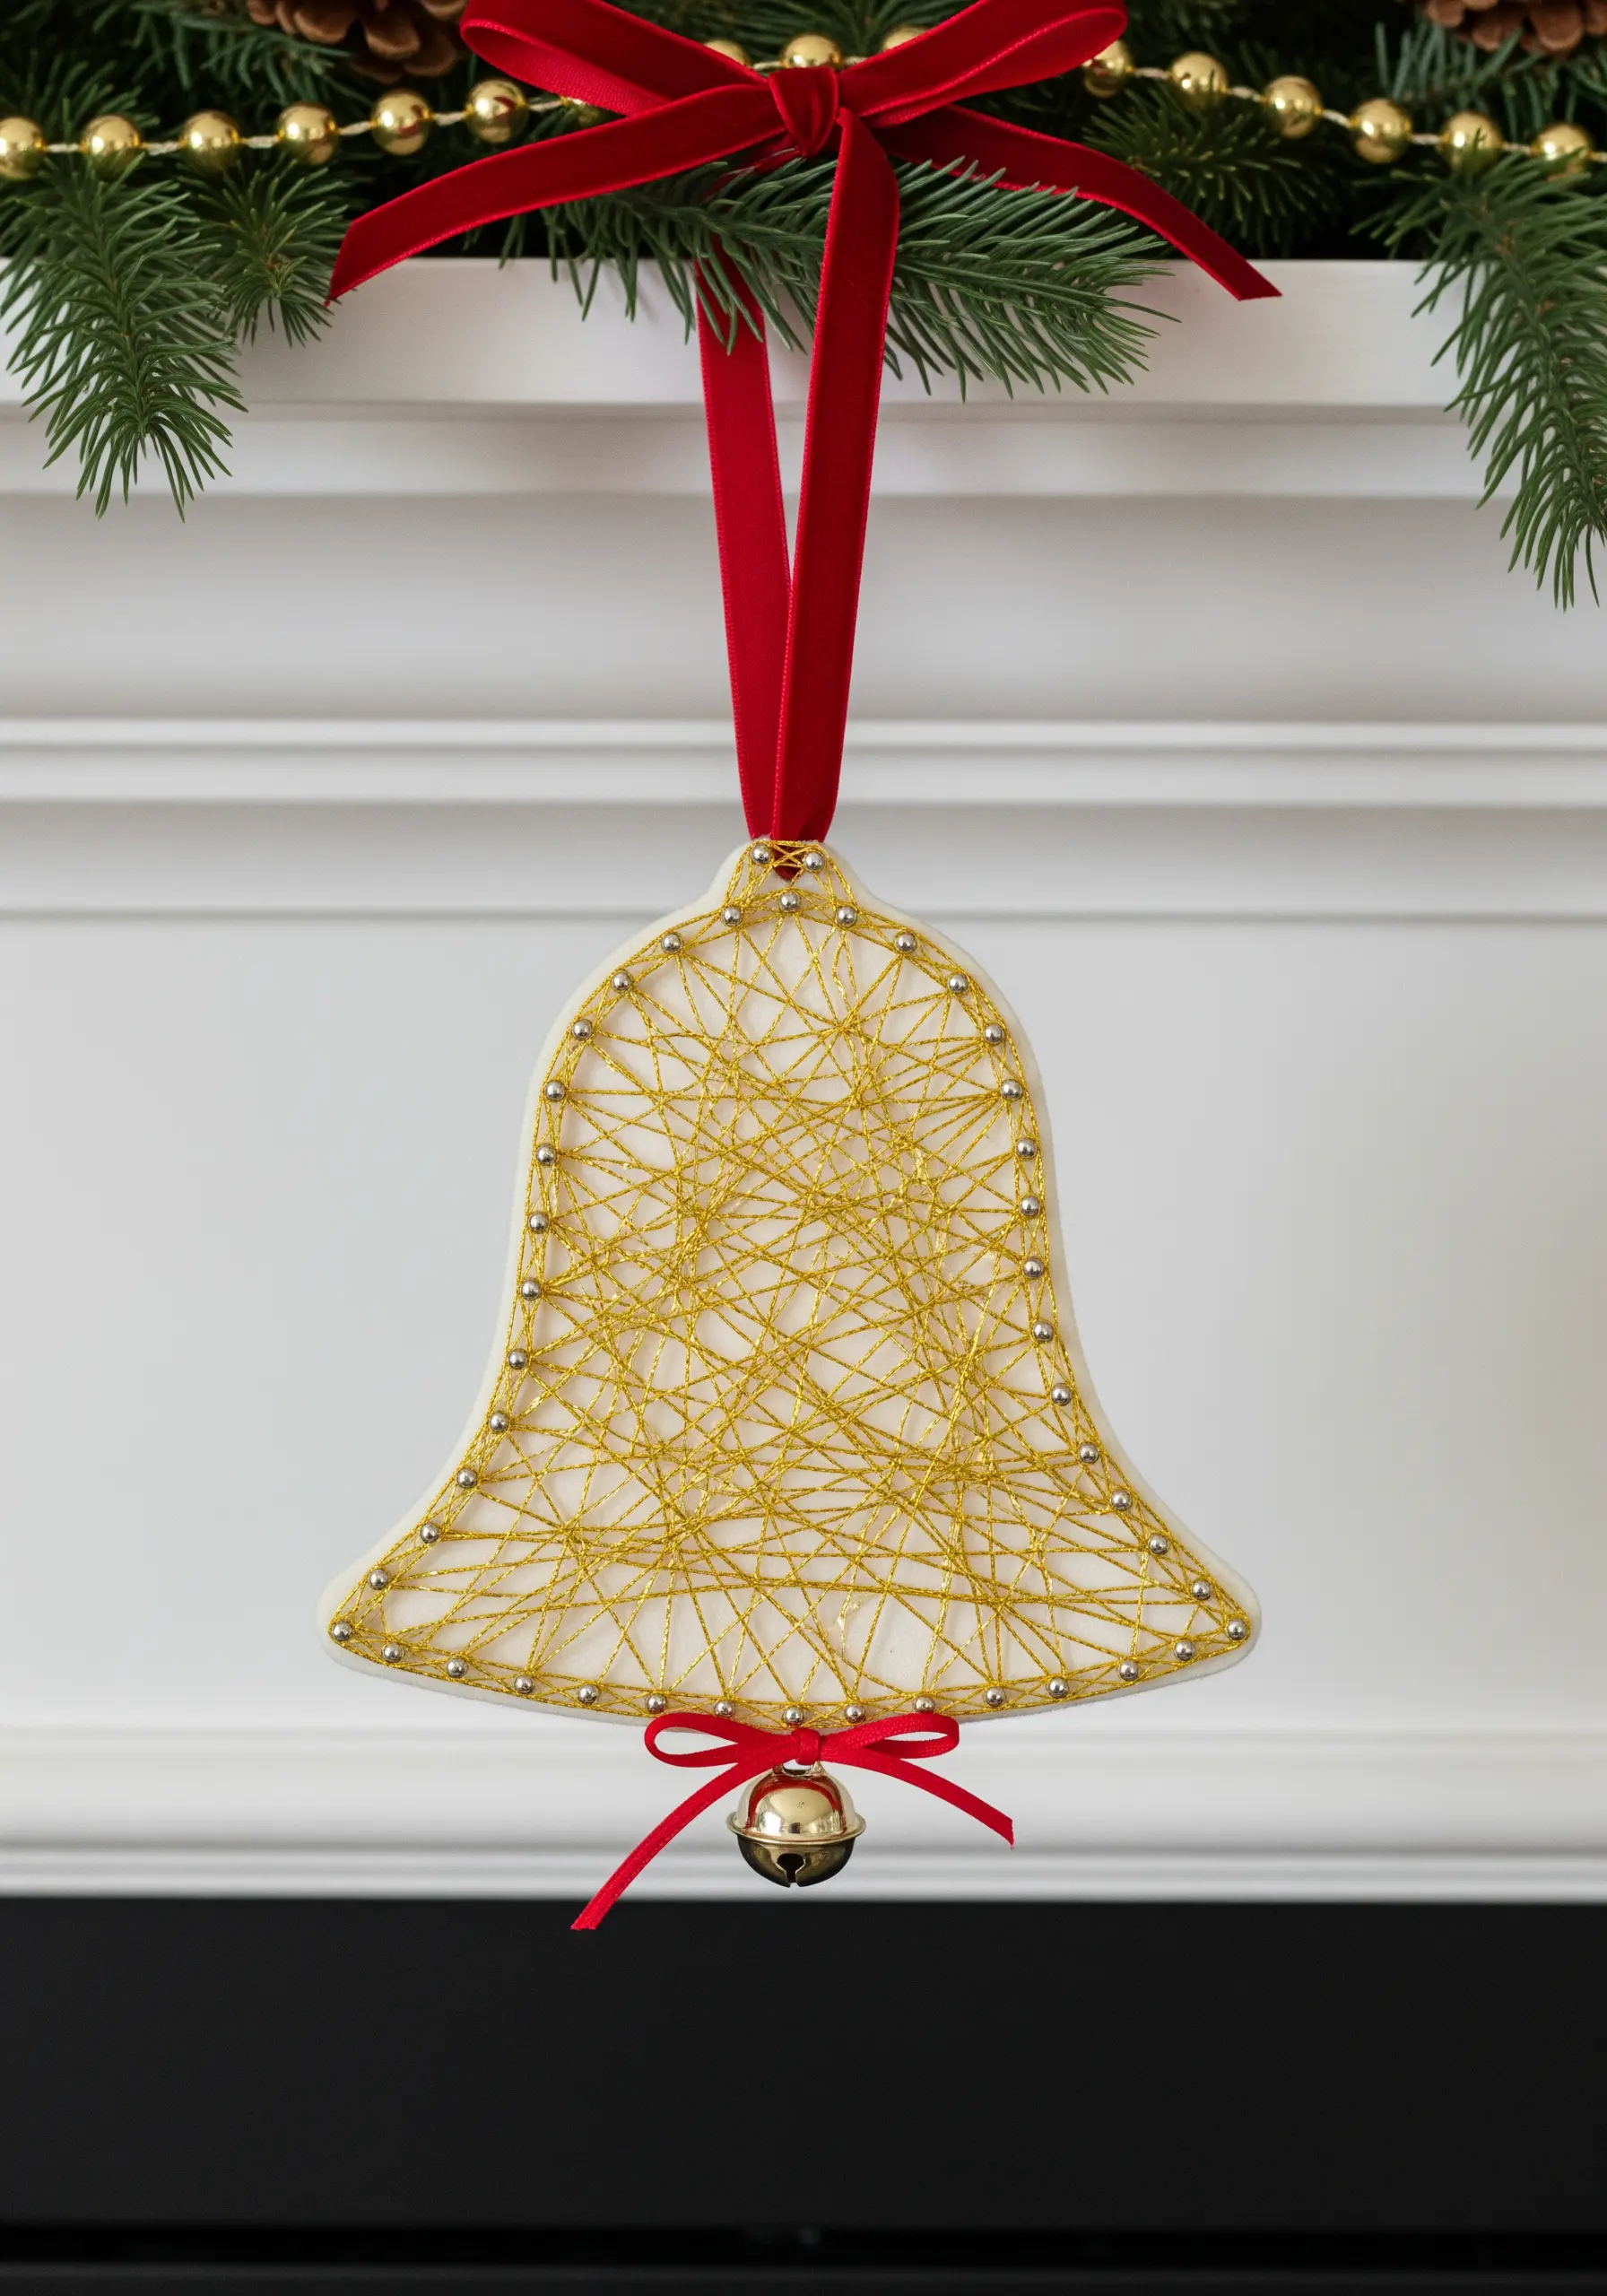
For a less structured, more artistic look, wrap your metallic thread in a completely random, crisscrossing pattern.
This technique creates a web-like texture that catches the light from every angle, resulting in a beautiful, disorganized sparkle.
The key is to let go of precision and embrace the chaos, winding the thread back and forth until you achieve the desired density.
A crisp outline of pins on a smooth ceramic base contains the abstract filling, providing a perfect balance of order and randomness.
27. Layering Colors in a Geometric Mandala
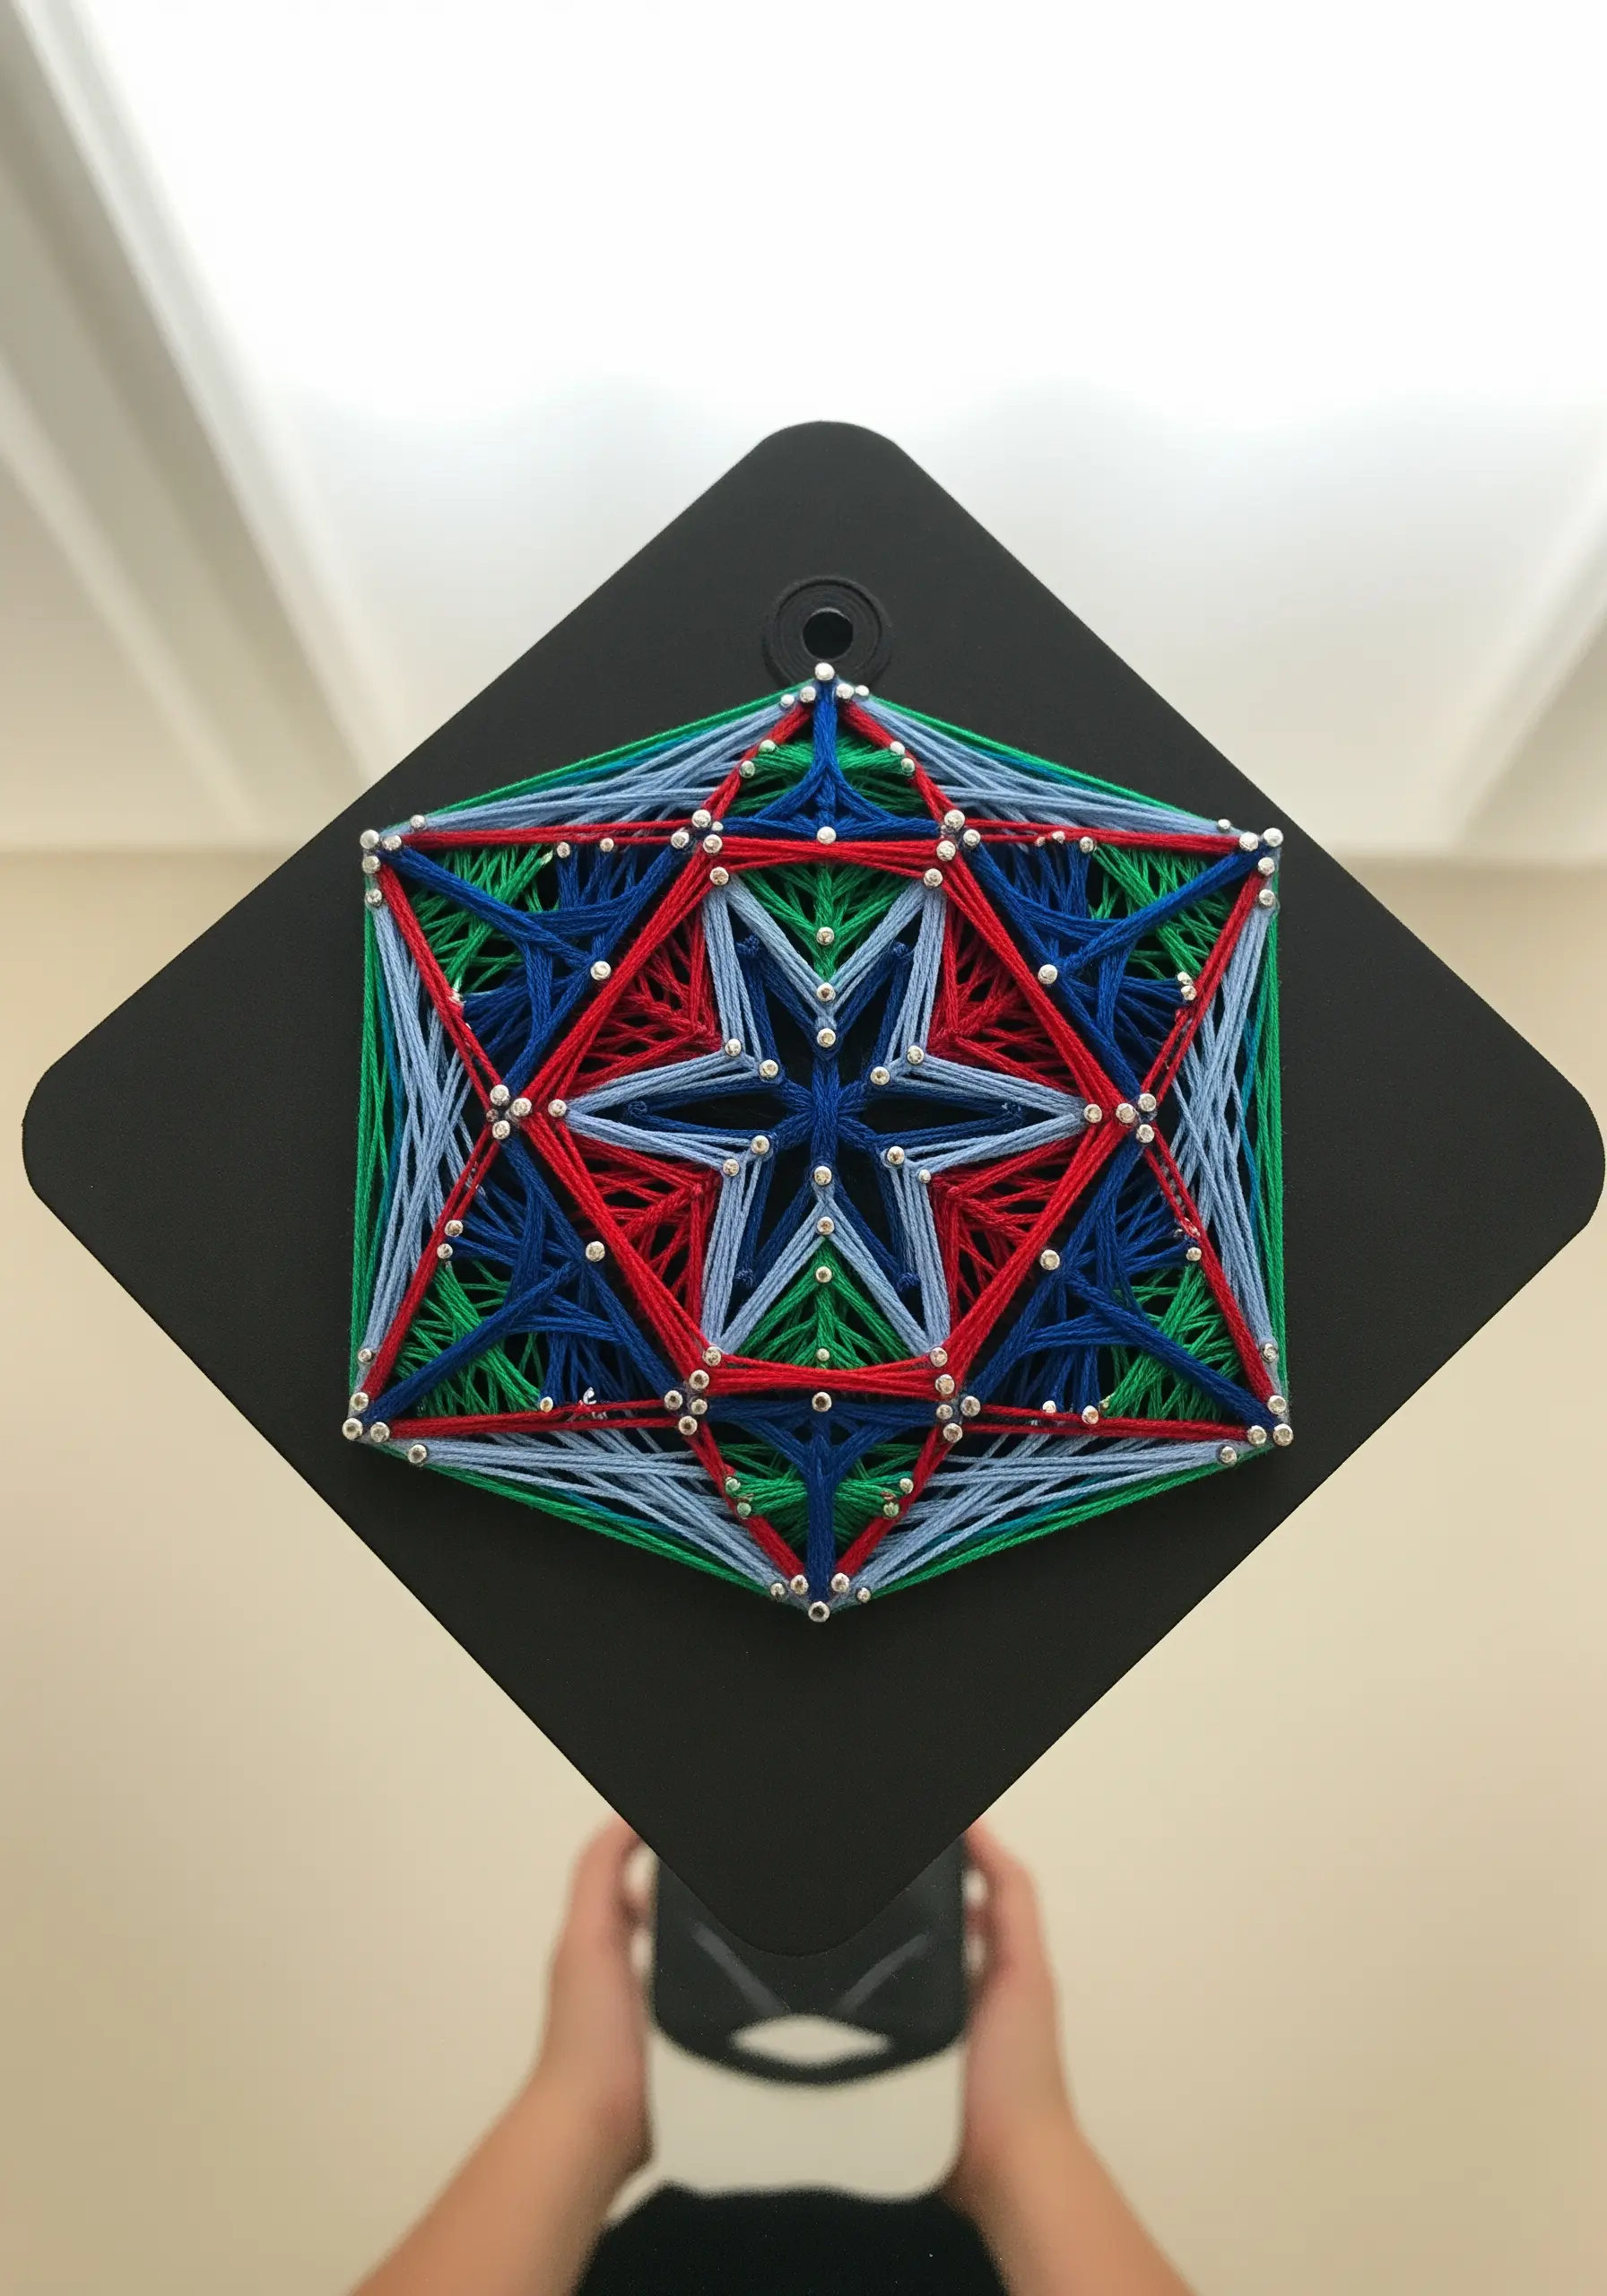
Build complex geometric patterns by layering different colors systematically.
Start with the largest shapes and the base colors—like the outer blue triangles—and work your way inward with progressively smaller shapes and brighter colors.
This layering technique creates incredible visual depth and intricacy, drawing the eye toward the center.
Using multiple shades of the same color, like light and dark blue, adds subtle complexity to the meditative design.


