

Have you ever finished a piece of embroidery, stepped back, and felt that something was missing? The stitches are neat, the colors are right, but it doesn’t quite feel like the work of art you envisioned. Often, that final touch of magic lies not in the stitching itself, but in how you present it.
Framing your embroidered quotes is more than just a finishing step—it’s an integral part of the design process. The right frame can elevate your work, give your words context, and transform a simple piece of craft into a confident statement piece for your home.
Think of this not as a list of rules, but as a series of quiet invitations. Invitations to consider texture, to play with scale, and to choose a frame with the same intention you choose a thread. Let’s explore how to give your favorite quotes the thoughtful, polished display they truly deserve.
1. Achieve Typographic Precision with a Split Backstitch
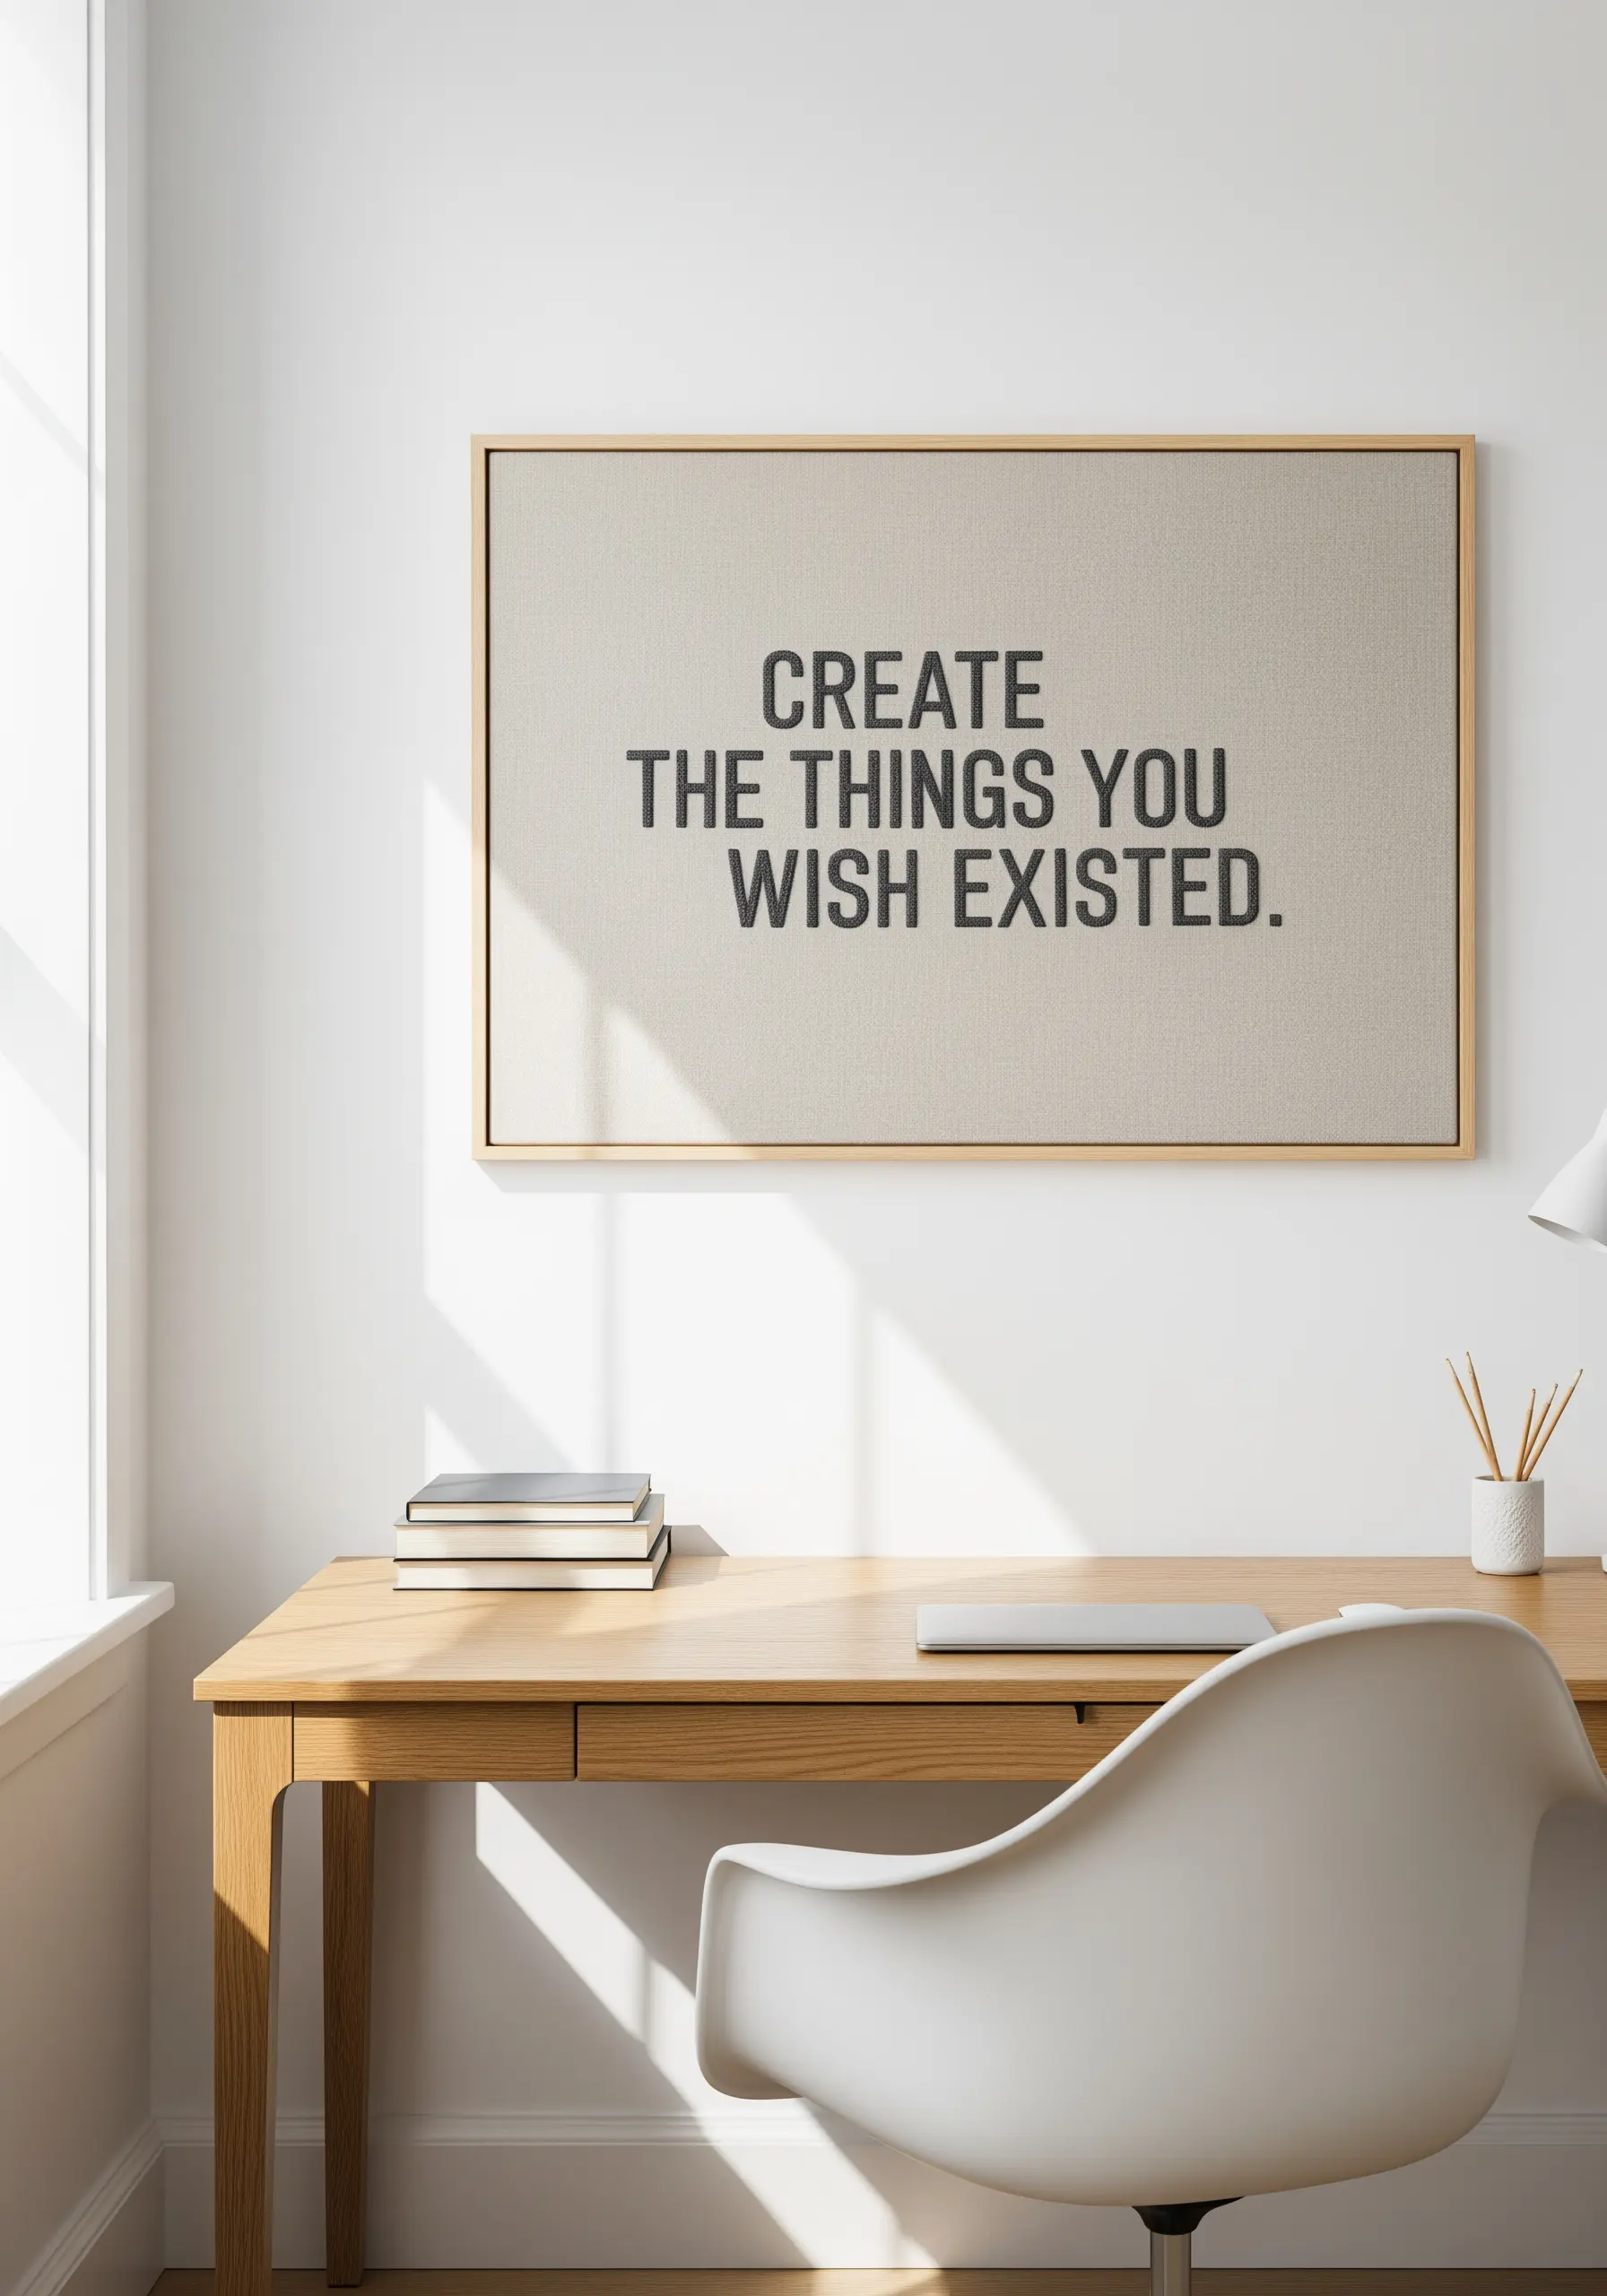
For bold, sans-serif quotes that need to feel clean and graphic, the stitch itself is your most important tool.
Instead of a standard satin stitch that can look uneven over large areas, use a dense split backstitch or brick stitch to fill your letters.
This method creates a flat, woven texture that reads like a high-quality print, ensuring every letterform is crisp and intentional.
Choose a high-count linen or canvas fabric; its tight weave provides the perfect stable ground for sharp, architectural lettering.
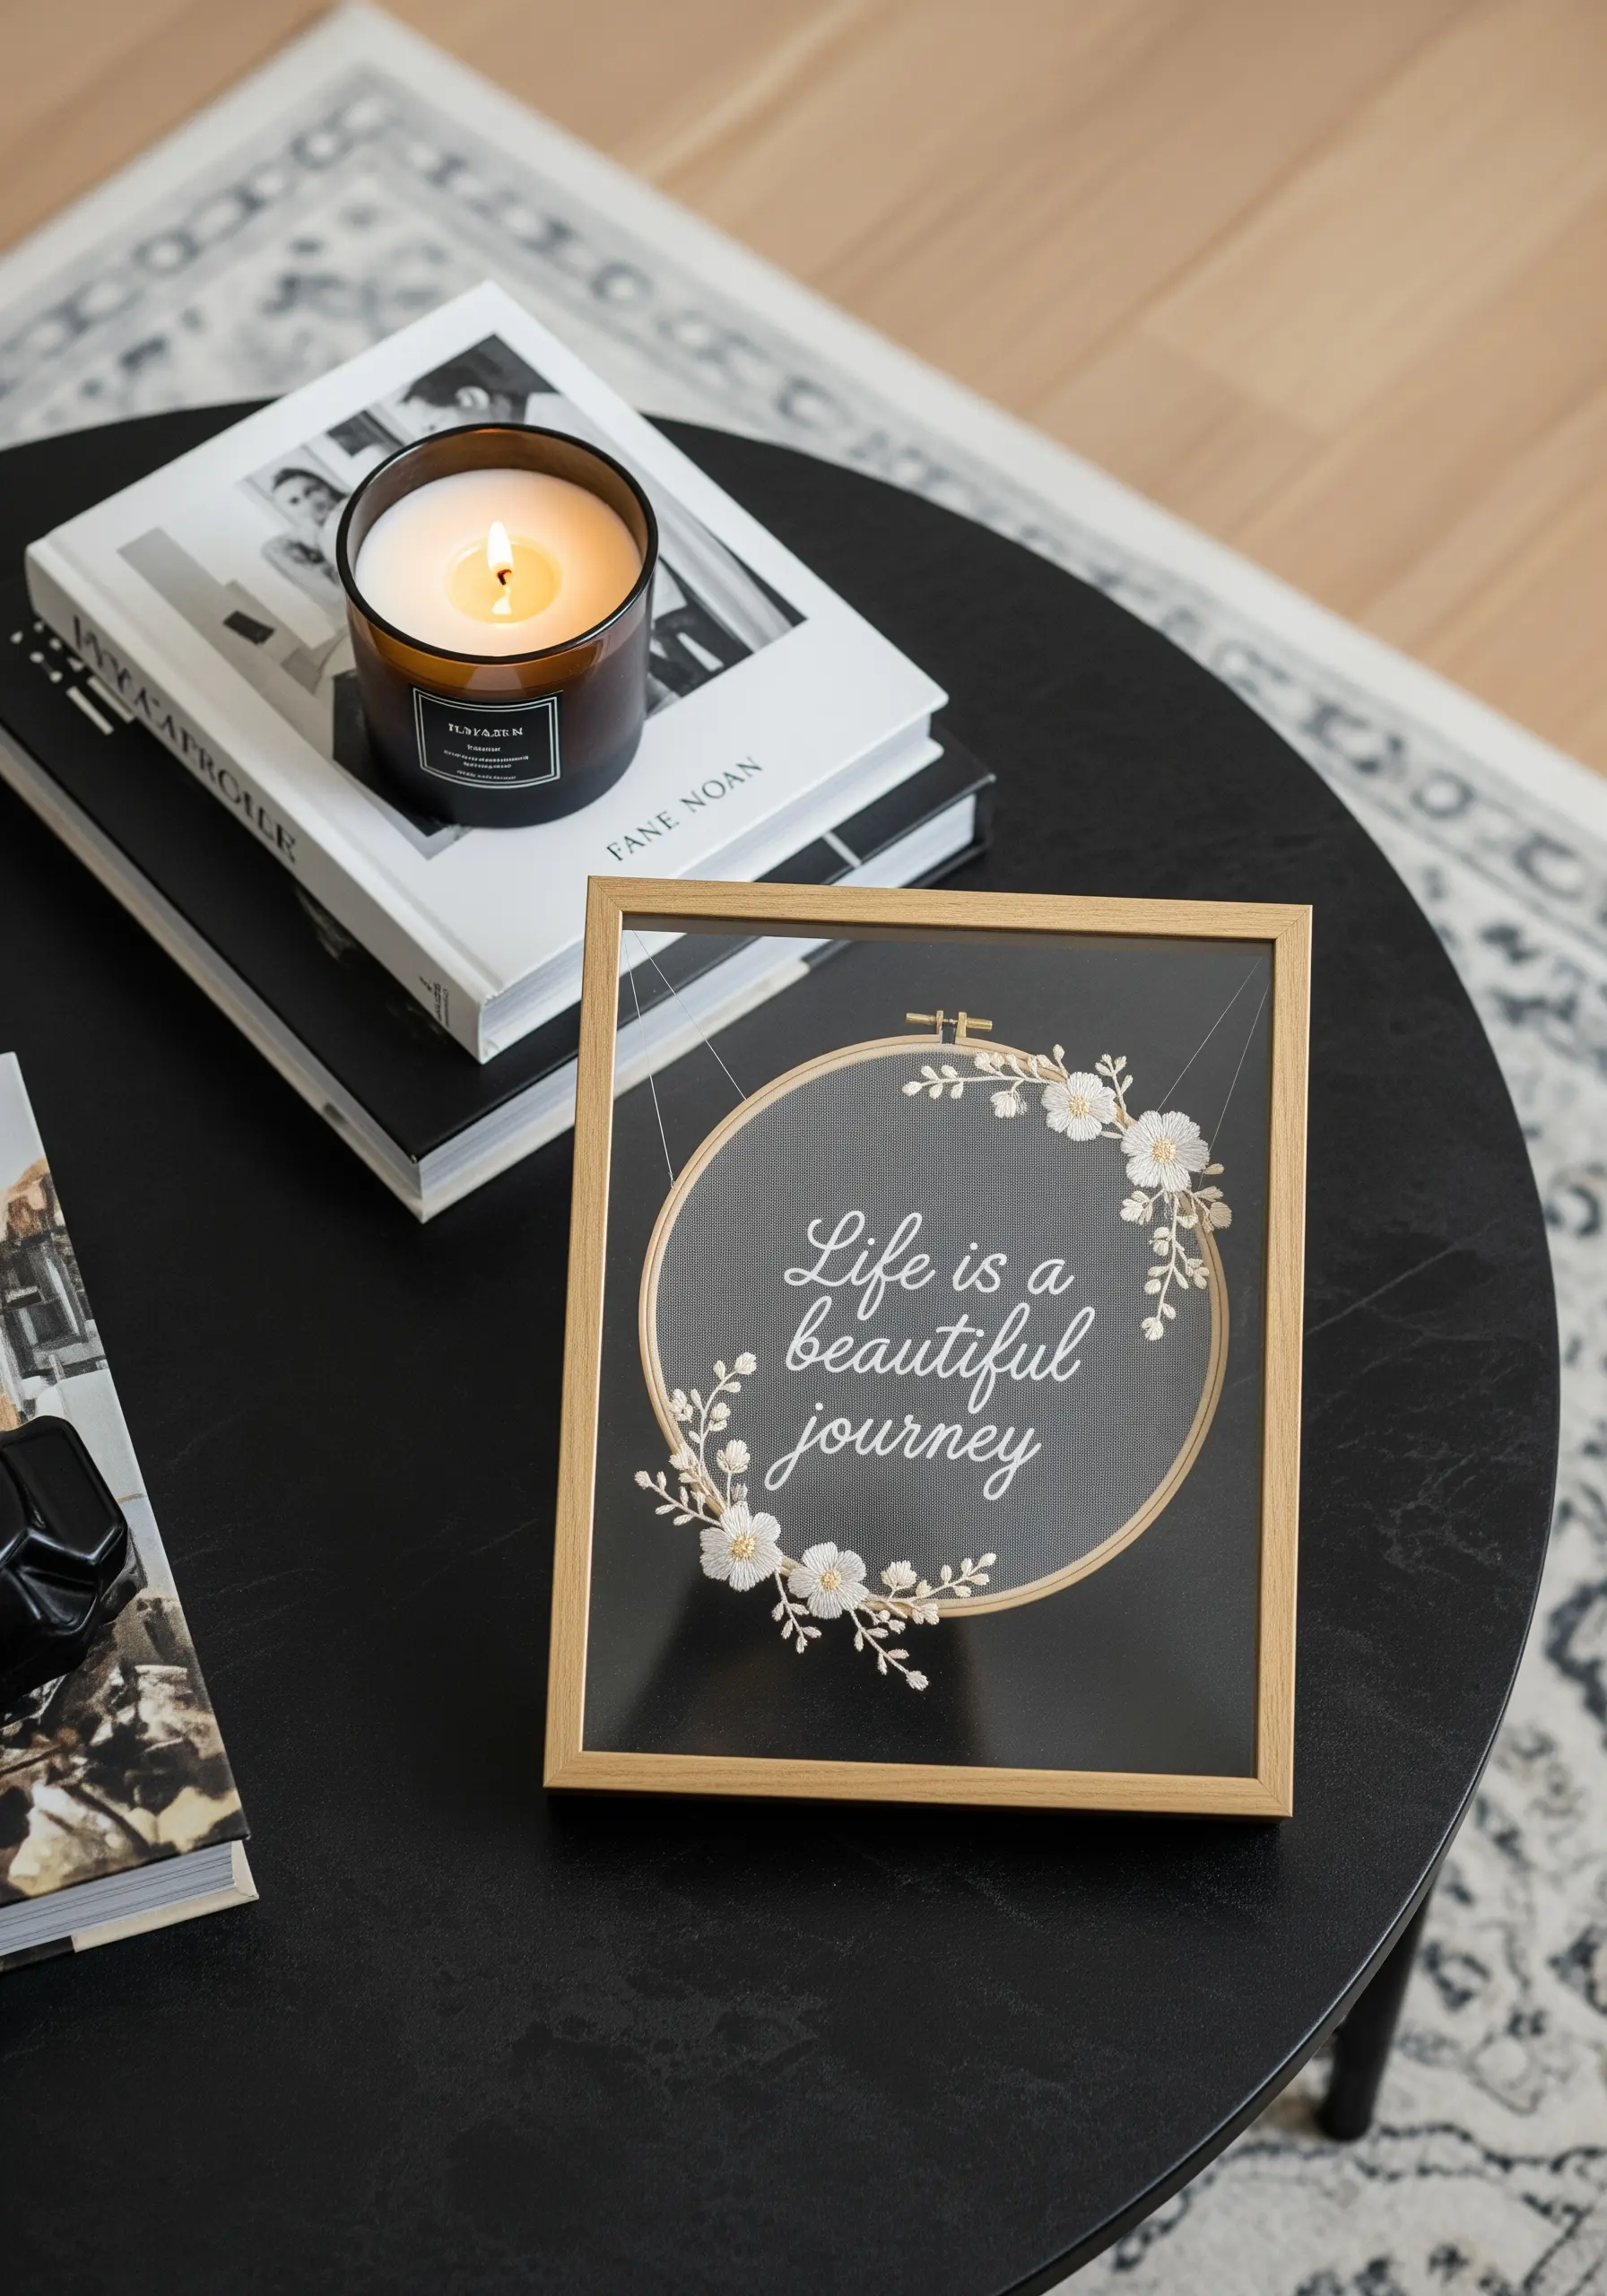
2. Frame Your Quote with Delicate Botanical Flourishes

To soften a quote and give it a classic, heartfelt feel, encircle it with a simple botanical wreath.
Use a single strand of floss for the lettering in a whipped backstitch to create fluid, elegant curves that mimic handwriting.
For the leaves, a fishbone stitch provides a subtle texture and centerline that adds a touch of realism without overwhelming the text.
Keeping the finished piece in a wooden hoop enhances its handcrafted charm and makes it a perfect addition to a cozy reading nook.
3. Curate a Cohesive Hoop Art Gallery Wall
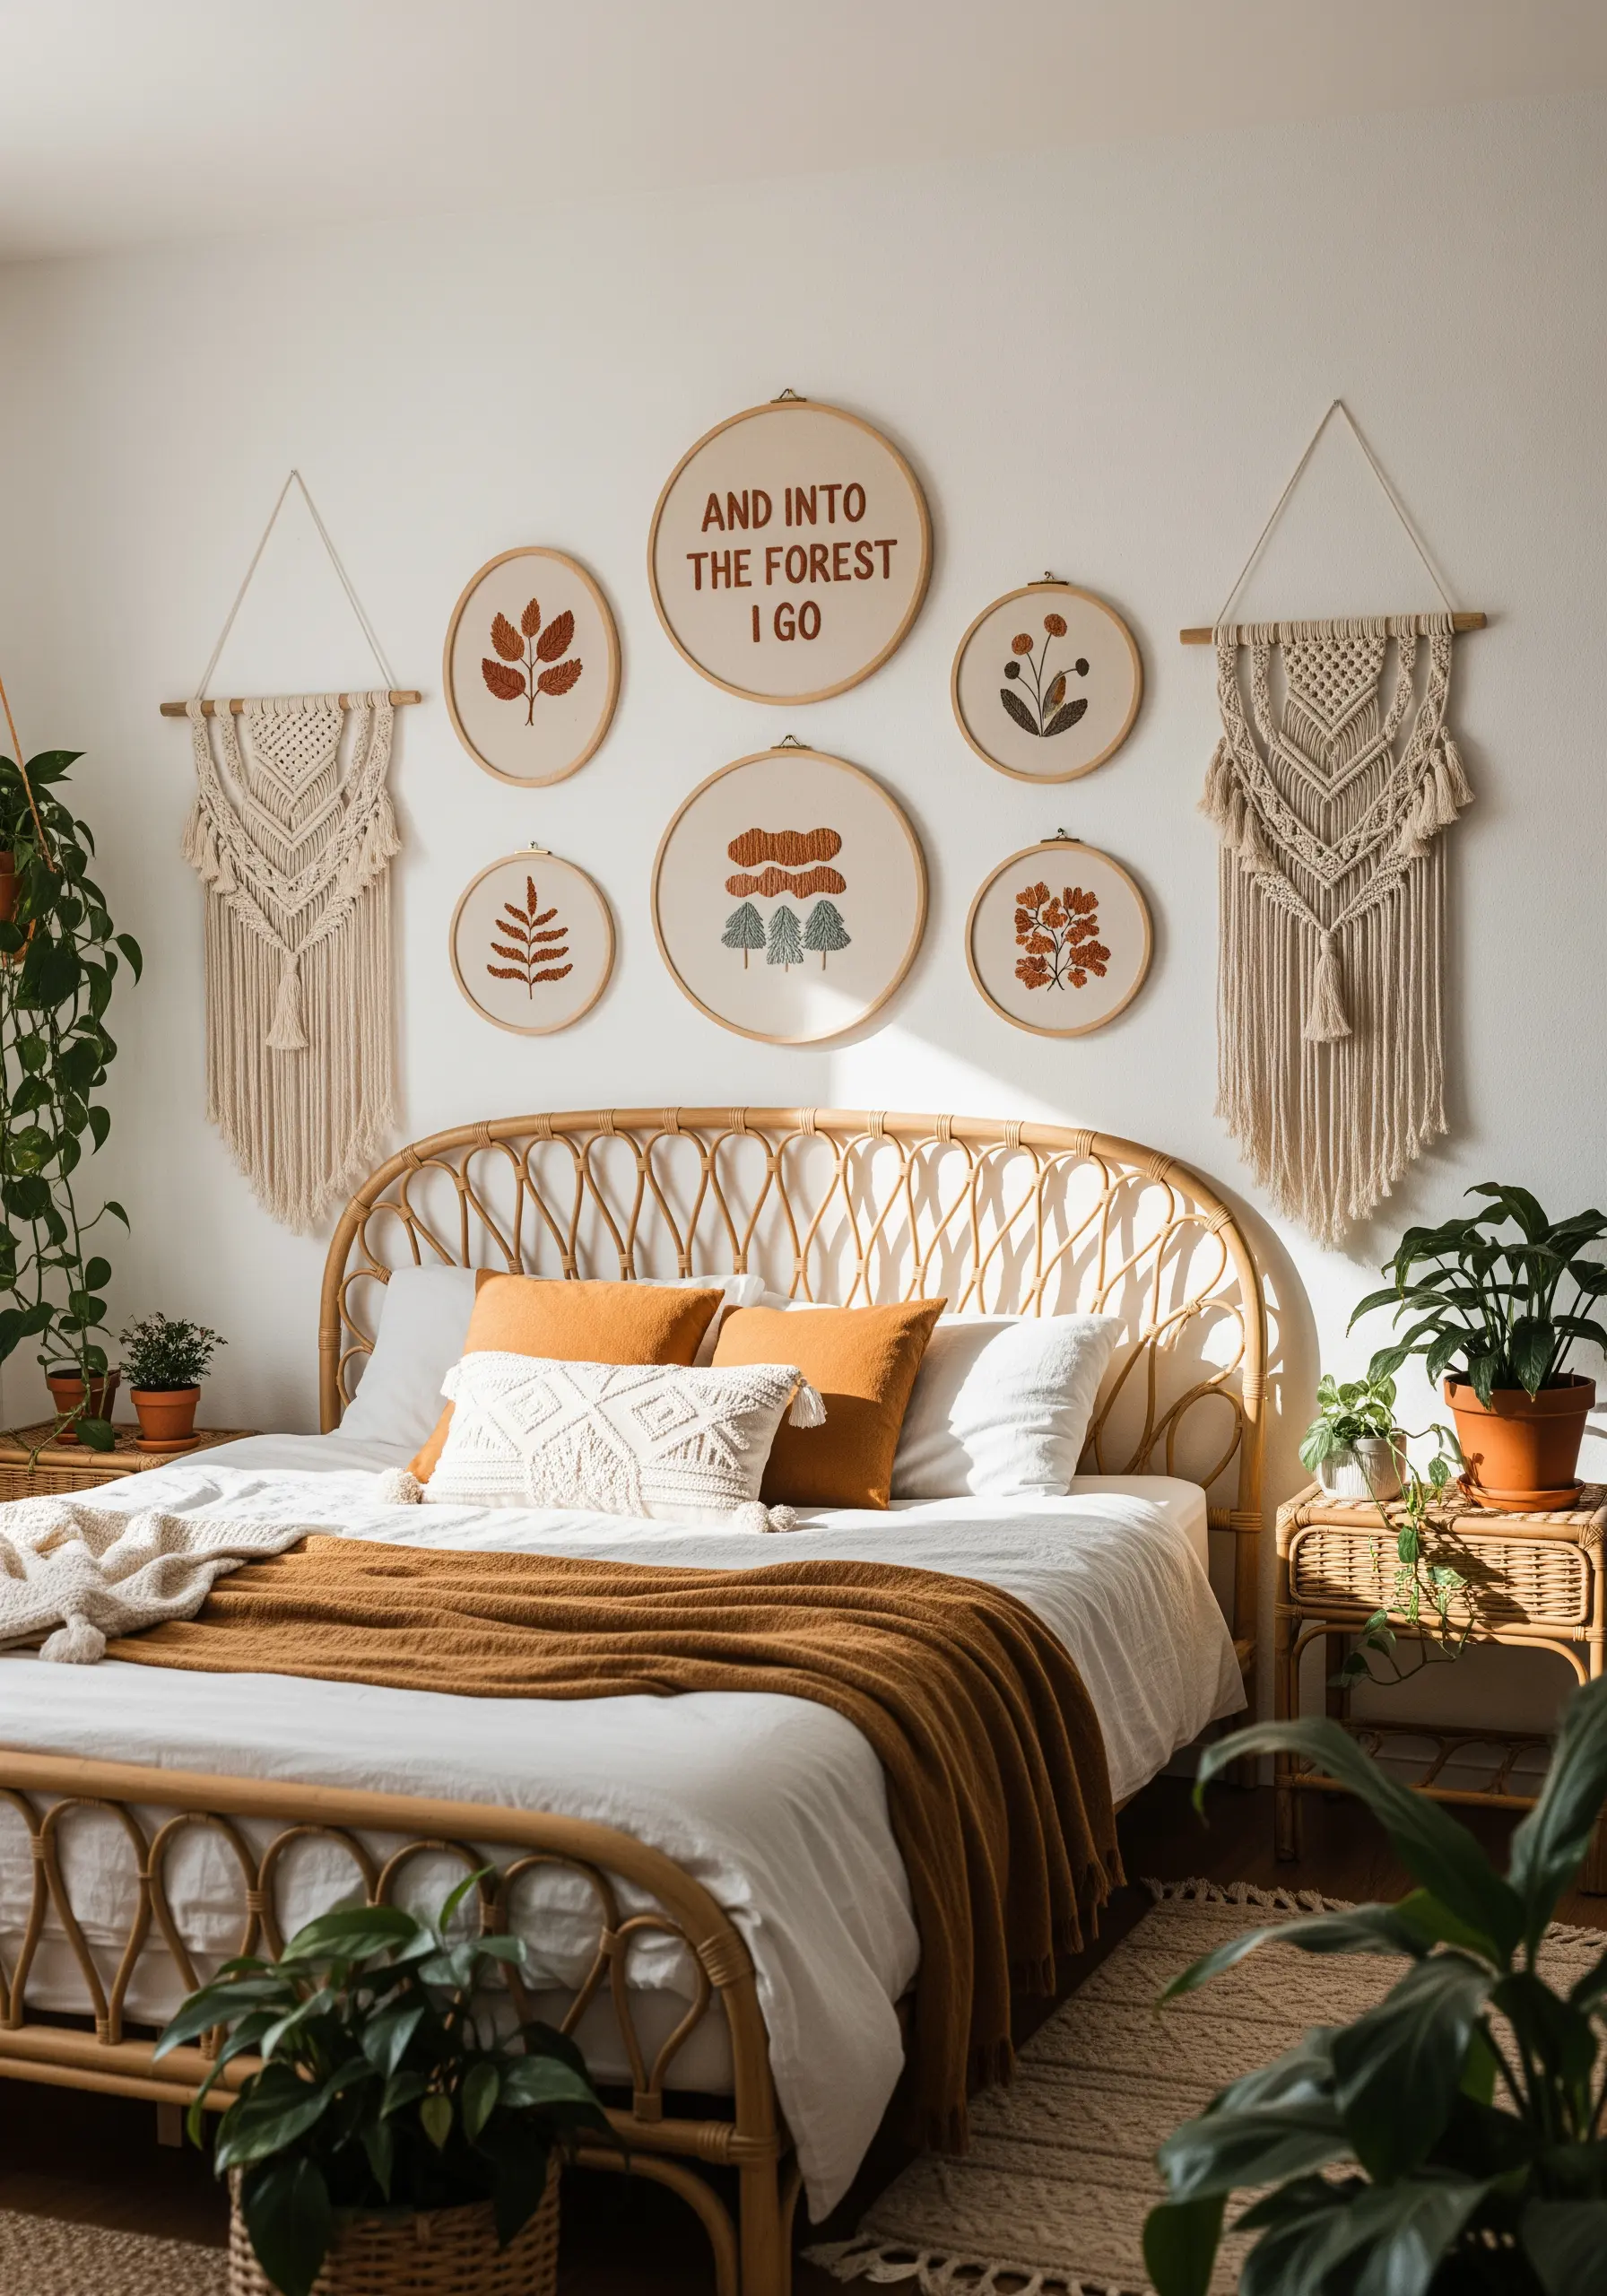
Turn a collection of quotes and motifs into a single work of art by establishing a consistent visual language.
Select a unified color palette—like these warm earth tones—and use it across all your hoops to create harmony.
Vary the scale of the hoops and the complexity of the designs, but keep the fabric color and hoop style the same to ensure the collection feels curated, not chaotic.
This approach allows you to mix text-based pieces with purely illustrative ones, creating a gallery wall that tells a larger story.
4. Embrace Texture with Bold Appliqué on Burlap
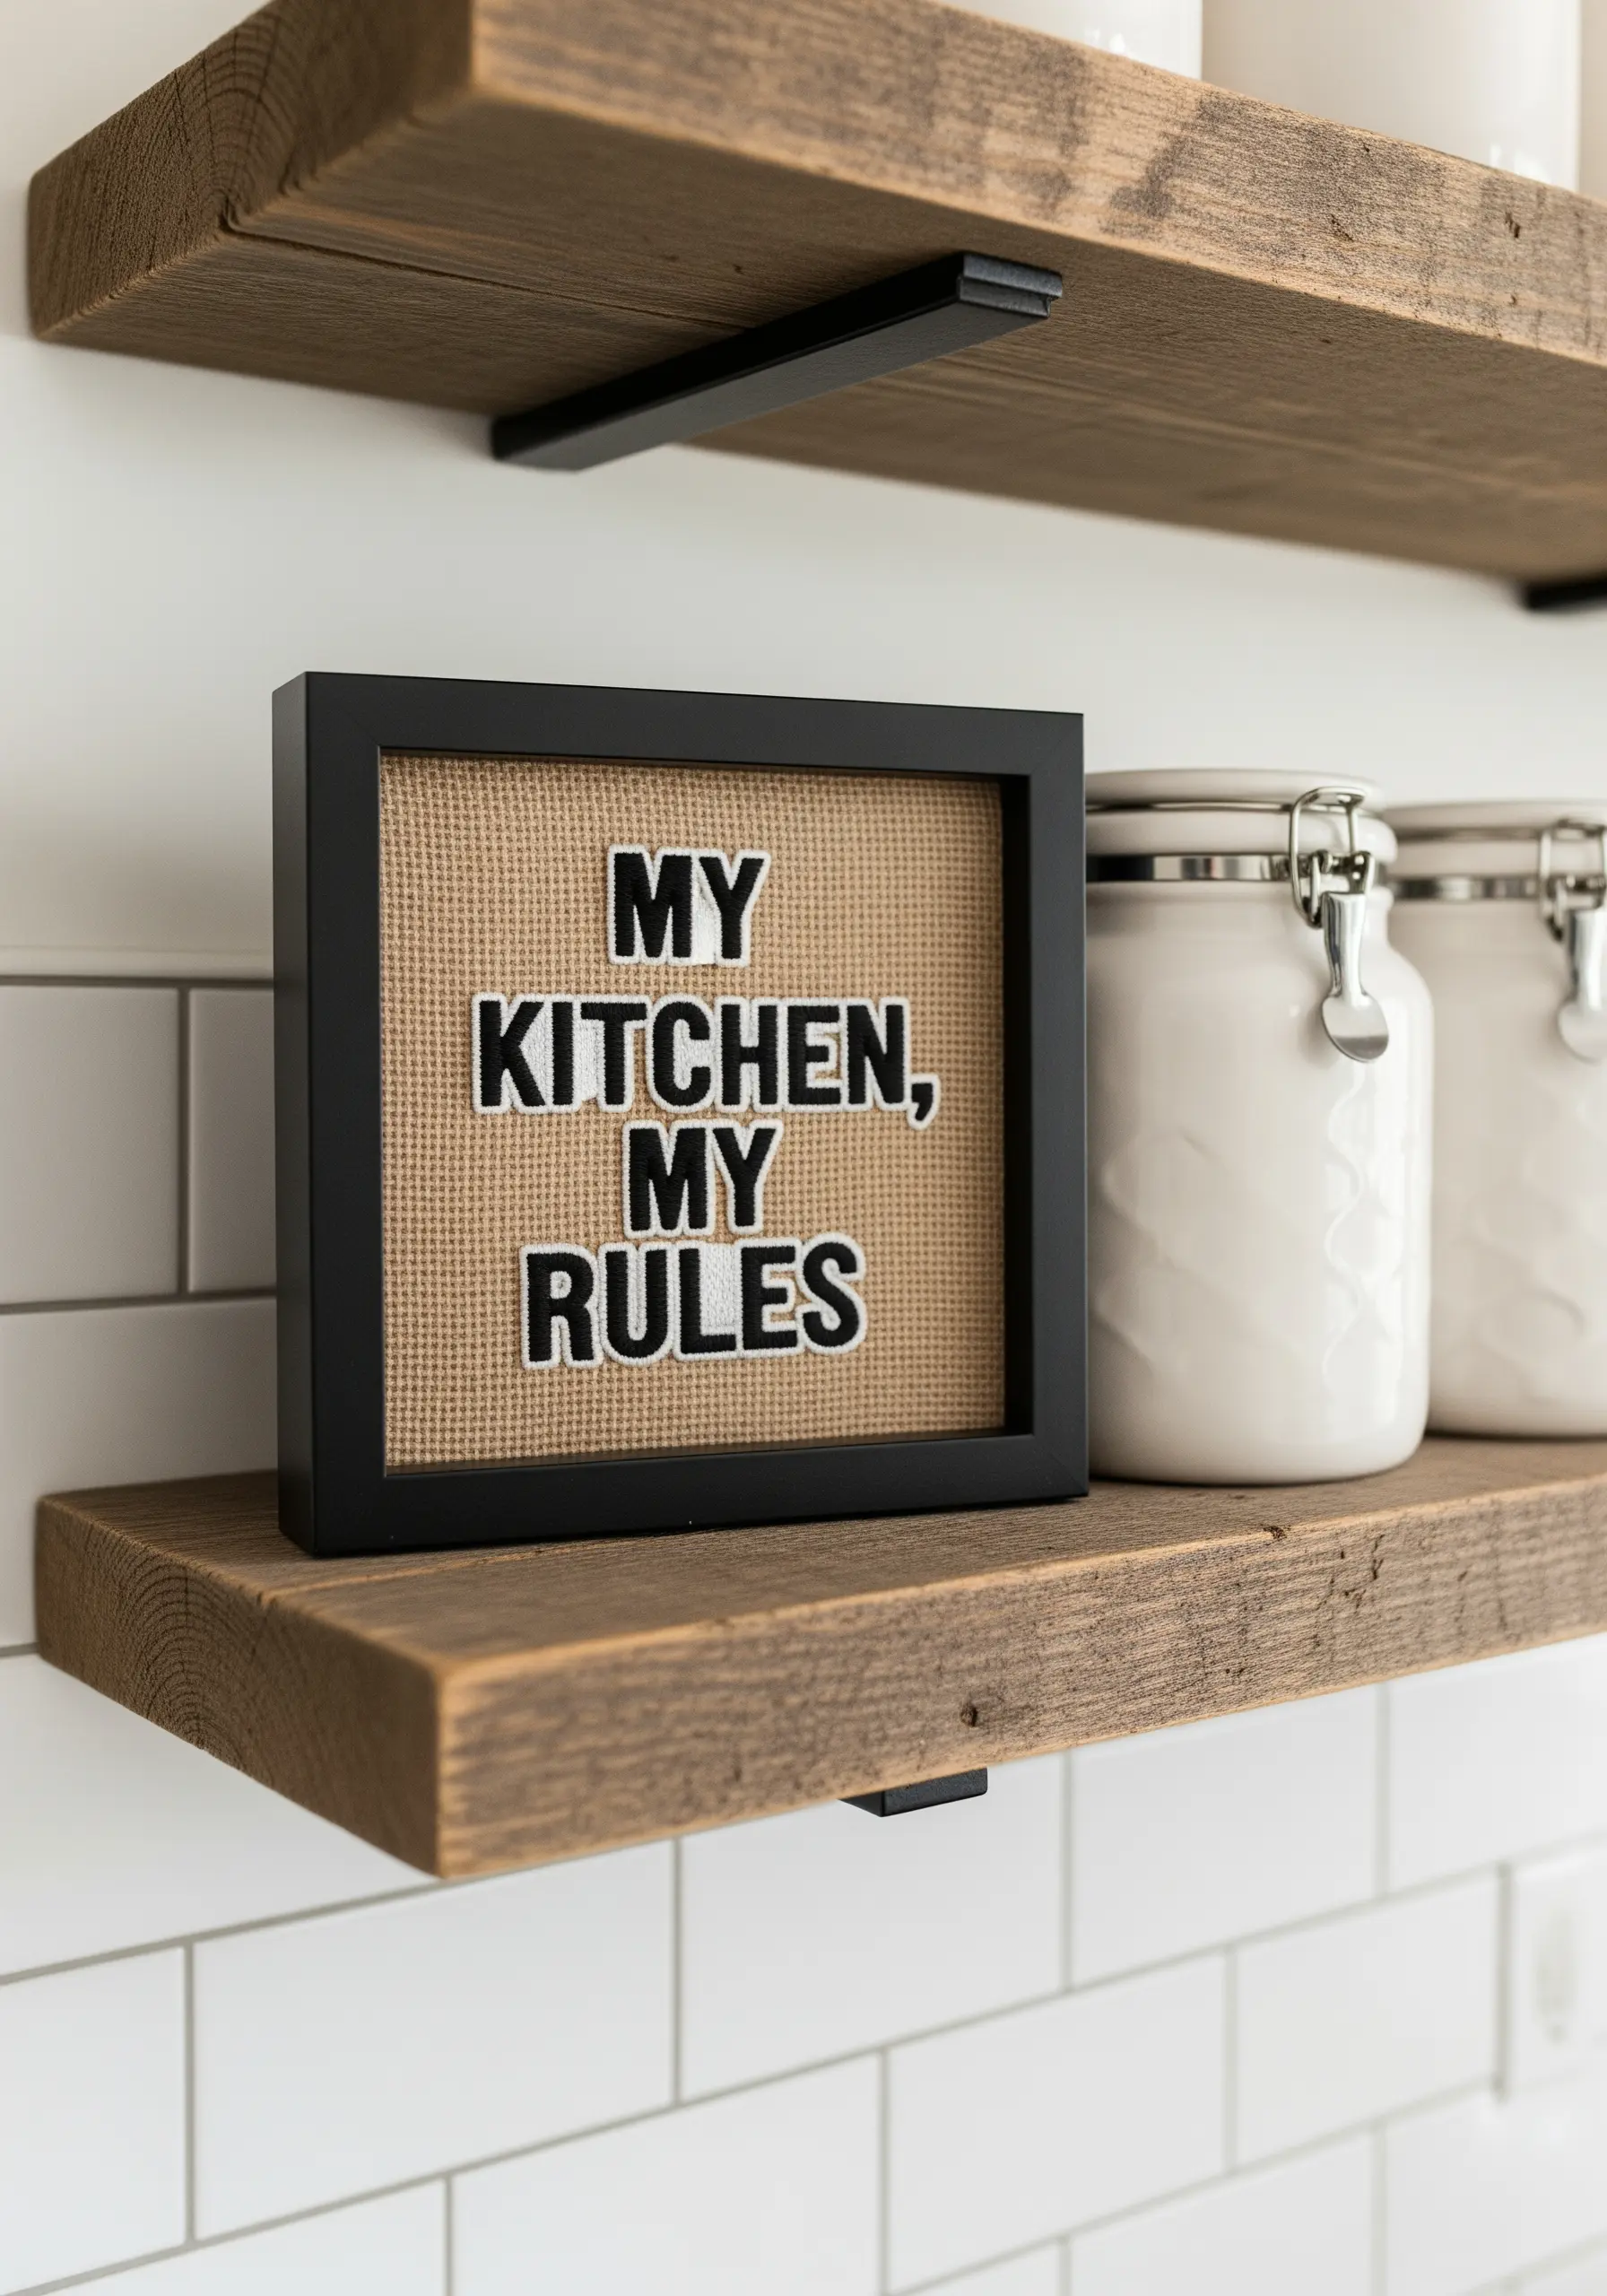
For a quote that needs to make a strong, tactile statement, move beyond thread alone.
Cut your letters from felt or thick fabric and use a simple running stitch around the edges to appliqué them onto a textured base like burlap or raw linen.
This technique creates immediate dimension and contrast, giving your words a bold, graphic weight that traditional stitching cannot replicate.
The interplay between the soft felt and the coarse burlap provides a rich sensory experience, framed simply to let the materials shine.
5. Master High-Contrast Elegance with Ornate Framing
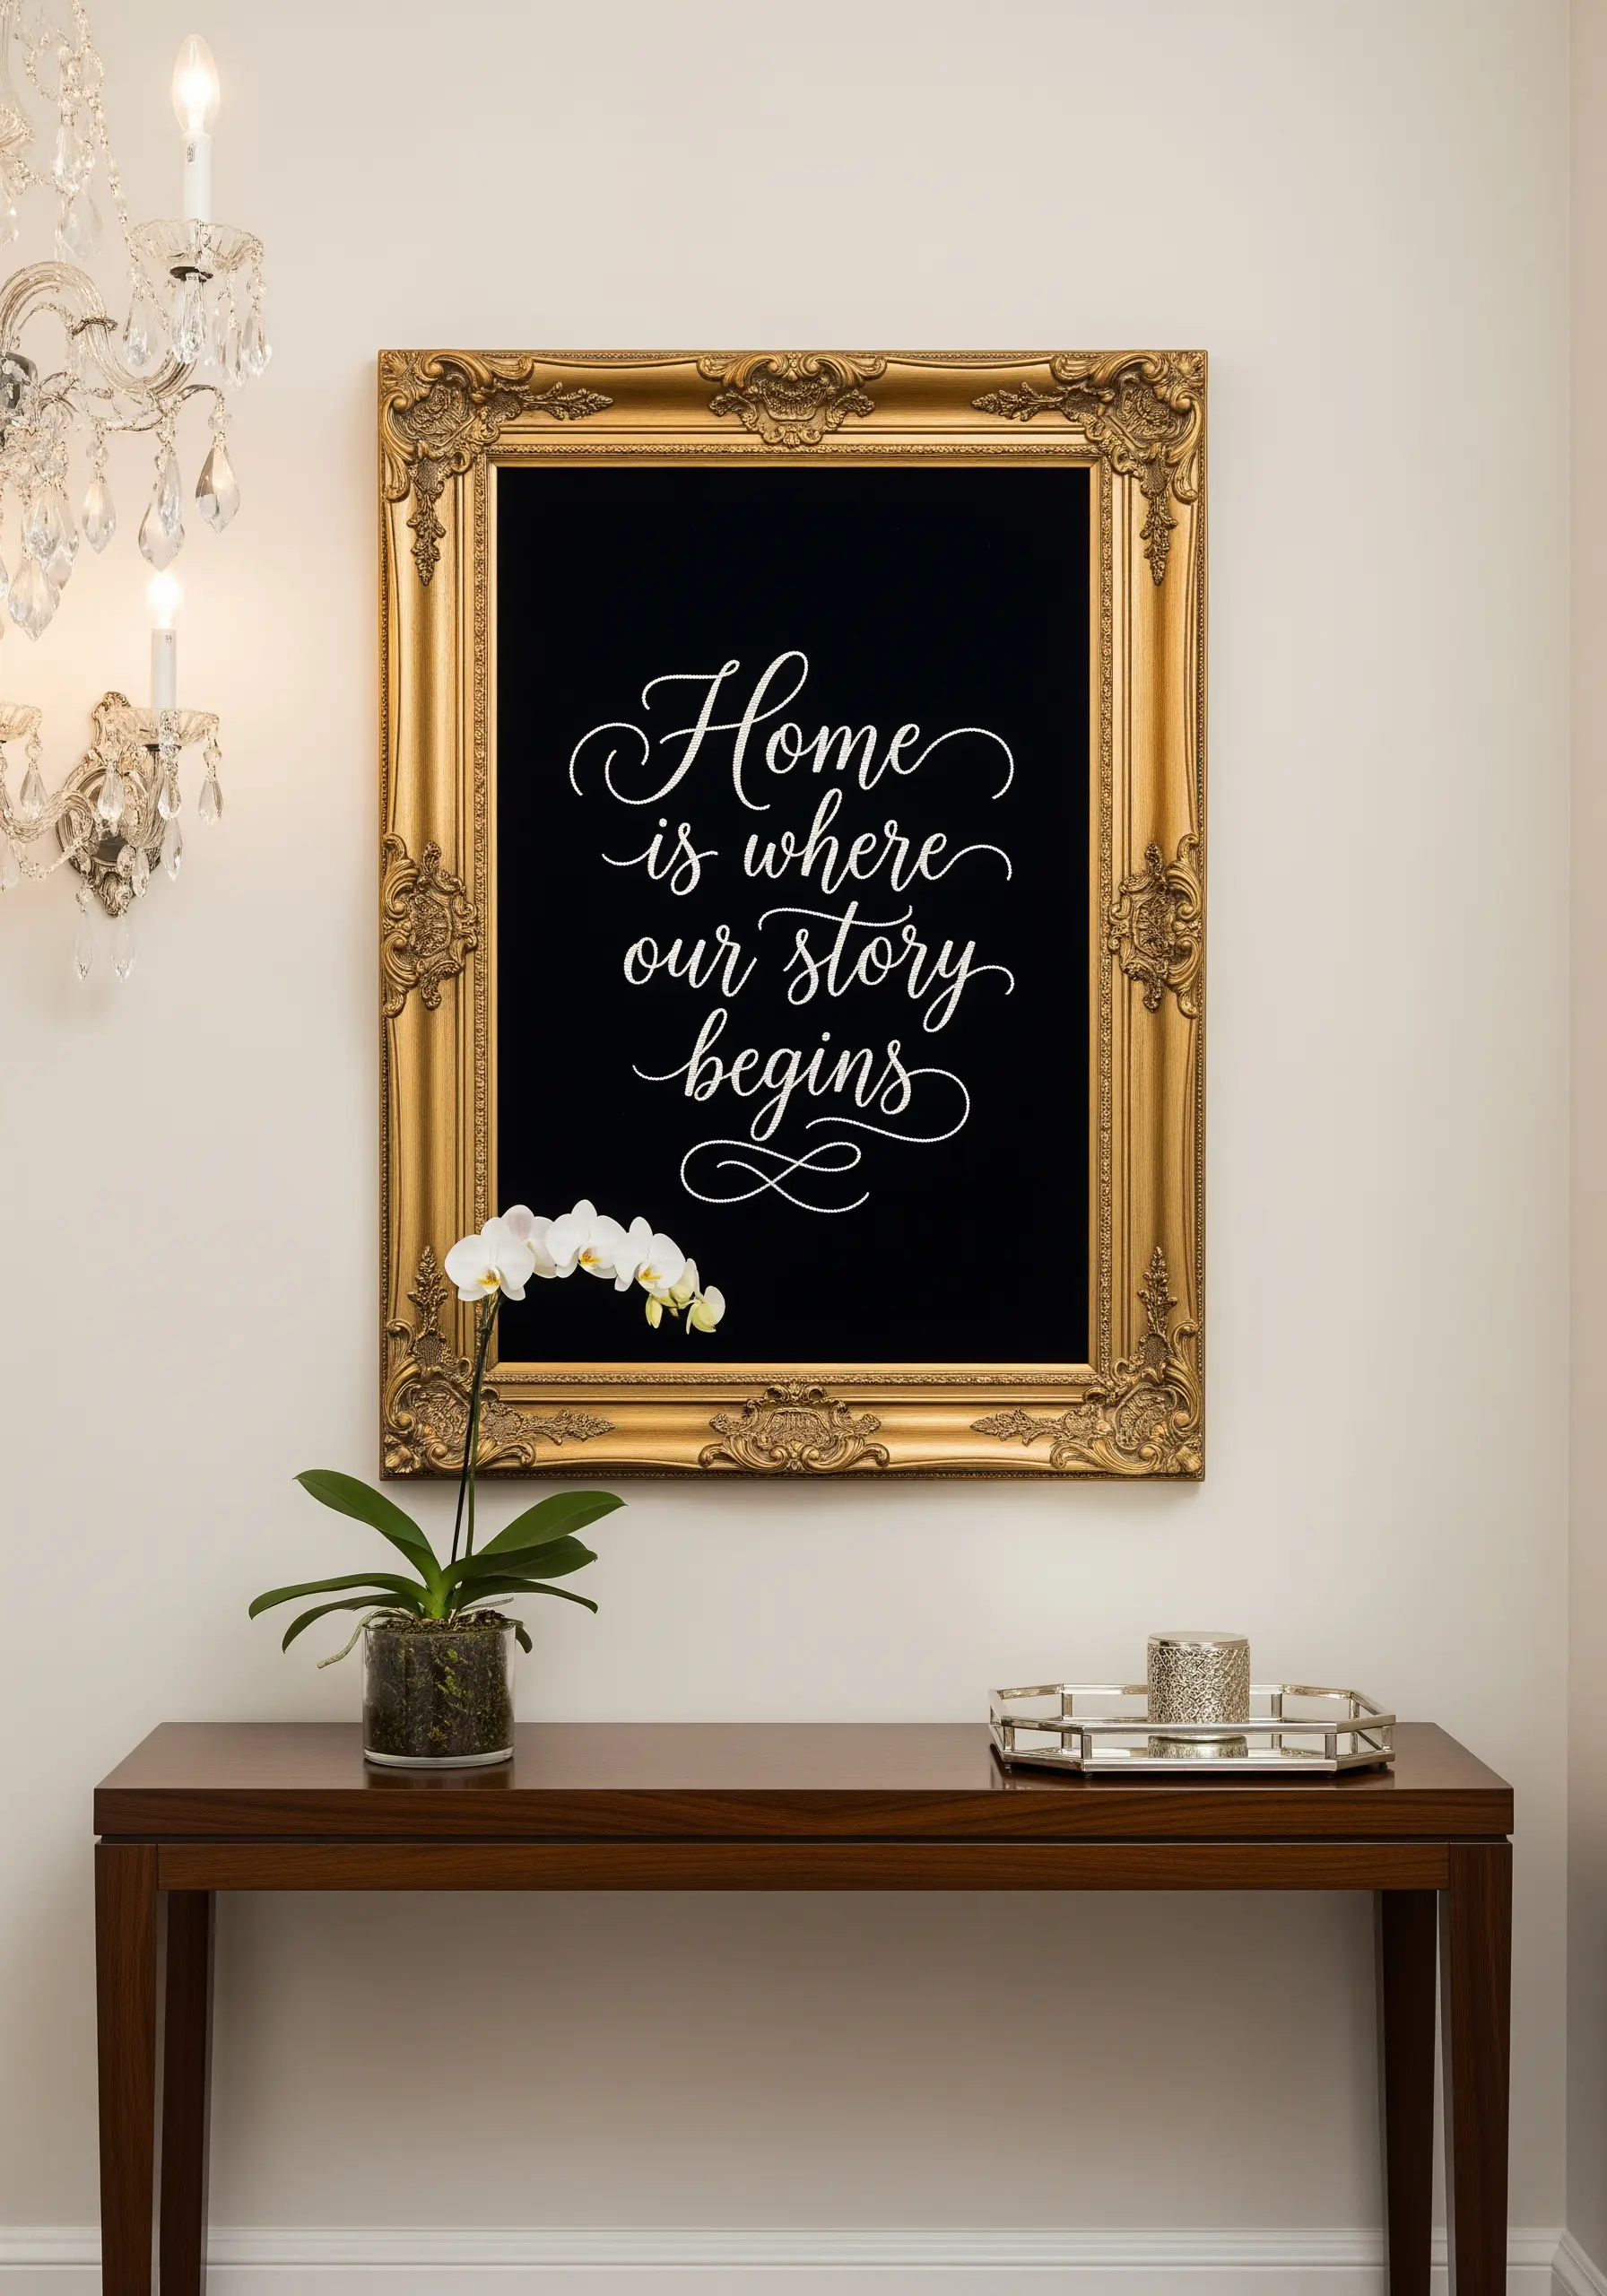
Elevate a simple quote into a piece of fine art by pairing high-contrast materials with a dramatic frame.
Stitch your lettering with a bright white silk or rayon floss on a deep black velvet or linen background. The sheen of the thread will catch the light beautifully against the matte fabric.
Choose an ornate, gilded frame to create a powerful juxtaposition between the modern simplicity of the quote and the classic opulence of the display.
This intentional pairing transforms your embroidery into a sophisticated statement piece, proving that the frame is as crucial as the stitch.
6. Go Big with an Oversized, Color-Blocked Quote
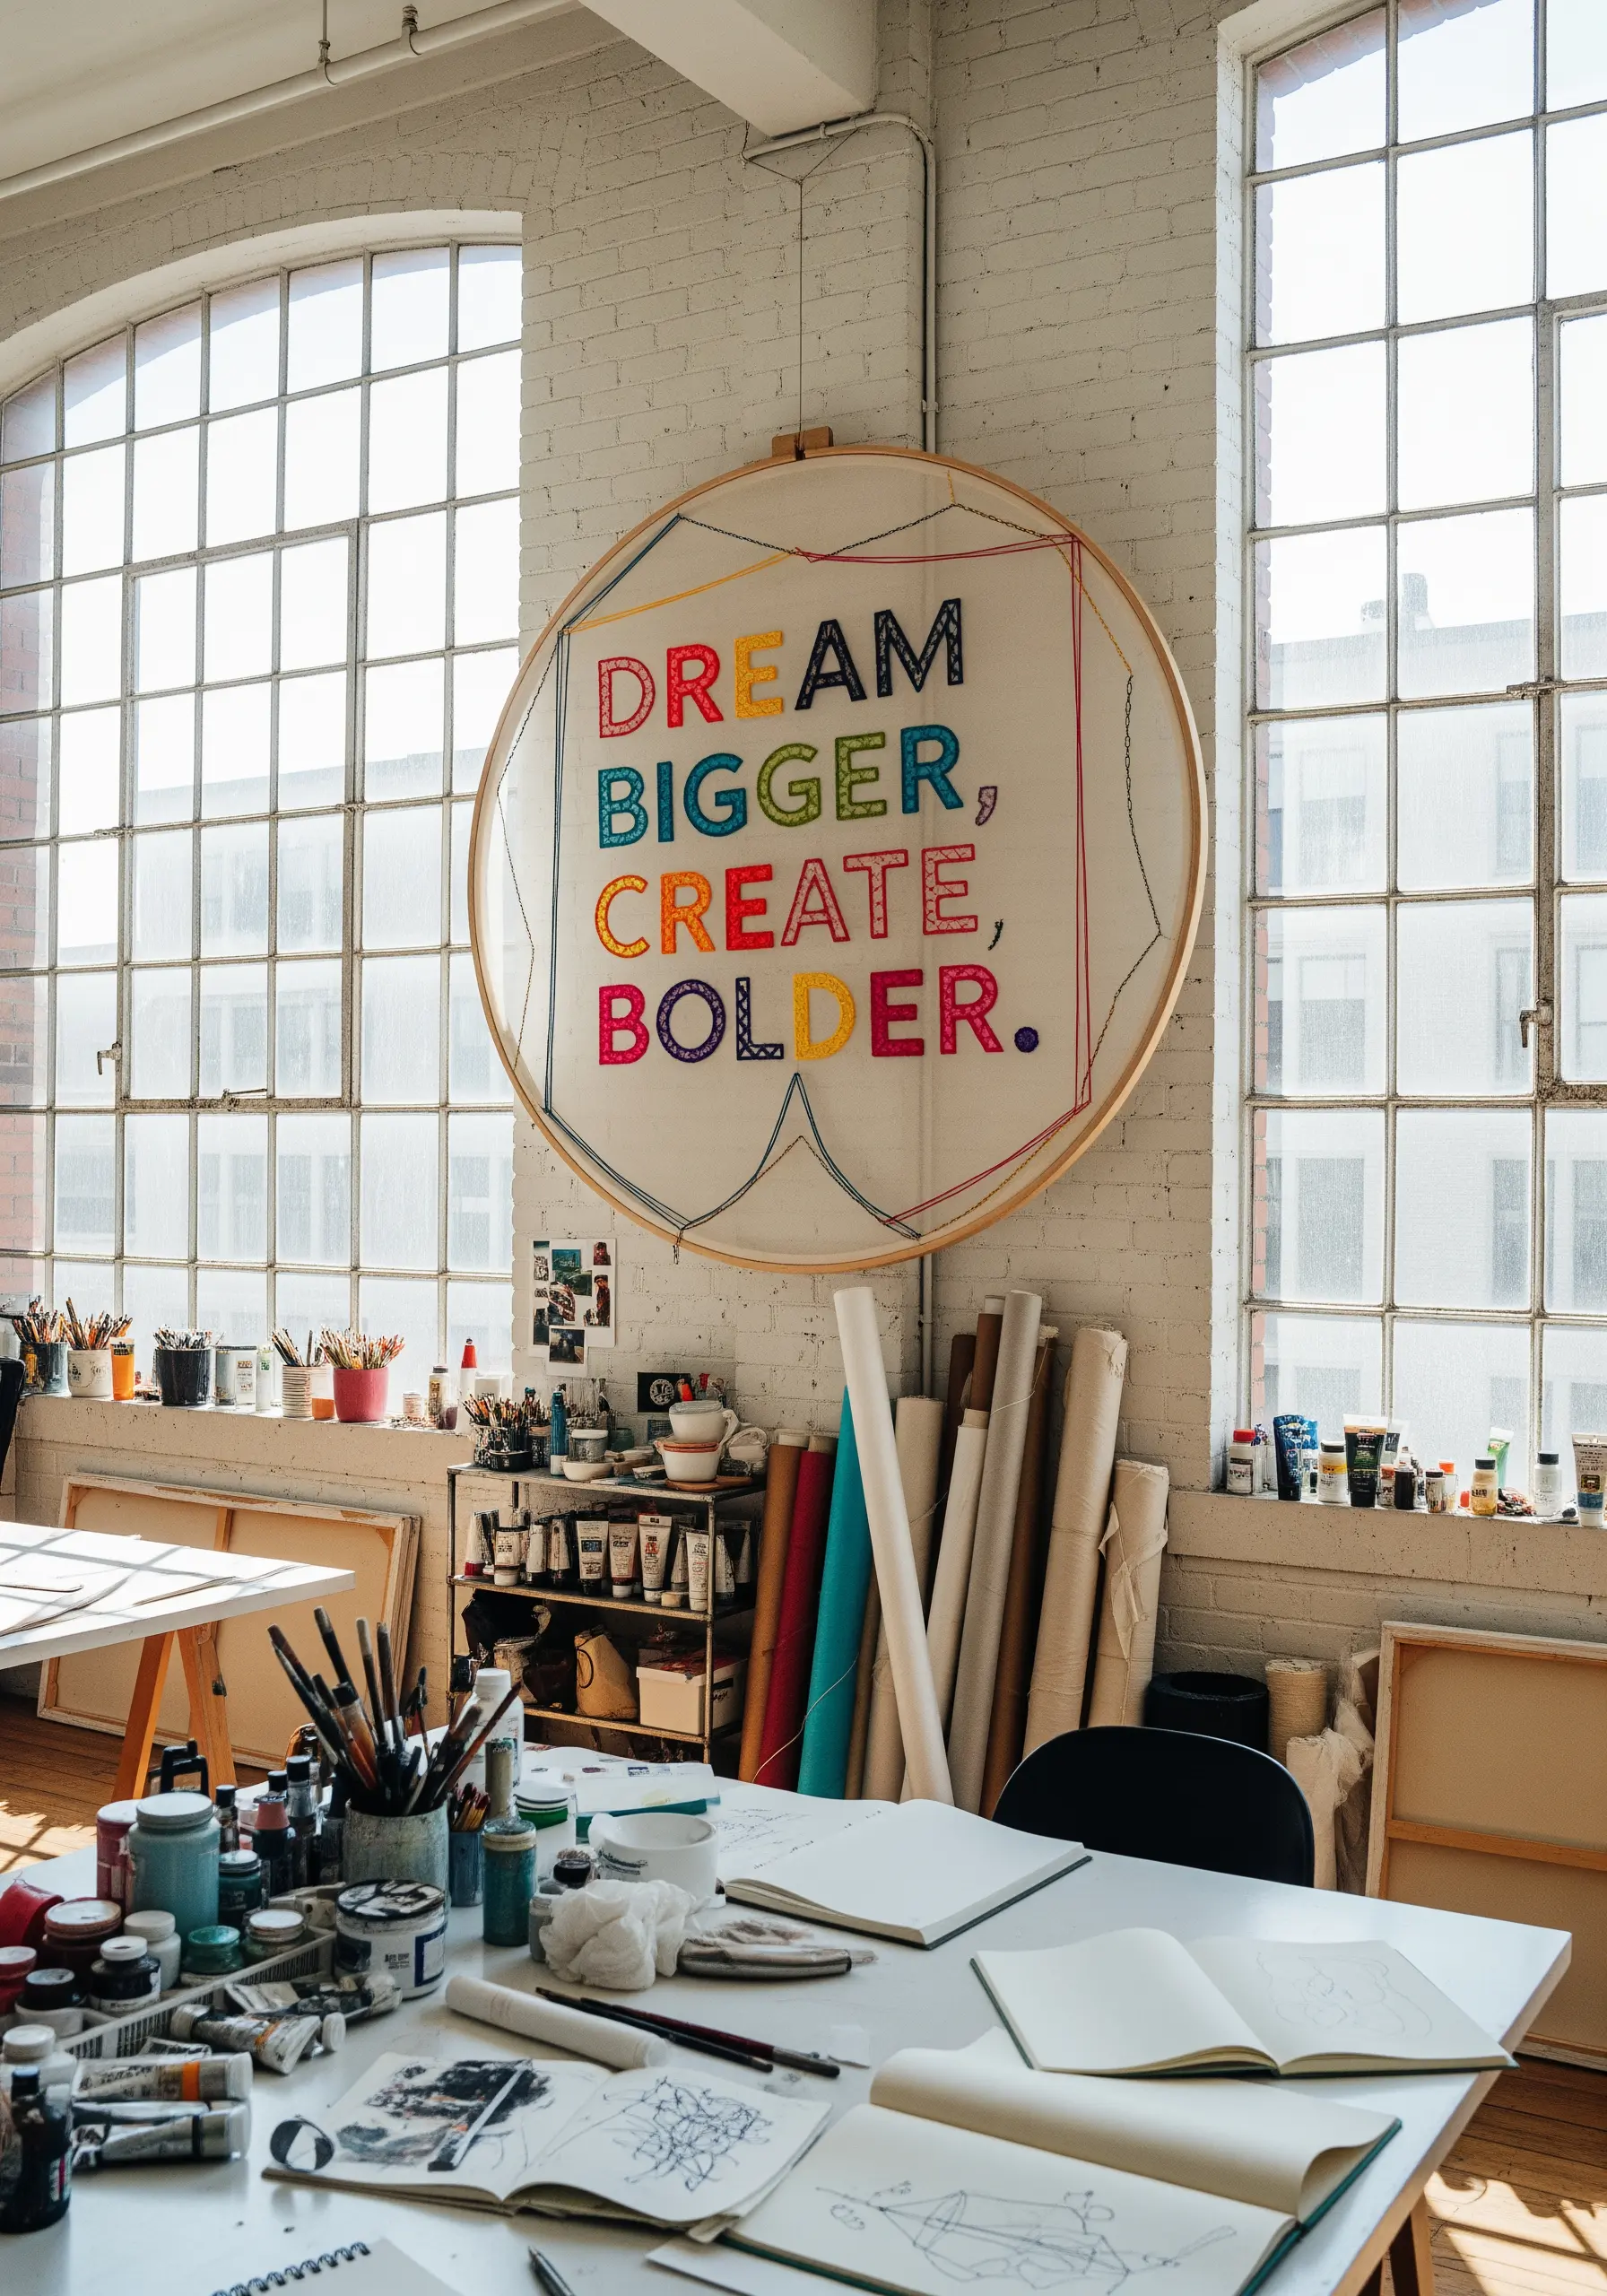
Don’t be afraid to let your embroidery command a room. Working on a large scale turns a simple quote into a powerful focal point.
Use an oversized quilting hoop or a custom-built frame to stretch your fabric taut.
Fill bold, blocky letters with a dense long-and-short stitch, using vibrant, contrasting colors for each word to create a playful, graphic effect.
These oversized hoop wall displays are perfect for studios, playrooms, or any space that needs a dose of creative energy.
7. Evoke Calm with Minimalist Lettering
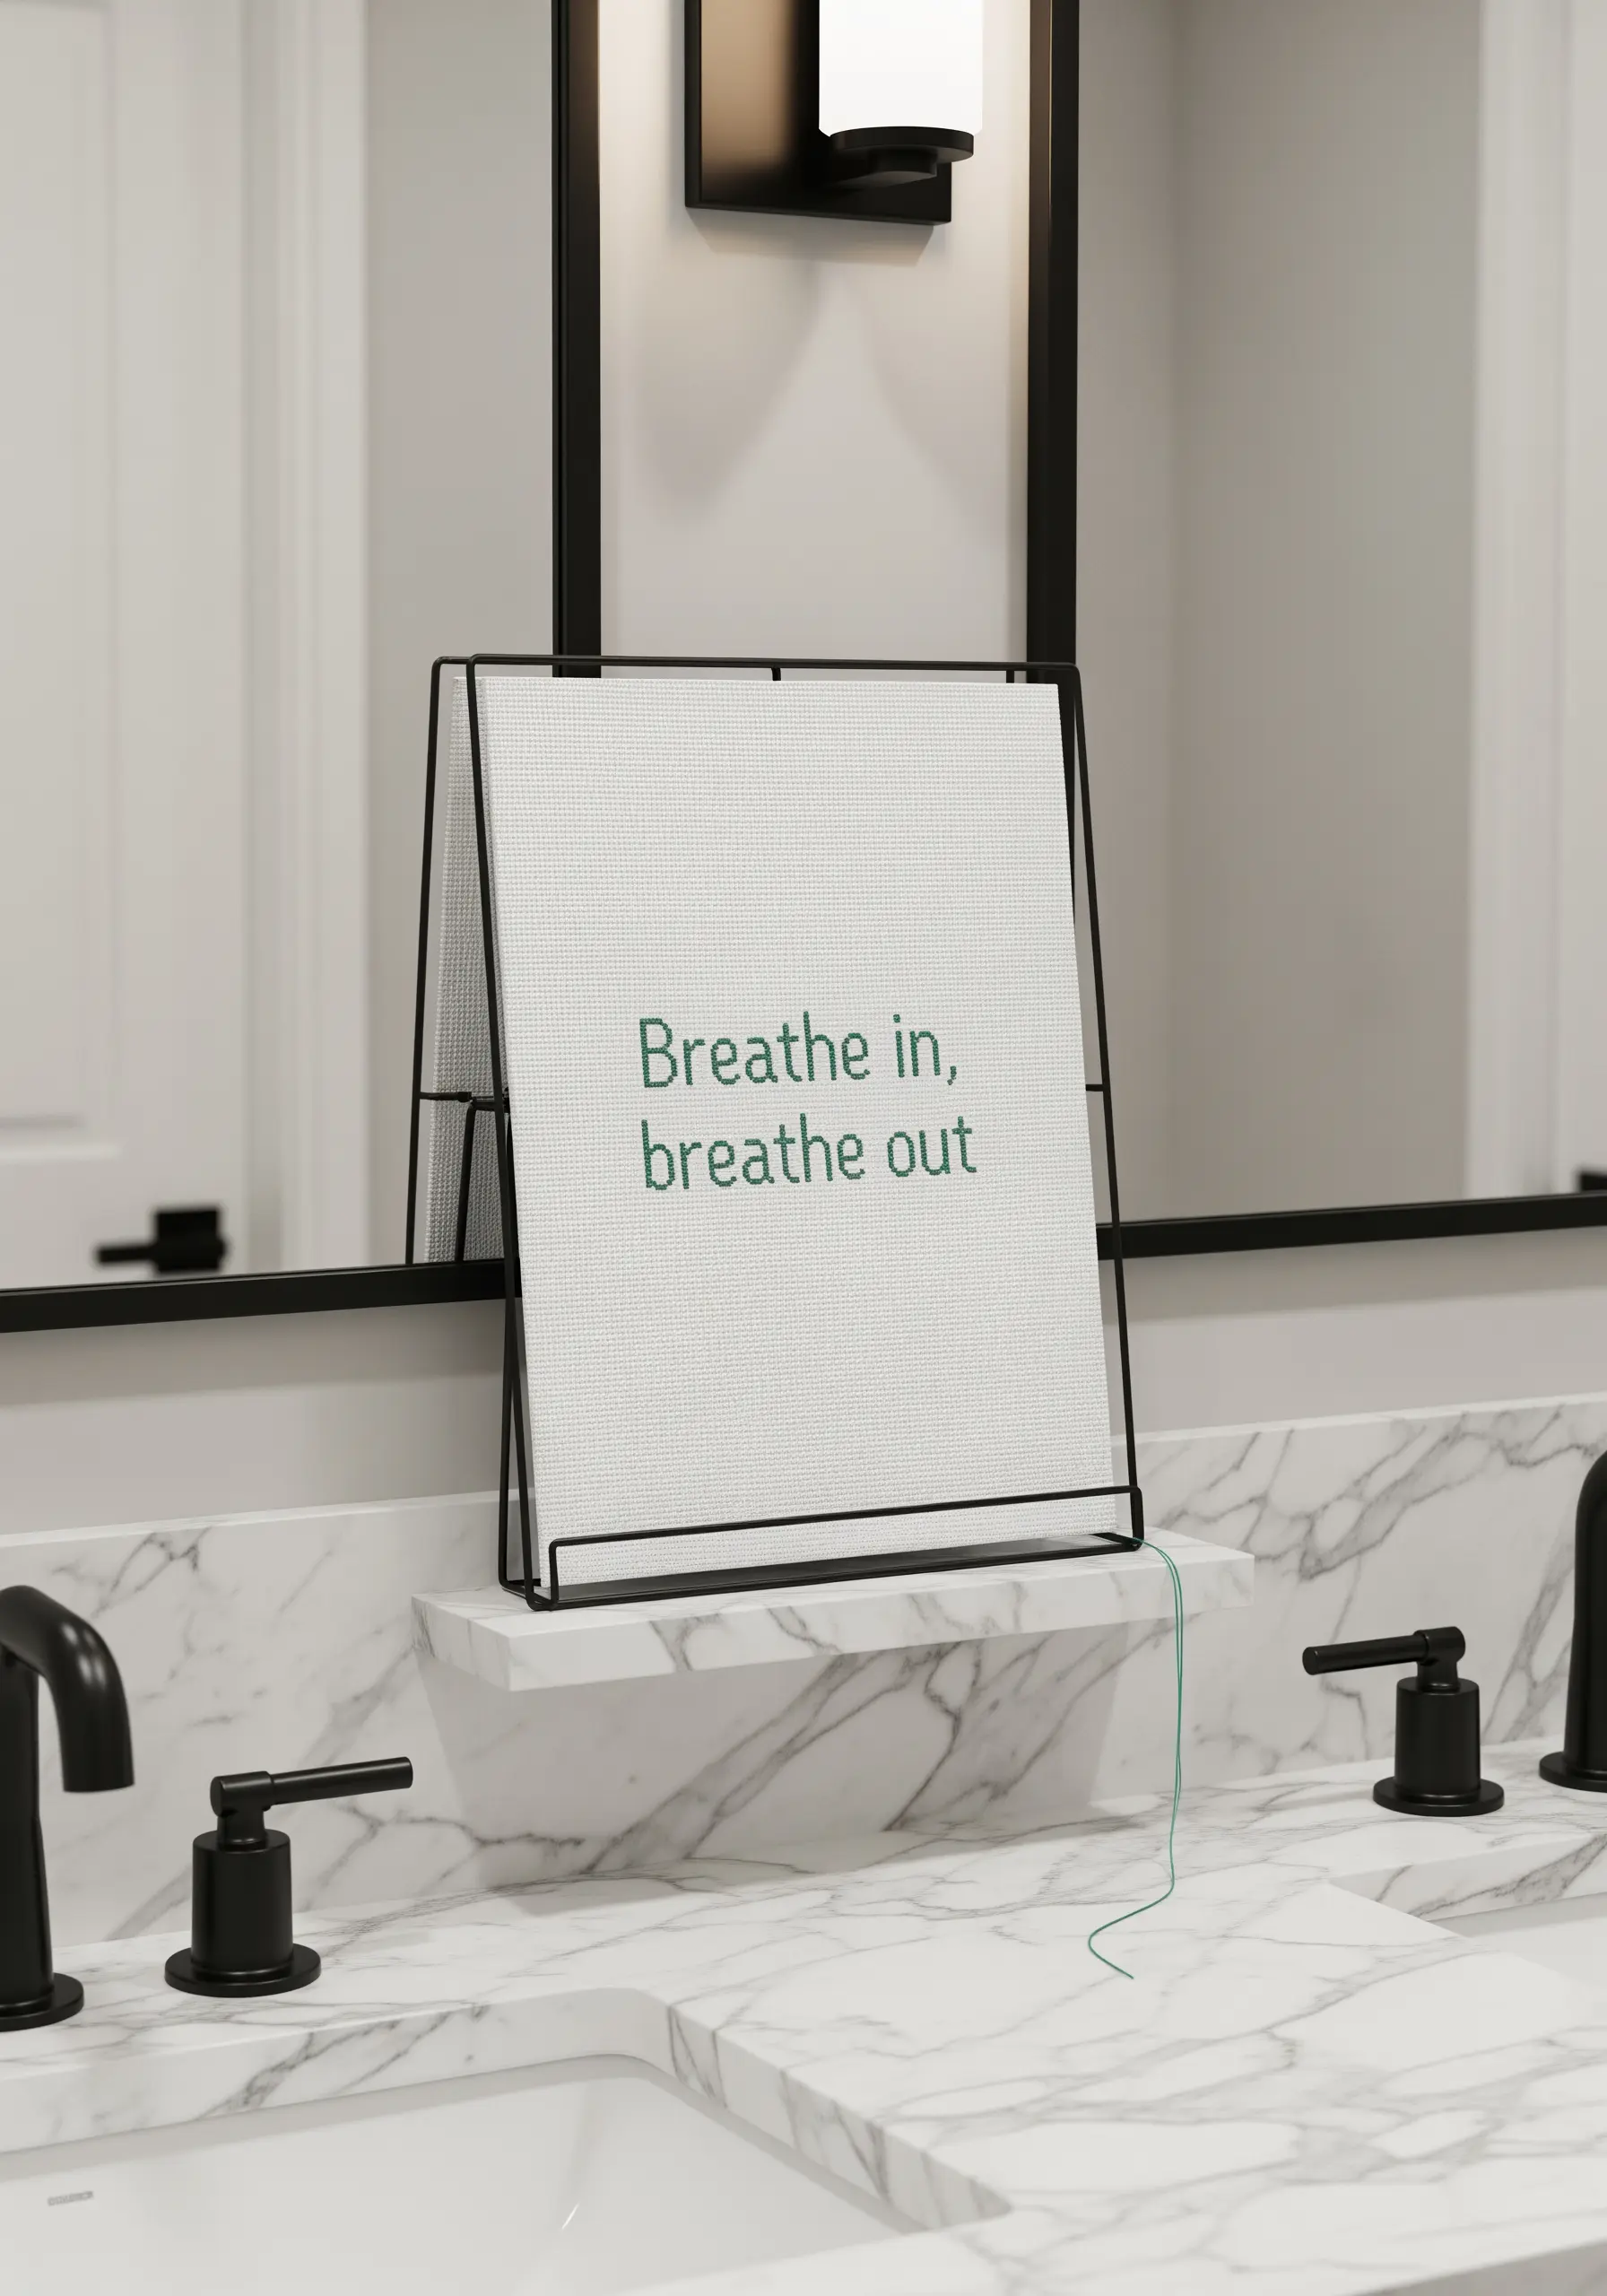
Sometimes, the quietest statements are the most powerful. For a message of mindfulness, focus on simplicity and negative space.
Choose a fine, single-strand backstitch on a crisp, white Aida or even-weave fabric. The grid-like structure of the fabric ensures perfect letter spacing and alignment.
A modern, industrial frame—like a simple metal easel—complements the clean aesthetic and allows the piece to be moved easily.
Consider leaving a long, single thread trailing from the last stitch as a deliberate design element, symbolizing an ongoing thought or breath.
8. Add Playful Dimension with Padded Satin Stitch
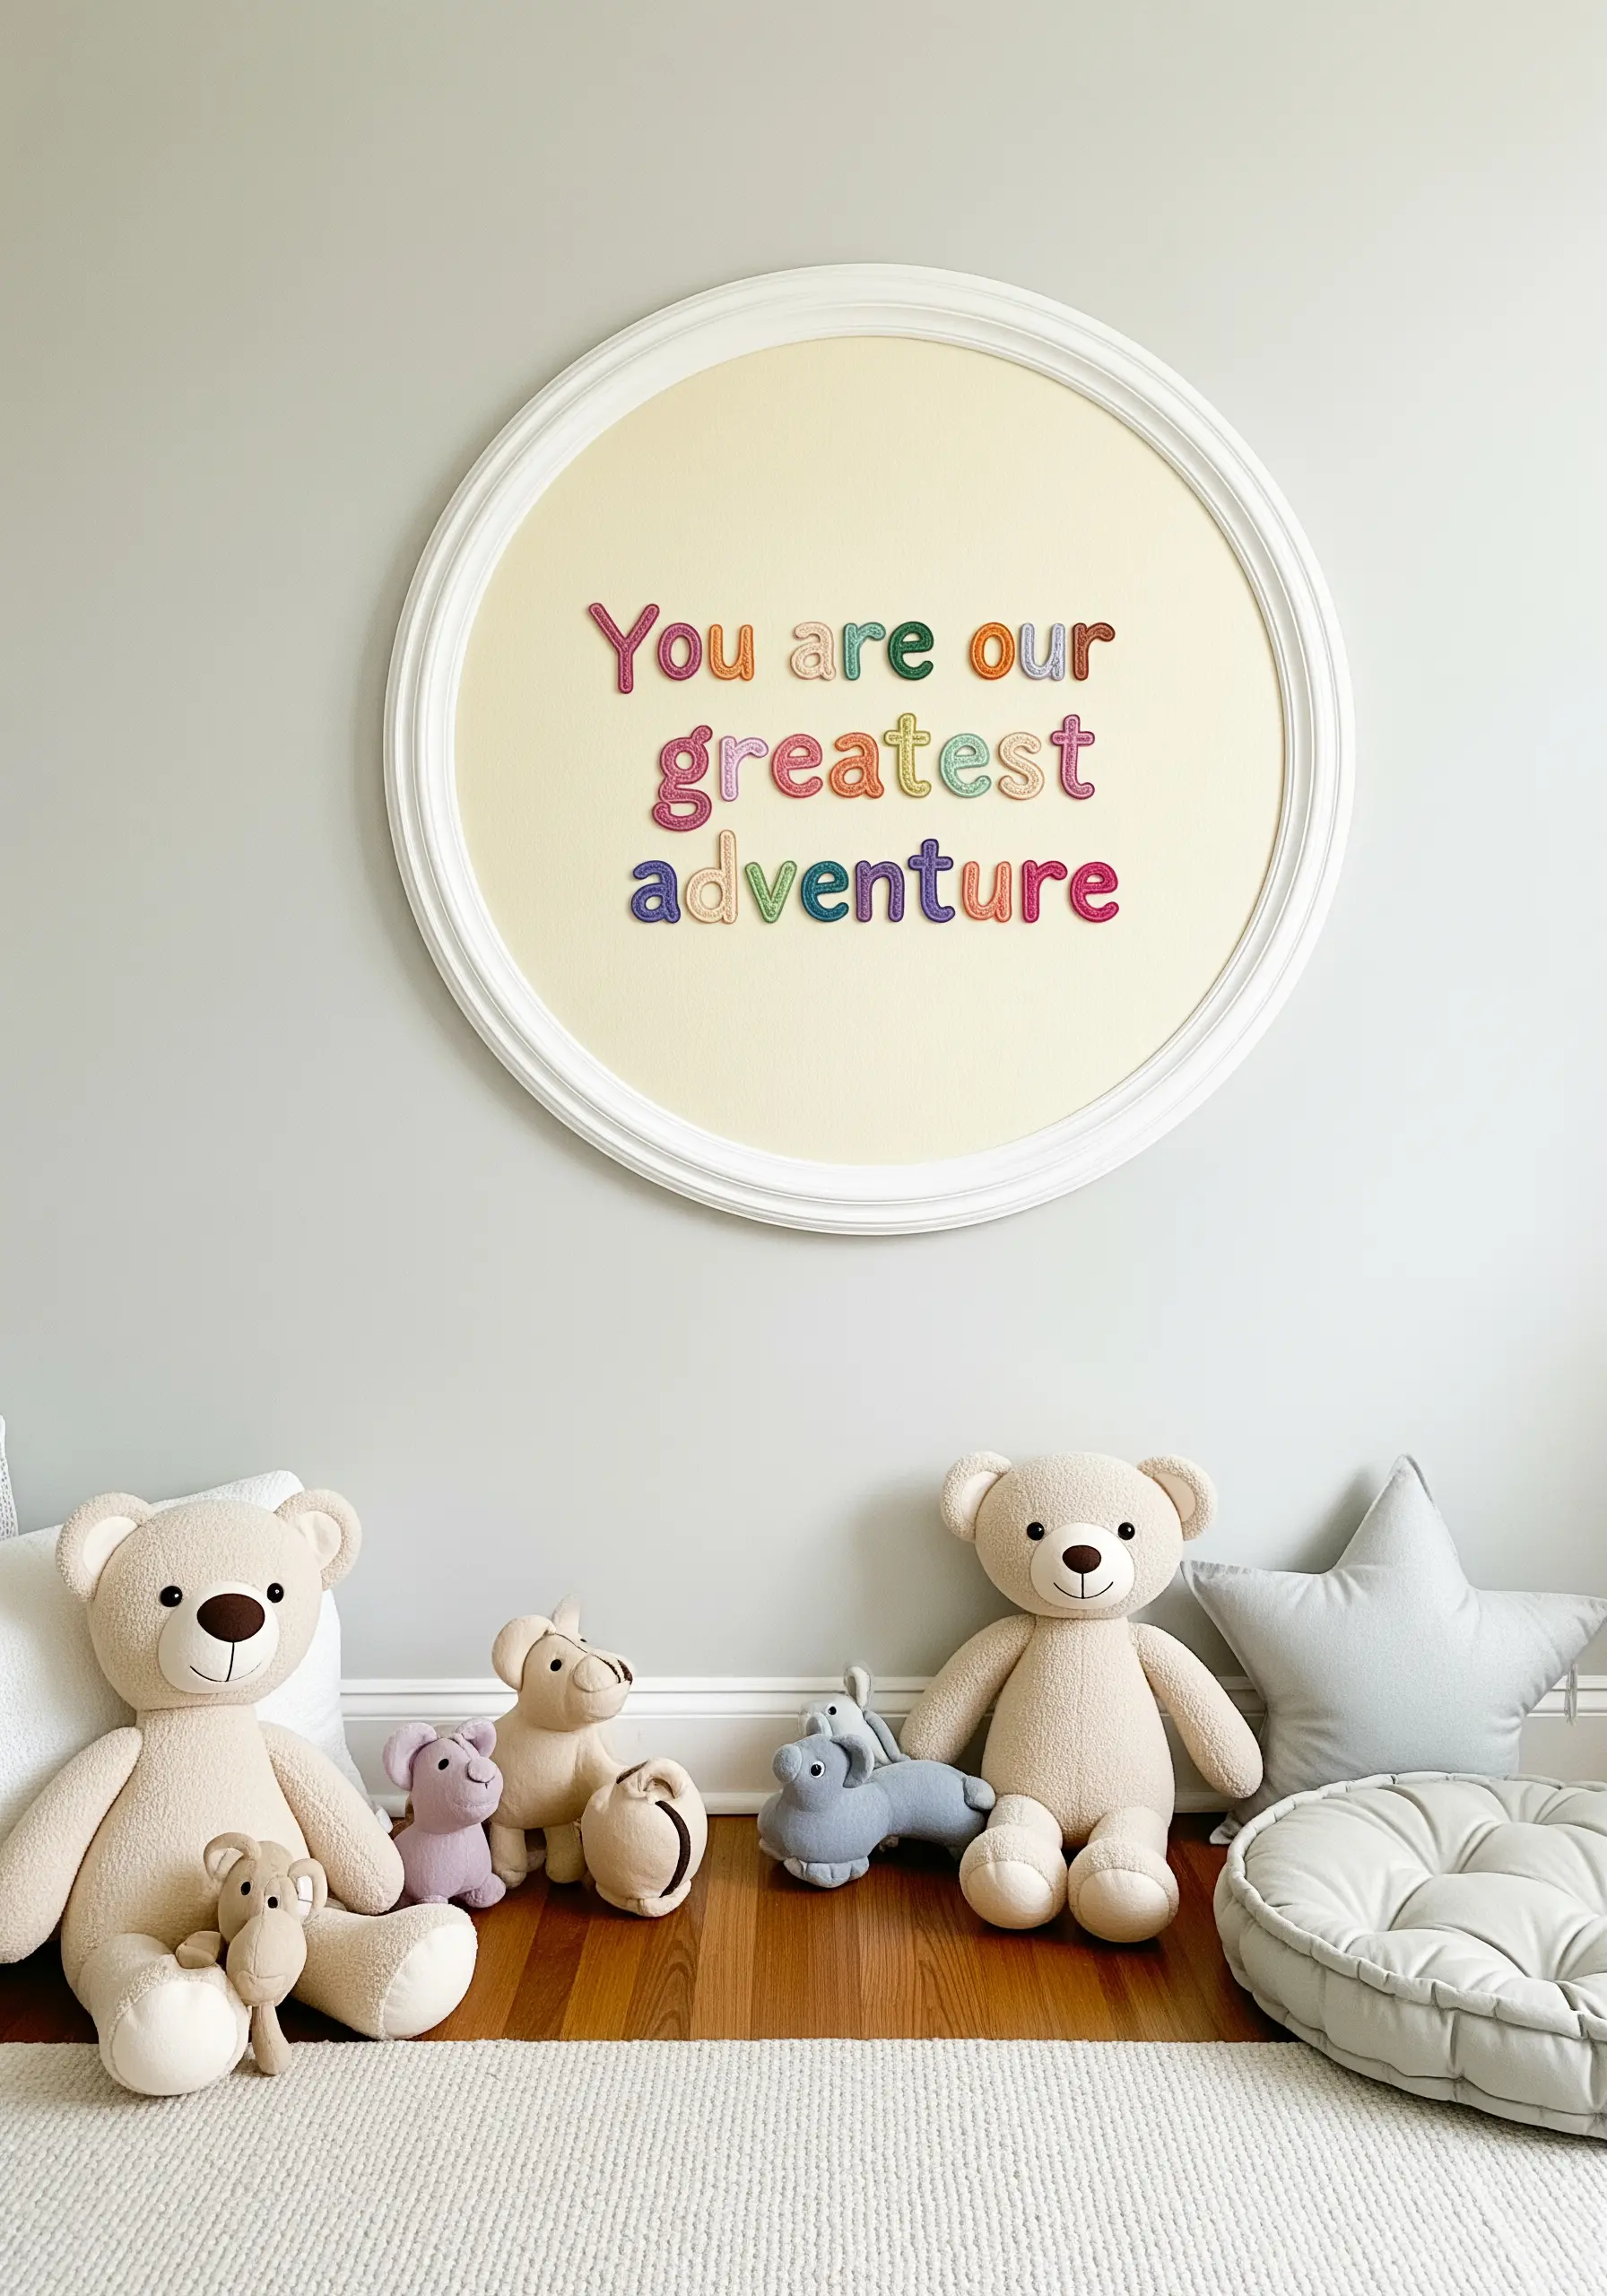
Give your letters a soft, three-dimensional quality perfect for a nursery or child’s room by using a padded satin stitch.
First, fill the shape of each letter with a foundation of small running stitches or seed stitches.
Then, cover this padded base with a smooth layer of satin stitch. The underlying texture will lift the top stitches, creating a pillowy, tactile effect.
Use a gentle, multi-color palette to add a touch of whimsy and joy, turning a sweet quote into a cherished piece of embroidered nursery decor.
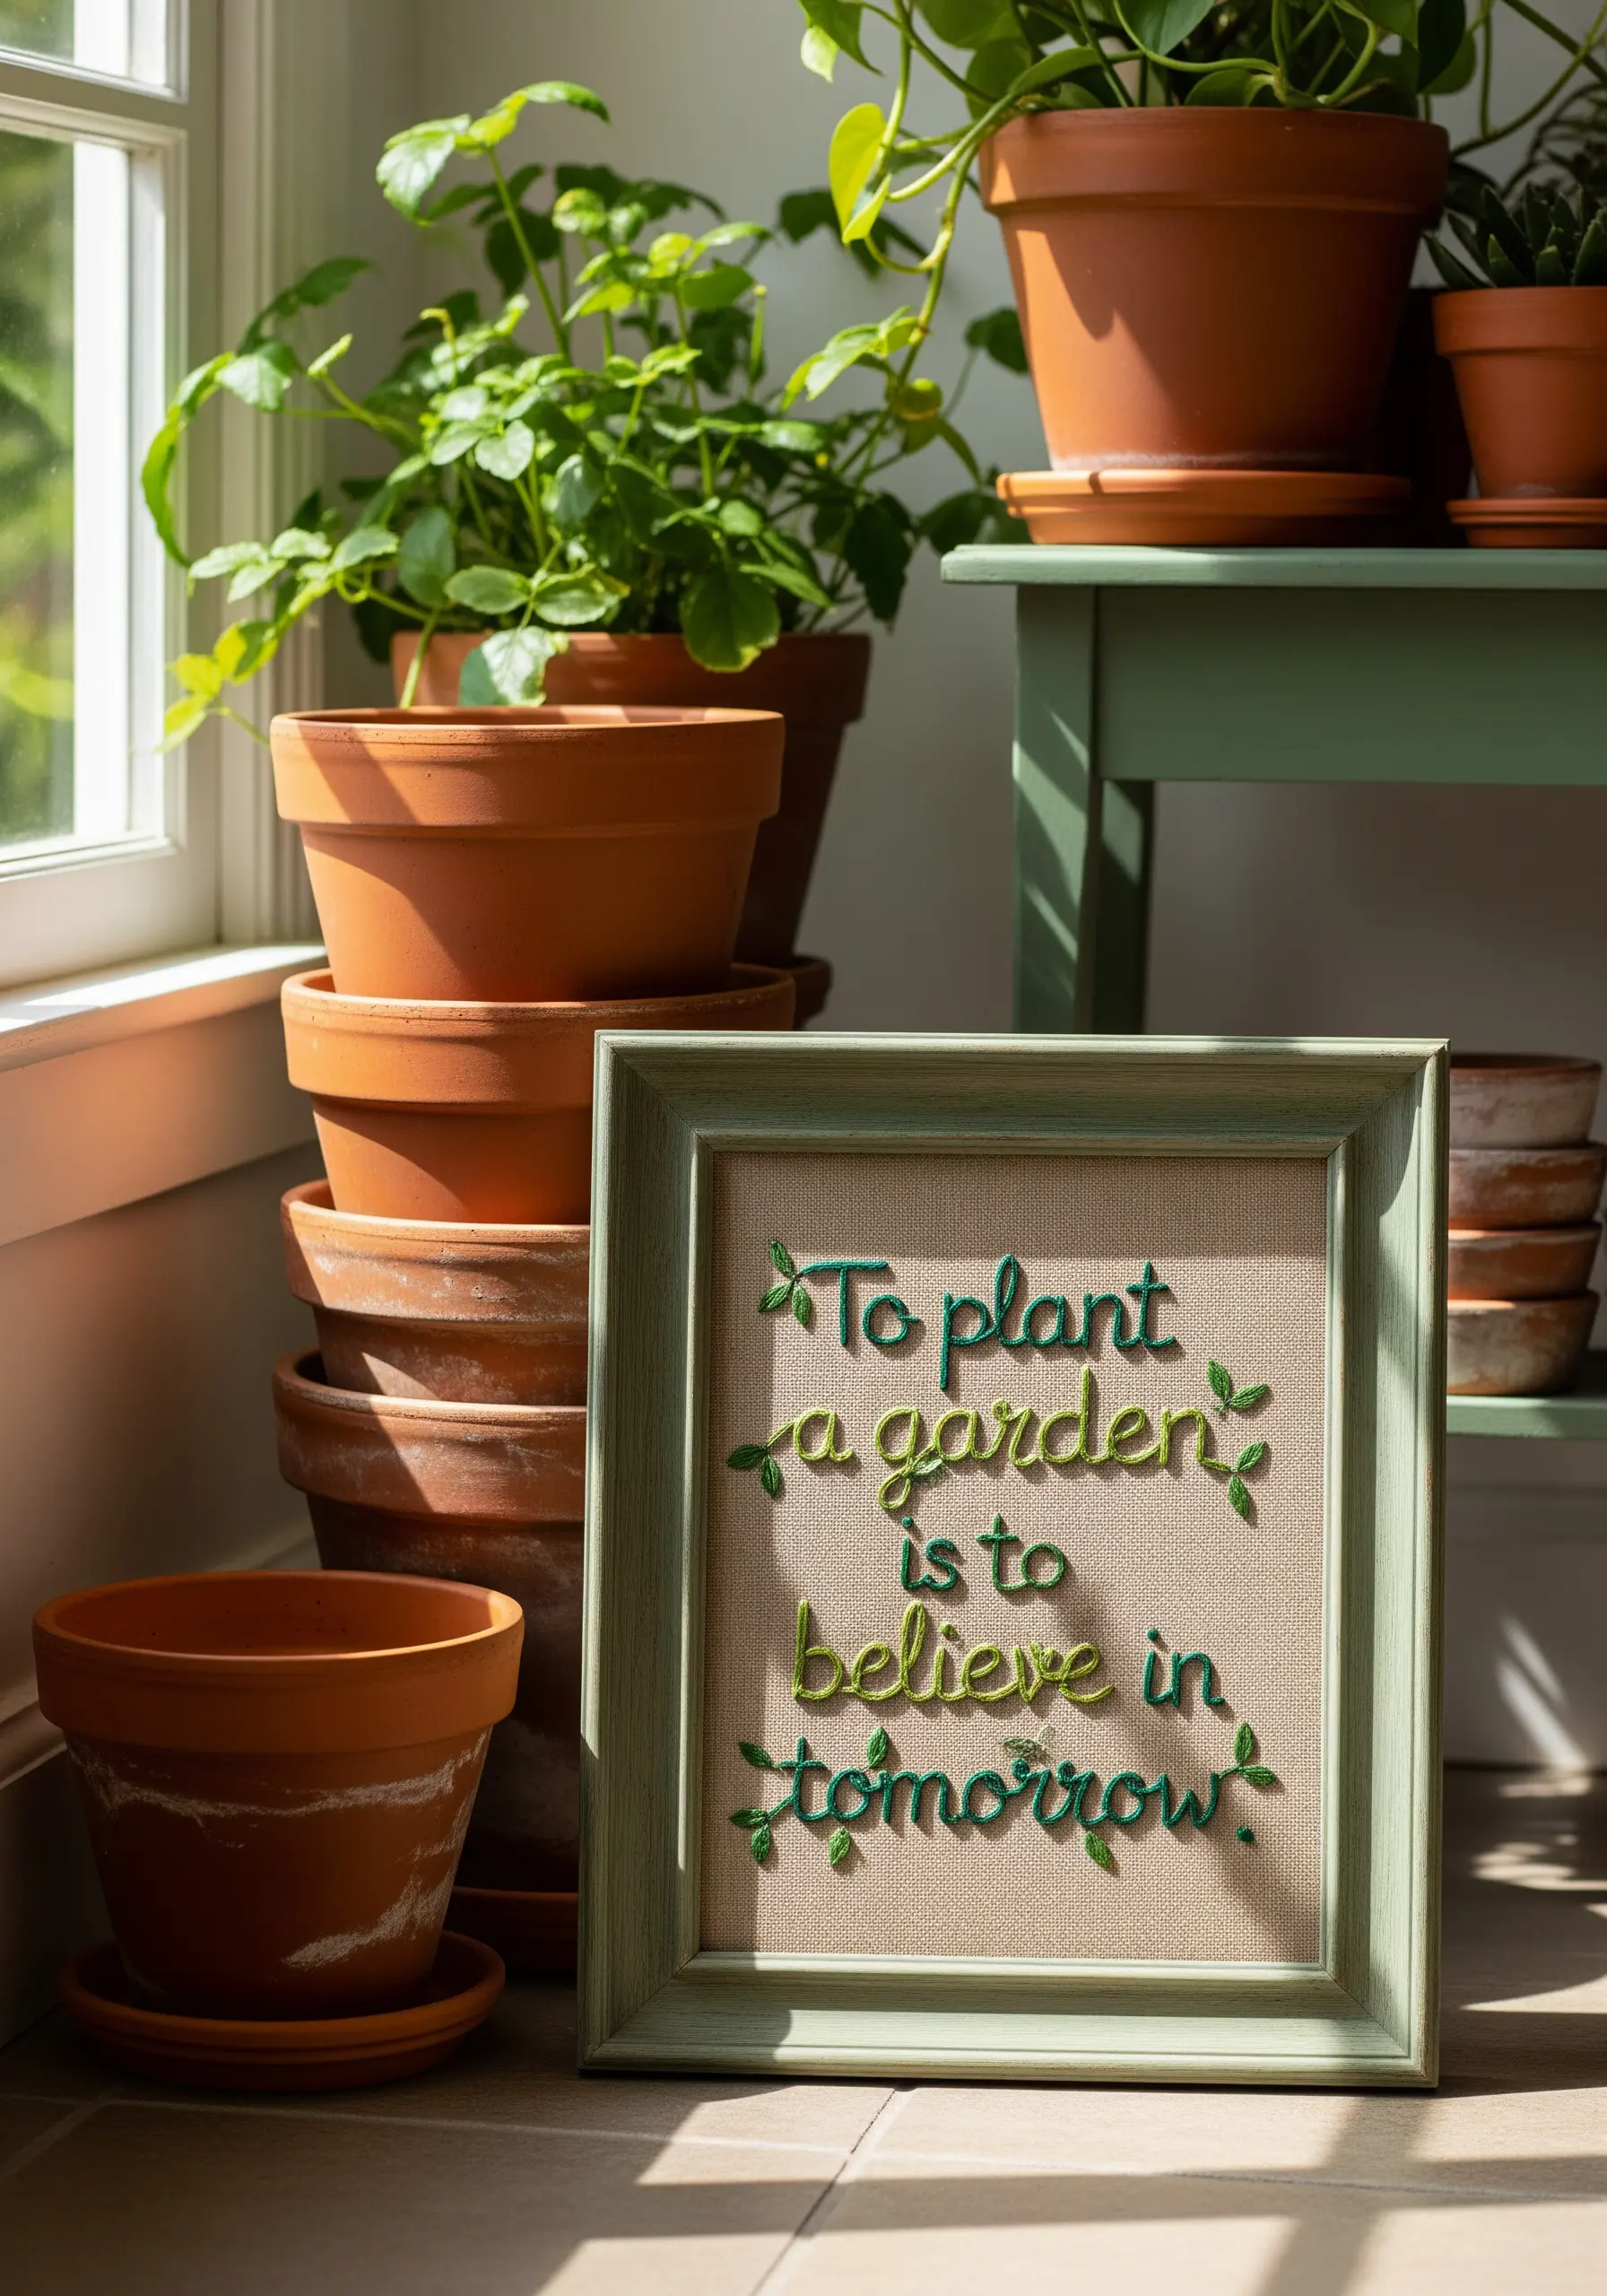
9. Pair Textured Stitches with a Rustic Frame

Create a harmonious piece by echoing the texture of your stitches in your choice of frame.
Use a chunky thread and a dense satin stitch for the main word of your quote to make it the clear focal point.
Contrast this with a lighter backstitch for the surrounding words to create visual hierarchy.
Mount the finished work in a reclaimed wood frame. The natural grain and imperfections of the wood will complement the handmade quality of your stitching, creating a cohesive, rustic look.
10. Capture a Formal Tone with Traditional Lettering
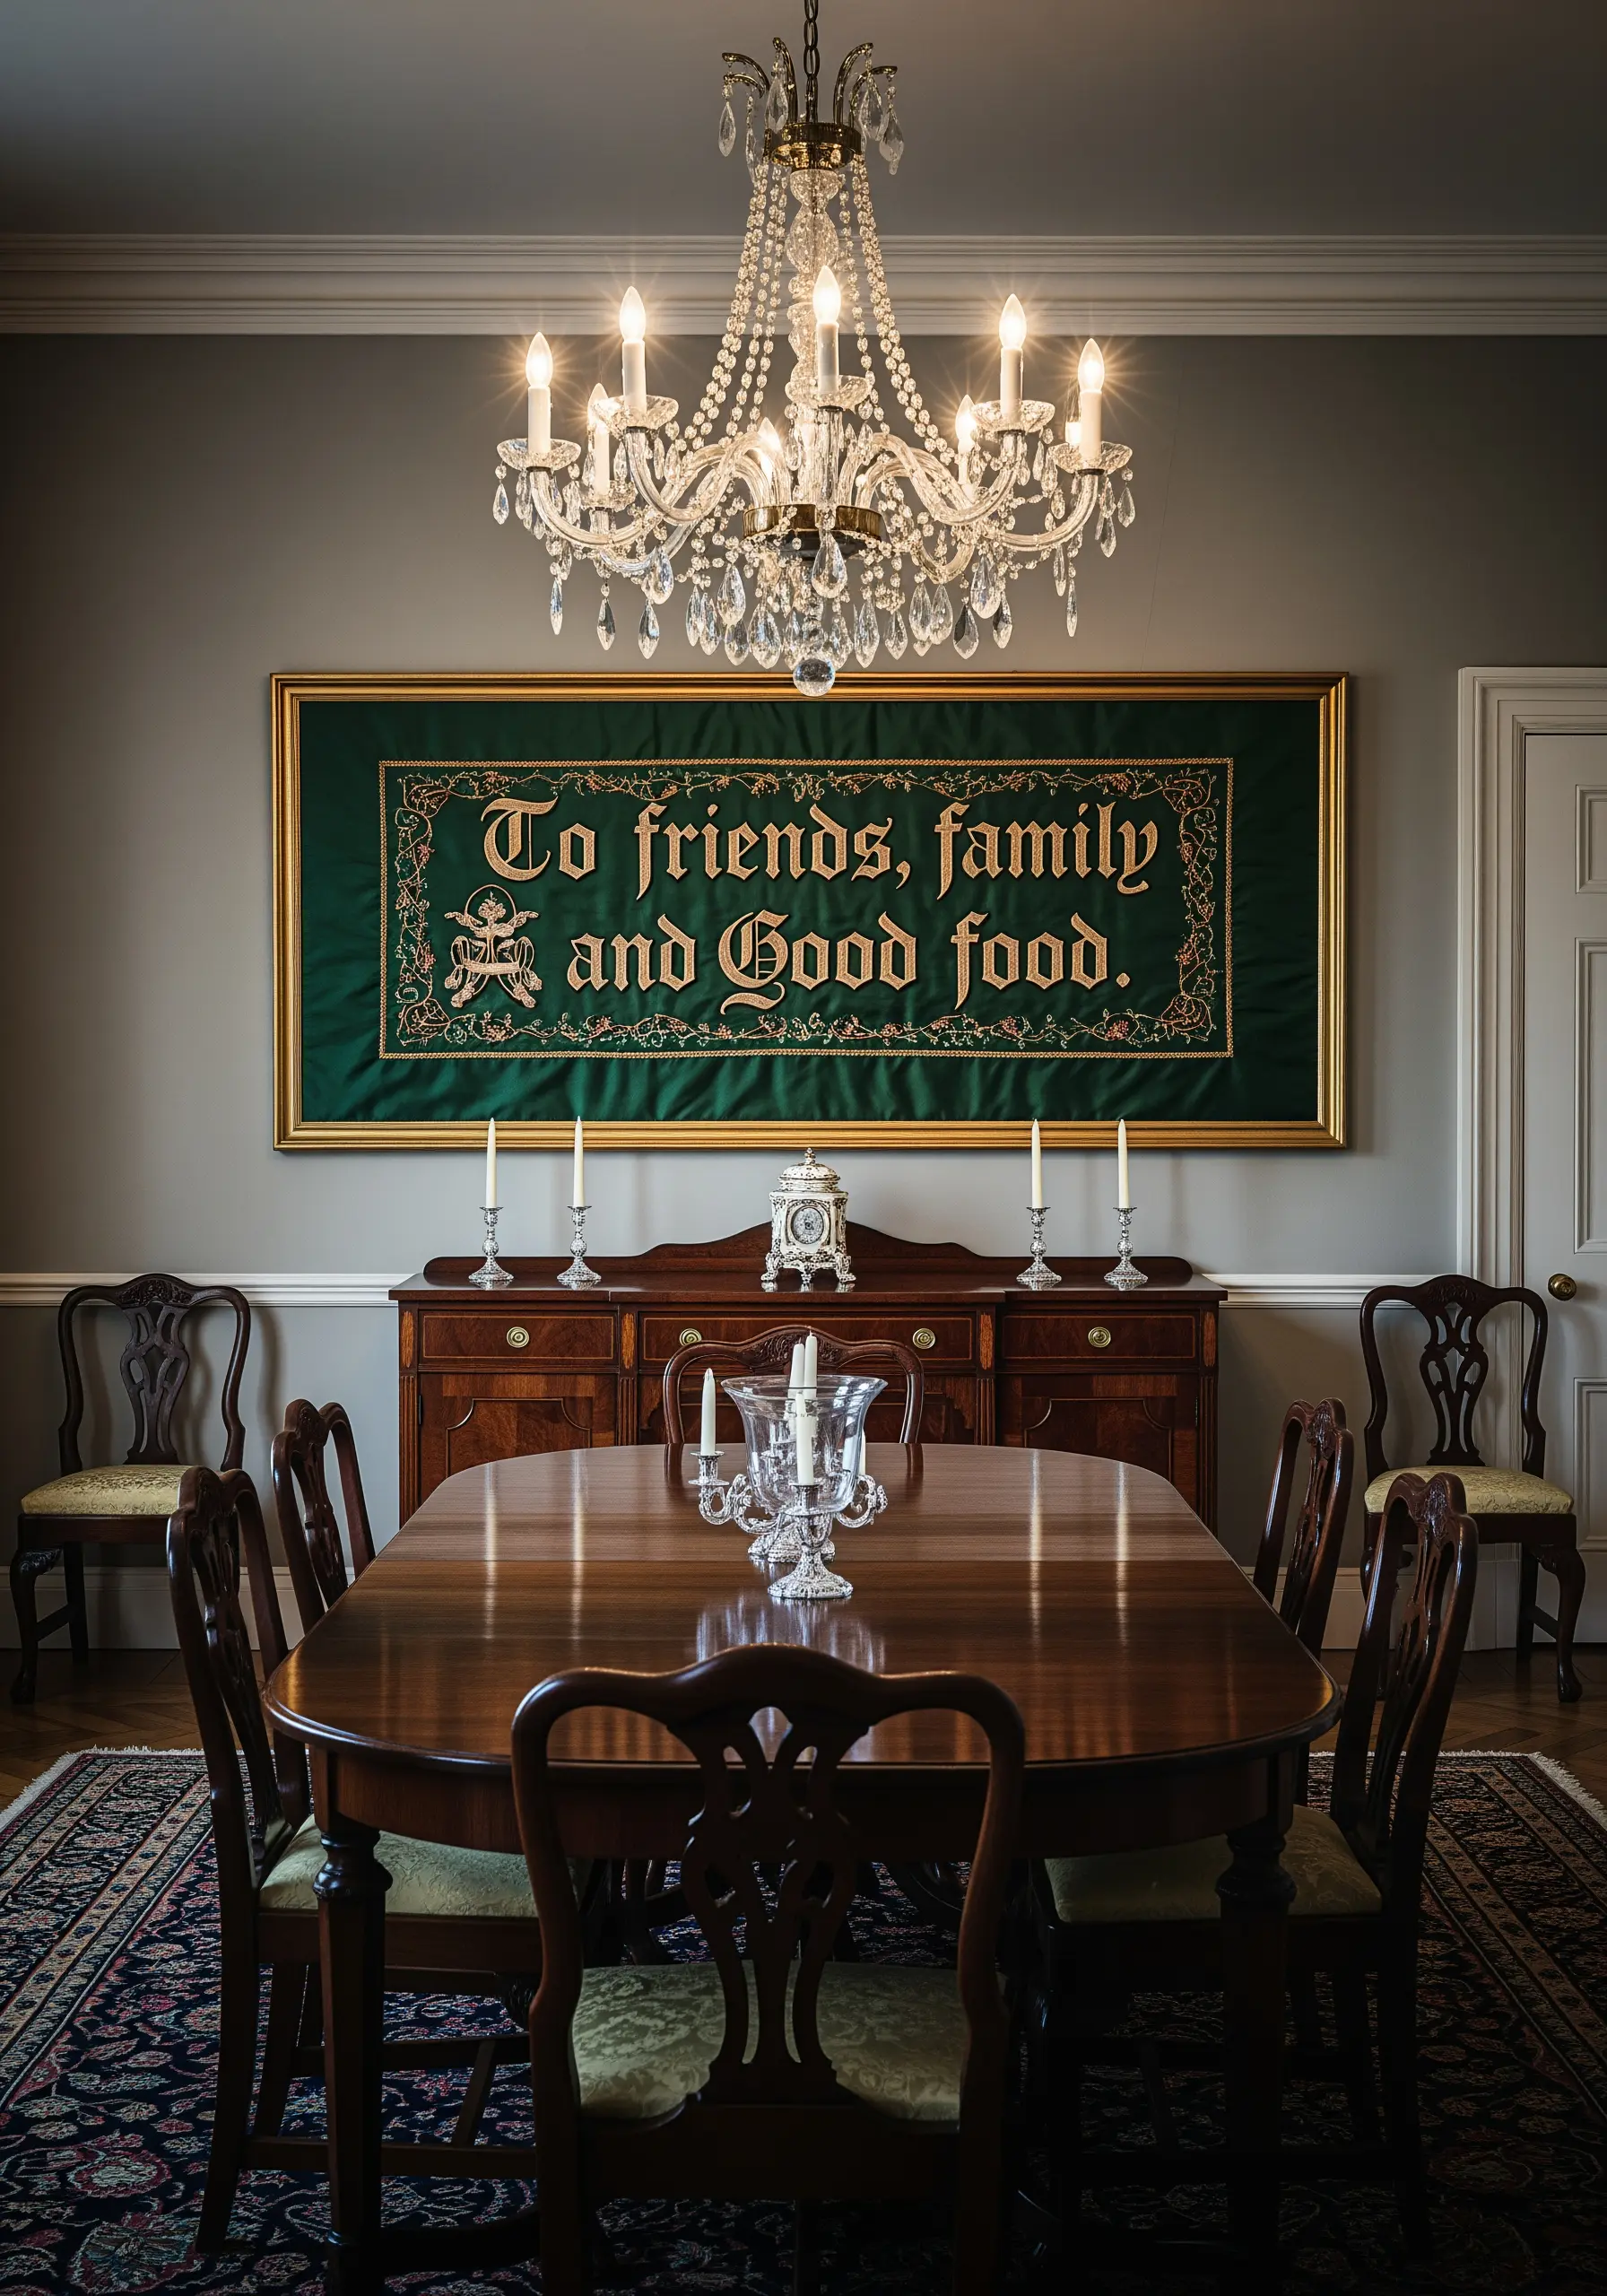
For quotes that evoke a sense of heritage or formality, choose a typeface and color palette that reflects tradition.
Study Blackletter or Gothic scripts and replicate them using a fine, metallic gold thread on a rich, dark fabric like emerald velvet or navy linen.
Use a combination of satin stitch for the thick strokes and backstitch for the thin lines to accurately capture the calligraphic style.
Framing this as a long banner enhances its stately, heirloom quality, making it a commanding piece for a formal dining room or study.
11. Showcase Delicate Stitches in a Modern Acrylic Frame
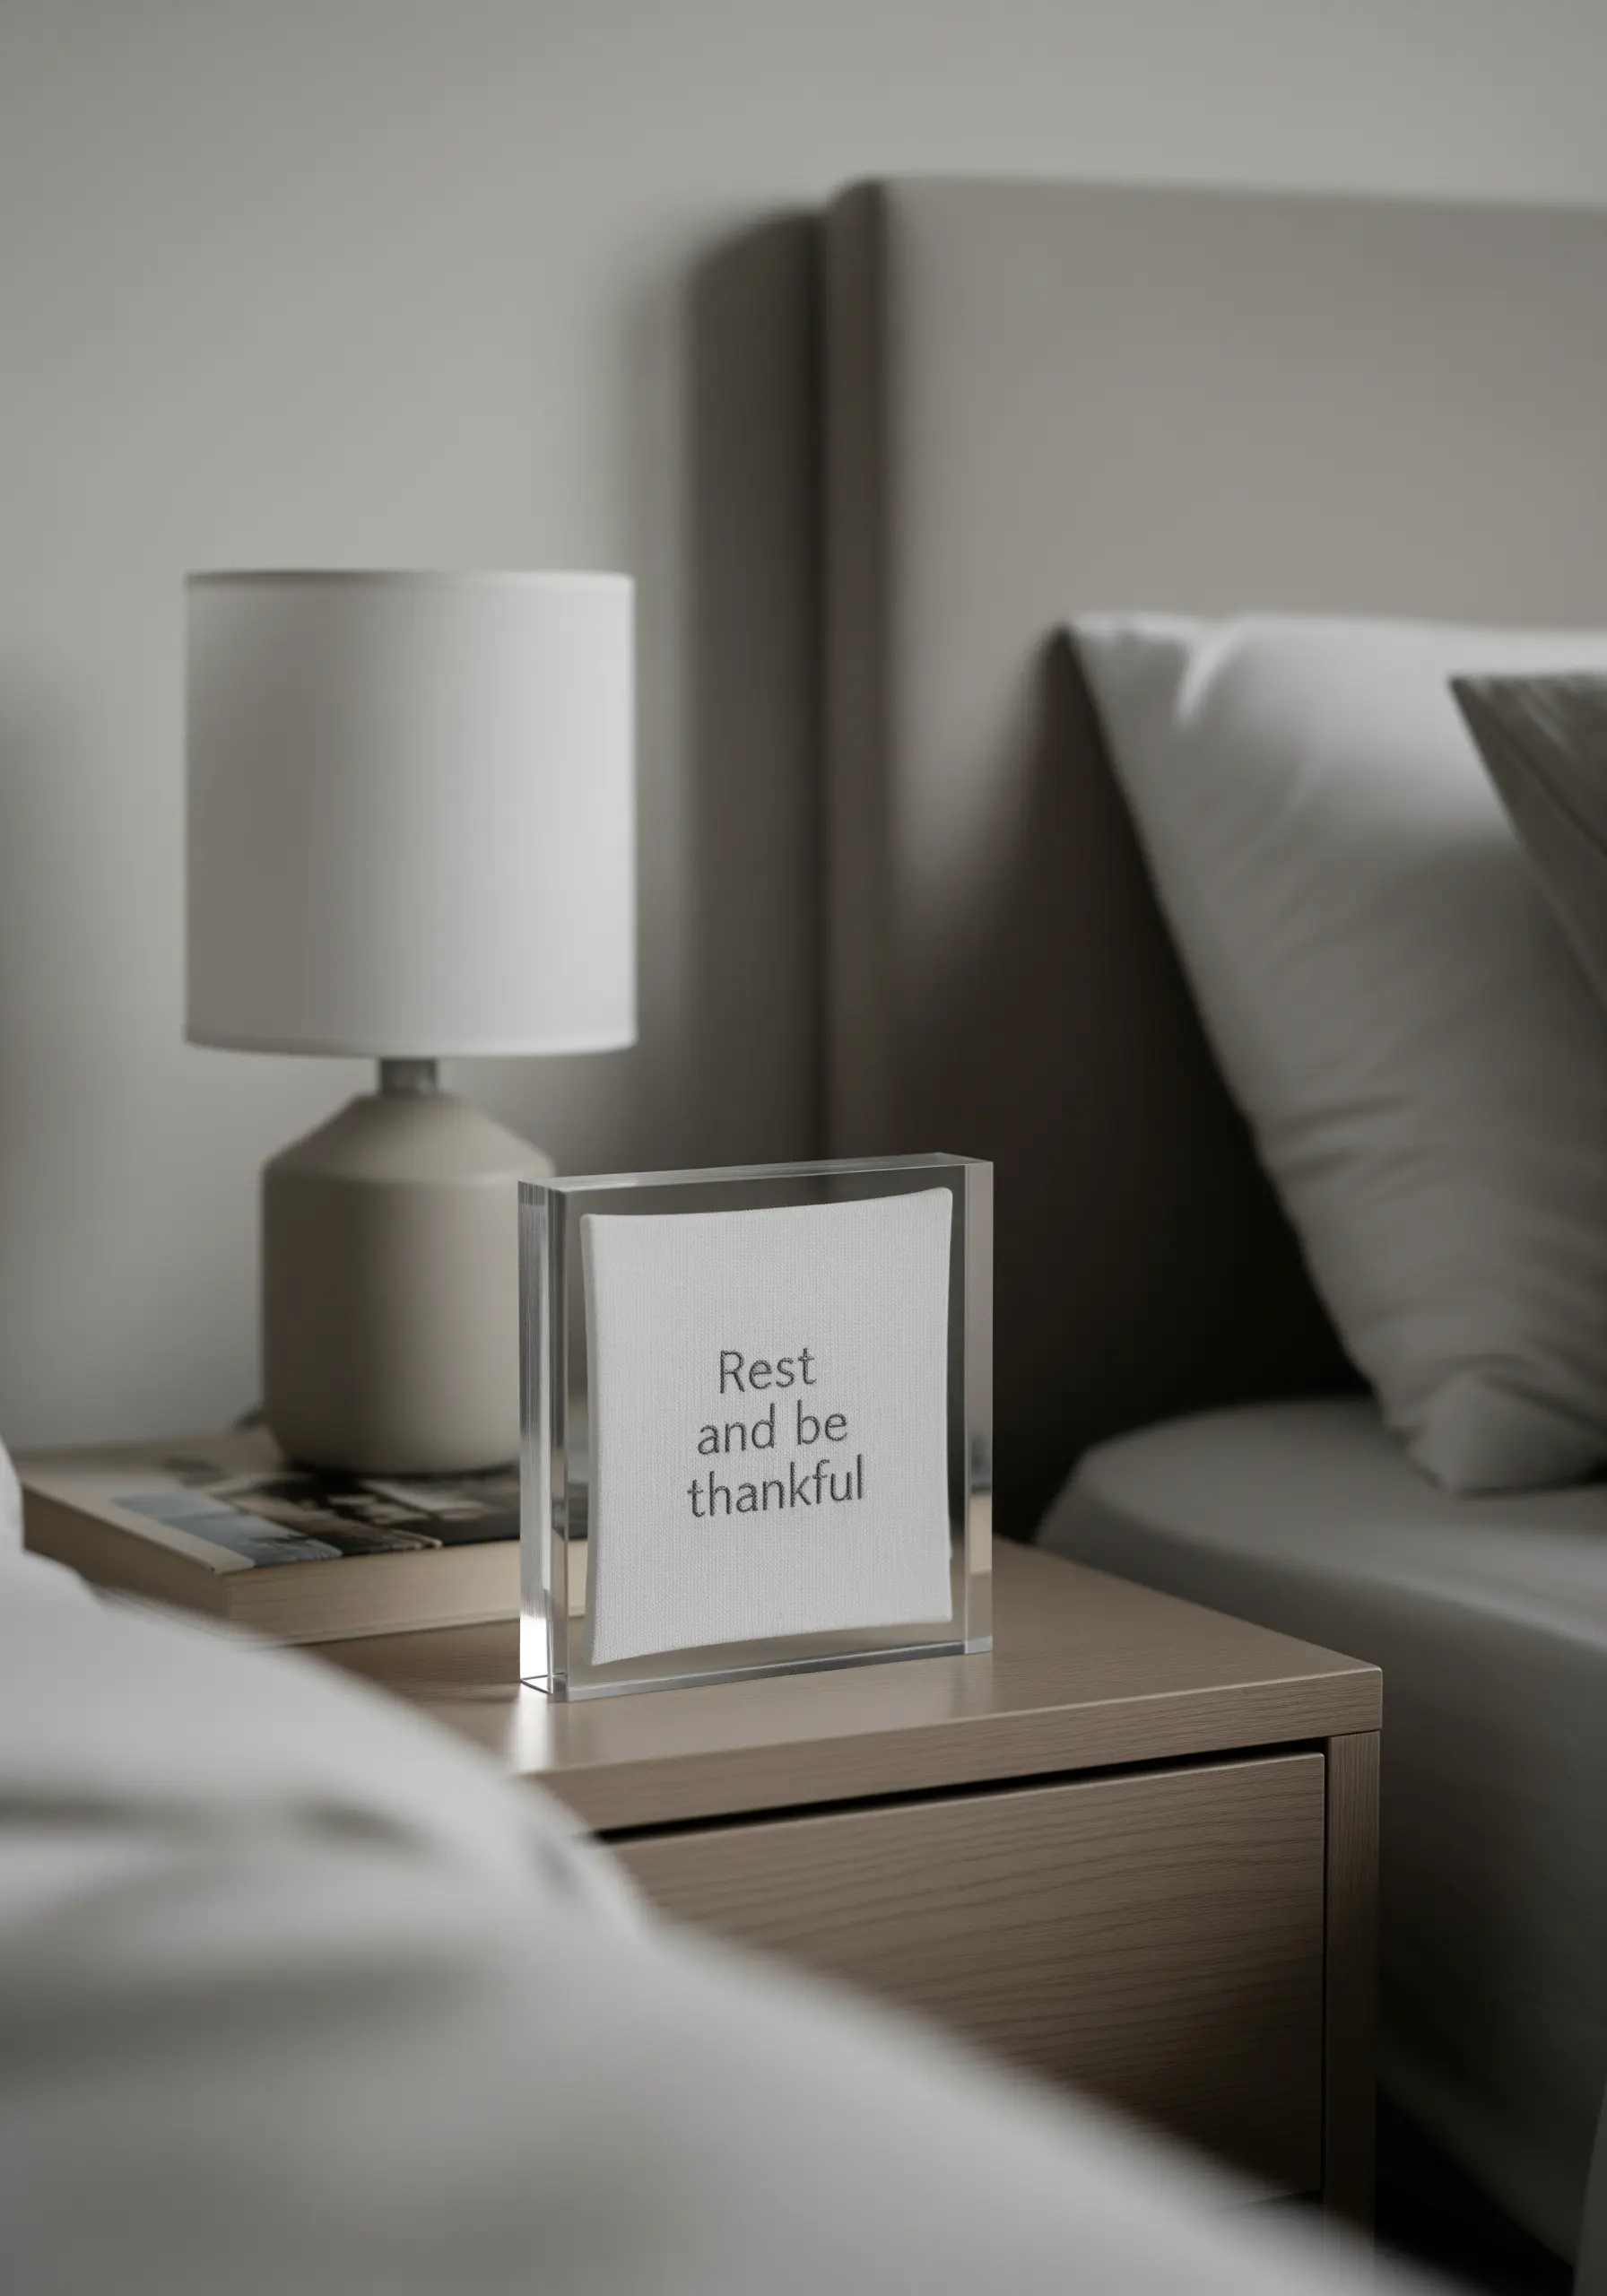
Give a tiny, understated quote a place of honor by choosing a frame that feels like a museum display.
Stitch a simple phrase using just one or two strands of floss on a high-quality, neutral fabric.
Encasing the piece in a clear acrylic block or a floating glass frame removes all distractions, focusing the viewer’s attention entirely on the delicate craft of the stitches.
This minimalist presentation is perfect for a modern bedside table or desk, turning one of your minimal DIY embroidery projects into a precious object.
12. Embrace Maximalism with High-Texture Yarn
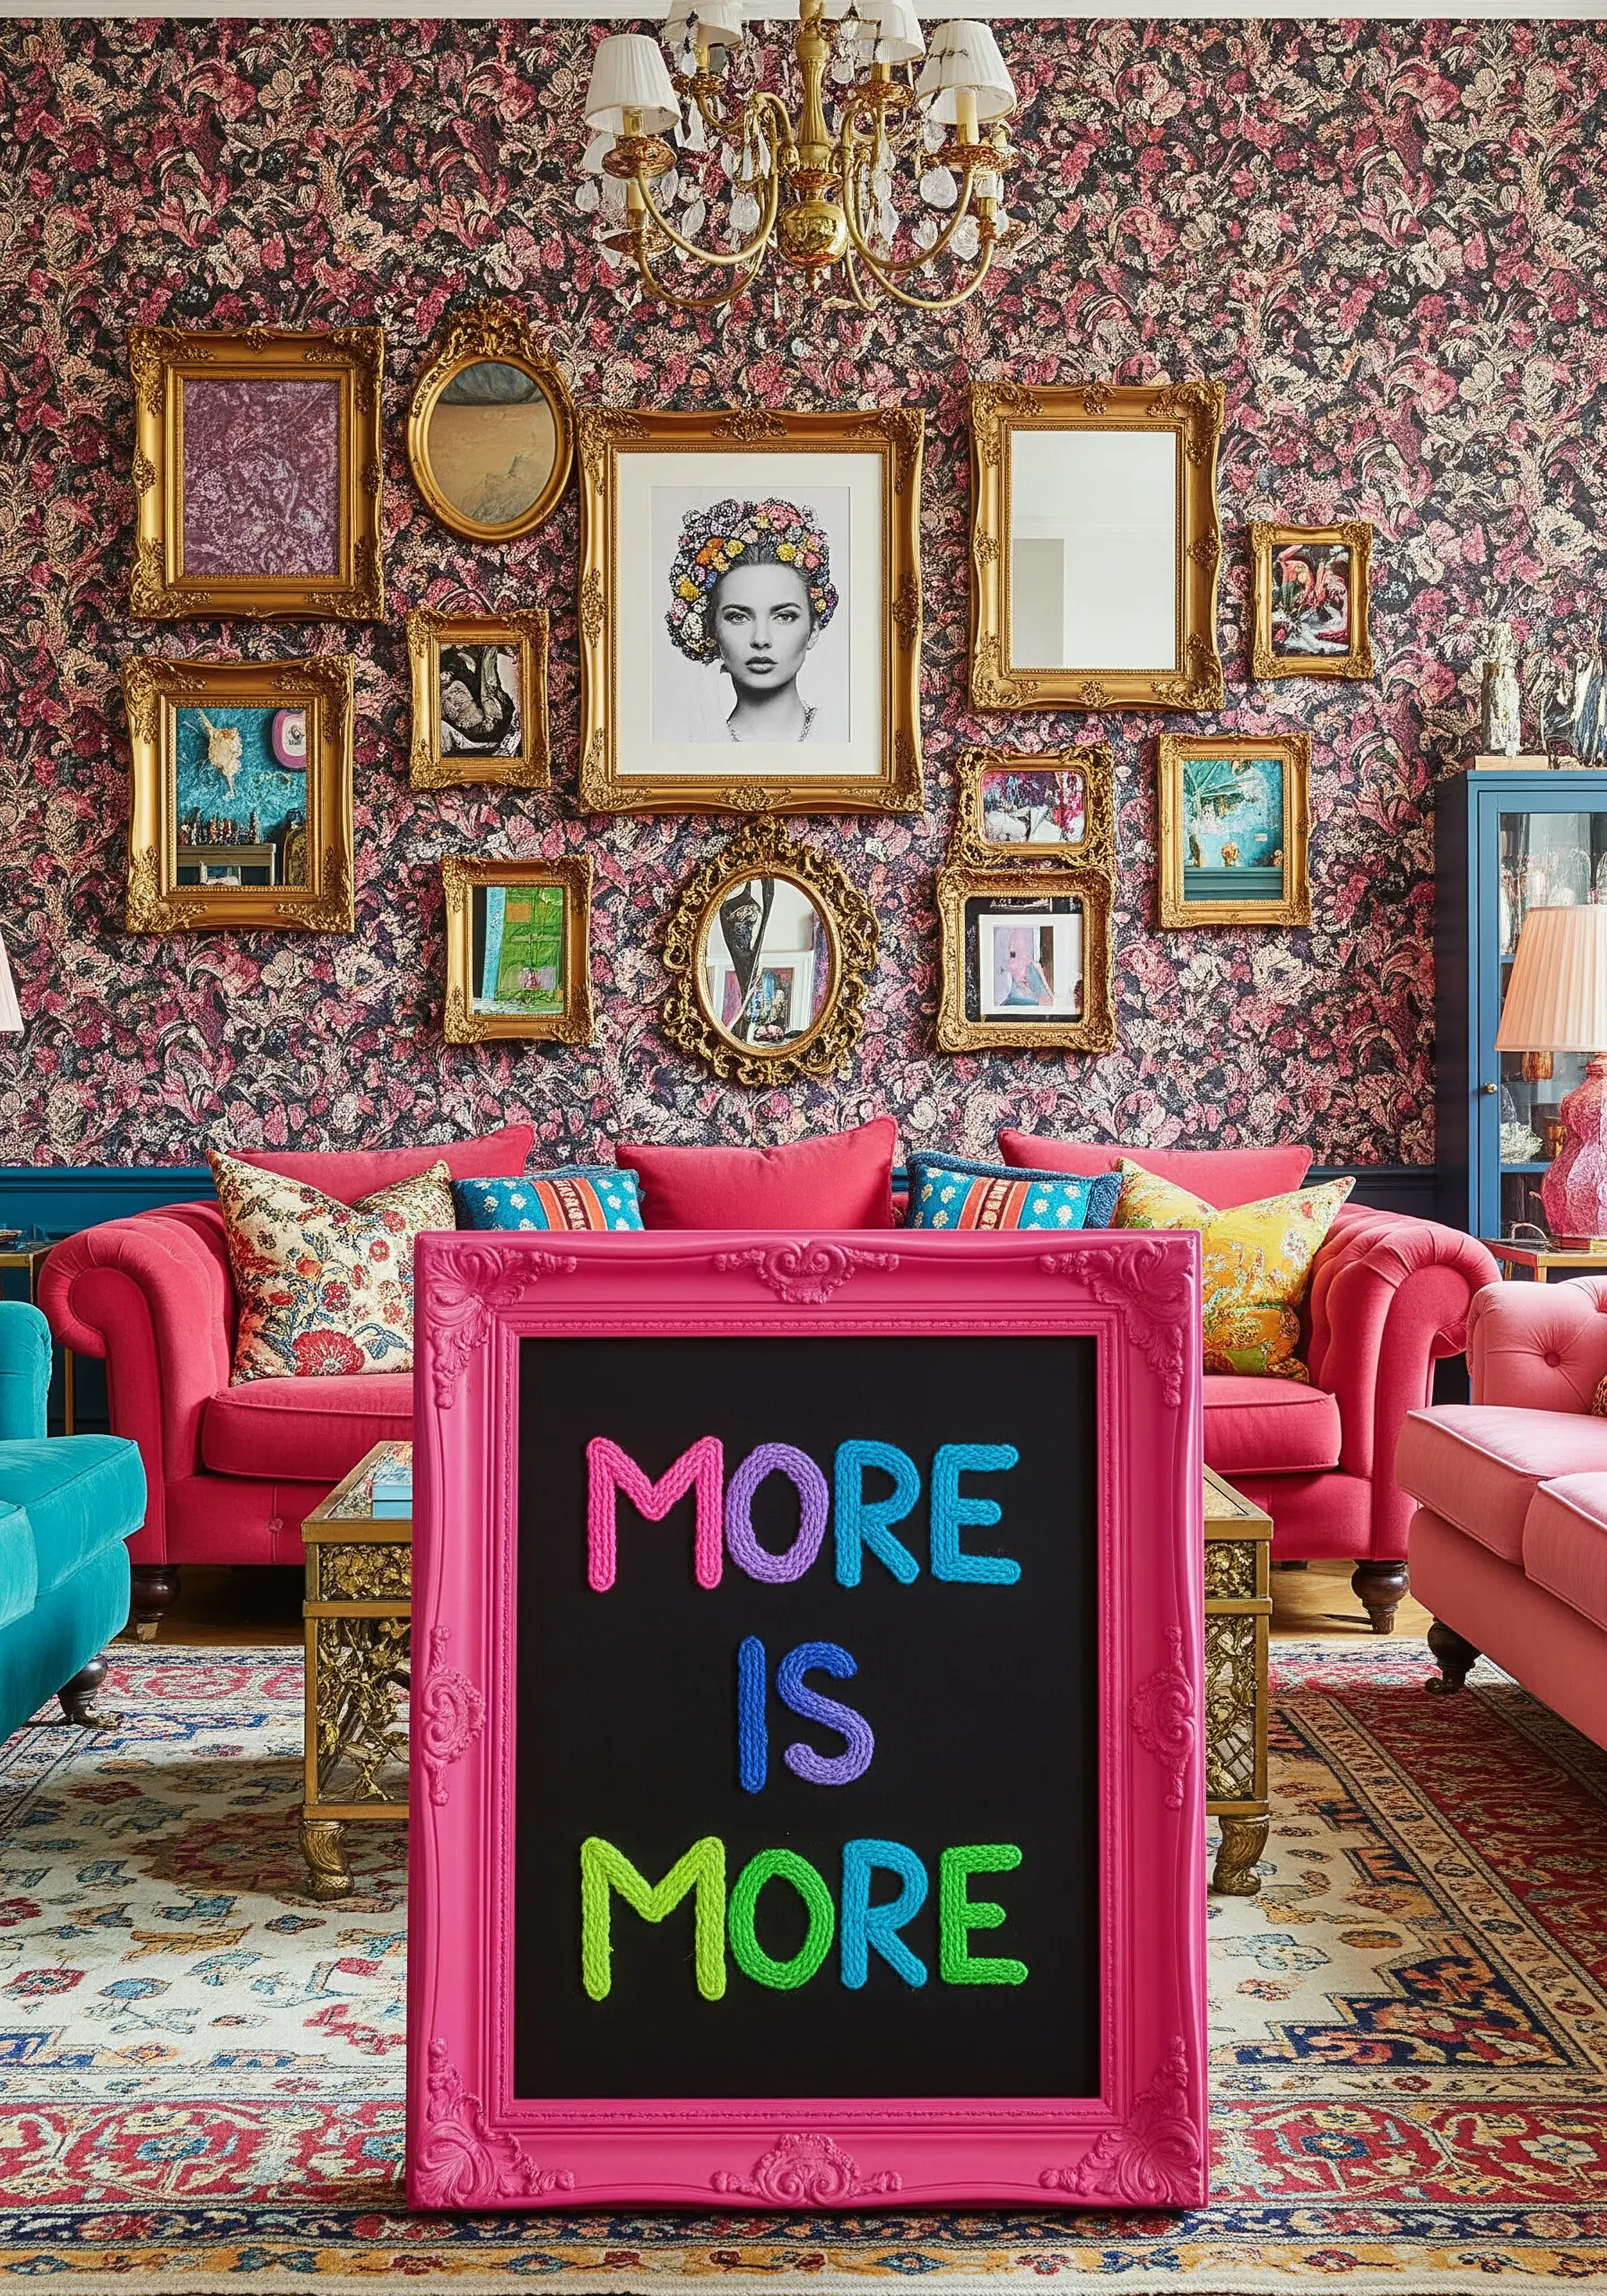
When your motto is “more is more,” let your materials reflect that philosophy.
Instead of floss, use chunky yarn and a punch needle to create bold, highly textured letters with a looped, rug-like finish.
Alternatively, couch thick yarn onto the fabric surface with a thinner, matching thread for a similar dimensional effect.
Mount your work on a black background to make the vibrant colors pop, and choose a frame that is just as loud and joyful as the quote itself.
13. Create a Floating Effect with Sheer Fabric
Make your words appear to float in mid-air by stitching on a transparent or semi-transparent fabric.
Use a delicate material like tulle, organza, or voile stretched tightly in a hoop. A simple backstitch or stem stitch works best, as complex stitches can pull and distort the fine fabric.
Once complete, mount the sheer fabric in a floating glass frame. This technique is especially beautiful for delicate script and ethereal floral motifs that seem to hover within the frame.
14. Illustrate Your Quote with Rhythmic Stitch Patterns
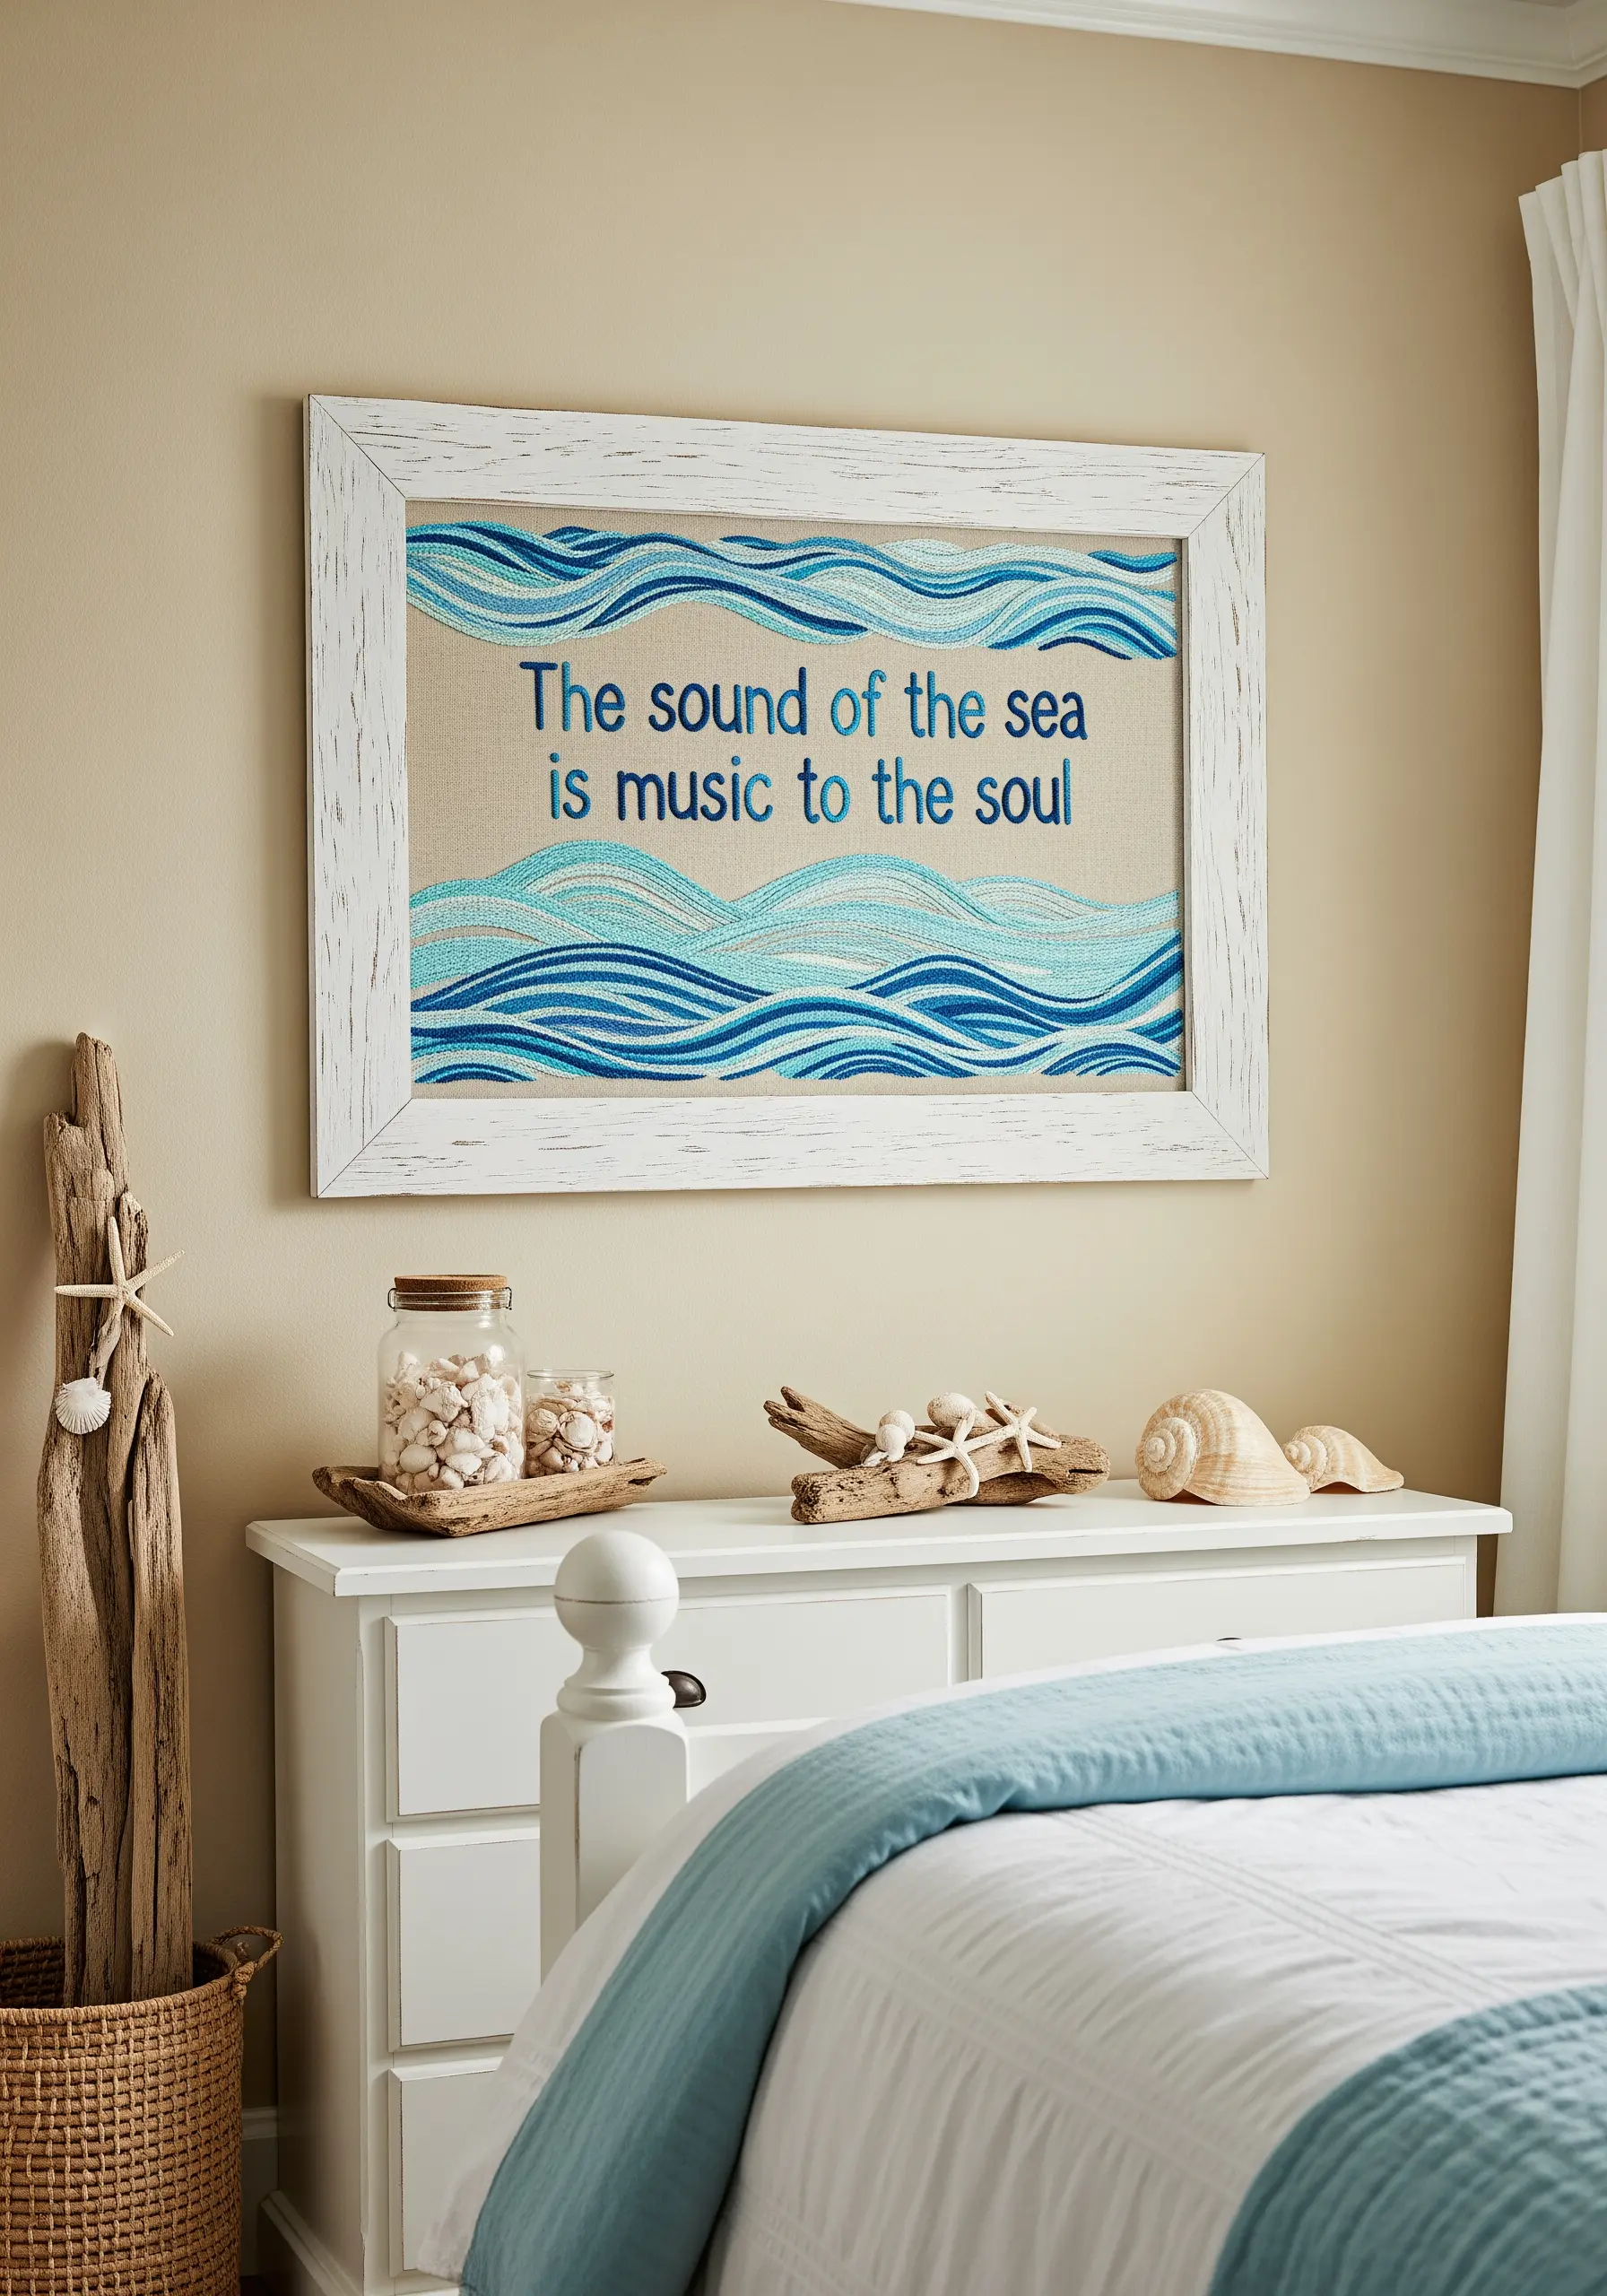
Bring your words to life by integrating illustrative elements that visually represent the quote’s meaning.
For a phrase about the sea, use rows of chain stitch, running stitch, or stem stitch in varying shades of blue and turquoise to create the texture of ocean waves.
Let the stitched pattern flow around and behind the letters, creating a dynamic composition where text and image are one.
A distressed white frame enhances the coastal theme and adds to the piece’s relaxed, breezy feel.
15. Add Geometric Interest with an Unconventional Frame
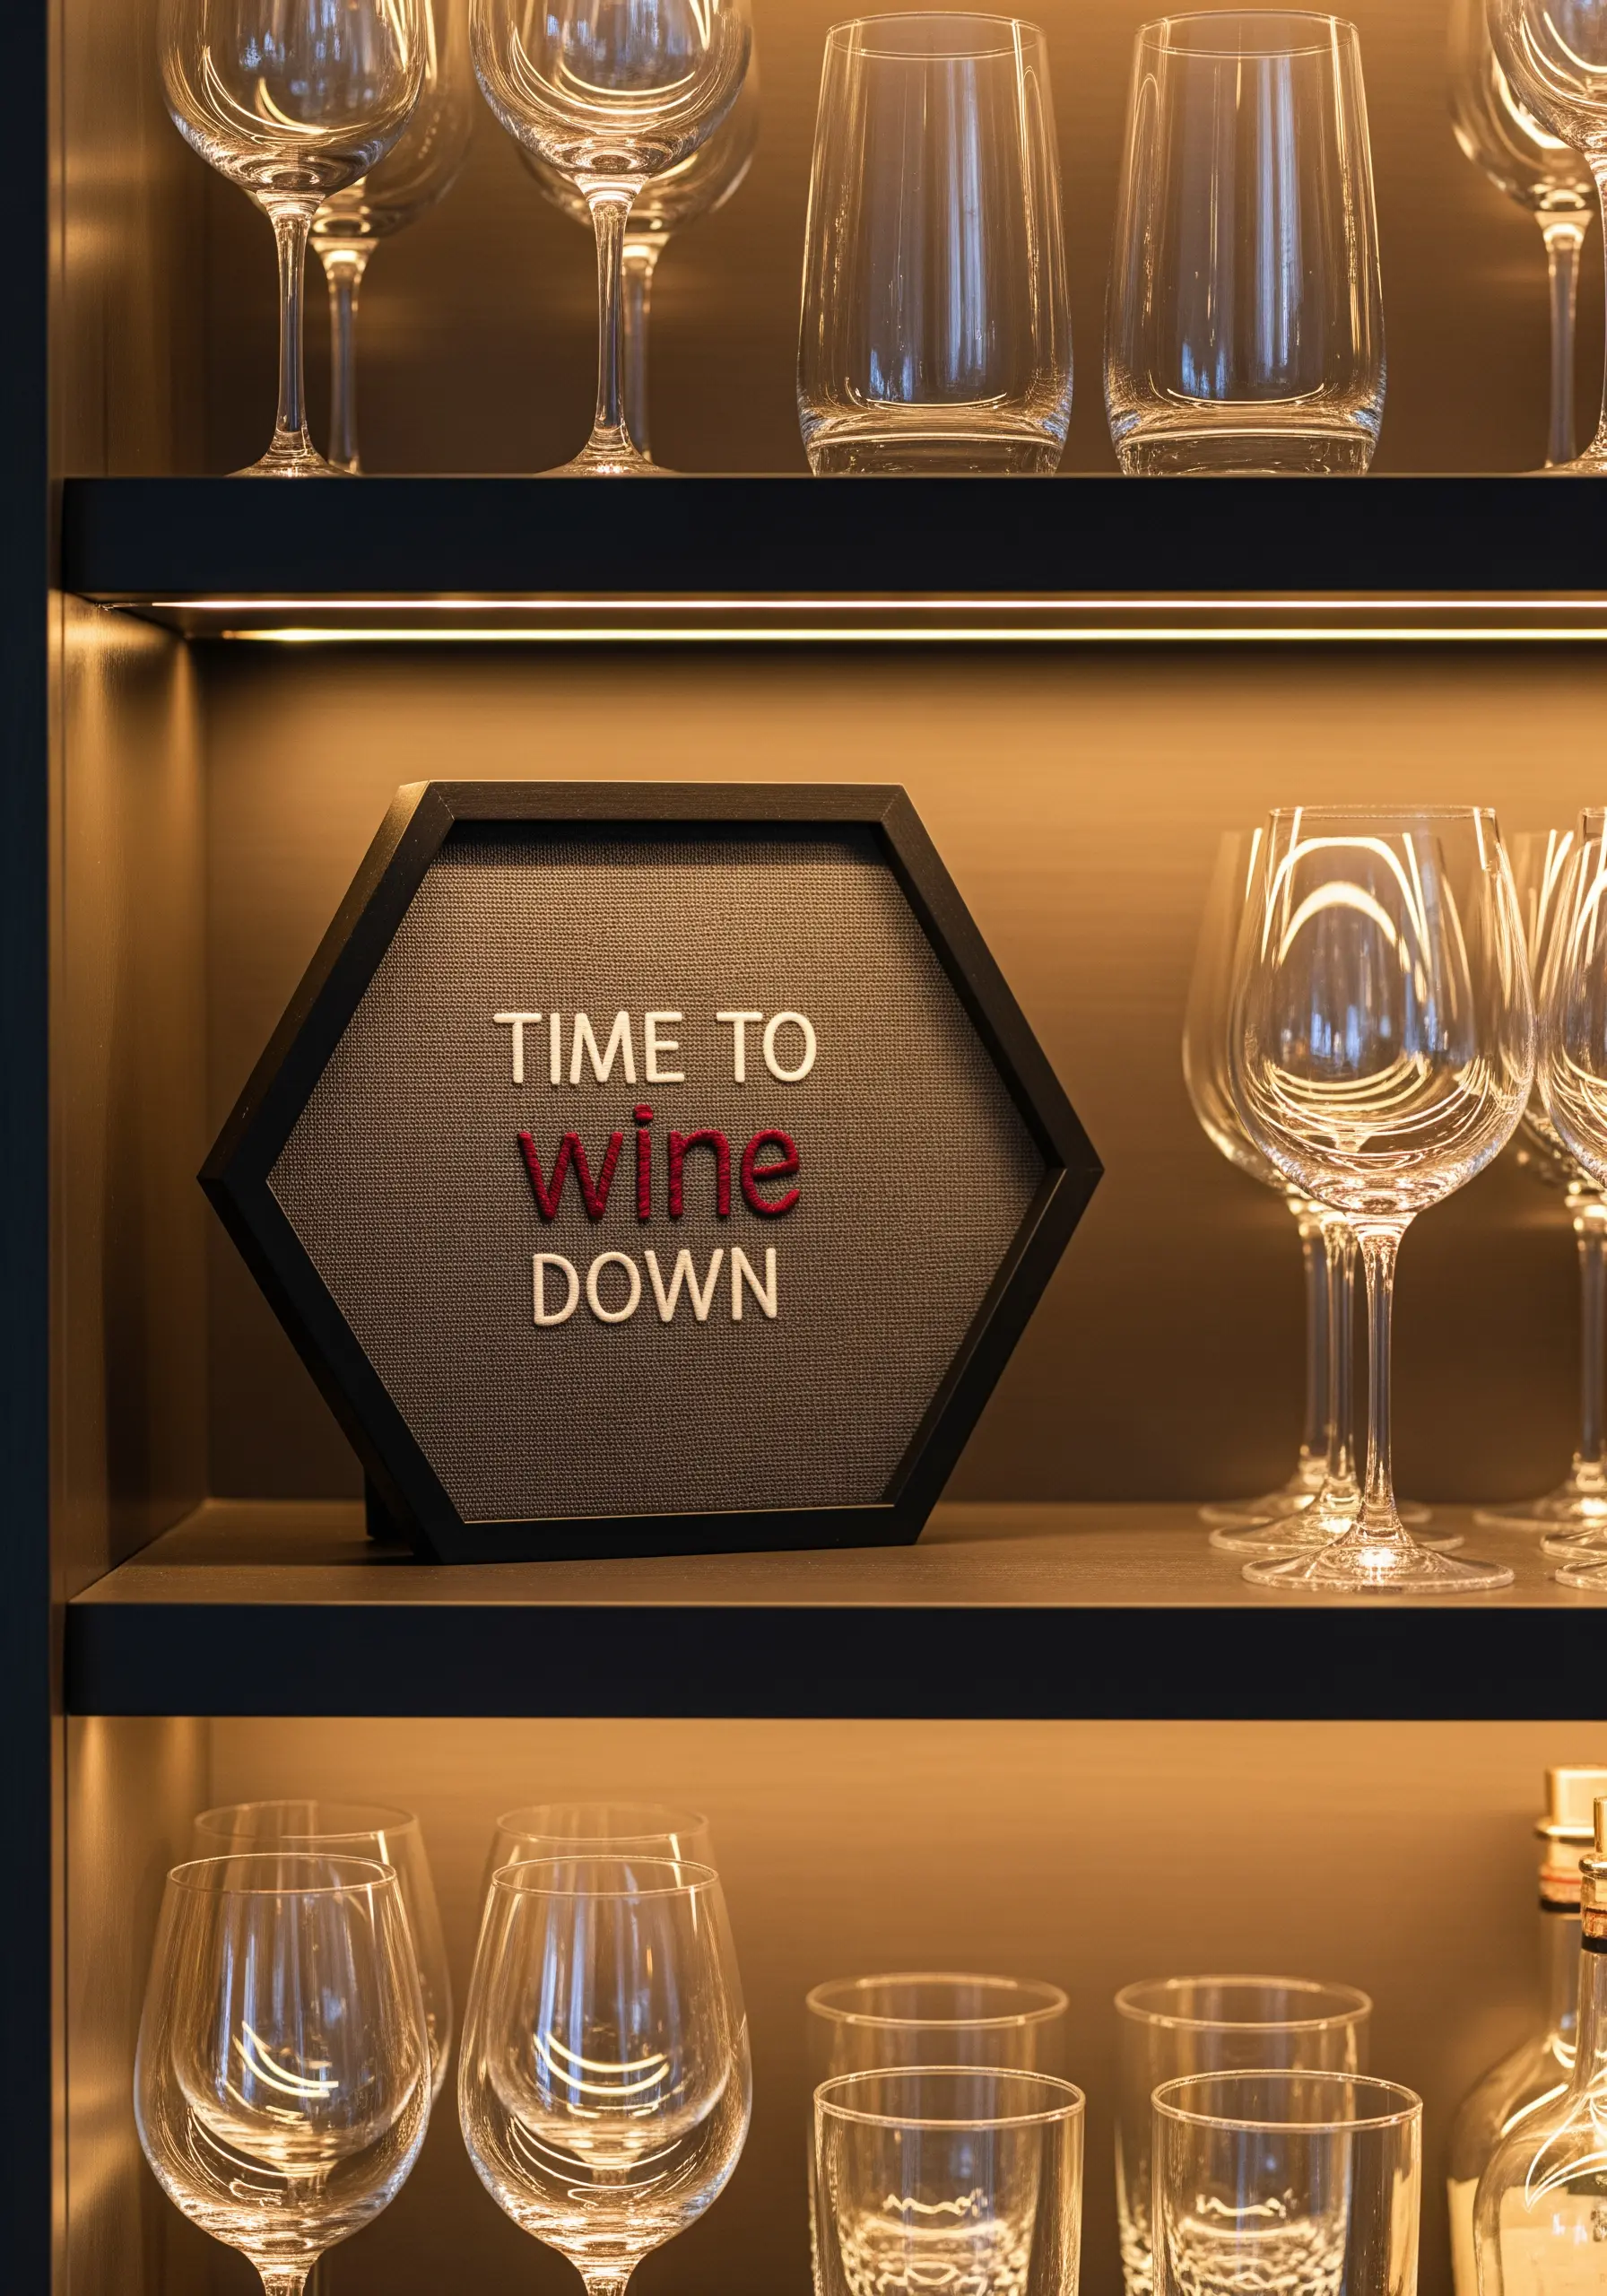
Break free from the traditional circle or square by choosing a frame with an unexpected shape.
A hexagonal, octagonal, or even triangular frame adds instant modern appeal to even the simplest embroidered quote.
To mount your fabric, cut a piece of acid-free mat board to fit the frame’s interior. Wrap your embroidered fabric around the board, securing it tightly on the back with archival tape or stitches, before placing it in the frame.
This method ensures a crisp, clean finish, no matter the shape.
16. Choose Textured Stitches for a High-Impact Message
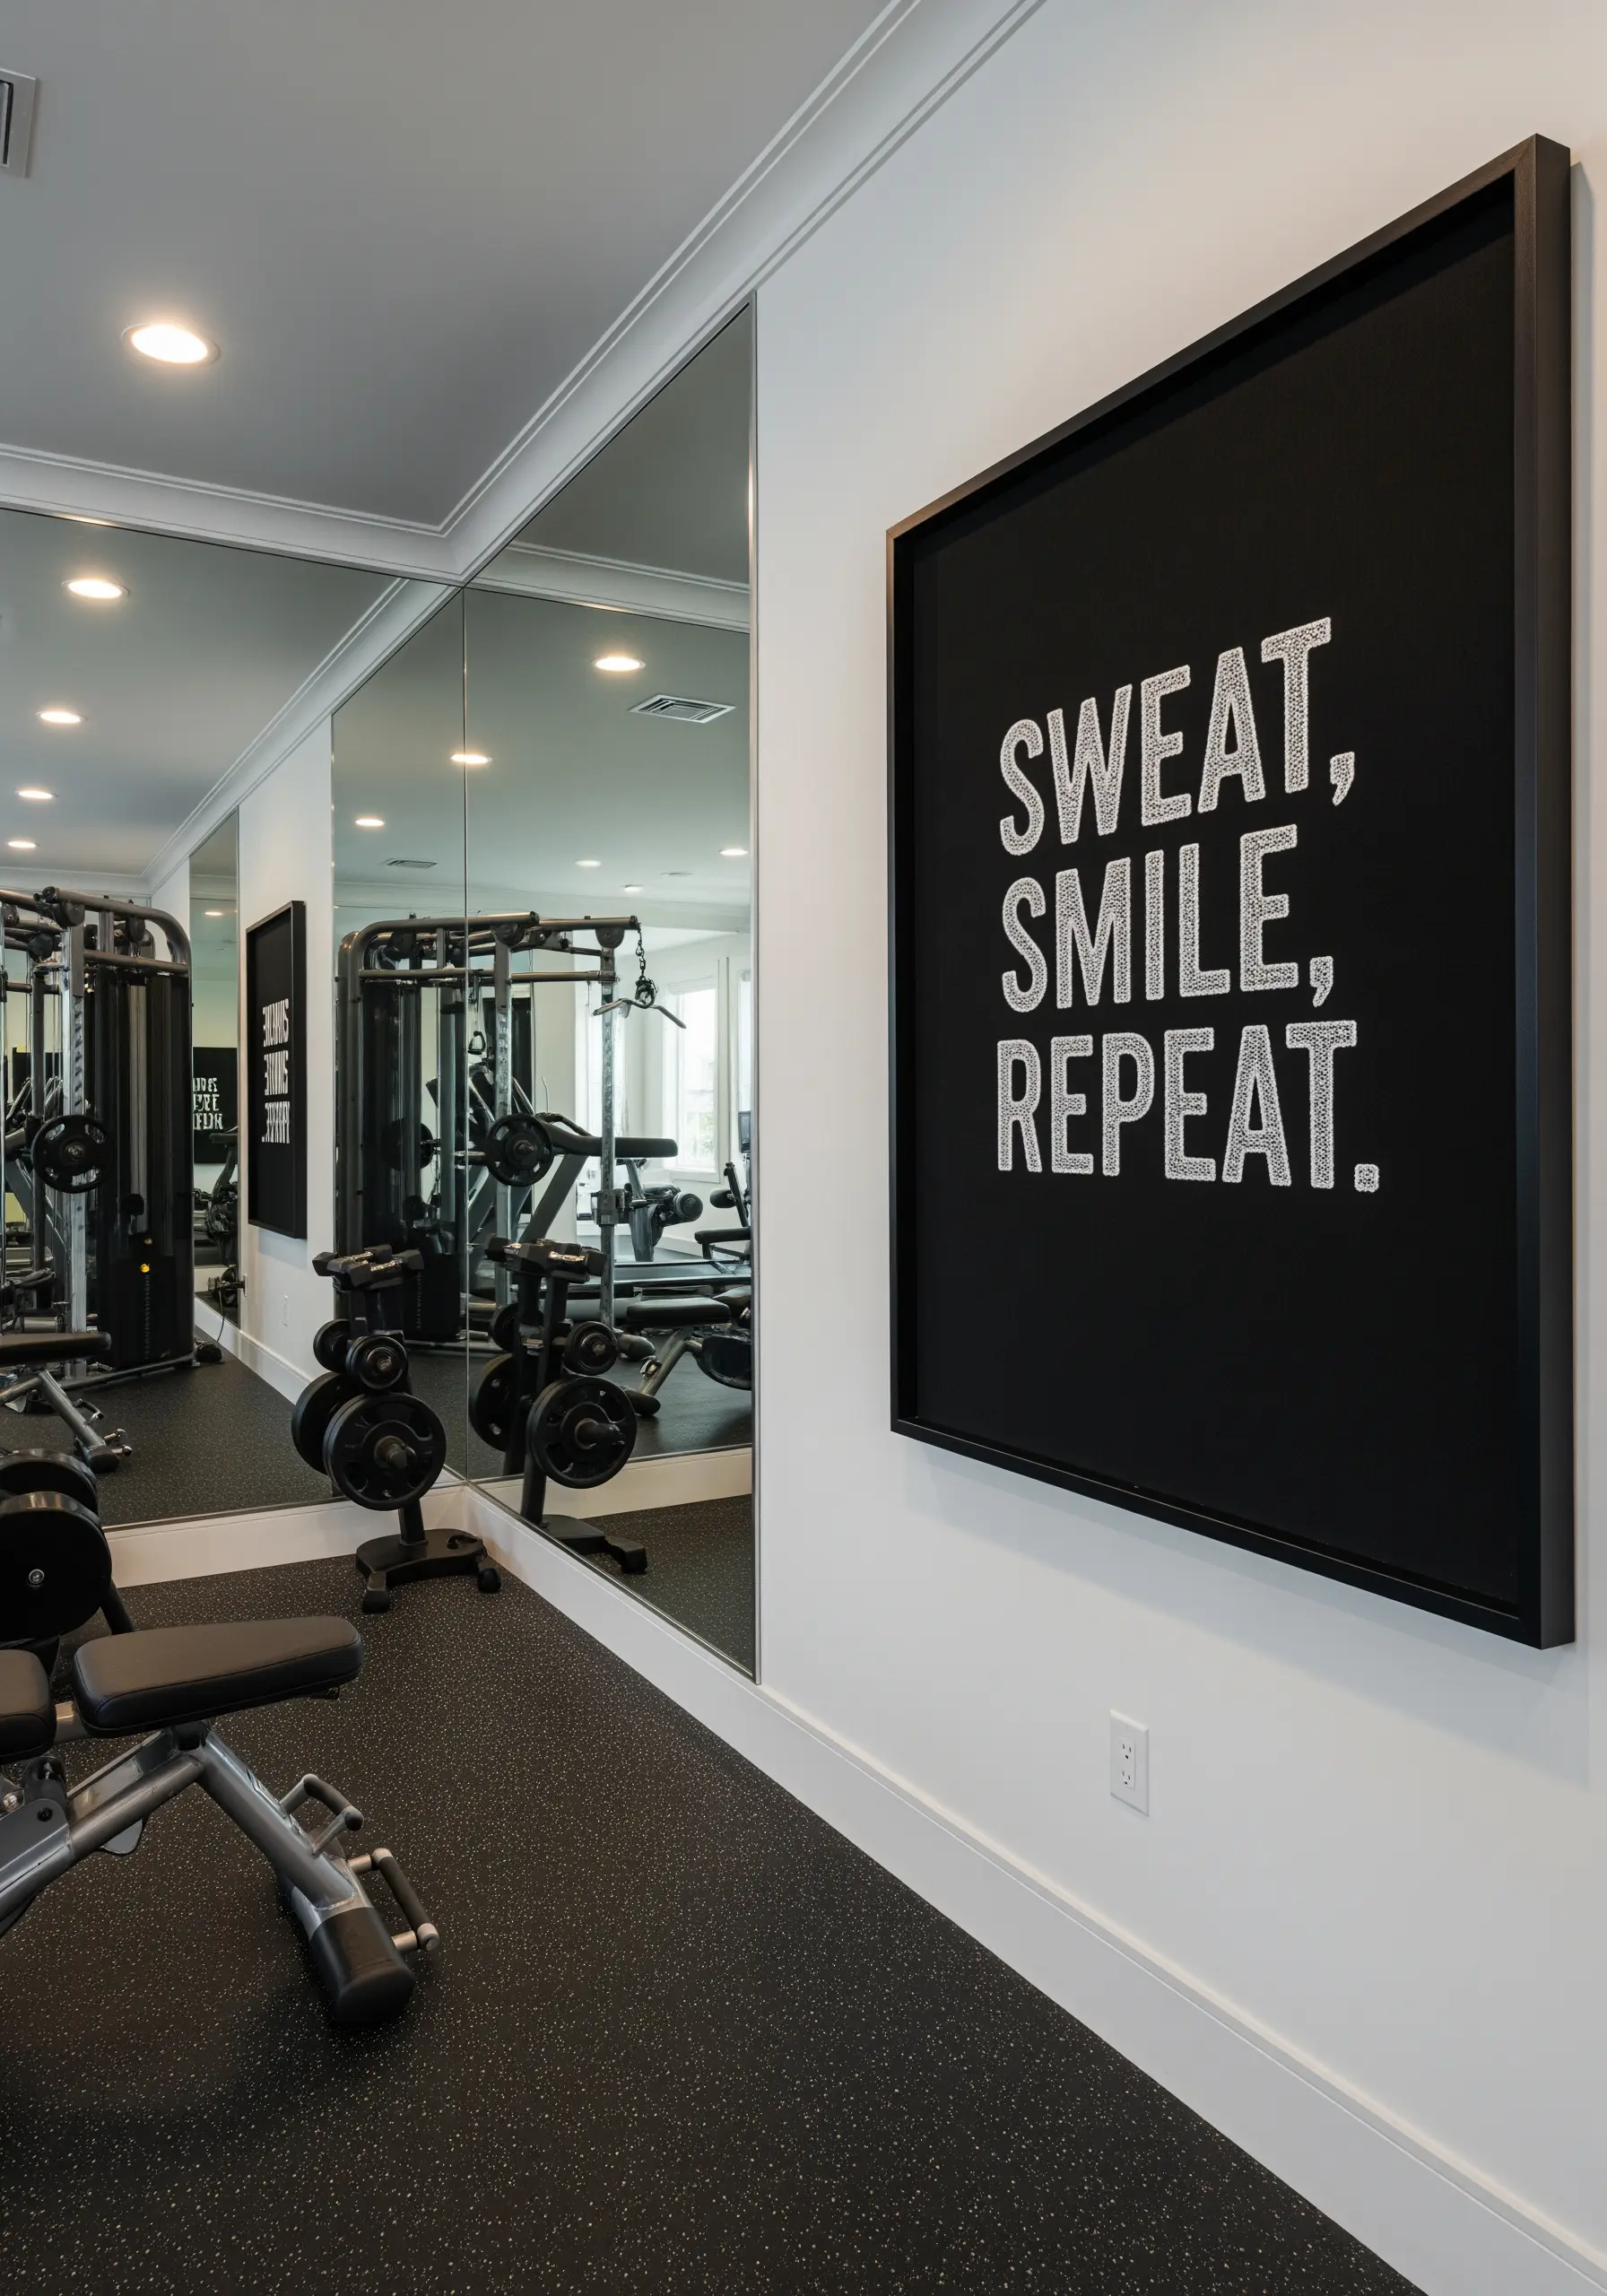
For a motivational quote in a high-energy space like a gym, your stitch choice should feel as strong as the words themselves.
Use a heavy-weight thread, like sashiko thread or perle cotton, to give your letters substance.
Fill the letters with a textured stitch like a French knot, chain stitch, or even a series of tight colonial knots. This creates a raised, gritty surface that feels active and powerful.
The high contrast of white thread on black fabric ensures the message is clear and impossible to ignore.
17. Unify Text and Symbol with Consistent Line Work
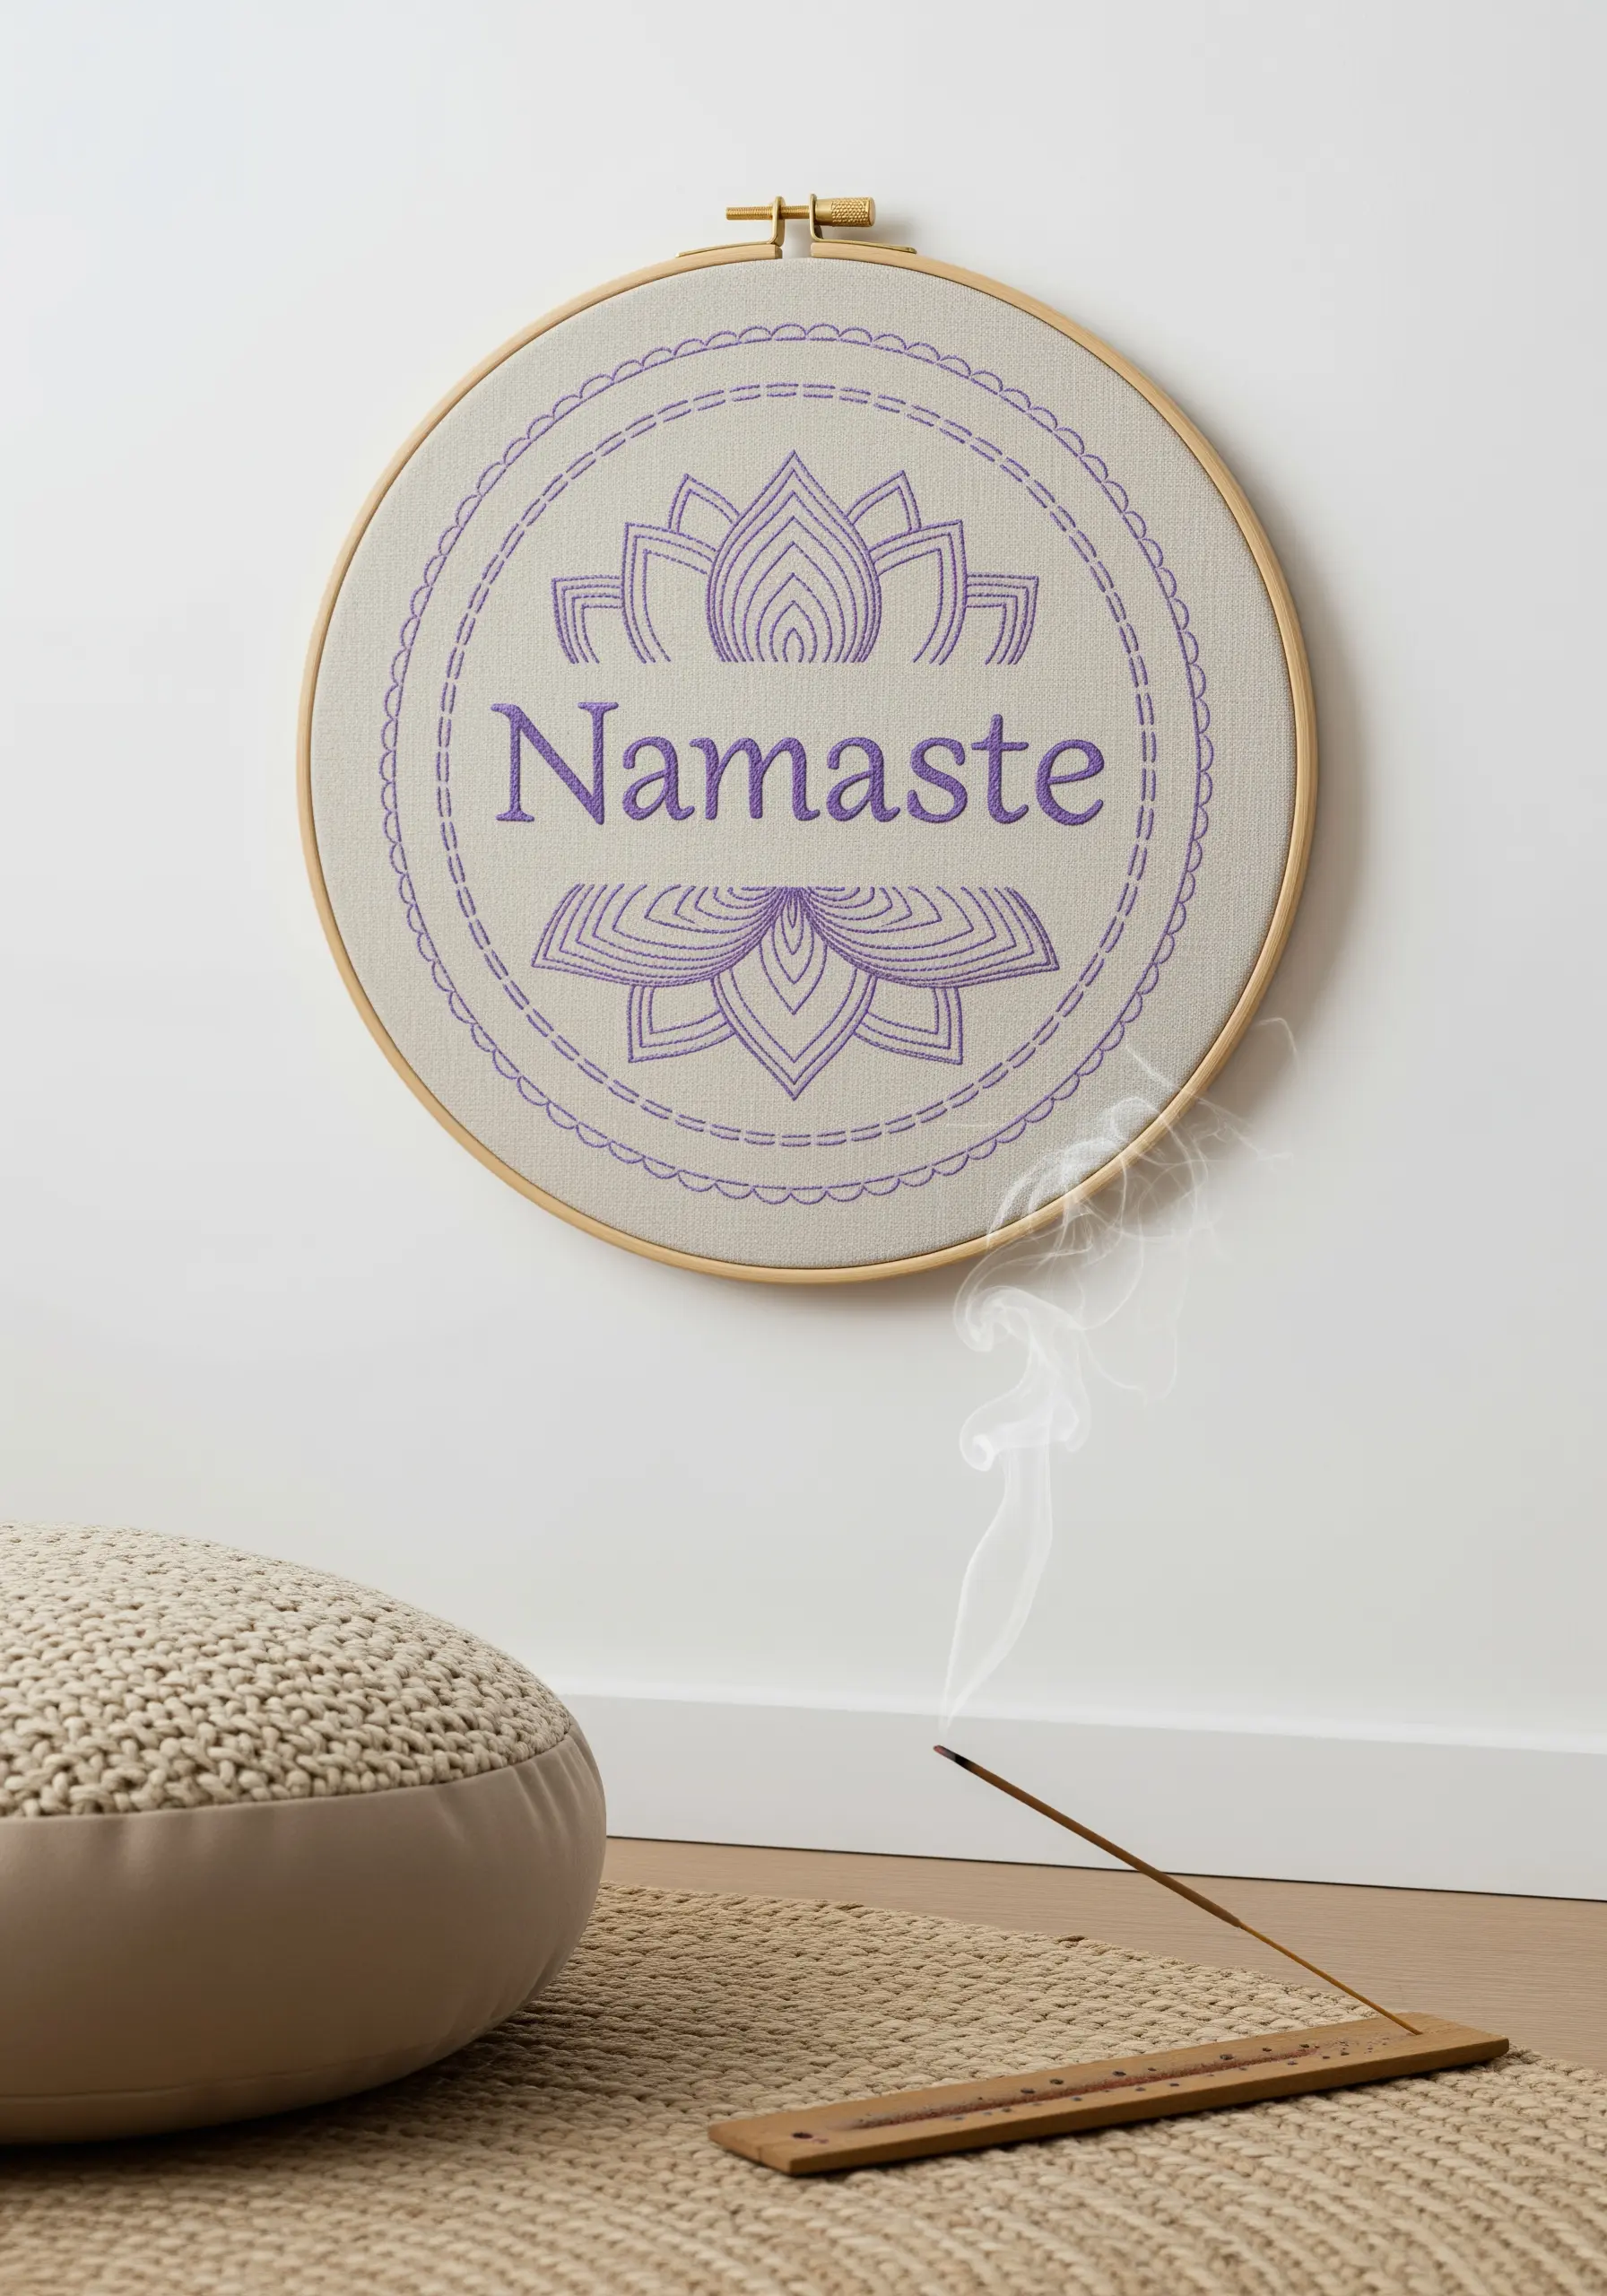
When combining a word with a symbolic image, create a harmonious design by using the same stitch and thread weight for both elements.
Here, a simple backstitch or stem stitch defines both the lotus flower and the lettering, making them feel like they belong together.
This technique results in a clean, graphic look that is both calming and cohesive.
Enclosing the entire design within a simple stitched border adds a final touch of polish and beautifully finishes the piece within the hoop.
18. Evoke a Mood with Gradient Color Blending
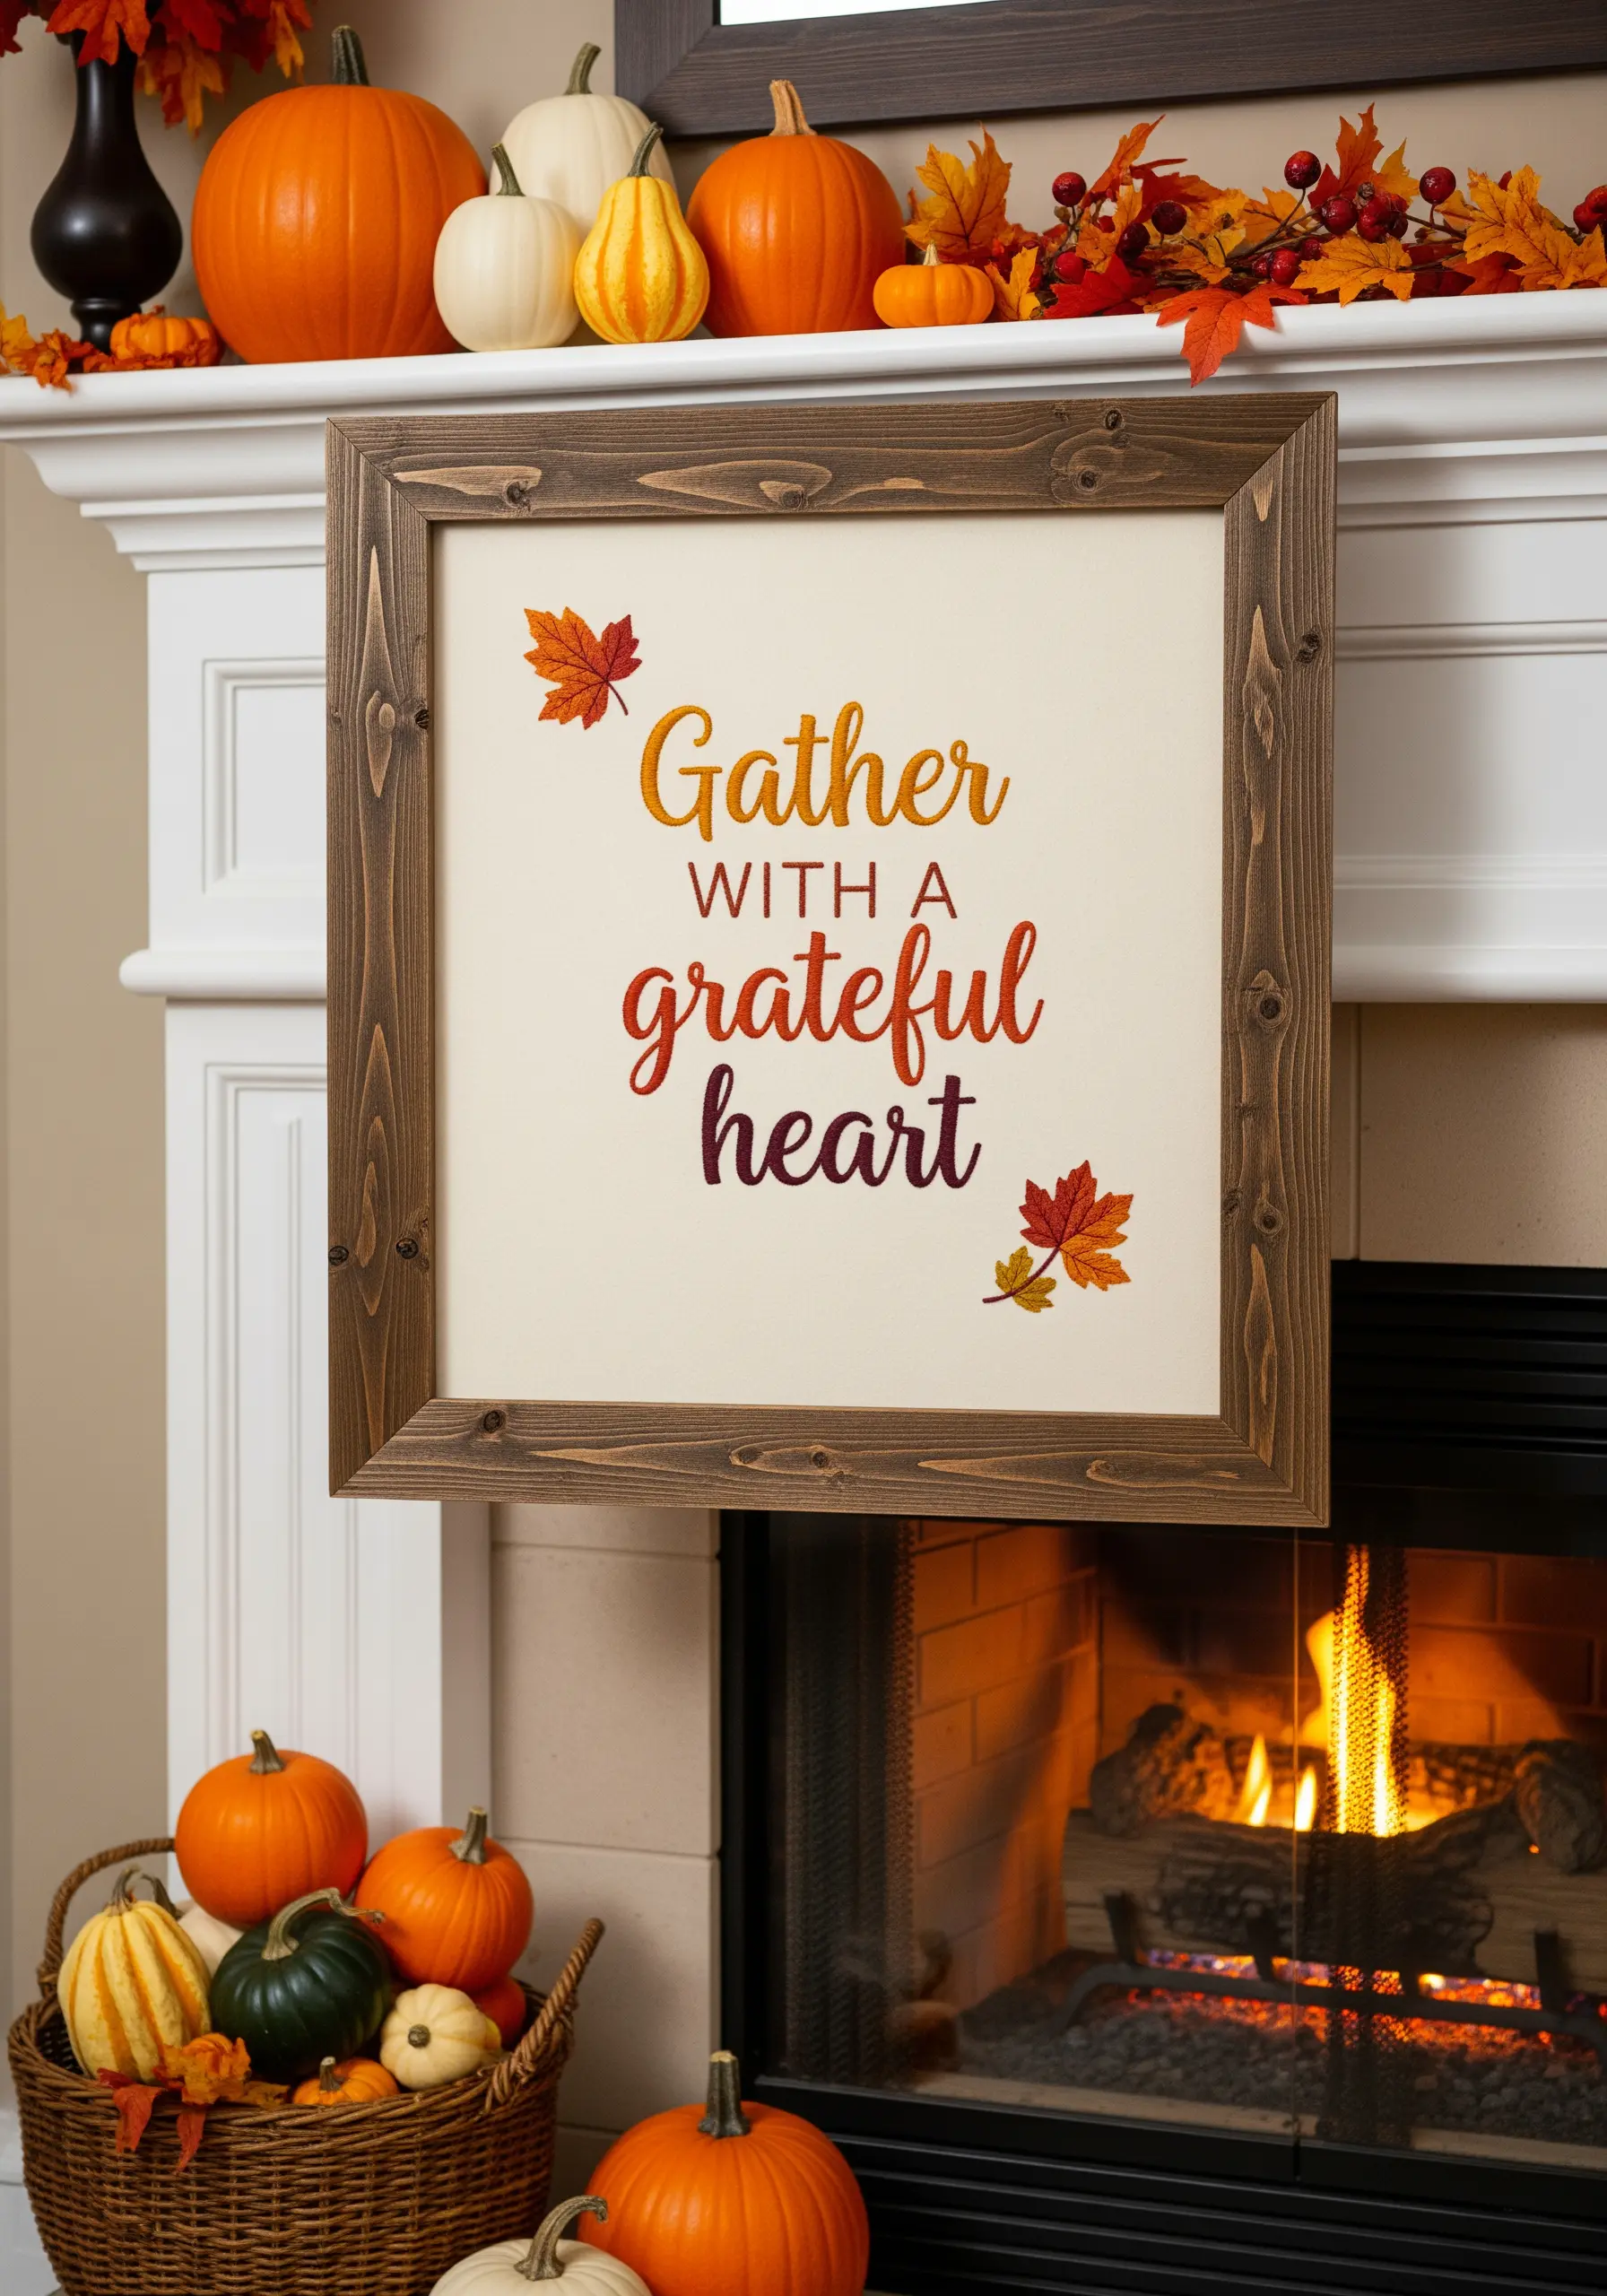
Infuse your lettering with emotion and seasonality by blending colors directly in your stitches.
Instead of using a single color, thread your needle with two or three different colored strands of floss at once. As you stitch, the colors will mix randomly, creating a soft, heathered gradient.
For a more controlled effect, use long-and-short stitch and swap colors gradually to create a smooth ombré transition.
This is a beautiful way to capture the feeling of a sunset, autumn leaves, or gentle morning light within your quote.
19. Tell a Story with a Triptych Display
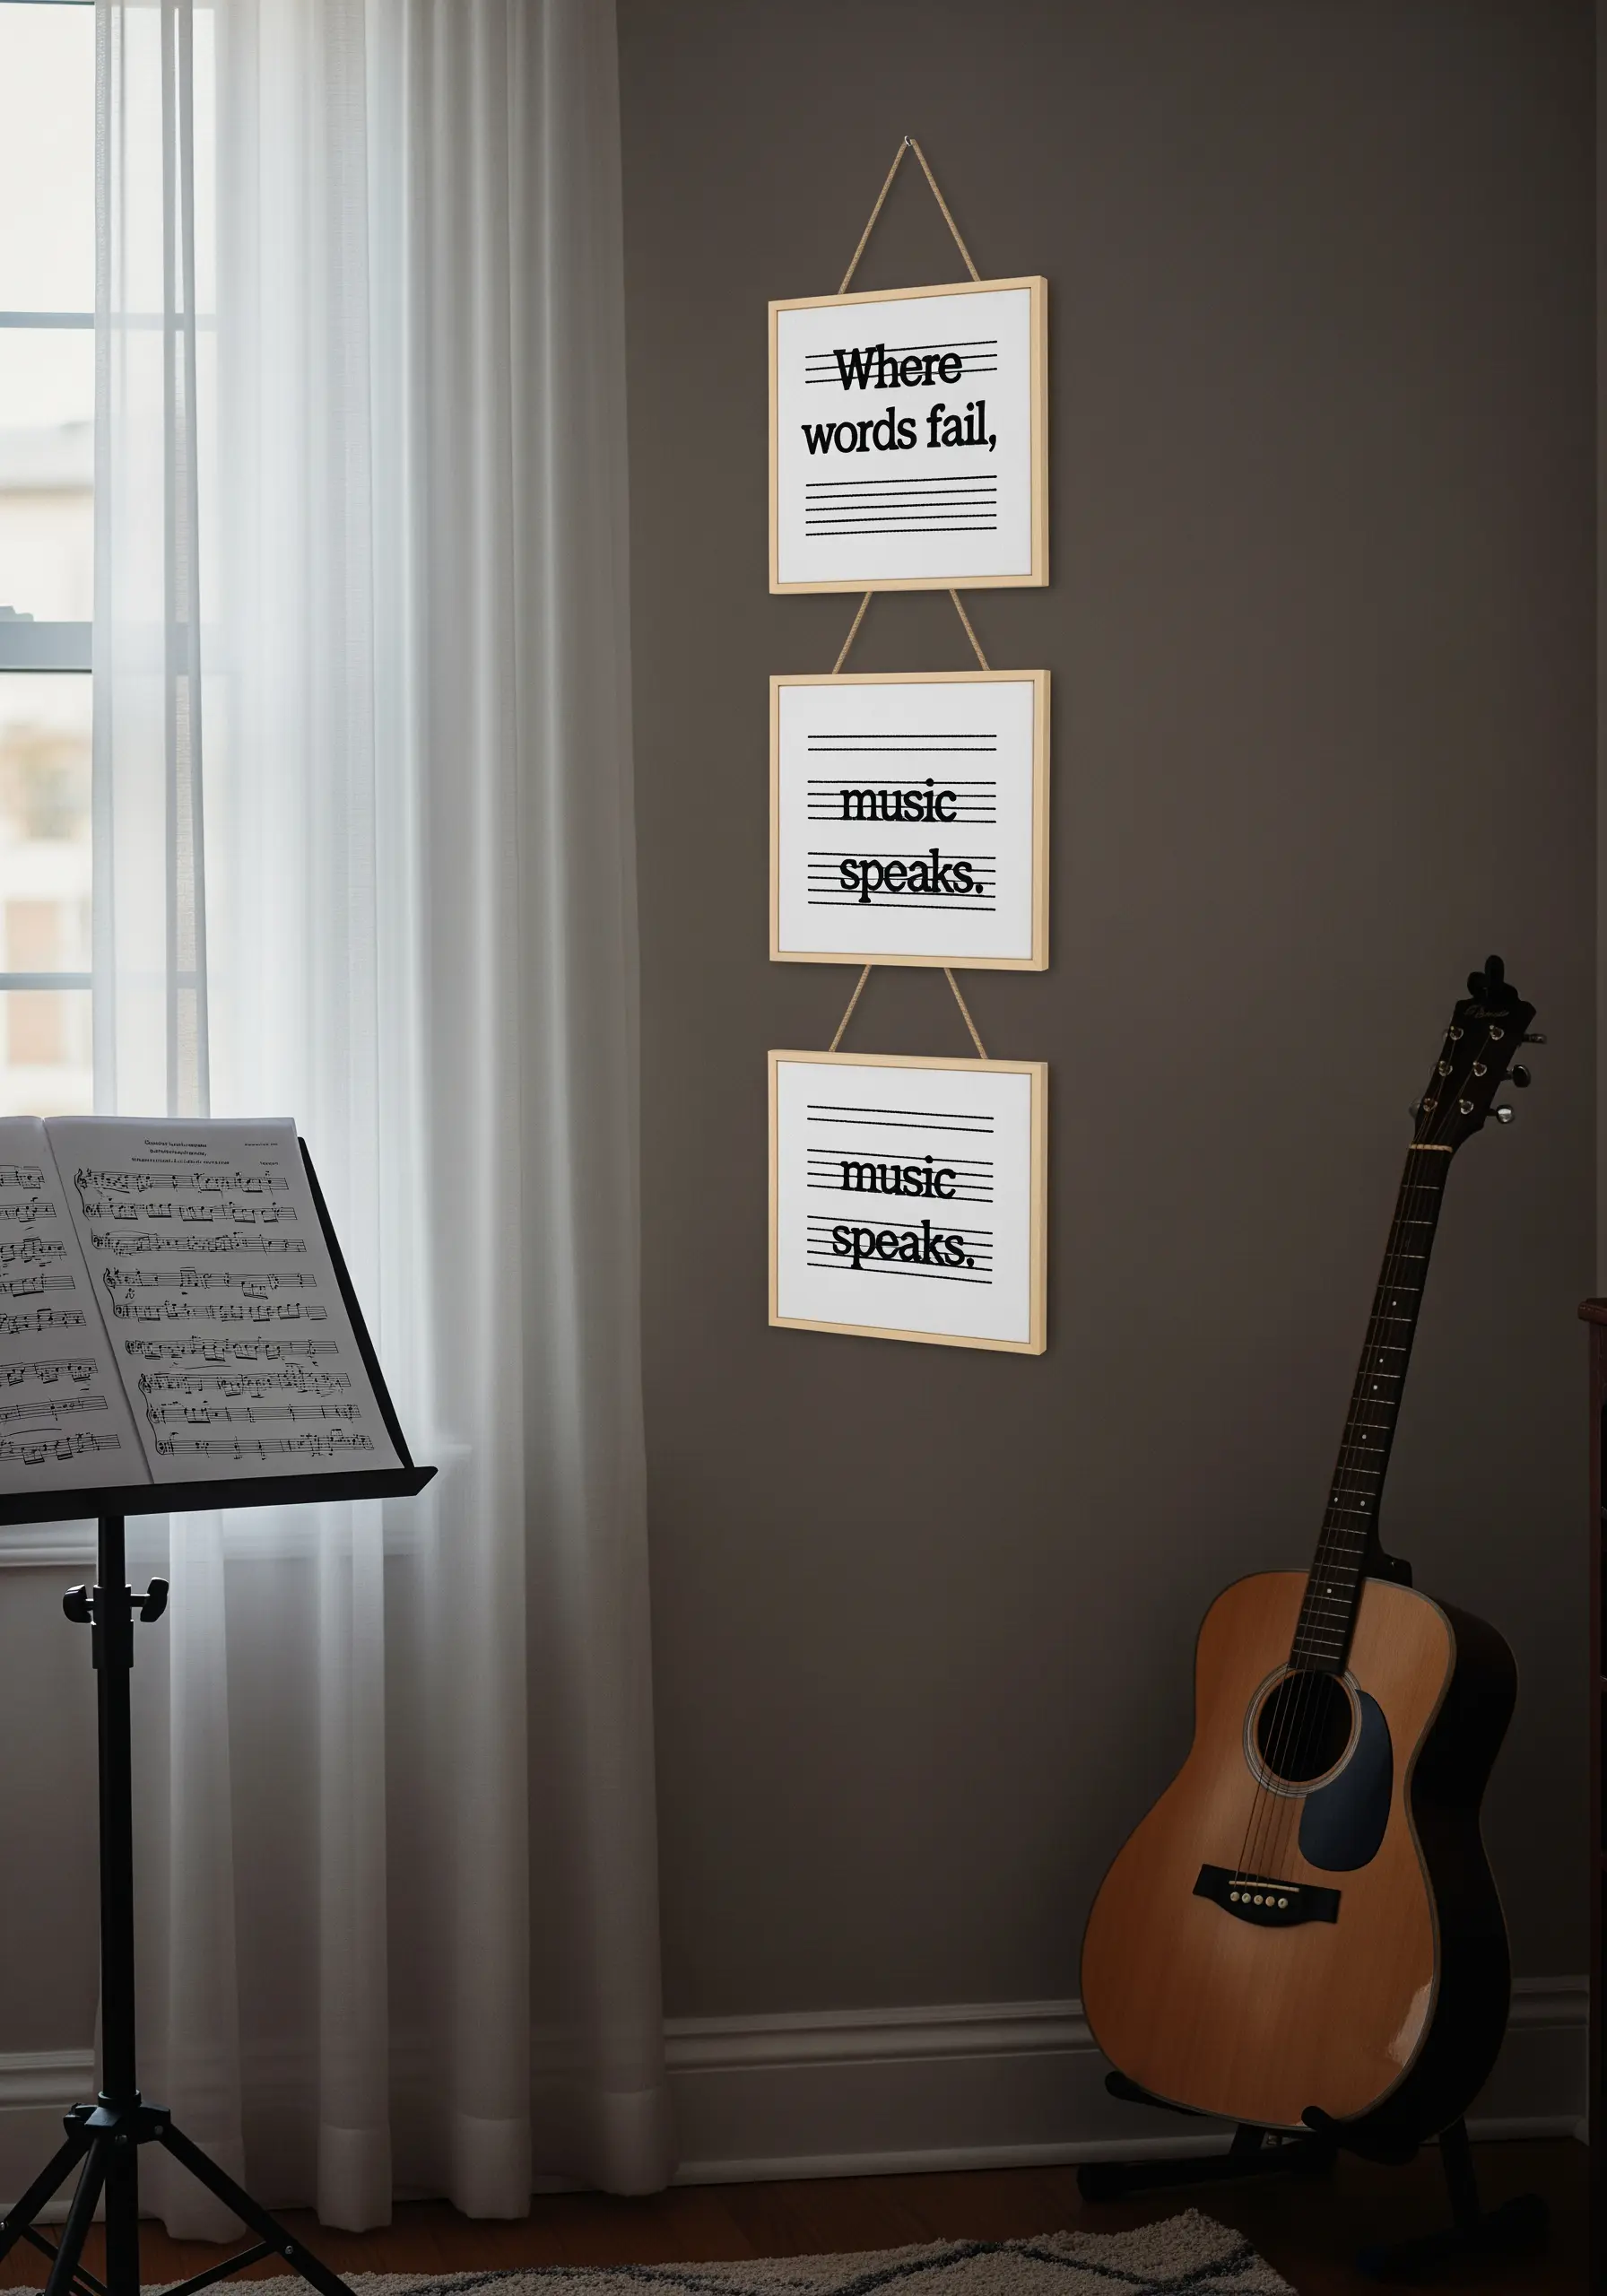
Break a longer quote or a recurring phrase into smaller parts and display them as a series.
A triptych, or a series of three, creates a powerful visual rhythm and encourages the viewer to pause and read each piece in sequence.
Maintain consistency across all three frames: use the same font, fabric, thread color, and frame style to ensure they read as a single, unified artwork.
This vertical arrangement is perfect for a narrow wall, drawing the eye upward and adding an elegant, thoughtful touch to your space.
20. Integrate Text and Illustration with Intertwined Motifs
Make your design feel more organic and dynamic by allowing illustrative elements to weave through and around your letters.
Stitch your quote first, then add vining botanicals that appear to grow over and behind the words.
Use a stem stitch for the vines and lazy daisy stitches for the leaves to create a delicate, garden-like effect.
This technique transforms a simple quote into a living piece of art, where nature and words are beautifully intertwined. These hand-embroidery leaf patterns are a great place to start.


