
You have the threads, the fabric, and the desire to create something beautiful. But sometimes, your finished pieces don’t quite capture the calm, polished vision in your mind. It’s not about needing more skill—it’s about making small, intentional choices that change everything.
This is where you can shift from simply following a pattern to truly designing with thread. Think about how a single change—using a finer thread, angling your stitches, or adding a padded base—can transform a flat motif into something with life and dimension. It’s about understanding the *why* behind the technique.
Let these ideas guide you toward creating pieces that feel not just handmade, but artfully made. These are more than just projects; they are ways to infuse your home with a quiet, tactile beauty that reflects your own unique touch. You have everything you need to begin right now.
1. Build a Landscape with Layered Textures

To create a sense of deep perspective in a landscape, think in layers of texture, not just color.
Use dense French knots or turkey work for the mossy foreground elements, giving them a plush, three-dimensional feel that brings them visually forward.
For the middle ground and water, switch to flat, directional satin stitches. This contrast makes those areas recede, enhancing the illusion of distance.
This technique allows you to create depth in your embroidery using natural textures without needing dozens of thread colors—the texture does the work.
2. Embellish Knitwear with Bold Couching

Transform a simple knit blanket by adding bold, graphic patterns with yarn couching.
Instead of stitching *through* the delicate knit, which can cause pulling and distortion, lay thick yarn on the surface and tack it down with a finer, matching thread every quarter-inch.
This method preserves the blanket’s stretch and softness while adding a high-impact, sculptural design.
It’s a perfect way to apply cozy DIY ideas to textiles that are otherwise difficult to embroider directly.
3. Achieve Botanical Finesse with Single-Strand Stitches
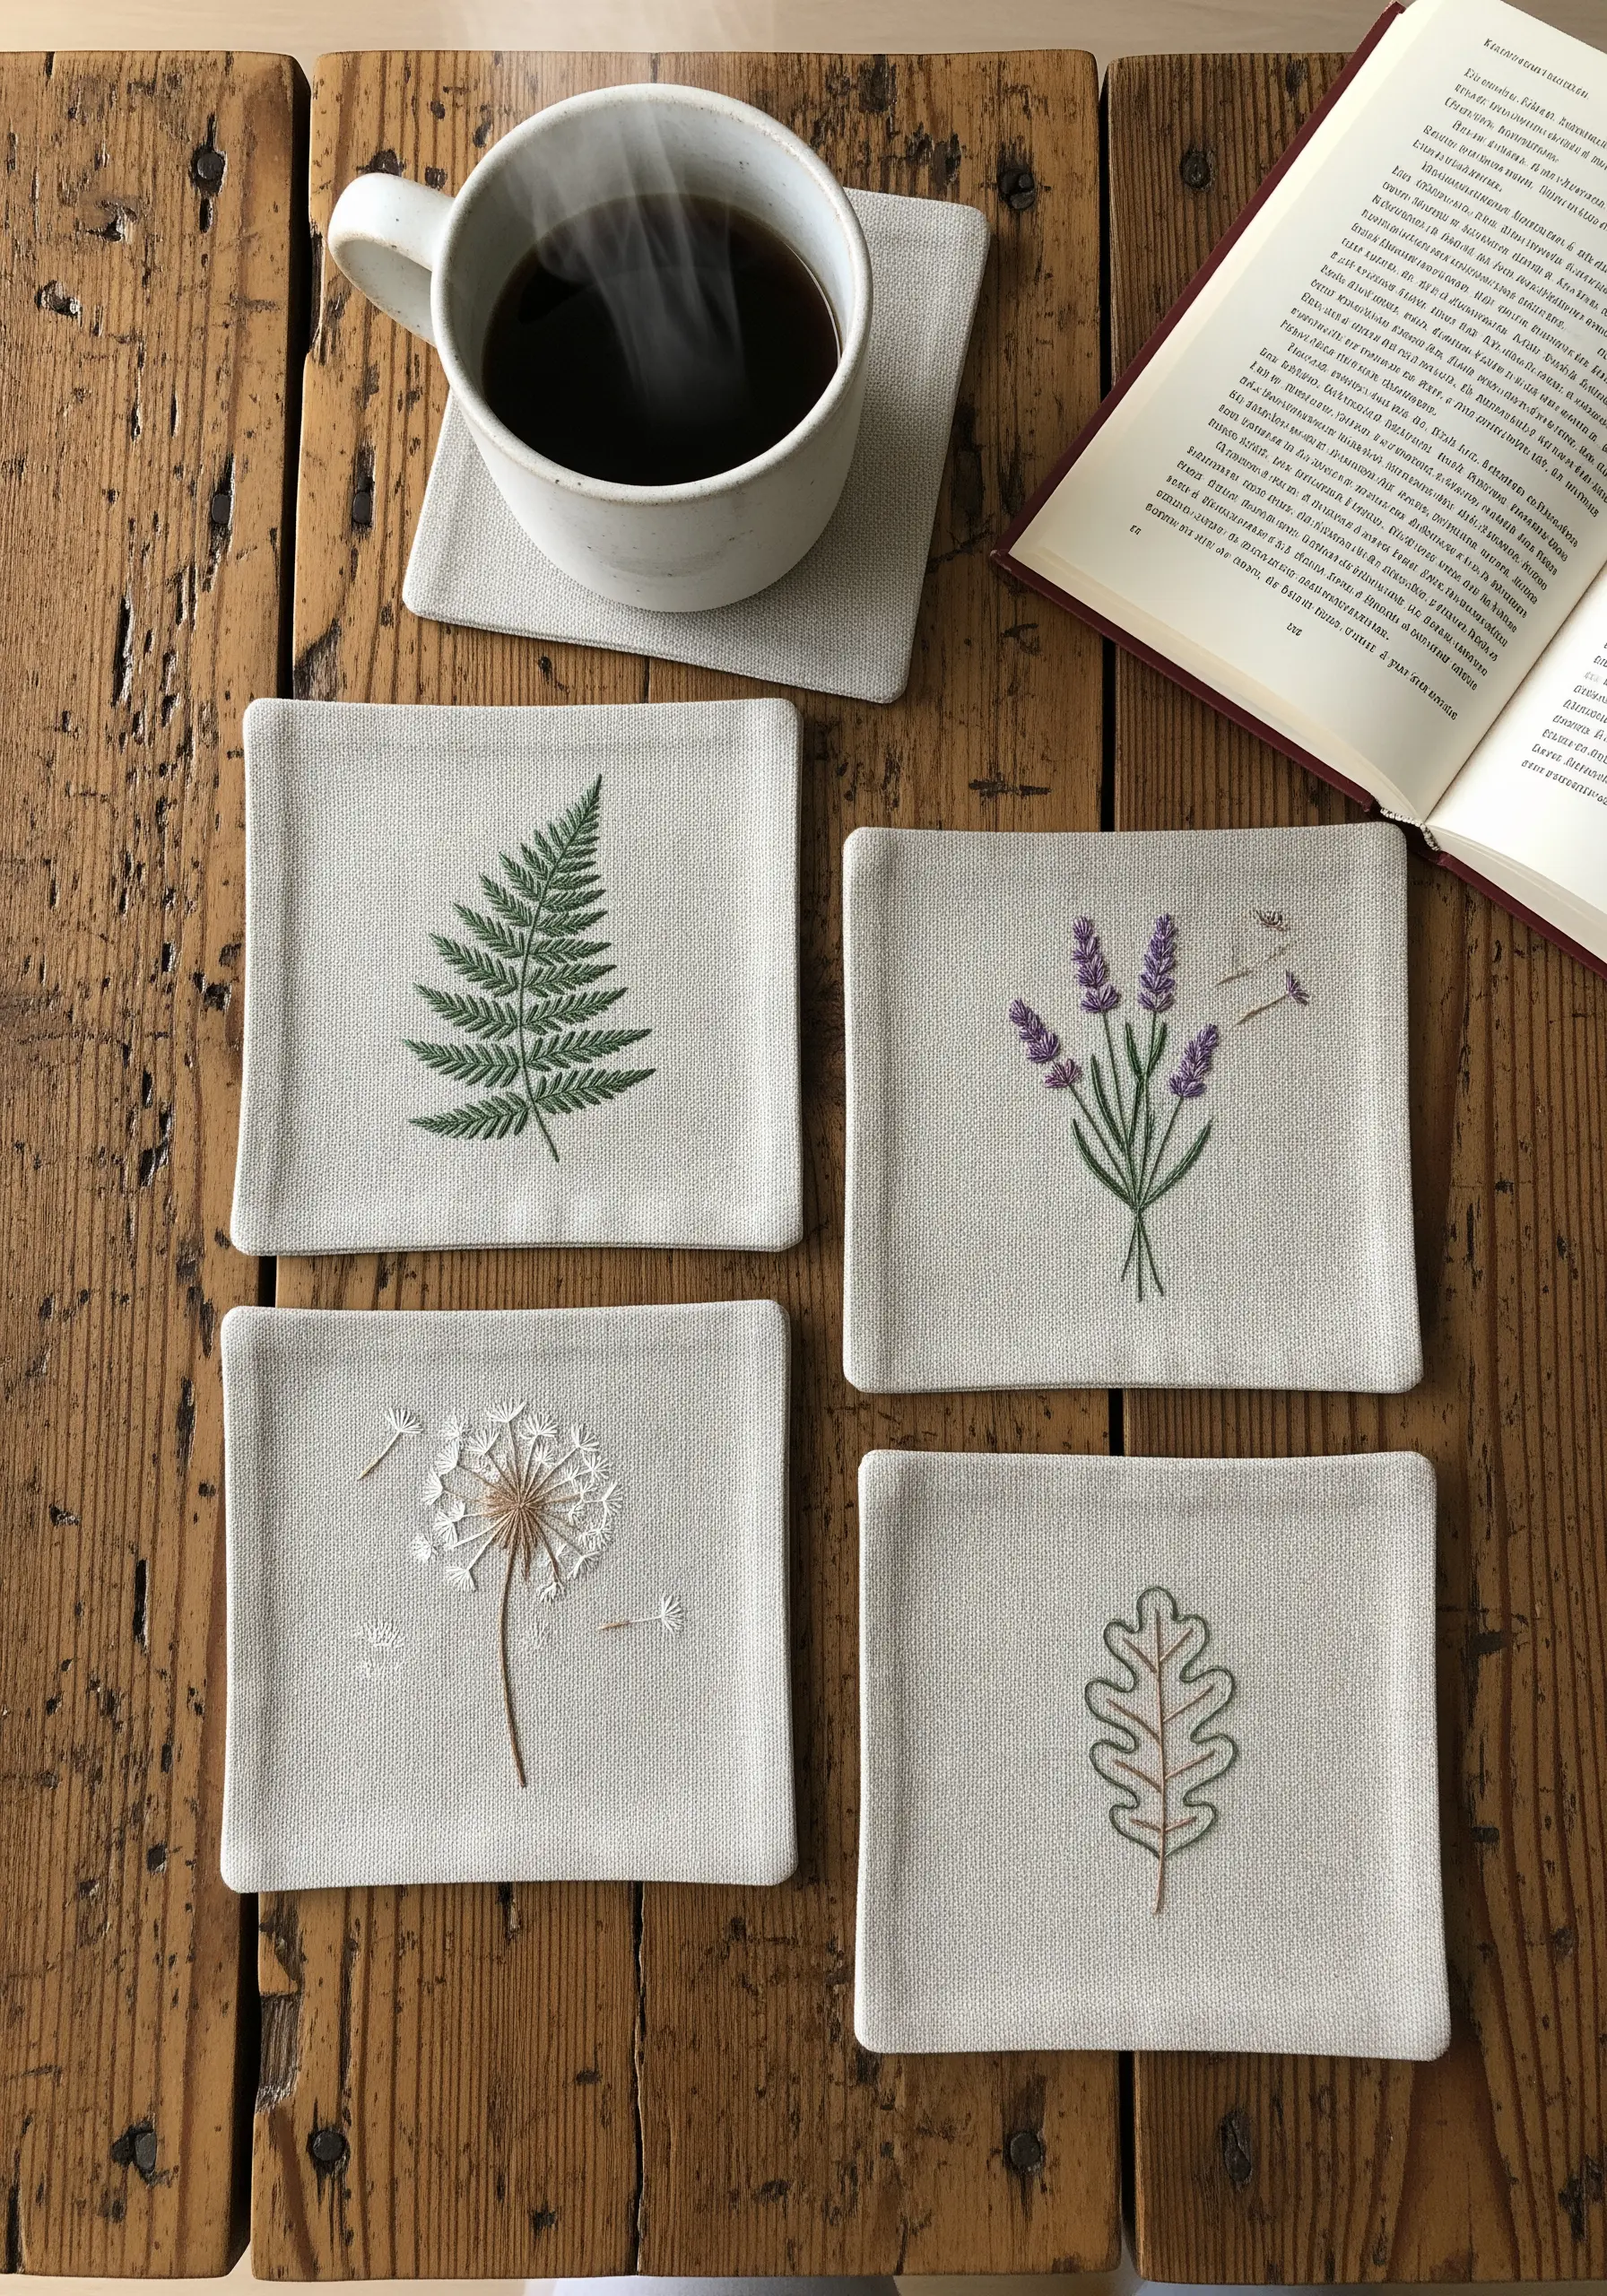
For hyper-realistic botanicals on items like coasters or napkins, the key is using a single strand of six-strand floss.
This creates impossibly fine lines that mimic botanical illustrations, perfect for delicate fern fronds or dandelion seeds.
Work on a high-count linen or cotton fabric; its tight weave provides the stable canvas needed for such precise, tiny stitches to look crisp and clean.
You can use this technique for medicinal herb embroidery designs that require scientific accuracy and elegance.
4. Mimic Natural Textures with 3D Knots
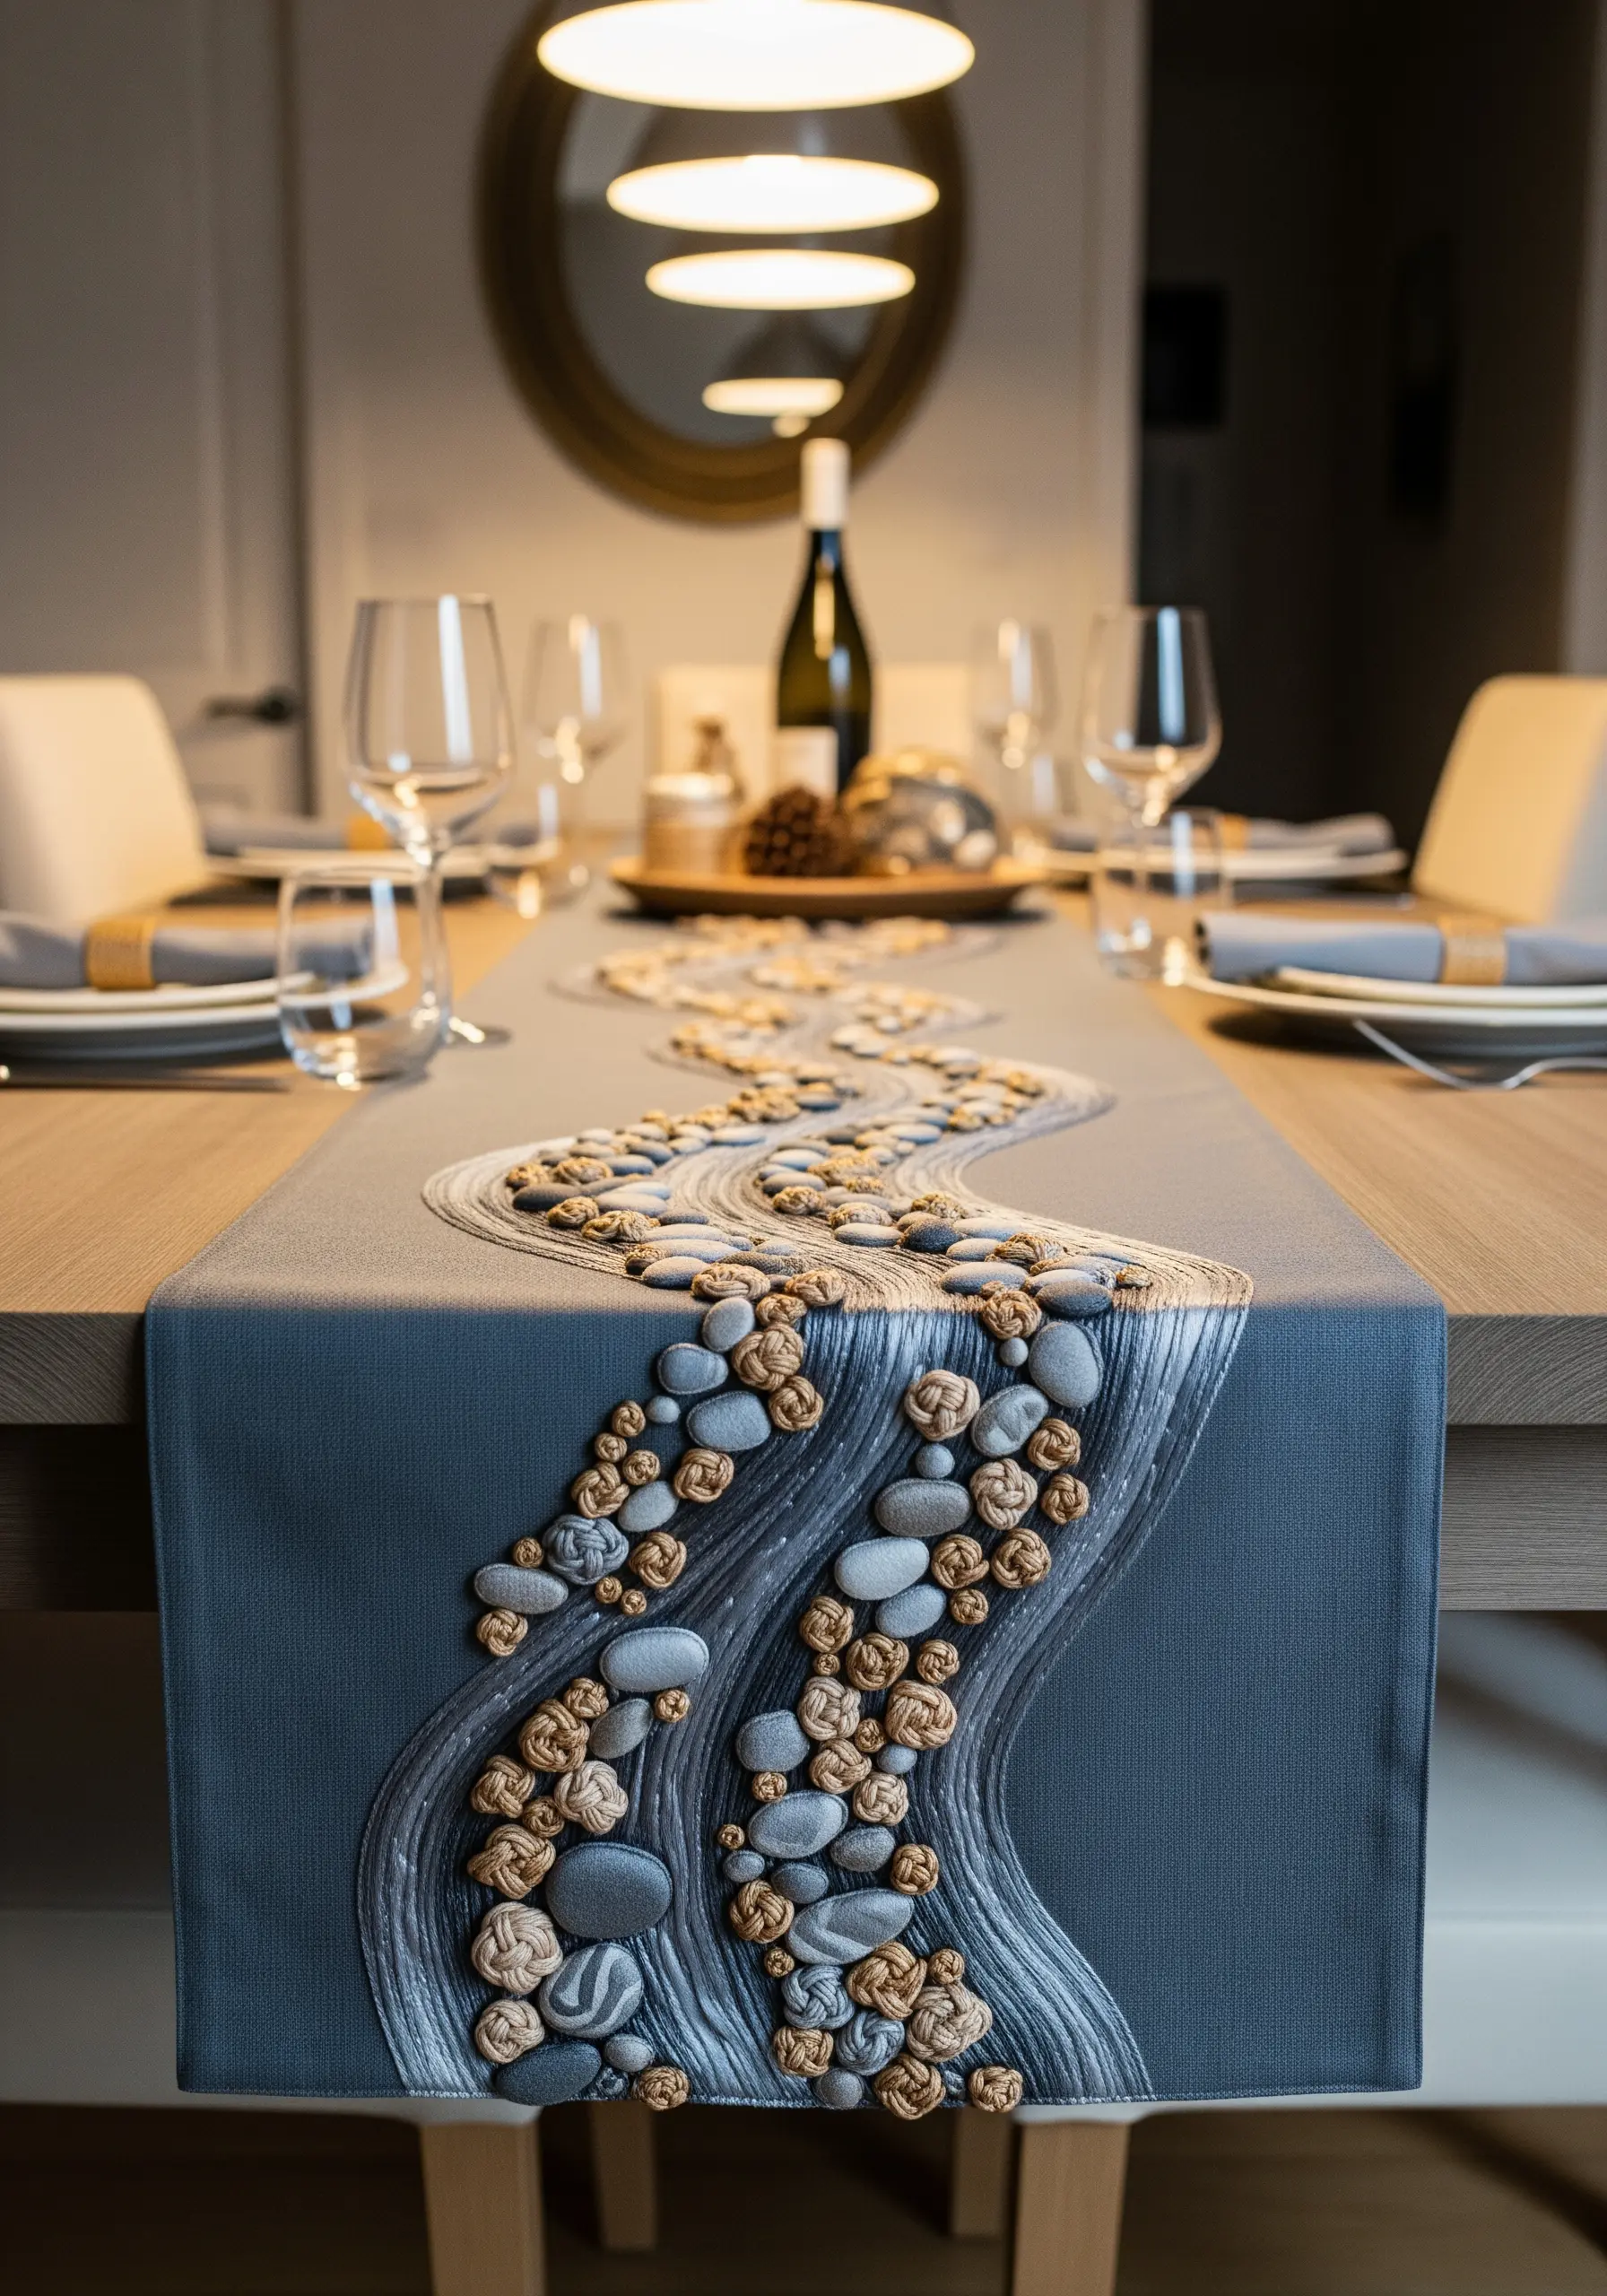
Create the illusion of river stones on a table runner by mastering textural stitches instead of using actual appliqués.
Use chunky, variegated yarn to make large bullion knots or woven wheel stitches, pulling them tight to create dense, pebble-like shapes.
Arrange these “stones” in organic clusters along a path of flowing split stitches to simulate water.
These hand-stitched table runner embroidery designs add stunning dimension and are surprisingly durable for functional items.
5. Define Landscapes with Directional Satin Stitch

When stitching landscapes, use the direction of your satin stitches to define the topography.
Instead of filling each colored section flatly, angle your stitches to follow the slopes of the mountains and hills.
This simple adjustment creates movement and shadow, making the entire scene feel more dynamic and realistic without adding extra colors or complex shading.
It transforms simple color-blocking into sophisticated, travel-inspired embroidery hoops that tell a story of place.
6. Create Rhythmic Texture by Varying Thread Weight
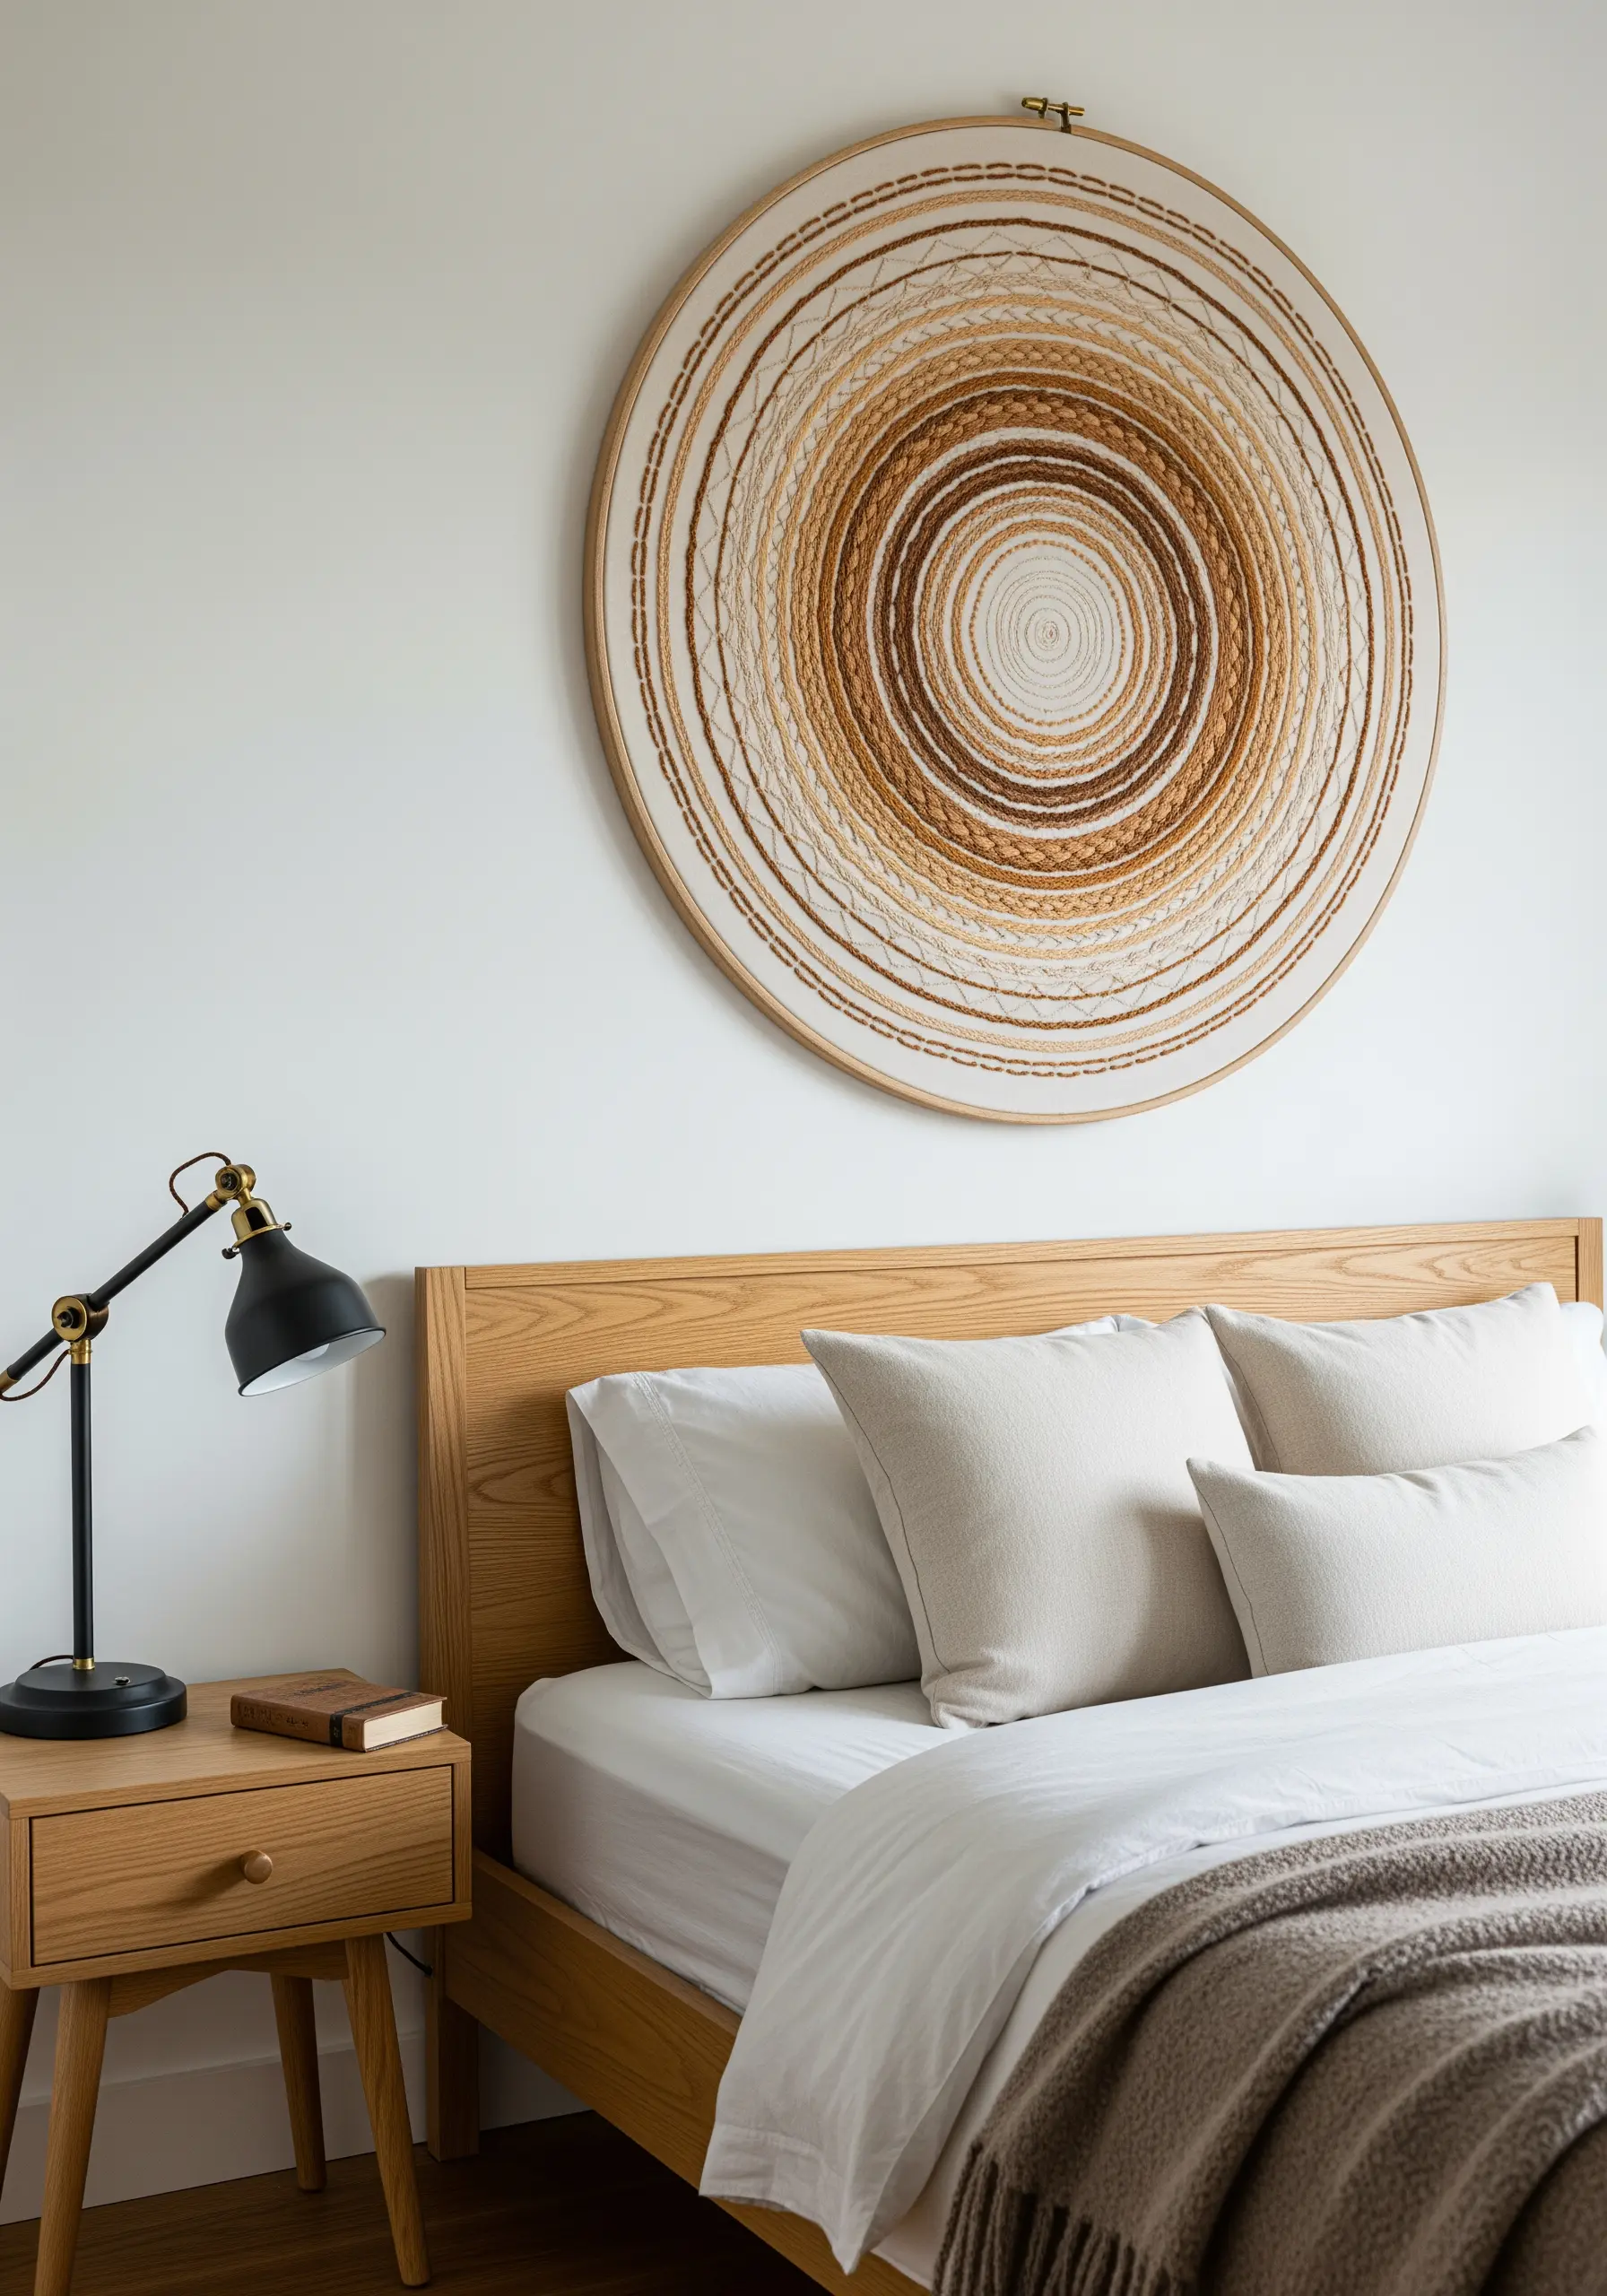
Turn a simple spiral into a captivating art piece by varying the weight of your thread.
Start with a single strand of floss in the center and gradually increase to two, four, and then all six strands as you stitch outwards.
You can then switch to thicker fibers like perle cotton or even fine yarn to create a ridged, topographic effect.
This approach elevates modern thread mandala ideas from flat patterns into tactile sculptures.
7. Stitch Organic Lines with a Whipped Backstitch

To create smooth, uninterrupted lines for motifs like roots or branches, use a whipped backstitch.
First, lay down a standard backstitch along your design line. Then, using the same or a contrasting thread, slide your needle under each backstitch without piercing the fabric.
This wraps the initial stitches, eliminating the segmented look of a standard backstitch and producing a fluid, raised line that mimics natural forms perfectly.
It’s an ideal technique for the earthy texture embroidery patterns that define organic home decor.
8. Design an ‘Upward Flow’ for Curtain Embroidery
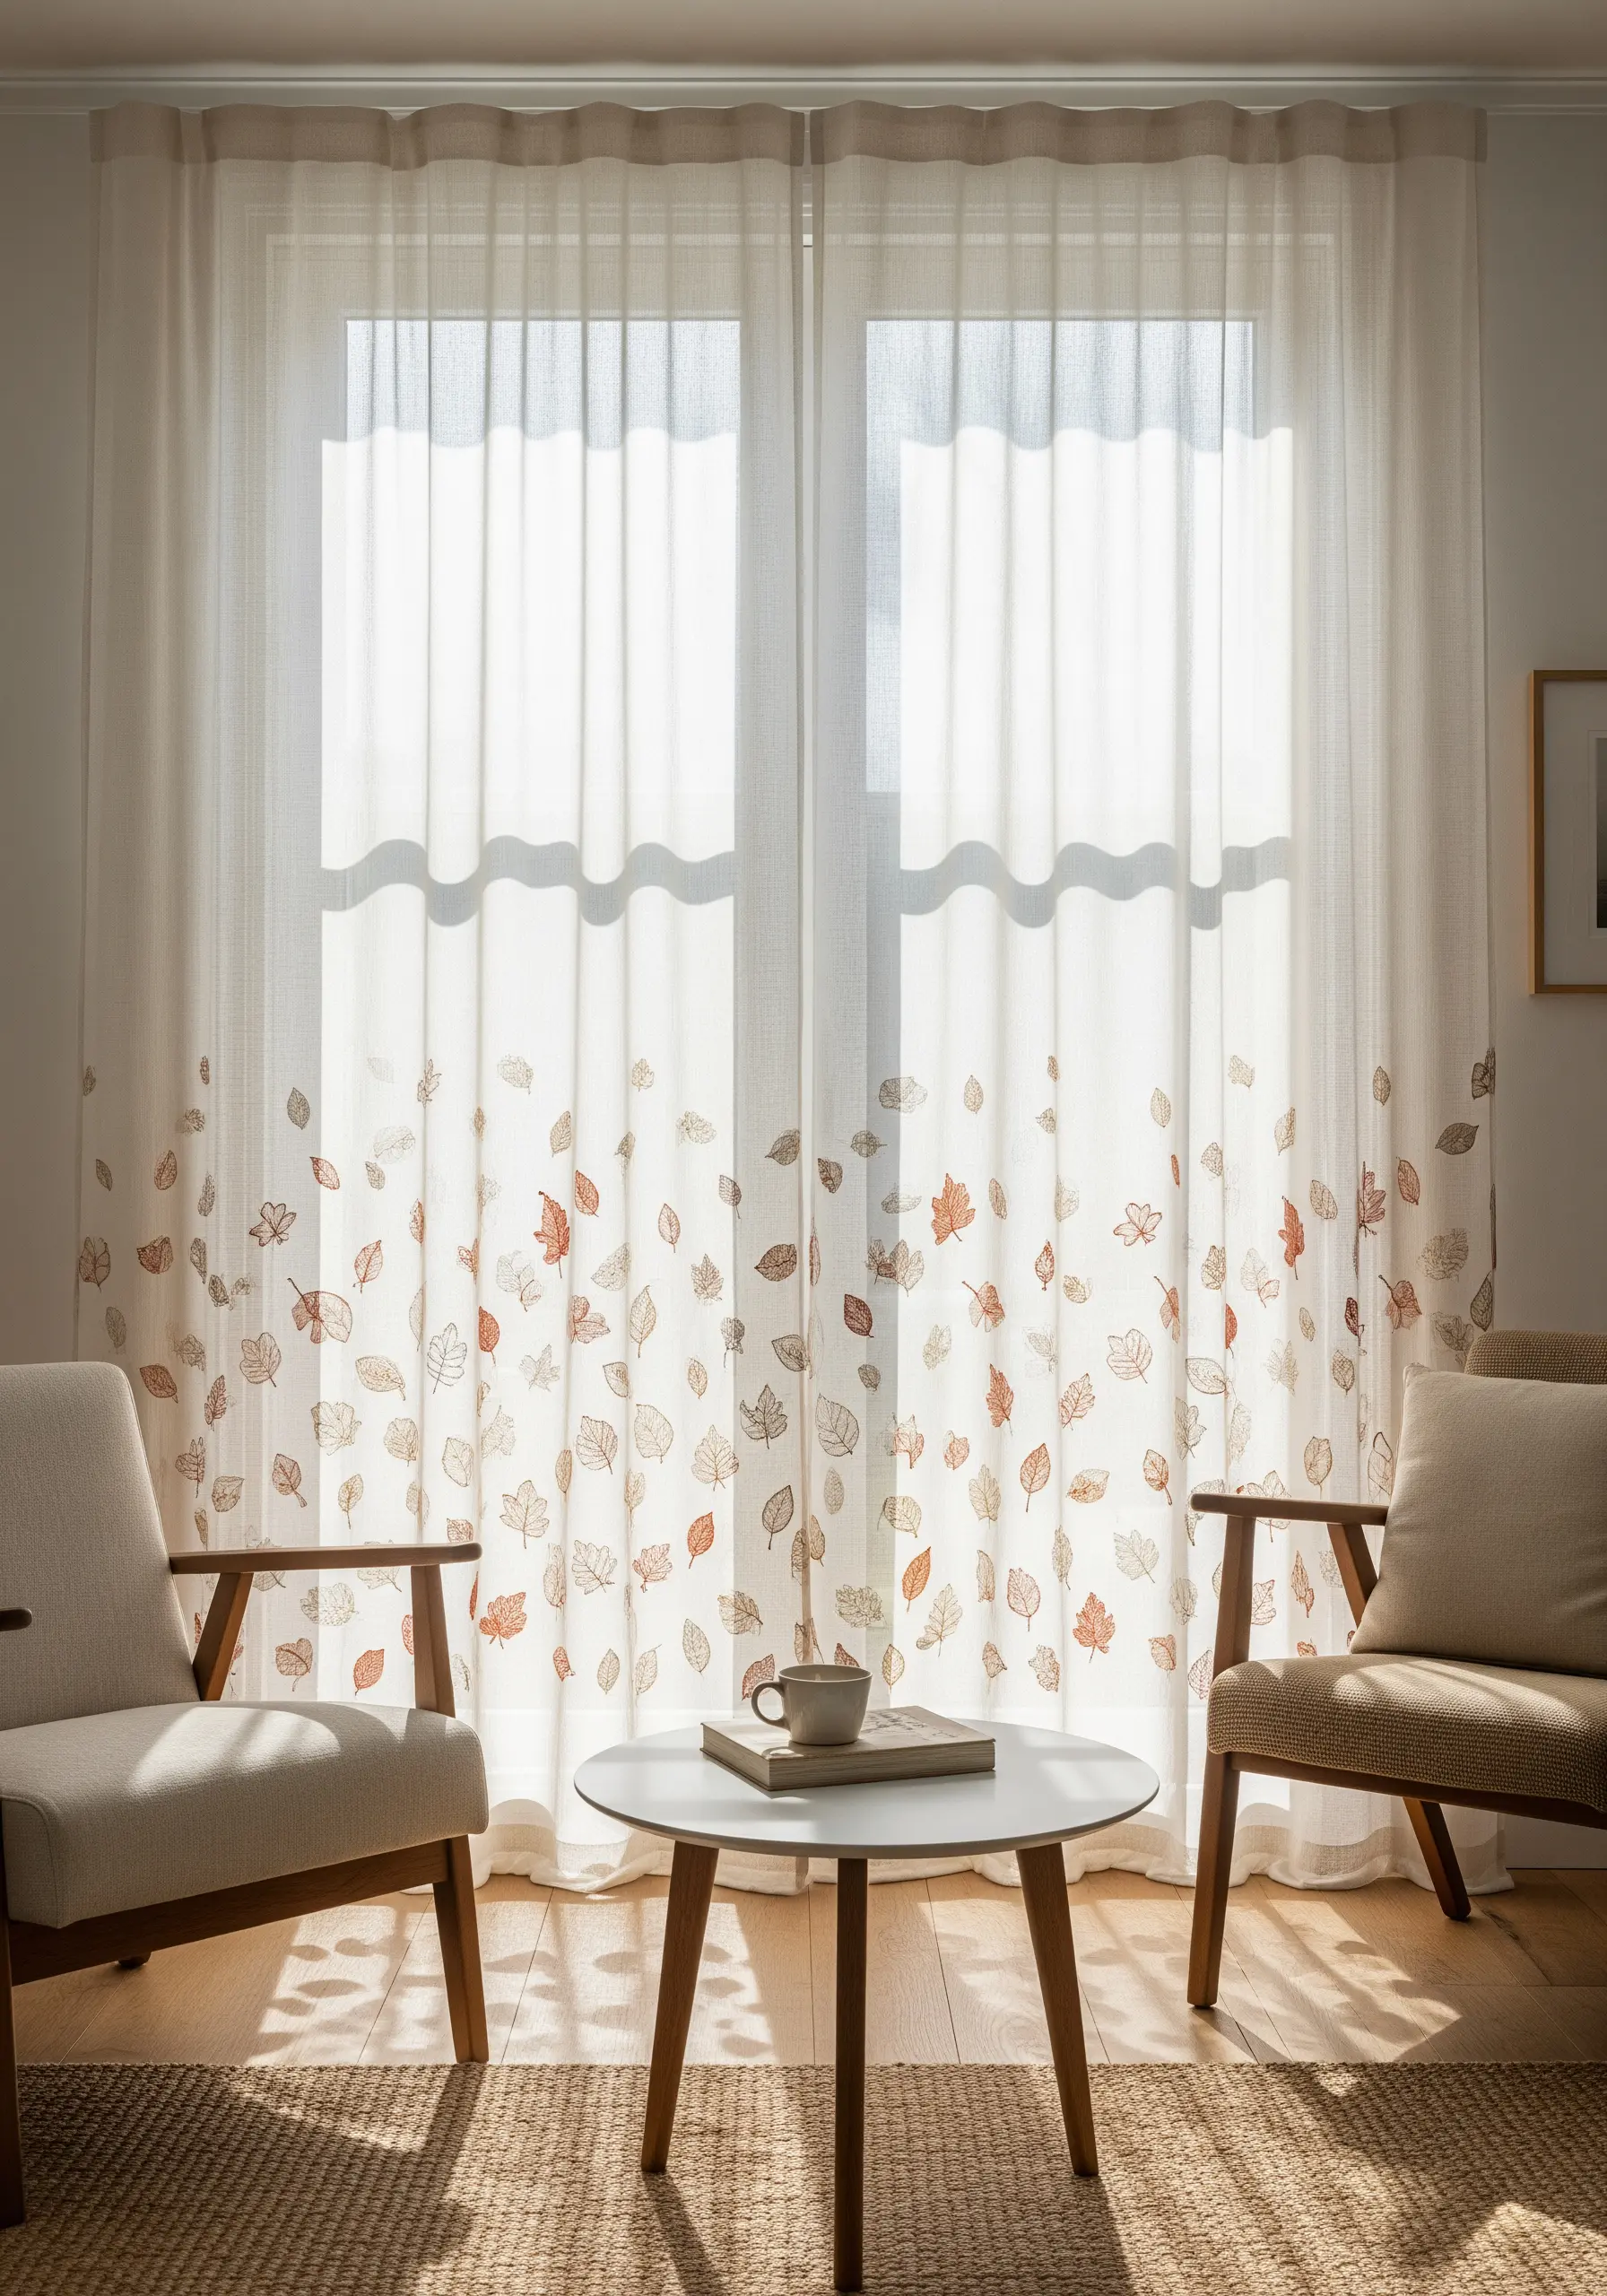
When embroidering sheer curtains, create a sense of lightness and movement by concentrating your motifs at the bottom and letting them scatter as they move upward.
Stitch the leaves or botanicals more densely near the hem, gradually increasing the space between them as you work your way up the panel.
This gradient effect draws the eye upward, making the ceiling feel higher and allowing light to filter through the top of the curtain unobstructed.
These subtle cream-clay embroidered curtain borders add warmth without overwhelming a room.
9. Master Embroidery on a Lampshade
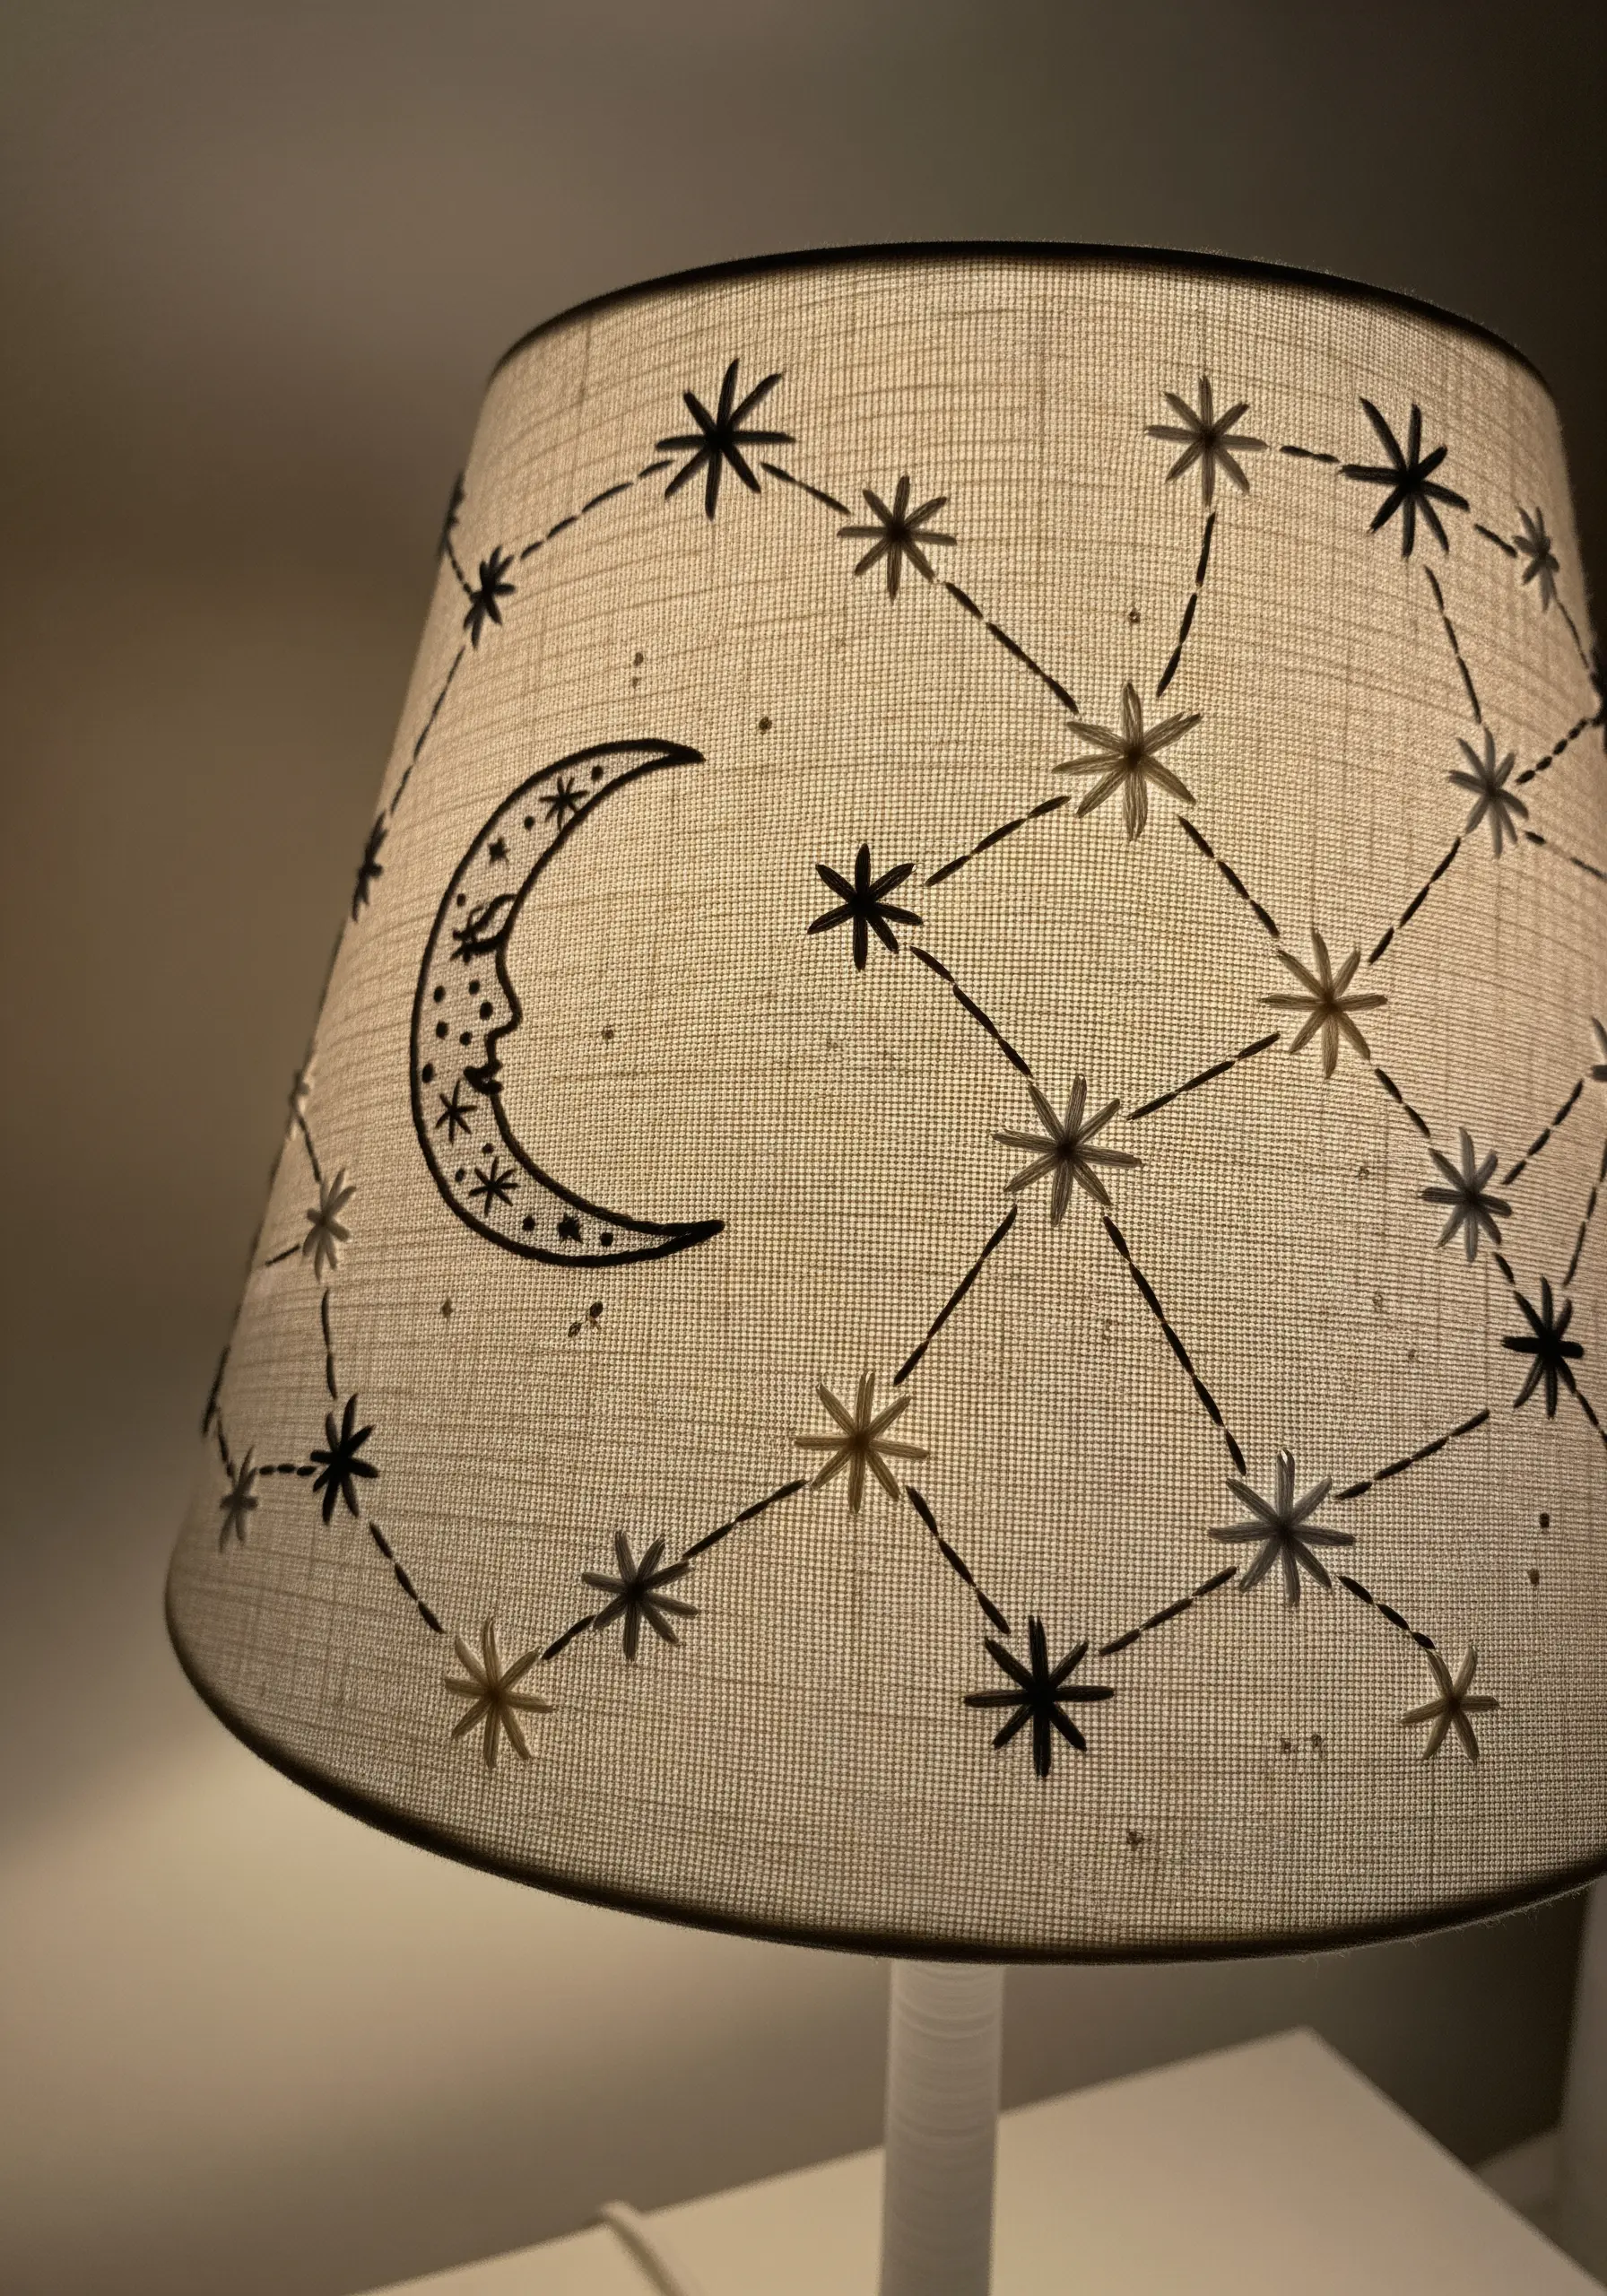
Stitching on a taut, curved lampshade requires a different approach. You can’t use a hoop, so choose simple, graphic stitches that don’t require high tension.
A basic backstitch for lines and simple star stitches for fillers are perfect. Use a thimble to push the needle through the stiff material without straining your fingers.
The magic happens when the light is on, turning your simple stitches into a glowing constellation. These celestial micro-embroidery ideas are especially effective on translucent fabrics.
10. Craft a Serene Headboard with Tactile Stitches
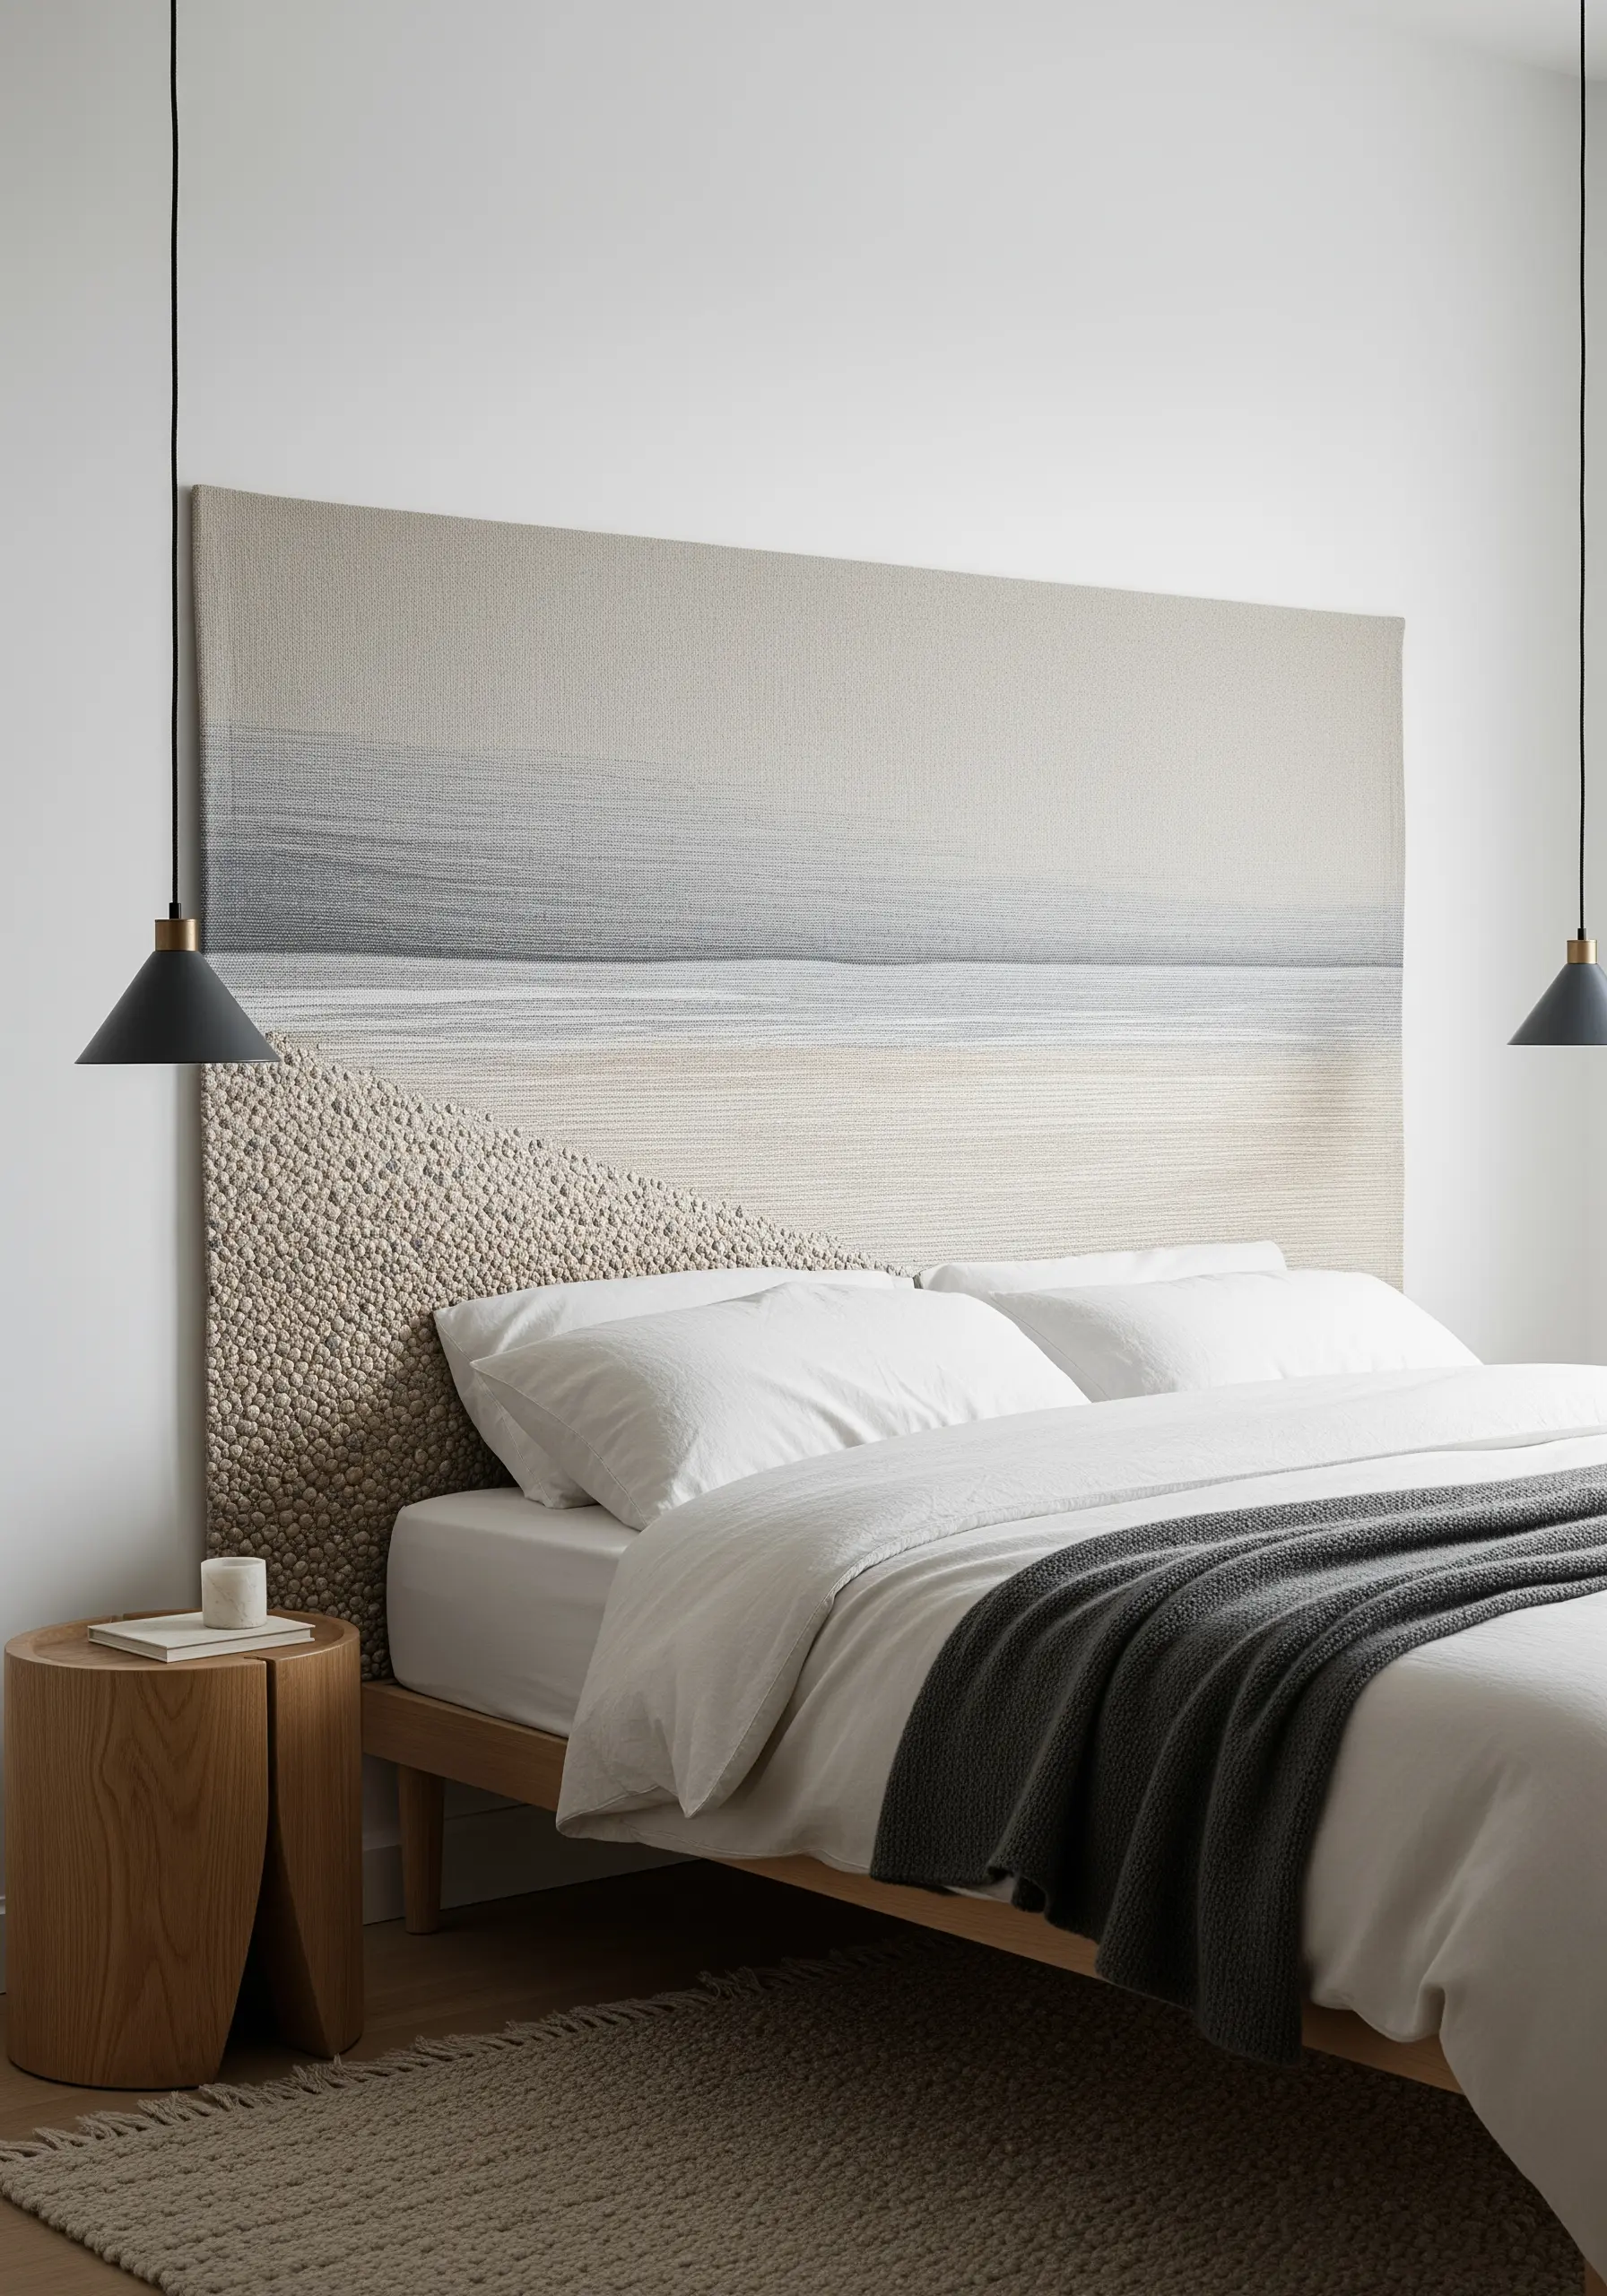
Design a large-scale textile headboard by focusing on texture over intricate detail.
Use dense fields of French knots in a sandy tone to mimic a shoreline, creating a highly tactile lower section.
For the sky and water, use long, horizontal seed stitches in muted grays and blues. The contrast between the plush knots and the flat stitches creates a sophisticated, abstract landscape.
This project proves that stunning embroidered wall hangings can also be beautifully functional.
11. Use Thread Painting for Hyper-Realistic Motifs

To embroider a complex object like a morel mushroom, use the thread painting technique, also known as long-and-short stitch.
Work with single strands of floss in several closely related shades of brown and beige. Create small, irregular patches of stitches that blend into one another, mimicking the natural texture.
The key is to make your stitches varied in length and direction, just like in nature. This approach is perfect for nature texture embroidery projects that feel amazingly real.
12. Create Movement with Wavy Chain Stitch Rows
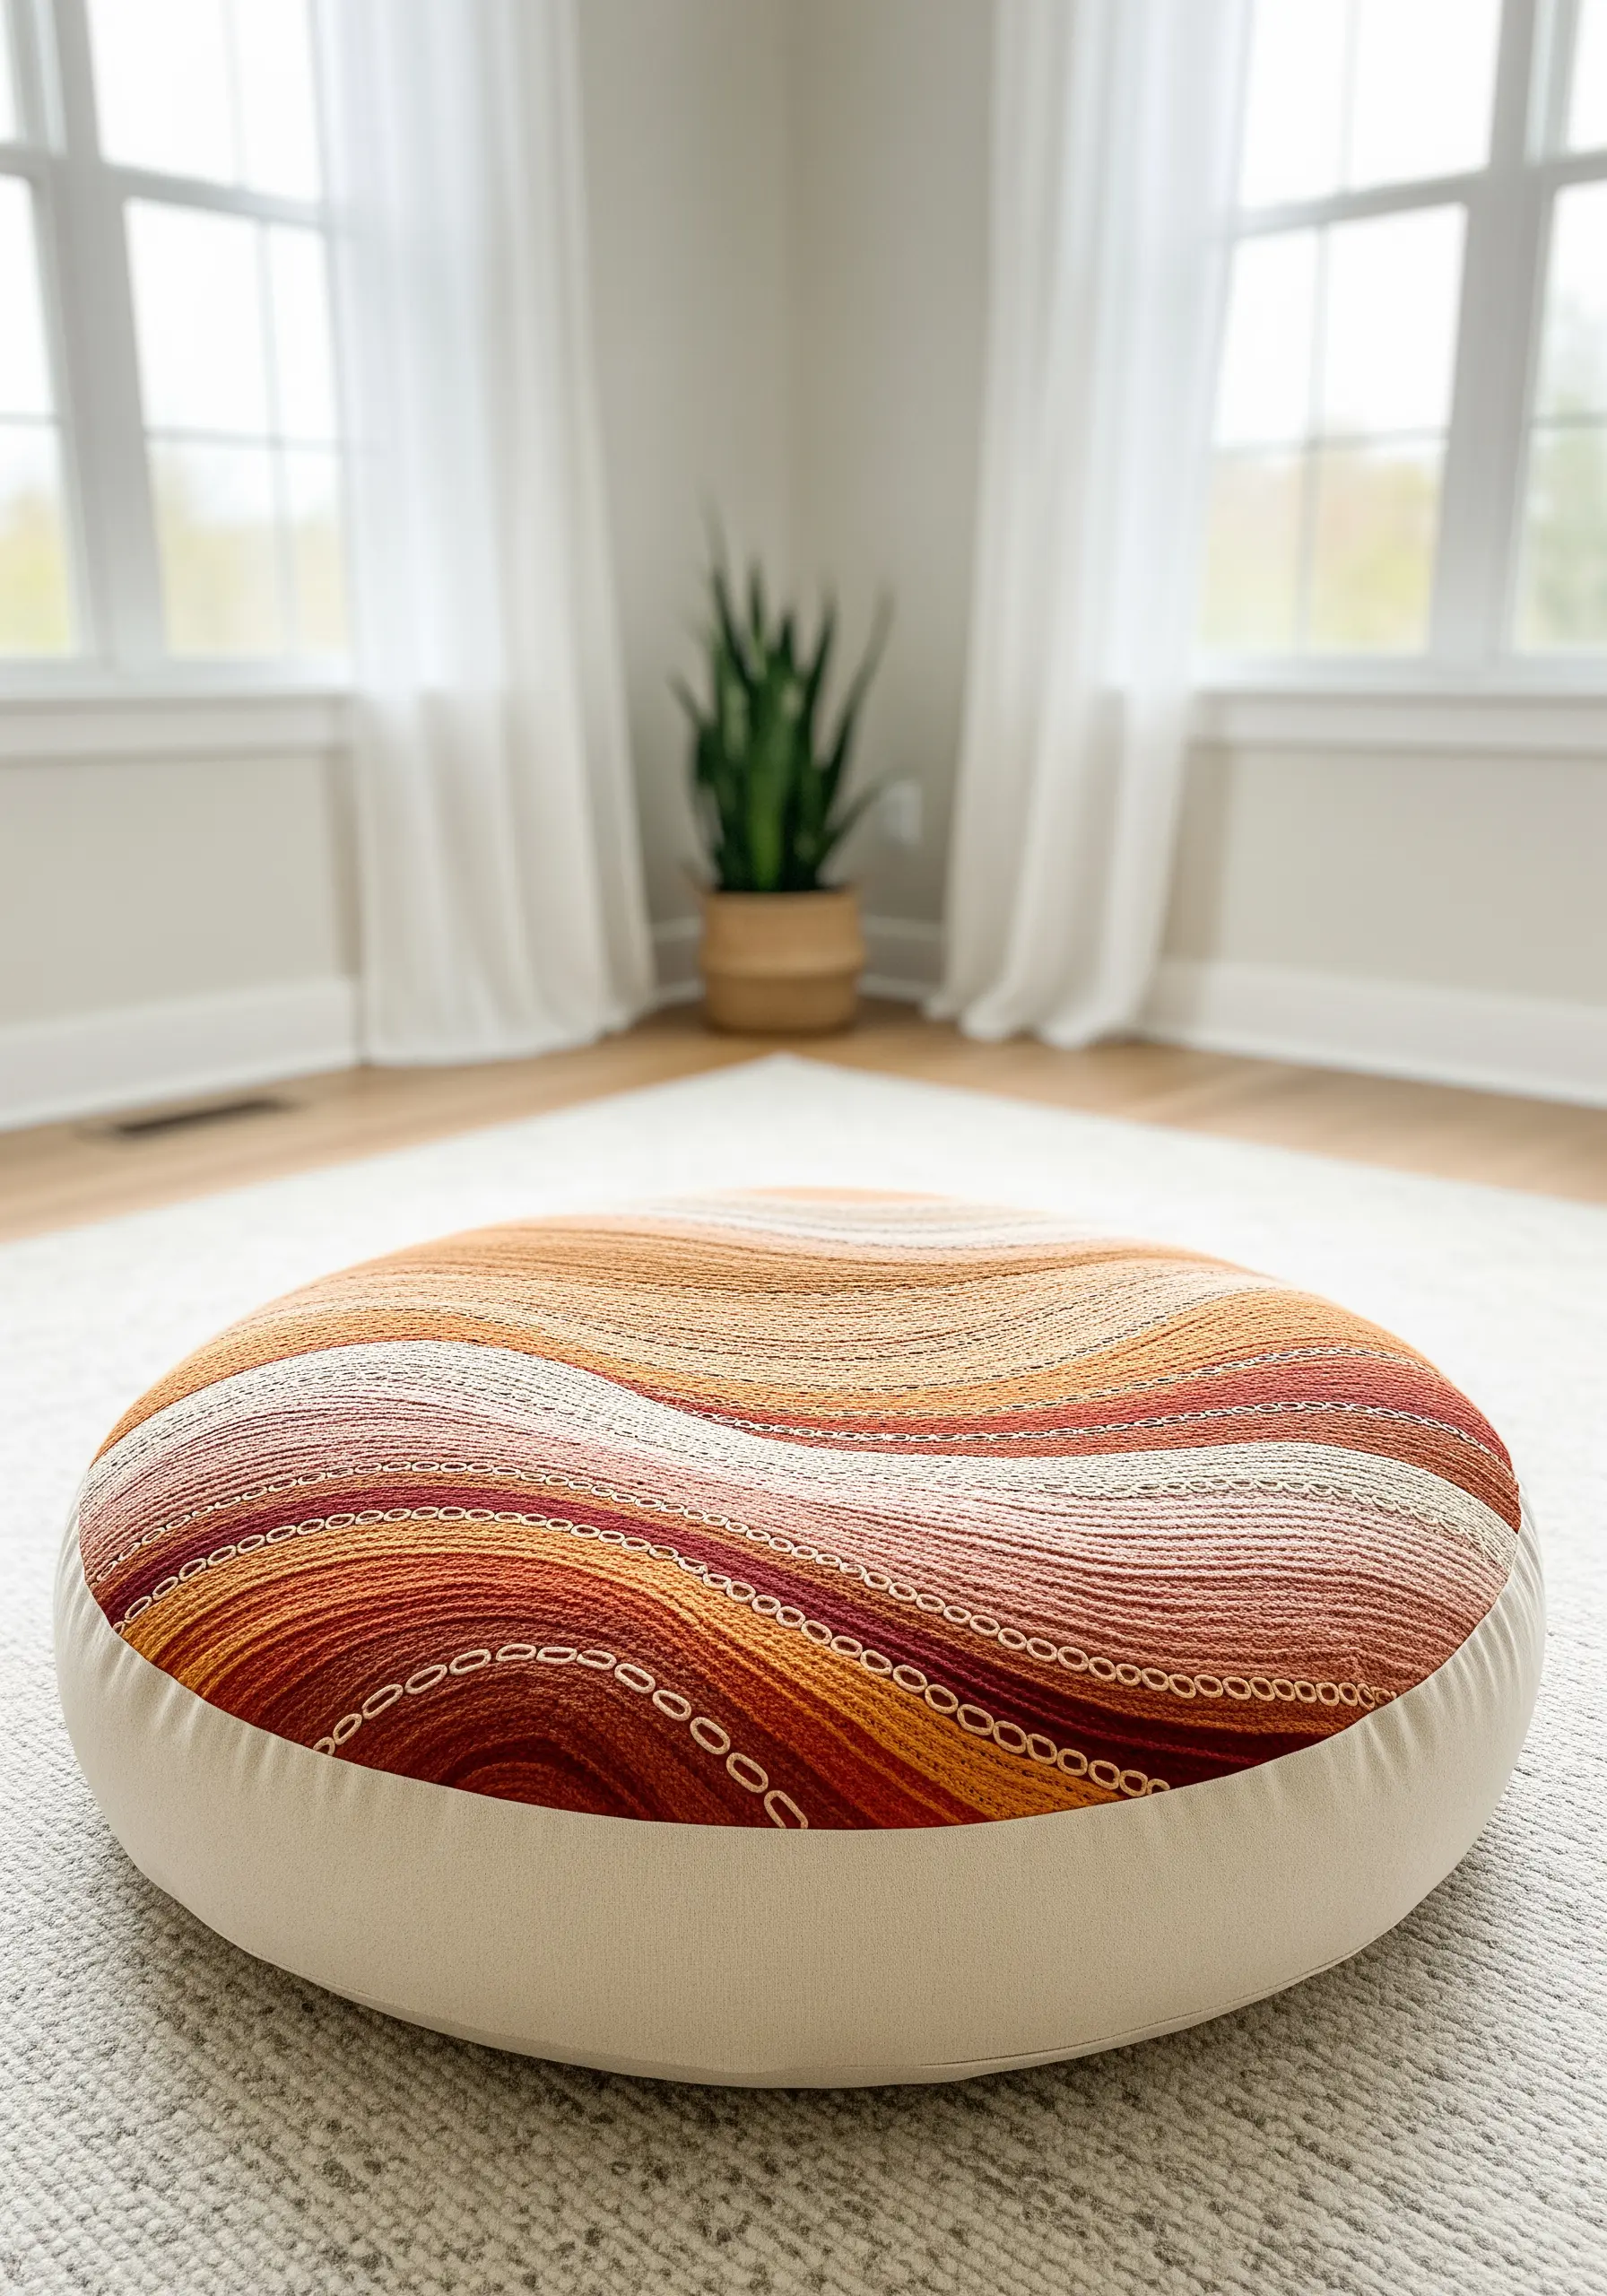
For a dynamic, flowing design on a functional piece like a floor cushion, fill wide bands with rows of chain stitch.
Instead of stitching in straight lines, work in gentle, undulating waves. Pack the rows tightly together so the individual stitches blend into a cohesive, corduroy-like texture.
Using a variegated thread will enhance the sense of movement and depth, making the surface look like a contoured landscape.
This is one of the best ways to capture nature’s textures in your next embroidery project.
13. Unify a Quilt with a Consistent Motif
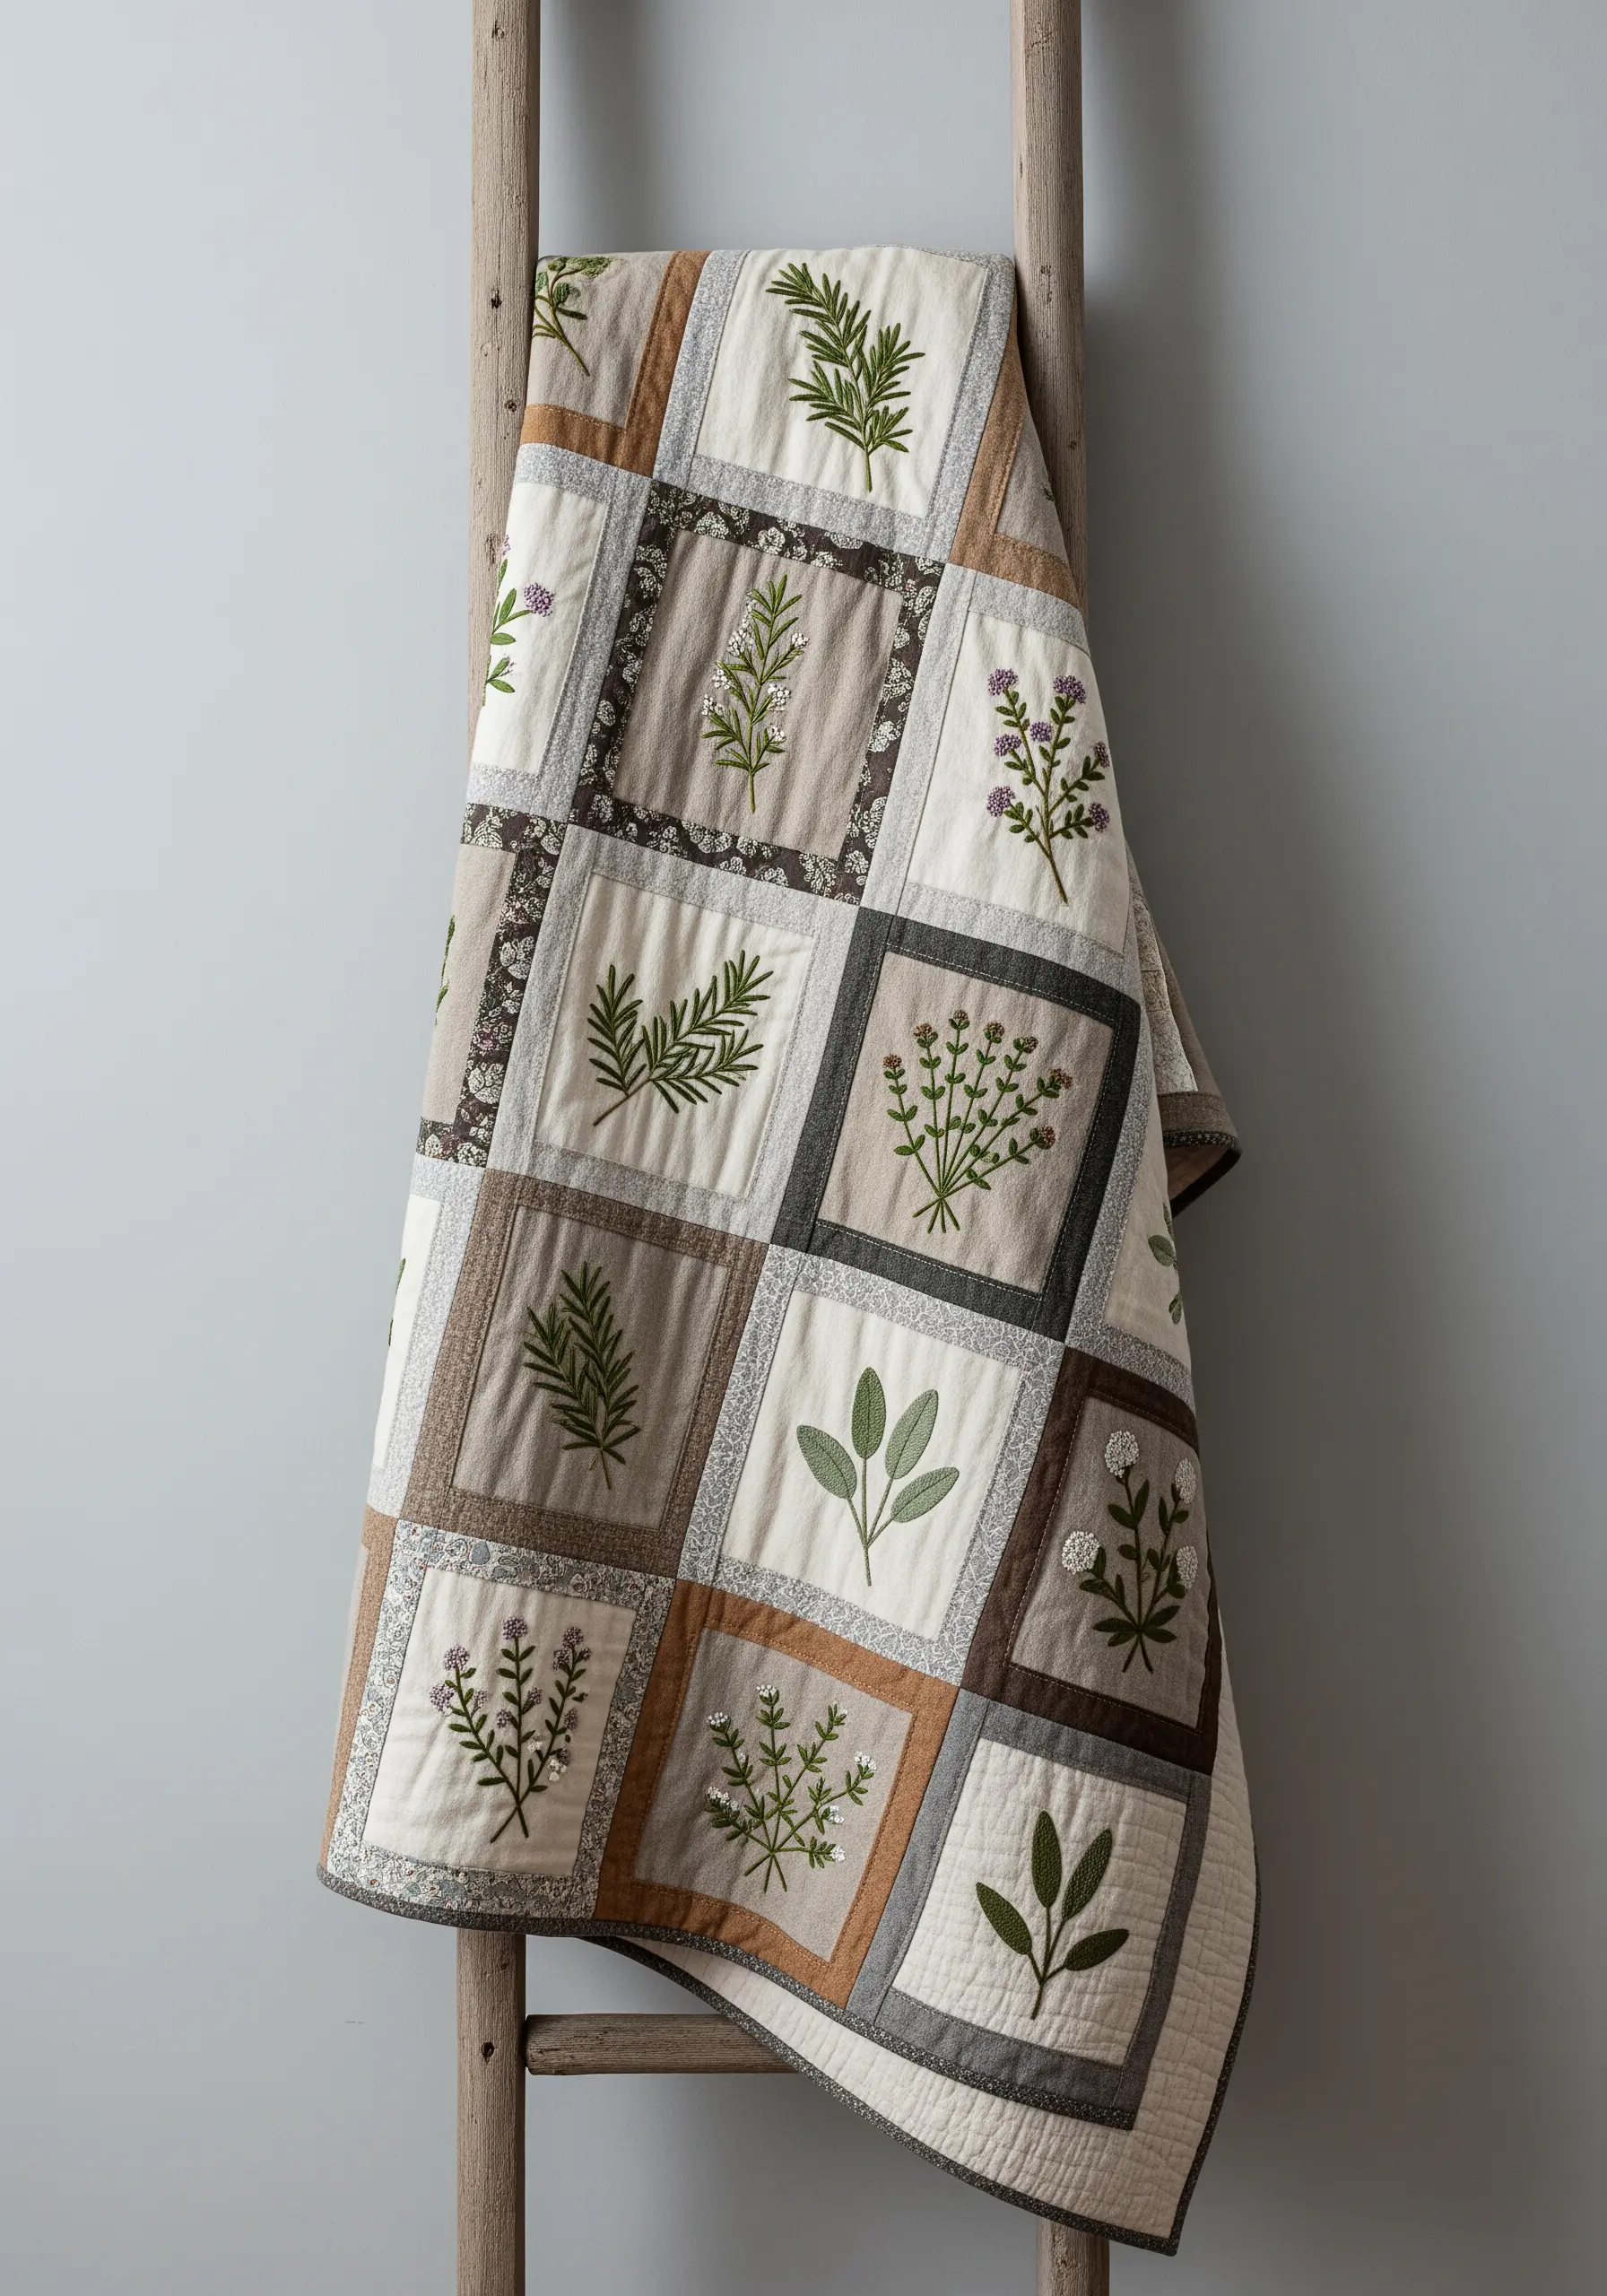
To give a patchwork quilt a cohesive, polished look, connect the disparate fabric squares with a unified embroidery theme.
Choose a single subject, like botanicals, but render a different species in each square. Use a consistent color palette and stitch style (like simple stem and satin stitches) across all motifs.
This creates a sense of rhythm and intention, turning a collection of scraps into a thoughtful, heirloom-quality piece.
This idea transforms cottagecore floral embroidery ideas into a large-scale, functional artwork.
14. Add Dimension with Padded Satin Stitch

Make your satin-stitched subjects pop by padding them first. Before you lay down your final satin stitches, fill the area with a base of small, perpendicular running stitches or a layer of felt.
Then, work your satin stitch over this padded base. The slight elevation catches the light differently, giving your mushrooms or florals a subtle, sculptural quality.
This technique makes framed embroidery patterns look exceptionally professional and three-dimensional.
15. Create Bold Lines with Thick, Textural Stitches
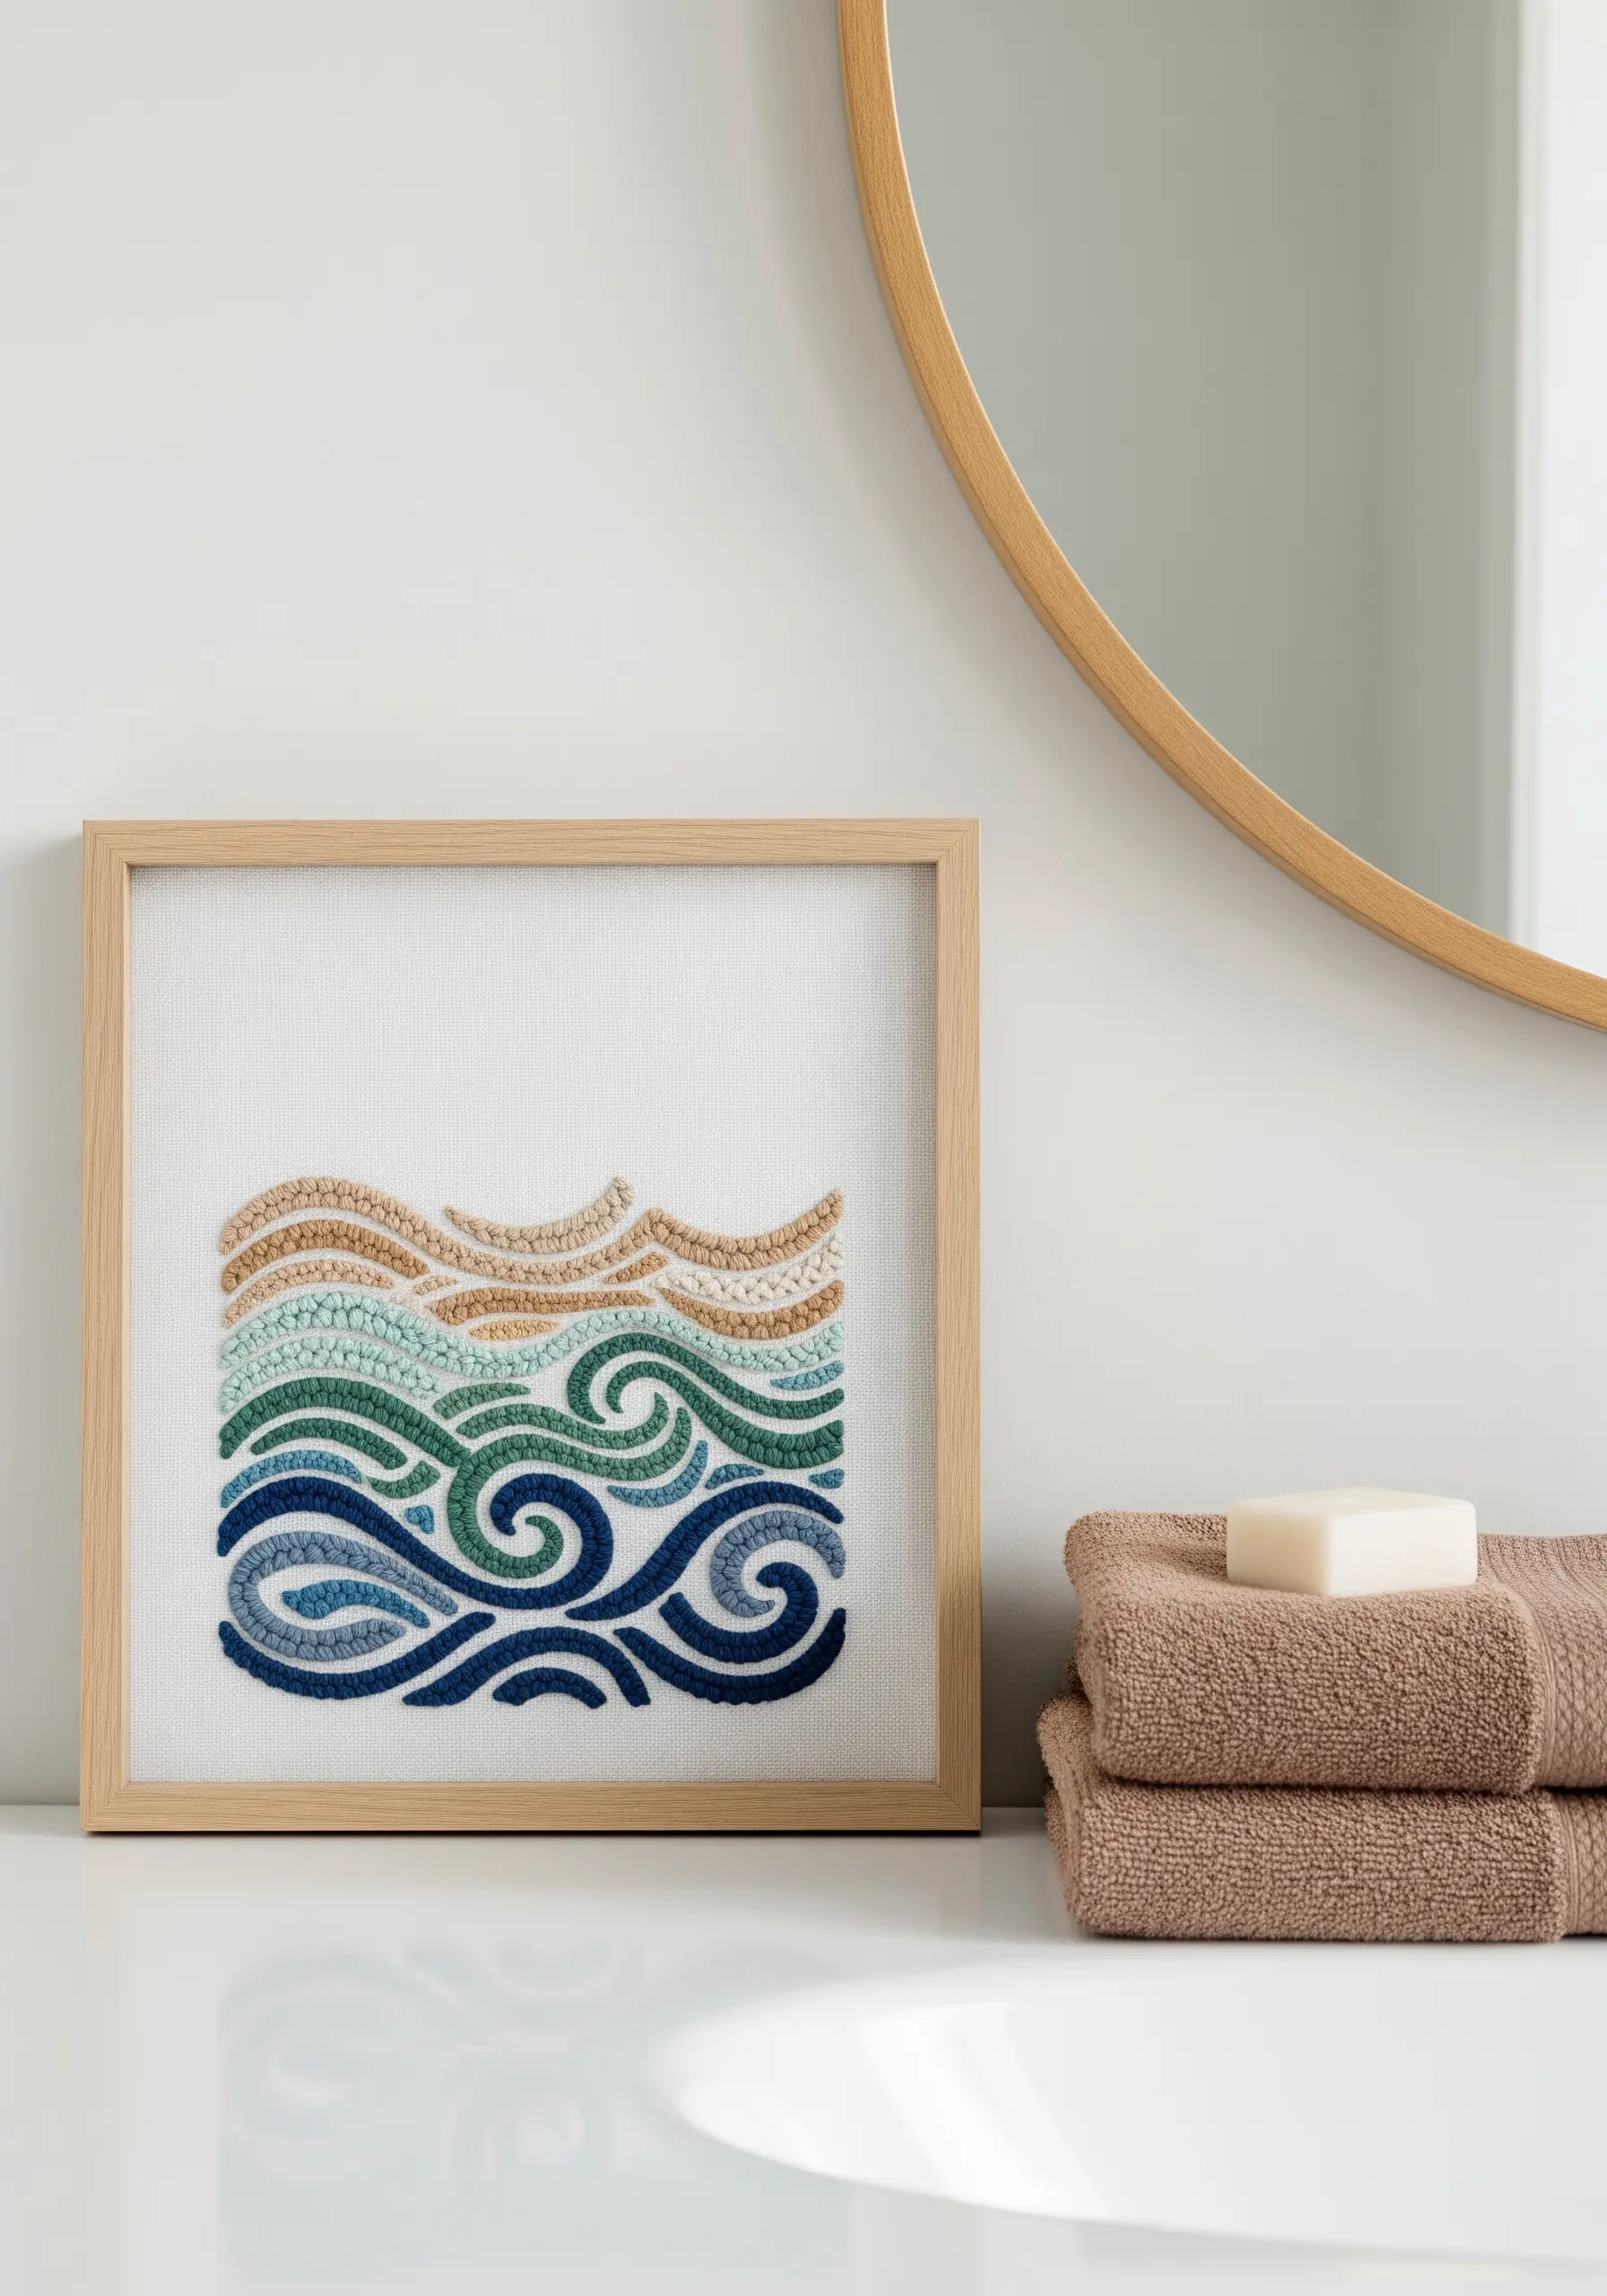
For graphic designs that need to make a statement, move beyond thin floss and embrace thicker fibers and dimensional stitches.
Use perle cotton or even fine yarn to work a whipped chain stitch or a heavy stem stitch. These stitches create a thick, rope-like line that stands out beautifully against the fabric.
They are perfect for capturing the energy of ocean waves or abstract patterns, adding both color and a powerful tactile quality.
These abstract thread waves & swirls bring dynamic energy to any piece.
16. Explore Abstract Forms with Variegated Thread
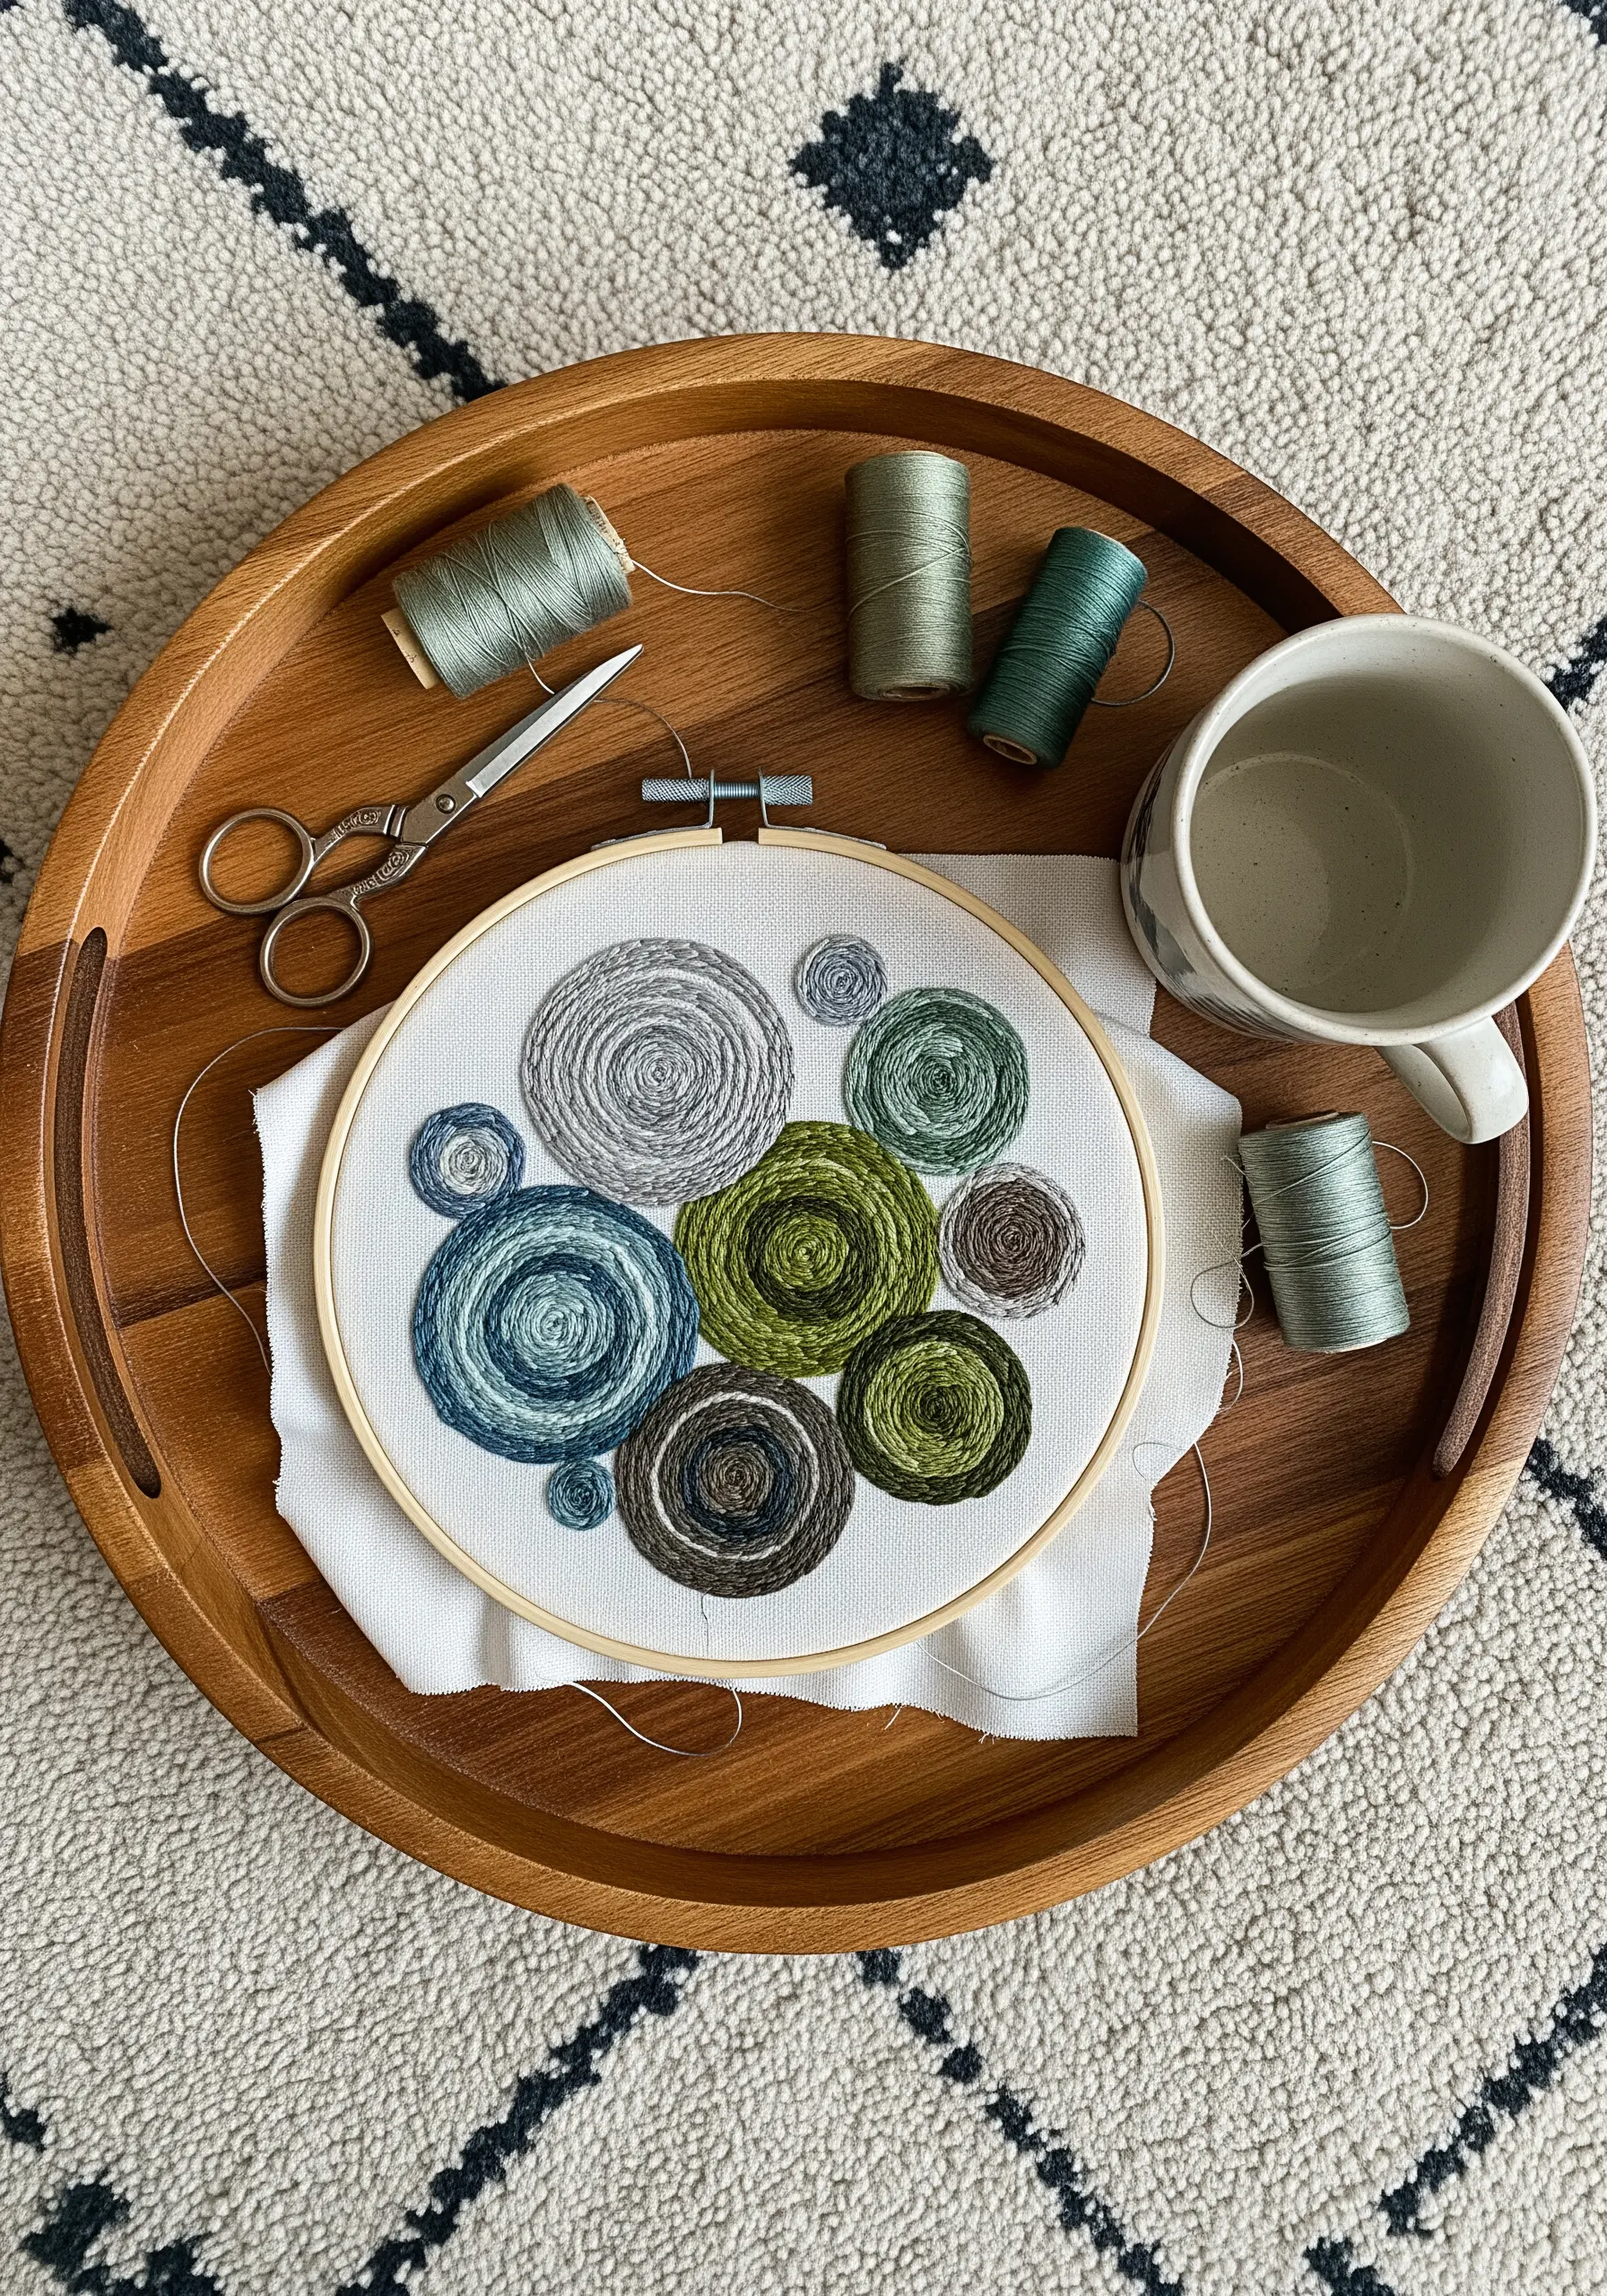
Let variegated thread guide your creativity in an abstract piece. Instead of planning every color change, allow the thread’s natural color shifts to dictate the form.
Work in simple spirals or circles using a basic backstitch. As the color transitions from green to blue to gray, it will create organic, unpredictable patterns that look incredibly complex.
This is a meditative technique that turns abstract hoop art concepts into an exercise in mindfulness.
17. Combine Appliqué and Stitching for Large-Scale Botanicals

When creating oversized botanicals for a room divider or large wall hanging, combine fabric appliqué with embroidery for efficiency and impact.
Cut the main leaf shapes from felt or heavy cotton and appliqué them onto your base fabric. Then, use long satin stitches or couched yarn to add veins, stems, and textural details.
This mixed-media approach allows you to cover large areas quickly while still showcasing the beauty of hand-stitching.
These statement-size embroidered textile hangings become focal points in any room.
18. Achieve Geometric Precision with Outlines
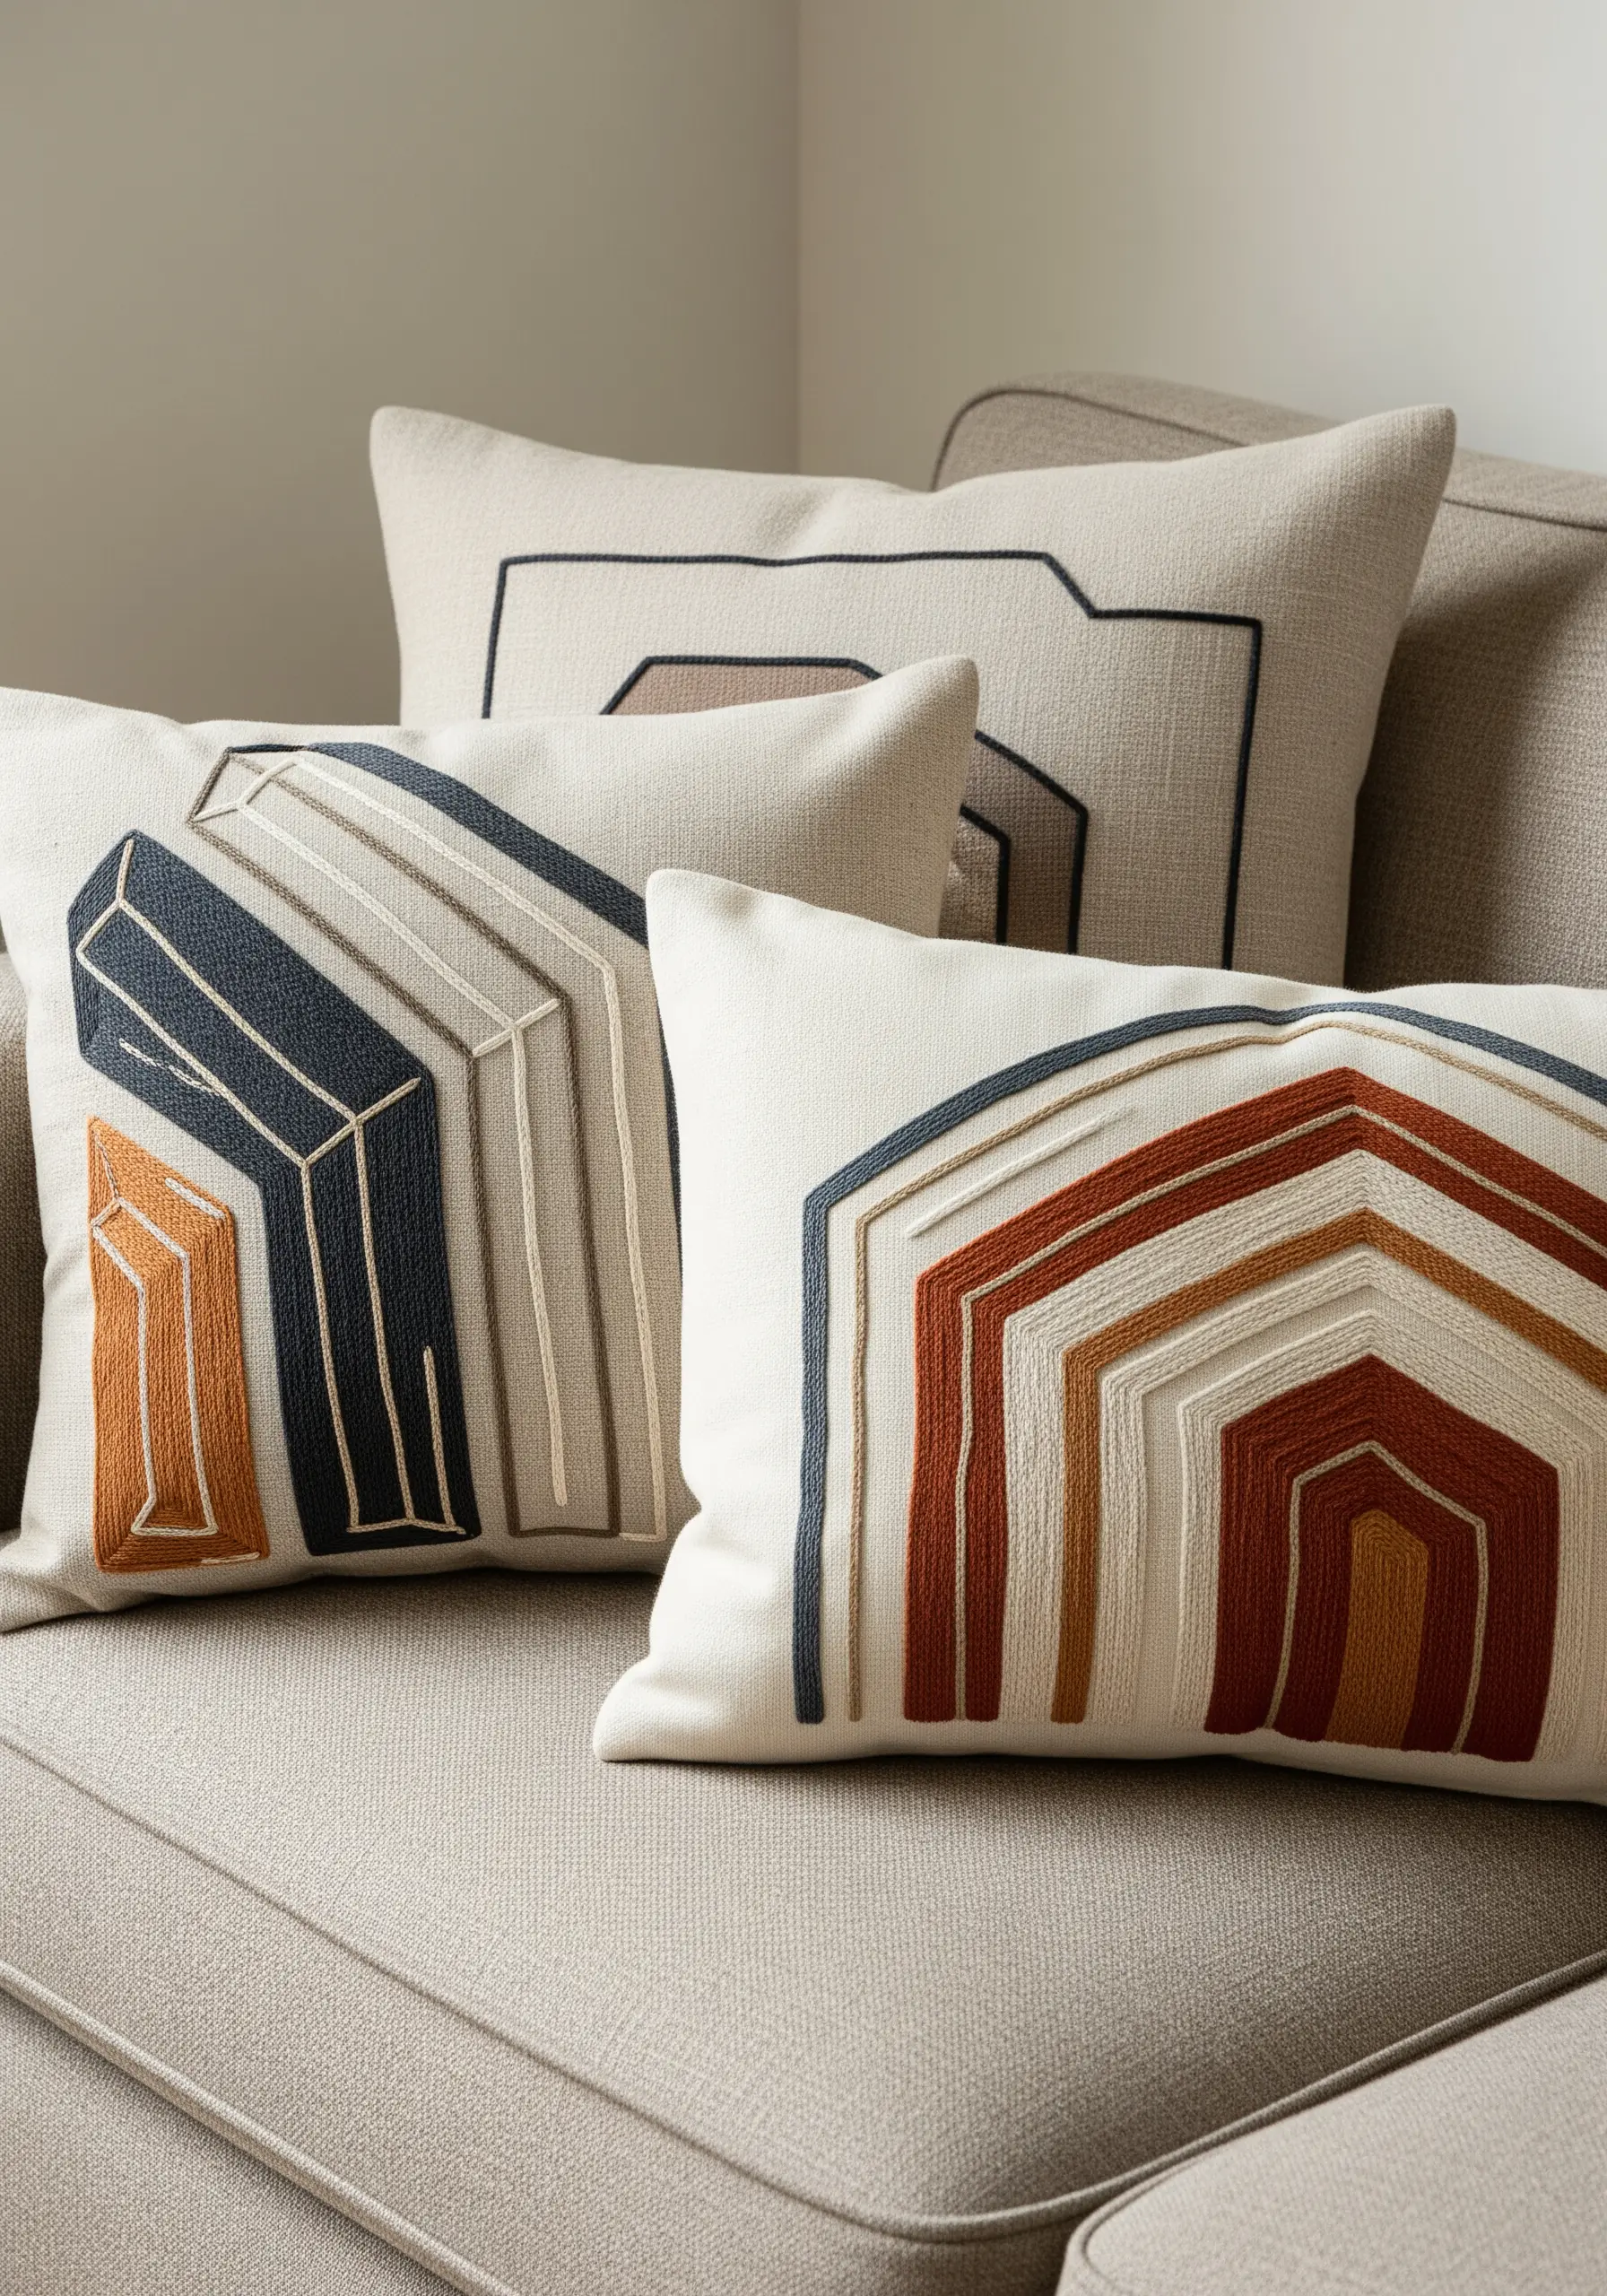
To ensure your geometric satin stitch blocks have perfectly crisp edges, outline them first.
Use a single strand of matching or contrasting thread to backstitch or split-stitch the entire perimeter of the shape before you begin filling it.
This outline acts as a firm ‘wall’ for your satin stitches to press against, preventing them from slipping and creating a sharp, clean line every time.
This is the secret to making modern geometric thread art ideas look flawless and professional.
19. Create Organic Gradients with French Knots

For a large, abstract piece with a soft gradient, use thousands of French knots as if they were pixels of color.
Start with your darkest shade at the bottom, stitching a dense field of knots. Gradually introduce the next shade, mixing the two colors together at the transition point before switching entirely to the lighter color.
This ‘pointillist’ approach creates a seamless, pebble-like texture and a beautifully soft blend of tones. It can turn simple fibers into extraordinary art.
This is a stunning example of fiber art installations that turn simple fibers into extraordinary art.
20. Capture Light with Directional Satin Stitch
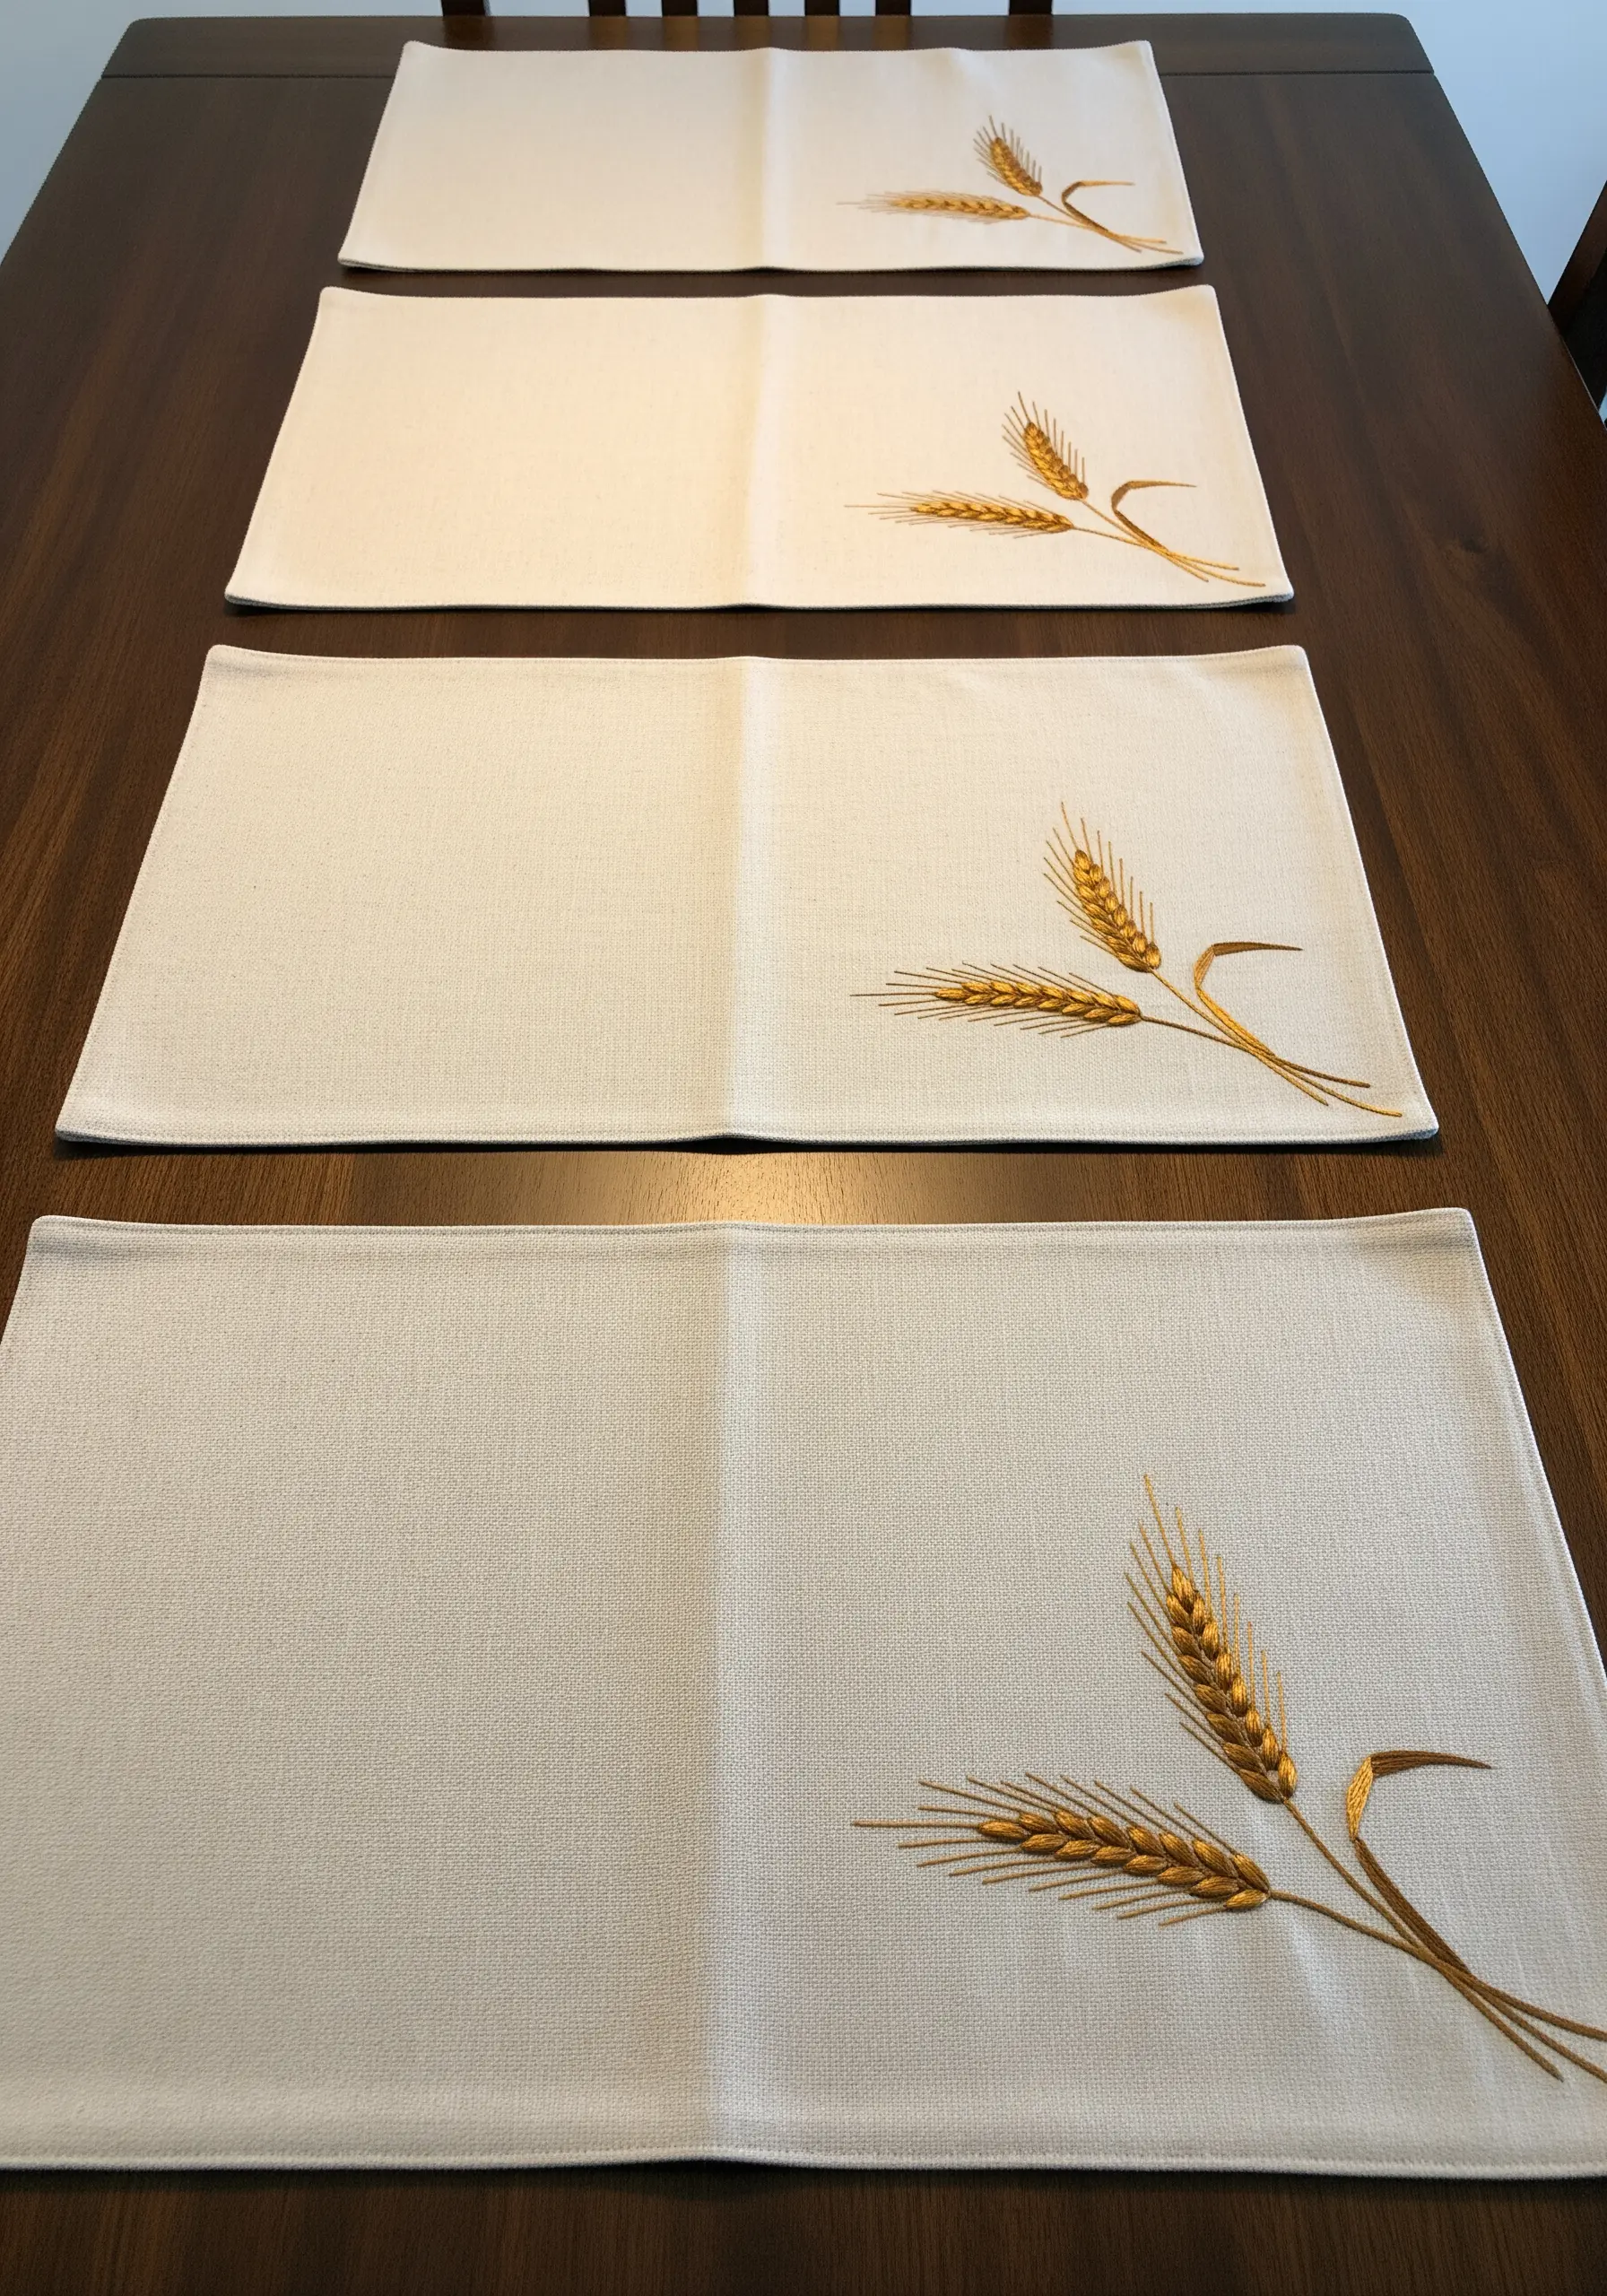
To make a simple motif like a stalk of wheat appear to shimmer, pay close attention to the direction of your satin stitches.
Use a thread with a natural sheen, like rayon or silk floss. Angle your stitches to follow the natural curves of each grain and stalk.
This ensures the threads catch and reflect light uniformly, creating a subtle, realistic glow that makes the design come alive.
This elevates simple abstract designs that look stunning on neutral linen table runners into works of art.
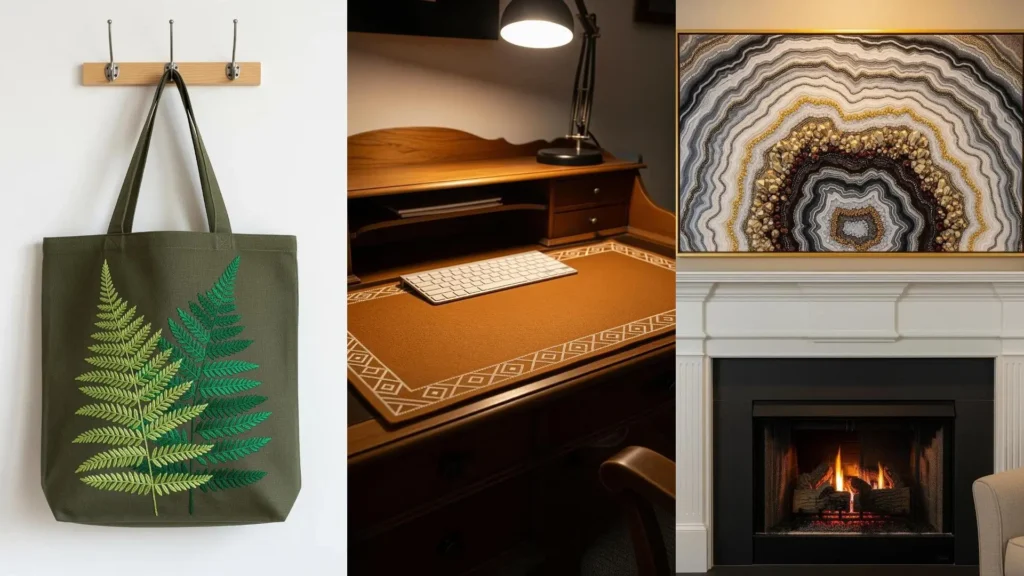
21. Create Depth with Tonal Shading

To make botanical designs look more dynamic, embroider them with two or more shades of the same color.
Stitch one fern in a bright, fresh green and place a second, slightly overlapping one behind it in a deeper, shadowy green.
This simple tonal shift instantly creates a sense of depth and layering, making the composition feel lush and realistic. It’s a classic artistic principle applied with thread.
It’s perfect for leaf embroidery stitches that turn ordinary tote bags into botanical art.
22. Use Negative Space on Dark Fabric
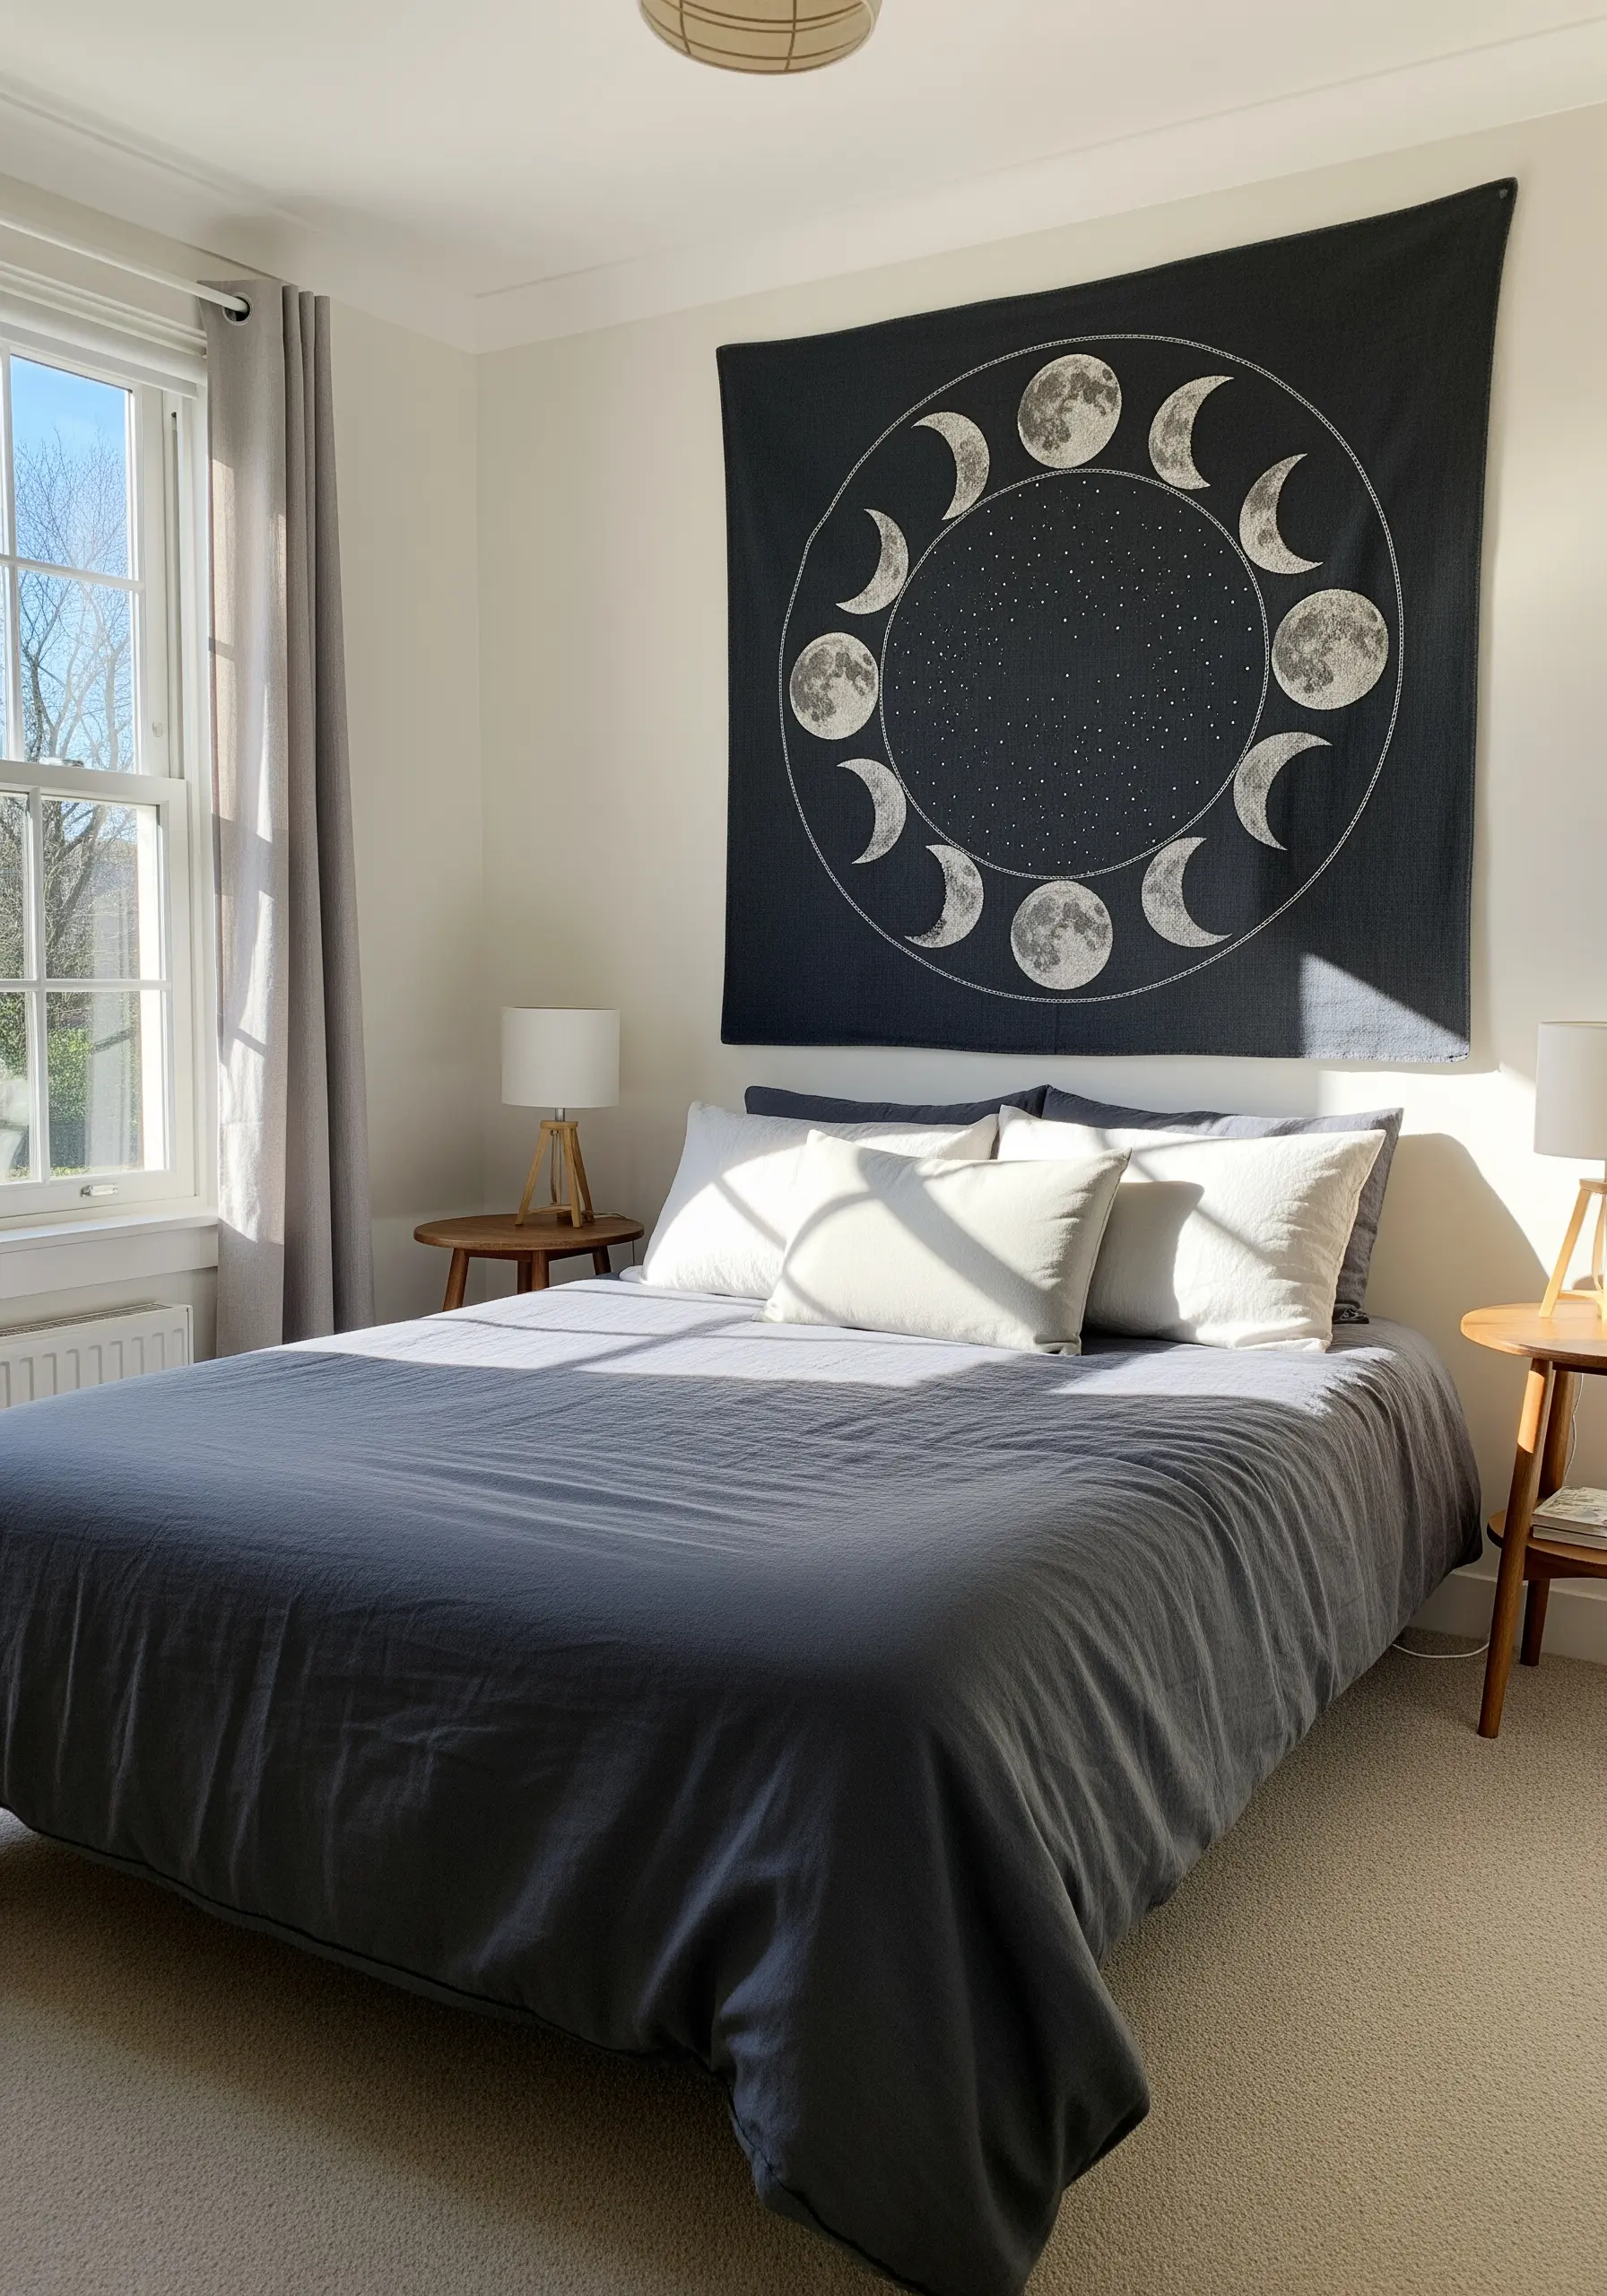
When working on dark fabric, let the unstitched background do much of the work for you.
For a moon phase design, stitch the bright, illuminated parts of the moon with dense satin stitch or French knots, but leave the shadowed areas completely empty.
The high contrast between the white thread and the dark fabric creates a dramatic, photorealistic effect that is far more impactful than trying to stitch the shadows with gray thread.
This is key to creating night garden embroidery ideas using dark fabric.
23. Add Subtle Elegance with a Geometric Border
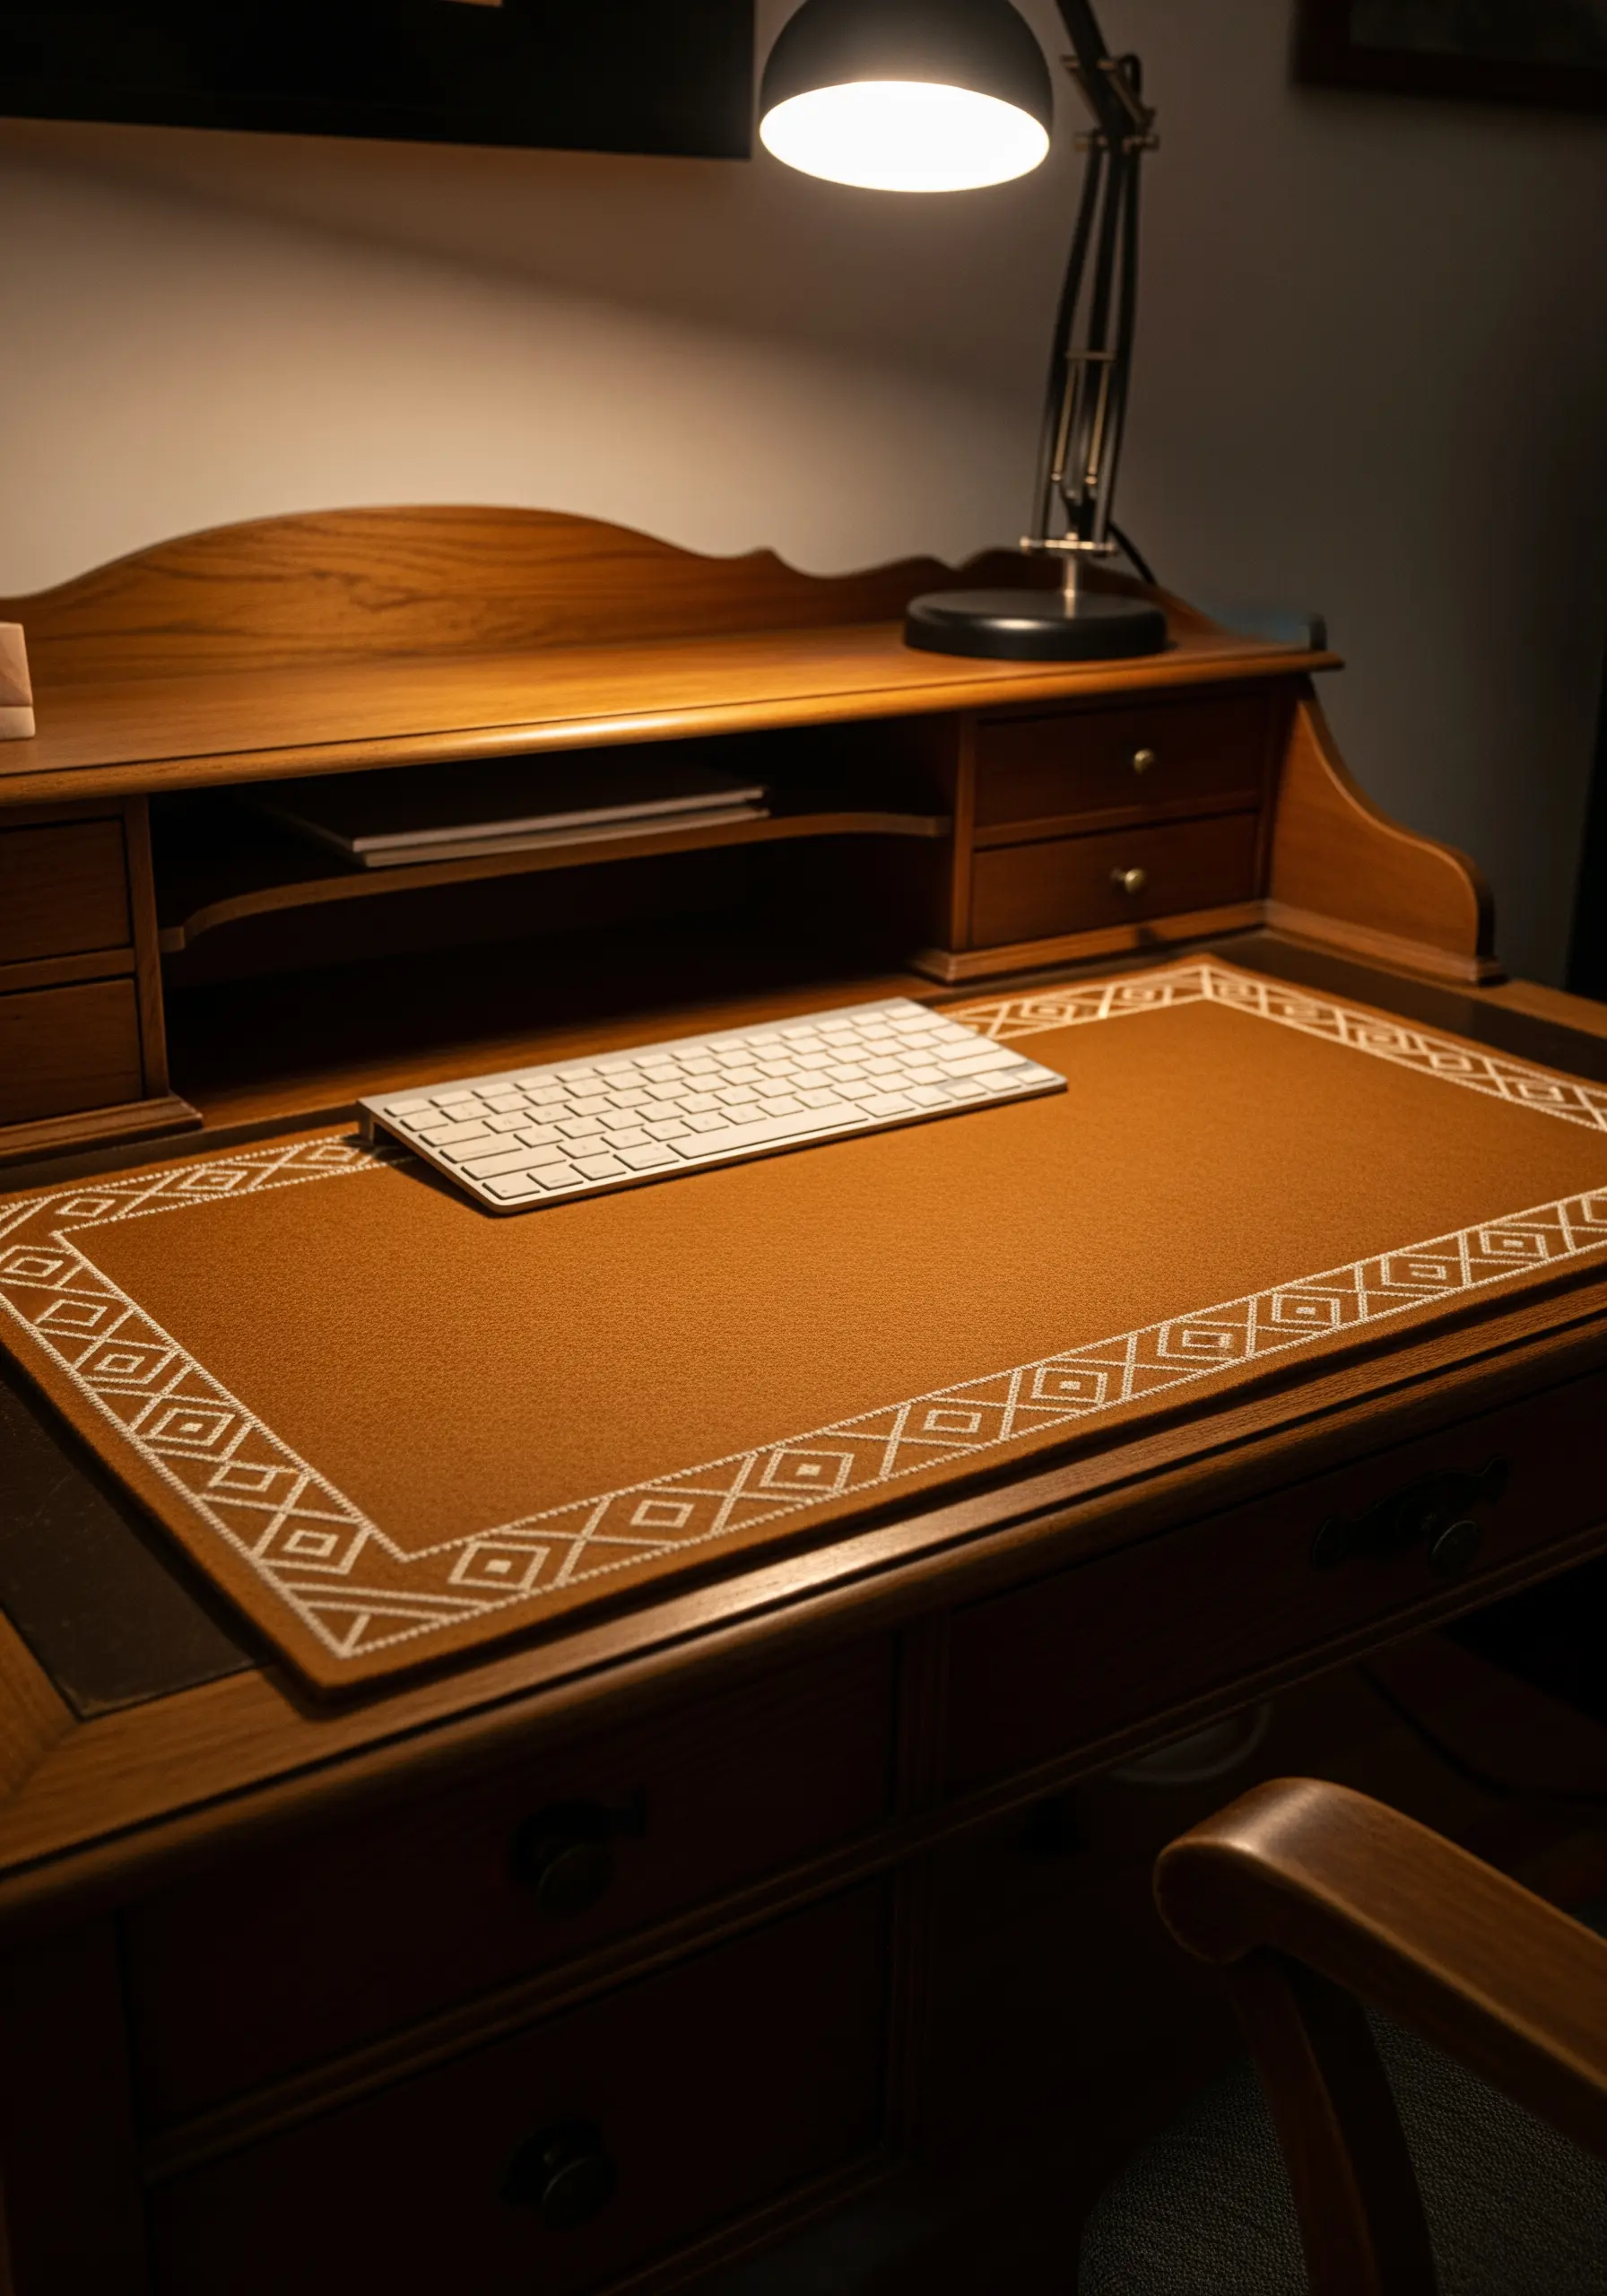
Elevate a simple object like a leather desk blotter by adding a clean, geometric border in a contrasting thread.
Use a simple running stitch or backstitch to create a pattern of diamonds, lines, or zigzags. The key is precision: measure and mark your stitch points with a ruler and a removable fabric pen before you begin.
This thoughtful detail adds a touch of bespoke craftsmanship and transforms a utilitarian item into a piece of decor.
It’s a way to add minimal embroidery accents that completely upgrade your entryway or workspace.
24. Turn a Hoop into a Functional Object
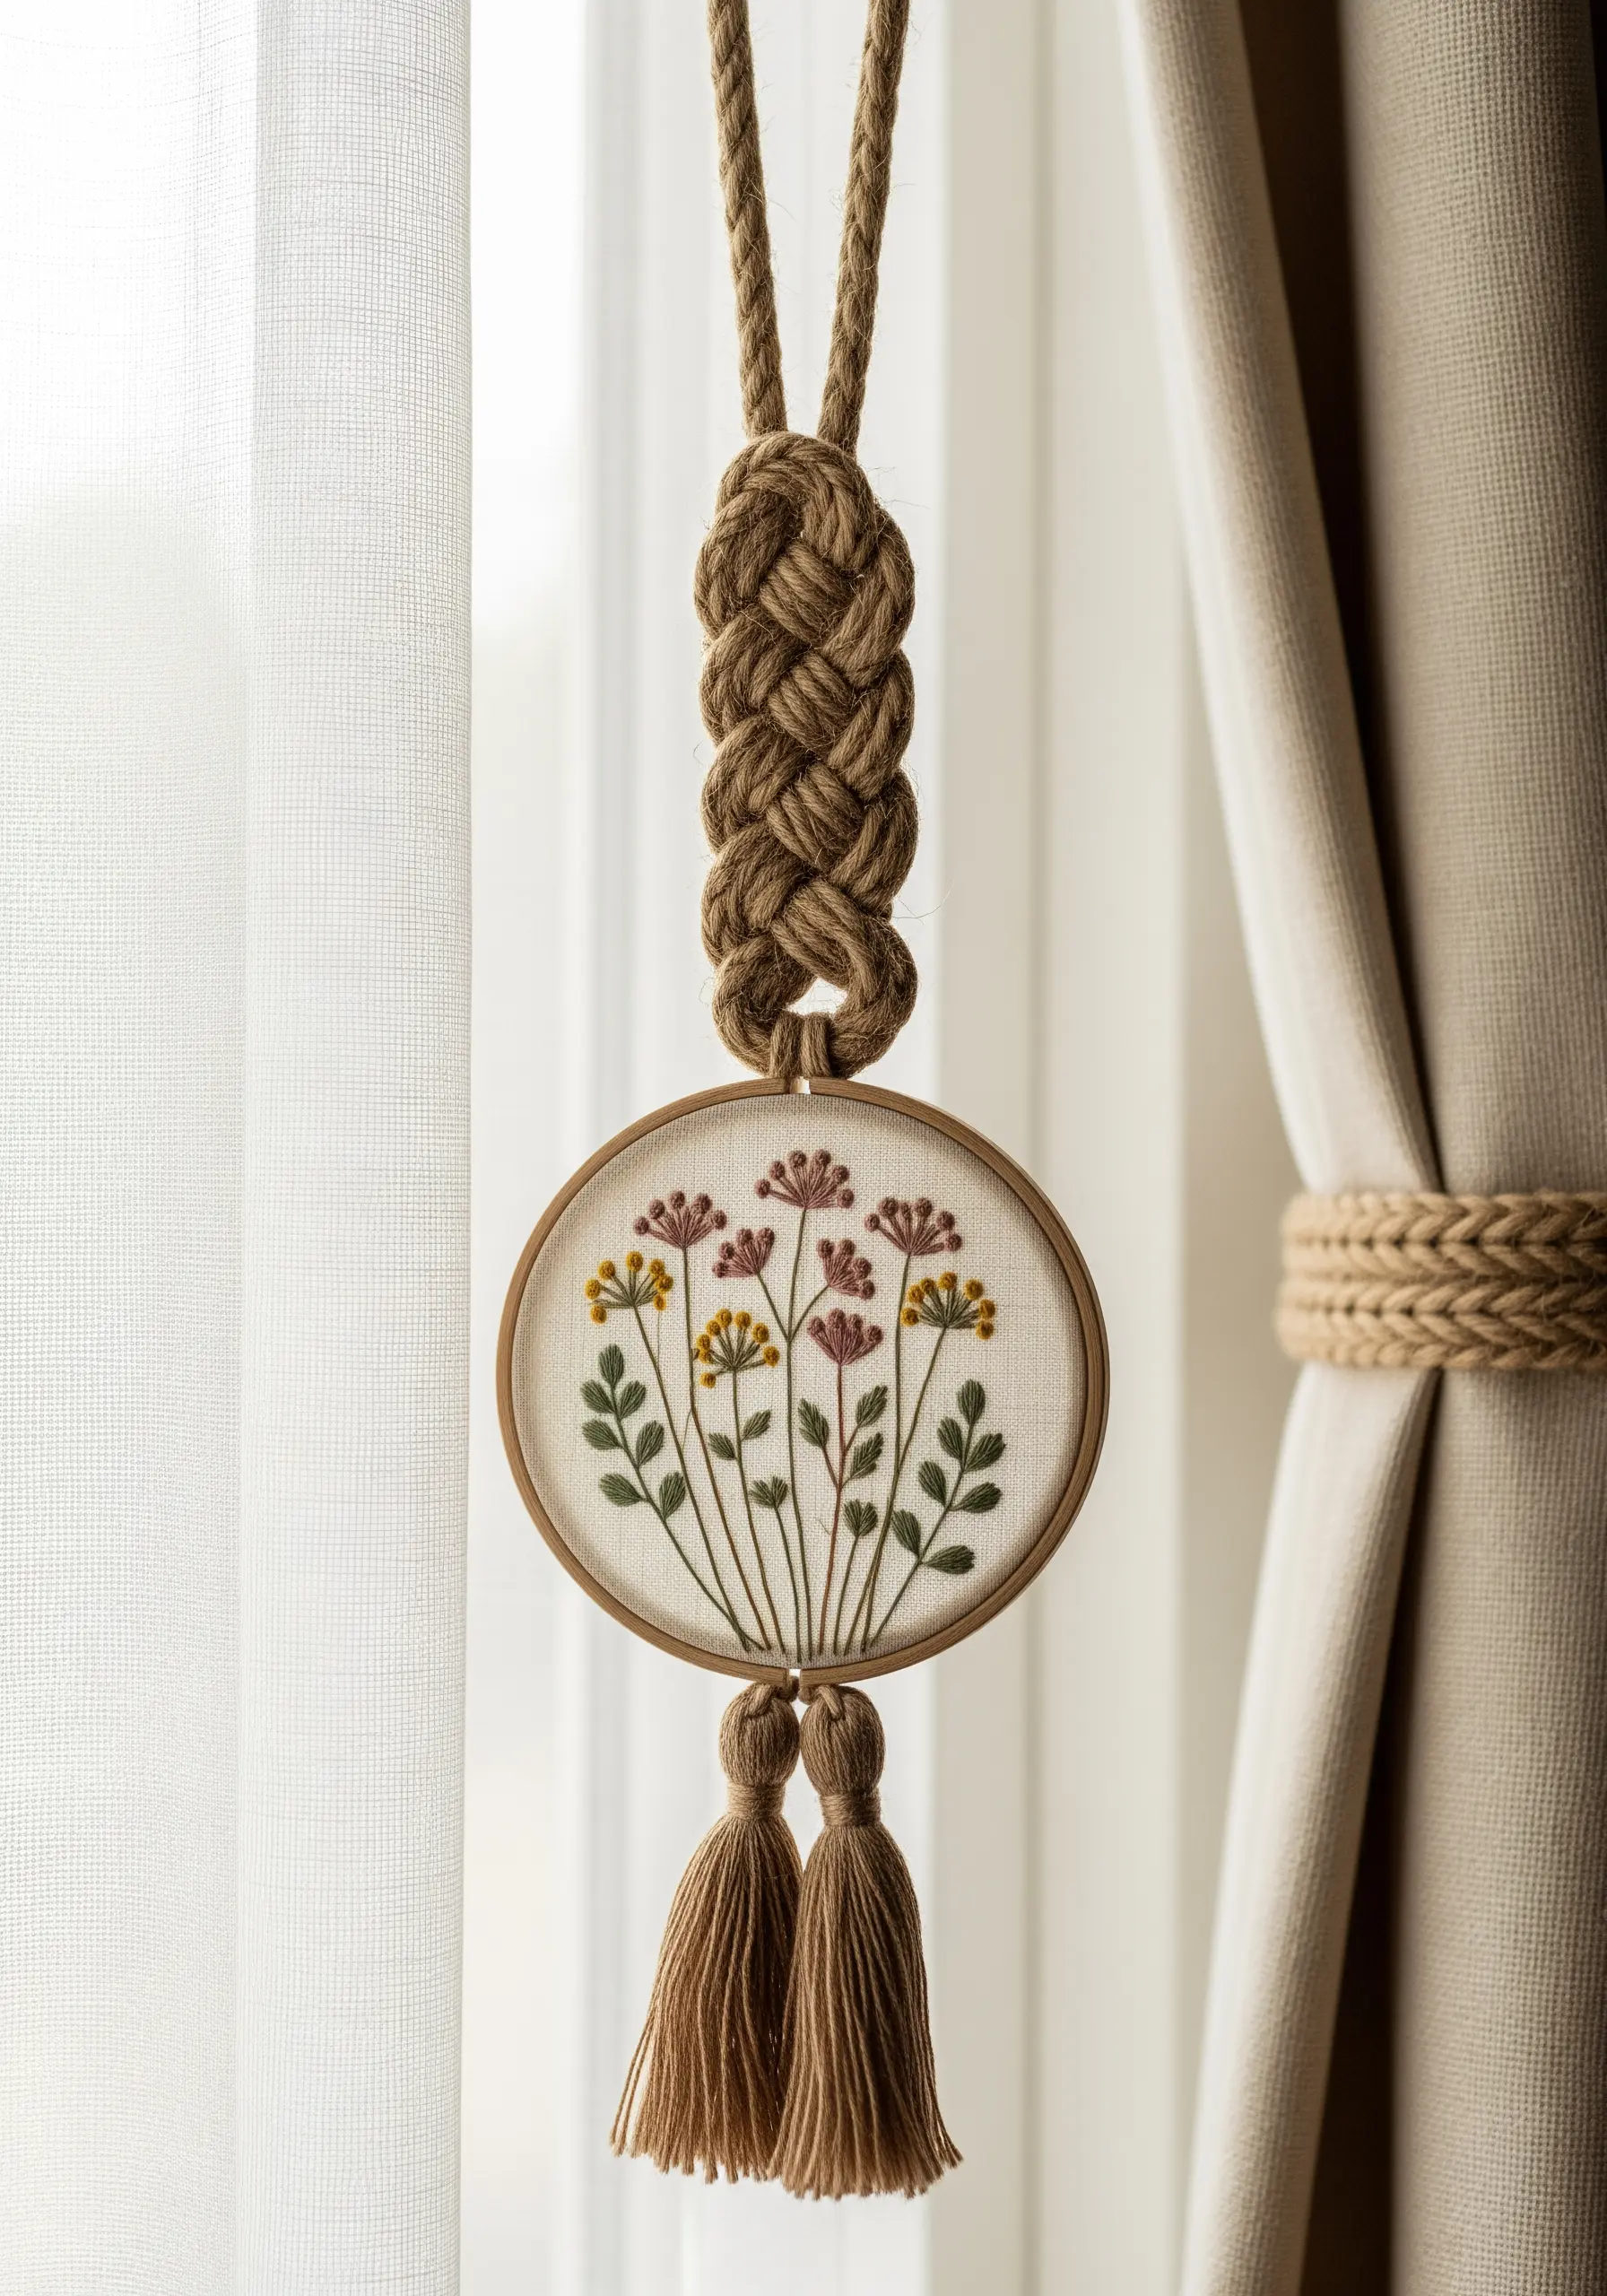
Frame your small botanical embroideries in a hoop and transform them into functional curtain tie-backs.
After finishing your stitching, back the hoop securely with felt. Then, create a hanger by braiding several strands of thick cord or jute and attaching it to the hoop’s tightening screw.
Adding tassels to the bottom provides a beautiful finishing touch and gives the piece a weighted, professional look. It’s one of many genius embroidery hoop decor hacks for small spaces.
25. Master the Art of Tone-on-Tone Stitching

For an understated, luxurious finish, try tone-on-tone embroidery. Select a thread that is only one or two shades lighter or darker than your base fabric.
The design will be subtle, revealing itself through texture and the way it catches the light, rather than through bold color contrast.
This technique is perfect for adding elegant motifs to book covers, linens, or clothing when you want a high-end, minimalist aesthetic.
These tone-on-tone embroidery techniques are the secret to refined, quiet luxury.
26. Design for Durability on High-Use Items

When embroidering functional objects like a yoga bolster, choose stitches that are flat and durable.
Avoid loopy stitches like turkey work or delicate single-strand details. Instead, opt for dense satin stitch, chain stitch, or backstitch fills.
These stitches lie flat against the fabric, minimizing the risk of snagging or wear. Using a high-quality, colorfast thread will also ensure your design withstands use and cleaning.
This makes neutral mandala embroidery patterns not just beautiful but also practical for everyday life.
27. Create Geode Textures with Mixed Media
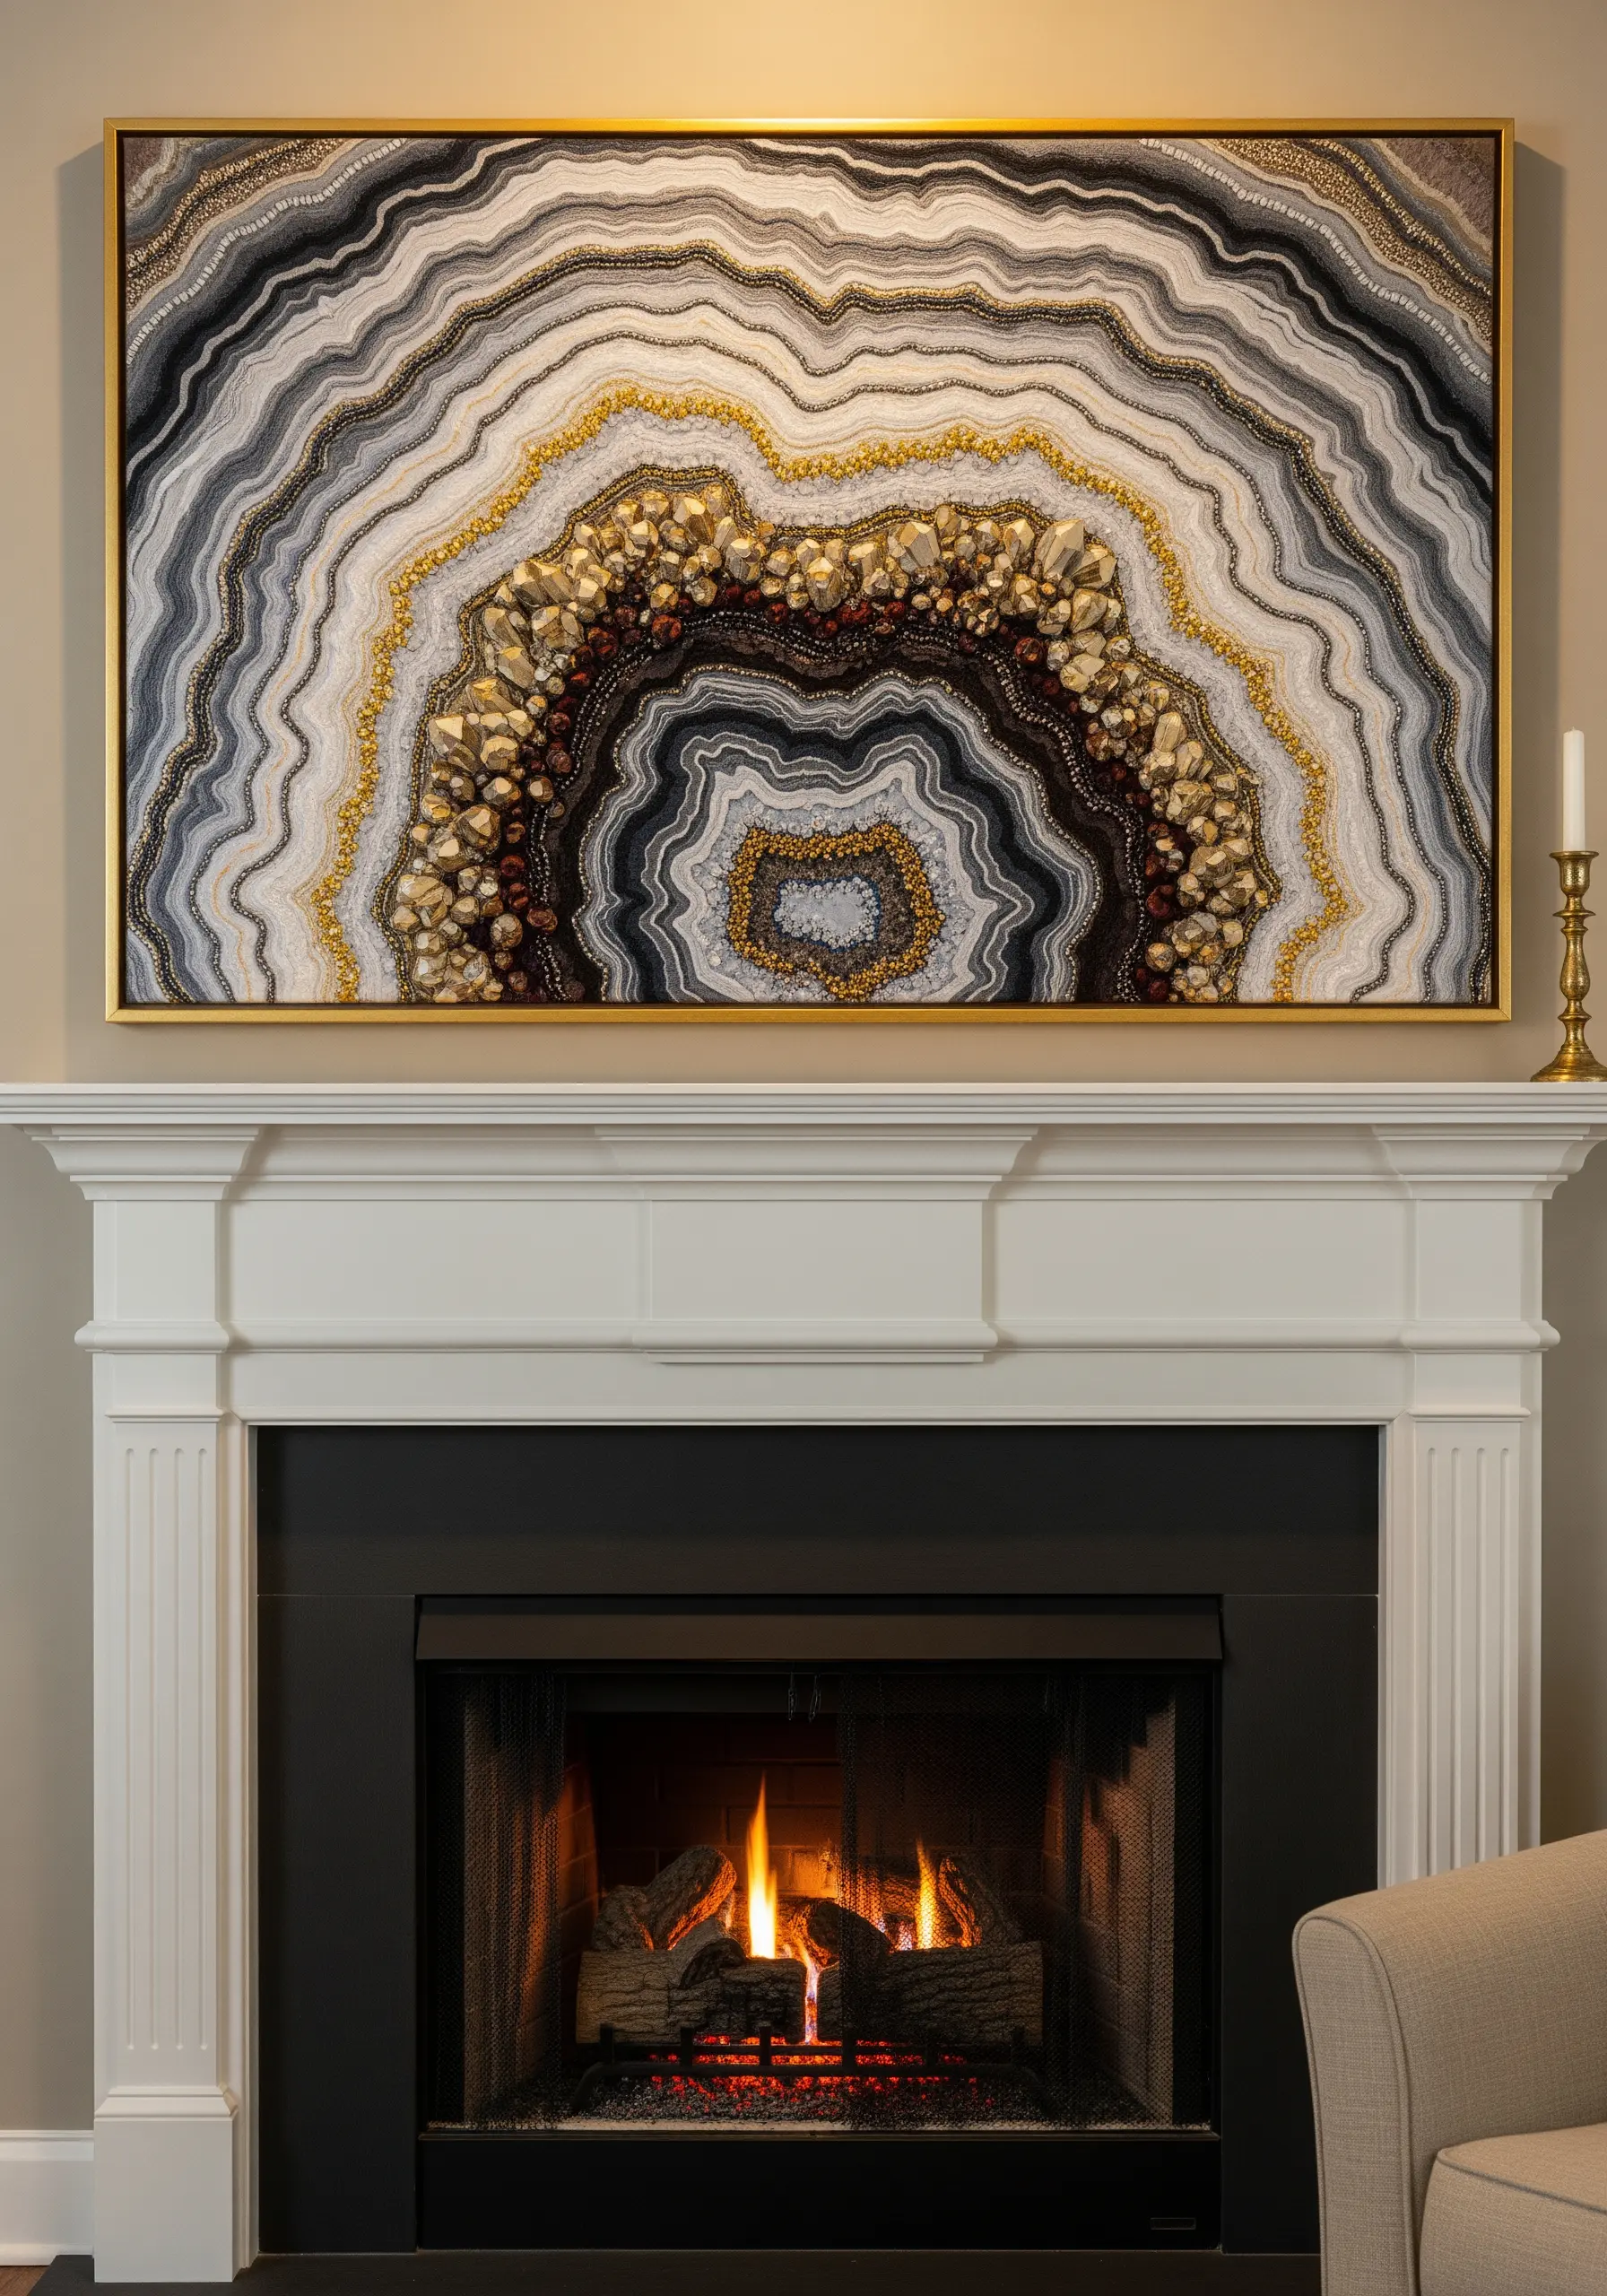
To replicate the complex texture of an agate slice, you need to think beyond thread.
Outline the main bands with couched metallic yarn. Fill wider sections with dense French knots for a matte, sandy texture. For the crystalline center, stitch on actual crystal chips or seed beads to catch the light.
Combining these different materials—thread, yarn, and beads—is the key to creating a convincing and luxurious geode effect.
Try these abstract metallic thread projects that sparkle and impress.
28. Use Quilting as a Design Element

Transform a simple floor cushion by using quilting lines not just for structure, but as the main design element.
On a thick, felted fabric, stitch simple, intersecting lines using a contrasting, heavy-duty thread like perle cotton. Use a basic backstitch or running stitch for a clean, graphic look.
The stitching will compress the fabric slightly, creating subtle contours and a minimalist pattern that emphasizes the cushion’s form and texture.
These minimalist embroidery projects prove that simplicity is often the most elegant choice.
29. Add Realism with Beaded Details
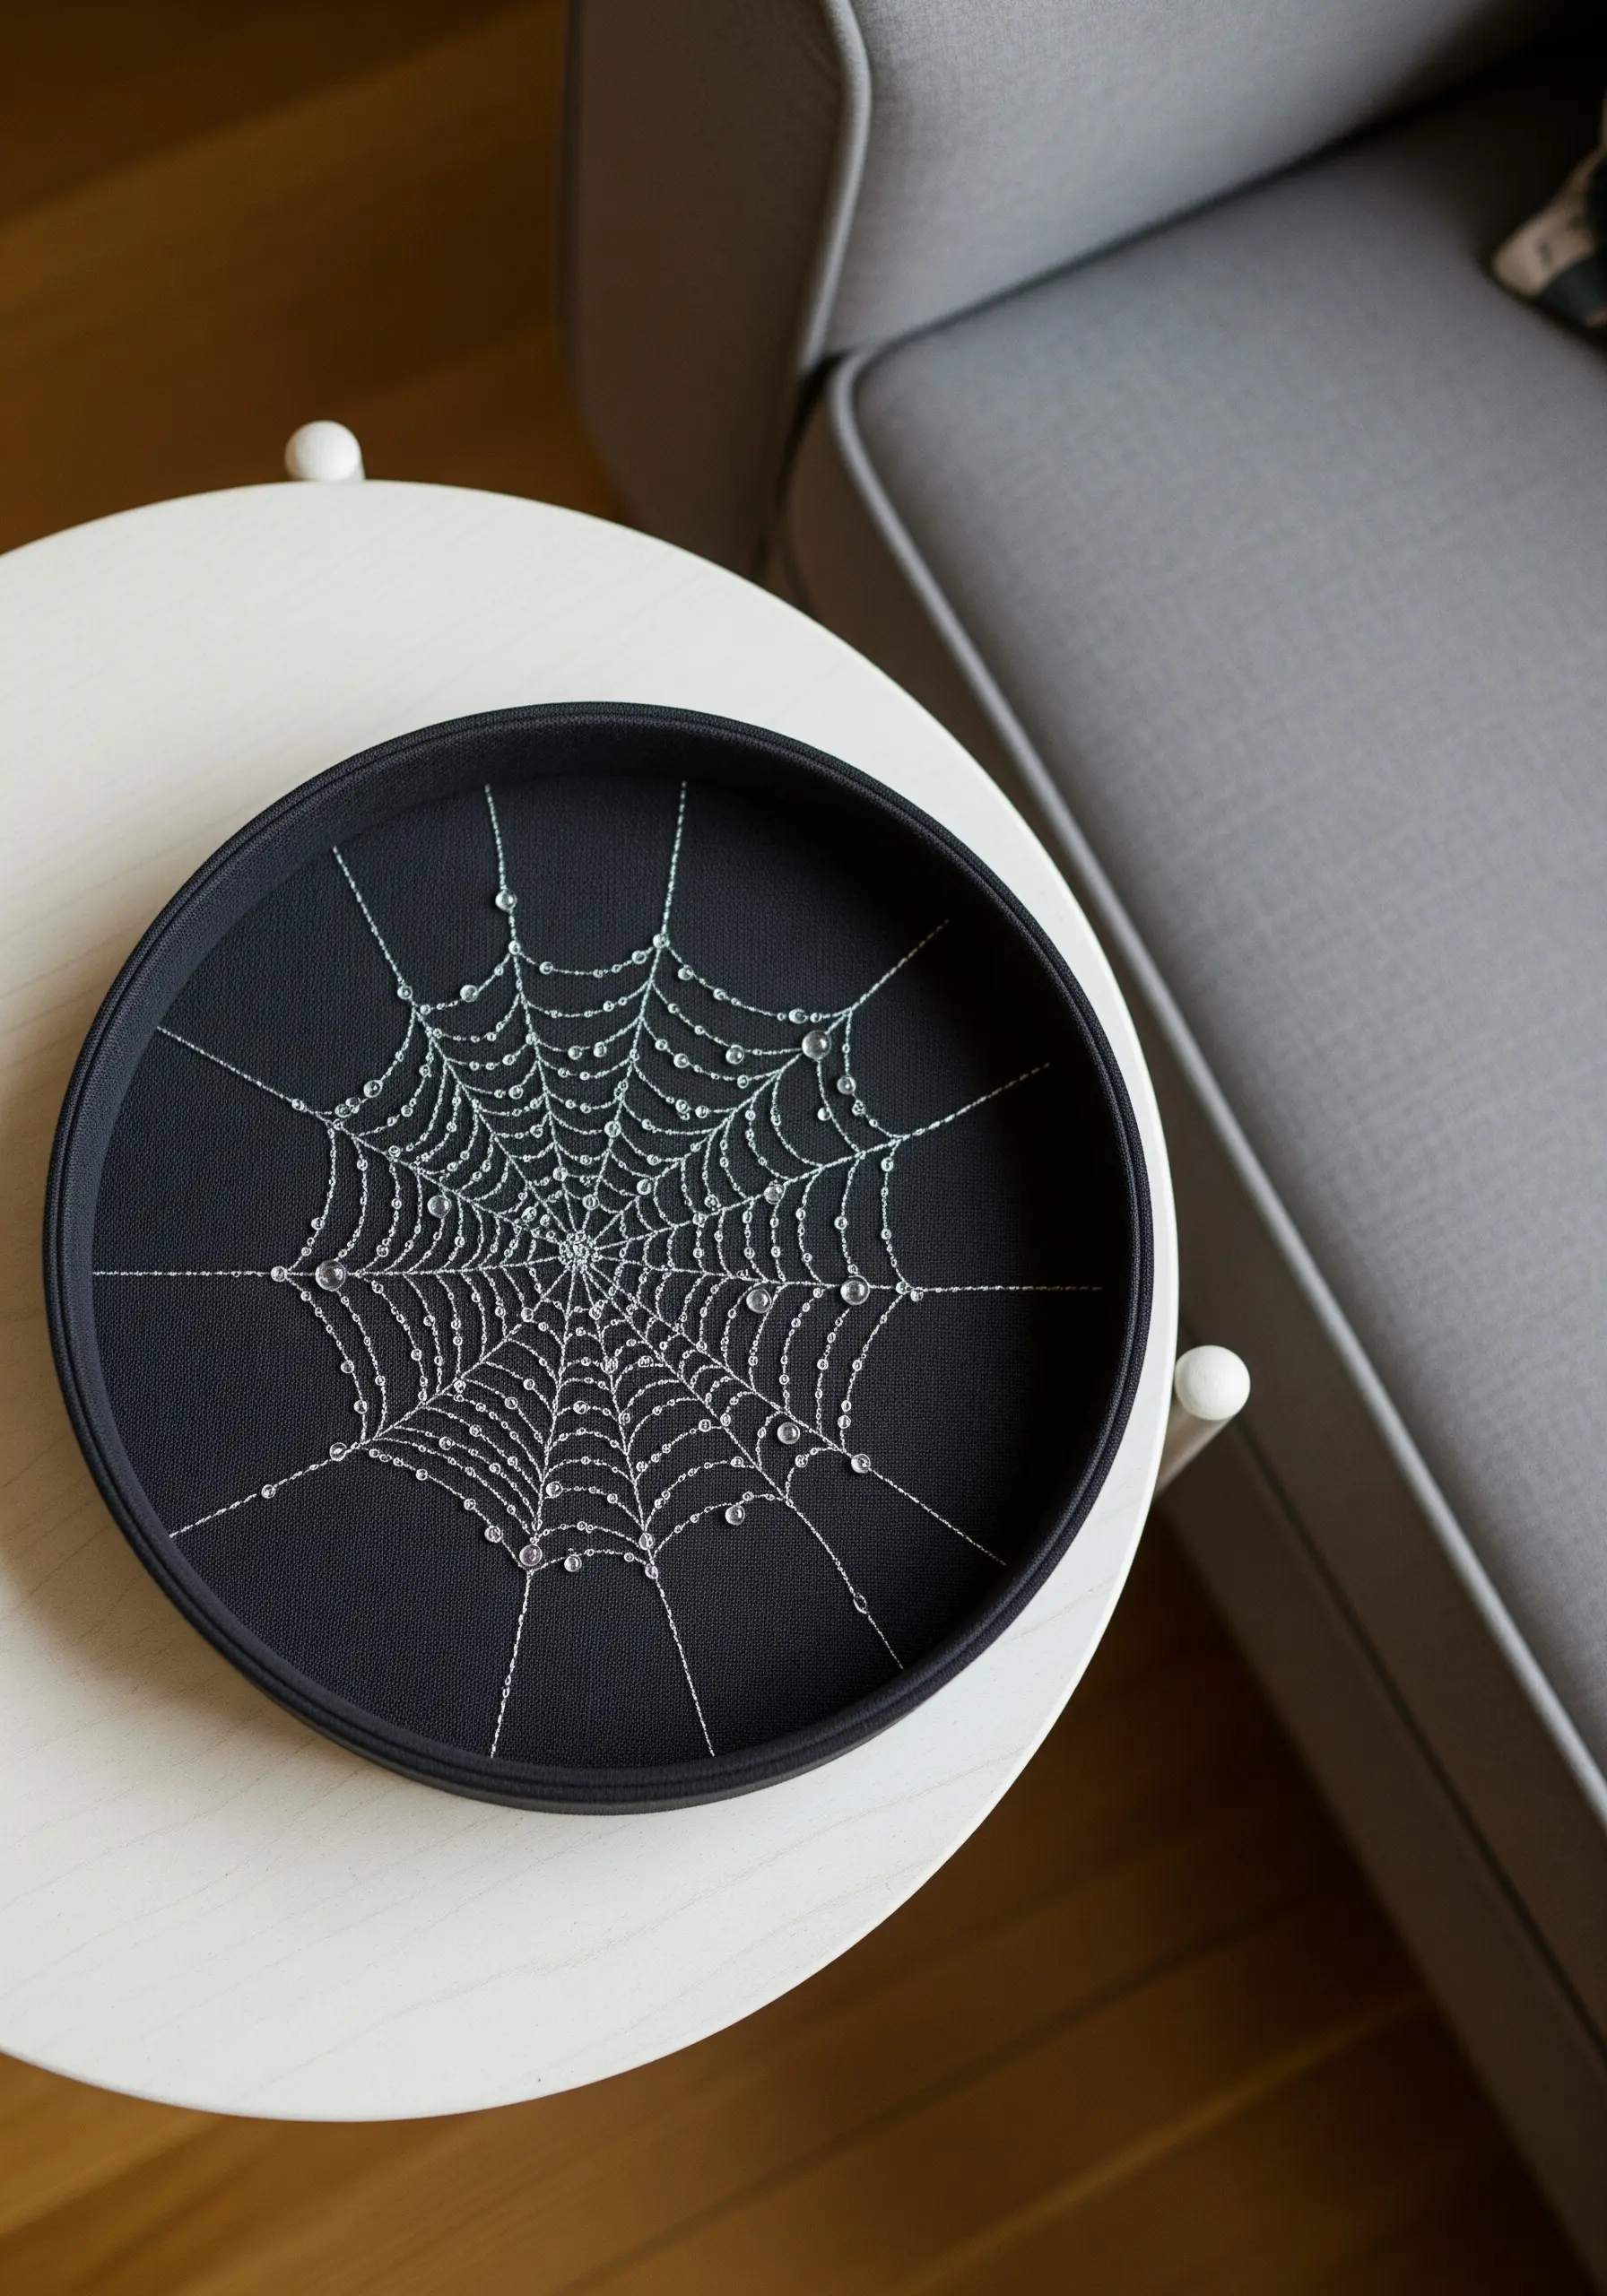
To elevate a delicate design like a spiderweb, incorporate tiny, clear seed beads to mimic morning dew.
First, stitch the web itself using a fine, silvery metallic thread. Then, go back and secure a single seed bead at the intersections of the web’s threads and scattered randomly along the strands.
This small addition catches the light in a way thread cannot, adding a magical touch of realism and sparkle to your work.
This technique can transform tiny embroidery details that make fabric crafts pop.
30. Achieve Intricacy with a Simple Backstitch
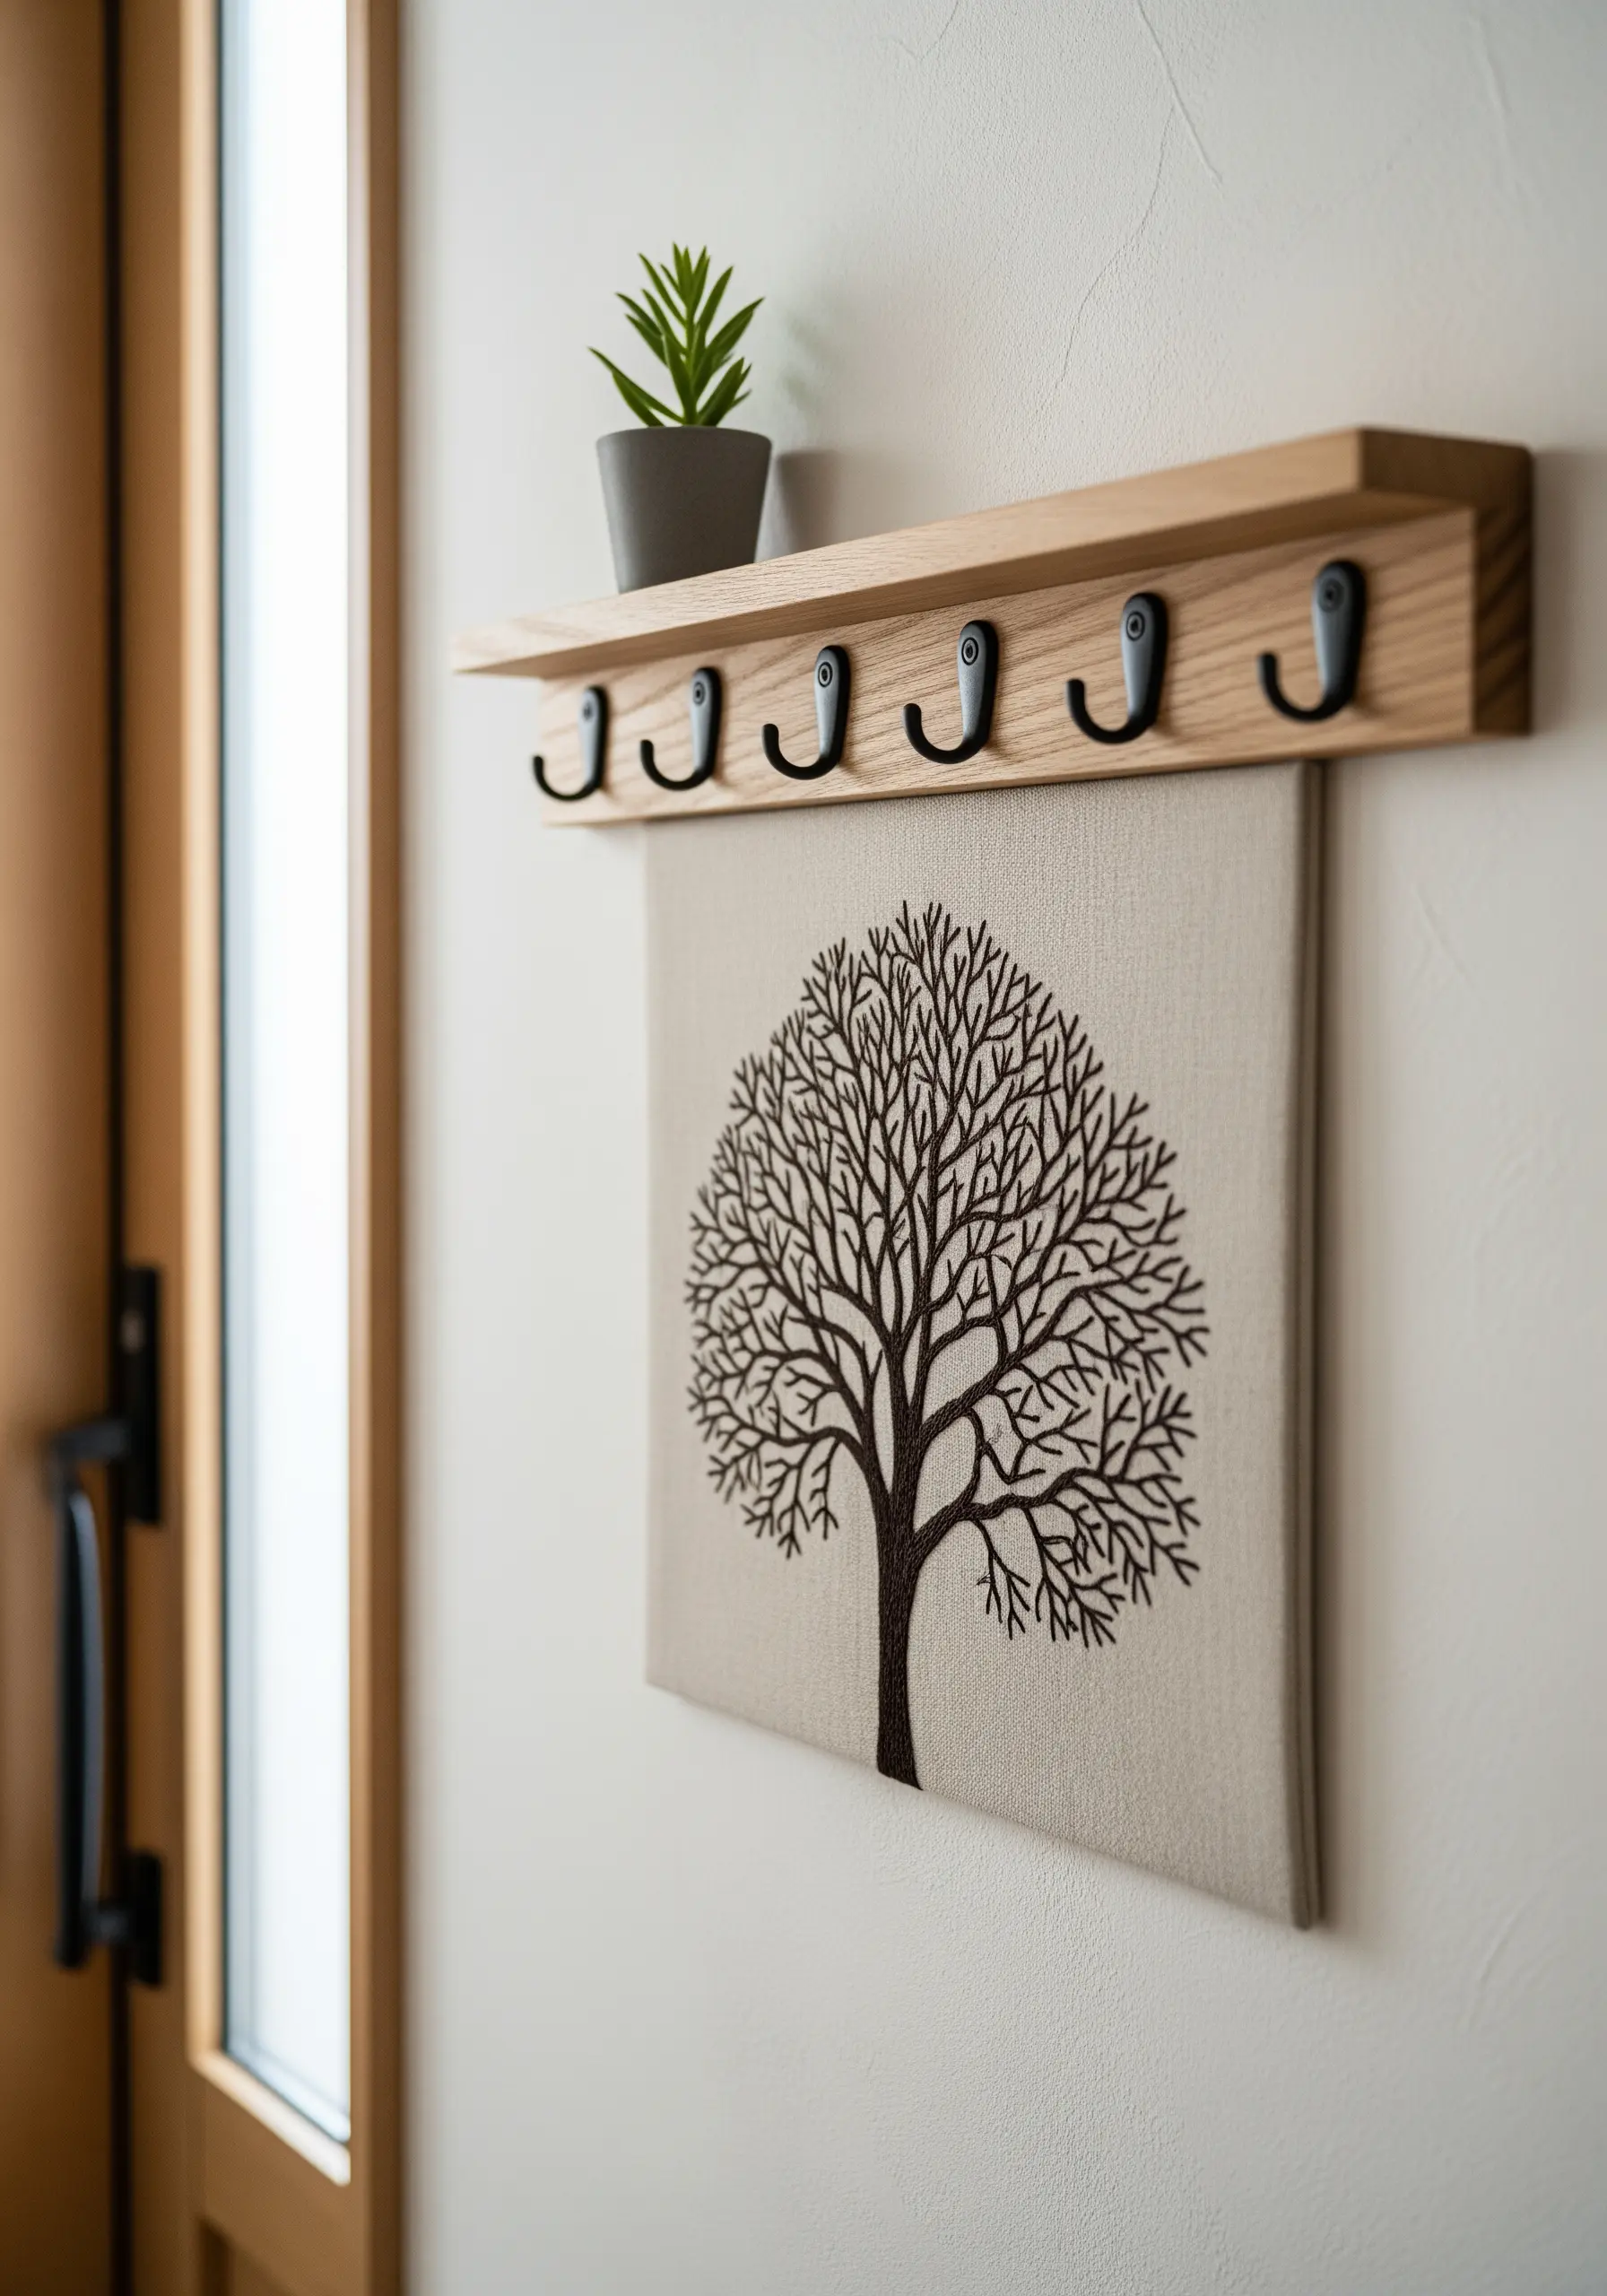
You don’t need complex stitches to create a highly detailed design. A simple backstitch can achieve stunning results when used with precision.
For a dense motif like a tree, focus on varying your stitch length—use longer stitches for the thick trunk and tiny, almost dot-like stitches for the delicate outer branches.
This variation in length, combined with a dark thread on a light fabric, creates all the texture and detail you need for a powerful, graphic statement.
This is how minimalist line art nature embroidery can achieve maximum impact.


