

Have you ever looked closely at the texture of lichen on a stone or the intricate veins of a fallen leaf and wished you could capture that feeling in thread? It’s a common desire—to move your embroidery beyond just following a pattern and into something more personal and expressive.
The key isn’t necessarily learning more complex stitches, but learning to see the world differently. Nature offers an endless library of textures, forms, and color palettes that can elevate your work from handmade to artful. It’s about translating what you observe into stitches you already know.
Here, you’ll find ideas that focus on that very translation. We’ll explore how to use simple stitches to create complex textures, how to think about composition on functional items, and how to combine techniques for a result that feels both modern and timeless. Let this be your invitation to stitch the world around you with new eyes.
1. Render Birch Bark with Layered Fiber
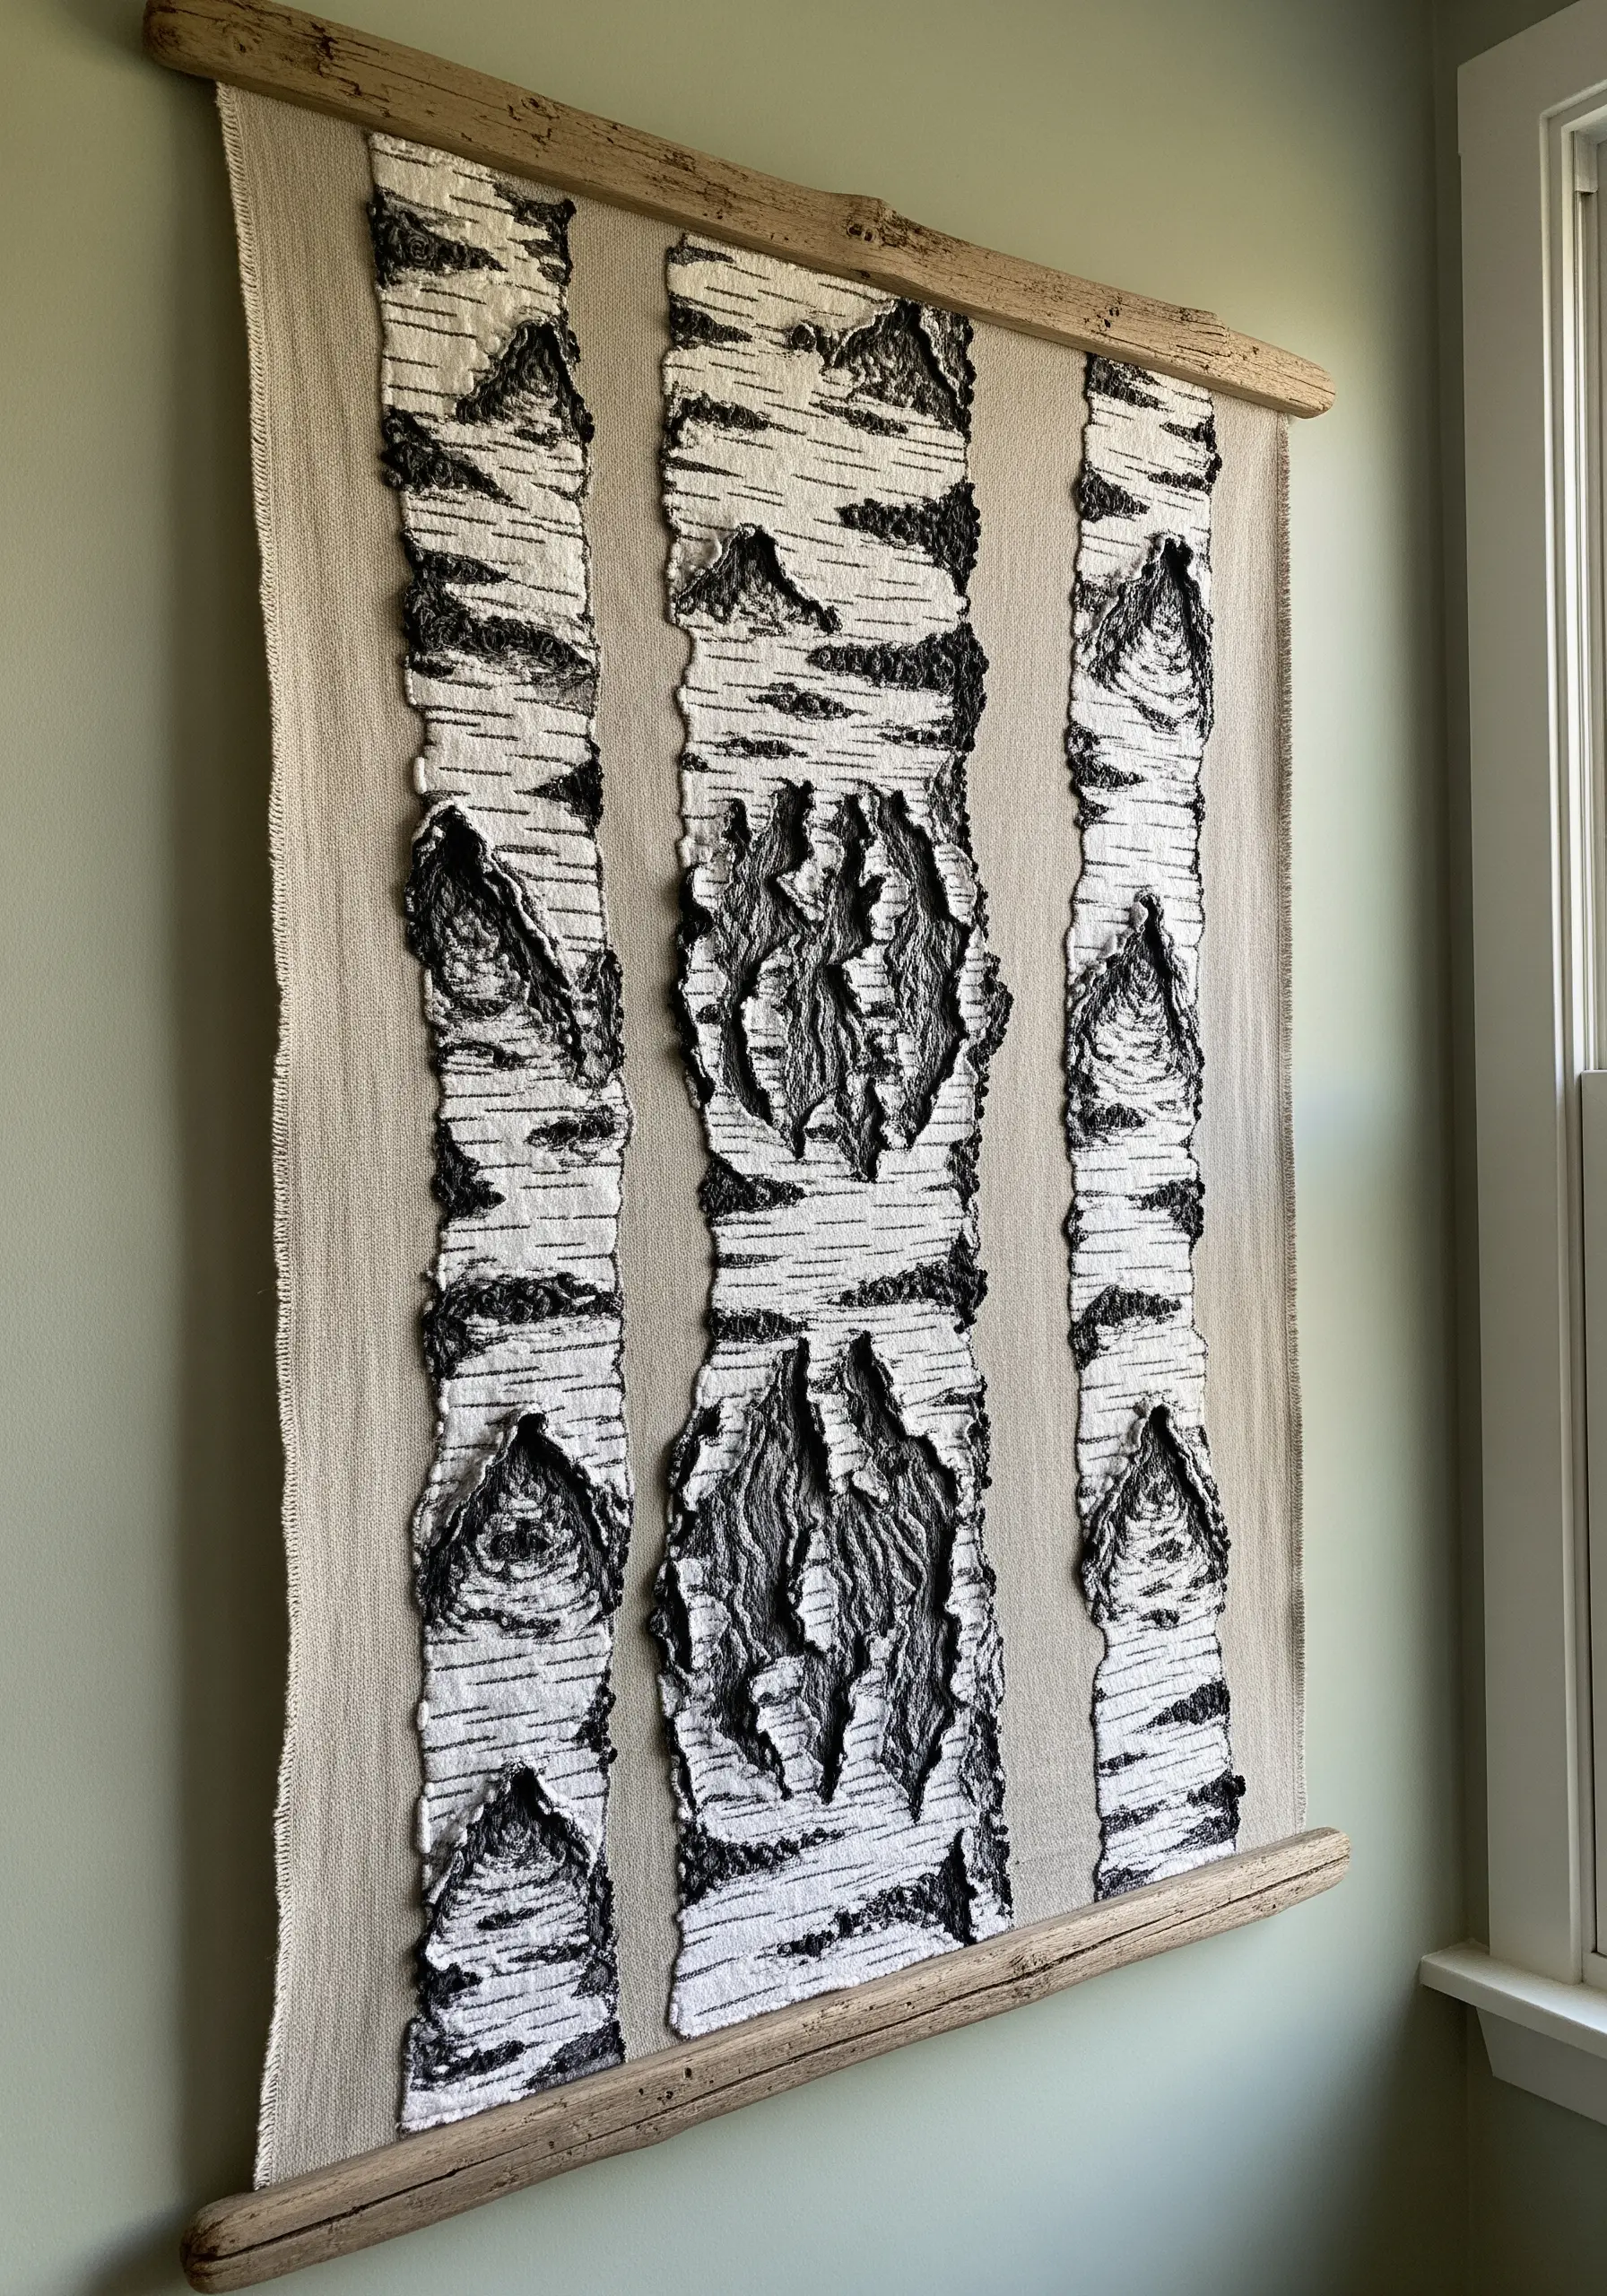
Move beyond the hoop and create a statement-size embroidered textile hanging that captures the rugged texture of birch bark.
Instead of dense stitching, work with appliquéd strips of fabric or felt as your base.
Build texture by couching thick, slubby yarns for the raised, peeling edges of the bark, contrasting it with fine, chaotic free-motion stitching in black thread for the deep crevices.
This technique creates dramatic, high-relief texture that gives the piece a sculptural quality, perfect for a feature wall.
2. Stitch a Gradient of French Knot Pebbles

To capture the smooth, varied surface of river stones, fill a circular area with tightly packed French knots.
The secret to a polished look is creating a subtle color gradient.
Divide your circle into three or four soft, blended zones, moving from dark to light shades of a single color family.
Vary the number of thread strands—using three for denser areas and two for lighter ones—to enhance the sense of depth and mimic the way light hits a curved surface.
These earth-inspired embroidery textures turn a simple stitch into a sophisticated study of form and color.
3. Elevate Functional Decor with Satin-Stitched Leaves

Transform a simple floor cushion into a functional work of art by scattering embroidered autumn leaves across its surface.
For durability, use a high-sheen pearl cotton instead of standard floss, as its twisted ply is less prone to snagging.
Achieve those rich, blended colors with the long-and-short stitch, which allows for seamless gradients without the bulk of thread painting.
Anchor the composition with a sharp, clean outline using a single backstitch to define each leaf shape against the dark fabric, making the colors appear even more vibrant.
Explore more handmade pillow cushion embroidery patterns to elevate your living space.
4. Build Sculptural Moss with Dimensional Stitches
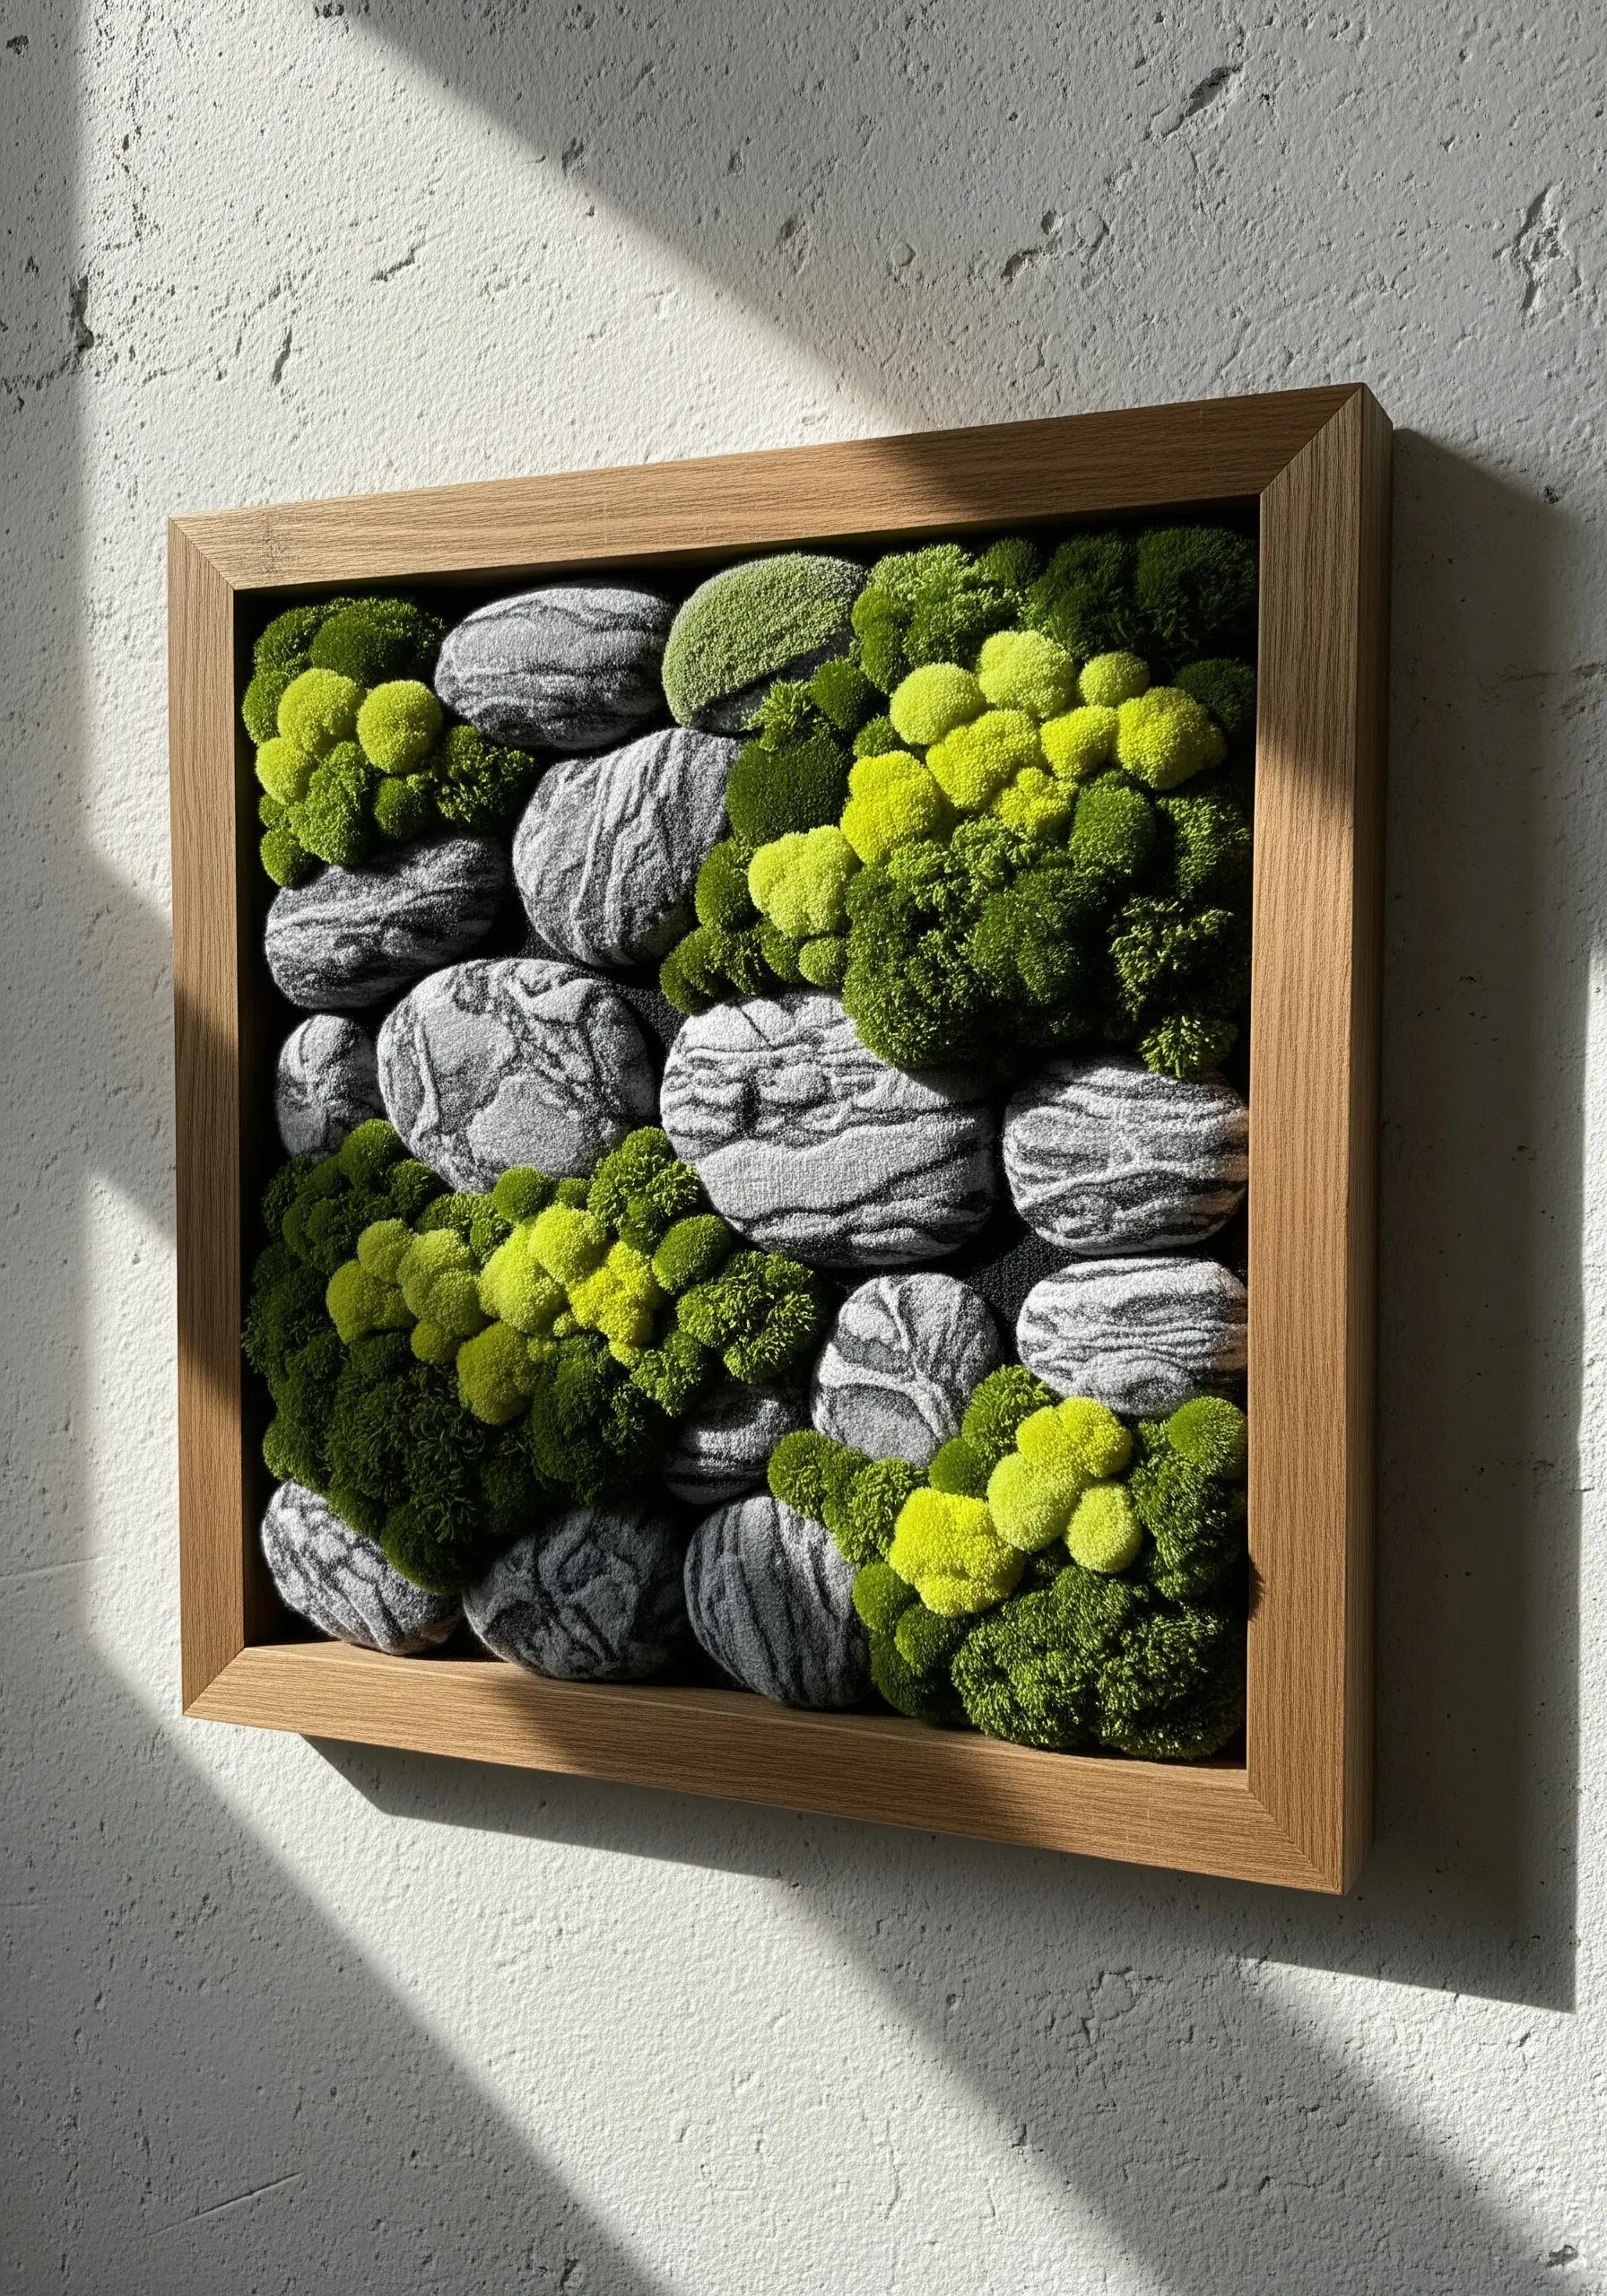
Create a stunning three-dimensional piece by combining embroidery and mixed media to mimic a mossy stone wall.
For the stones, use a felt appliqué base and add veining with a simple backstitch in a contrasting grey.
The vibrant moss is created with the turkey work stitch; leave the loops uncut for a dense, bulbous texture or snip them for a softer, fluffier feel.
By clustering these stitches in varying heights and shades of green, you can build a truly sculptural, lifelike moss that invites touch.
5. Capture Light with Sheer Skeleton Leaves

Stitch delicate skeleton leaves on a sheer fabric like organza or tulle to create an ethereal window hanging that plays with light.
To prevent puckering, secure your sheer fabric in the hoop with a layer of water-soluble stabilizer on top; it provides the tension you need and washes away completely.
Use a single strand of thread and a fine backstitch or whipped backstitch to trace the intricate veins, letting the negative space and transparency do the heavy lifting.
Working with sheer fabrics for dreamy effects transforms simple line work into an elegant light filter.
6. Articulate Detail in Cracked Earth Textures
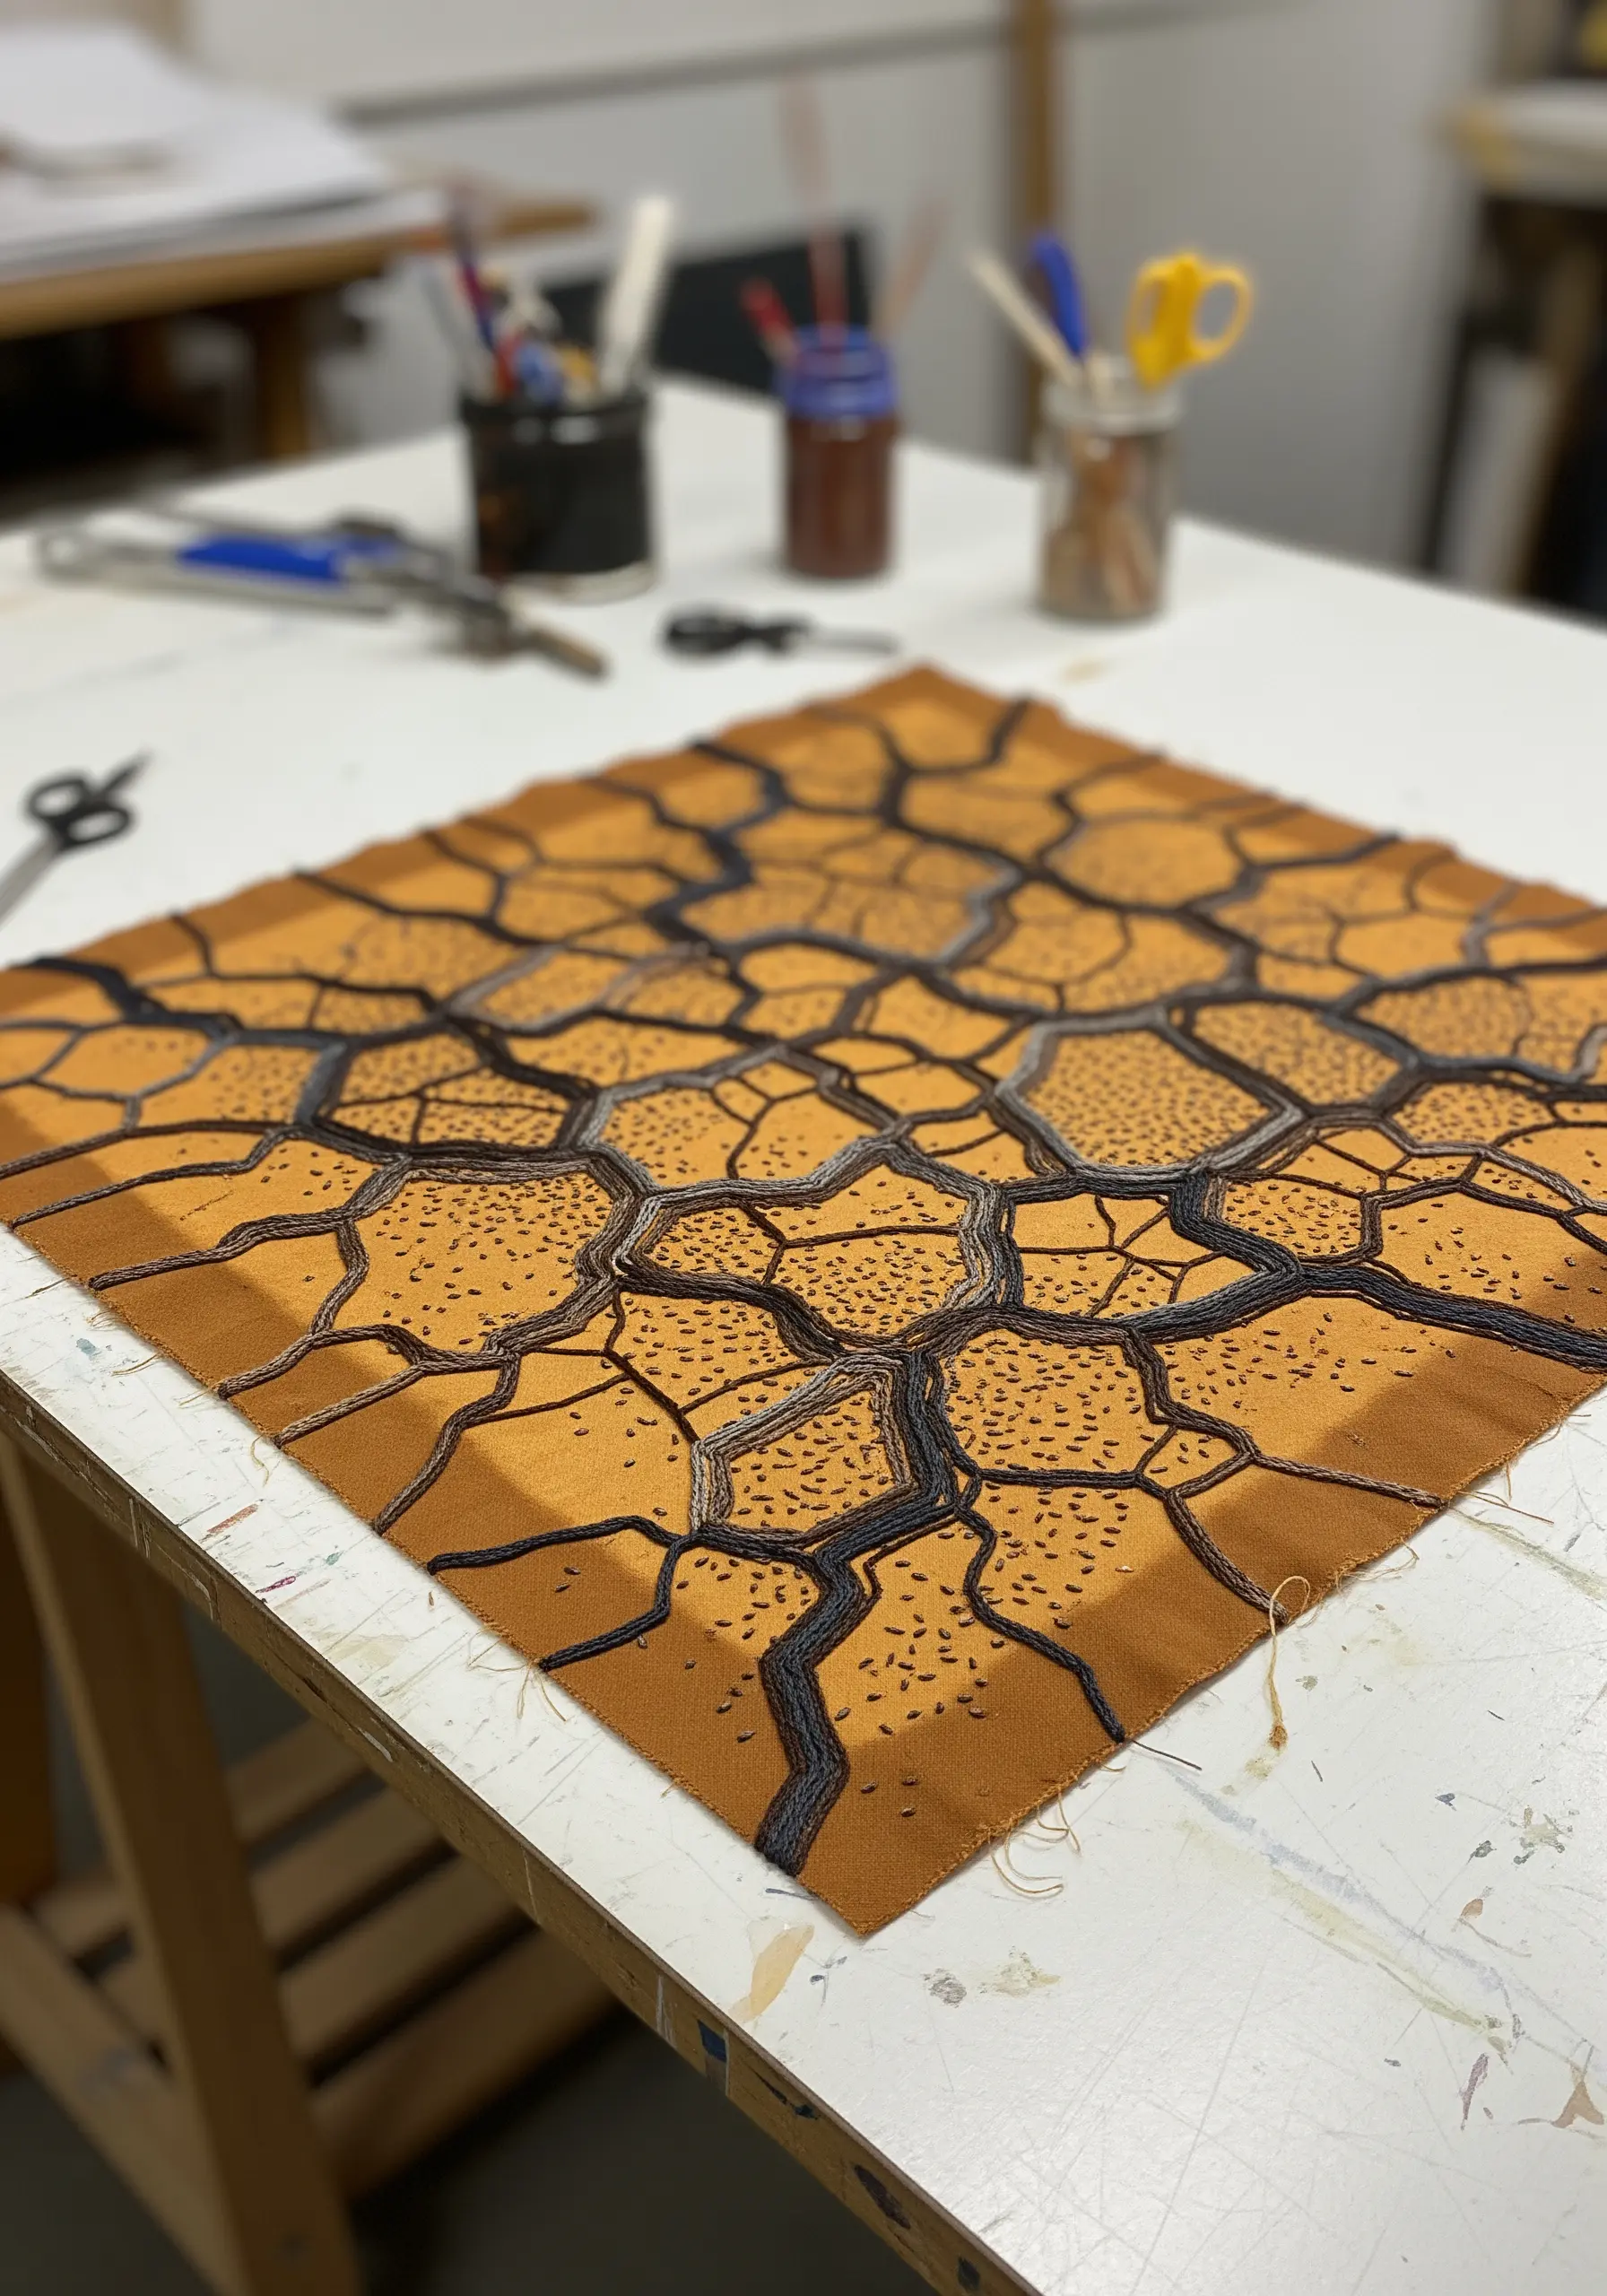
Recreate the graphic pattern of cracked earth by focusing on line weight and subtle texture.
Use a whipped backstitch or a narrow satin stitch for the main cracks, varying the stitch width to create a sense of depth and shadow.
For the finer, textured ground, sprinkle in tiny seed stitches or single-strand French knots, keeping them sparse to avoid overwhelming the composition.
This contrast between bold, defined lines and delicate, scattered texture is key to making earthy texture embroidery patterns feel dynamic and realistic.
7. Design a Flowing Fern Table Runner
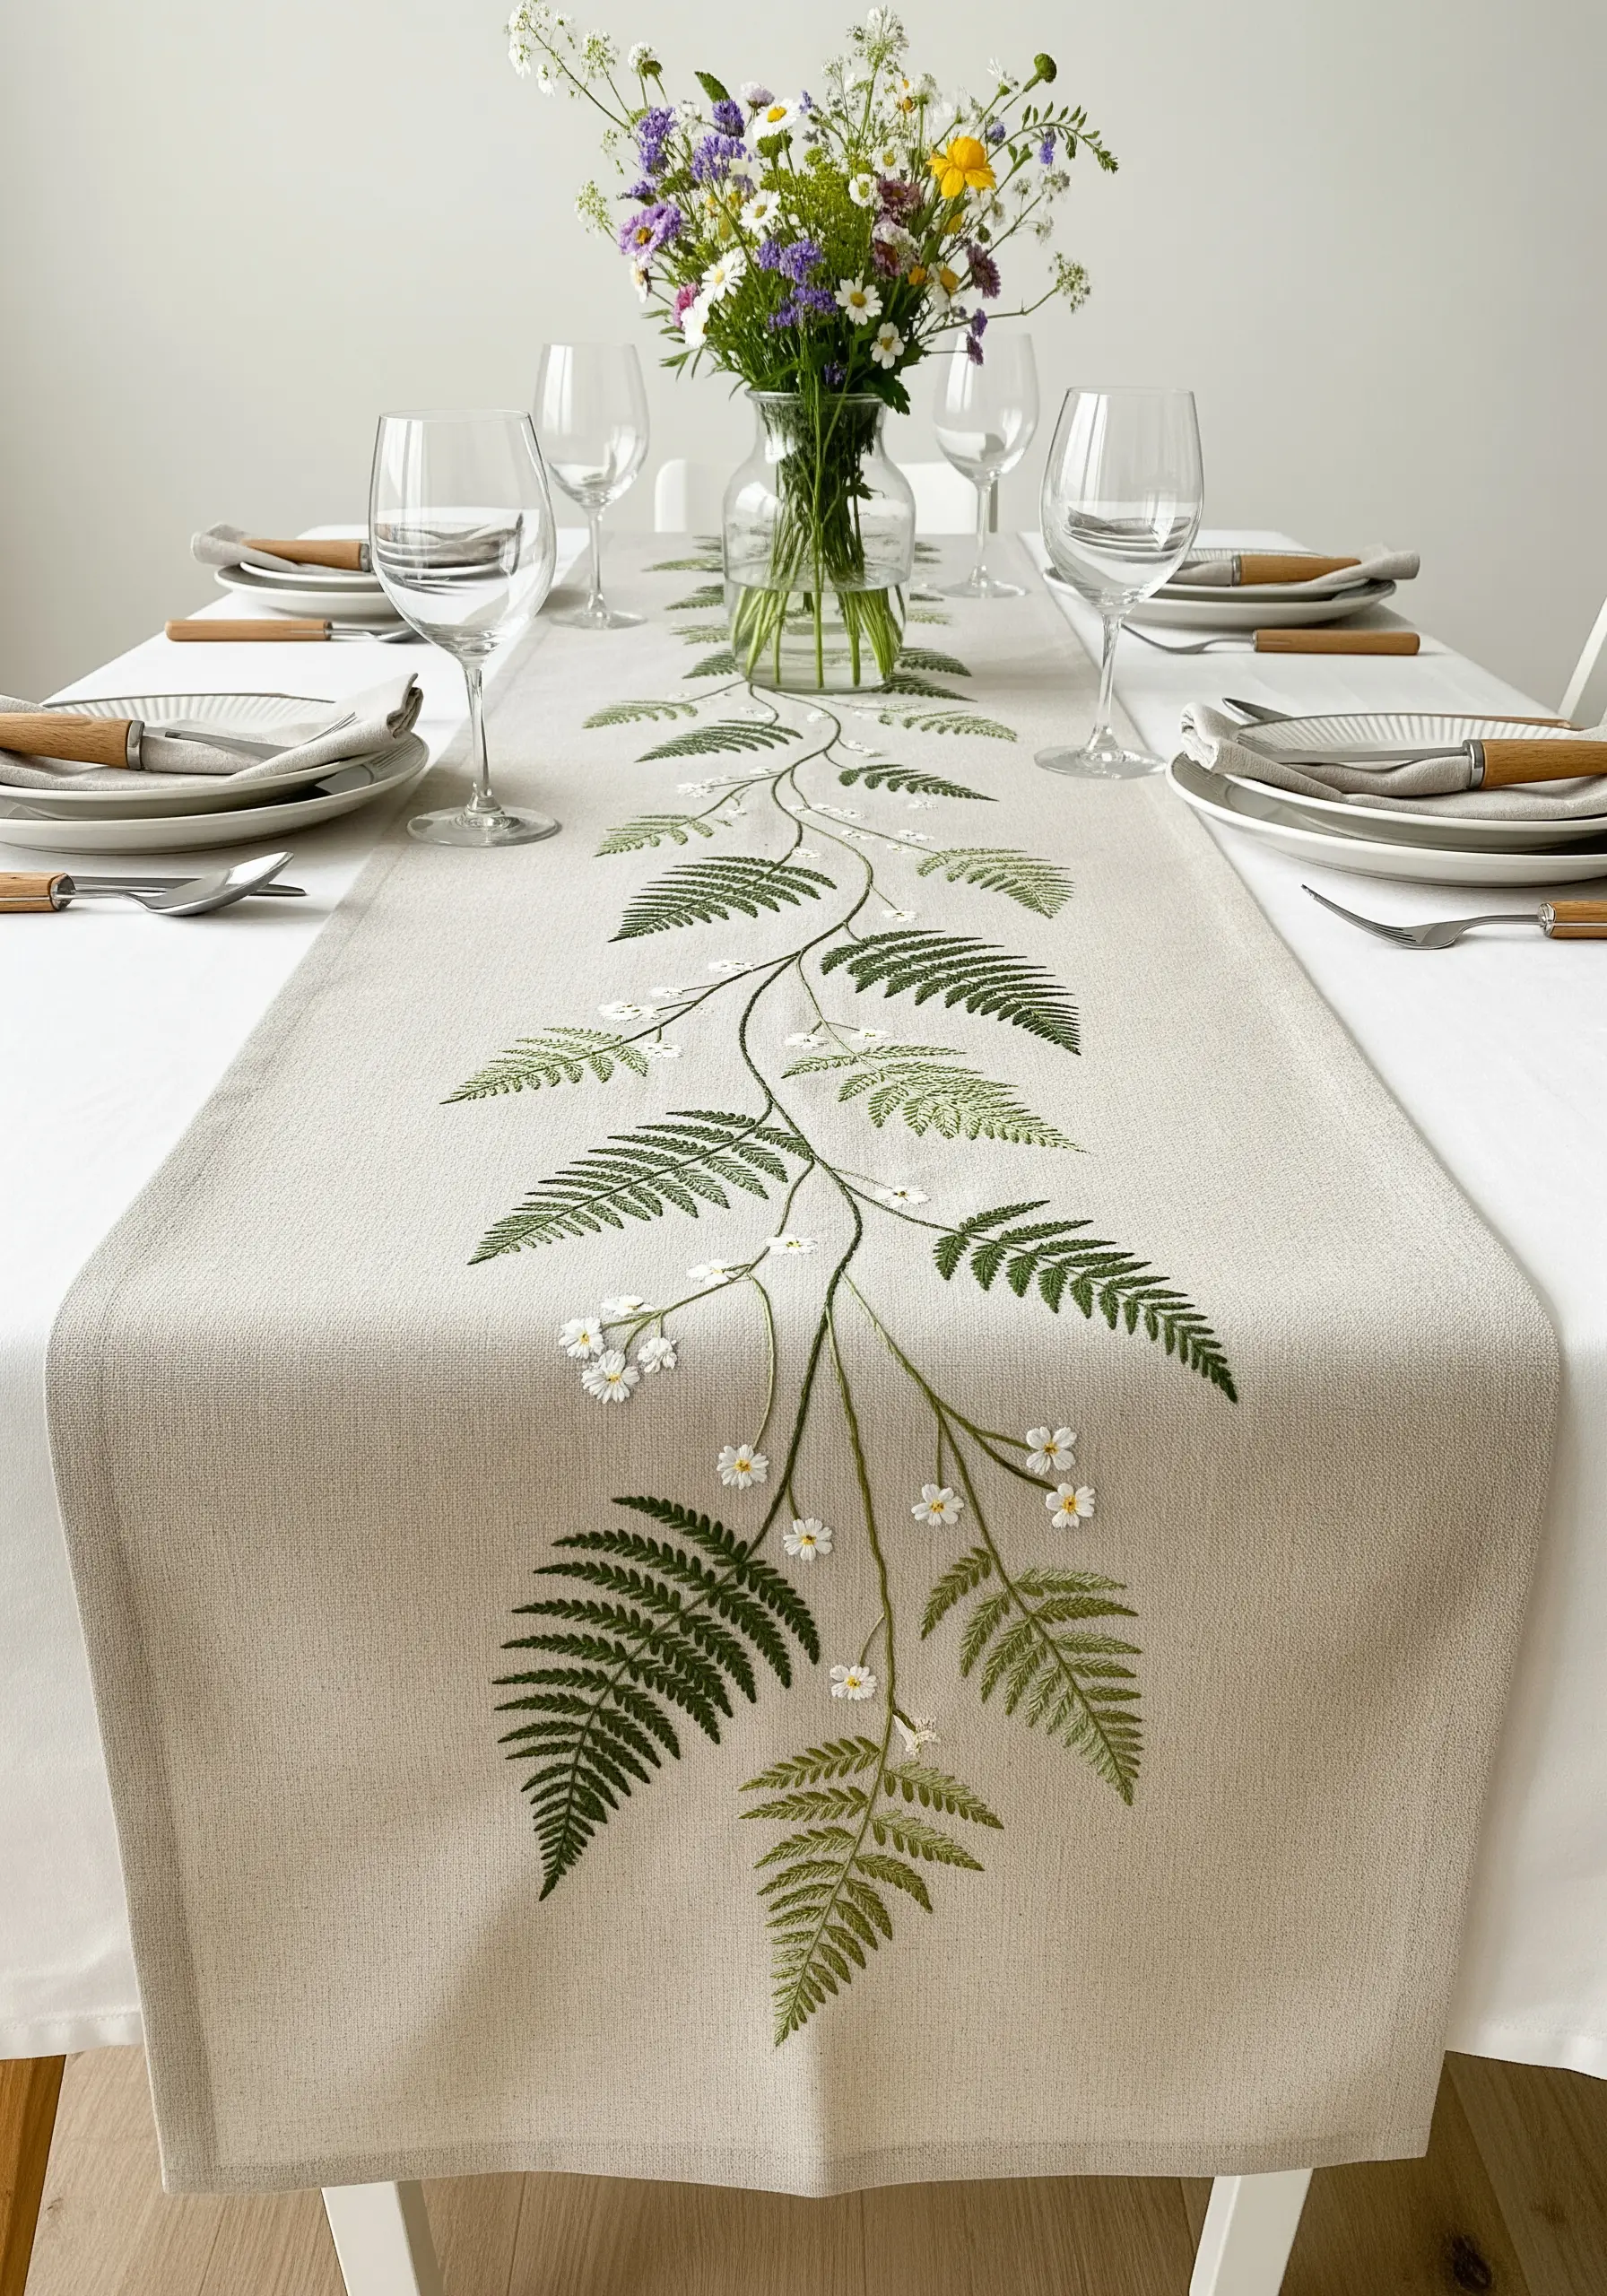
When embroidering long items like a table runner, composition is everything.
Instead of repeating a small motif, stitch a single, elegant fern that flows down the center, creating a natural focal point for your tablescape.
Use a fishbone stitch for the fern fronds, alternating shades of green to mimic the natural variegation of a real plant.
Adding tiny, scattered lazy daisy stitches for small white flowers breaks up the green and adds a touch of delicate contrast to these elegant table linen embroidery motifs.
8. Master the Luster of Metallic Thread
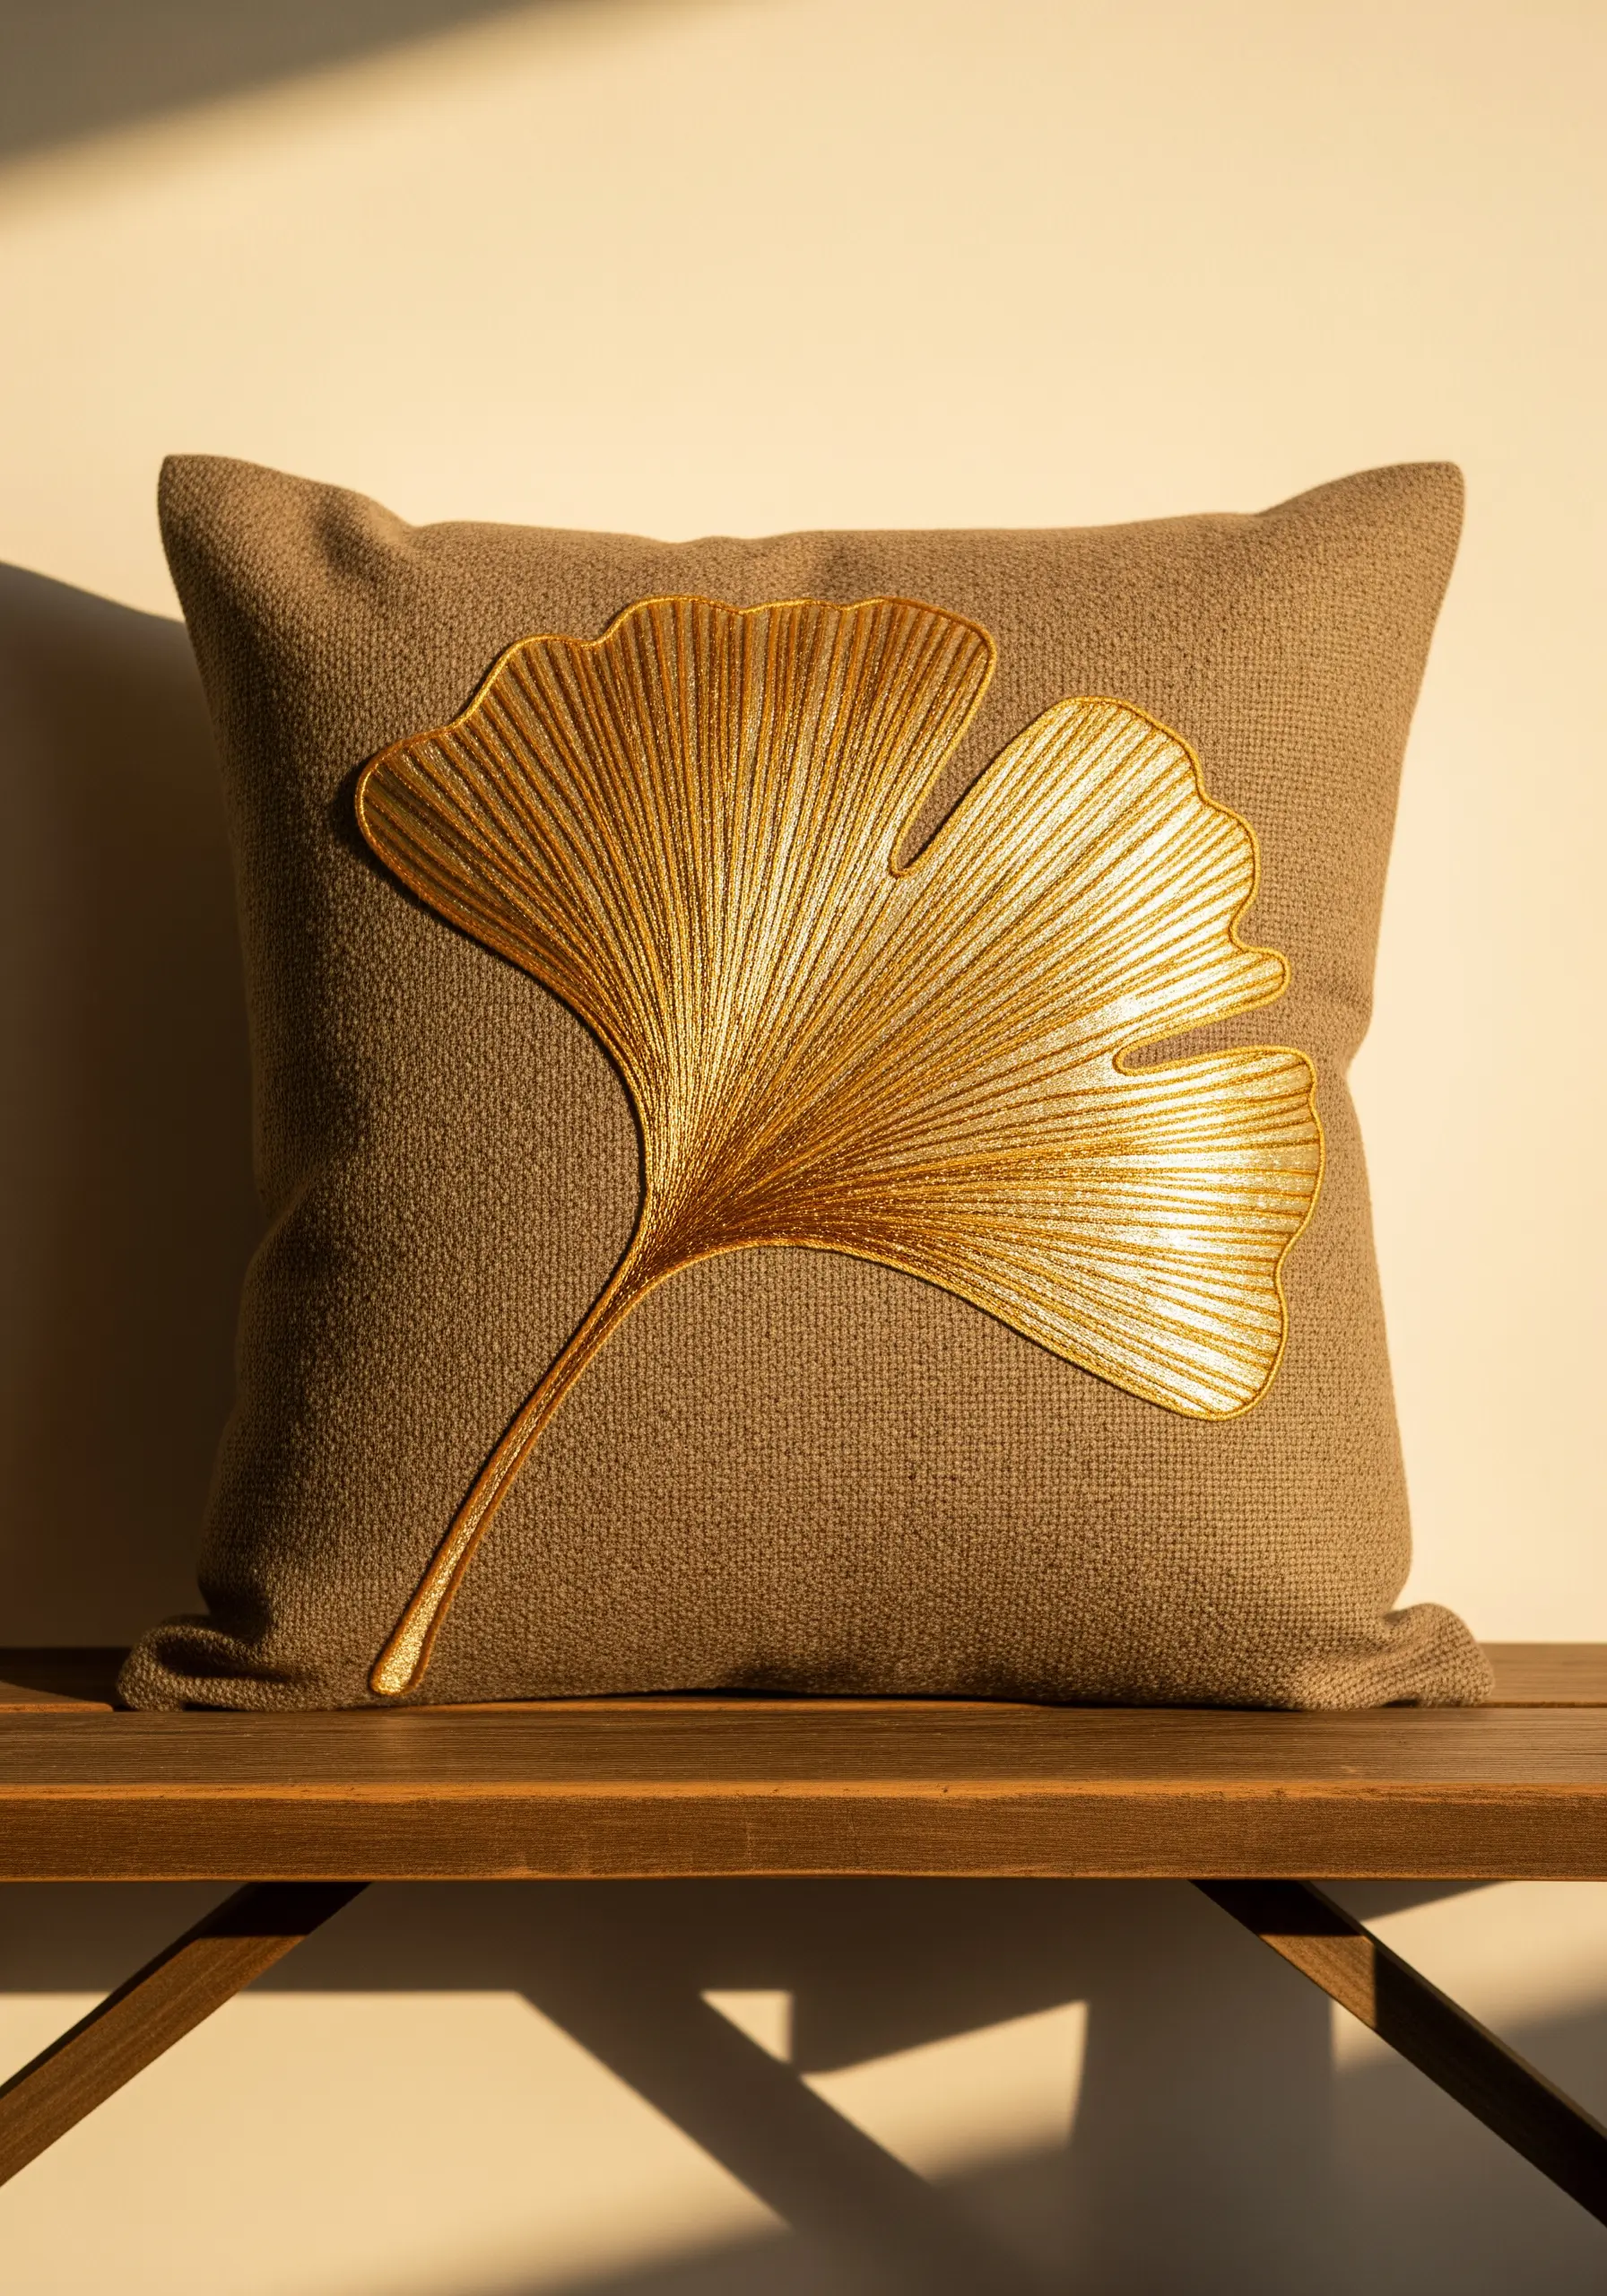
Create a truly show-stopping piece by rendering a ginkgo leaf in metallic gold thread.
To tame difficult metallic floss, use shorter thread lengths (no more than 12 inches) and a thread conditioner like beeswax to reduce friction and prevent unraveling.
Employ a directional satin stitch, following the natural lines of the leaf’s veins to maximize light reflection and create that gorgeous liquid-gold effect.
A simple backstitch outline in the same metallic thread will give it a clean, finished edge, turning it into a piece of gold thread luxury wall art.
9. Create a Sampler of Natural Textures
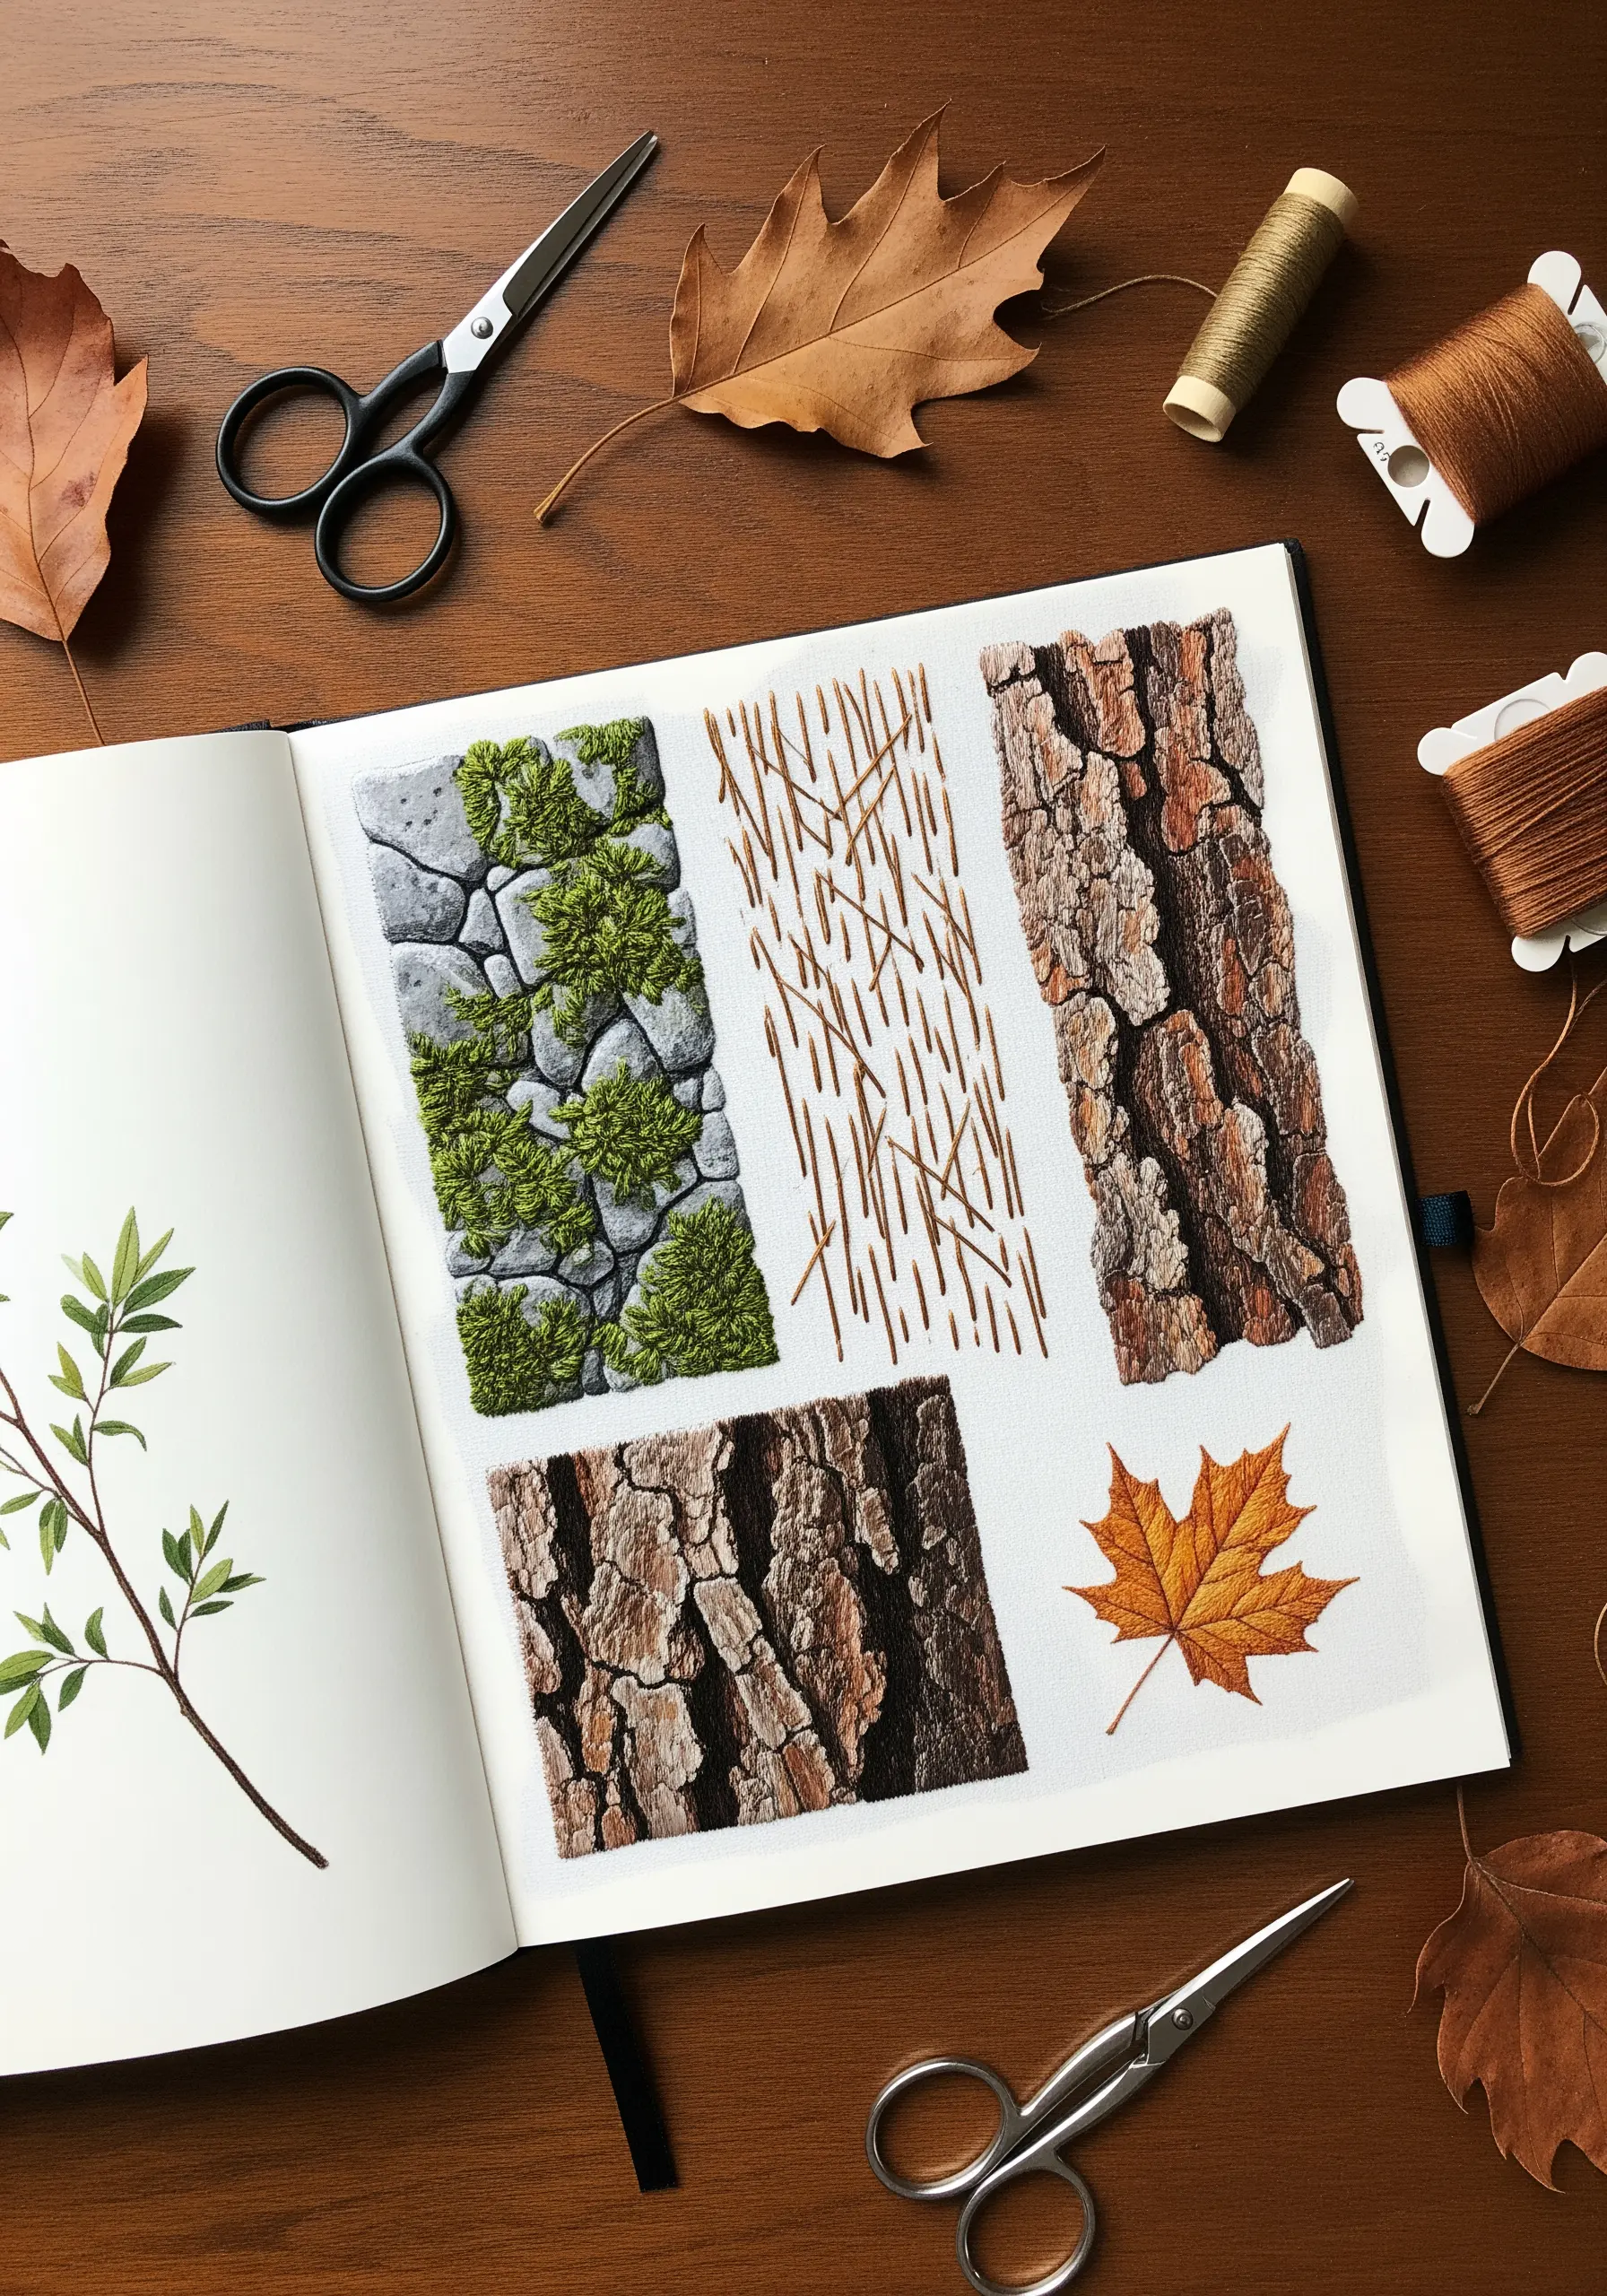
Build your skills by creating a visual library of natural textures on a single piece of fabric.
Dedicate small rectangular sections to different elements: use dense French knots and turkey work for moss, chaotic straight stitches in varied browns for bark, and tightly packed seed stitches for granite.
This exercise trains your eye to see nature as a collection of shapes and textures that you can translate into thread.
It’s the most effective way to learn how to stitch natural textures like a pro and develop your own unique style.
10. Couch Concentric Lines for a Geode Effect
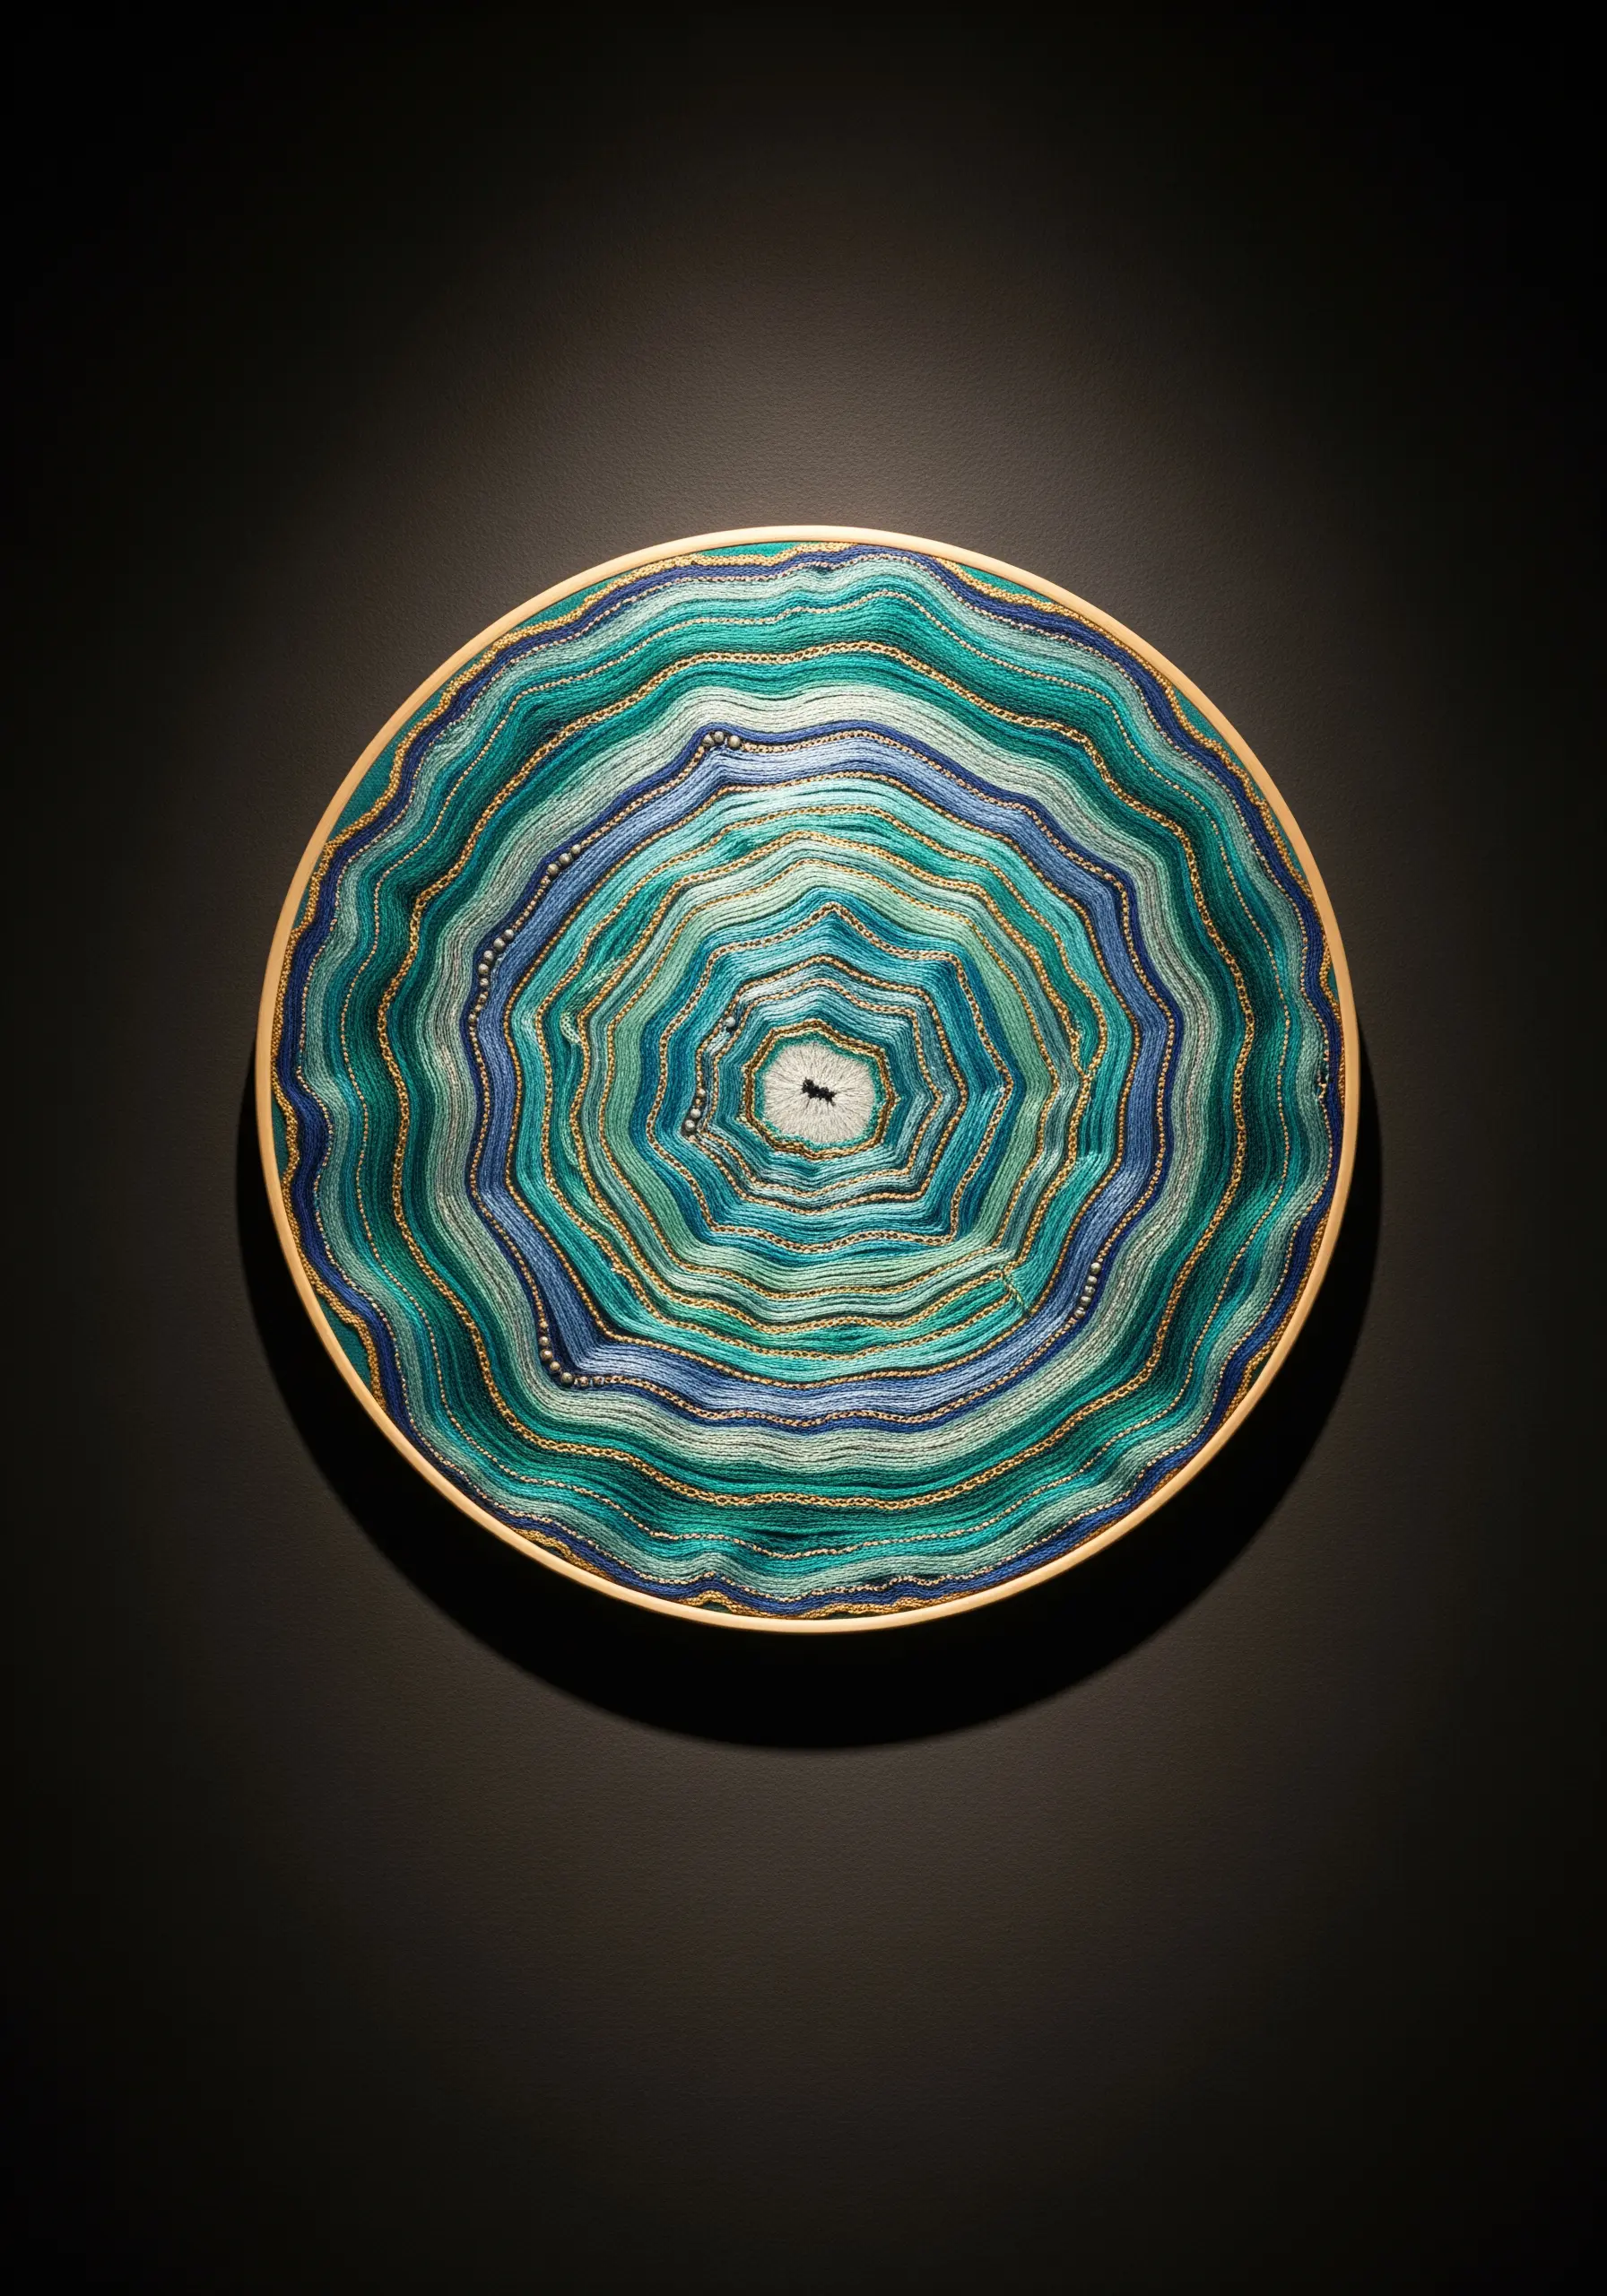
Mimic the mesmerizing layers of an agate stone by using couching to create organic, concentric rings of color.
Couching, the technique of laying a thread on the fabric surface and tacking it down with smaller stitches, is perfect for incorporating thicker or more textured fibers like pearl cotton, silk ribbon, or metallic cords.
Vary the thickness of your couched threads and the spacing between the rings to create a dynamic, natural rhythm.
This approach transforms a simple hoop into one of many abstract thread landscapes.
11. Curate a Cohesive Embroidered Triptych
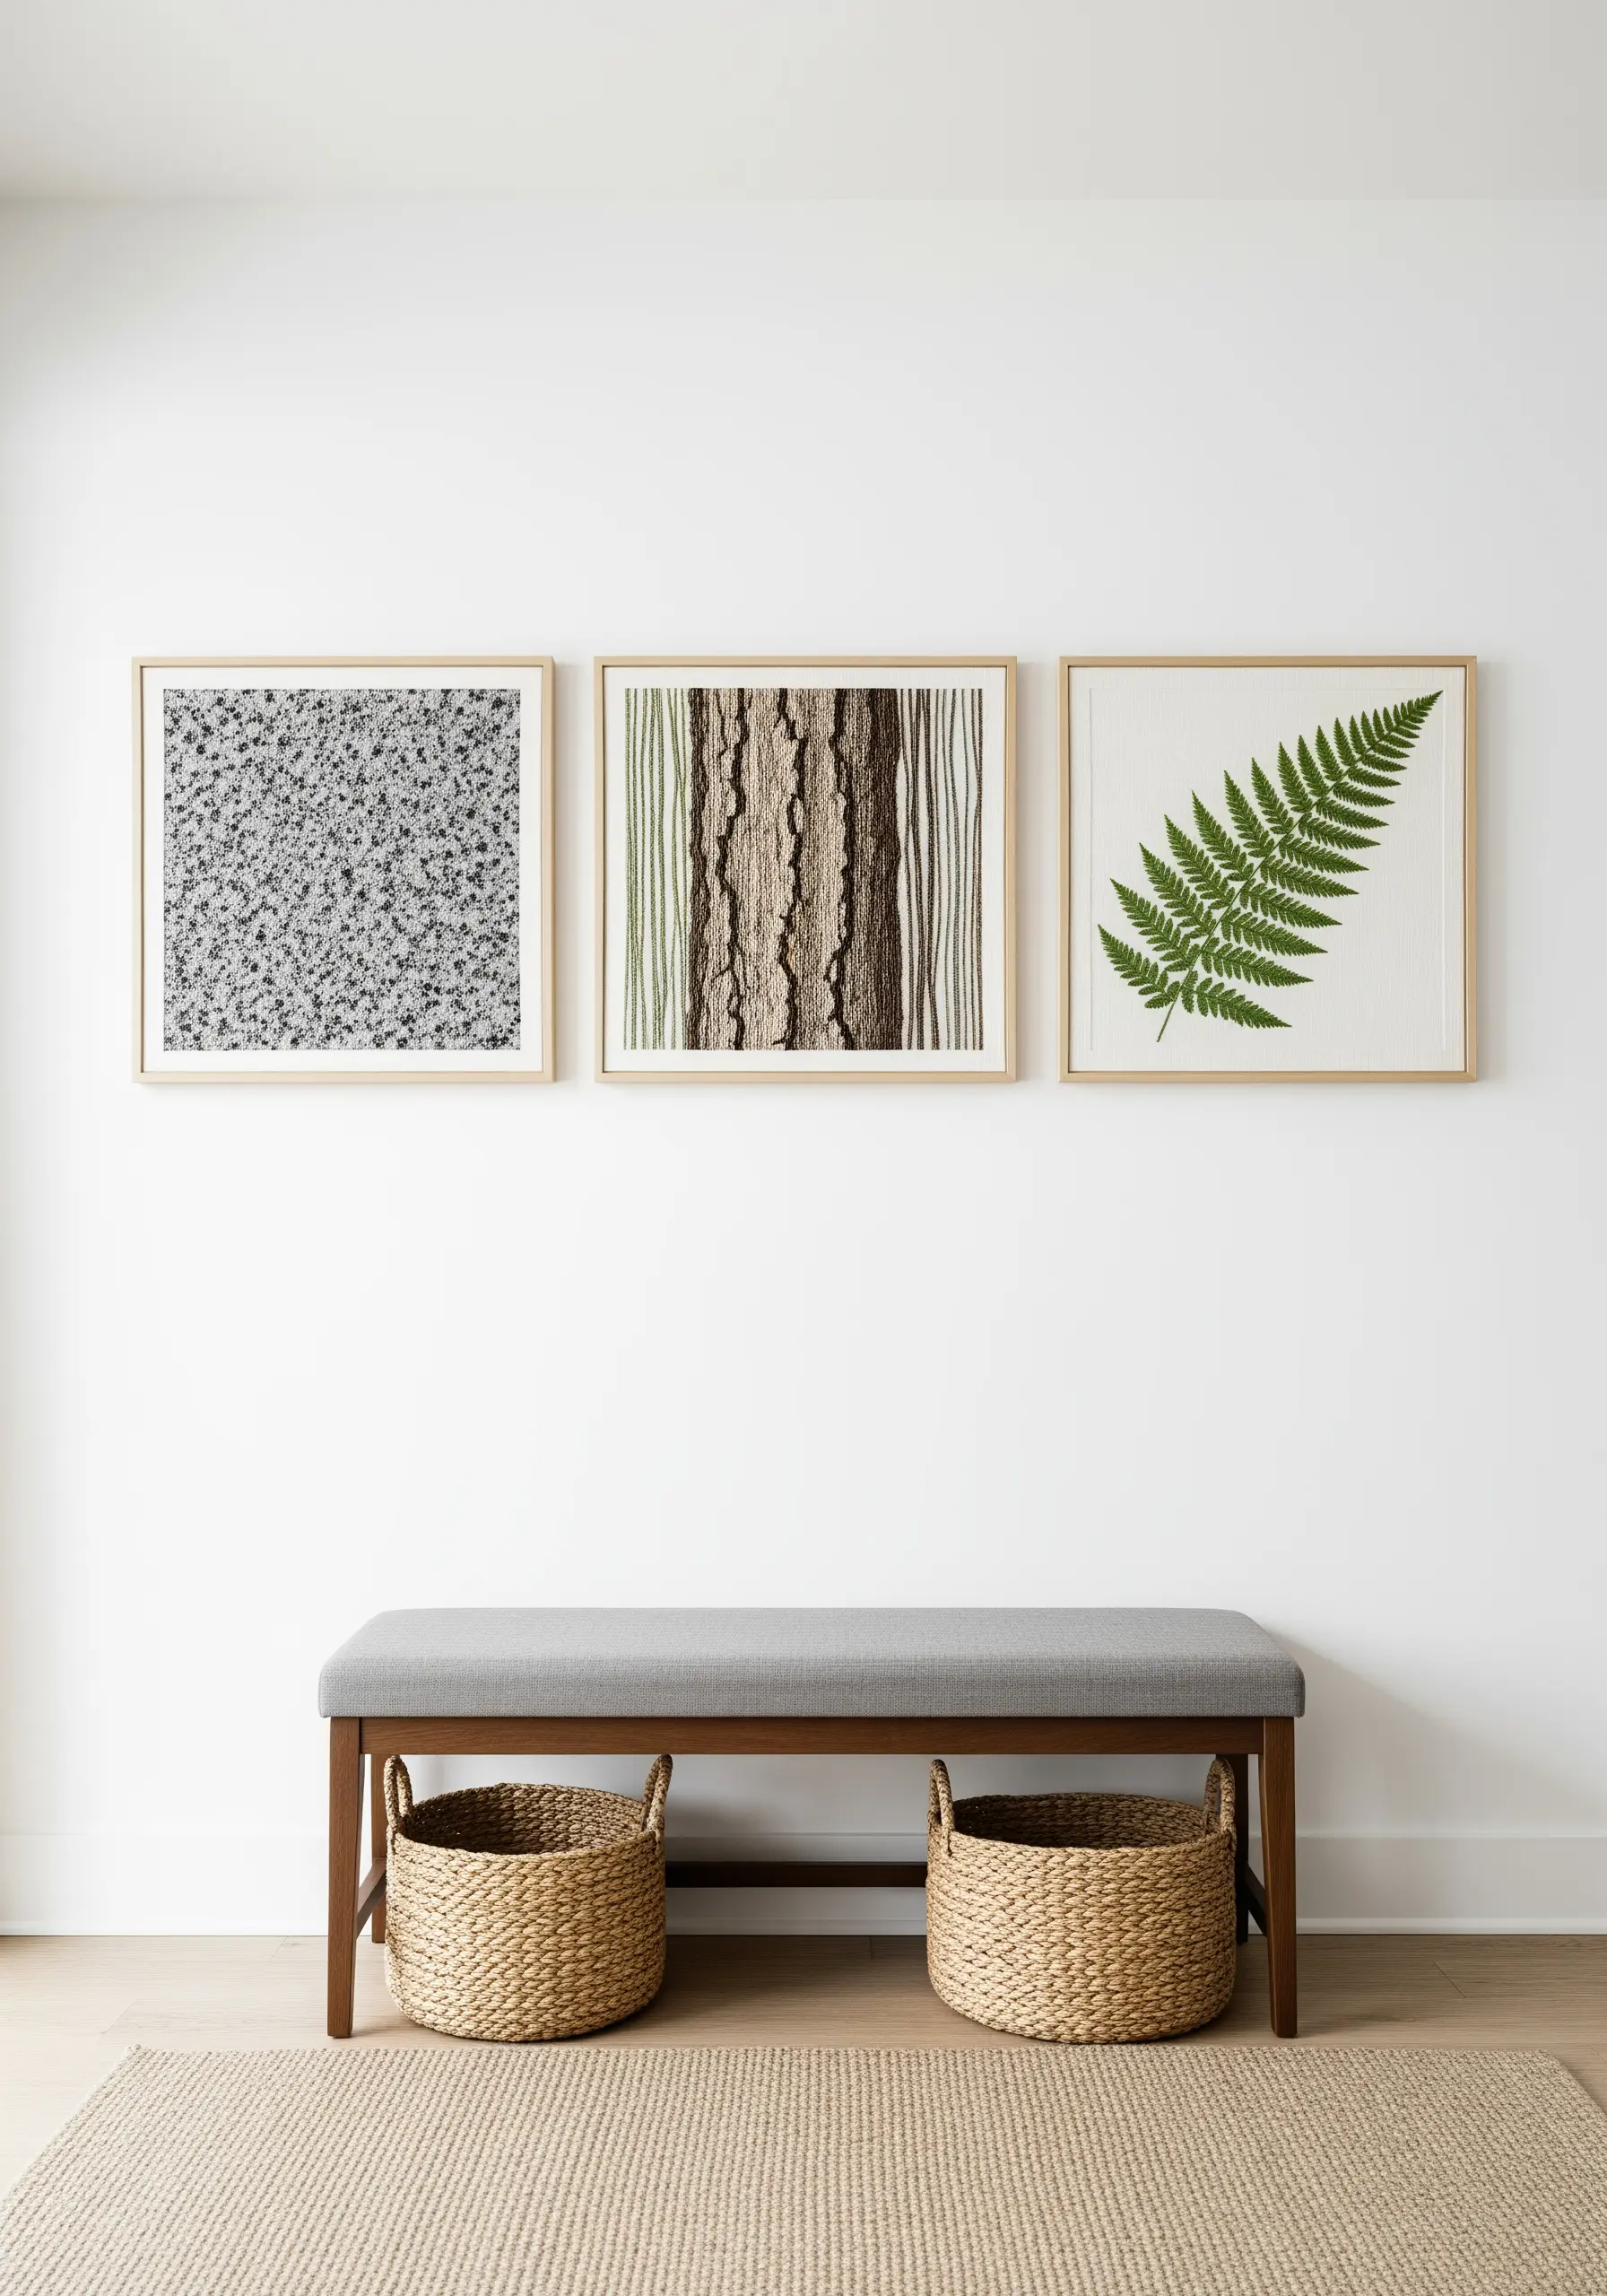
Elevate your finished embroidery by thinking like a curator.
Instead of a single piece, create a series of three works that explore a common theme, such as natural textures, but with different subjects—stone, bark, and a leaf.
Using the same size hoop or frame and a consistent color palette ties the individual pieces together into a sophisticated collection.
This grouping technique gives your work more impact and intention, turning simple hoops into beautiful framed embroidery wall art ideas.
12. Add Dimensionality with Stumpwork
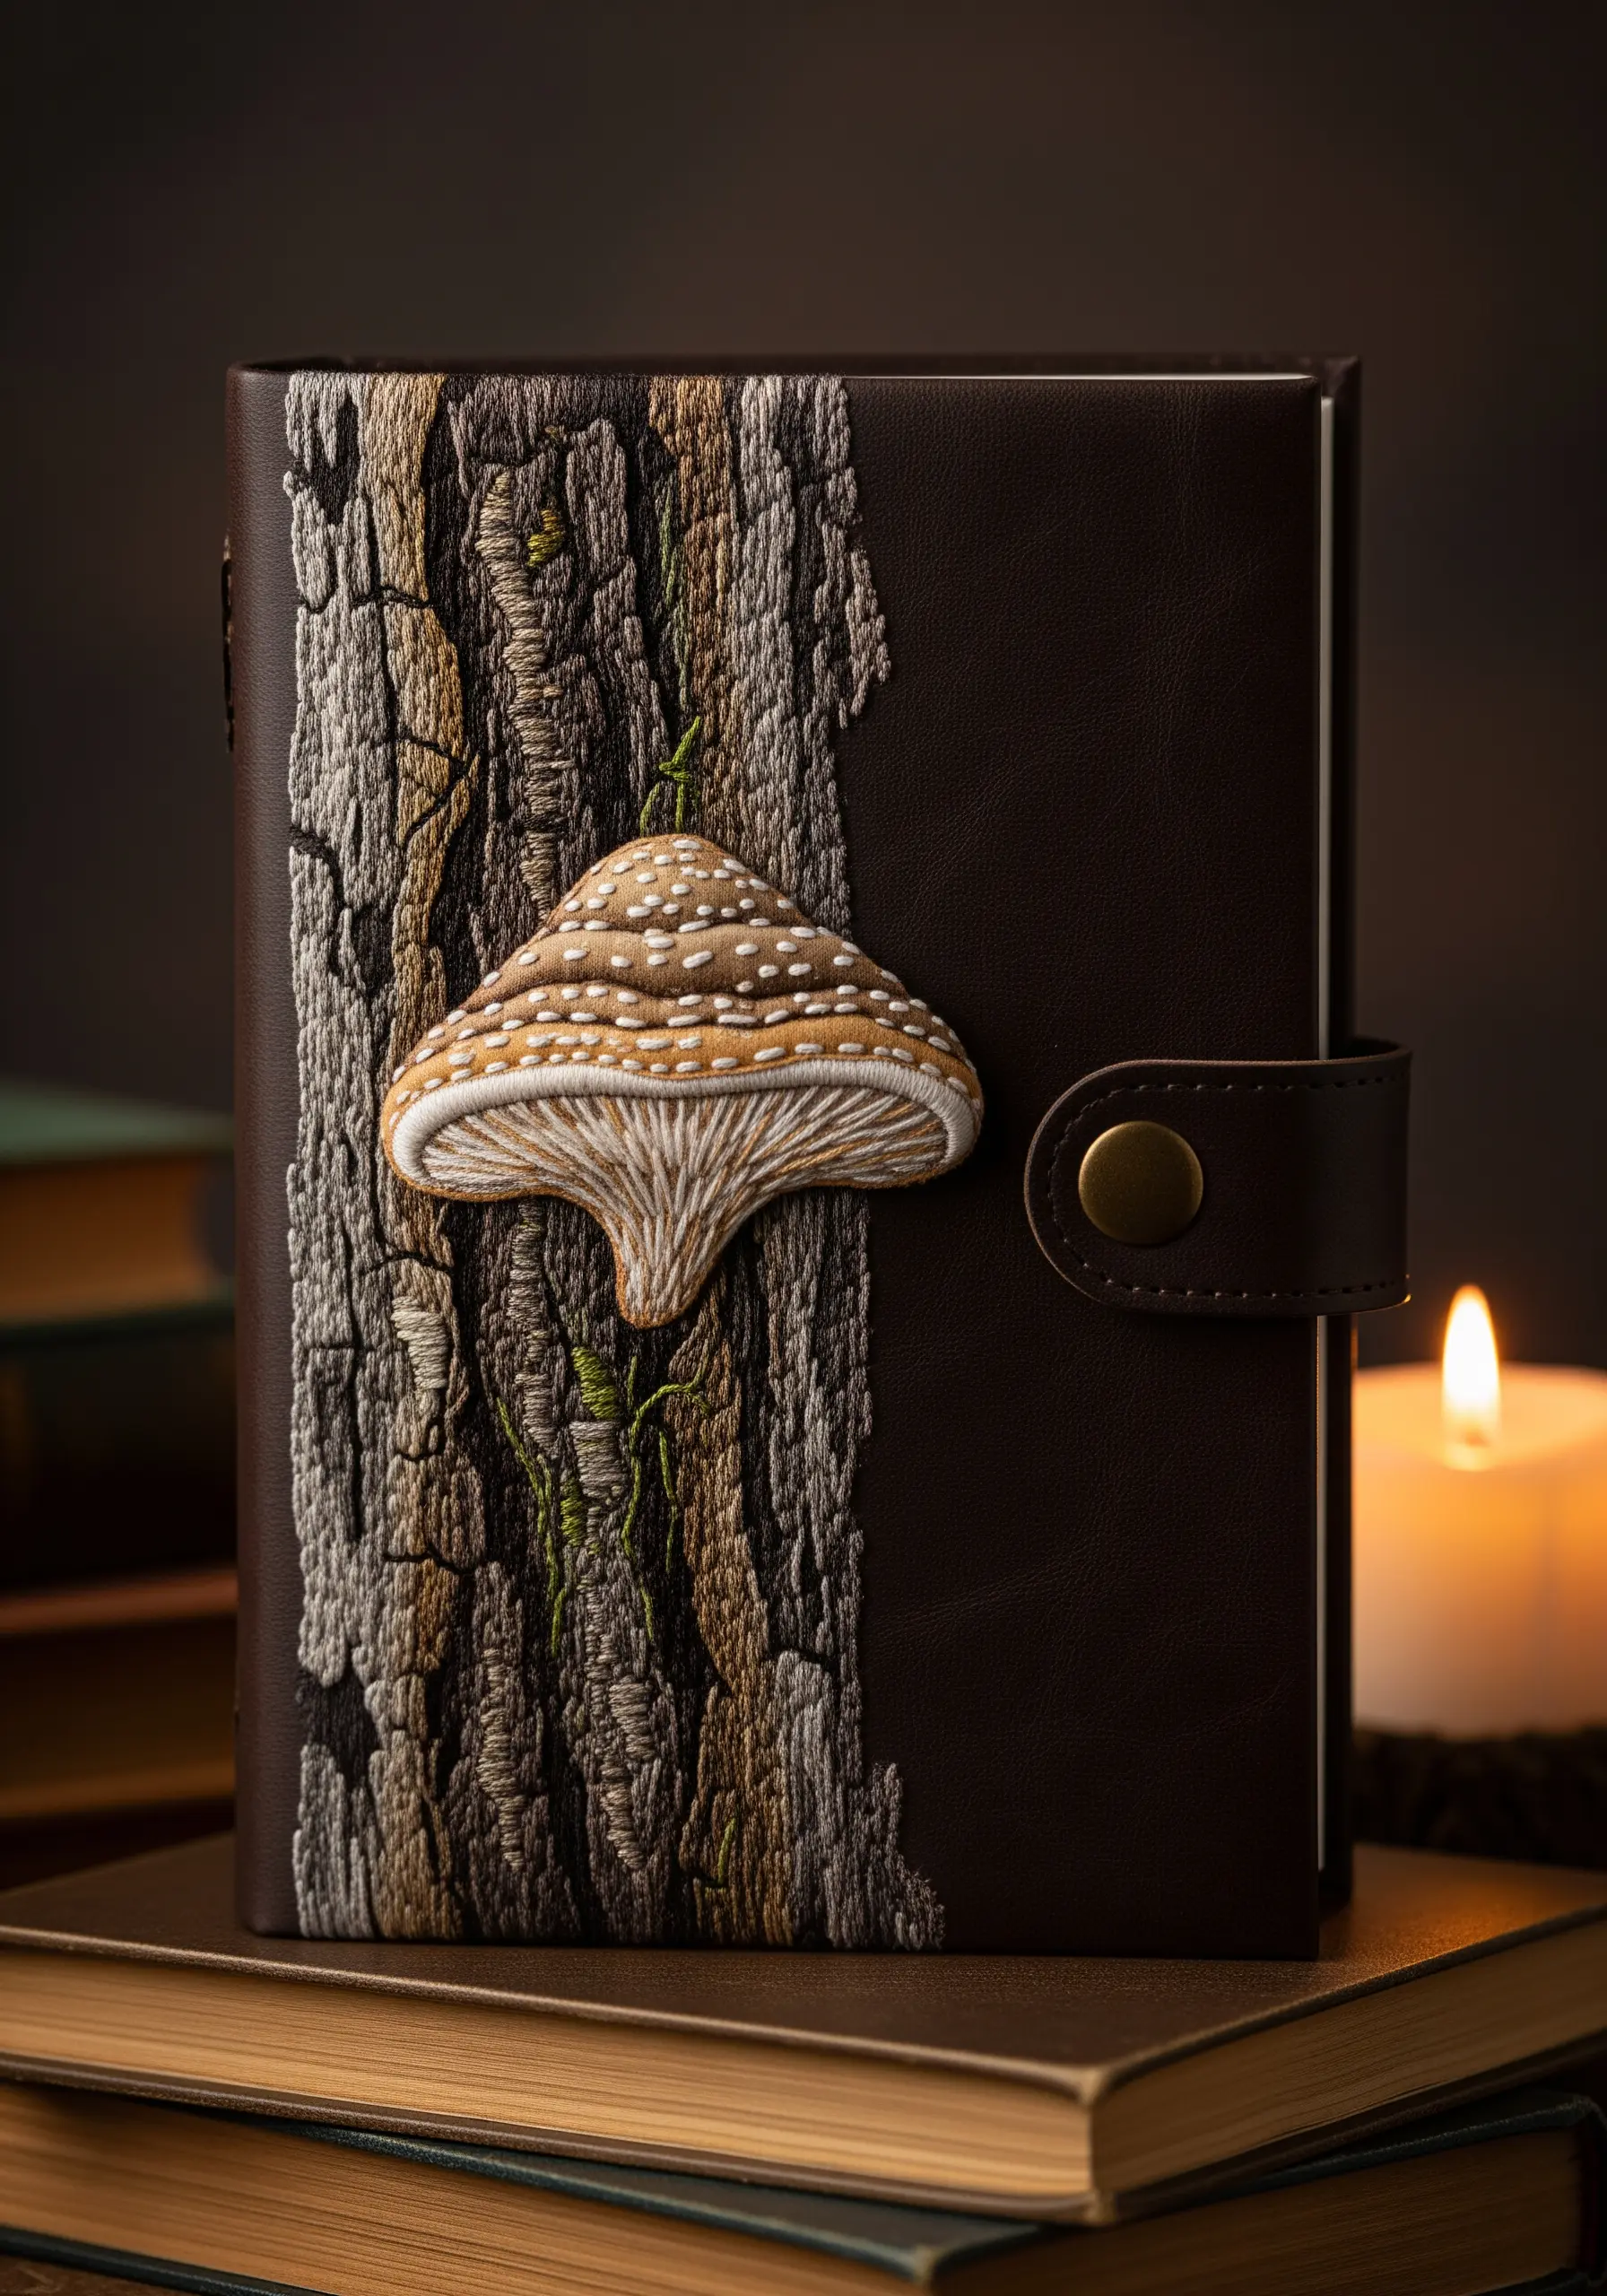
Bring elements of your design to life by incorporating stumpwork, a technique that creates raised, three-dimensional forms.
To make the mushroom, create a padded shape with felt layers, then cover it with thread painting (long-and-short stitch) before attaching it to the background fabric.
This elevates the mushroom from the bark-textured background, creating realistic depth and shadow.
It’s a perfect technique for DIY embroidered mixed-media journals, where a single focal point can make a huge impact.
13. Design a Delicate Border for Curtains
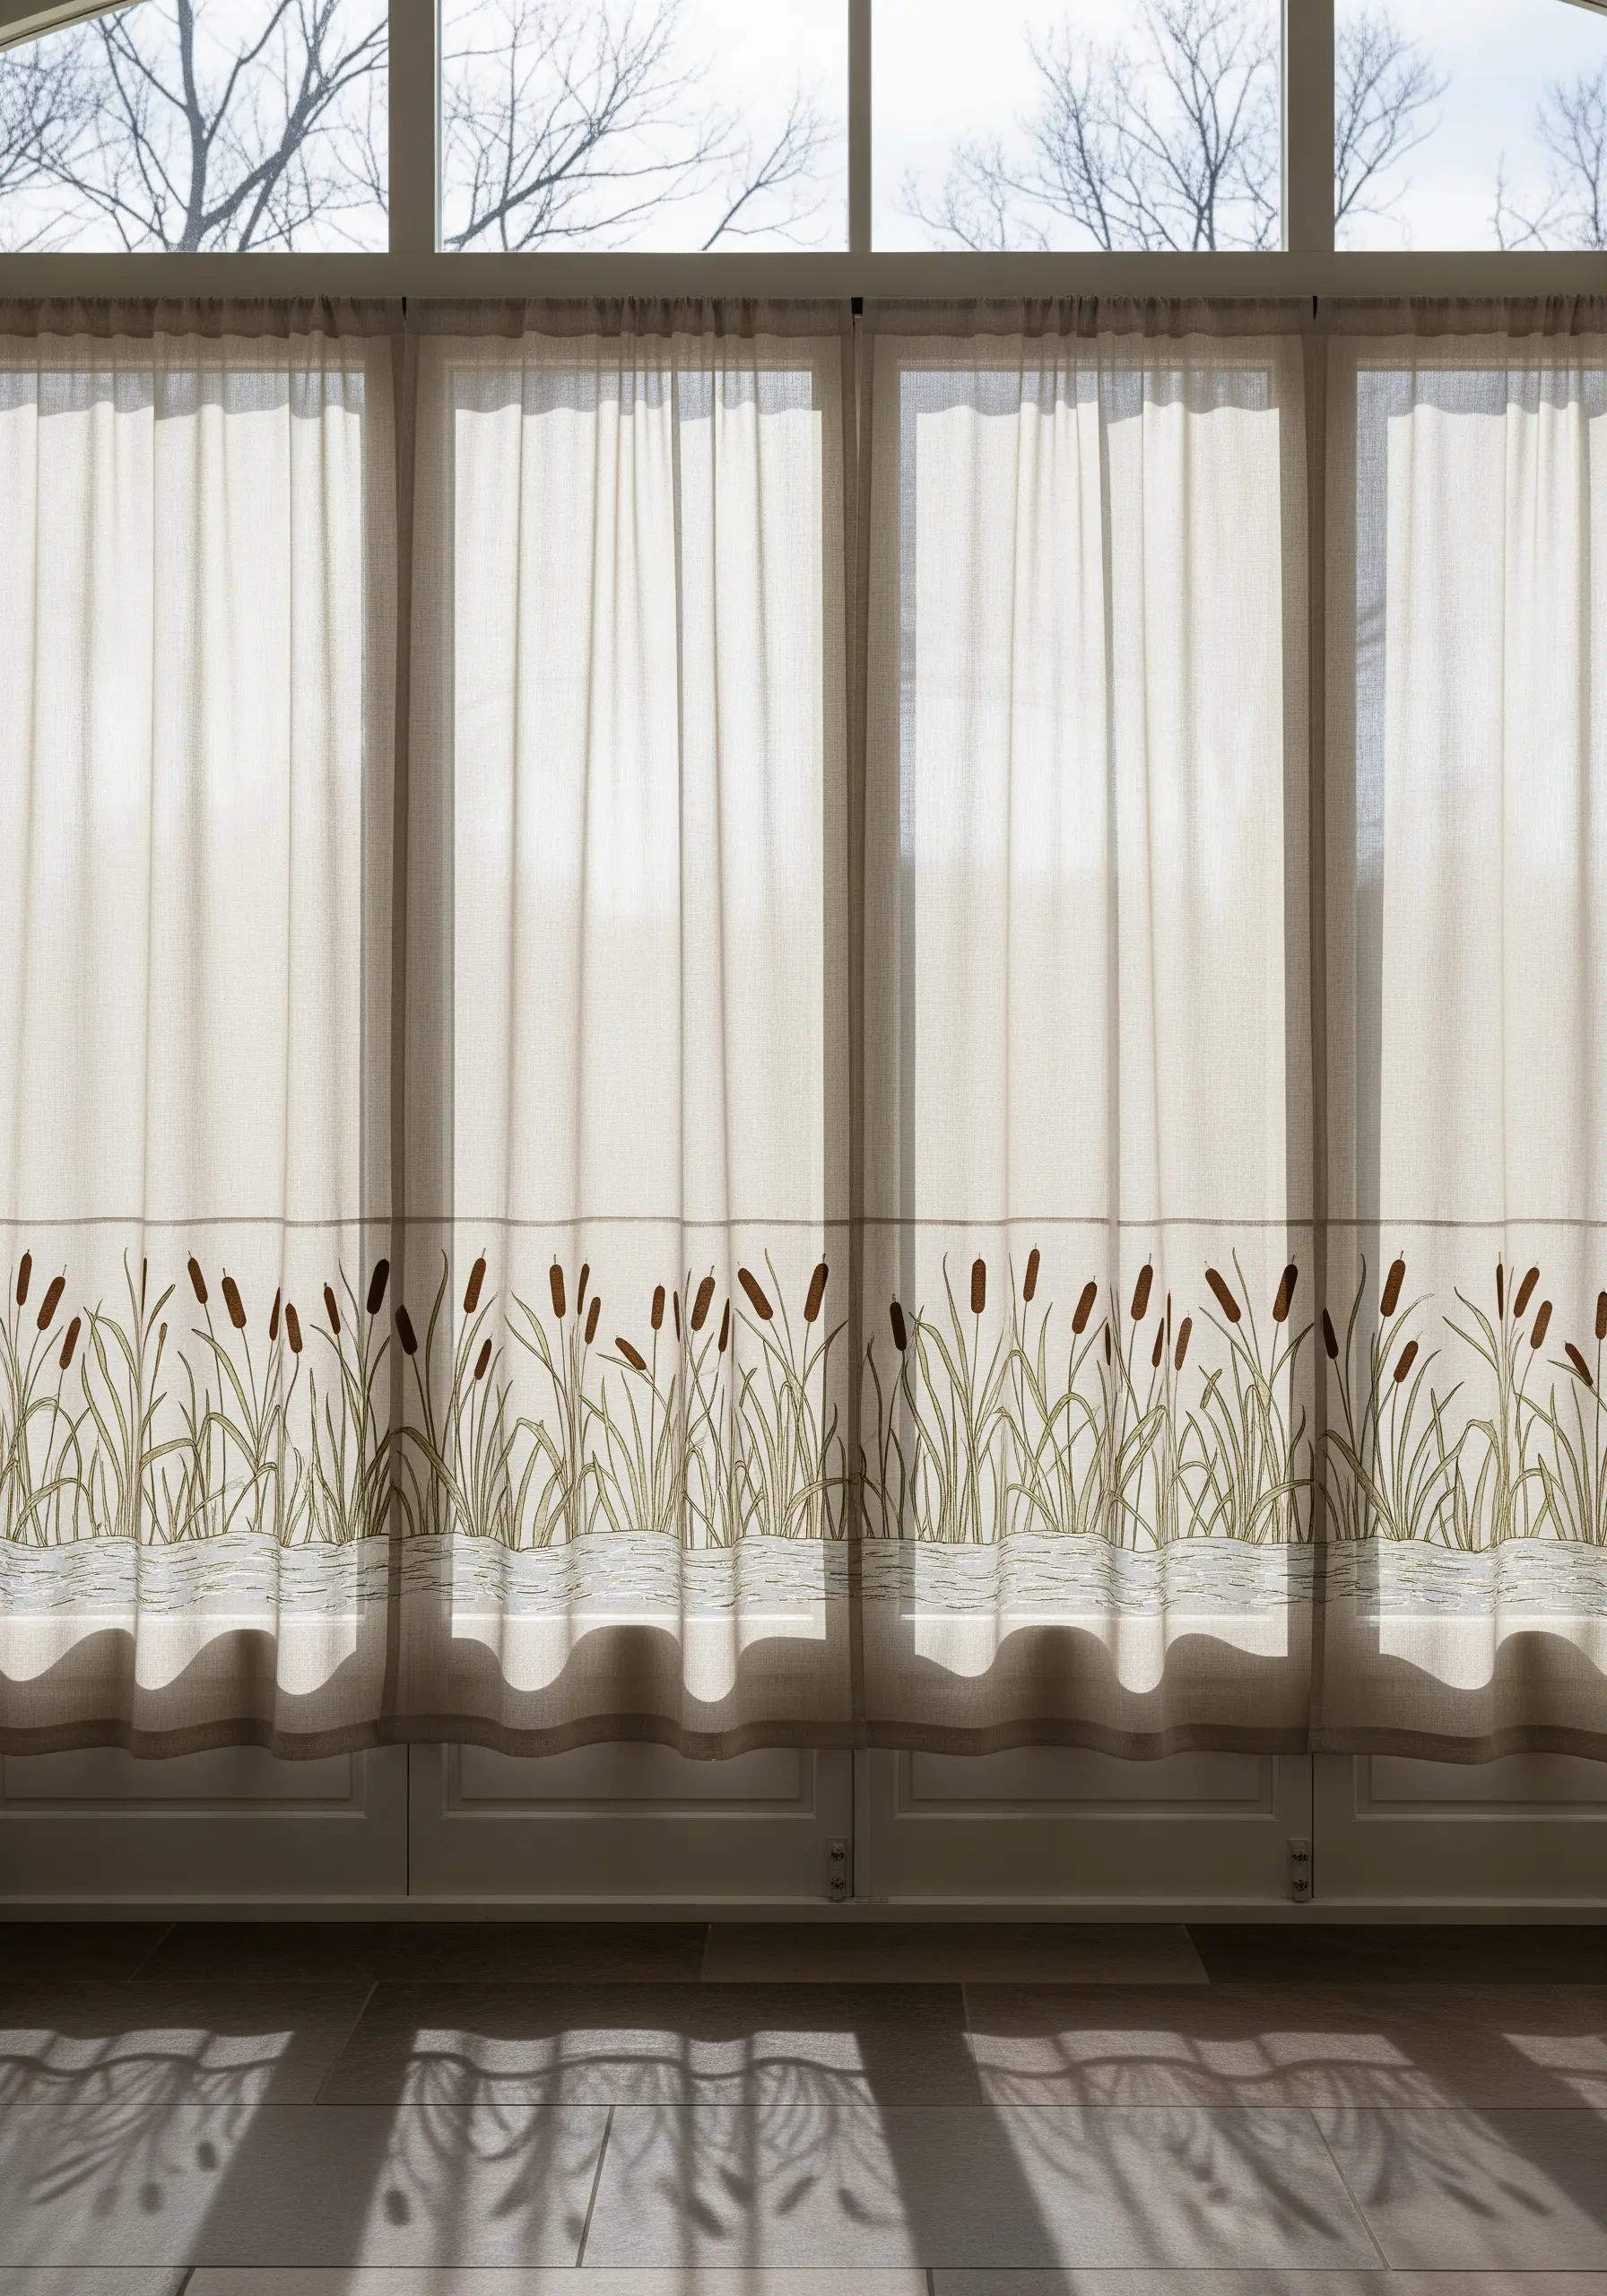
Embellishing lightweight home textiles like curtains requires a delicate touch.
Choose a simple, open design like these cattails, which uses negative space effectively and won’t make the fabric heavy or stiff.
Use basic stitches like stem stitch for the reeds and a padded satin stitch for the cattail heads to add subtle dimension.
Always use a lightweight tear-away or wash-away stabilizer on the back to prevent puckering as you stitch, ensuring your embroidered curtain blind ideas hang beautifully.
14. Recreate Lichen with Clustered Knots
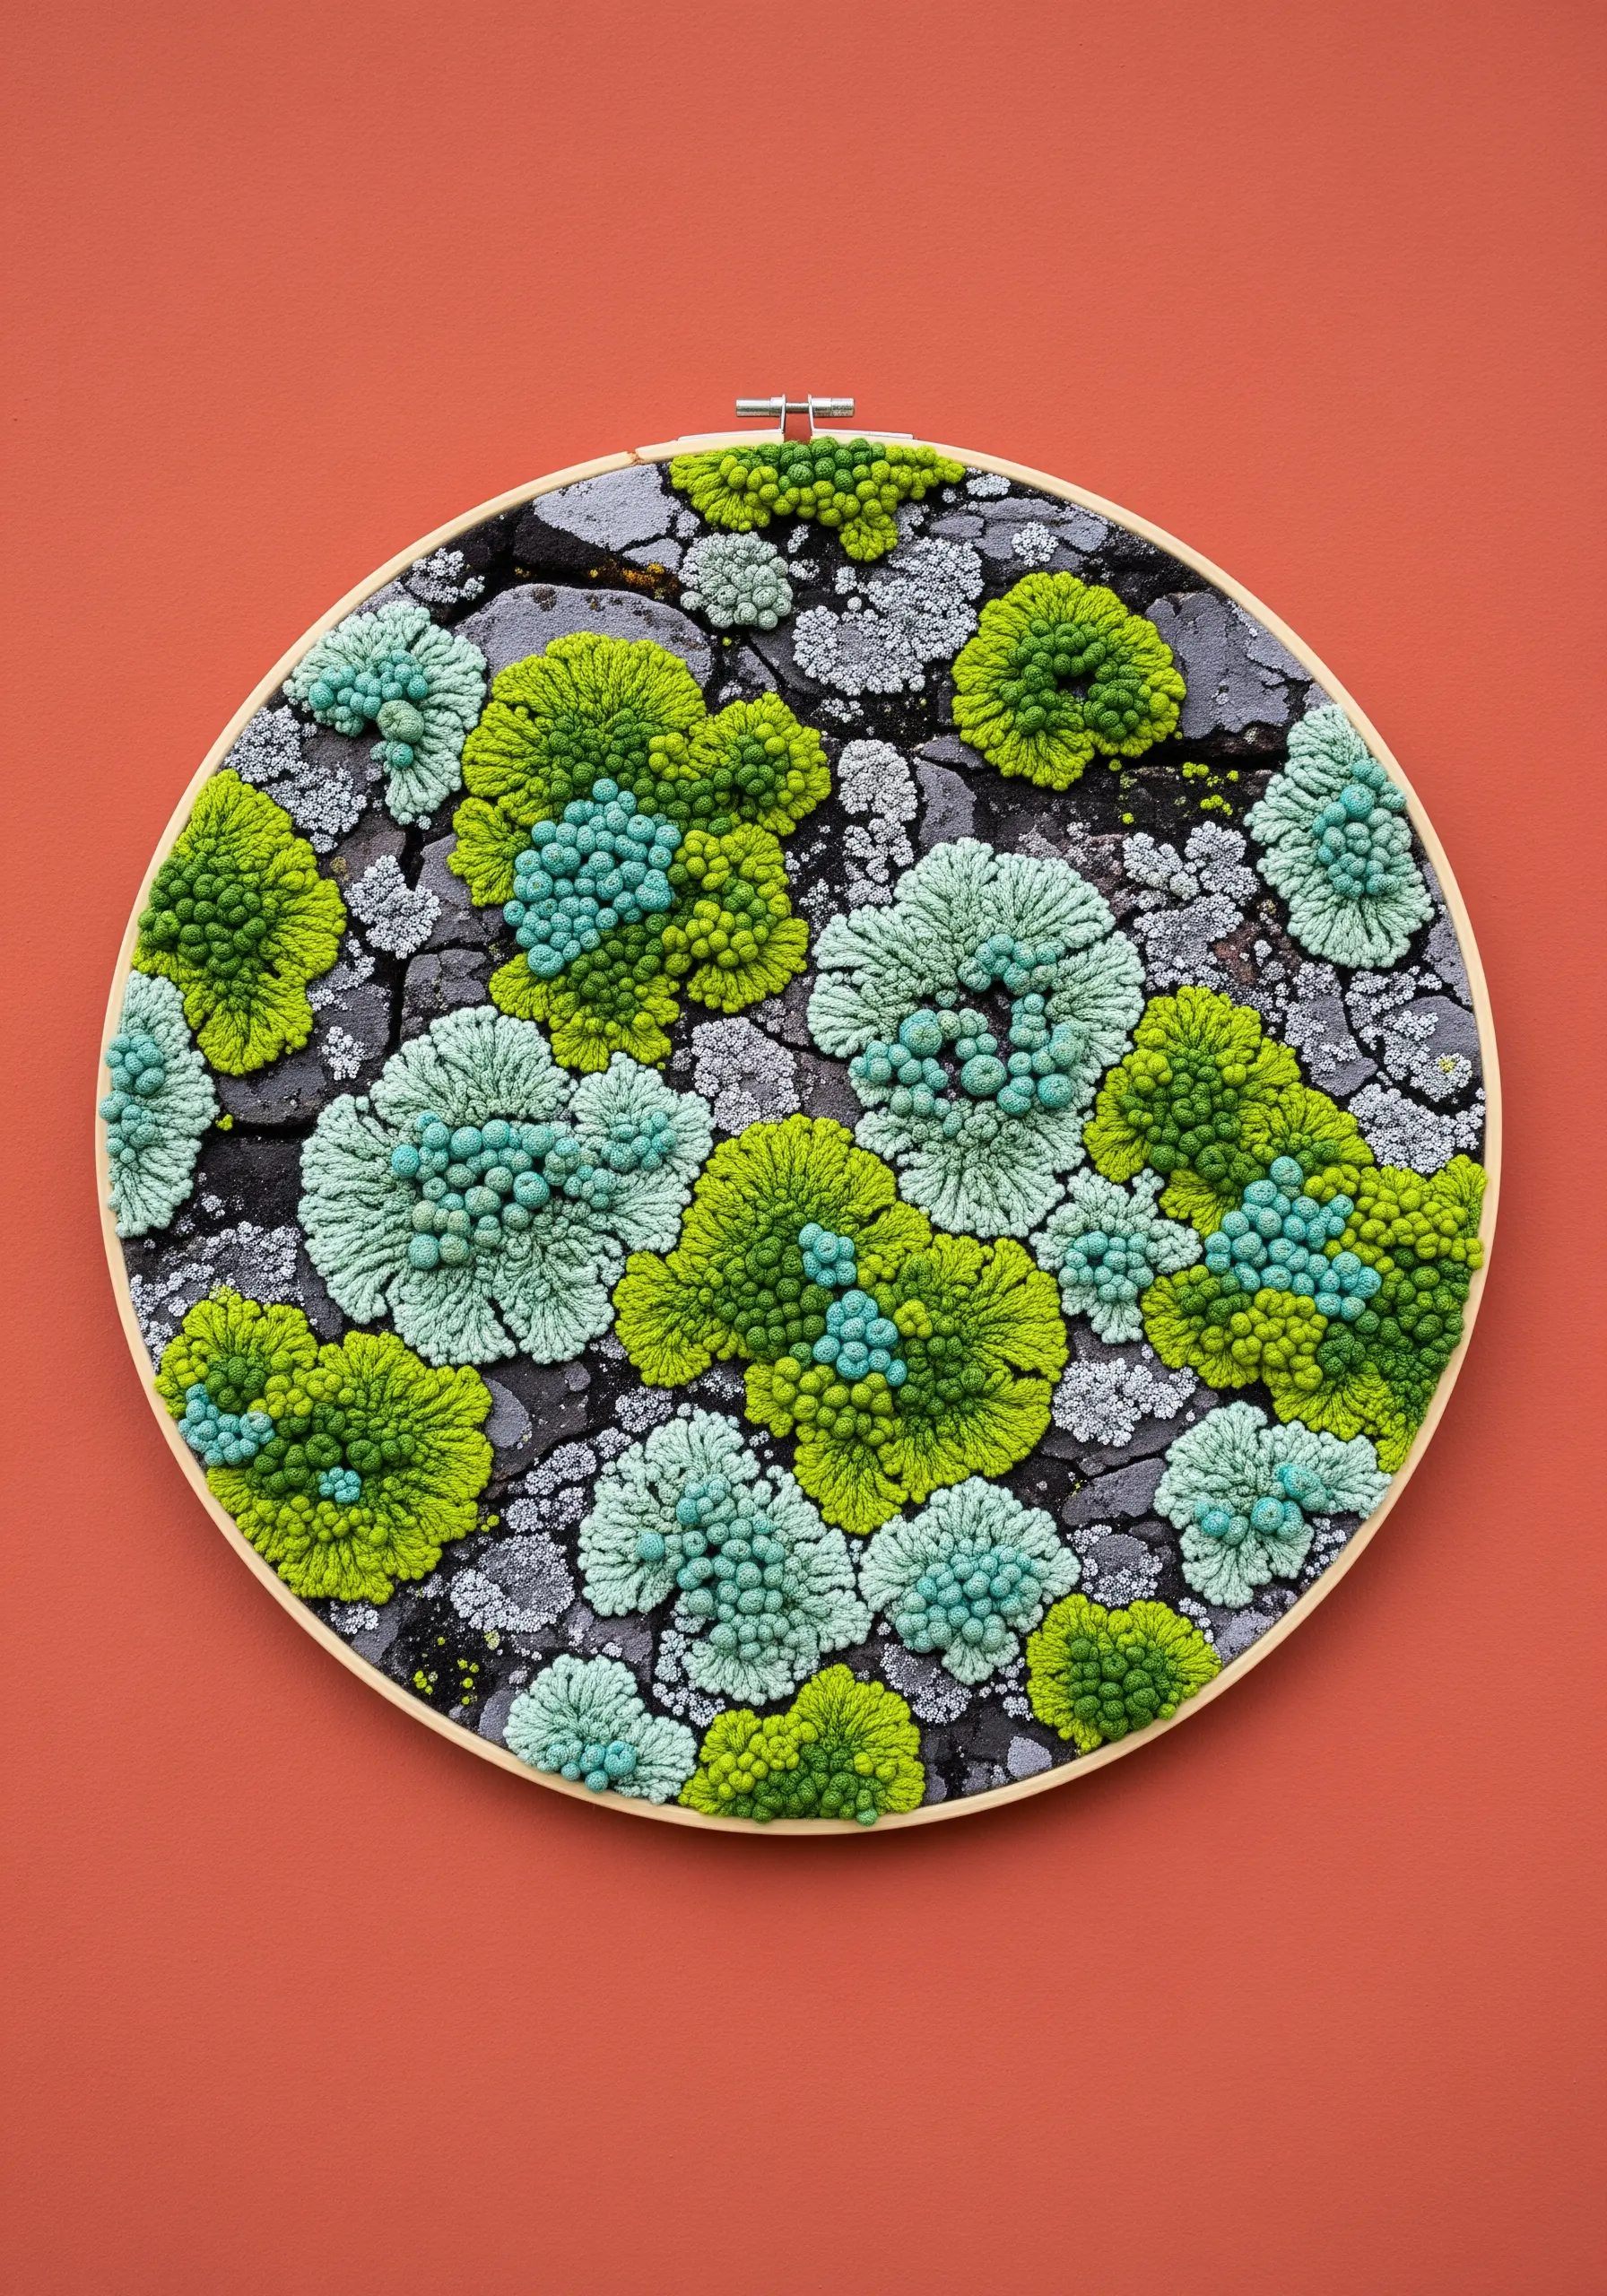
Capture the complex, cauliflower-like texture of lichen by clustering French and colonial knots of different sizes and colors.
For the flatter, crust-like areas, use a base of grey seed stitches to represent the stone.
Then, build up the lichen formations with tightly packed knots, using more wraps around the needle for larger knots and fewer for smaller ones.
Mixing matte cotton floss with a slightly shinier rayon thread can also mimic the subtle variations in lichen’s surface, making for highly realistic organic texture embroidery designs.
15. Stitch and Cut Standalone Leaf Patches
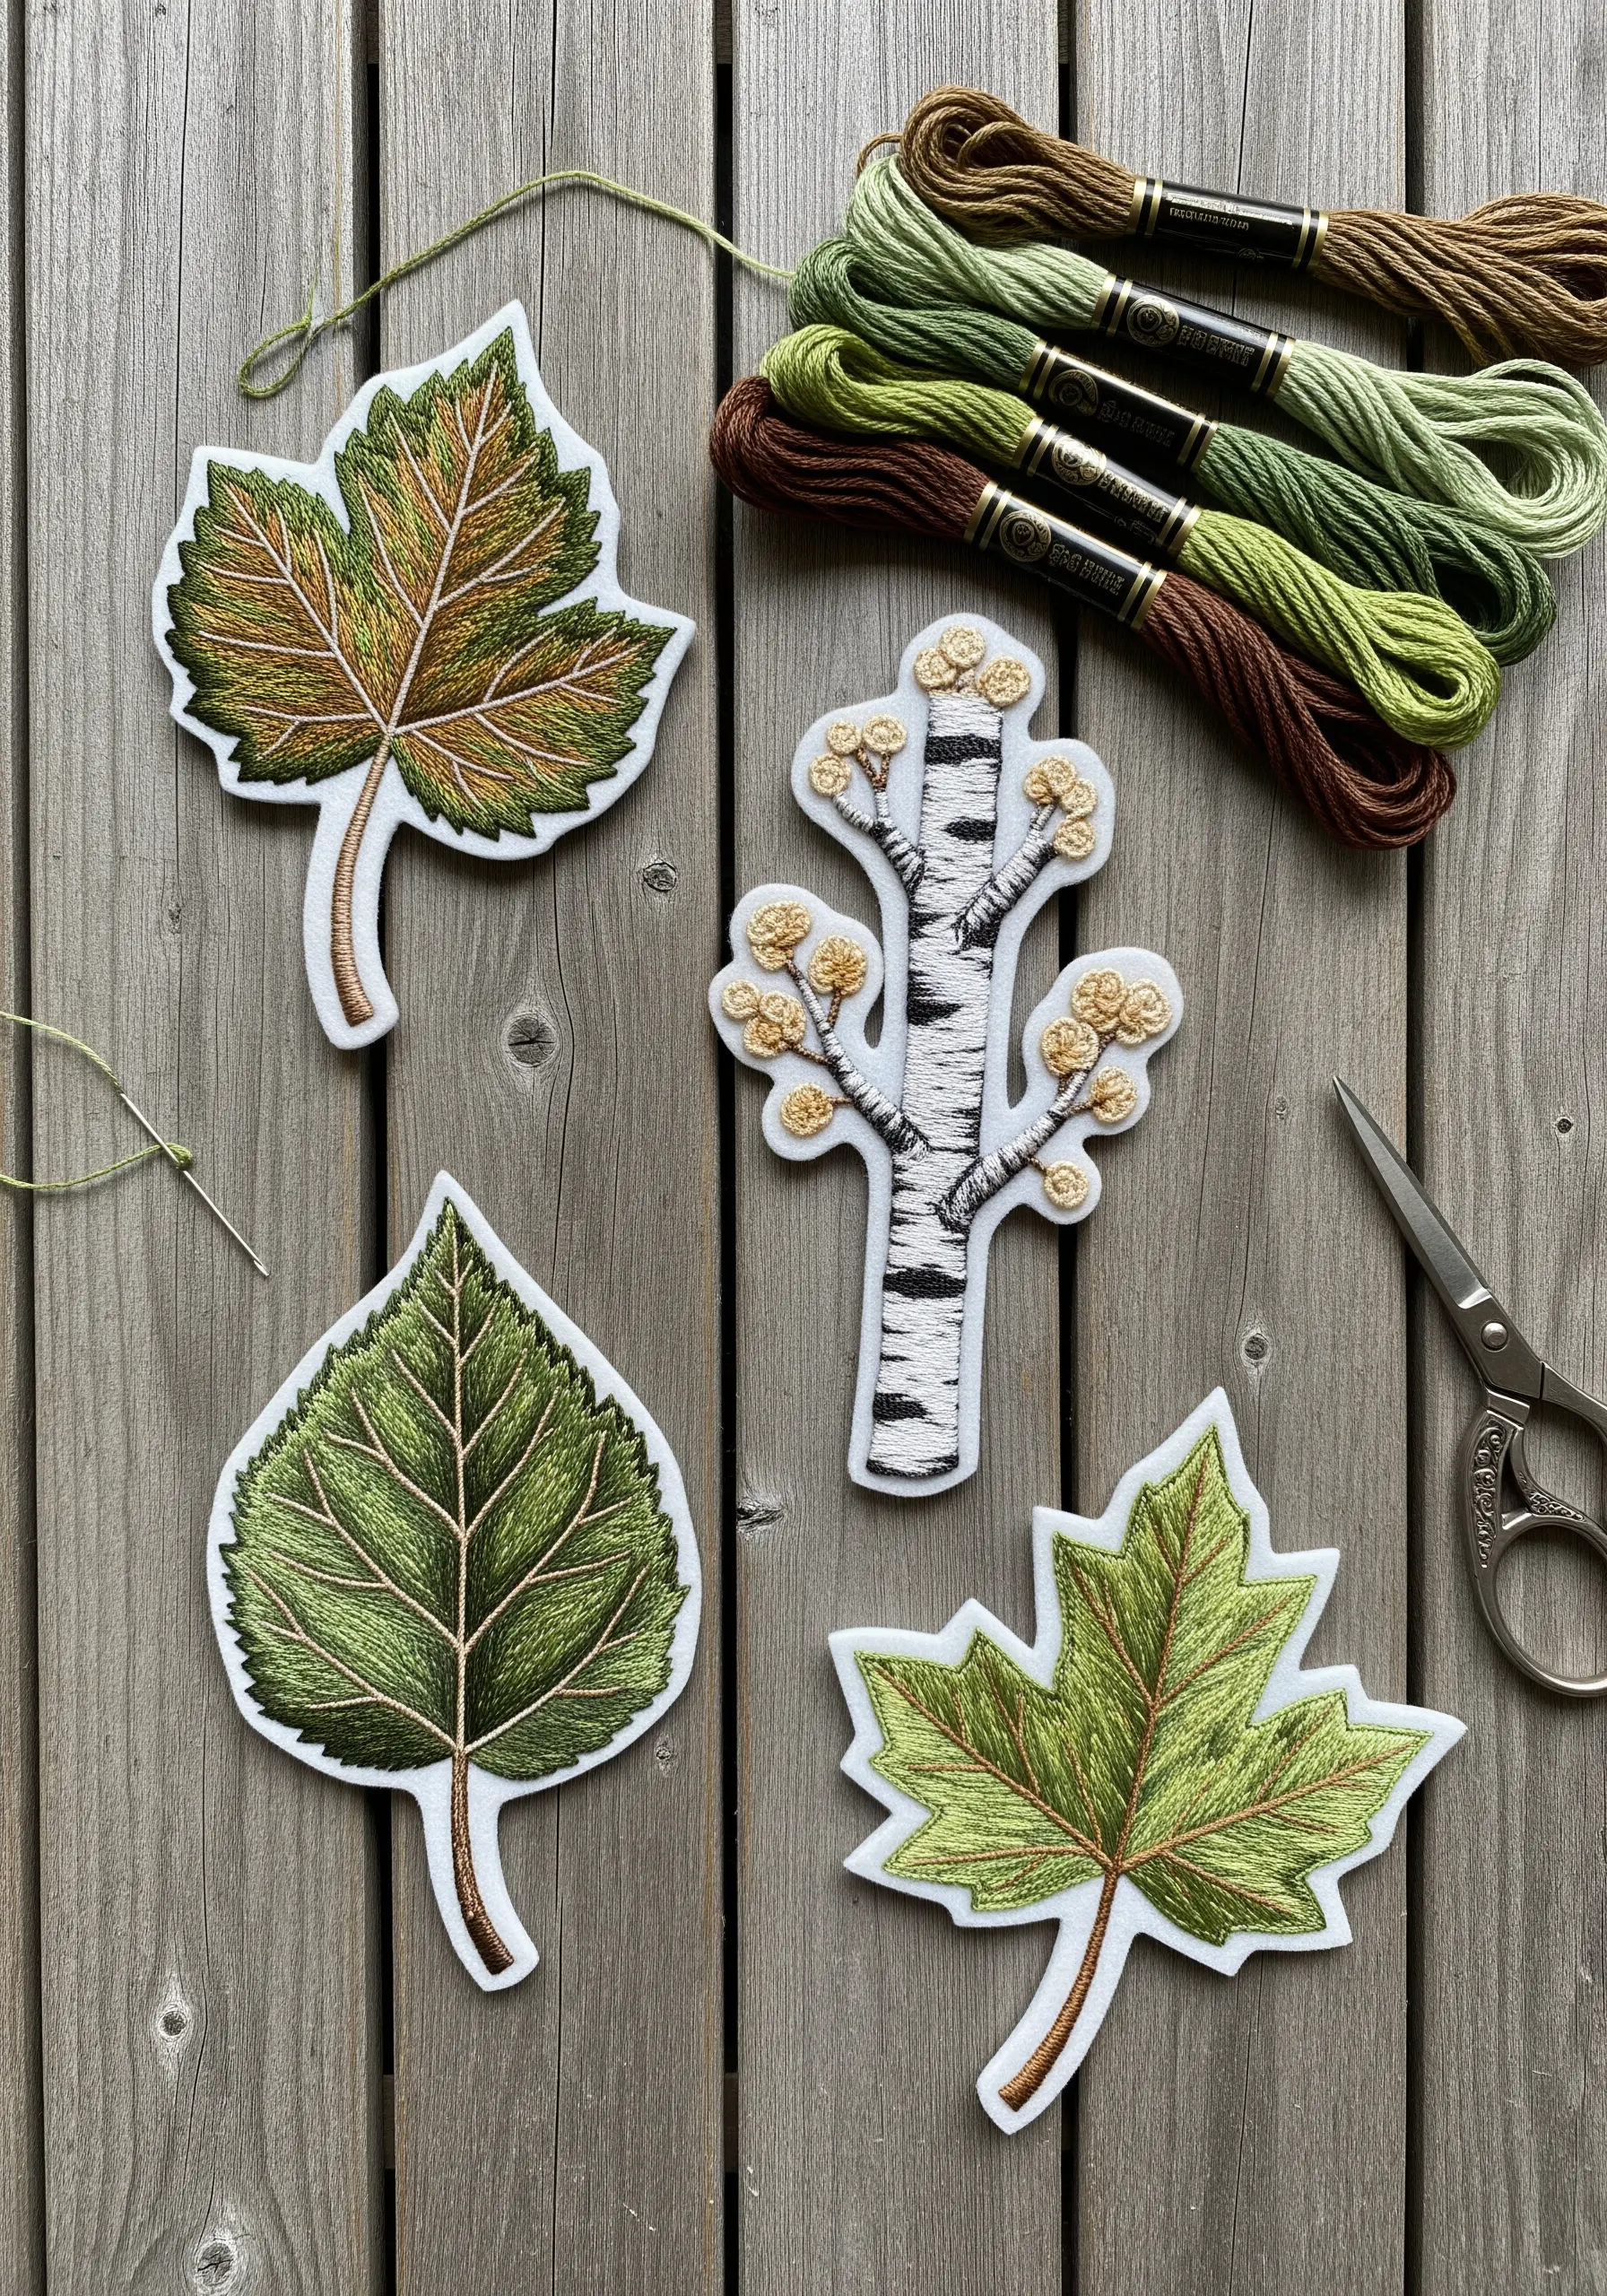
Create versatile embroidered elements by stitching onto water-soluble stabilizer instead of directly onto fabric.
Complete your leaf design using long-and-short stitch for shading and a crisp backstitch for the veins and outline.
Once finished, dissolve the stabilizer in water, leaving you with a clean, sturdy embroidered patch you can apply to clothing, bags, or other projects.
Paying attention to the leaf vein details you can stitch gives these small pieces incredible realism.
16. Craft a Soft Nursery Mobile with Felt and Yarn

For nursery decor, prioritize soft textures and simple, high-contrast details.
Cut your leaf and cloud shapes from soft felt, which is easy to work with and requires no hemming.
Use a simple running stitch with thick pearl cotton or a single ply of wool yarn to add details like leaf veins or decorative borders.
The combination of wool roving for the fluffy tassels and simple stitching on felt makes for charming and tactile dreamy baby clothing embroidery ideas and accessories.
17. Compose a Multi-Layered Textile Ecosystem
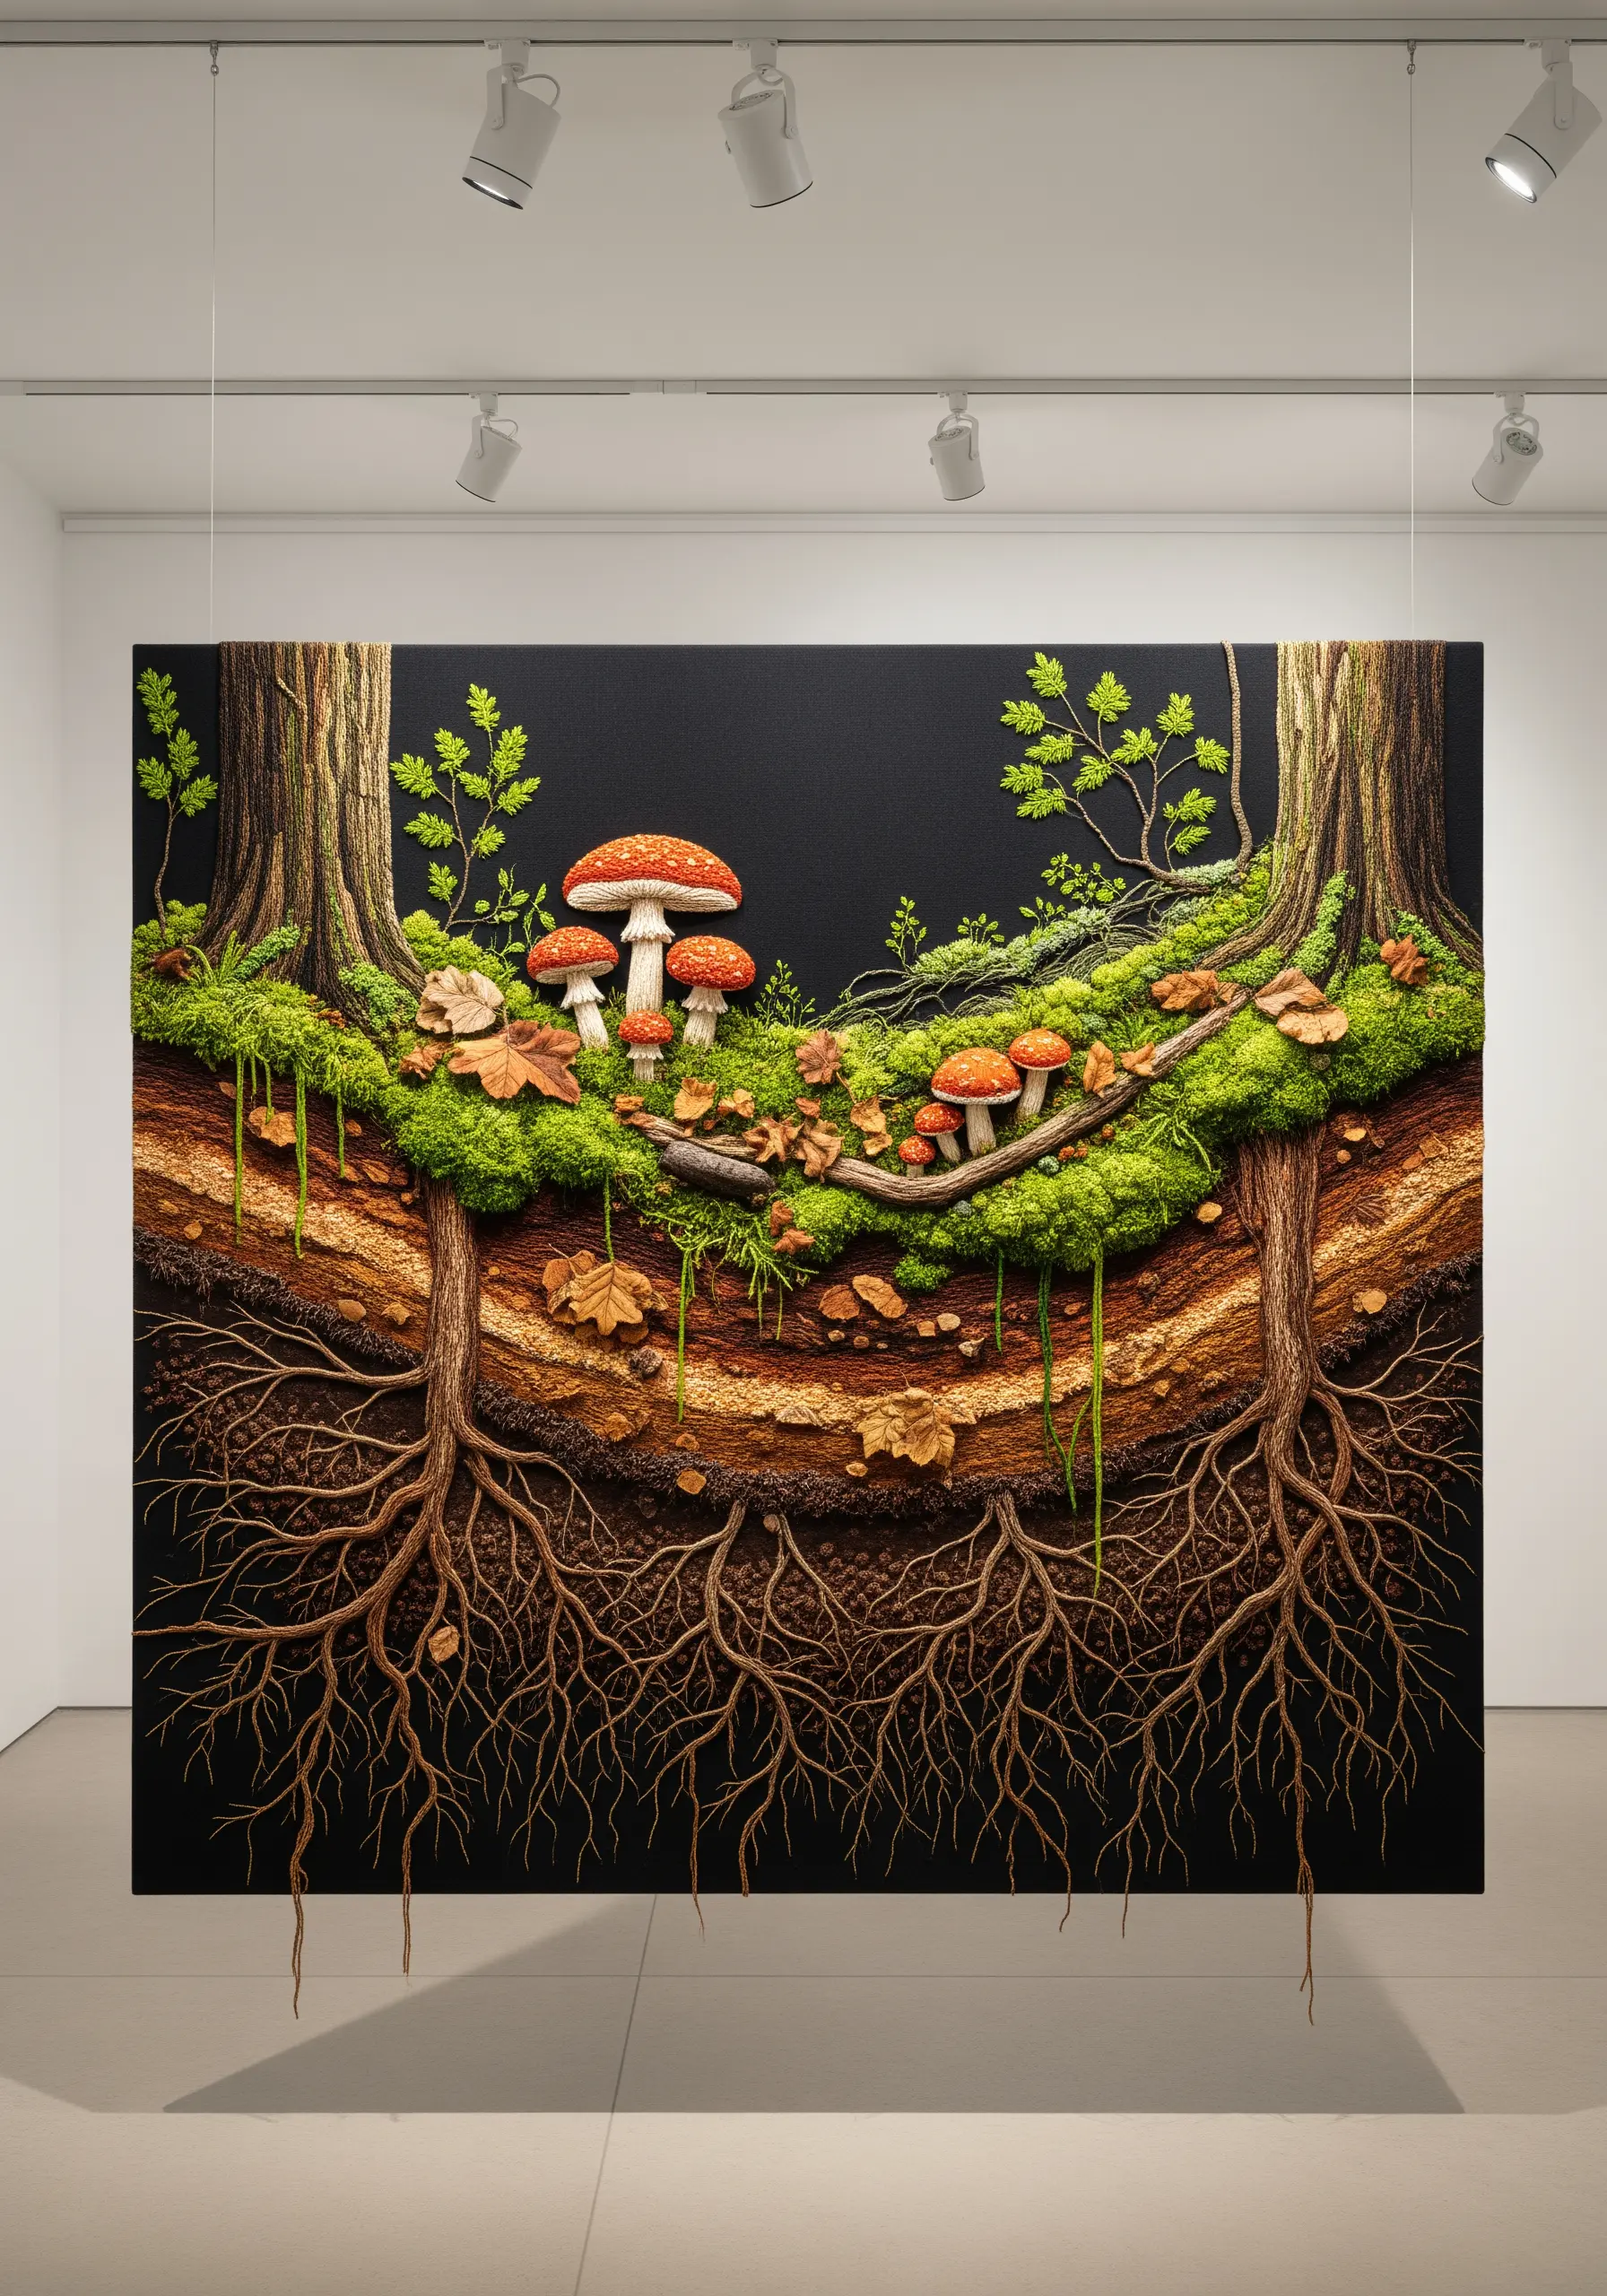
For an ambitious project, think in layers to create an entire ecosystem on canvas.
Build up the forest floor by combining different techniques: couch thick, twisted brown yarns for tree roots, use dense turkey work for mossy banks, and add stumpwork for dimensional mushrooms.
The dark background creates dramatic contrast and makes each textured element pop.
This is the essence of creating multilayered textile wall art, where you combine multiple embroidery skills to tell a rich, textural story.


