

You have the stitches down. You know your backstitch from your stem stitch, and your French knots are finally behaving. Yet, you look at your finished hoop and feel a small gap between what you made and what you envisioned—that elusive polish that transforms a project into a piece of art.
That transformation isn’t about learning dozens of complex new techniques. It’s about learning to see differently. It’s about understanding how the crispness of a line can contrast with the softness of a petal, how negative space can speak as loudly as a filled shape, and how a single pop of color can tell an entire story.
These designs, which pair the human element of the hand with the organic beauty of flowers, are your framework. They are a playground for you to explore contrast, composition, and texture. With each one, you’ll make small, intentional choices that lead to a profoundly more artistic and cohesive result. This is where your unique style finds its voice.
1. Achieve High Contrast with Satin Stitch & Line Art
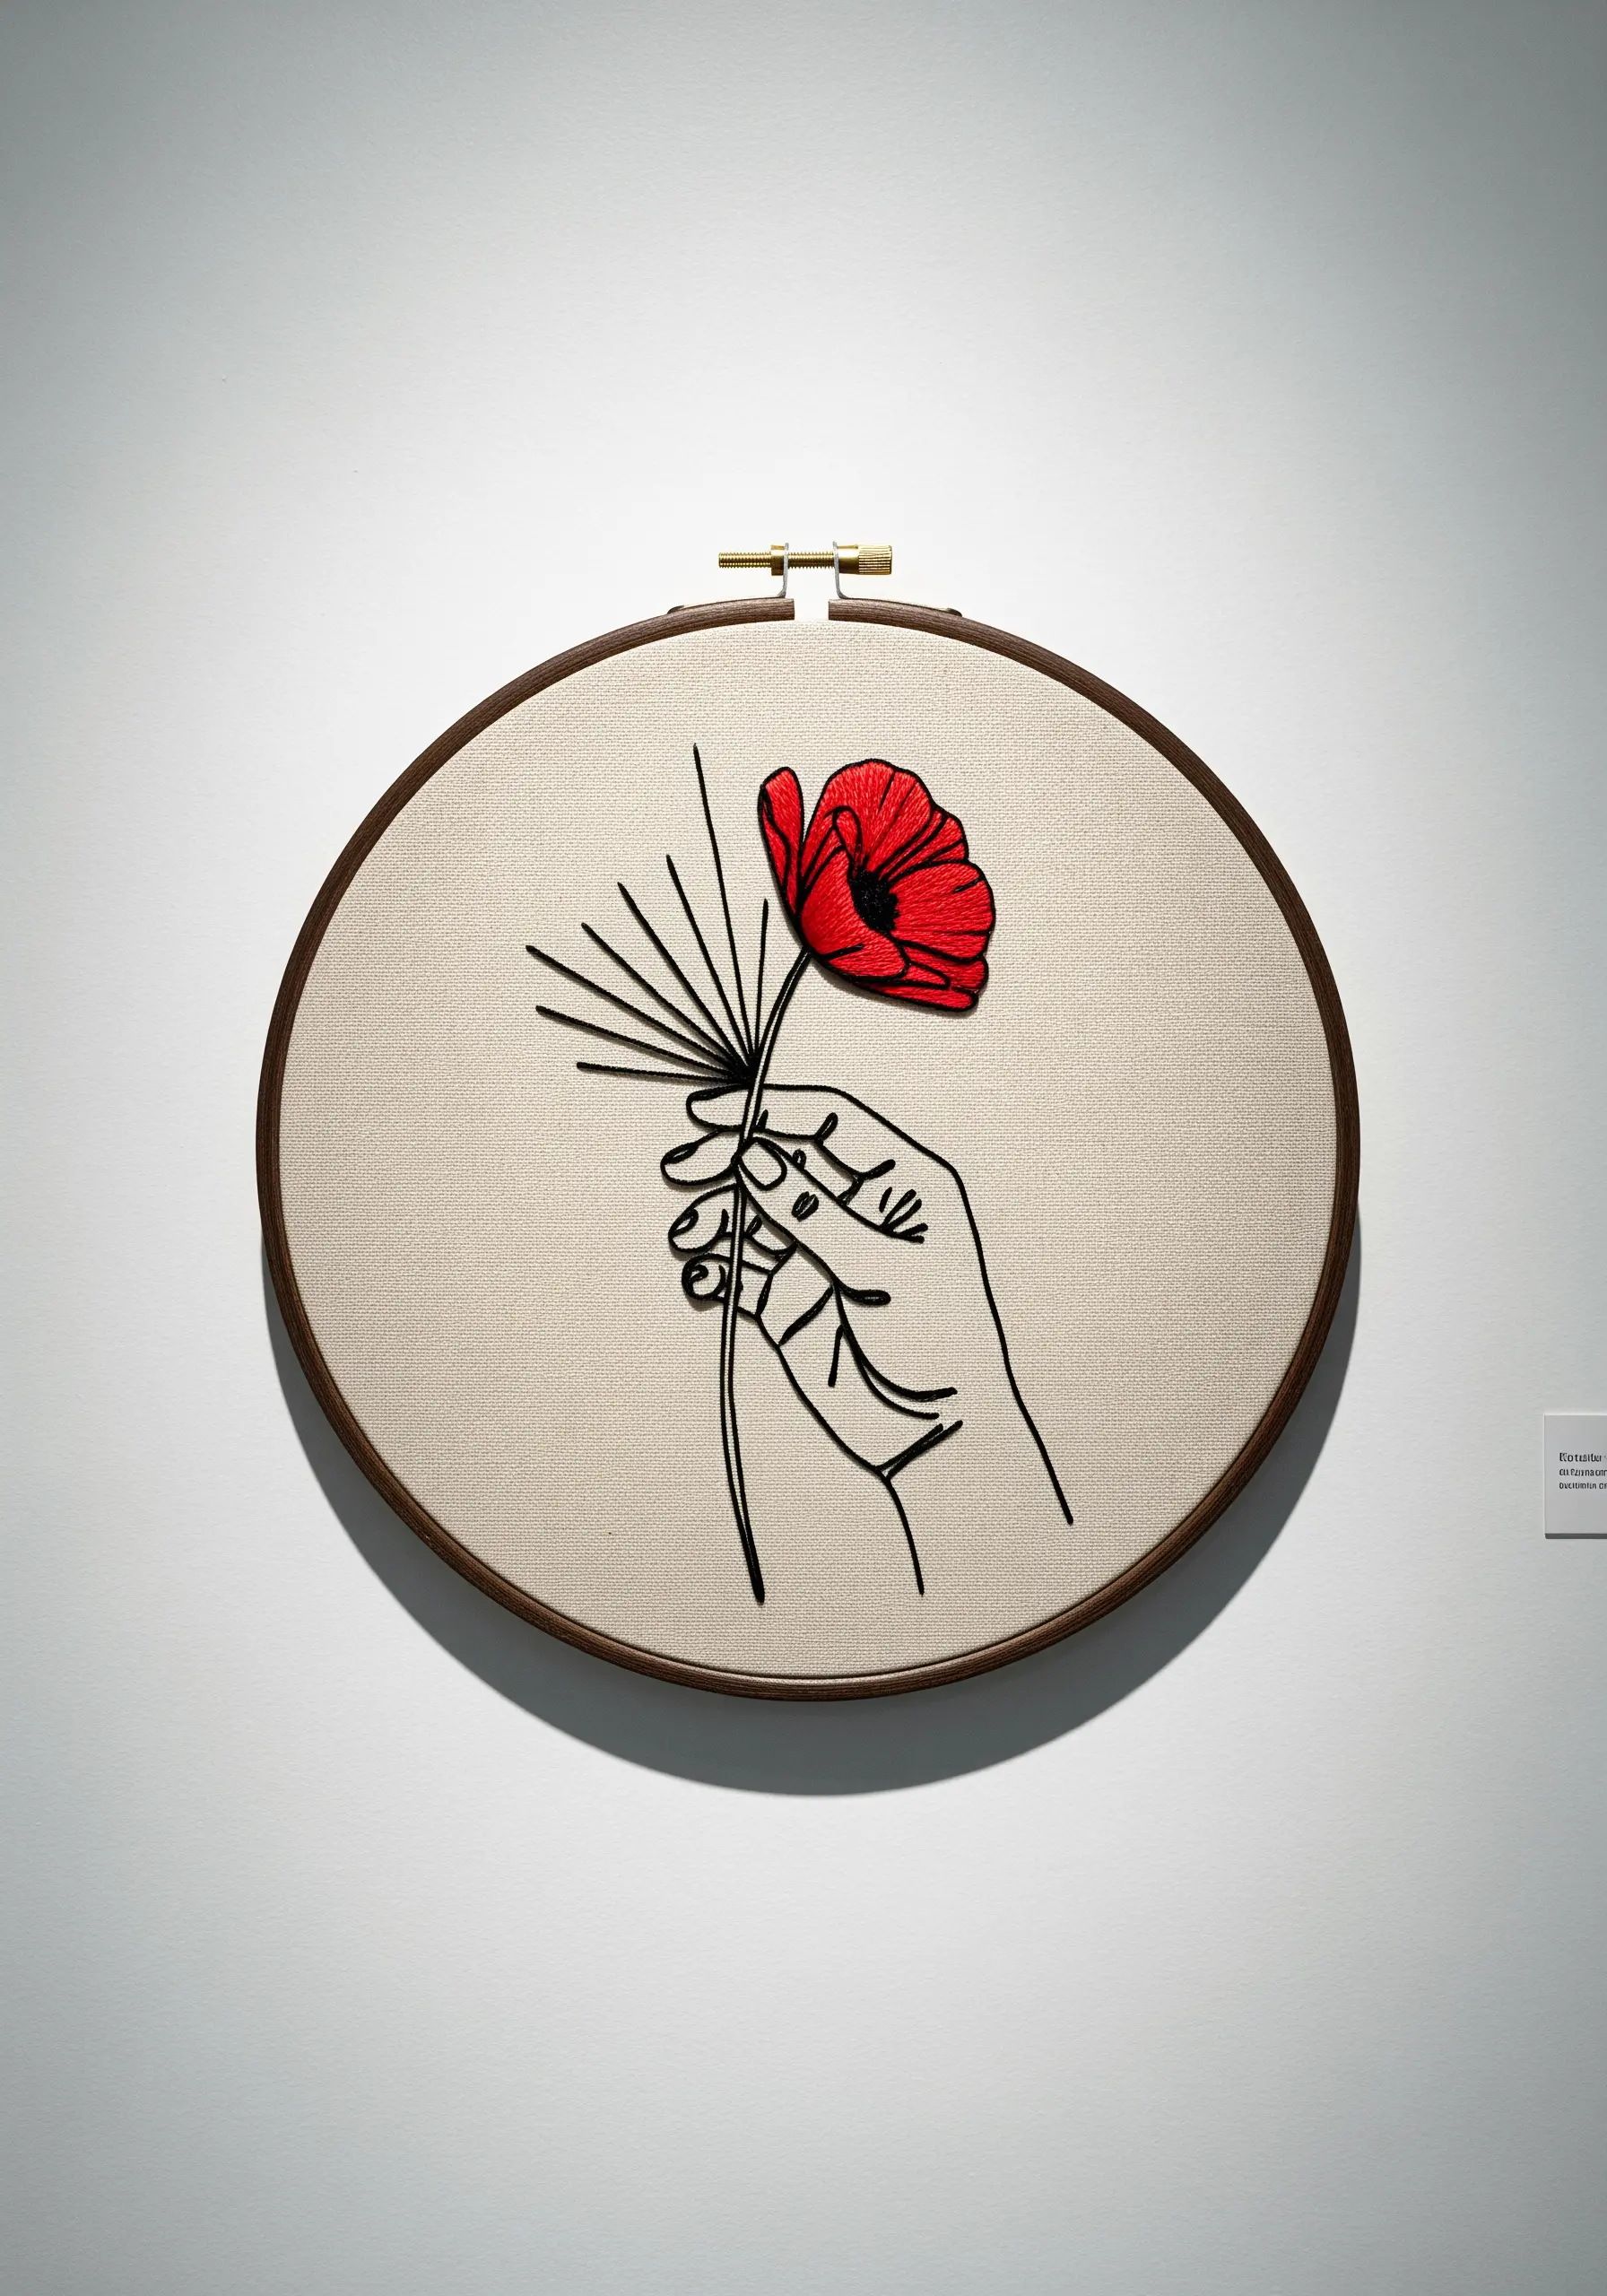
Create a powerful focal point by combining a densely filled element with clean, sharp line work.
Use a vibrant, six-strand floss for the poppy, filling it completely with a smooth satin stitch for a bold block of color.
For the hand, switch to a two-strand black thread and use a precise backstitch to maintain the crispness of the illustration.
The abstract straight lines can be stitched with a single strand, giving them a lighter, more energetic quality that contrasts beautifully with the solid flower.
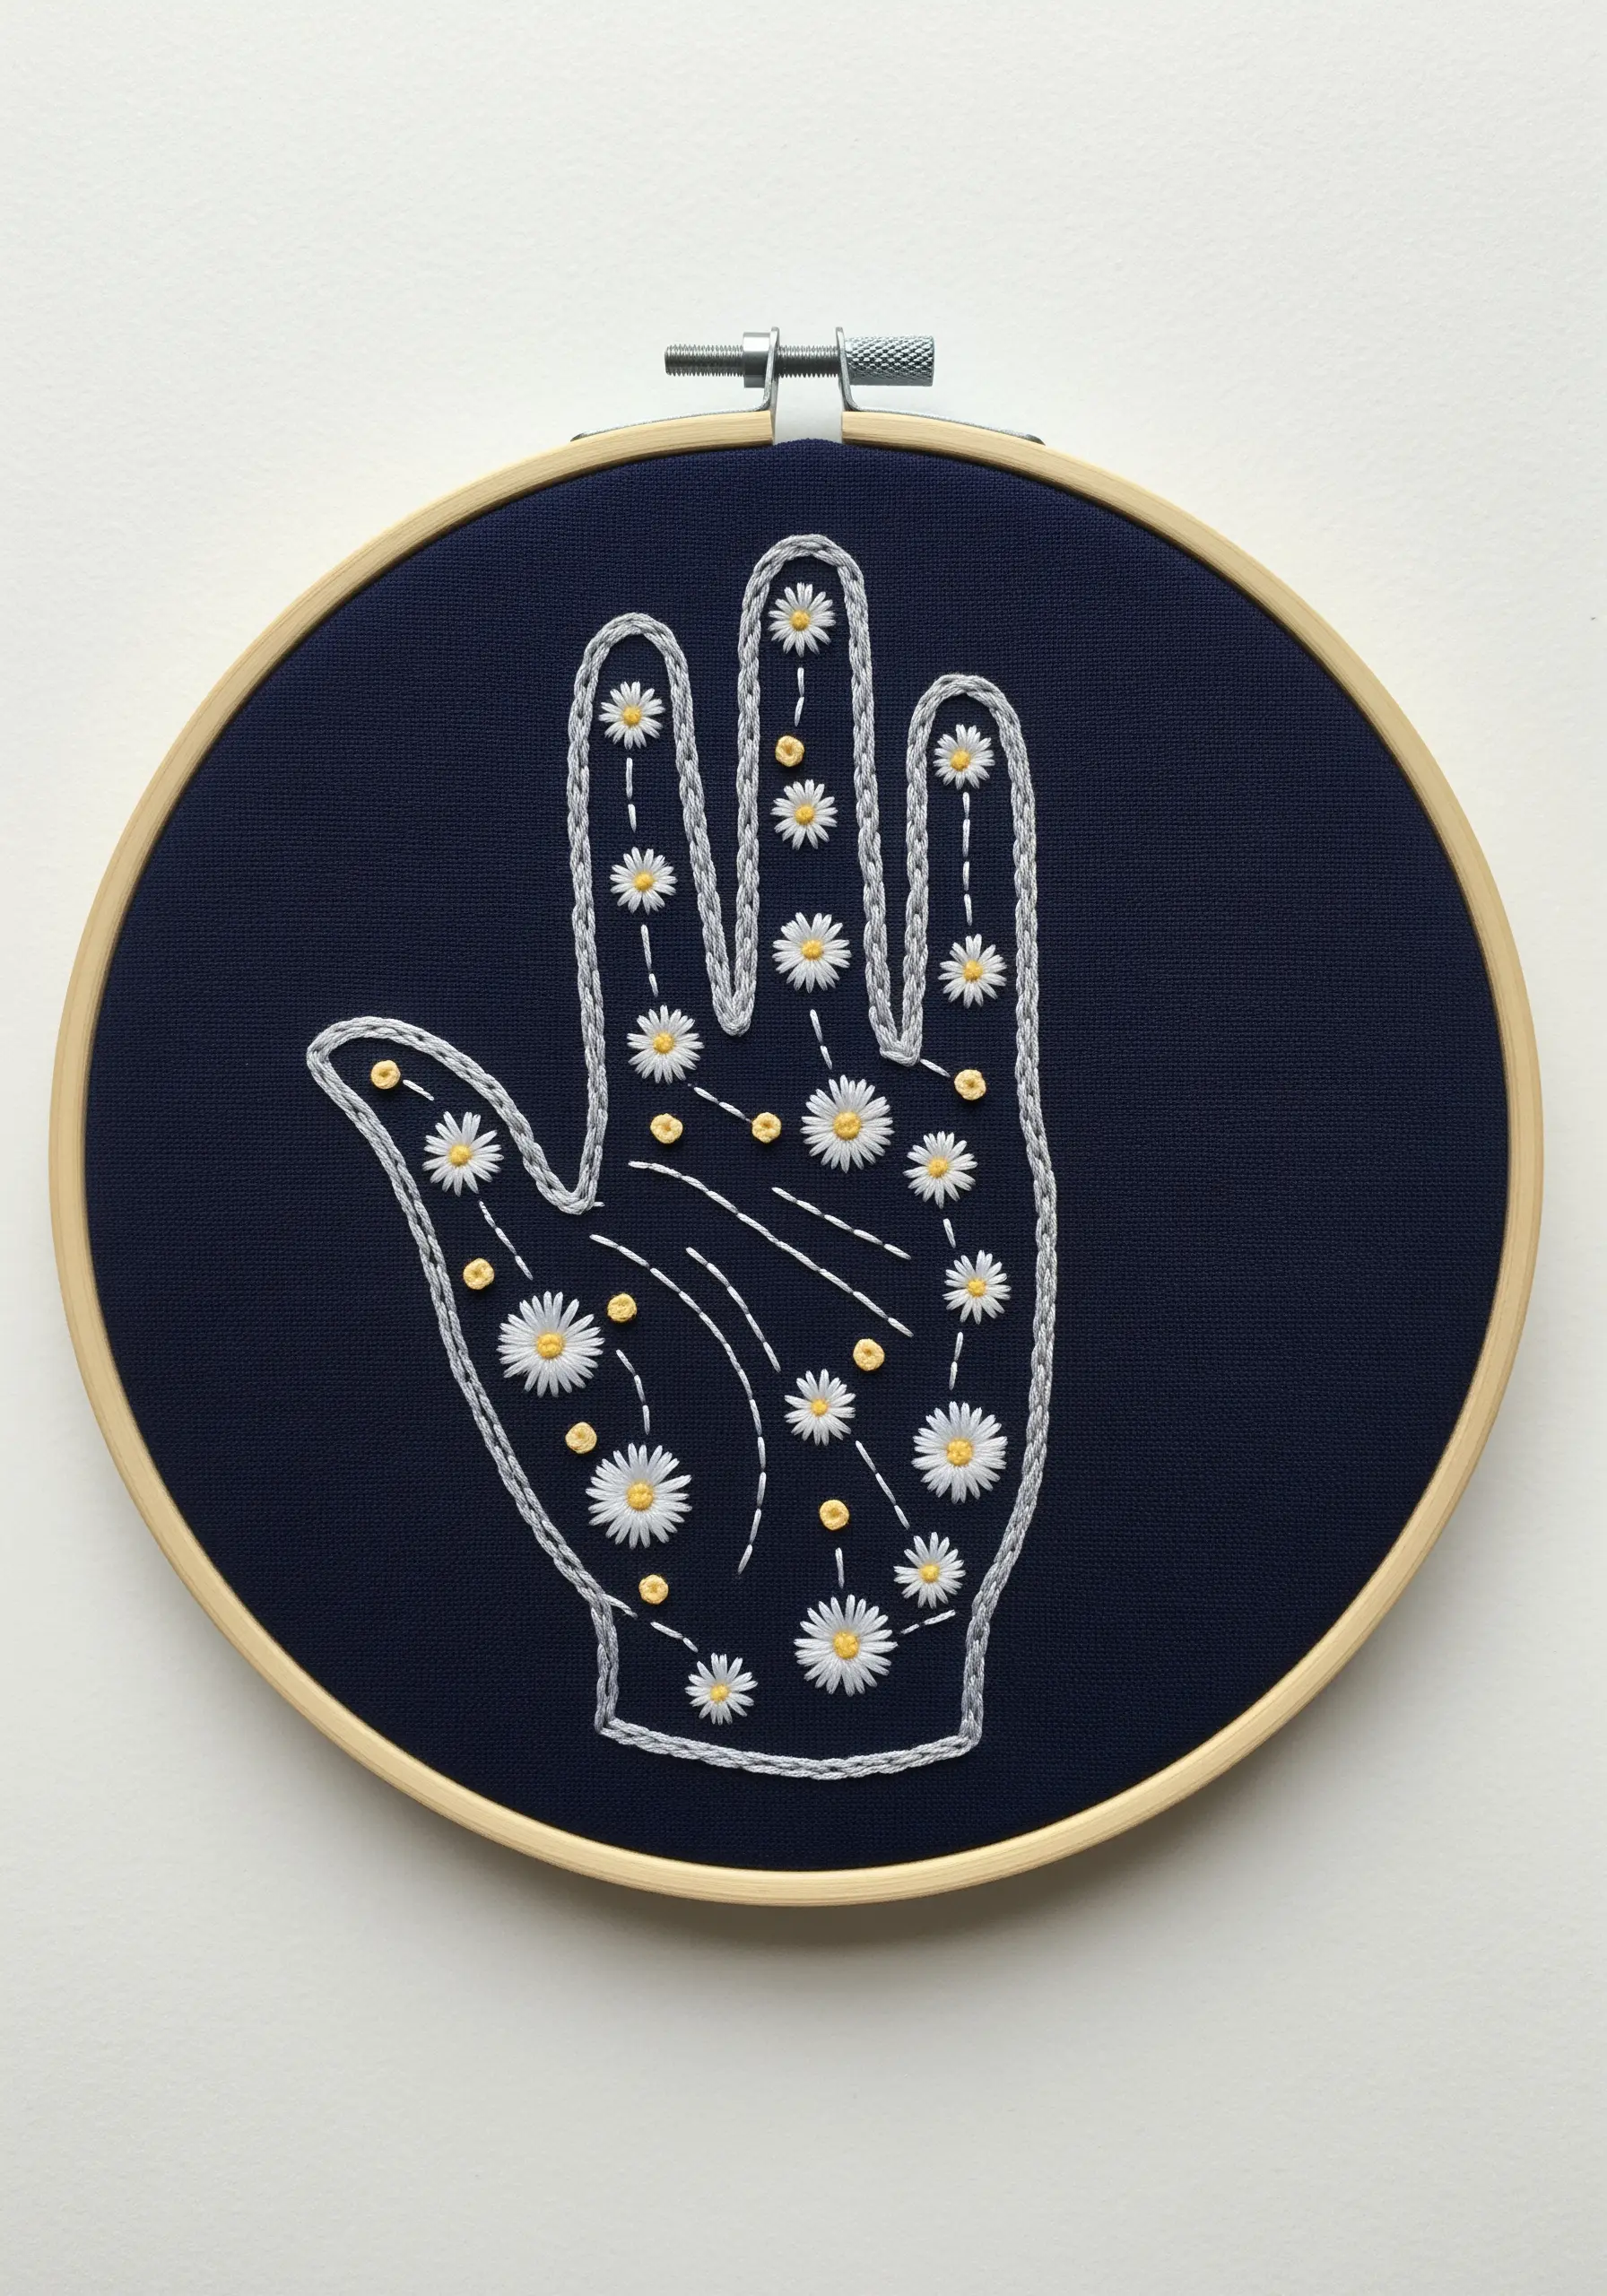
2. Capture Ephemeral Motion on a Dark Canvas

Stitching on dark fabric instantly creates drama and makes light-colored threads pop with graphic intensity.
Use a crisp white thread on a deep navy cotton or linen for maximum visual impact.
Work the hands in a simple two-strand backstitch for clarity.
For the delicate dandelion seeds, use a single strand of floss for the stems and form the fluff with tiny detached chain stitches, which keeps them looking light and airy as they float away.
3. Weave Tactile Dimension with French Knots
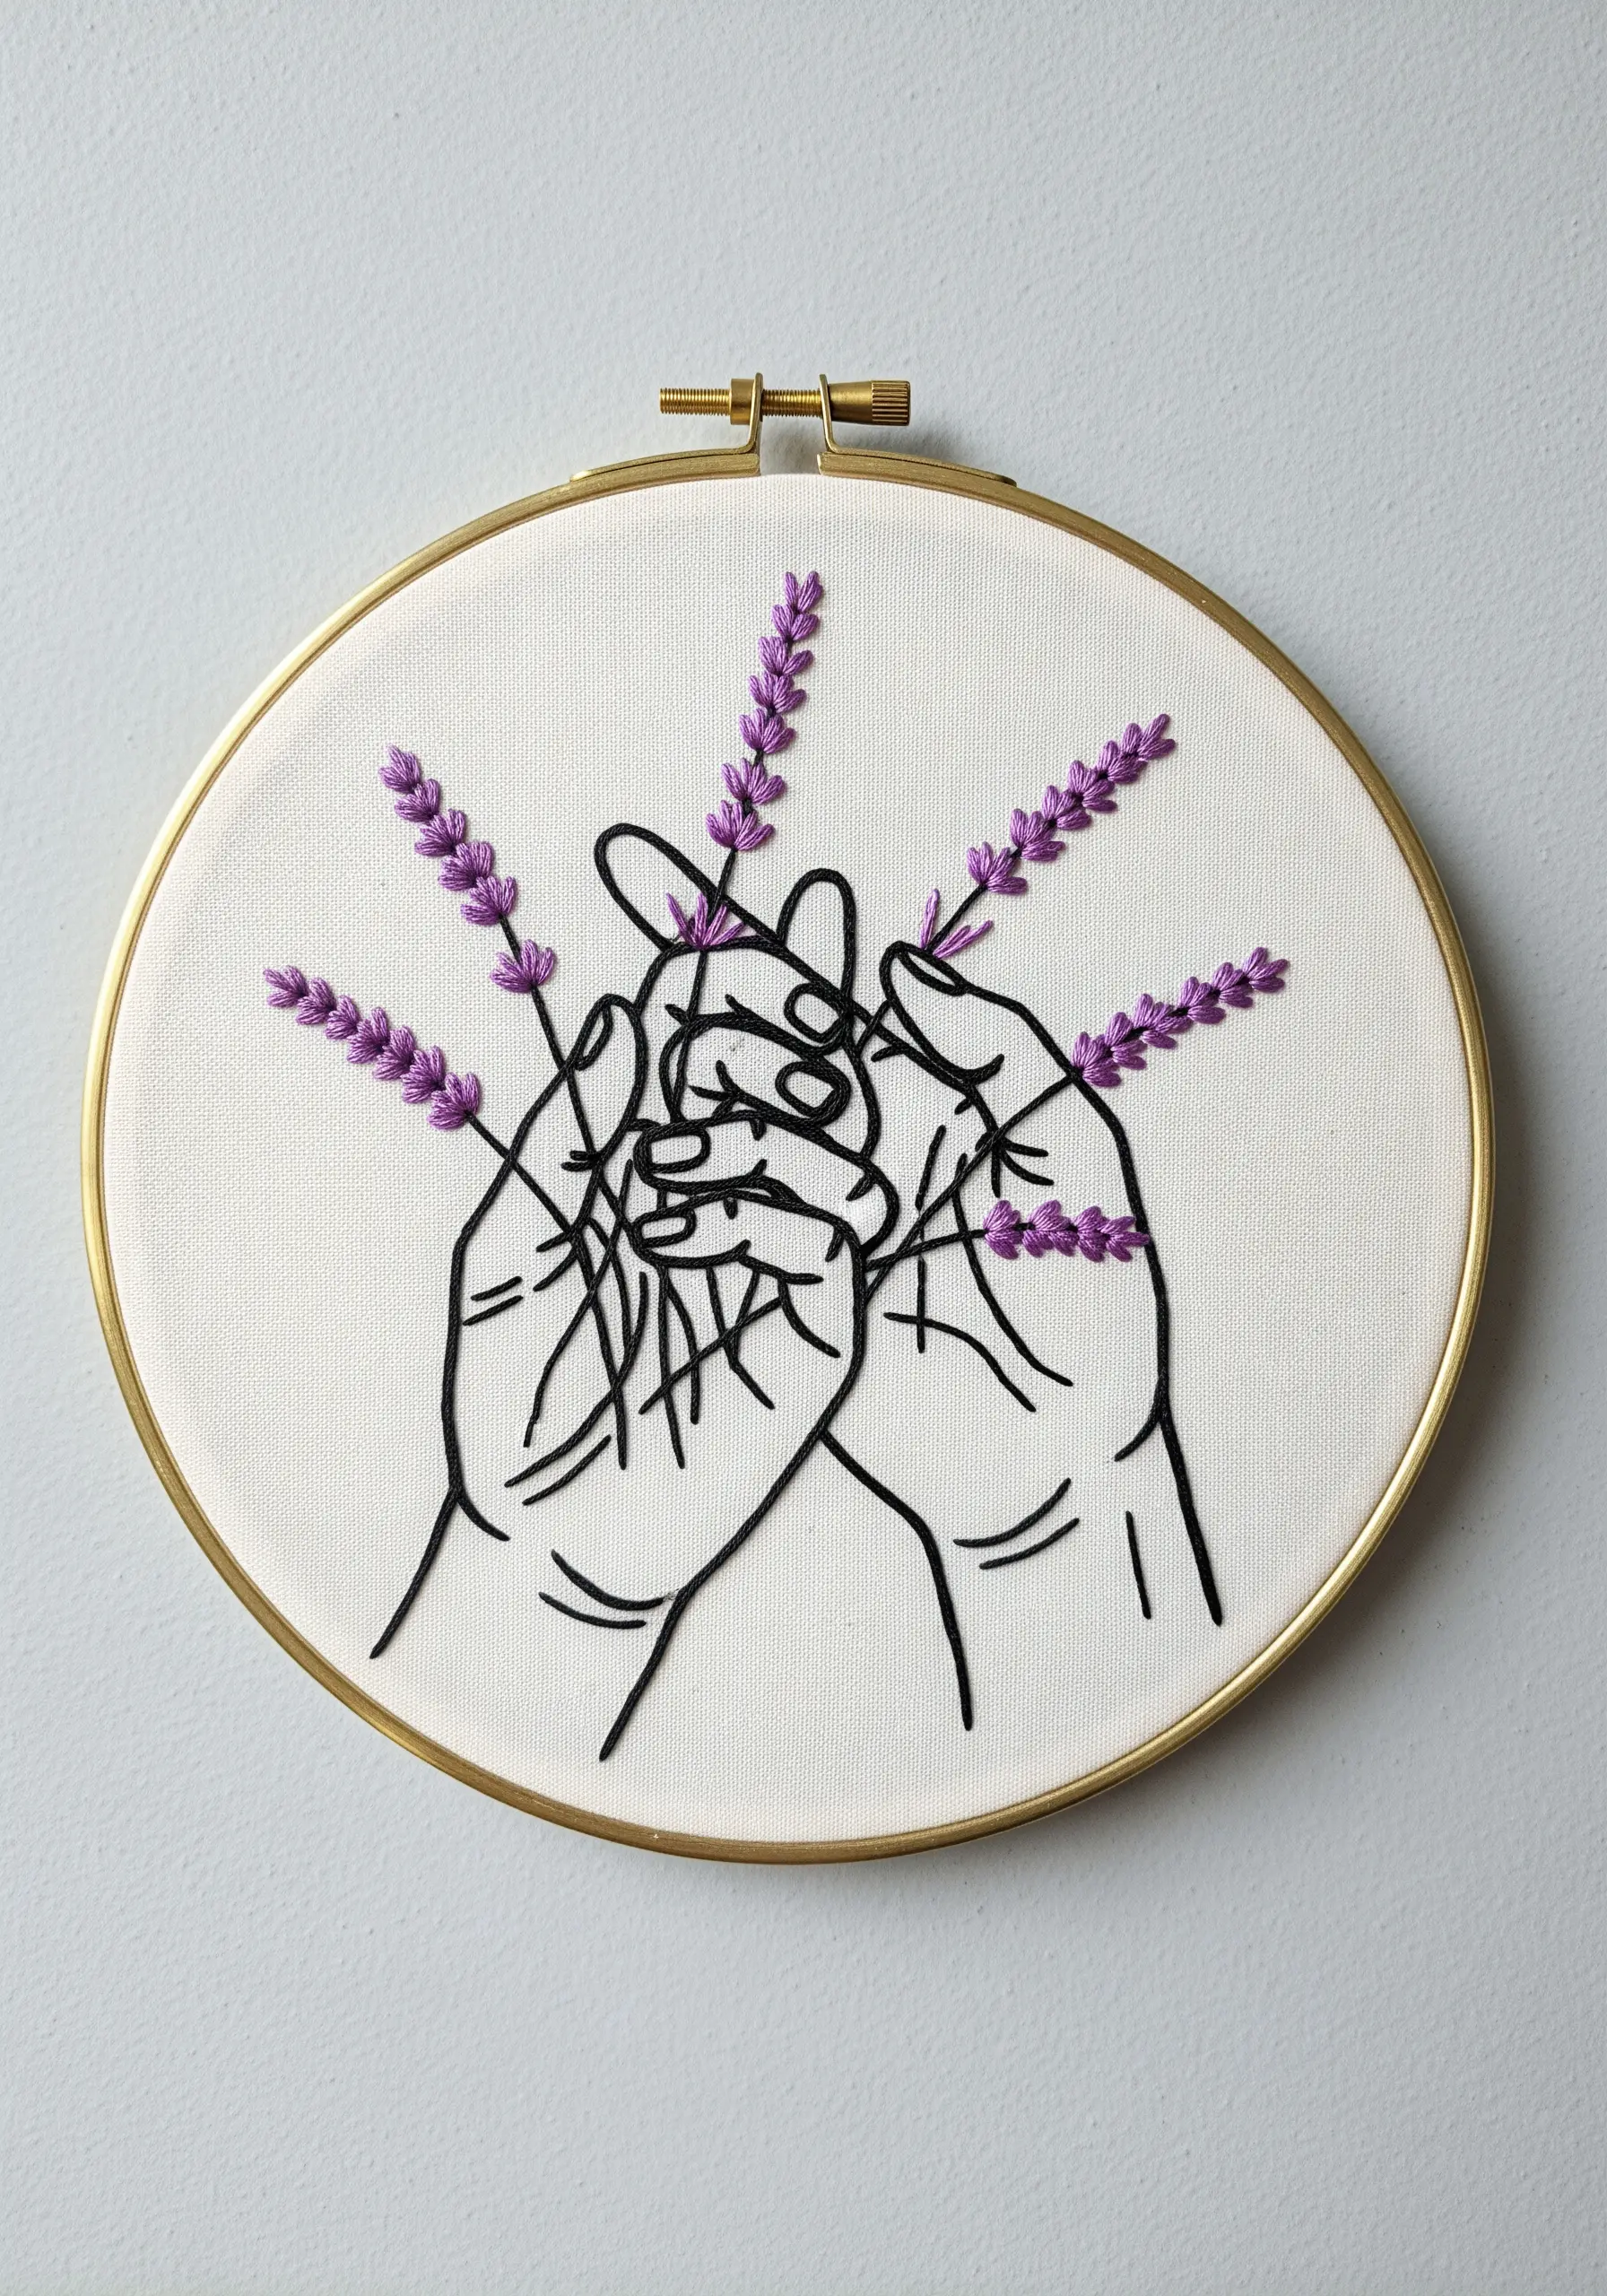
Introduce a textural element that invites both sight and touch by pairing smooth lines with dimensional knots.
Outline the intertwined hands with a clean three-strand backstitch for definition.
For the lavender, use a simple stem stitch for the stalks and then build the blossoms with tightly packed French knots.
By slightly varying the number of wraps for each knot, you can give the lavender a more organic, textured, and realistic appearance.
4. Master the Elegance of a Continuous Line

This design celebrates the beauty of a single, unbroken line, creating a sophisticated, illustrative feel.
To achieve a smooth, rope-like finish that flows seamlessly, use a whipped backstitch or a stem stitch.
Before you begin, lightly trace your stitching path to plan how the thread will travel under the fabric to emerge at the next point without breaking the visual line.
Using three strands of black floss on a bright white canvas gives the final piece a bold, graphic quality.
5. Fuse Geometric Precision with Organic Florals
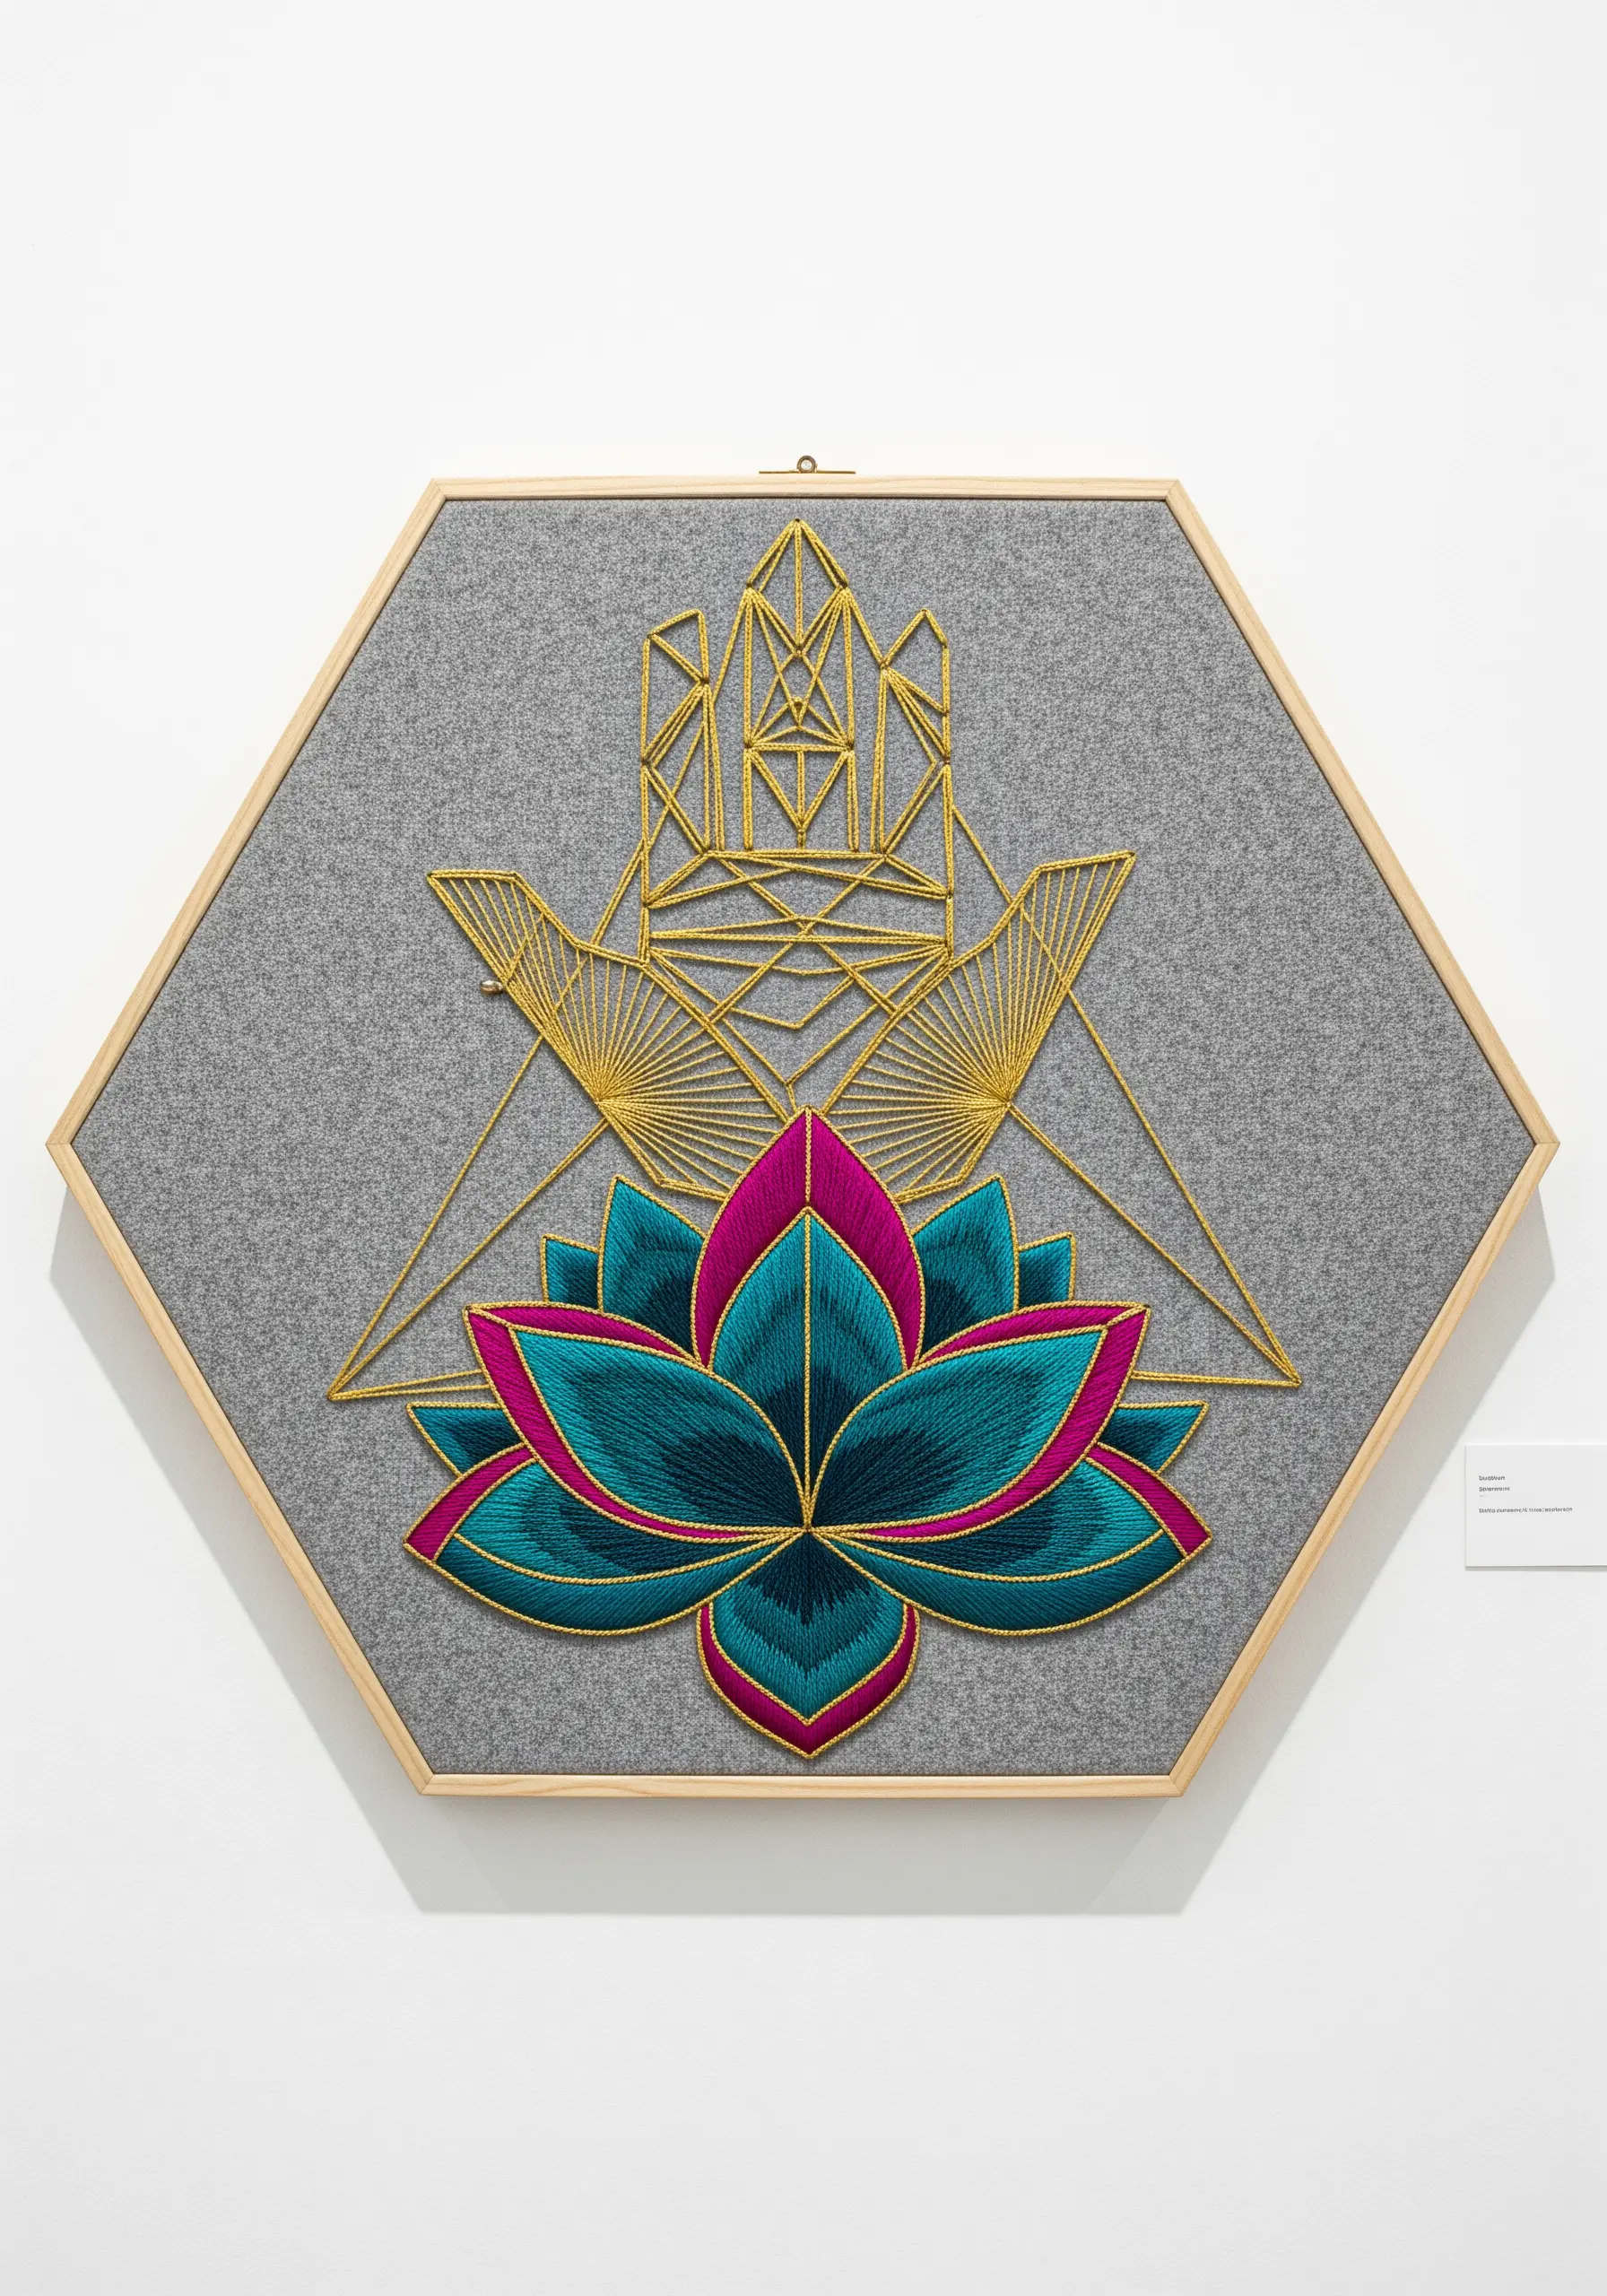
Create a striking modern statement by juxtaposing sharp, geometric forms with soft, blended botanicals.
Use a sturdy fabric like felt to support the dense stitching and prevent puckering.
Fill the lotus petals with a long-and-short stitch, blending two or more colors for a painterly effect.
For the geometric hand outlines, use a heavier thread like pearl cotton to ensure the lines are bold, clean, and provide a strong contrast to the filled flower.
6. Create Sculptural Petals with the Woven Wheel Stitch
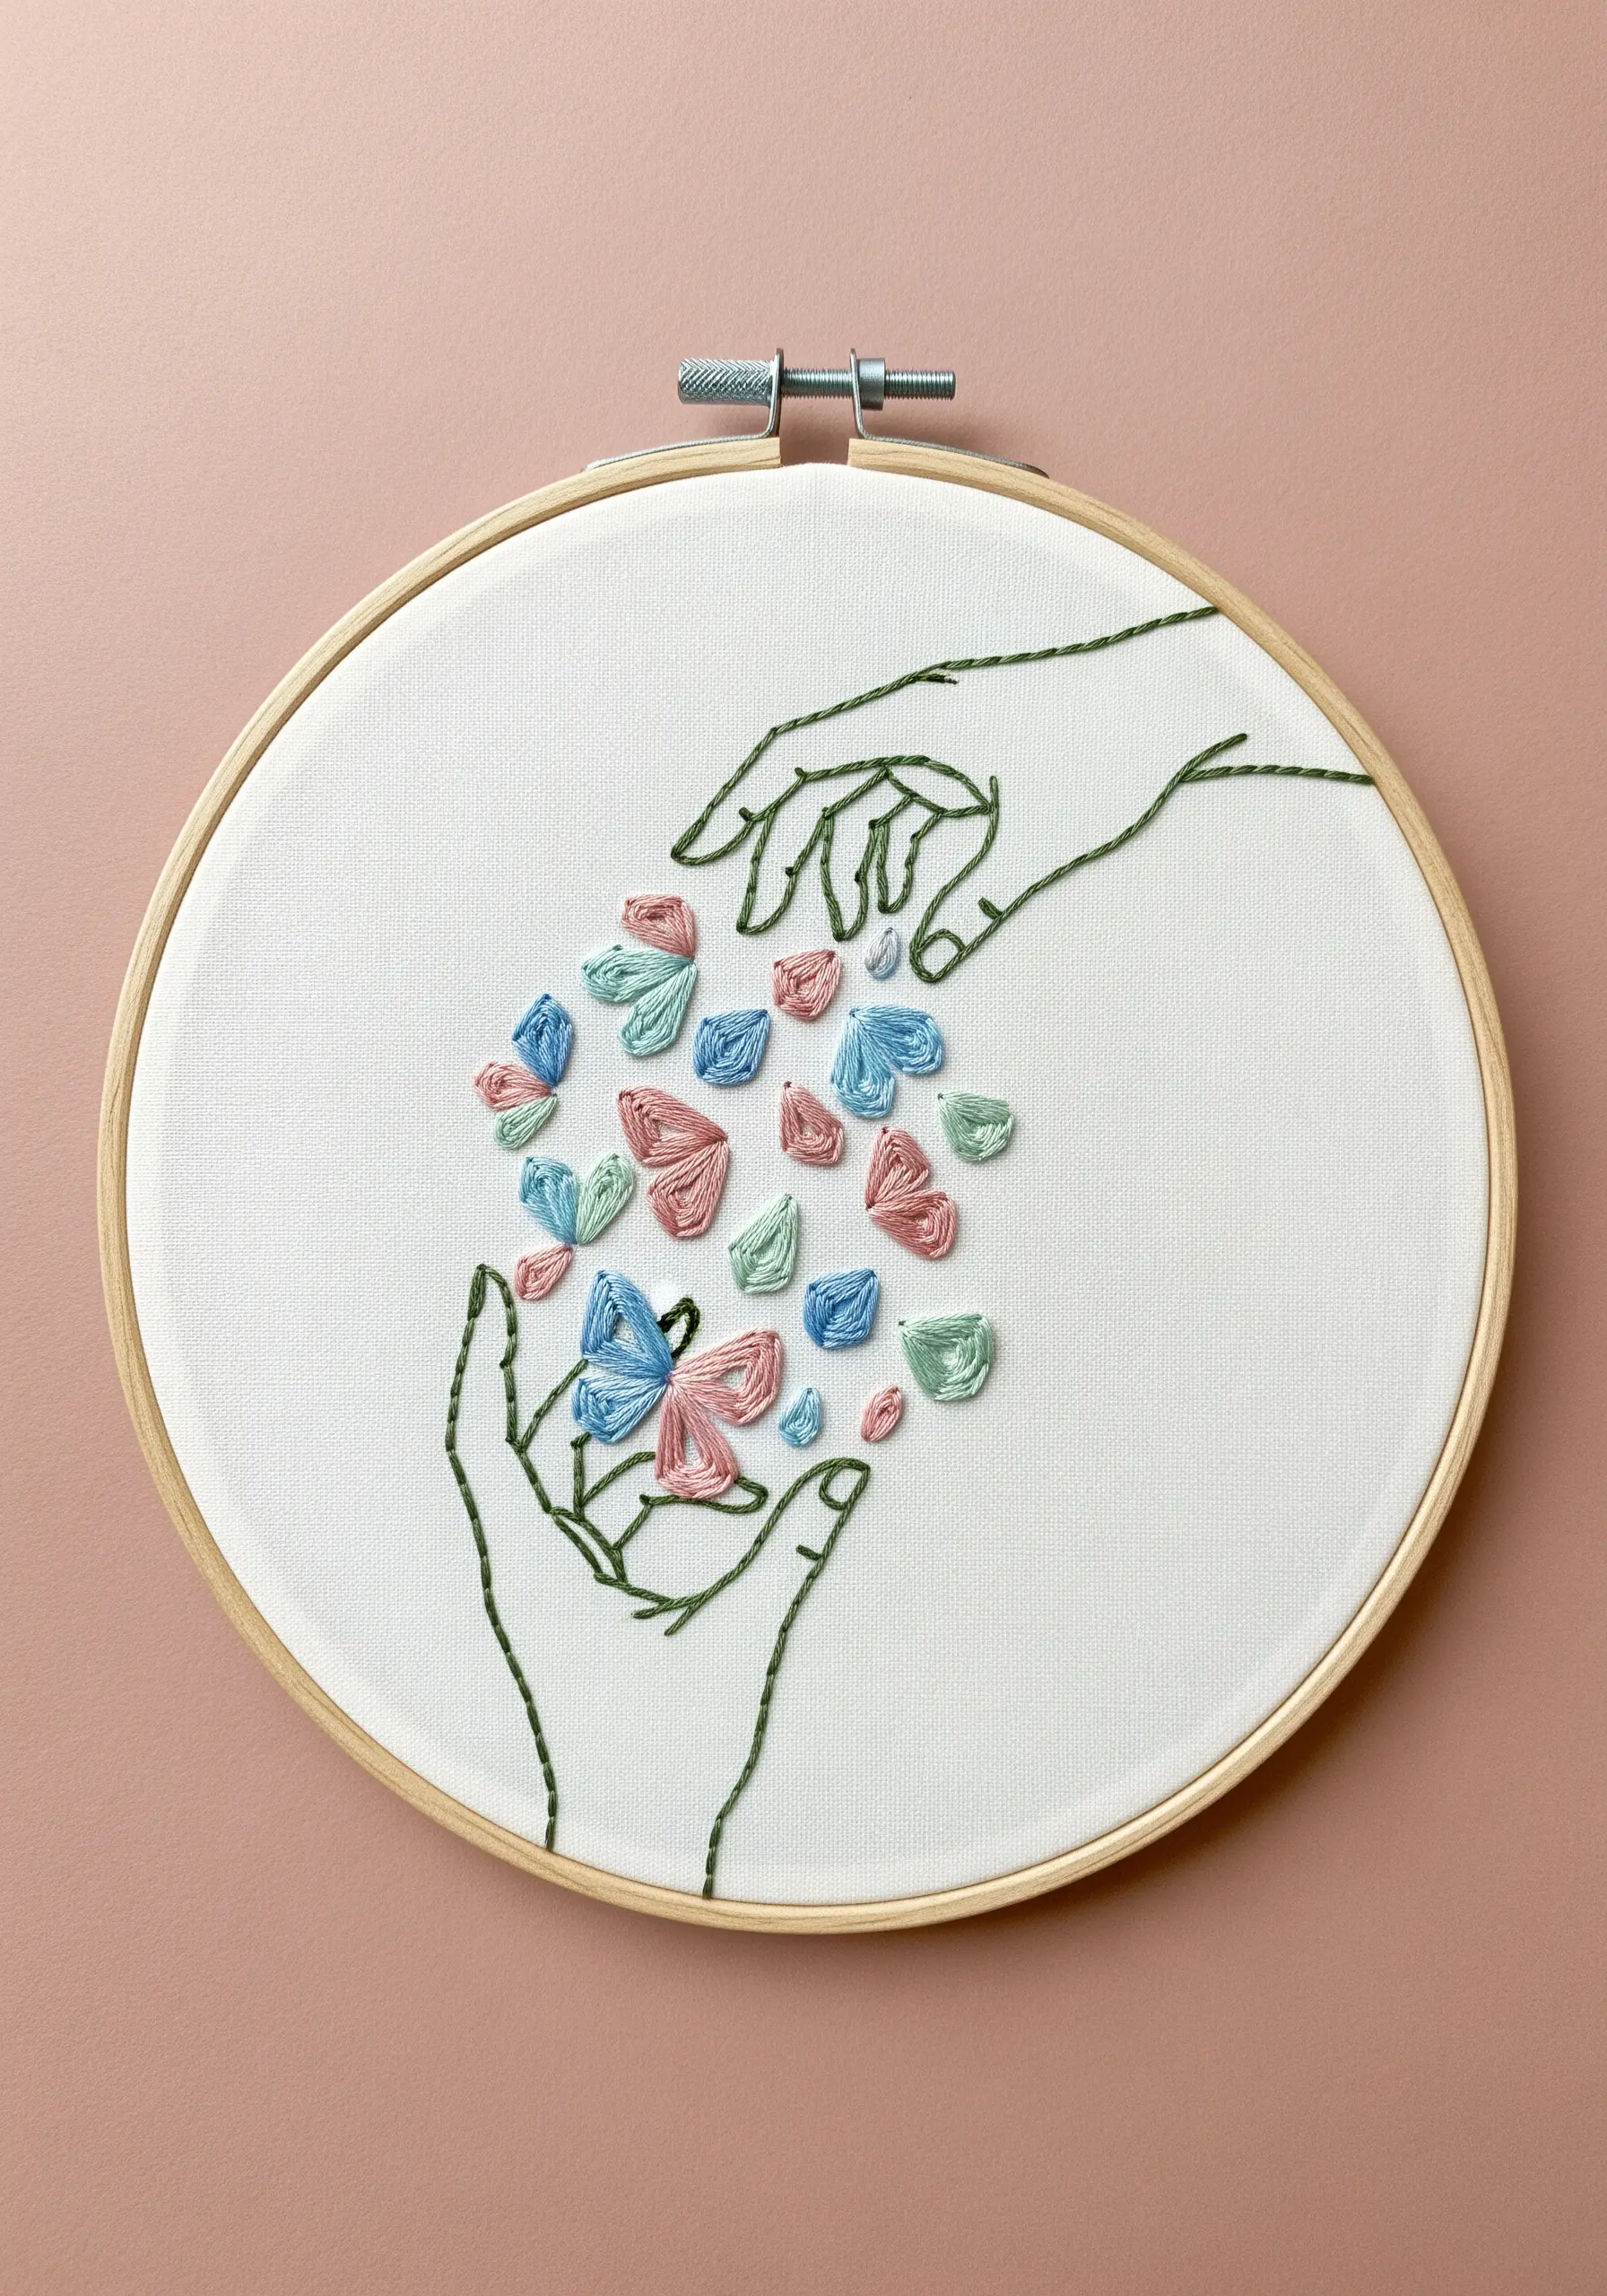
Give your design a subtle 3D effect by using a stitch that raises the petals off the fabric surface.
After outlining the hands with a simple backstitch, create the falling petals using a modified woven wheel stitch.
Instead of a full circle, lay down just three or five straight-stitch “spokes” in a petal shape, then weave your thread over and under them.
This technique gives each petal a raised, textural quality, making them feel like they are truly tumbling through the air.
7. Harness the Power of a Minimalist Focal Point
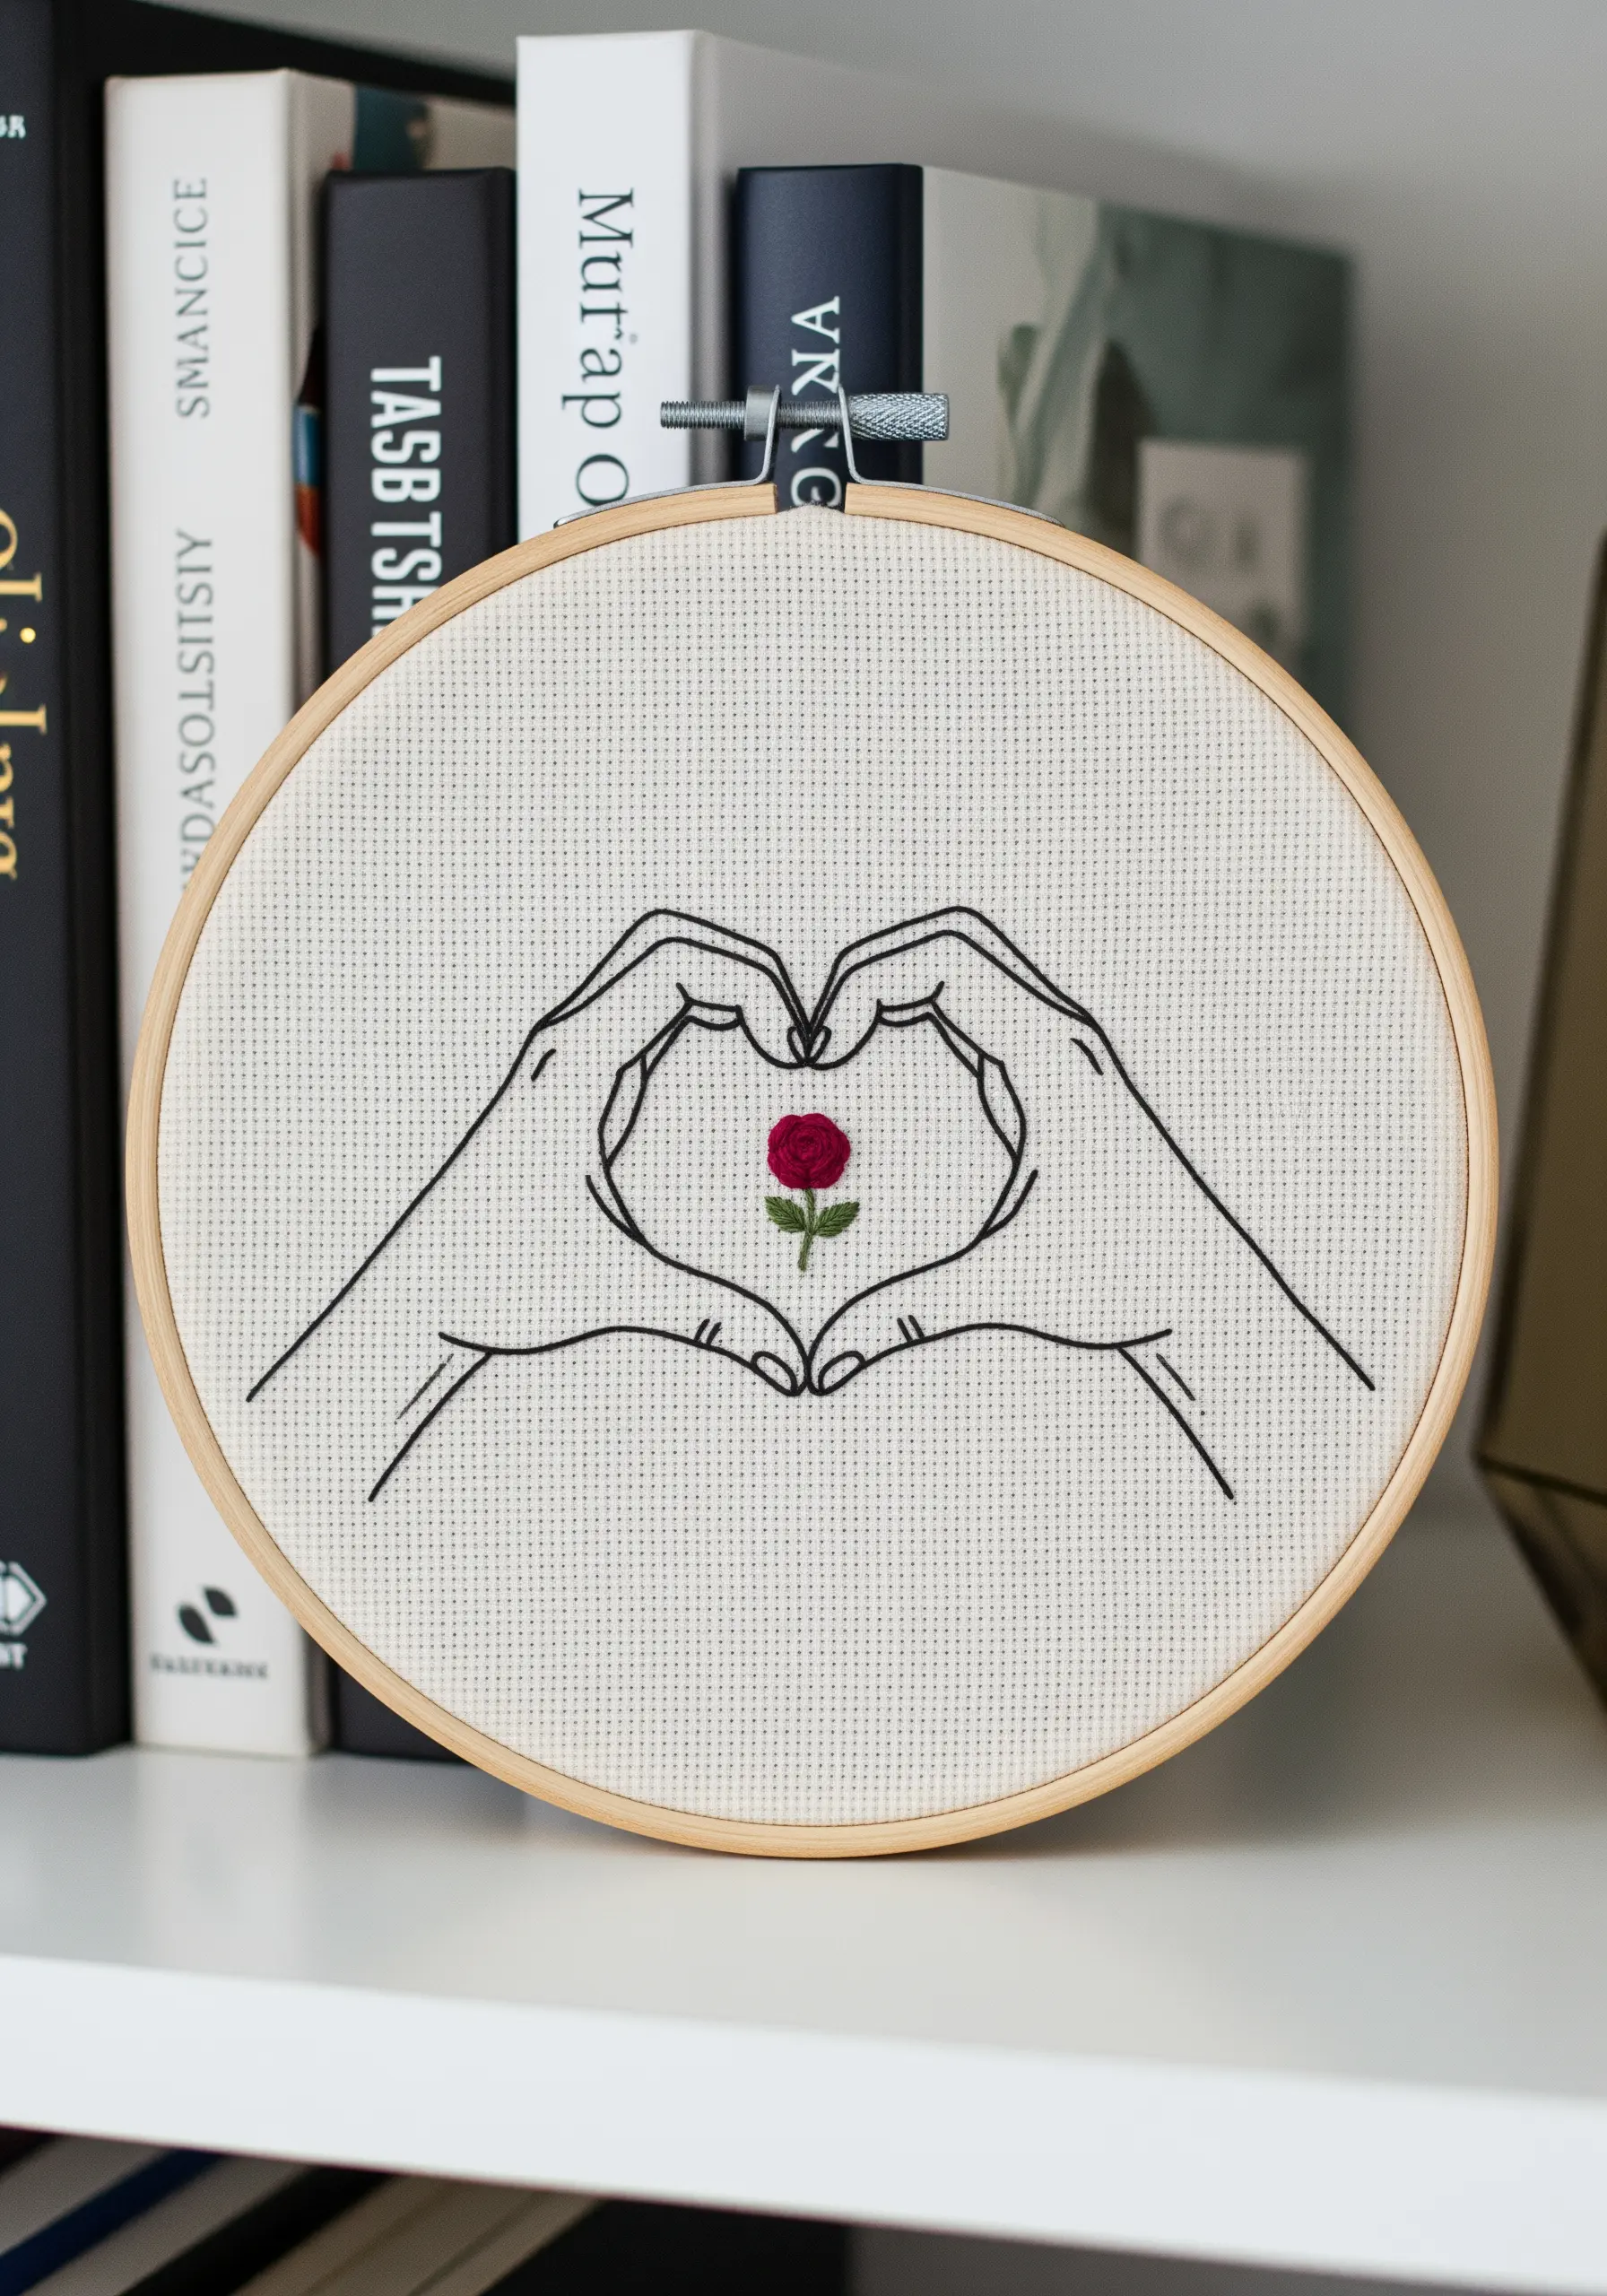
The elegance of this design lies in its quiet confidence and masterful use of negative space.
Use a crisp two-strand backstitch for the hands, ensuring the lines are defined but not visually heavy.
For the central rose, employ a woven wheel stitch for the bud to give it texture and presence.
This single, tiny pop of color and dimension draws the eye inward, transforming the surrounding empty fabric into an intentional, calming part of the composition.
8. Stitch Cascading Color with Gradient Shading
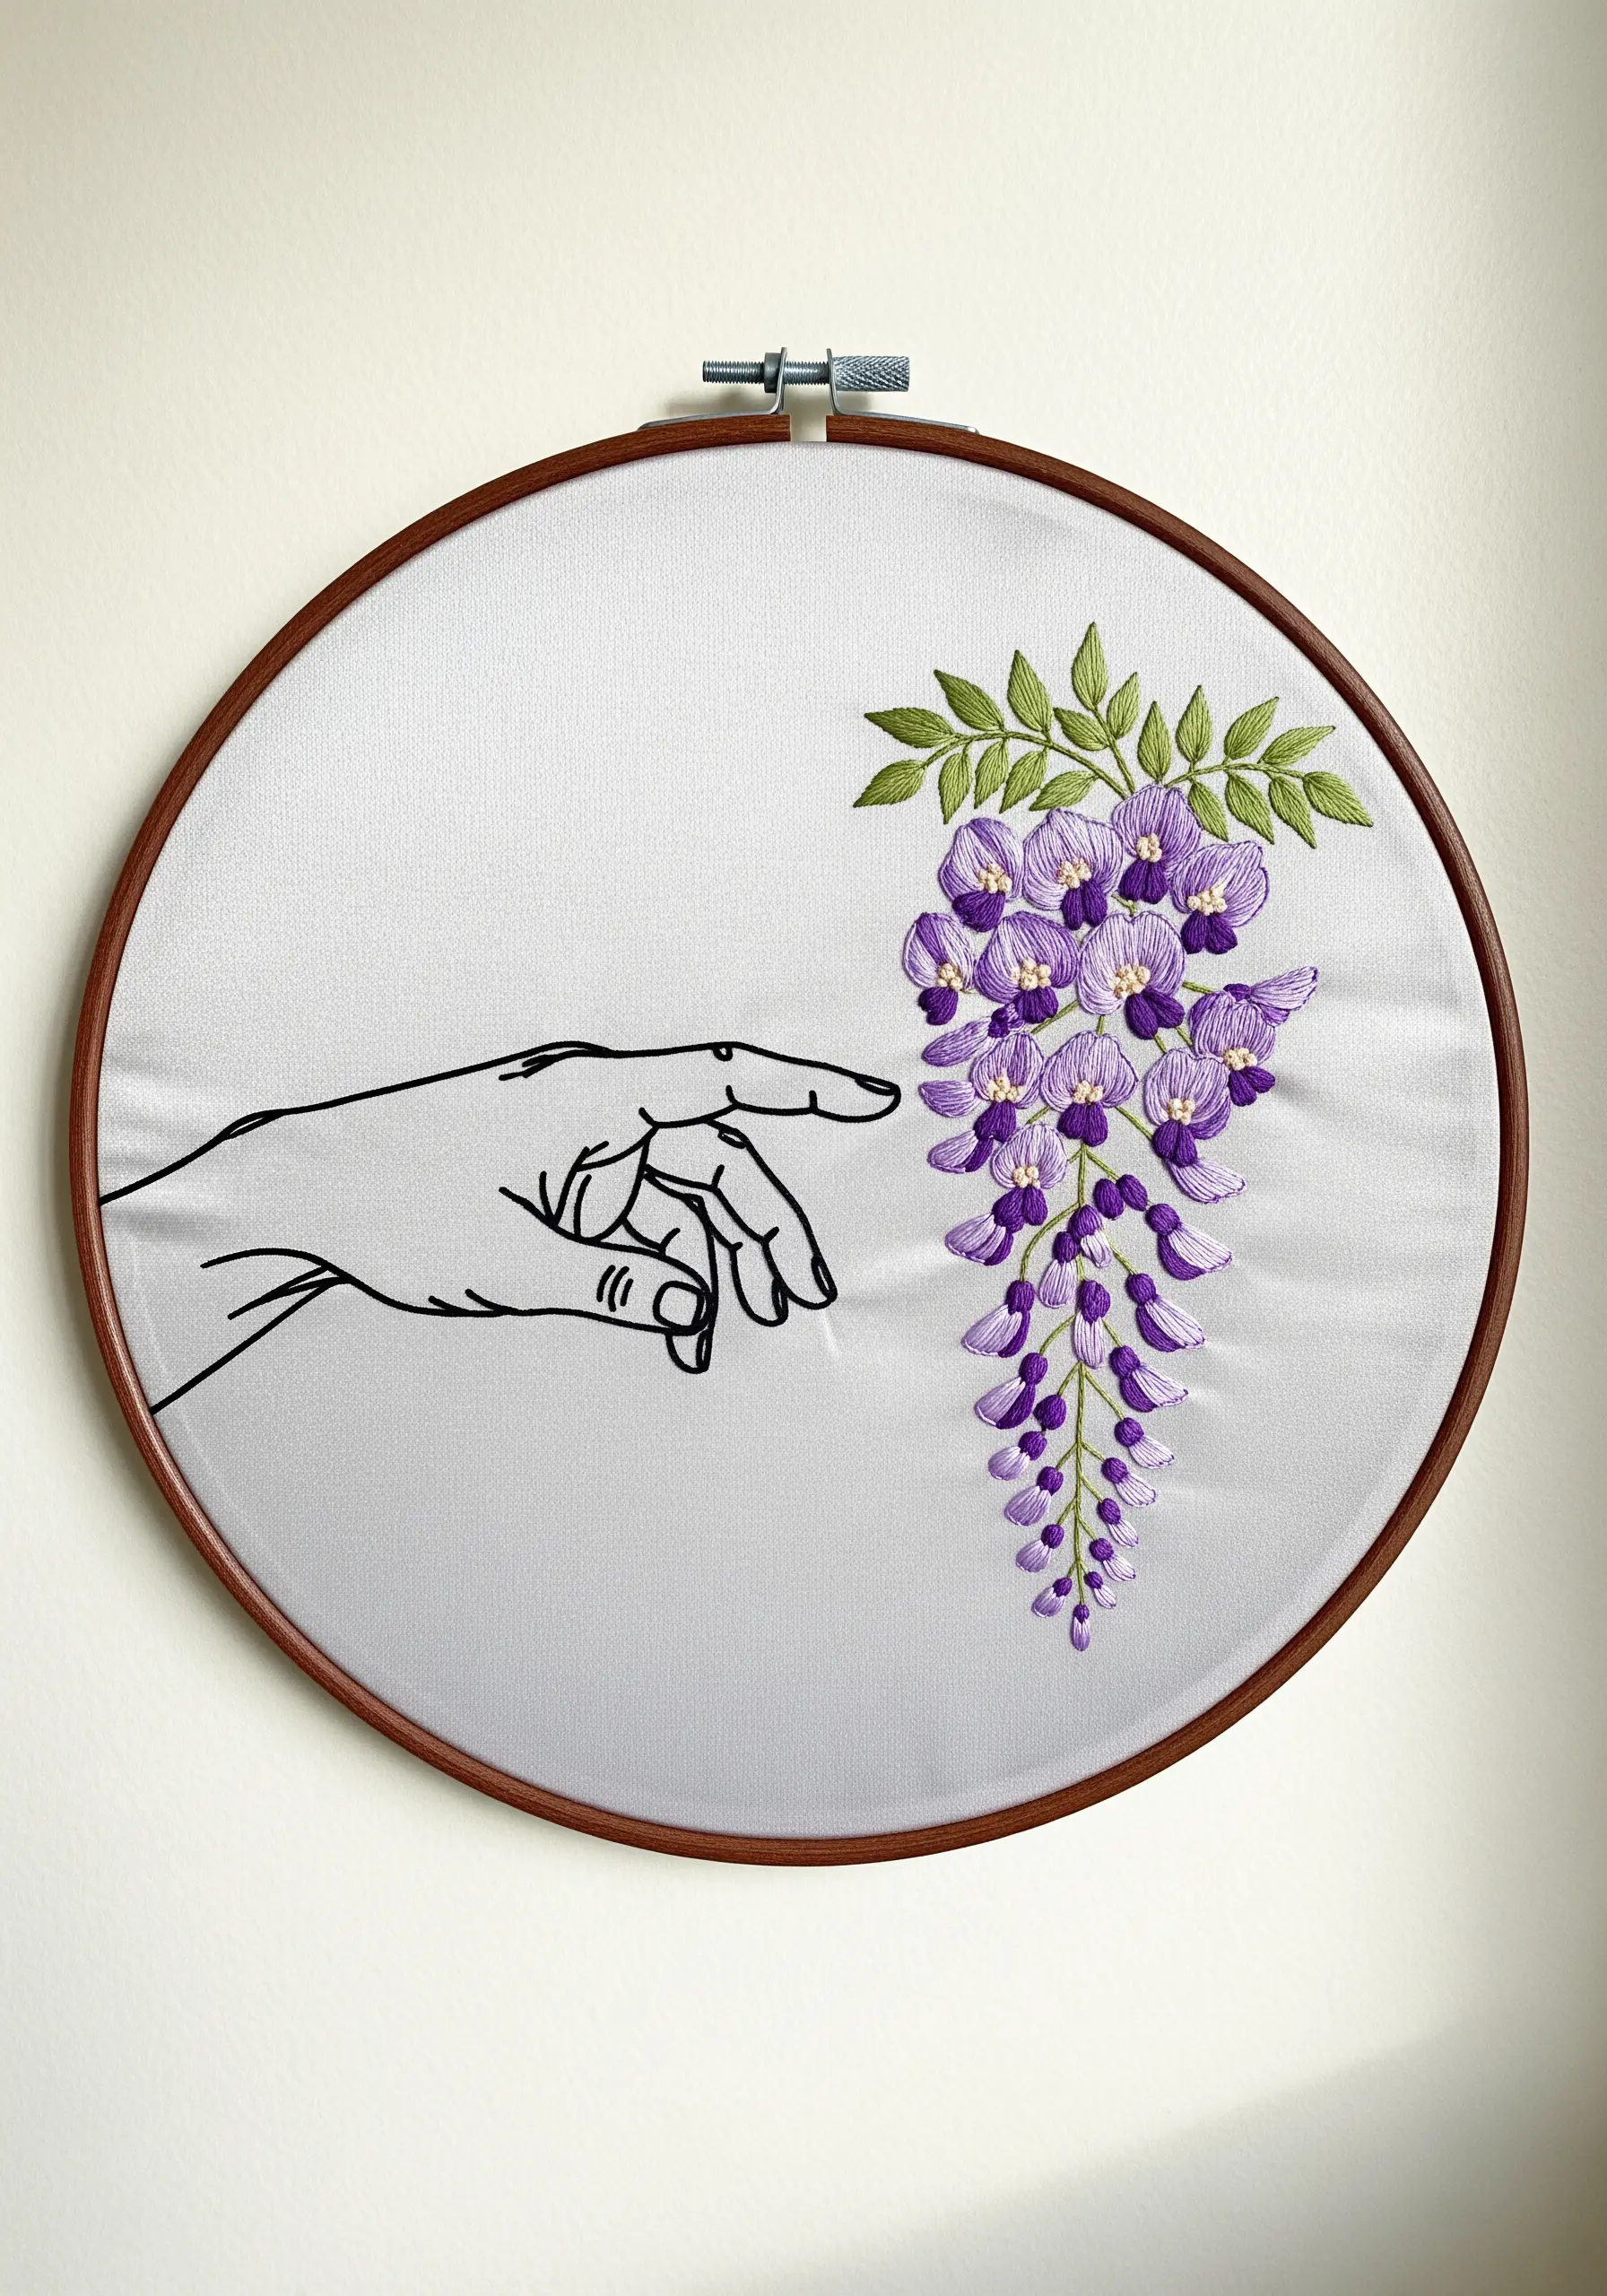
Bring your florals to life by blending multiple shades to create soft, realistic depth.
After stitching the hand with a clean backstitch, tackle the wisteria using a long-and-short stitch.
Select three or four shades of purple, from dark to light, and work from the top of each blossom downwards, blending the tones smoothly into one another.
This painterly gradient effect provides a stunning contrast to the stark black outline of the hand.
9. Tell a Story Across Two Hoops with a Diptych Design
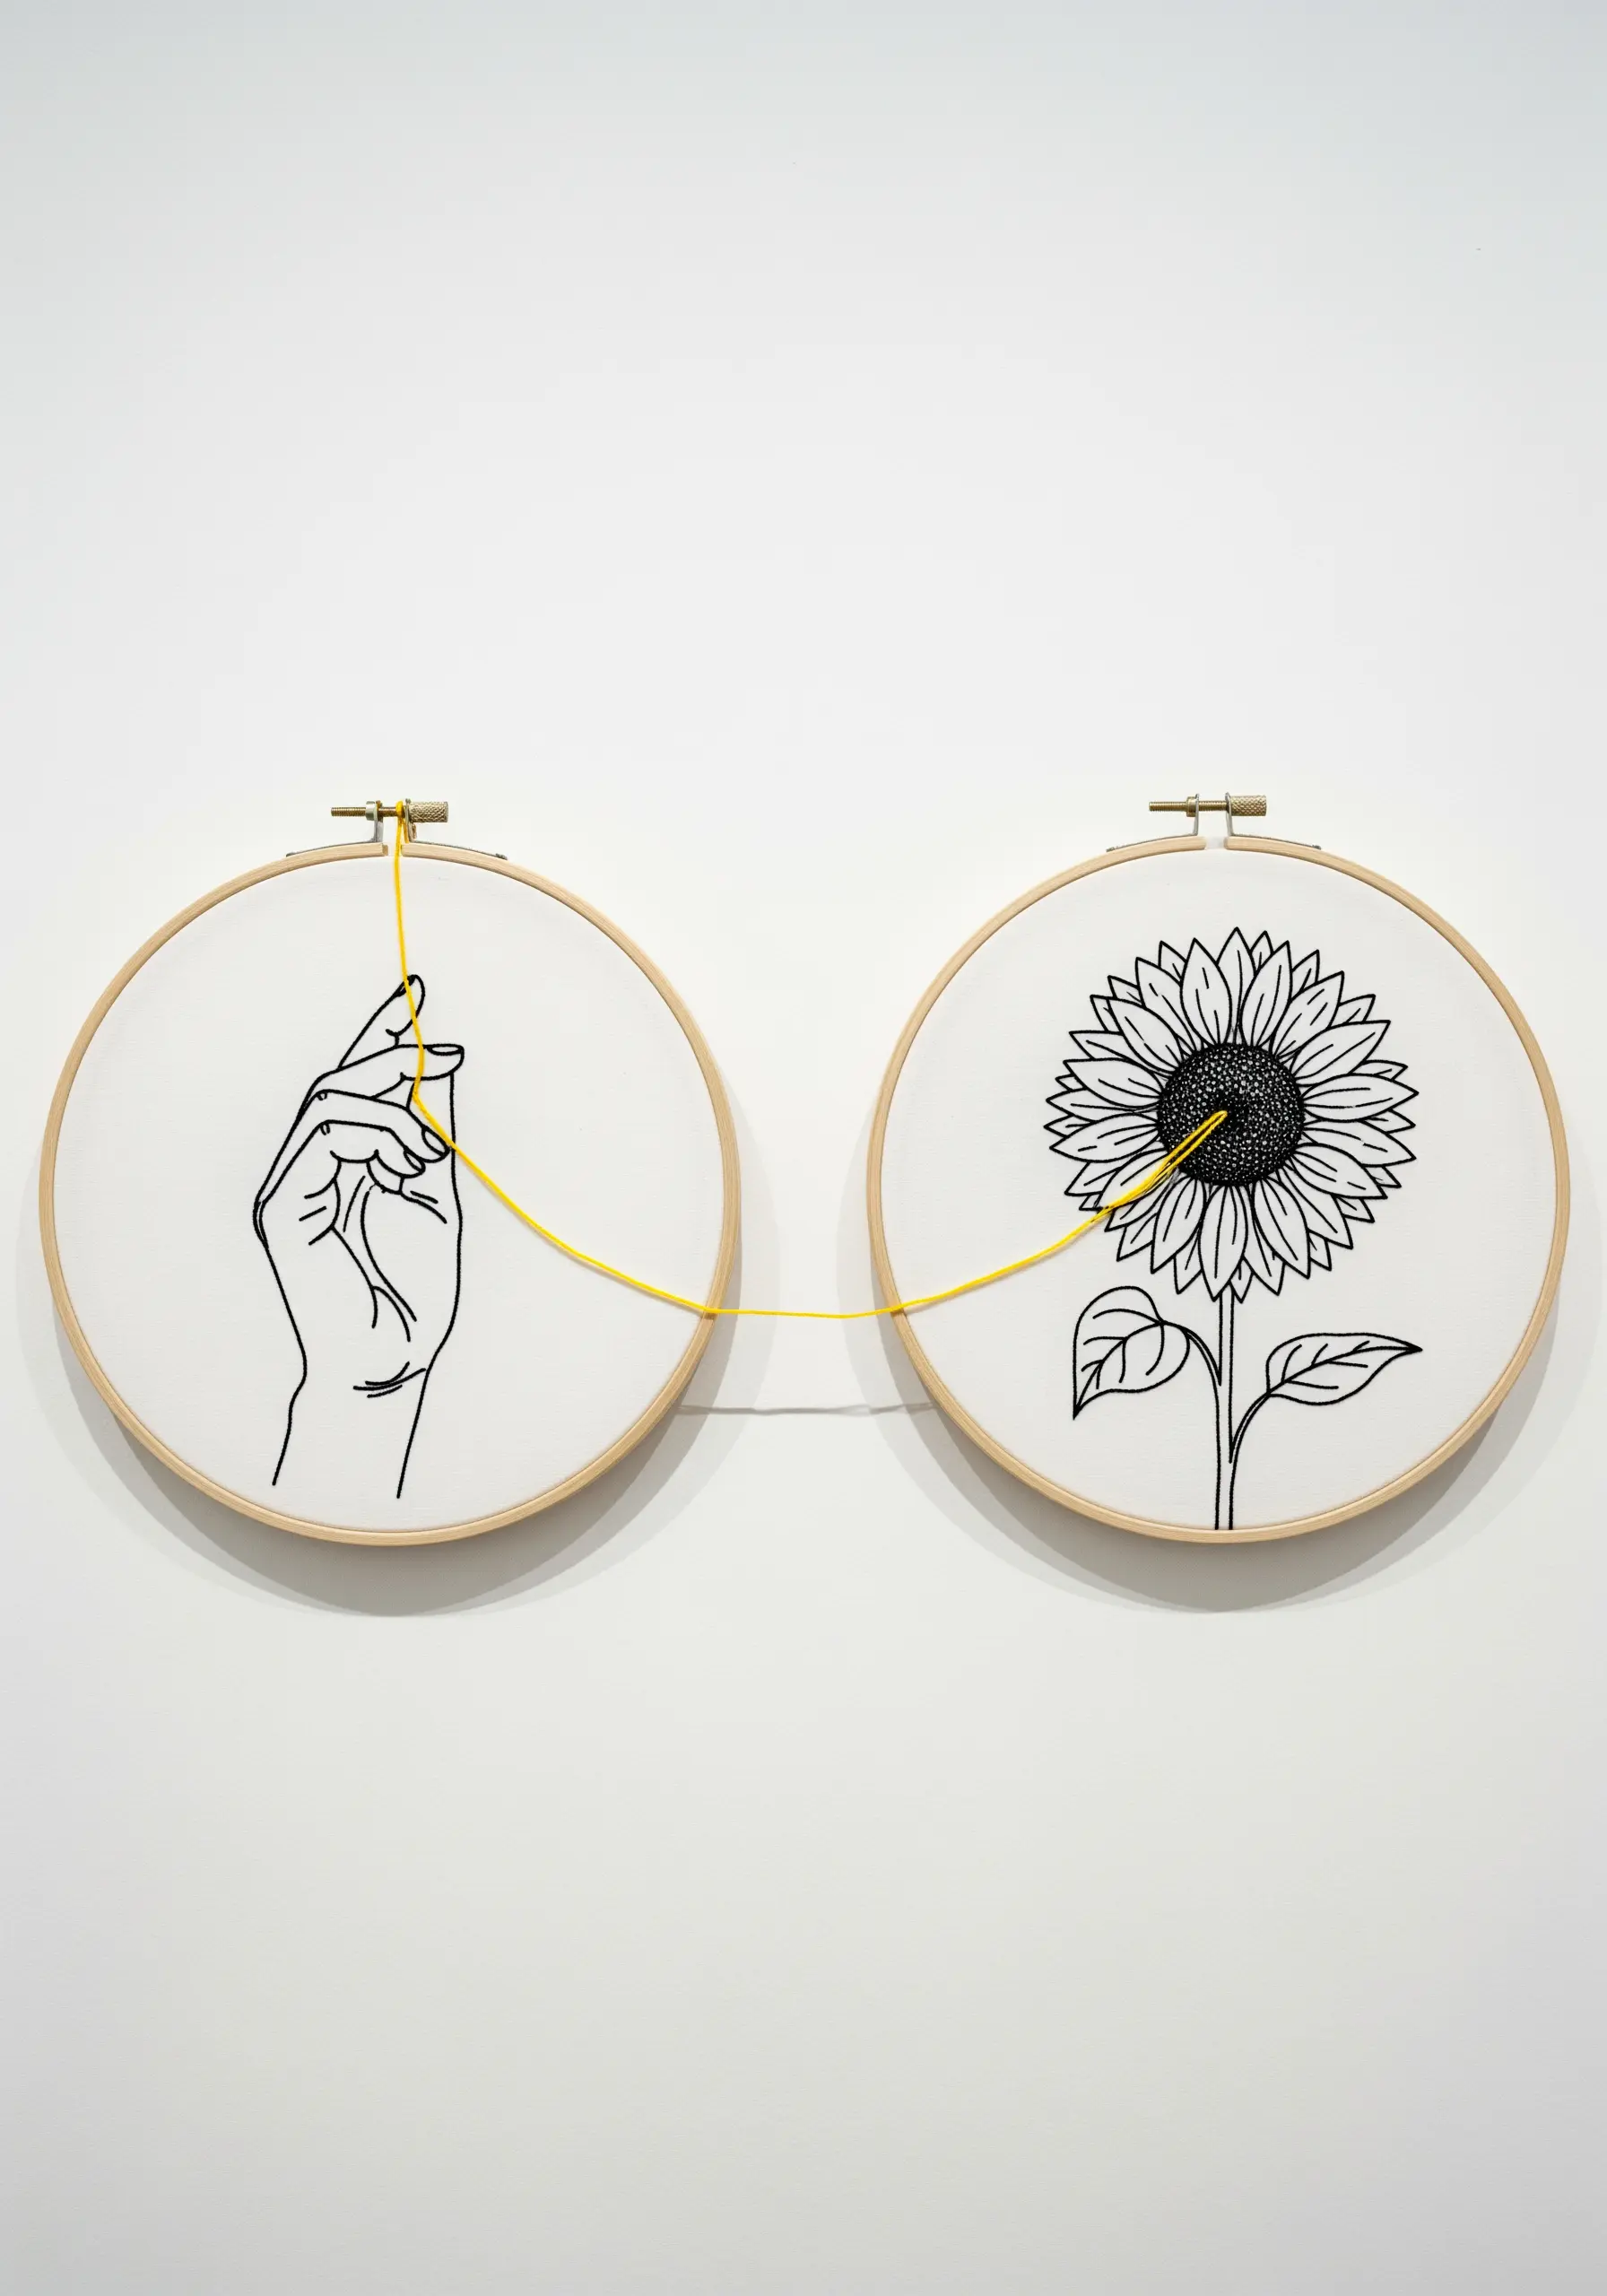
Elevate your wall art by creating a conceptual piece that connects two separate hoops into a single narrative.
Stitch the hand and sunflower individually, each in its own hoop, using a bold backstitch for clarity.
Before you finish the back of the hoops, leave one long, continuous strand of yellow thread stretching between the two elements.
This physical connection creates an interactive and impactful art installation that tells a more complex story.
10. Achieve Photorealism with Thread Painting
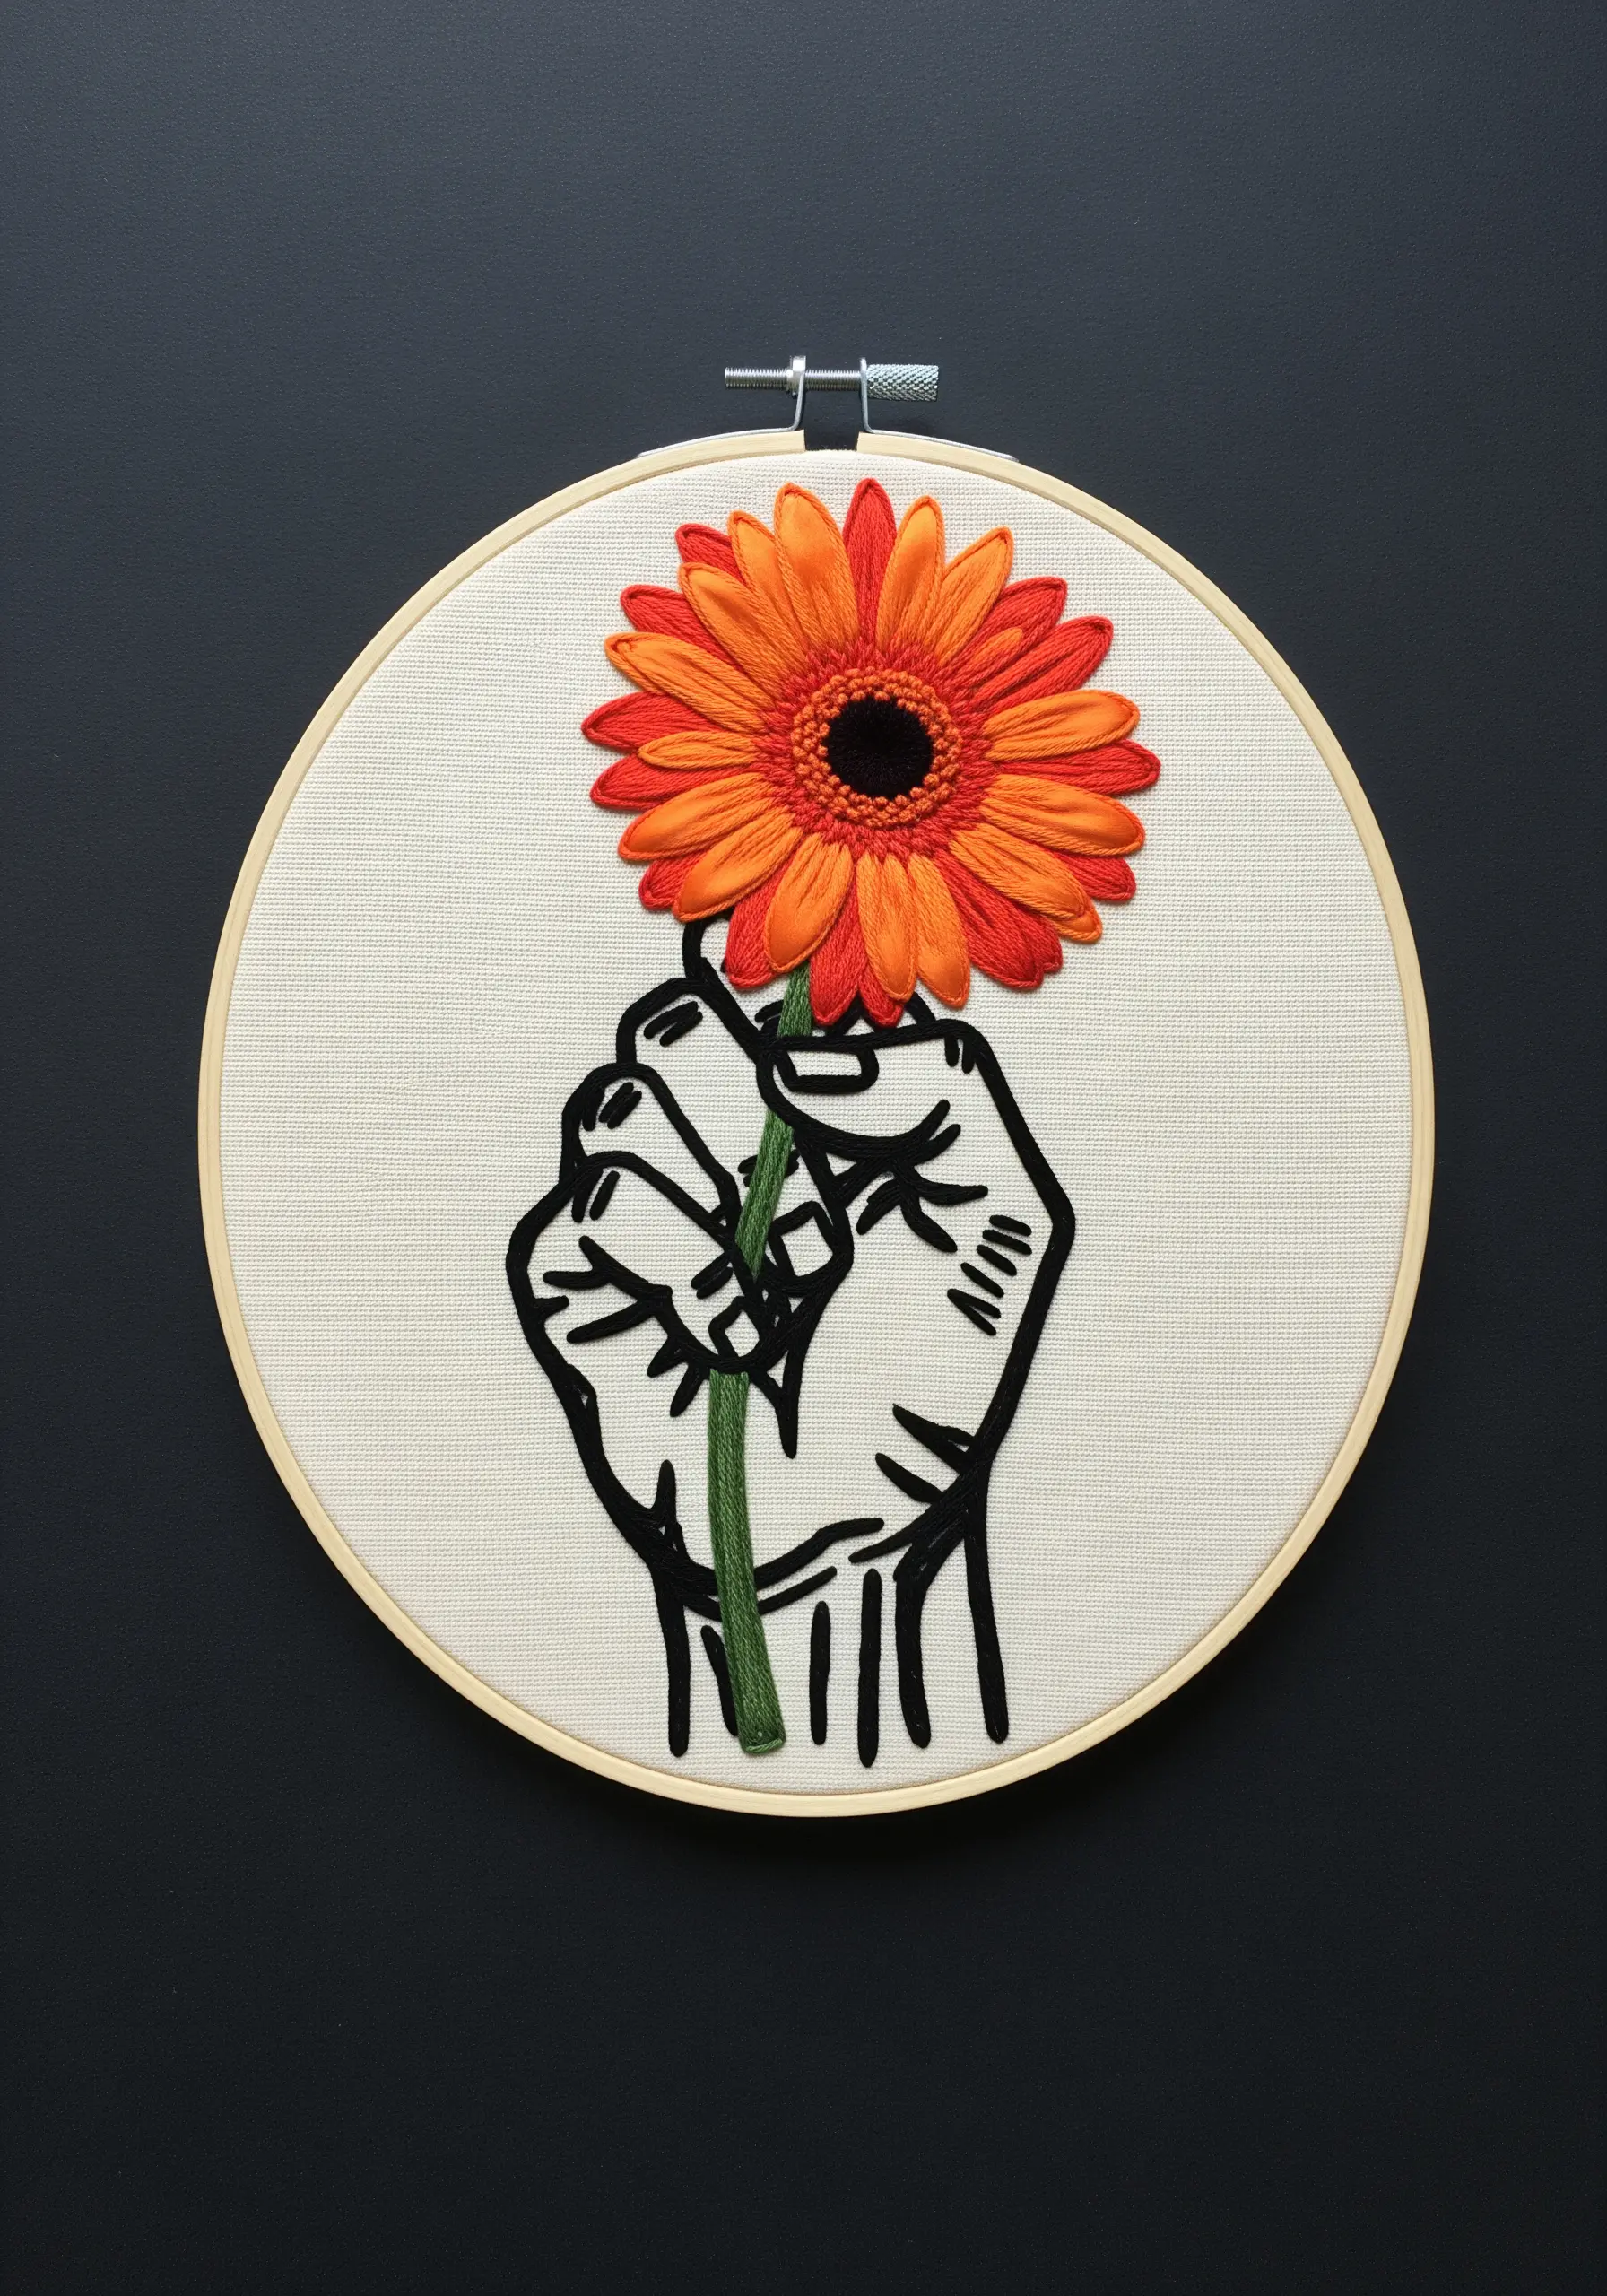
Combine graphic line art with advanced thread painting for a piece that truly stands out.
Give the hand a feeling of solidity by outlining it with a heavy, four-strand backstitch.
For the daisy, use at least three shades of orange and red, applying the long-and-short stitch in lines that radiate from the center, just like real petals.
Fill the center with dense French knots in a dark brown to create a shockingly realistic flower that seems to pop off the fabric.
11. Add Symbolic Meaning with Delicate Embellishments

Transform a simple gesture into a richer story with the addition of tiny, meaningful details.
First, establish the clean backstitch outline of the pinky promise.
Then, add the forget-me-nots by creating tiny floral clusters around the wrists. Use single-strand detached chain stitches for the blue petals and a single yellow French knot for each center.
This small embellishment adds a layer of delicate beauty and deepens the symbolism of the piece.
12. Create Electric Energy with Neon on Black
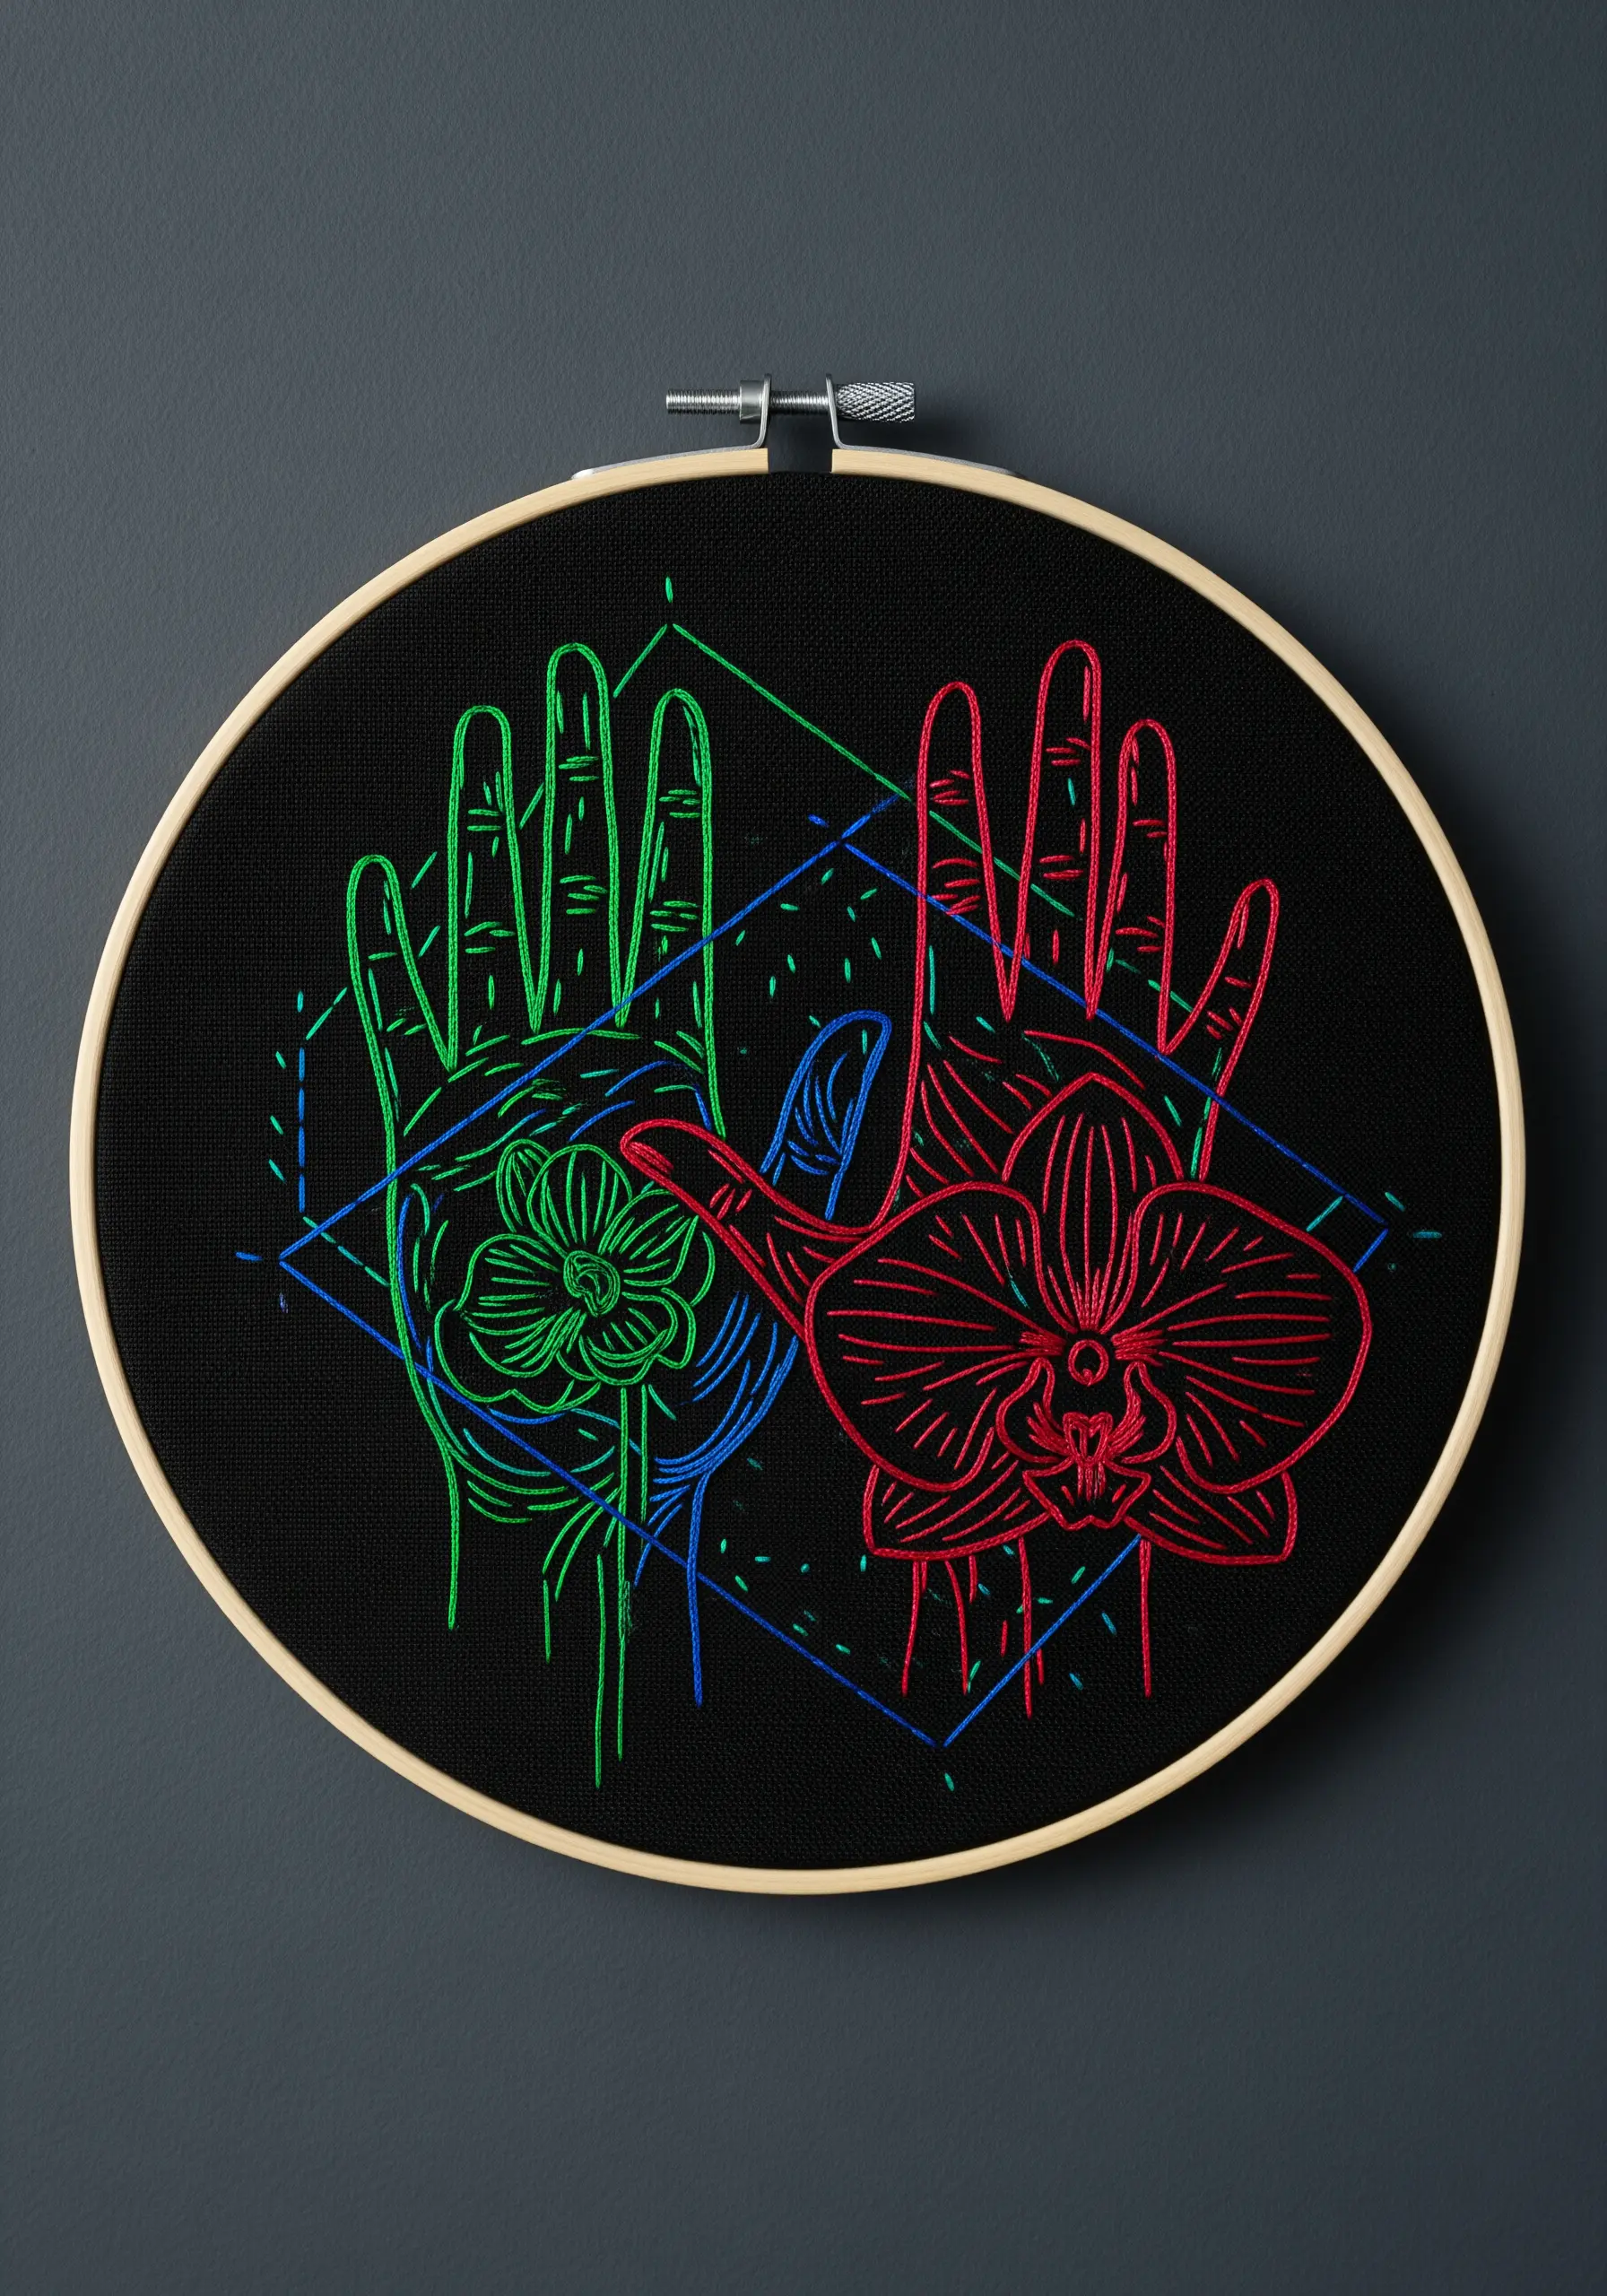
Make your design vibrate with energy by pairing bright, neon threads with a stark black background.
The high contrast allows simple stitches to have a massive impact. Use a basic backstitch for all the lines, but vary your thread weight—three strands for the hands, two for the orchids—to create a subtle visual hierarchy.
The overlapping geometric forms in the background add depth, resulting in a piece that feels both modern and dynamic. It’s a perfect project for exploring how neon threads on a stark black canvas can generate pure energy.
13. Design an Internal Garden Within an Outline
Use a simple outline not as the end goal, but as a container for a world of intricate detail.
Stitch the hand’s silhouette with a clean two-strand backstitch.
Then, instead of filling it with solid color, scatter tiny tiny detached chain stitch daisies with French knot centers inside the shape.
Adding a few gold French knots brings a touch of sparkle. This technique turns a simple shape into a beautiful miniature landscape.
14. Imply Shading with Colored Line Art

Prove that line art doesn’t have to be monochrome by using different colors to suggest light and shadow.
Use a darker, primary color for the main outlines of the hands and tulips.
Then, introduce a lighter, secondary color to add lines that imply highlights and form, much like an artist’s sketch.
This technique allows you to build up dimension and depth using only simple lines, creating a result that is both delicate and complex.
15. Add Dimension by Padding Your Satin Stitch
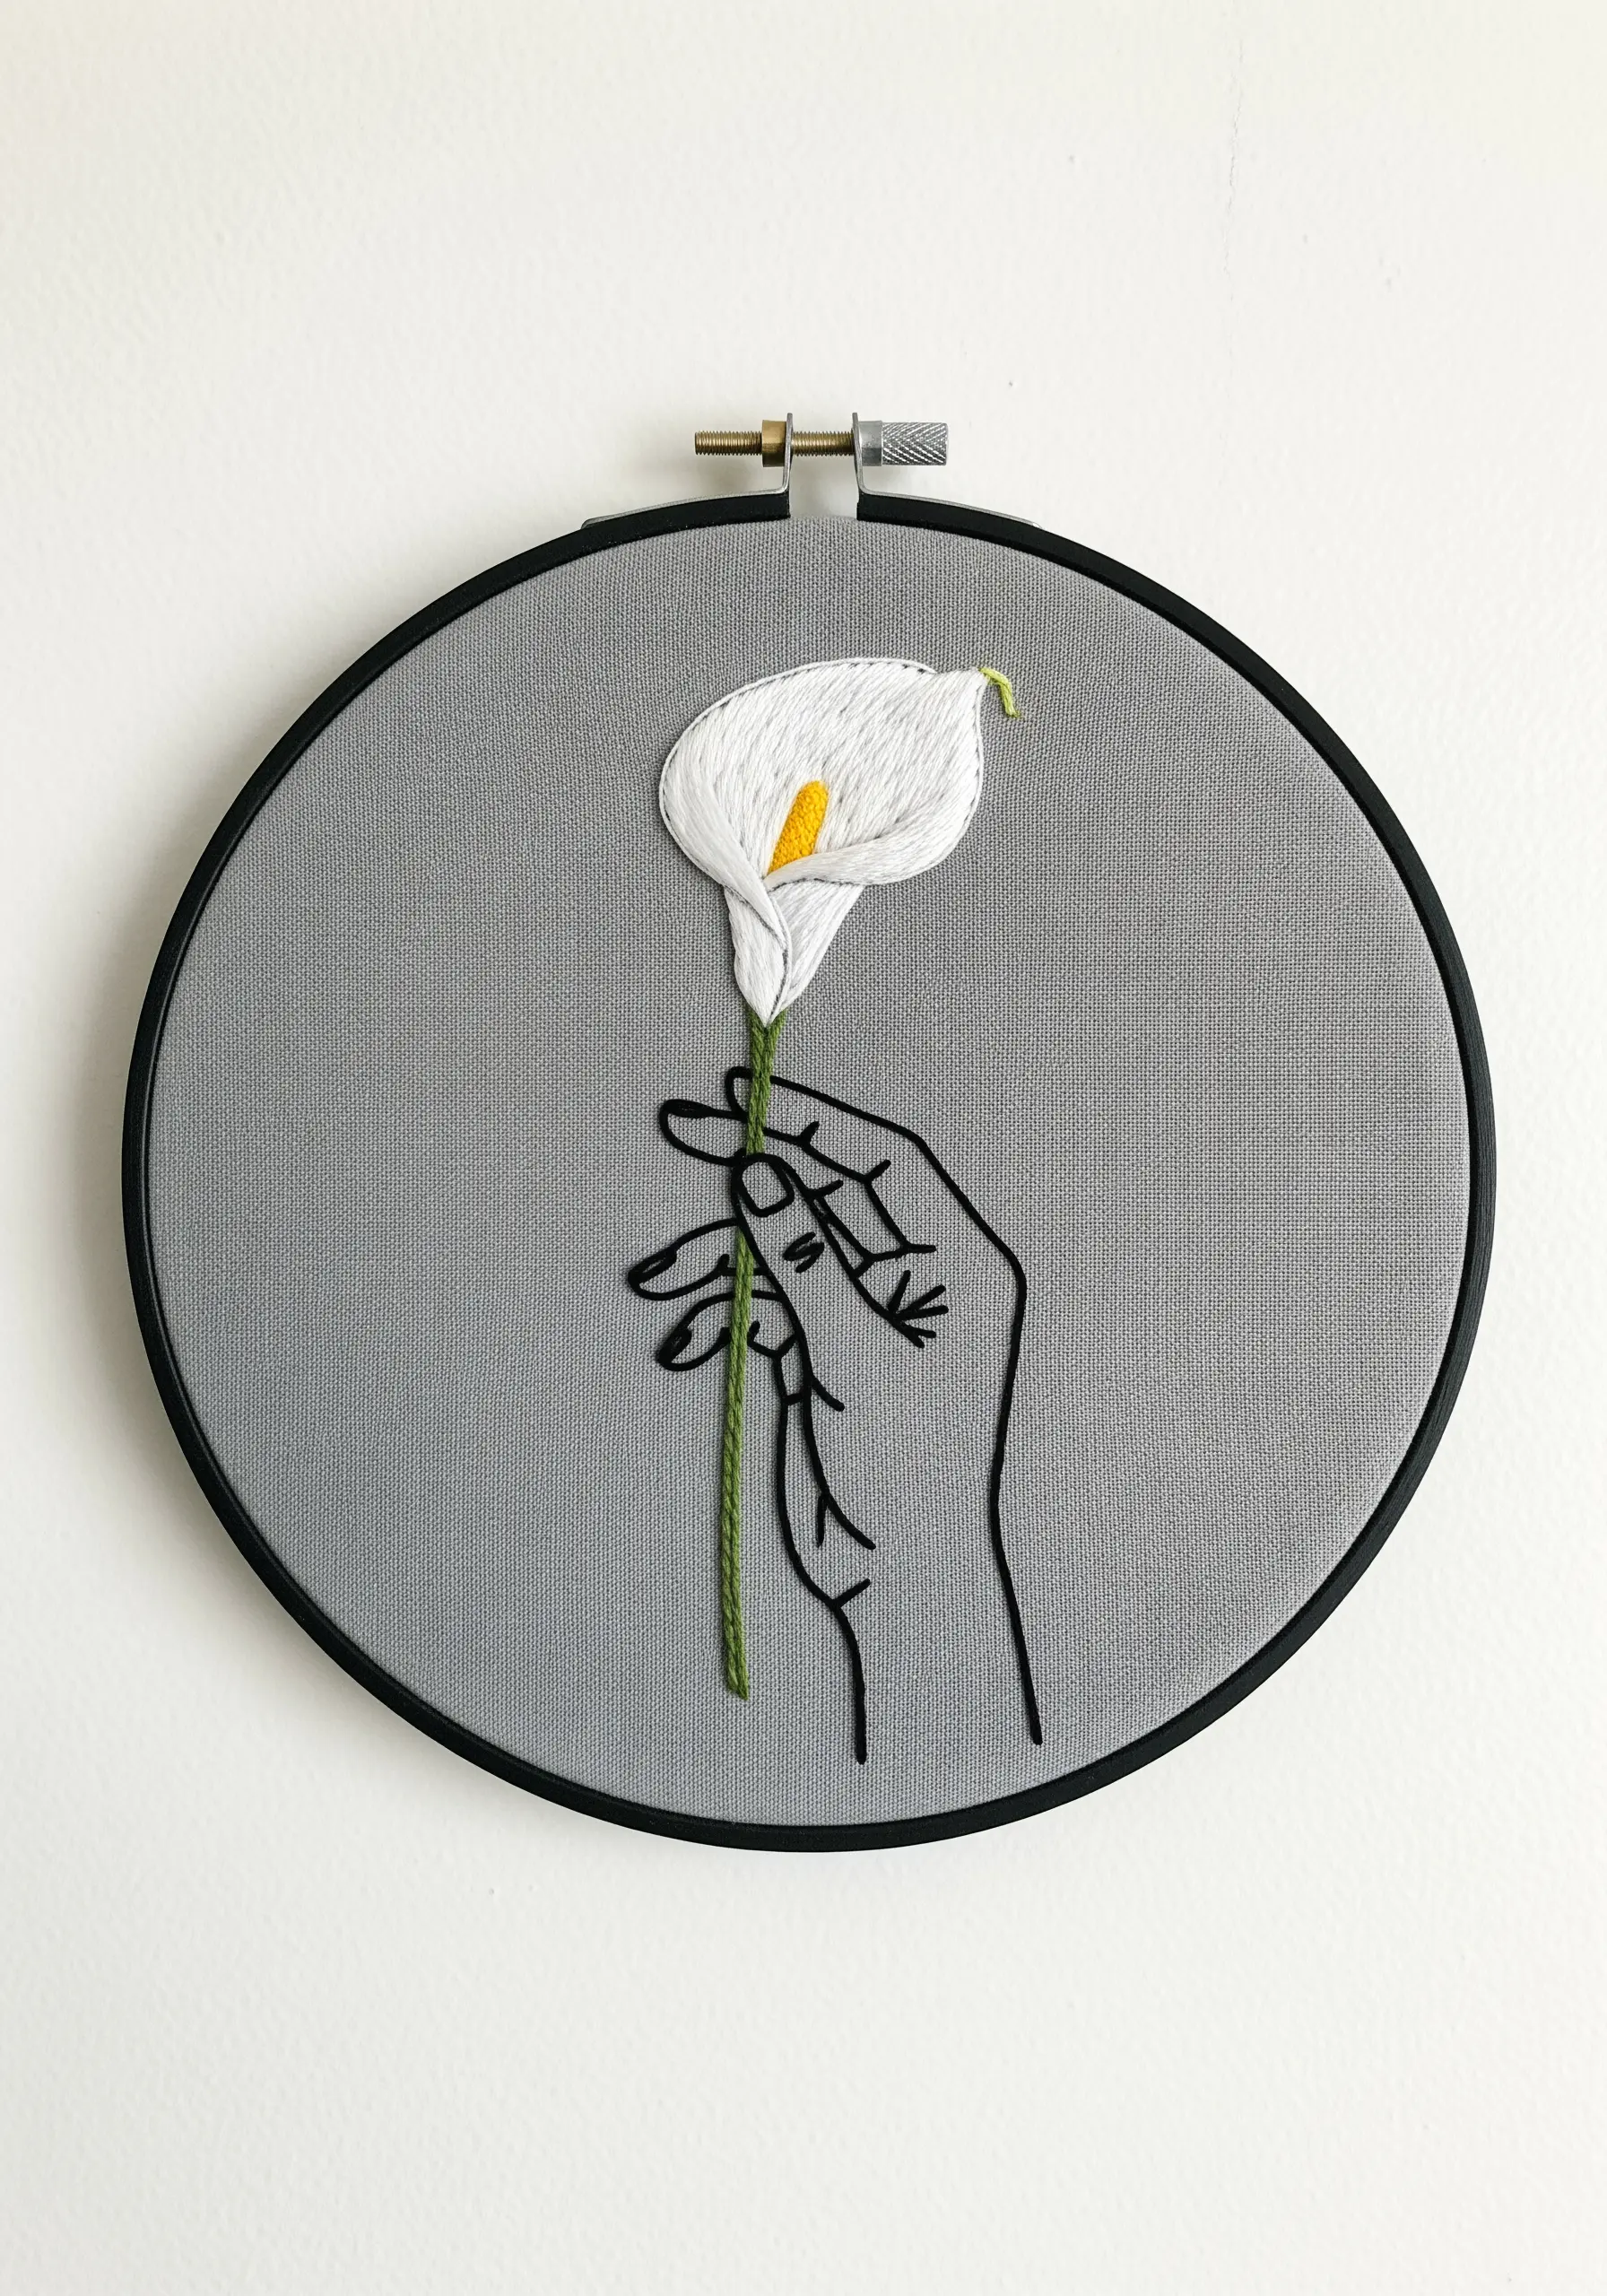
For a truly professional finish, give your satin-stitched elements a subtle, sculptural lift.
First, outline your shape—in this case, the calla lily—with a split stitch. Then, fill the area with a base layer of simple straight stitches; this is called padding.
Finally, cover this padding with your satin stitch, ensuring your stitches go just beyond the split stitch outline for a clean edge.
This technique creates a raised, three-dimensional quality that makes the flower feel soft and substantial.
16. Capture Complexity with Illustrative Line Work
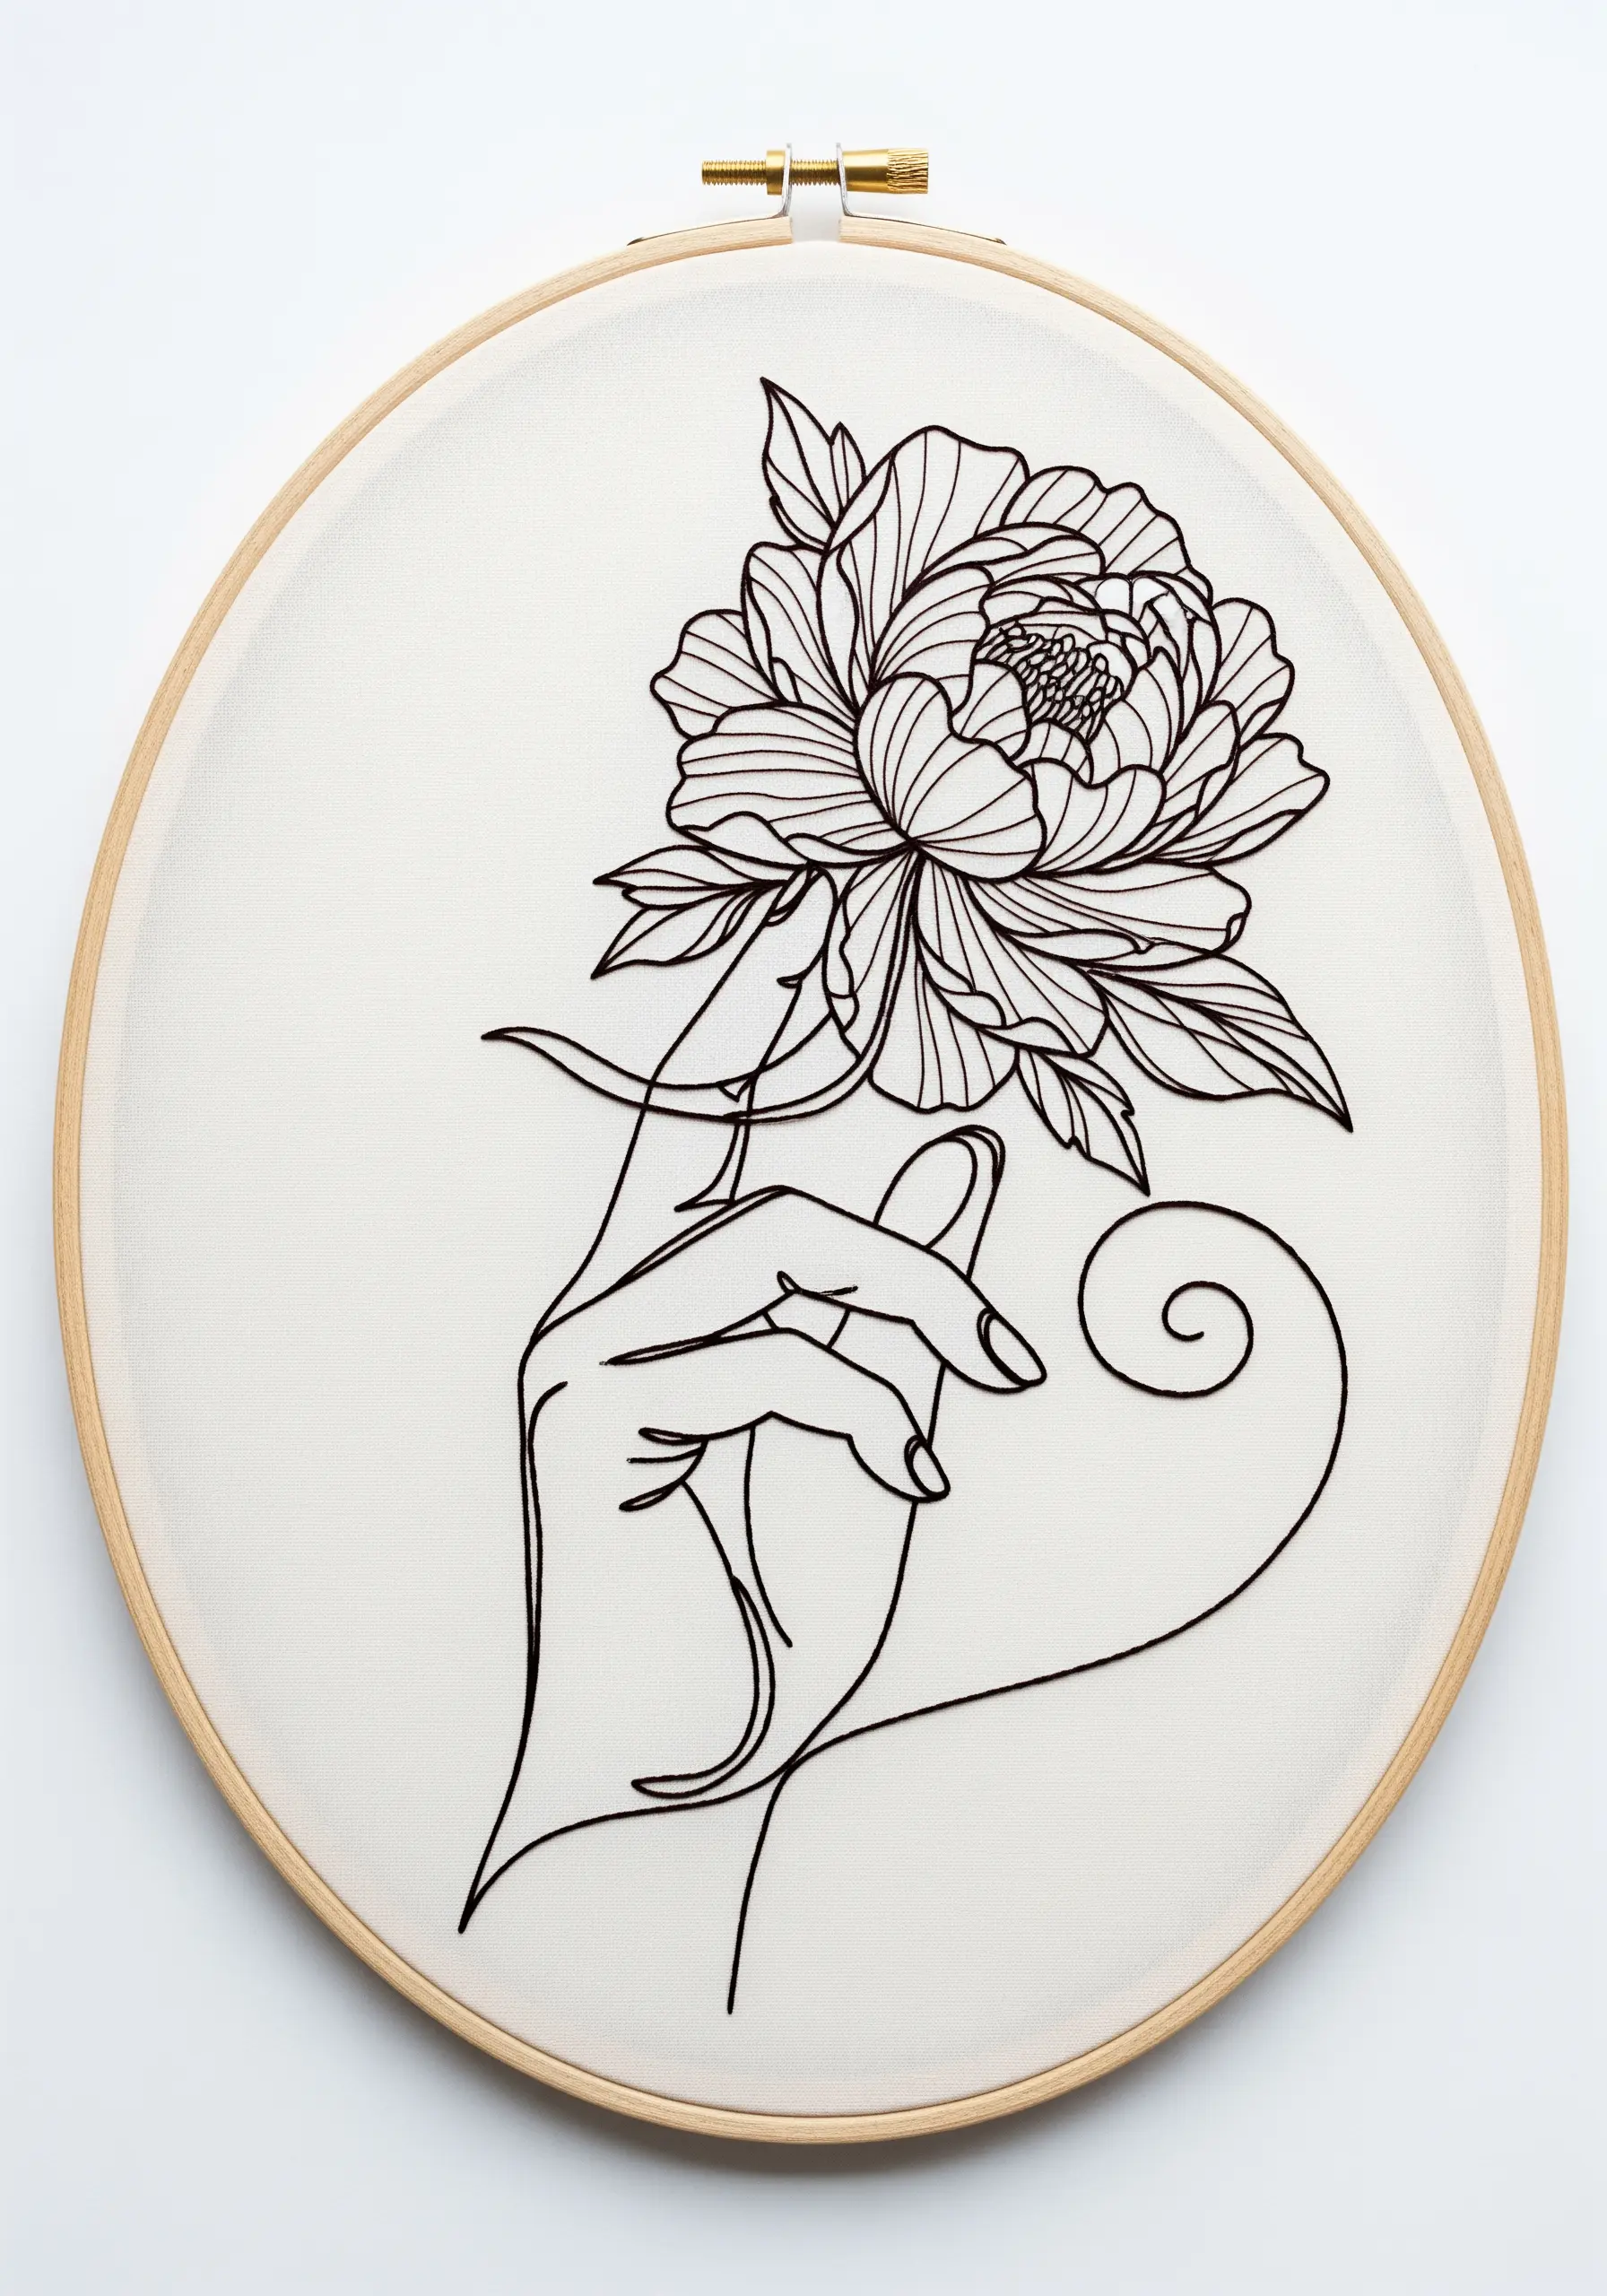
This piece is a masterclass in capturing the intricate, layered beauty of a peony using only lines.
To keep the details sharp and defined, use a single strand of black floss and a stem stitch, which creates a slightly raised, clean line.
Pay close attention to the direction of your stitches, angling them to mimic the natural curl and fold of the petals.
This focus on illustrative detail transforms a simple stitch into a work of art.
17. Weave Botanicals for an Integrated Composition
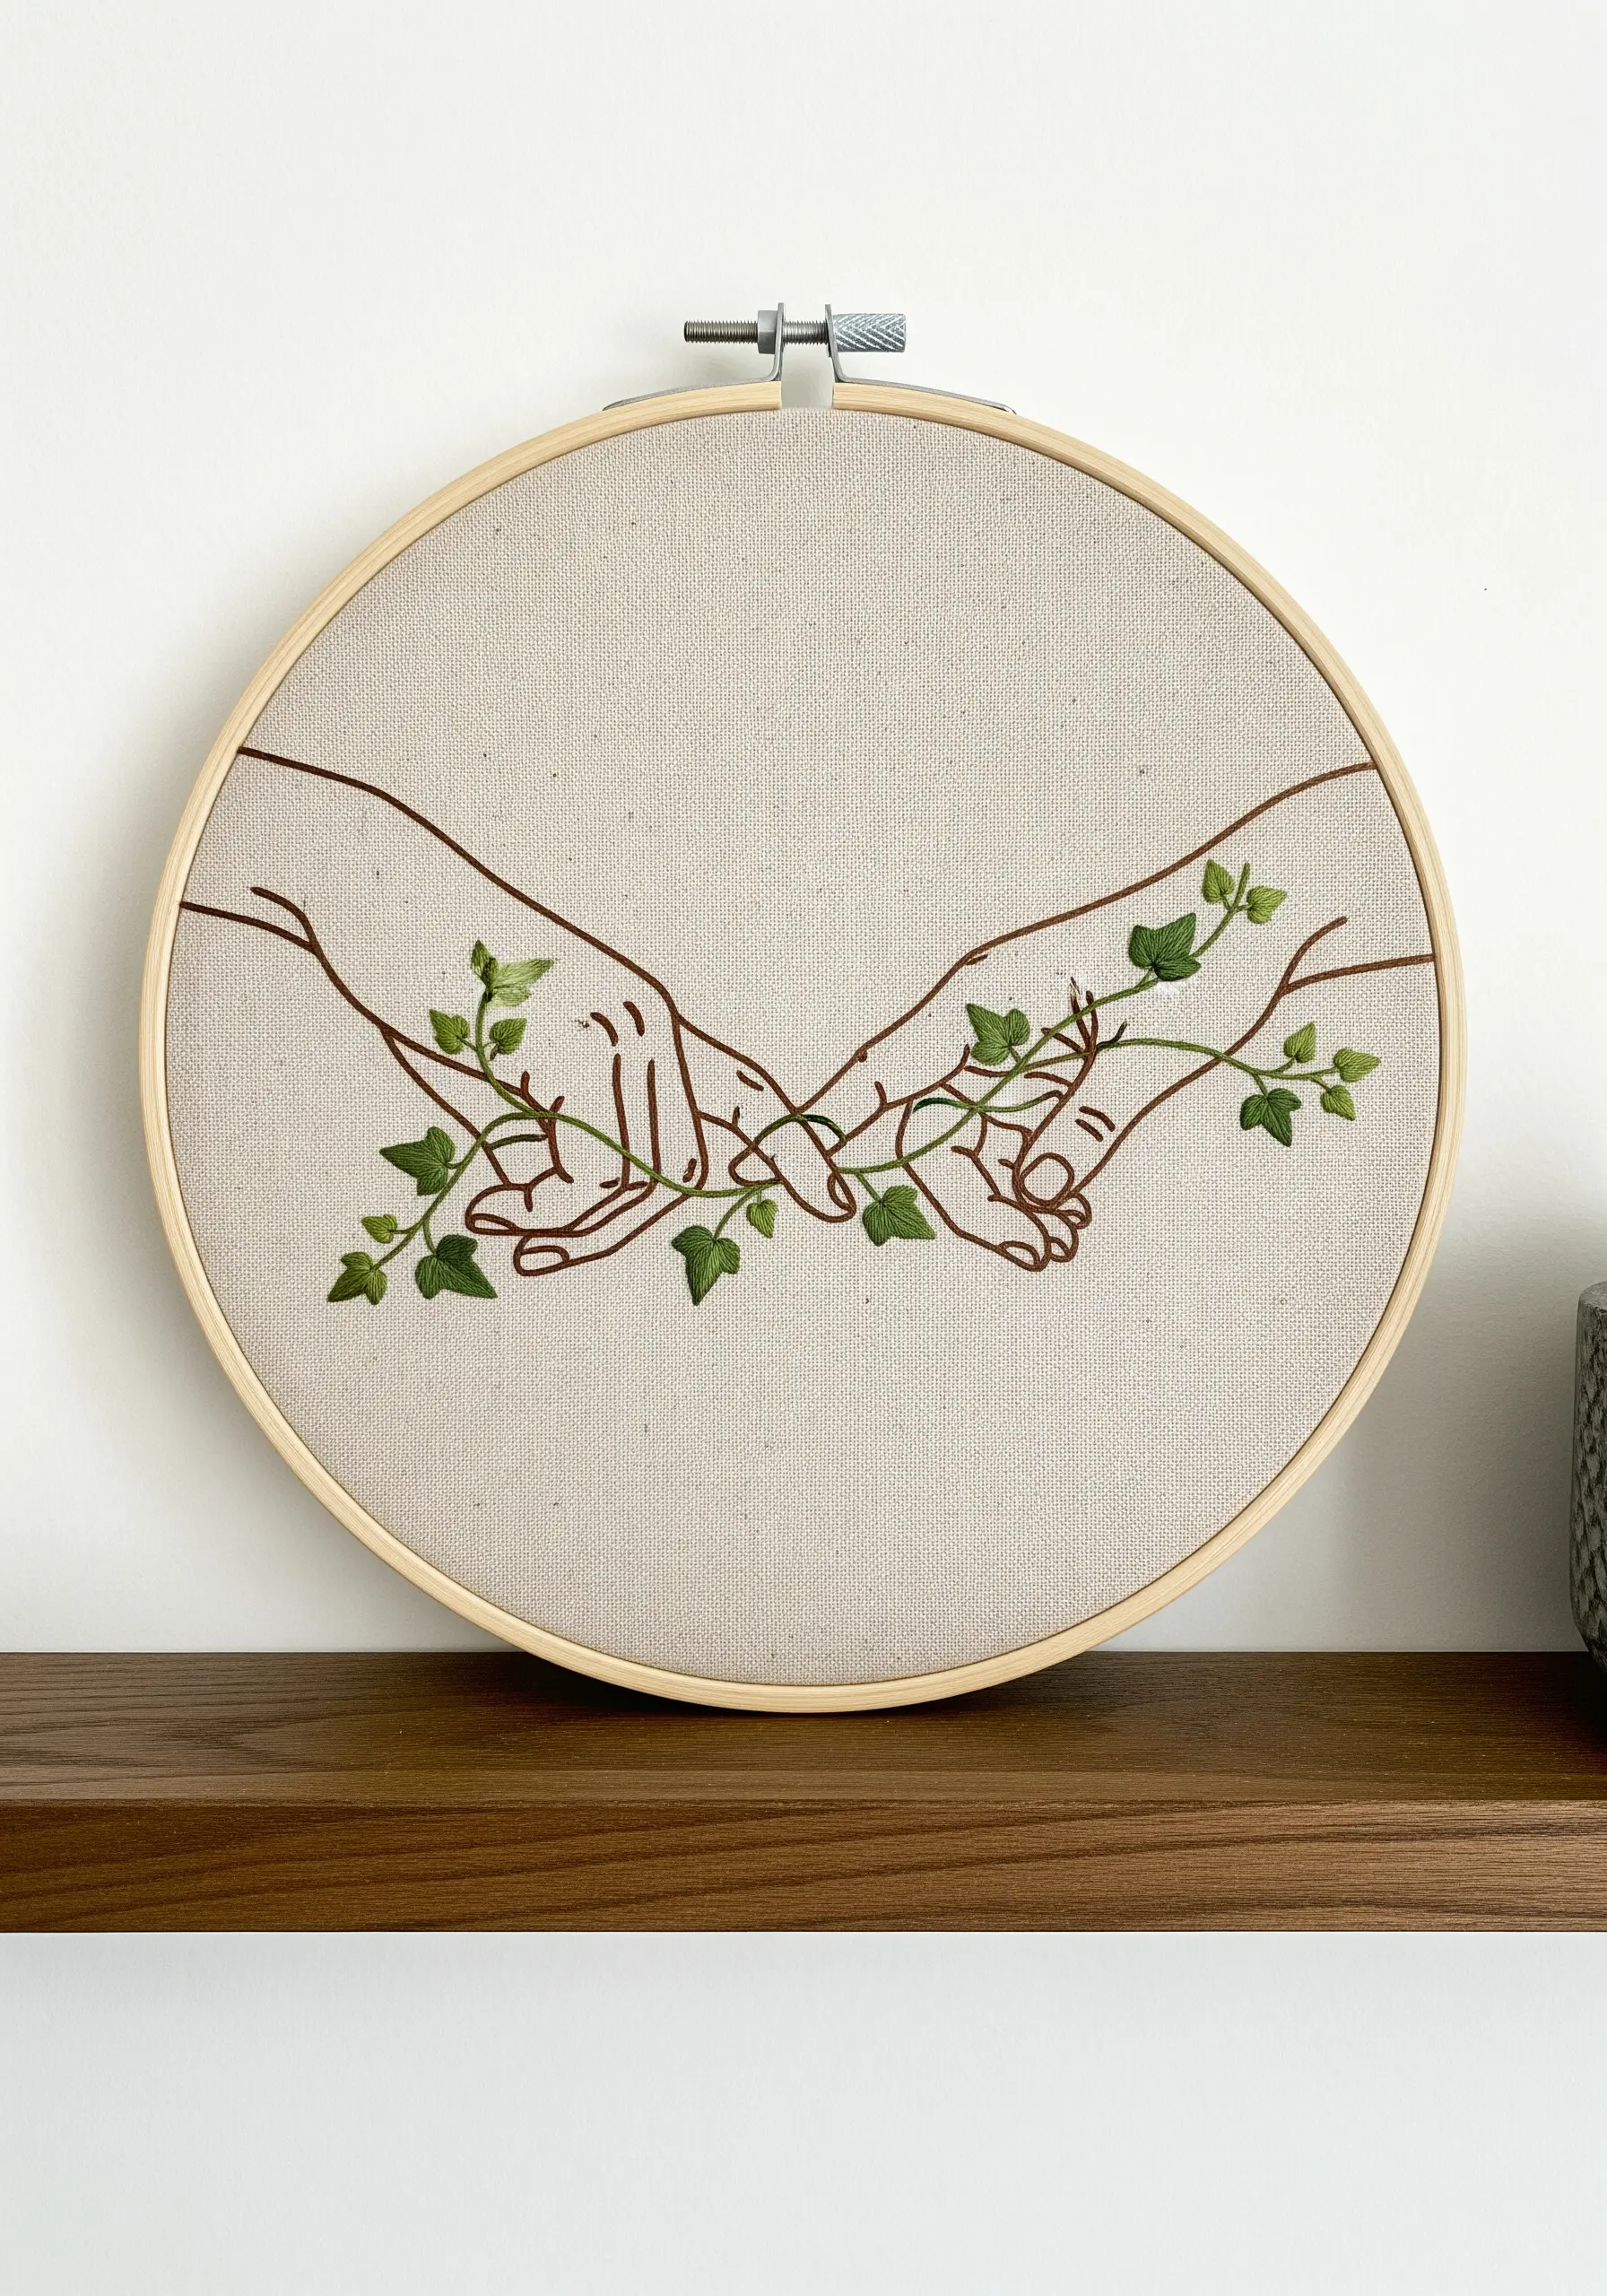
Create a more dynamic and engaging design by having the botanical elements physically interact with the hands.
Stitch the hands first, using a two-strand backstitch in a soft brown to keep them from overpowering the delicate leaves.
Then, add the ivy, using a stem stitch for the main vine and fishbone stitch for the leaves.
Carefully planning the path of the vine so it weaves over and under the fingers results in a beautifully unified and lifelike composition.
18. Create a Sense of Movement with Scattered Stitches
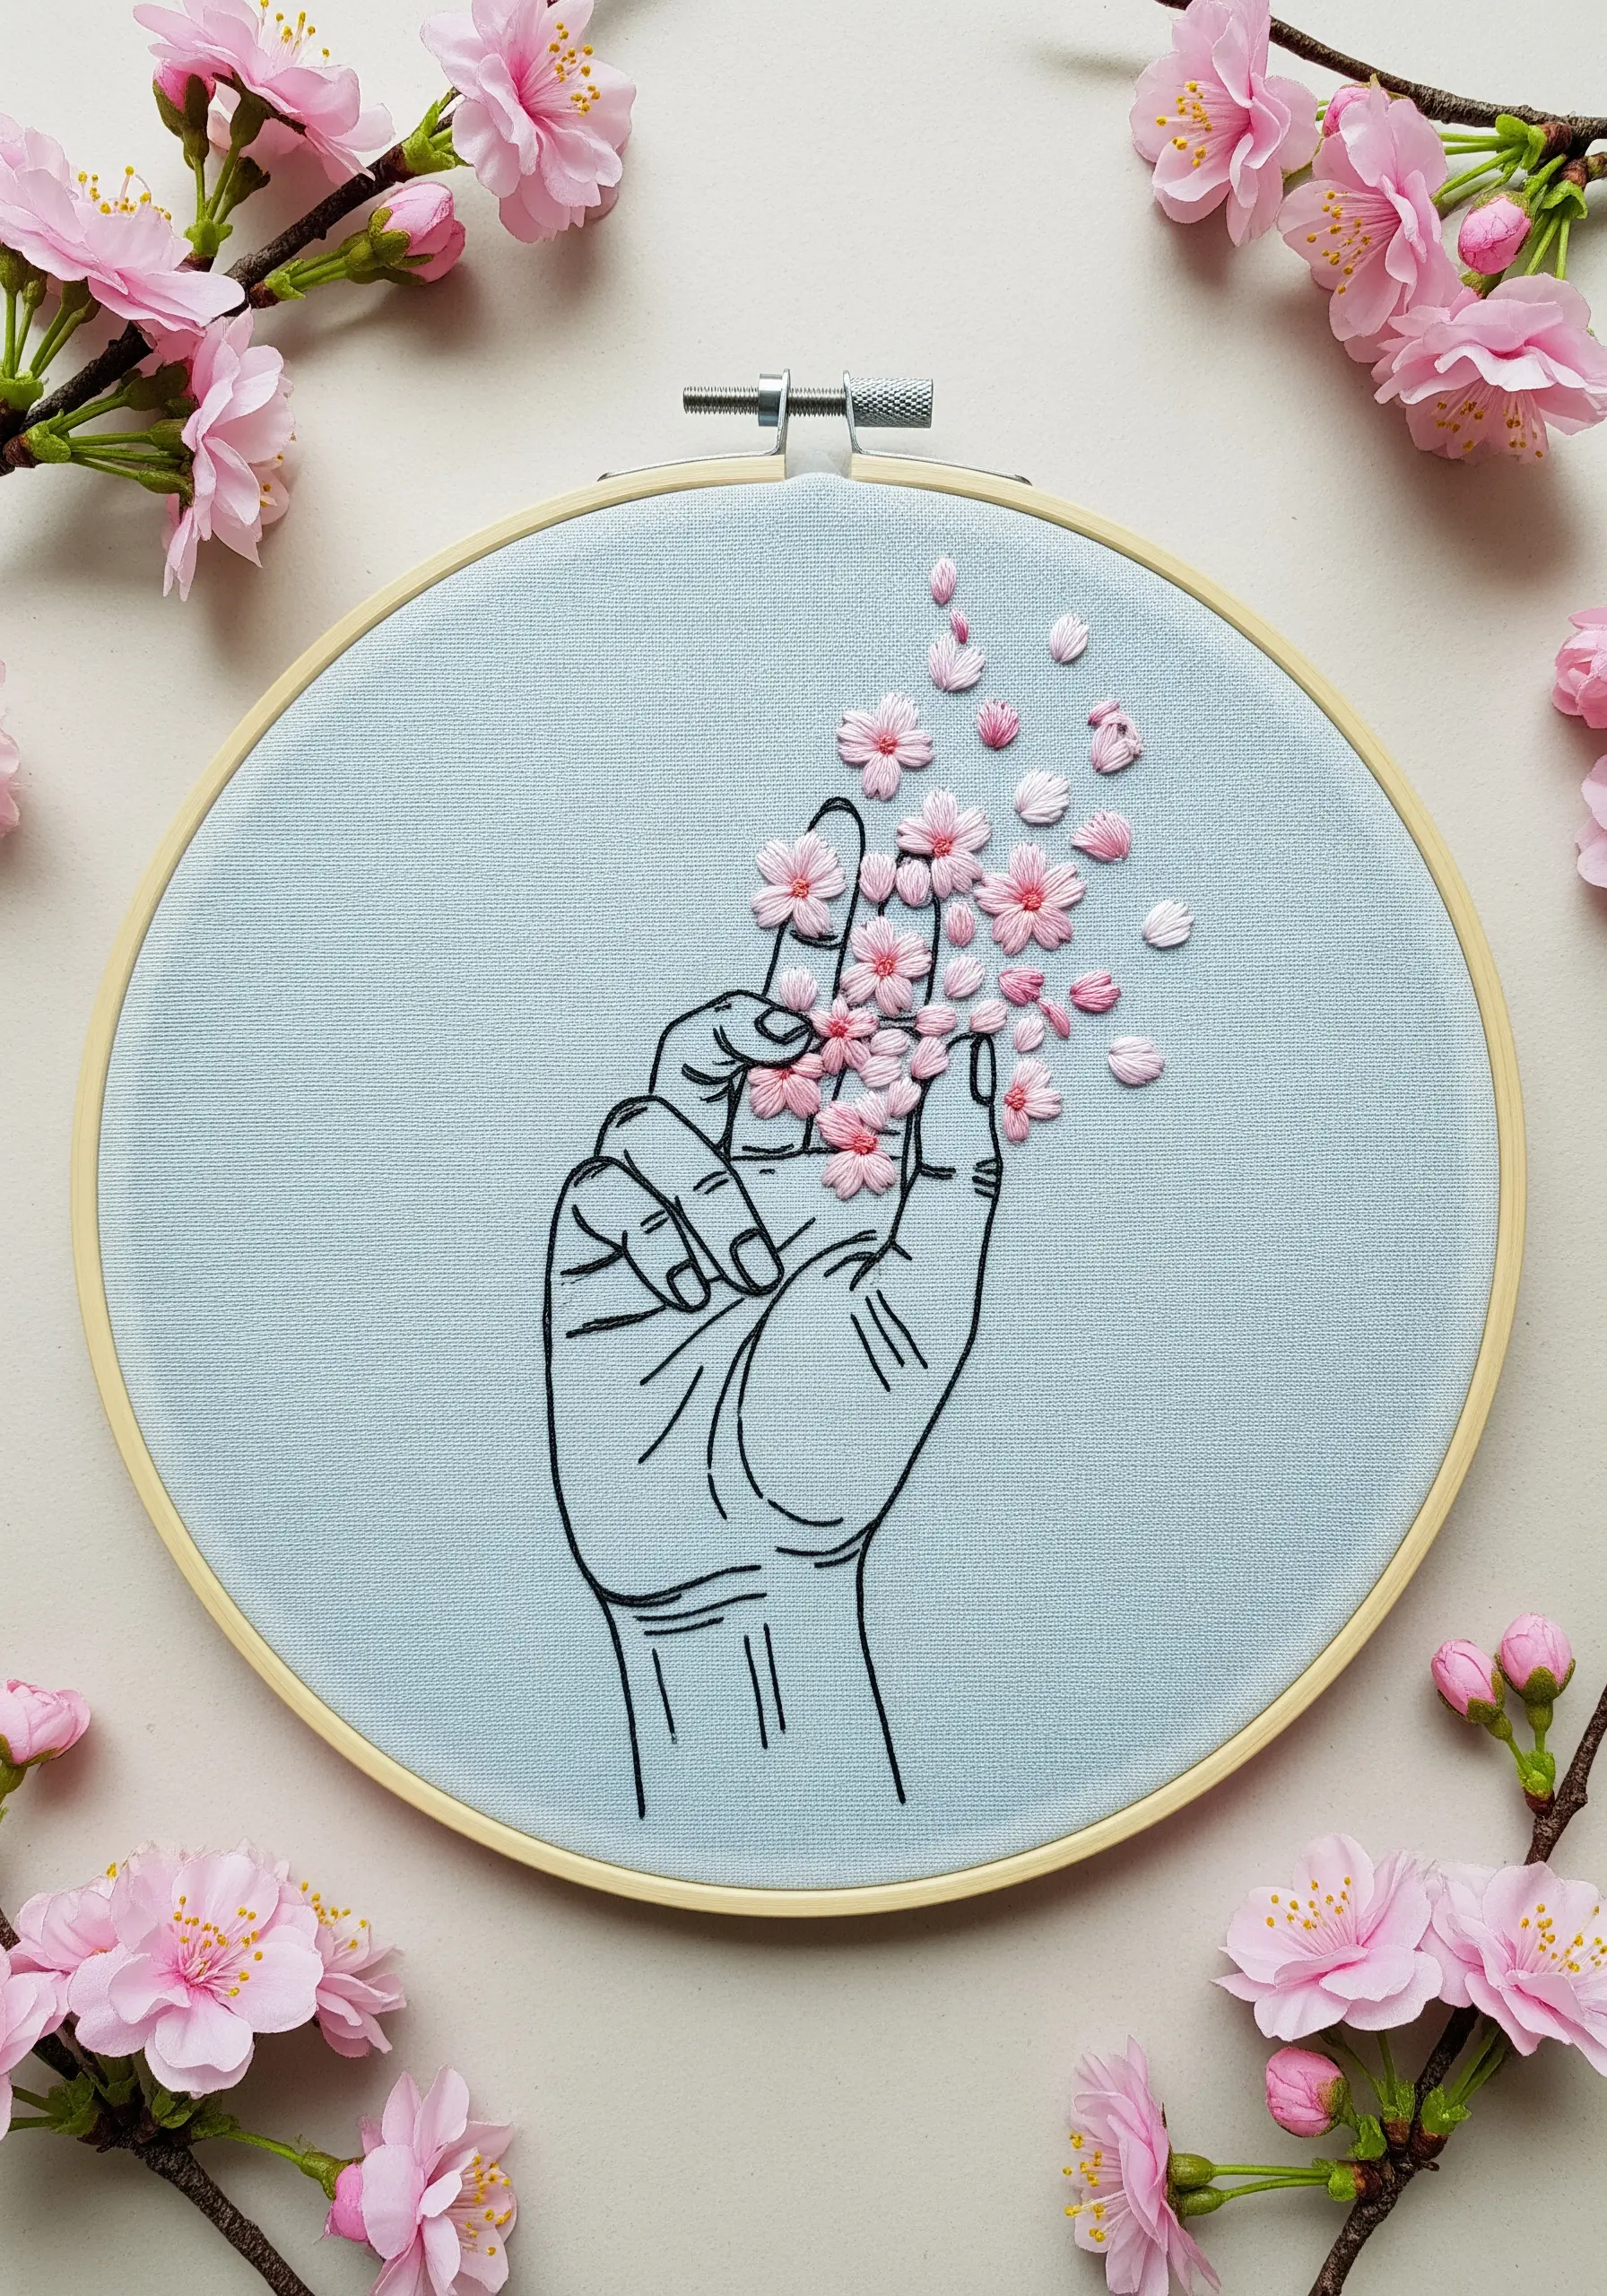
Capture the feeling of cherry blossoms floating on the breeze by stitching them as individual, detached elements.
After outlining the hand in a simple black backstitch, form each blossom with five detached chain stitches arranged in a circle, with a single French knot at the center.
Vary the size and placement of the blossoms, letting them drift upwards from the hand to create a beautiful sense of movement and delicacy against the soft blue fabric.
19. Integrate Botanicals into a Symbolic Gesture
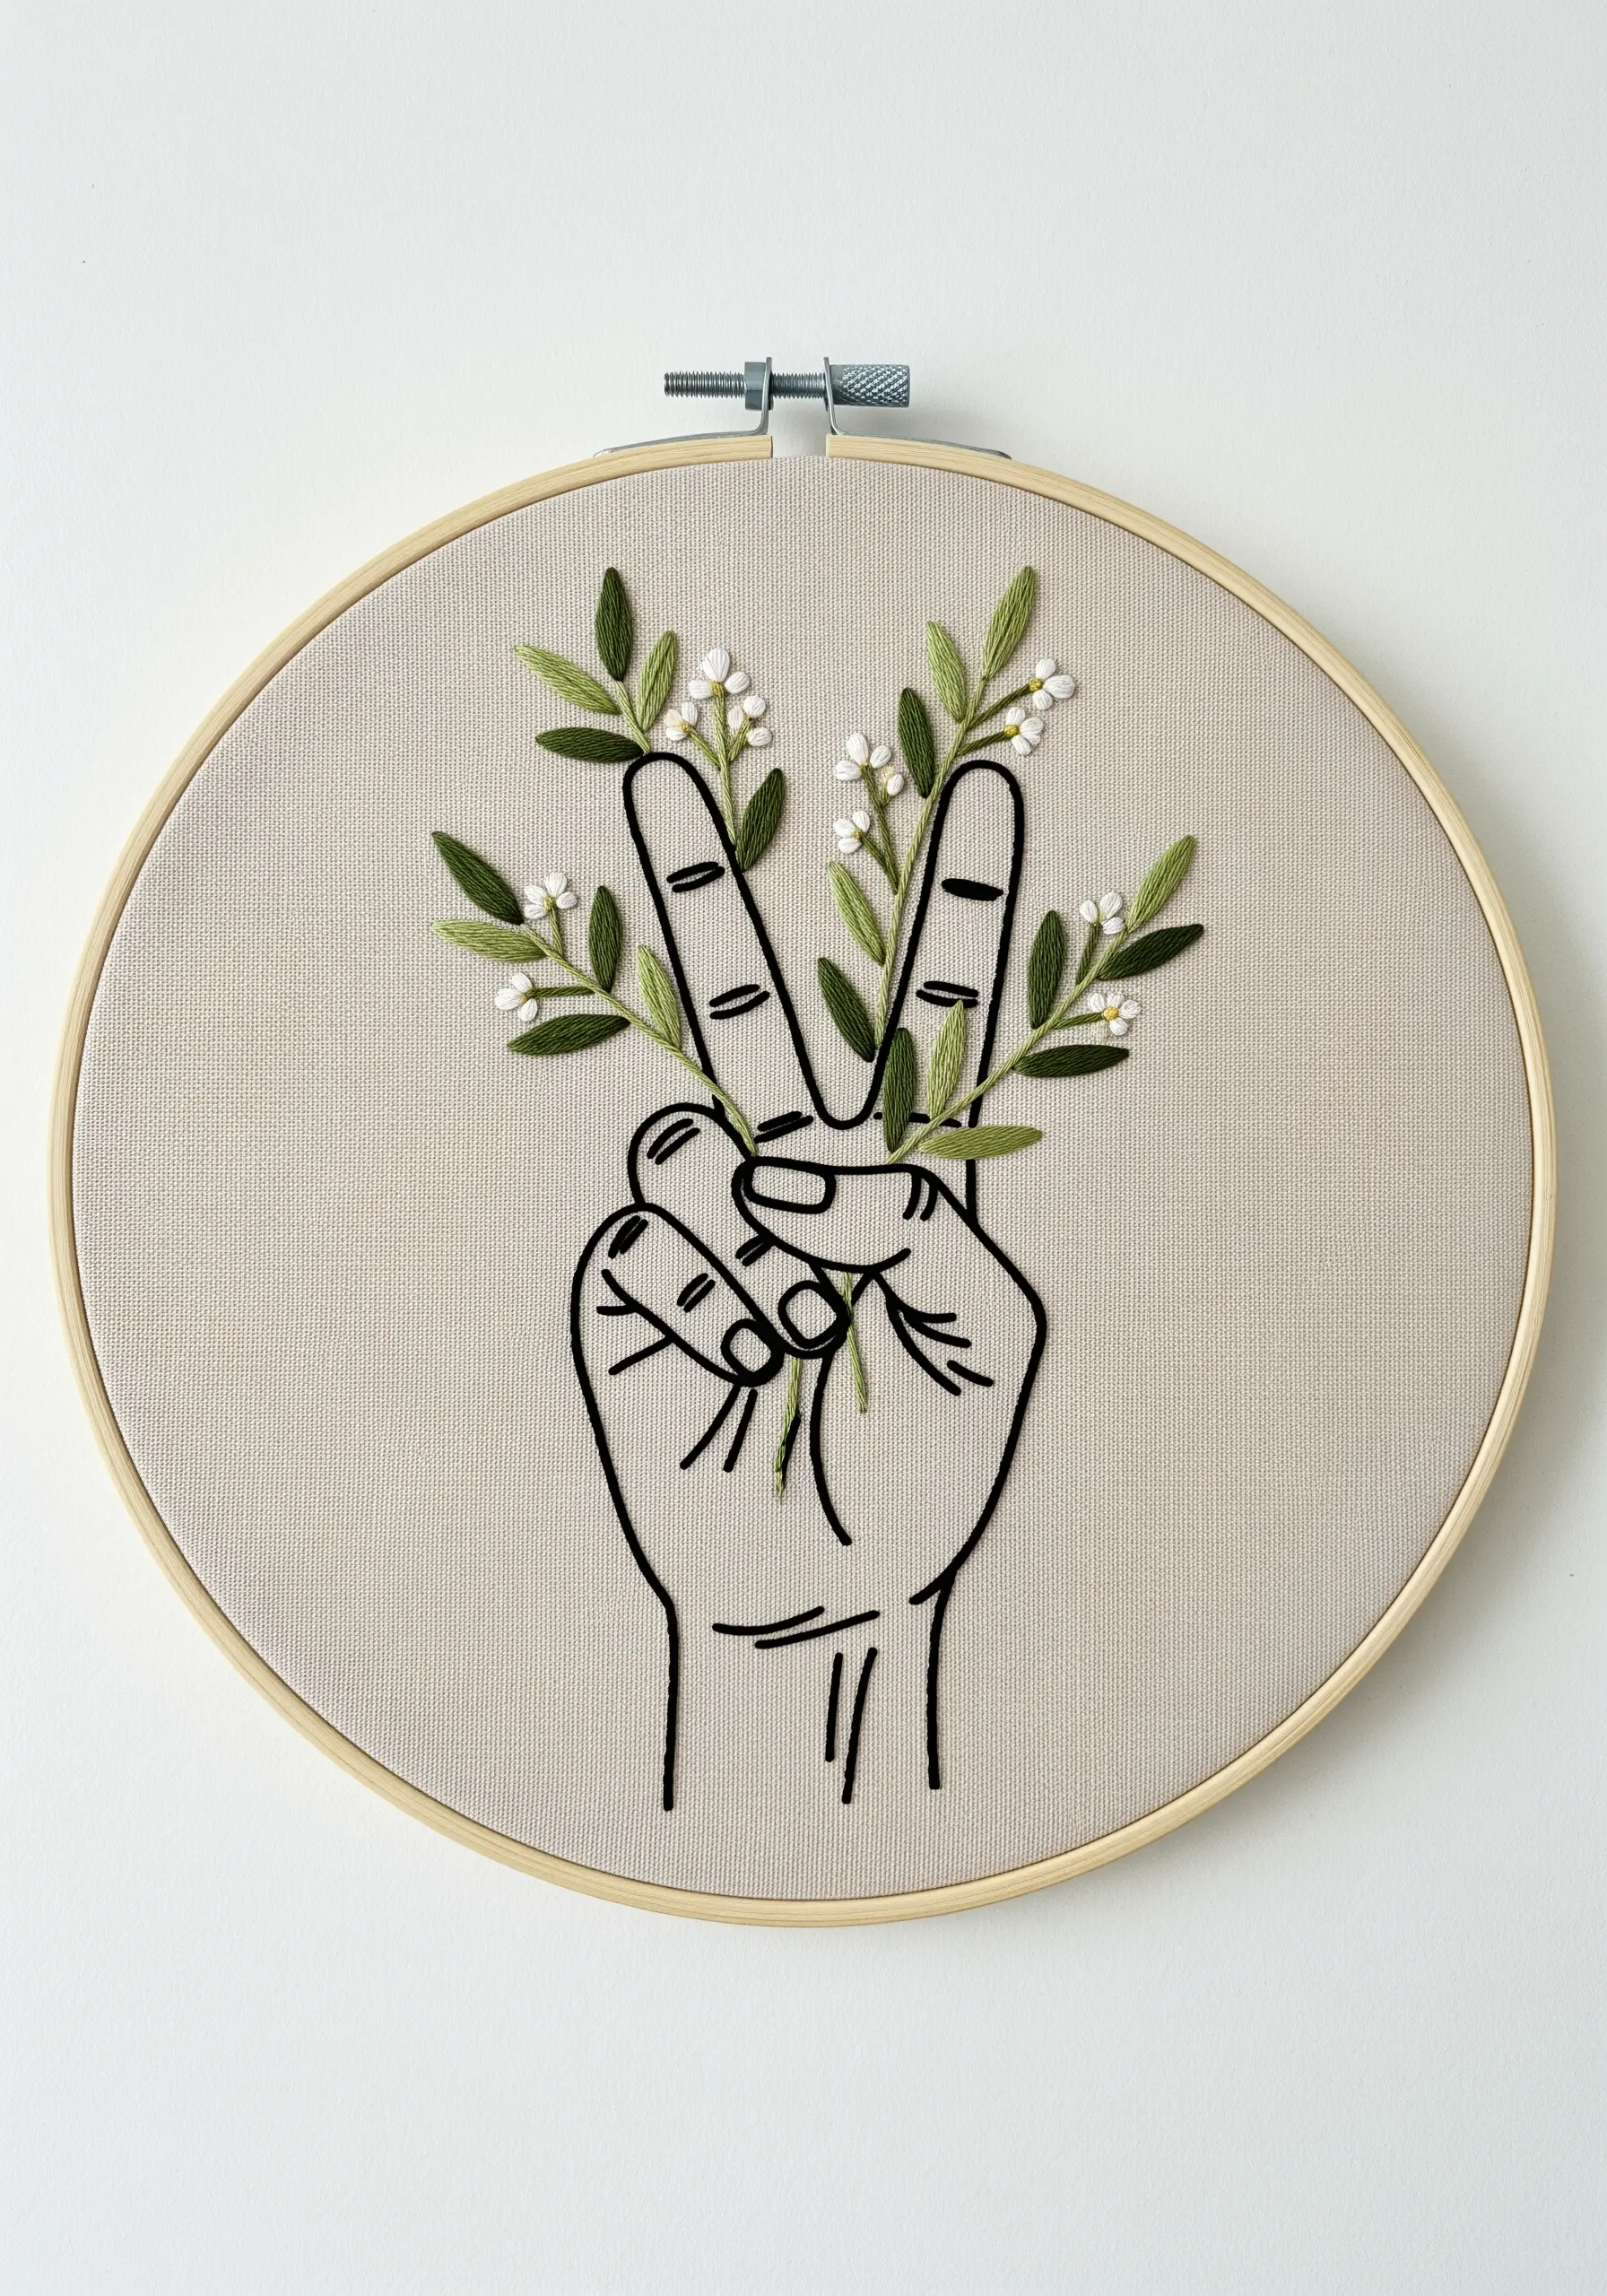
This design beautifully merges a strong, universally recognized symbol with the gentle persistence of nature.
Give the hand weight and presence by using a bold, four-strand backstitch for its outline.
In contrast, use a lighter touch for the botanicals: a two-strand stem stitch for stems, fishbone stitch for leaves, and tiny French knots for blossoms.
Having the branches grow directly from the fingers creates a powerful message of peace and organic growth intertwined.
20. Contrast Solid Shapes with Delicate Wildflowers
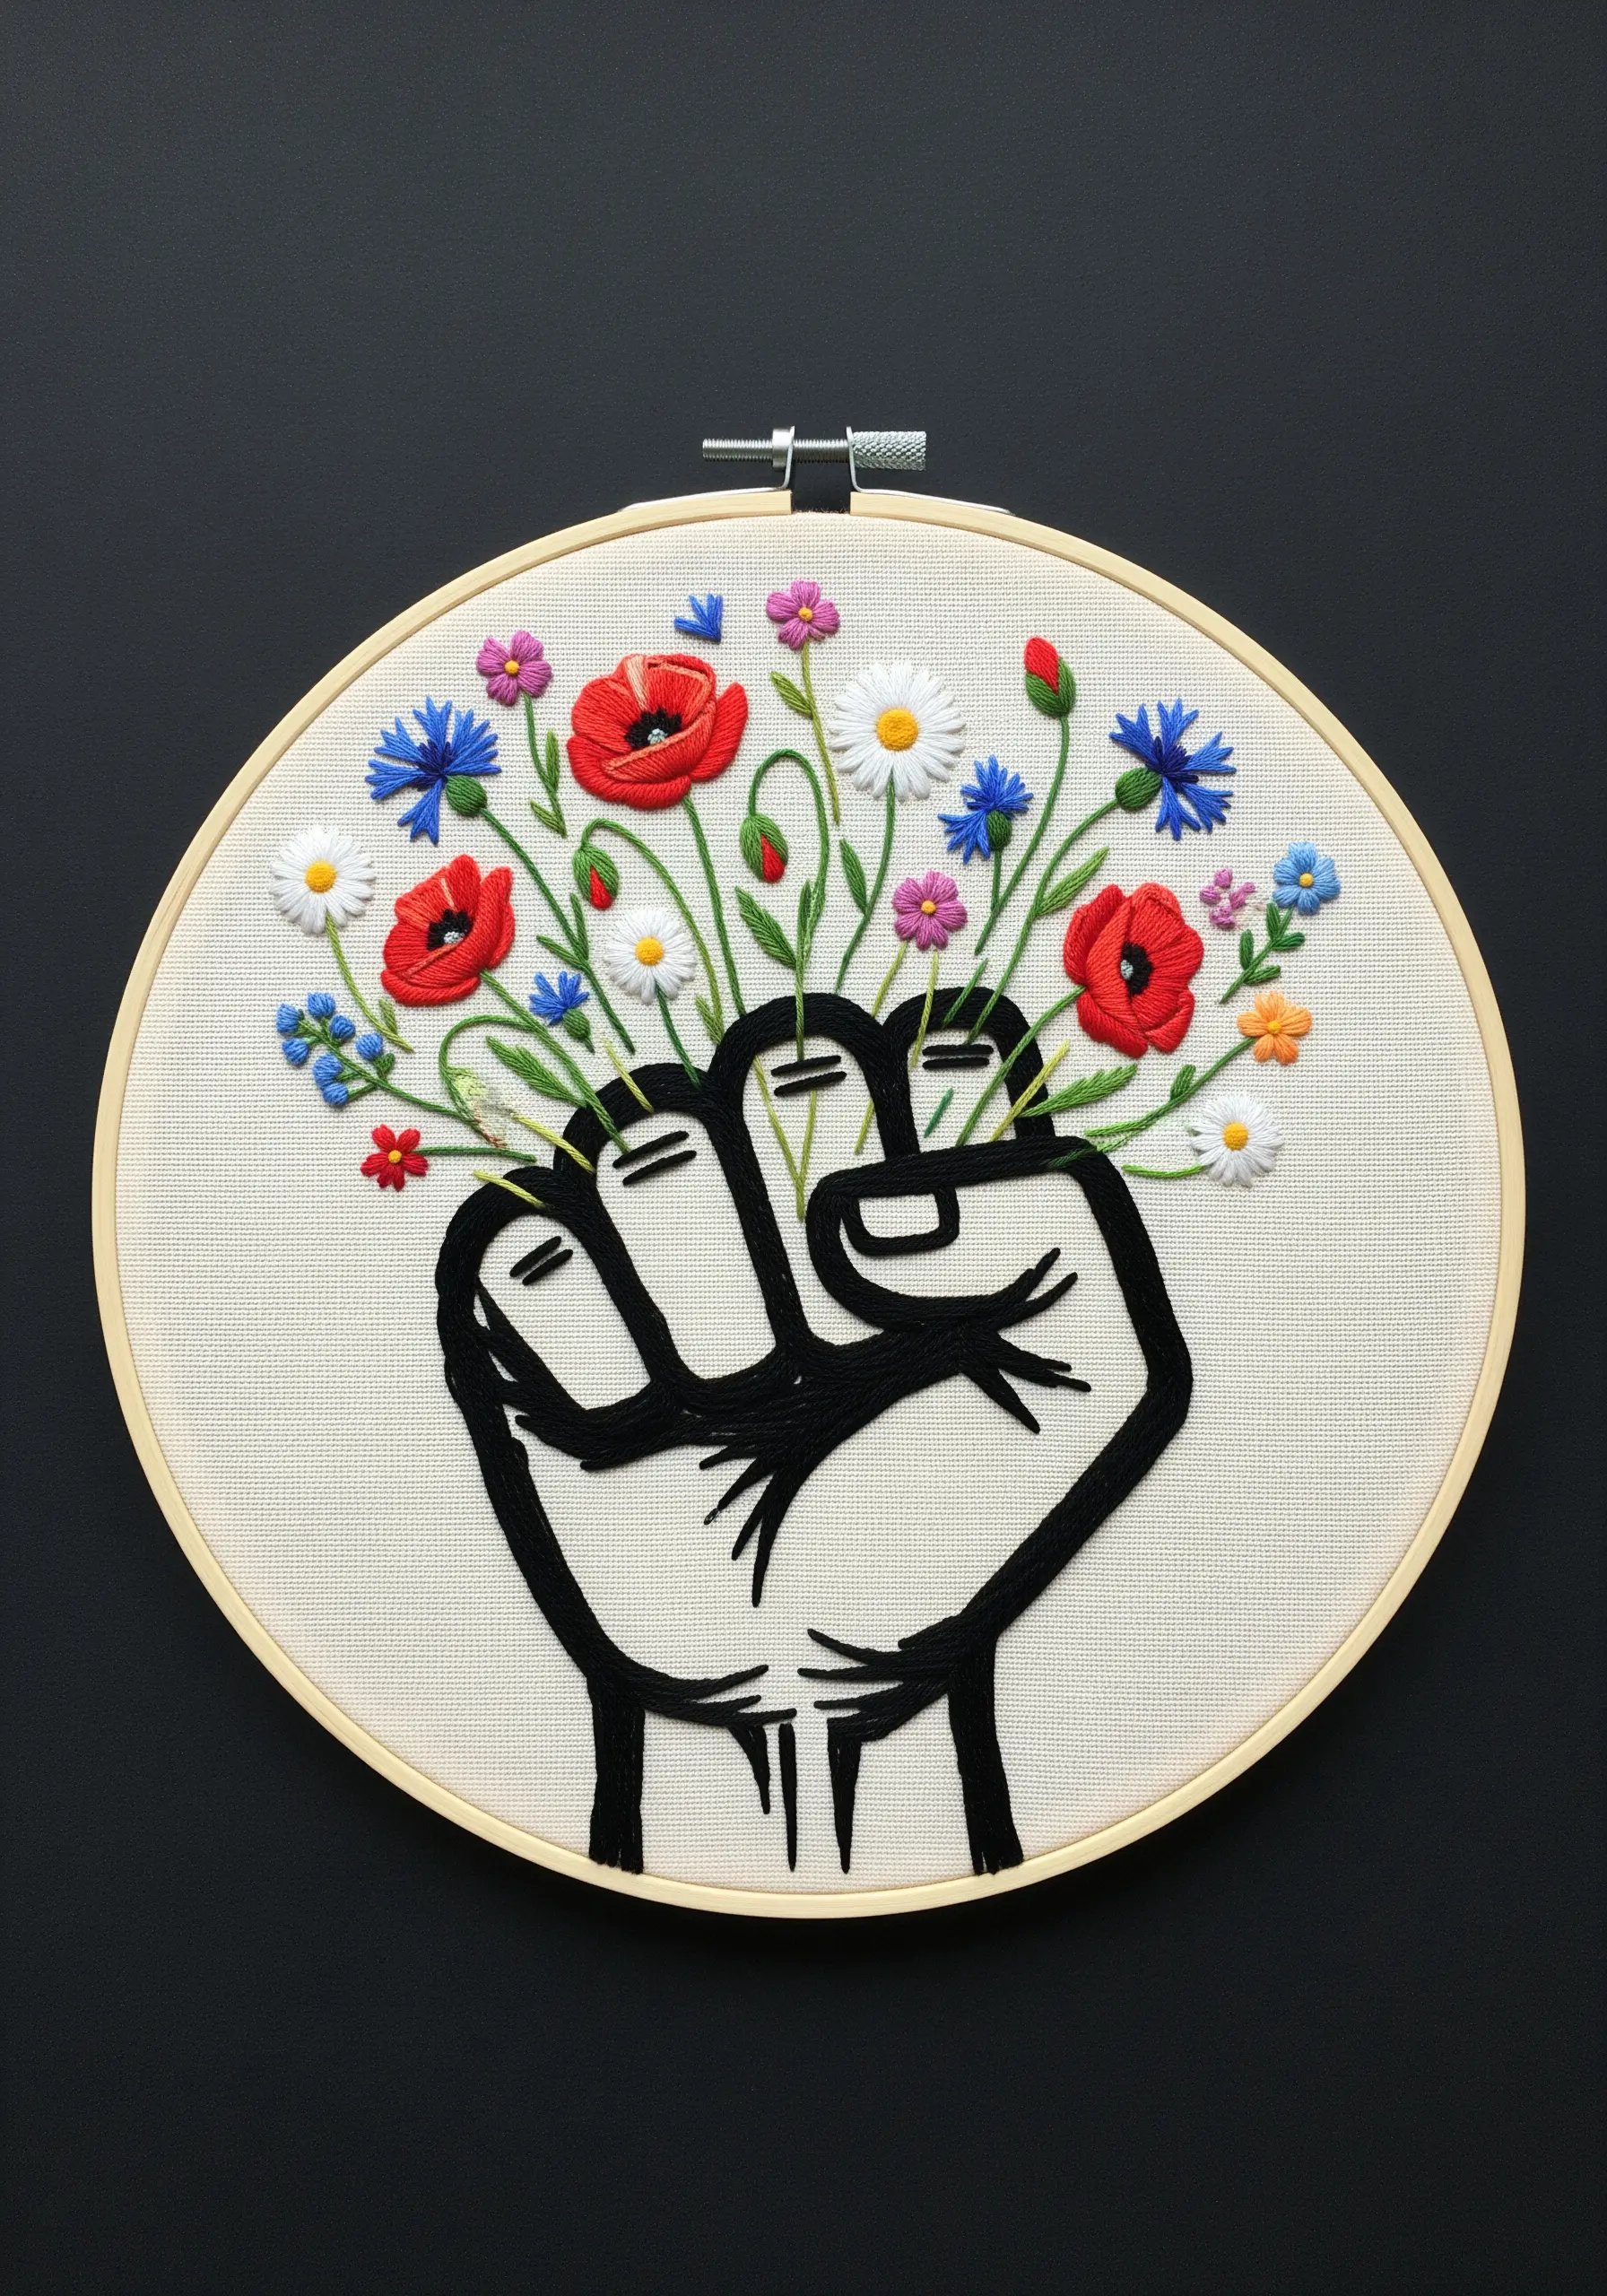
Create a visually arresting piece by juxtaposing a powerful, solid form with a spray of light, colorful botanicals.
Fill the fist with a dense, black satin stitch, creating a strong anchor for the entire design.
From this solid base, let a bouquet of delicate wildflowers emerge. Use a mix of simple stitches—detached chain, French knots, and straight stitches—in vibrant colors.
This high-contrast approach results in a stunning and deeply symbolic composition.
21. Create a Meta-Narrative of Thread Drawing Thread
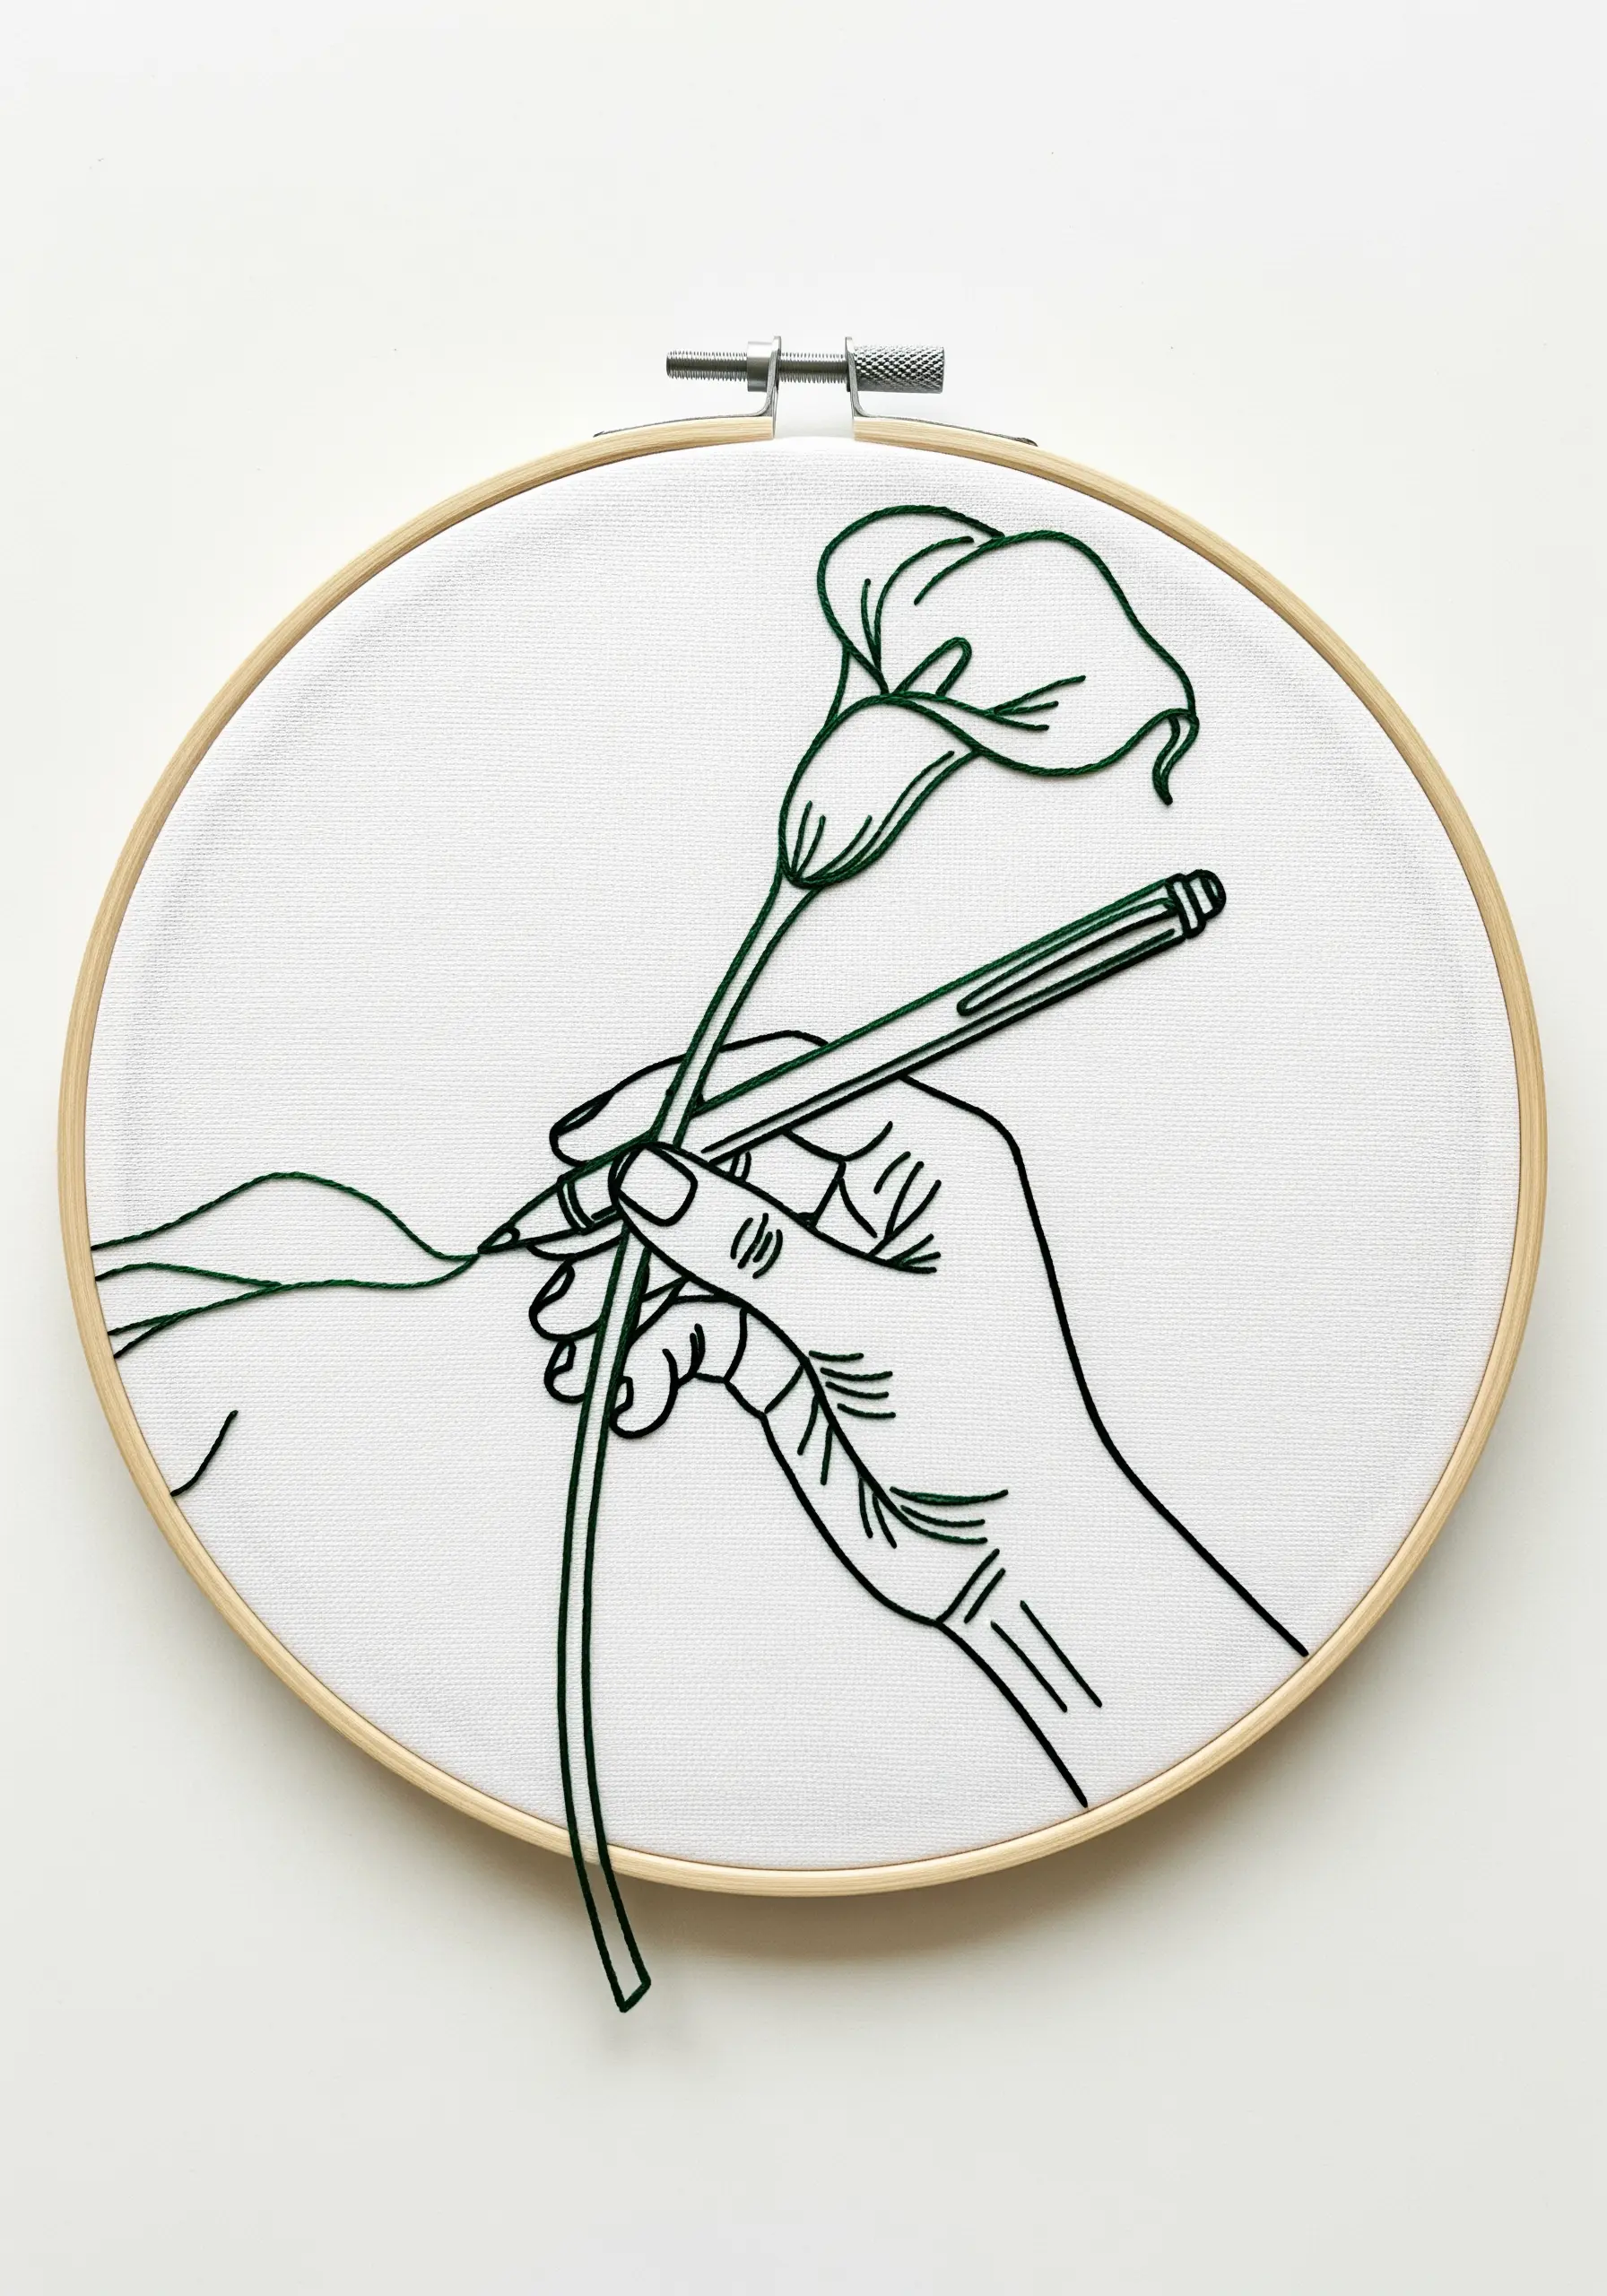
This clever, self-referential design makes the embroidery thread itself the hero of the story.
Use a crisp backstitch for the hand and the pen to give them solid, defined forms.
For the flower being ‘drawn,’ switch to a slightly looser stem stitch to mimic the fluid, organic quality of an ink line.
The single strand of floss extending from the pen to the artwork creates a beautiful illusion and an elegant tribute to the art of stitching.
22. Fill a Shape with the Illusion of Liquid Movement
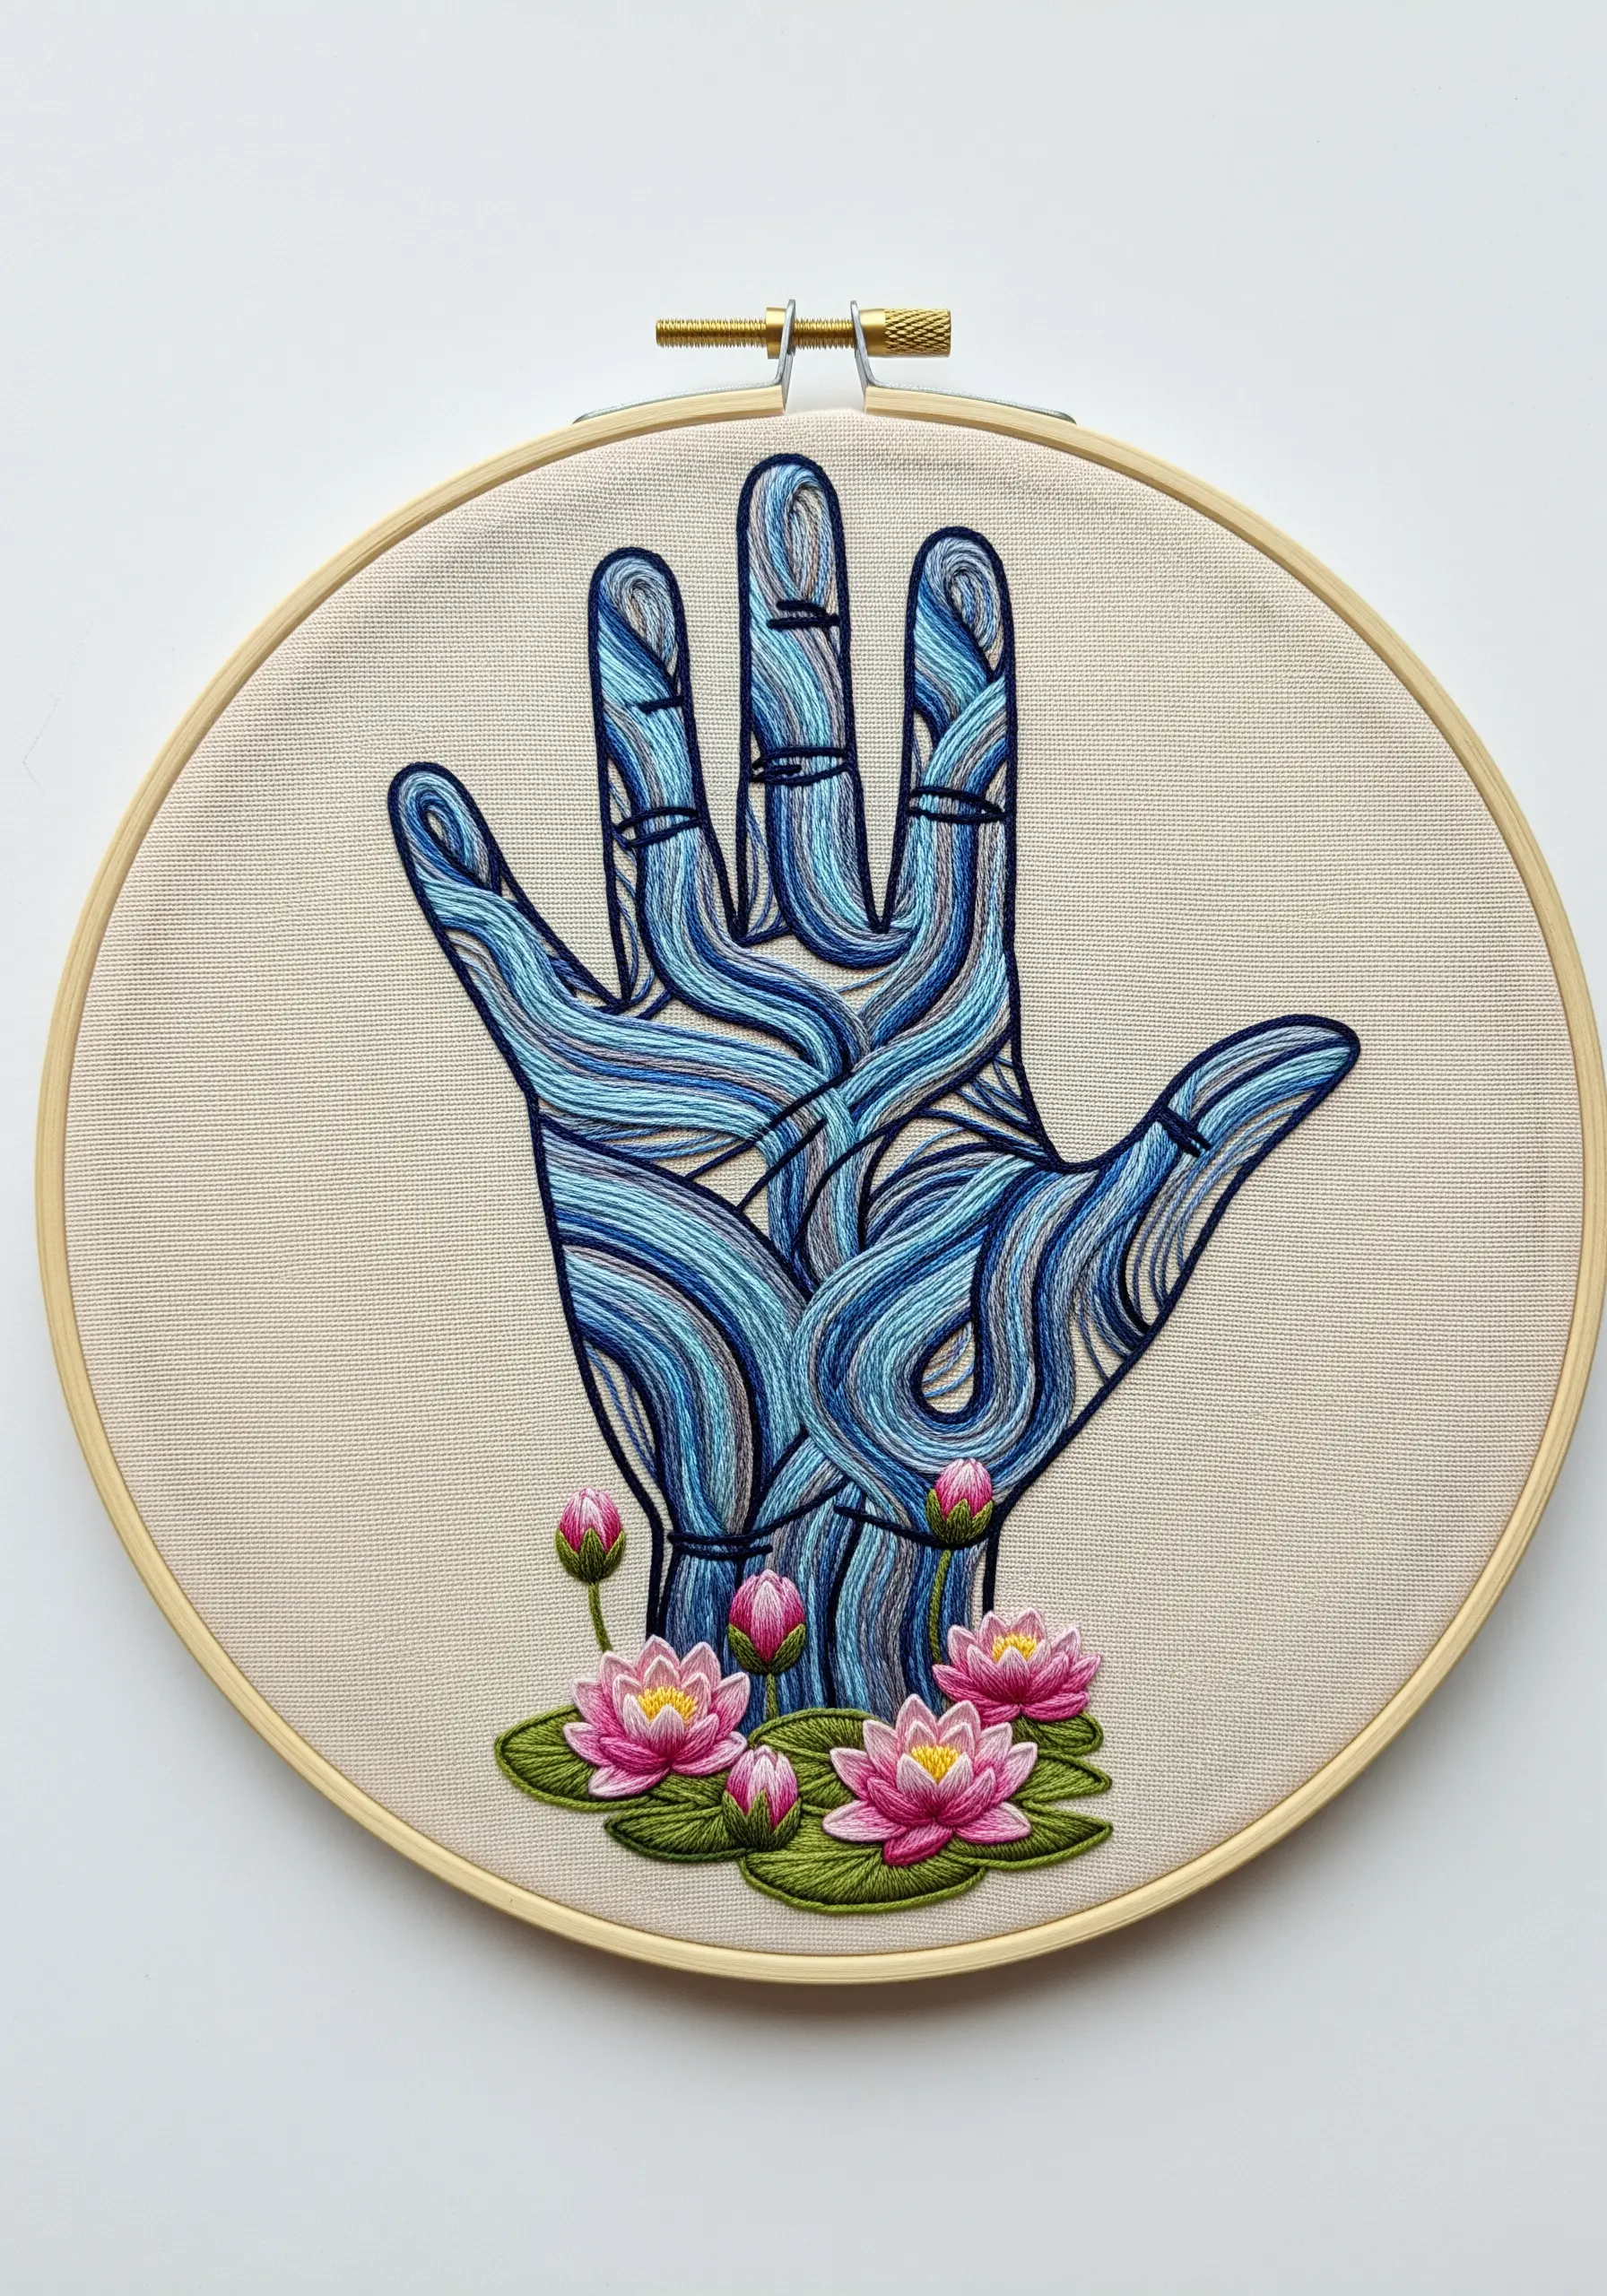
Instead of a simple outline, fill the hand with a pattern that evokes the fluid motion of water.
Using several shades of blue floss, create the wavy, interlocking lines with a split stitch or stem stitch.
Slight variations in stitch length and direction are not mistakes; they enhance the organic, liquid effect.
The small, satin-stitched water lilies at the base anchor the design, completing the serene, aquatic narrative.
23. Reimagine Classic Art with a Modern Twist

Give a celebrated masterpiece a fresh, contemporary voice through embroidery.
Use a crisp white backstitch on black fabric for the iconic hands, creating a high-contrast, graphic feel that instantly modernizes the image.
Then, replace the central spark of life with a single, vibrant sunflower, using long-and-short stitch for the petals and dense French knots for the center.
This technique of Reinterpreting Classic Art with a pop of textured color is both witty and beautiful.
24. Add Whimsical Dimension with 3D Stitches
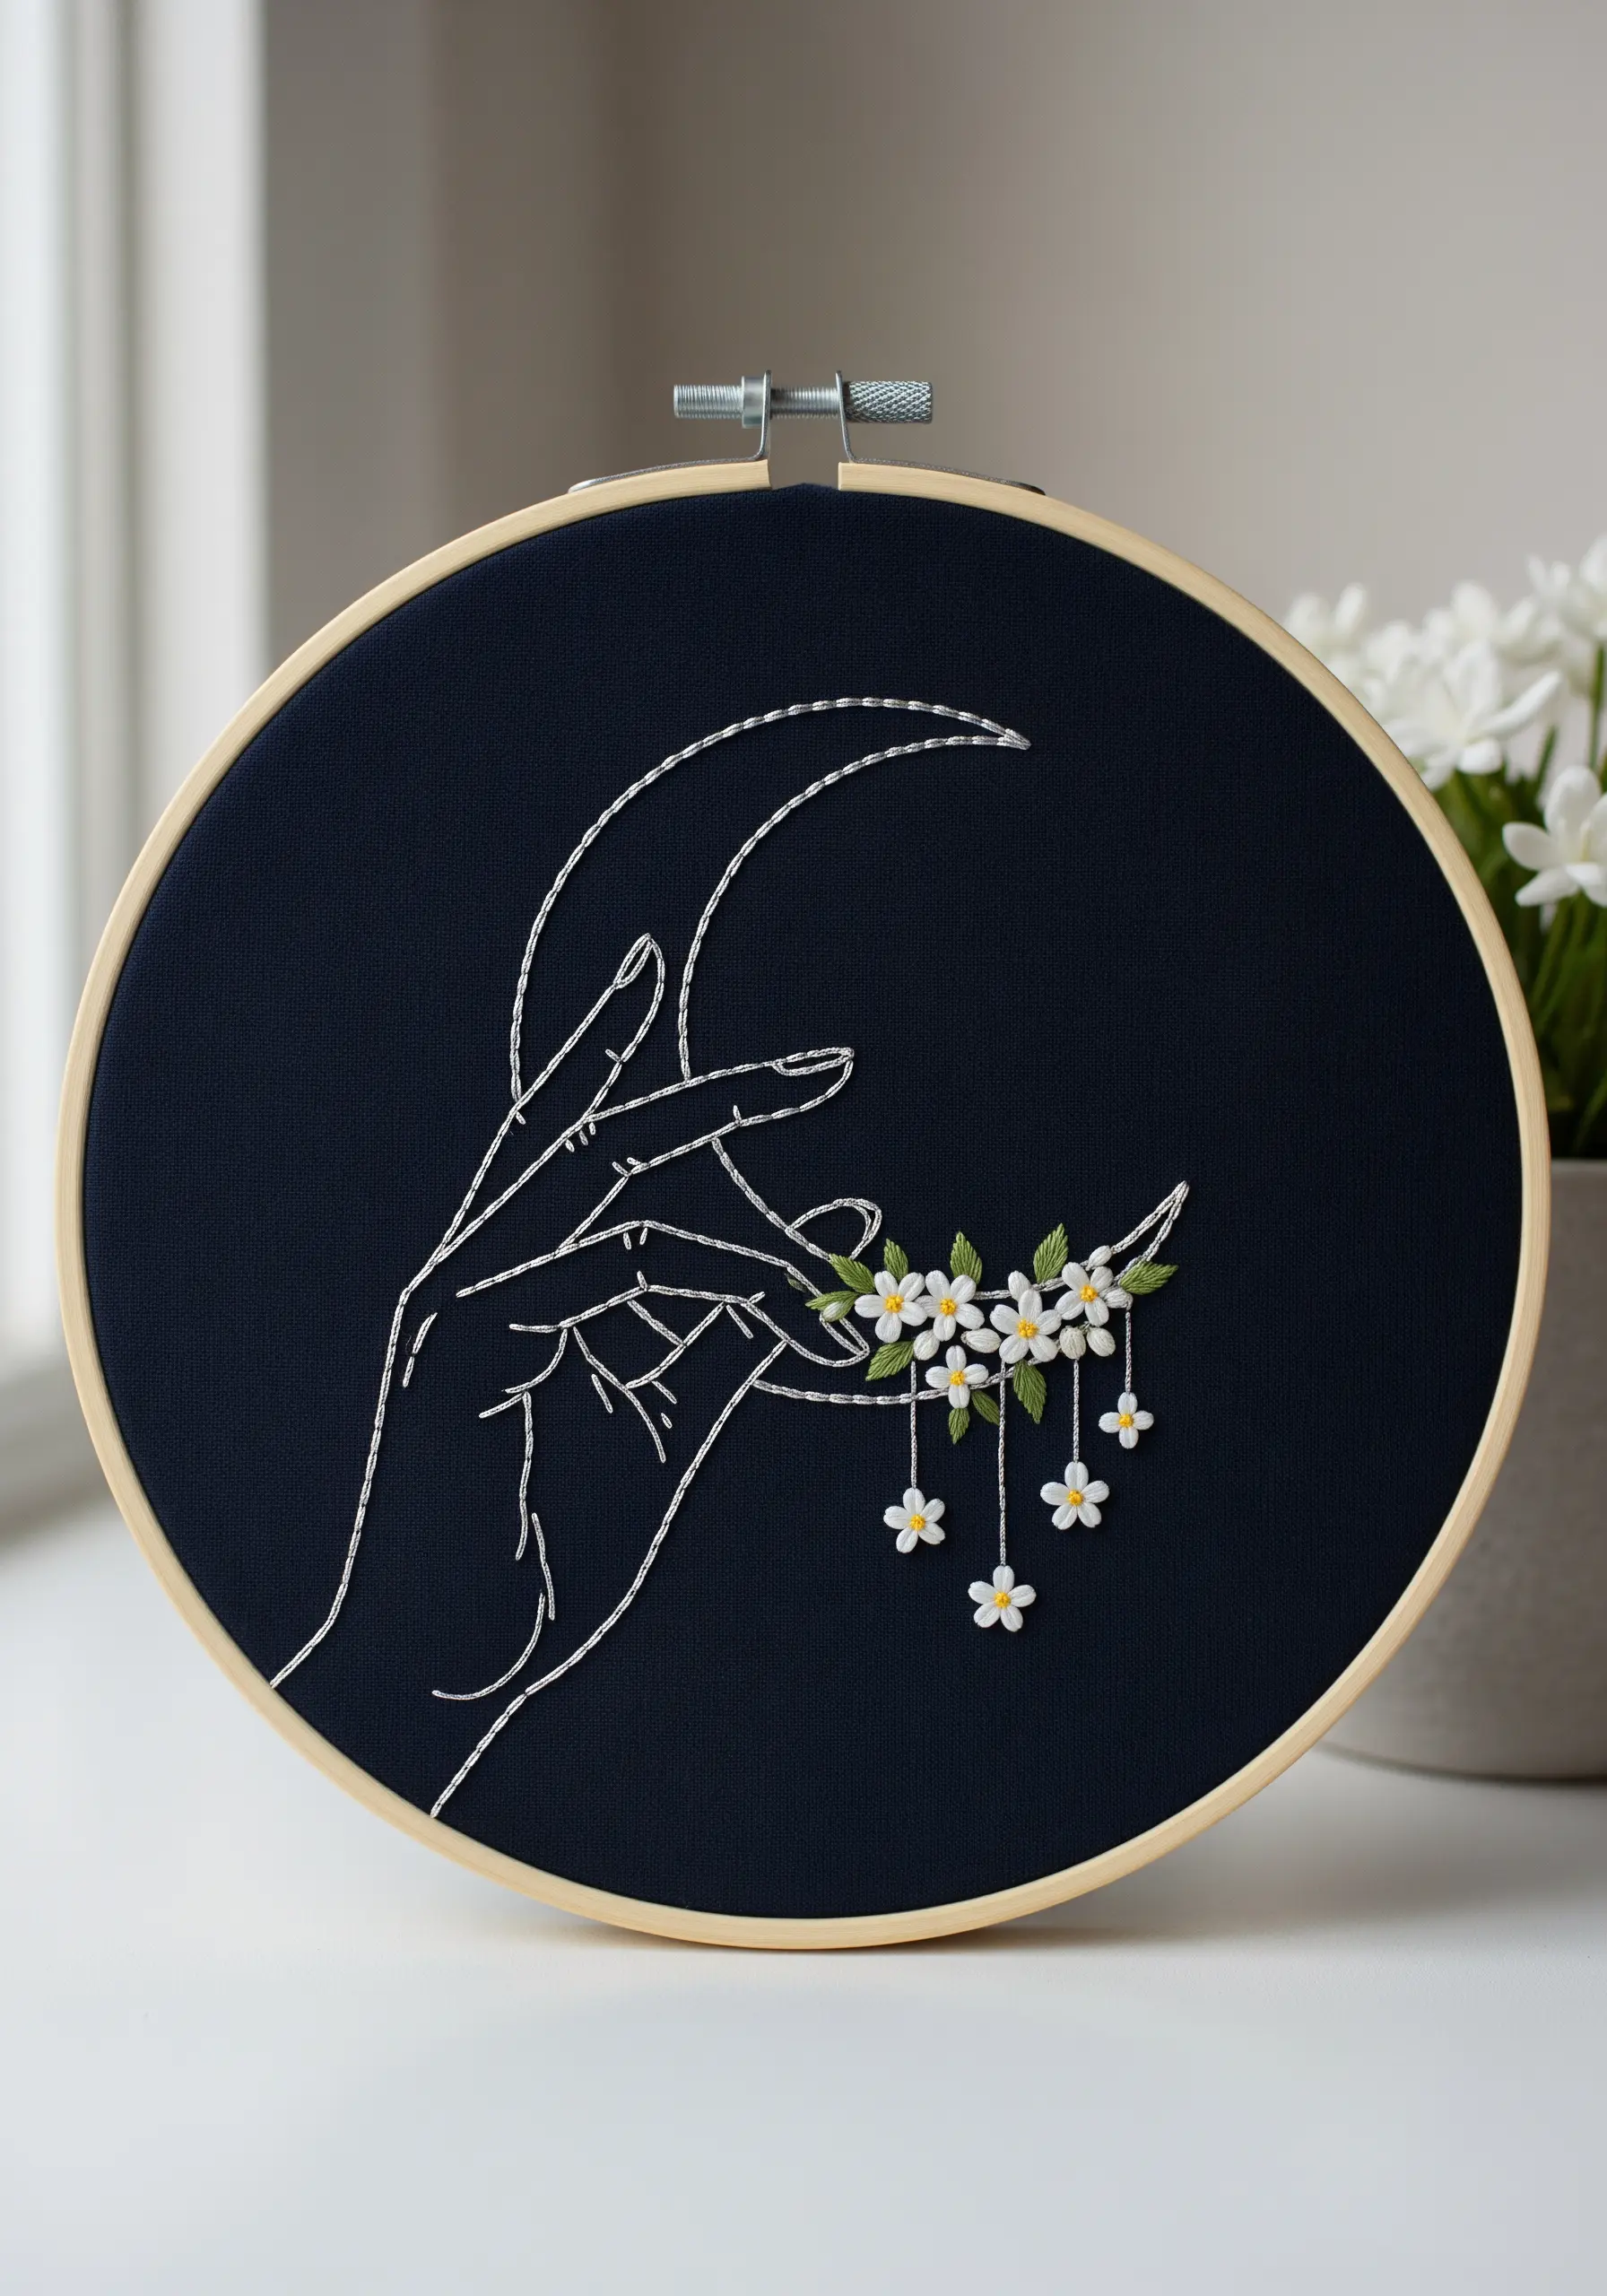
Create a dreamy, celestial scene by combining flat outlines with three-dimensional floral elements.
Use a whipped backstitch in a silvery-white thread for the hand and moon to give them a smooth, elegant line.
To create the hanging flowers, stitch long, single-thread stems and finish each one with a detached chain stitch daisy.
This simple 3D effect makes the flowers appear to float off the fabric, adding a layer of whimsical magic and movement to the piece.
25. Capture a Flower’s Character Through Texture

A thistle offers the perfect opportunity for exploring texture by assigning a different stitch to each part of the plant.
Use a sharp fishbone stitch to create the thistle’s spiky leaves. Fill the green bulb beneath the flower with a smooth satin stitch.
For the fluffy purple top, use layered straight stitches that fan out from the base, building up volume and creating a soft, brush-like effect.
This multi-stitch approach brings the complex and beautiful flower to life in a tactile way.


