
Have you ever looked at a piece of embroidery and wondered how it feels so alive? The secret isn’t a vast collection of complicated stitches. It’s texture—and you already have everything you need to master it.
Think of texture as a way of translating what you see and feel in nature into thread. It’s in the direction of a satin stitch that mimics the smoothness of a pebble, or the way tightly packed French knots become a patch of moss. It’s about making simple, intentional choices with your needle: varying the thickness of your thread, changing the density of a stitch, or layering one simple technique over another.
These projects are designed to help you explore that idea. They’re invitations to slow down, observe the world around you, and discover how to capture its incredible details, one satisfying stitch at a time. Let’s begin.
1. Create a Mossy Forest Floor
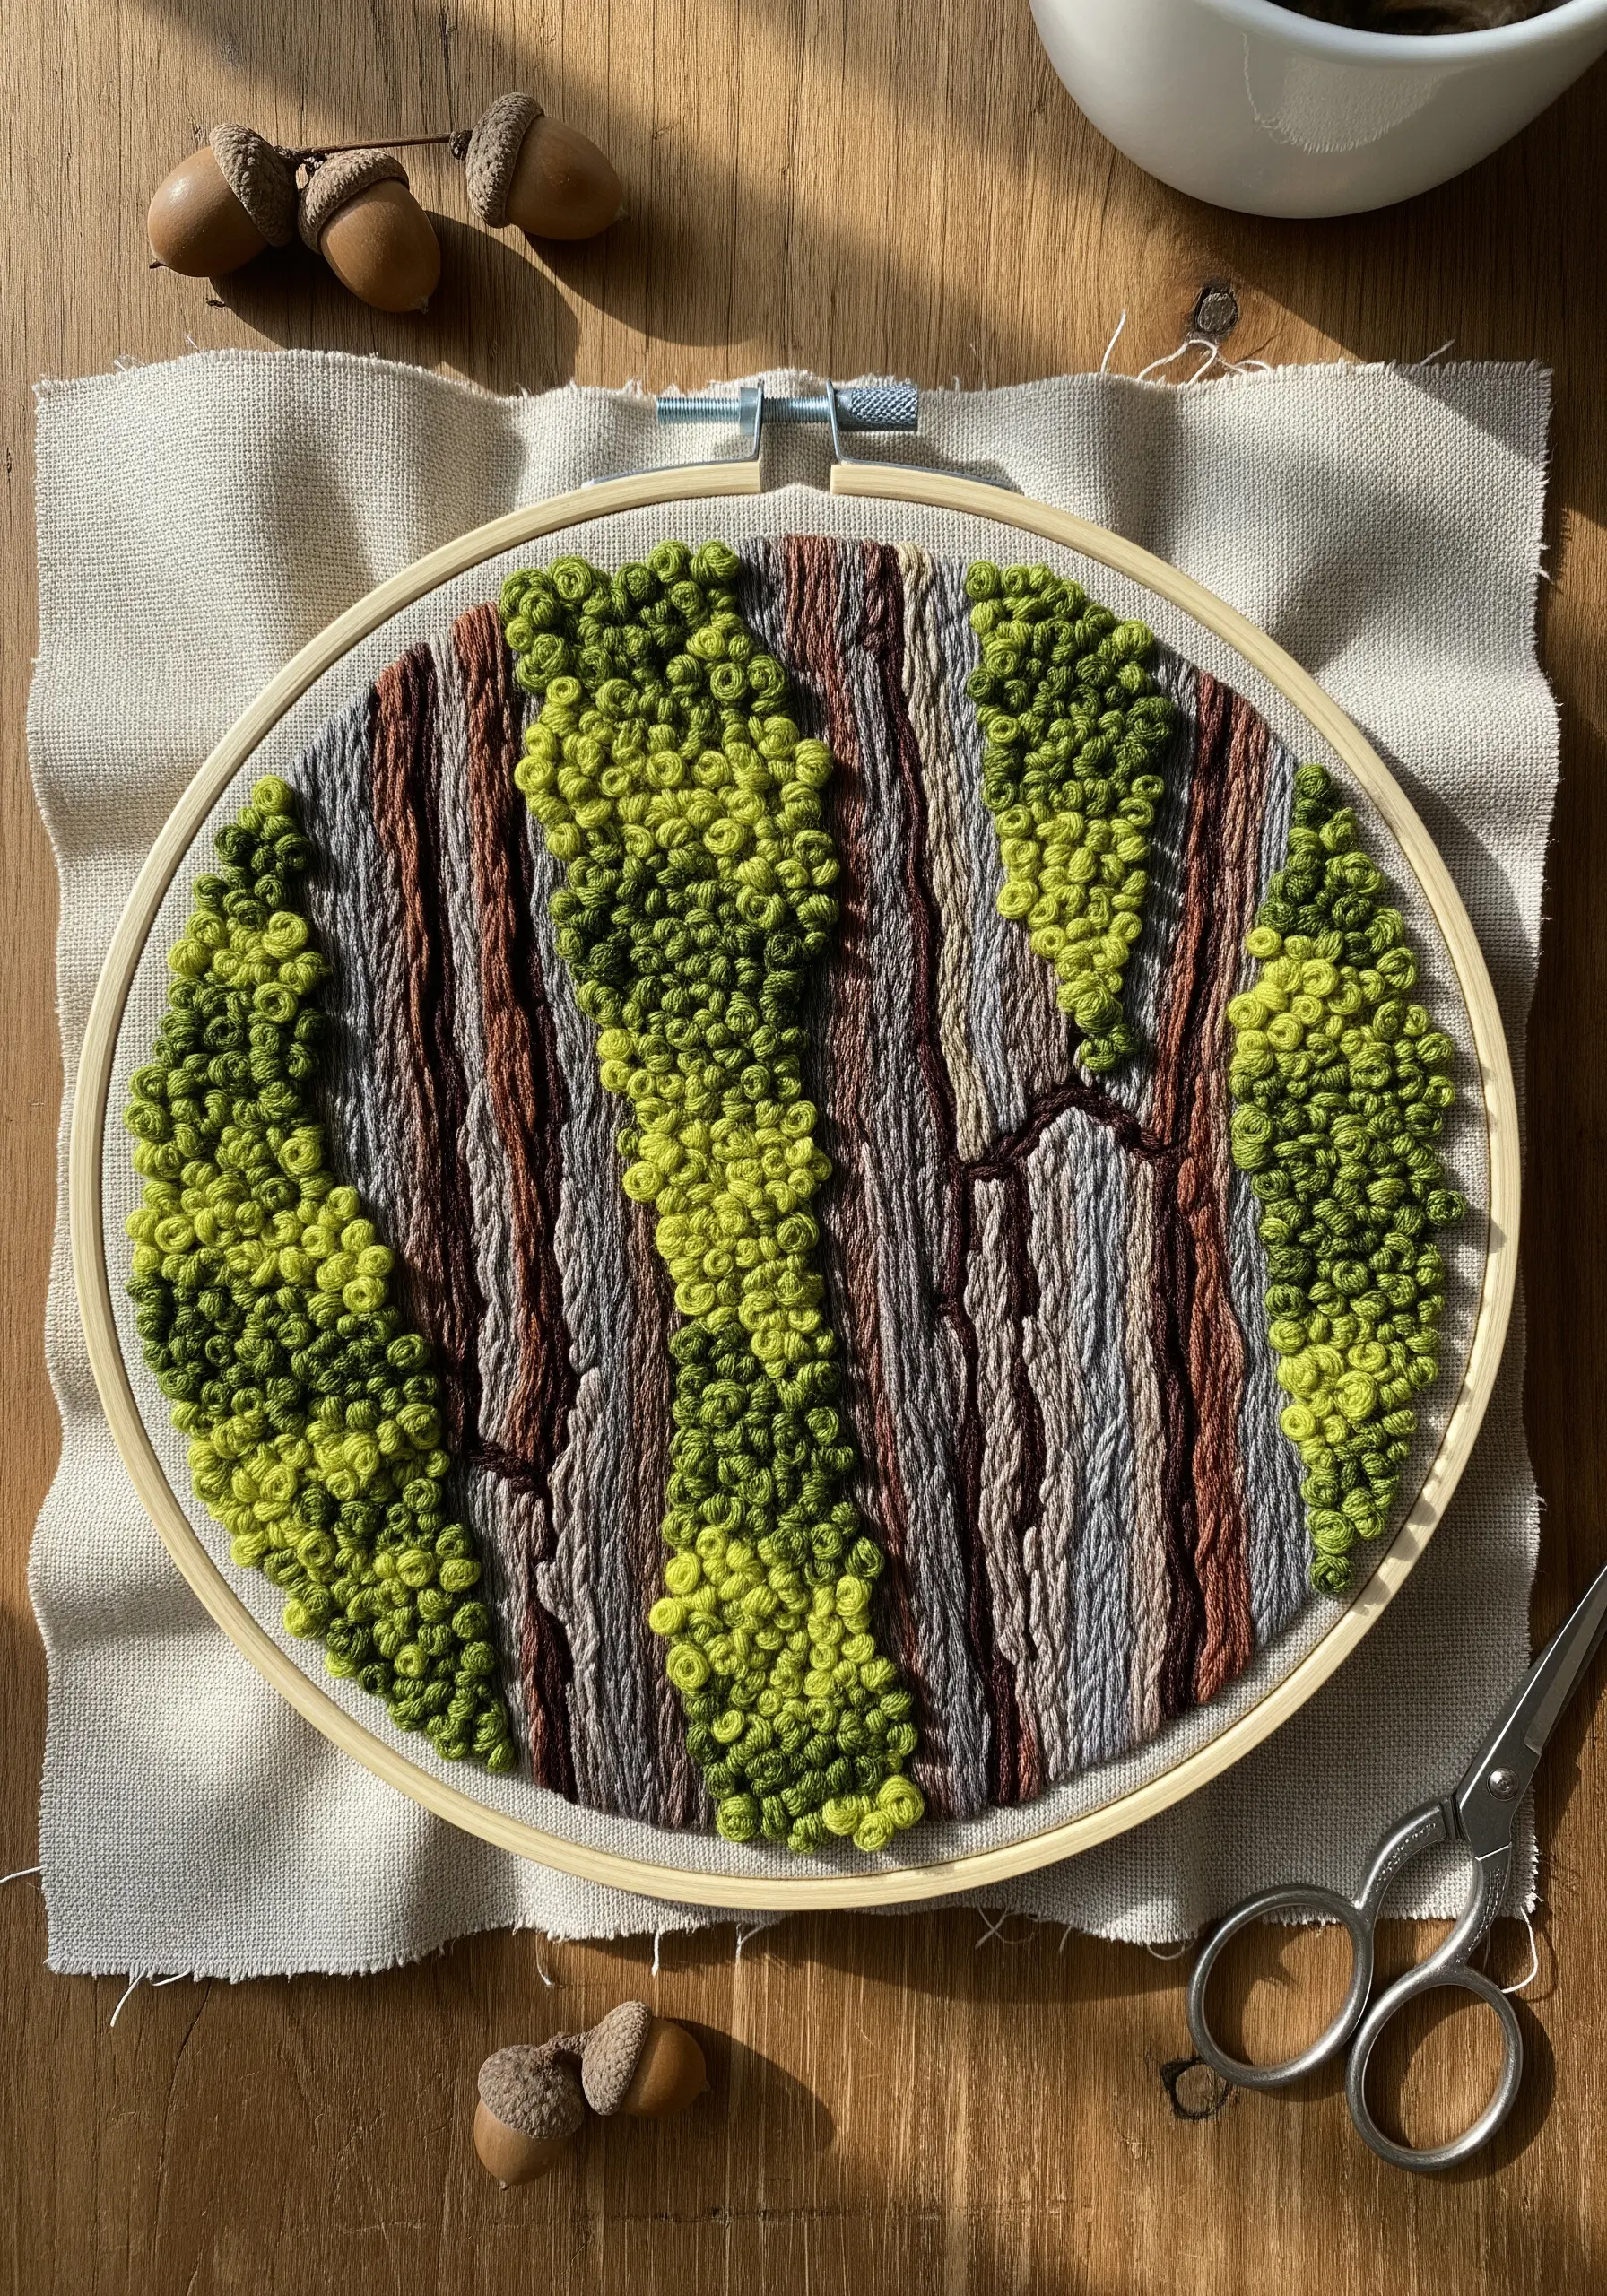
Combine two simple textures for a surprisingly realistic woodland scene: French knots for moss and straight stitches for bark.
Use a full six strands of floss for the French knots, pulling each one tightly to create dense, bumpy clusters that mimic moss.
For the tree bark, lay down long straight stitches using fewer strands—perhaps two or three—in variegated grey and brown threads to suggest texture without overwhelming the moss.
This contrast in thread count and stitch type is what gives the piece its incredible depth and tactile quality, making it one of those creative ways to stitch natural textures that truly elevates your work.
2. Stitch Polished River Stones
To achieve the smooth, serene look of water-worn stones, focus on perfecting your satin stitch.
First, outline each stone shape with a delicate split stitch. This creates a slightly raised edge that contains your satin stitches, resulting in a cleaner, more defined finish.
Fill each shape with perfectly parallel satin stitches using three strands of floss. Don’t pull the thread too tight, as this can pucker the fabric; instead, let it glide over the surface.
The key is the unwavering direction of your stitches, which creates a subtle sheen that looks just like a polished stone surface, perfect for abstract framed embroidery patterns.
3. Capture the Delicacy of a Dandelion
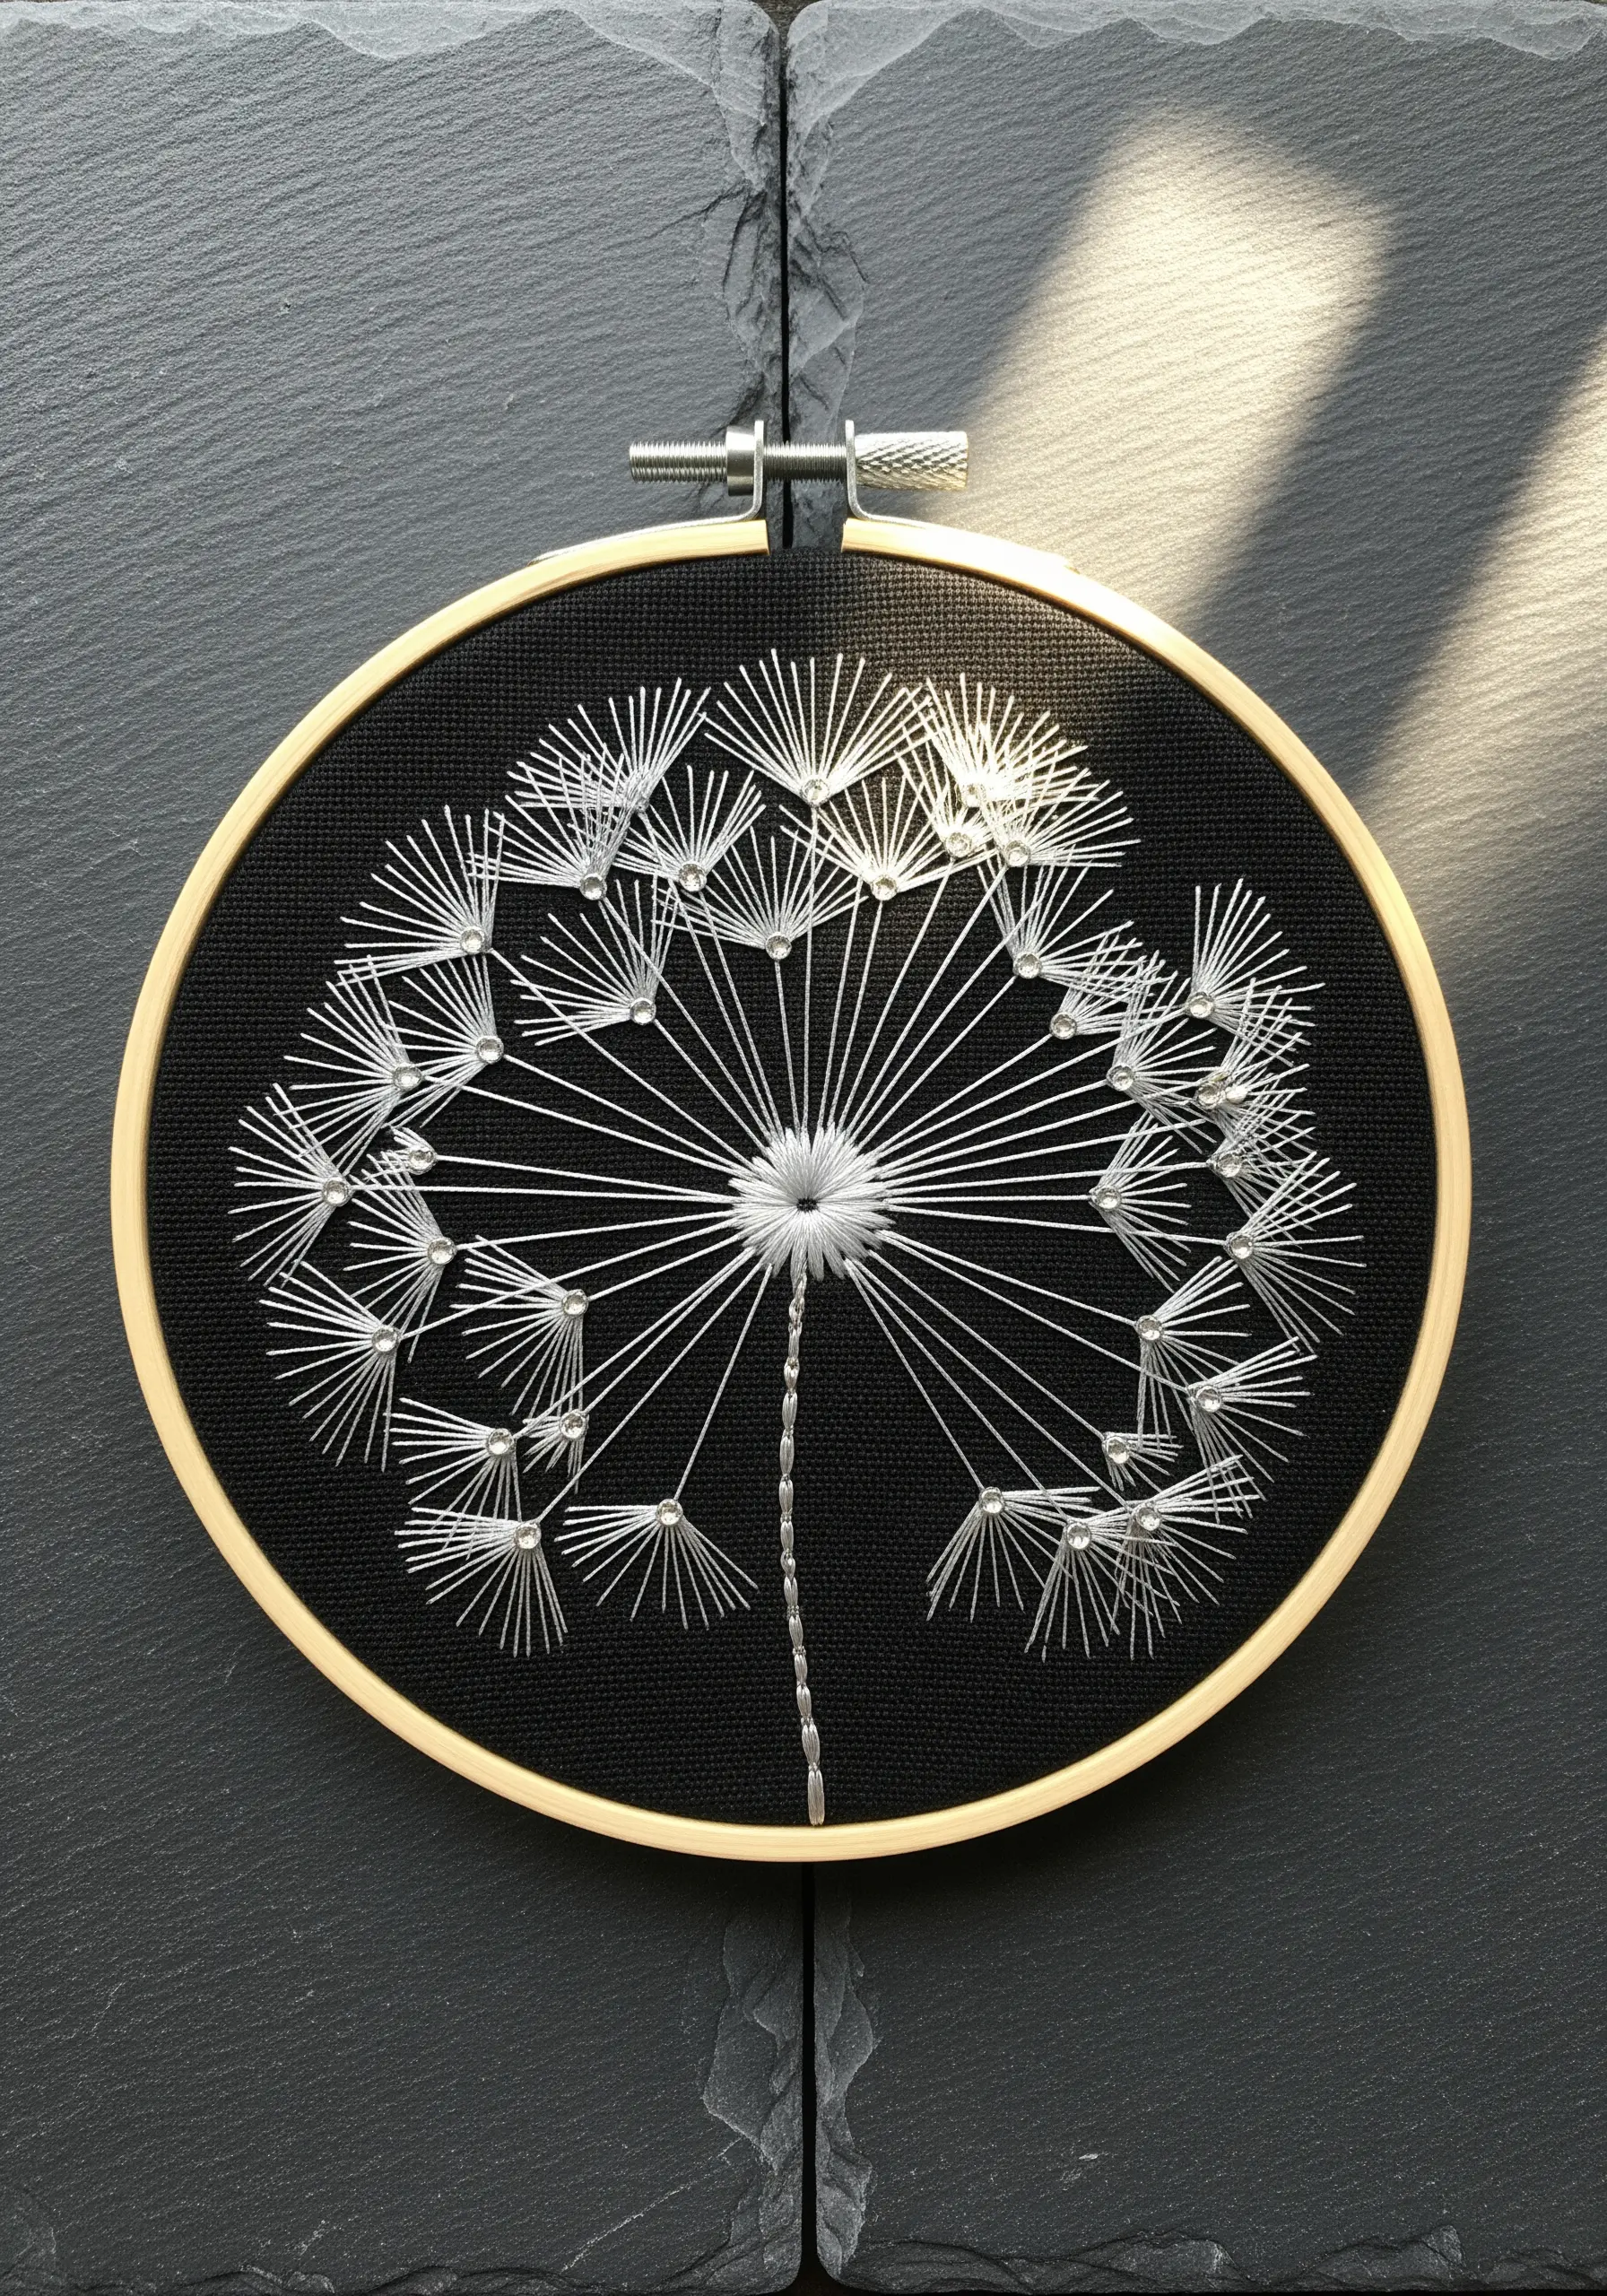
The magic of this design lies in precise tension and thoughtful details, creating an effect of weightless seeds.
Use a bright white, single-strand perle cotton on dark fabric for maximum contrast and strength. Work each seed stalk as a single straight stitch radiating from a central point.
To give the seeds a sense of weight and realism, finish the end of each straight stitch with a tiny French knot or a small silver bead.
This small addition transforms simple lines into a recognizable, delicate structure, proving that the simplest stitches can have the most significant impact.
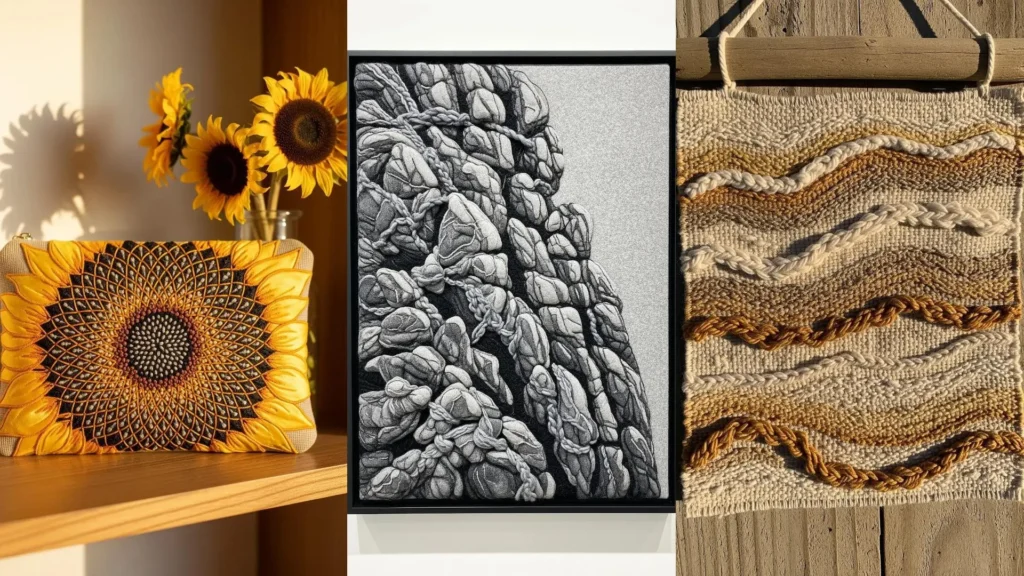
4. Weave an Earthy, Textured Landscape
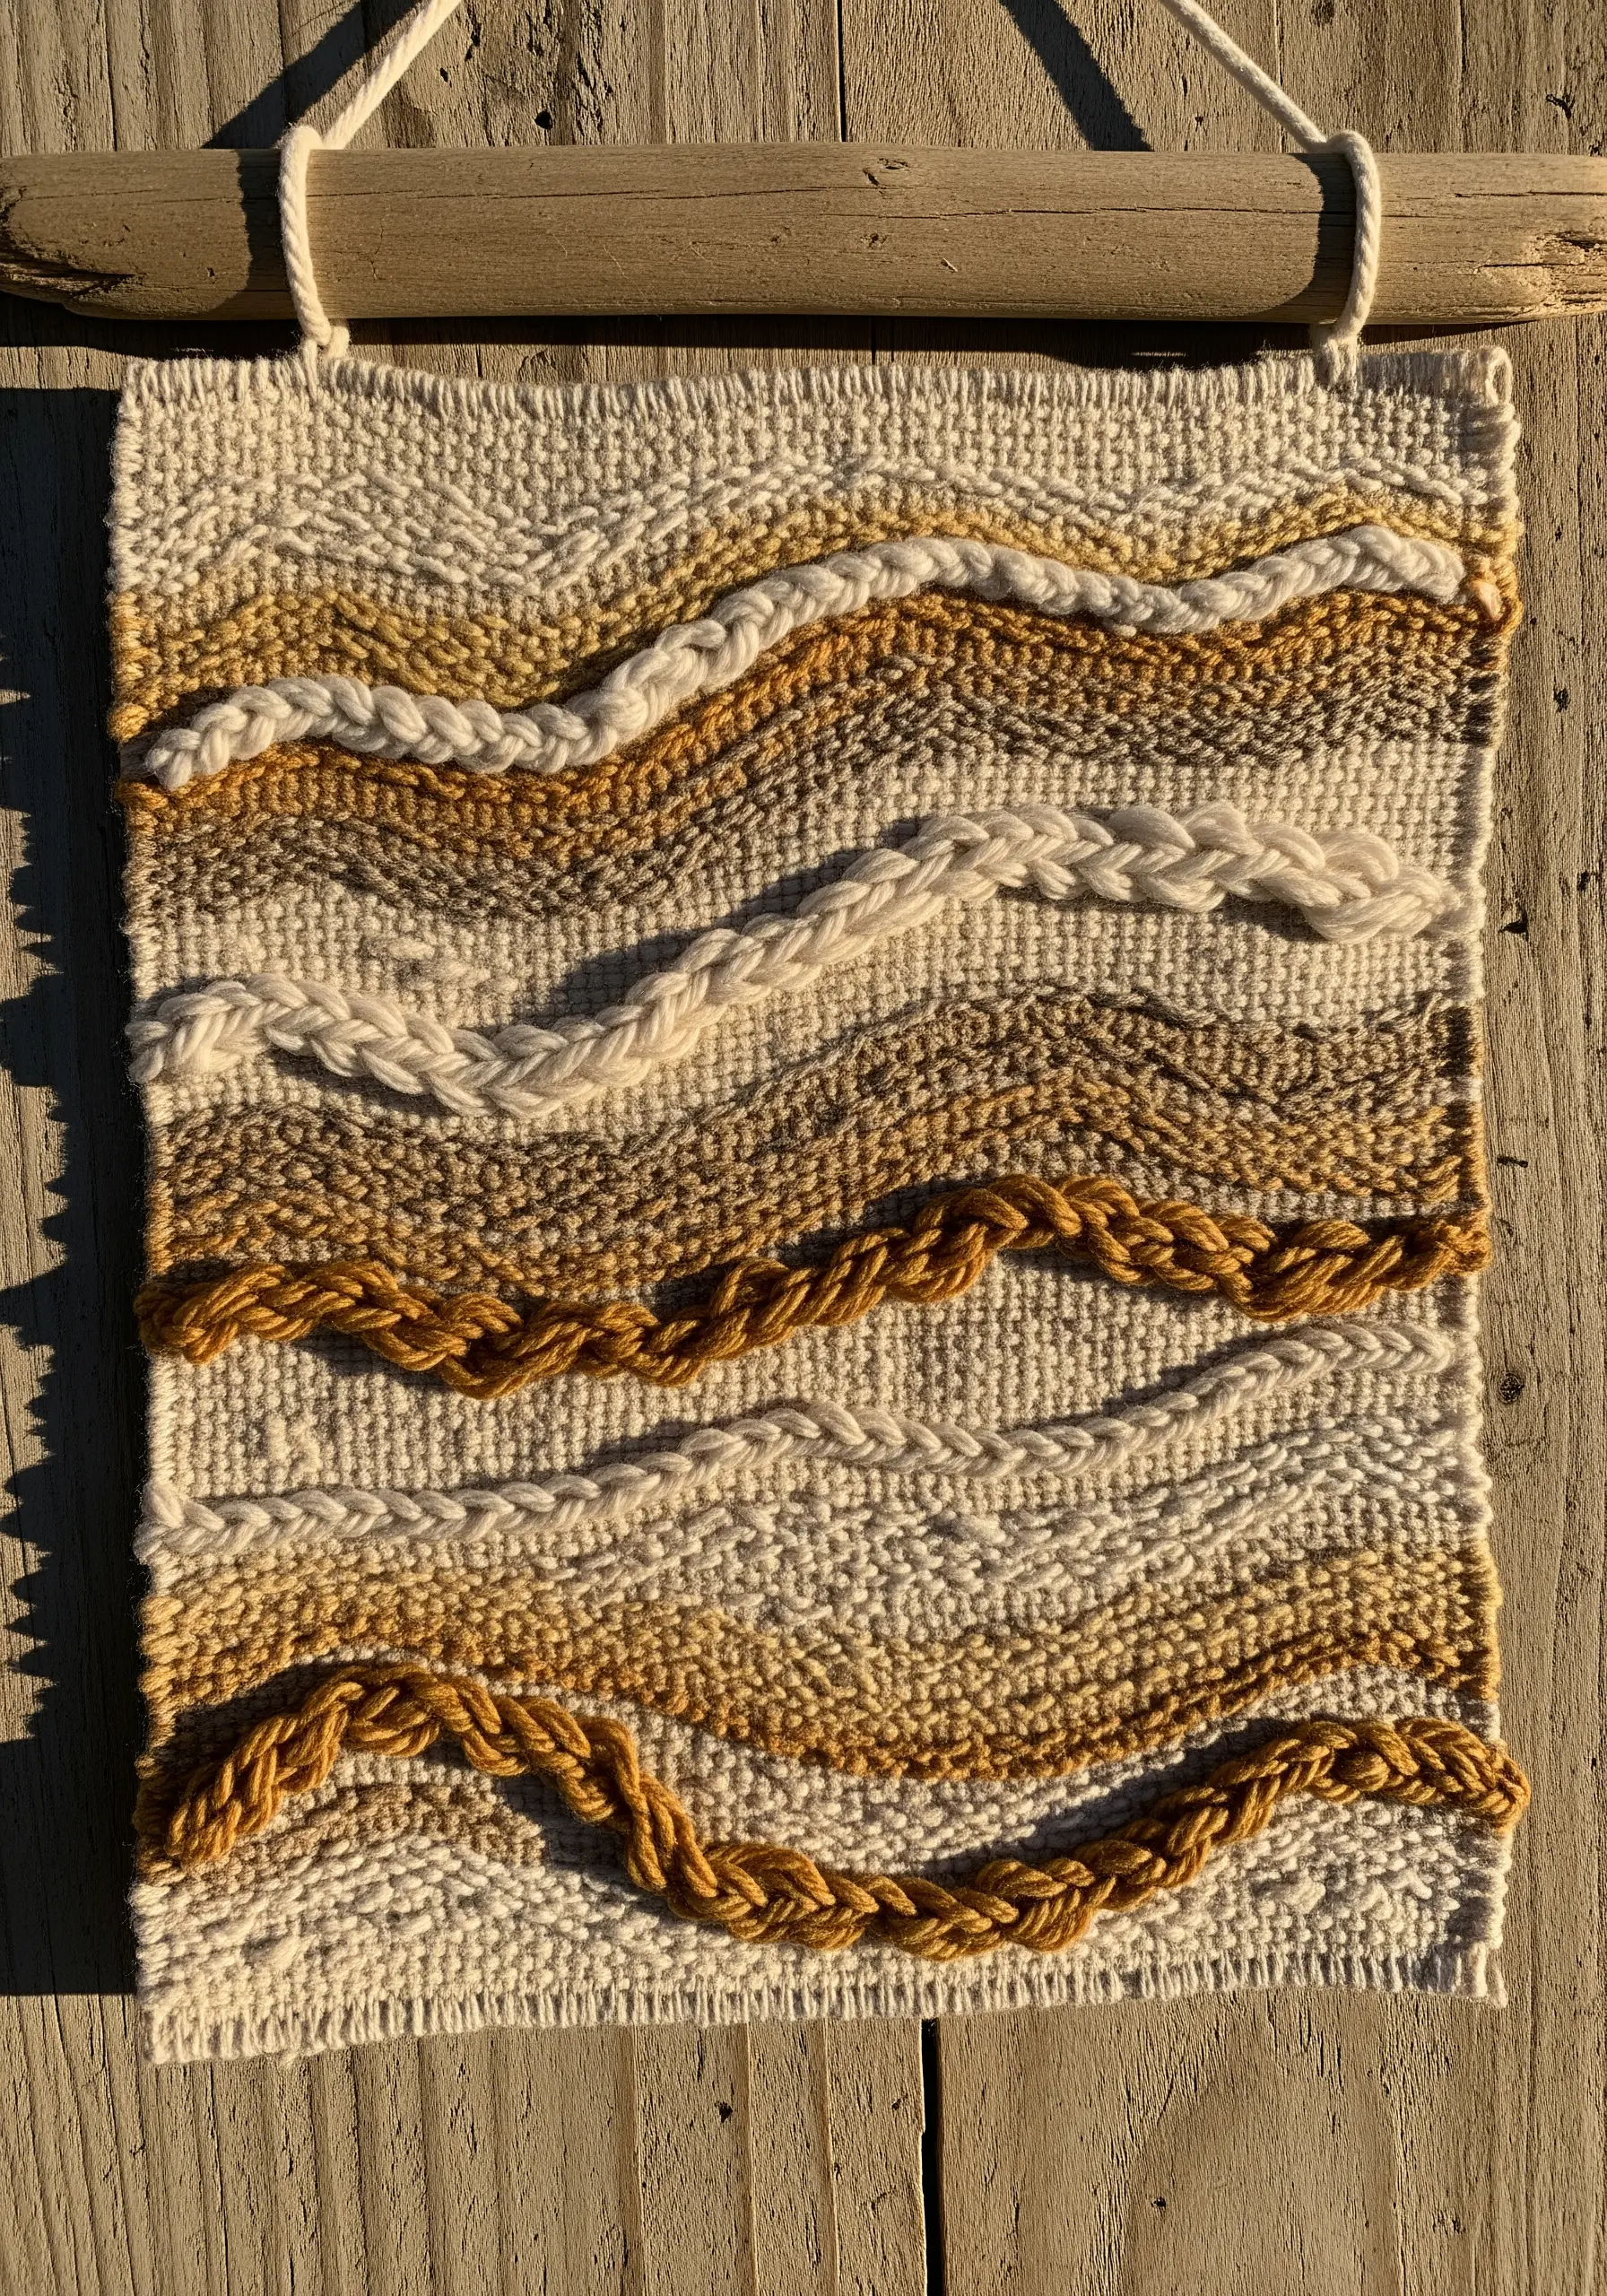
Explore texture beyond the needle by incorporating weaving techniques into your wall art. This approach builds depth quickly and feels wonderfully tactile.
Use a simple frame loom or even a sturdy piece of cardboard to warp your vertical threads. Weave with thick, natural yarns in earthy tones, alternating between a standard tabby weave and more dimensional stitches.
Introduce a thick, braided Soumak stitch to create raised, wavy lines that mimic hills or shorelines. This simple addition breaks up the flat surface and adds a professional, sculptural quality to your mixed fiber wall hangings.
5. Outline an Autumn Leaf with Precision
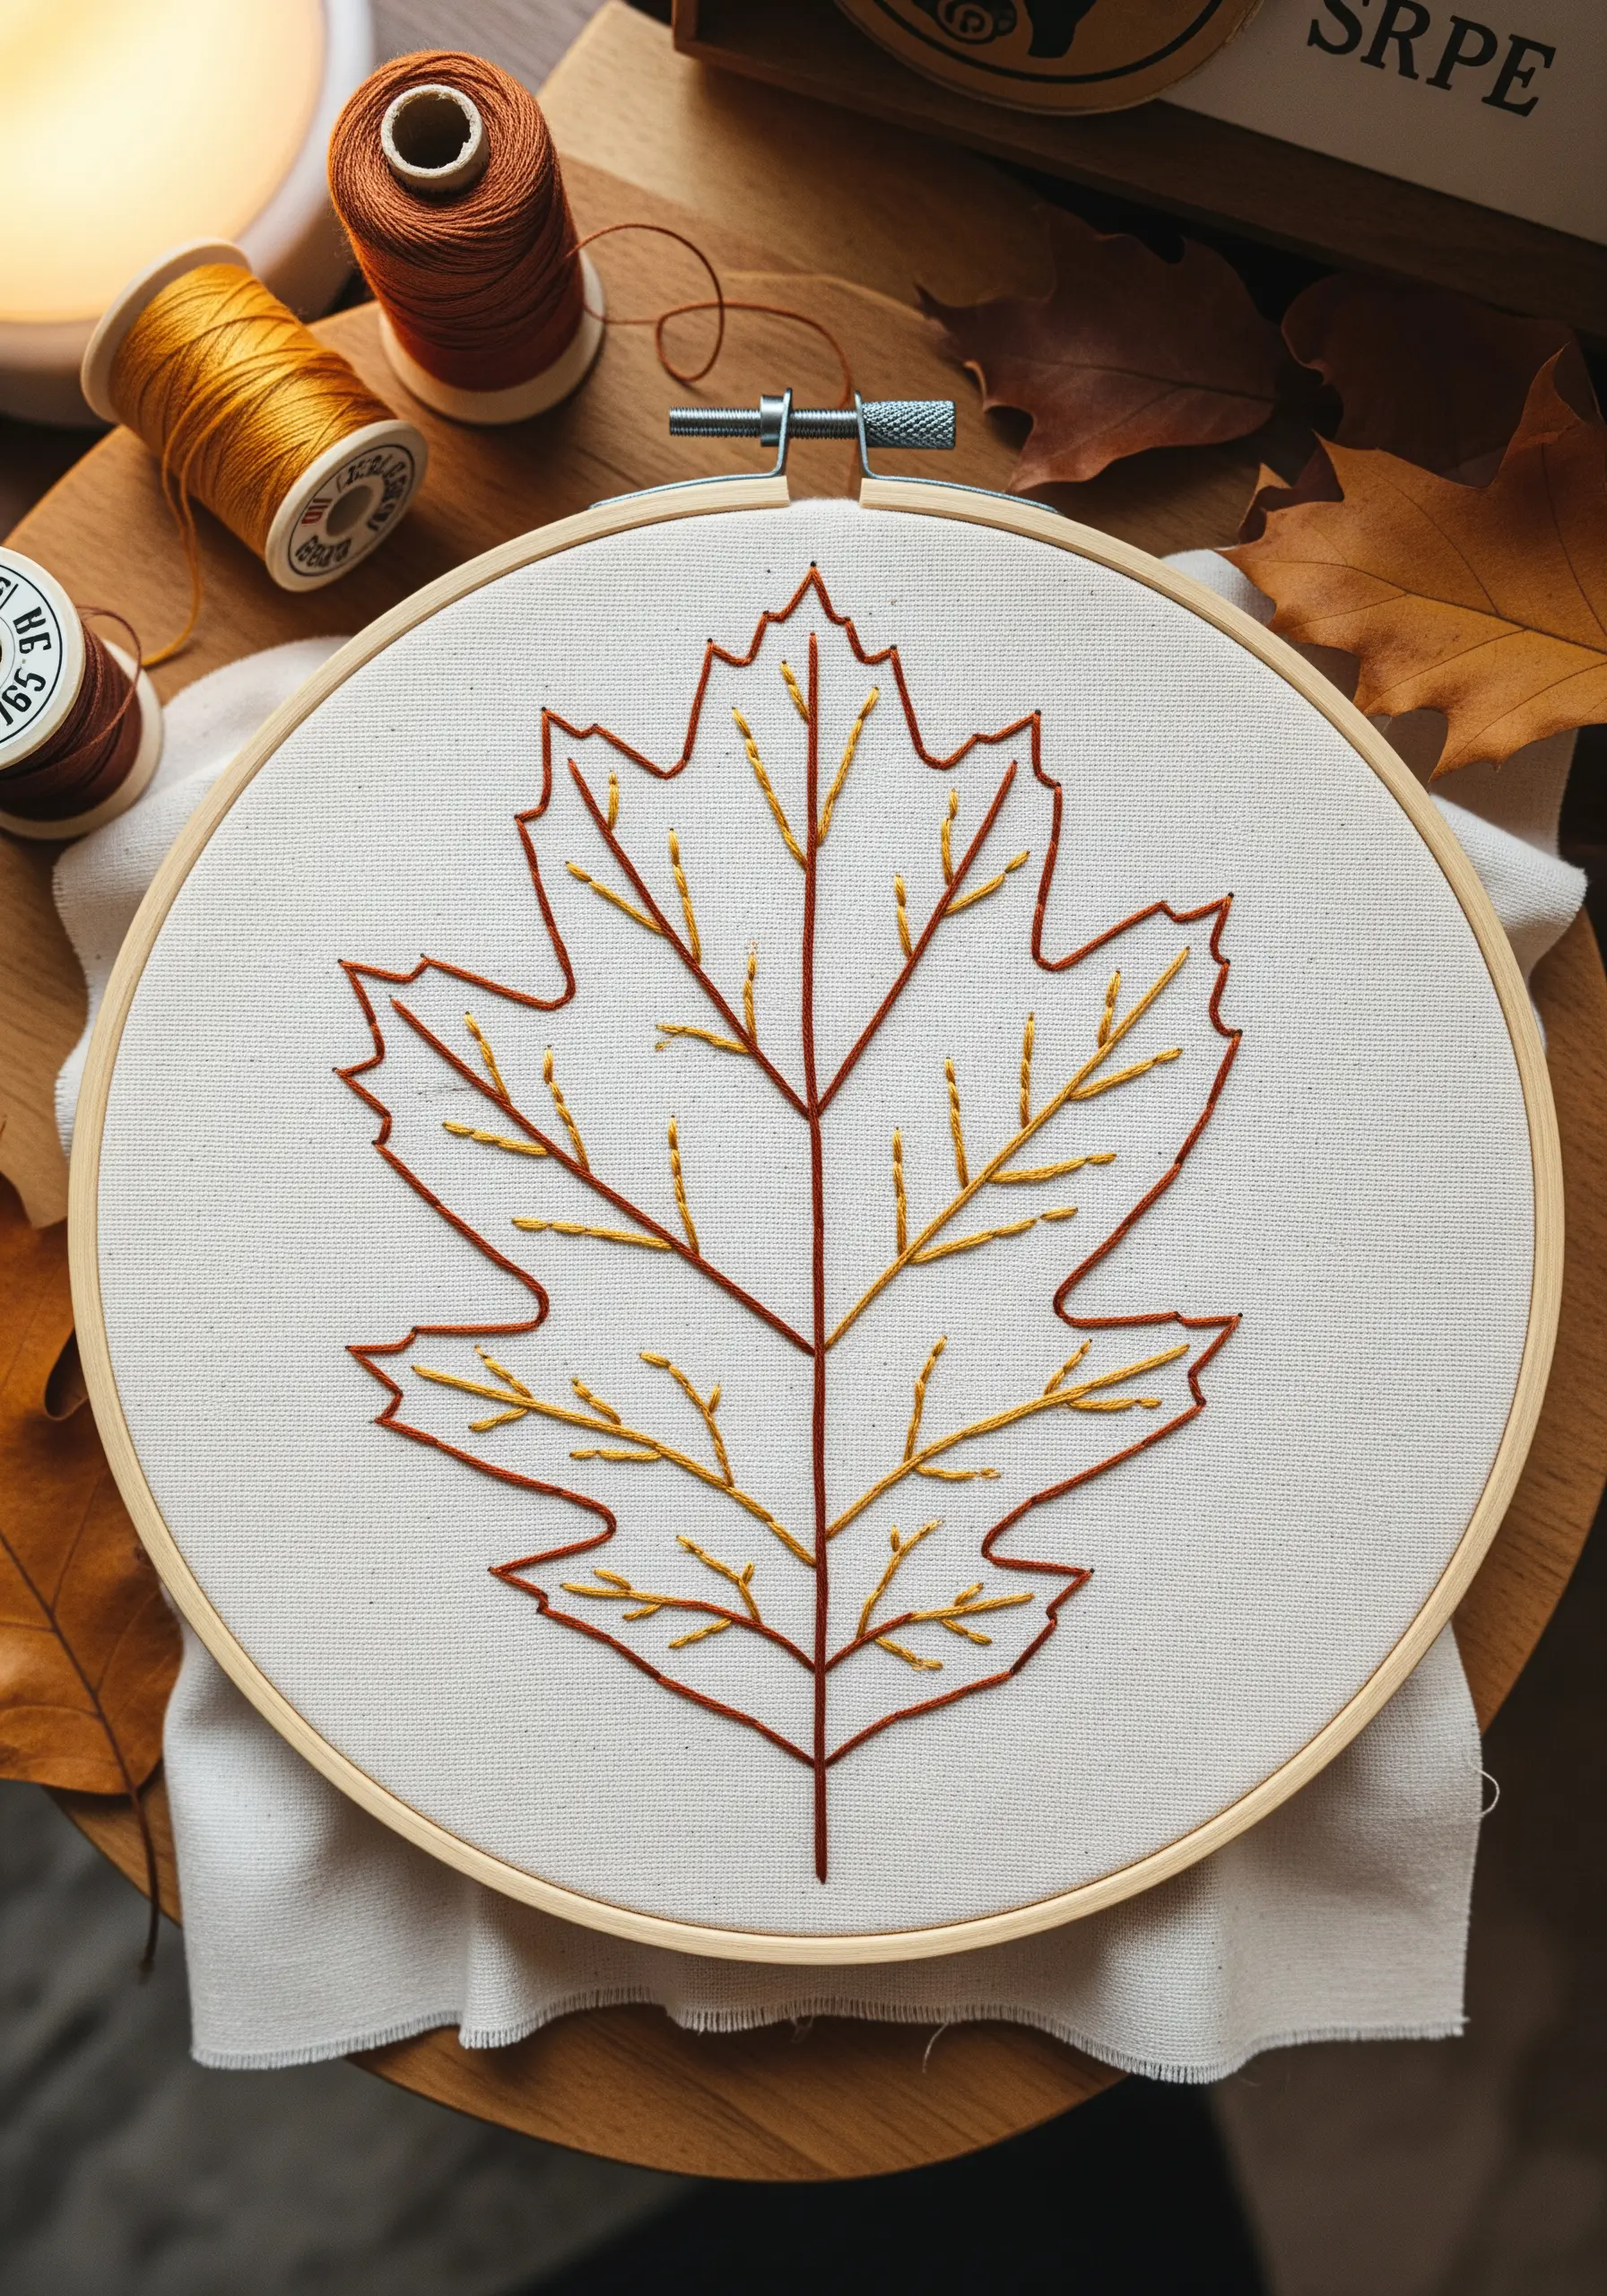
Elevate a simple line drawing by strategically varying your thread weight. This technique adds visual hierarchy and elegance to minimalist designs.
Use a crisp stem stitch or backstitch for the entire outline. For the main stem and outer edge, use three strands of floss to give it presence and structure.
For the smaller, delicate inner veins, switch to a single strand of floss in a complementary color. This subtle shift in thickness makes the leaf feel more realistic and less like a flat cartoon.
This simple adjustment is a hallmark of refined minimalist line art nature embroidery and shows an attention to detail that makes your work stand out.
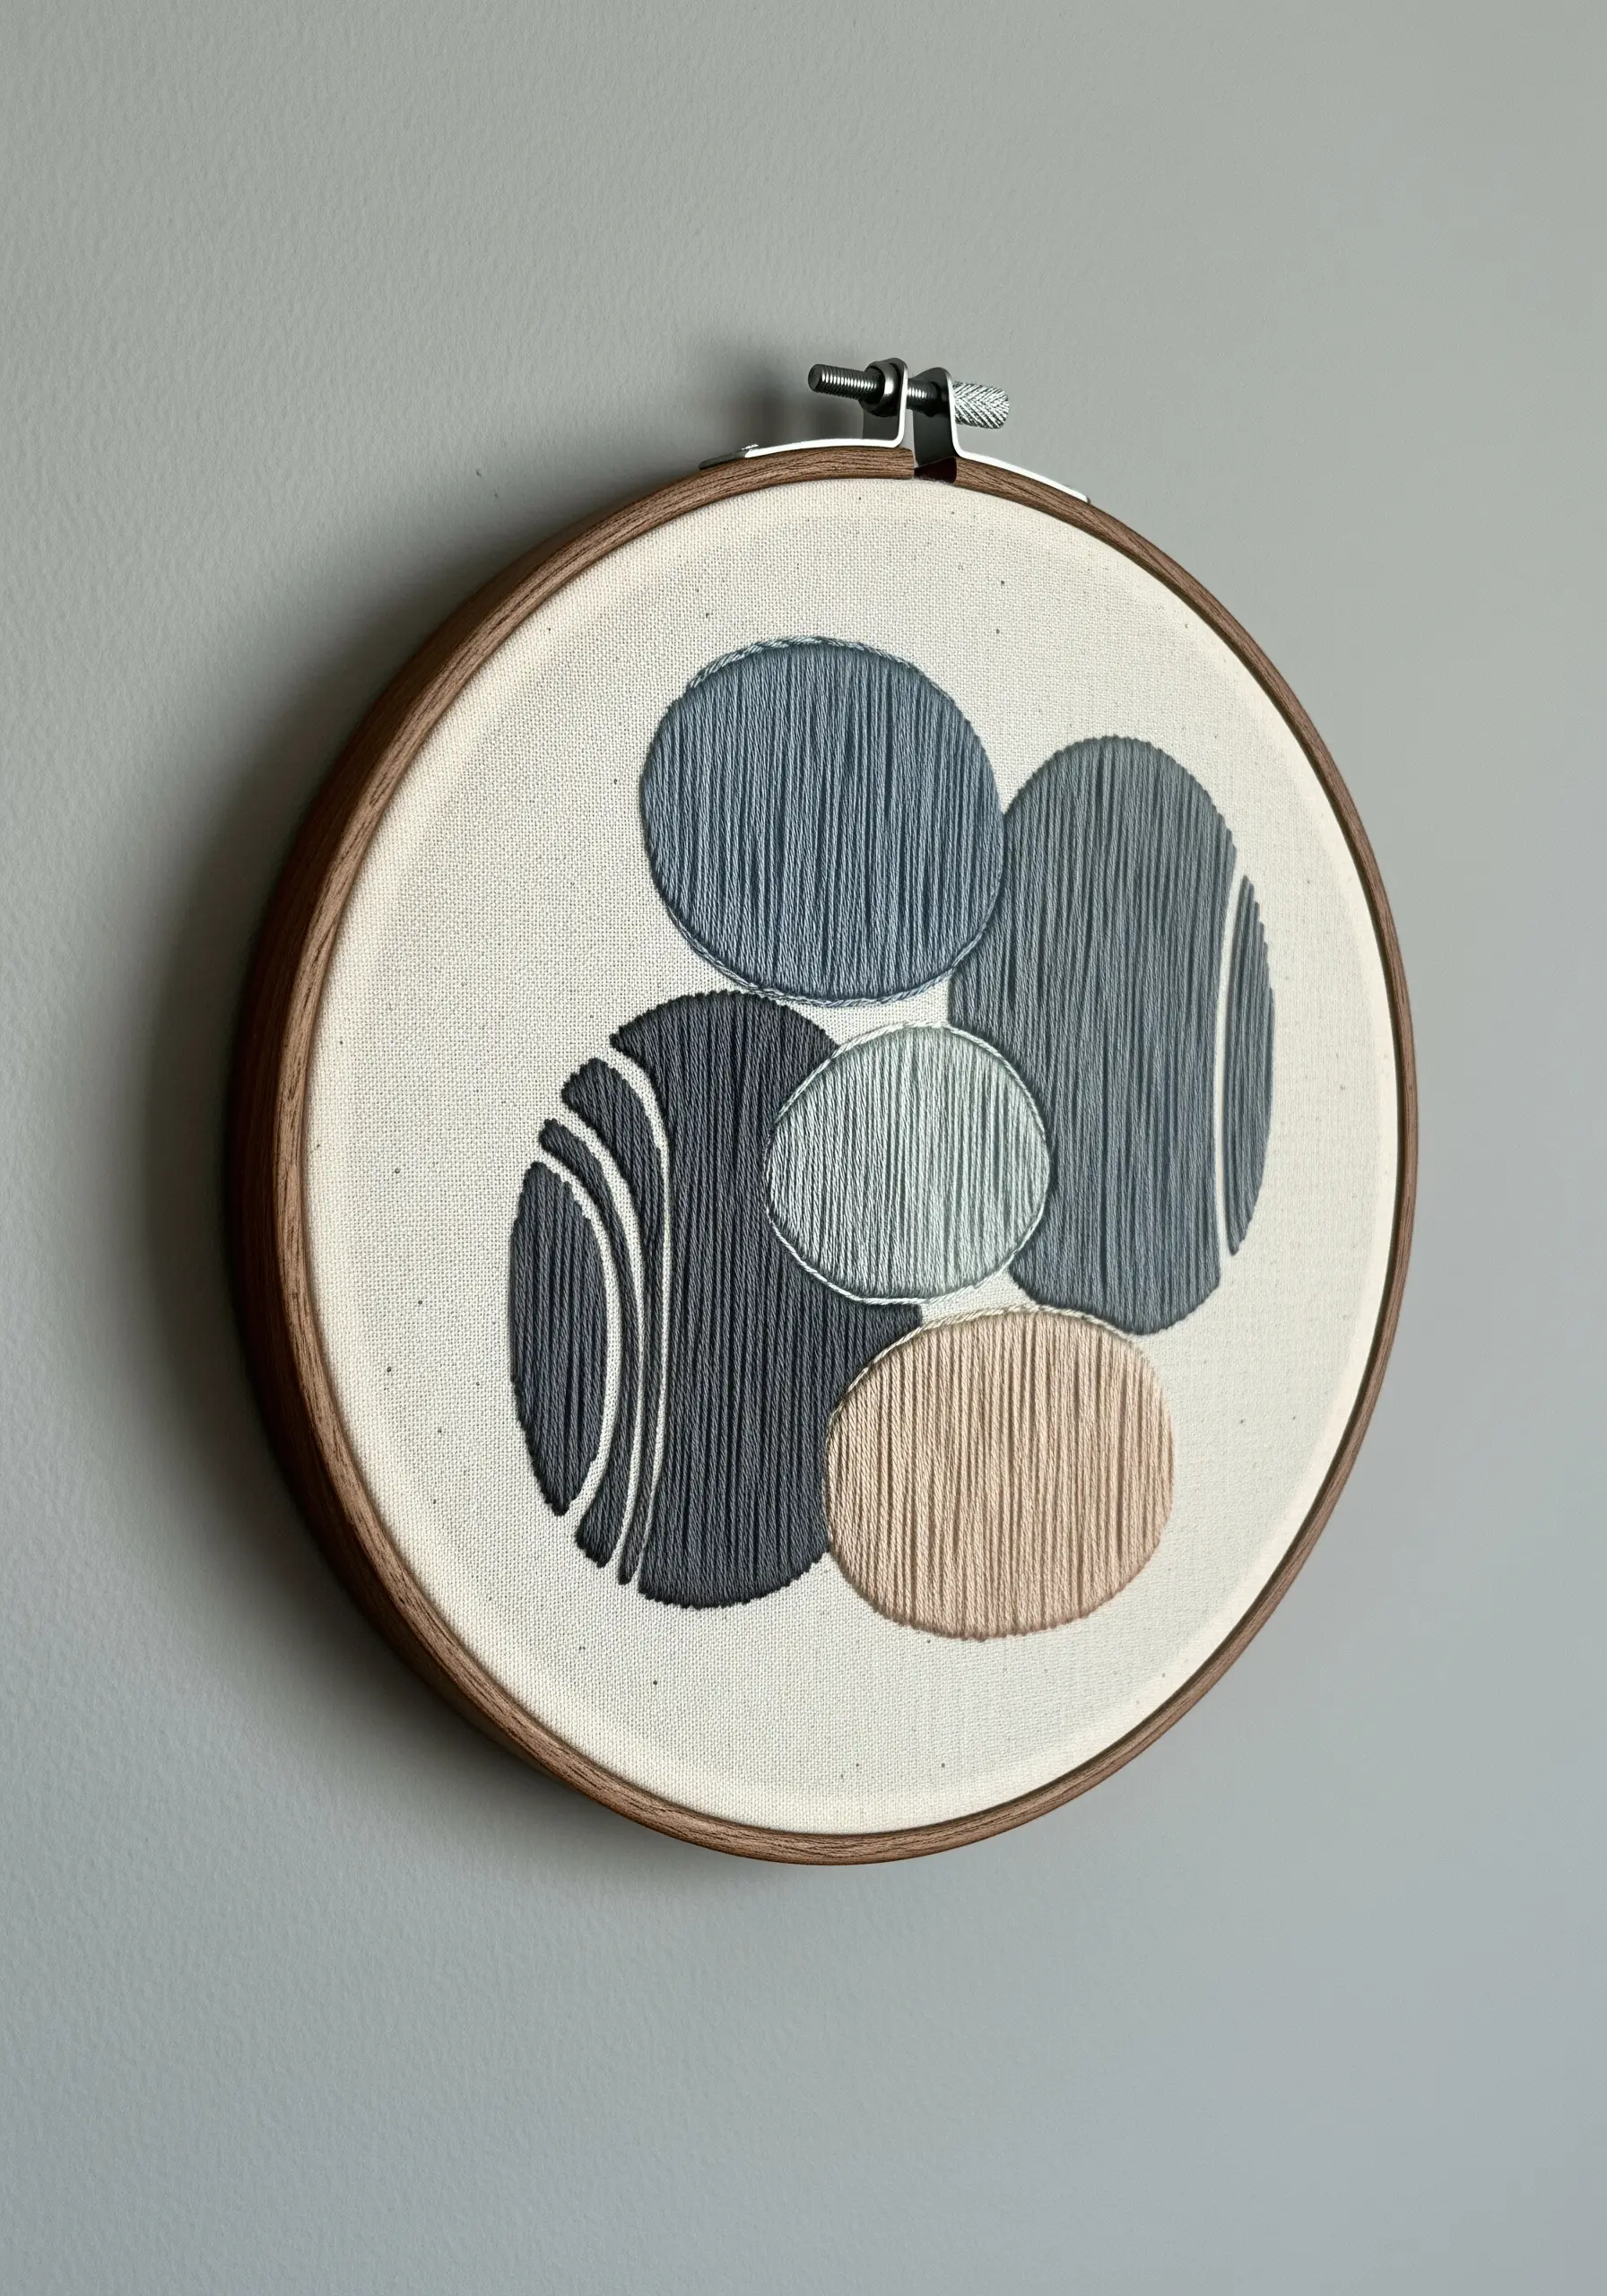
6. Build a Textured Mandala Cushion

Transform a plain pillow into a tactile masterpiece by layering concentric circles of different stitches. The richness comes from variety, not complexity.
Start with a central cluster of French knots, then radiate outwards with rows of chain stitch, bullion knots, and even simple seed stitches.
To maintain a cohesive, elegant look, choose an analogous color palette—here, shades of purple, grey, and white. This ensures the textures are the star of the show without the colors becoming chaotic.
This meditative, repetitive stitching is perfect for creating intricate handmade pillow cushion embroidery patterns that feel luxurious to the touch.
7. Craft a Dimensional Pinecone
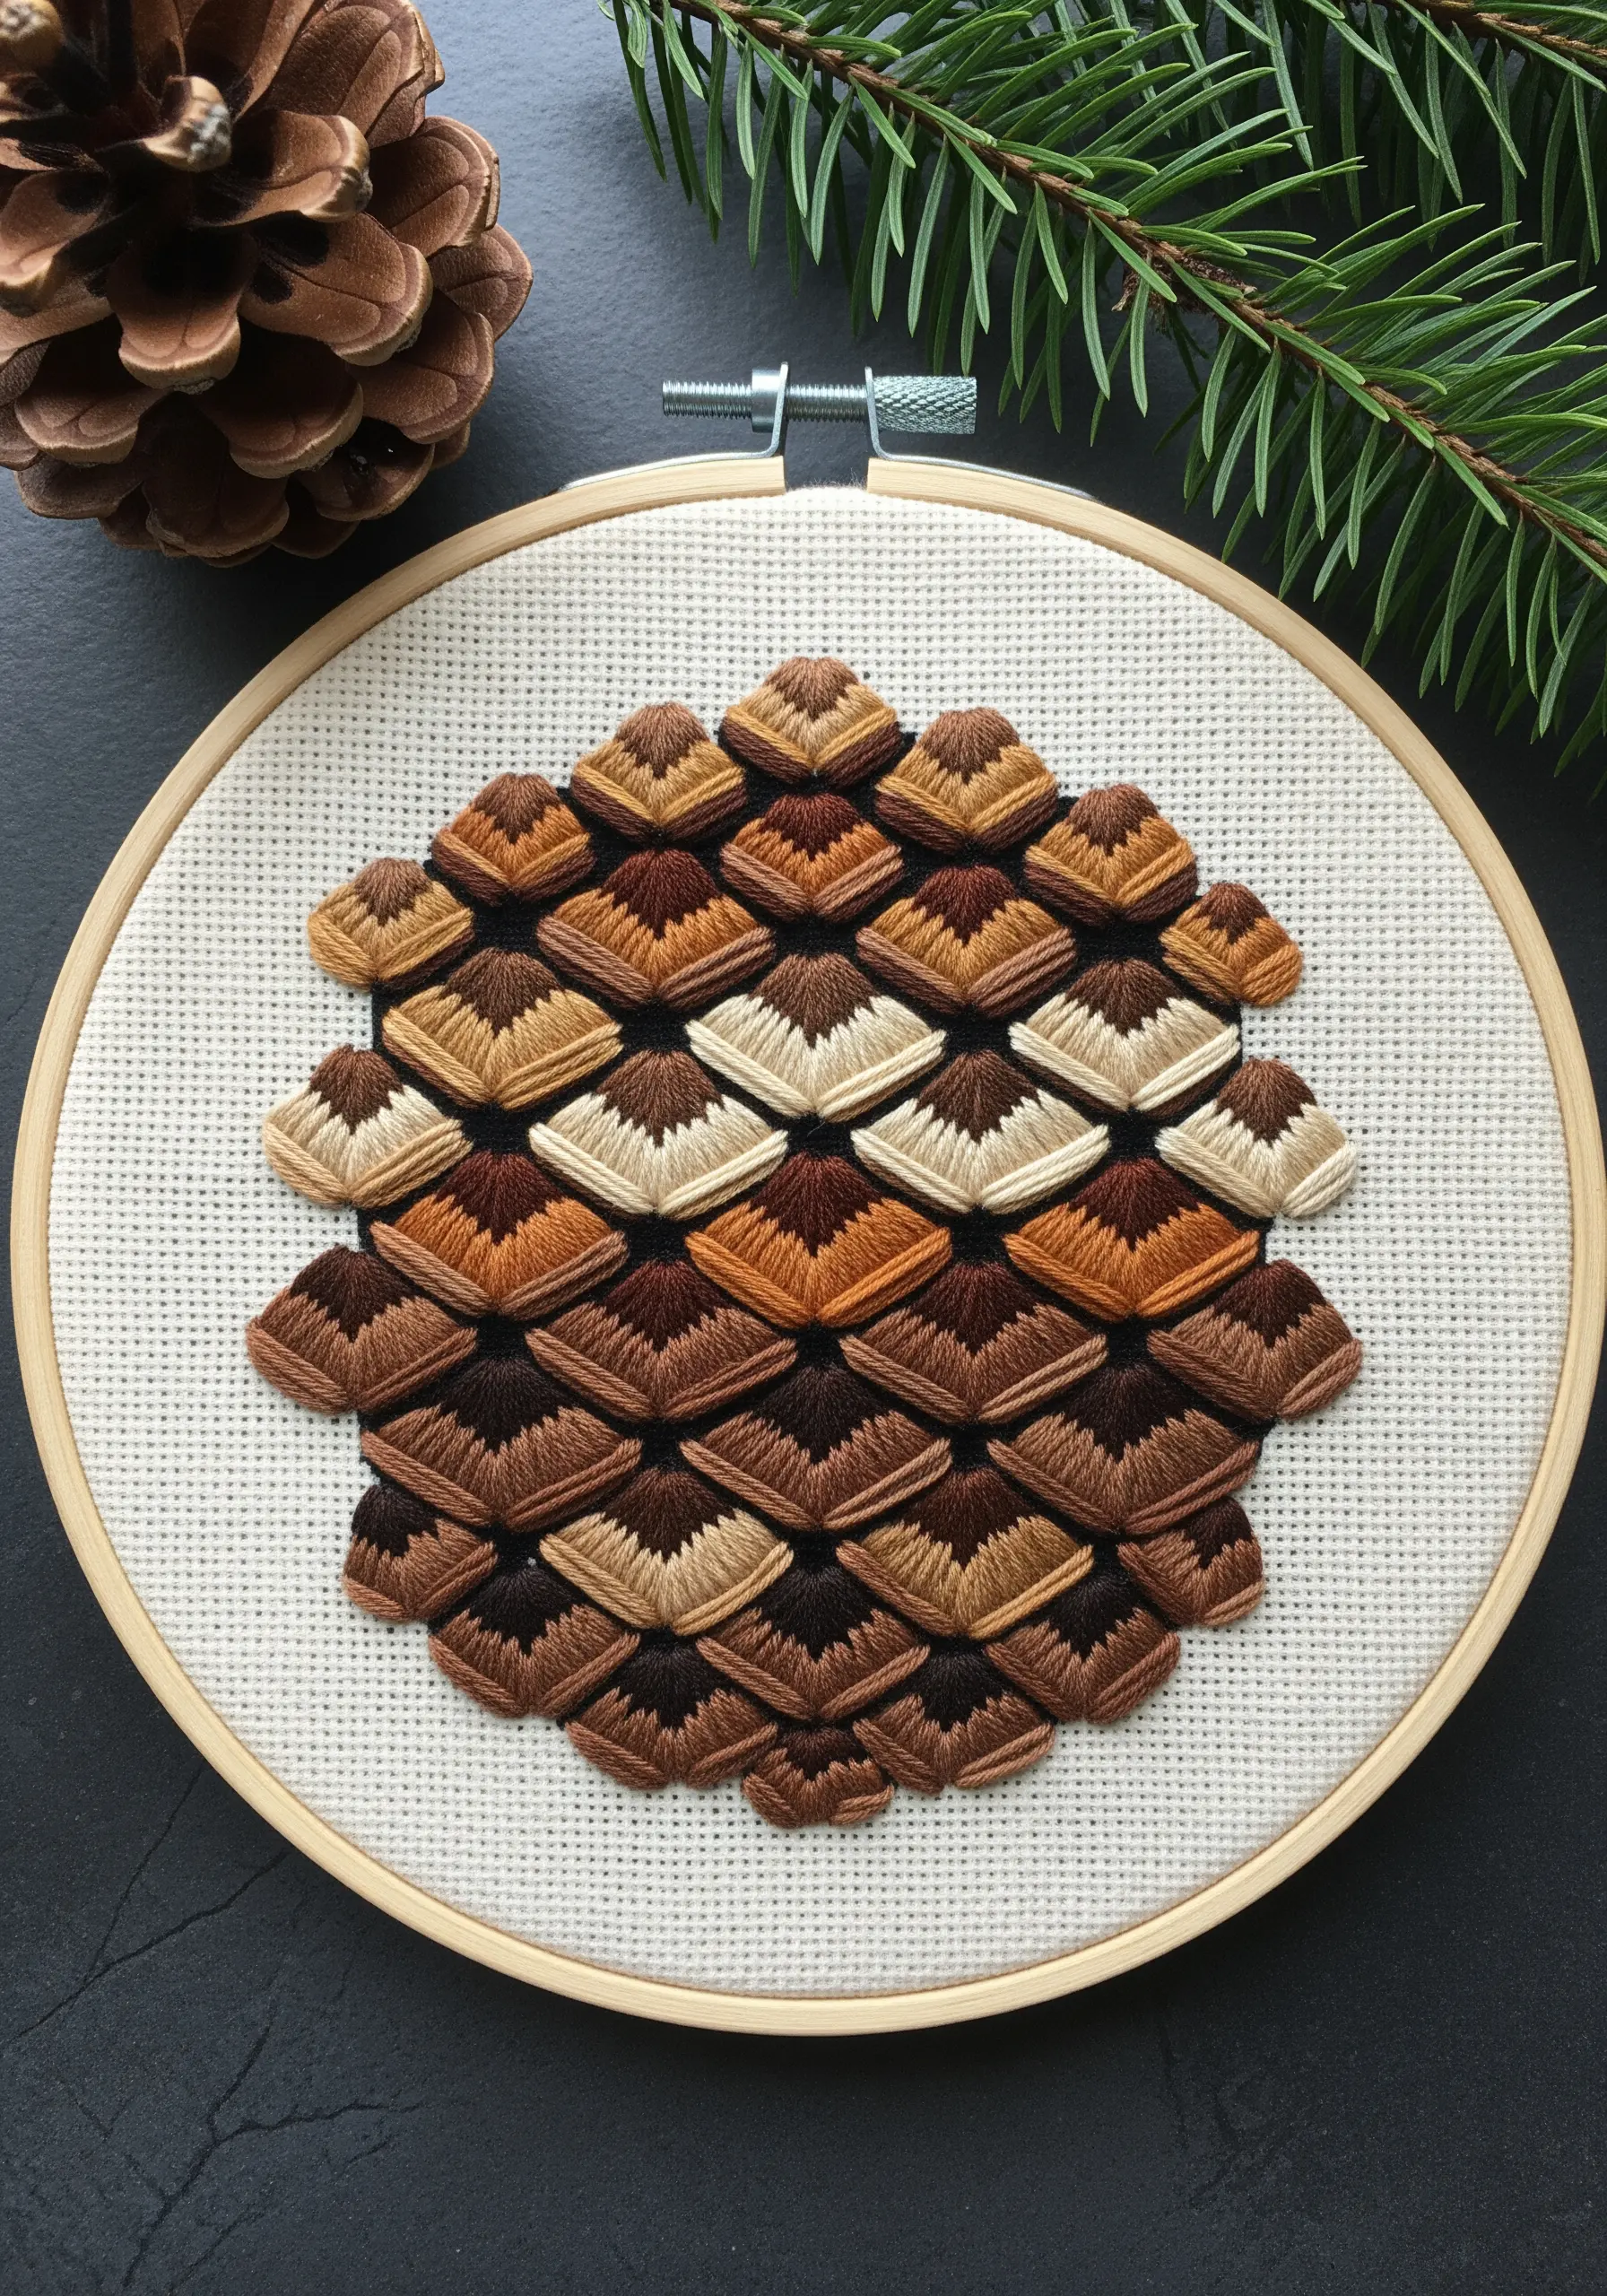
Create the overlapping scales of a pinecone using a dimensional fishbone stitch or a padded satin stitch. The key is to work from the bottom up.
Stitch the lowest row of scales first. When you stitch the row above it, allow the tips of your stitches to slightly overlap the previous row. This layering is what creates the convincing 3D effect.
Use a gradient of three to four brown tones to add shading and realism. Stitching the lighter shades near the top and darker ones at the base of each scale enhances the illusion of depth in your earth-tone patterns.
8. Sculpt a Rocky Cliff Face
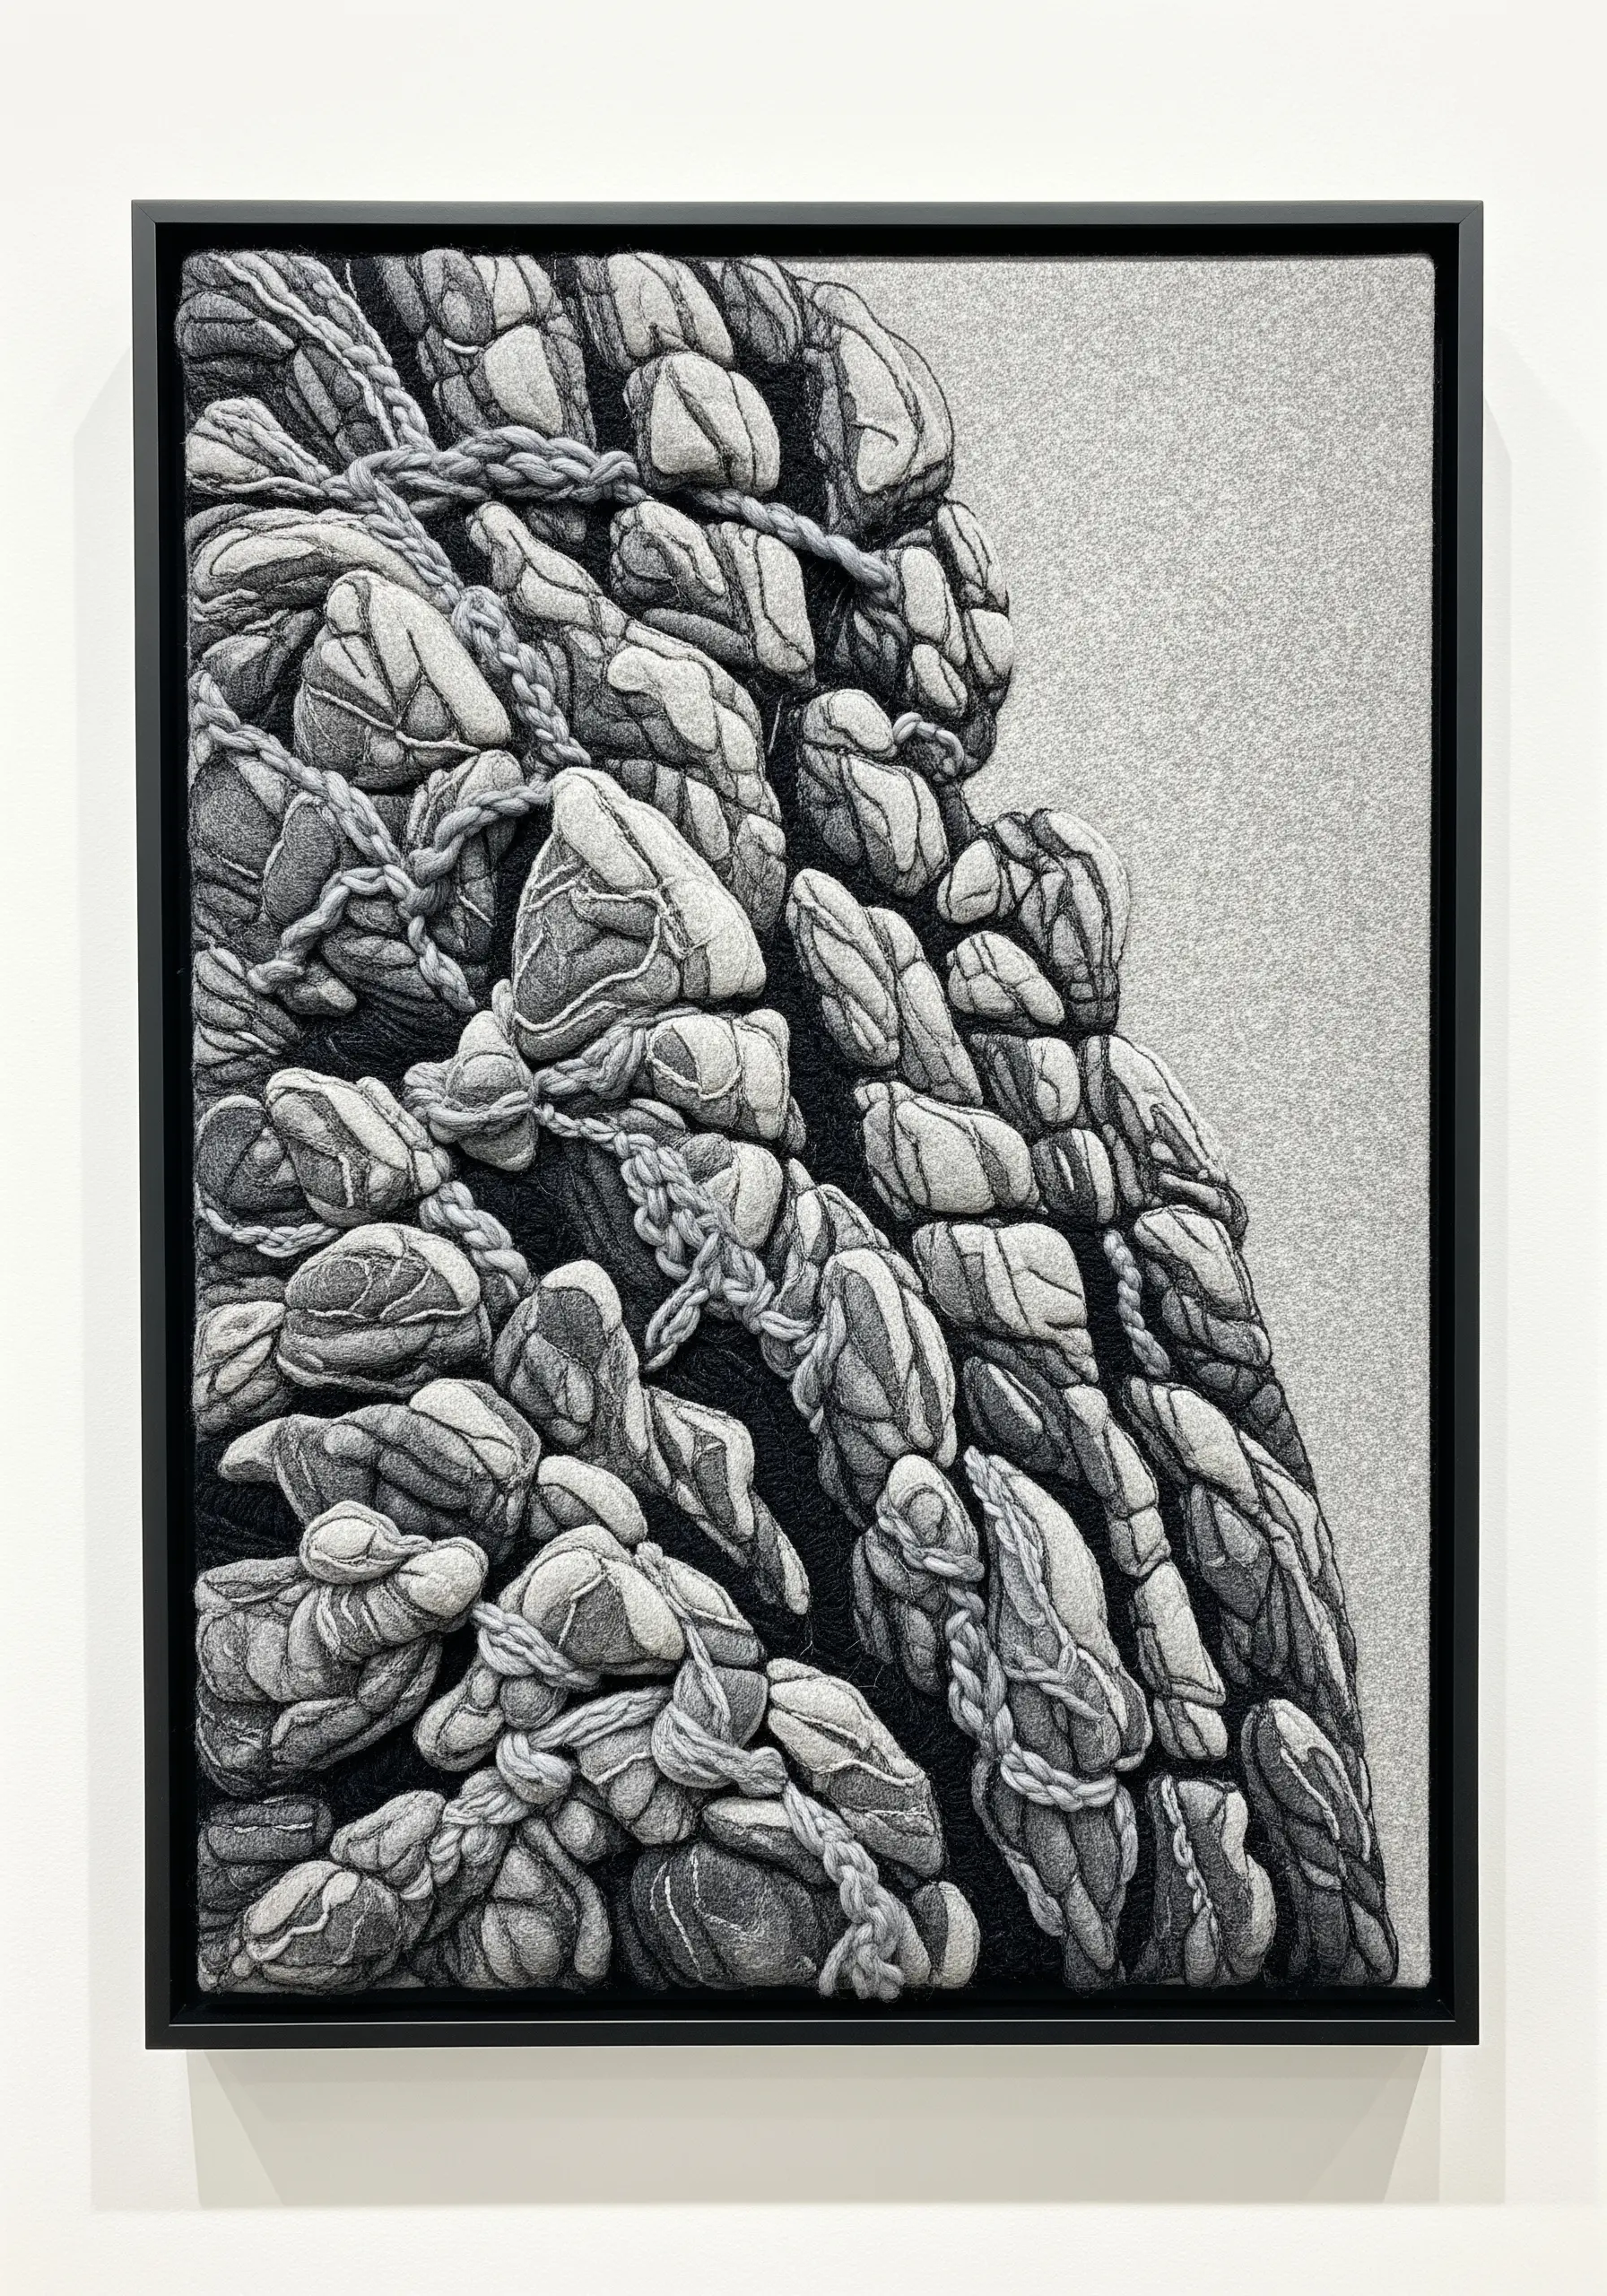
Give your work a sculptural quality by using couching to create bold, raised textures. This technique involves laying thicker yarns or cords onto your fabric and tacking them down with smaller, discreet stitches.
Outline rock shapes with a dark backstitch, then fill them with a light grey split stitch to suggest form. For the raised elements, couch thick, braided grey yarn between the rock forms.
This contrast between the flat, stitched background and the high-relief couched yarn creates a dramatic sense of depth and tangible ruggedness that mimics a real rock face.
9. Stitch Delicate Mushroom Gills
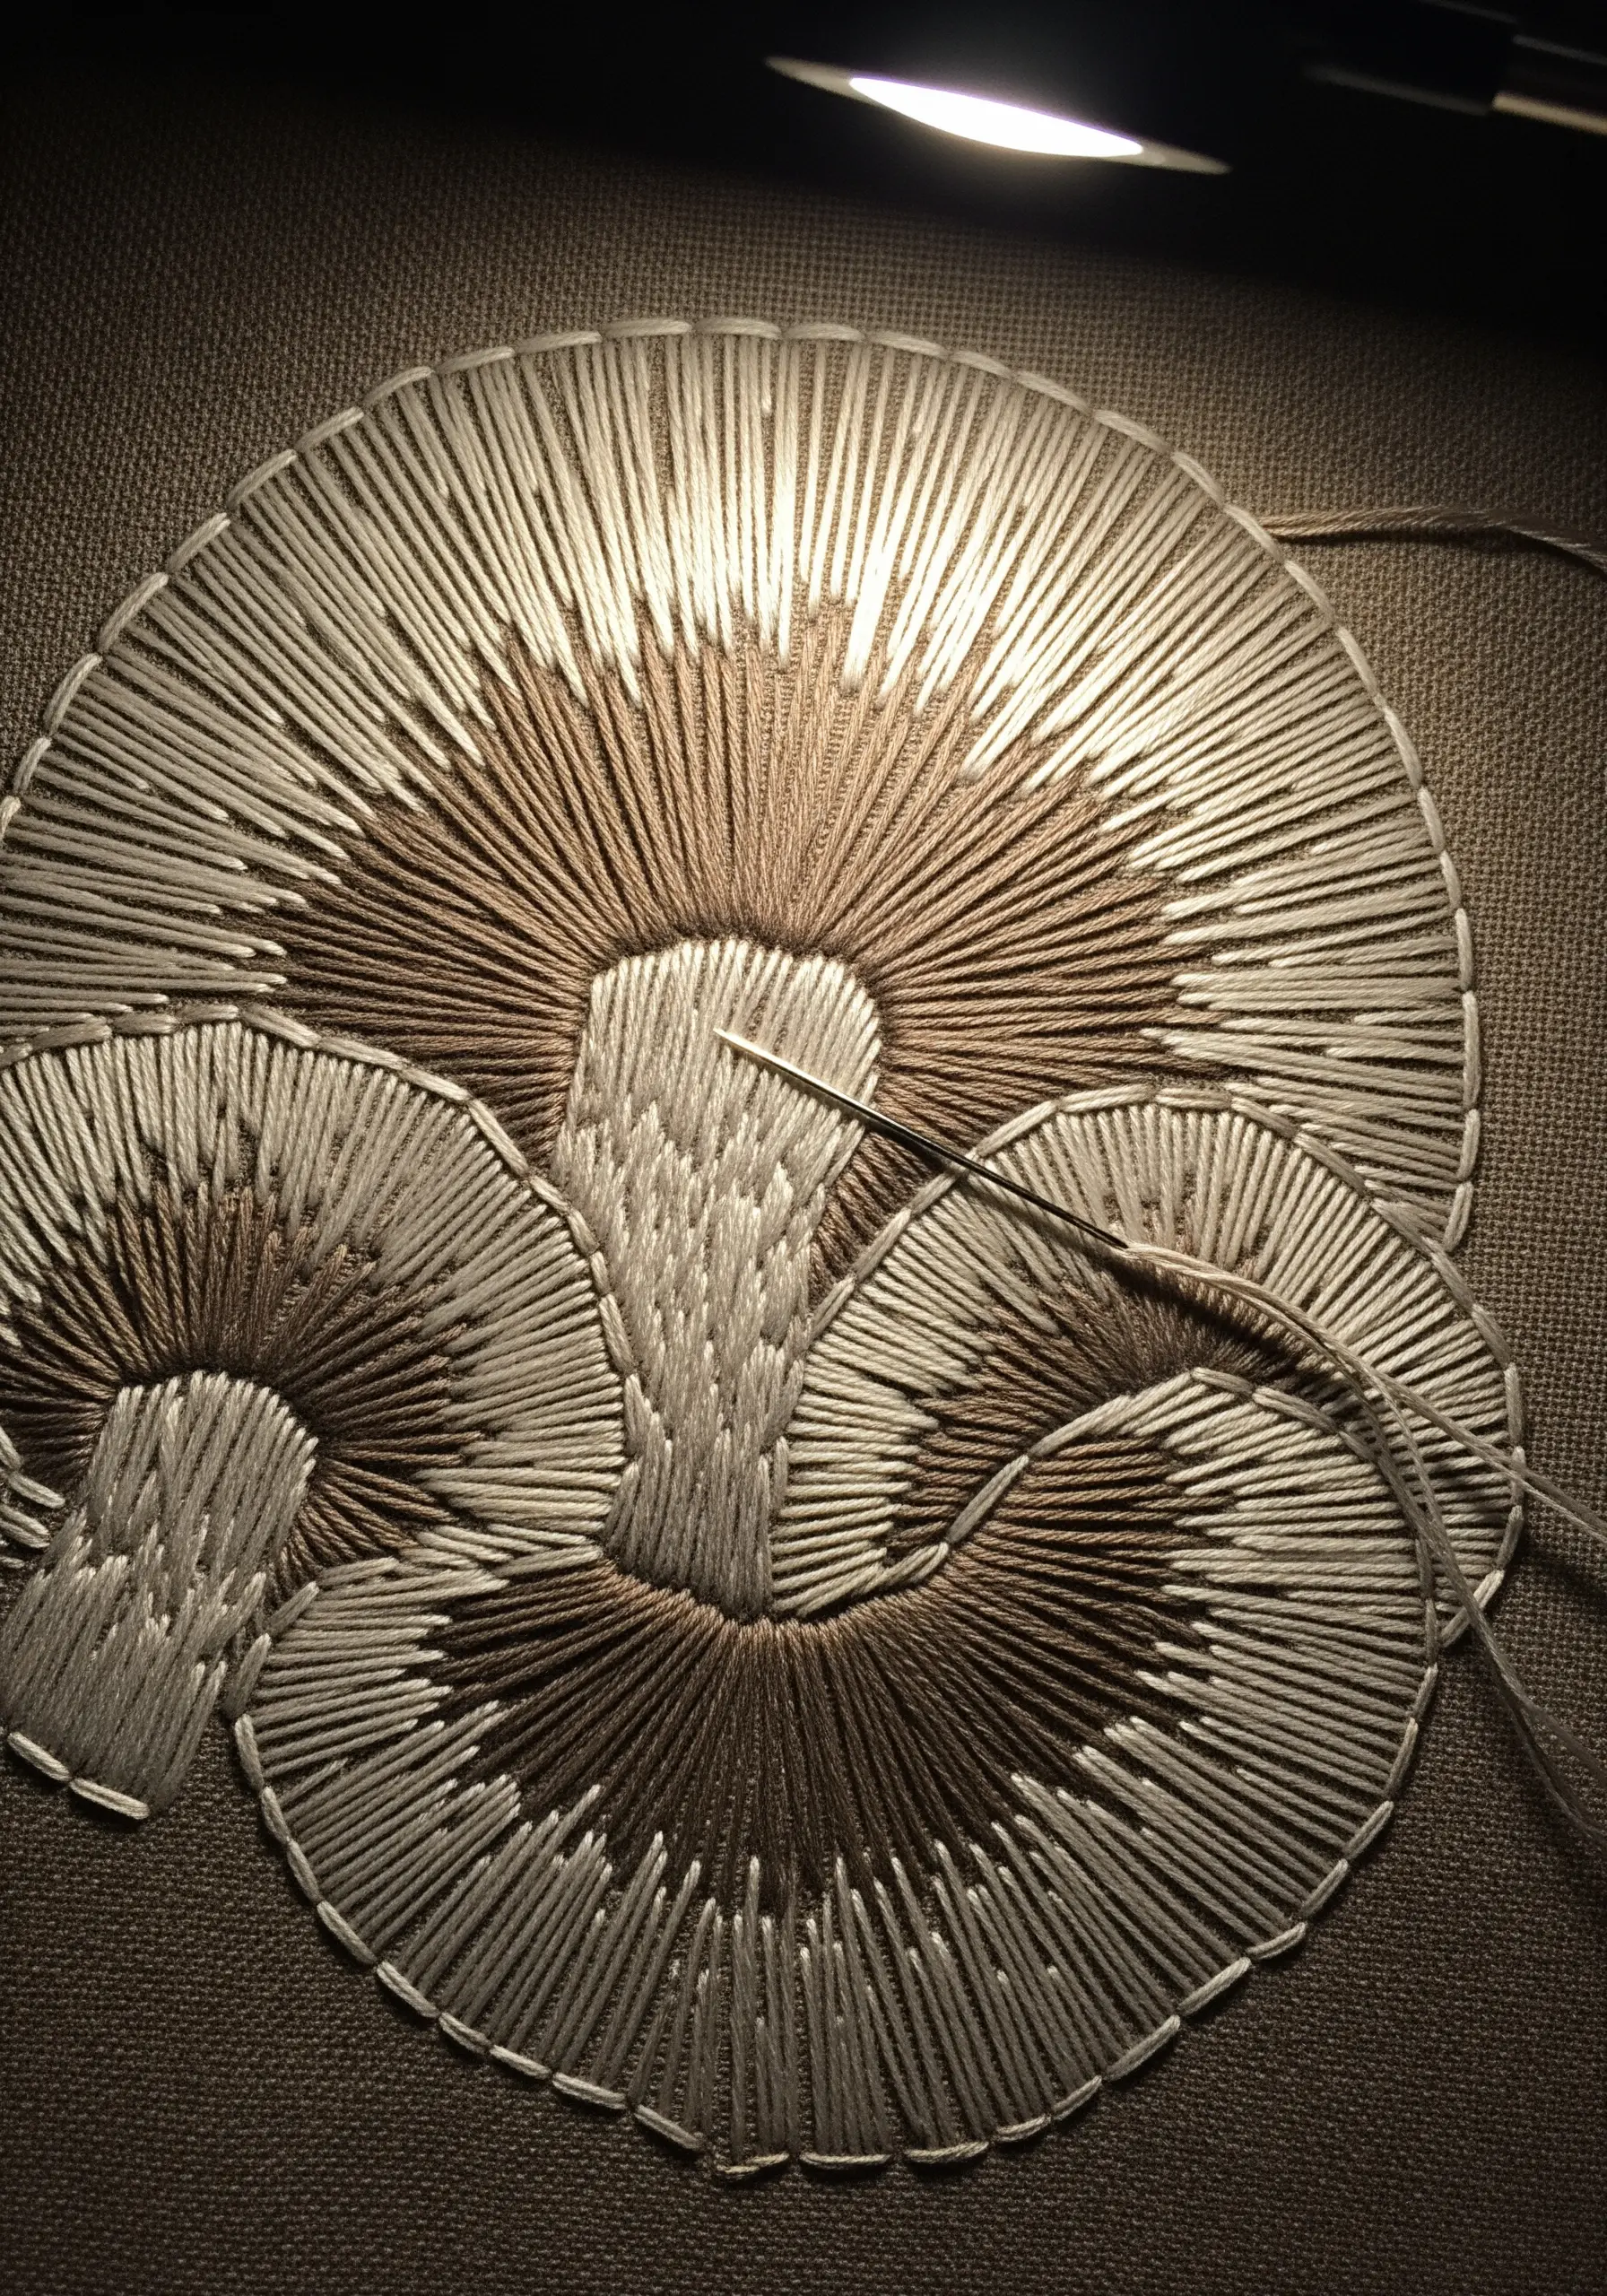
Replicate the fine, radial lines of a mushroom’s underside with disciplined straight stitches. The key to this design is meticulous planning and execution.
Lightly draw radiating guidelines on your fabric with a water-soluble pen before you begin. This ensures your stitches remain perfectly straight and evenly spaced.
Create soft shading by blending two similar colors of thread in your needle at once—for example, one strand of beige and one strand of tan. This simple trick adds subtle color variation and realism.
This project is a beautiful way to practice precision and capture nature’s textures in their most delicate forms.
10. Create a Luminous Sunflower
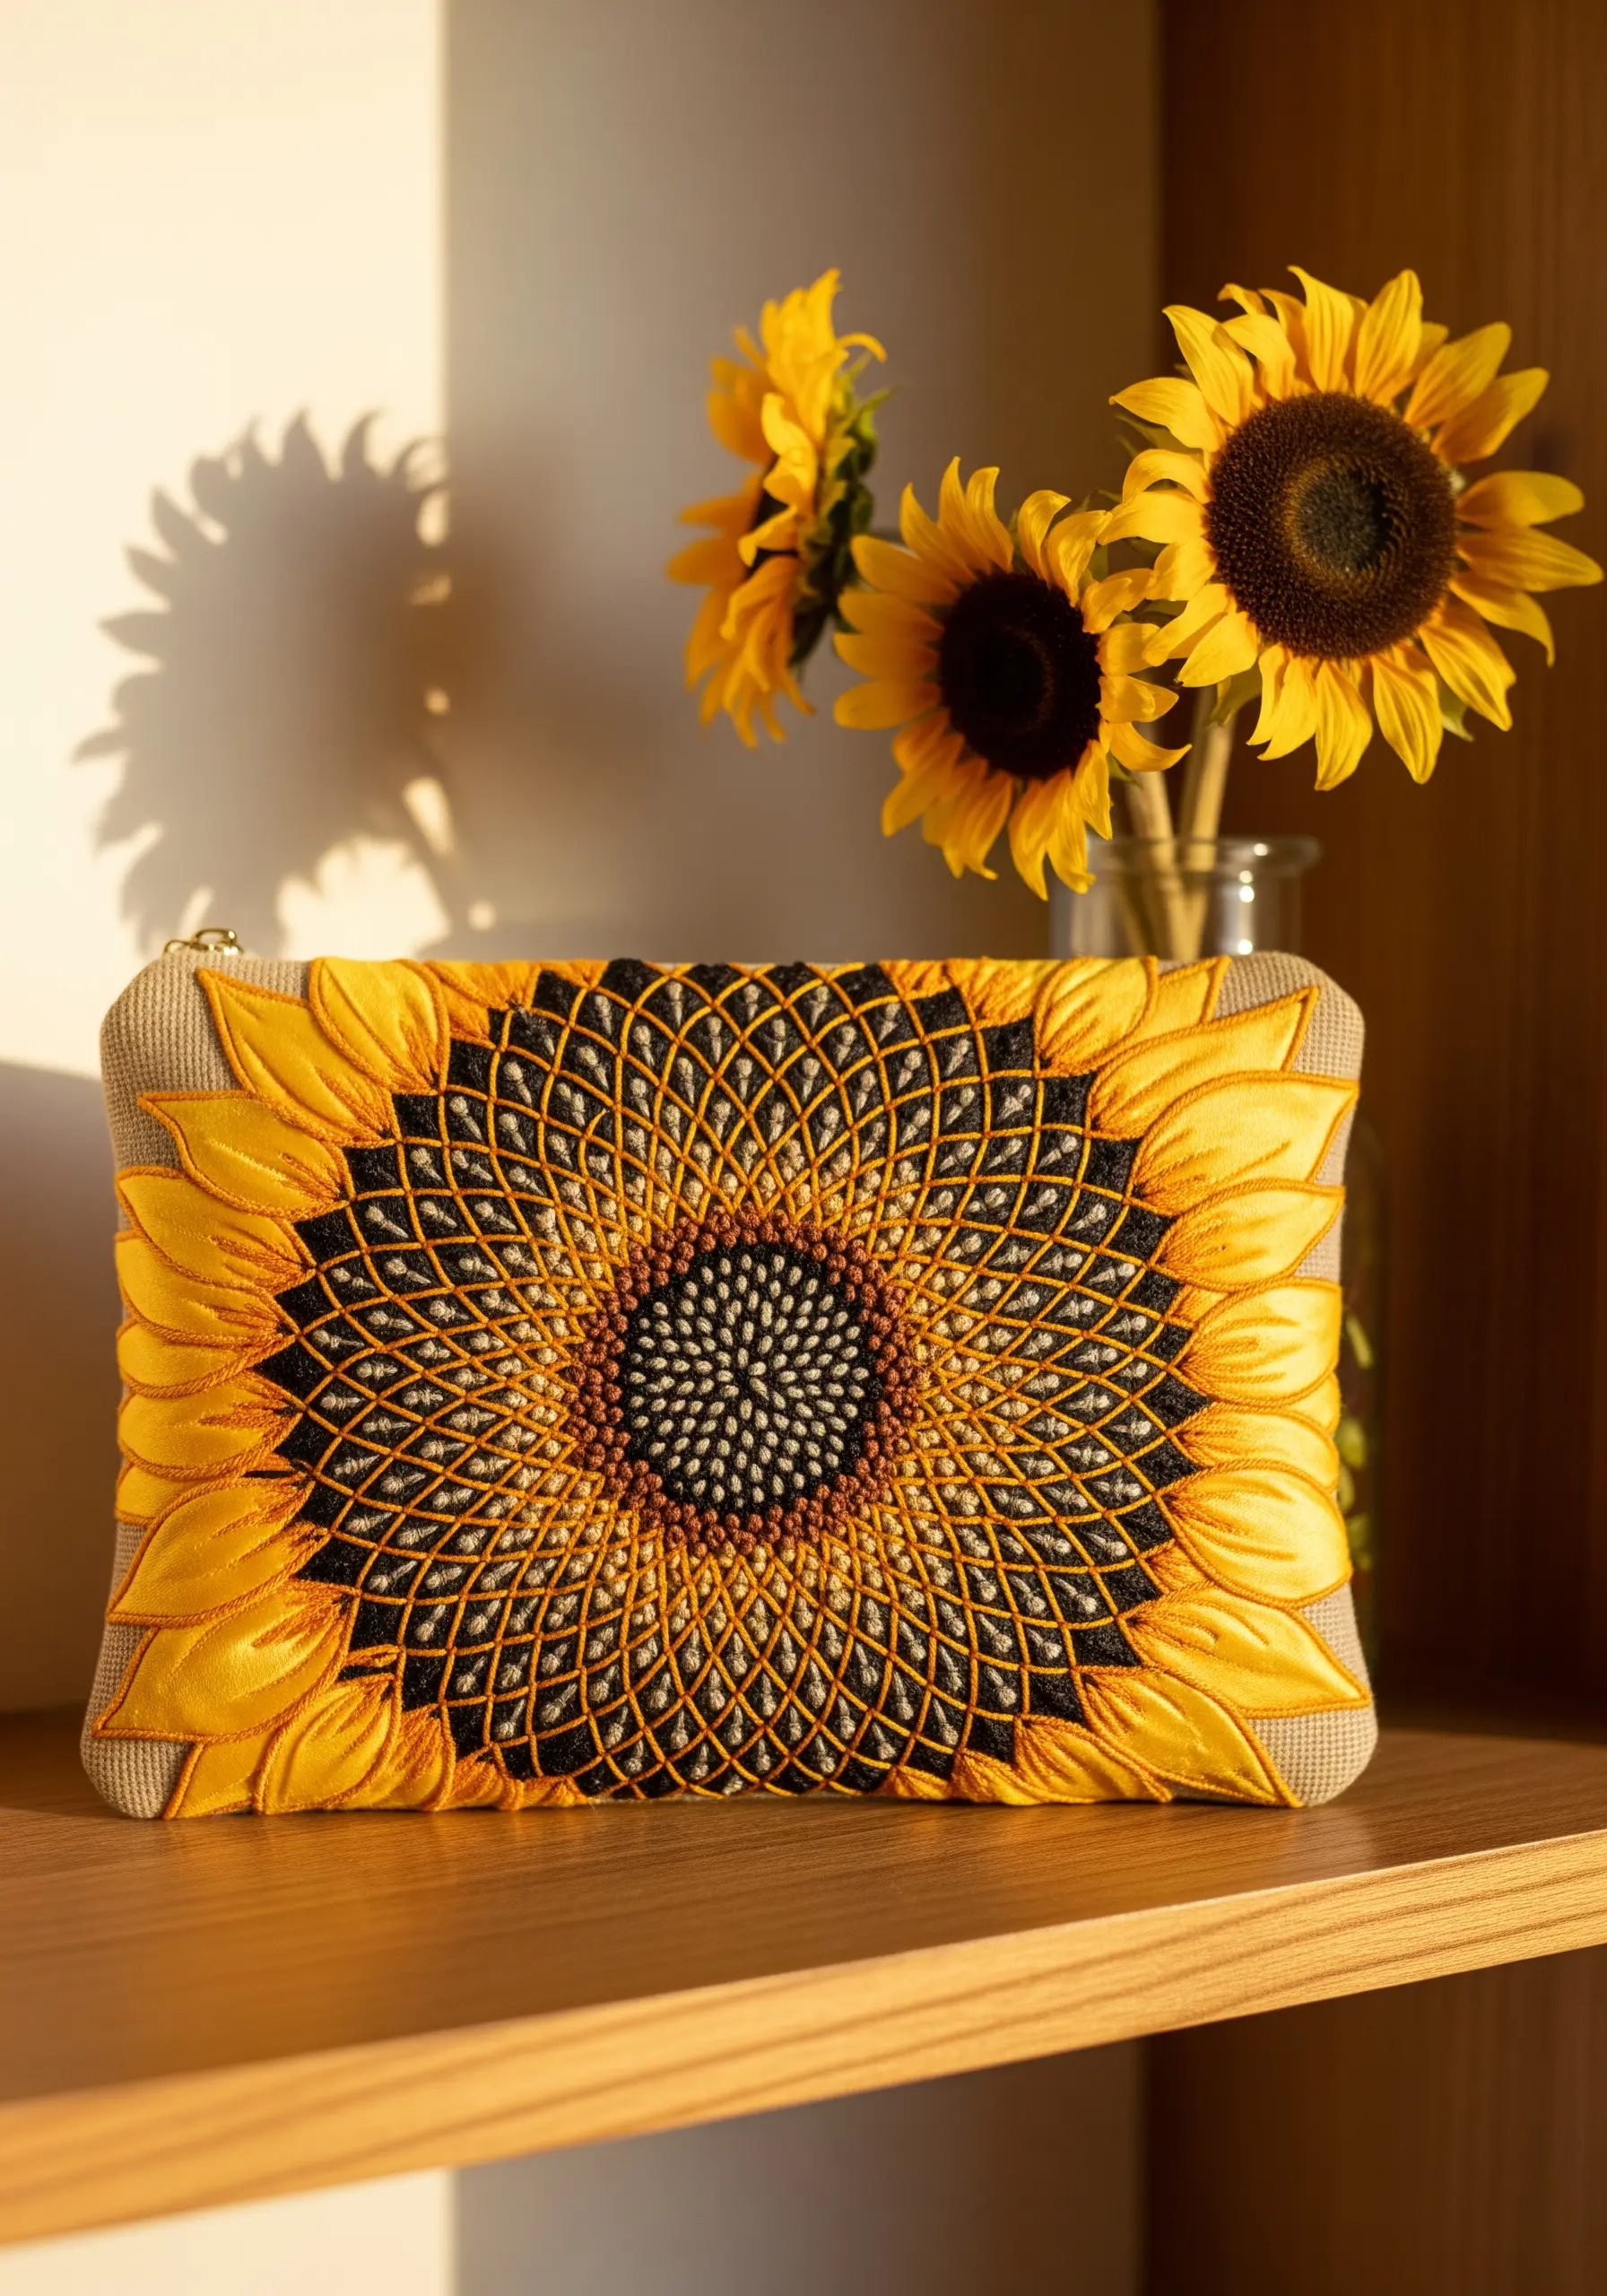
Capture the vibrant energy of a sunflower by combining geometric stitching with lustrous satin-stitched petals.
For the center, create a grid-like pattern using laid work or a series of overlapping straight stitches. Fill in the gaps with French knots to mimic the texture of seeds.
The petals are the main event. Use a glossy rayon or silk floss and work your satin stitches from the outer tip of the petal inward. This directionality gives each petal a natural curve and maximizes the thread’s light-reflecting qualities.
This combination of matte texture and high sheen is what makes the flower look so alive and radiant.
11. Abstract Nature into Coaster Art
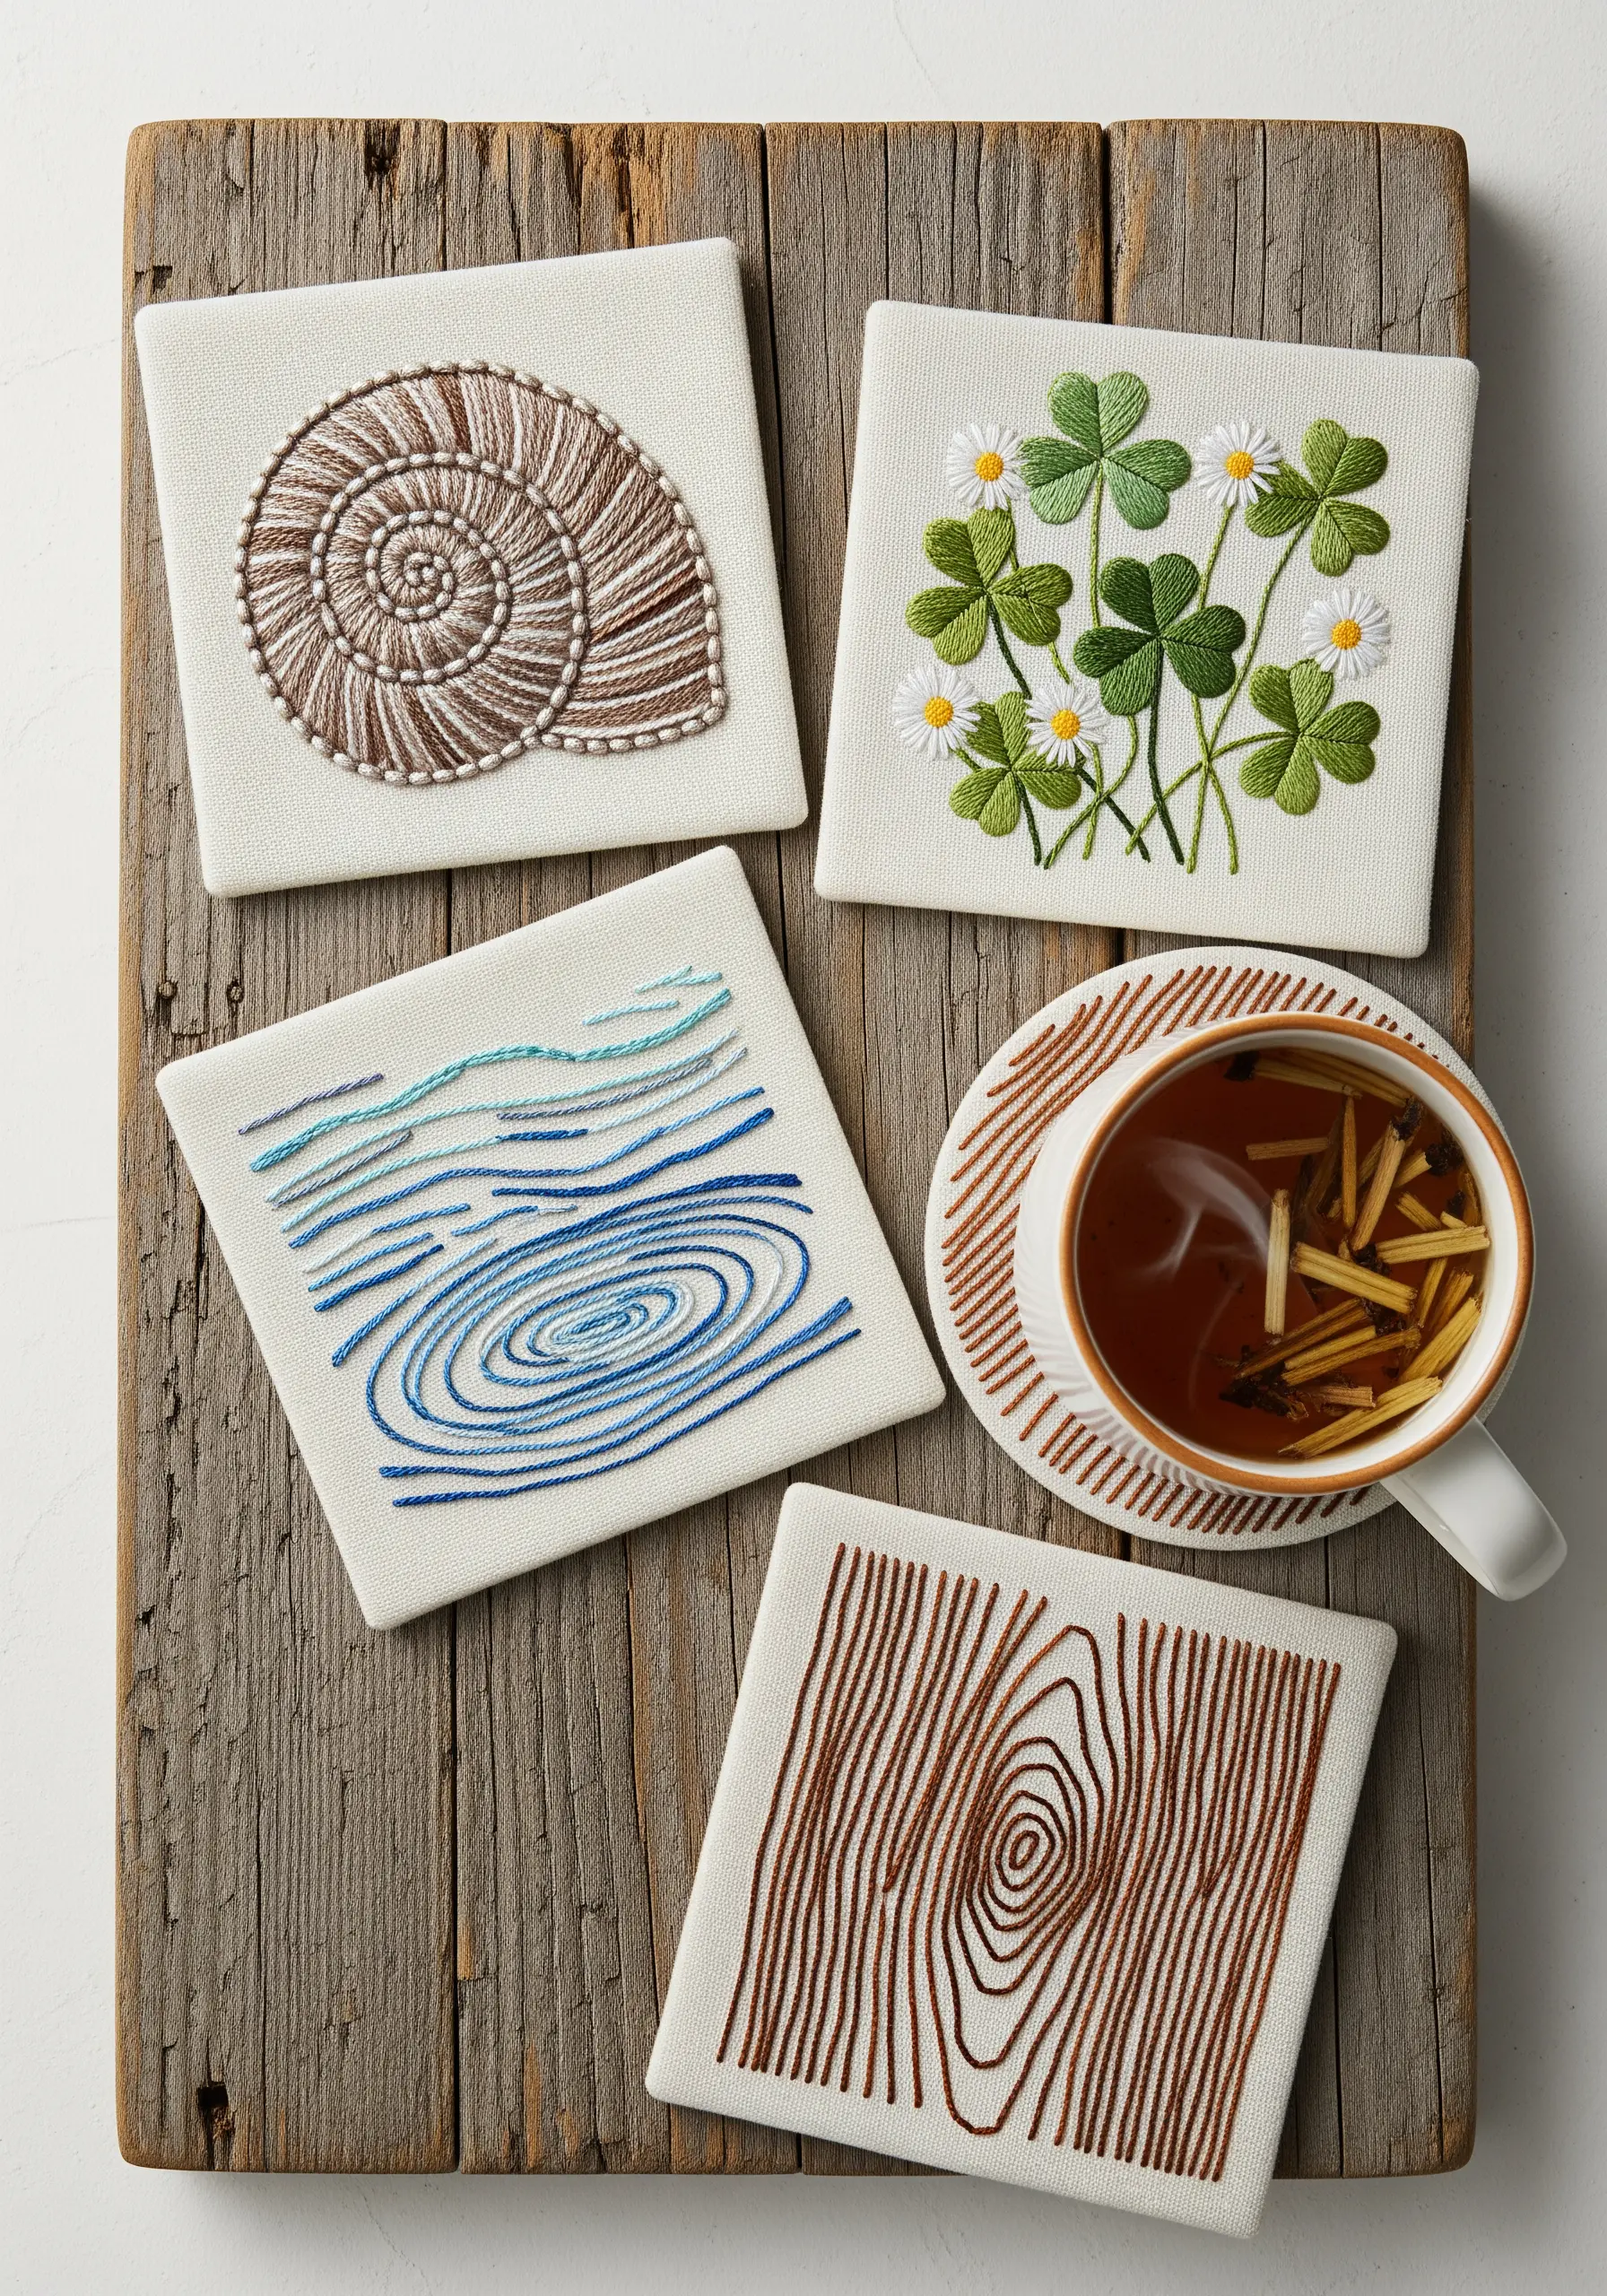
Translate complex natural textures into minimalist designs by choosing one defining stitch for each element.
For wood grain, use a flowing backstitch in variegated brown thread. For a seashell, use a concentric stem stitch. For water ripples, use loose, expressive running stitches in shades of blue.
By simplifying each texture down to its essential form and motion, you create a cohesive set that is both modern and recognizable. It’s an exercise in thoughtful reduction, perfect for simple embroidery accents.
12. Embroider Ethereal Frost Crystals
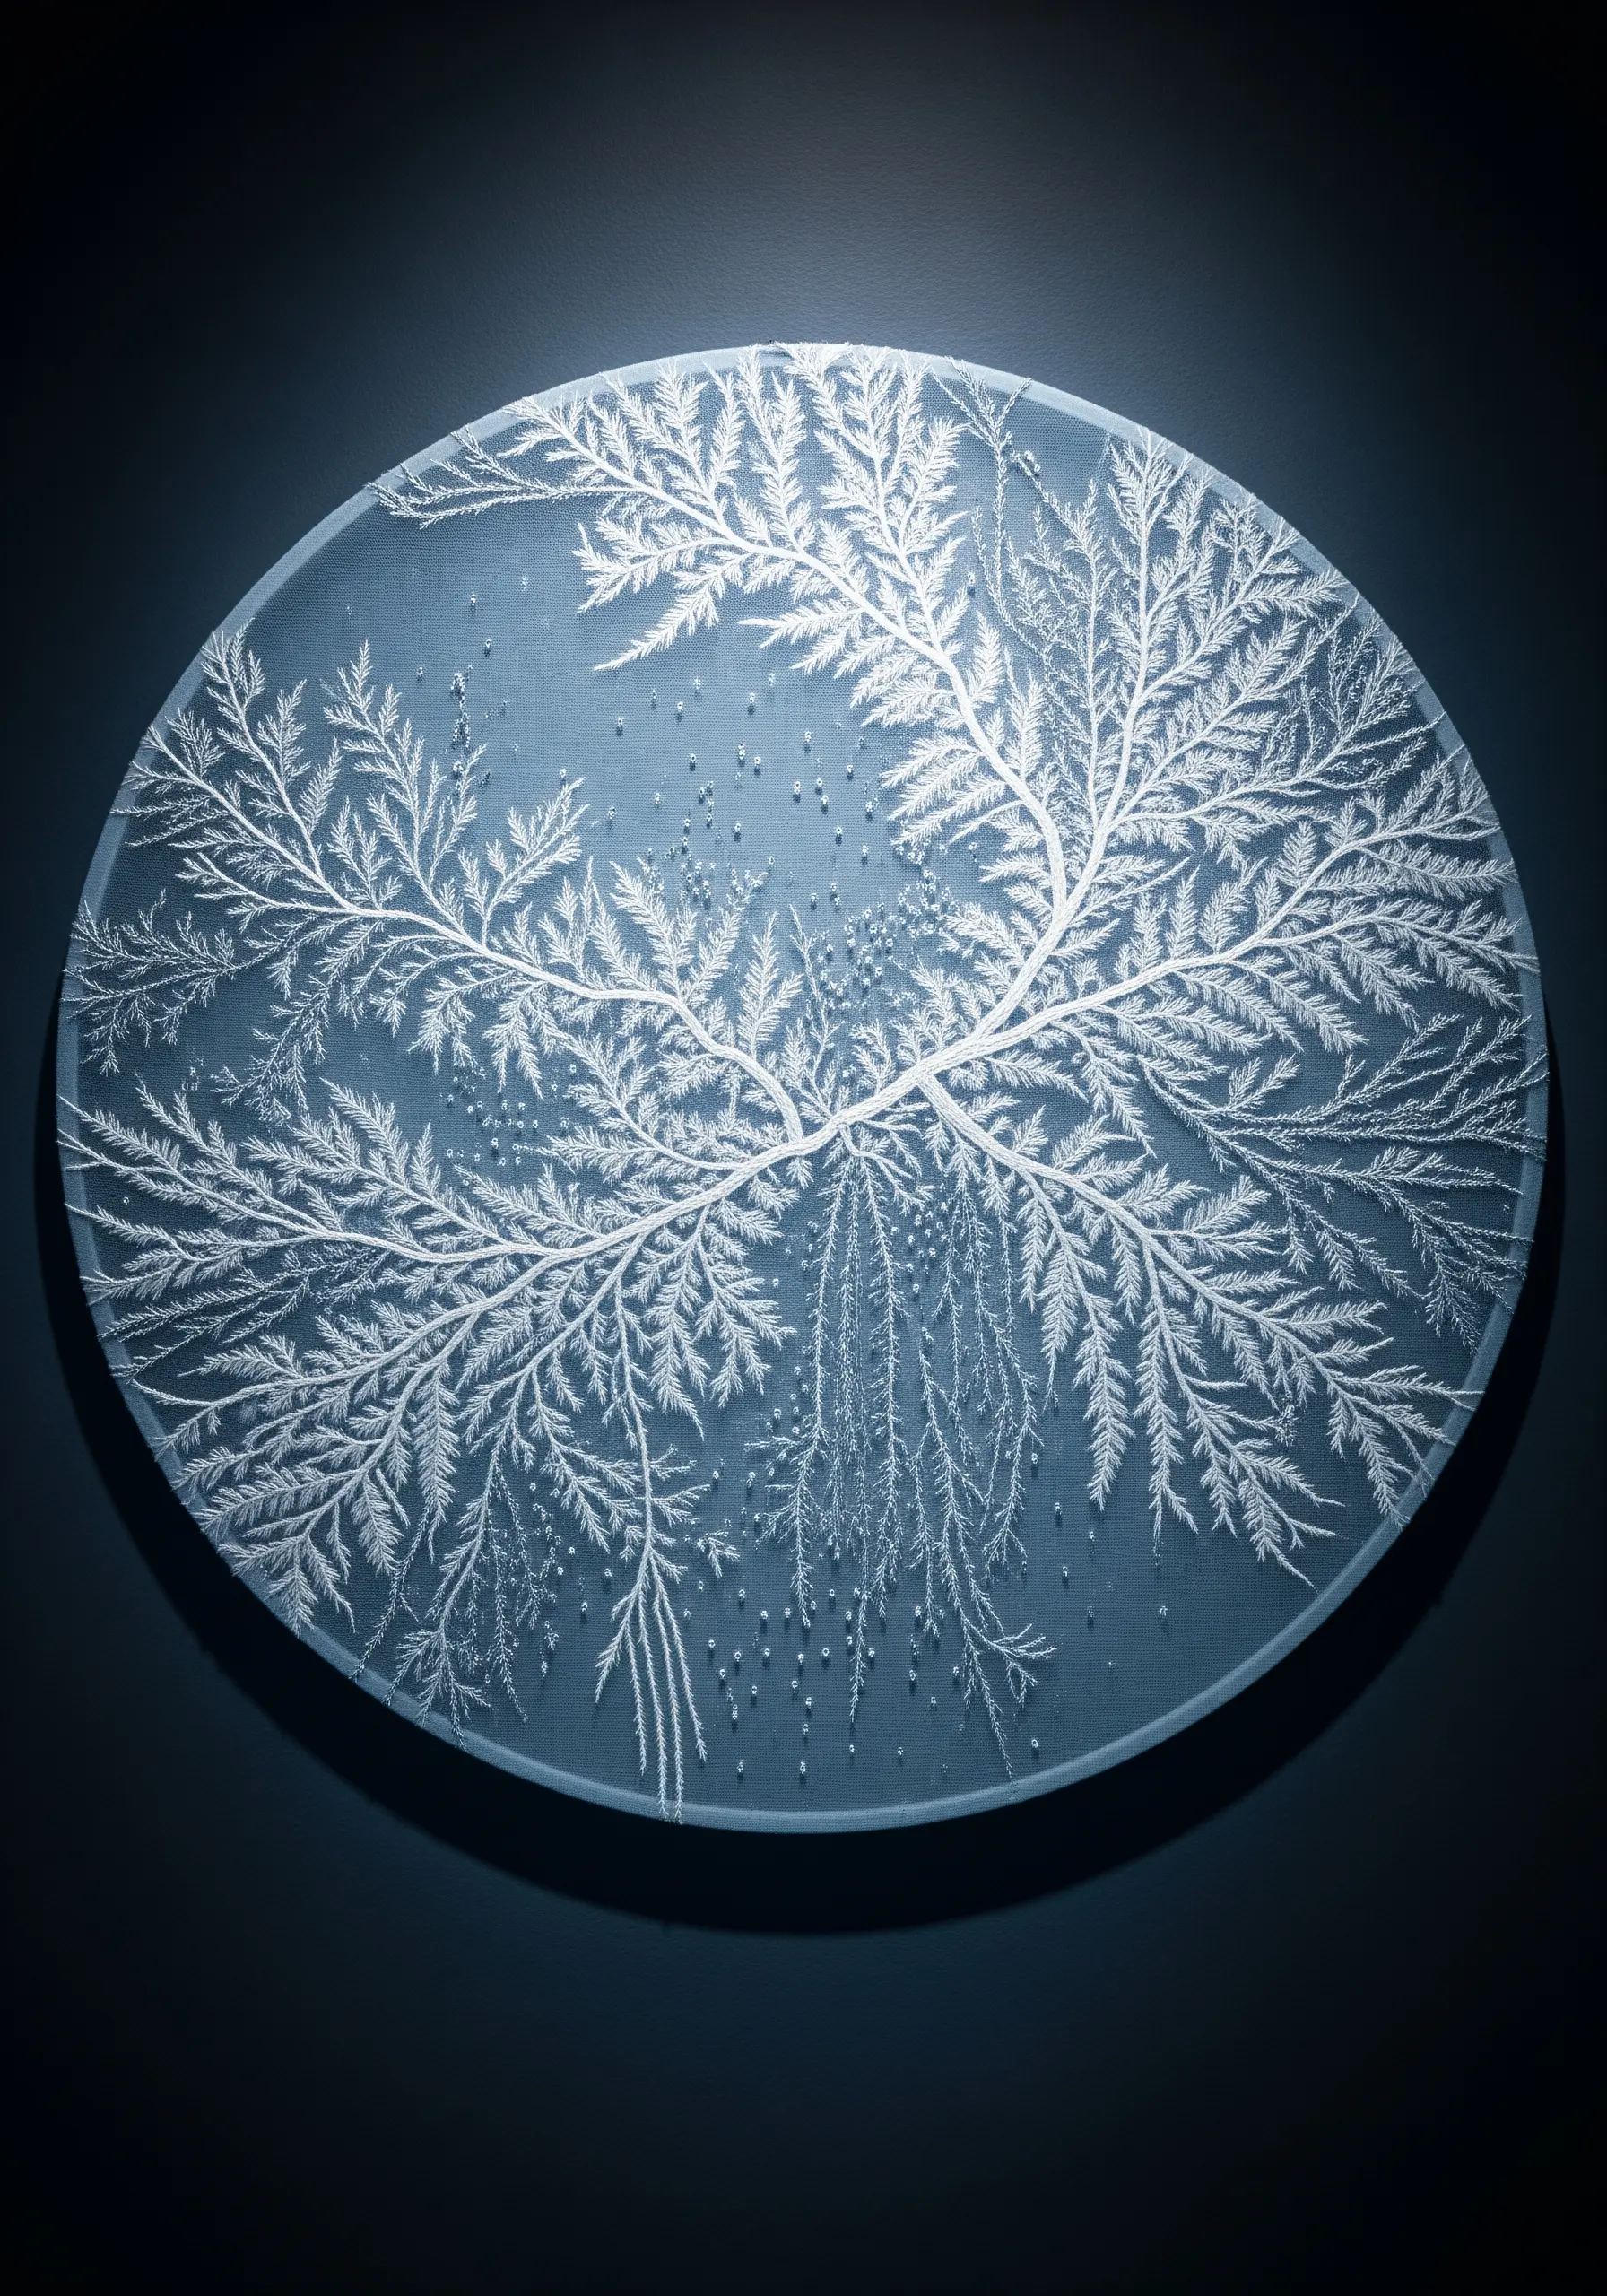
Create the delicate, branching pattern of frost by working on a sheer or semi-sheer fabric like organza. The transparency of the fabric adds to the icy, ethereal effect.
Use a fine, single strand of white or metallic silver thread to stitch. The feather stitch is perfect for creating the main branching structures, as it naturally grows outwards.
Add tiny, scattered seed stitches and French knots around your main branches to represent ice crystals forming. This layering of distinct stitch types is what makes the texture so believable and magical.
13. Fill a Gourd with Textured Seed Stitch
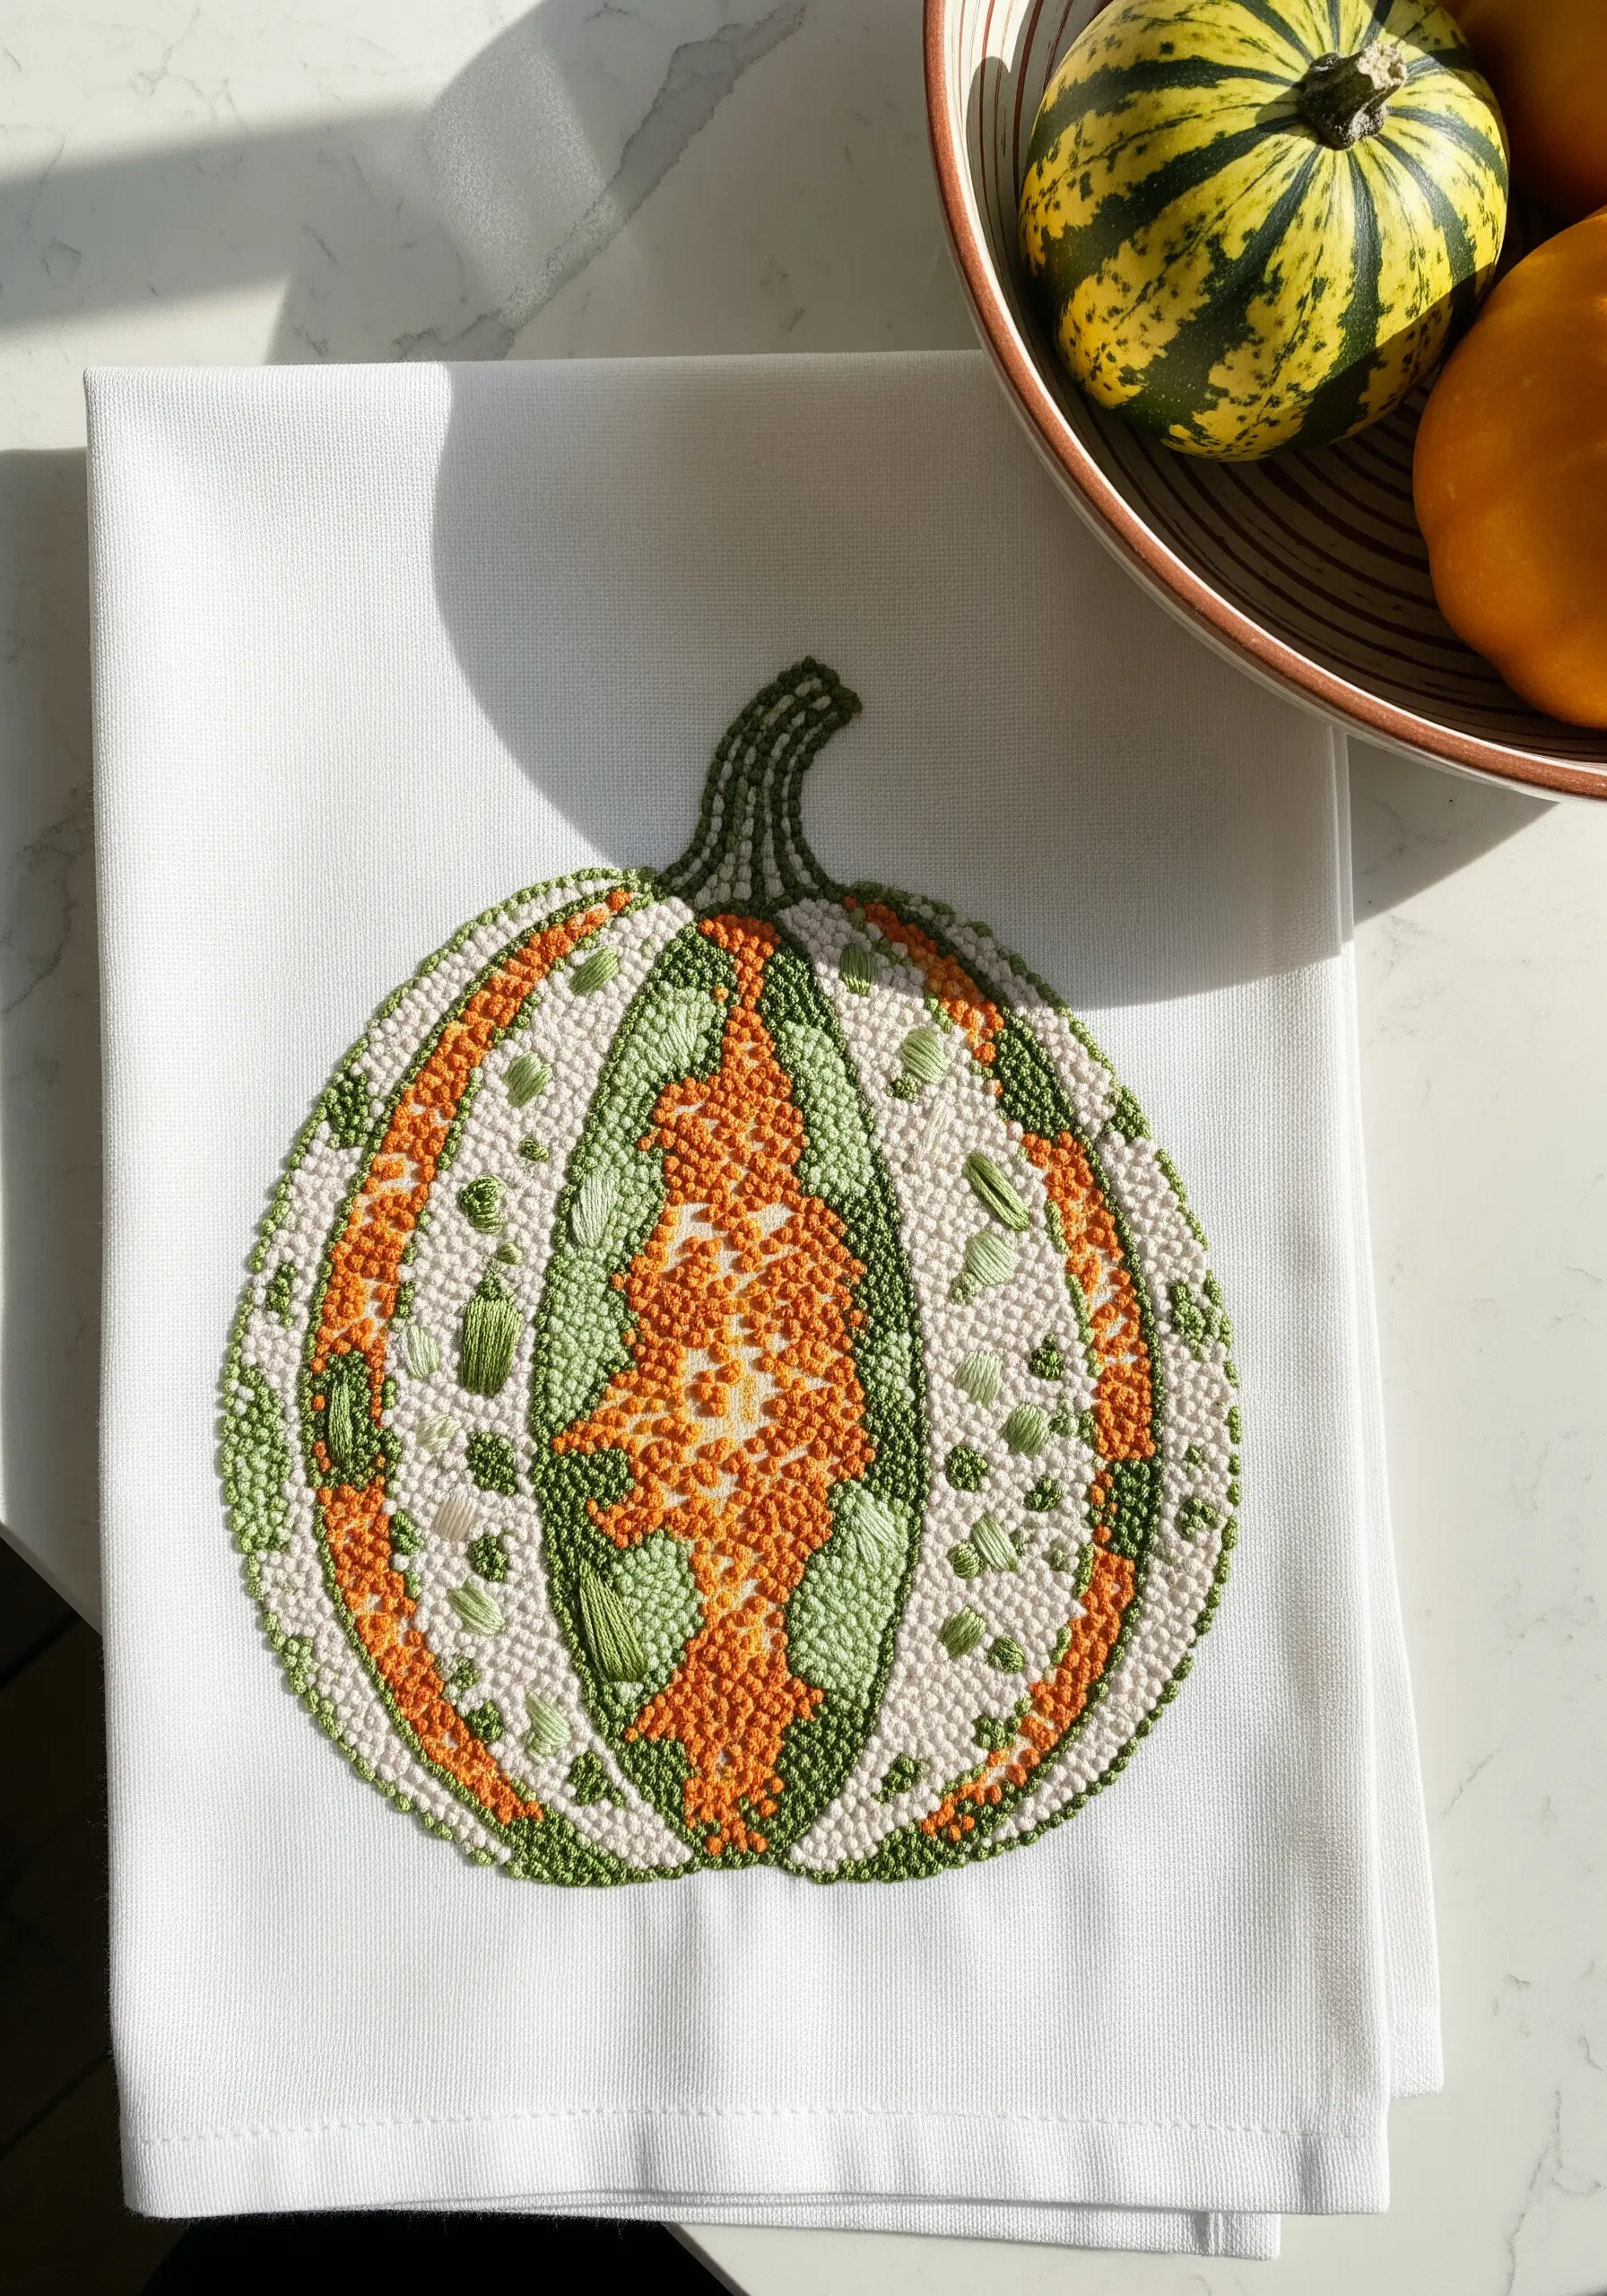
Instead of struggling with a perfectly smooth satin stitch, embrace the texture of seed stitch for a more forgiving and visually interesting fill.
Outline your main shapes with a clean backstitch. Then, fill the sections with small, randomly placed straight stitches, like scattered seeds. This technique is fast, meditative, and excellent for hiding imperfections.
Incorporate small clusters of French knots to add a secondary, bumpier texture. This mix of smooth outlines, speckled fill, and bumpy knots makes simple minimal fruit botanical embroidery patterns look incredibly sophisticated.
14. Stitch a Heather Field with Atmospheric Depth
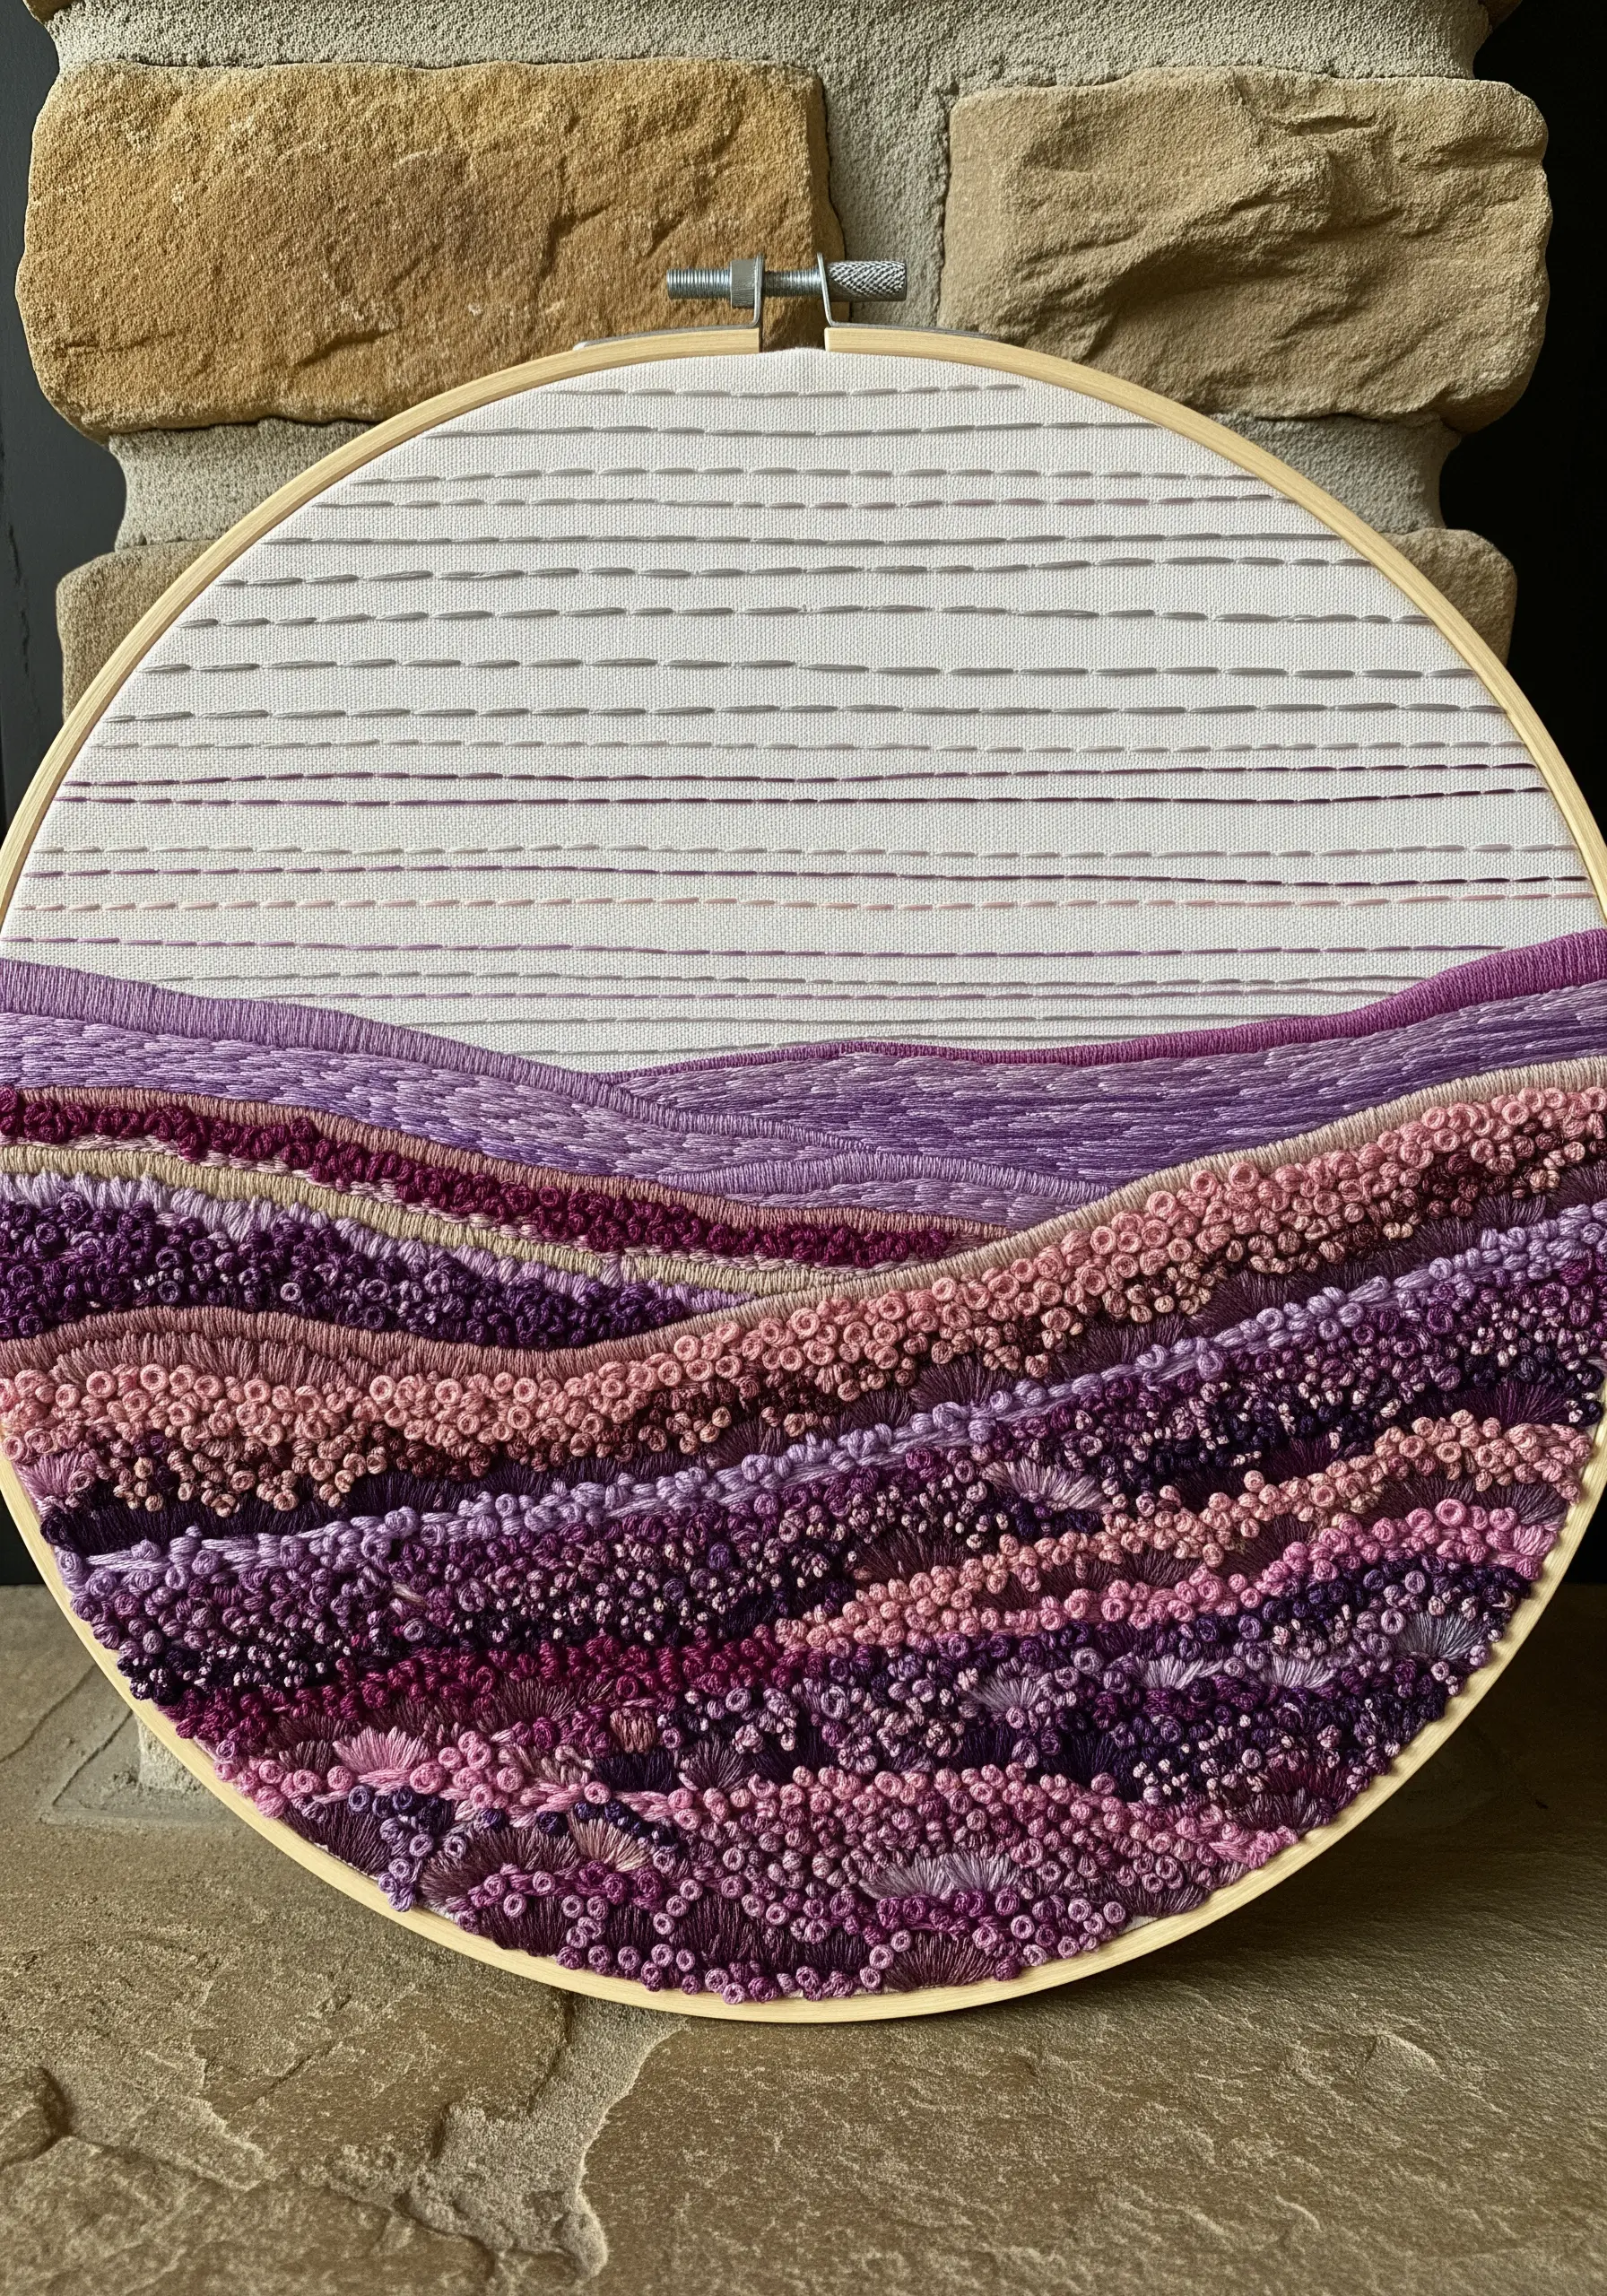
Create the illusion of a vast, rolling landscape by varying your stitch density and color saturation. This is a classic artistic principle applied to thread.
For the foreground, use thick, dense clusters of French and colonial knots in vibrant, saturated purples and pinks. This brings this section visually forward.
For the hills in the background, switch to flatter satin stitches and use fewer, lighter, and more muted shades. This makes them recede into the distance.
This strategic use of texture and color from your wildflower thread palettes is what gives the piece its incredible sense of space.
15. Form a Starfish with Knotted Stitches
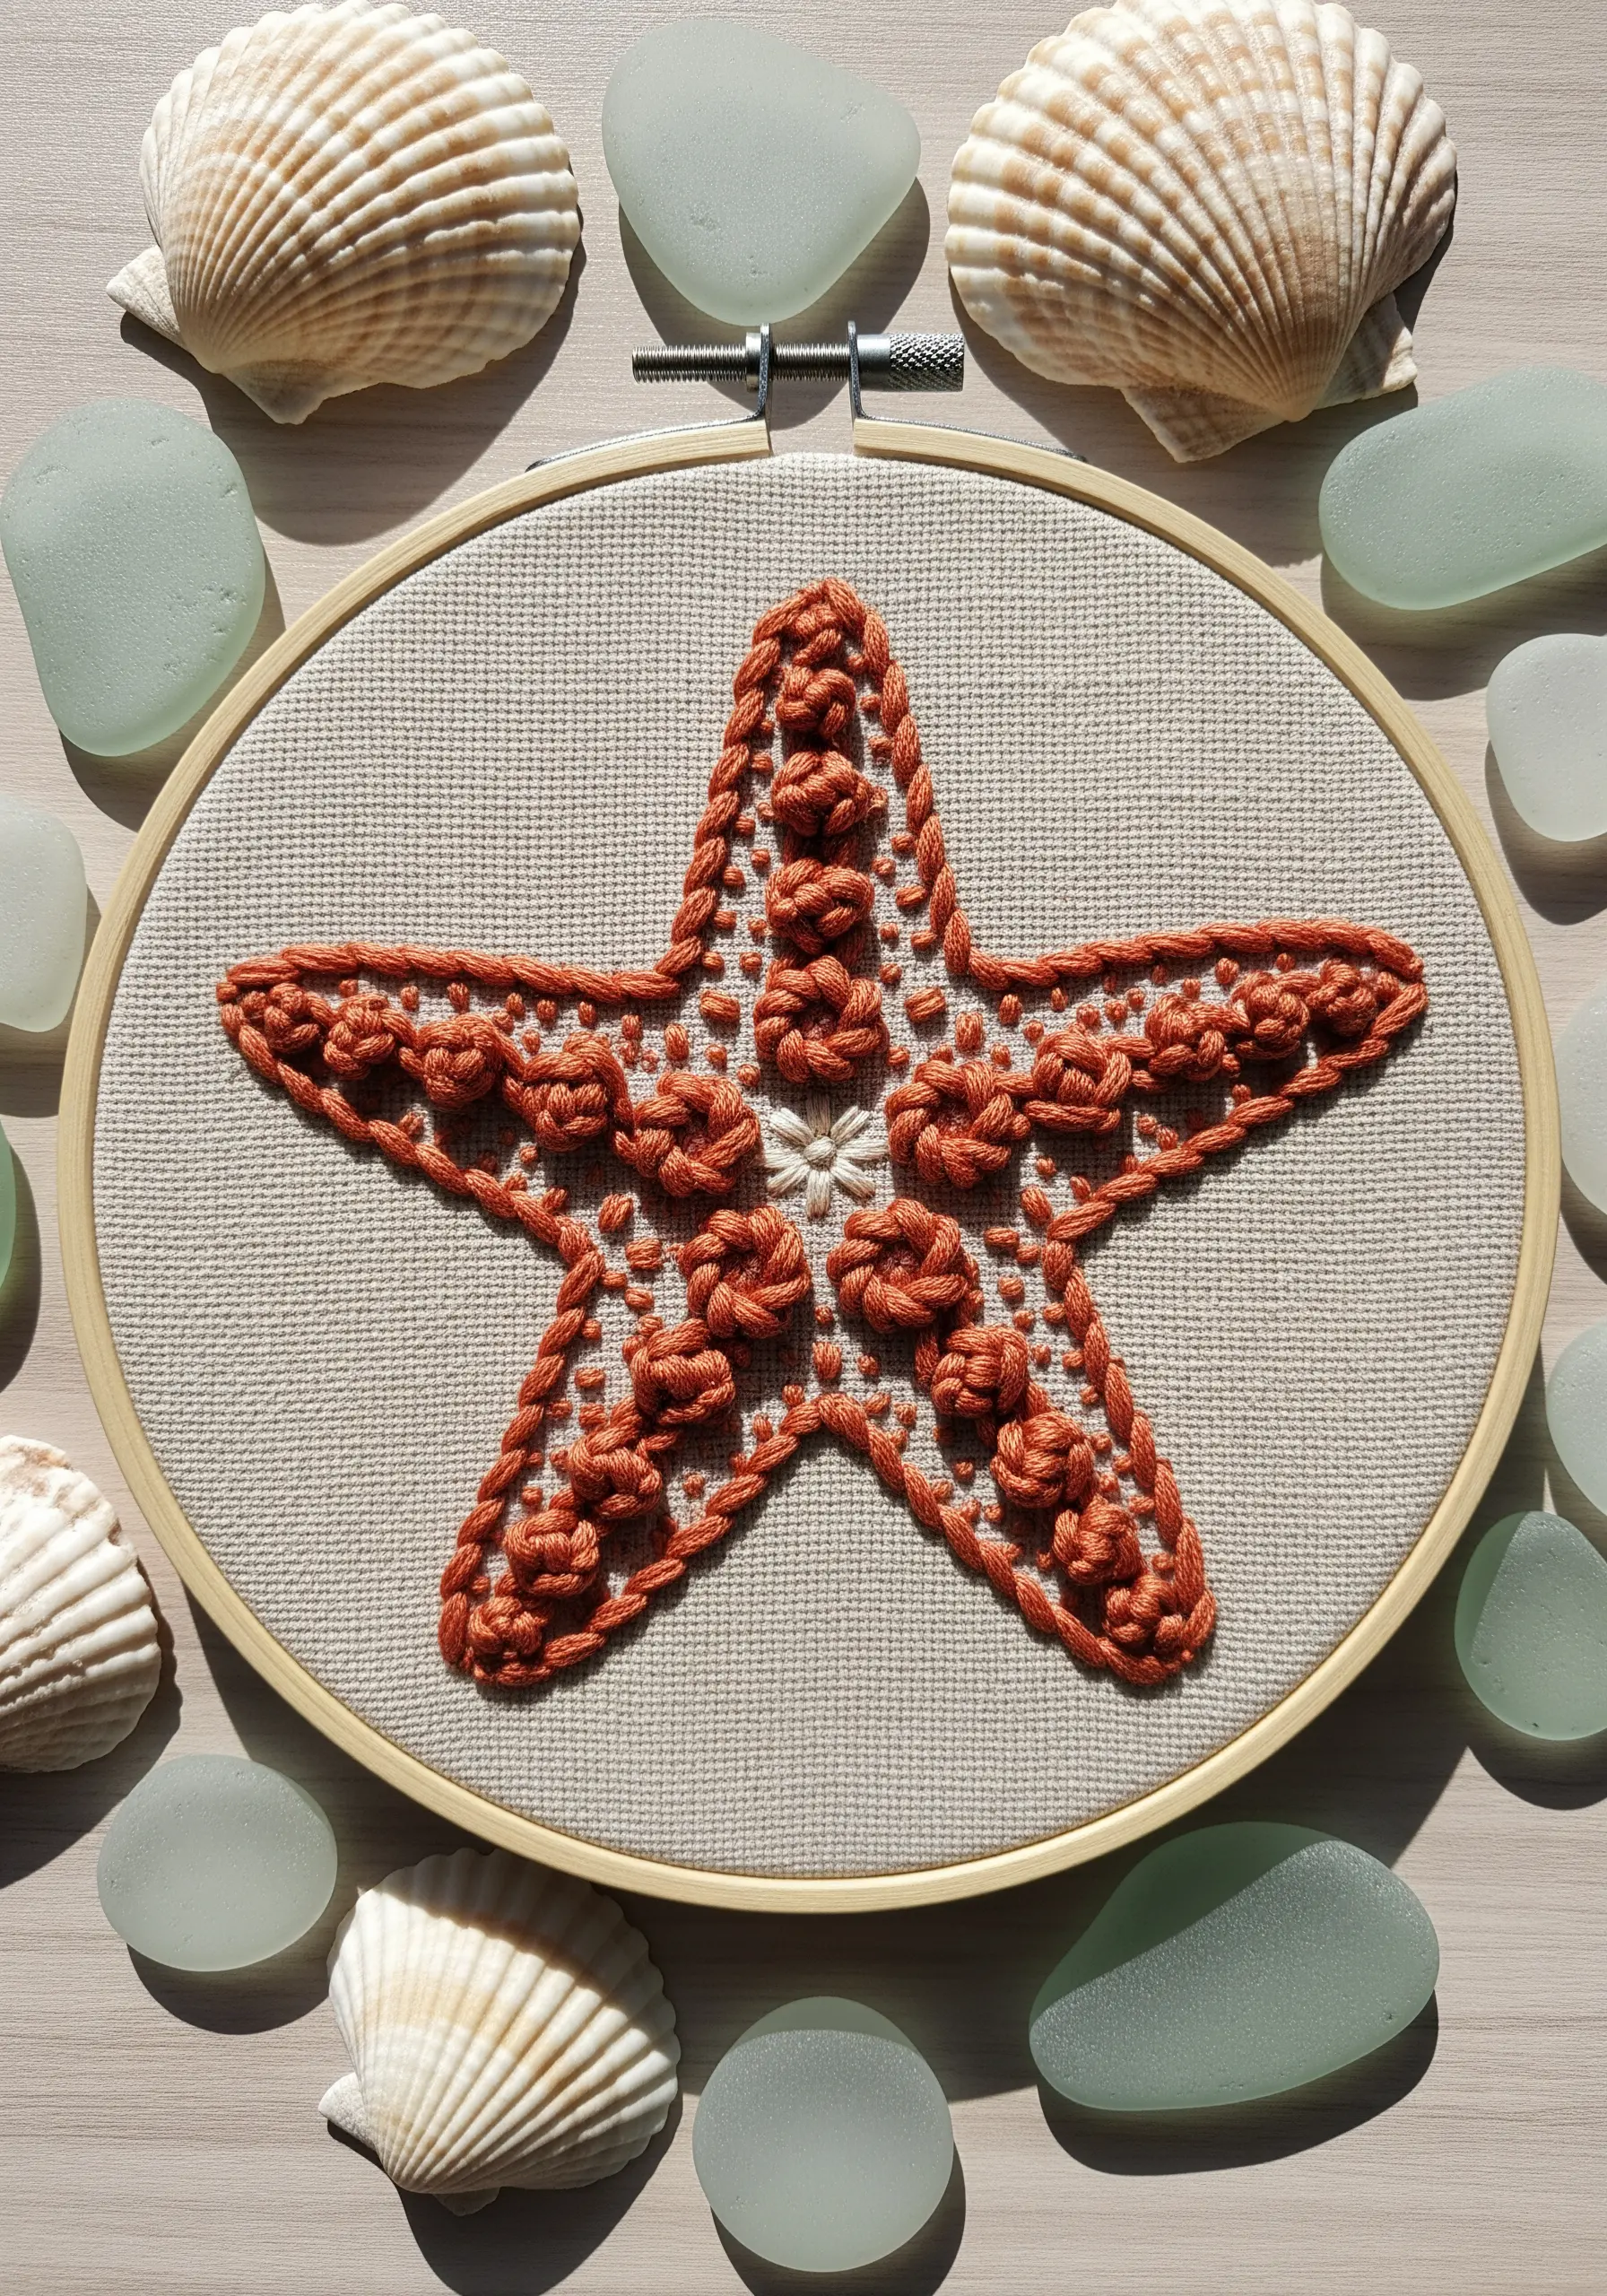
To replicate the bumpy, calcified texture of a starfish, build your design entirely from knotted stitches. The more variety, the better.
Outline the shape with a line of bullion knots placed end-to-end. Fill the interior with a mix of French knots, colonial knots, and woven picot stitches of varying sizes.
Using a thick, matte thread like perle cotton will enhance the three-dimensional quality of the knots. This tactile approach is a fun way to explore ocean-inspired hoop embroidery.
16. Construct a Naturalist’s Bird Nest
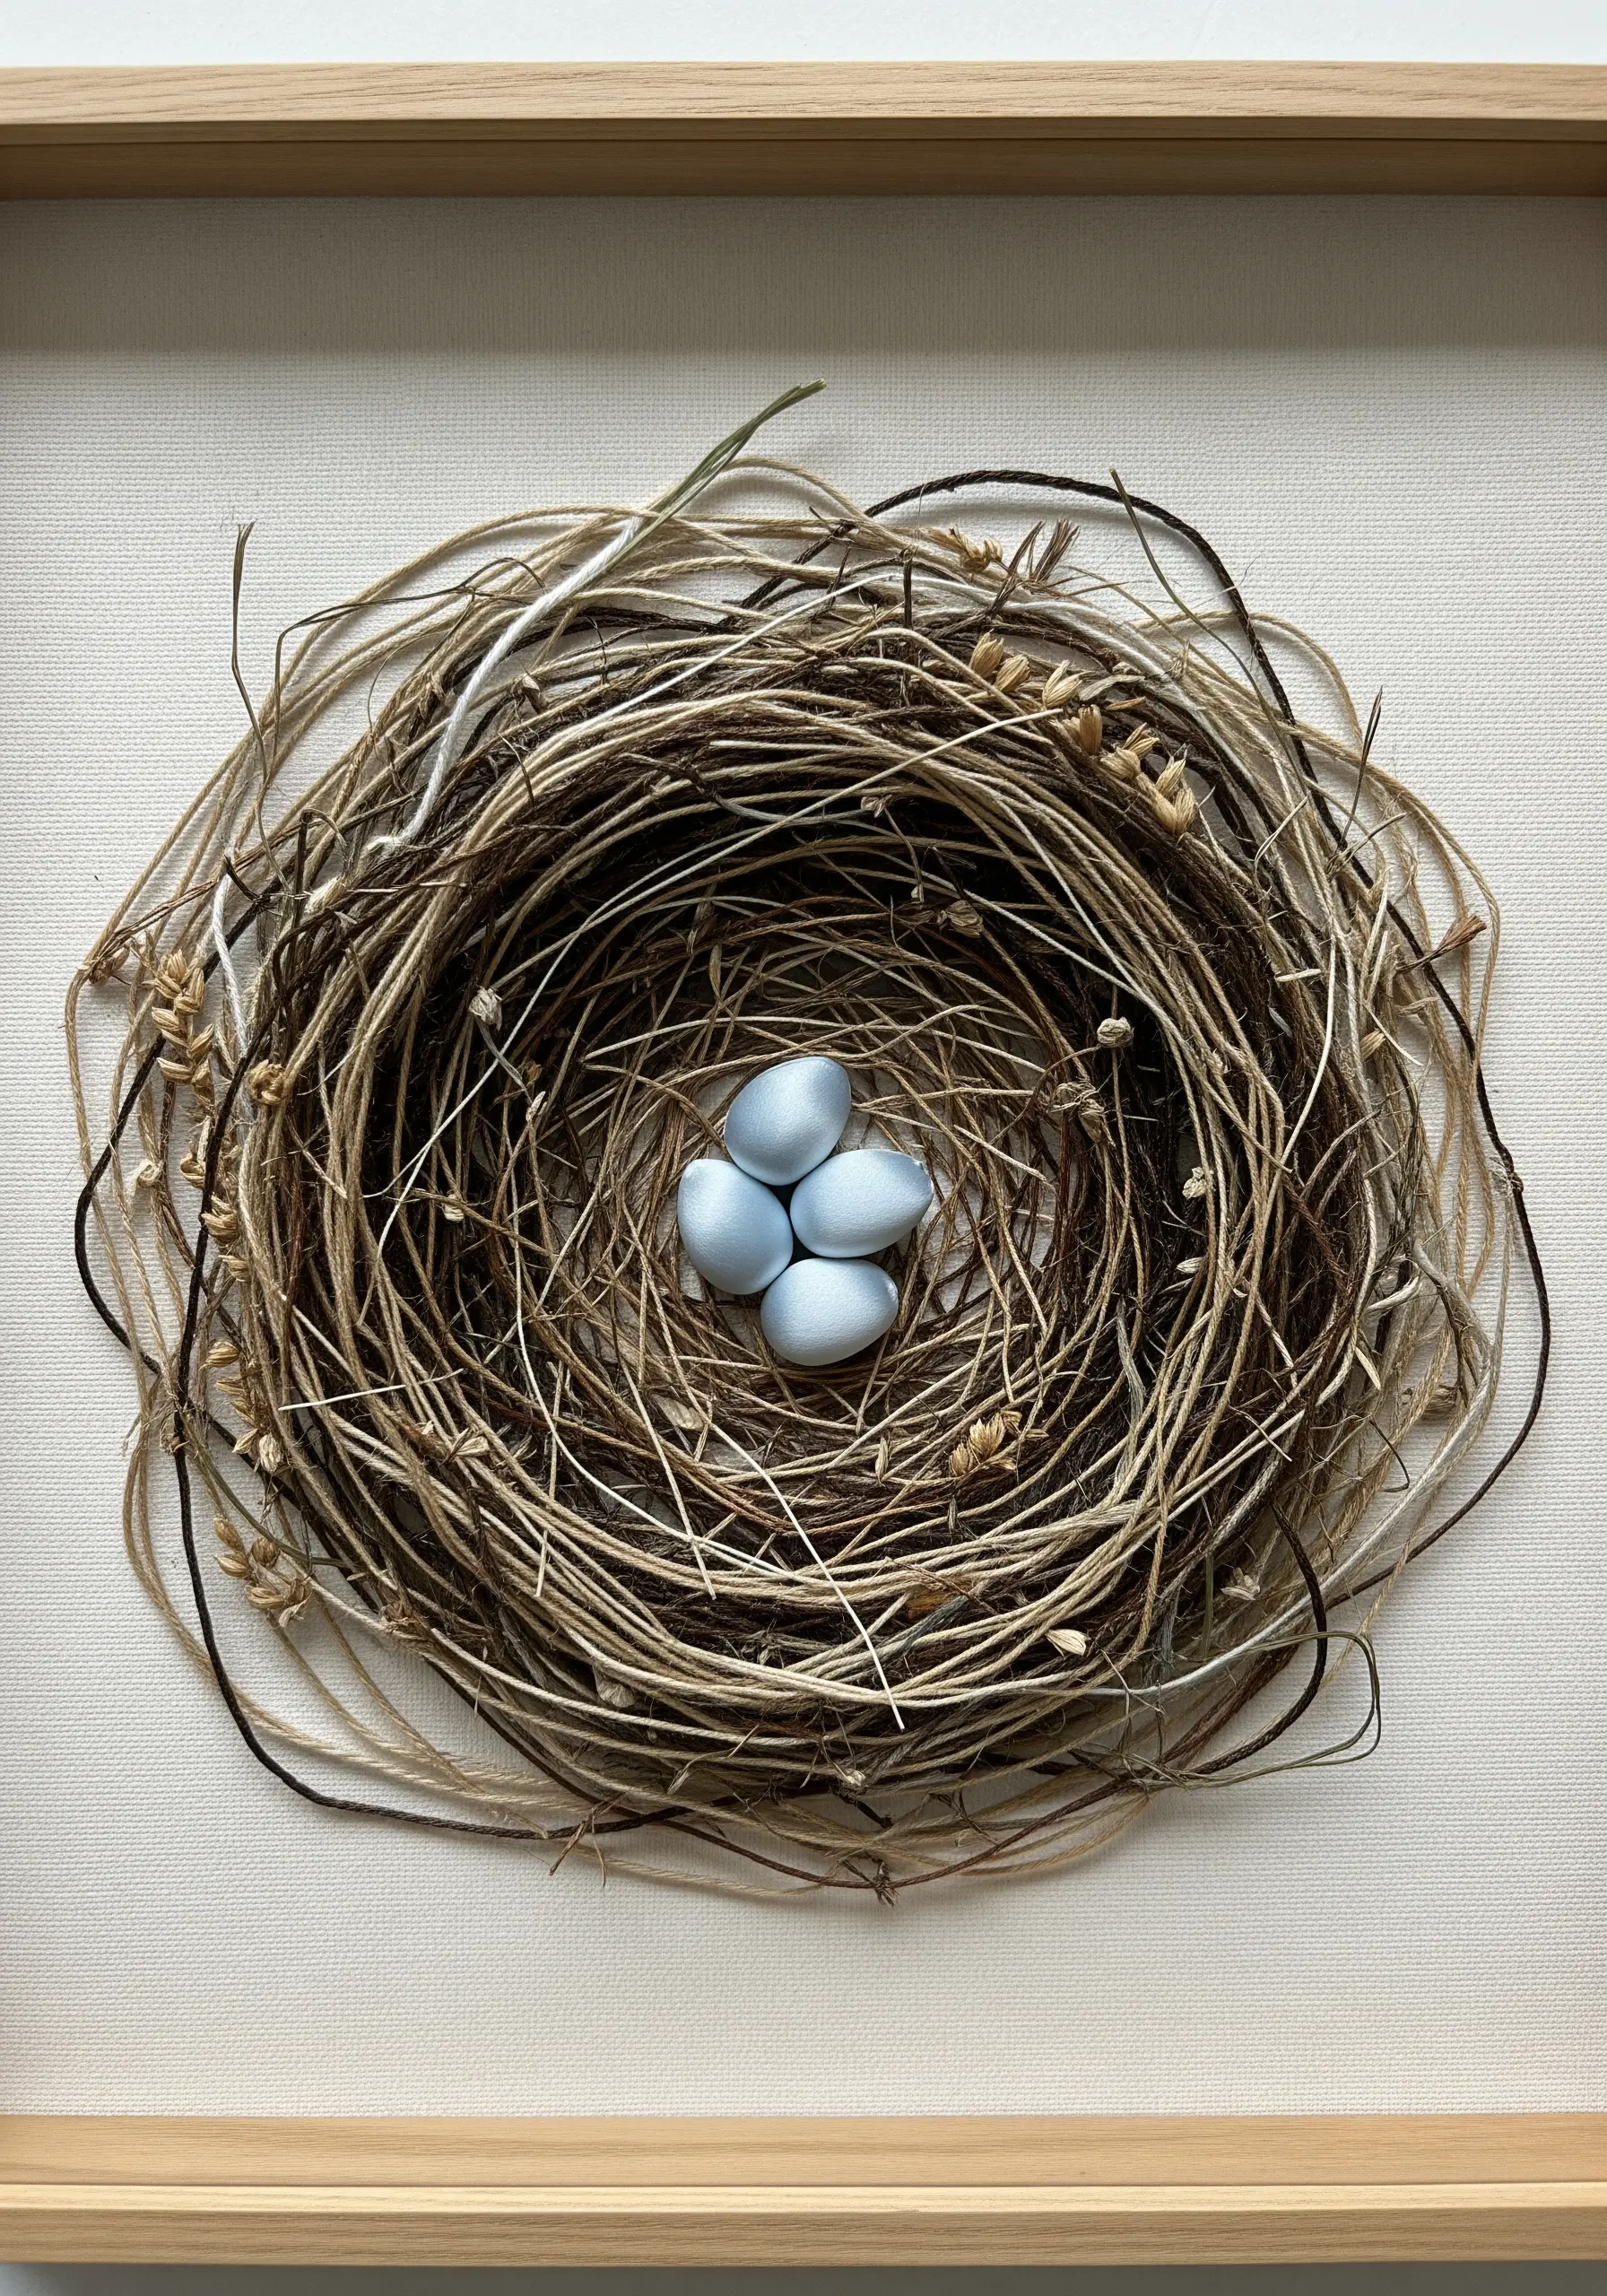
Move beyond thread and incorporate natural fibers to create an astoundingly realistic bird’s nest. This mixed-media technique is all about thoughtful layering.
Start by creating a base shape on your fabric with couched twine or raffia. Secure these thicker fibers with small, evenly spaced stitches in a matching thread color.
Weave in finer threads, dried grasses, and other natural elements, allowing them to loop and tangle organically. The goal is to create a sense of chaotic, yet purposeful, construction, just like a real nest.
Finish with a few small, sculpted beads or clay eggs nestled in the center to complete the story.
17. Add a Fern to Denim with Fishbone Stitch
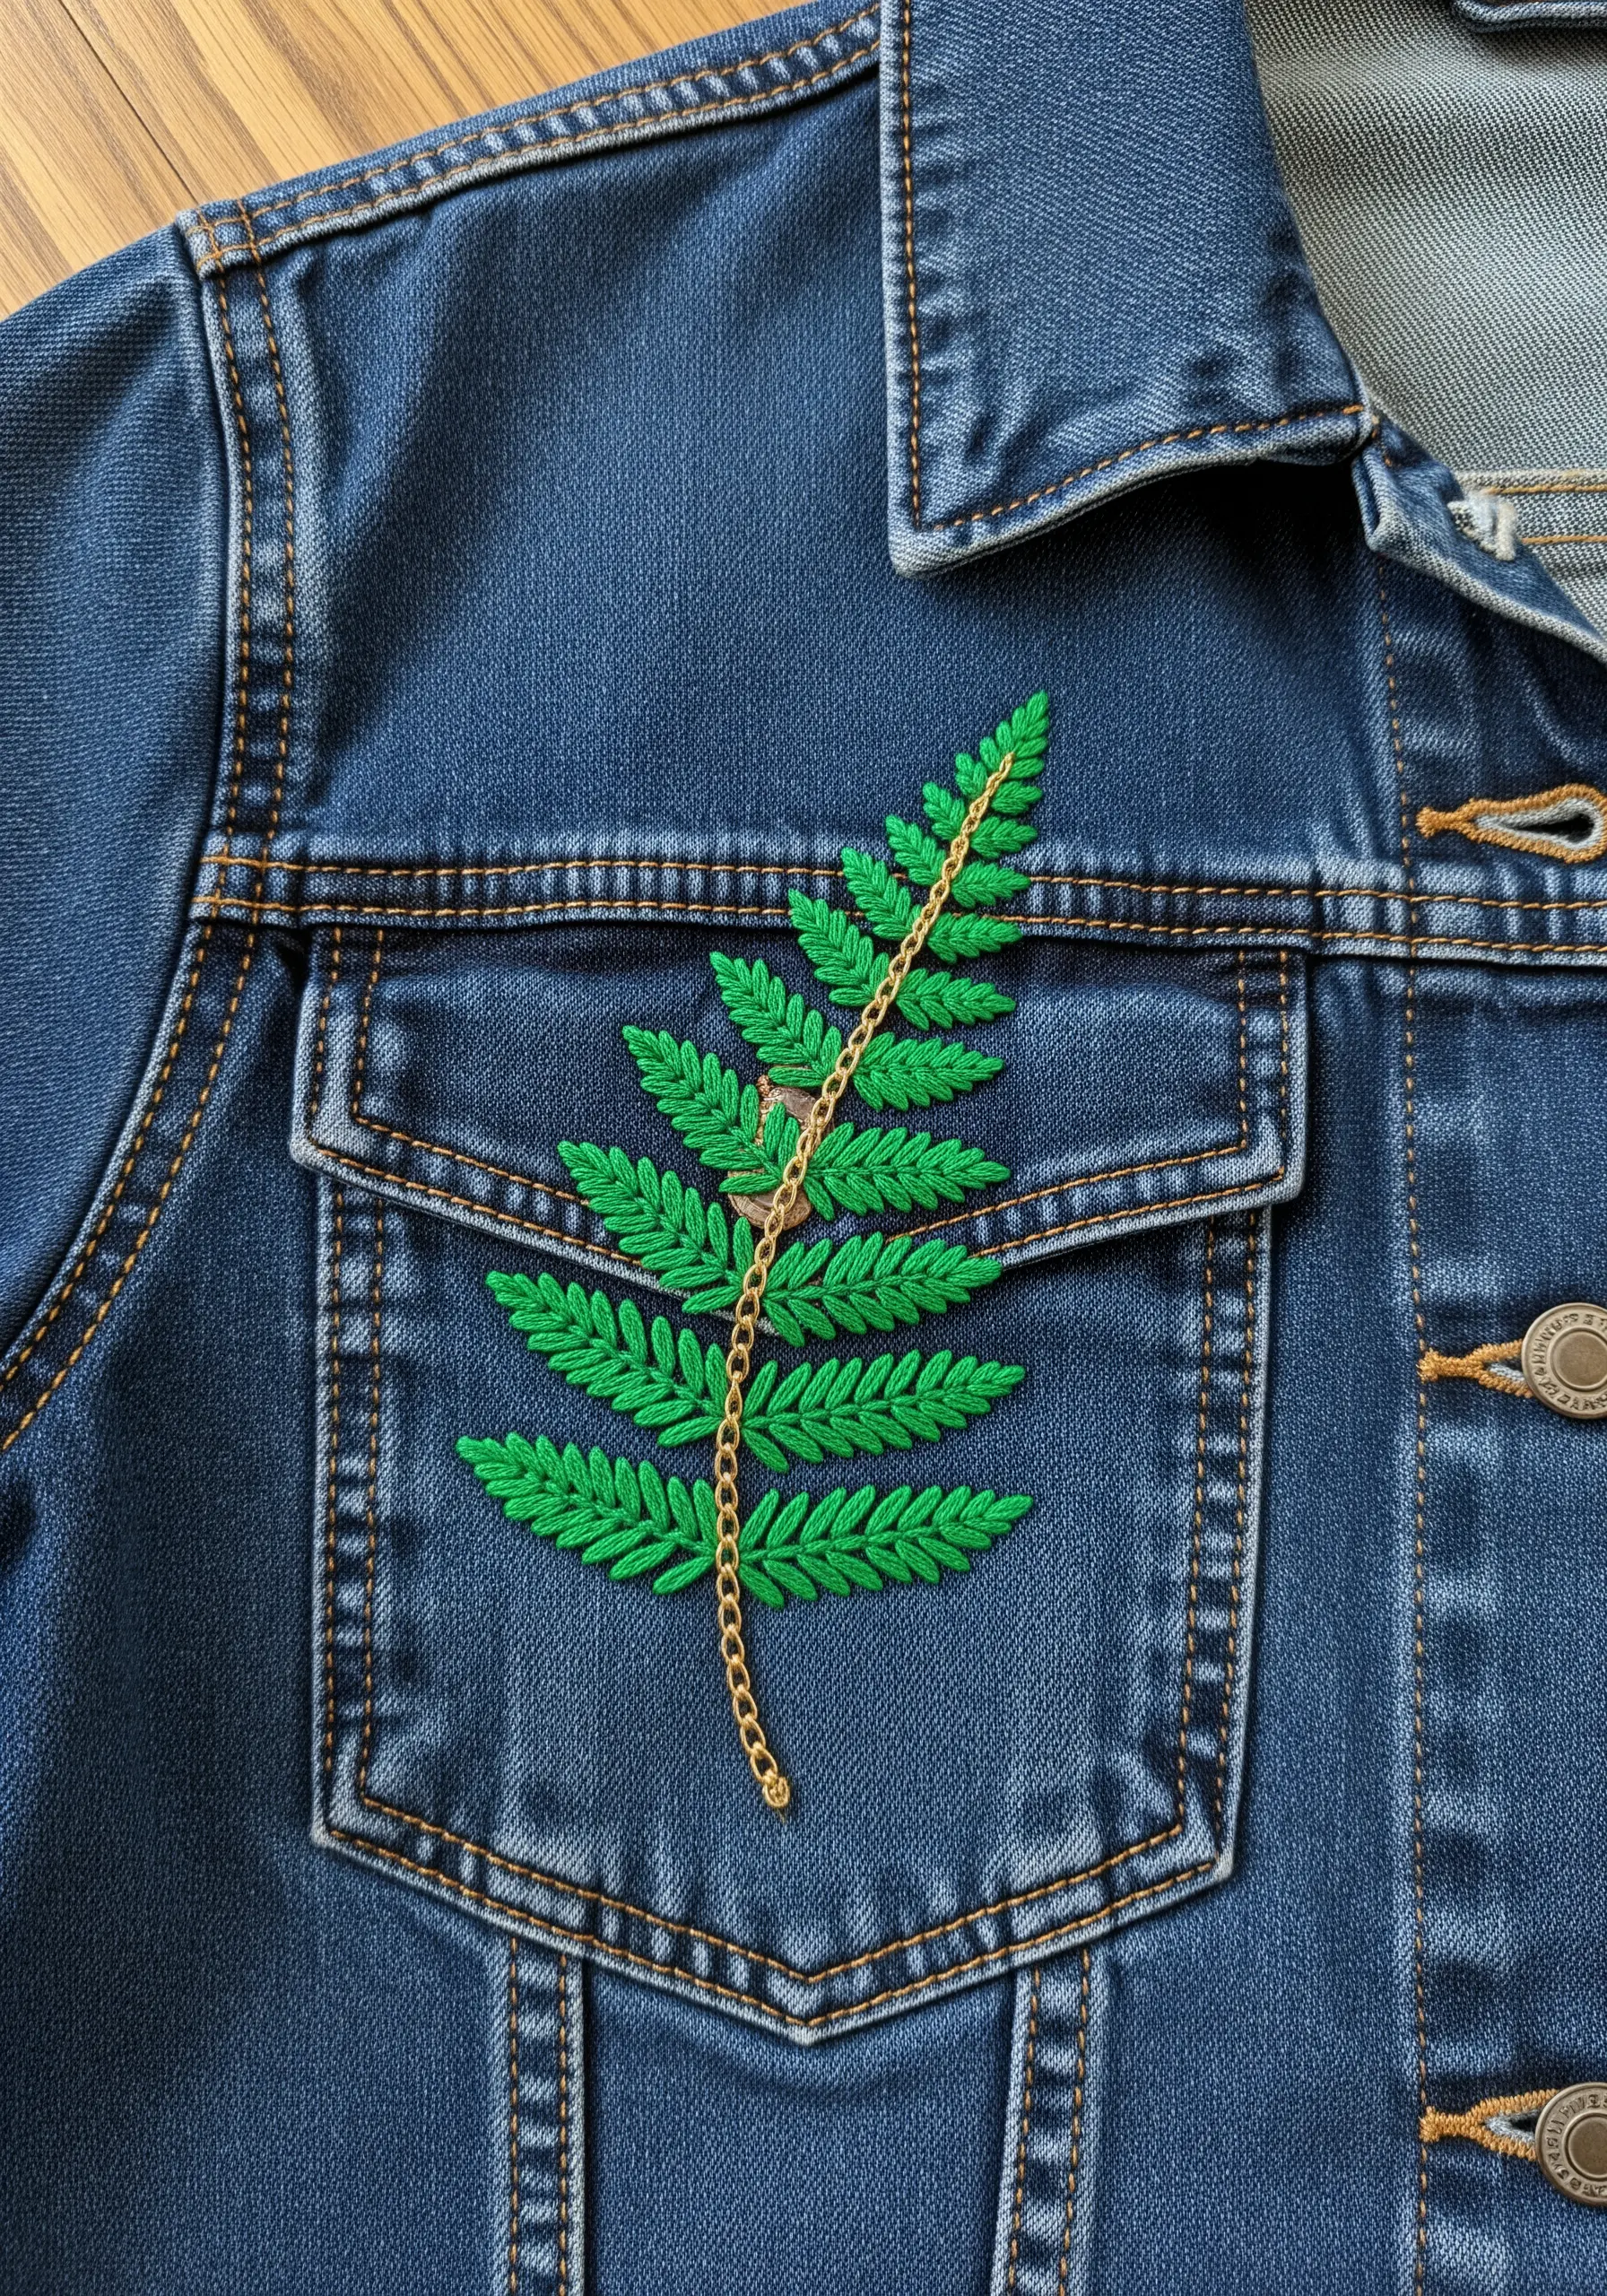
The fishbone stitch is the perfect choice for embroidering leaves and ferns, as it creates the stem and the angled leaflets in a single, fluid motion.
To make the fern pop against a dark fabric like denim, choose a vibrant, high-contrast thread color. A bright, grassy green creates a fresh, modern look.
Keep your stitches uniform in length and angle for a clean, graphic appearance. The beauty of this stitch is its inherent texture—the overlapping threads create a raised central vein that looks incredibly professional.
Consider adding a non-traditional element, like a delicate gold chain for the stem, to add a contemporary edge.
18. Paint Abstract Waves with Thread
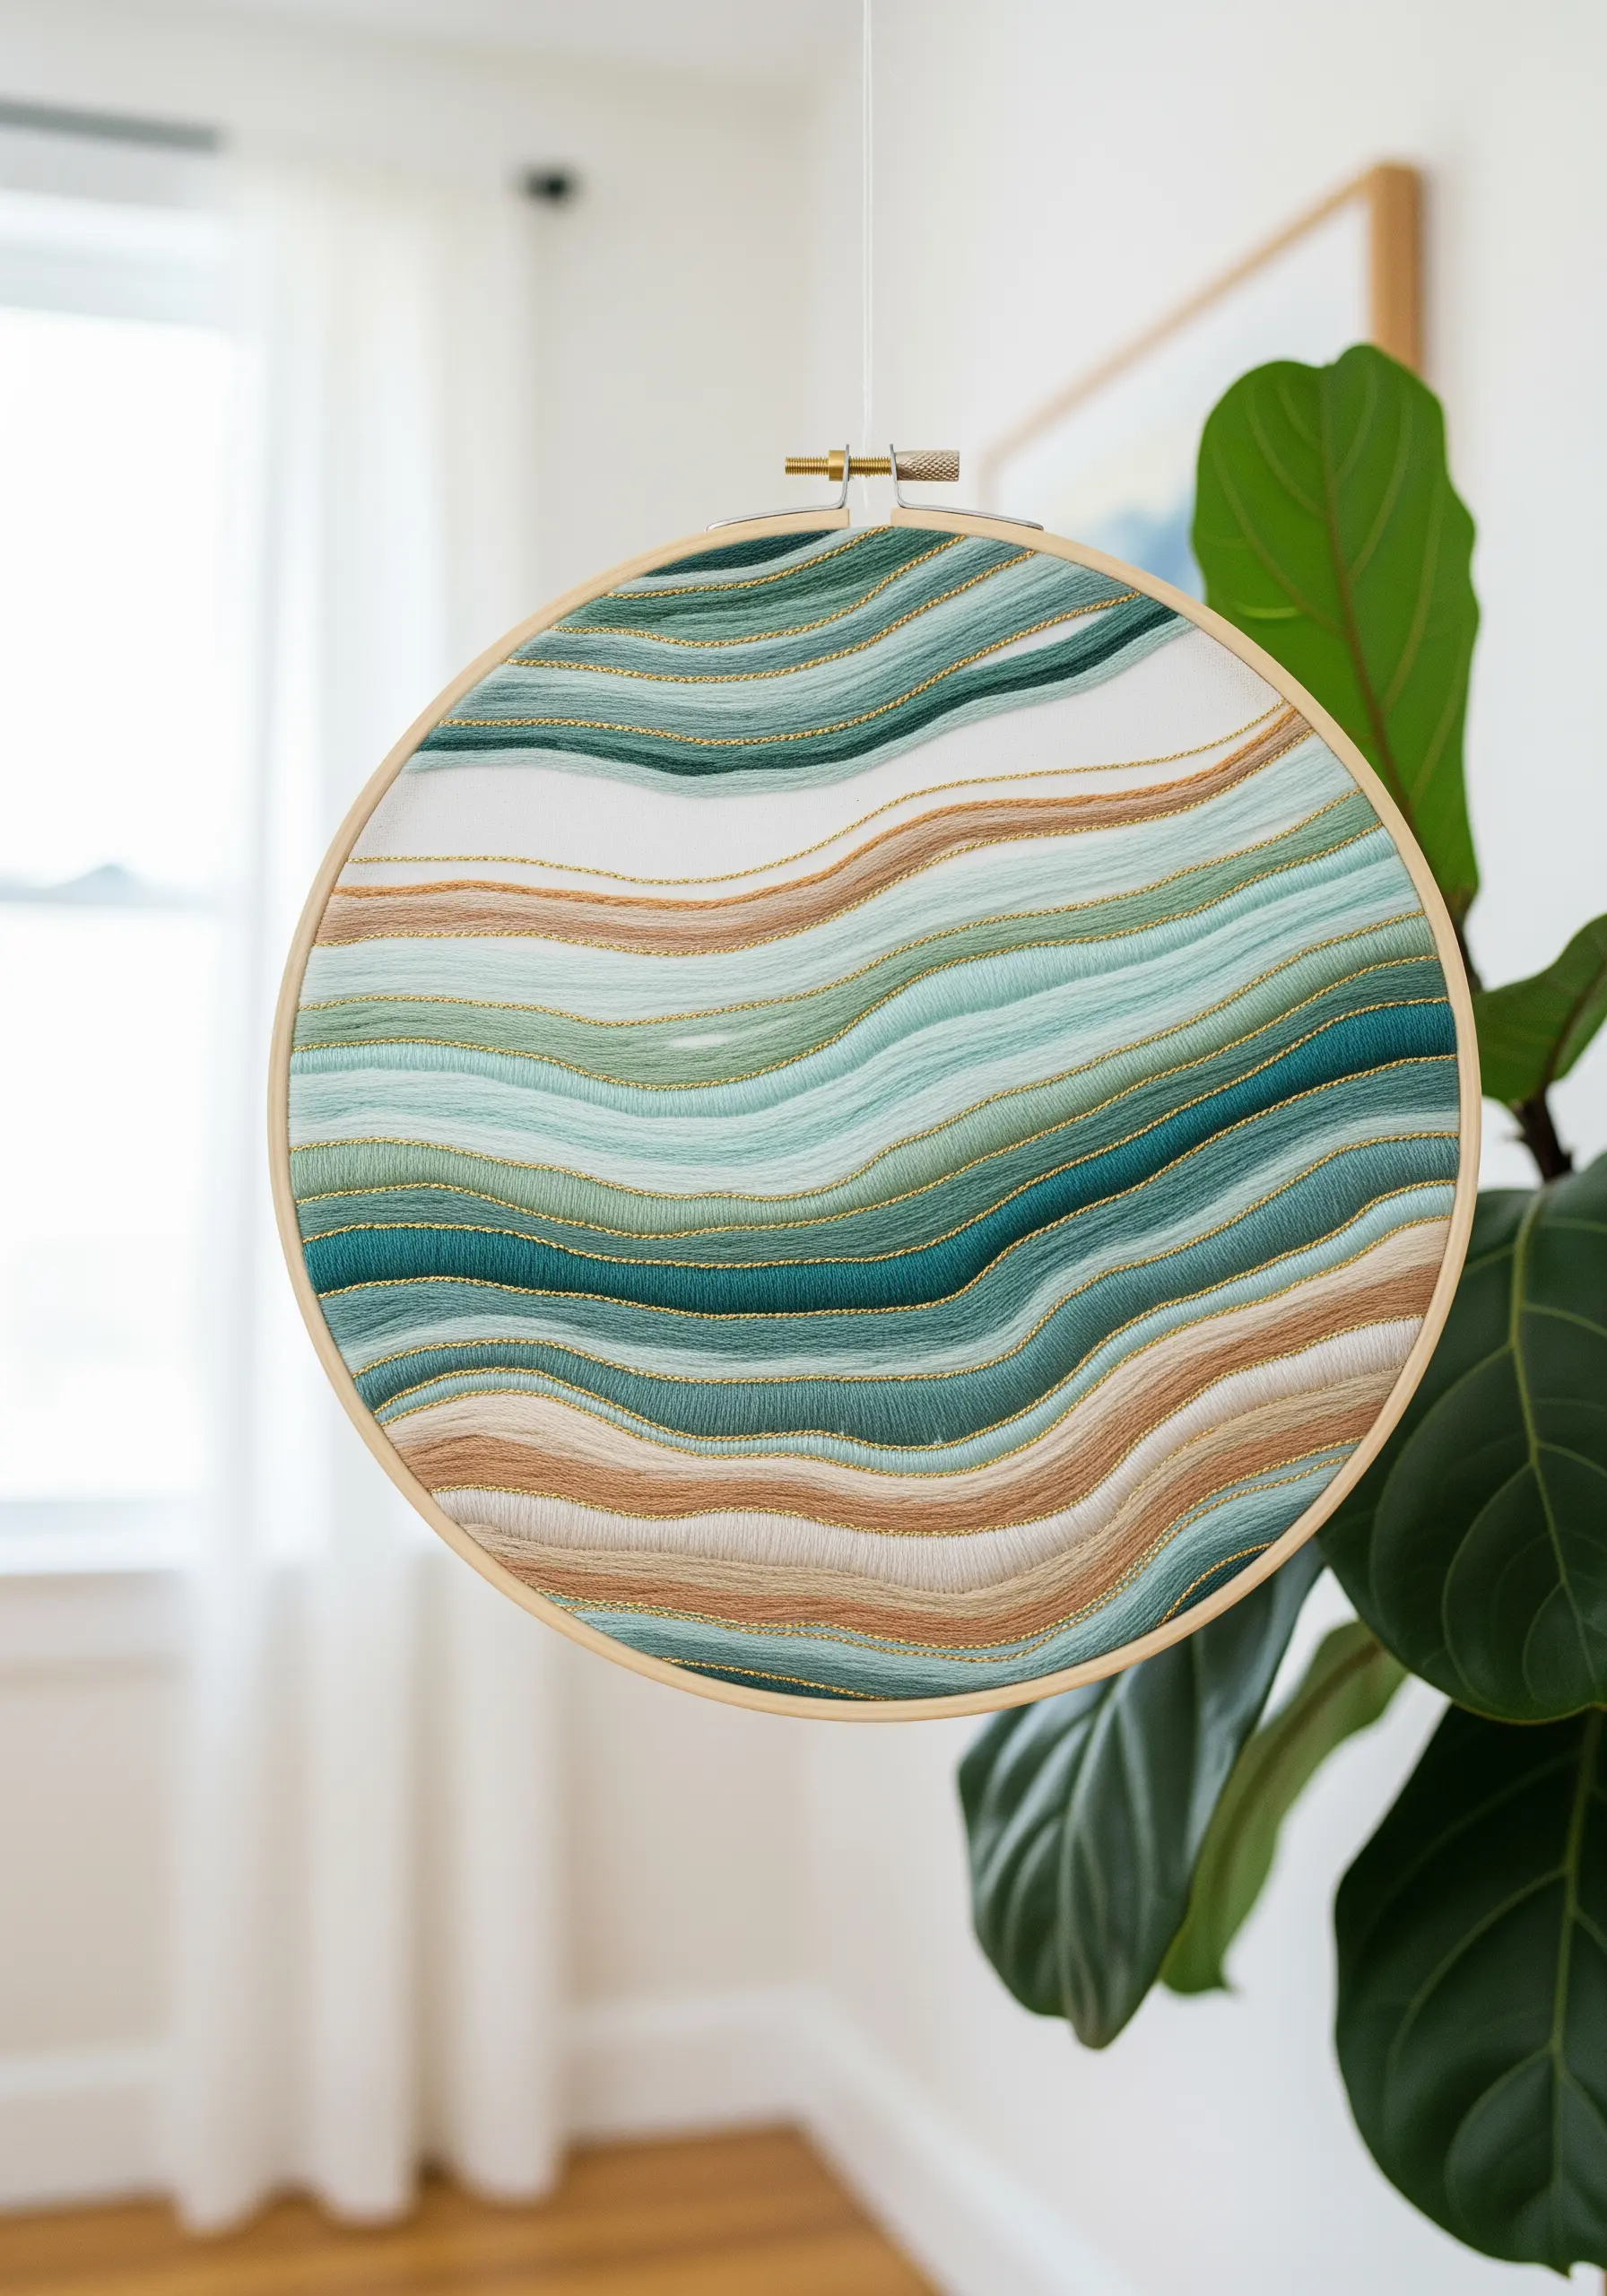
Create a flowing, painterly landscape by filling your hoop with dense, undulating lines of thread. This technique, known as thread painting, is surprisingly simple.
Divide your design into wavy sections and fill each one with long stitches that follow its curve. Don’t worry about perfect uniformity; slight variations in stitch length add to the organic feel.
To add a touch of luxury and catch the light, randomly incorporate a single strand of gold metallic floss alongside your cotton threads. This subtle shimmer elevates the entire piece, turning simple stitches into compelling abstract thread landscapes.
19. Stitch a Meadow of Clover
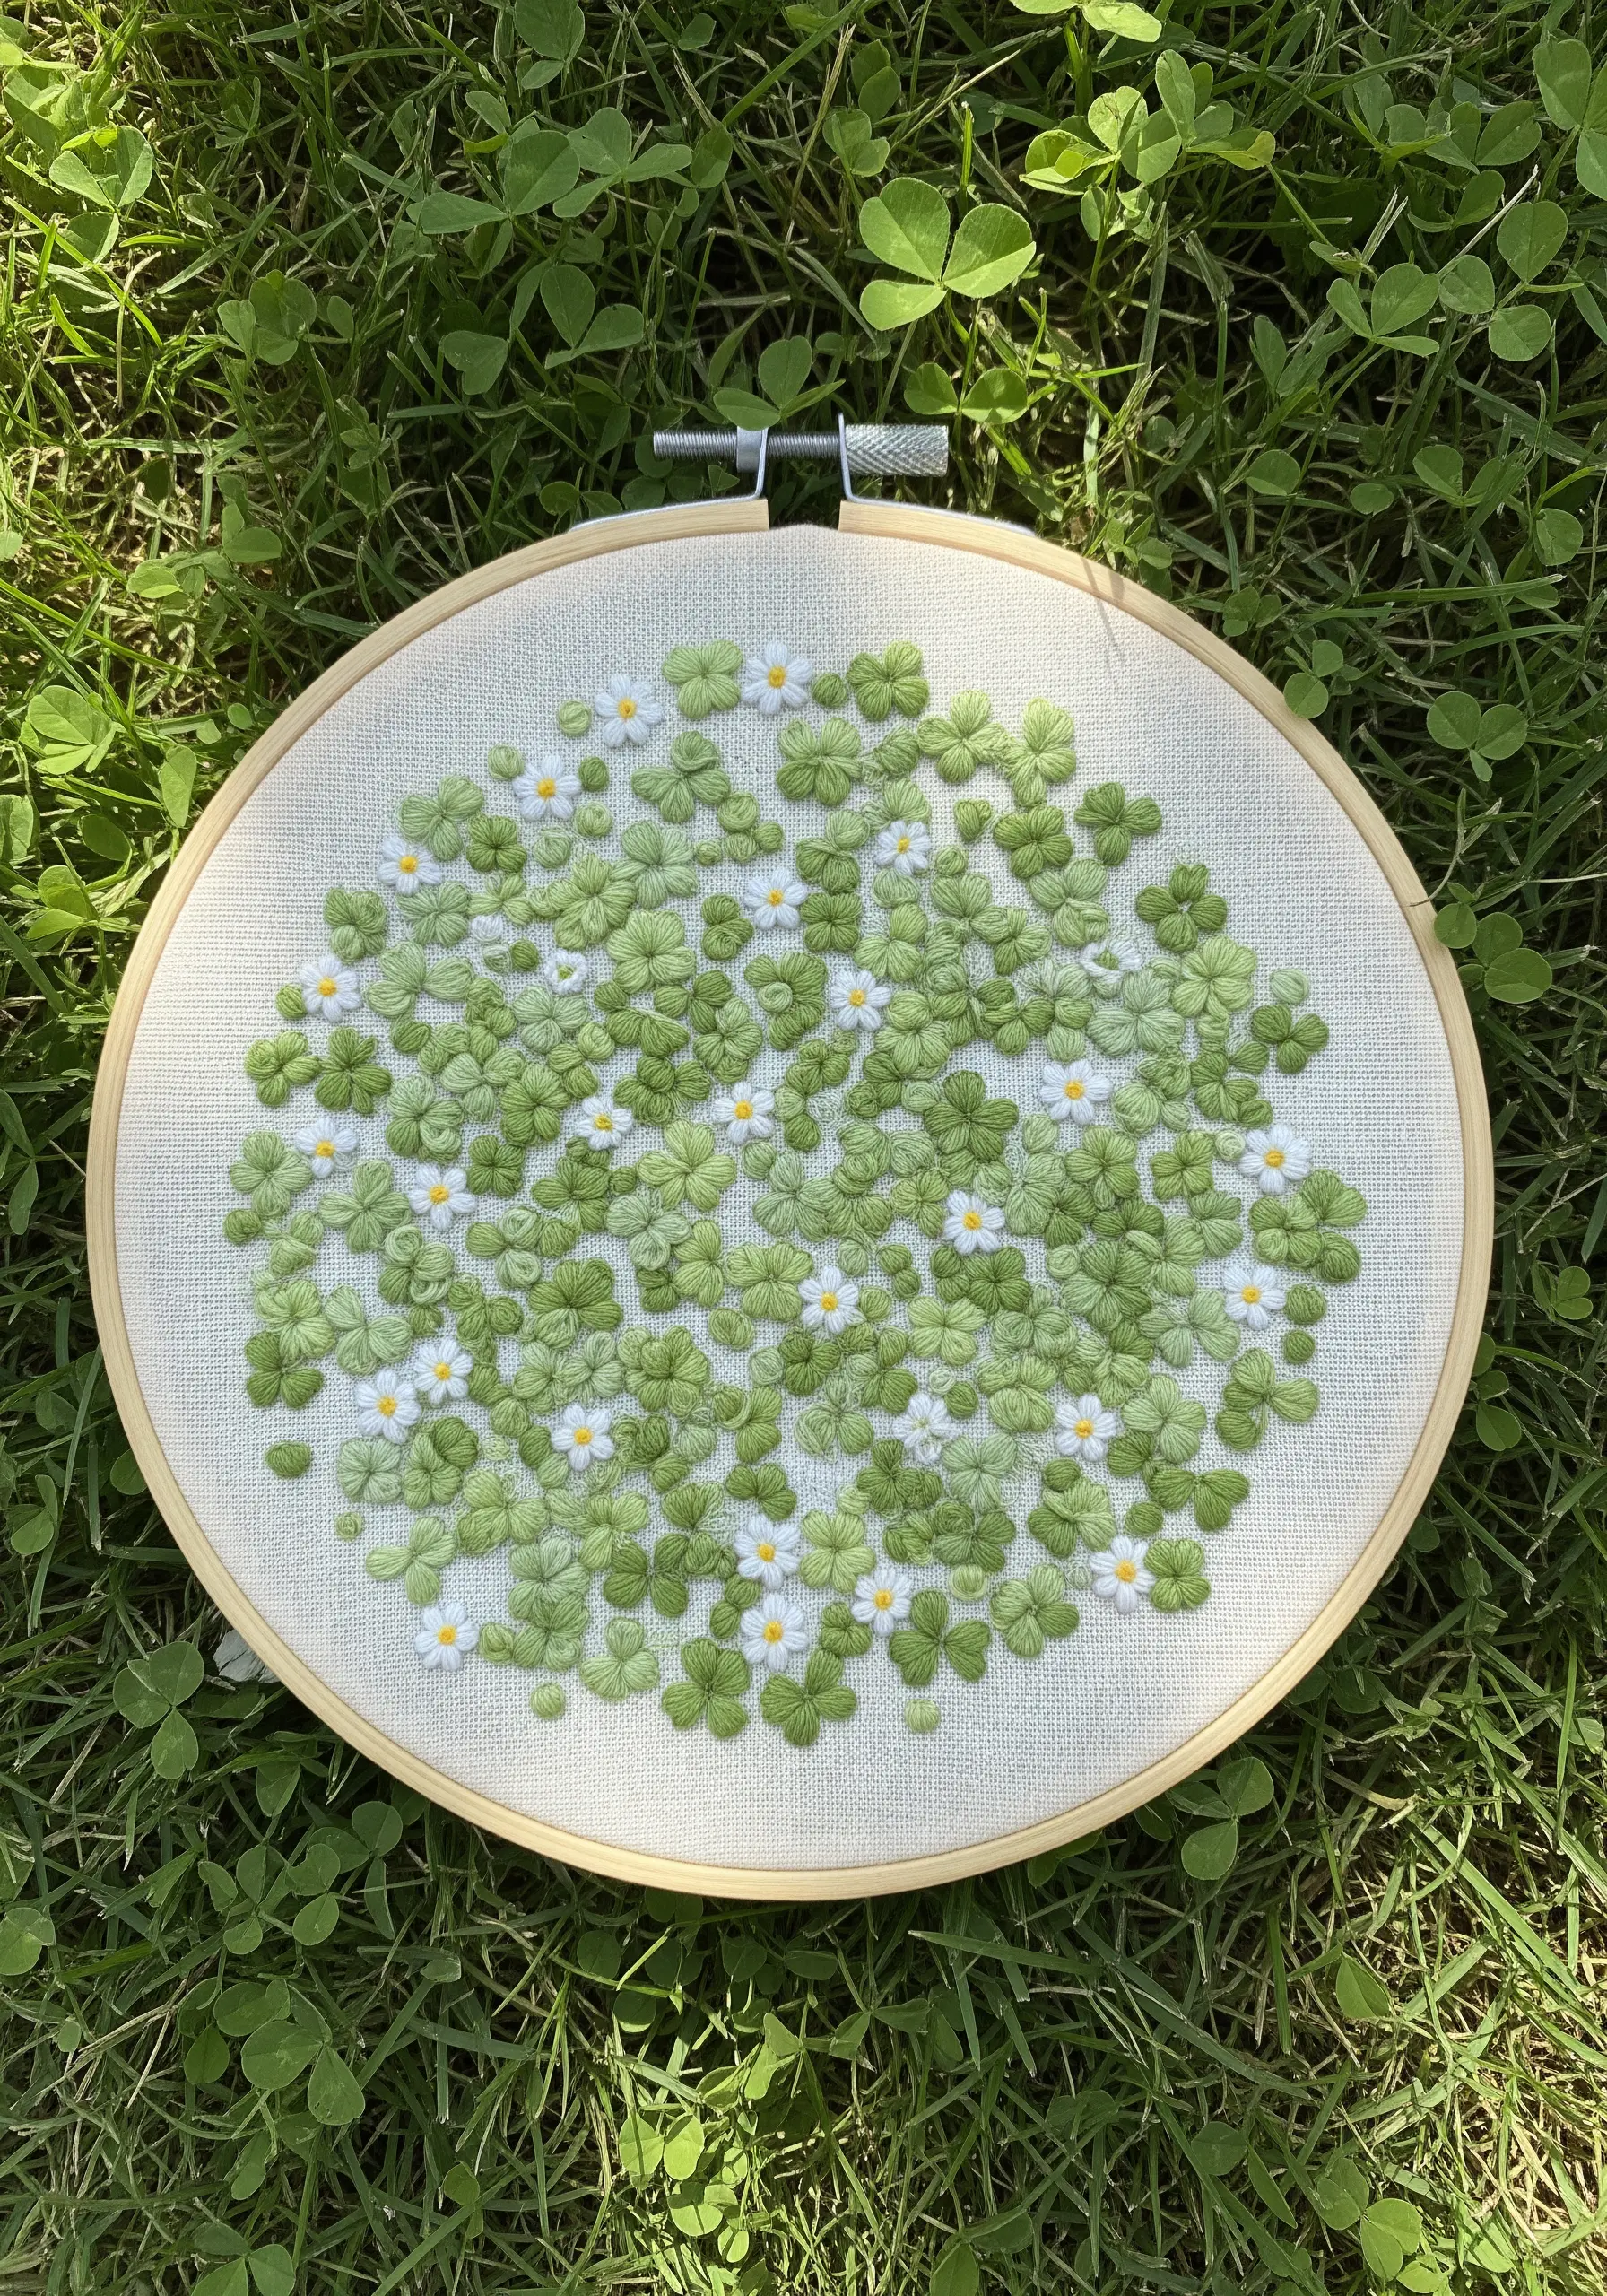
A dense, lush texture can be created from one of the simplest stitches: the detached chain stitch, also known as a lazy daisy.
Fill your hoop by stitching hundreds of three-leaf clovers, allowing them to overlap and face in different directions. This randomness is what makes the final piece look like a natural, wild patch of clover.
Use at least two or three slightly different shades of green to create depth and avoid a flat, uniform appearance. Dot the meadow with tiny white and yellow French knots for daisies to complete the charming effect.
20. Sculpt with Fabric and Yarn
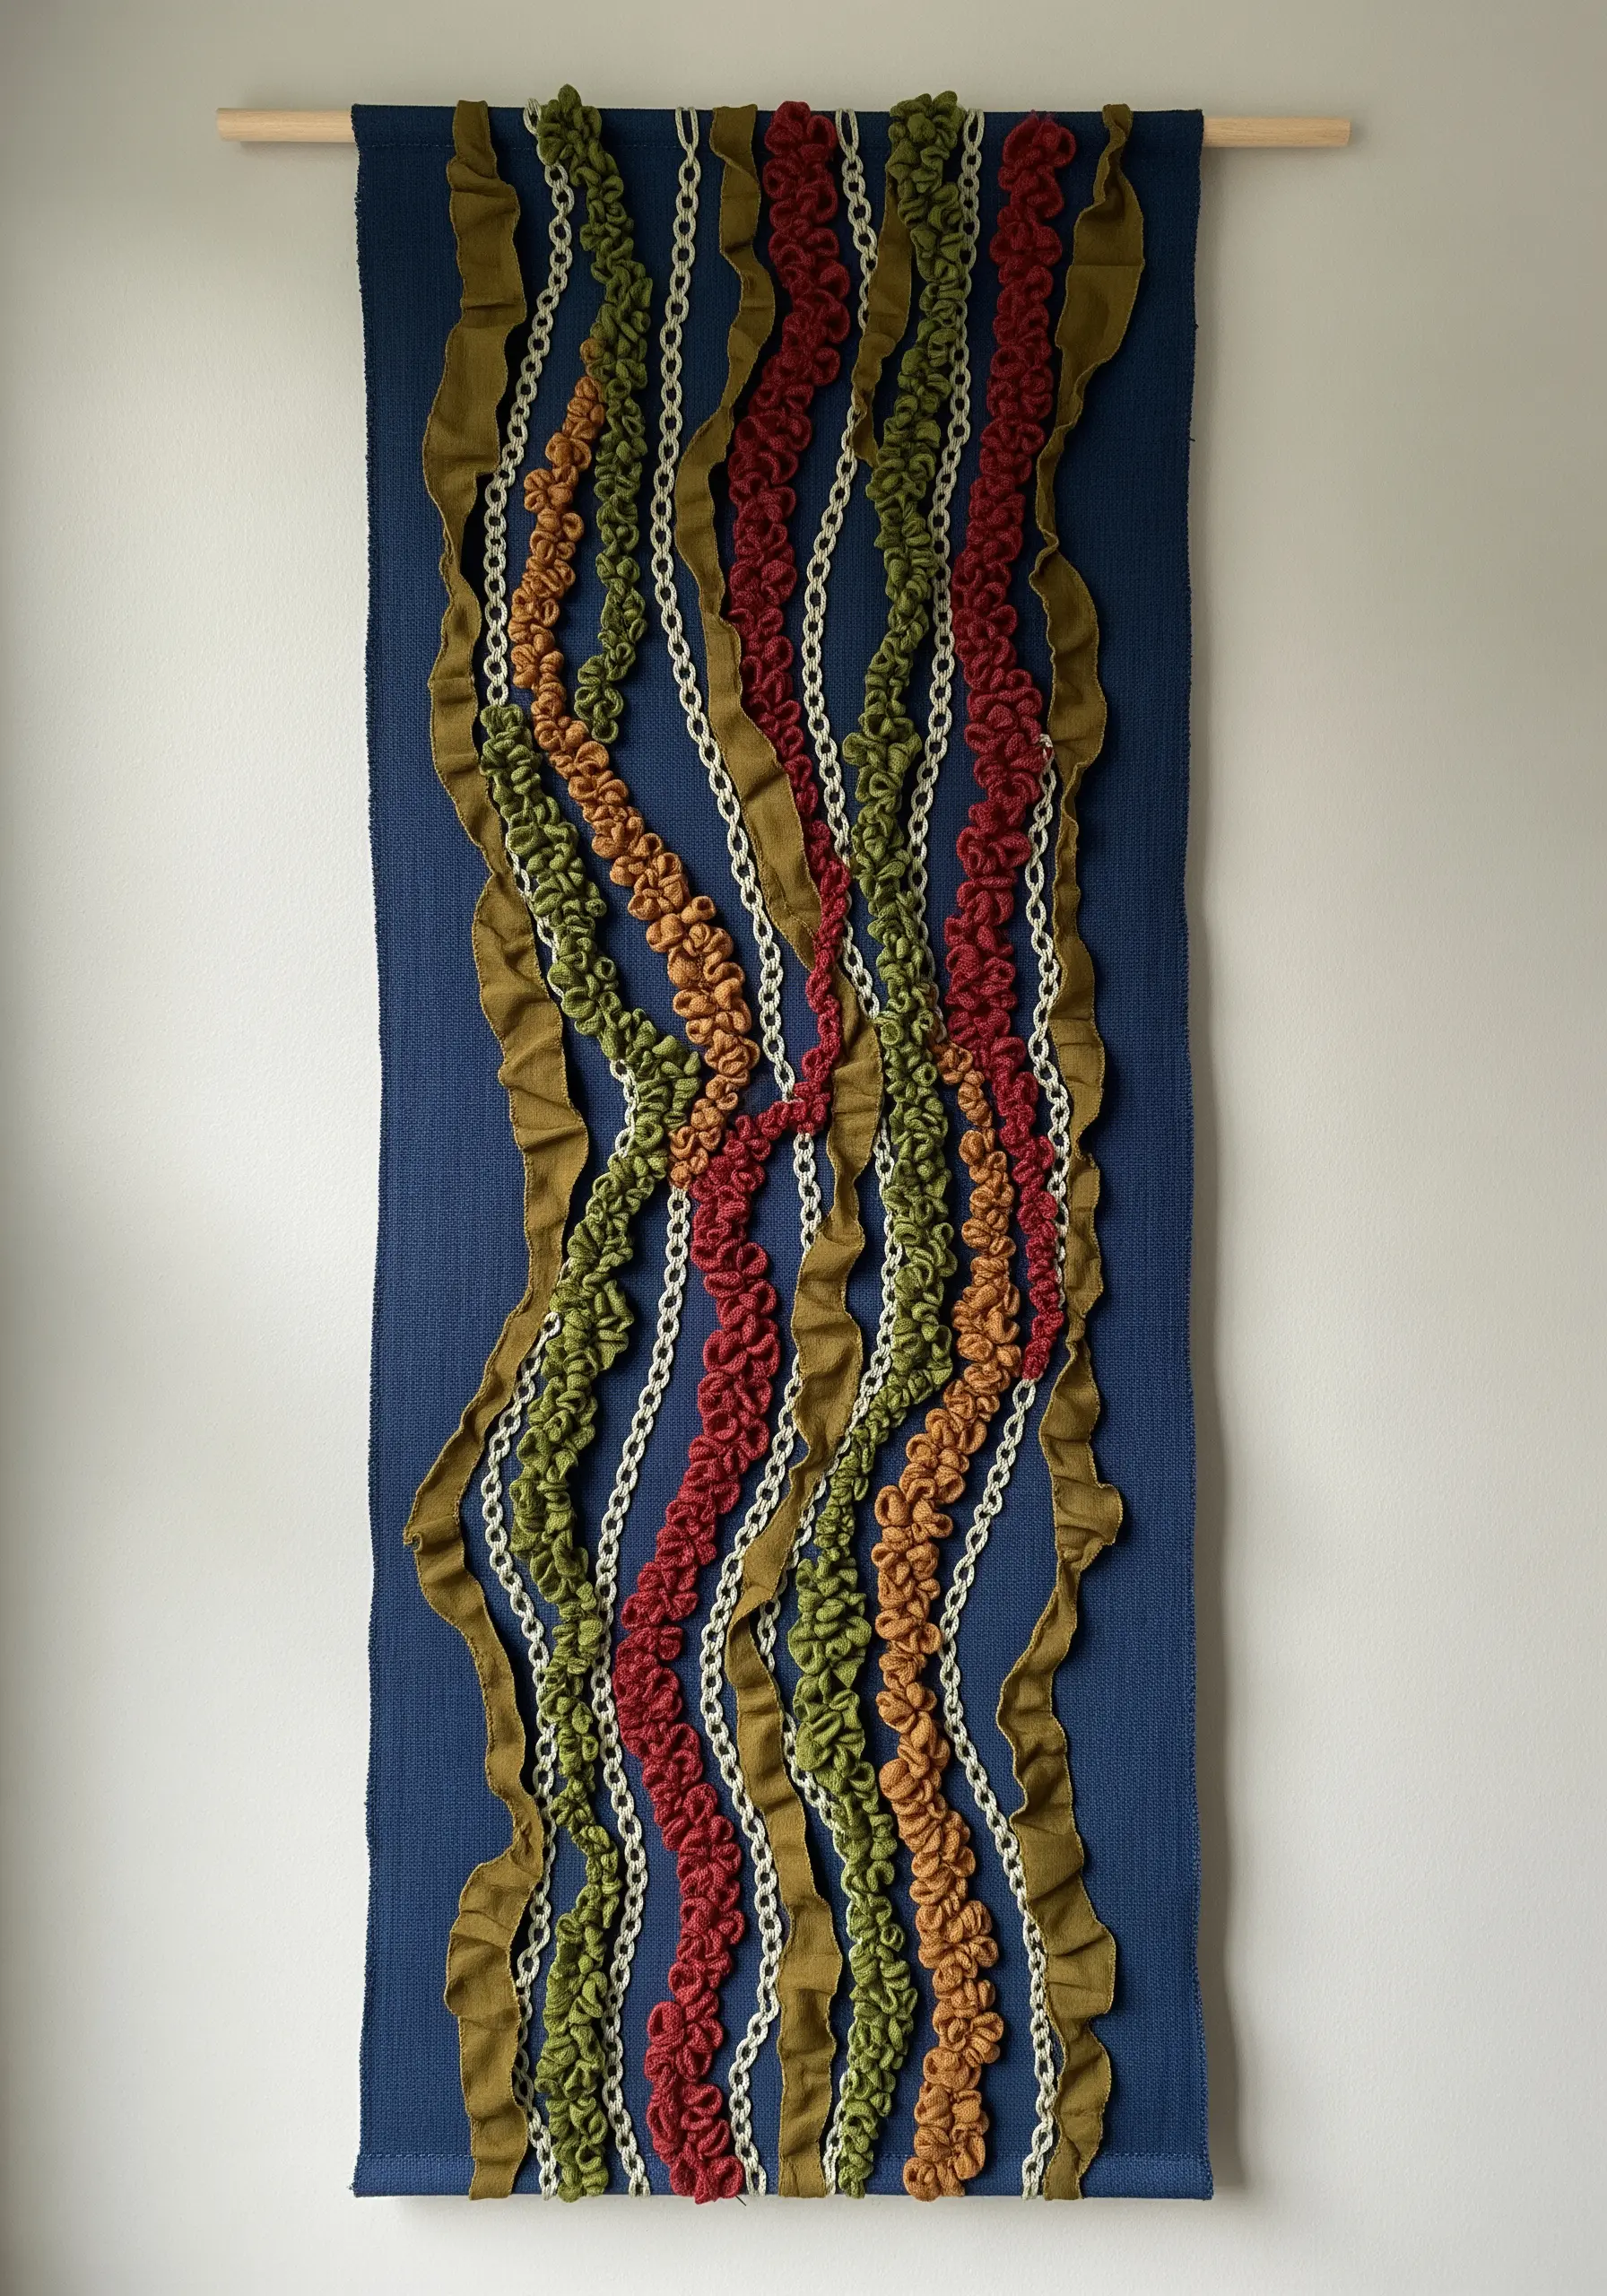
Take your texture off the surface by incorporating manipulated fabric and chunky yarn into your wall hangings.
Create the flowing, vertical rivers of color by ruching or gathering long strips of fabric and stitching them down onto your base cloth. This immediately creates dramatic, high-relief forms.
Complement the soft fabric folds with lines of highly textured stitches, such as bullion knots or colonial knots worked in thick yarn. The contrast between the sharp, bumpy knots and the soft, gathered fabric is visually dynamic and exciting.
21. Trace the Contours of Wood Grain
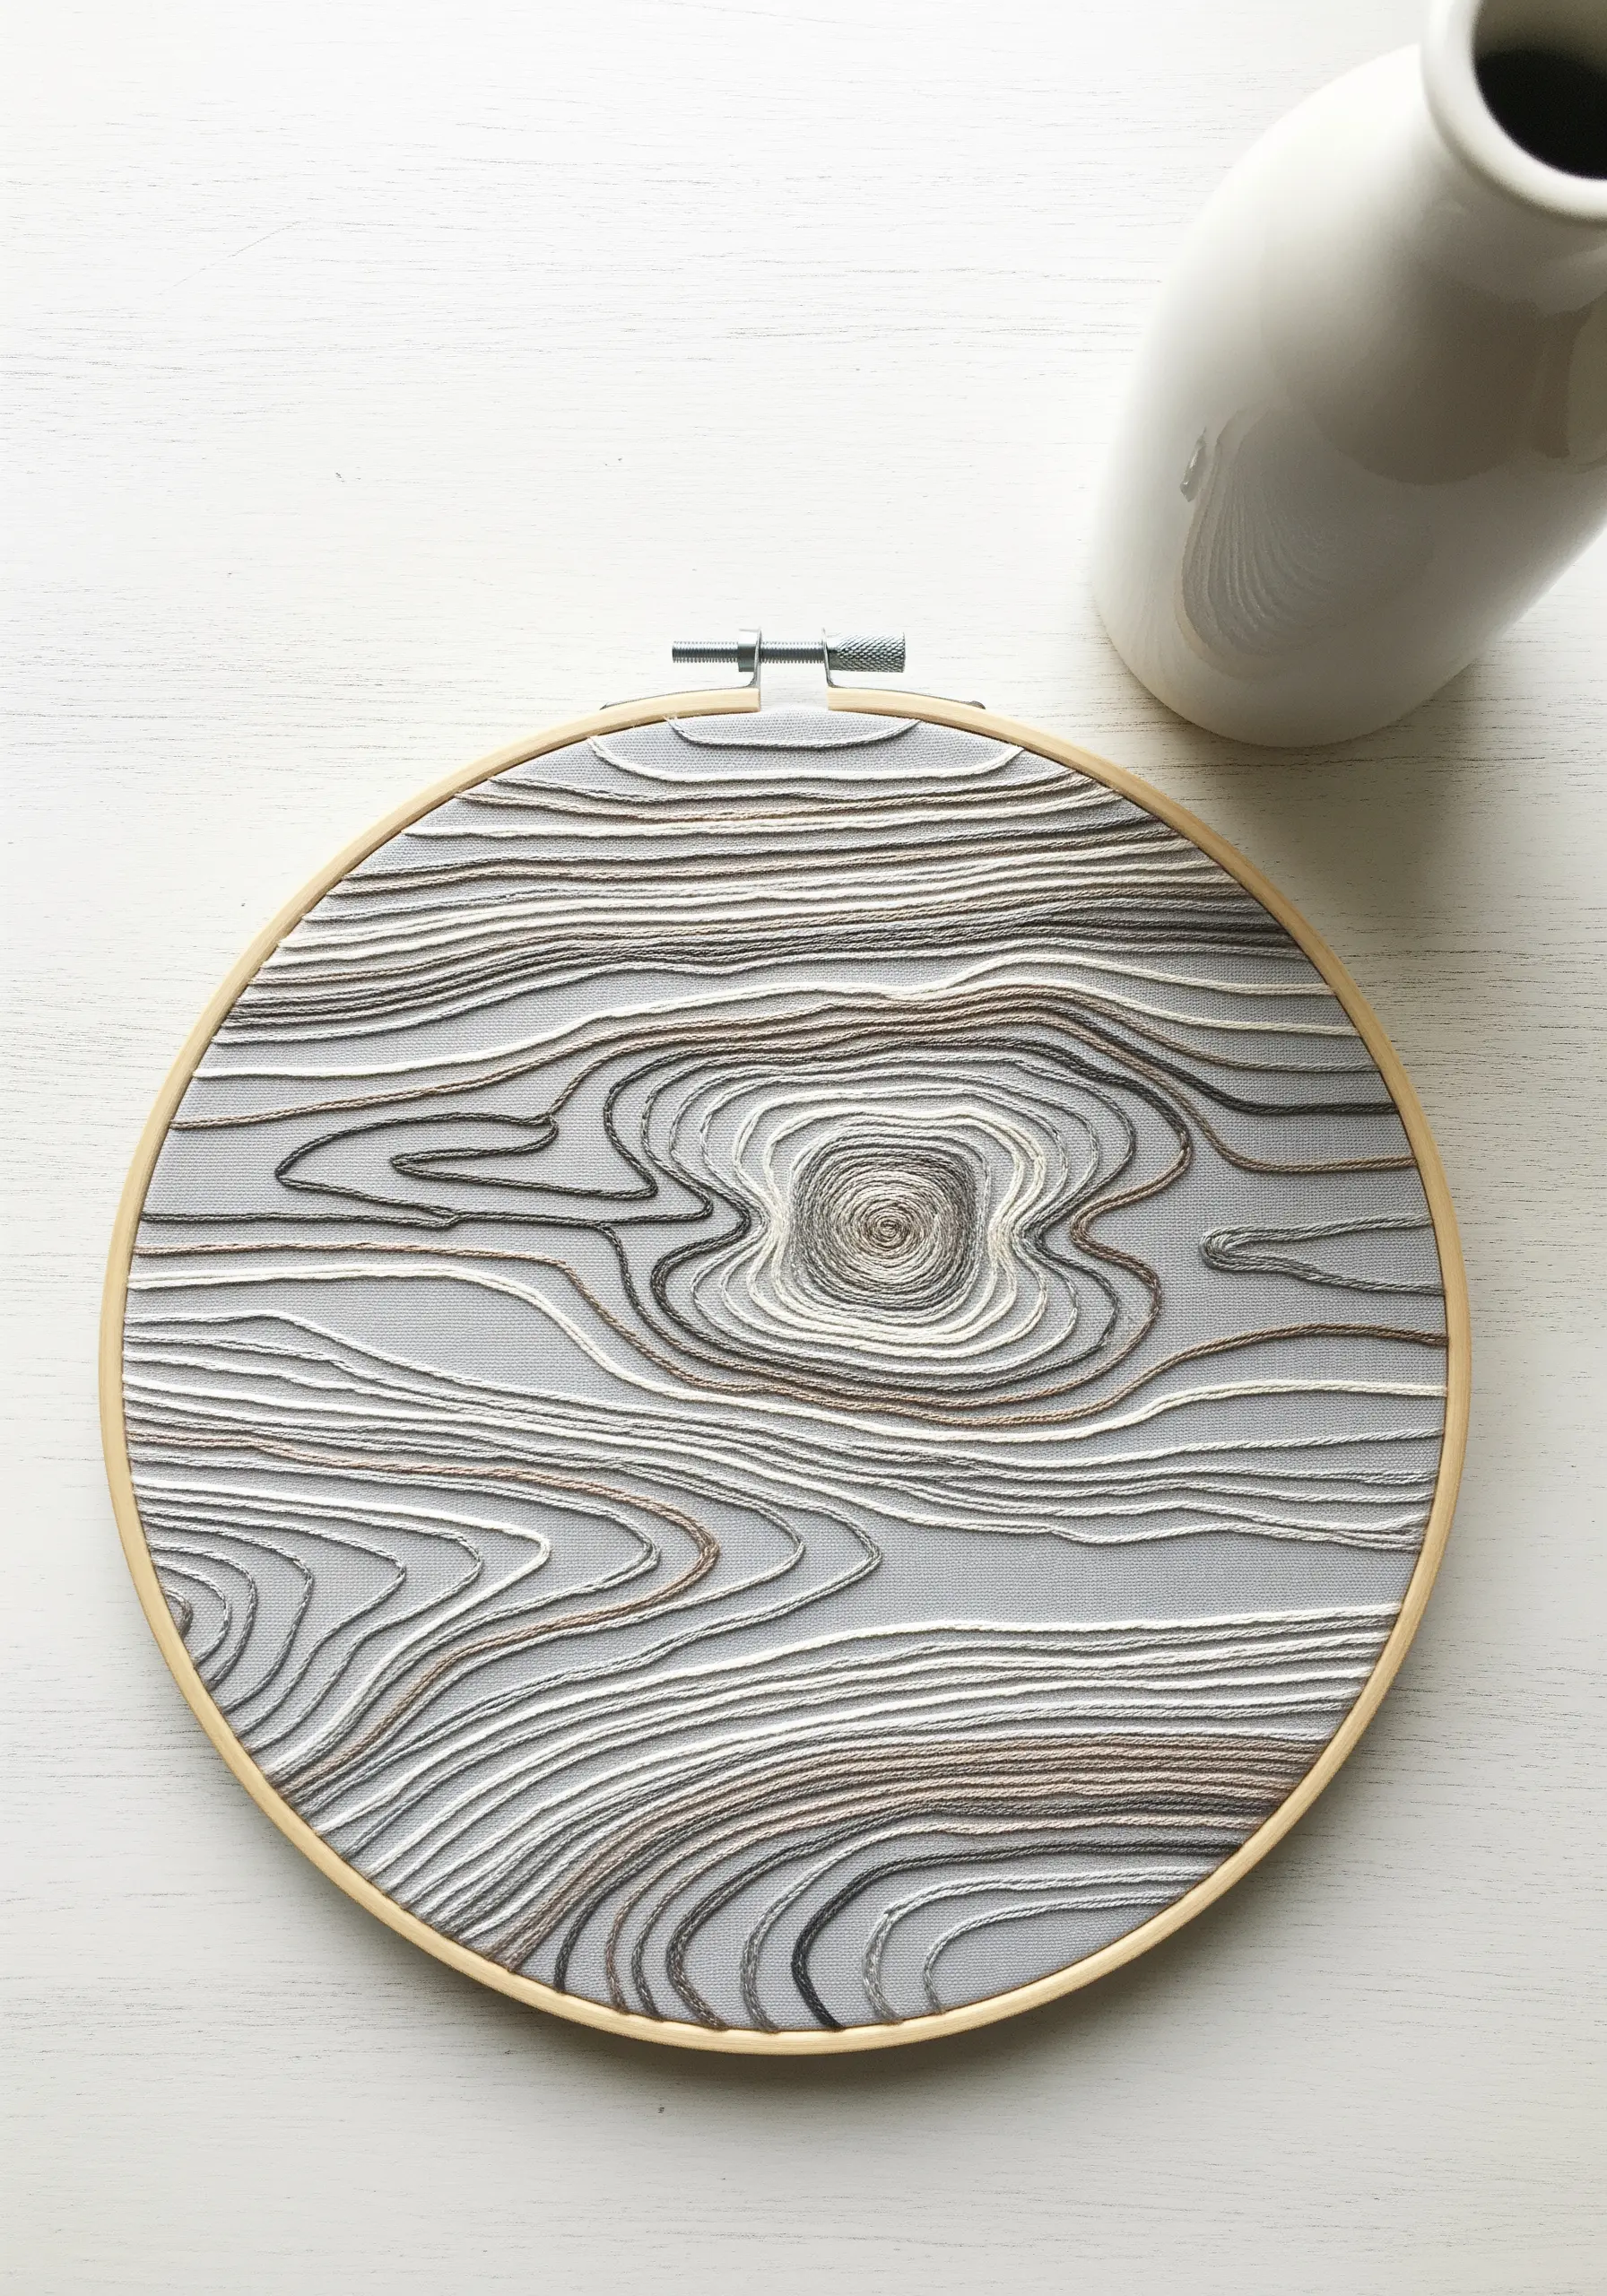
You can capture the intricate, flowing patterns of wood grain using nothing more than a simple backstitch. The artistry is in the placement and spacing of your lines.
Lightly draw the contour lines of the wood grain onto your fabric with a pencil or heat-erasable pen. Don’t aim for perfect symmetry; the beauty lies in the organic, irregular shapes.
Stitch over your lines using a mix of neutral, analogous colors like grey, beige, and cream. By placing the lines closer together in some areas and further apart in others, you create a convincing illusion of depth and texture.
This is a meditative way to create unique embroidery patterns capturing nature’s textures.
22. Create a Fragrant Lavender Bouquet

Mimic the dense, clustered buds of lavender by mastering the French knot and varying your thread weight. The contrast between the delicate stems and plush buds is key.
For the buds, use all six strands of embroidery floss to create plump, textured French knots. Cluster them tightly at the top of each stem for a realistic look.
For the stems, switch to just two or three strands of green floss and use a simple straight stitch or stem stitch. This difference in thickness ensures the flowers remain the focal point.
This thoughtful detail is what makes these delicate lavender stitch ideas so effective and beautiful.


