
I know you’re looking for something more than just another pattern. You want to create pieces that feel intentional, polished, and quietly confident—items that seamlessly blend into your life because they reflect a style that is truly yours.
Neutral and earth-toned palettes are not about limitation; they are an invitation to focus on what truly matters in embroidery: the beauty of a perfectly executed stitch, the interplay of light on thread, and the rich story told through texture.
Here, you’ll find not just ideas, but tangible techniques to elevate your work. Think of this as a quiet conversation about how to make your stitches speak with more clarity and grace, transforming simple materials into objects of personal, lasting value.
1. Master the Angled Satin Stitch Leaf
To give your leaves a natural, lifelike quality, focus on the direction of your satin stitches.
Instead of stitching straight across, angle your stitches from the outer edge inward, meeting at an invisible center line where the stem would be.
This simple adjustment creates the illusion of a central vein without adding another stitch, giving the leaf elegant form and movement.
For added subtlety, use two closely related shades of thread—one for each half of the leaf—to create depth in your embroidery using natural textures.
2. Sculpt with Thick Yarn Couching
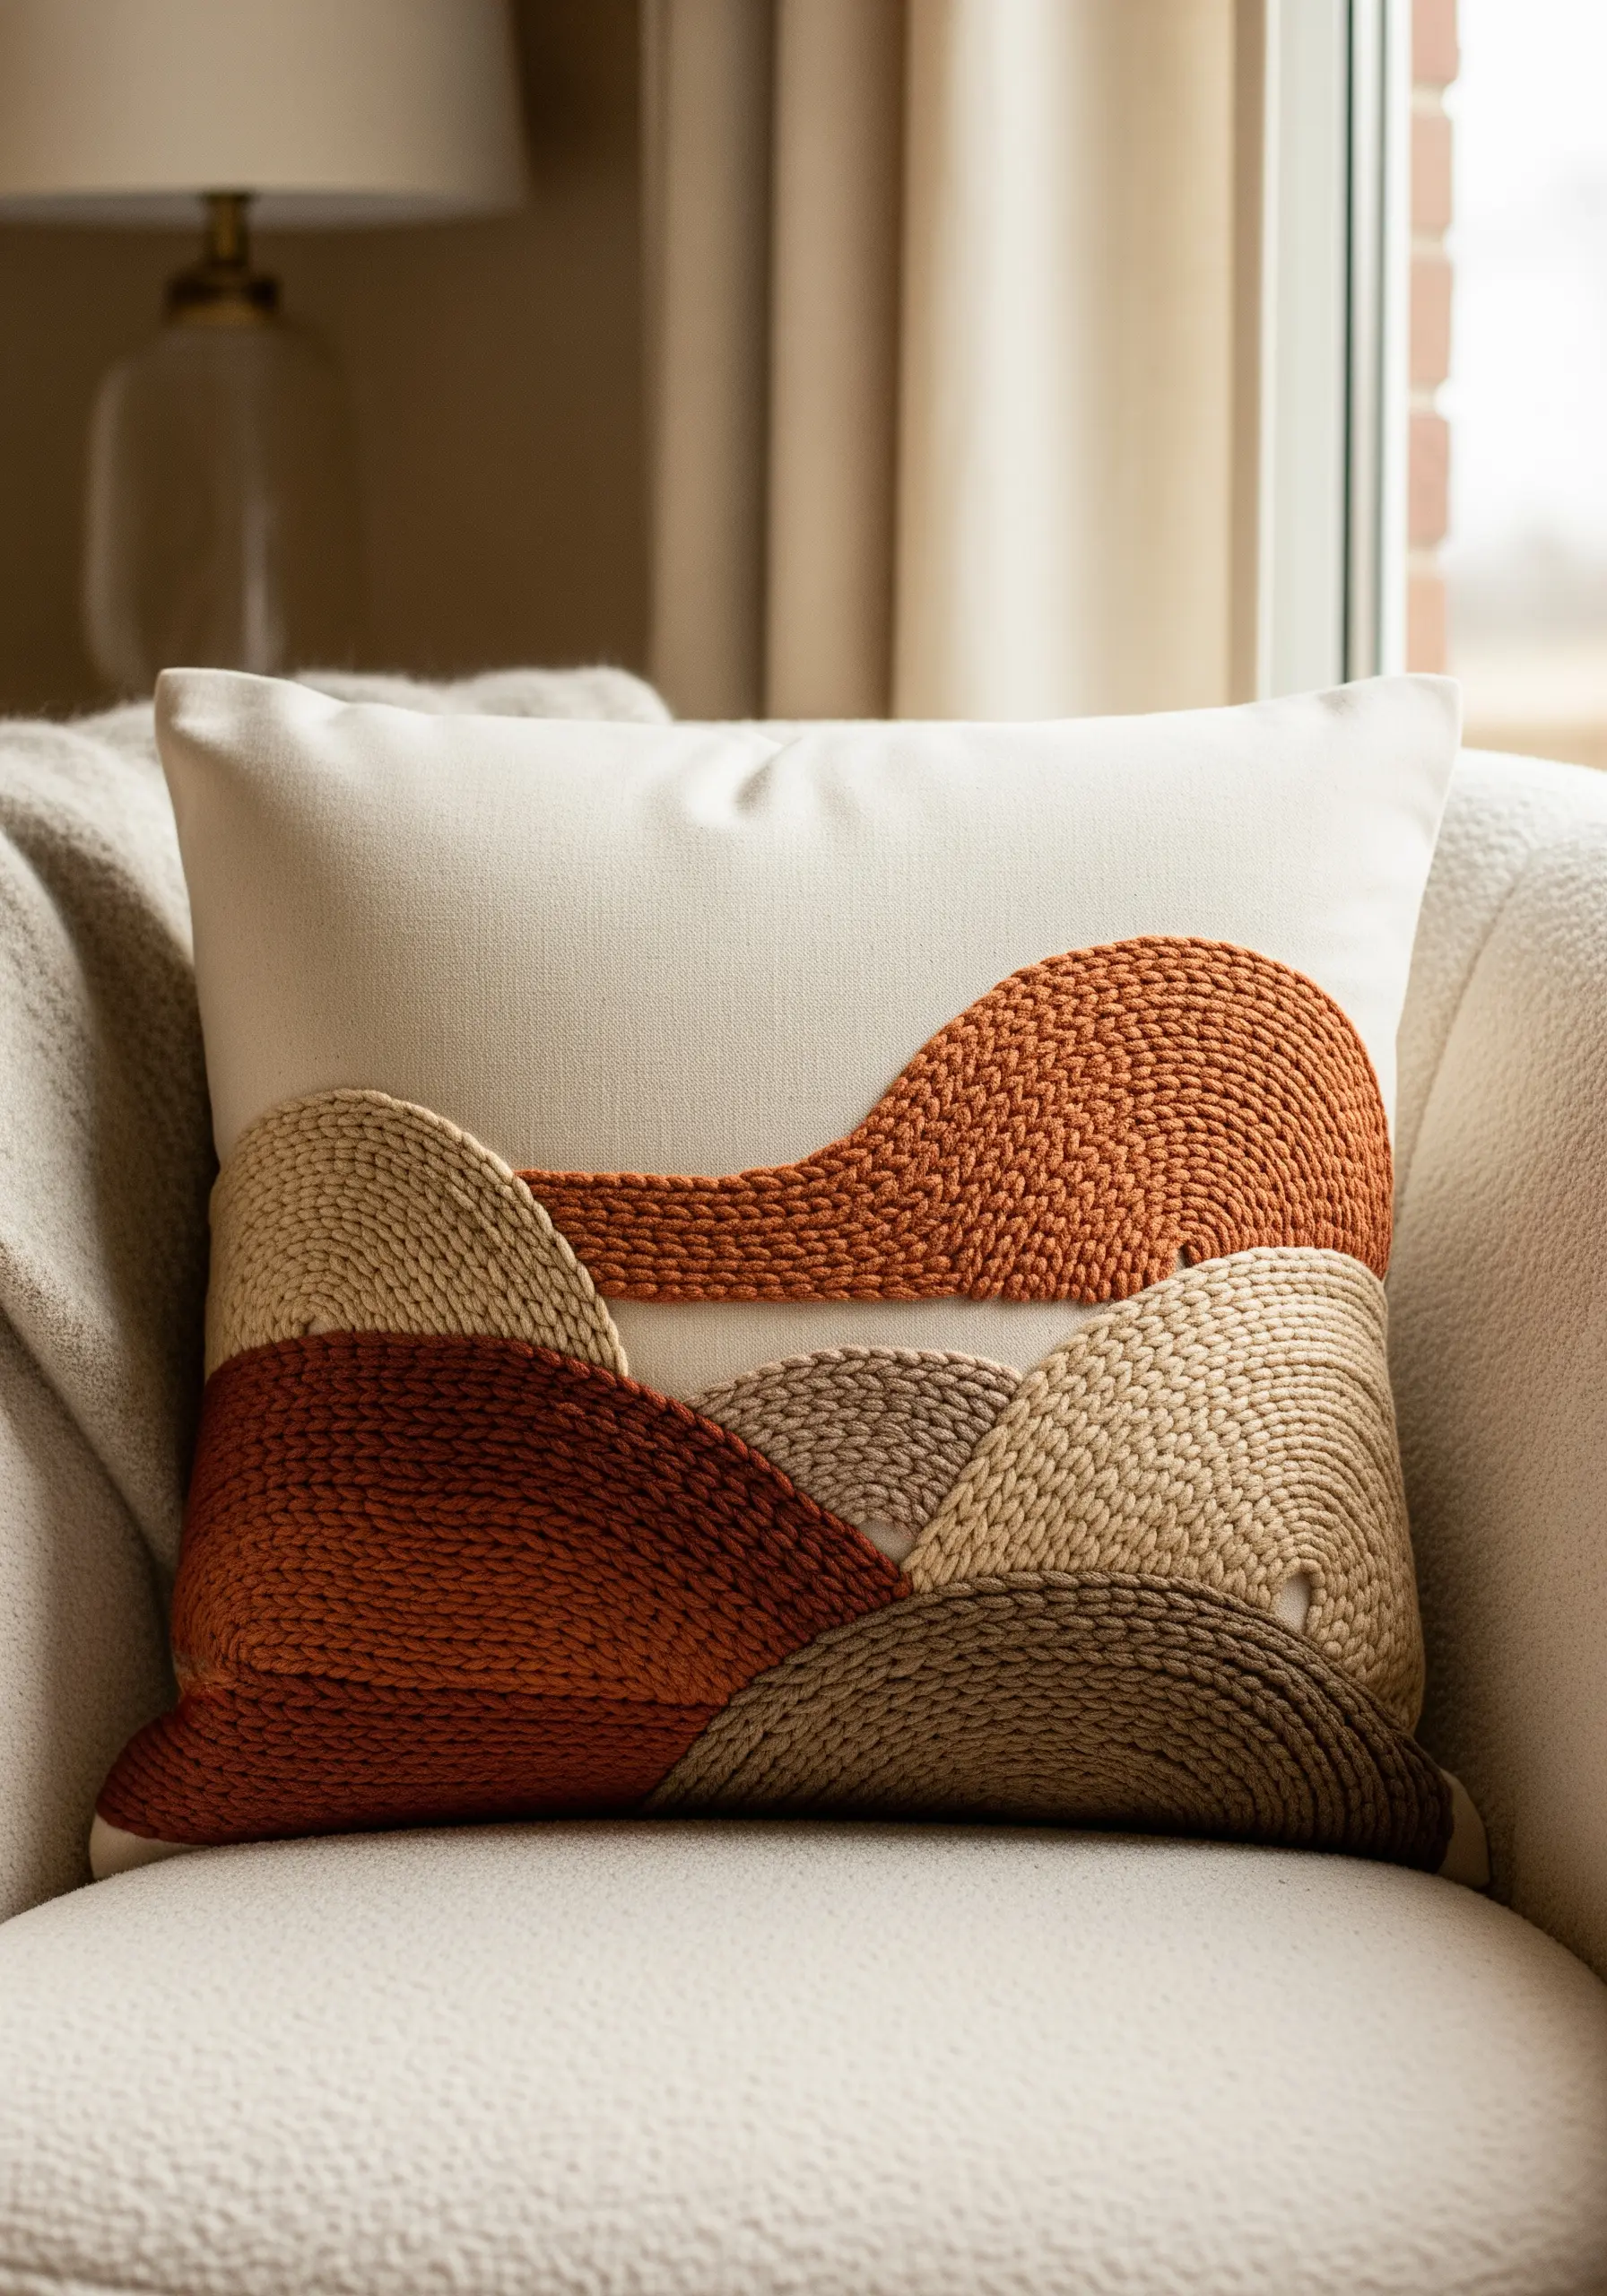
Achieve this bold, textural effect by couching thick yarn onto your fabric surface.
First, lay down a thick yarn or multiple strands of embroidery floss along your design lines.
Then, using a single strand of matching sewing thread, make small, discreet tacking stitches over the yarn to secure it in place.
This technique allows you to create dramatic, raised shapes and cover large areas much faster than traditional fill stitches, adding instant sculptural quality to a simple pillow.
Explore must-try natural texture embroidery ideas for more inspiration.
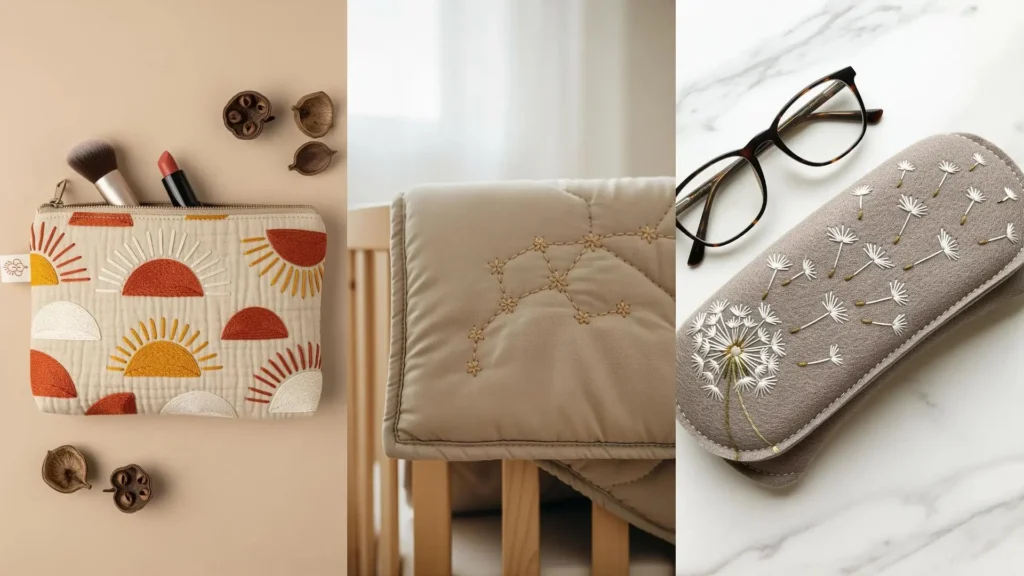
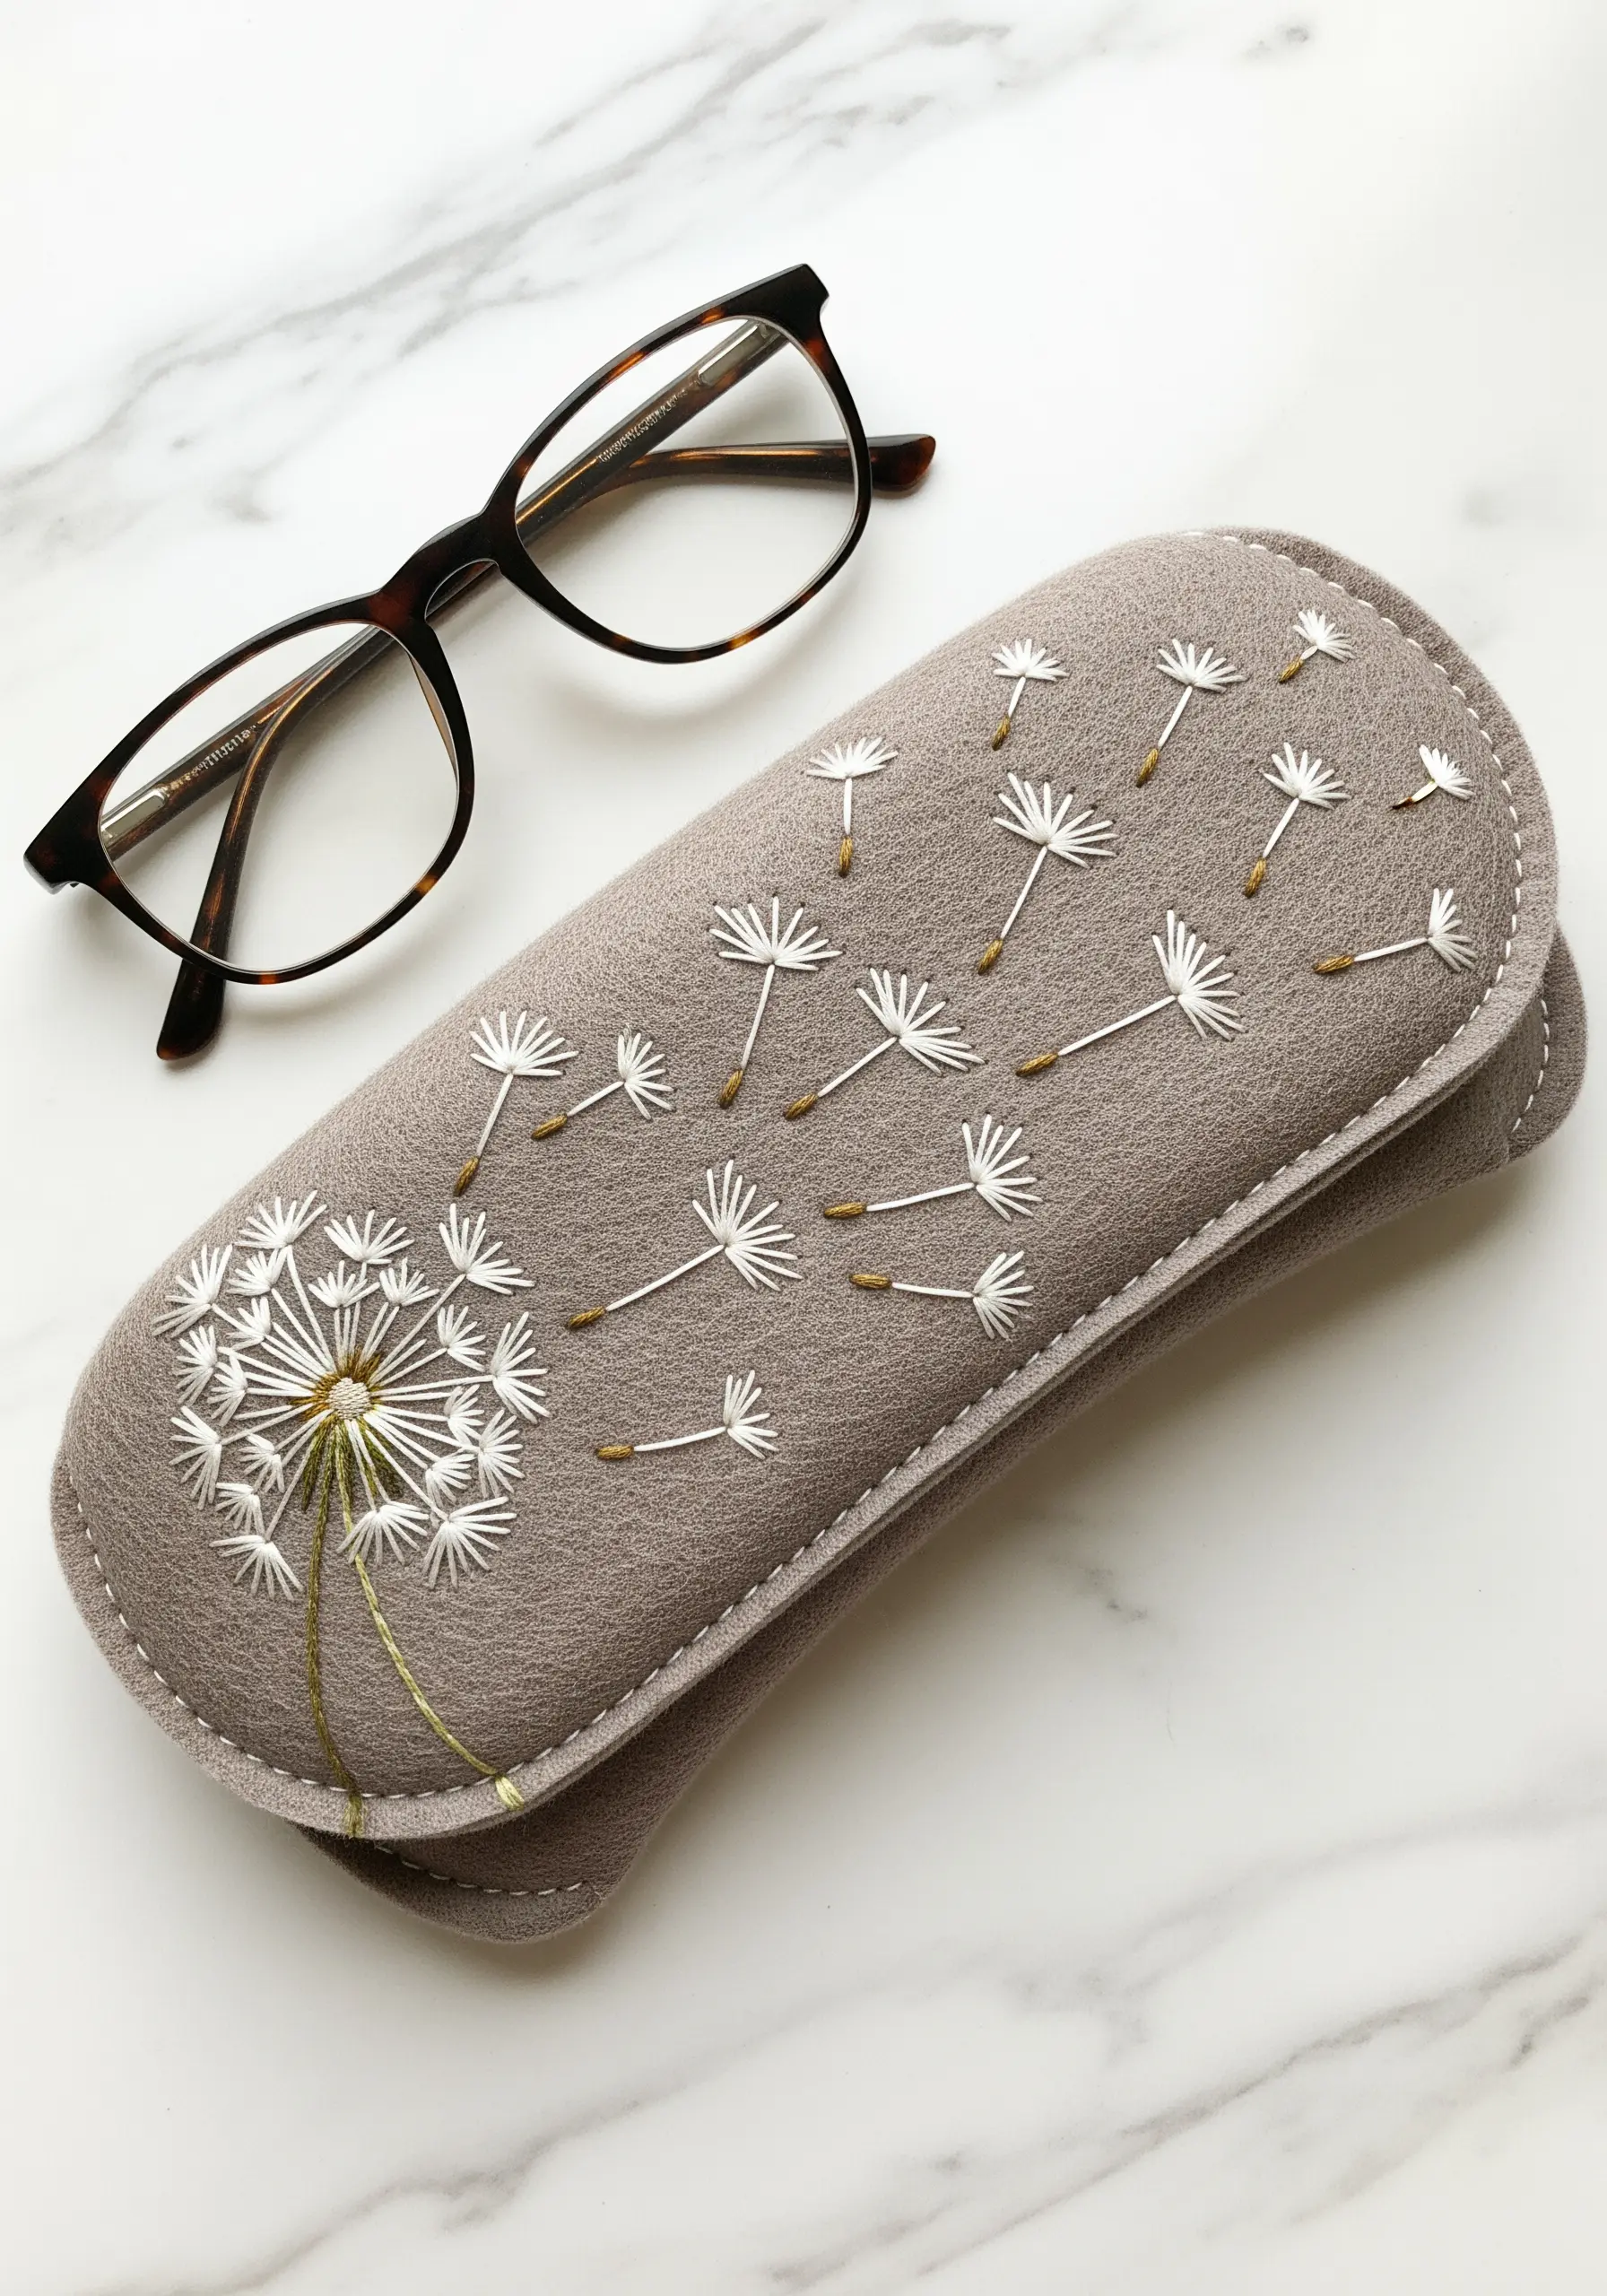
3. Elevate Linens with a Single, Placed Motif
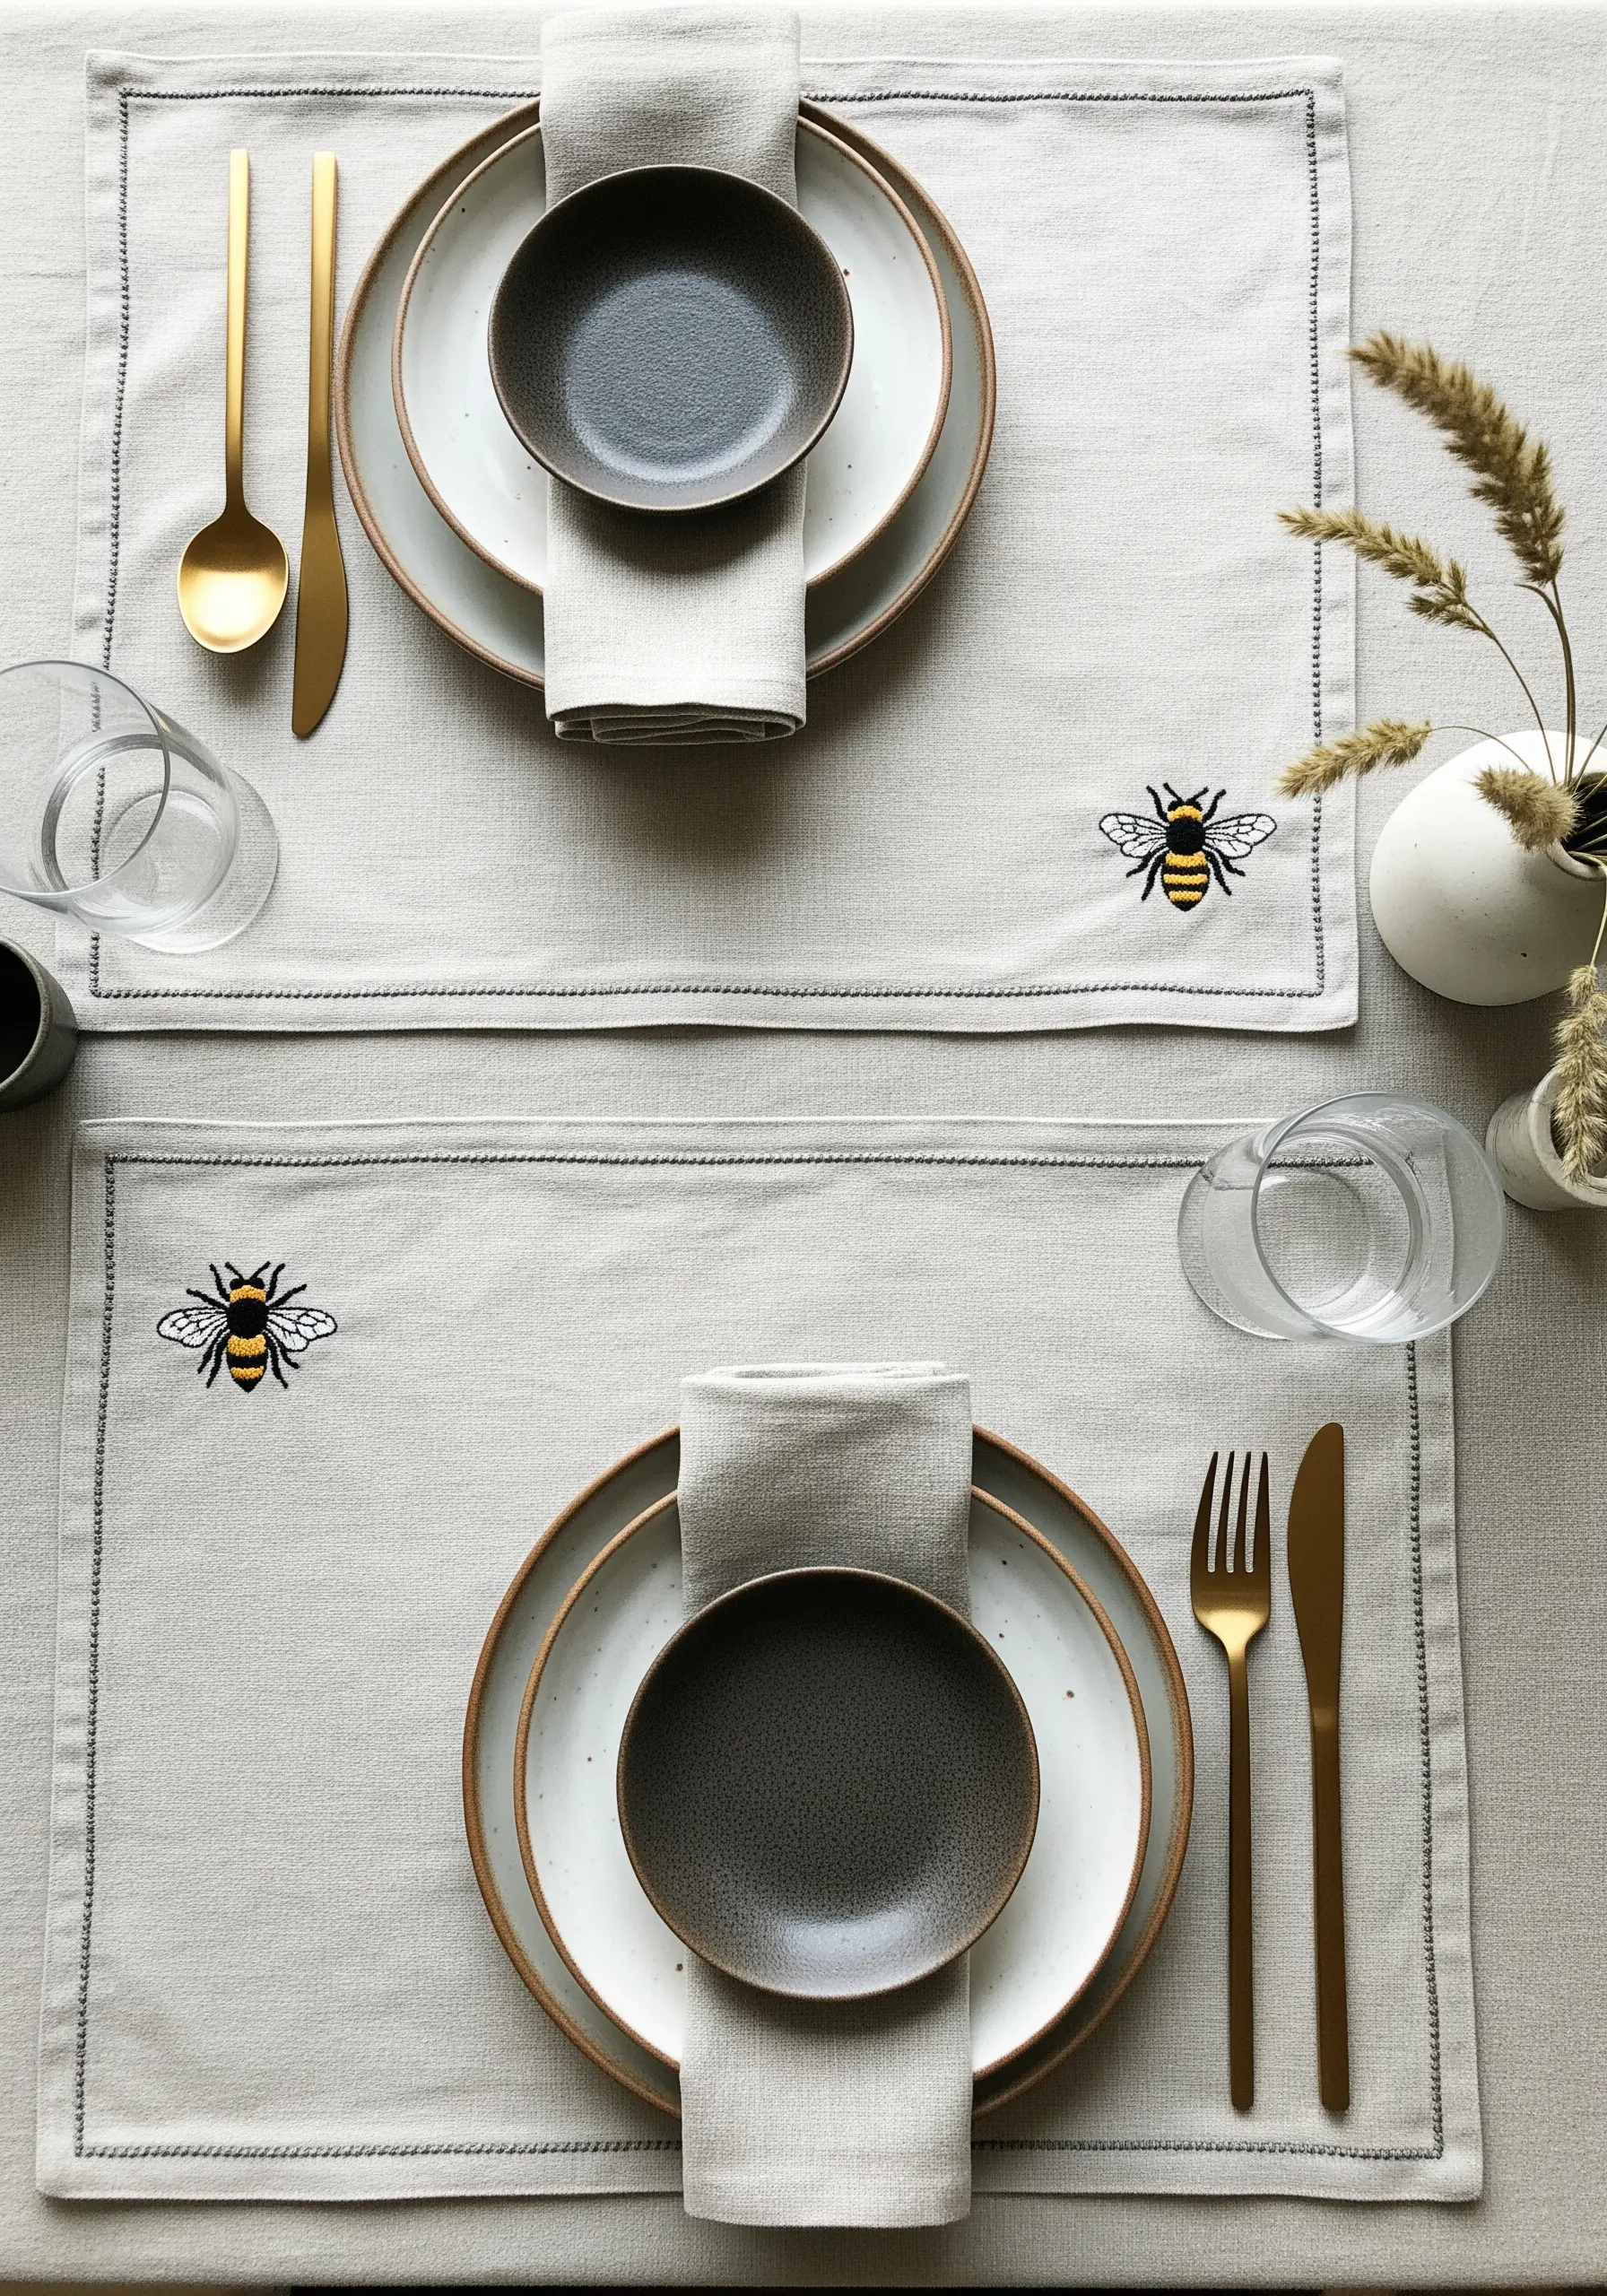
The key to making a simple motif feel intentional is its placement.
Instead of centering the design, place it off-kilter—in a corner or along one edge—to create a modern, balanced composition that draws the eye.
For tiny details like the bee’s wings, use a single strand of floss for sharpness.
Give the body a subtle lift by using a padded satin stitch: add a few underlying straight stitches before filling the shape to create a raised, three-dimensional effect.
These are the table linen embroidery motifs that instantly transform a plain dining table.
4. Blend Colors with Long-and-Short Stitch
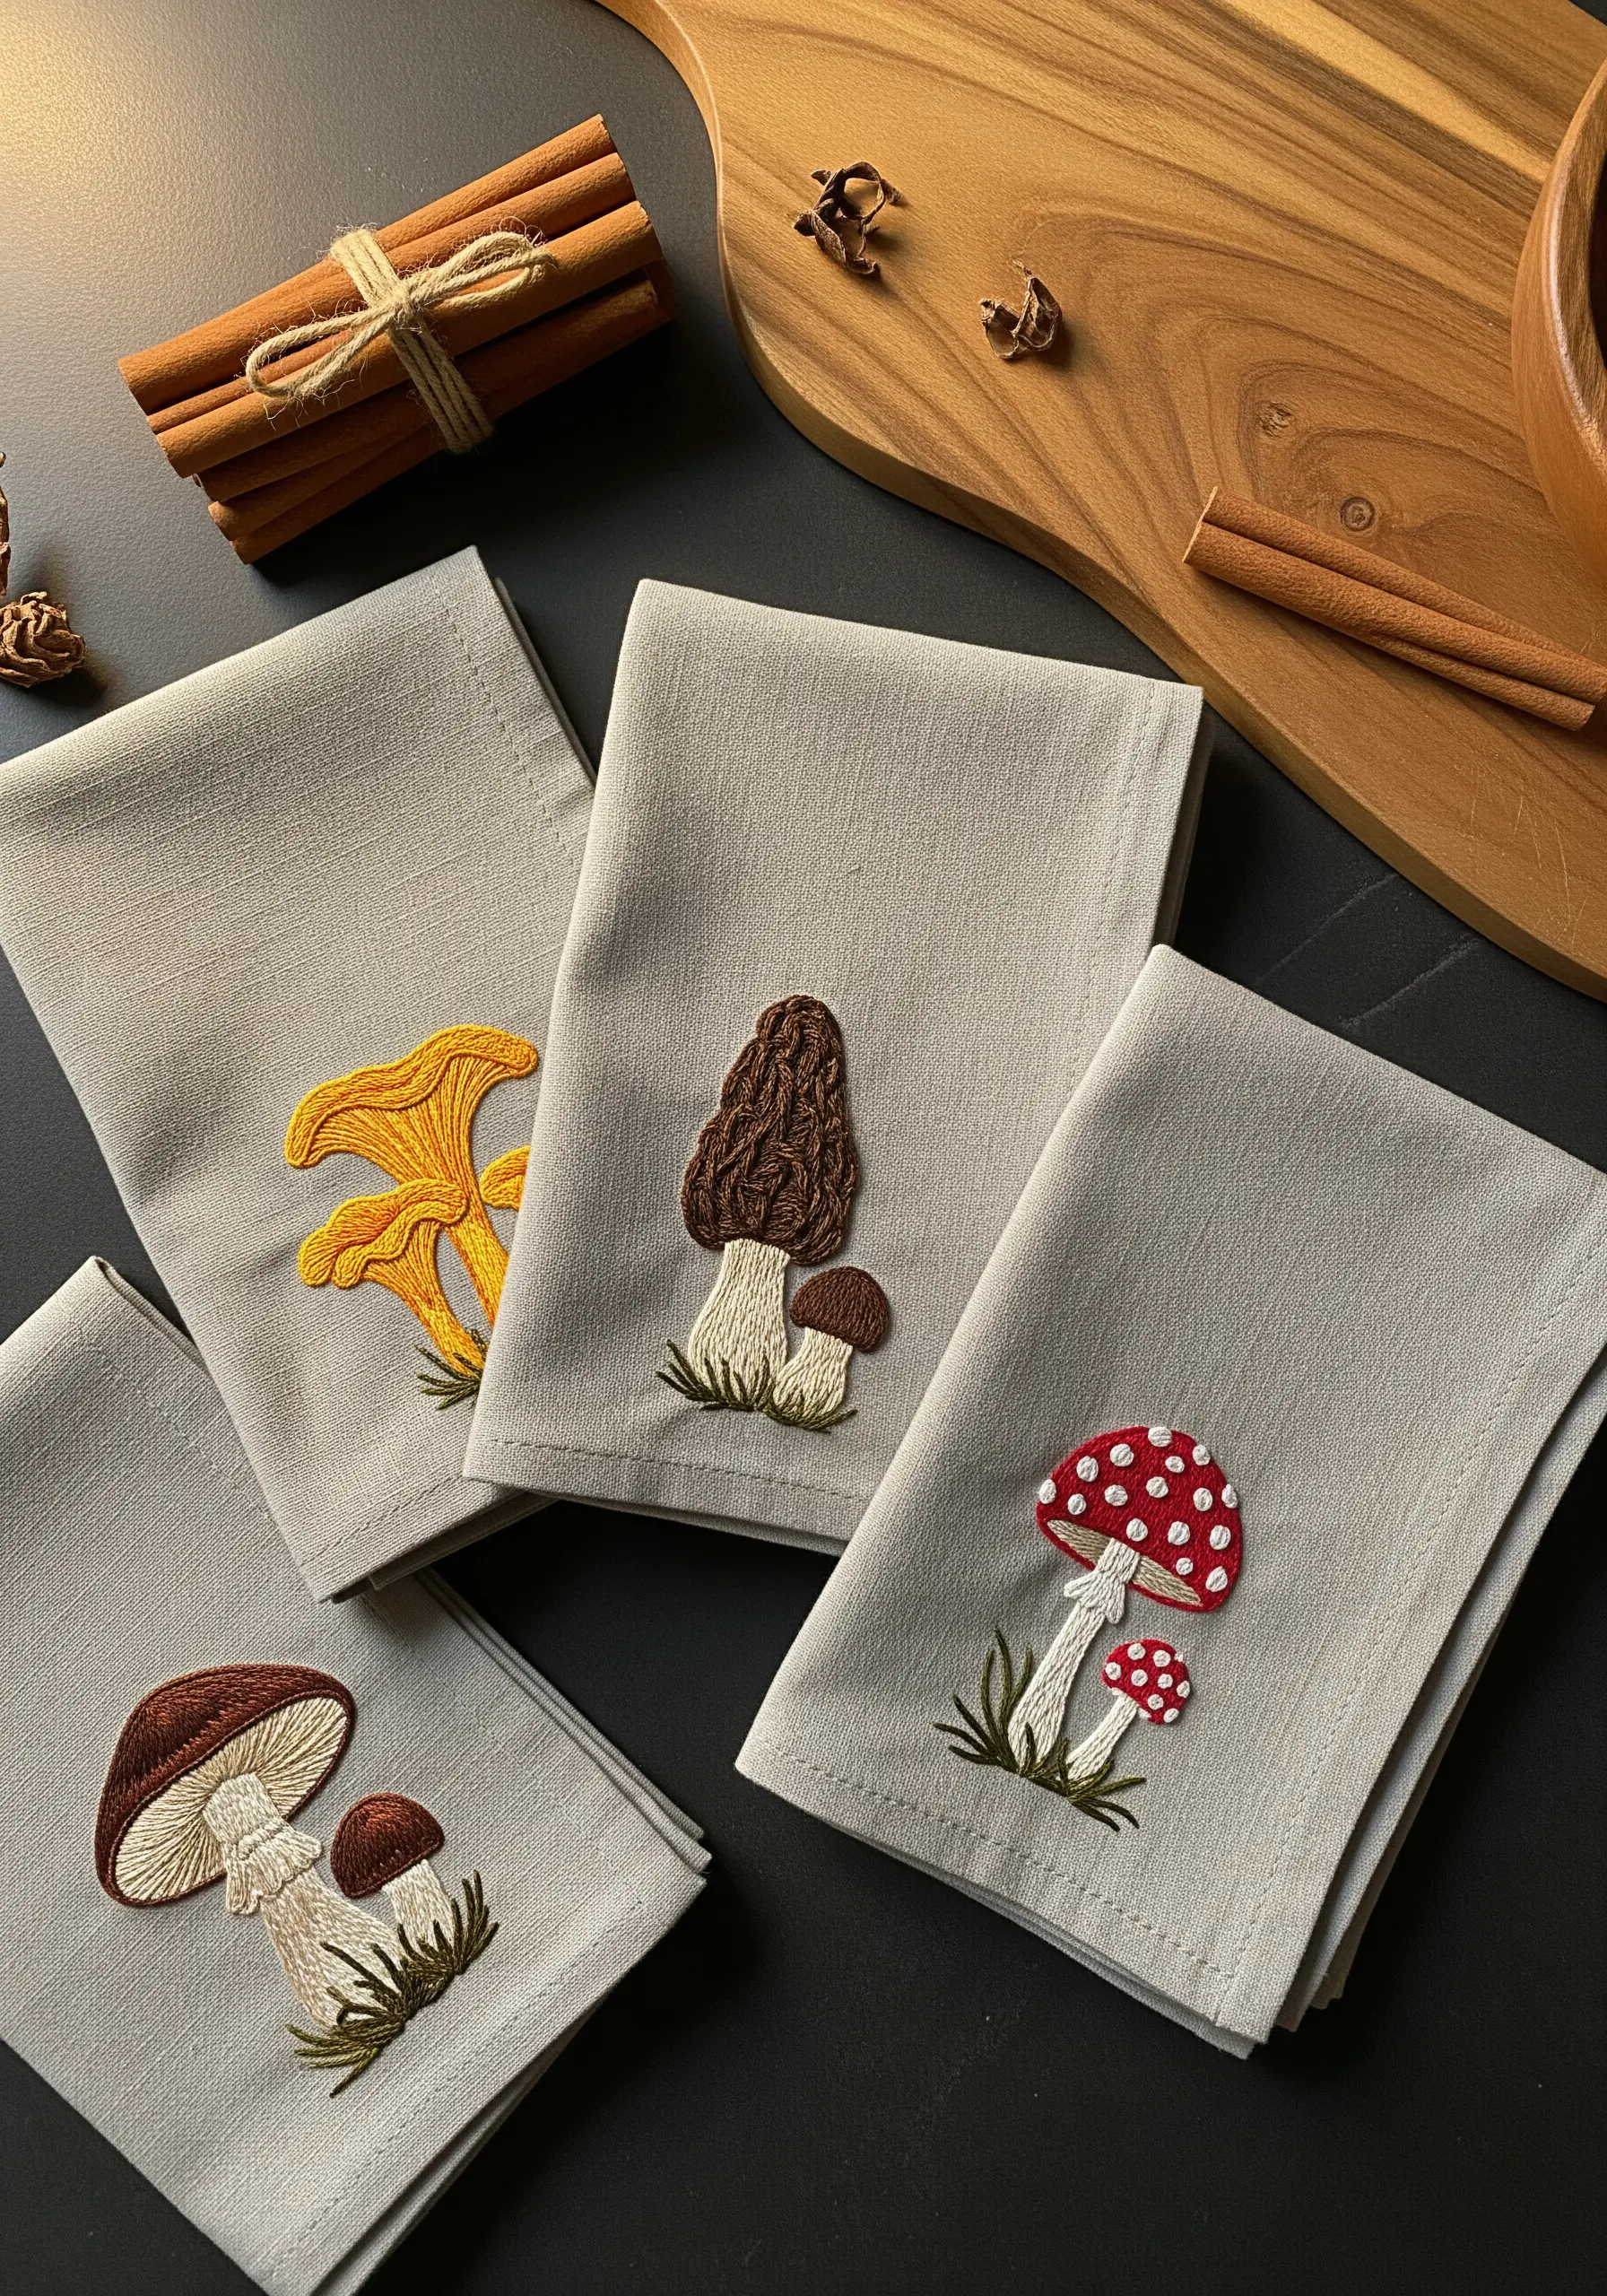
For realistic gradients on natural forms like mushroom caps, the long-and-short stitch is your best tool.
Begin with a row of alternating long and short satin stitches along the edge of your shape.
Then, work subsequent rows into the first, interlocking stitches of varying lengths to blend the colors seamlessly.
This technique eliminates the harsh lines that can occur with satin stitch, creating a soft, painterly transition between shades that mimics nature perfectly.
Combine it with tiny French knots for texture on the spots.
5. Define Line Art on Textured Fabrics
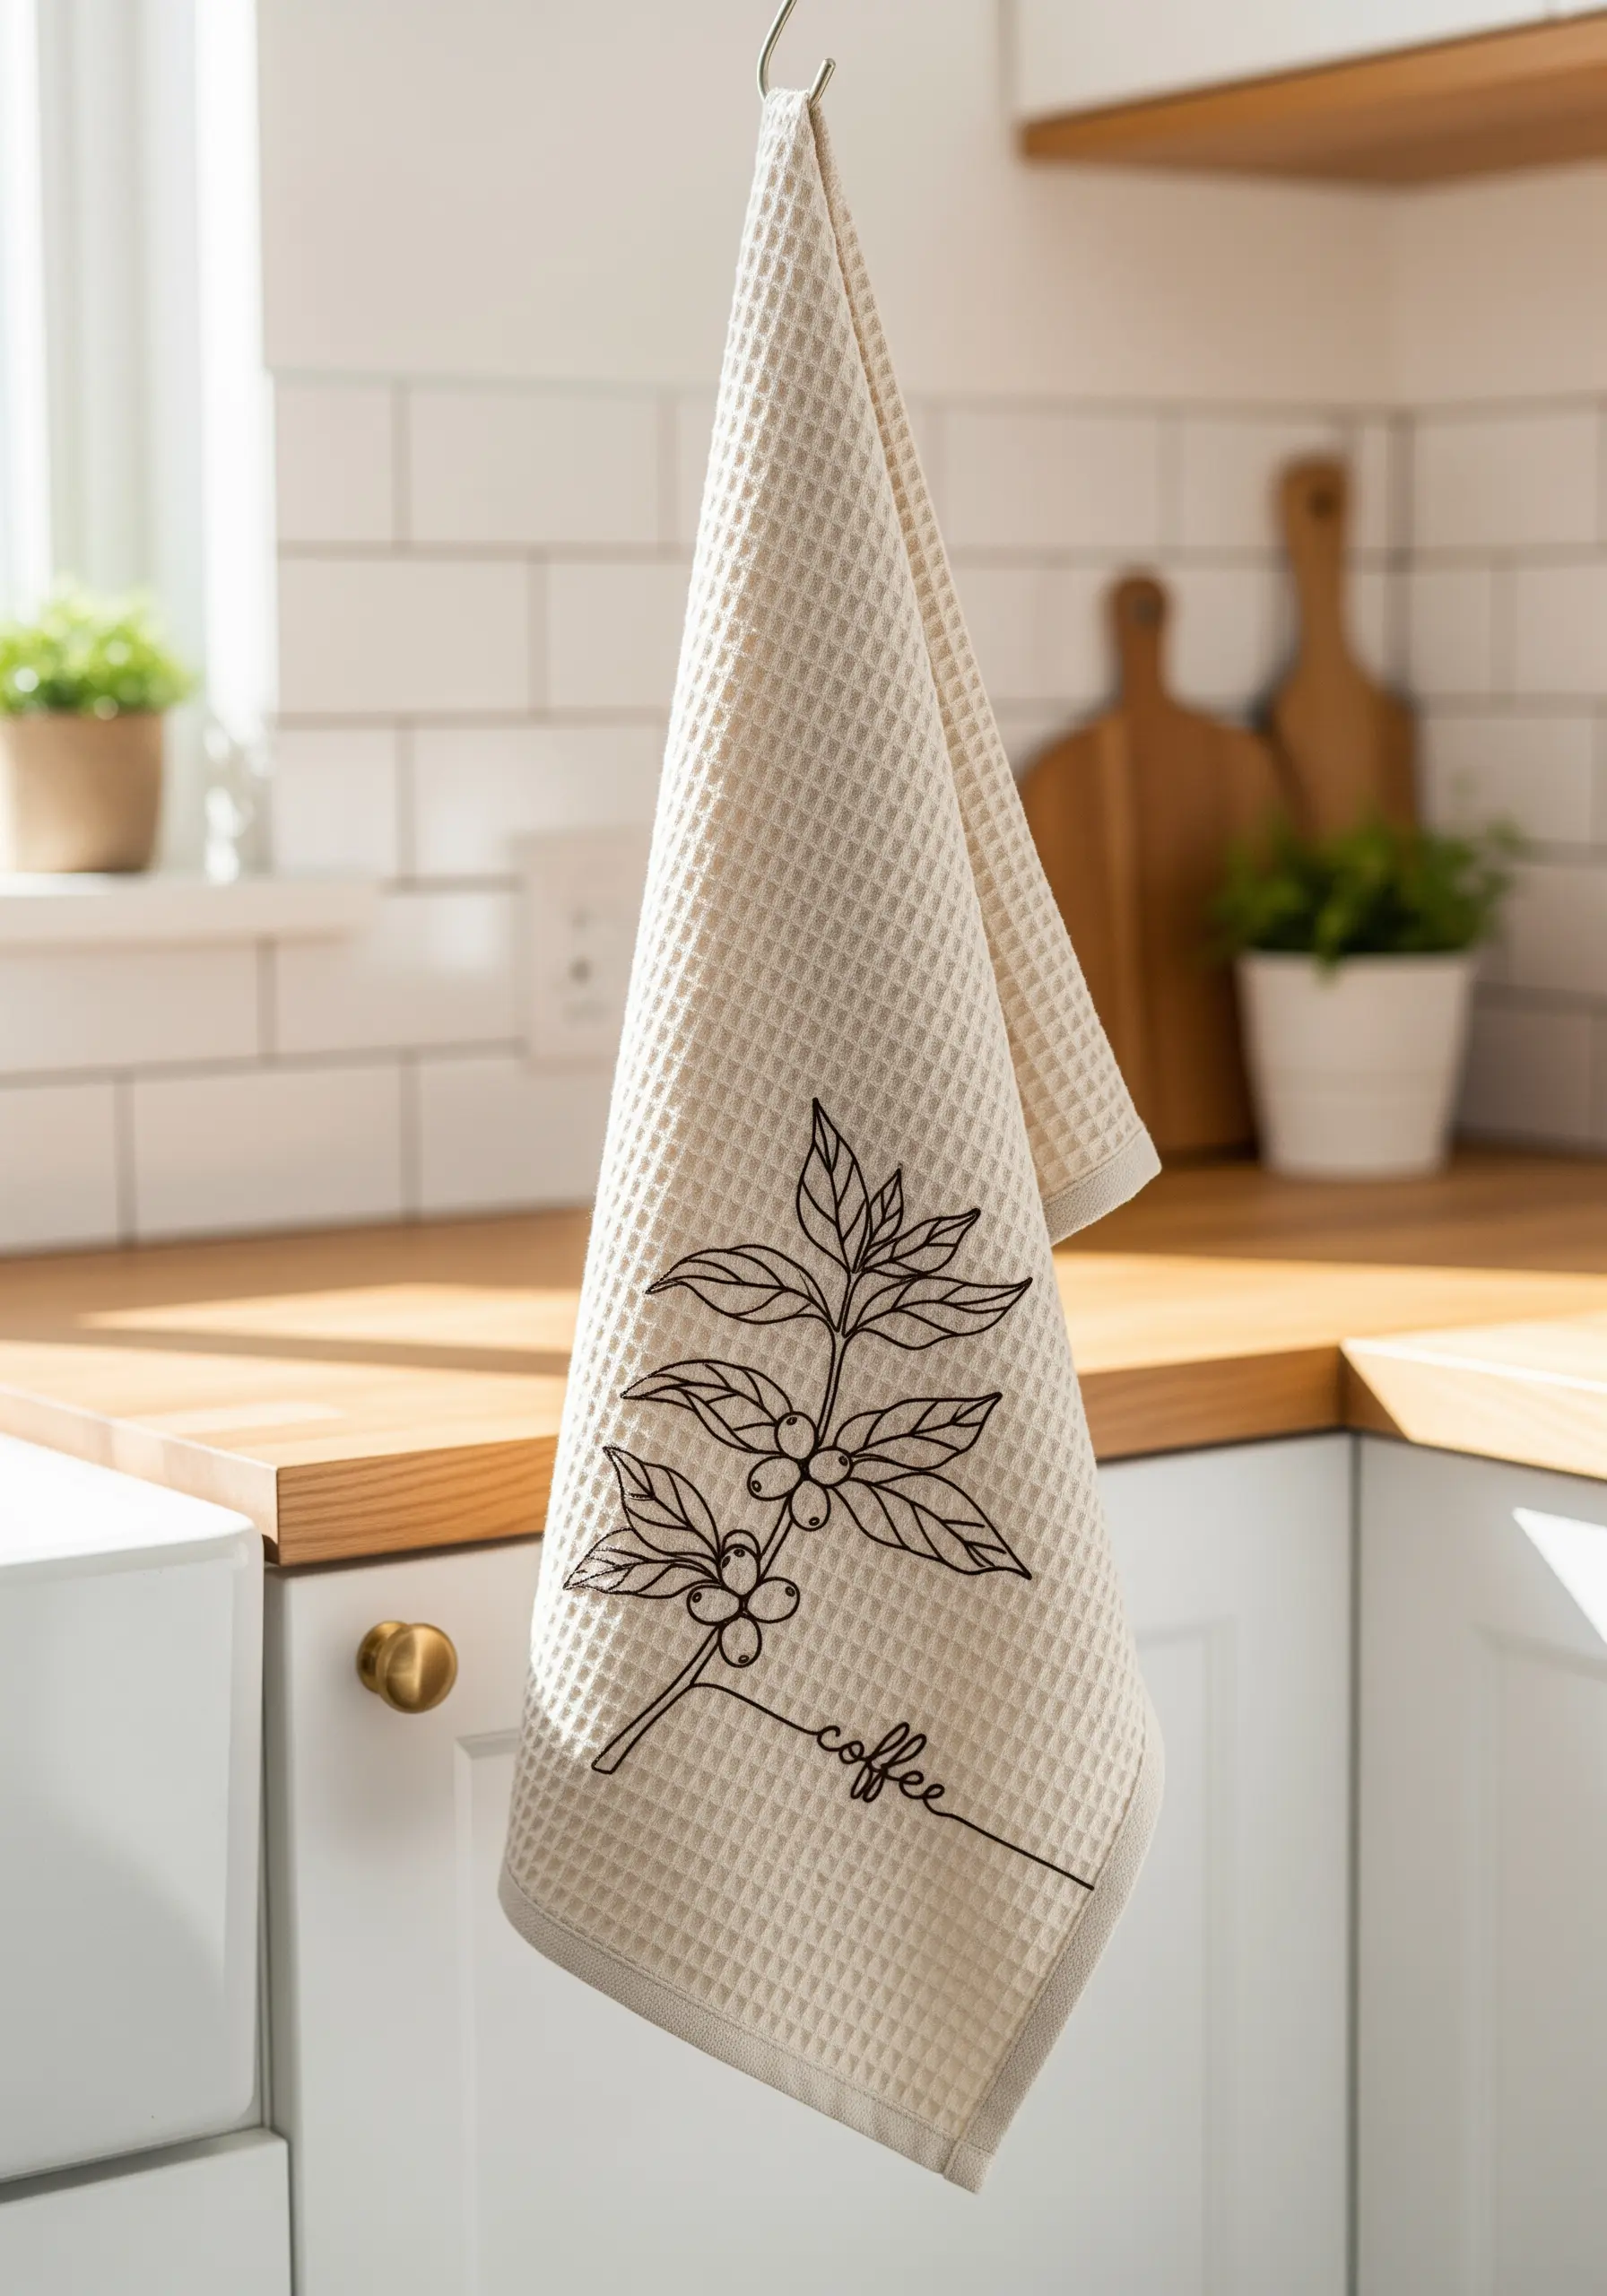
When embroidering on a fabric with a deep texture like waffle weave, your stitches can easily get lost.
Counter this by using a heavier thread—three or four strands of floss—and choosing a stitch that sits on top of the fabric, like a stem stitch or whipped backstitch.
A tear-away stabilizer on the back will also prevent the fabric from stretching and keep your lines clean and defined.
This approach ensures your minimalist line art nature embroidery remains crisp and visible.
6. Achieve Precision in Geometric Mandalas

The beauty of a mandala lies in its symmetry, so precision is paramount.
Use a water-soluble transfer pen to mark your entire pattern onto the fabric before you begin.
Focus on keeping your stitch length absolutely consistent, especially on the radiating straight stitches, as this creates the clean, graphic rhythm.
Combine simple stitches like lazy daisies, French knots, and backstitch to build intricate layers without overwhelming complexity, resulting in one of our favorite modern minimal mandala embroidery ideas.
7. Build Botanical Texture with Knots and Stitches

Give your florals realistic dimension by choosing stitches that mimic their natural forms.
Use bullion knots or French knots clustered together to create the bumpy, textural buds of a lavender stalk.
For the delicate leaves, a fishbone stitch provides a built-in central vein, giving each leaf a natural, defined shape that tapers beautifully.
Combining these textural stitches on a small item like a bookmark makes the design feel rich and tactile.
Try these delicate lavender stitch ideas to create a calming effect.
8. Create Crisp Edges with a Split-Stitch Outline
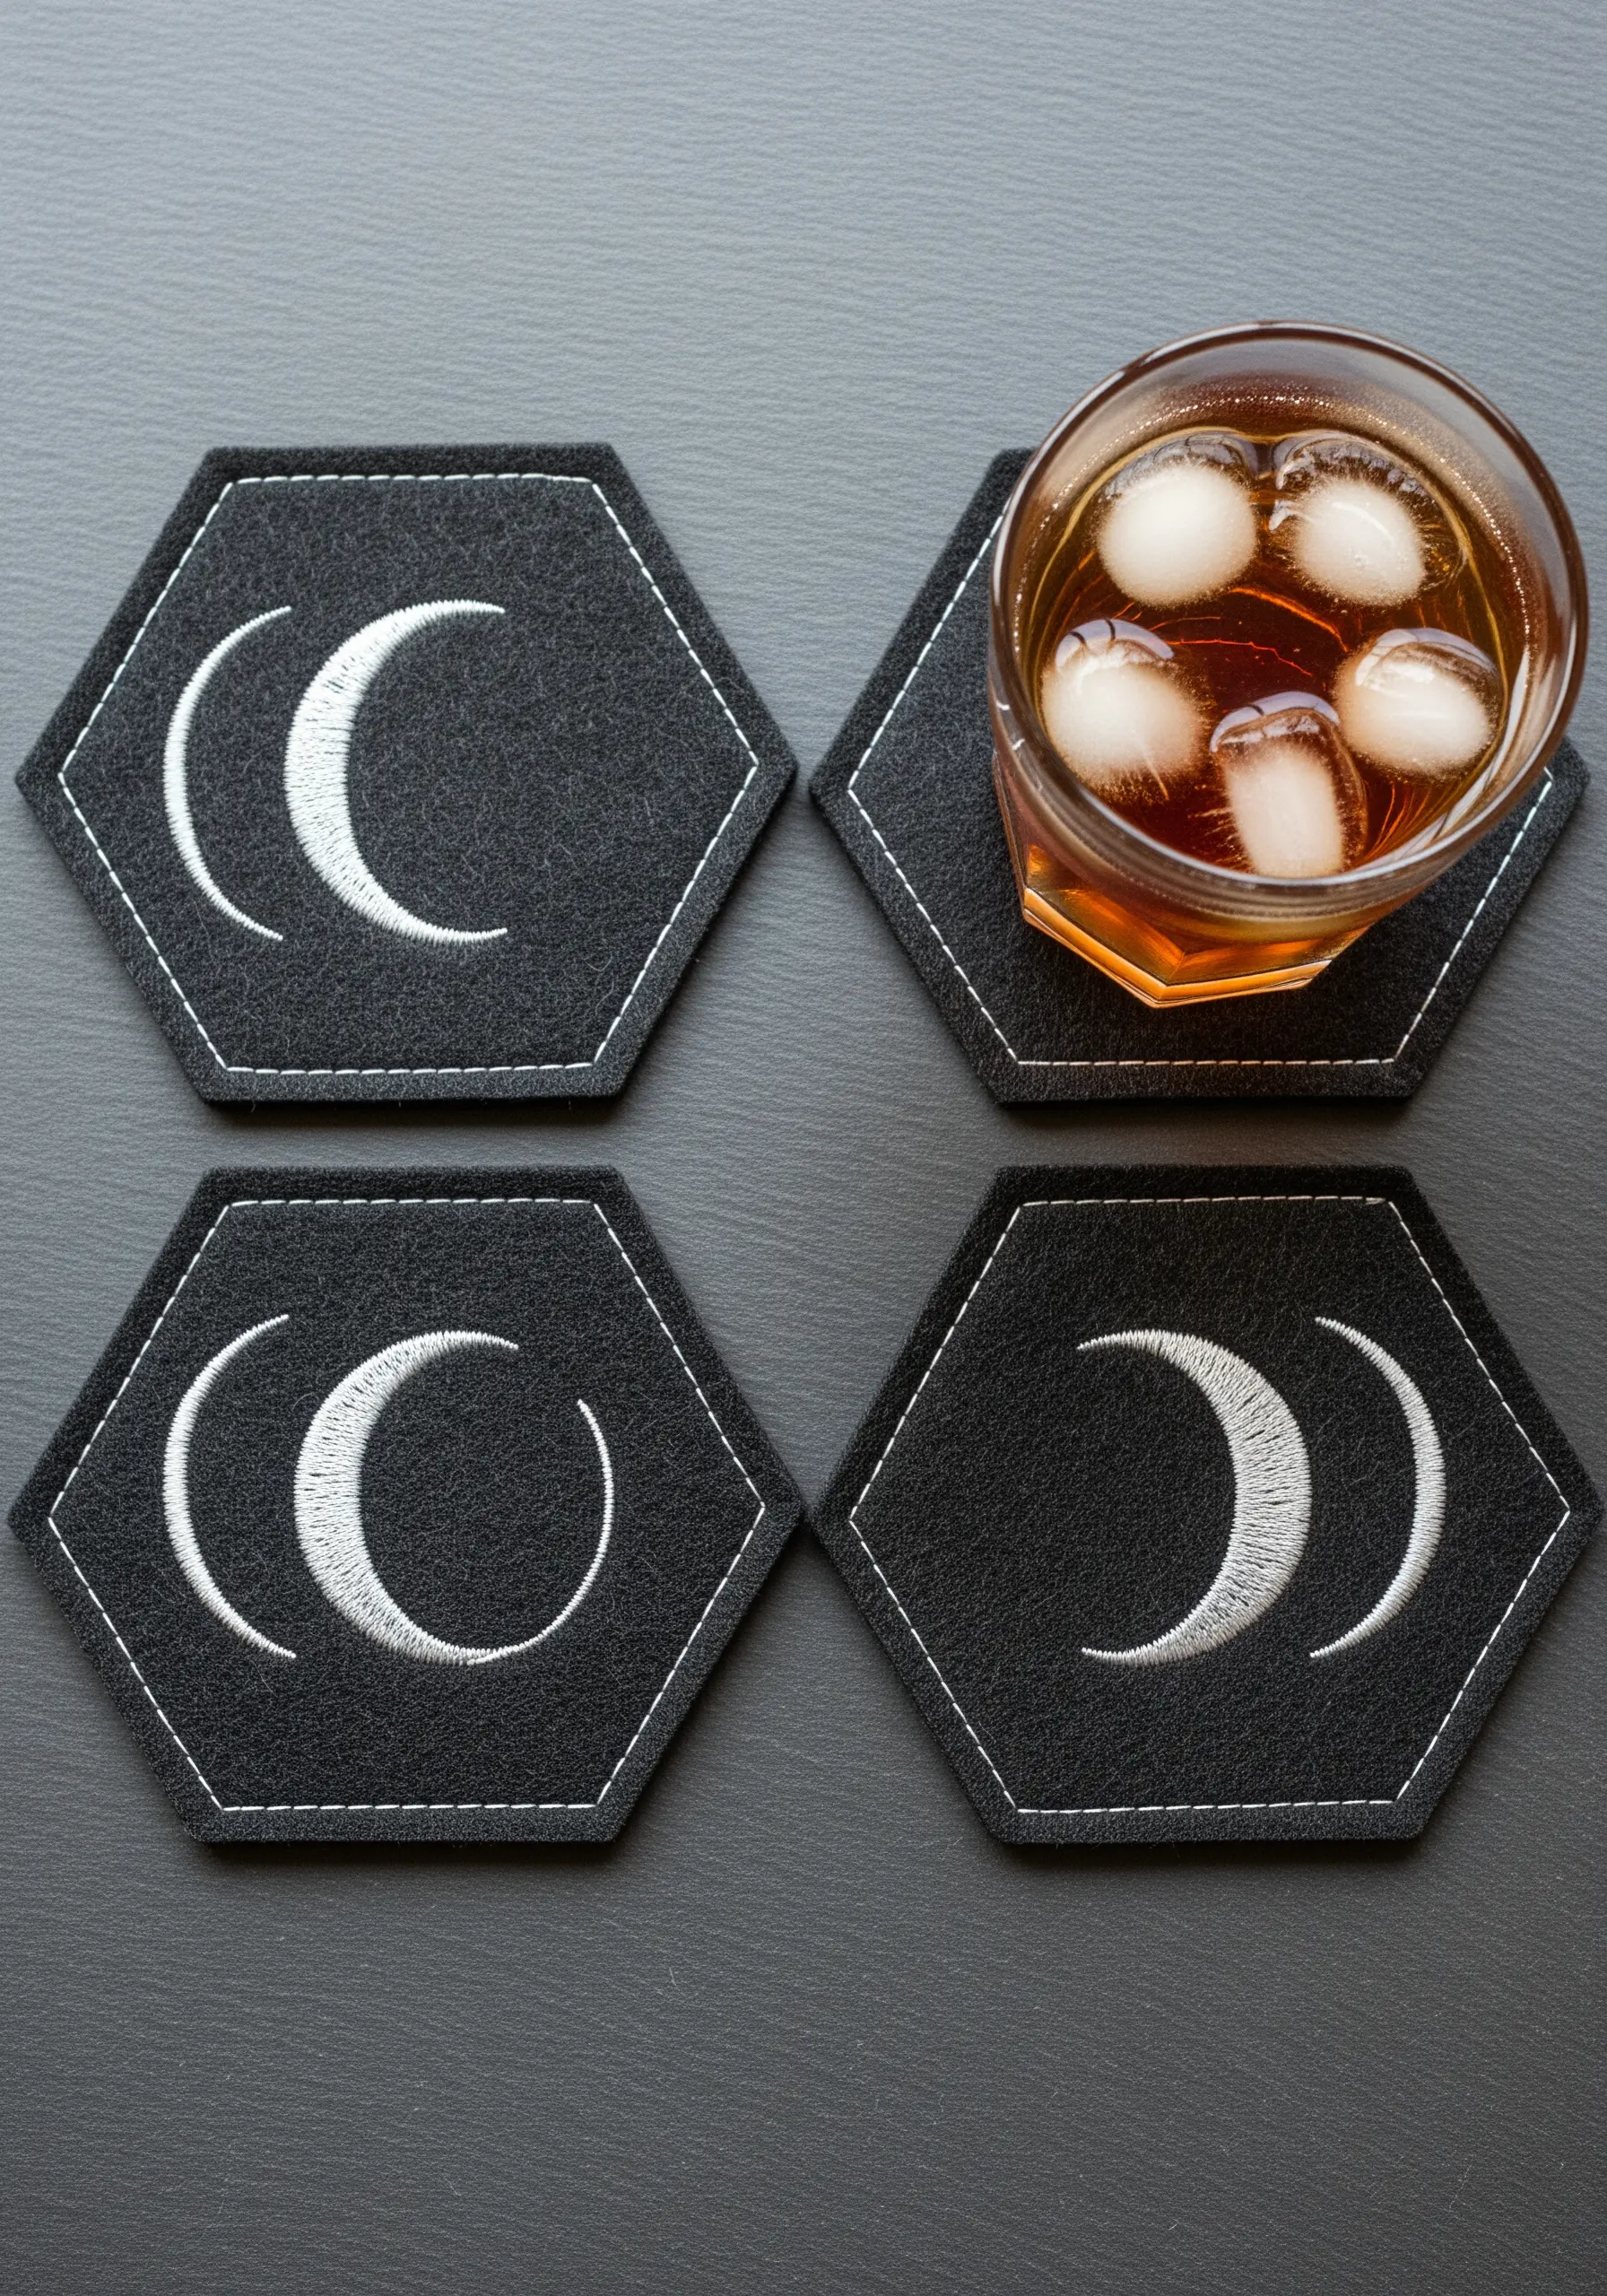
For a flawless satin stitch, especially on high-contrast designs, always start with an outline.
Trace the shape of the moon phases using a single line of split stitch.
Then, fill the shape with your satin stitches, making sure to bring your needle up just outside the split-stitch line and down just inside it.
This simple preparation acts as a raised barrier, guiding your fill stitches into a perfectly smooth, sharp, and slightly padded edge. It’s perfect for minimal sky moon designs.
9. Use Whipped Backstitch for Smooth, Bold Lines

To make a single-color line drawing feel elevated and substantial, switch from a standard backstitch to a whipped backstitch.
First, create a foundation of simple backstitches along your design line.
Then, using the same thread, pass your needle under each backstitch without piercing the fabric, ‘whipping’ the thread around the foundation.
This technique smooths out the segmented look of backstitch, creating a solid, rope-like line that gives your artwork a clean and professional finish. It’s one of the best fern foliage stitch variations.
10. Add Dimension to Embroidered Lettering
Make your embroidered text stand out by using a padded satin stitch.
Before you begin your main satin stitches, lay down a foundation of small horizontal stitches within the shape of each letter.
Then, cover this padding with vertical satin stitches.
This extra layer raises the lettering from the fabric surface, giving it a subtle shadow and a pleasing, three-dimensional quality that looks professional and refined.
11. Combine Appliqué and Stitching for Graphic Impact

Create bold, graphic shapes by combining simple appliqué with embroidery.
Cut your sun shapes from felt or non-fraying fabric and secure them to your base with a simple running stitch or a neat blanket stitch around the edge.
Then, add the sun’s rays with radiating straight stitches using a contrasting thread color.
This mixed-media approach allows you to block in color quickly and adds a layer of texture that embroidery alone cannot achieve. It’s a key technique in abstract fabric collage embroidery ideas.
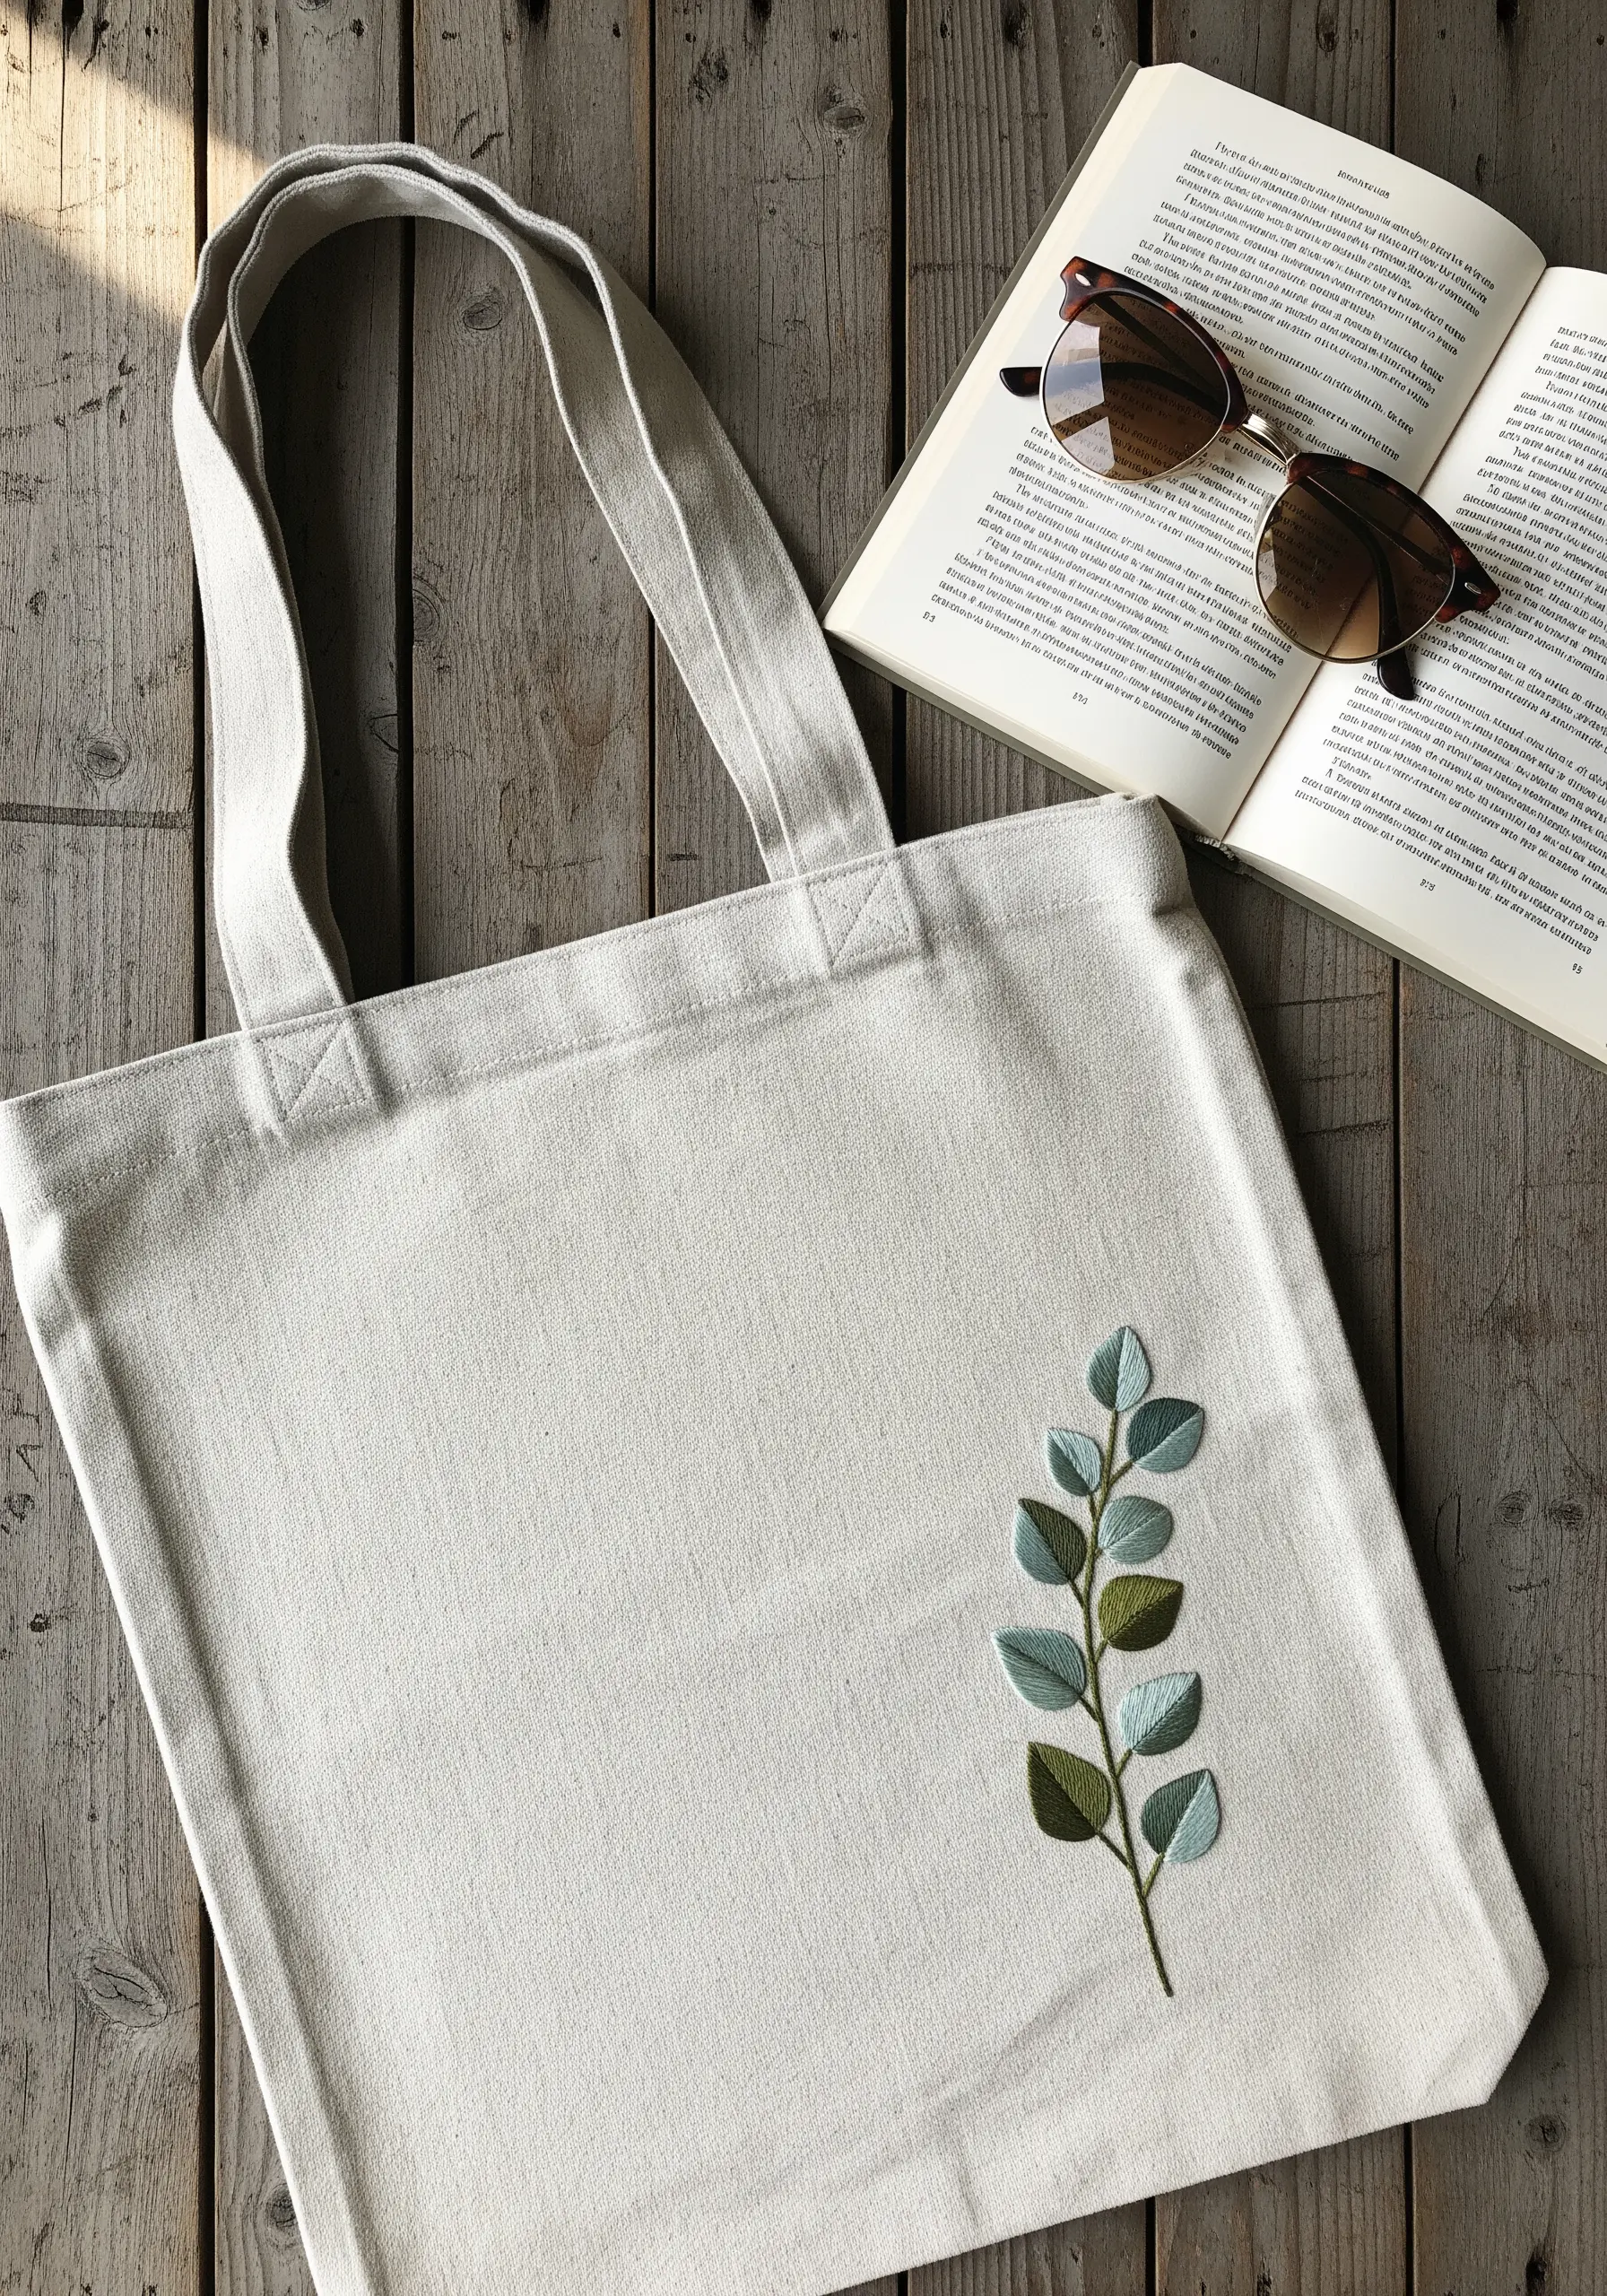
12. Embellish Functional Items with Purpose
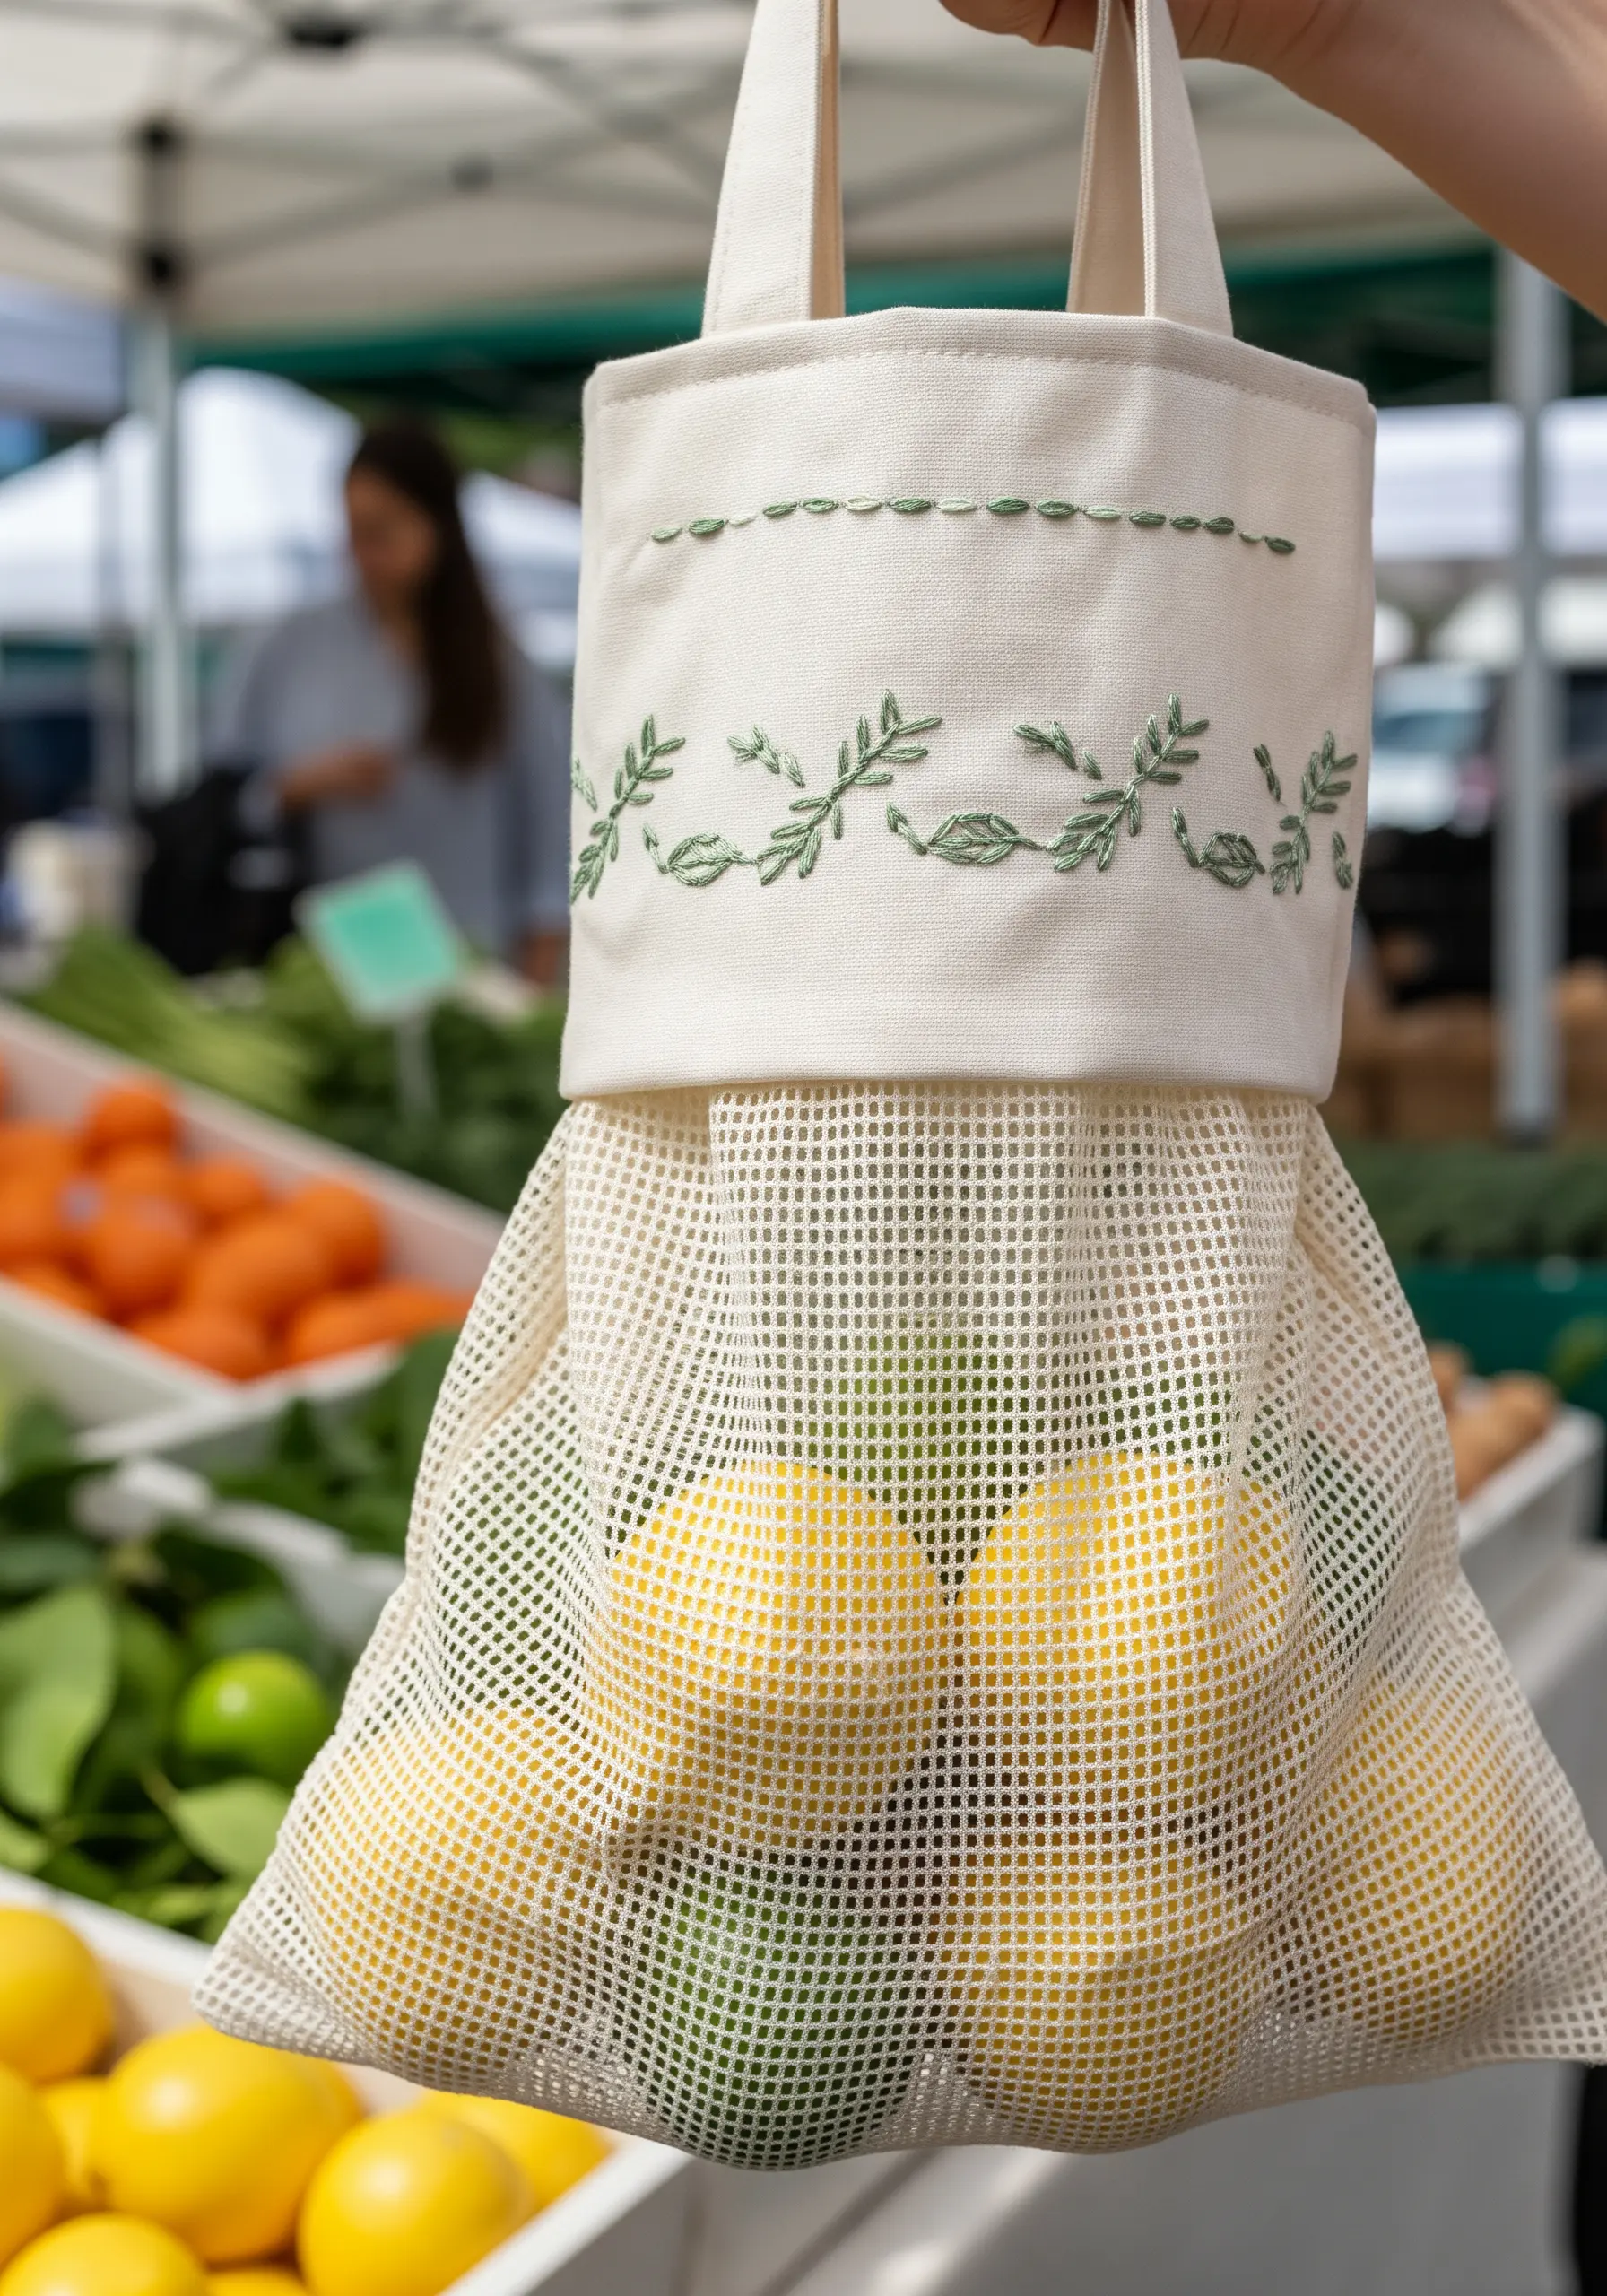
When adding embroidery to a practical item like a produce bag, the goal is to enhance, not hinder, its function.
Focus the embroidery on a reinforced area, like the solid canvas cuff, to ensure it doesn’t snag.
Use simple, sturdy stitches like stem stitch for vines and fly stitch for leaves, which lie flat and are less likely to catch.
A delicate, repeating pattern adds a touch of handmade luxury without compromising the item’s utility. These simple leaf embroidery stitches are perfect for the job.
13. Vary Stitch Direction to Mimic Light and Shadow

To make your satin-stitched leaves look more dynamic, consciously vary the angle of your stitches within each leaf.
Instead of keeping them all parallel, slightly fan them out from the stem’s base to the leaf’s tip.
This causes the threads to catch the light in different ways, creating the illusion of highlights and shadows without changing your thread color.
It’s a subtle technique that adds a significant amount of realism and dimension, perfect for ways to layer leaf stitching.
14. Make a Statement with Bold, Minimalist Outlines
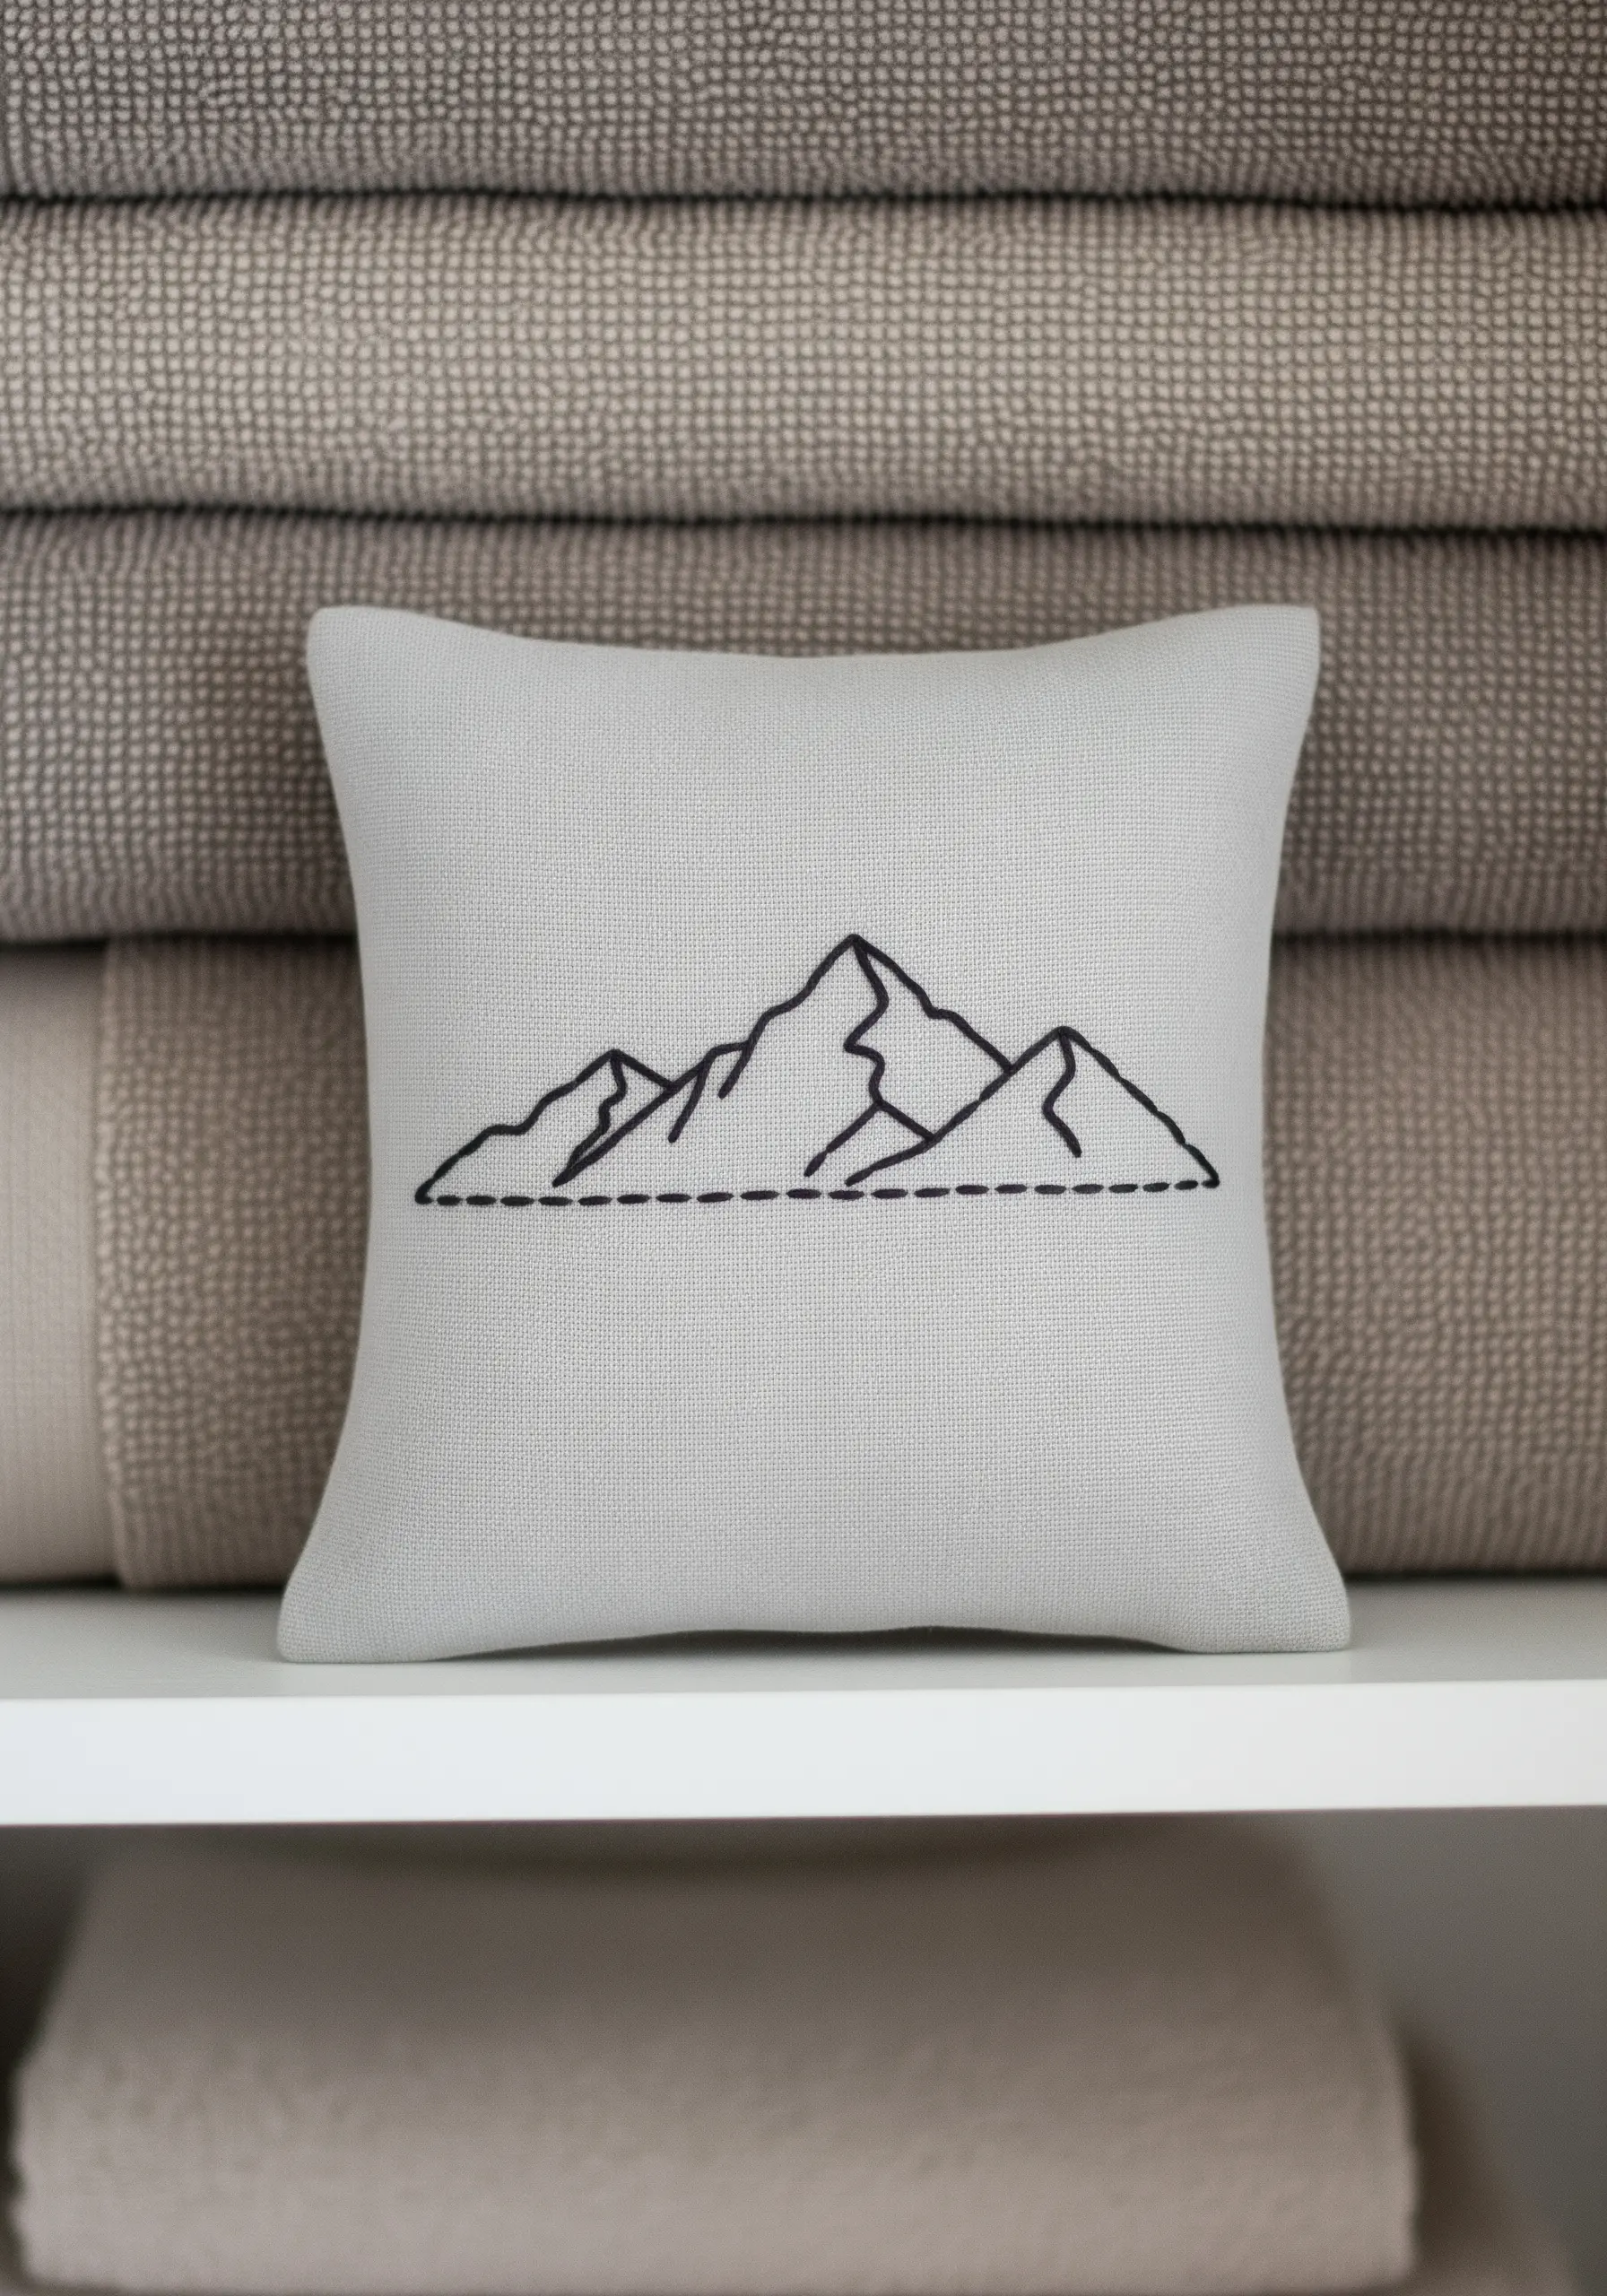
The power of a minimalist design lies in the quality of its line.
To create a bold, graphic outline that doesn’t disappear into the fabric, use all six strands of your embroidery floss.
A chain stitch or a heavy backstitch will produce a thick, confident line that defines the shape with authority.
This technique proves that you don’t need complex fills or multiple colors to create a striking piece; a single, well-executed line is enough. You can see more in our collection of minimalist embroidery projects.
15. Add Delicate Details to Quilted Surfaces
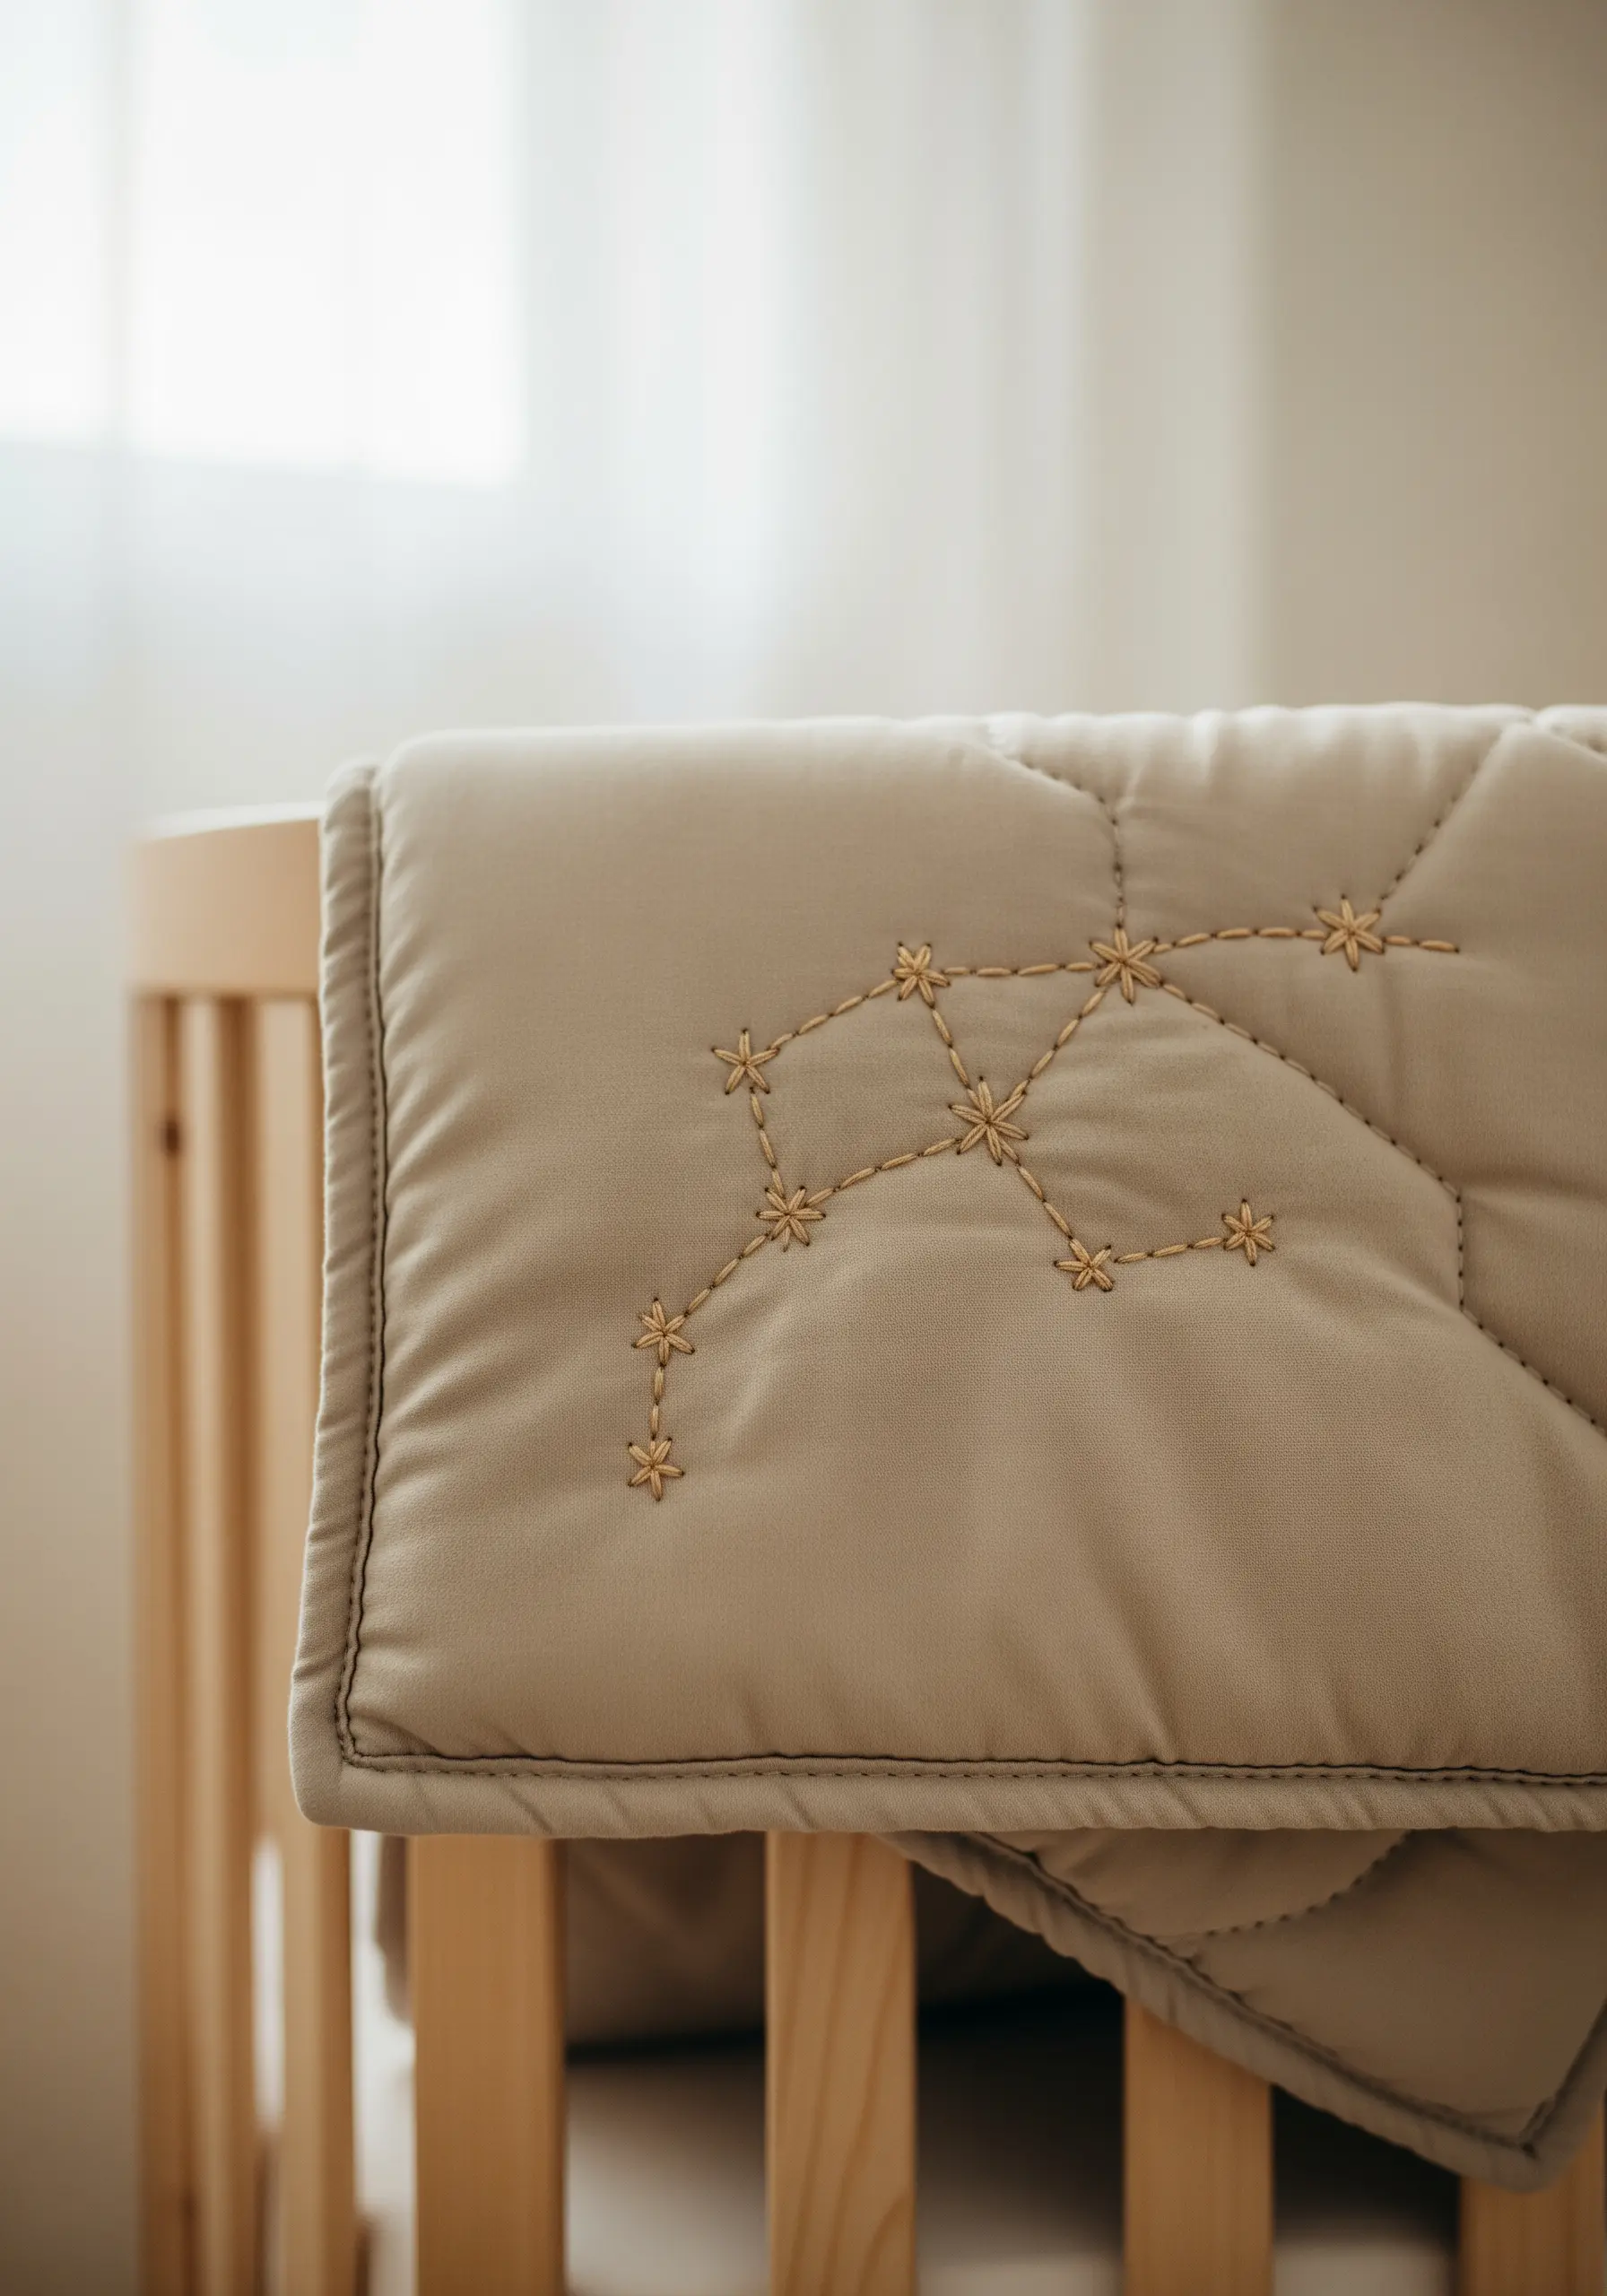
When stitching on a thick, quilted fabric, maintain a light touch to avoid compressing the batting.
Use a simple lazy daisy stitch to create the star-like flowers, which allows the thread to sit gently on the surface.
Keep your tension relaxed—just tight enough to secure the stitch, but not so tight that it creates puckers or dents in the quilting.
This ensures your delicate embroidery complements the soft, puffy texture of the blanket rather than fighting against it.
16. Create Bold Lines with Braided Cord
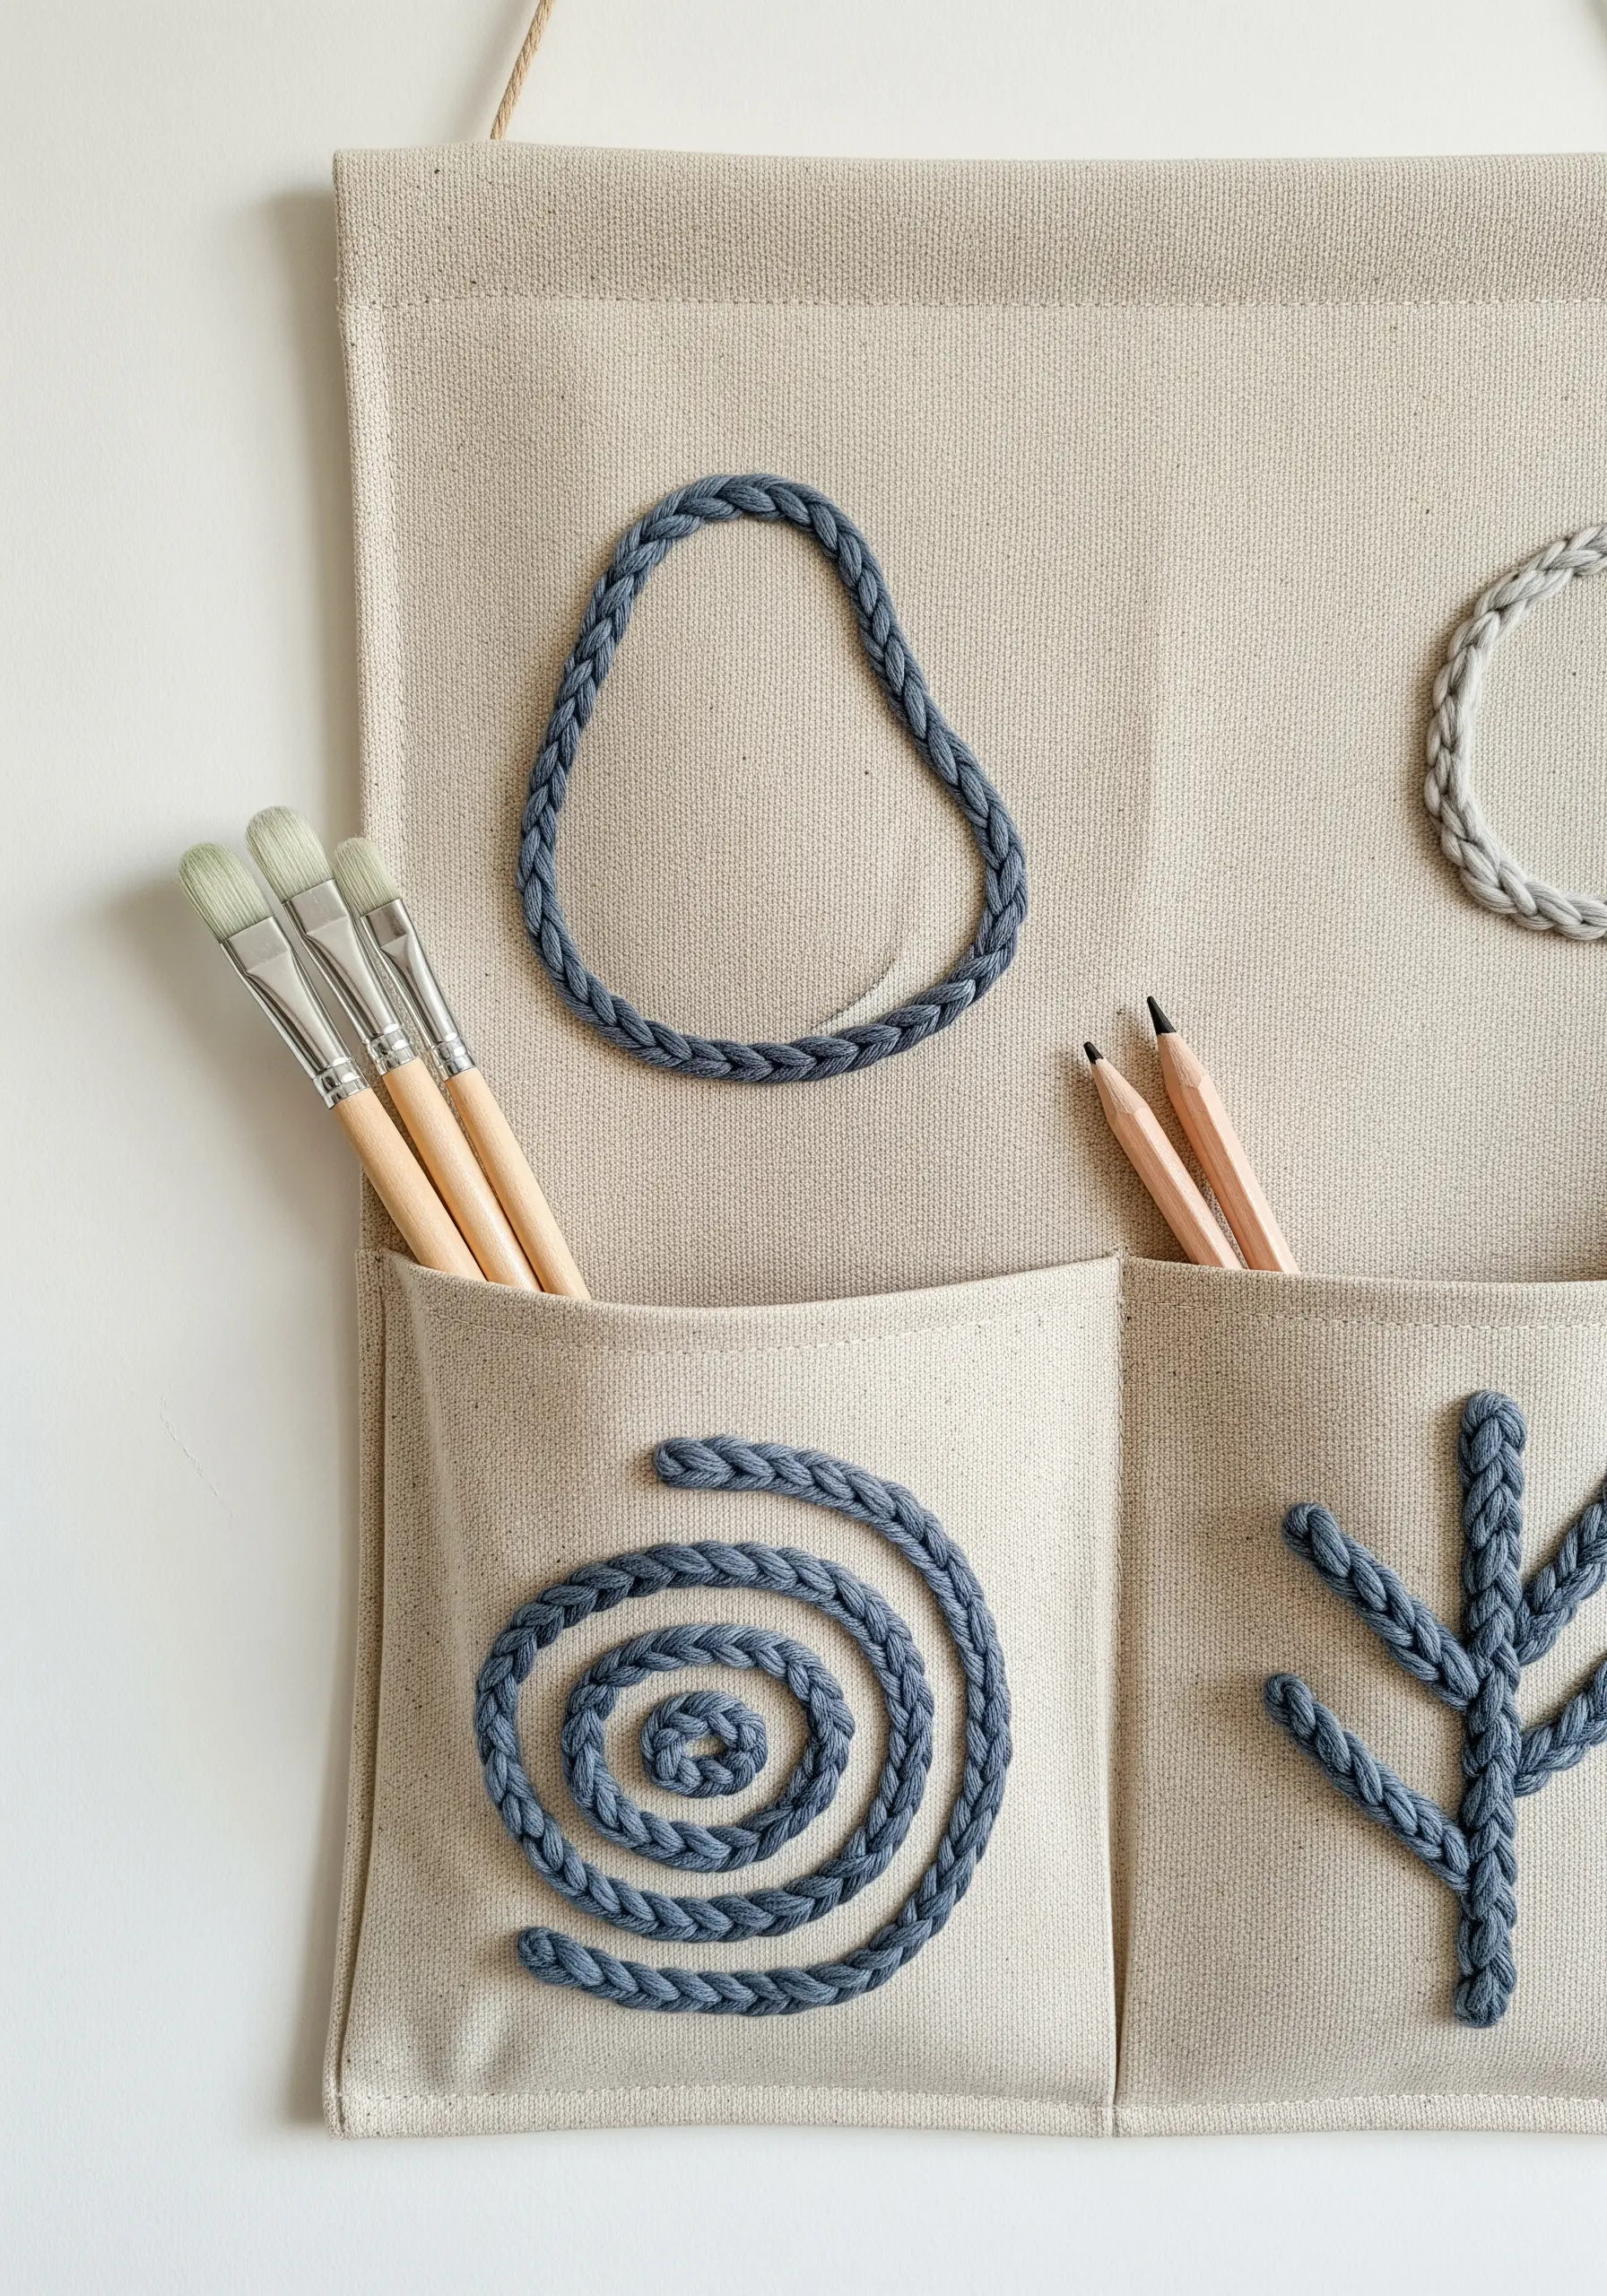
For an exceptionally bold and textural outline, couch a braided or plied cord onto your fabric.
This technique allows you to create thick, sculptural lines that would be impossible with embroidery floss alone.
Lay the cord along your design line and use a thin, strong sewing thread in a matching color to tack it down every few millimeters.
The result is a fast, high-impact design that adds both graphic and tactile interest to functional items like this wall organizer. It’s one of our favorite abstract thread embroidery ideas.
17. Stitch on Felt for Structure and Ease
Felt is an ideal base for embroidery because its matted fibers provide stability without the need for a hoop.
Use a sharp needle to pierce the dense material cleanly.
For the dandelion, create the delicate floating seeds with detached chain stitches (lazy daisies) combined with a straight stitch for the stem.
The felt’s texture grips the thread, preventing slippage and making it easy to create precise, delicate motifs like these with excellent results.
18. Use Contrast for Geometric Precision
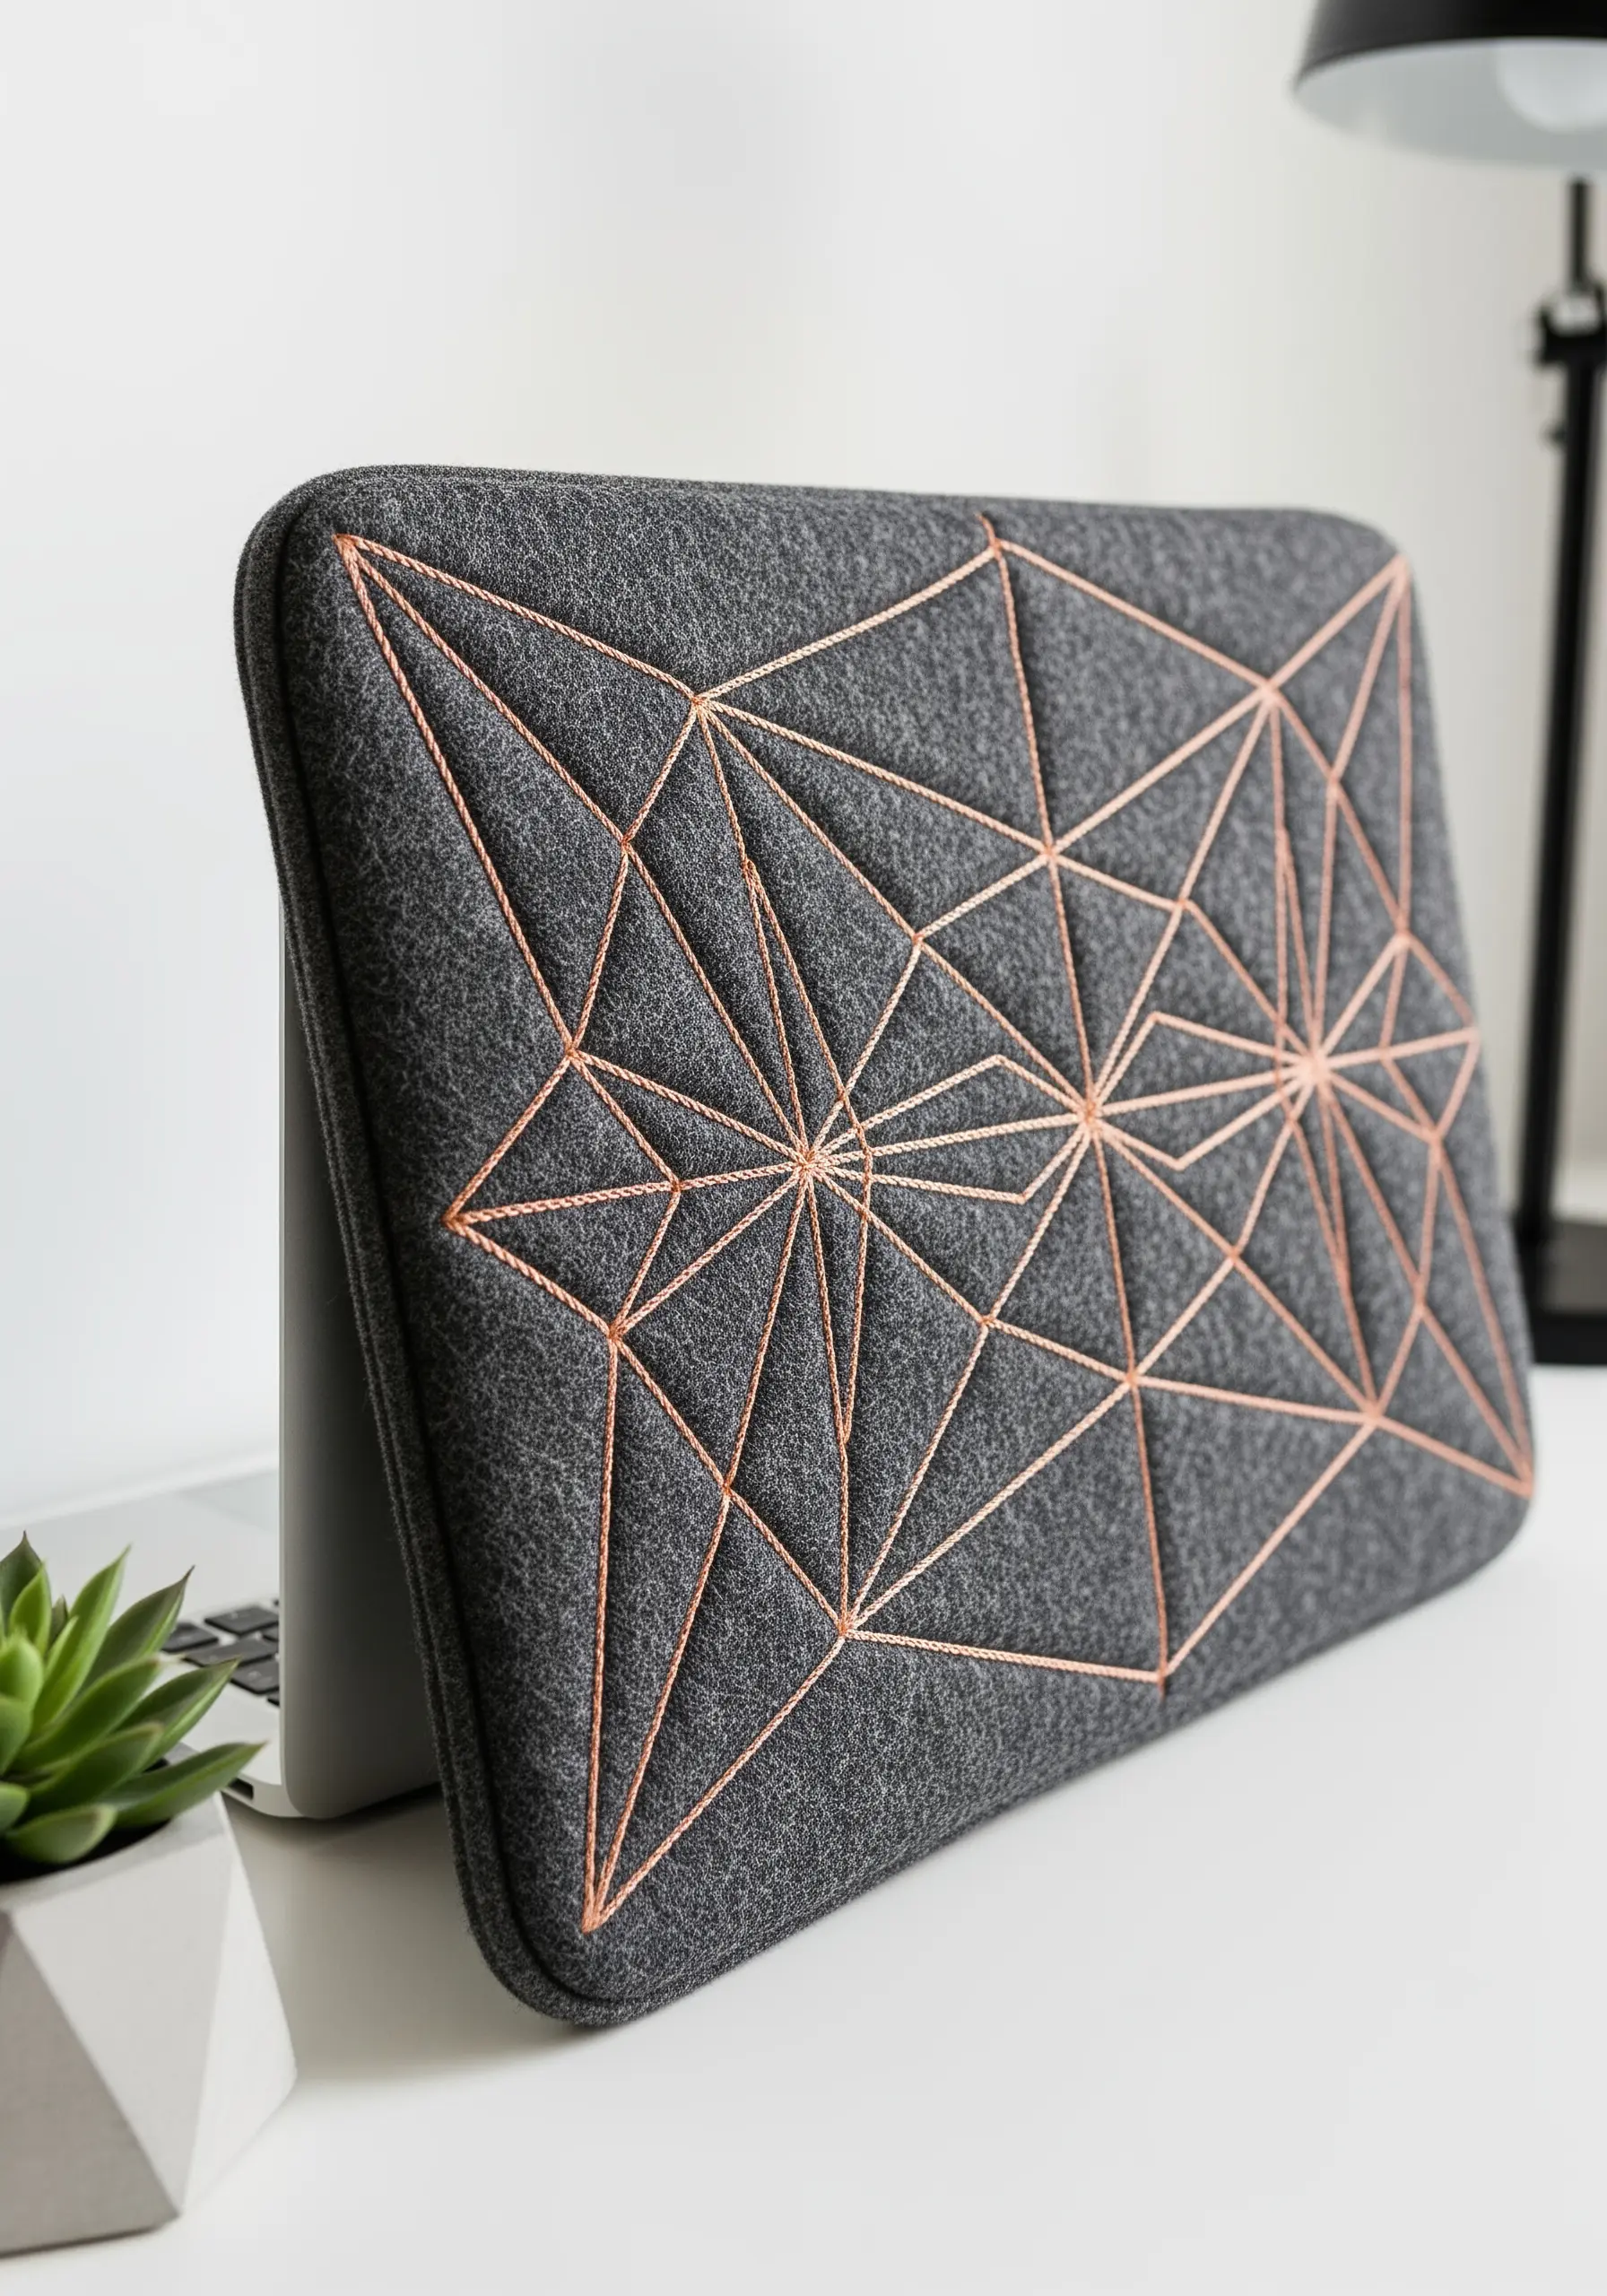
To make a geometric design truly stand out, maximize the contrast between your thread and fabric.
A metallic copper thread on a dark charcoal felt creates a visually striking, architectural effect.
When executing the design, the key is consistency.
Use a ruler and a disappearing ink pen to mark your lines perfectly, and concentrate on maintaining an identical stitch length throughout to ensure the finished piece looks clean, sharp, and intentional. Find more inspiration with these modern geometric thread art ideas.
19. Achieve Crisp Monograms with an Underlay
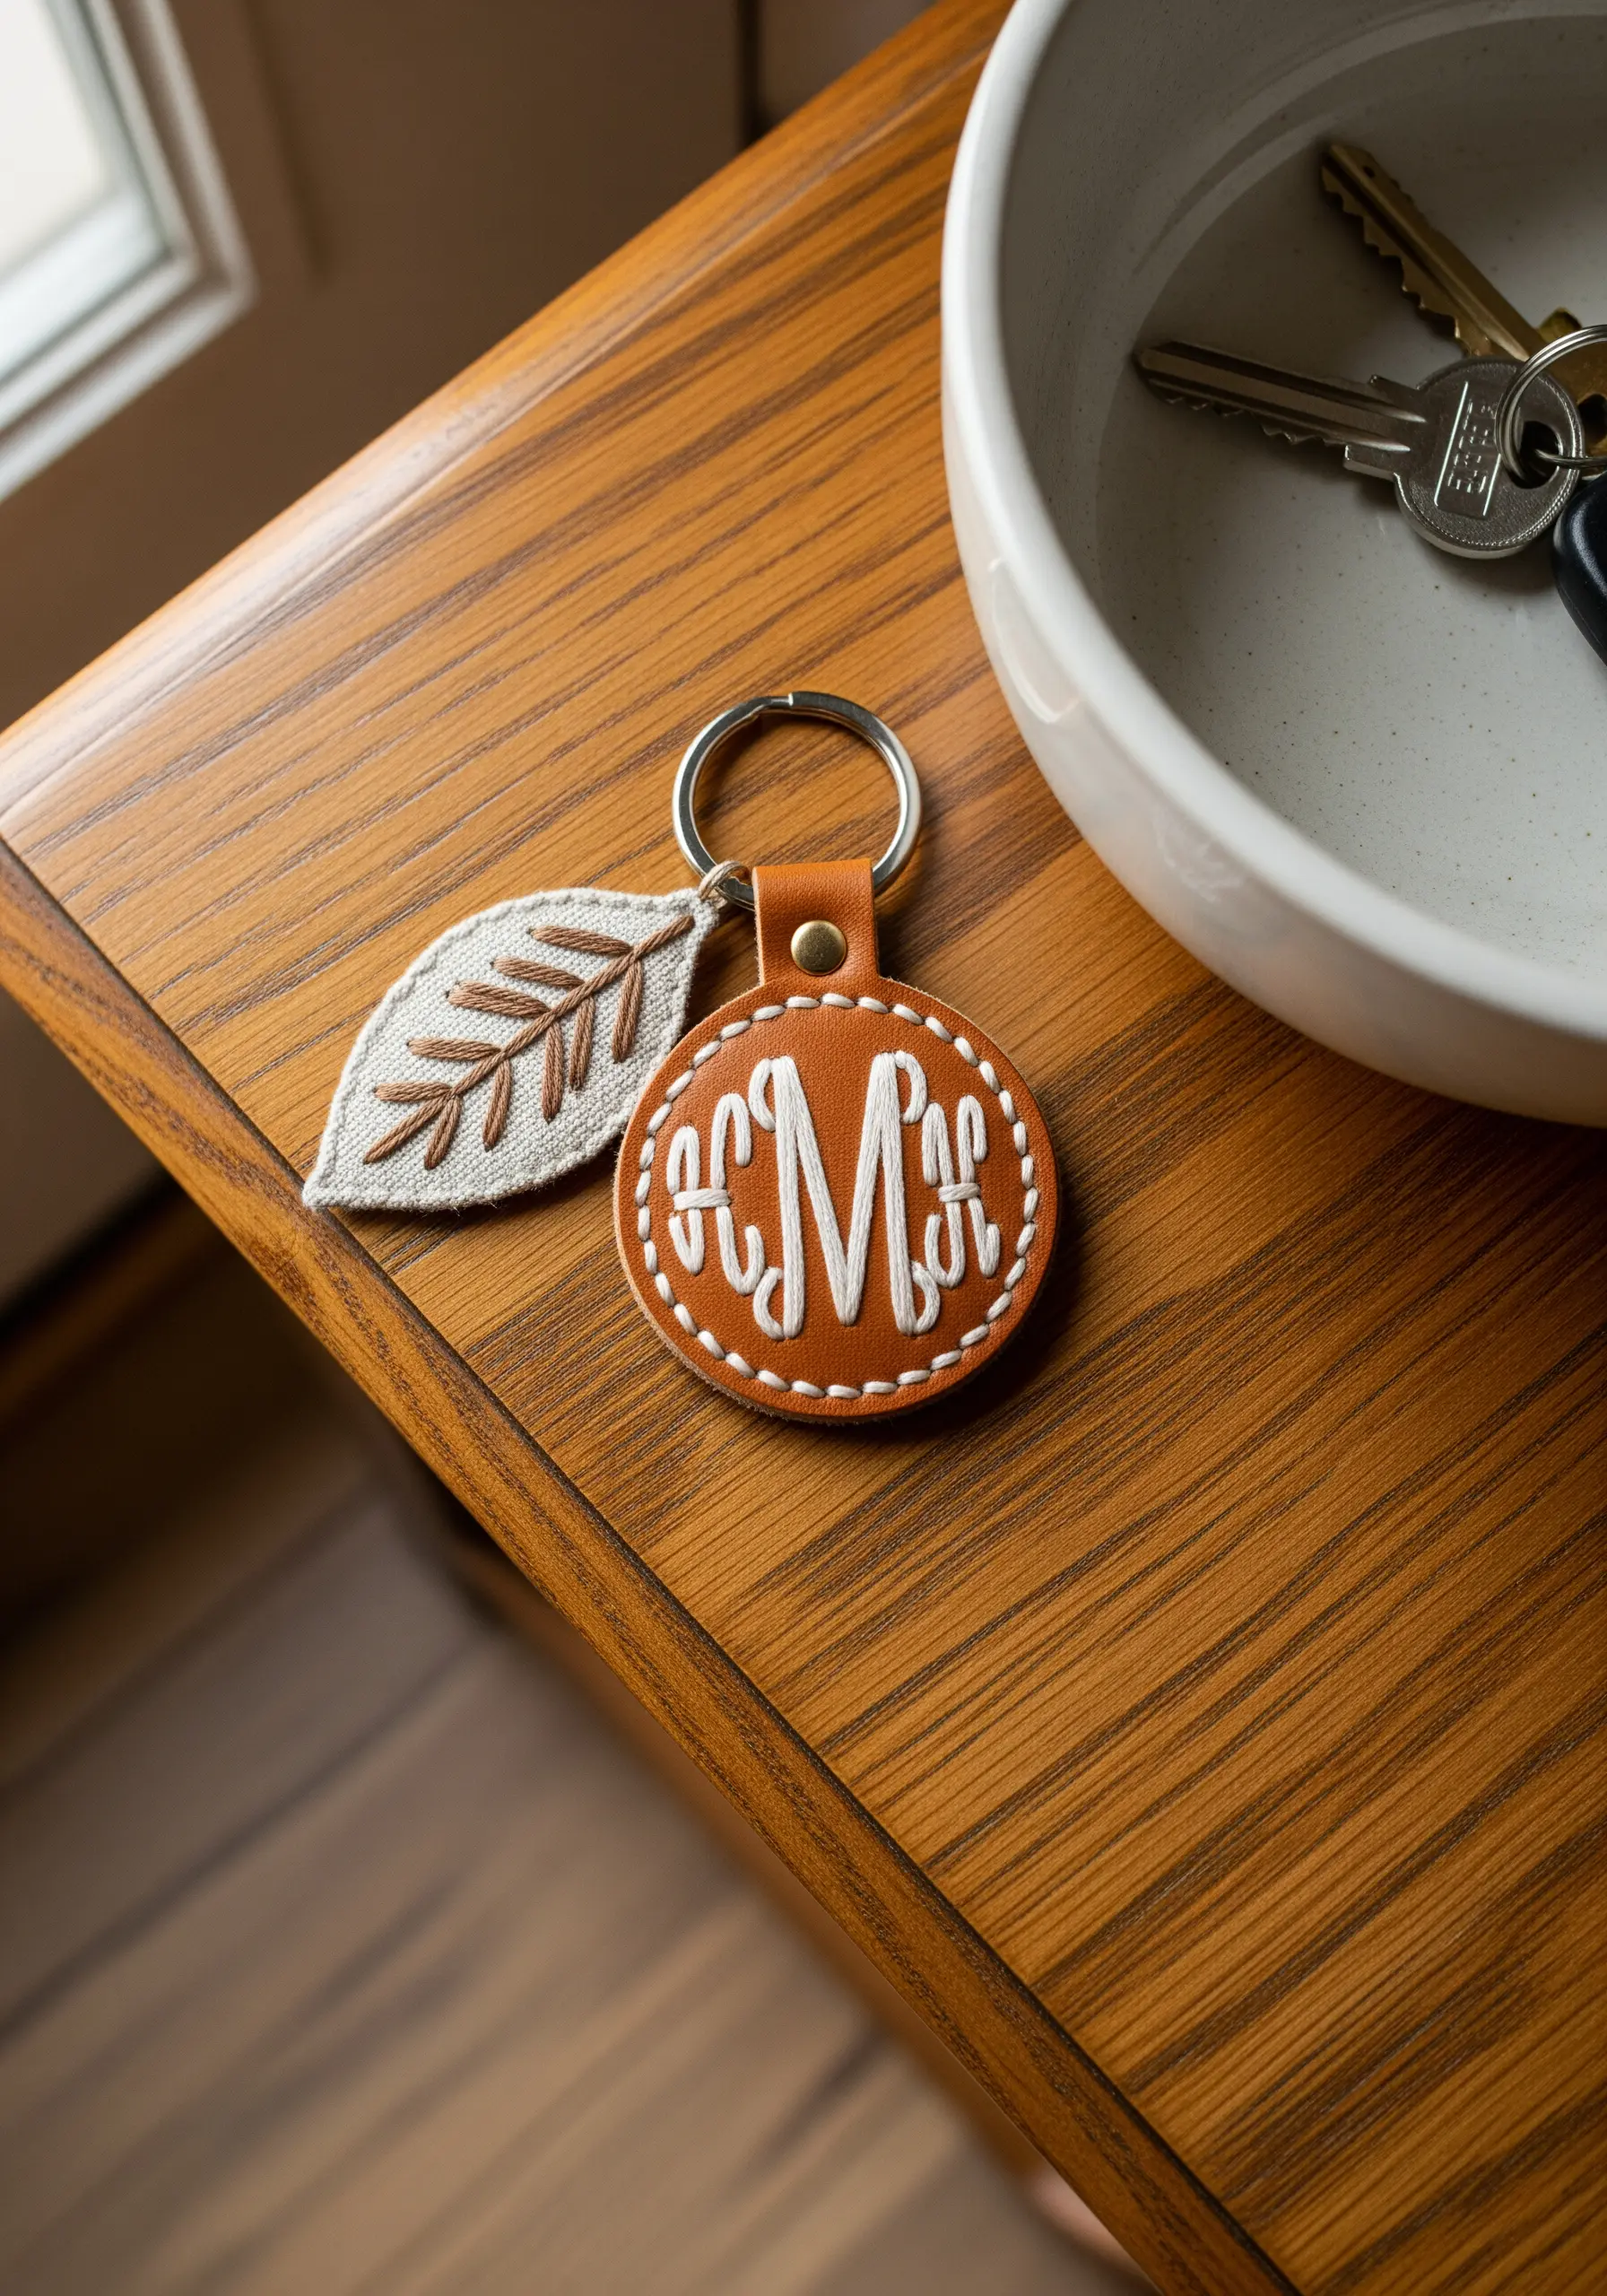
For a professional-quality monogram on leather or faux leather, a foundation is essential.
First, create a padded base by stitching a series of small horizontal stitches within the outline of your letter.
Then, cover this padding with dense satin stitches, working in the opposite direction.
This underlay raises the monogram, creating dimension and ensuring the final stitches are smooth, even, and well-defined, making it one of the most elegant minimal monogram styles.
20. Integrate Embroidery into Patchwork
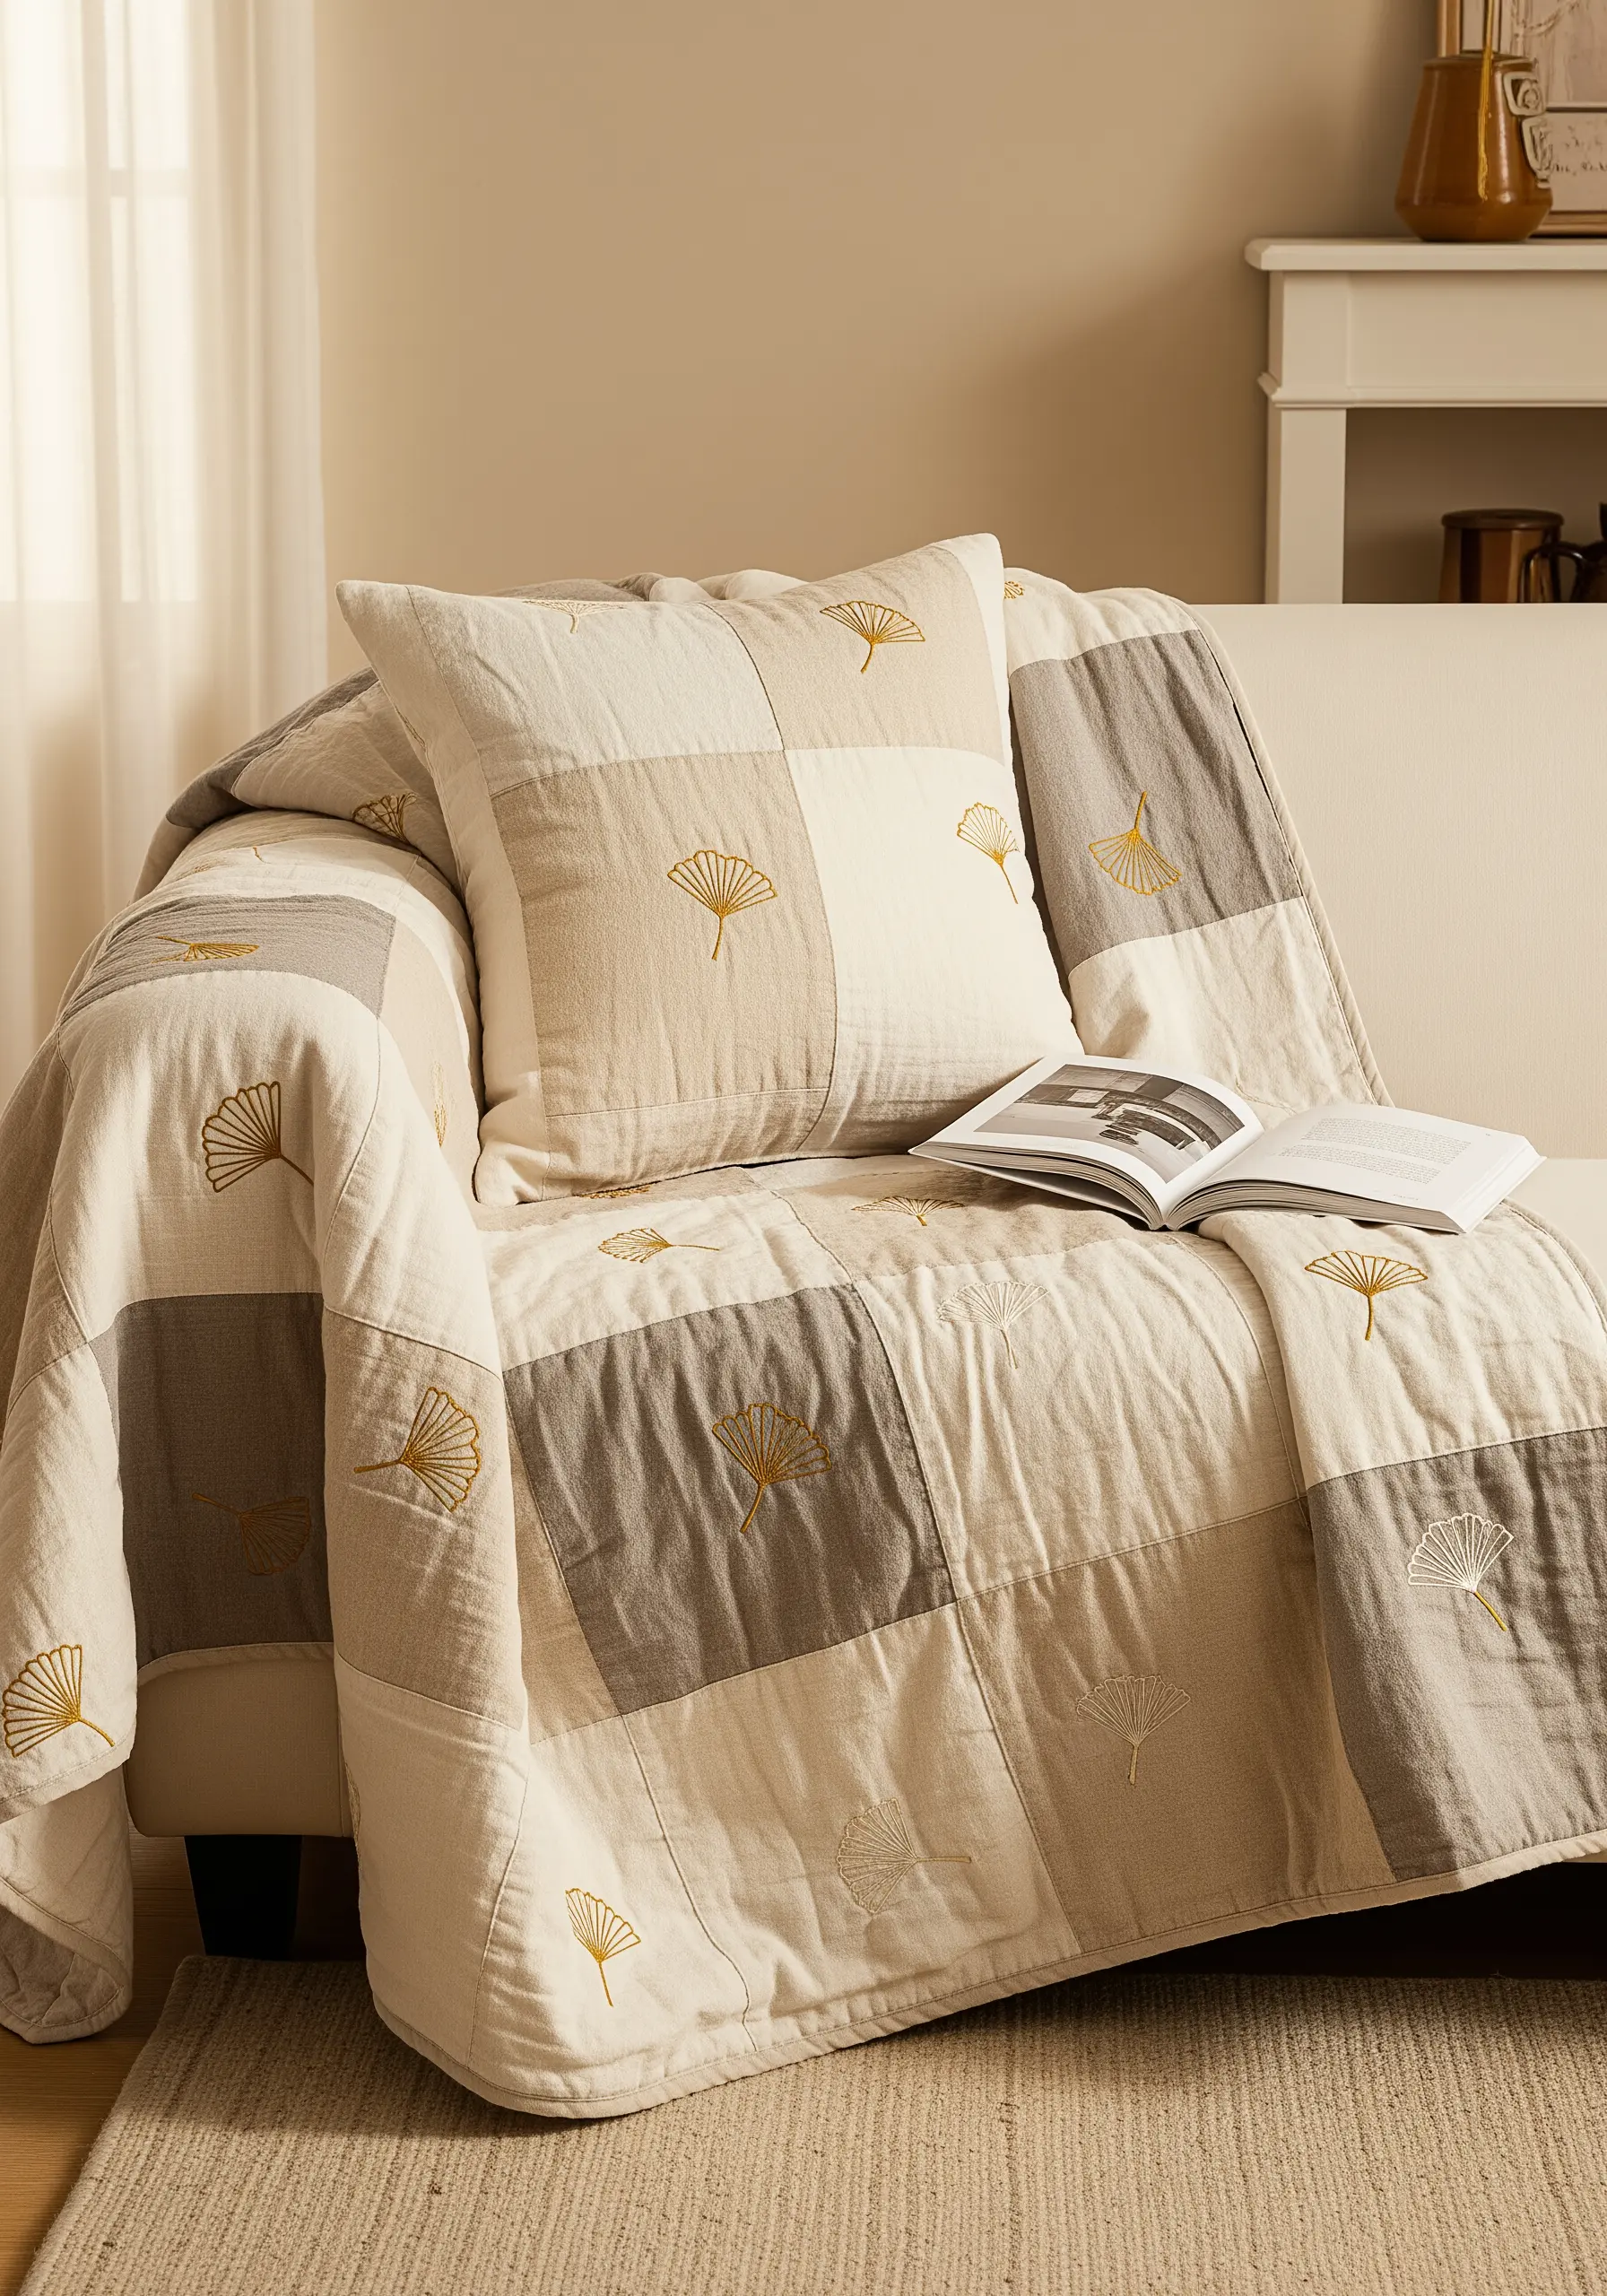
When adding embroidery to a patchwork piece, let the existing structure guide your design.
Instead of a large, central motif, use a small, repeating pattern placed within each fabric square to create a sense of cohesion.
A simple stem stitch or backstitch outline in a contrasting thread adds a delicate graphic element without overwhelming the patchwork itself.
This approach honors both crafts, creating a harmonious and layered textile. These simple embroidery patterns that make statement wall art work beautifully here.
21. Create Rhythm with Repeating Patterns

To successfully execute a repeating pattern on a long surface like a table runner, consistent spacing is crucial.
Create a reusable stencil from cardstock to transfer your design, ensuring each artichoke is perfectly placed.
By arranging the motifs in a uniform grid, you create a visual rhythm that is calming and sophisticated.
The repetition transforms a simple botanical drawing into an elegant, cohesive design. You can elevate your dining room with simple stone gray embroidered table runner ideas like this one.
22. Design for Light with Silhouette Stitching
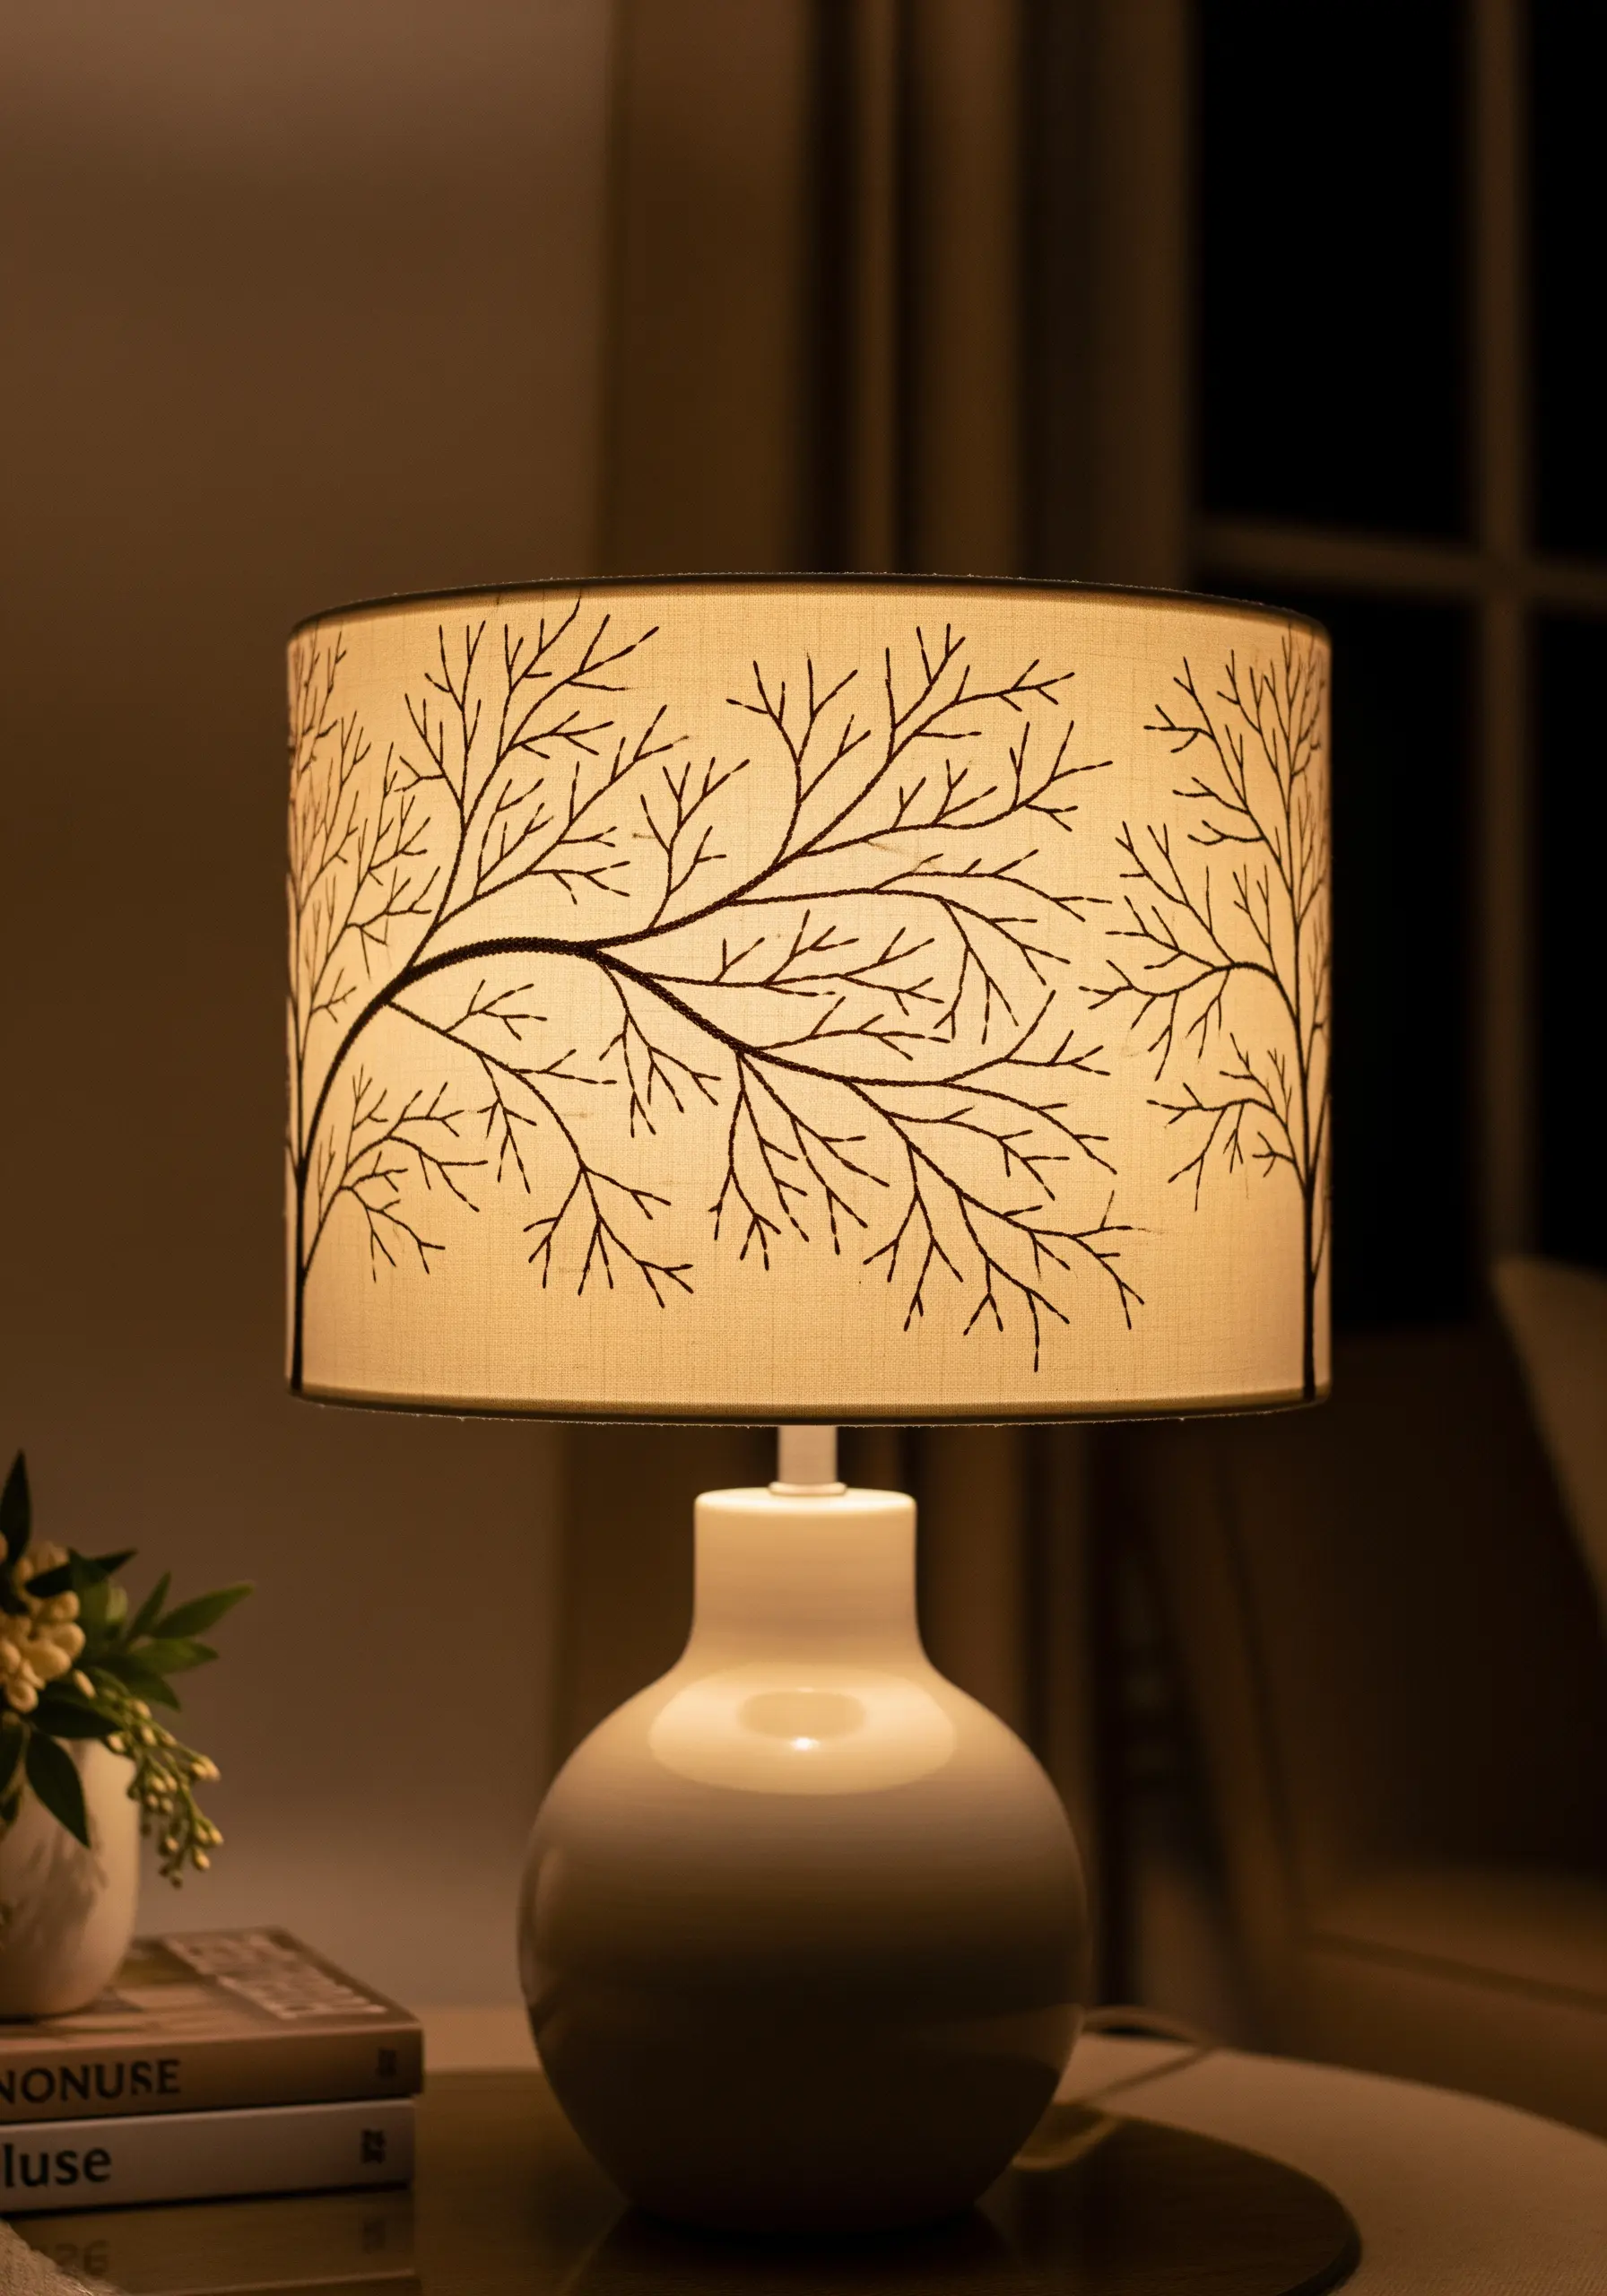
When embroidering an object that will be backlit, like a lampshade, think in silhouettes.
Use a dark thread on a light, translucent fabric to create a strong contrast.
A simple backstitch or stem stitch is all you need to trace the outlines of the branches.
The true artistry is revealed when the lamp is turned on, transforming the stitches into a dramatic shadow play and making your embroidery a source of both texture and light. Explore more ways to create embroidery designs that turn everyday nature into stunning art.
23. Add Bold Texture with Chunky Chain Stitch

For a fast, high-impact textural element on home decor, use a chunky yarn instead of standard floss.
Work a large-scale chain stitch to create the bold, graphic arches of the rainbows.
This technique covers ground quickly and creates a raised, dimensional line that you can both see and feel.
It’s a perfect way to add a playful, modern touch to a simple canvas planter or basket. These diy yarn wall art pieces often use similar techniques.
24. Master Subtle Tone-on-Tone Texture
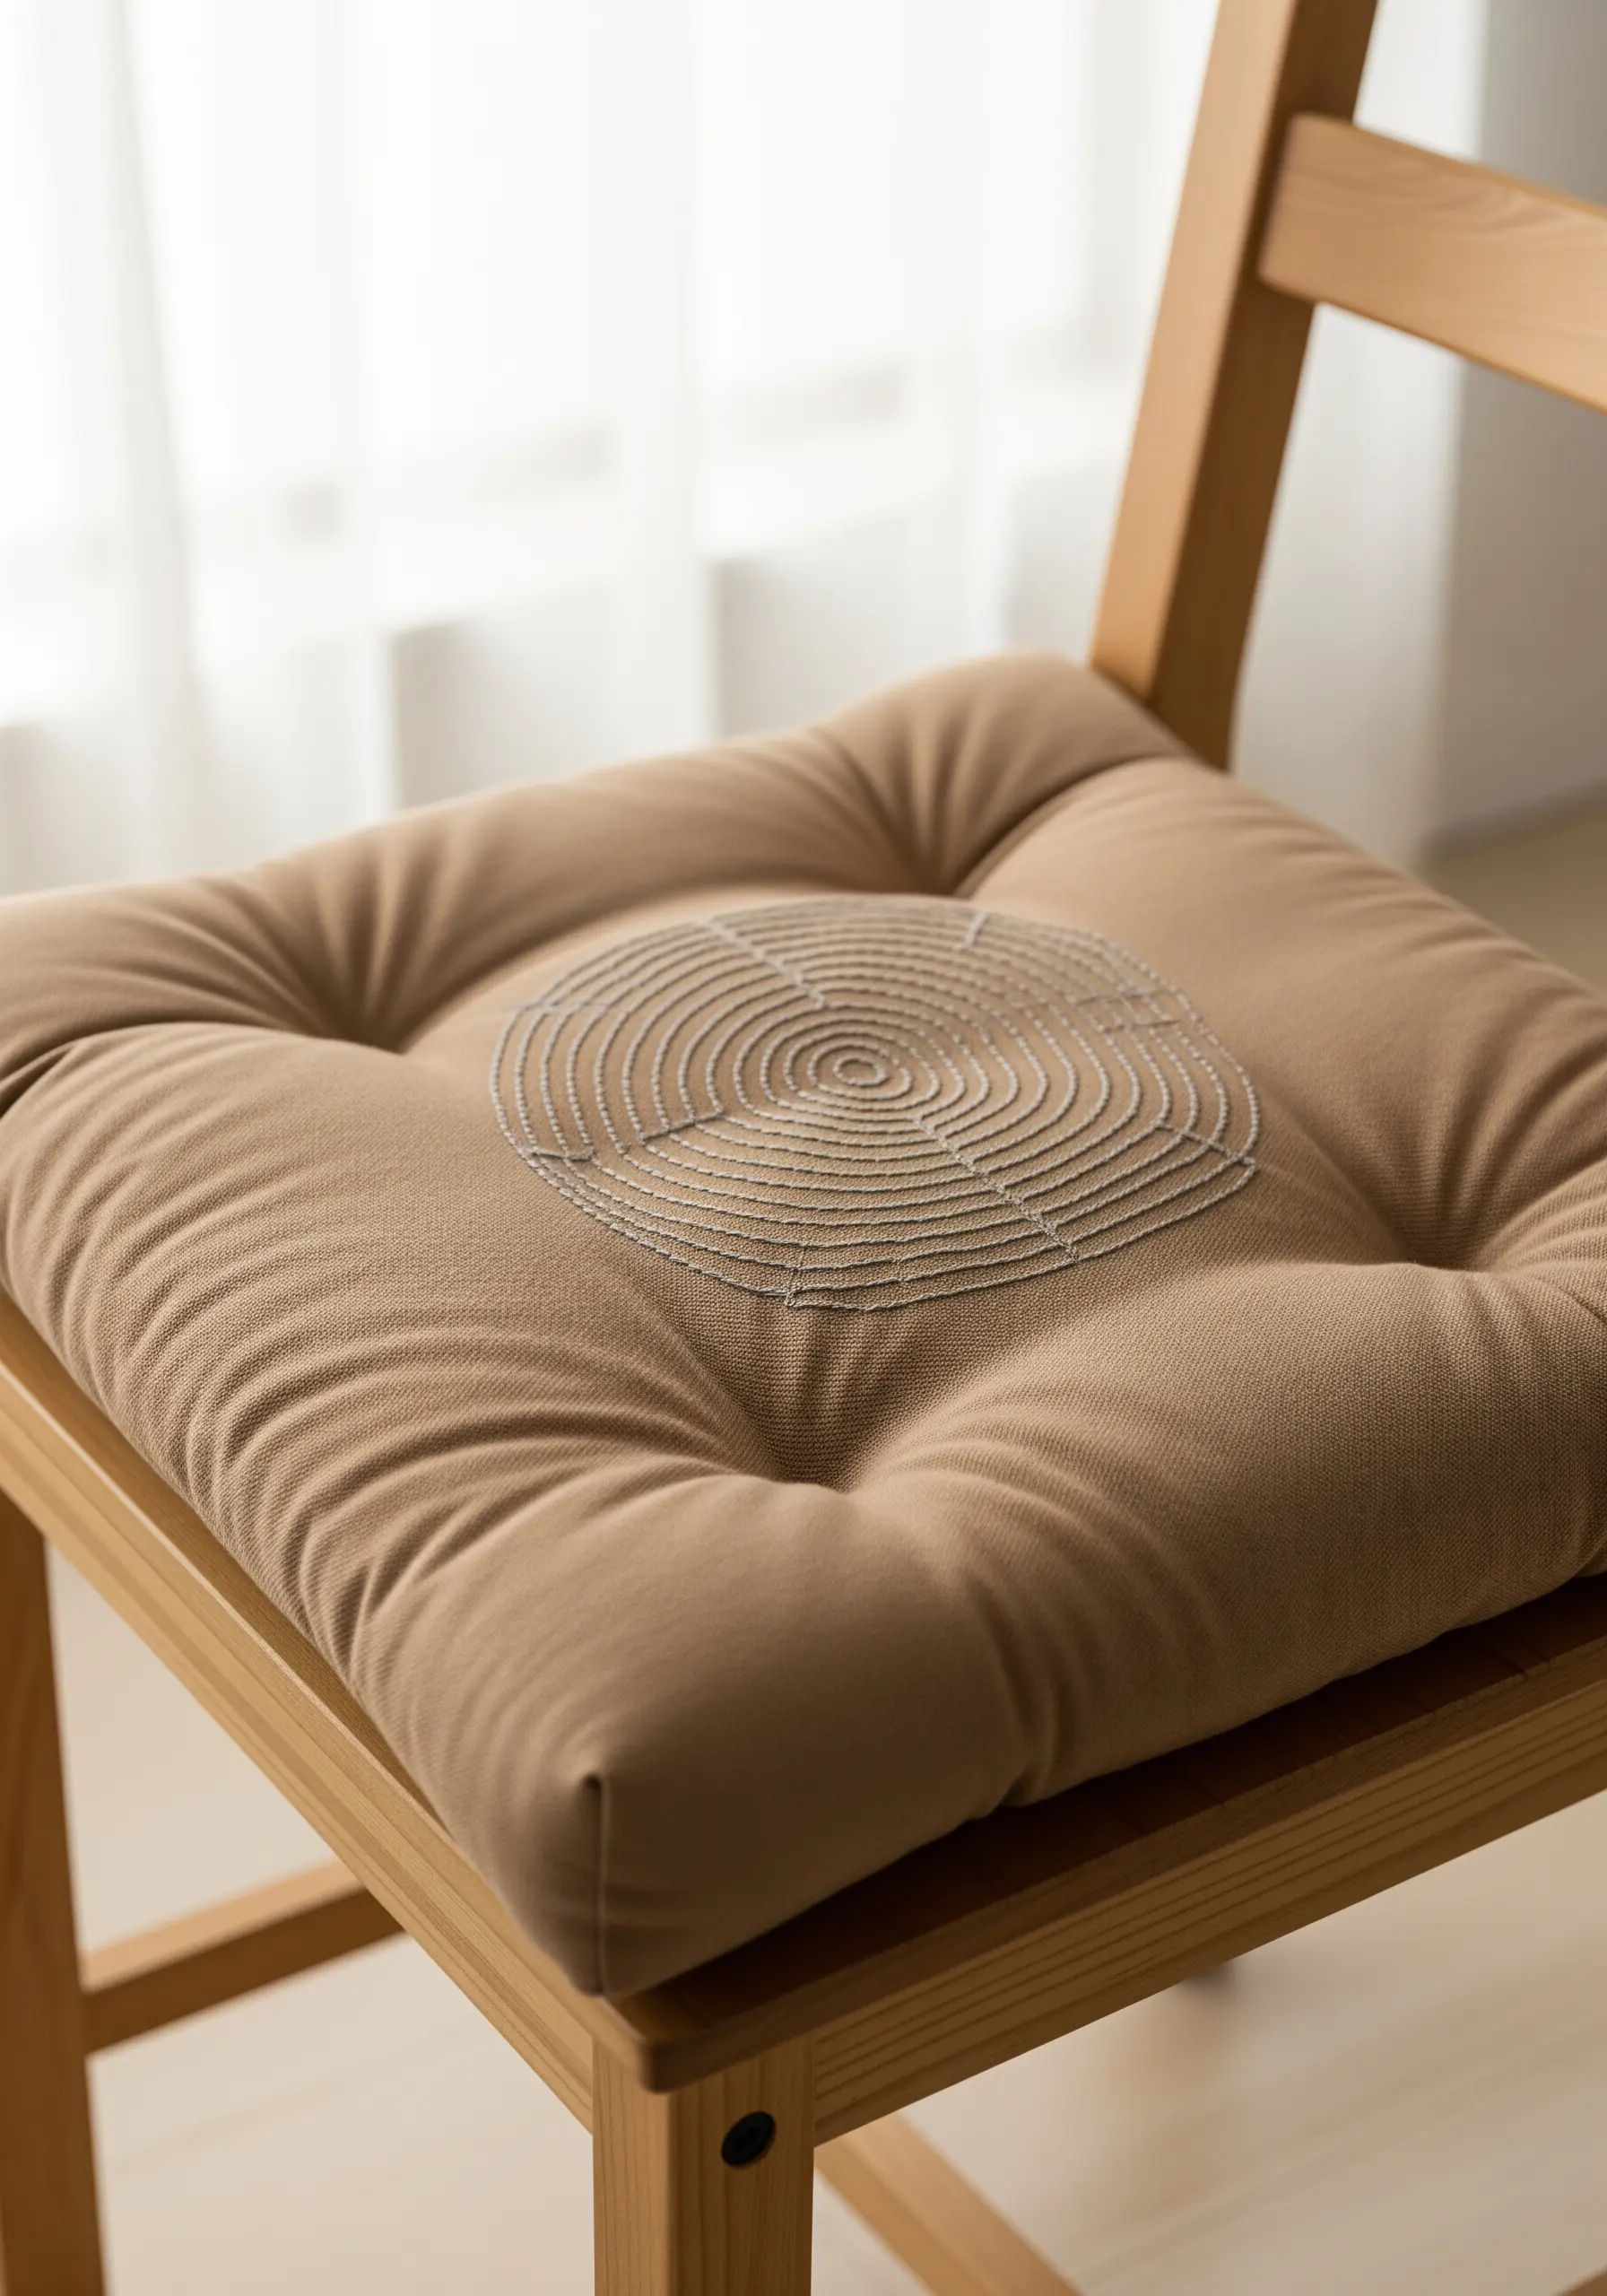
Create an elegant, high-end look by using thread that is only a shade or two different from your fabric.
The goal isn’t high contrast, but subtle texture.
Use a stitch that creates a raised line, like a whipped backstitch or a tight chain stitch, to form the concentric circles.
This creates a design that catches the light and invites touch, adding a layer of quiet luxury that feels both modern and timeless. It’s one of the best tone-on-tone embroidery techniques.


