

Your bedroom is a sanctuary, a place for quiet reflection. What if your creative practice could be a part of that peace? Embroidery doesn’t have to be another item on your to-do list; it can be a slow, mindful ritual that begins or ends your day with a moment of calm focus.
Let’s shift your thinking from just following a pattern to truly designing with thread. The difference between a good piece and a great one often lies in the smallest details—the direction of a stitch, the texture of a knot, the subtle shift in color. These are the techniques that transform your work from a craft project into a piece of personal art that resonates with tranquility.
These nature scenes are more than just patterns; they are invitations to pause. As you stitch, you’re not just decorating a hoop; you’re weaving a small piece of serenity into the fabric of your quietest space. Let each stitch be a quiet breath, and create something that brings you peace every time you see it.
1. Capture Atmospheric Depth in Mountain Layers
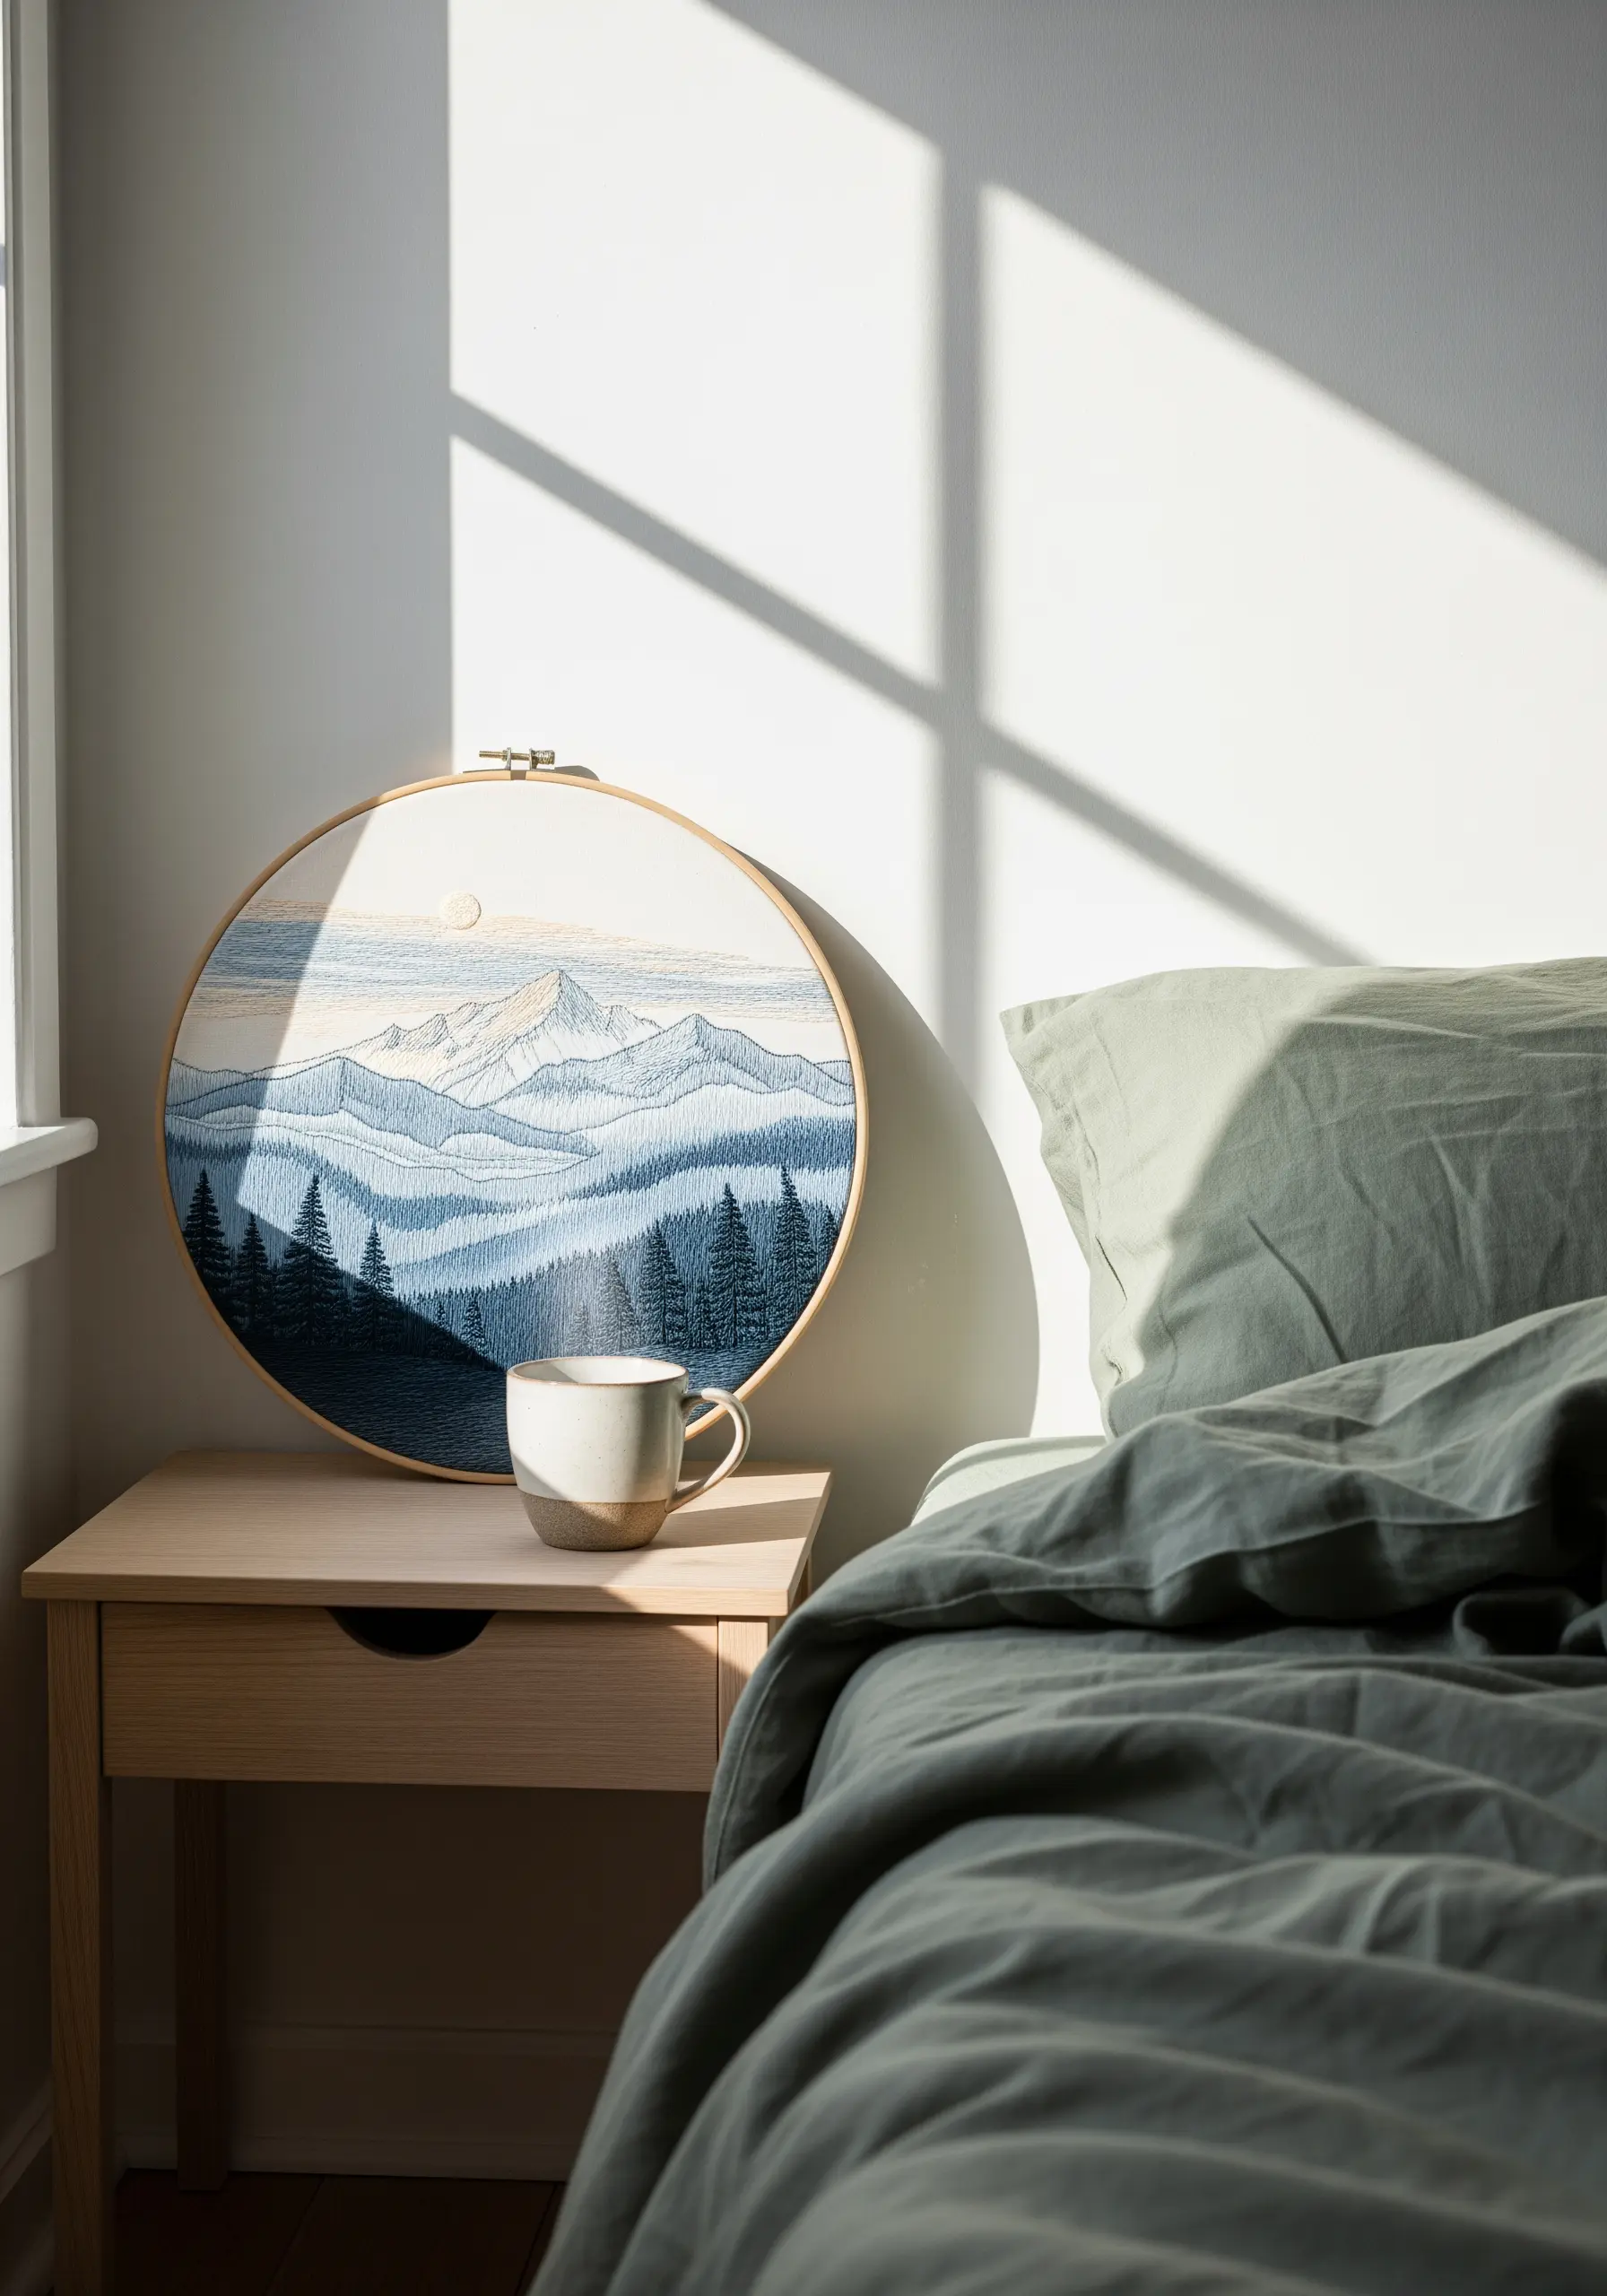
To give your mountain ranges a sense of distance and haze, focus on the direction of your stitches.
Use a simple split stitch or backstitch, but ensure all stitches in one mountain layer flow in the same horizontal direction, mimicking sedimentary lines.
For the layer behind it, stitch in a slightly different direction—perhaps a gentle upward angle—to create subtle visual separation.
Select a palette of muted blues and grays, using the lightest shades for the farthest peaks to create an effect of atmospheric perspective, making your landscape feel vast and quiet.
2. Build a Textured Woodland Floor
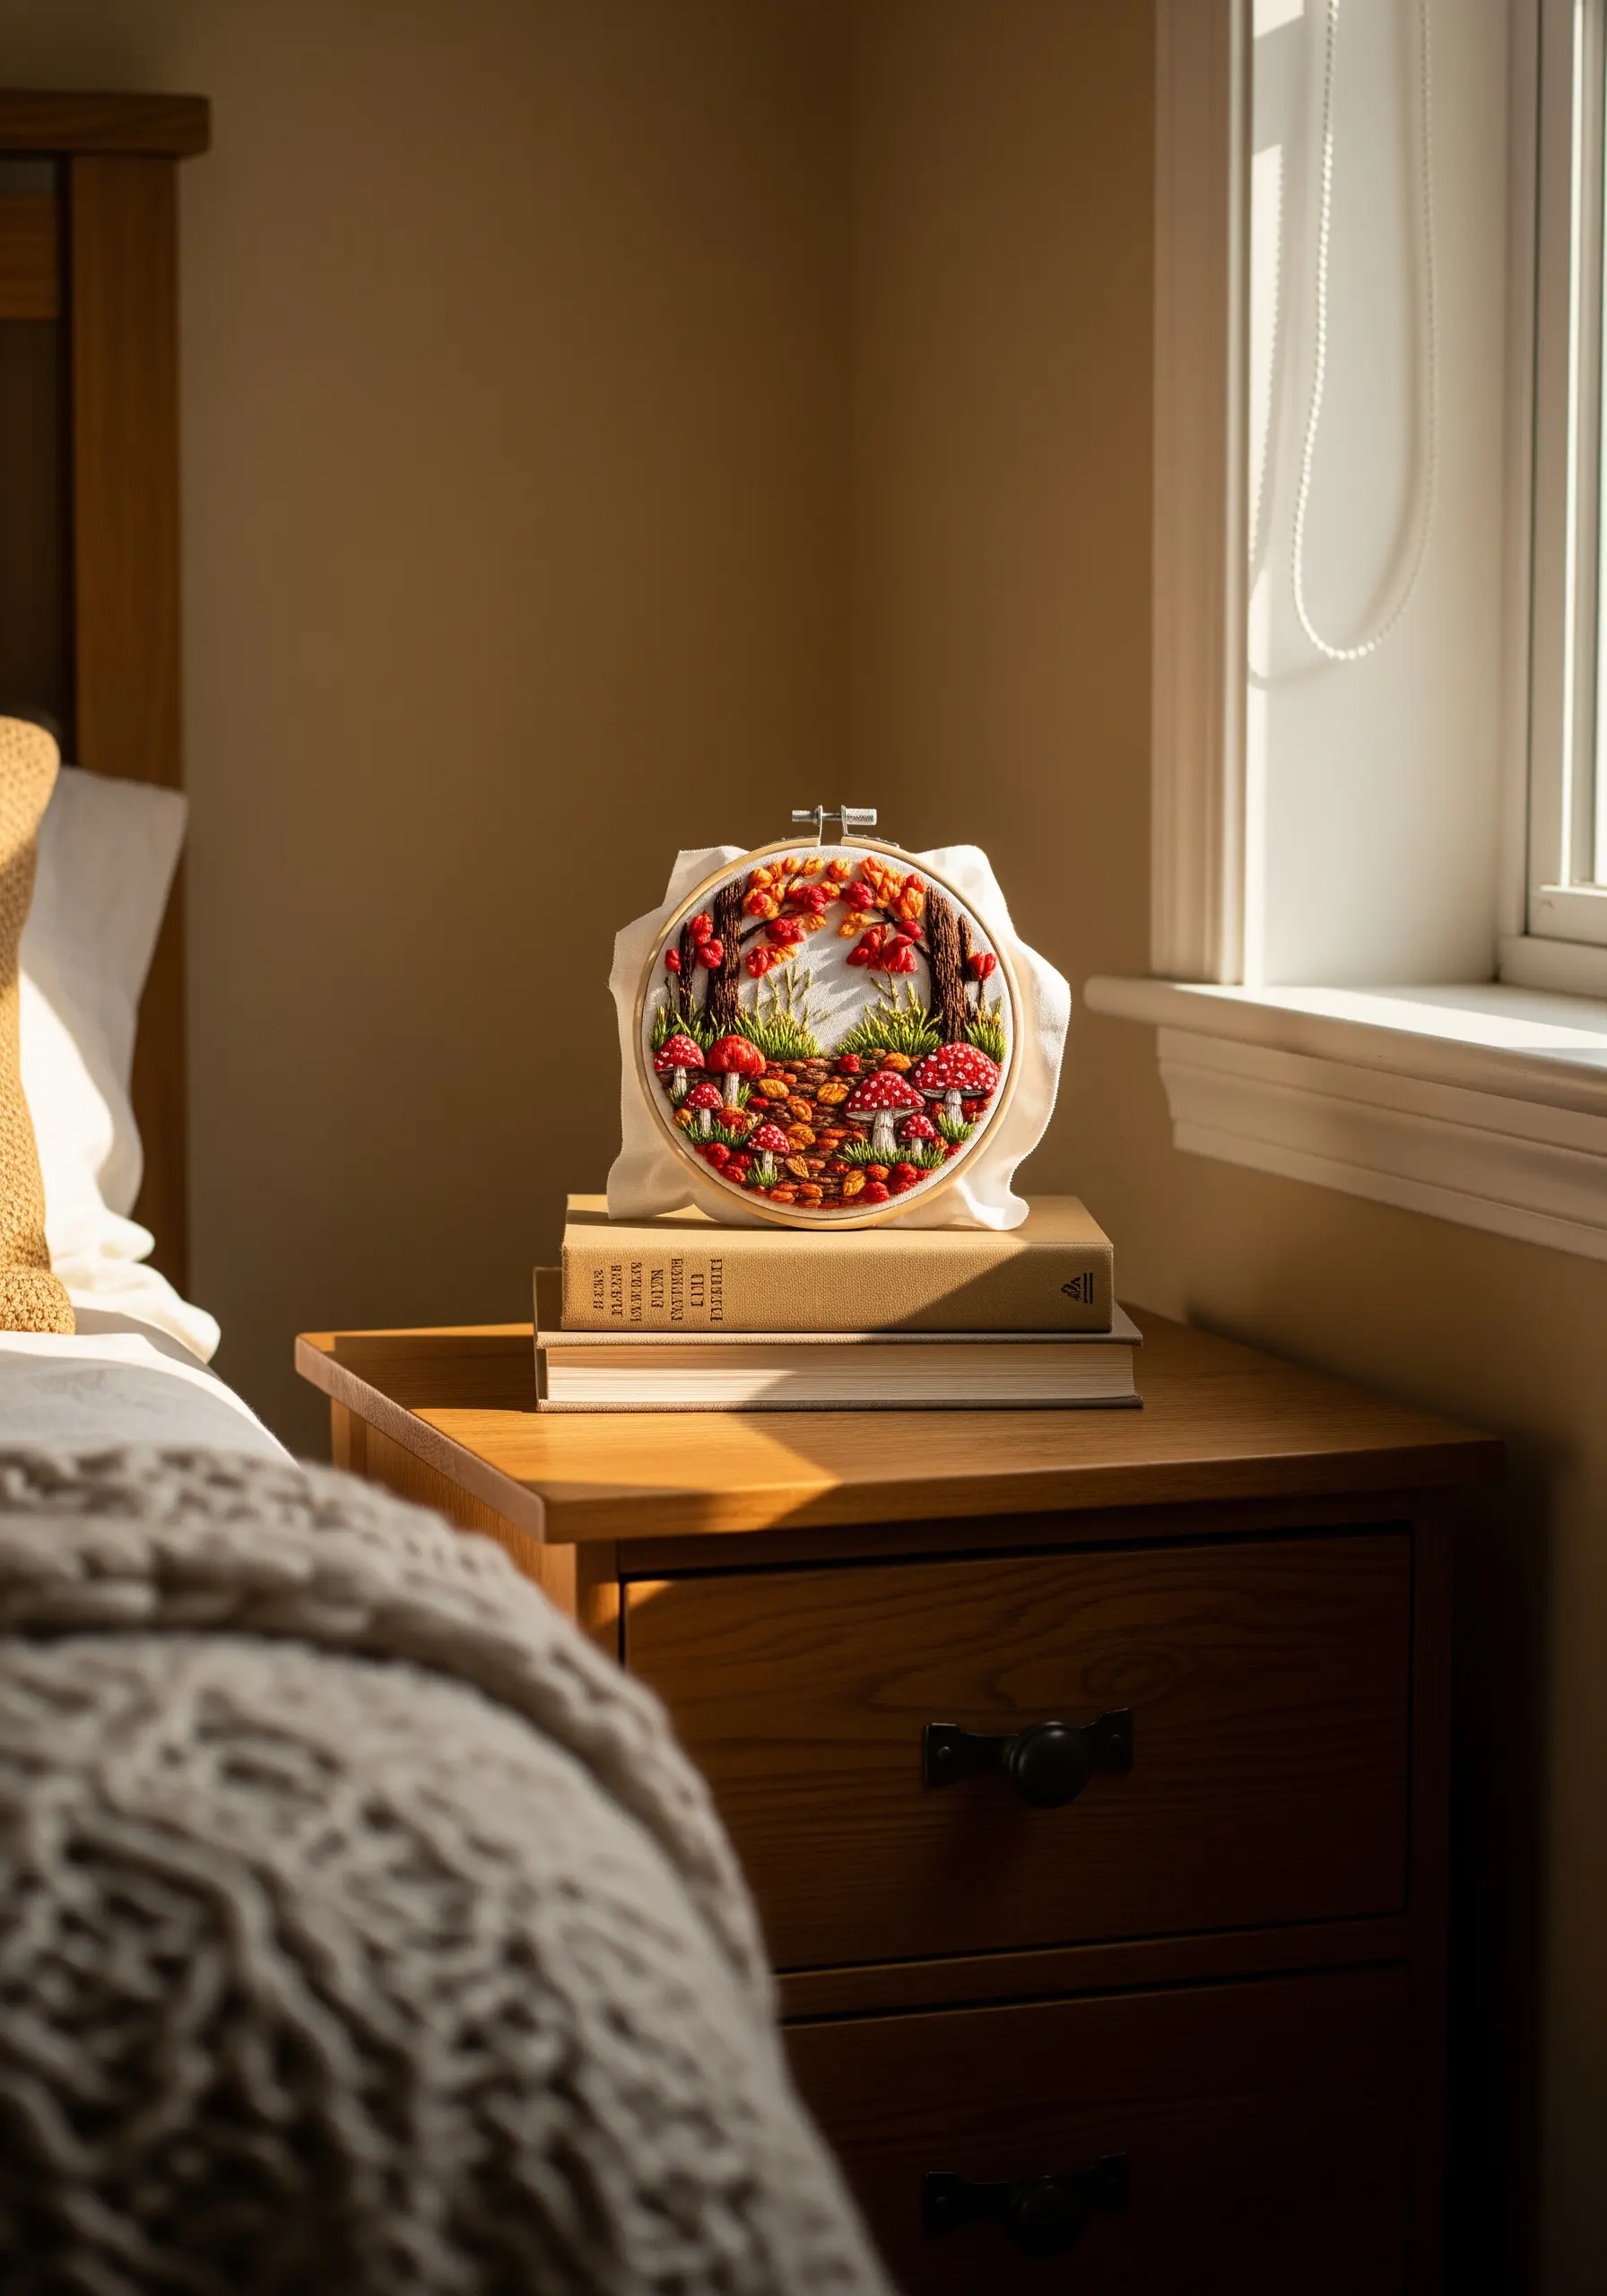
Transform a flat forest path into a three-dimensional scene by focusing on textural variety.
Use bullion knots for the curved caps of mushrooms, adjusting the number of wraps to create different sizes.
For mossy patches, stitch random French knots using two or three shades of green thread held together in the needle—this creates instant color variation and a lush feel.
Fill in the ground with a mix of seed stitches and straight stitches to suggest fallen leaves and soil, preventing any area from looking too uniform.
3. Curate a Cohesive Coastal Gallery

When displaying multiple hoops, the key to a polished look is a unified color story.
Select a core palette—here, sandy beiges, ocean blues, and seafoam whites—and distribute these colors across each piece in different proportions.
Vary the stitch density to represent different parts of the scene: dense French knots for the texture of wet sand, smooth satin stitch for calm water, and energetic, layered backstitches for crashing waves.
This method allows you to create a cohesive gallery wall that feels like a single, expansive view rather than separate pieces.
4. Embrace Elegance with Sheer Fabric

Stitching on a transparent fabric like organza or tulle instantly adds an ethereal, delicate quality to your work.
The negative space becomes part of the design, allowing light and the background to filter through, which works beautifully for motifs like this weeping willow.
Use a fine, single strand of thread to keep the lines crisp and light.
To secure your stitches without creating messy knots on the back, use tiny holding stitches that can be hidden within the main lines of your design.
5. Craft a Dimensional Cottage Garden

To prevent your floral arrangements from looking flat, incorporate stitches that create physical dimension.
Use woven wheel stitches for the roses; their raised, spiral texture makes them the focal point of the composition.
Contrast this with the flatter profile of lazy daisy stitches for the daisies and simple straight stitches for the lavender.
This mix of high and low-profile stitches adds depth and realism, giving your hoop a gentle, romantic feel that draws the eye in.
6. Paint a Sunset with Thread Gradients
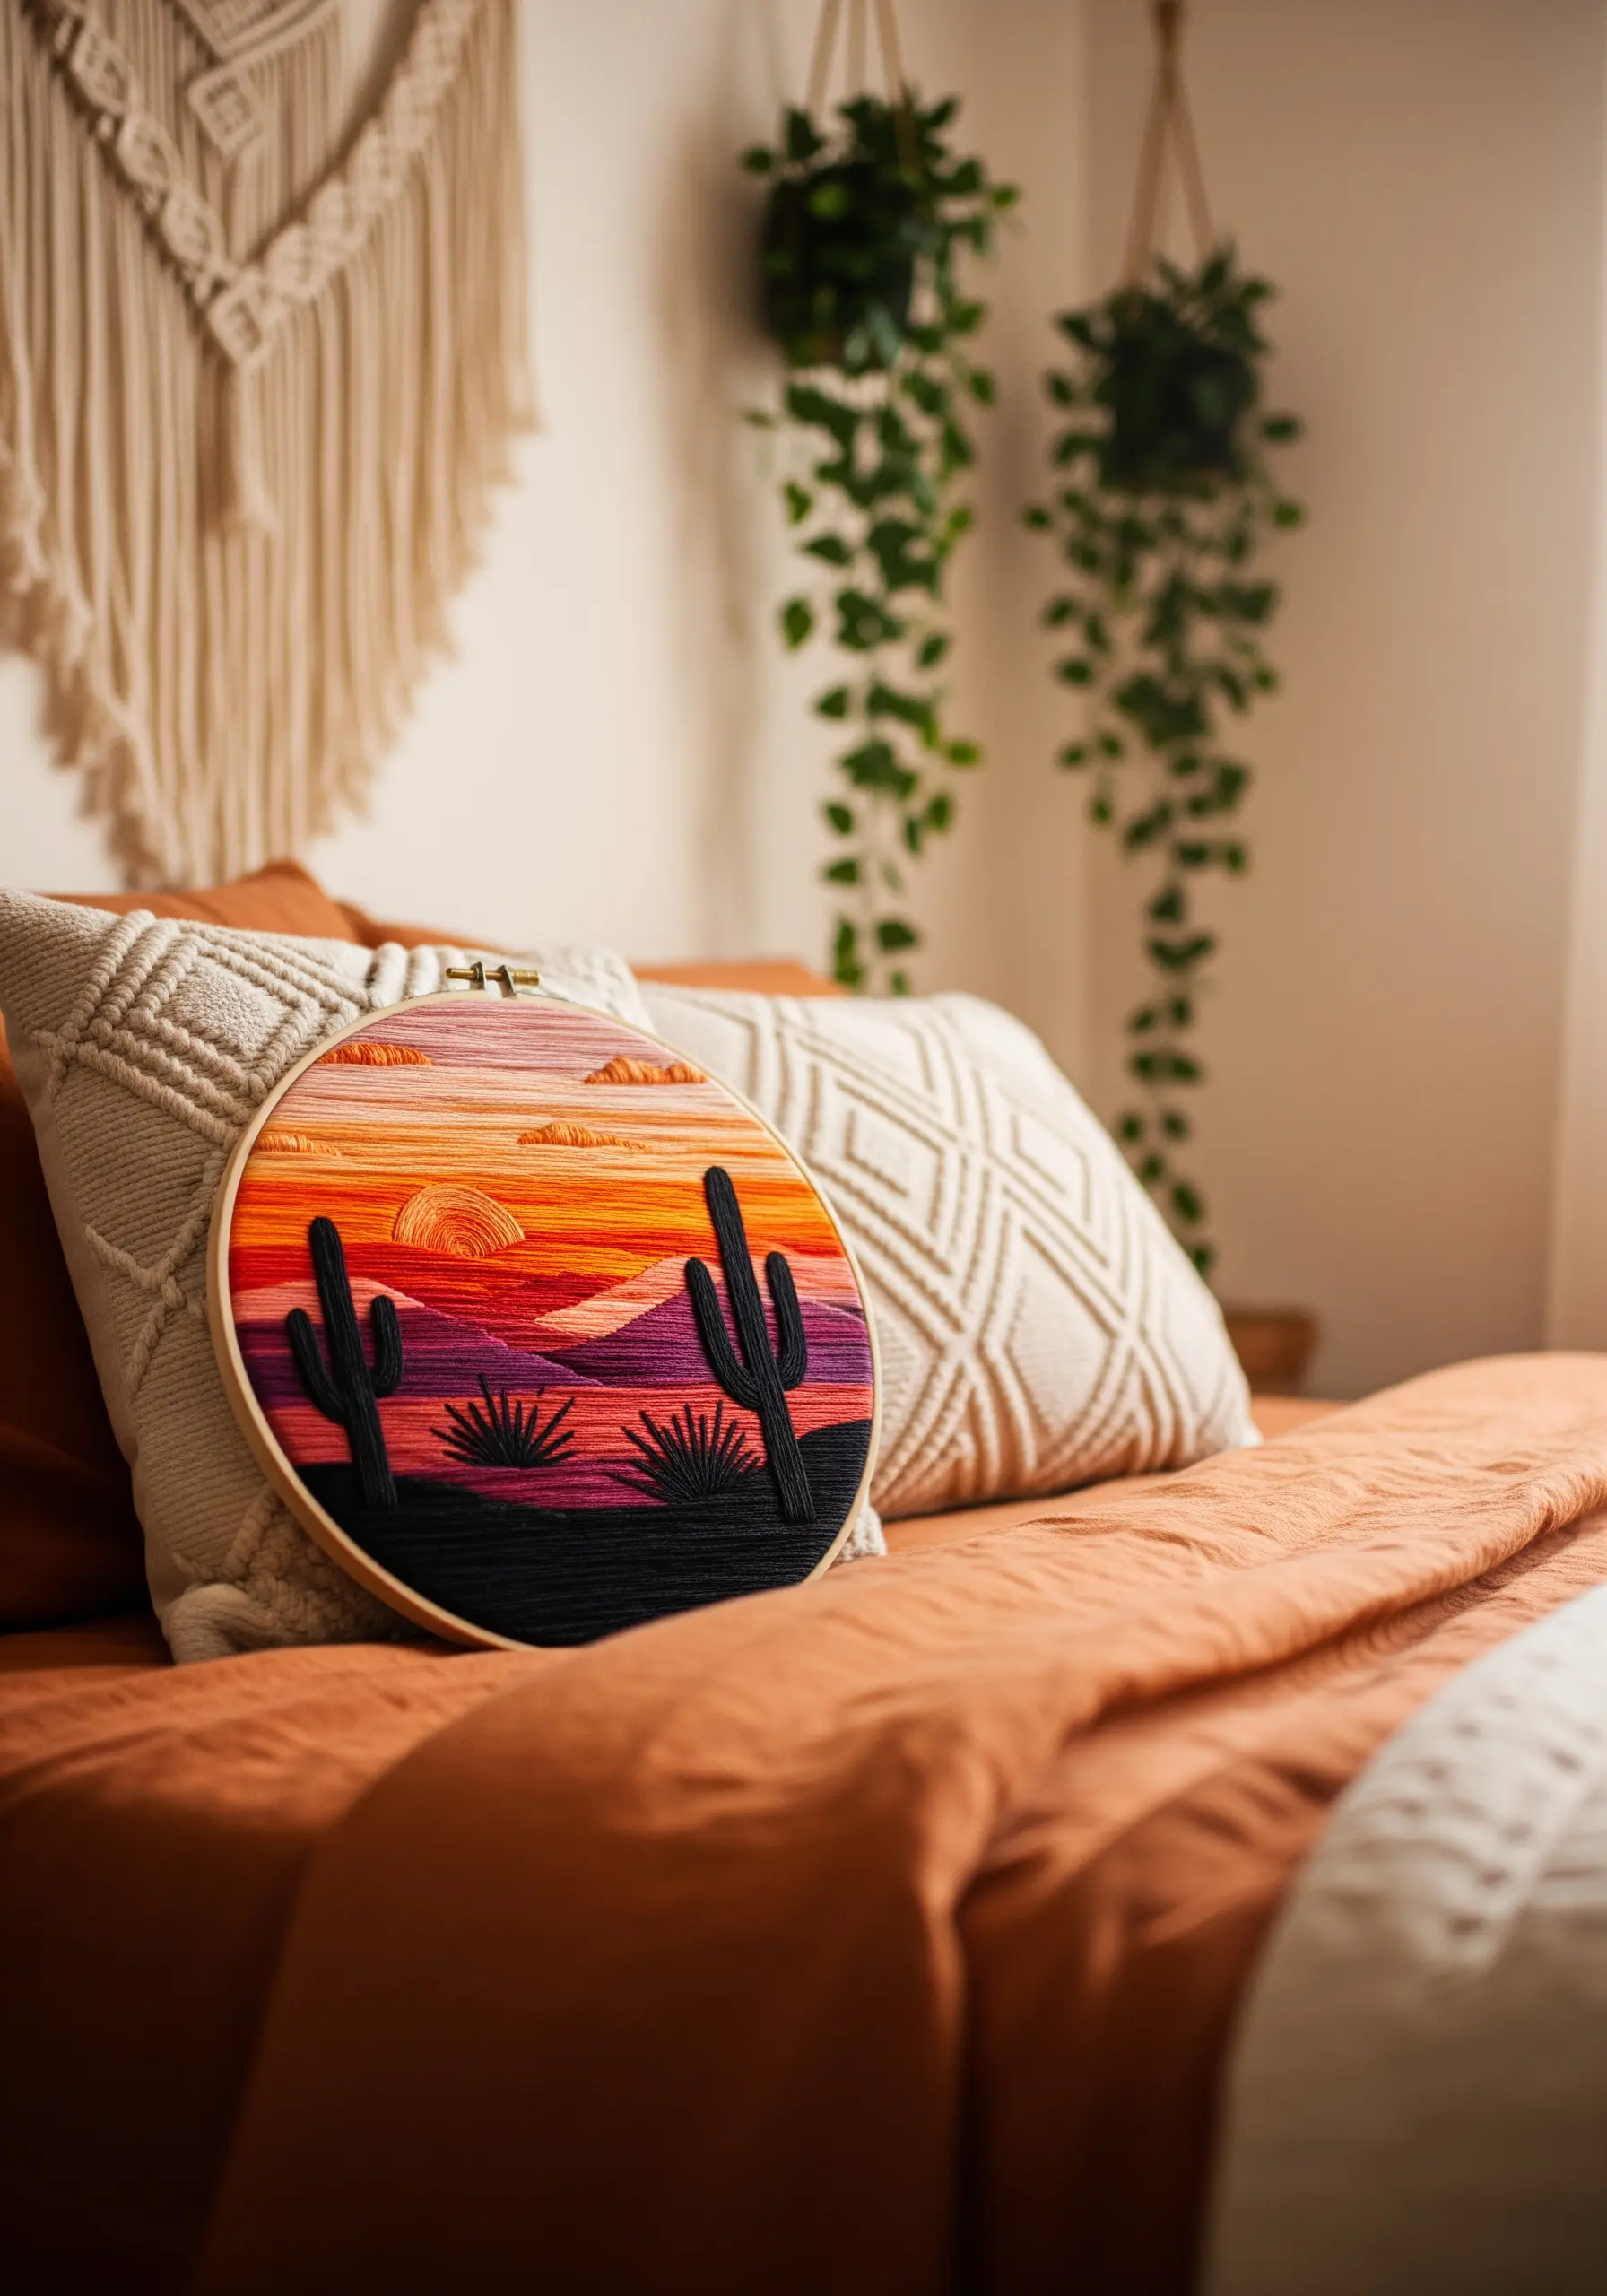
The secret to a seamless, painted-like sky is the long-and-short stitch.
Work in horizontal bands of color, starting with the lightest shade at the horizon.
As you introduce a new color, ensure your stitches from the new row overlap and interlock with the previous one at varying lengths, just like blending paint.
Using single-strand floss gives you the finest control for a smooth transition, turning simple stitches into abstract thread landscapes with emotional depth.
7. Convey Softness with Minimalist Texture
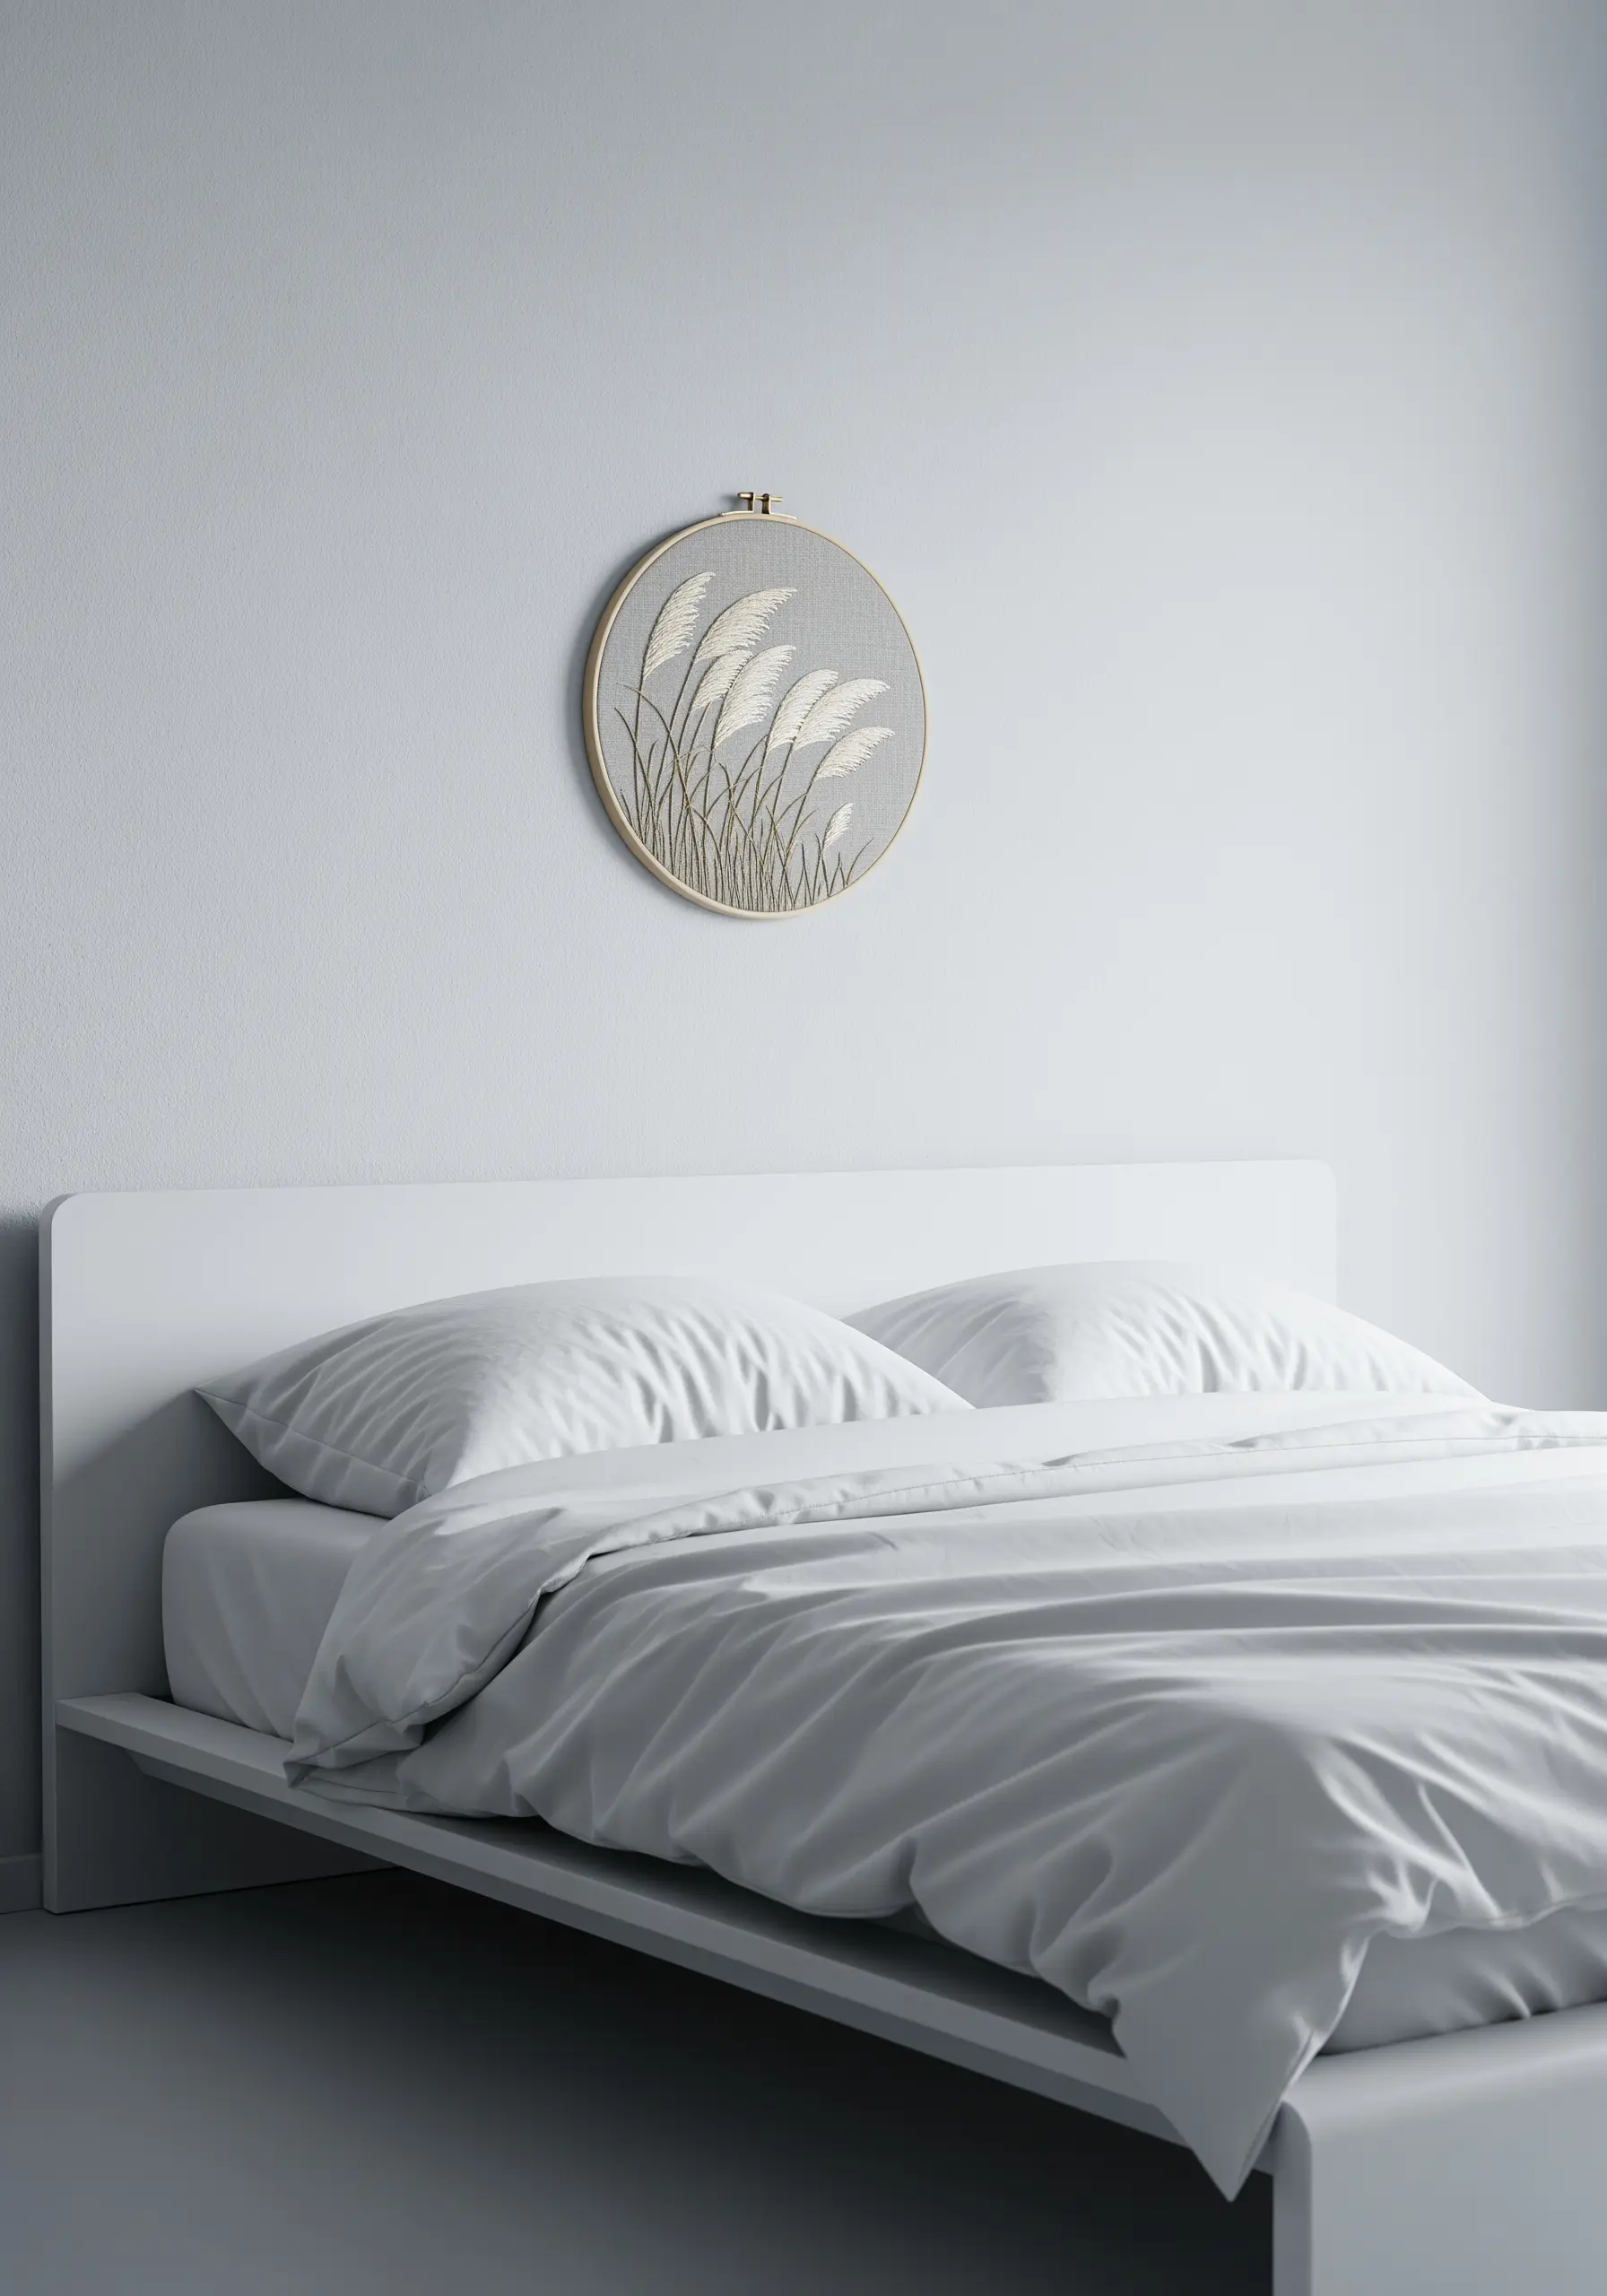
You don’t need dozens of colors to create an impactful piece; sometimes, texture is all you need.
To capture the feathery quality of pampas grass, use a soft, thicker thread like a single ply of merino wool or a fluffy cotton floss.
Use long, slightly curved satin stitches for the plumes, layering them loosely to create volume.
Paired with thin, sharp stem stitches for the stalks, this textural contrast creates a piece of minimal embroidery using texture instead of color for a serene, modern aesthetic.
8. Stitch a Luminous, Spiraling Moon

To give your embroidered moon a soft, otherworldly glow, stitch it in a continuous spiral.
Start from the center with a single stitch and work your way outwards using a split stitch or chain stitch, following a circular path.
This technique creates a subtle texture that catches the light differently than a standard satin stitch.
Intersperse a single strand of fine metallic or silky white thread with your main cotton floss to add a hint of shimmer, making your moon truly luminous against the dark fabric.
9. Achieve Realism with Thread Painting

For lifelike animal portraits, thread painting is your go-to technique.
Using a single strand of floss, fill areas with long-and-short stitches, always following the natural direction of fur growth for realism.
To create soft shading, blend two or three similar tones in one area by staggering the stitches where the colors meet.
This detailed work transforms your stitching from a simple outline into a vibrant, soulful portrait, perfect for adorable forest animal embroidery ideas.
10. Create a Silhouetted Meadow with Light

This design leverages the power of backlighting to create a peaceful, hazy morning atmosphere.
Stitch a simple wildflower silhouette on a semi-sheer fabric like cotton voile or linen gauze.
Use single-strand backstitch for delicate stems and lazy daisy stitches for simple blossoms.
When placed in a window, the morning light filters through the fabric, blurring the details and turning your embroidery into a dreamy, calming silhouette.
11. Master Reflections with Mirrored Stitching
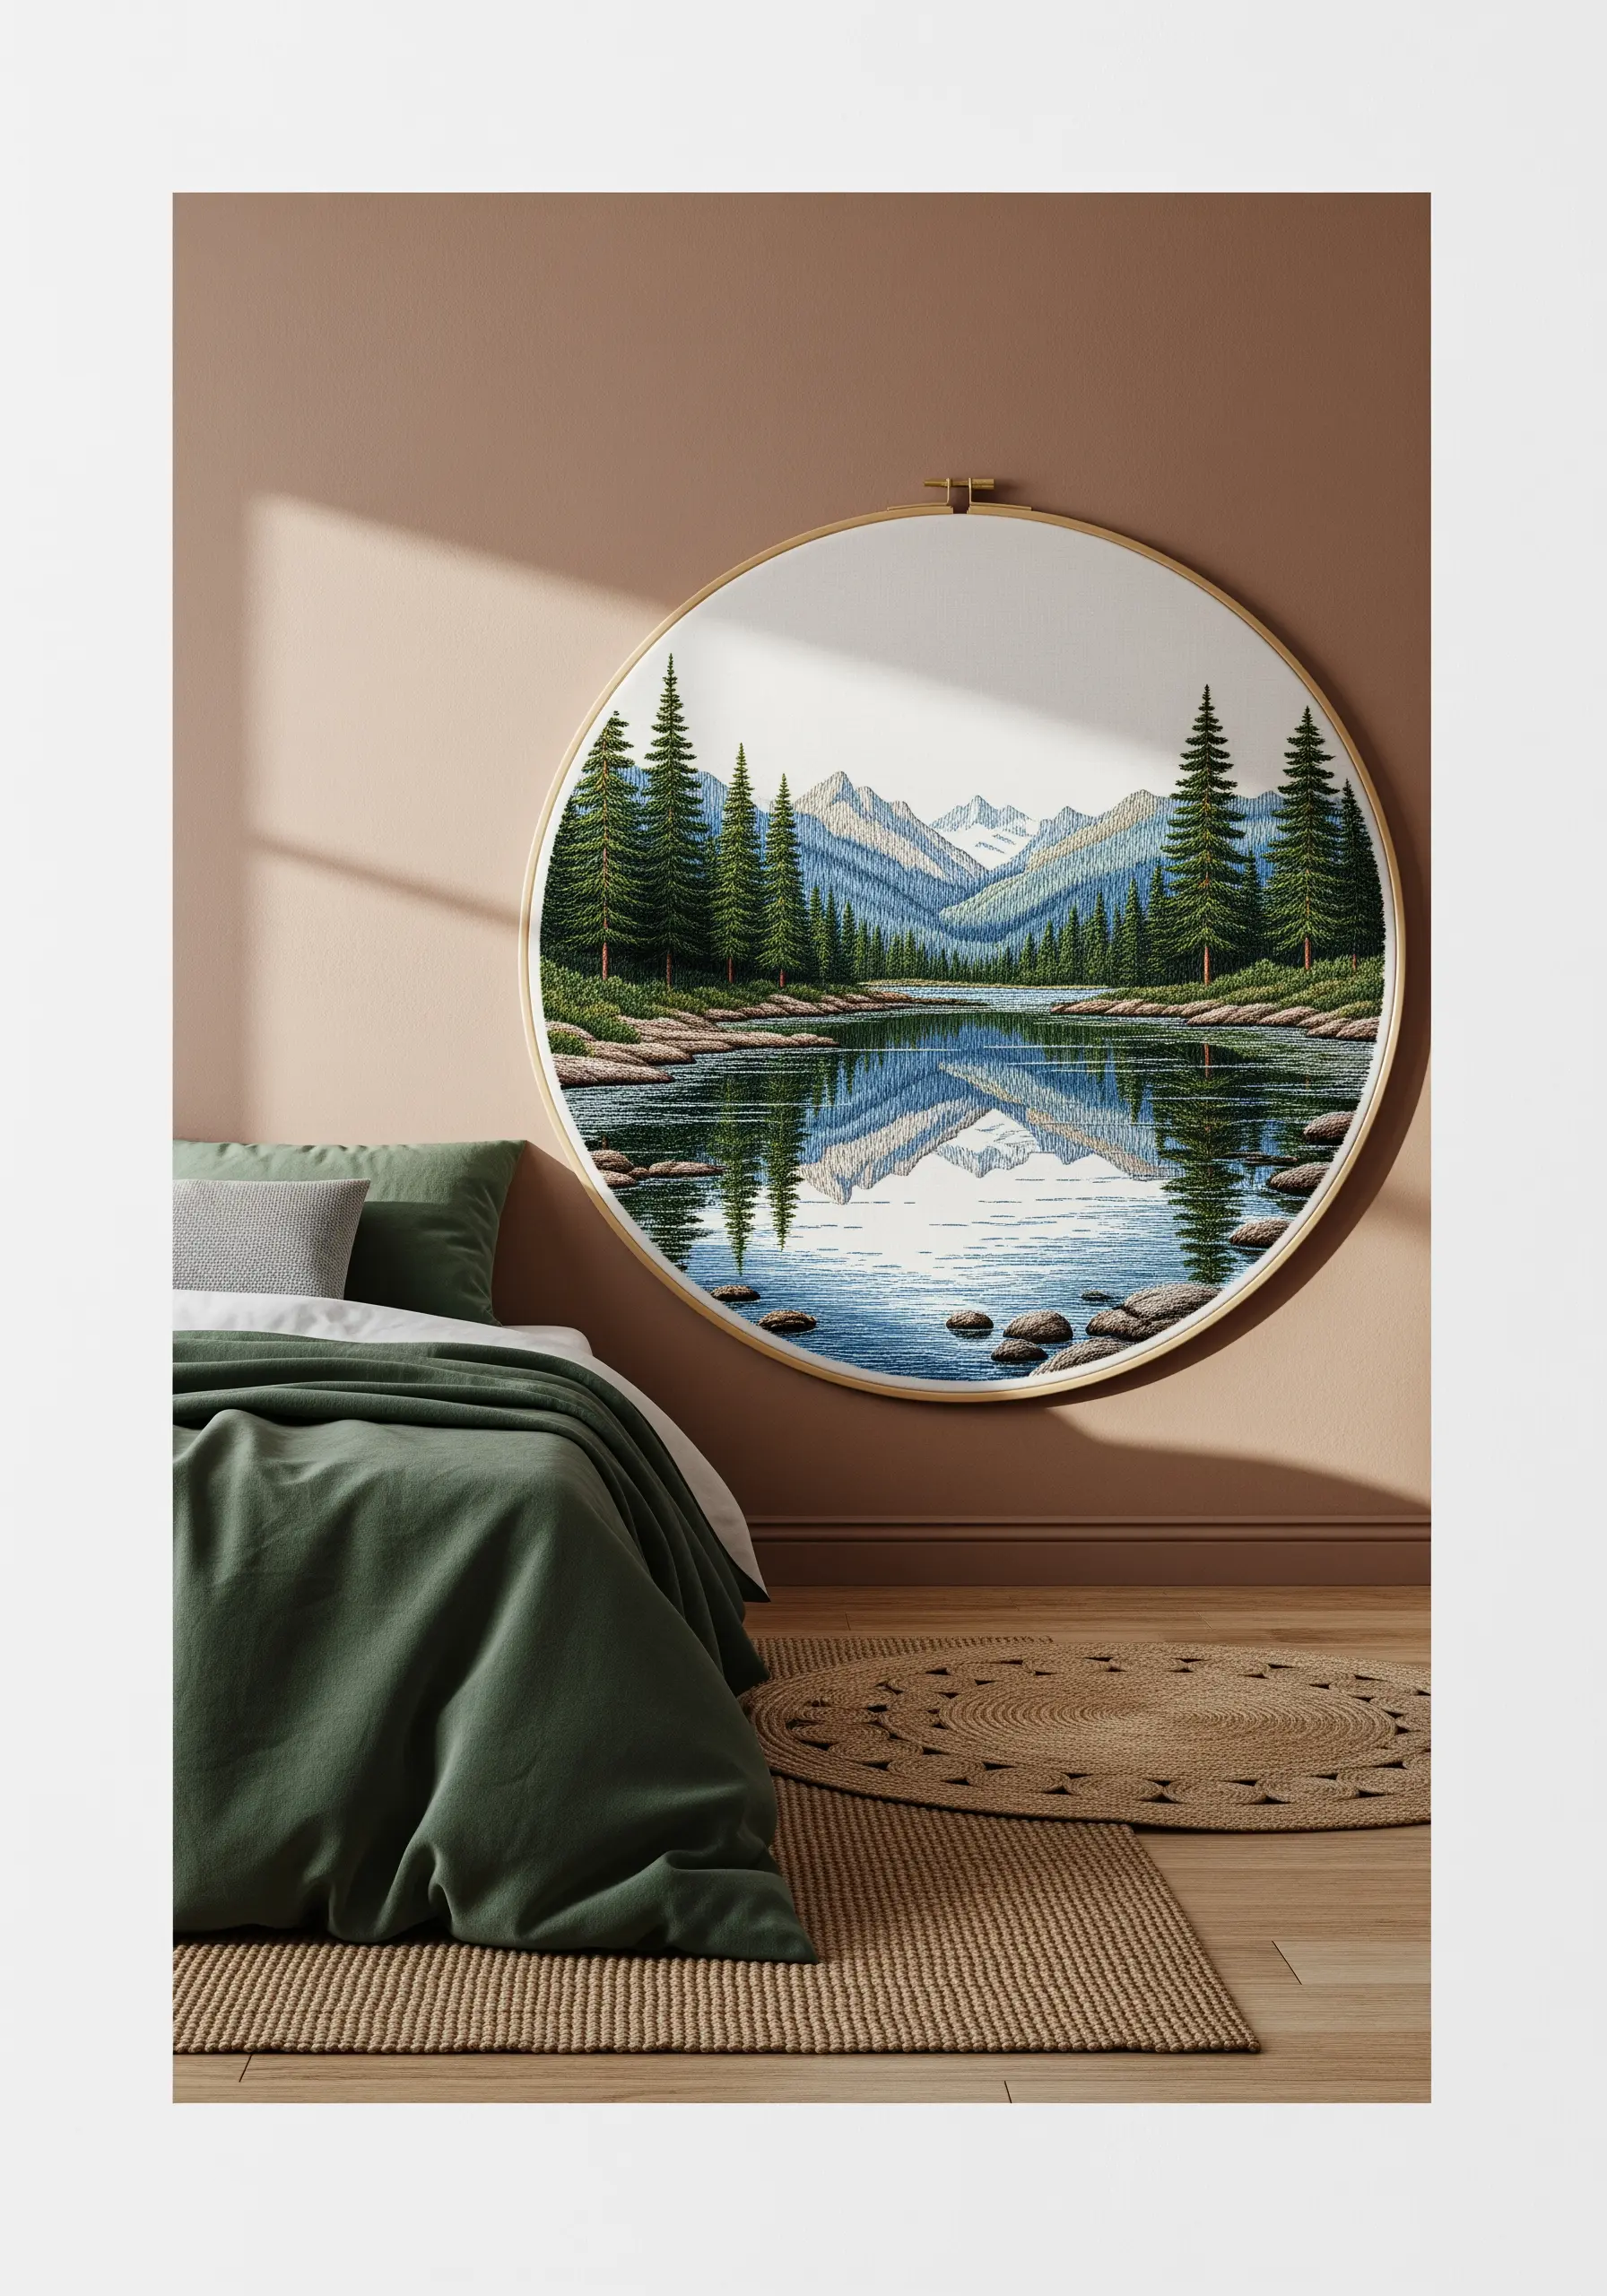
The key to a convincing water reflection is to mirror not just the shapes, but also the stitch direction of the landscape above.
If your mountains are stitched with horizontal satin stitches, use the same technique for their reflection.
To create the illusion of water, slightly break up the stitches in the reflection with short, vertical straight stitches using a slightly lighter or darker shade.
Weave in a single strand of silver metallic thread to mimic the glint of light on the water’s surface, completing the illusion of depth.
12. Build Delicate 3D Cherry Blossoms

Give your floral embroidery a delicate, three-dimensional lift that feels true to nature.
Use detached chain stitches (lazy daisies) for individual petals, leaving them slightly loose to allow them to lift off the fabric.
Cluster five of these stitches together to form a single blossom, and anchor the center with a single French knot in a contrasting color.
This technique is quick, effective, and makes your subtle floral embroidery motifs feel as if they are truly blooming.
13. Capture a Storm’s Energy with Dynamic Lines
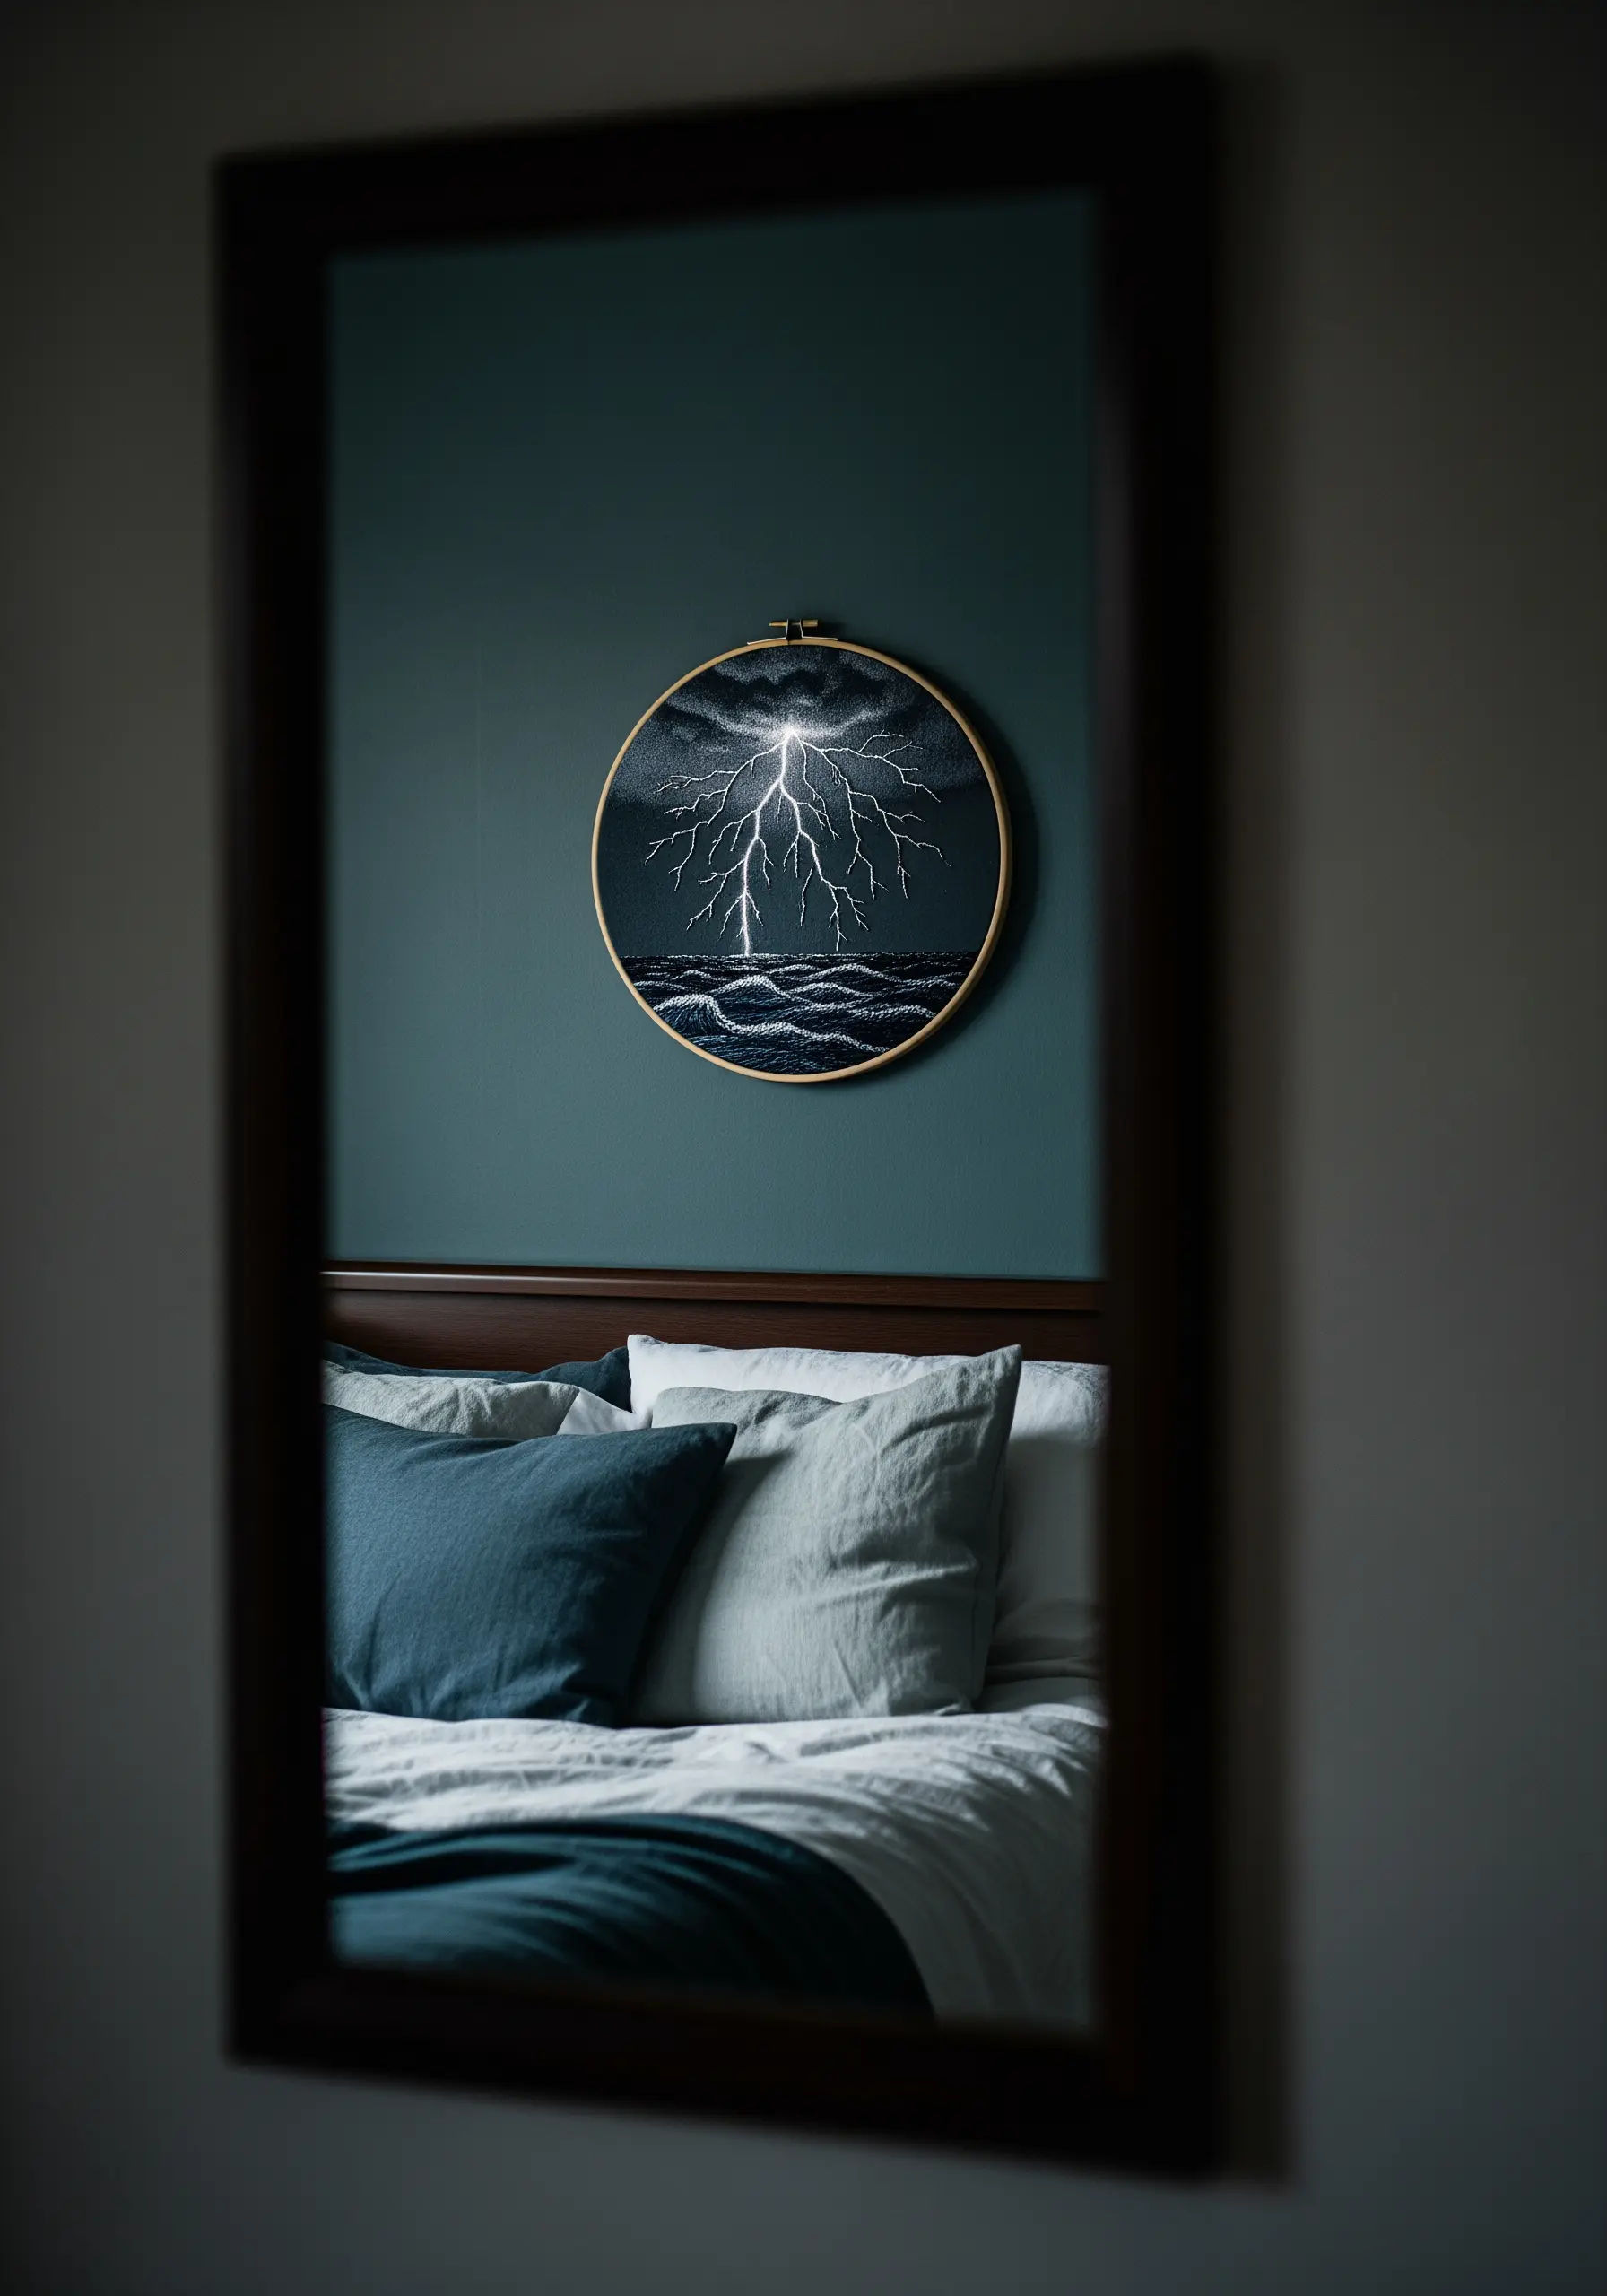
To embroider something as dynamic as lightning, your thread choice and stitch variety are crucial.
Work on a dark, high-contrast fabric like black or navy linen.
Use a bright white or silver metallic floss and vary the number of strands you use—a thick central bolt with six strands, branching off into thinner bolts of two or three strands.
Combine sharp, straight stitches with jagged split stitches to create a sense of unpredictable, crackling energy.
14. Stitch Perfect Lavender with a Simple Trick

Recreating the unique shape of lavender is surprisingly simple and creates beautiful texture.
First, create the central stalk with a single straight stitch.
Then, work small lazy daisy stitches over the top of the stalk on both sides, angling them slightly upwards.
This combination perfectly mimics the shape of lavender buds clinging to the stem and results in a full, textured sprig that looks complex but is beautifully efficient to stitch, perfect for lavender-inspired embroidery designs.
15. Weave a Pastoral Scene with Textural Contrast
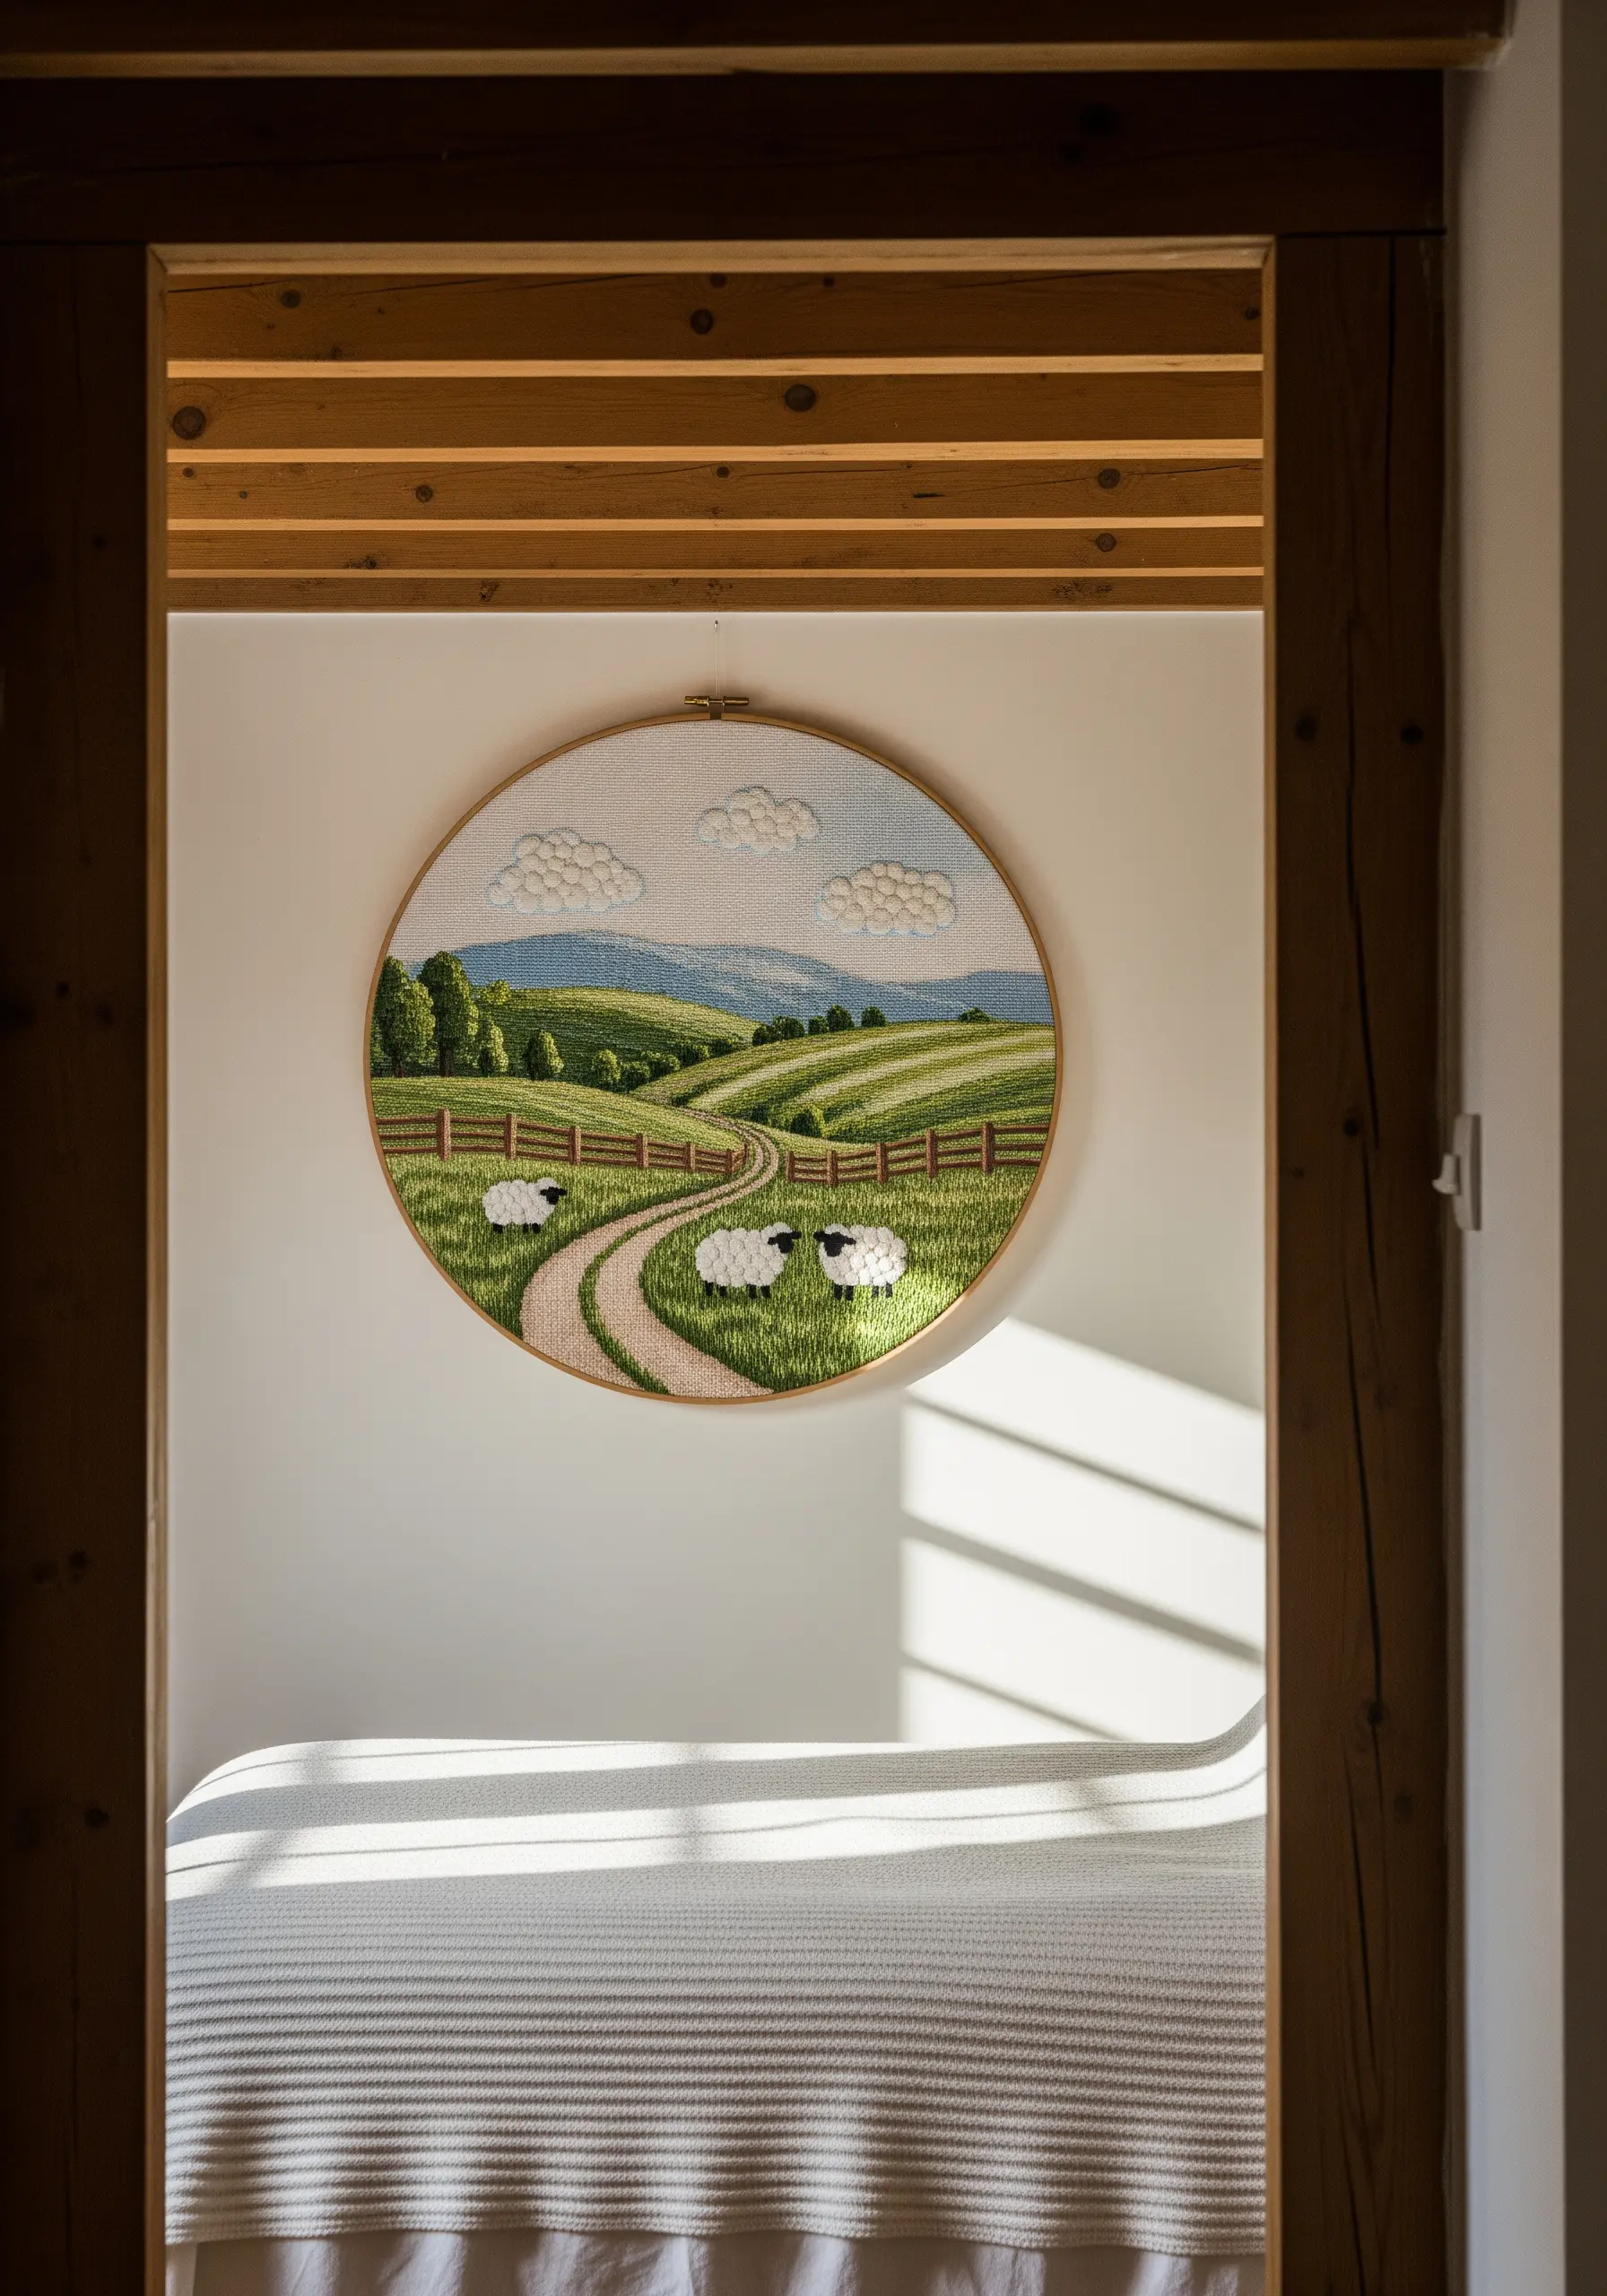
Create a charming, storybook landscape by exaggerating the textures of different elements.
Stitch the sheep’s fleece with dense, fluffy French knots or turkey work to make them pop right off the fabric.
Contrast this with smooth, flat satin stitches for the rolling green hills and a tidy backstitch for the fence lines.
This intentional use of varied textures guides the eye through the scene and gives the entire piece a tactile, whimsical quality.
16. Elevate Designs with Graphic Sun Rays
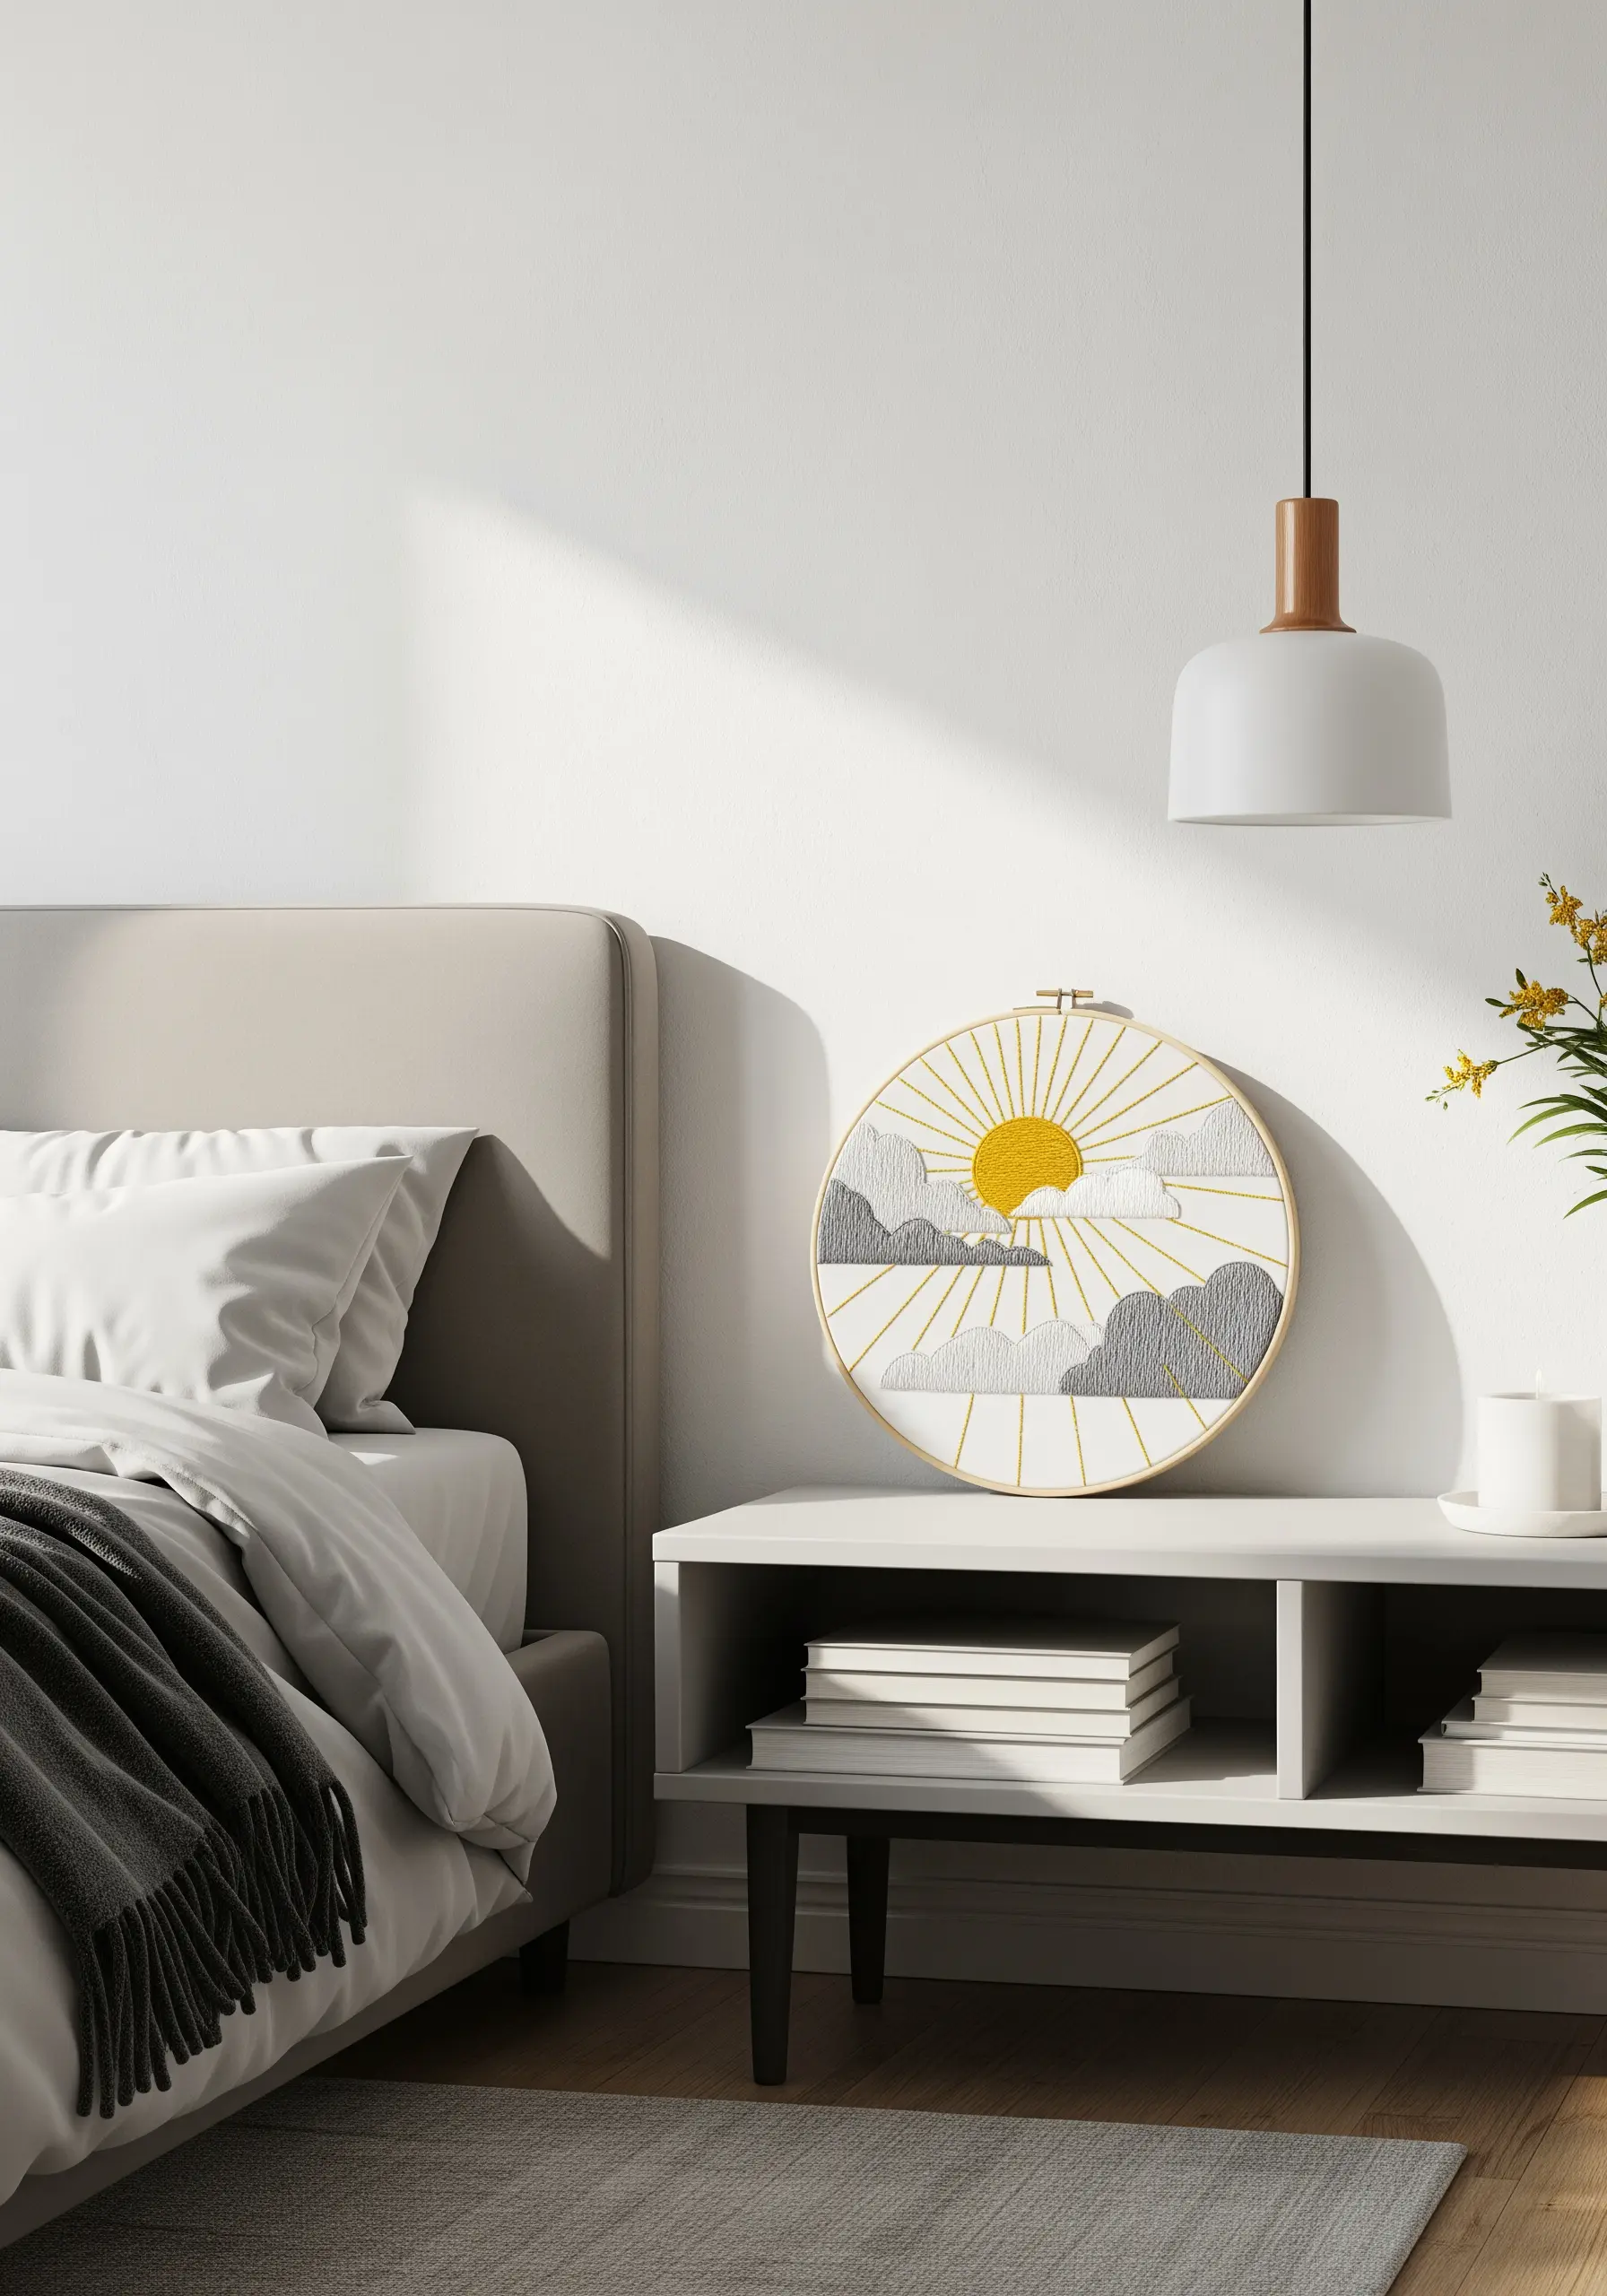
In a minimalist design, every stitch counts. Achieve a clean, graphic look by focusing on precision.
Use long, perfectly straight stitches for the sun’s rays, ensuring each one is taut and evenly spaced.
A hoop stand can be invaluable here, as it frees both hands to guide the needle for maximum accuracy.
Fill the sun with a dense, smooth satin stitch, outlining it first with a split stitch to create a crisp, defined edge that makes your graphic elements truly shine.
17. Layer Foliage for a Lush Forest Floor

To create the dense, overlapping look of a fern gully, think in layers.
Start by stitching the ferns in the background using a slightly darker shade of green.
Once complete, stitch the foreground ferns directly over the top of the background layer, using a brighter green.
This physical layering of thread, combined with the color difference, creates immediate depth and makes your forest feel lush and immersive. It is a fantastic way to create a rich, layered effect with simple stitches.
18. Find Expression in Abstract Simplicity
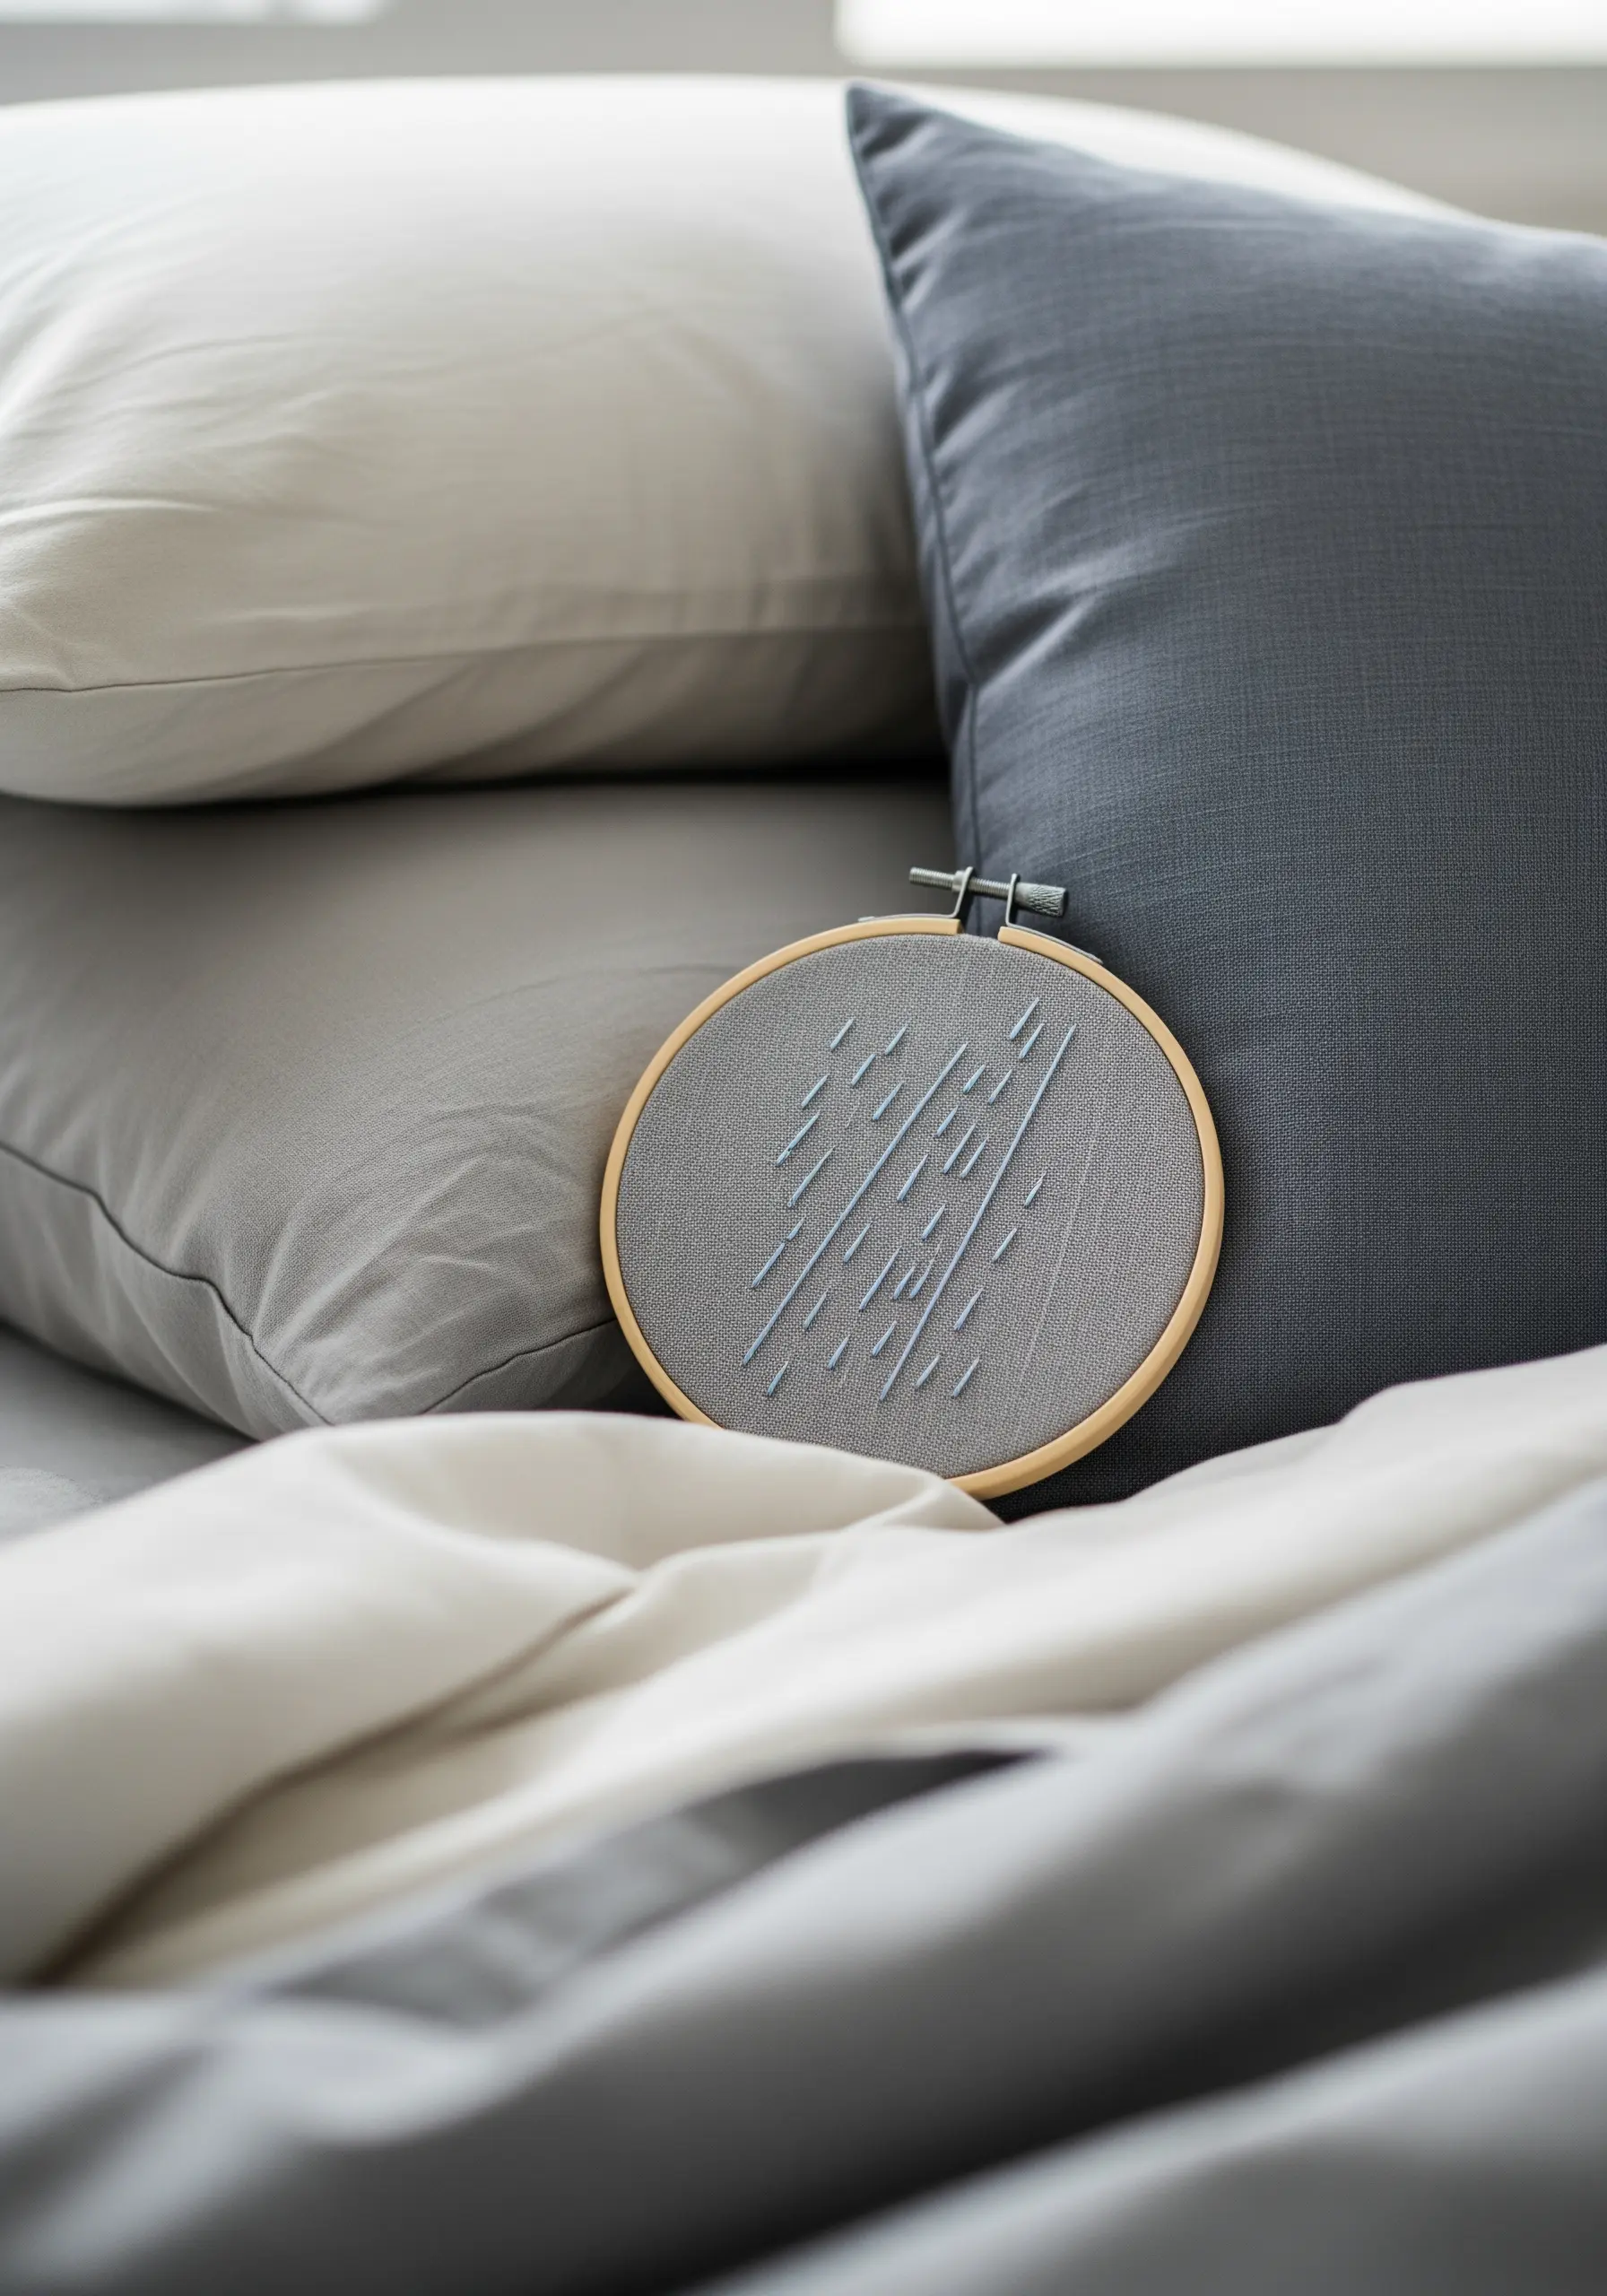
An abstract design can be just as evocative as a detailed landscape.
This piece captures the feeling of a quiet rain shower using only angled straight stitches.
The magic is in the composition: vary the length, angle, and spacing of your stitches to create a sense of movement and rhythm.
Using a single color on a neutral background turns the focus entirely to form and flow, proving that you don’t need complexity for a powerful, minimalist expression.
19. Capture the Glisten of a Winter Sunset

The beauty of a snowy landscape is in the way it reflects light.
After stitching your sunset sky with soft, blended long-and-short stitches, focus on the snow.
Use a base of white floss and then scatter tiny seed stitches and French knots throughout using an iridescent or pearlescent blending filament.
This subtle addition will catch the light and create a magical, glittering effect that perfectly captures the feeling of untouched, sparkling snow at dusk.
20. Sculpt a River Landscape with Knots

To create a tactile, topographical feel for an aerial landscape, rely on the French knot.
Use a dense field of French knots in varying shades of green and brown to build up the riverbanks, creating a bumpy, organic texture.
For the river, switch to smooth, flowing long stitches that follow the water’s curves, perhaps blending blues, greens, and white for depth and movement.
This stark contrast between the knotted land and smooth water creates a dynamic, visually engaging piece of earth-inspired embroidery.
21. Detail Realistic Birch Bark Texture
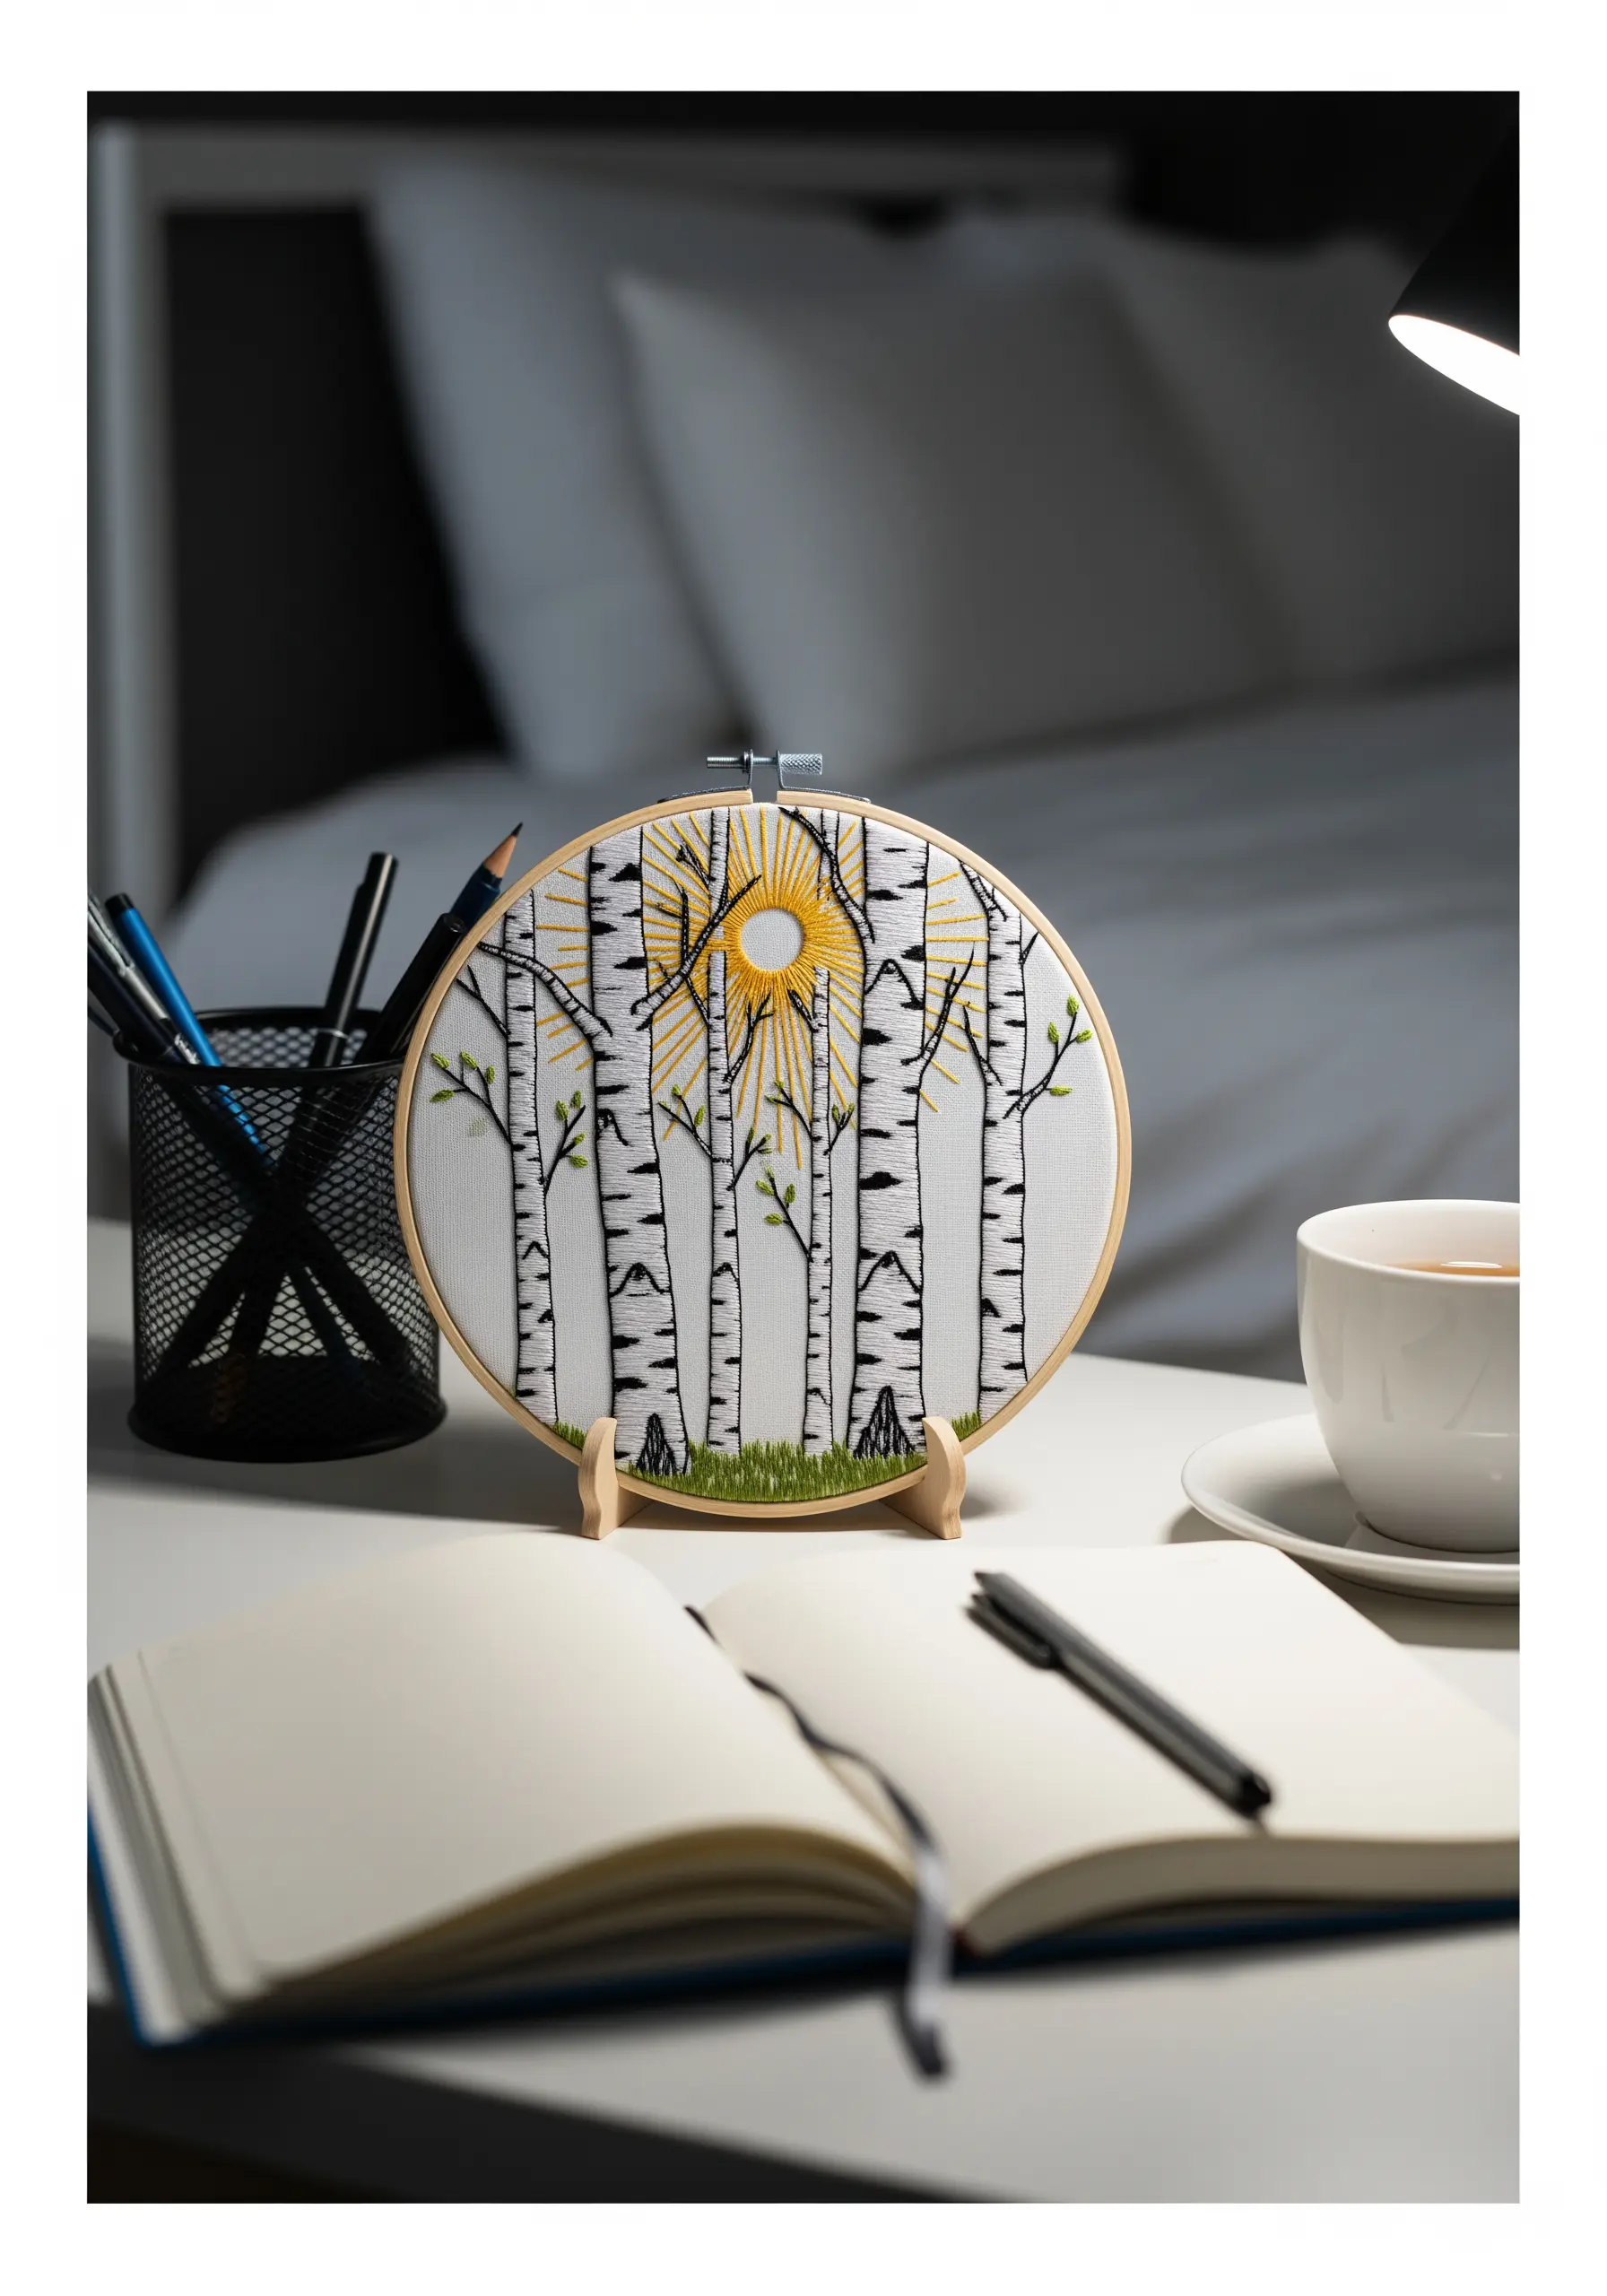
The distinct character of birch trees lies in their unique bark.
First, fill the tree trunks with vertical satin stitches in an off-white or very light grey thread.
Then, using a single strand of black or dark grey floss, add short, horizontal straight stitches across the trunks.
Vary the length and spacing of these dark stitches, adding small knots and ‘V’ shapes where branches emerge. This simple layering technique instantly creates the recognizable, papery texture of birch bark.
22. Define Crisp Edges for Bold Motifs
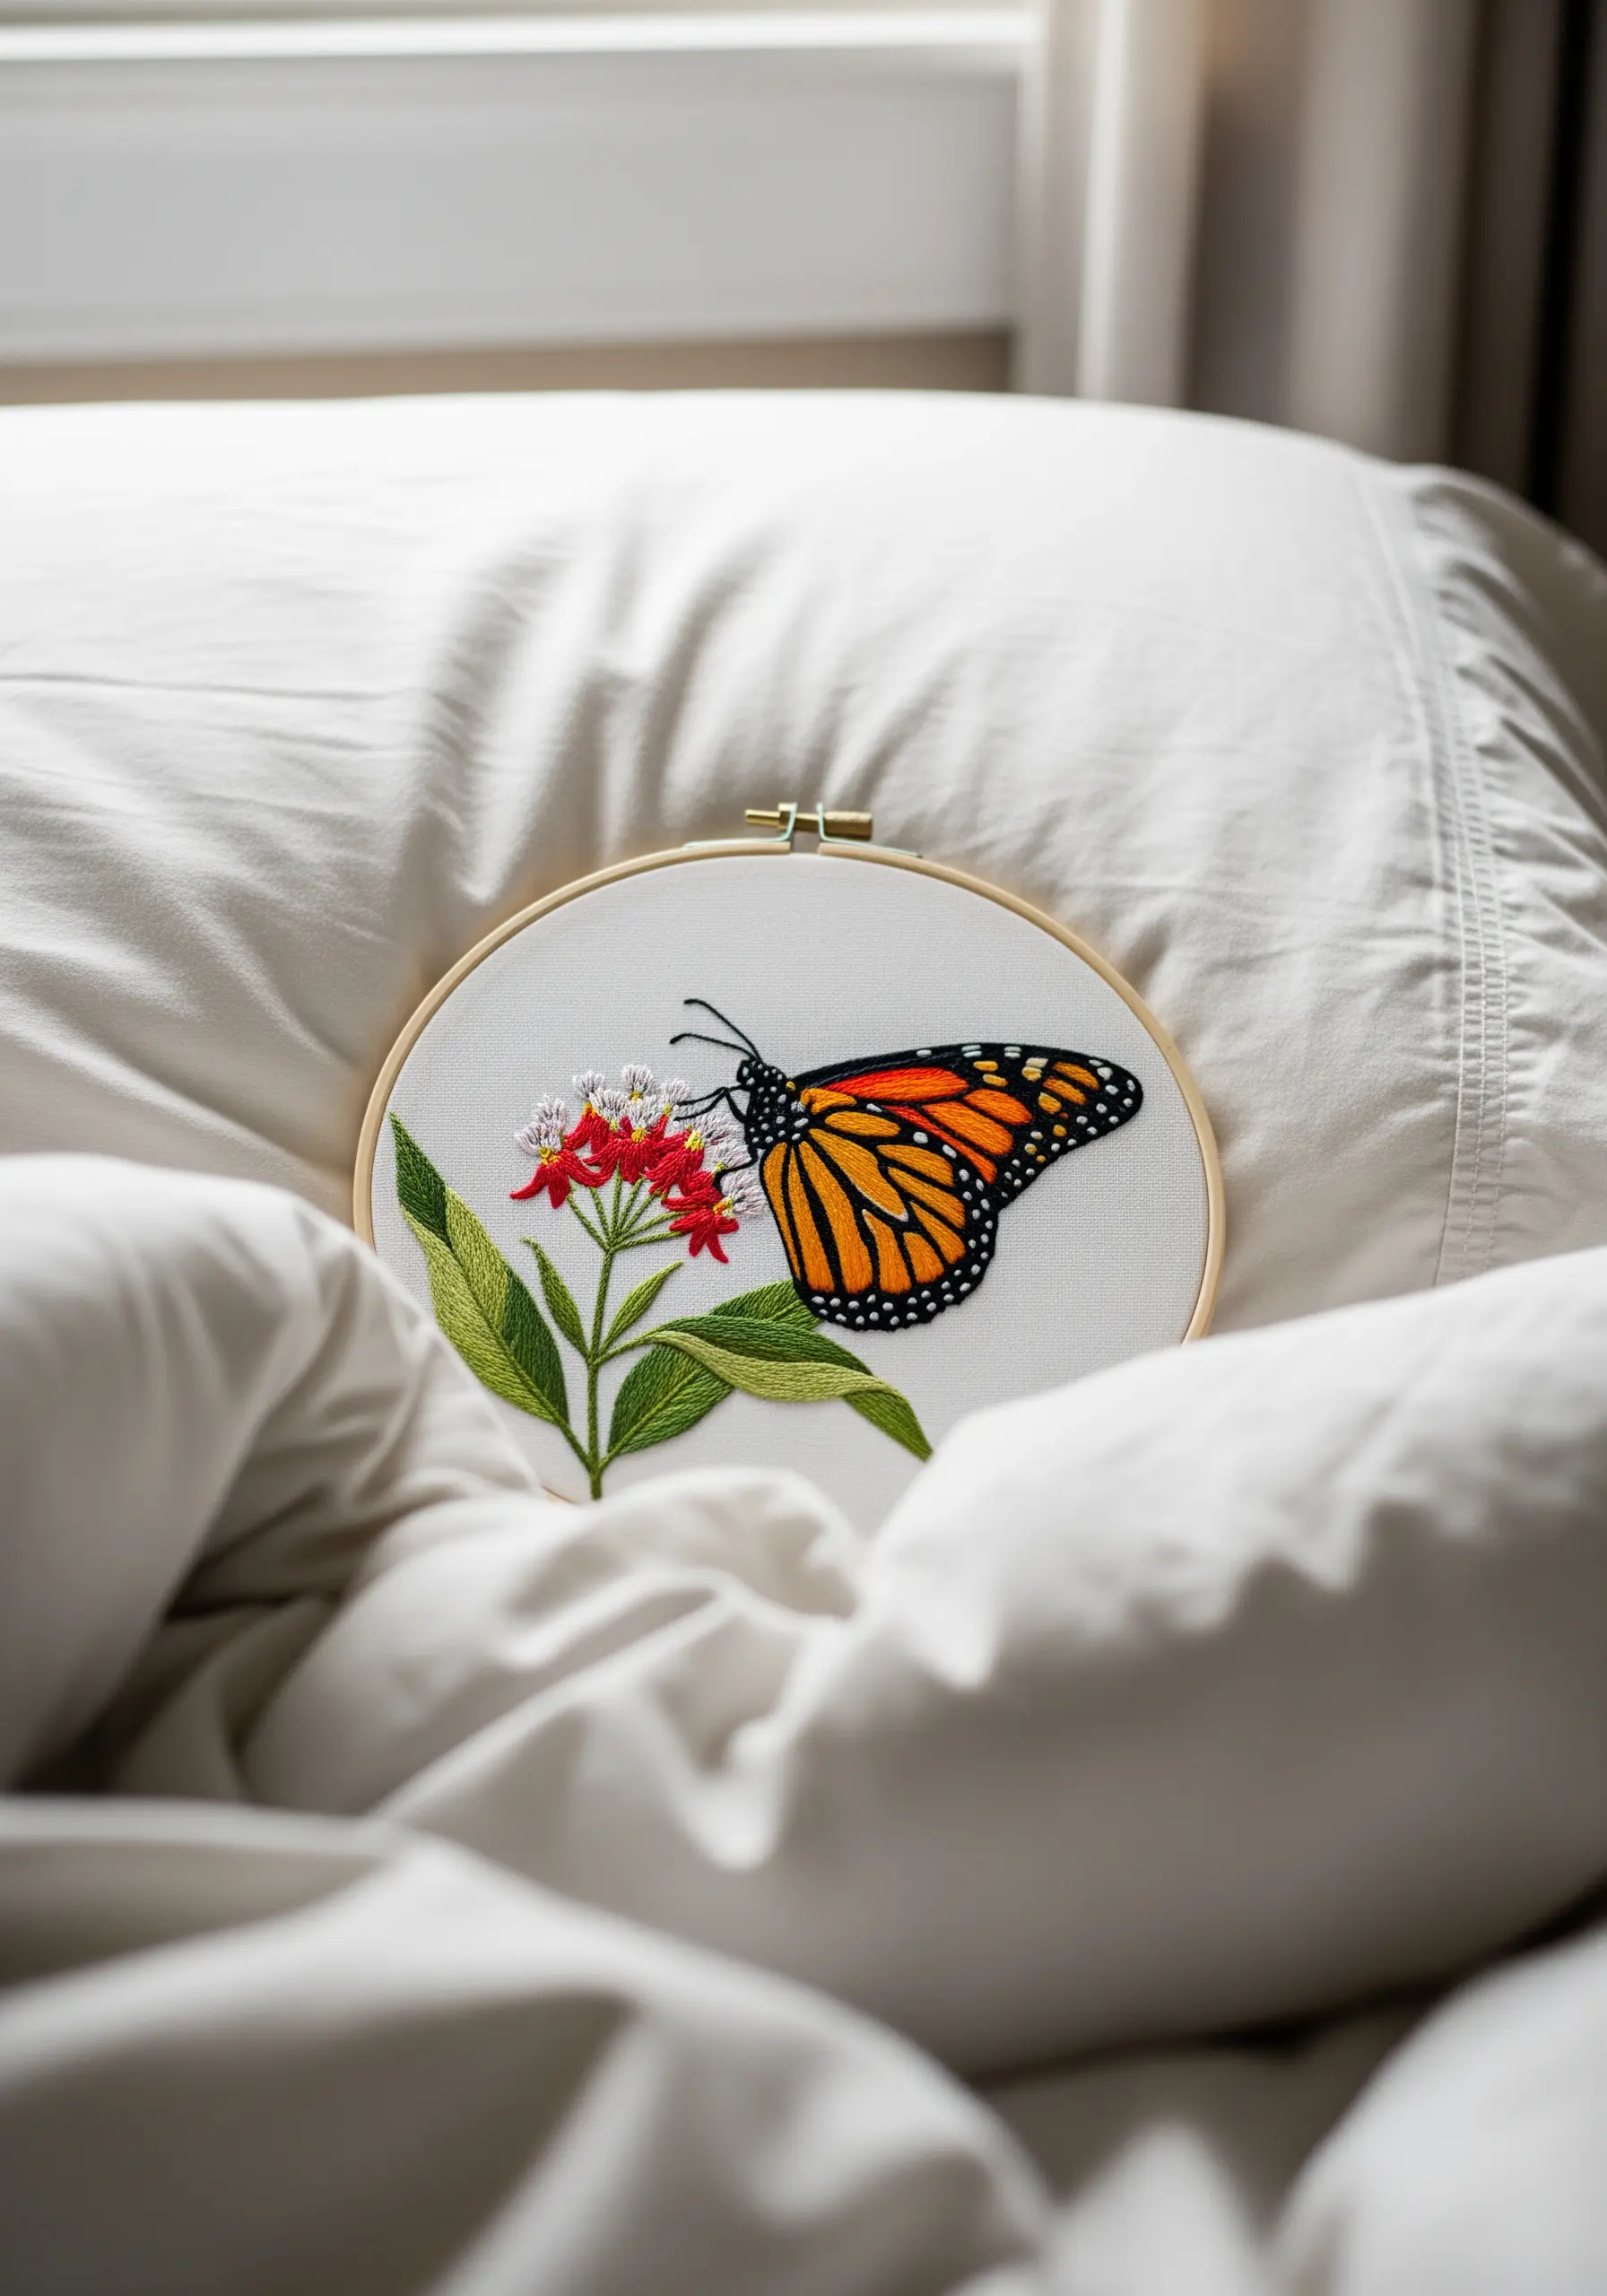
When working with bold, graphic motifs like a butterfly’s wings, clean edges are essential for a professional finish.
Before you begin filling in any sections with satin stitch, outline each shape with a single row of split stitch using the same color floss.
This creates a slightly raised border that your satin stitches can tuck up against, preventing them from shifting and resulting in perfectly crisp, defined color blocks.
It’s a simple preparatory step that makes a world of difference in the final piece.
23. Create a Deep and Distant Starfield

To give your night sky a sense of infinite depth, vary the size and brightness of your stars.
Use French knots, but change the number of times you wrap the thread around the needle—a single wrap creates a tiny, distant star, while two or three wraps create a larger, brighter one.
For the most prominent stars, use a bright white or pale yellow floss. For the fainter, background stars, use a light grey or silvery thread.
This subtle variation turns a simple star pattern into a breathtaking, realistic cosmos.
24. Build a Dense and Tactile Sunflower Center

The heart of a sunflower is a dense, seed-packed spiral. Replicate this texture with a sea of French or colonial knots.
Work in a spiral from the center outwards, packing the knots tightly together.
Use several shades of brown and a touch of black, stitching clusters of each color randomly to avoid a uniform, unnatural look.
This highly textured center provides a beautiful contrast to the smooth, radiating long-and-short stitches of the yellow petals, making your sunflower feel incredibly lifelike and inviting to the touch.


