

You have the threads, the fabric, the quiet moments—but perhaps you feel a gap between the vision in your mind and the piece in your hands. It’s not about learning a hundred new stitches, but about understanding why a certain stitch, thread, or color choice can transform your work from a craft project into a piece of personal art.
Think of your needle not just as a tool, but as a pen. A single, unbroken line can tell a story of connection. The subtle shift from a satin stitch to a long-and-short stitch can give a petal breathtaking realism. This is where the magic lies—in the small, intentional decisions that elevate your work.
These ideas are more than just patterns; they are invitations to explore texture, depth, and personal meaning. Let’s create something for your most intimate space that feels not just handmade, but deeply and truly yours.
1. Gilded Monograms on Velvet
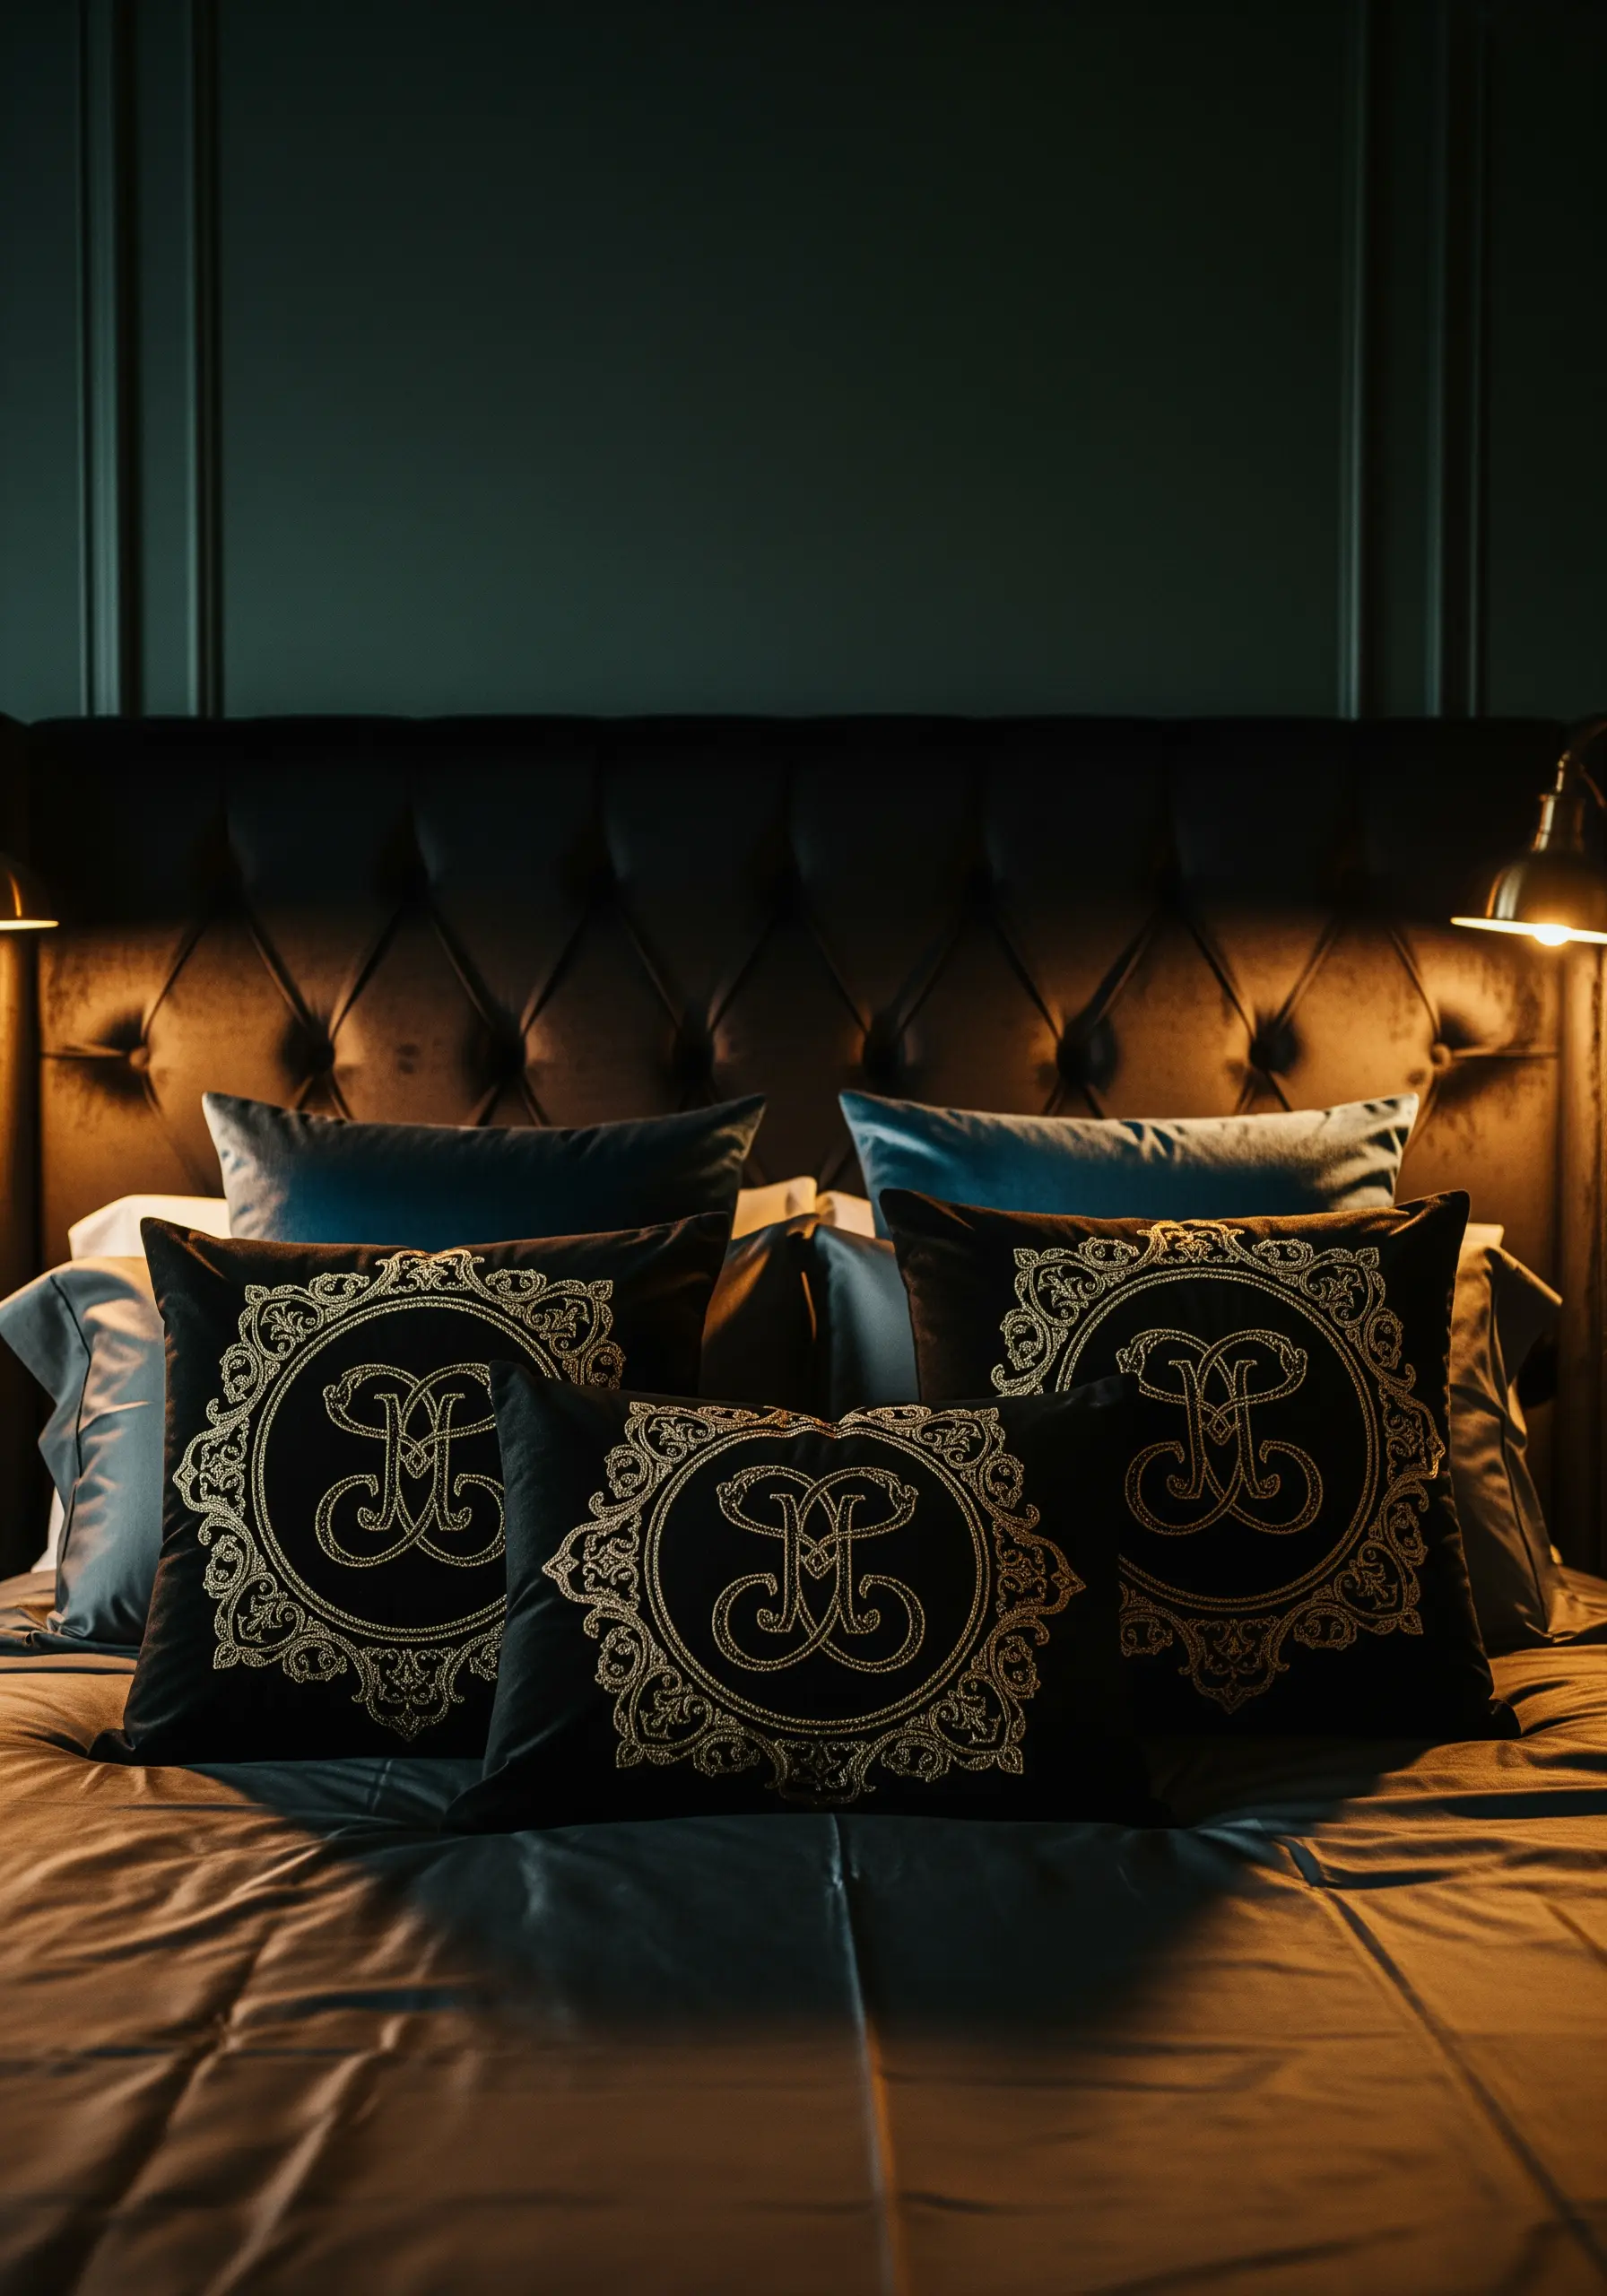
To achieve a luxurious, raised effect on plush velvet, use a couching technique for your metallic threads.
Instead of passing the delicate metallic floss through the fabric repeatedly, lay it on the surface and tack it down with a finer, matching sewing thread.
This prevents the metallic thread from snagging or breaking while creating a clean, professional line that sits proudly on top of the velvet’s pile, mimicking the opulence of historical tapestry.
2. The Single-Thread Statement Tapestry
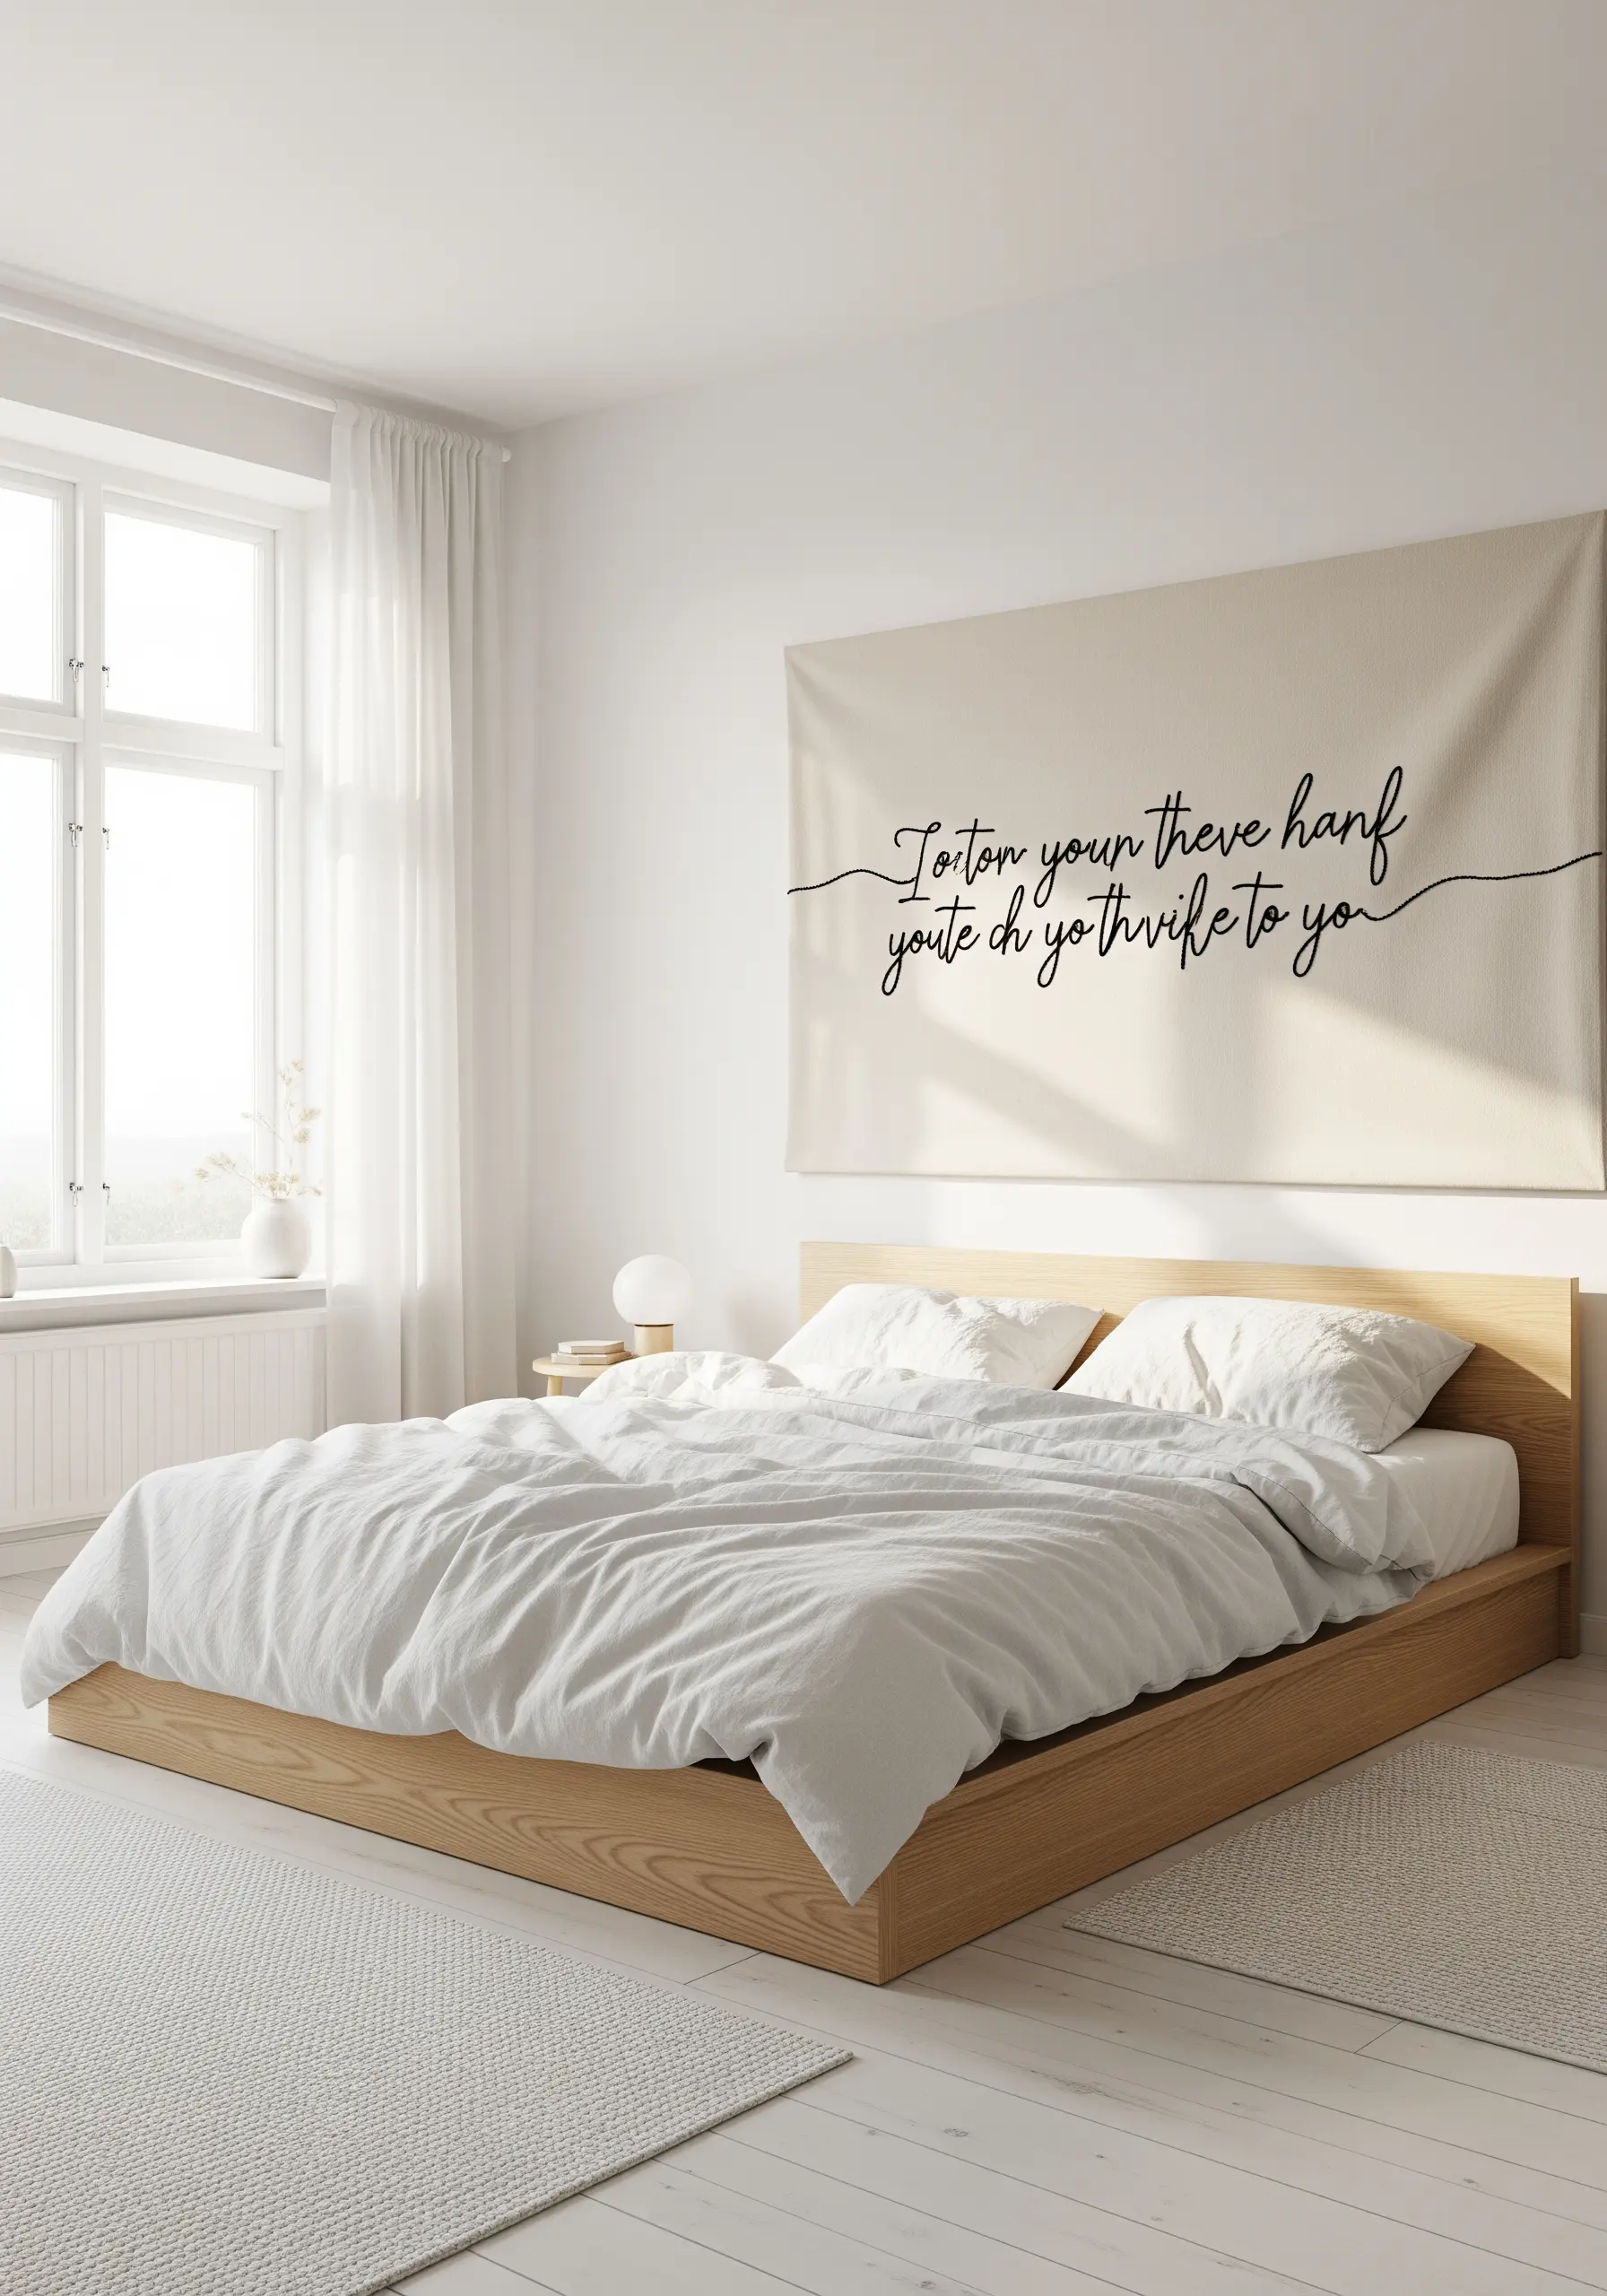
The power of this design is its clean, unbroken line, which you can achieve with a whipped backstitch or a stem stitch.
Use a thicker thread, like a #8 pearl cotton or all six strands of embroidery floss, to give the line visual weight and presence.
The most critical part is maintaining perfectly even tension as you stitch; this prevents the fabric from puckering and ensures your fluid script hangs flat, turning a simple quote into a piece of minimalist line art.
3. Celestial Chart on Linen
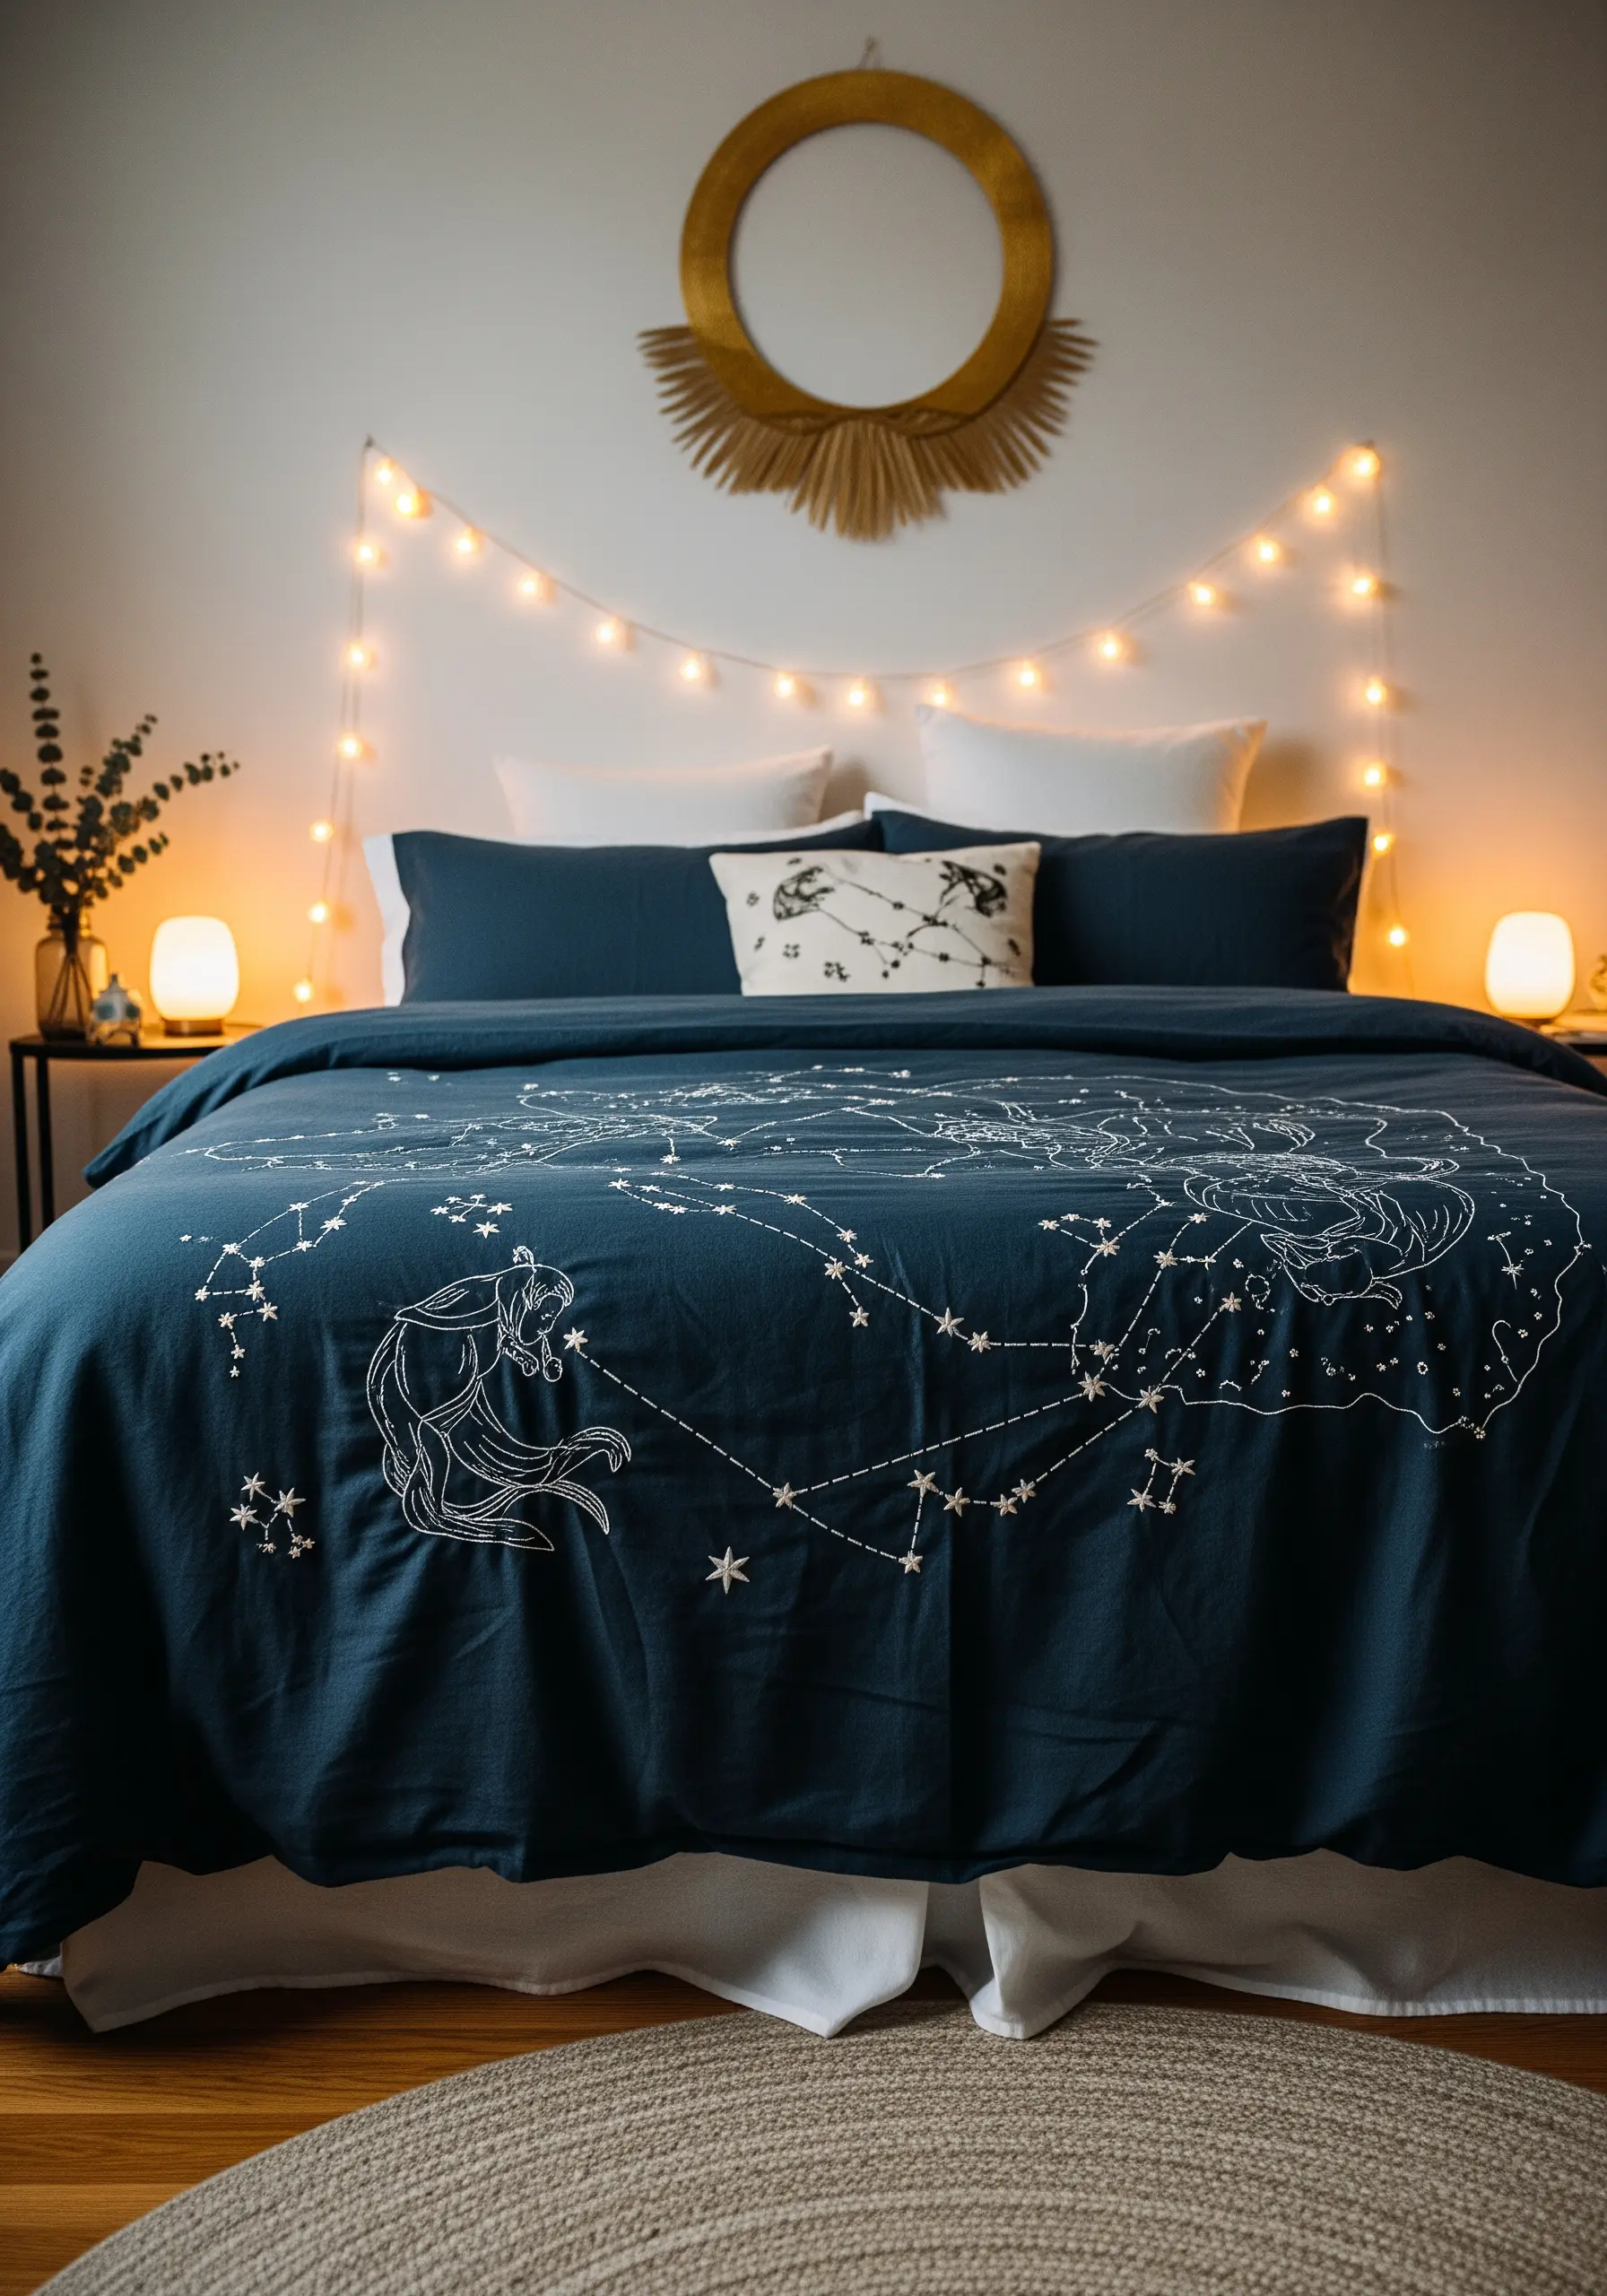
Create your own personal star map using a simple backstitch for the connecting lines and tiny French knots for the stars.
For a subtle, romantic secret, use a high-quality glow-in-the-dark thread for the main stars in your chosen constellations.
The design will appear as a delicate white drawing during the day and transform into a magical, glowing chart when the lights go out.
4. The Meadow Gallery Wall
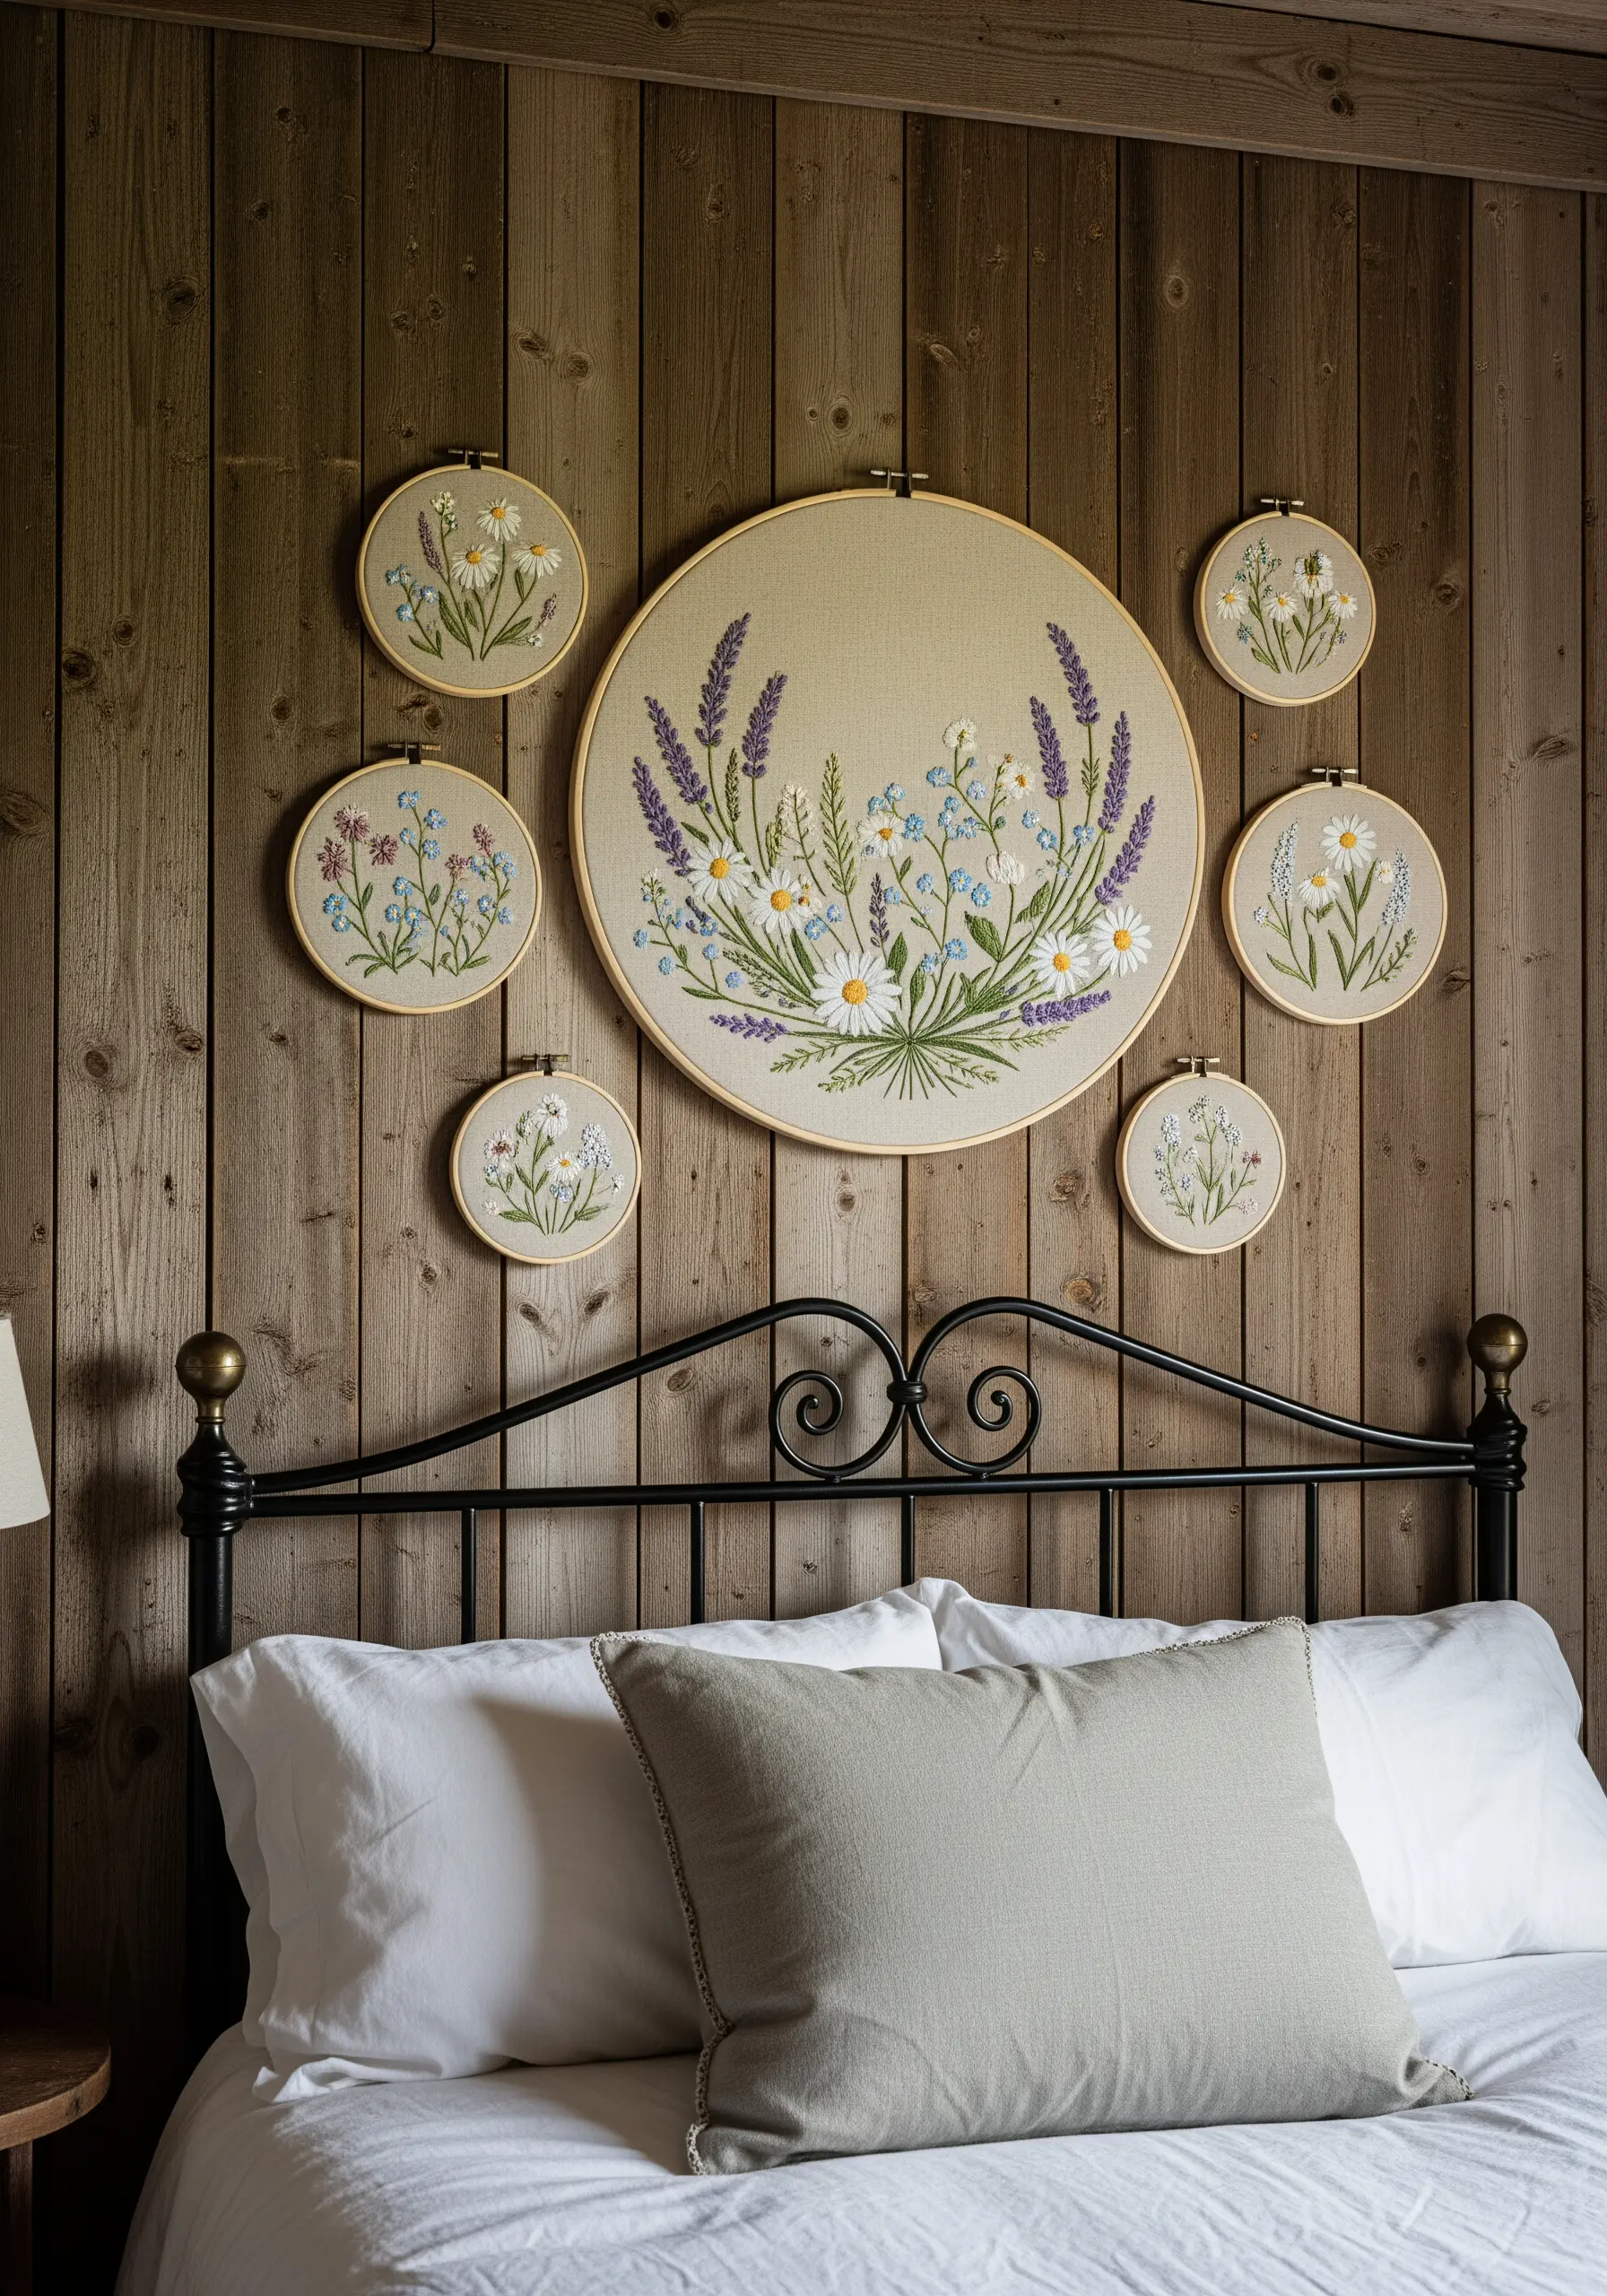
Instead of a single large piece, create a narrative by arranging a cluster of hoops with complementary designs above your headboard.
To ensure the collection feels cohesive, use the same background fabric and a consistent color palette throughout all the pieces.
Varying the stitches—lazy daisies for petals, French knots for centers, and stem stitch for stalks—will add texture and depth to your botanical hooped wall collage, making each piece unique yet connected.
5. Line Art Embrace on a Knit Throw

Stitching on a stretchy knit fabric requires a stabilizer to prevent the design from warping.
Apply a layer of water-soluble stabilizer on top of your design area before you begin stitching. This creates a stable surface for your stitches.
Use a chain stitch, which has some natural elasticity, to create a bold, continuous line that moves with the fabric instead of constricting it. Once you’re finished, the stabilizer will wash away, leaving a clean design that feels integrated into the throw.
6. Topographic Heart Map
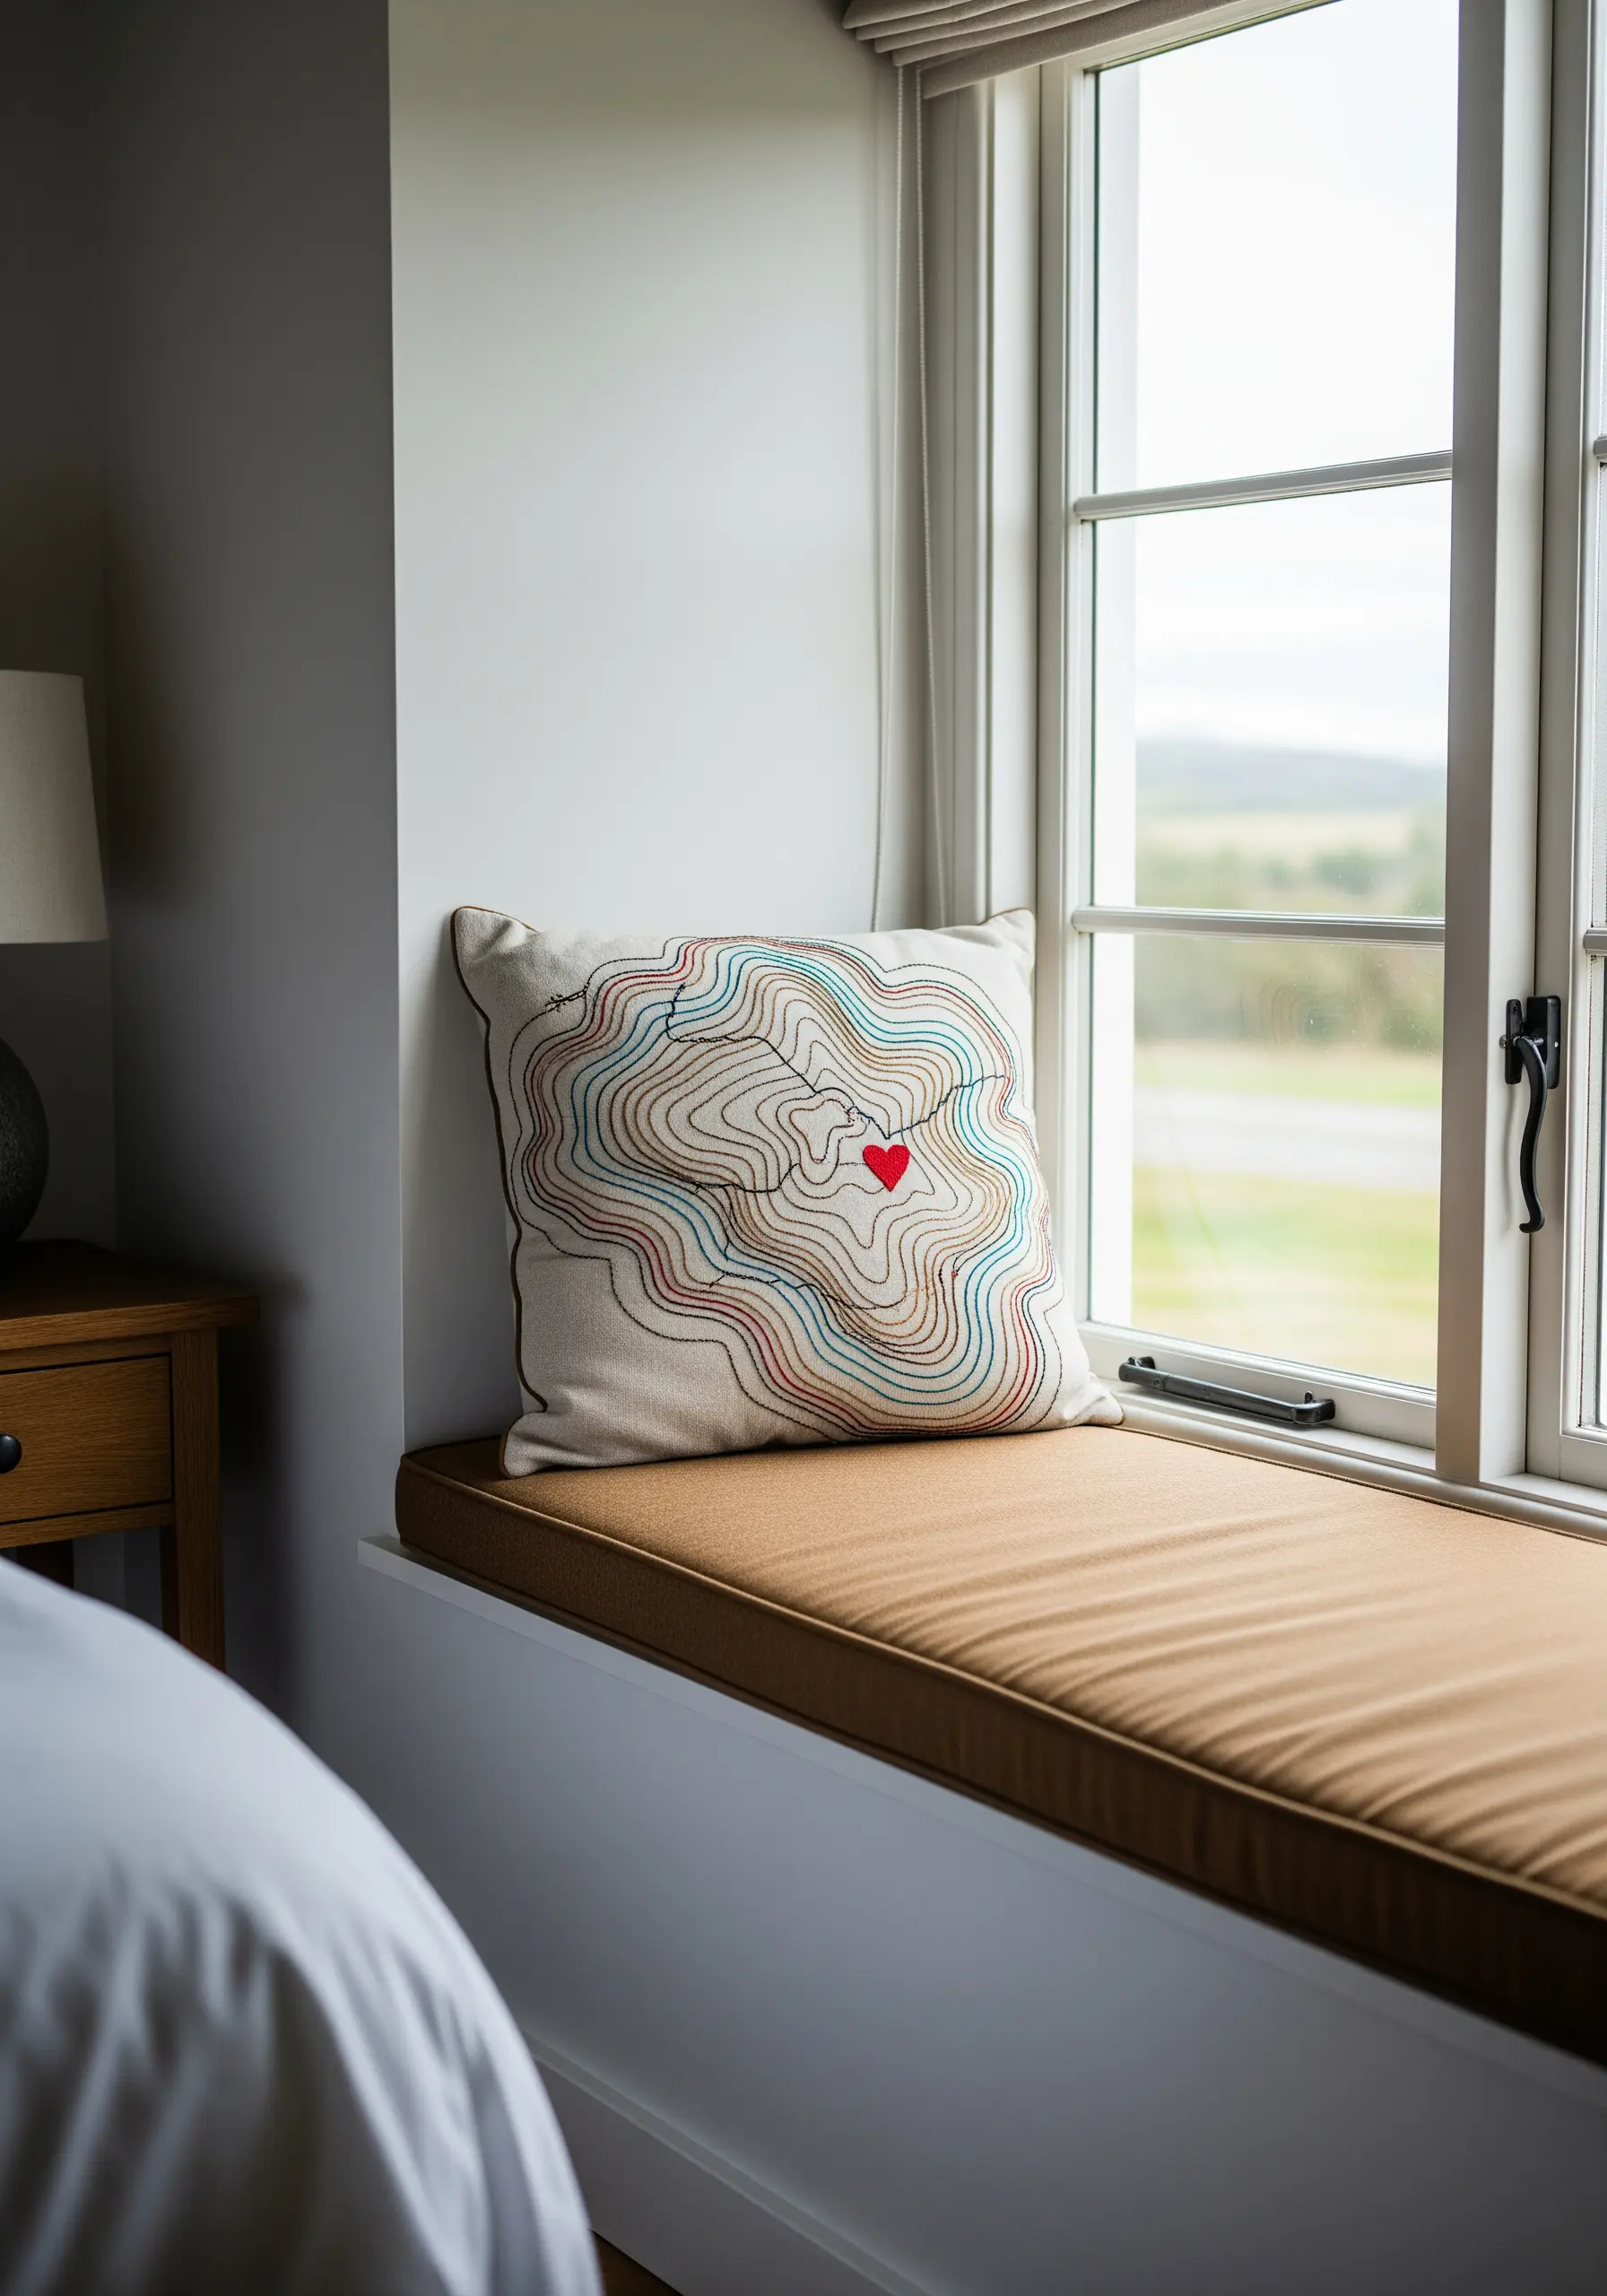
Capture a meaningful location with the clean precision of a topographic map using a simple backstitch for the contour lines.
To make the heart the undeniable focal point, give it a subtle three-dimensional quality with a padded satin stitch.
First, fill the heart shape with a small underlayer of seed stitches, then cover it completely with smooth satin stitches. This slight padding lifts the heart off the fabric’s surface, drawing the eye immediately.
7. The Embroidered Trellis Headboard

Elevate a plain headboard into a botanical feature using tone-on-tone embroidery.
Select three to four shades of the same color to give the leaves dimension and realism.
Alternate between satin stitch and long-and-short stitch to vary the texture and the way the light reflects off the threads. This technique turns a simple embroidered headboard into a lush, organic work of art that feels fully integrated with the furniture.
8. Stitch a Personal Soundwave

Turn a meaningful audio clip—a snippet of a song, a laugh, or a spoken phrase—into a modern, personal design.
Use a simple vertical satin stitch or a series of straight stitches to form the waves. The key to a crisp, graphic finish is precision.
Use a water-soluble fabric marker and a ruler to draw exact guidelines on your fabric before you begin. This ensures every stitch is uniform, transforming an abstract shape into a deeply personal code.
9. The Mirrored Aviary Pillow Set

Create a beautiful sense of balance and harmony on the bed by splitting a single design across two pillows.
For the birds’ feathers, use long-and-short stitch to blend your colors seamlessly, creating a soft, realistic effect.
Position the motifs so they mirror each other. This turns two separate pillowcases into a single, cohesive piece of art that frames the bed perfectly.
10. Celestial Balance in Metallic Threads

The drama of this design comes from the high contrast between shimmering thread and dark satin fabric.
For the sun’s rays, use straight stitches of varying lengths radiating from a central point. For the moon, a dense, smooth satin stitch will capture its calm glow.
When using metallic thread, work with shorter lengths (no more than 12 inches) and use a needle with a larger eye to reduce friction and prevent the thread from fraying.
11. The Botanical Anatomy Heart
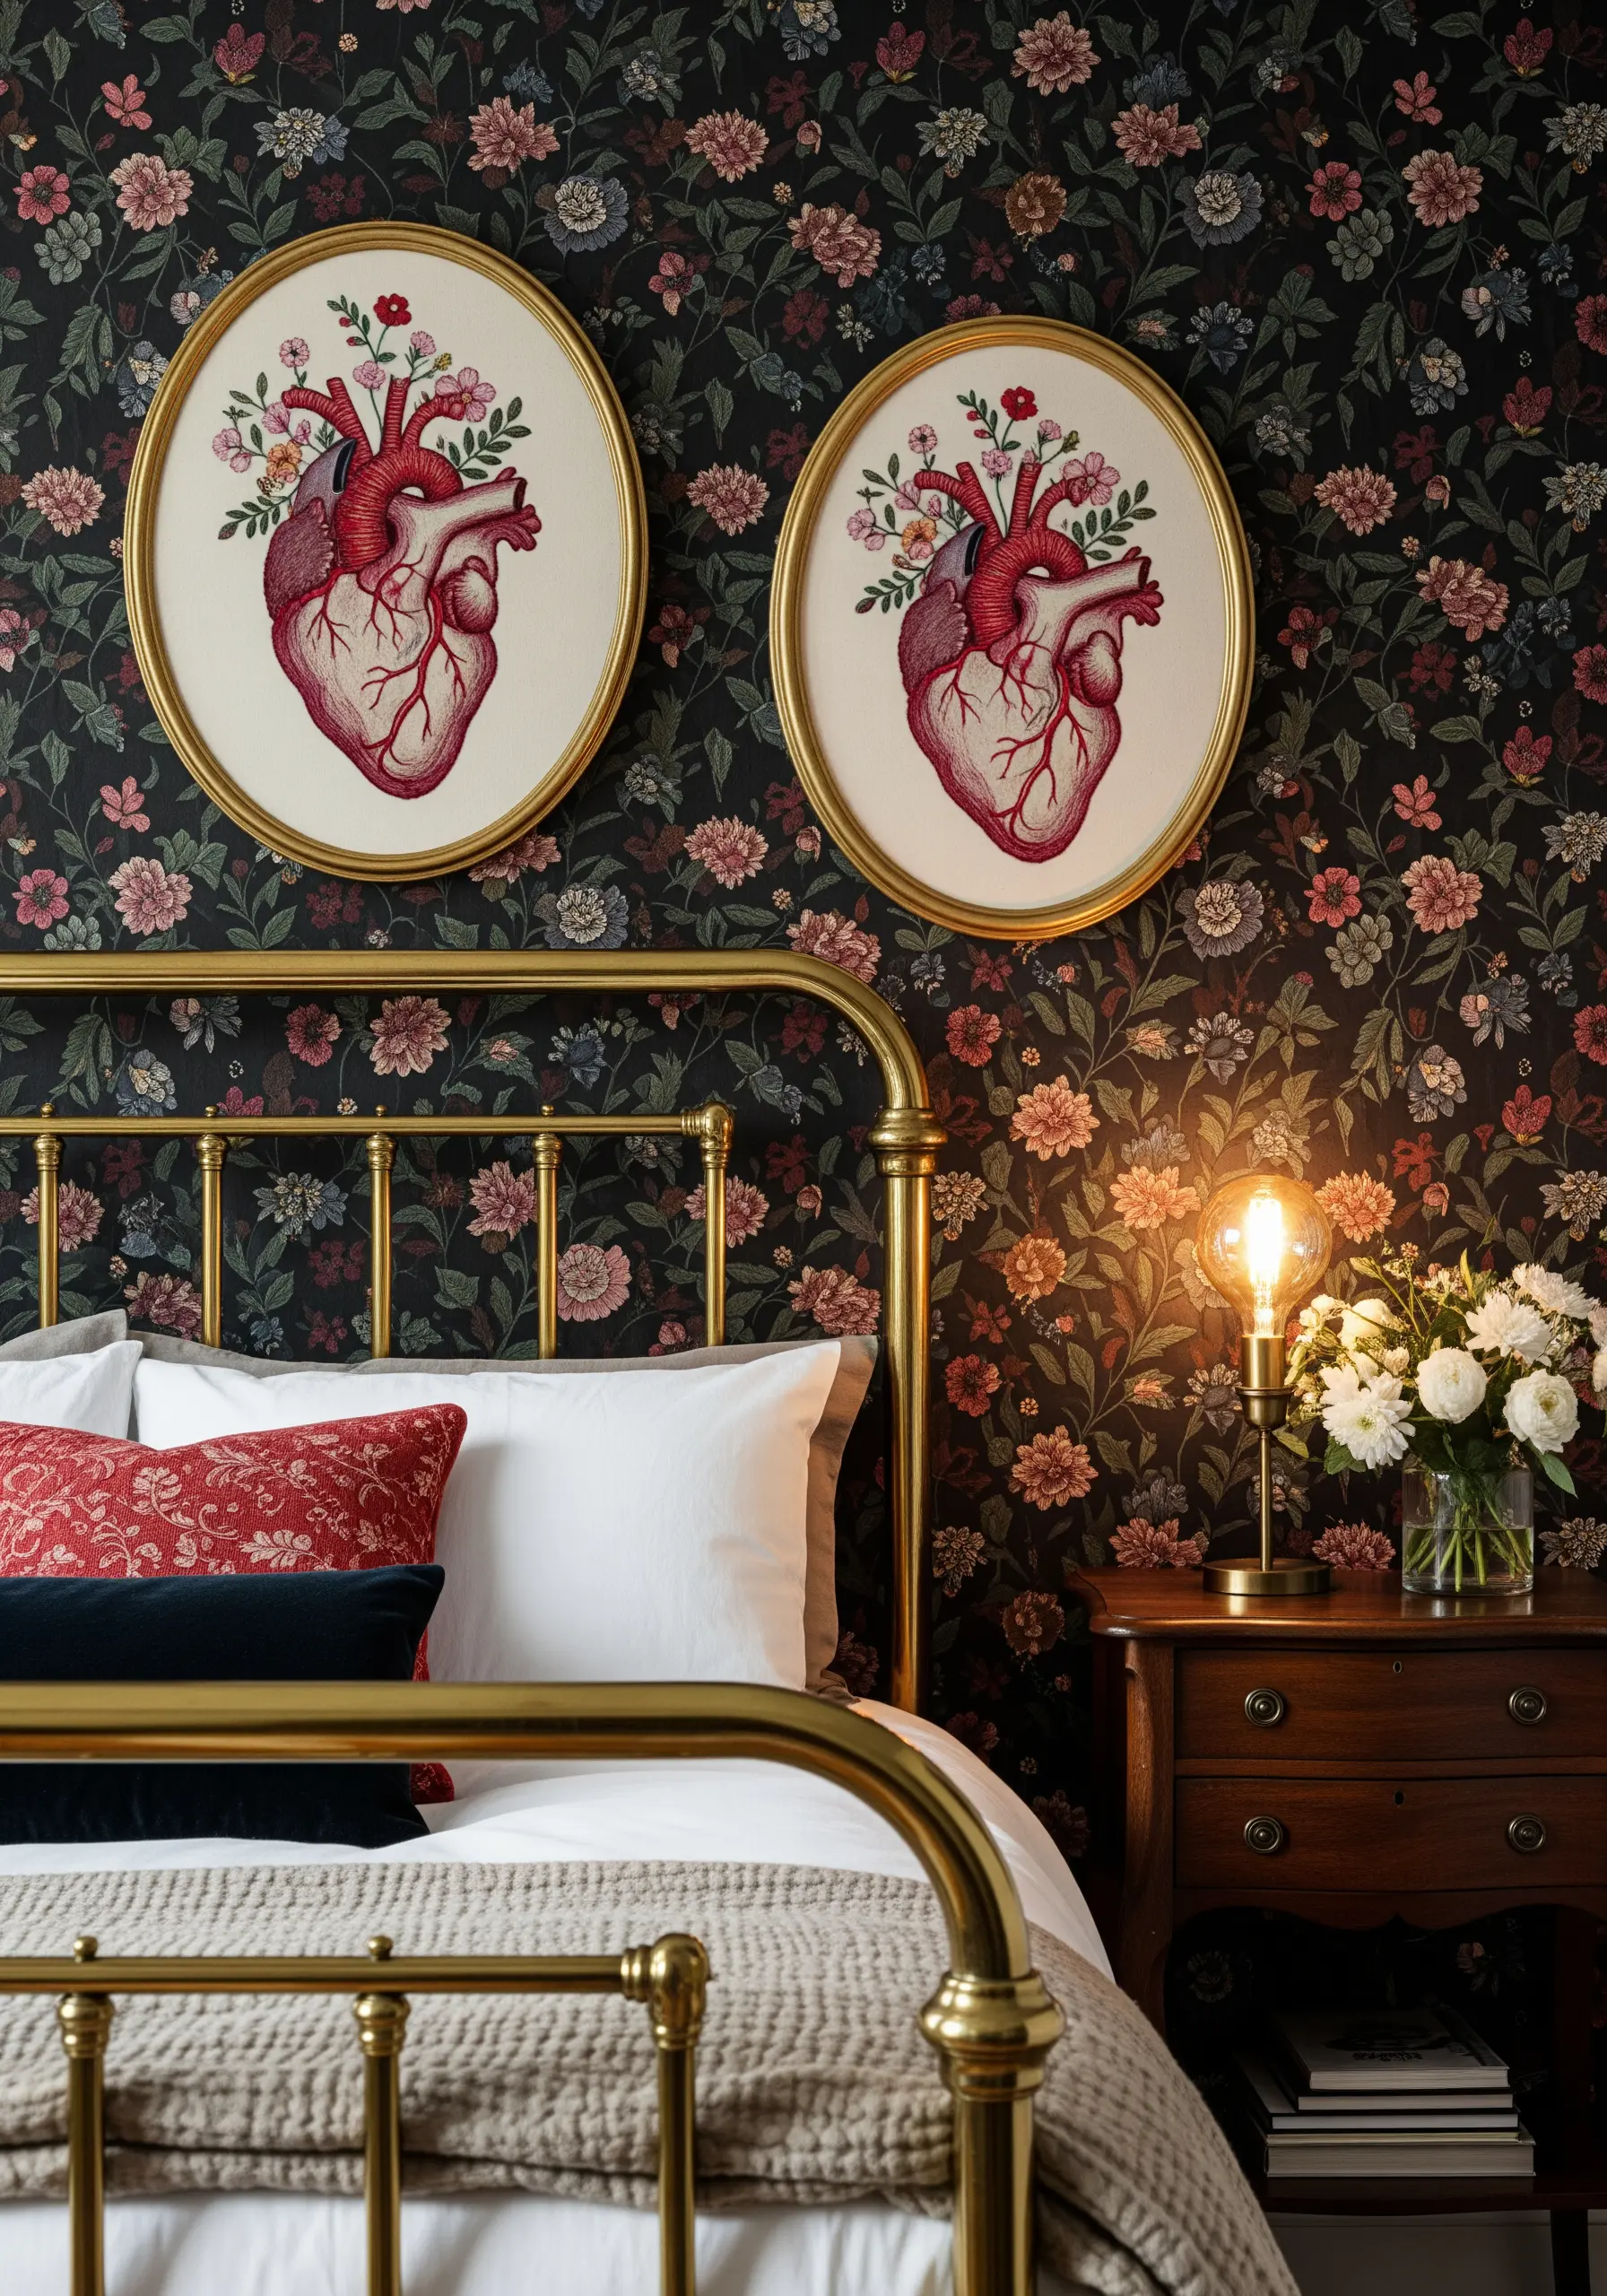
This striking design merges scientific detail with romantic florals. For the delicate arteries and veins of the heart, use a single strand of red floss and a split stitch to achieve fine, precise lines.
For the flowers, use a mix of textures: bullion knots for rosebuds, French knots for filler flowers, and lazy daisy stitches for small petals.
This contrast between the clinical precision of the heart and the organic freedom of the flowers is what gives the piece its emotional power.
12. Secret Message in Binary Code
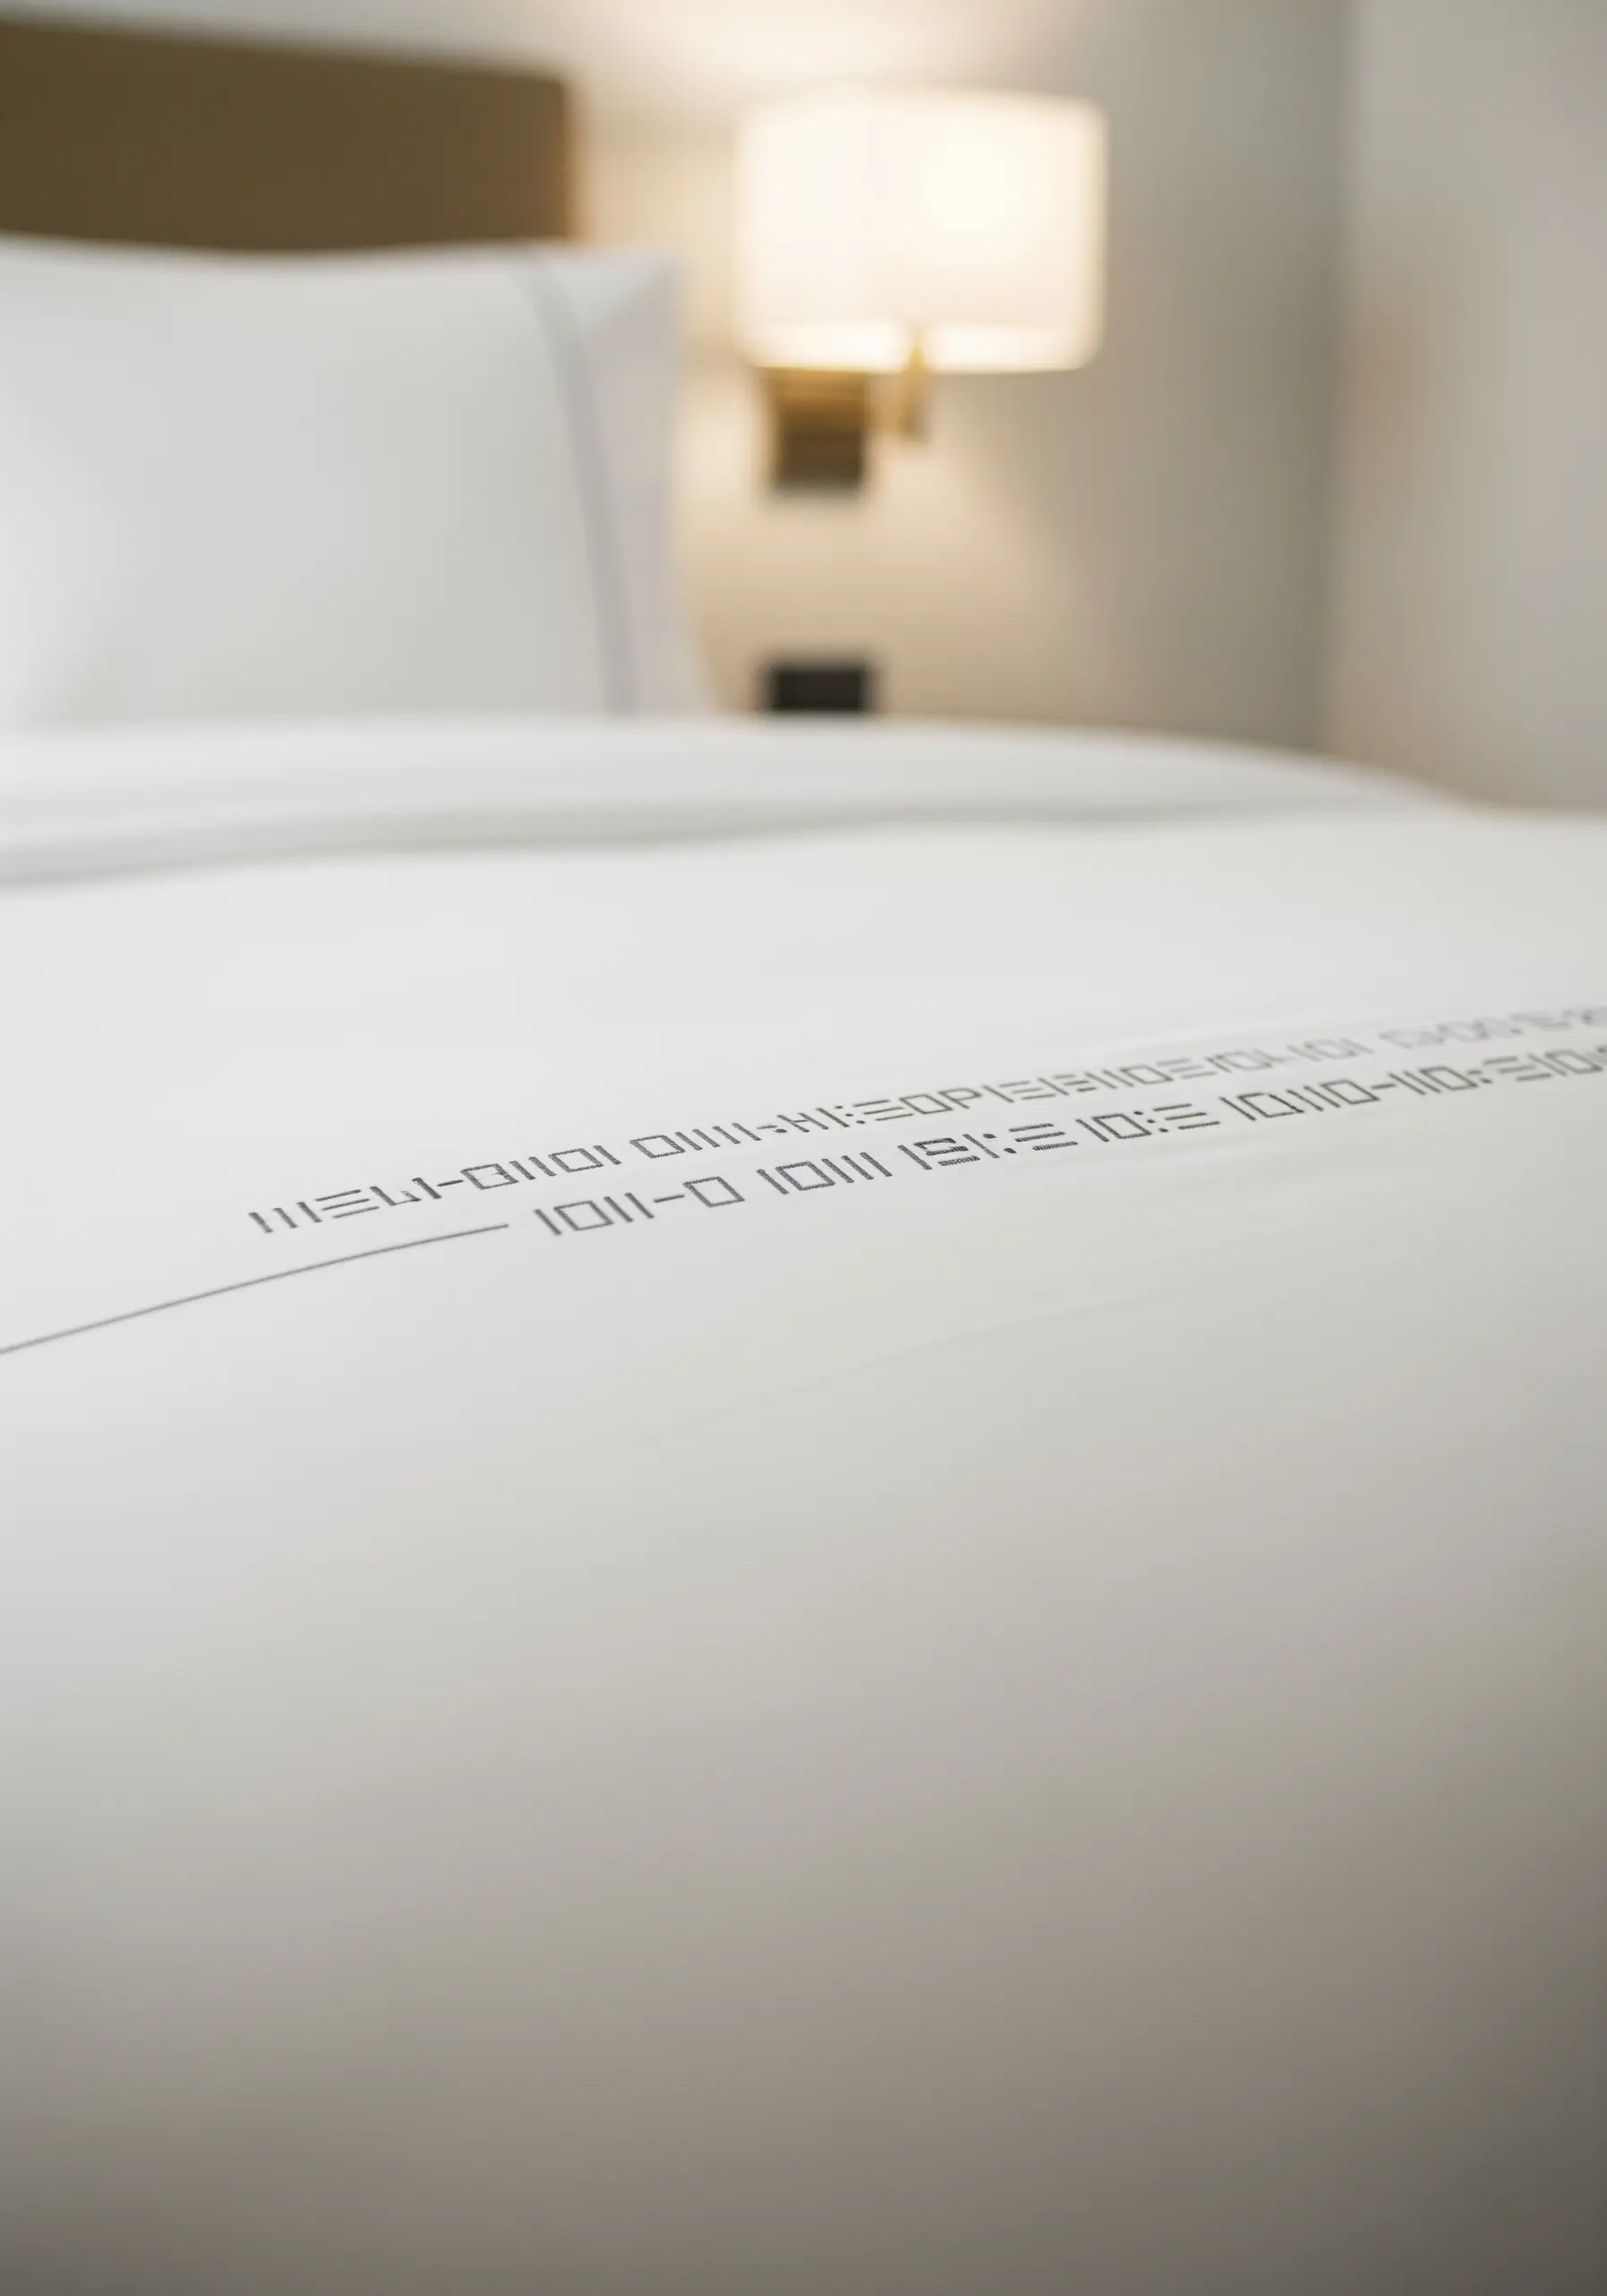
Embed a personal message, date, or set of initials into your decor with the clean, modern aesthetic of binary code.
The success of this design lies in its geometric precision. Use a ruler and a water-soluble fabric pen to create a perfect grid before you begin stitching.
A simple backstitch in a contrasting color is all you need. The result is a minimalist pattern that holds a secret meaning only you and your partner share.
13. The Coordinates of a Memory

Commemorate a location that’s special to your relationship—the place you first met, your first home, or where you got engaged.
To achieve perfectly formed, evenly spaced lettering, print your coordinates onto a sticky, water-soluble stabilizer and affix it to your fabric.
Stitch directly through the paper using a simple backstitch, then gently wash the stabilizer away. This technique removes any guesswork and leaves you with flawless, meaningful typography.
14. Intertwined Hands Line Art
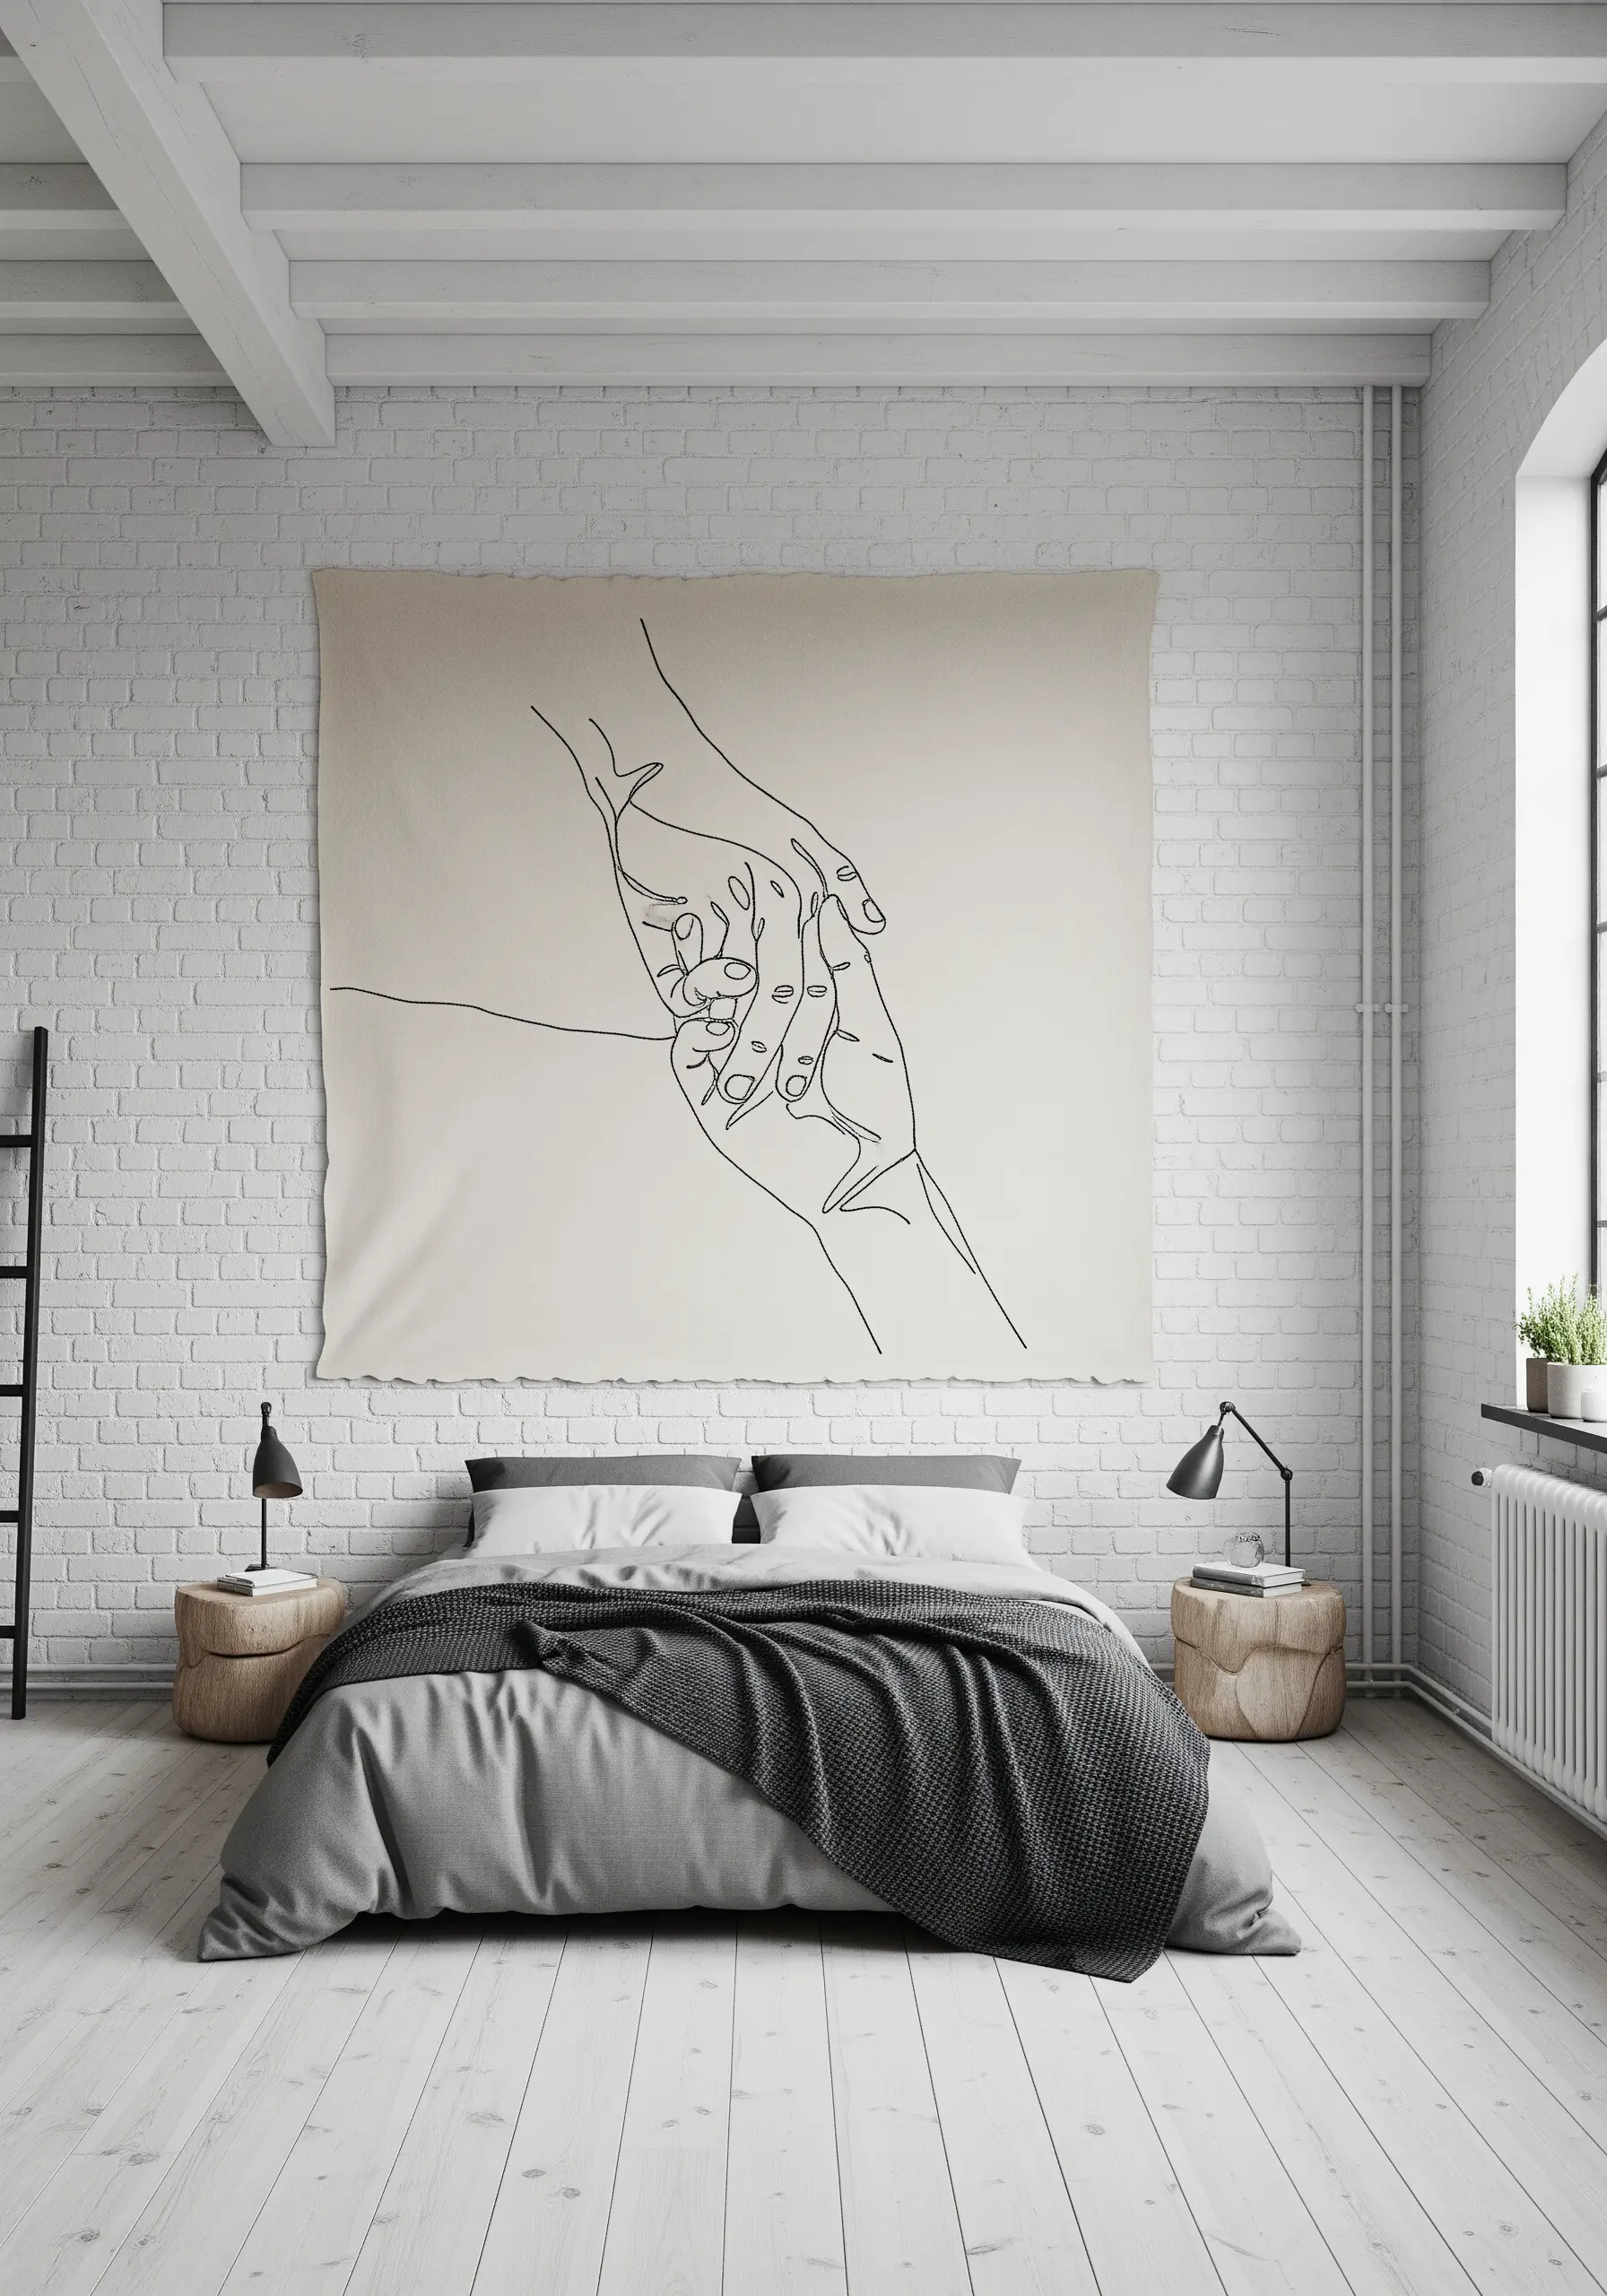
For large-scale line art hands, the goal is to create a single, fluid line that suggests form and connection without overwhelming the space.
Use a whipped backstitch. First, create a standard backstitch outline, then weave a second thread through the stitches on the surface without piercing the fabric.
This technique covers the gaps in a standard backstitch, resulting in a smooth, solid, rope-like line that is perfect for minimalist, expressive artwork.
15. Cherry Blossoms on Sheer Curtains
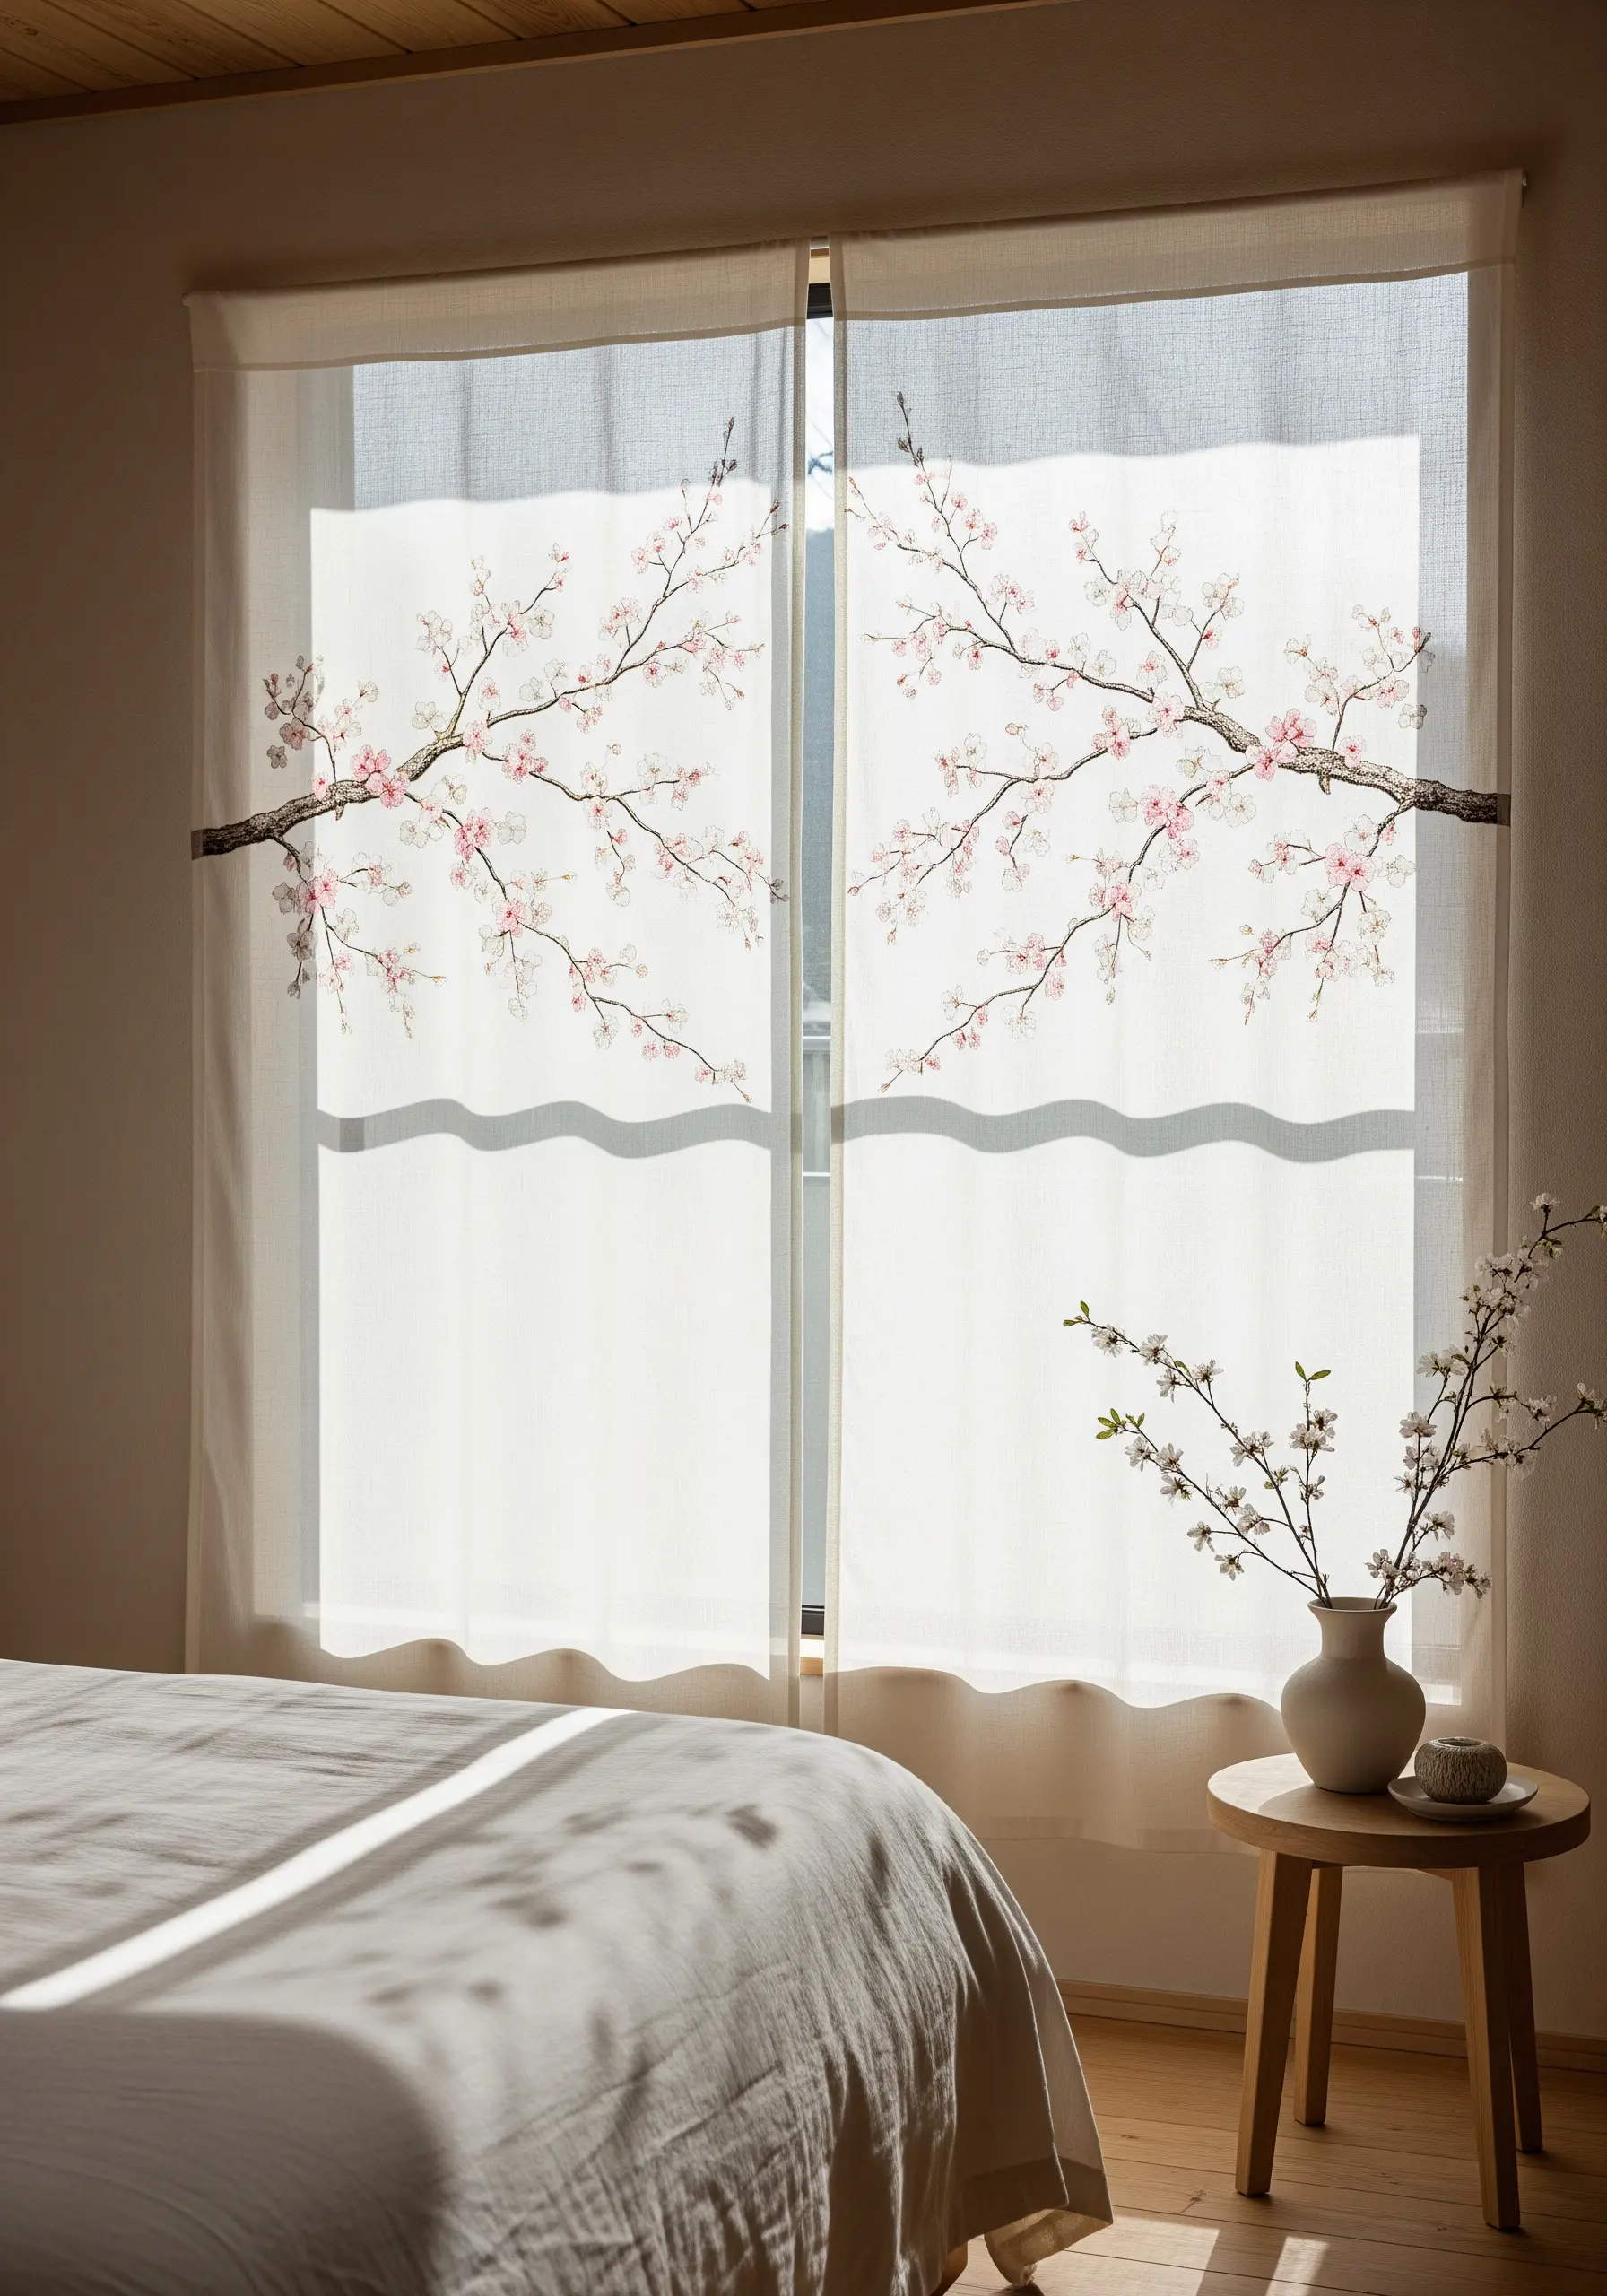
Embroidering on sheer fabric like voile or organza creates a magical, ethereal effect where the design appears to float.
To support your stitches without adding visible weight, use a lightweight tear-away stabilizer on the back of the fabric while you work.
Keep your stitches delicate: a simple stem stitch for branches and detached chain stitches for the blossoms. When you’re done, gently tear the stabilizer away for a clean, floating finish.
16. Our Story in Stitched Icons
Document your relationship’s milestones with a charming visual timeline of embroidered icons.
For crisp, clean shapes, first outline each small icon with a split stitch. Then, fill the shape with satin stitch, using the outline as a raised boundary.
This simple step, known as padded satin stitch, gives each icon a neat, defined edge and a slightly raised appearance, turning your love story into a beautiful piece of personalized embroidery wall pieces.
17. The Dandelion Wish
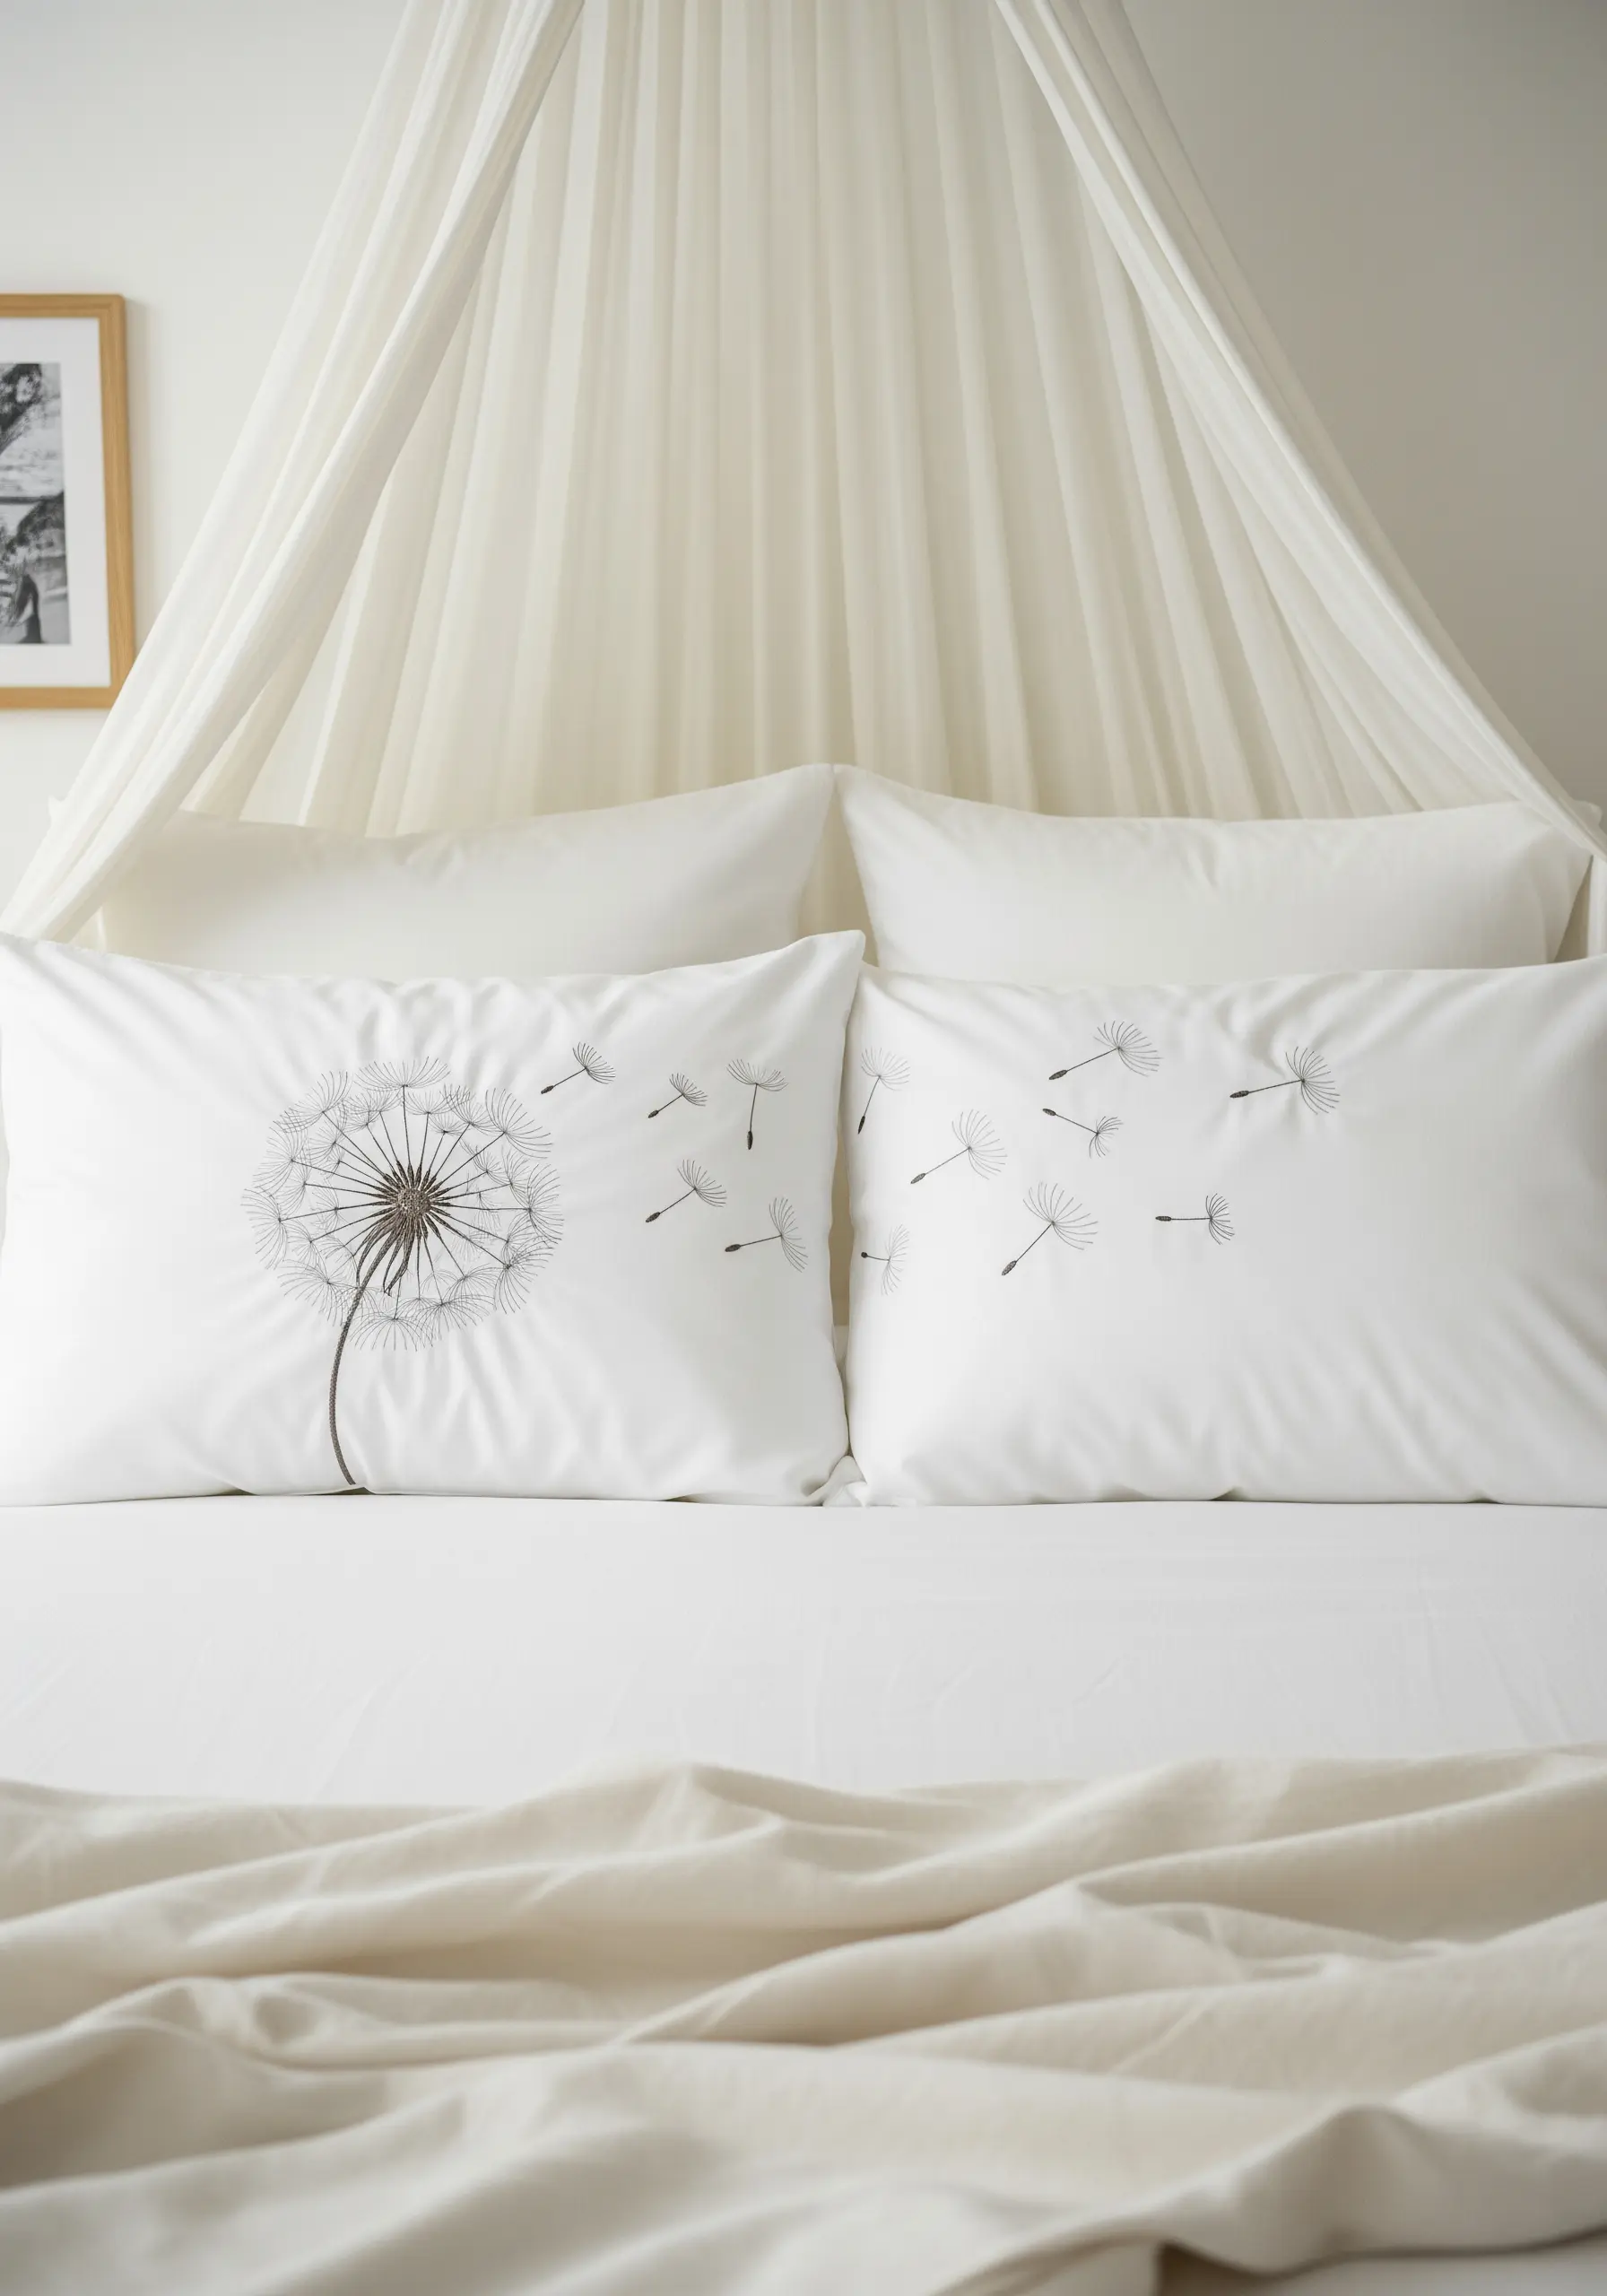
This design creates a beautiful sense of movement that connects two separate pillowcases into one cohesive piece.
For the delicate, floating seeds, use a single strand of floss and a simple straight stitch to give them a weightless quality.
In contrast, build up the central dandelion head with layered straight stitches and French knots to create a full, fluffy texture. This contrast in density is what makes the design feel dynamic and alive.
18. Geometric Hearts in Raised Stitches

Modernize the classic heart shape by giving it a geometric structure and a three-dimensional texture.
Use a thick thread, like #5 pearl cotton, and a raised stem stitch band to create a bold, corded outline that sits high on the fabric’s surface.
This technique transforms a simple line drawing into a tactile, sculptural piece. The contrast between the sharp, graphic lines and the romantic heart symbol makes these string art heart patterns both modern and meaningful.
19. Cameo Silhouettes in Thread
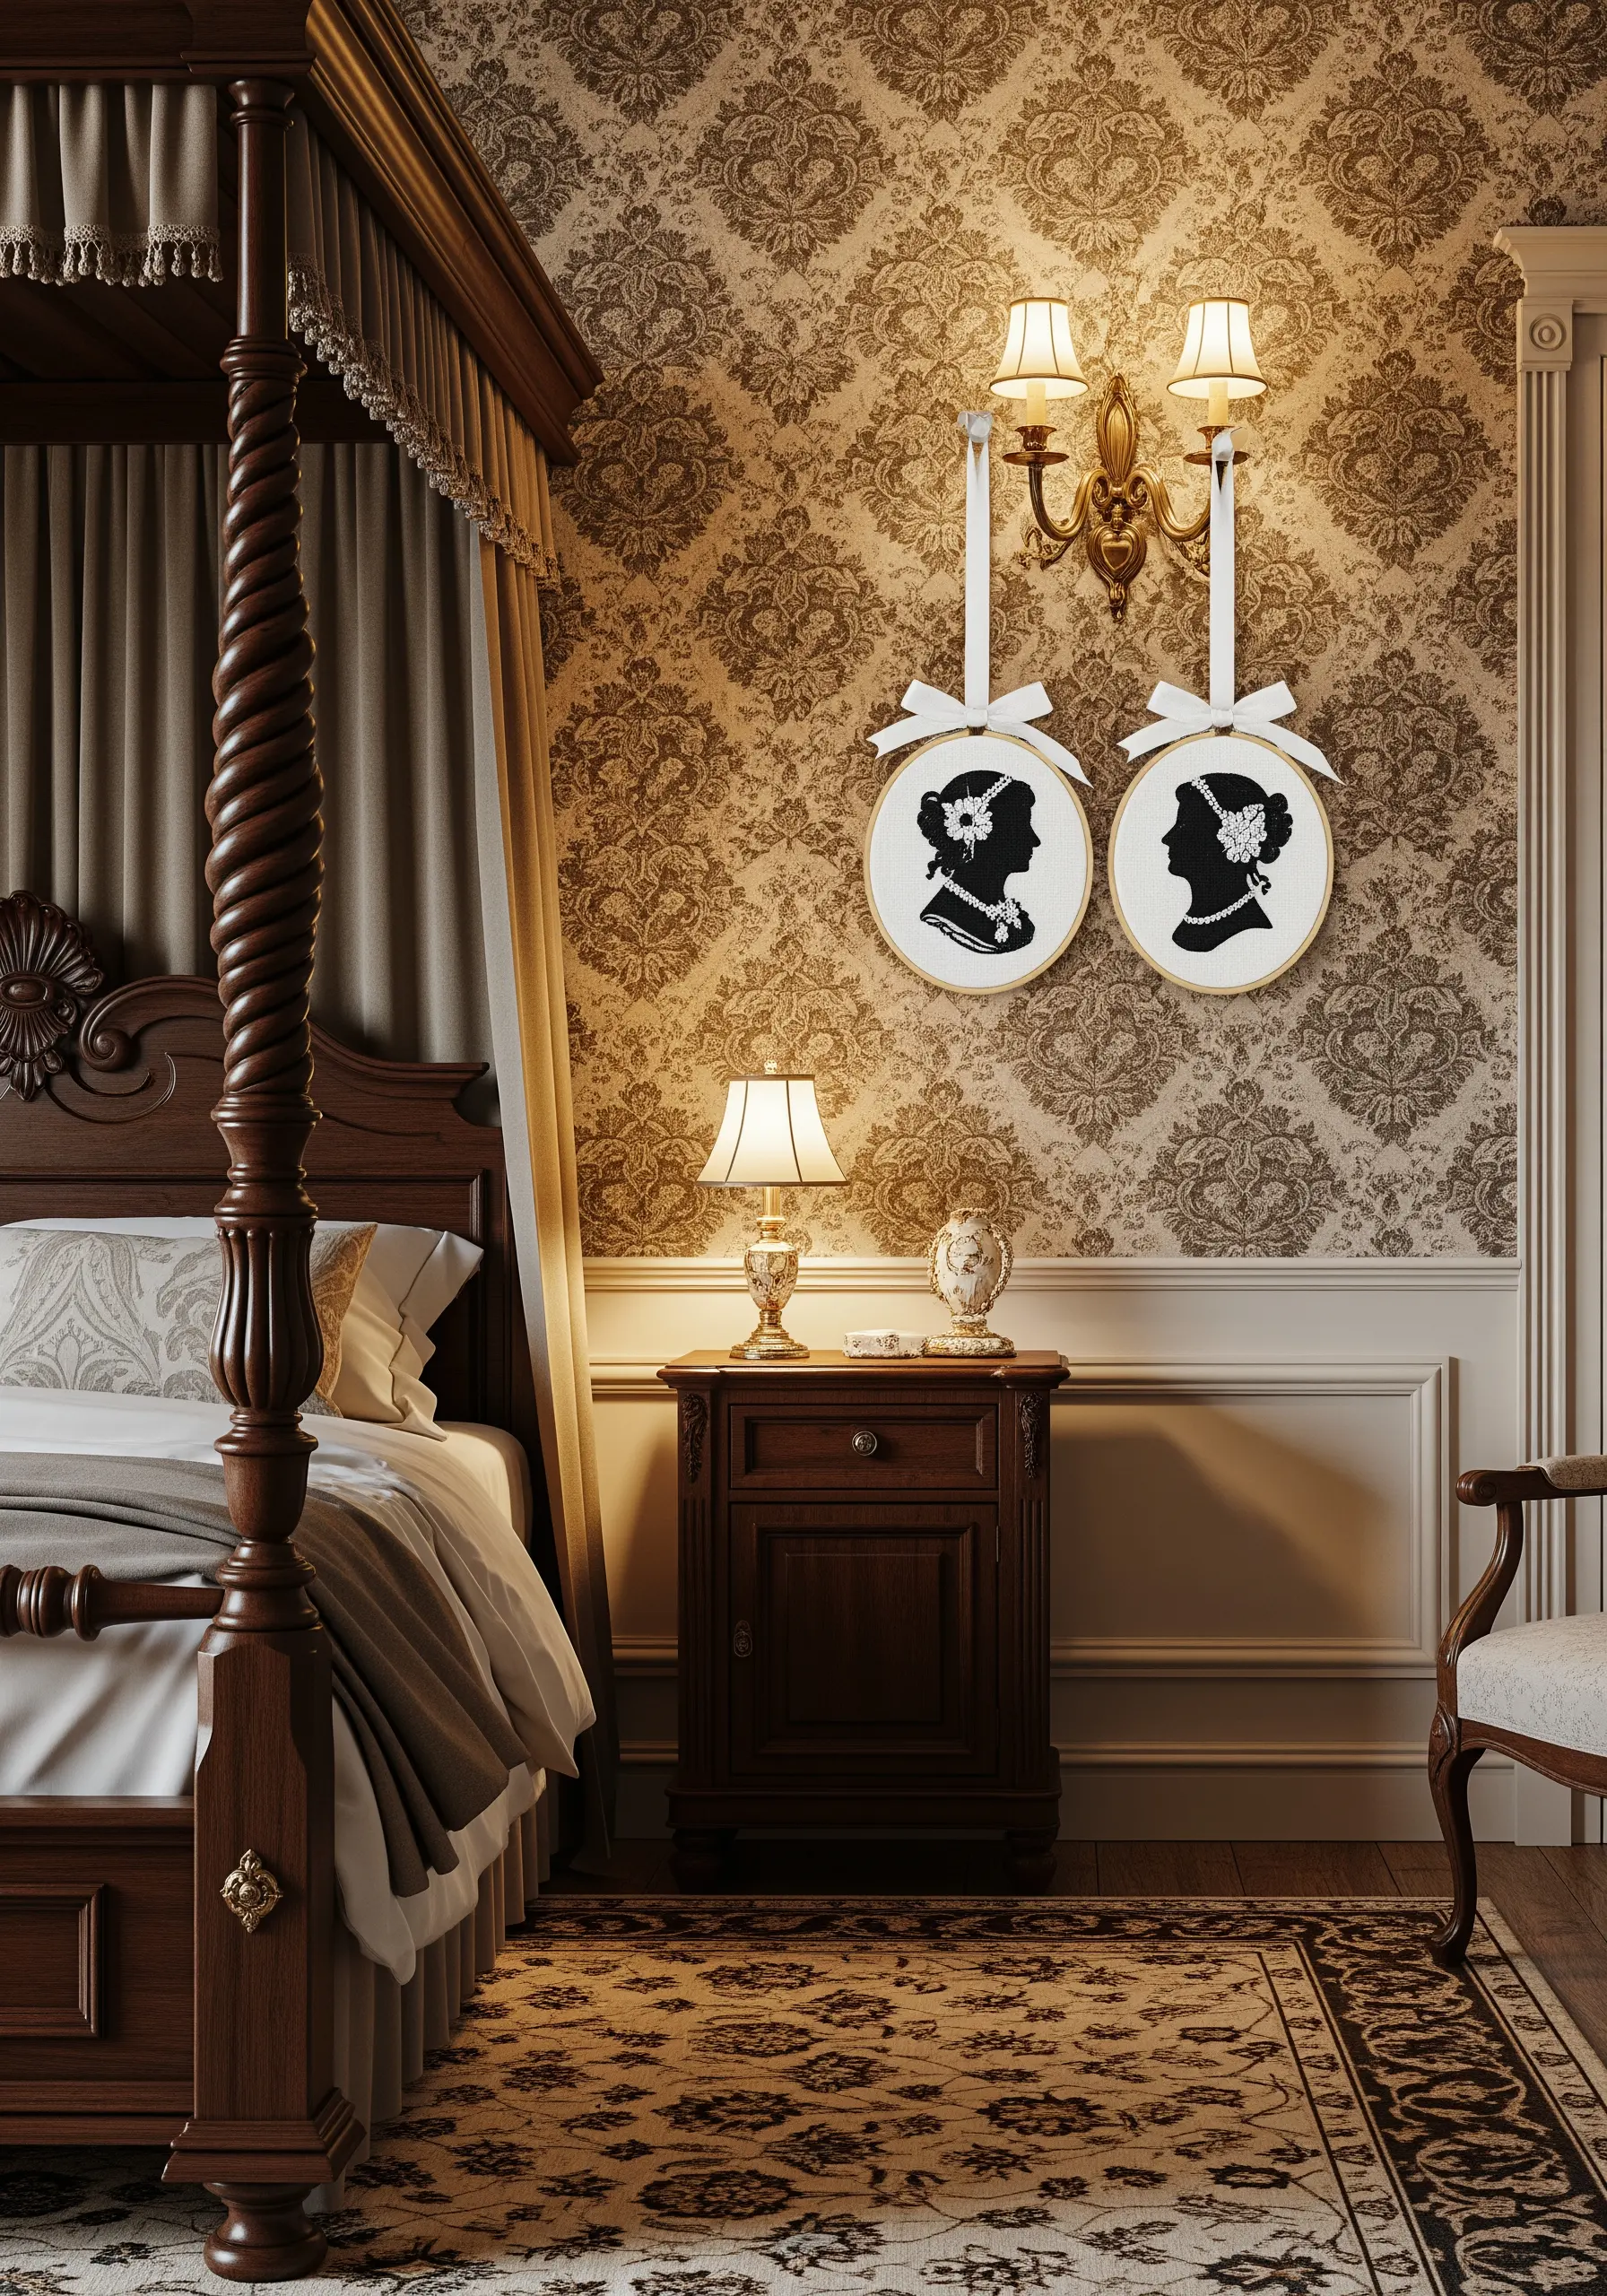
Recreate the timeless elegance of cameo portraits with thread. To achieve a perfectly smooth, dense fill for the silhouette, the direction of your stitches is everything.
Work your satin stitches vertically and in small, organized sections. Before you begin filling, outline the entire silhouette with a split stitch.
This creates a firm, raised edge that will keep your satin stitches perfectly contained, resulting in a crisp, professional finish.
20. The Everlasting Laurel Wreath

Combine the symbol of infinity with the classic laurel leaf to represent eternal, victorious love.
For the leaves, use the fishbone stitch. This clever stitch creates both the central vein and the angled sides of the leaf in a single, fluid motion.
Slightly overlapping each leaf as you work your way around the infinity loop will create a lush, full wreath with beautiful, natural-looking texture.
21. The Glow-in-the-Dark Constellation Tapestry

Create a design with a hidden dimension by using glow-in-the-dark embroidery floss.
To maximize the glowing effect, use stitches that sit prominently on the surface of the fabric, such as French knots or small, dense satin stitch dots for the stars.
By day, it’s a minimal, chic piece of astronomical art. At night, after being charged by light, it transforms into your own private, glowing galaxy.
22. The Lock and Key Velvet Set
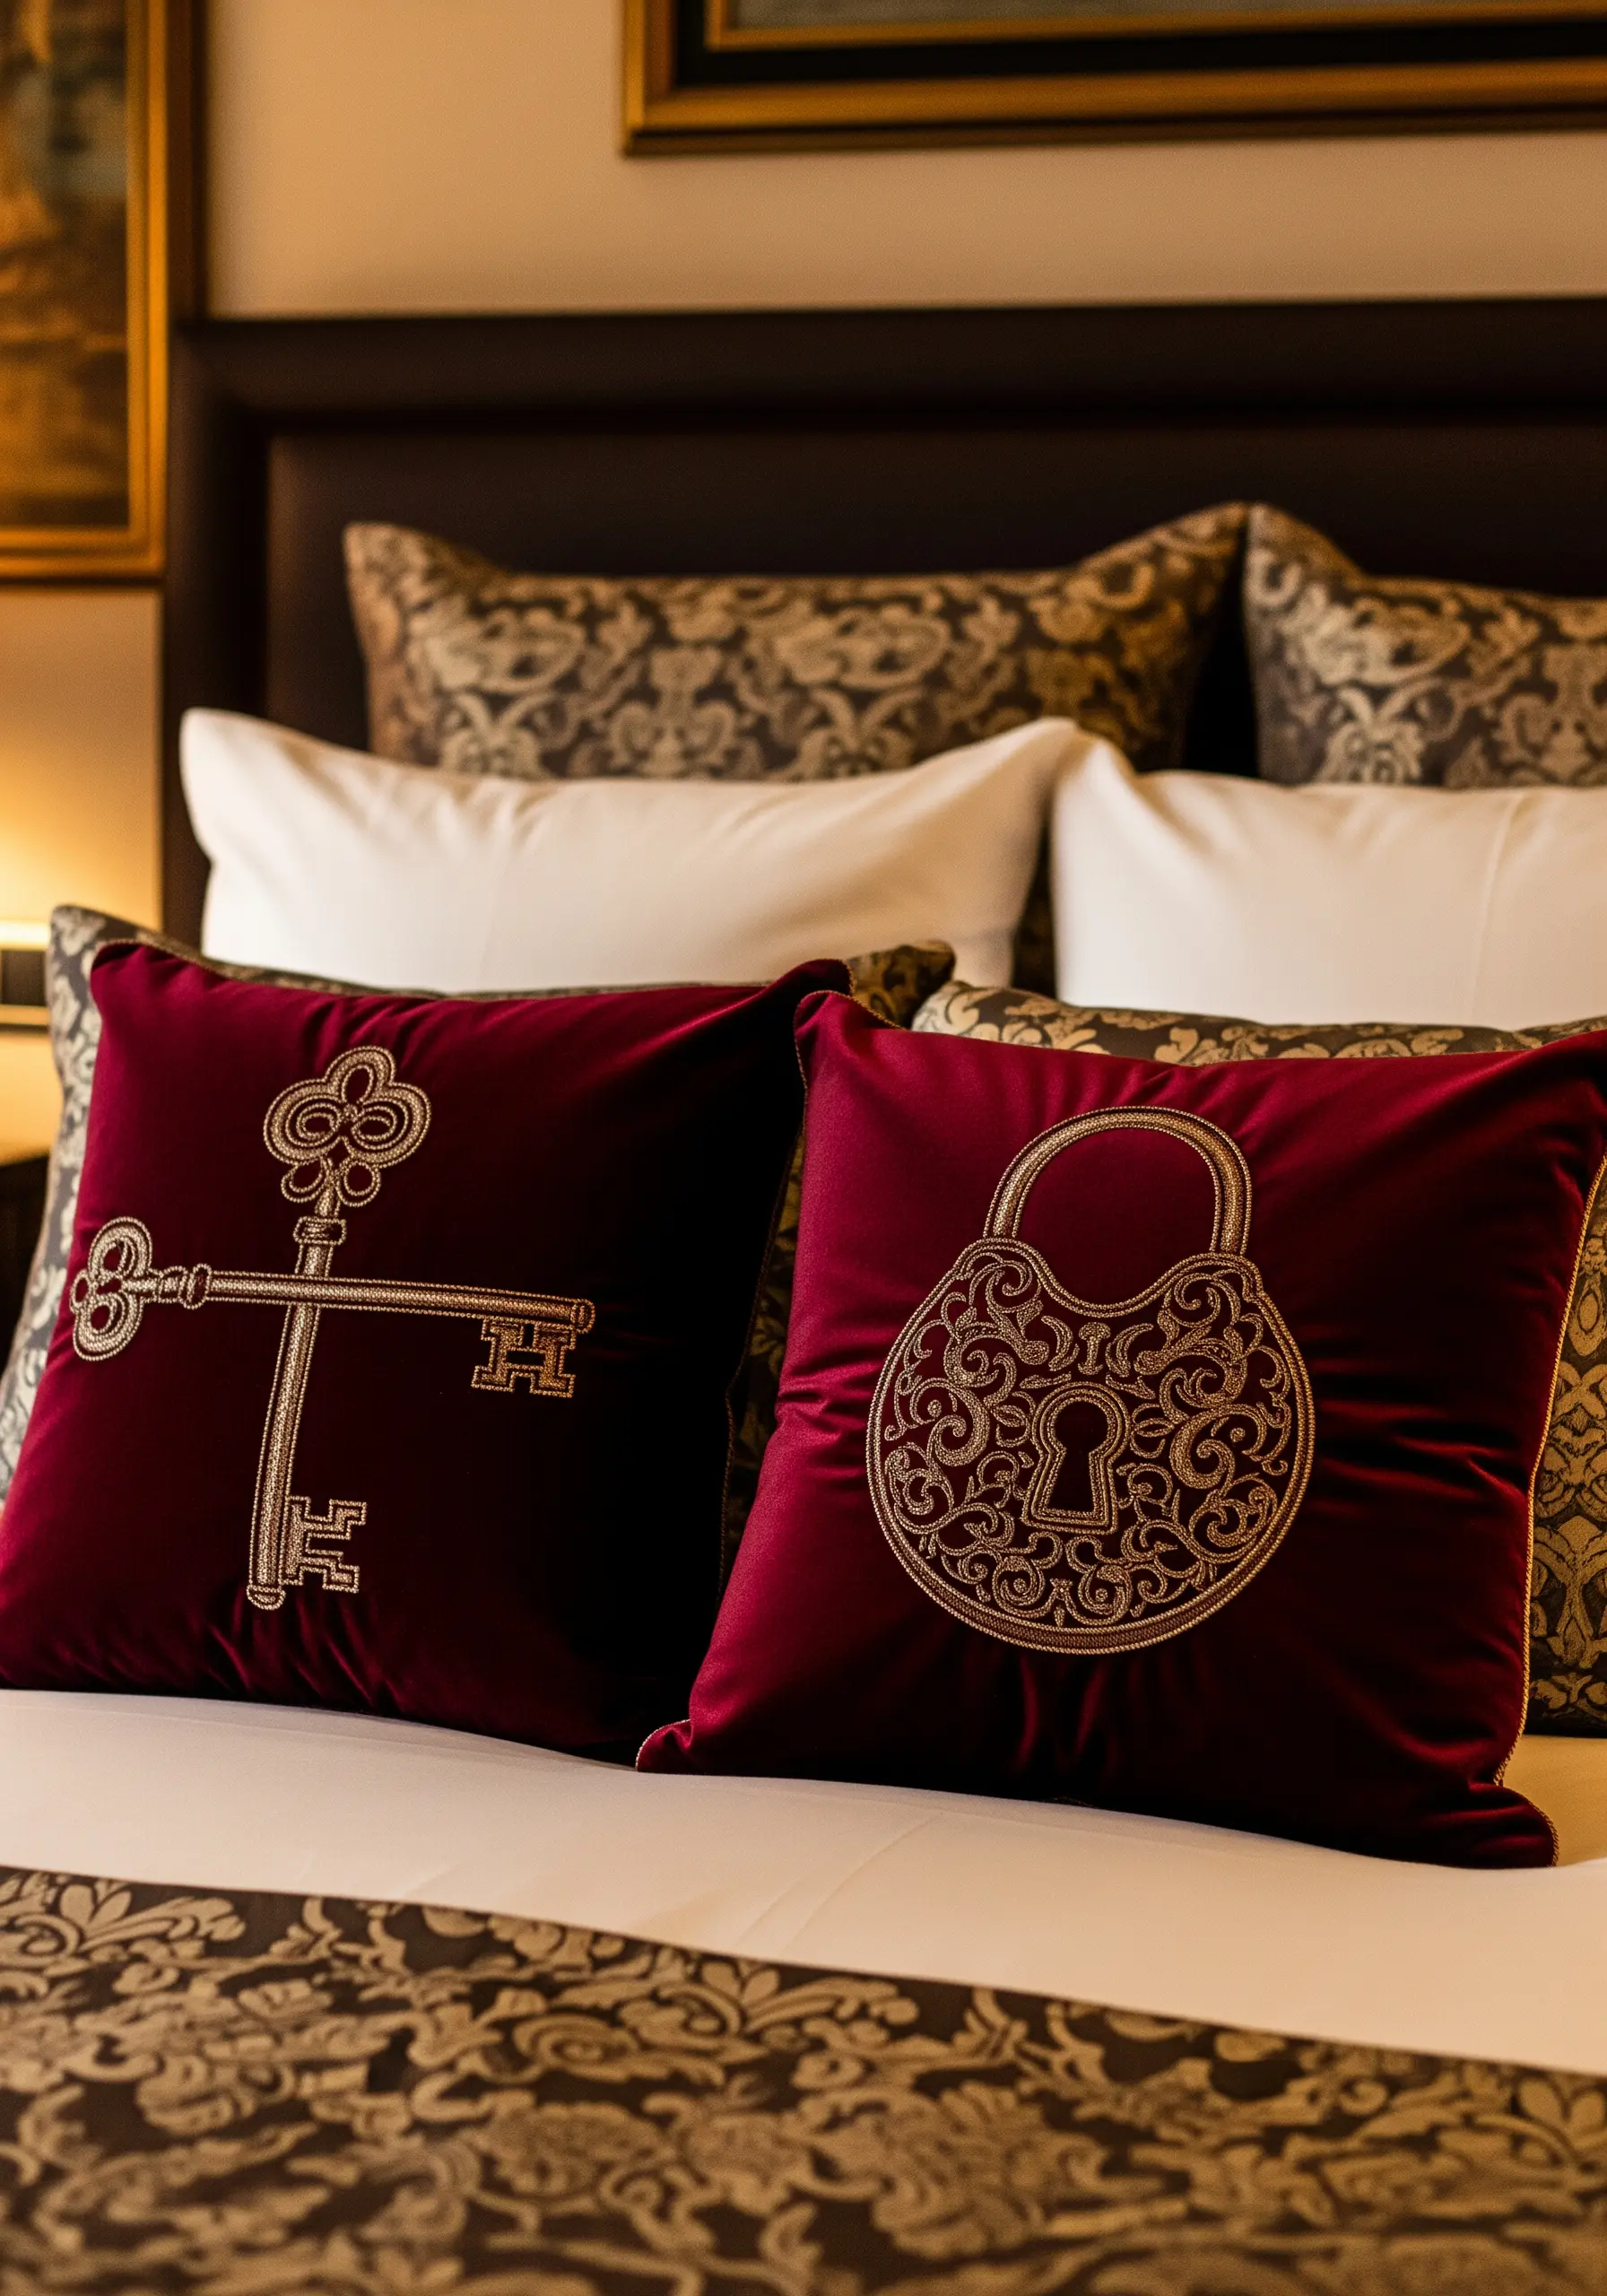
For intricate, shimmering designs on a deep-pile fabric like velvet, couching is the superior technique.
Lay your metallic thread on the surface of the fabric and use a second, finer thread (like sewing thread in a matching color) to stitch over it, tacking it down.
This allows the metallic thread to sit on top of the velvet pile, ensuring it catches the light beautifully instead of getting lost in the texture. It’s the secret to a truly opulent finish.
23. A Subtle, Lasting Promise
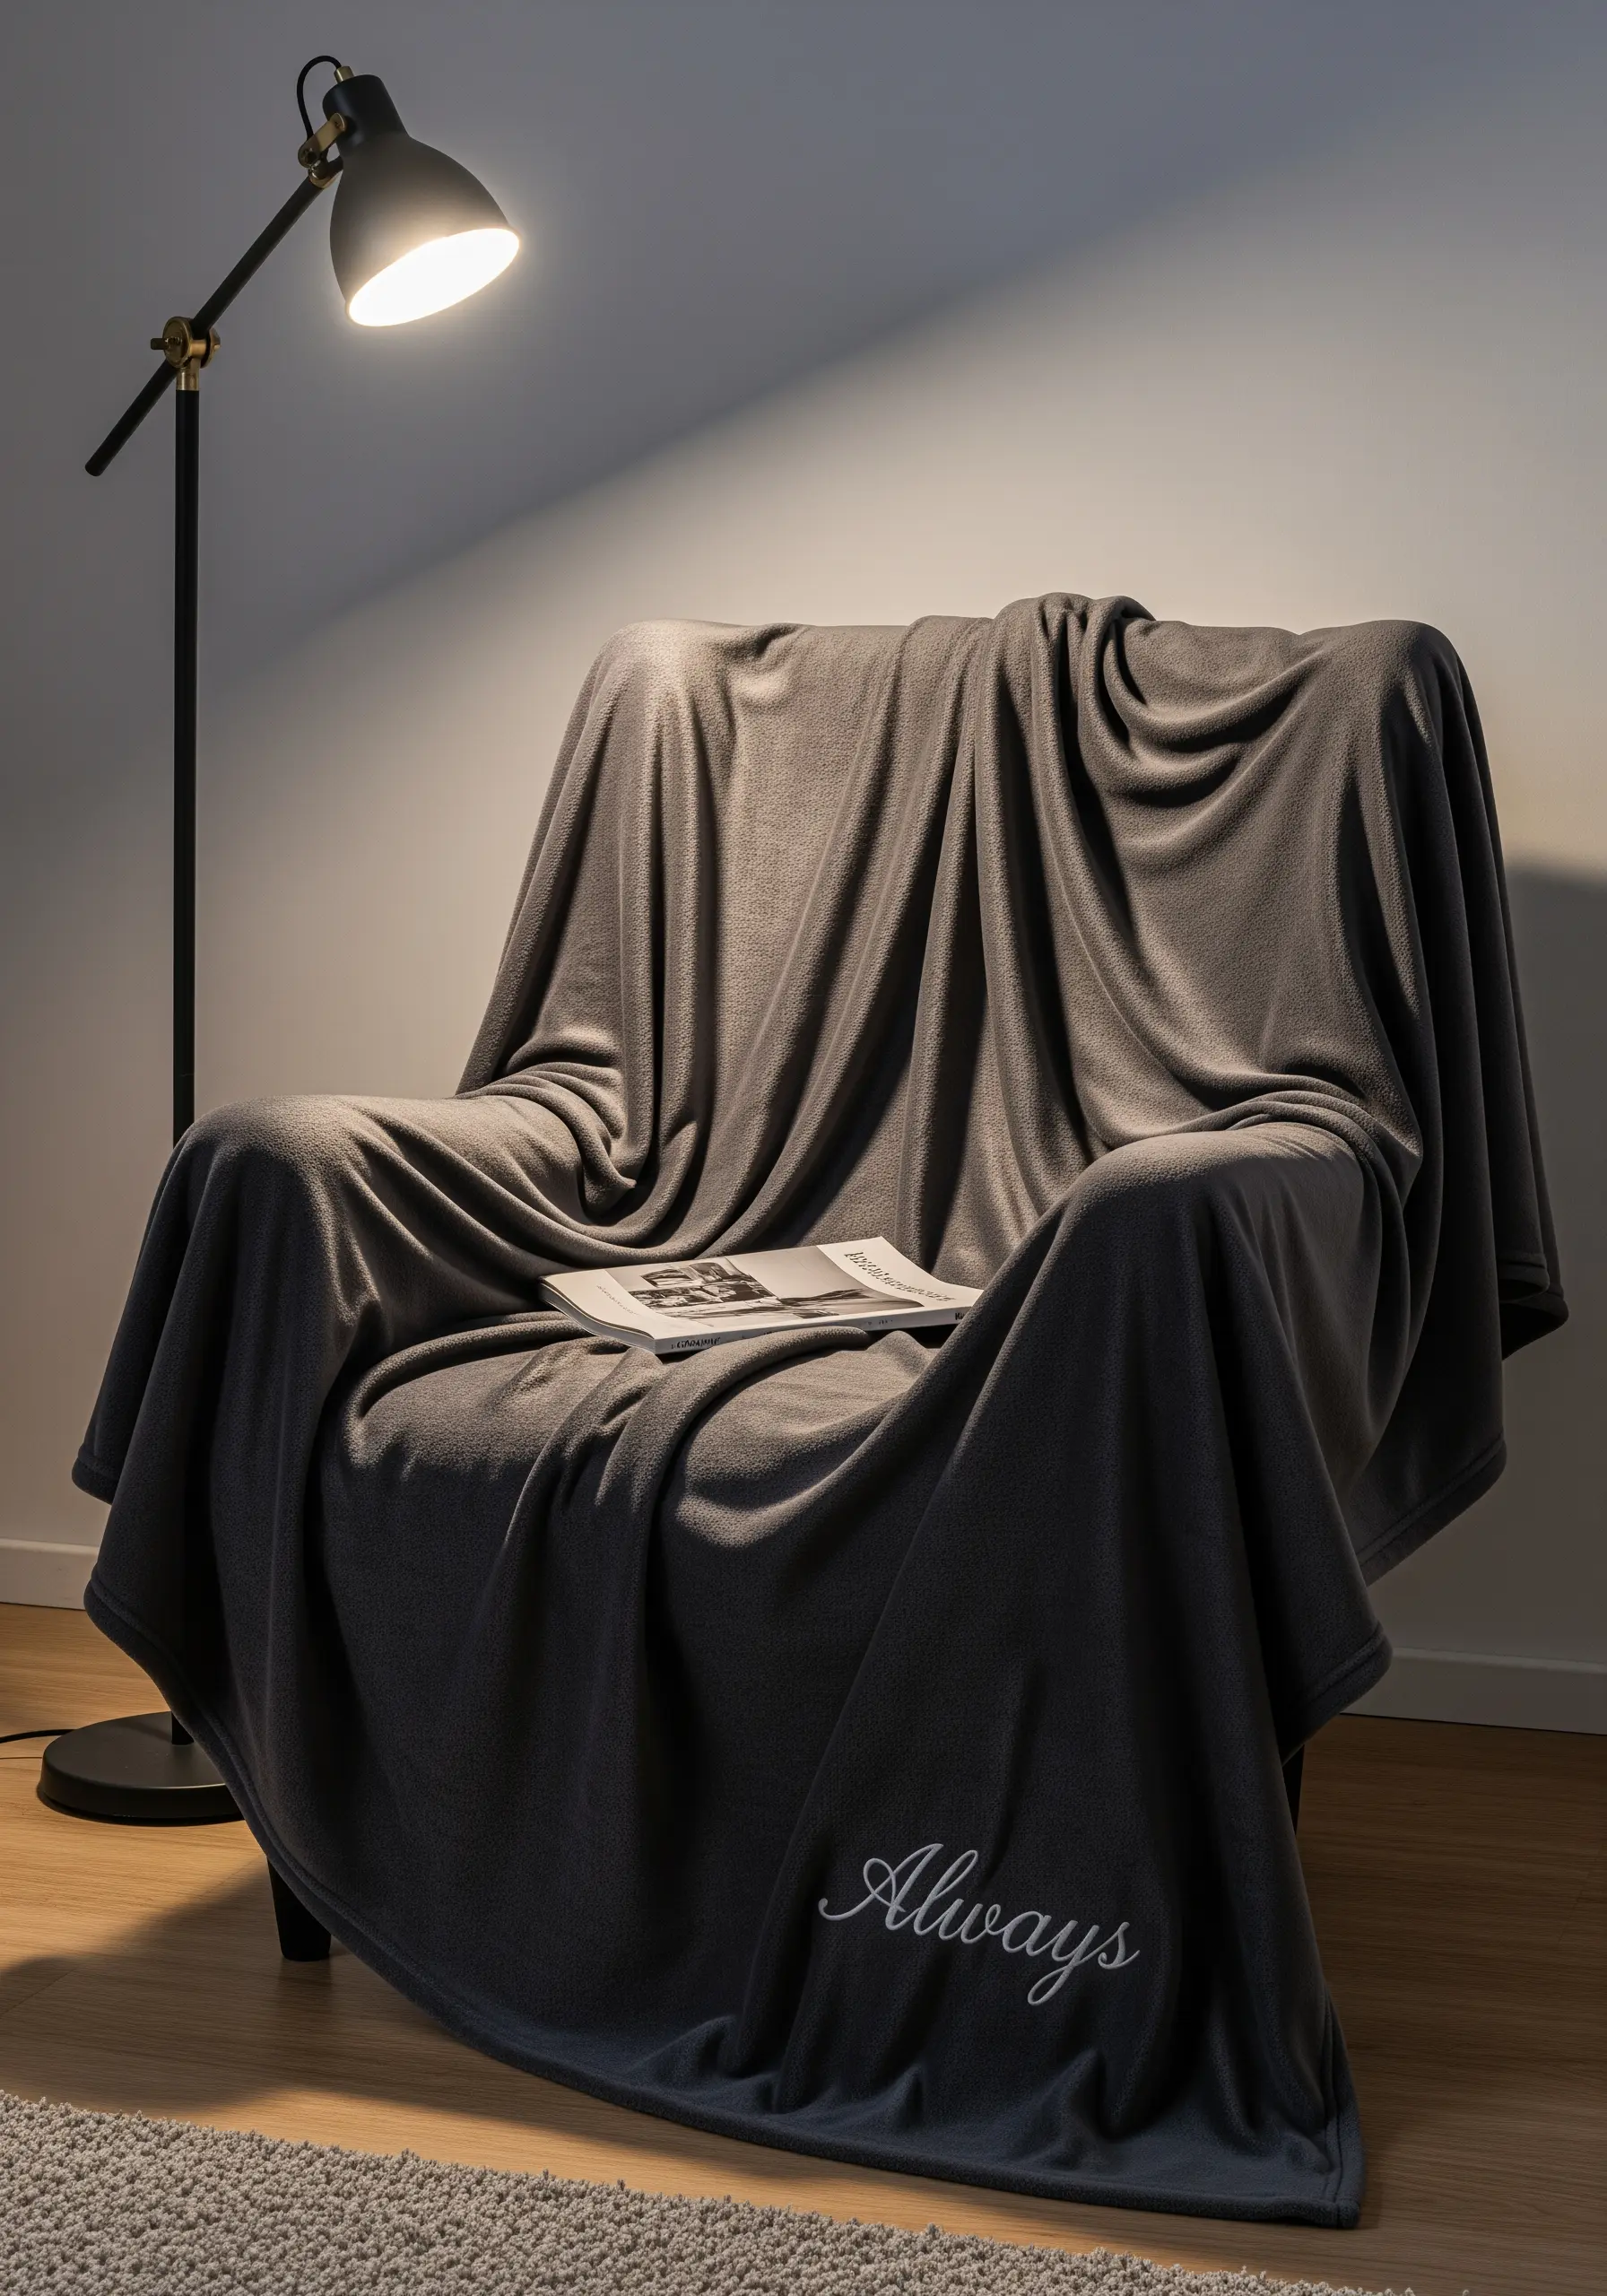
A single, meaningful word can add a powerful touch of romance to a simple throw blanket.
When embroidering on a fluffy fabric like fleece, always use a water-soluble stabilizer on top of your design area.
This thin film provides a smooth surface and prevents your stitches from sinking into the pile and disappearing. Once you’re finished, it dissolves in water, leaving crisp, clear lettering.
24. The Illuminated Love Poem

Transform a plain lampshade into a romantic, glowing feature. Don’t stitch directly on the shade; instead, embroider your chosen text onto a piece of light-colored linen or cotton fabric first.
Use a simple, legible backstitch. Then, carefully wrap the embroidered fabric around the lampshade and secure it with a heat-resistant, acid-free fabric glue.
When lit, the lampshade will cast a warm glow, illuminating your stitched words from behind.
25. The Mountain Vista Pillowscape

Achieve a stunning, painterly effect on your pillows using thread painting techniques.
Use long-and-short stitch to blend different shades of blue and grey, creating the atmospheric depth of a mountain range. Use lighter, cooler tones for distant peaks and darker, warmer tones for the foreground.
For the evergreen trees, use clusters of French knots and short straight stitches in various greens to build up a convincing texture. This layered approach turns pillows into a serene mountain landscape thread painting.
26. The Fingerprint Heart

Translate the unique pattern of your fingerprints into a deeply personal piece of art.
To capture the continuous, swirling ridges, use a whipped backstitch. This technique creates a smooth, solid line with no gaps, perfectly mimicking the look of a fingerprint.
By intertwining the two prints to form a heart, you create a modern, graphic symbol of your unique connection and identity as a couple.
27. The Lion and Lioness Portrait Pair

The key to realistic animal portraits is directional stitching. Your needle should act like a paintbrush, with each stitch following the natural direction of the fur’s growth.
Use long, flowing stitches for the mane to create a sense of movement, and shorter, tighter stitches around the eyes and nose to capture the contours of the face.
This meticulous attention to stitch direction is what will breathe life and personality into your work, making the portraits feel powerful and real.
28. The Abstract Ribbon of Infinity

Create the illusion of a three-dimensional, twisting ribbon using careful color blending with a long-and-short stitch.
For each color section, use at least three shades: a dark tone for shadows (like in the folds), a mid-tone for the main body, and a light tone for highlights where the light would hit.
Blending these shades seamlessly where they meet is what gives the flat embroidery a convincing sense of volume, depth, and movement.
29. Golden Ginkgo on Silk

Capture the distinct, elegant shape of a ginkgo leaf by using a fan-shaped satin stitch.
All of your stitches should originate from a single point at the base of the leaf and radiate outwards, fanning out towards the wavy edge. This perfectly mimics the leaf’s natural vein structure.
Using a high-sheen thread, like silk or rayon, on a silk fabric will create a luxurious play of light and texture.
30. The Mythical Pomegranate
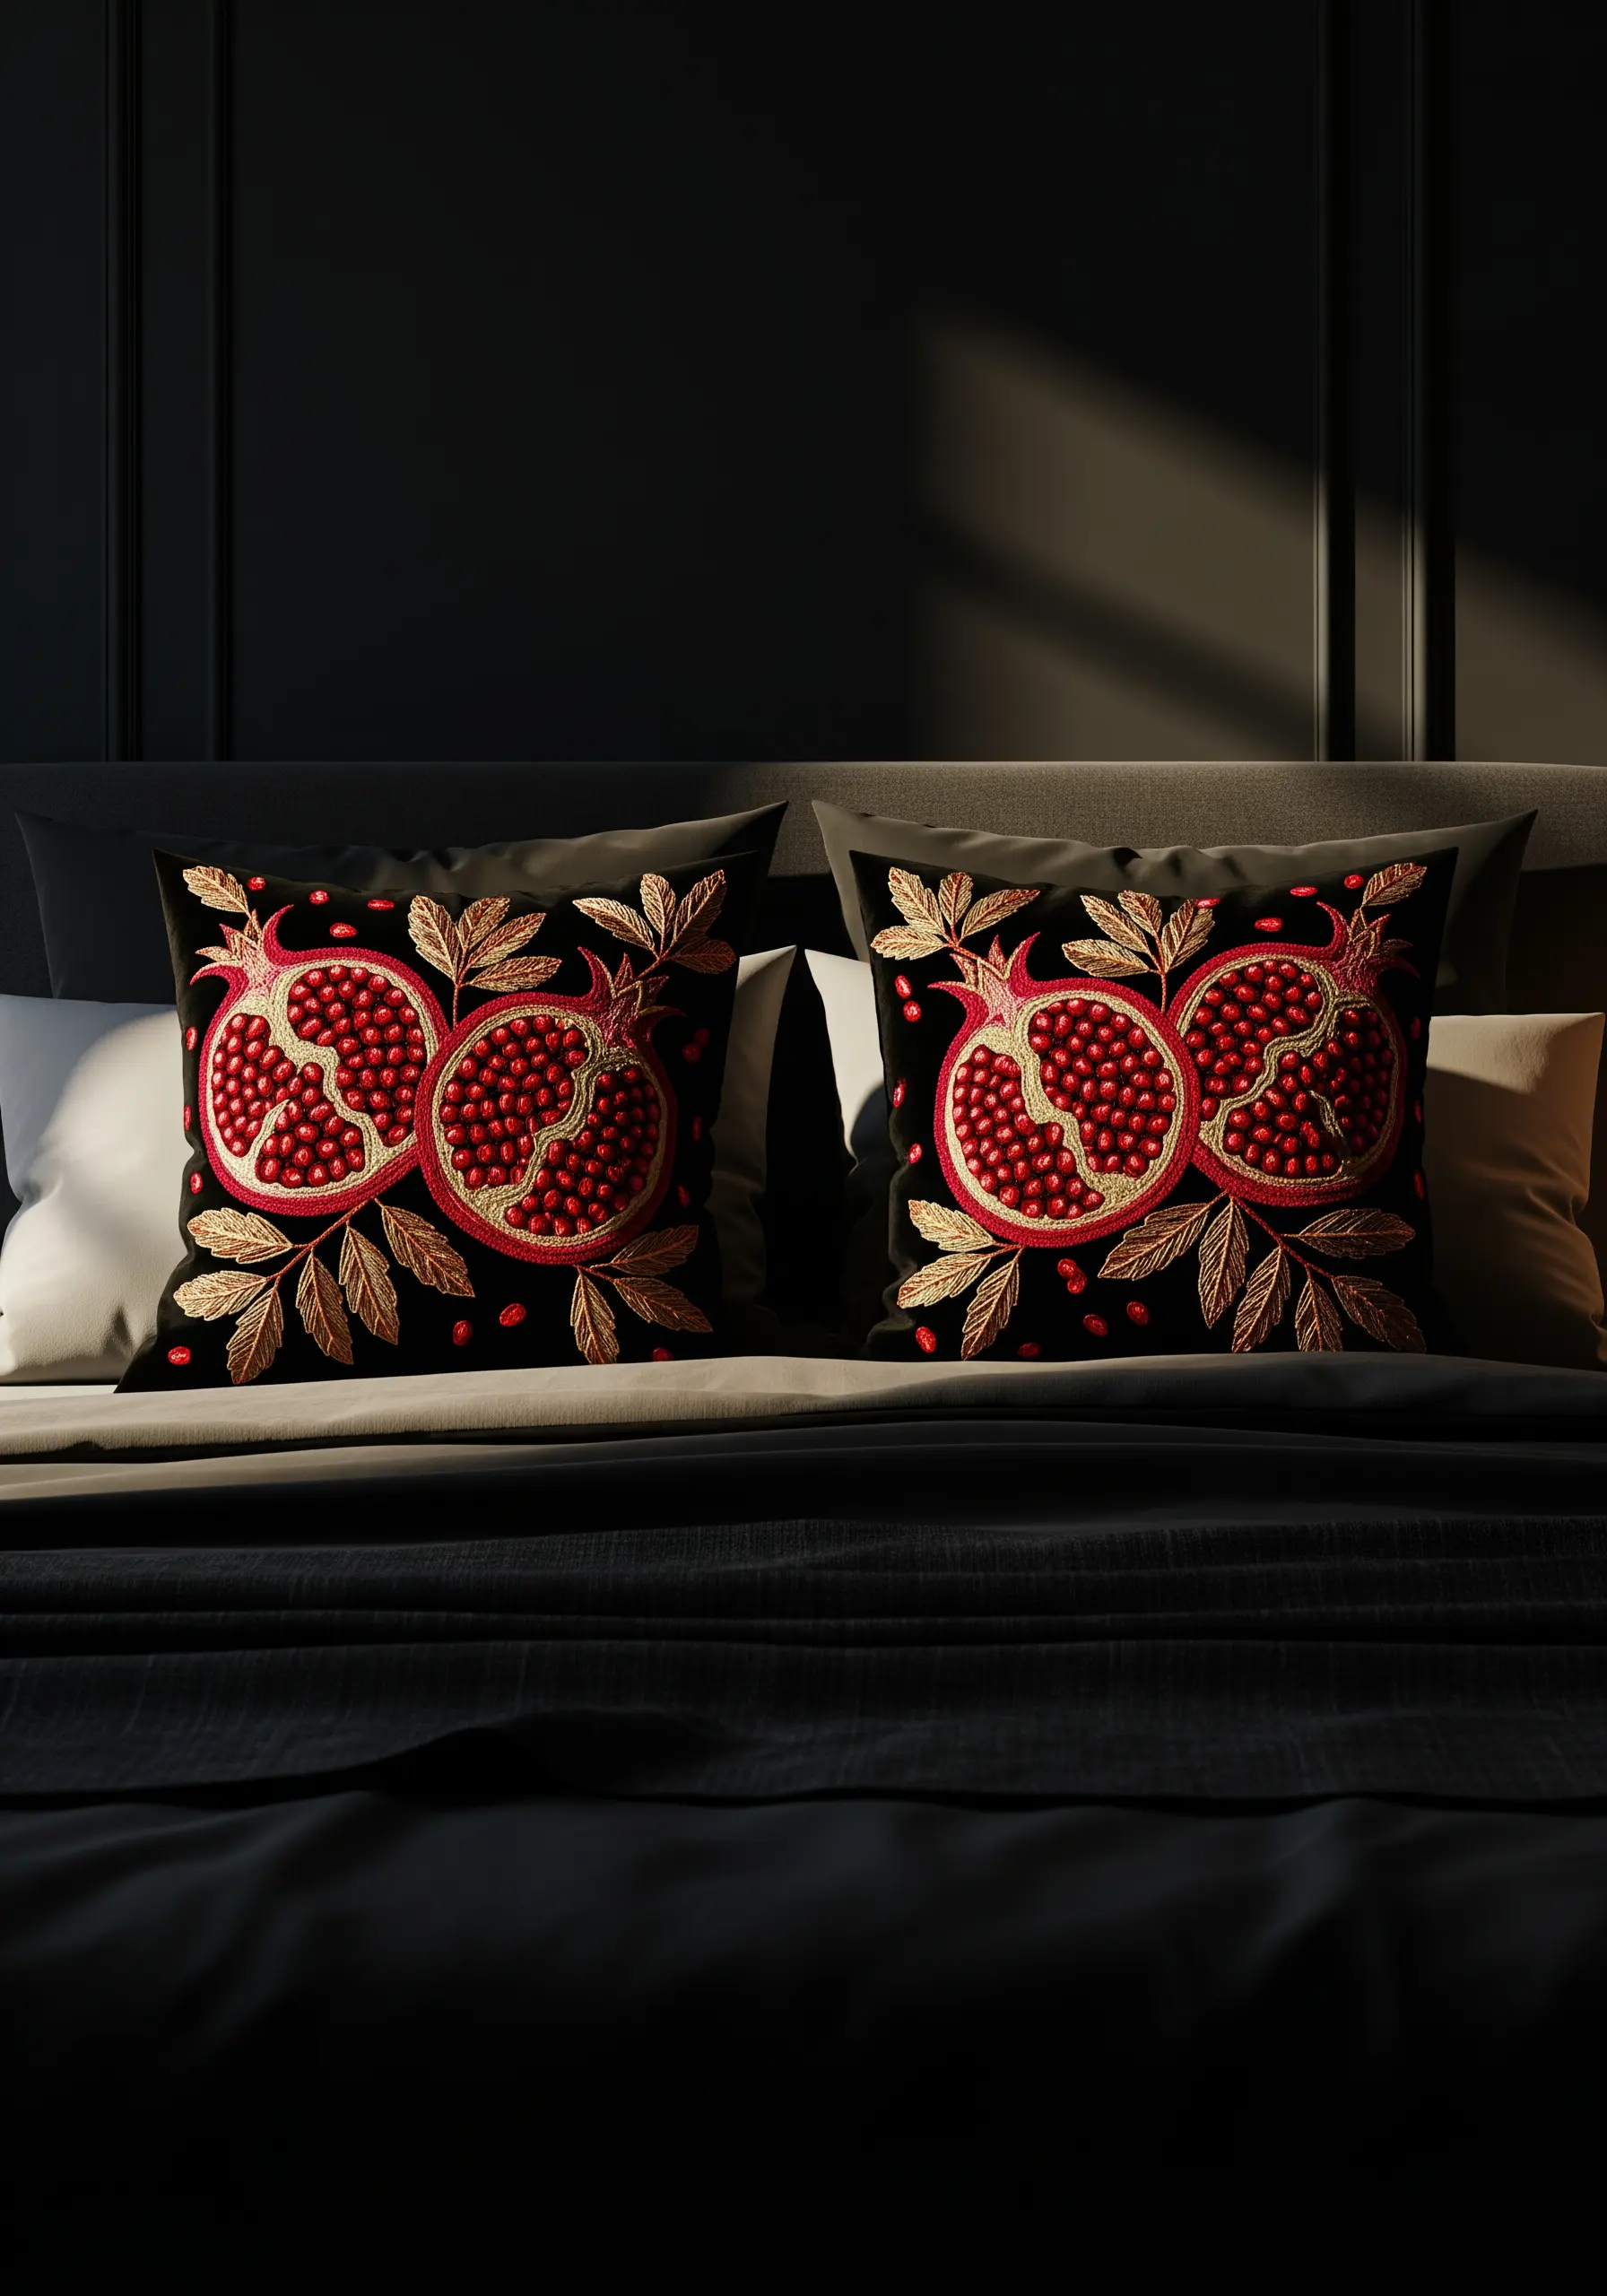
This design is a masterclass in texture. Create a stunning contrast by using different types of thread for different elements.
For the juicy seeds, use a high-sheen rayon or silk thread and pack tiny French knots tightly together to make them look like glittering jewels.
For the outer rind and leaves, switch to a matte cotton floss. This subtle difference between shiny and matte finishes will add incredible depth and realism to the design.
31. The Red Thread of Fate

This romantic couple line art is inspired by the myth that two destined souls are connected by an invisible red thread.
To secure the long, meandering line to the duvet without causing puckering, use a couching technique. Lay down a bold strand of red pearl cotton on the fabric’s surface, then tack it in place with a much finer, matching red thread.
This method allows the thread to curve and wander freely while staying perfectly flat, telling its simple, powerful story across the bed.


