

You have the threads, the fabric, and the desire to create something beautiful. But perhaps your finished pieces don’t quite capture the calm, polished look you envision. It’s often the smallest adjustments that make the biggest difference—the choice of thread, the direction of a stitch, the way a design is placed on the fabric.
Think of your needle not just as a tool for making stitches, but as a pencil for drawing with texture and a brush for painting with light. The techniques here aren’t about complexity; they’re about intention. They are quiet methods for adding depth, softness, and a sense of thoughtful artistry to your work.
This is your invitation to slow down, to observe the details, and to stitch with a newfound confidence. You already have the skill. Now, let’s refine it, turning simple linens and threads into serene works of art that make your bedroom a true sanctuary.
1. Frame a Linen Throw with Trailing Botanicals

When embroidering on a large textile like a throw blanket, plan your design as a delicate border that complements, rather than overwhelms, the piece.
Choose a lightweight linen or cotton-linen blend; its natural texture provides a beautiful ground for fine stitches.
Use a single strand of floss for the stems and two strands for the blossoms to create subtle dimension.
A trailing vine or a scattered wildflower pattern works beautifully, as it allows the fabric to drape naturally without the stiffness of a dense design.
Always use a tear-away stabilizer on the back to prevent puckering, especially along the length of the stems.
2. Combine Appliqué and Stitch for Delicate Details
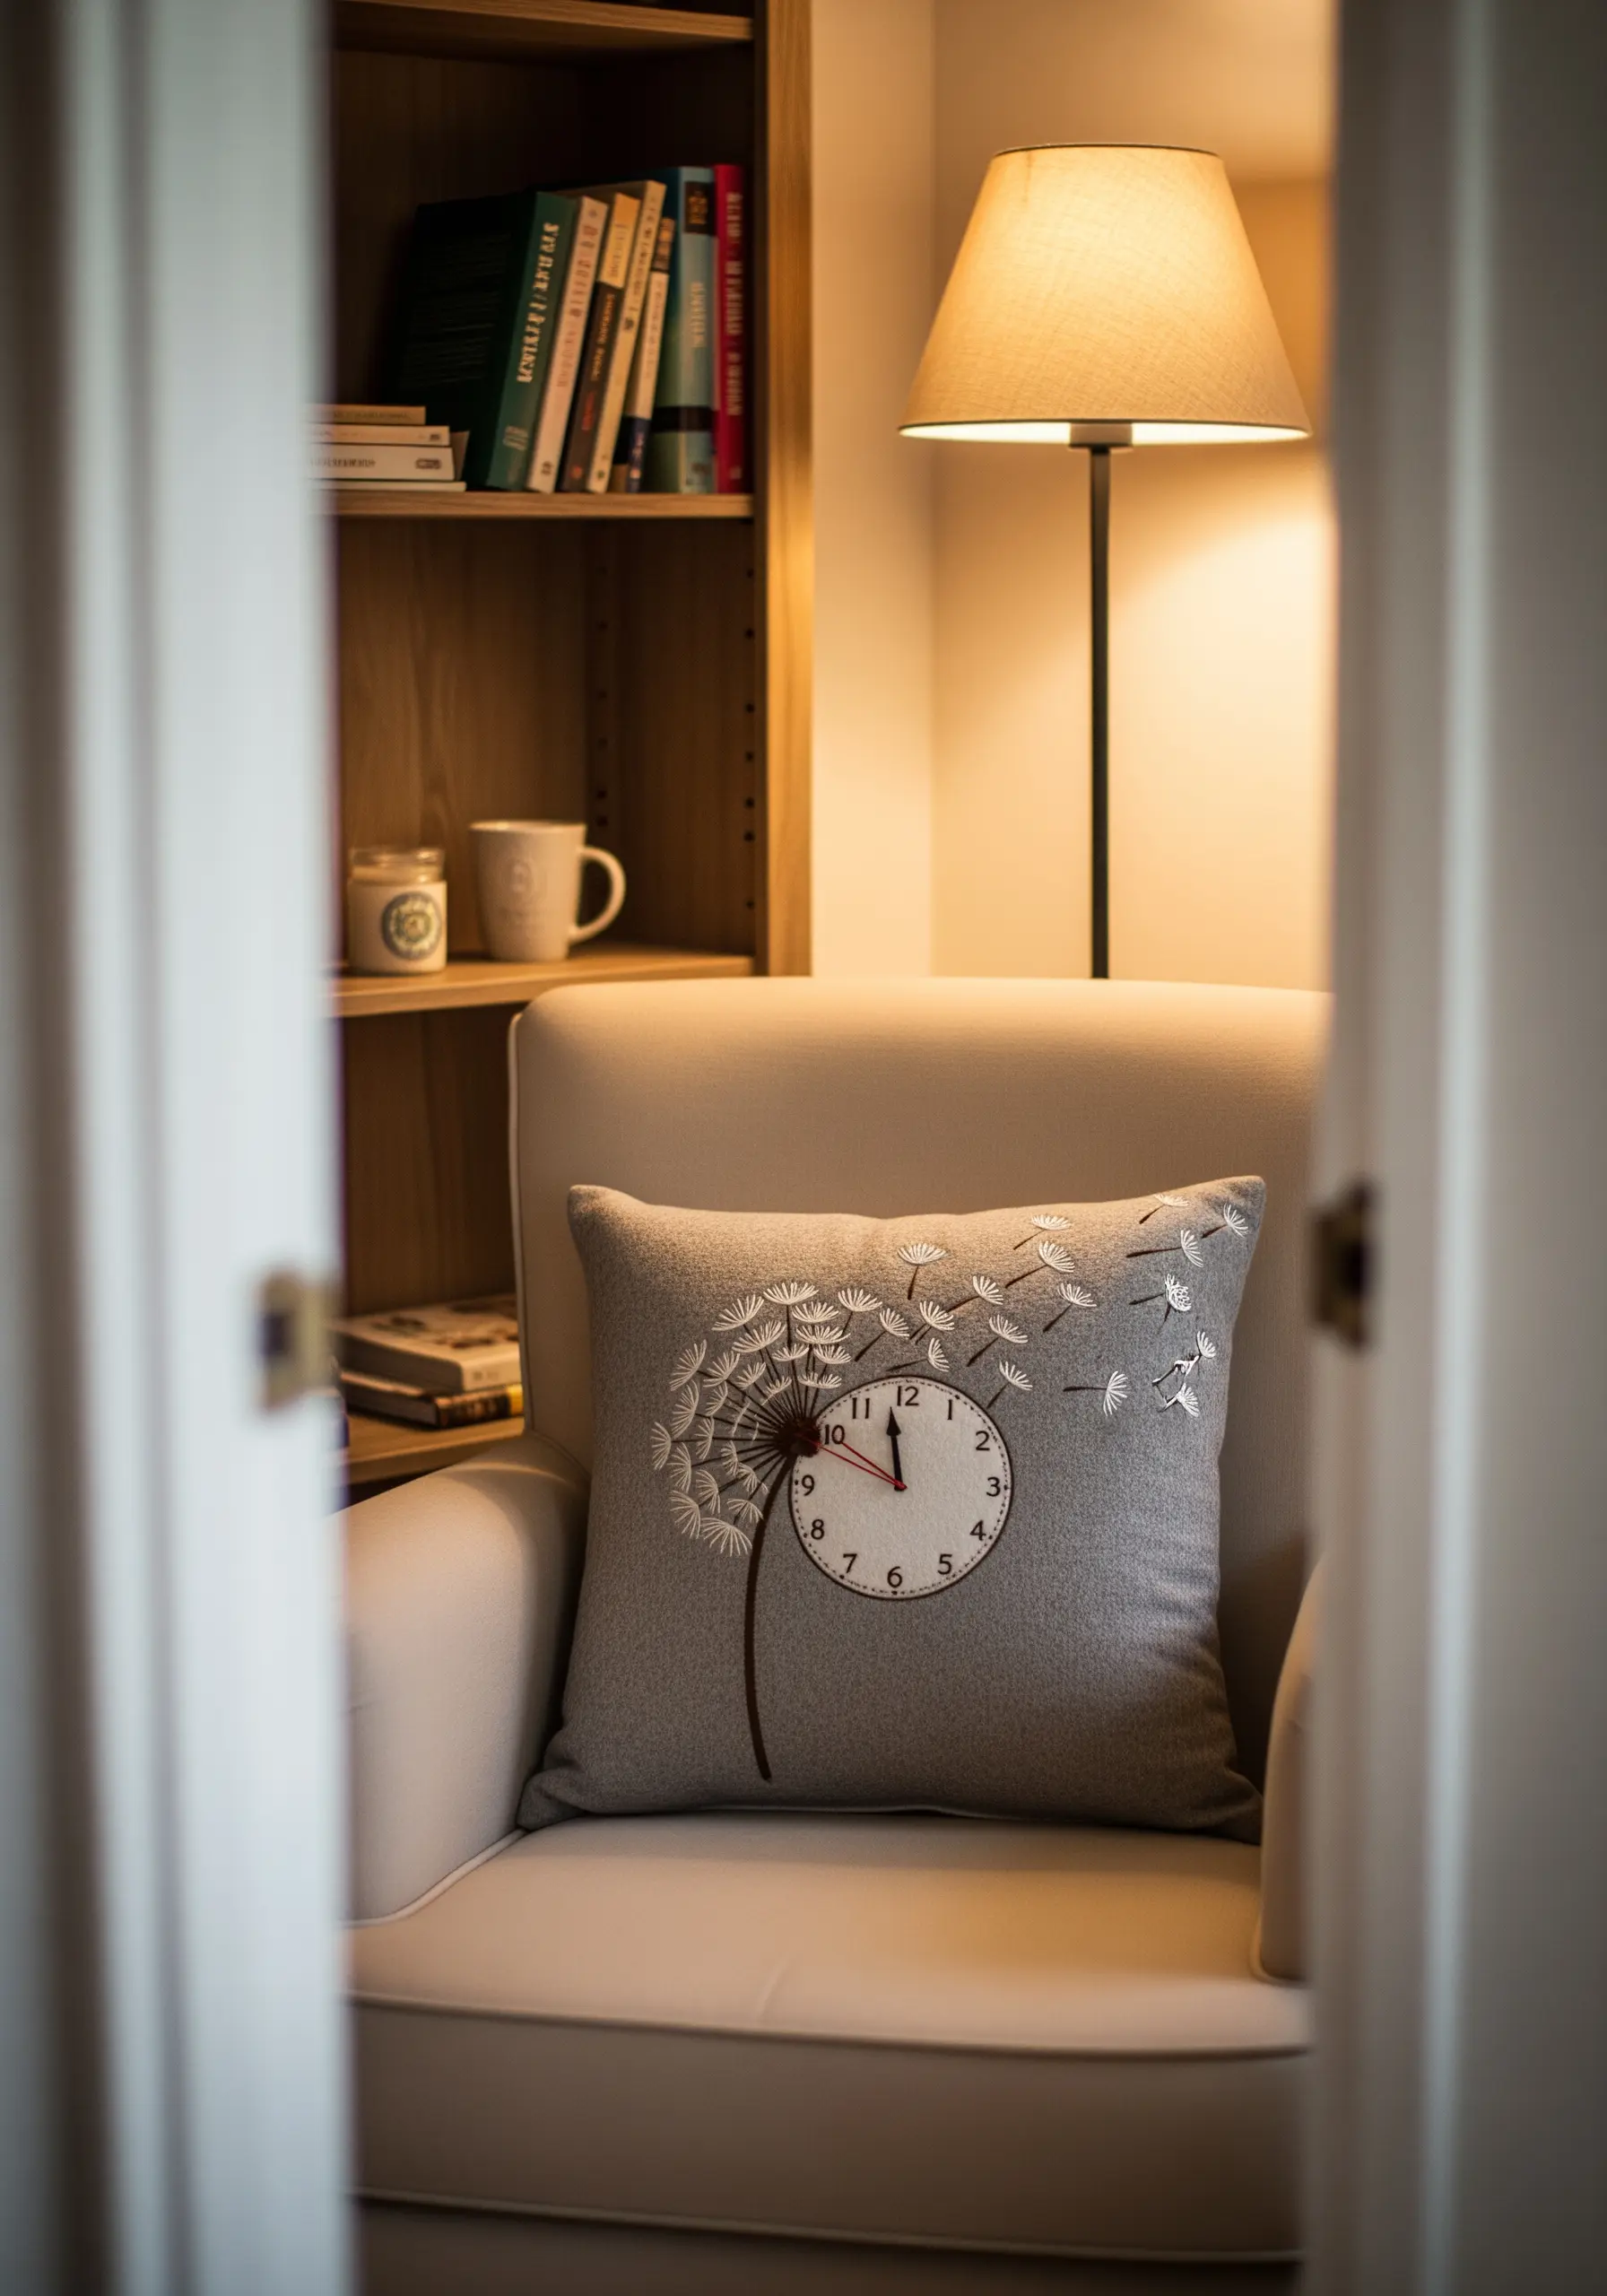
For designs that require a solid, crisp shape like a clock face, combine appliqué with embroidery.
Cut your shape from a piece of thin, white cotton fabric, secure it with an iron-on adhesive, and then stitch the edges with a fine satin stitch or backstitch for a clean finish.
This technique saves time and ensures a perfectly smooth surface that would be difficult to achieve with fill stitches alone.
For the dandelion seeds, use single detached chain stitches or straight stitches to create the sense of movement and weightlessness.
3. Master Embroidery on Knitted Textures

Embroidering on a chunky knit requires a different approach than working on woven fabric.
Use a water-soluble stabilizer on top of your knit; this provides a smooth surface to draw your pattern on and prevents your stitches from sinking into the fabric’s texture.
Choose stitches that are bold and textural themselves, like chain stitch, stem stitch, or large French knots.
For the delicate lace-like border, consider couching—tacking down a thicker yarn or cord with smaller, invisible stitches—to create a raised line that sits proudly on the surface.
4. Create Depth with Subtle Color Variation

To give a simple botanical pattern a more realistic and less flat appearance, use several shades of the same color family.
For this lavender field, use at least three tones of purple and two tones of green, assigning them randomly to different stems.
This variation mimics the way light hits plants in nature and adds sophisticated depth without any complex shading techniques.
Keep the stitches simple—stem stitch for the stalks and straight stitches or French knots for the blossoms—and let the color palette do the work.
Stretching your finished piece over a canvas frame is a modern alternative to displaying it in a hoop.
5. Design a Cohesive Wildflower Cushion Set
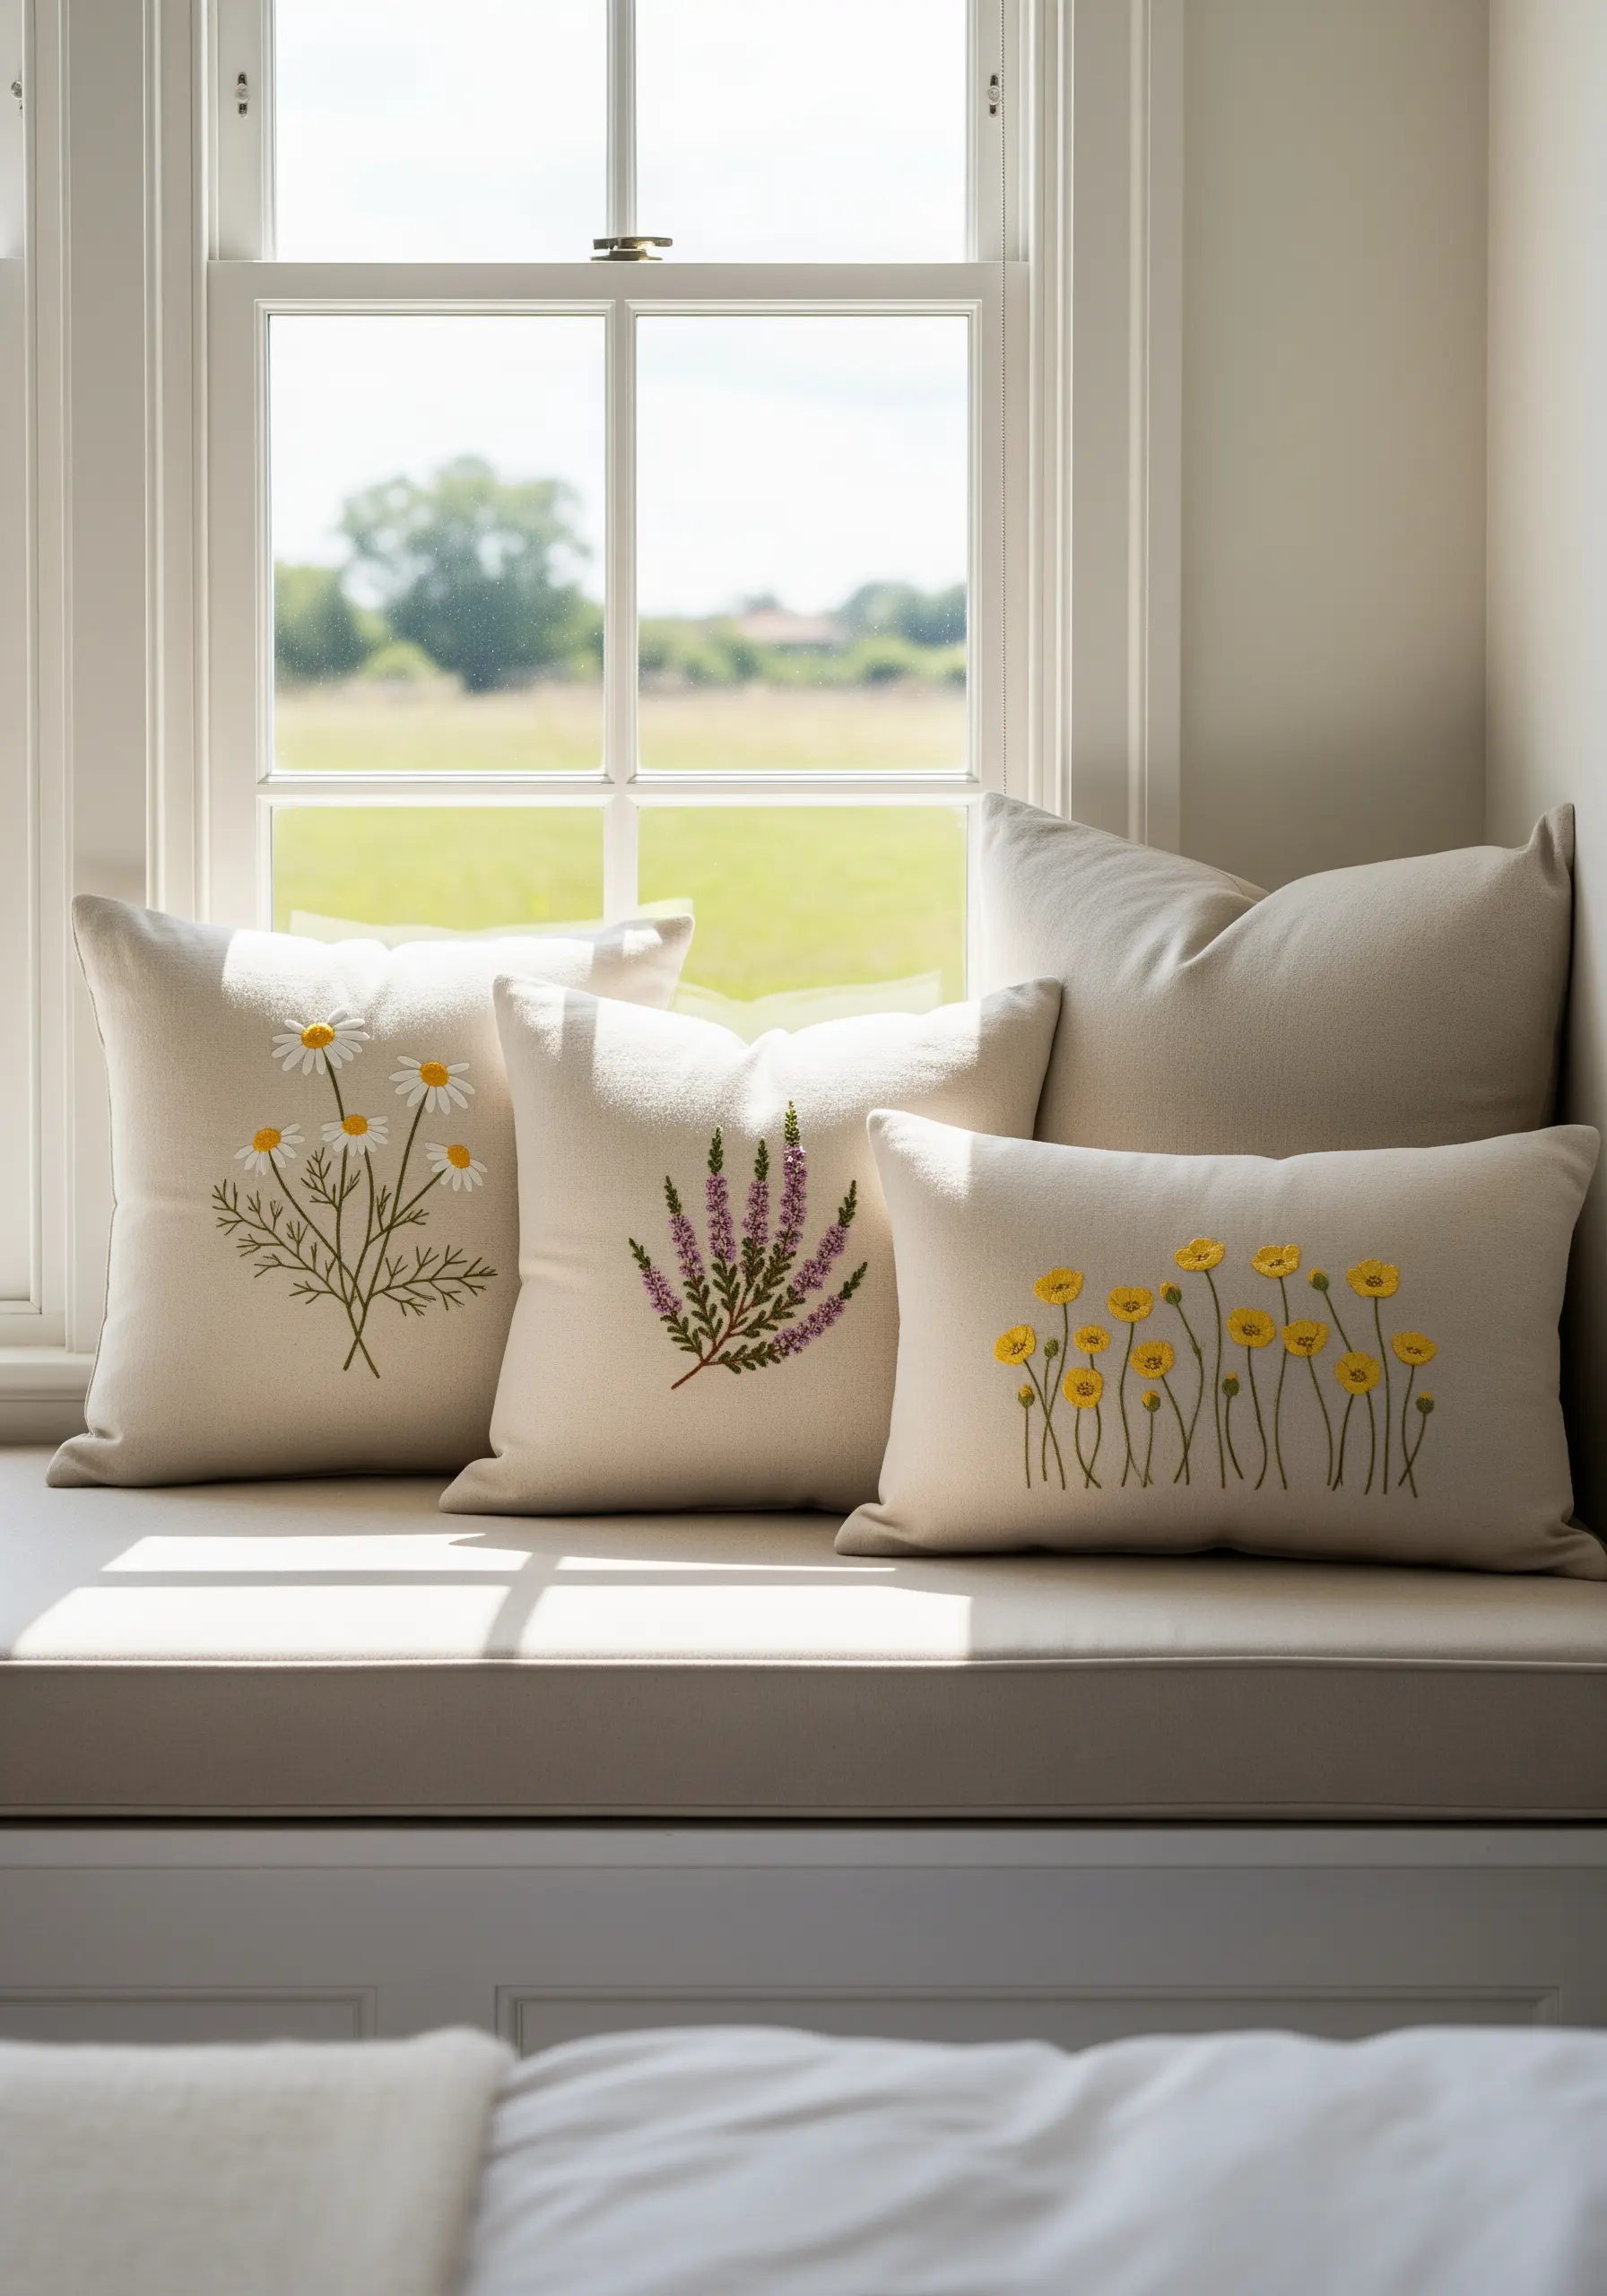
To create a set of embroidered cushions that feel connected but not identical, choose a theme like wildflowers and vary the specific motifs.
Maintain a consistent artistic style across all pieces by using the same stitch types and thread weight for stems, leaves, and petals.
For example, use backstitch for all stems, fishbone stitch for leaves, and detached chain stitch for petals.
This creates a visual language that ties the collection together, even when the colors and flowers are different.
6. Illuminate Your Stitches on a Fabric Lampshade

When embroidering a lampshade, remember that your design will be backlit.
Opt for clean outlines like a stem or split stitch, as the light will catch the texture and create a beautiful silhouette.
A single color creates a sophisticated, graphic effect that doesn’t overwhelm the space.
Before you begin, hold your fabric up to a window to see how your thread choice looks when illuminated—some colors can appear darker or duller than expected.
Secure your thread tails meticulously, as they will be visible from the inside when the lamp is on.
7. Stitch a Meadow-Inspired, All-Over Duvet Pattern

An all-over pattern adds a luxurious, custom feel to bed linens, but it must be planned carefully to maintain softness and drape.
Choose small, scattered motifs like ferns, daisies, and delicate sprigs rather than large, dense blocks of satin stitch.
Work with a limited, neutral color palette to keep the overall effect serene and cohesive.
Use a lightweight thread (no more than two strands) to ensure the embroidery doesn’t make the fabric stiff or heavy.
This approach creates a rich visual texture that feels as soft as it looks.
8. Embroider on Sheer Curtains for a Luminous Effect
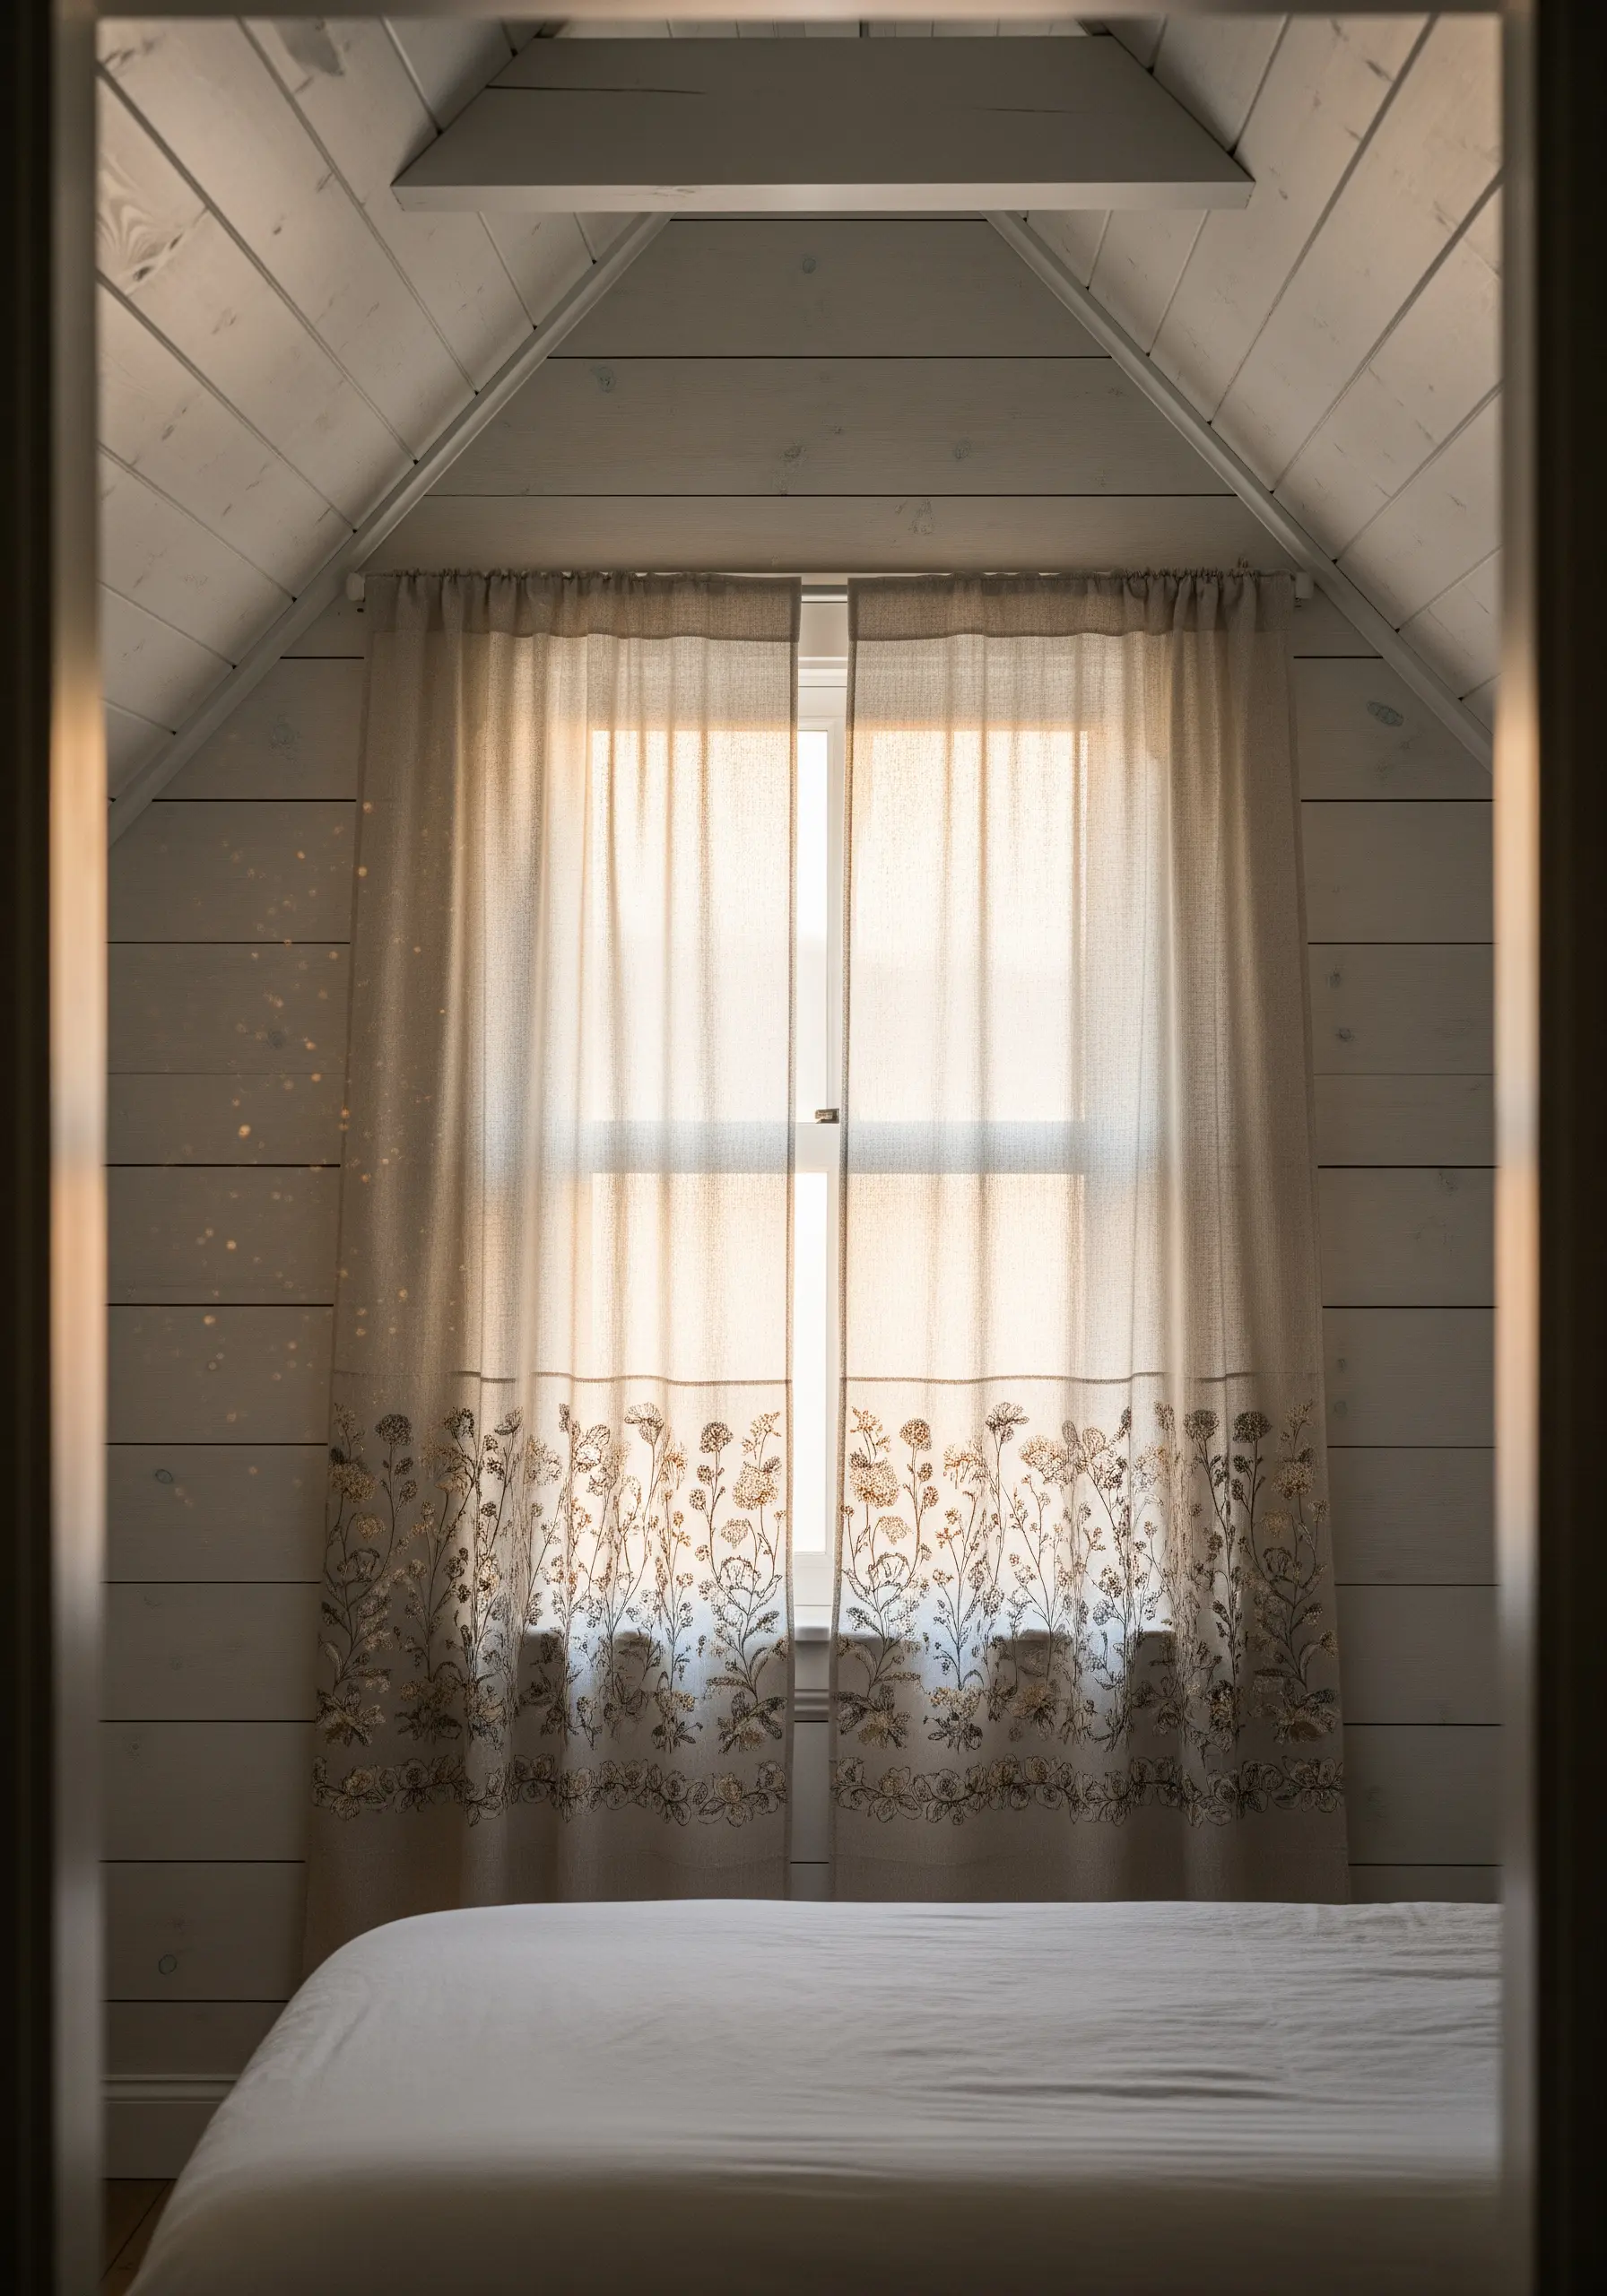
Stitching on sheer or semi-sheer fabric creates a magical, floating effect as light filters through.
Use a wash-away stabilizer for support while you stitch; it will dissolve completely, leaving your embroidery suspended on the delicate fabric.
A simple backstitch or stem stitch is ideal, as both sides of your work will be somewhat visible.
Plan your design along the bottom hem or edges to add decorative weight, helping the curtains hang beautifully while framing the window view.
9. Craft a Perfectly Spaced Floral Border

For a polished, professional-looking border on a table skirt or curtain hem, precise spacing is essential.
Create a template of your repeating motif on paper or cardstock to ensure each element is identical in size and shape.
Use a water-soluble transfer pen and your template to mark the placement of each motif before you begin stitching.
This meticulous preparation is the key to transforming a simple row of flowers into a truly elegant and cohesive design feature.
10. Capture Botanical Illustrations in Thread

Achieve the clean, elegant look of a vintage botanical sketch by using a limited number of stitches and very fine thread.
Use a single strand of black or dark gray floss for the entire piece to maintain a consistent line weight.
Rely on backstitch or split stitch for crisp outlines and use tiny seed stitches or light cross-hatching for subtle shading, rather than dense satin stitch.
This technique emphasizes form and detail, transforming your embroidery into a piece of fine art.
Grouping hoops of different sizes creates a dynamic gallery wall above a headboard.
11. Embellish Quilted Surfaces with Delicate Sprays

When stitching on a quilted fabric, use the existing texture to your advantage.
Place your motifs within the quilted sections to prevent your stitches from competing with the texture of the grid.
For delicate florals like baby’s breath, use French knots for the blossoms; their tight, round shape sits neatly on the puffy surface.
Use a simple stem stitch for the branches, following the grain of the fabric to avoid puckering the quilted layers.
12. Master the Woven Wheel Rose for Plush Florals

The woven wheel stitch is the secret to creating full, dimensional roses with incredible texture—and it’s easier than it looks.
Start by creating a star of five straight stitches as your foundation.
Then, using a tapestry needle to avoid splitting the threads, weave your floss over and under these spokes, spiraling out from the center.
Don’t pull the thread too tight; allow it to build up loosely to create the plush, rounded shape of a blooming rose.
It’s a perfect stitch for creating a romantic focal point on sachets or pillows.
13. Build Tactile Dimension with Varied Stitches
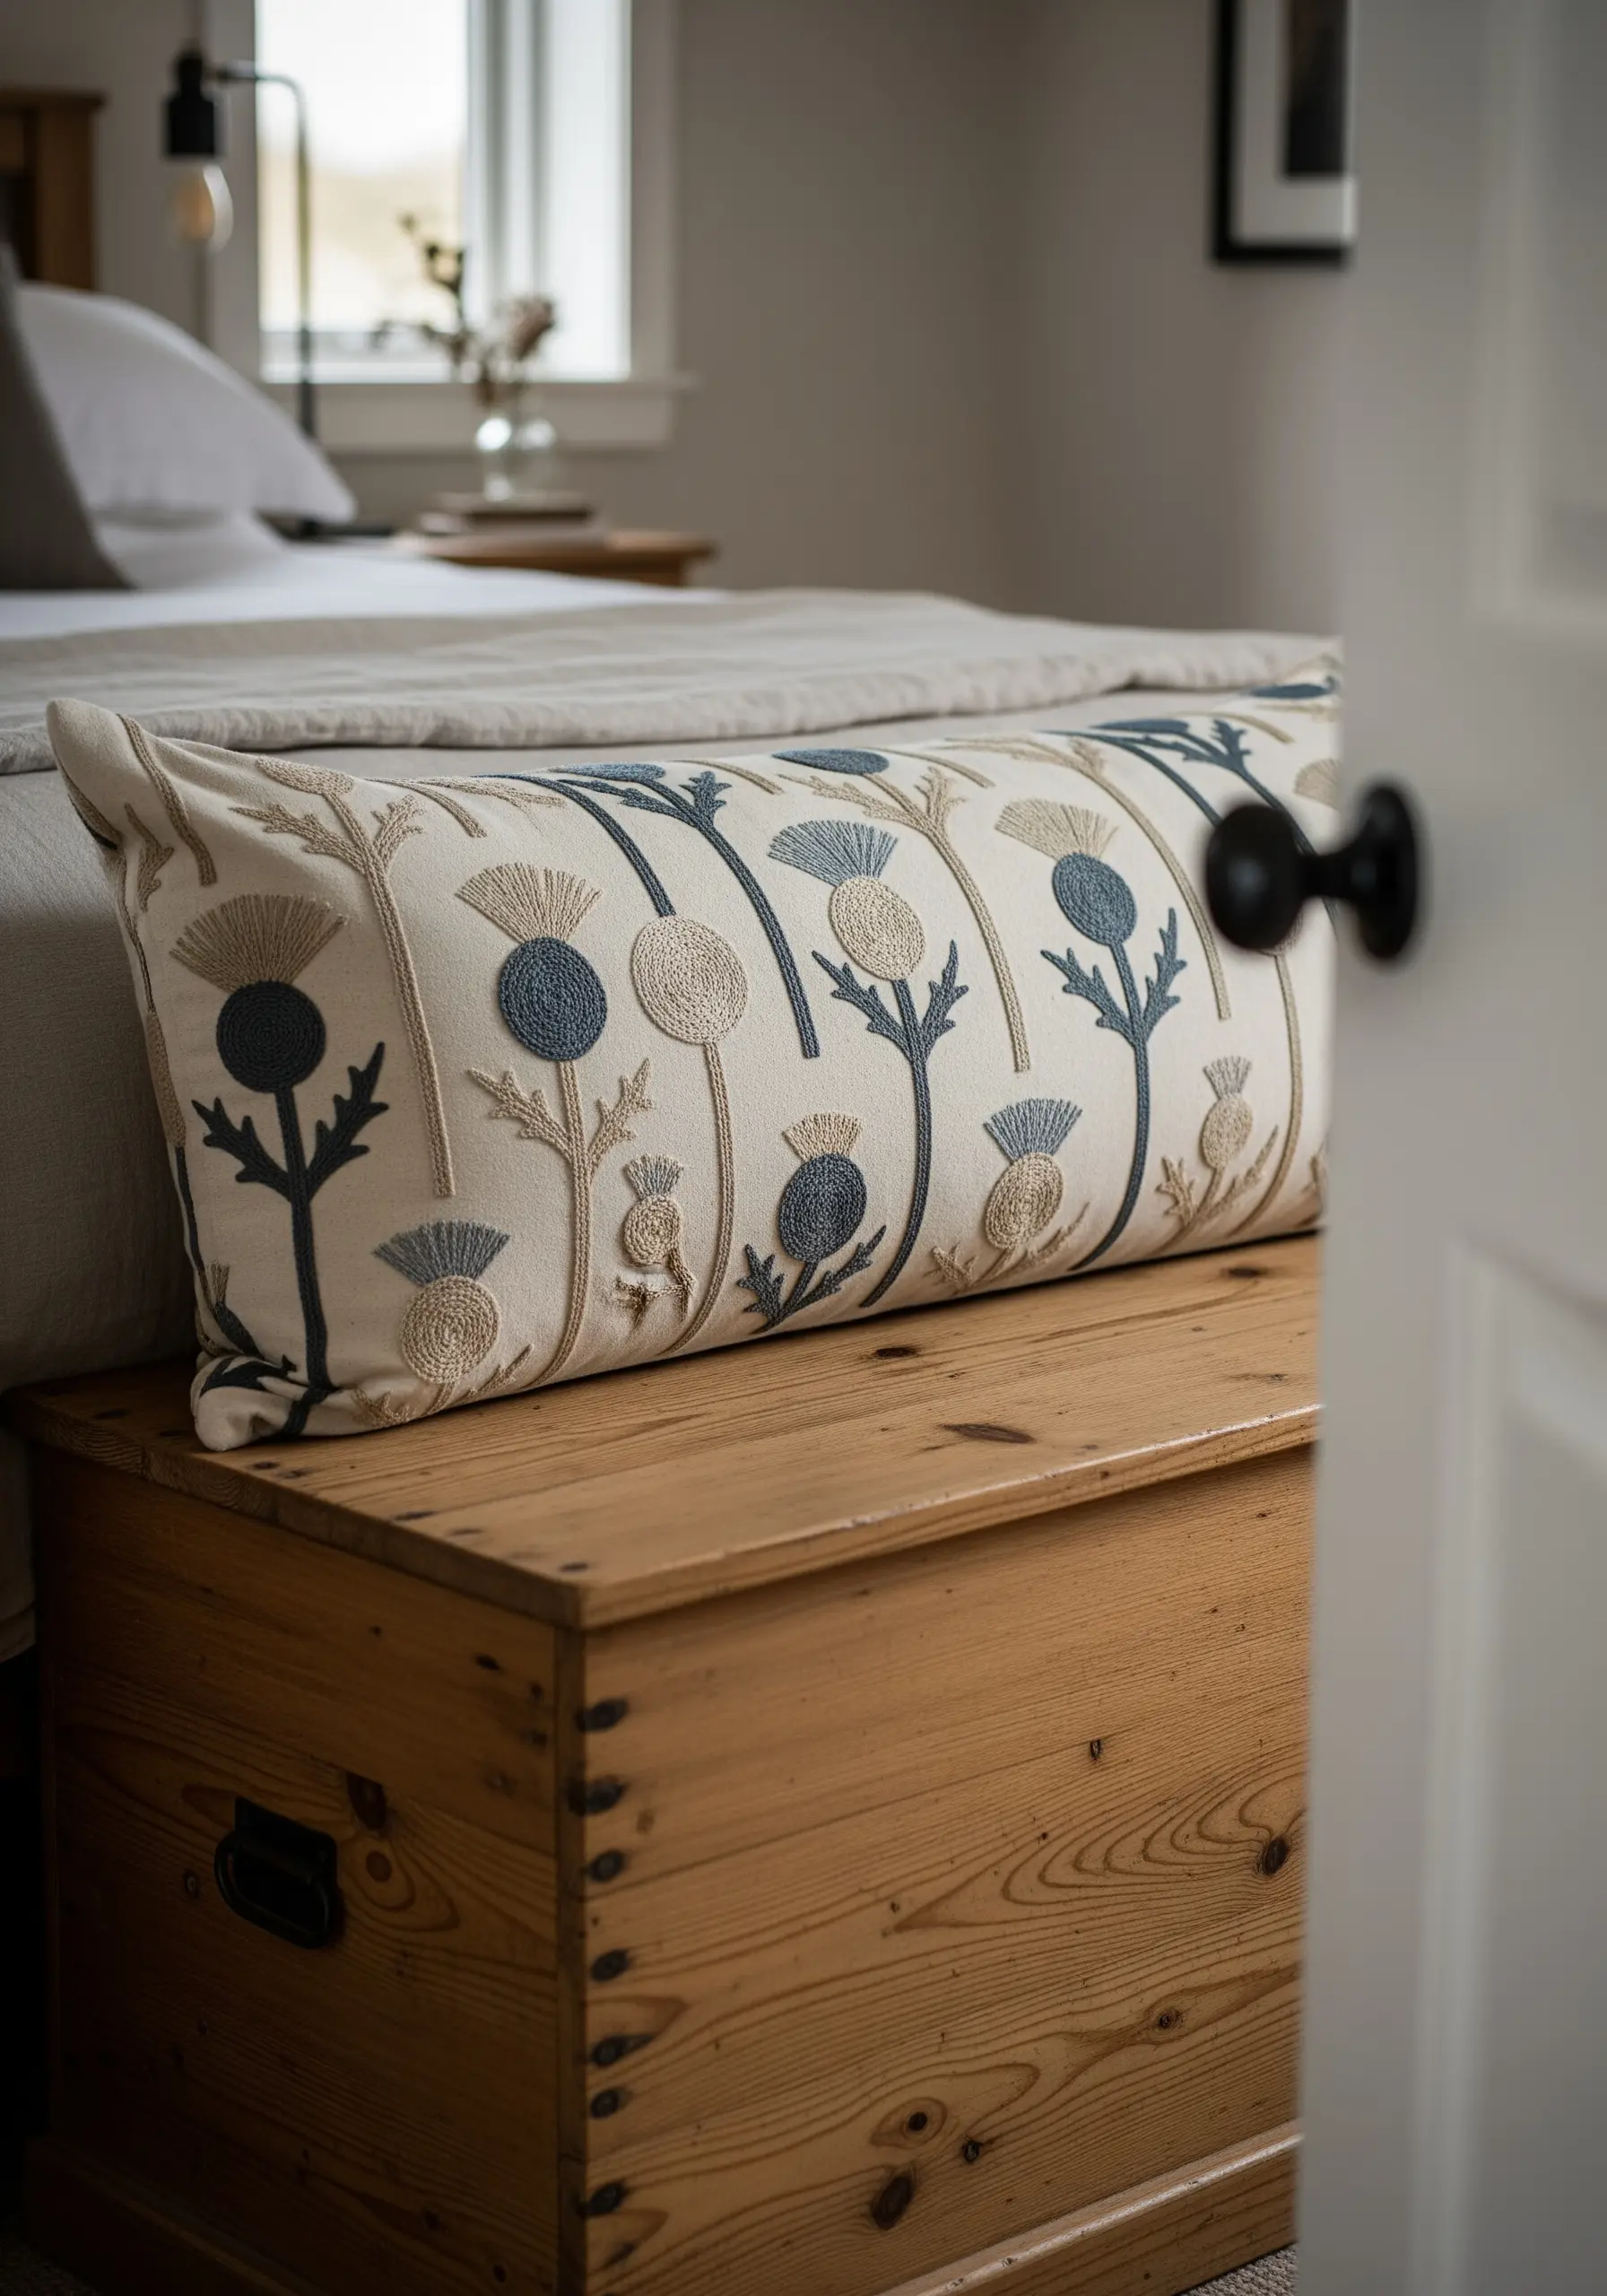
Create a design that invites touch by assigning different stitches to different textures within your motif.
For a thistle, use a smooth, flat satin stitch for the deep blue flower head to contrast with the more textured elements.
Use a series of overlapping straight stitches or a turkey stitch for the lighter, spiky top of the bloom.
This combination of varied textures makes the design more dynamic and visually interesting than using a single stitch throughout.
14. Elevate Linens with a Botanical Monogram

A hand-stitched monogram turns simple pillowcases into personal heirlooms.
Choose a classic, elegant font and trace it onto your fabric using a fine-tipped, water-soluble pen.
Frame the letters with a delicate, symmetrical wreath of leaves or tiny blossoms.
For a refined look on crisp white cotton, use a single color like taupe, dove gray, or muted silver. Two strands of floss and a neat backstitch are all you need for a timeless finish.
15. Practice Thread Painting on a Miniature Scale

If you’re new to thread painting, a small motif like a mushroom is the perfect canvas for practice.
Use the long-and-short stitch to blend shades of brown and beige across the mushroom cap, creating a soft, realistic gradient.
Focus on making your stitches follow the curved direction of the cap to enhance its rounded shape.
Small projects like this allow you to master the technique of blending without the intimidation of a large, complex design, making them perfect for fabric scraps or table toppers.
16. Add Subtle Detail to Functional Textiles

Elevate everyday functional items, like canopy tie-backs, with a touch of simple embroidery.
Choose a durable fabric like a linen or cotton band that can withstand being tied and untied.
A simple, repeating motif like a stalk of wheat is perfect; it’s elegant and can be stitched quickly using just a stem stitch and a few straight stitches.
This small detail adds a layer of custom craftsmanship that makes a bedroom feel thoughtfully designed.
17. Design an Asymmetrical Floral Headboard

Embroidering an upholstered headboard is a statement project that creates a stunning focal point.
Plan your design to be embroidered on the fabric *before* it is attached to the headboard frame.
An asymmetrical, climbing floral like a cherry blossom branch feels more organic and modern than a centered, symmetrical design.
Place the branches so they appear to grow from the corners, drawing the eye upward and creating a sense of graceful movement.
Use padded satin stitch for the blossoms to give them a slight lift from the surface.
18. Use Appliqué for Clean, Graphic Floral Shapes

For a bold, graphic floral with clean edges, combine appliqué with embroidery.
Cut your tulip shapes from a contrasting fabric and secure them to the background with an iron-on adhesive.
Then, use a simple running stitch or backstitch just inside the raw edge to secure the shape and add a handmade, illustrative quality.
This method creates a modern, stylized look that is much faster to execute than filling the entire shape with satin stitch.
19. Introduce 3D Effects with Padded Satin Stitch

Give your embroidery a sculptural, three-dimensional quality using padded satin stitch.
Before you stitch your final layer, create a base of small, underlying stitches (like seed stitches) within the area you want to raise.
Then, work your satin stitches over this padding, completely covering the base stitches.
The result is a raised, rounded surface that catches the light beautifully, making petals and leaves look incredibly lifelike, perfect for a special book cover or statement piece.
20. Finish Edges with a Scalloped Buttonhole Stitch

Combine a decorative border with a functional edge finish by using the buttonhole stitch to create scallops.
Mark your scalloped line lightly with a water-soluble pen.
Work the buttonhole stitch closely together along this line, with the purled edge of the stitch creating the clean, defined curve.
Once the stitching is complete, you can carefully trim away the excess fabric right up to the edge of your stitches.
This classic technique provides a beautiful, durable finish for bed linens and tablecloths.
21. Embrace the Simplicity of Minimalist Line Art

You don’t need dense color or complex stitches to make a powerful statement.
A simple line art design, stitched in a single contrasting color, can be incredibly impactful.
The key to successful line art embroidery is consistency.
Use a backstitch or stem stitch and focus on keeping your stitch length uniform for a smooth, unbroken line.
This technique is perfect for adding a modern, graphic touch to rustic linen bedding or wall hangings.
22. Create Cascading Florals for a Wall Runner
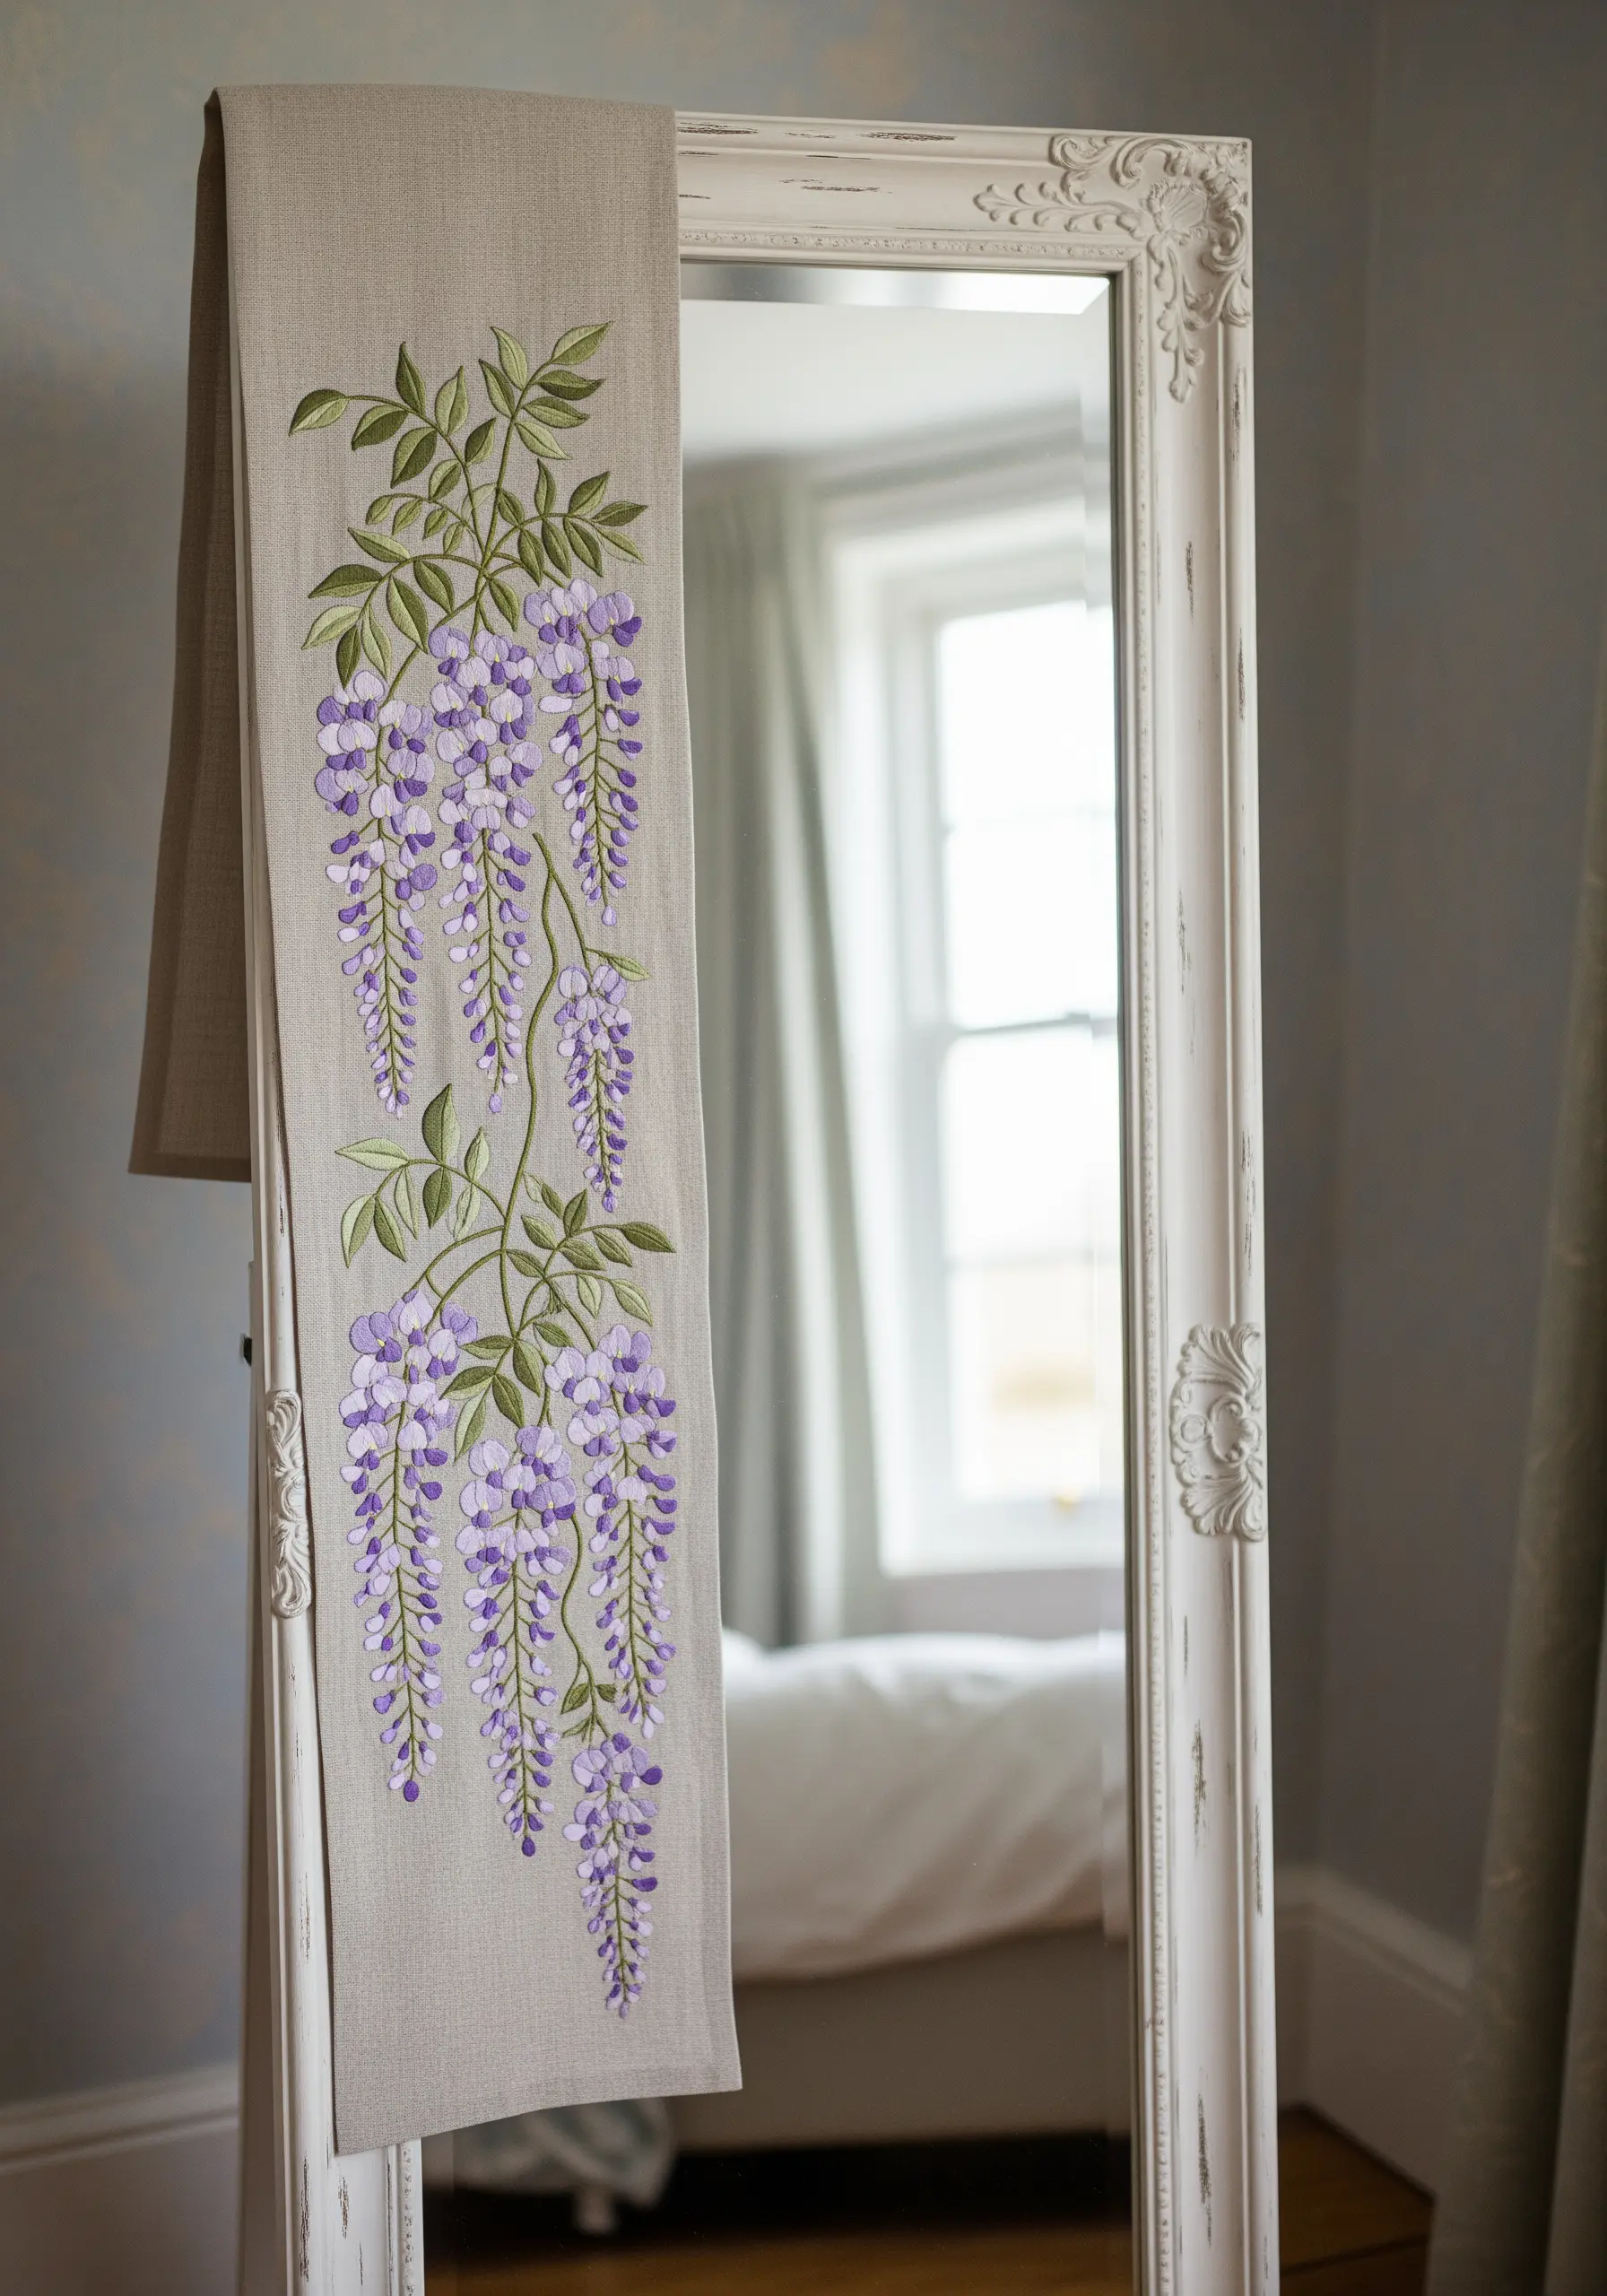
For a dramatic floral element, create a long, narrow embroidered panel to drape over a mirror or hang on a door.
Wisteria is a perfect subject for this, as its natural form is cascading and elegant.
Use a combination of satin stitches and French knots in varying shades of purple to create the dense clusters of blossoms.
By varying the length of each blossom cluster, you can create a natural, organic sense of movement and depth.
23. Paint a Landscape with Directional Stitches
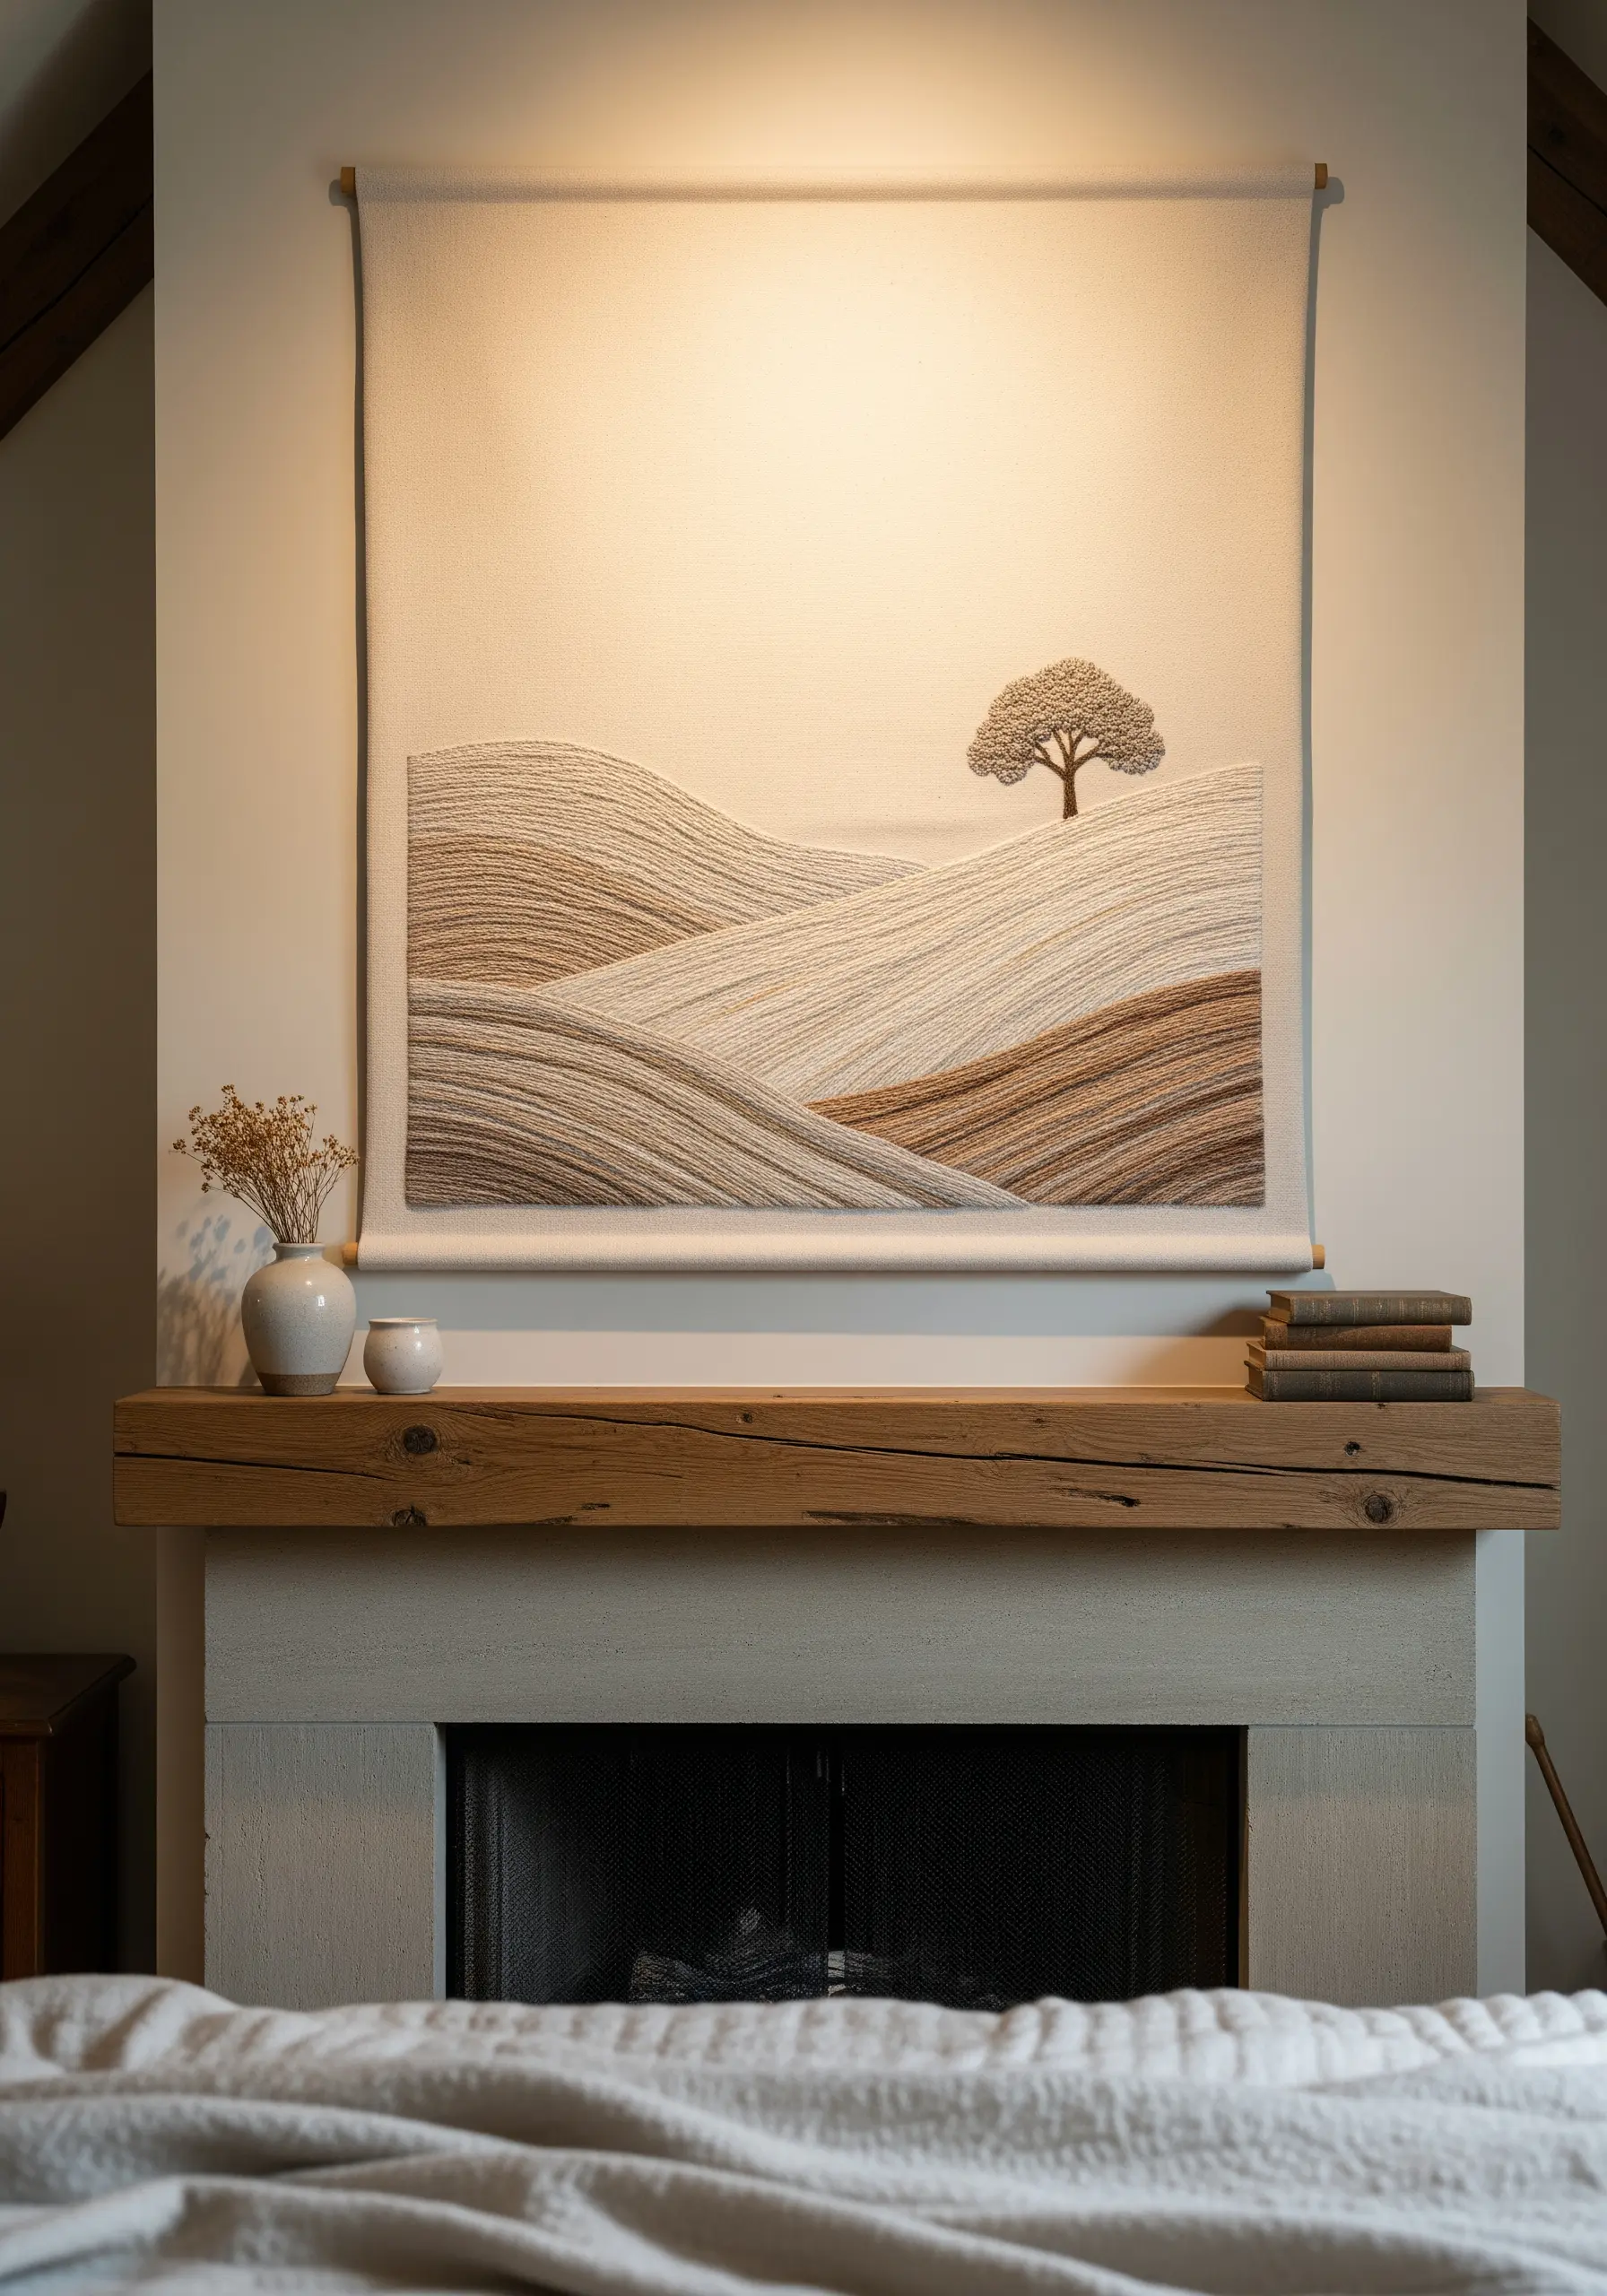
Transform your thread into paint by using long, straight stitches to create a textured landscape.
Instead of outlining and filling shapes, lay down rows of stitches that follow the contours of the land.
Vary the stitch length and use a blend of several neutral tones—beige, brown, gray, cream—to build up layers of color and texture that mimic rolling hills.
This abstract thread painting technique creates incredible movement and a painterly quality that is both modern and serene.
24. Perfect Your Lettering with a Simple Wreath

Embroidering legible, graceful text is a skill that elevates any personalized project.
Use a simple backstitch for clean lines or a whipped backstitch for a smoother, more solid appearance.
Always trace your letters from a printed font to ensure consistent shape and spacing.
Framing your word or monogram with a simple wreath of lazy daisy stitches or stem stitch leaves adds a touch of classic charm and helps to center the design.
25. Design a Motif for Backlit Window Blinds

A large, central motif on a Roman blind can act as a piece of translucent art.
Choose a design with open spaces, like a sunflower wreath, so that it enhances the light rather than blocking it.
Use thread colors that will hold their vibrancy when backlit—yellows, oranges, and light greens are excellent choices.
Before you begin, test your color palette by holding the threads up to a window to see how they transform in the sunlight.
26. Mimic Natural Textures with Raised Knots

To capture the soft, fuzzy texture of pussy willows, move beyond flat stitches.
Use raised knots, such as French knots or colonial knots, for the catkins.
For a more elongated, bud-like shape, master the bullion knot, wrapping the thread around your needle multiple times before pulling it through.
By blending white, gray, and black threads within each knot, you can create a realistic, variegated texture that beautifully mimics nature.
27. Stitch a Durable Border for Everyday Items

When embroidering items that get a lot of use, like a chair cushion, durability is as important as beauty.
Choose sturdy stitches like backstitch, stem stitch, or small, tight chain stitches for your outlines.
Avoid long satin stitches or loose loops that can easily snag.
A simple, repeating border of small motifs like strawberries and leaves adds a charming detail that is robust enough to withstand daily life.
28. Combine Embroidery with Fabric for a Memo Board

Turn your embroidery into a functional piece of home decor by incorporating it into a mixed-media project.
Embroider your central design on a piece of linen or cotton, then use it as a panel on a padded memo board.
Combine it with a coordinating fabric, like a neutral plaid, to create a larger, more dynamic piece.
This approach allows you to showcase your detailed stitchwork while creating something both beautiful and useful for your bedroom wall.
29. Embroidering on Textured Waffle Weave

The deep grid of a waffle weave robe can be a challenging surface, but the result is beautifully integrated texture.
Always use a stabilizer to prevent the fabric from stretching and to keep your stitches from disappearing into the weave.
Choose a design with bold shapes and outlines, as very fine details may get lost.
A satin stitch, when worked carefully over a stabilizer, can fill the squares of the weave to create a solid, plush motif that contrasts beautifully with the surrounding texture.
30. Elevate Linens with a Single, Perfect Motif

You don’t need an elaborate design to make an impact. A single, exquisitely stitched botanical motif can transform a simple folded napkin or pillowcase.
Focus your attention on executing one small design perfectly.
Choose a simple subject—a daisy, a poppy, a clover—and use careful, deliberate stitches.
This minimalist approach celebrates the beauty of a single flower and the quiet artistry of your handiwork, making it one of the most elegant small embroidery ideas for home textiles.
31. Use High-Contrast Threads on Dark Fabric

Make your embroidery pop by stitching with light, neutral threads on a dark background fabric like charcoal gray or navy.
The high contrast makes every stitch visible, so precision is key. Use a sharp needle and maintain even tension to ensure your work is flawless.
To transfer your pattern, use a white water-soluble transfer pen or chalk pencil.
This technique is perfect for intricate, symmetrical designs like this moth, as the dark background allows the delicate details to take center stage.
32. Fill a Motif with Dense French Knots

For a rich, pointillist-style texture, fill a shape entirely with French knots.
This technique, often called “thread painting with knots,” creates a wonderfully tactile surface.
To achieve a full, organic look for these elderflower clusters, vary the number of times you wrap the thread around the needle (once for small knots, twice for larger ones).
Pack the knots closely together, allowing them to nestle against one another to completely cover the fabric. The result is a lush, textured motif that adds dimension and softness.


