

You have a love for texture, a box of threads, and an eye for pieces with history. But how do you bridge the gap between a thrift store find and a truly personal piece of home decor? The answer lies not in more complex patterns, but in more intentional techniques.
This is where you move beyond just stitching a design onto fabric. It’s about seeing a plain cushion, a simple curtain, or a worn wooden chair as a canvas. It’s about understanding how a change in stitch direction can mimic the fall of light on a petal, or how a visible, chunky yarn seam can turn upholstery into a statement of craft.
Here, you’ll find ideas that focus on that transformation. We’ll explore how to add depth, texture, and a modern sensibility to vintage pieces, turning them into warm, meaningful accents that make your small apartment feel like a curated, cozy home. You can do this, and your space will be all the more beautiful for it.
1. Render Florals with Painterly Depth
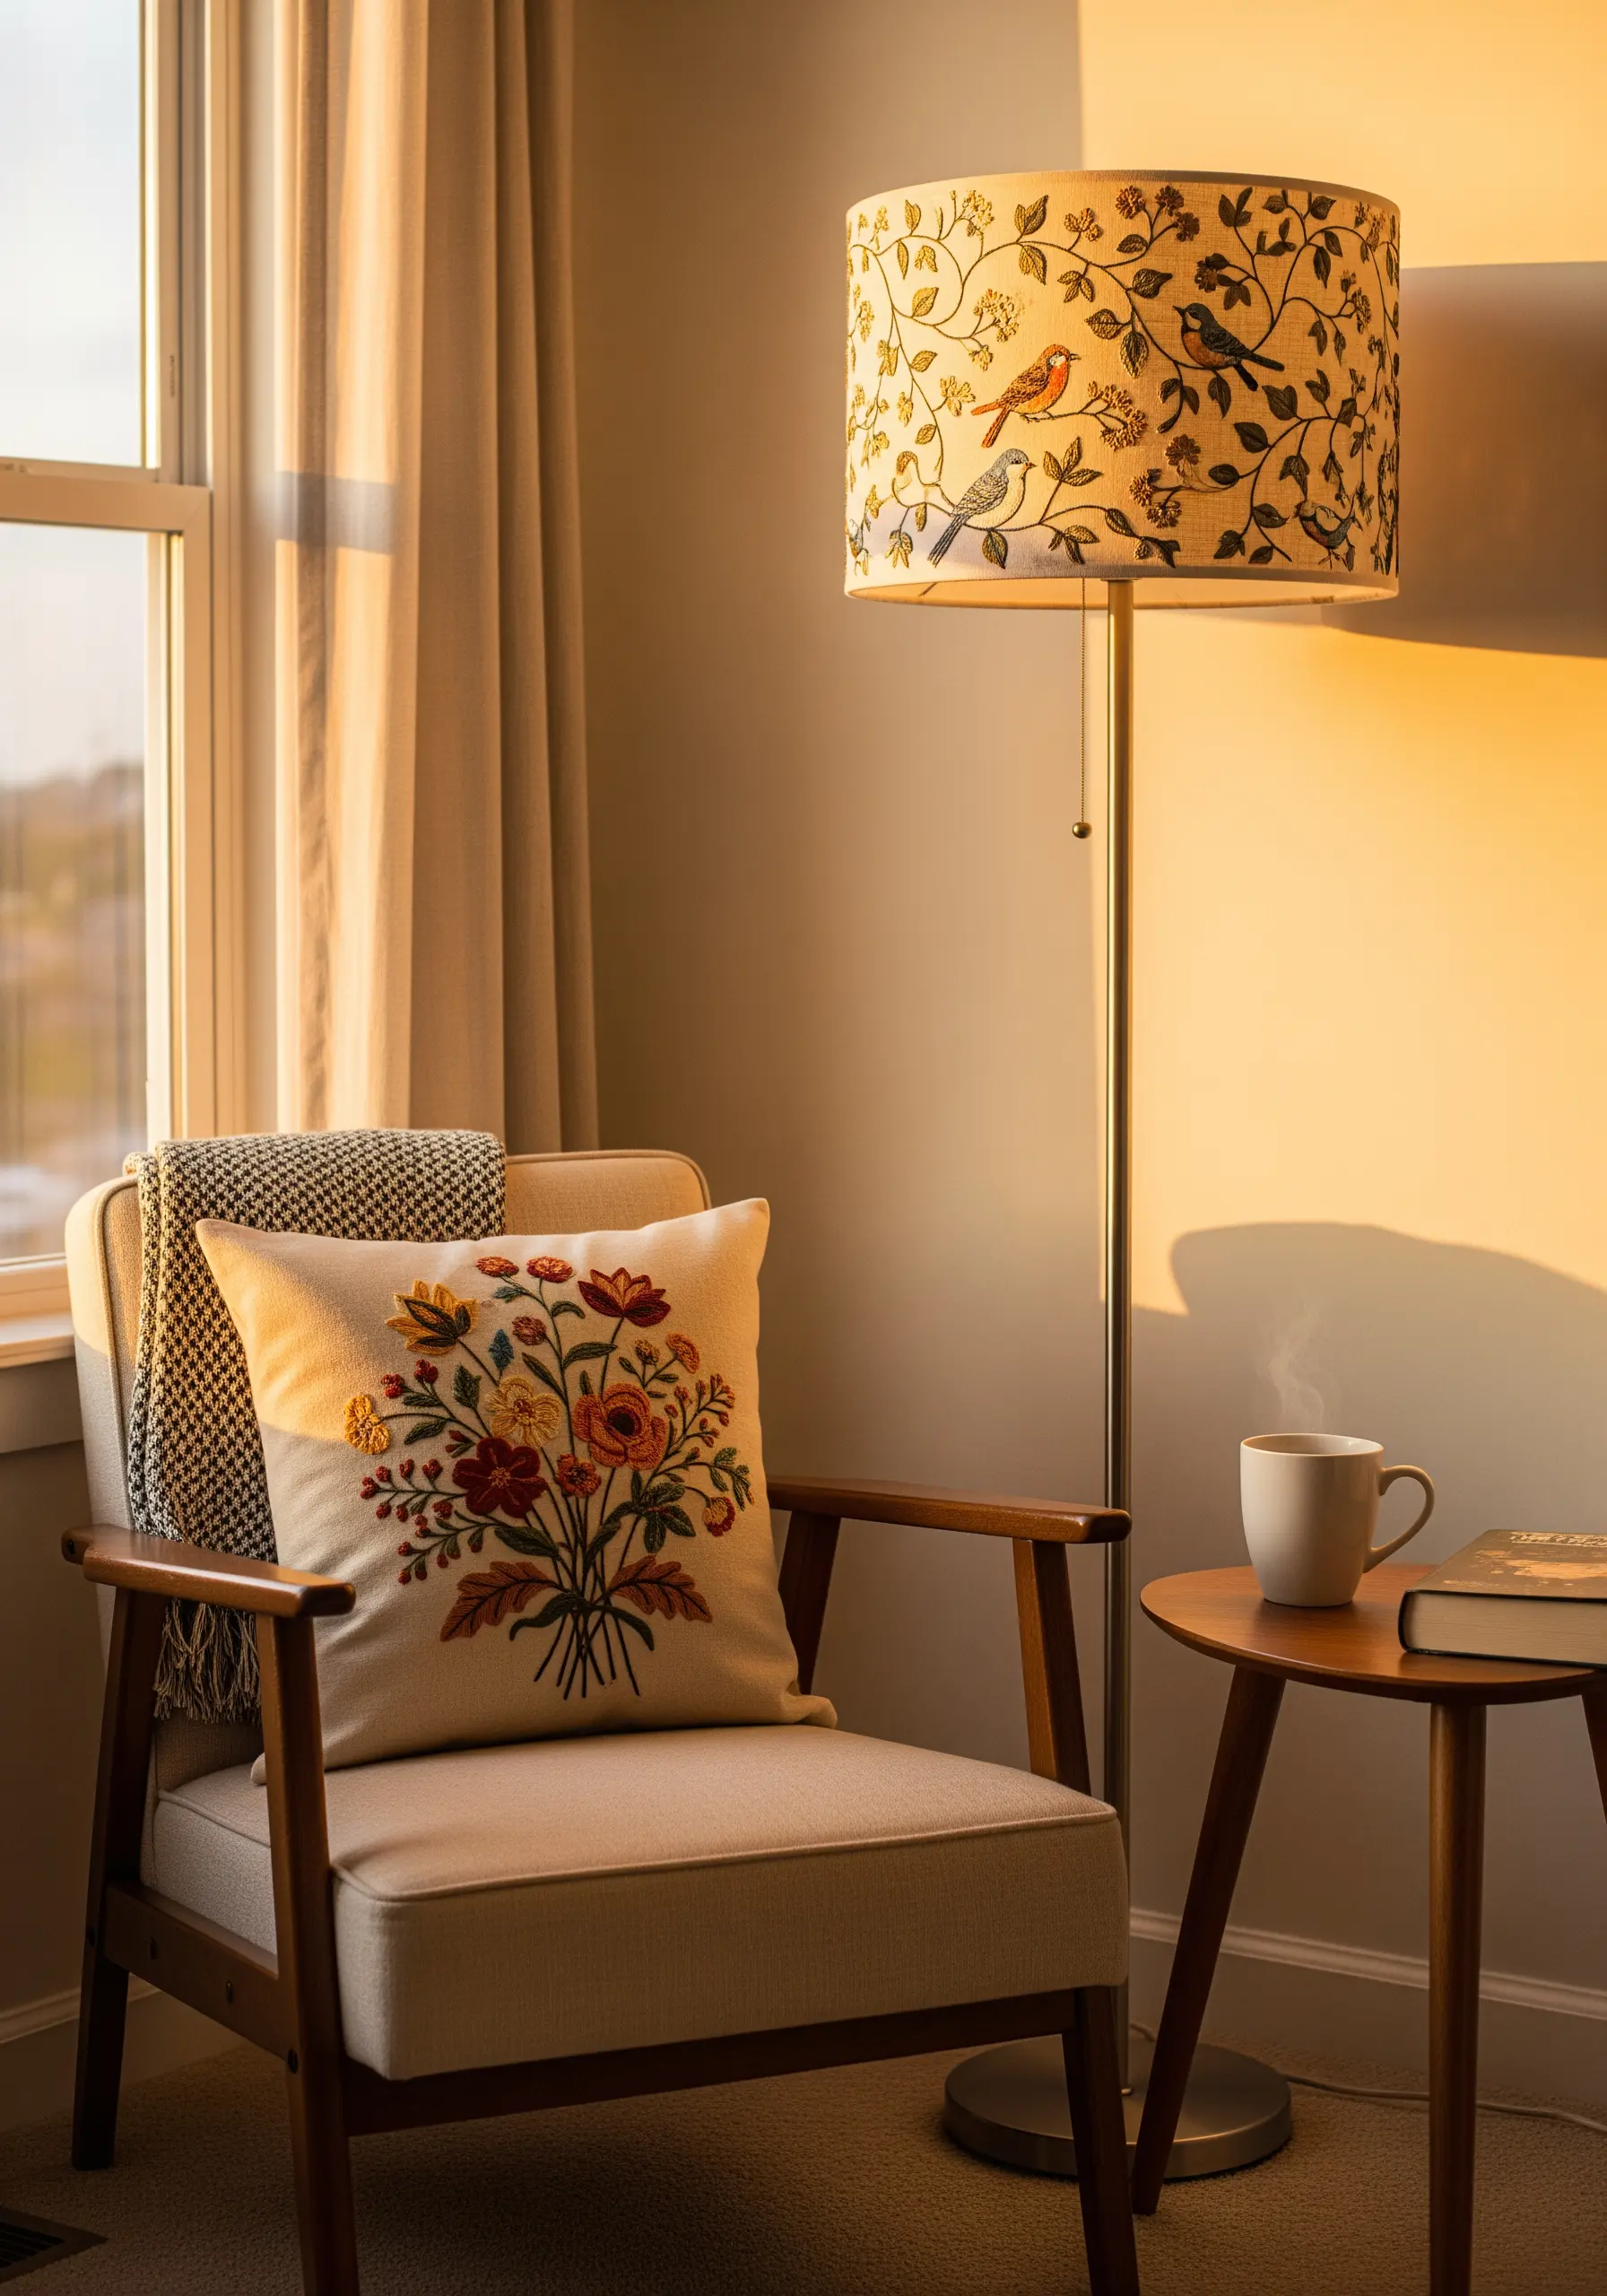
Give a thrifted cushion a modern botanical update by focusing on stitch direction to create light and shadow.
Instead of filling petals with a flat satin stitch, use the long-and-short stitch technique.
This allows you to blend shades of floss seamlessly, giving each flower a realistic, dimensional quality that feels more like a painting than a simple stitch-out.
For fine details like stamen, a single strand of a contrasting color in a French knot adds the perfect finishing touch, elevating your plant-inspired embroidery patterns into true works of art.
2. Frame a Mirror with Pleated Textiles

Transform a simple, frameless mirror by creating a soft, textured border from a thrifted embroidered textile.
Look for fabrics with repeating geometric patterns, like a vintage table runner or placemat.
Cut the textile into a long strip, then create soft pleats as you wrap and secure it around a circular wooden or MDF base, leaving the center open for the mirror.
This technique adds warmth and a touch of global-inspired design, making your entryway feel intentional and welcoming. It’s one of the most effective compact hoop embroidery designs for functional decor.
3. Illuminate a Tapestry with Metallic Accents
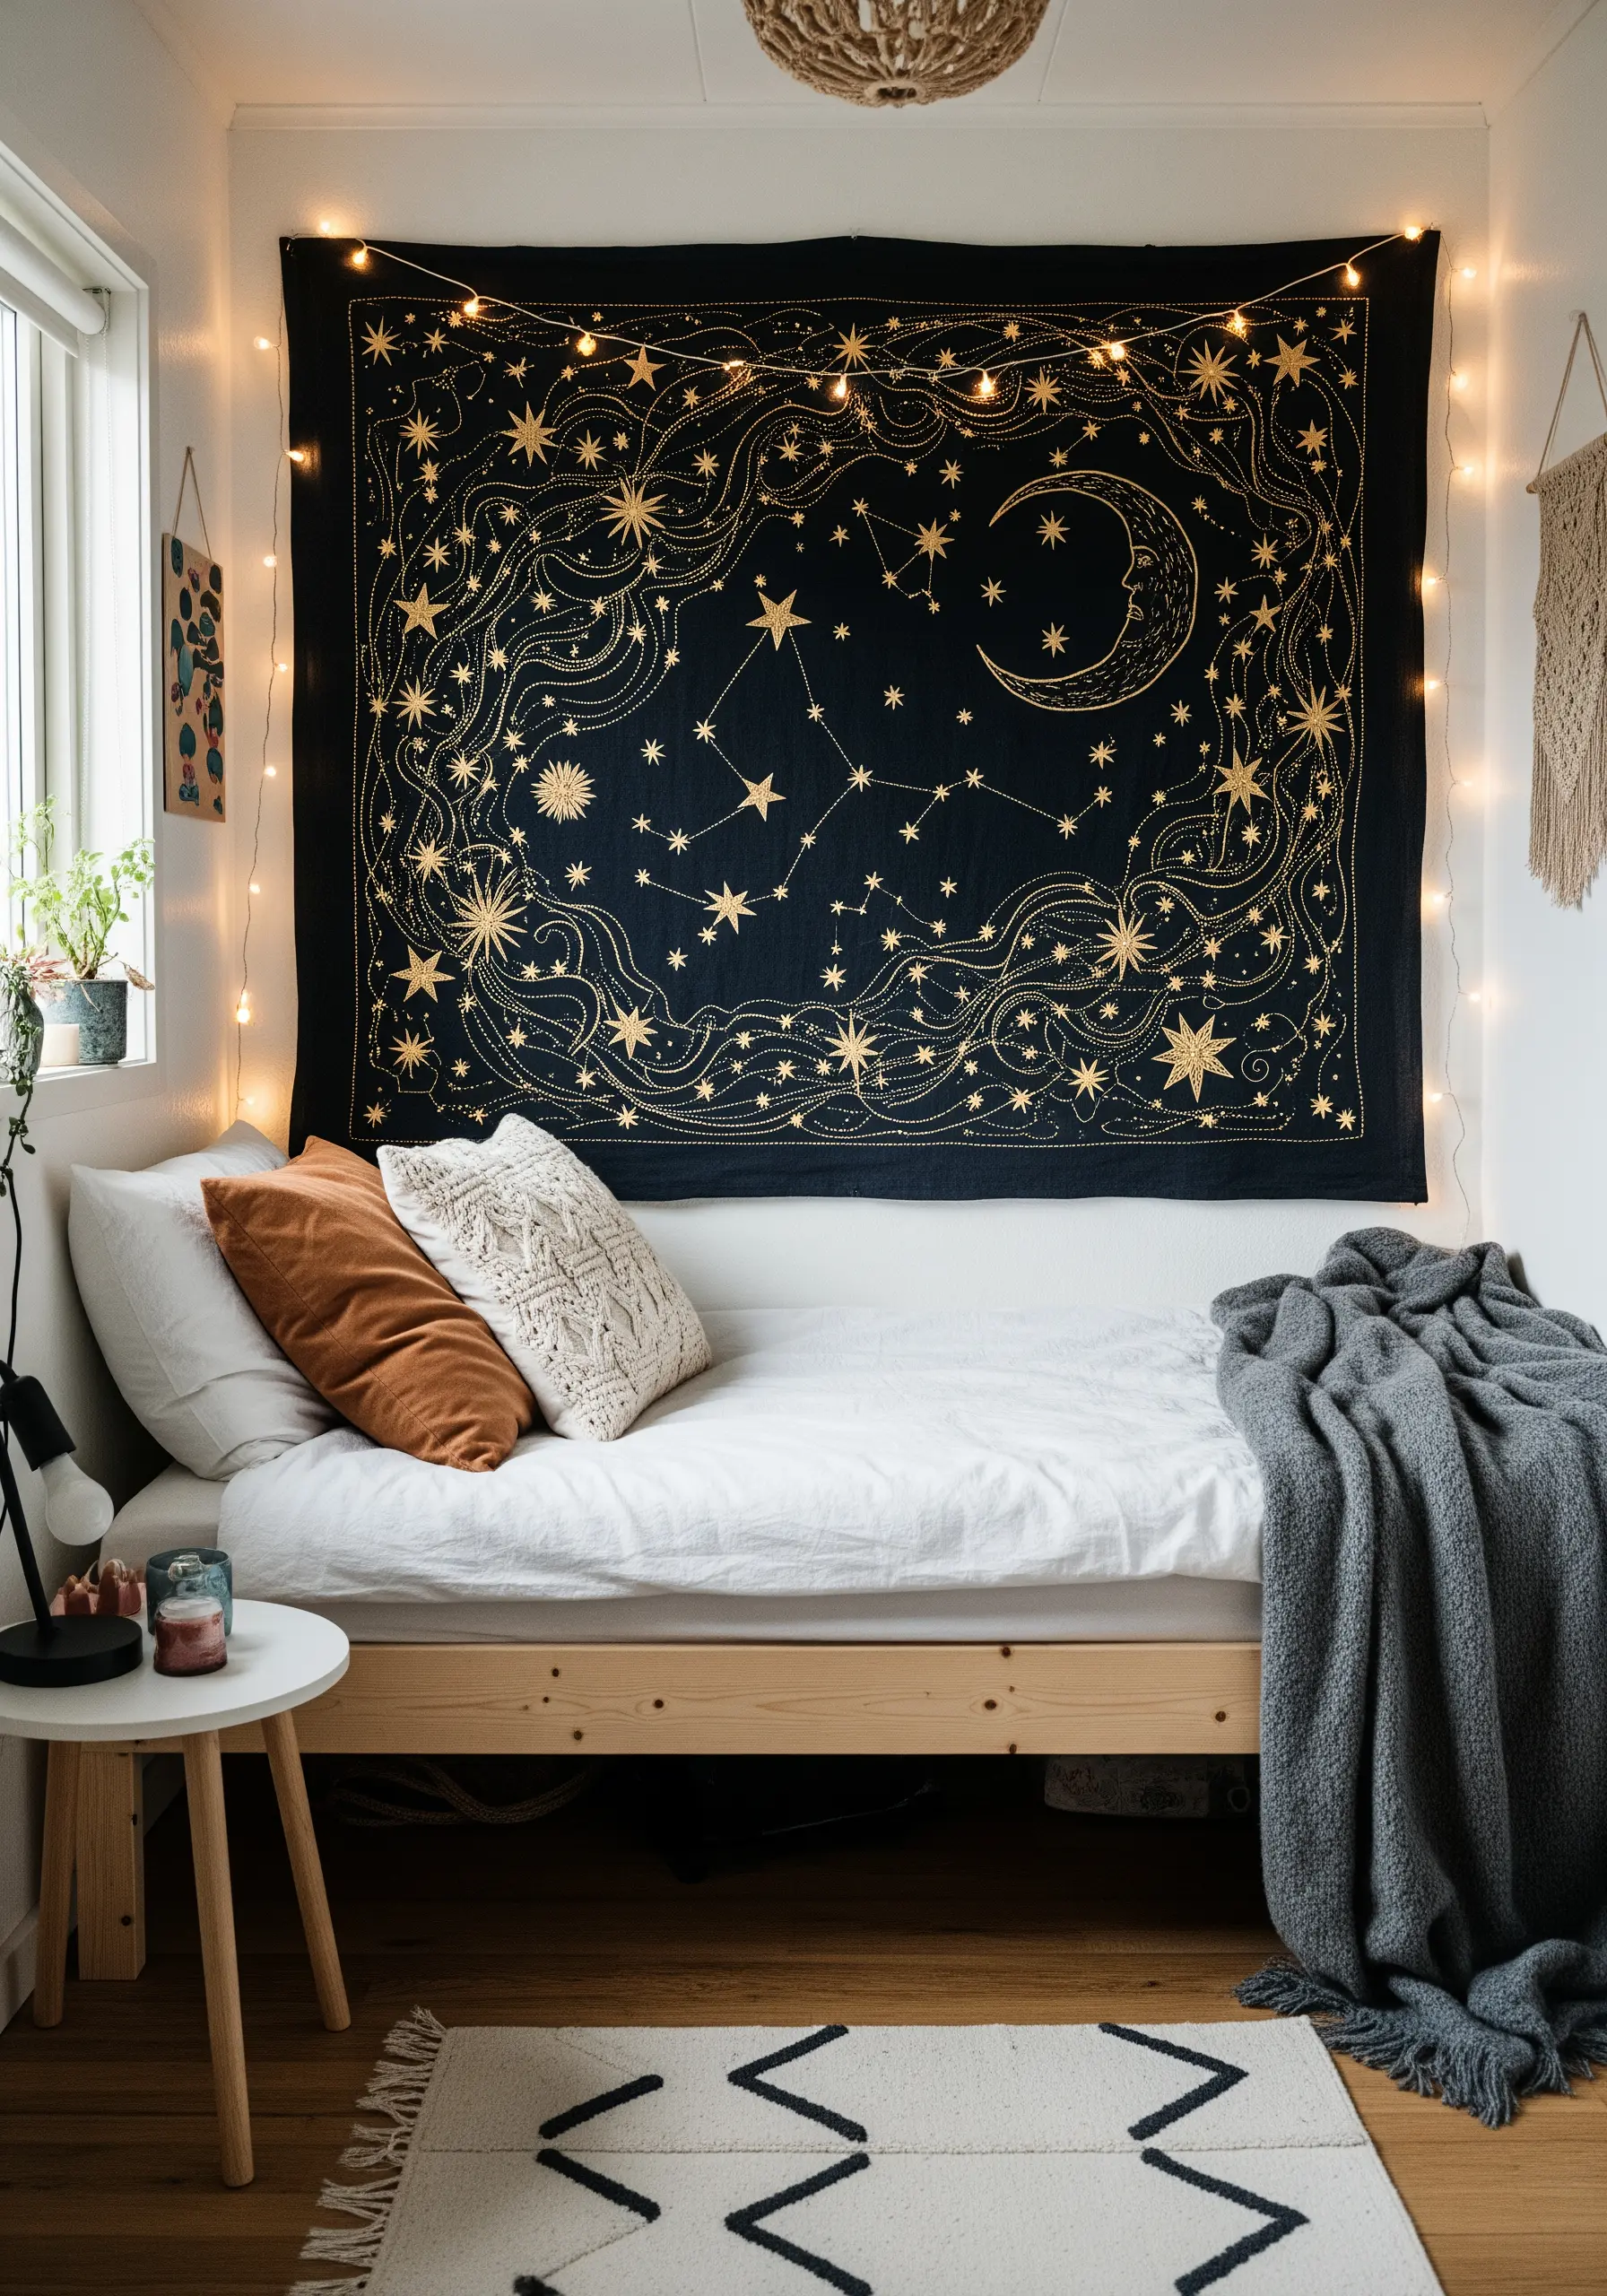
Elevate a store-bought or thrifted printed tapestry by tracing key design elements with metallic thread.
You don’t need to stitch the entire piece; instead, selectively outline constellations, stars, or celestial curves with a single strand of gold or silver floss using a simple backstitch.
This subtle embellishment catches the light, adding a layer of shimmer and handmade luxury that makes the original print feel uniquely yours.
It’s a perfect way to experiment with contemporary metallic thread designs without committing to a full project.
4. Stitch a Minimalist Border on Kitchen Linens
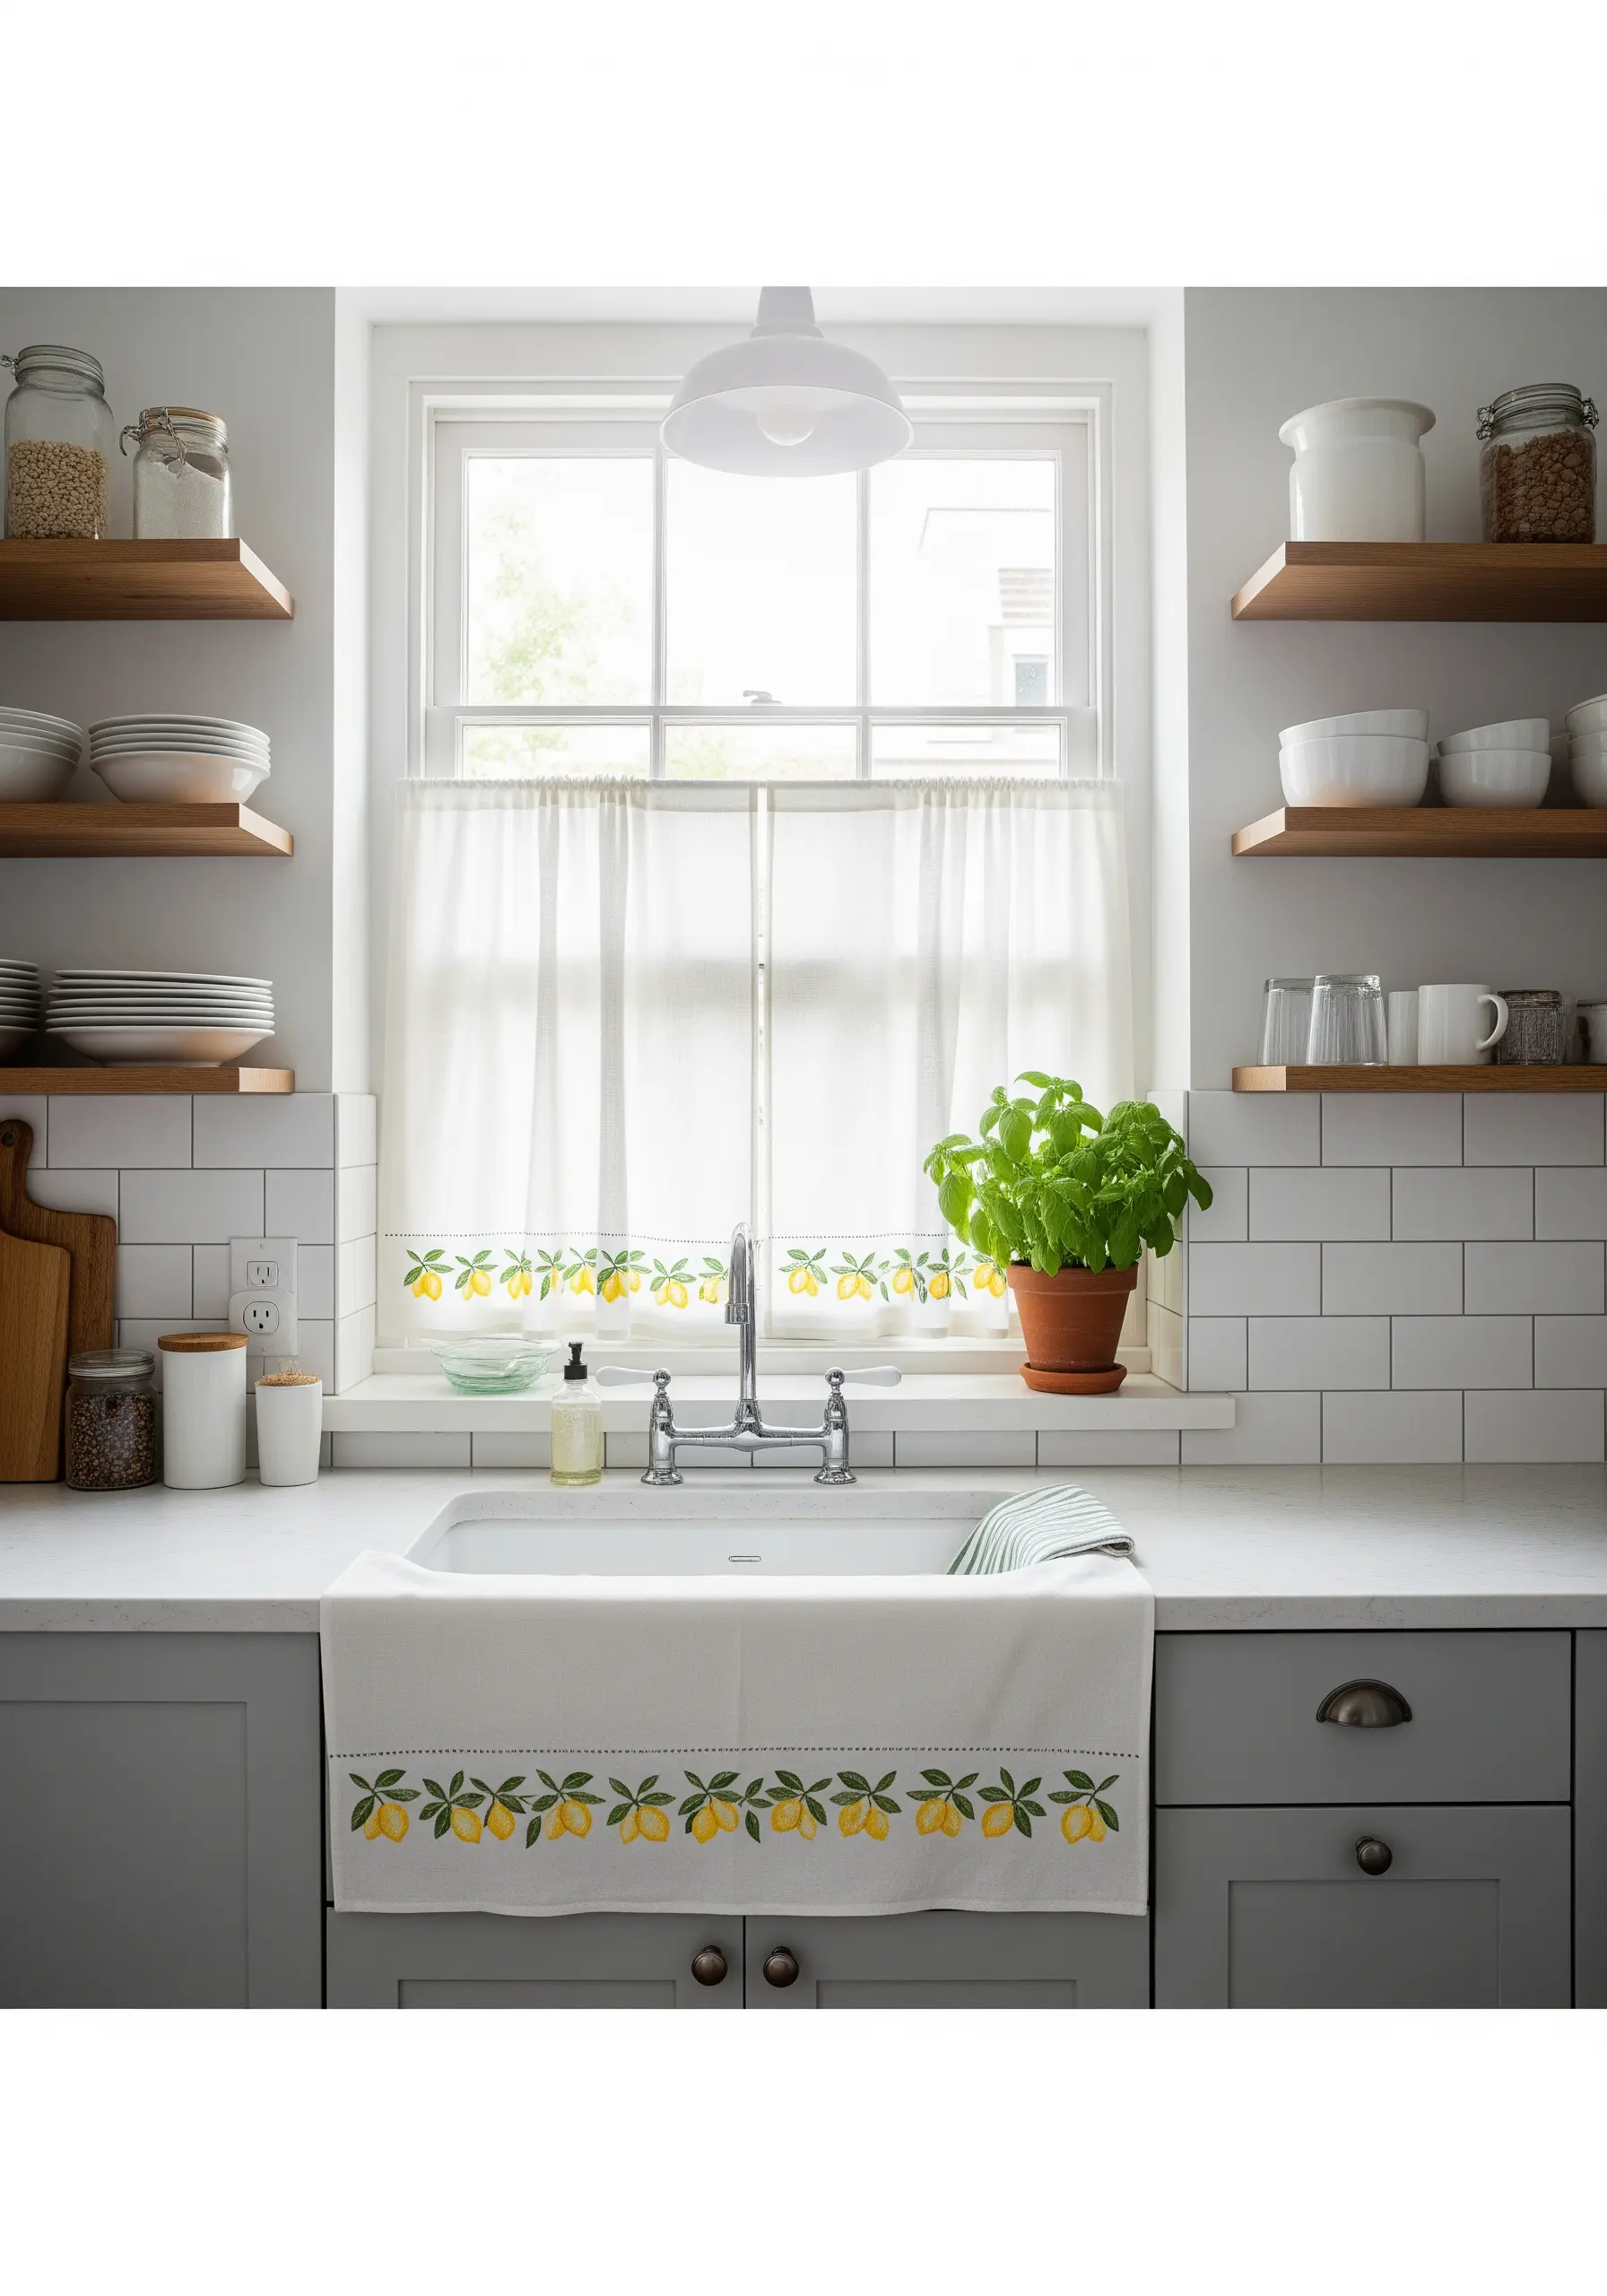
Refresh plain kitchen curtains or a simple tea towel with a clean, repeating botanical border.
Choose a simple motif, like a lemon branch, and use just two or three core stitches—stem stitch for the vines, satin stitch for the lemons, and lazy daisies for the leaves.
The key to a polished look is consistency in stitch length and spacing. This measured approach turns a basic linen into a piece with cheerful, bespoke charm.
These minimal fruit botanical embroidery patterns bring a touch of Mediterranean warmth to your space.
5. Curate a Cushion Collection with Mixed Textures
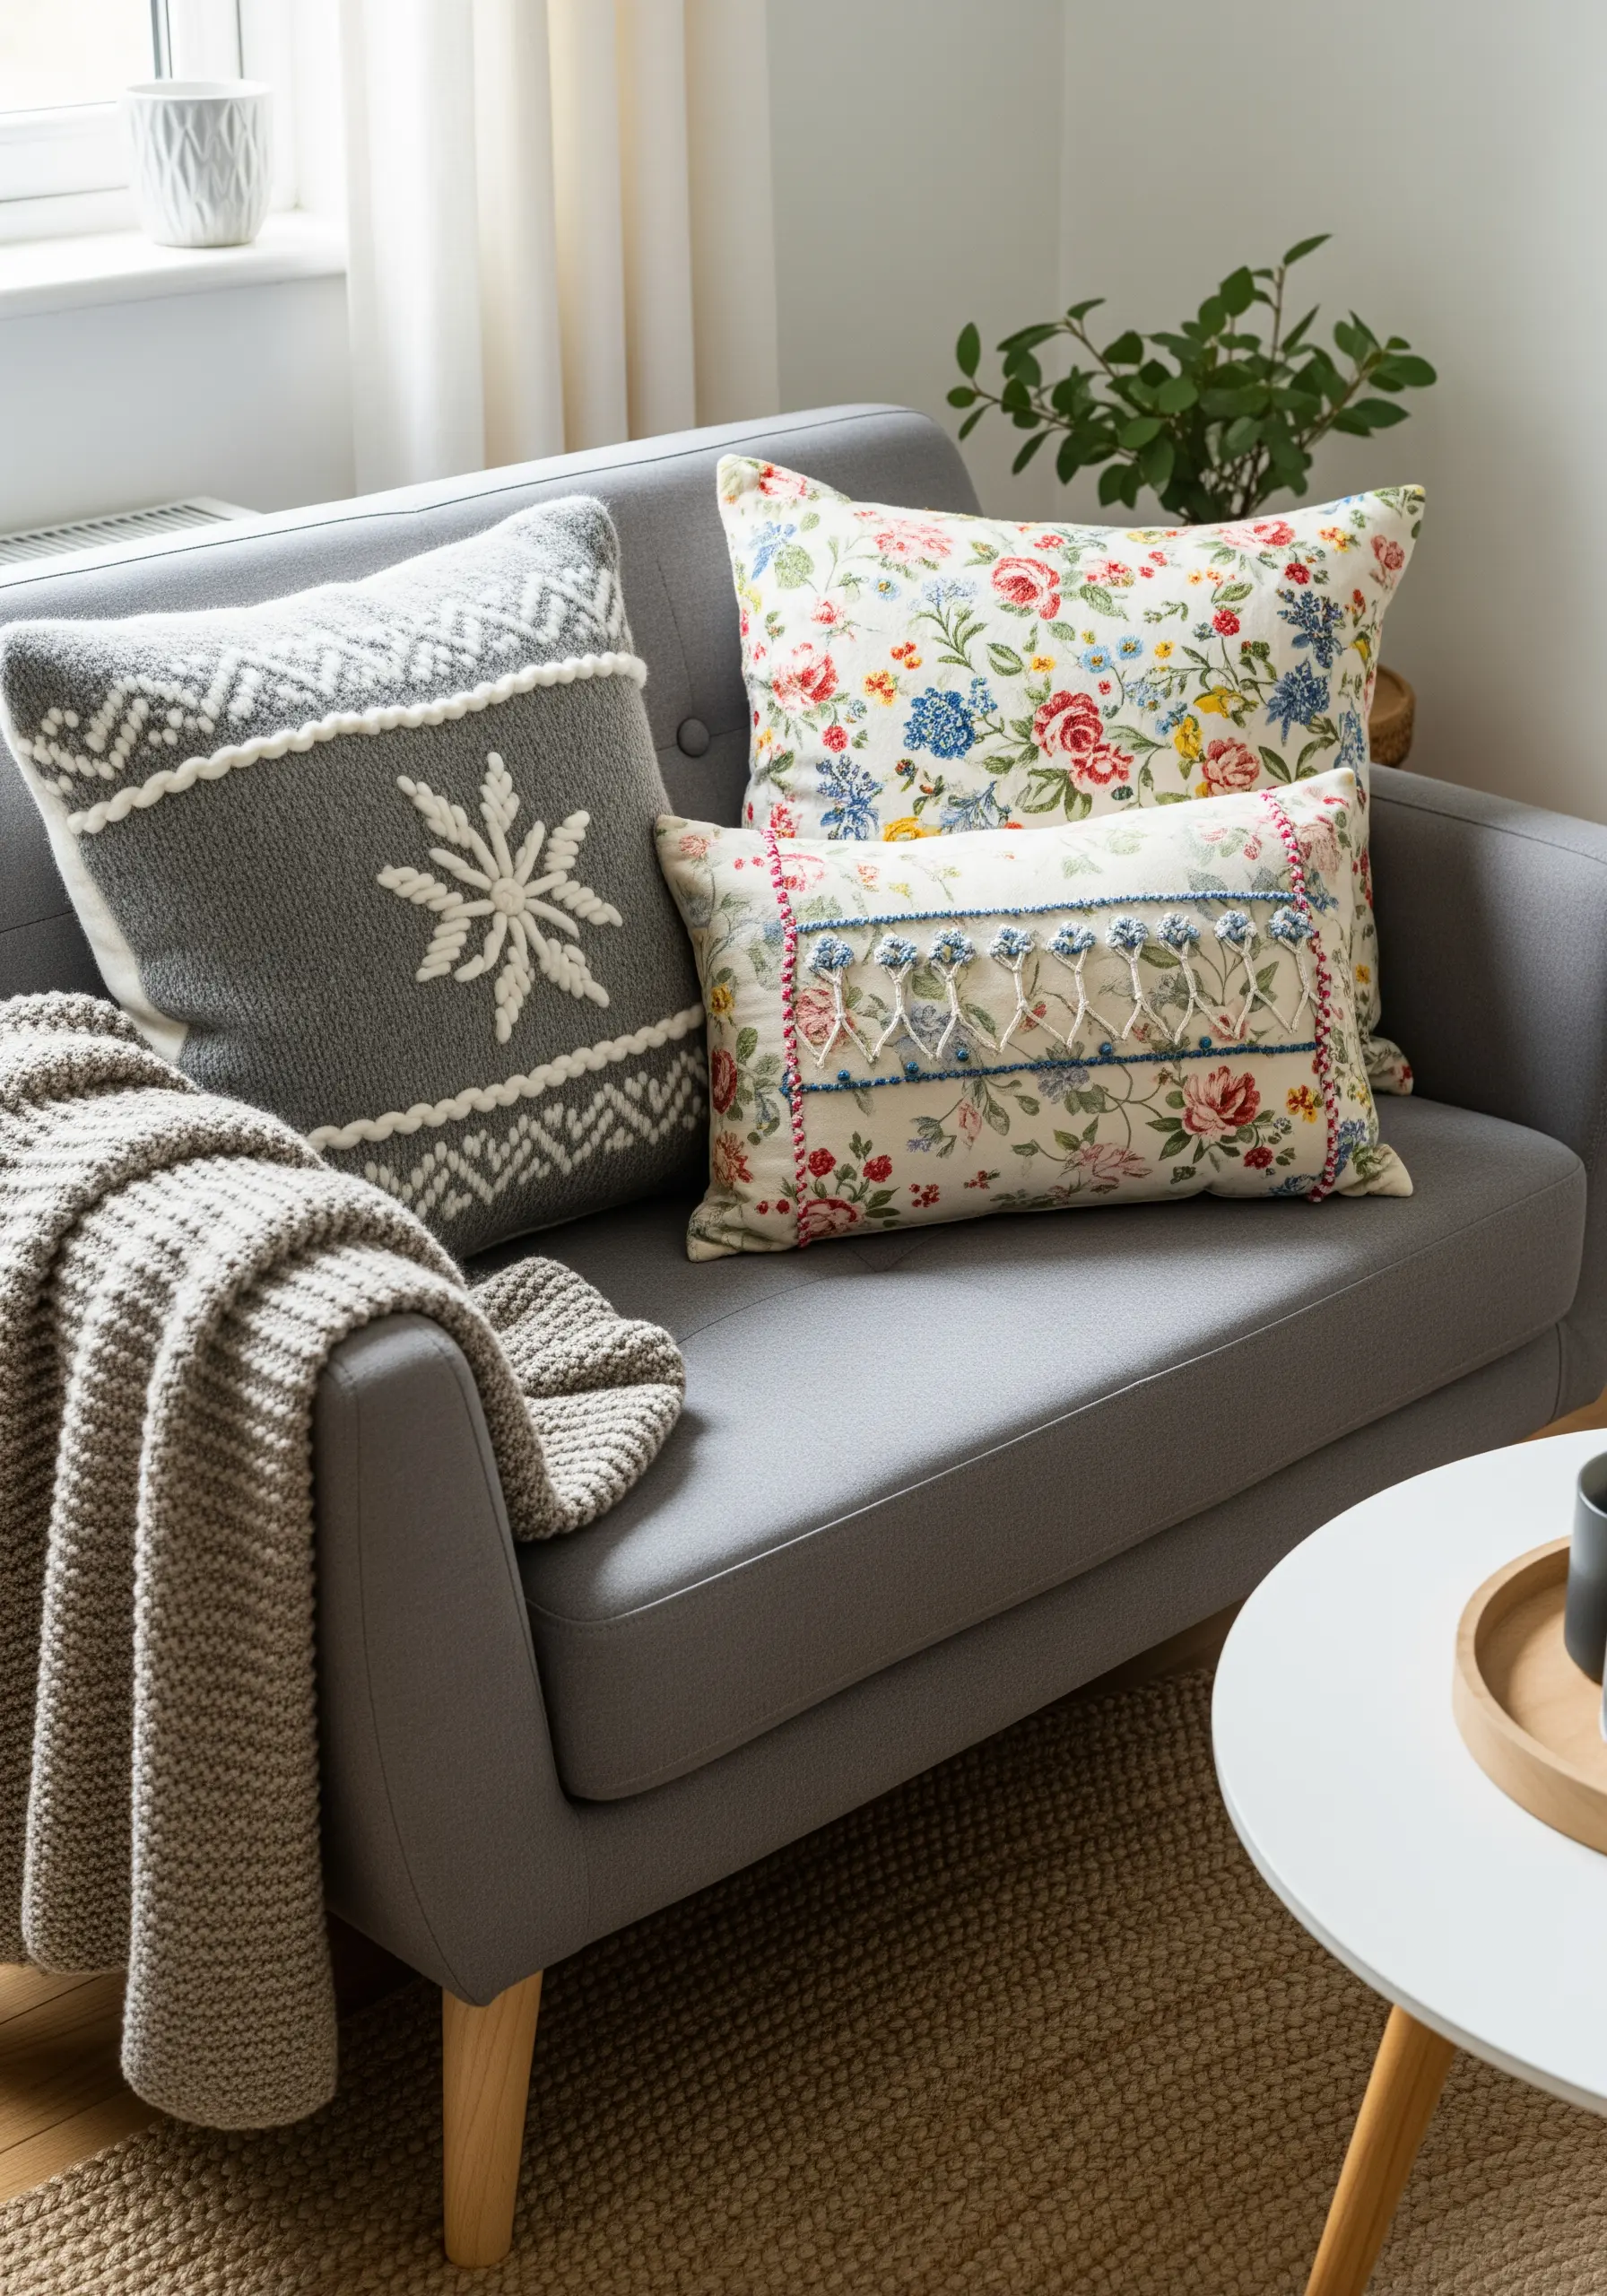
Create a visually rich sofa landscape by combining cushions with different embroidery styles and textures.
Don’t be afraid to pair a chunky, yarn-embroidered snowflake with a delicate floral print and a piece featuring intricate ribbon work.
The secret to cohesion is a loosely connected color story—here, the cool tones of grey and blue tie the varied styles together.
This approach makes your living room feel layered and collected over time, showcasing a range of textile arts and mixed fiber designs.
6. Revitalize Dining Chairs with Bold Folk Art
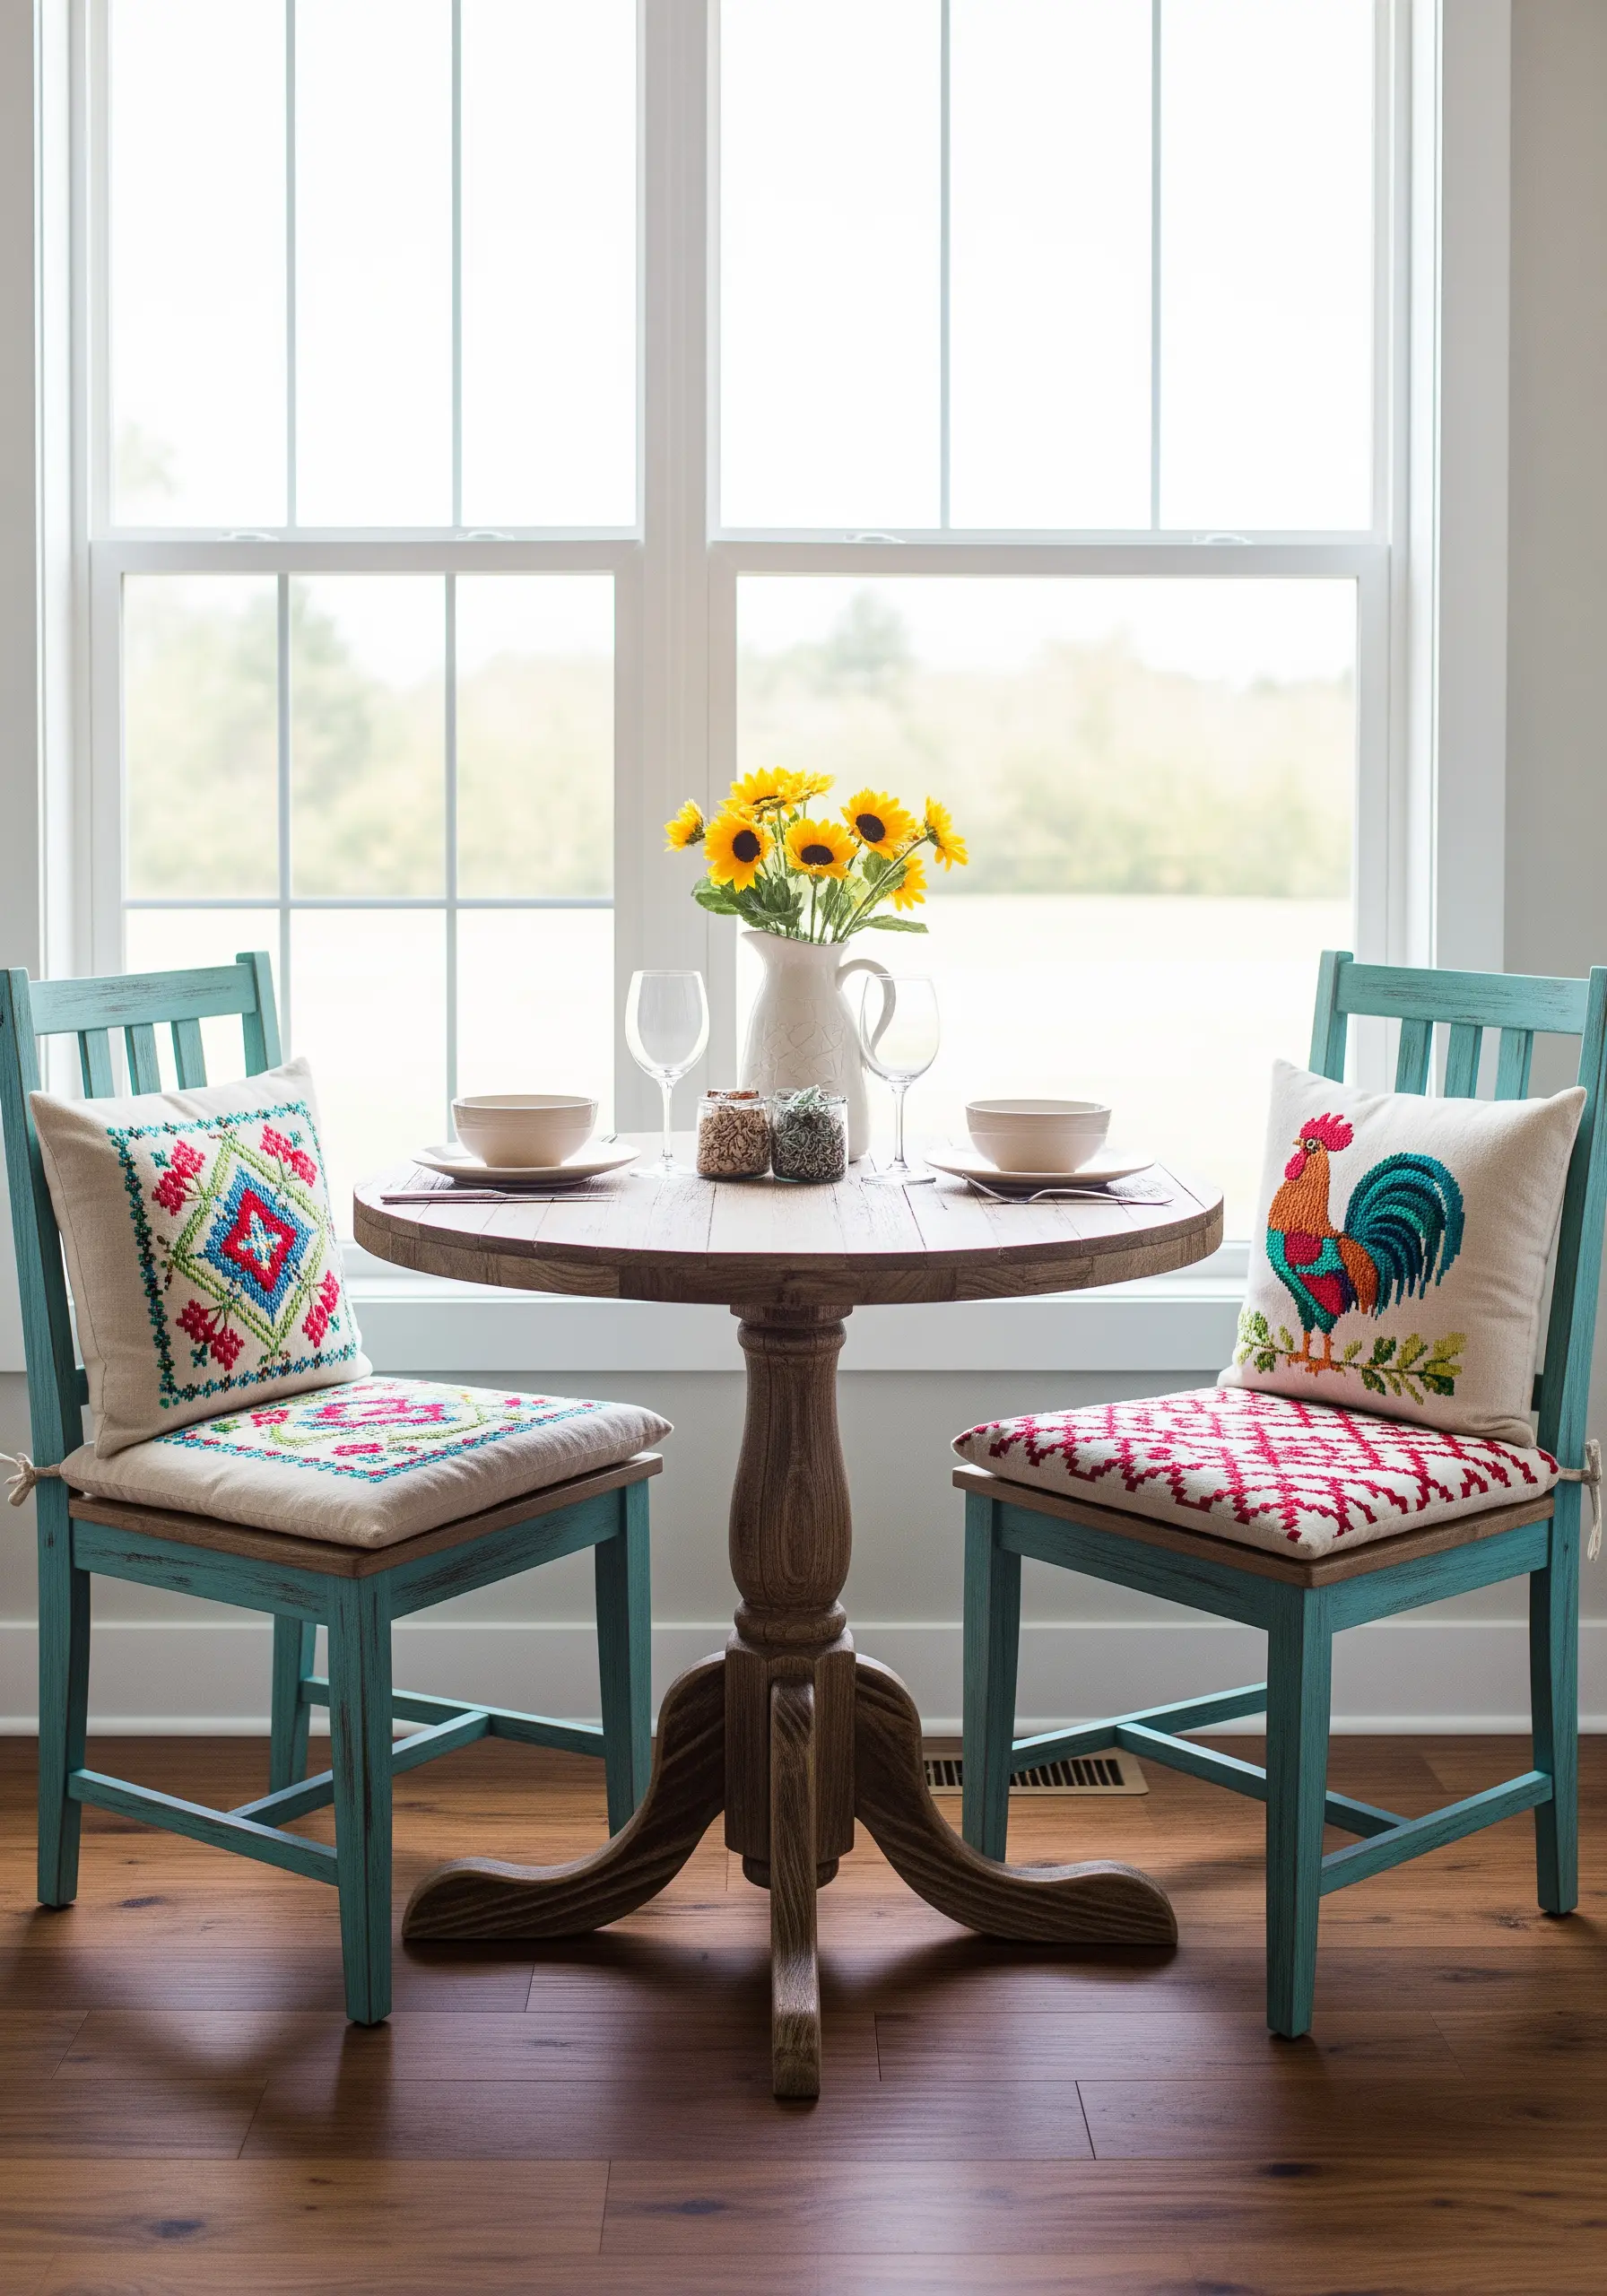
Transform simple wooden chairs into vibrant focal points by adding embroidered seat cushions.
Choose or create designs with bold, graphic shapes and a high-contrast color palette. Use dense fill stitches like satin stitch or long-and-short stitch to make the colors pop.
This is an excellent opportunity to rescue a set of mismatched or worn chairs, unifying them with a common textile element.
The combination of rustic wood and vivid thread work creates an inviting, eclectic dining nook, perfect for showcasing your love for bold bohemian floral embroidery ideas (or folk art motifs).
7. Craft a Sculptural Monogram with Yarn Couching
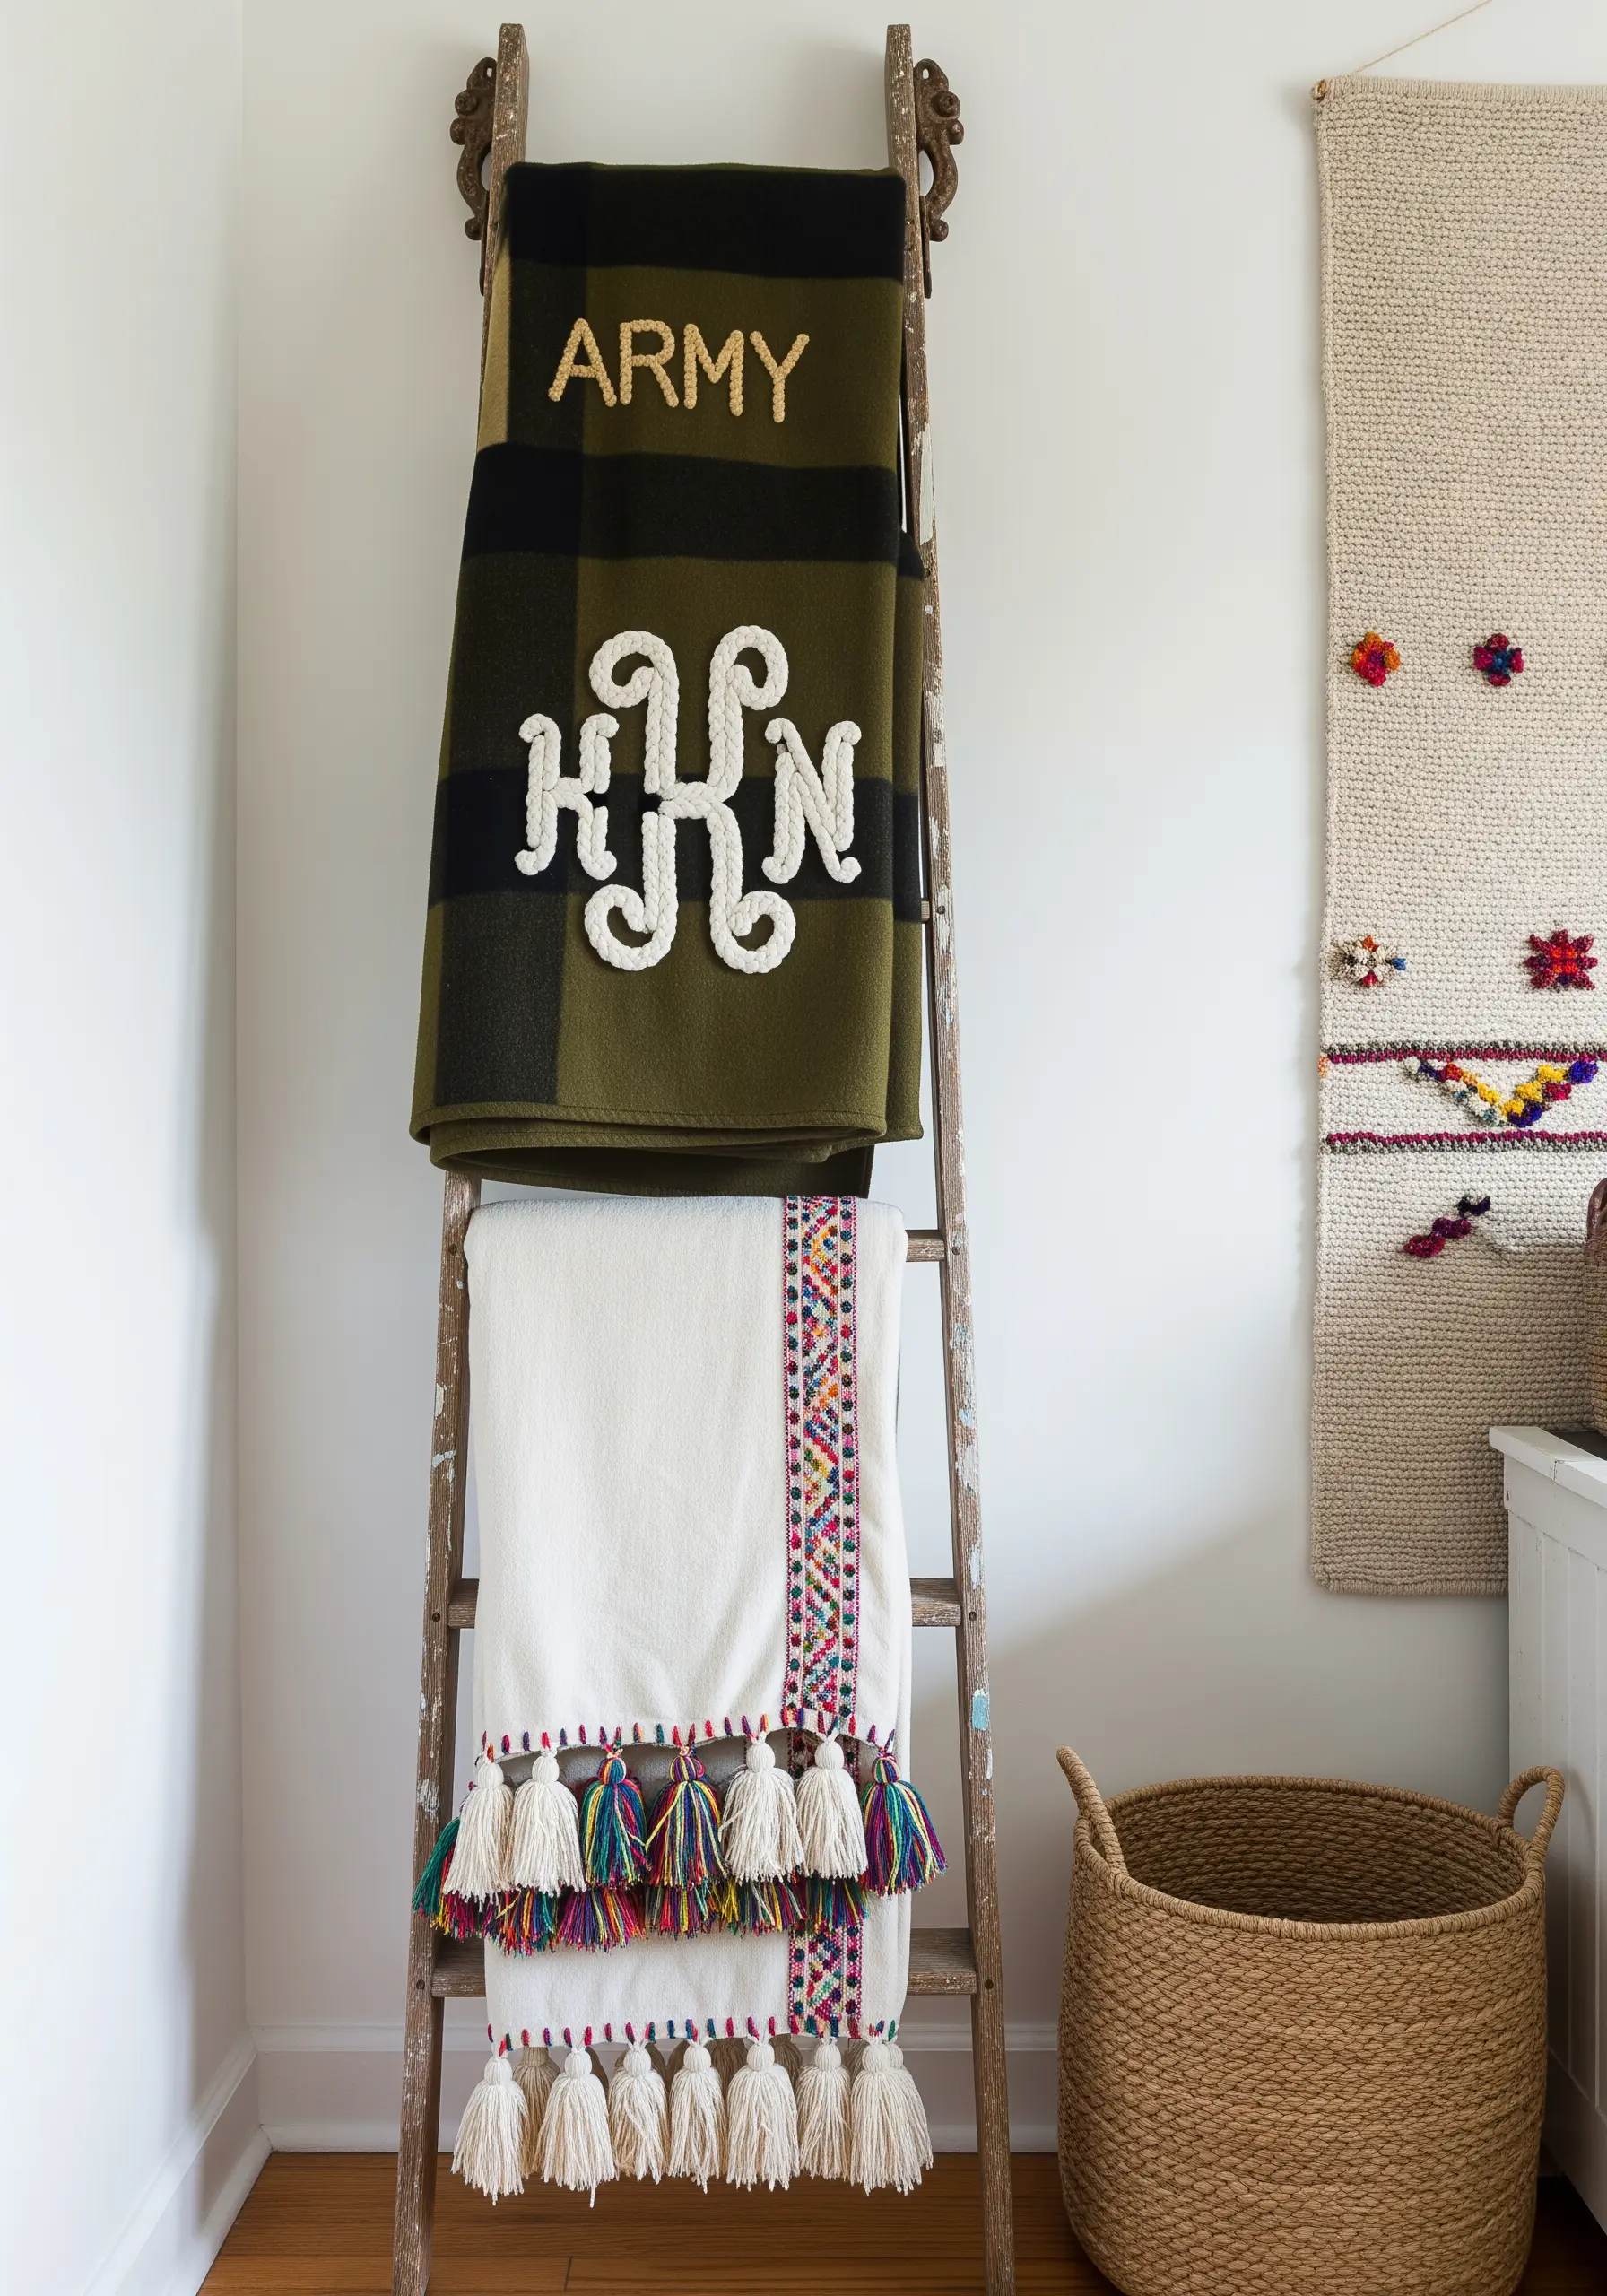
Add a dramatic, personalized touch to a thrifted wool blanket with a raised yarn monogram.
Instead of stitching with the yarn, use the couching technique: lay a thick, textural yarn on the surface of the fabric in your desired letter shape, then use a thinner, matching embroidery floss to tack it down with small, evenly spaced stitches.
This method creates a bold, three-dimensional effect that is much faster than traditional fill stitches and gives the blanket a high-end, bespoke feel, perfect for personalized name monogram wall embroidery gifts or decor.
8. Design a Statement Room Divider
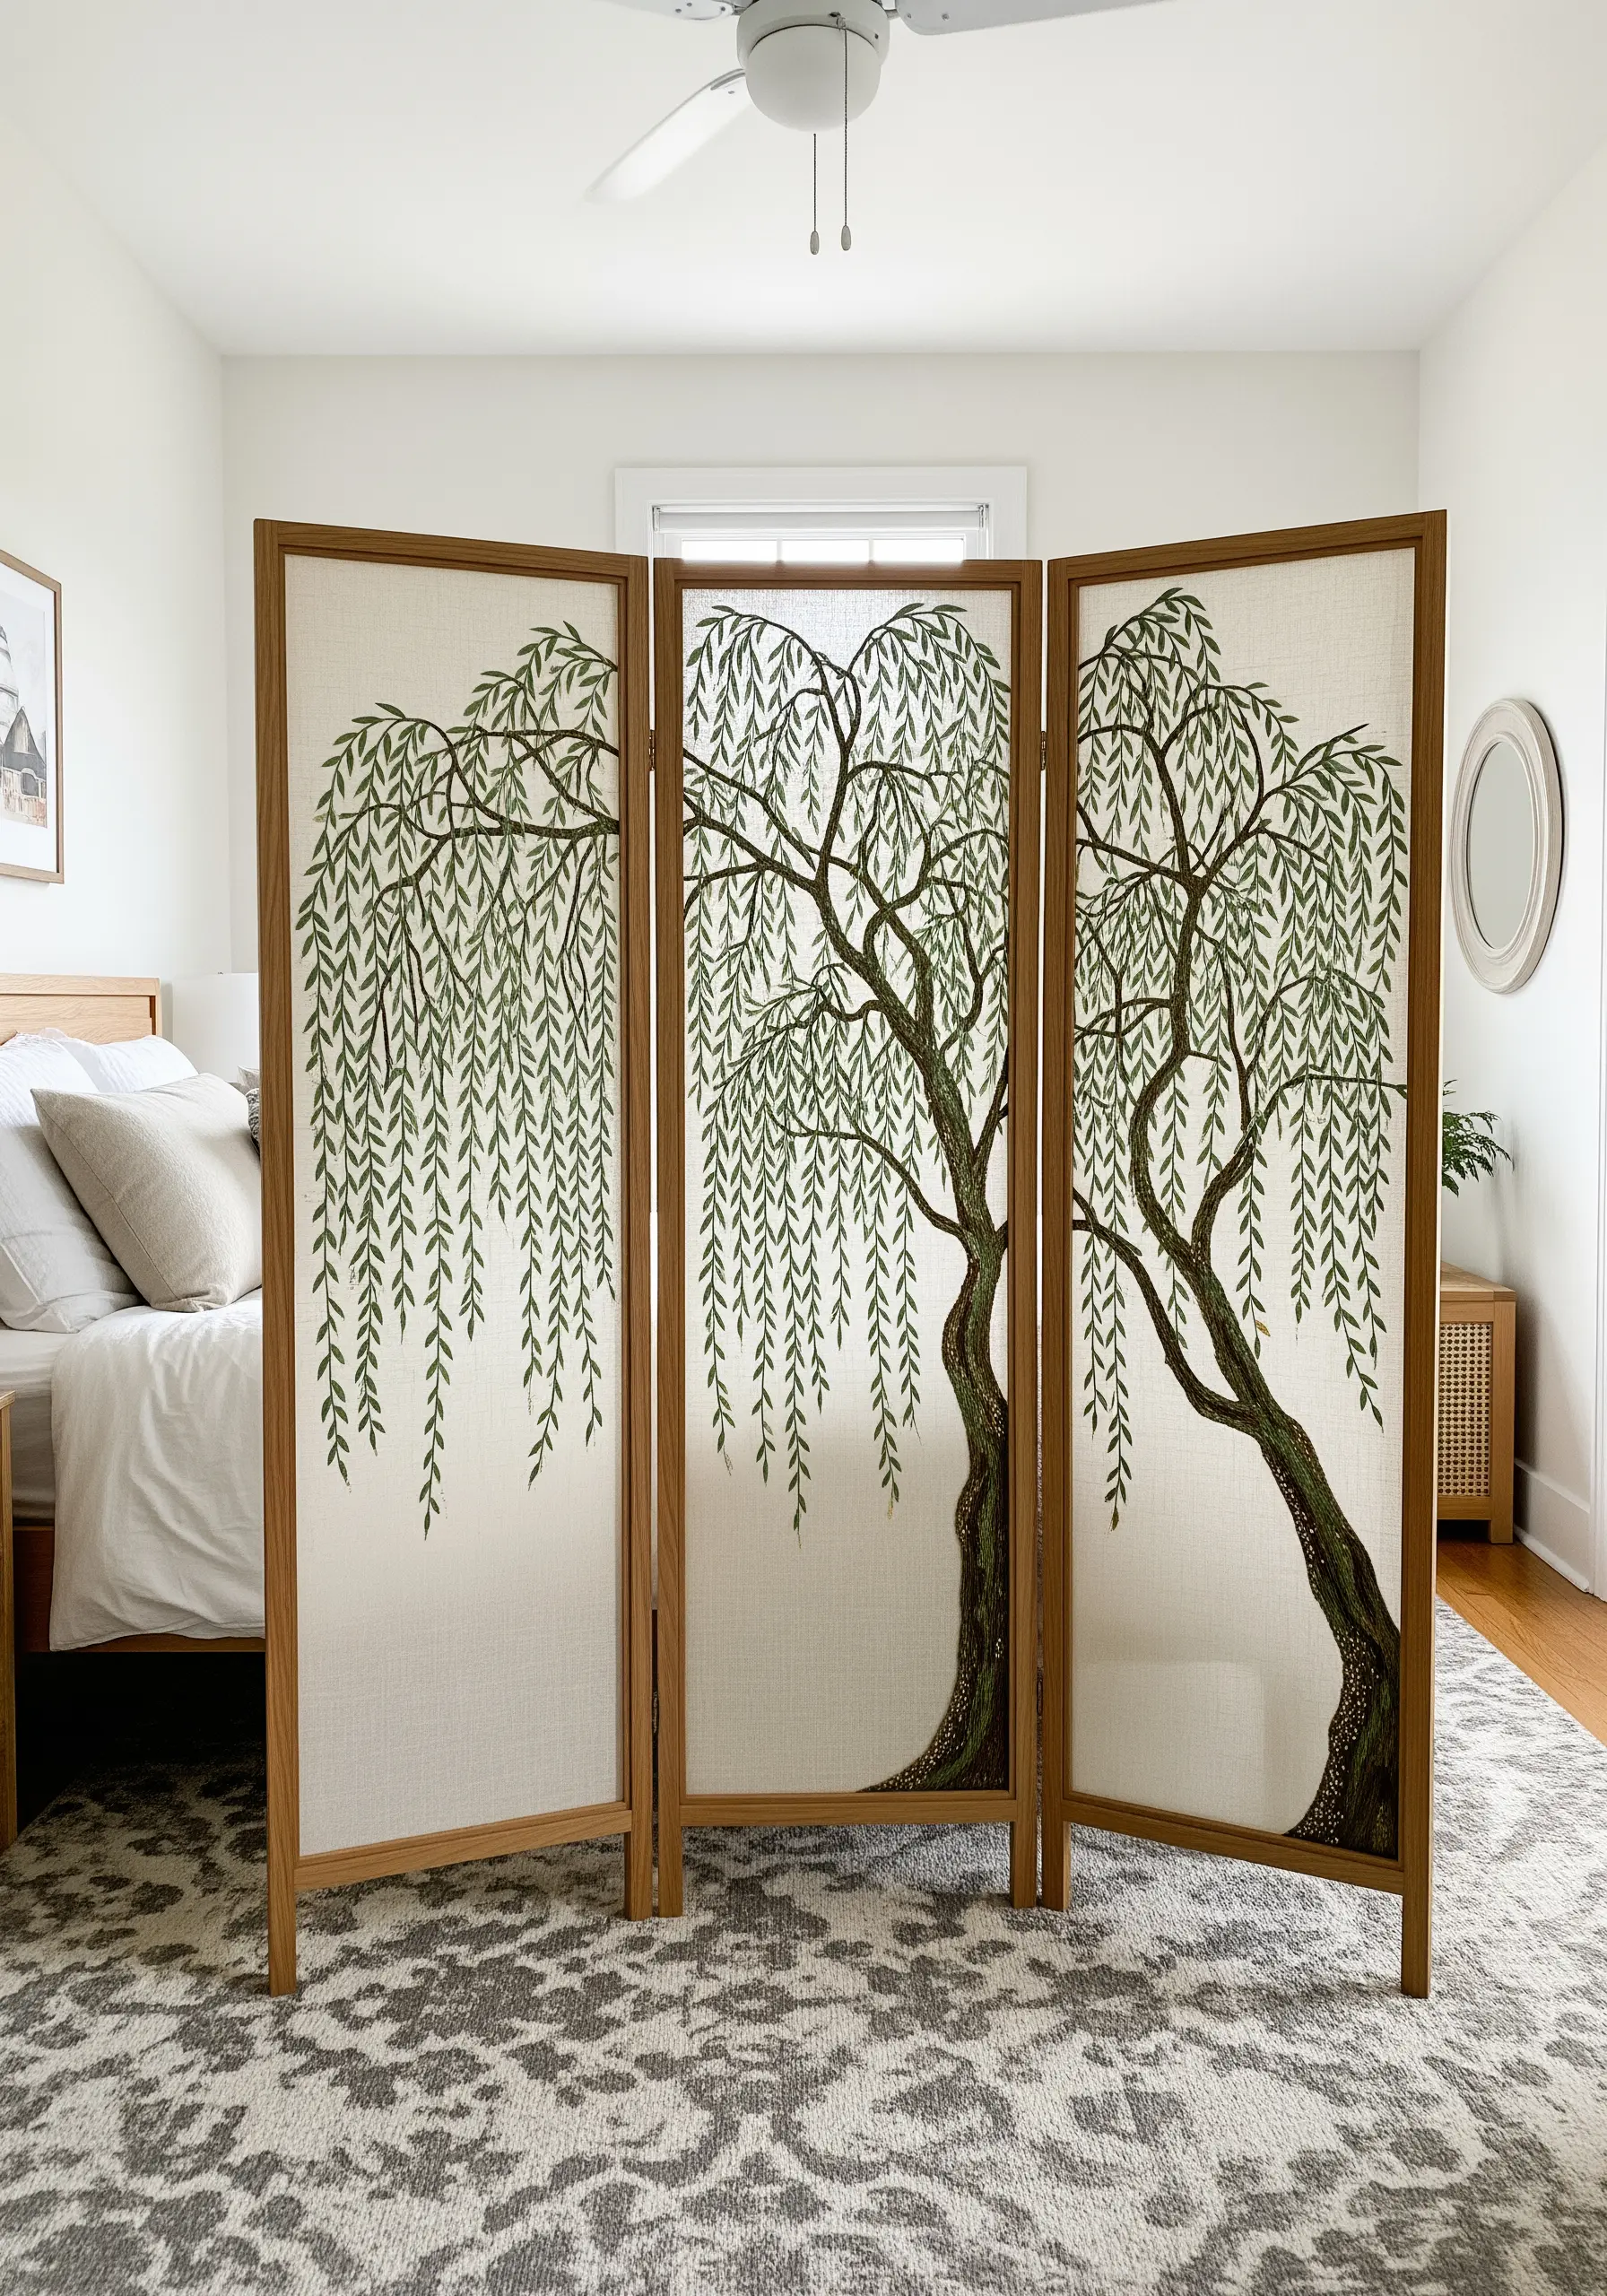
Turn a plain folding screen into a breathtaking piece of functional art with large-scale embroidery.
Stretch a neutral, durable fabric like linen or canvas across each panel. Use a simple, elegant motif that can span across the entire screen, like a weeping willow tree.
Outline the design with a bold stem stitch or chain stitch using a darker, contrasting thread to create a strong silhouette.
This project transforms a simple room divider into a stunning focal point, much like custom embroidered wall panels.
9. Frame Fabric Scraps as Abstract Art
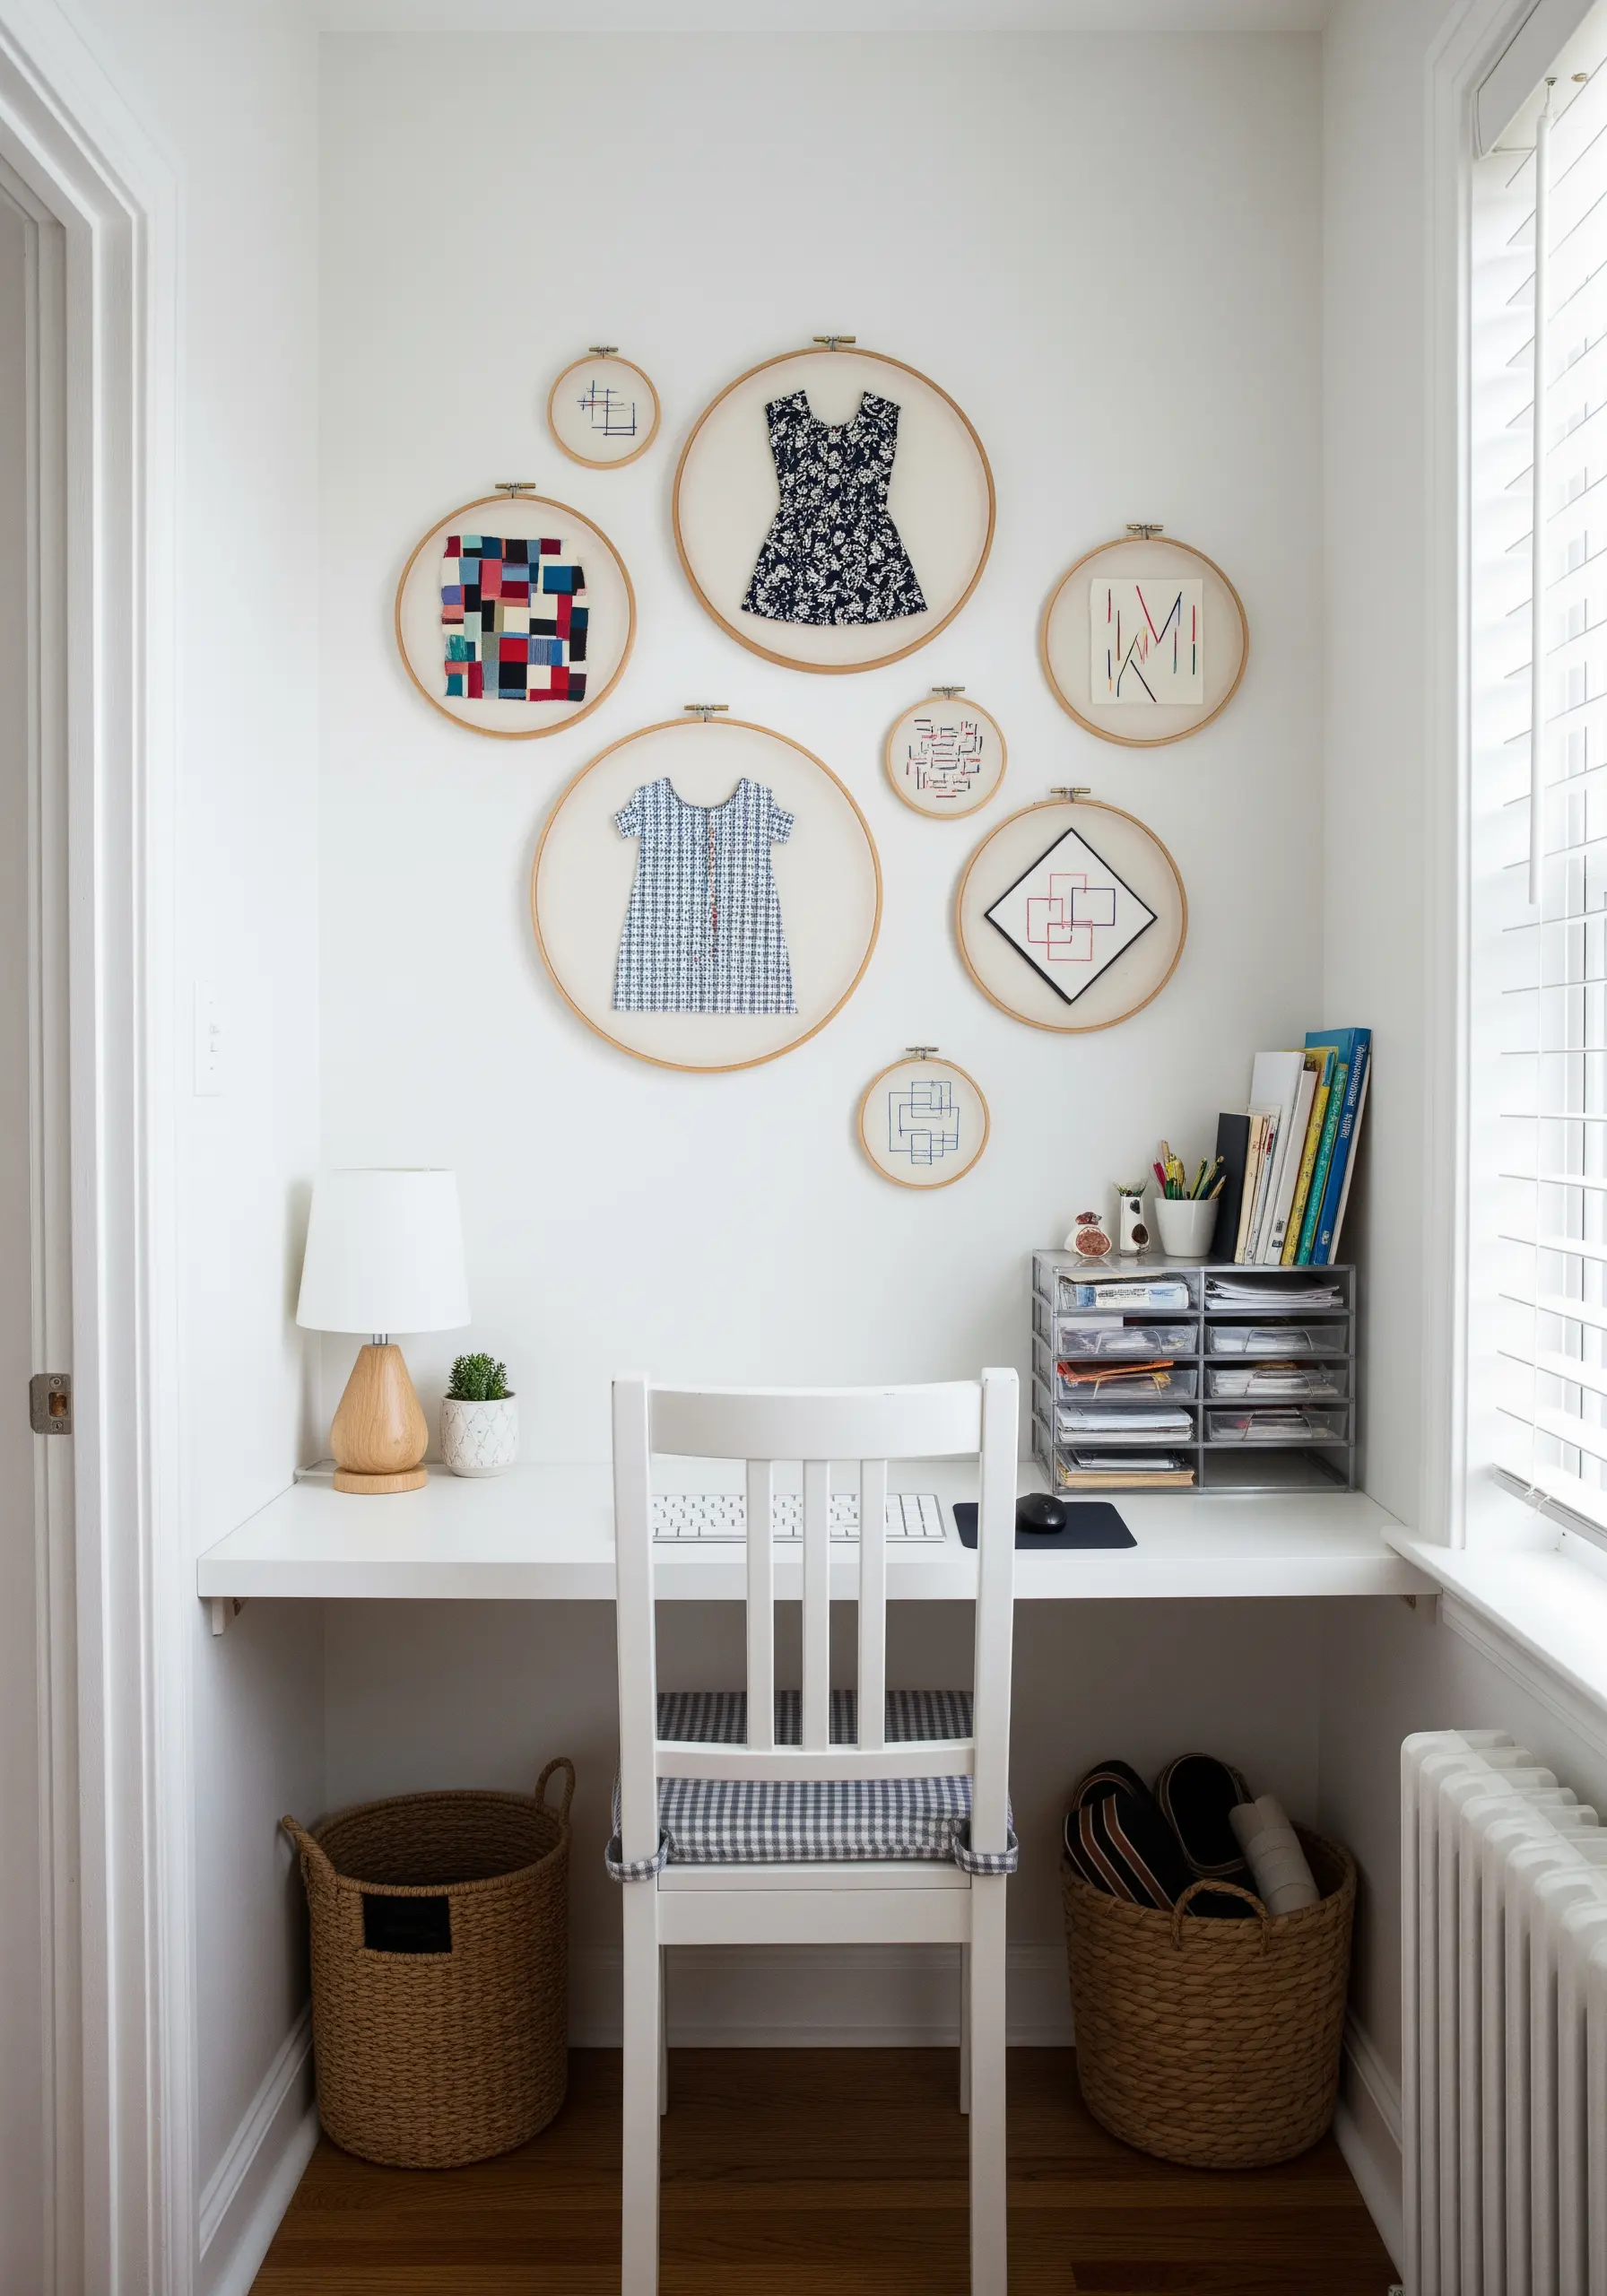
Elevate sentimental fabric scraps—a piece of a child’s first dress, a vintage handkerchief, or a compelling pattern—by framing them in embroidery hoops.
This technique, known as ‘specimen art,’ treats the fabric as a found object worthy of display.
Arrange the hoops in a gallery wall formation, mixing sizes and orientations for a dynamic effect. It’s a no-stitch way to celebrate pattern and memory, turning leftovers into intentional decor.
Think of it as the ultimate in minimalist scrap fabric collage embroidery ideas.
10. Upgrade a Pouf with Chunky Yarn Stitches
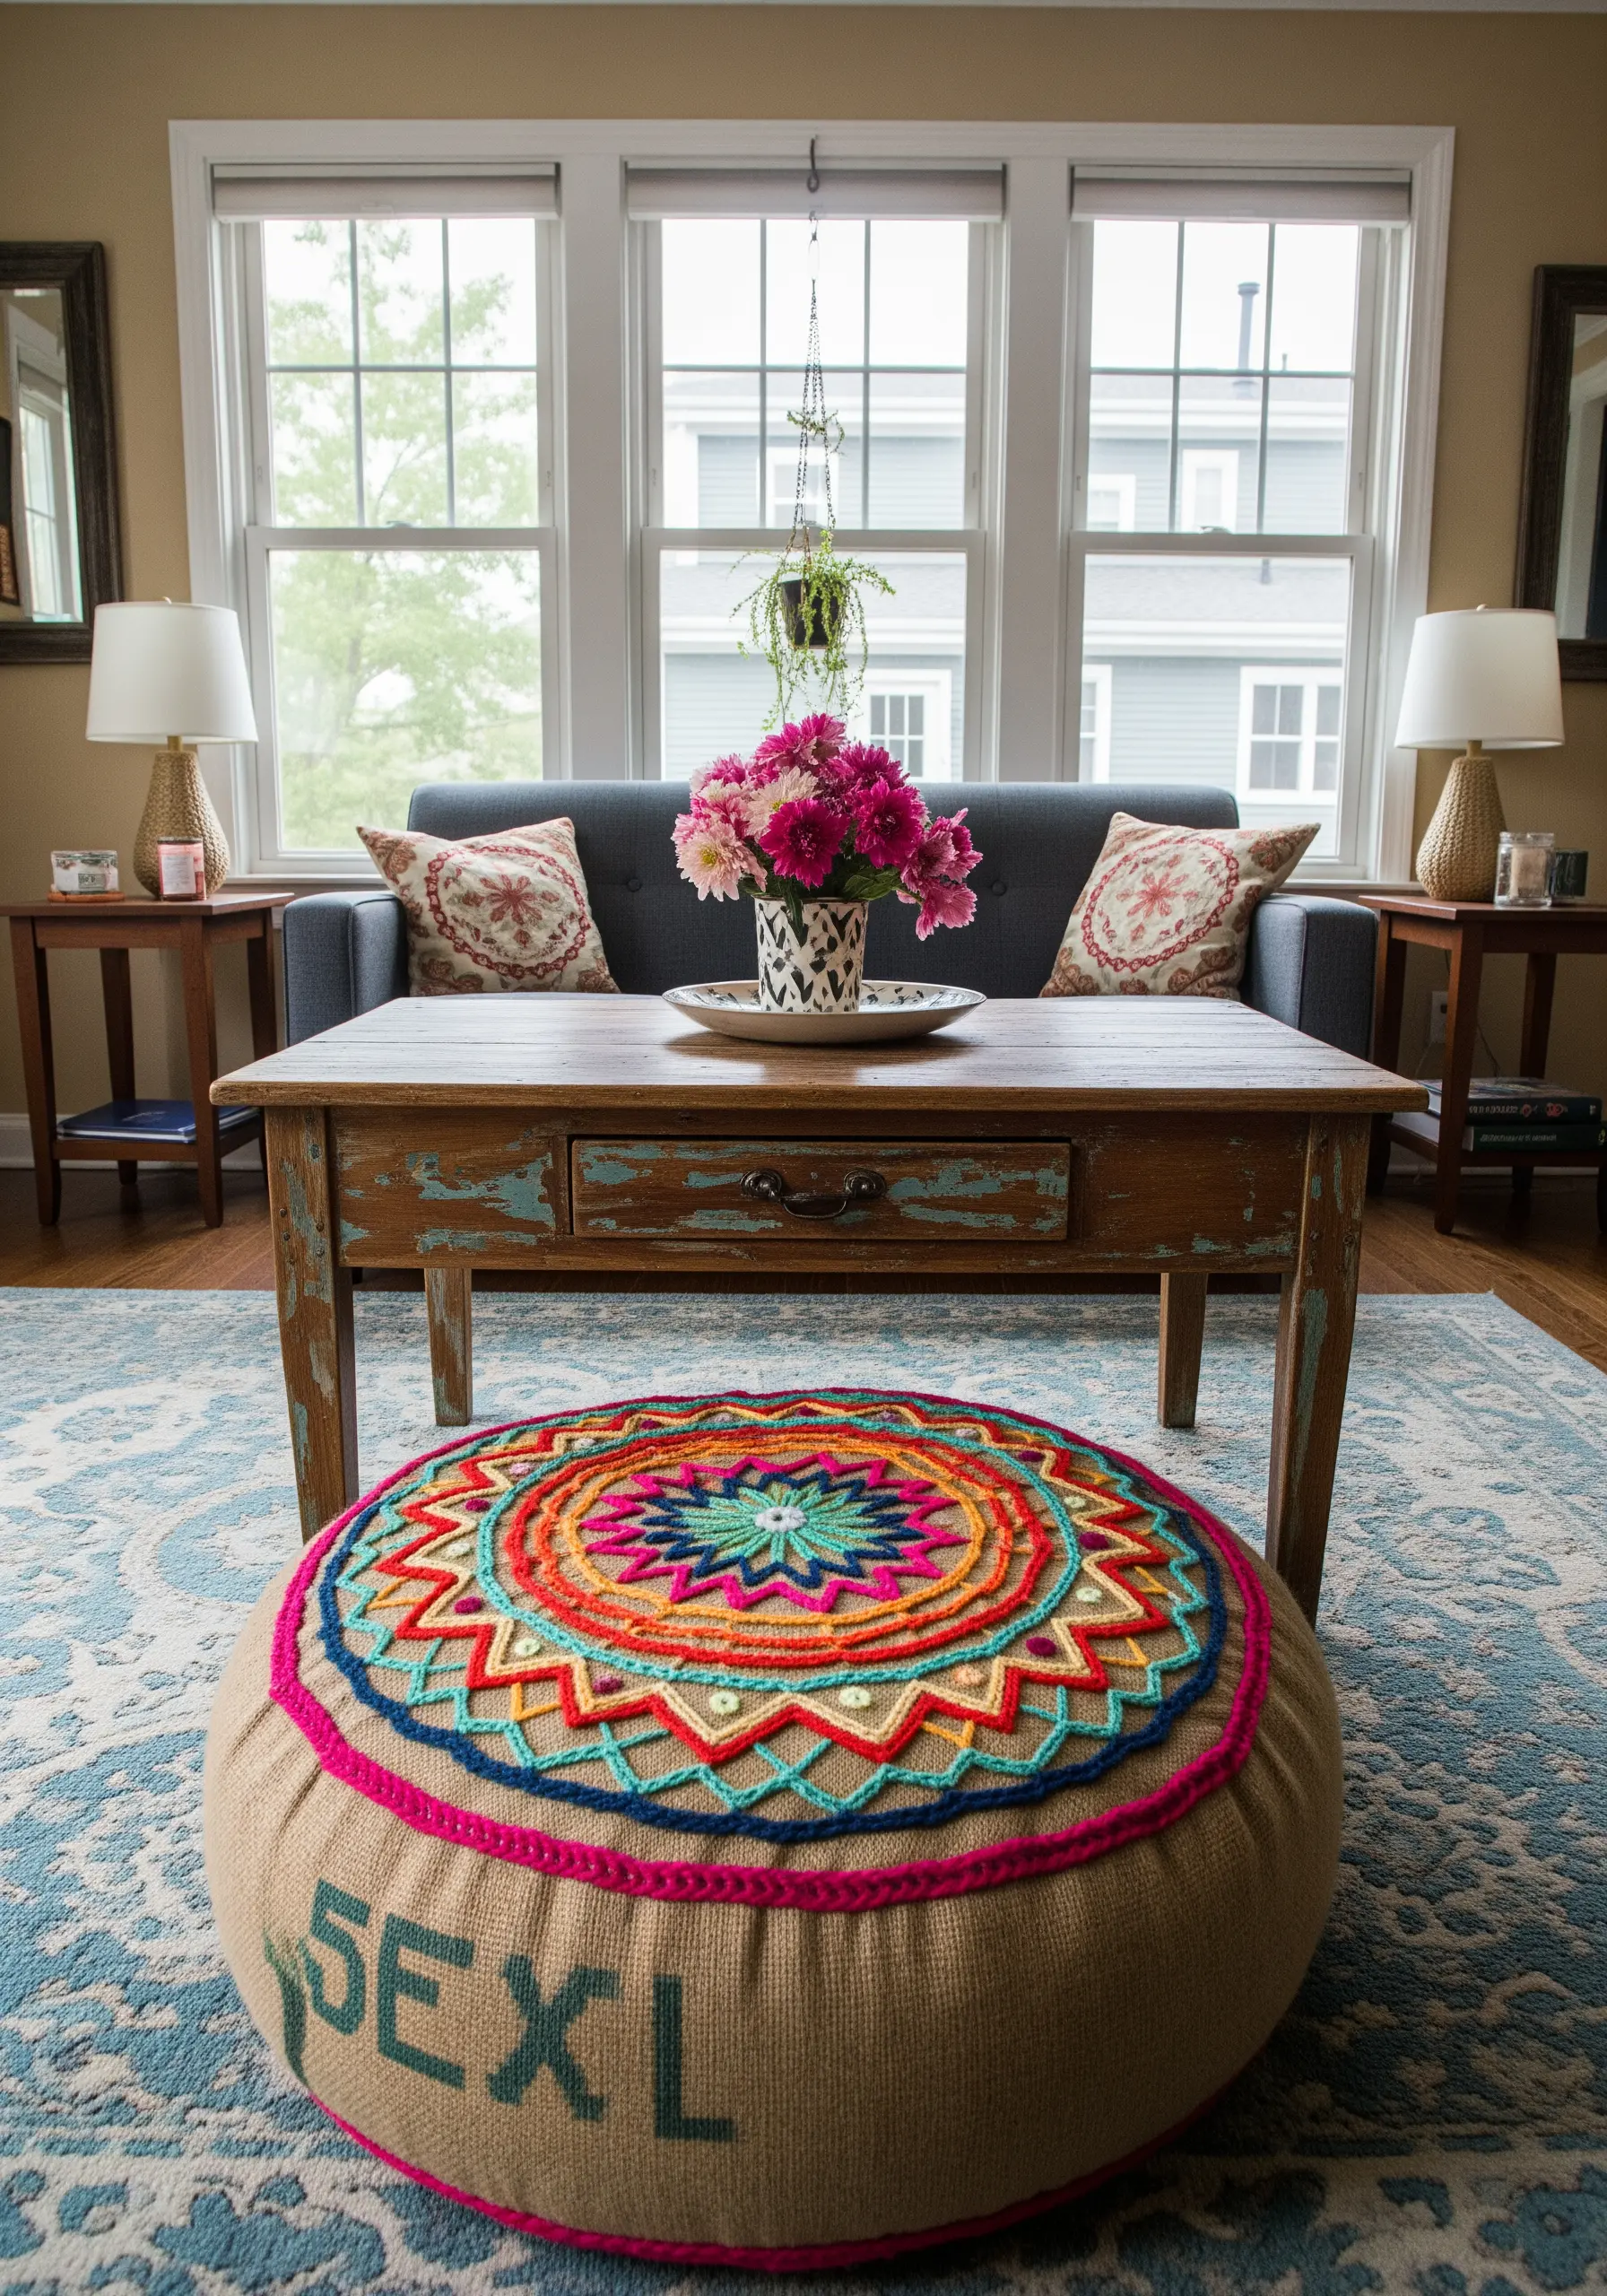
Give a plain burlap or canvas pouf a vibrant, textured makeover using thick yarn.
The open weave of fabrics like burlap is perfect for working with a large needle and chunky yarn, allowing you to create bold designs quickly.
Use a simple chain stitch to outline a large mandala or geometric pattern. The thick yarn creates an instantly satisfying, high-impact design that adds a cozy, handmade feel to your living space.
It’s a fantastic application for the same principles behind yarn wall art techniques.
11. Enhance a Window Seat with Layered Textiles
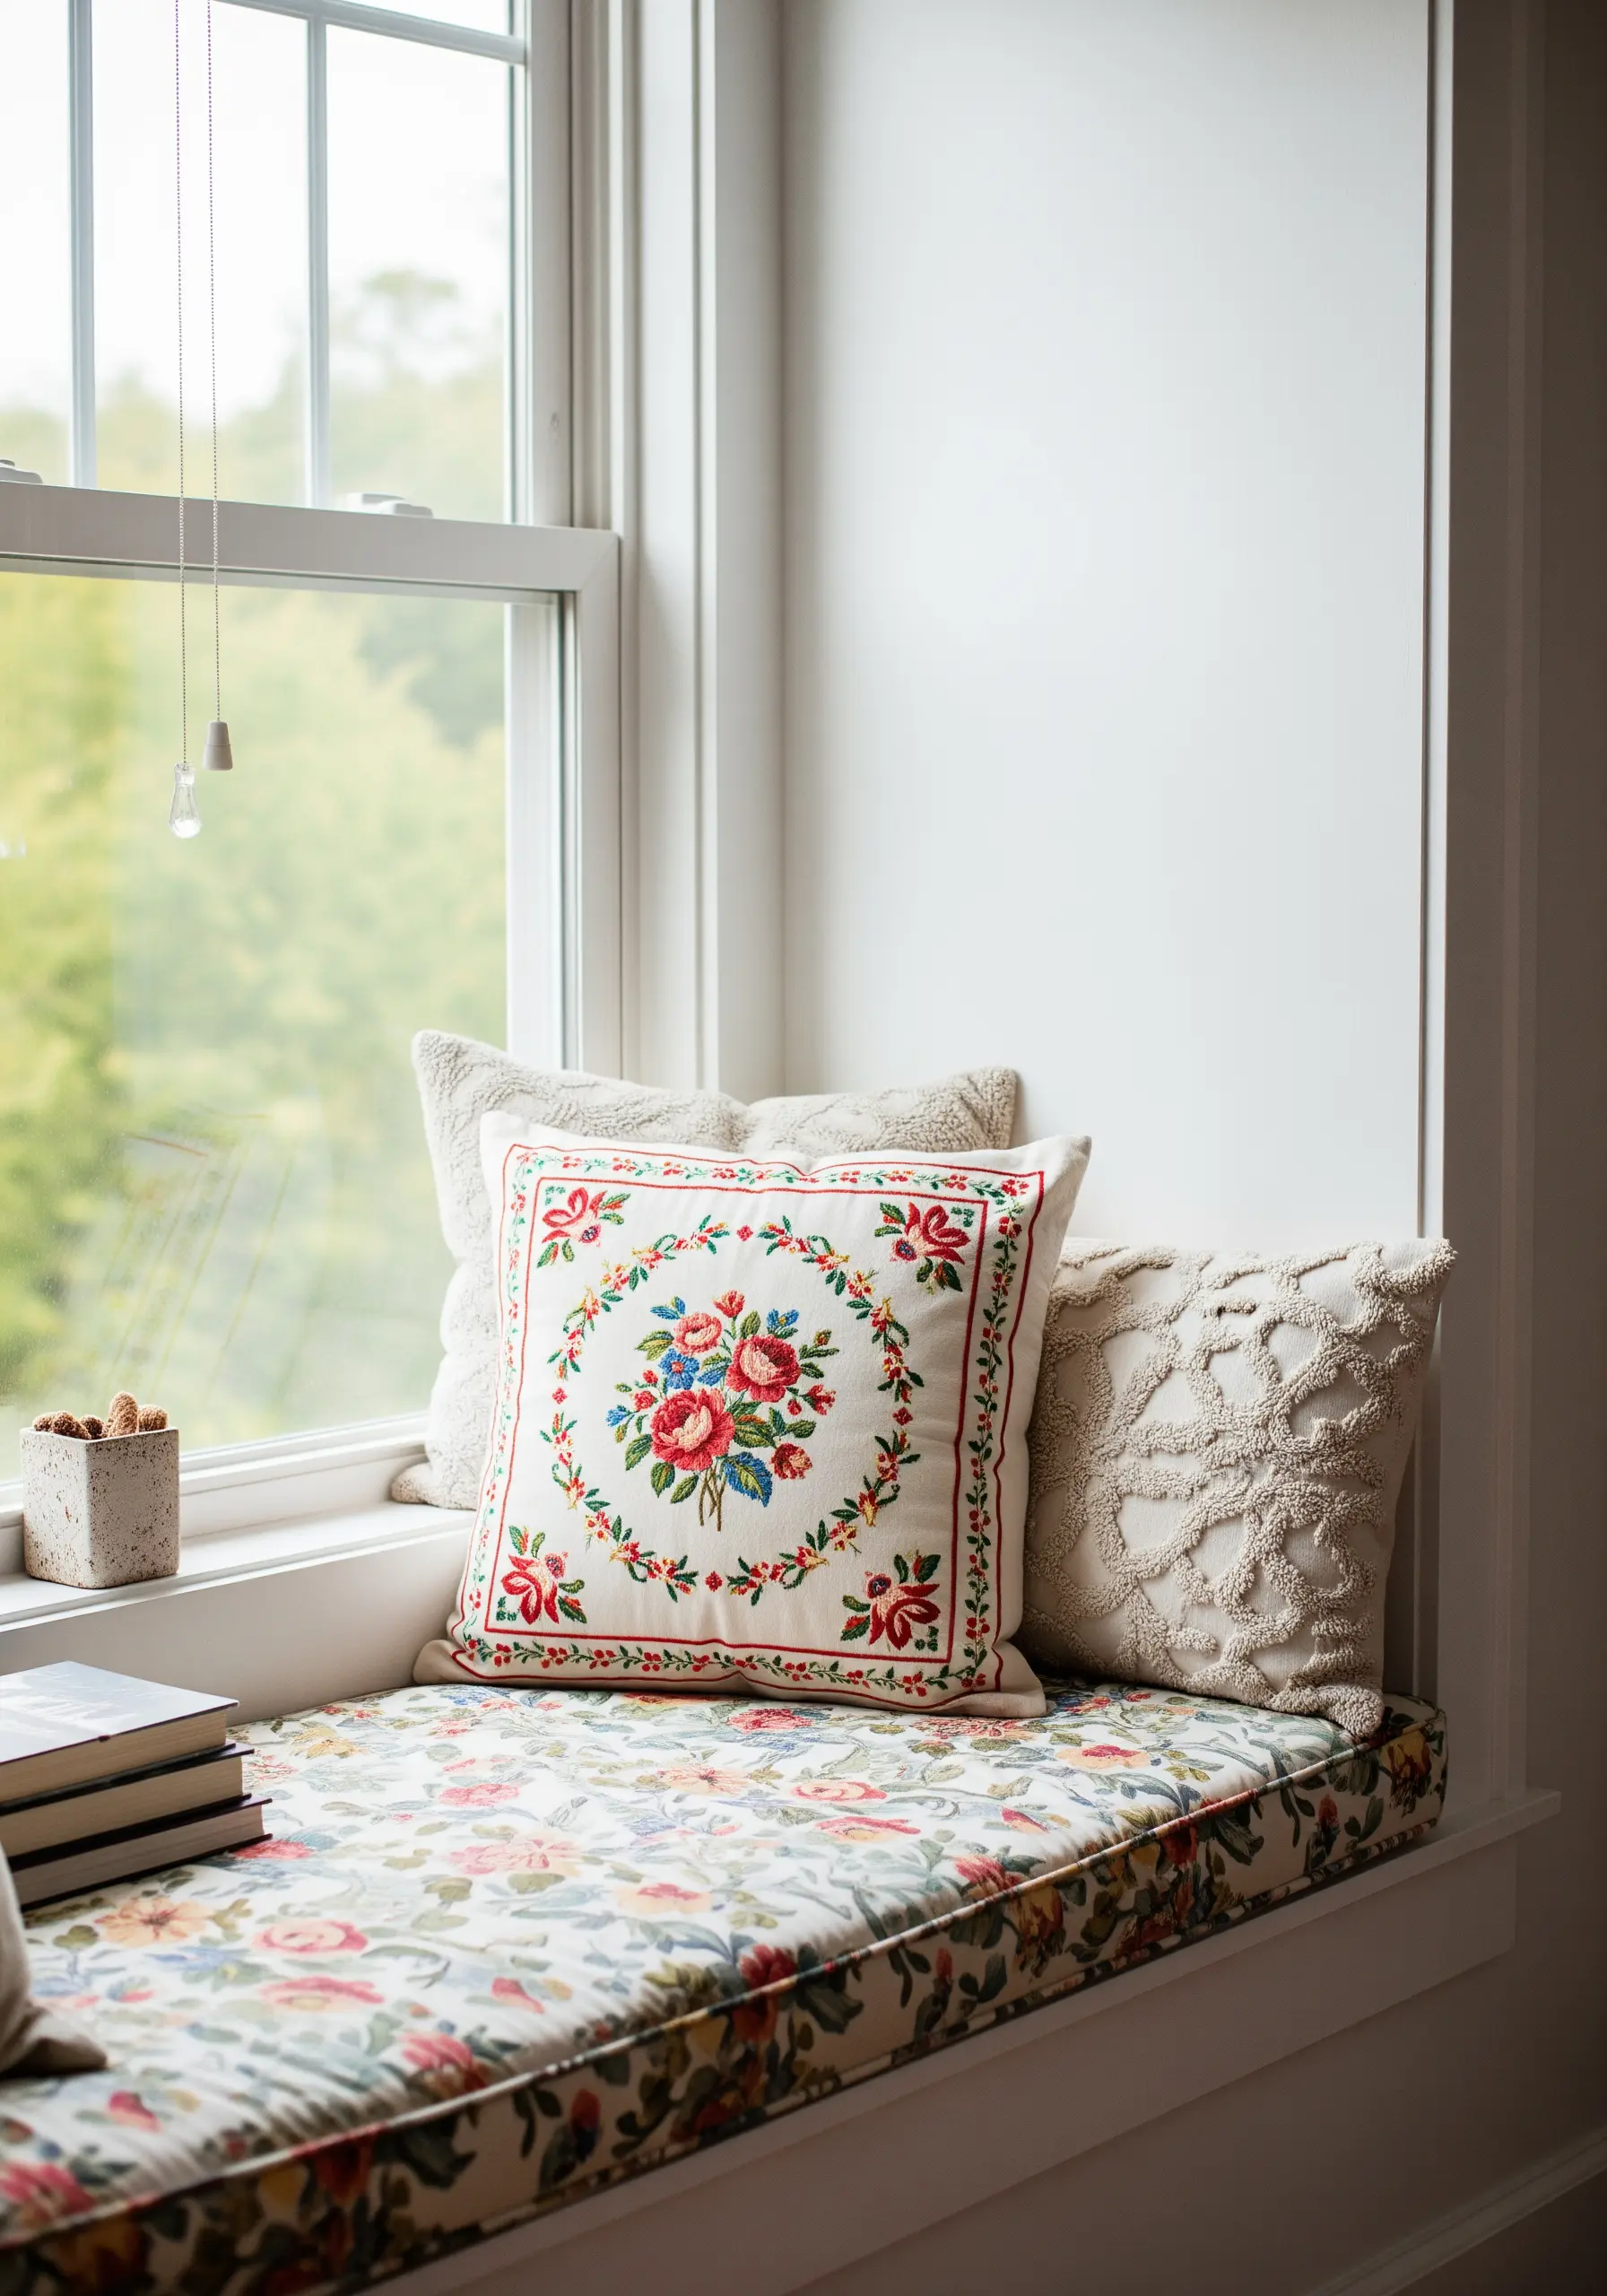
Create an inviting reading nook by layering textiles with complementary patterns and textures.
Start with a custom cushion made from a larger-scale floral fabric. Then, add pillows that pull out key colors from that base fabric.
Incorporate a vintage, hand-embroidered piece and pair it with a modern, texturally stitched cushion. The key is to let the vintage piece be the hero while the others act as supporting characters.
This is where adding simple hand-stitched cushion borders to a plain pillow can help tie everything together.
12. Personalize Towels with Clean, Modern Monograms
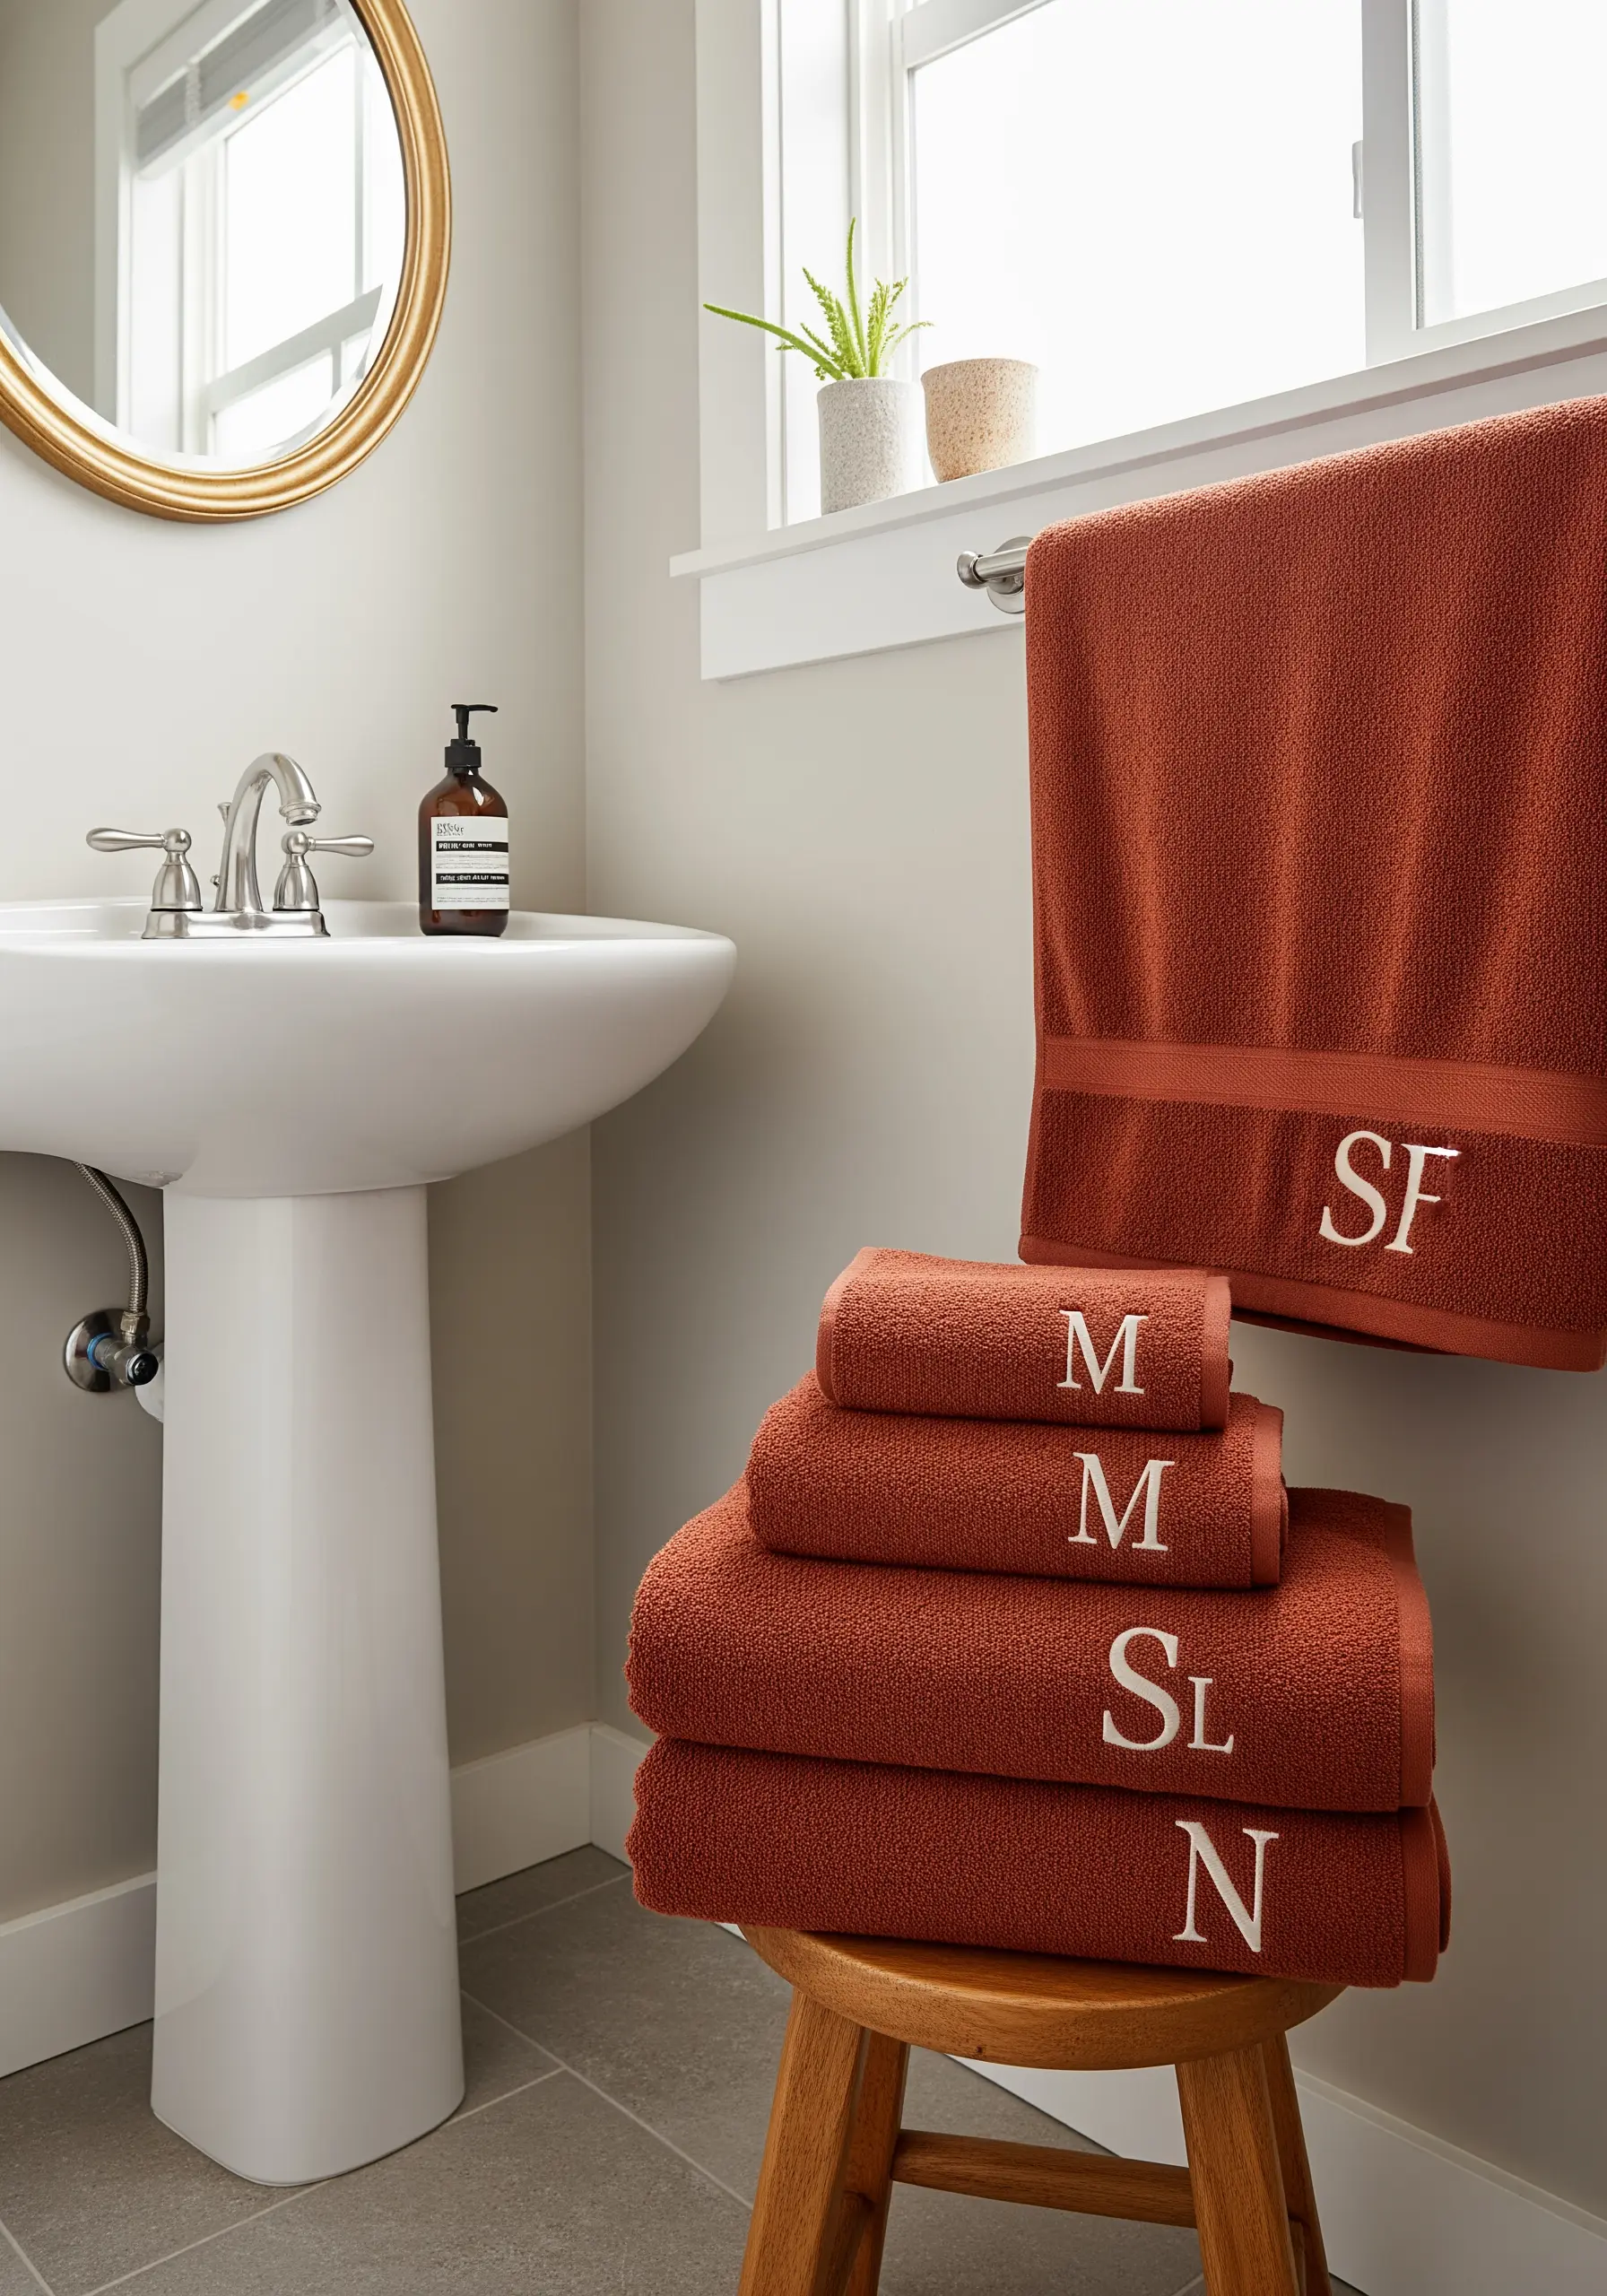
Add a touch of spa-like elegance to your bathroom by embroidering monograms onto a set of plush towels.
For a clean, contemporary look, choose a simple, sans-serif font. The most crucial step for stitching on terry cloth is using a water-soluble stabilizer on top of the fabric.
This prevents your stitches from getting lost in the towel’s pile, ensuring your lettering is crisp, clear, and professional-looking. These are more refined than full minimal typography quotes, but follow the same principle of clarity.
13. Create a Simple Banner from a Thrifted Scarf
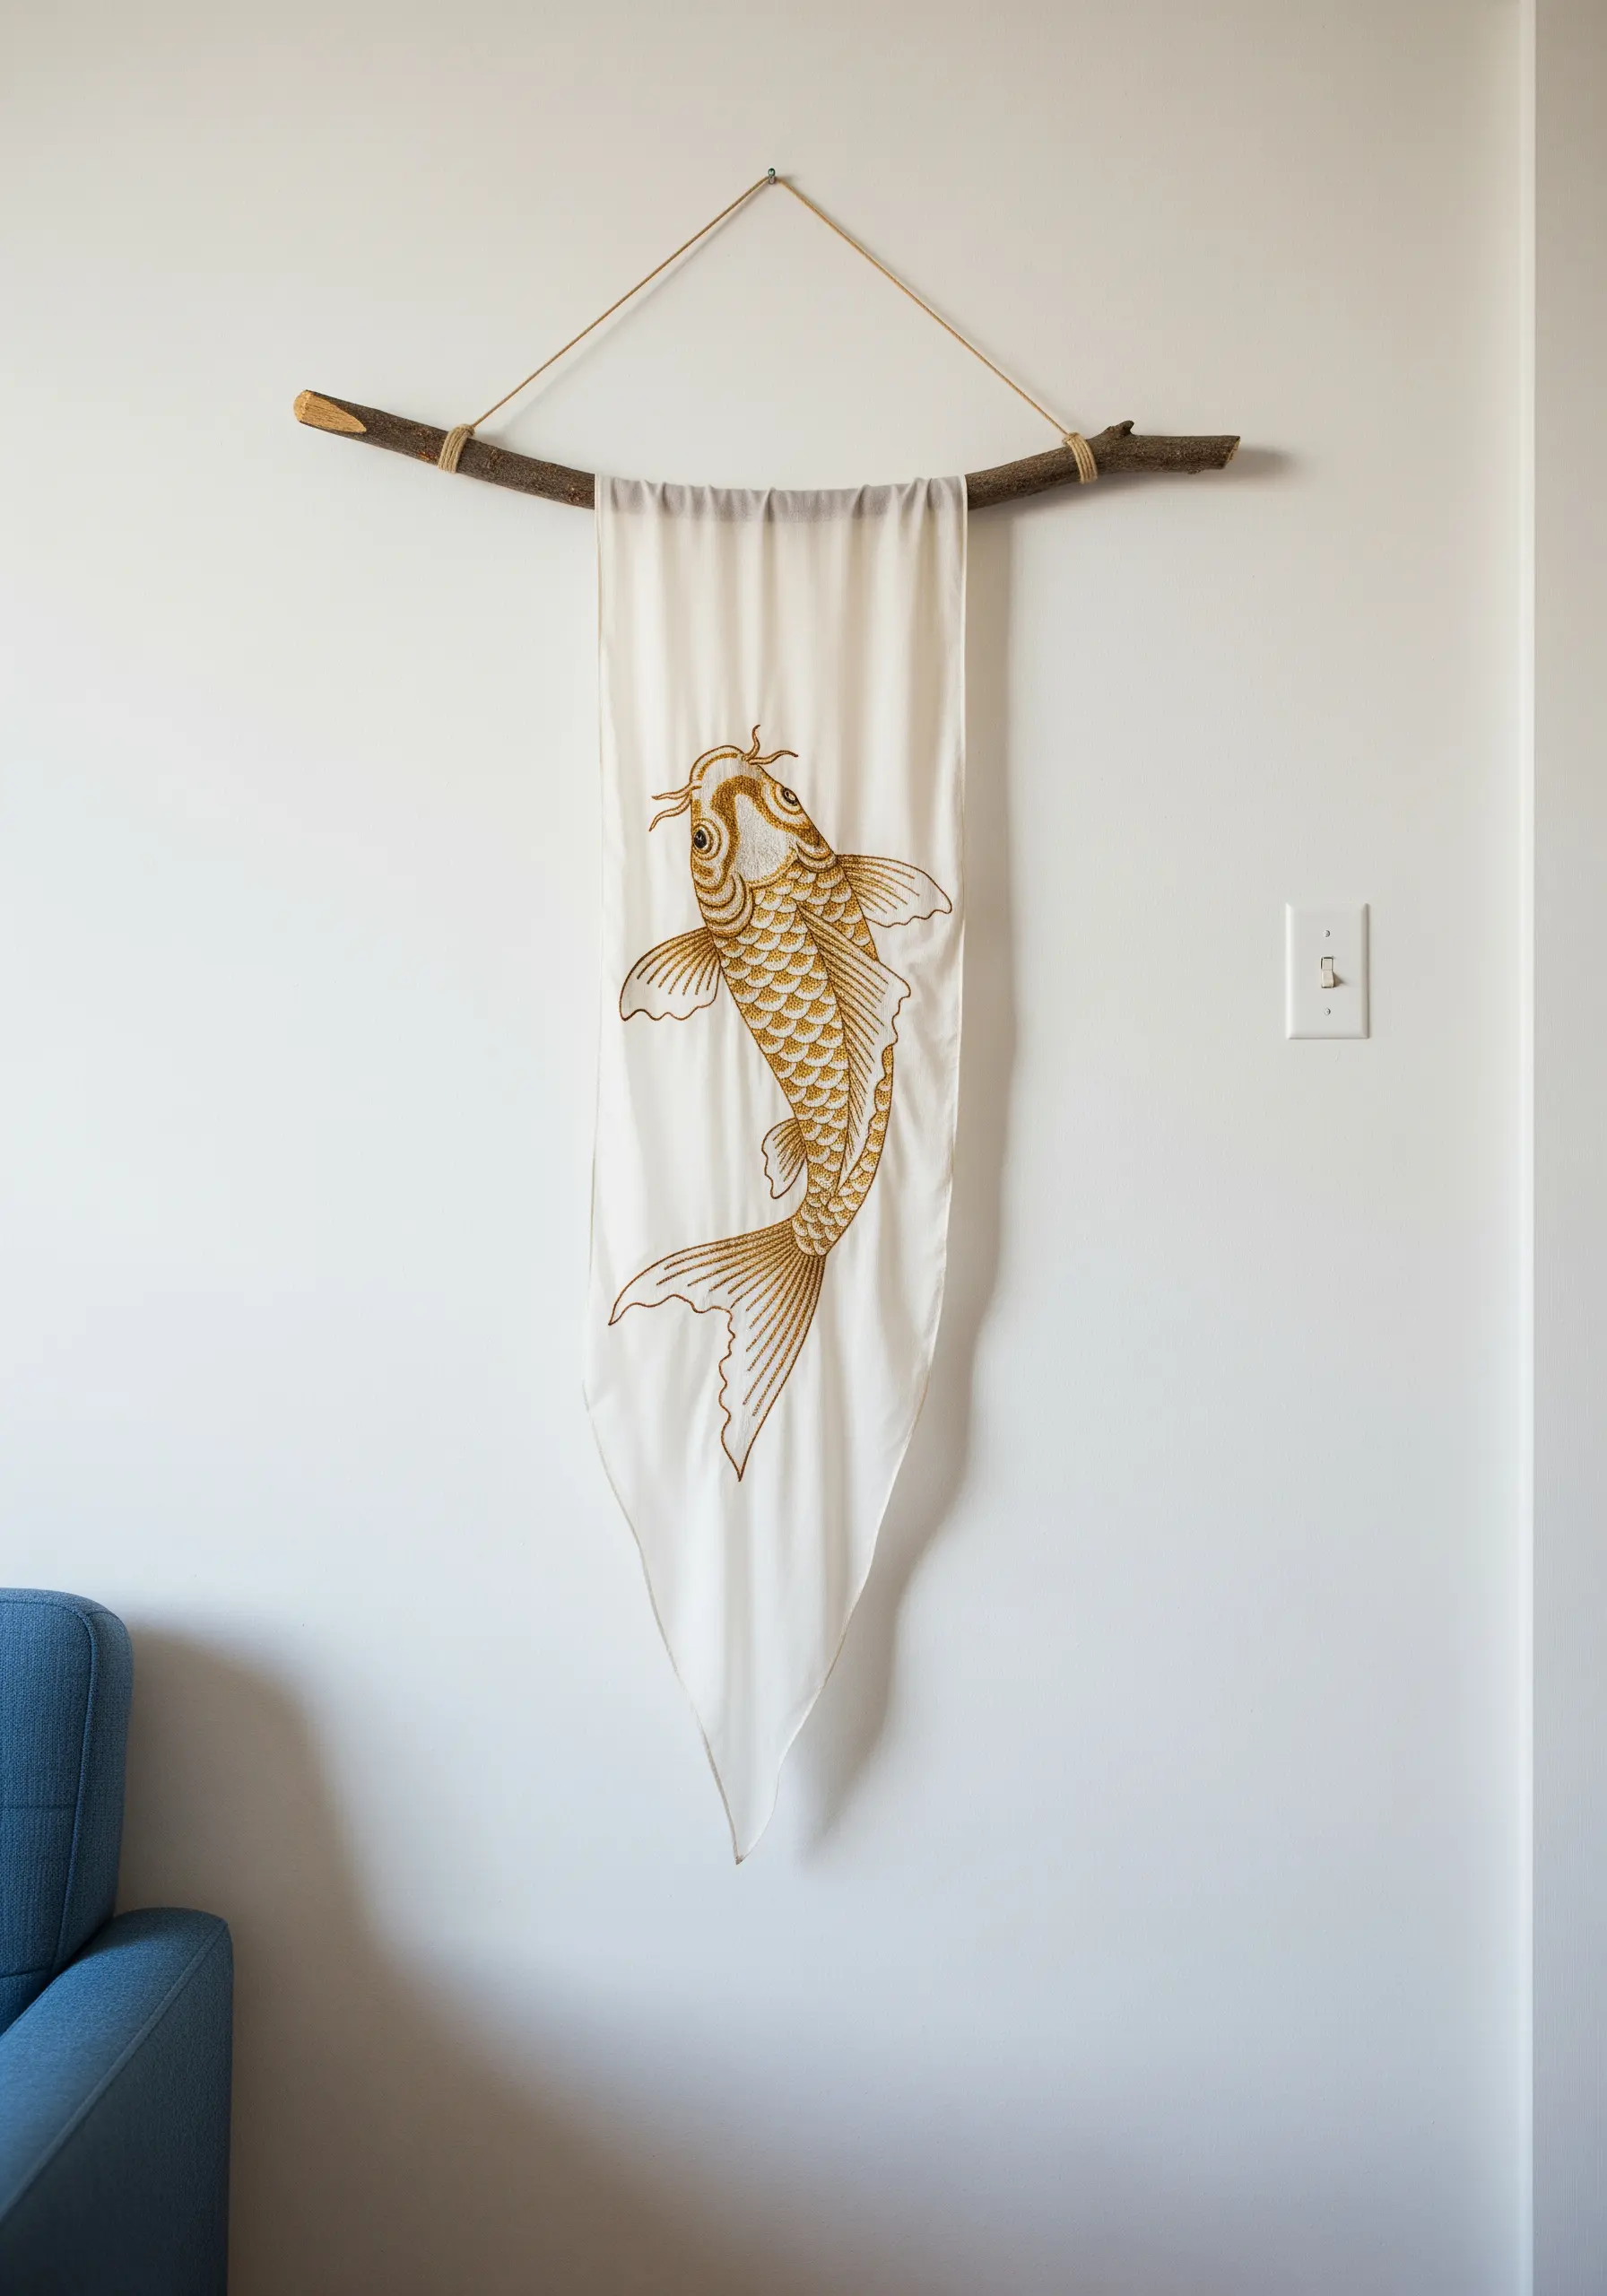
Repurpose a beautiful silk or linen scarf with a single, striking motif into a simple wall banner.
Instead of cutting or altering the fabric, simply fold the top edge over a found branch or a wooden dowel and secure it with a few hidden stitches.
Hang it with a piece of natural twine for a rustic, organic feel. This no-fuss display method honors the original textile and allows you to create instant art without a hoop.
It works especially well for vintage-style embroidery banners that have a story to tell.
14. Craft Rustic Pantry Labels with Linen Scraps

Organize your kitchen with charming, handmade pantry labels that add a touch of rustic elegance.
Use scraps of burlap or natural linen and stitch simple labels using a basic backstitch in a contrasting color like red or black.
To prevent fraying and add a bit of structure, either hem the edges or use a product like Fray Check before wrapping the labels around your glass jars.
This is one of the easiest DIY embroidery ideas for a calm minimalist kitchen space, offering both function and style.
15. Add Art to a Functional Sofa Caddy
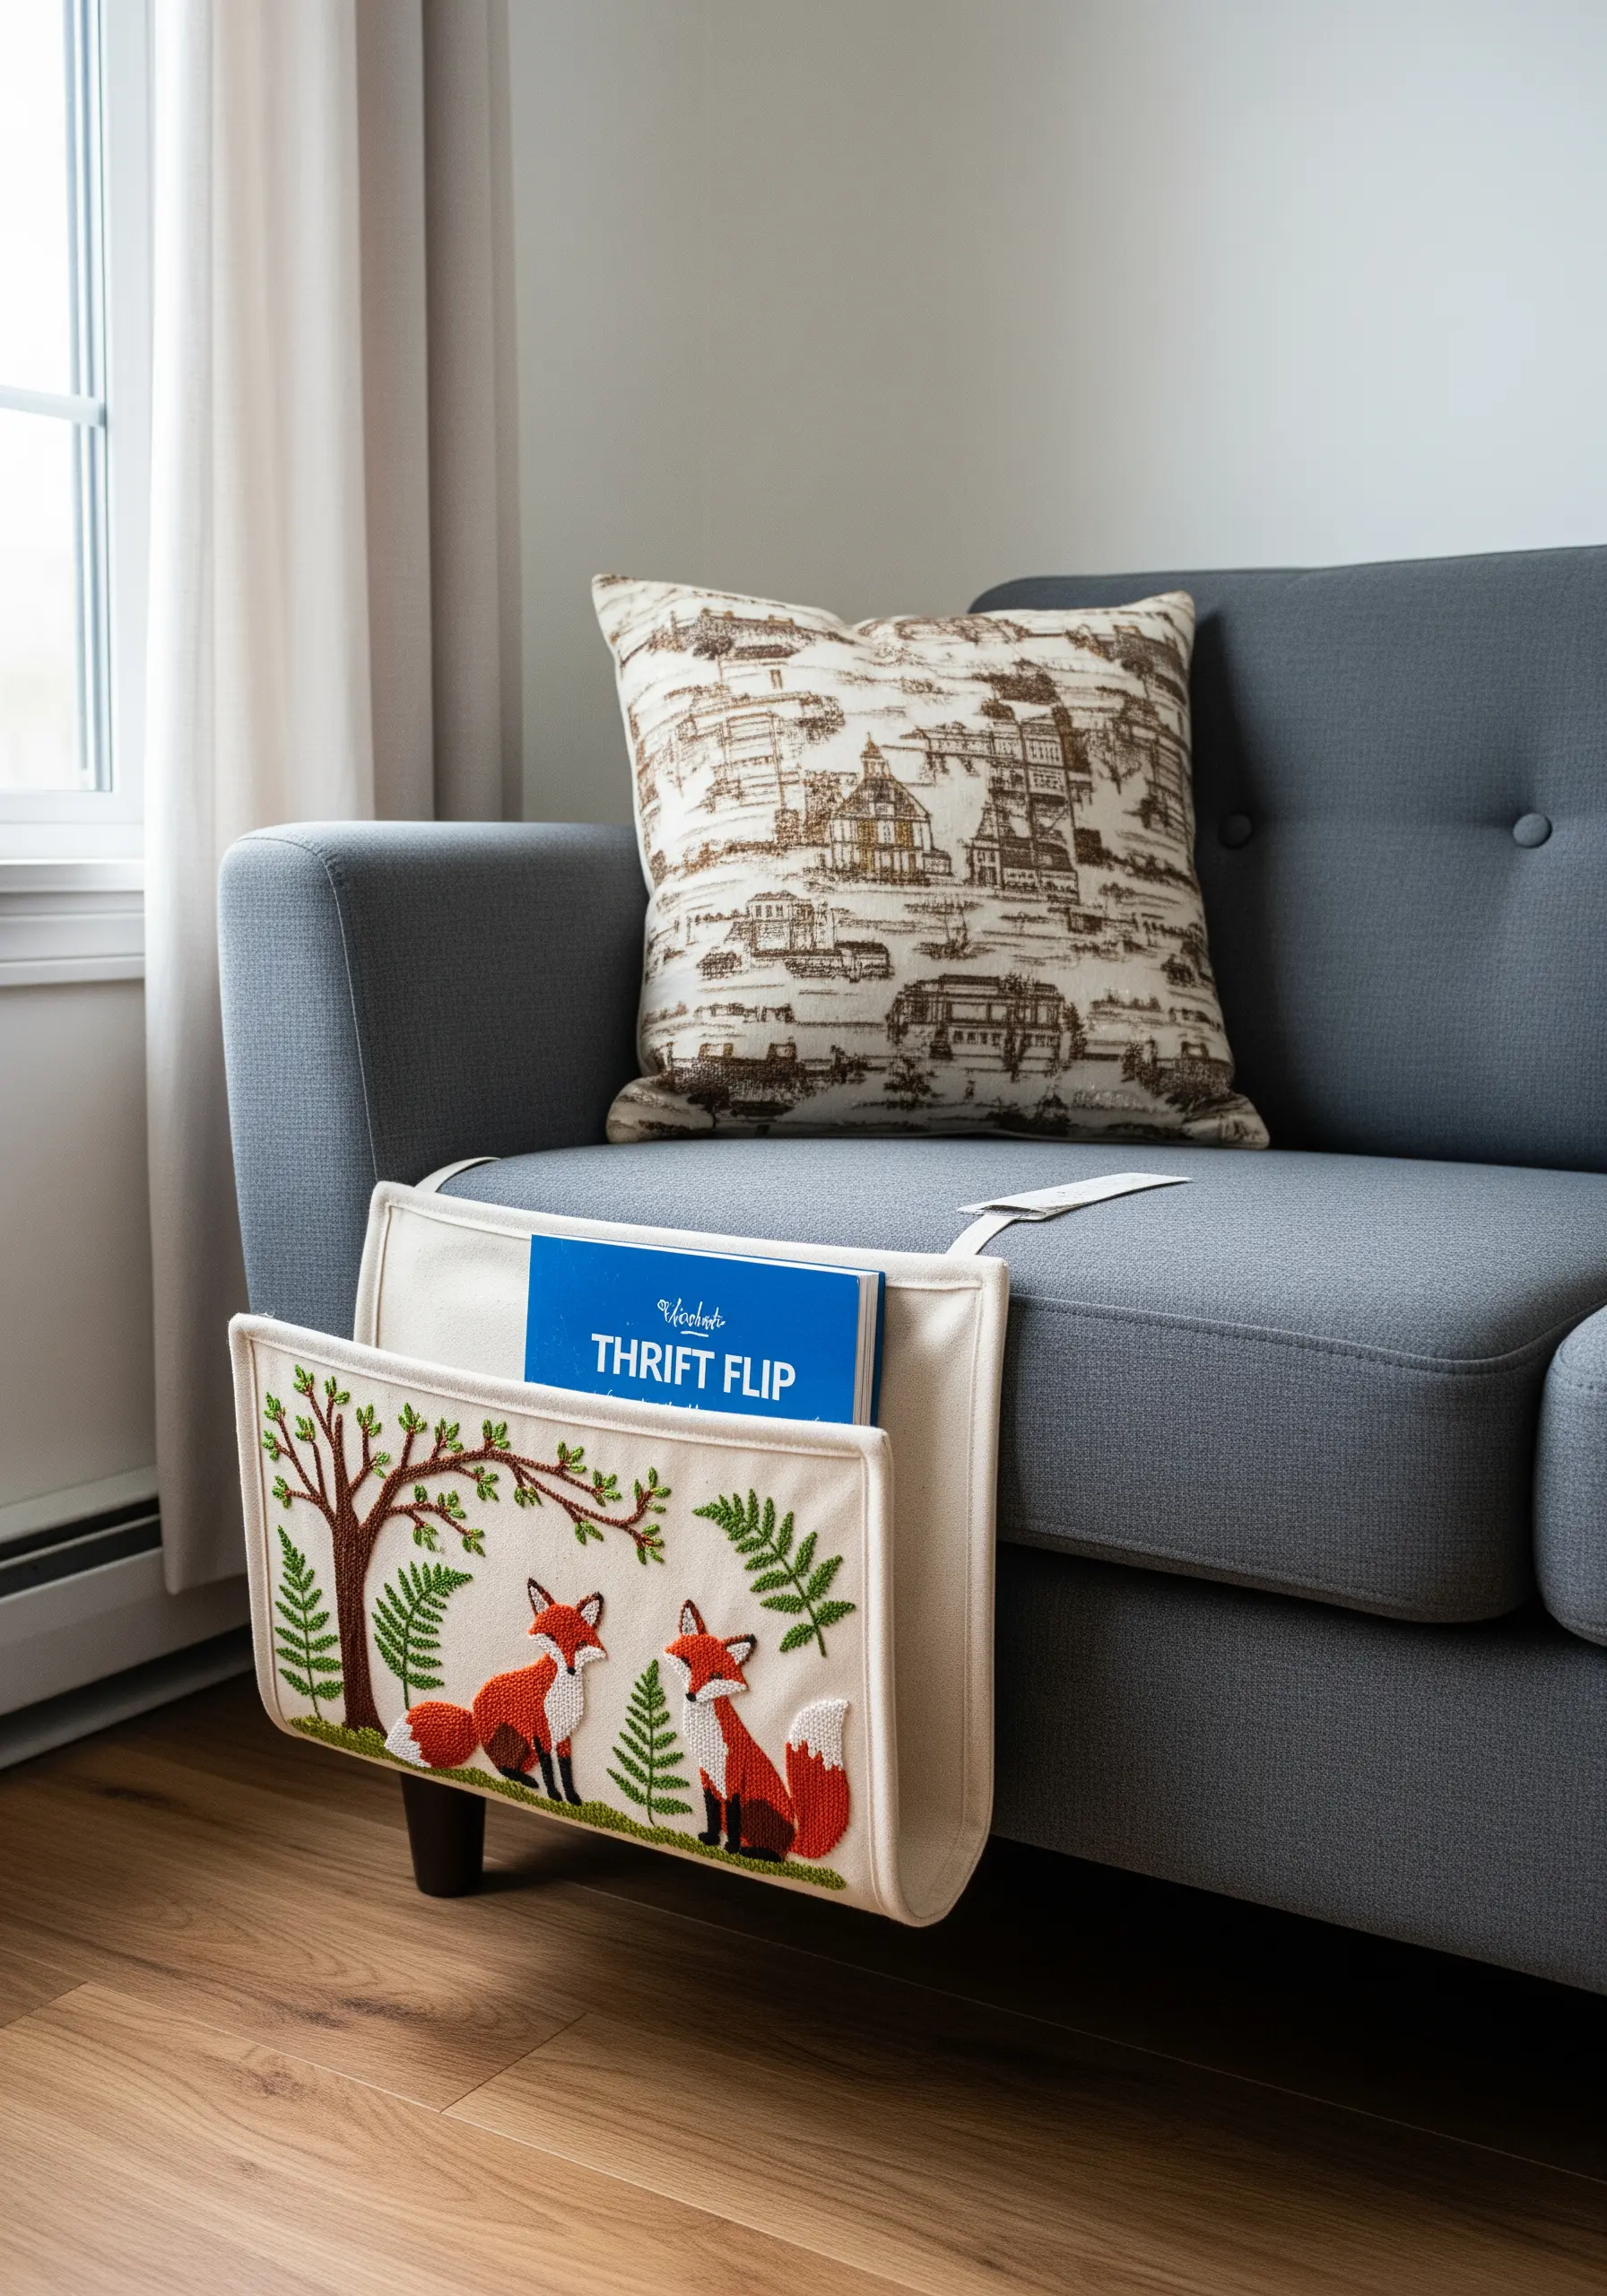
Combine organization and art by embellishing a plain sofa caddy or armchair organizer.
Choose a simple, contained scene, like a pair of foxes under a tree, and focus your embroidery on one of the pockets.
Use a combination of satin stitch for solid color fills and backstitch for outlines and details. This transforms a purely practical item into a piece of decor that reflects your personality and skill.
It’s one of the most creative smart embroidery storage ideas for tiny apartments where every item counts.
16. Capture a Landscape on a Bolster Pillow
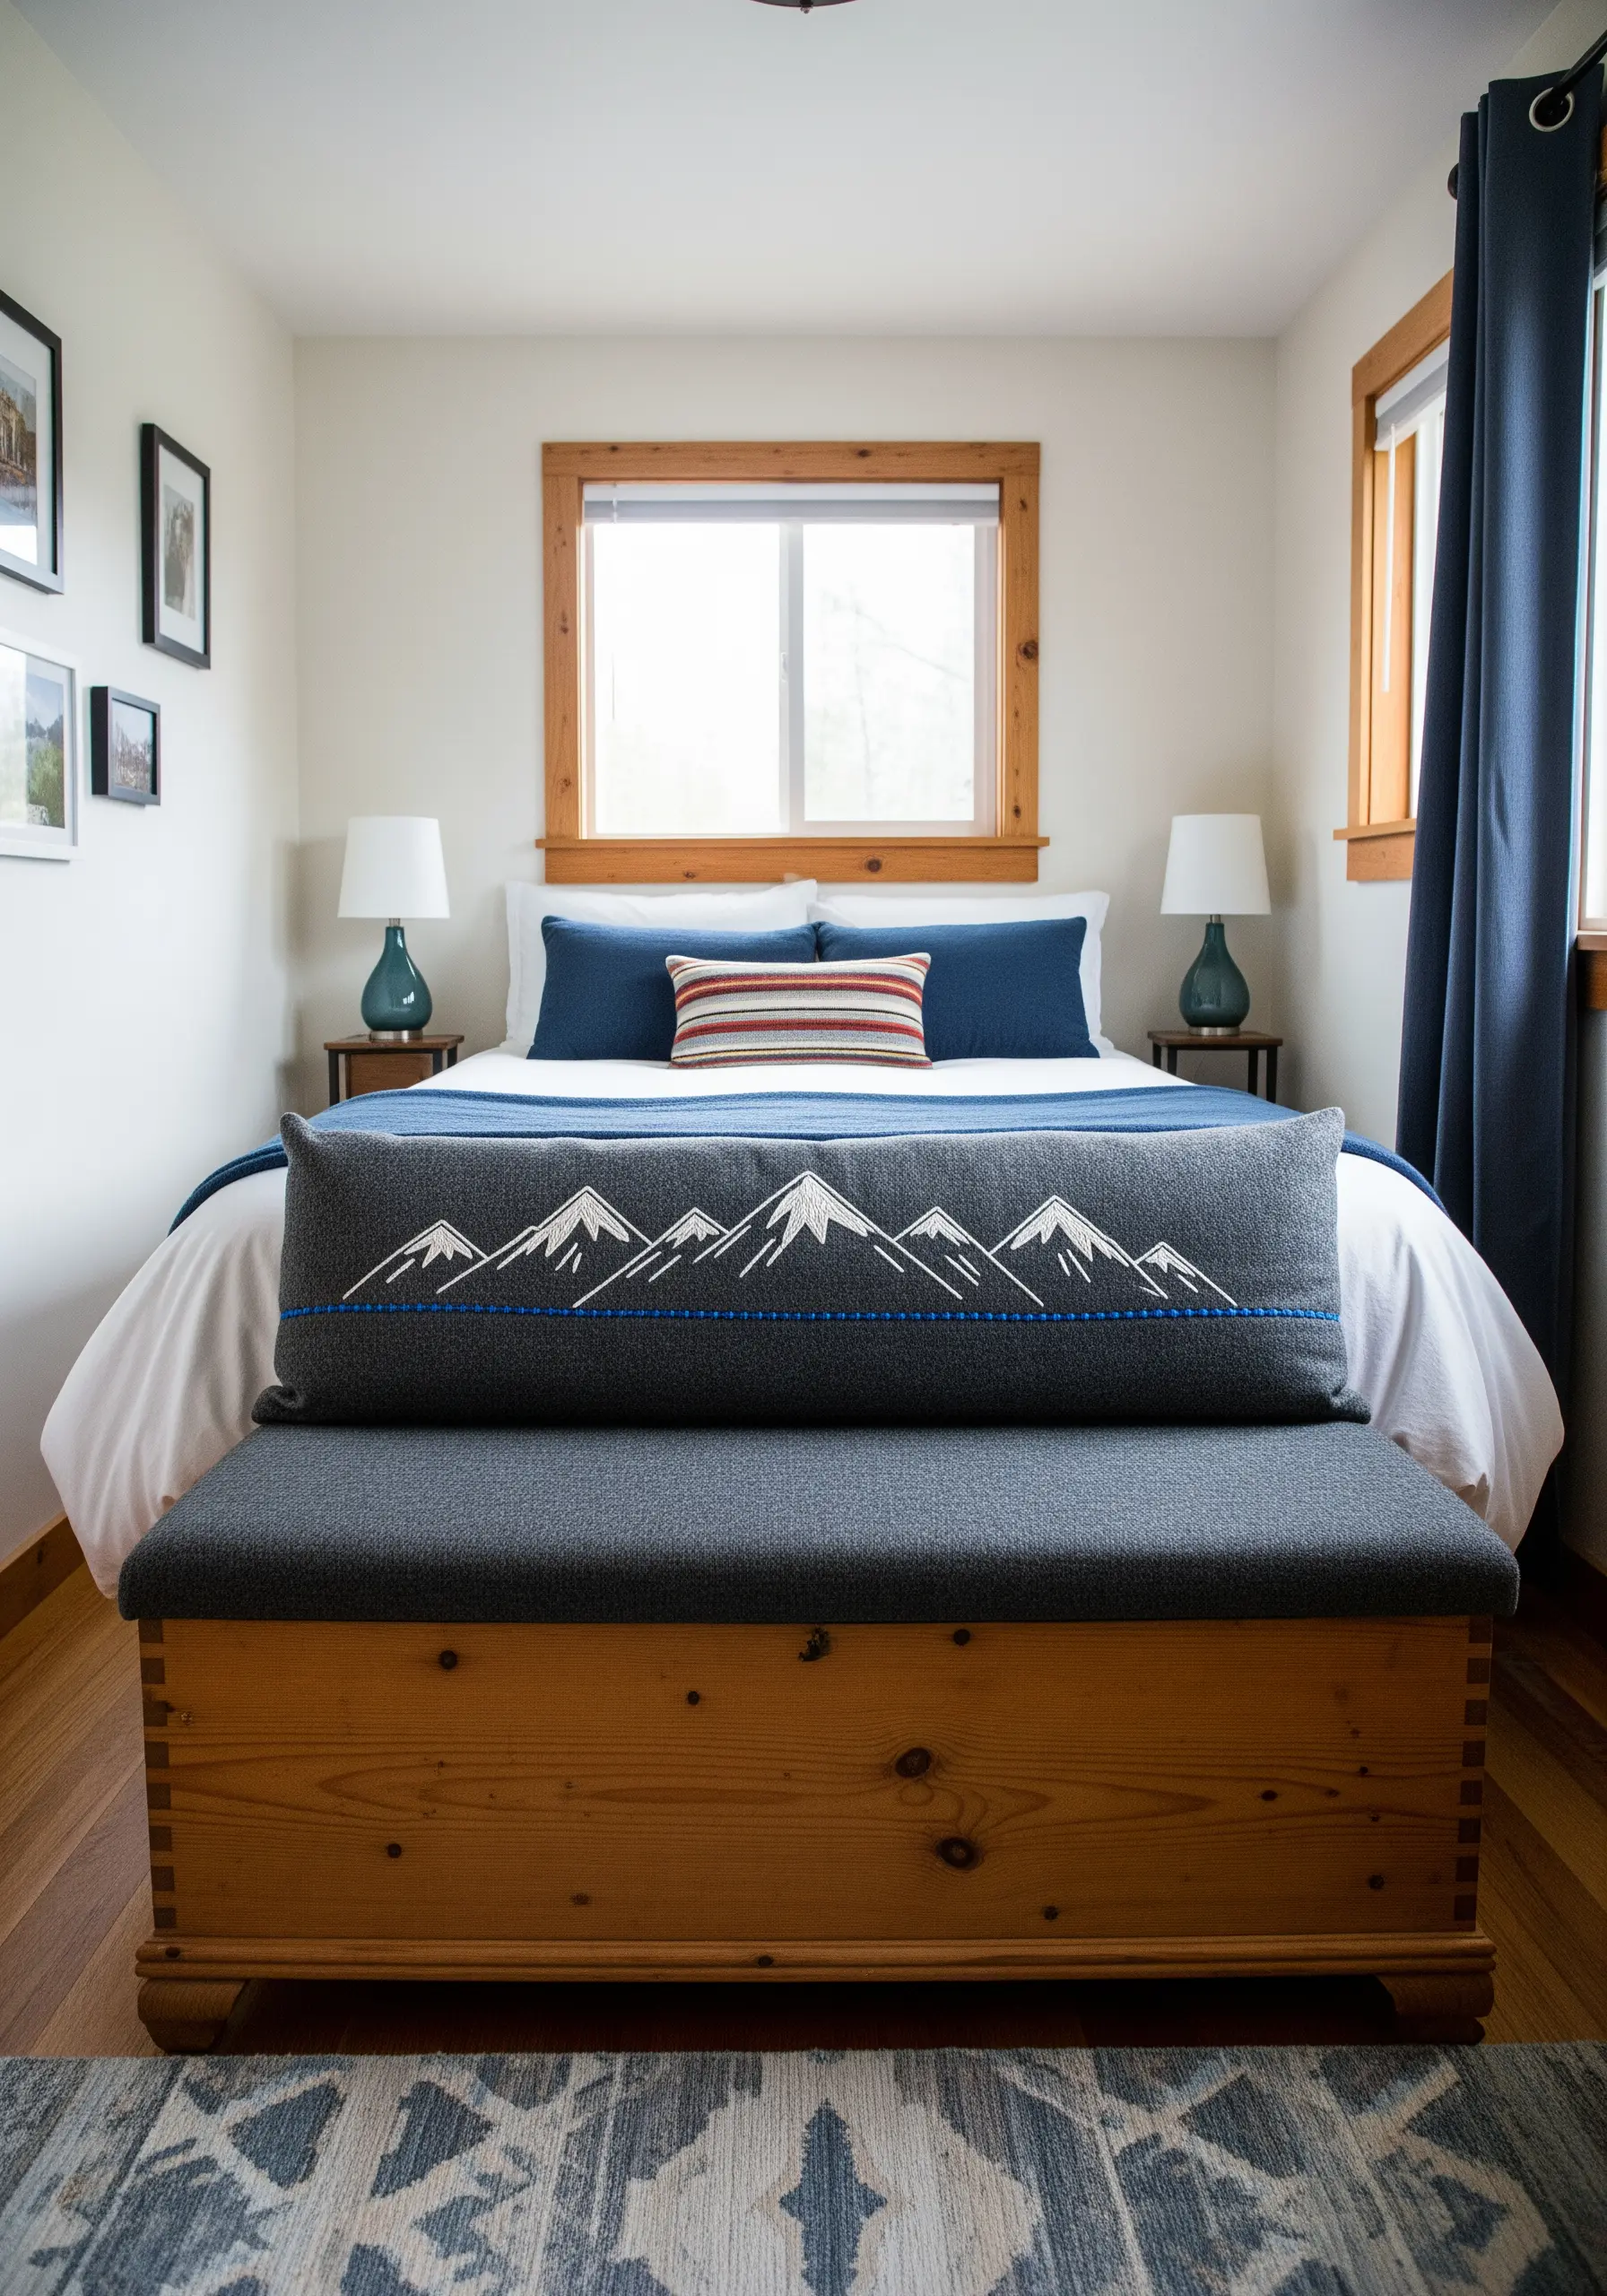
Use the long, narrow shape of a bolster pillow as a canvas for a panoramic landscape.
A mountain range is a perfect subject. Sketch a simple outline, then use a clean satin stitch with white thread for the snow-capped peaks.
A simple running stitch in a contrasting color can define the horizon line and add a graphic border. This minimalist approach creates a sophisticated, nature-inspired accent for a bed or bench.
Practice your mountain landscape thread painting techniques on a smaller scale first.
17. Frame a Bulletin Board with Stitched Ribbon
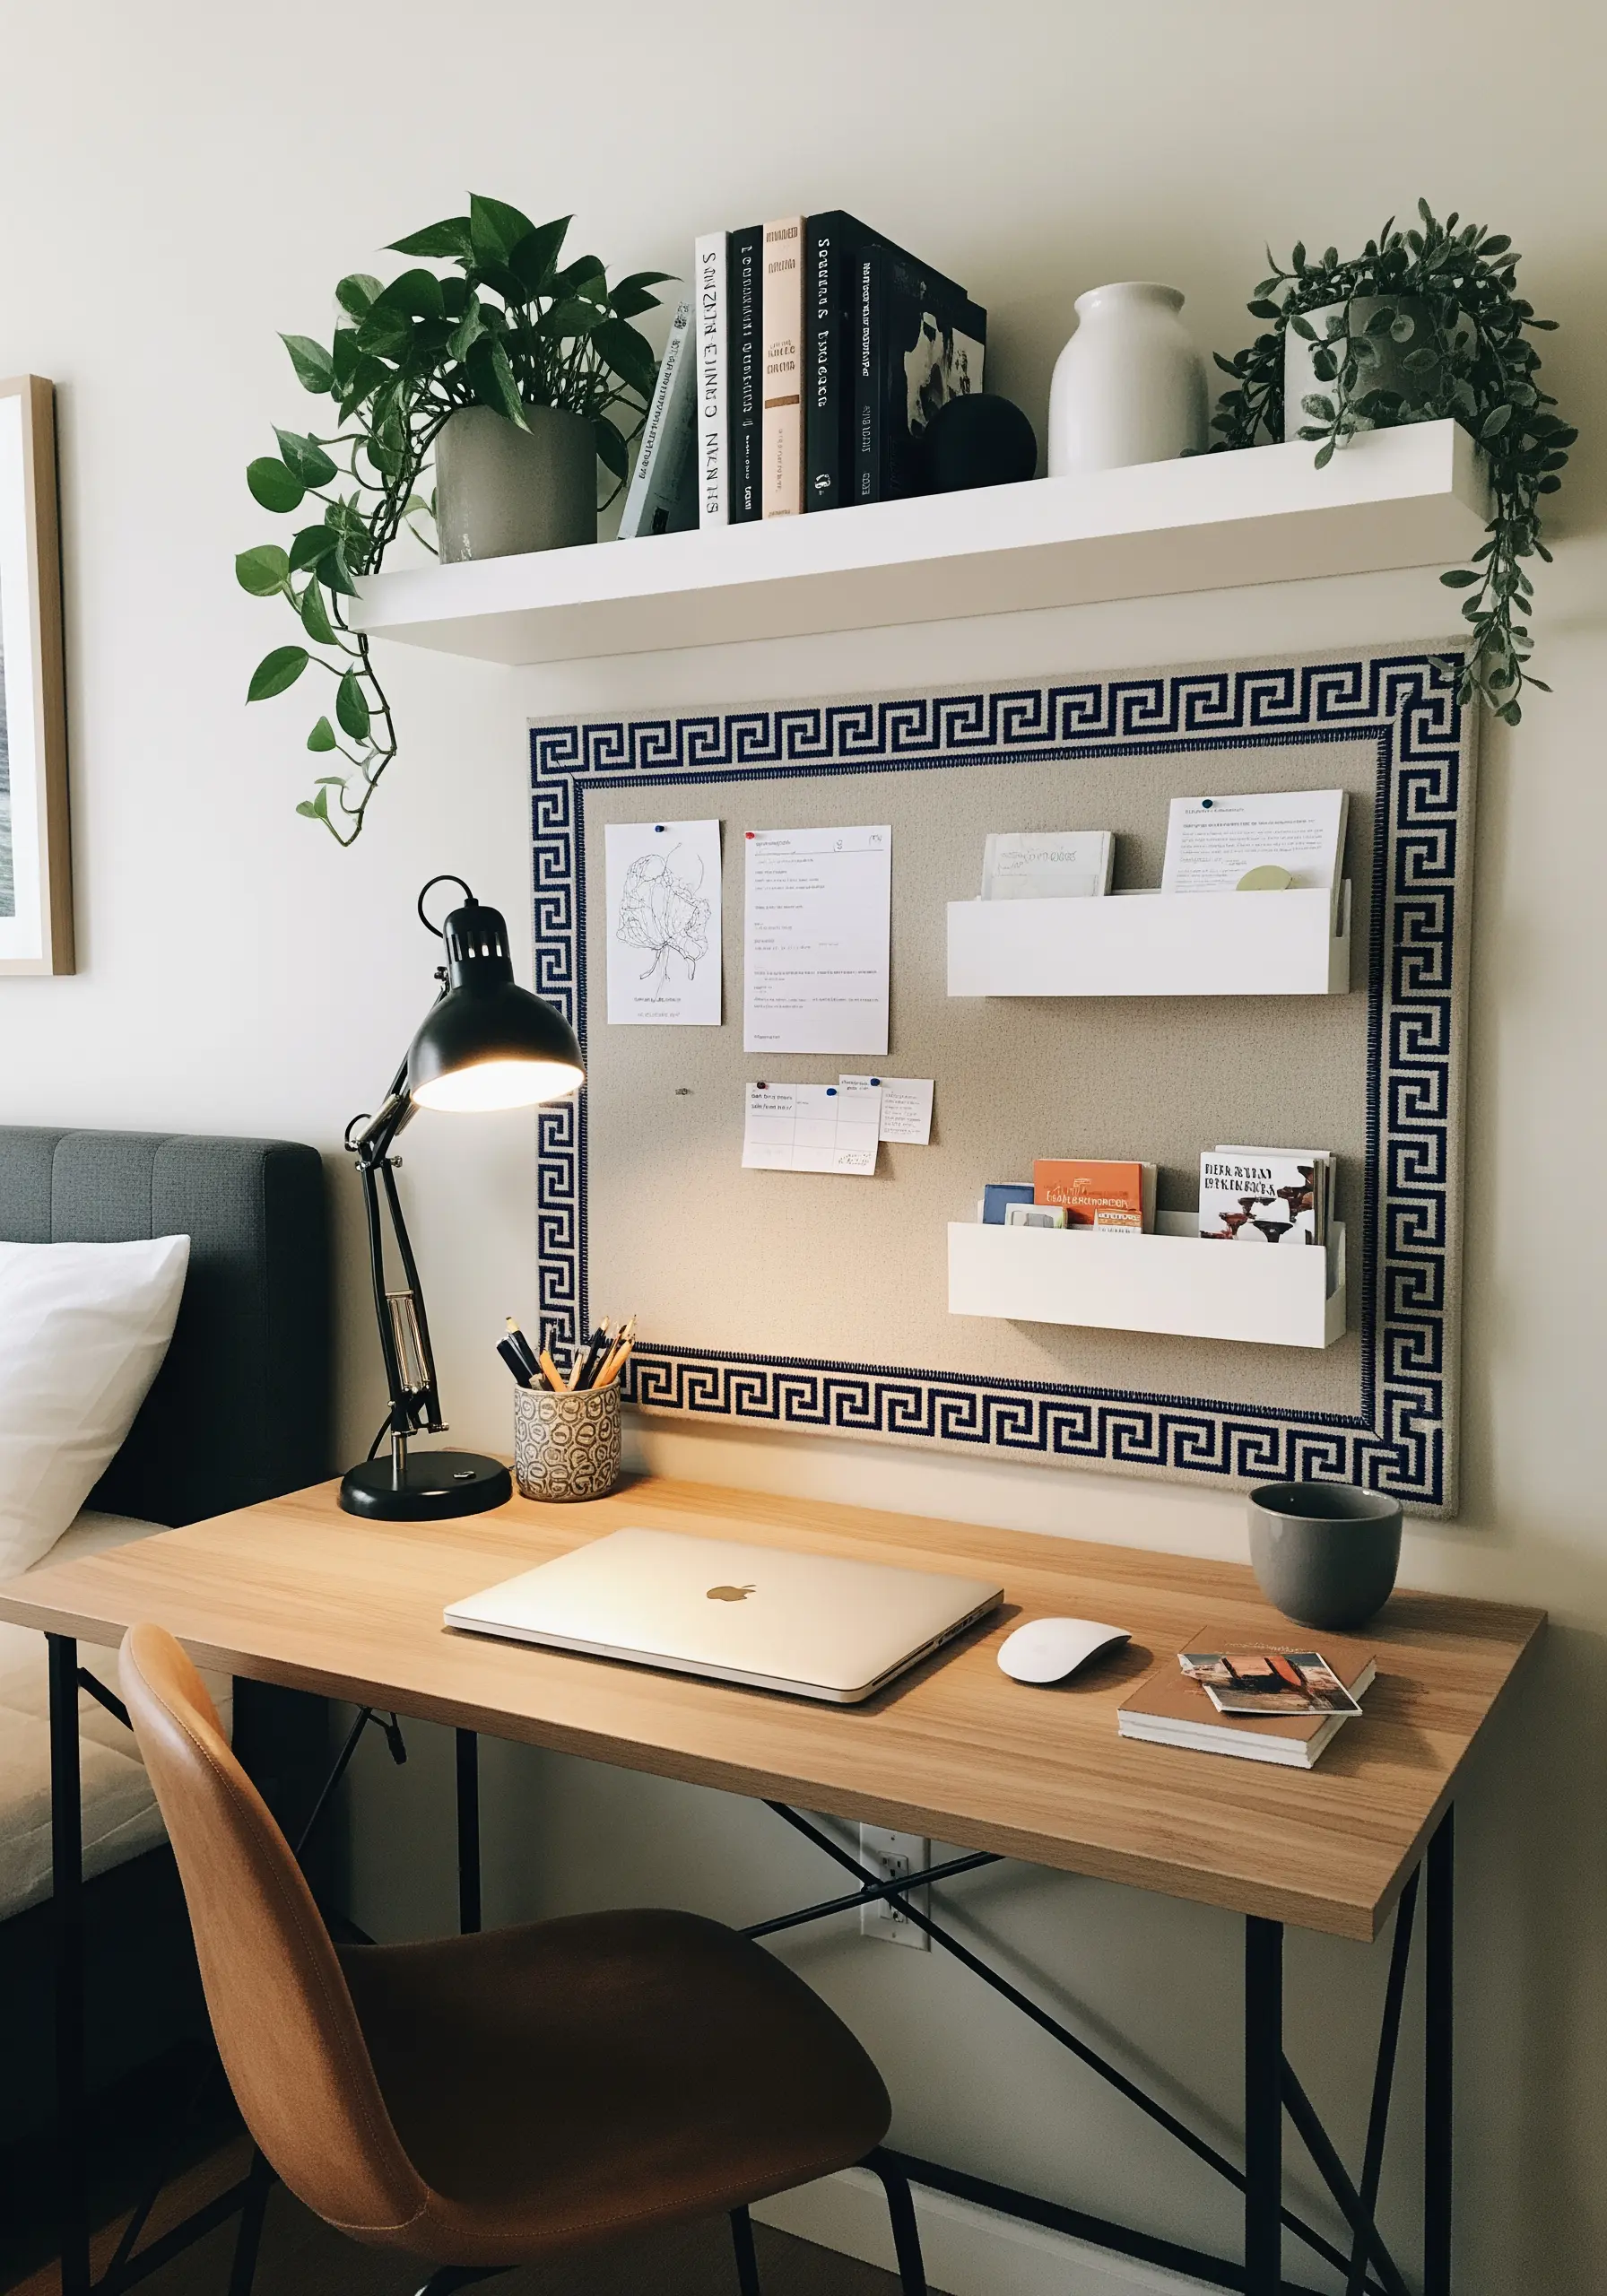
Elevate a standard office bulletin board by adding a custom frame made from embroidered ribbon or fabric trim.
Find a vintage trim with a geometric pattern, like a Greek key design, at a thrift or craft store.
Carefully wrap and glue the trim around the existing frame of the board, using pins to hold it in place as it dries. This simple thrift flip adds a touch of sophistication to your workspace and makes mundane notes feel more curated.
These charming DIY embroidery projects to refresh your workspace blend function and beauty.
18. Add a Woven Yarn Border to a Jute Rug
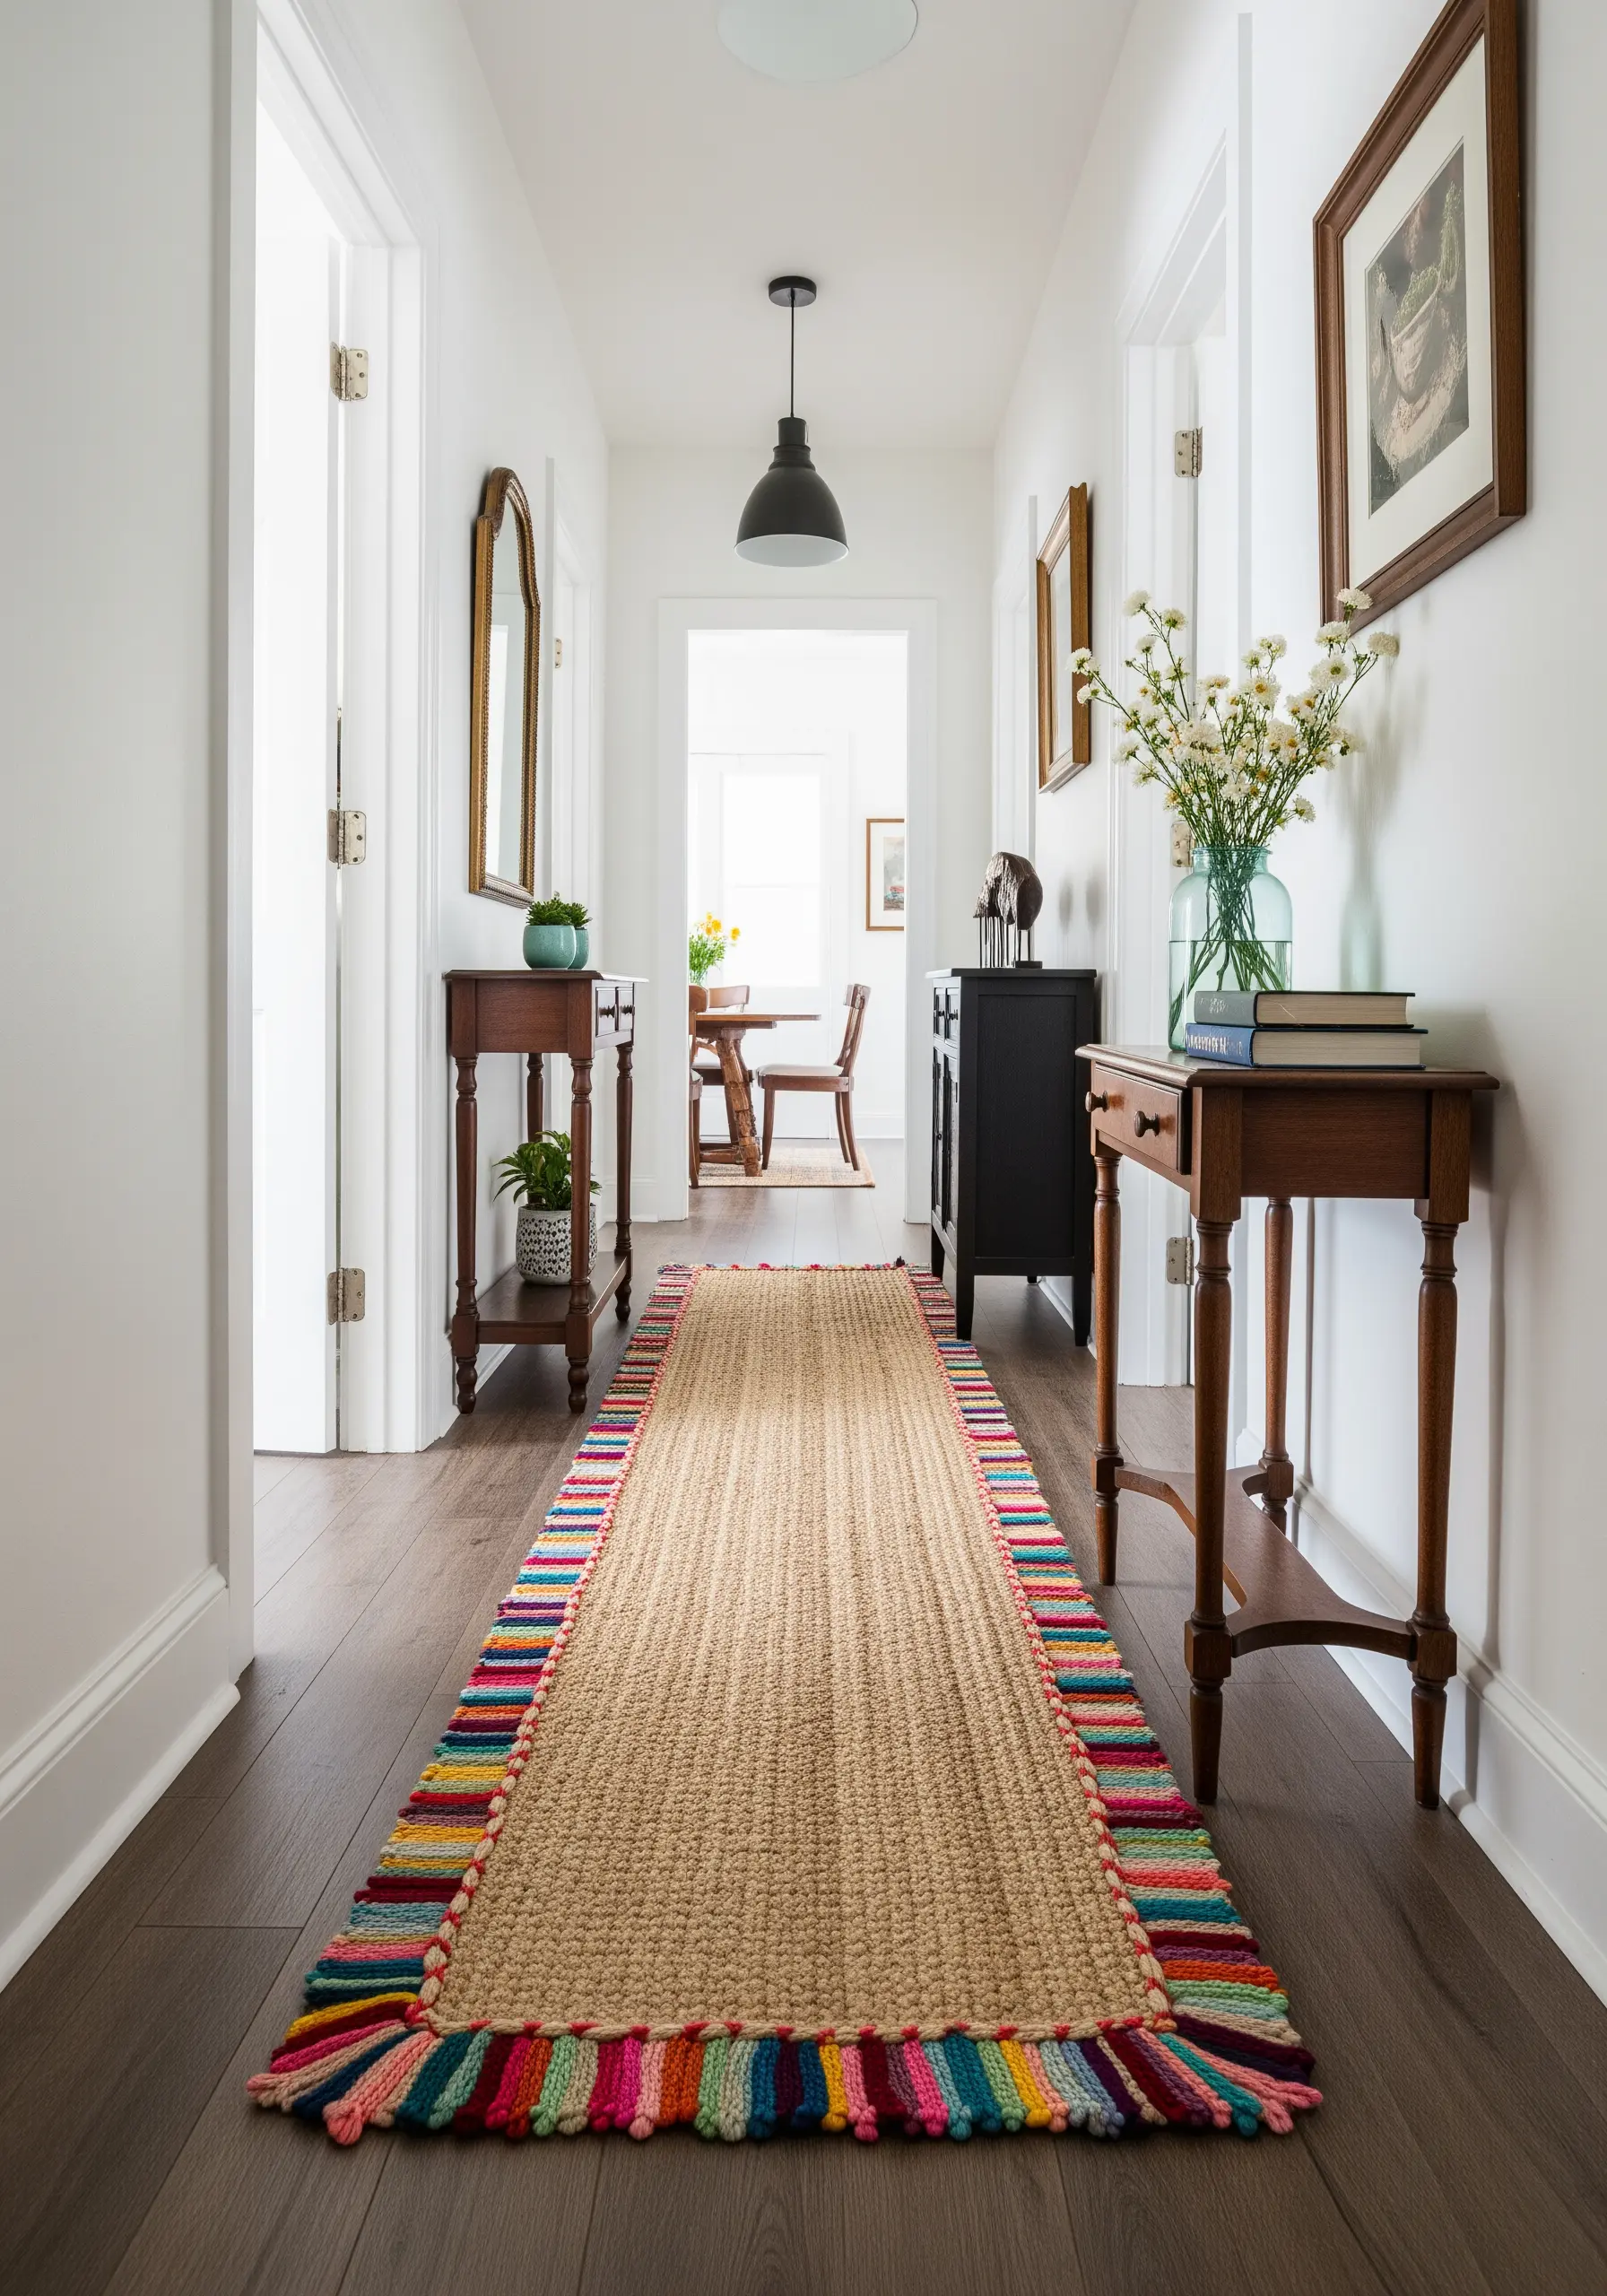
Give a simple, natural fiber rug a playful and colorful edge with a woven yarn border.
Using a large tapestry needle, weave brightly colored yarn through the existing weave of the rug’s edge, creating loops or tassels.
Work with a vibrant, multicolored palette to create a festive, bohemian look. This no-sew technique is a fast and easy way to customize a thrifted runner and add a pop of color to a neutral hallway.
It’s a great example of how playful mixed fiber art projects can transform a room.
19. Introduce Color by Wrapping Cutlery Handles
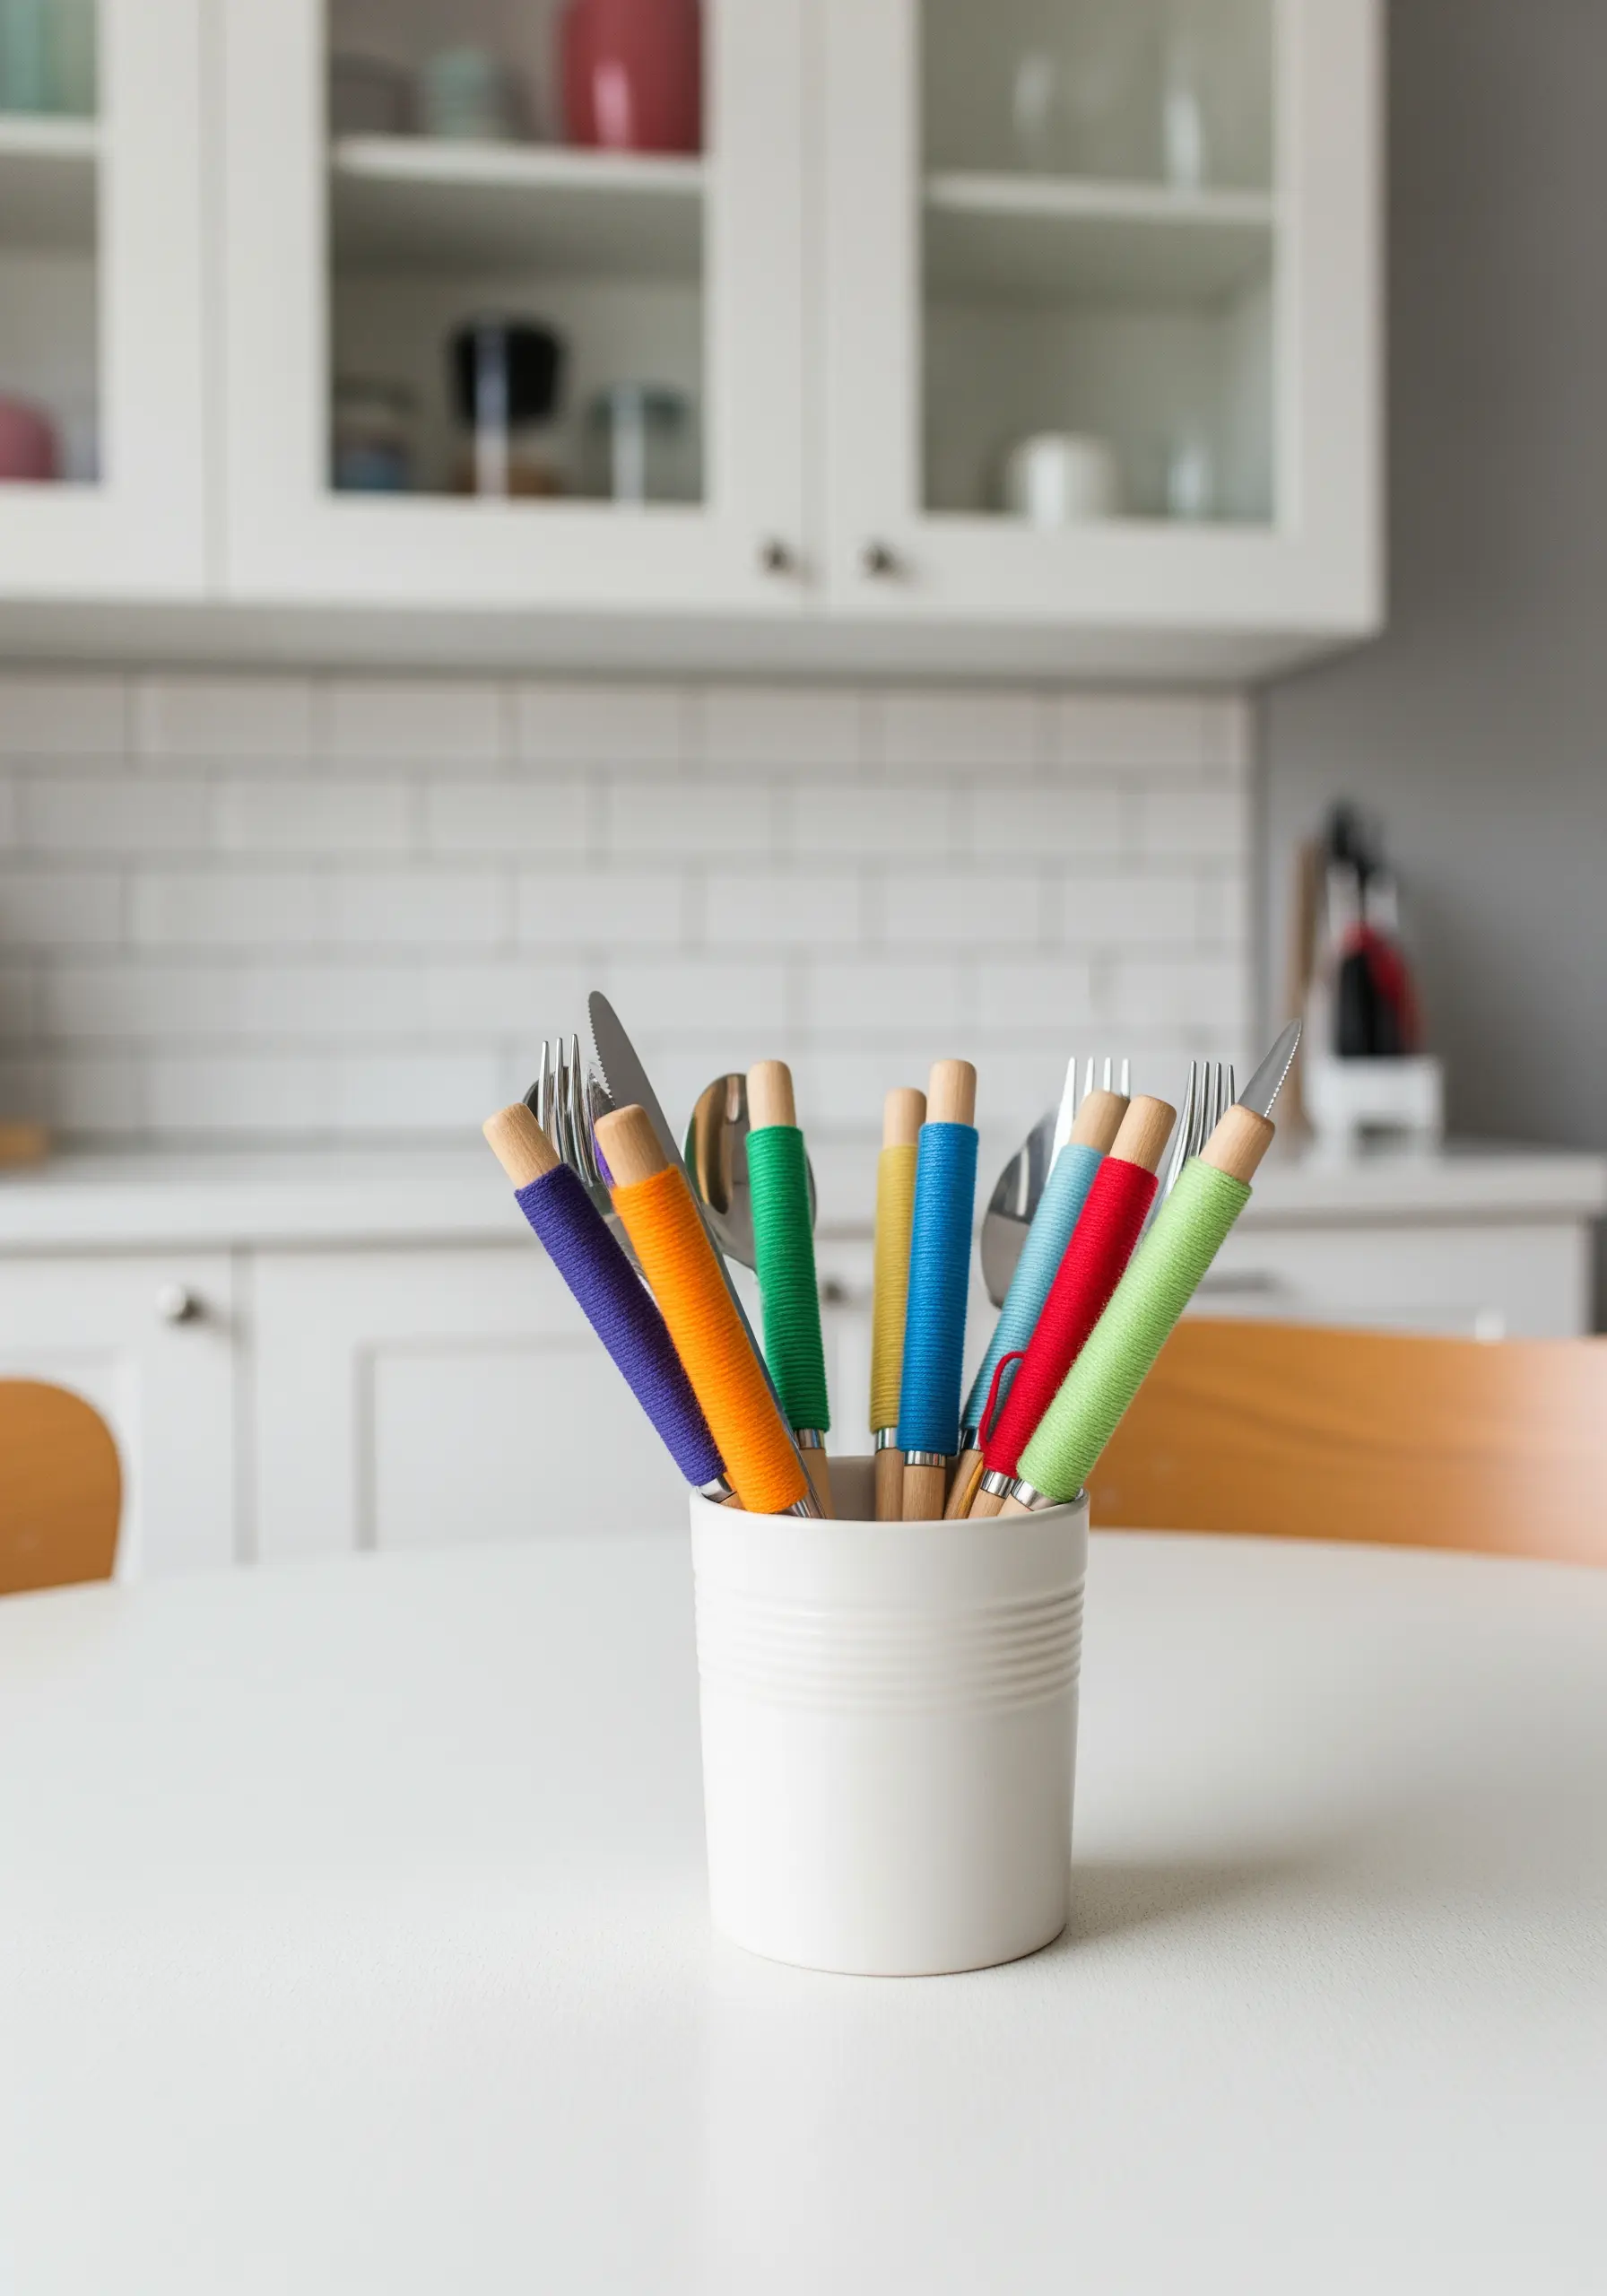
Instantly brighten your dining table by wrapping the handles of thrifted cutlery with colorful embroidery floss.
Secure the start of the thread with a tiny dot of superglue, then wrap the floss tightly and evenly around the handle, ensuring there are no gaps.
Secure the end with another small dot of glue. Use a variety of bold, solid colors to create a cheerful, mismatched set that adds a surprising and personal touch to your kitchen.
These are the kinds of small stitches that add instant charm to everyday items, even without a needle.
20. Stitch a High-Contrast Botanical for Outdoors
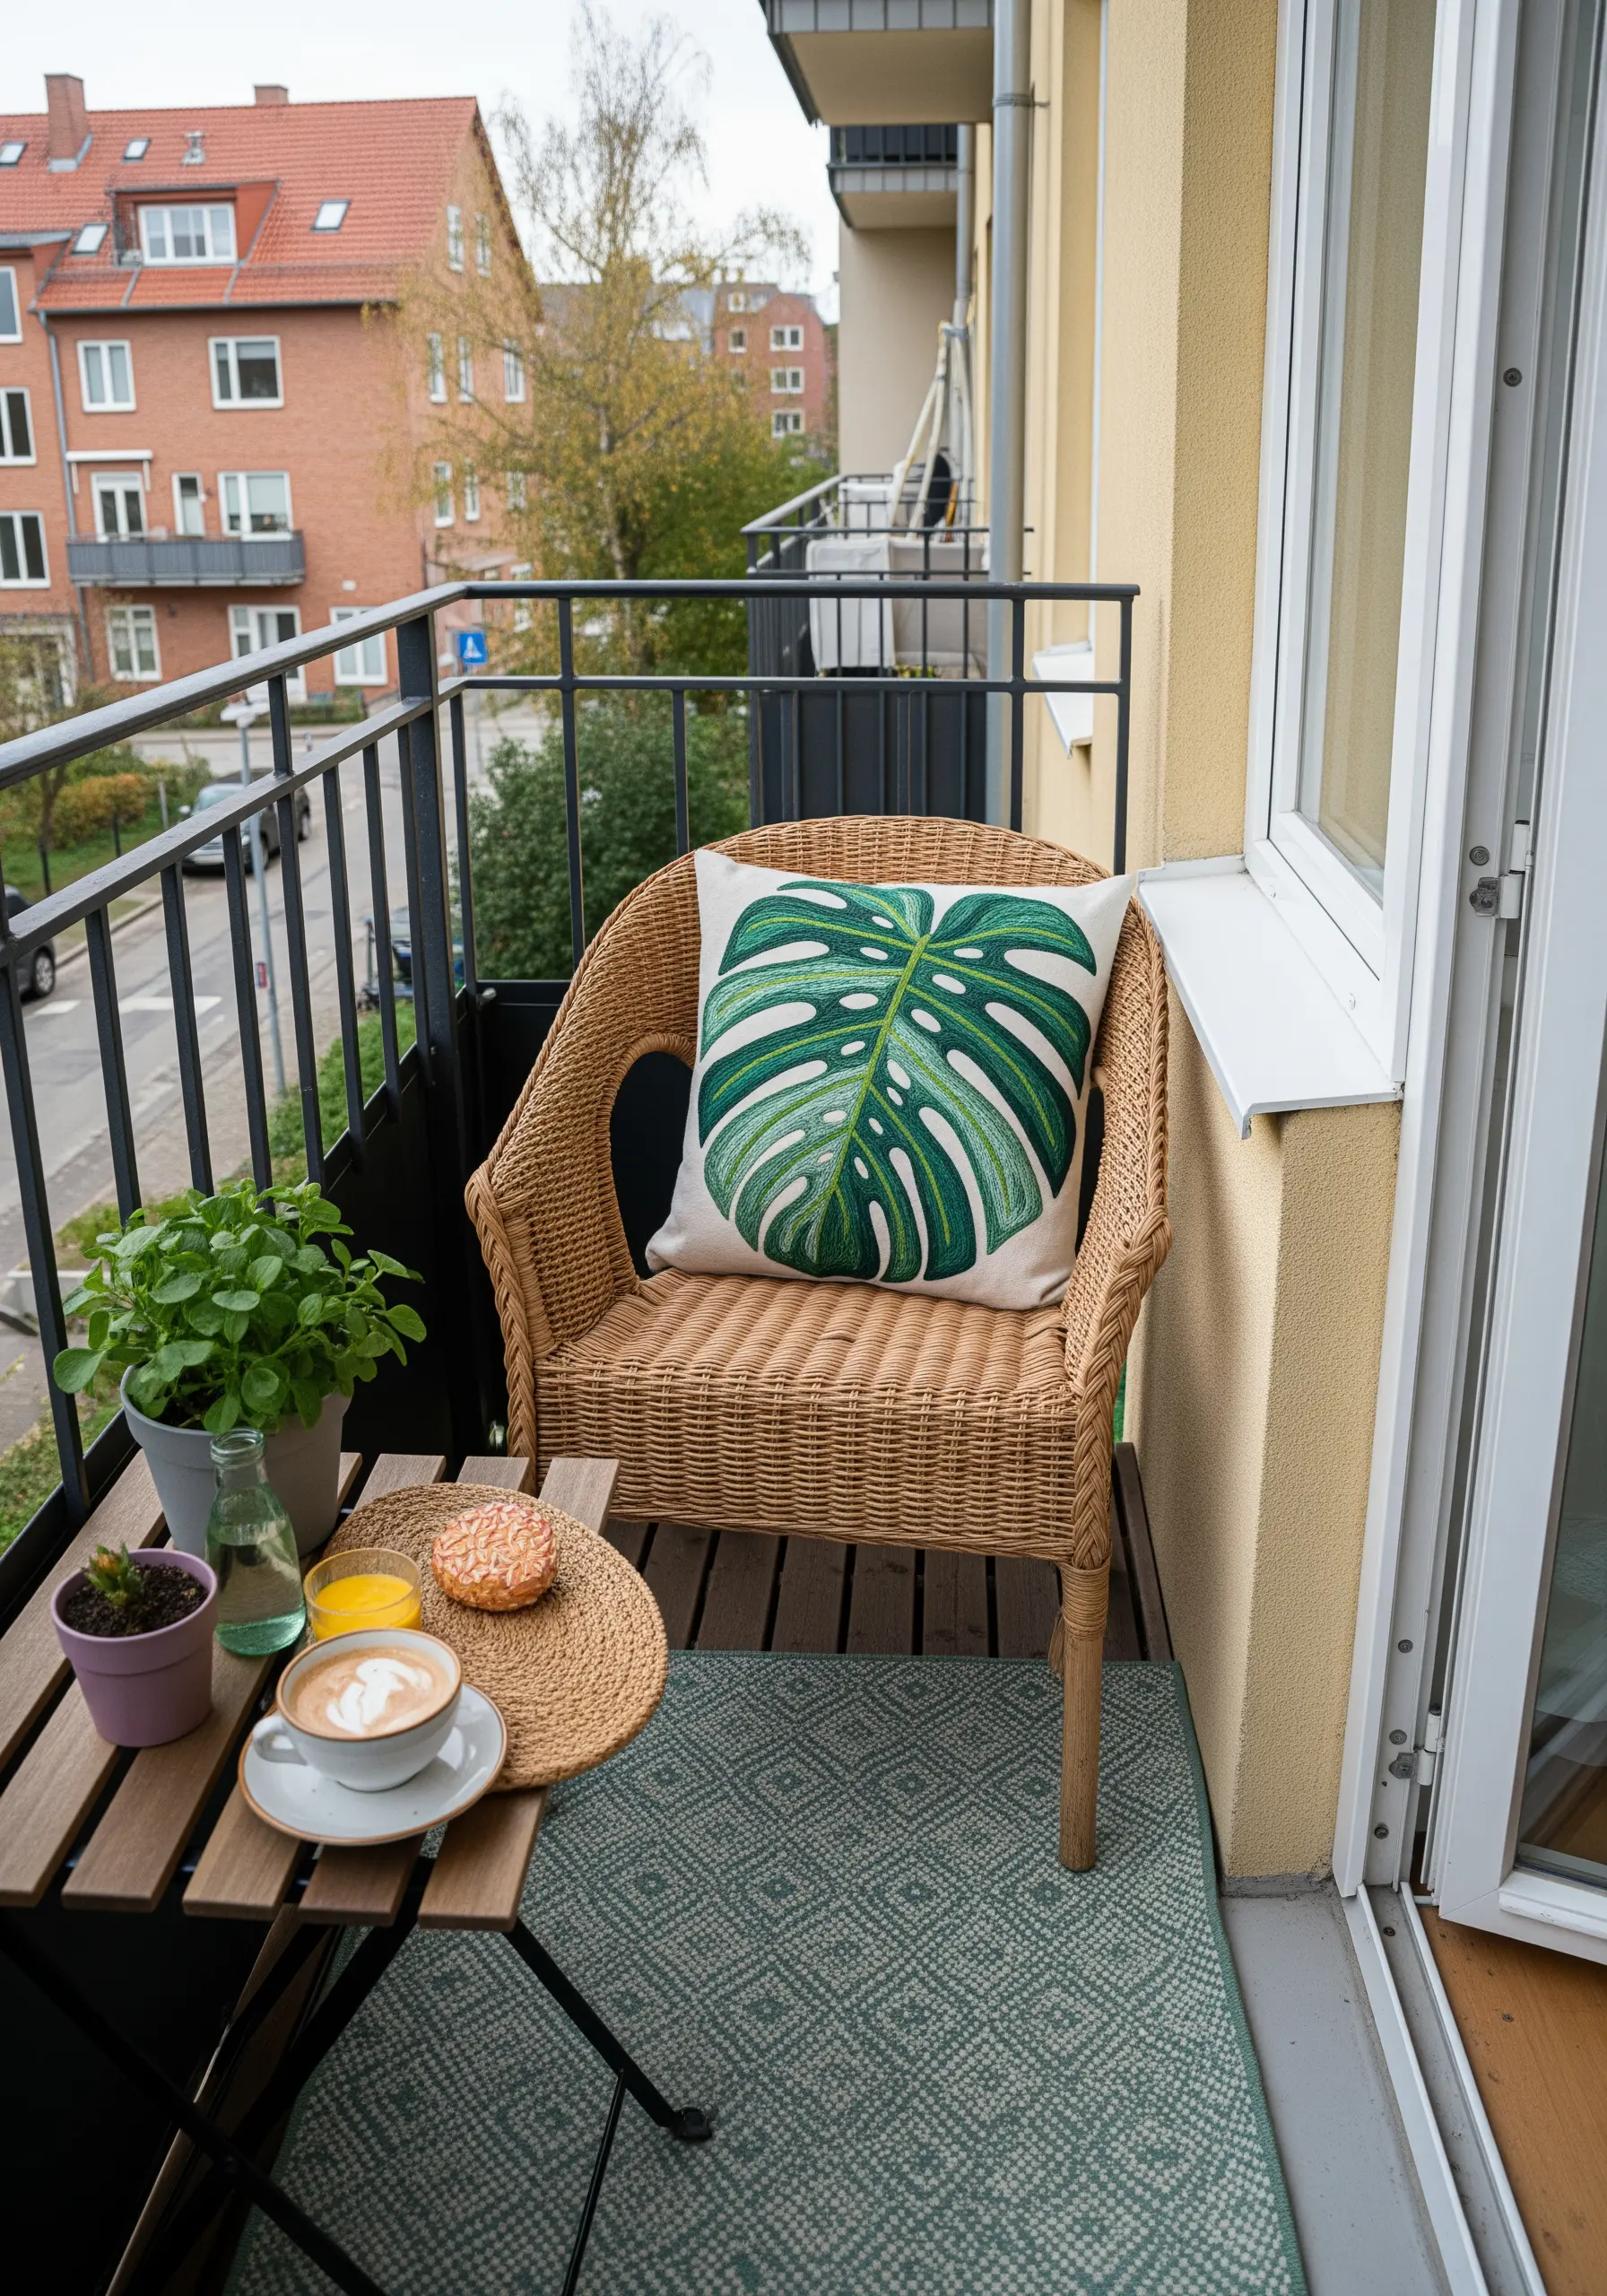
Make a statement on your balcony or patio with a bold, graphic botanical cushion.
Choose a large, recognizable leaf shape like a Monstera. To achieve that clean, defined look, use a split stitch for the outlines and veins in a dark green thread.
Fill the sections with a lighter green using a long-and-short stitch to create subtle shading. The high contrast against a white or neutral background makes the design pop, even from a distance.
This is a perfect project for lovers of houseplant embroidery motifs.
21. Personalize Your Library with Embroidered Spines
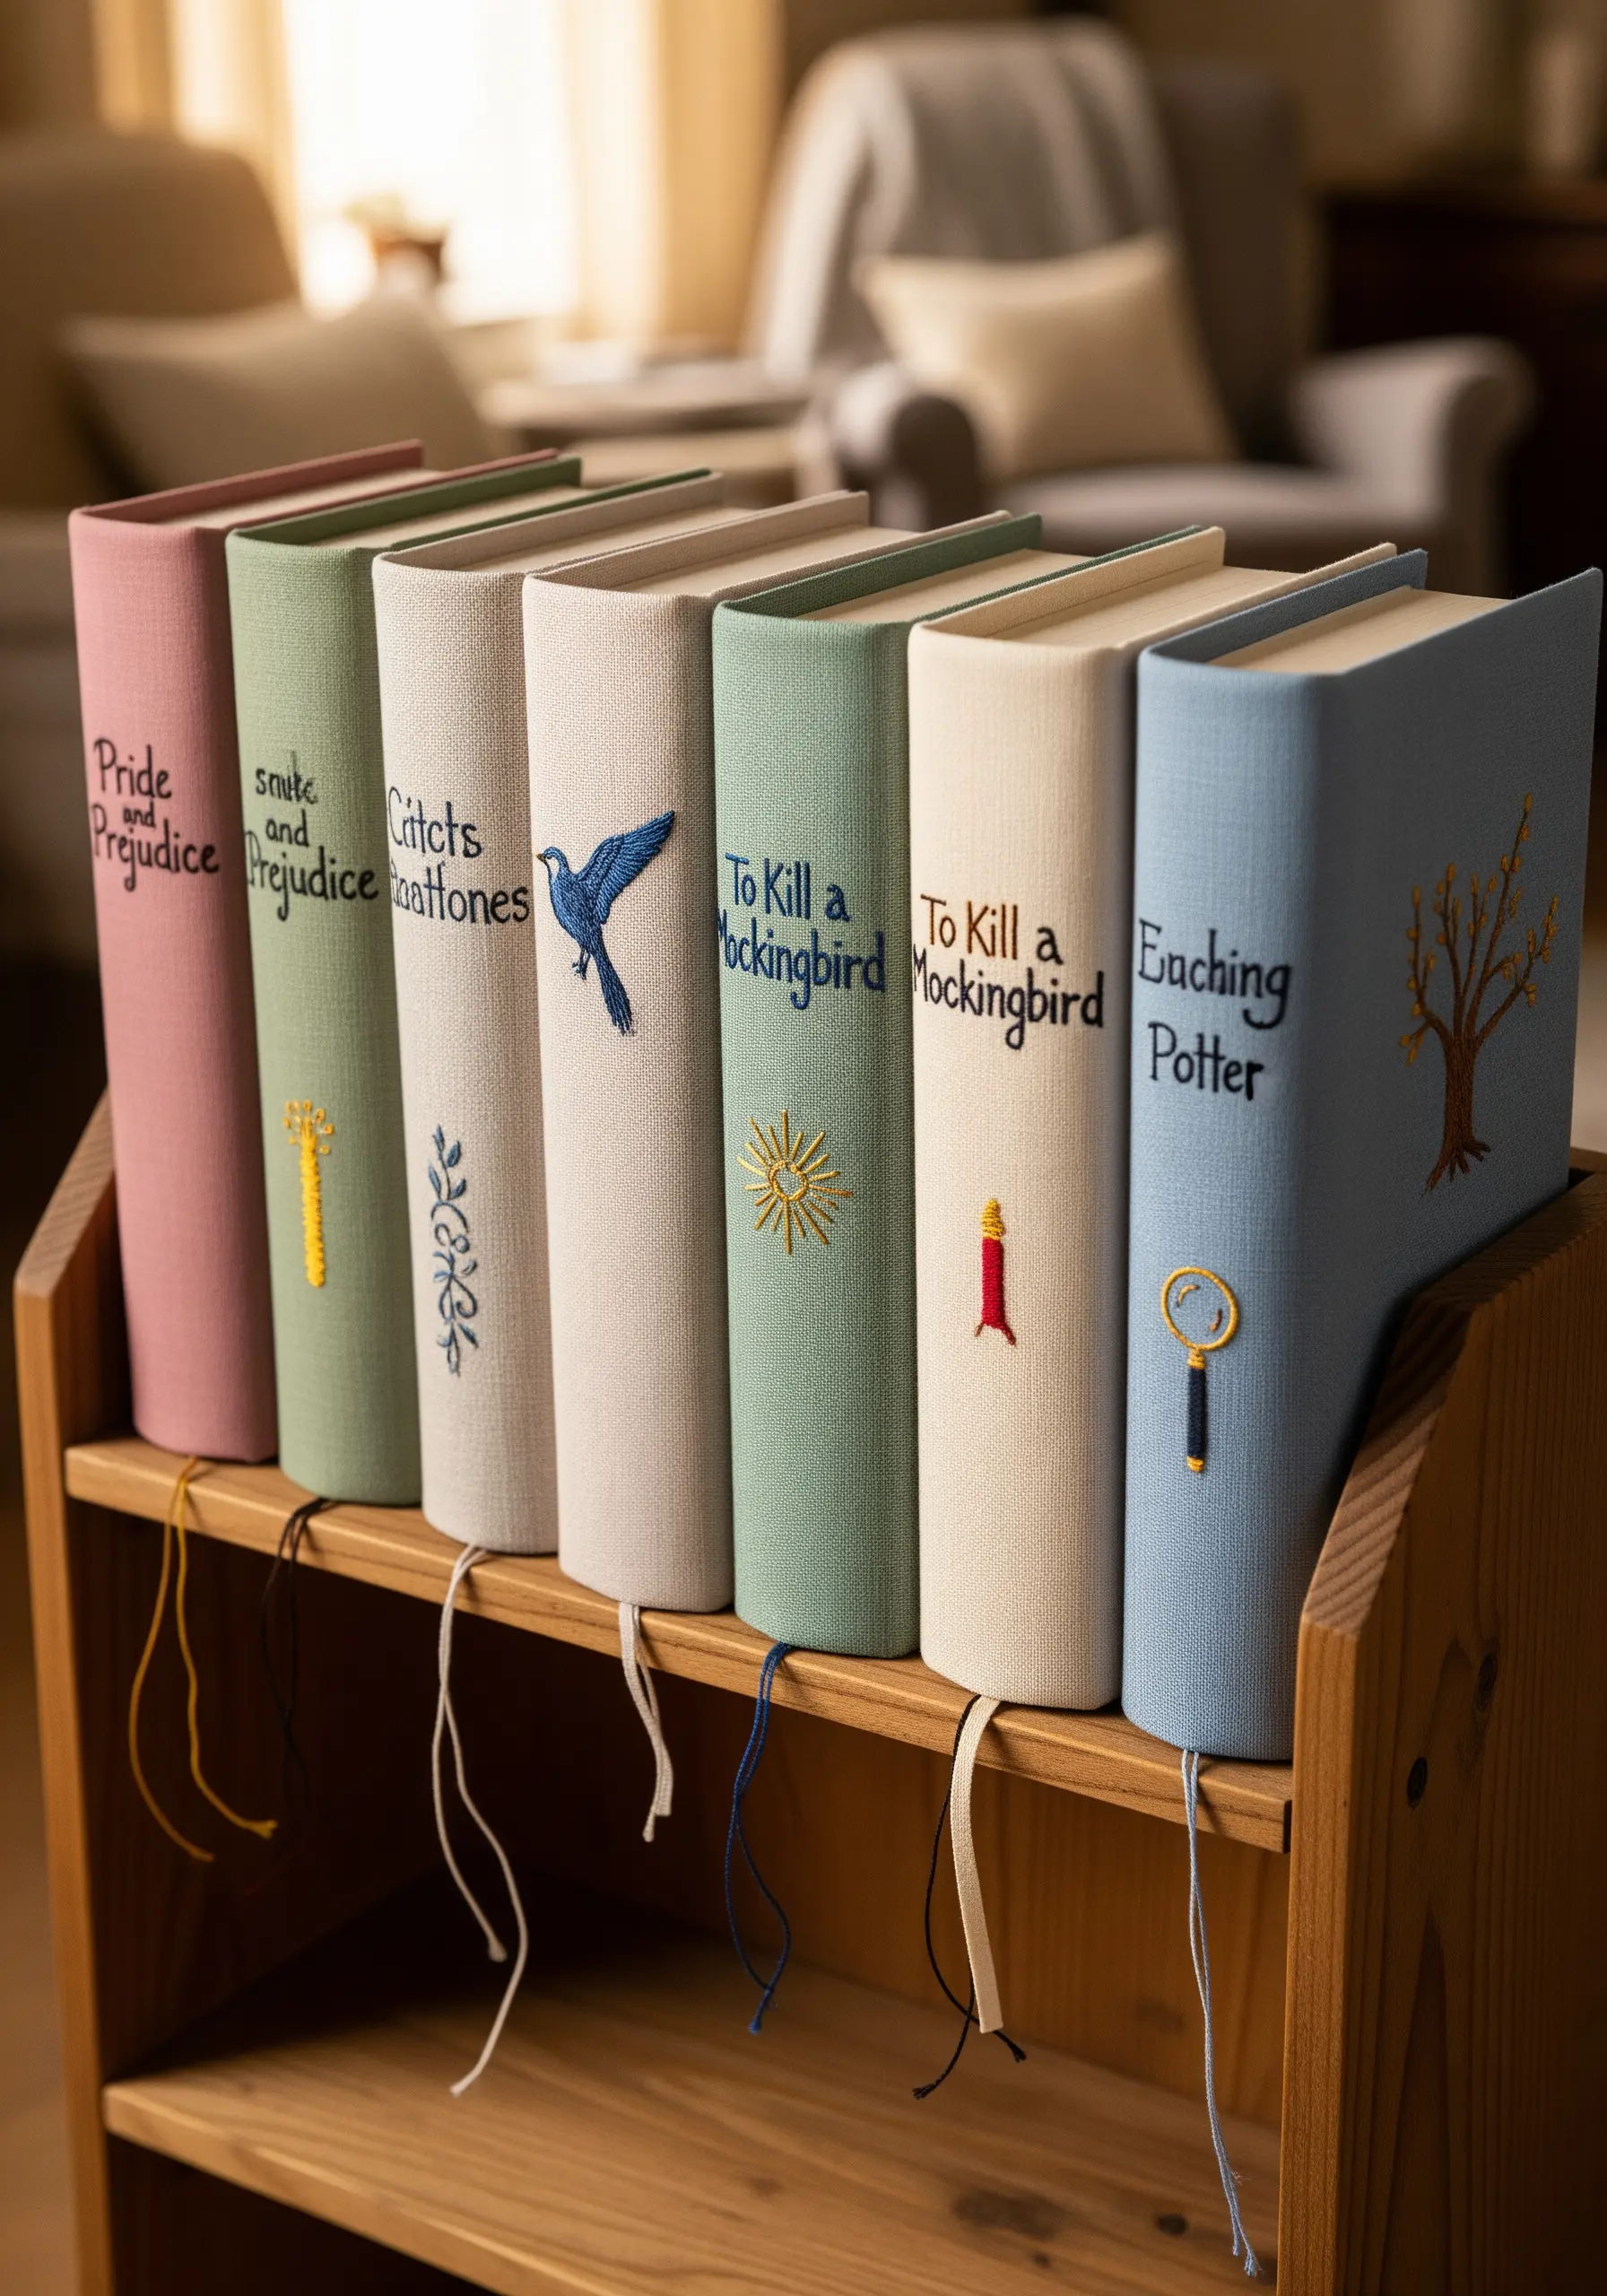
Give your favorite books a new life by creating custom embroidered fabric covers.
Measure the book to create a dust jacket pattern, then stitch a title or a small, symbolic motif onto the spine area of the fabric.
A simple backstitch or stem stitch works beautifully for lettering, while a small satin-stitched icon adds a touch of visual interest. This project turns your bookshelf into a curated collection of textile art.
These quick-stitch inspirations to beautify your notebooks and journals also apply perfectly to books.
22. Upcycle Denim into Playful Upholstery
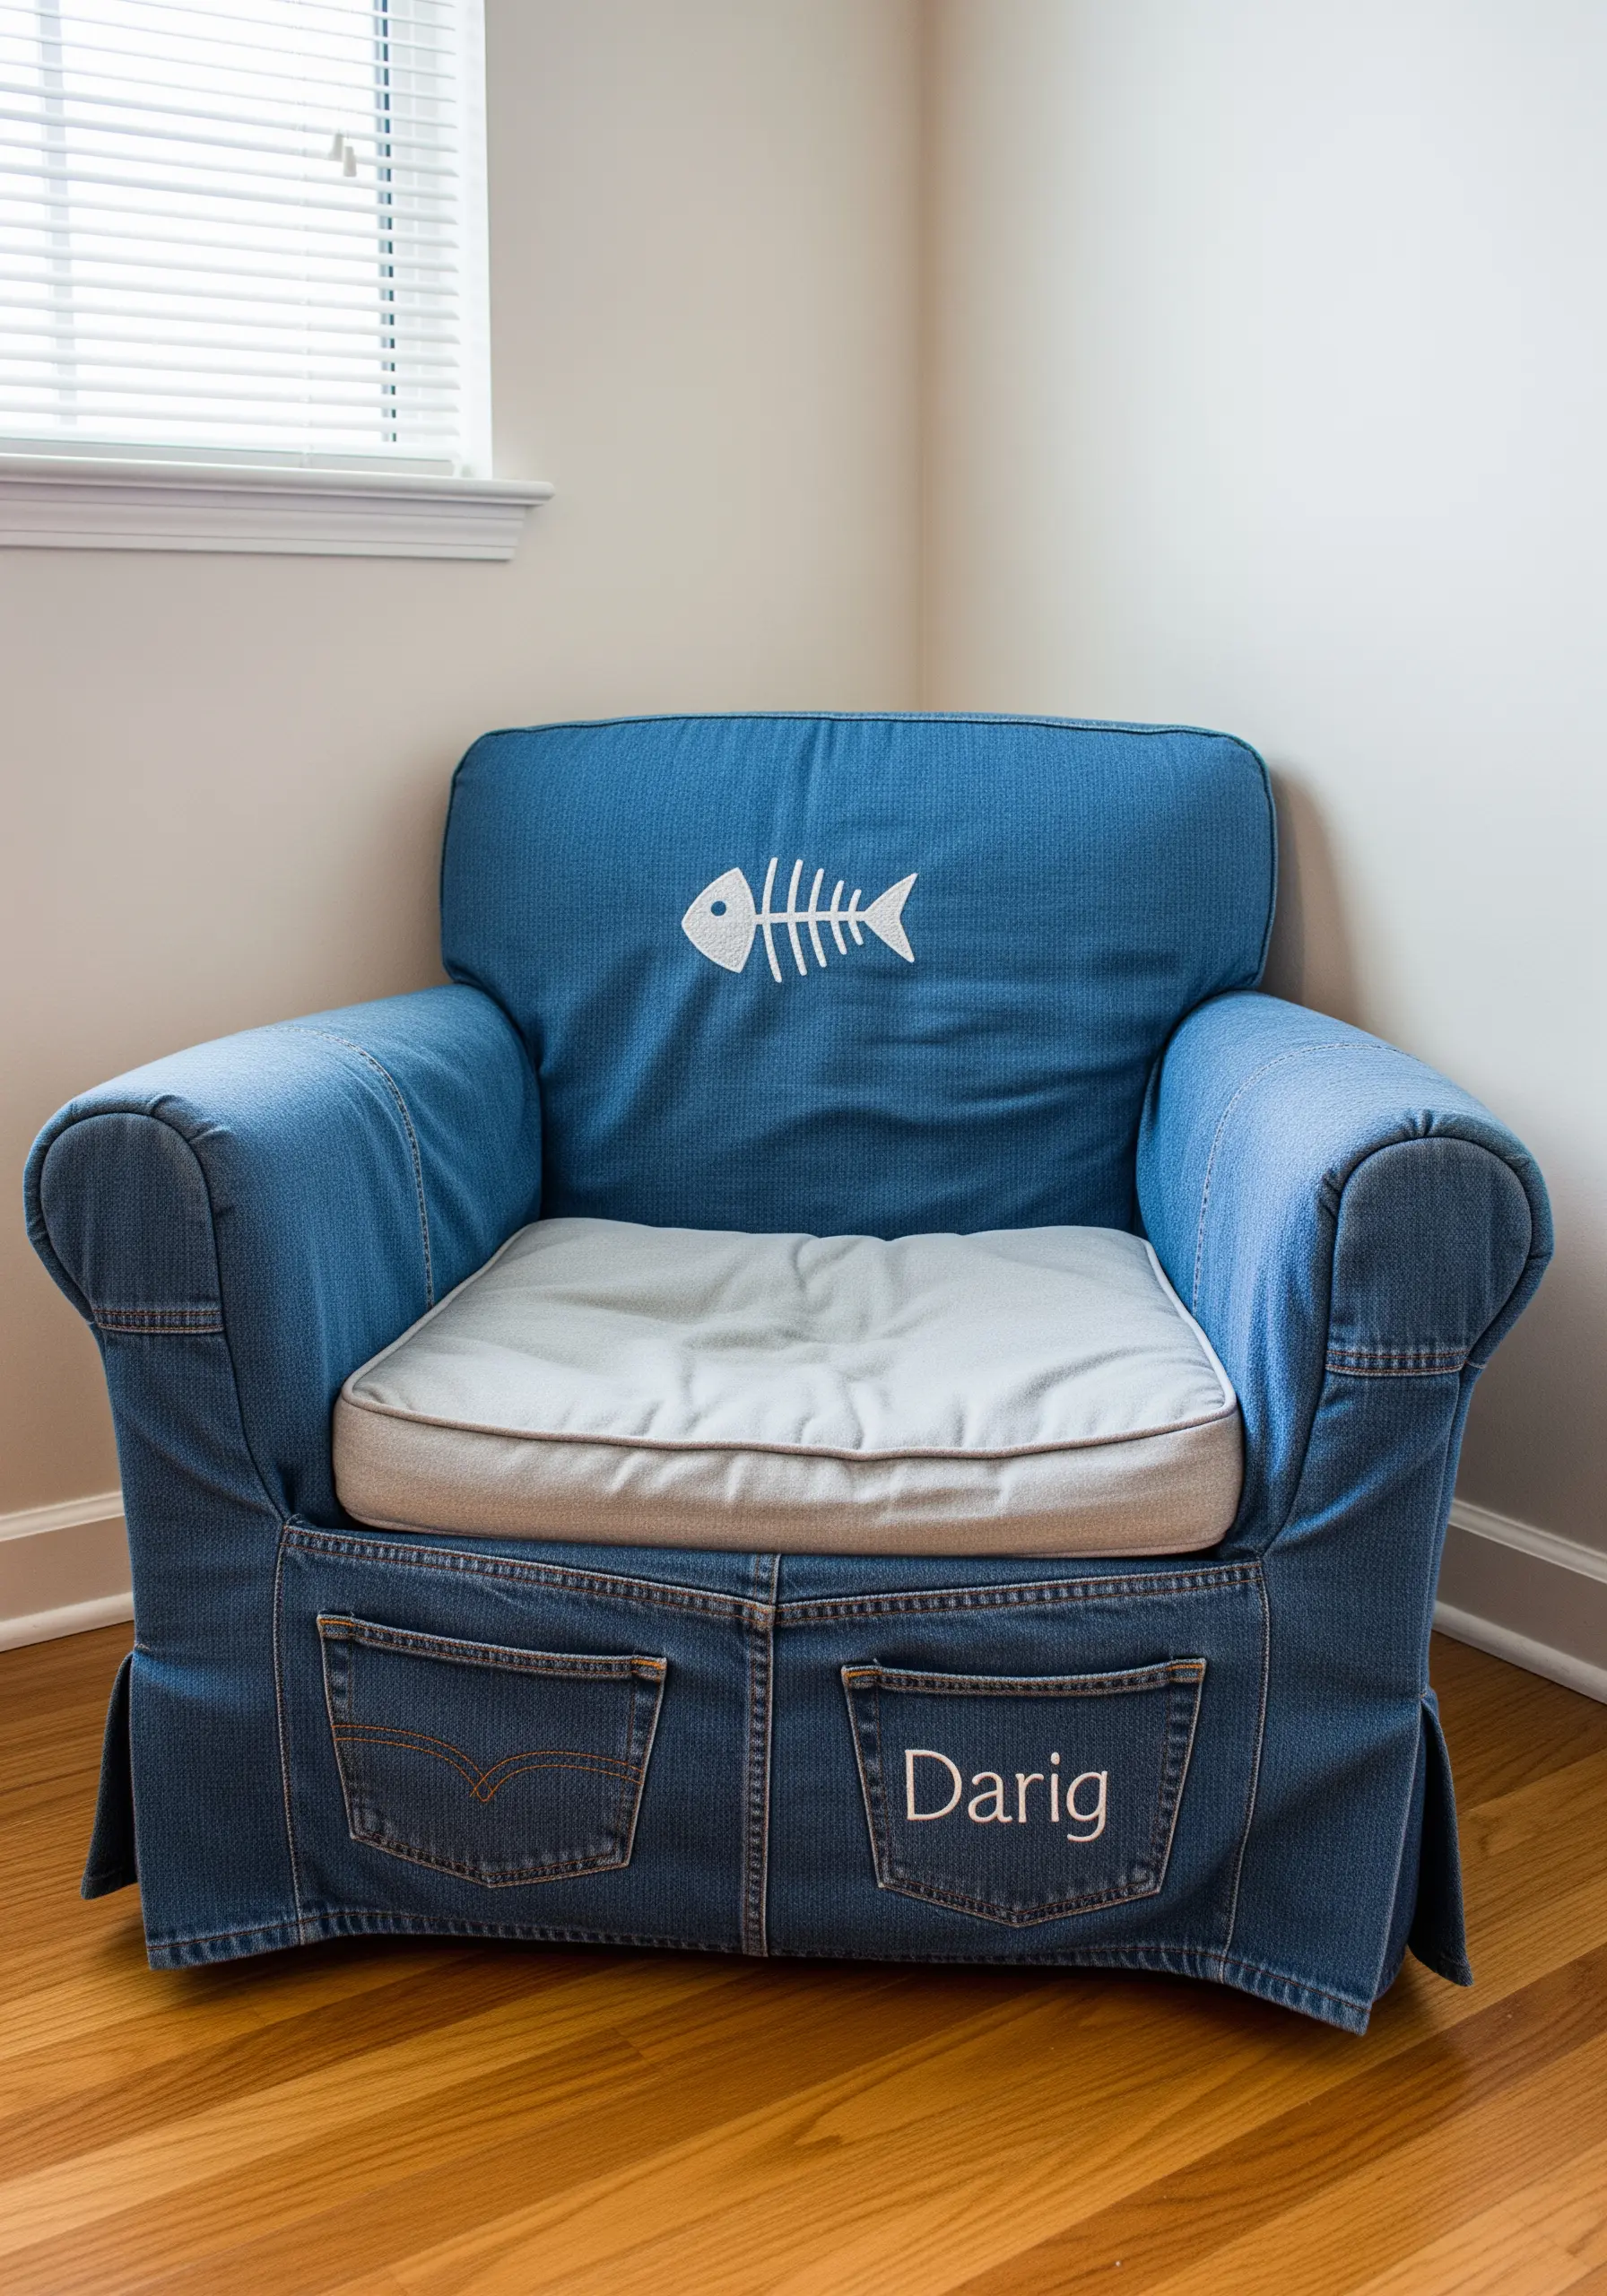
Give a child’s chair or a small footstool a durable and whimsical makeover using old denim jeans.
Use the larger pieces of fabric for the main body of the chair and incorporate iconic details like pockets and belt loops into the design for a playful touch.
Add a simple embroidered name or an appliqué motif, like a fishbone, using a contrasting white thread to stand out against the blue denim.
This is a fun way to apply the same spirit of projects that easy stitches that bring your plain denim jackets to life.
23. Display an Unwearable Garment as Wall Art
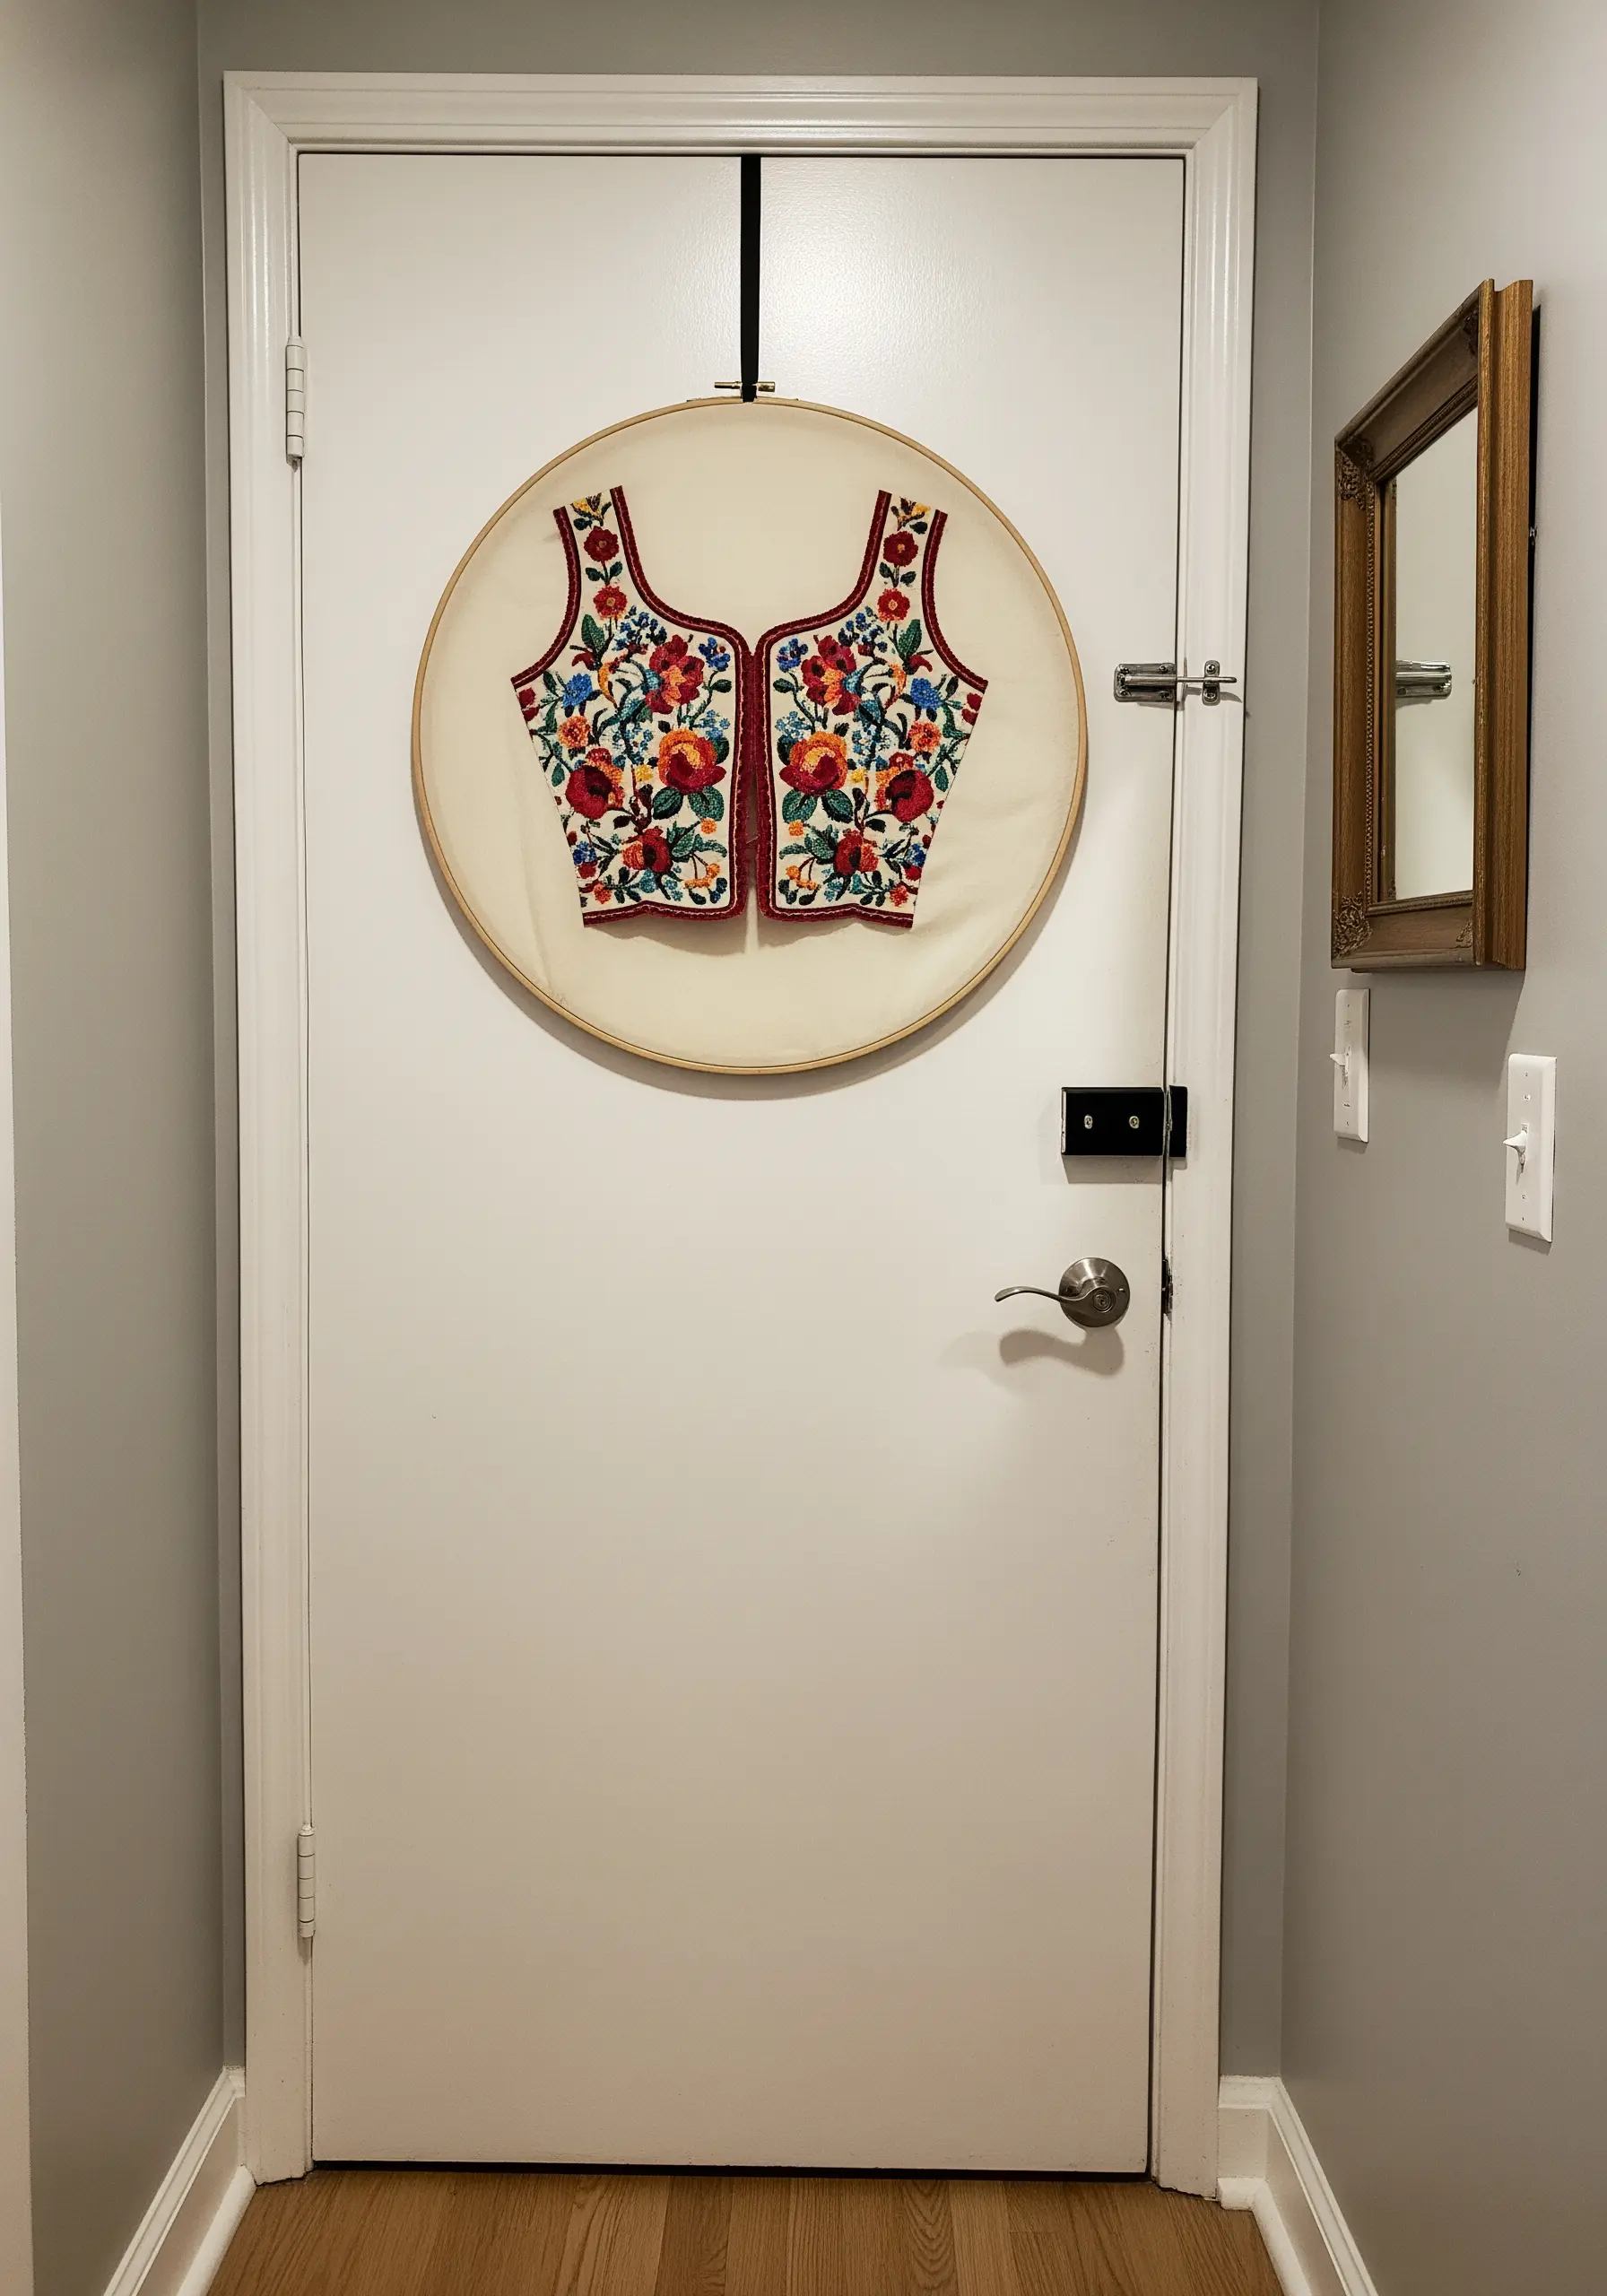
Preserve the beauty of a vintage embroidered garment that’s too delicate or damaged to wear by framing it in a large embroidery hoop.
Carefully stretch the most interesting part of the piece—like the bodice of a vest or a detailed collar—inside the hoop, ensuring the fabric is taut but not stressed.
This honors the original maker’s craftsmanship and turns a piece of clothing into a stunning, three-dimensional piece of wall art.
You can create a whole collection of these framed embroidery art pieces.
24. Craft Bohemian Curtain Tie-Backs from Yarn
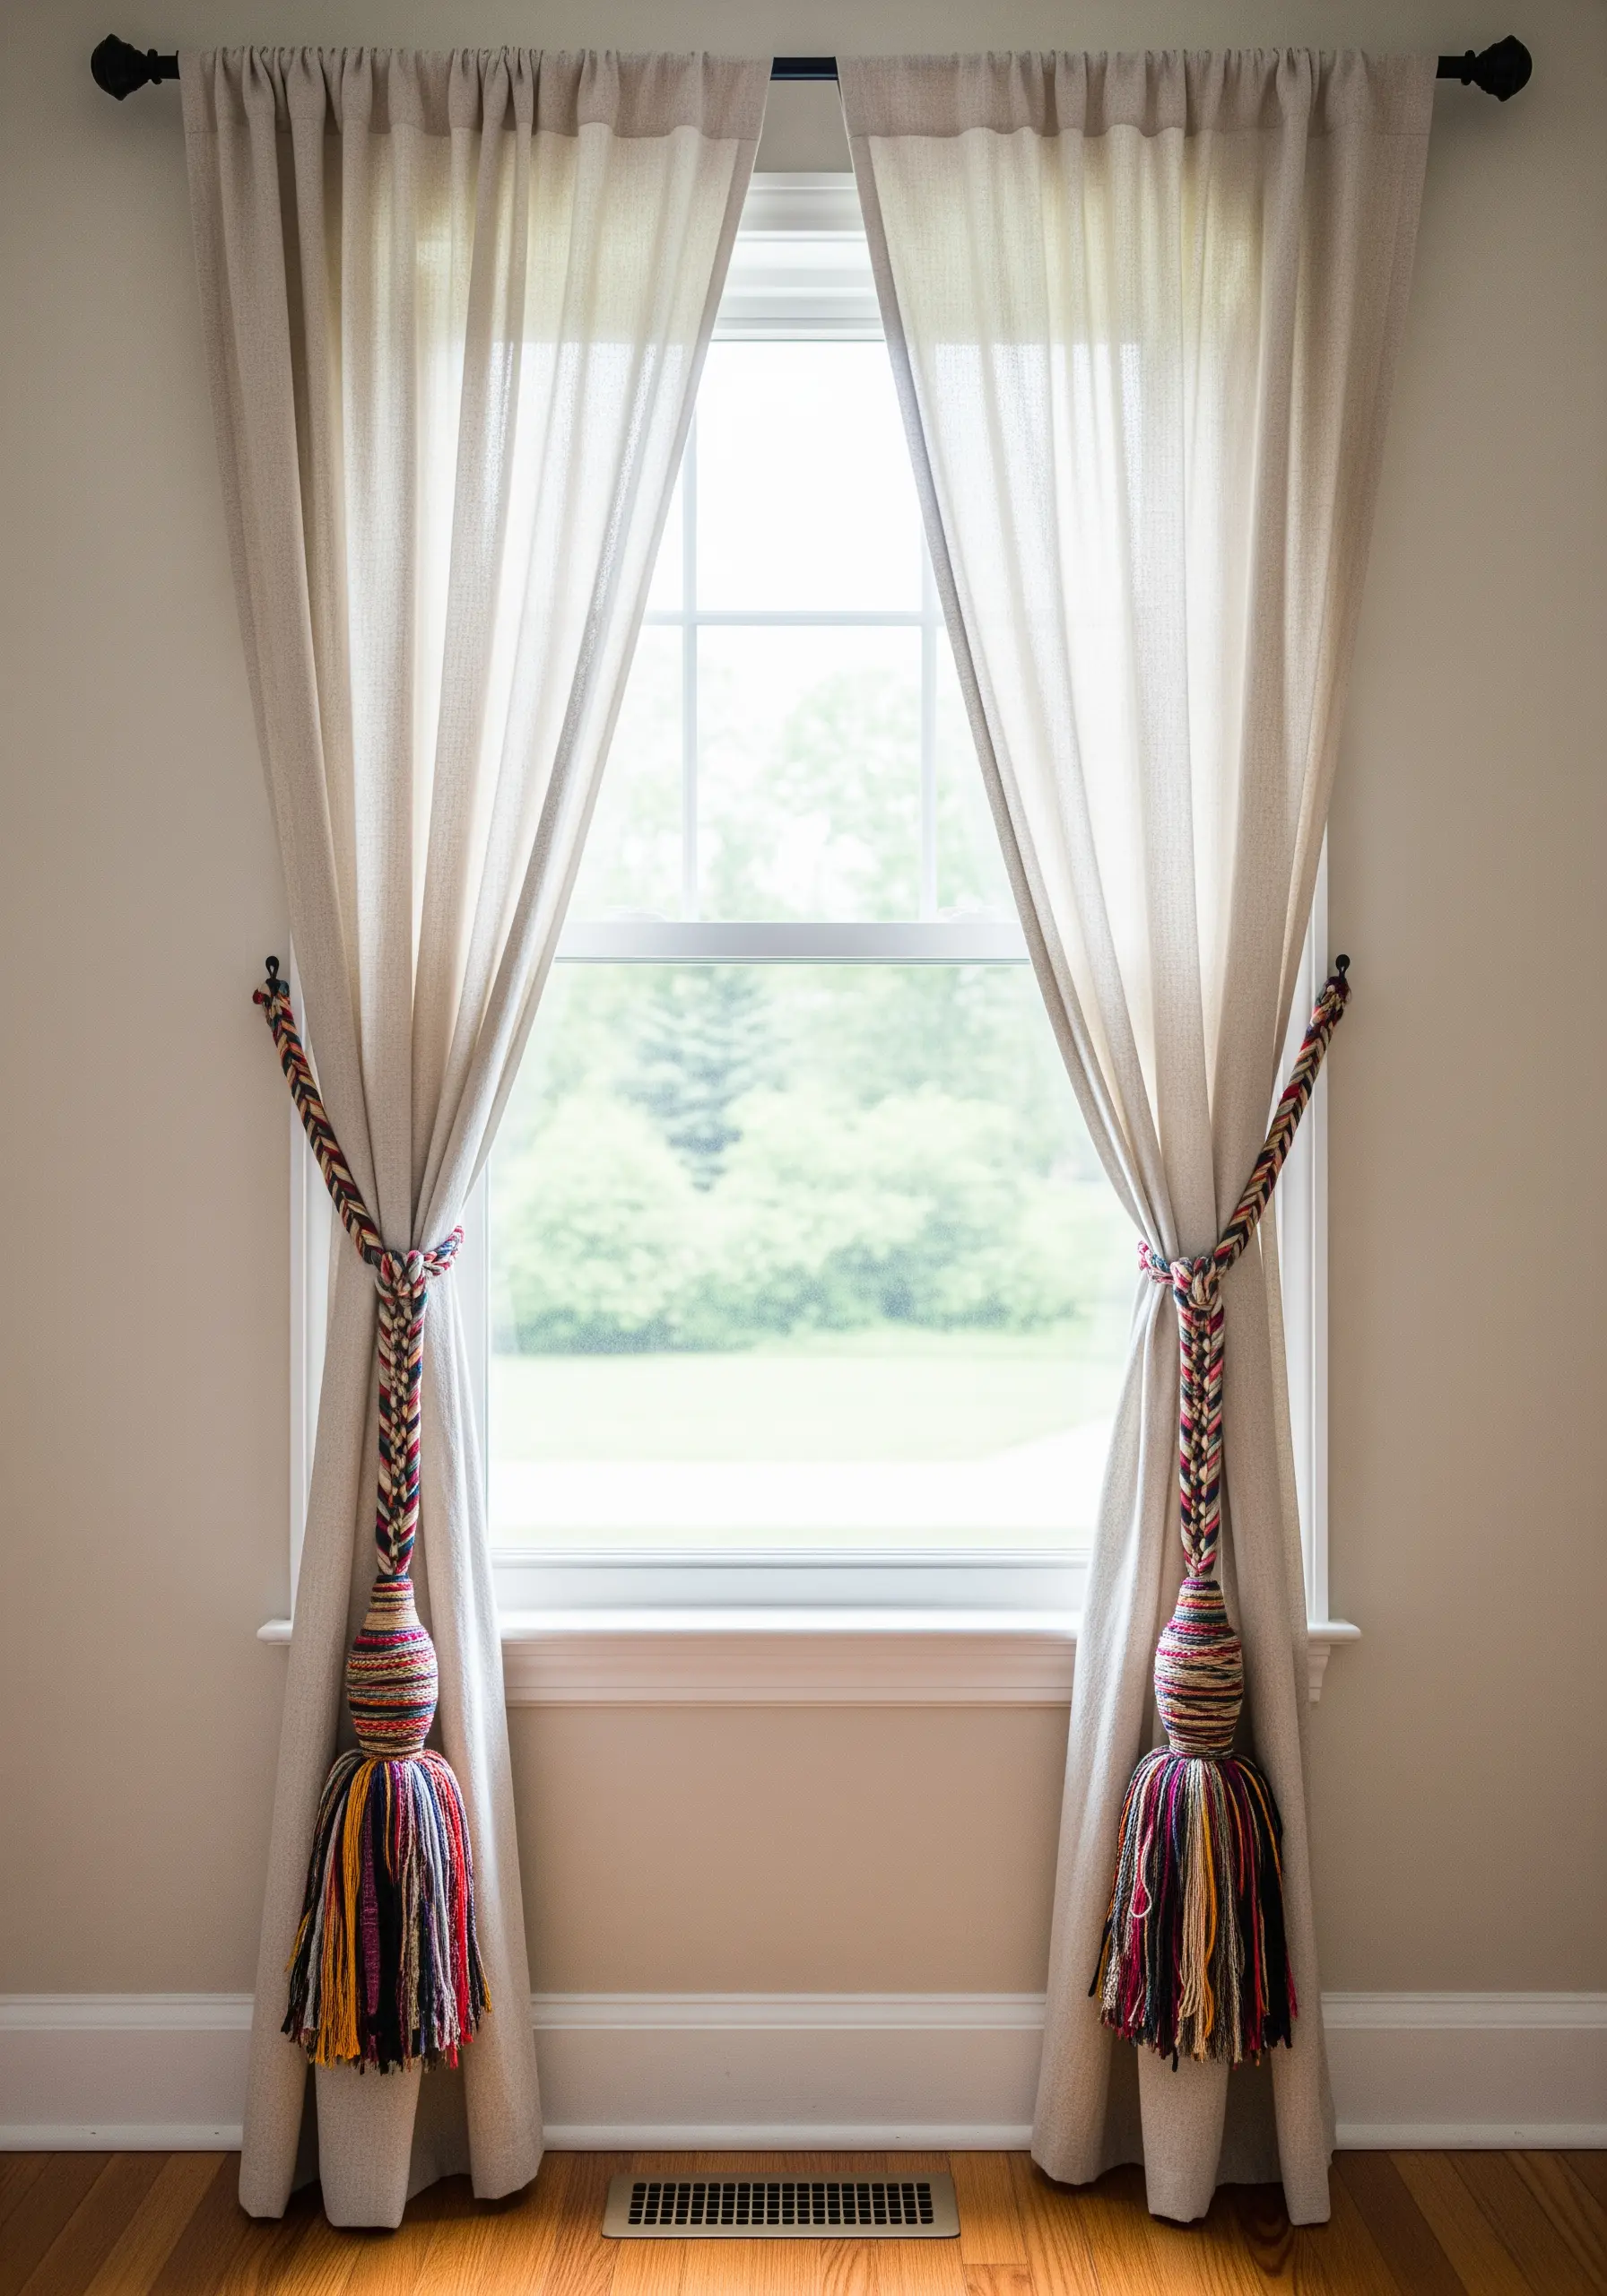
Add a soft, bohemian touch to plain curtains with handmade, chunky tie-backs.
Braid together multiple strands of thick, colorful yarn to create a sturdy rope. Then, wrap sections of the rope with different colors of embroidery floss to create a central, decorative element.
Finish by creating large, fluffy tassels at the ends. This project requires no fine stitching but adds a significant amount of texture, color, and handmade charm to your windows.
These tie-backs are a functional twist on bohemian yarn wall art projects.
25. Add a Faux-Quilted Finish to Furniture
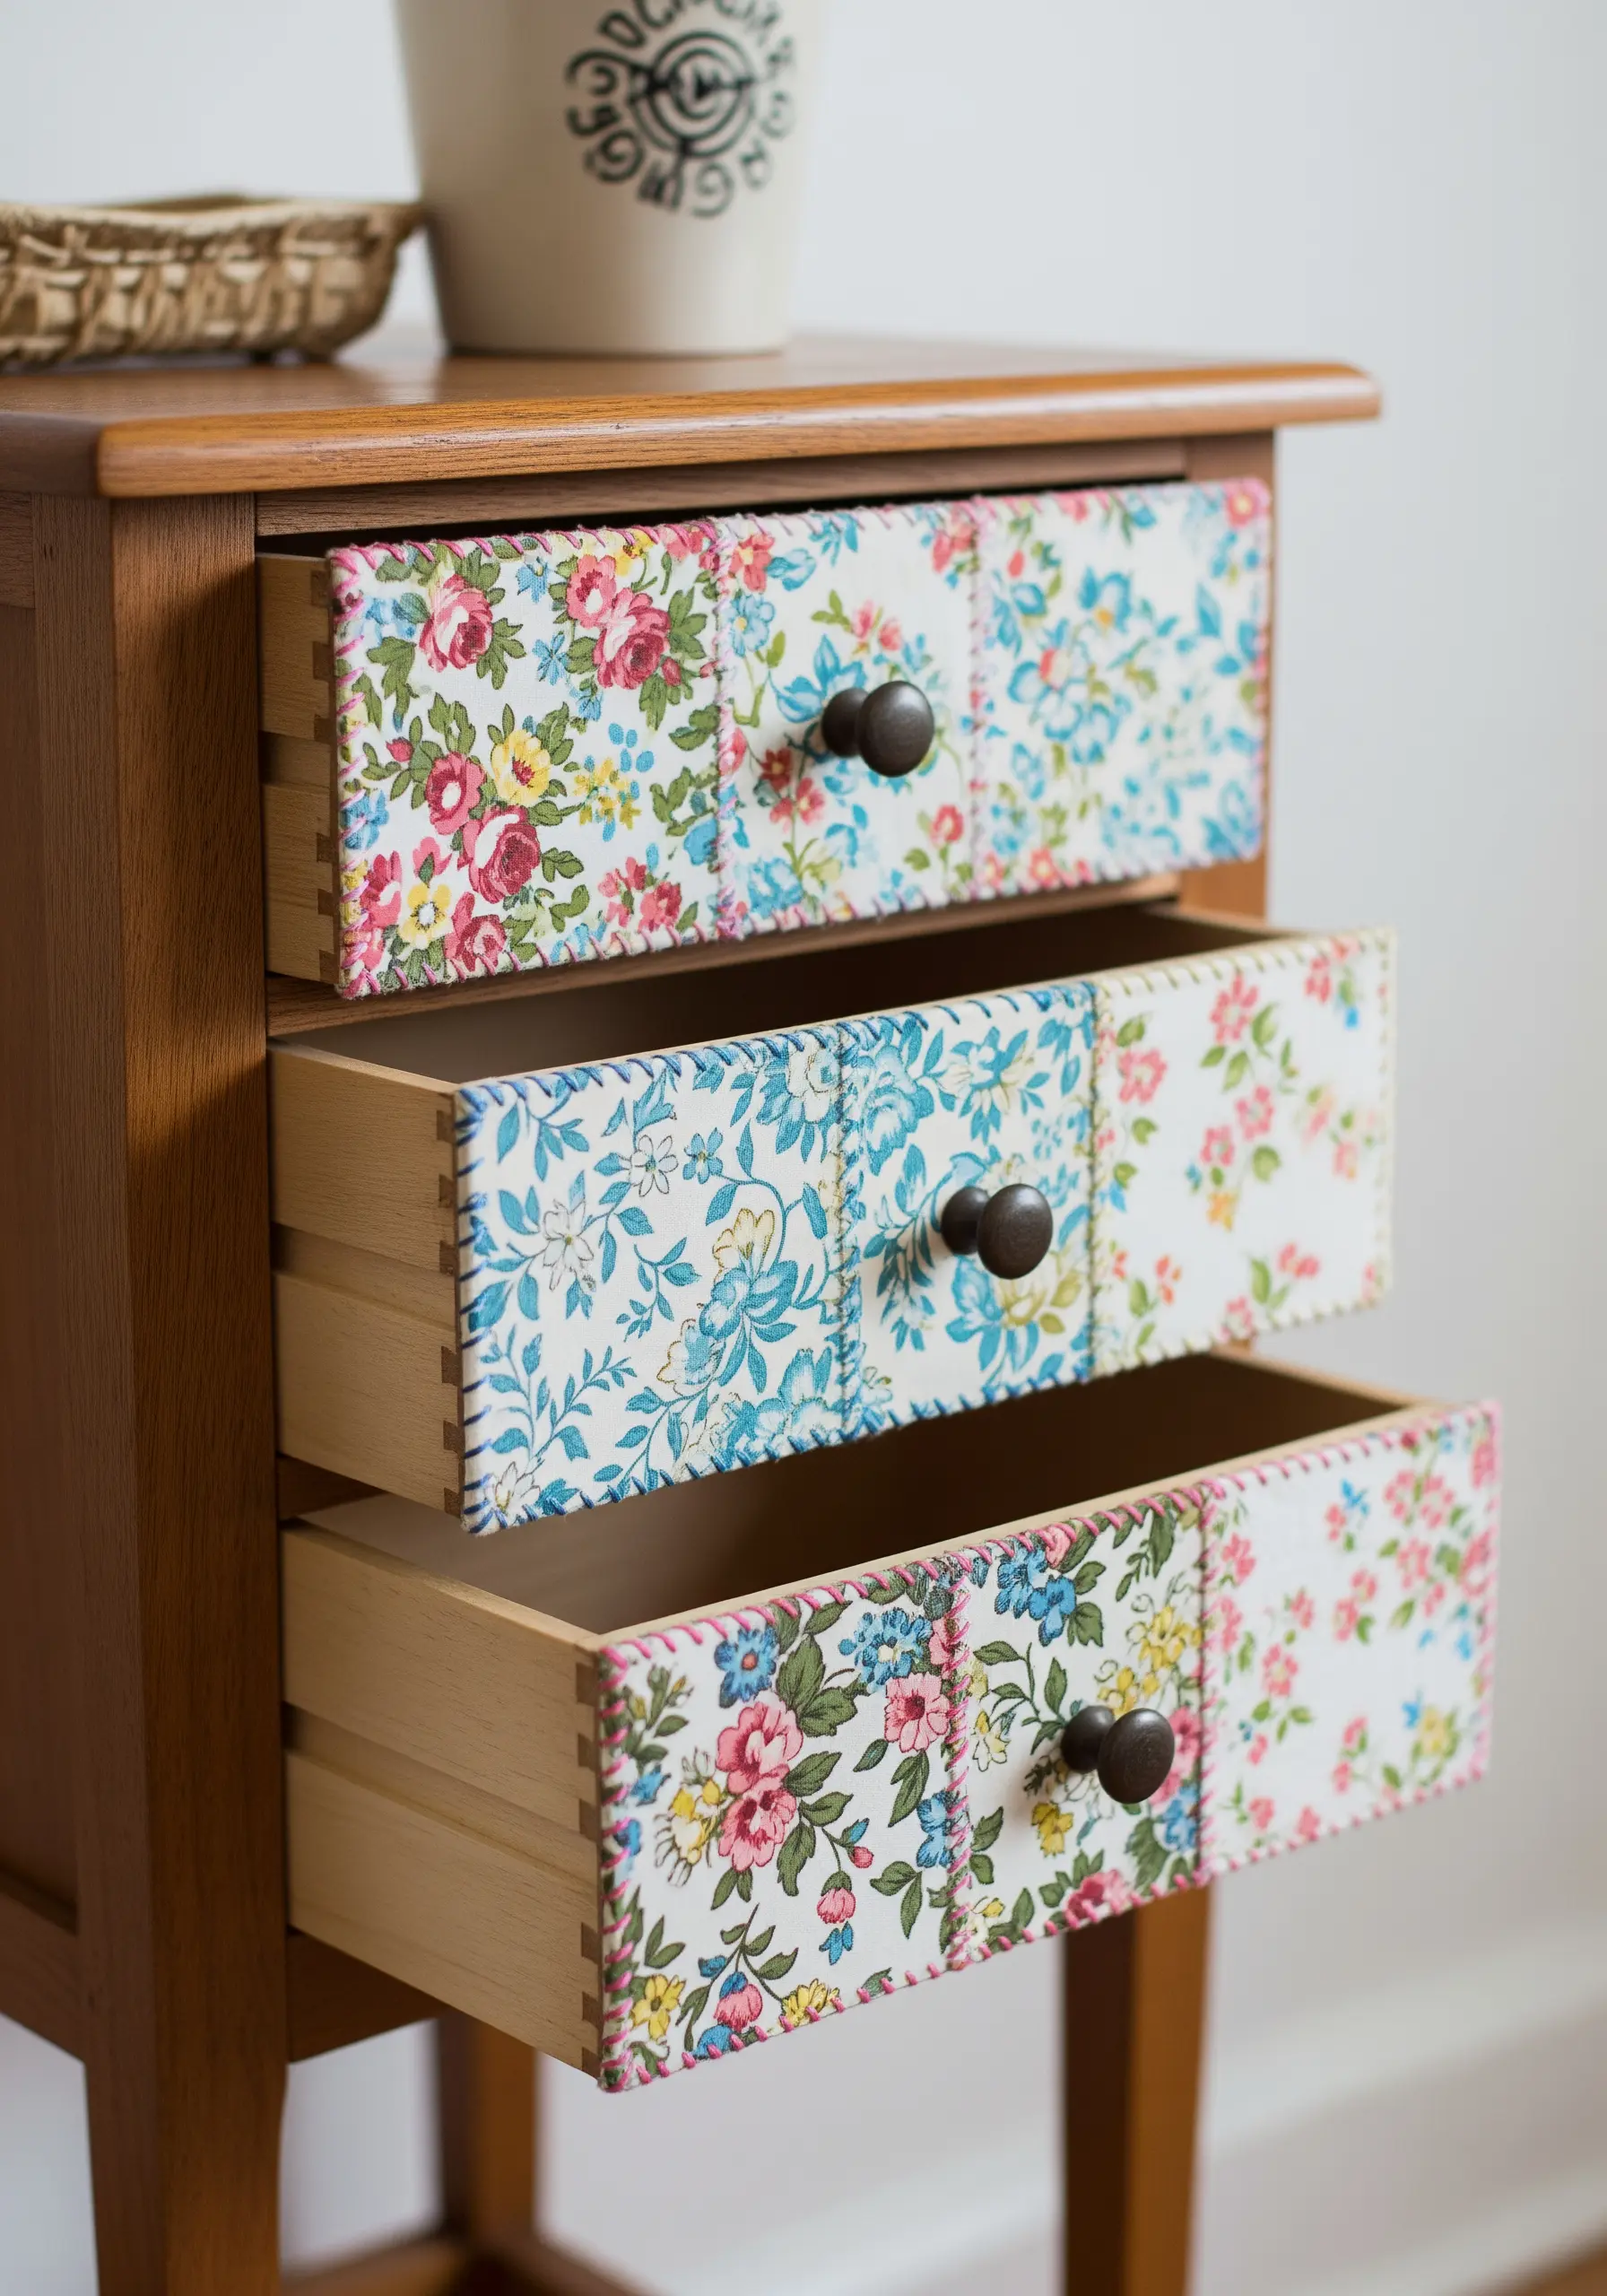
Give a small piece of furniture, like a nightstand, a soft, cottage-style makeover by covering the drawer fronts with fabric.
Use a decoupage medium like Mod Podge to adhere patchwork squares of vintage floral fabric to the drawers.
Once dry, elevate the look by adding a simple, visible running stitch in a contrasting thread along the seams of the fabric squares. This small detail creates a charming, quilted effect that feels thoughtful and handmade.
You can create entire whimsical fabric collage embroidery scenes with this technique.
26. Mount Embroidery on Natural Wood
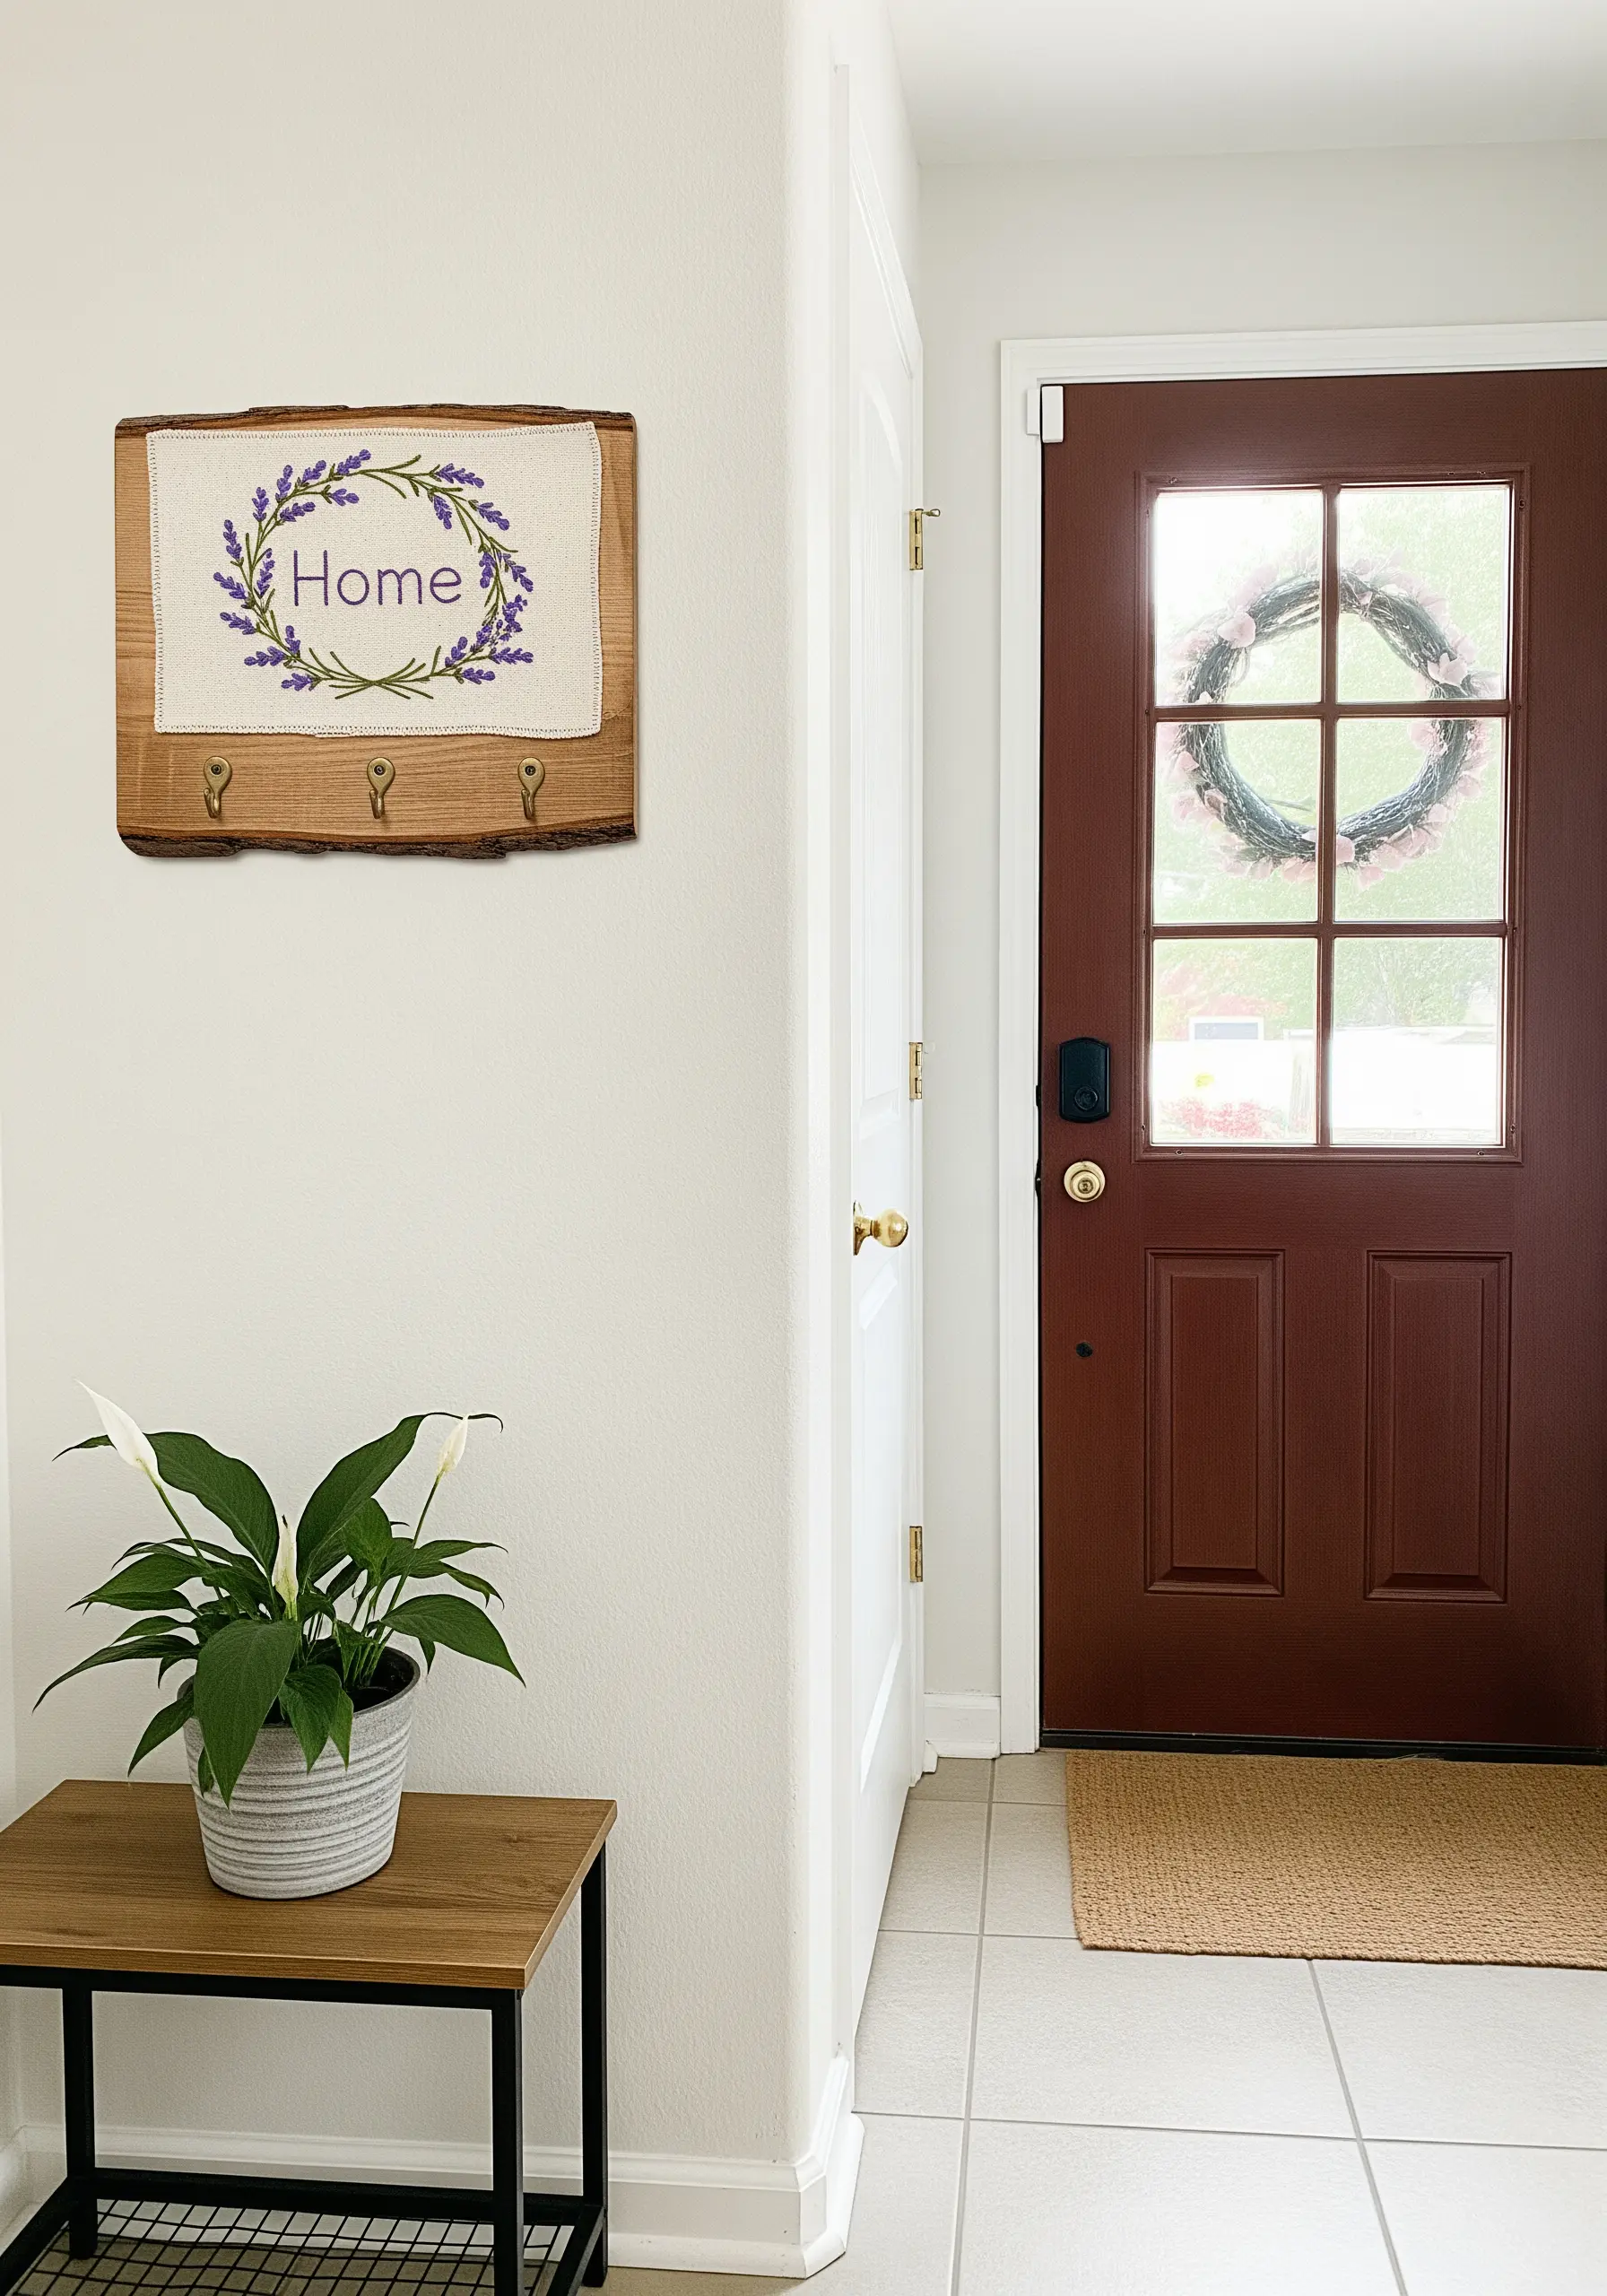
Create a warm and rustic piece of entryway decor by mounting a small embroidered piece onto a slice of natural wood.
Complete your stitching on a piece of linen or canvas, leaving a generous margin. Then, stretch the fabric over the wood slice and secure it tightly on the back with a staple gun or strong glue.
This method of framing provides a beautiful contrast between the soft, delicate thread and the rough, organic texture of the wood.
This is one of the most effective minimalist embroidery patterns perfect for entryway decoration.
27. Upholster a Footstool with a Carpet Remnant
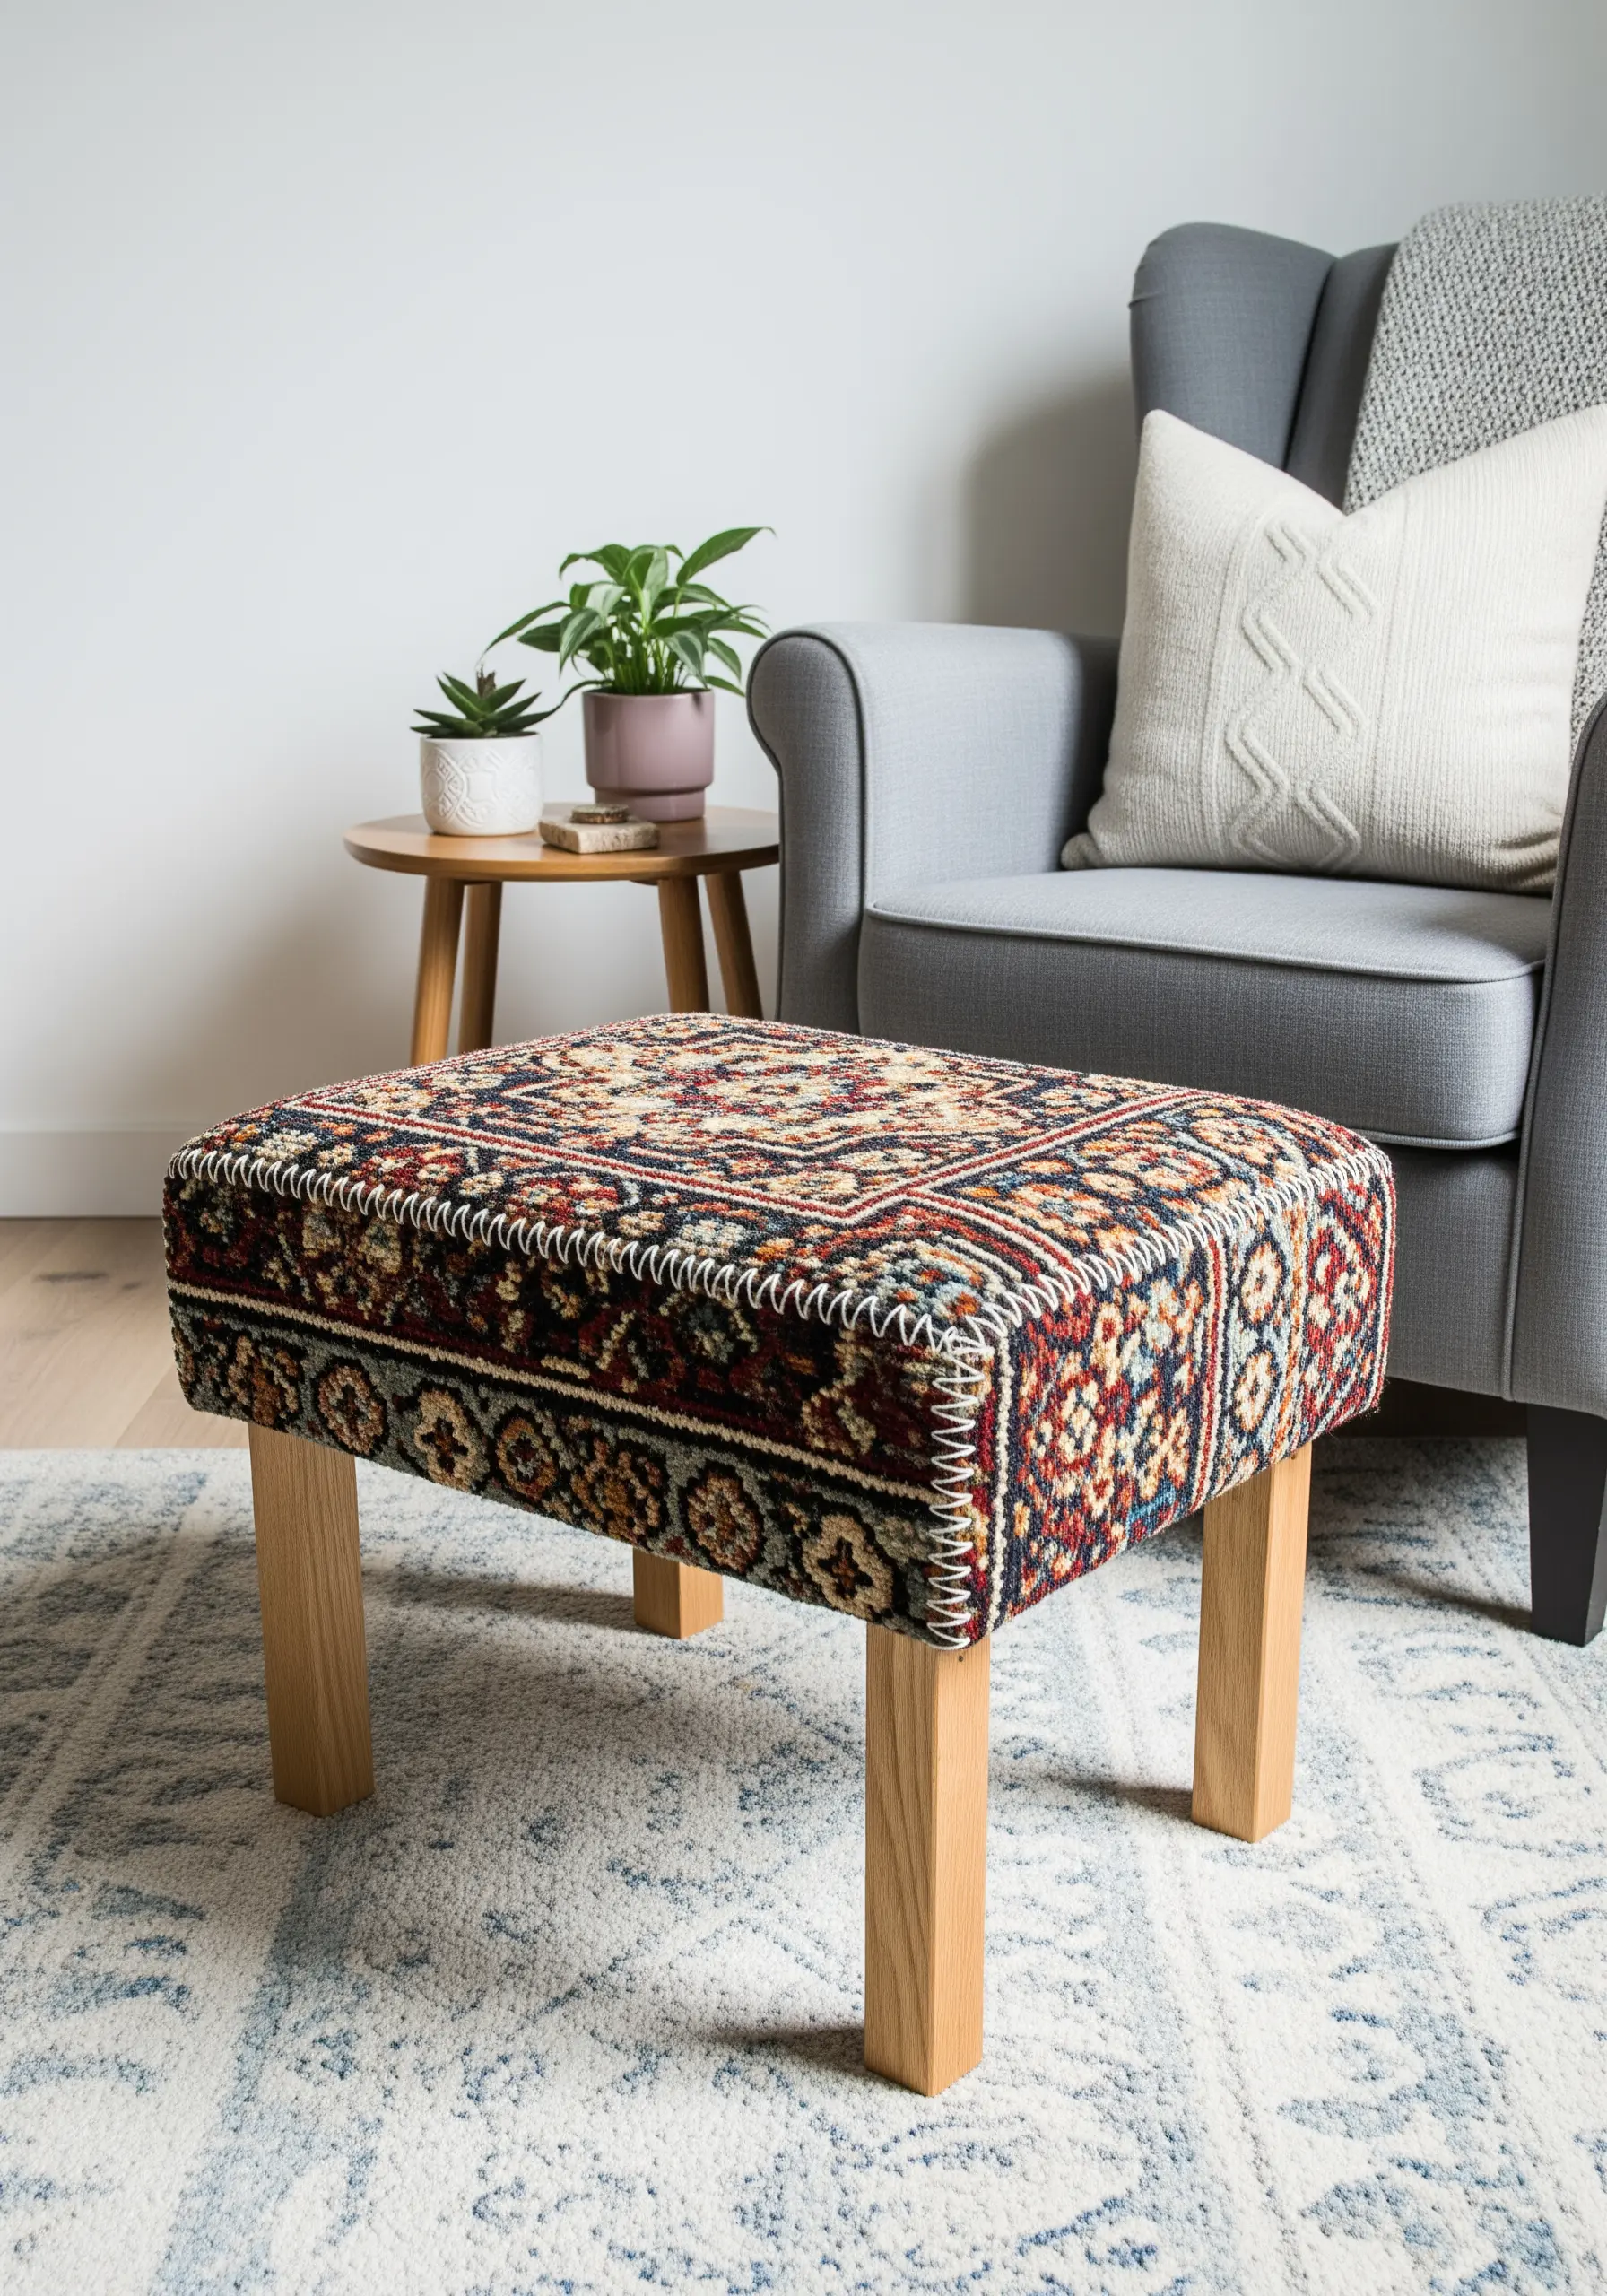
Breathe new life into a tired footstool or ottoman by reupholstering it with a durable, patterned carpet remnant.
Choose a piece with a rich, vintage-inspired design. Wrap the fabric tightly around the stool’s cushion and secure it underneath with a staple gun.
For a truly handcrafted finish, use a thick, contrasting yarn or twine to add a decorative whipstitch or blanket stitch around the seams. This visible stitch celebrates the piece’s construction and adds authentic character.
This idea is perfect for those who love rustic vintage embroidery wall decor ideas and want to apply them to furniture.
28. Stitch a Narrative Map on a Table Runner
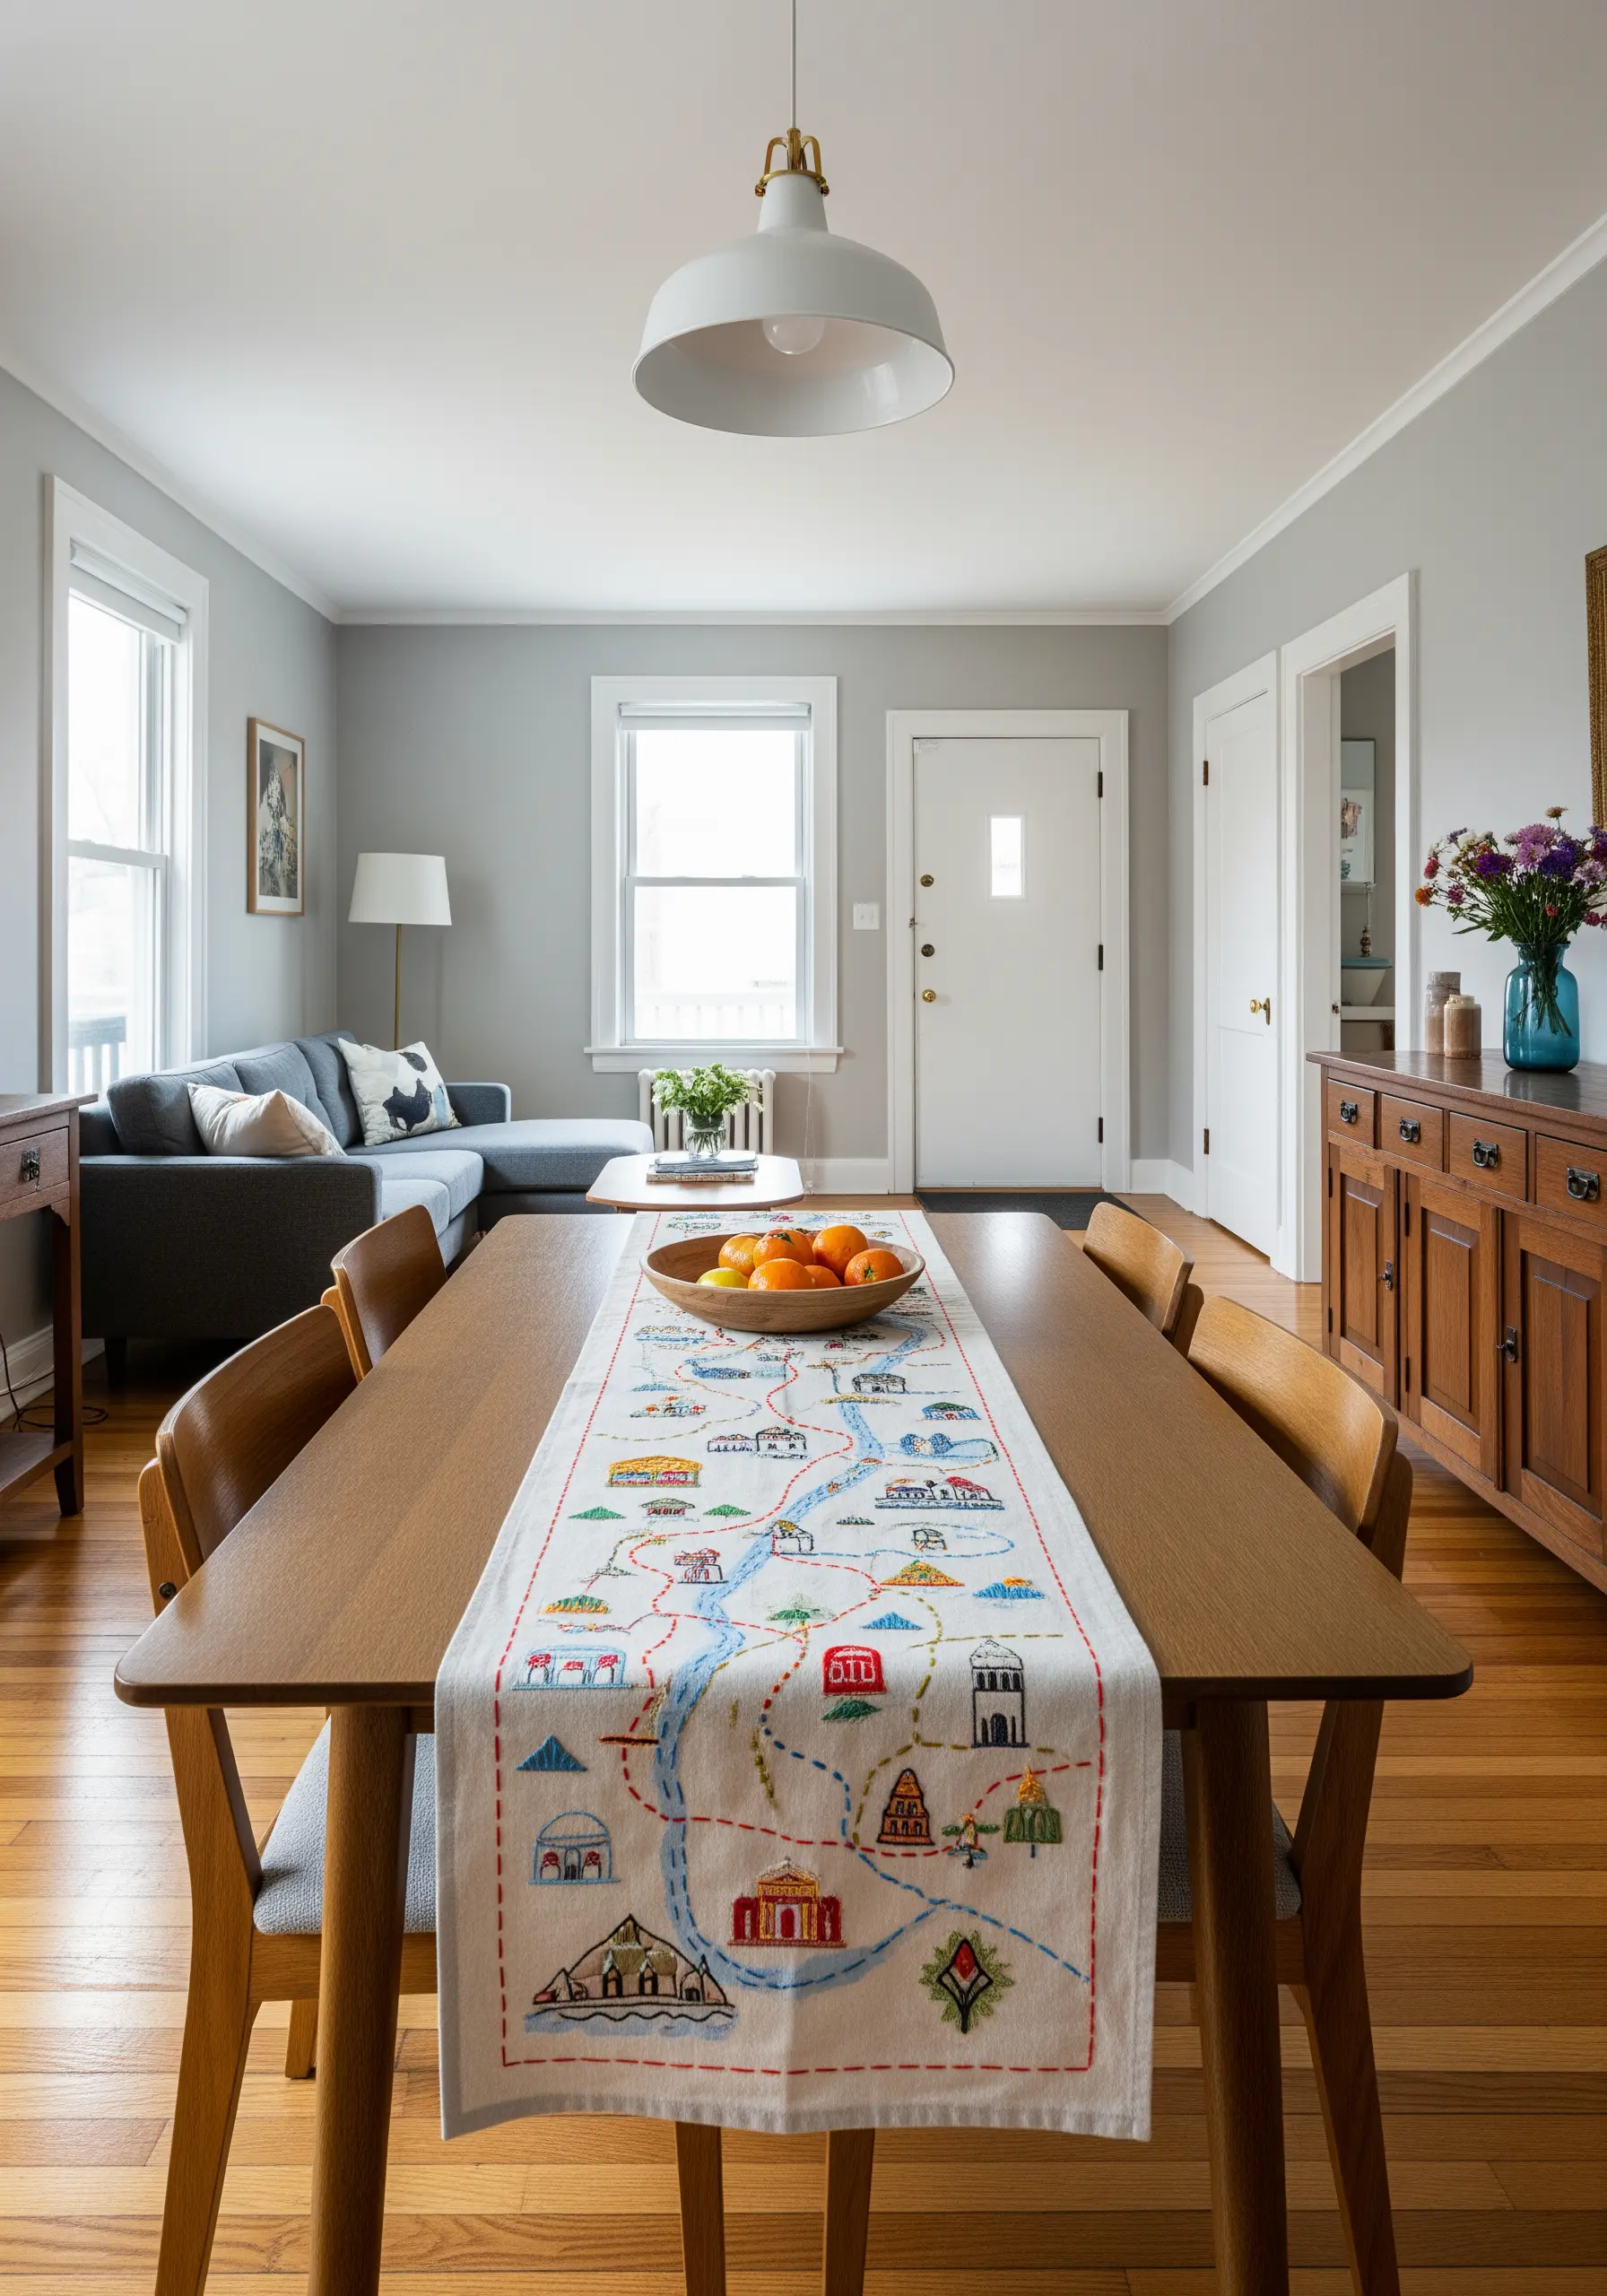
Turn a plain linen table runner into a conversation piece by embroidering a whimsical map of a meaningful place—your neighborhood, a favorite travel destination, or a fantasy land.
Use a simple backstitch for the lines and roads, and small, icon-like satin stitches for buildings and landmarks.
The charm of this project lies in its personal, illustrative quality, not in perfect realism. It’s a beautiful way to tell a story with thread.
You can even incorporate minimal travel-themed embroidery ideas for a modern look.
29. Craft Embroidered Covers for Plant Pots
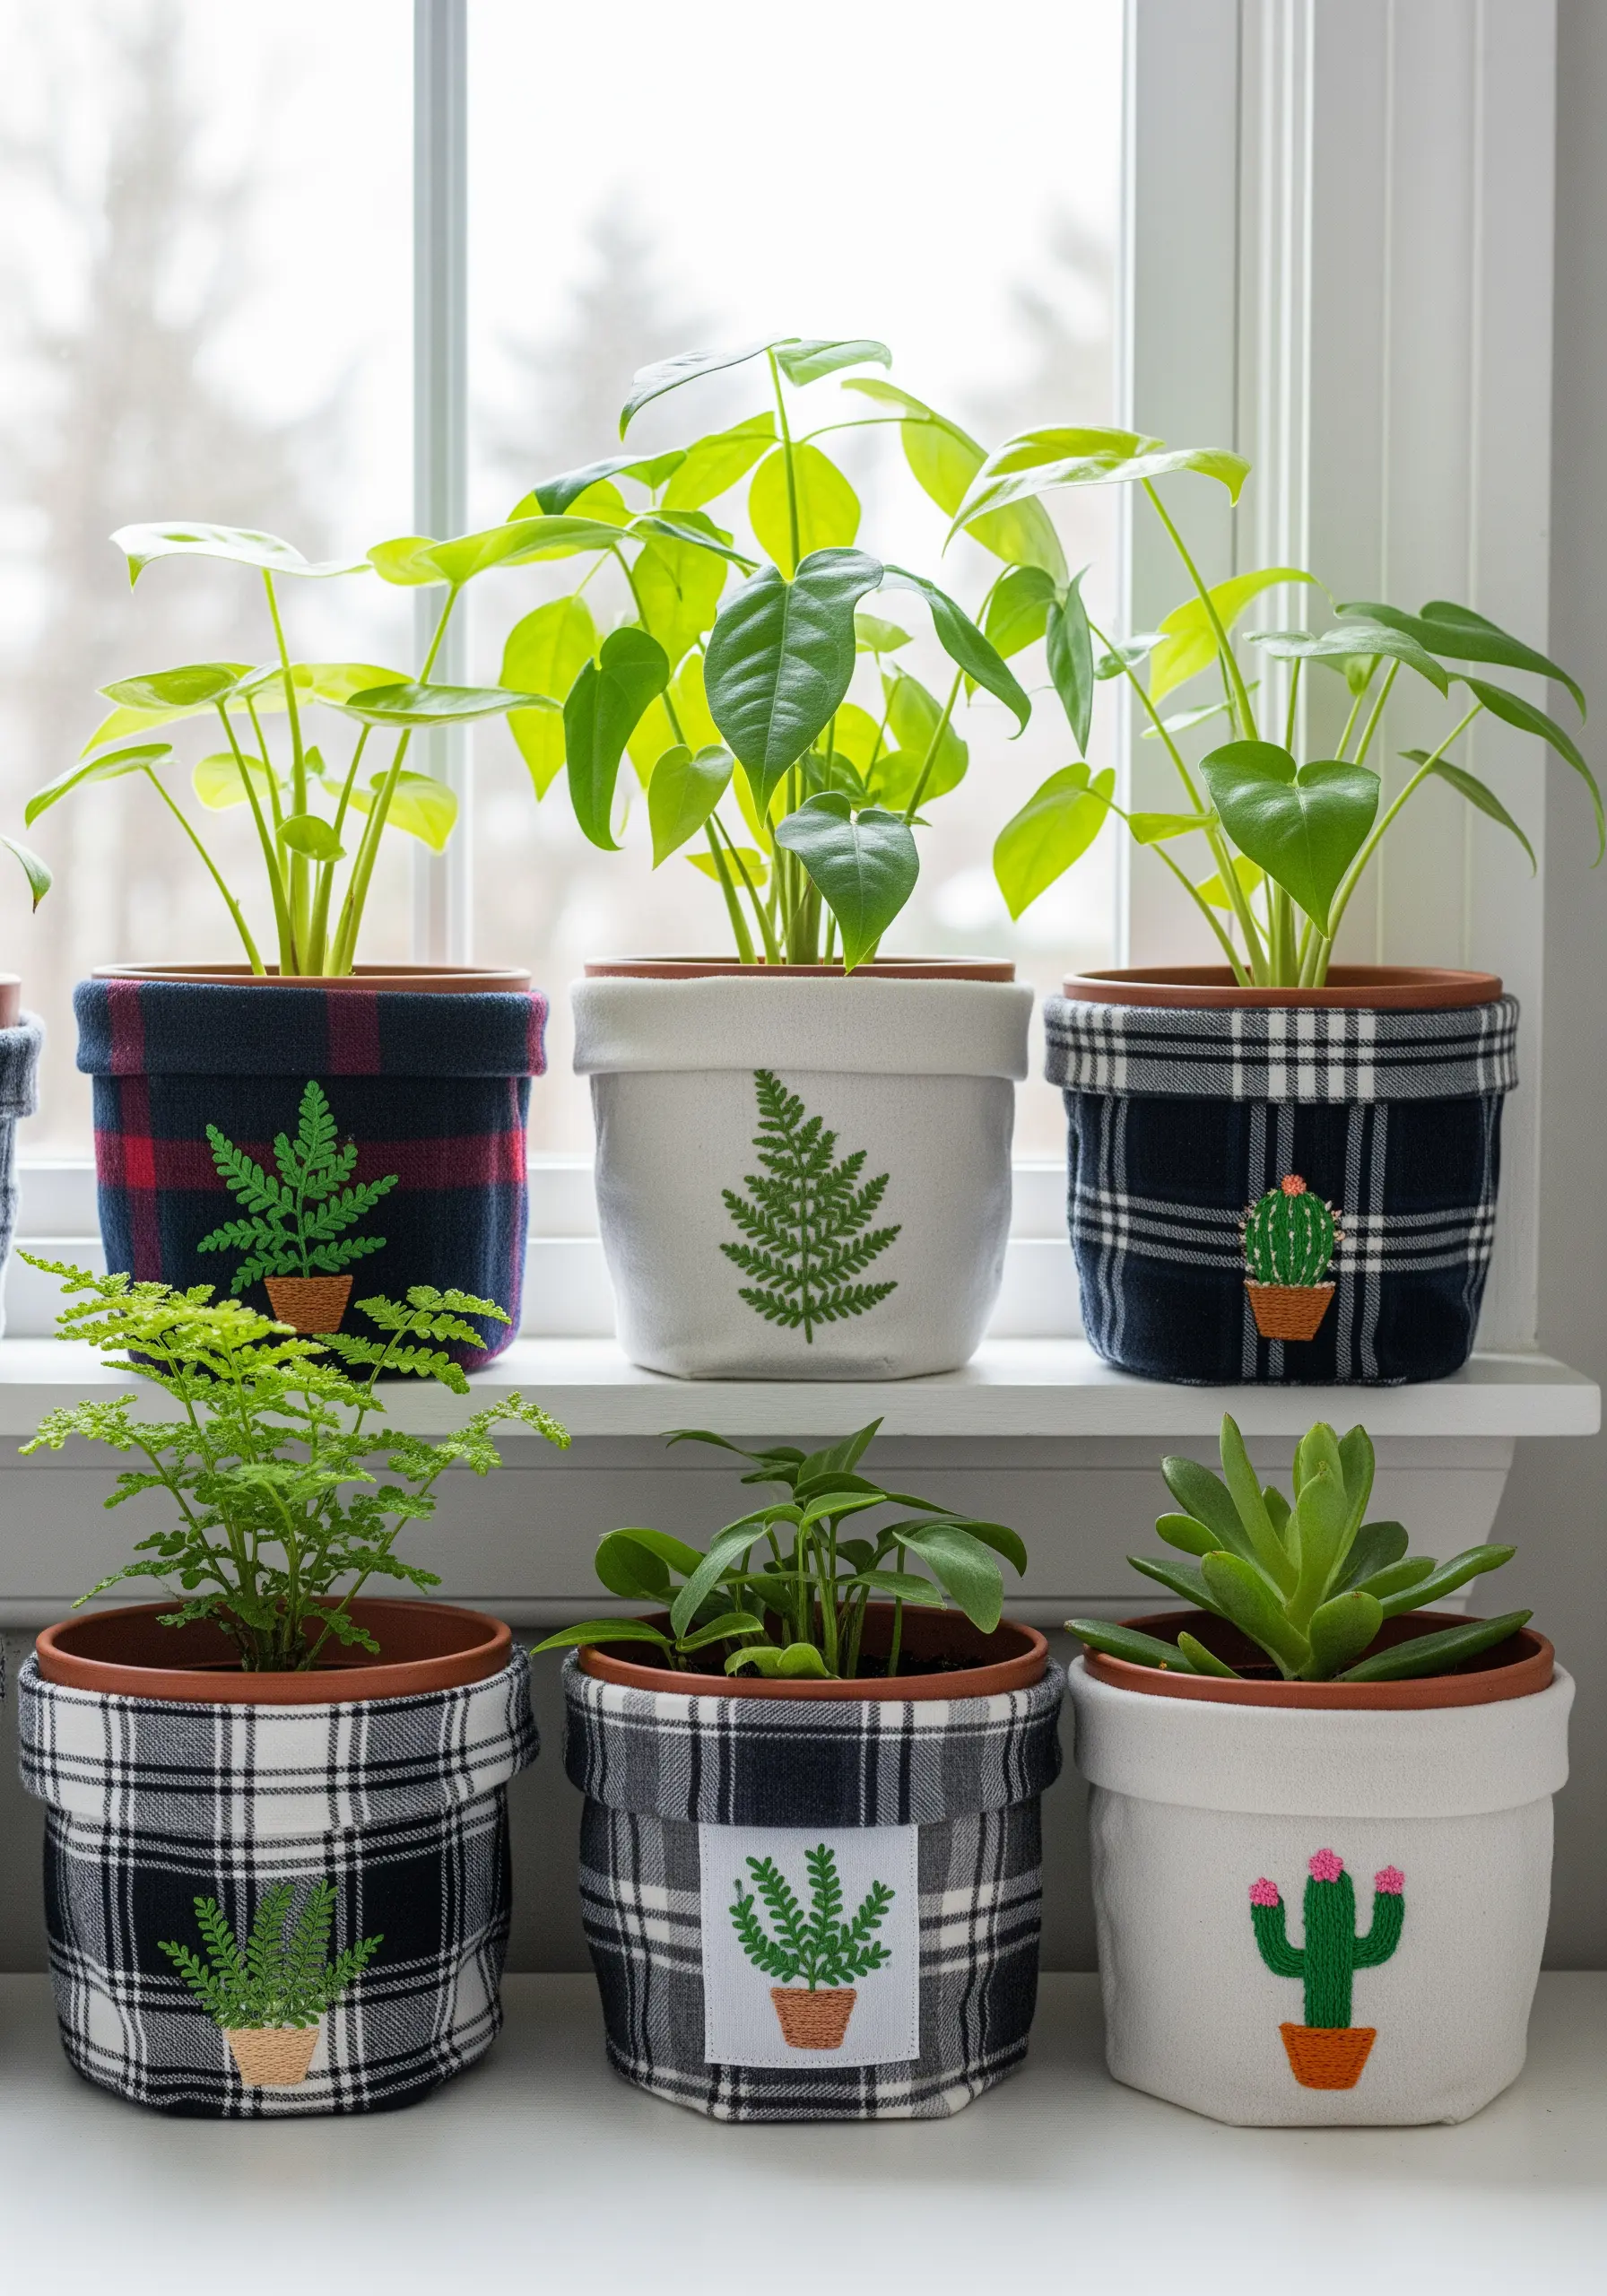
Hide unsightly plastic nursery pots and add a layer of texture to your indoor garden with simple, embroidered fabric covers.
Use durable fabrics like canvas, denim, or felt. You can either stitch directly onto the fabric before sewing it into a cylindrical shape or embroider a small patch and appliqué it onto a pre-made cover.
Simple botanical motifs like ferns or cacti work beautifully and connect the textile art to the plant it holds.
These are perfect for showcasing your favorite minimalist botanical stitch designs.
30. Replace Cabinet Doors with Embroidered Curtains
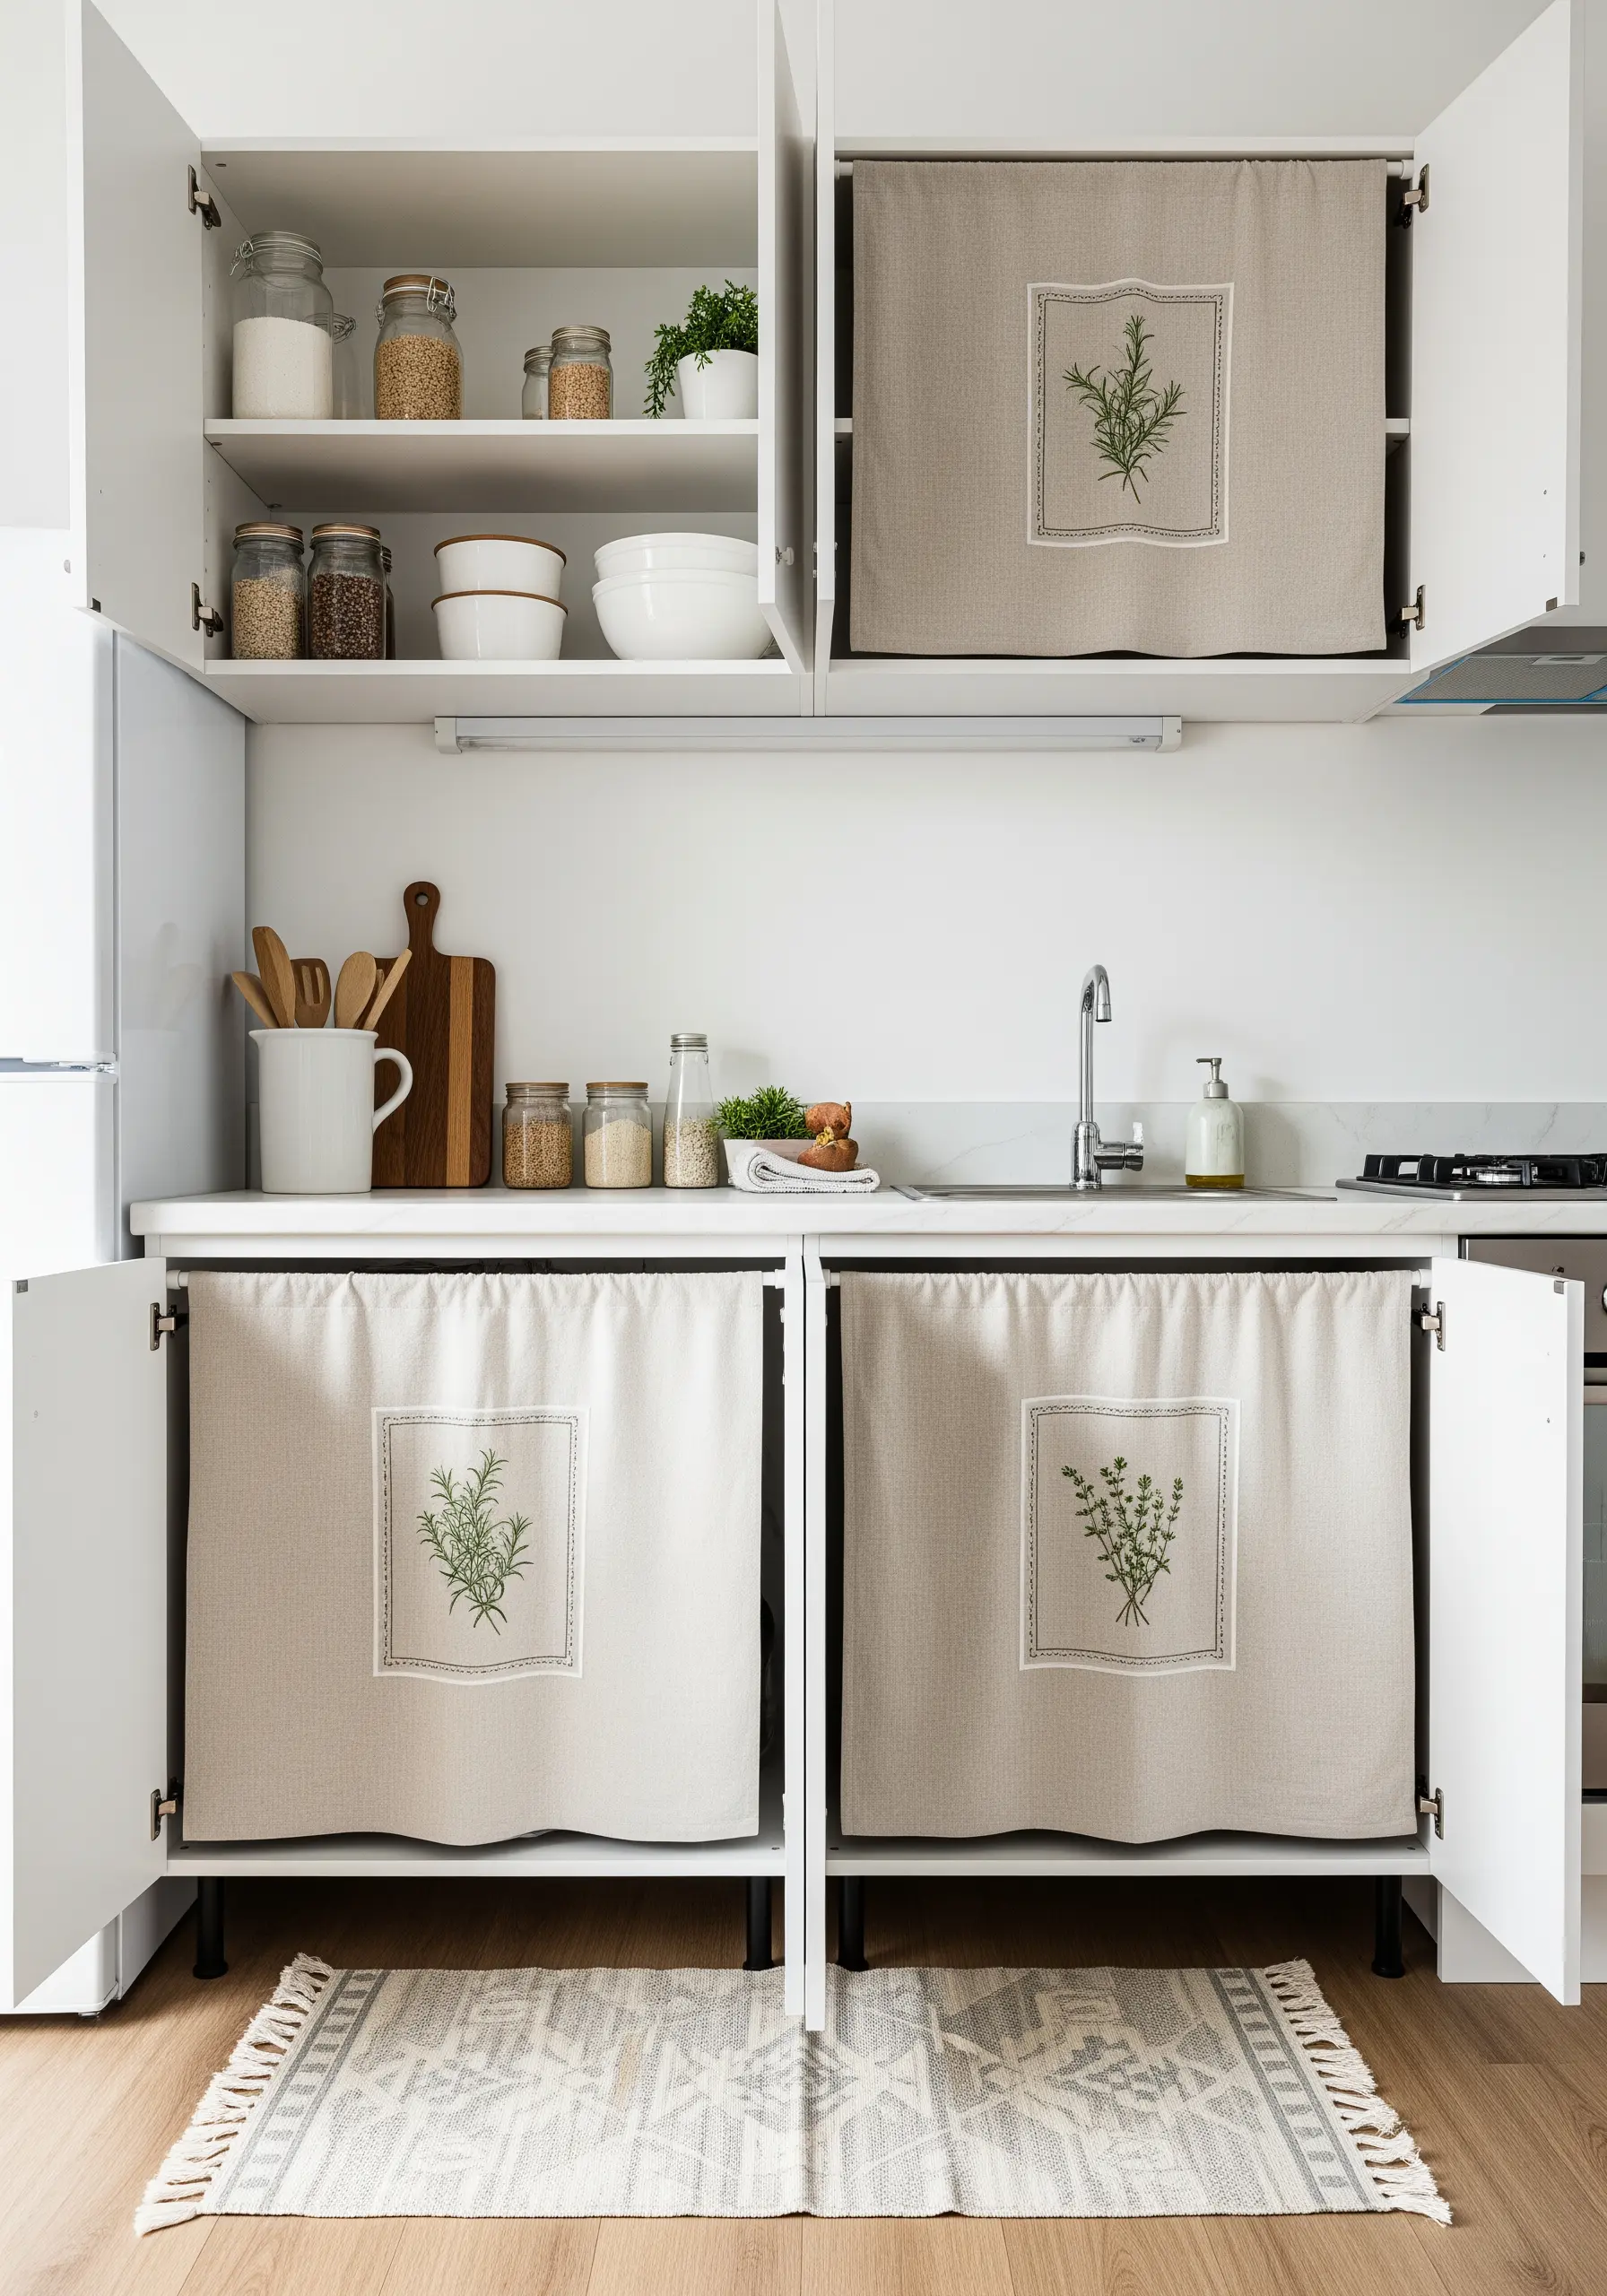
Soften the look of your kitchen and add a touch of cottage charm by replacing lower cabinet doors with simple fabric curtains.
Use a lightweight, breathable fabric like linen or cotton. Add a single, elegant embroidered motif, such as a sprig of rosemary or thyme, to the center of each panel.
This is a clever, budget-friendly way to conceal clutter while adding a personal, handmade element to a utilitarian space. It’s perfect for fans of subtle herbal plant embroidery motifs.
31. Weave a Coiled Rope Trinket Tray
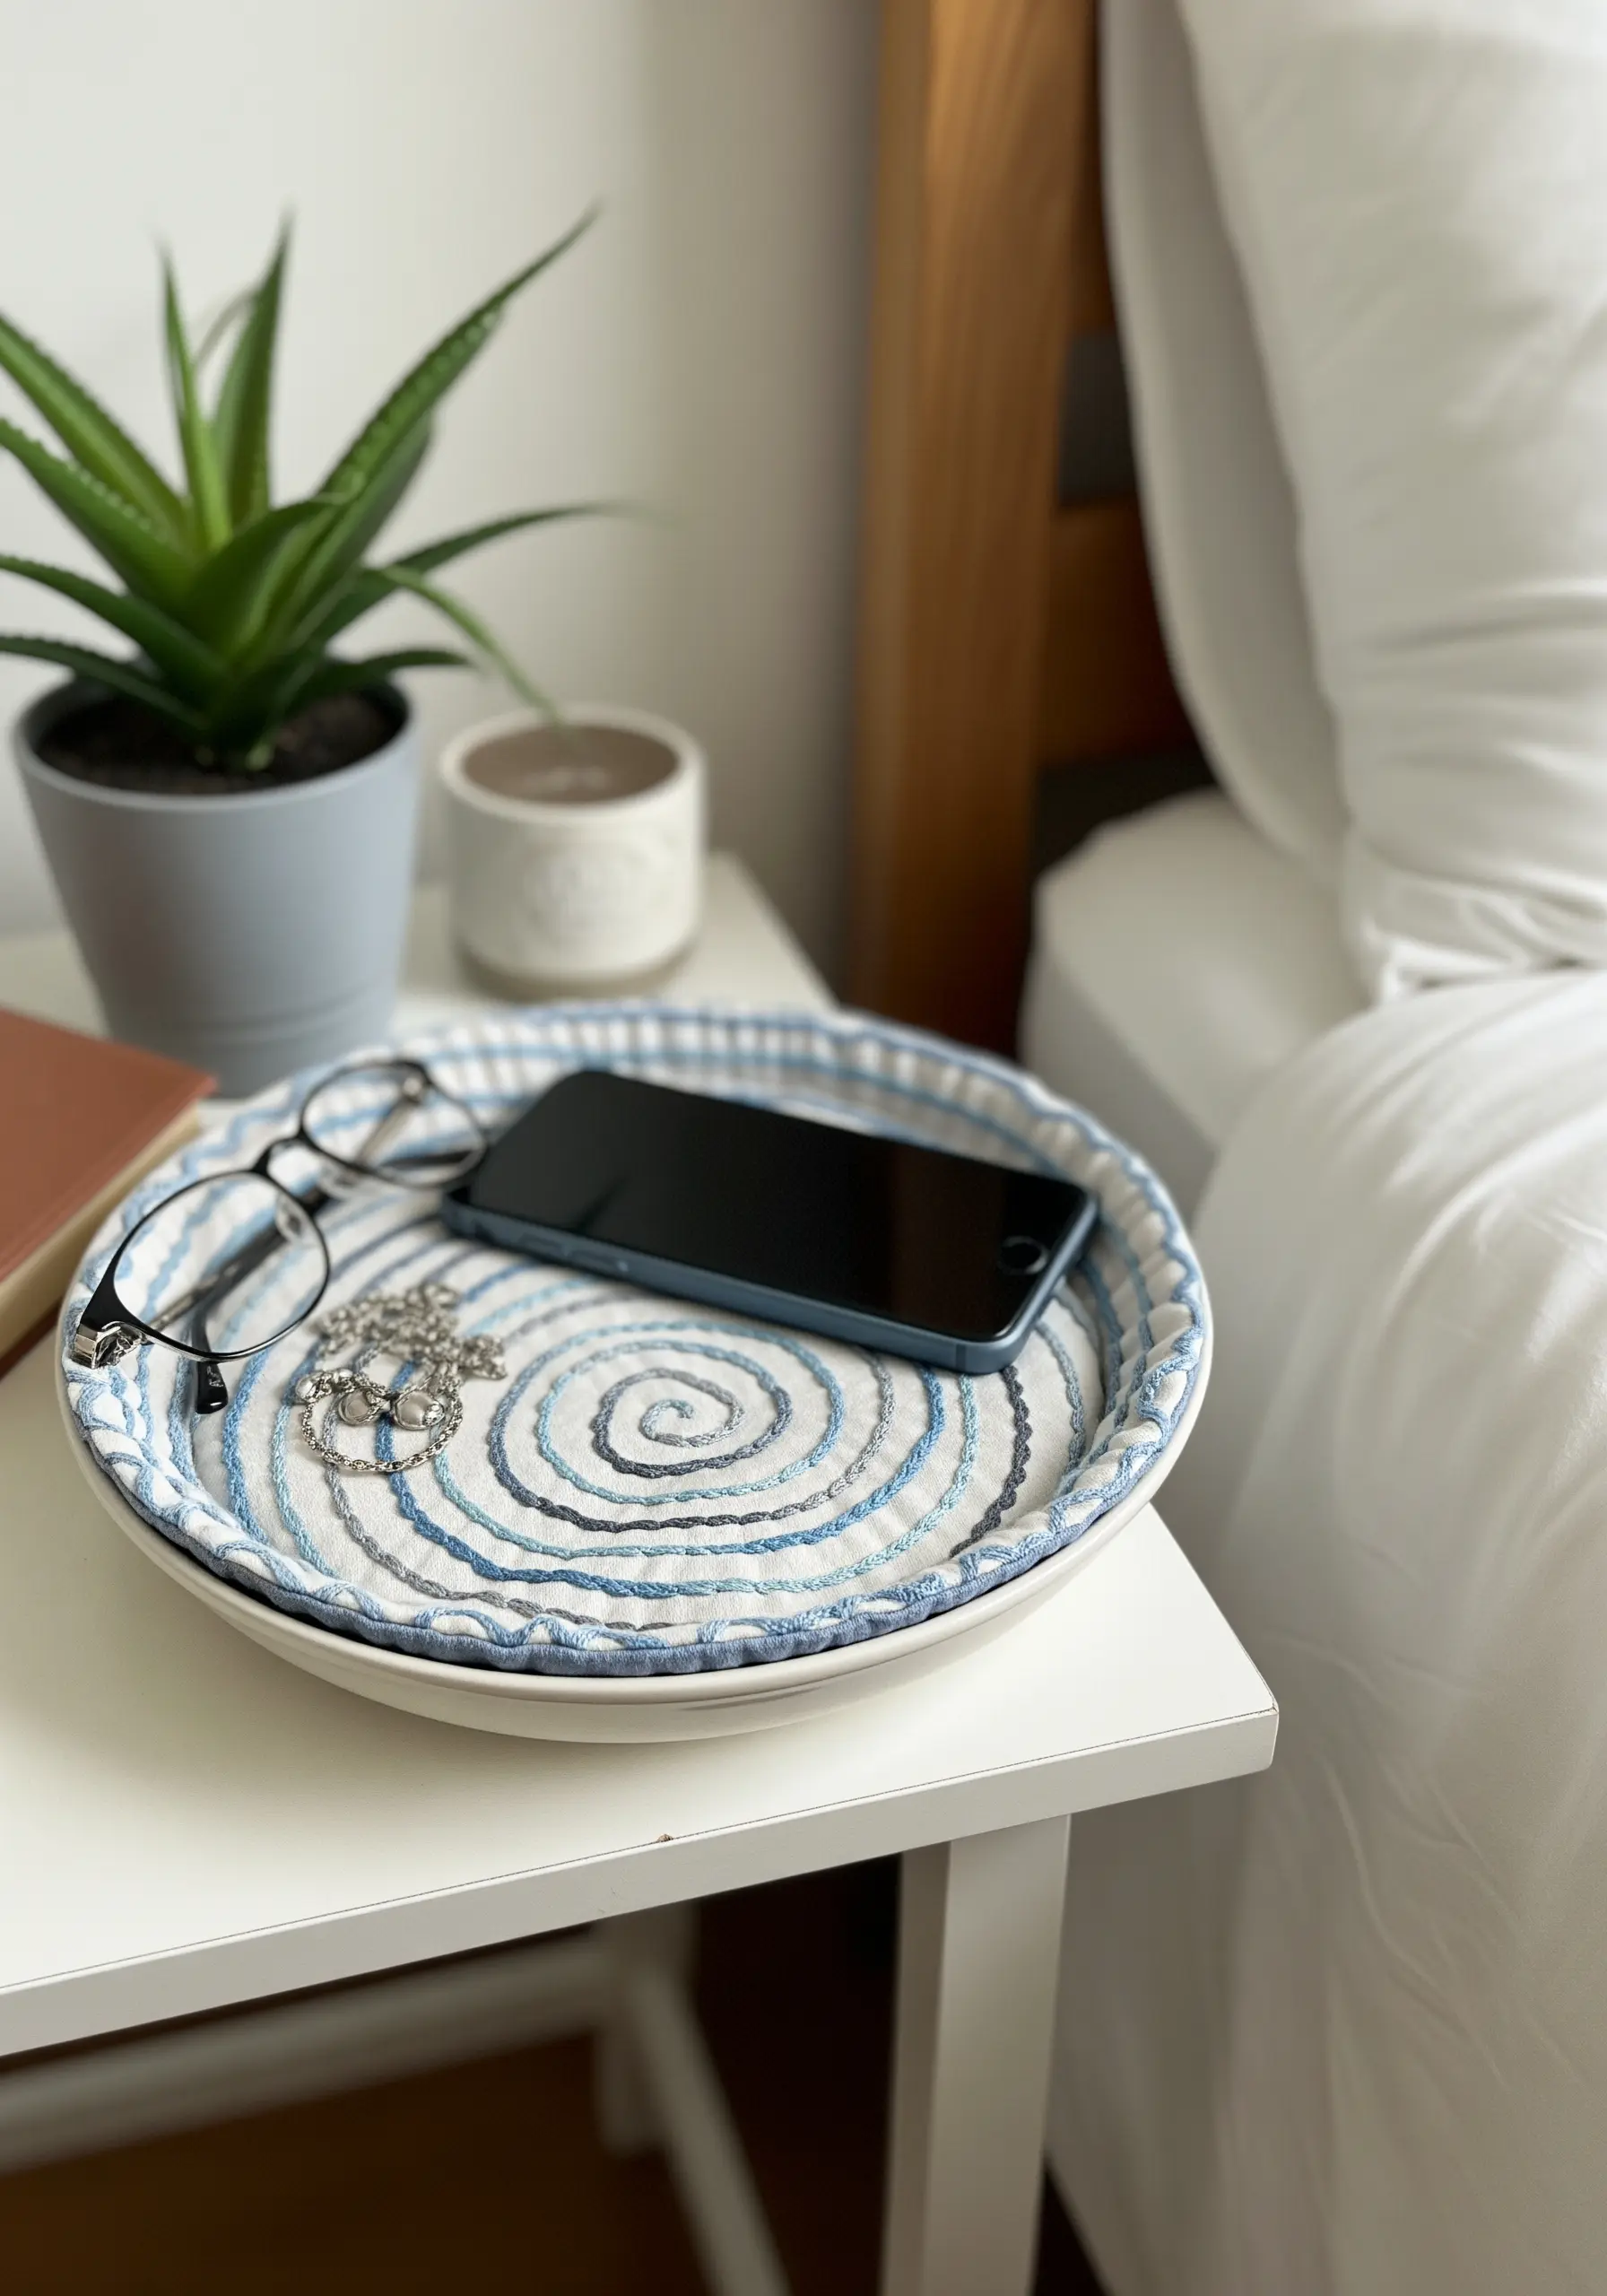
Create a beautiful and functional catch-all tray for your nightstand using rope and fabric scraps.
Tightly wrap a thick cotton rope with thin strips of fabric in your chosen color palette. As you wrap, coil the rope into a flat spiral, using a needle and thread to stitch the coils together from the back.
Continue coiling upwards to form the sides of the tray. This technique transforms basic materials into a sturdy, textural, and useful object.
It’s one of those tiny artistic home touches that make a big statement.
32. Organize Your Closet with Embroidered Dividers
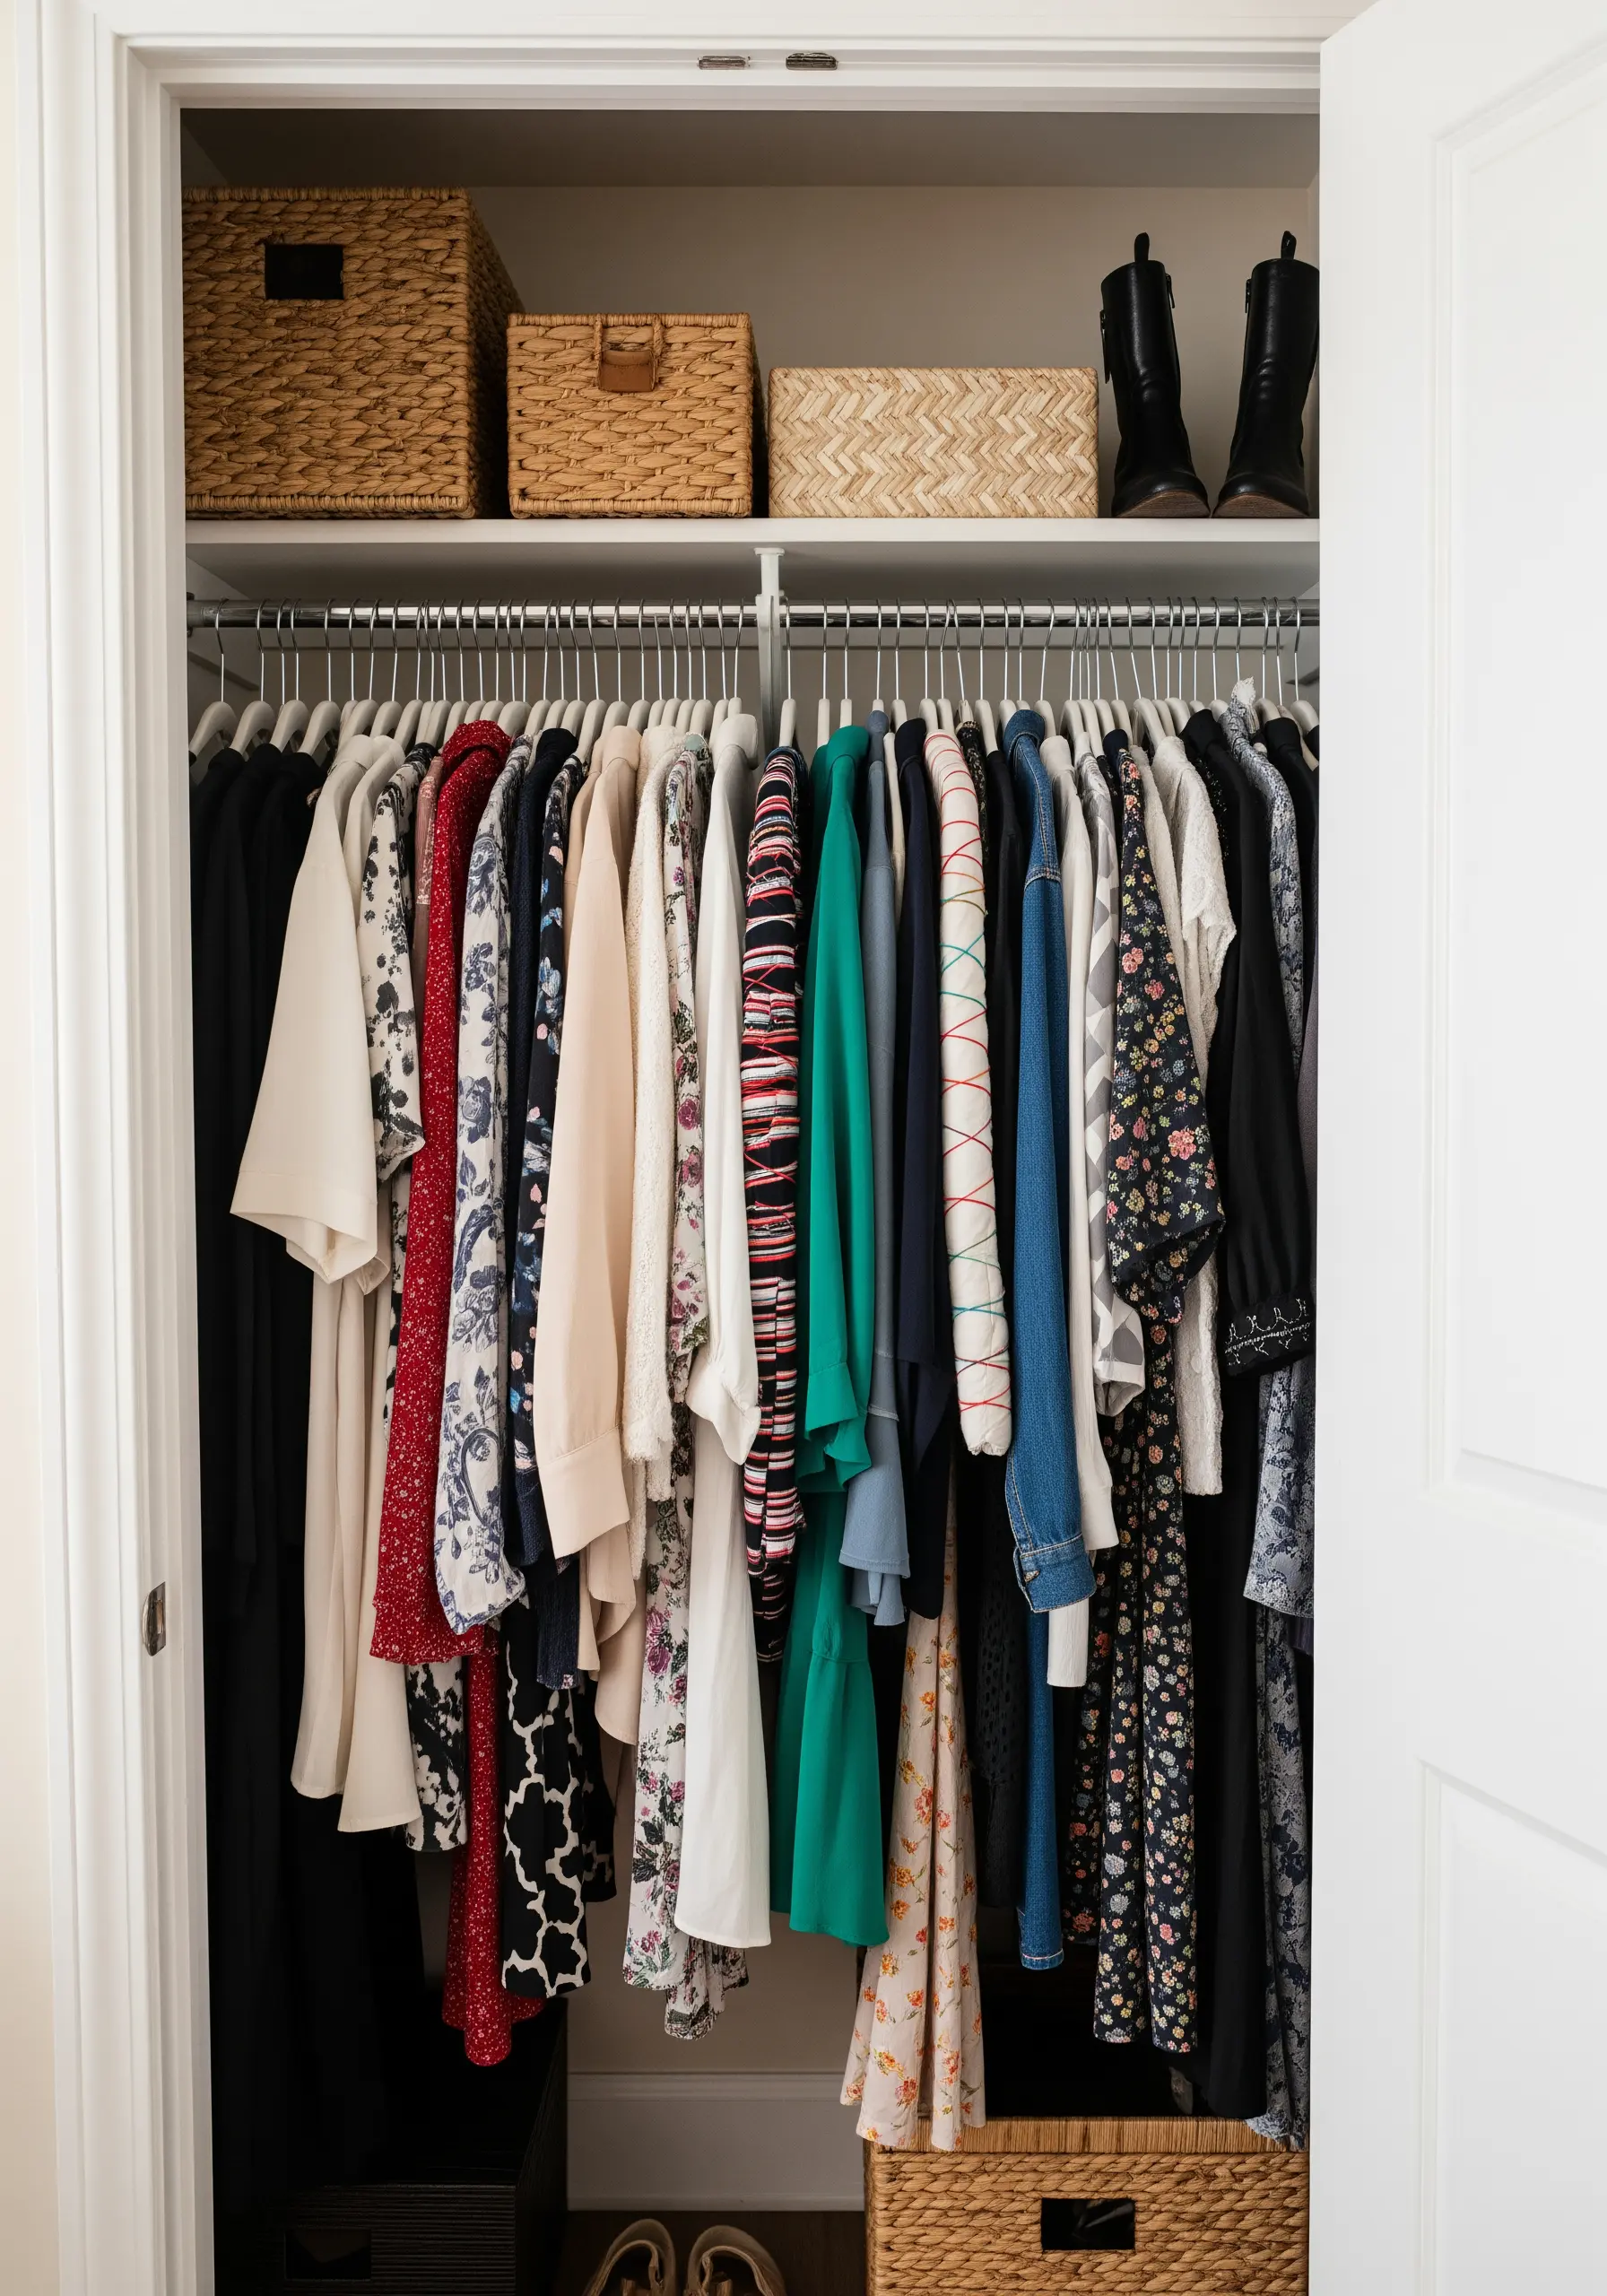
Bring order and a touch of beauty to your closet by creating custom embroidered clothing dividers.
Use sturdy materials like felt, heavy cardstock, or thin pieces of wood as your base. Cut them into a shape that can hang on your closet rod.
Stitch simple labels like ‘Work,’ ‘Weekend,’ ‘Summer,’ or ‘Winter’ directly onto the felt, or embroider them on linen patches to glue onto the other materials.
This is a project where even simple mini embroidery patterns for absolute beginners can have a huge impact on daily organization.
33. Create a Sculptural Sun with Chunky Yarn
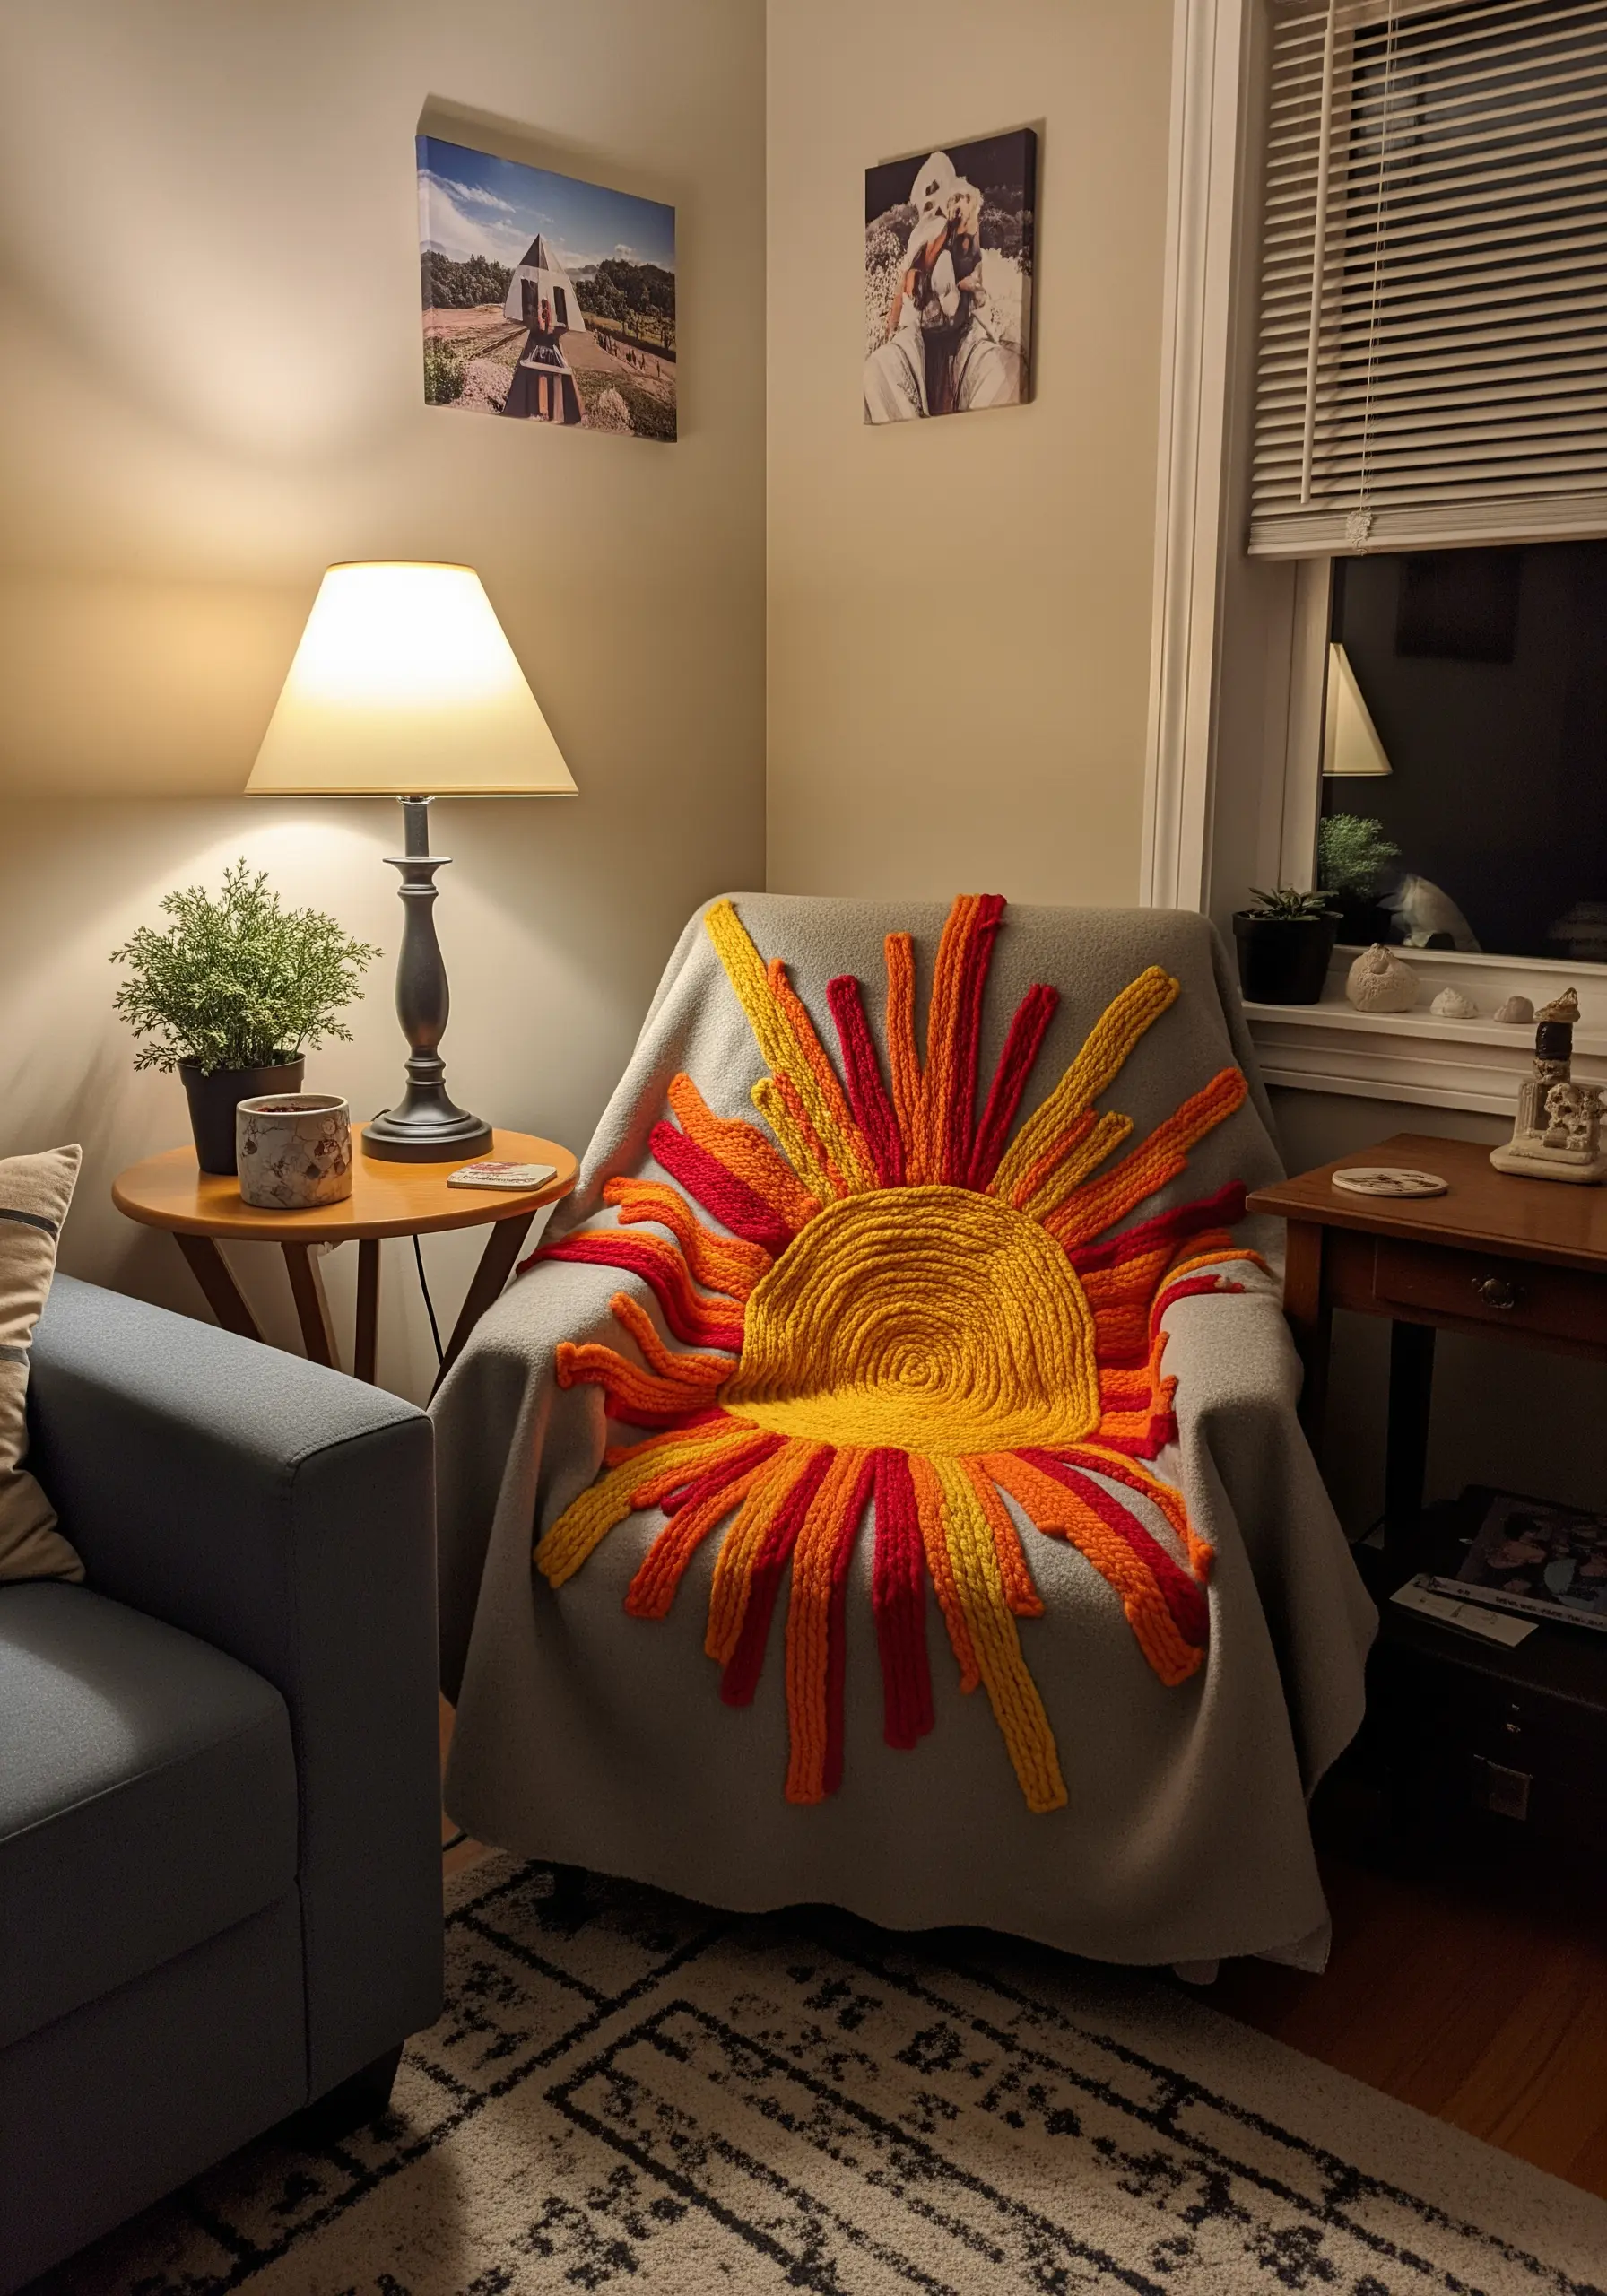
Make a bold, optimistic statement by adding a large, textural yarn sun to a plain throw blanket.
Create the center of the sun by coiling and couching thick, yellow yarn in a spiral. For the rays, use a technique called ‘stuffed appliqué’ or simply couch long, straight pieces of yarn radiating outwards.
Use a mix of oranges, reds, and yellows to create a vibrant, gradient effect. This high-texture piece adds warmth and joy to any corner of your room.
It proves that stunning yarn wall art projects don’t have to stay on the wall.


