
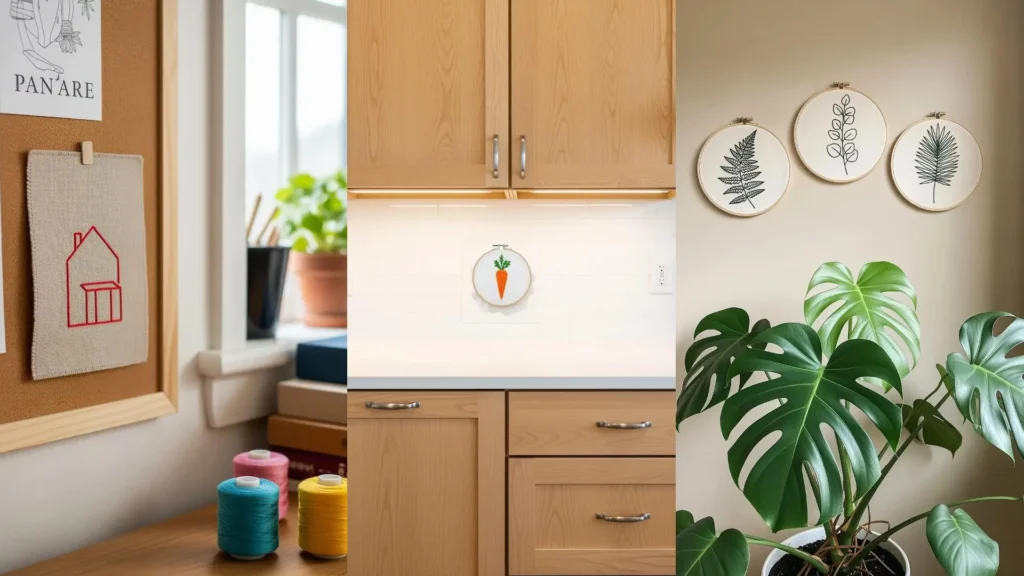
There is a quiet power in creating something beautiful with your own hands. You already know the simple joy of pulling thread through fabric, but perhaps you’re wondering how to translate that feeling into art that feels polished, modern, and truly *you*.
The secret isn’t in learning dozens of complicated stitches. Instead, it lies in the small, intentional choices you make—adjusting your thread count for a finer line, changing your stitch direction to catch the light, or selecting a fabric that lets your design breathe.
Here, you’ll find ideas built on subtle techniques that offer visible results. Think of them not as rules, but as gentle suggestions to help you transform a blank wall, a quiet corner, or an empty hoop into a small pocket of minimalist beauty.
1. Render Texture with French Knots
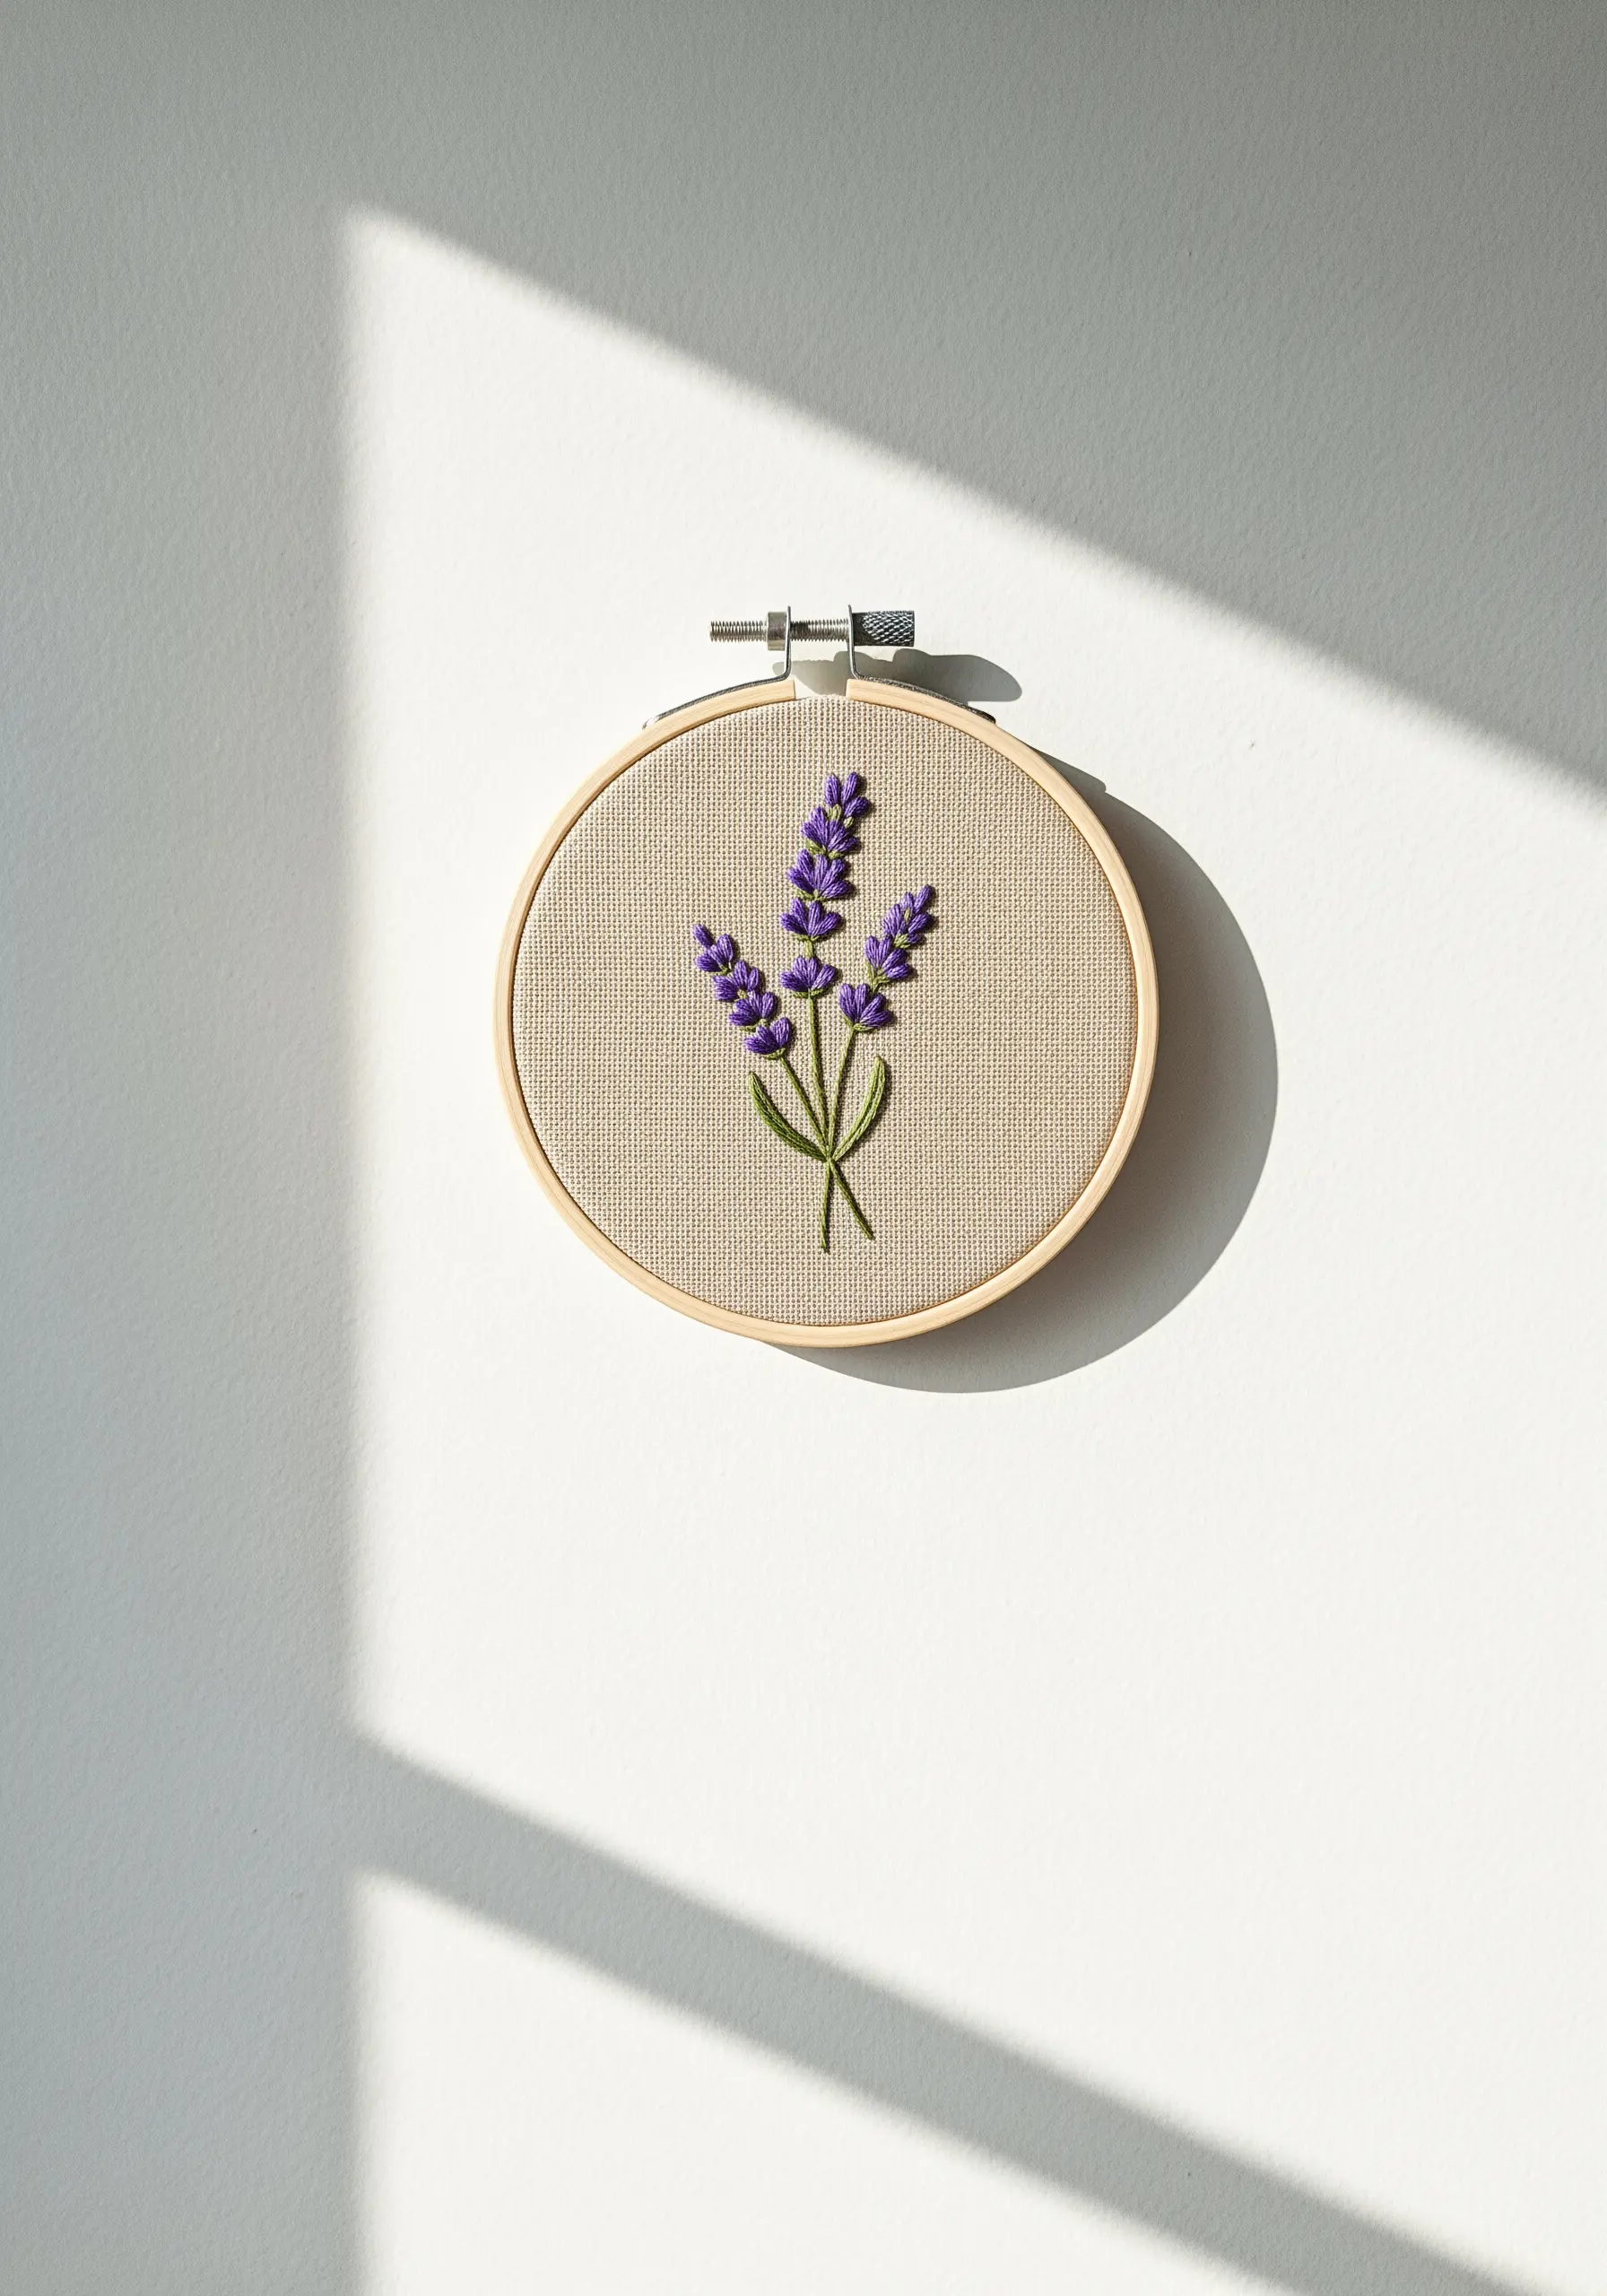
Create plush, dimensional lavender buds by clustering French knots at the top of each stalk.
Use a single wrap for delicate knots and two wraps for fuller, more prominent buds, varying them to mimic natural growth.
For the stems, a simple stem stitch using two strands of floss provides the perfect weight and texture against the open-weave linen.
This contrast between the smooth stems and bumpy knots is what gives medicinal herb embroidery designs their realistic, tactile quality.
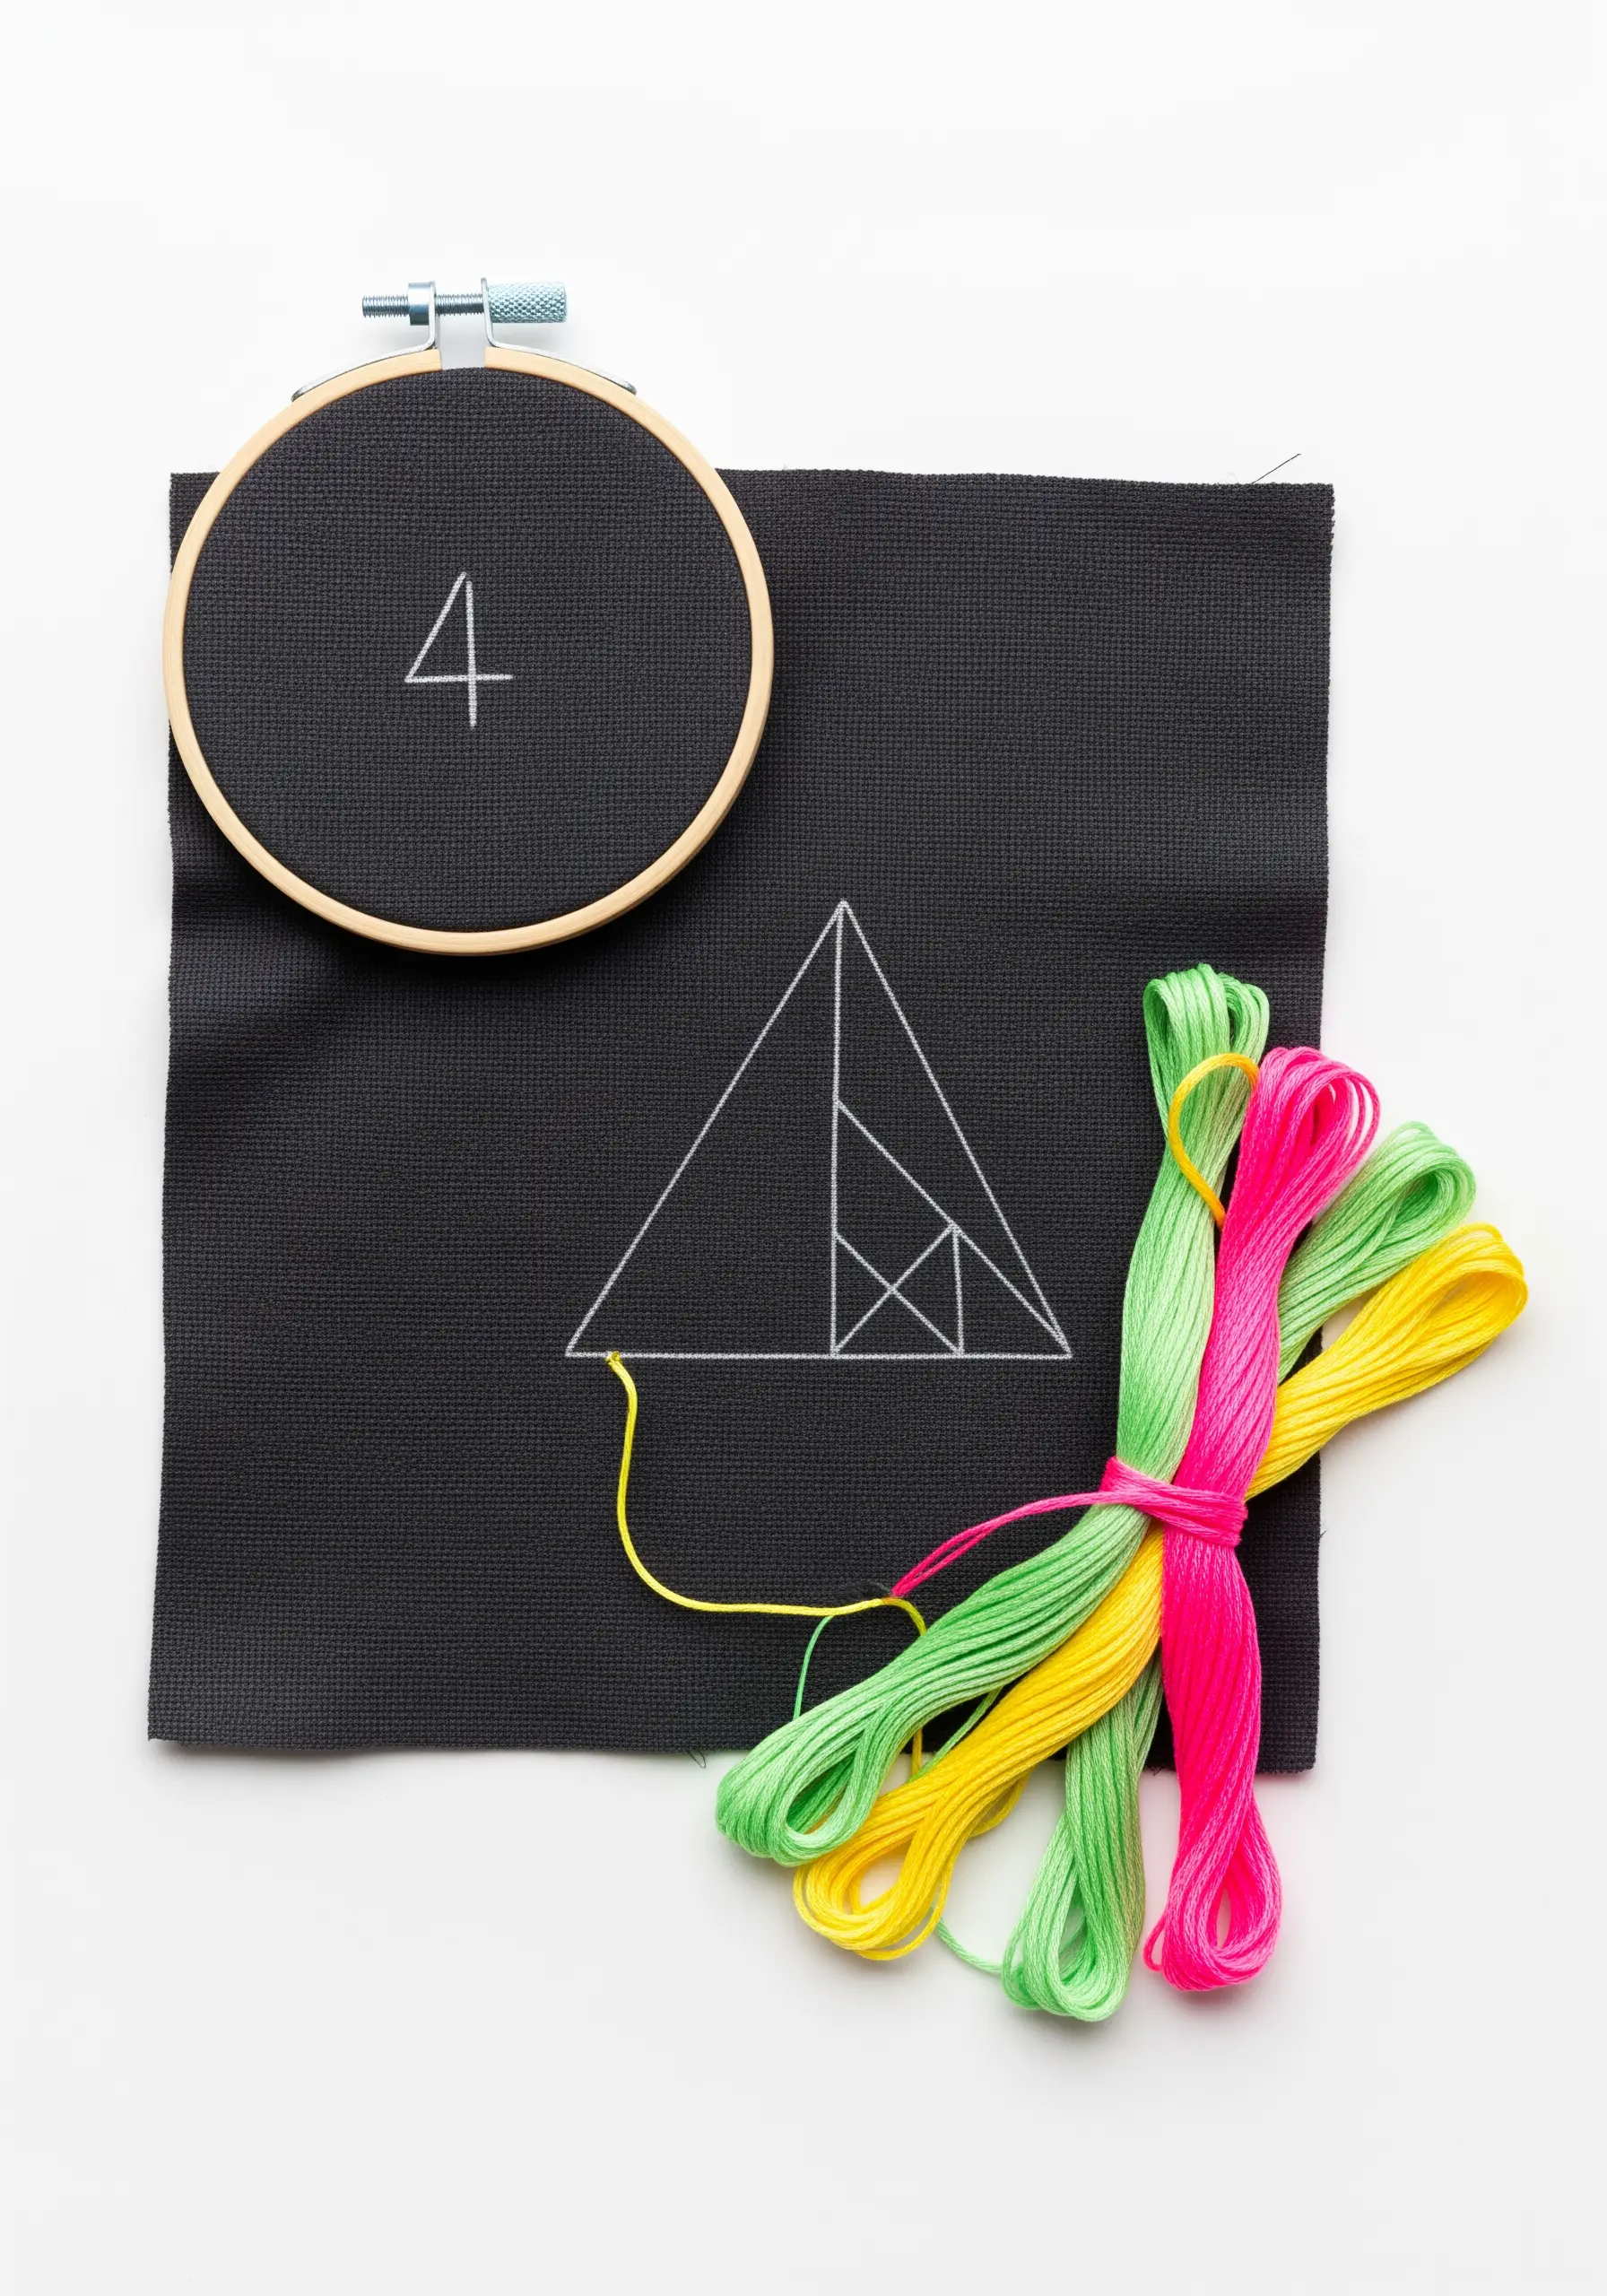
2. Master Precision with Metallic Thread
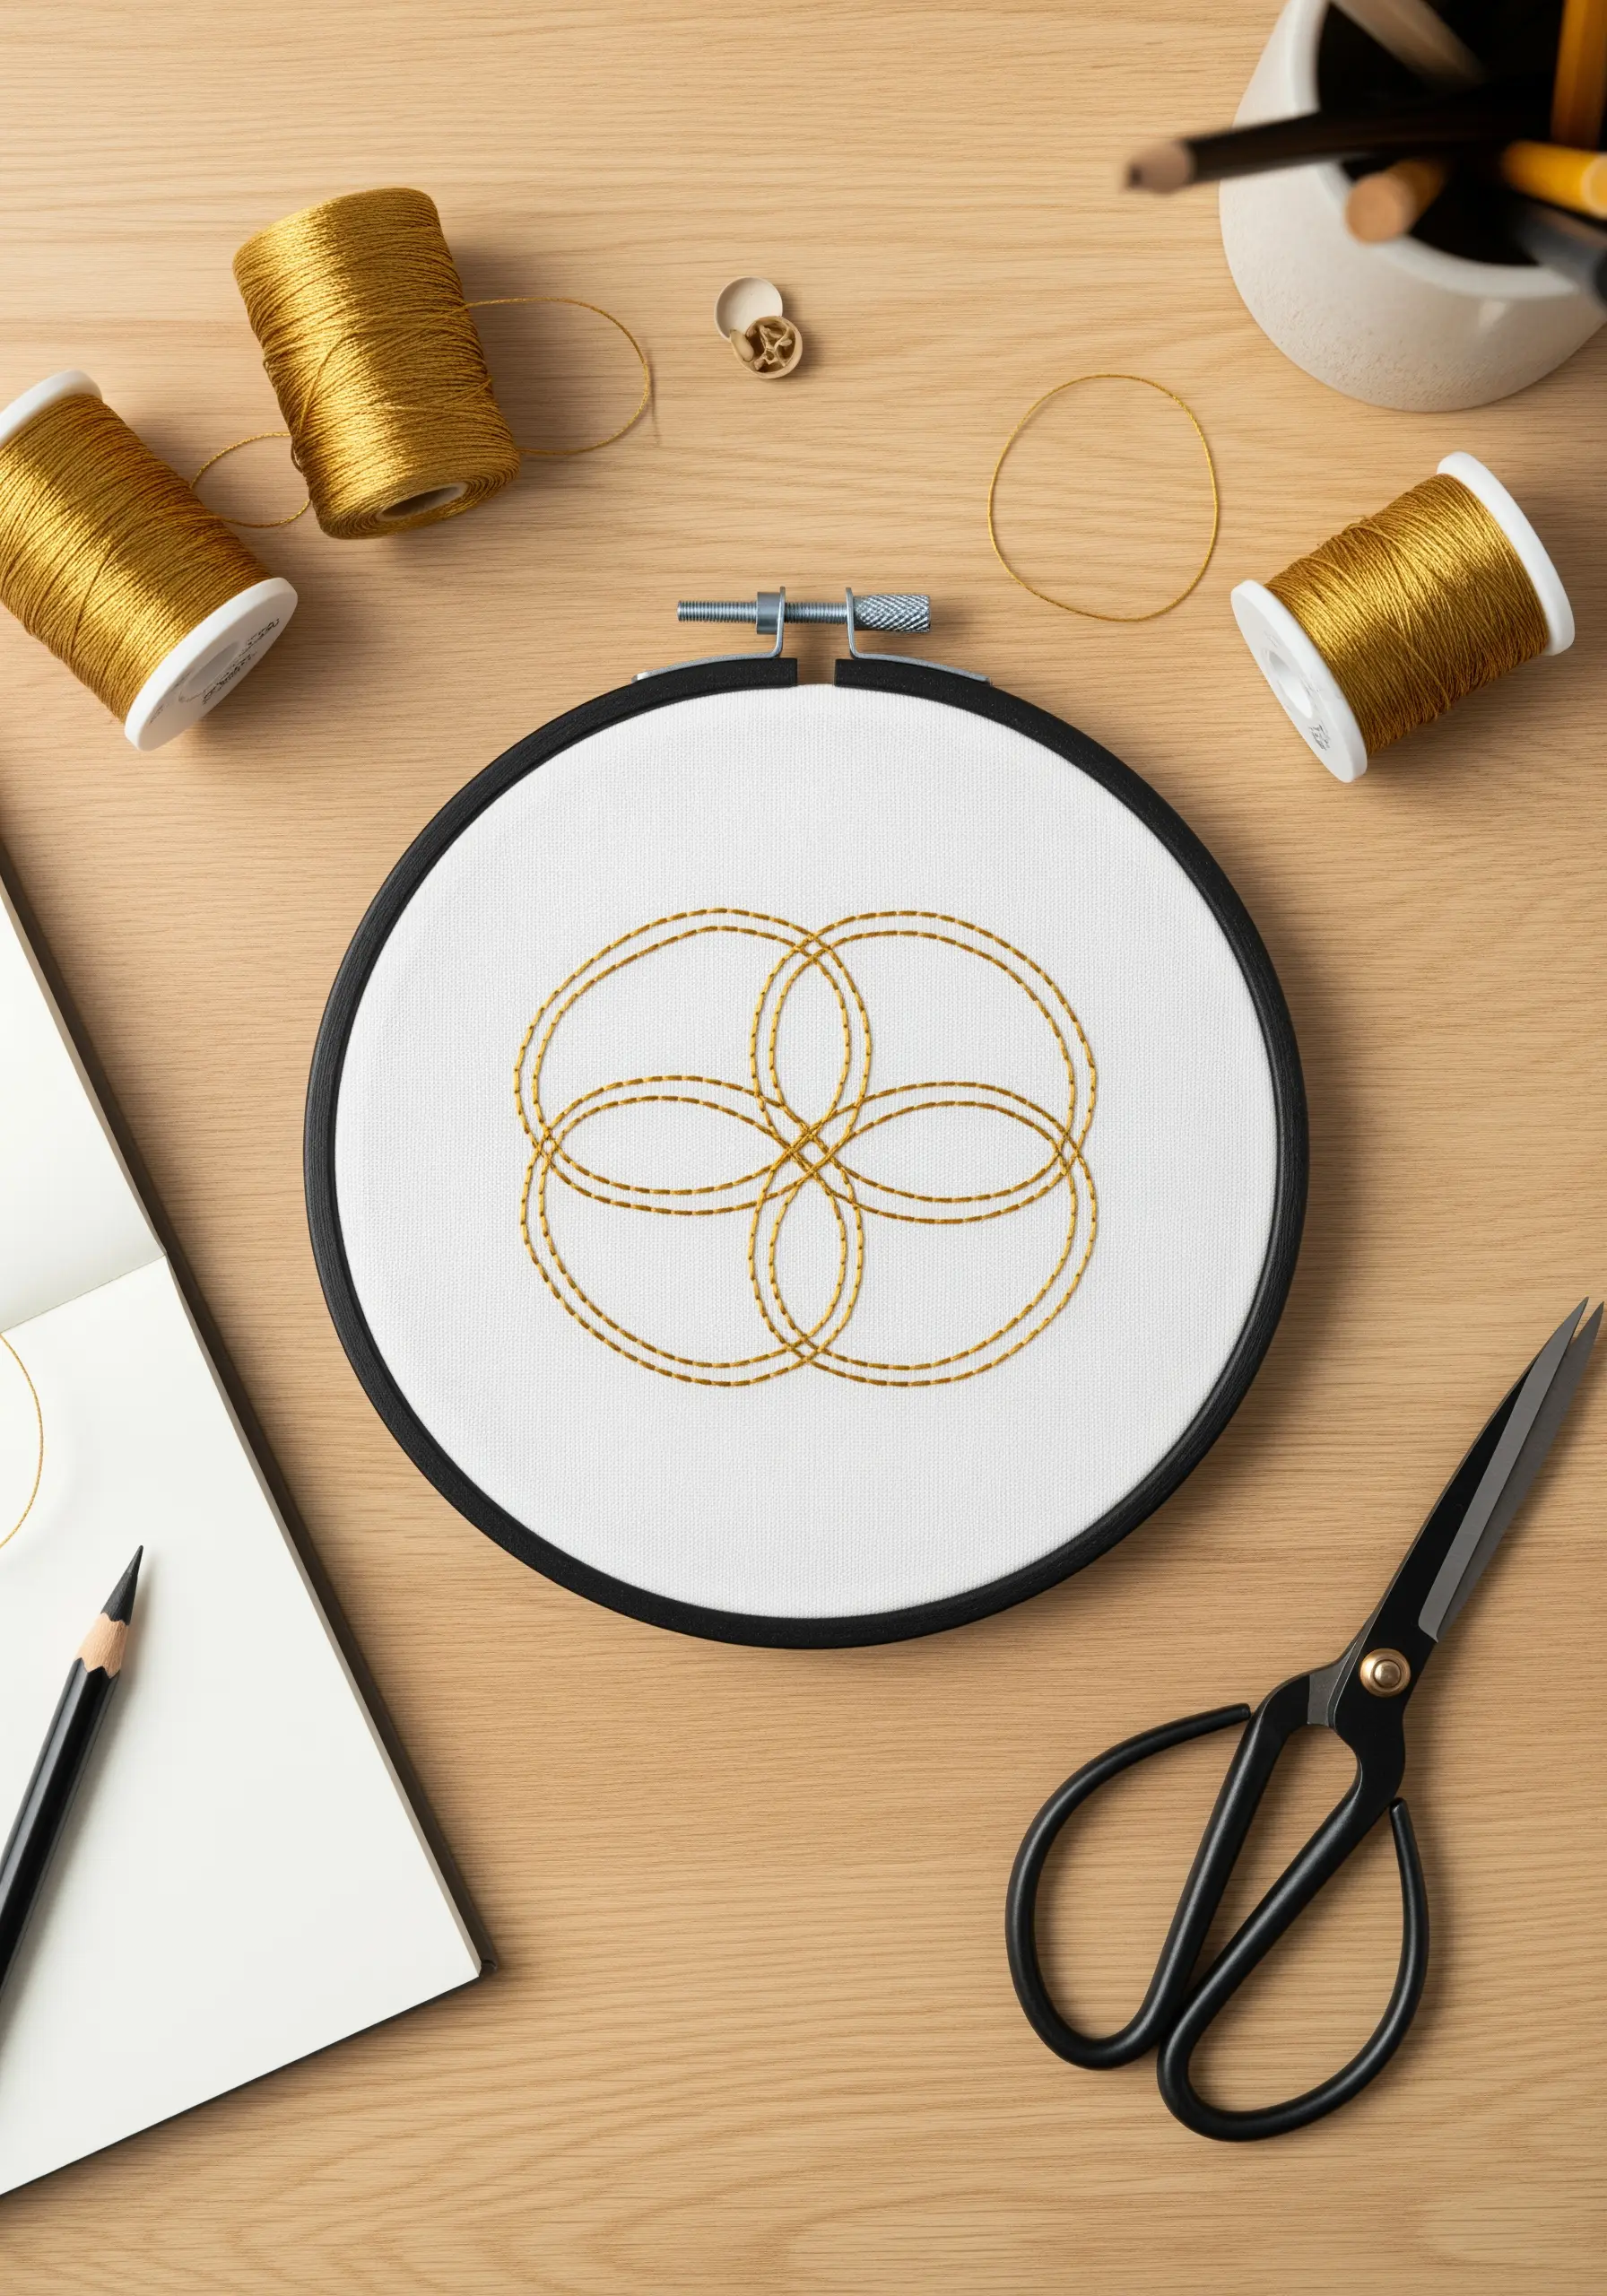
To achieve flawless geometric shapes, stitch your running stitch in shorter, more deliberate segments.
Metallic thread can unravel, so work with a shorter length than you normally would—about 12 inches—to minimize friction and fraying.
A sharp, thin needle will also glide through the fabric more easily, preventing snags and keeping your lines crisp.
This method transforms a simple running stitch into a clean, graphic statement, perfect for modern geometric thread art ideas that feel both elegant and precise.
3. Frame Line Art as Minimalist Decor
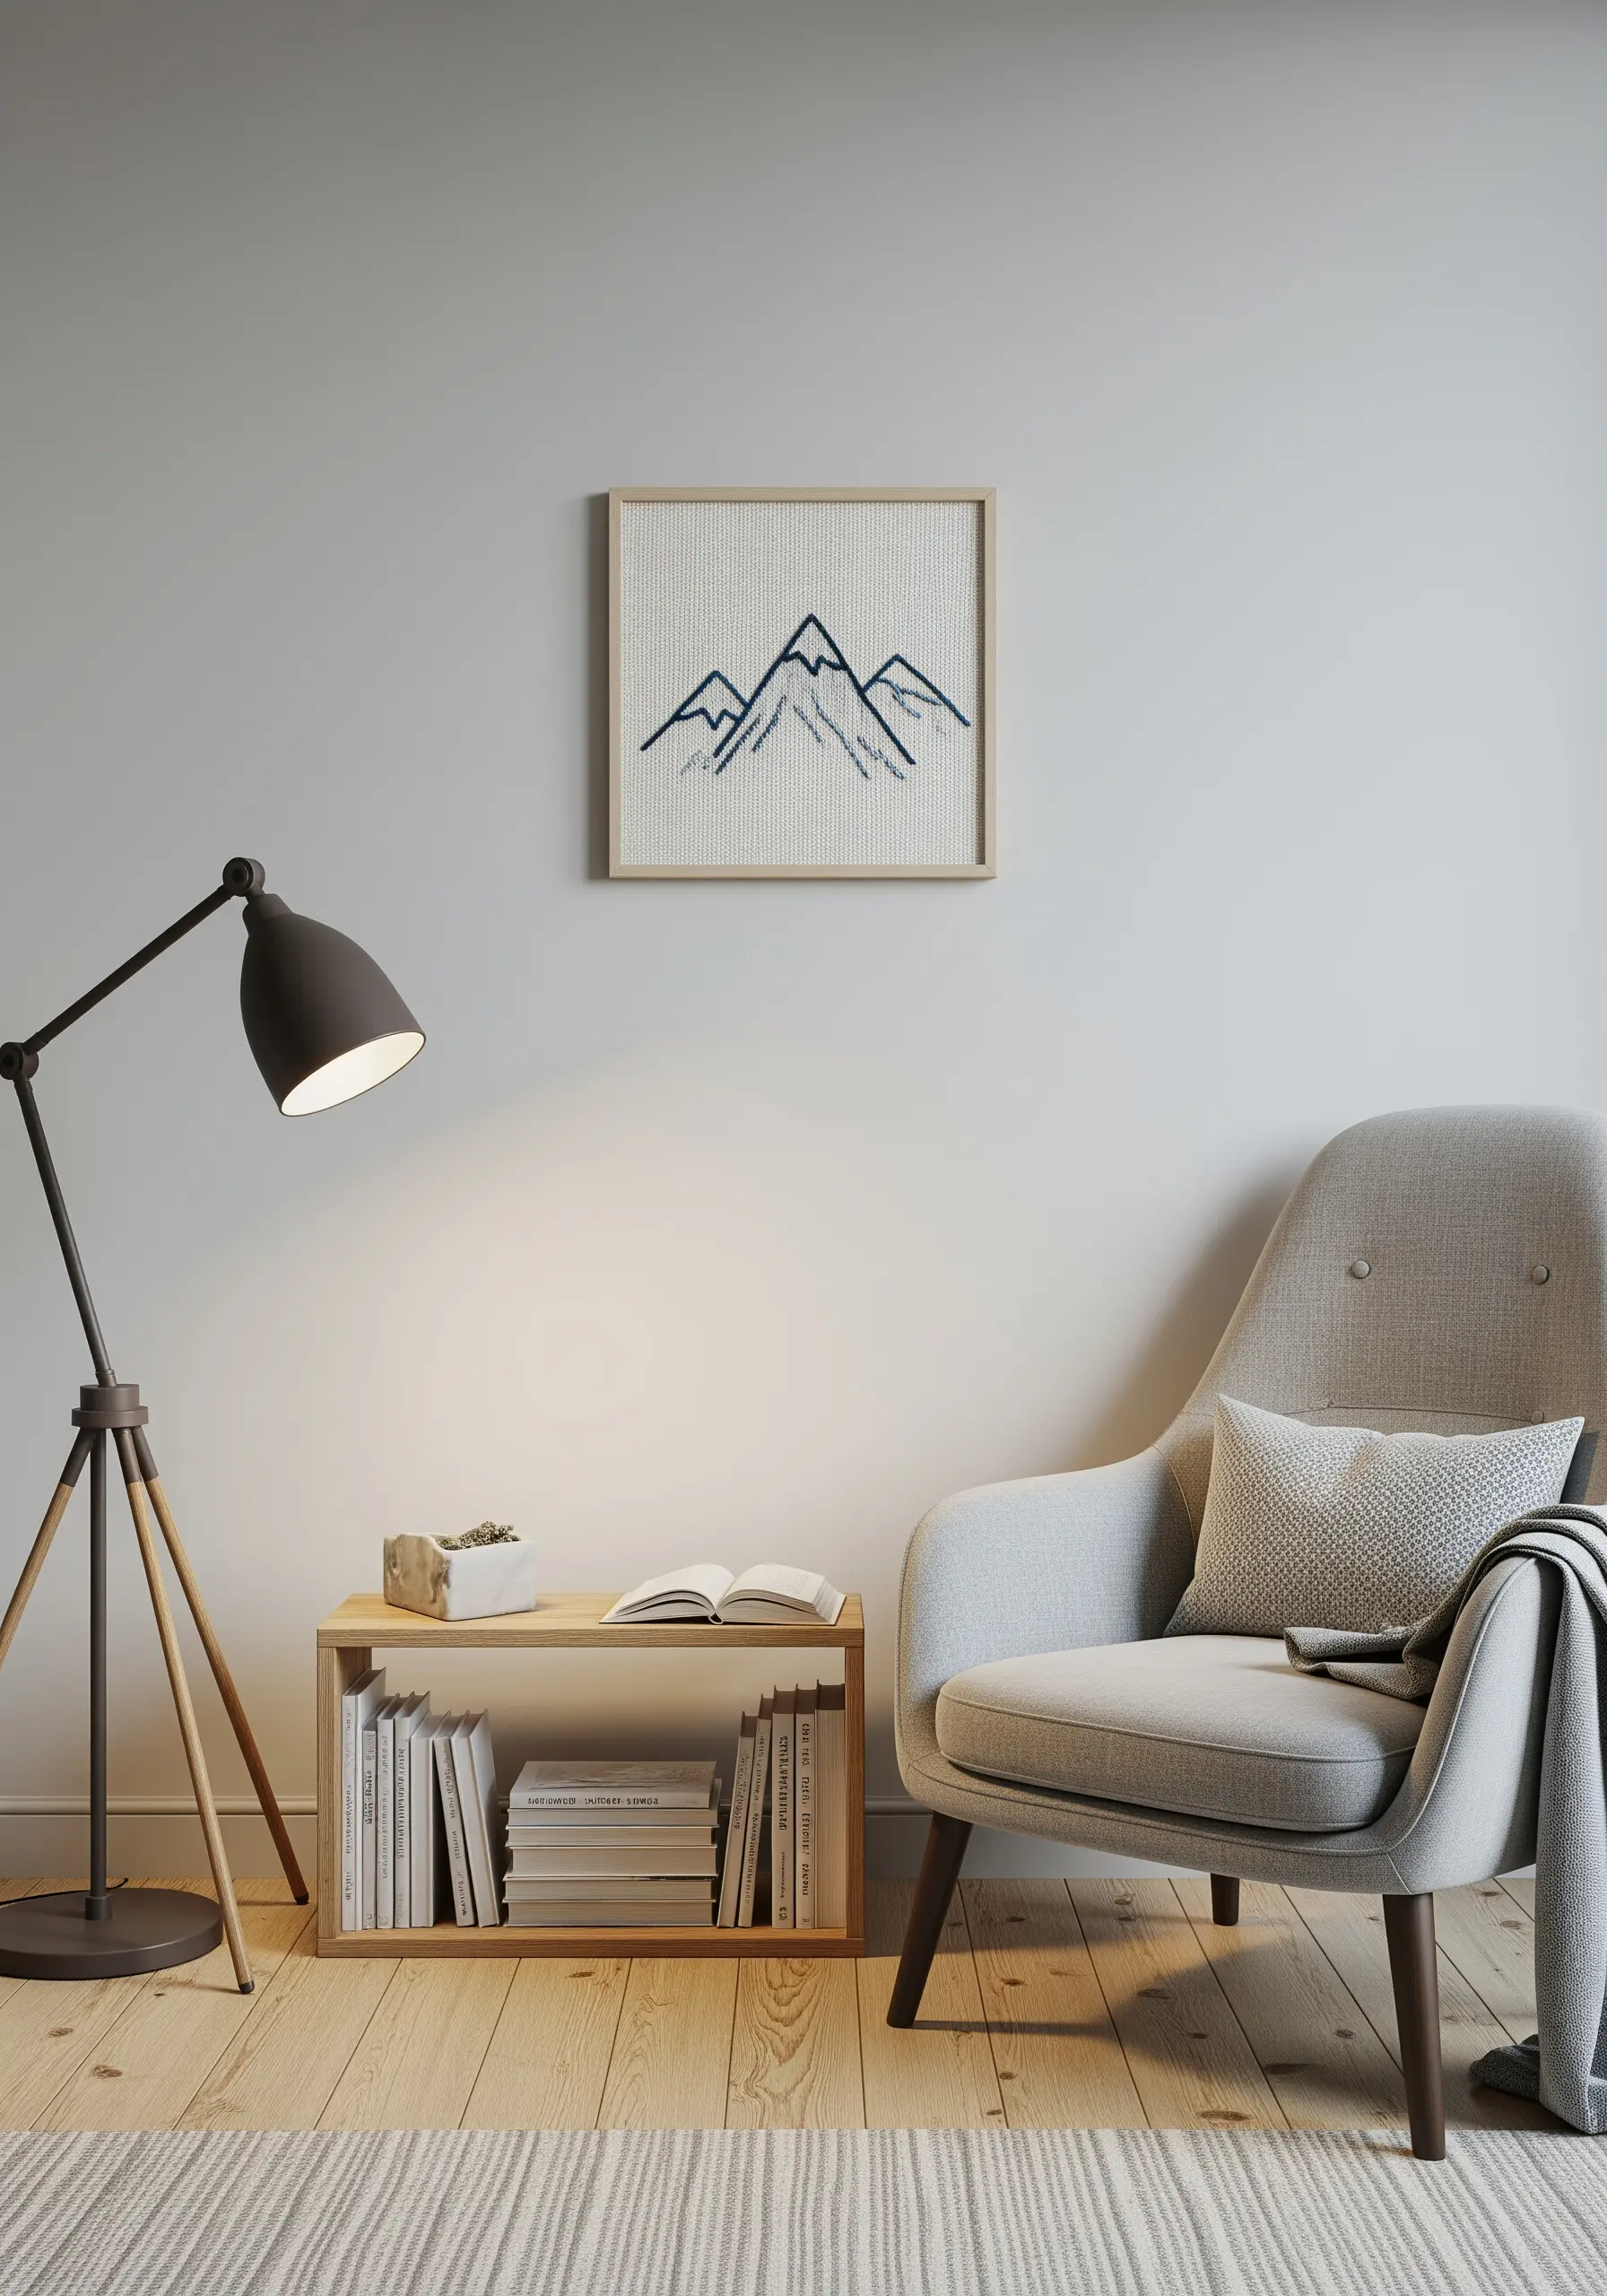
Create a graphic mountain range using only backstitch or stem stitch in varying lengths.
The key to this design’s power is the negative space—allow the unstitched fabric to define the shapes as much as the thread does.
Use a high-contrast palette, like deep navy on off-white Aida cloth, to make the linework feel bold and intentional.
When finished, frame it in a simple wood frame to elevate the piece from a hoop project to intentional wall art, enhancing your mountain landscape thread painting techniques.
4. Create Depth with Monochromatic Texture
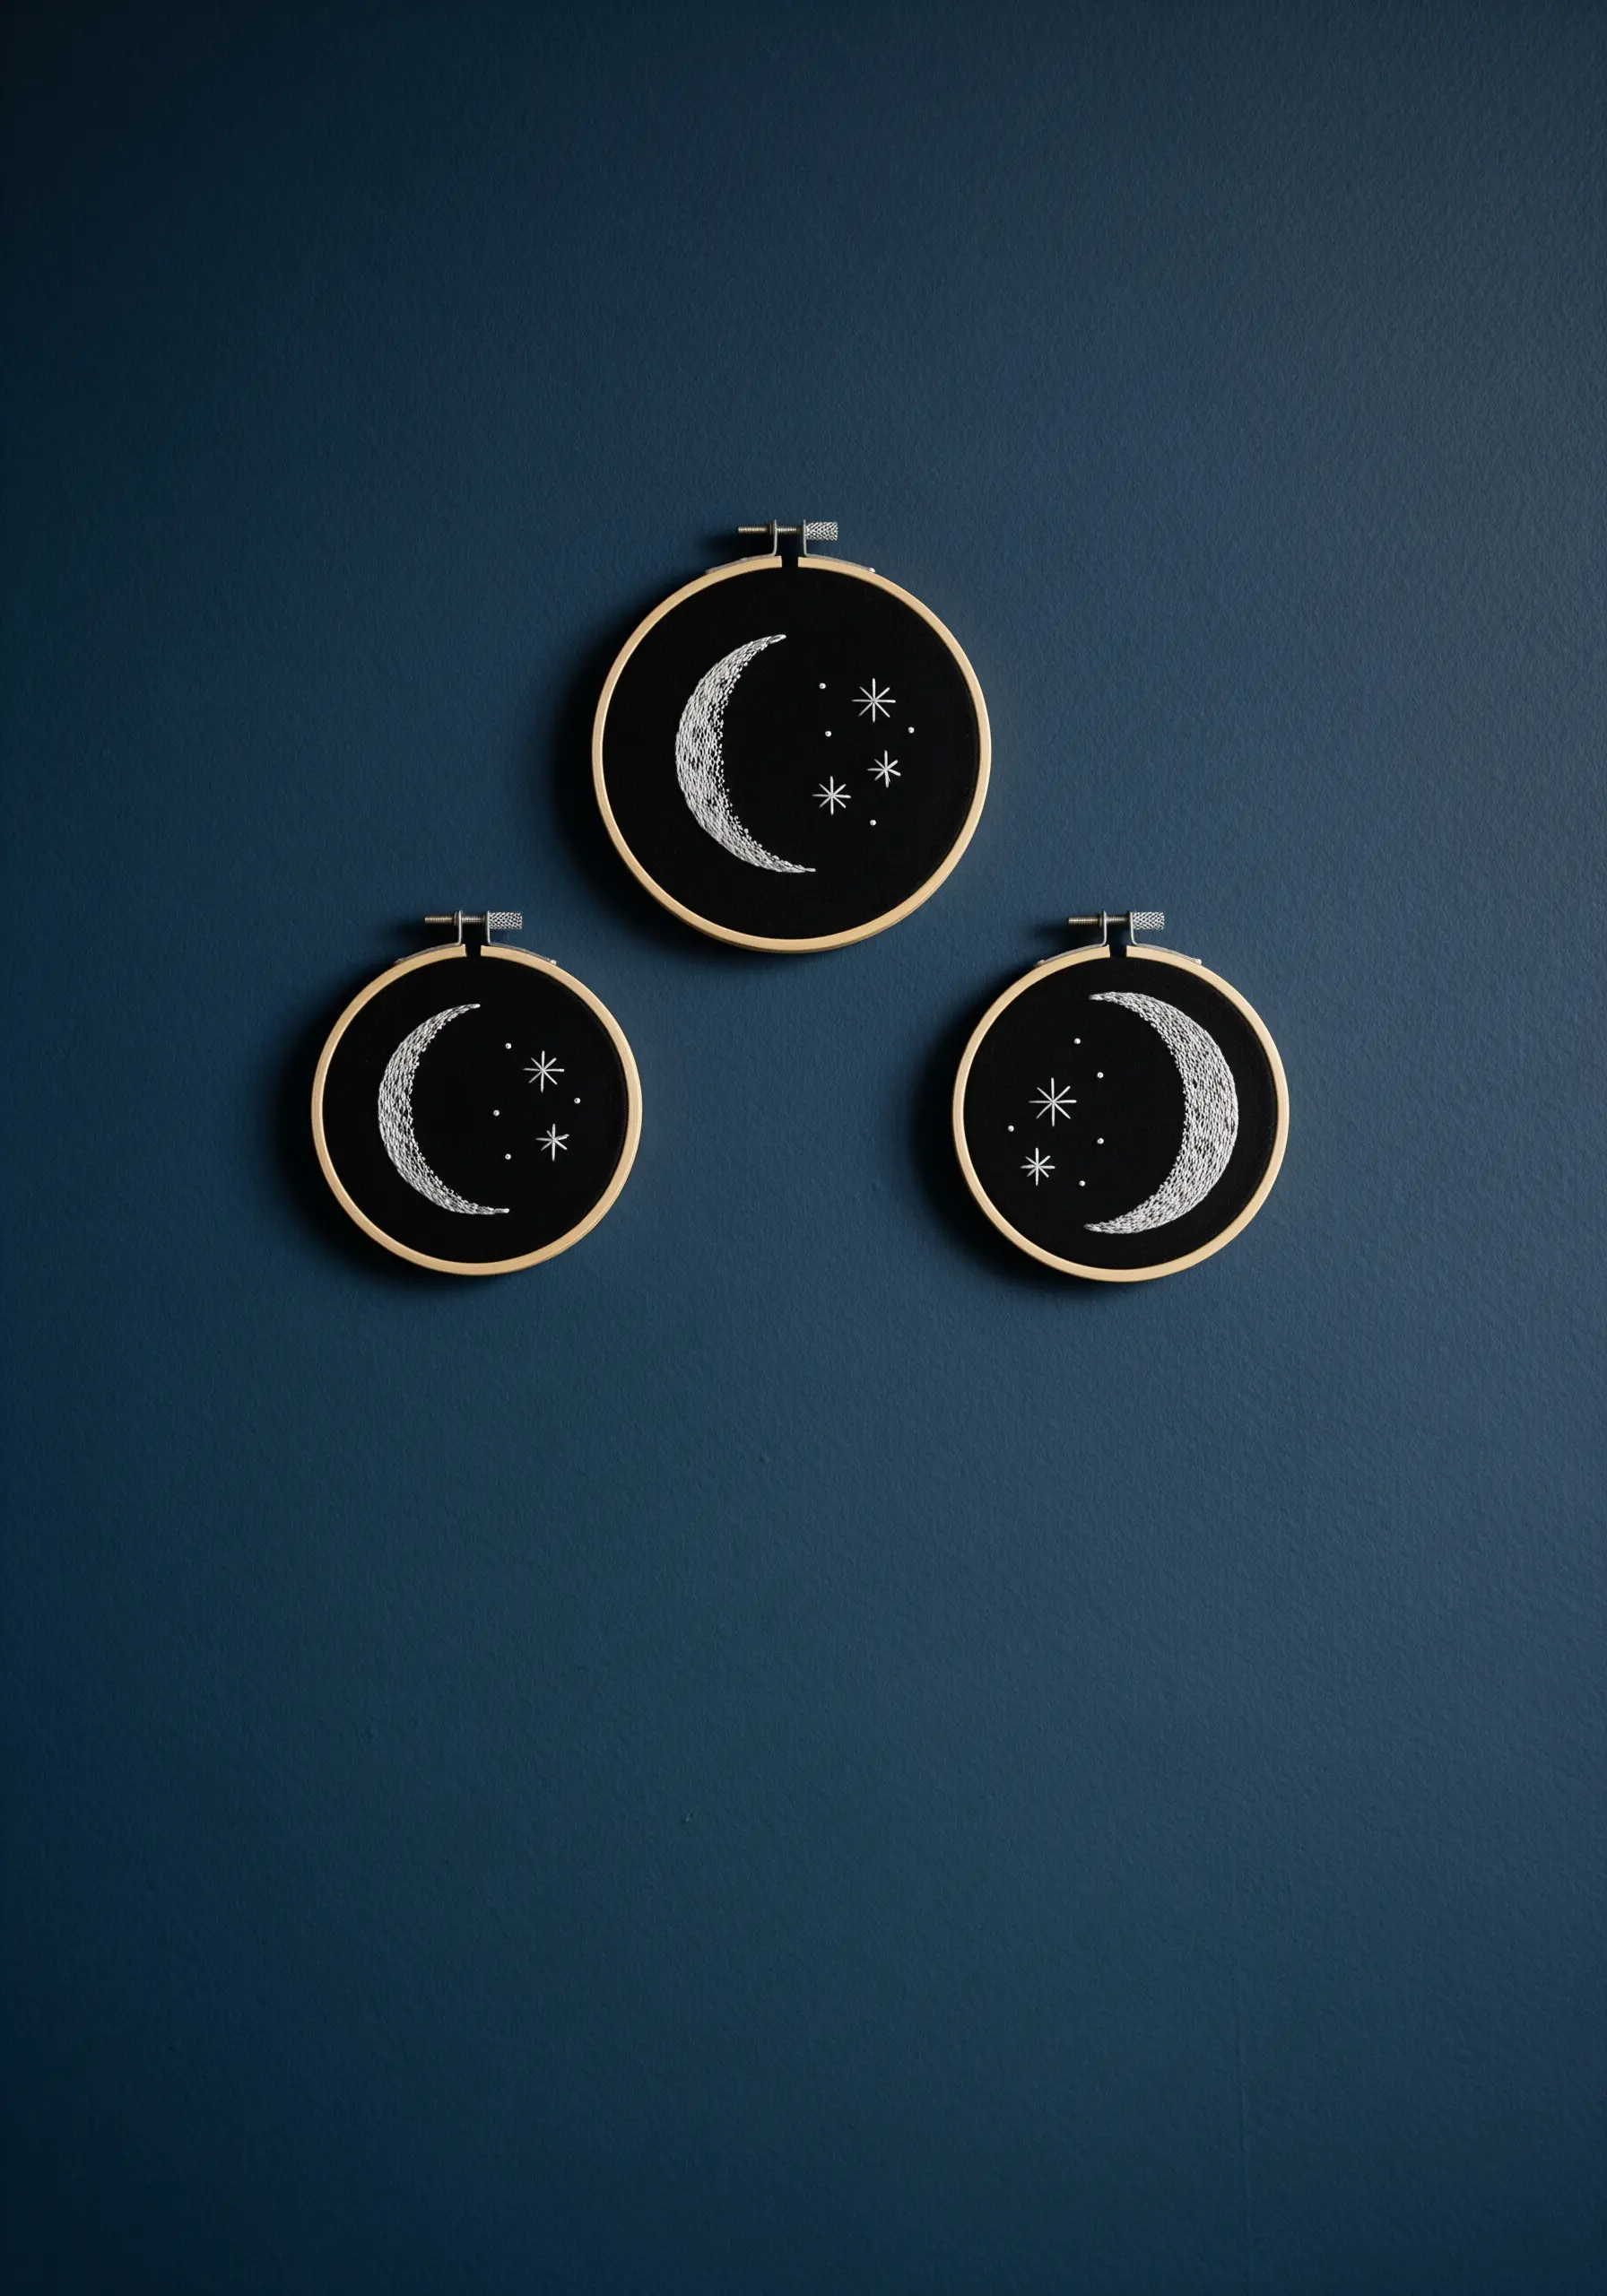
Use a single color of thread on a dark, contrasting fabric to explore texture without overwhelming the design.
Fill the crescent moon shapes with directional satin stitches or dense seed stitches to mimic the moon’s cratered surface.
This technique, known as thread painting, creates a sense of depth and light.
Group several hoops of varying sizes together to create a cohesive celestial gallery wall, turning your wall into a collection of tiny night sky embroidery designs.
5. Define Shapes with a Bold Whipped Backstitch
For clean, continuous curves in line art, first lay down a simple backstitch.
Then, without piercing the fabric, whip the thread around each backstitch to create a smooth, cord-like line that eliminates the segmented look.
Use all six strands of cotton floss for a bold, graphic weight that stands out against the soft background.
This technique elevates minimalist line art embroidery patterns, making them feel fluid and intentional.
6. Modernize Cross-Stitch with Graphic Motifs
Reimagine cross-stitch beyond traditional samplers by using it for bold, graphic fills.
Choose a simple, iconic shape and a vibrant color palette to create a piece that feels contemporary and fresh.
The inherent grid of Aida fabric makes it perfect for pixel-art-inspired designs.
This is an excellent way to explore iconic pop art stitch motifs with a meditative, rhythmic technique.
7. Complement Your Design with a Shaped Hoop
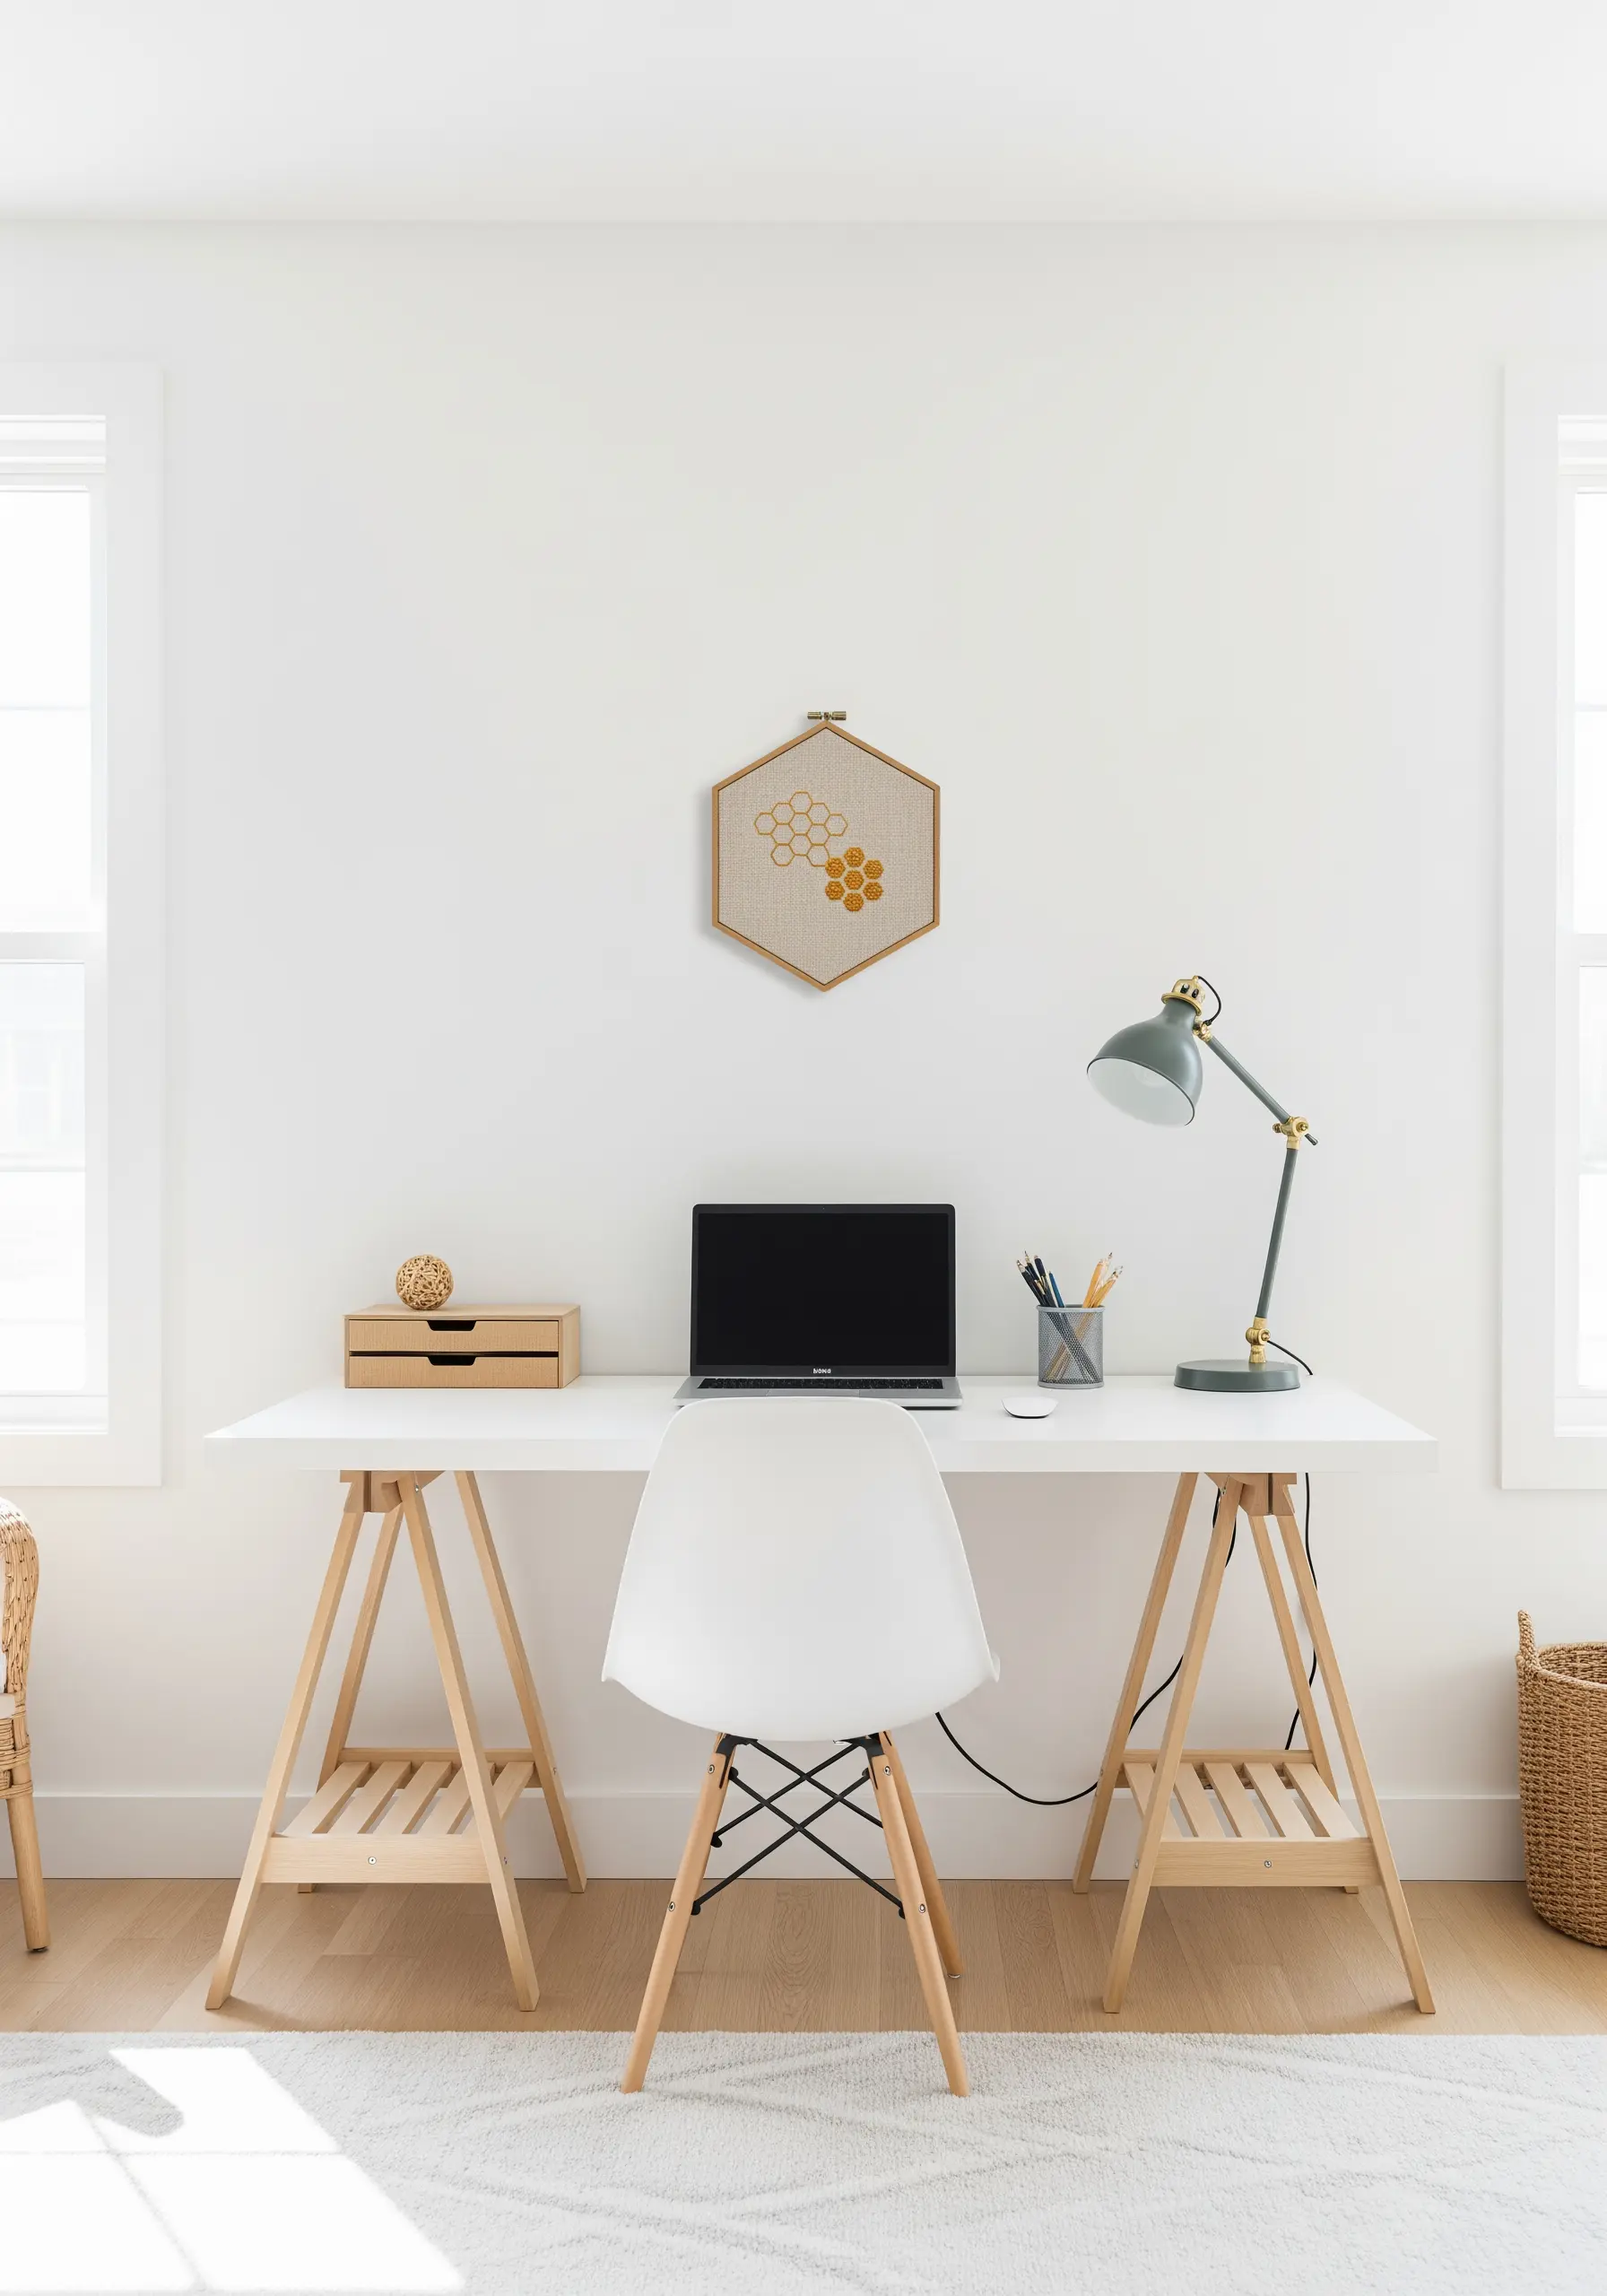
Let the frame become part of the art by choosing a hoop that echoes your motif’s shape.
A hexagonal hoop perfectly complements the geometric structure of a honeycomb pattern, creating a cohesive and polished final piece.
For this clean look, use a simple backstitch with three strands of floss to keep the lines defined but not bulky.
This approach is perfect for minimalist stitch designs that fit in the palm of your hand and make a big impact.
8. Suggest Movement with Detached Stitches
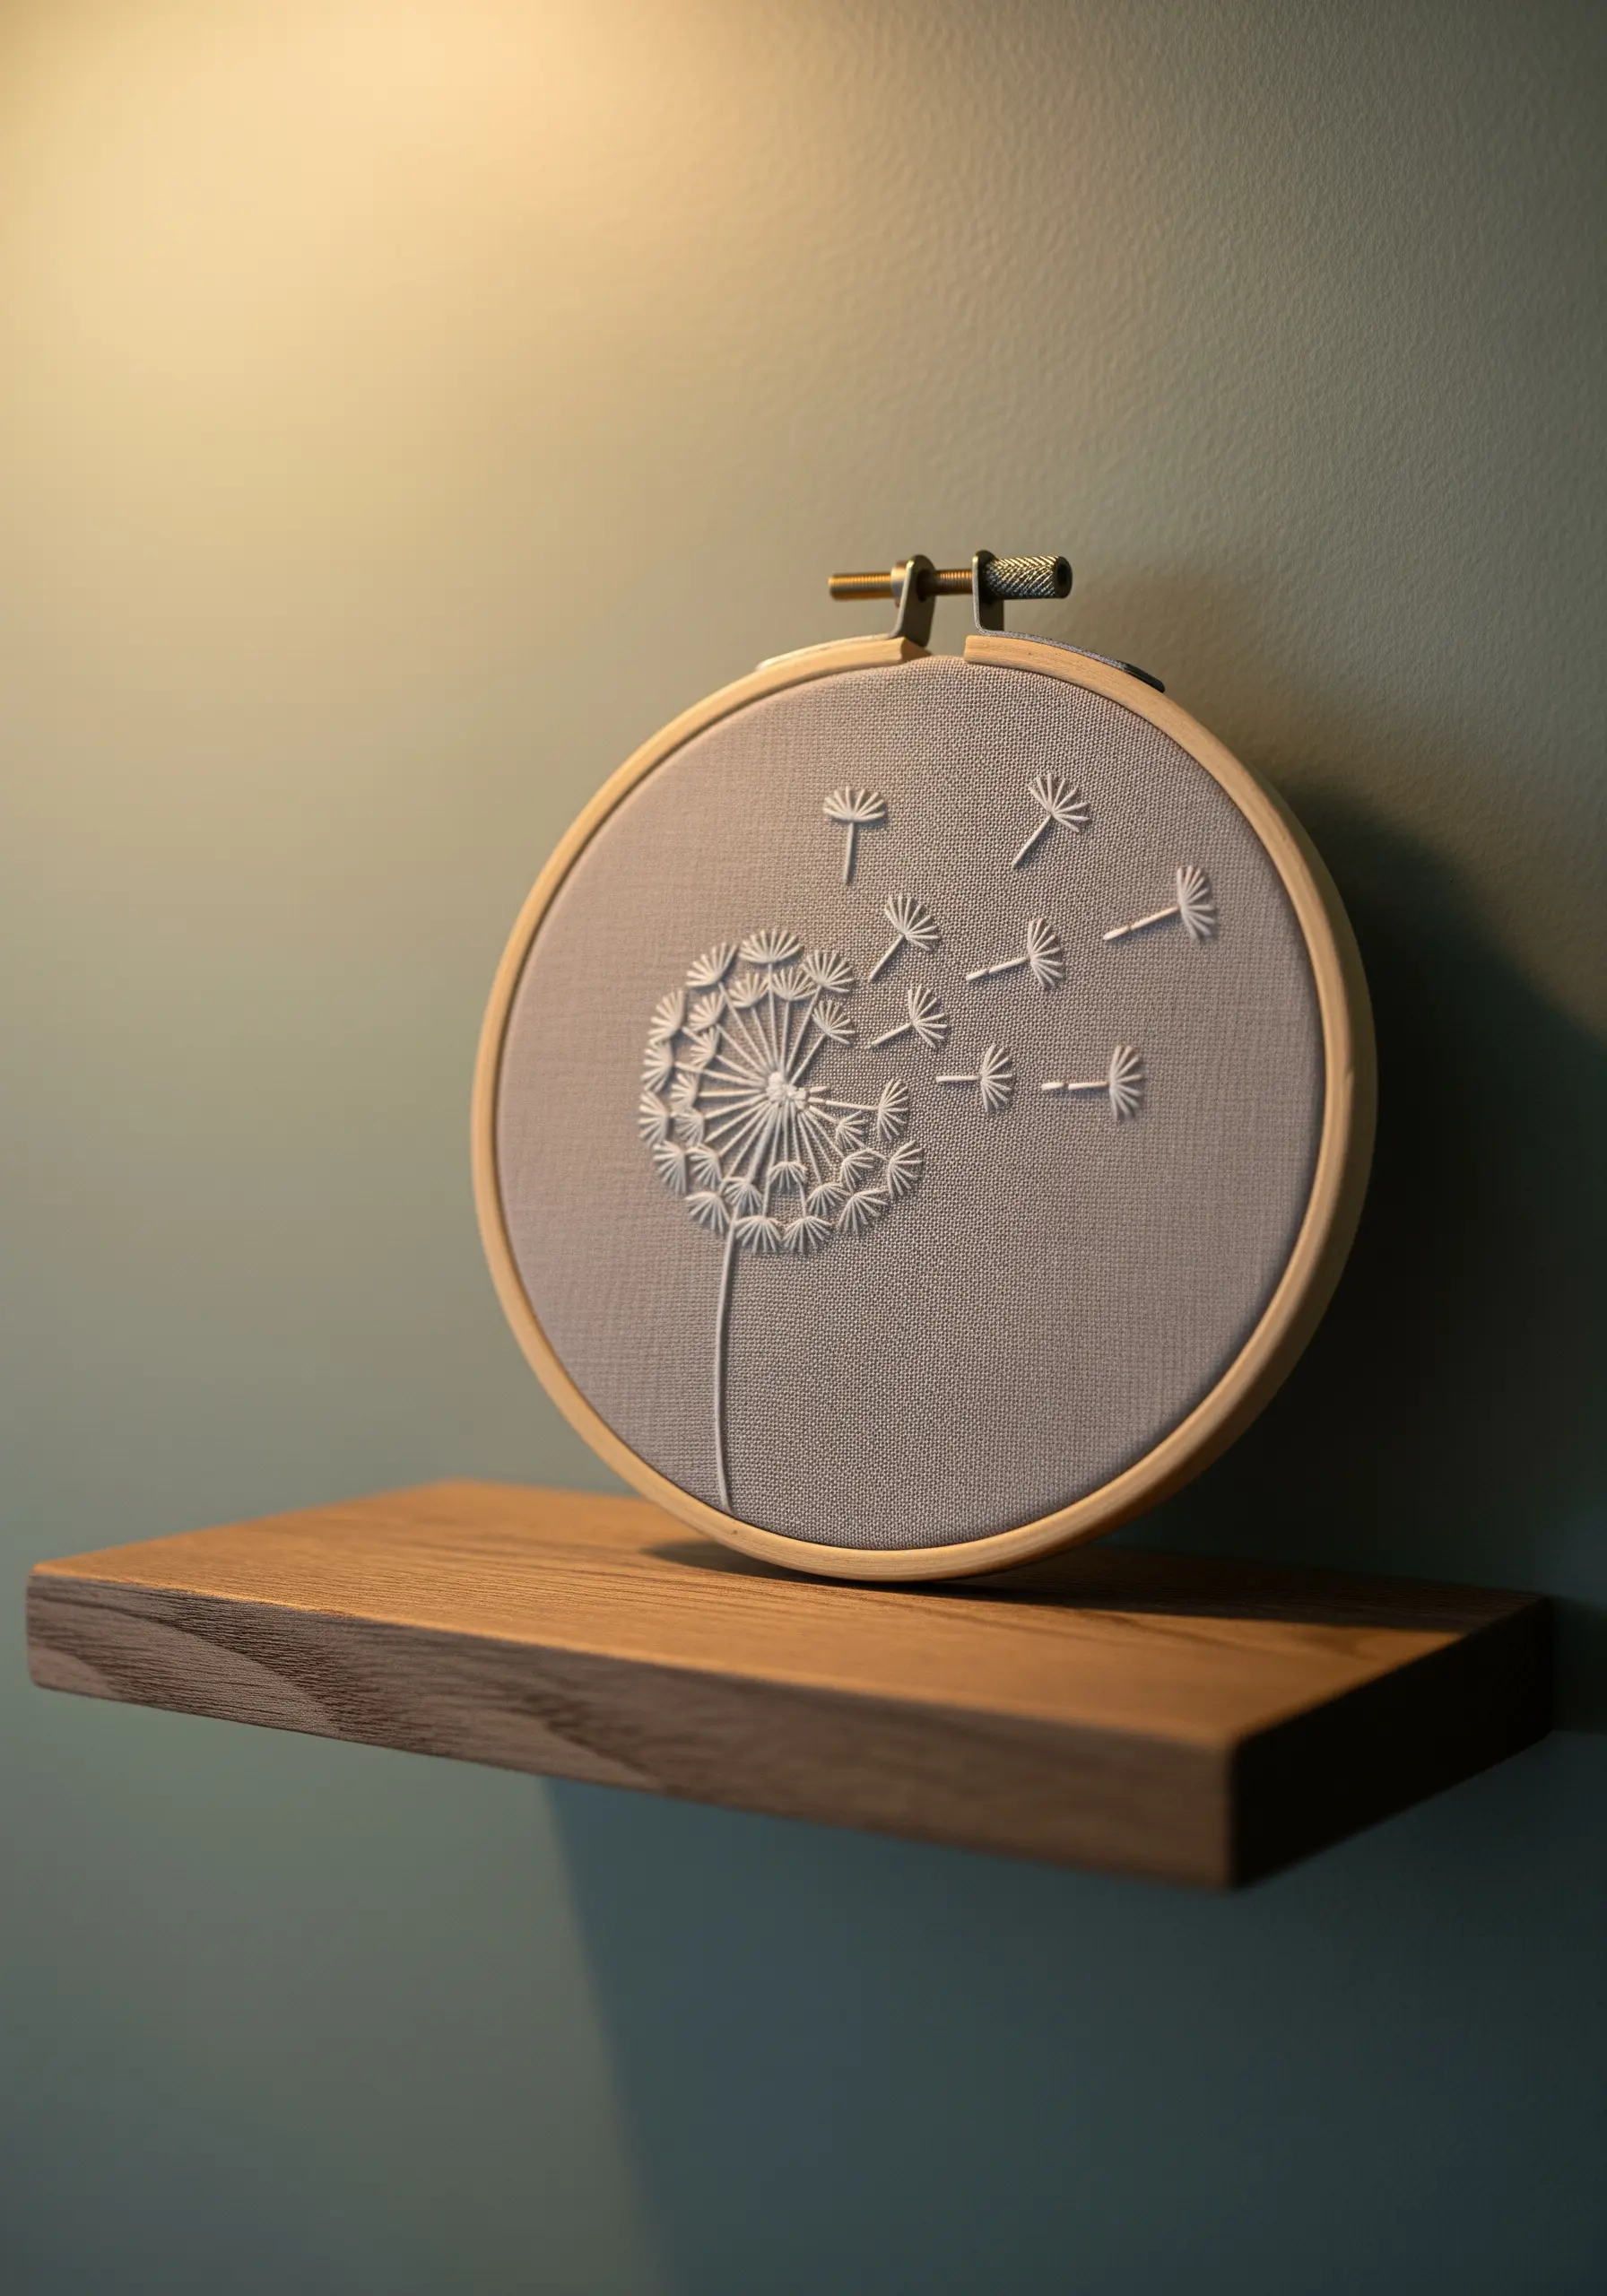
To capture the feeling of dandelion seeds floating away, use a combination of stitches that create a sense of lightness and motion.
Form the main seed head with radiating straight stitches and French knots for density.
For the airborne seeds, use detached chain stitches (lazy daisies) paired with a single straight stitch—this gives them direction and delicacy.
Stitching with white thread on a muted gray fabric enhances the ethereal quality, ideal for gentle floral embroidery ideas for serenity-filled bedroom walls.
9. Build Intricate Textures with Open Fill Stitches
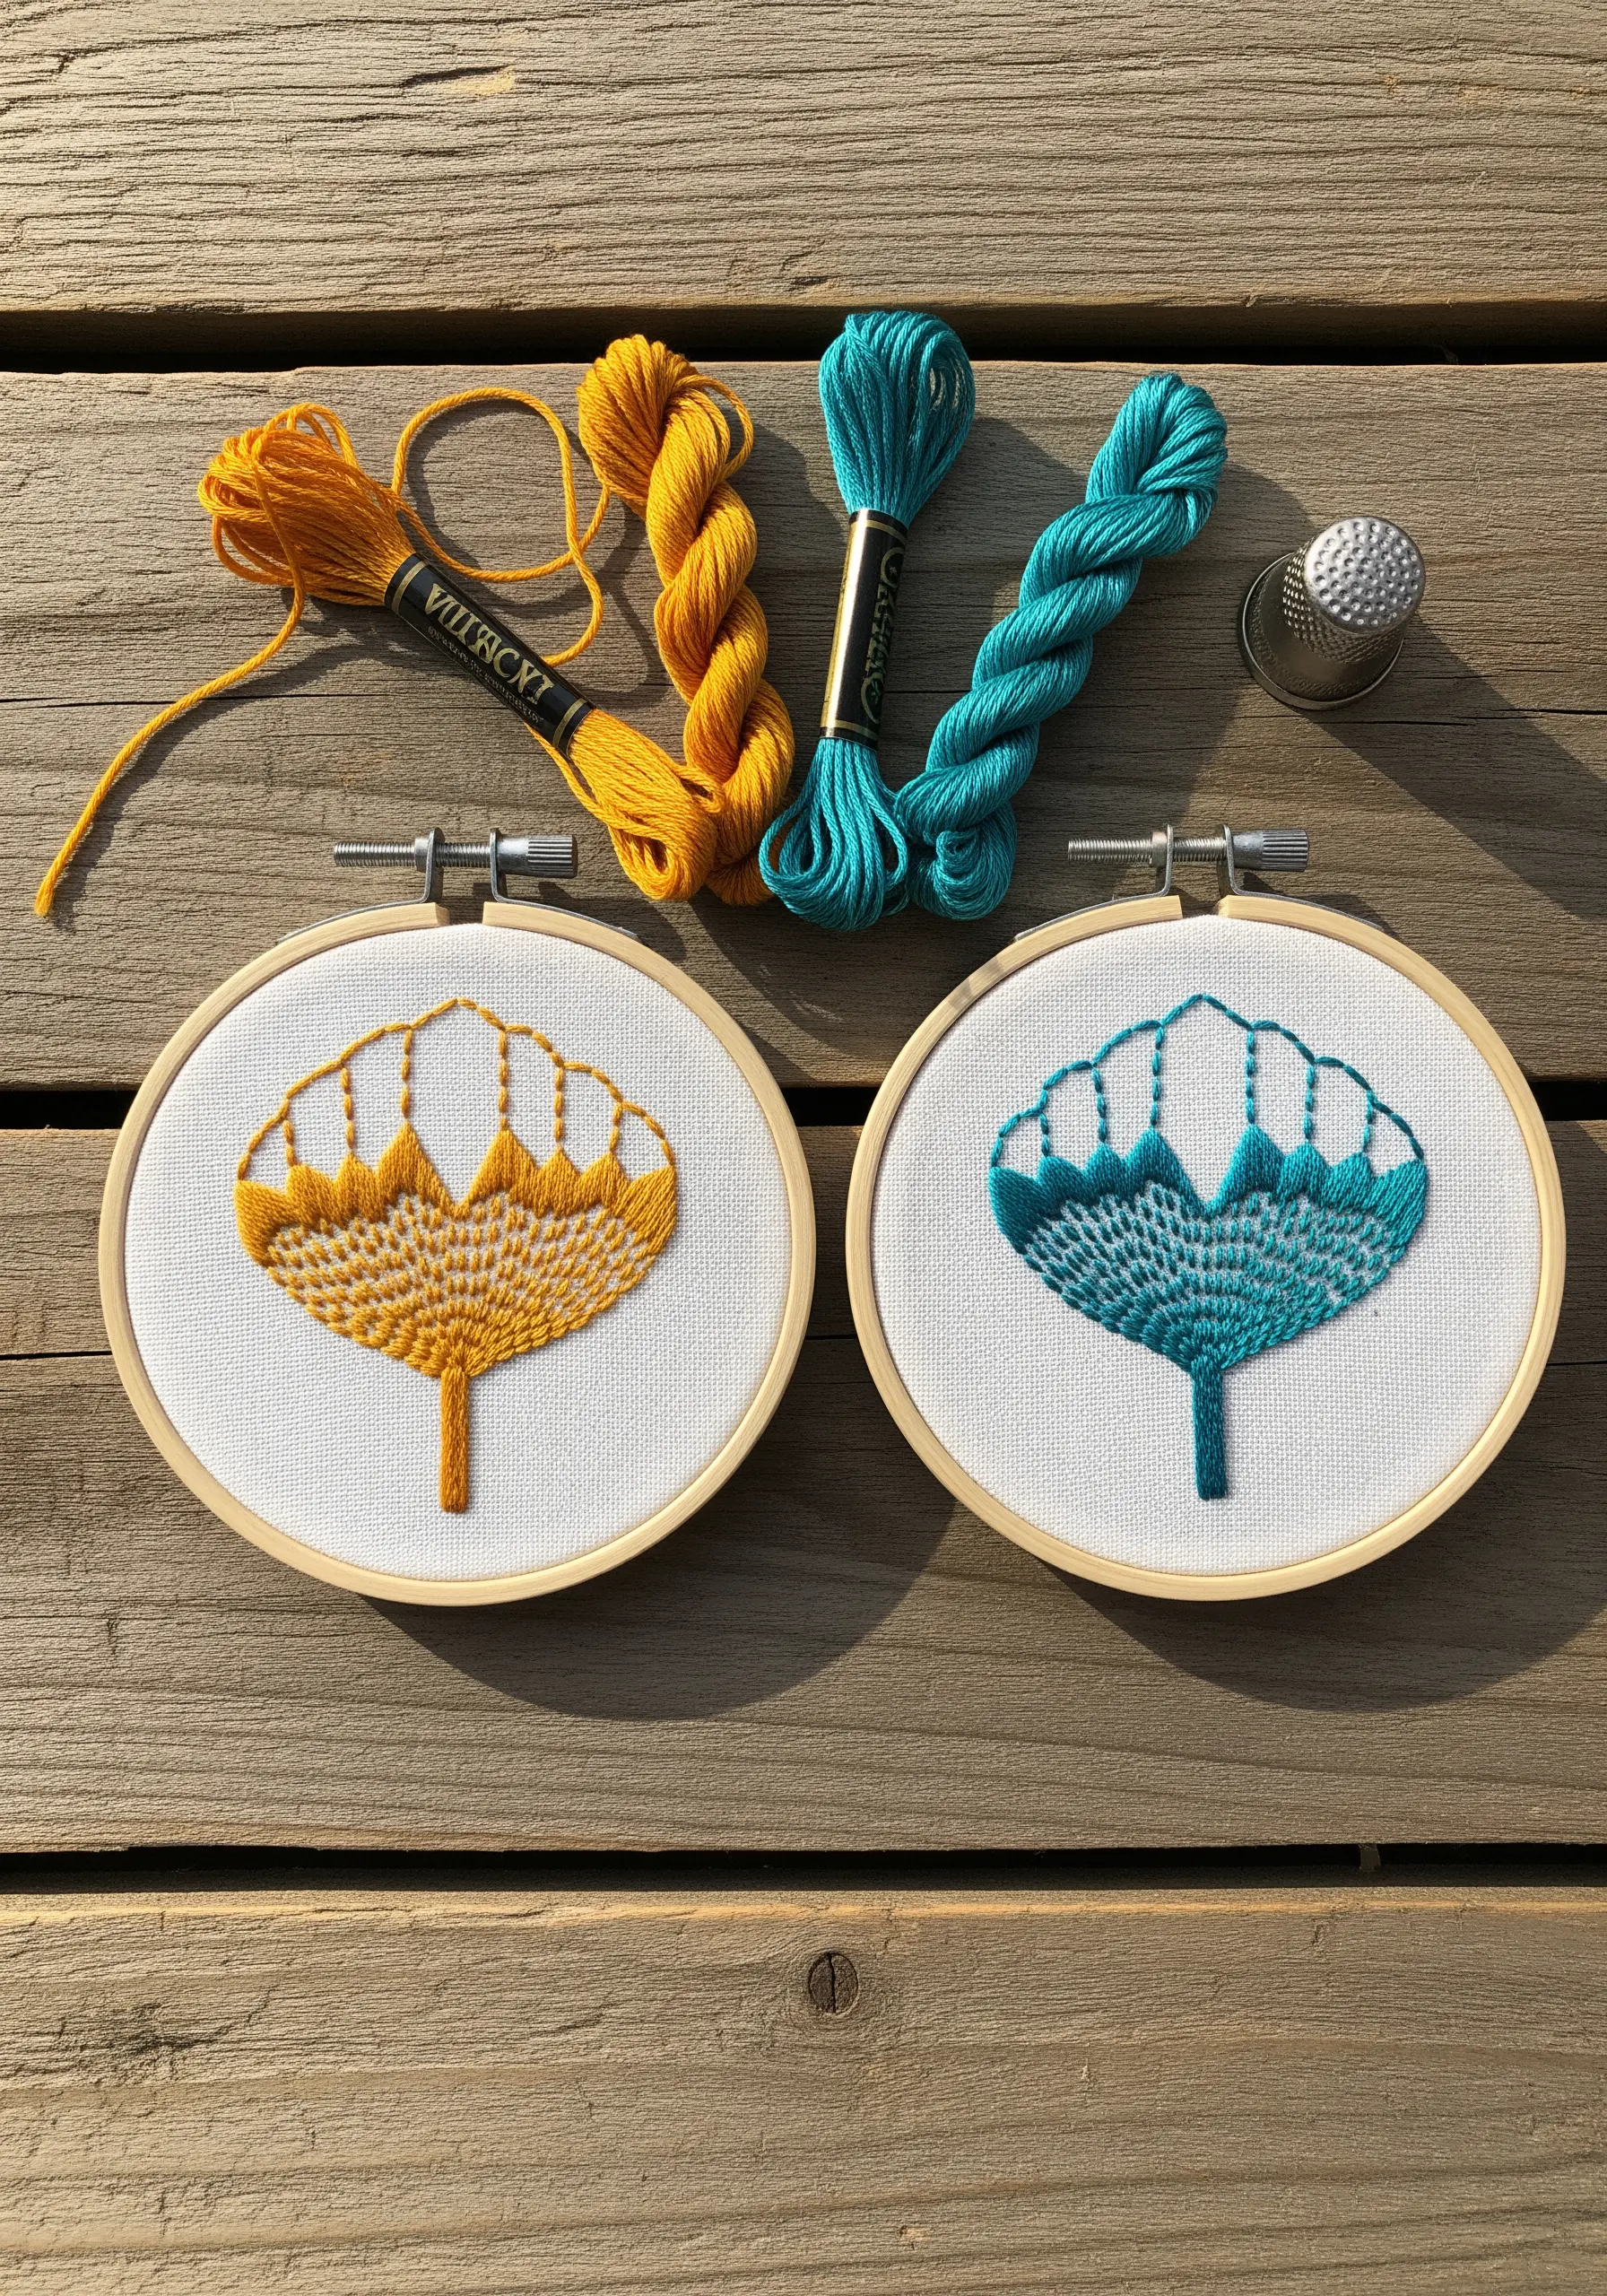
Instead of a solid satin stitch, explore open fill stitches like the woven picot or trellis stitch to create a lace-like effect.
These techniques use less thread and add beautiful, airy texture to your work.
Start by creating a foundation of straight stitches and then weave your thread through them without piercing the fabric.
These abstract texture-play designs are perfect for showcasing color and intricate detail.
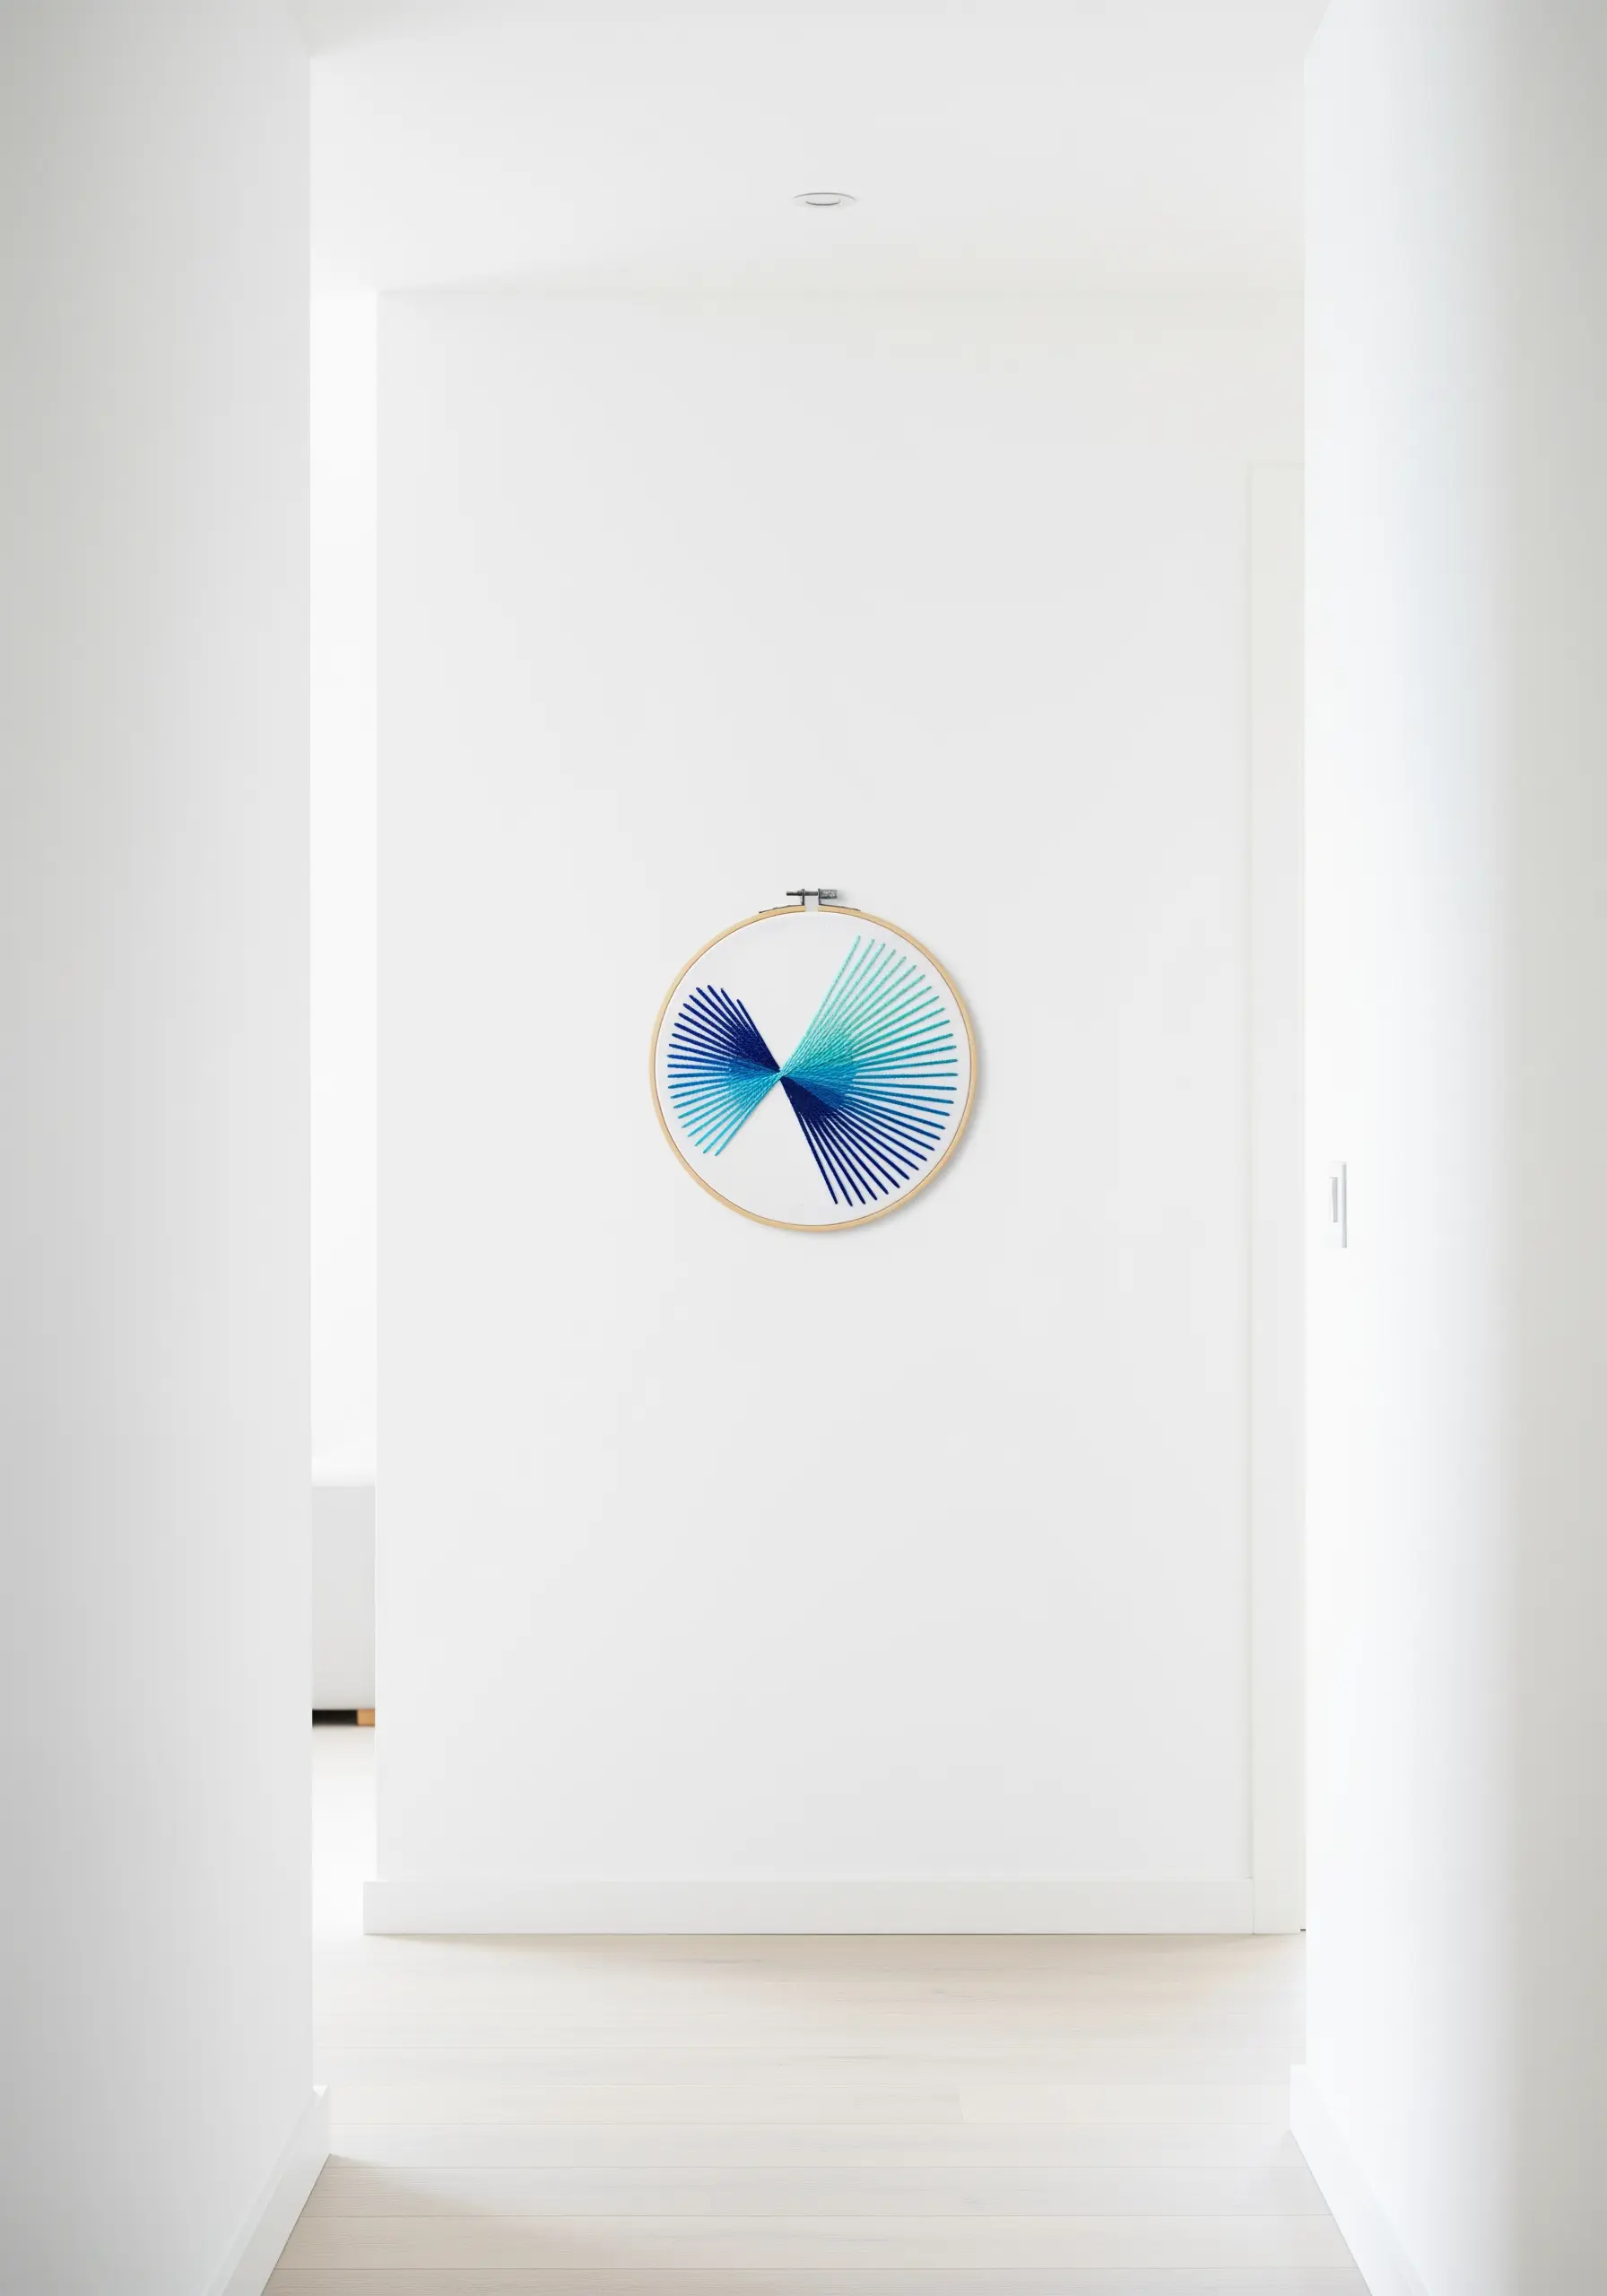
10. Create Radiance with Precise Straight Stitches
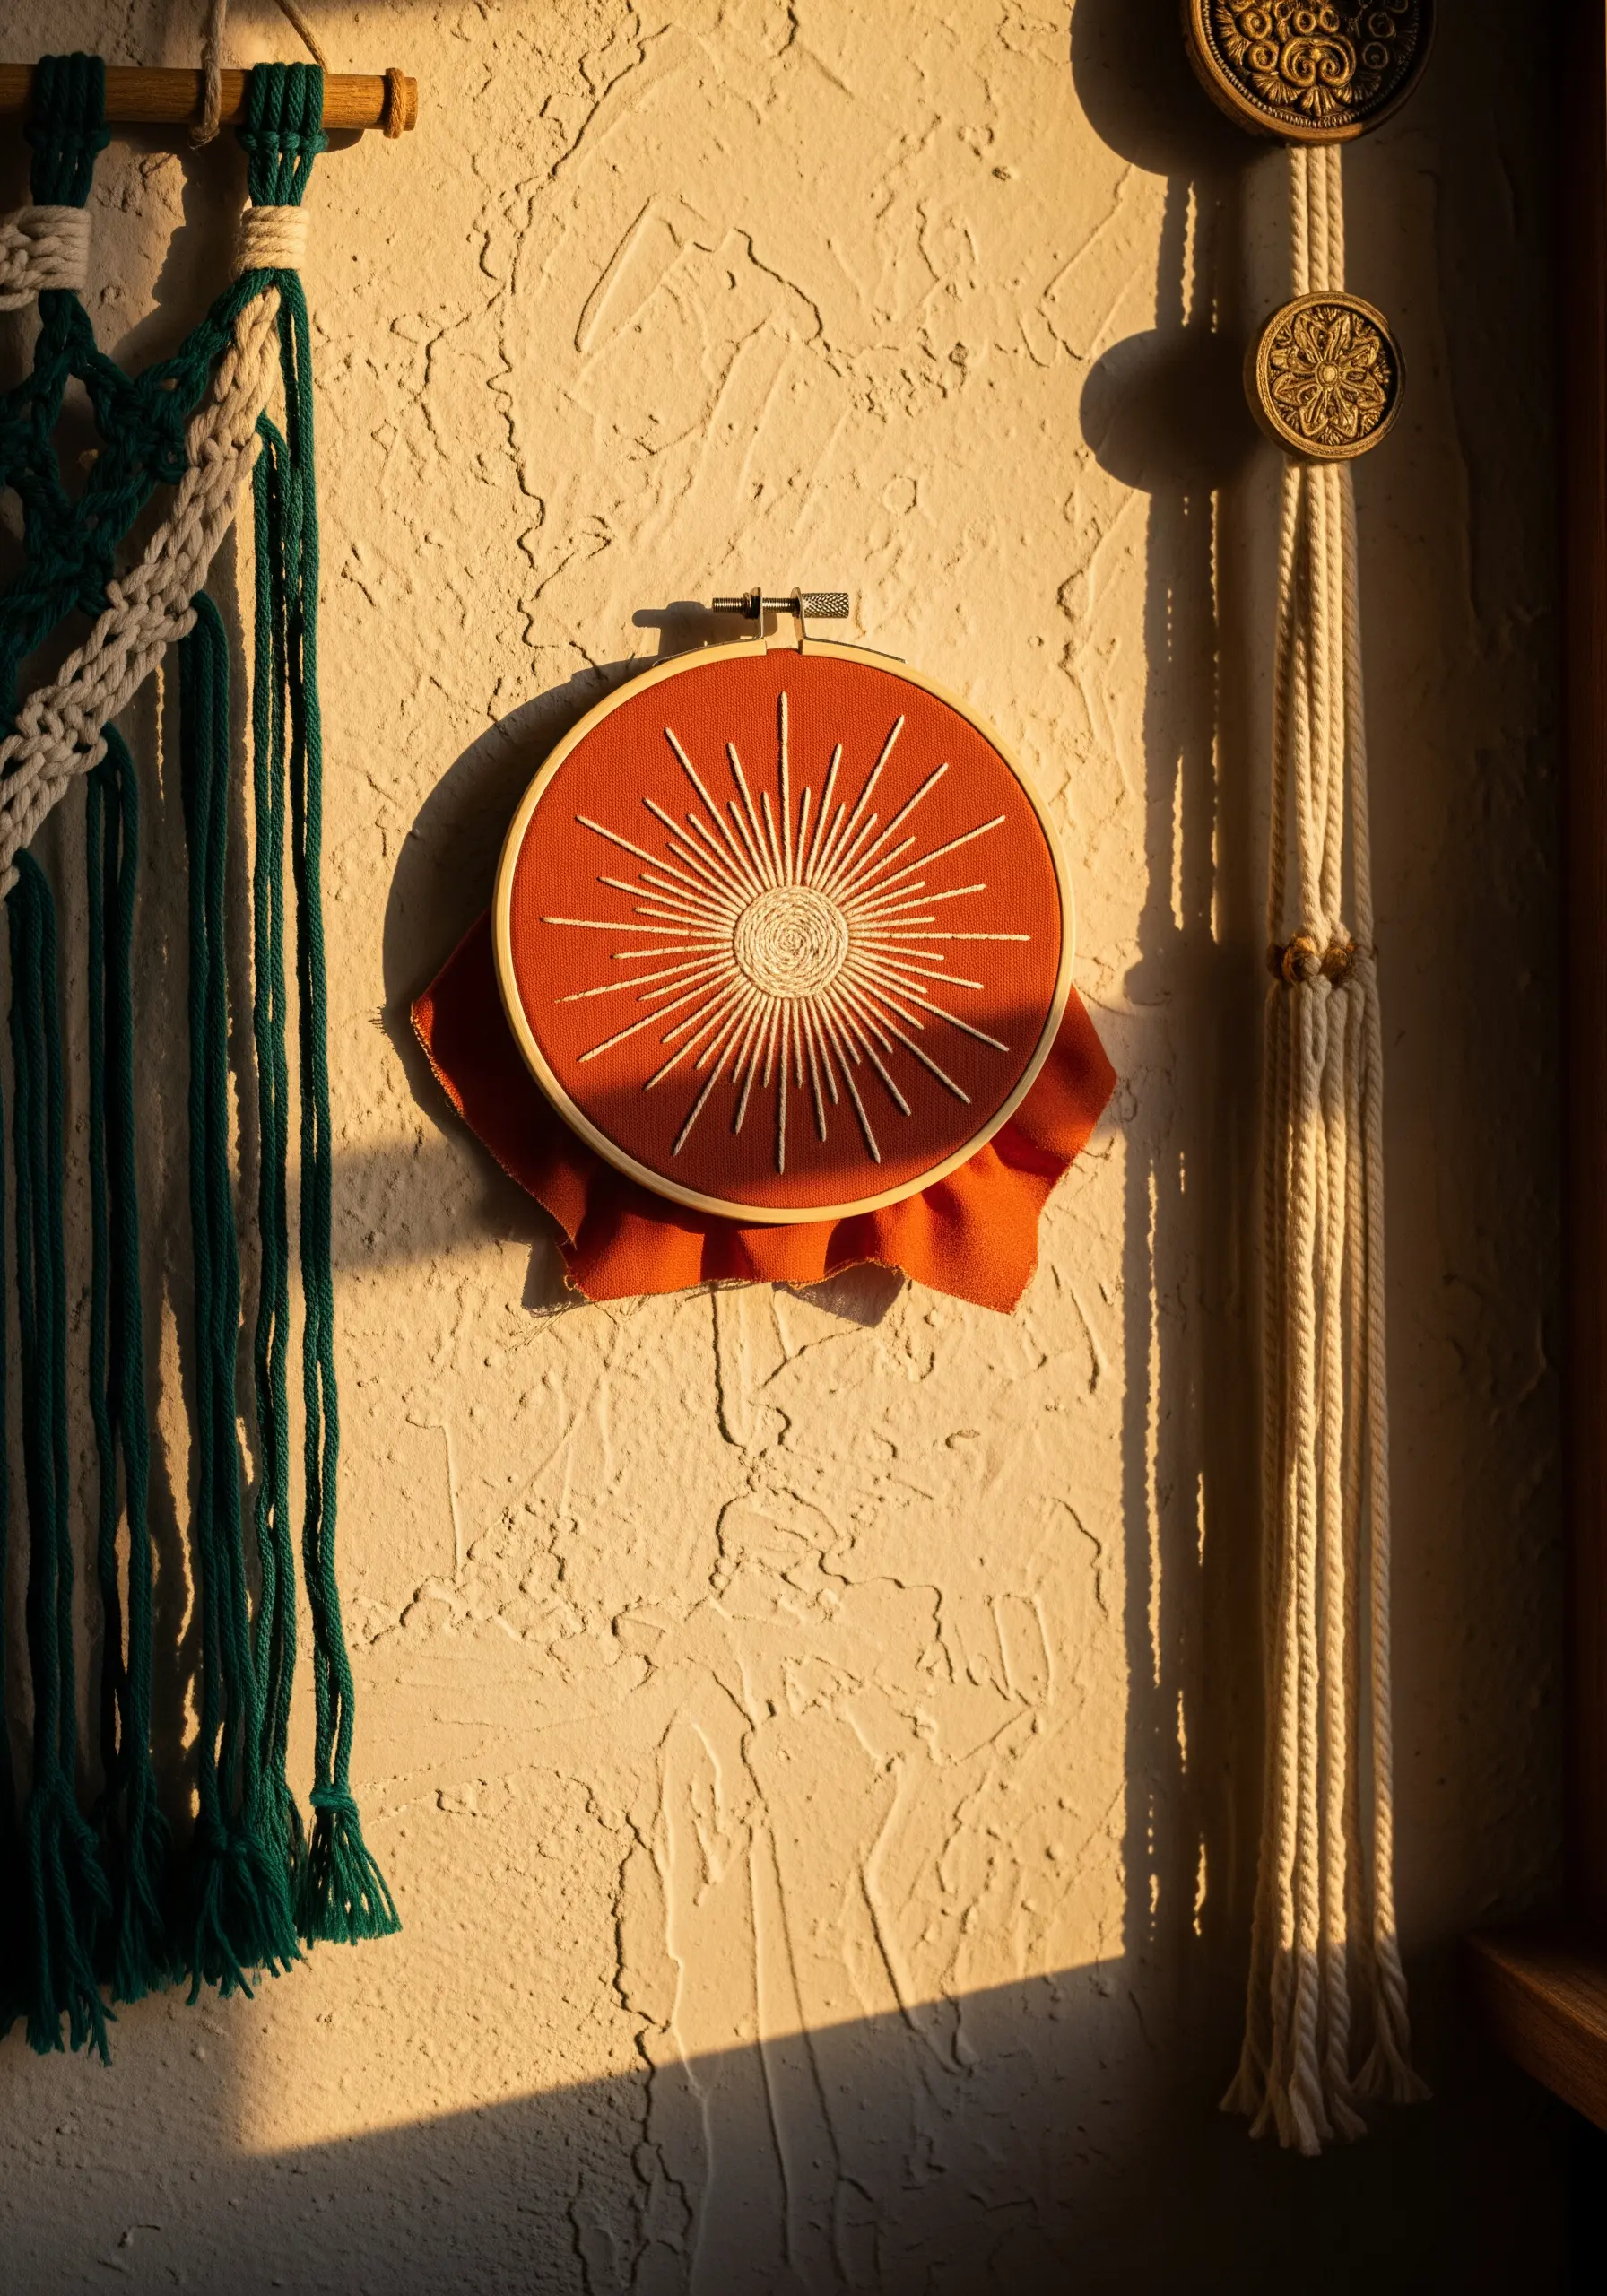
This striking sunburst relies on one thing: impeccable tension.
To prevent the fabric from puckering, ensure each straight stitch is taut but not tight.
Mark your radiating lines with a water-soluble pen before you begin for perfect symmetry.
Fill the center with a dense cluster of French knots or a woven wheel stitch to create a powerful focal point, a technique often used in gold thread luxury wall art projects.
11. Capture Fluidity with Directional Stitches
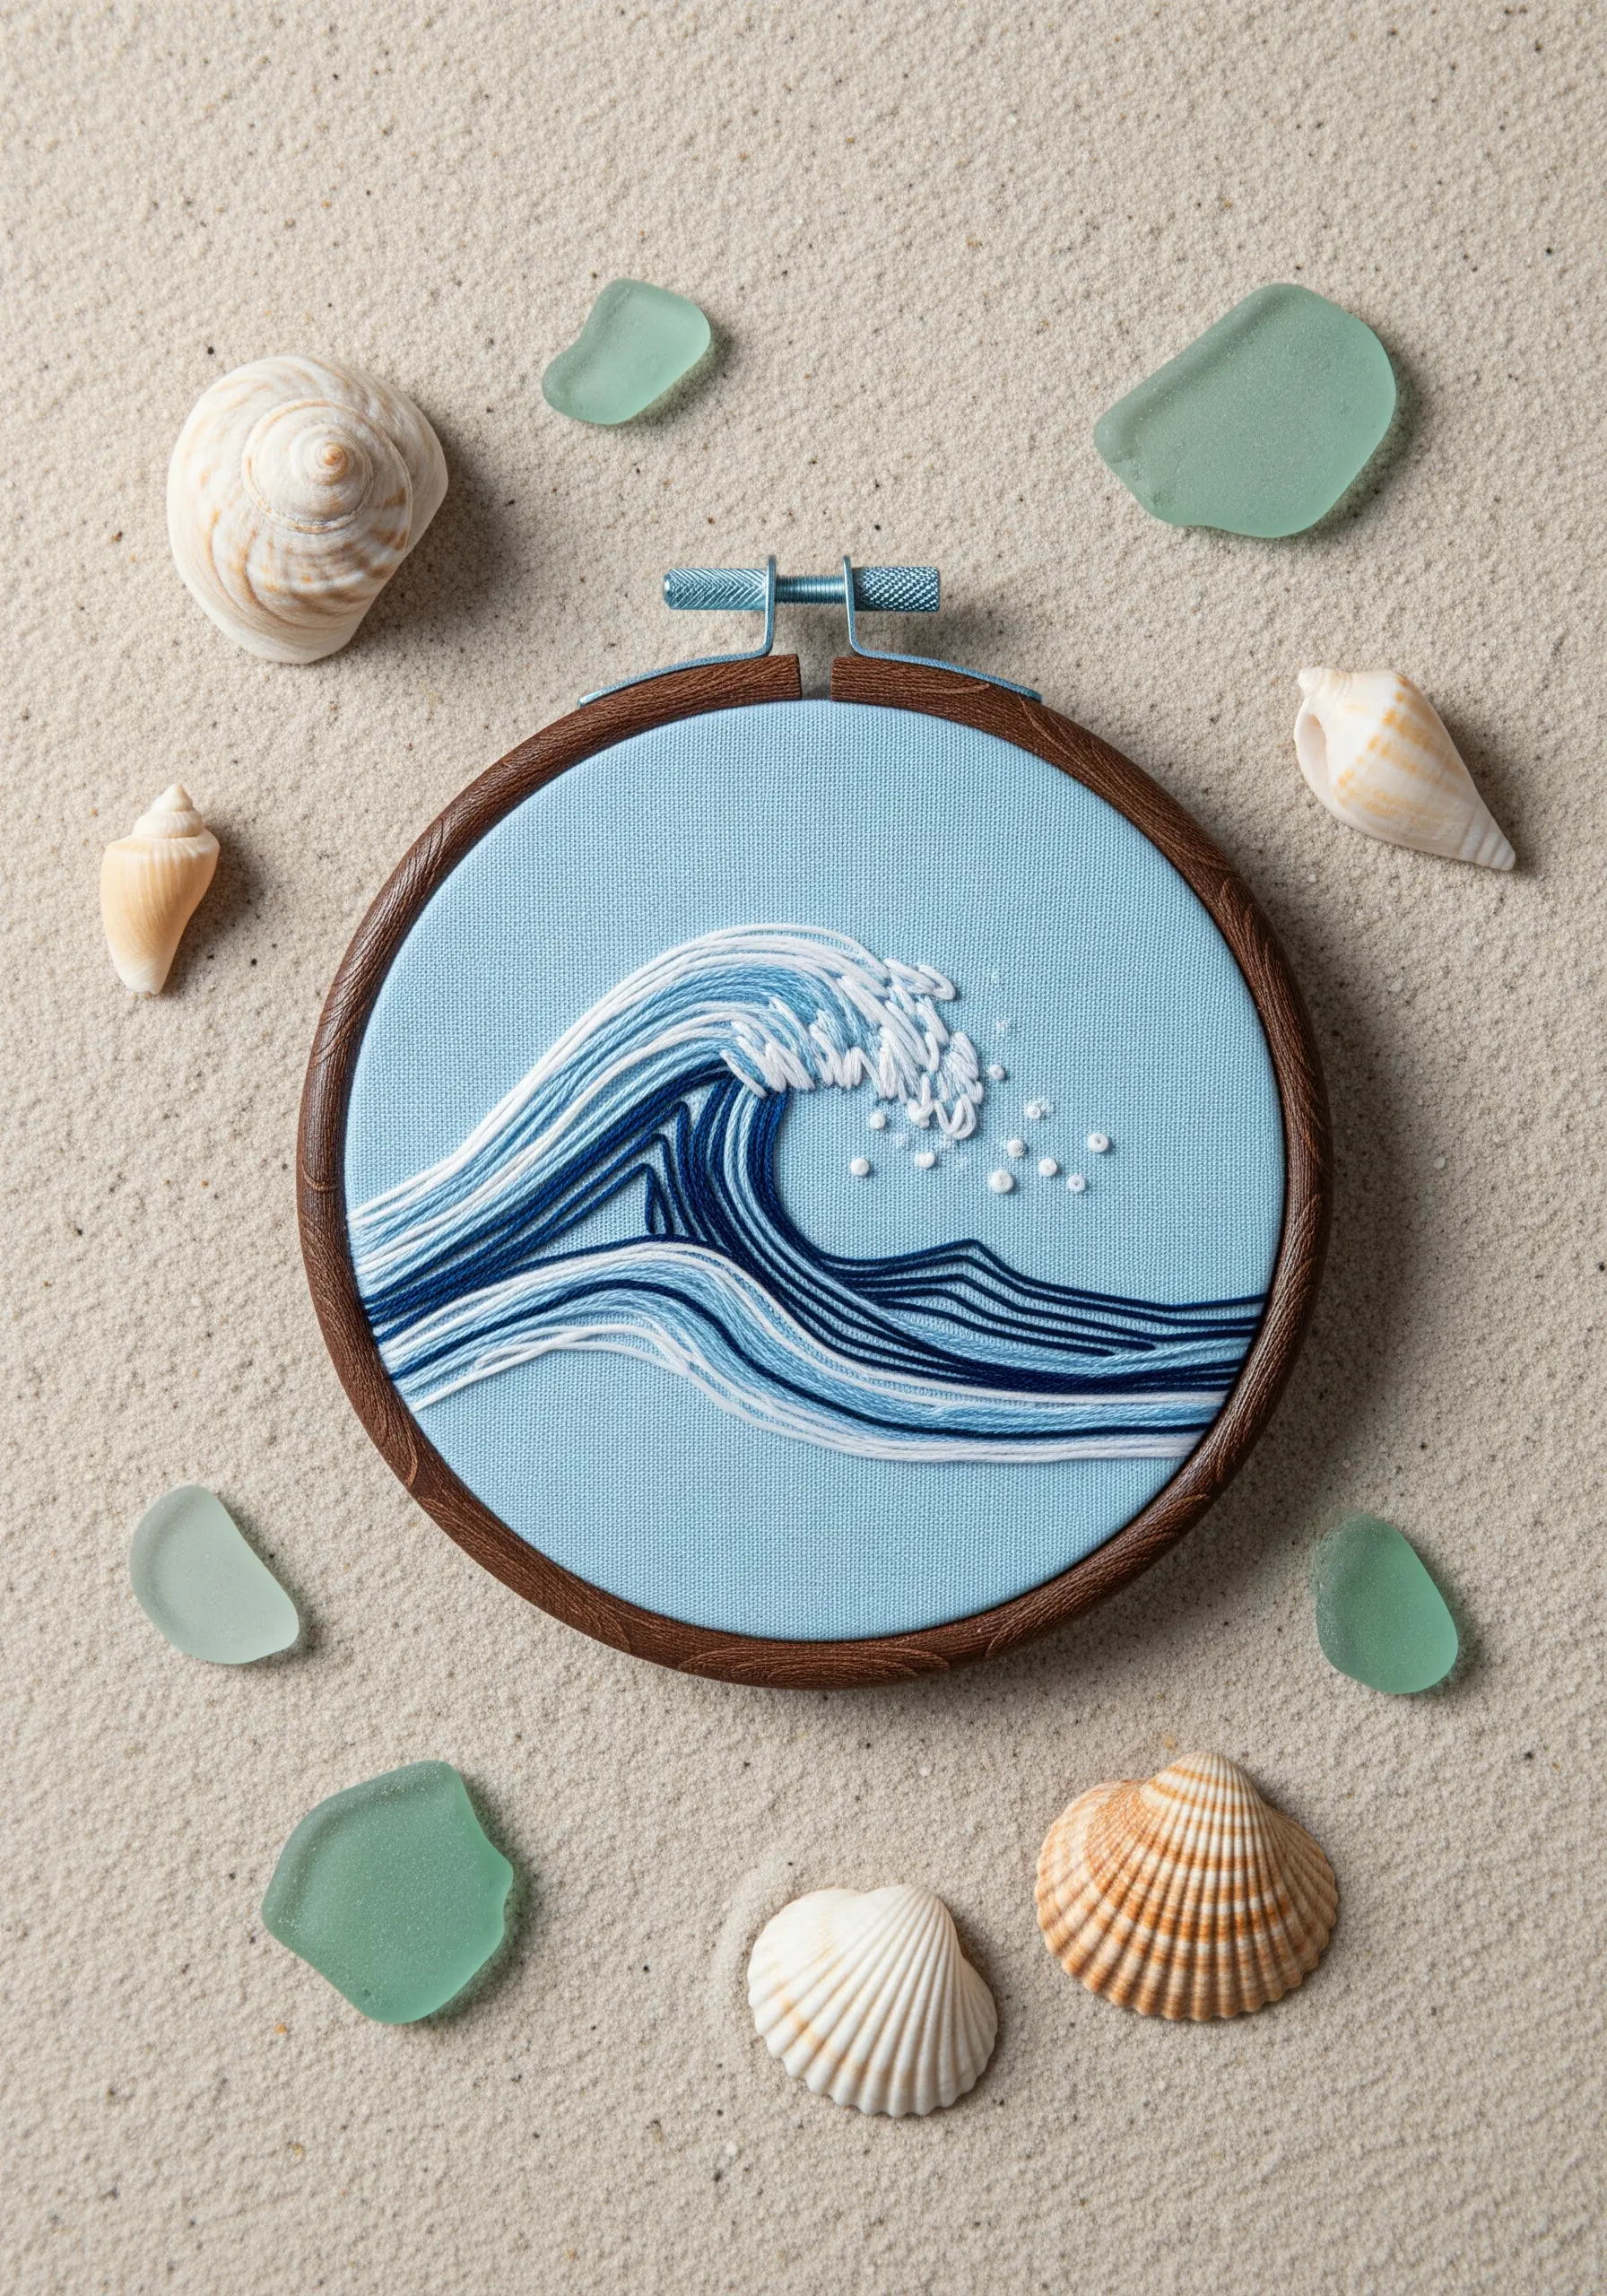
To make a wave feel like it’s in motion, the direction of your stitches is everything.
Use a split stitch or long-and-short stitch, following the curve of the wave to guide your needle.
Blend several shades of blue, from dark to light, to create depth and highlights.
Finish with scattered white French knots to represent sea spray, adding a final touch of realism to ocean-inspired hoop embroidery ideas.
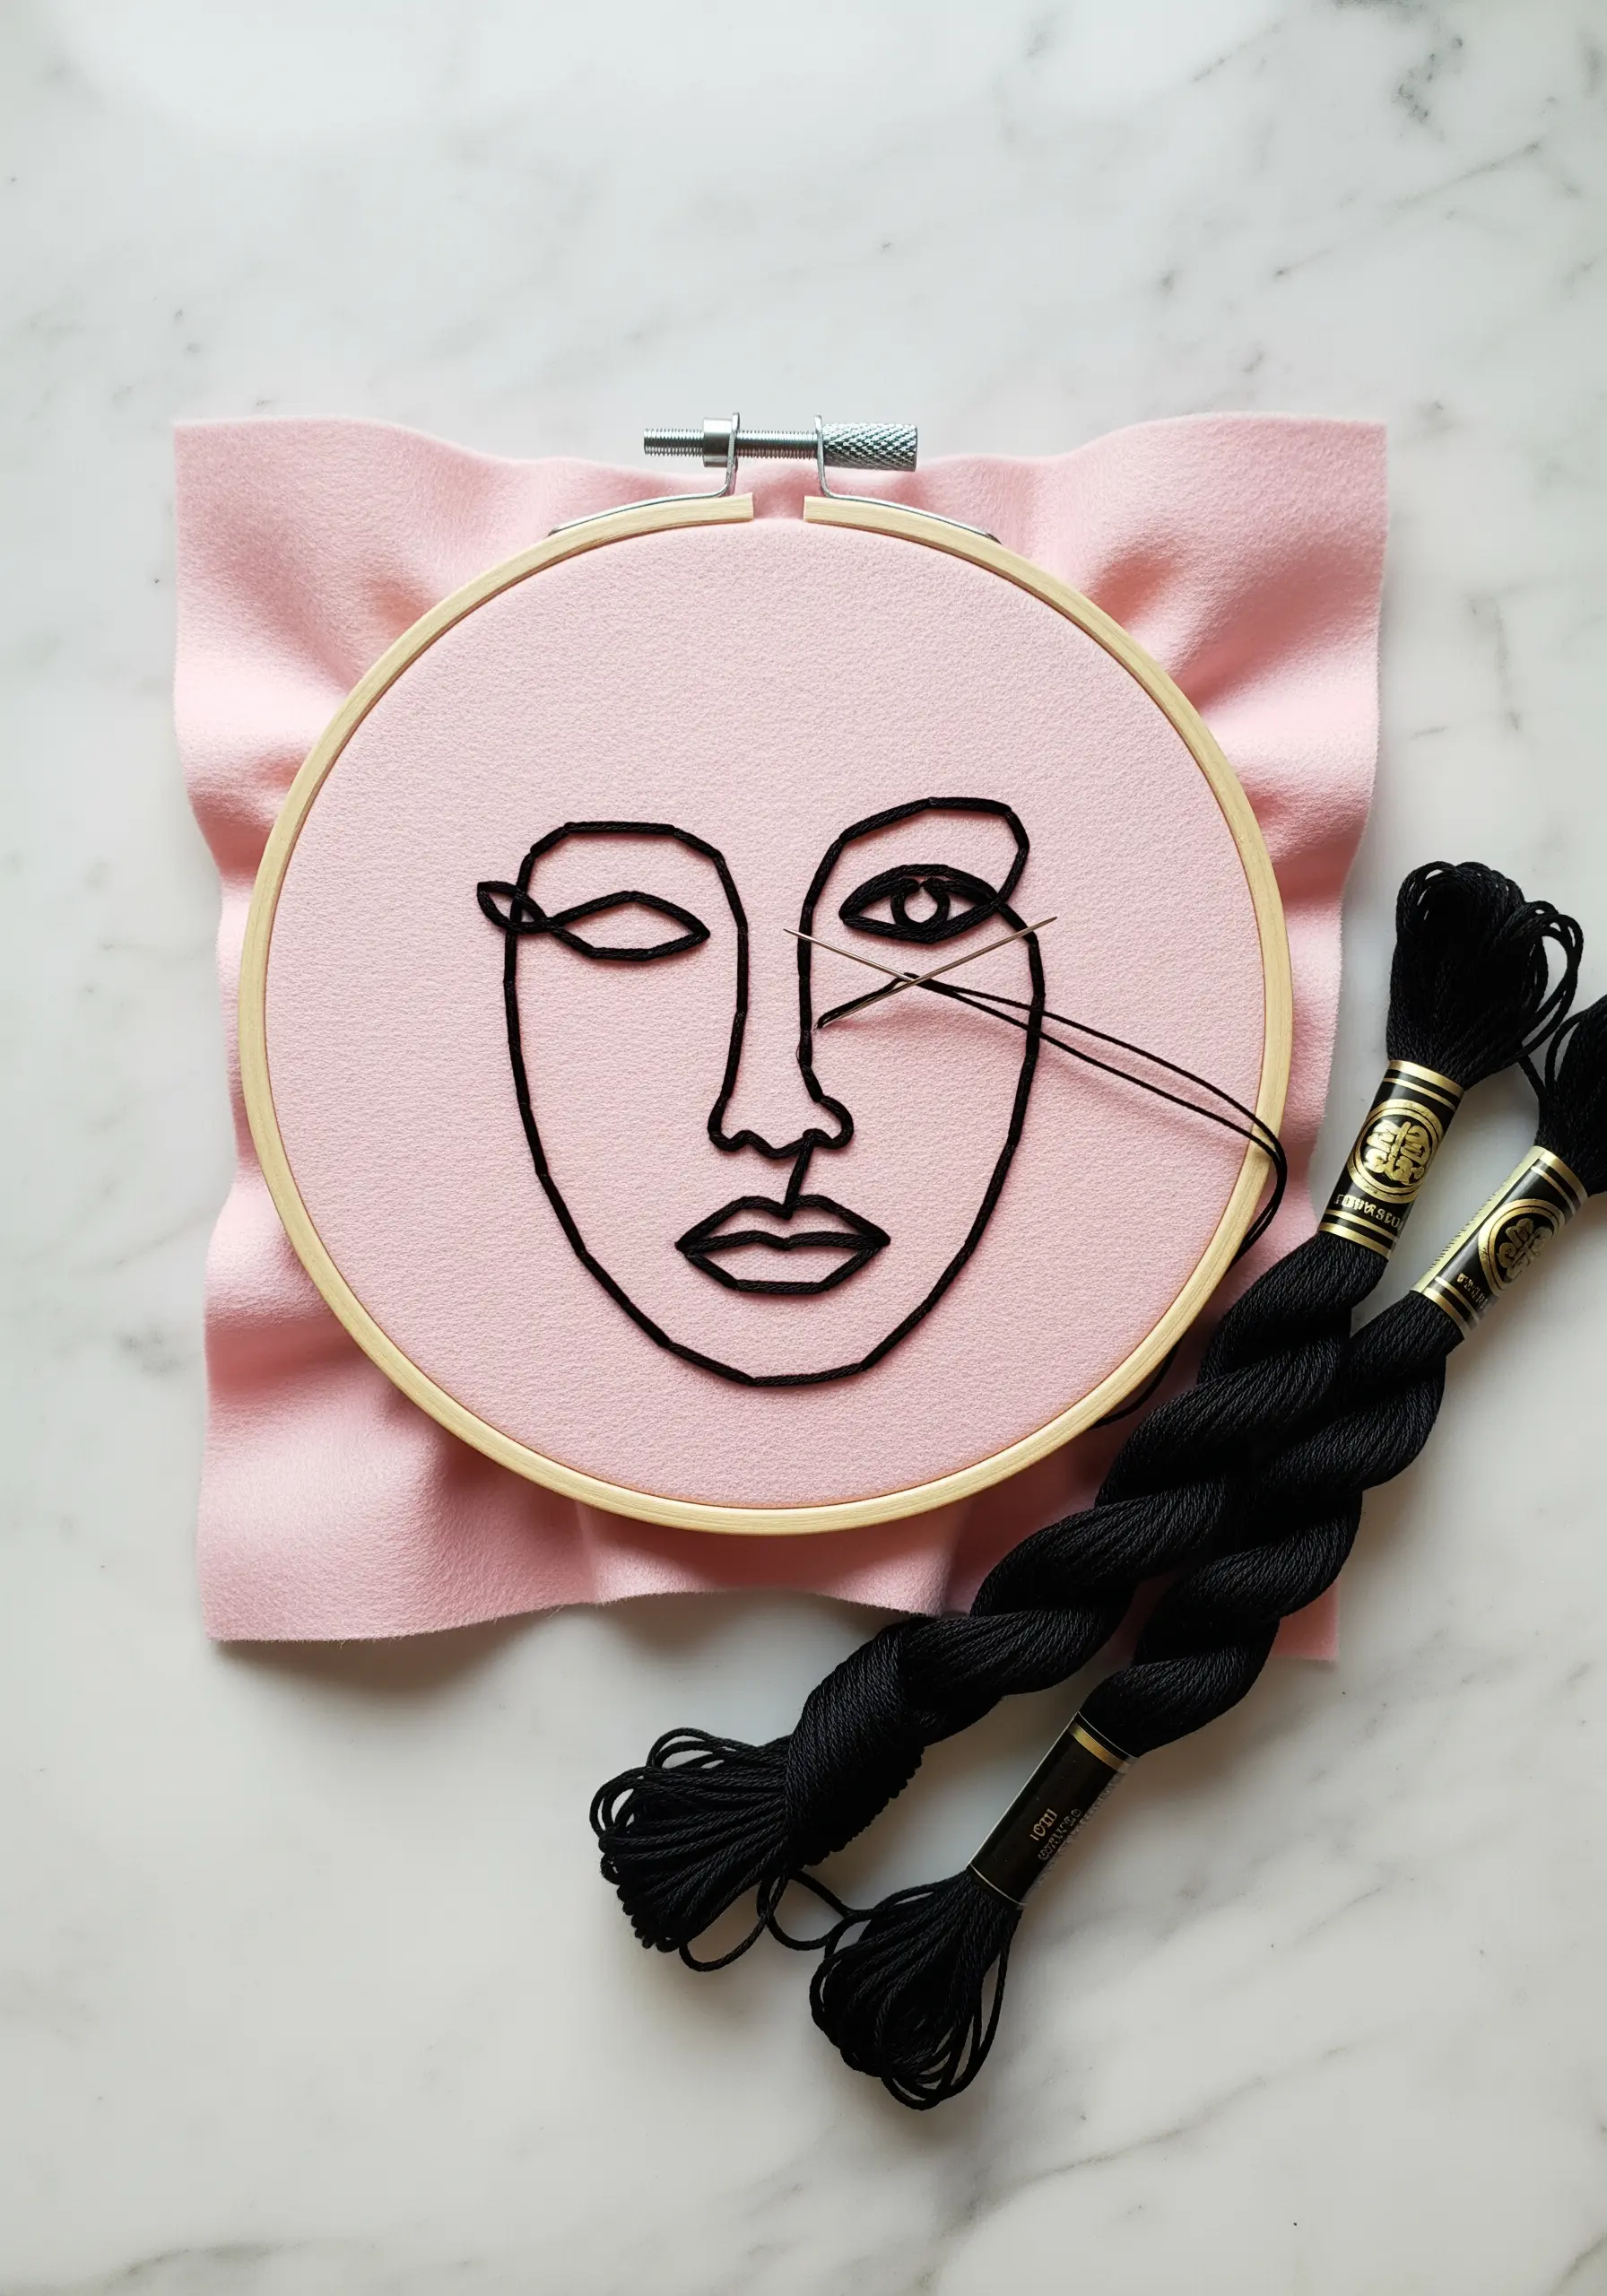
12. Achieve Delicate Lines with Fewer Strands
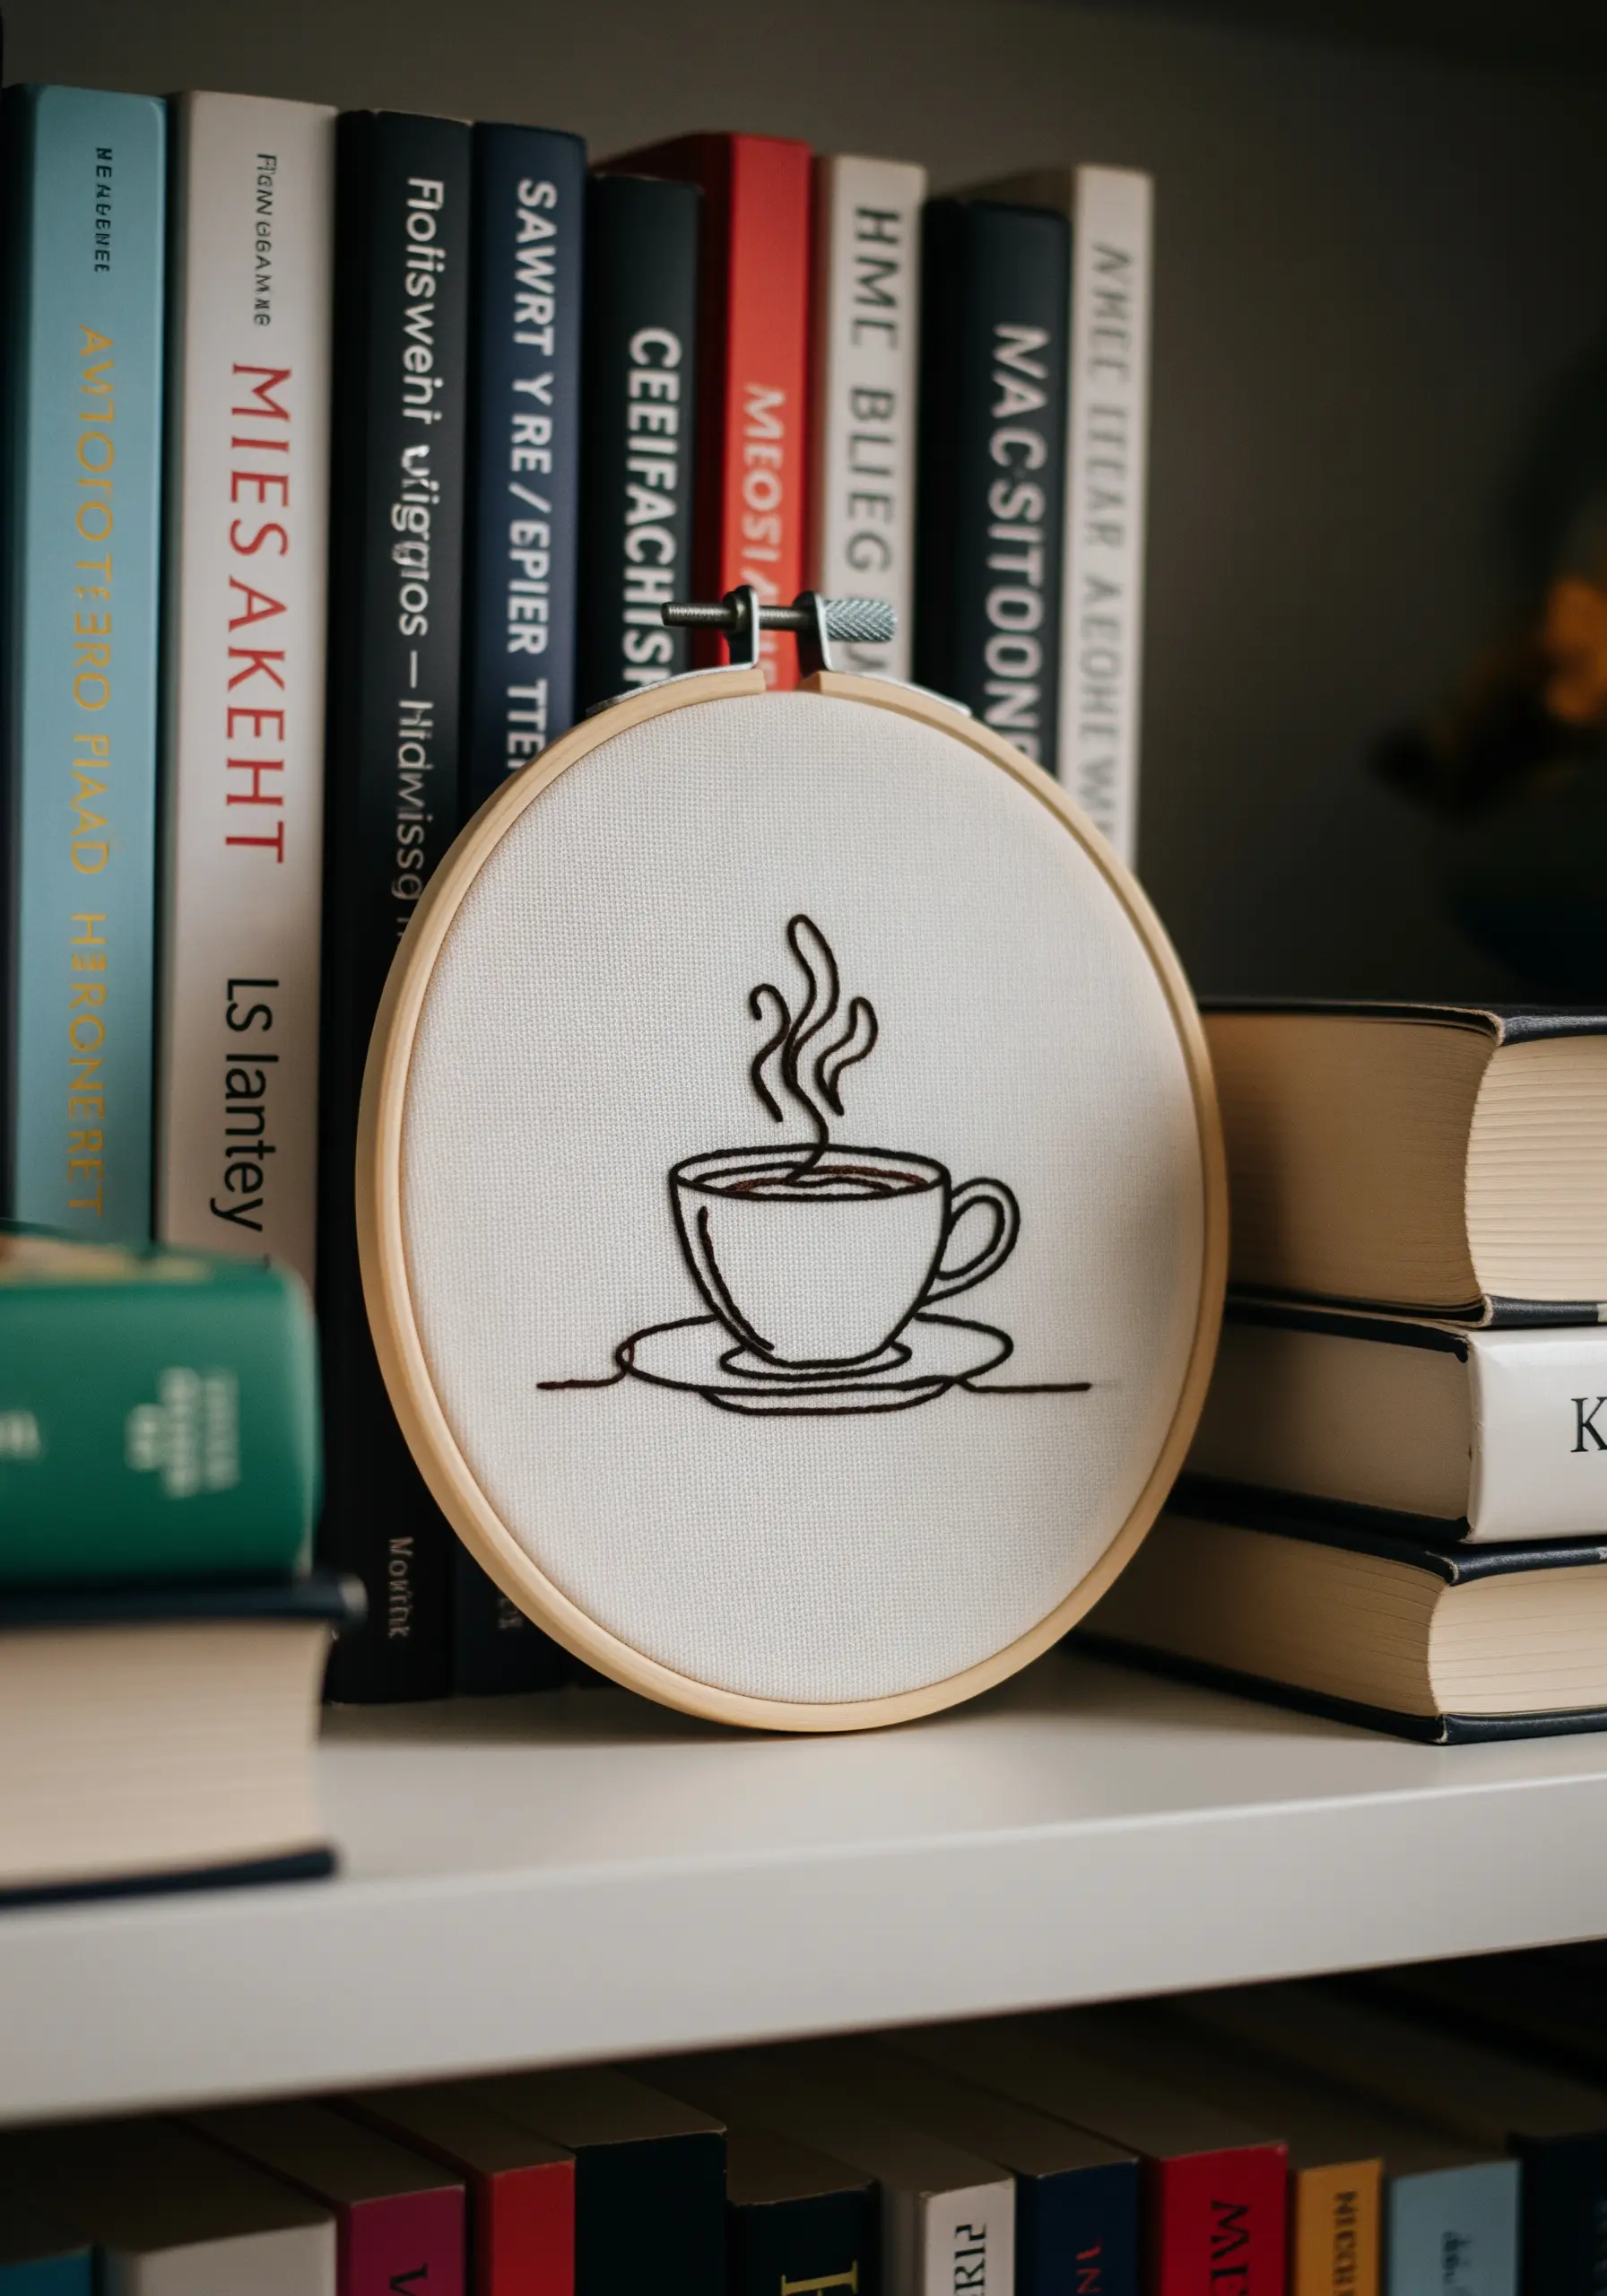
For fine, illustrative designs, reduce your thread to just two strands of floss.
This allows for greater detail and prevents the lines from looking bulky or losing their shape, especially in tight curves.
A stem stitch works beautifully for the fluid steam, while a simple backstitch provides a clean, consistent outline for the cup.
It’s a simple adjustment that adds a professional touch to cute dessert & tea theme table linen embroidery motifs.
13. Perfect Your Satin Stitch with an Outline
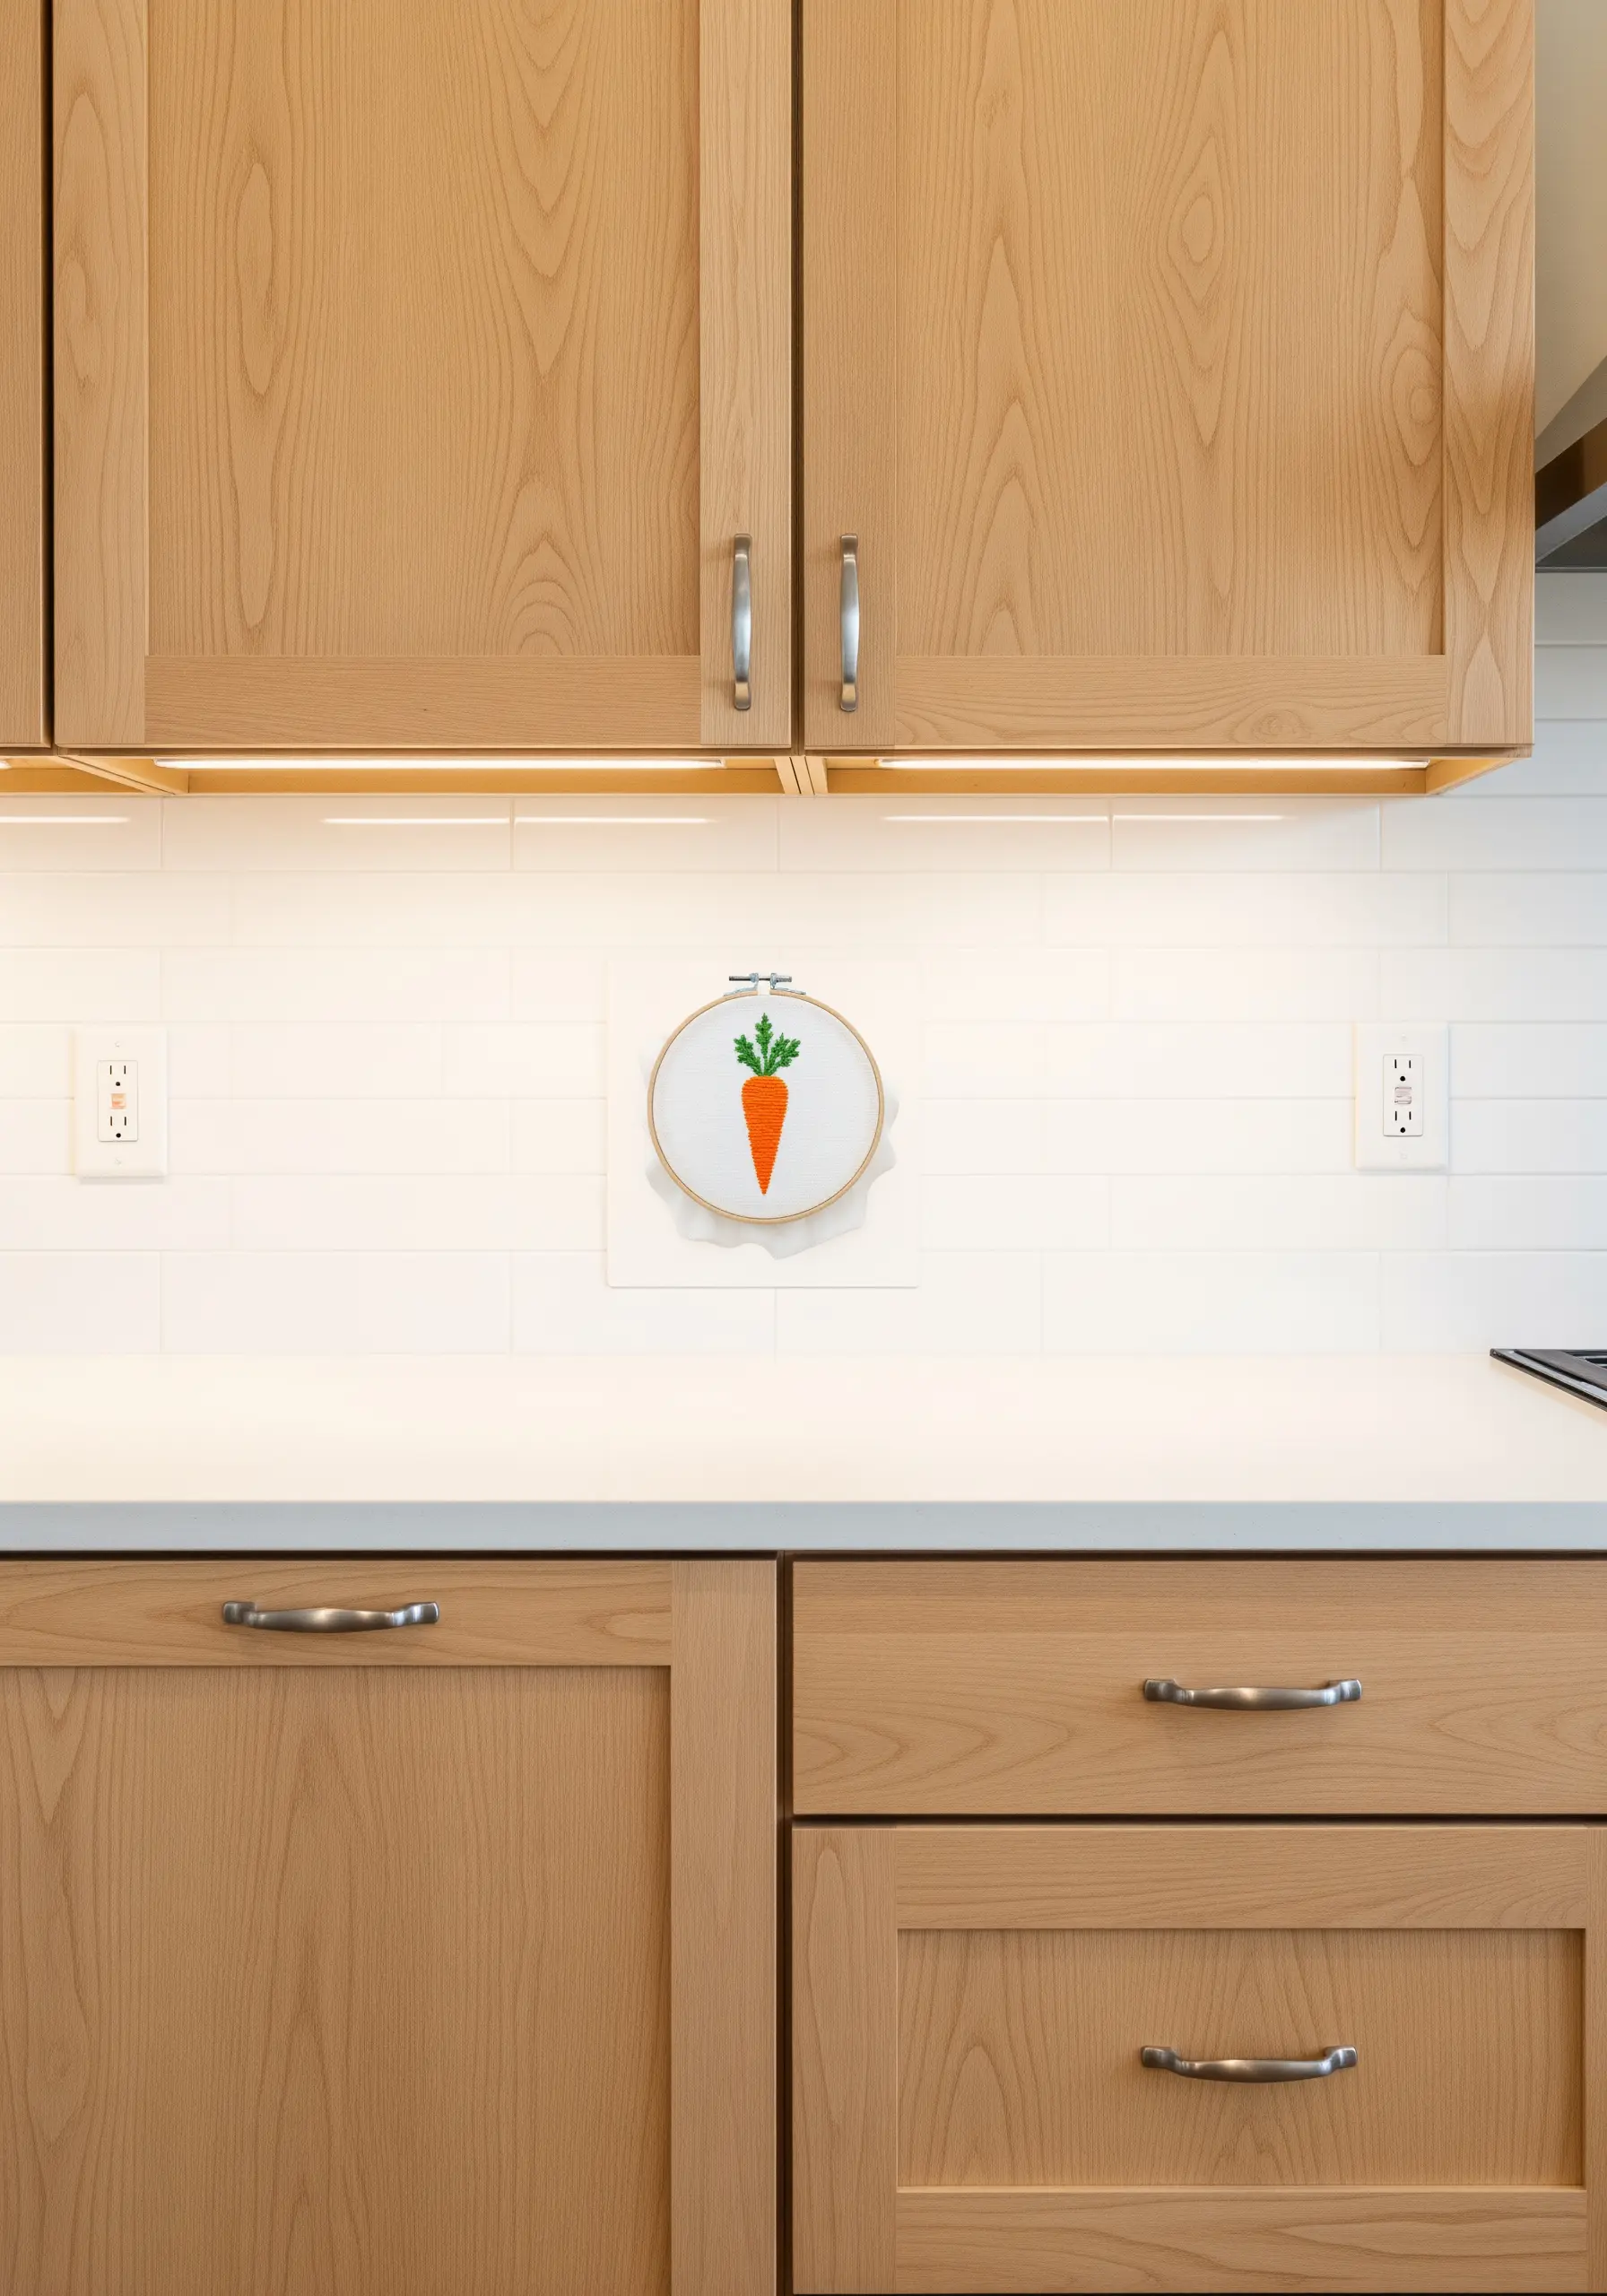
To achieve a perfectly smooth and raised satin stitch, first outline your shape with a split stitch.
This simple preparation acts as a guide and gives your satin stitches a clean, defined edge to rest against, preventing gaps and unevenness.
When filling the shape, angle your stitches slightly to create a subtle sheen.
This technique turns simple minimal fruit & botanical embroidery patterns into polished art.
14. Define Abstract Shapes with Stitch Direction
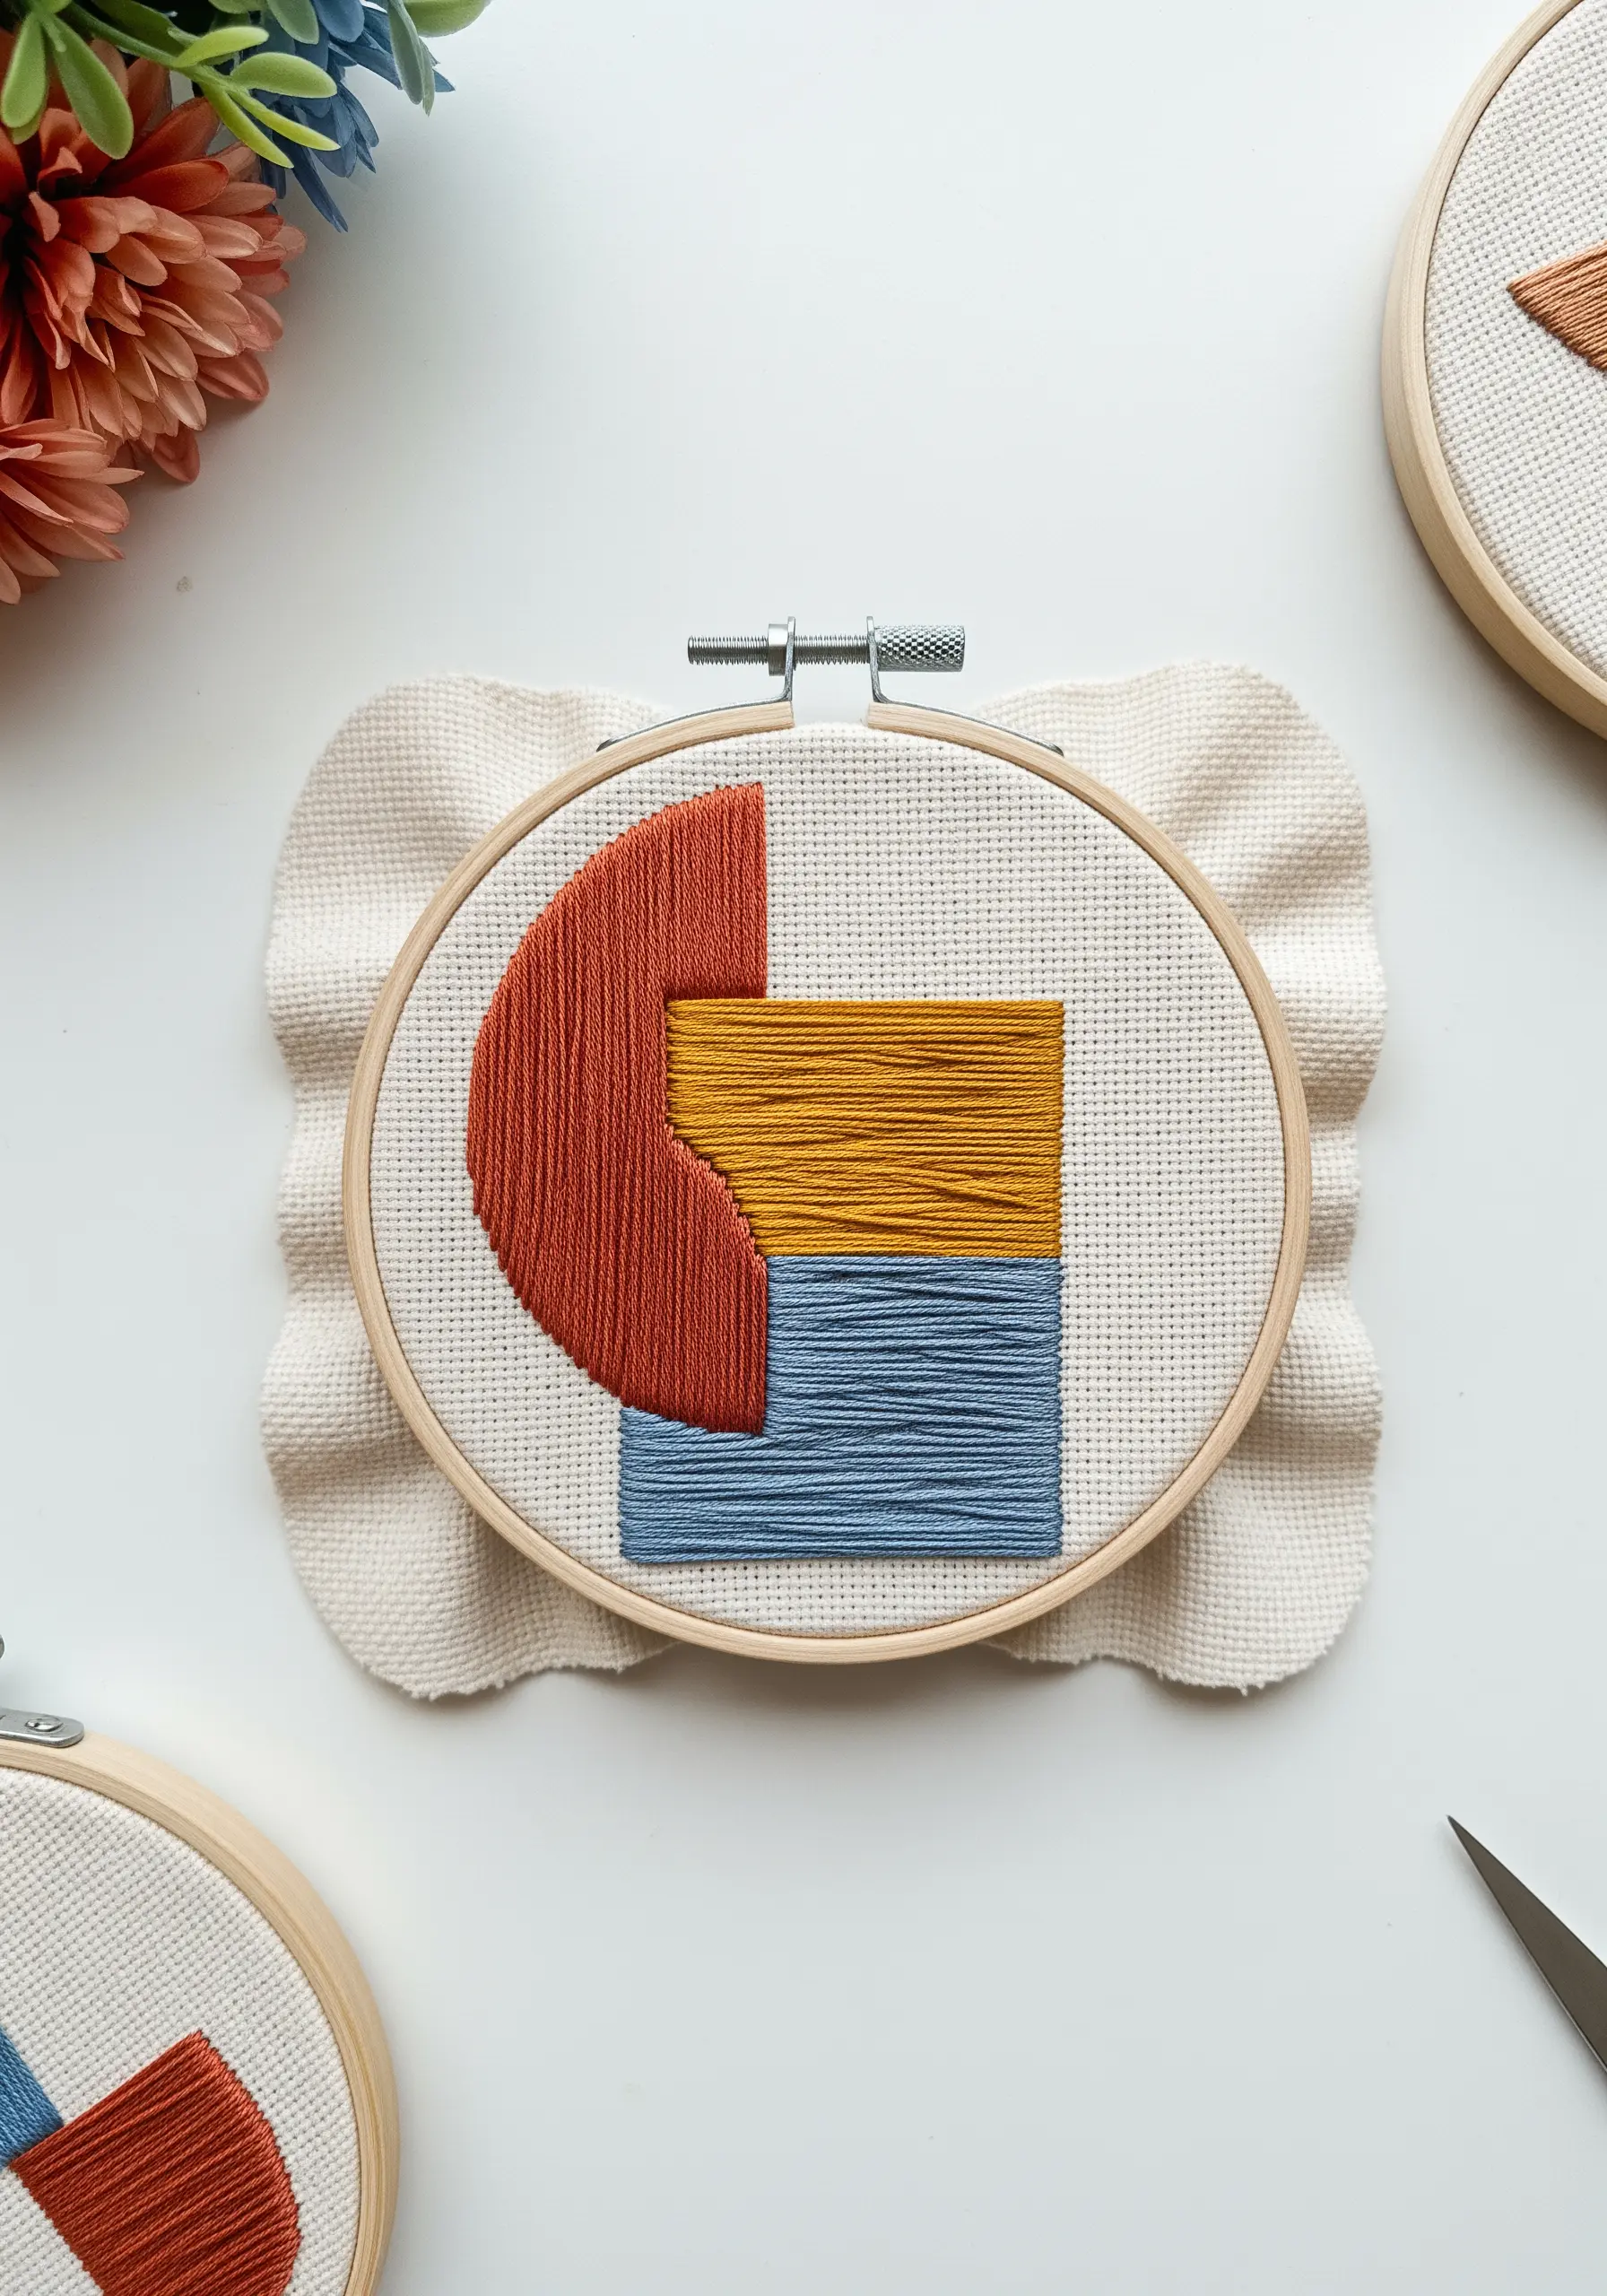
When working with abstract blocks of color, use the direction of your satin stitches to create definition and texture.
Stitch one block vertically, the next horizontally, and another diagonally.
Even when using the same stitch, this variation catches the light differently, making each shape distinct and adding dynamic energy to the composition.
This is a core principle behind effective abstract color-blend stitch ideas.
15. Embroider Flawless Script with a Stabilizer
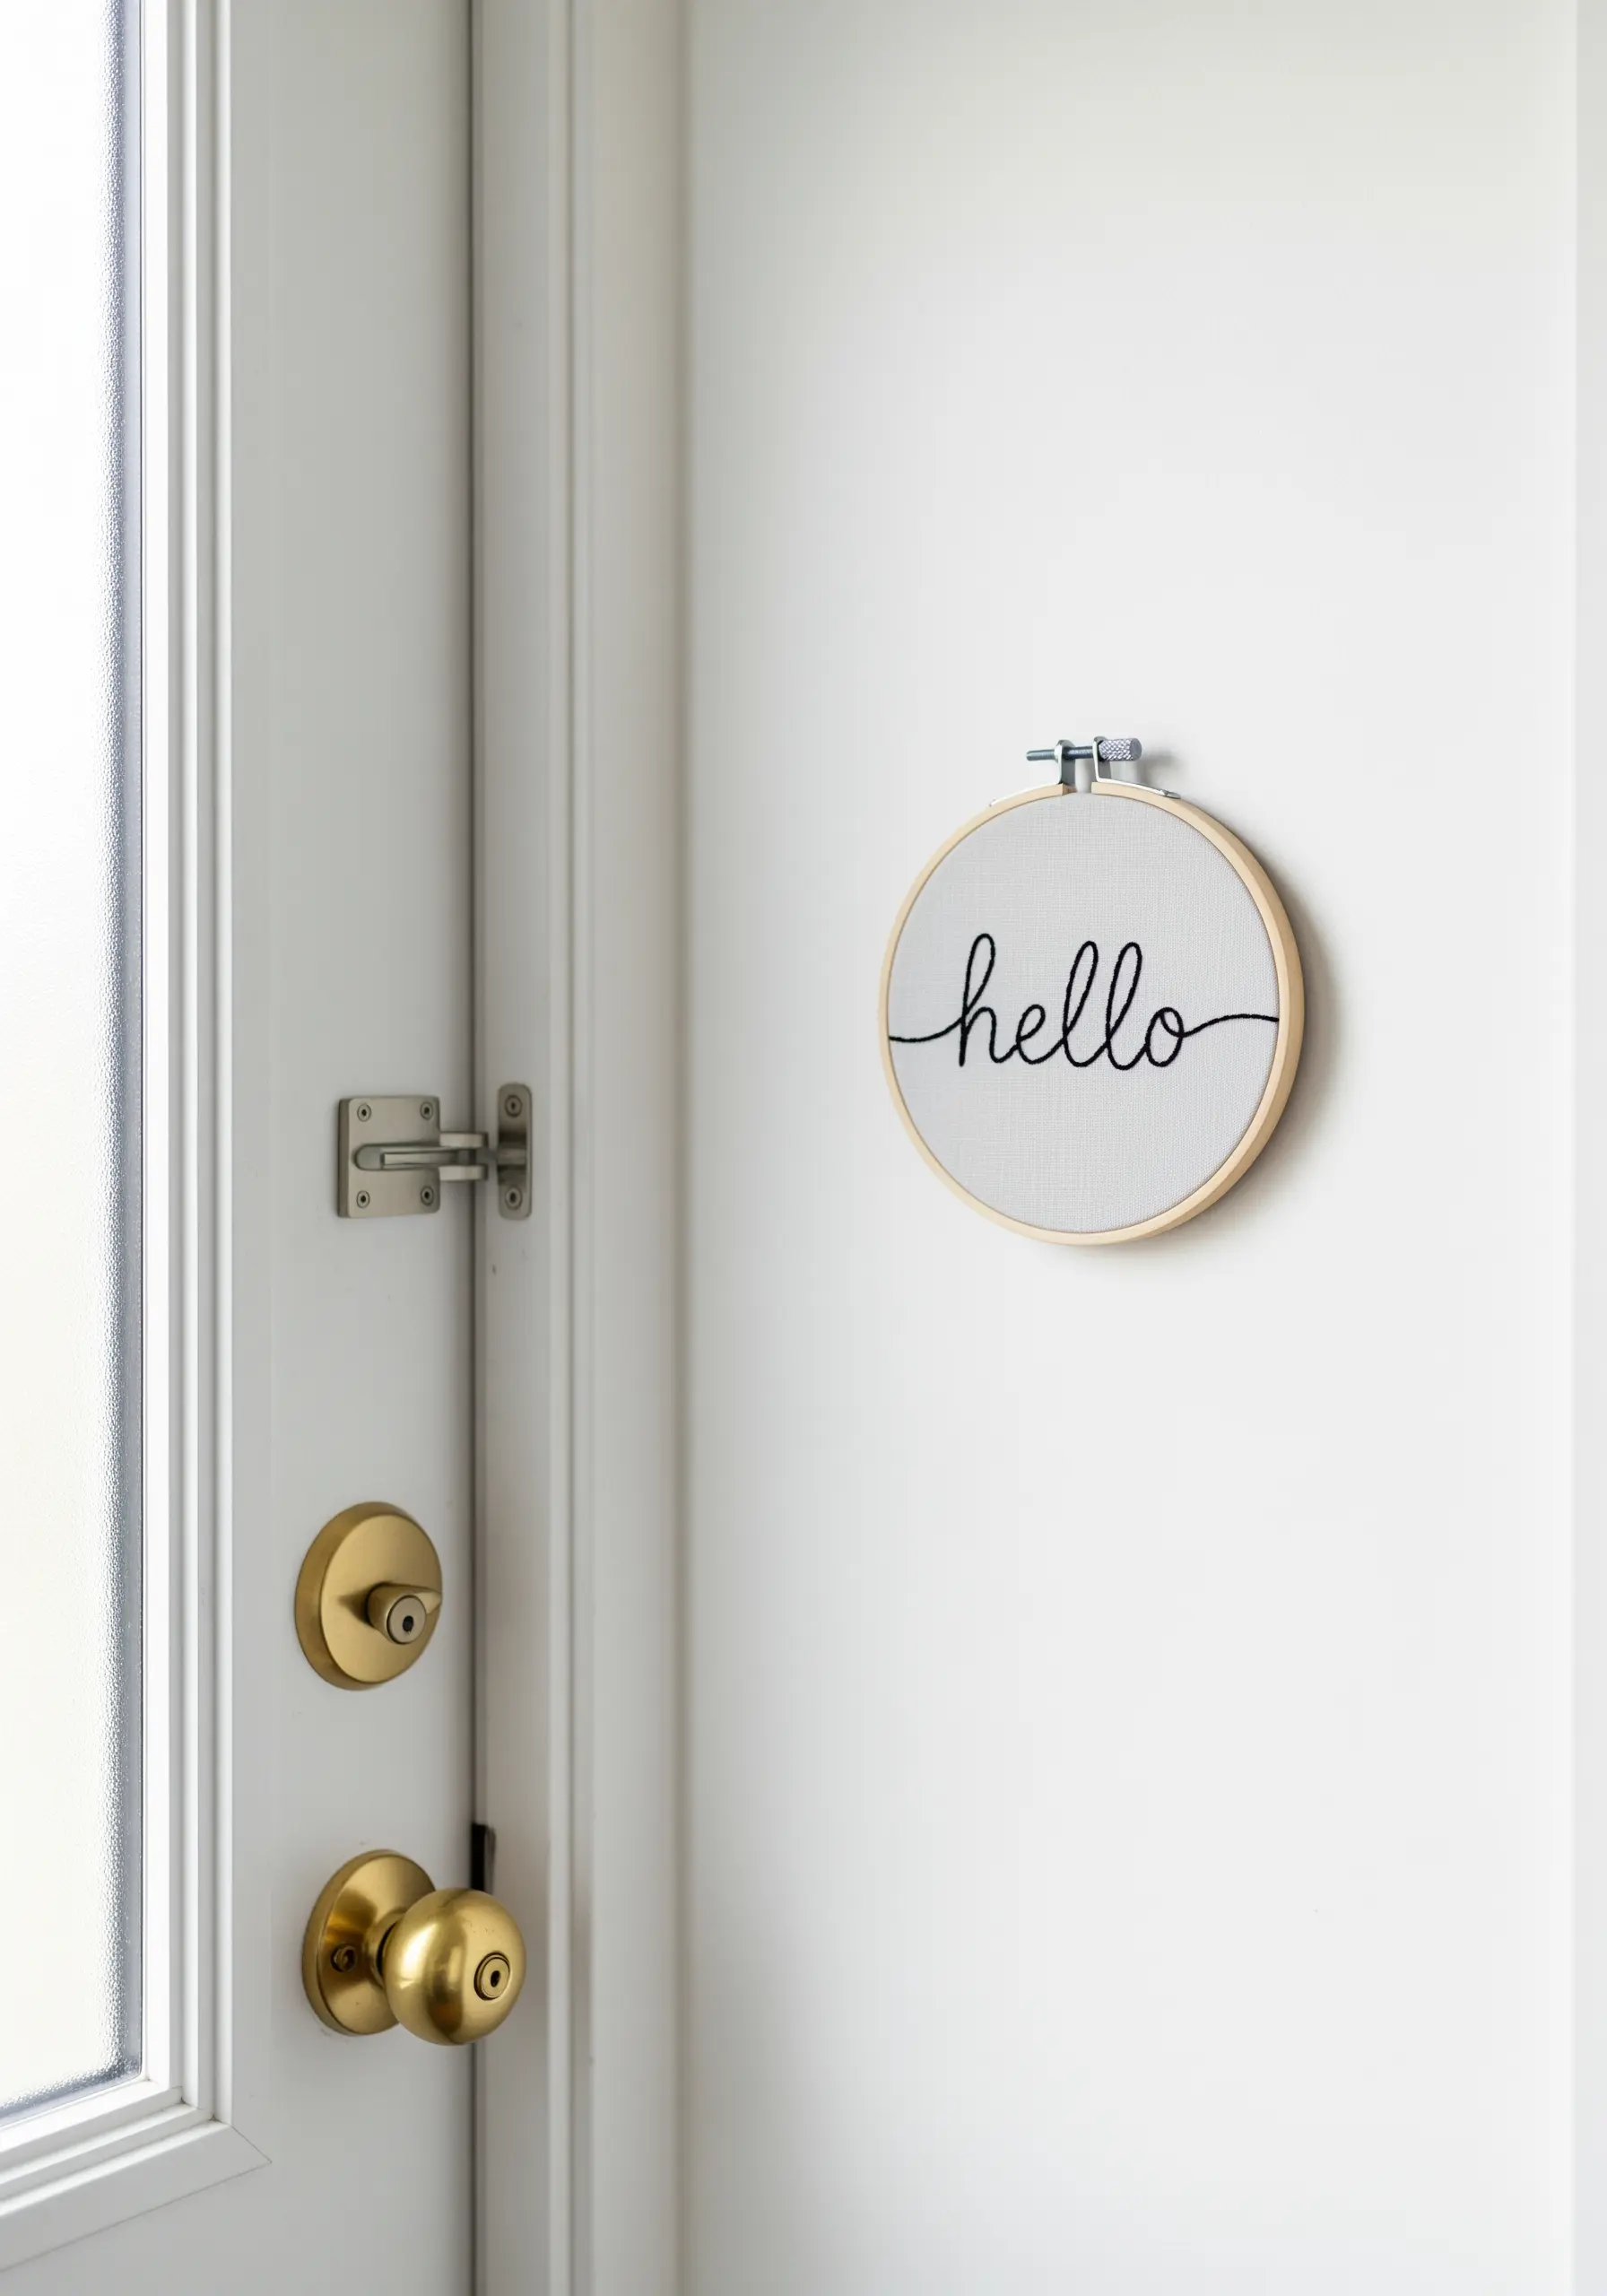
To achieve clean, consistent lettering, trace your word onto a sheet of water-soluble stabilizer (like Sulky Fabri-Solvy).
Hoop it with your fabric, stitch directly over the lines, and then dissolve the stabilizer in water.
This method ensures your curves are smooth and your spacing is perfect, leaving only your beautiful stitches behind.
It’s the best way to tackle minimal typography quotes with confidence.
16. Create a Cohesive Set with a Unified Palette
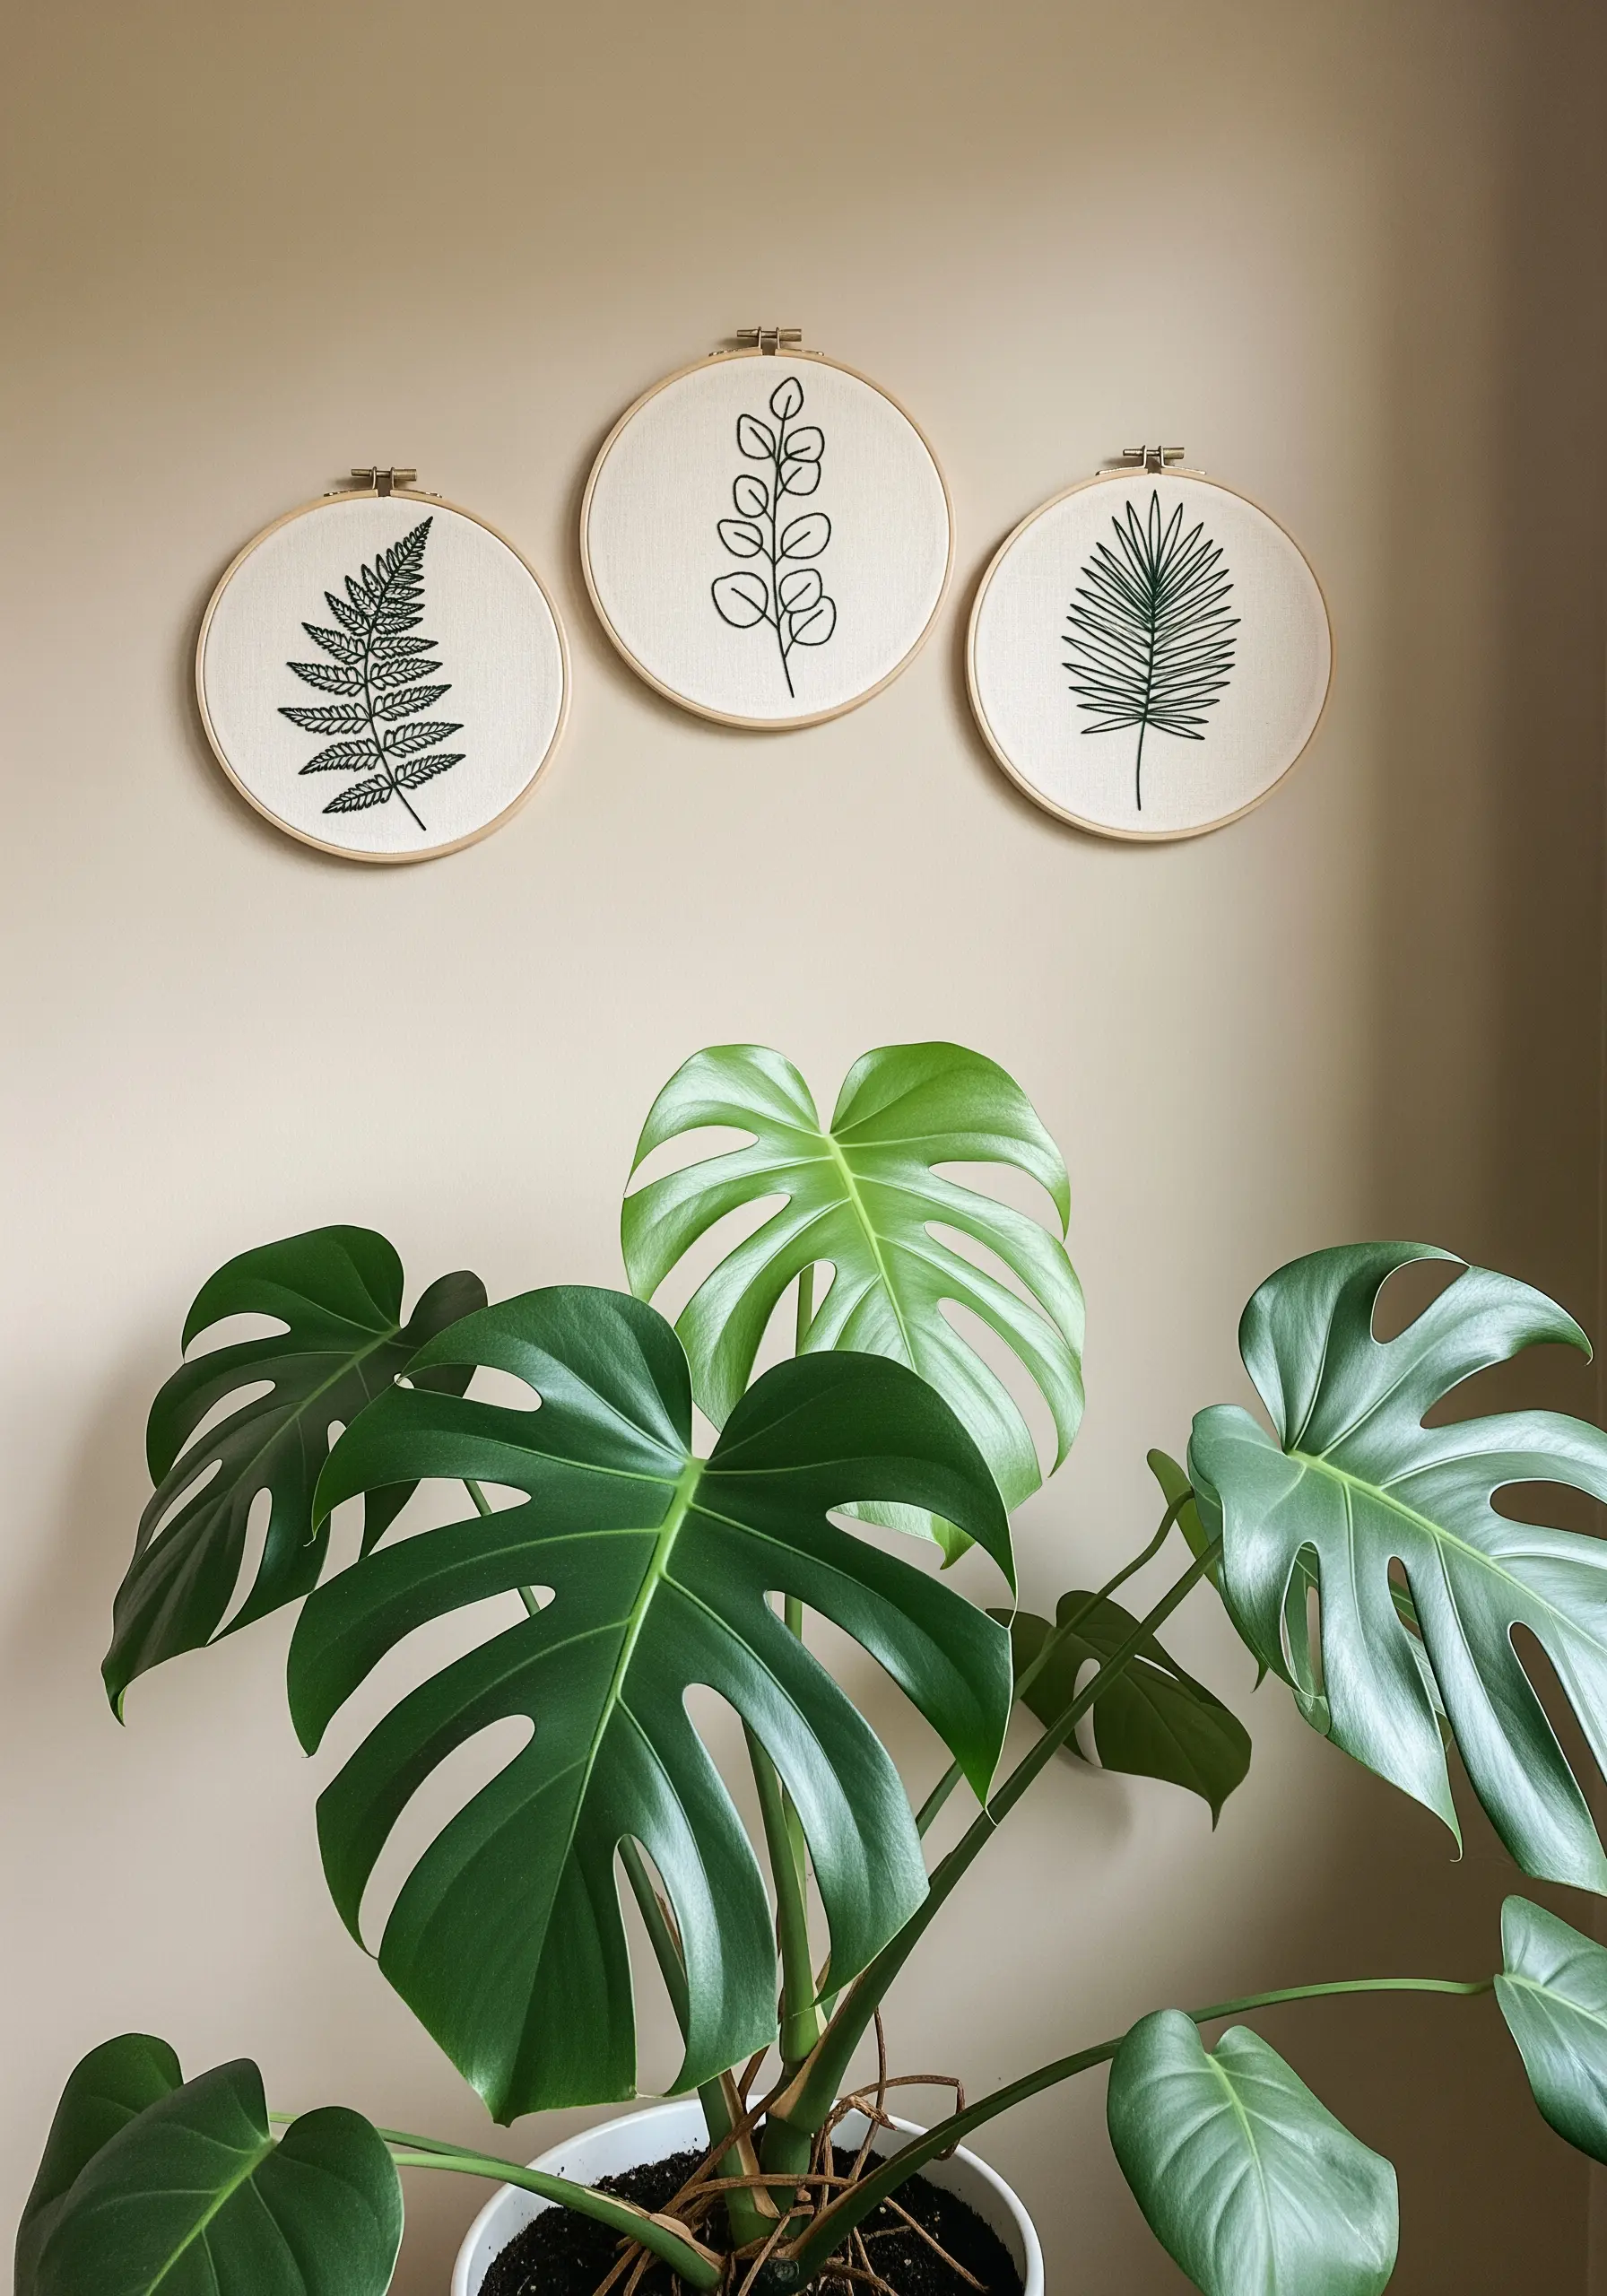
To design a sophisticated gallery wall, stitch different motifs using the same fabric and thread color.
This simple constraint ties the individual pieces together, creating a unified and intentional display.
Use a basic backstitch or stem stitch to keep the focus on the delicate forms of the botanicals.
This technique is perfect for showcasing collections of tropical leaf embroidery designs in a clean, modern way.
17. Combine Stitches for Lifelike Detail
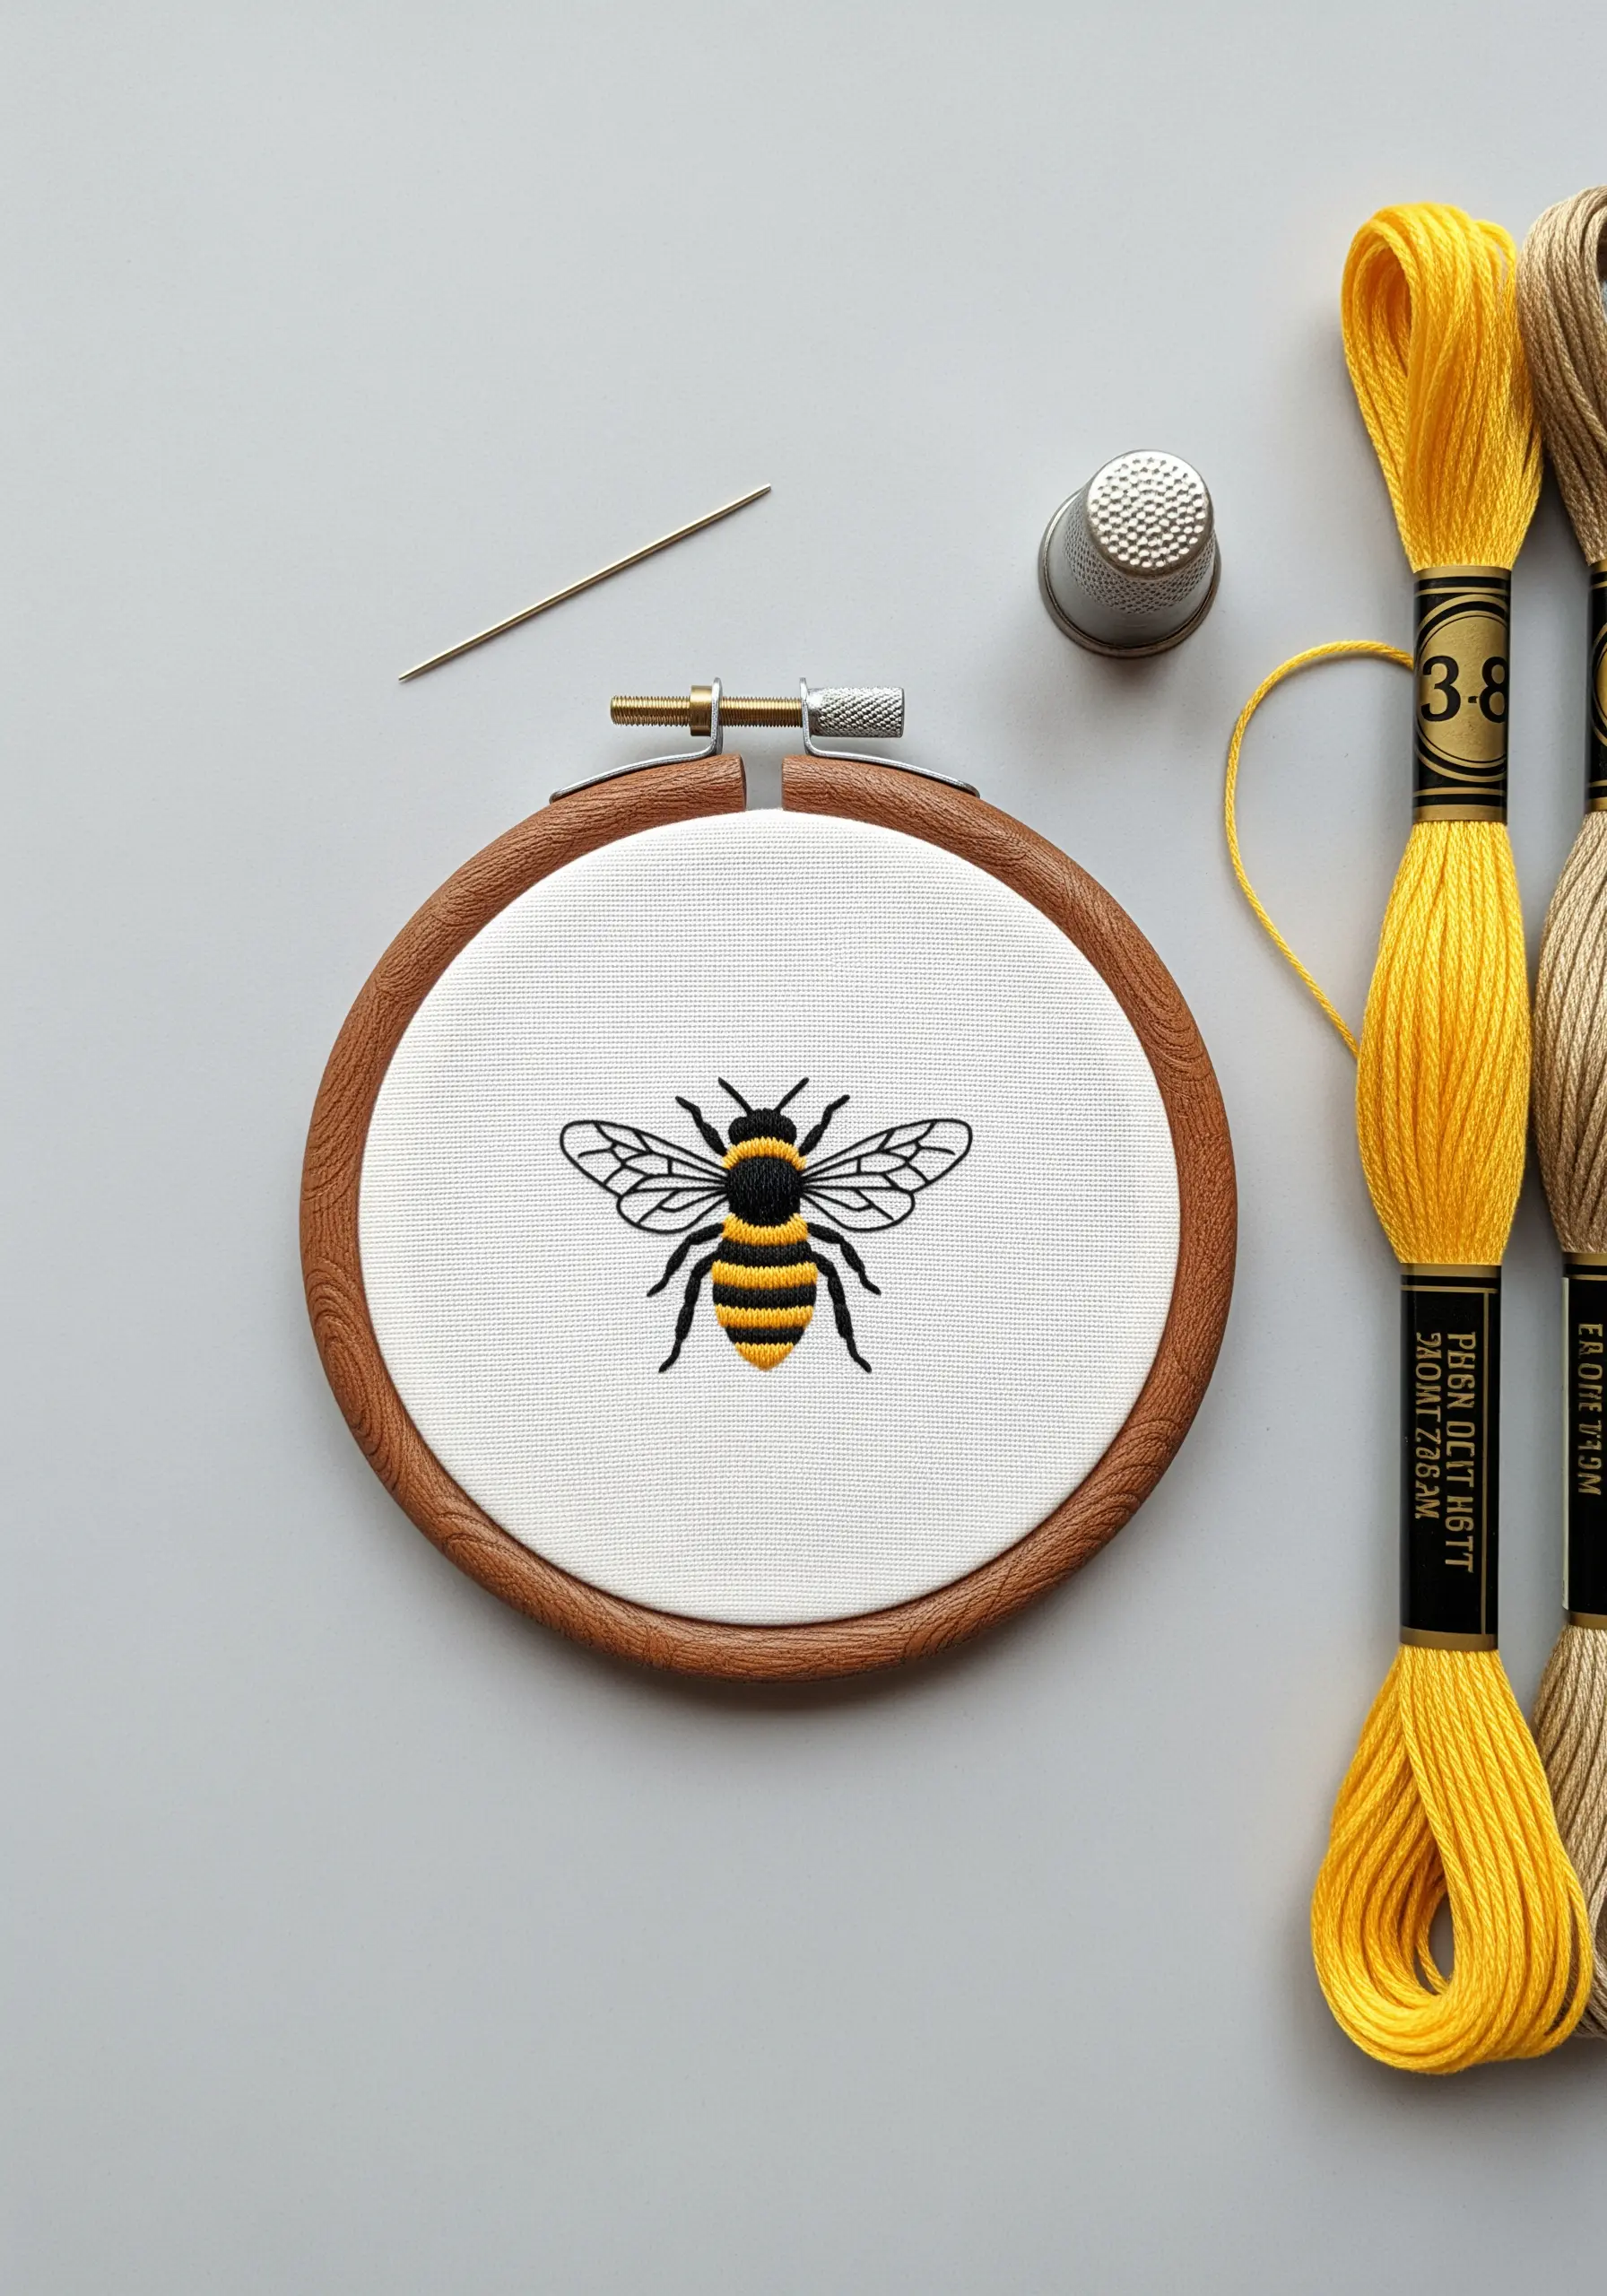
Bring a simple motif to life by assigning different stitches to different textures.
Use a crisp backstitch for the hard outlines of the bee’s legs and antennae.
Fill the body with a soft, plush satin stitch to suggest its fuzzy texture.
For the delicate wings, use tiny seed stitches or an open fishbone stitch to create a sense of transparency.
This thoughtful approach is key to ways to capture nature’s textures in your next embroidery project.
18. Blend Colors for a Soft, Dreamy Effect
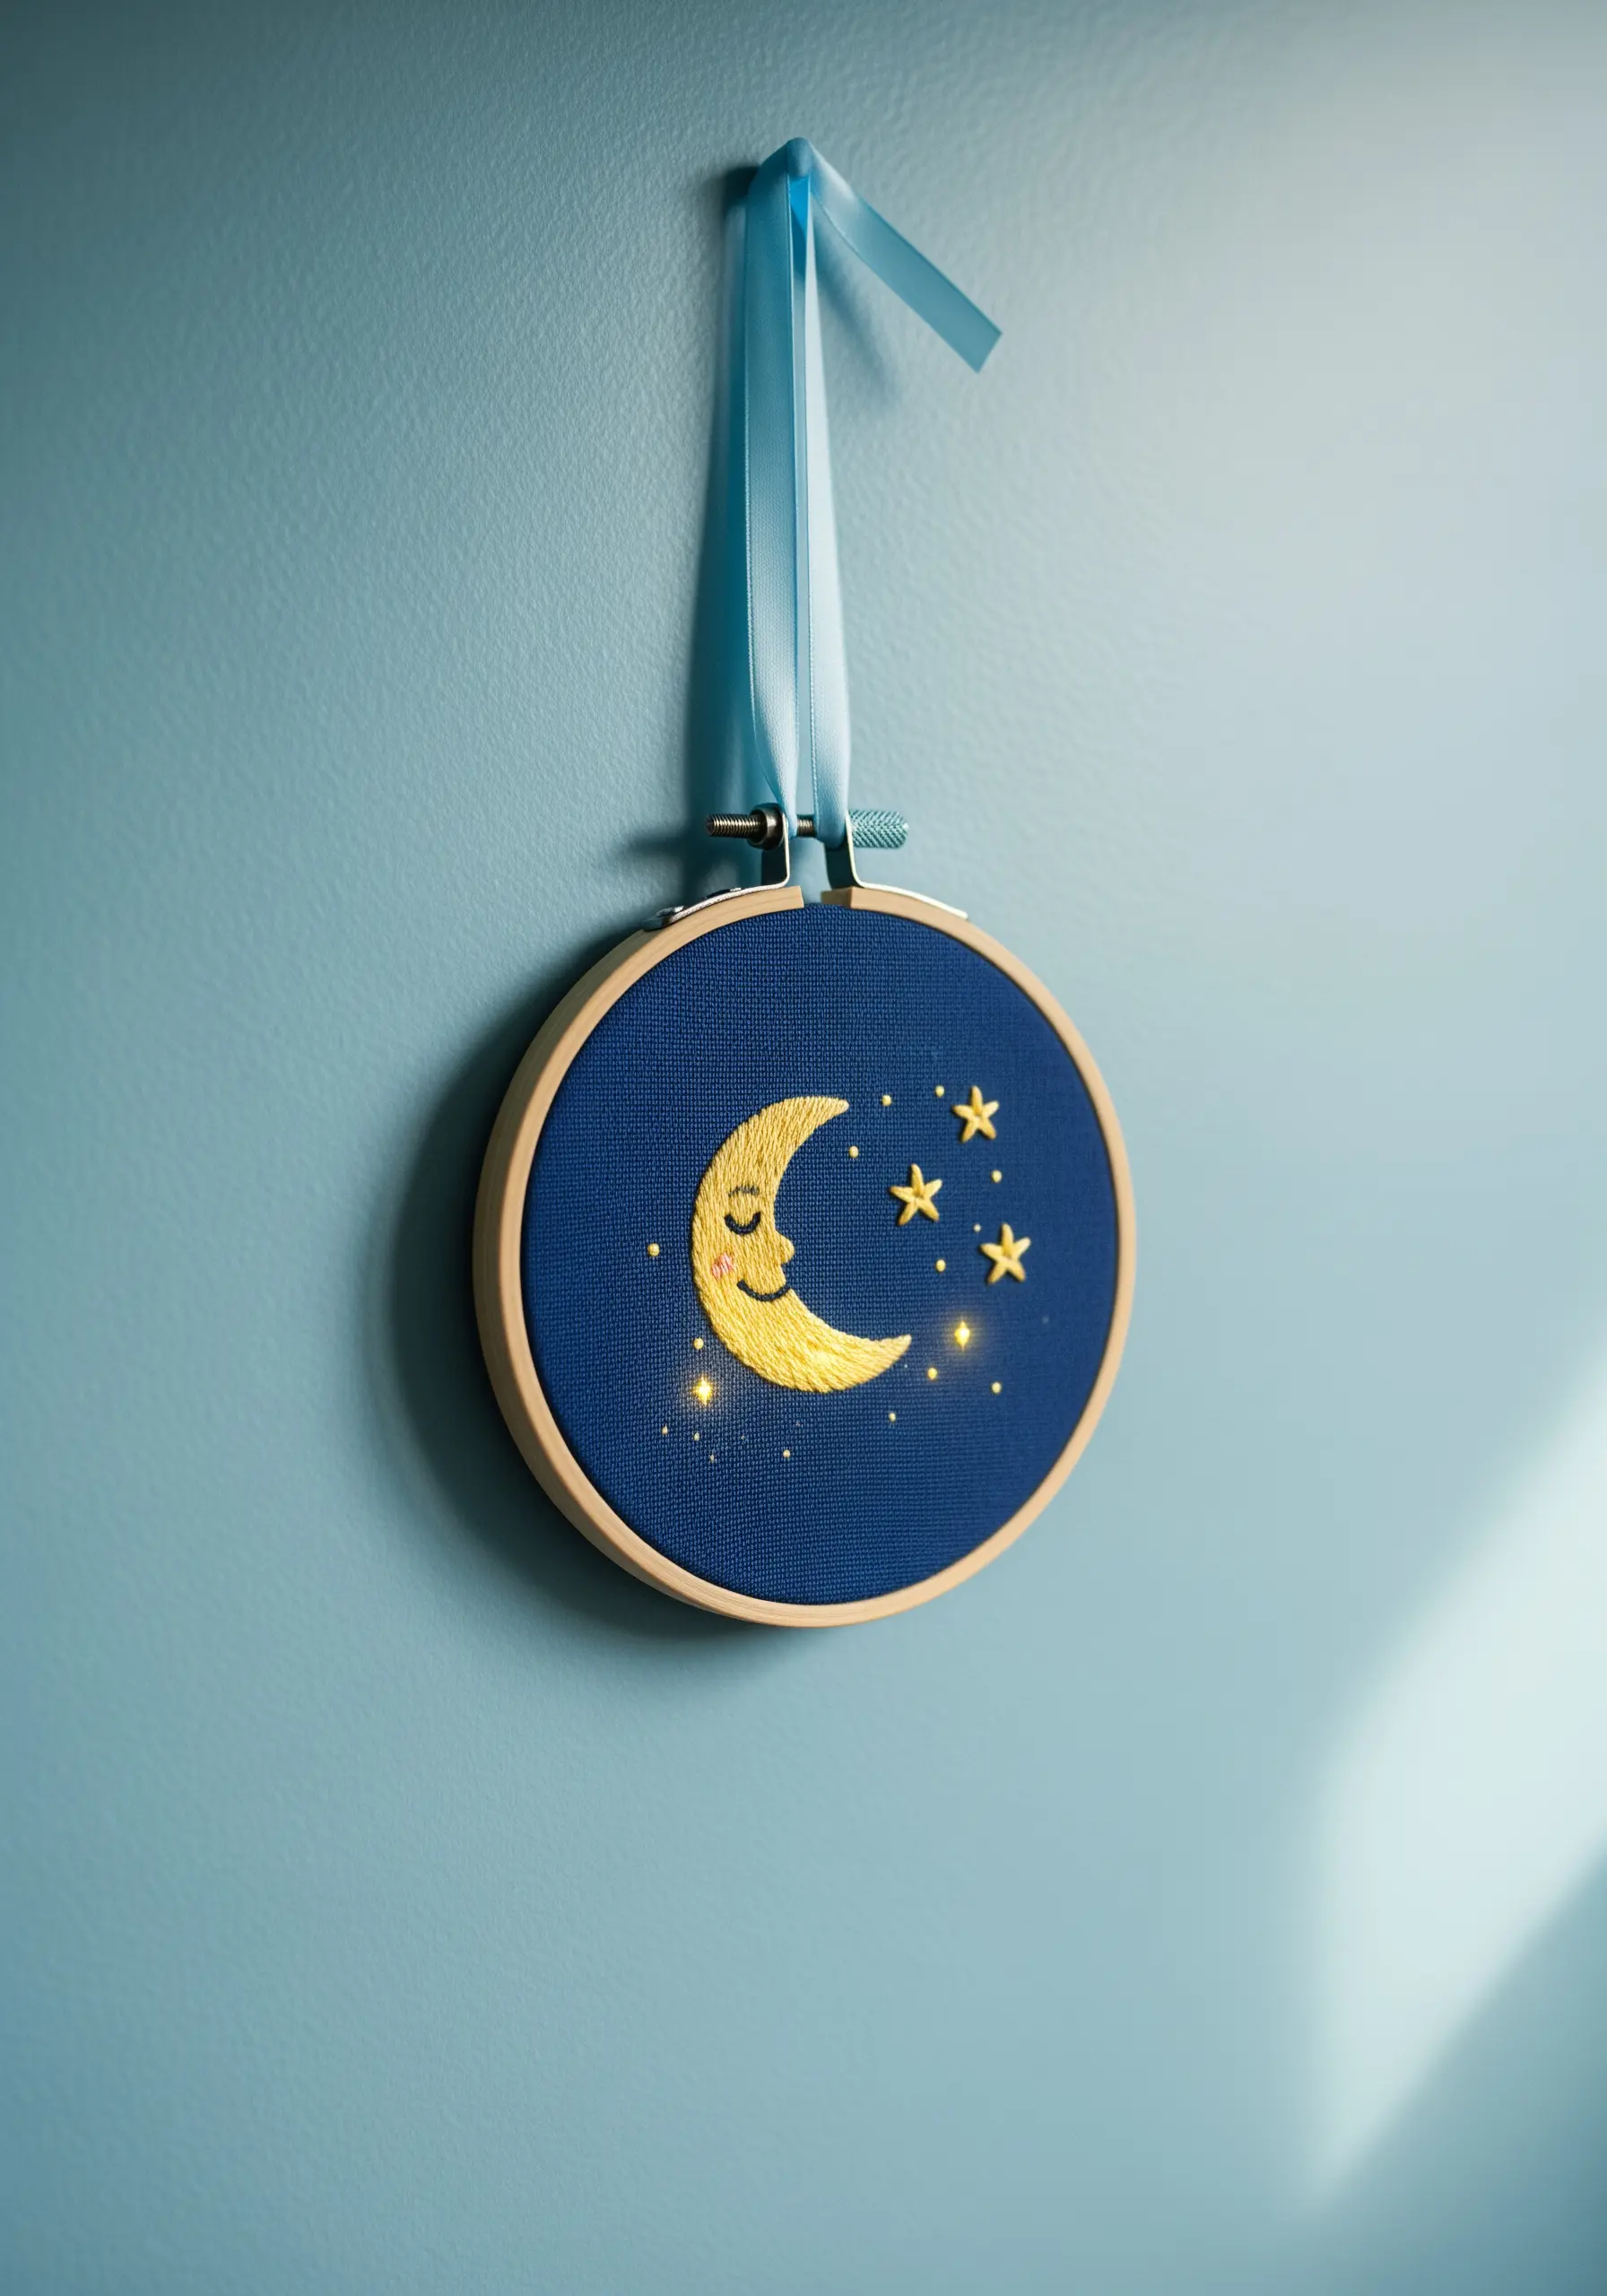
Create a gentle gradient on the moon by using the long-and-short stitch with two similar shades of yellow.
Instead of a hard line between colors, this technique allows the stitches to interlock, creating a soft, painterly blend.
For extra magic, add a few tiny stars with a single strand of metallic gold thread—it will catch the light subtly.
This gentle blending is perfect for cloud-soft embroidery hoops for nursery walls.
19. Echo Your Environment with Color and Form
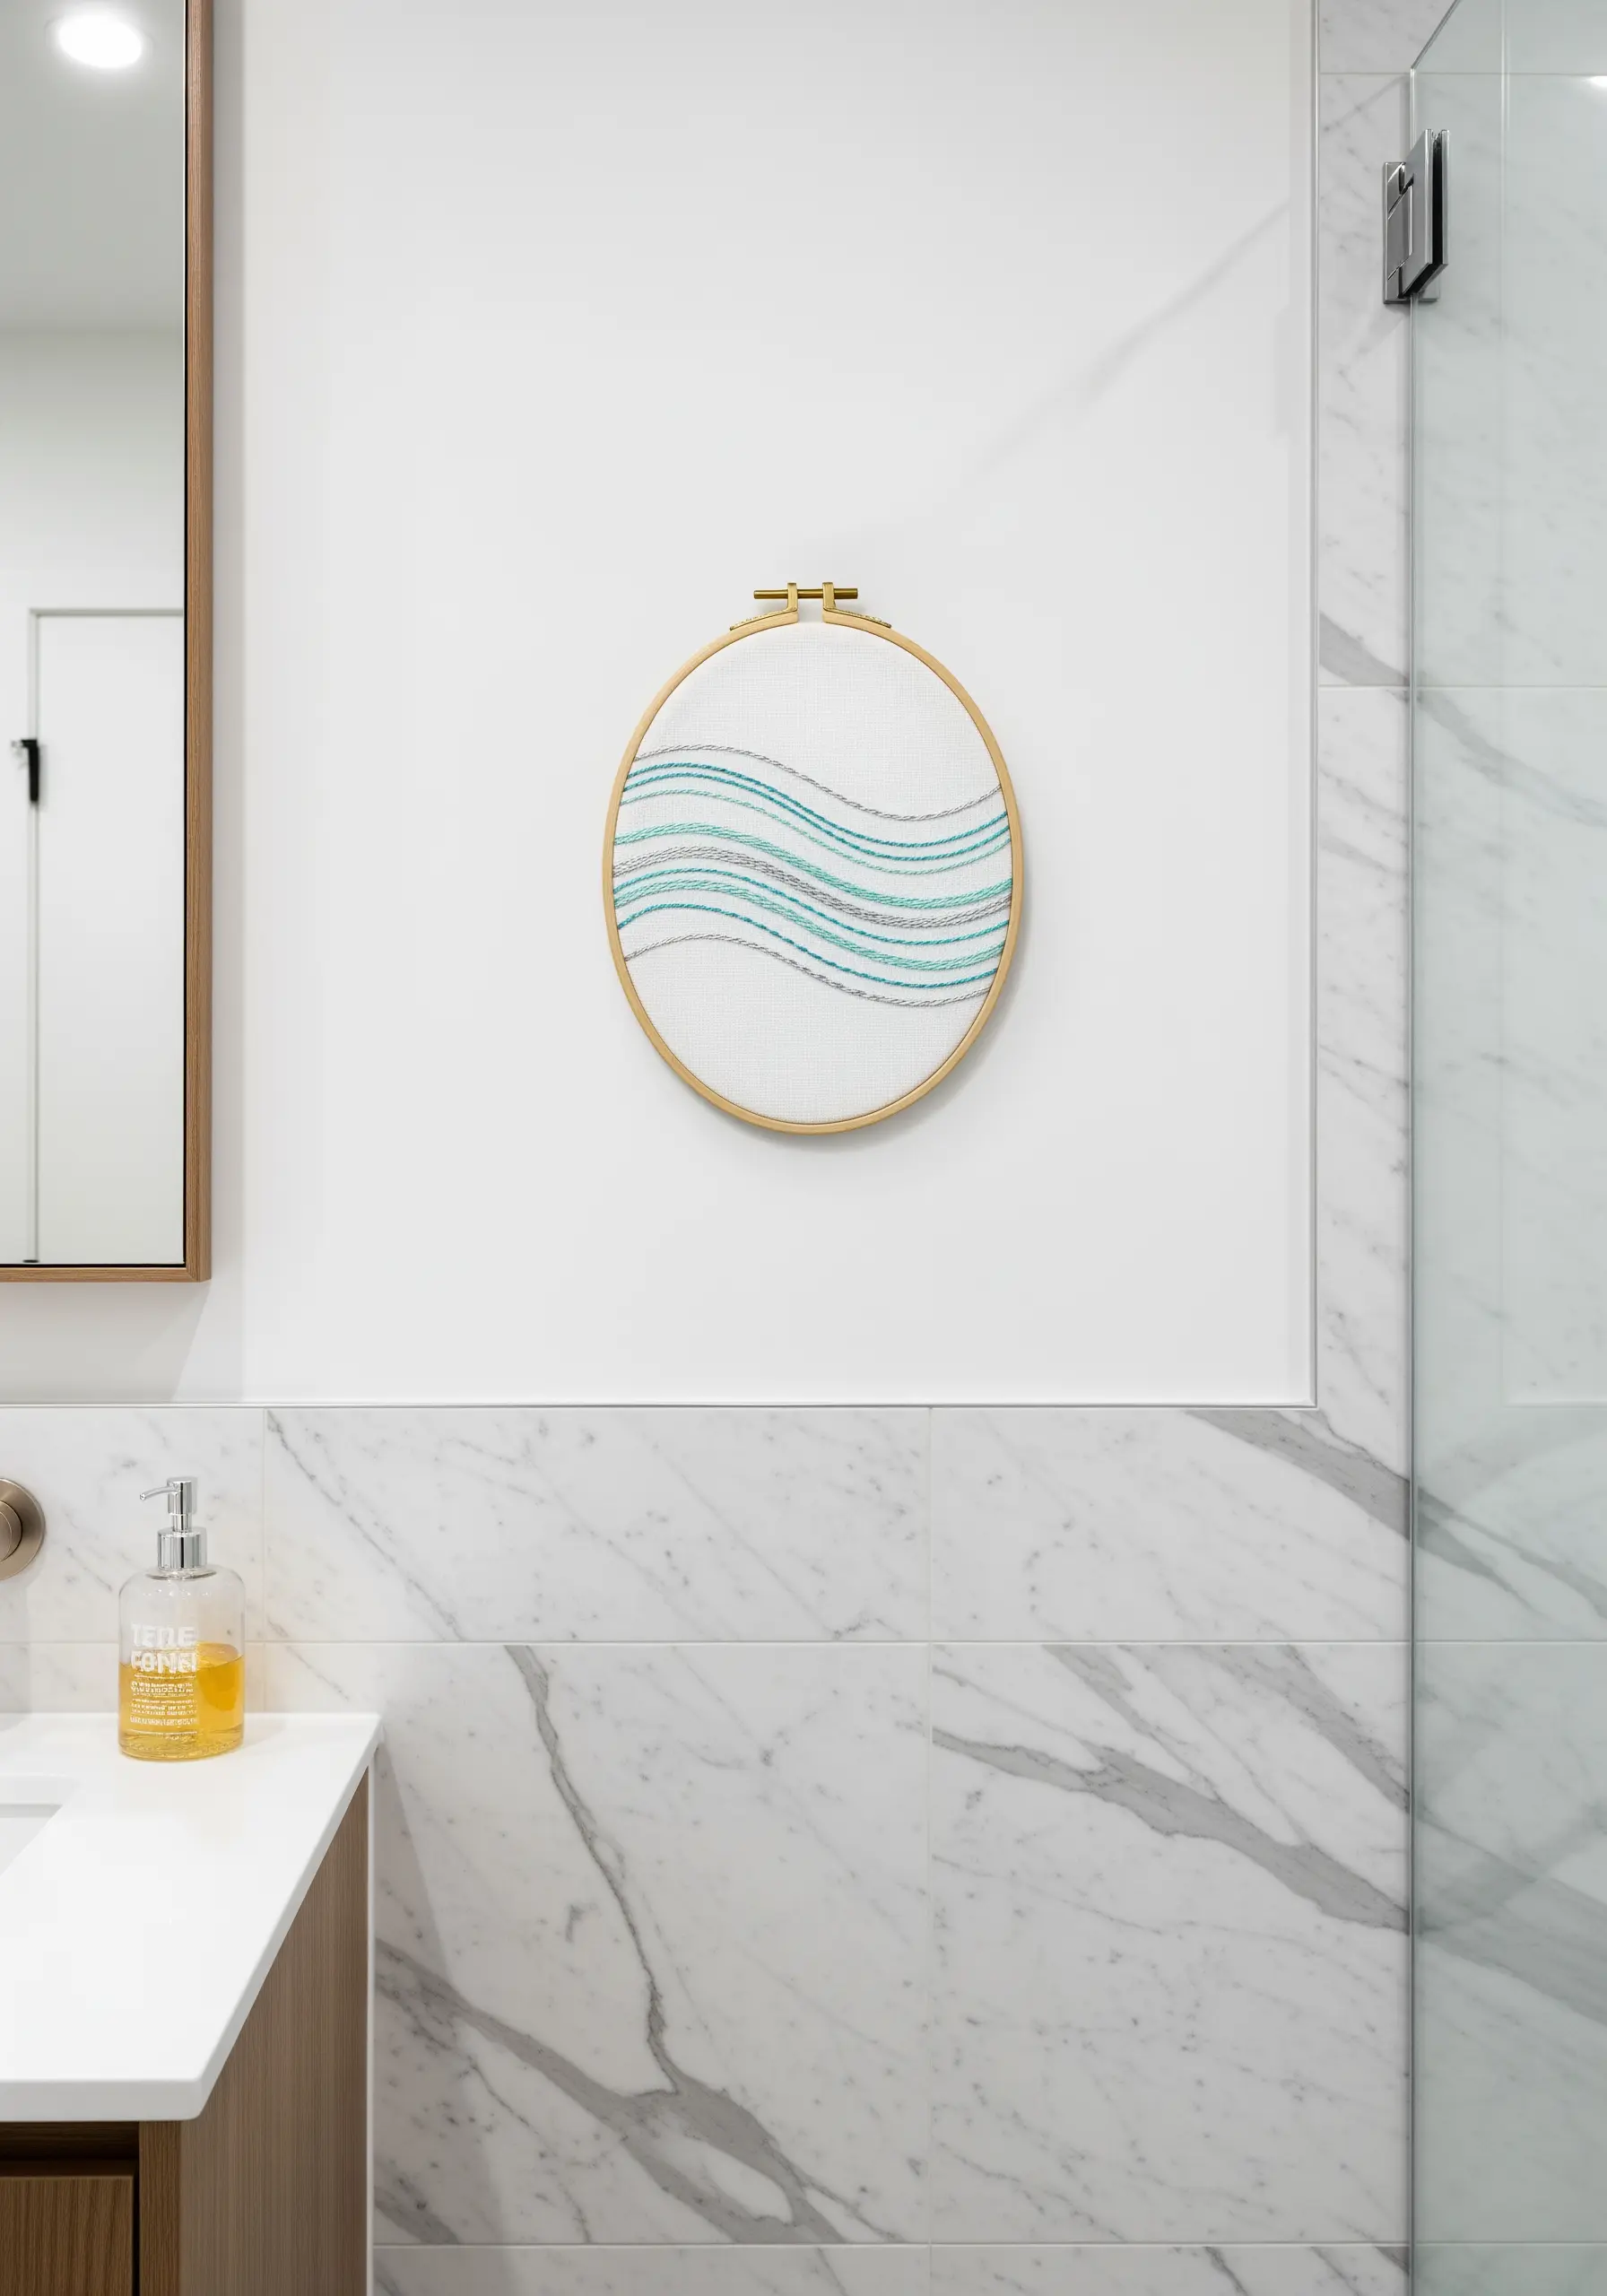
When creating decor for a specific room, pull your color palette directly from the space.
The cool grays and teals in this piece echo the marble and water elements of a bathroom, creating a harmonious and serene feel.
The gentle, flowing lines stitched with a simple backstitch mimic the movement of water, making it a perfect fit for the environment.
This thoughtful integration is the basis for successful tiny bathroom embroidery art projects.
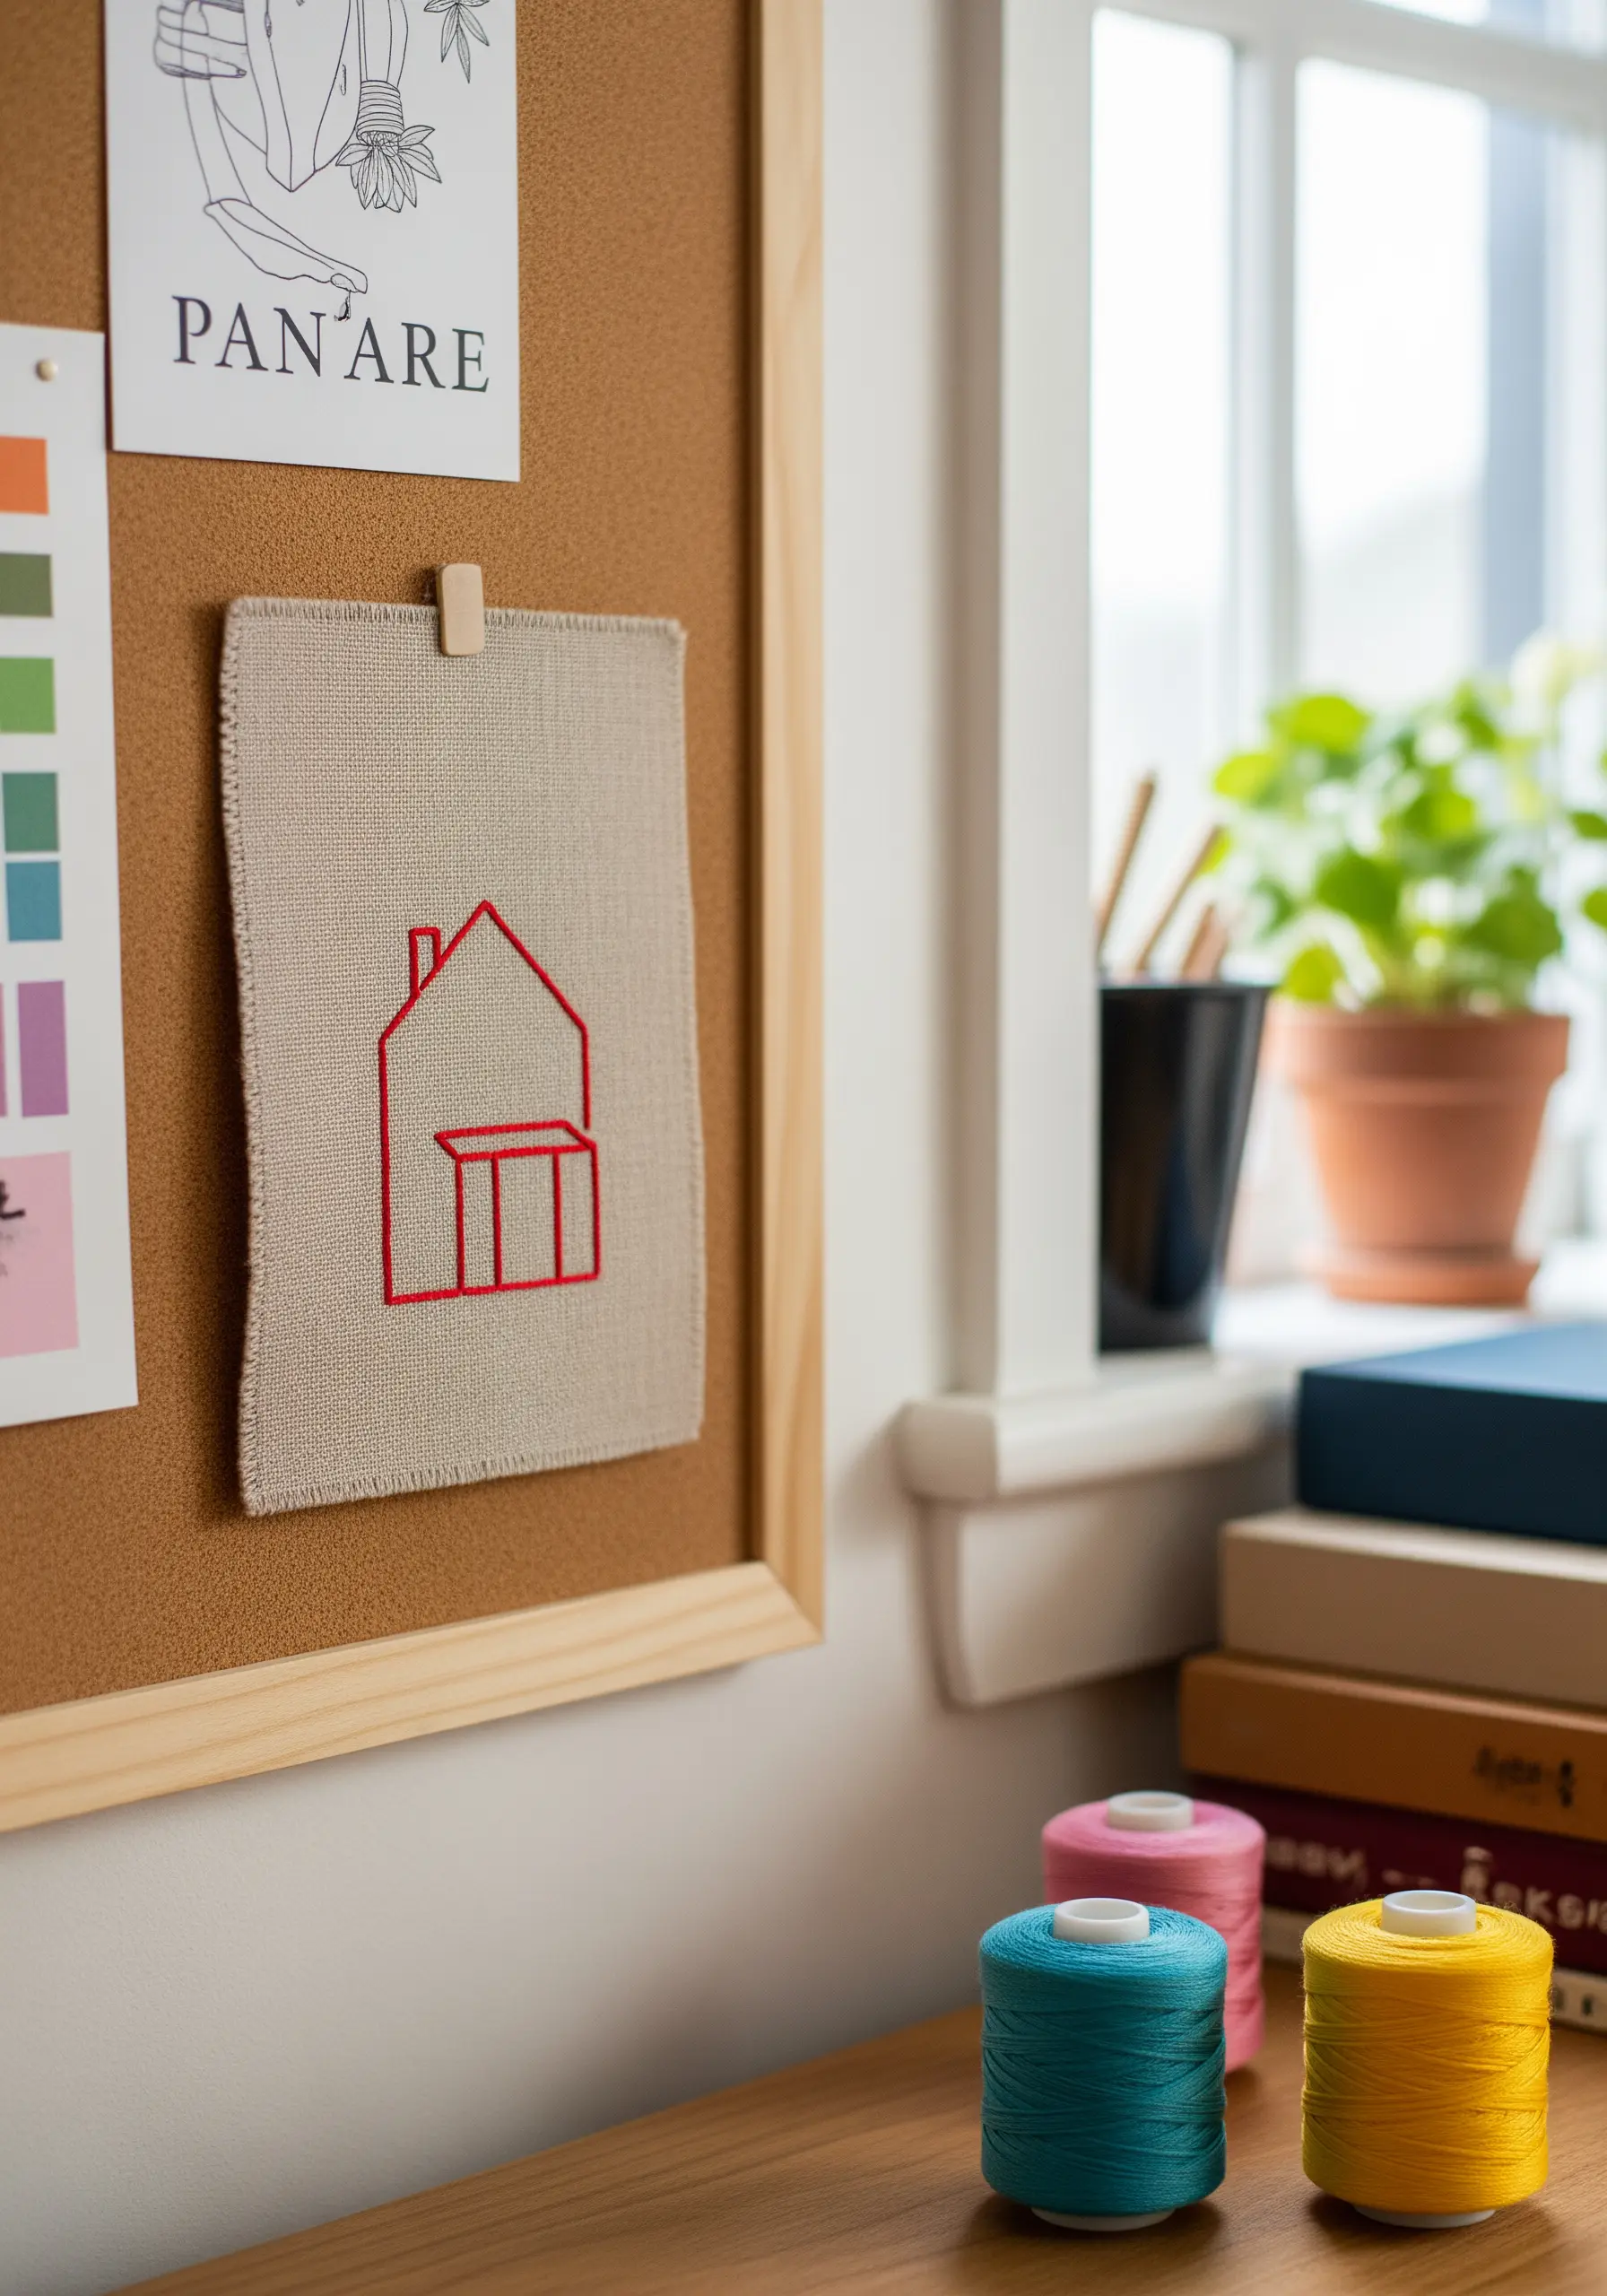
20. Embrace Contrast for Graphic Impact
Make simple linework pop by stitching with bright, vibrant threads on a dark fabric like black or navy blue canvas.
The high contrast makes every stitch stand out, turning a simple geometric design into a bold statement piece.
A simple backstitch is all you need; the power of this design comes from the confident color choices.
This is a great way to experiment with abstract thread embroidery ideas that turn simple lines into mesmerizing wall art.
21. Display Your Art Without a Hoop
For a rustic, modern look, display your finished embroidery on a raw-edged piece of fabric.
After stitching your design, remove the fabric from the hoop and gently fray the edges by pulling away the outer threads.
Pin it to a corkboard or clip it to a string for a relaxed, unframed presentation.
It’s an effortless way to style minimal DIY embroidery pieces perfect for a gallery wall.
22. Create Sculptural Effects with Woven Wheels
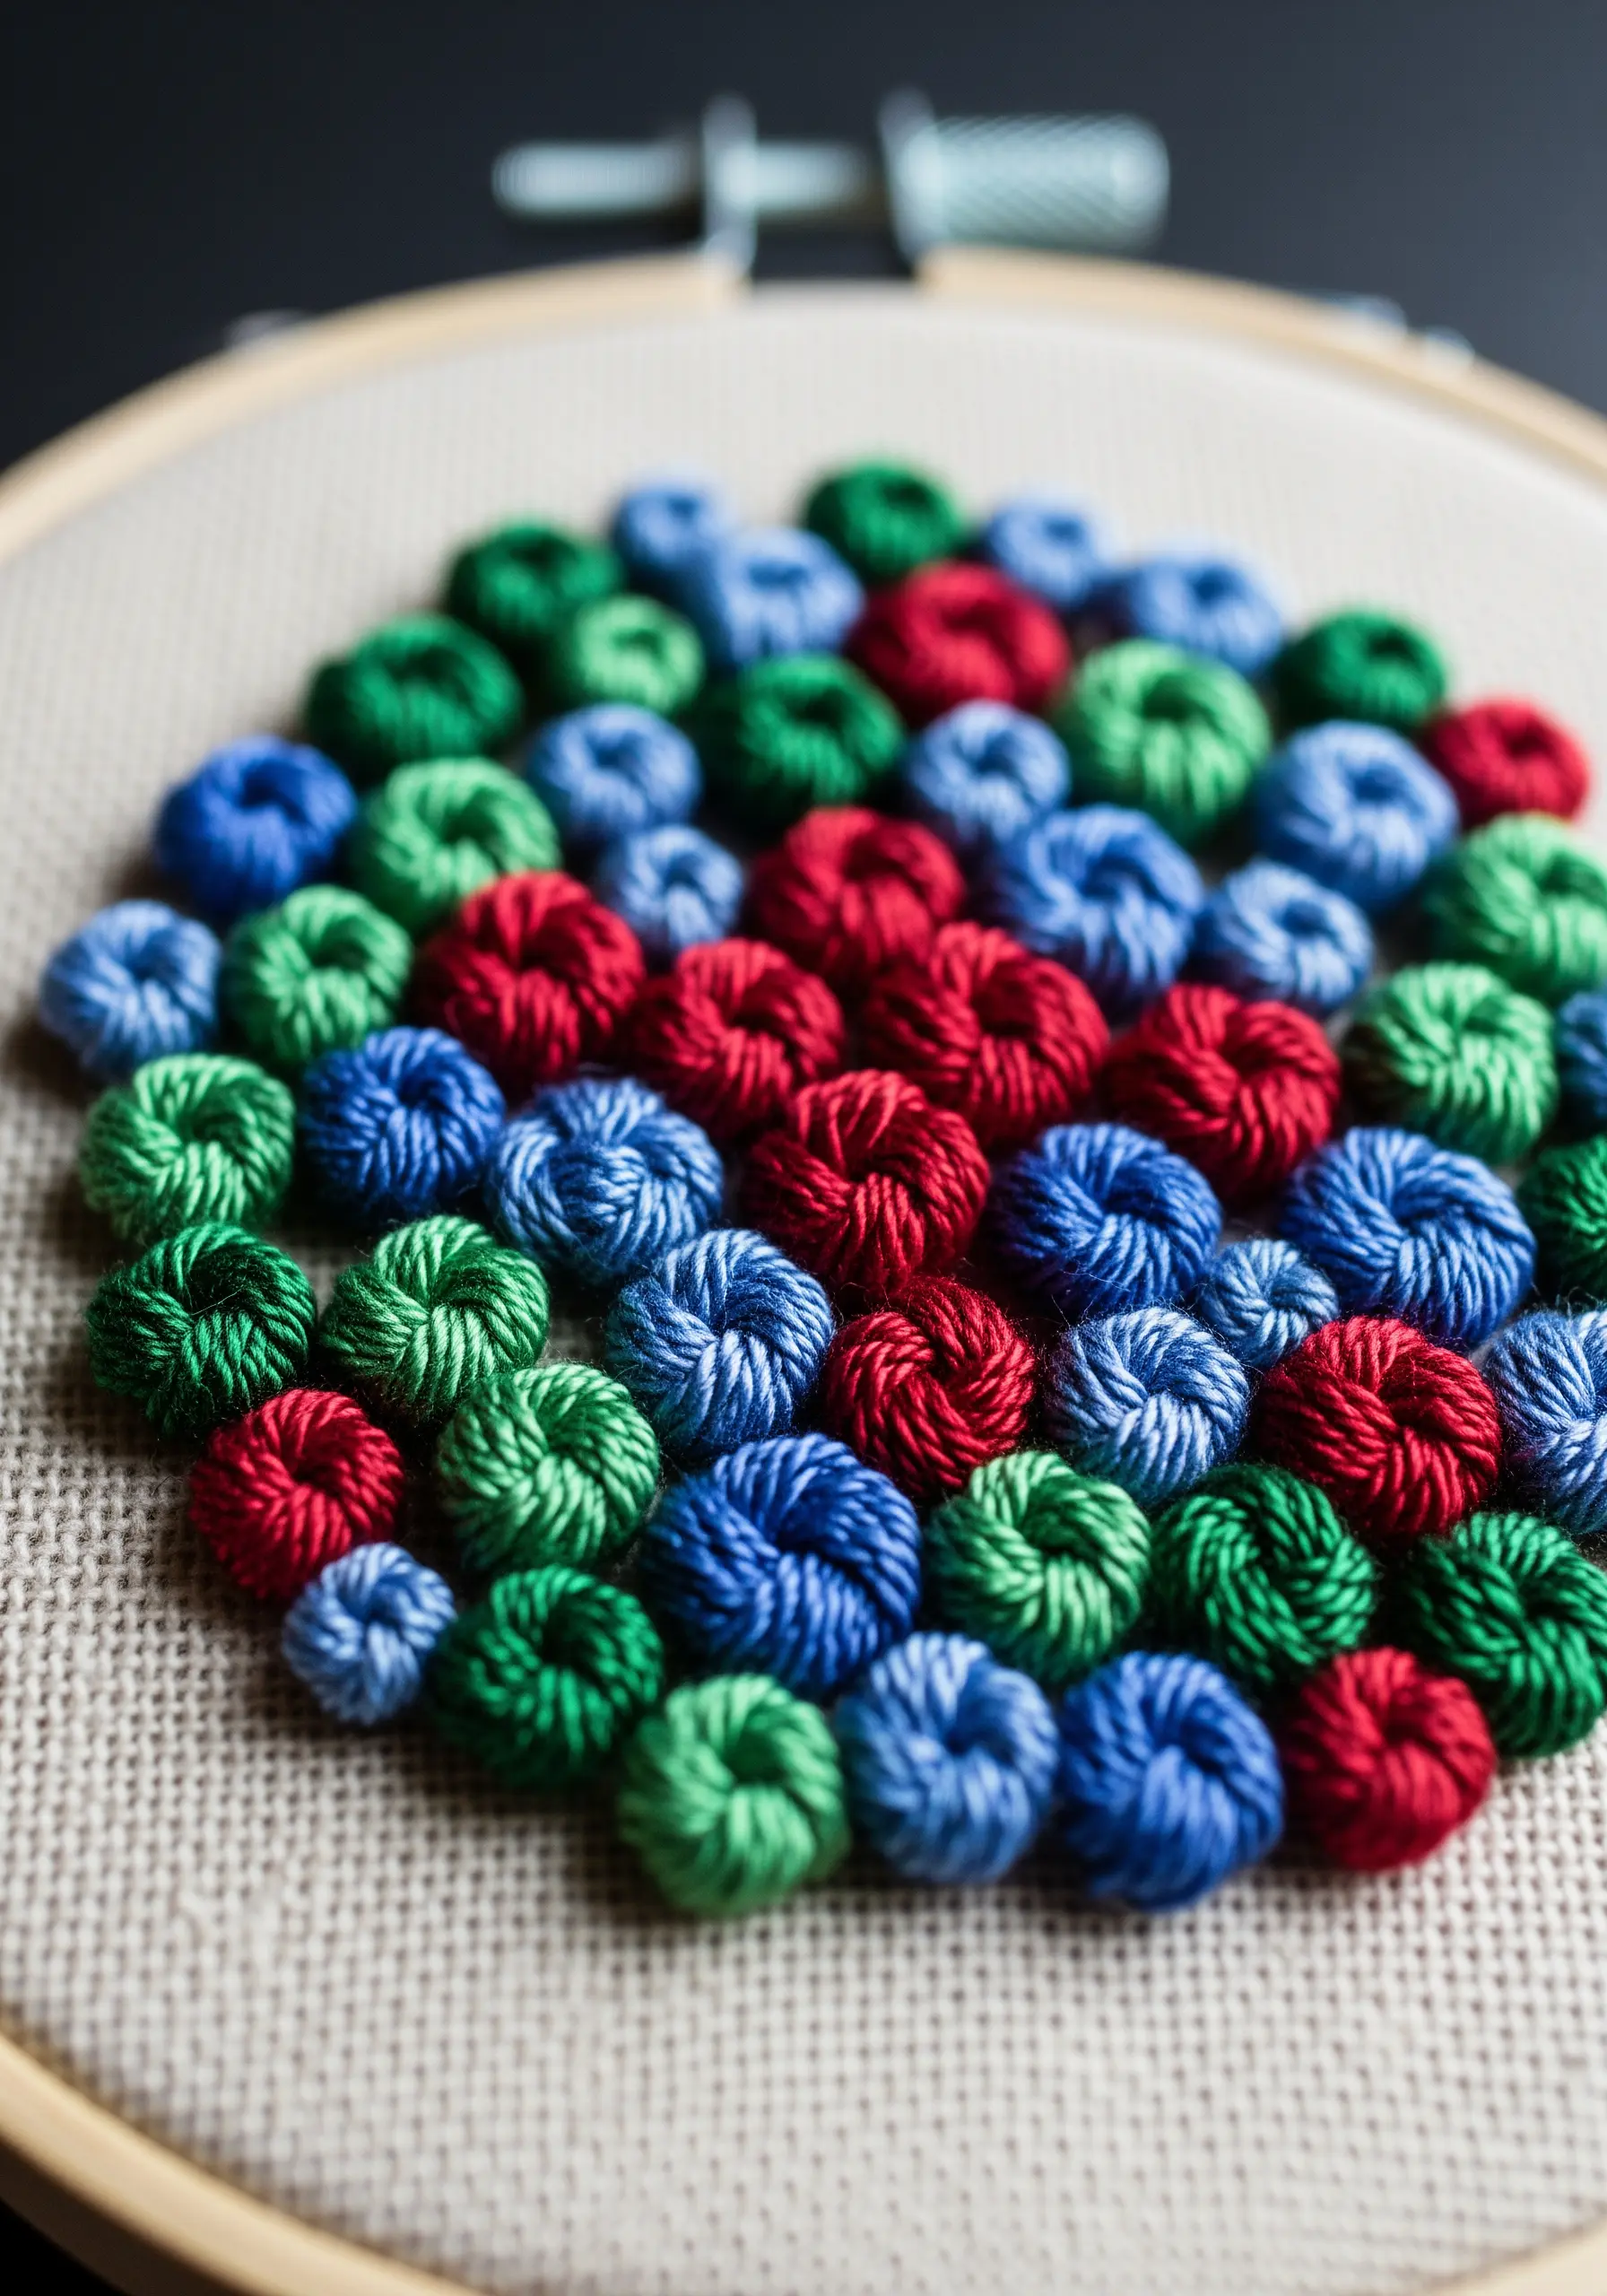
Move beyond flat stitches and build raised, three-dimensional texture with the woven wheel stitch (also called the spider web rose stitch).
Create a foundation of an odd number of straight stitches, then weave your thread over and under them in a spiral until the foundation is covered.
By varying the stitch size and thread colors, you can create a dense, tactile garden of texture, perfect for exploring contemporary texture techniques.
23. Integrate Embroidery into Your Gallery Wall
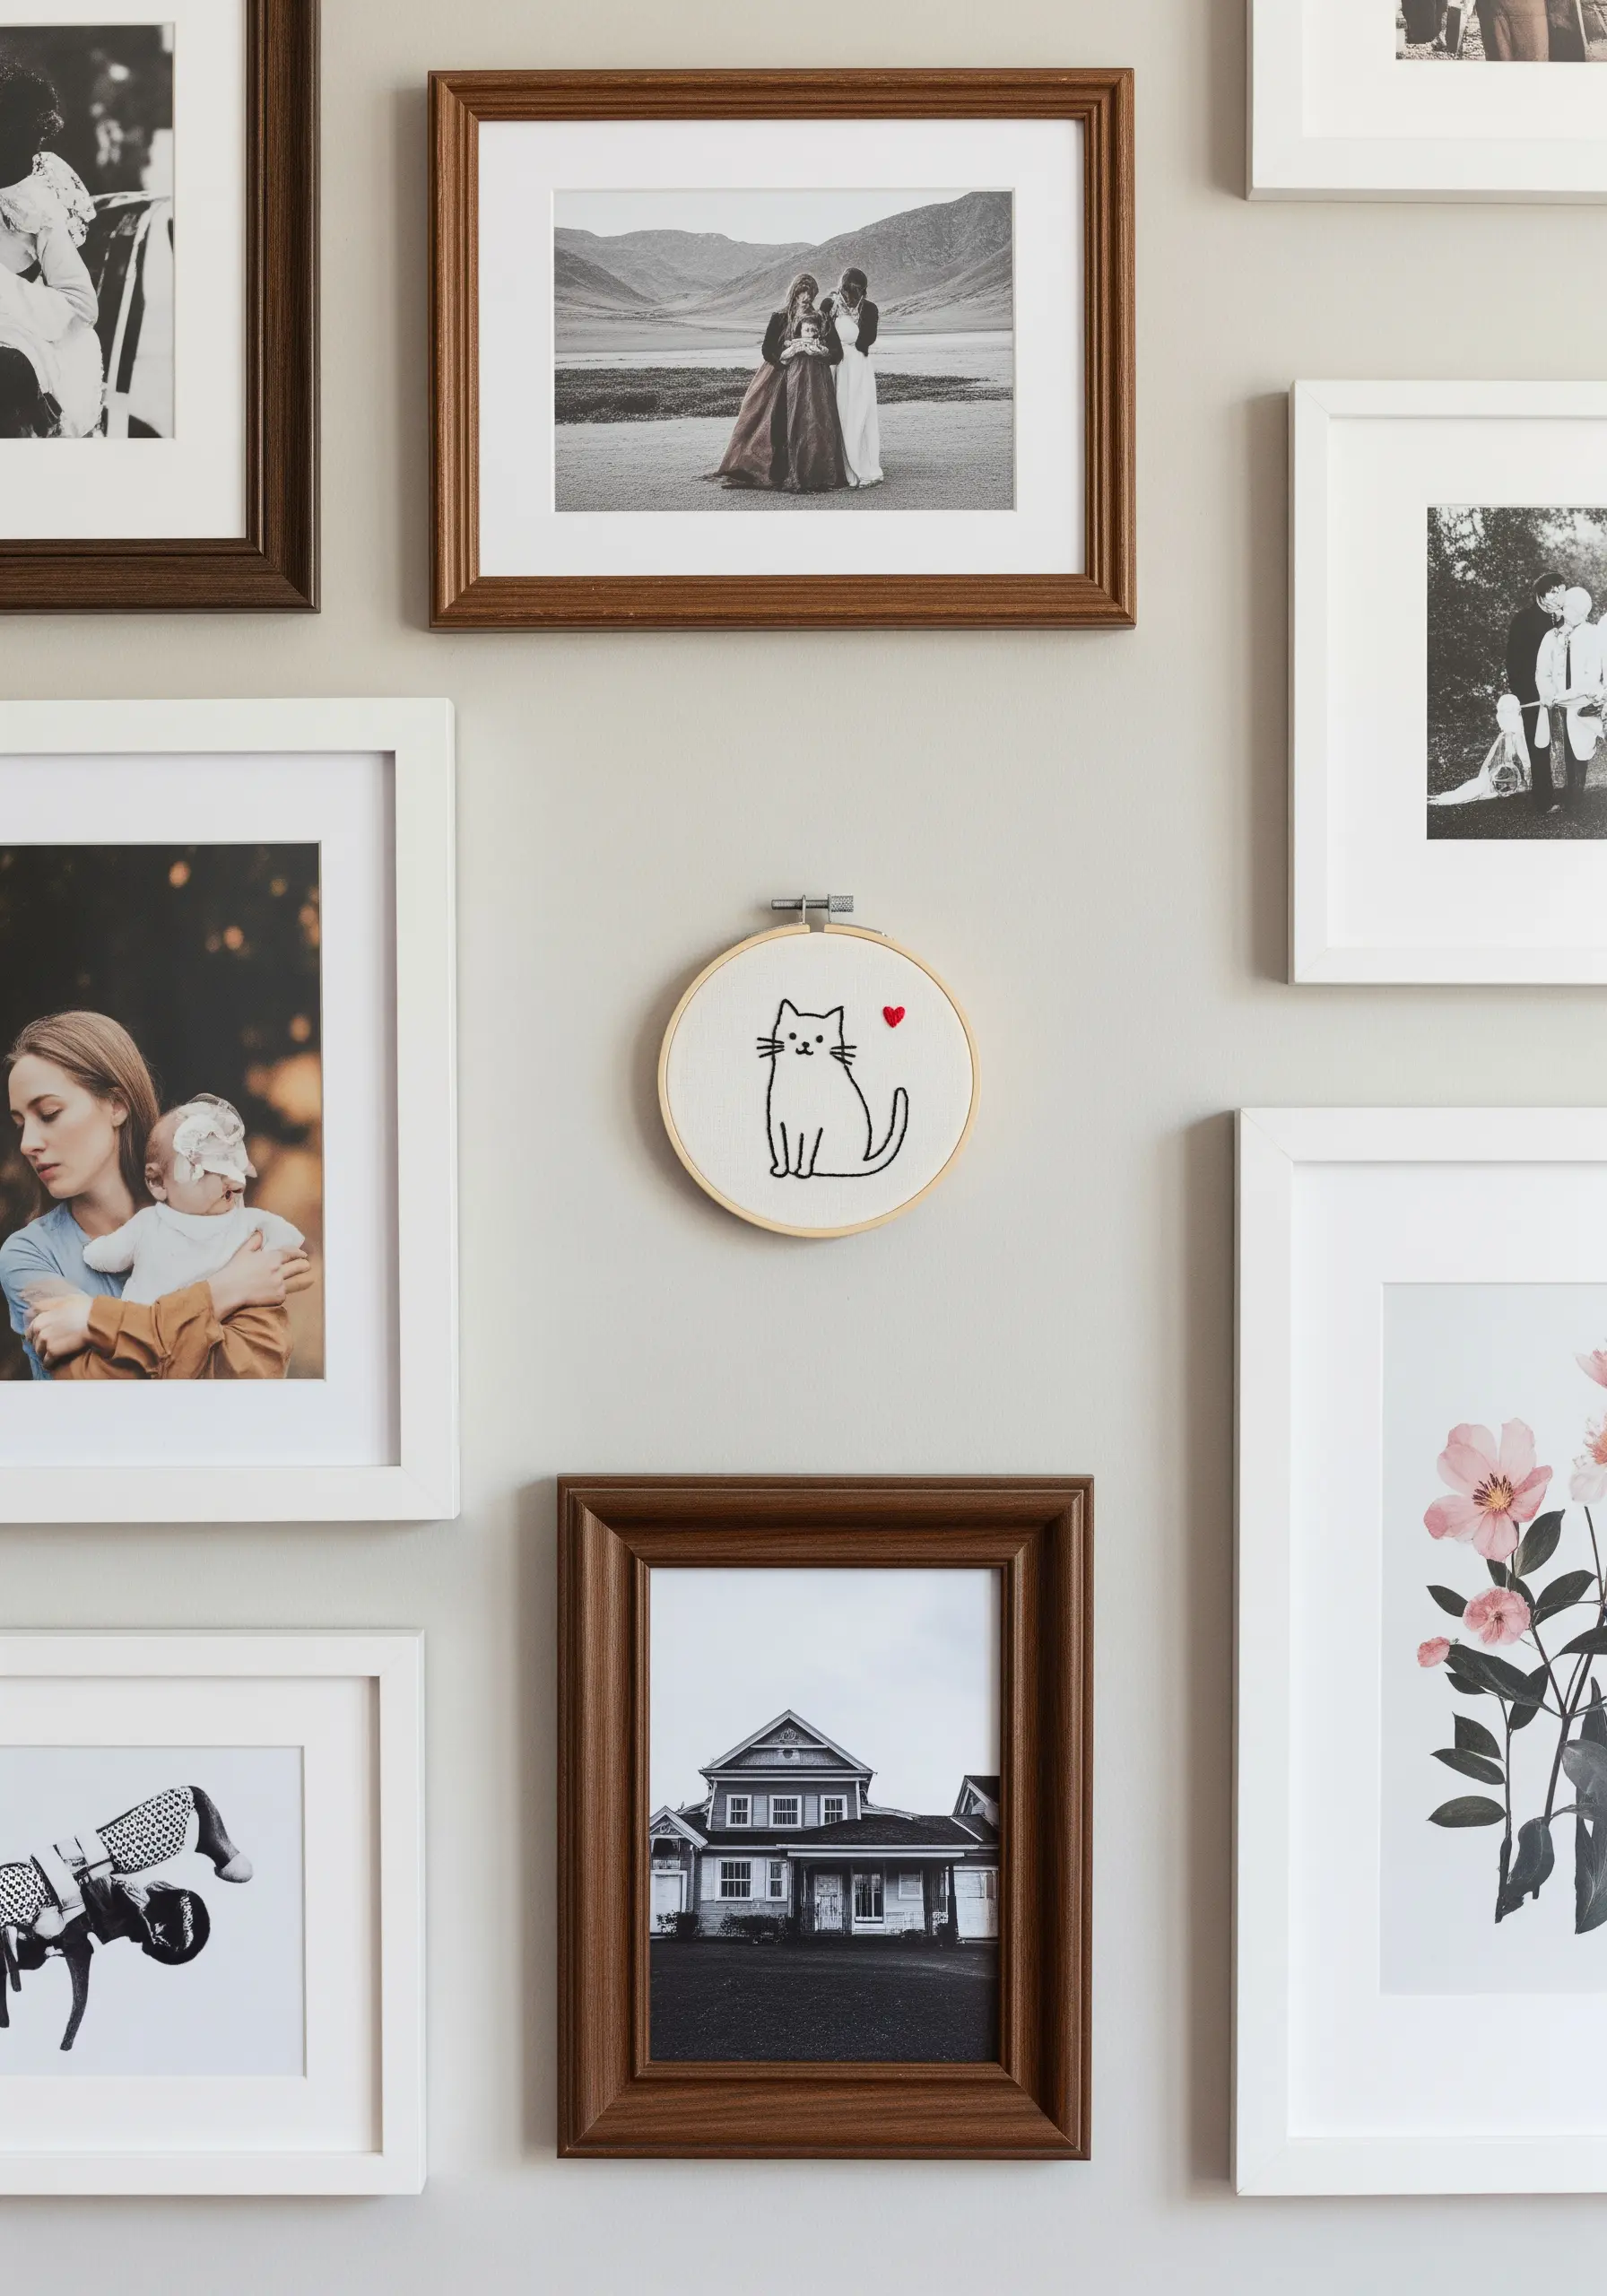
Add a warm, personal touch to a wall of photographs by tucking in a small, hand-stitched piece.
A simple line-art portrait of a pet or a meaningful symbol provides a beautiful textural contrast to the flat, glossy finish of photos.
Keep the design minimal and the hoop simple to ensure it complements the other frames rather than competing with them.
This is a heartfelt way to create heartwarming pet-inspired string art designs.
24. Embellish with Beads for a Touch of Magic
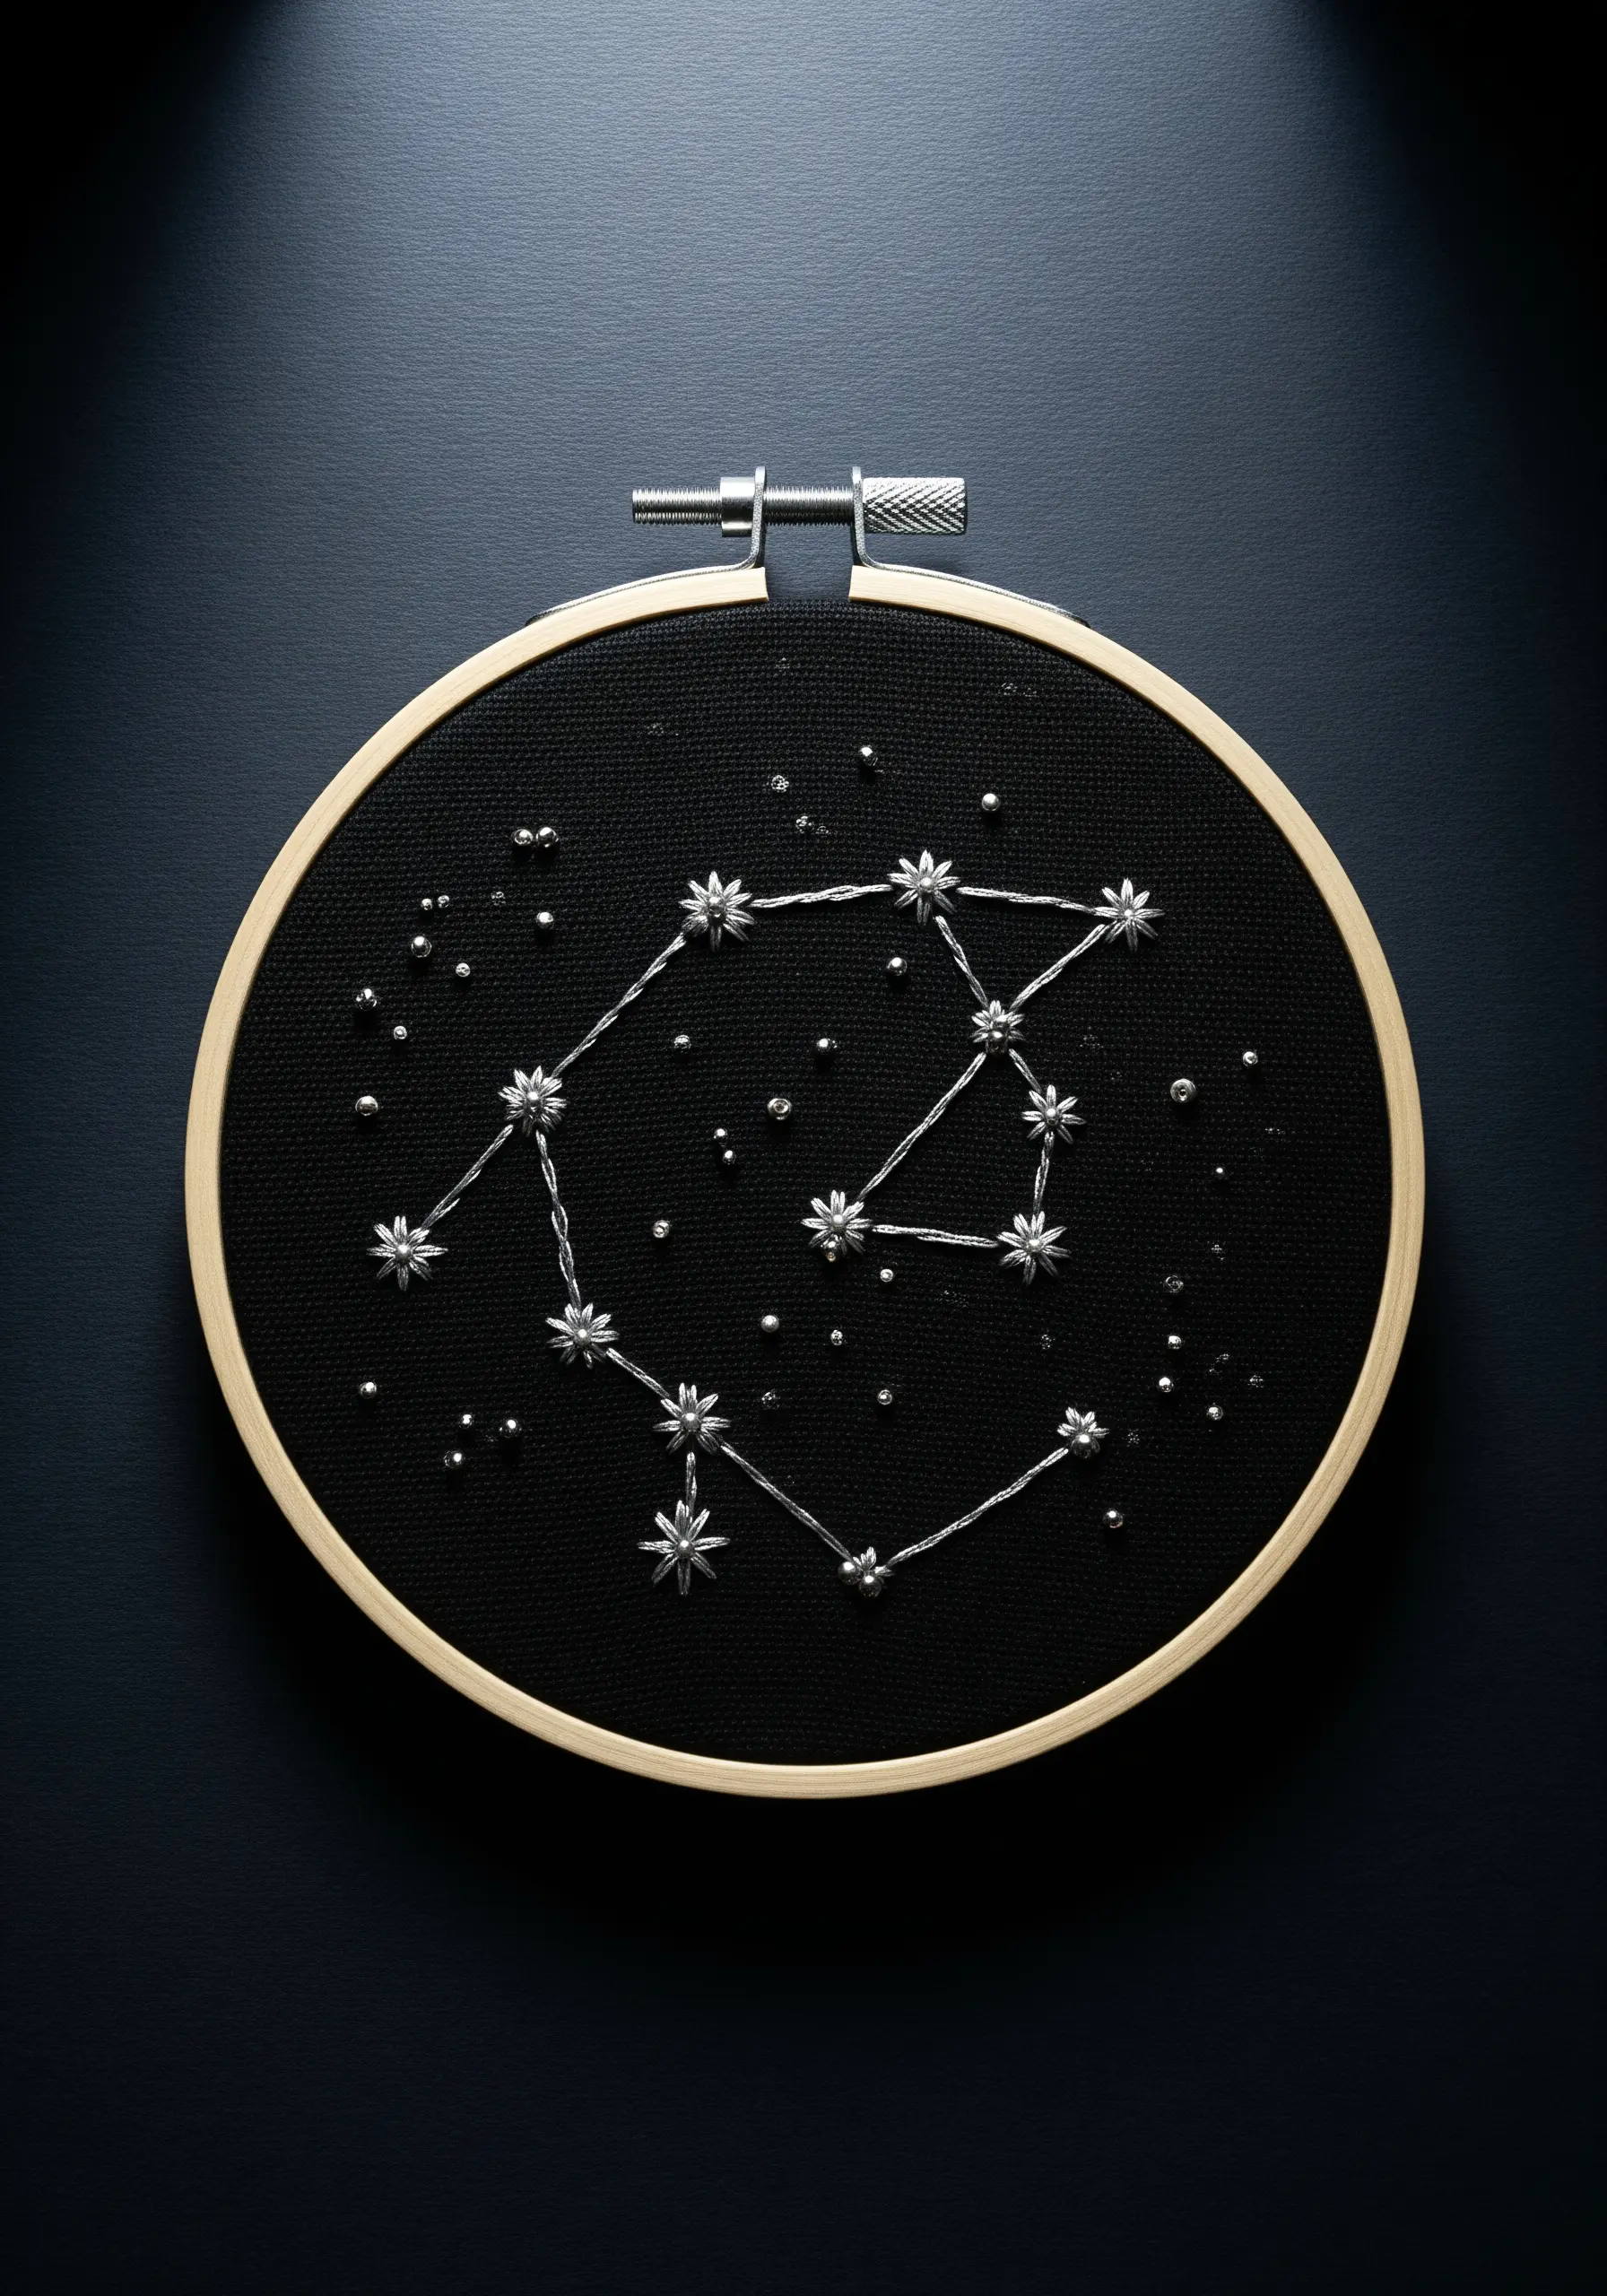
Elevate a simple constellation design by incorporating tiny metallic beads.
Stitch the stars with a star stitch or lazy daisy stitch using silver metallic floss, then anchor a single seed bead in the center of each one.
The beads will catch the light in a way that thread alone cannot, adding a subtle, elegant sparkle to your piece.
It’s a perfect technique for celestial micro-embroidery ideas that feel truly special.
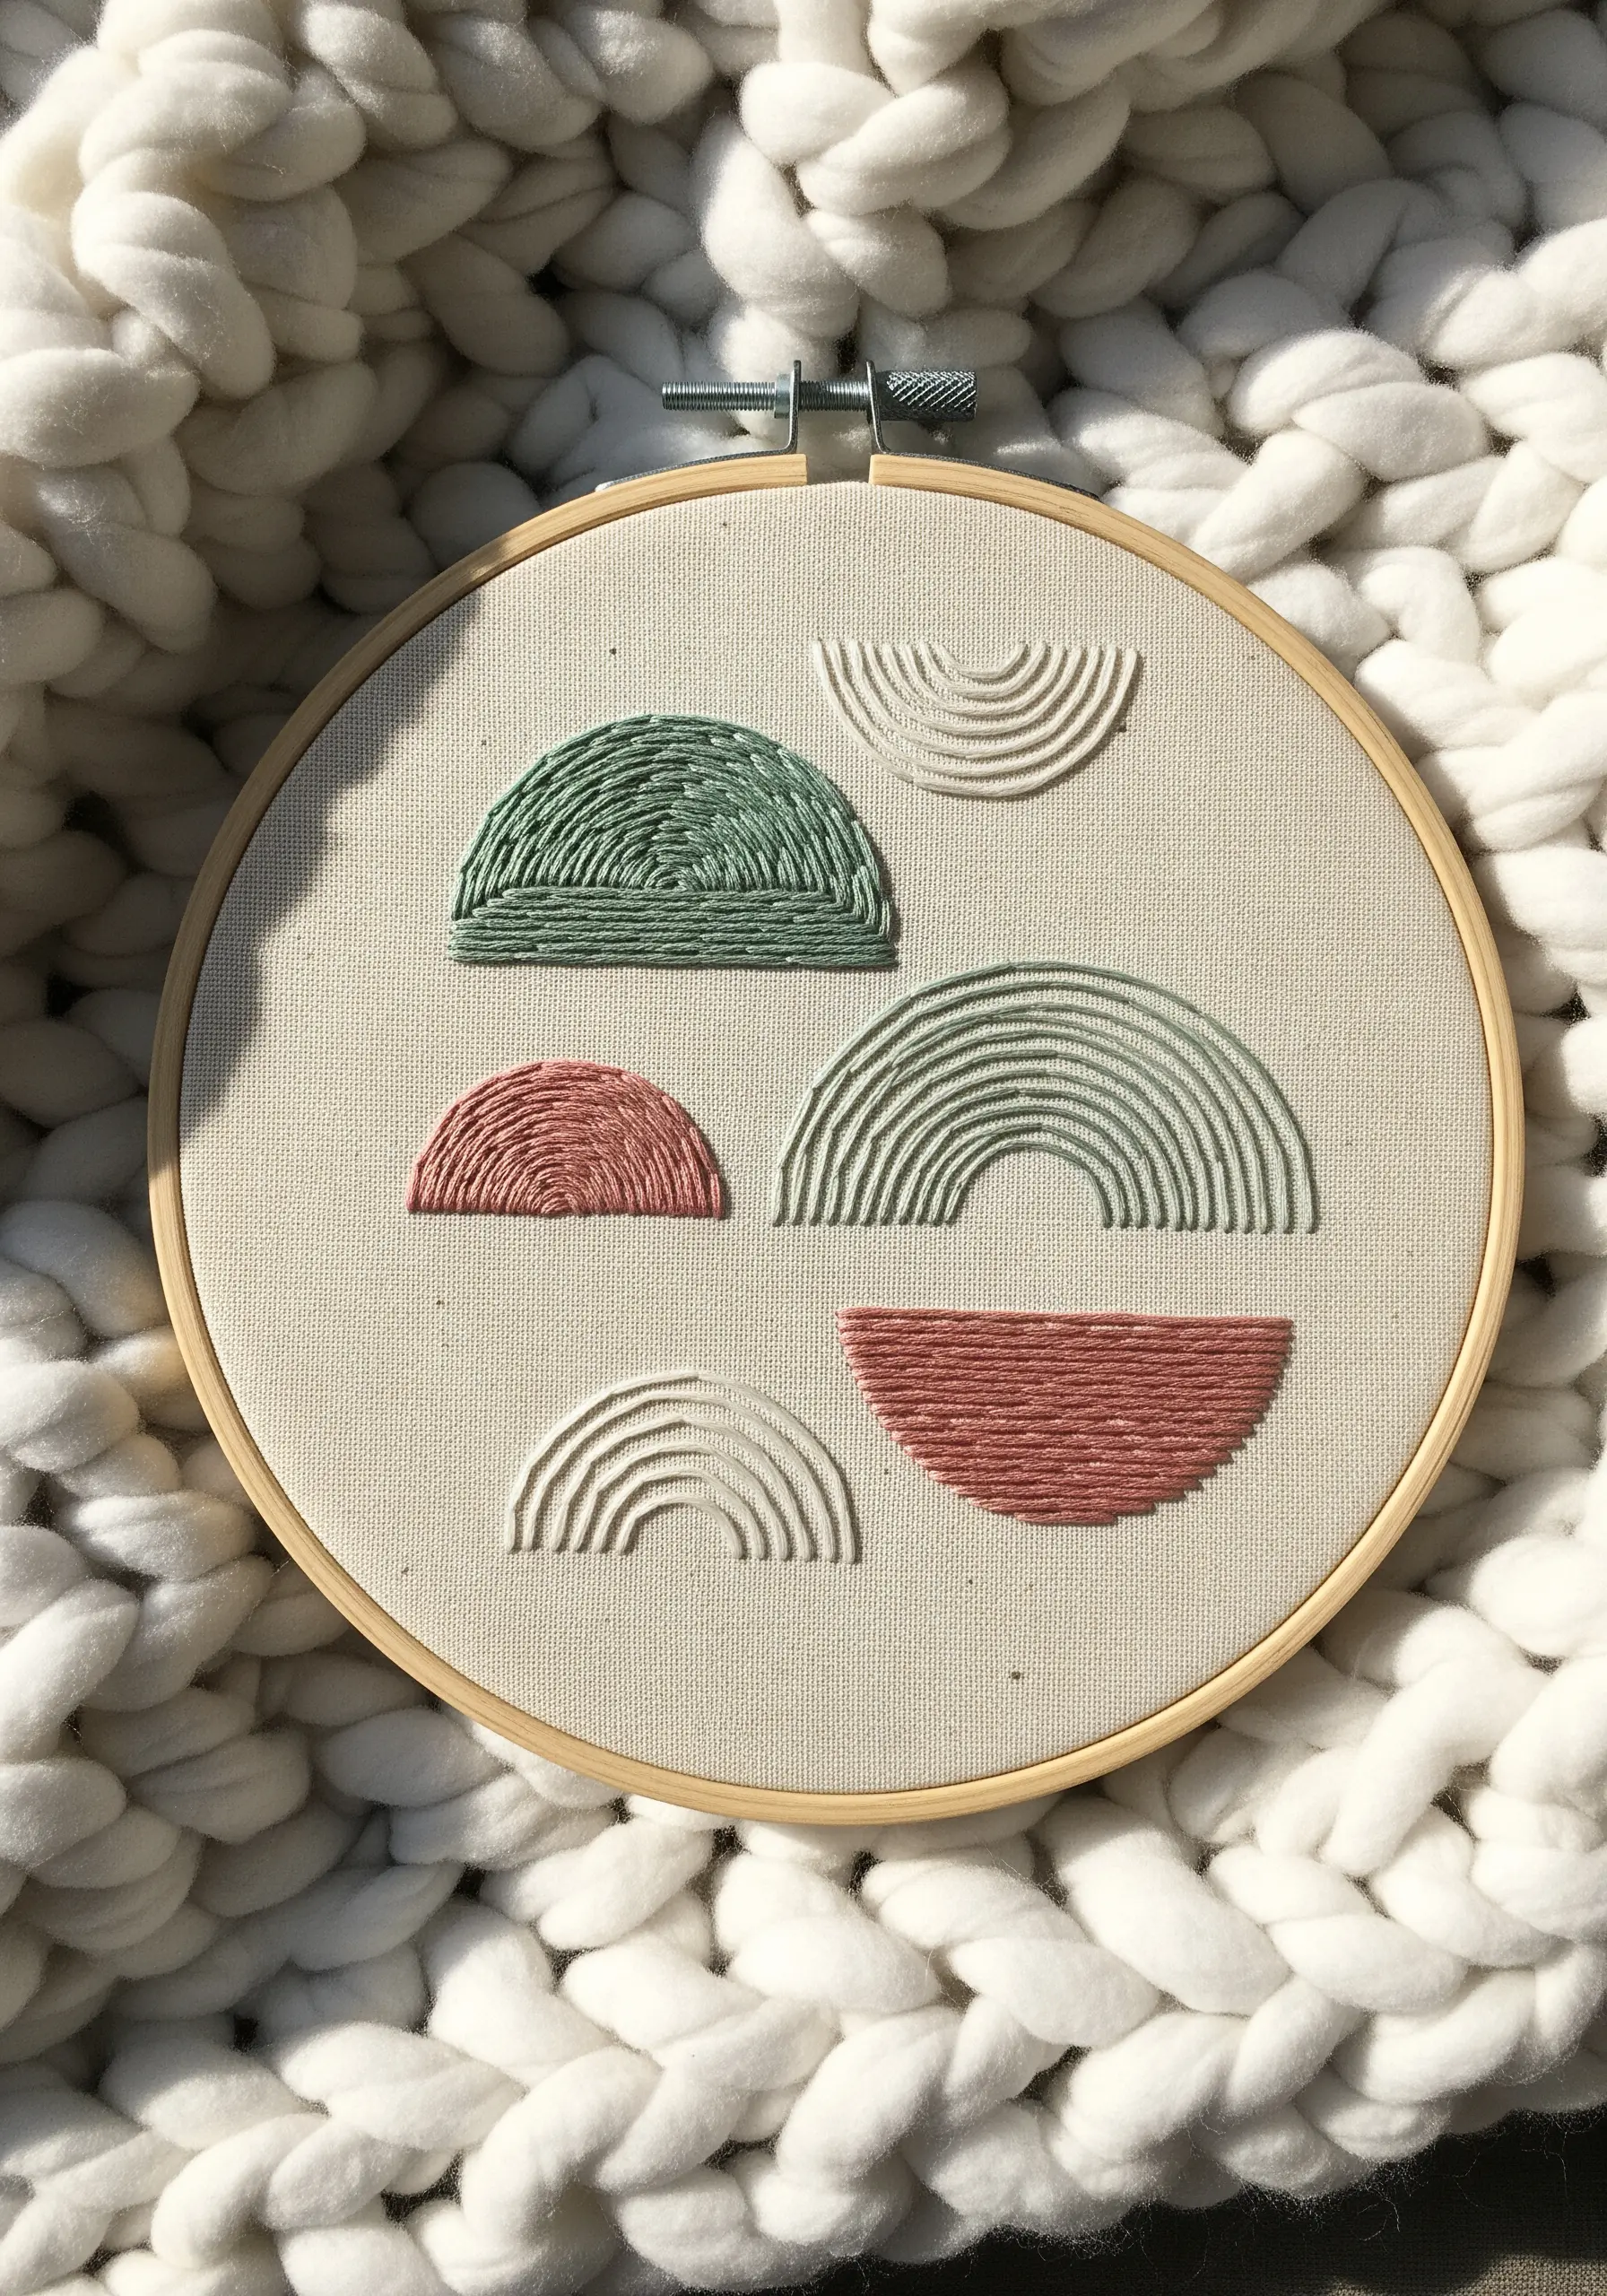
25. Explore Color Theory with Thread Gradients
Use a simple geometric pattern as a canvas to play with color blending.
Arrange your threads in a gradient from dark to light, or create a harmonious palette of analogous colors (colors next to each other on the color wheel).
The precision of the straight stitches allows the focus to remain entirely on the beautiful flow of color.
This is a meditative way to apply abstract color psychology stitch ideas to your work.
26. Use Fishbone Stitch for Realistic Leaves
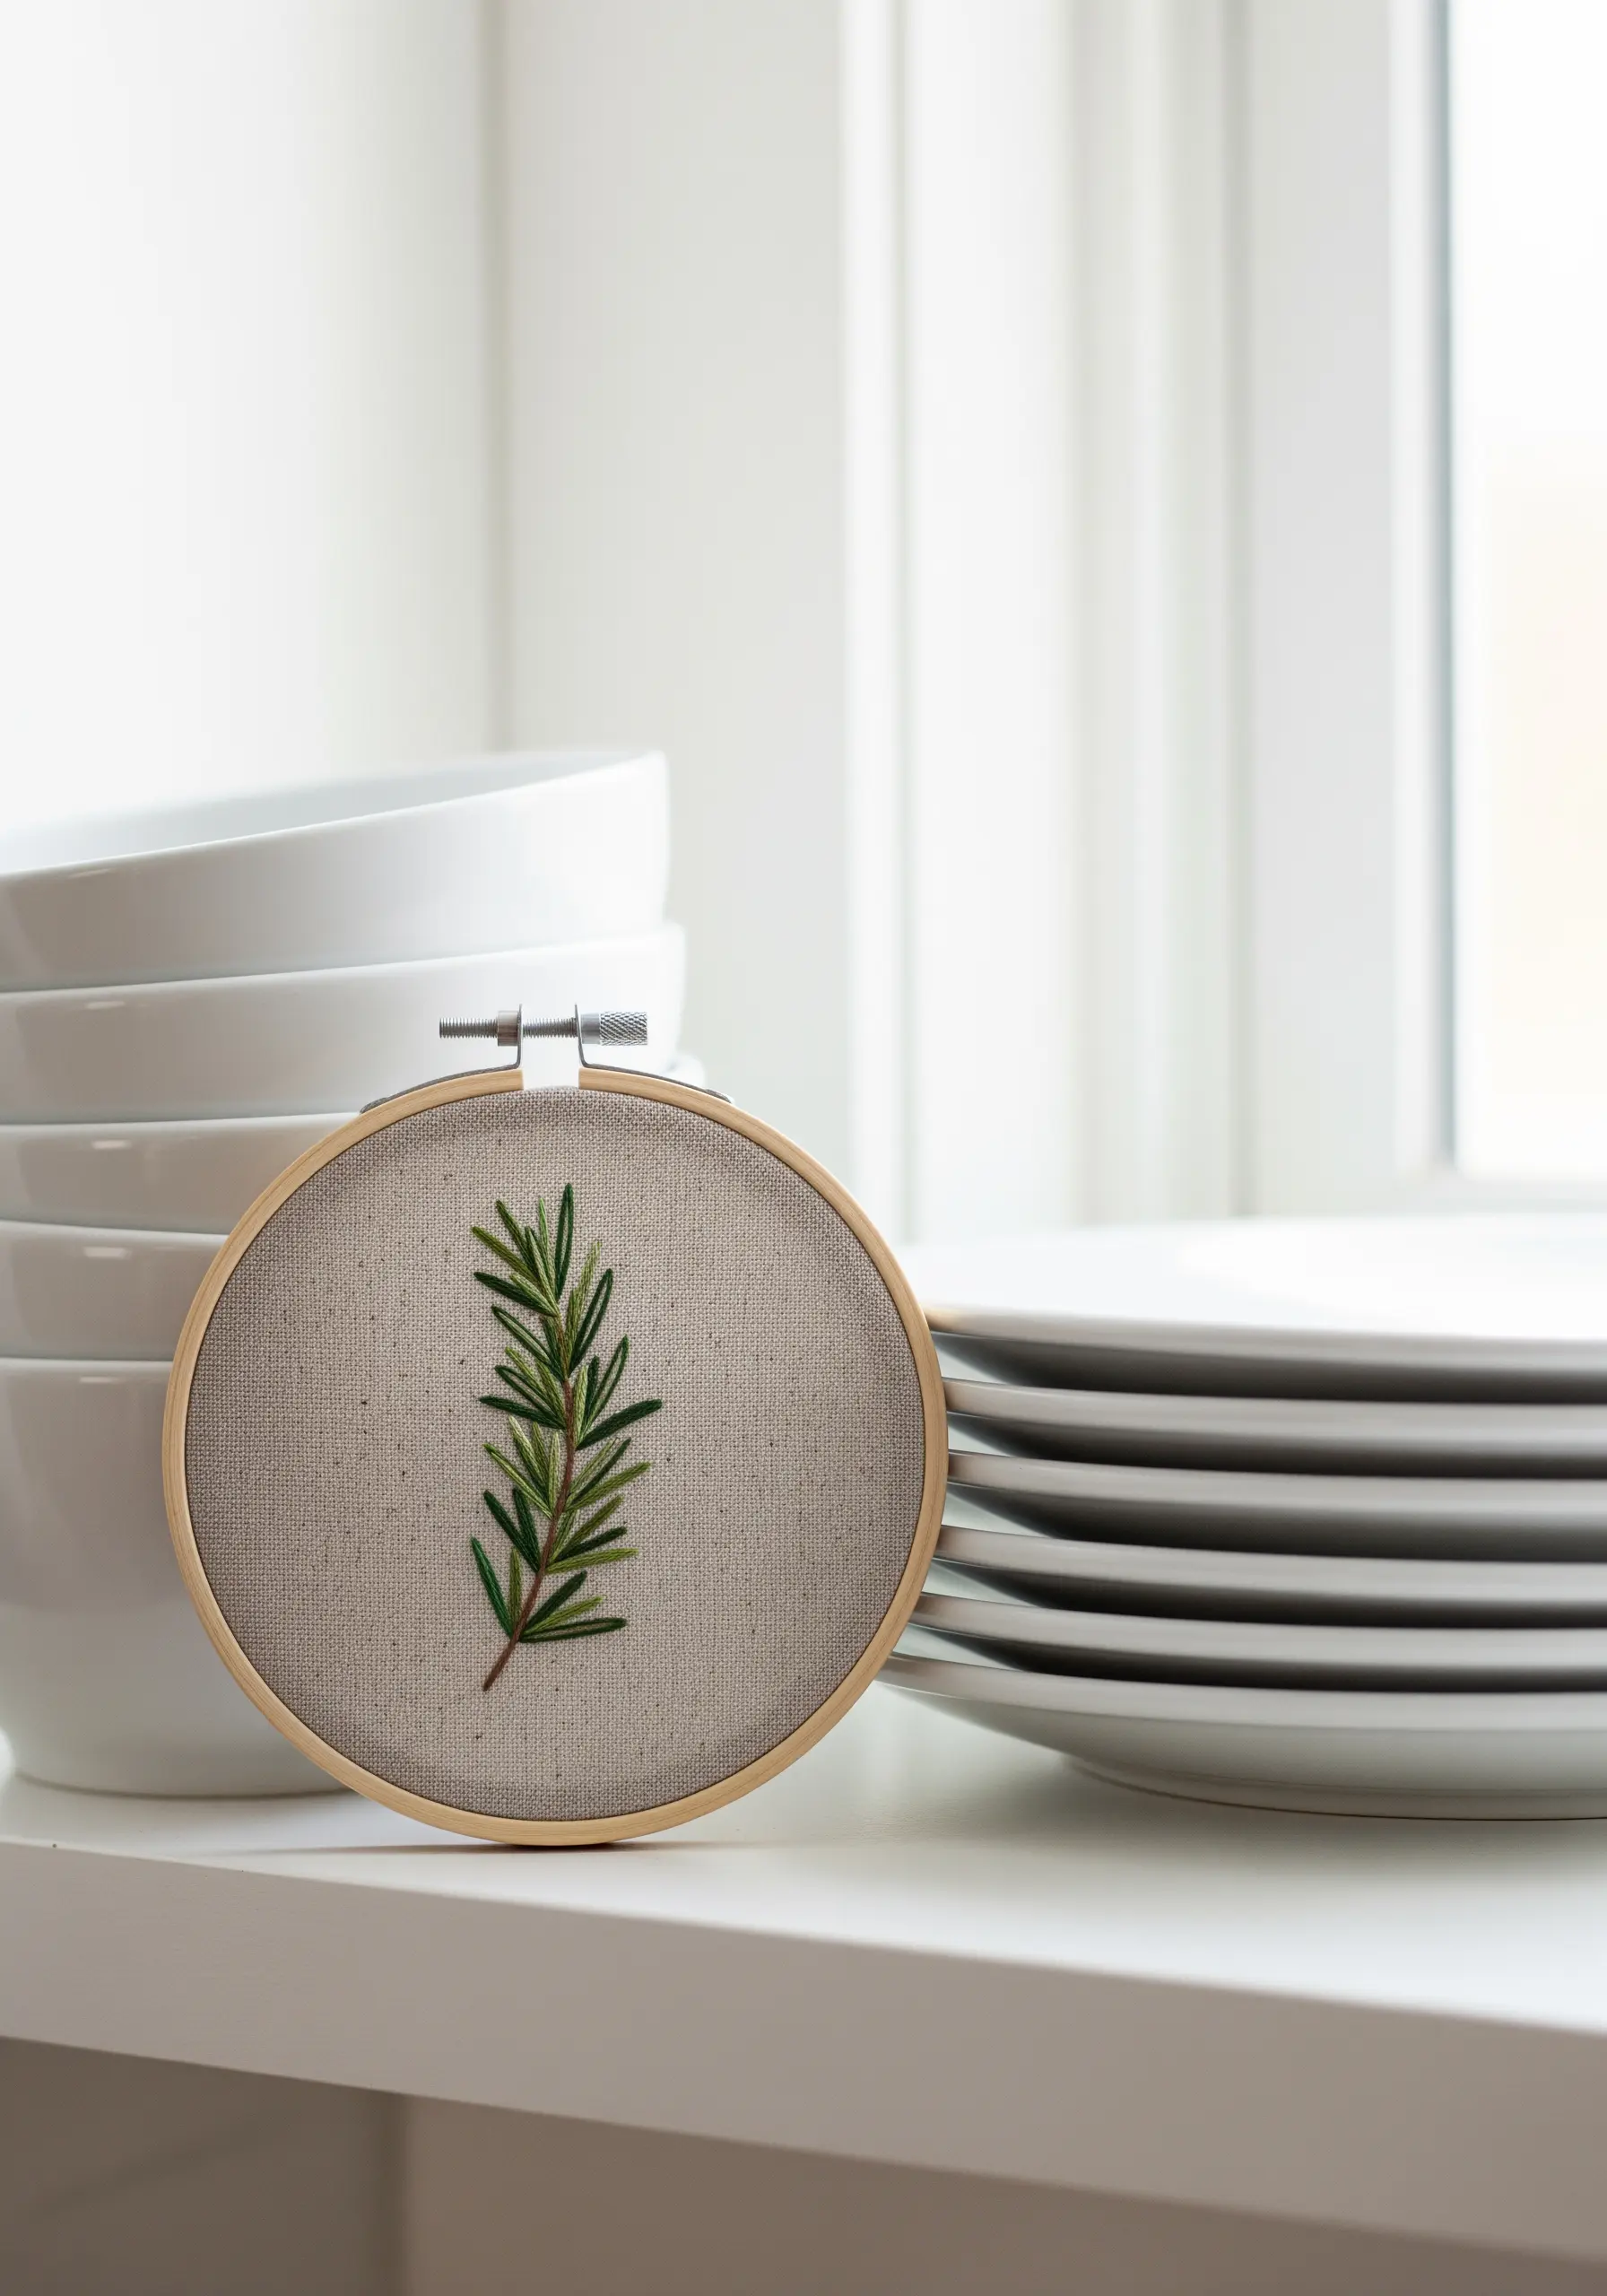
To give leaves a natural, veined appearance, the fishbone stitch is your best choice.
This stitch creates a central line (like a stem) and overlapping diagonal stitches that mimic the texture of a real leaf.
Alternate between two similar shades of green thread to add subtle depth and highlights, making your botanicals look even more lifelike.
It’s an essential technique for any DIY embroidery ideas for a calm, minimalist kitchen space.
27. Create Texture with a Raised Chain Stitch Fill
Fill abstract shapes with rows of chain stitch to create a raised, corded texture that invites touch.
By stitching the rows tightly together, the individual stitches merge into a cohesive, tactile surface.
This technique adds dimension and interest without complicating the design, relying on the repetition of a simple stitch.
It’s a perfect fit for Scandinavian texture embroidery ideas that emphasize warmth and materiality.
28. Give Your Satin Stitch a Padded Foundation
For a monogram that looks truly high-end, create a padded effect before you begin your satin stitch.
First, fill the letter shape with small underlying seed stitches or a layer of satin stitches in the opposite direction.
Then, cover this foundation with your final layer of smooth satin stitches.
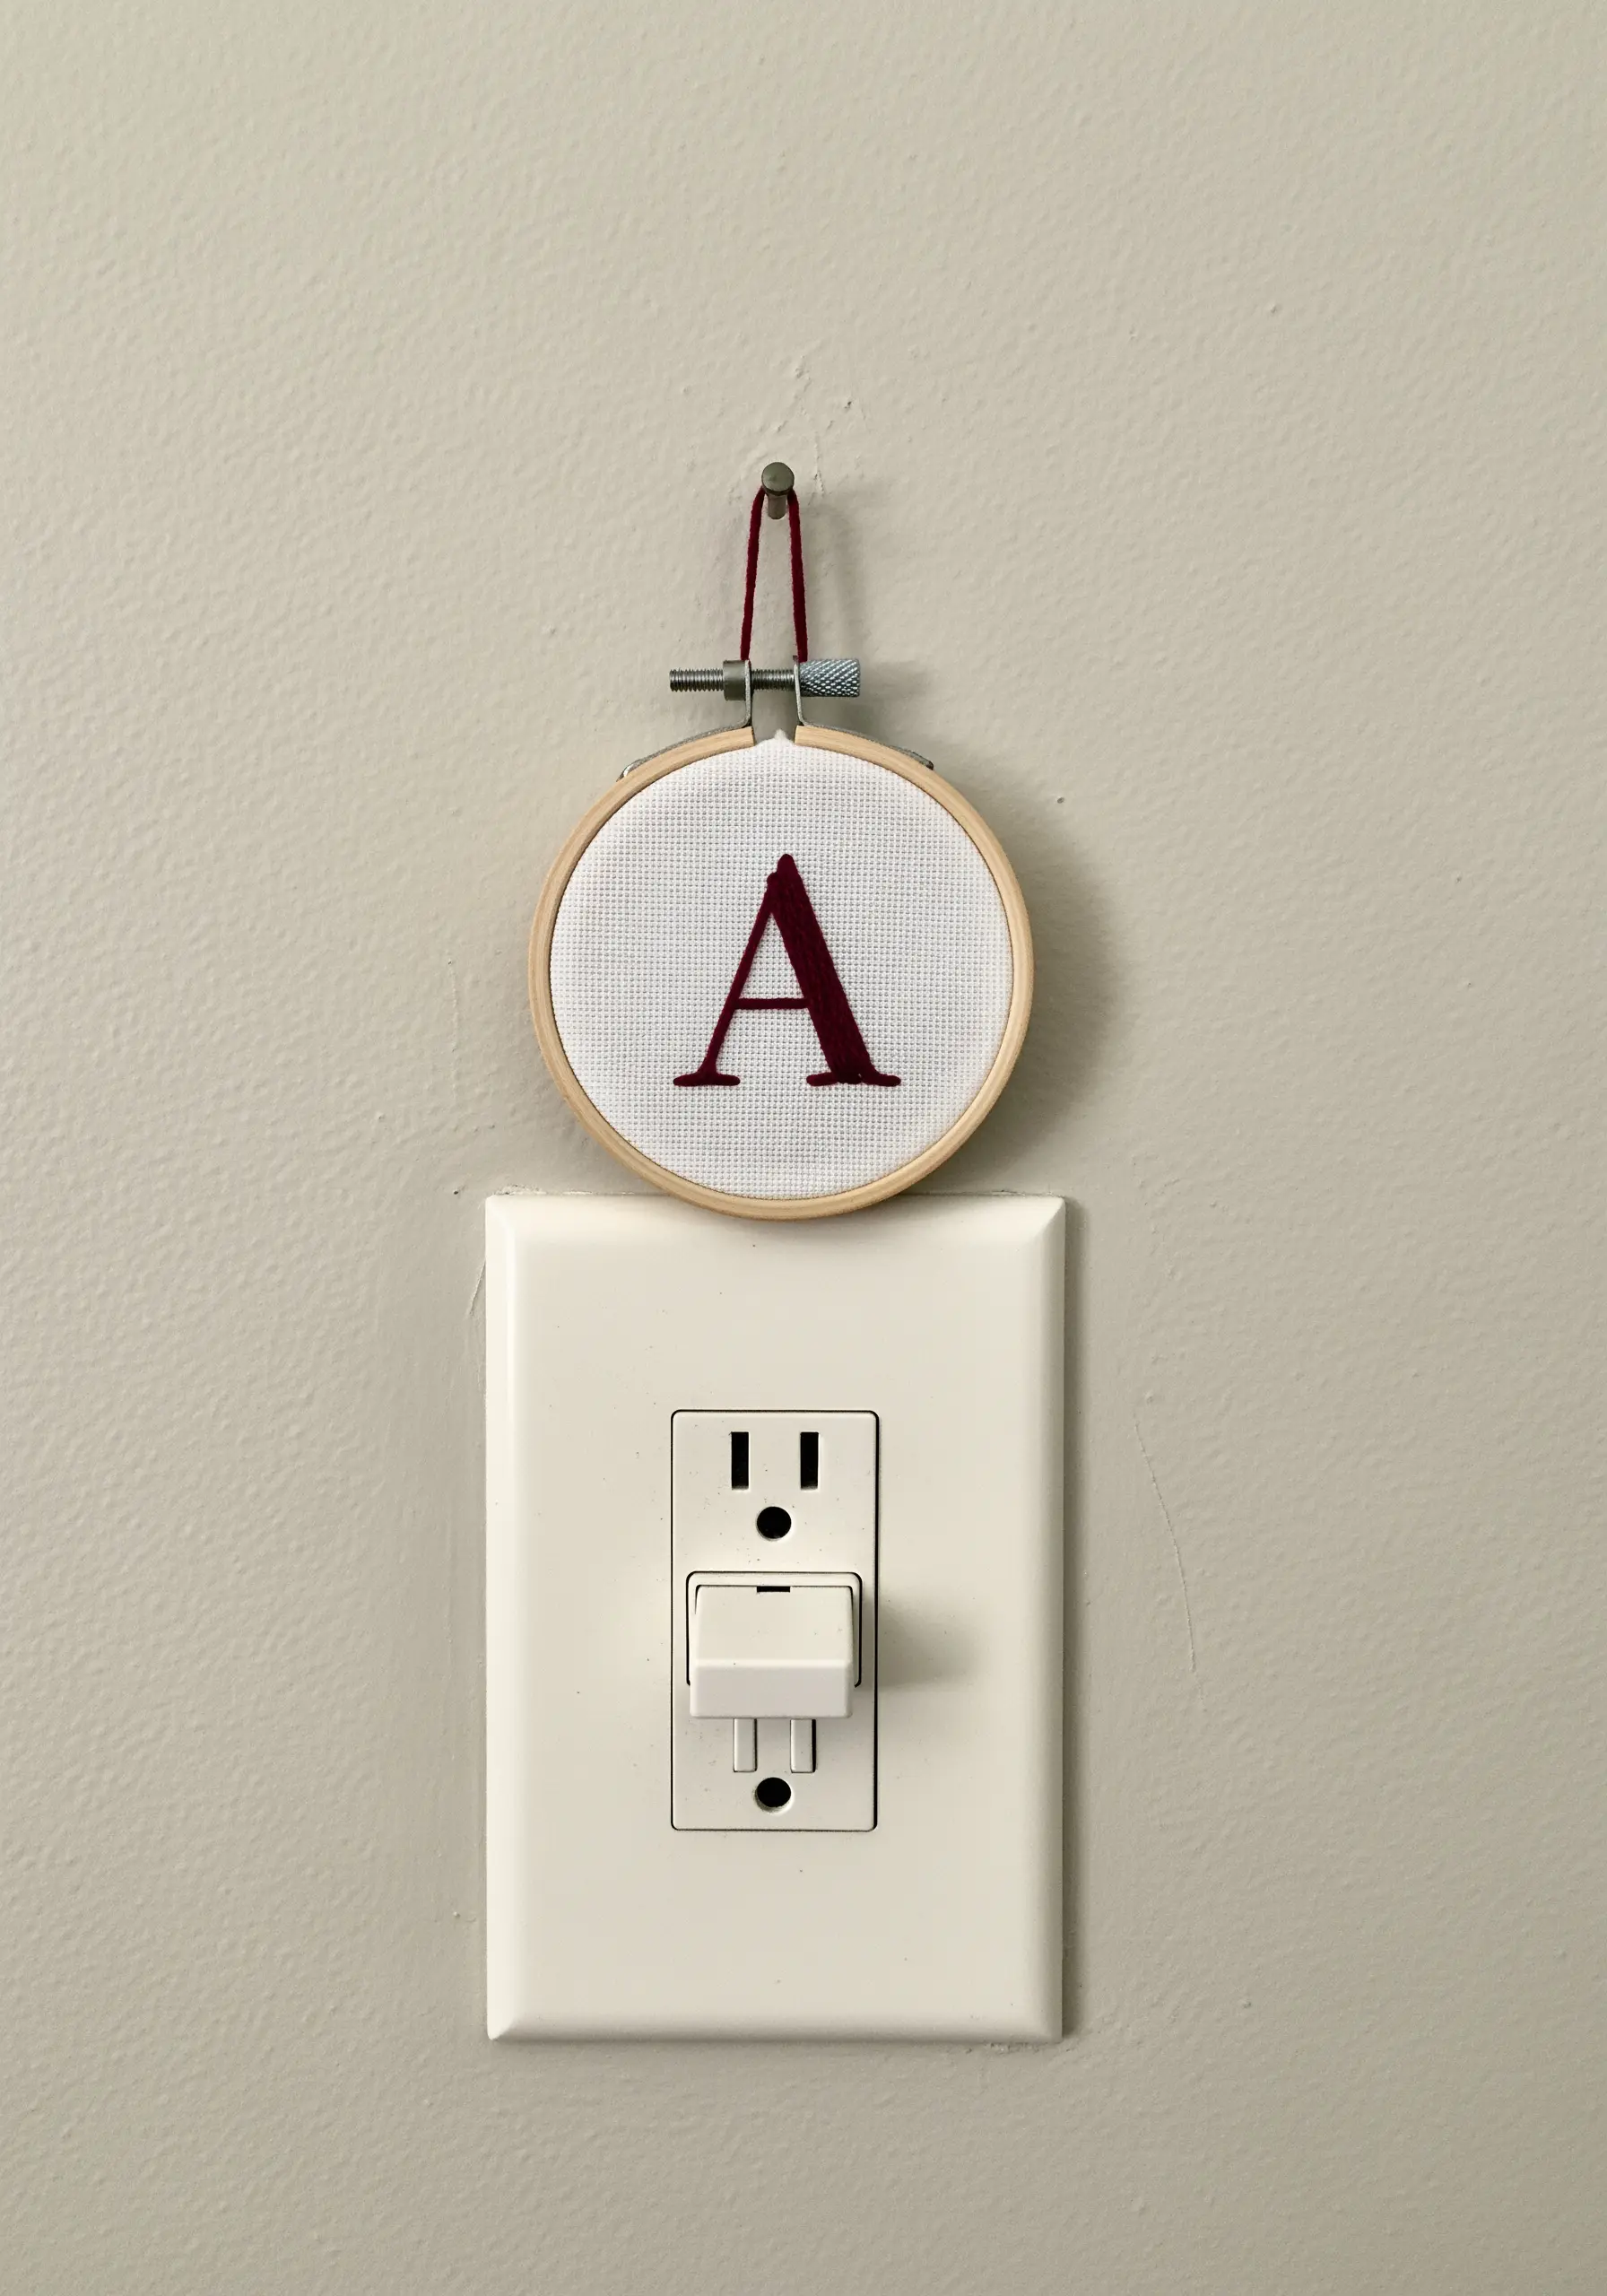
This simple extra step gives your letter a raised, three-dimensional quality, perfect for personalized monogram table linen embroidery ideas.
29. Let Your Outline Tell the Whole Story
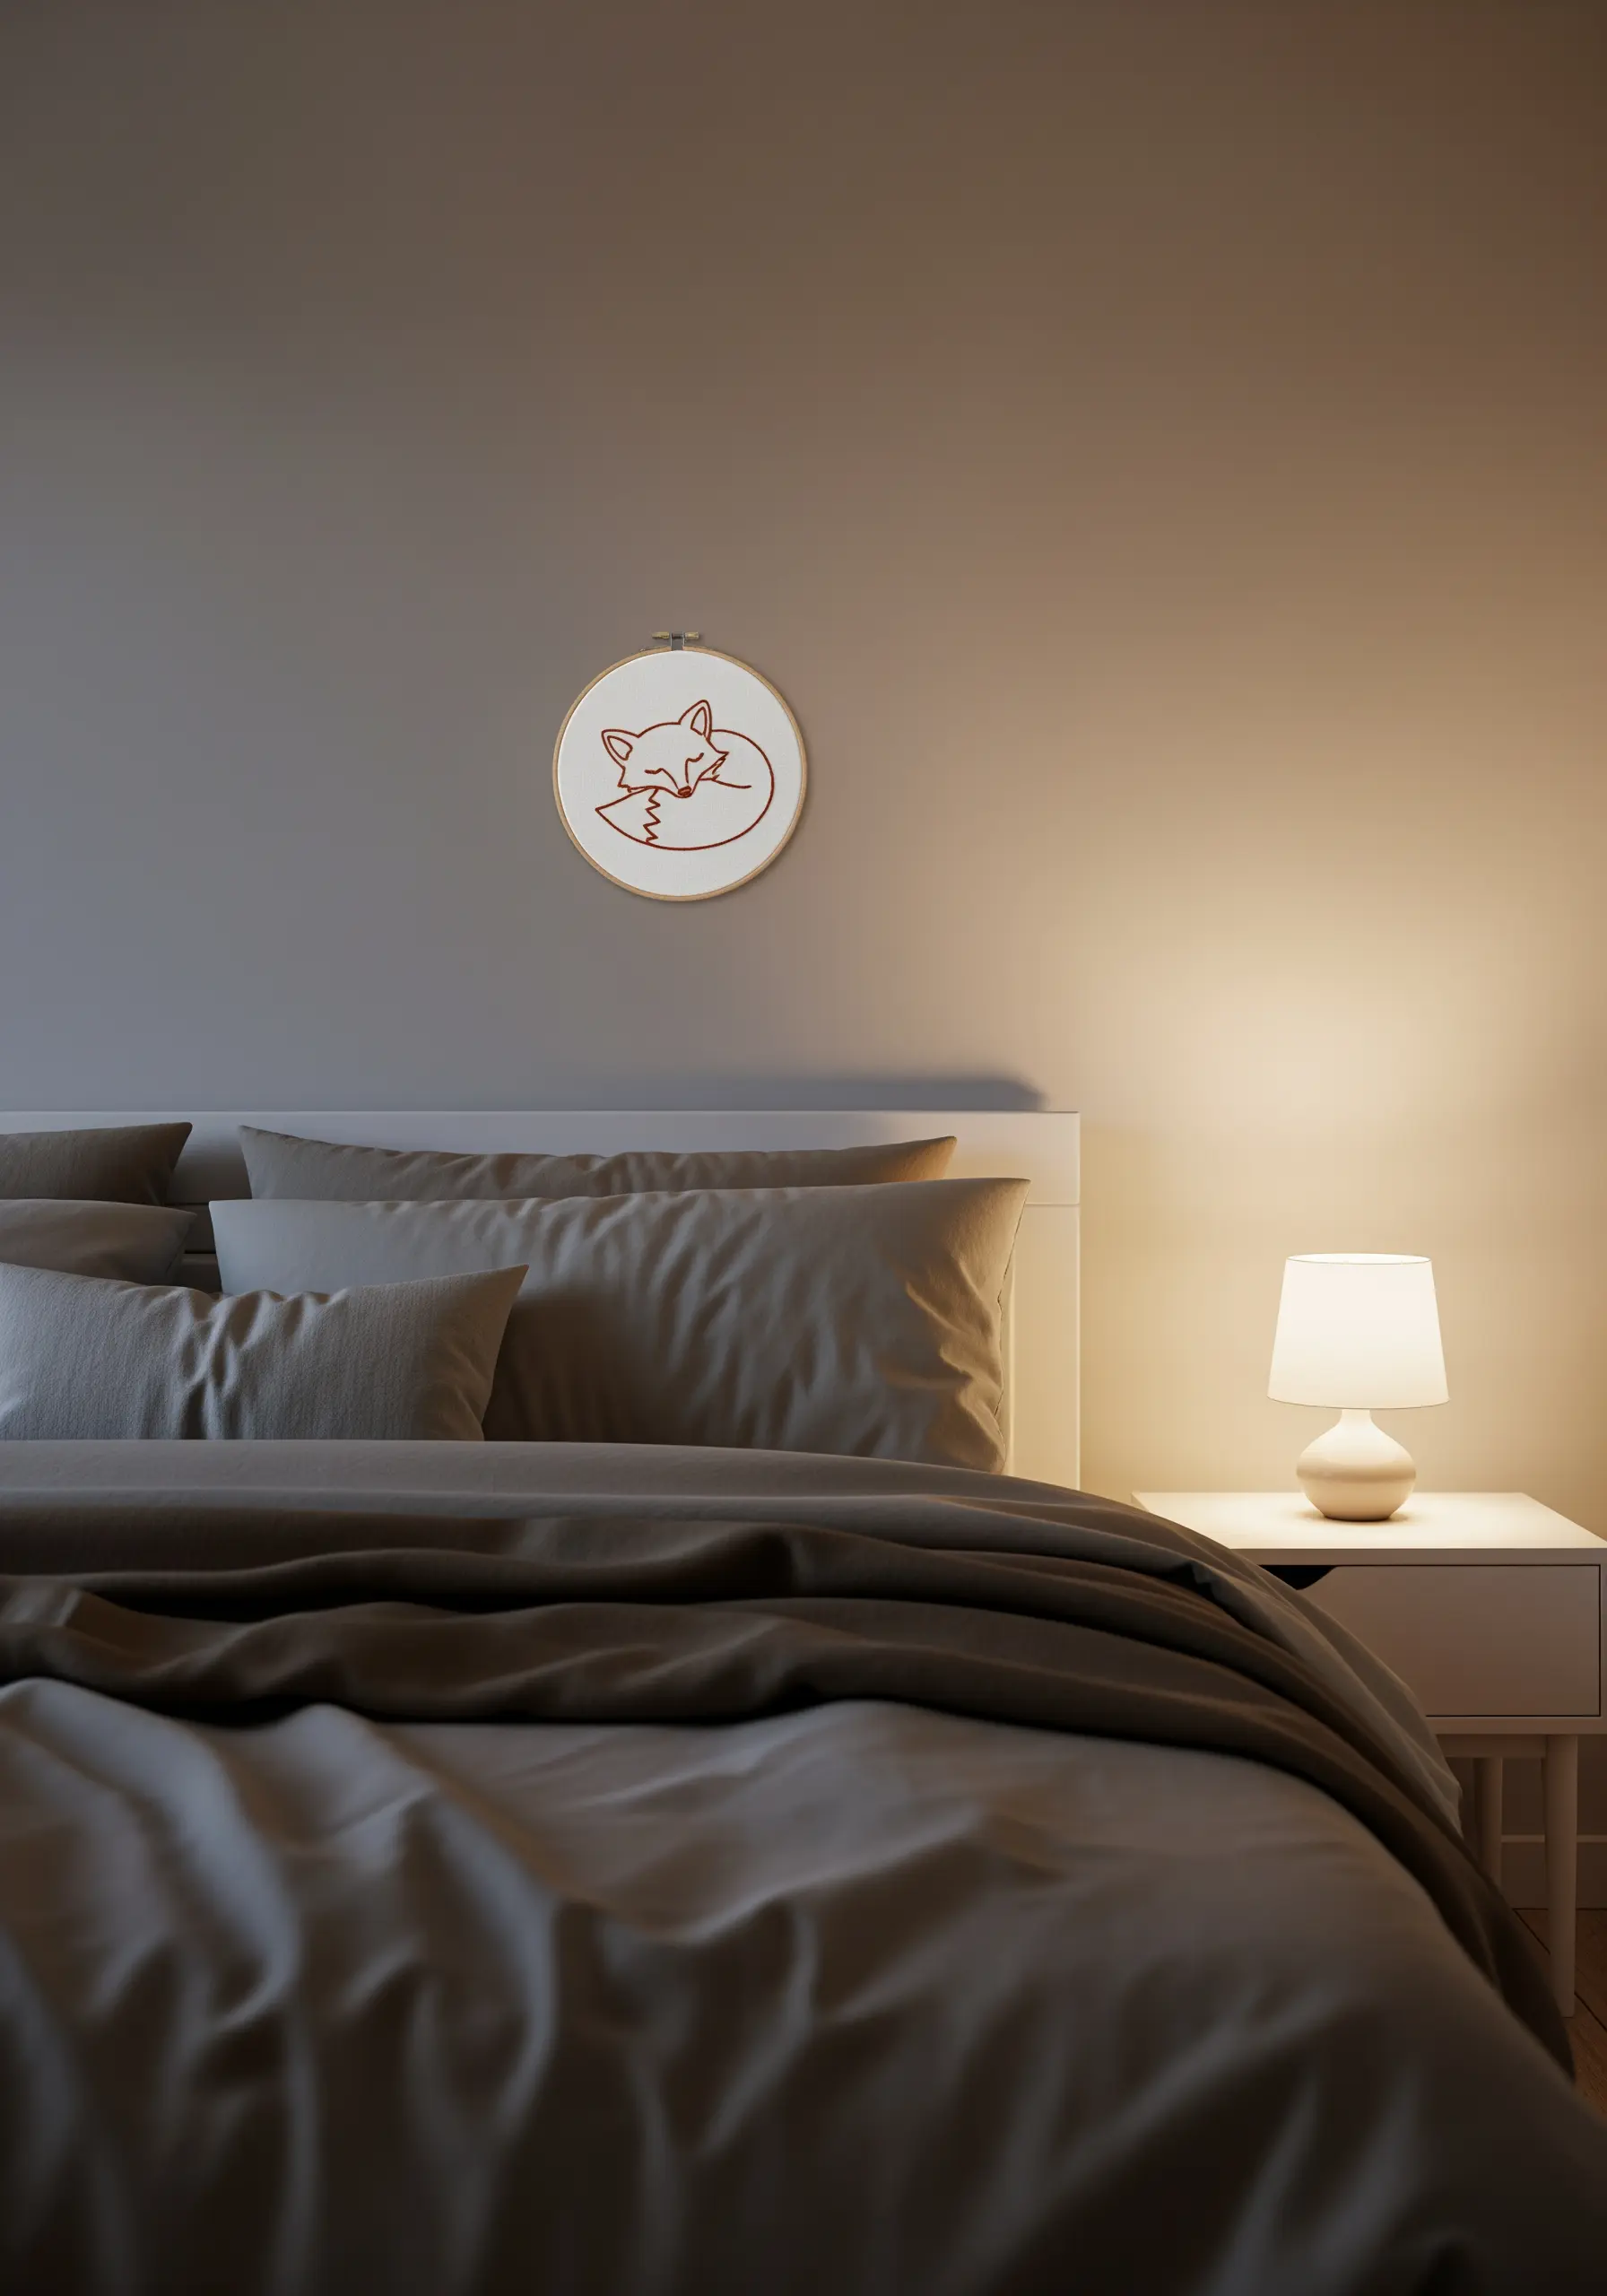
You don’t need complex fills to create a charming piece of art.
A simple, continuous outline stitched with a backstitch or stem stitch can convey form and personality with elegant efficiency.
Choose a warm, earthy thread color to create a soft, calming presence in a bedroom or quiet space.
This less-is-more approach is the essence of minimalist line-art animal designs.
30. Craft Your Own Custom Patches
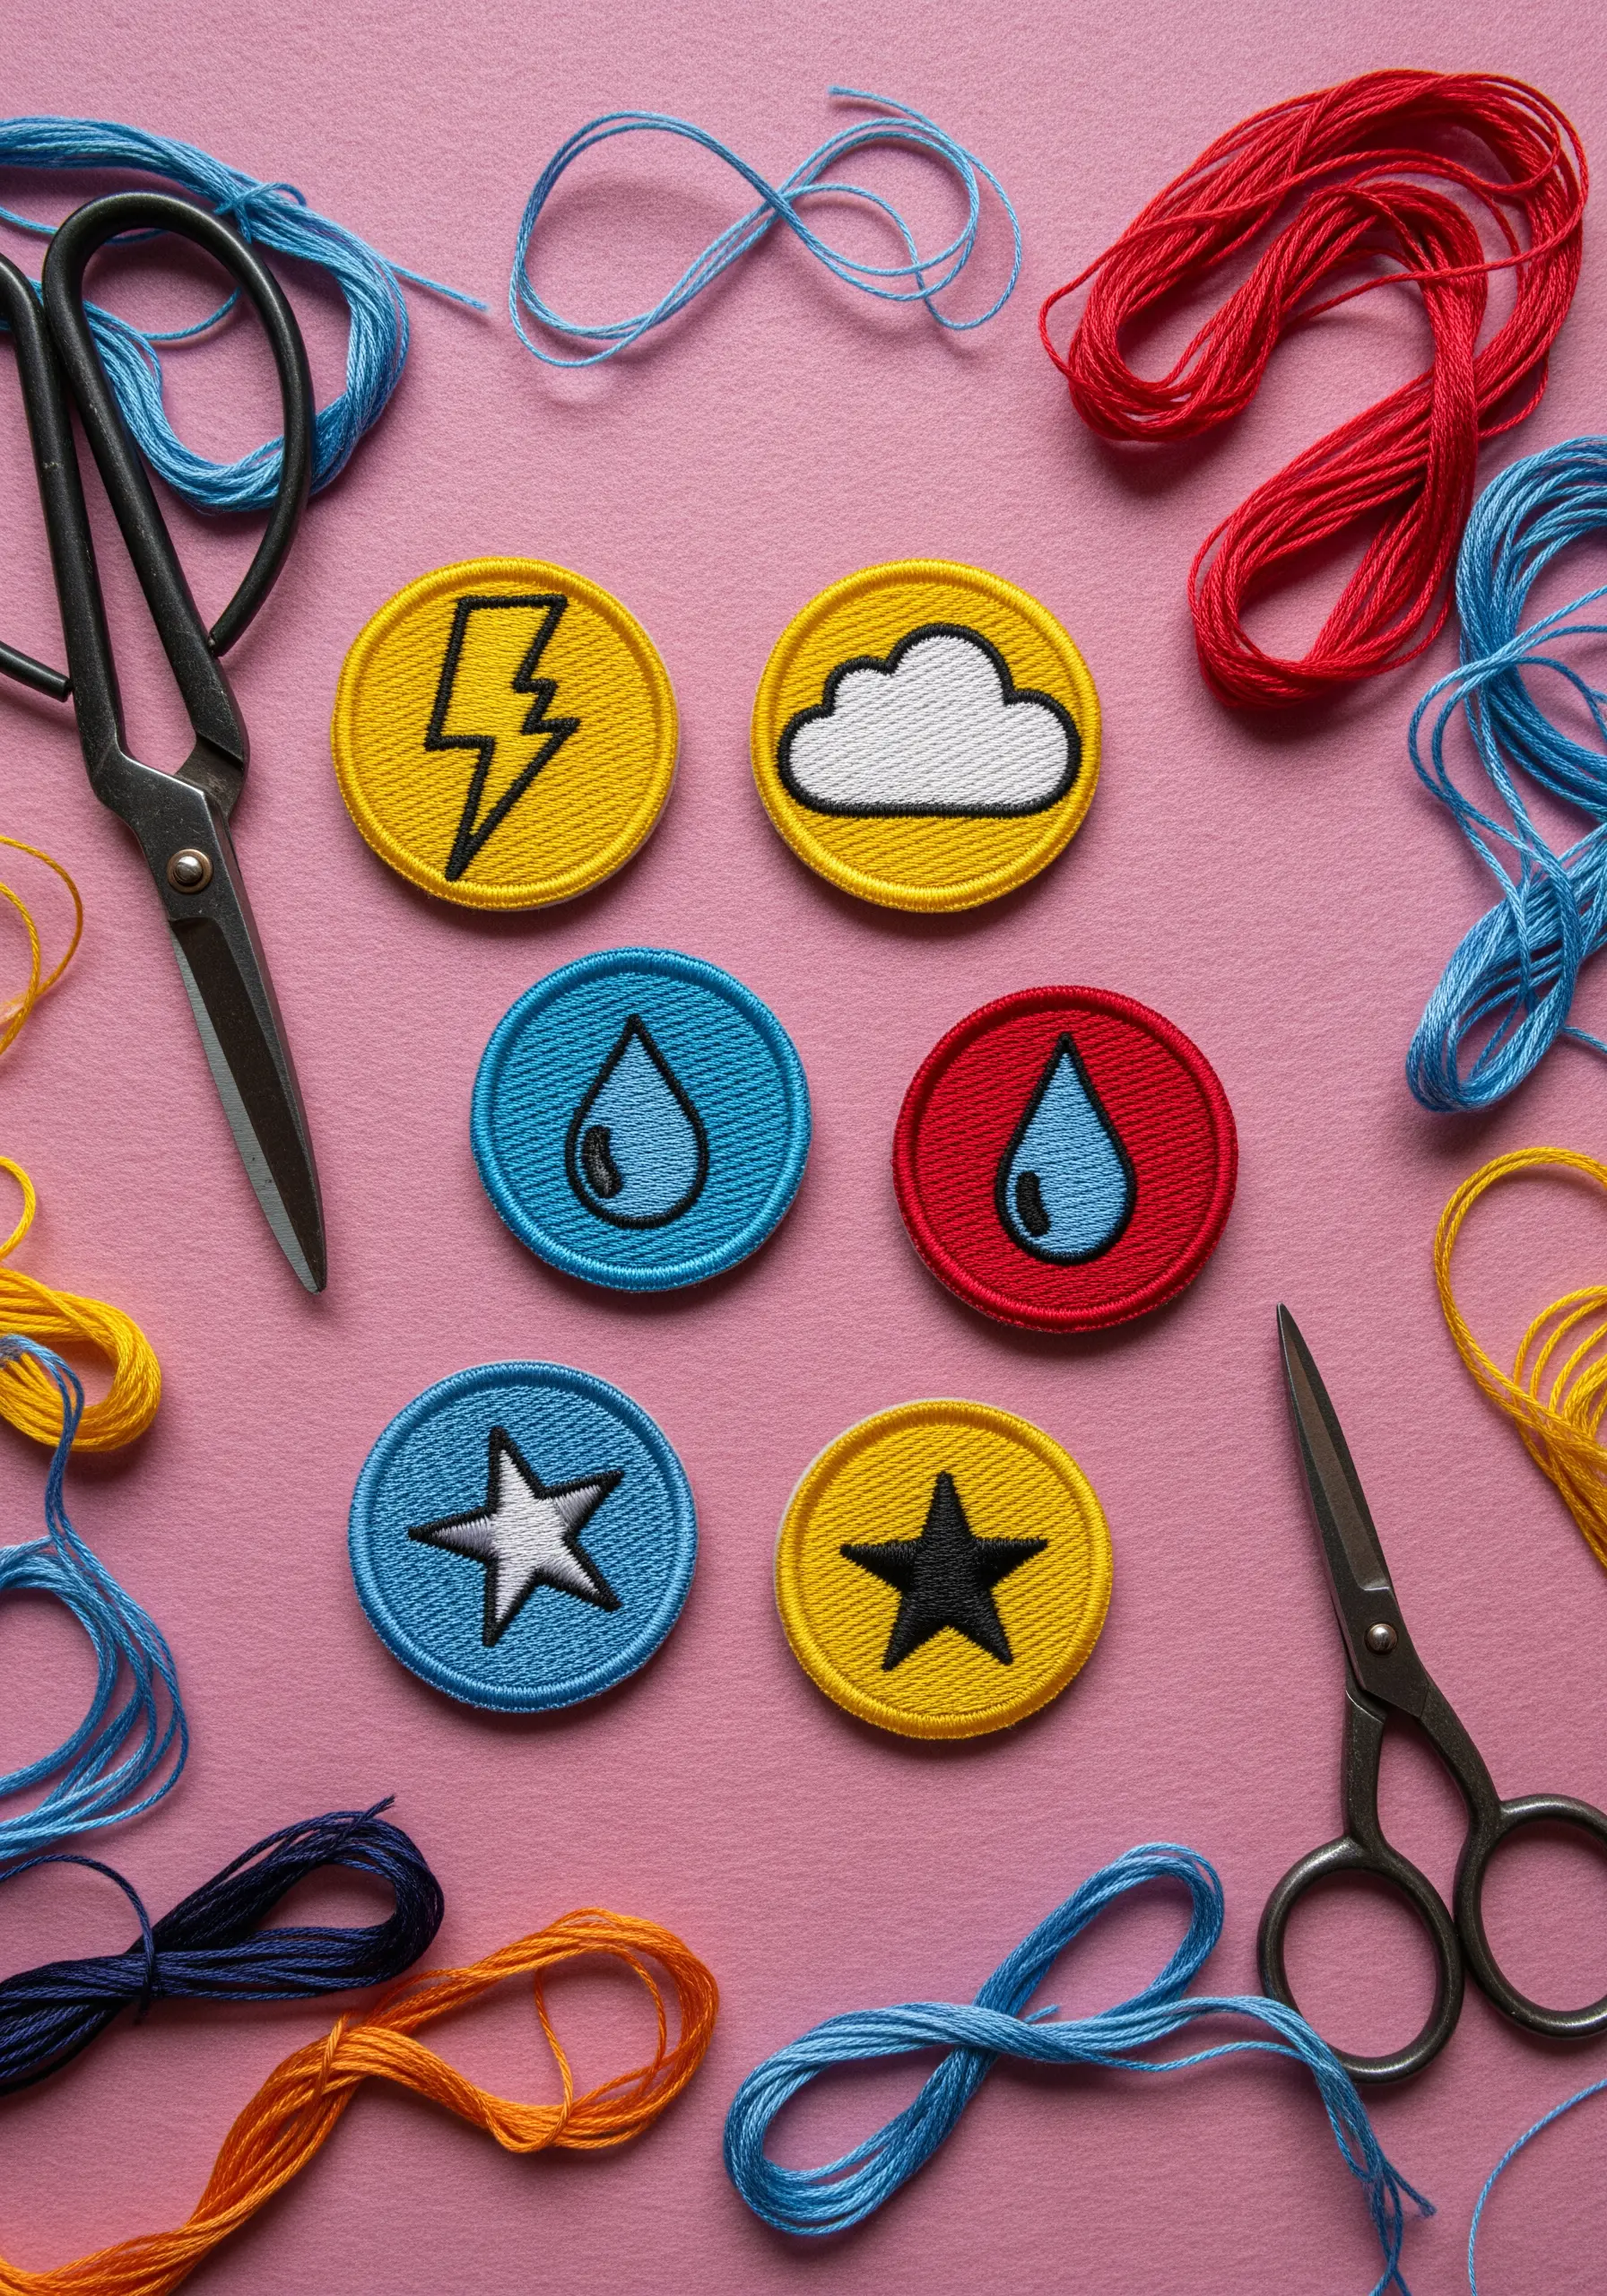
Create durable, custom patches by stitching your design onto a sturdy piece of felt.
Once your embroidery is complete, outline the entire shape with a tight satin stitch border—this will prevent the edges from fraying when you cut it out.
Apply an iron-on adhesive backing (like HeatnBond) before cutting for easy application to jackets, bags, or hats.
It’s a fun way to create tiny embroidery ideas to personalize your denim jacket.
31. Frame Creatively with a Double Hoop
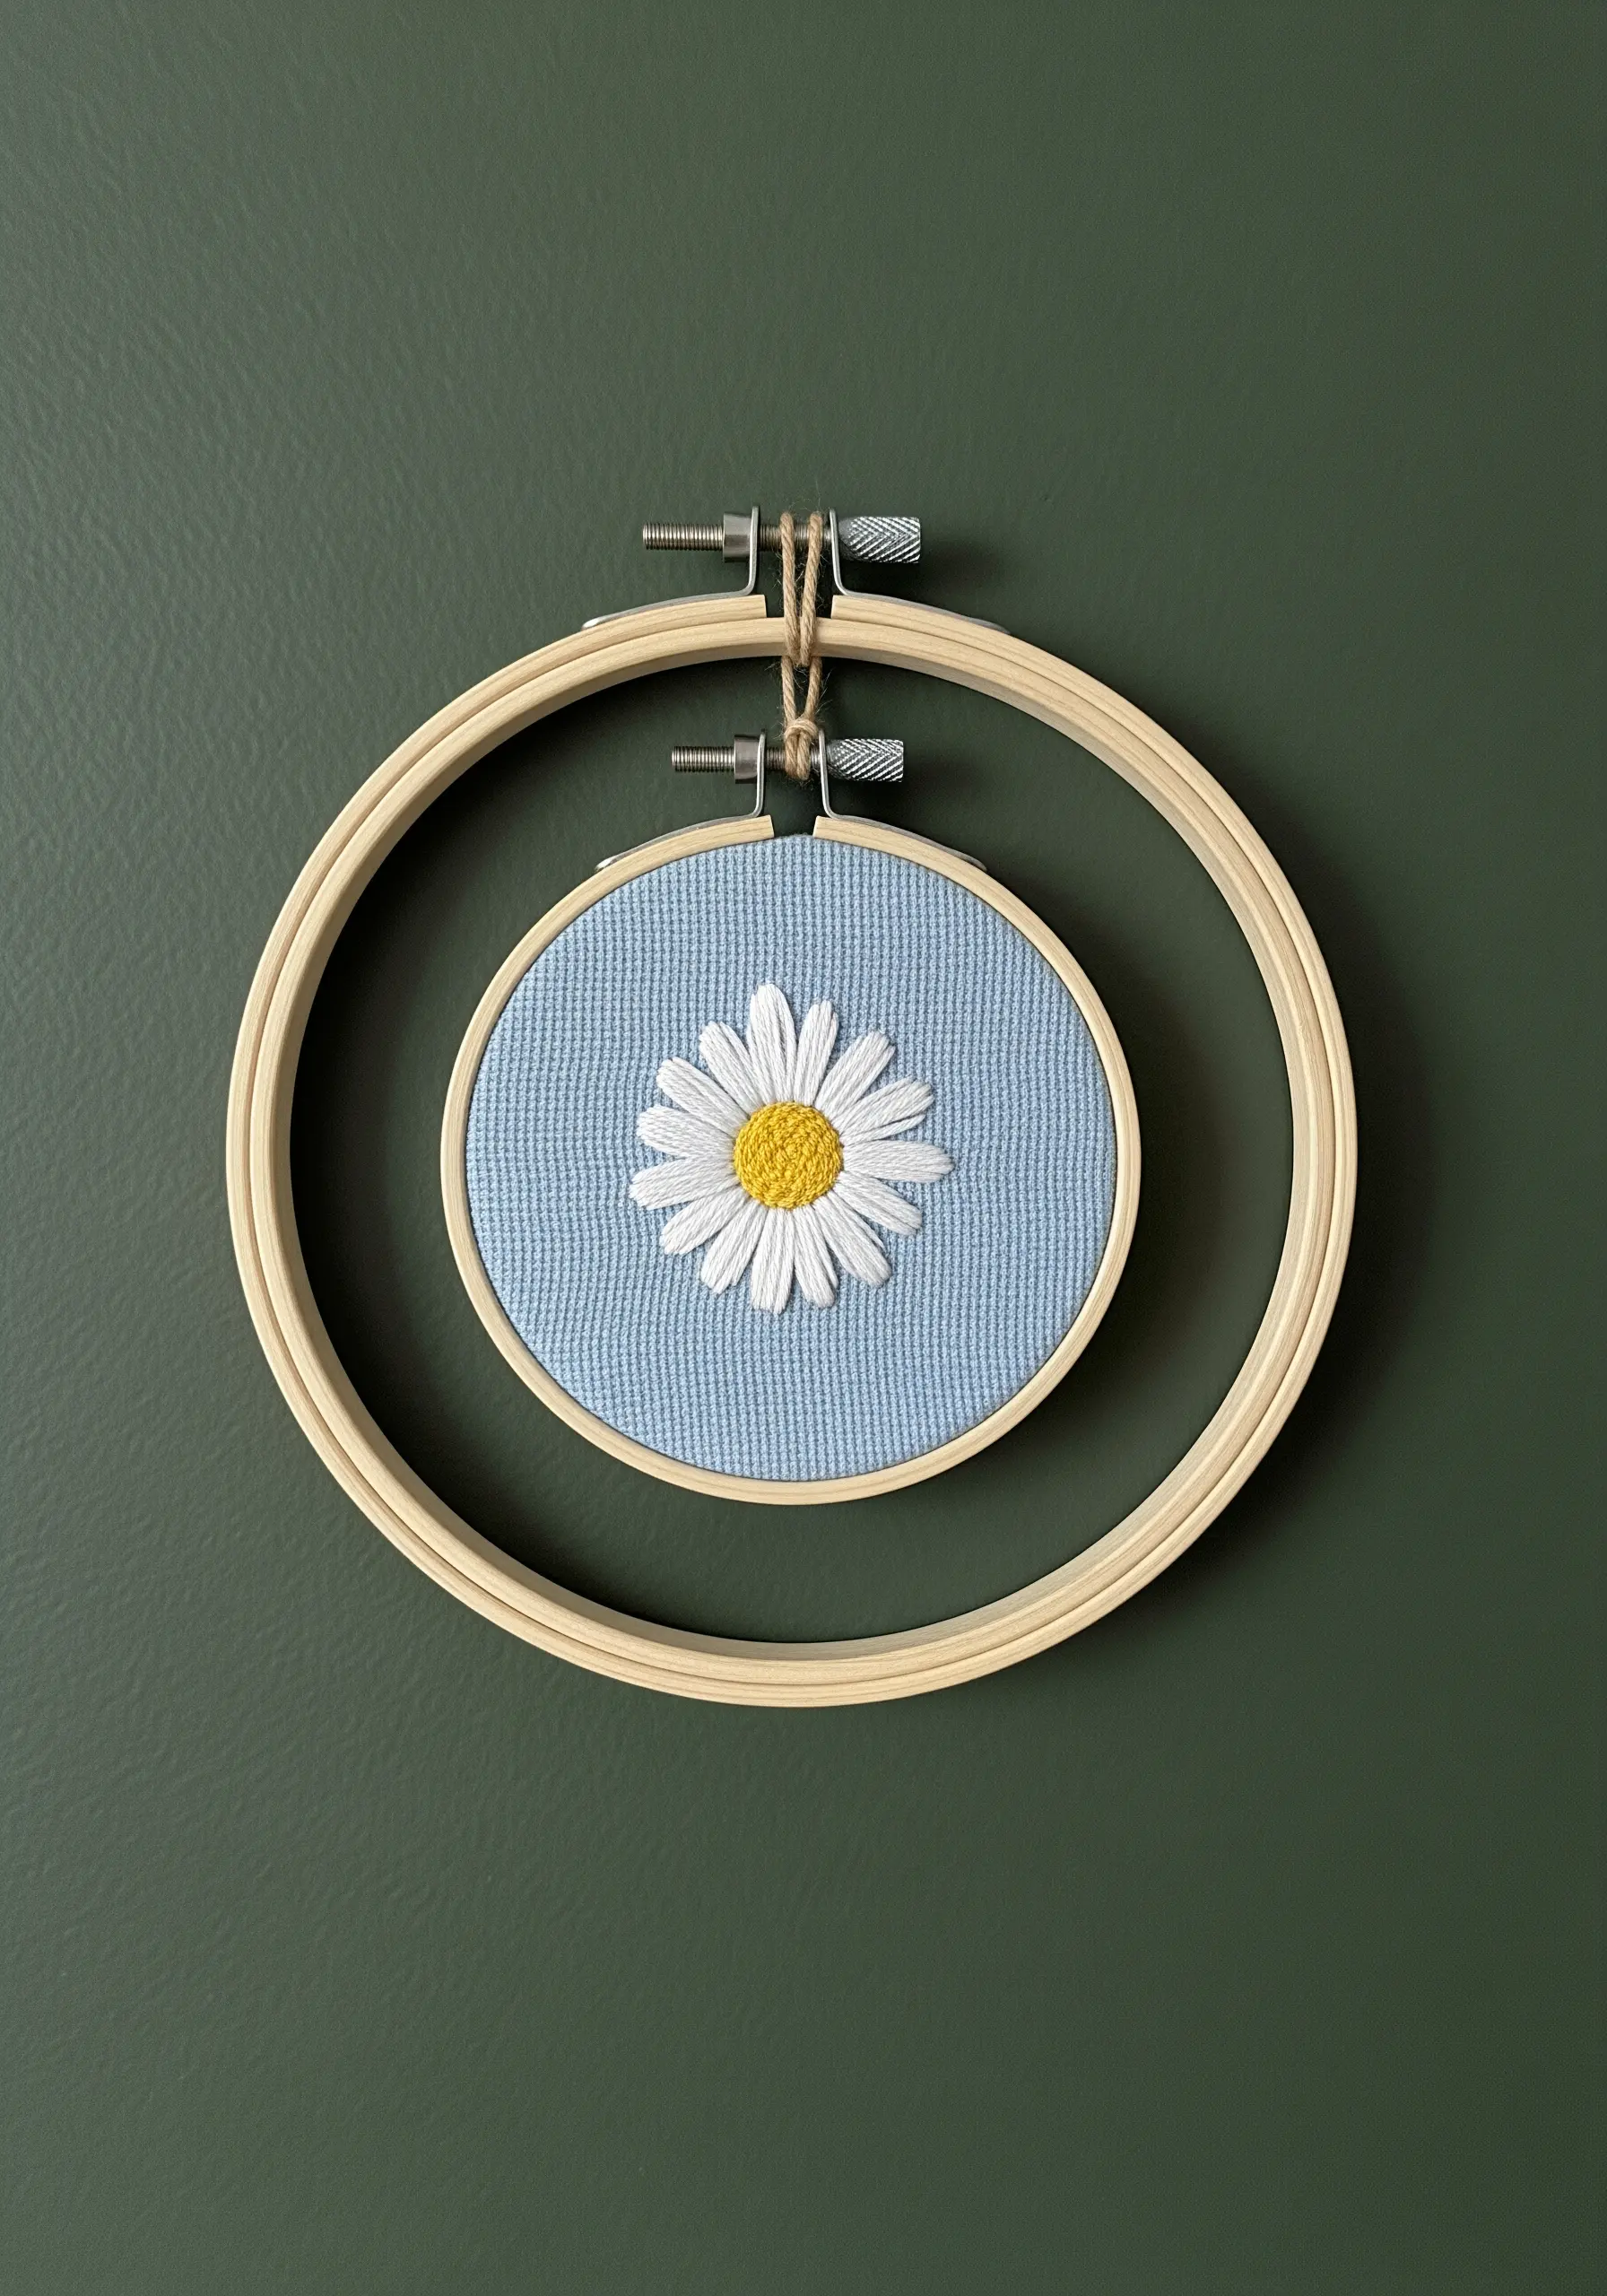
Create a striking, modern display by mounting your finished piece inside a second, larger embroidery hoop.
This technique adds an extra layer of visual interest and turns a simple project into a statement piece of decor.
Secure the inner hoop to the outer one with twine or fine wire wrapped around the hardware.
This is one of the most effective inspiring hoop art projects for a creative gallery wall.
32. Add Dimension with Padded Satin Stitch
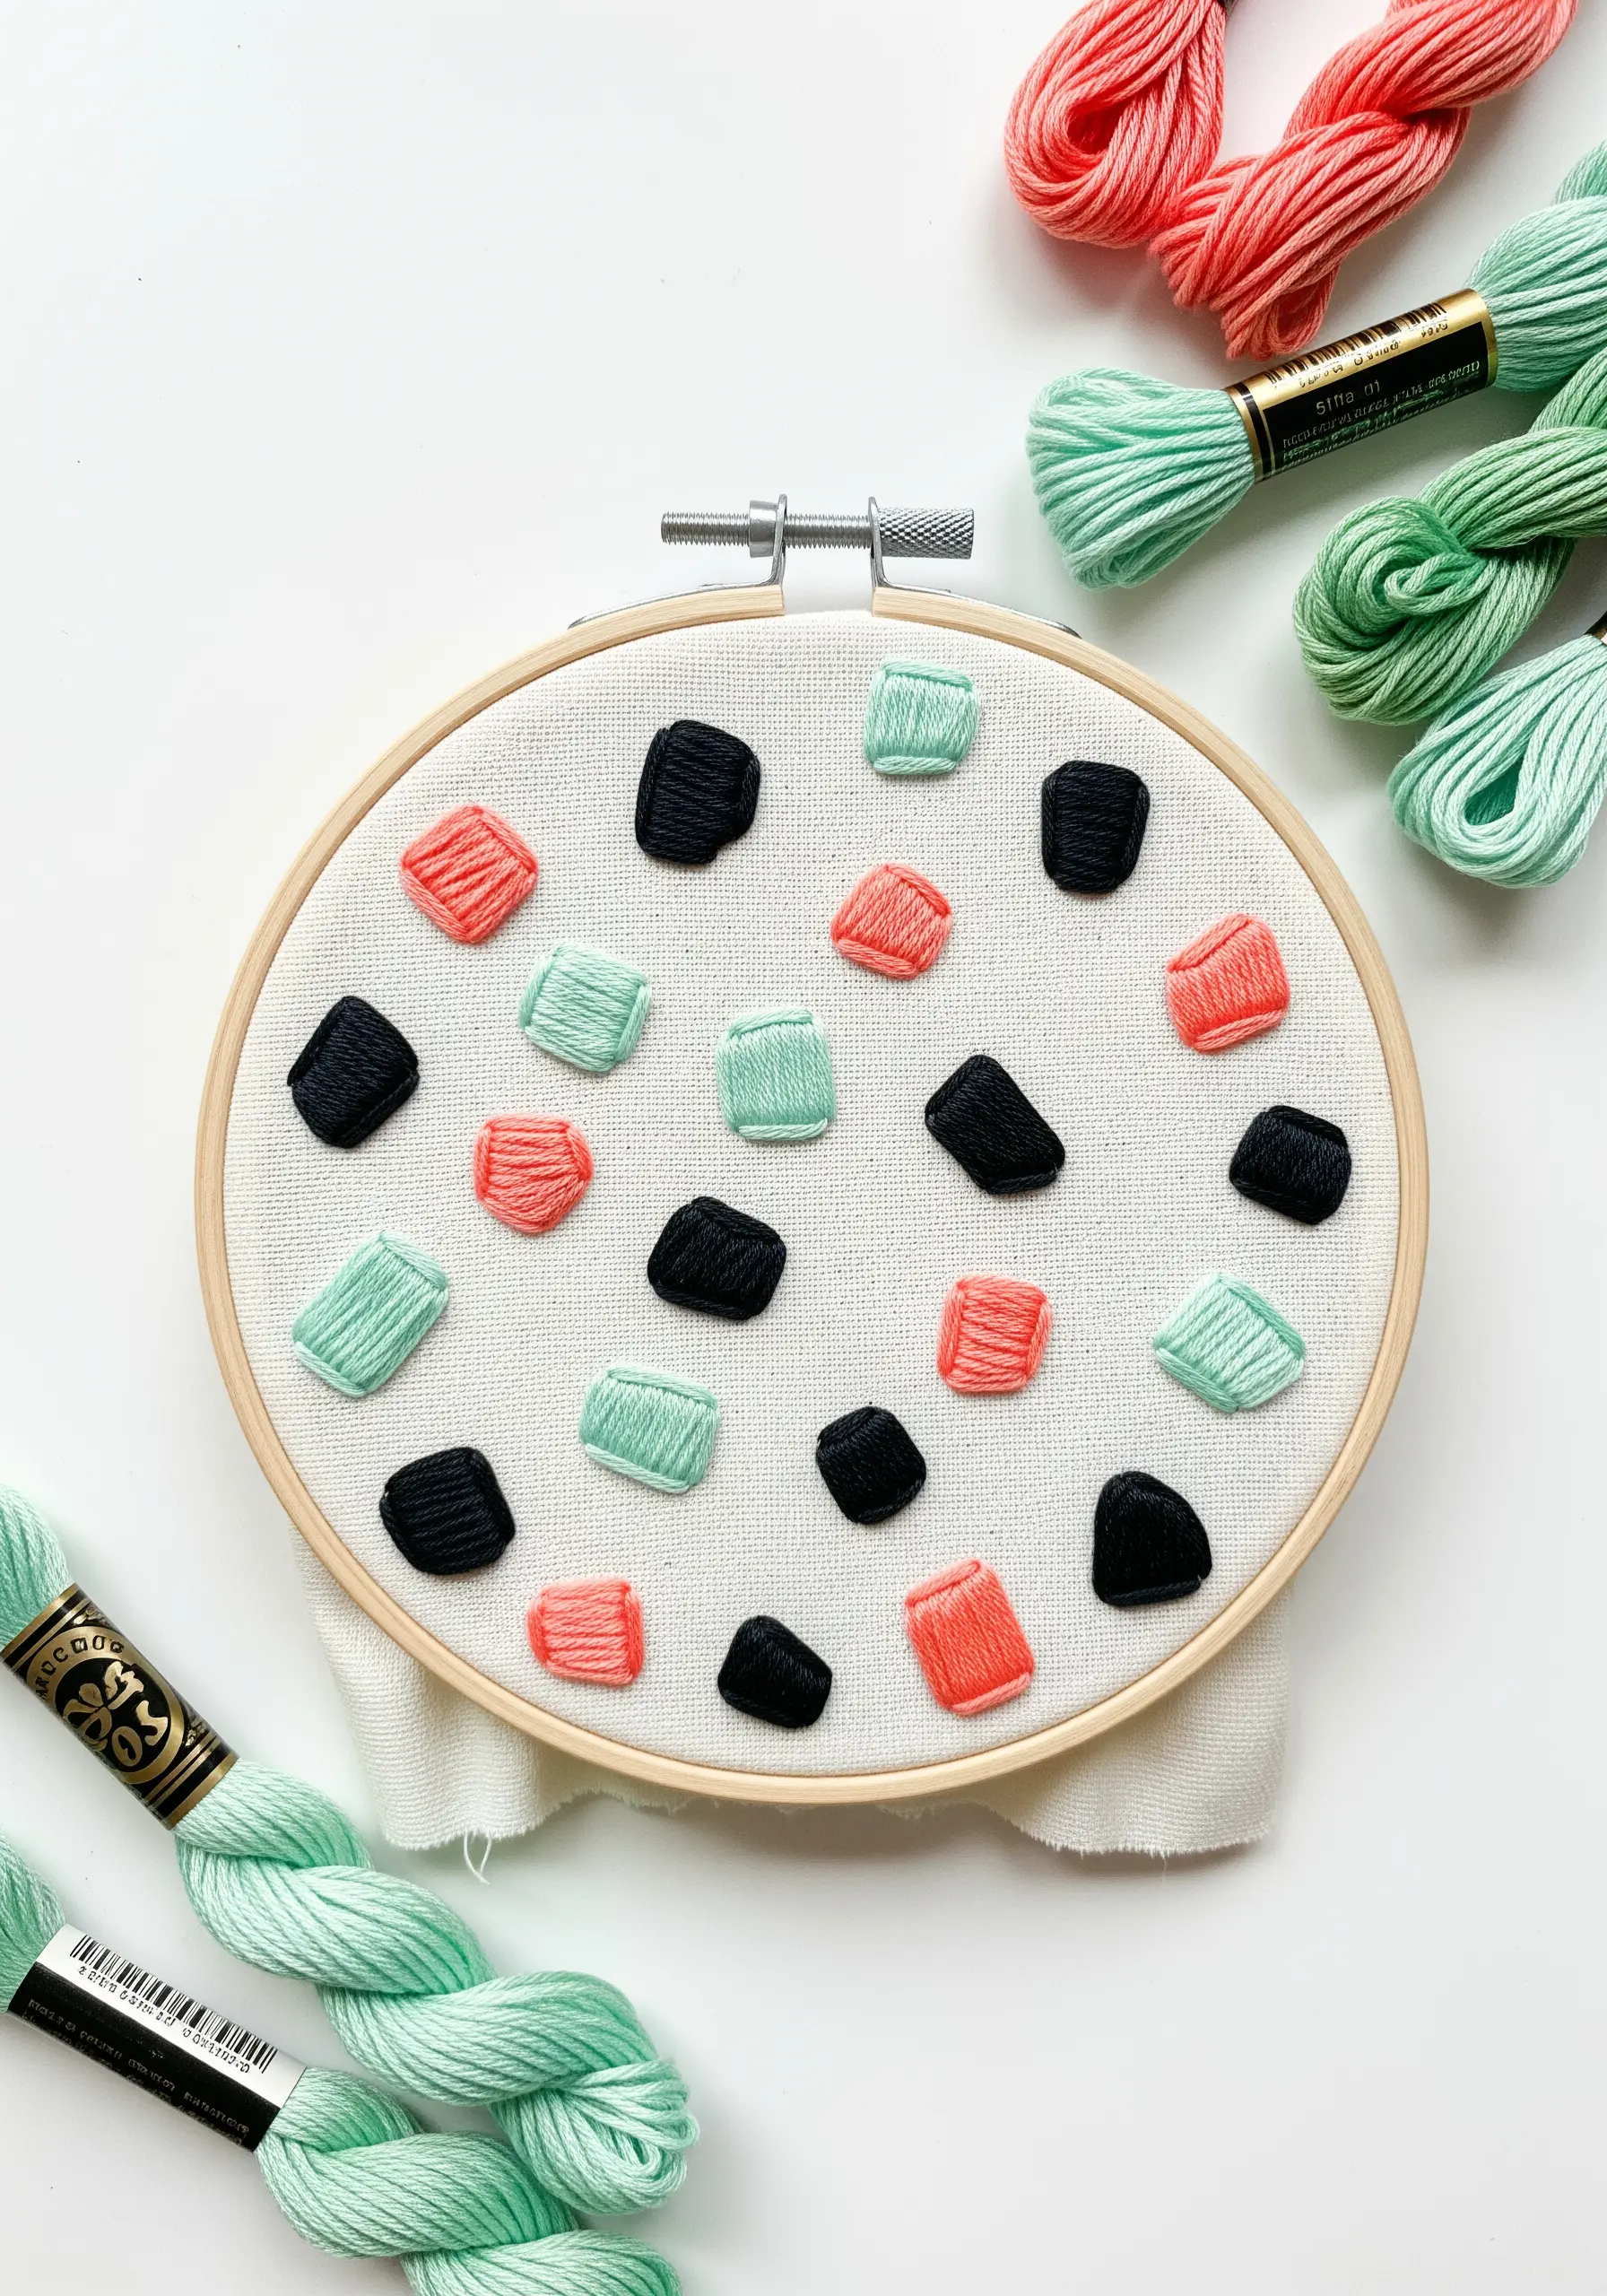
To make small shapes feel puffy and three-dimensional, use a padded satin stitch technique.
Before you stitch your final layer, create a small foundation of underlying stitches in the center of your shape.
Then, cover this padding completely with satin stitches that extend to the full outline of the shape.
This subtle lift makes each element pop, a great trick for elevating beyond simple 3D floral embroidery techniques into abstract art.
33. Create Bold Graphics with Wrapped Thread
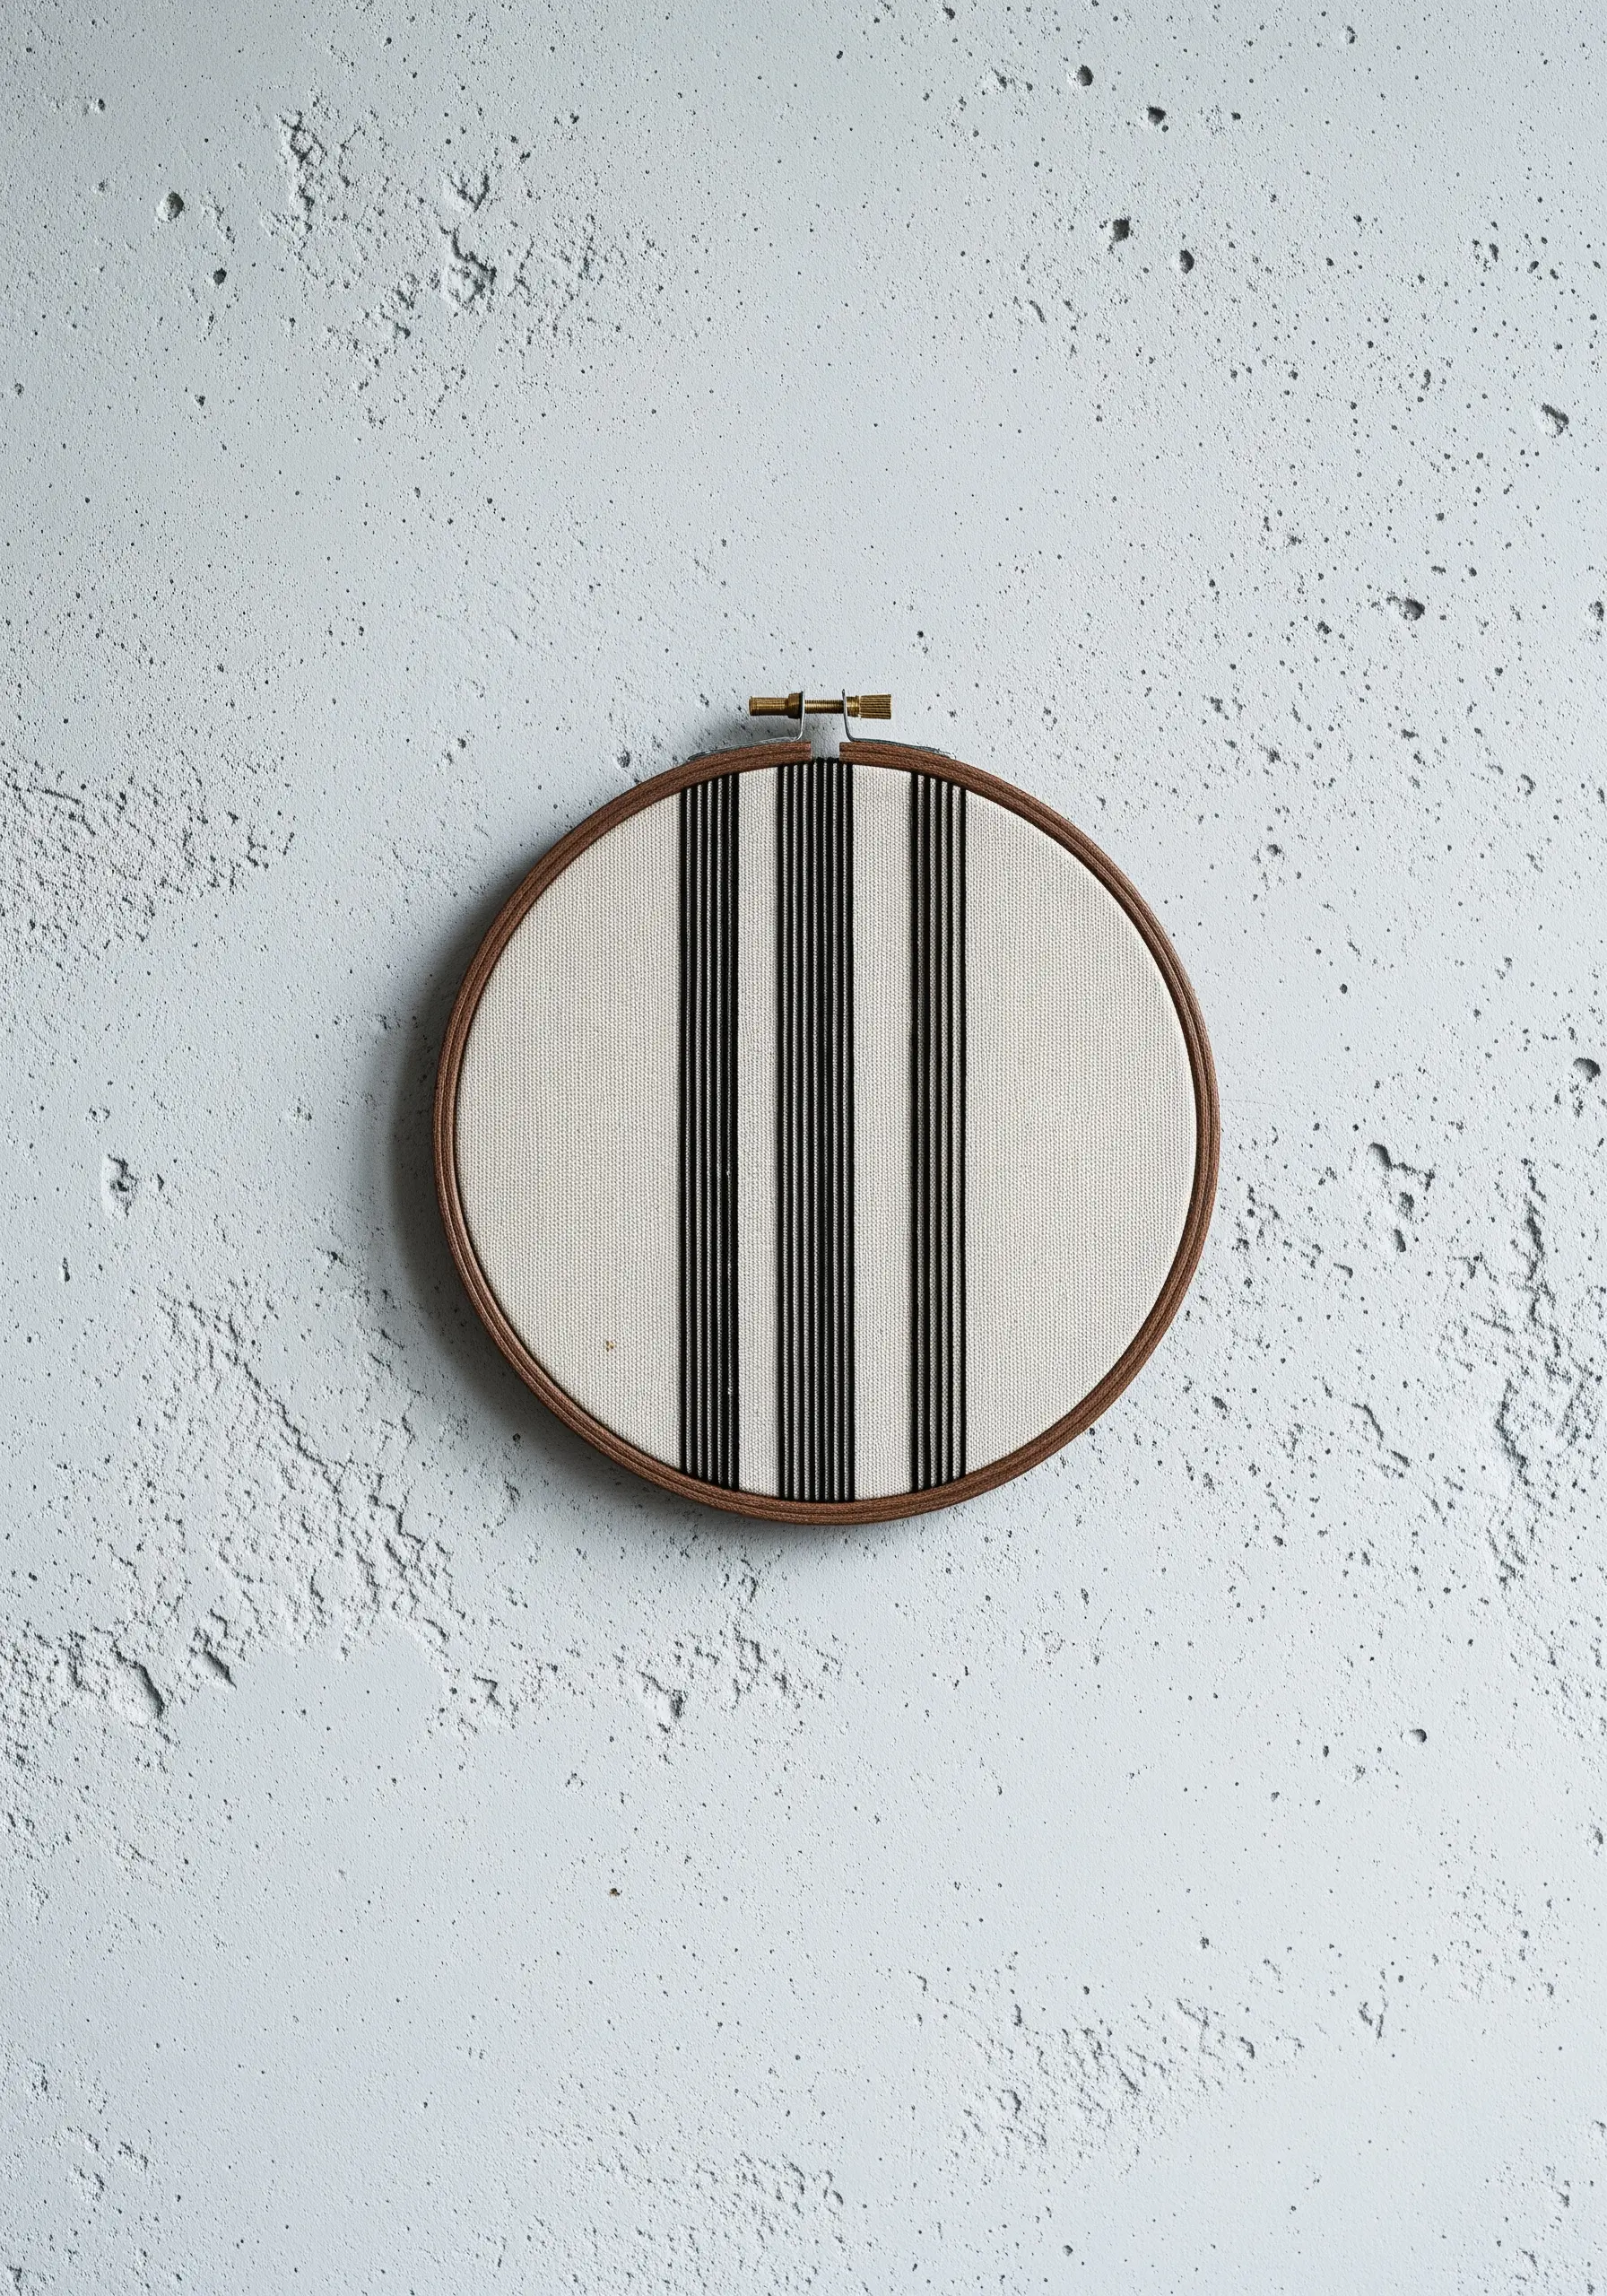
For a bold, graphic statement, move beyond traditional stitches and think sculpturally.
Wrap thick thread or fine yarn directly around the embroidery hoop, using the frame itself as the foundation for your art.
This string art-inspired technique is all about tension and precision, creating clean, impactful lines with minimal effort.
It’s a fast and effective way to create abstract thread embroidery stitches that turn plain fabric into bold wall sculptures.


