

When you think of the sea, what comes to mind? Is it the quiet rhythm of the waves, the texture of sand, or the pearlescent interior of a shell? Embroidery gives you a unique way to hold onto those feelings, translating them into art that is both personal and deeply calming.
You don’t need dozens of complex stitches or a vast collection of threads. Instead, the magic lies in small, intentional choices. It’s in the direction of a single satin stitch that makes a shell shimmer, or the tight cluster of French knots that brings seafoam to life.
Here, we’ll explore how tiny details can transform your work. You’ll learn not just what to stitch, but how to think about texture, light, and composition to create pieces that feel less like a craft project and more like a cherished memory of the coast.
1. Add Luster with Thread Direction and Beads
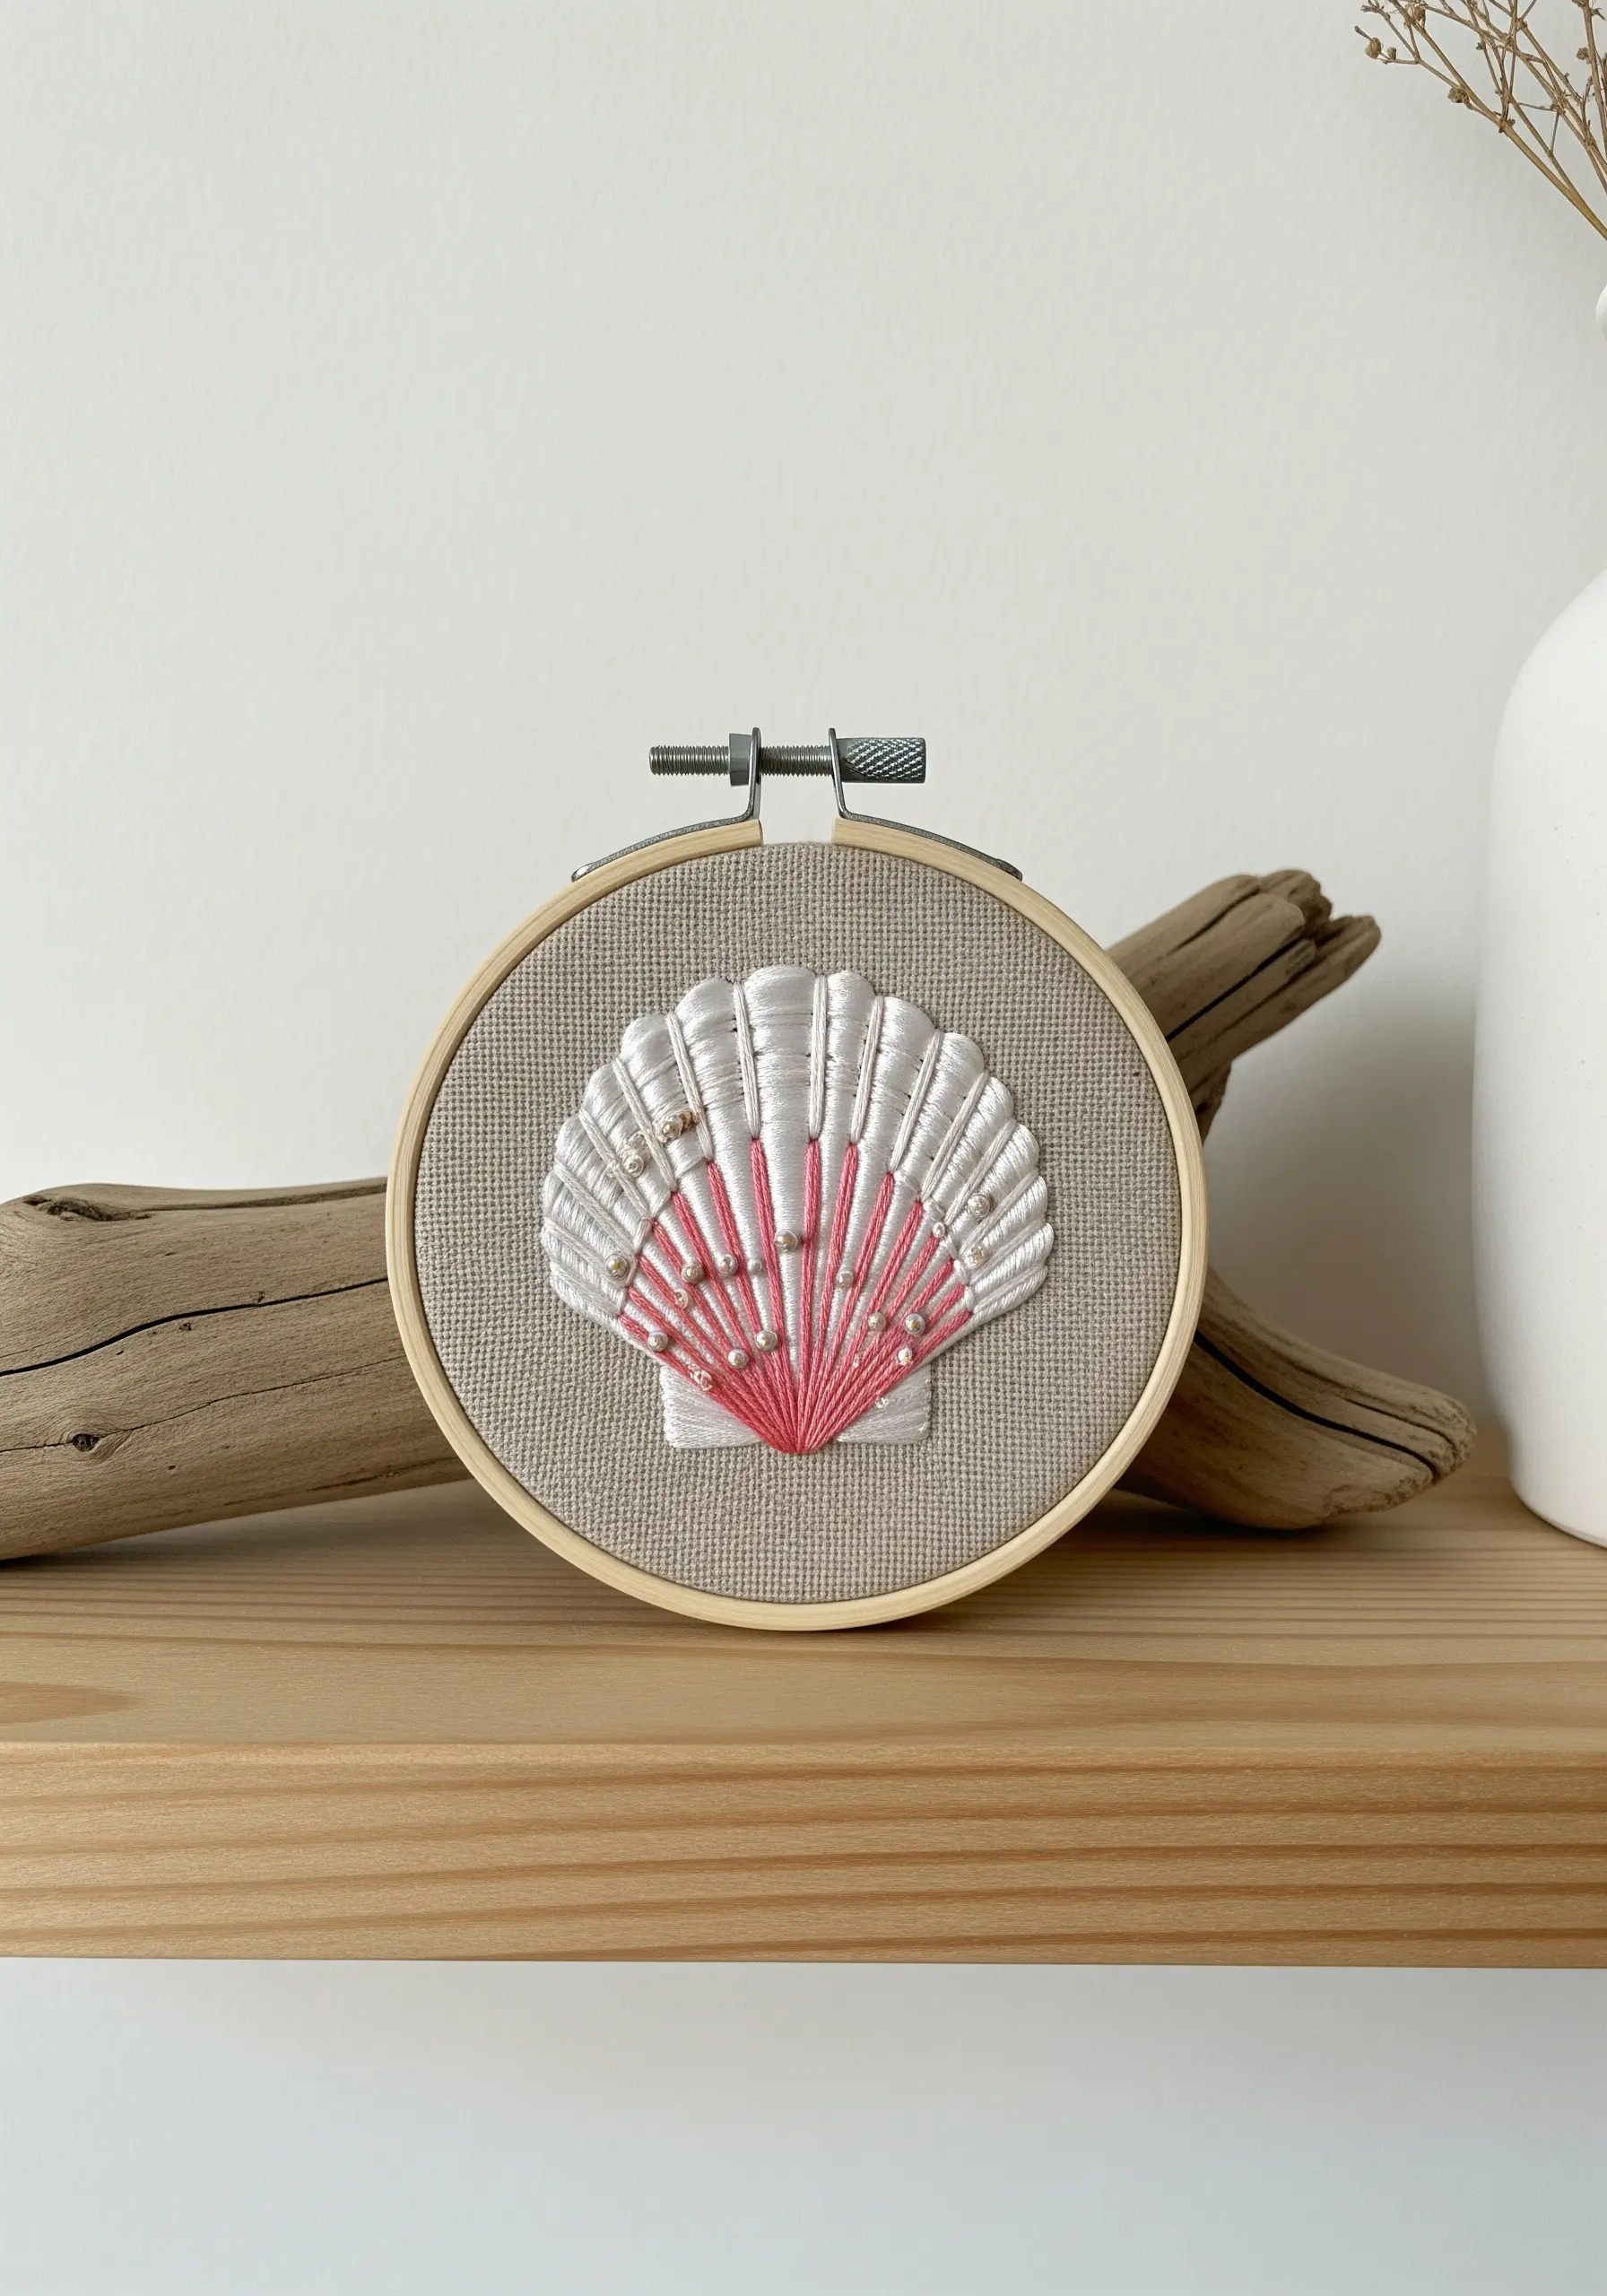
To give your seashell a pearlescent sheen, use a satin stitch and pay close attention to the direction of your threads.
Vary the angle of your stitches in each segment to mimic the way light reflects off a real shell.
Choose a thread with a slight gloss, like silk or satin floss, to enhance this effect.
For a final touch of texture, scatter tiny seed beads where the segments meet; this adds dimension and catches the light beautifully.
2. Sculpt Seafoam with Dimensional Knots
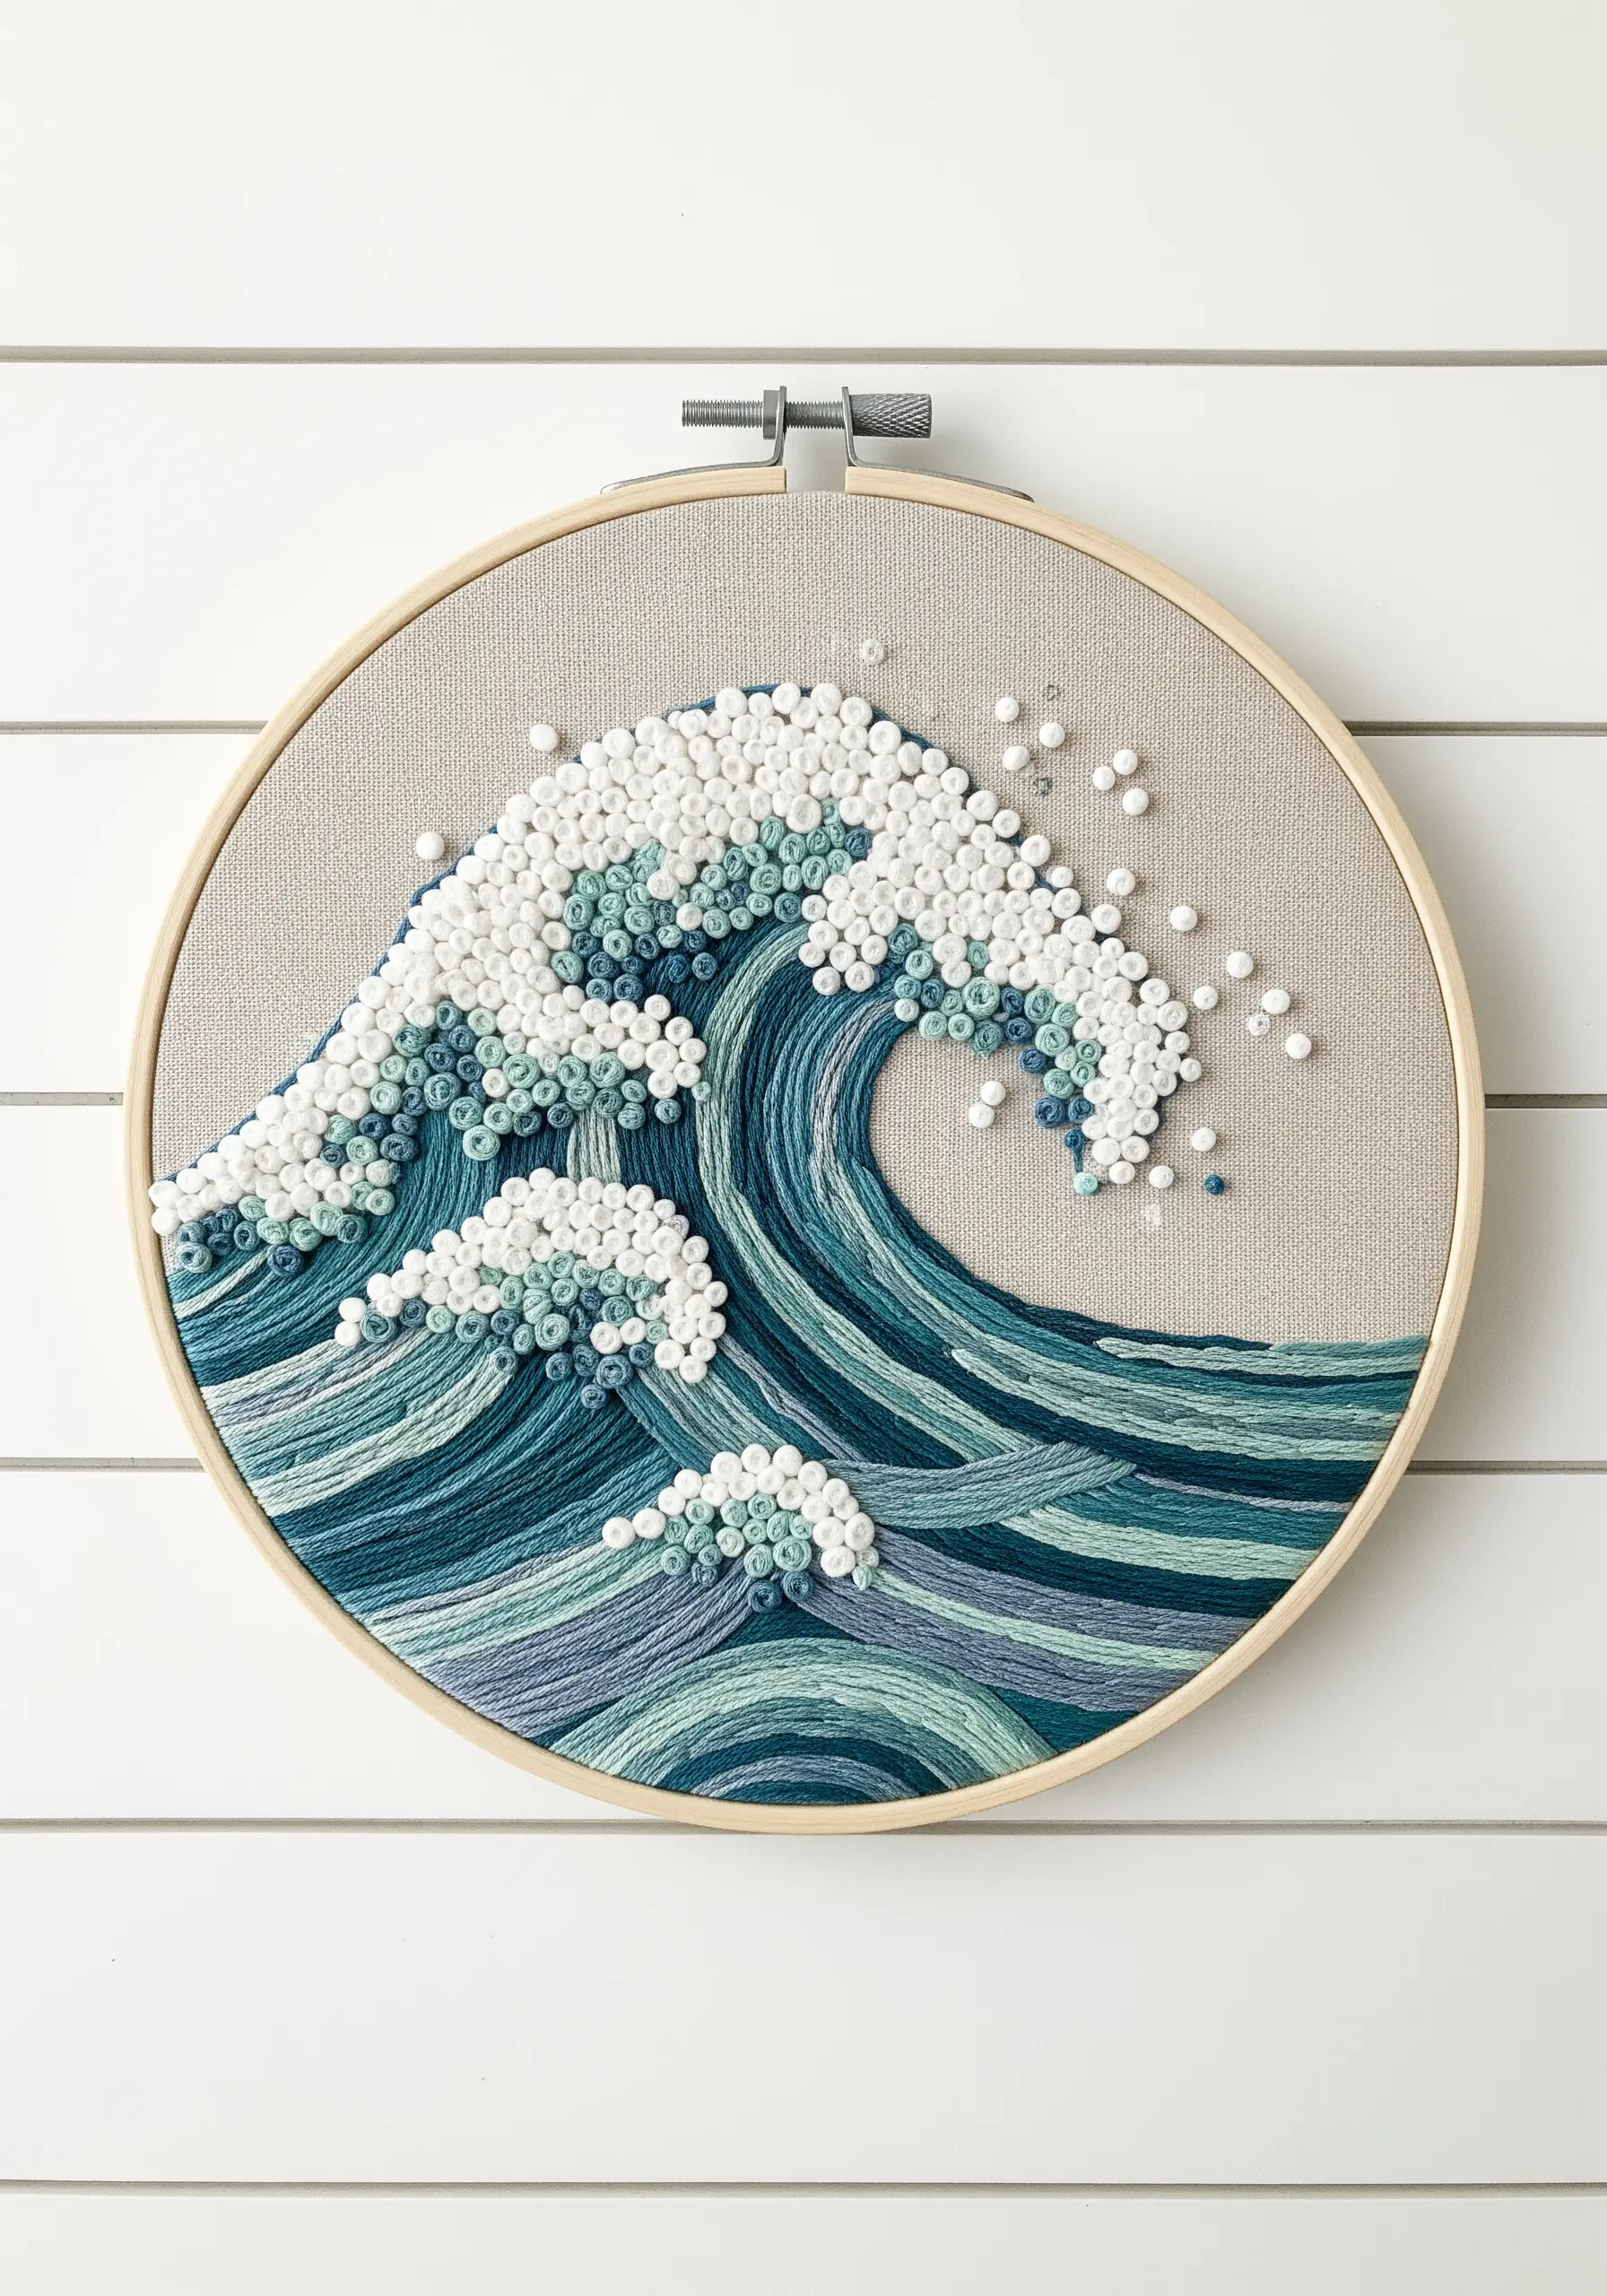
Create the chaotic, bubbly texture of crashing waves by clustering French knots in varying sizes and densities.
Use thicker thread (three to four strands) and wrap the needle multiple times for larger knots in the crest of the wave, then switch to single strands for smaller, sparser knots that suggest sea spray.
For the body of the wave, use long-and-short stitches in shades of teal and navy, ensuring your stitches follow the curve to create a sense of powerful movement.
This contrast between the smooth, flowing water and the tight, bumpy seafoam is what gives the piece its dynamic energy.
3. Make Coral Pop with Variegated Thread
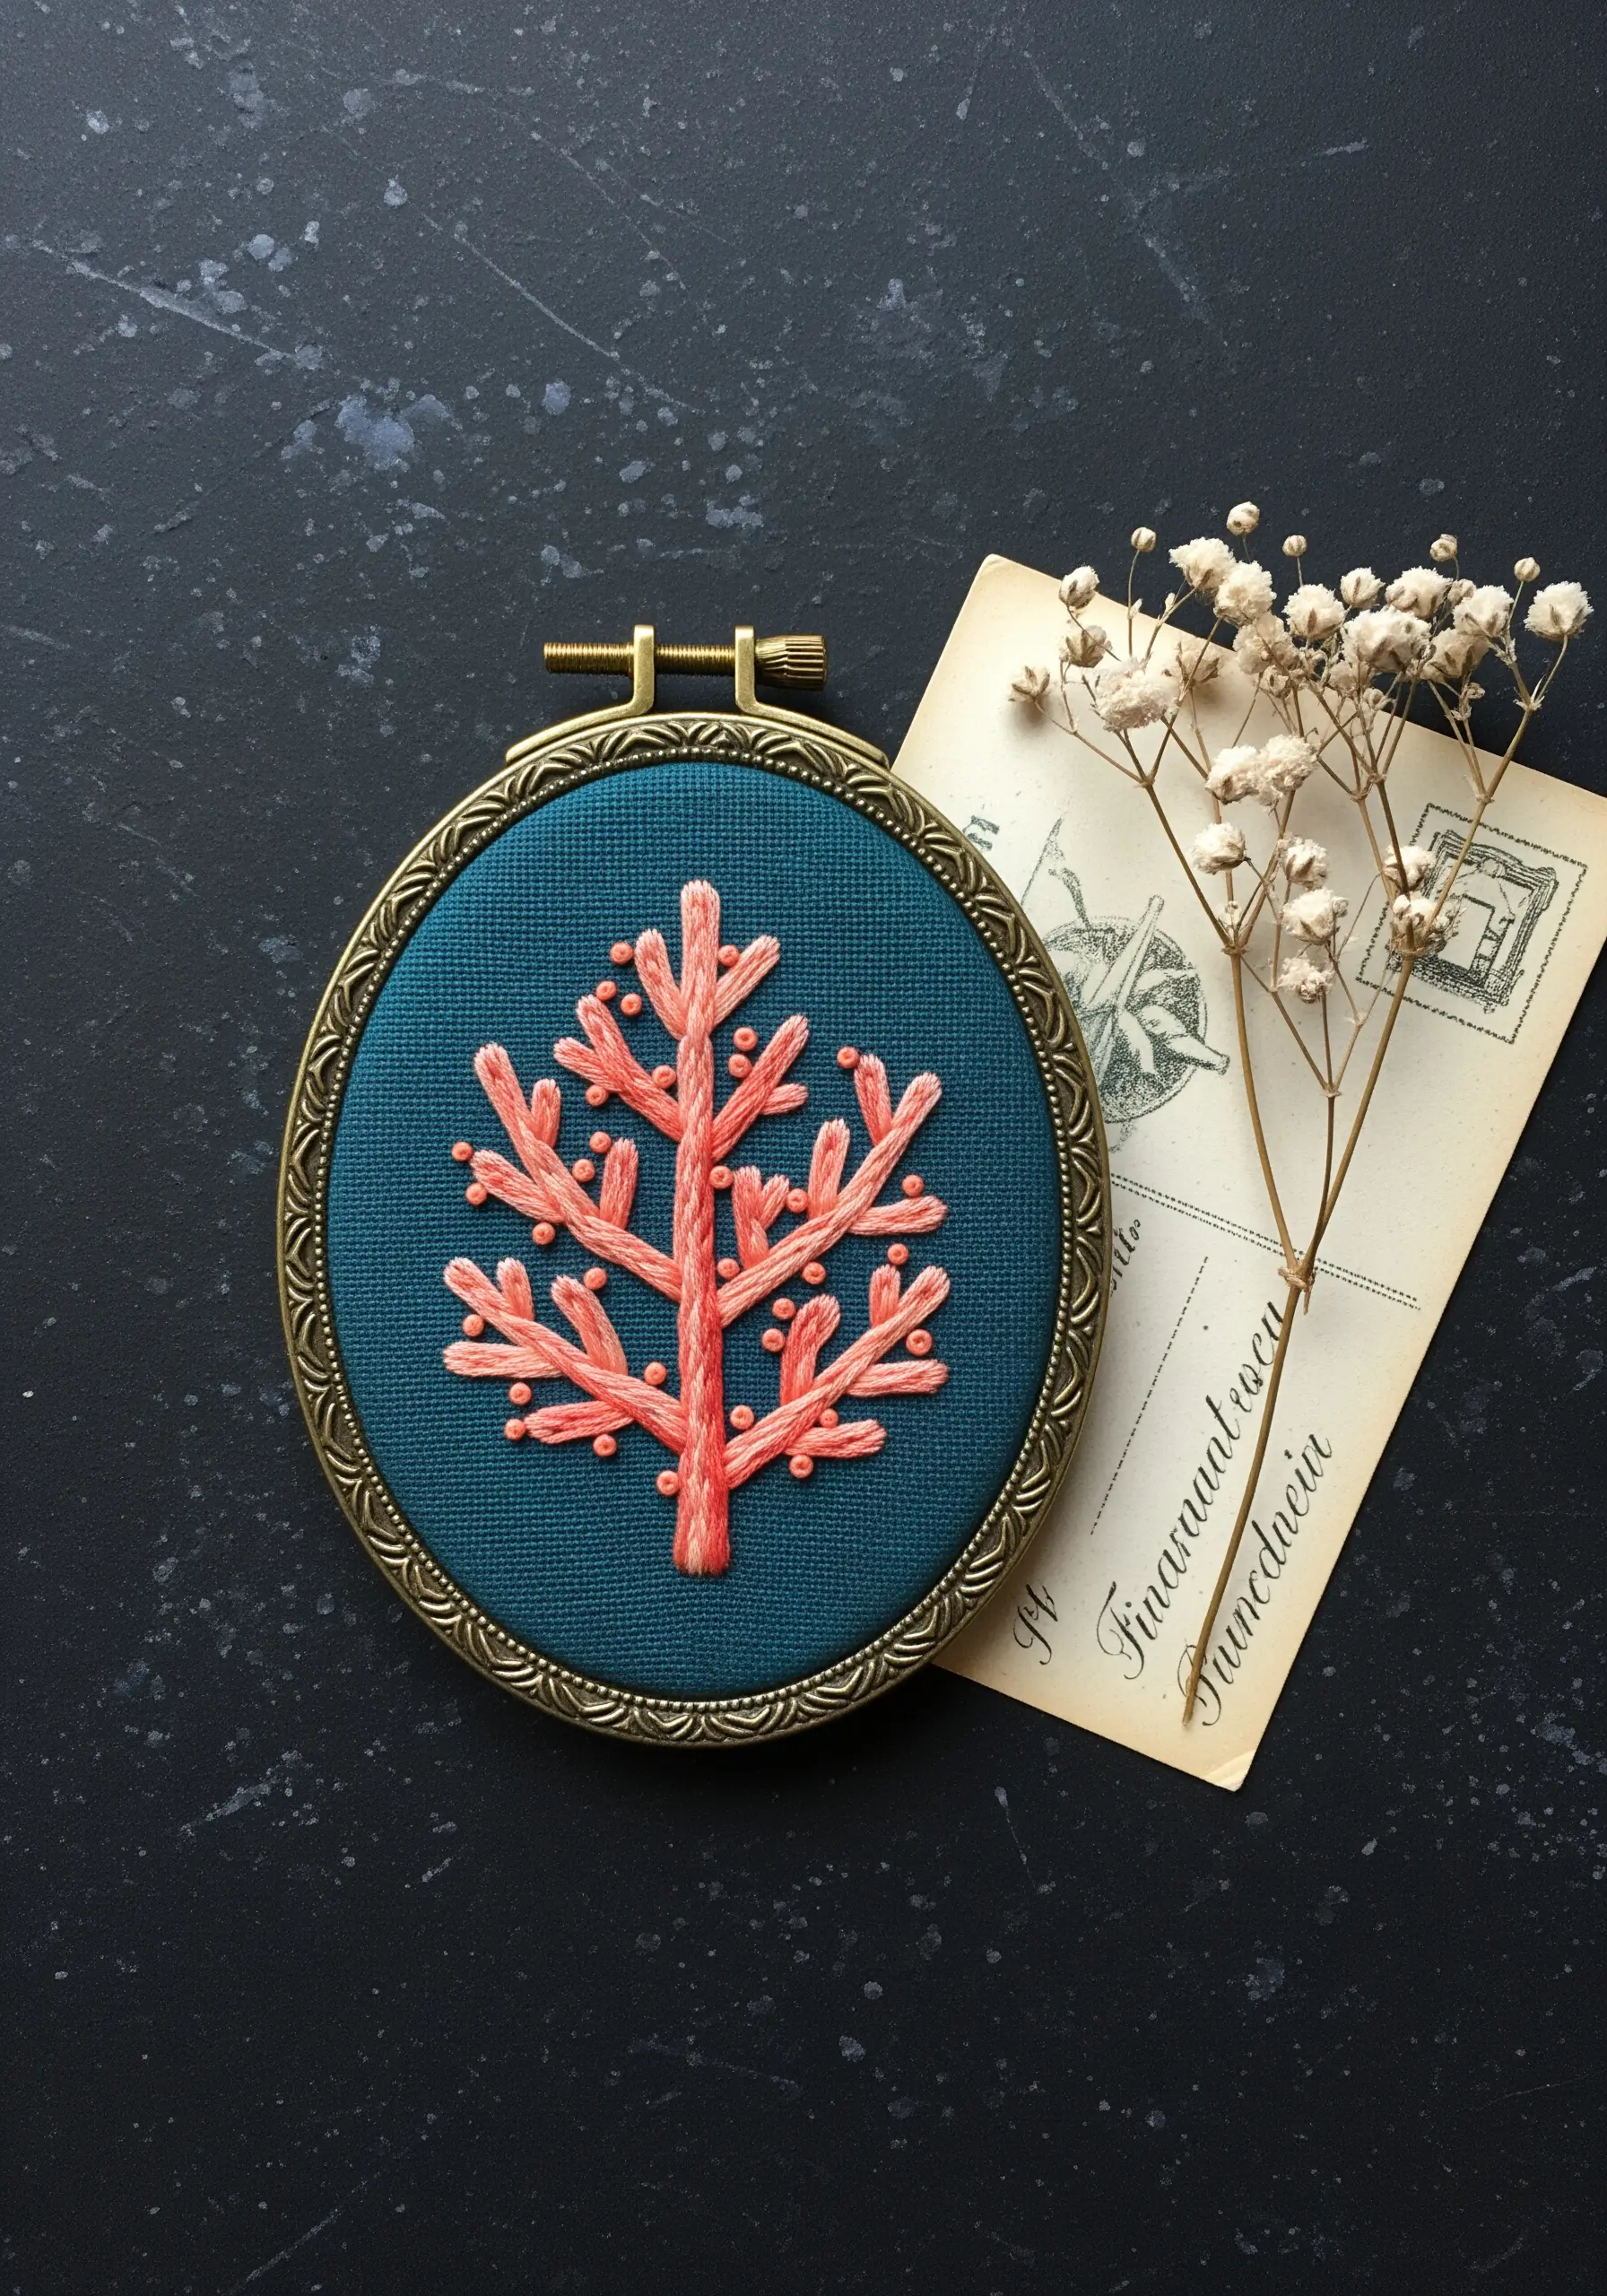
To achieve a natural, multi-tonal look for coral branches without constantly changing colors, select a high-quality variegated thread.
The subtle color shifts in a single strand will do the work for you, creating depth and highlights automatically.
Use a whipped backstitch or coral stitch to give the branches a rounded, defined shape that stands out against a dark fabric background.
Tiny, strategically placed French knots in a contrasting color add a delicate, organic detail that completes the underwater illusion.
4. Master Elegance with a Single Clean Outline
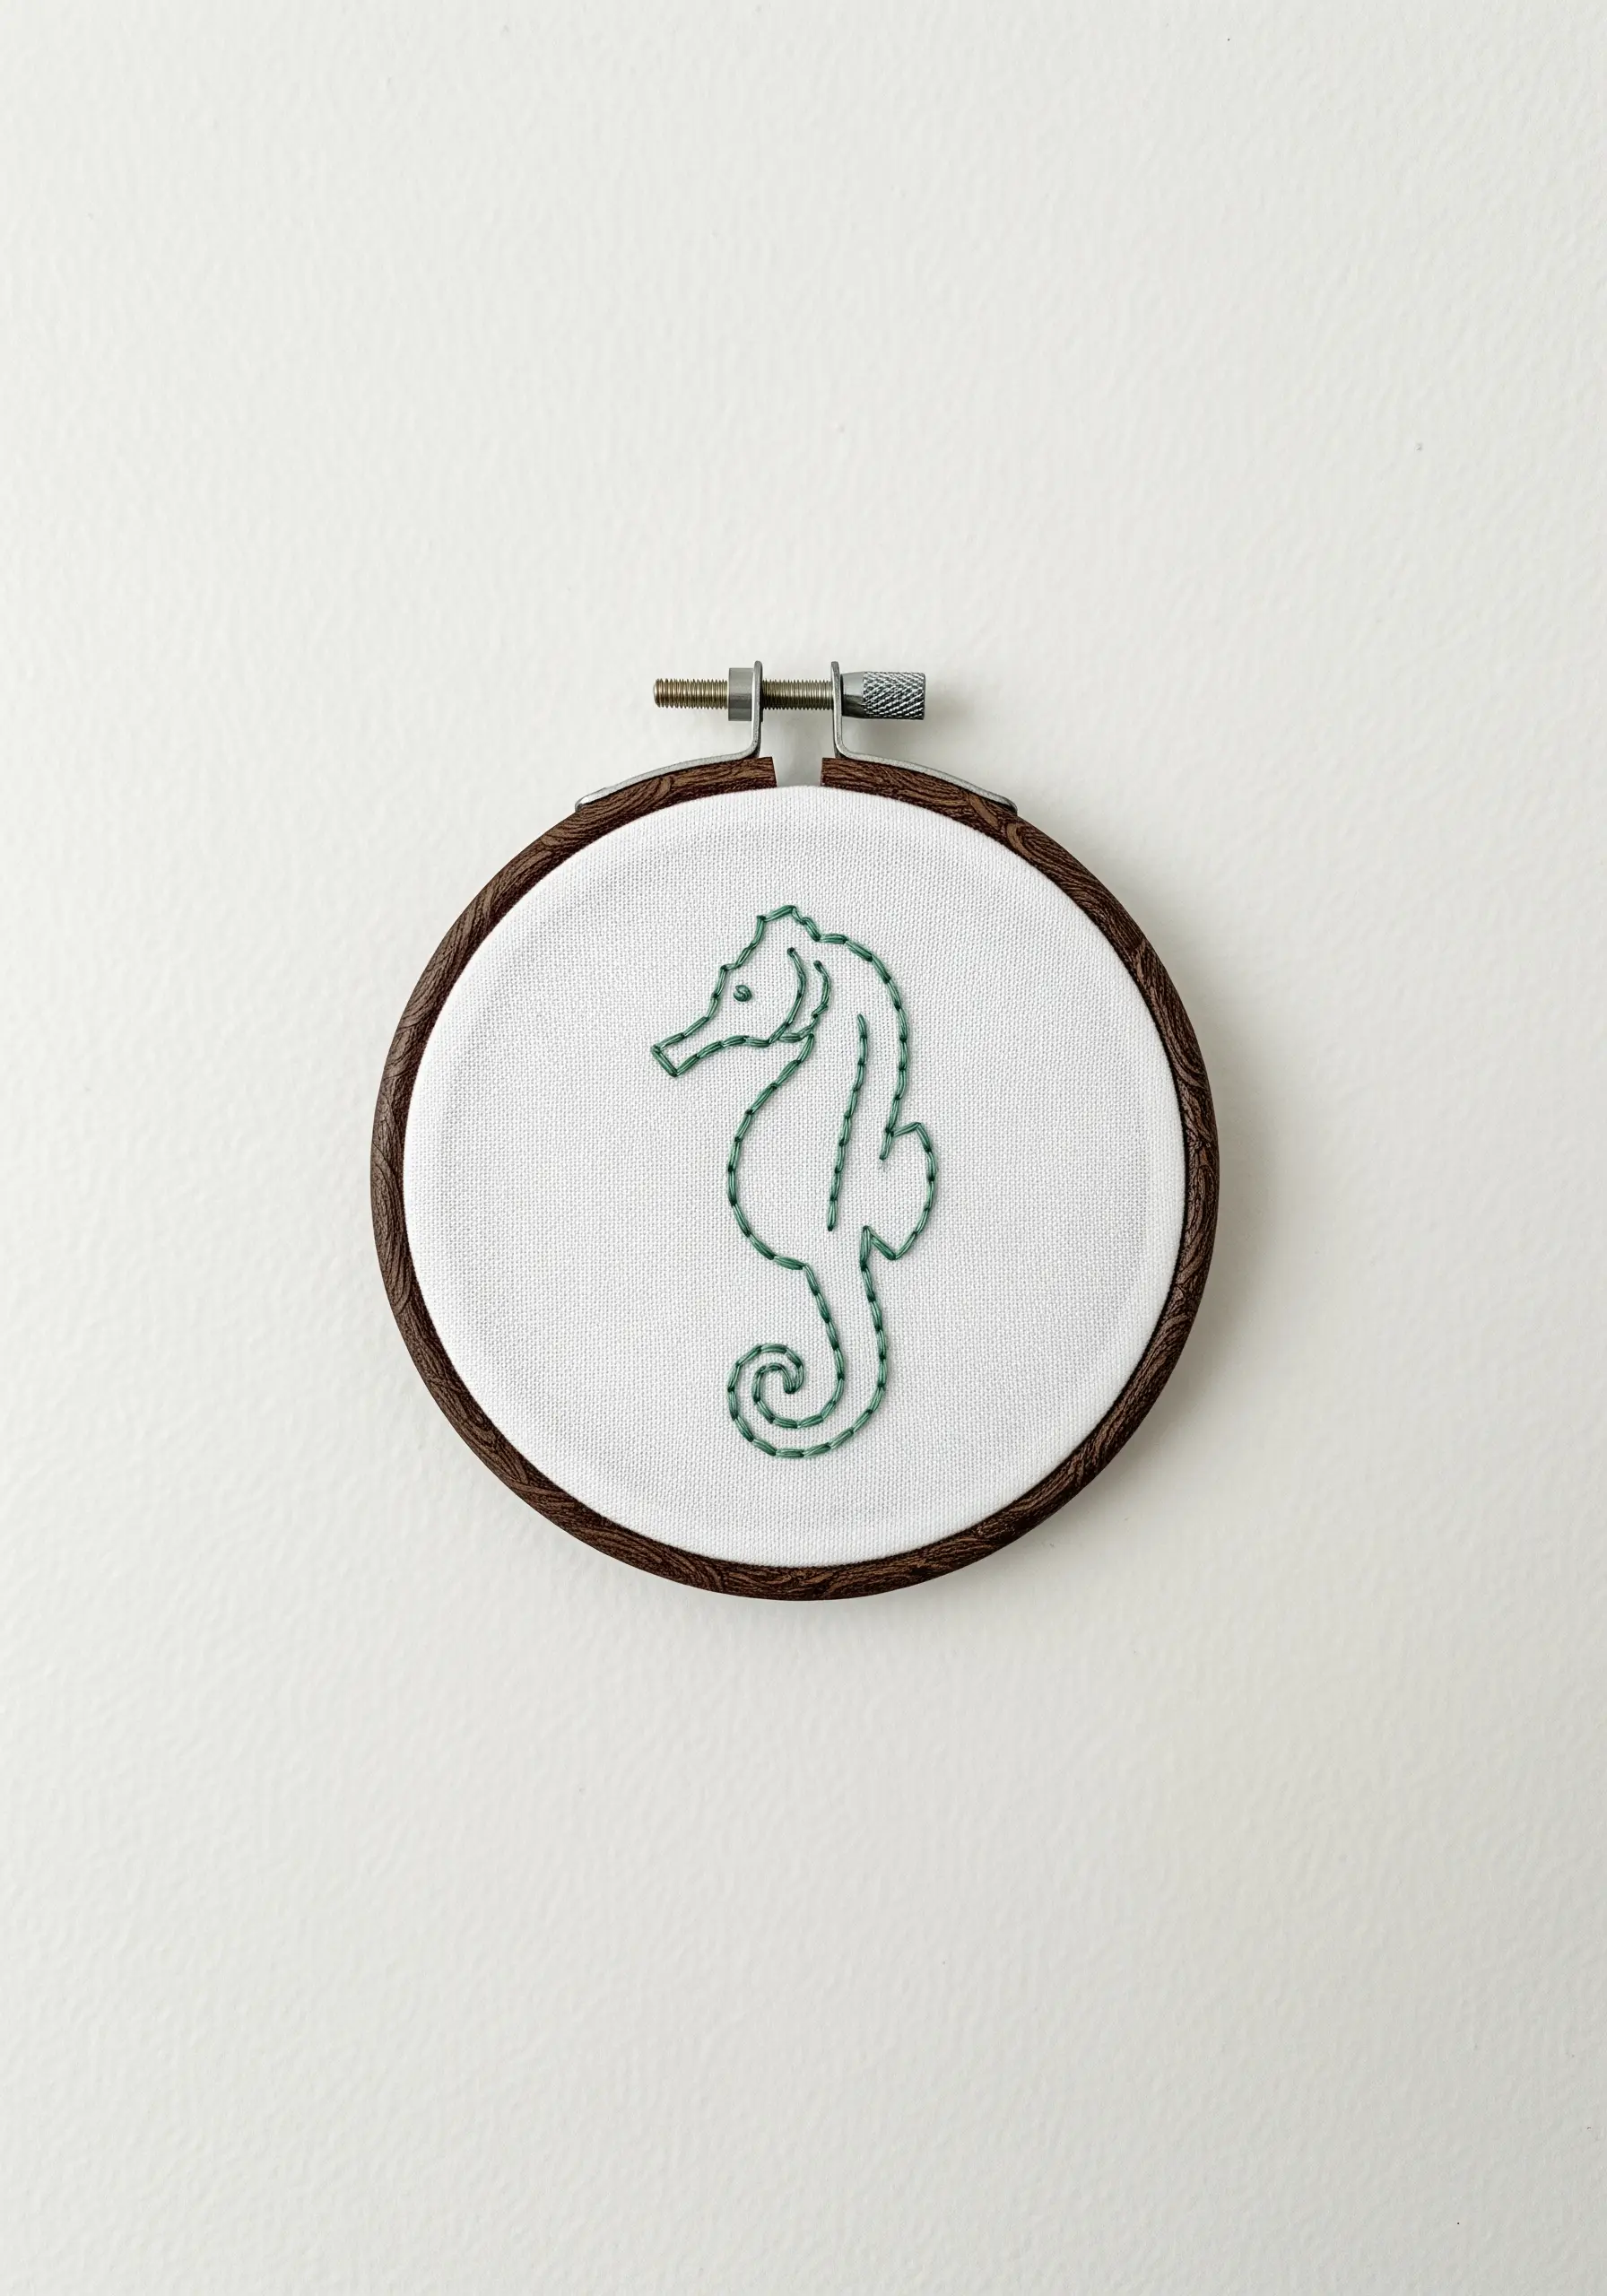
The beauty of a minimalist seahorse lies in the perfection of its silhouette.
Instead of a simple backstitch, which can look broken, use a whipped backstitch or a stem stitch for a smooth, uninterrupted line.
This technique creates a slightly raised, cord-like effect that looks incredibly refined and intentional.
Choose a single strand of thread for a delicate feel, and let the negative space do the talking—it’s a powerful element in modern embroidery.
5. Weave Texture with a Laid Work Fill
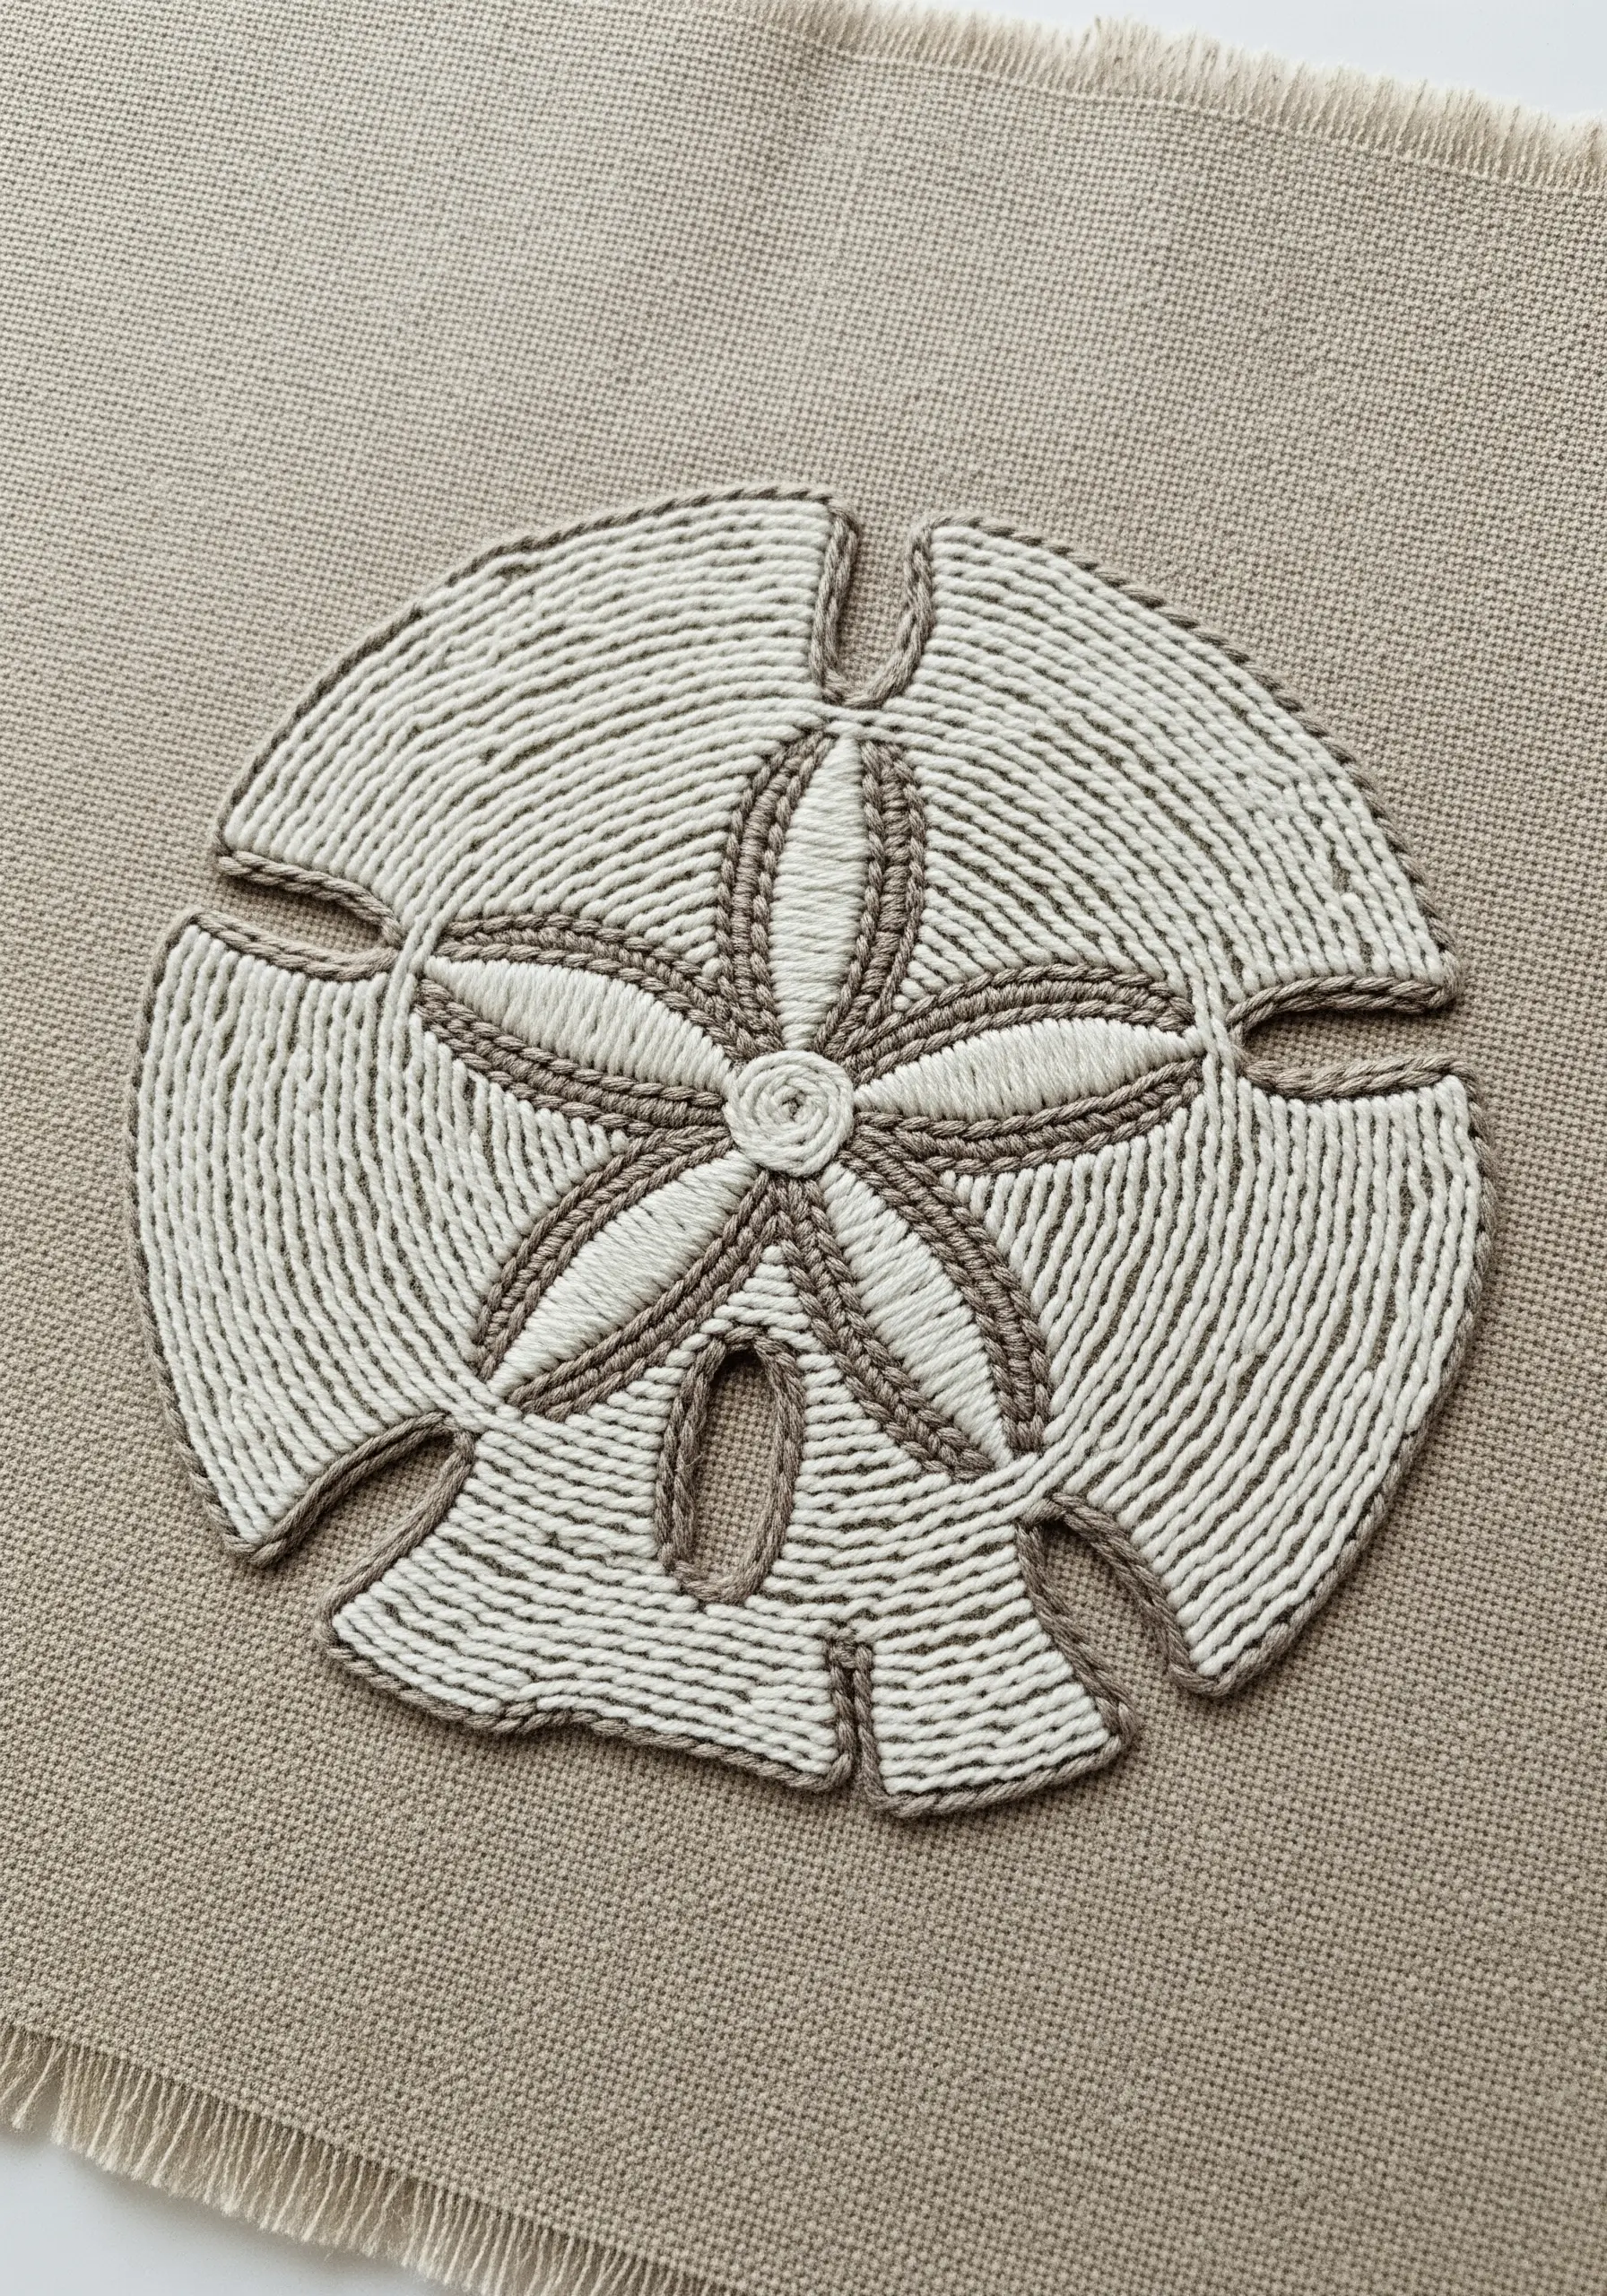
To replicate the fine, radial lines of a sand dollar, use a technique called laid work or couching.
First, lay long, parallel stitches across the entire section you want to fill.
Then, use a second thread (in the same or a contrasting color) to make tiny tacking stitches at regular intervals, securing the long threads to the fabric.
This method creates a beautiful, woven texture that is much more uniform and impactful than a traditional satin stitch for large areas.
6. Layer Textures for a Lifelike Jellyfish
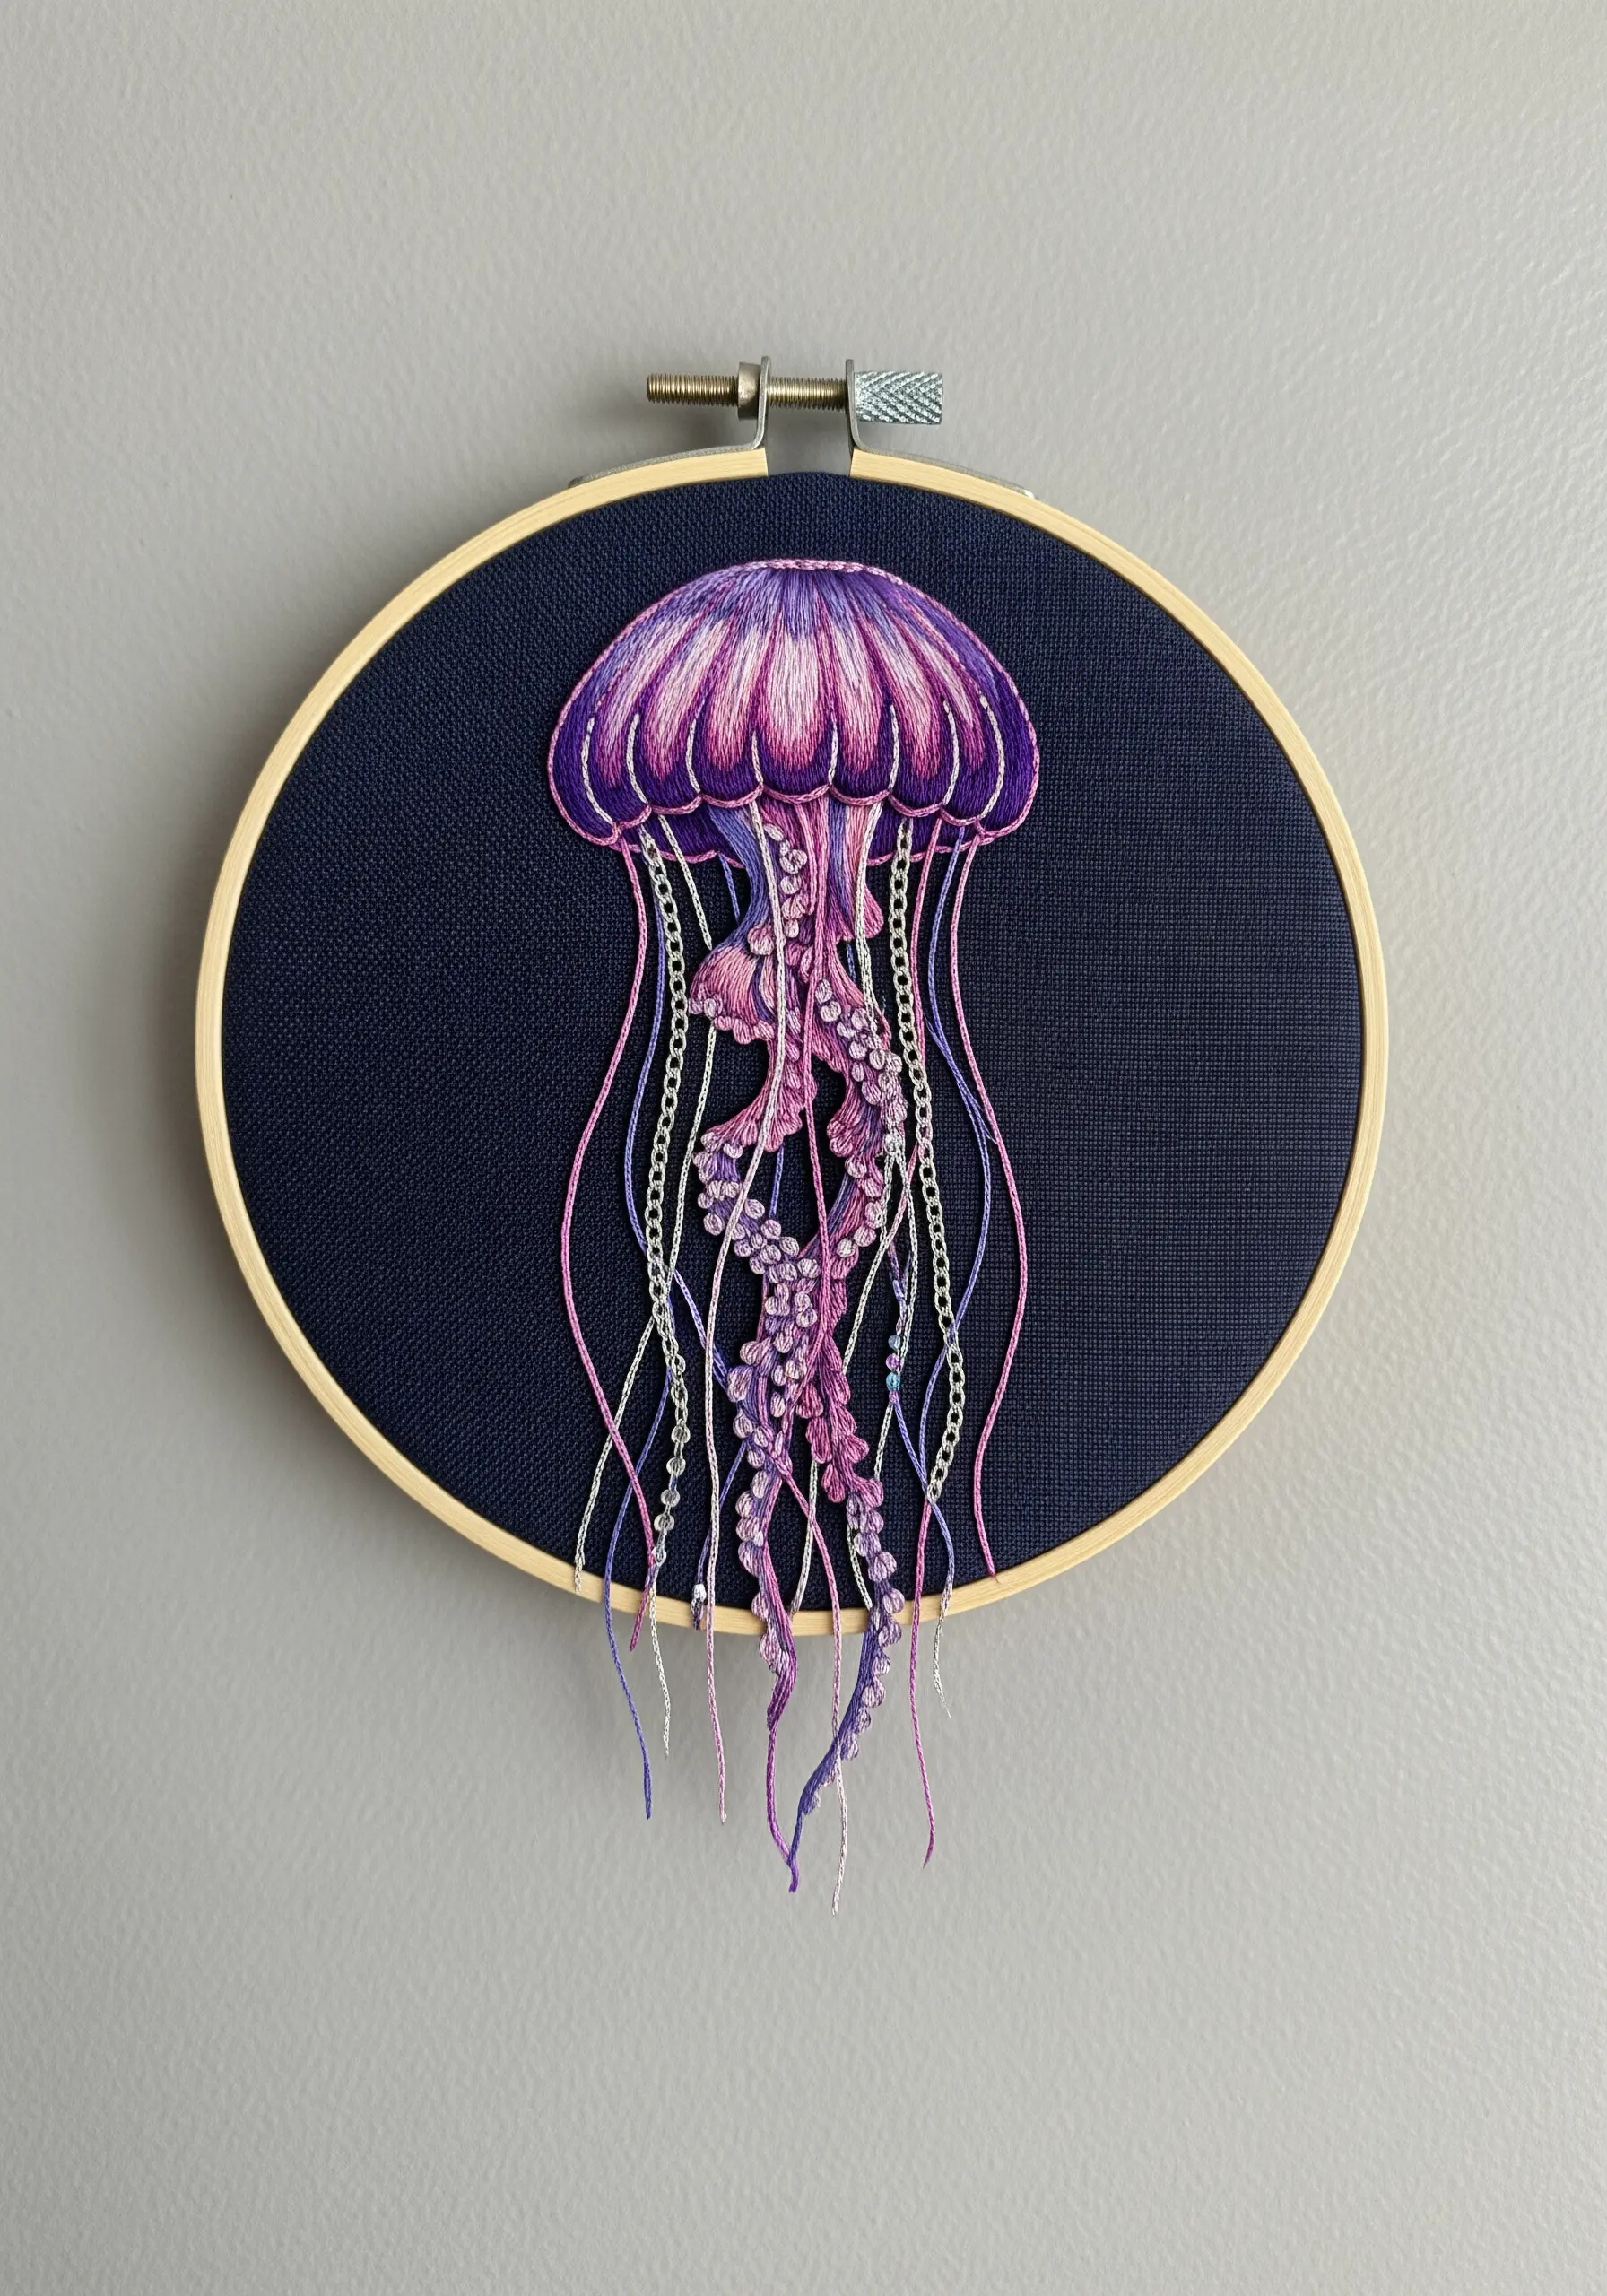
Bring a jellyfish to life by combining different stitches and threads to represent its varied textures.
Use a smooth satin stitch for the bell, blending shades of purple and pink to create a rounded, translucent look.
For the delicate oral arms, apply clusters of French knots and loose bullion knots.
Finally, let the tentacles flow freely by using single strands of rayon or metallic thread in a simple chain stitch, leaving some threads to hang loose for graceful movement.
7. Design a Subtle Pattern with Metallic Thread
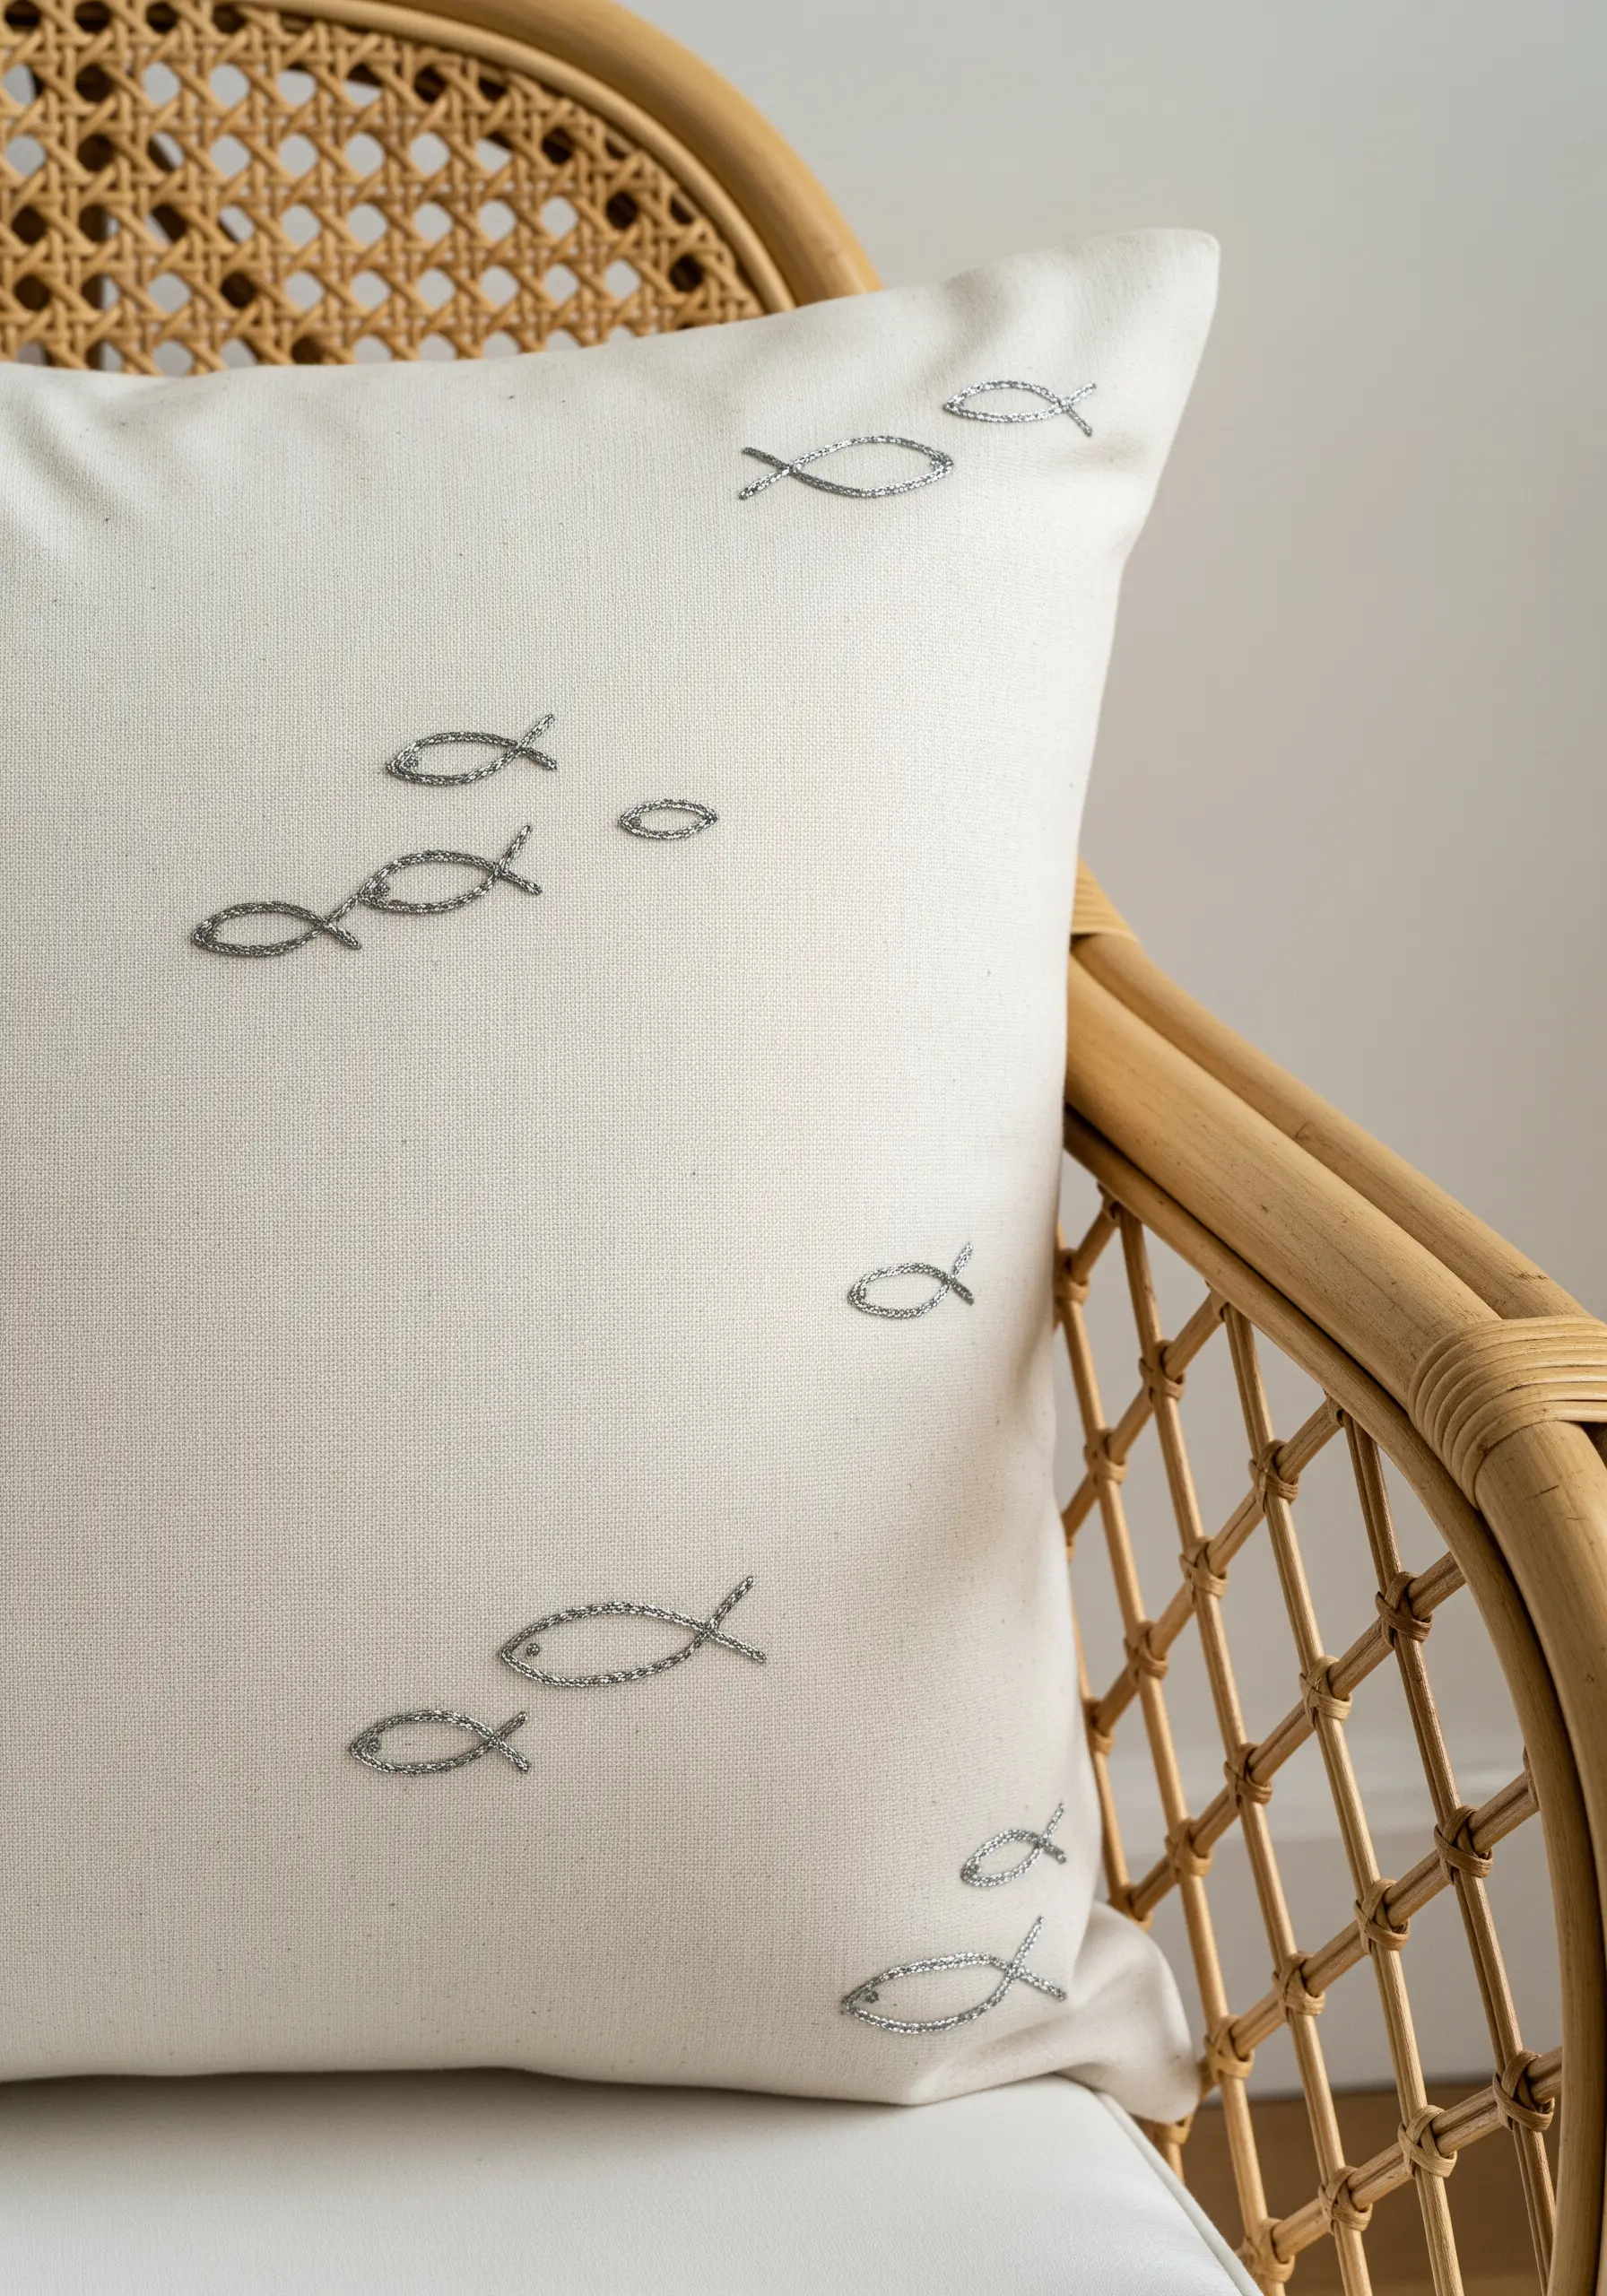
Elevate simple home décor like pillow covers by stitching a scattered pattern of tiny motifs.
Use a silvery metallic thread to create a school of fish; the subtle shimmer catches the light and adds a touch of luxury without overwhelming the design.
Fill each fish with a simple split stitch, which is more textural and forgiving than satin stitch on upholstery fabric.
Vary the spacing and orientation of the fish to create a natural, flowing pattern that feels bespoke and thoughtfully designed embroidered pillow covers.
8. Build Dimensionality with Chunky Knots
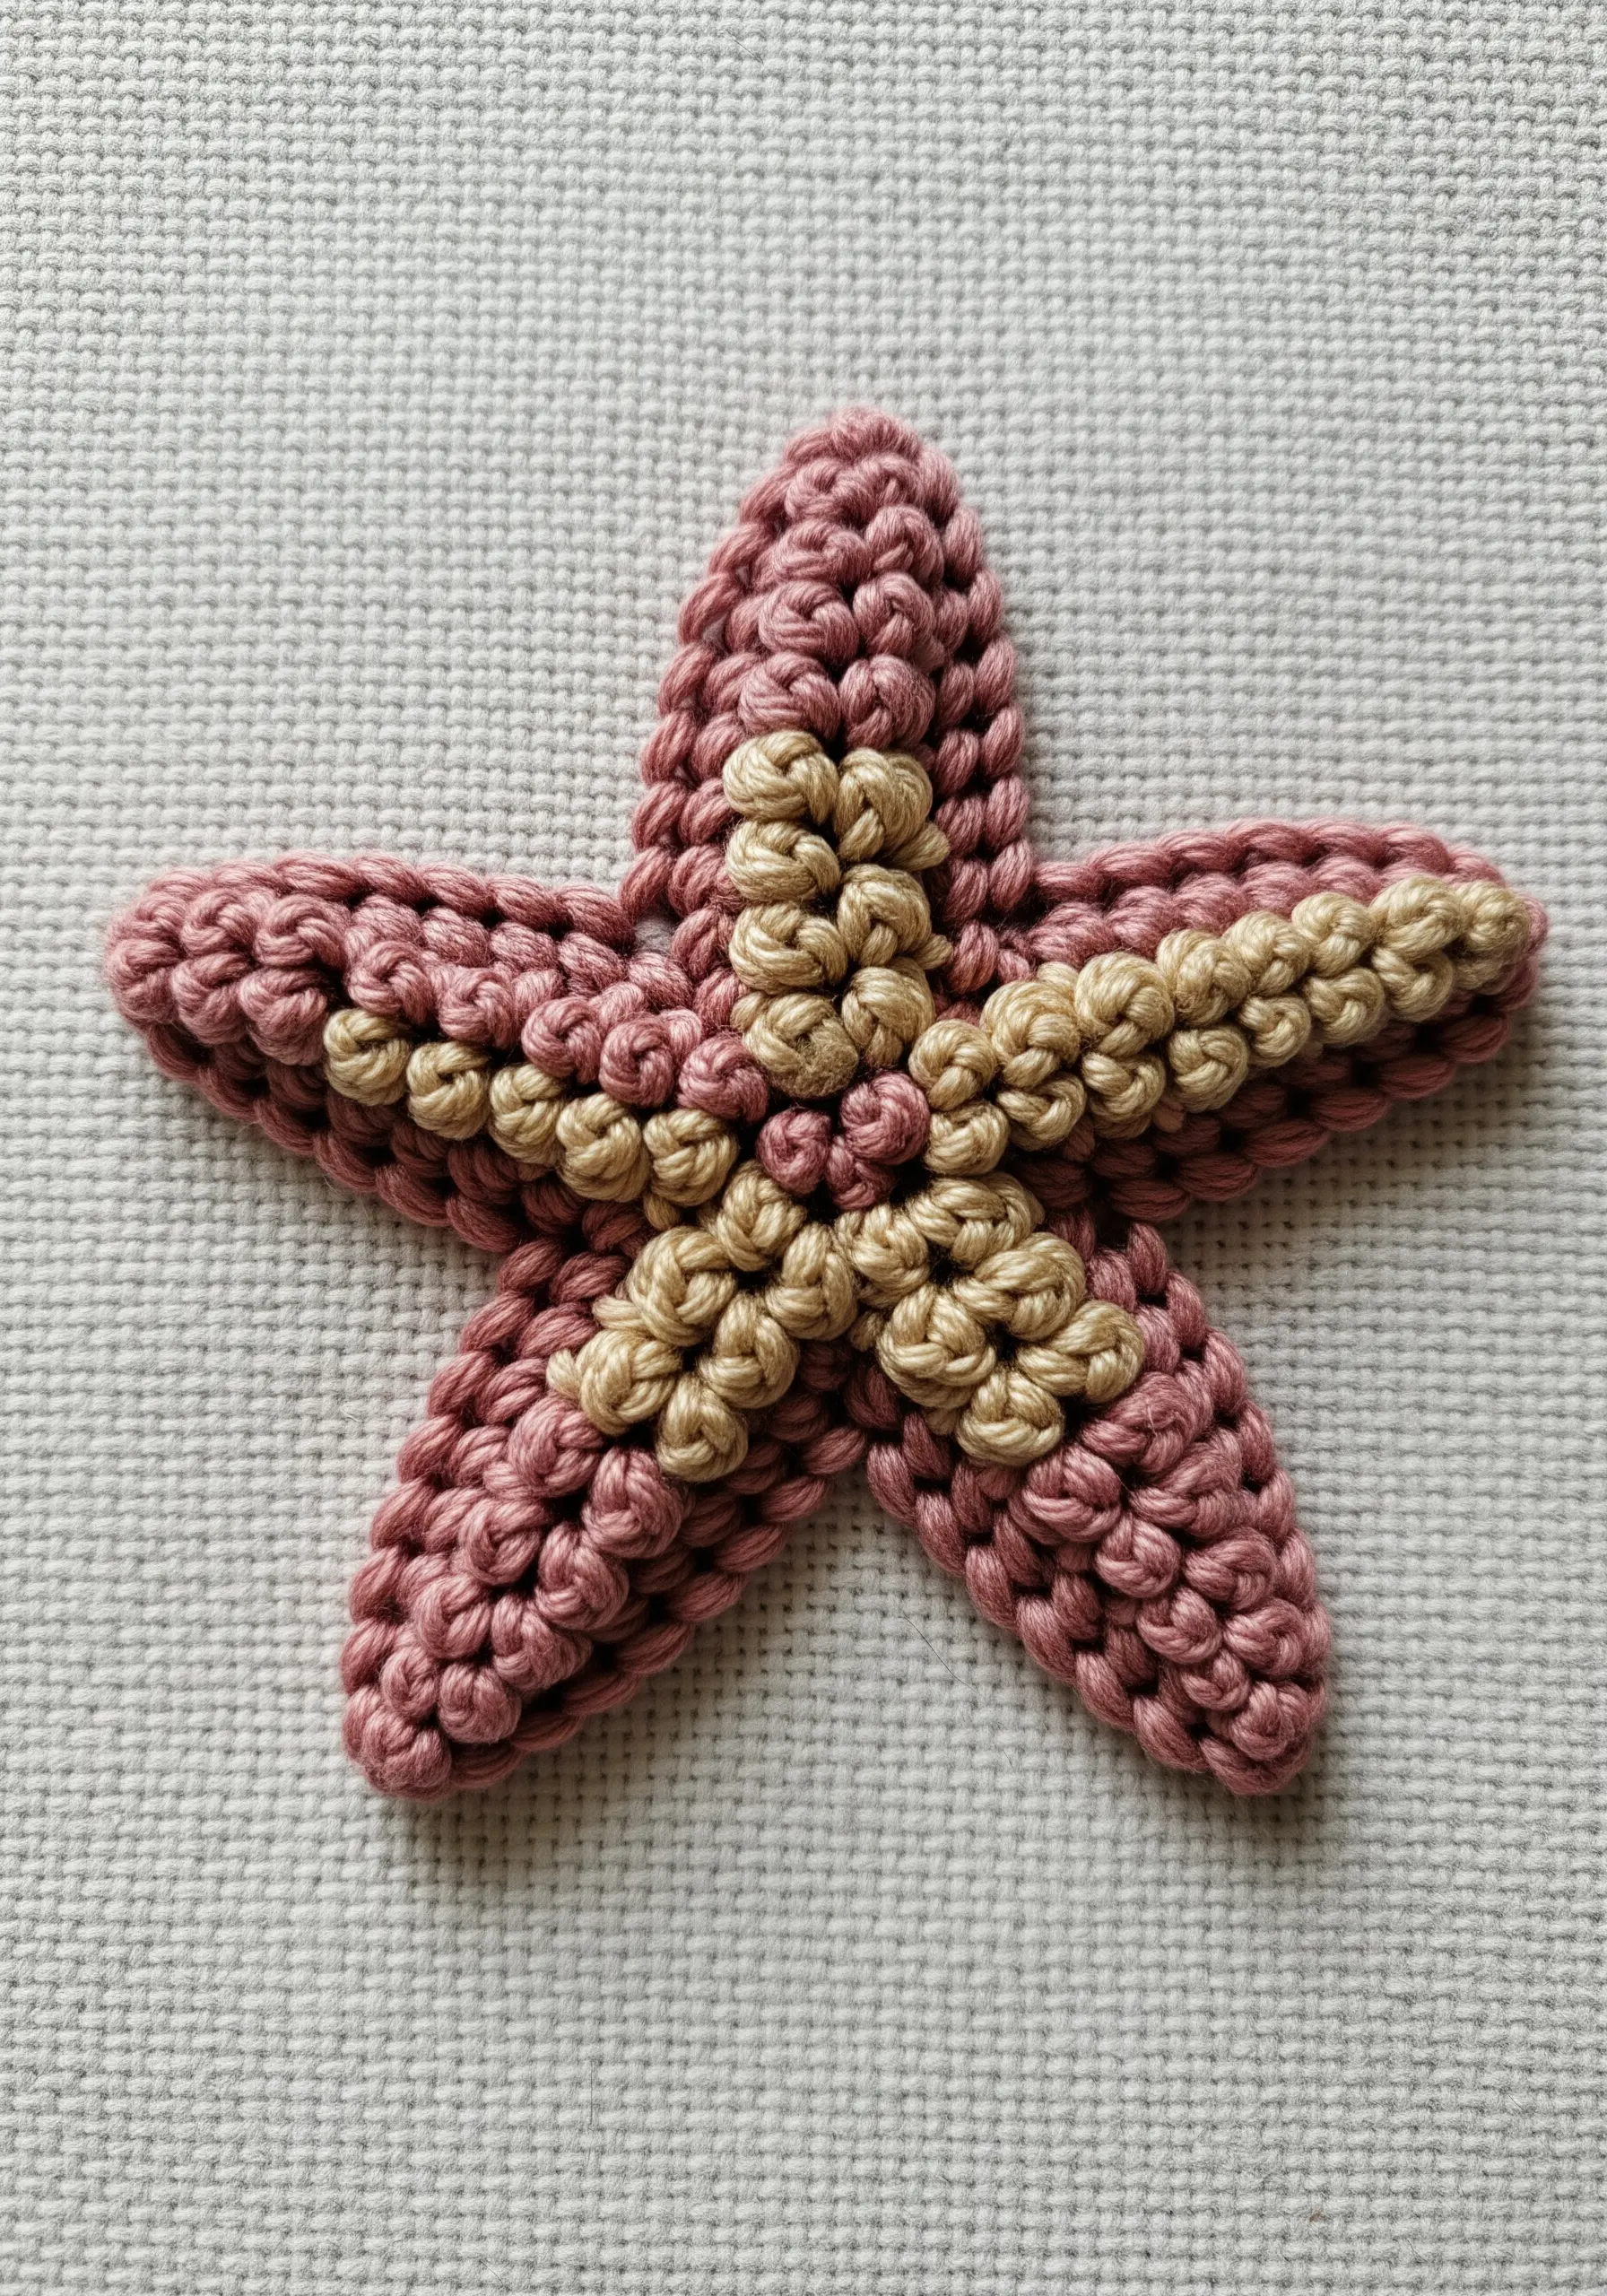
For a starfish that feels wonderfully tactile and three-dimensional, move beyond standard stitches and embrace texture.
Use a thick thread, like pearl cotton or even fine yarn, to make chunky bullion knots or colonial knots.
Pack the knots tightly together to build a raised surface that you can’t help but touch.
This focus on organic texture embroidery makes the piece far more engaging than a flat design.
9. Tell a Story with Minimal Lines and a Pop of Color
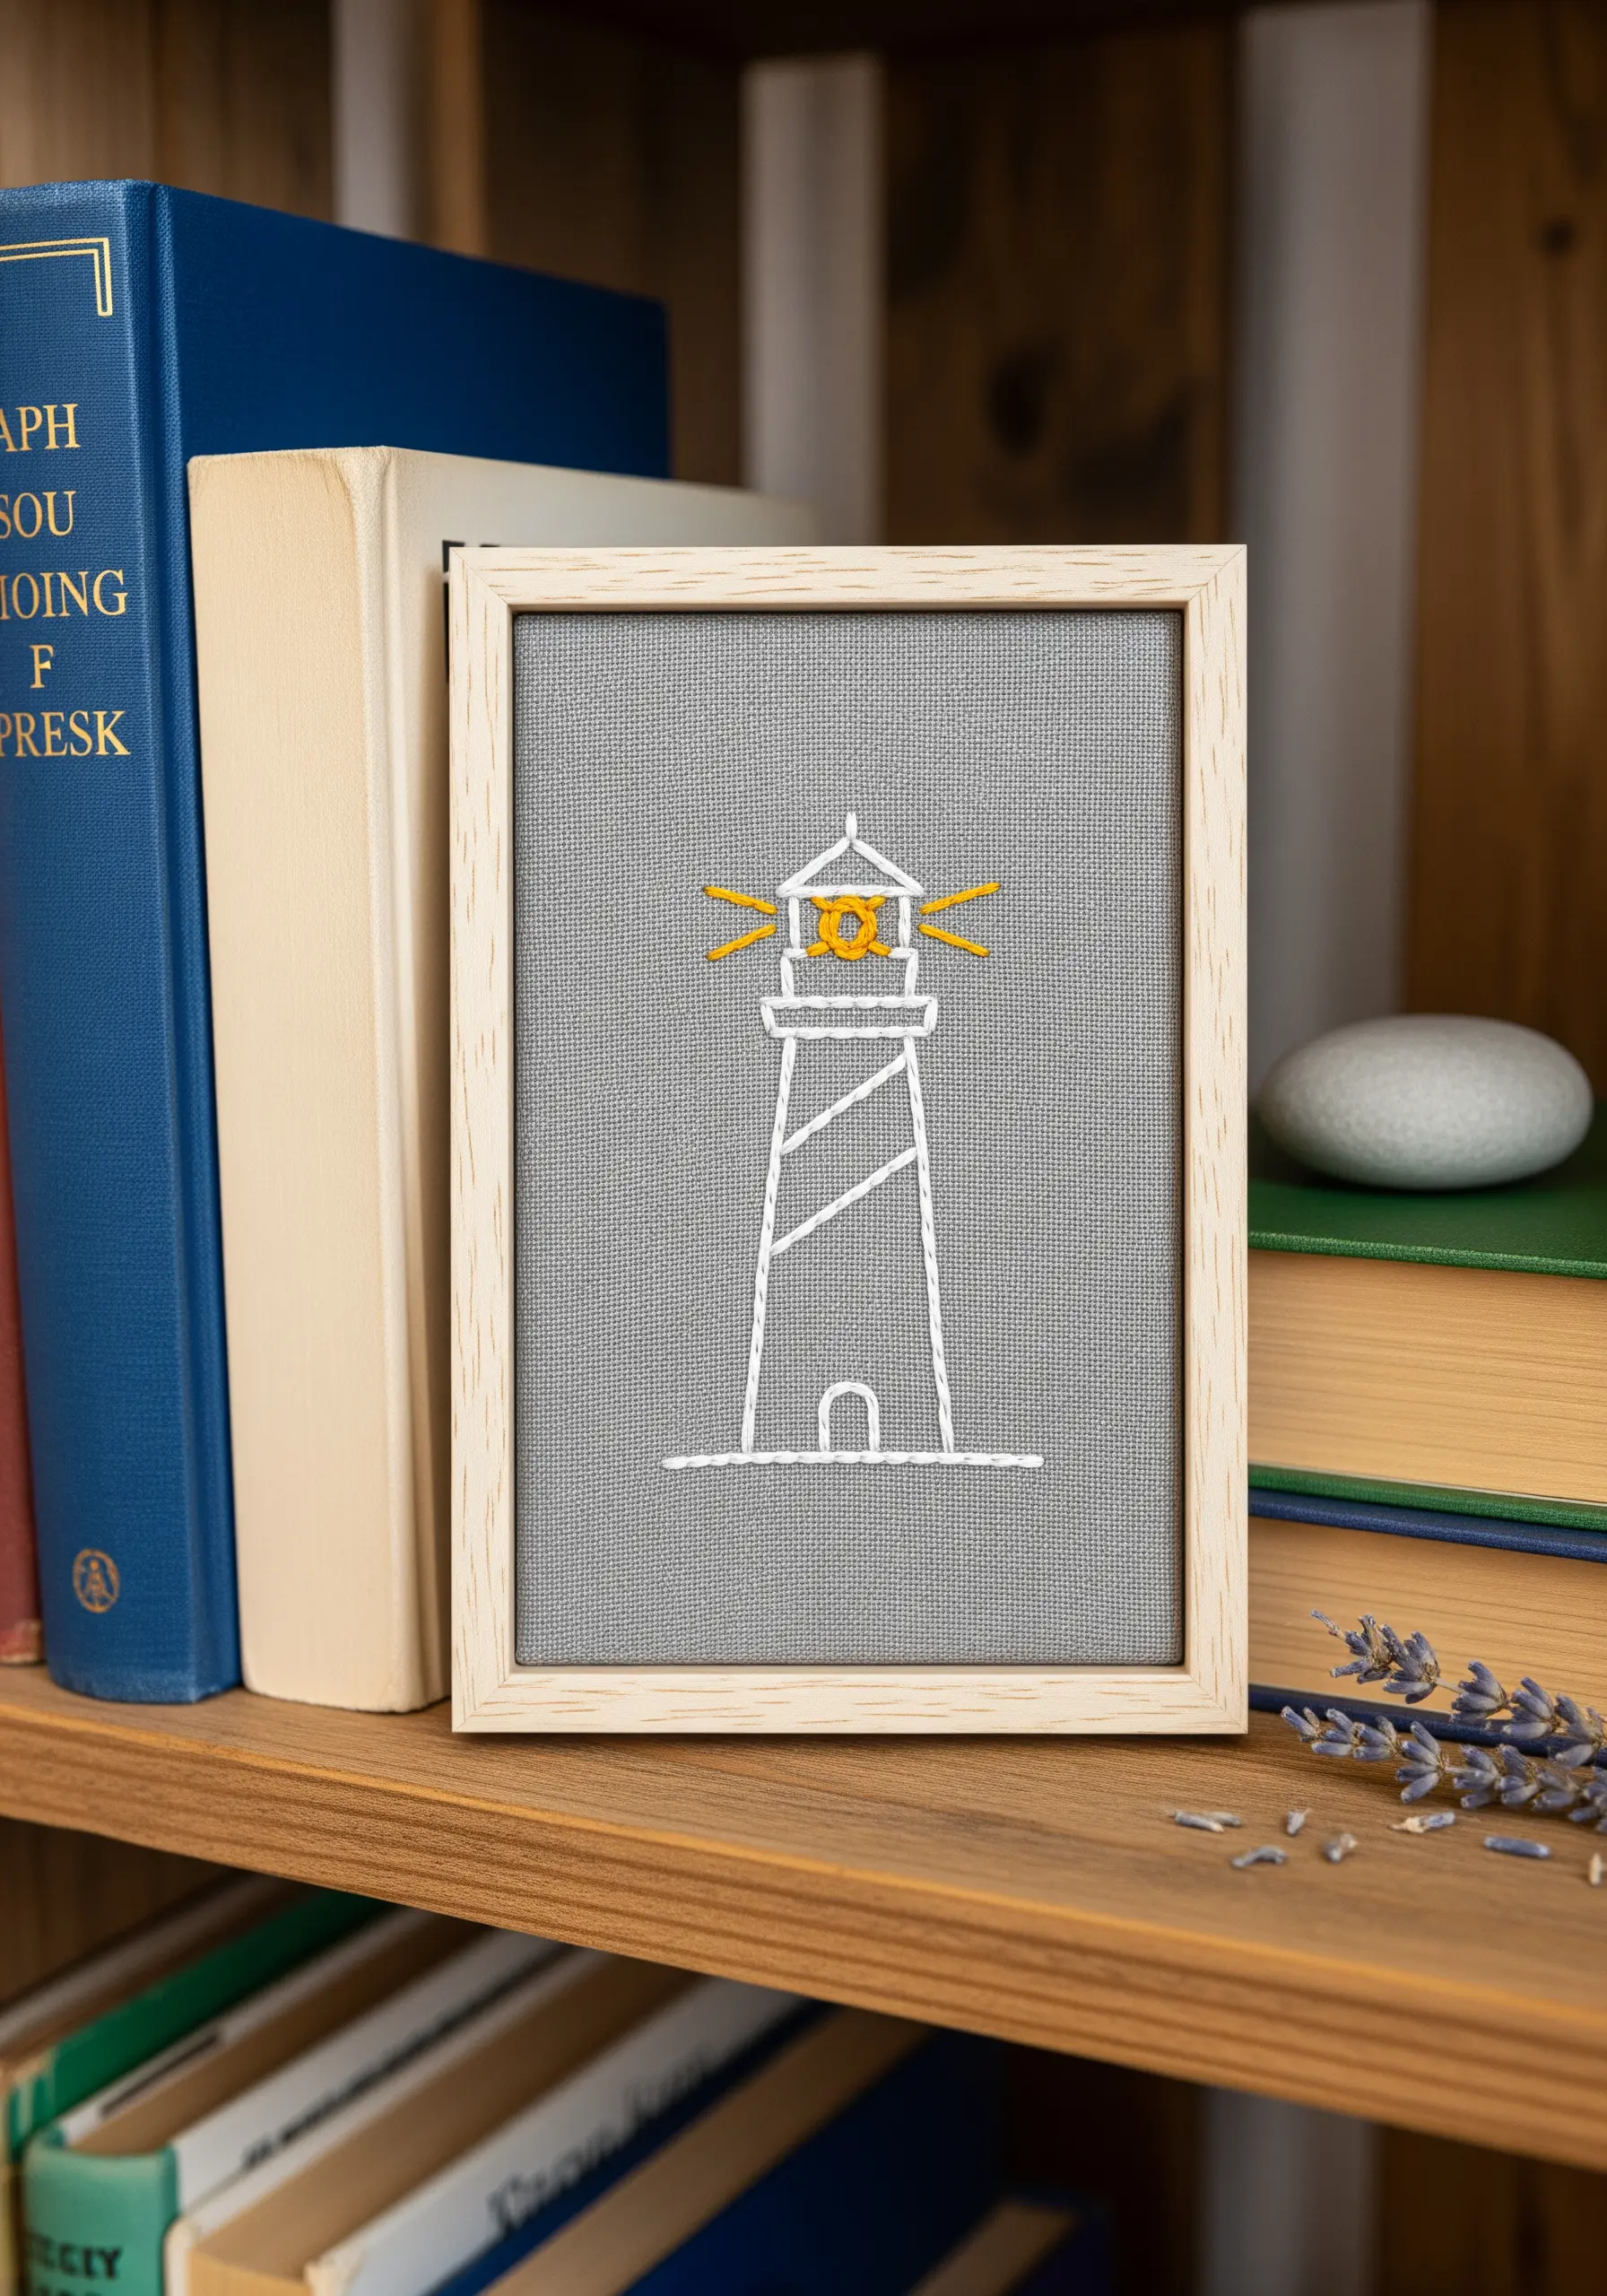
You don’t need complex detail to create a compelling scene. A simple line-art lighthouse can be incredibly evocative.
Use a clean backstitch with two strands of white floss for the structure, focusing on crisp lines and geometric precision.
Then, add a single, powerful focal point: the light.
Use a vibrant yellow or gold thread to stitch a few straight stitches radiating from the lamp, instantly drawing the eye and giving the quiet scene a sense of purpose.
This is a perfect example of how minimalist stitched art can be both simple and profound.
10. Create an Underwater Garden with Botanical Stitches
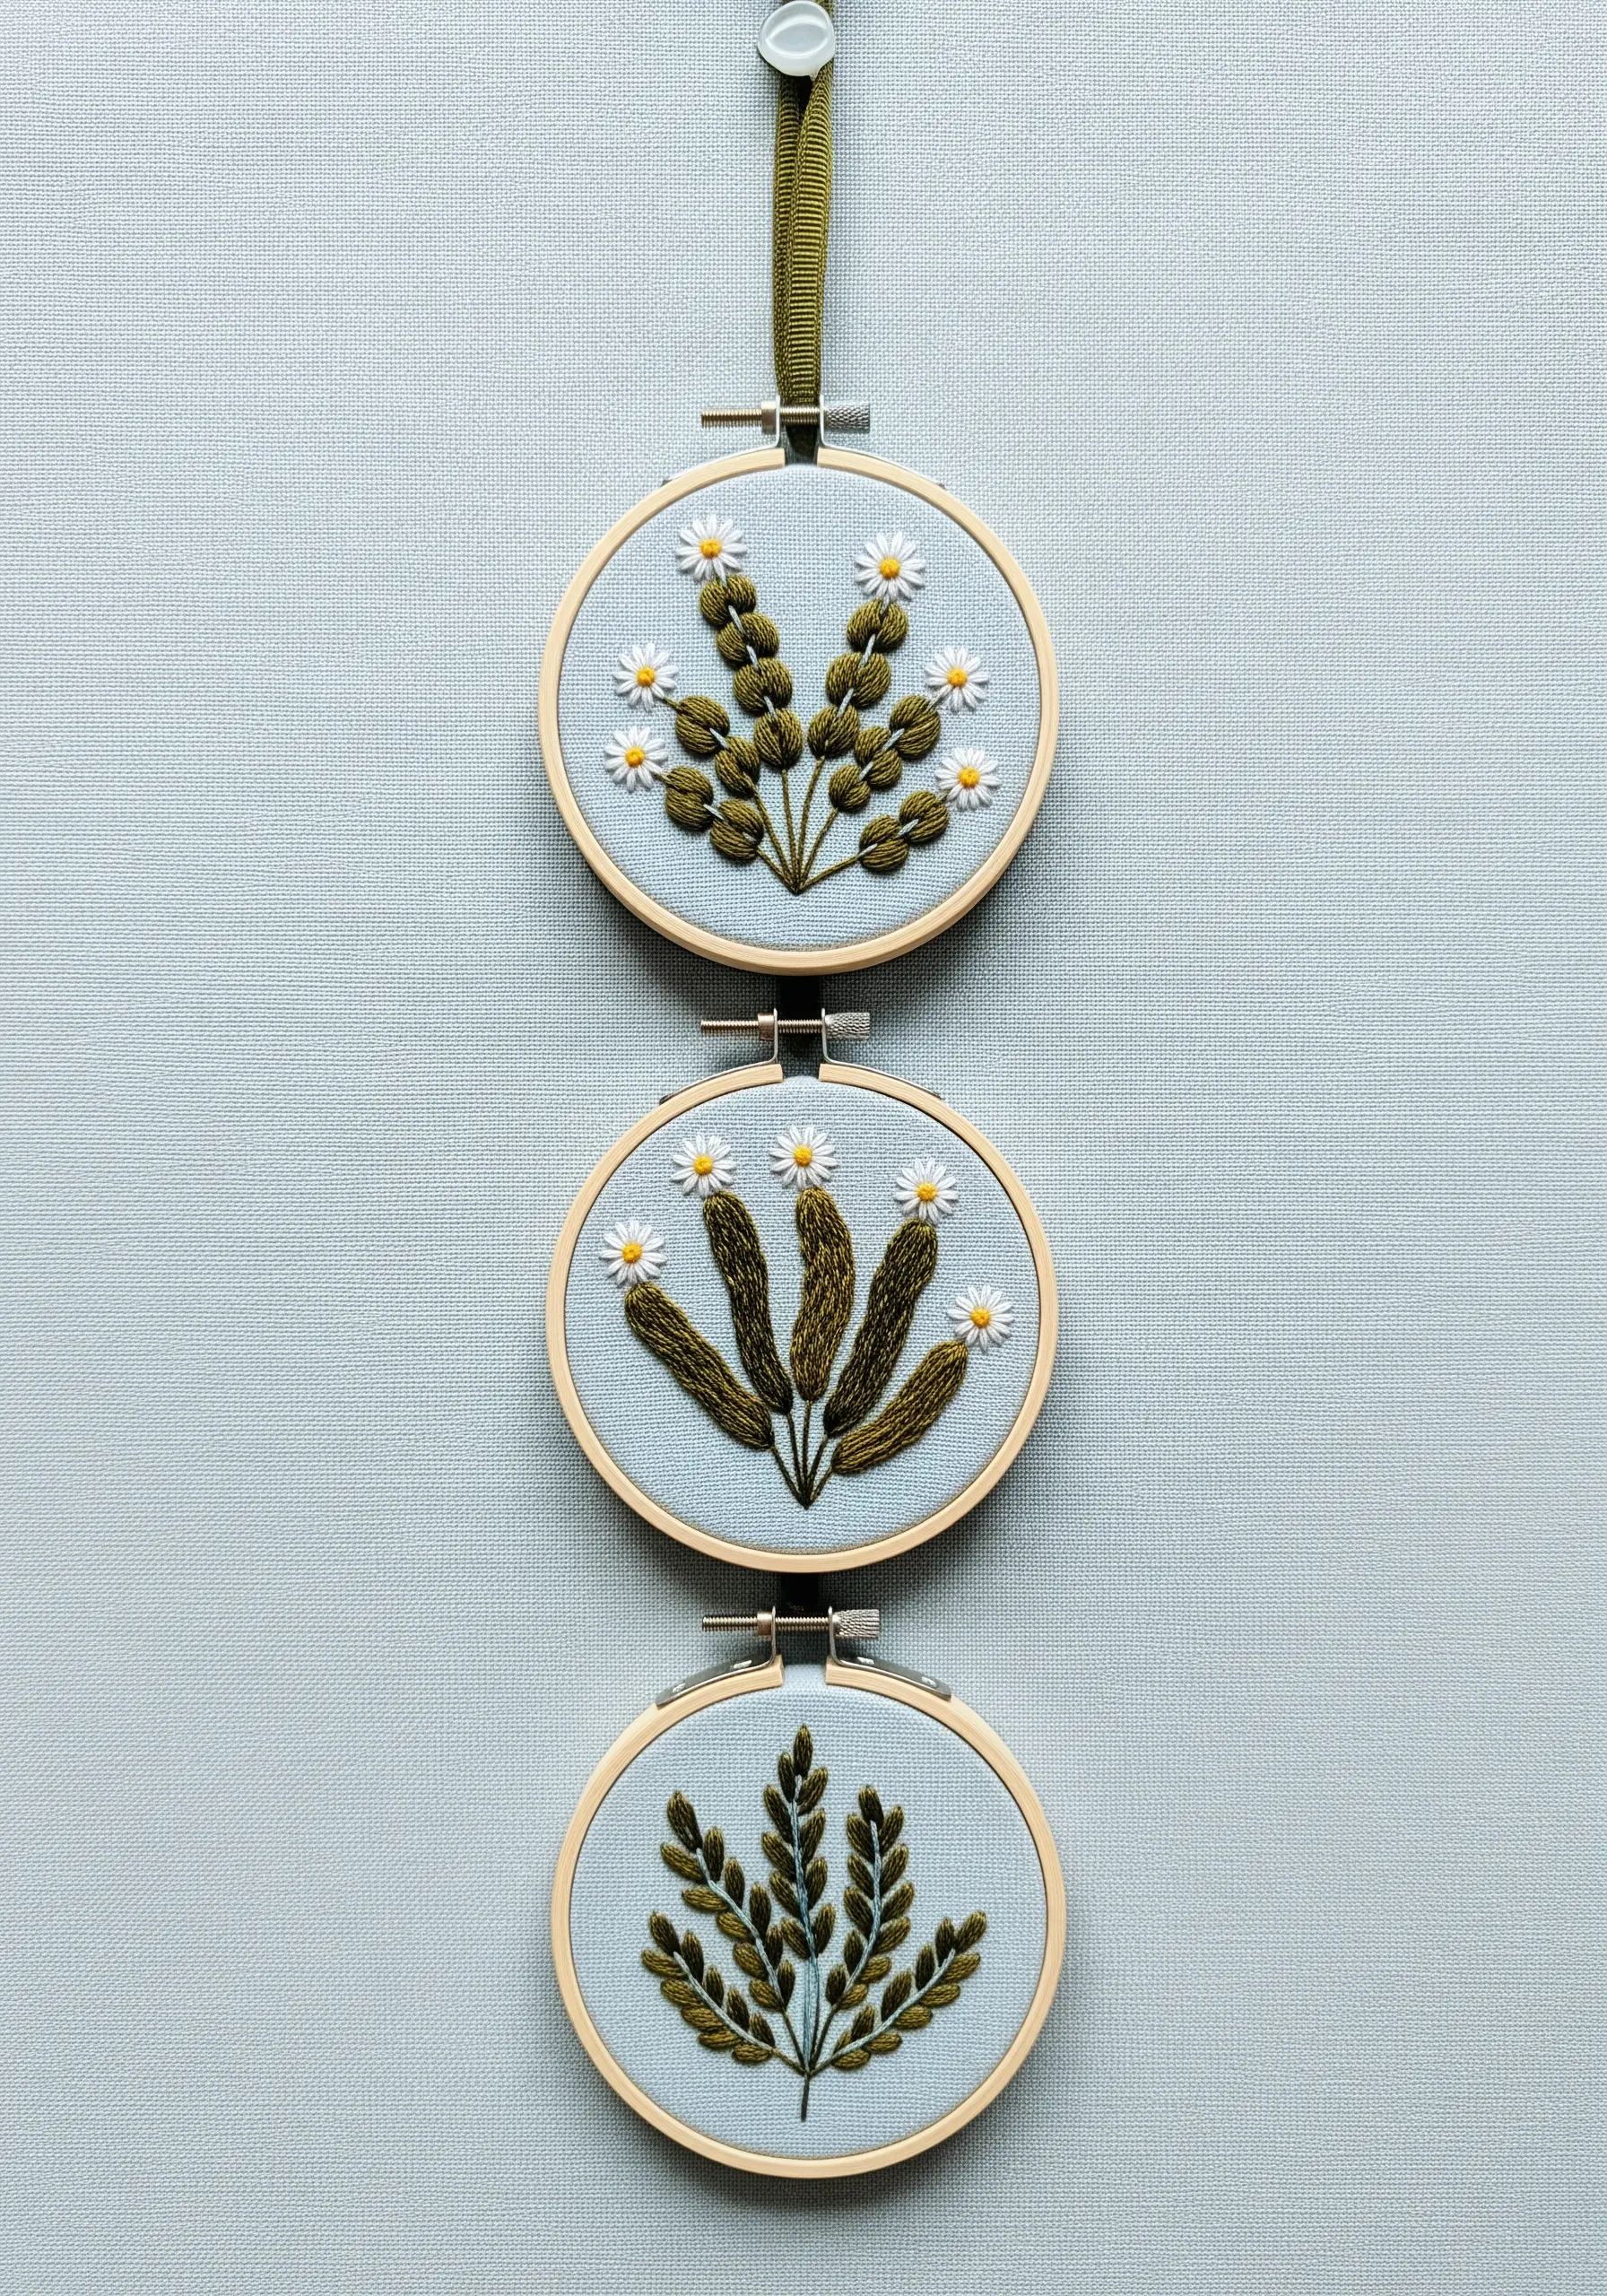
Translate your knowledge of floral stitches to create a delicate seaweed scene.
Use the fishbone stitch to create the wide, leafy fronds, which allows you to stitch a central spine and angled leaves in one fluid motion.
For finer, fern-like seaweed, the fly stitch is perfect for creating branching patterns.
Finally, add a few detached chain stitches (lazy daisies) with white thread to suggest tiny sea blossoms or trapped air bubbles, completing your underwater meadow.
11. Mimic Iridescence with Directional Thread Painting
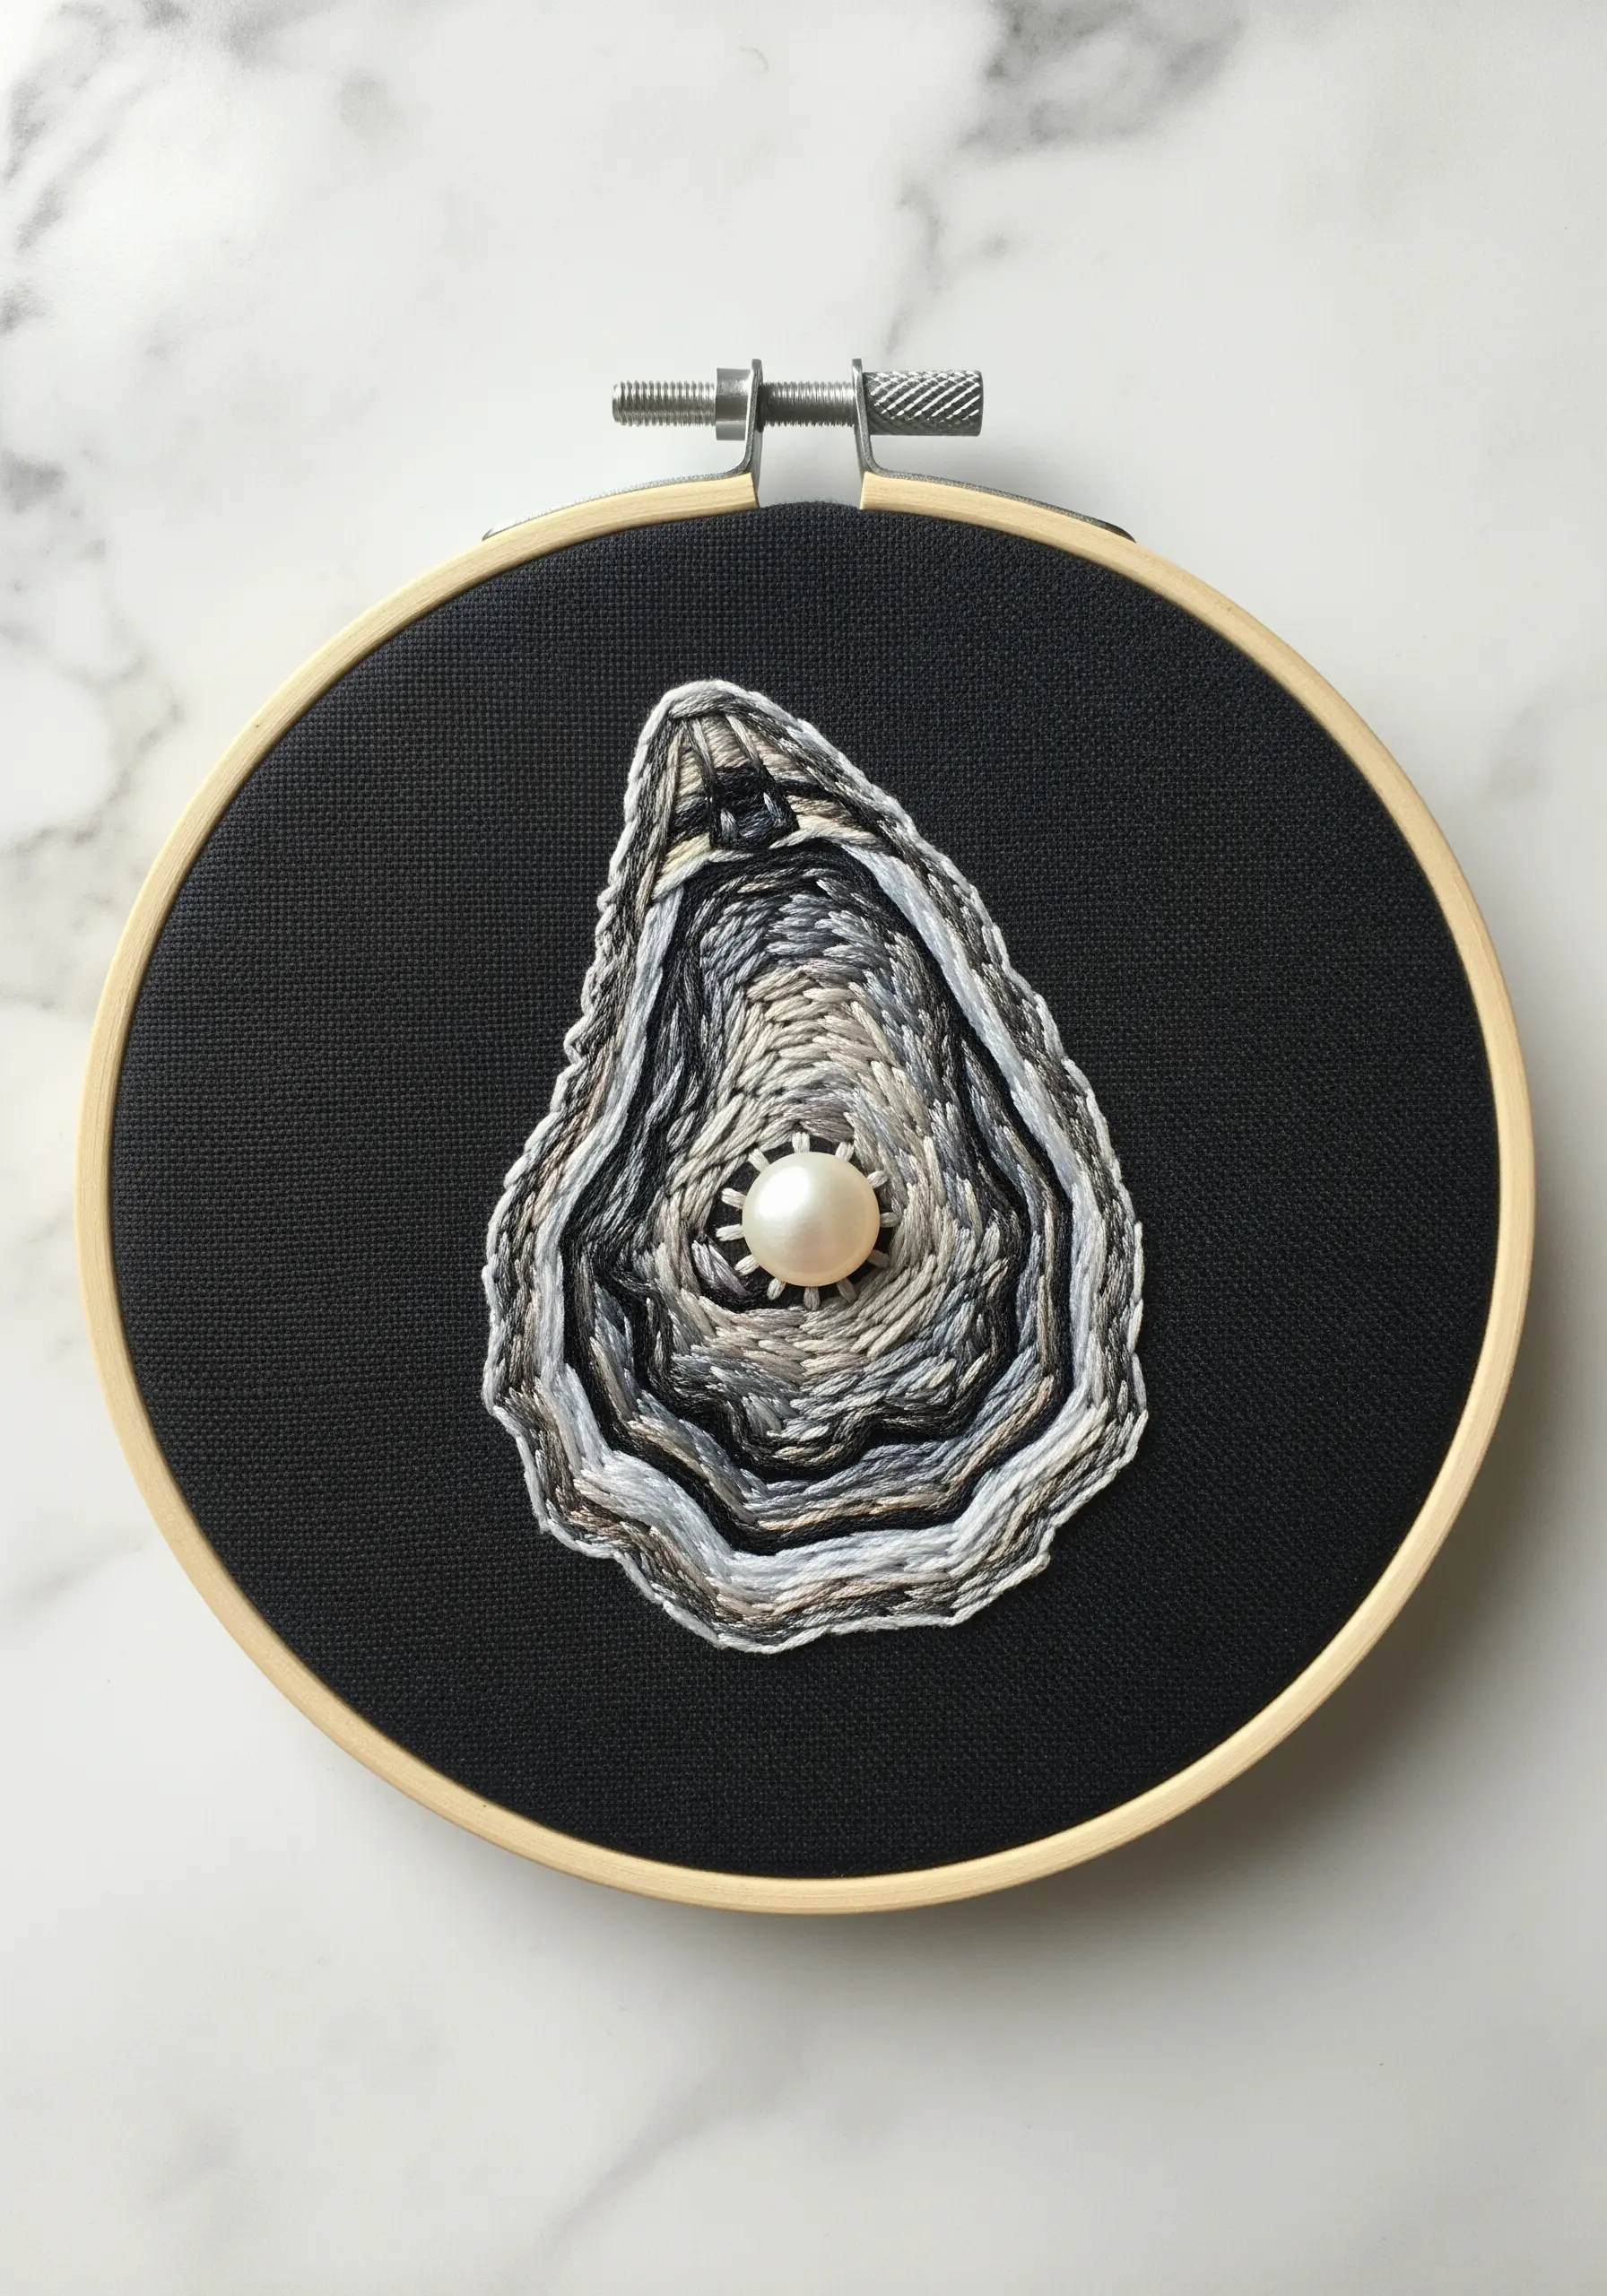
To capture the nacreous interior of an oyster shell, you need to think like a painter.
Use a single strand of thread and the long-and-short stitch technique, working in concentric rings from the outside in.
Blend multiple shades of gray, cream, and silver, ensuring your stitches follow the curved shape of the shell. This directional stitching is what creates the illusion of depth and shimmer.
A single, real pearl bead stitched in the center provides a perfect, luxurious focal point against the dark fabric.
12. Achieve a Flawless Fill with a Split Stitch Base
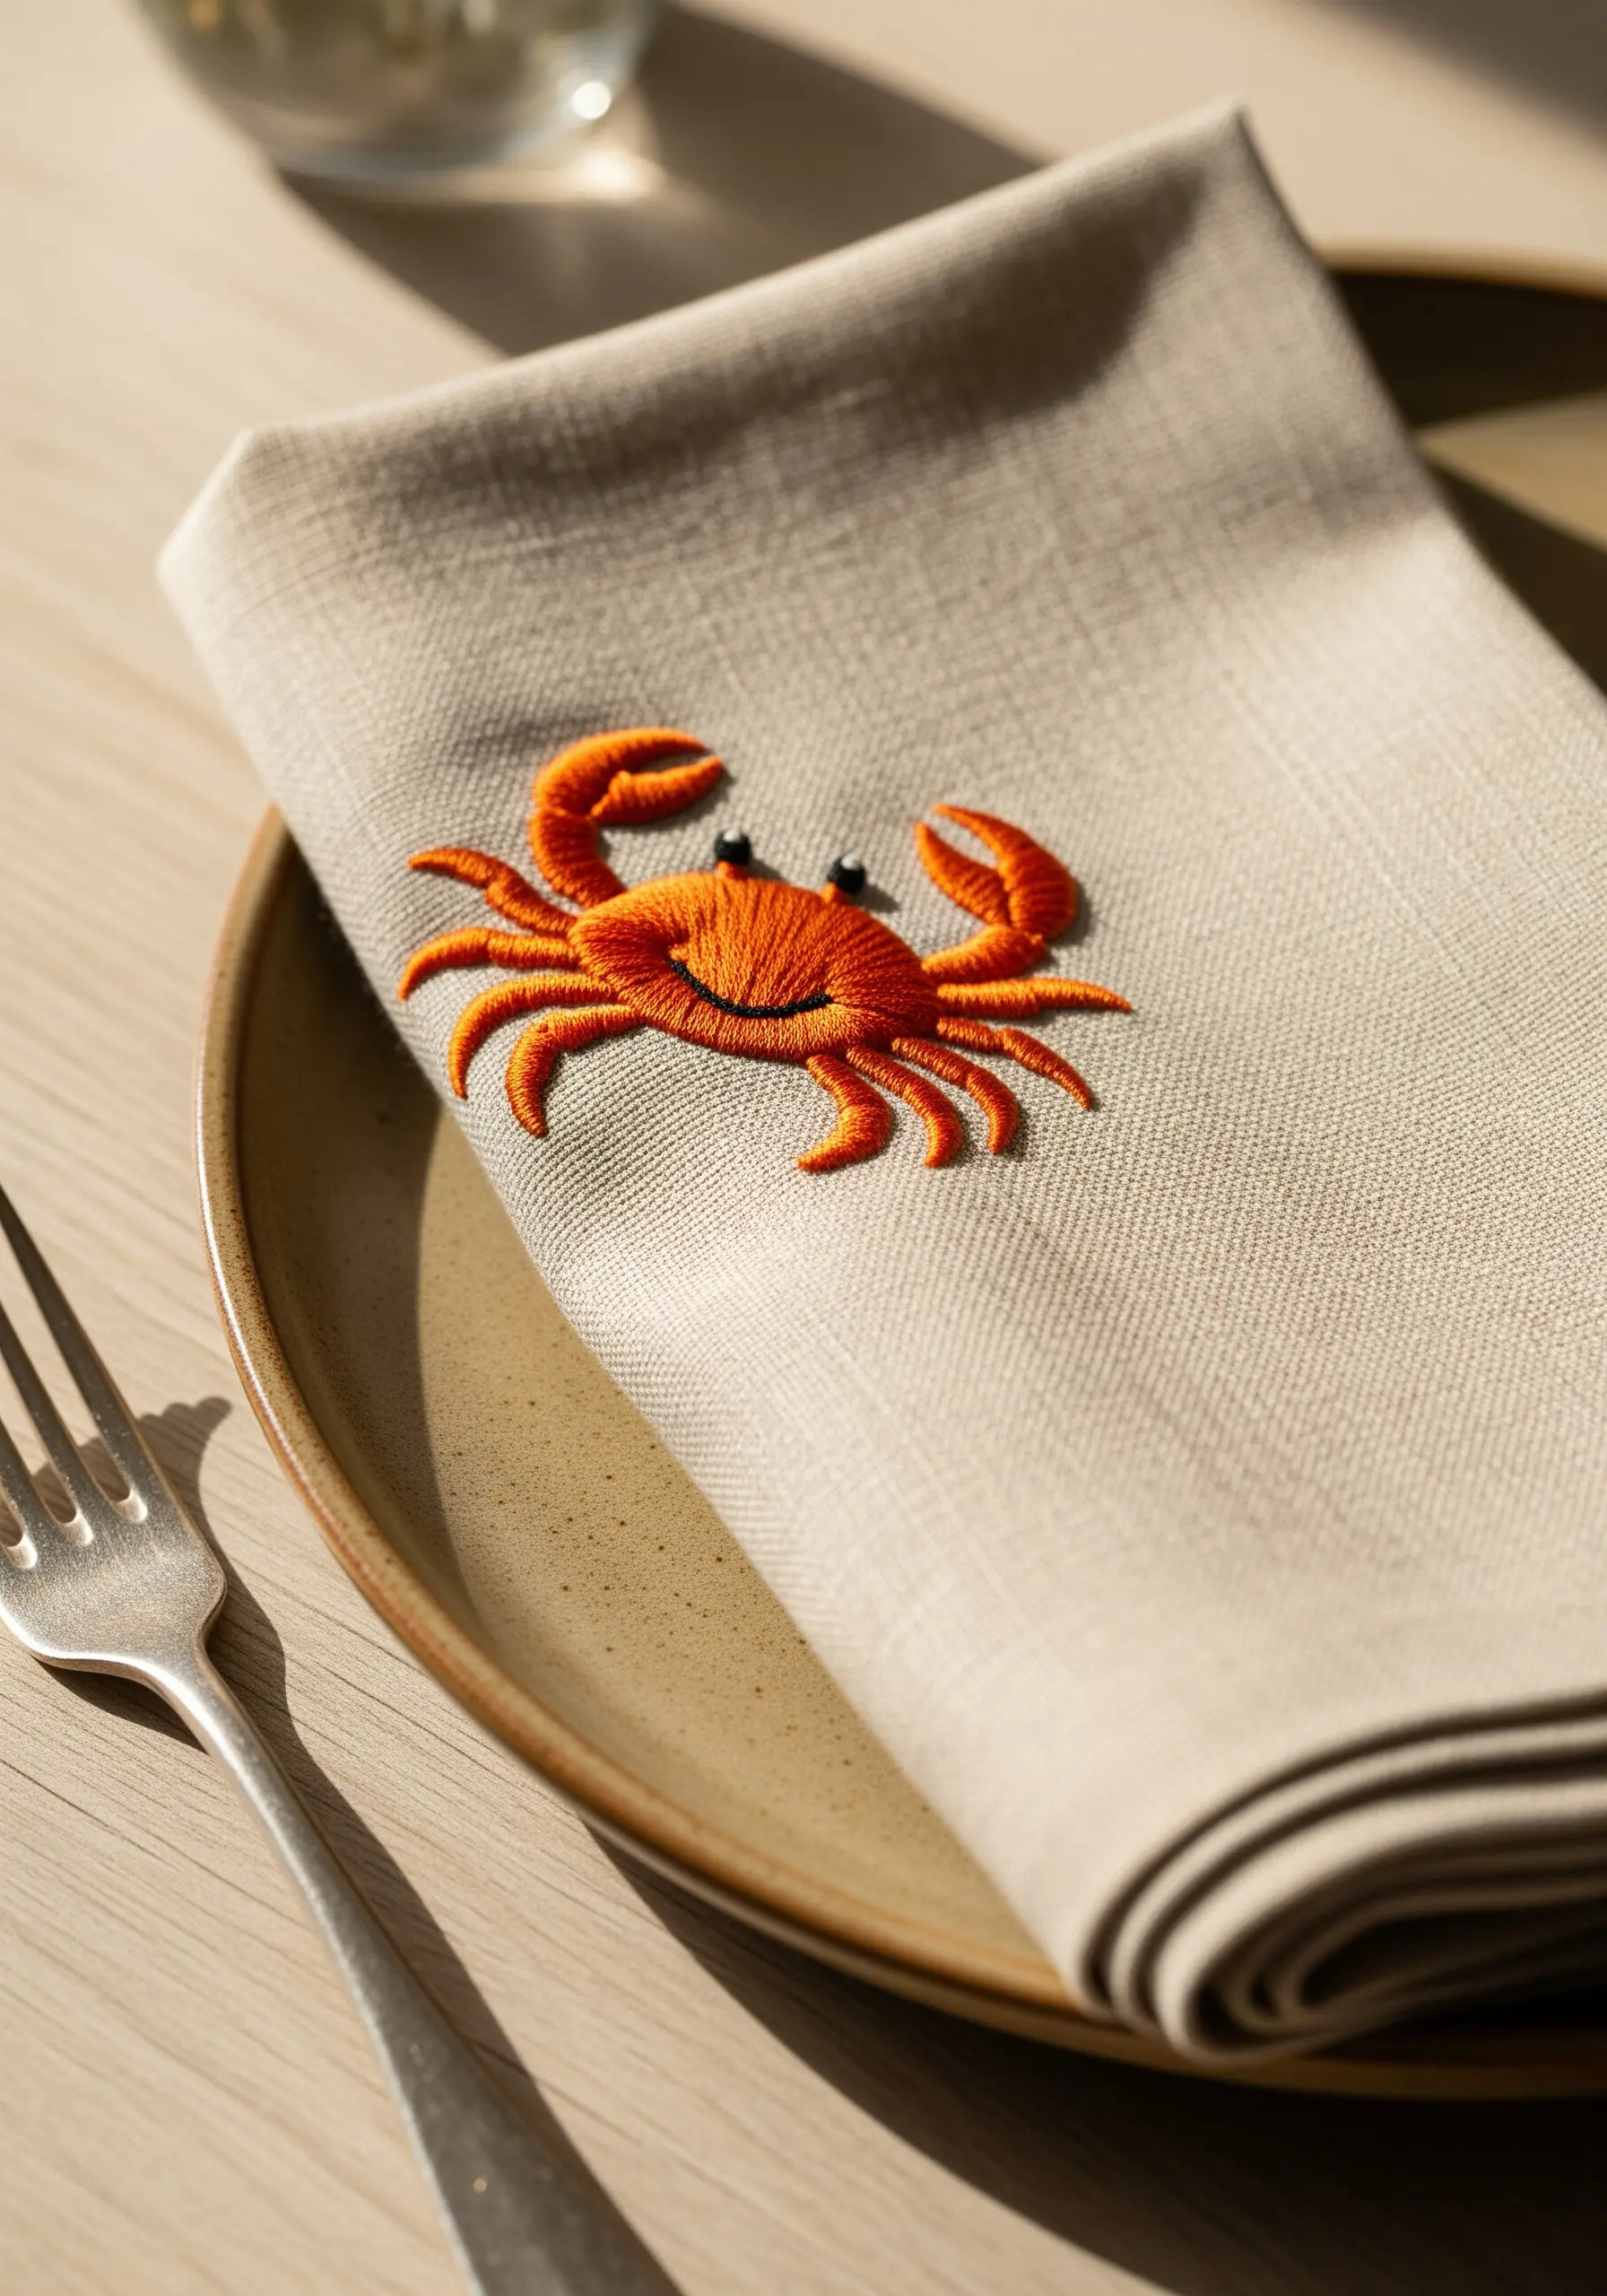
For a bold, solid motif like a crab, a smooth satin stitch is essential.
To ensure your edges are perfectly crisp and prevent the fabric from puckering, first outline the entire shape with a split stitch.
Then, fill the area with your satin stitches, bringing your needle up just outside the split stitch line and down on the other side. The outline acts as a raised foundation, guiding your fill stitches and resulting in a clean, professional finish.
This technique works beautifully for embellishing table runners and napkins.
13. Imply Translucence with Sheer Fabric Appliqué
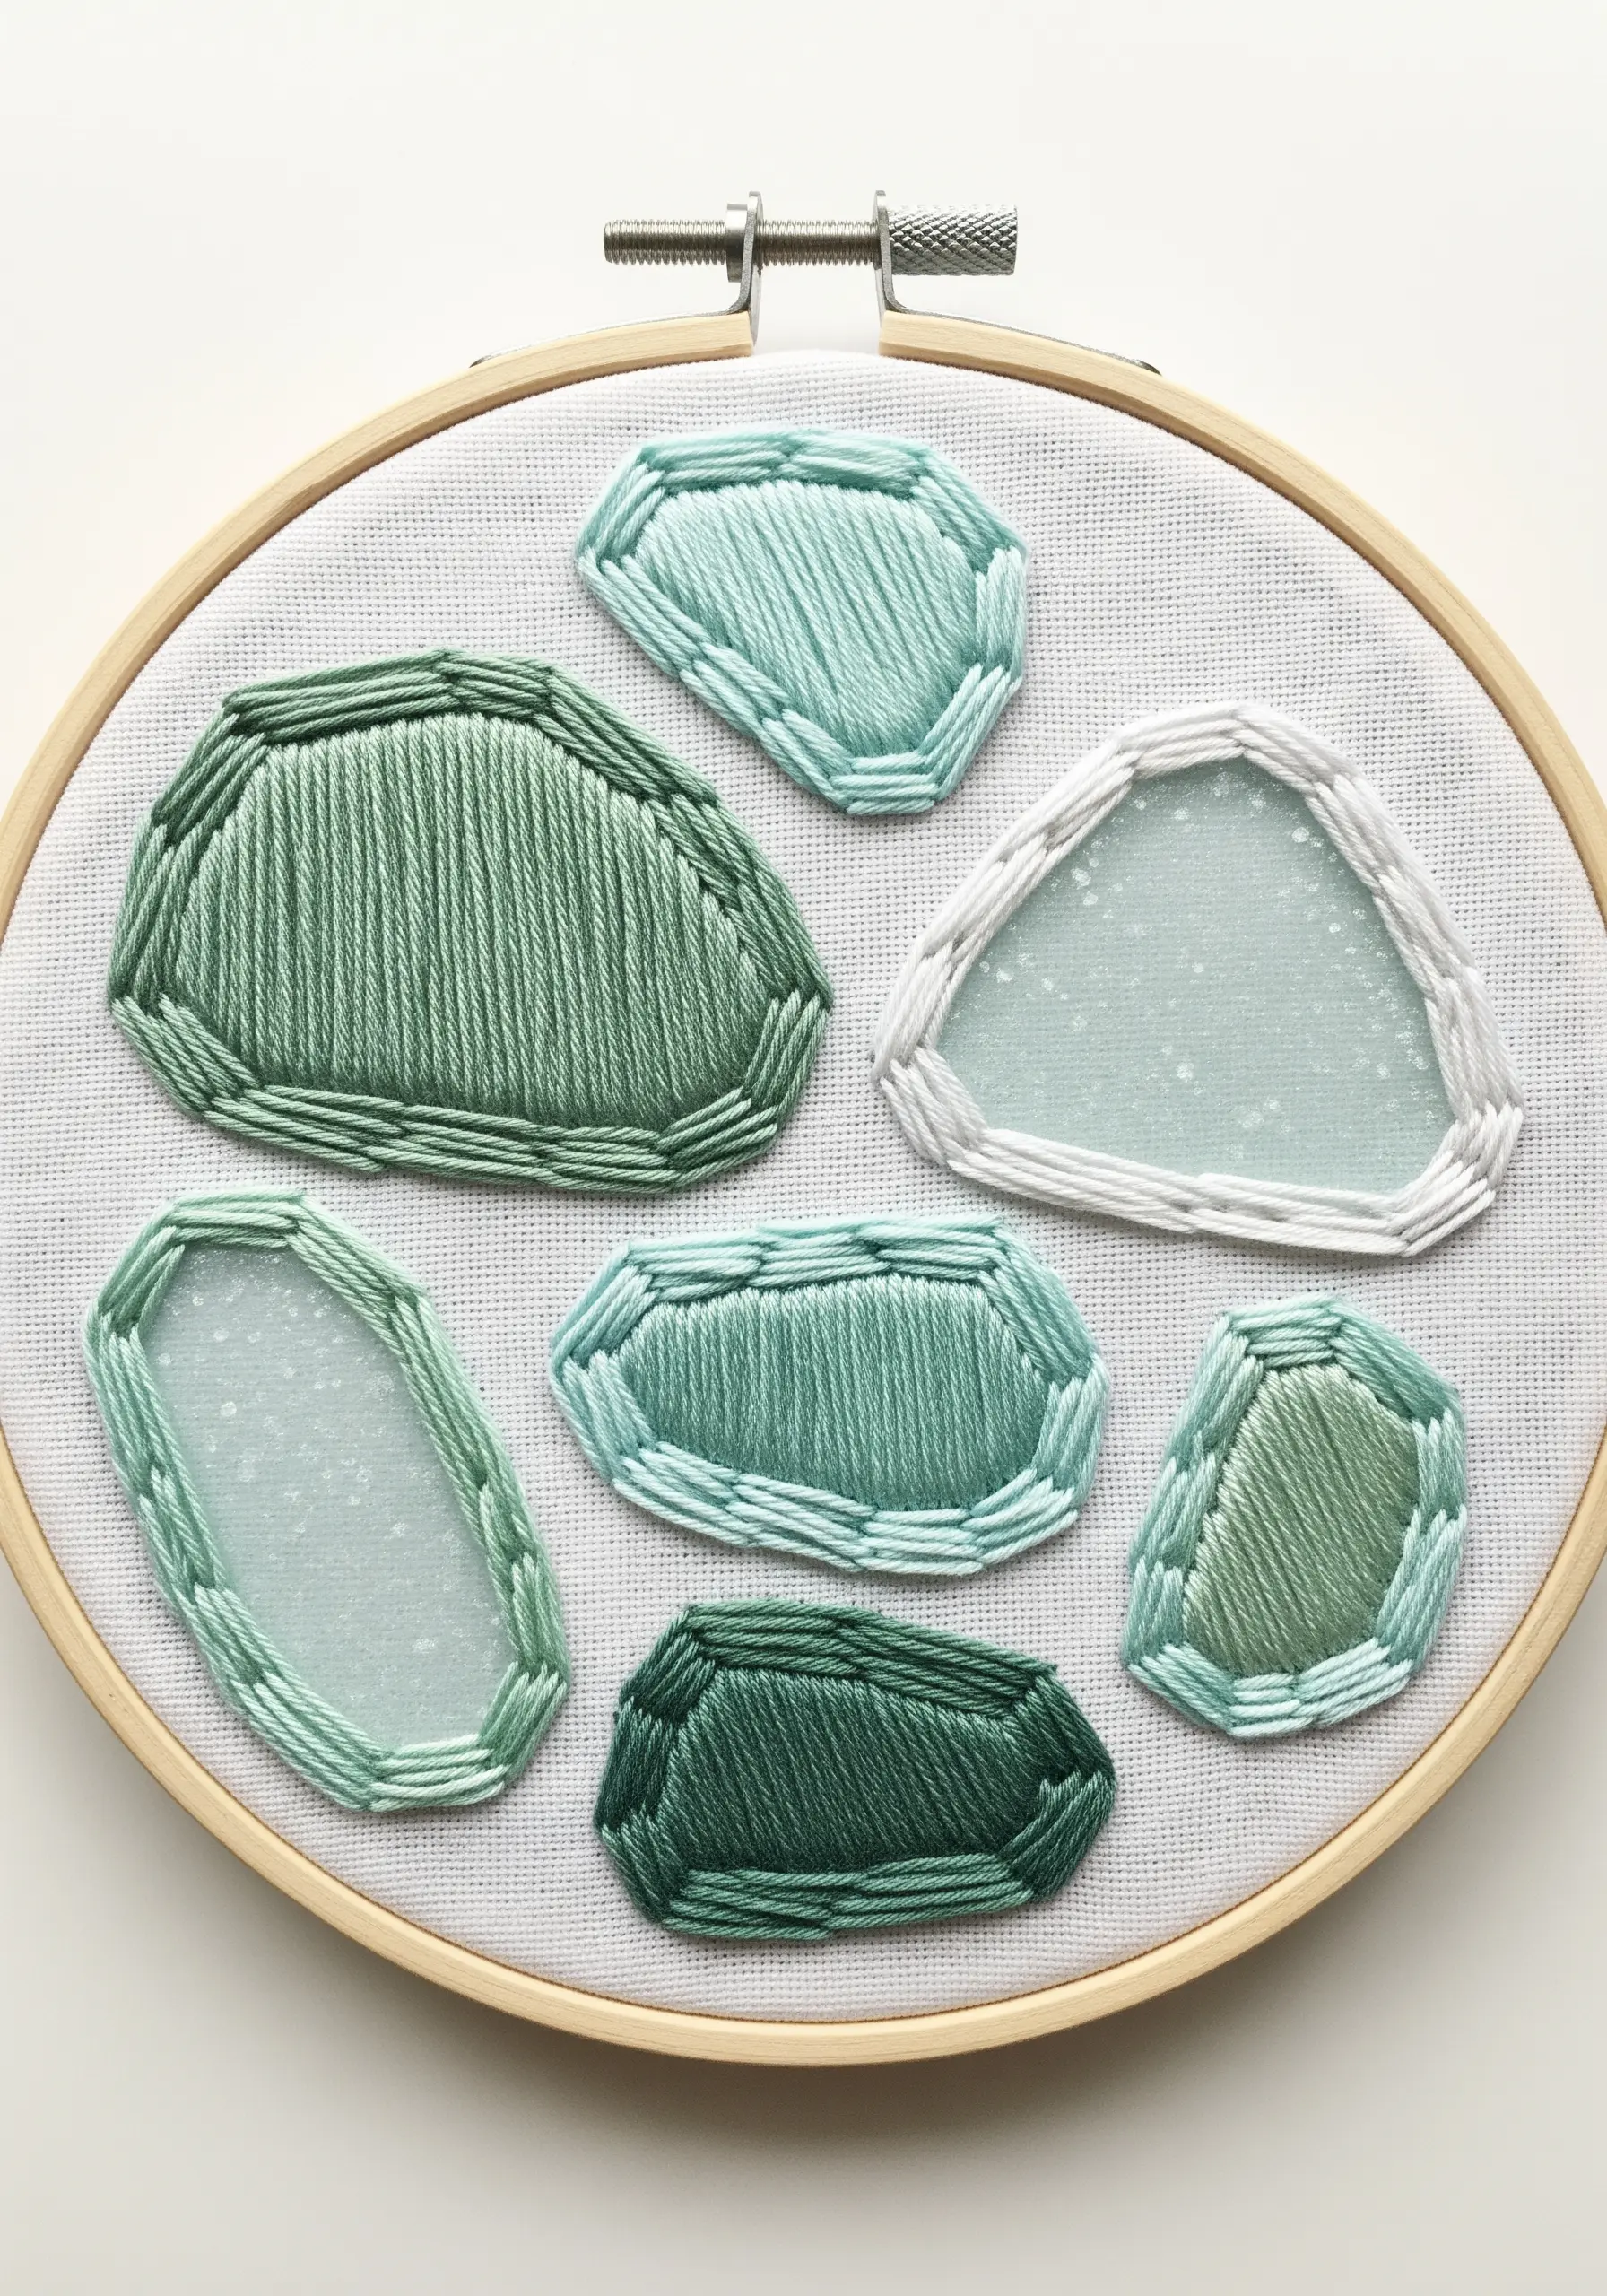
Create the soft, frosted look of sea glass by combining embroidery with appliqué.
Cut your shapes from a piece of sheer fabric like organza or chiffon and place them on your base fabric.
Then, secure the edges with a neat satin stitch or blanket stitch border. Using different shades of floss in the border creates a subtle gradient that enhances the illusion of depth.
This mixed-media approach adds a layer of texture and sophistication that thread alone cannot achieve.
14. Paint a Seascape with Three Core Textures
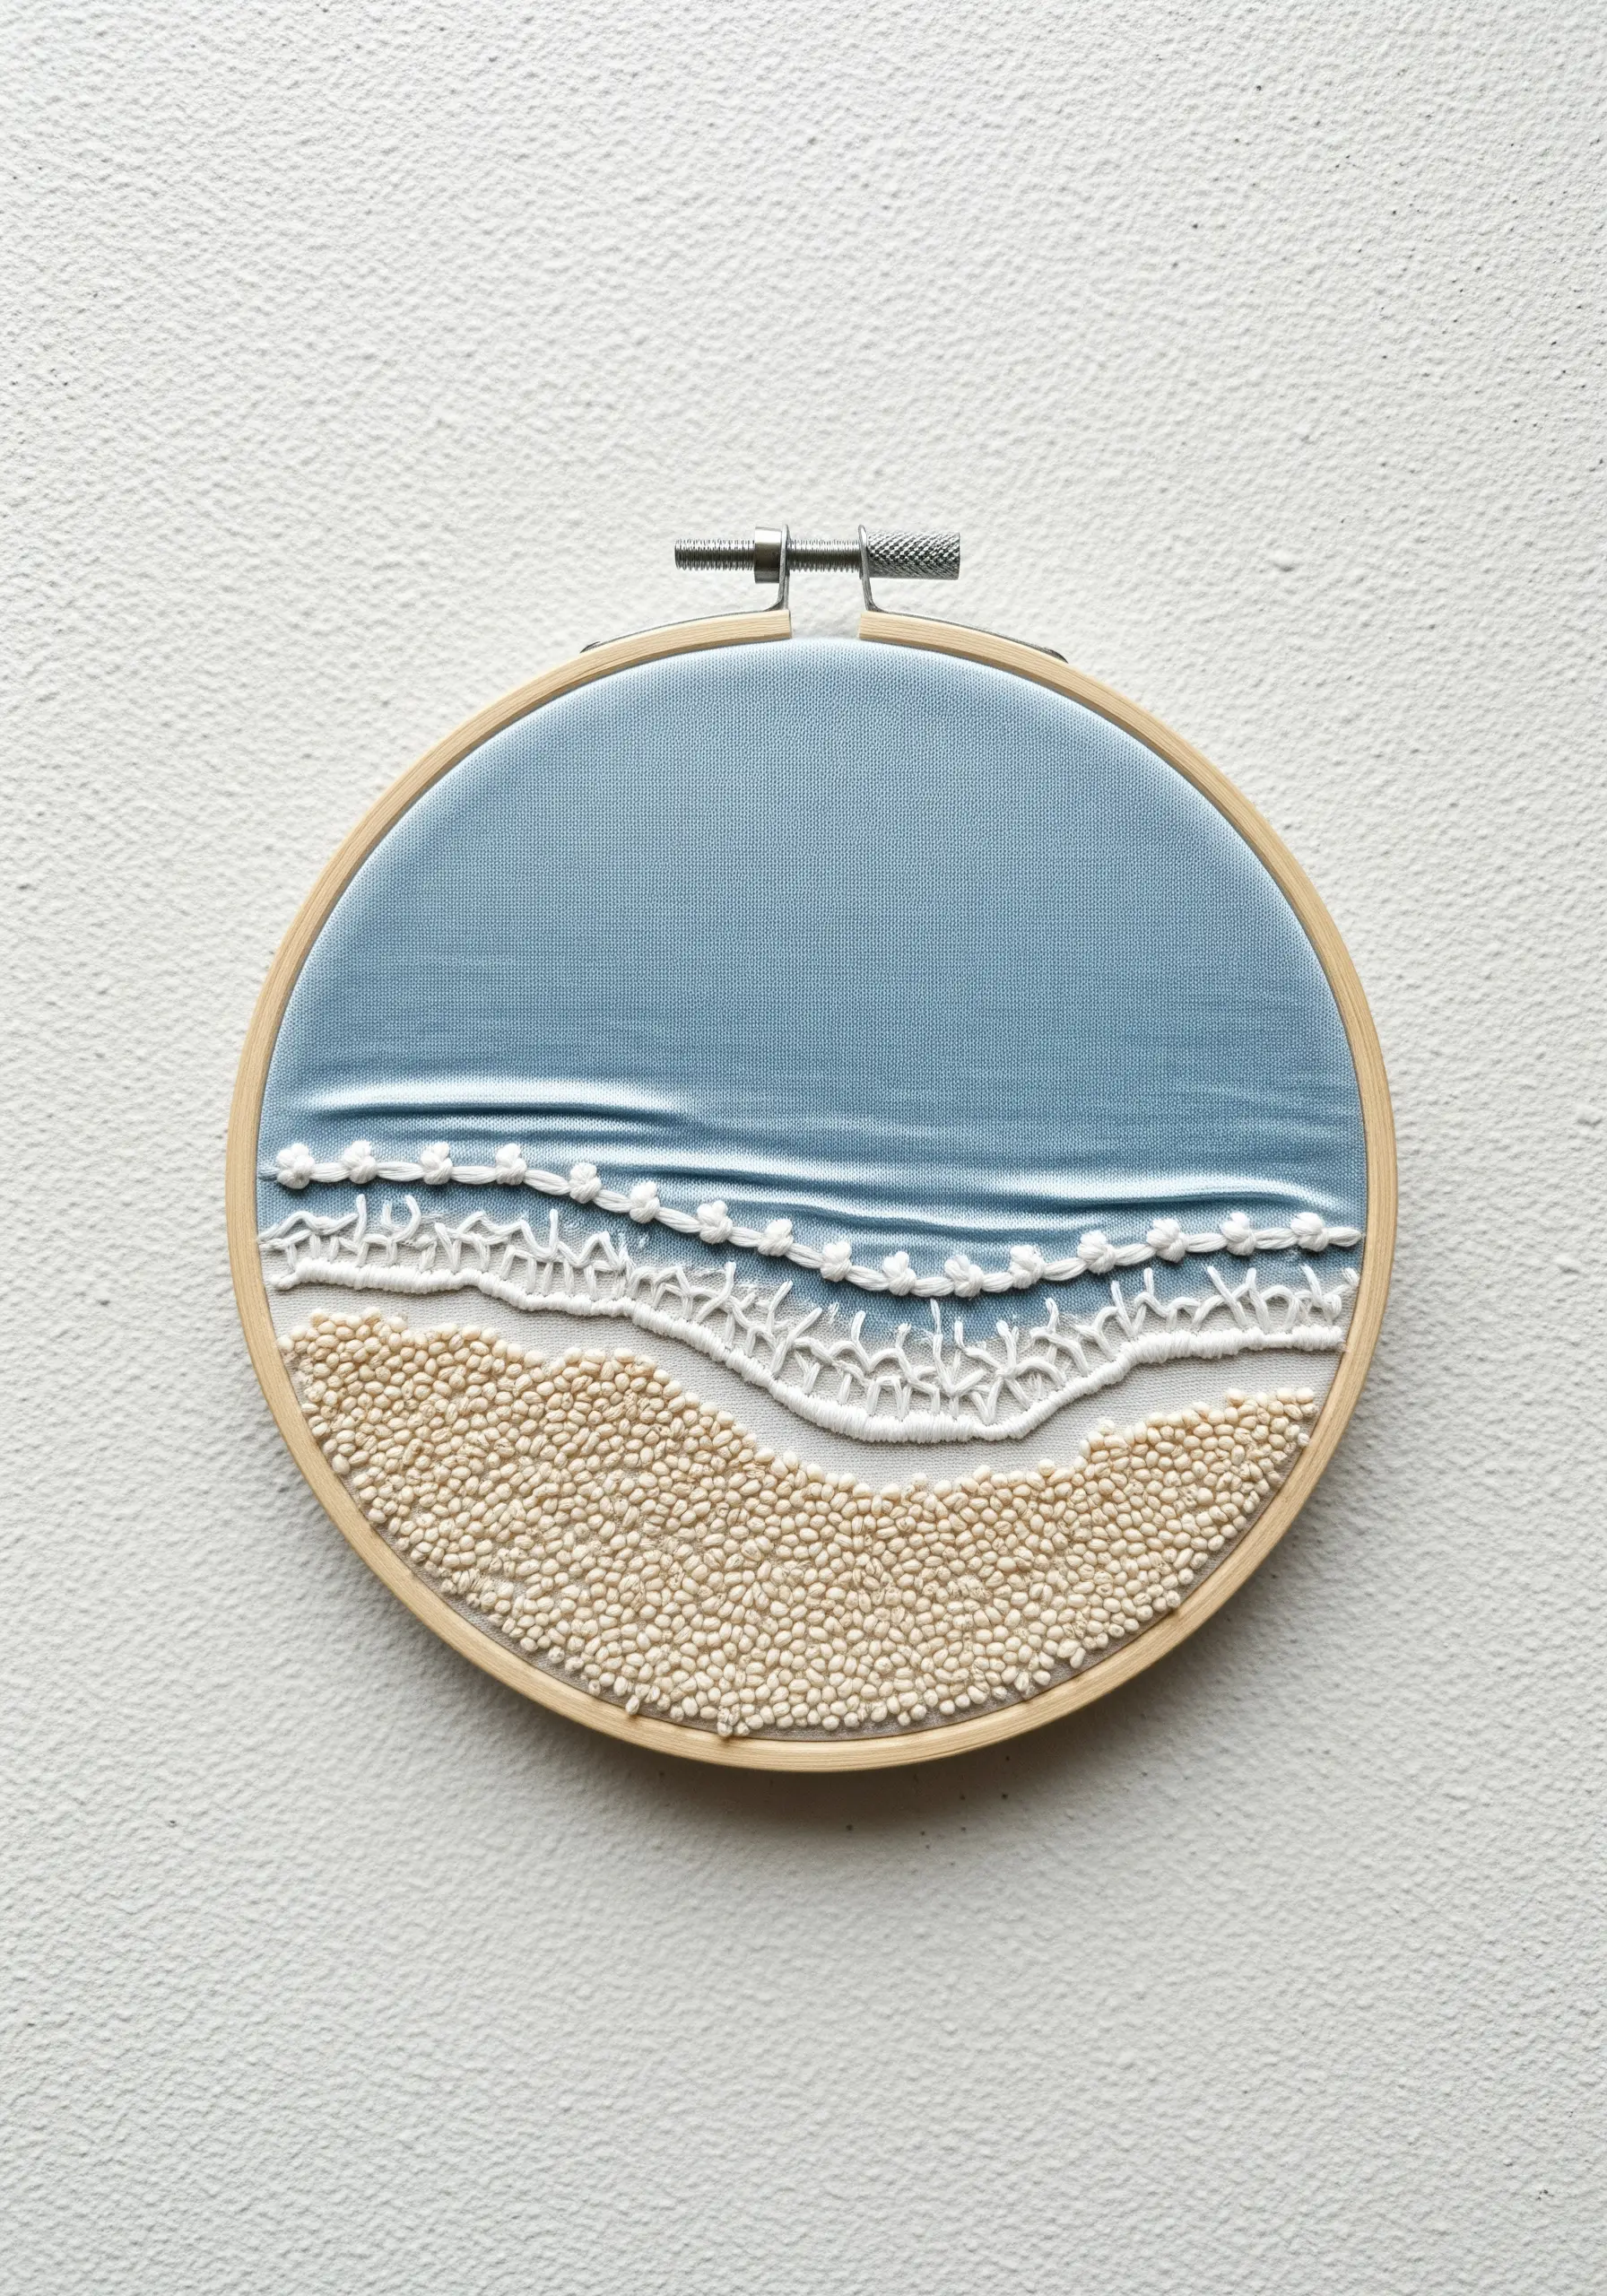
To create a cohesive coastal landscape, focus on three distinct textures: water, foam, and sand.
For the water, use a piece of blue fabric that has a slight sheen, like silk or sateen, and secure it with horizontal running stitches to suggest gentle ripples.
Create the foam by stitching a line of open, lacy stitches like Cretan stitch or feather stitch in bright white.
Finally, fill the beach area with a dense field of tiny seed stitches or French knots in a sand color for a grainy, tactile finish.
15. Weave a Narrative with Line and Fill
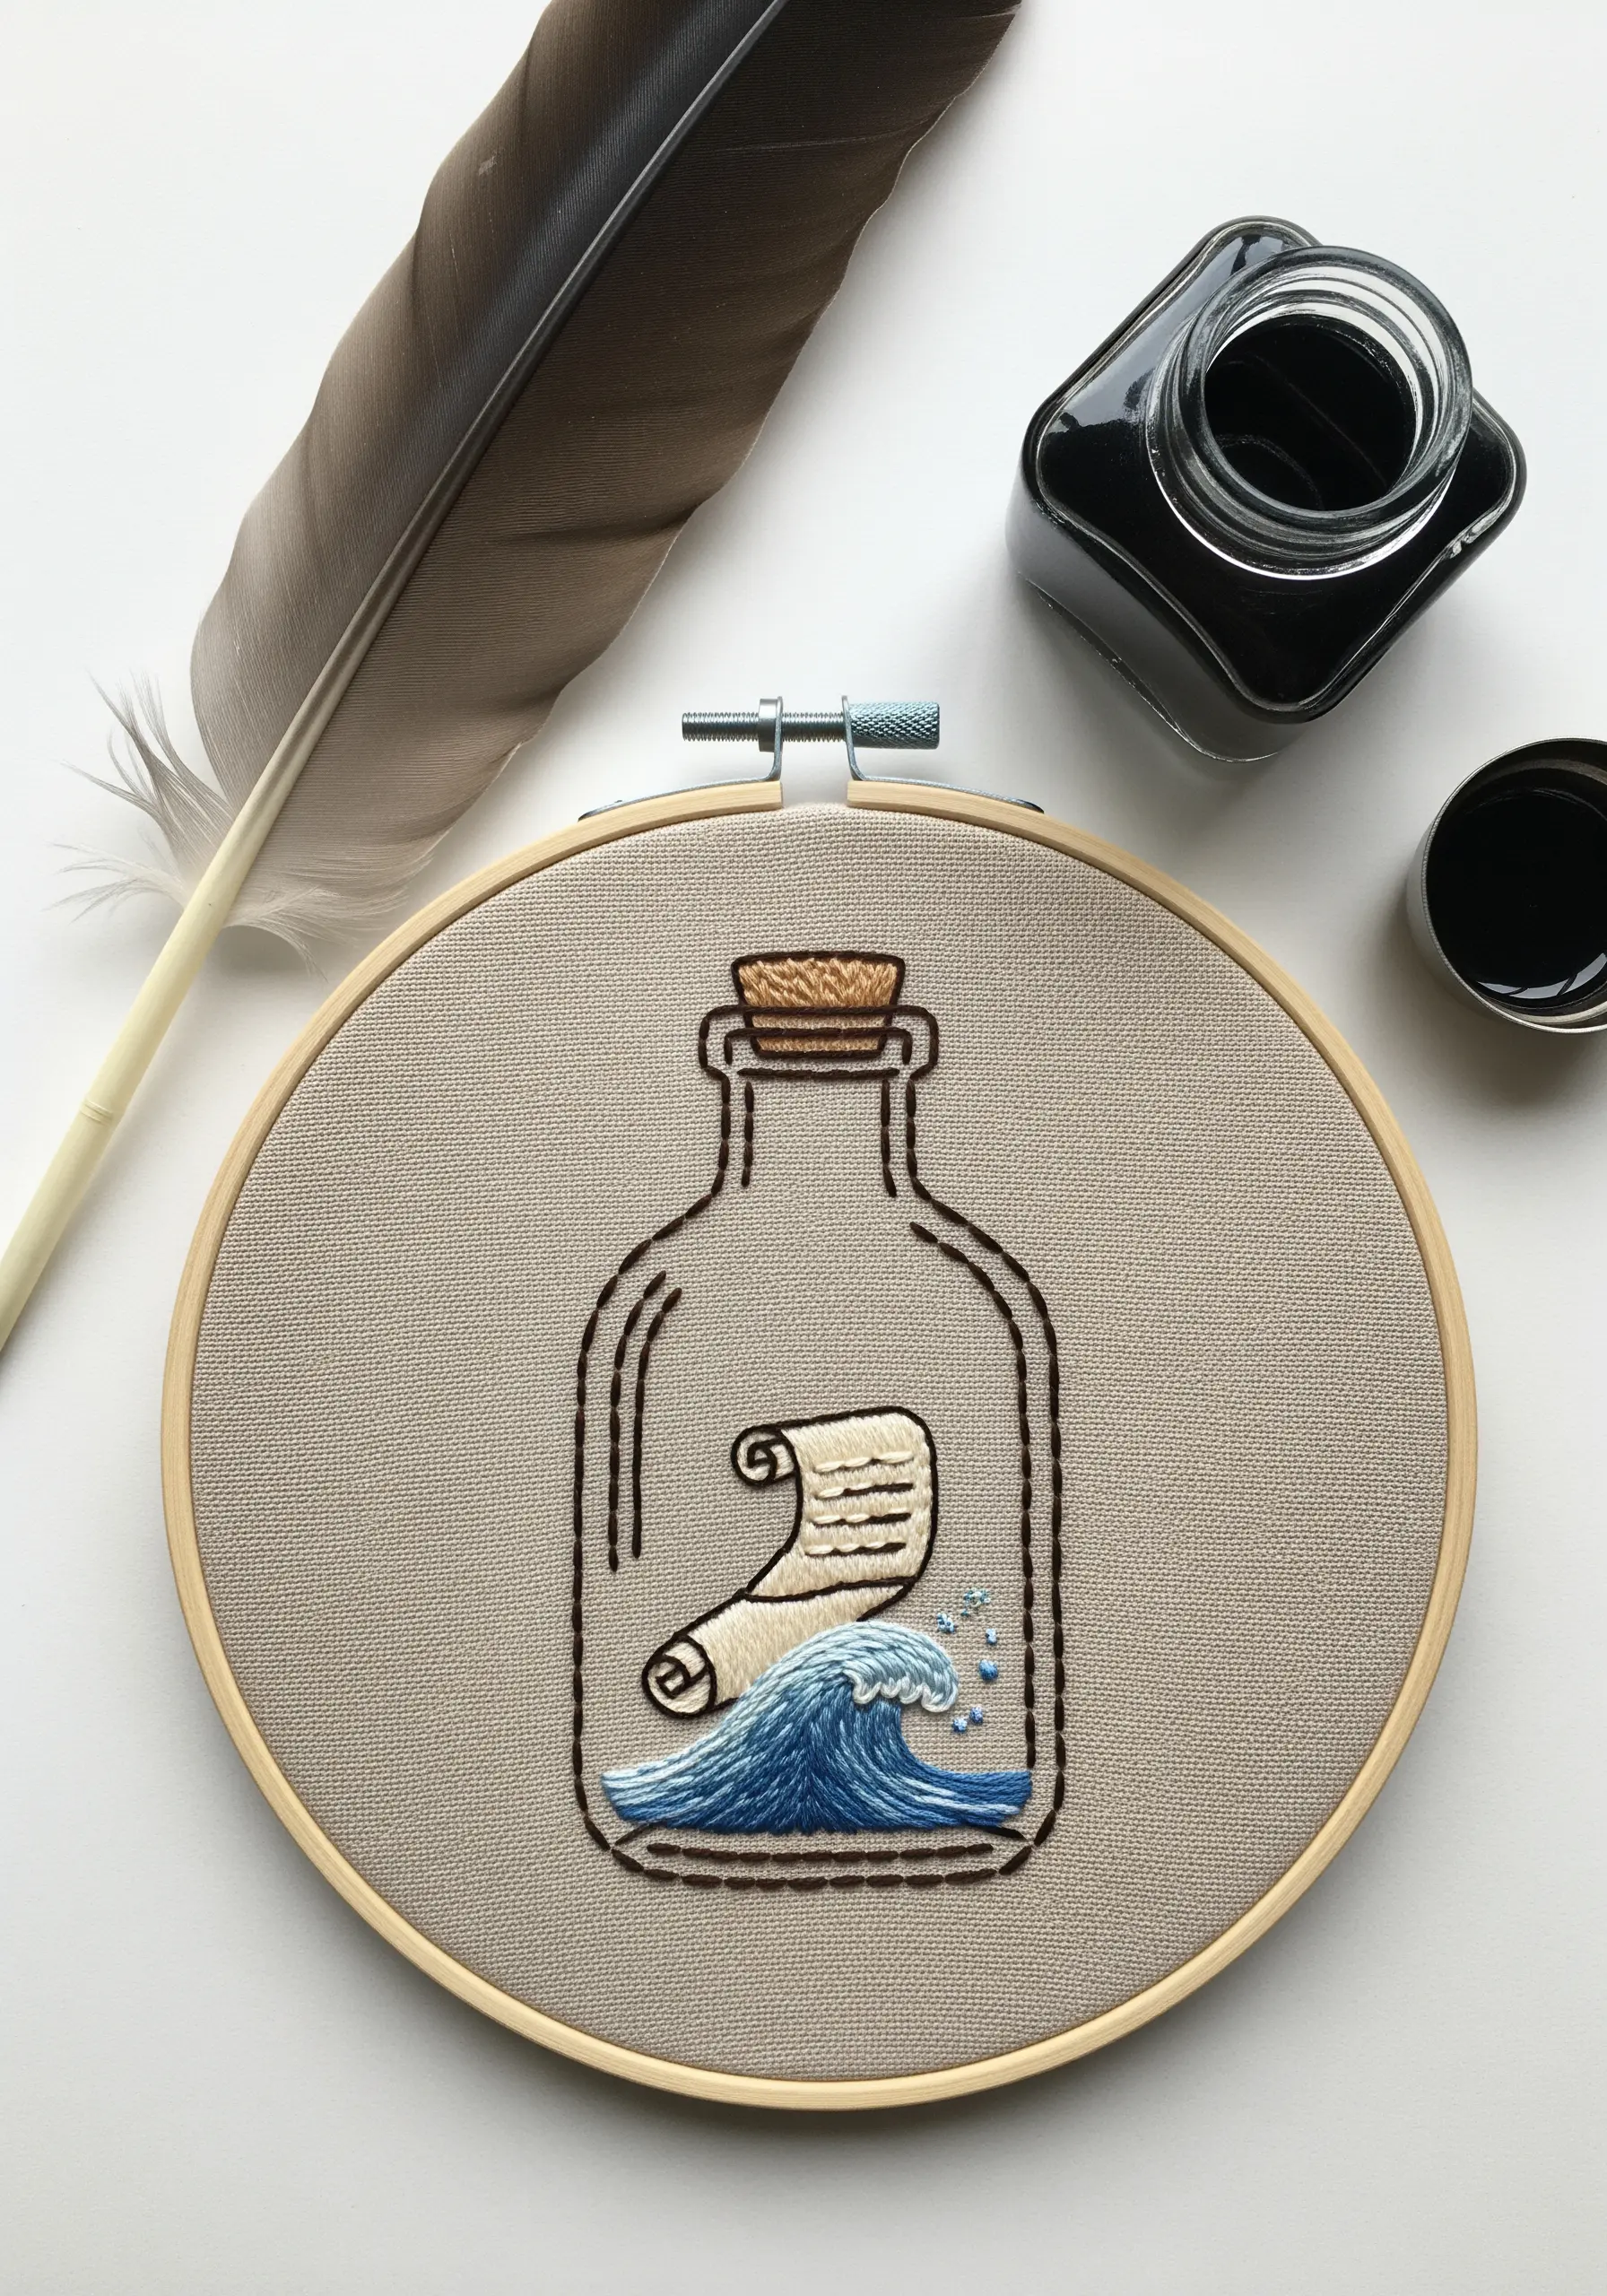
Turn your embroidery into a tiny story with just a few well-chosen elements.
Use a simple backstitch to create the clean outline of the bottle and the scroll.
Suggest writing on the scroll with a few tiny, flowing seed stitches rather than trying to form actual letters.
Fill the base of the bottle with small, thread-painted waves using two or three shades of blue to add color and movement, grounding the delicate scene.
16. Create Bold Graphics on Heavy Canvas
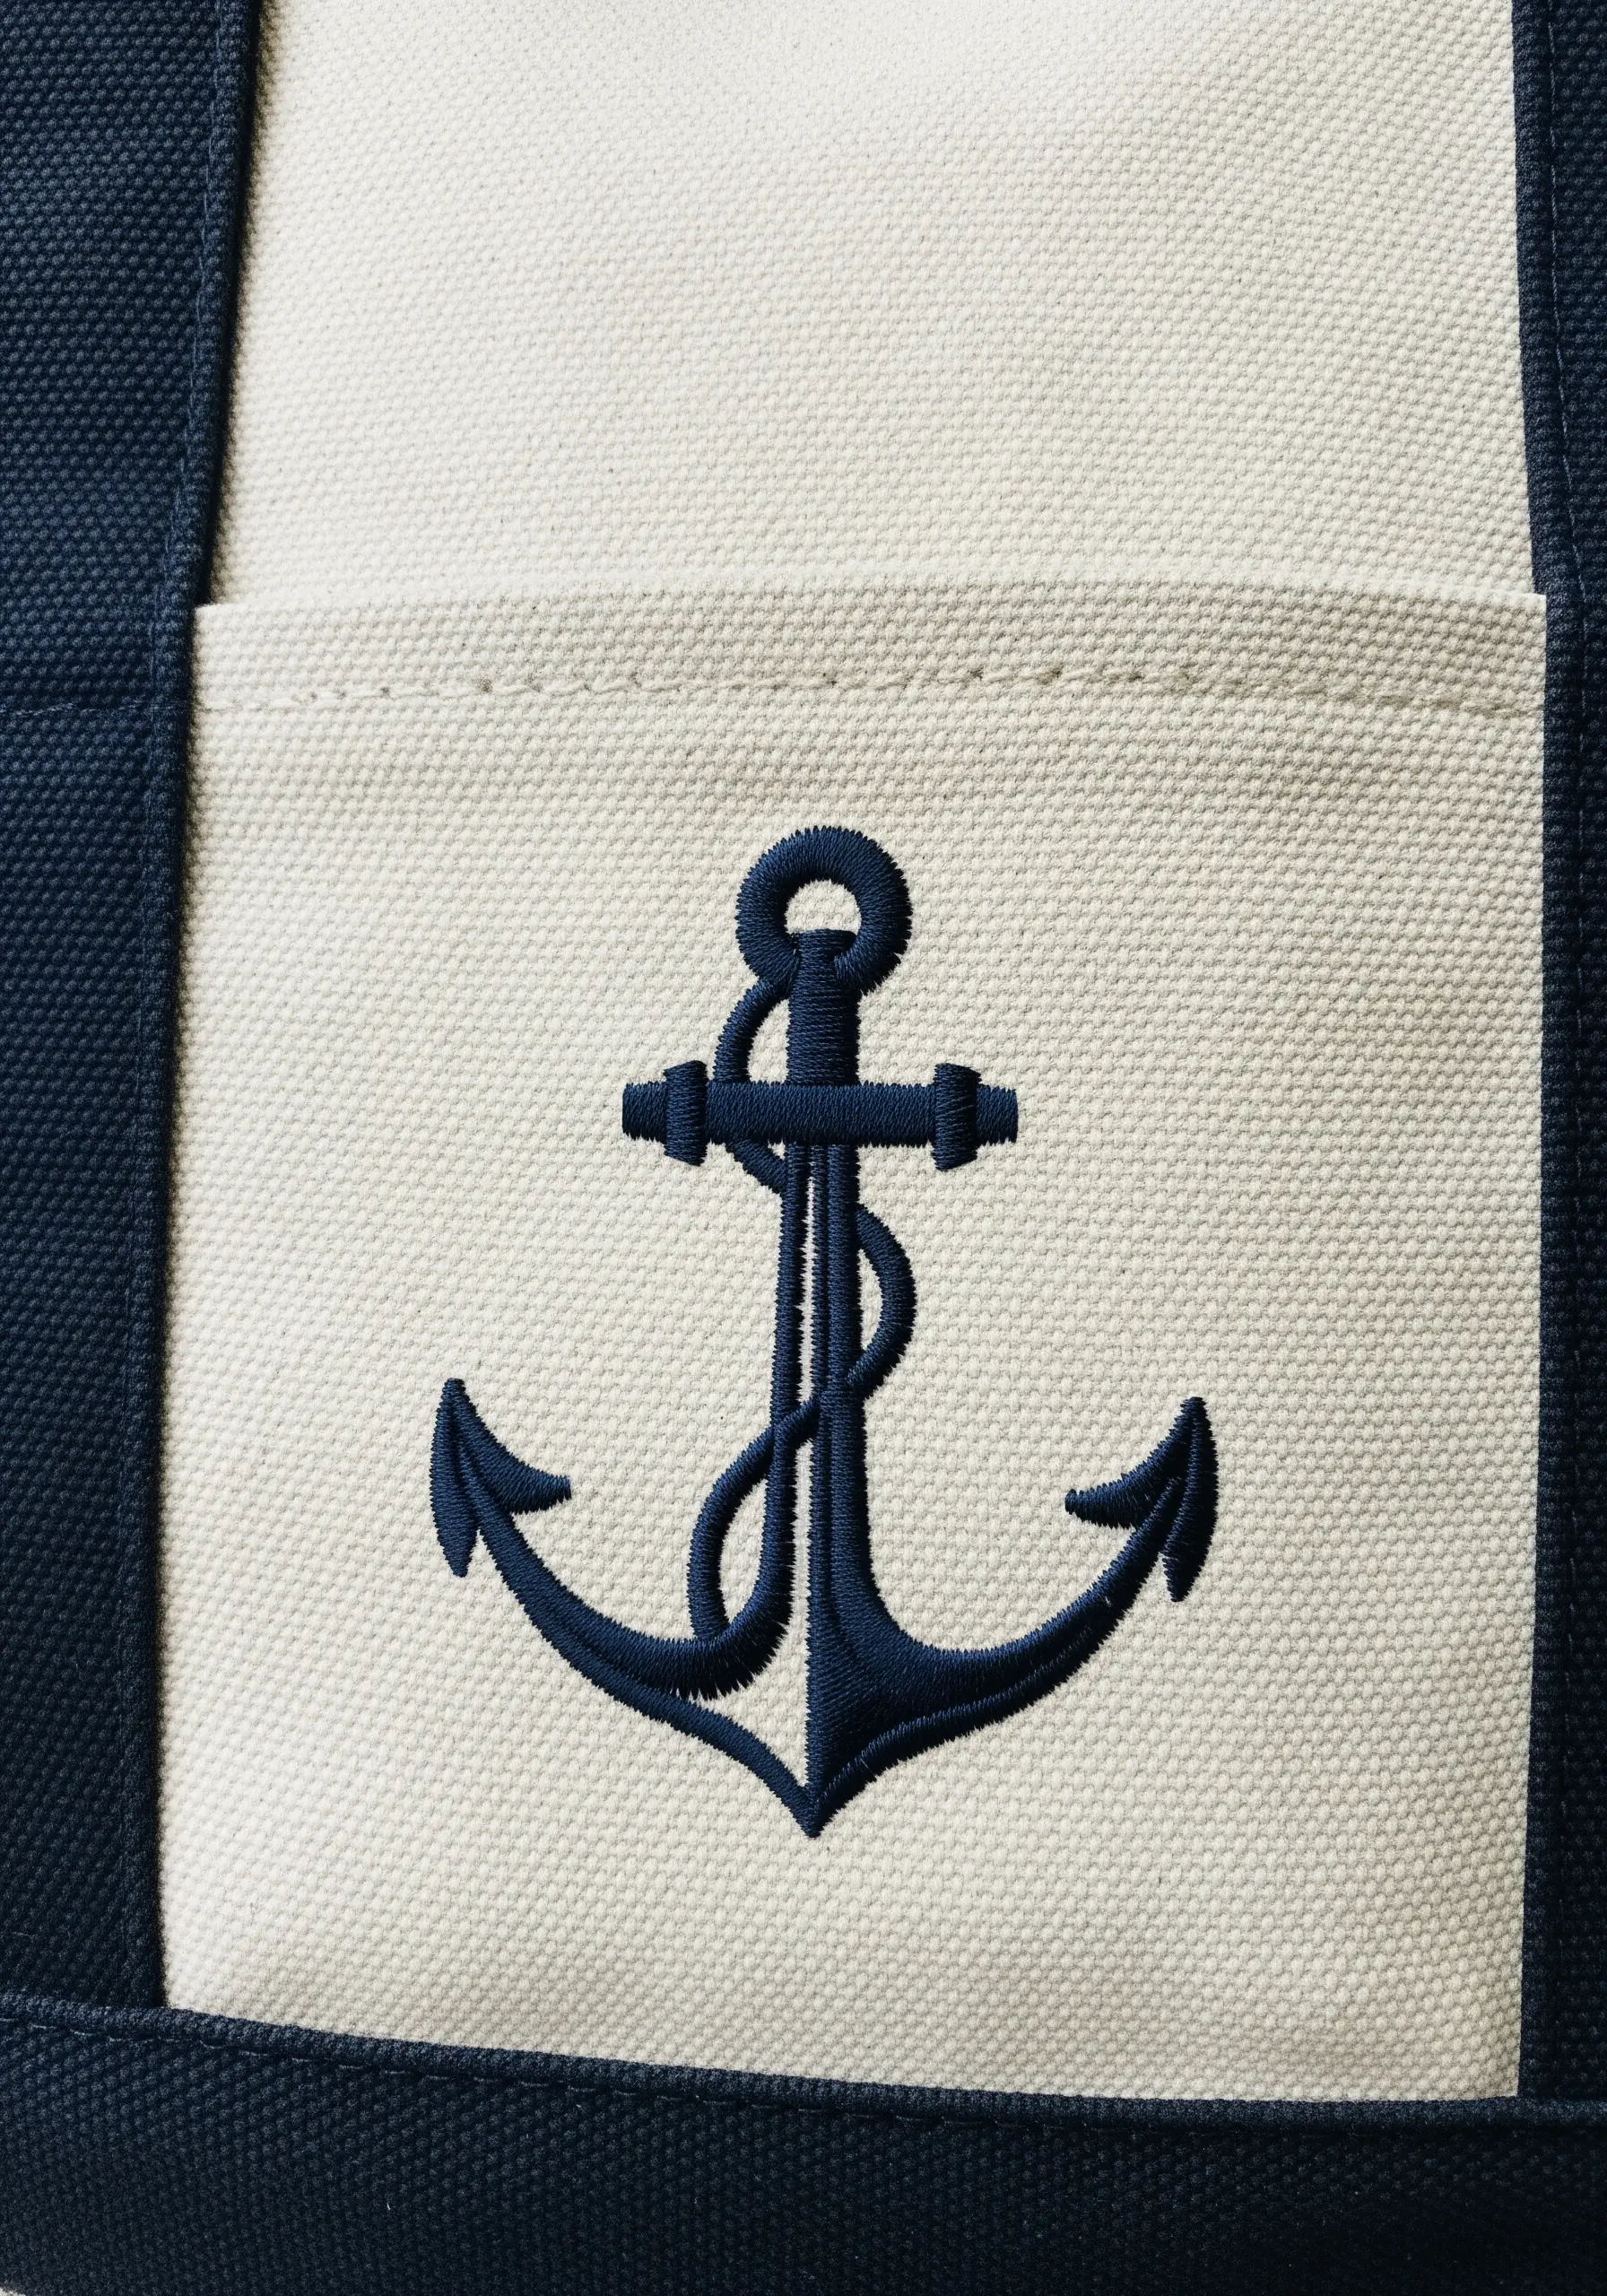
When embroidering on a sturdy fabric like the canvas of a tote bag, your technique needs to be bold and clean.
To achieve a crisp, solid anchor like this, first create a padded base by filling the shape with horizontal satin stitches.
Then, cover this padding with a final layer of vertical satin stitches. This two-layer approach creates a raised, dimensional effect that looks professional and prevents the canvas texture from showing through.
It’s the perfect statement for a beach-themed tote bag.
17. Sculpt 3D Petals with Turkey Work

To create the plush, velvety texture of a sea anemone, the Turkey work stitch is your best friend.
This technique involves creating loops of thread on the surface of the fabric, which you then snip open and trim to create a soft, brush-like pile.
Work in concentric circles from the outside in, blending different colors to achieve a natural gradient.
The result is a wonderfully dimensional and interactive piece that truly stands off the fabric.
18. Evoke a Scene with Minimalist Marks
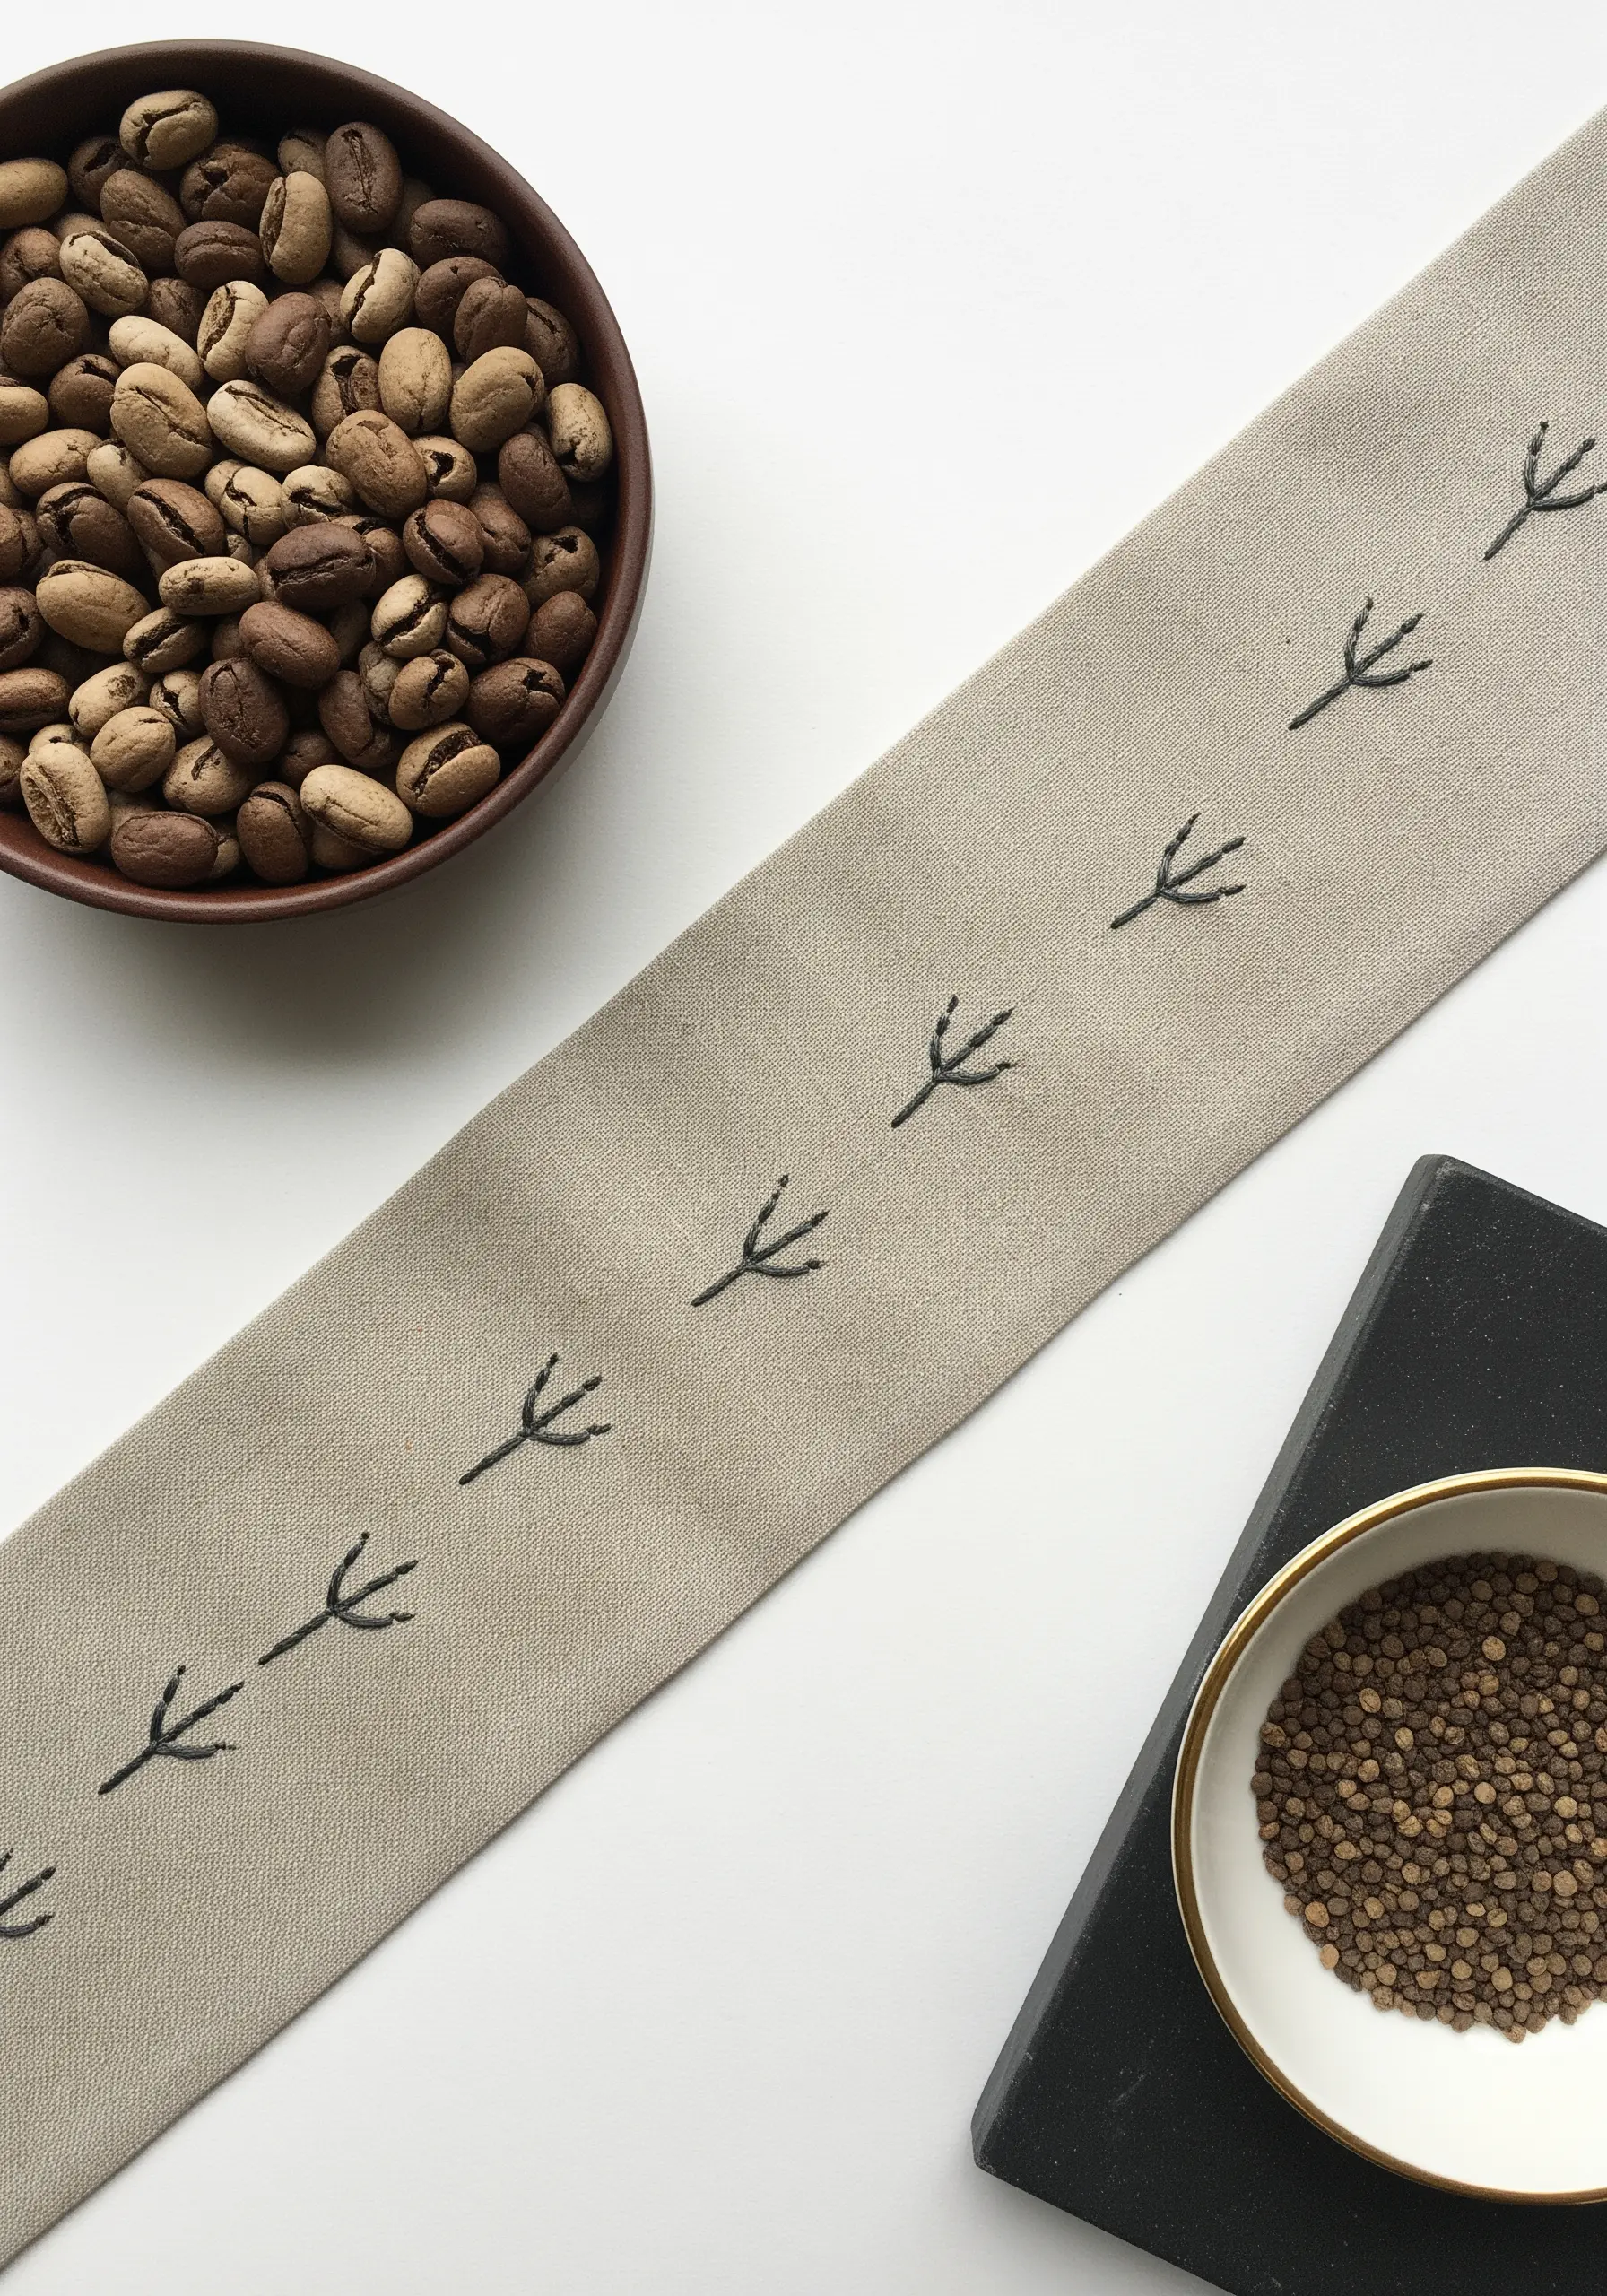
Sometimes, the most powerful embroidery is the most understated. You can suggest a whole story with just a few carefully placed stitches.
Create a trail of bird footprints using three simple, small straight stitches for each foot.
Arrange them in a slightly meandering line to imply movement along the sand.
This minimalist approach is perfect for adding a subtle, thoughtful detail to table linens, napkins, or the corner of a tea towel.
19. Define Form with Directional Shading
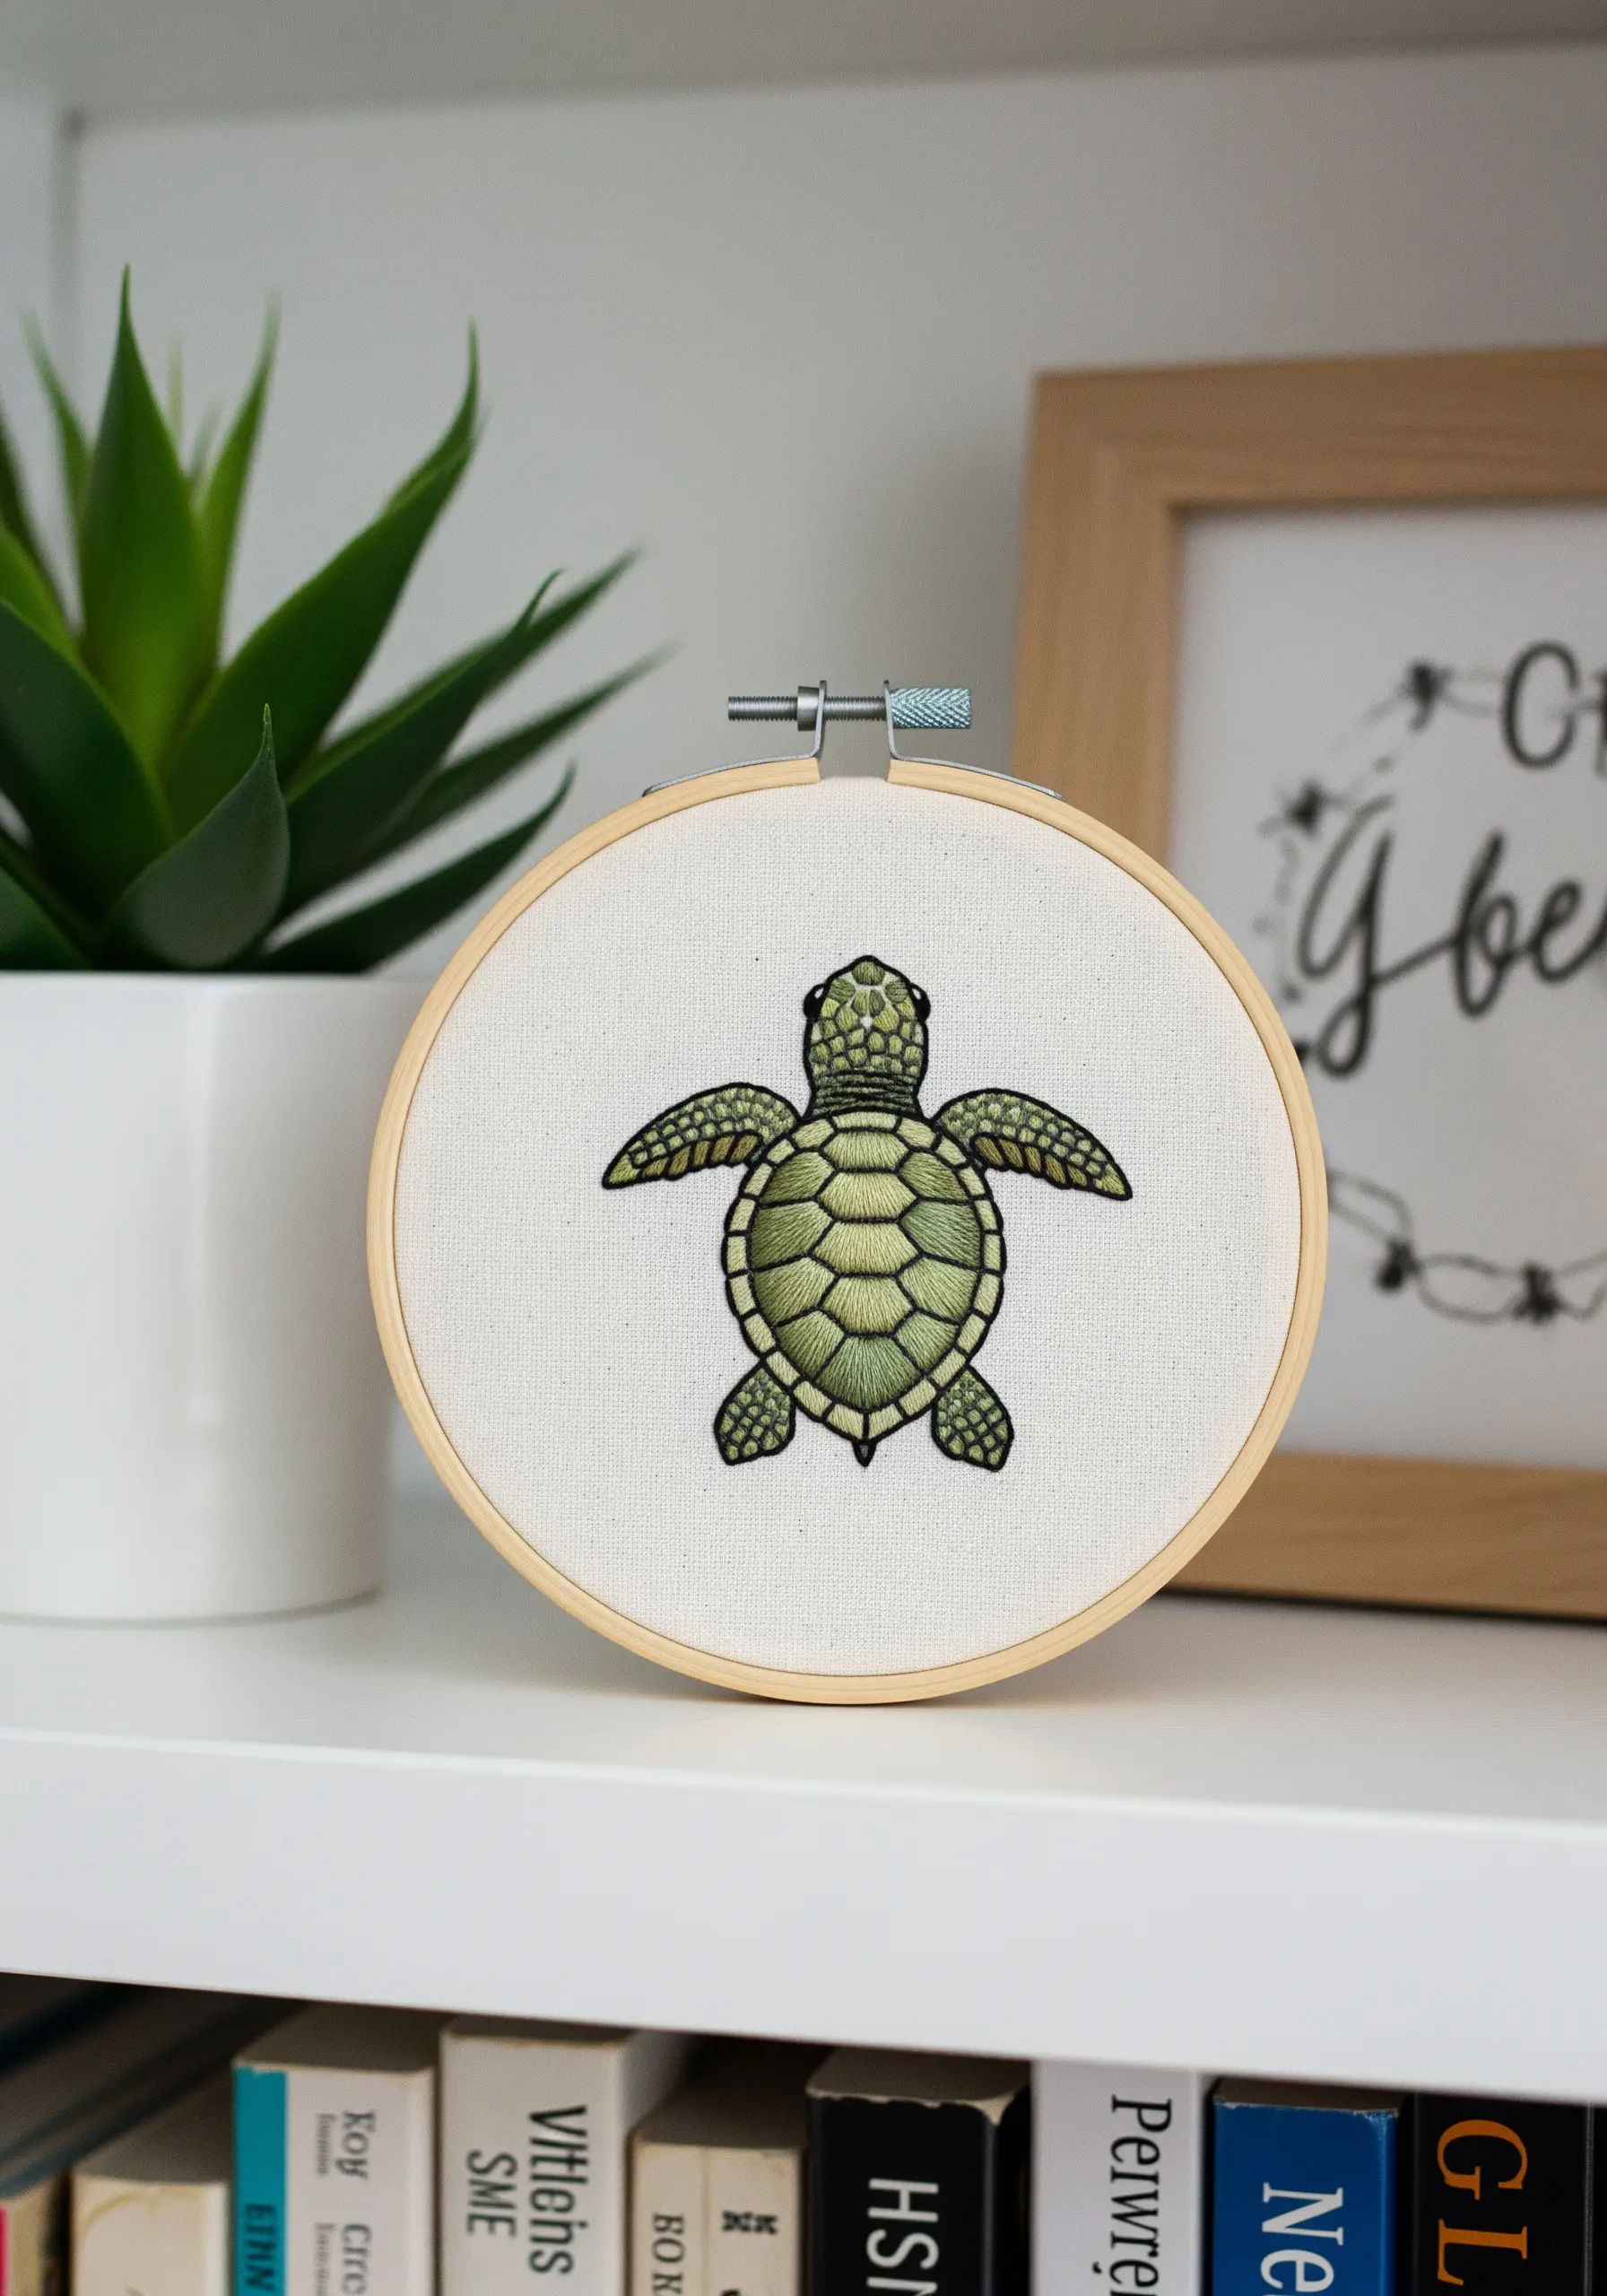
The key to a realistic sea turtle is capturing the distinct, geometric plates of its shell.
Tackle one segment at a time, using long-and-short stitch to blend two or three shades of green.
Pay close attention to the direction of your stitches within each plate; changing the angle slightly for each segment will define its shape and create the illusion of a hard, contoured surface.
A crisp backstitch outline around each plate adds the final layer of definition.
20. Achieve Effortless Gradients with Variegated Floss
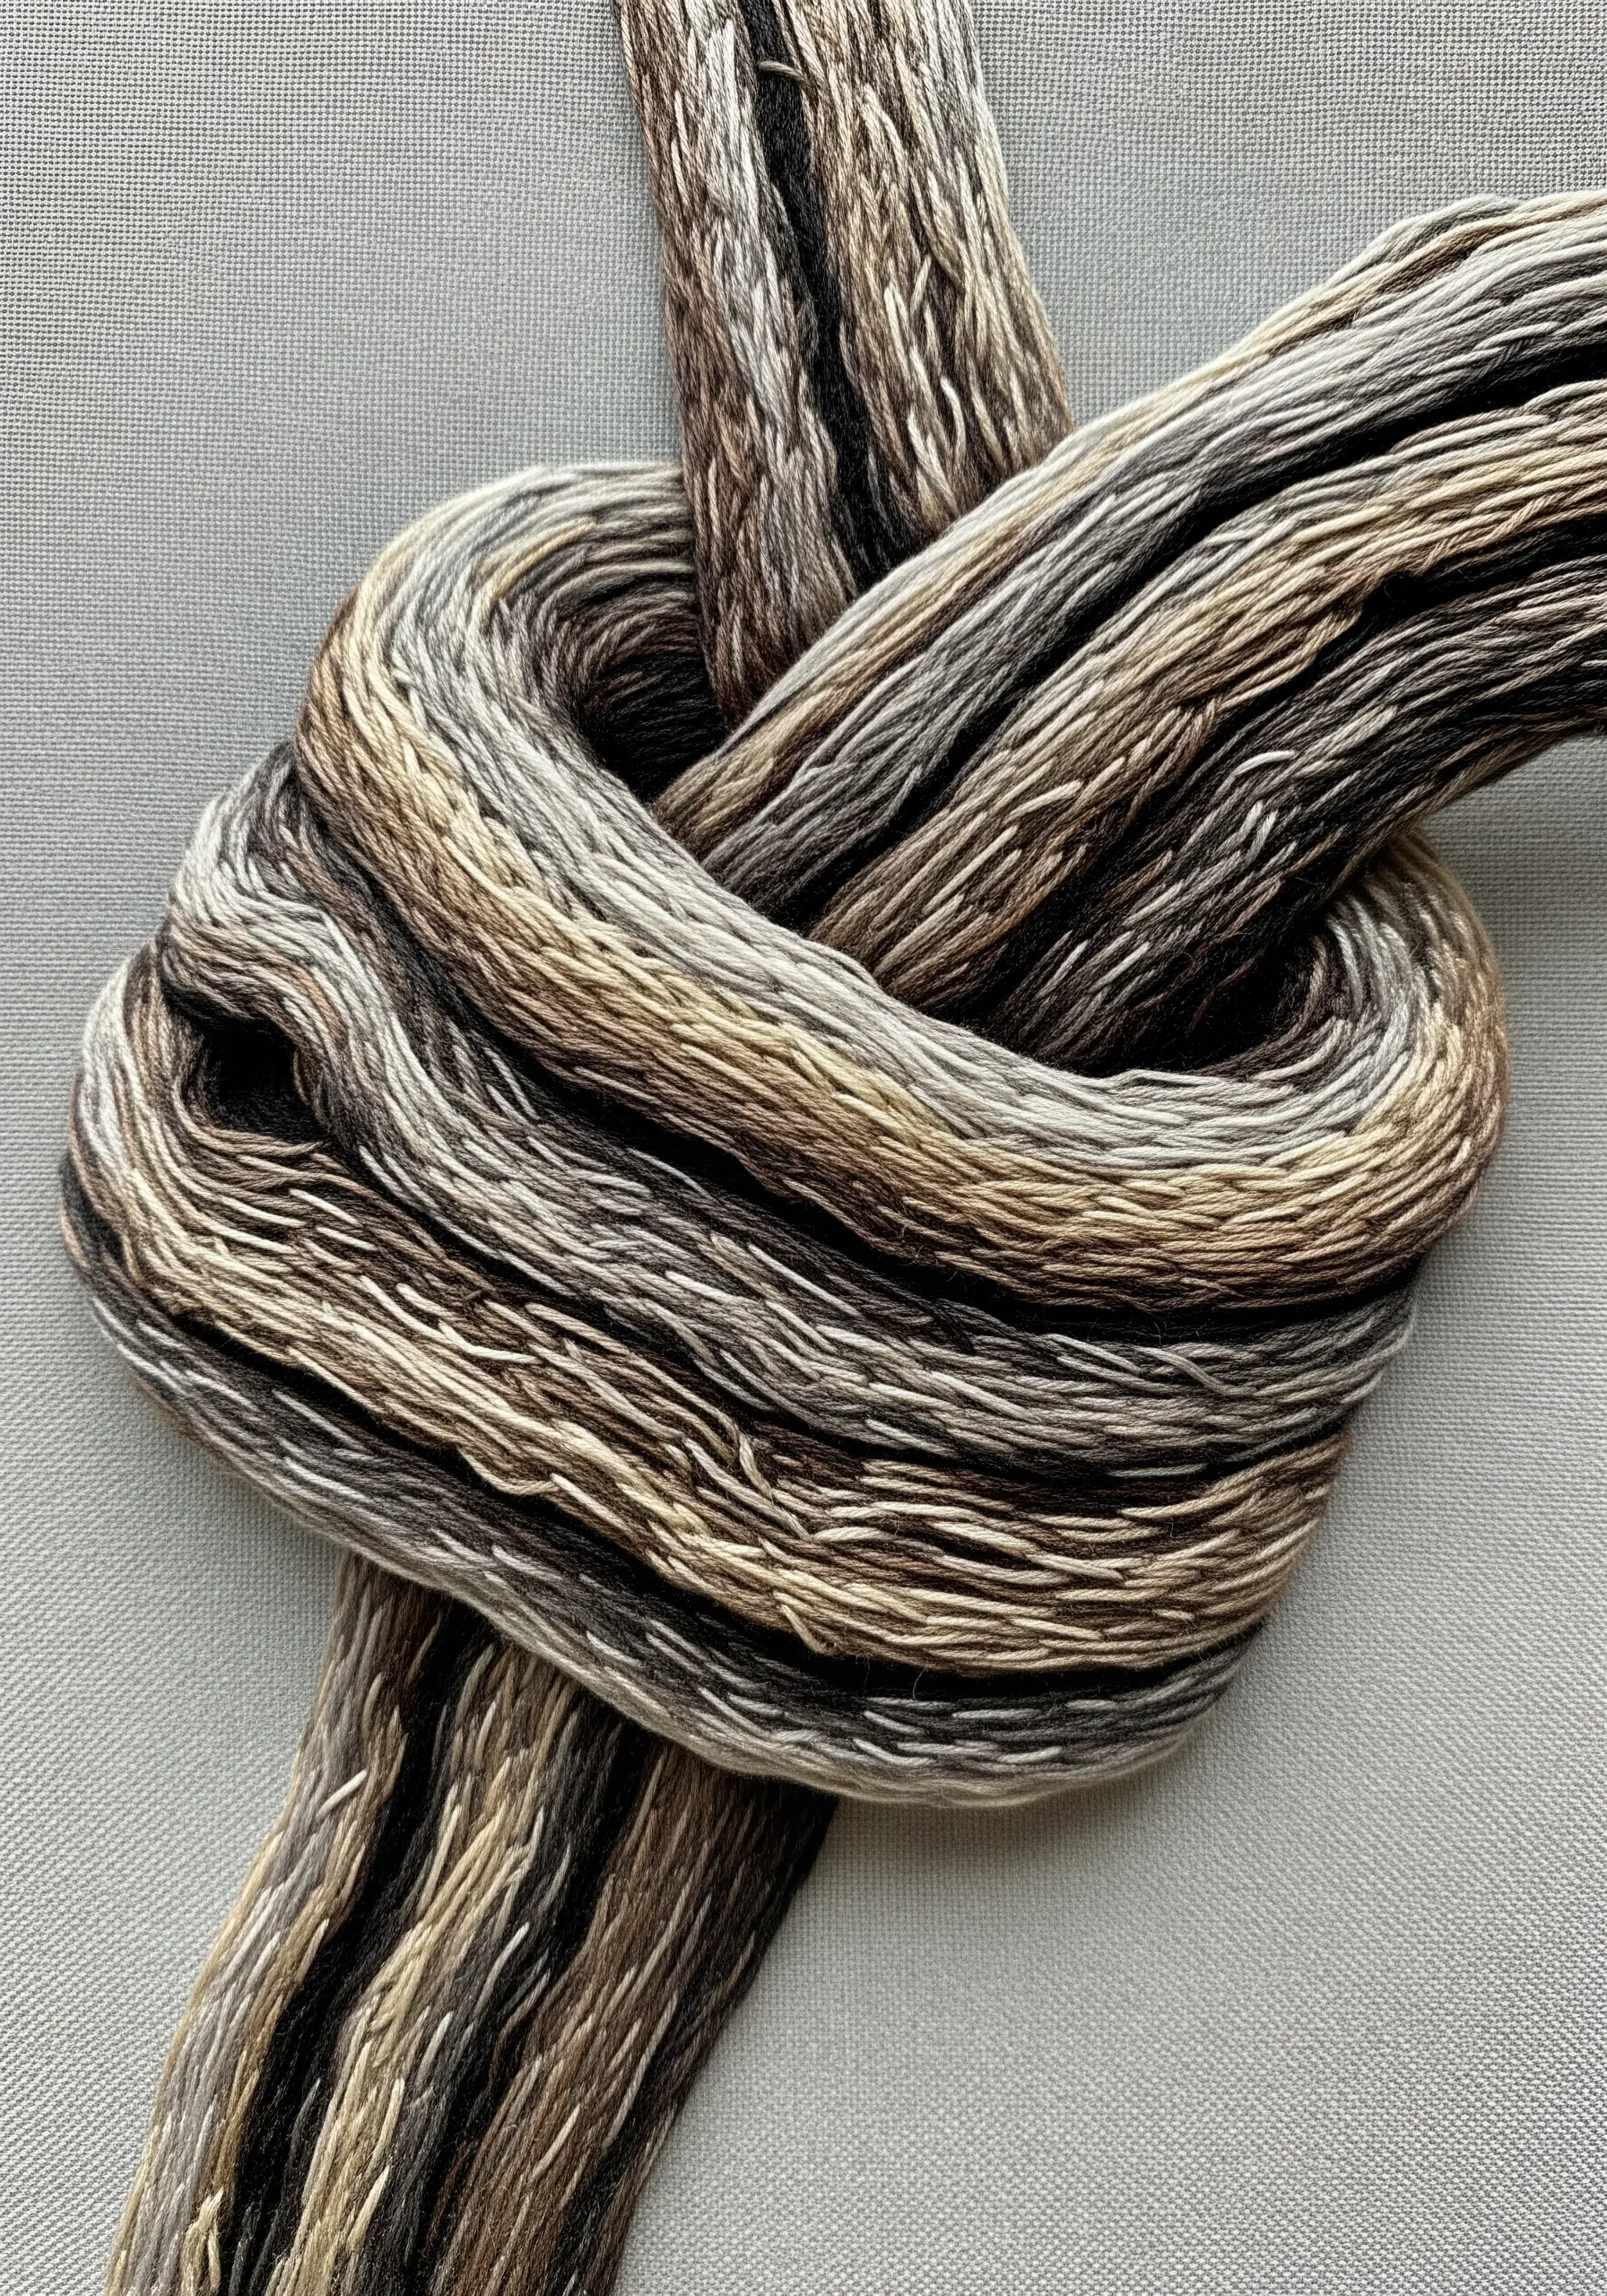
For organic subjects like driftwood, water, or sand, variegated floss is a game-changer.
A single strand contains multiple tones, allowing you to create complex, natural-looking color blends without ever having to switch your thread.
As you stitch, the colors will shift randomly, producing subtle highlights and shadows that look incredibly realistic.
It’s the perfect tool for adding sophisticated depth to your work with minimal effort.
21. Combine the Celestial and the Oceanic
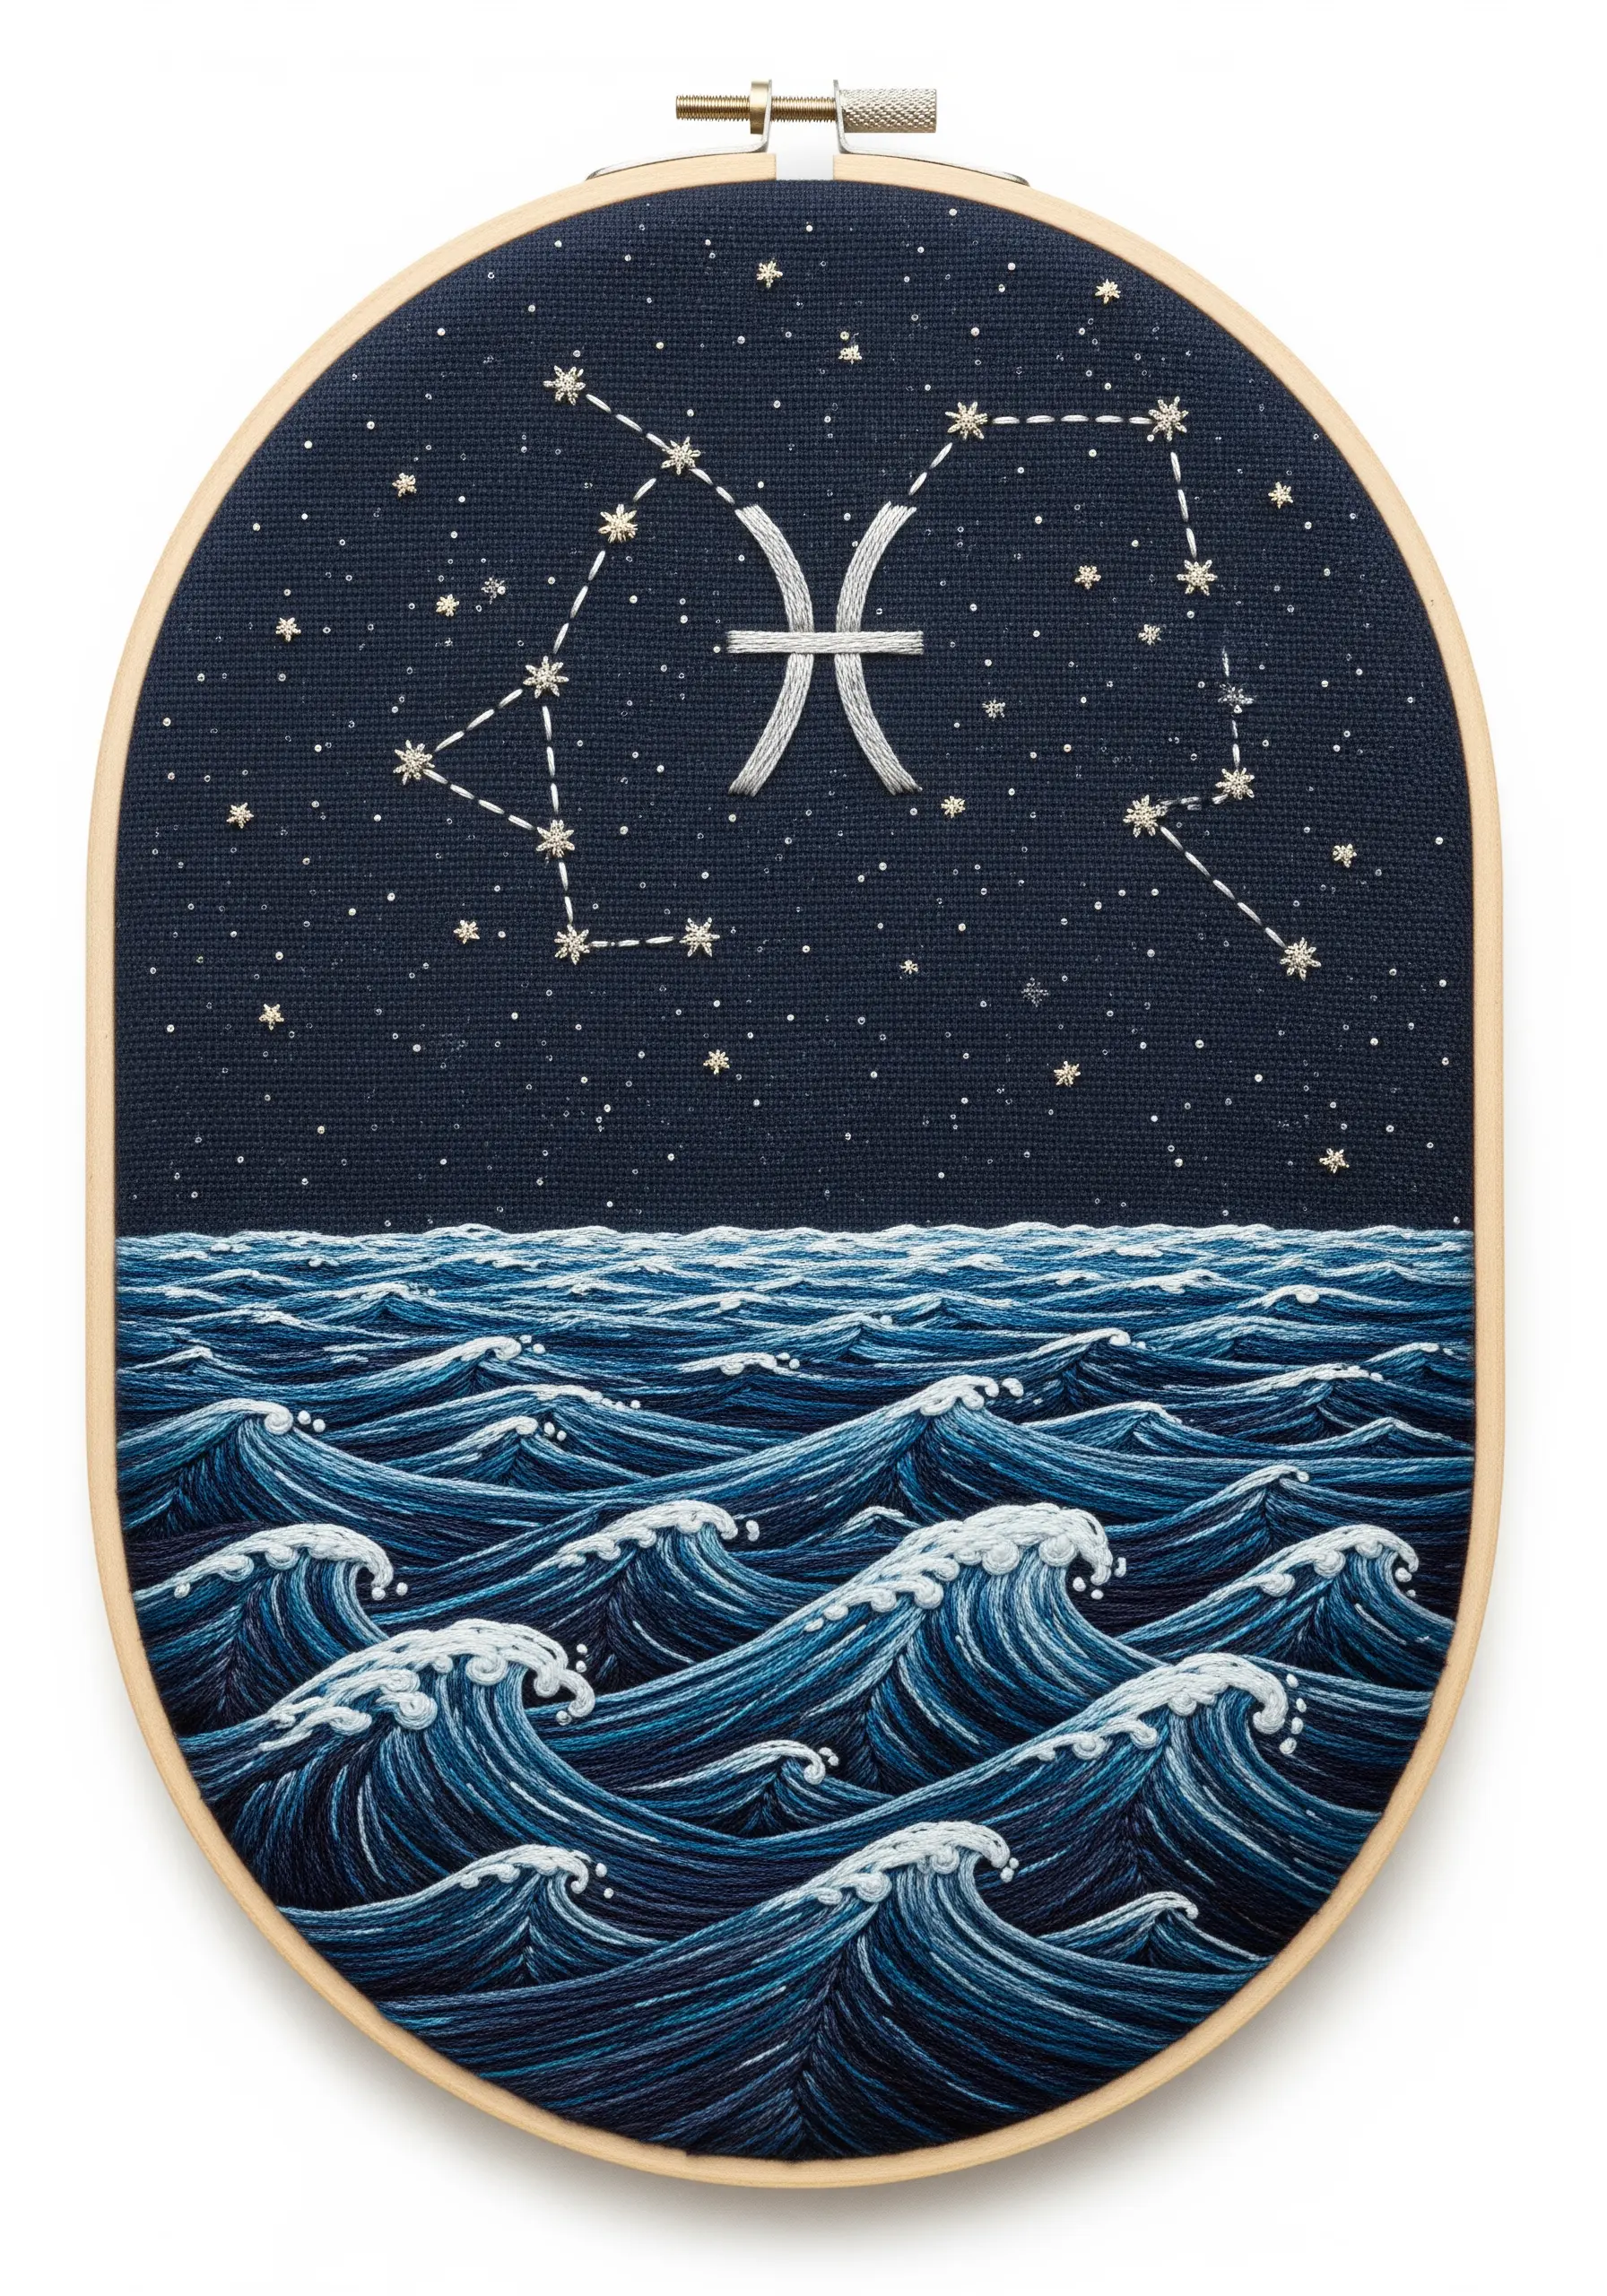
Create a magical piece by blending the night sky with the deep sea.
On dark navy fabric, use a single strand of silver metallic or white thread to stitch the constellations with small straight stitches and tiny French knots for stars.
For the sea below, use multiple shades of blue and white in a dense, directional satin stitch to create the movement of waves. The contrast between the sparkling, delicate stars and the powerful, flowing water creates a beautiful visual harmony.
22. Curate a Tiny Coastal Collection
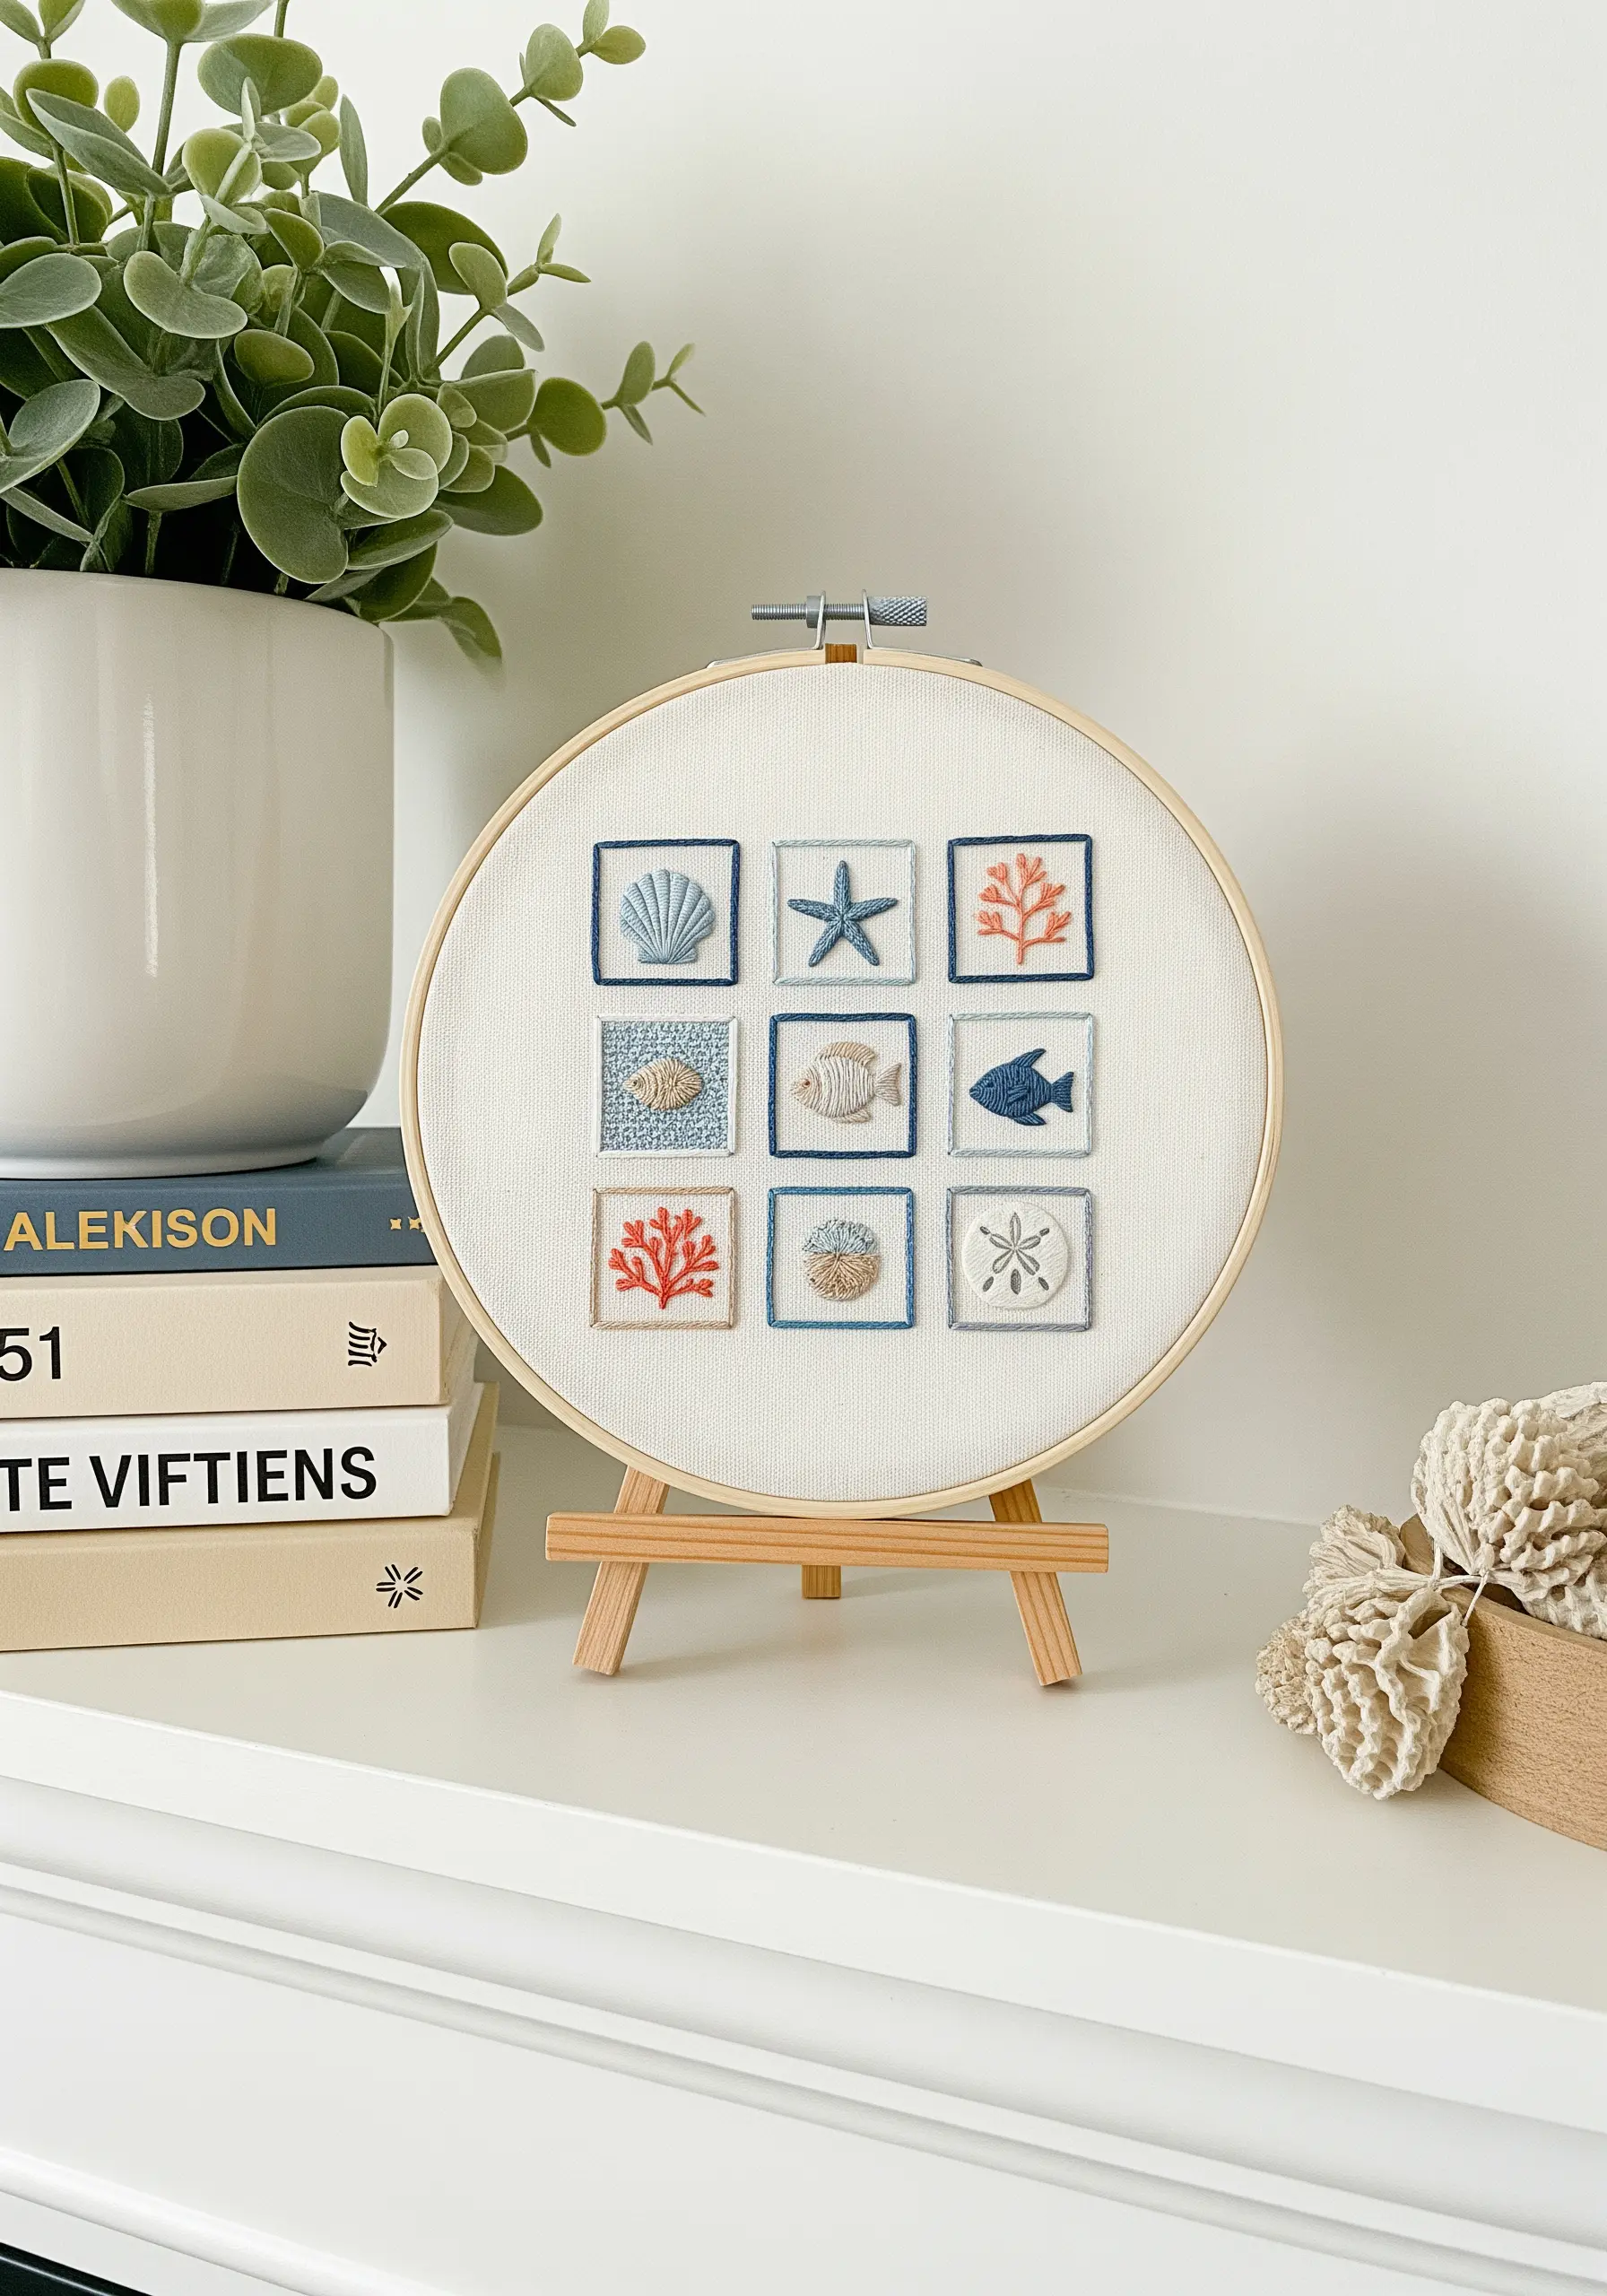
Instead of one large piece, tell a broader story by creating a sampler grid of tiny sea-inspired motifs.
This approach allows you to experiment with different stitches, colors, and textures—satin stitch for a shell, French knots for coral, backstitch for a fish—all within one cohesive artwork.
Stitch a simple backstitch border around each square to create a clean, modern frame for your collection.
It’s an excellent way to practice techniques while creating a sophisticated piece of minimal embroidery wall art.


