
Perhaps you’ve found yourself looking at a finished piece, feeling that something is missing—a certain polish or depth that you see in professional work. The secret isn’t about using more colors or more complex stitches. It’s about making subtle, intentional choices.
Think of your pillowcase not just as a piece of decor, but as a canvas. Each design here is an invitation to explore a specific technique that will elevate your work. It might be the way you angle your stitches to create a curve, blend two shades to mimic a shadow, or choose a stitch that adds just the right amount of texture.
These are more than just patterns; they are lessons in artistry. Let’s move beyond simply filling in shapes and begin to truly paint with thread, creating pieces that feel alive, personal, and deeply connected to the natural world you admire.
1. Add Realistic Depth with Layered Stitches
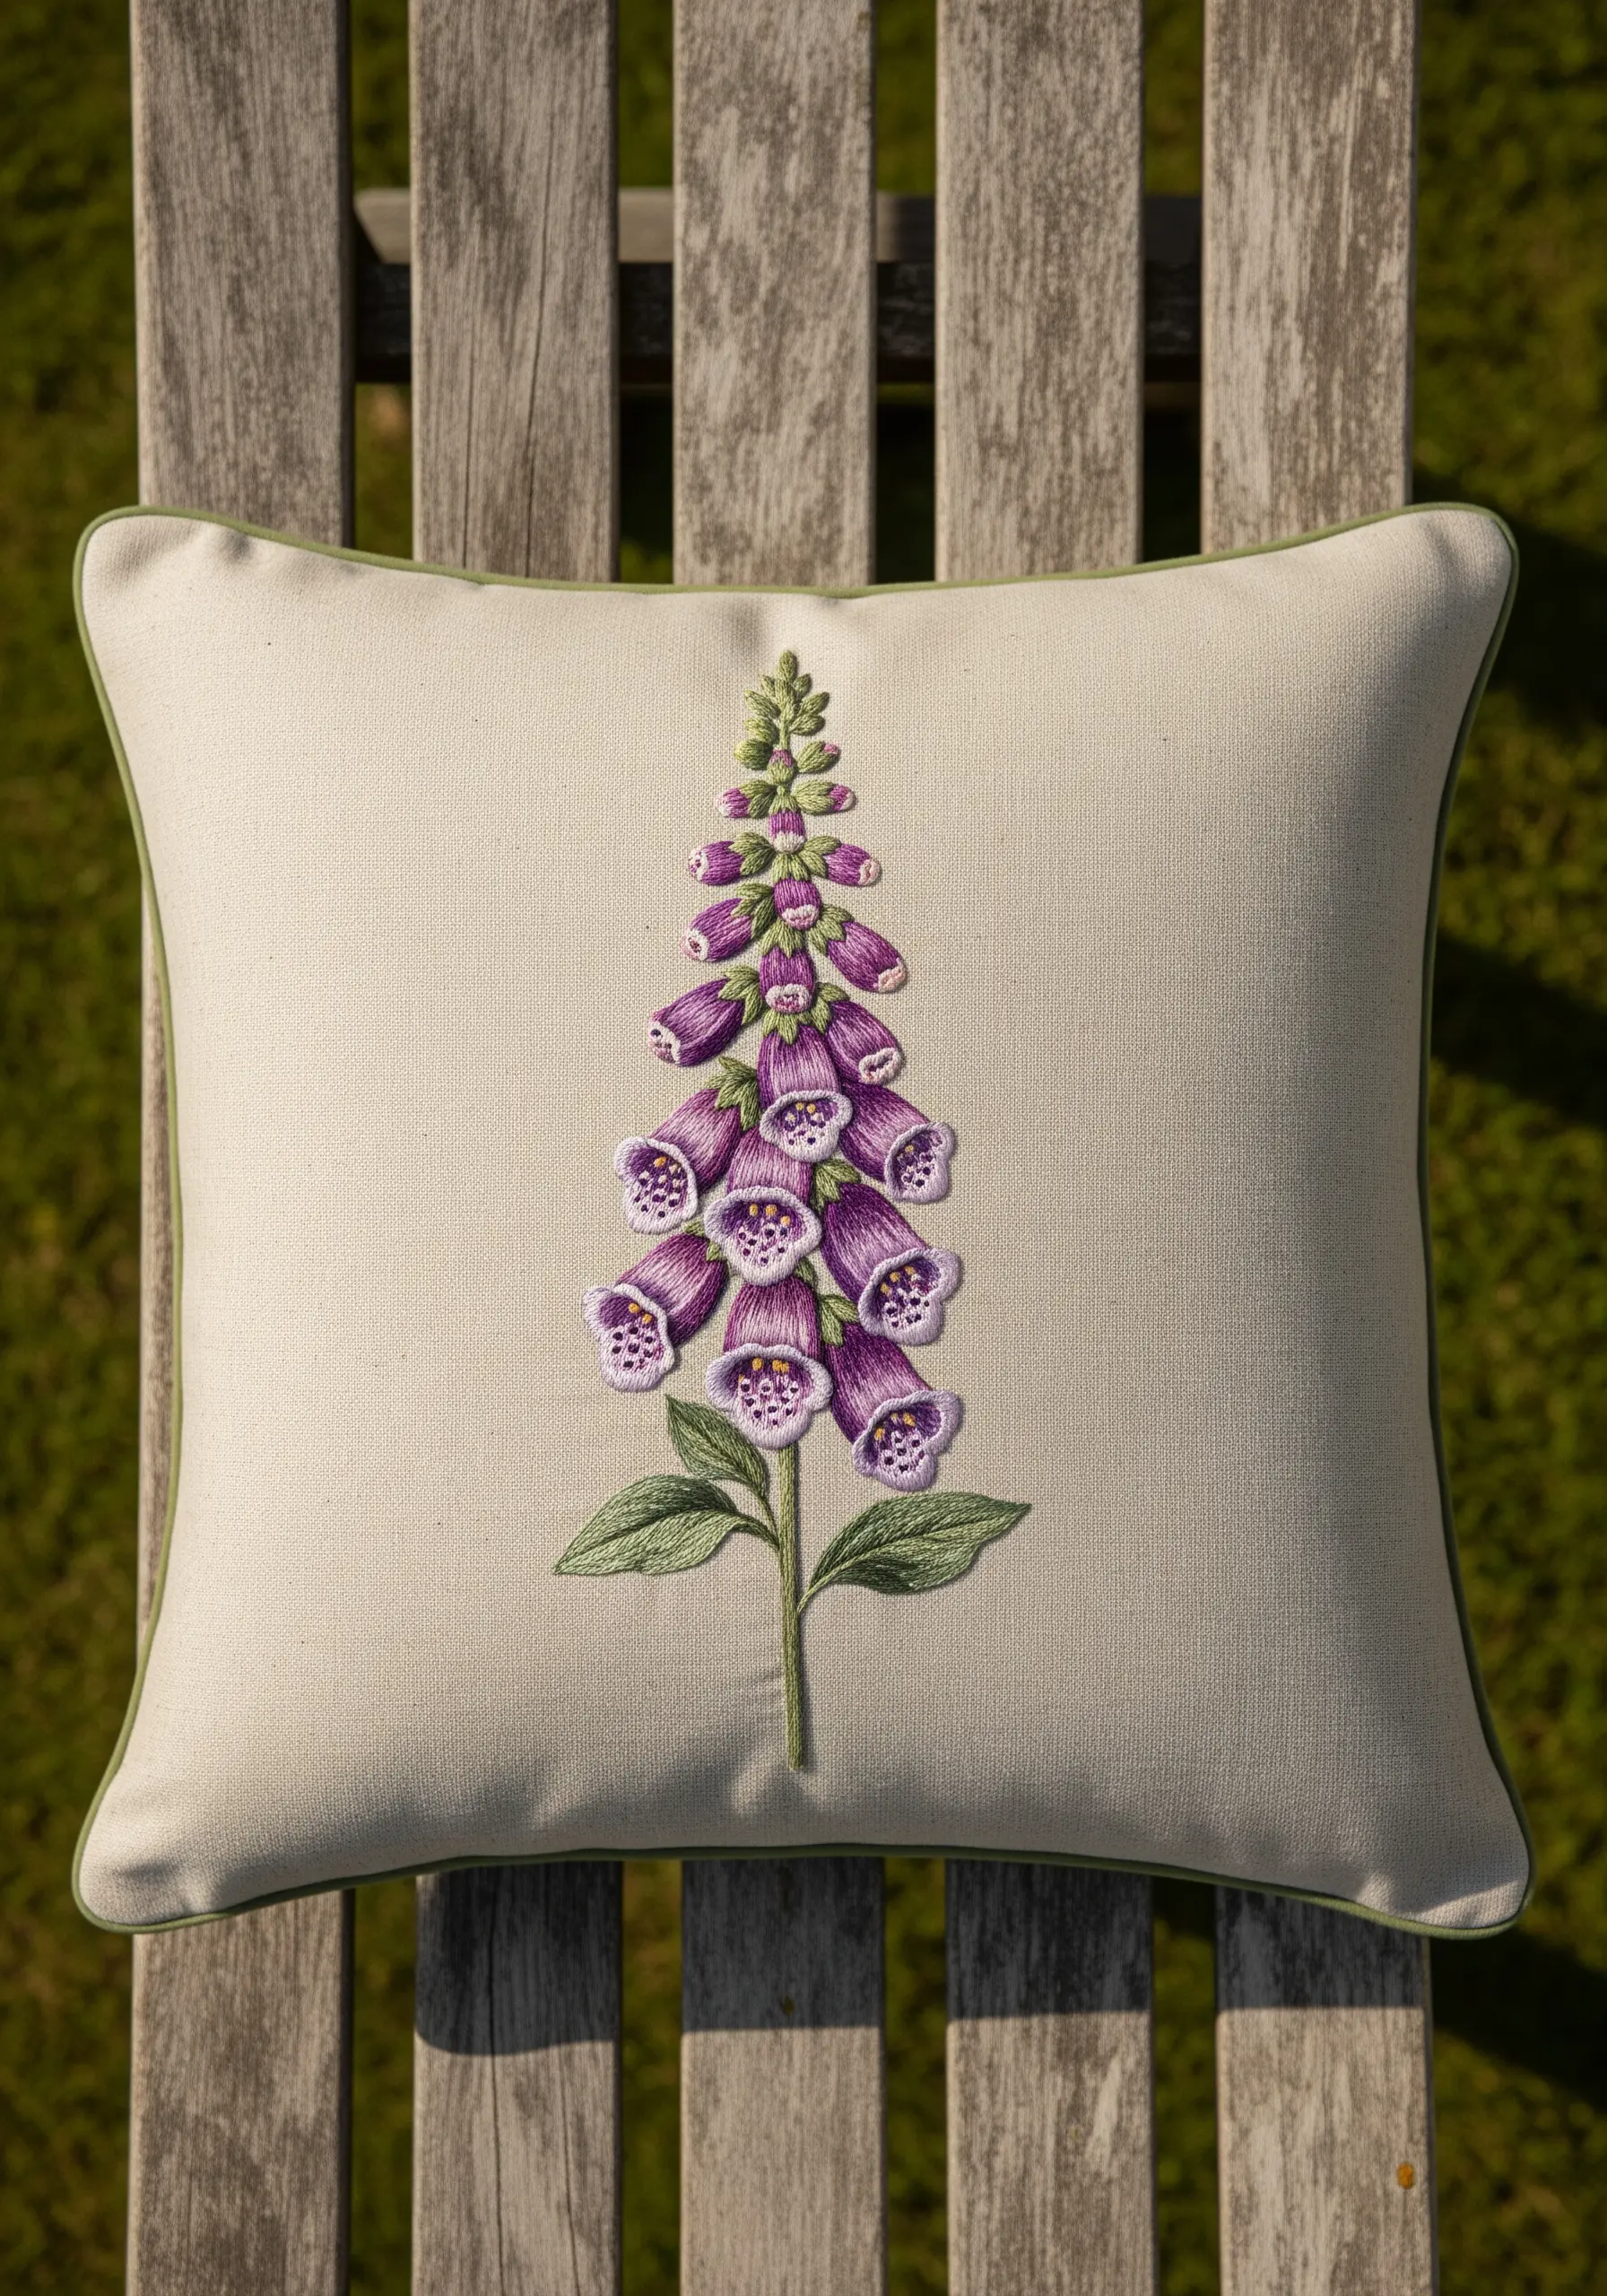
To prevent your foxglove from looking flat, build the bell-shaped flowers in layers.
Start with a base of satin stitch in a mid-tone purple, then add darker thread using long-and-short stitches on the underside to create shadow and shape.
For the delicate speckles inside each blossom, use single-strand French knots in a deep burgundy or black instead of just straight stitches—this adds convincing texture.
Finally, finish the pillow with piping that matches the stem color to create a cohesive, professionally framed piece.
2. Create Raised Petals with Woven Wheels
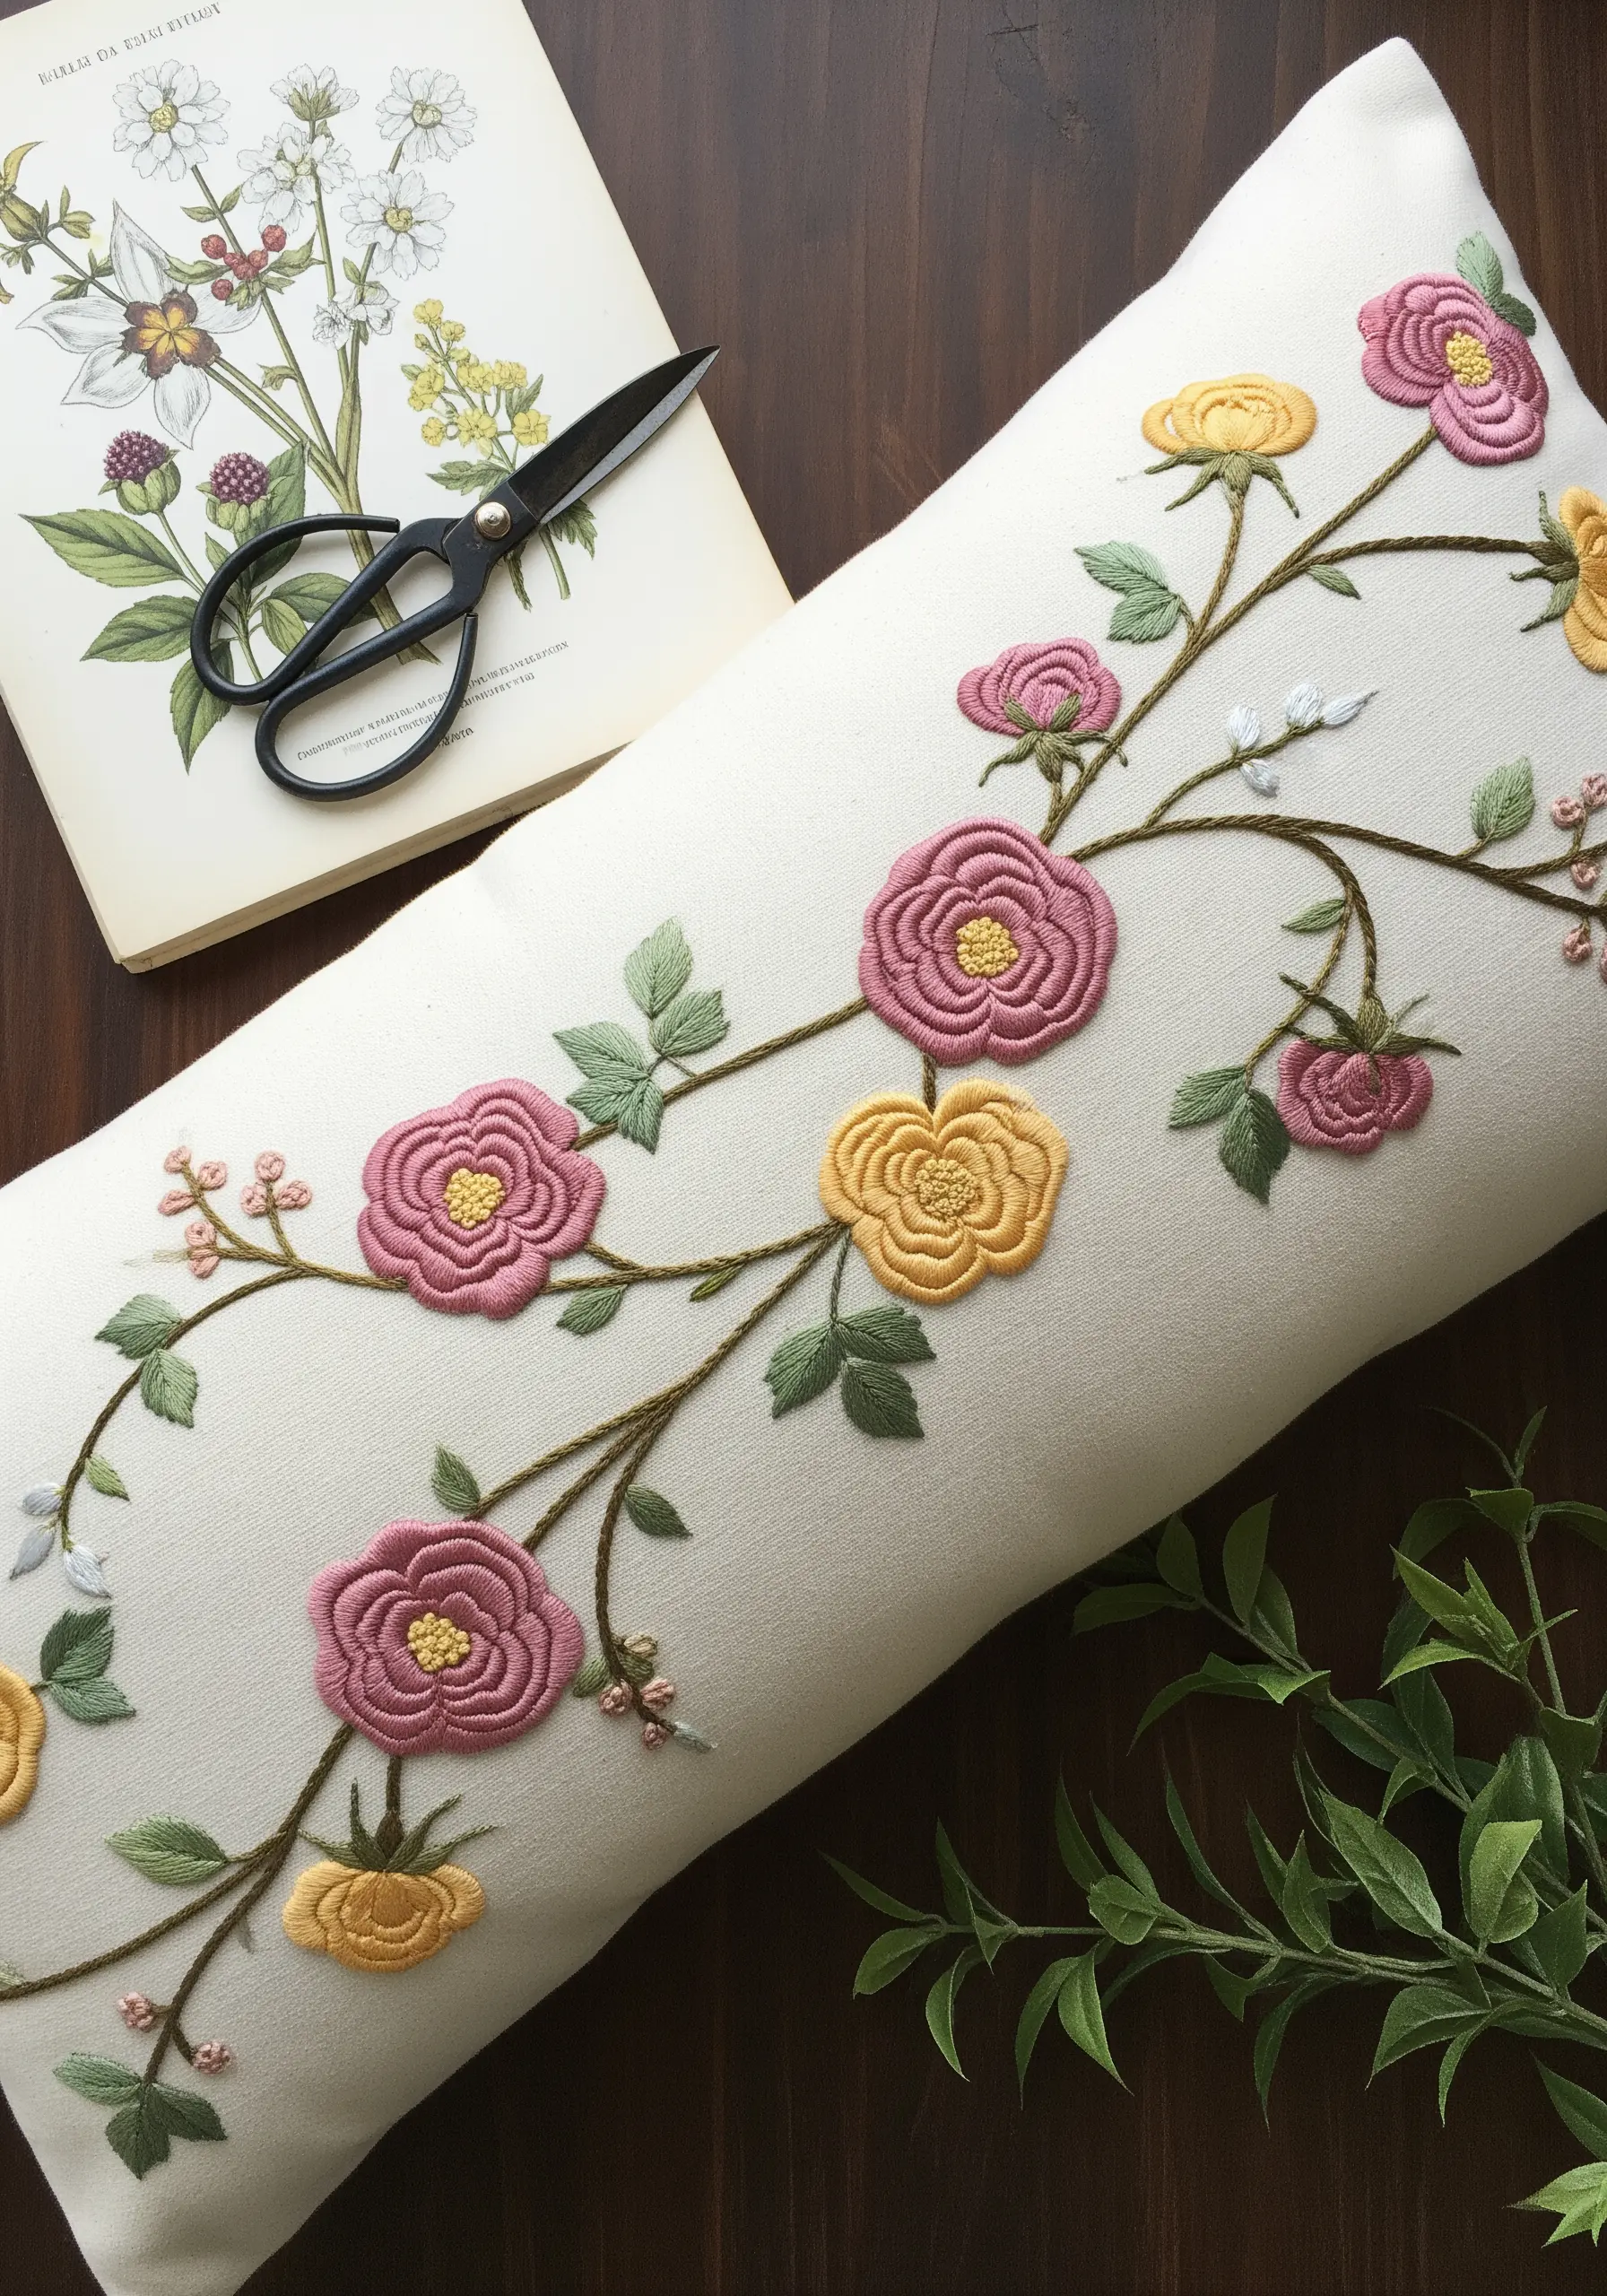
For flowers with a dense, dimensional feel like these roses, replace standard satin stitch with the woven wheel stitch (or spider web stitch).
Create a base of five straight stitches radiating from a center point, then weave your thread over and under these spokes until the shape is filled.
This technique builds thread upwards, creating a raised, textural petal effect that catches the light beautifully.
Use a whipped backstitch for the connecting vines to ensure they are smooth, rounded, and stand out against the fabric.
3. Capture Organic Texture with Directional Stitching
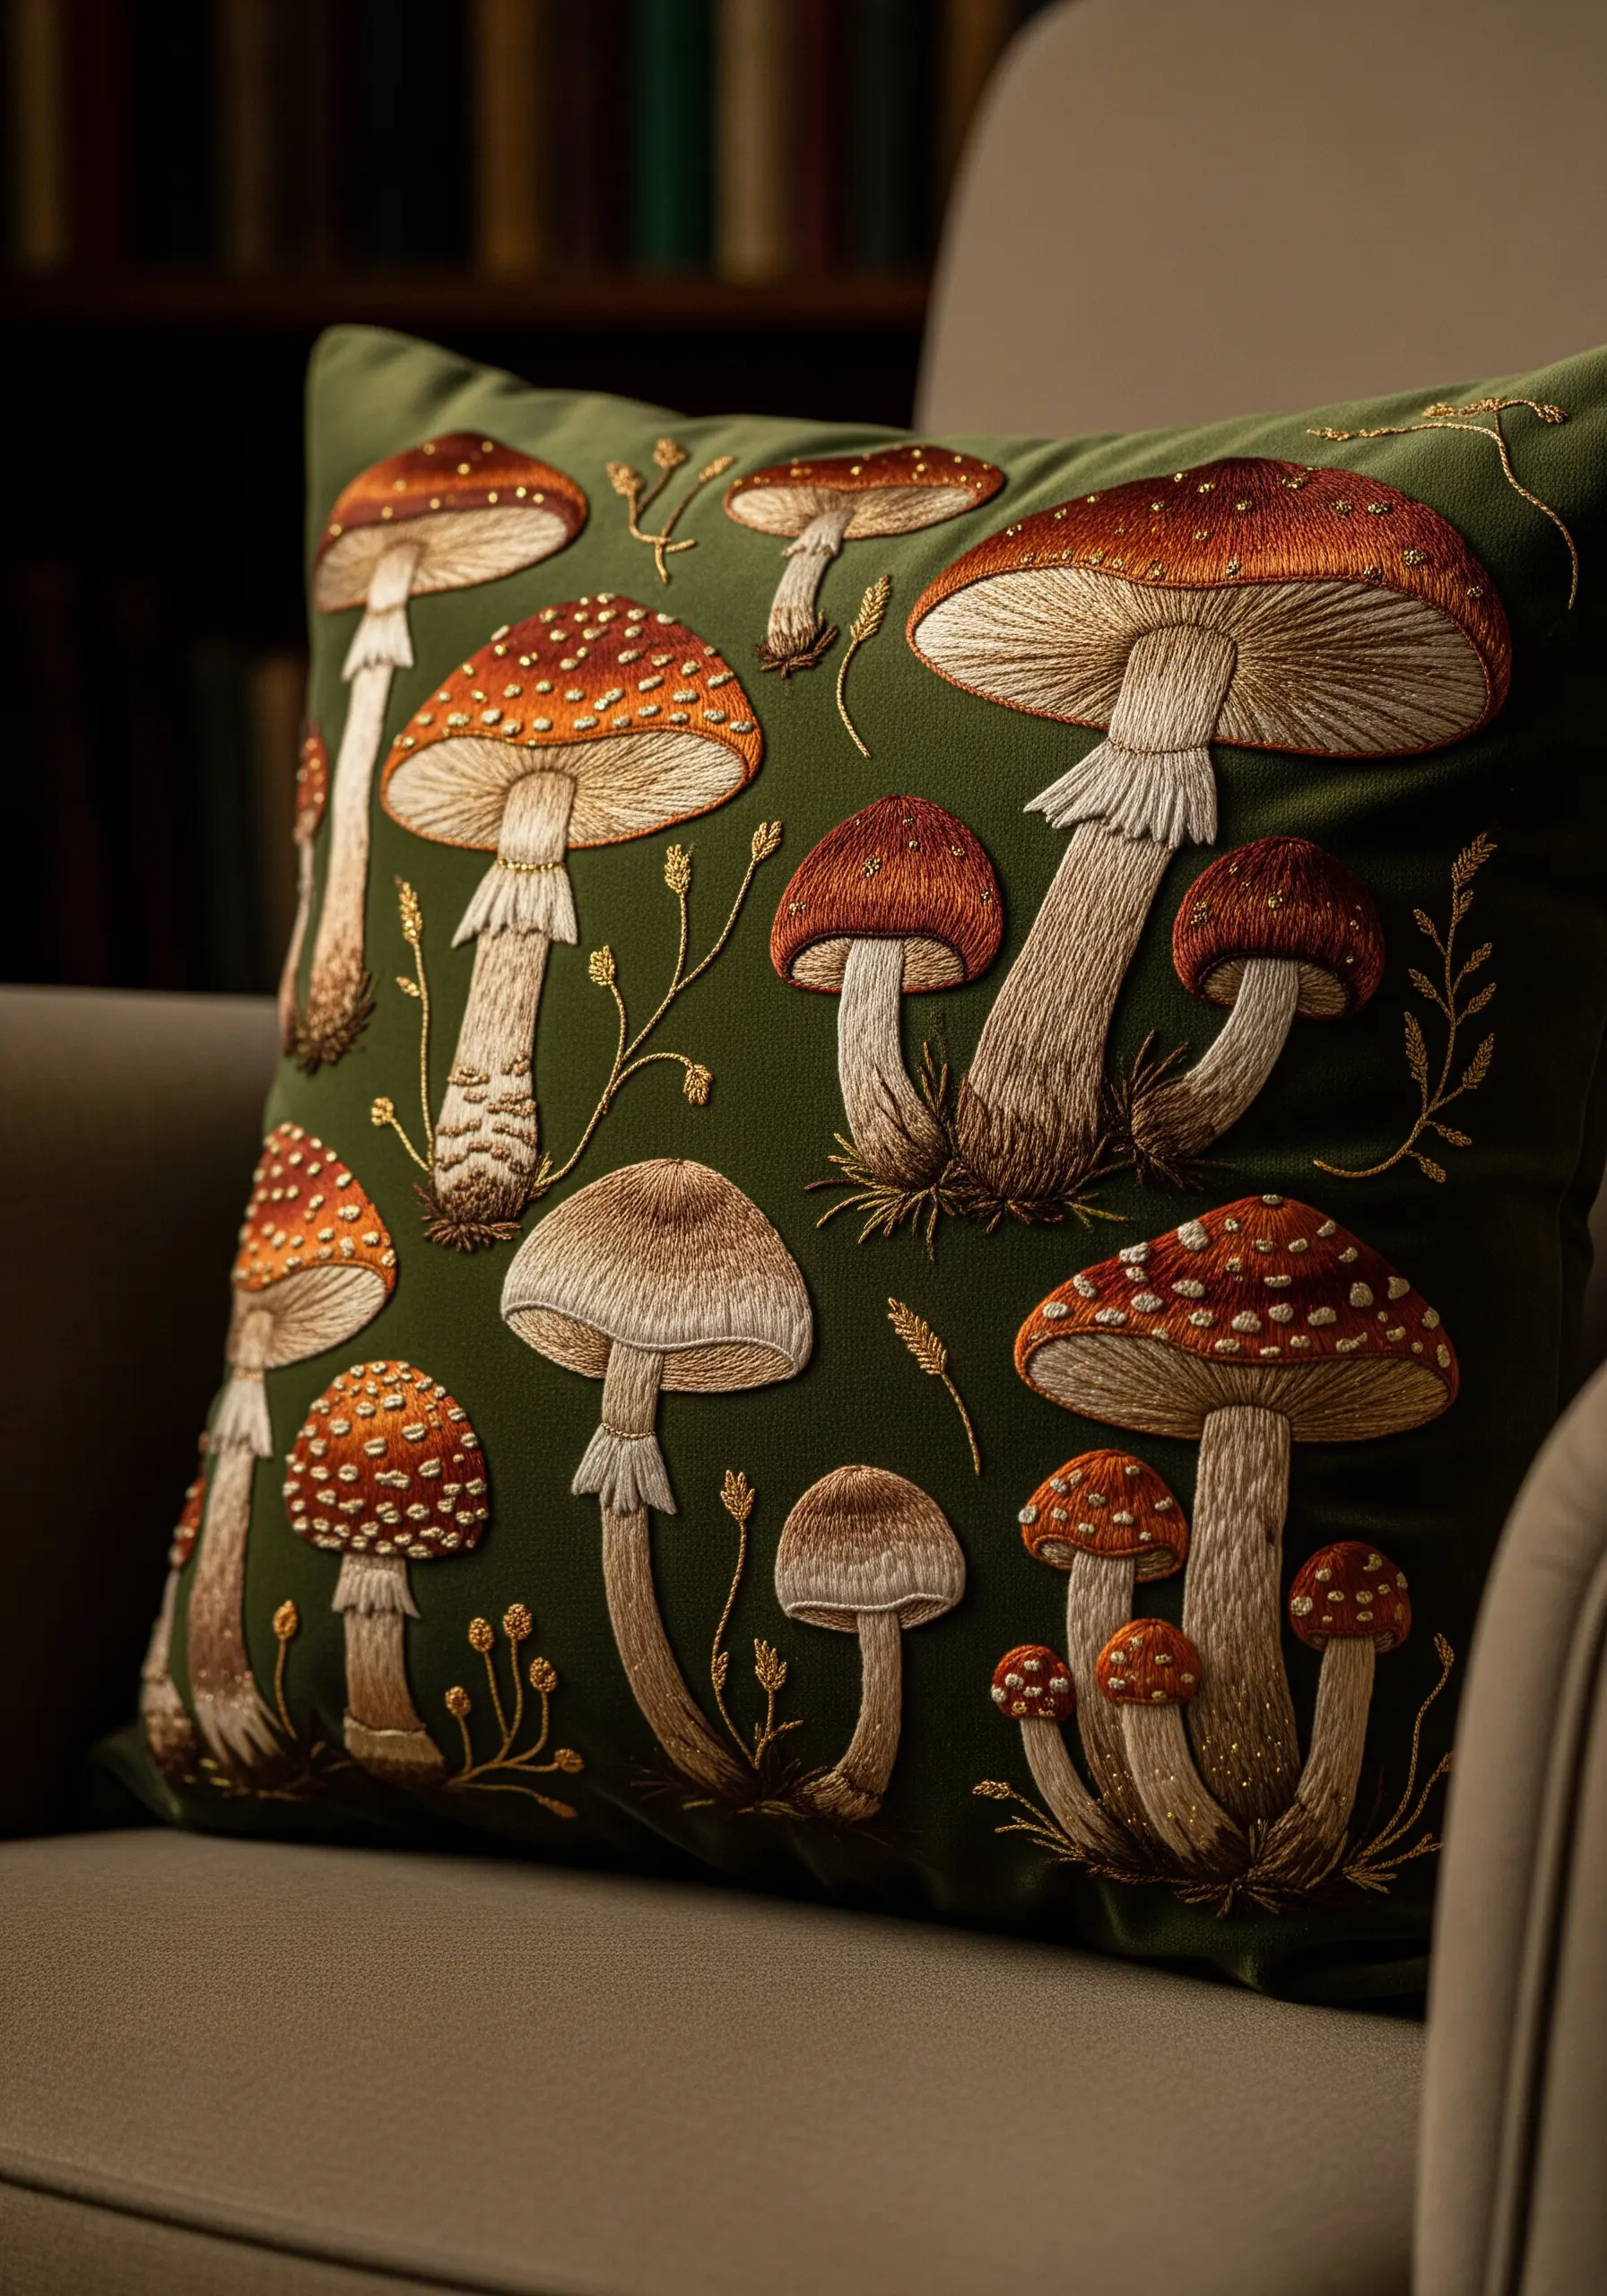
To stitch realistic mushrooms, the direction of your stitches is everything.
Use vertical long-and-short stitches for the stems to create a fibrous texture, and stitch the gills with radiating straight stitches fanning out from the stem.
For the caps, angle your satin stitches to follow their natural curve, making them look rounded and full.
Using a single strand of floss allows for finer blending and more detailed shading, especially on the delicate gills and spotted caps.
4. Design a Calming Wreath with Varied Textures
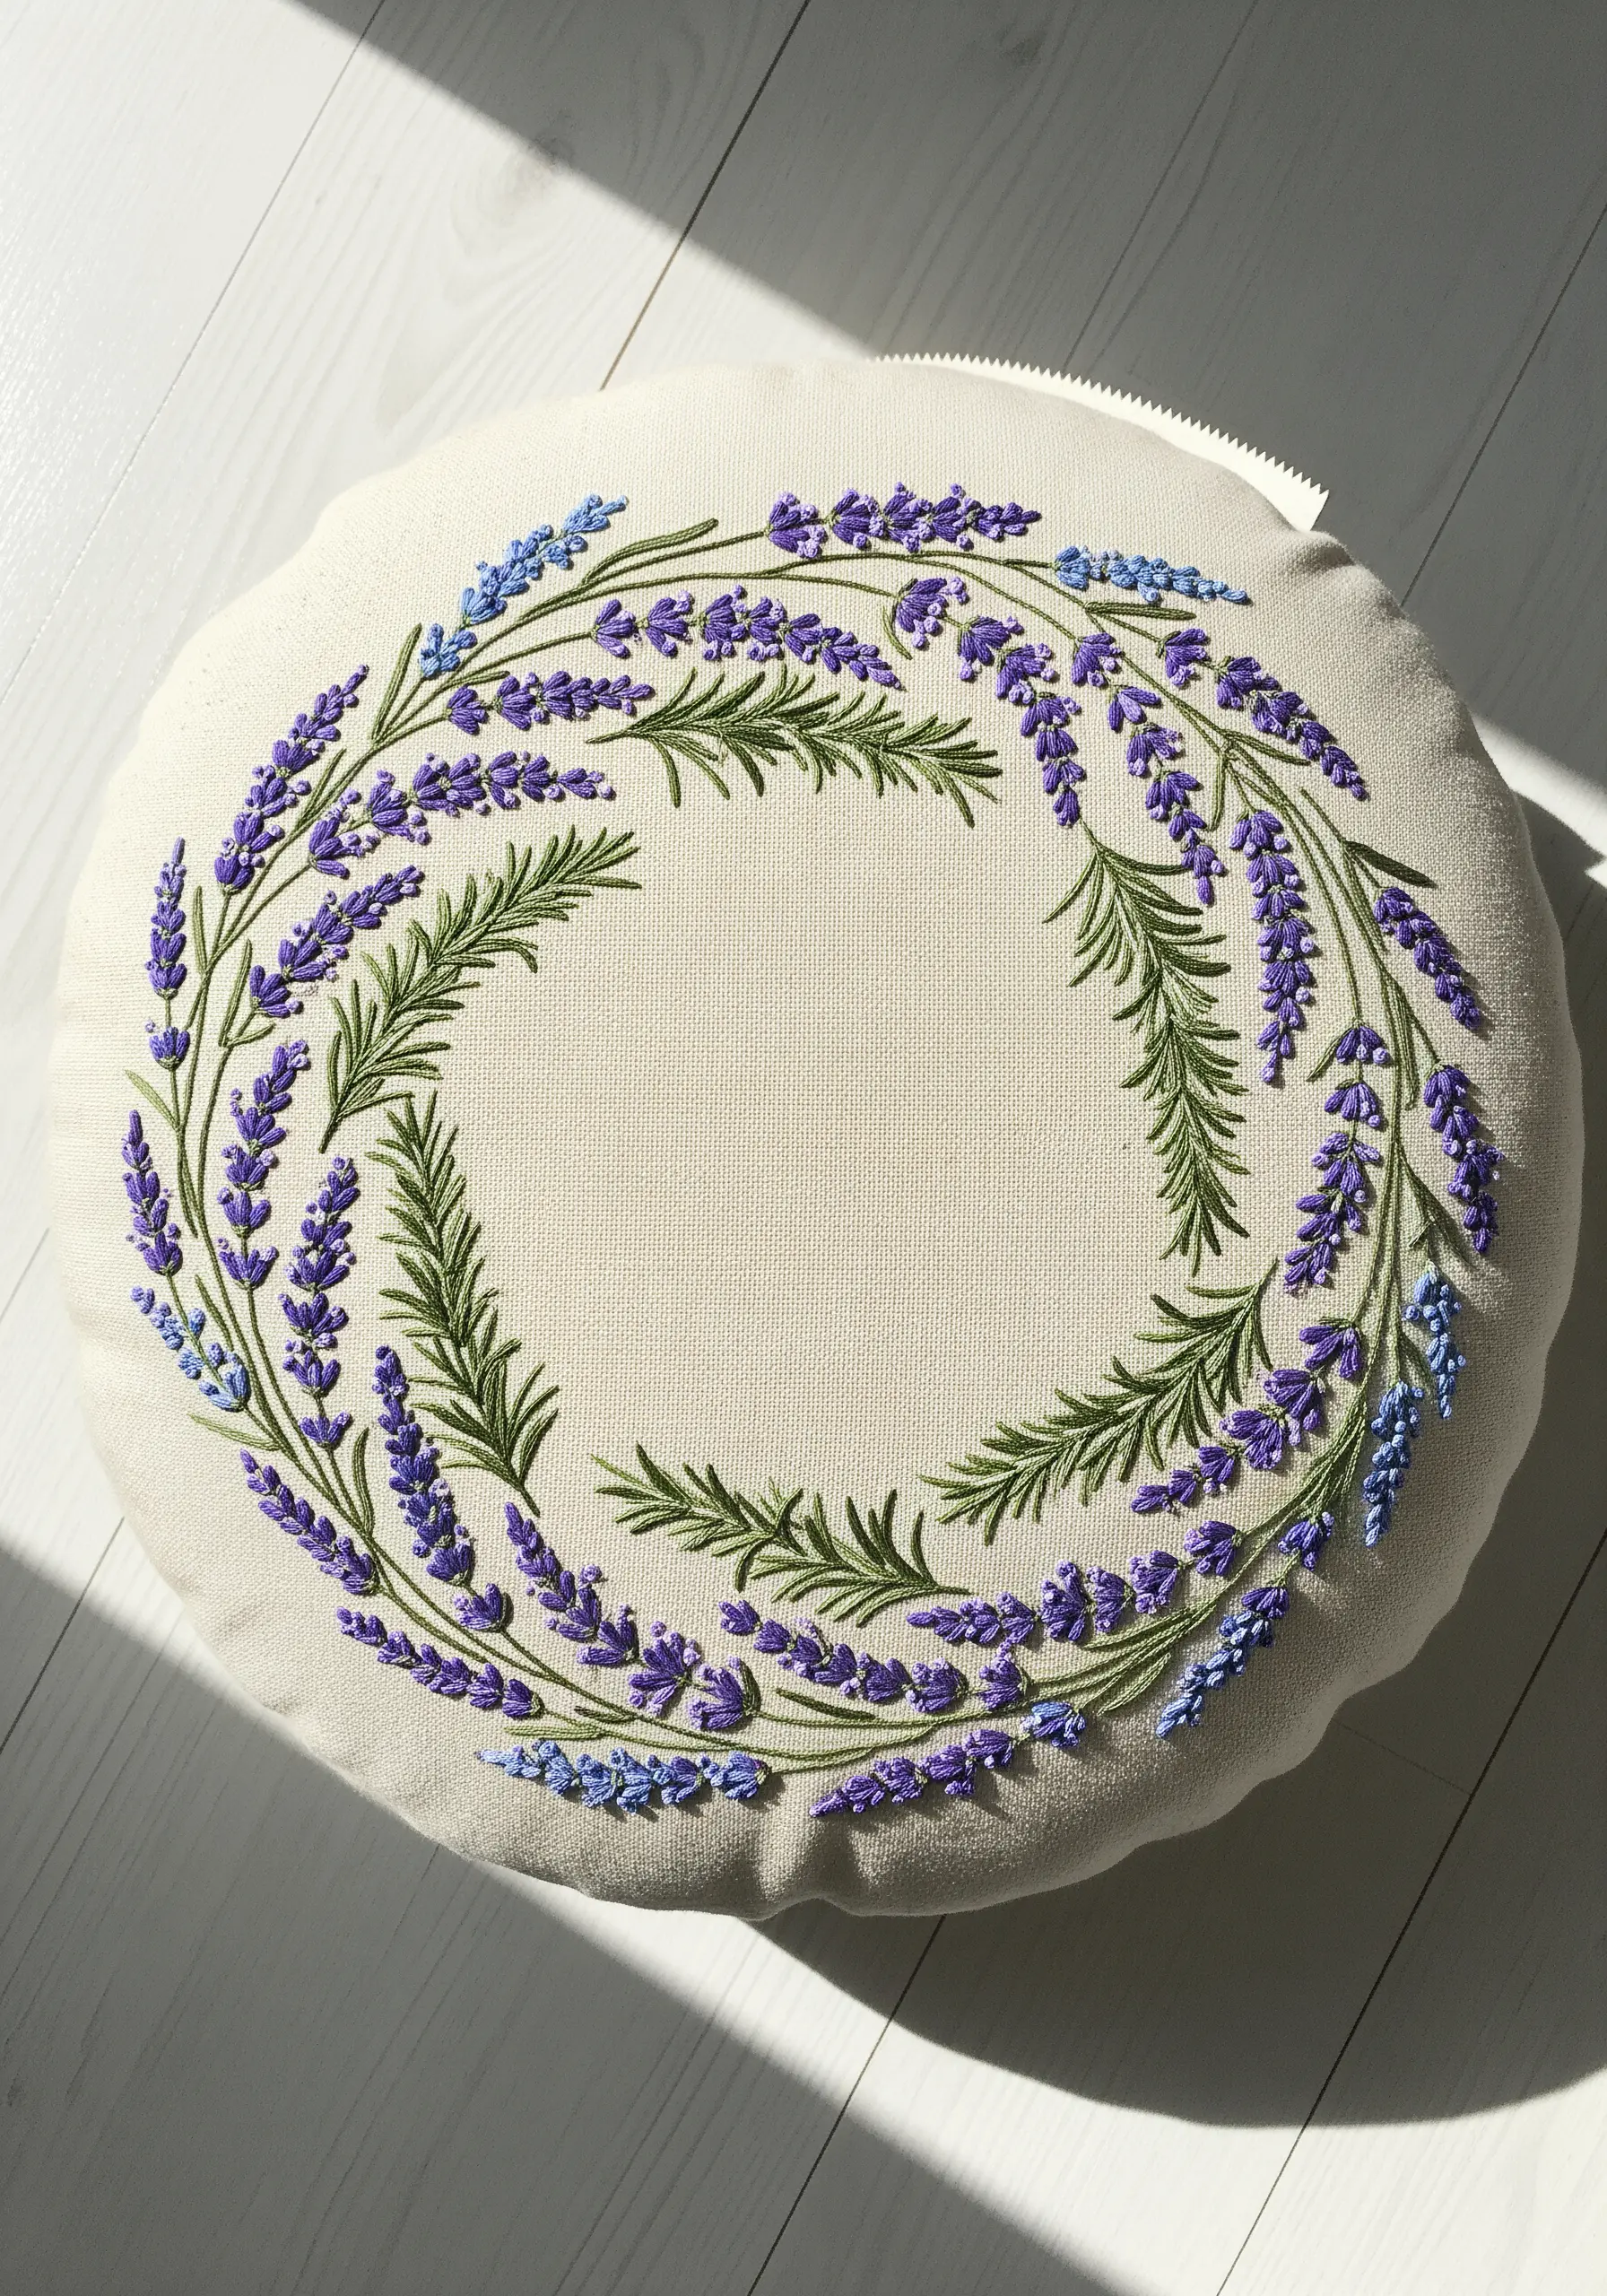
Create visual interest in a simple wreath by assigning a different stitch to each botanical element.
Use small detached chain stitches for the lavender buds, which gives them a plump, tear-drop shape that stands out.
For the rosemary, use simple straight stitches layered in different directions to mimic fine needles without adding bulk.
Introduce two or three shades of purple and a soft blue to add subtle complexity and prevent the design from feeling static, turning it into delicate calming bedroom art.
5. Achieve Delicate Detail with High-Contrast Threads
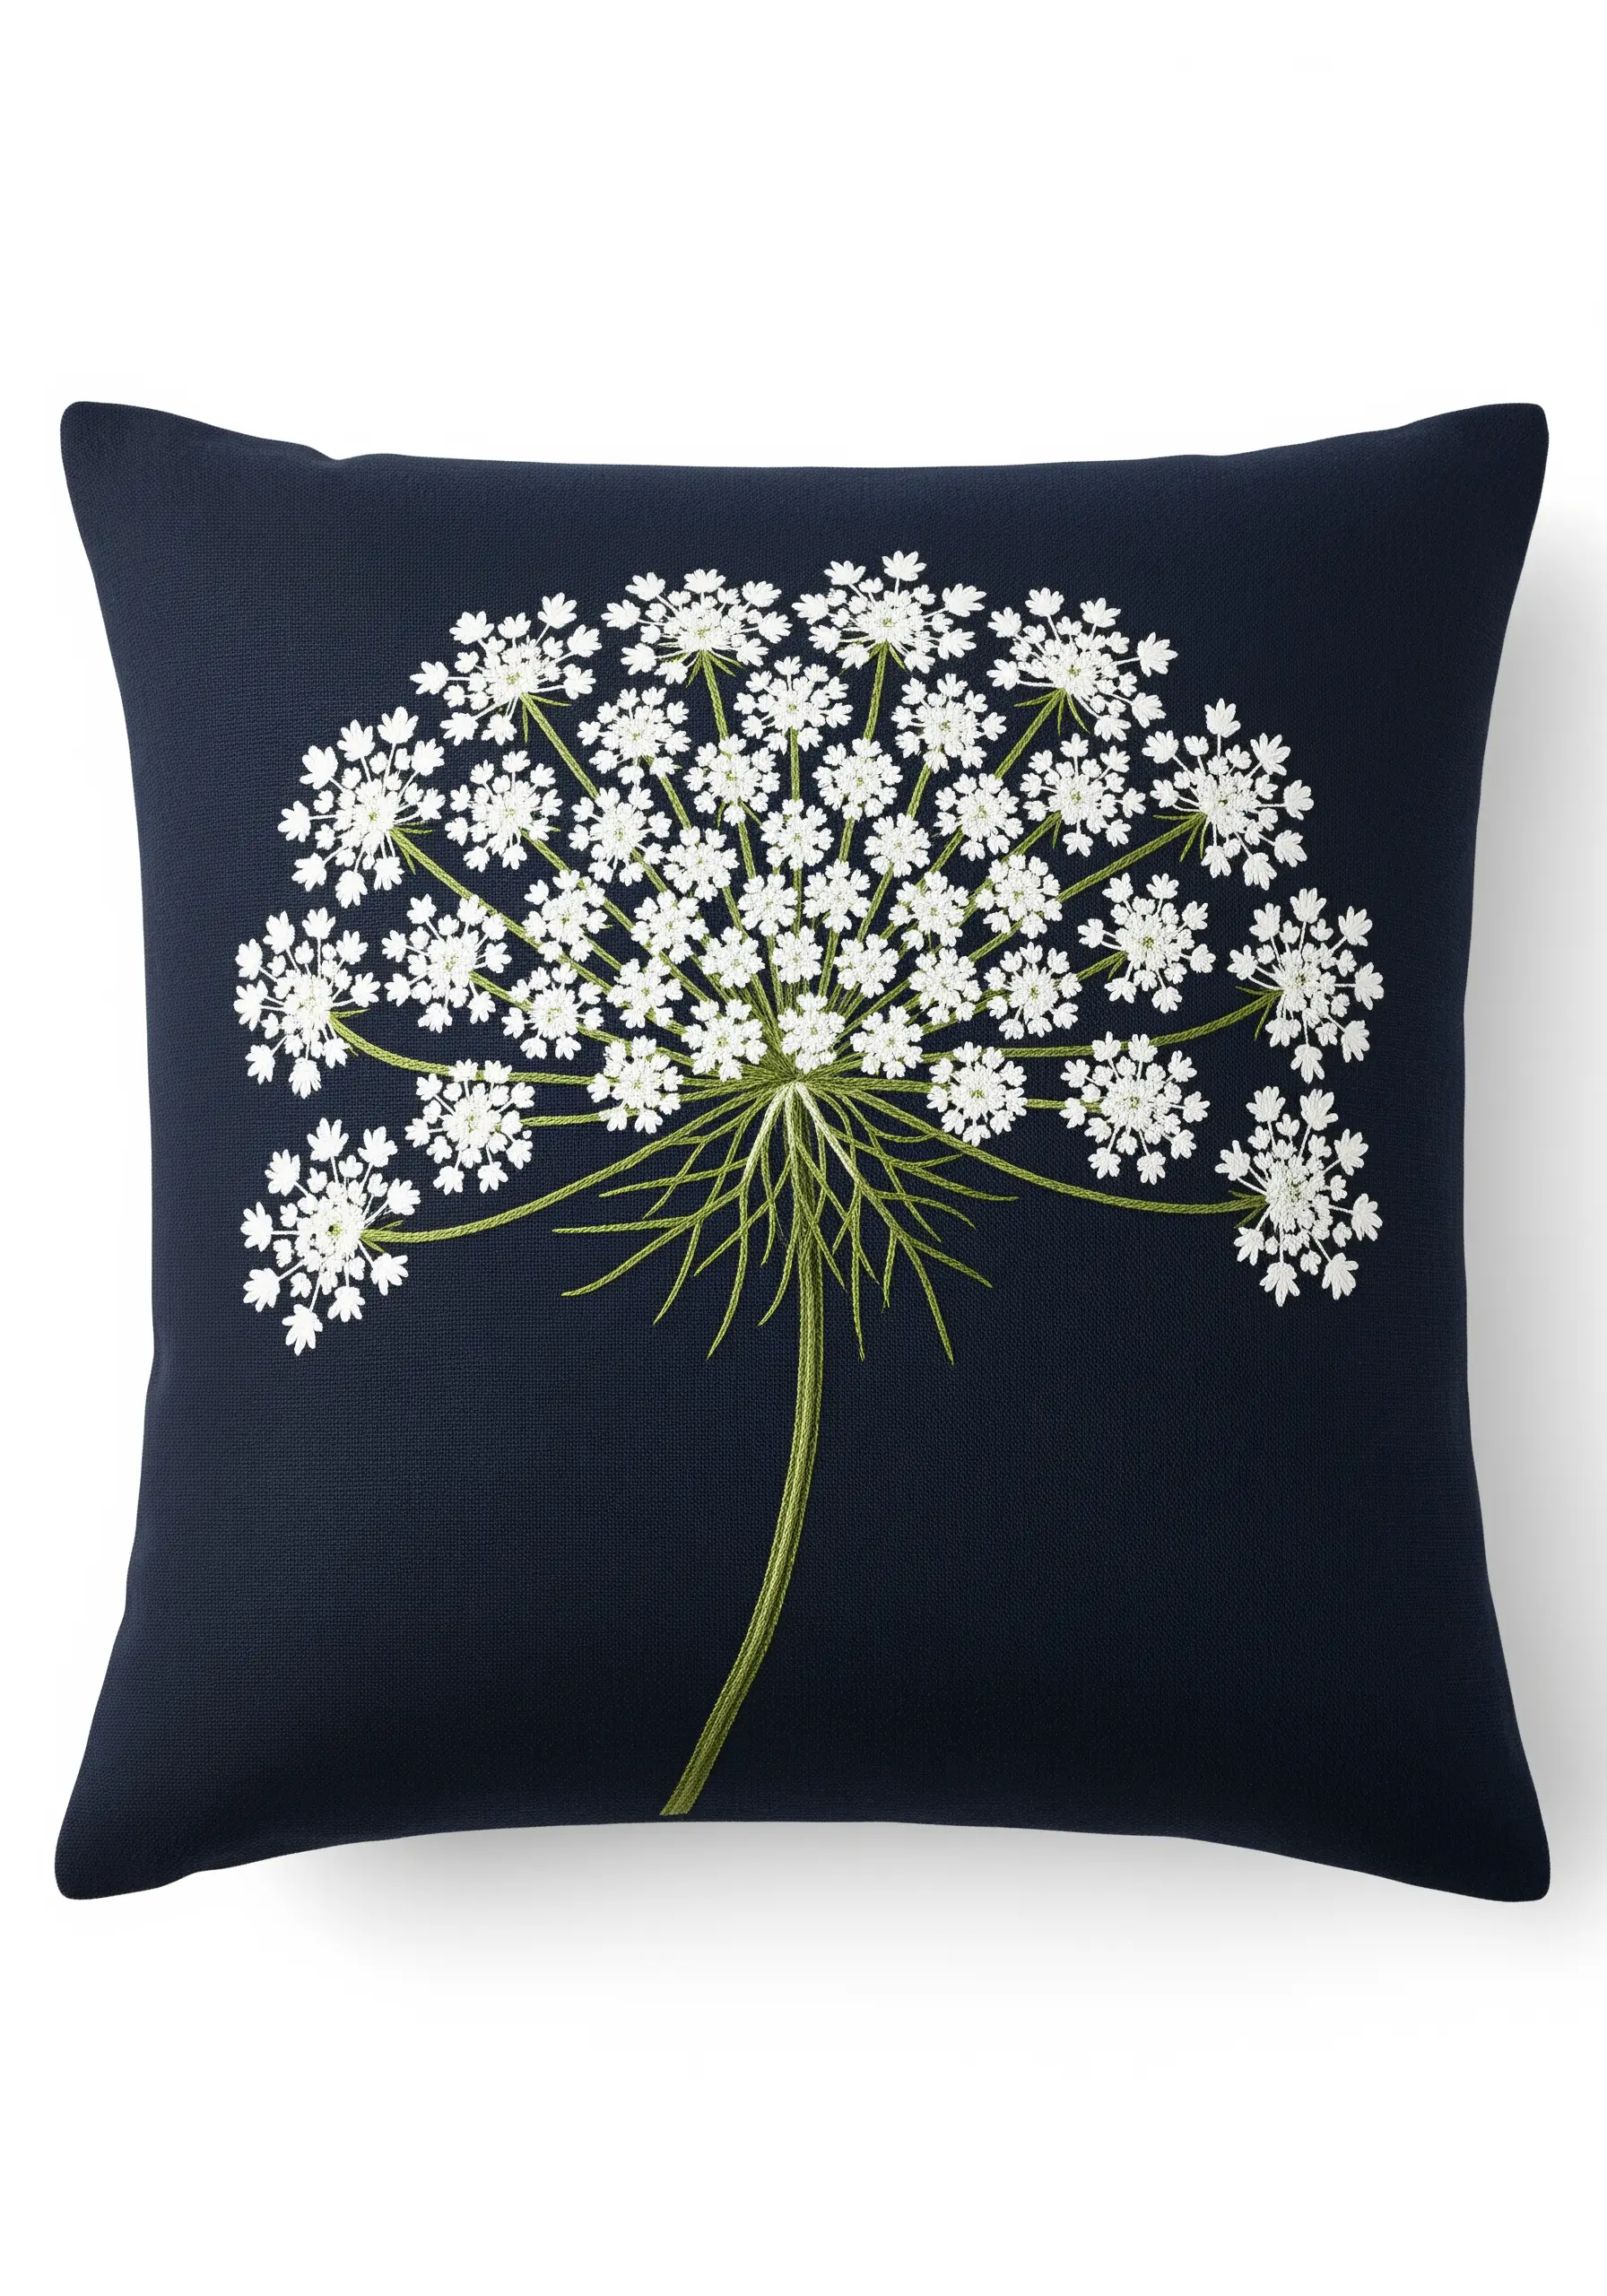
For intricate florals like Queen Anne’s lace, success lies in delicacy and contrast.
Choose a dark, tightly woven fabric like navy cotton twill to make your white stitches pop.
Use a single strand of white floss to create tiny French knots for each floret, ensuring they remain distinct and don’t blur together.
Keep the stems thin and elegant with a single row of stem stitch, allowing the complex flower head to be the undisputed focal point.
6. Convey Movement with Open Space and Straight Stitches
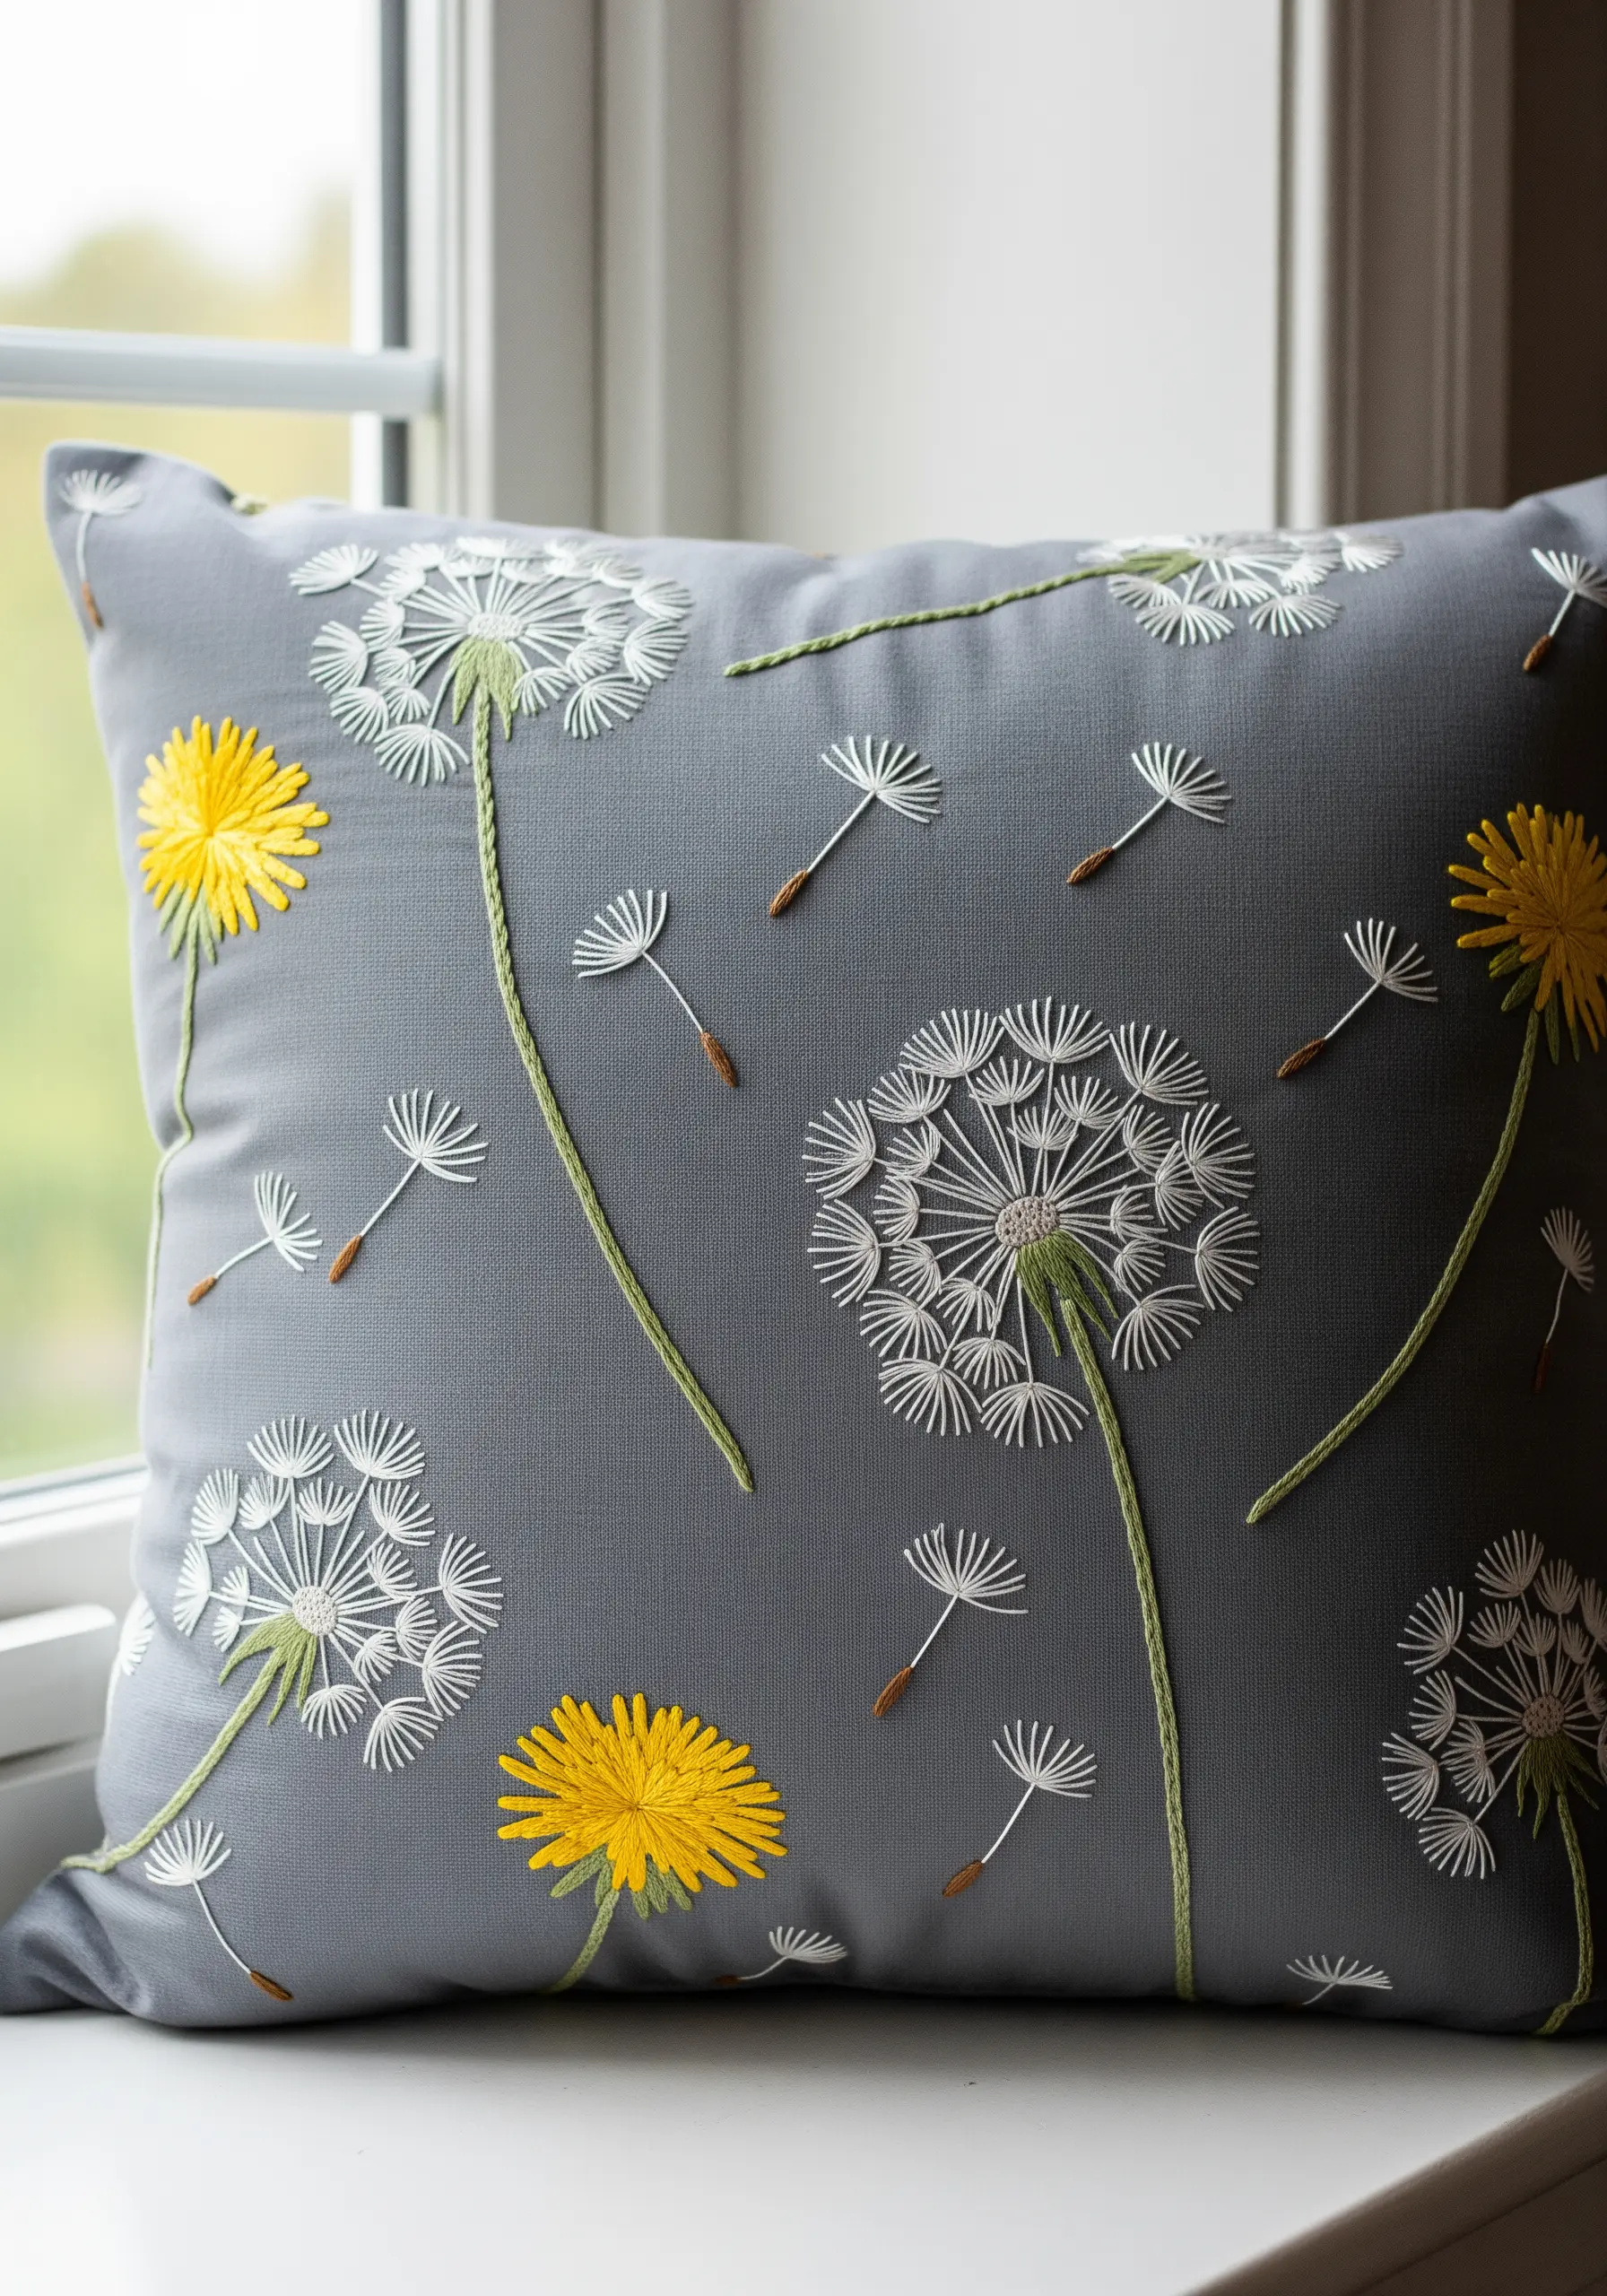
This design’s magic comes from its sense of movement, achieved by mastering the straight stitch.
For the dandelion seed heads, ensure your white straight stitches radiate precisely from a central point, varying their lengths slightly for a natural look.
Scatter the floating seeds across the pillow, leaving ample negative space to create the illusion of them drifting on the wind.
This strategic use of empty space is just as important as the stitching itself for a dynamic composition.
7. Blend Autumnal Hues with Thread Painting
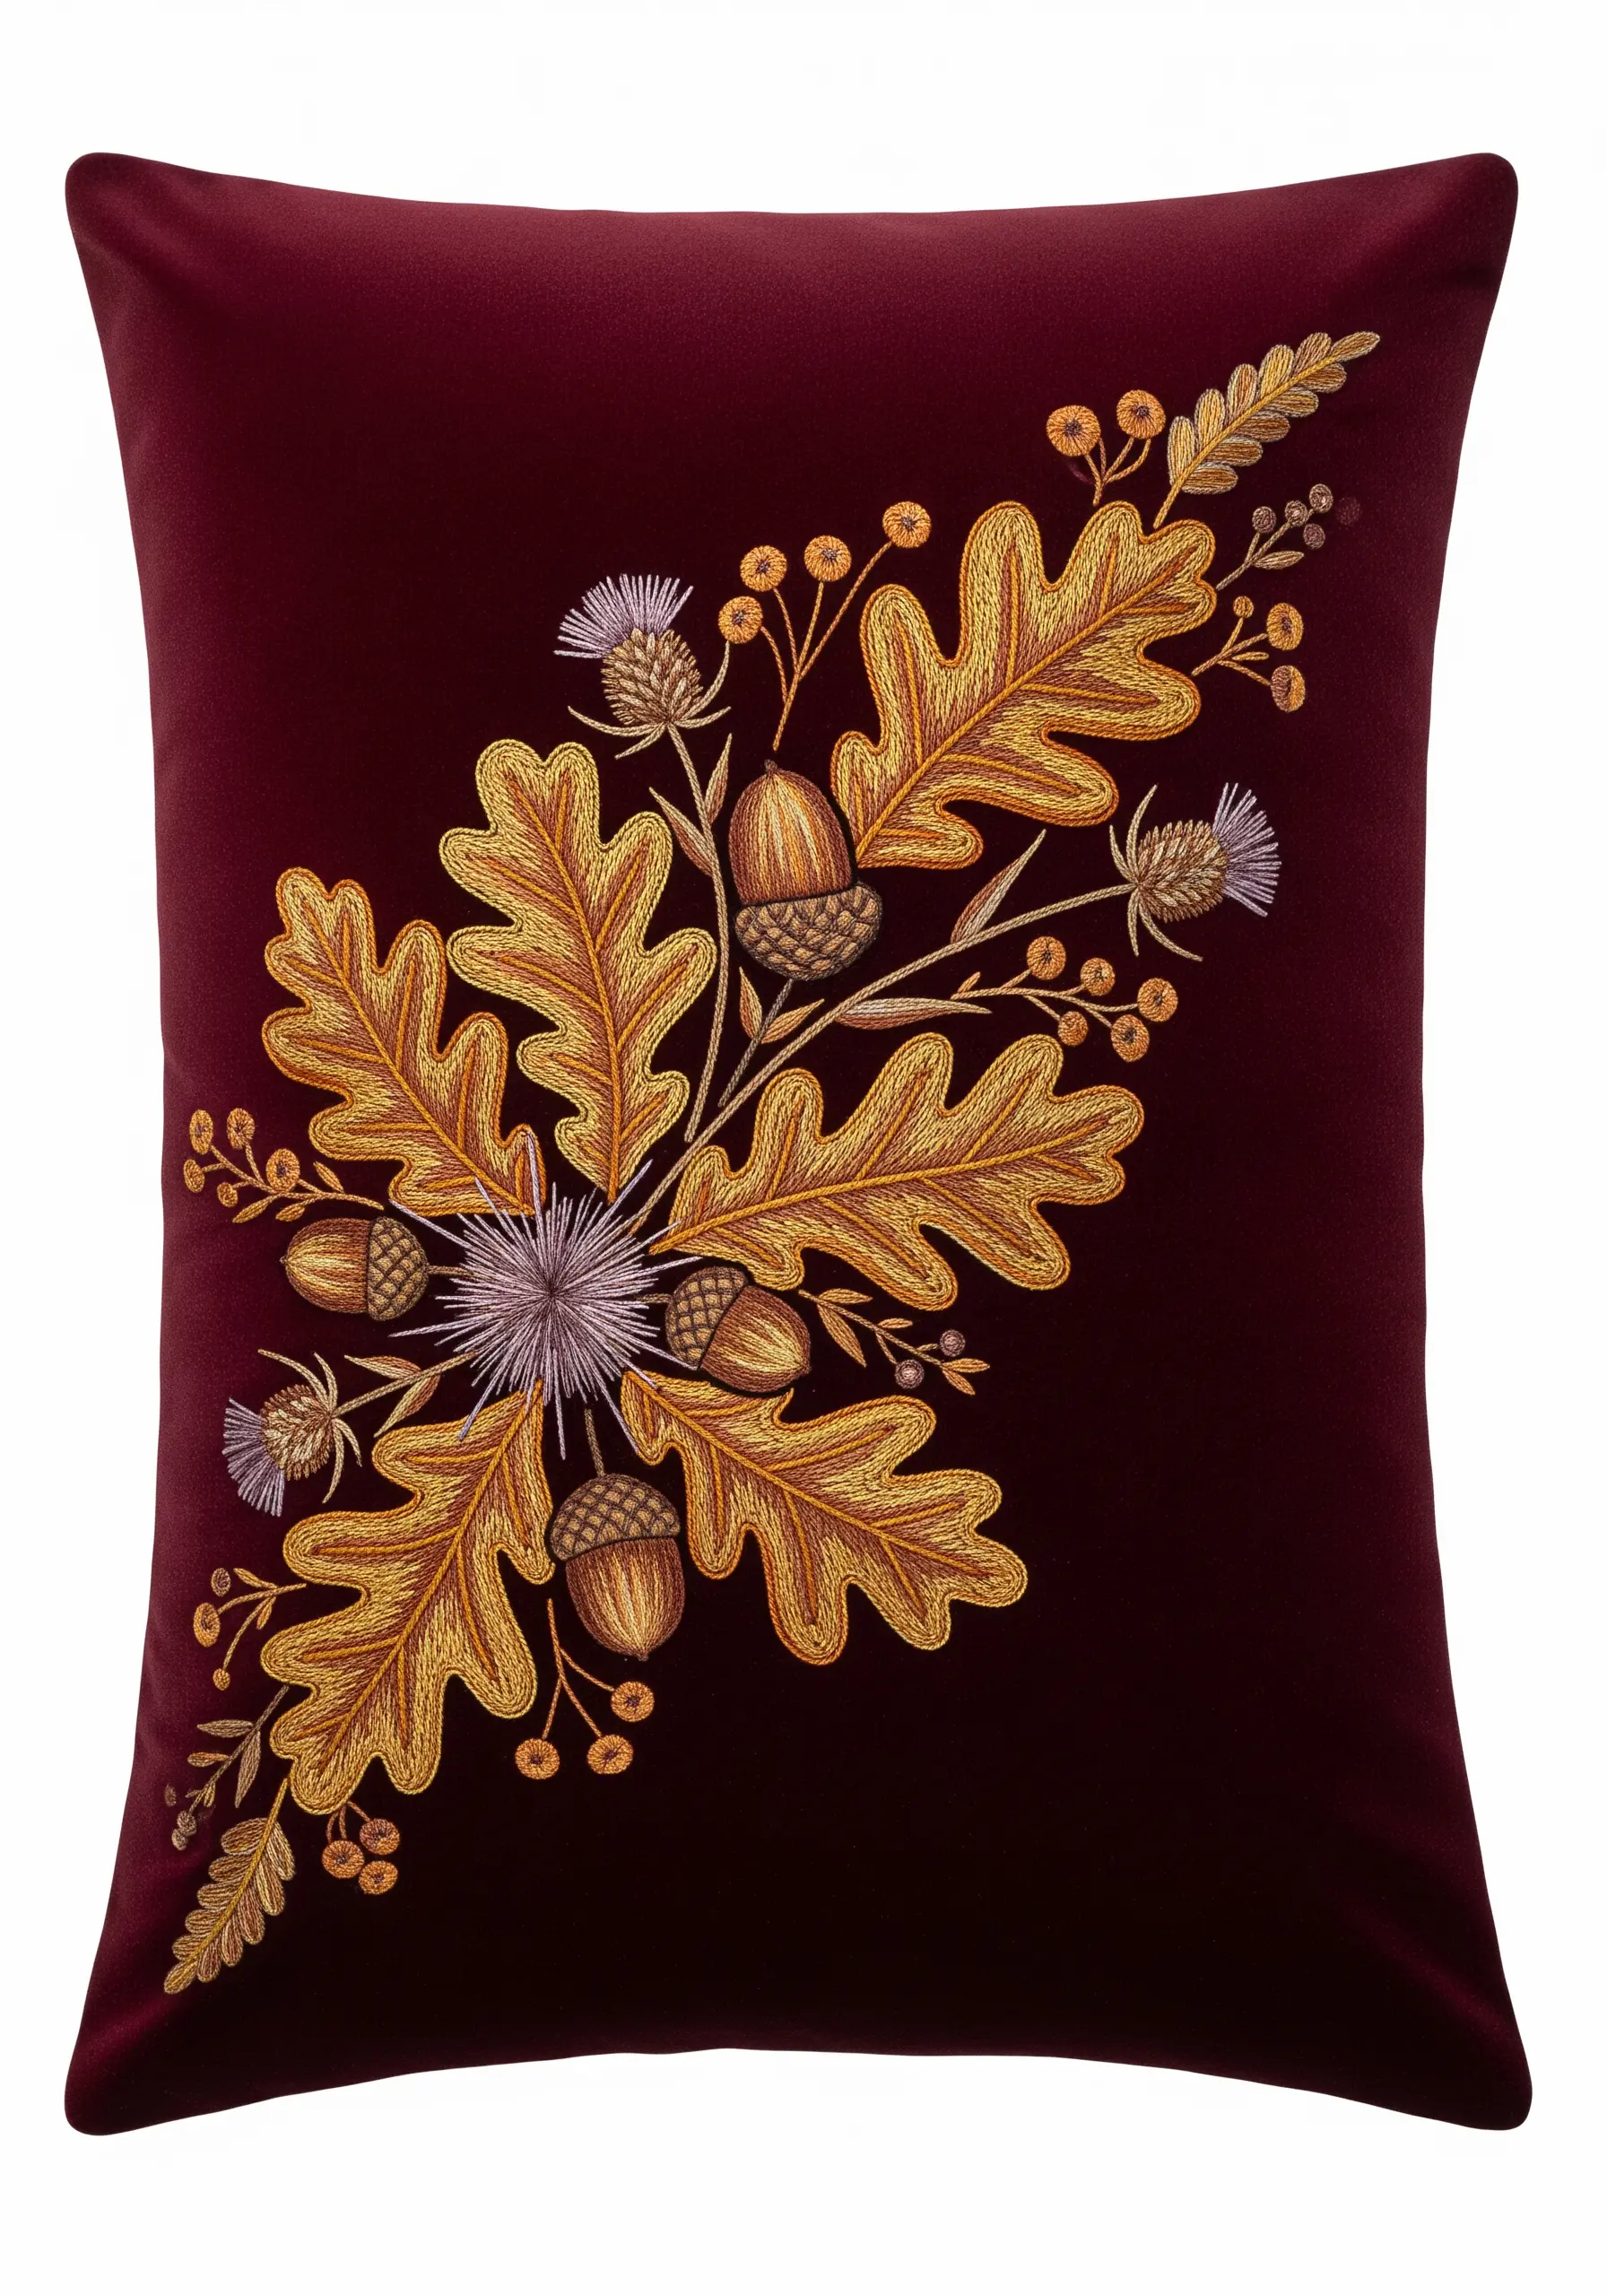
To capture the rich gradients of autumn leaves, use the long-and-short stitch technique.
Fill the oak leaves by blending shades of gold, ochre, and brown, ensuring your stitches follow the direction of the leaf’s veins for realism.
For the acorns, combine a smooth satin stitch for the nut with a dense field of French knots for the cap to create a satisfying textural contrast.
Stitching on a deep burgundy or plum velvet enhances the warmth of the metallic and earthy threads.
8. Master Precision with a Botanical Sampler
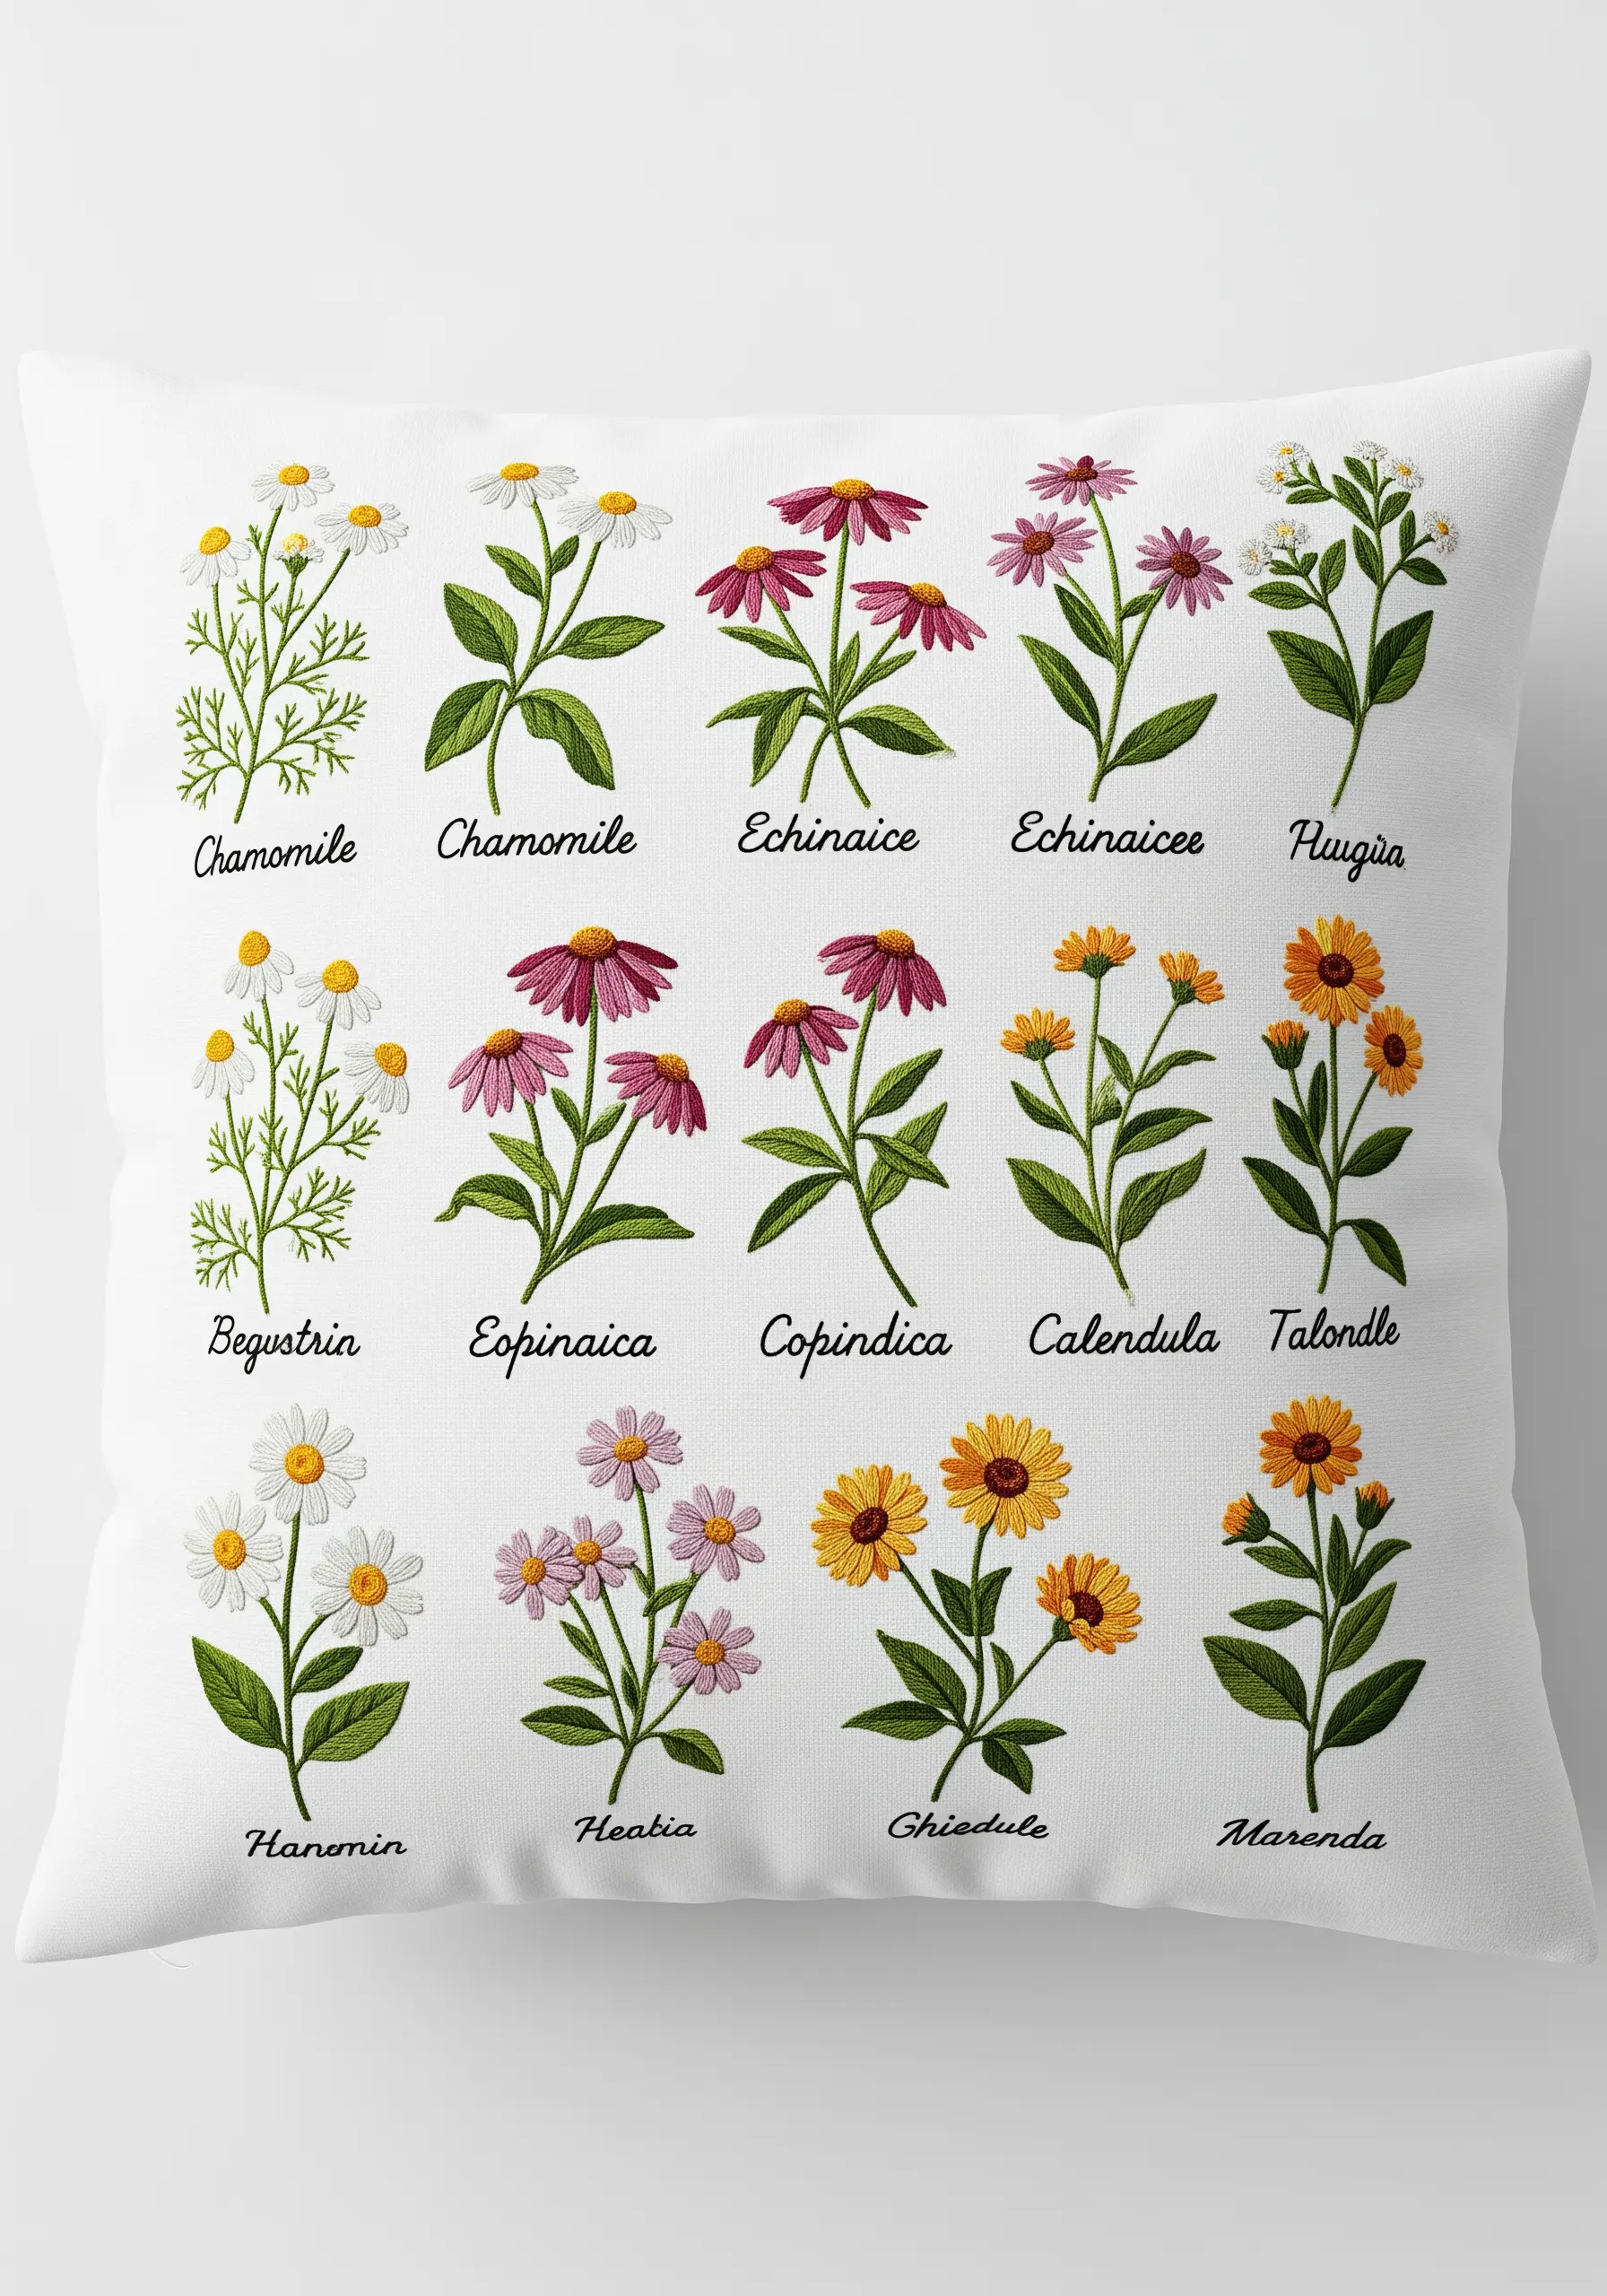
A sampler-style pillow challenges you to perfect your stitch consistency across multiple small motifs.
Outline each flower and leaf with a precise split stitch before filling to create a clean, illustrative edge.
For the delicate script, use a single strand of floss and a tiny backstitch, ensuring each letter is uniform in height and spacing.
This disciplined approach transforms a simple grid of florals into a refined botanical chart.
9. Create Dimension with Raised and Padded Stitches
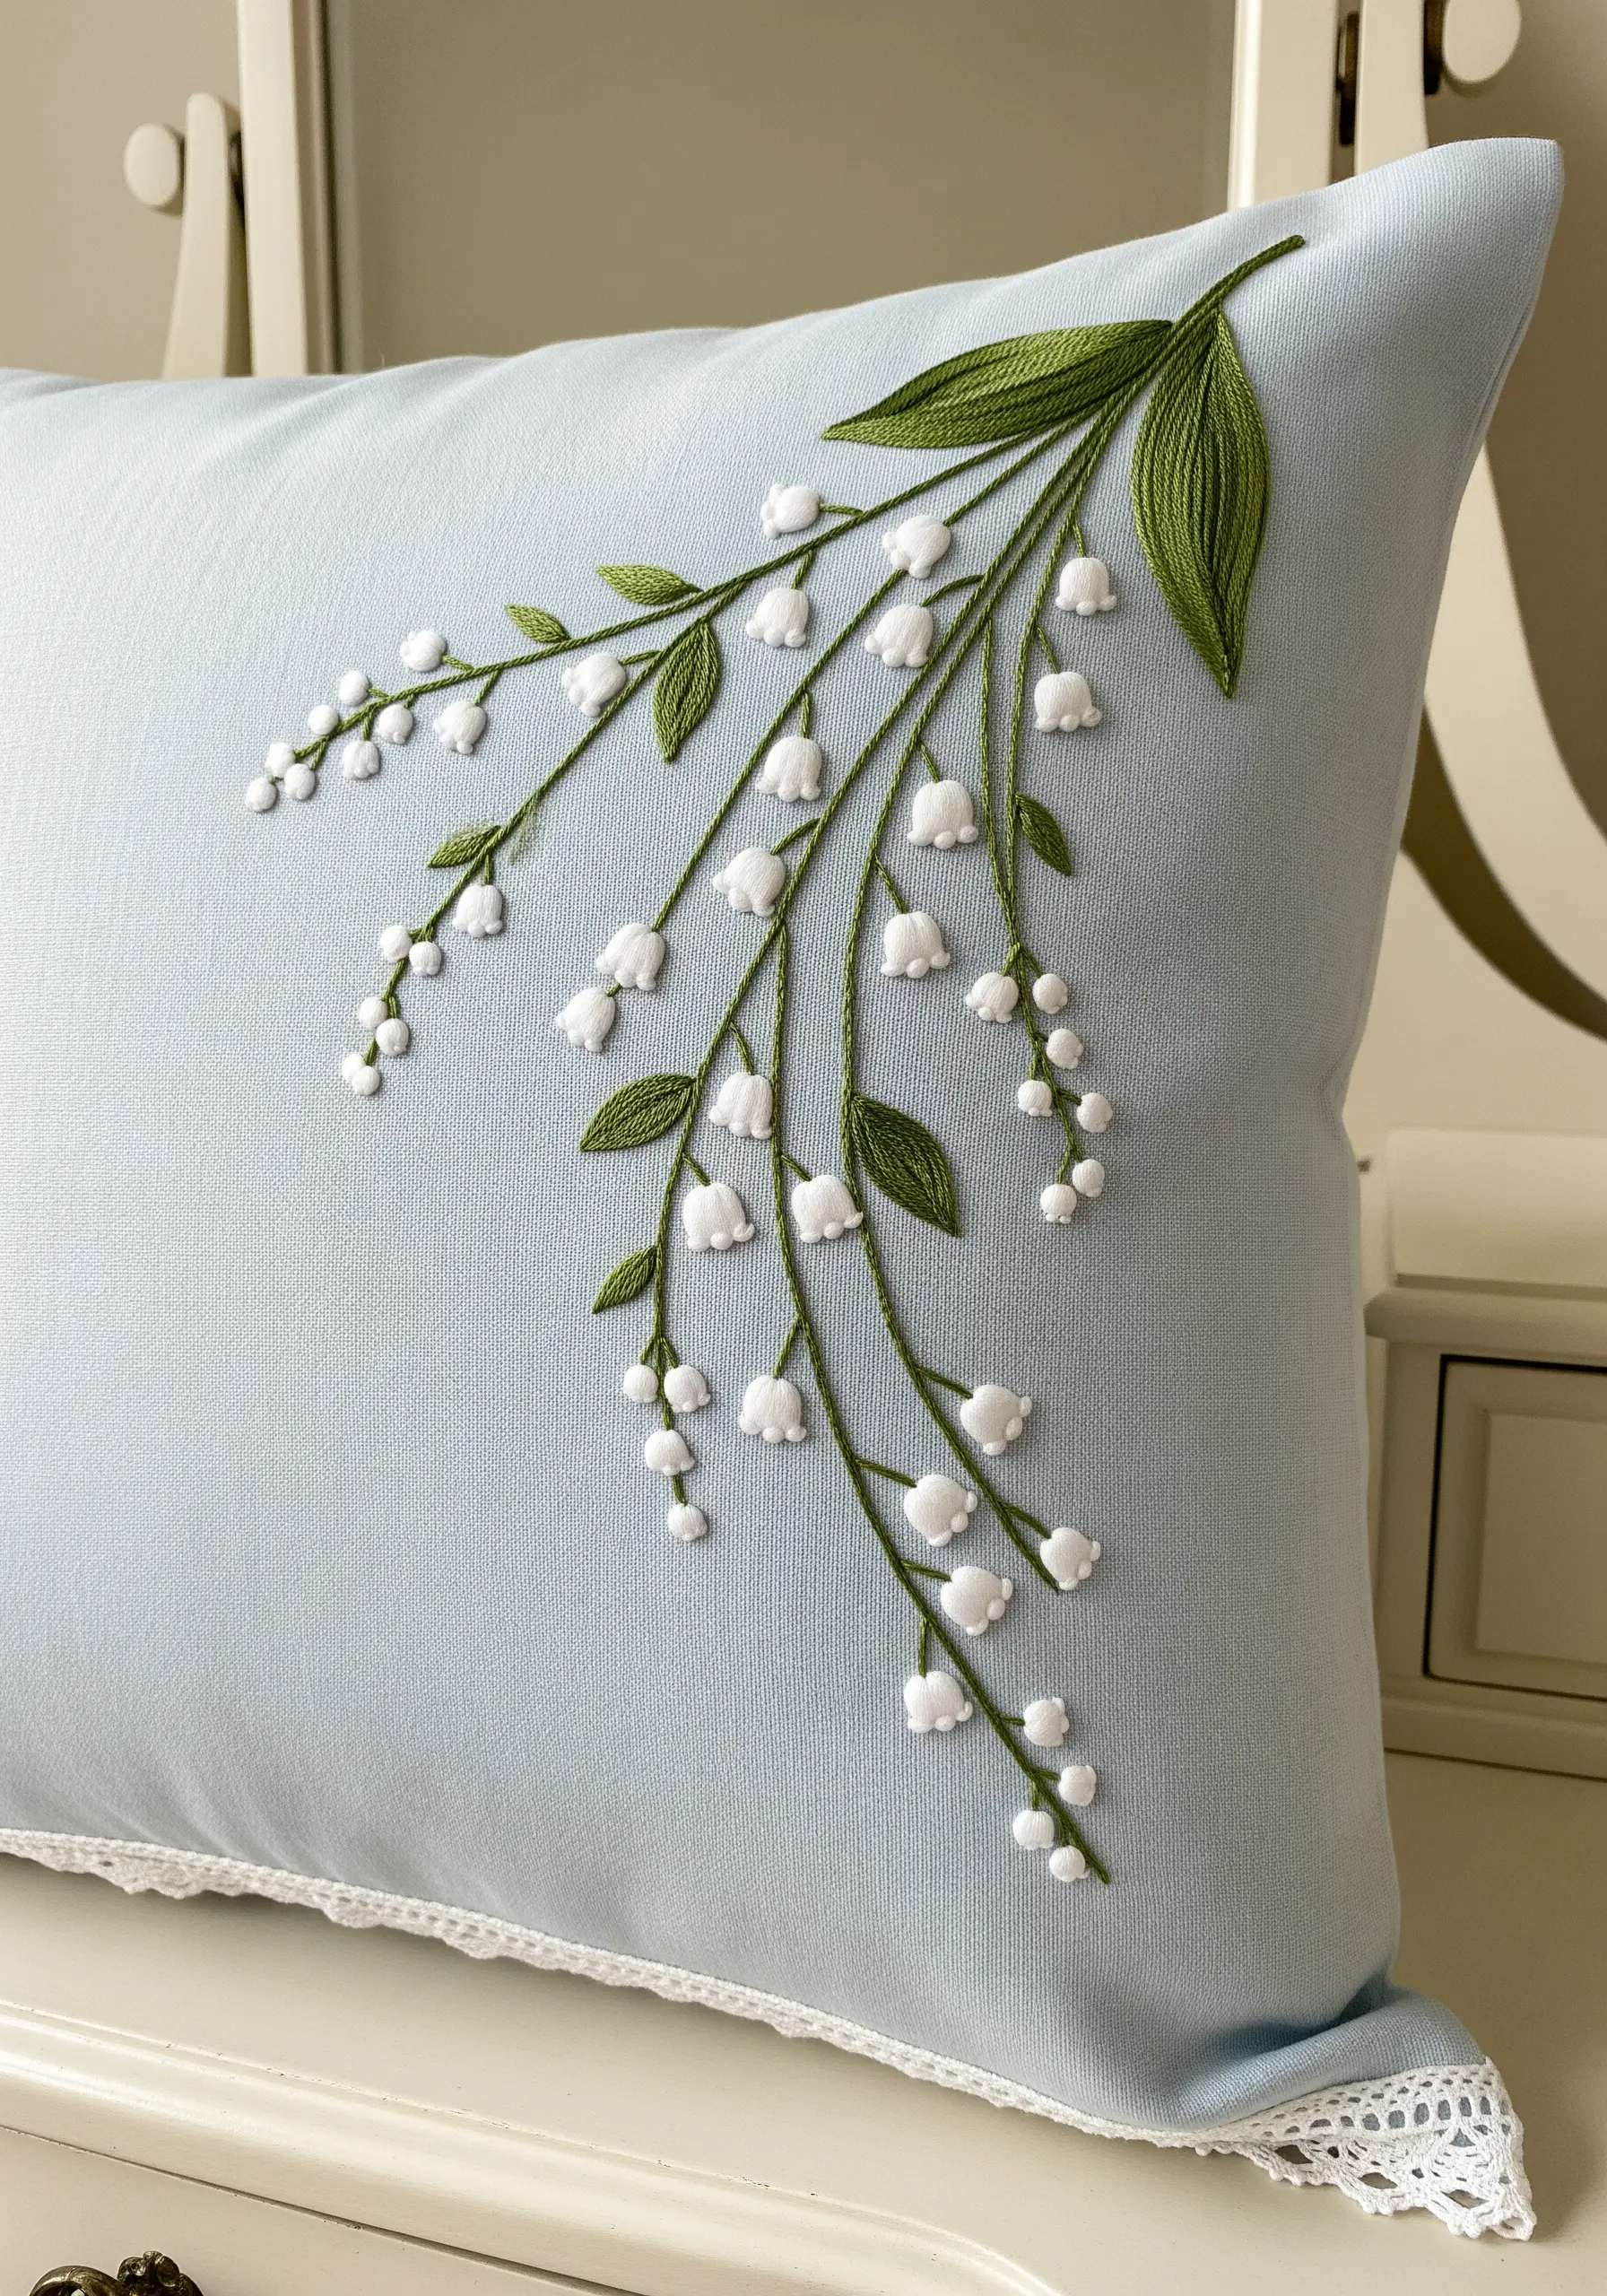
Give delicate Lily of the Valley bells a 3D effect without complex techniques.
Instead of a simple satin stitch, use a detached chain stitch for each blossom, pulling it taut to create a puffy, bell-like shape.
Alternatively, place a few tiny straight stitches as padding before covering them with satin stitch to lift them from the fabric surface.
This subtle lift makes the tiny white flowers pop against the soft blue background and adds a touch of realism.
10. Refine Petal Shading with Angled Stitches
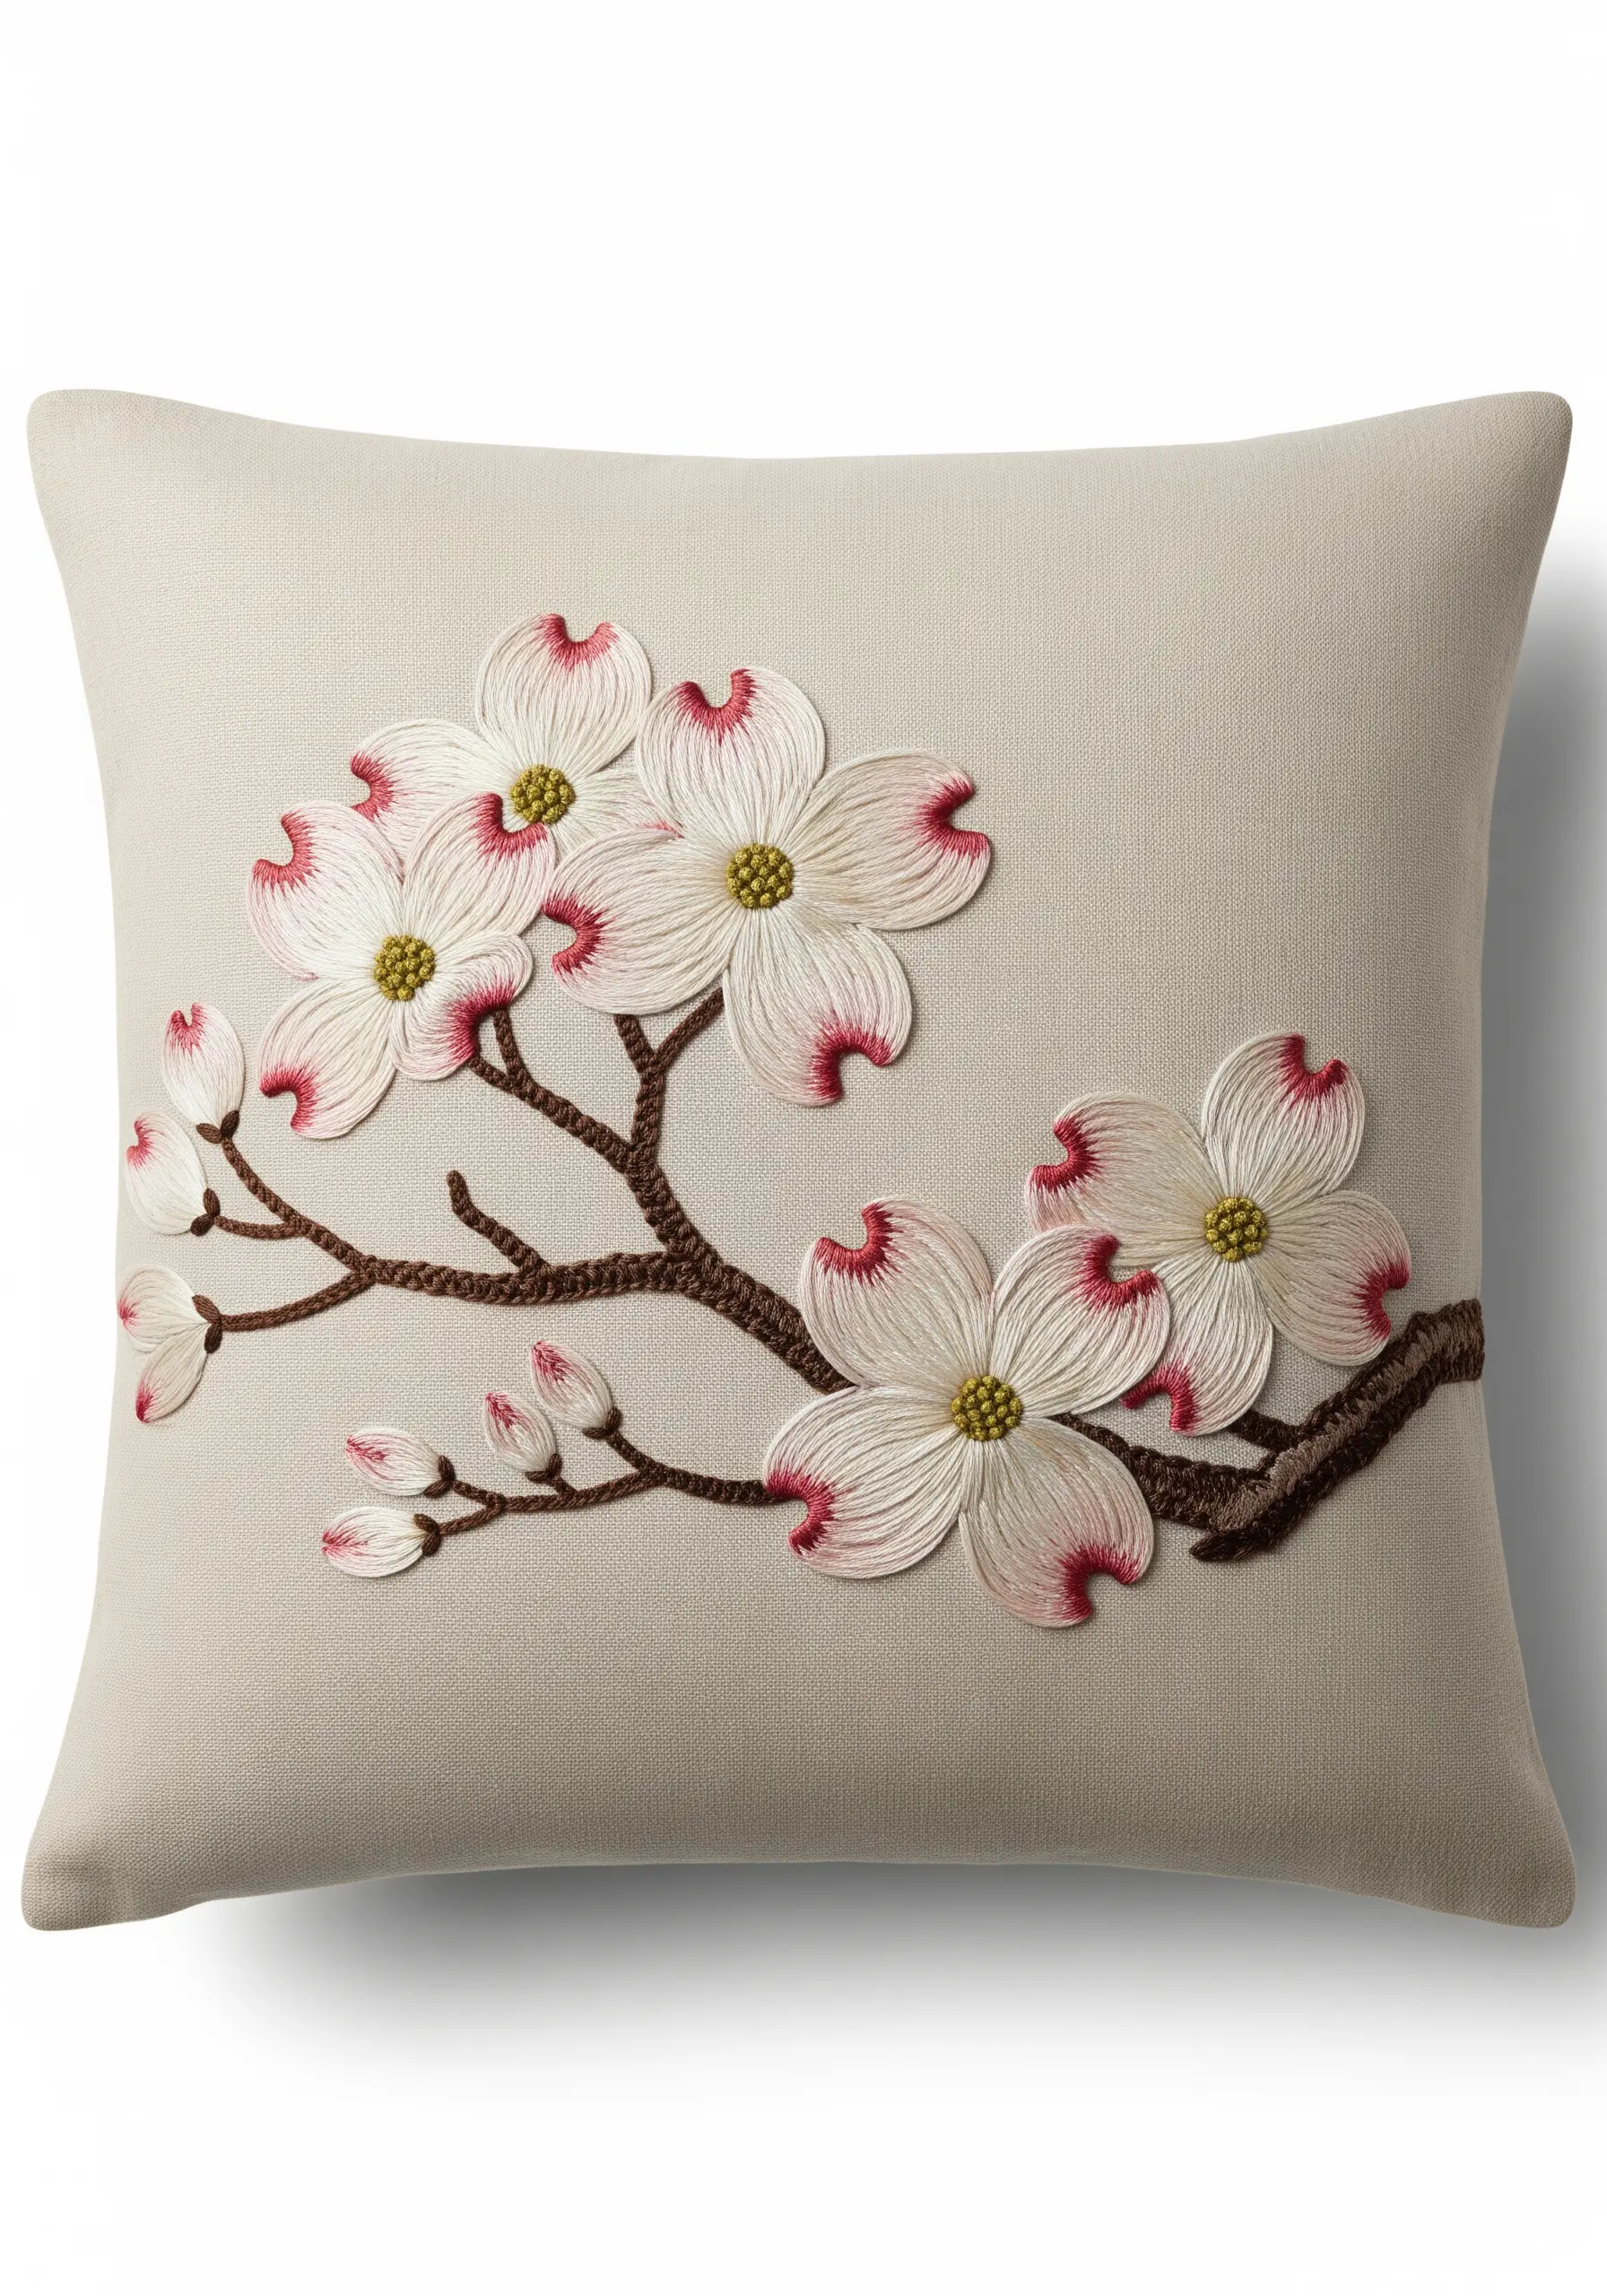
The realism in these dogwood blossoms comes from meticulous color blending and stitch direction.
Use single-strand floss and long-and-short stitch, angling your stitches to radiate from the center towards the notched tip of each petal.
Introduce the pink shading at the tips with very short stitches that blend seamlessly into the white.
This careful directionality makes the petals appear to curve and fold naturally, just like the real flower.
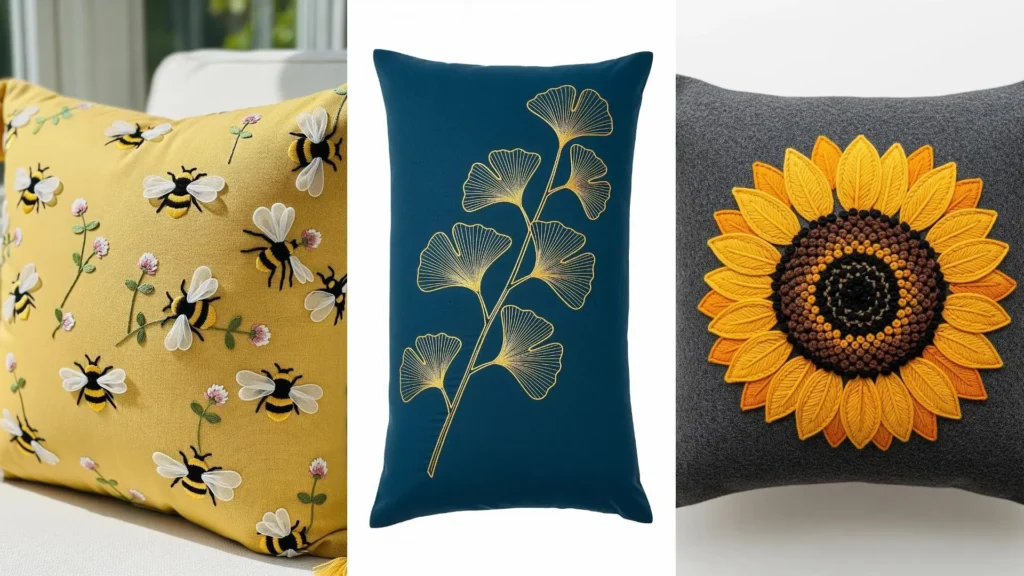
11. Build a Sunflower’s Center with Layered Knots
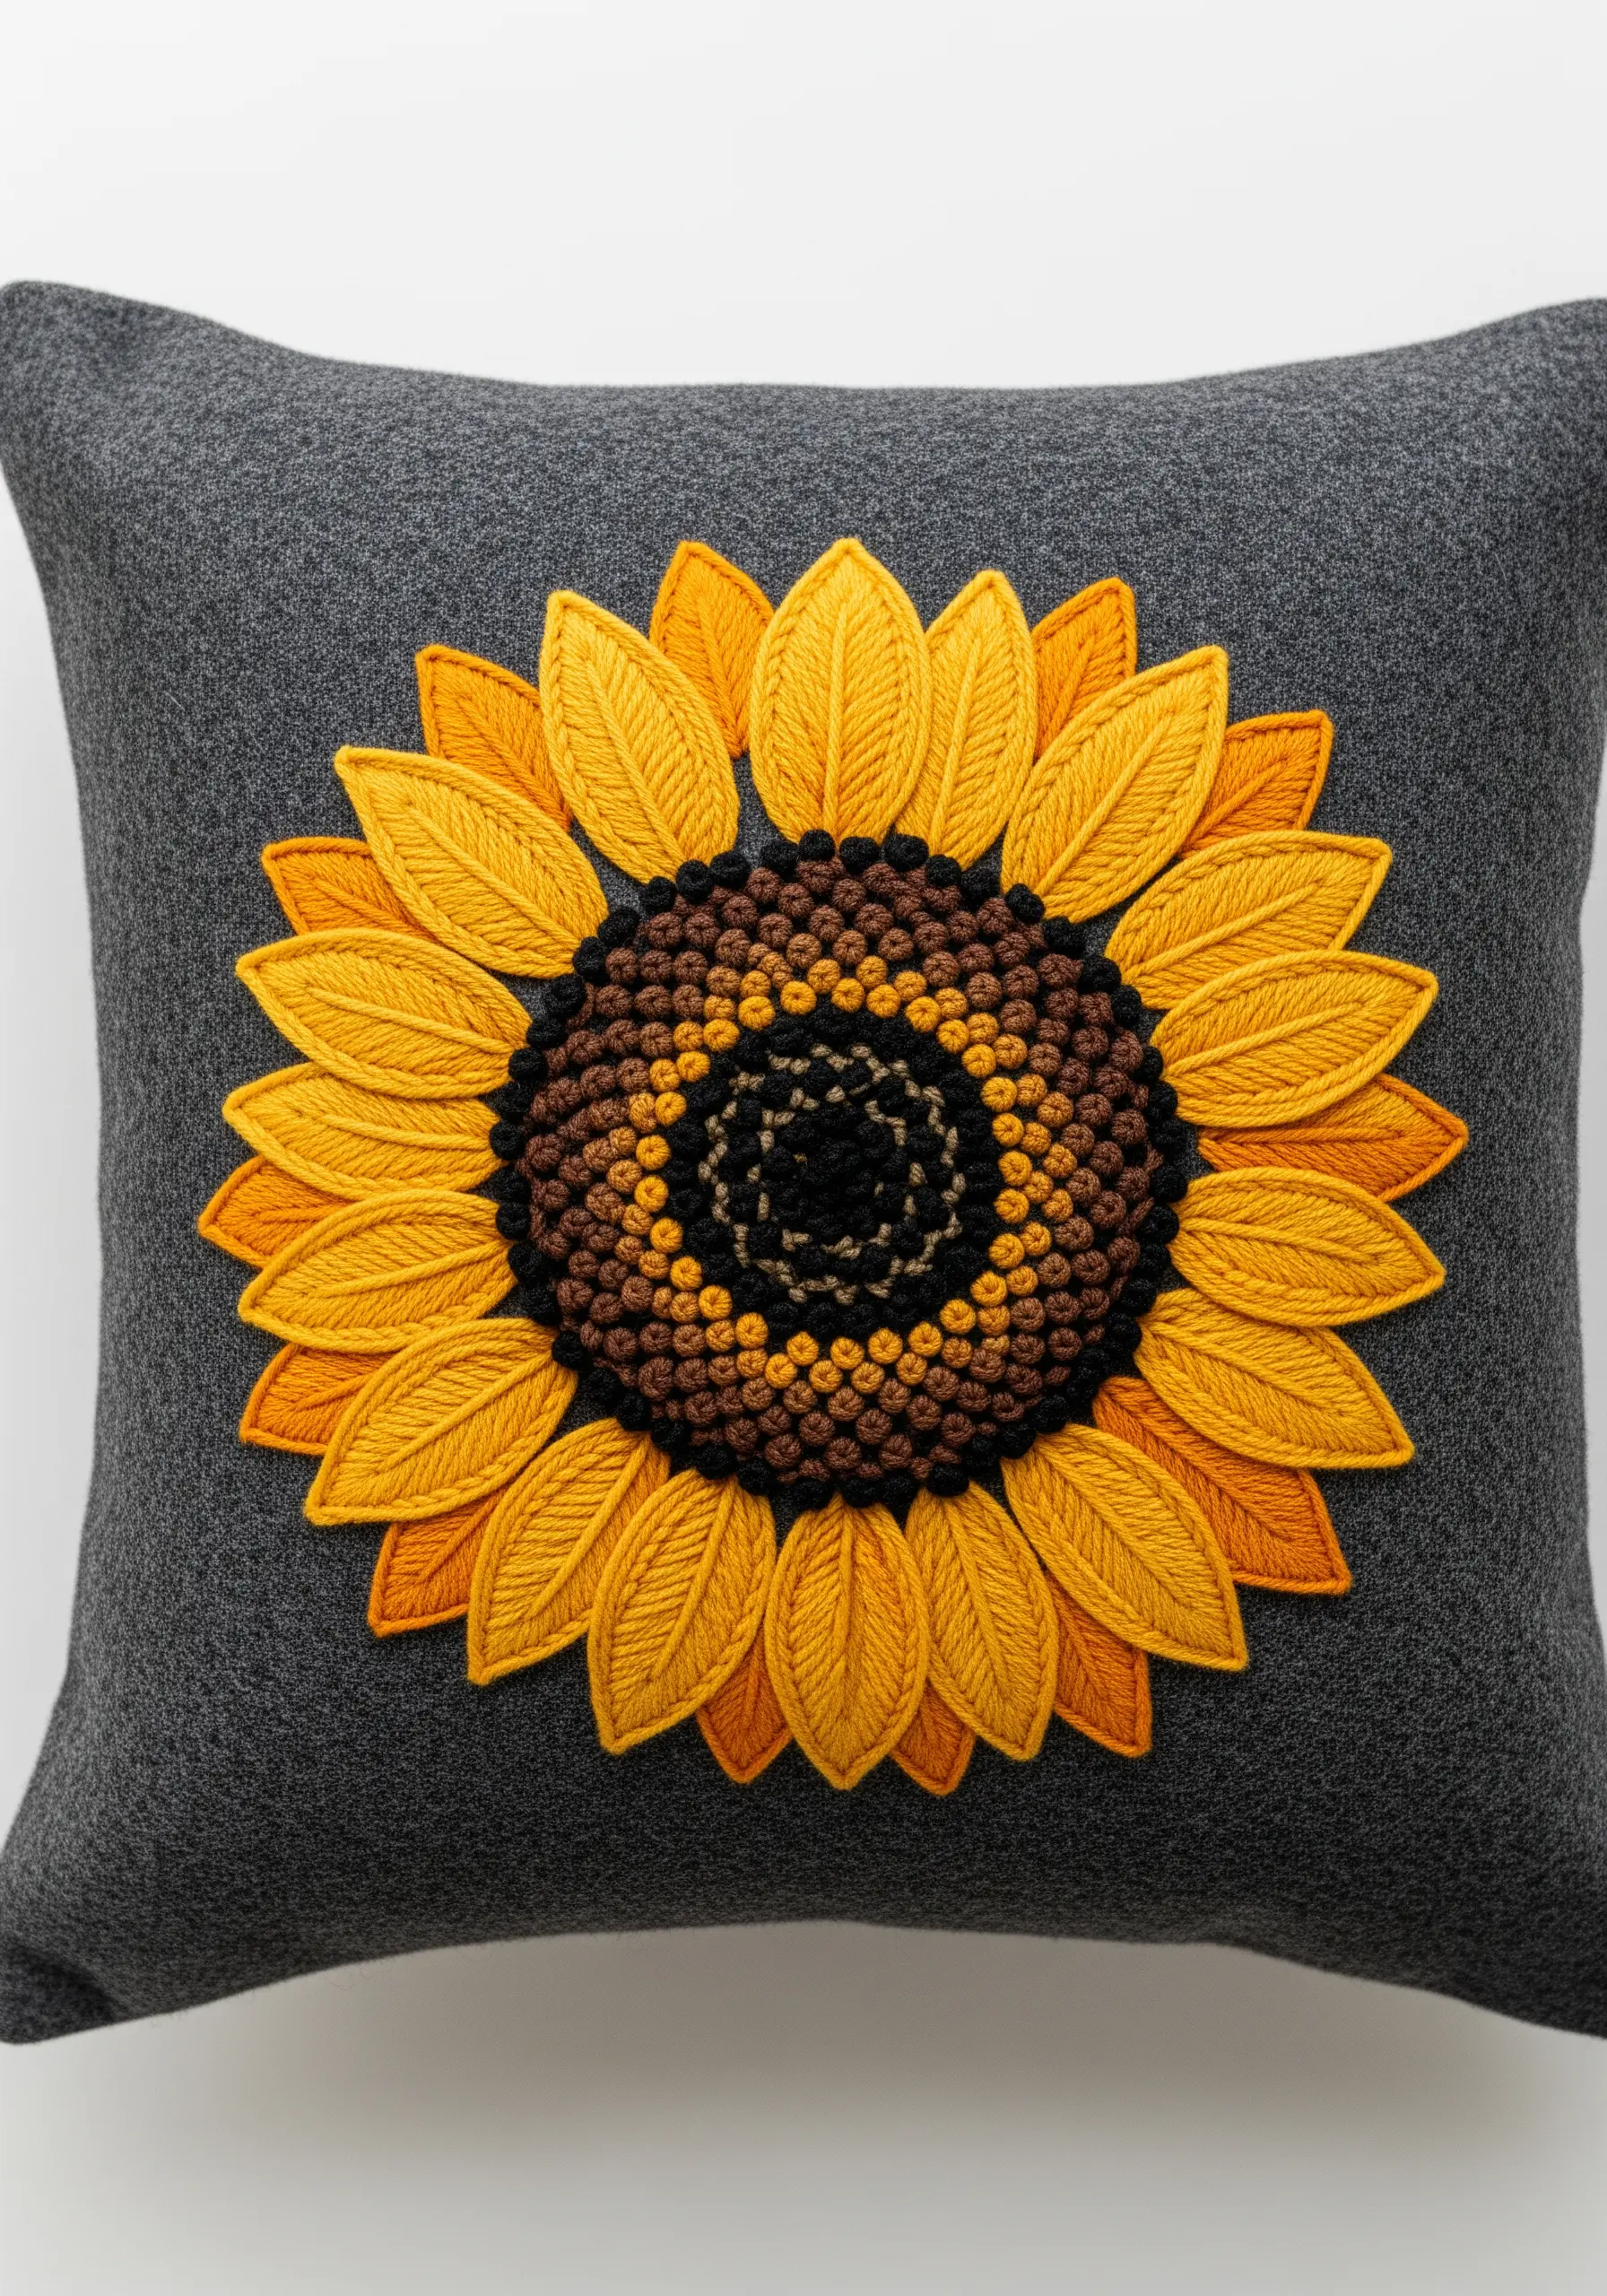
The soul of a sunflower embroidery is its textural center. Build it in concentric circles.
Start with a dense cluster of black French knots in the middle, then add a ring of brown knots, followed by a ring of golden-brown knots.
Varying the size of the knots by wrapping the thread once or twice around the needle adds another layer of realism.
This high-texture technique makes the smooth satin-stitched petals appear even more vibrant and distinct.
12. Incorporate Sheer Fabric for Delicate Wings
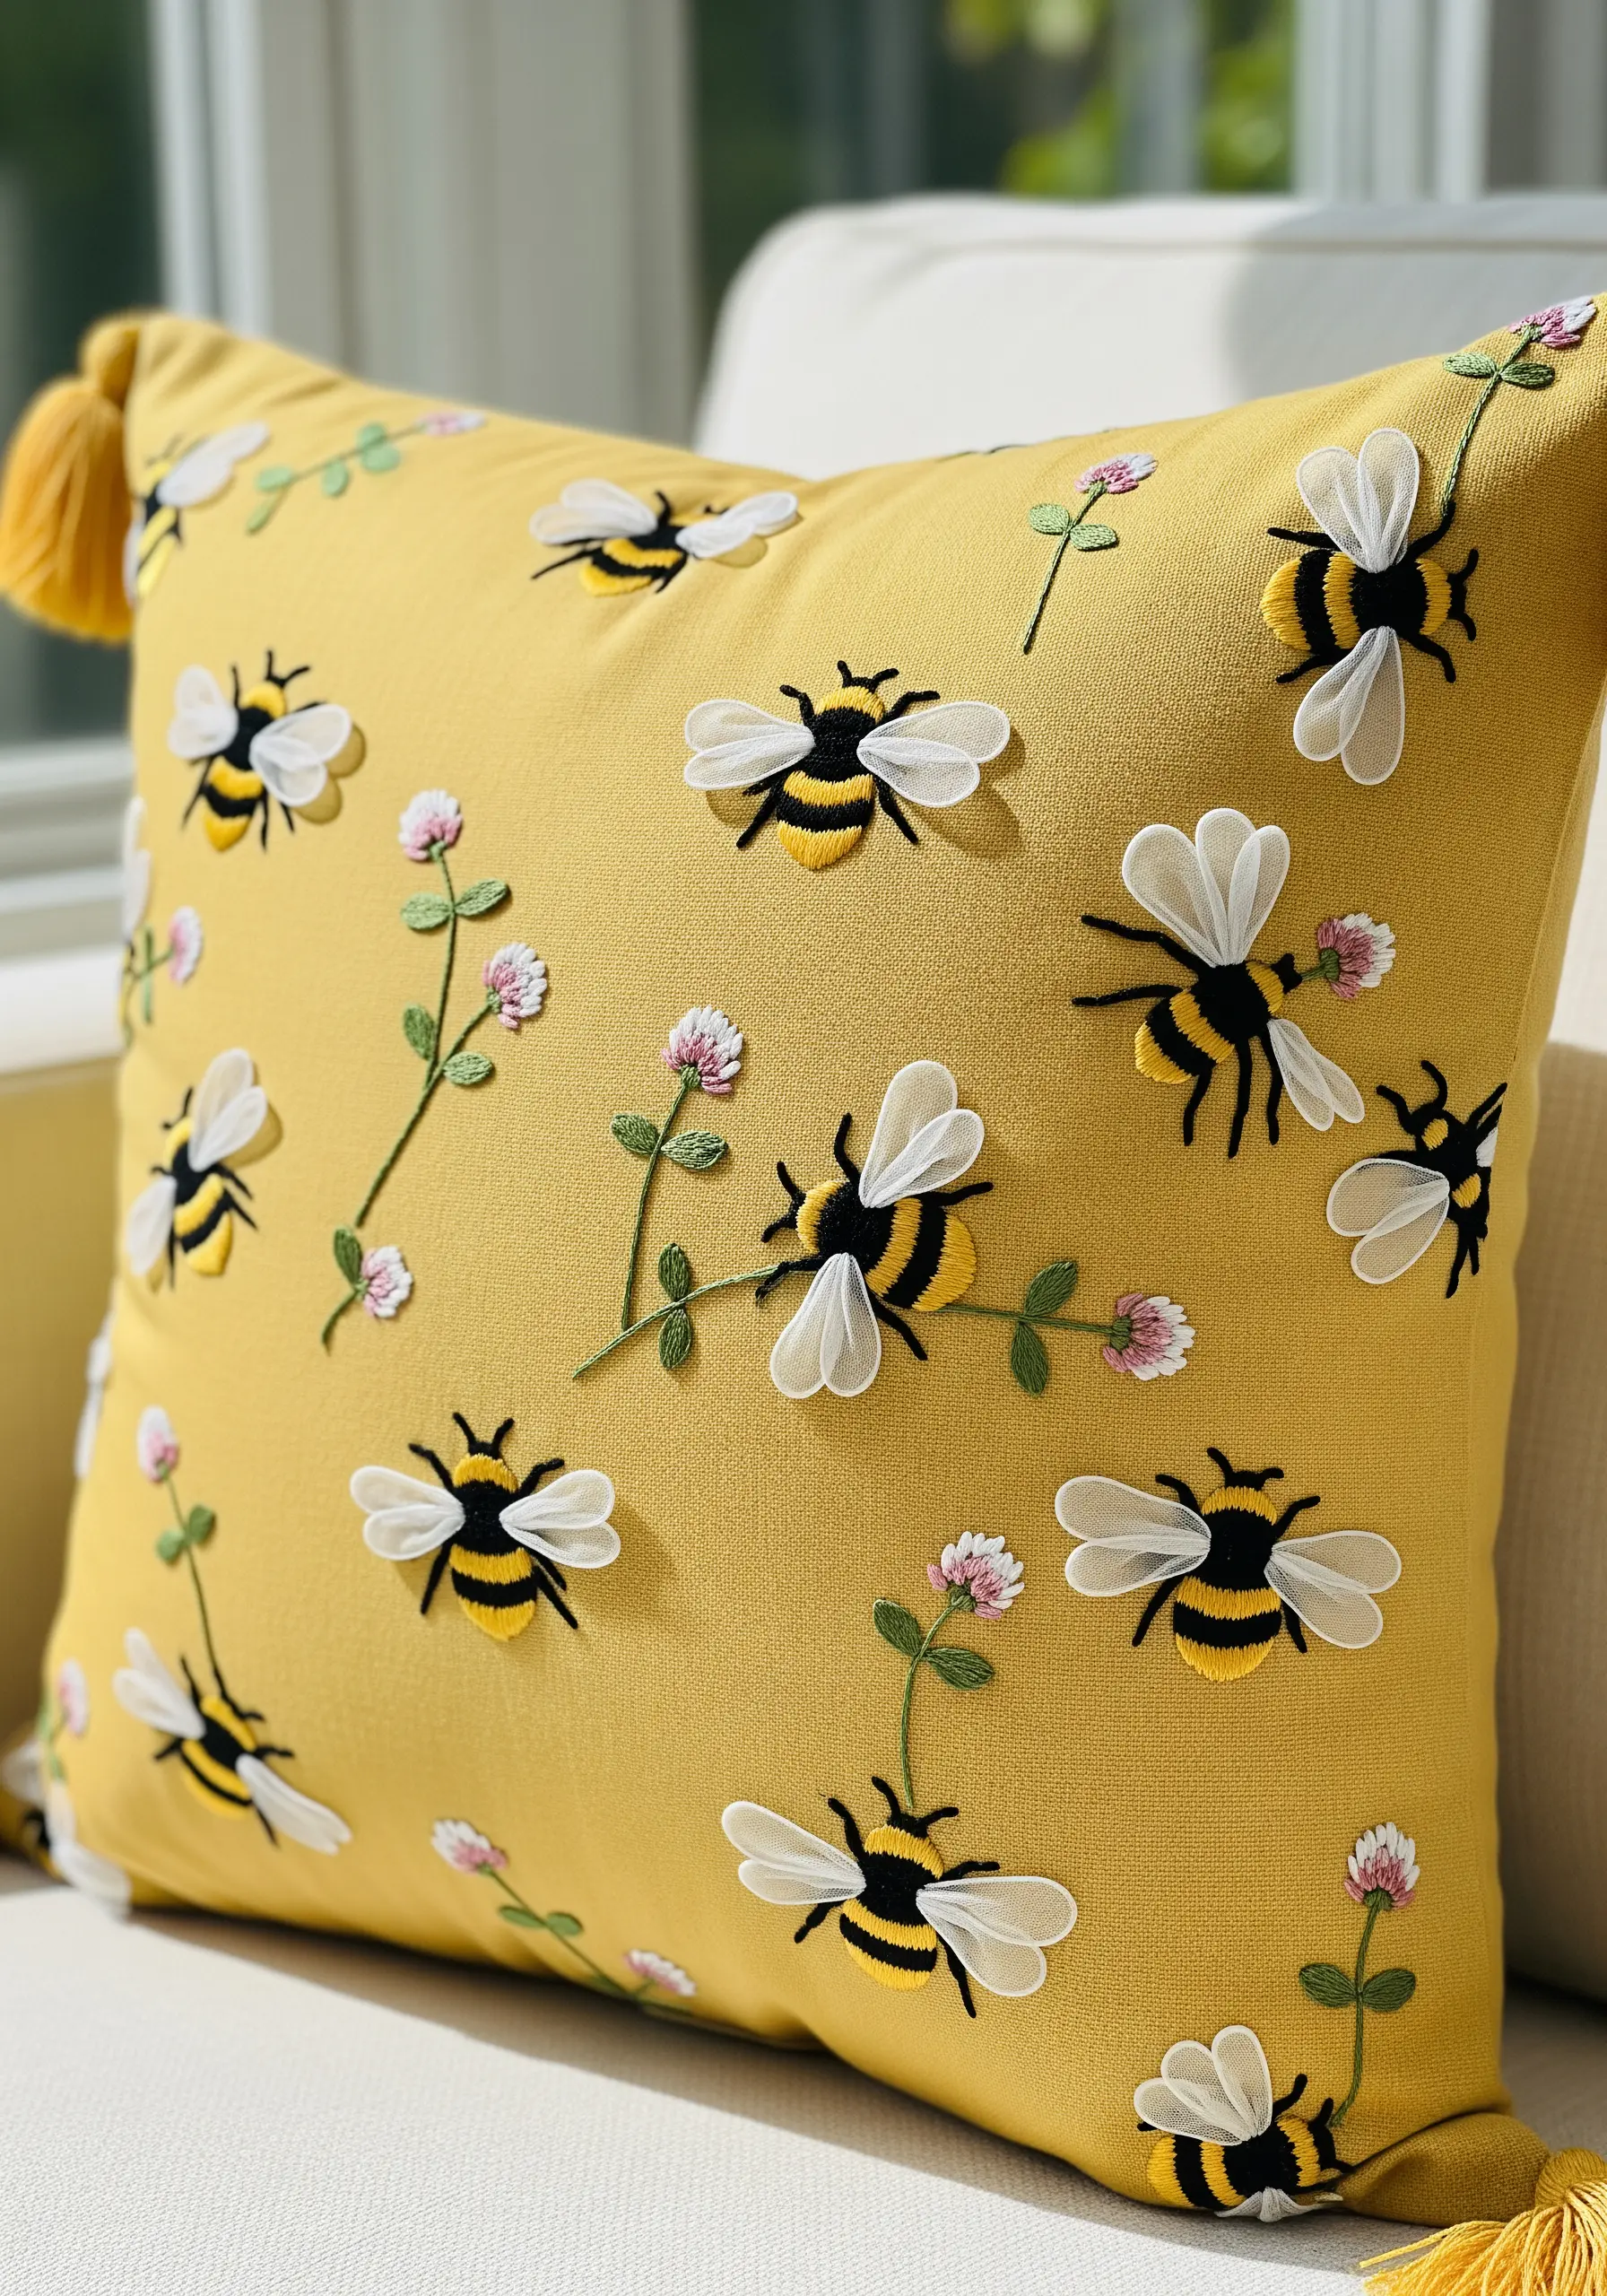
Elevate a simple bee motif by adding a mixed-media element for the wings.
Stitch the bee’s body with classic satin stitch, then tack down a small piece of sheer white organza for the wings using a few tiny stitches.
Embroider the wing veins directly onto the organza, then carefully trim away the excess fabric close to the stitches.
This technique creates translucent, delicate wings that lift slightly from the pillow, adding a whimsical, 3D effect to your mixed-media ideas.
13. Explore Foliage Textures with a Single Stitch Family
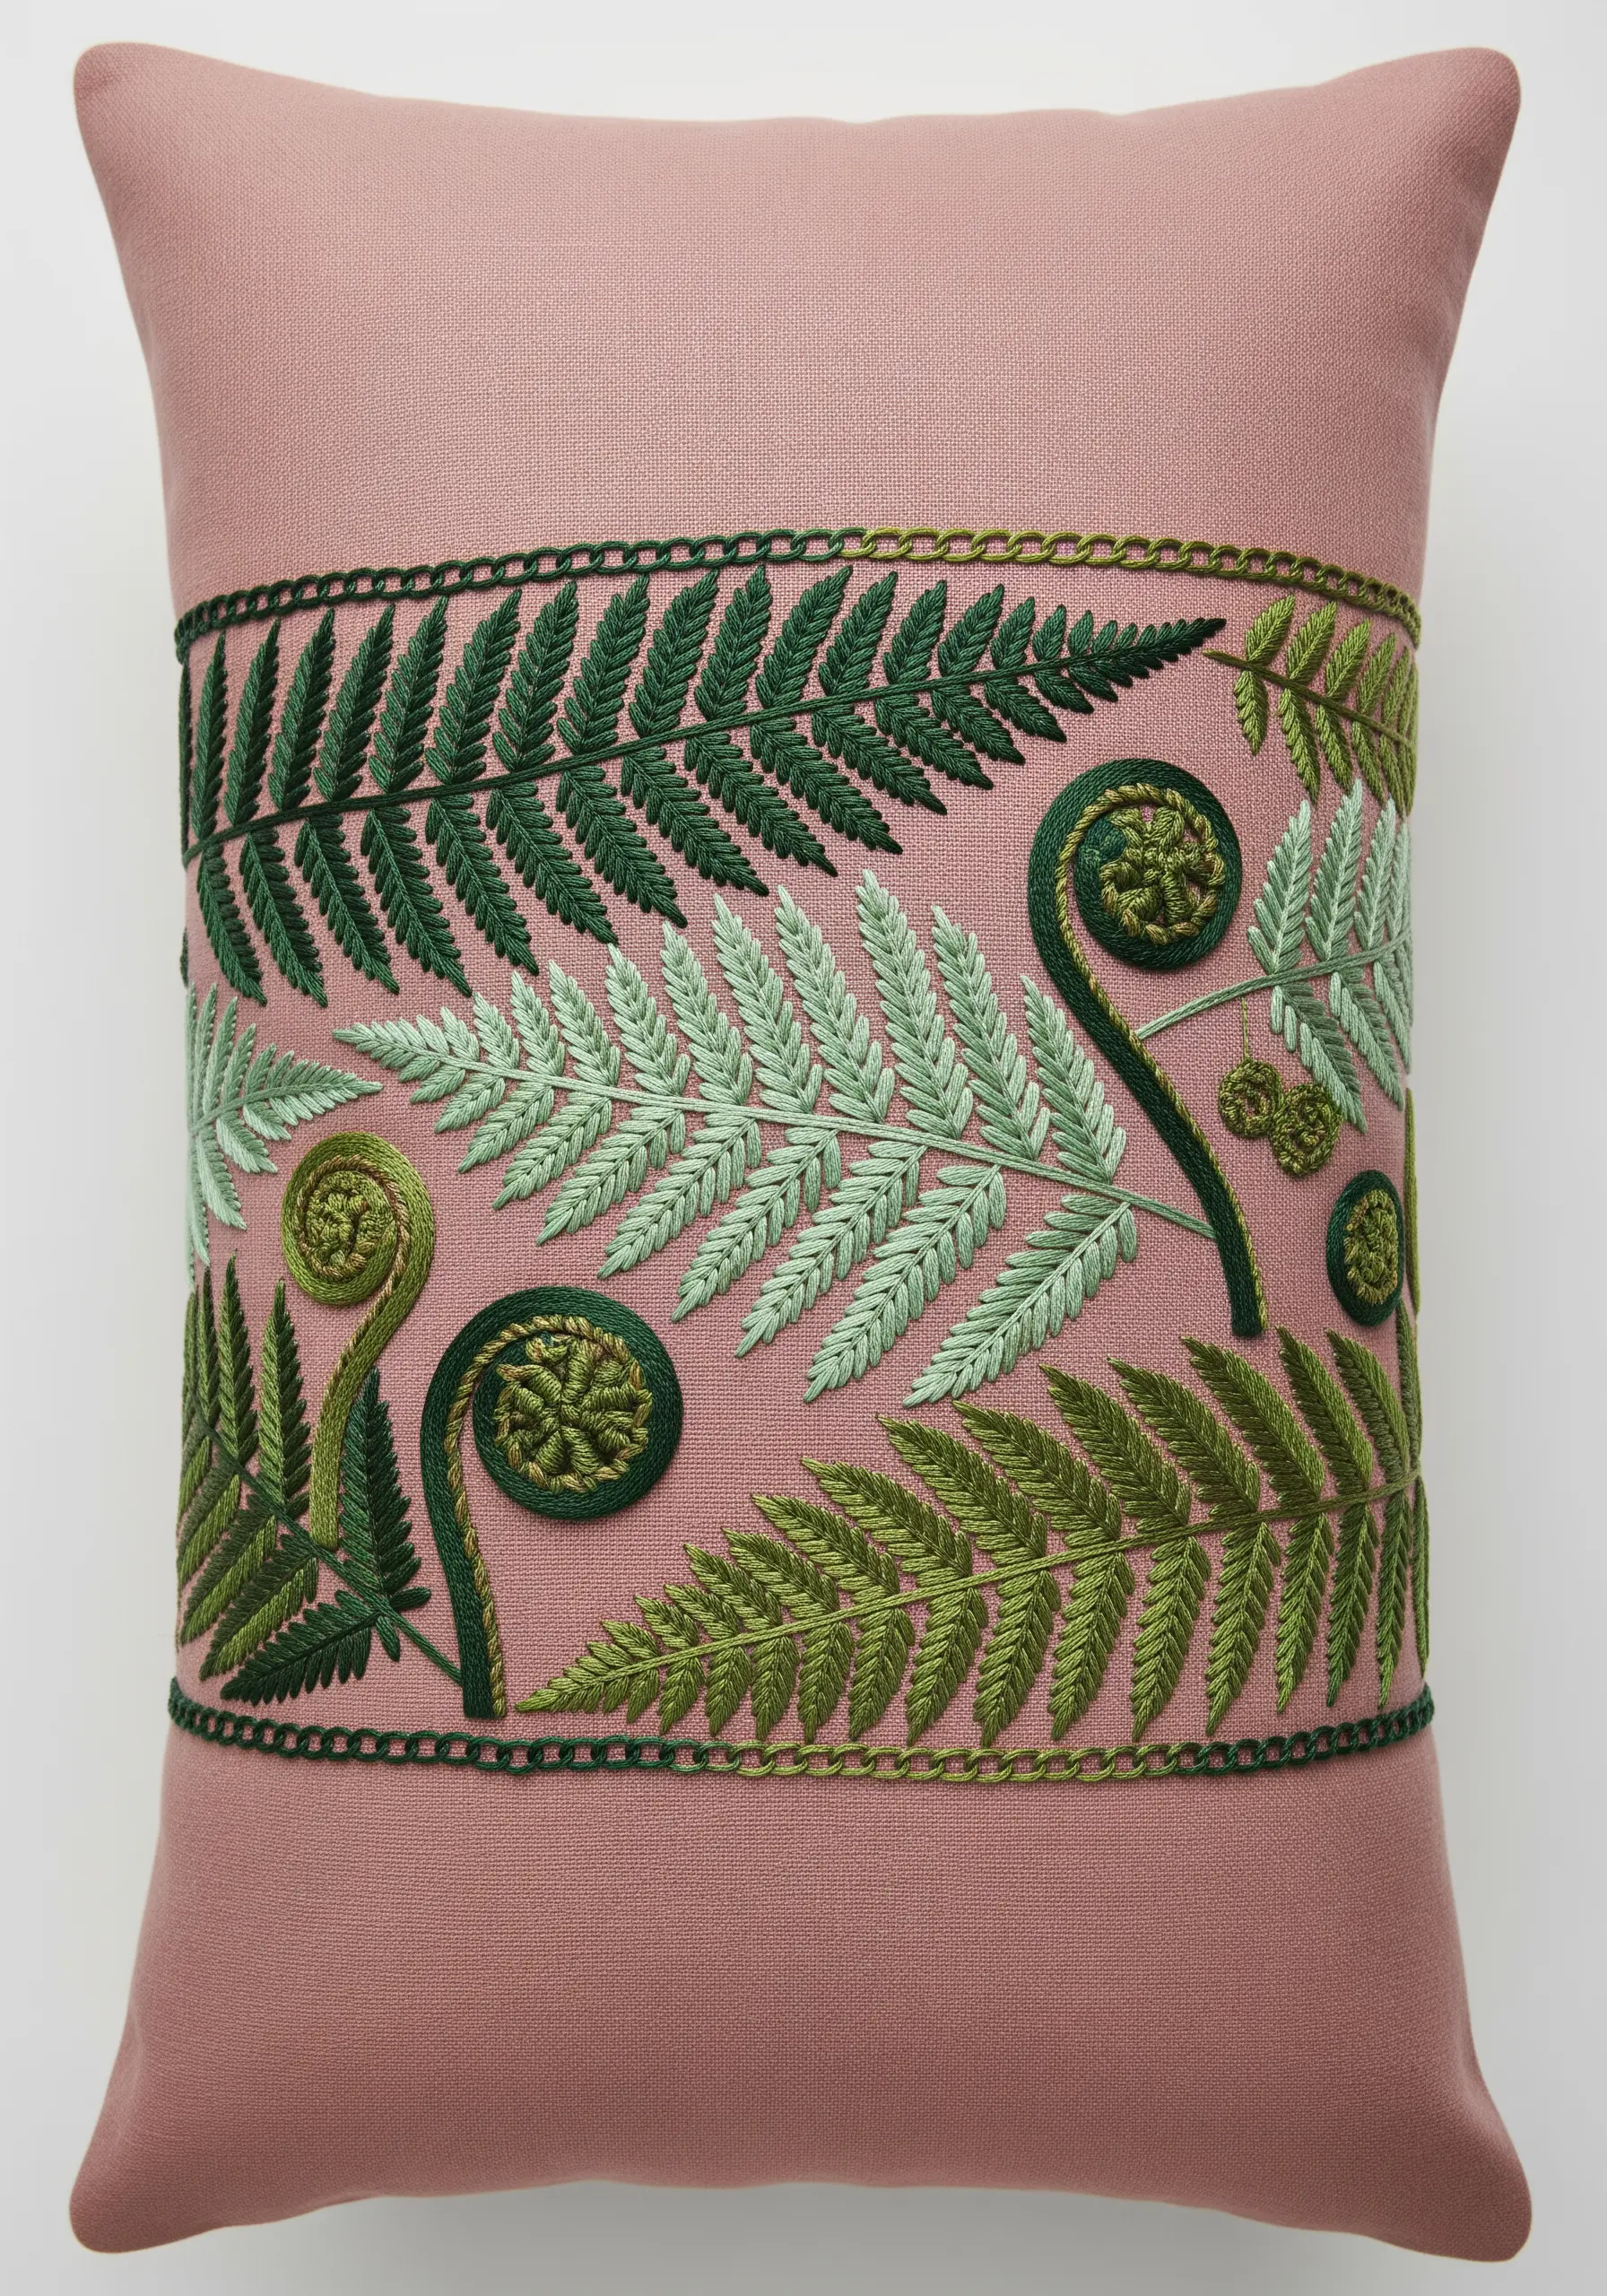
Create a sophisticated, cohesive design by exploring variations of a single stitch.
Use the fishbone stitch for the larger fern fronds, which creates a beautiful central spine and angled leaves in one motion.
For the fiddleheads, a whipped backstitch or a heavy chain stitch provides a solid, curled shape that contrasts with the feathery leaves.
Sticking to a limited palette of greens forces you to focus on texture and form, resulting in an elegant, modern botanical piece.
14. Replicate Juicy Texture with Clustered Knots
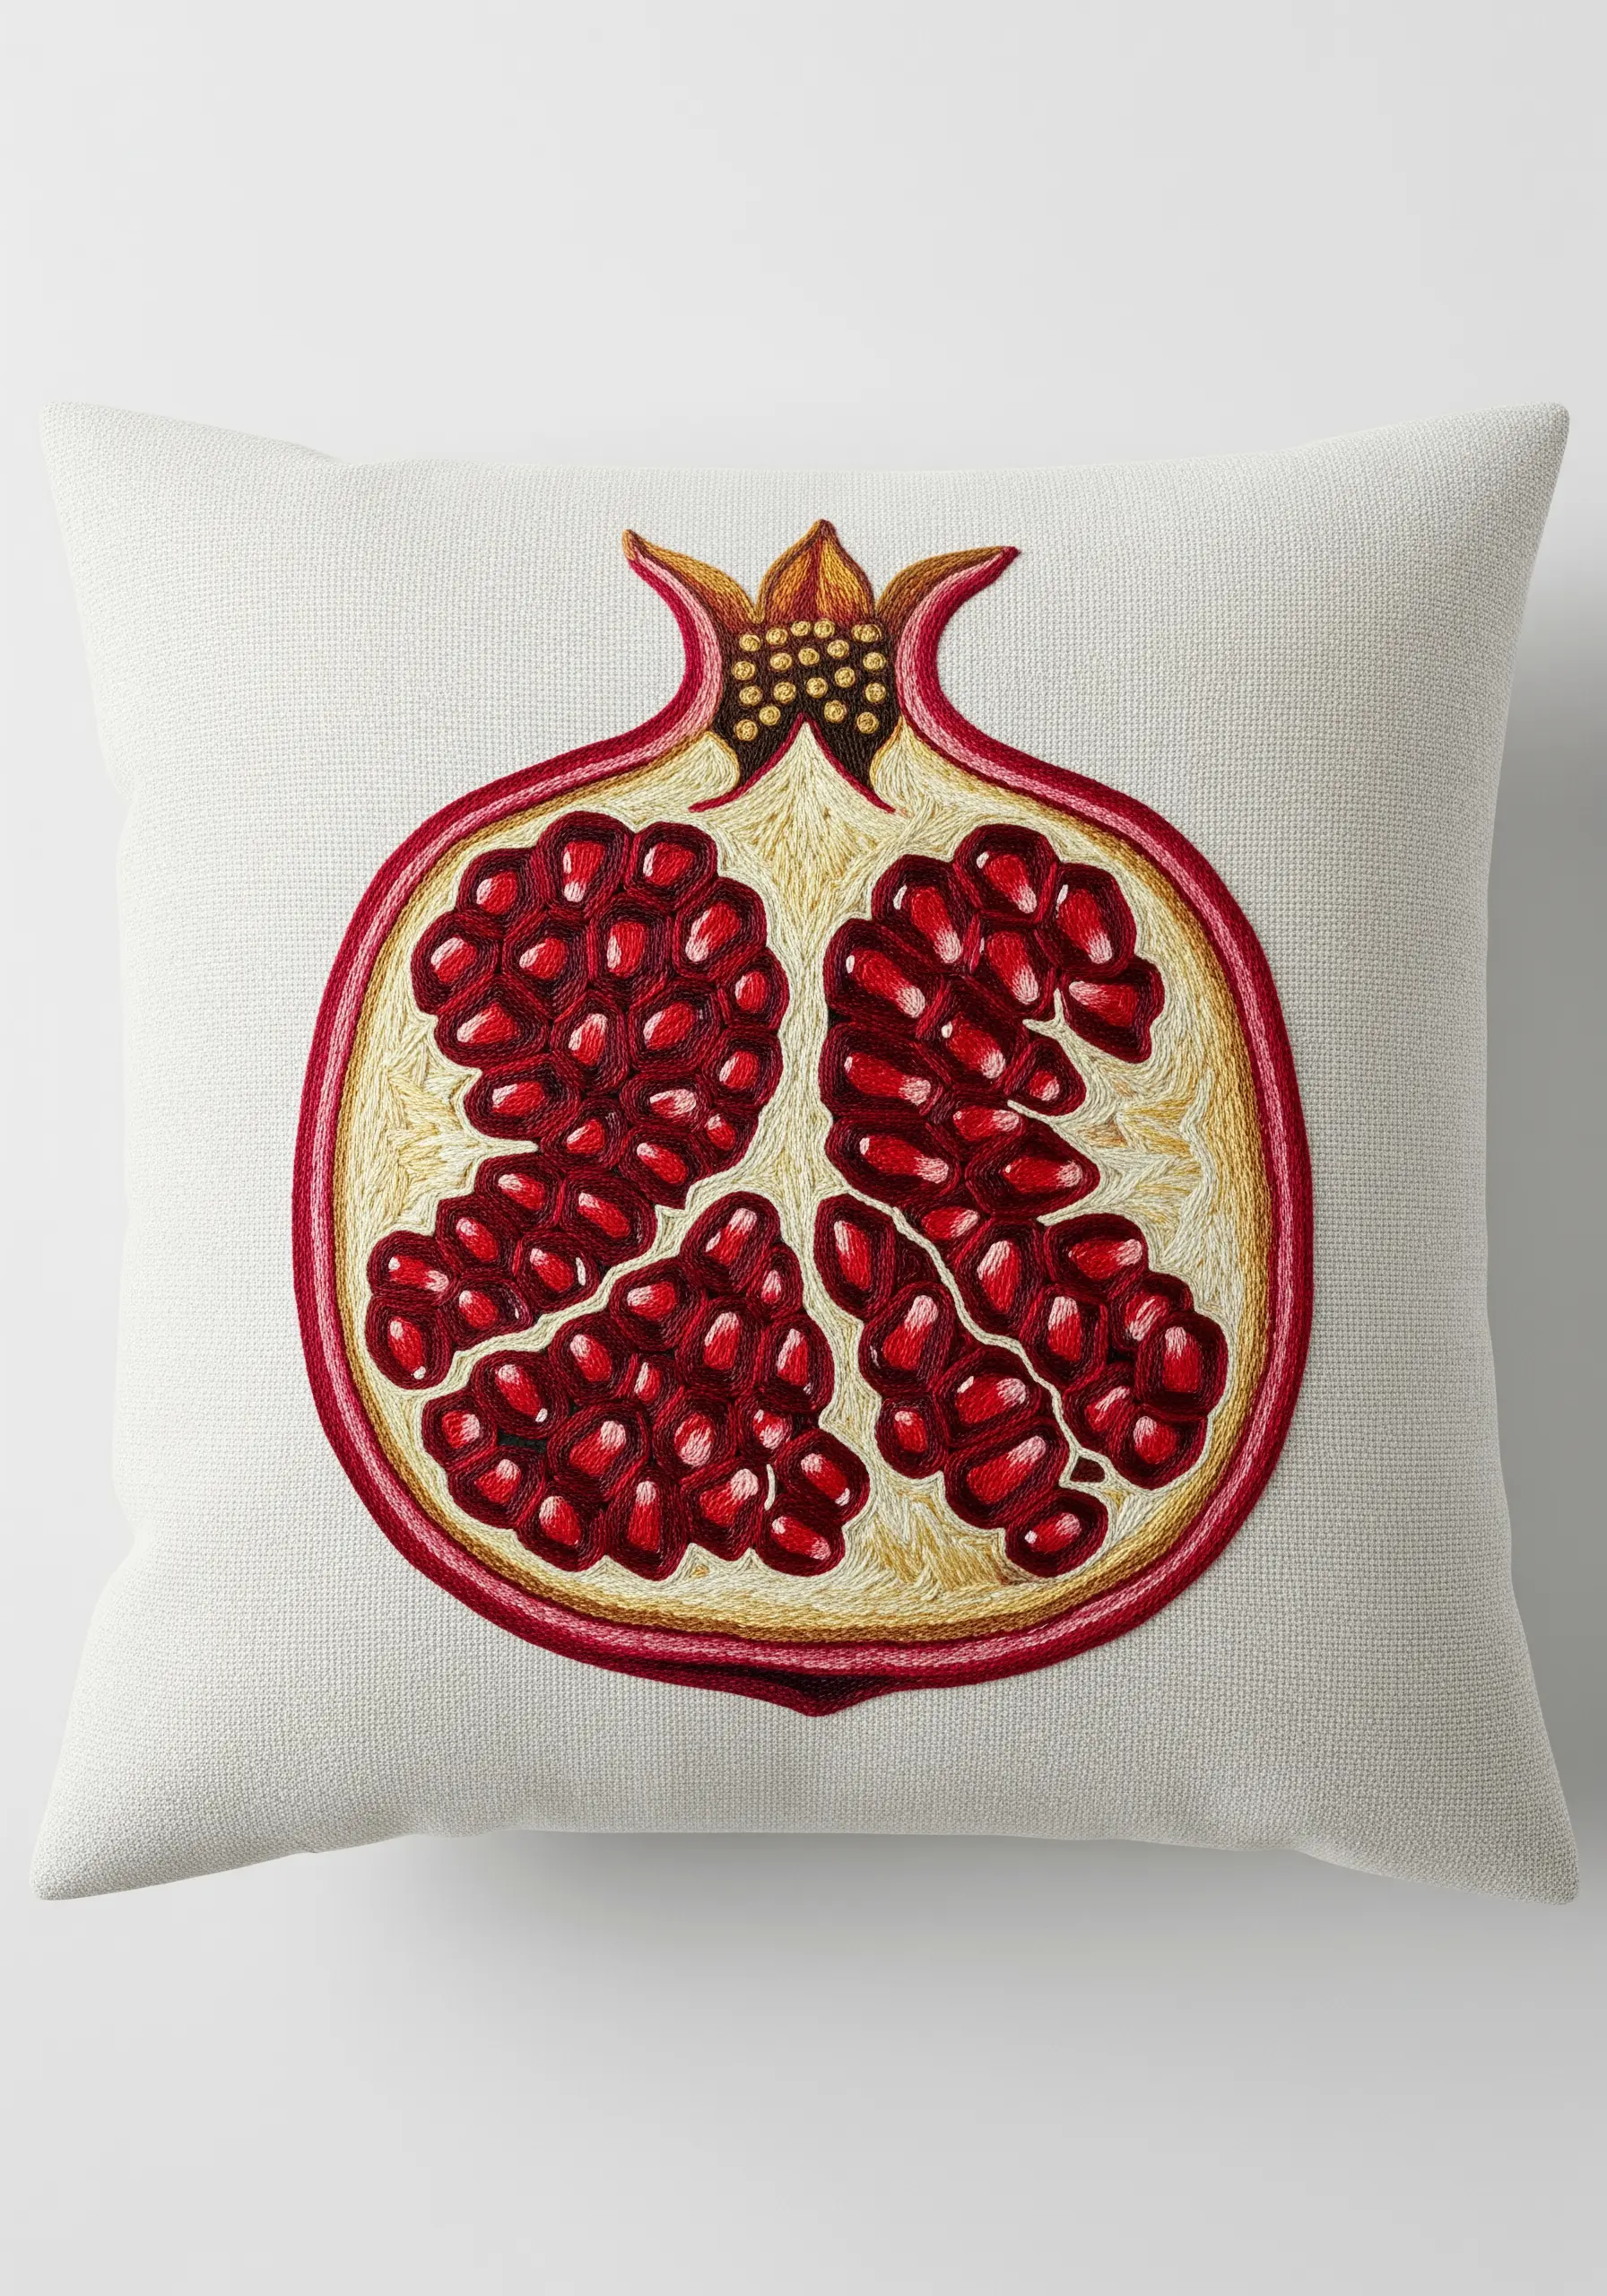
The challenge of a pomegranate is capturing the glistening, jewel-like quality of the seeds.
Instead of flat satin stitch, fill each seed pocket with a dense cluster of French knots in varying shades of ruby and crimson.
Add a single white stitch to a few knots to mimic a highlight, giving the impression of light reflecting off a juicy surface.
A sharp, raised outline in split stitch contains the texture and gives the fruit a clean, defined edge.
15. Add Detail with Stitches on Top of Stitches
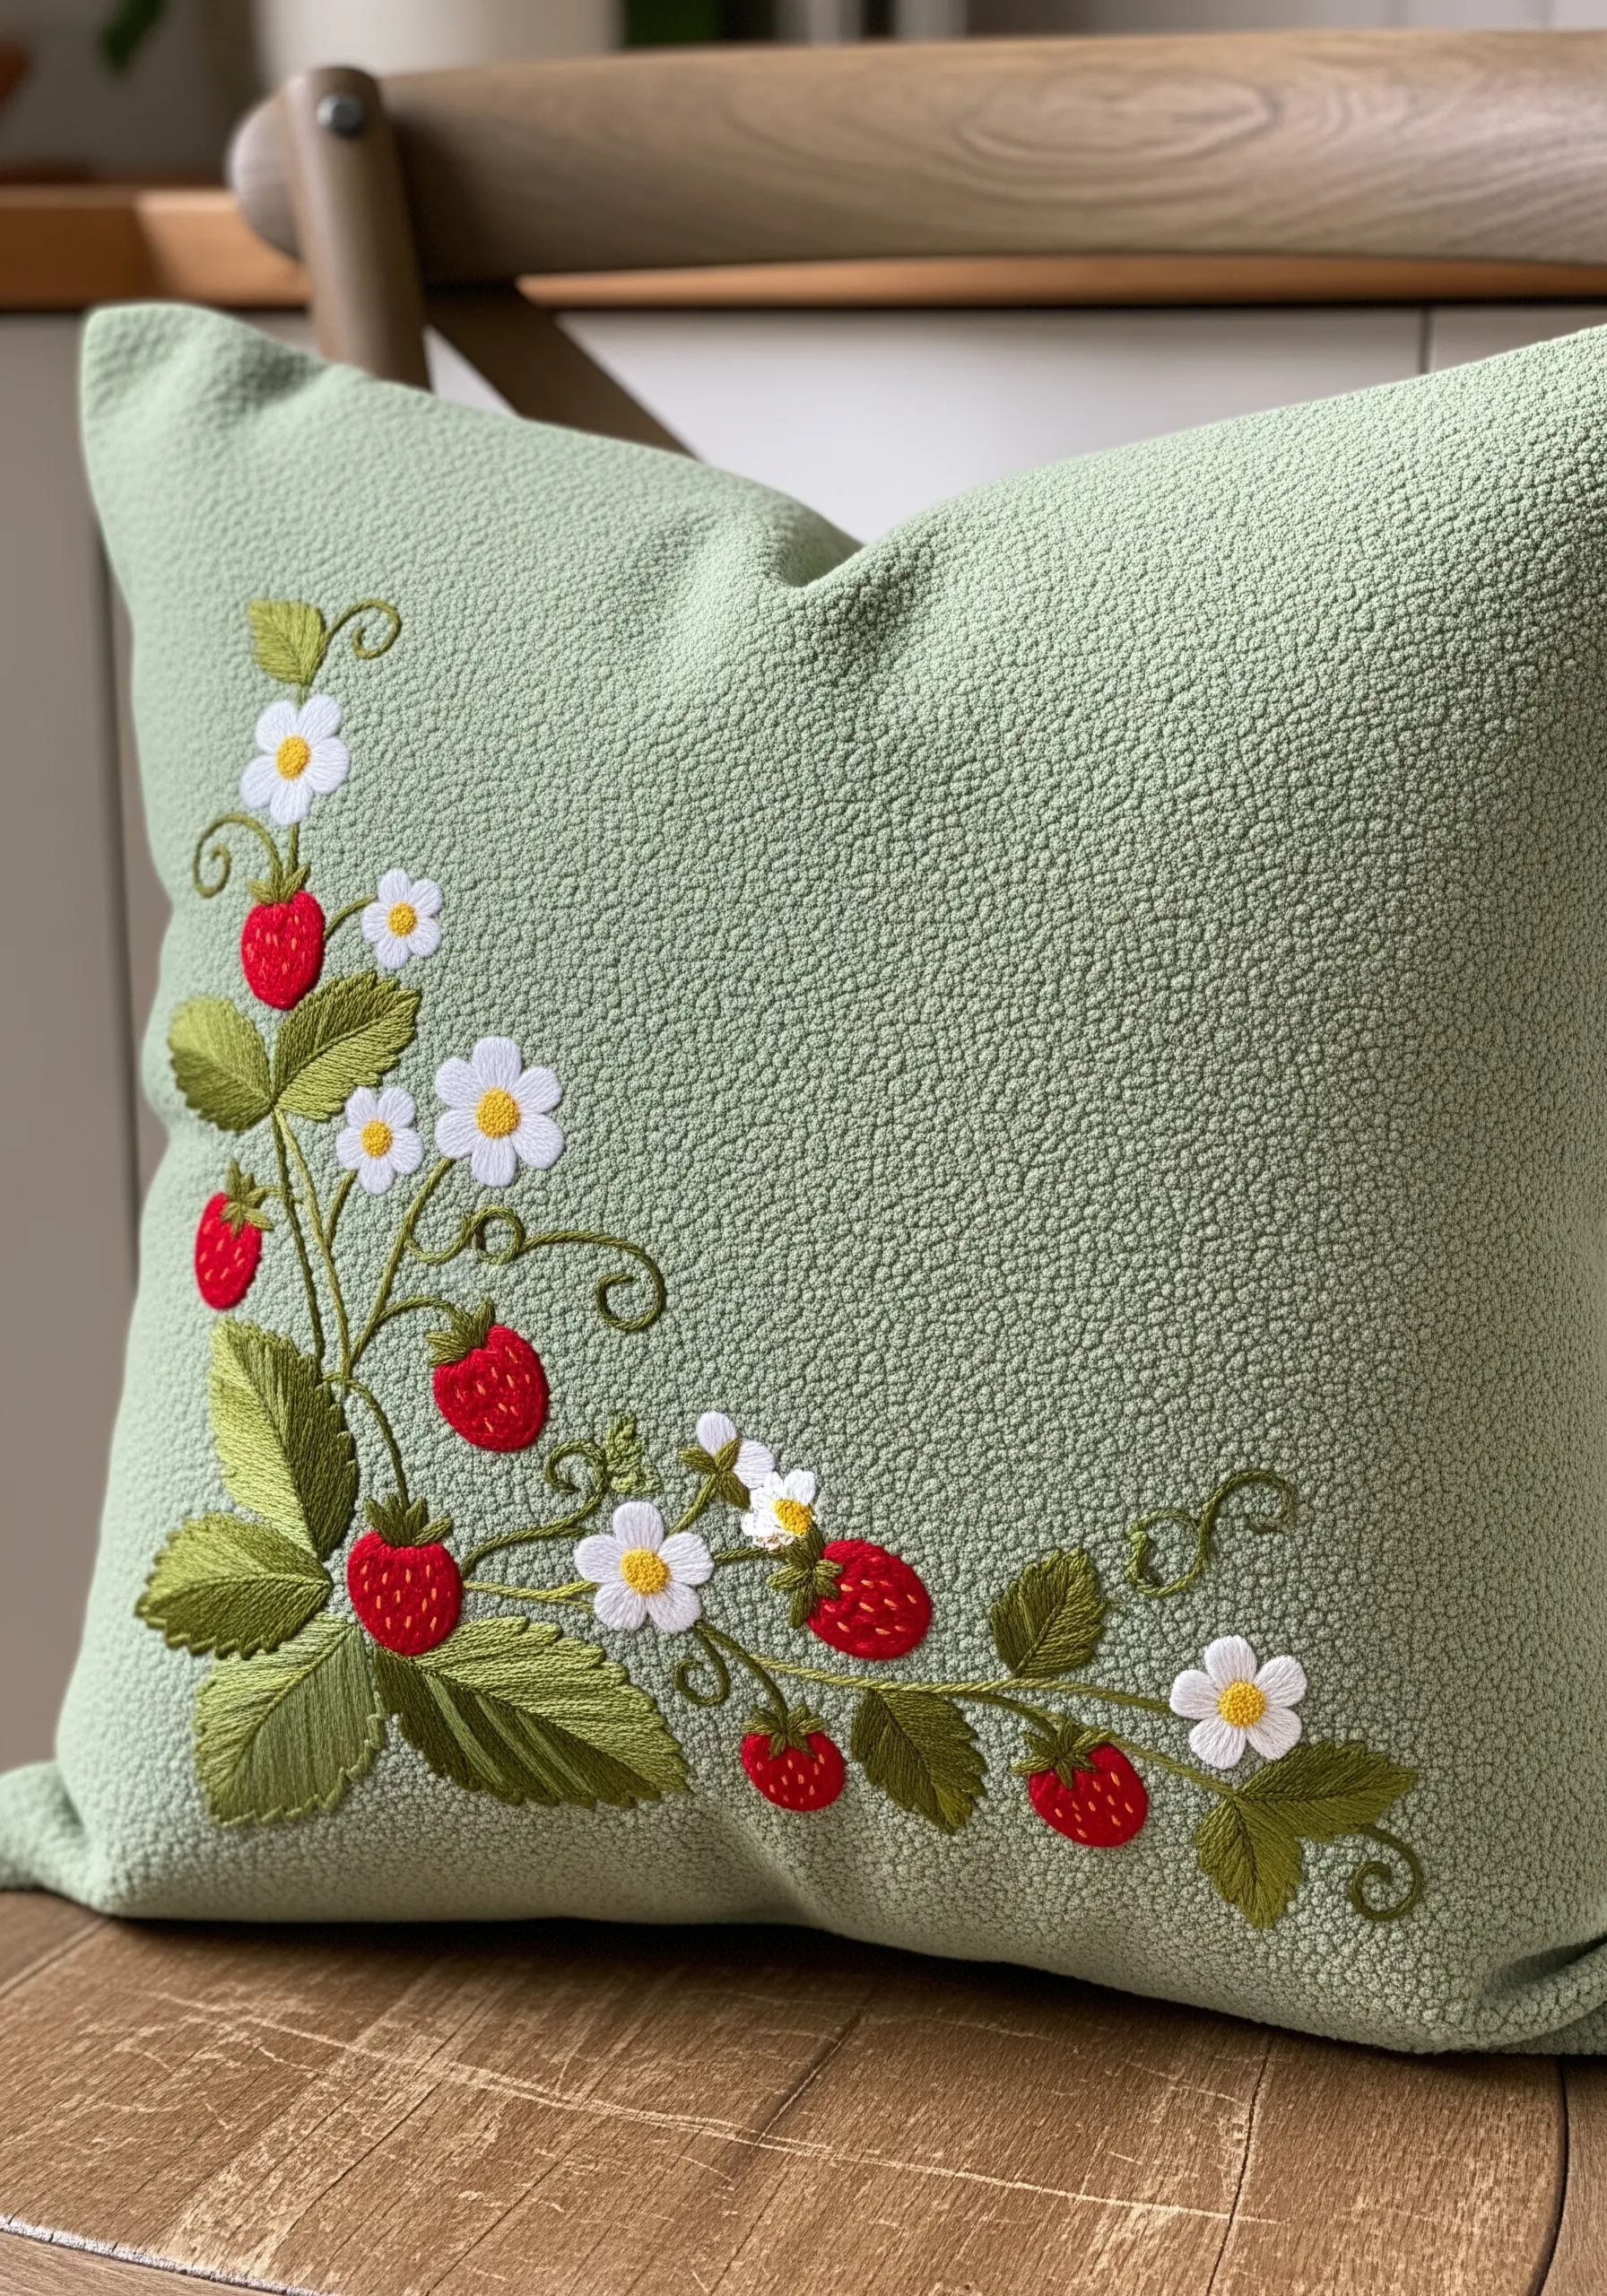
To give your strawberries a realistic finish, work in layers.
First, fill the berry shape with a smooth satin stitch in a rich red.
Once the base is complete, go back and add the tiny yellow achenes (seeds) on top using single seed stitches or French knots.
This layered approach is faster than trying to stitch around tiny seed details and results in a much cleaner, more professional look.
16. Create Graphic Elegance with Precise Line Work

For minimalist designs like this ginkgo branch, the quality of your lines is paramount.
Use a two-strand stem stitch or whipped backstitch to ensure every curve is perfectly smooth and consistent in thickness.
To create the delicate veins in the leaves, switch to a single strand of the same color and use simple straight stitches.
Choosing a high-sheen or metallic thread against a dark, matte fabric like this teal cotton creates a dramatic, elegant contrast that highlights your clean minimalist line art embroidery patterns.
17. Combine Stitches for Prickly and Soft Textures
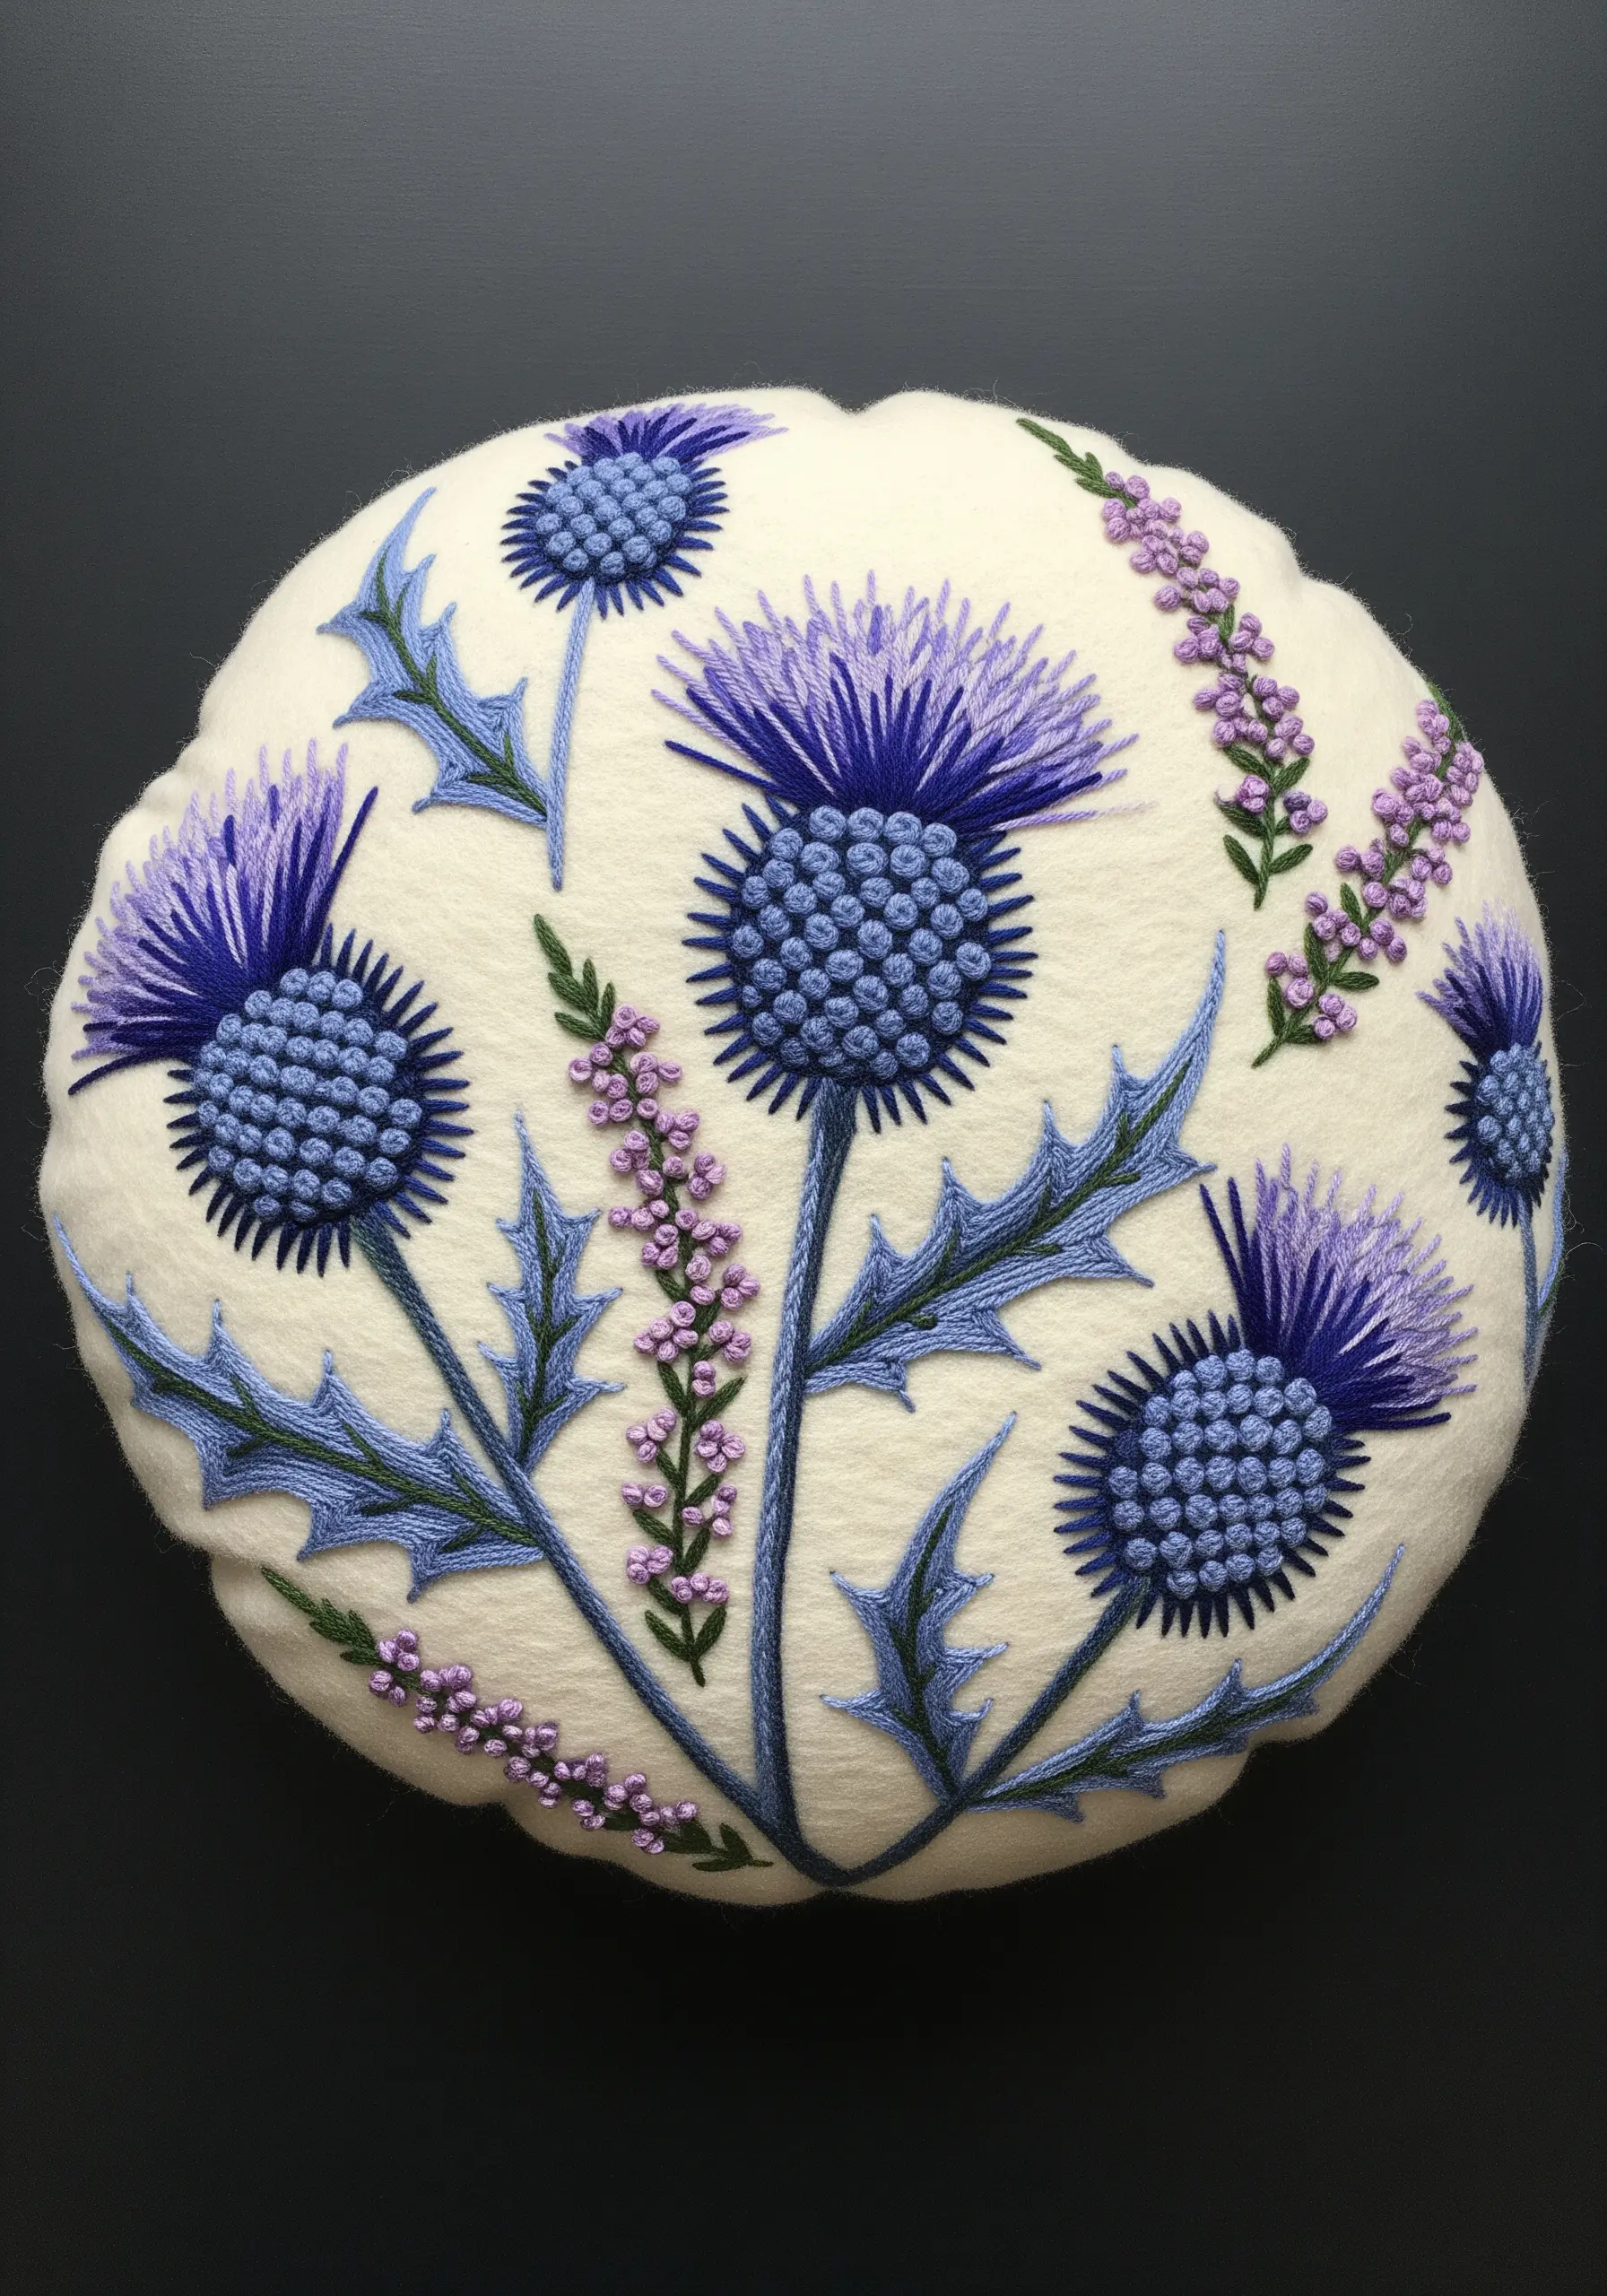
A Scottish thistle offers a perfect opportunity to combine different textures in one motif.
Create the bulbous base of the flower with a dense layer of French knots packed tightly together.
For the spiky purple top, use the turkey work stitch (or Ghiordes knot) and trim the loops to create a fluffy, brush-like effect.
Stitching on a thick, soft fabric like wool felt enhances the cozy, tactile quality of the finished pillow.
18. Use Fabric Weave as a Stitching Guide
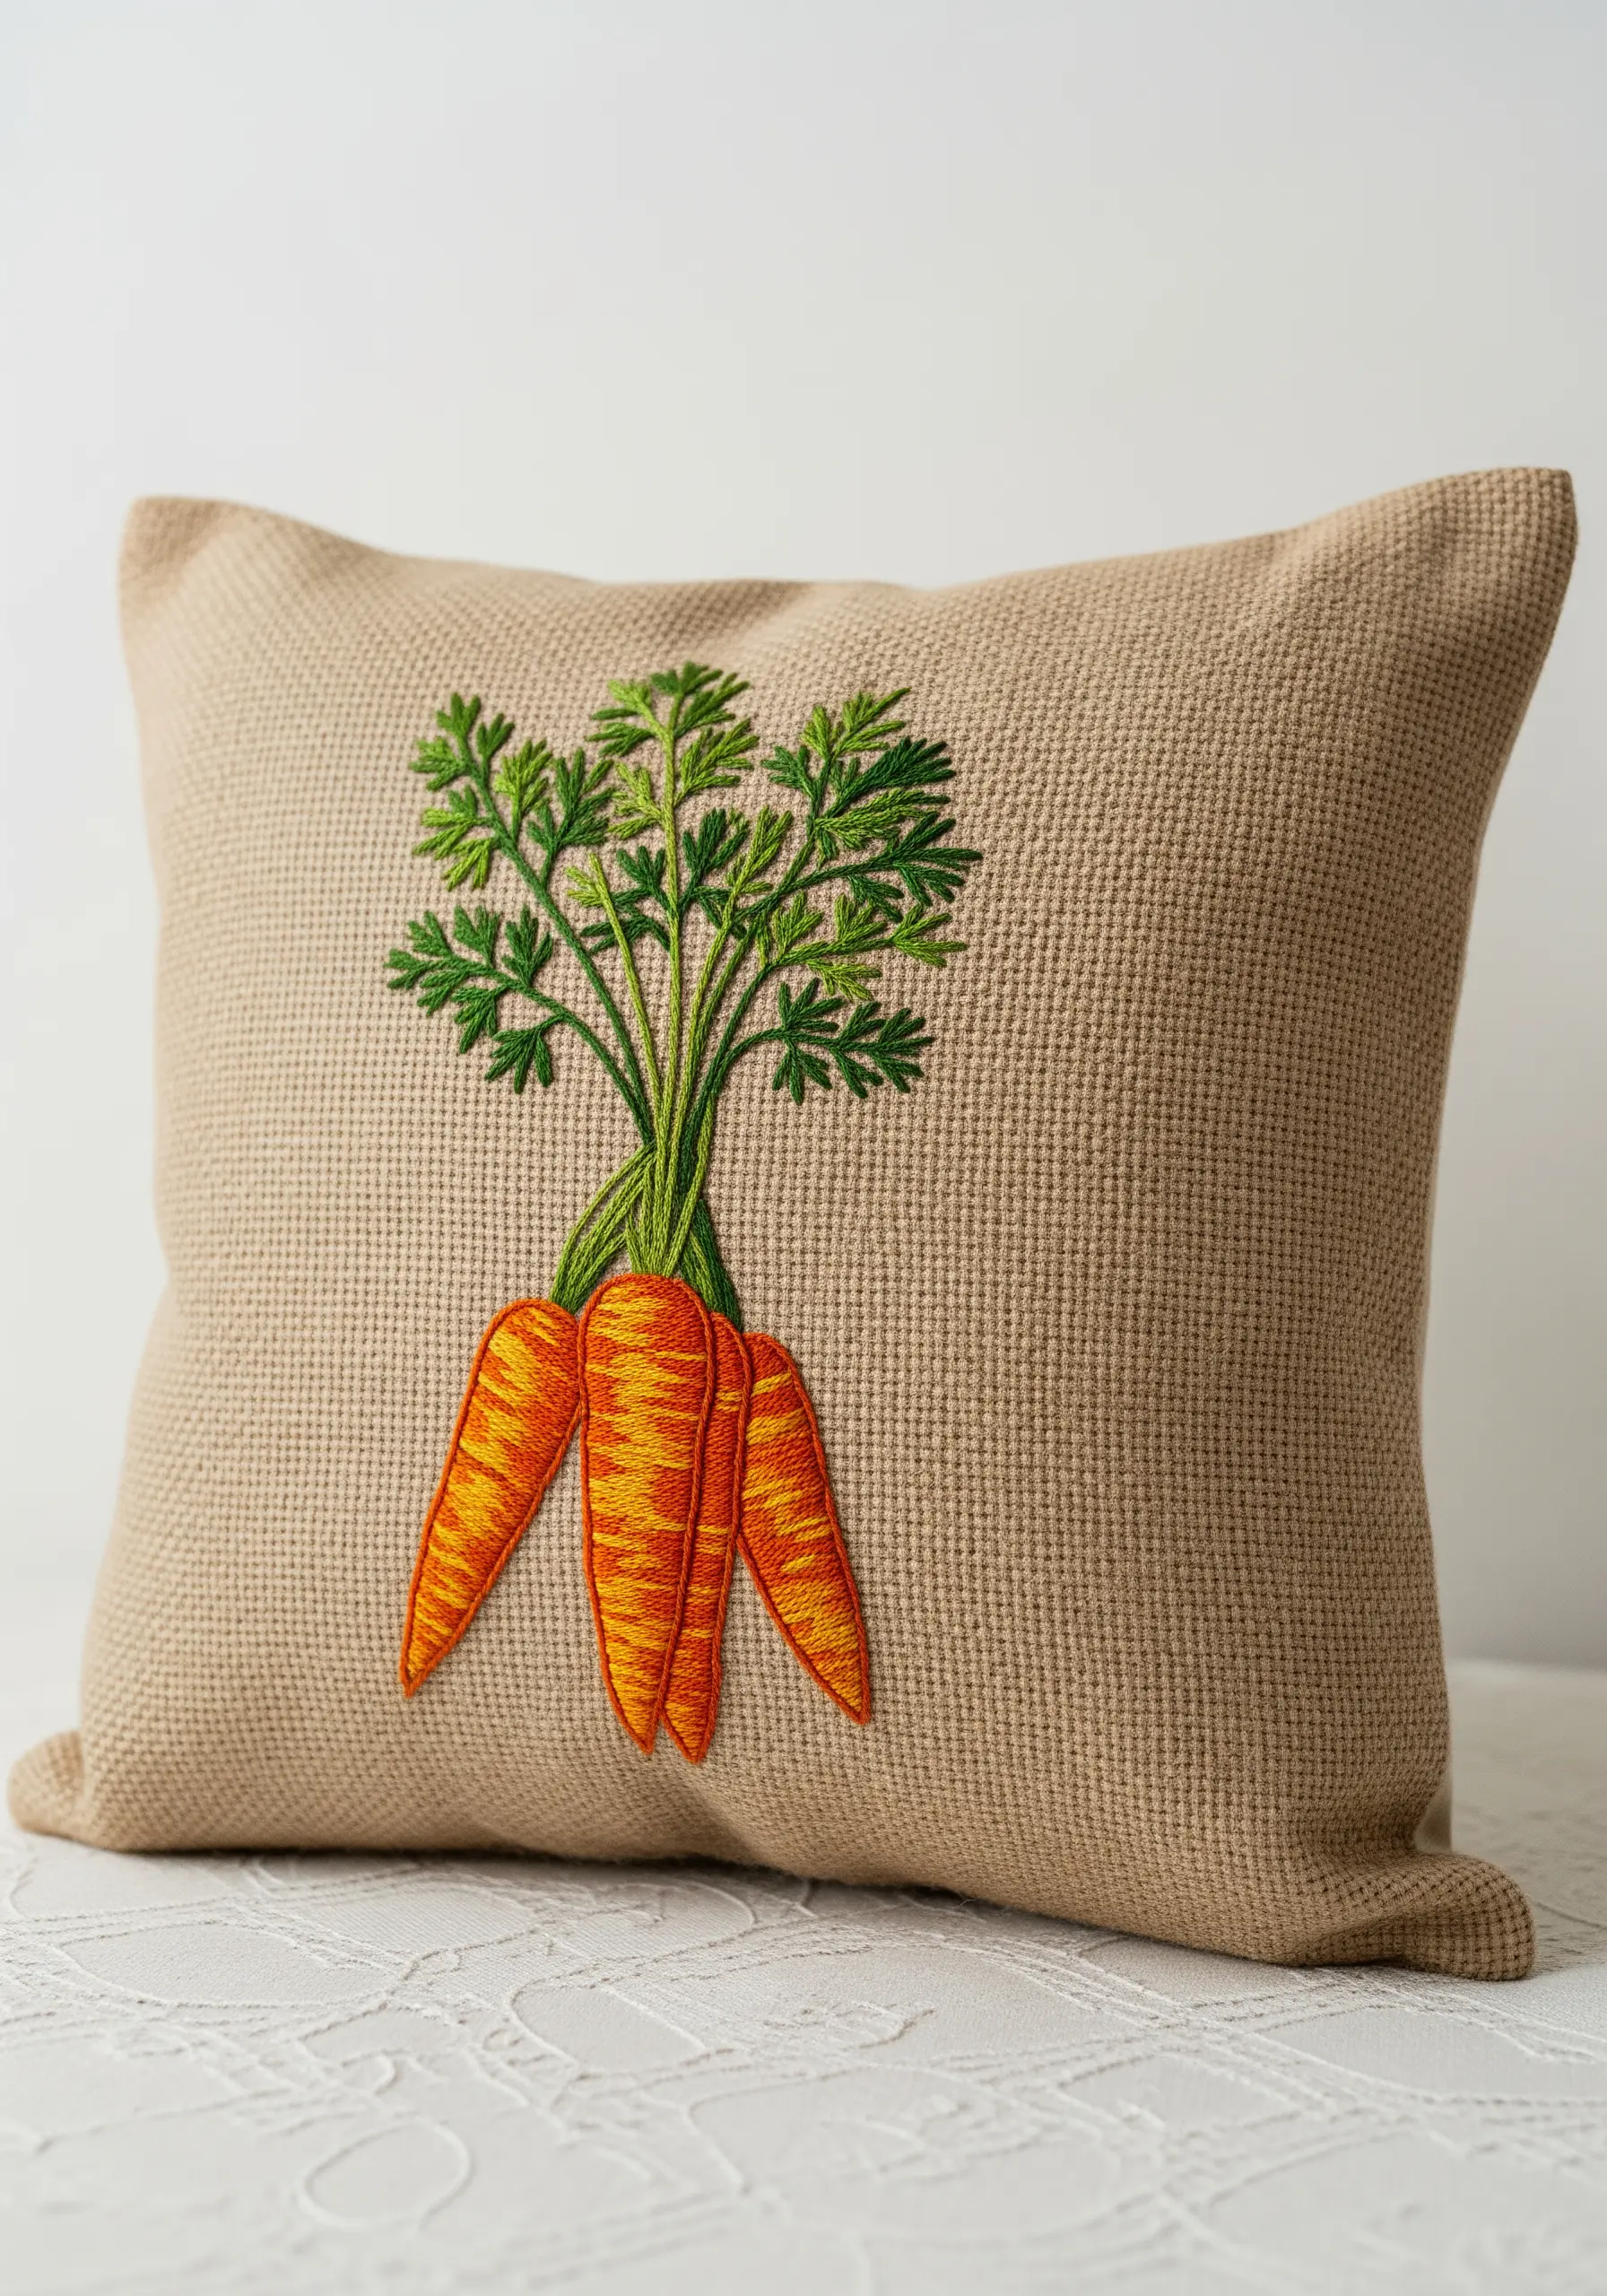
When working on an even-weave fabric like Aida or burlap, use the grid to your advantage.
Keep your long-and-short stitches for the carrots perfectly vertical, allowing the fabric’s texture to add a subtle, almost pixelated look to your shading.
For the leafy tops, use fly stitch or fern stitch, which creates feathery, open foliage that contrasts nicely with the solid roots.
This approach merges the precision of cross-stitch with the illustrative freedom of embroidery.
19. Capture Ruffled Petals with Thread Painting
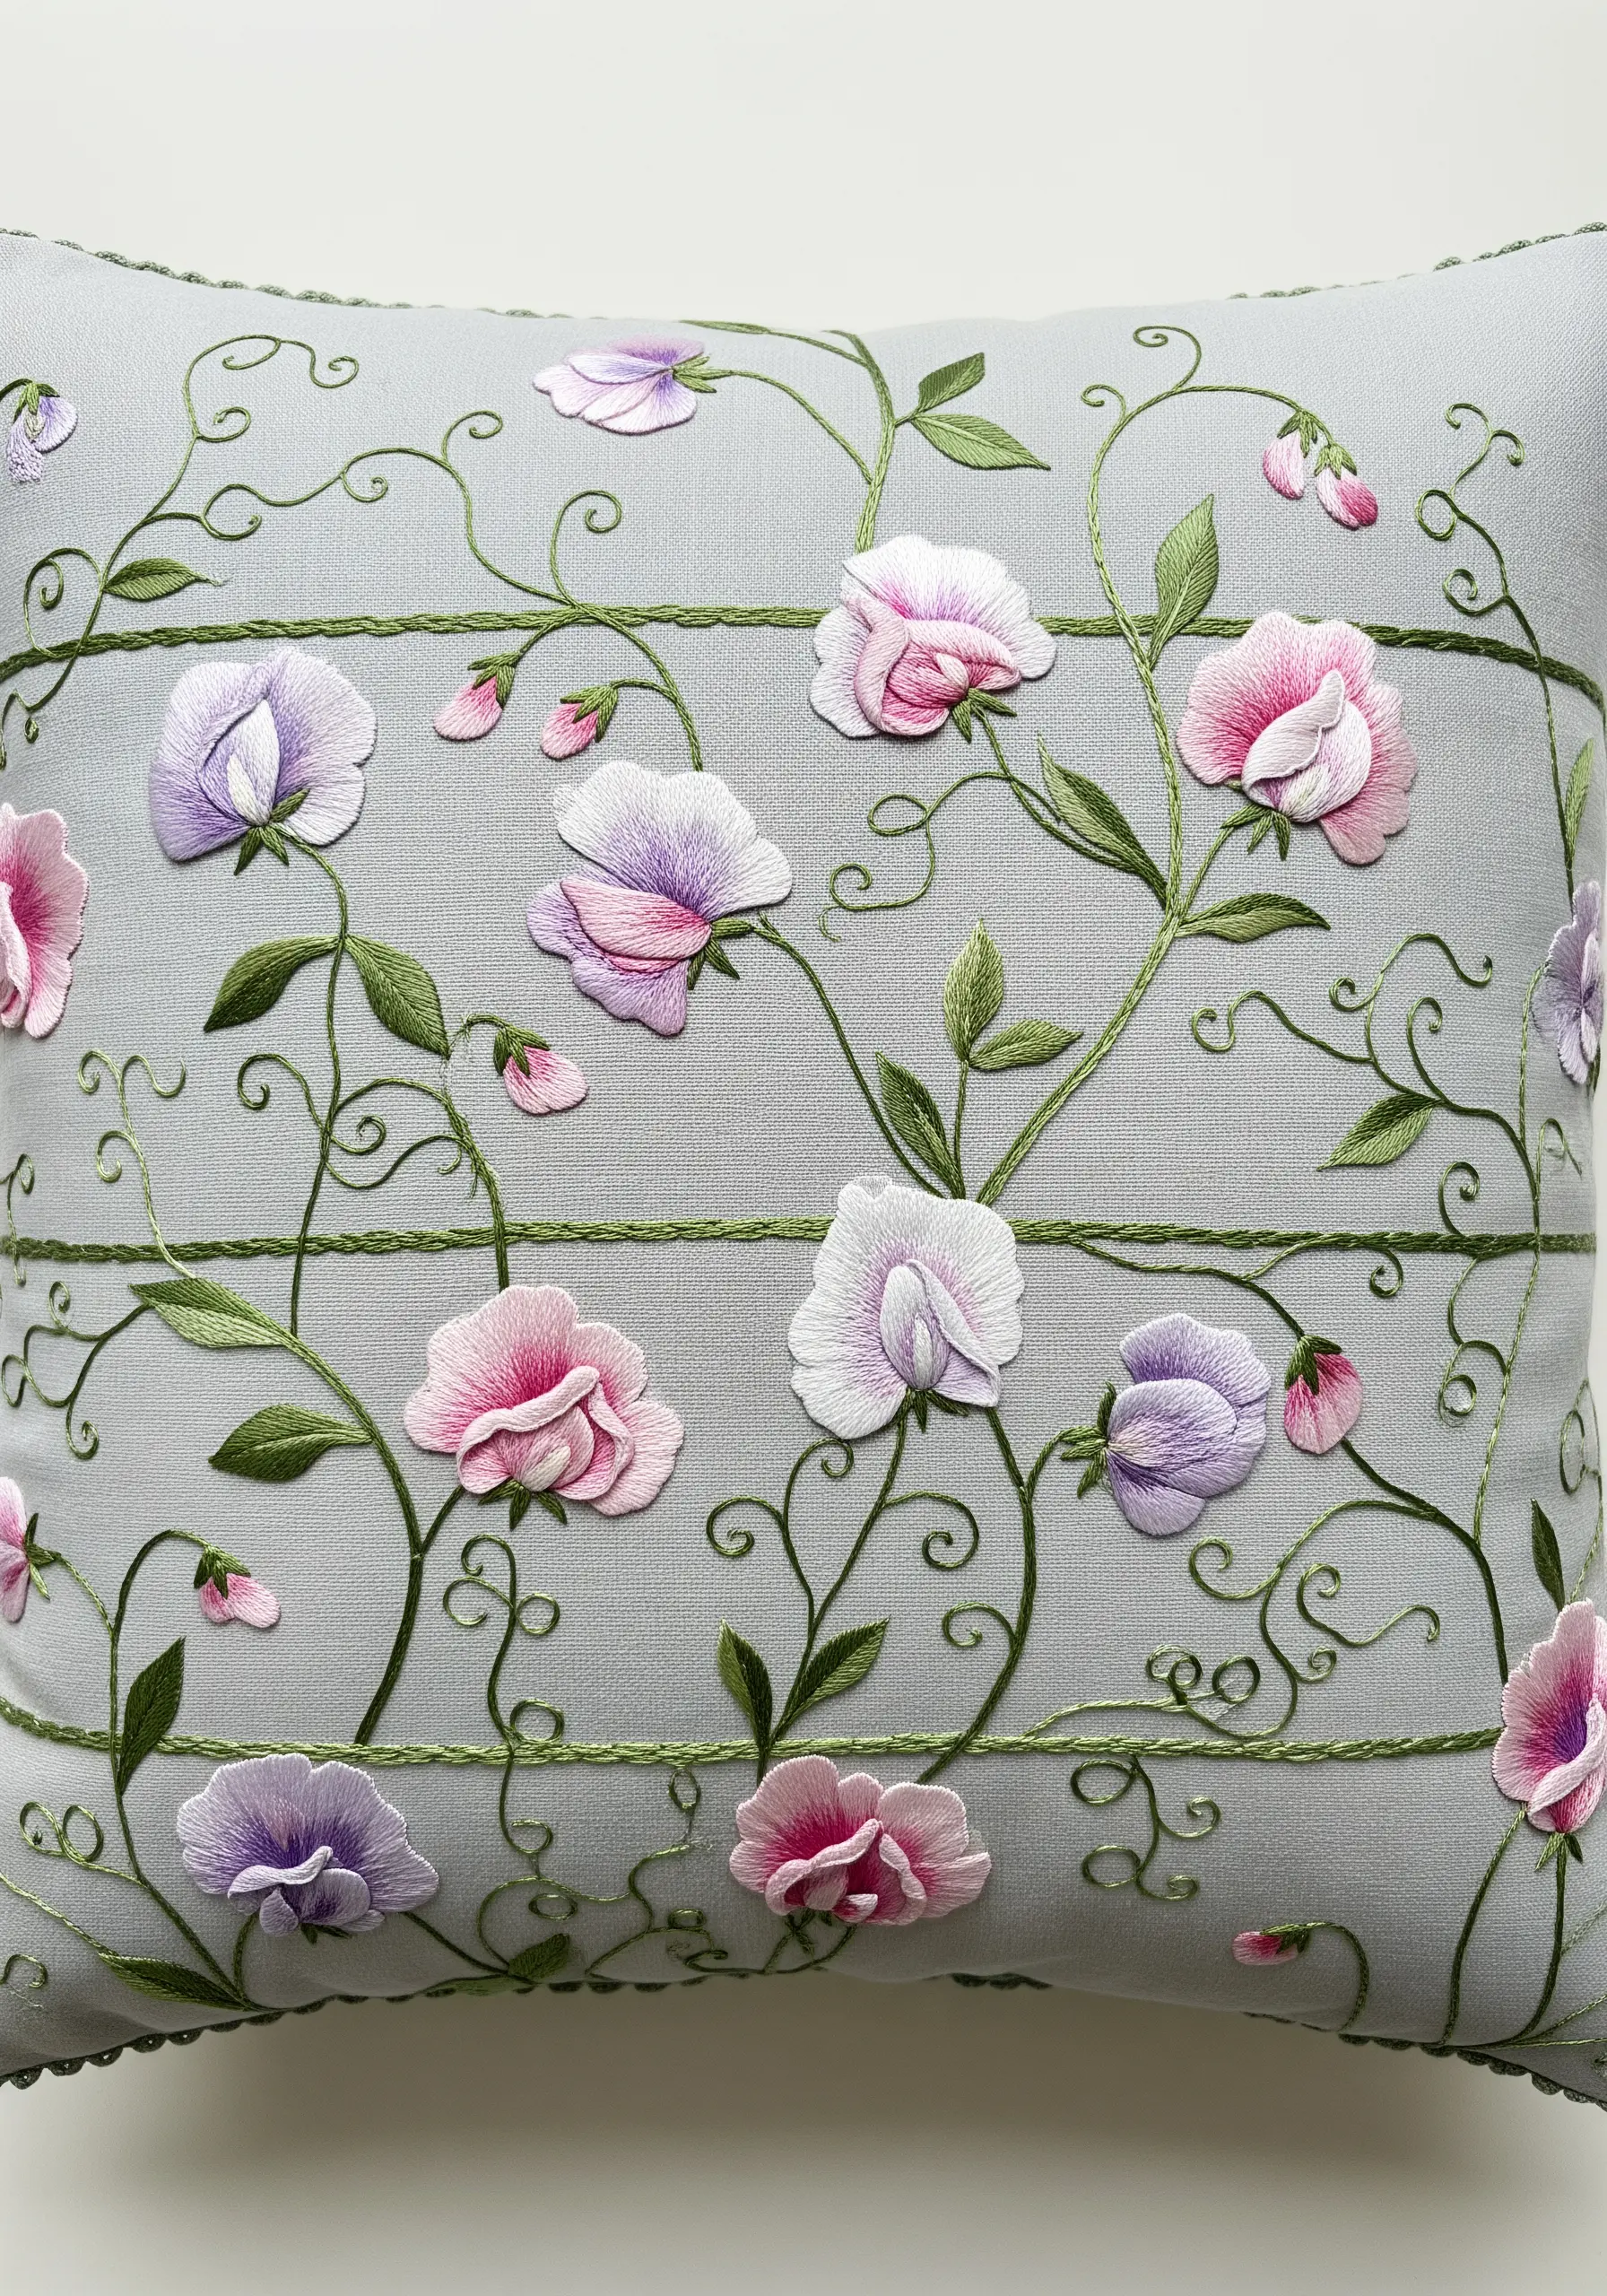
The delicate, ruffled nature of sweet pea petals can be beautifully rendered with thread painting.
Use single-strand floss and angle your long-and-short stitches to follow the petal’s natural curl, blending shades of pink, purple, and white.
Don’t pull your stitches too tight; a slightly looser tension helps create the impression of soft, thin petals.
These floral thread painting techniques are what give the design its breathtaking realism.
20. Maximize Drama with a Black Background
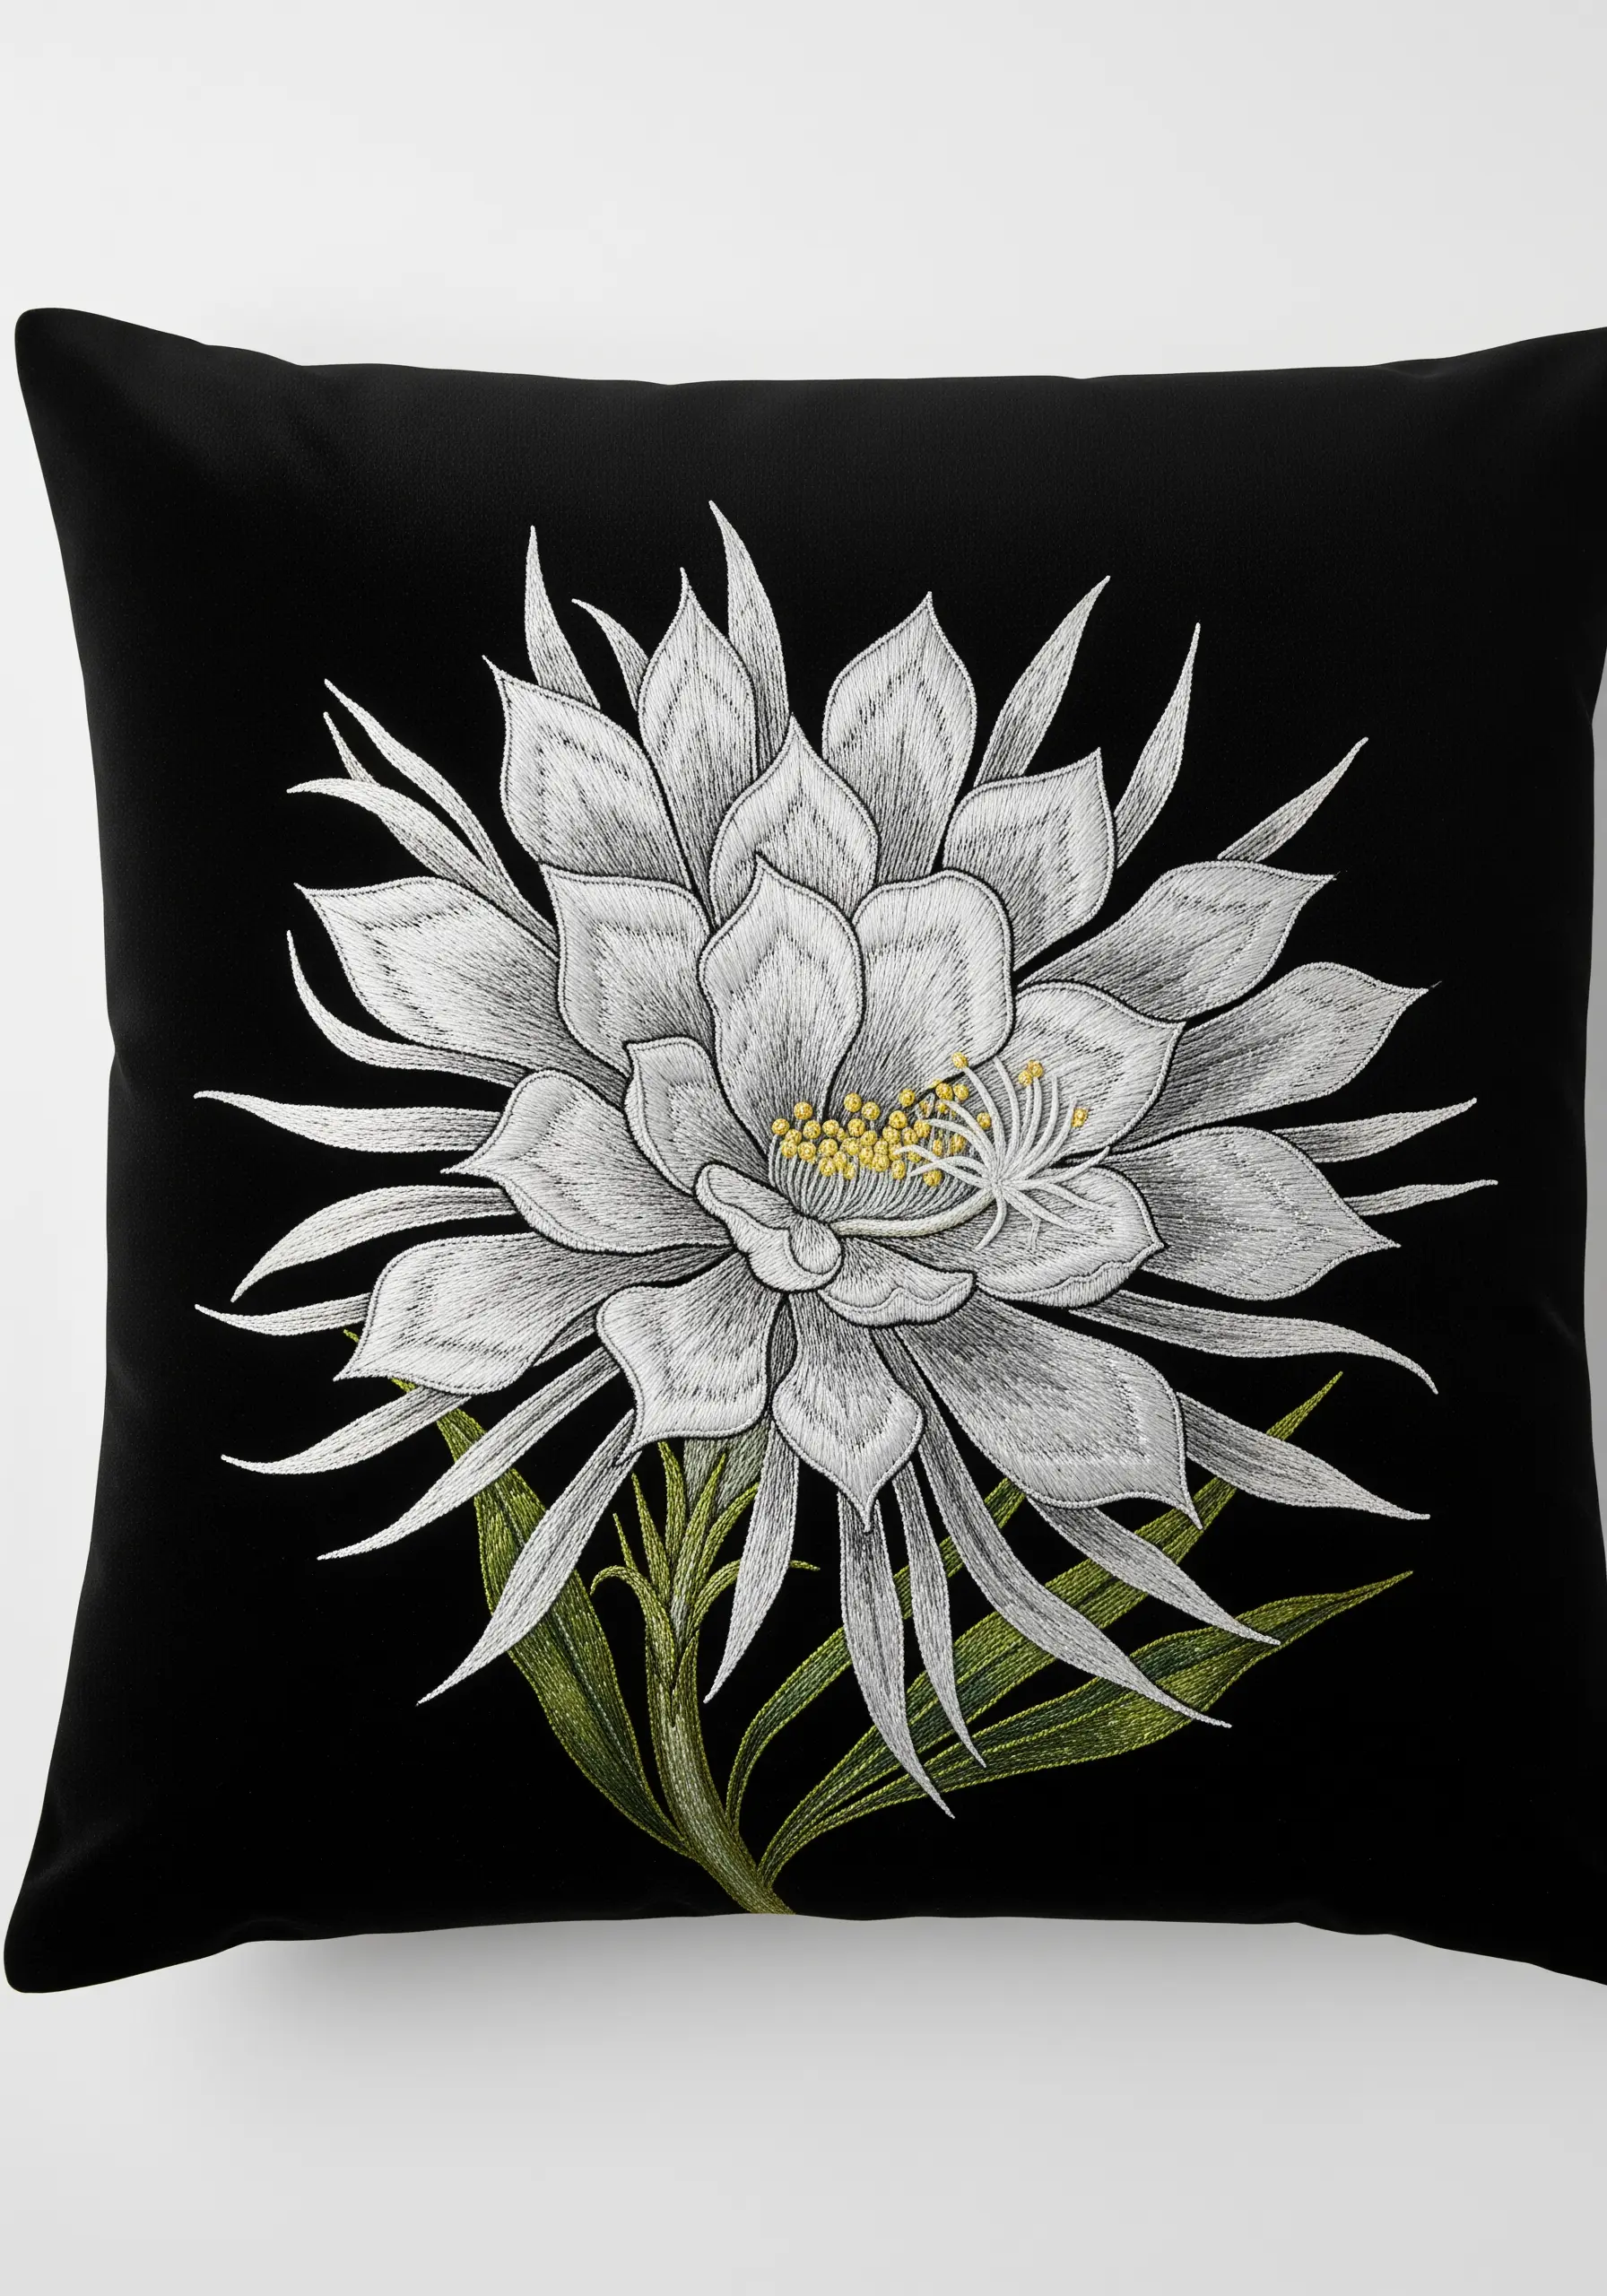
Stitching a white flower on black fabric is the ultimate exercise in contrast and clean execution.
Use a light grey or silver thread for your outlines and deepest shadows instead of pure white to create dimension.
Reserve your brightest white thread for the highlights—the edges of the petals that would catch the most moonlight.
This subtle shading prevents the flower from looking flat and creates a dramatic, ethereal glow against the dark background.


