
Your embroidery hoop is more than a tool—it’s a frame for a story you tell with thread. But it’s easy to feel stuck, repeating the same stitches or wondering how to turn a simple idea into a polished piece of art for your walls. The secret isn’t in mastering dozens of complex techniques overnight.
Instead, it’s about making small, intentional adjustments. It’s understanding how a single change—like the direction of your stitches or the weight of your thread—can transform a flat design into something with depth, texture, and life. It’s about seeing your fabric as a canvas and your needle as a brush.
Let’s explore how you can elevate your hoop art from a pleasant craft to a confident artistic statement. These ideas are designed to give you specific, actionable ways to refine your work, helping you create pieces you are truly proud to display.
1. Curate a Botanical Gallery Wall

Create a cohesive yet dynamic display by combining a central, large-scale floral piece with smaller, complementary foliage motifs.
For the peonies, use a long-and-short stitch to blend shades of pink, which gives the petals a soft, realistic gradient that satin stitch alone cannot achieve.
Vary the leaf designs—like monstera and fern—to add visual interest, but unify the collection with a consistent color palette of deep greens.
To make petals look even more lifelike, study floral thread painting techniques that mimic natural light and shadow.
Arrange the hoops in an organic, asymmetrical cluster to make the composition feel more natural and less rigid.
2. Stitch Atmospheric Mountain Landscapes

Capture the mood of a sunrise or twilight sky by creating a triptych of mountain ranges, each with a distinct color palette.
Use single-strand floss for the fine sun rays to create a delicate, ethereal glow that contrasts with the denser fill of the mountains.
Work your satin stitches horizontally in the sky and diagonally on the mountain slopes to create a subtle shift in texture that directs the viewer’s eye.
This directional stitching adds depth and prevents the landscape from looking flat, enhancing the sense of perspective.
The key is a gradual color shift; select five to seven shades per hoop to build a smooth, painterly transition from dark to light.
3. Create Celestial Designs with High Contrast

Make your cosmic patterns pop by stitching with metallic or bright white thread on a dark, matte fabric like black linen or cotton canvas.
The contrast is everything here—it allows tiny French knots and straight stitches to read as distant stars and constellations.
For the central spiral galaxy, vary the density of your stitches. Place them closer together near the center and farther apart toward the edges to create a sense of gravitational pull.
Using a silver metallic thread adds a subtle shimmer that catches the light differently than standard floss, enhancing the magical effect.
Arrange smaller constellation hoops around a larger centerpiece to build a narrative of the night sky on your wall.
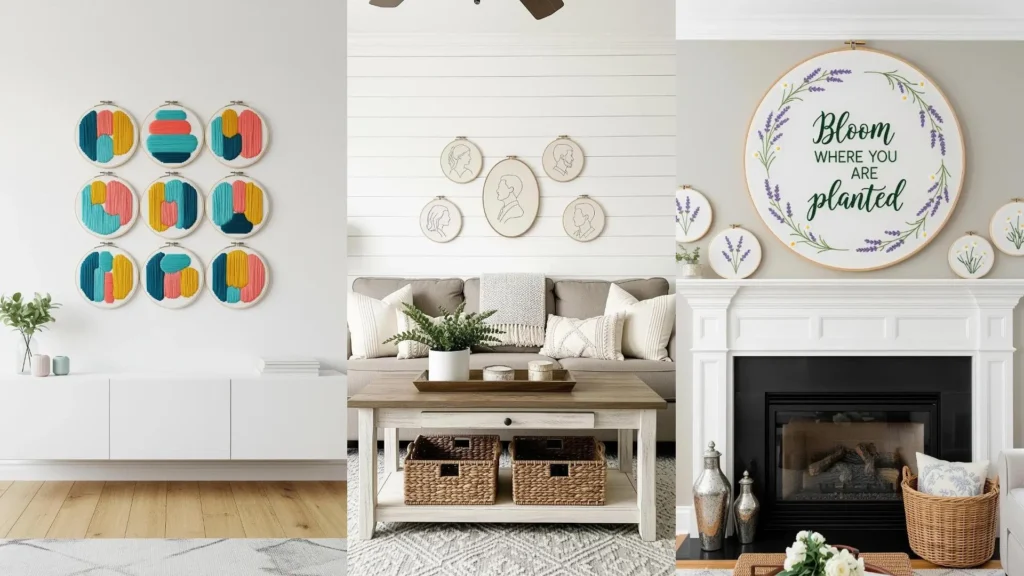
4. Explore Abstract Art with Textured Color Blocking

Move beyond figurative designs by filling hoops with bold, abstract shapes and fields of pure color.
Use a thicker thread, like pearl cotton or all six strands of embroidery floss, to create chunky, satisfying blocks of satin stitch.
To keep your edges crisp where two colors meet, first outline each shape with a split stitch in the corresponding color before filling it in.
Arrange a grid of nine hoops, but vary the composition within each one to create a unified piece that is still full of surprises.
This is an excellent way to use up leftover thread and experiment with abstract thread embroidery ideas and unconventional color combinations.
5. Master the Elegance of Single-Line Art
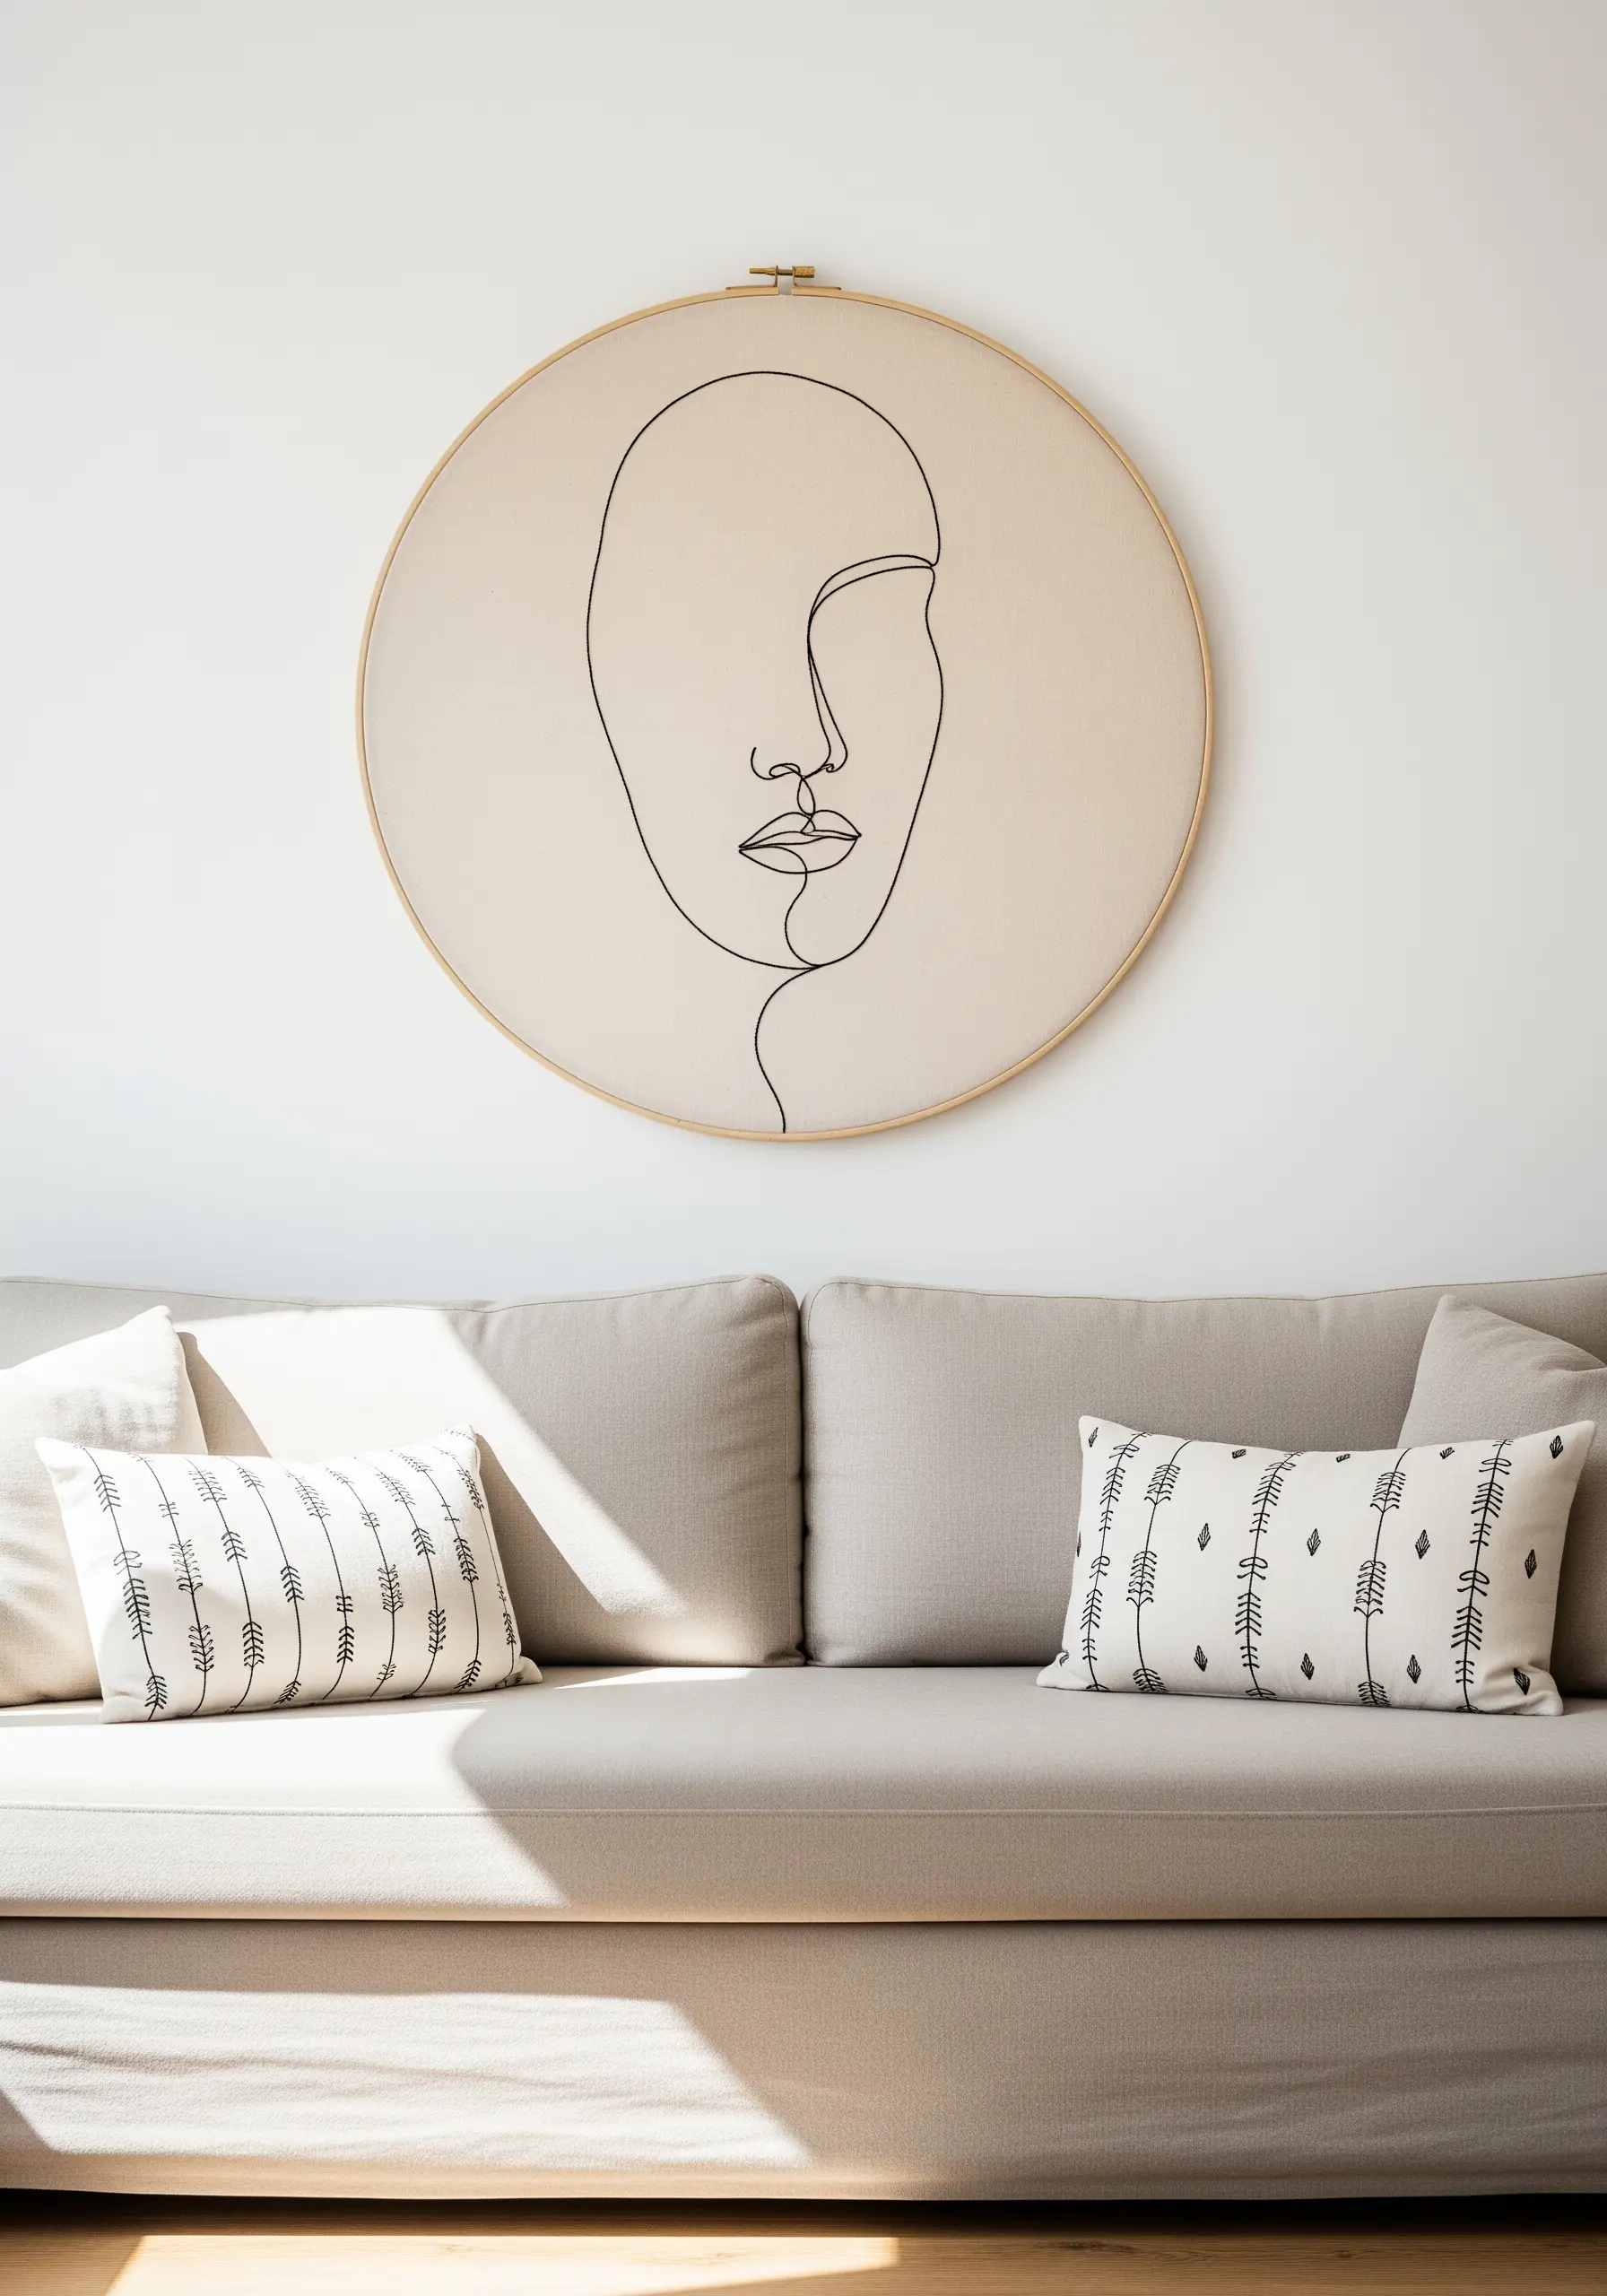
Capture the essence of a subject with a single, continuous line to create a modern and minimalist statement piece.
Use a large-format hoop—12 inches or more—to give the design breathing room and transform it into substantial wall art.
The key to a flawless line is using a whipped backstitch or stem stitch, which creates a smooth, uninterrupted curve without the jagged look of a basic backstitch.
Choose a high-contrast combination, like black thread on natural linen, to emphasize the purity and confidence of the line.
These single-line face profiles work beautifully over a sofa or bed, adding an artistic touch without overwhelming the space.
6. Build a Meadow with Textural Wildflowers

Instead of relying on one stitch, create a dynamic floral scene by assigning a different textural stitch to each type of flower.
Use woven wheel stitches for roses to create a dense, three-dimensional bloom. For daisies, combine a satin stitch for the petals with a cluster of French knots for the center.
For filler flowers and leaves, incorporate lazy daisy stitches and straight stitches of varying lengths to mimic the organized chaos of a real meadow.
Using a variety of stitches adds incredible depth and tactile appeal, inviting viewers to look closer.
Group different floral hoops together to create your own wild botanical wreath patterns right on the wall.
7. Design a Retro Gallery with Geometric Motifs

Embrace a mid-century modern aesthetic by creating a vibrant, interlocking gallery wall of geometric patterns.
Fill bold shapes with dense satin stitch, ensuring all your stitches lie in the same direction within a single block of color for a clean, uniform finish.
To achieve sharp points and clean lines, use a single backstitch at each corner to anchor the turn before continuing your fill.
Mix hoop sizes and orientations to create an energetic, asymmetrical arrangement that draws the eye across the entire composition.
This approach allows for endless creativity; you can invent your own patterns or explore modern grid dot stitch concepts for inspiration.
8. Frame a Meaningful Quote with Delicate Botanicals
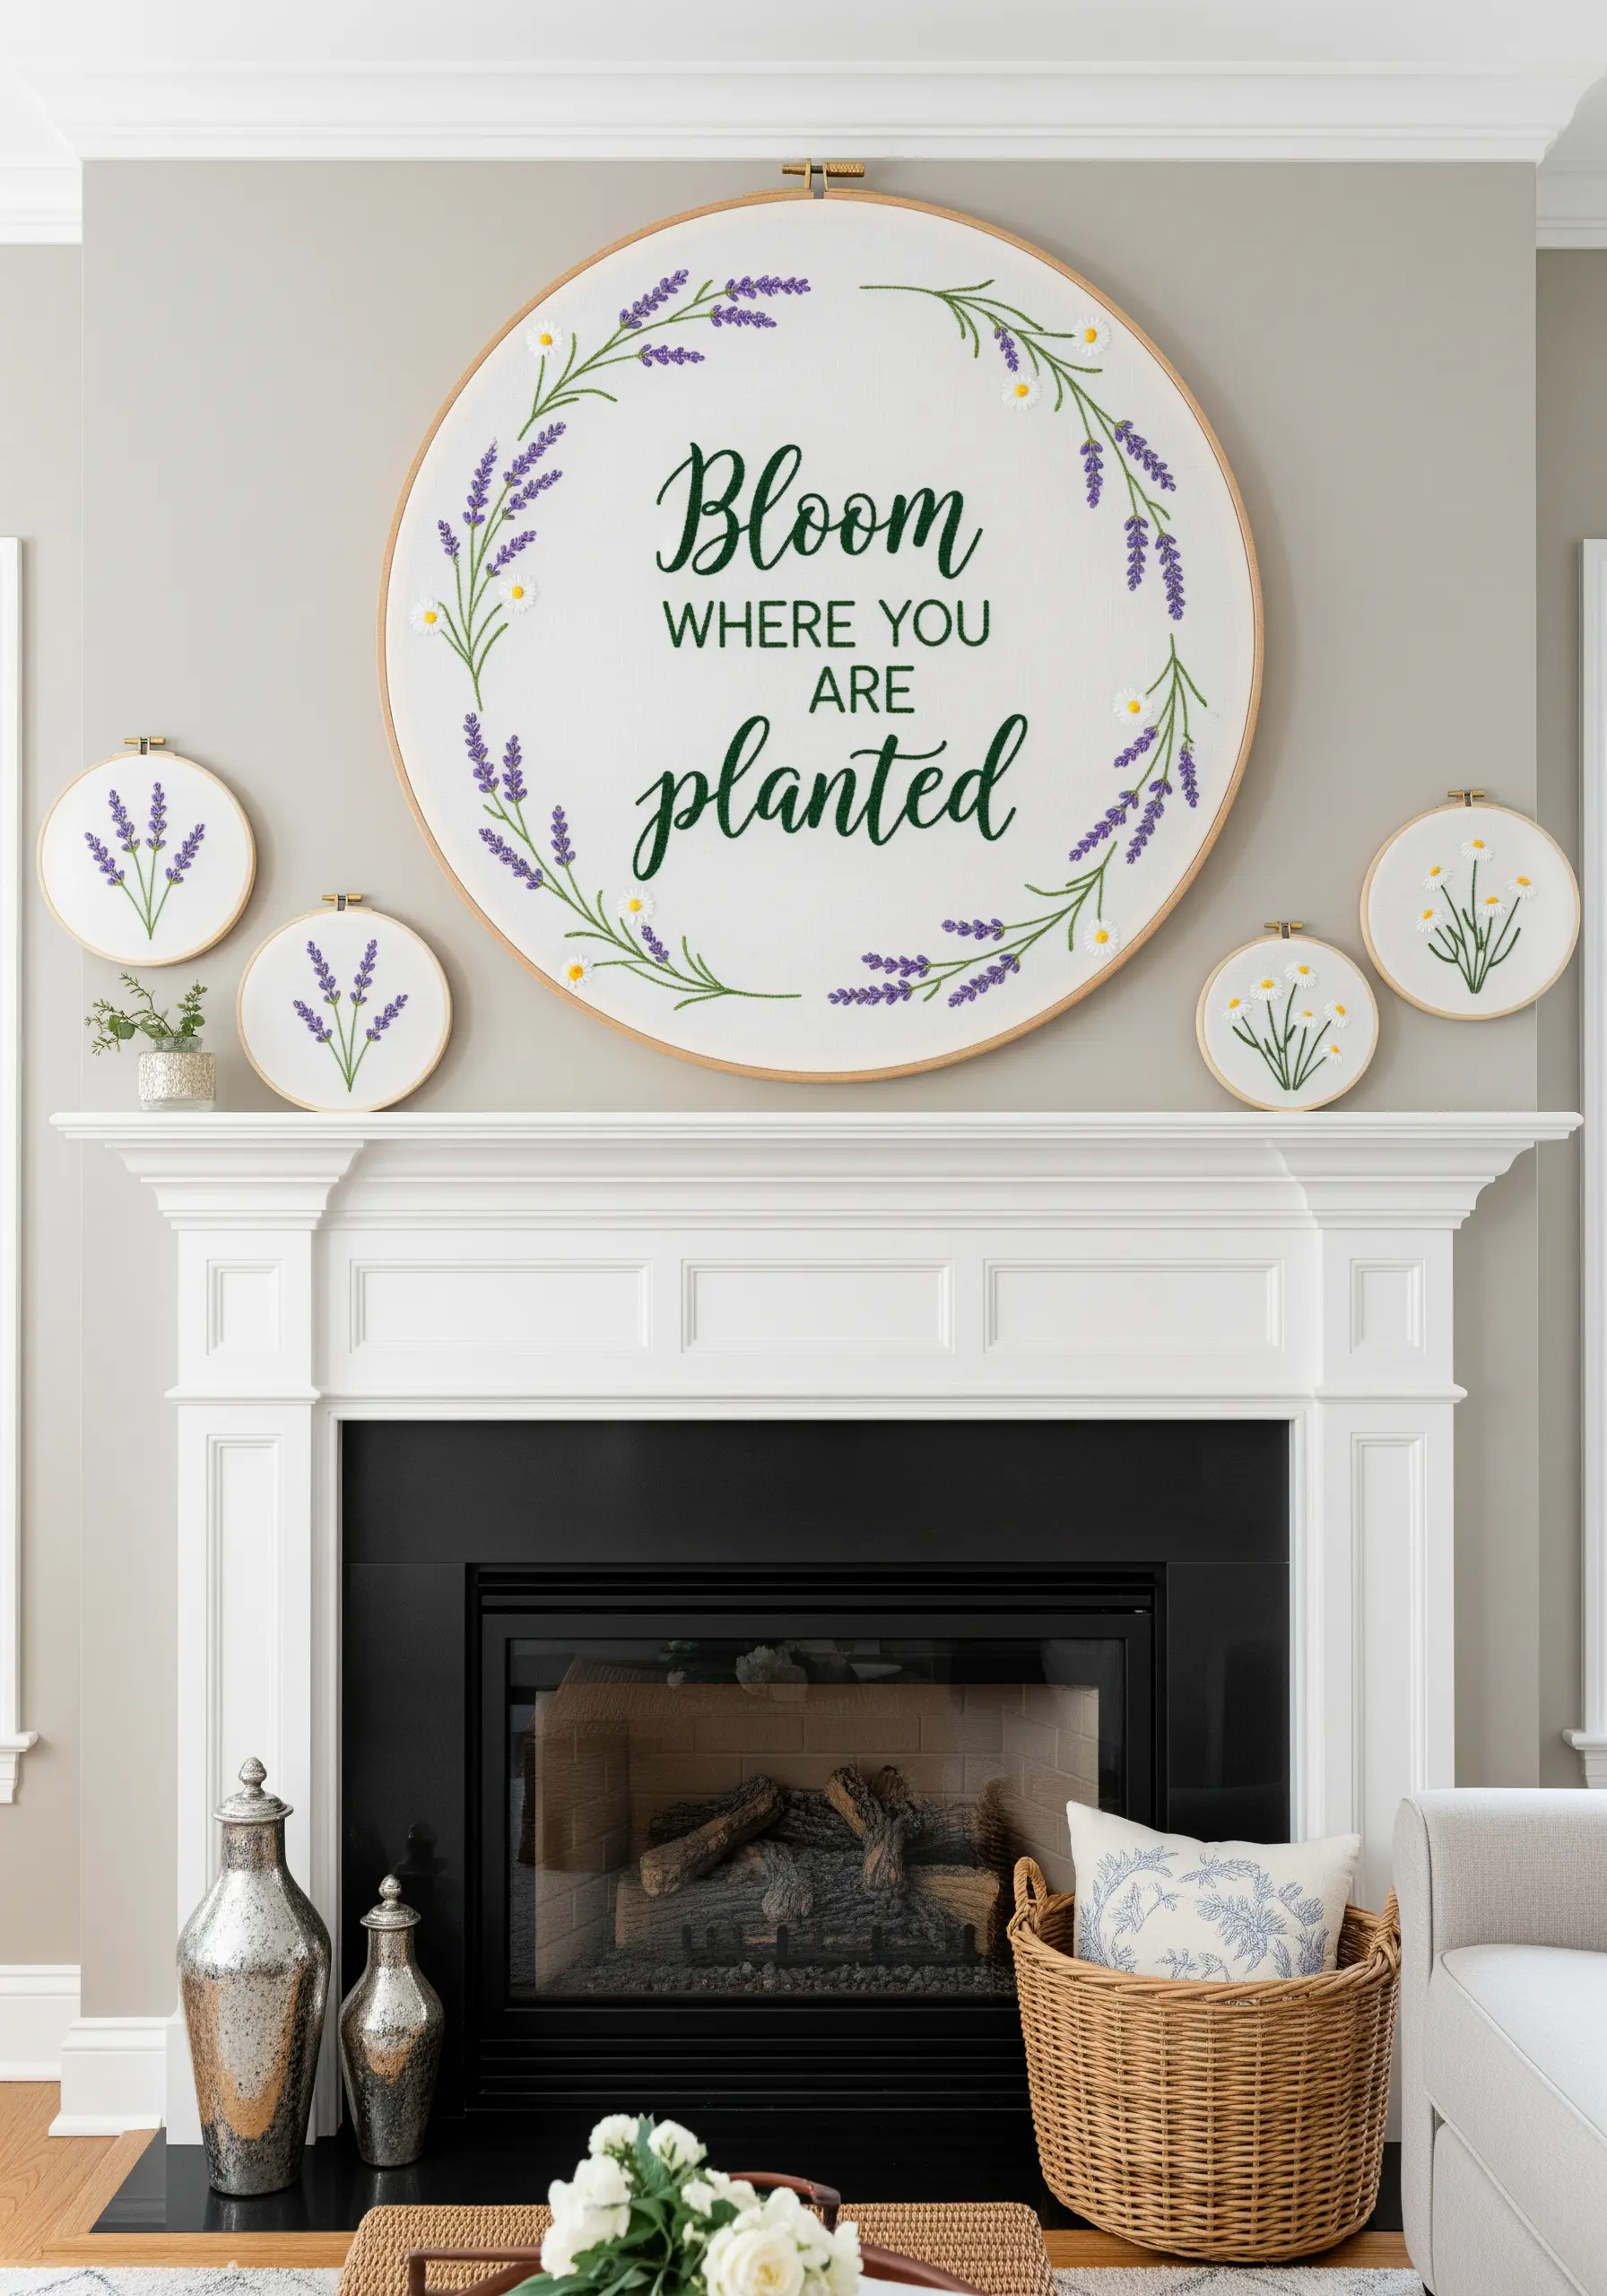
Turn a favorite phrase into a focal point by pairing elegant script with a delicate floral wreath. An oversized hoop makes it a true statement piece.
For the lettering, use a whipped backstitch to create a smooth, flowing line that mimics calligraphy. This is far cleaner than a standard backstitch for curves.
Stitch the lavender sprigs with a combination of stem stitch for the stalks and tiny straight stitches or French knots for the blossoms.
The negative space within the wreath is just as important as the stitching; ensure your quote is perfectly centered to create a sense of balance and calm.
This transforms simple embroidered quote wall hangings into personalized, sophisticated art.
9. Stitch a Vibrant Tropical Escape

Bring warmth and energy into a room with a collection of bold tropical flora and fauna. The key is oversaturated, confident color.
Achieve the glossy, dimensional look of toucan feathers and hibiscus petals by using the long-and-short stitch to blend bright, contrasting colors.
Don’t be afraid to use unexpected shades—a touch of blue in a leaf or pink on a feather—to create highlights and depth.
For a professional finish, ensure your satin stitches are packed tightly with no fabric showing through, creating a solid, almost painted appearance.
These vibrant tropical flower designs are perfect for creating a joyful, vacation-inspired corner in your home.
10. Create a Serene Woodland Scene

Develop a calm, Scandinavian-inspired look by stitching simple woodland creatures on a neutral, textured fabric like oatmeal linen.
Use a limited, earthy color palette to maintain a cohesive and peaceful aesthetic. The natural fabric color becomes part of the design itself.
This style often benefits from simple fill stitches like the seed stitch or even basic cross-stitch, giving it a charming, illustrative quality.
Arrange the hoops vertically in a narrow space, like beside a doorway or on a slim column, to create an elegant, space-saving wall feature.
These gentle fox deer embroidery patterns feel both modern and timeless.
11. Sculpt Motion with Embroidery That Breaks the Frame

Create a stunning, high-impact installation by extending your embroidery beyond the boundaries of the hoop.
First, stitch the most detailed parts of the waves within the hoops, using dense French knots for seafoam and directional satin stitches for the water.
Then, stretch a larger piece of matching blue fabric on the wall and arrange the finished hoops on top, creating a continuous flow.
Fill in the connecting fabric with looser, broader stitches to suggest the powerful movement of water between the framed ‘snapshots’.
This technique transforms individual hoops into a single, immersive piece of art that captures pure energy and motion.
12. Paint a Skyline with Thread

Capture the drama of a city sunset by blending a vibrant gradient sky behind a stark black silhouette.
For the sky, use a long-and-short stitch with a rich palette of reds, oranges, and purples. Keep your stitches vertical to mimic the setting sun’s rays.
The city silhouette should be stitched in solid black using a dense, vertical satin stitch. This sharp contrast makes the sky appear even more luminous.
Use a single strand of yellow floss to add tiny, glowing windows with simple French knots or straight stitches for a touch of life.
Create a multi-hoop panoramic display where the skyline continues from one frame to the next, turning your wall into a window with a view.
13. Focus on Monochrome Textural Studies

Explore the beauty of texture by creating a triptych using only one color of thread on a matching fabric.
Dedicate each hoop to a different stitch. In one, fill the space with tightly packed French knots of varying sizes to create a bumpy, pebble-like surface.
In another, create a geometric pattern using satin stitches, changing the direction of the stitch to catch the light in different ways.
This minimalist approach highlights the tactile quality of the stitches themselves, proving that texture can be just as compelling as color.
These two-color embroidery ideas (or in this case, one color) make minimalism feel incredibly rich and sophisticated.
14. Stitch Bold, Mid-Century Modern Shapes

Channel a retro aesthetic with a gallery of hoops featuring organic, boomerang-like shapes and a classic mid-century color palette.
Achieve perfectly smooth, solid fills by first outlining each shape with a split stitch. This creates a raised edge that contains your satin stitches and keeps them perfectly neat.
Use the full six strands of floss to get that satisfying, opaque coverage that defines this graphic style.
Arrange the hoops in a dynamic cluster around a larger central piece to create a sense of movement and playful interaction between the shapes.
These organic shape embroidery patterns bring a warm, nostalgic, and artistic flair to any room.
15. Create a 3D Hanging Garden on Tulle

Give your botanical embroidery a magical, floating effect by working on sheer tulle or organza instead of opaque fabric.
For trailing plants like string-of-pearls, let your threads hang loose below the hoop, securing them with tiny knots and a dab of fray check at the ends.
Use dense French knots or bullion knots to create the succulent leaves, which gives them a wonderfully three-dimensional and realistic texture.
Weave tiny LED fairy lights through the arrangement to add a warm, ambient glow that highlights the delicate, transparent nature of the fabric.
This technique turns simple hand embroidery leaf patterns into a breathtaking, living art piece.
16. Capture the Essence of Autumn
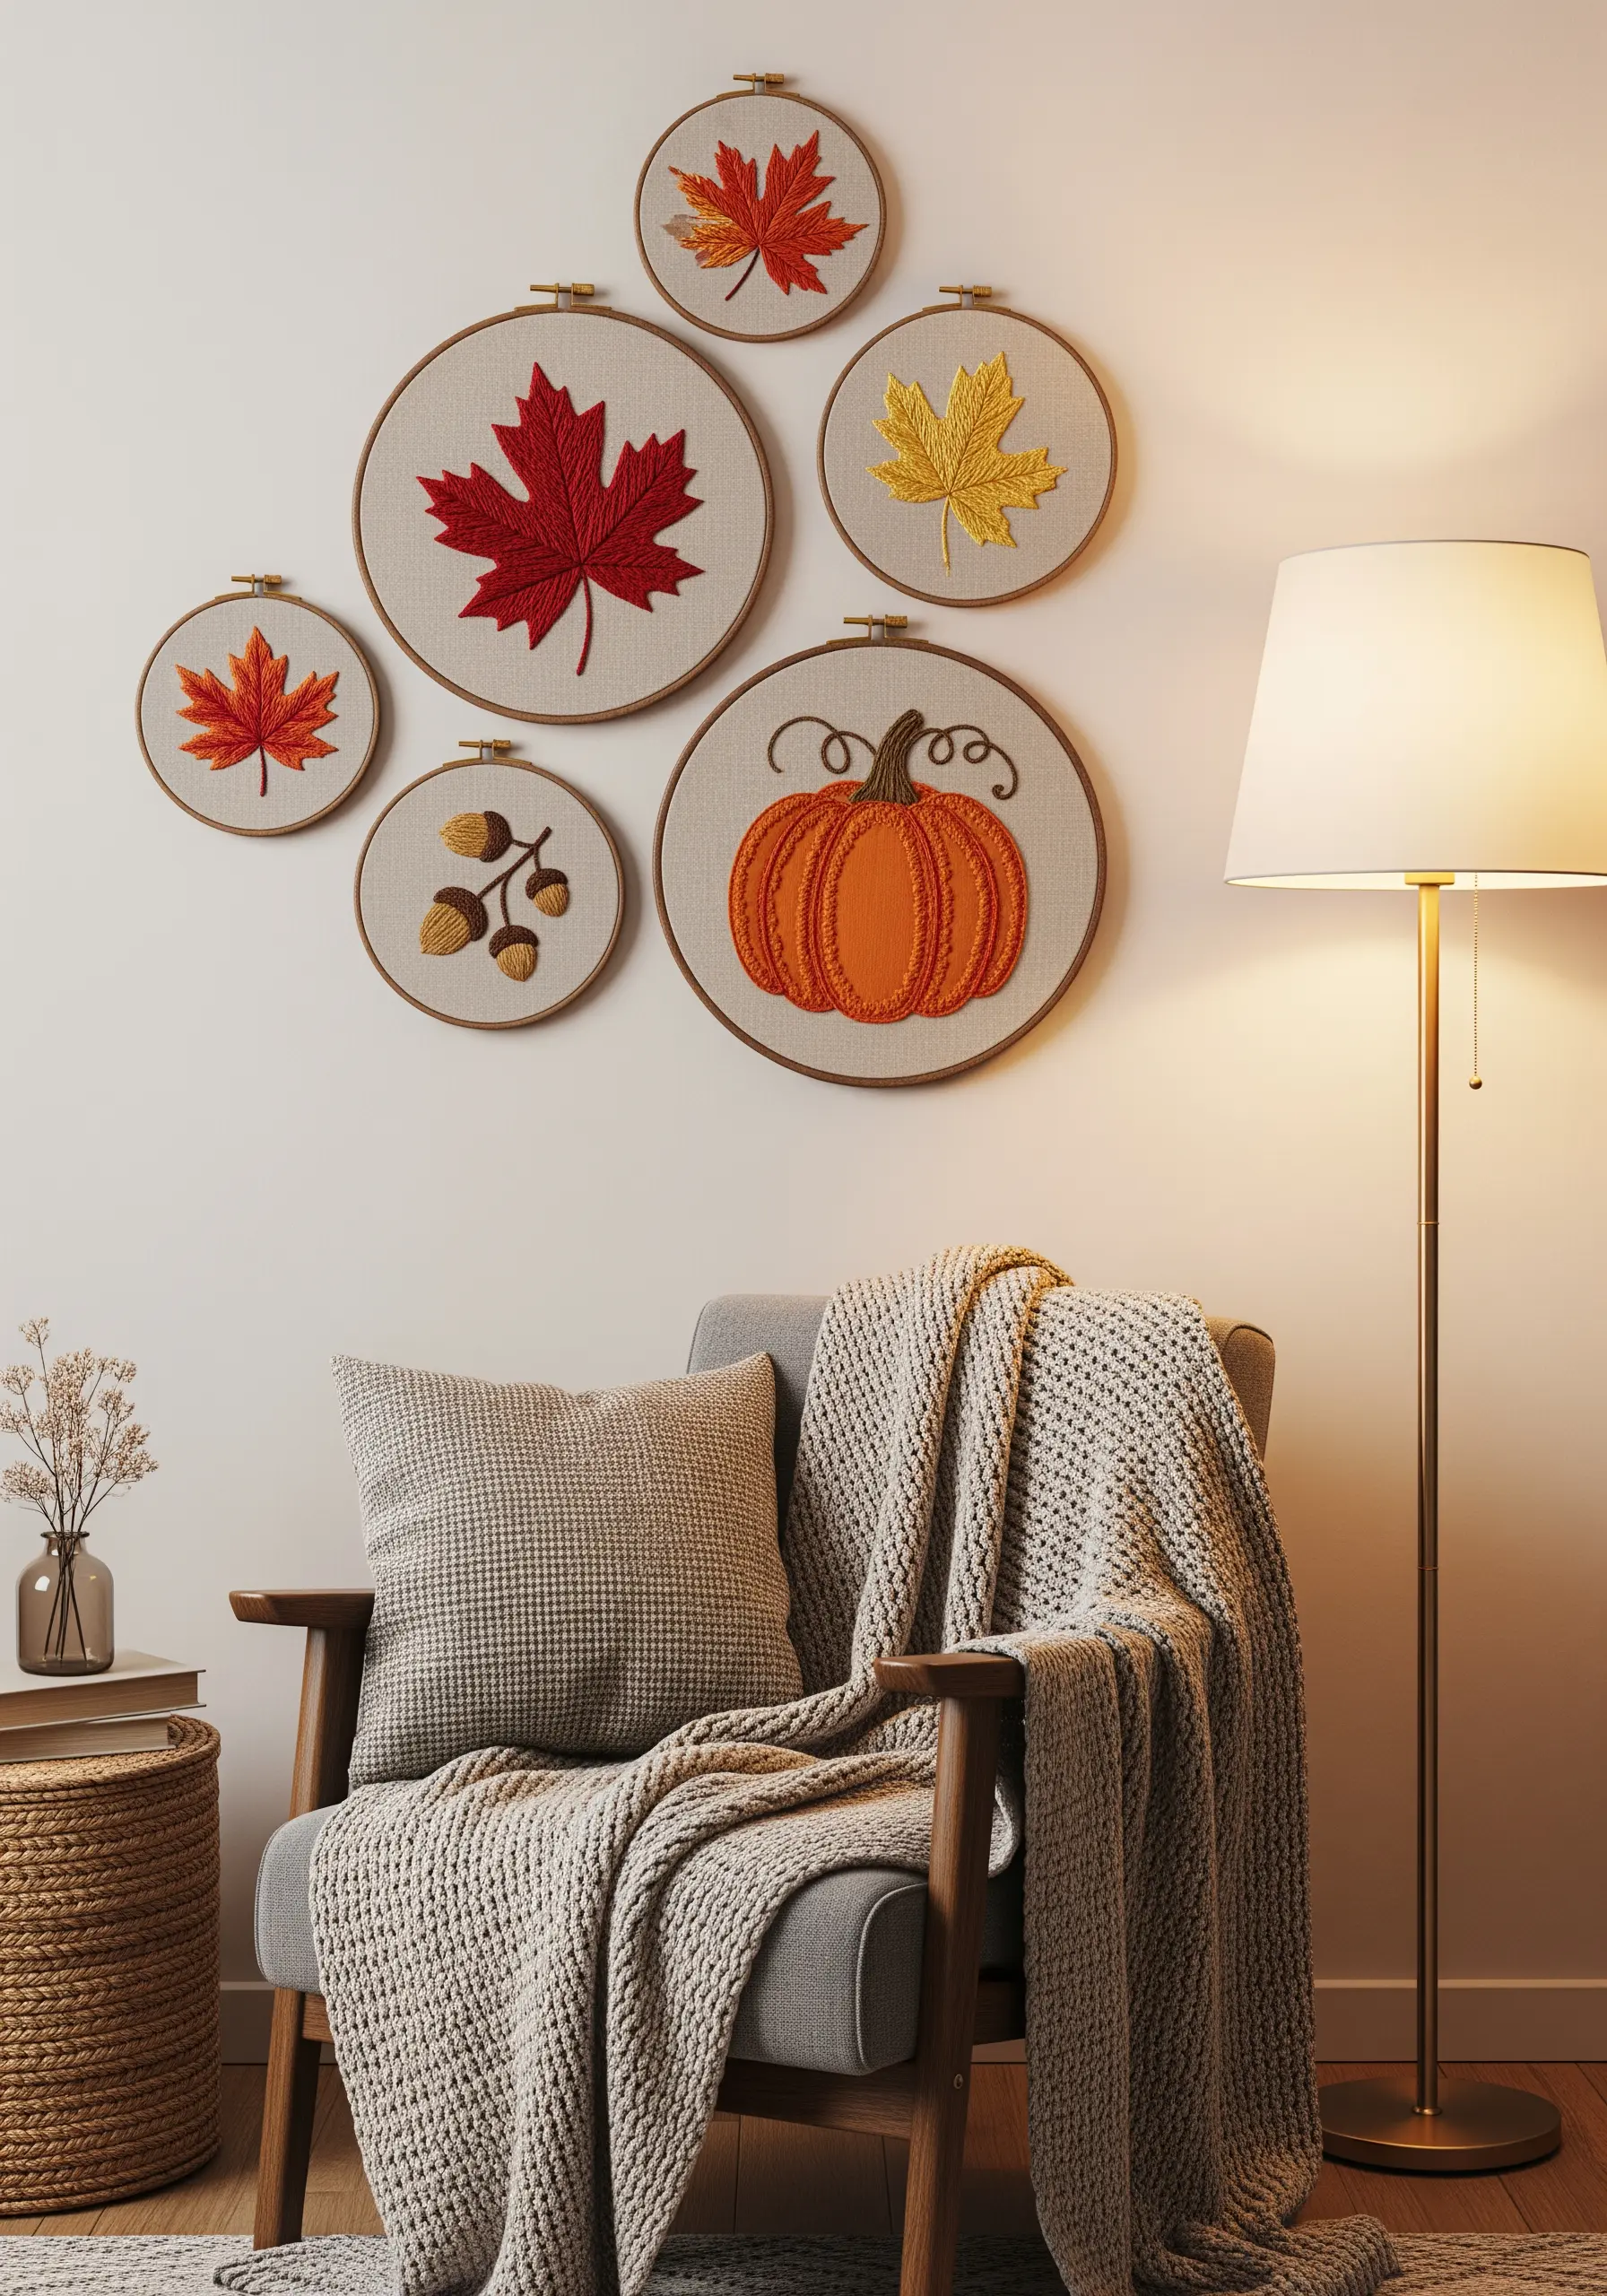
Create a cozy, seasonal display by focusing on the signature shapes and warm color palette of autumn.
For leaves, use a fishbone stitch to create a realistic central vein and give the leaf a subtle, dimensional quality.
Incorporate variegated thread—floss that changes color along its length—to give your leaves a natural, mottled appearance with very little effort.
For the pumpkin, use a padded satin stitch. First, lay down a foundation of straight stitches within the shape, then cover them with satin stitches going in the opposite direction for a raised, plump effect.
This project is a perfect way to practice ways to capture nature’s textures, from the crispness of a leaf to the roundness of a gourd.
17. Stitch Timeless Silhouette Portraits

Create modern heirlooms by stitching minimalist, single-line portraits of your family members.
Transfer your designs to a neutral, tightly woven fabric like kona cotton, which provides a stable base for precise line work.
Use a simple backstitch or stem stitch with two or three strands of black floss. This gives the line enough weight to be seen clearly without looking heavy.
Arrange the portraits as a family gallery wall, using a central oval hoop for parents or a couple and smaller round hoops for children to create a pleasing visual hierarchy.
These are more than decorations; they are subtle, artistic interpretations of cherished mother child line art motifs and family connections.
18. Tackle a Large-Scale Gradient Mandala

Make an unforgettable statement by filling an extra-large hoop (14 inches or more) with an intricate, rainbow-gradient mandala.
The key to a smooth color transition is to work with a palette of closely related shades and blend them carefully. Use just one or two strands of floss for delicate line work.
Break the project down into manageable sections. Completing one small segment at a time makes the overall design feel less intimidating.
This type of detailed work requires excellent fabric tension, so invest in a high-quality hoop or consider binding the inner ring with cotton tape for a better grip.
These intricate floral mandala embroidery ideas become a meditative practice and a stunning focal point.
19. Play with Patterned Fabric Backgrounds

Add another layer of visual interest to your work by stitching onto patterned fabric like gingham or polka dots instead of a solid color.
Choose a simple, bold motif—like a lemon or strawberry—so it stands out clearly against the busy background.
Use a dense satin stitch for your subject. This creates an opaque, almost patch-like effect that separates the embroidered element from the pattern underneath.
Instead of finishing your work in a hoop, you can trim the fabric around the edges and mount it on a stiff card or canvas for a clean, modern display.
This is a fun way to elevate simple line art fruit food motifs and give them a playful, graphic quality.
20. Create an Interactive Embroidered Map
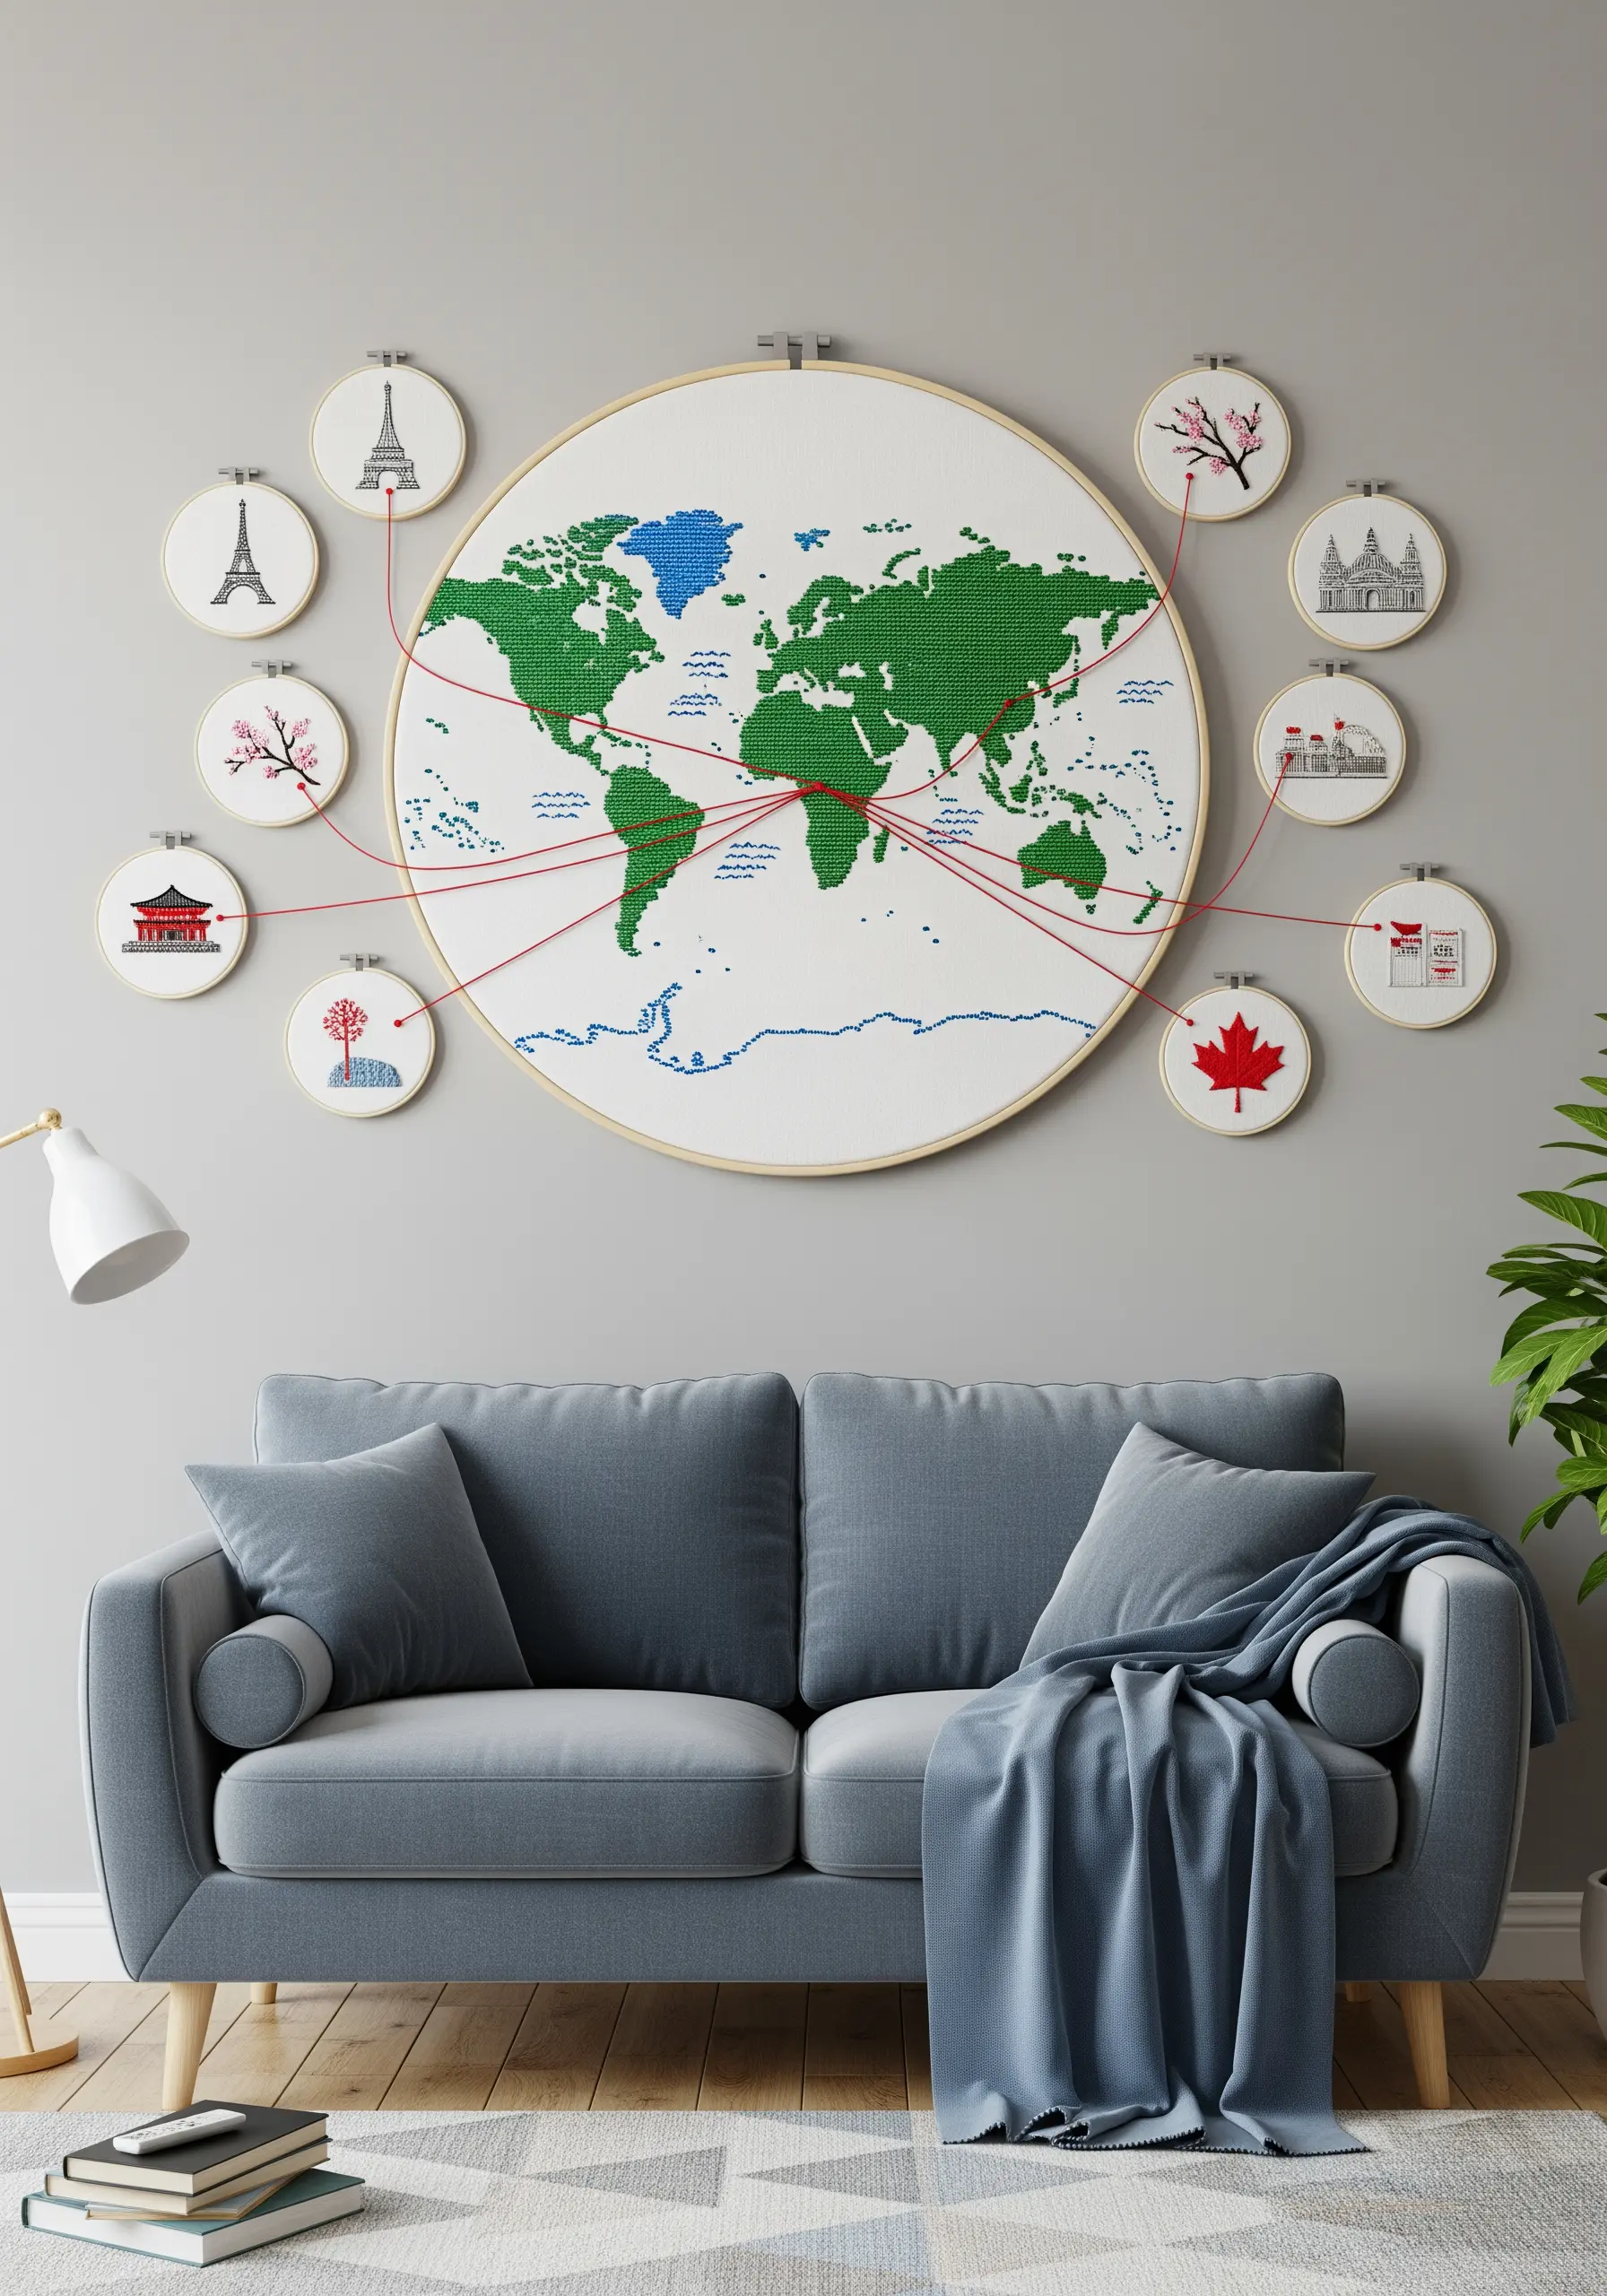
Design a piece of wall art that tells a story of your travels or connections. A world map serves as the perfect centerpiece.
Use a simple cross-stitch or seed stitch to fill in the continents, which is less time-consuming than satin stitch for large areas.
Surround the central map with smaller hoops, each featuring a landmark or symbol from a meaningful location.
Connect the smaller hoops to the corresponding locations on the main map with a single strand of red thread to visualize your journey or family ties.
These travel-inspired string art maps become a living document of your life’s adventures.
21. Compose with Abstract Textural Collage

Build a dynamic composition by combining different textures, colors, and patterns within a single hoop, almost like a fabric collage.
Divide your hoop into organic, flowing shapes. Fill some with dense satin stitch, others with grids of straight stitches, and some with clusters of French knots.
Leave some areas of the hoop as simple line drawings on plain fabric. This negative space provides a visual rest and makes the textured areas appear more impactful.
A limited color palette of three or four complementary colors—like navy, pink, and cream—keeps the complex design from feeling chaotic.
This technique turns your hoop into a canvas for abstract fabric collage embroidery ideas that feel sophisticated and artistic.
22. Paint a Landscape with Thread and Texture

Create a sense of deep perspective in a landscape scene by using different stitches for the foreground, mid-ground, and background.
For the distant hills and sky, use simple, flat stitches like the long-and-short stitch to suggest softness and distance.
In the mid-ground, use a slightly more textural stitch, like seed stitch, for the grassy fields. For the foreground, use highly dimensional stitches like long straight stitches and bullion knots for the reeds and cattails.
This progression from smooth to highly textured tricks the eye into seeing depth and distance within the small hoop.
It’s a wonderful way to explore embroidery ideas inspired by the subtle textures of nature in a single, cohesive piece.
23. Chart the Stars with a Zodiac Gallery

Create a sophisticated and personal gallery wall by embroidering the twelve zodiac constellations.
To maintain an elegant and unified look, use the same materials for every hoop: navy blue linen, a single color of metallic or white thread, and simple wooden hoops.
Stitch the constellations using a combination of tiny straight stitches for the connecting lines and French knots for the stars, varying the knot size to represent star magnitude.
Arrange the hoops in a circle on the wall to represent the celestial sphere, creating a powerful and balanced composition.
These celestial micro-embroidery ideas are perfect for a modern, minimalist space with a touch of personal meaning.


