
A denim jacket is more than just a piece of clothing; it’s a canvas waiting for a story. And what story is more vibrant, more alive, than that of an exotic parrot rendered in thread?
Forget simply filling in a pattern. I want you to think like a textile artist. Consider the direction of every stitch, the way light hits a silk thread versus a matte cotton, and how a three-dimensional knot can mimic the texture of a mossy branch.
Here, you’ll find not just patterns, but principles. Techniques for creating depth, blending color, and adding texture that will transform your jacket from a simple garment into a piece of wearable art that carries your unique touch in every fiber.
1. Achieve Depth with Directional Satin Stitch
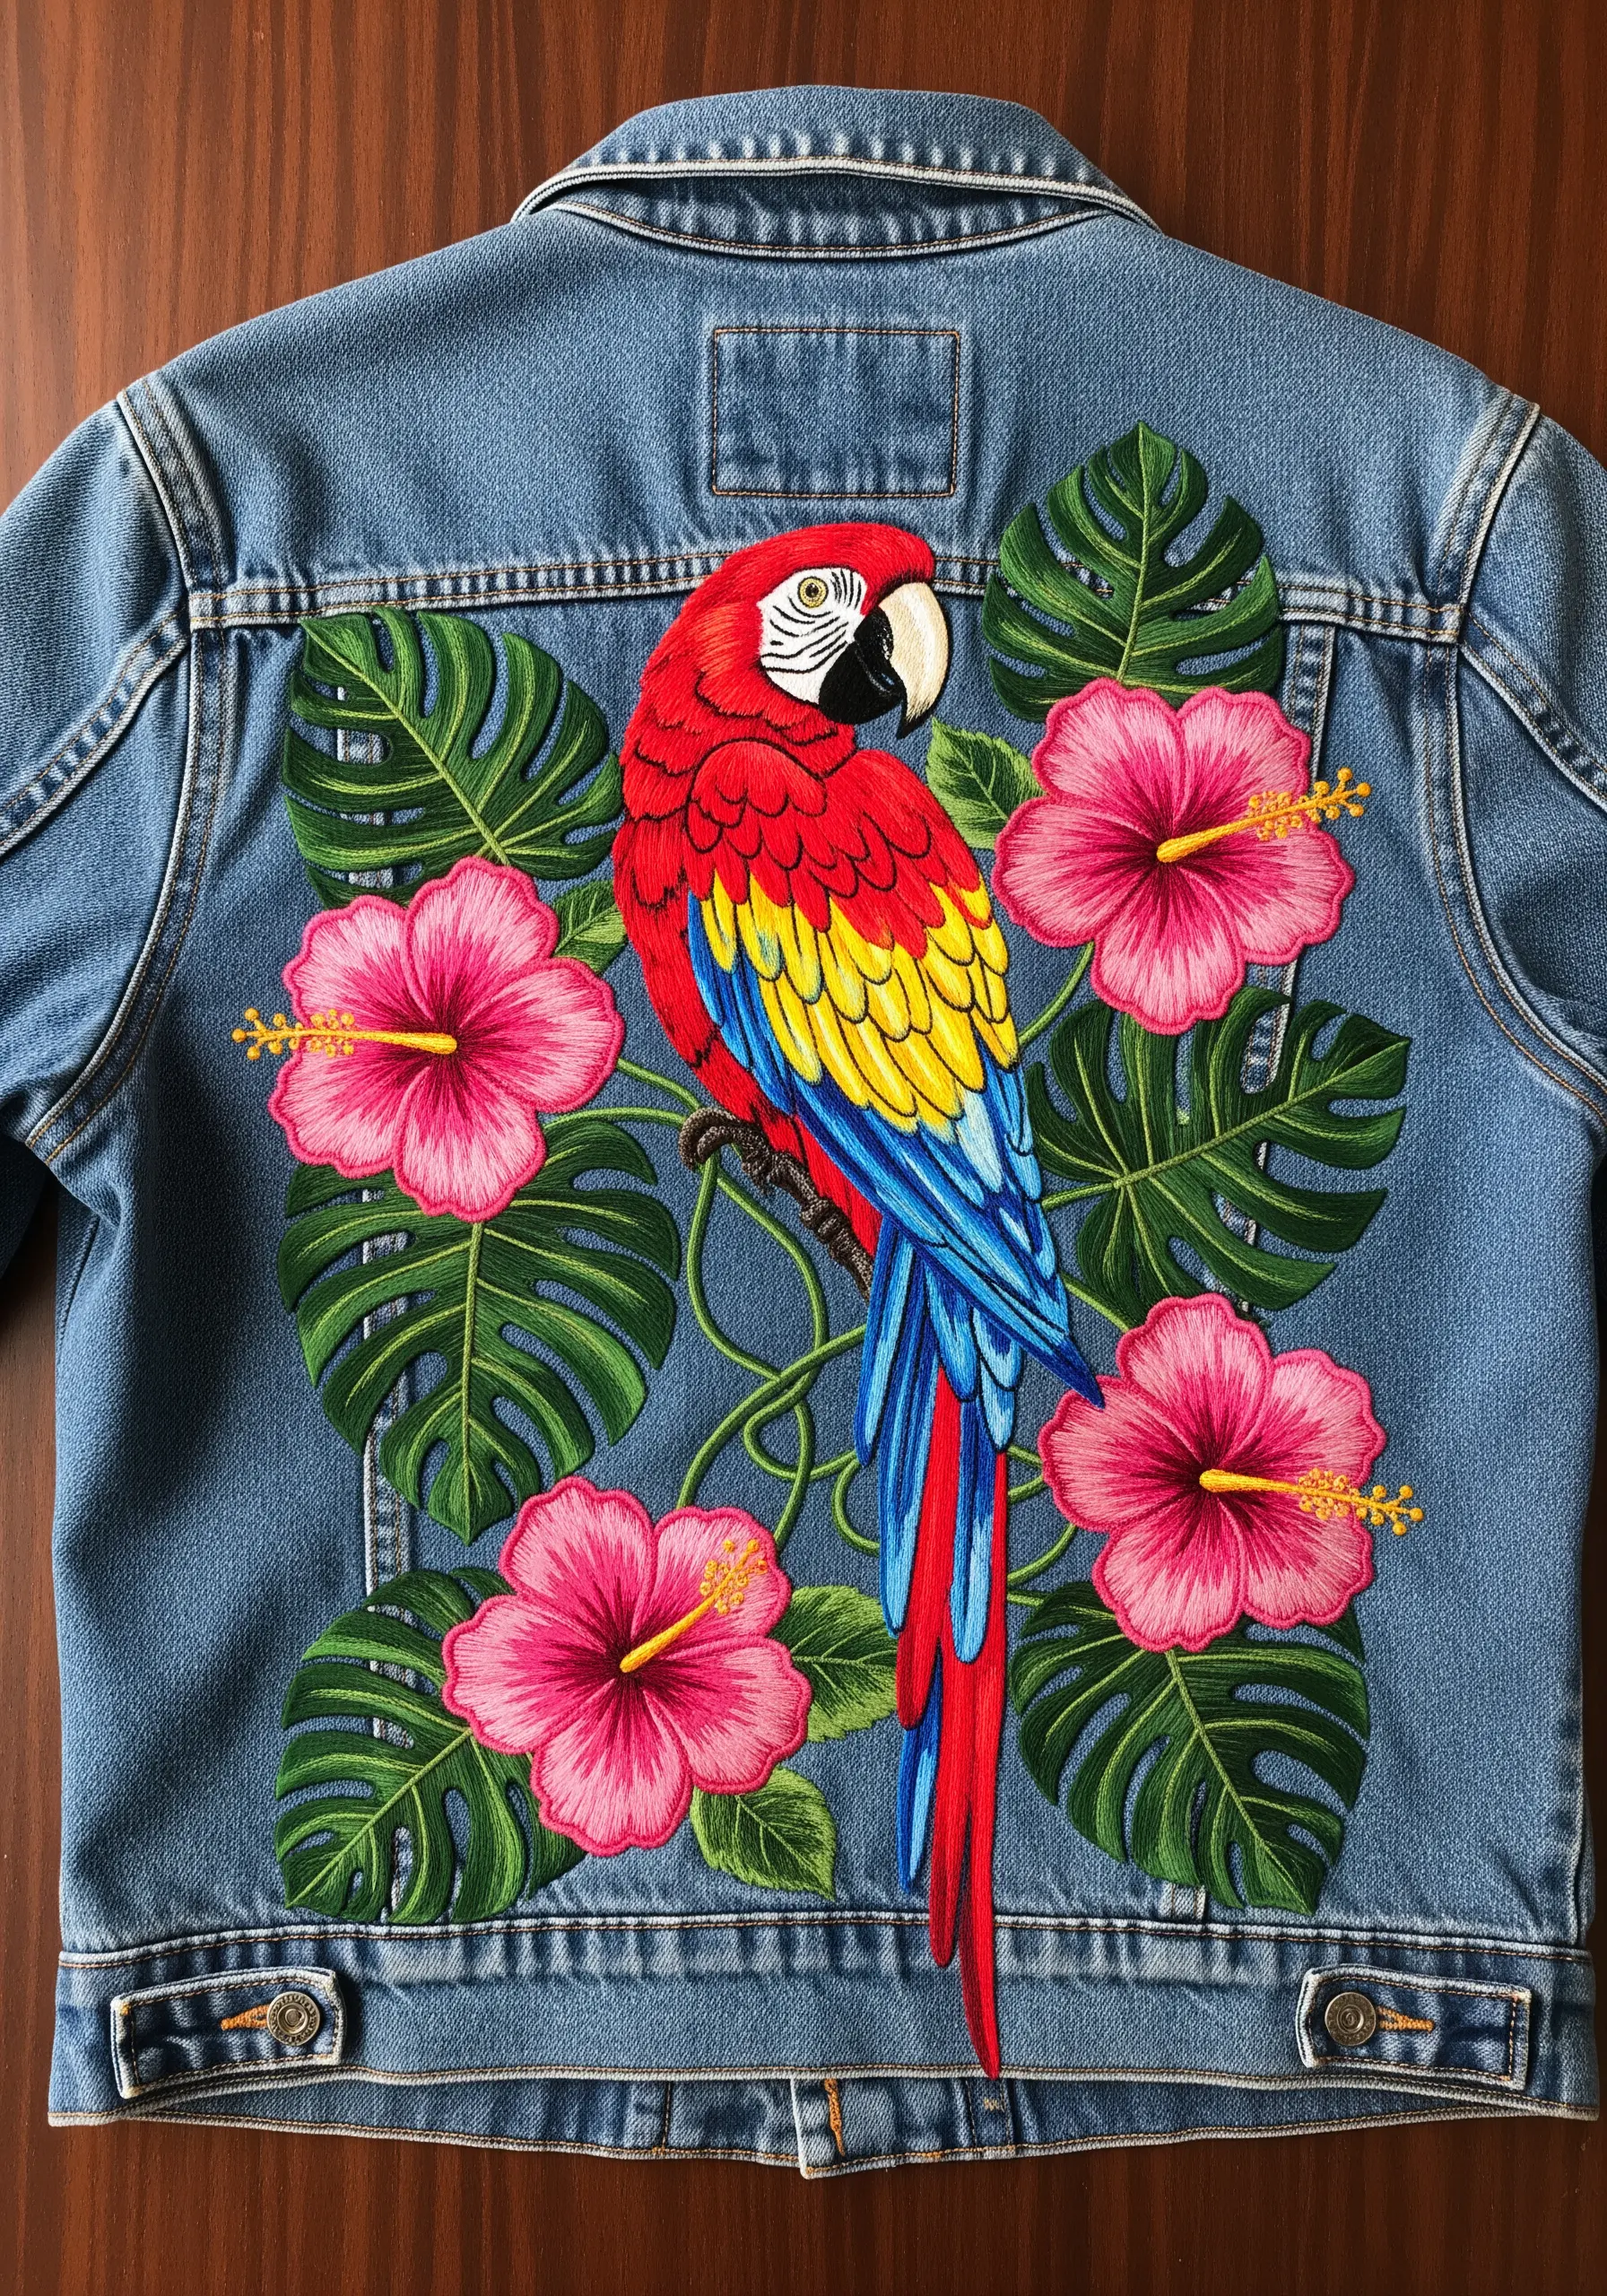
To prevent a large motif from looking flat, vary the direction of your satin stitches to follow the natural contours of the subject.
For the macaw’s red chest feathers, angle your stitches downward and outward from the center.
On the hibiscus petals, stitch from the outer edge inward toward the center, allowing the threads to create natural light and shadow.
Use a split stitch outline first to give your satin stitch a raised, clean edge, which is especially effective on heavy denim fabric.
2. Master Monochrome Shading with Thread Painting
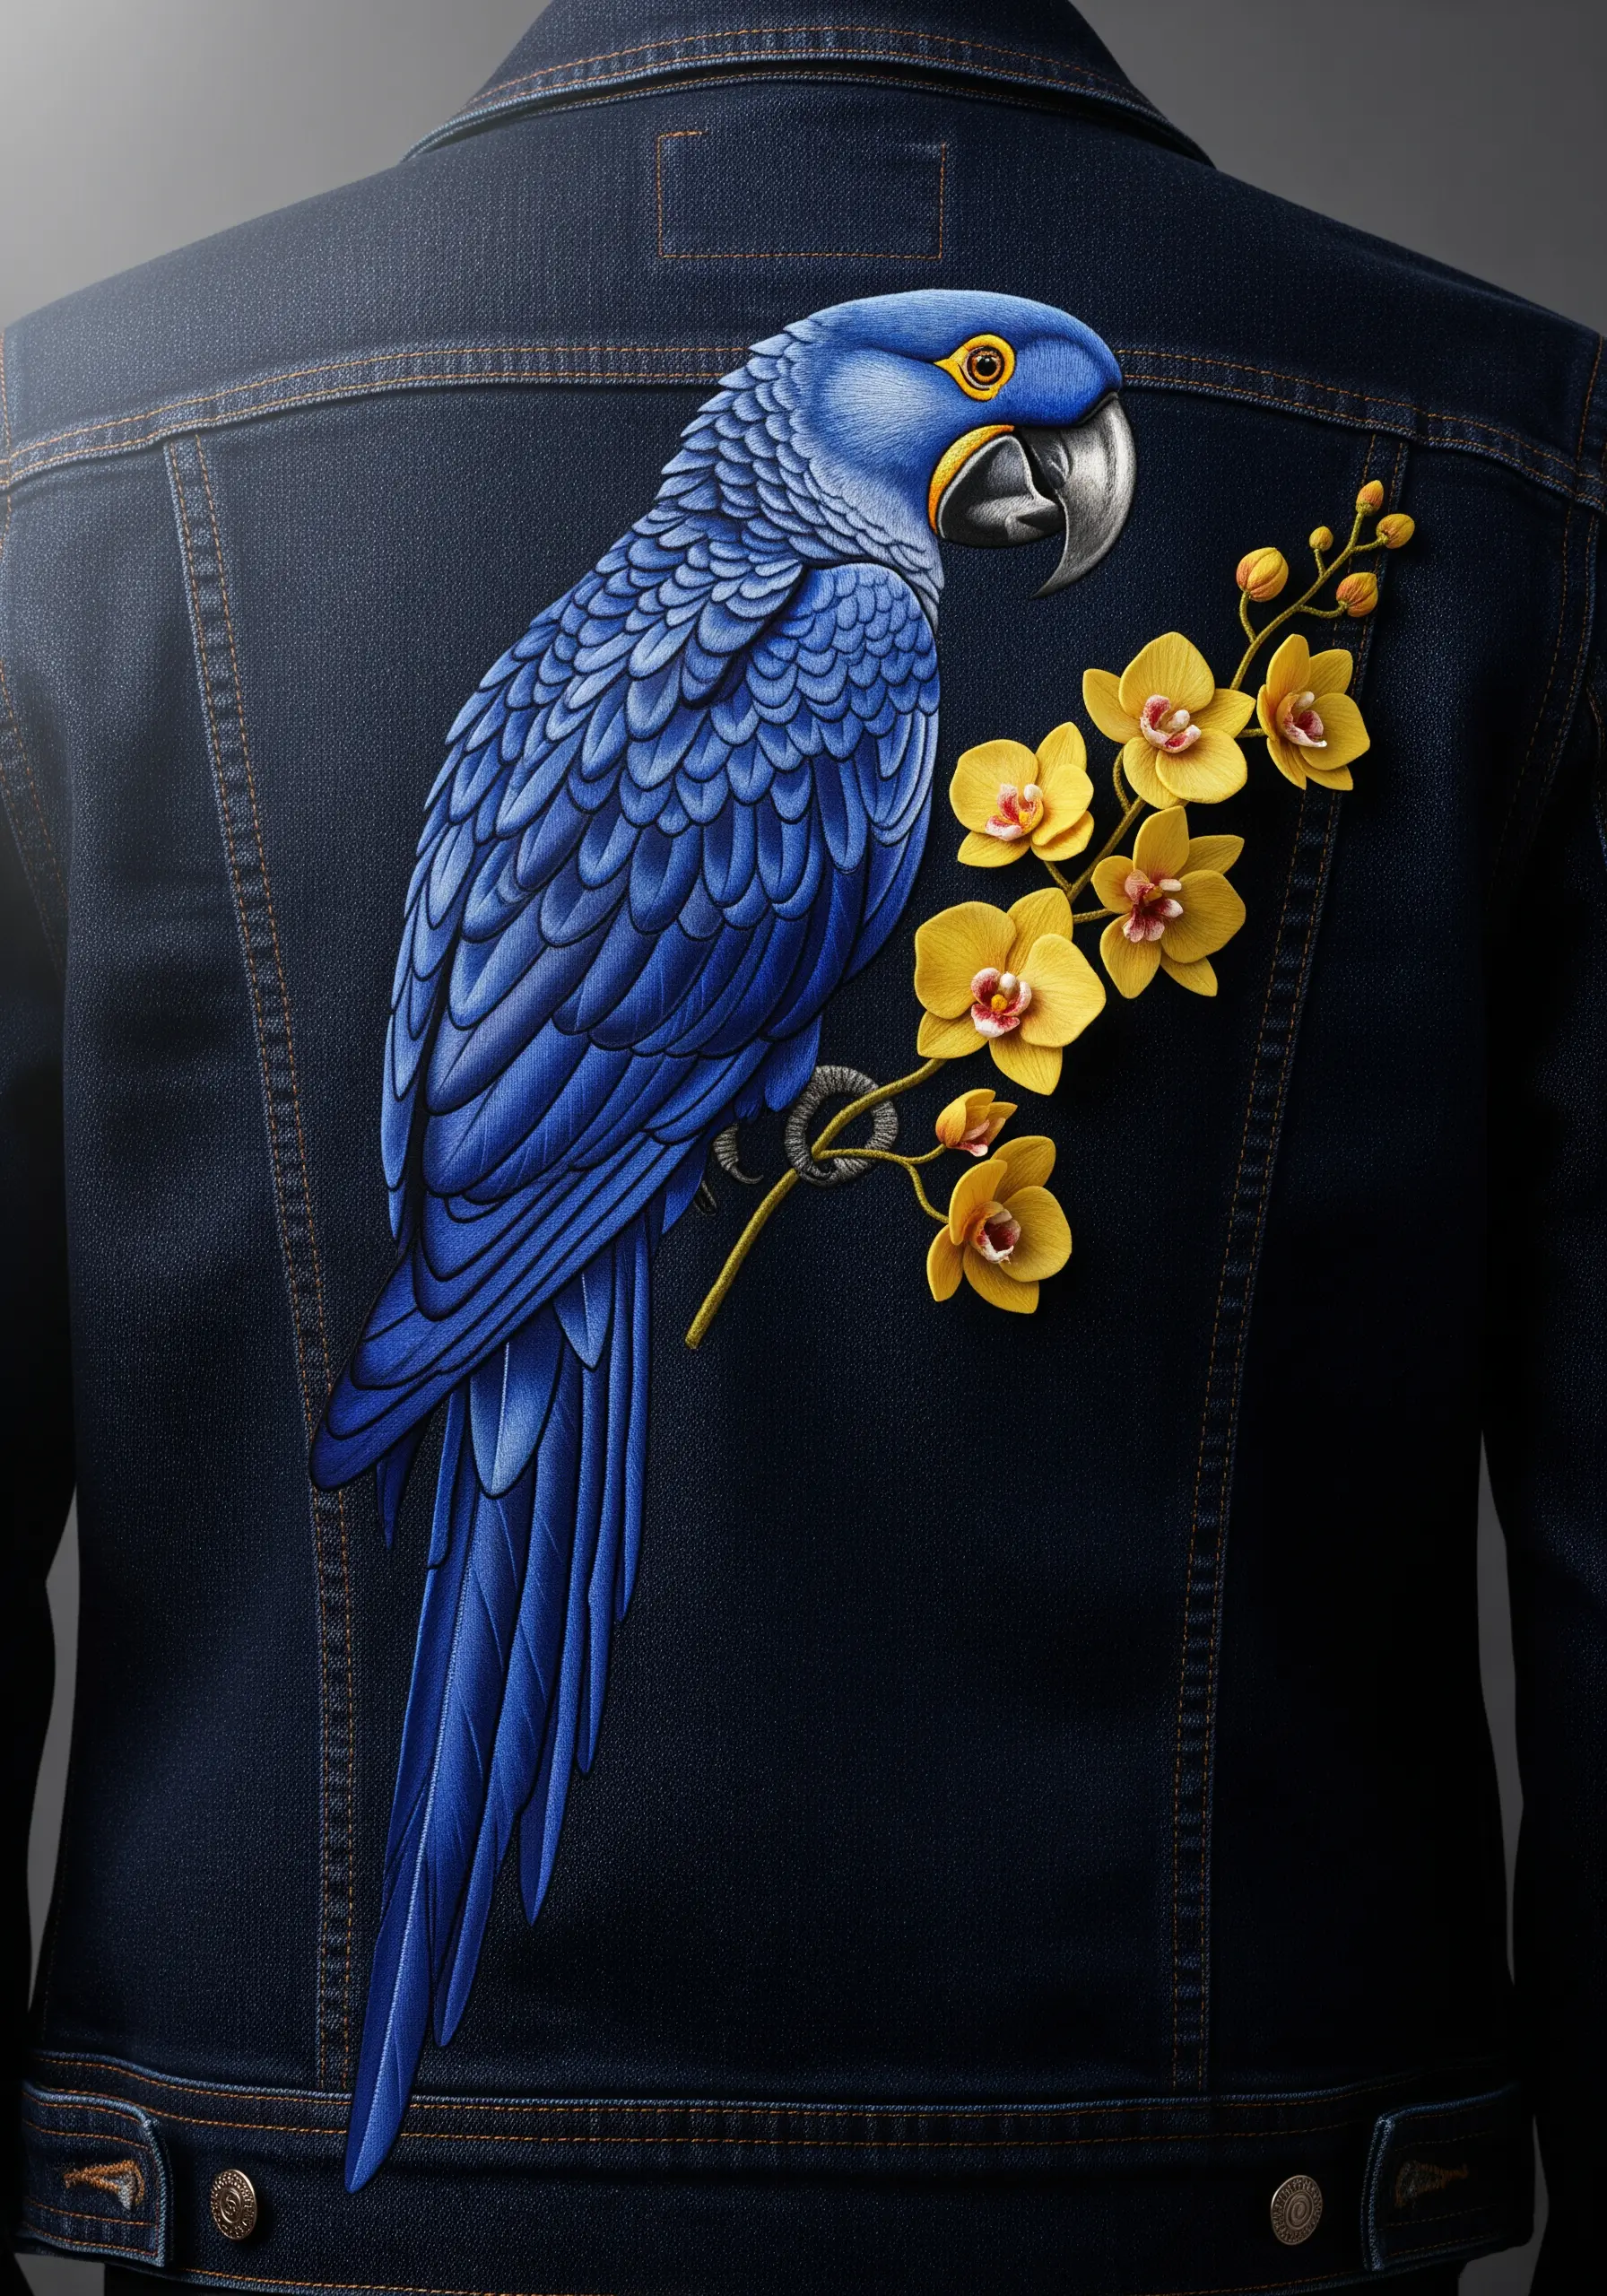
A single-color design gains its power from subtle shading.
Use three to four shades of the same color—in this case, blue—to execute the long-and-short stitch across the parrot’s wings.
Place the darkest shade in areas of shadow (under the wing, near the body) and the lightest shade where light would naturally hit.
This technique, known as thread painting, creates a realistic gradient that gives the bird weight and form against the dark denim.
3. Use Off-White Threads for Realistic Feather Texture
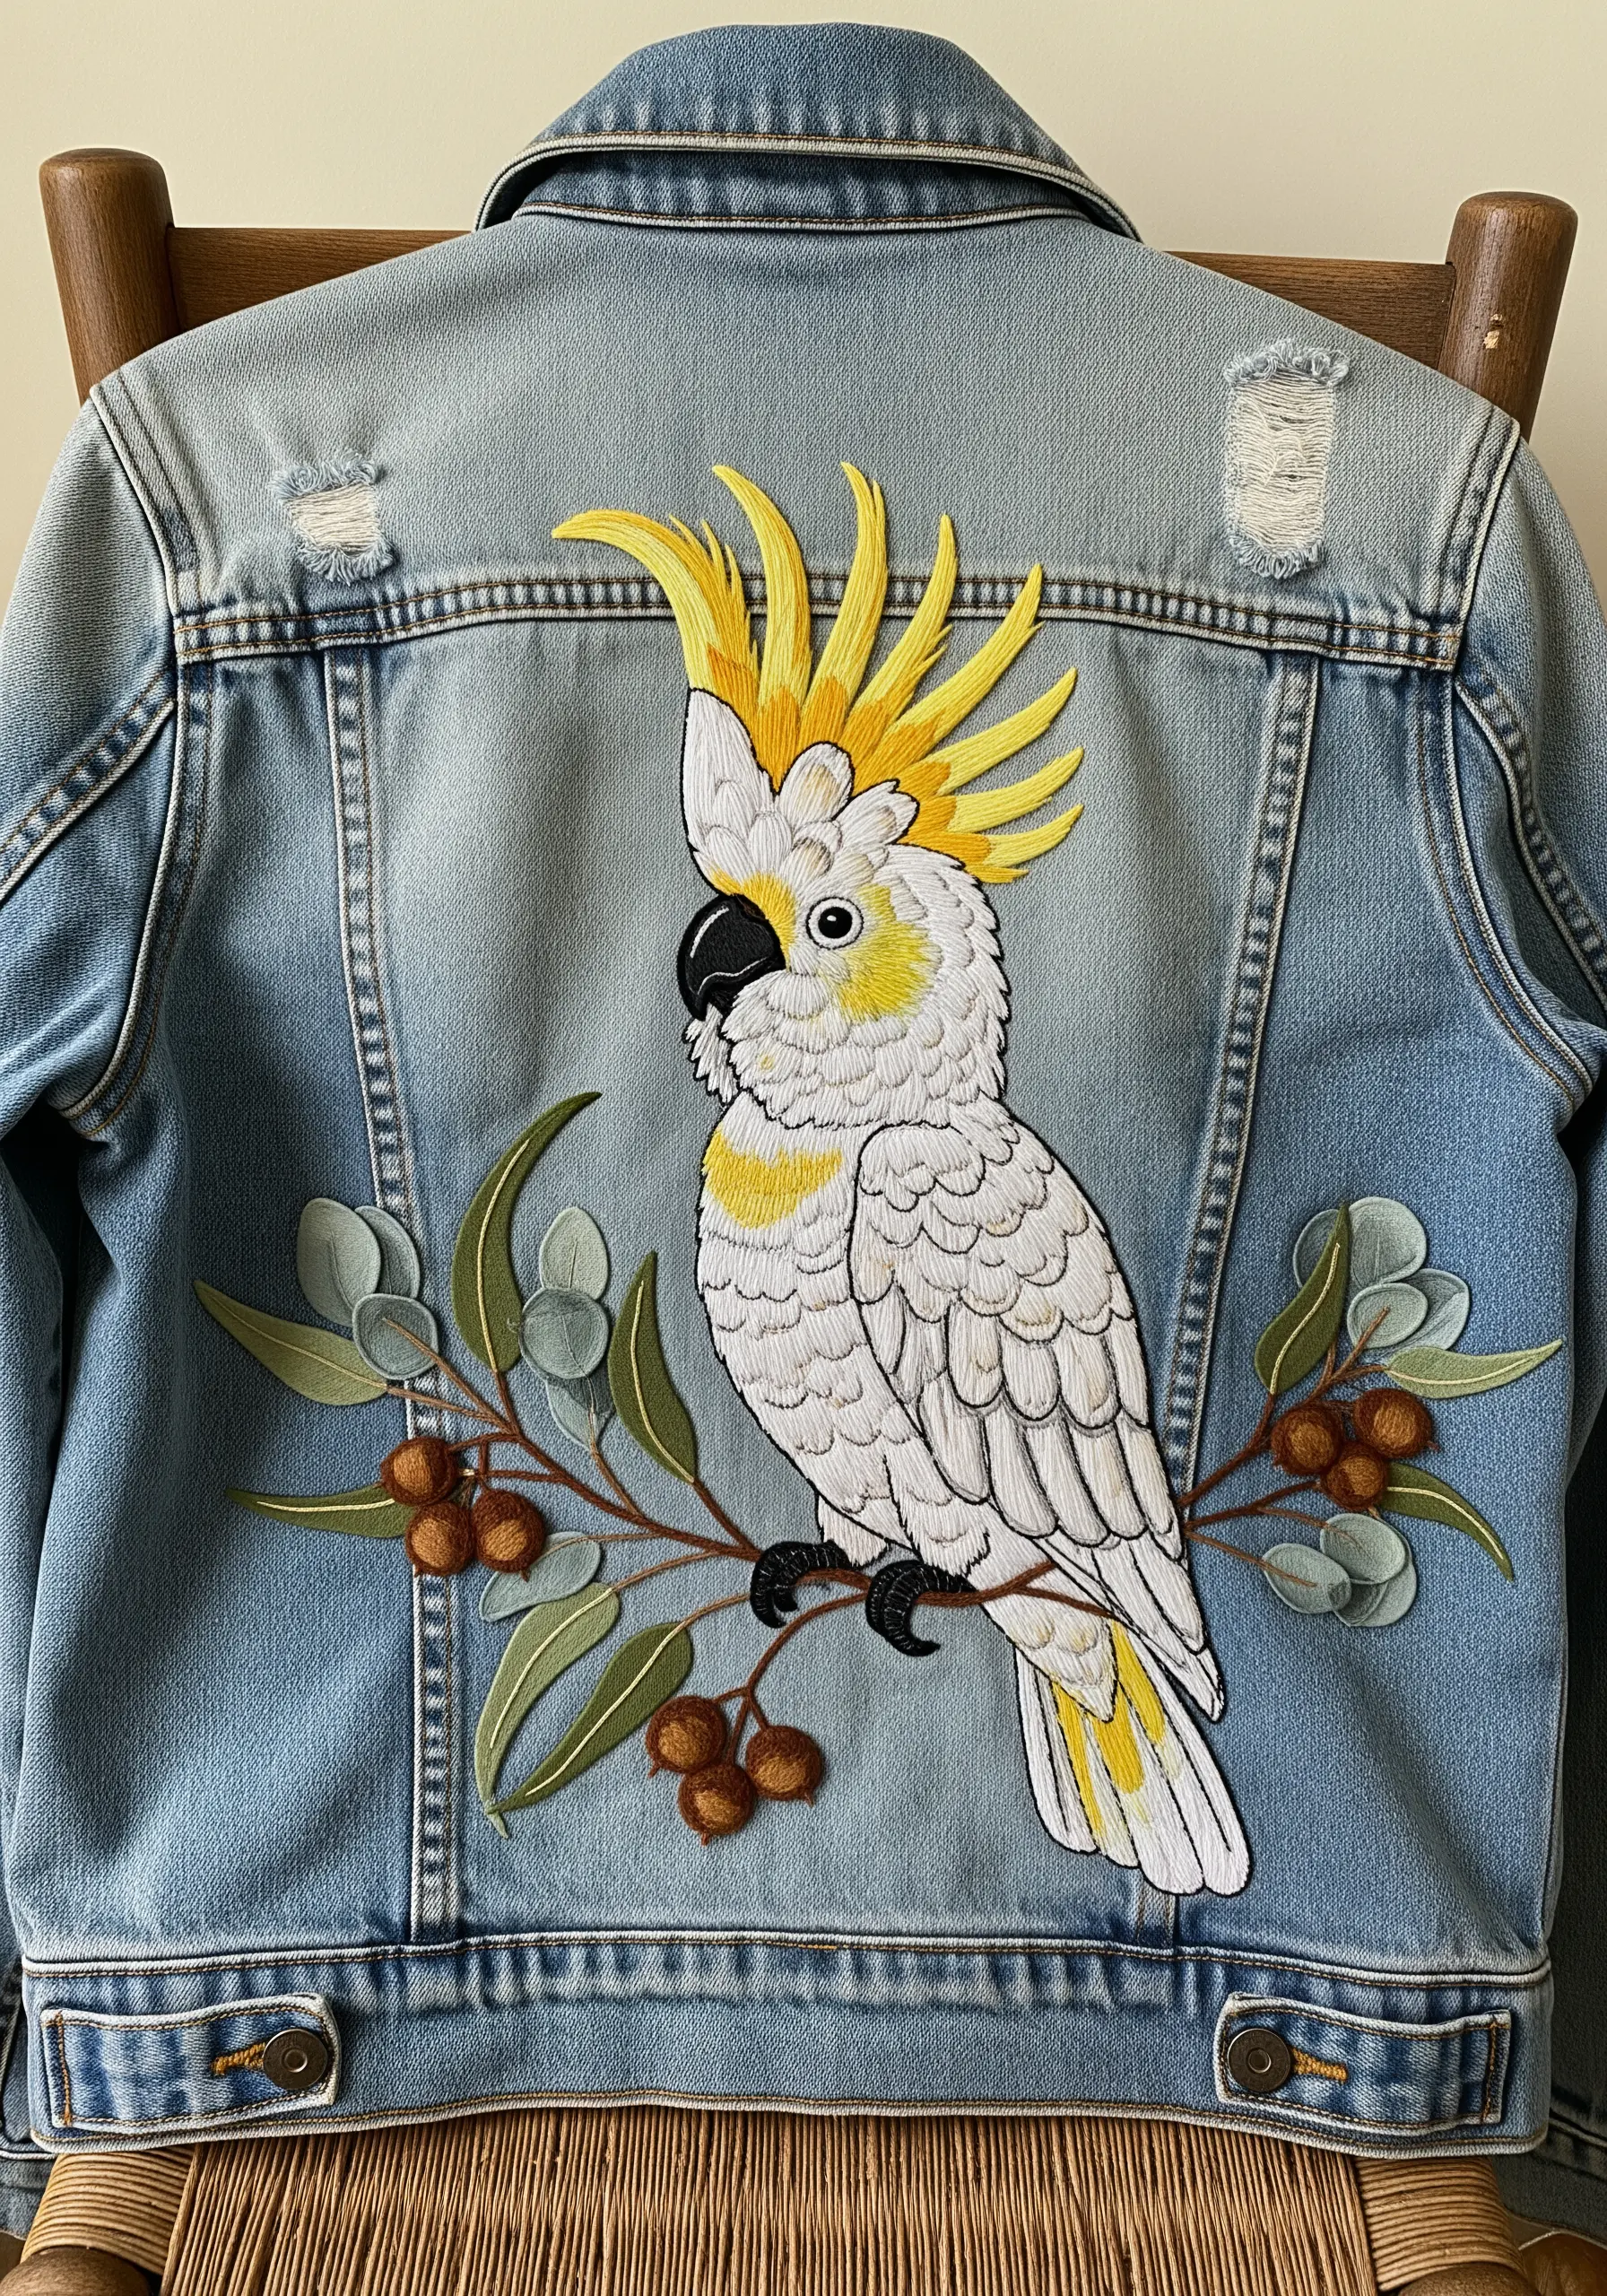
Pure white thread can often look flat and stark, especially on light-wash denim.
Instead, choose a palette of off-white, light silver, and pale grey to build the cockatoo’s feathers.
Use small, scalloped satin stitches that overlap slightly to mimic the way feathers lay on a bird’s body.
This creates a soft, touchable texture and a much more naturalistic finish than a single block of white.
4. Blend Vibrant Colors with Interlocking Stitches
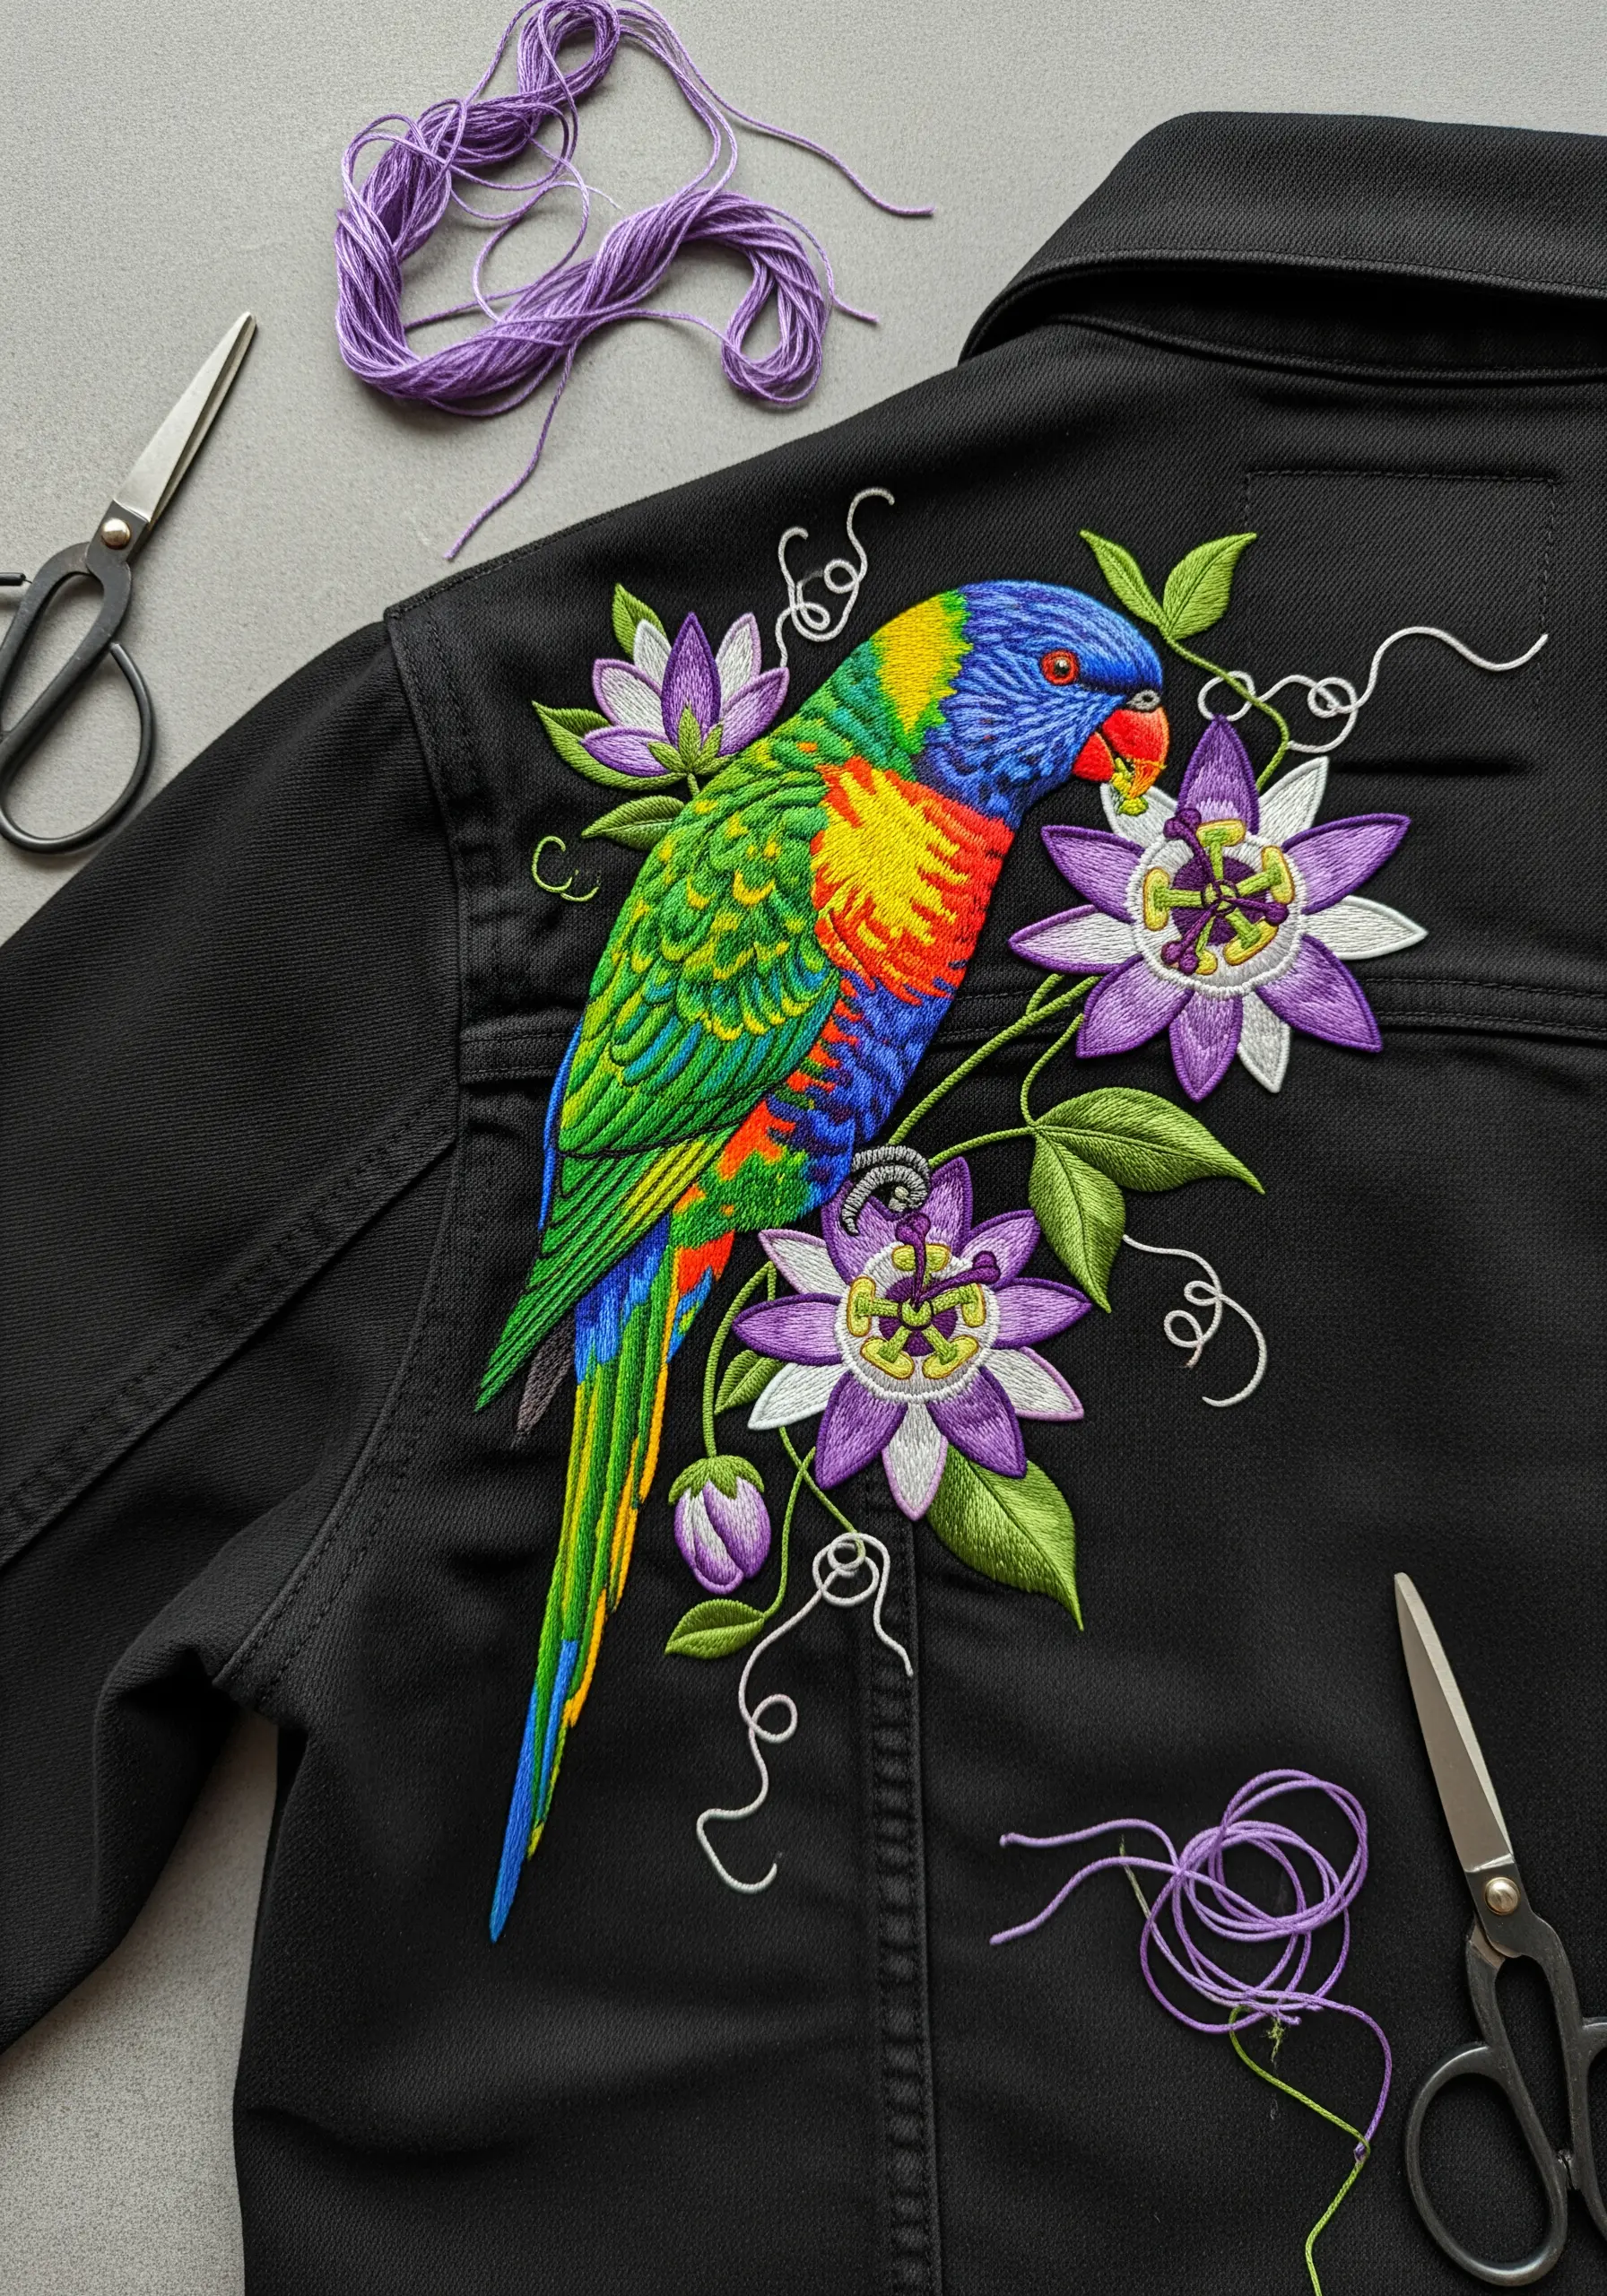
For a multi-colored bird like the Rainbow Lorikeet, the key to a professional finish is seamless color transition.
Instead of stitching separate blocks of color, use the long-and-short stitch, pulling your stitches from one color area slightly into the next.
This interlocking method creates a soft gradient that mimics the bird’s natural plumage.
Using a high-sheen rayon or silk thread will amplify the vibrancy of each color against a dark fabric like black denim.
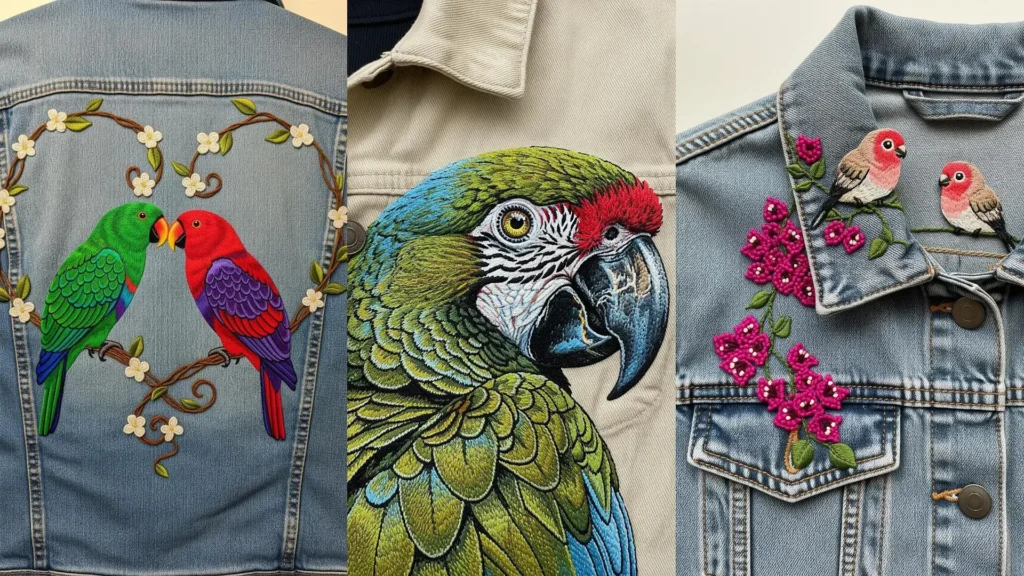
5. Create Compositional Harmony with Mirrored Motifs
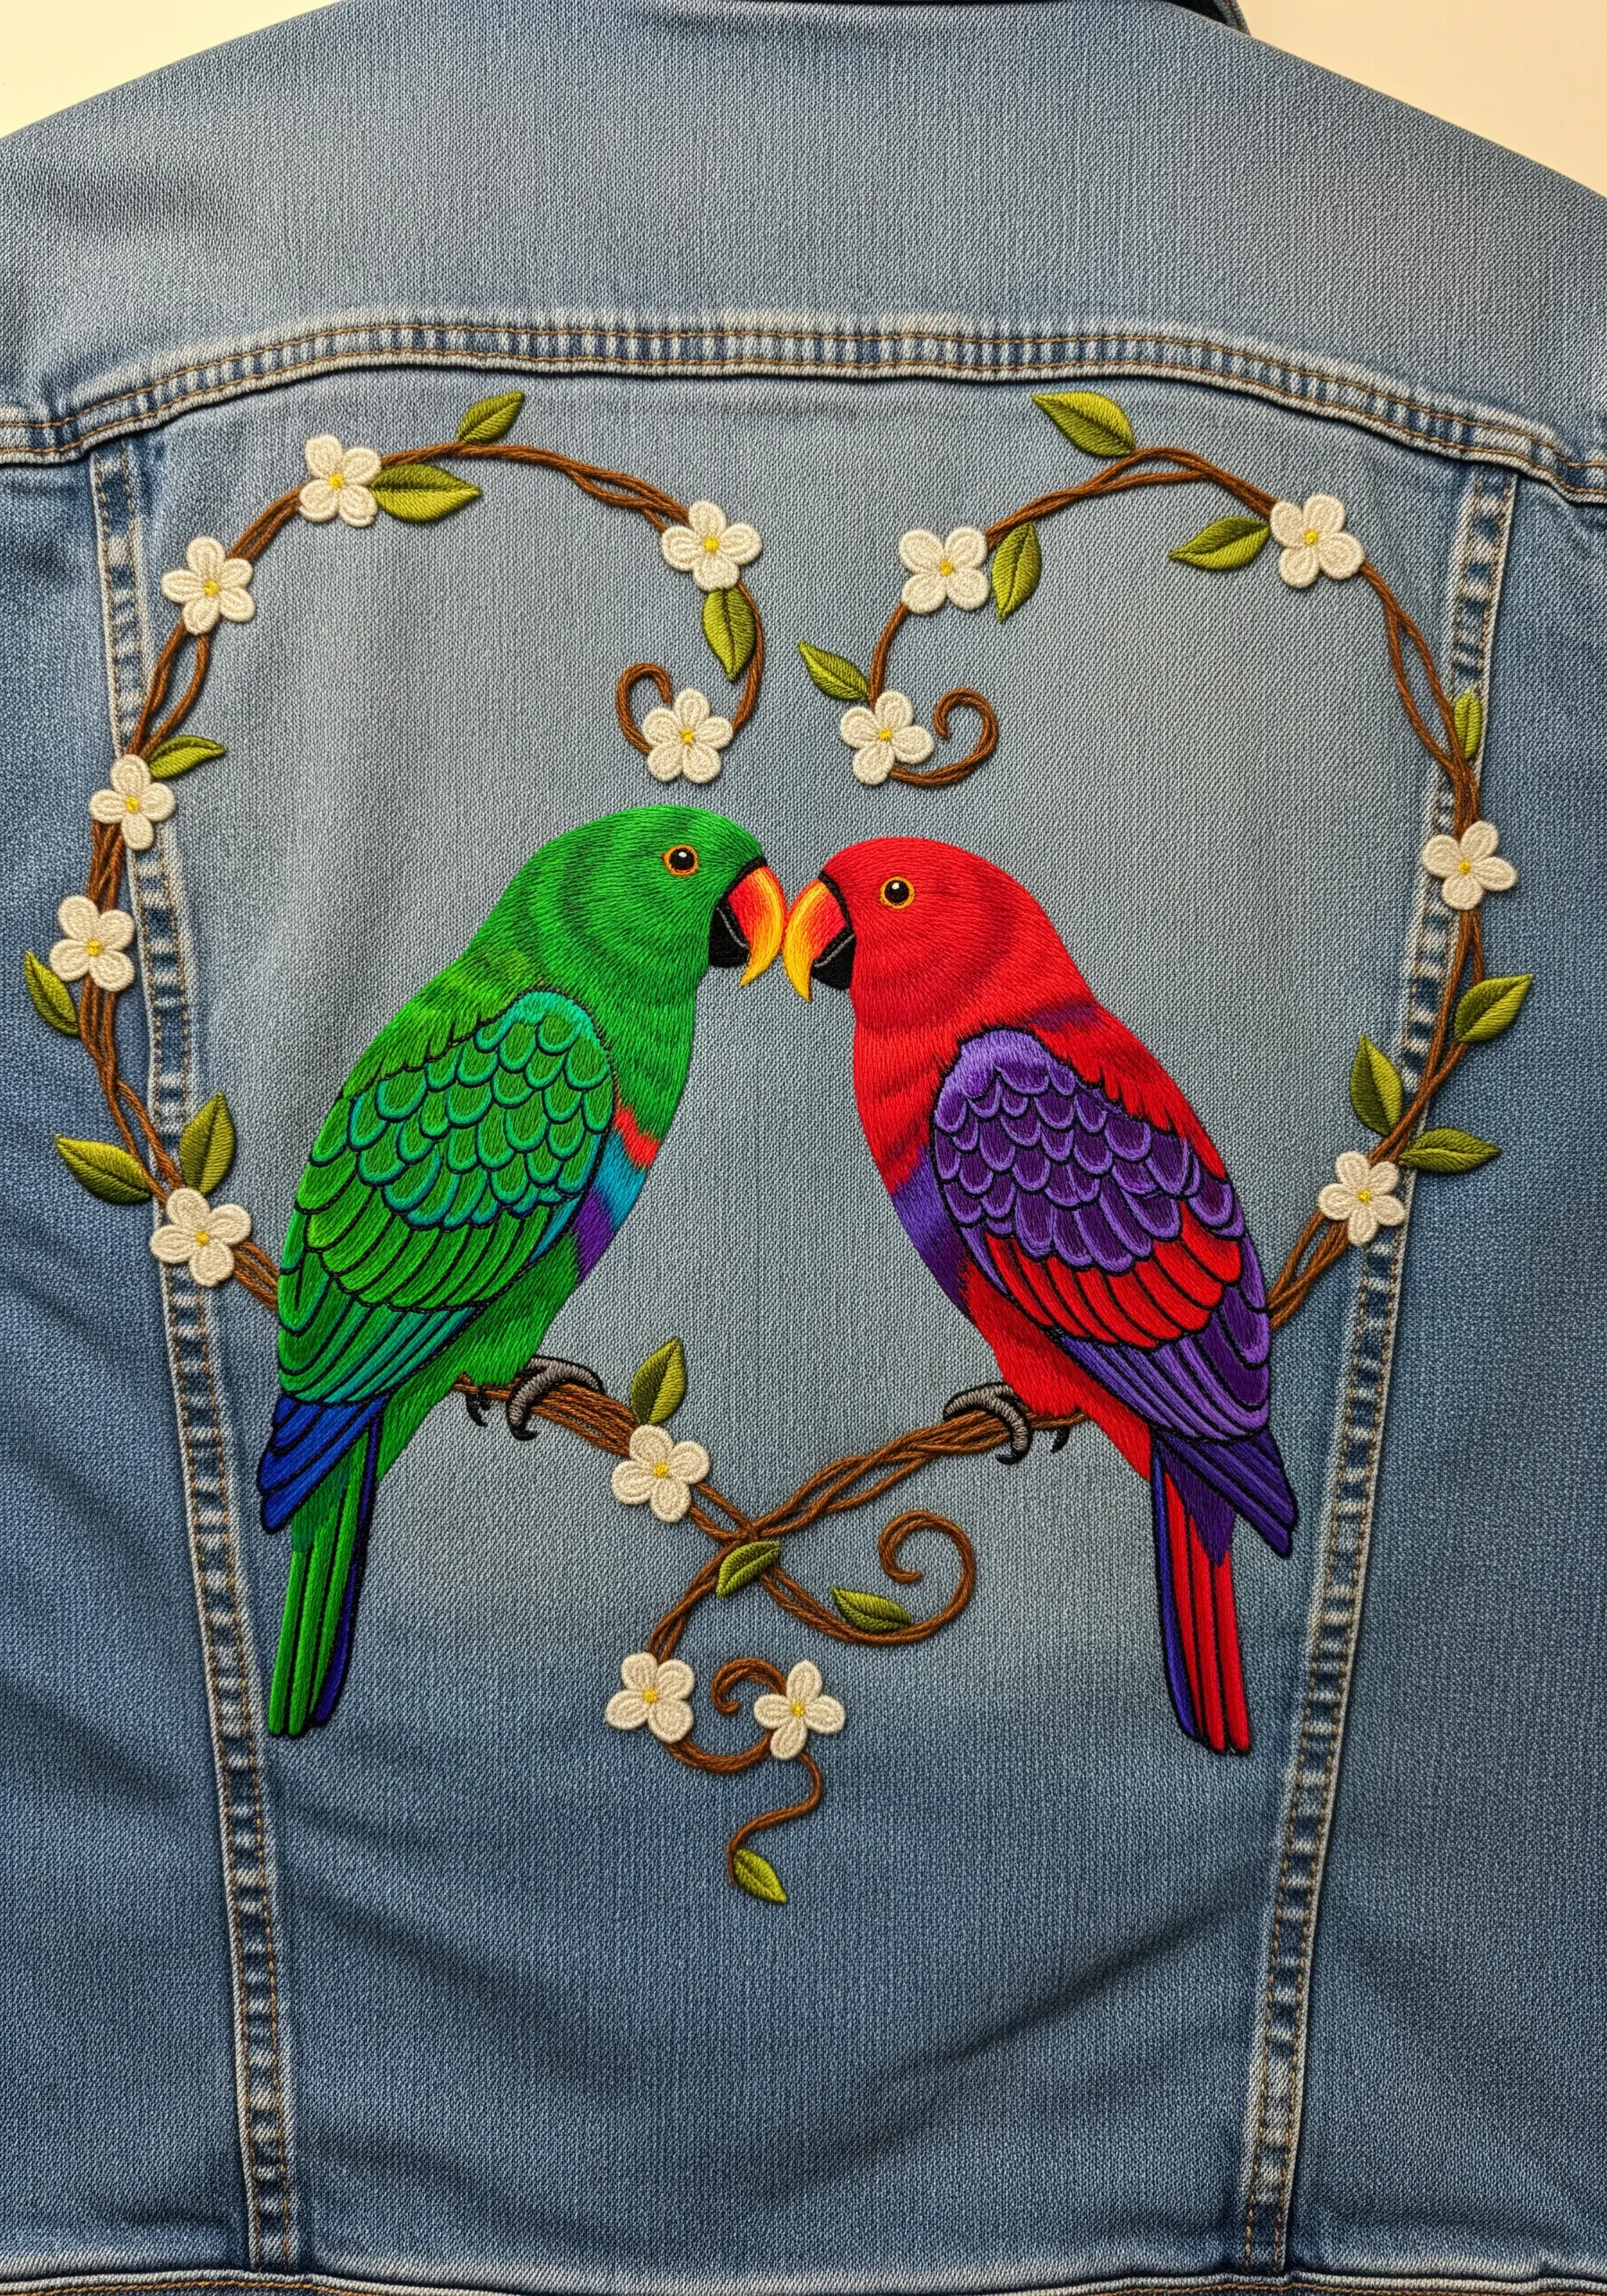
When featuring two subjects, create a sense of balance and intimacy through composition.
The heart-shaped frame not only adds a romantic element but also draws the viewer’s eye directly to the parrots.
To create the vine’s twisted texture, use a whipped backstitch or a heavy chain stitch.
Ensure the parrots are stitched with equal detail and density, making them a cohesive pair rather than two separate elements.
6. Design for Movement with Asymmetrical Sleeve Placement
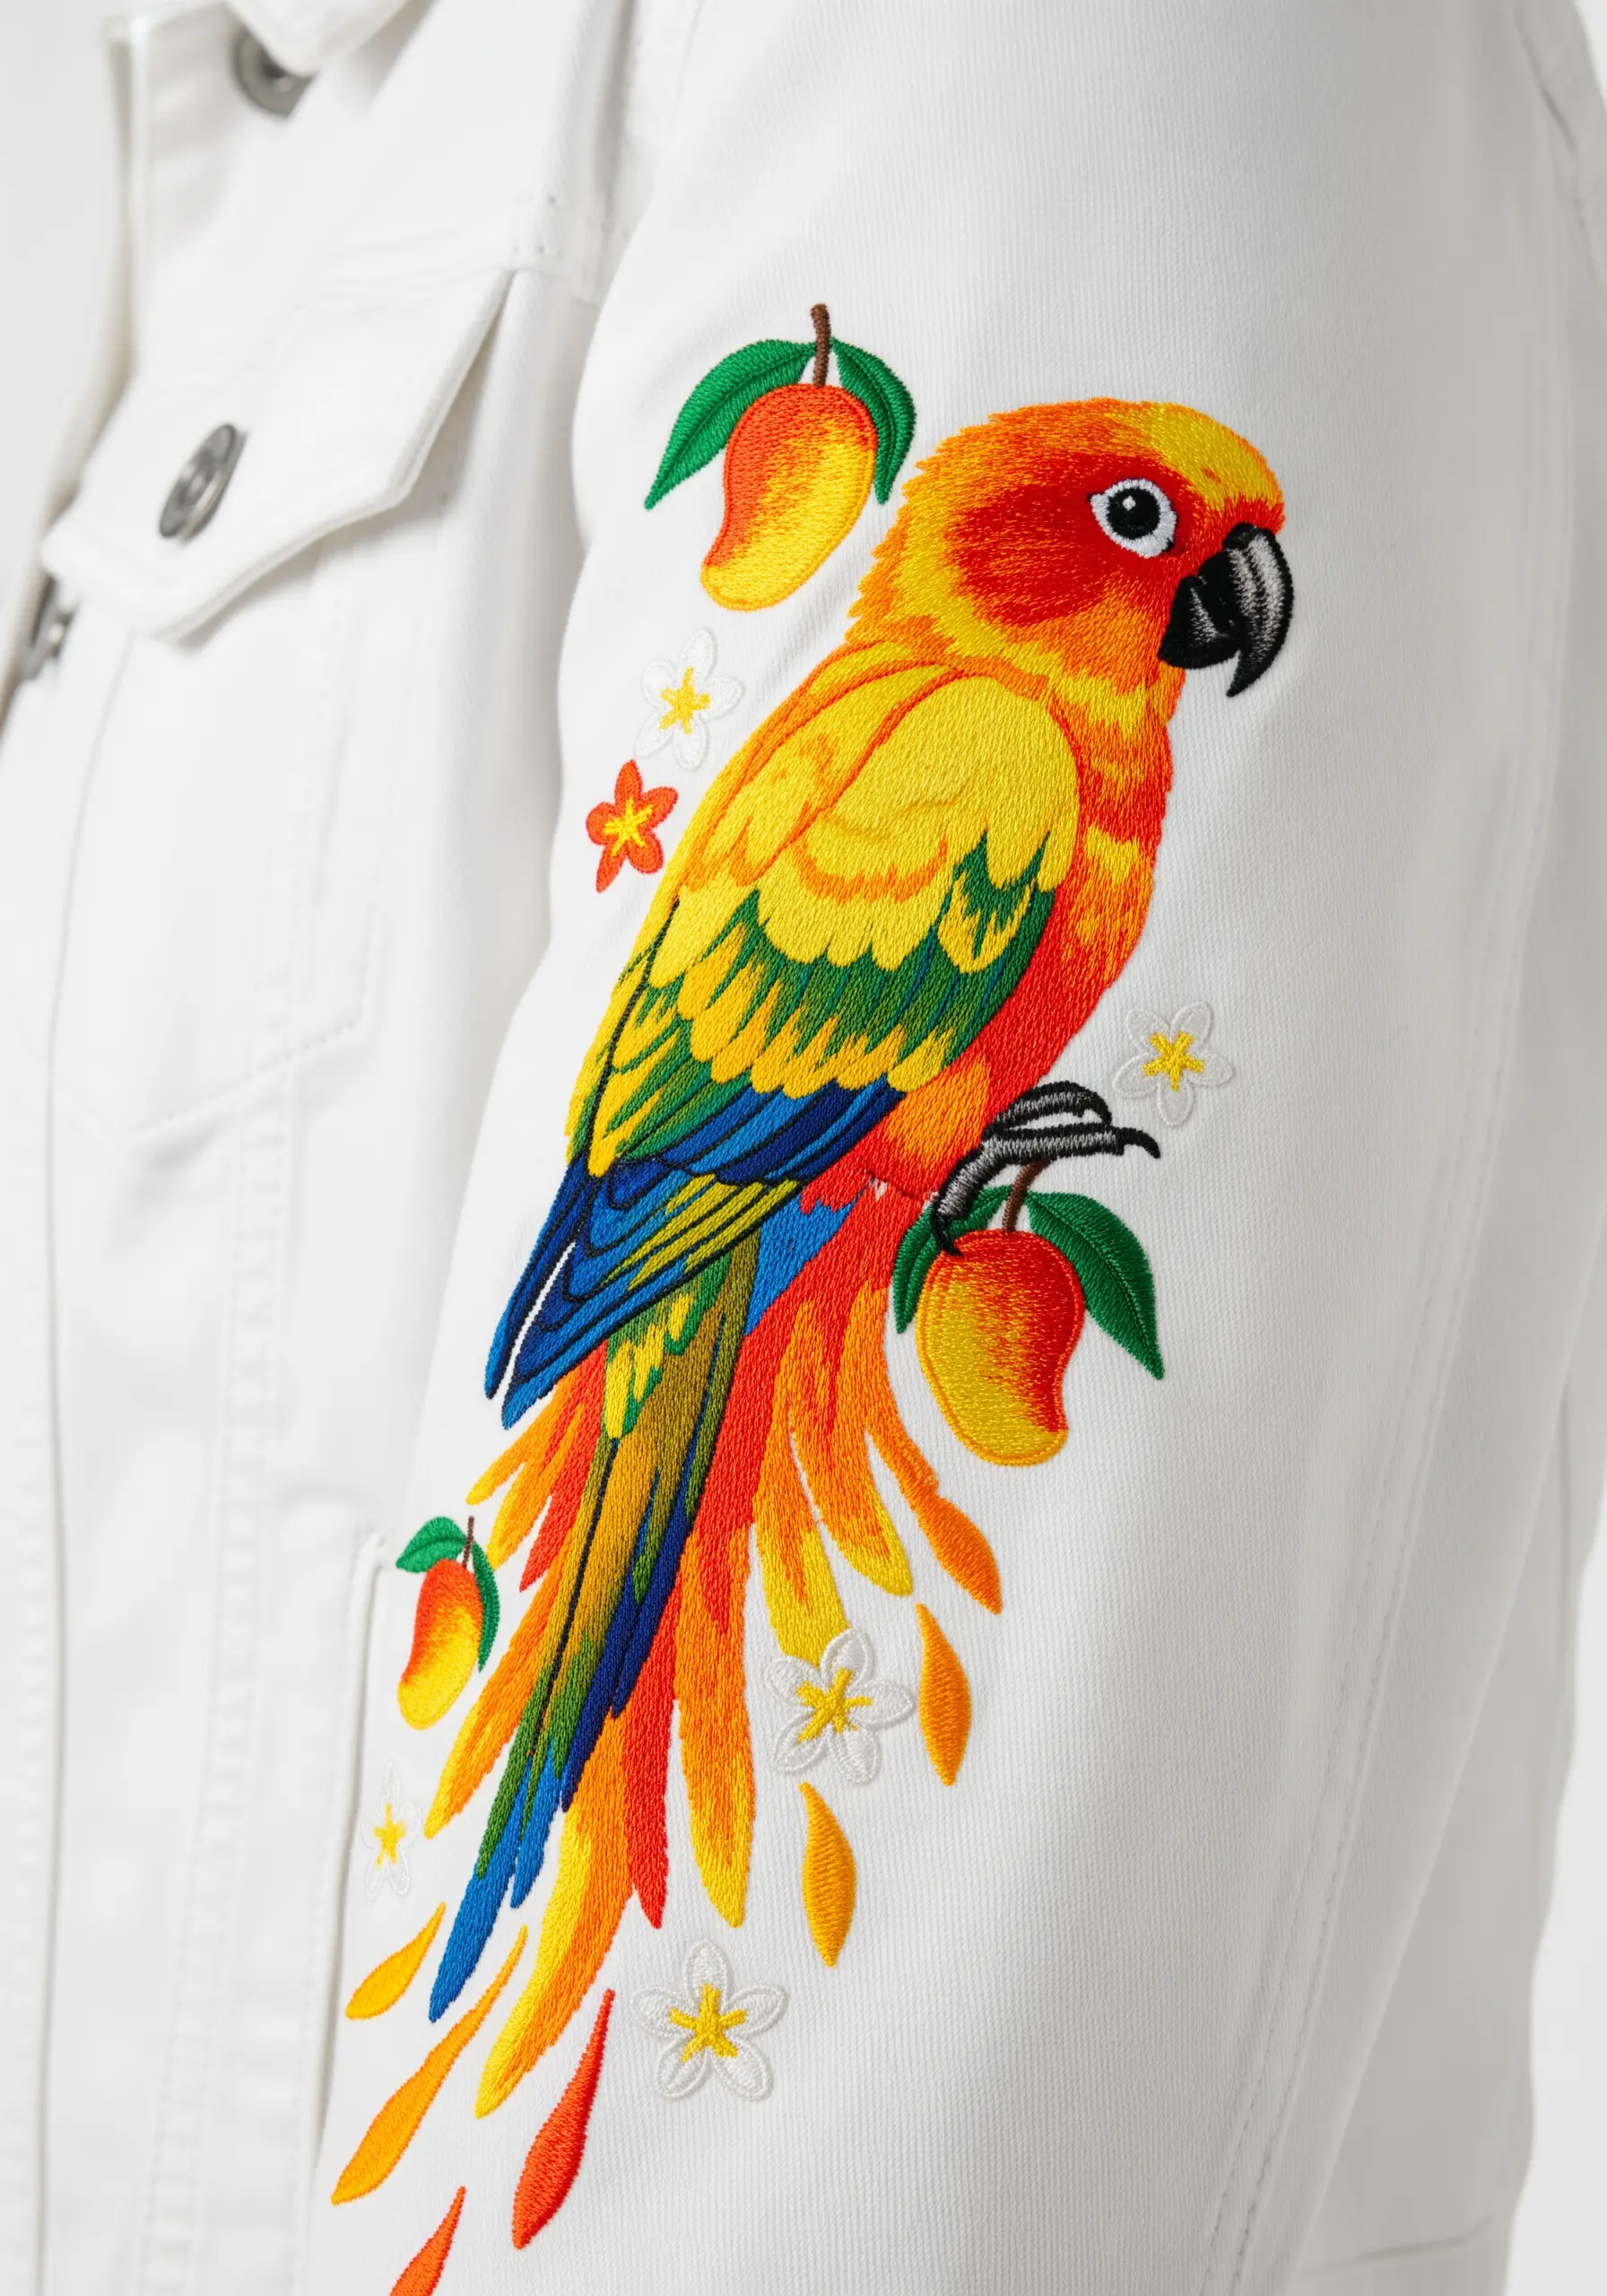
Placing your embroidery down the length of a sleeve adds an unexpected and dynamic element to the garment.
To create the illusion of flowing tail feathers, use long, detached straight stitches at the very end of the tail.
Always use a stabilizer on the inside of the sleeve while stitching to prevent the denim from stretching or puckering, ensuring a smooth finish.
This placement turns a simple gesture, like reaching for something, into a flash of color and artistry.
7. Complement Fabric Color with a Soft Pastel Palette
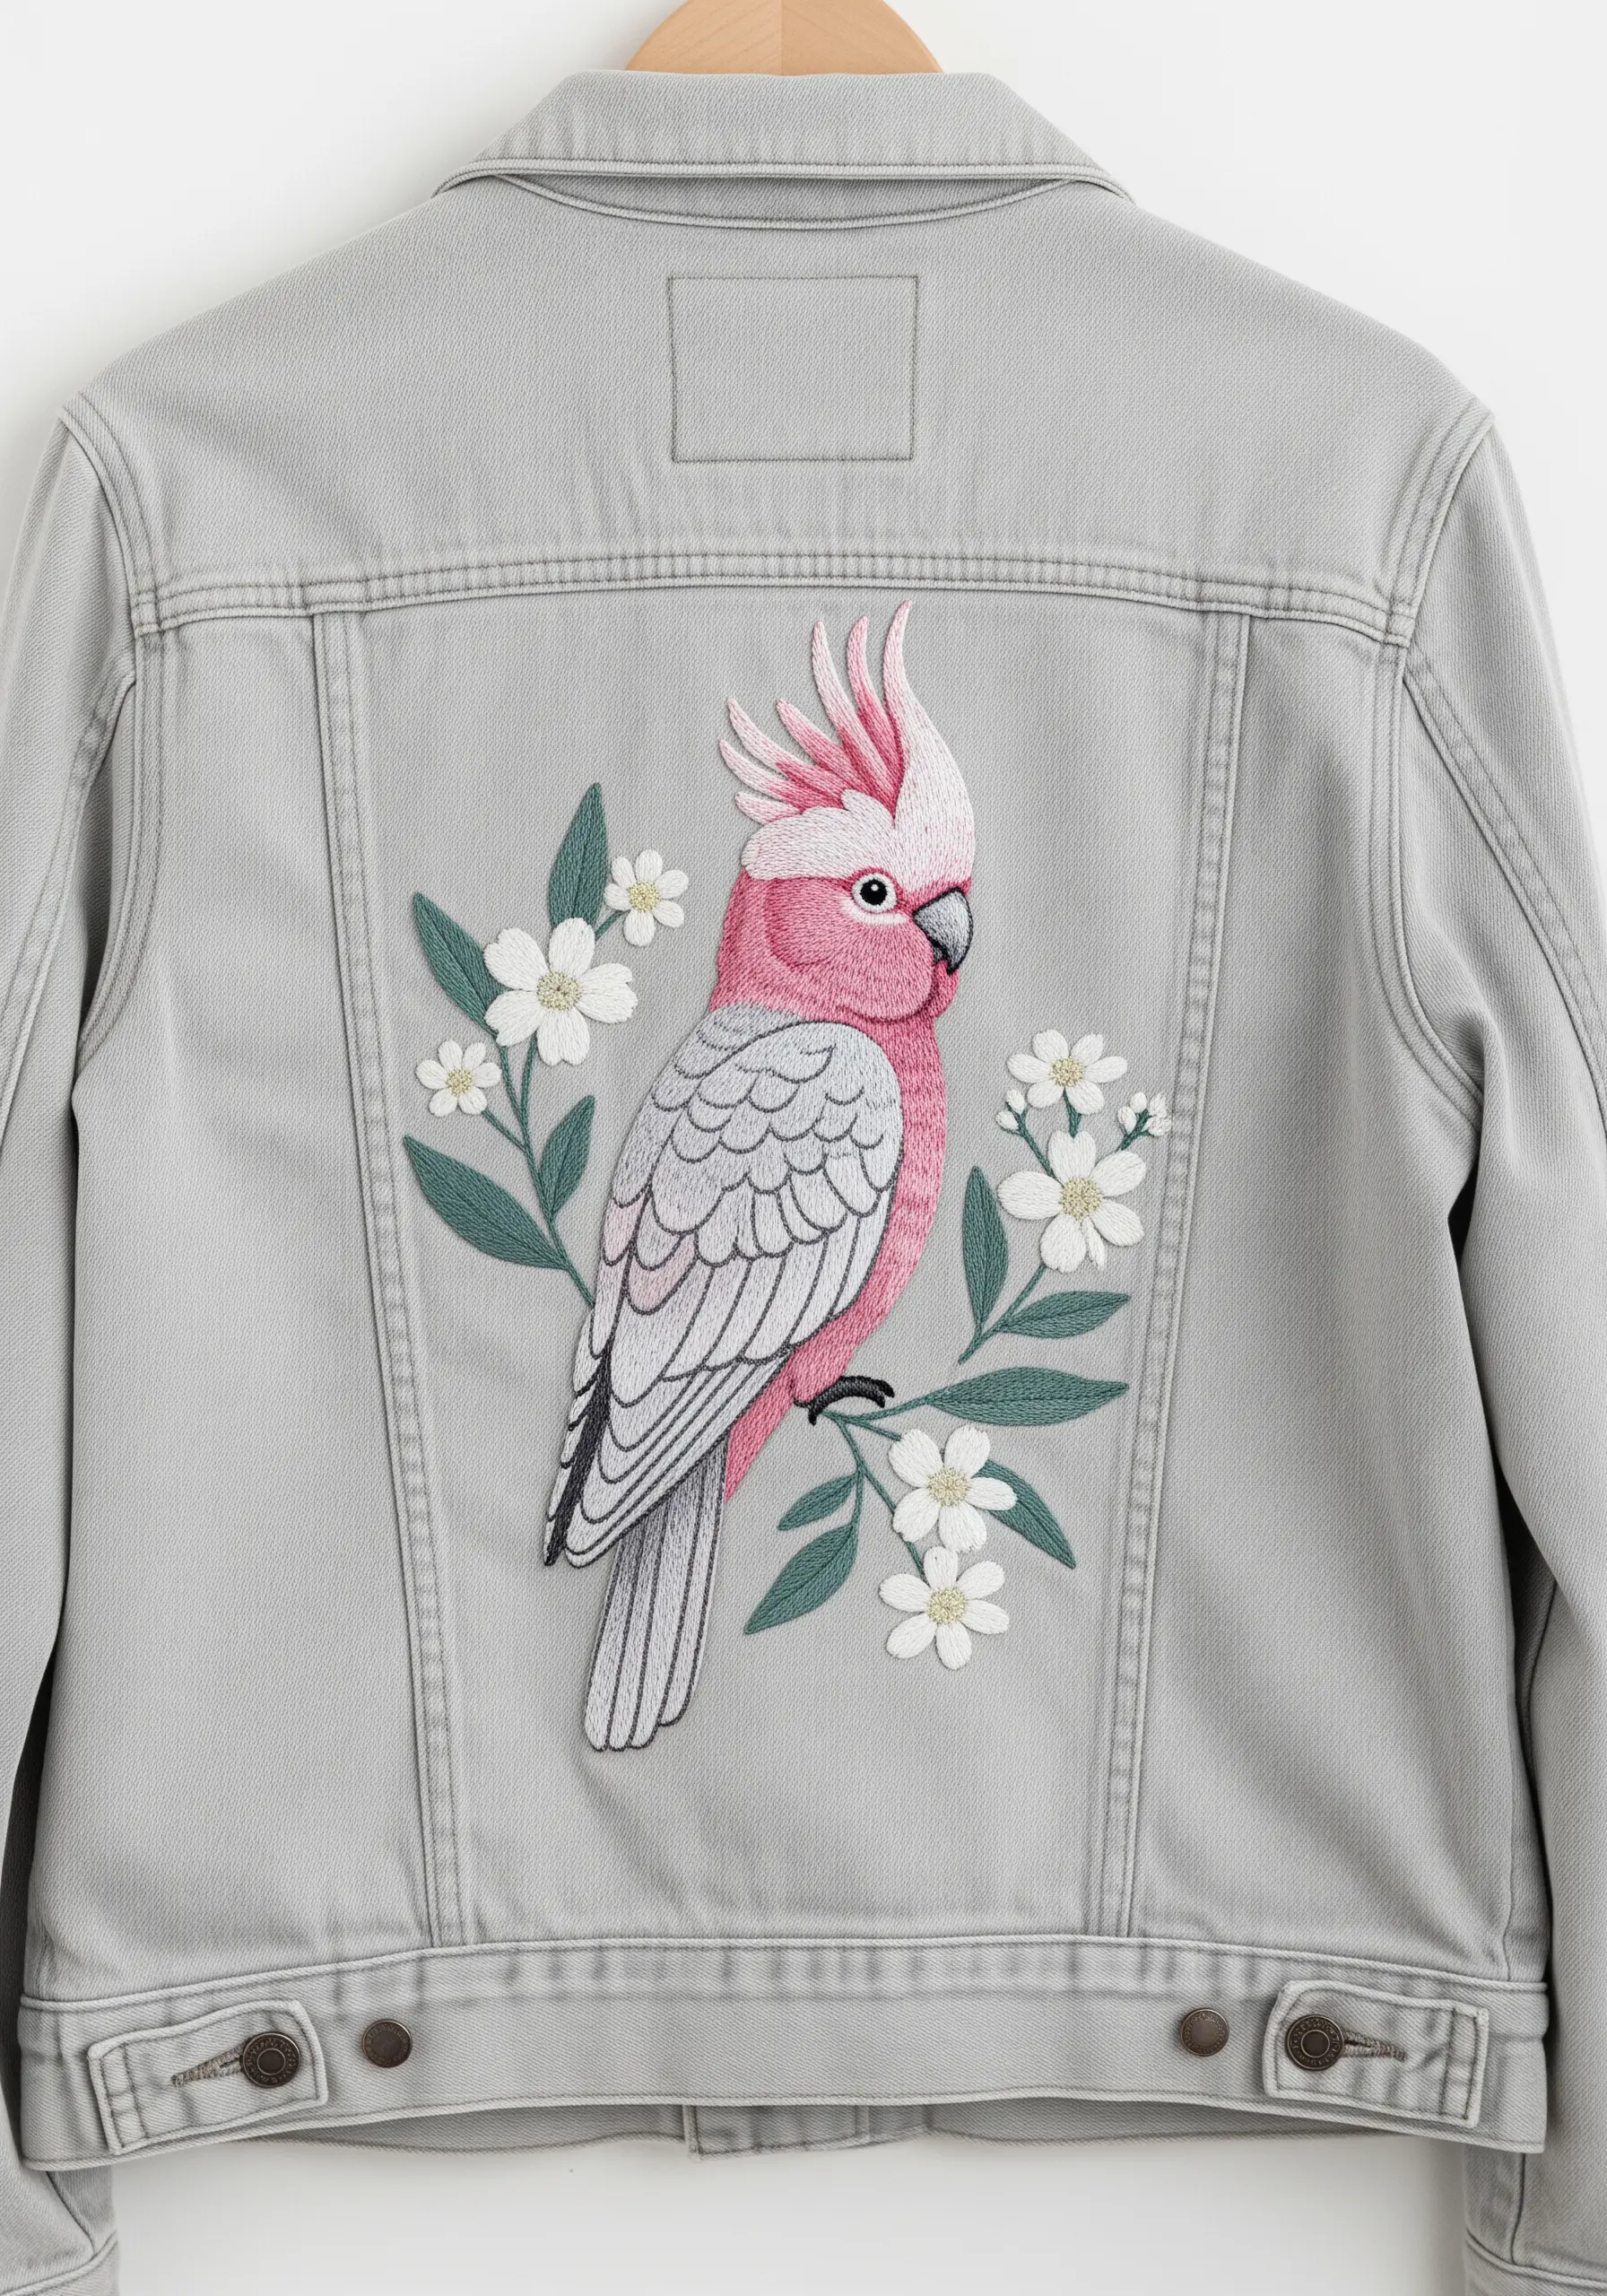
Your fabric is part of the design, not just a canvas. A light grey denim provides a soft, neutral backdrop that enhances pastel threads.
For the Galah’s iconic pink and grey feathers, choose dusty rose and muted silver tones rather than bright, saturated ones.
Using a matte cotton floss will absorb light and contribute to the overall soft, elegant aesthetic, creating a piece that feels cohesive and intentional.
8. Capture an In-Flight Pose by Layering Wing Feathers

To give wings a sense of depth and movement, you need to think in layers.
Map out the distinct sections of feathers first: the smaller covert feathers near the body and the longer primary feathers at the edge.
Stitch the feathers that are furthest back first, then slightly overlap the next layer on top.
Ensure all your stitches follow the direction of feather growth, sweeping backward to create a powerful, aerodynamic look.
9. Create a Tapestry Effect with Full-Coverage Embroidery

Transform the entire back panel of your jacket into a piece of wearable textile art.
To ensure the parrot stands out, use a slightly thicker thread (e.g., three strands of floss) for the bird and a thinner thread (two strands) for the background foliage.
Varying the greens in the background and the directions of your stitches will create a lush, dense jungle that doesn’t look flat.
This approach elevates a simple garment into one of your signature embroidered textile wall hangings.
10. Integrate Design Elements with Playful Pocket Art
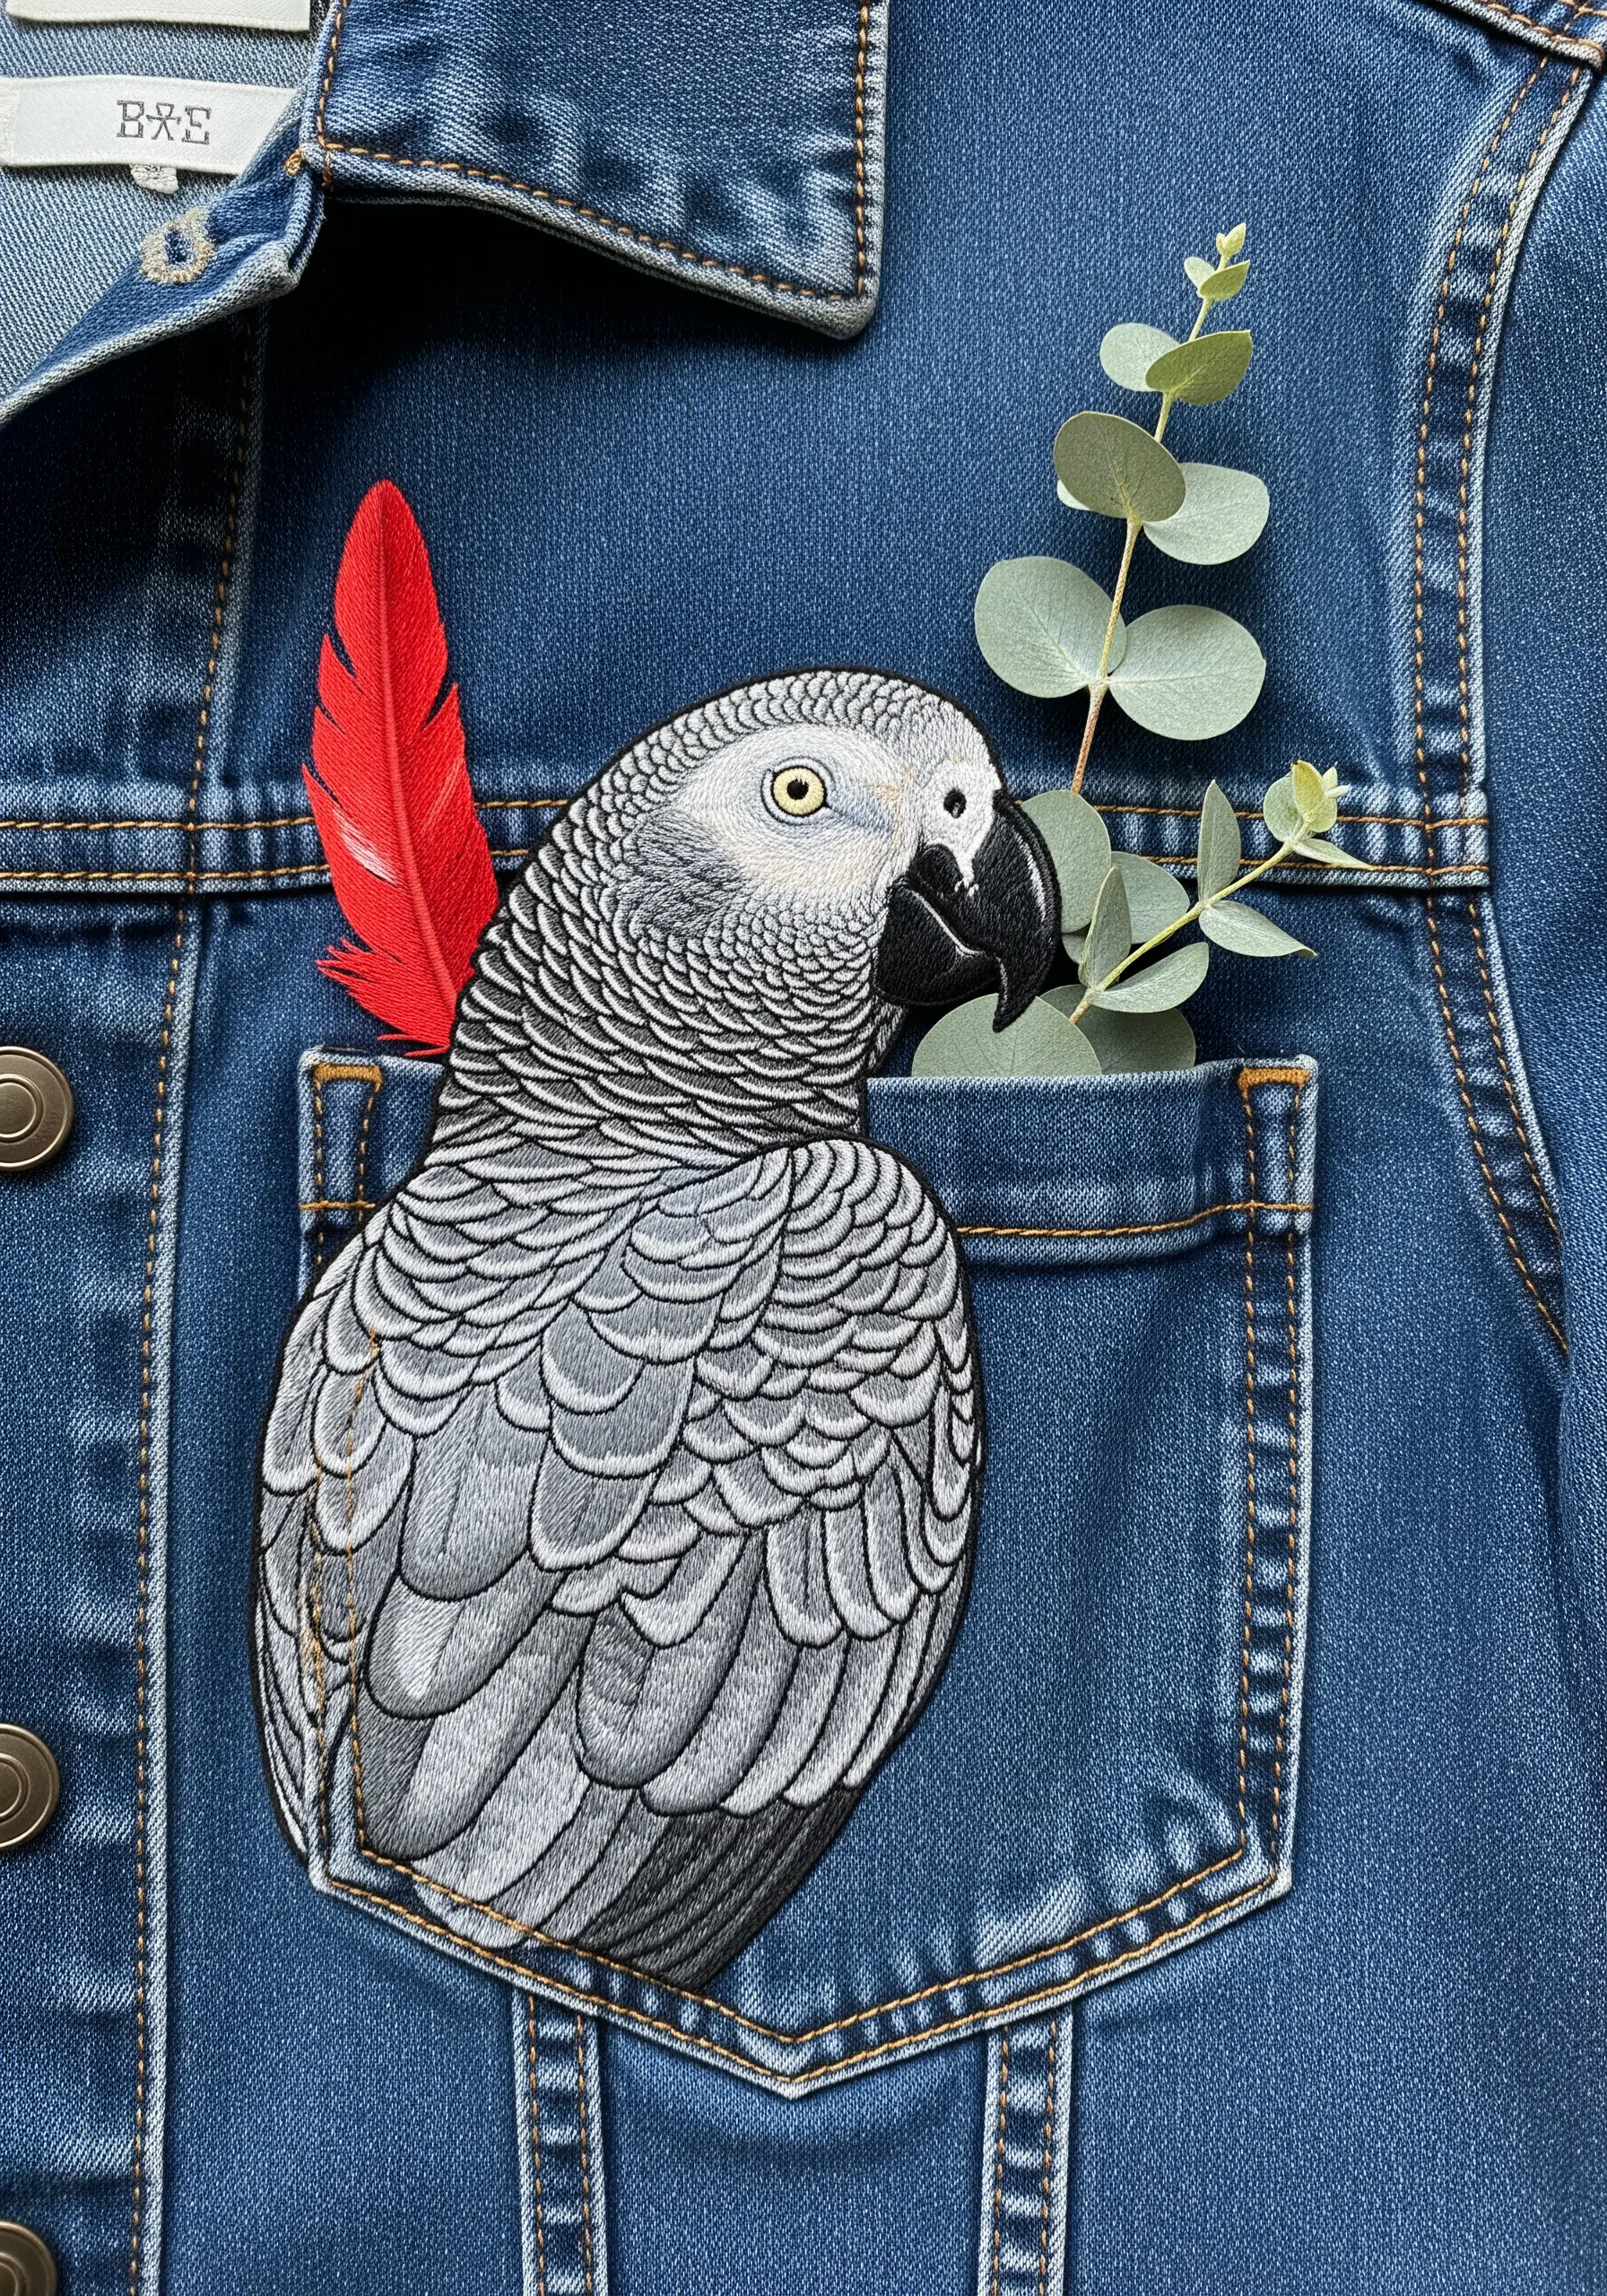
Use the existing architecture of the jacket as a playful frame for your work.
Stitching a parrot so it appears to be peeking out of the pocket adds narrative and charm.
For the African Grey’s scalloped feathers, use small, overlapping satin stitches in two or three shades of grey to create subtle dimension.
These tiny embroidery details turn a garment into a conversation starter.
11. Make Small Motifs Pop with French Knot Textures
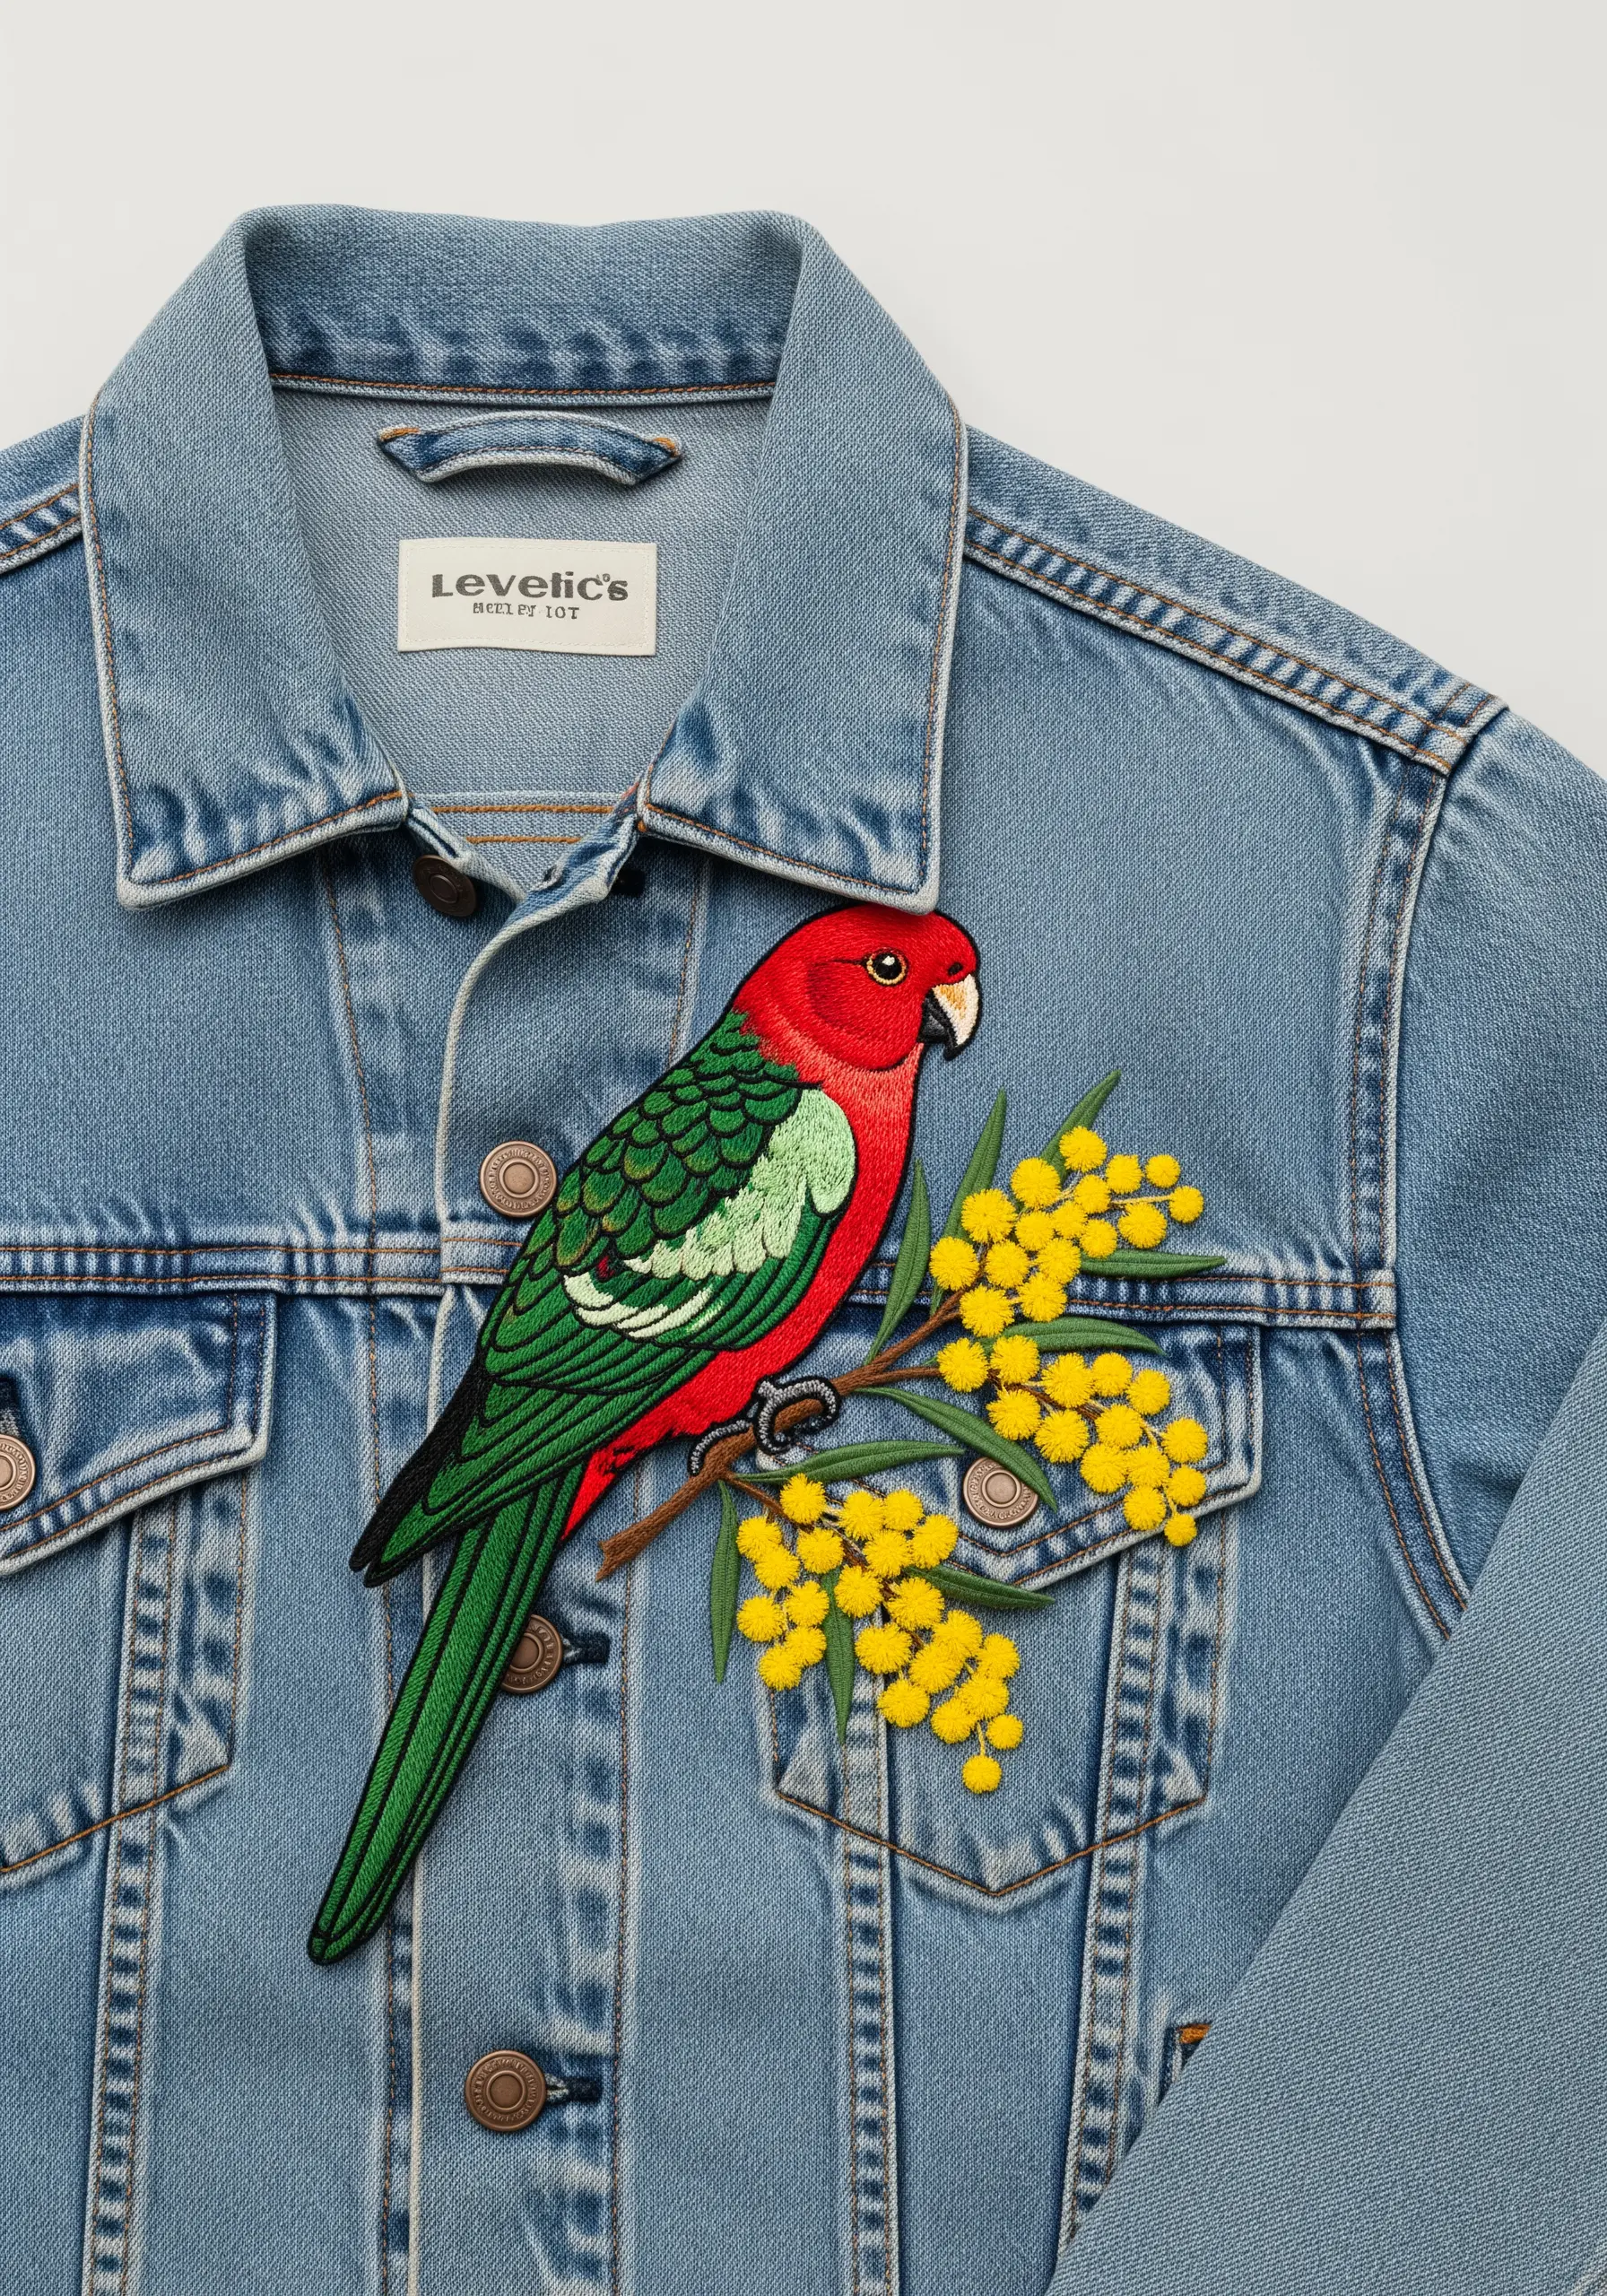
When your design is smaller and placed off-center, texture becomes essential for impact.
While the parrot is rendered in smooth satin stitch, the mimosa blossoms are created with dense clusters of French knots.
This textural contrast draws the eye and gives the simple composition a sophisticated, multi-dimensional feel.
Use a variegated yellow thread for the knots to give the blossoms a more natural, pollen-dusted appearance.
12. Embrace Graphic Style with Bold Color Blocking
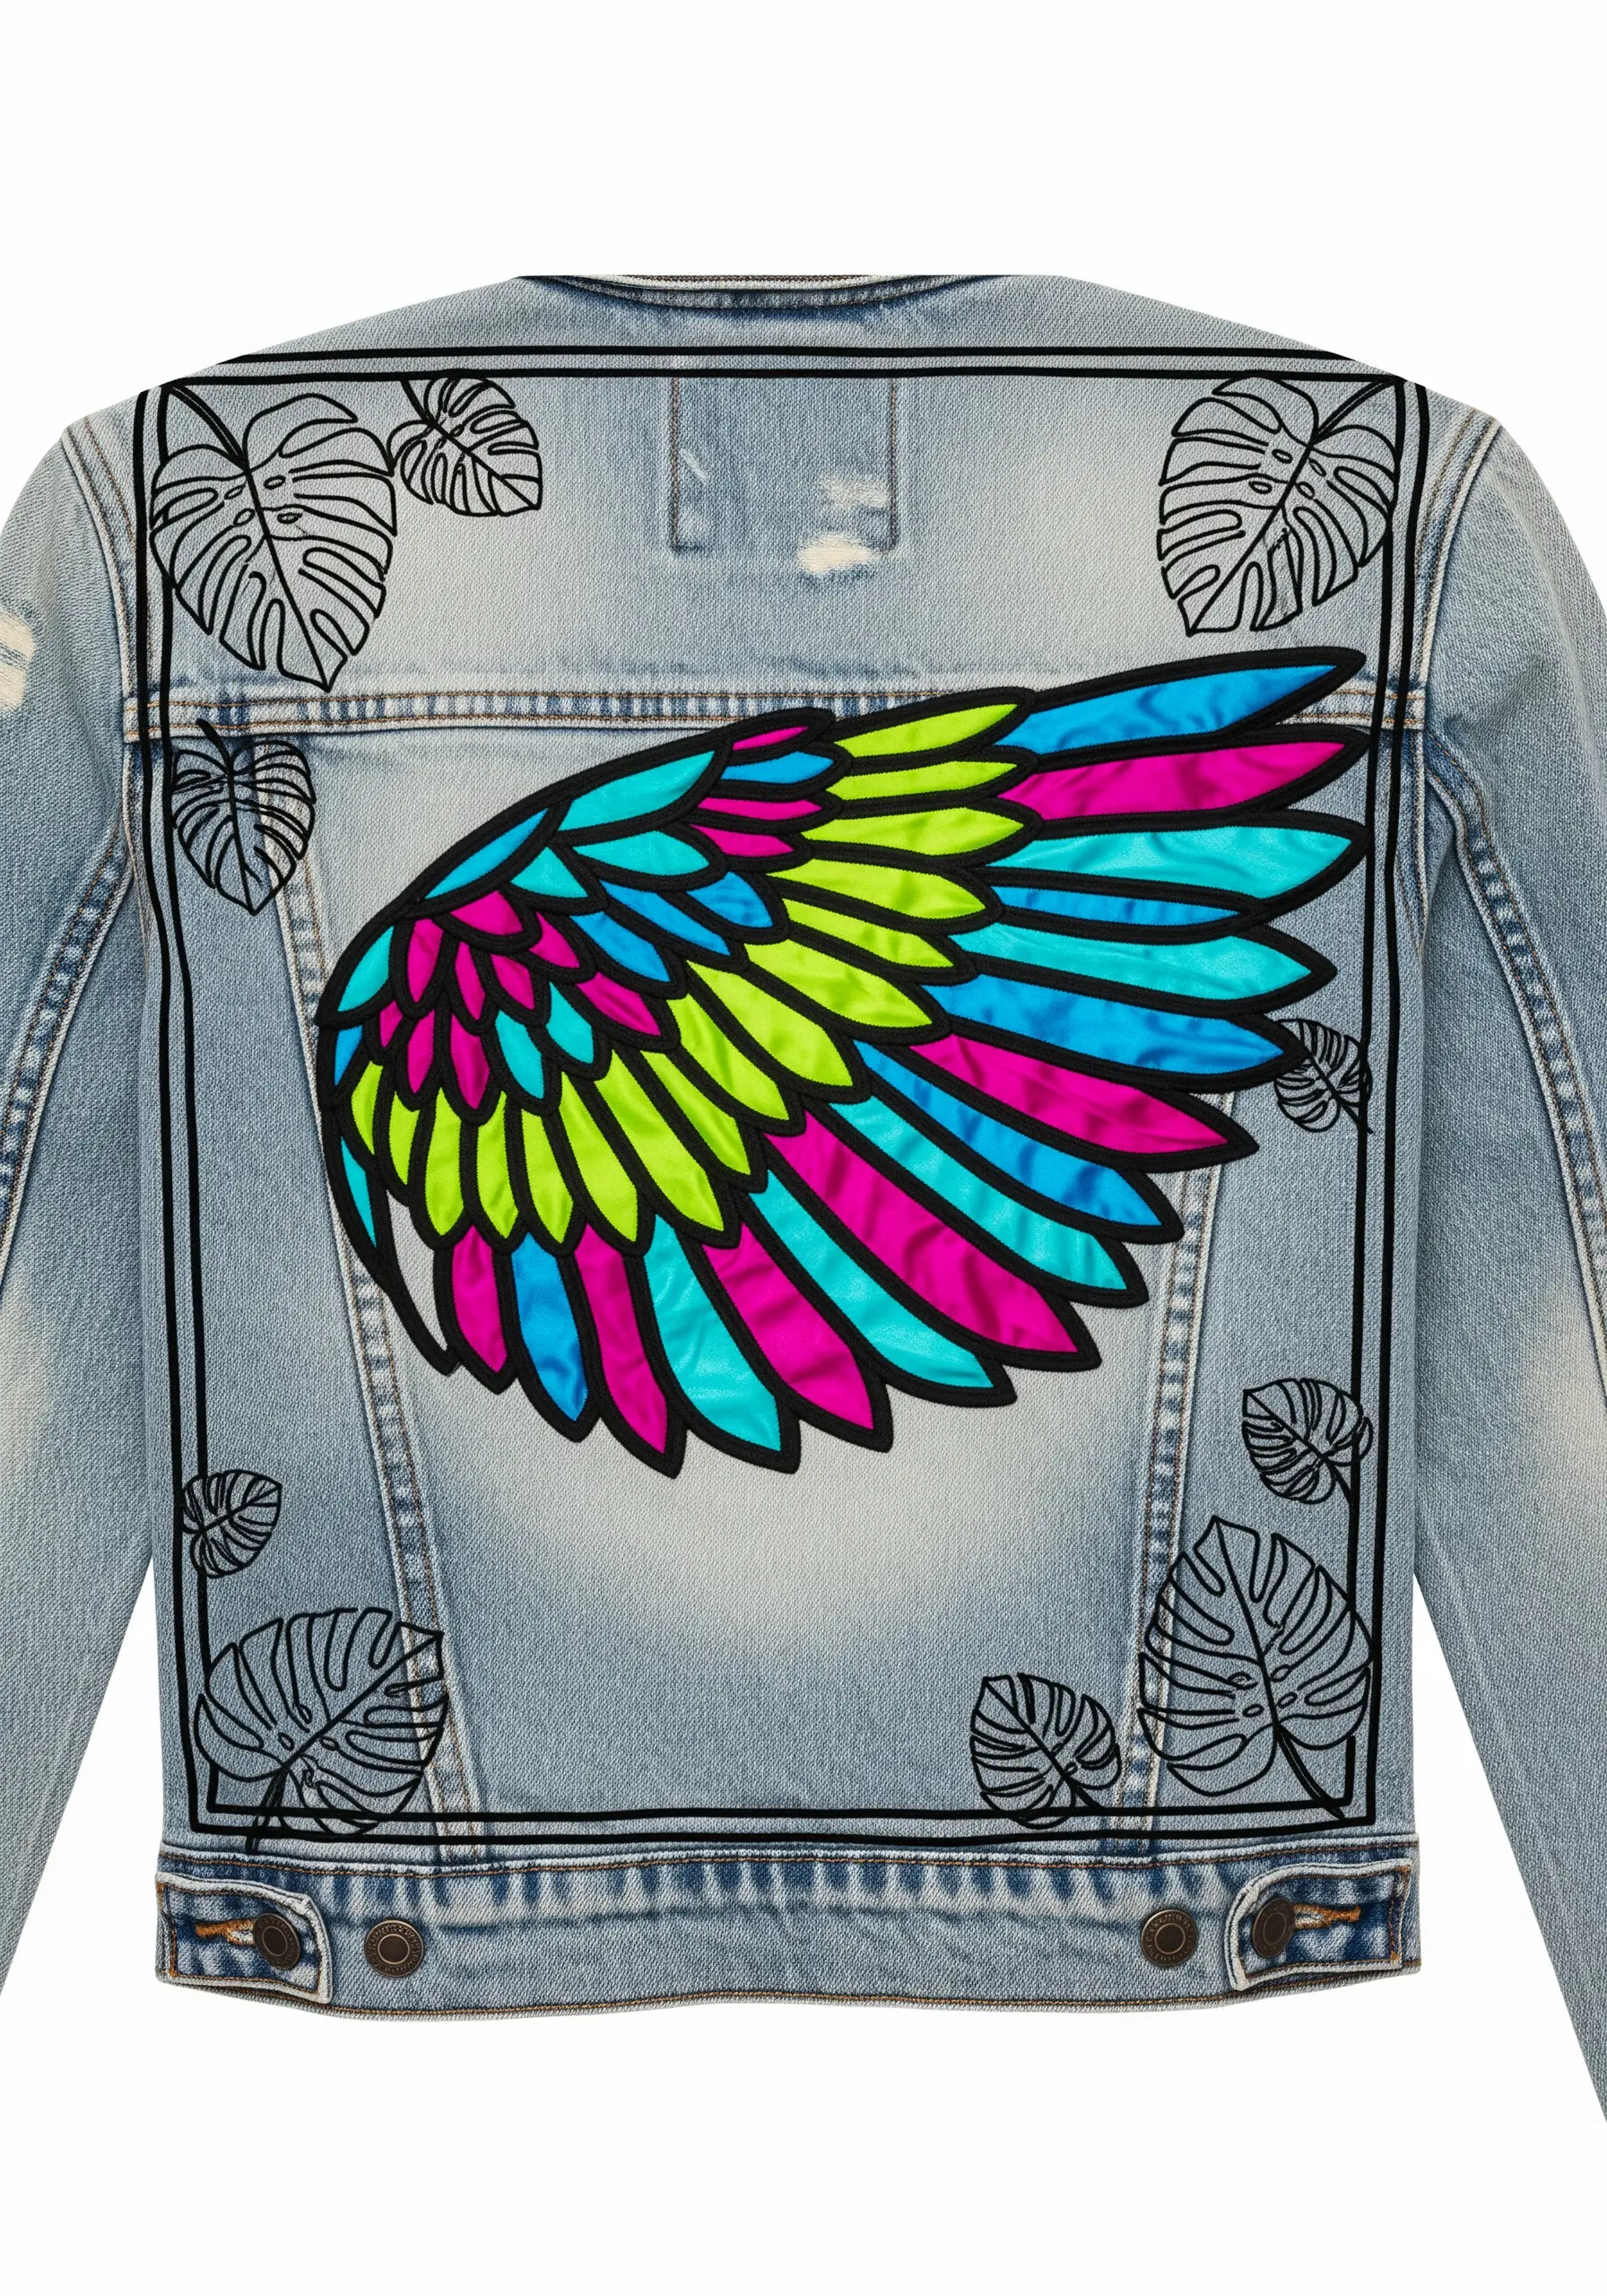
Move beyond realism with a graphic, abstract interpretation of a parrot’s wing.
Achieve the clean, sharp blocks of color with a dense, perfectly aligned satin stitch.
The most crucial element is the heavy black outline; stitch this last using a stem or chain stitch with at least four strands of floss to create a bold, containing line that makes the neon colors pop.
13. Add High Texture with Three-Dimensional French Knots
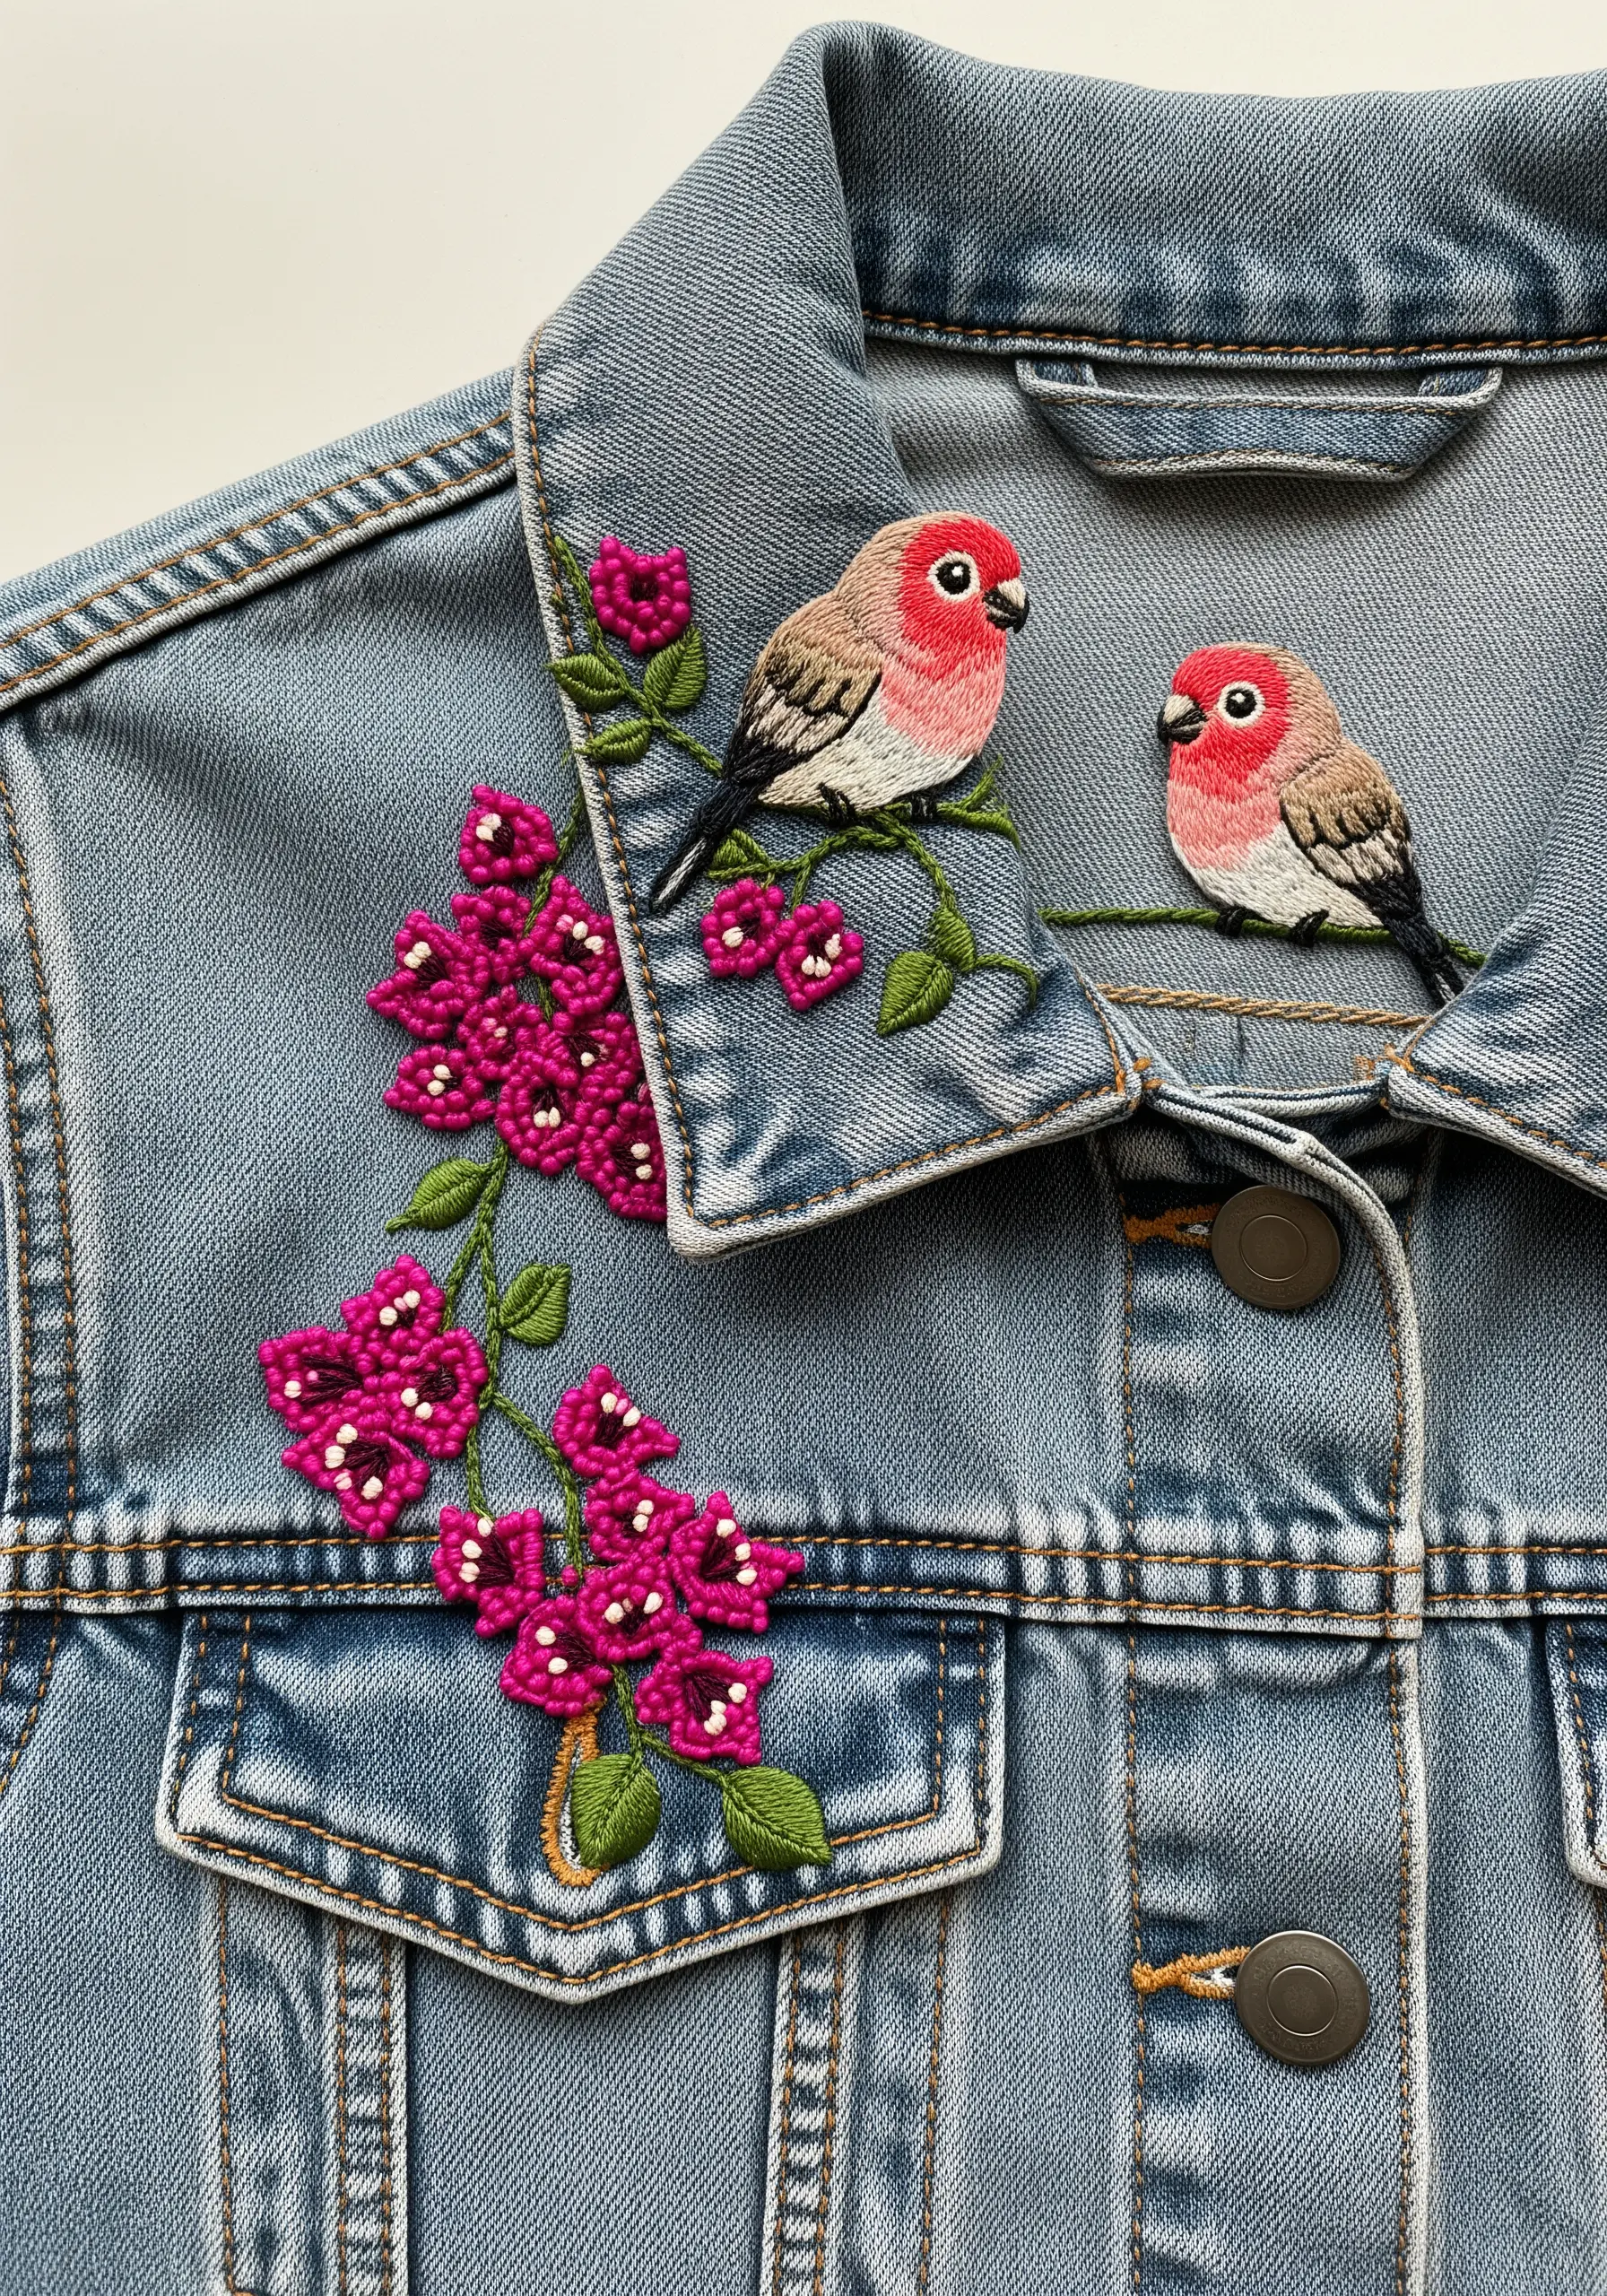
Give floral elements a lush, tactile quality that lifts them off the fabric.
For the bougainvillea clusters, use a vibrant magenta thread and create dense groupings of French knots.
Vary the number of times you wrap the thread around the needle (once or twice) to create knots of slightly different sizes, mimicking a real flower cluster.
This 3D effect provides a beautiful contrast to the smoothly stitched birds perched on the collar.
14. Define Monochrome Feathers on a Dark Background
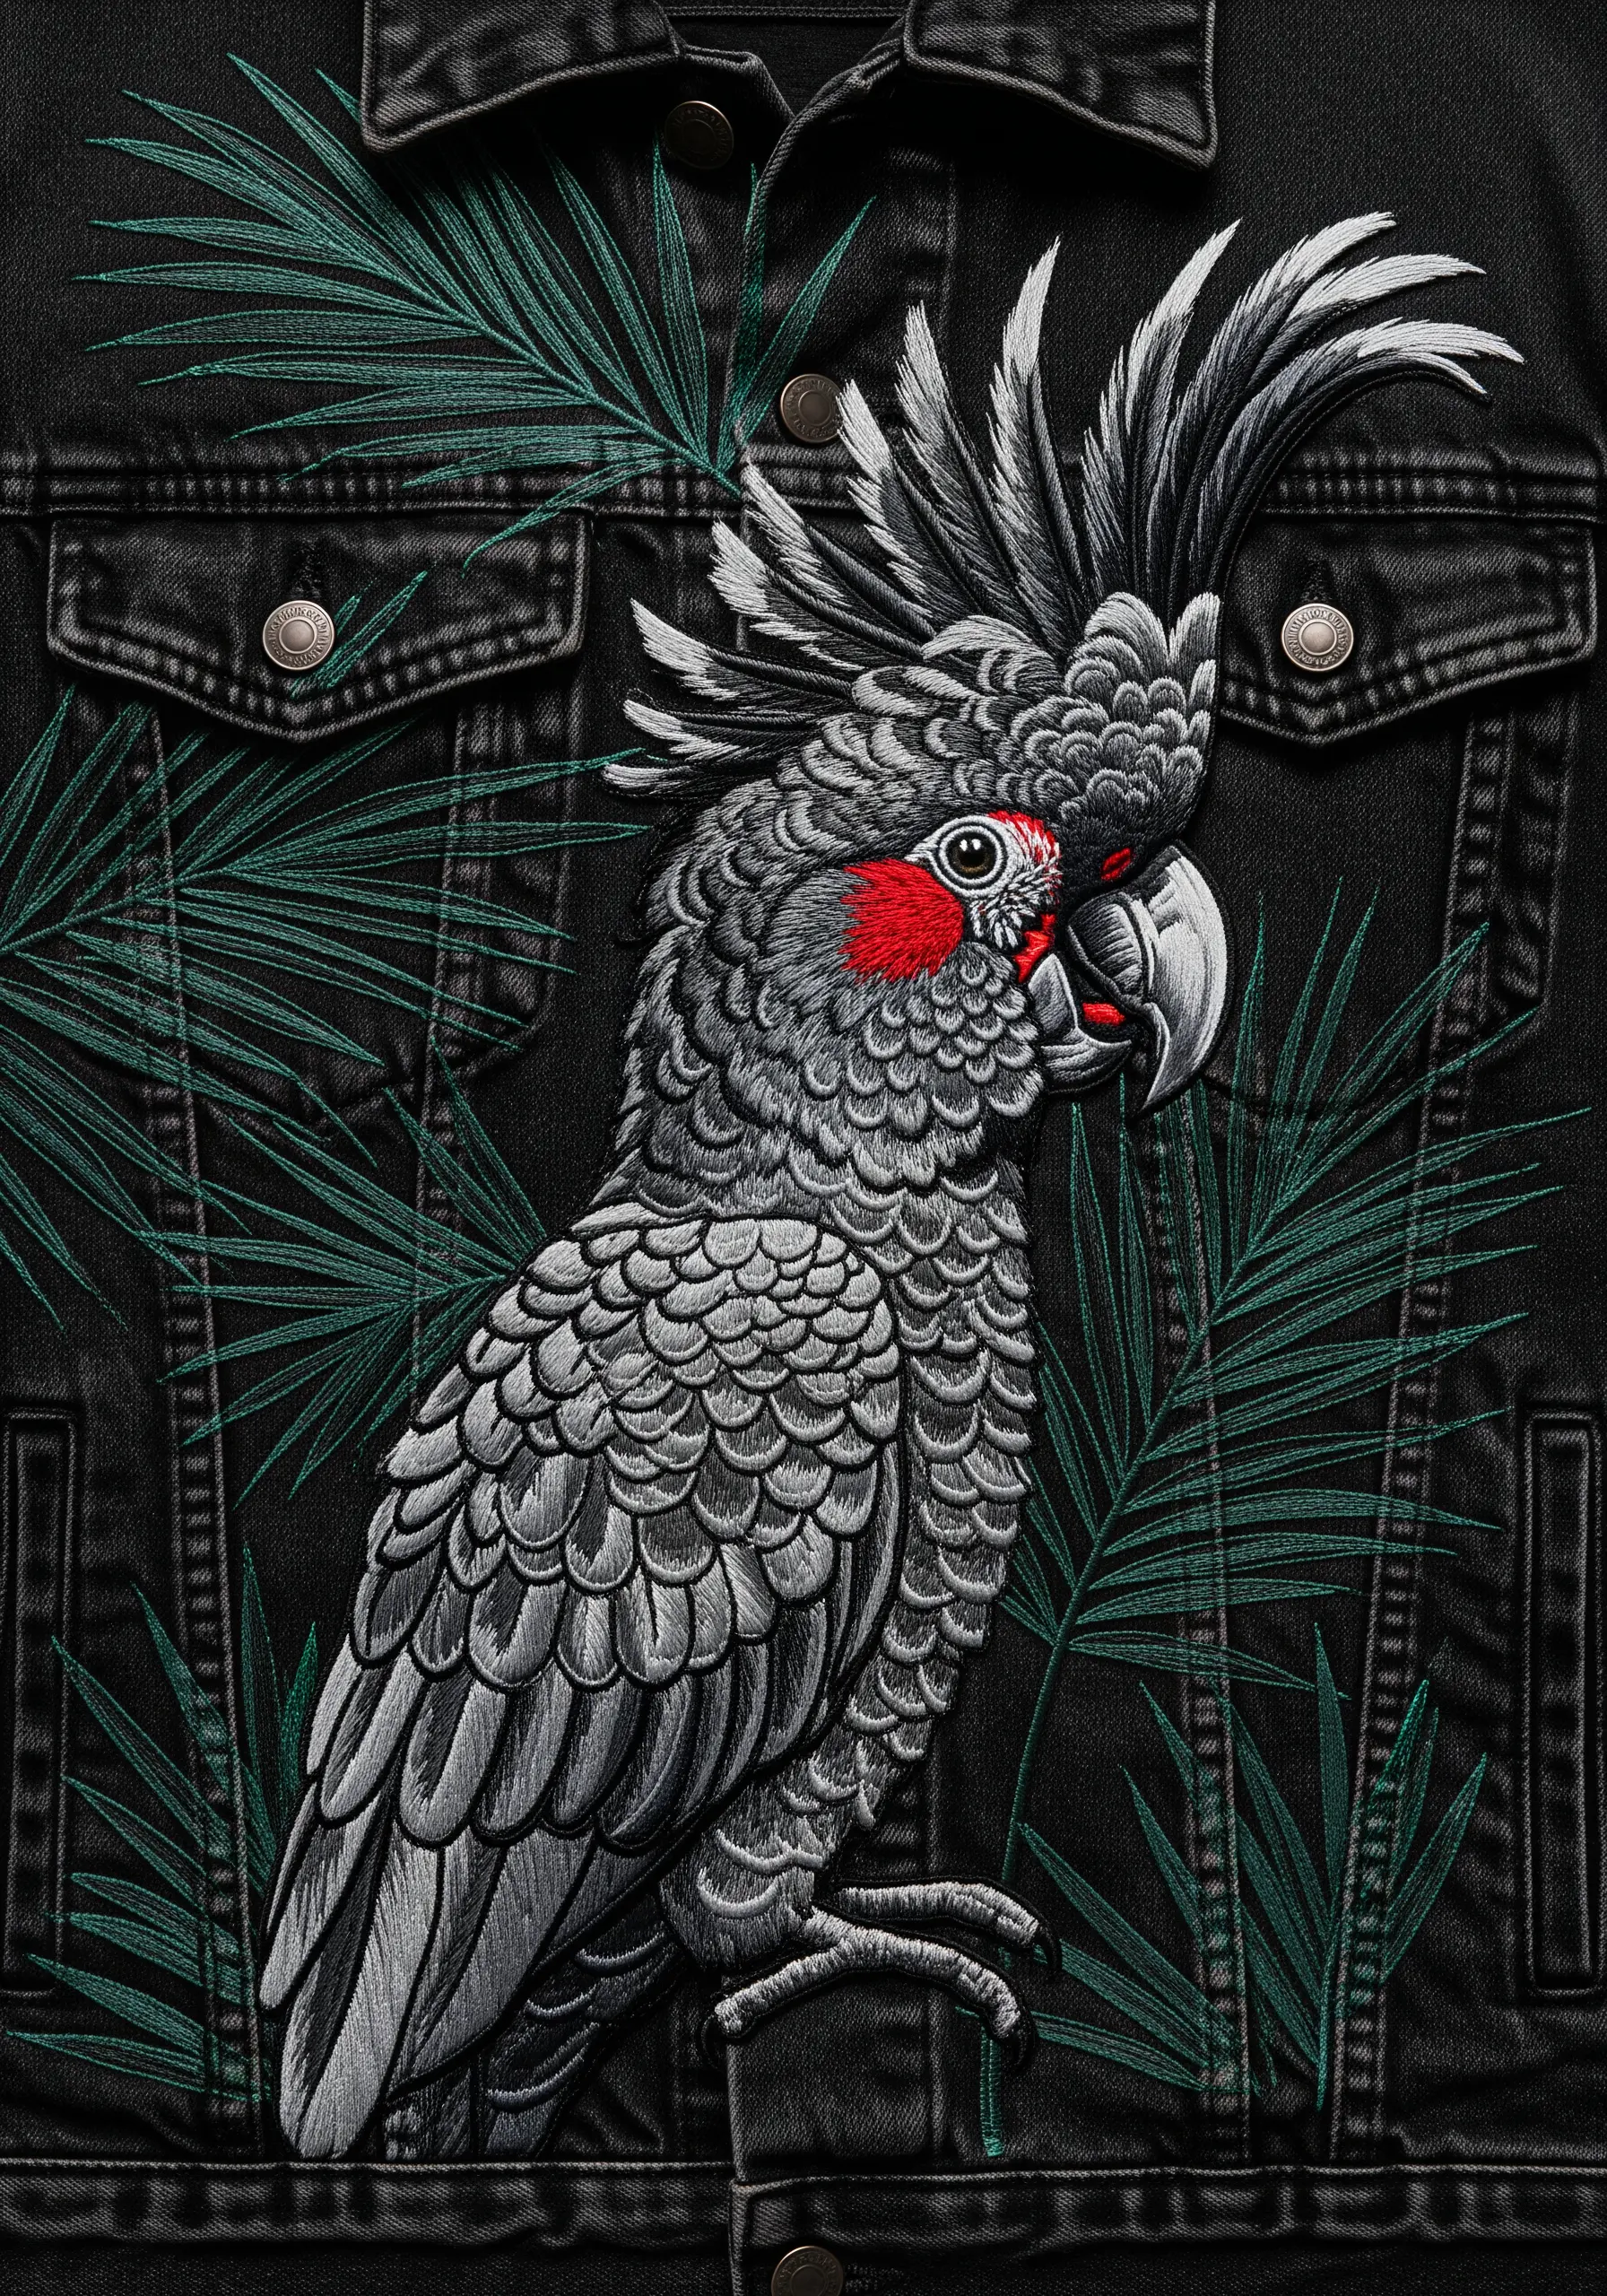
Stitching a dark subject on dark fabric is a challenge of texture over color.
To ensure the Palm Cockatoo’s feathers are visible, outline each one with a single strand of light grey thread before filling it with a darker grey or black.
Use a satin-finish thread, like rayon, which will catch the light and create subtle highlights that define the bird’s form.
The minimal use of deep green in the background foliage helps frame the bird without competing with it.
15. Combine Realism and Iconography with a Metallic Halo
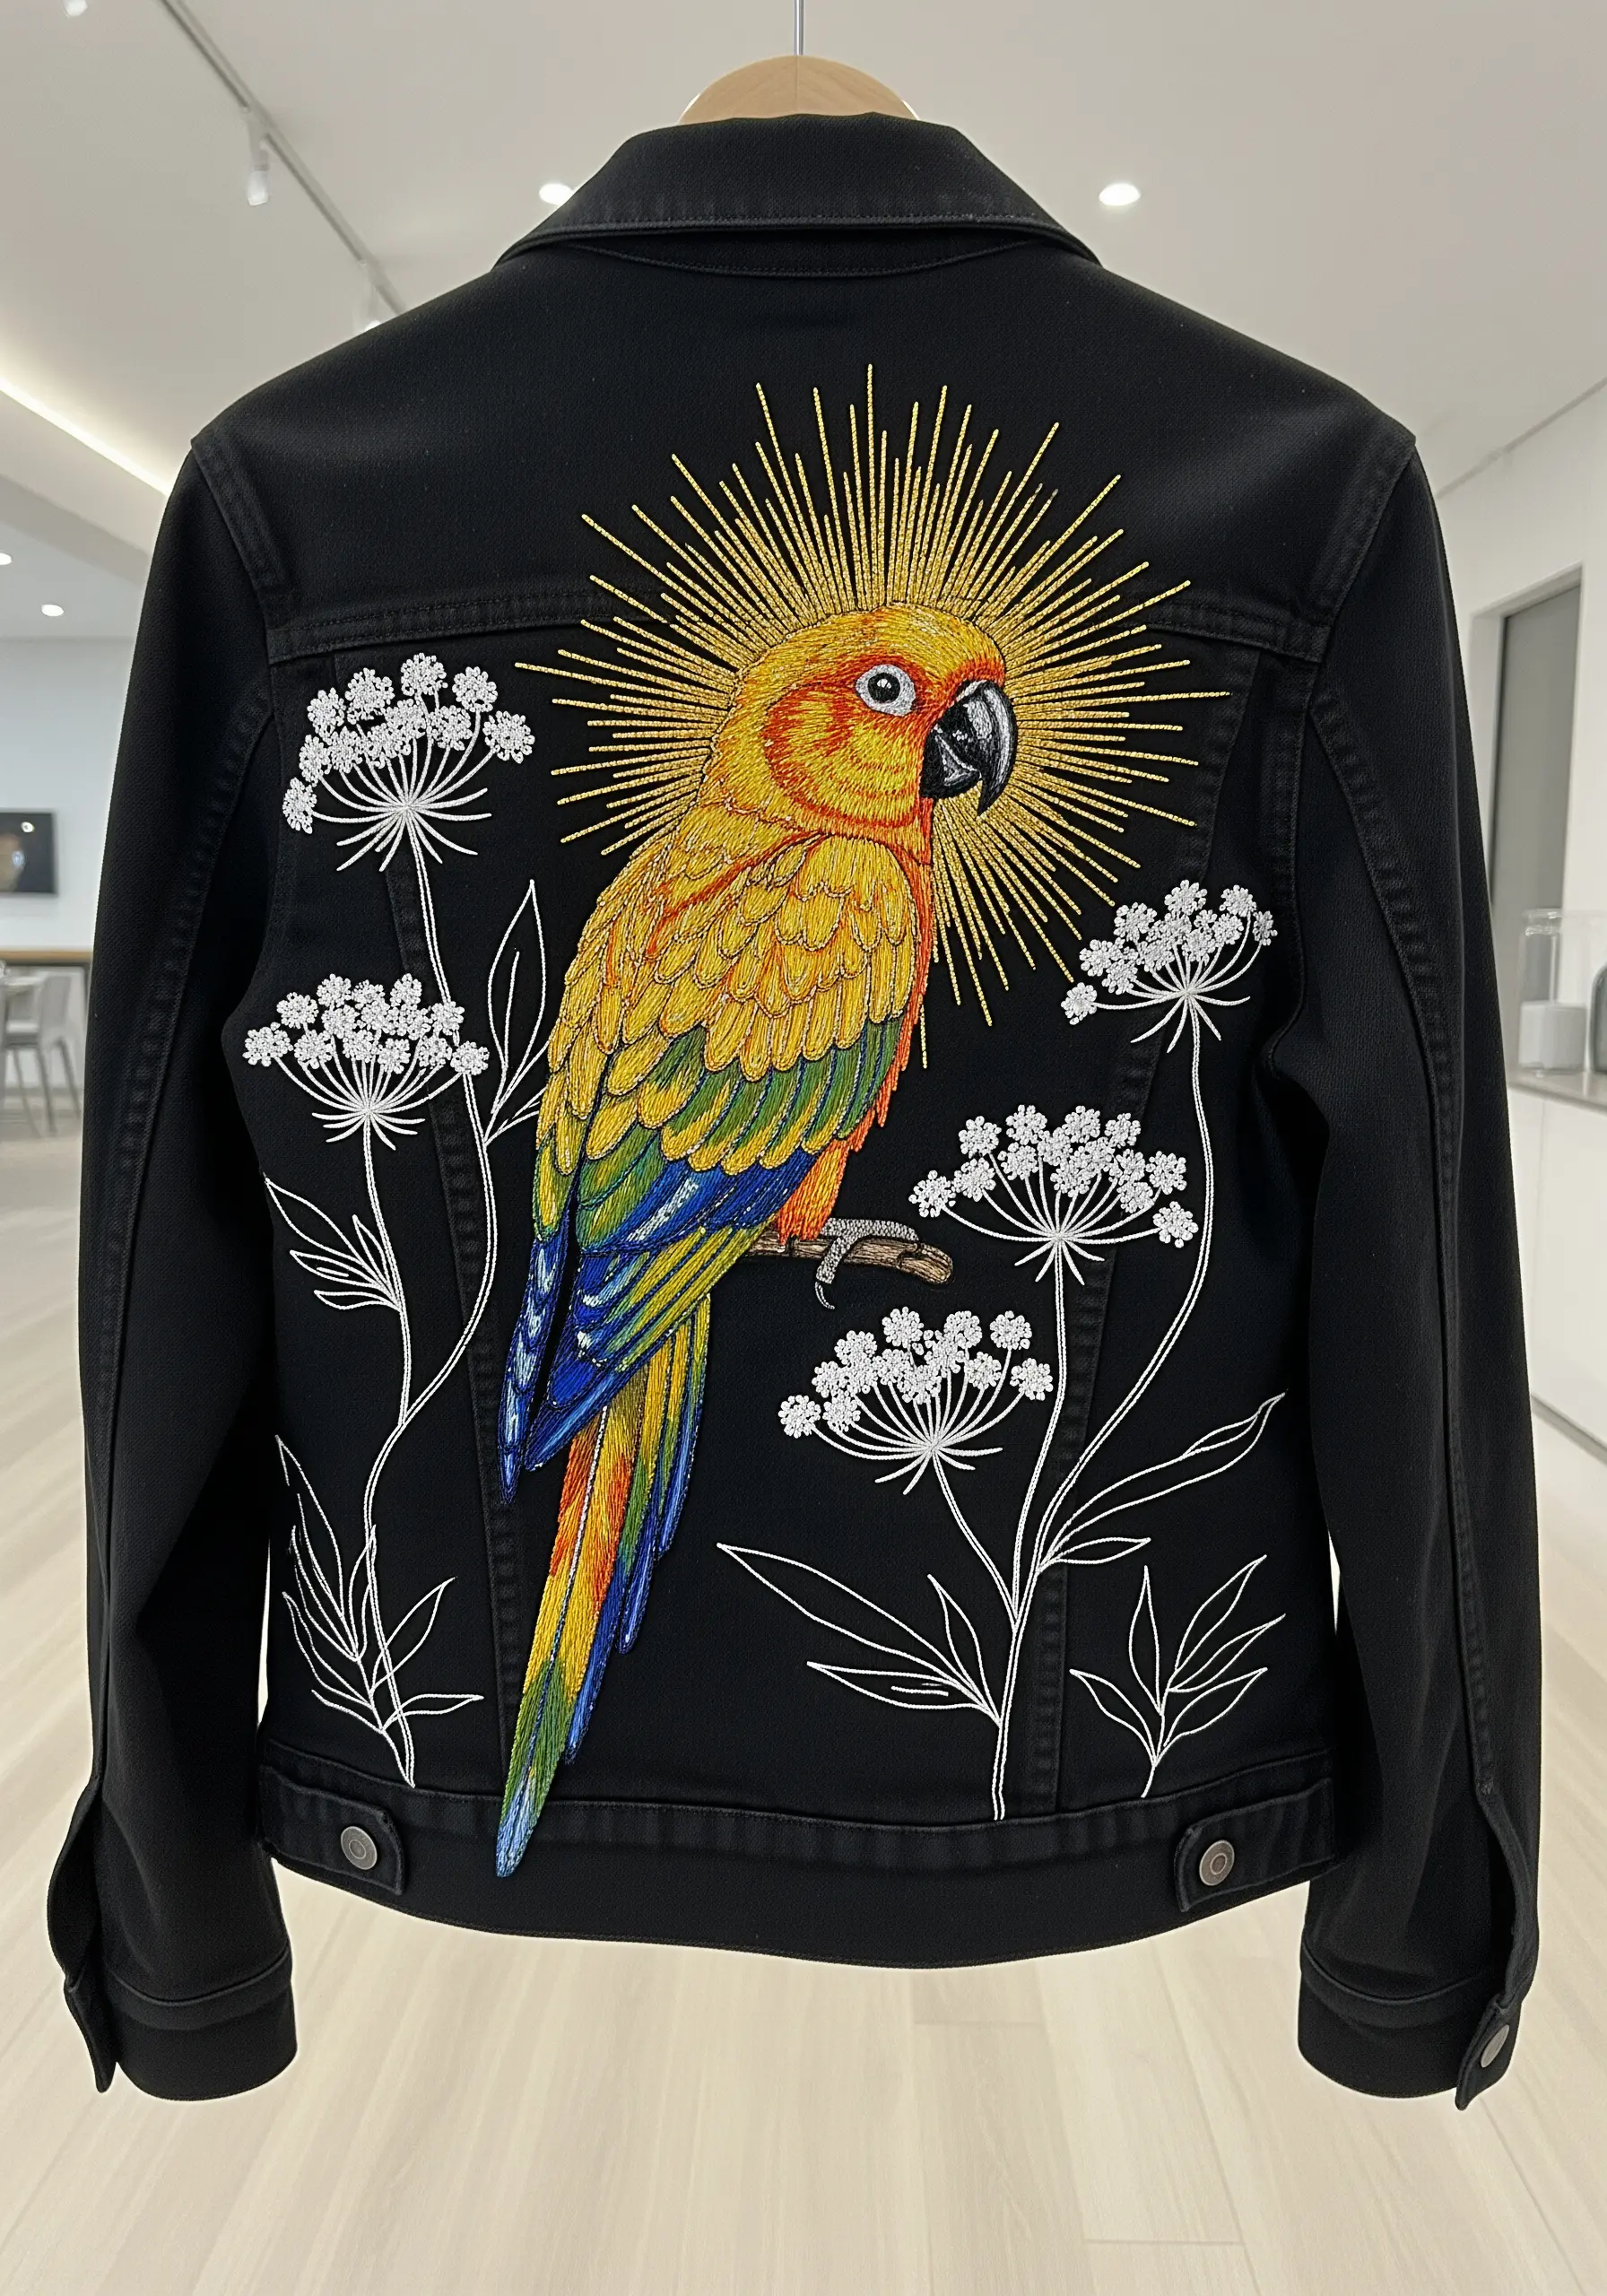
Elevate your parrot design by blending naturalistic stitching with a symbolic, graphic element.
Create the sunburst effect by using a gold metallic thread for long, radiating straight stitches.
To make working with metallic thread easier, use a needle with a slightly larger eye and work with shorter lengths of thread to prevent tangling and fraying.
These abstract metallic thread projects add a touch of the celestial to your work.
16. Create a Celestial Fill with Variegated Thread
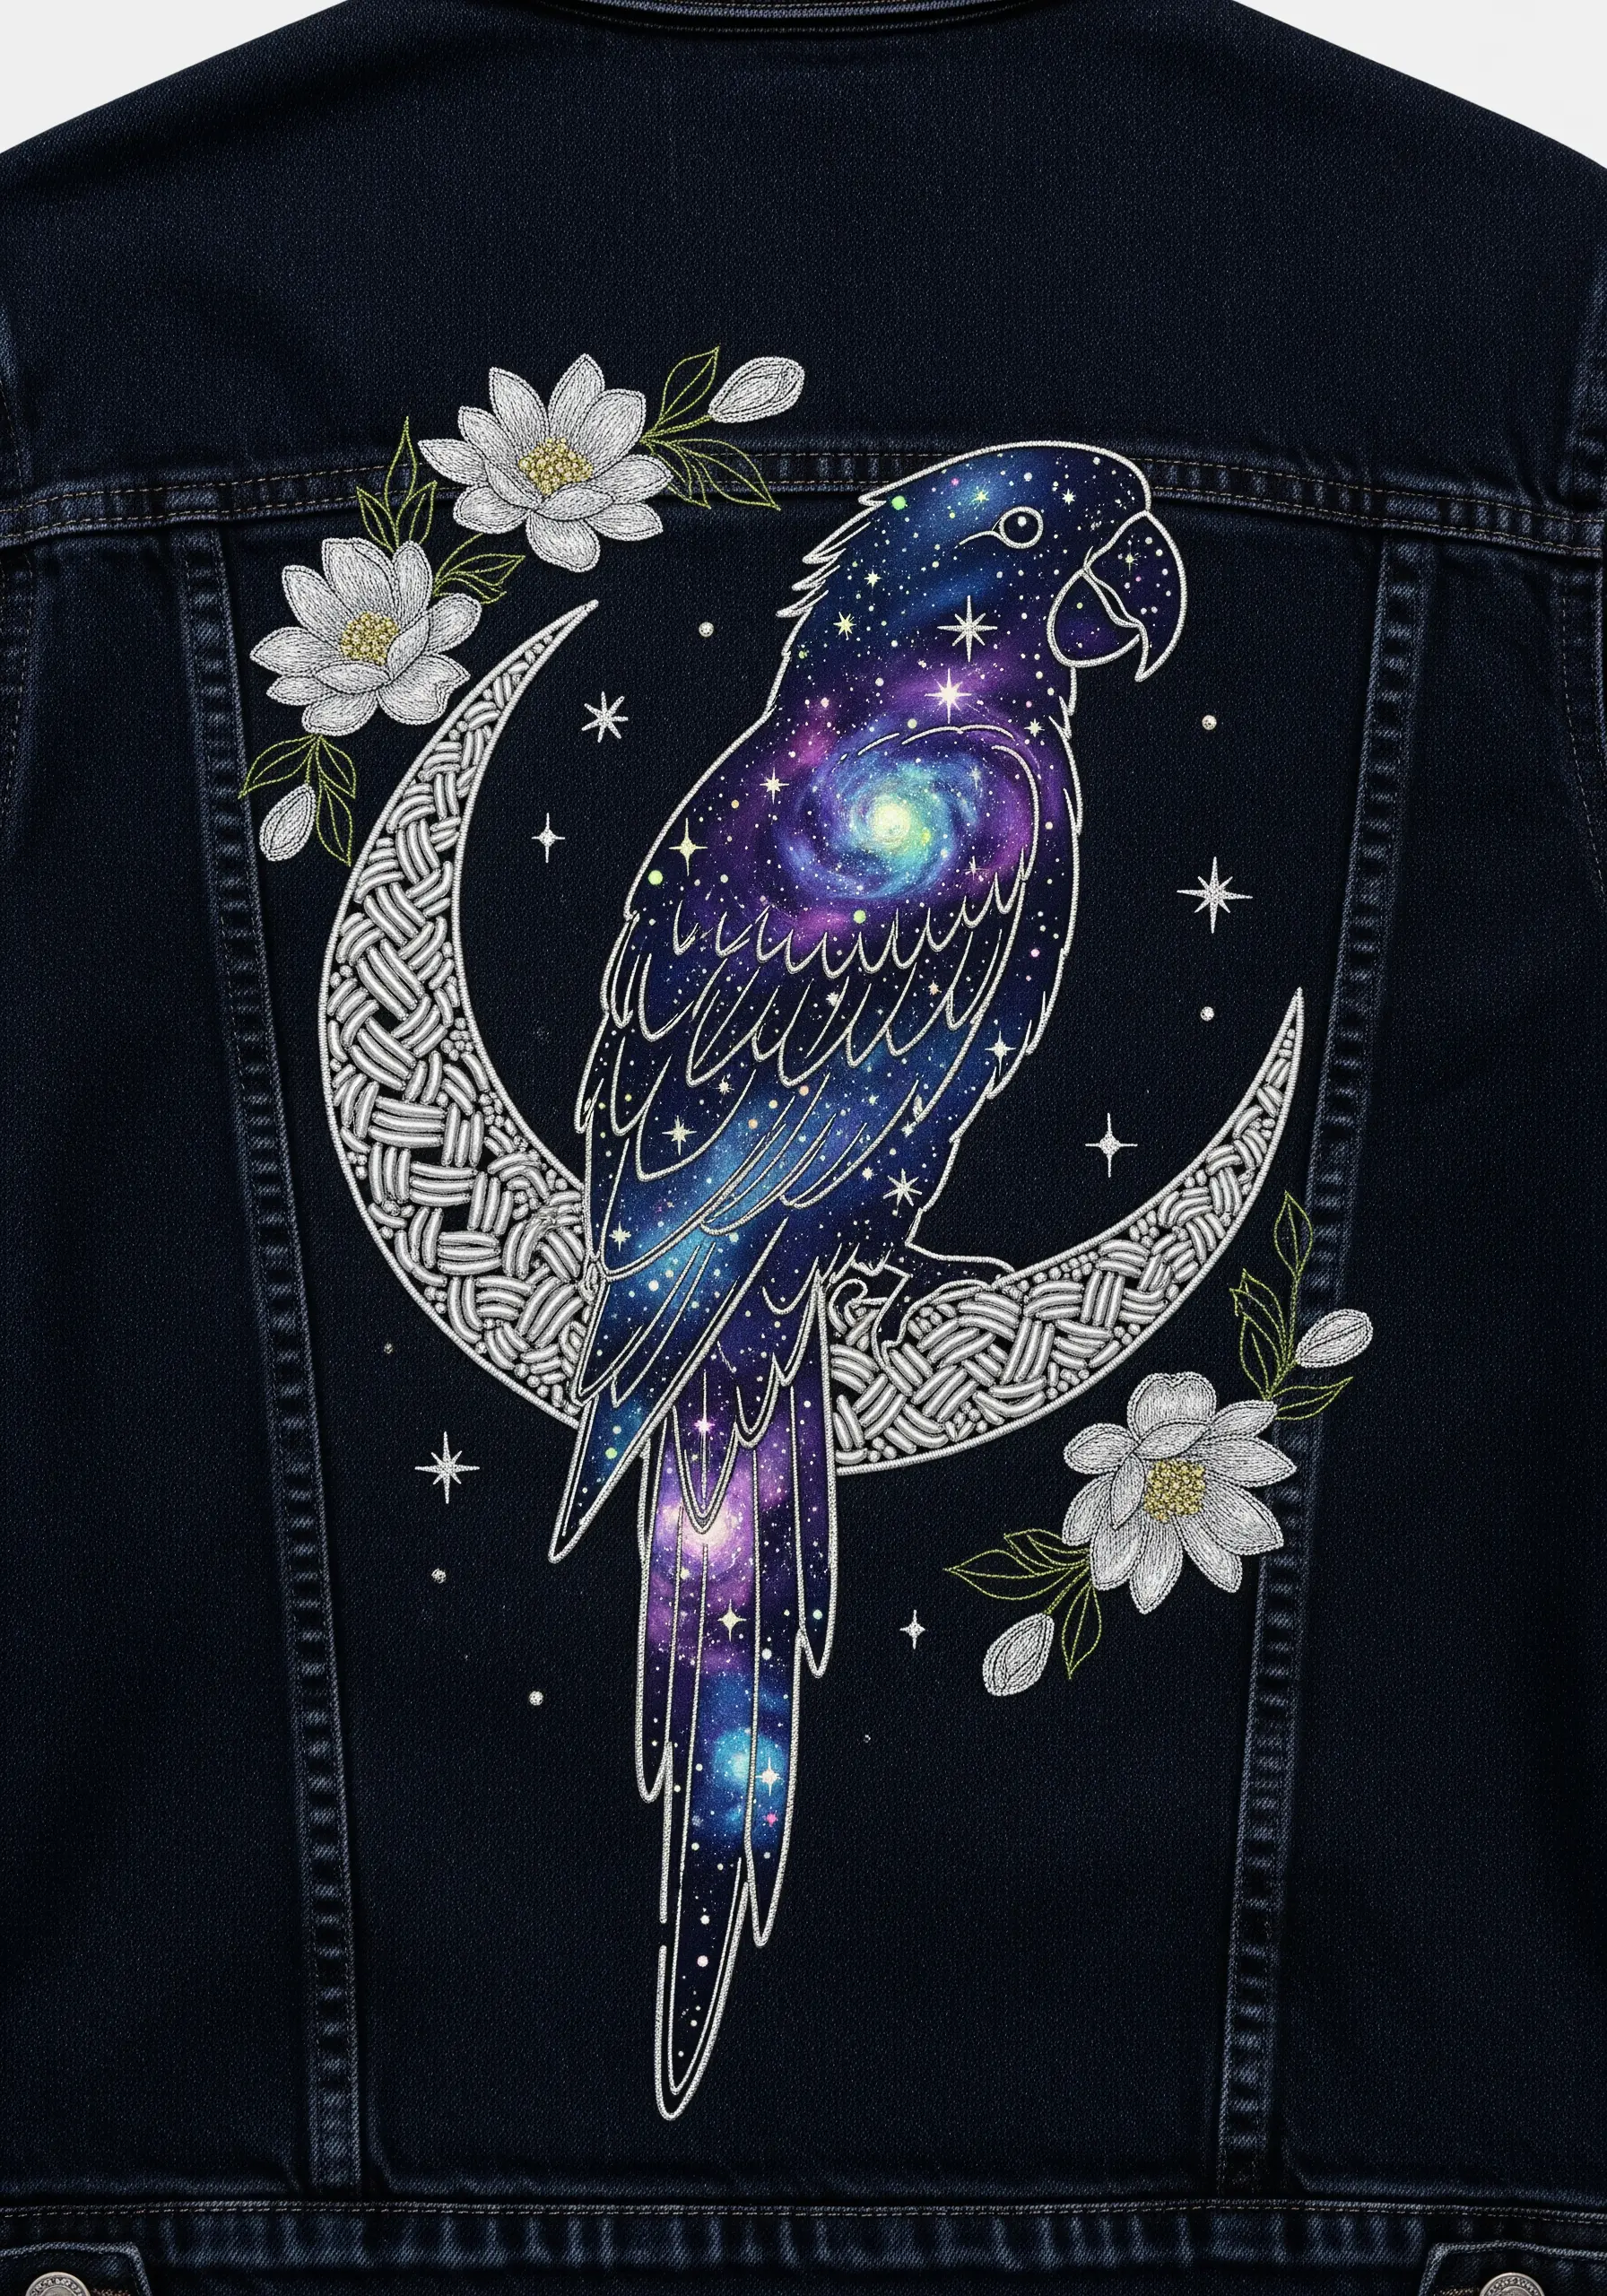
Instead of traditional thread painting, use a single variegated floss to create a galaxy effect inside the parrot’s silhouette.
Work in a seemingly random long-and-short stitch, allowing the thread’s color changes to create swirls of purple, blue, and indigo organically.
Add tiny white French knots or star stitches to serve as stars.
The intricate basket-weave stitch on the moon provides a structured, geometric contrast to the free-flowing galaxy fill.
17. Build a Lush Wreath with Padded Satin Stitch
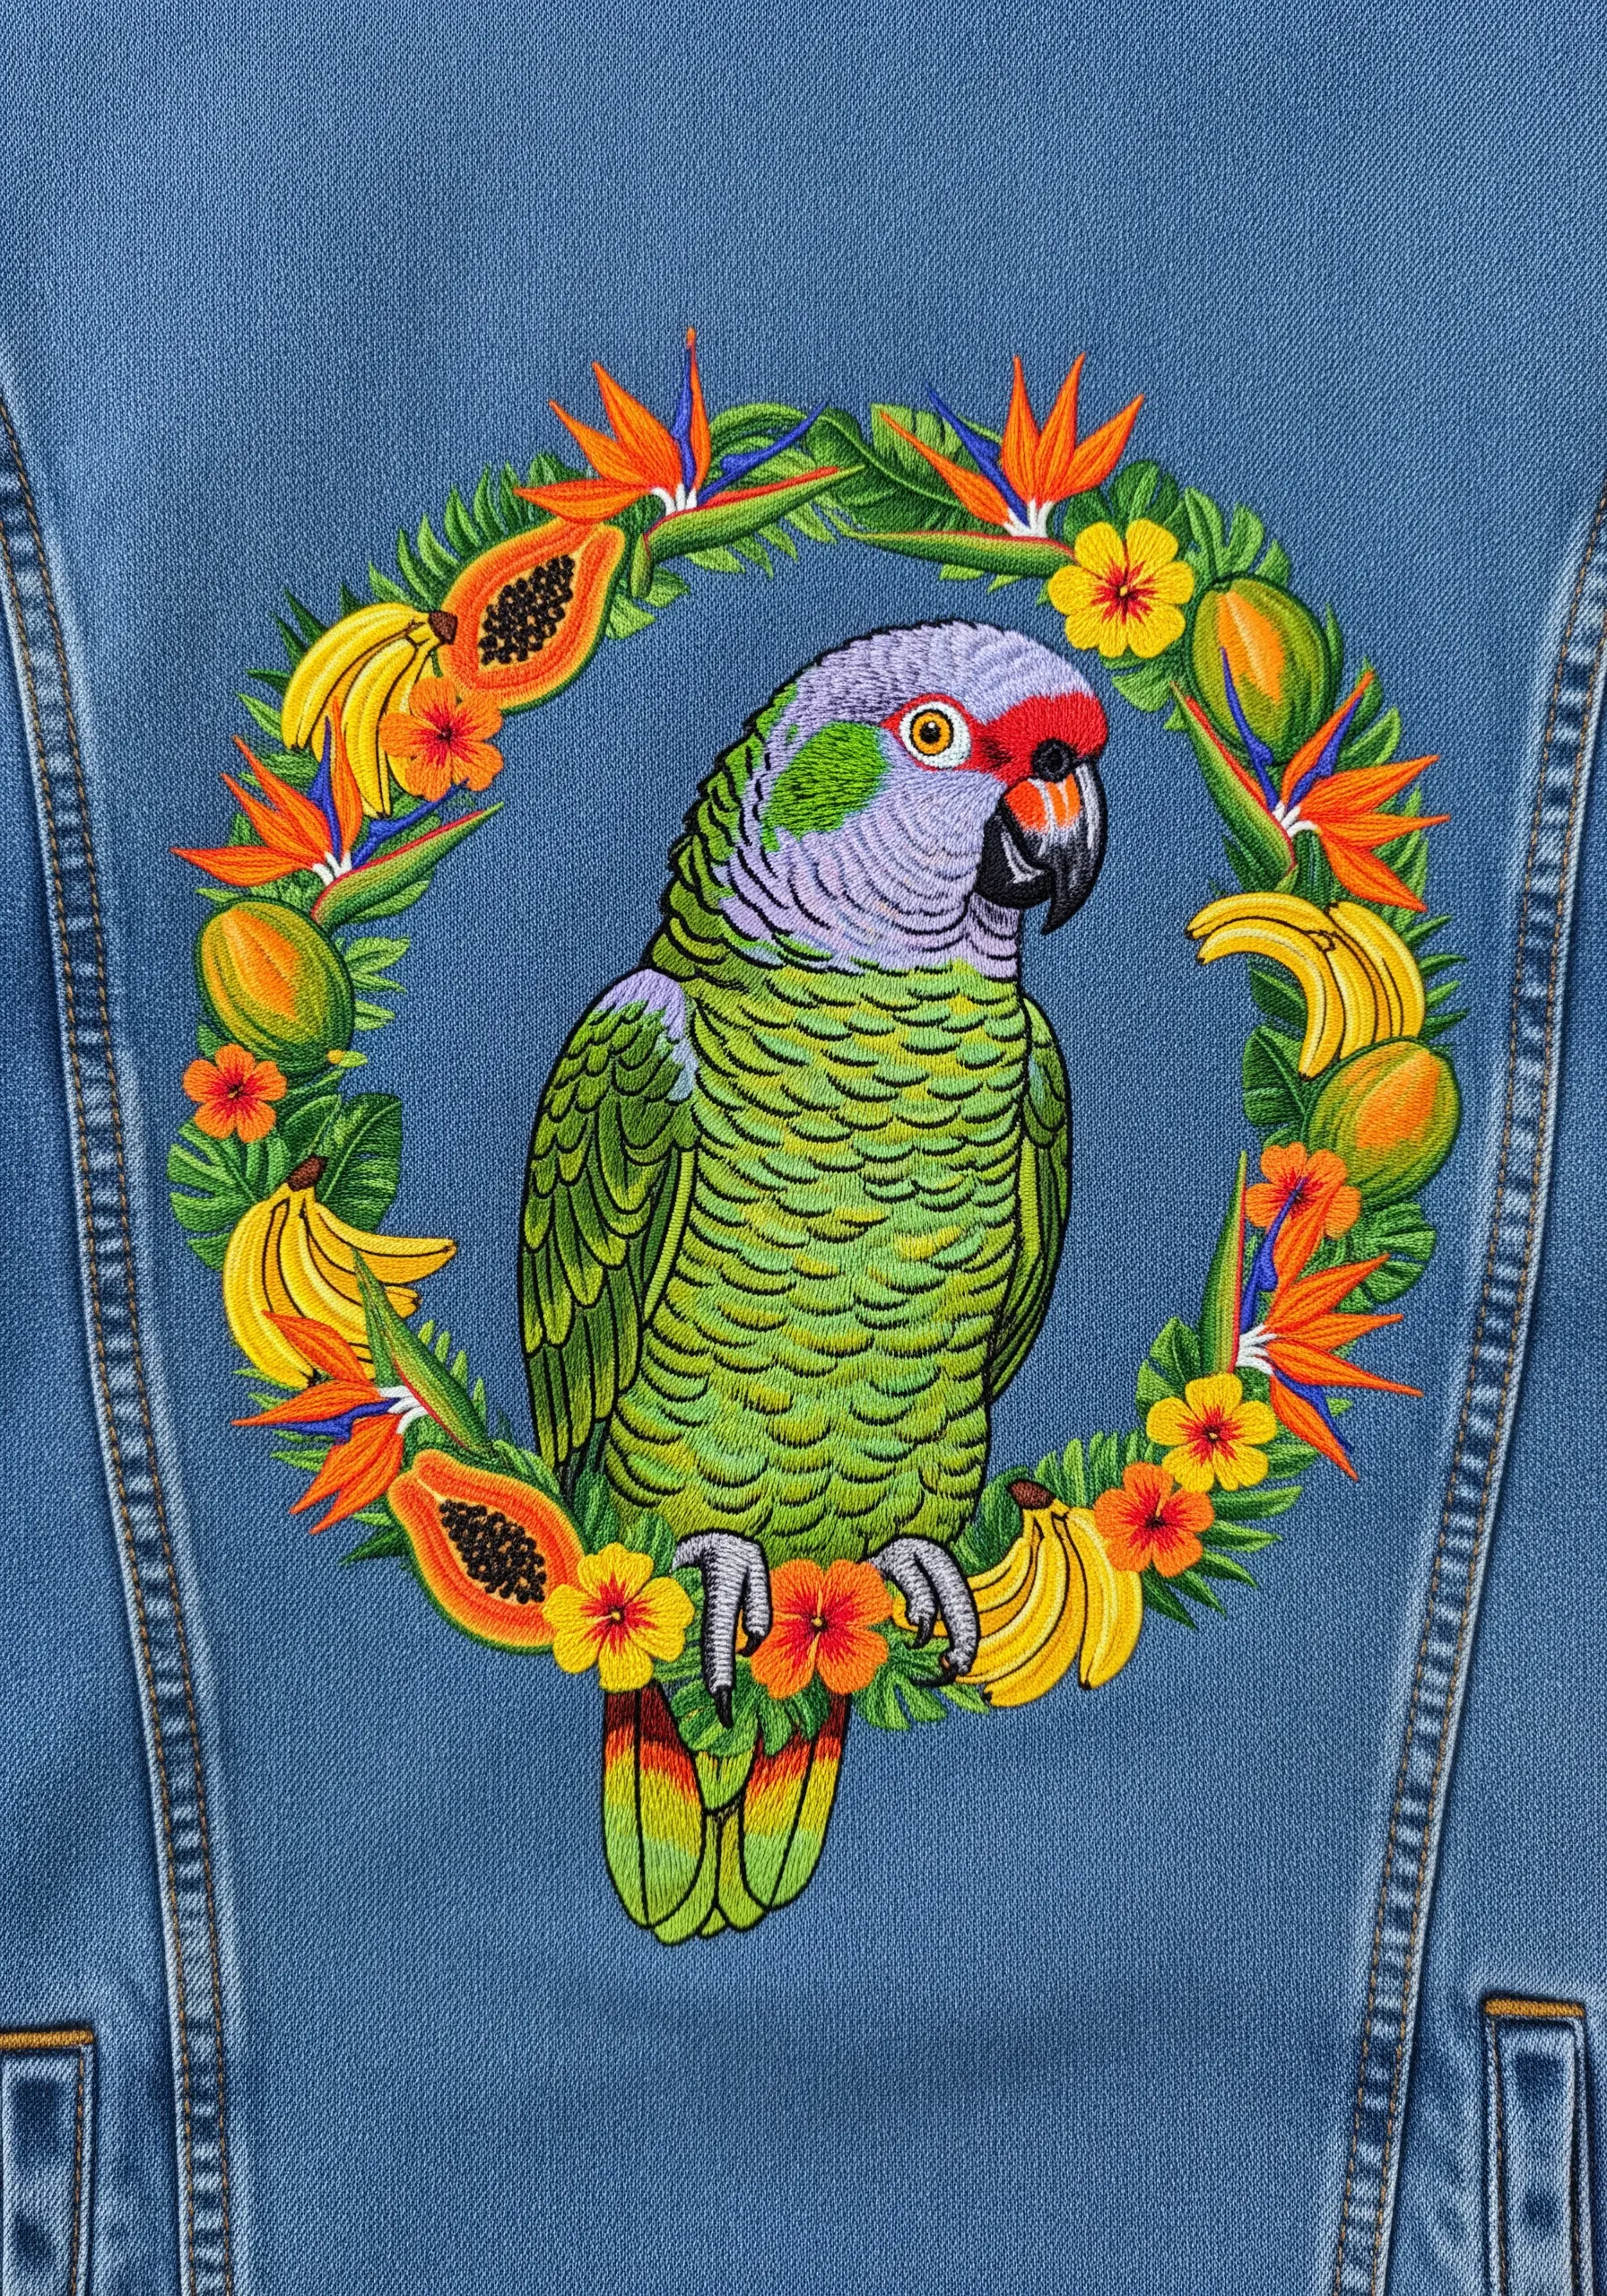
To make the fruits and flowers in the wreath feel dimensional and plump, use padding.
Before you begin your satin stitch, lay down a series of small straight stitches within the shape you want to fill.
Then, work your satin stitch over this padding. This simple step will raise the stitches off the denim, giving the papayas and bananas a rounded, 3D appearance.
This technique makes the wreath feel abundant and tactile.
18. Make a Statement with Minimalist Line Art
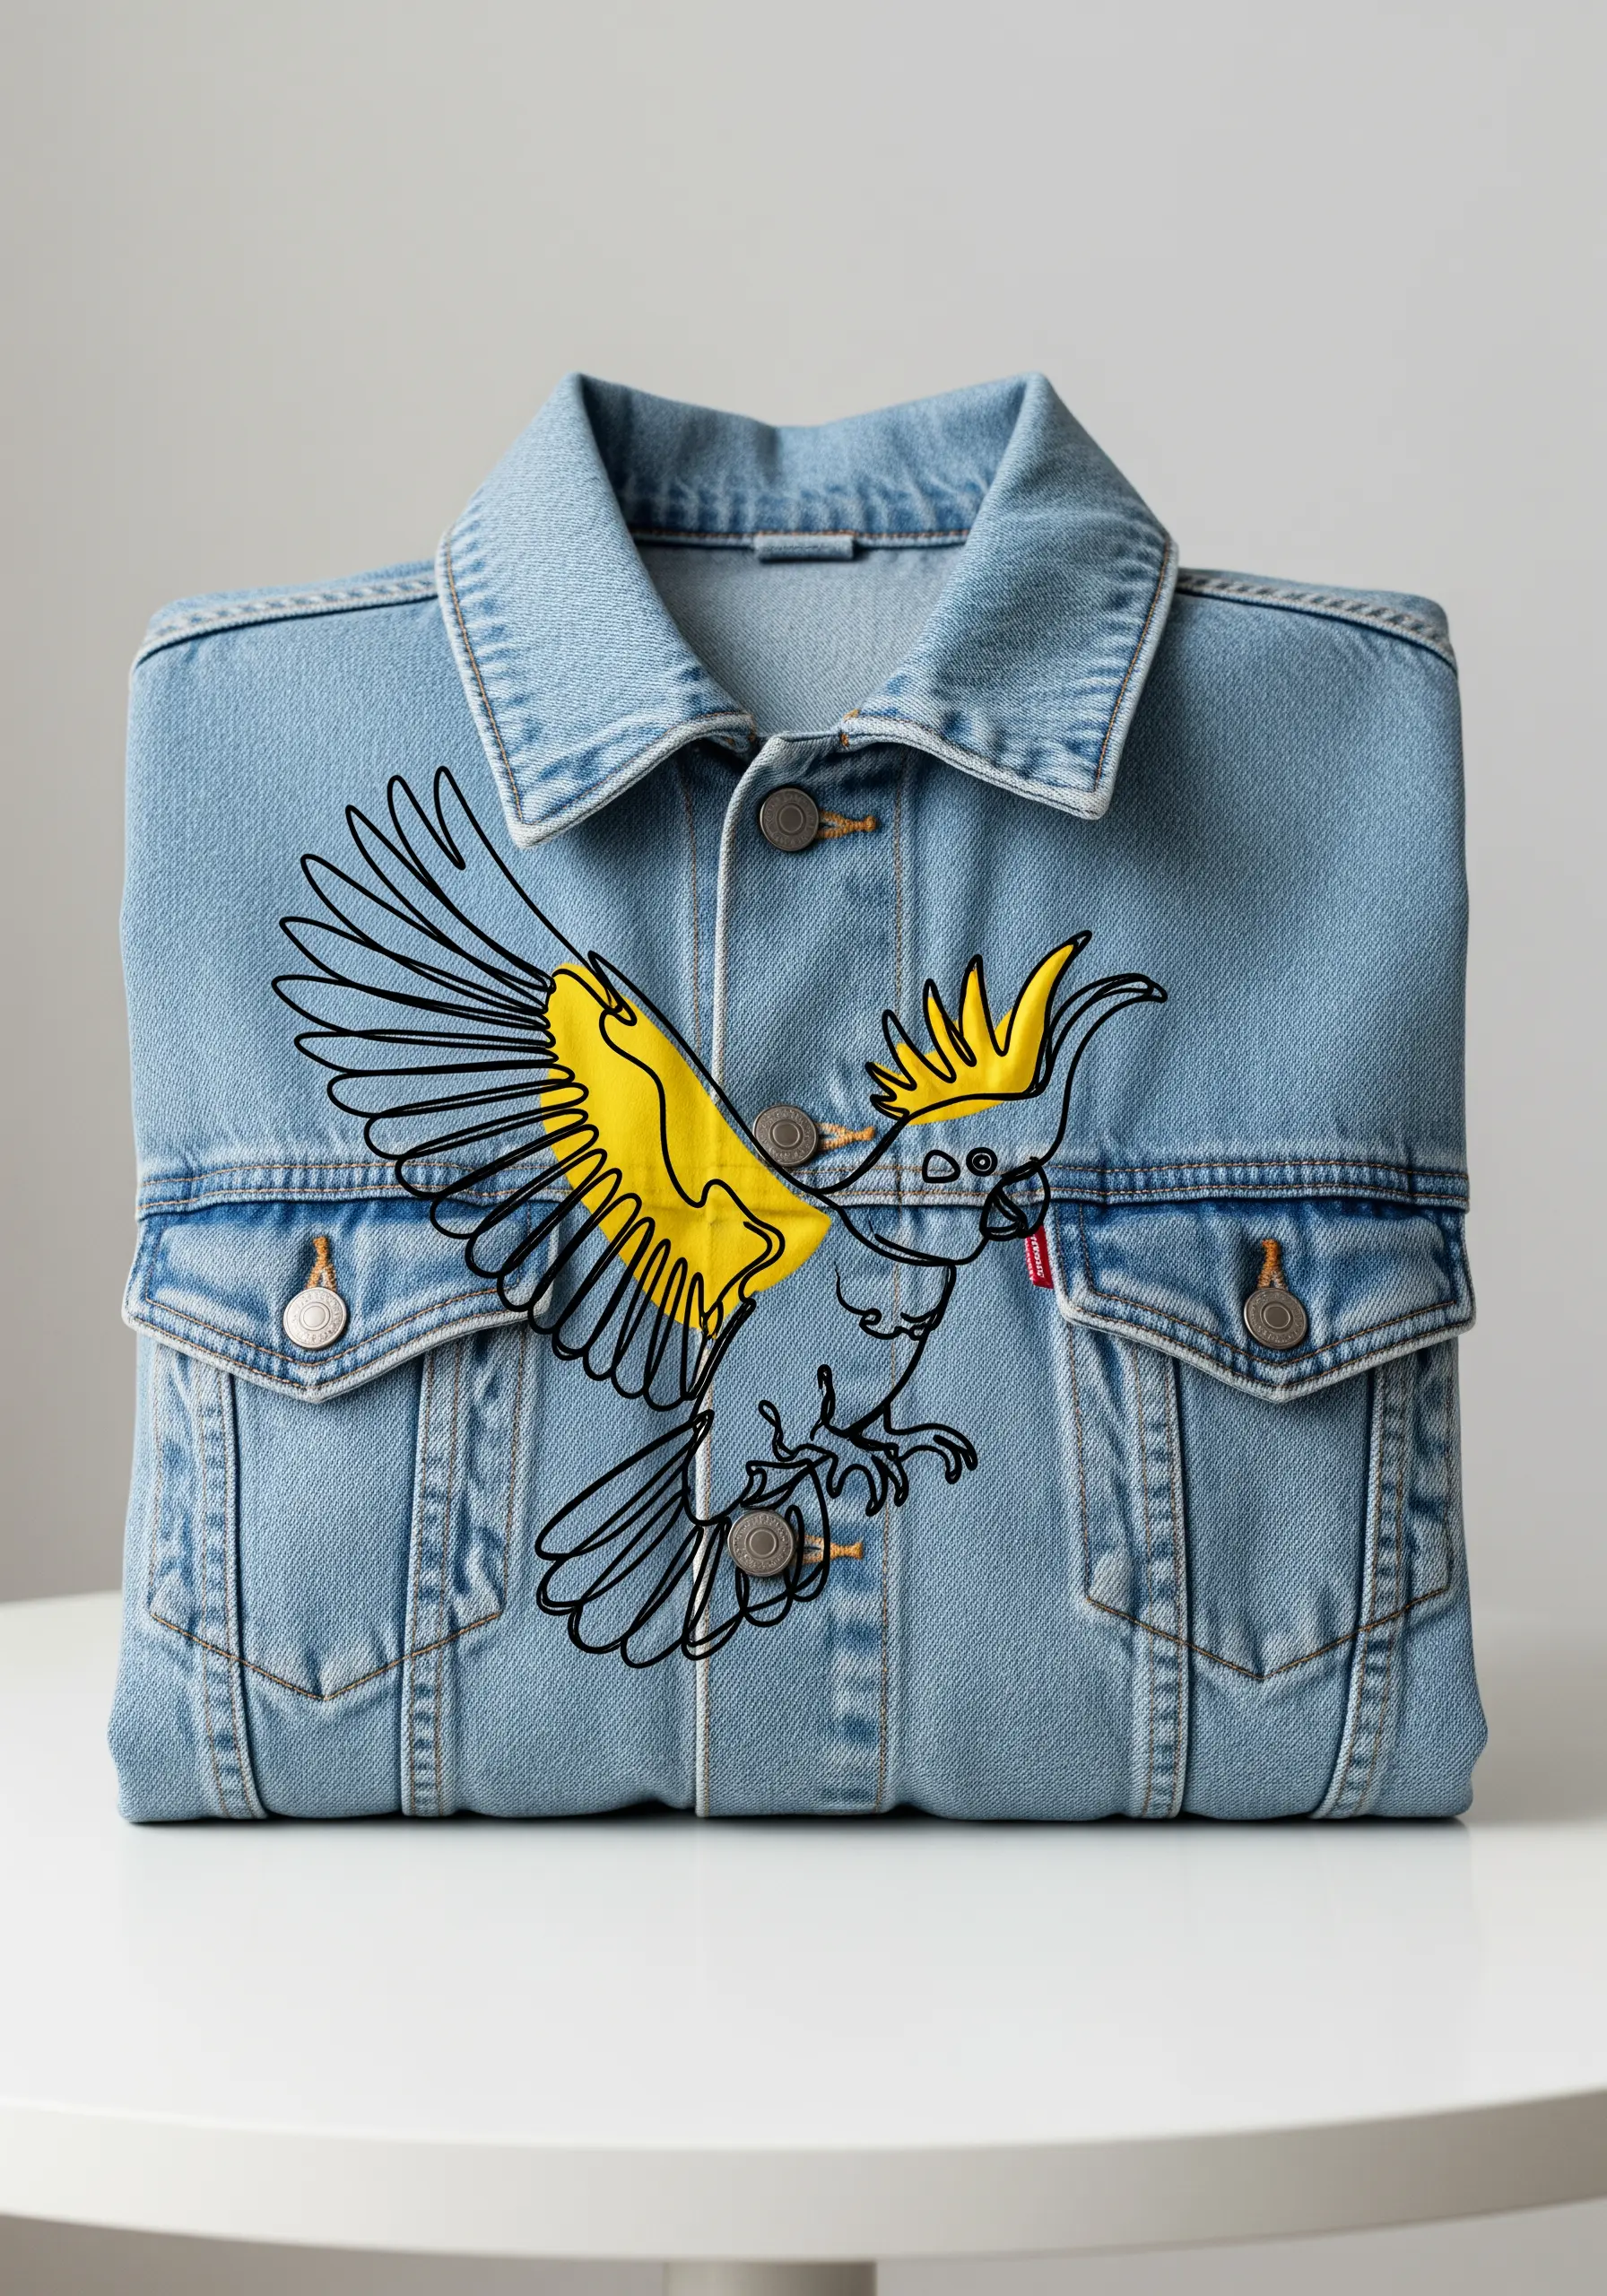
Prove that powerful design doesn’t always require dense stitching.
This approach relies on the clarity and confidence of a single line. Use a stem stitch or a whipped backstitch with three strands of black floss to ensure your line is bold and unbroken.
The strategic block of yellow adds a flash of color that draws attention without the need for full coverage, making it one of the most effective minimalist line-art embroidery patterns for apparel.
19. Incorporate 3D Stitches for Natural Textures
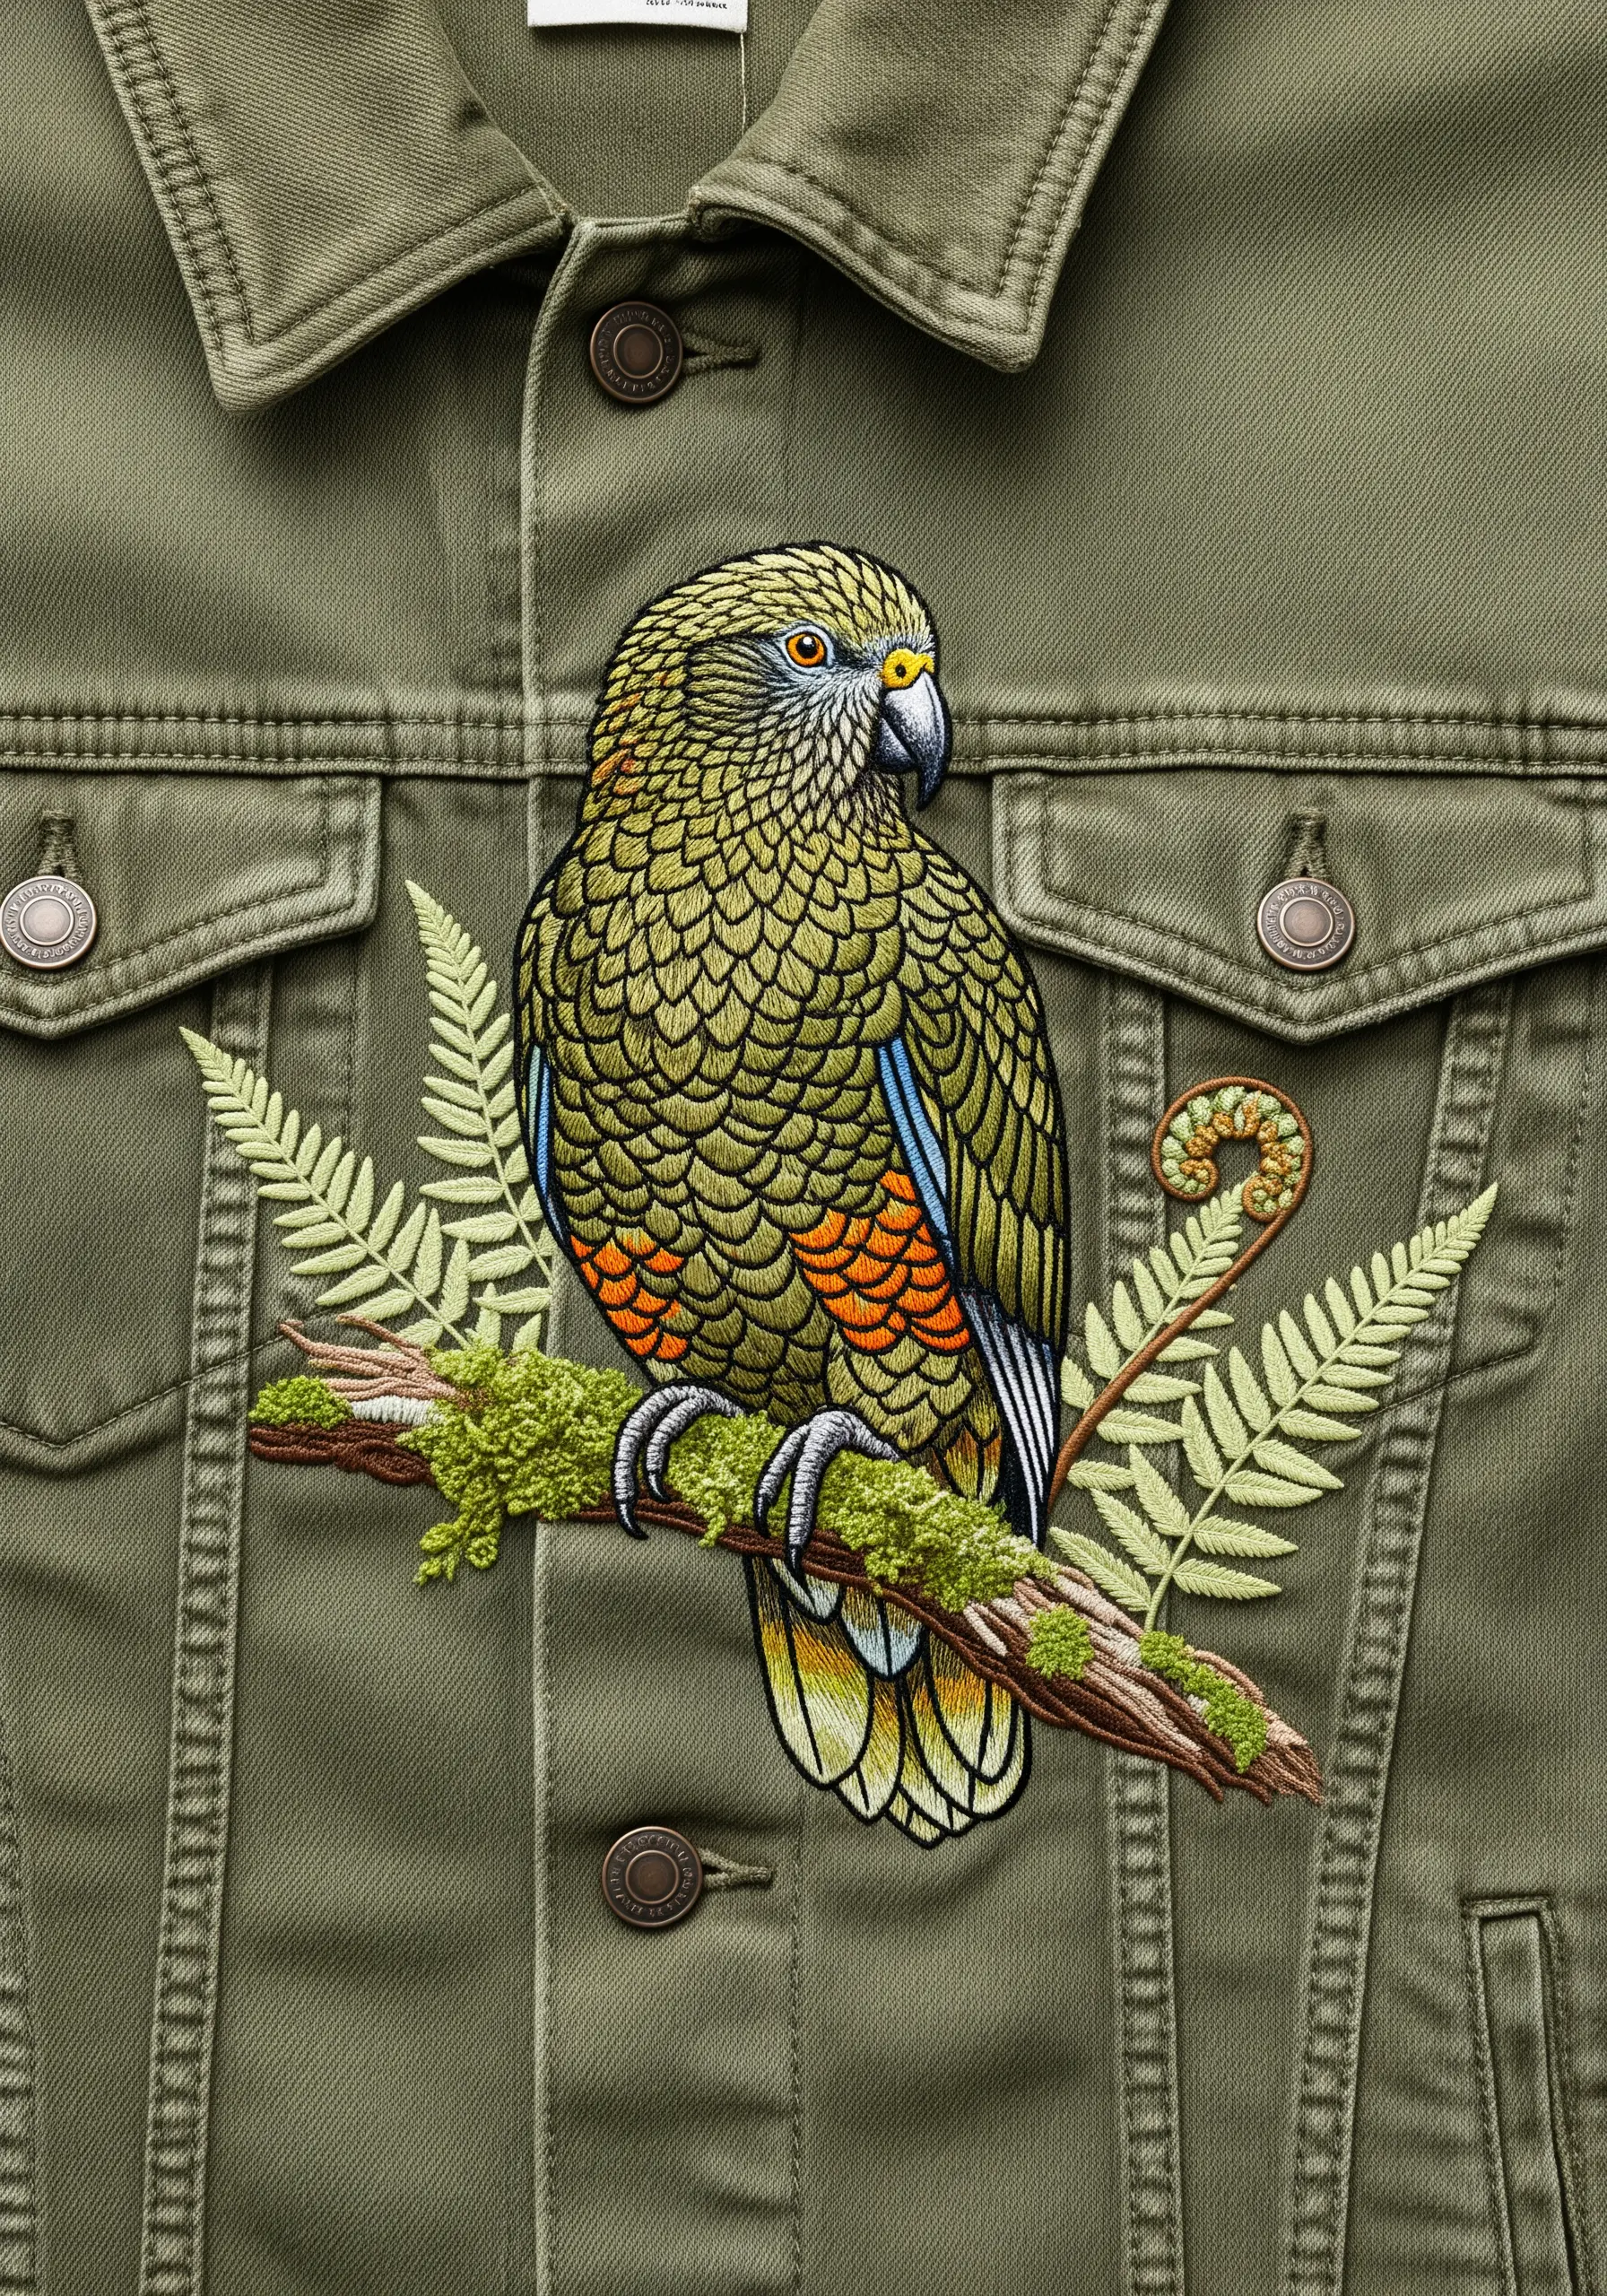
Bring your nature scene to life by replicating the textures of the forest floor.
Use the Turkey work stitch (or Ghiordes knot) with shades of green and brown thread to create the fuzzy, dimensional moss on the branch.
For the Kea’s unique, scale-like feathers, a series of very small, overlapping fishbone stitches will perfectly capture the pattern and sheen.
These tactile details invite closer inspection and make the piece feel incredibly lifelike.
20. Achieve Hyper-Realism with Single-Strand Thread Painting
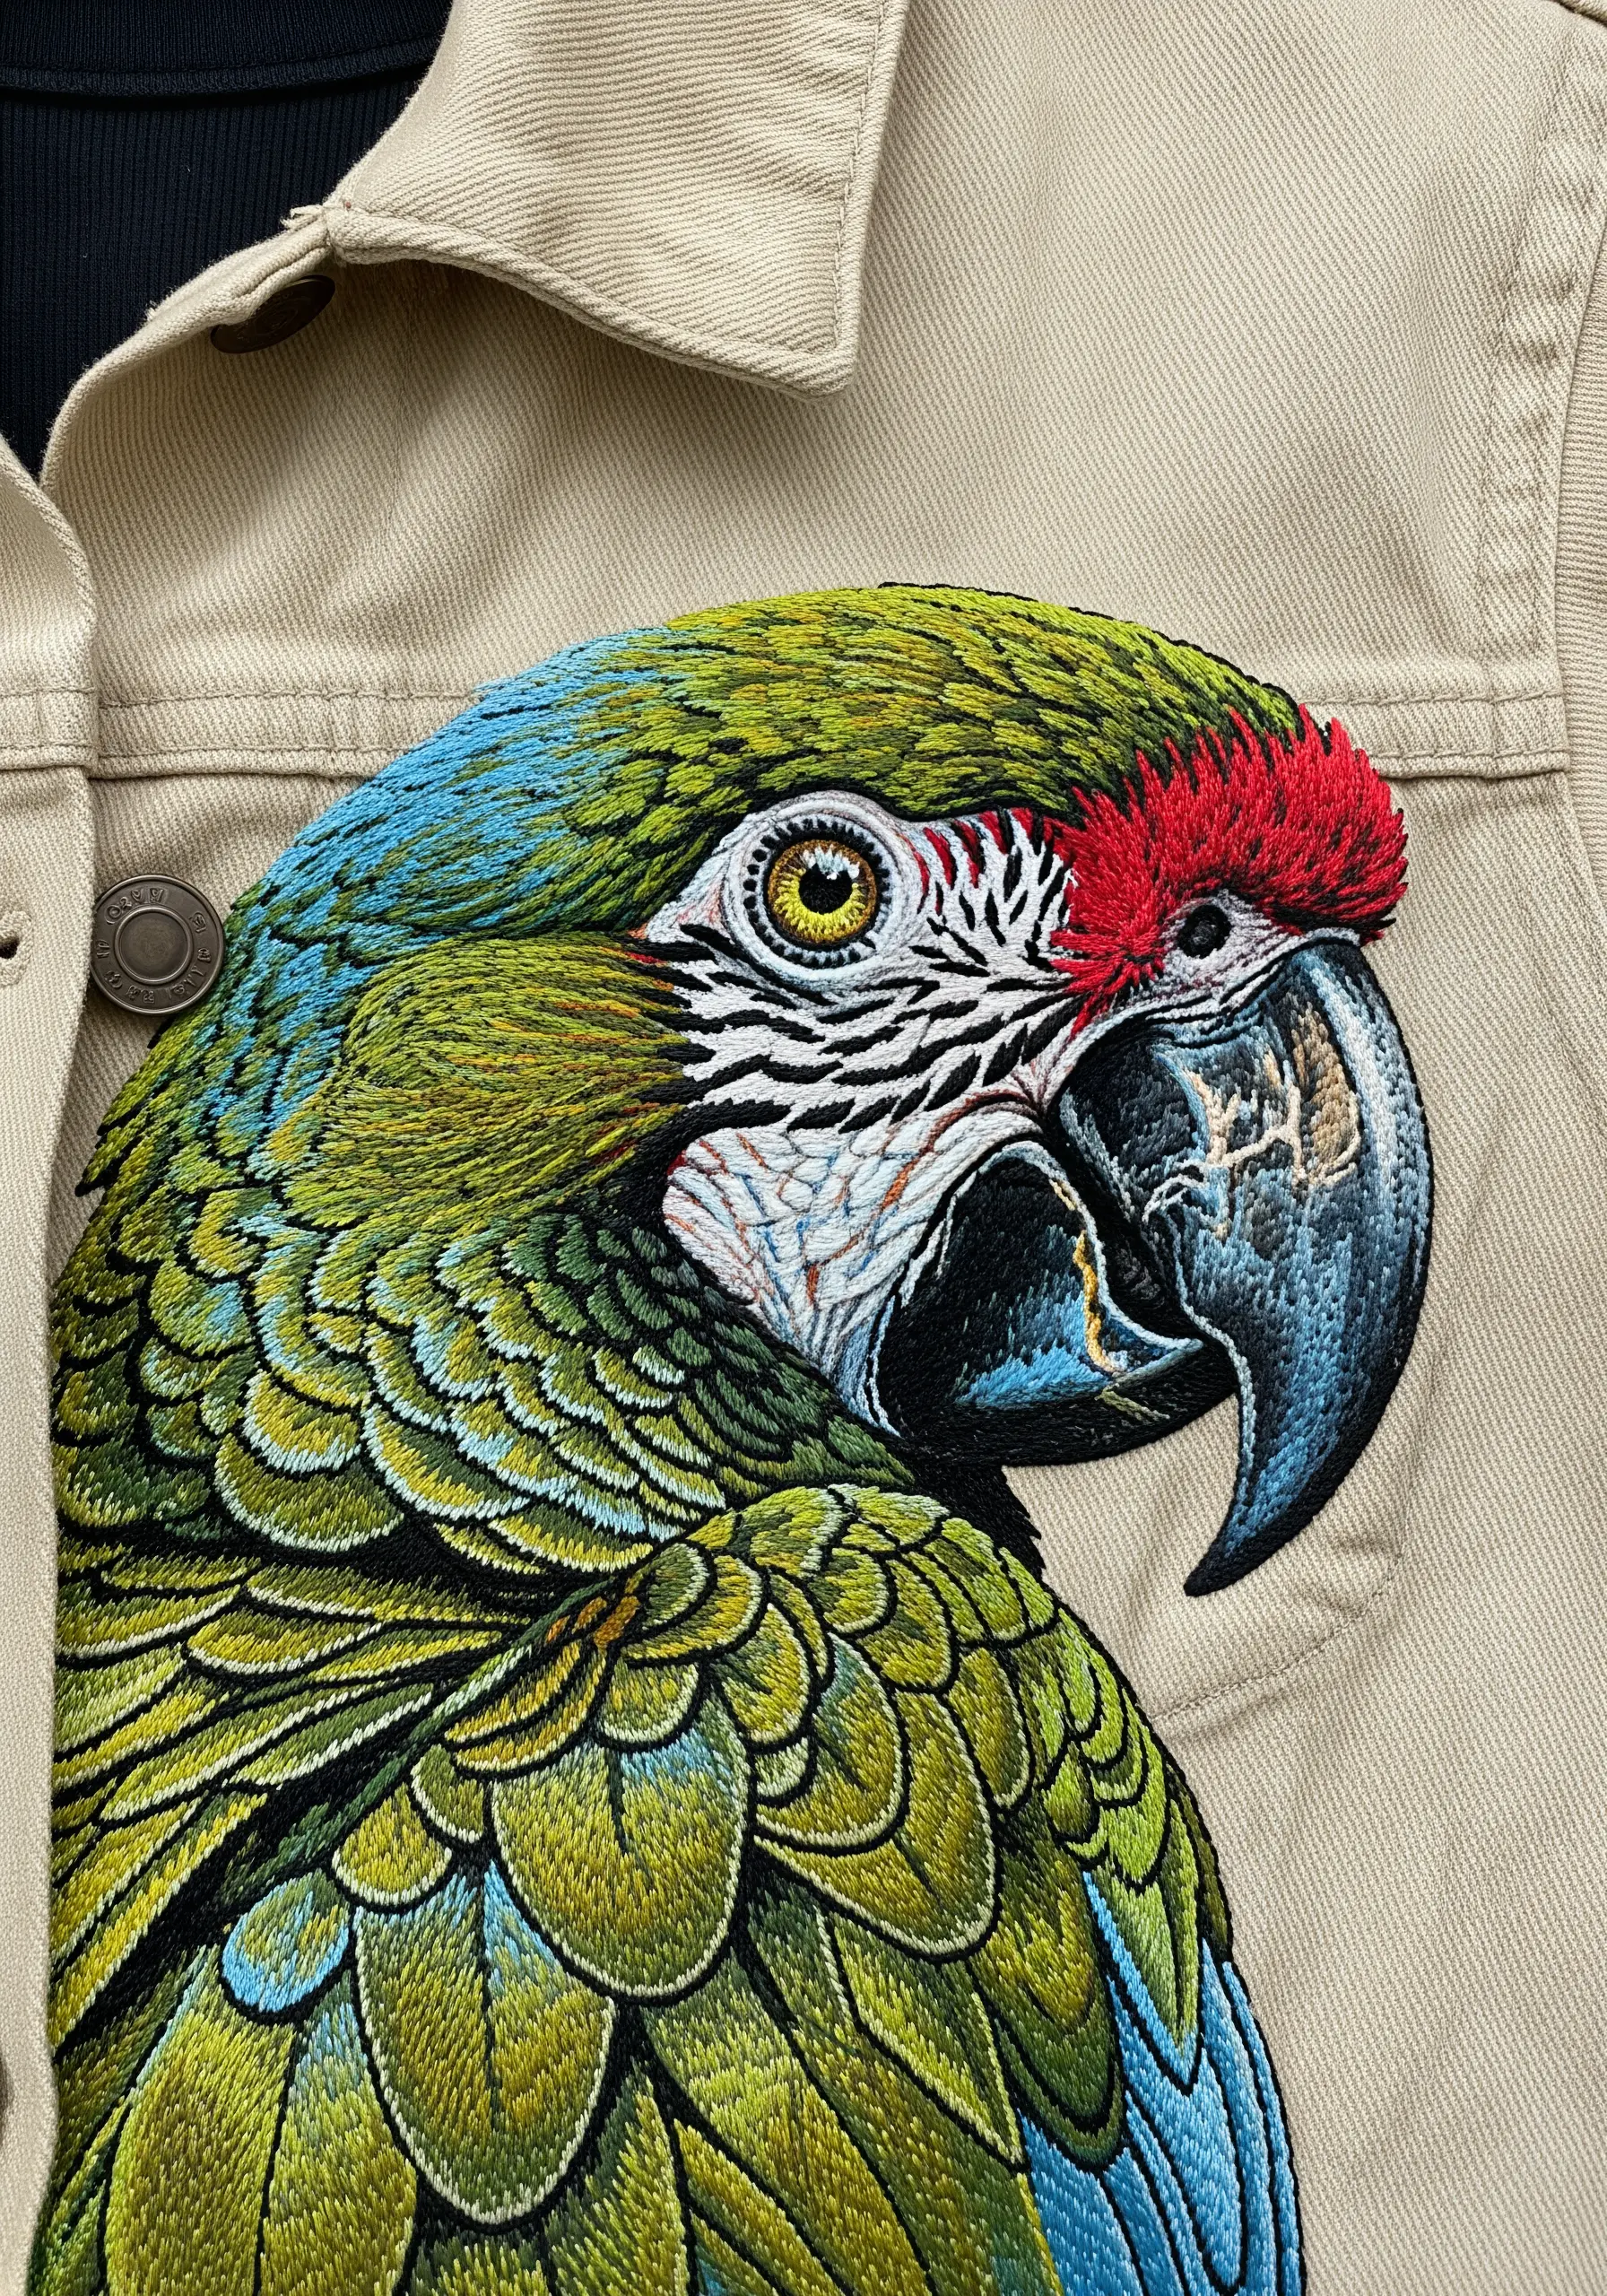
For a detailed, portrait-style piece, precision is everything.
Work exclusively with a single strand of six-strand floss. This allows you to blend colors with the subtlety of a paintbrush, creating smooth gradients around the eye and beak.
Your stitches should be tiny and directional, always following the contours of the bird’s face.
While time-consuming, contemporary thread painting techniques like this one produce breathtakingly realistic results.
21. Channel Folk Art with Stylized Shapes and Palettes
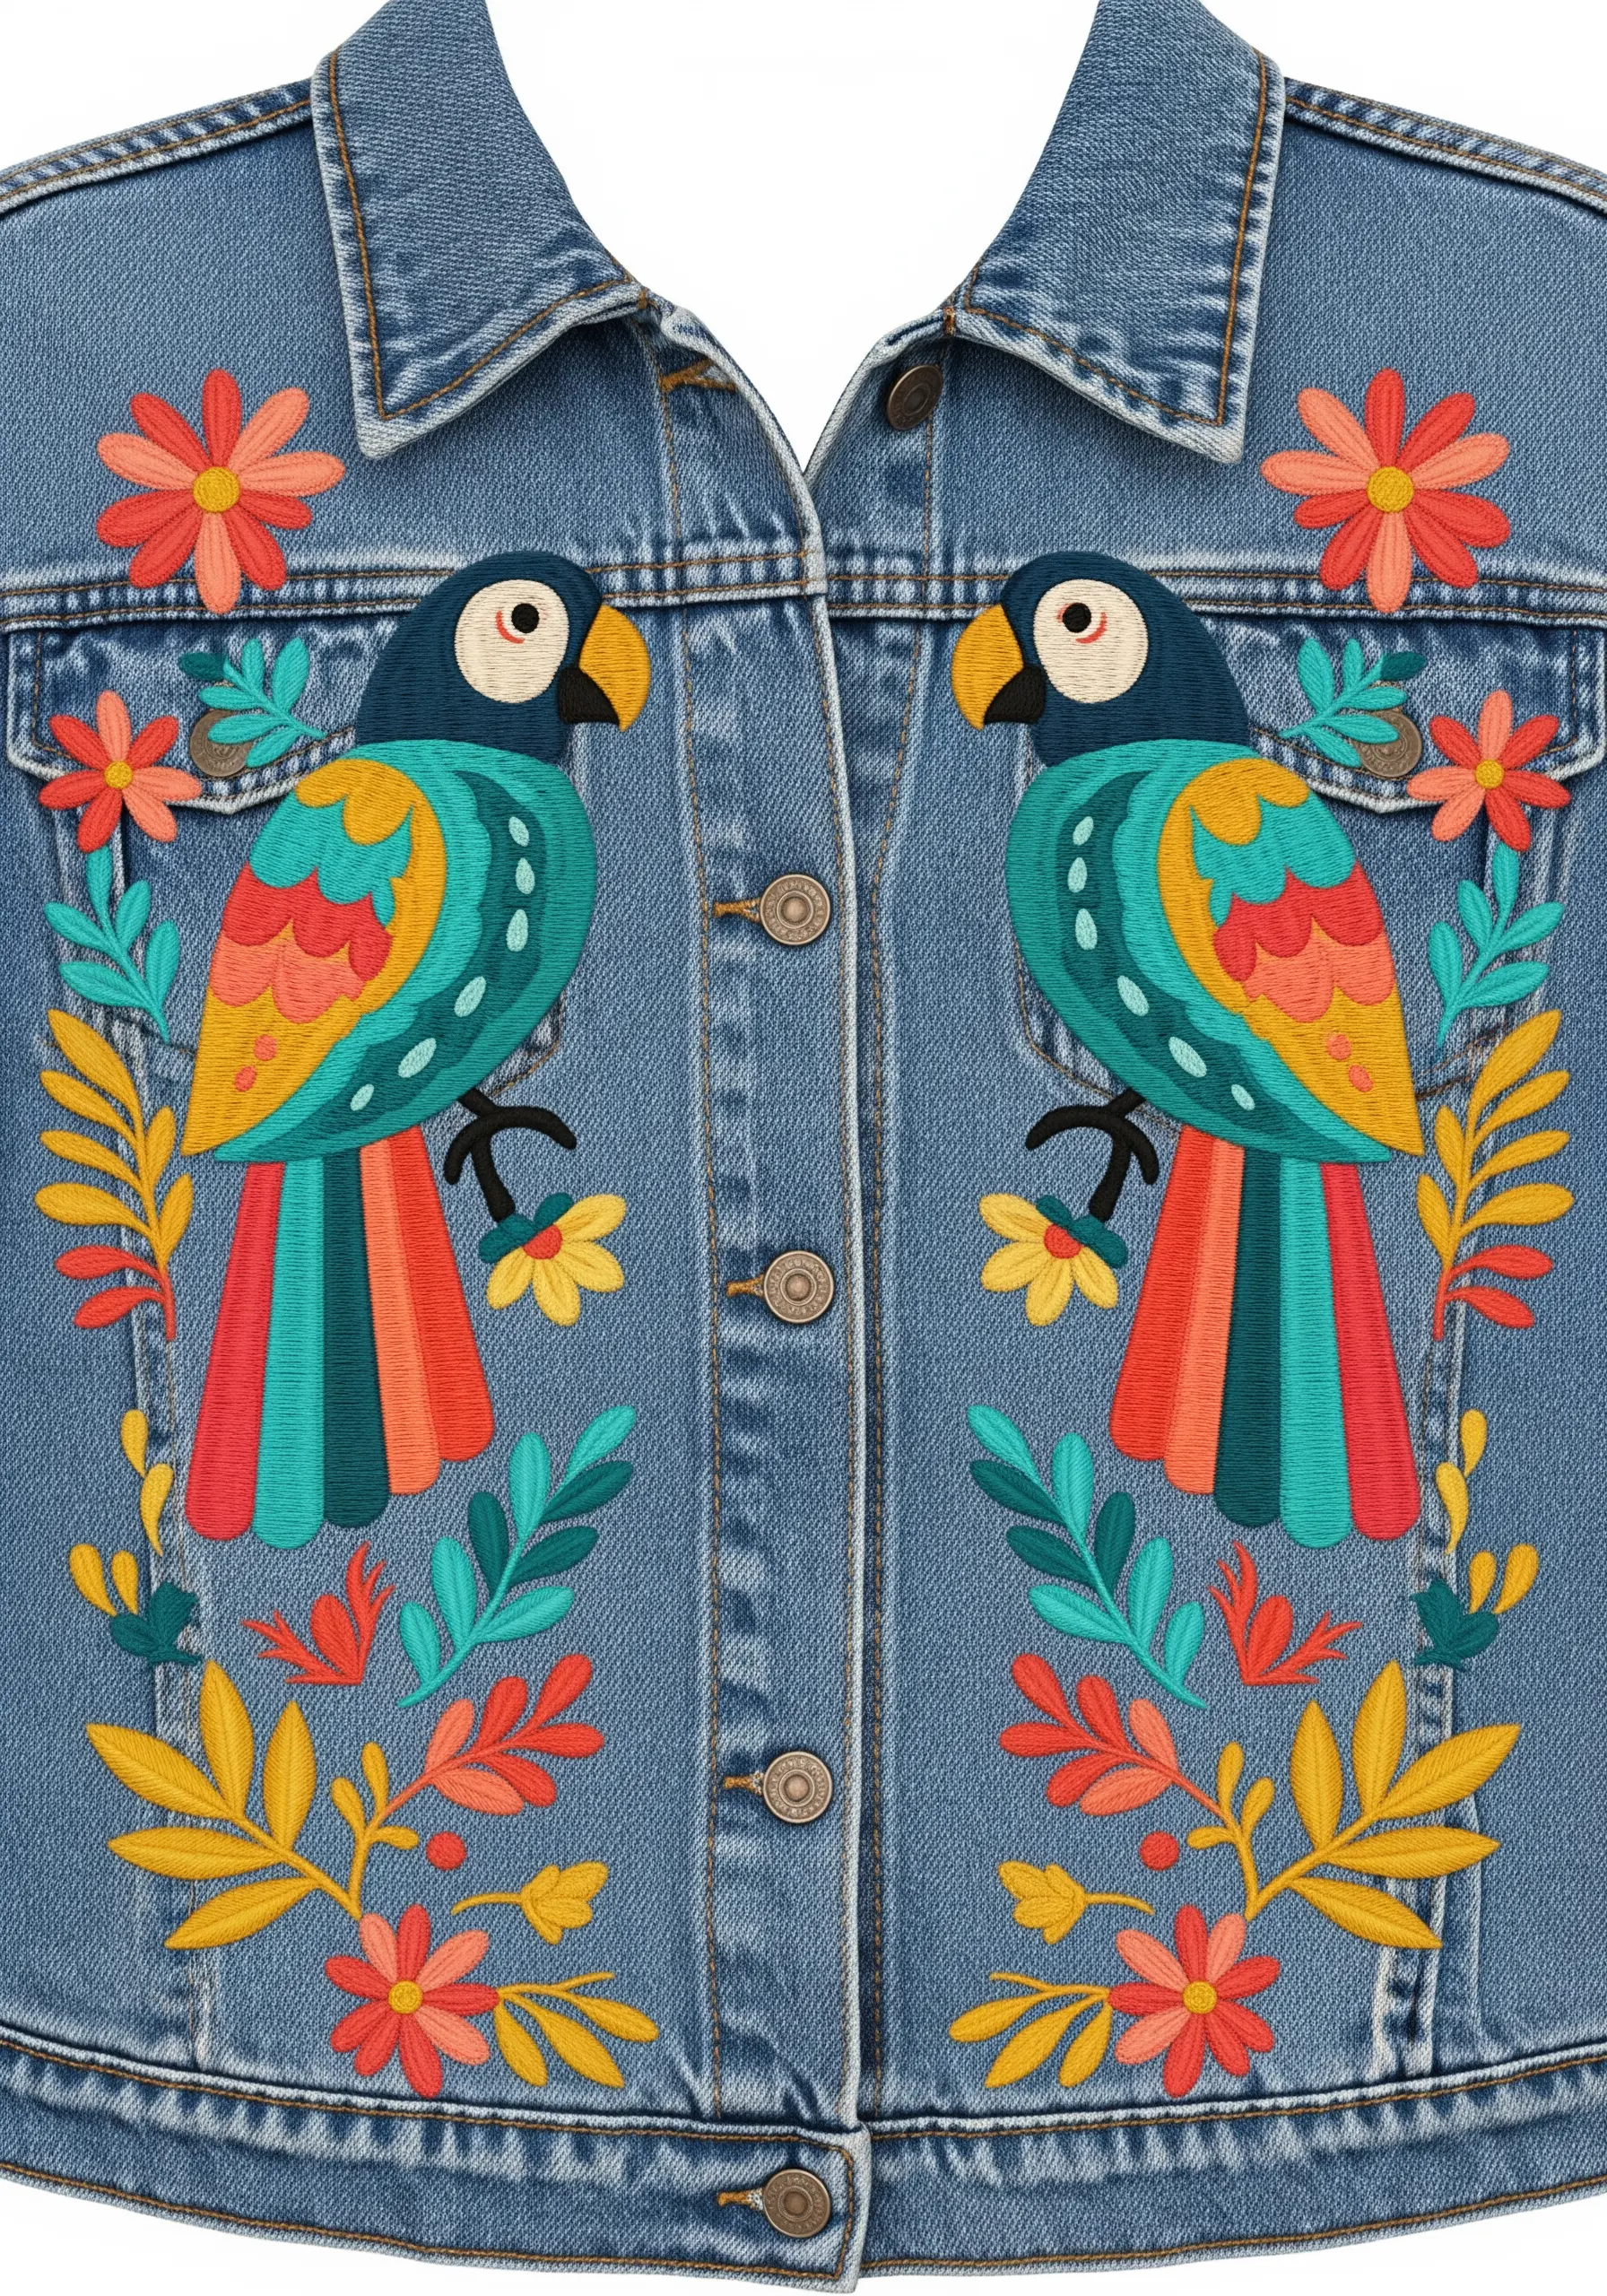
Embrace a stylized, illustrative aesthetic by focusing on shape and color over realistic detail.
This folk-art style uses solid blocks of color separated by clean lines. Use a dense satin stitch to fill each shape completely for a flat, patch-like effect.
The beauty of this style is in its simplicity and balanced color harmony. Resist the urge to add shading; let the bold shapes speak for themselves.
22. Add Realism with a Single Highlight Stitch
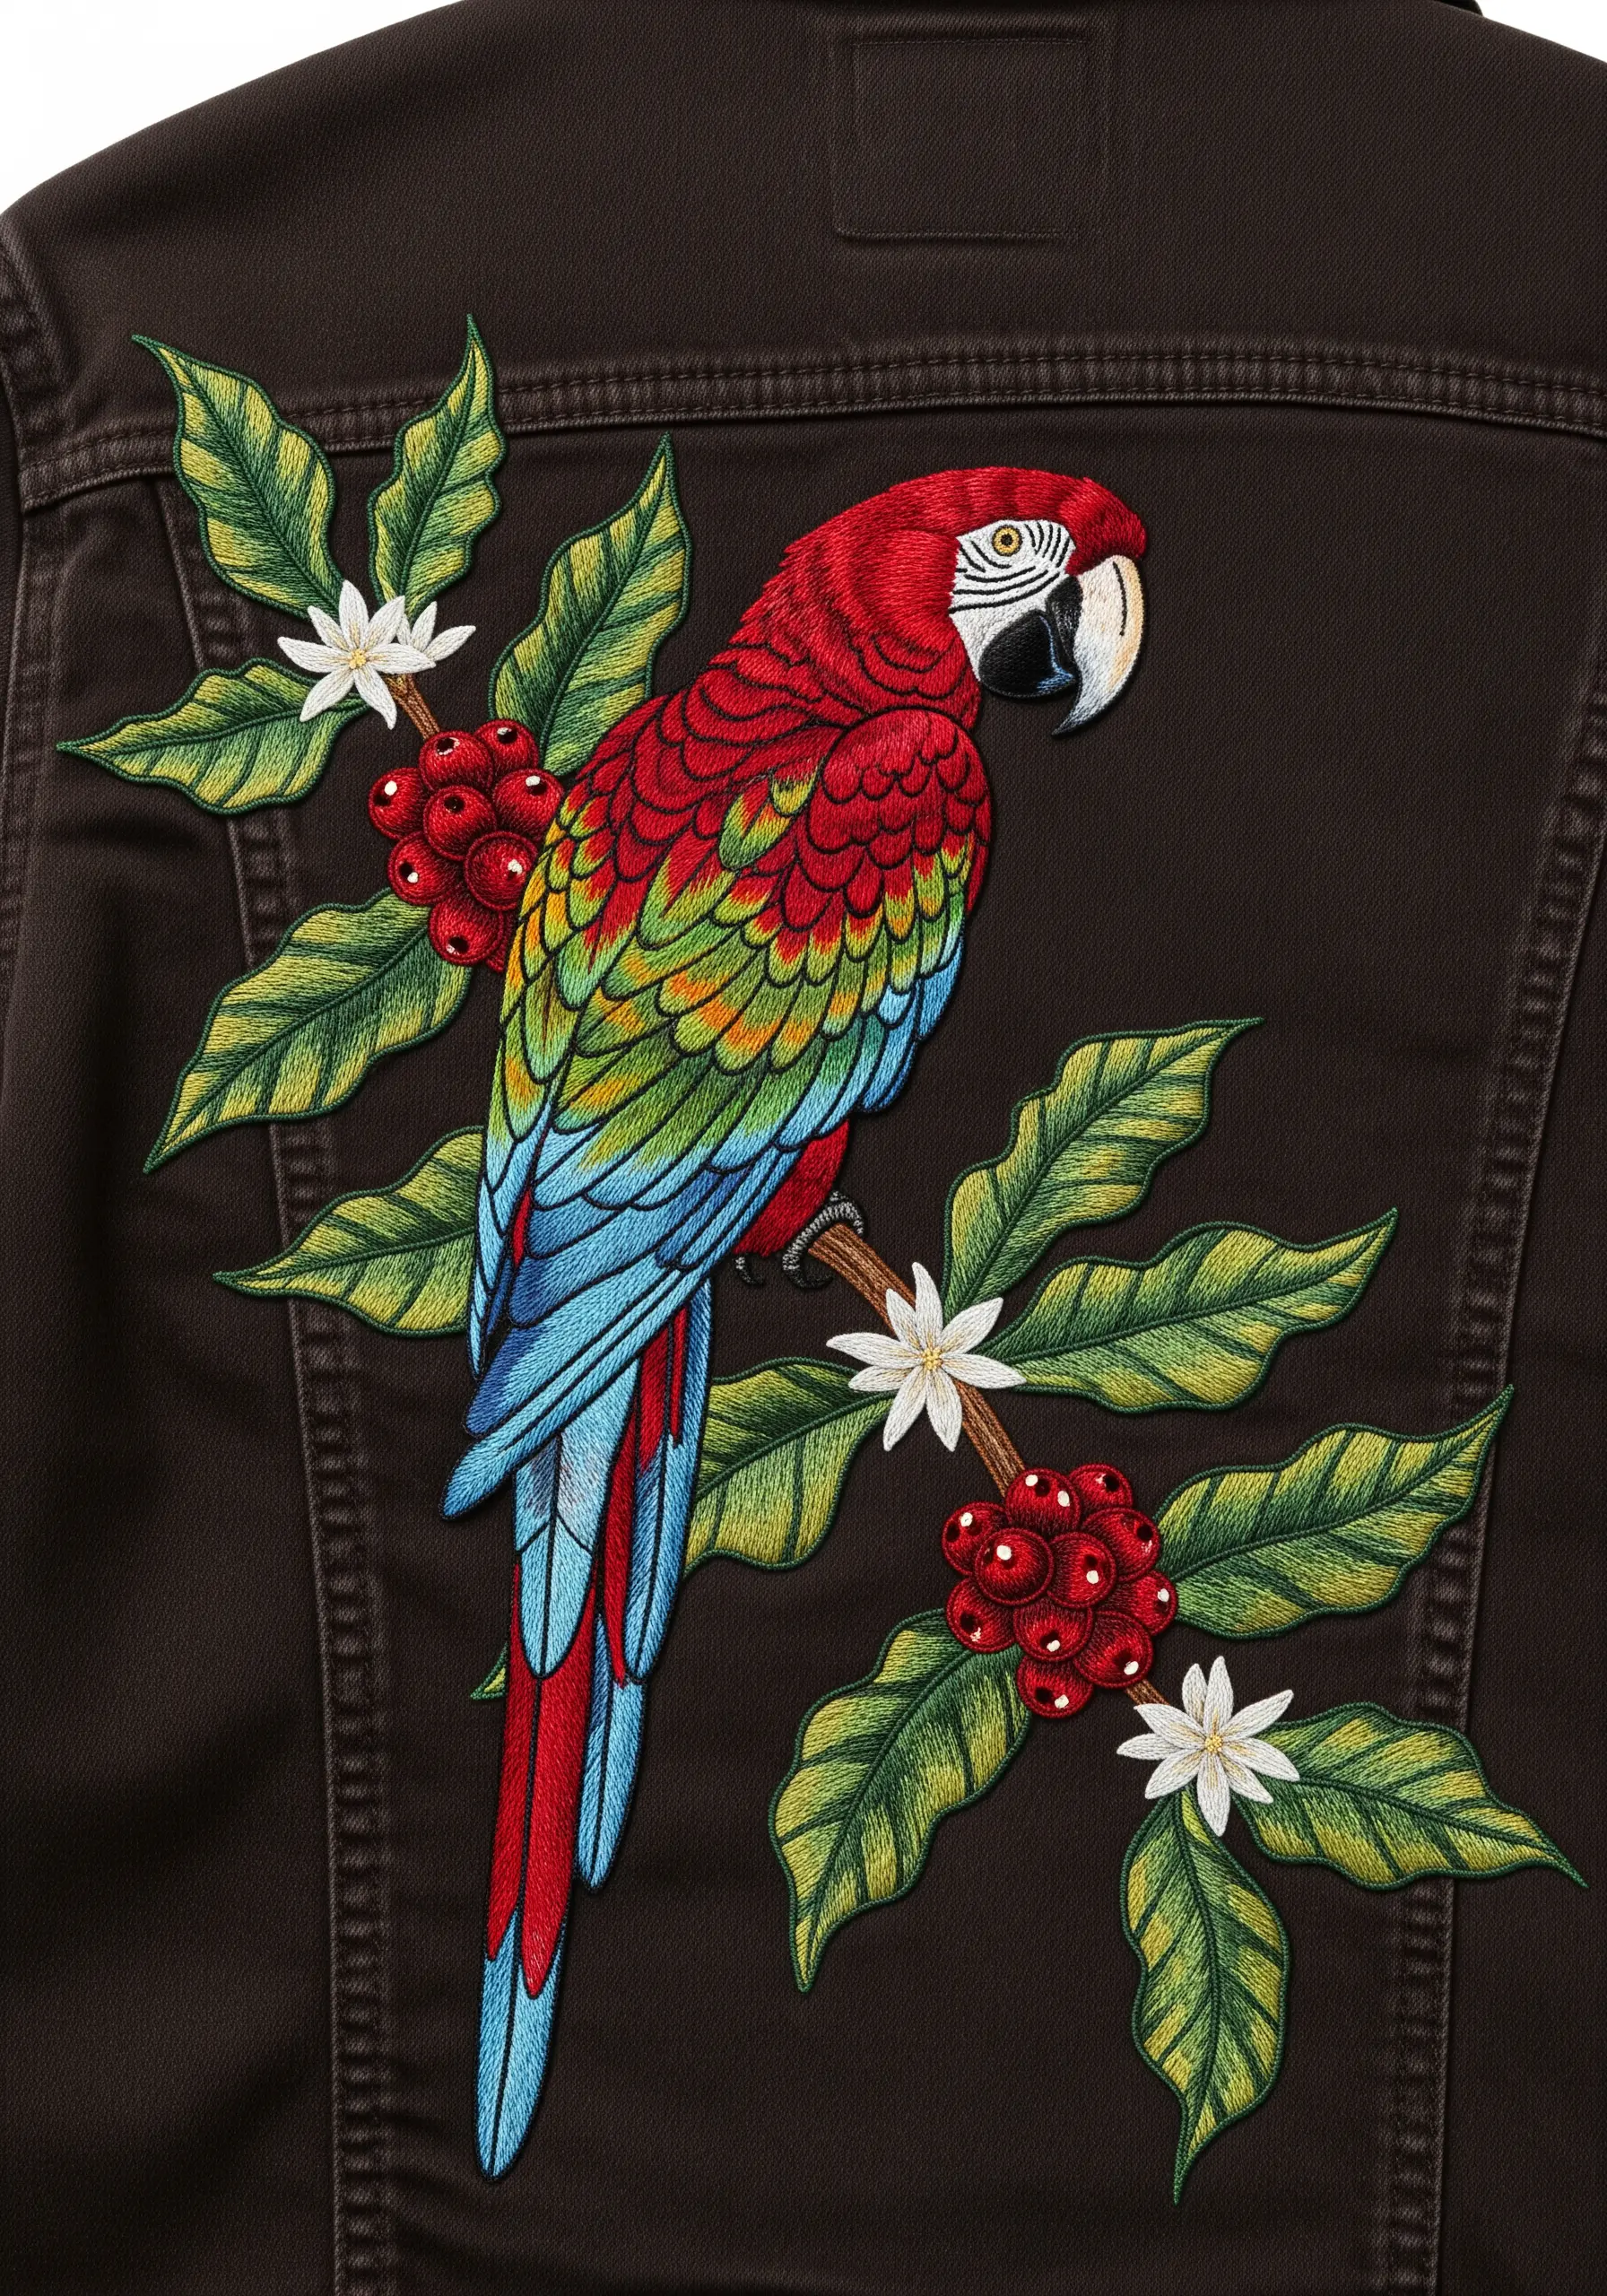
Sometimes, the smallest detail has the biggest impact.
After filling the coffee berries with a padded satin stitch in deep red, add a single, tiny straight stitch in off-white to one side.
This simple stitch acts as a specular highlight, instantly making the berries look round, glossy, and three-dimensional.
It’s a tiny detail that elevates the entire piece from a flat design to a dynamic, lifelike scene.
23. Anchor Your Design on a Busy Background
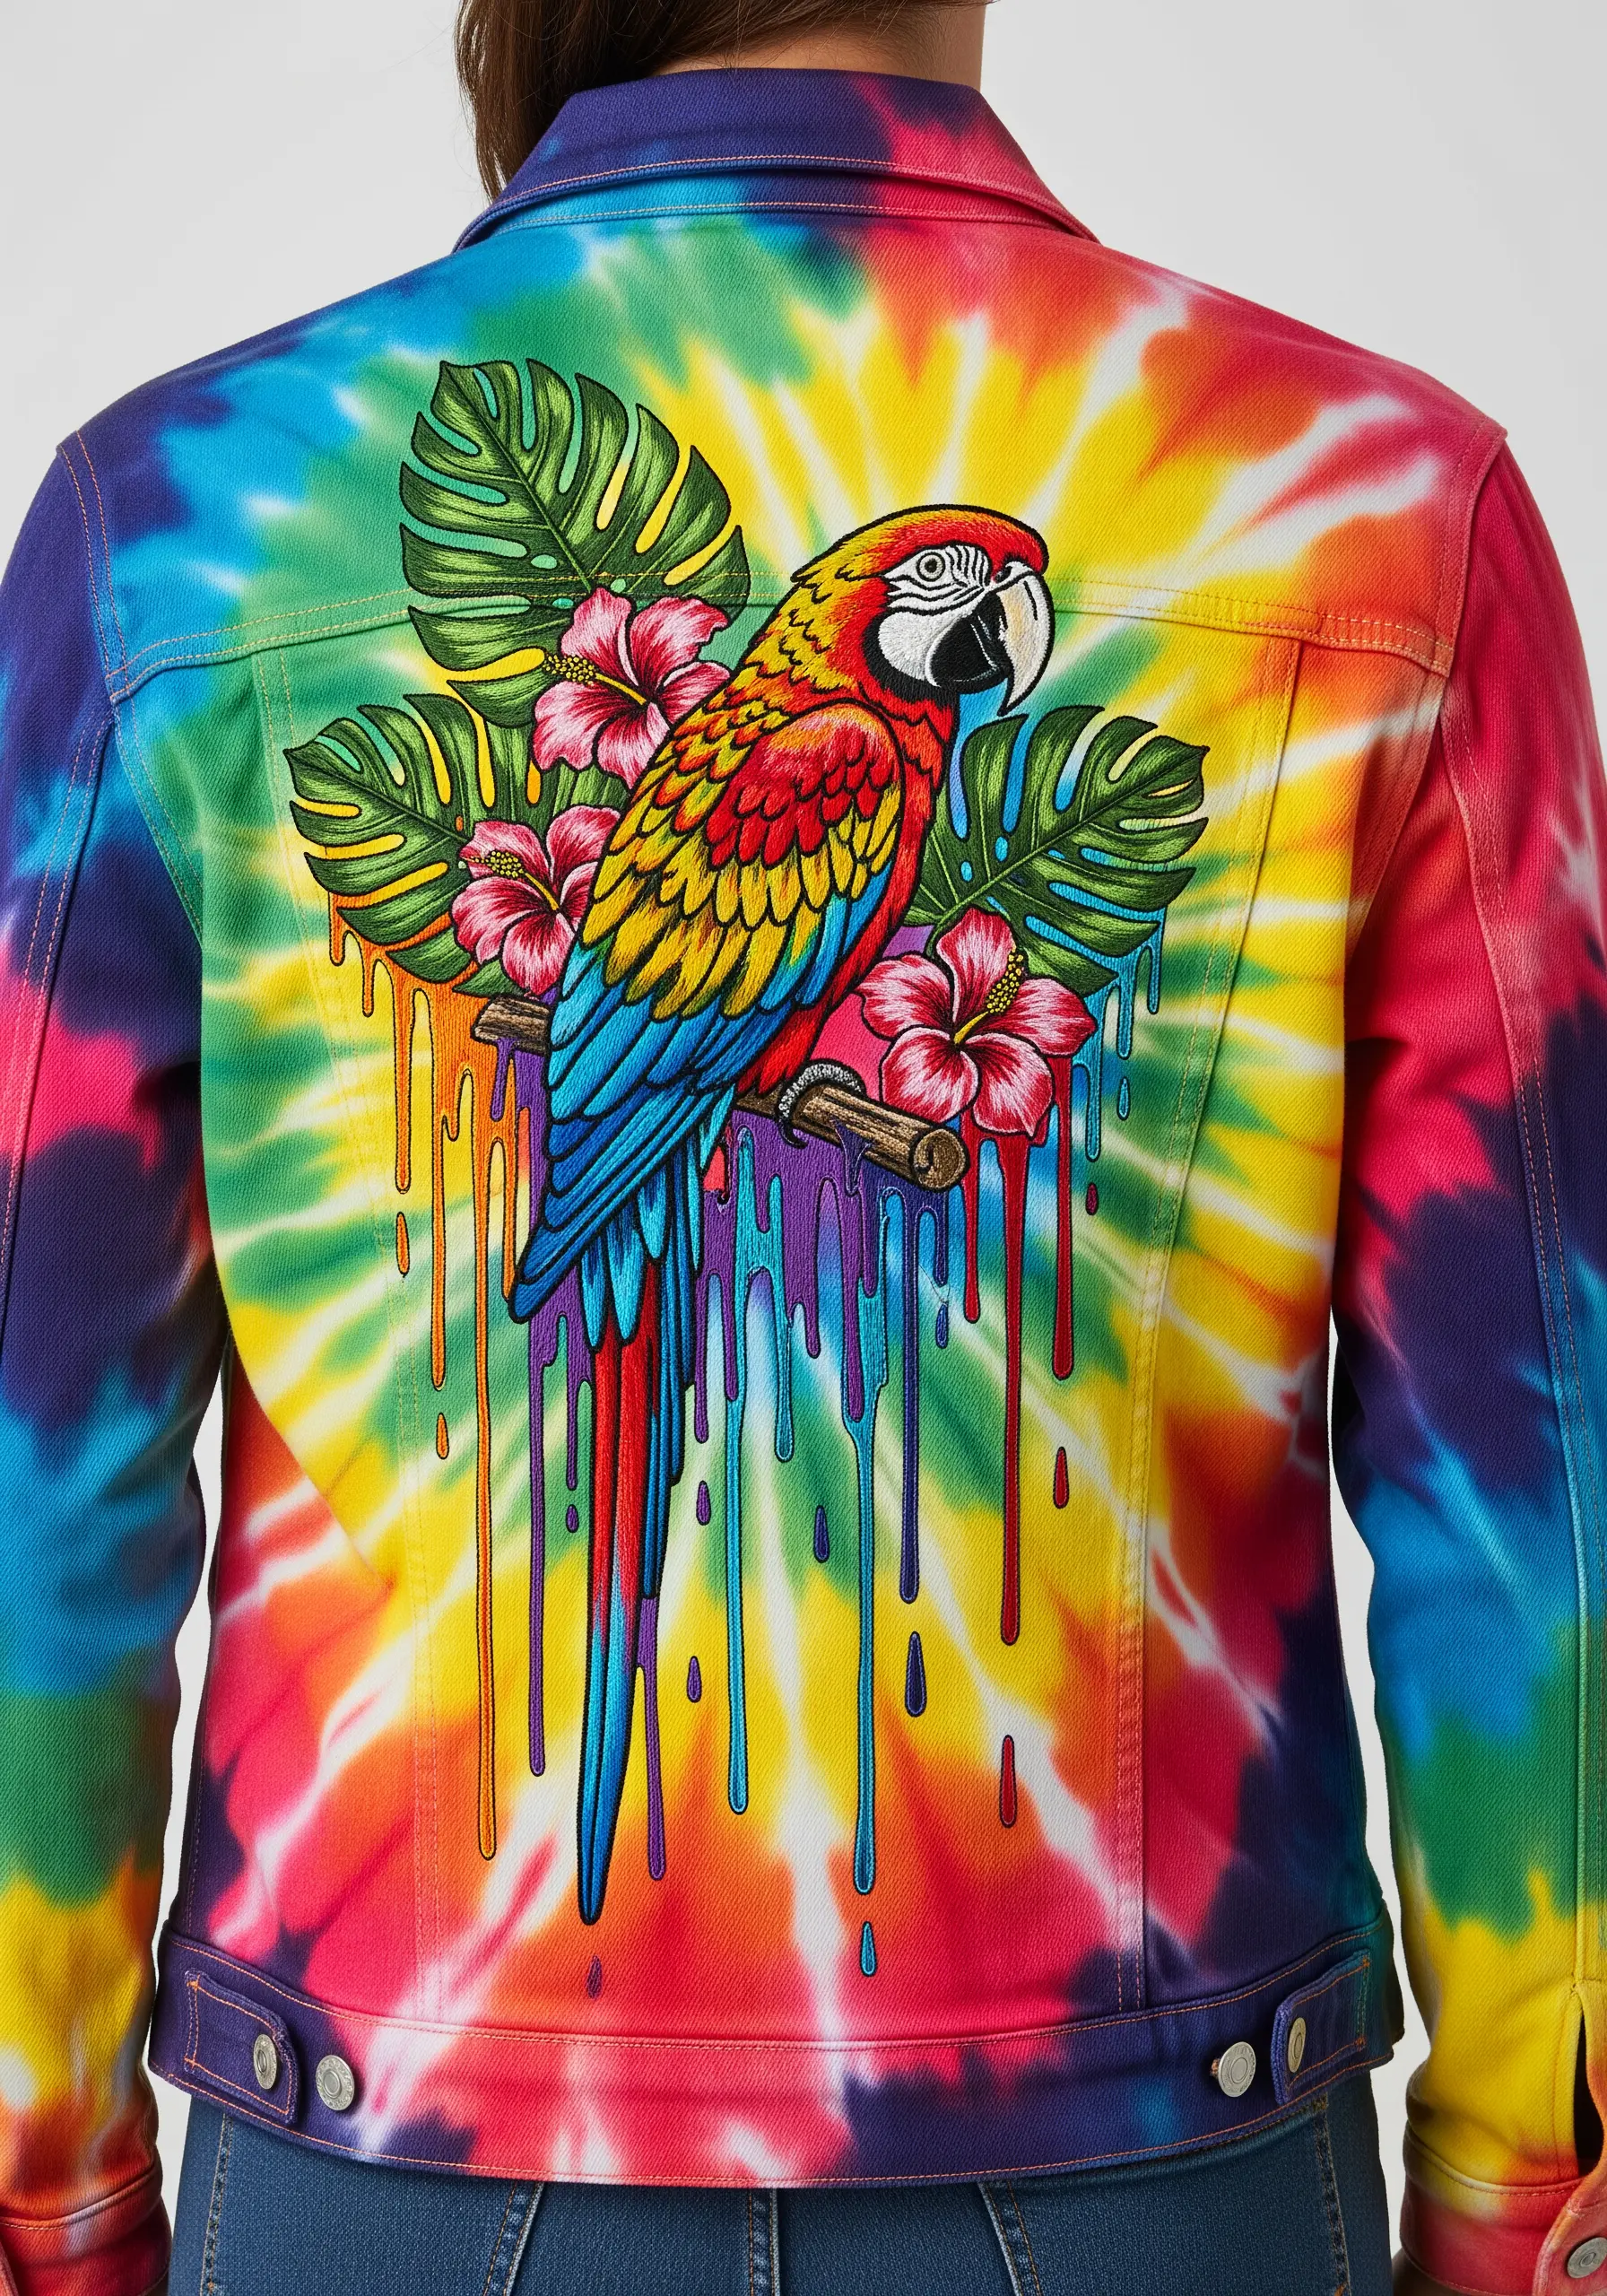
Stitching on a tie-dye or patterned fabric requires you to create visual clarity.
First, select thread colors that provide high contrast against the fabric behind them.
Most importantly, frame the entire embroidered motif with a thick, bold outline in black or another dark neutral. This acts as a visual border, separating the artwork from the background and allowing the parrot’s details to shine through.


