

Before you pick up a needle, I want you to reconsider the fabric in your hands. That old jacket, plain t-shirt, or simple pair of jeans is not just something to wear—it’s a canvas waiting for a story. Your story.
Embroidery is more than just a technique; it’s a way of adding intention, texture, and meaning to the everyday. It’s the difference between a garment you own and a piece of art you inhabit. The ideas that follow are not just about decoration. They are about transformation.
We will explore how a change in stitch direction can mimic the softness of fur, how layering thread can build a garden, and how a simple line can convey movement. Let these concepts guide you. Trust your hands, and watch as you turn simple cloth into something truly extraordinary.
1. Build a Meadow on Denim
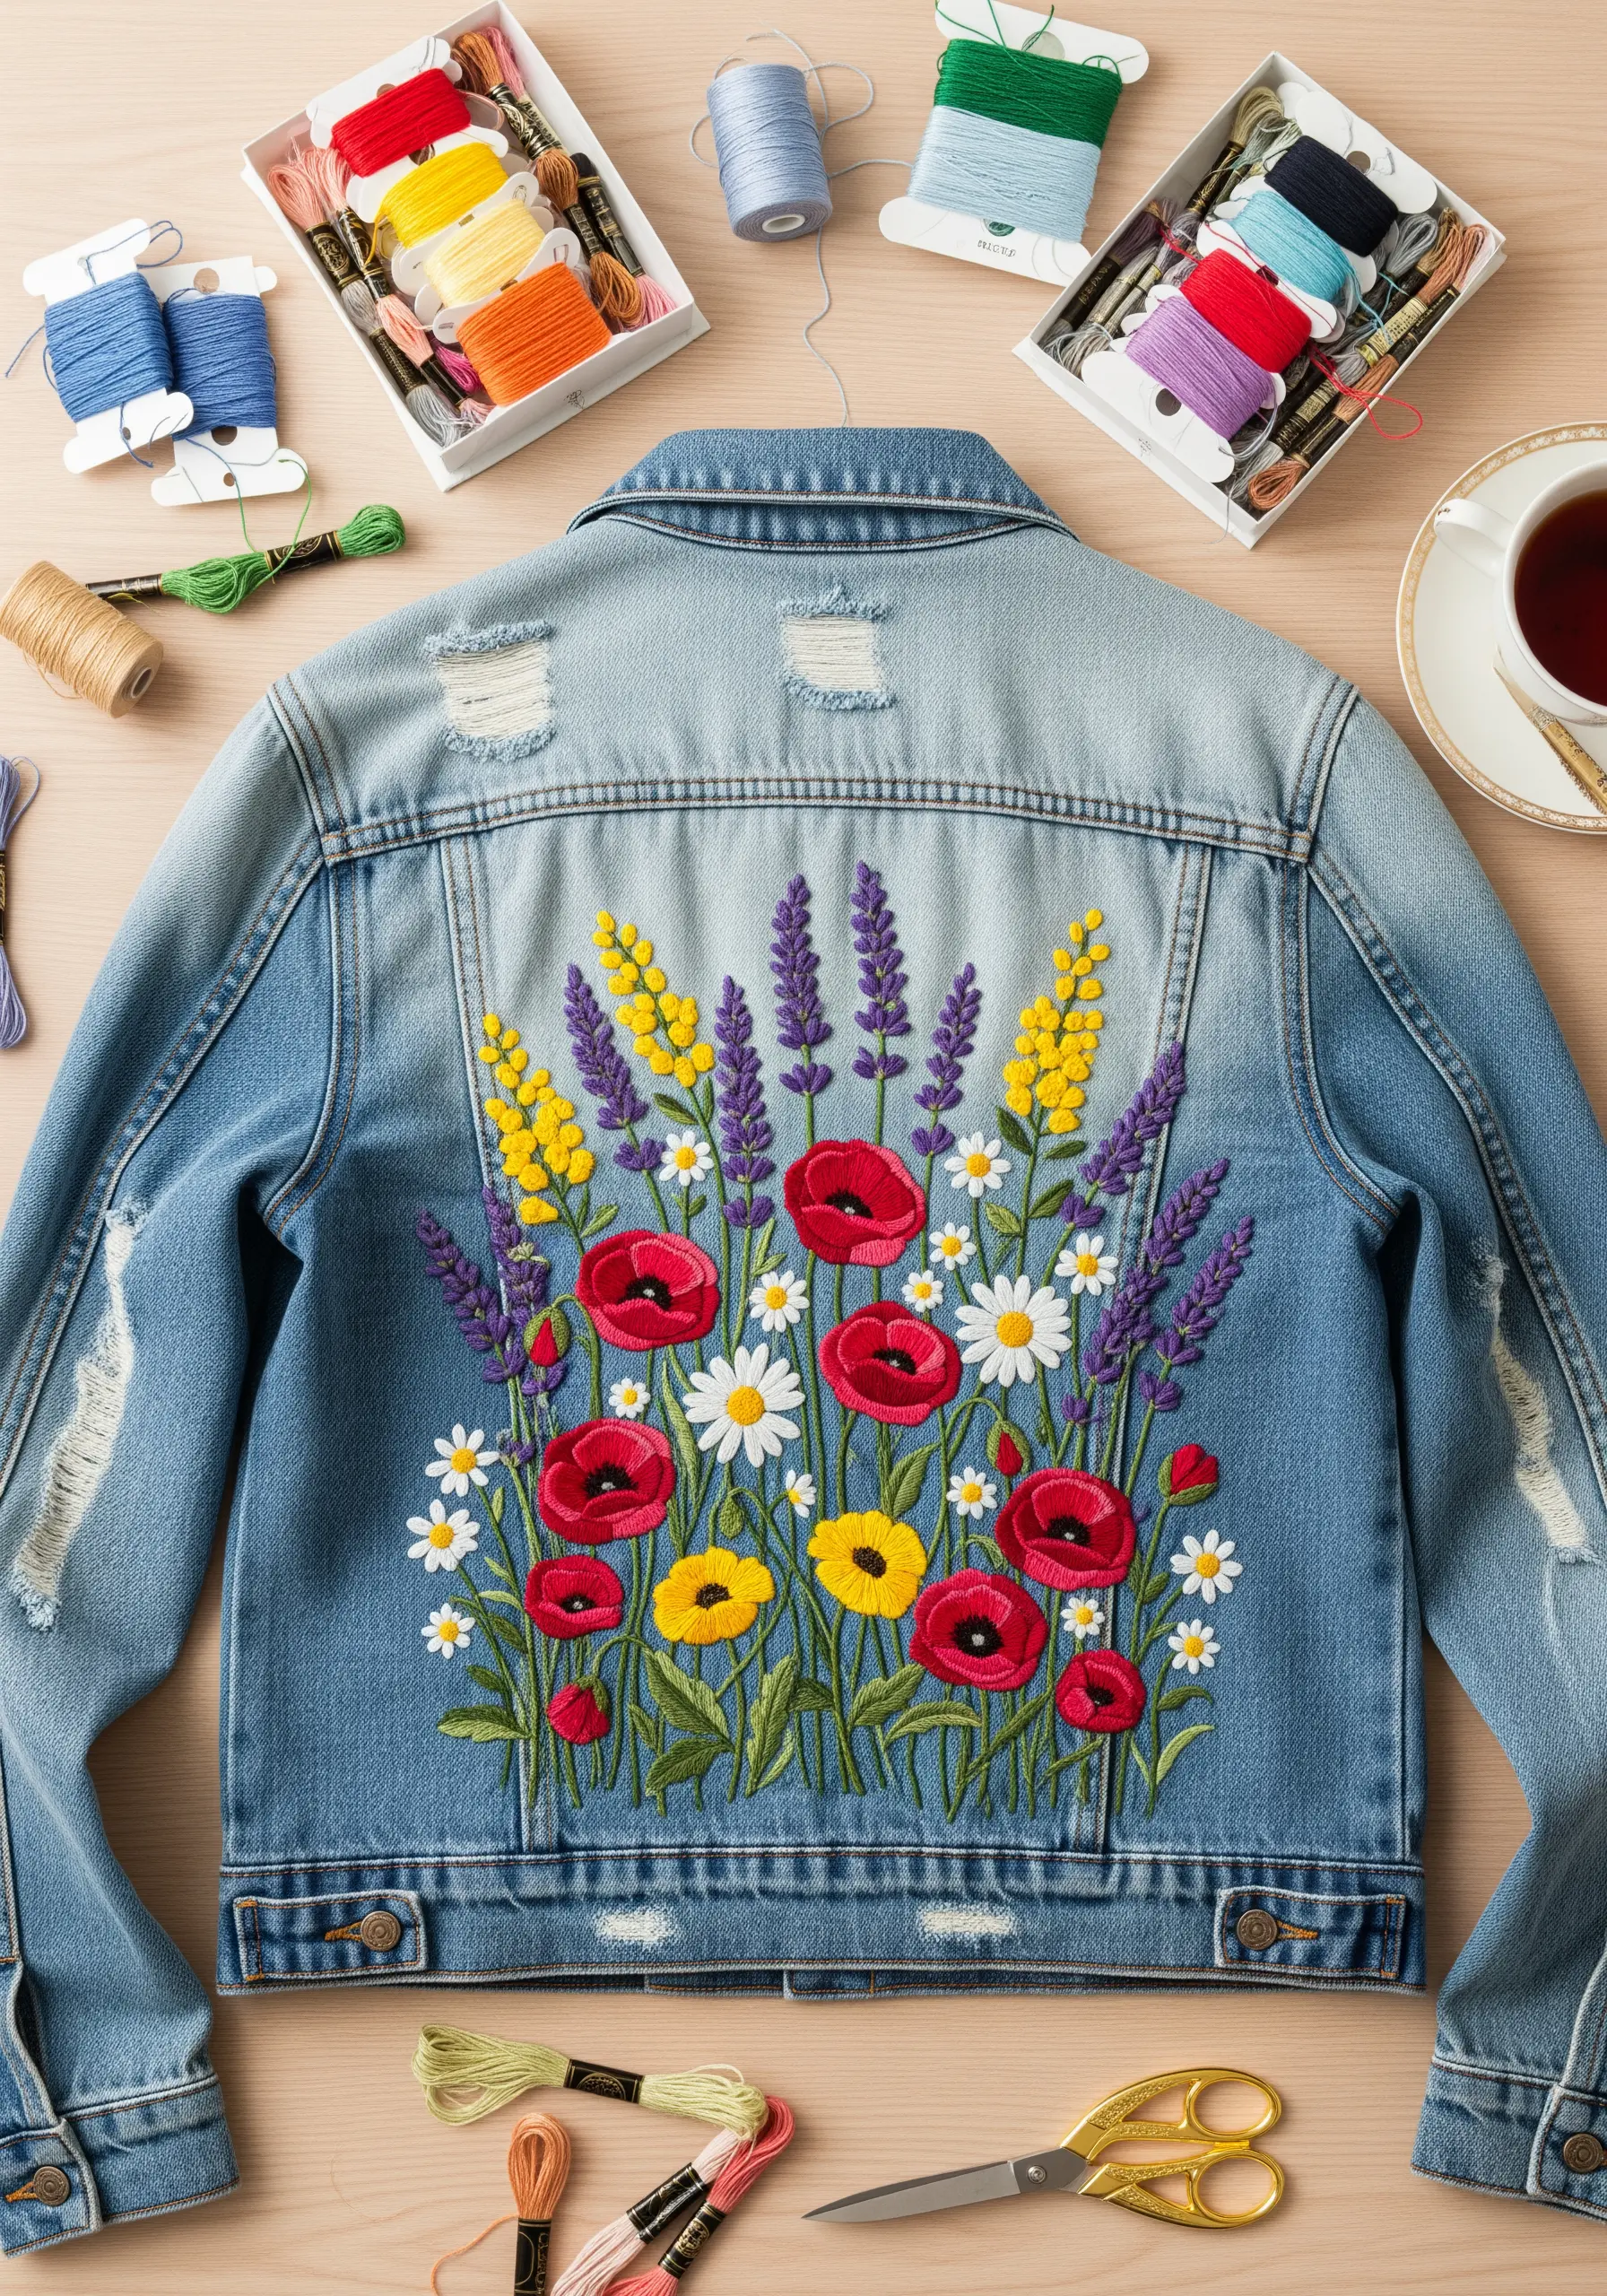
When embroidering on heavy fabric like denim, you need to create dimension so your stitches don’t sink into the weave.
Layer your textures strategically: use a smooth satin stitch for the poppy petals, dense French knots for the daisy centers, and raised lazy daisy stitches for the lavender.
This combination creates a visual hierarchy and a tactile richness that makes the entire piece feel lush and alive.
Always use a tear-away stabilizer on the inside of the jacket to prevent the fabric from puckering under the weight of the stitches.
2. Master the Minimalist Outline
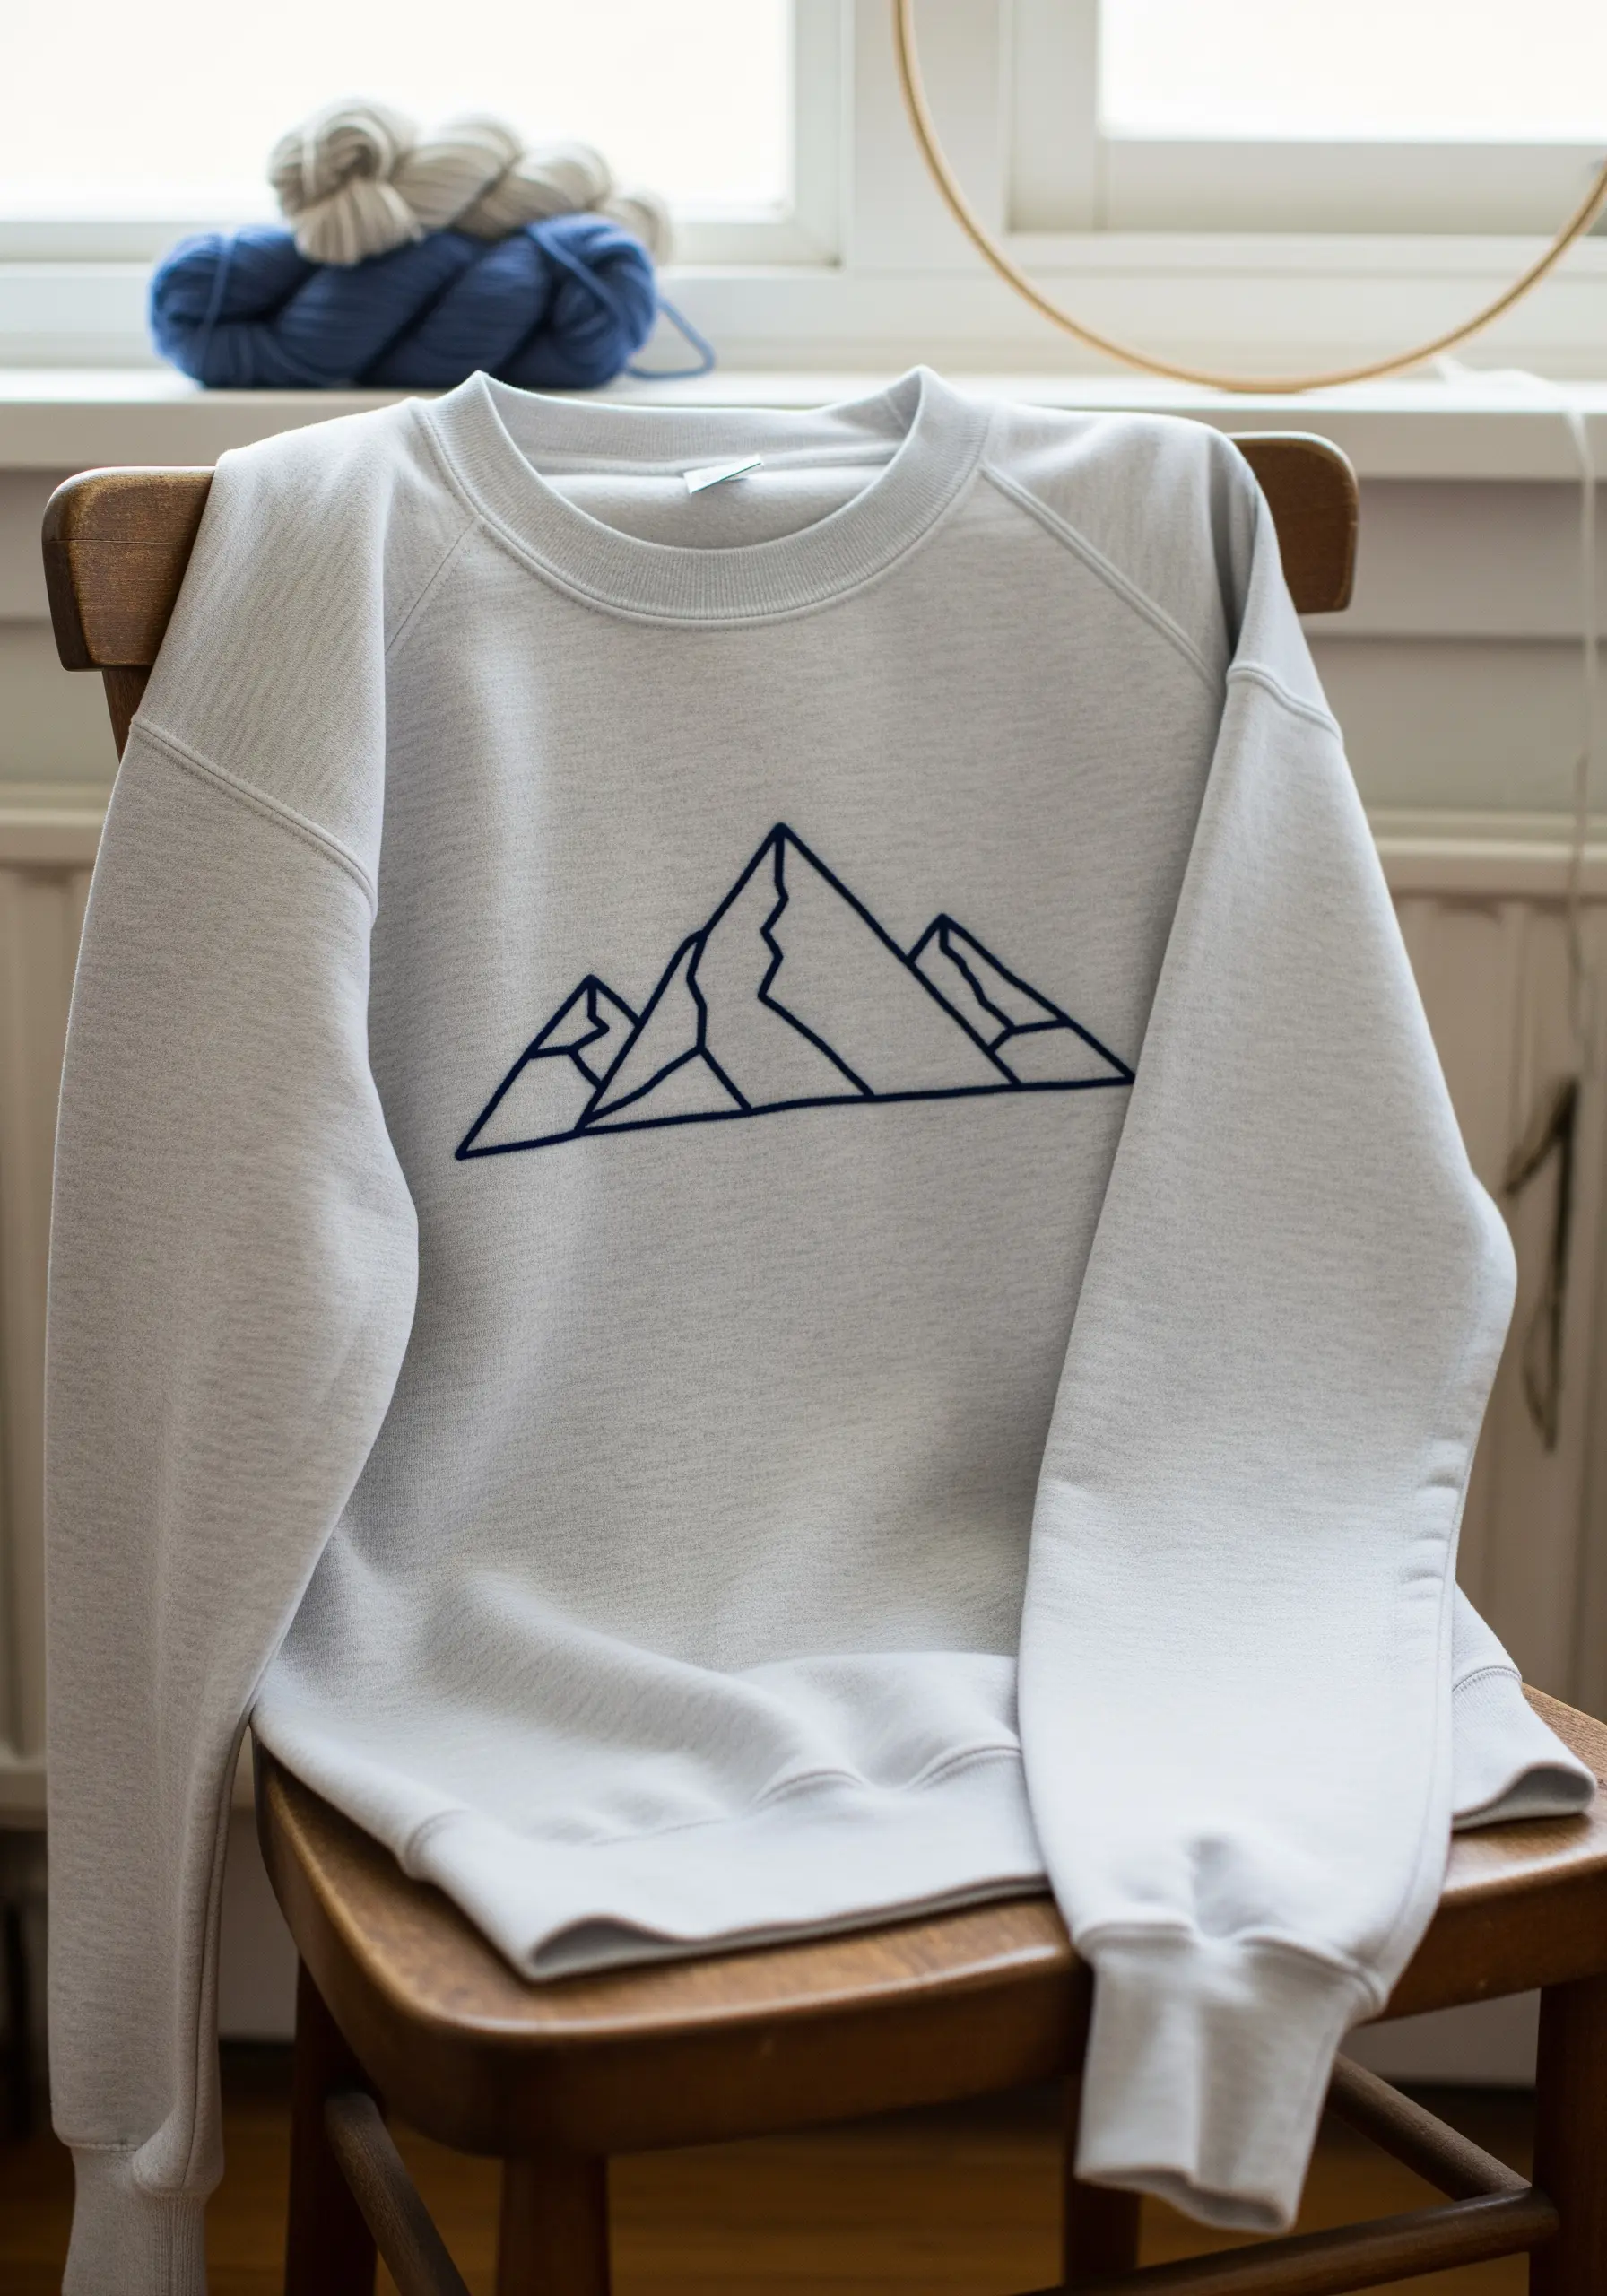
For a clean, graphic design on sweatshirt fleece, your choice of outline stitch is critical.
Instead of a standard backstitch, which can look segmented, use a stem stitch or a whipped backstitch.
The stem stitch creates a rope-like, continuous line, while whipping the backstitch smooths over the individual stitches, resulting in a fluid, unbroken contour.
Use at least four strands of floss to give the lines enough weight to stand out against the soft texture of the sweatshirt.
3. Weave Celestial Motifs with Mixed Media
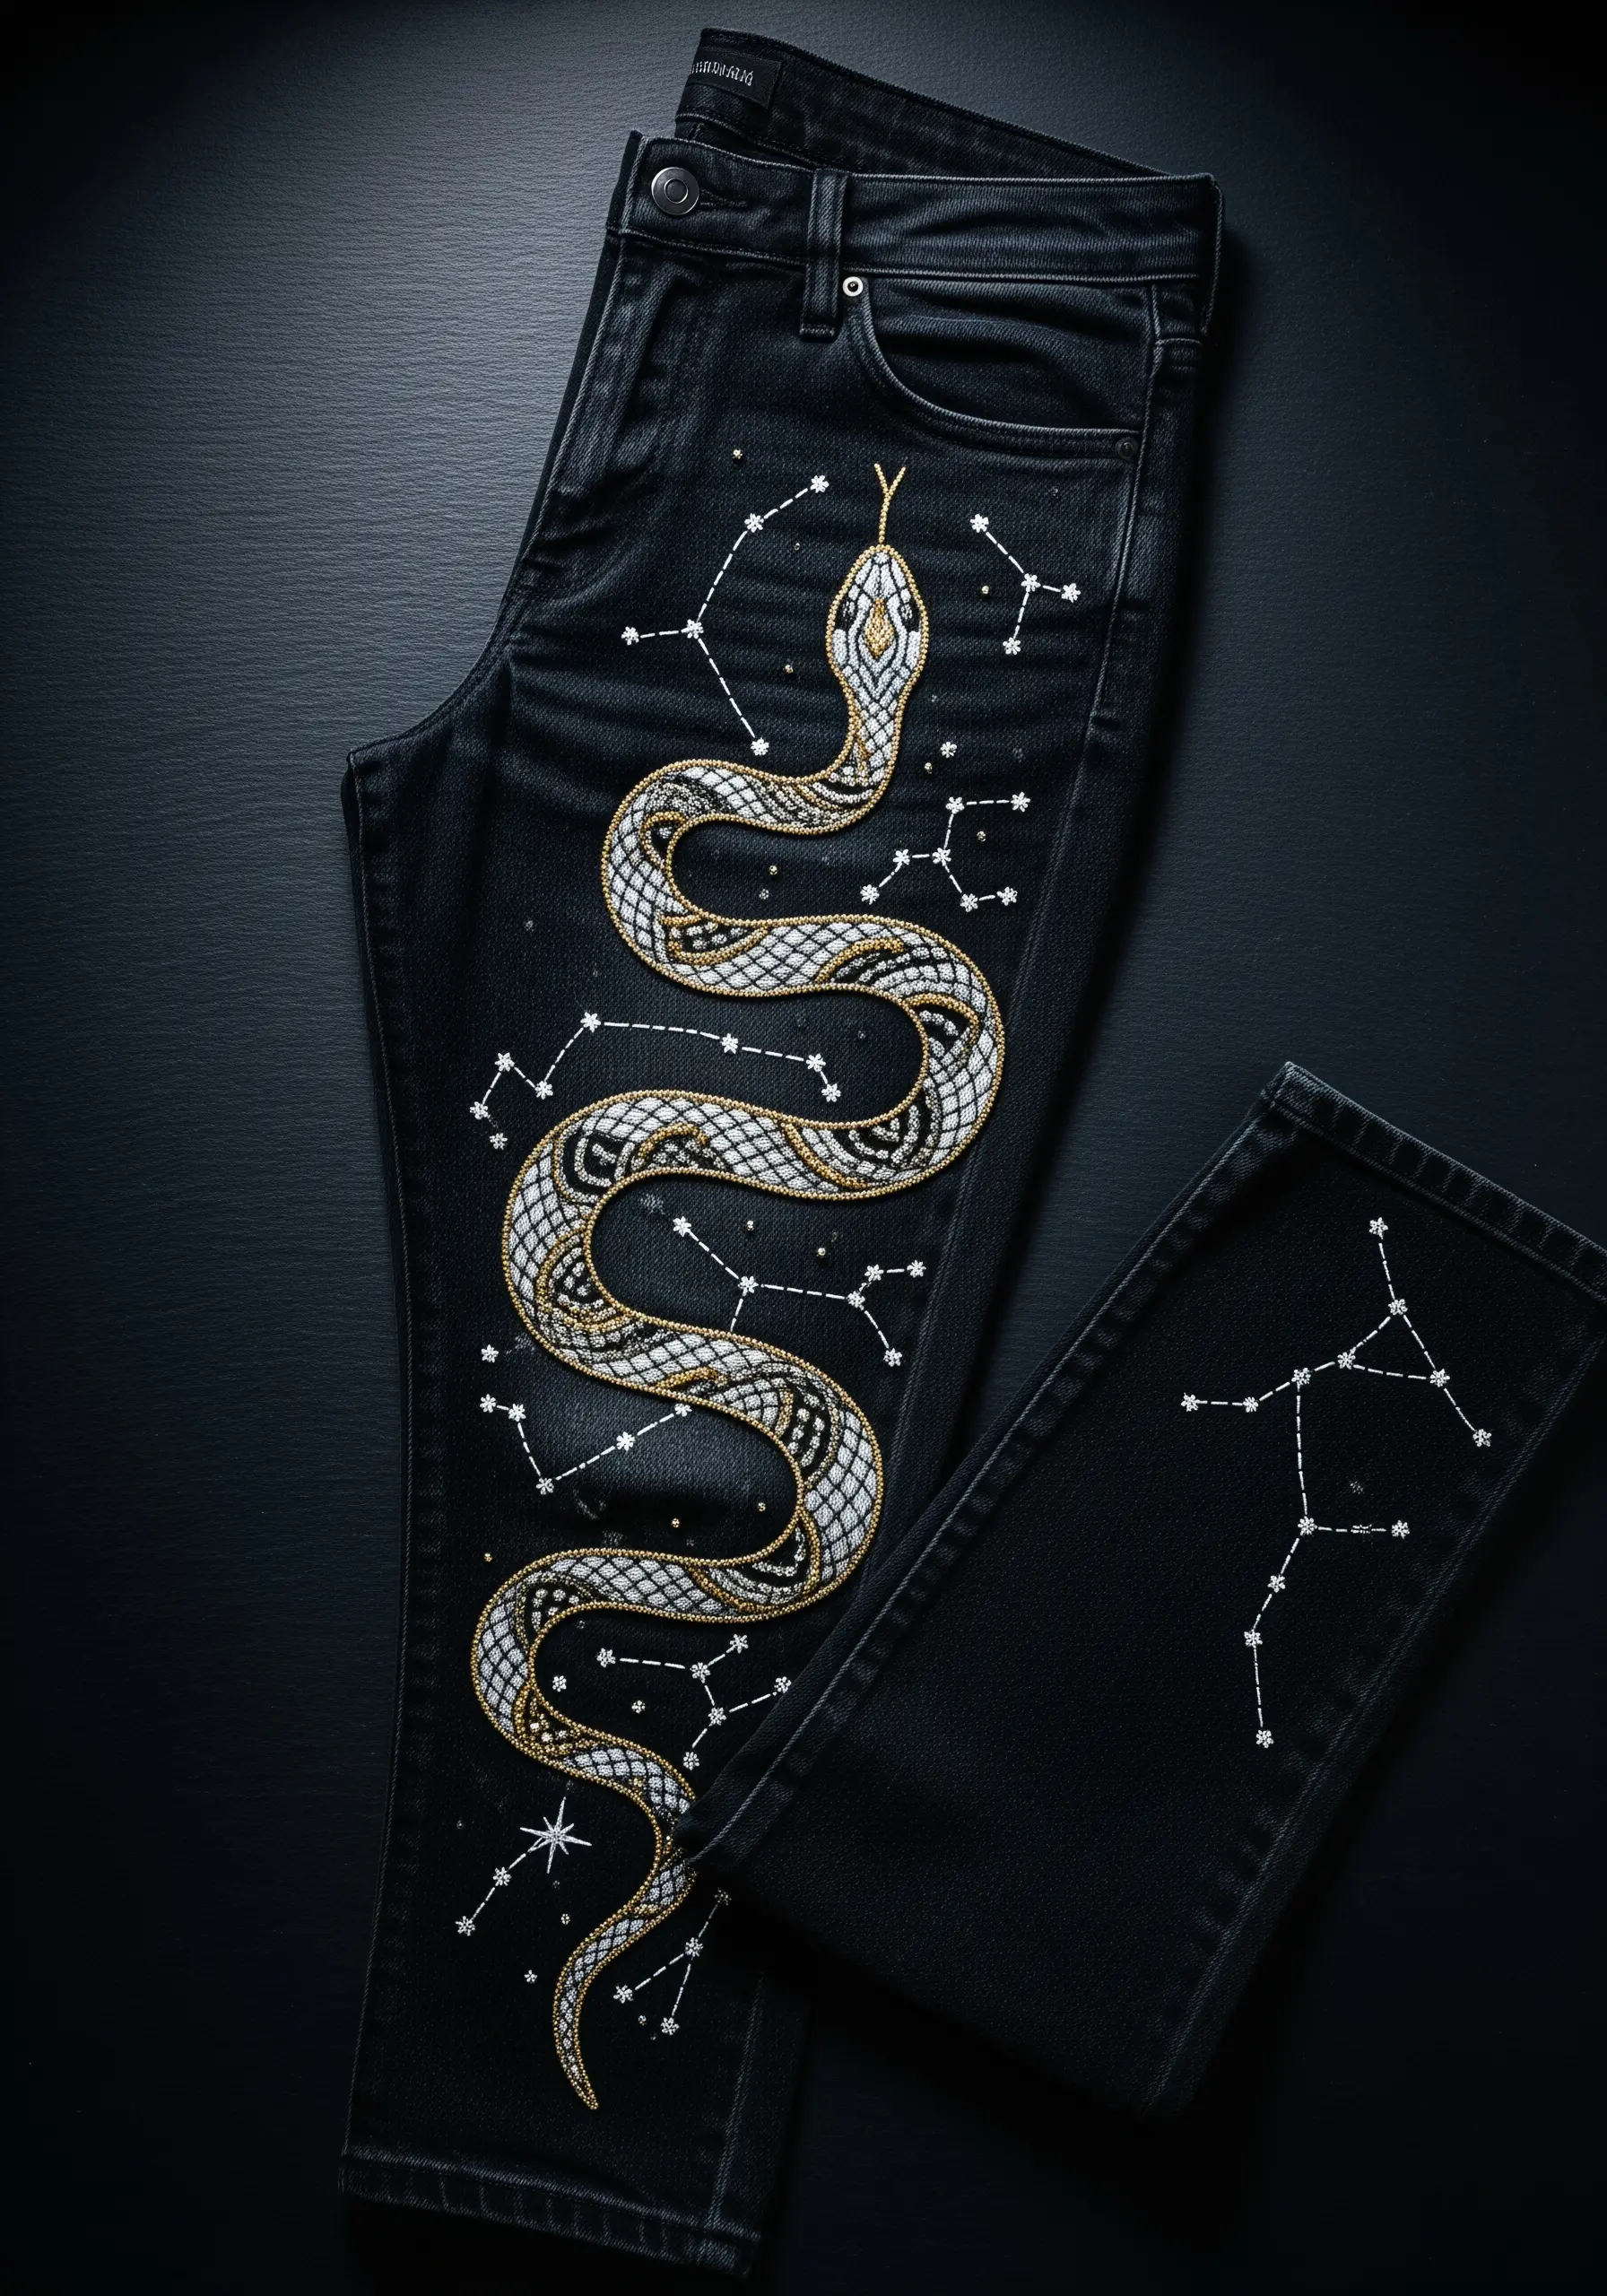
Elevate your embroidery on dark denim by introducing beads and metallic threads for a touch of luxury.
For the snake’s body, use a couching technique: lay down a metallic cord or thick thread and tack it in place with small, discreet stitches of a matching fine thread.
This method allows you to create bold, smooth curves without the frustration of stitching directly with difficult metallic floss.
Scatter small seed beads and single-stitch stars around the main motif to create a dynamic, constellation-inspired composition.
4. Paint a Sunset with Thread
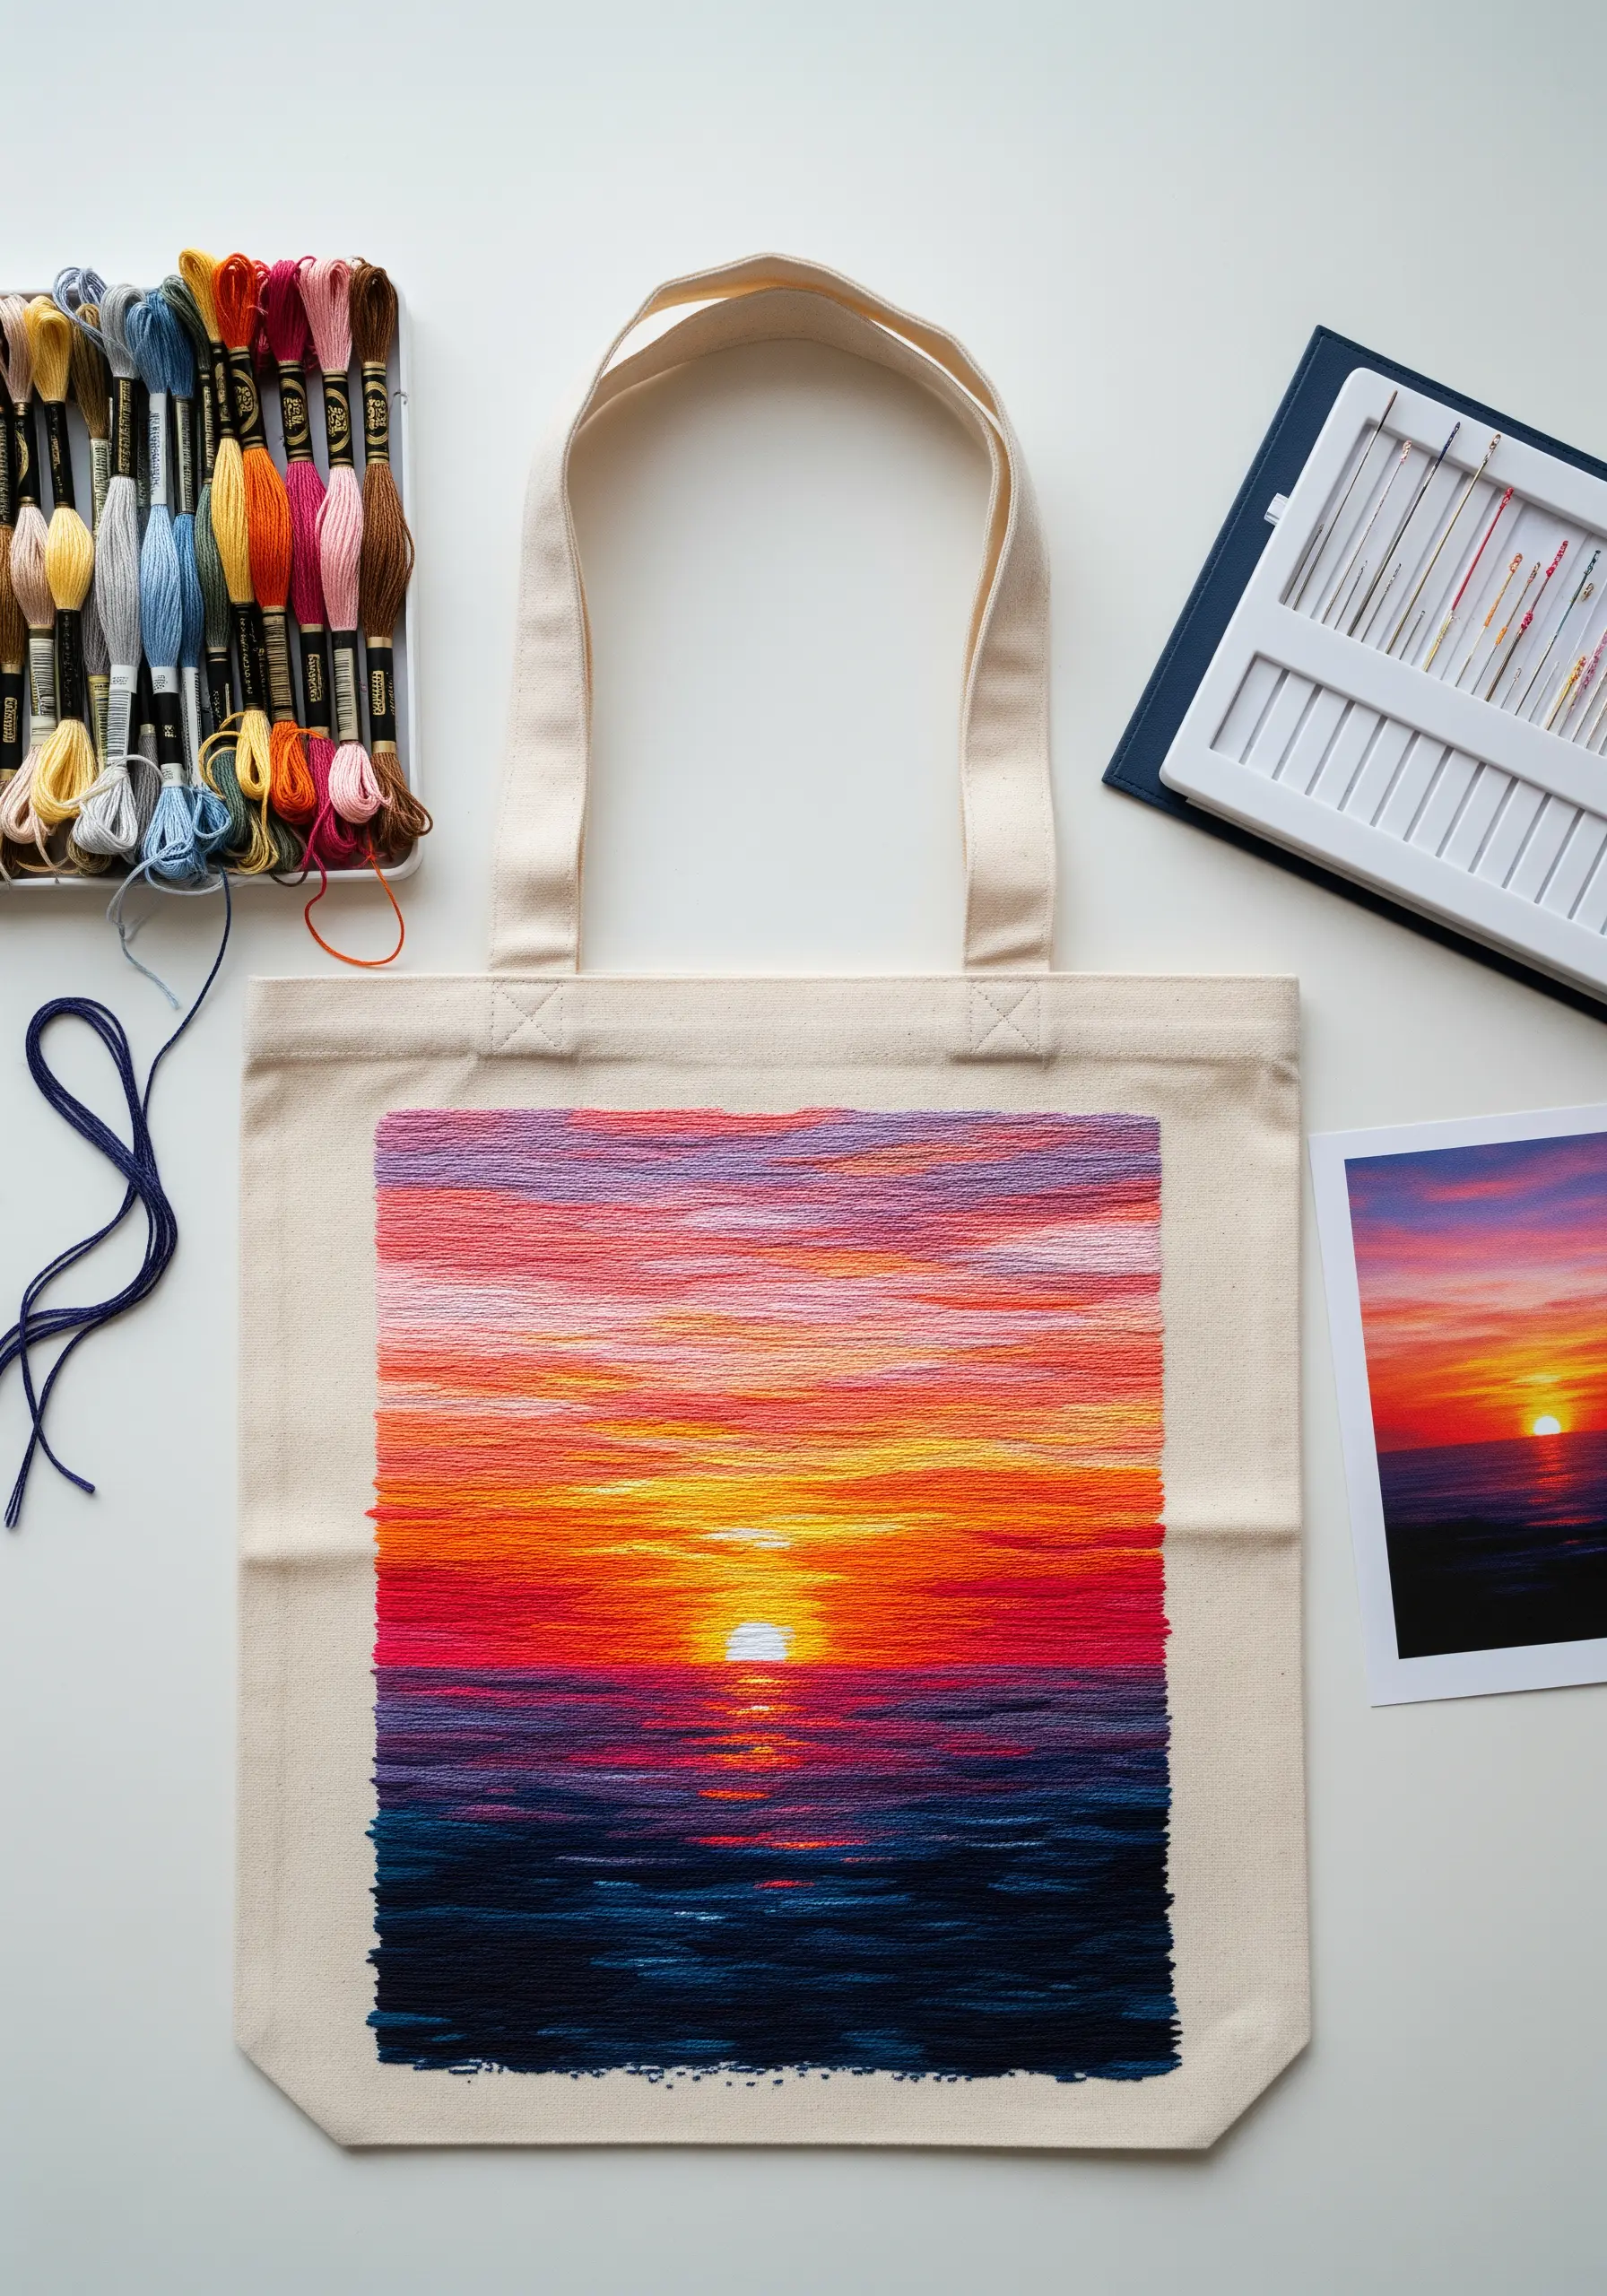
To achieve a painted, atmospheric effect like a sunset, the long-and-short stitch is your essential tool.
Work in horizontal bands of color, blending each new shade into the previous one with staggered stitches of varying lengths.
Don’t be afraid to use single strands of floss to create subtle tonal shifts, especially in the sky and the water’s reflection.
This technique, known as needle painting, transforms your tote bag from a simple accessory into a piece of wearable art with incredible depth and realism.
Explore contemporary rainbow blend stitches to perfect your color transitions.
5. Add Dimension with 3D Details
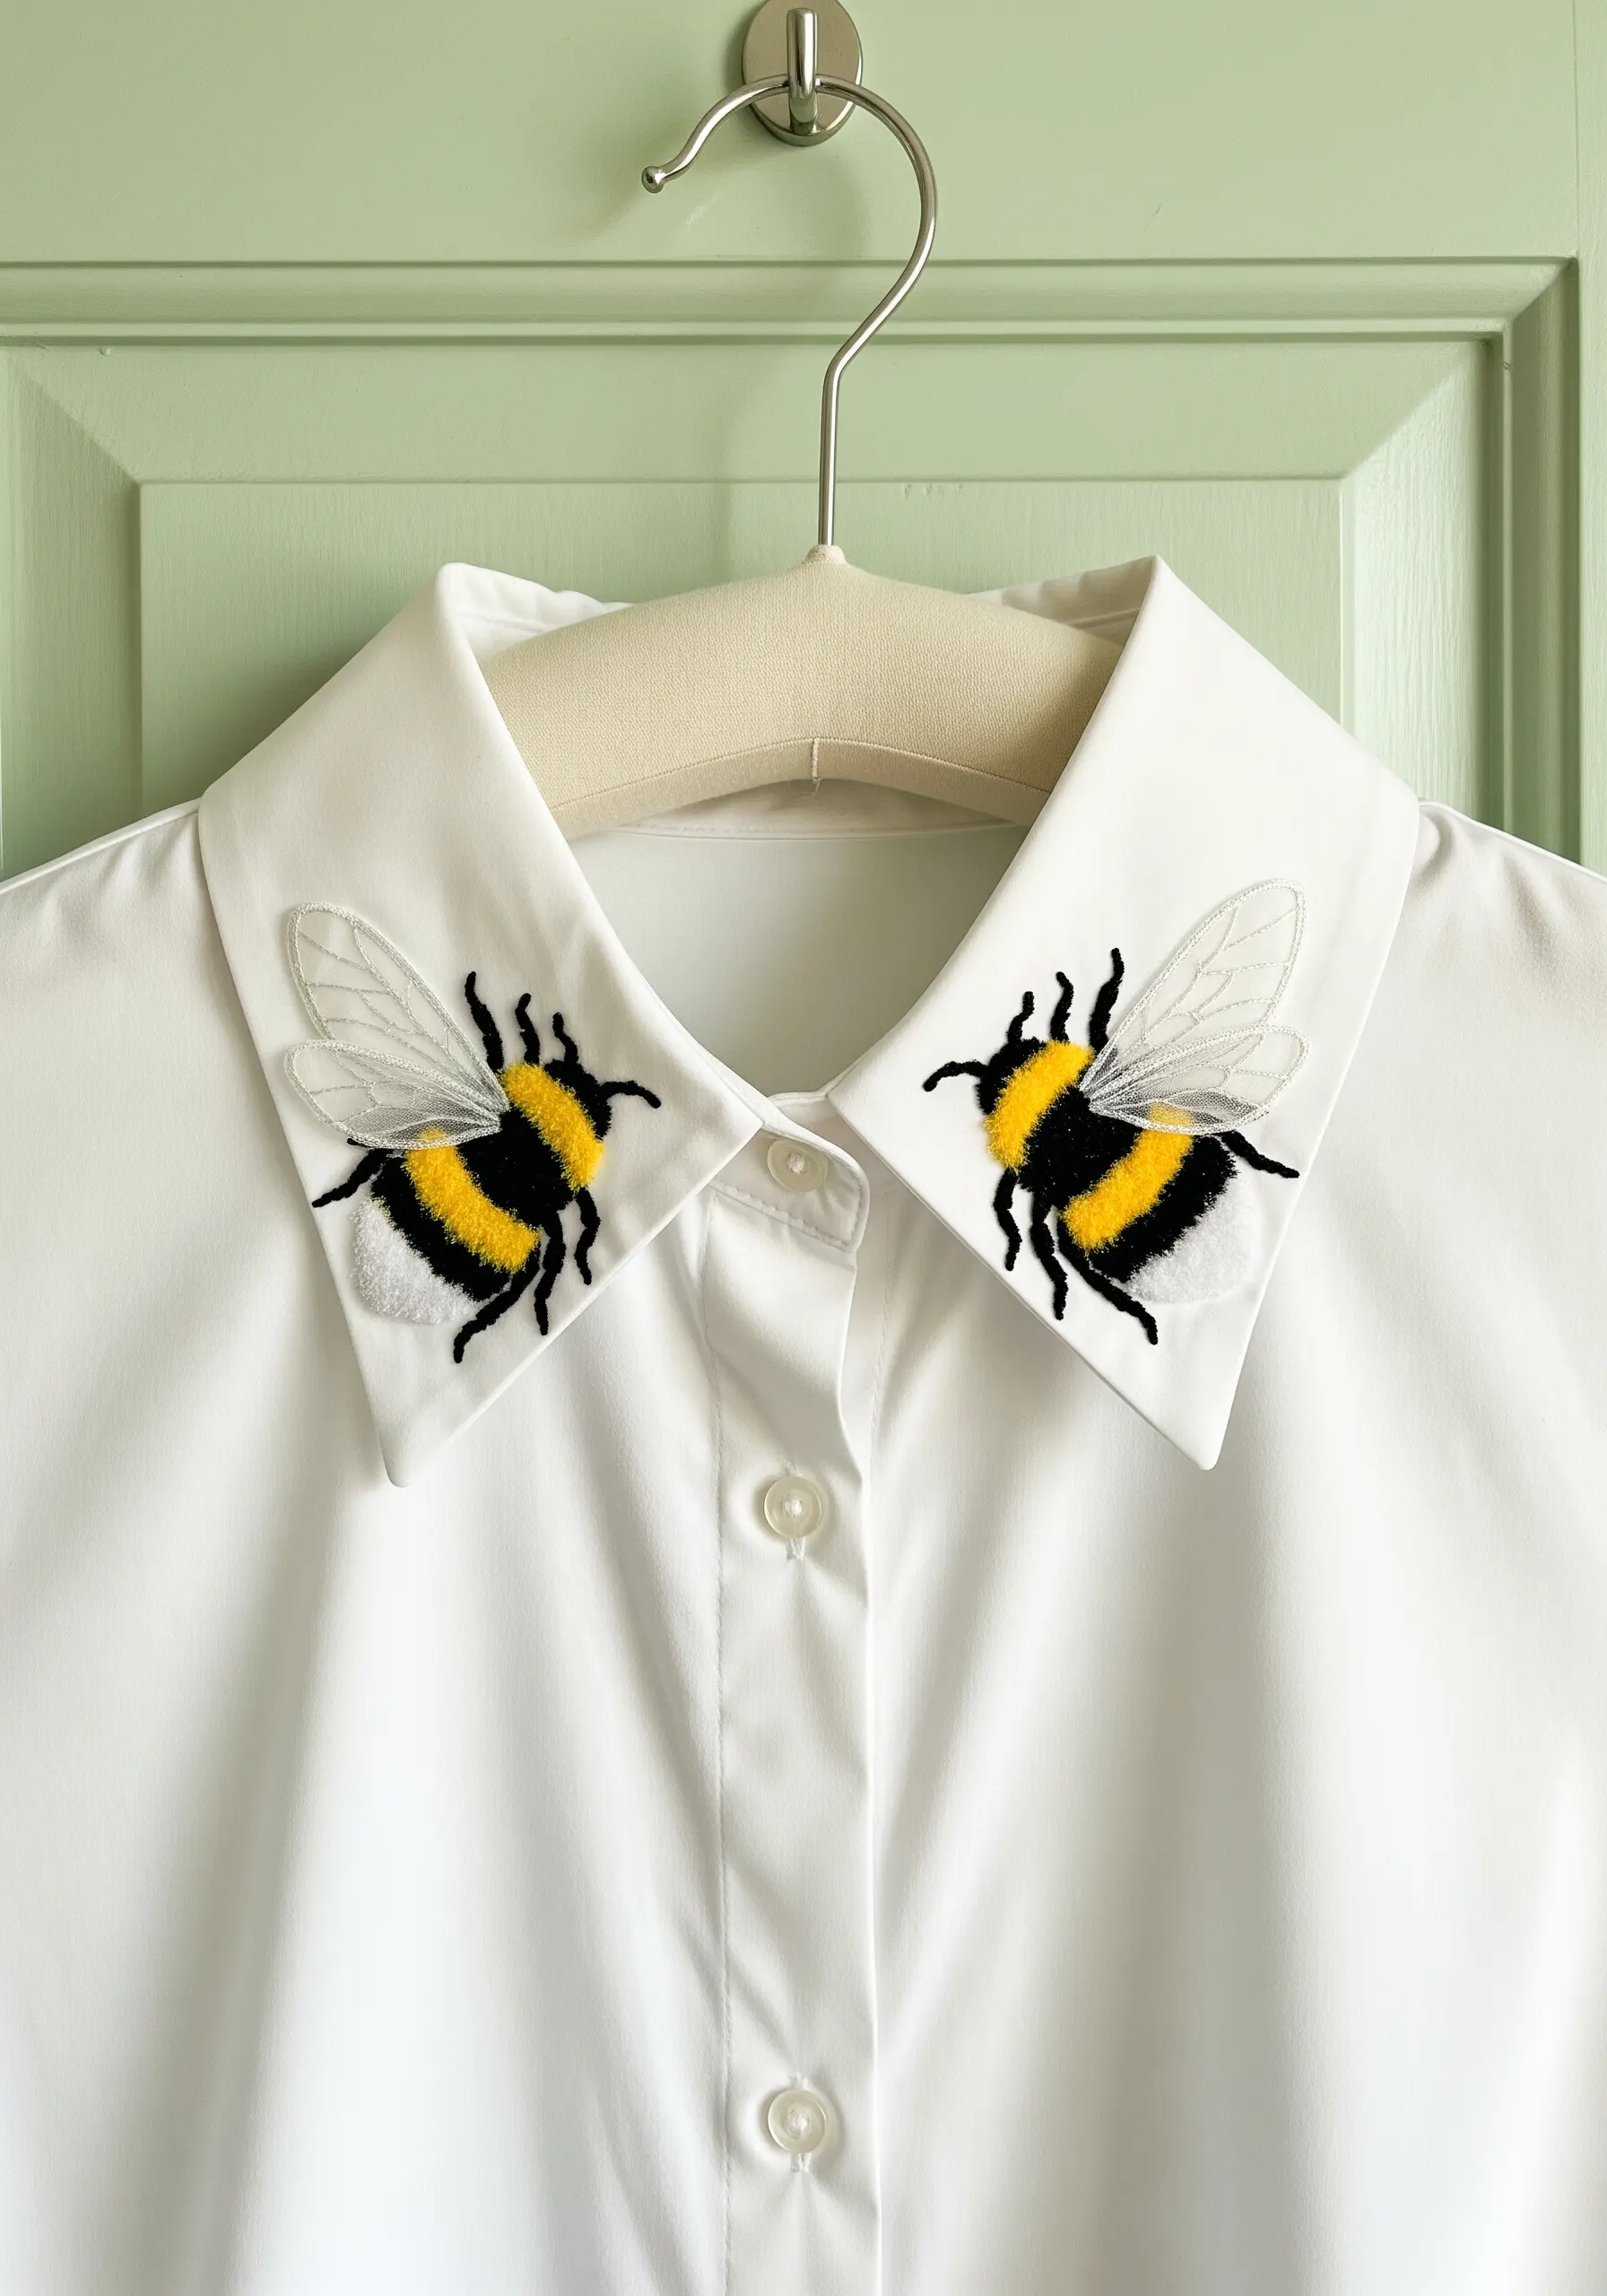
Bring a simple motif to life by incorporating stumpwork, a technique that adds three-dimensional elements to your embroidery.
For the bee’s wings, stitch the outline onto a separate piece of sheer organza fabric, fill it in, and then carefully cut it out, leaving a tiny margin.
Secure the detached wings to the shirt collar at the base, allowing them to lift away from the fabric for a realistic, delicate effect.
Fill the bee’s body with plush satin stitch or turkey work for a fuzzy texture that contrasts beautifully with the sheer wings.
6. Create Narrative with Appliqué Patches
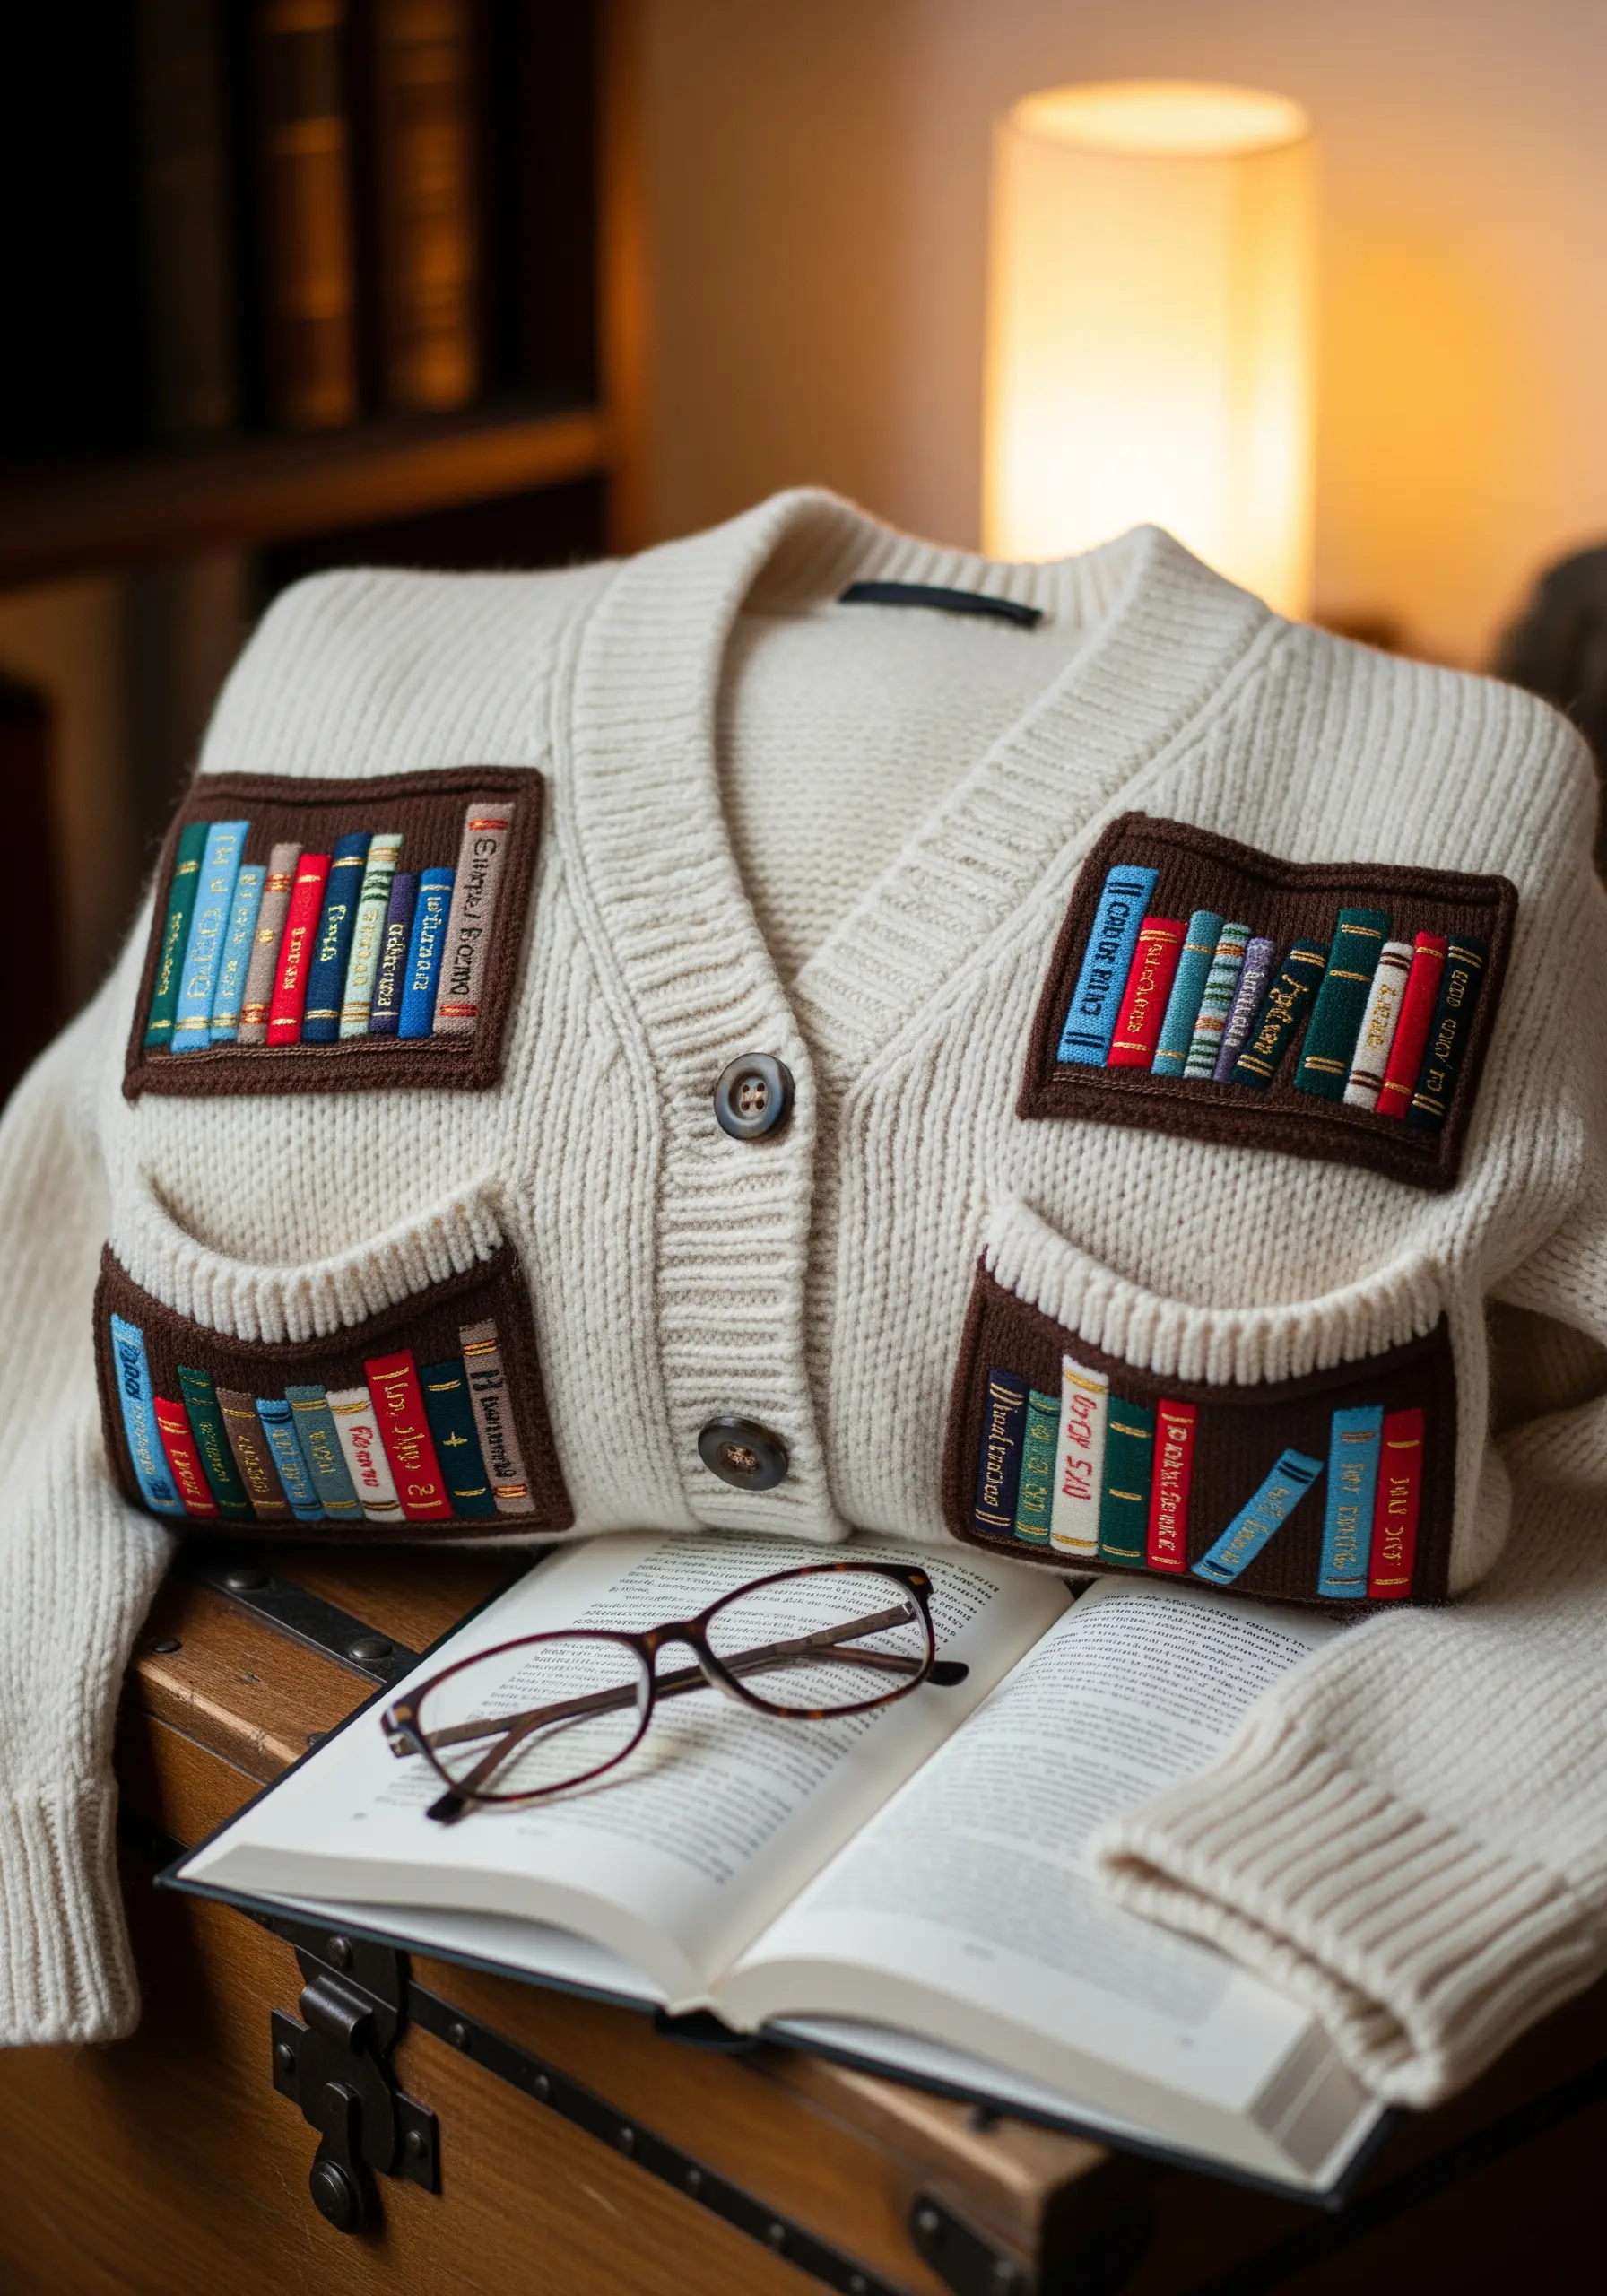
Turn your cardigan into a personal library with embroidered appliqué patches.
First, embroider your tiny book designs onto separate pieces of felt or sturdy cotton fabric.
Then, cut them out and neatly apply them to the pockets, using a tidy blanket stitch or whip stitch around the edges for a clean, secure finish.
This method is far easier than embroidering directly onto a chunky knit, and it allows you to achieve crisp details that tell a story.
For the titles, use a single strand of floss and a tiny backstitch for maximum legibility.
7. Compose with Abstract Shapes and Lines
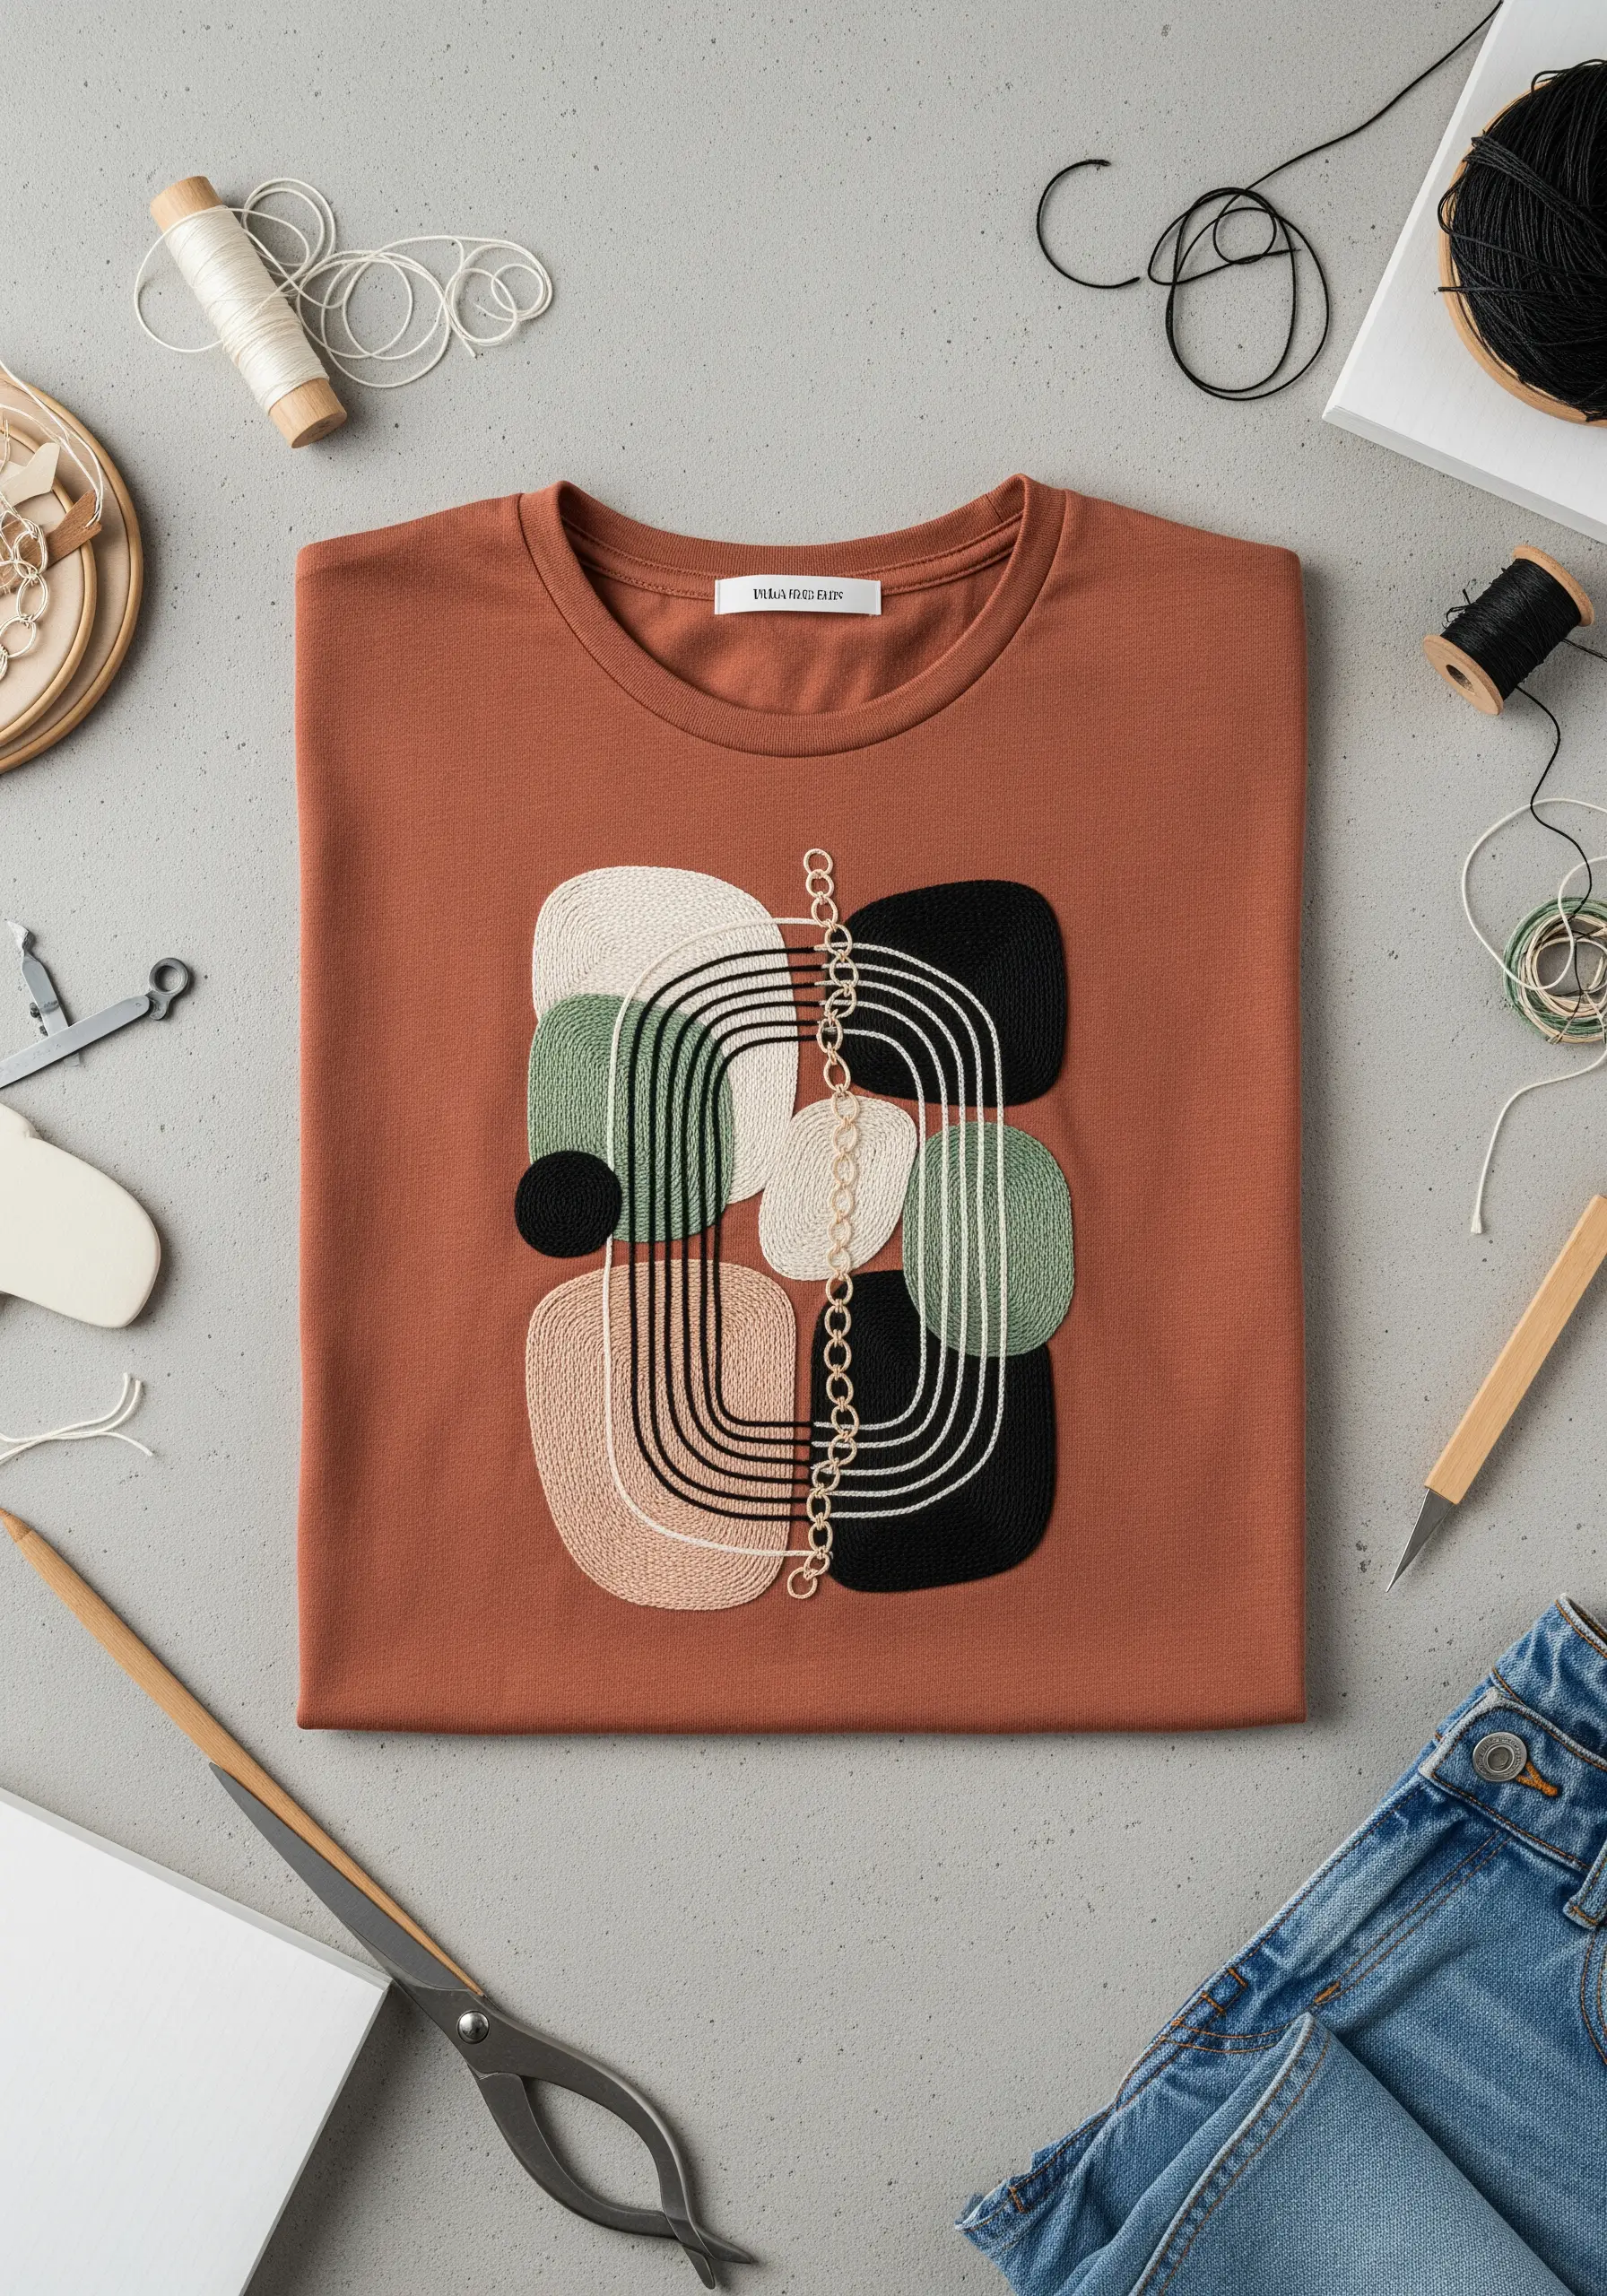
Create a modern, gallery-worthy design on a t-shirt by balancing filled shapes with clean line work.
Use a dense, smooth satin stitch for the solid forms, ensuring your stitches all lie in the same direction for a uniform sheen.
Contrast these filled areas with the crisp precision of a chain stitch or backstitch for the flowing lines.
The interplay between solid and void, and between texture and line, is what gives this abstract composition its sophisticated, artistic feel.
Always use an iron-on stabilizer with jersey knit to prevent stretching and distortion.
8. Stitch Bold and Juicy Pop Art
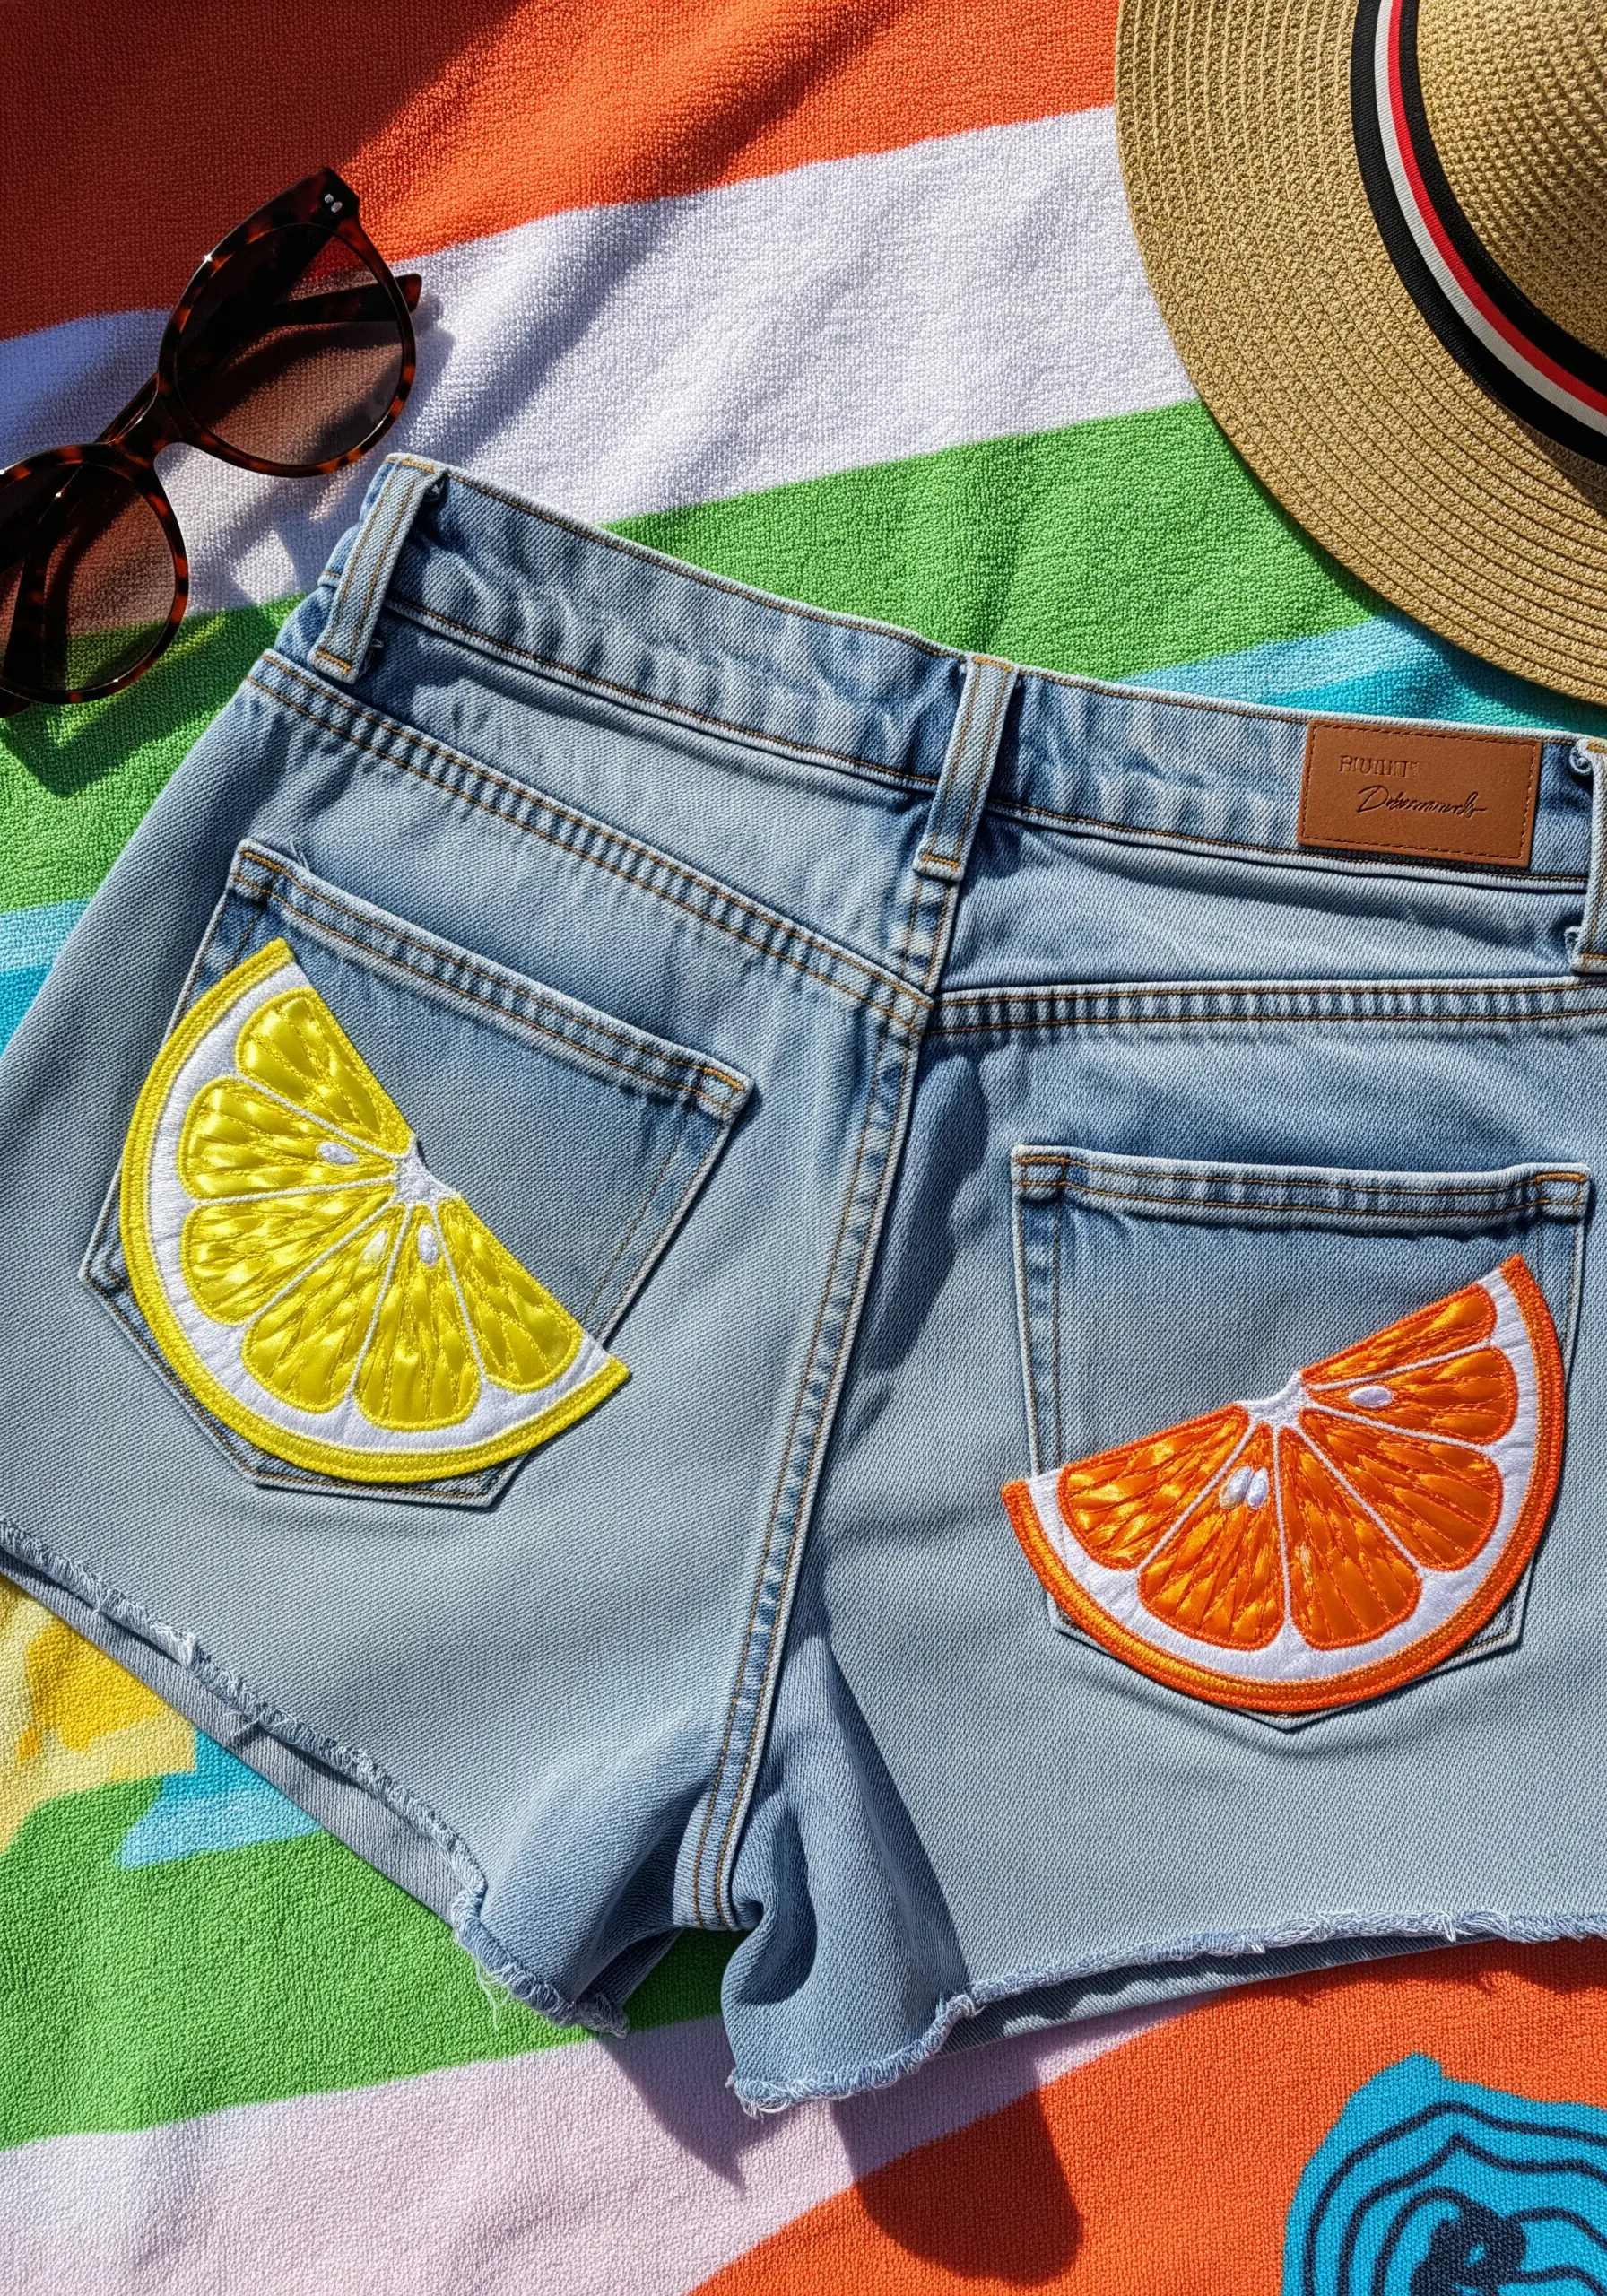
Achieve a vibrant, graphic look by turning your embroidery into a bold patch.
Stitch your fruit design onto a piece of felt, using a split stitch to outline each segment before filling with a directional satin stitch.
Create a thick, raised border with another layer of satin stitch to give it a clean, professional patch-like edge.
Once finished, cut it out and attach it to your denim shorts for a playful, high-impact statement that pops against the fabric.
These are more than just tiny embroidery patterns; they are bold statements.
9. Emulate Fur with Directional Stitching
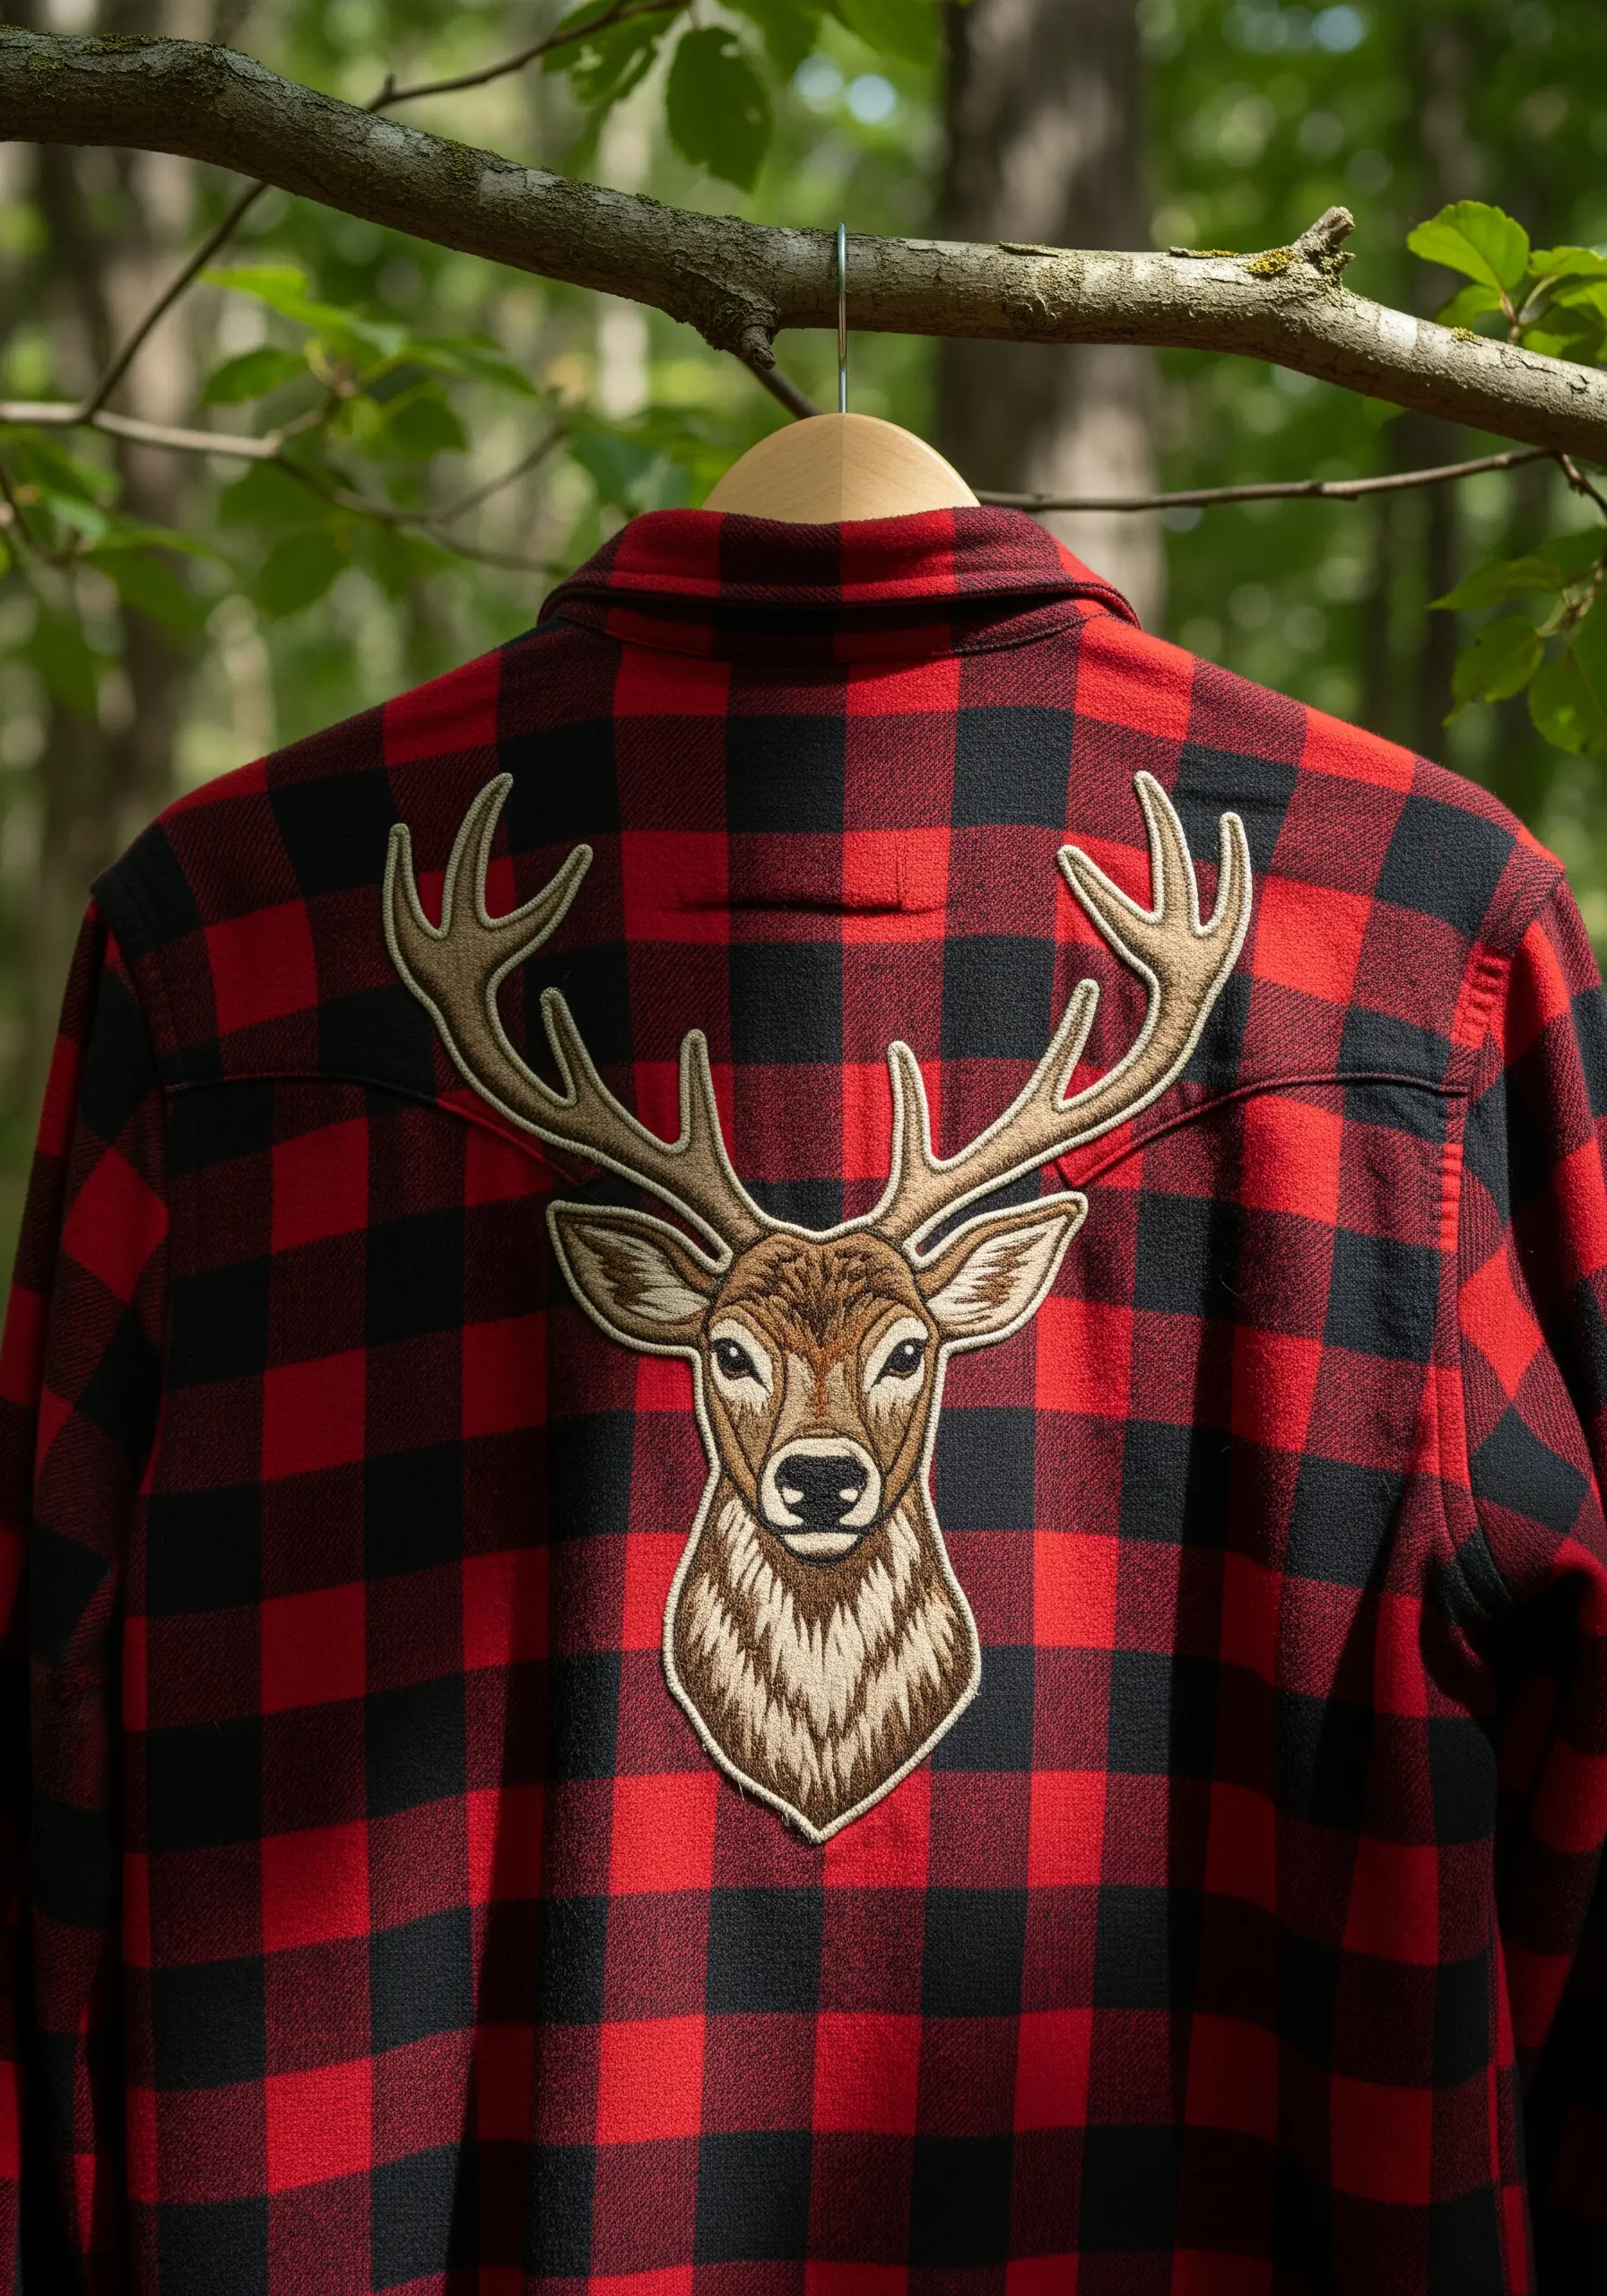
To create the illusion of fur and give your animal motifs a lifelike quality, the direction of your stitches is everything.
Use a long-and-short stitch, angling your stitches to follow the natural growth direction of the animal’s fur—down the nose, outwards from the eyes, and fanning across the cheeks.
Vary the stitch length and blend shades of brown, beige, and white to create depth and highlights.
This thoughtful approach to stitch direction is what separates a flat cartoon from a dynamic, textured portrait.
10. Build a High-Texture Coral Reef

Transform the hem of a dress into an underwater world by focusing on diverse, tactile stitches.
Use bullion knots for tubular coral shapes, clusters of French knots for sea anemones, and couched, twisted yarn for brain coral.
The goal is to create a landscape you can feel as well as see.
By mixing vibrant colors and varying the height and density of your stitches, you create a piece with incredible dimension and playful energy.
This is a perfect example of high-texture fabric collage using only thread.
11. Add a Subtle Botanical Accent
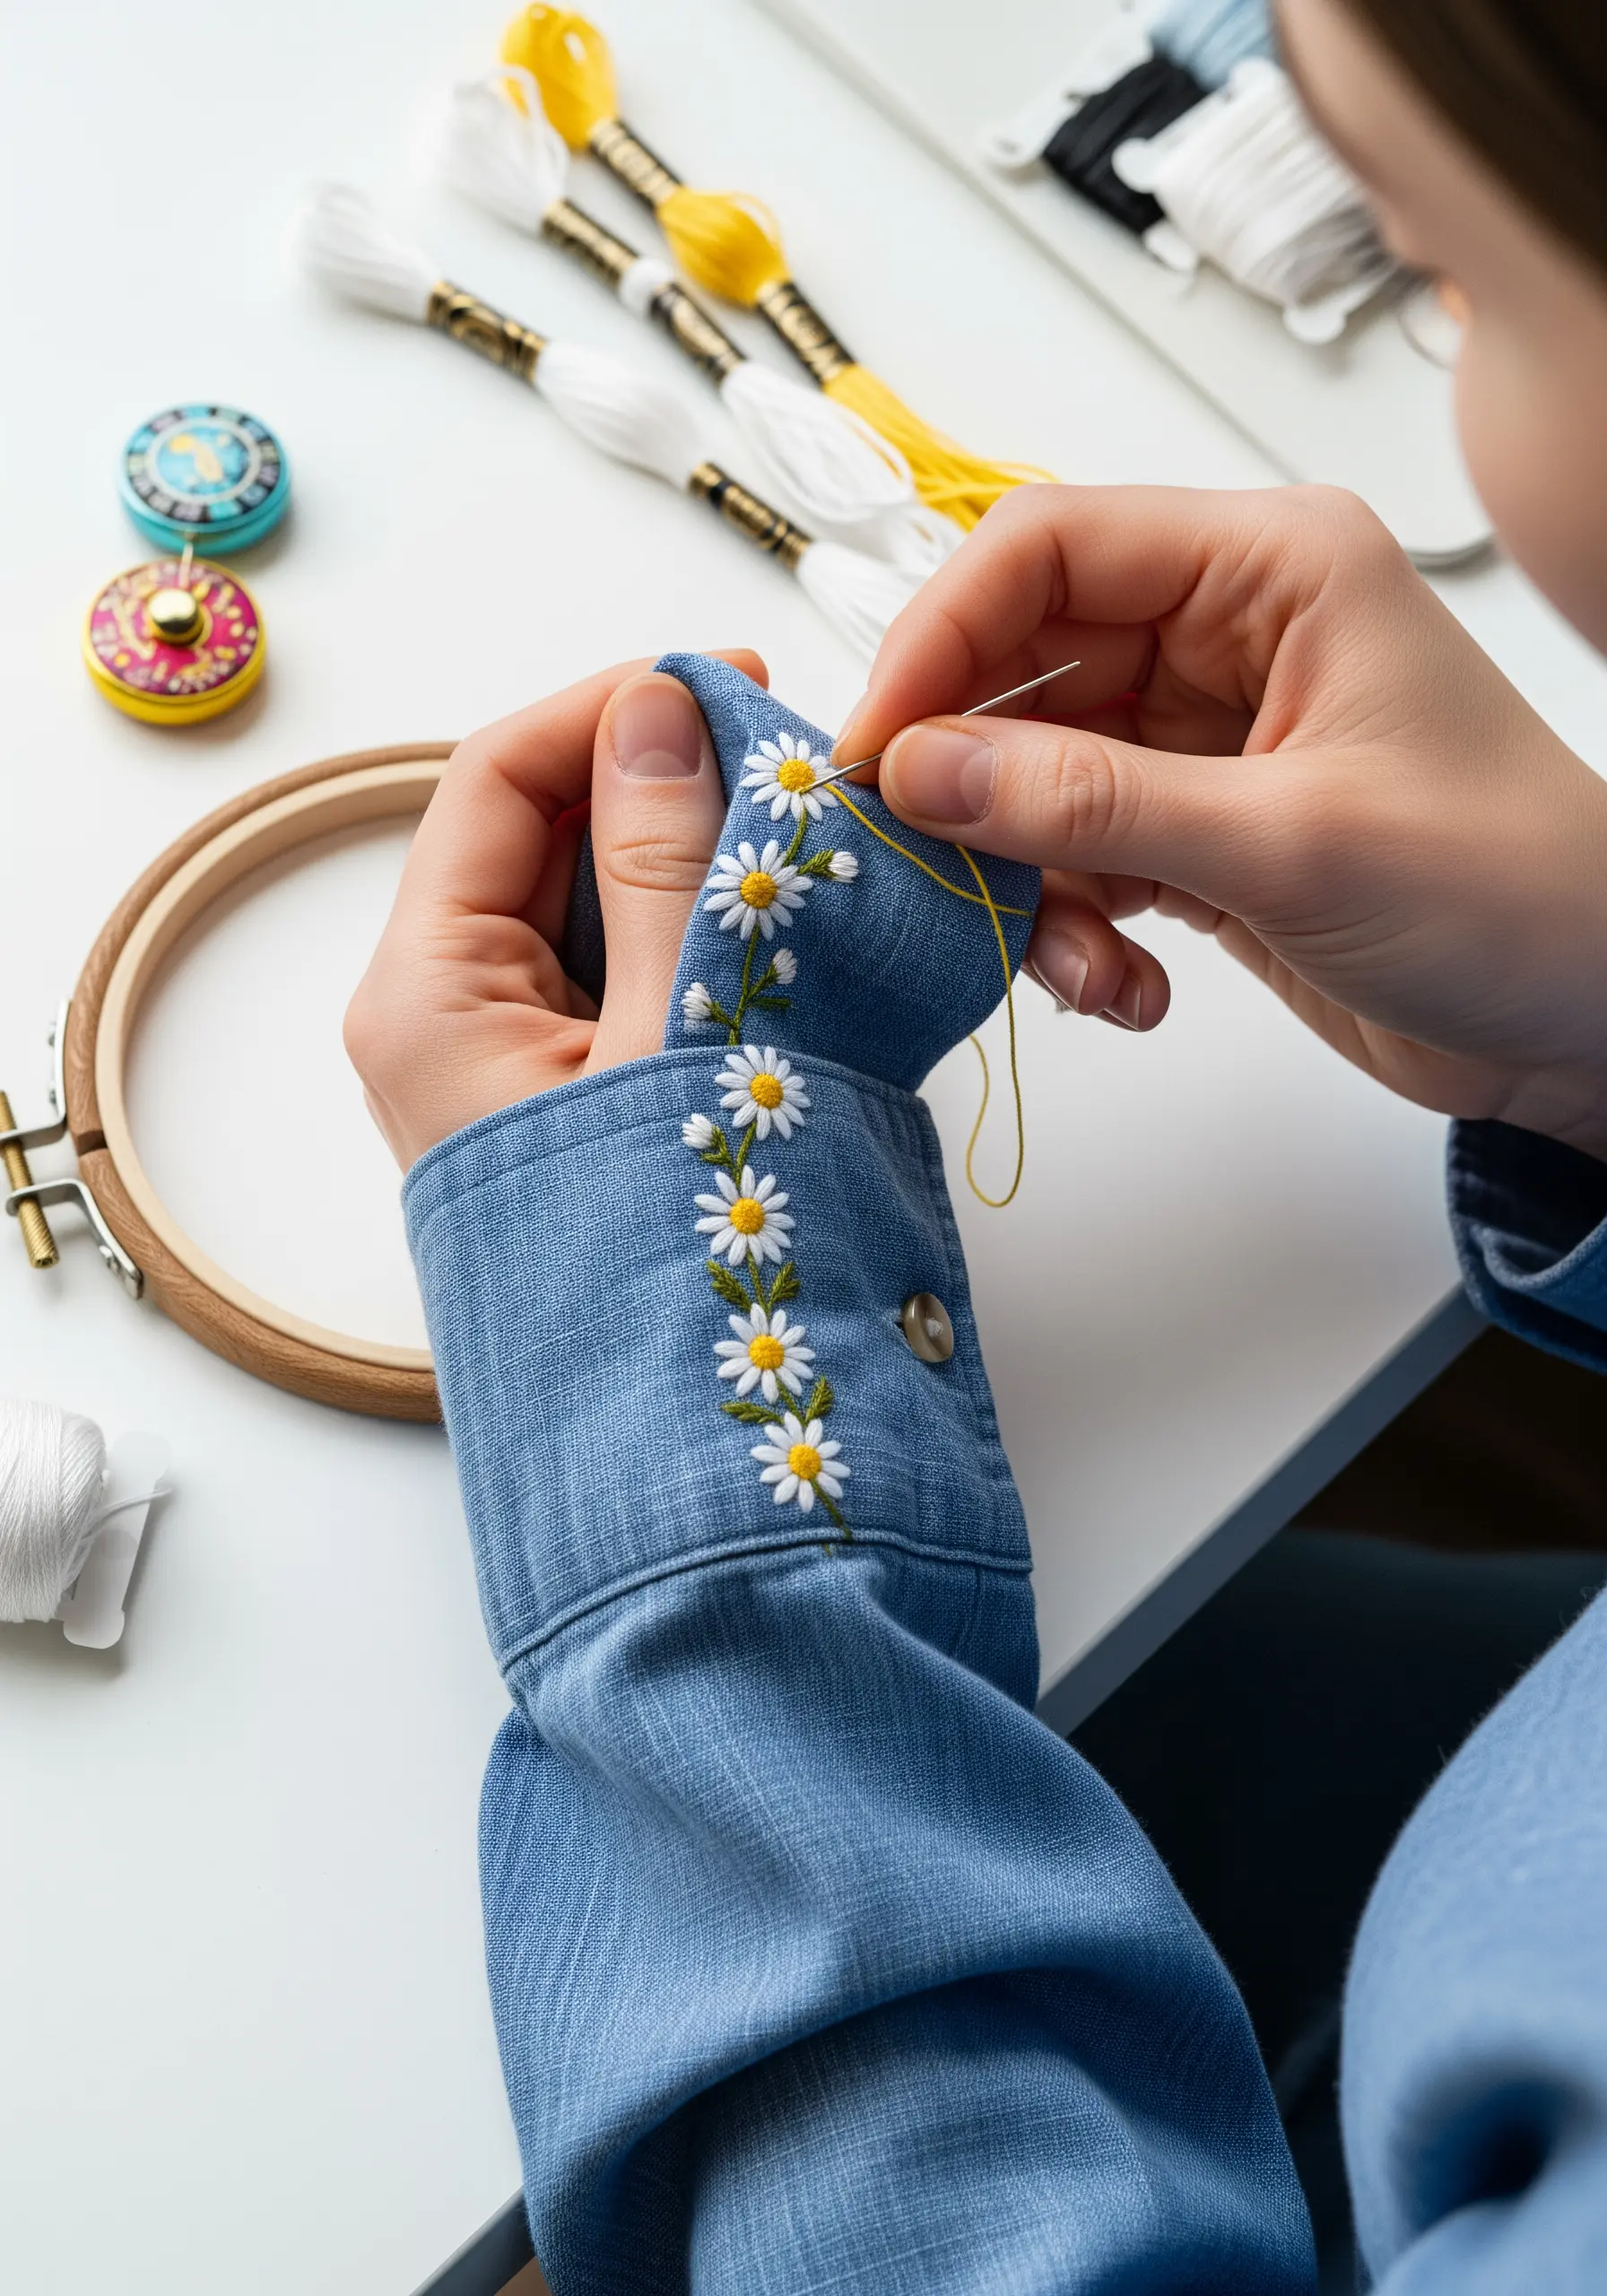
A small, repeating pattern on a cuff or collar adds a touch of bespoke elegance without overwhelming the garment.
For delicate daisies, use a lazy daisy stitch for the petals—it’s quick, efficient, and creates a perfect teardrop shape.
A single French knot in the center provides the ideal texture and color contrast.
When working in a small, visible area like a cuff, consistency is key. Ensure each flower is spaced evenly and each petal is pulled to the same tension for a polished, professional result.
12. Embroider on Canvas with Bold Strokes
When stitching on a non-traditional, sturdy surface like canvas sneakers, you need to adjust your technique.
Use a thicker thread, like pearl cotton or all six strands of embroidery floss, to ensure your design is bold and durable.
Opt for simple, graphic stitches like a heavy backstitch or chain stitch for outlines, and a satin stitch for fills.
A sharp, strong needle is essential to pierce the canvas without straining your hands. This is about making a statement, so don’t be afraid of color and playful motifs.
These cartoon-style embroidery ideas are perfect for this application.
13. Frame a Motif with Geometric Precision
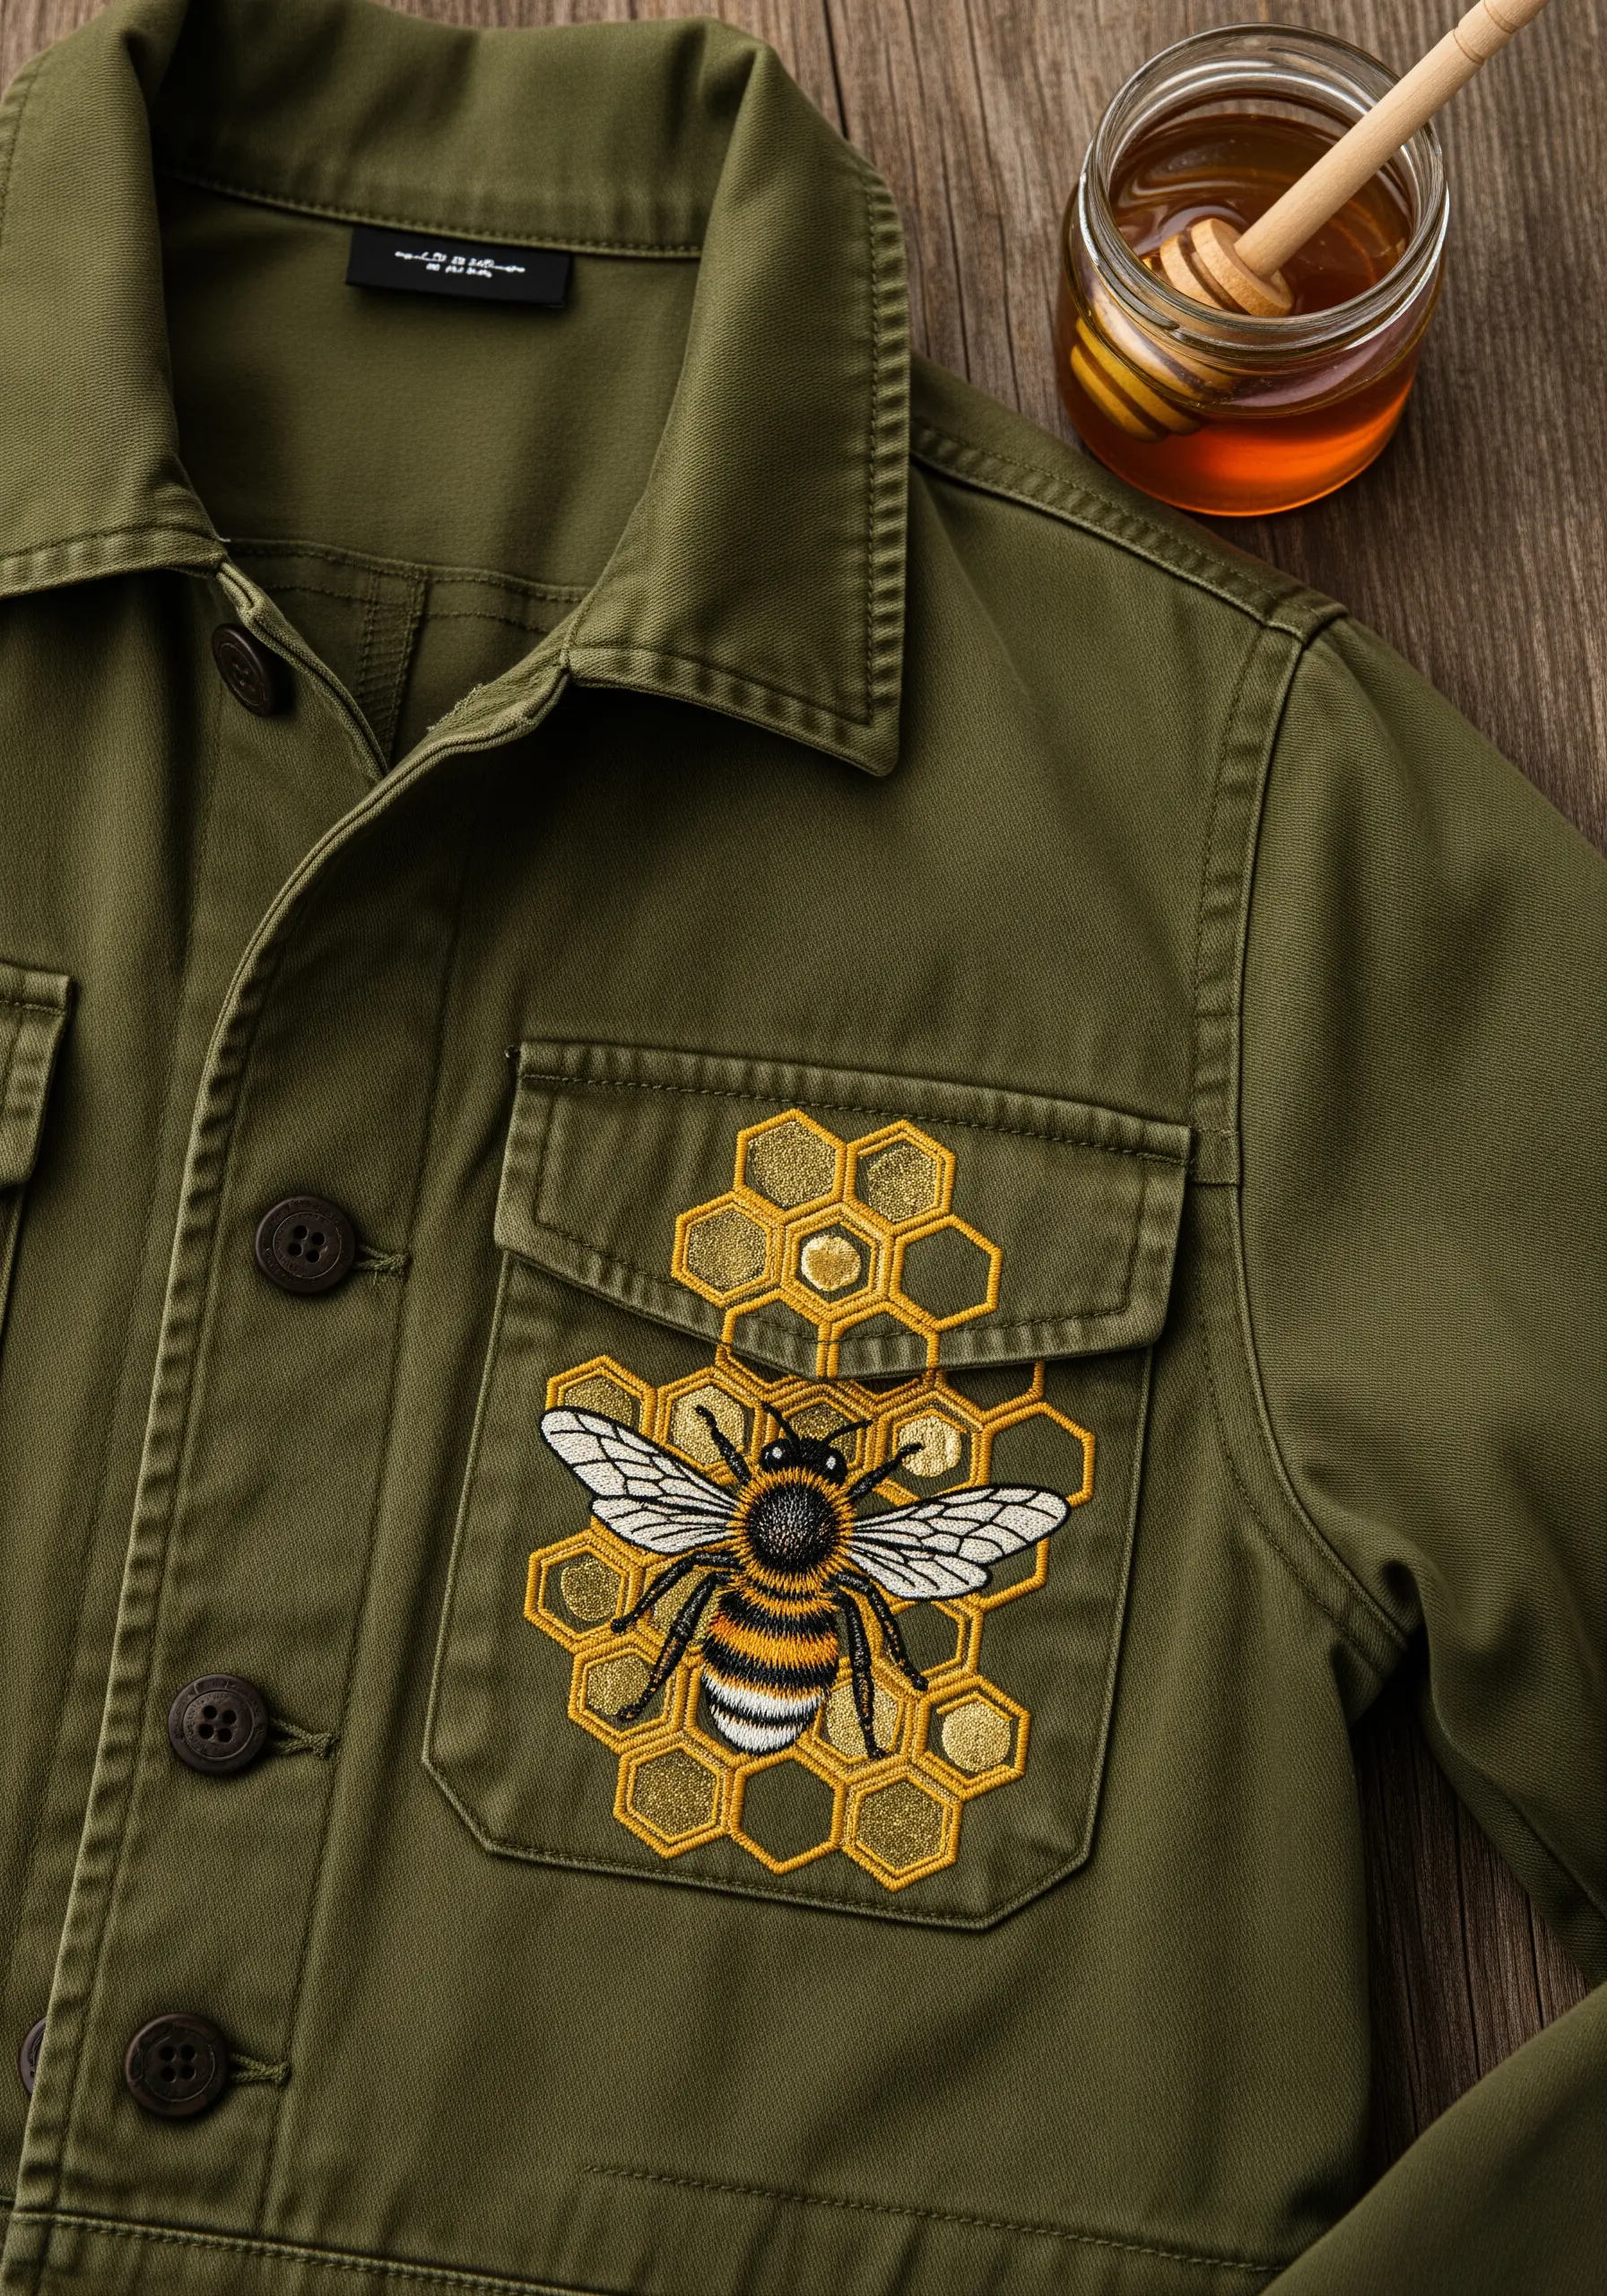
Create a powerful focal point by combining a detailed, organic subject with a crisp, geometric frame.
For the honeycomb, use a single color of metallic or satin floss and a precise backstitch to maintain the sharp hexagonal shapes.
In contrast, use thread painting (long-and-short stitch) with multiple shades for the bee to give it realistic depth and texture.
This contrast between the structured geometry of the background and the natural detail of the foreground makes the entire piece visually compelling.
14. Capture Movement with Minimalist Lines
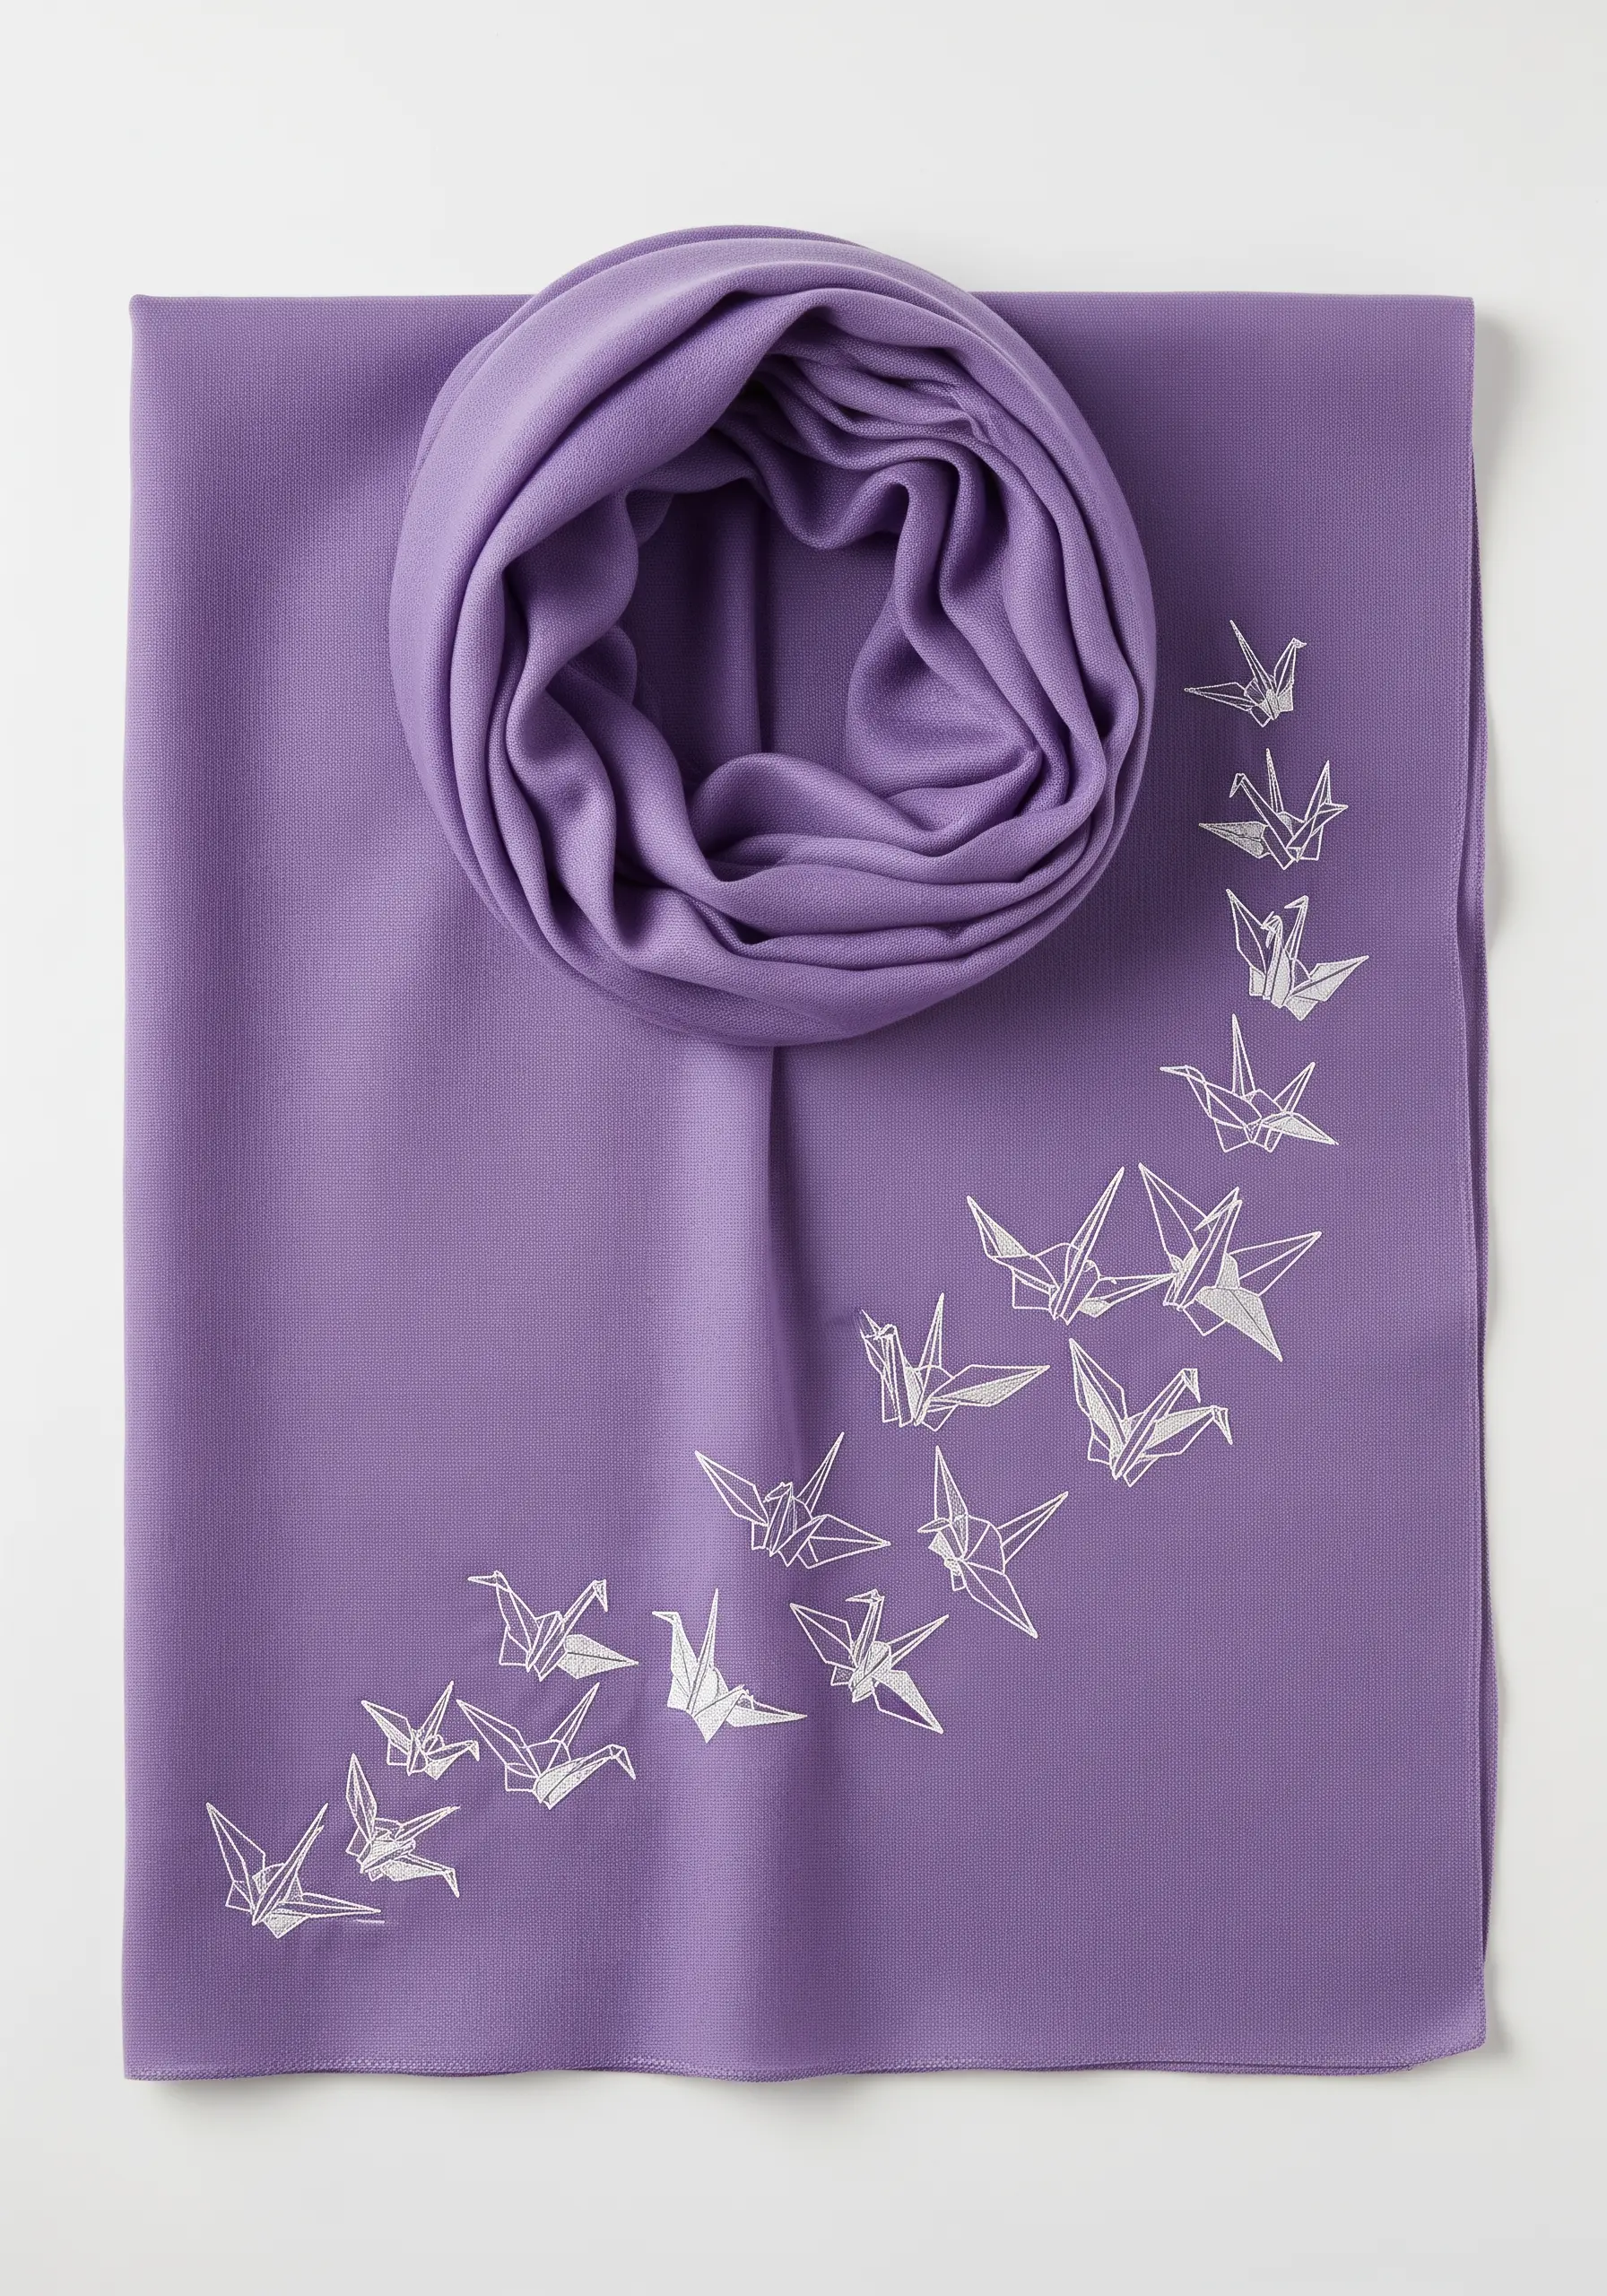
Suggest motion and grace with a simple, repeating line-art motif.
To embroider these origami cranes on a delicate fabric like a scarf, use only one or two strands of a contrasting thread, like white on purple.
A simple backstitch is all you need, but your focus must be on absolute consistency in stitch length and tension.
The beauty of this design lies in its quiet precision and the elegant flow created by the arrangement of the cranes, proving that powerful embroidery doesn’t always require complex stitches.
15. Construct an Ornate, Necklace-Like Neckline

Create the illusion of intricate jewelry directly on your garment using soutache or couching techniques.
Lay down fine cords, braids, or thick pearl cotton thread along your design lines, and then use a fine, discreet thread to tack them down every few millimeters.
This method builds a raised, textural design that looks incredibly complex but is fundamentally about careful placement and tidy anchoring stitches.
Combine colors and add a few seed beads to mimic the look of precious stones and metals for a truly opulent finish.
16. Reinforce with Artful, Visible Mending
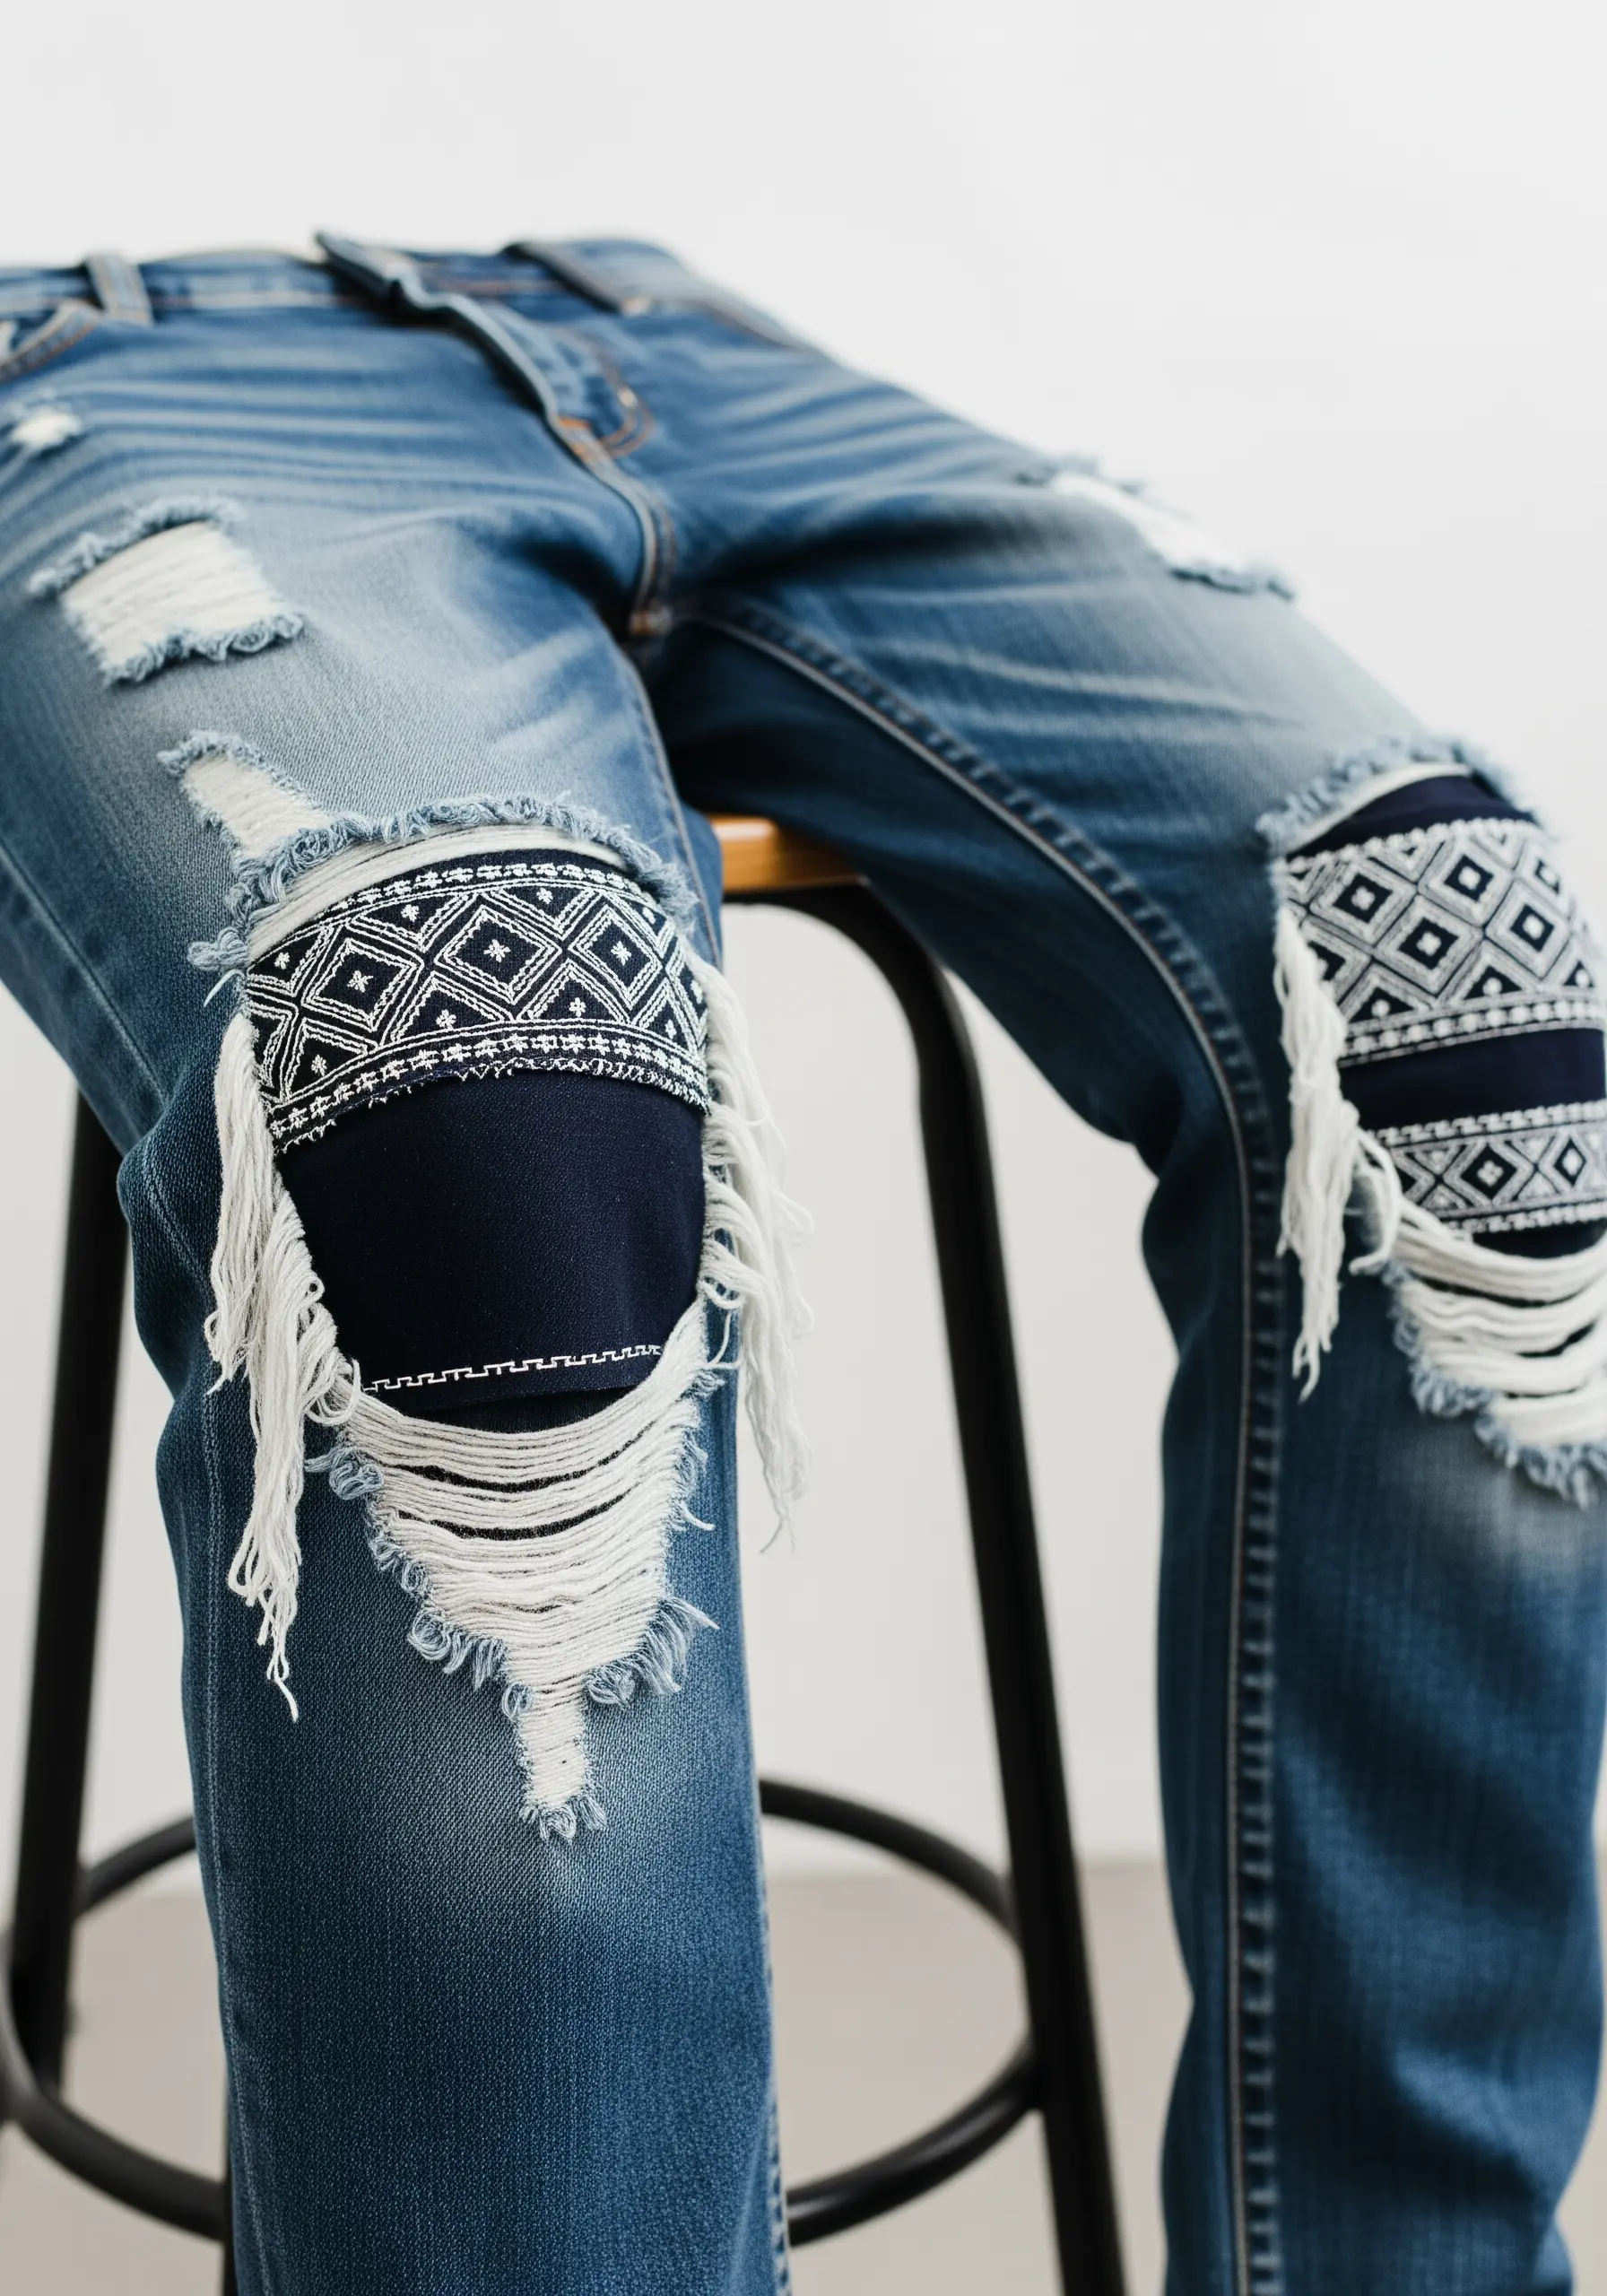
Transform a rip in your jeans from a flaw into a feature with decorative visible mending.
First, stabilize the area by applying a patch of sturdy fabric to the inside of the jeans.
Then, instead of trying to hide the repair, highlight it by embroidering a bold pattern over the patched area, using the existing threads of the rip as a design element.
A geometric pattern stitched in a contrasting color, like white on dark denim, creates a beautiful intersection of texture, pattern, and purpose.
17. Encapsulate a Landscape in a Patch
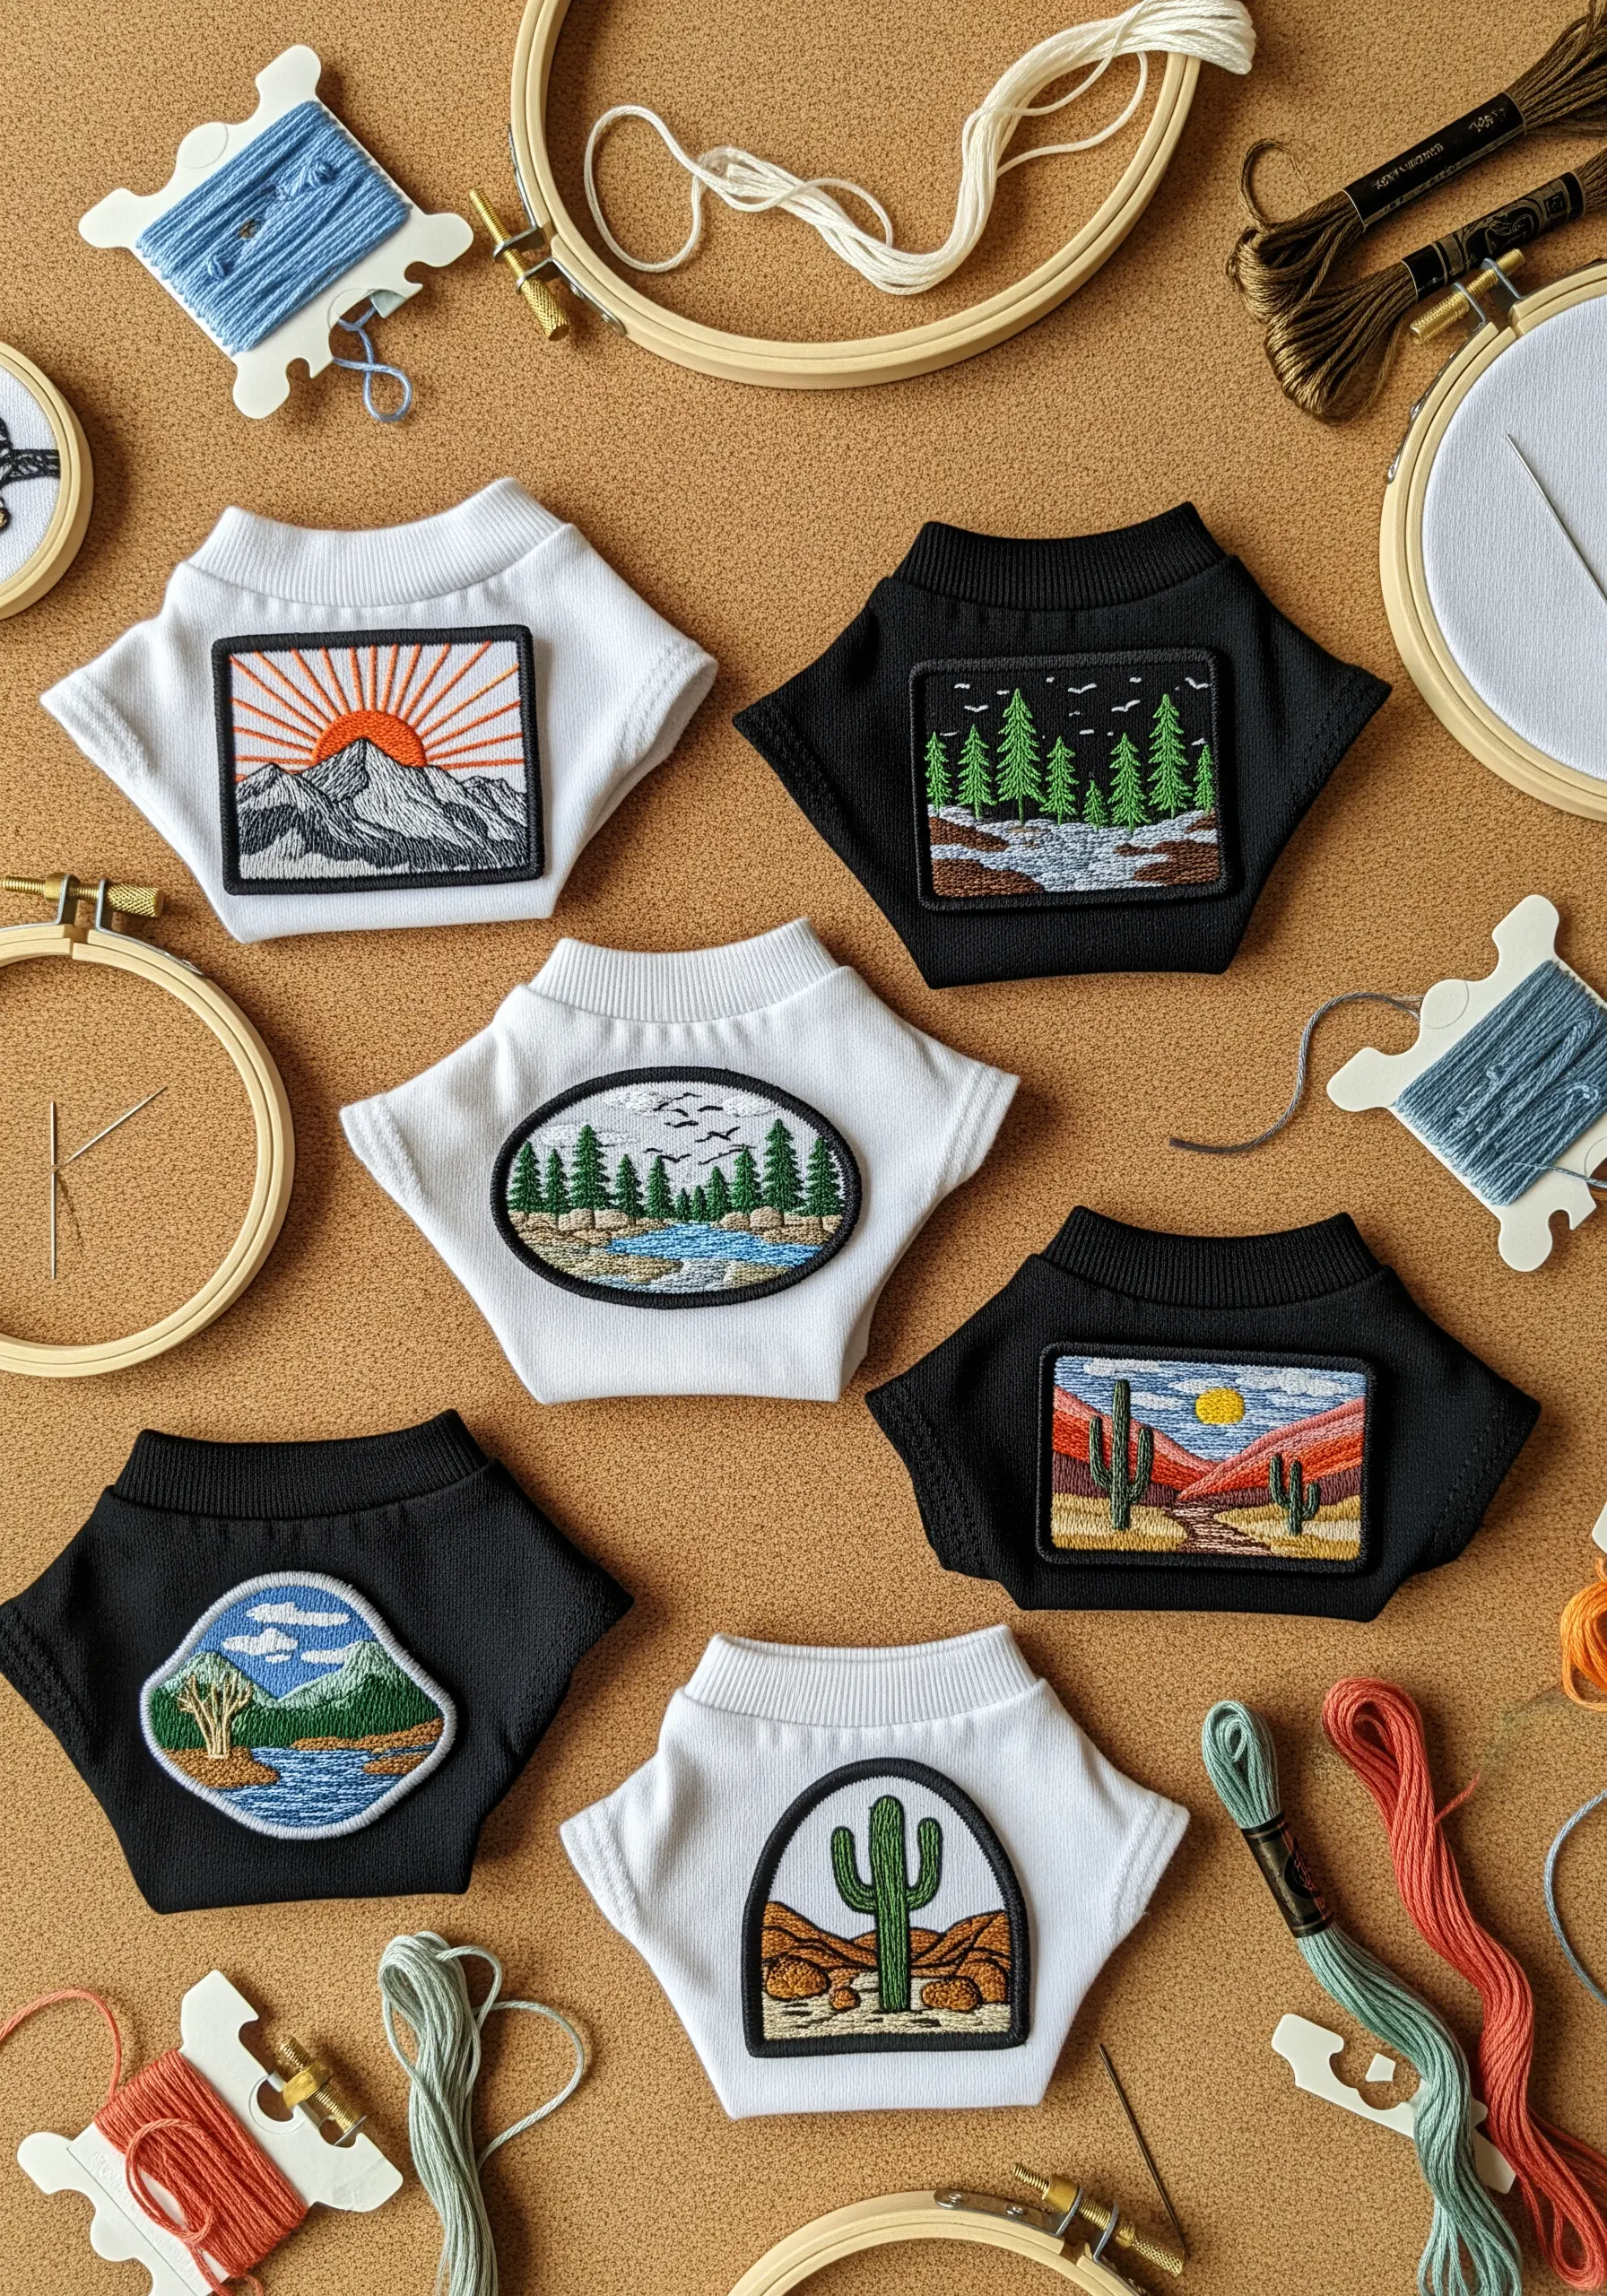
Distill the essence of a landscape into a small, wearable patch through simplified shapes and thread painting.
Break the scene down into its core elements: sky, mountains, trees, and water. Then, fill each shape using long-and-short stitch to blend colors and create texture.
Use a dark backstitch to define the major contours and add clarity to the composition.
This approach allows you to capture the mood and beauty of a vast scene within a few square inches, creating a tiny portal to another place.
Explore more embroidery projects inspired by textures found in nature.
18. Combine Appliqué and Embroidery for Tactile Depth
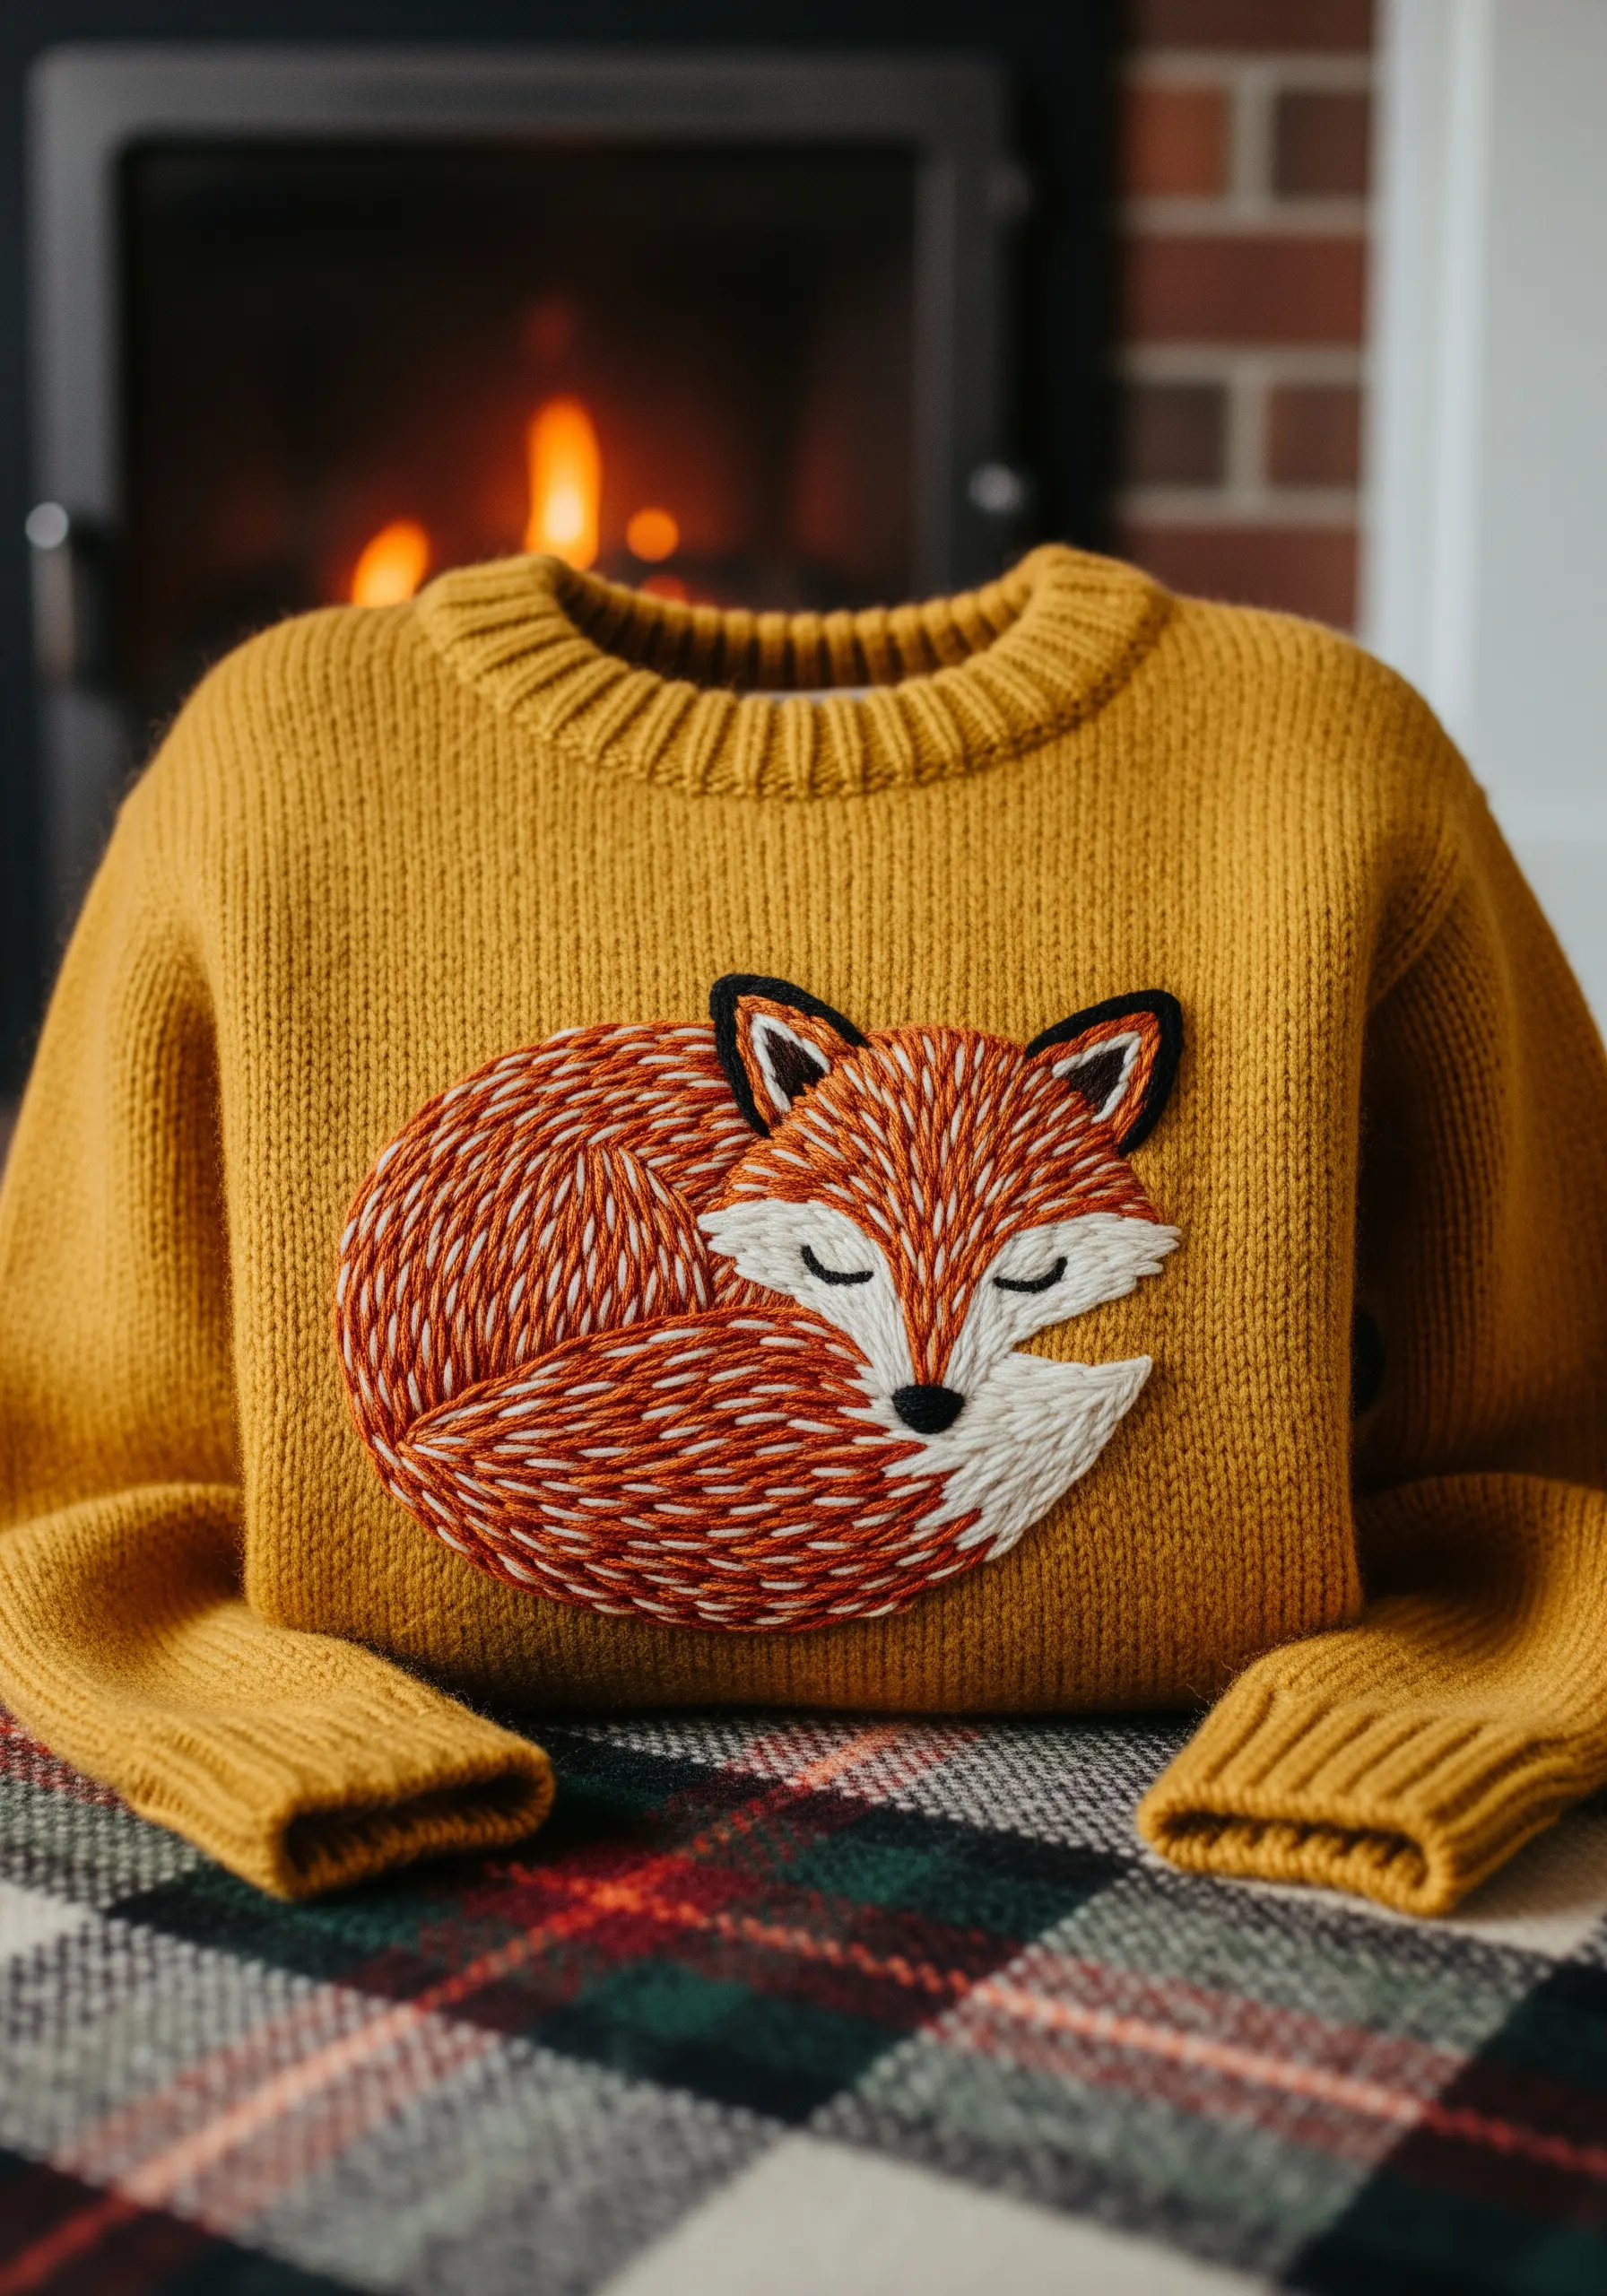
For a cozy, tactile design on a knit sweater, combine a soft appliqué base with detailed embroidery.
Cut the main shape of the fox from a piece of felt or non-fraying wool fabric and attach it to the sweater using a neat blanket stitch around the edge.
Then, use the felt as your canvas, adding directional long-and-short stitches for the fur, satin stitch for the white face, and a simple backstitch for the closed eyes.
This layered technique provides a stable base for your stitching on a stretchy knit and creates wonderful textural contrast.
19. Define Structure with Art Deco Geometry
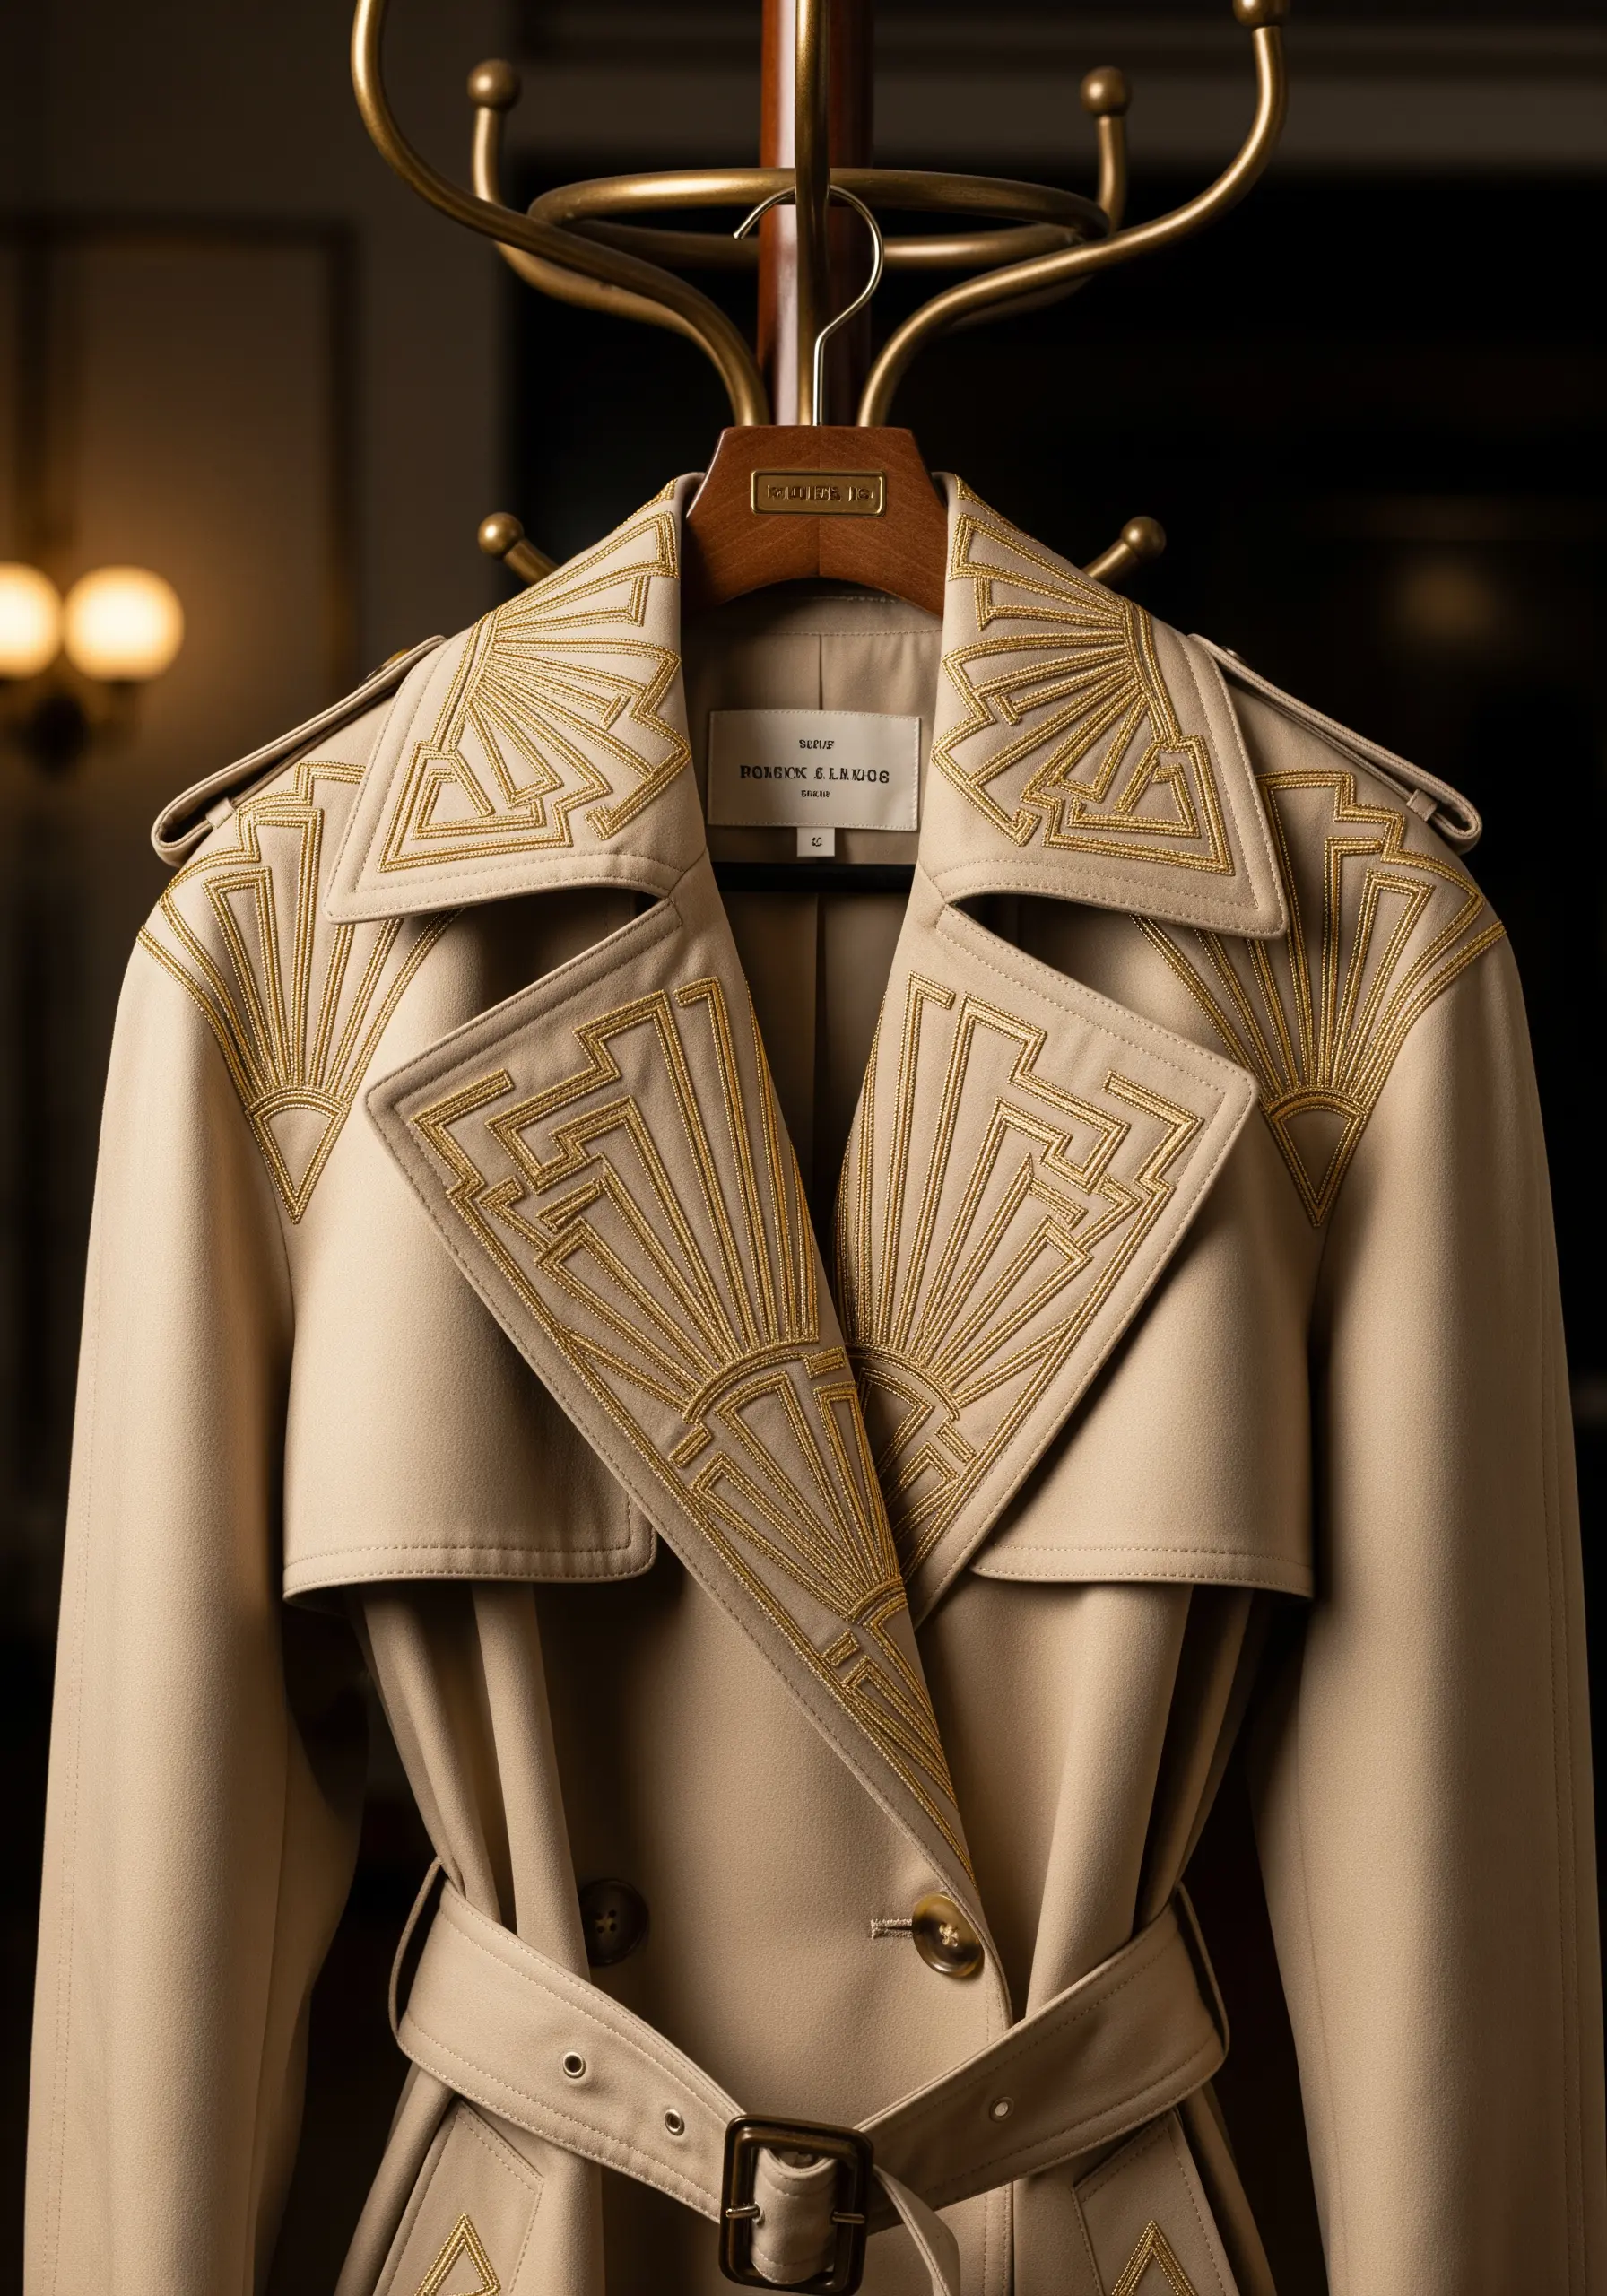
Add architectural elegance to a structured garment like a trench coat with bold, symmetrical Art Deco patterns.
Use a thick, lustrous thread, such as pearl cotton or a metallic blending filament, to make the lines pop.
A wide, dense satin stitch or a filled chain stitch will create the strong, graphic shapes characteristic of the style.
Focus on perfect symmetry and clean, sharp points to honor the geometric precision that defines Art Deco design.
This is about transforming the garment’s existing lines—lapels, epaulets—into a work of art.
20. Achieve an Effortless Ombré Script
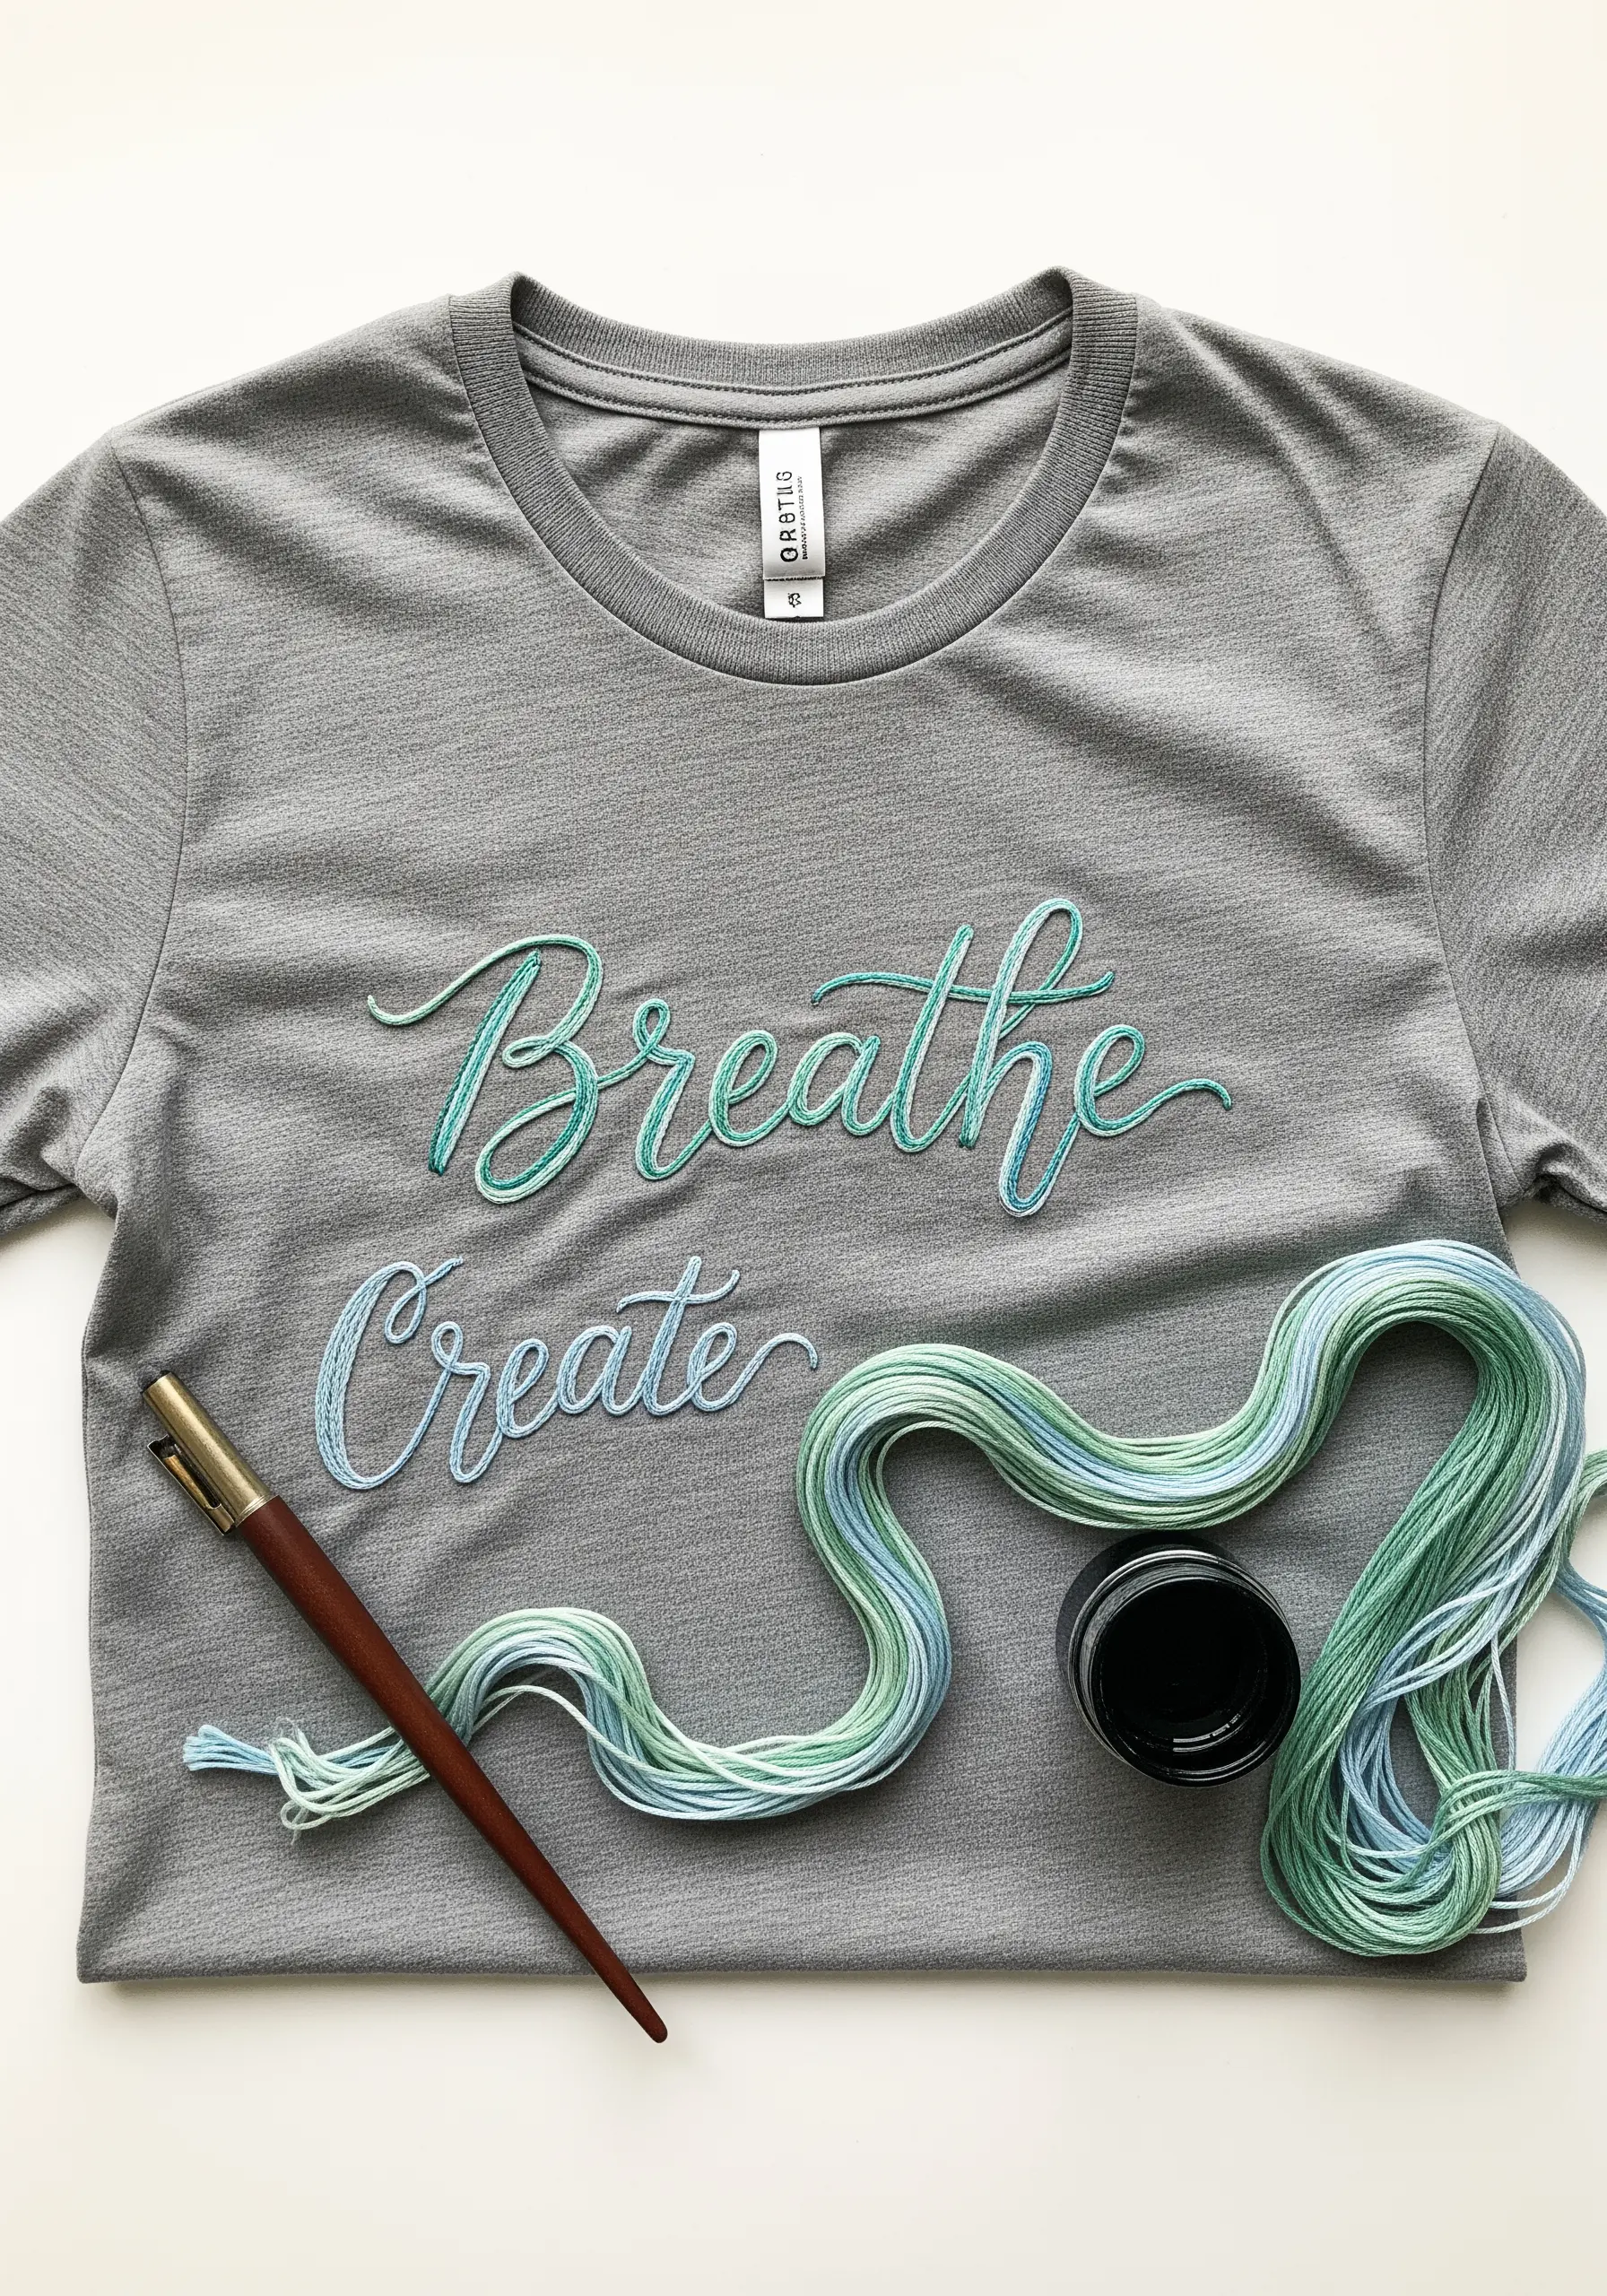
Create beautiful, blended lettering without the complexity of changing threads by using variegated floss.
Choose a smooth, flowing stitch like a whipped backstitch or a stem stitch to best display the gradual color shifts in the thread.
The key is to let the thread do the work. As you stitch, the colors will transition naturally, giving your script a watercolor-like effect with zero extra effort.
This technique adds a layer of visual interest and sophistication to even the simplest words or phrases.
21. Illustrate with Delicate Botanical Linework
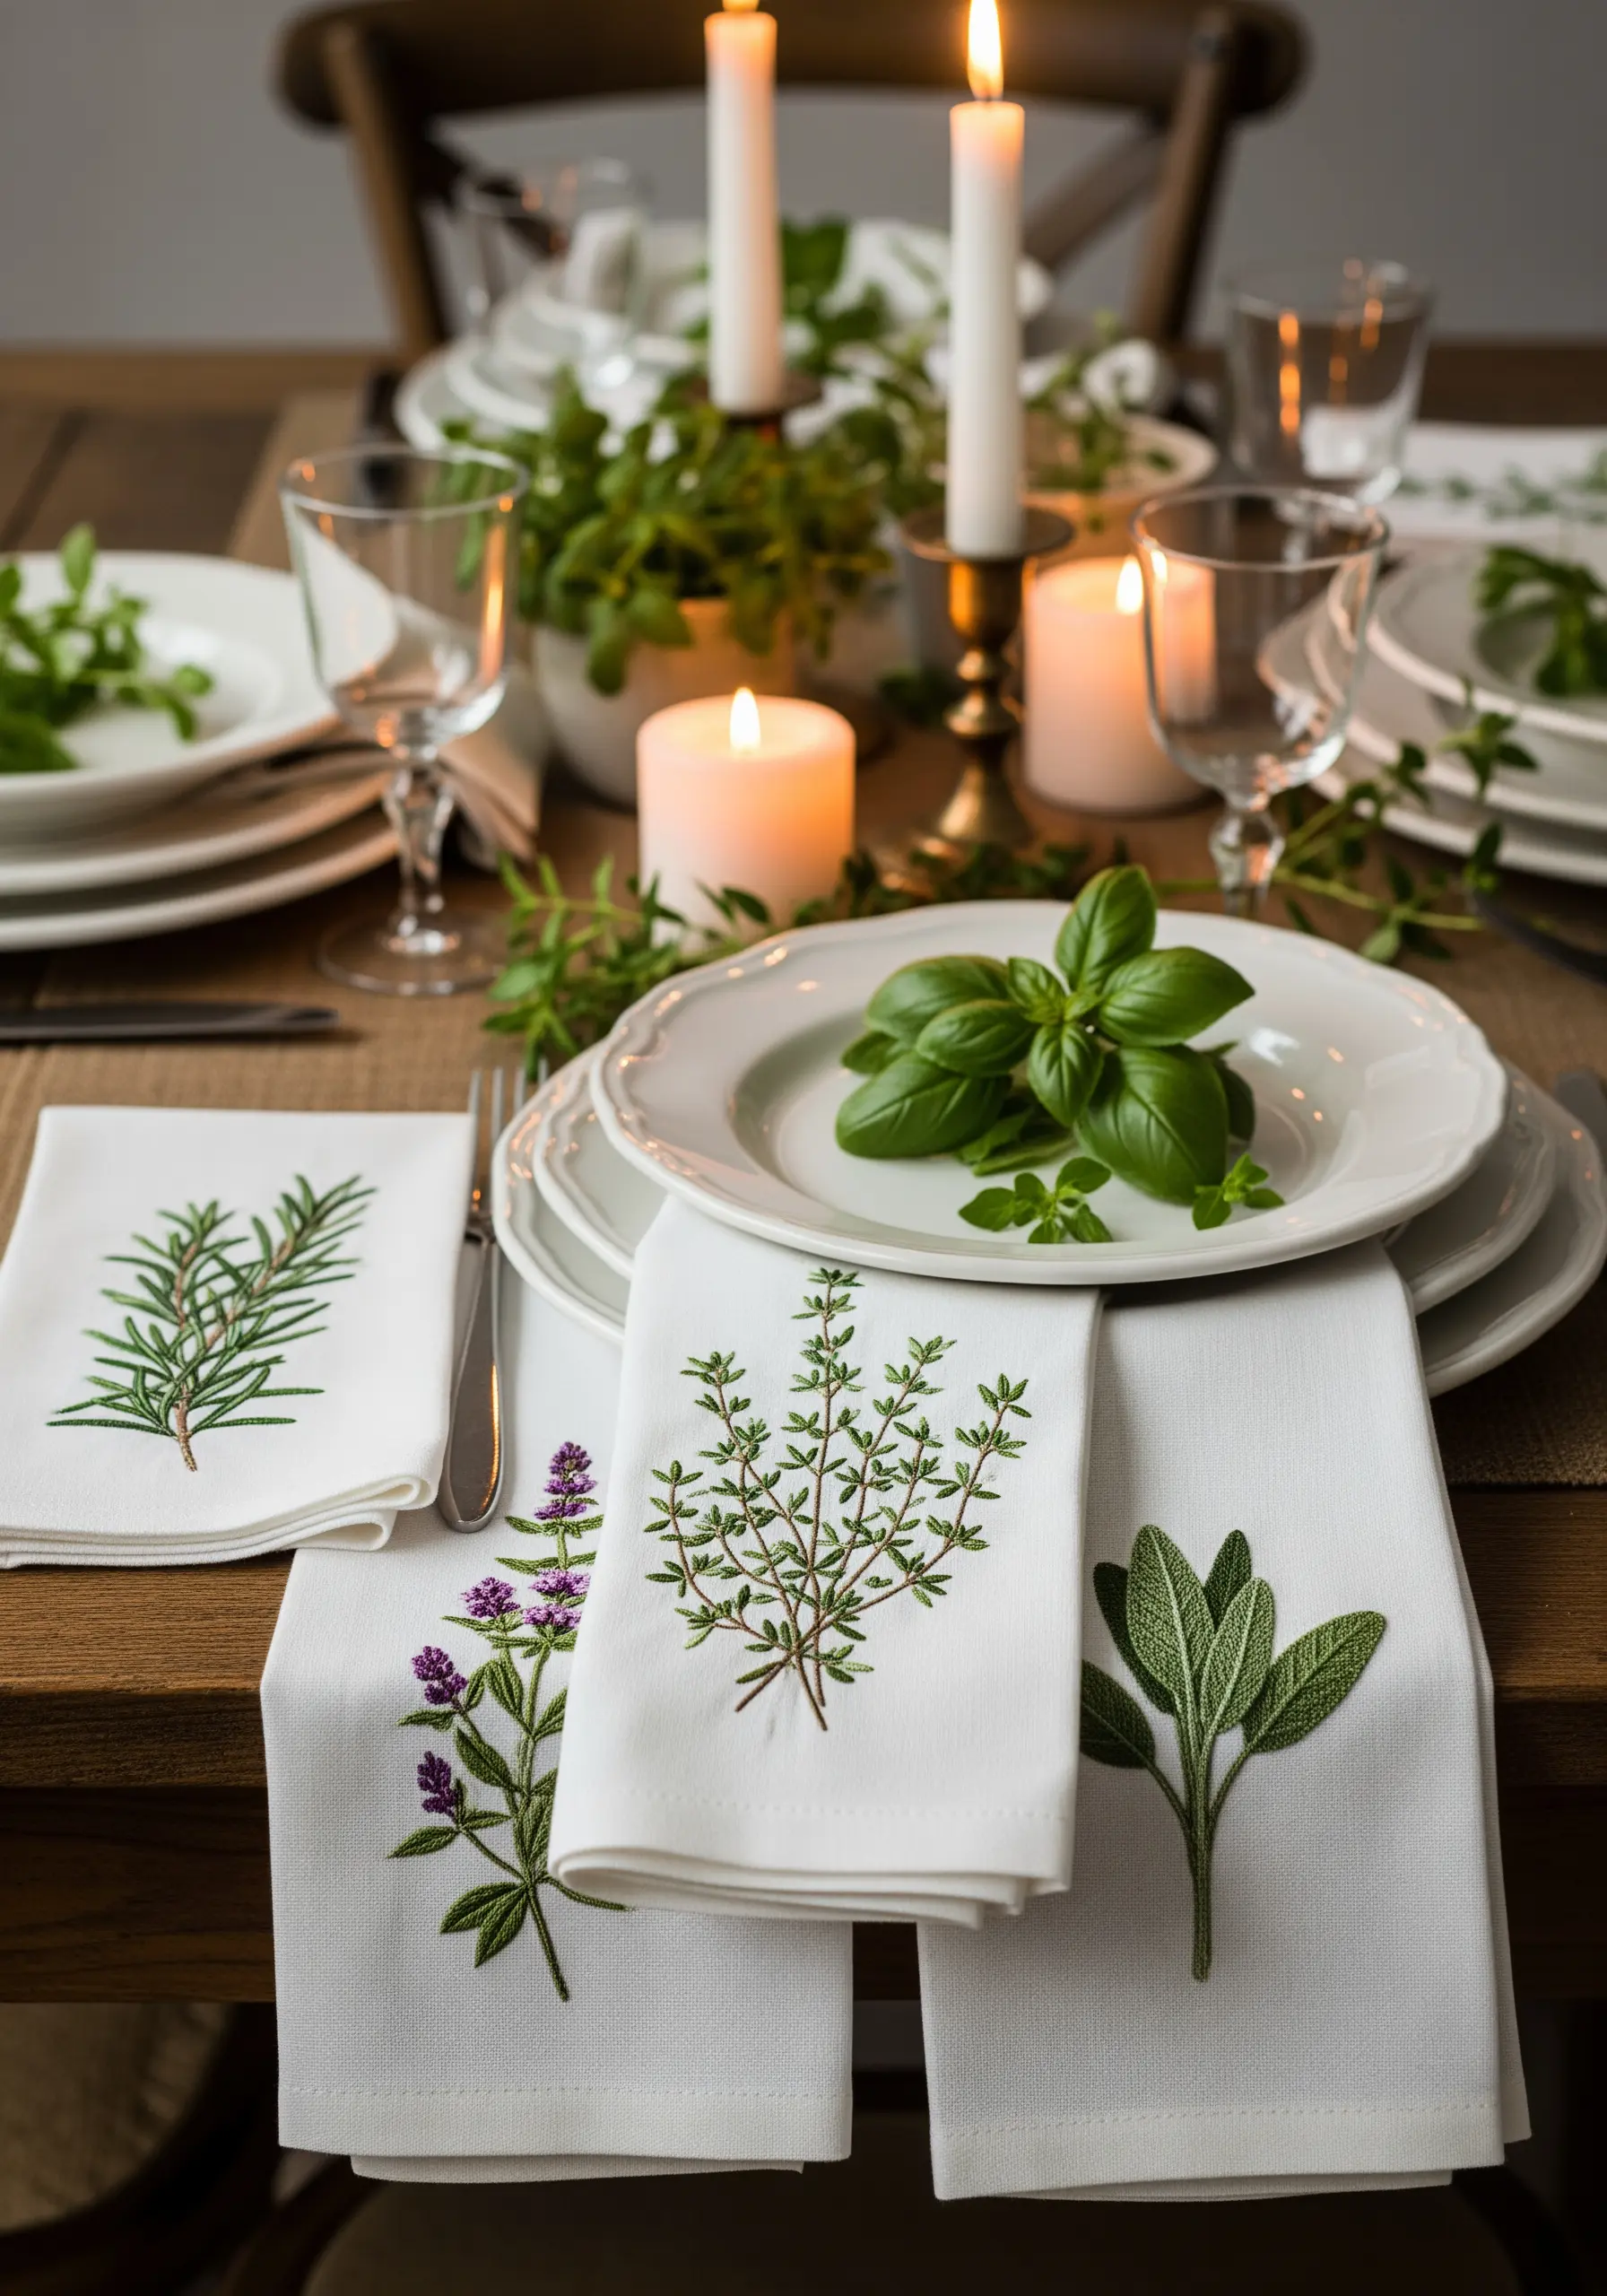
Embroidering fine botanical illustrations on table linens requires precision and a light touch.
Use a fine needle and only two strands of floss to keep the details crisp and avoid overwhelming the fabric.
Rely on a stem stitch for the main branches to give them a smooth, rounded quality. For the leaves, a fishbone stitch provides a central vein and directional fill in one motion.
For the most realistic look, you can study ways to embroider realistic shadows under leaves for depth that looks painted.
This approach transforms simple napkins into elegant, heirloom-quality pieces.
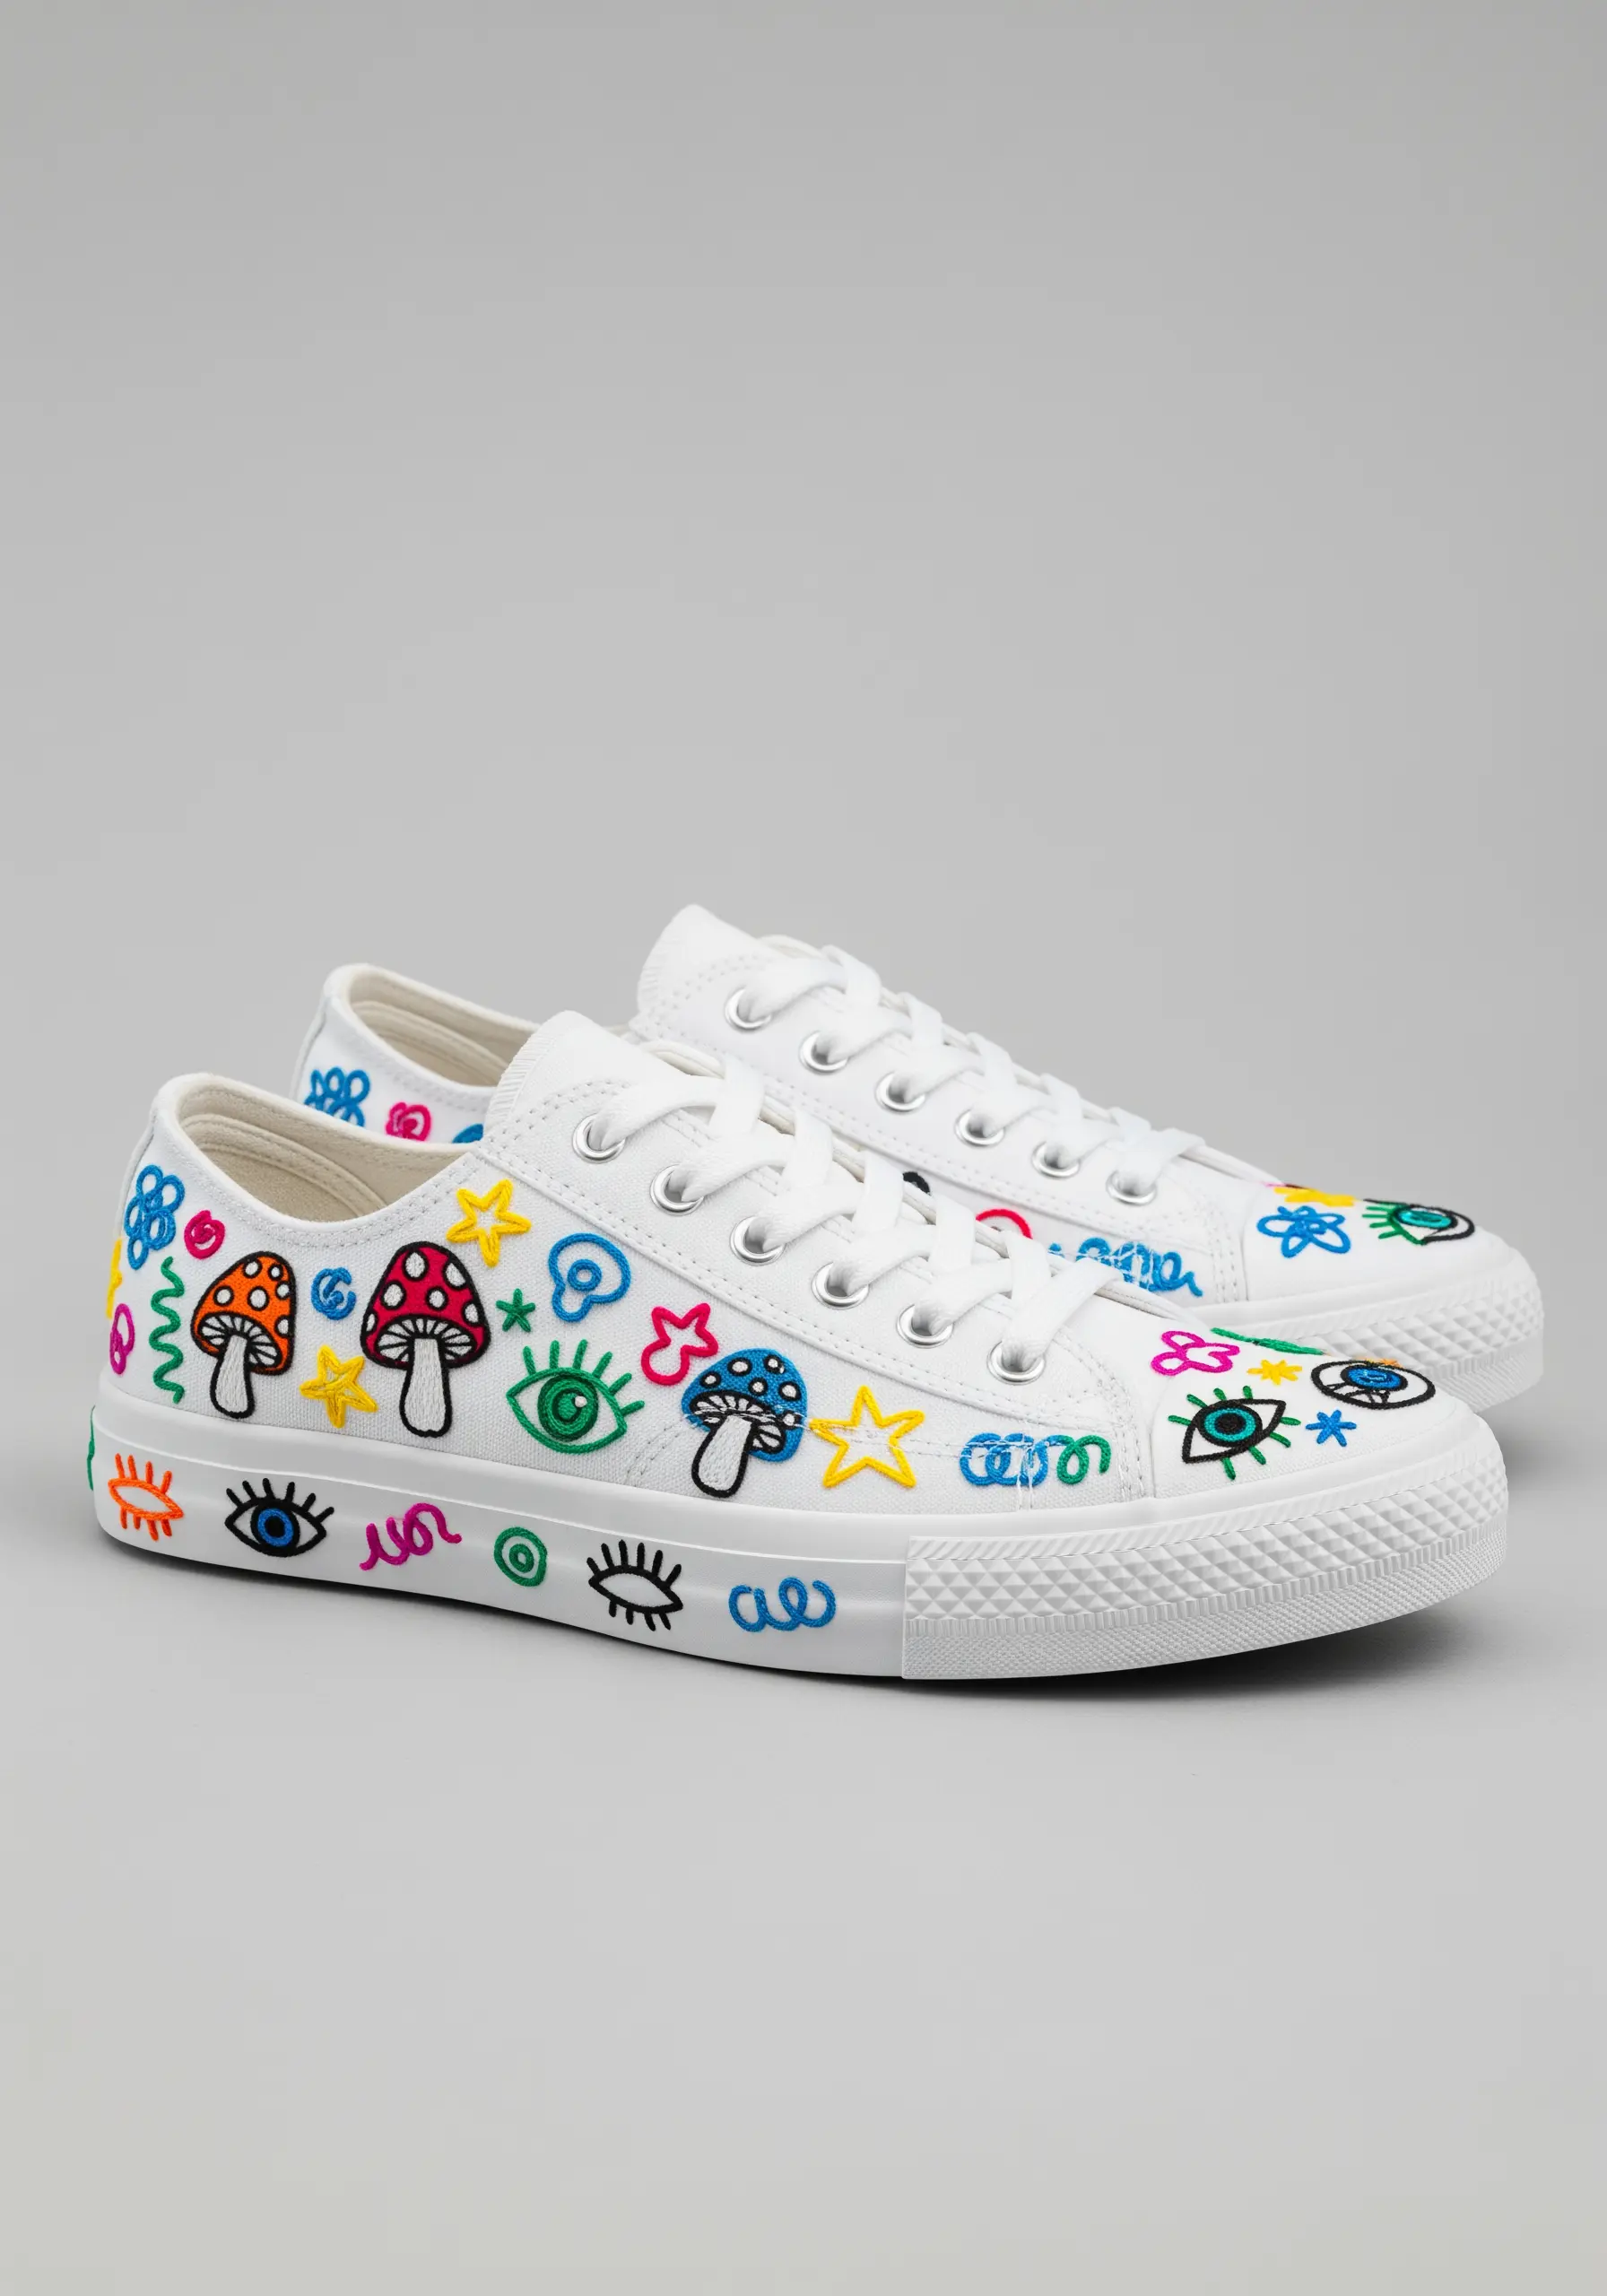
22. Master Psychedelic Color and Bold Outlines
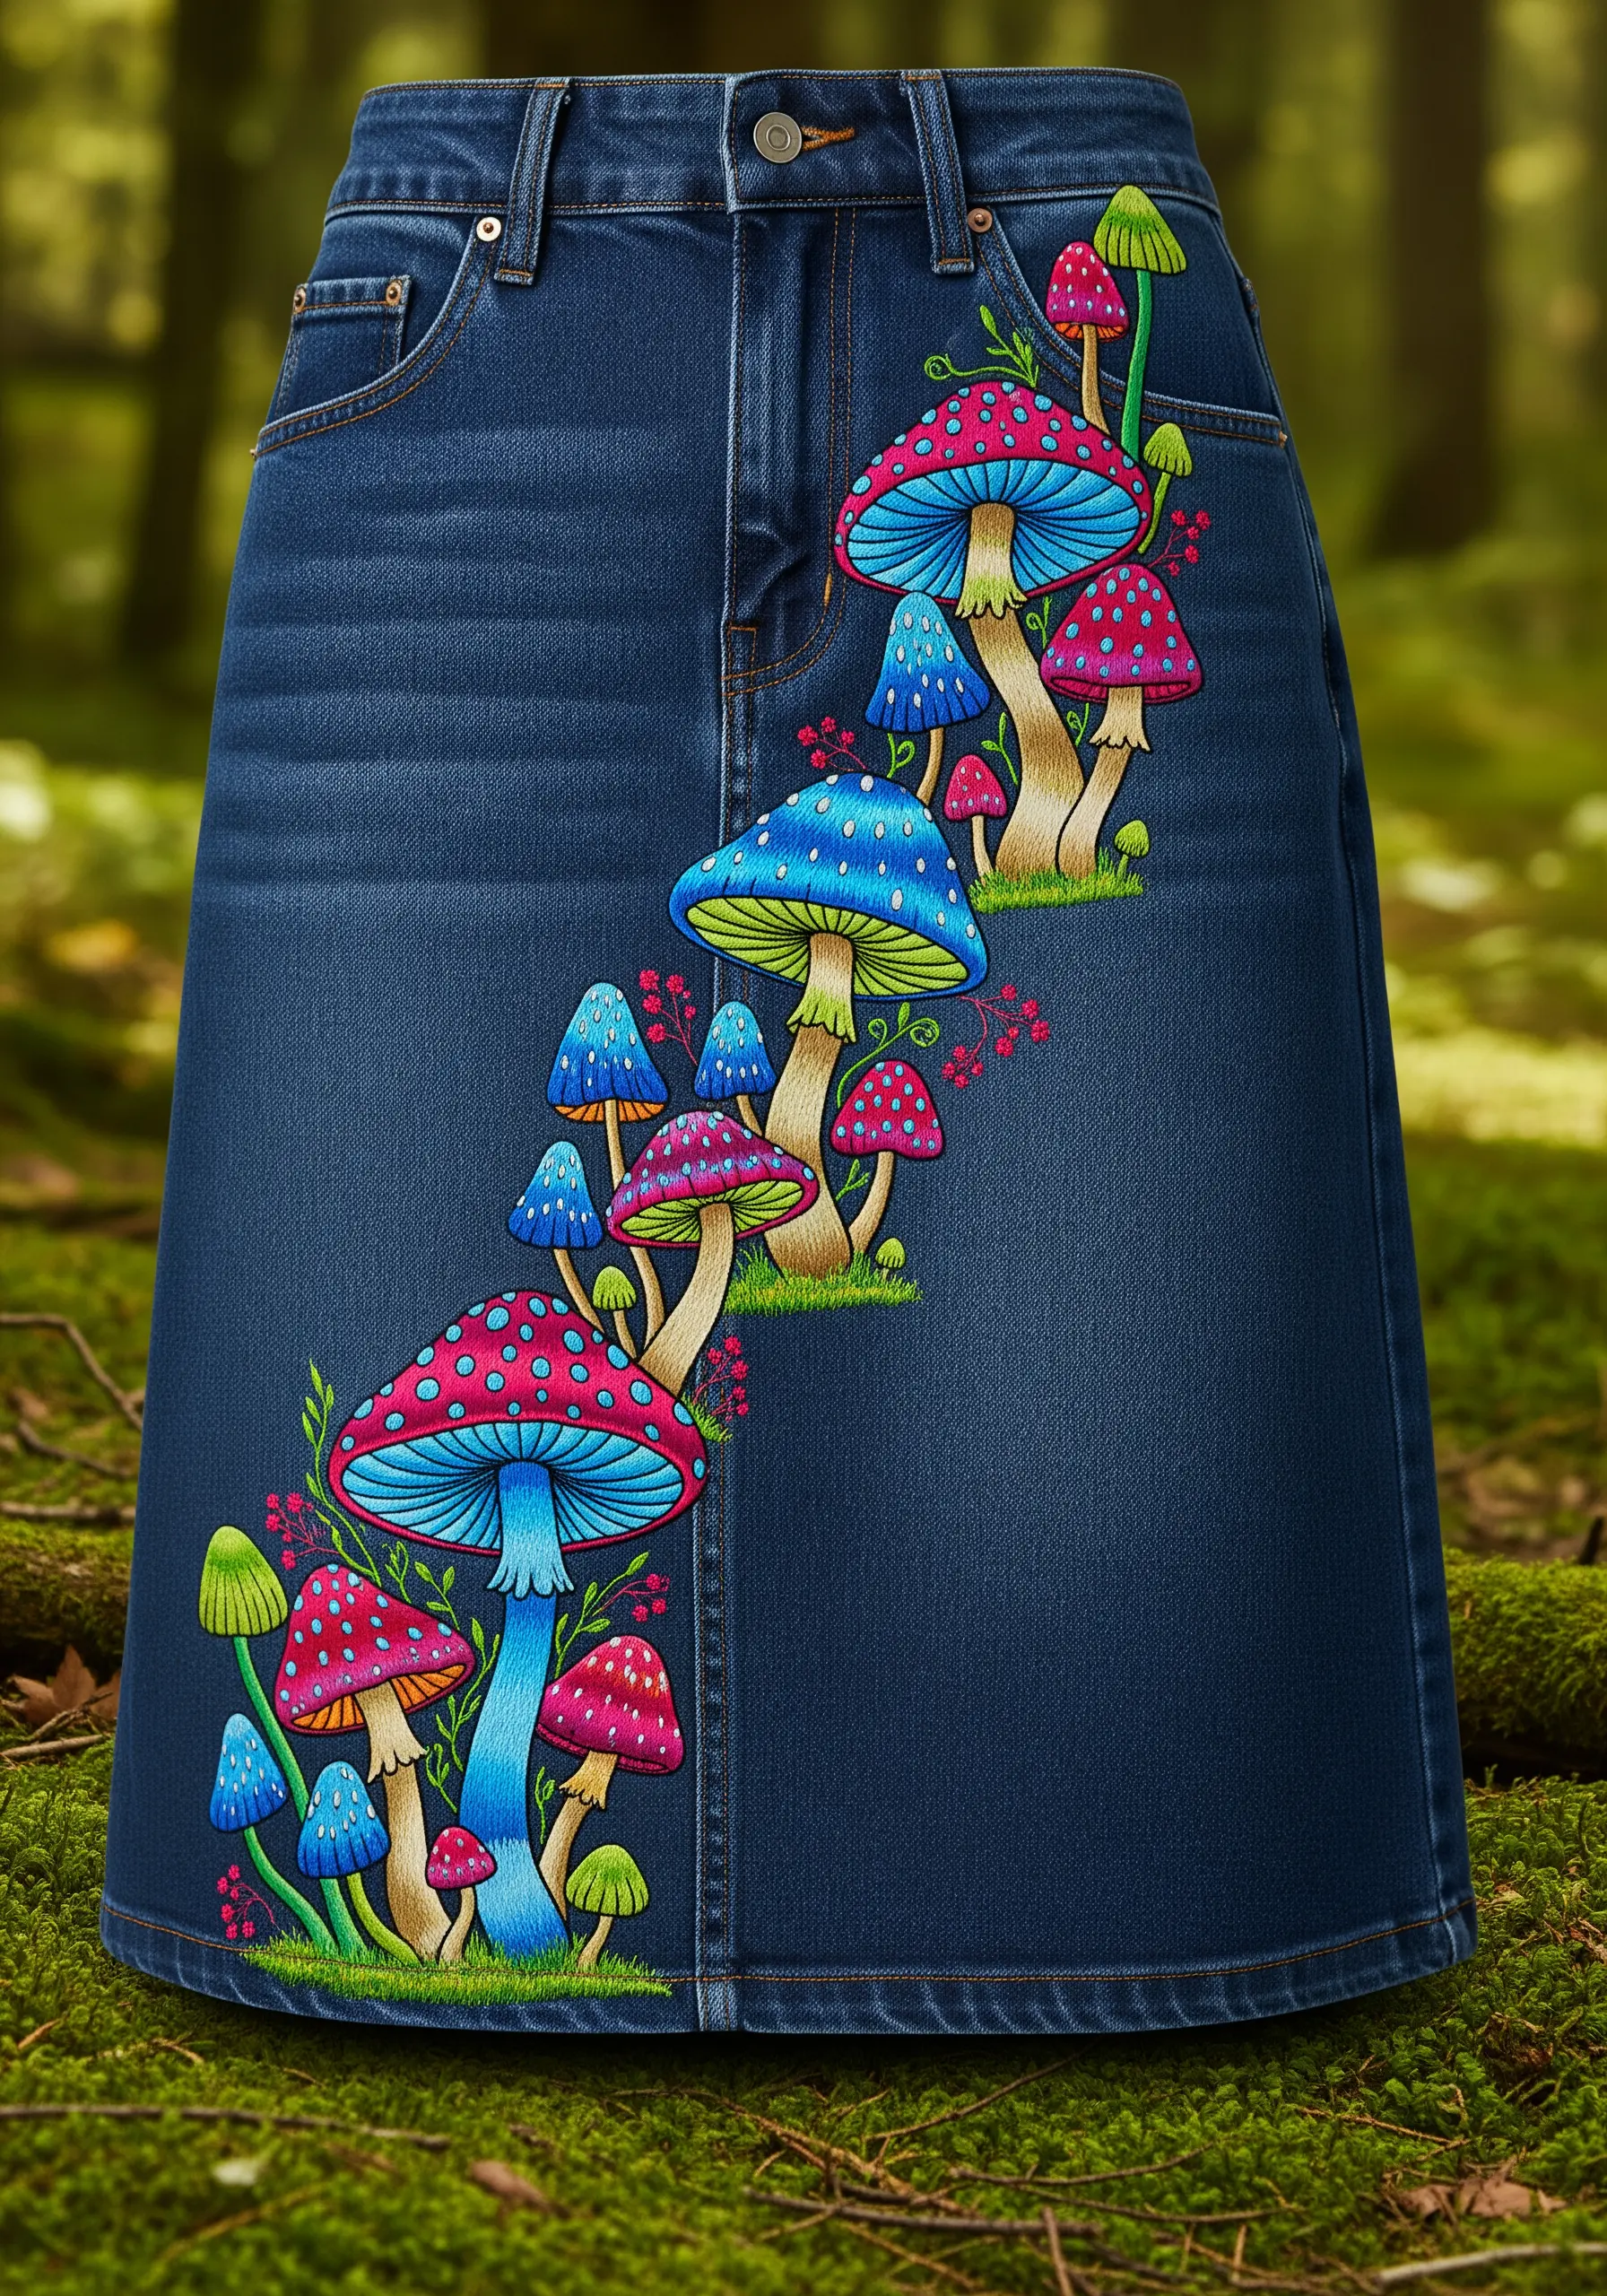
To create a vibrant, illustrative style that pops, pair intense color fills with bold, dark outlines.
Fill each section of the mushrooms with a dense, flat satin stitch. To prevent the long satin stitches from snagging, you can couch a single strand of floss across the middle of wider sections.
After filling all the shapes, go back and add a crisp outline using a backstitch with two or three strands of black floss.
This outlining technique contains the bright colors, adds definition, and gives the design a clean, cartoon-inspired finish that stands out on denim.
23. Weave Florals into a Monogram

Create a lush, personalized monogram by using a letter’s shape as the framework for a miniature garden.
Lightly trace the outline of your chosen letter, then fill the space with a variety of small-scale floral stitches.
Combine woven wheel roses, lazy daisy leaves, and clusters of French knots for texture and variety. Overlap elements slightly to create a sense of abundance and depth.
This technique transforms a simple initial into a rich, detailed work of art, making it perfect for personalizing gifts like pillowcases.
For more inspiration, explore some floral mandala embroidery ideas.
24. Stitch Constellations on Velvet
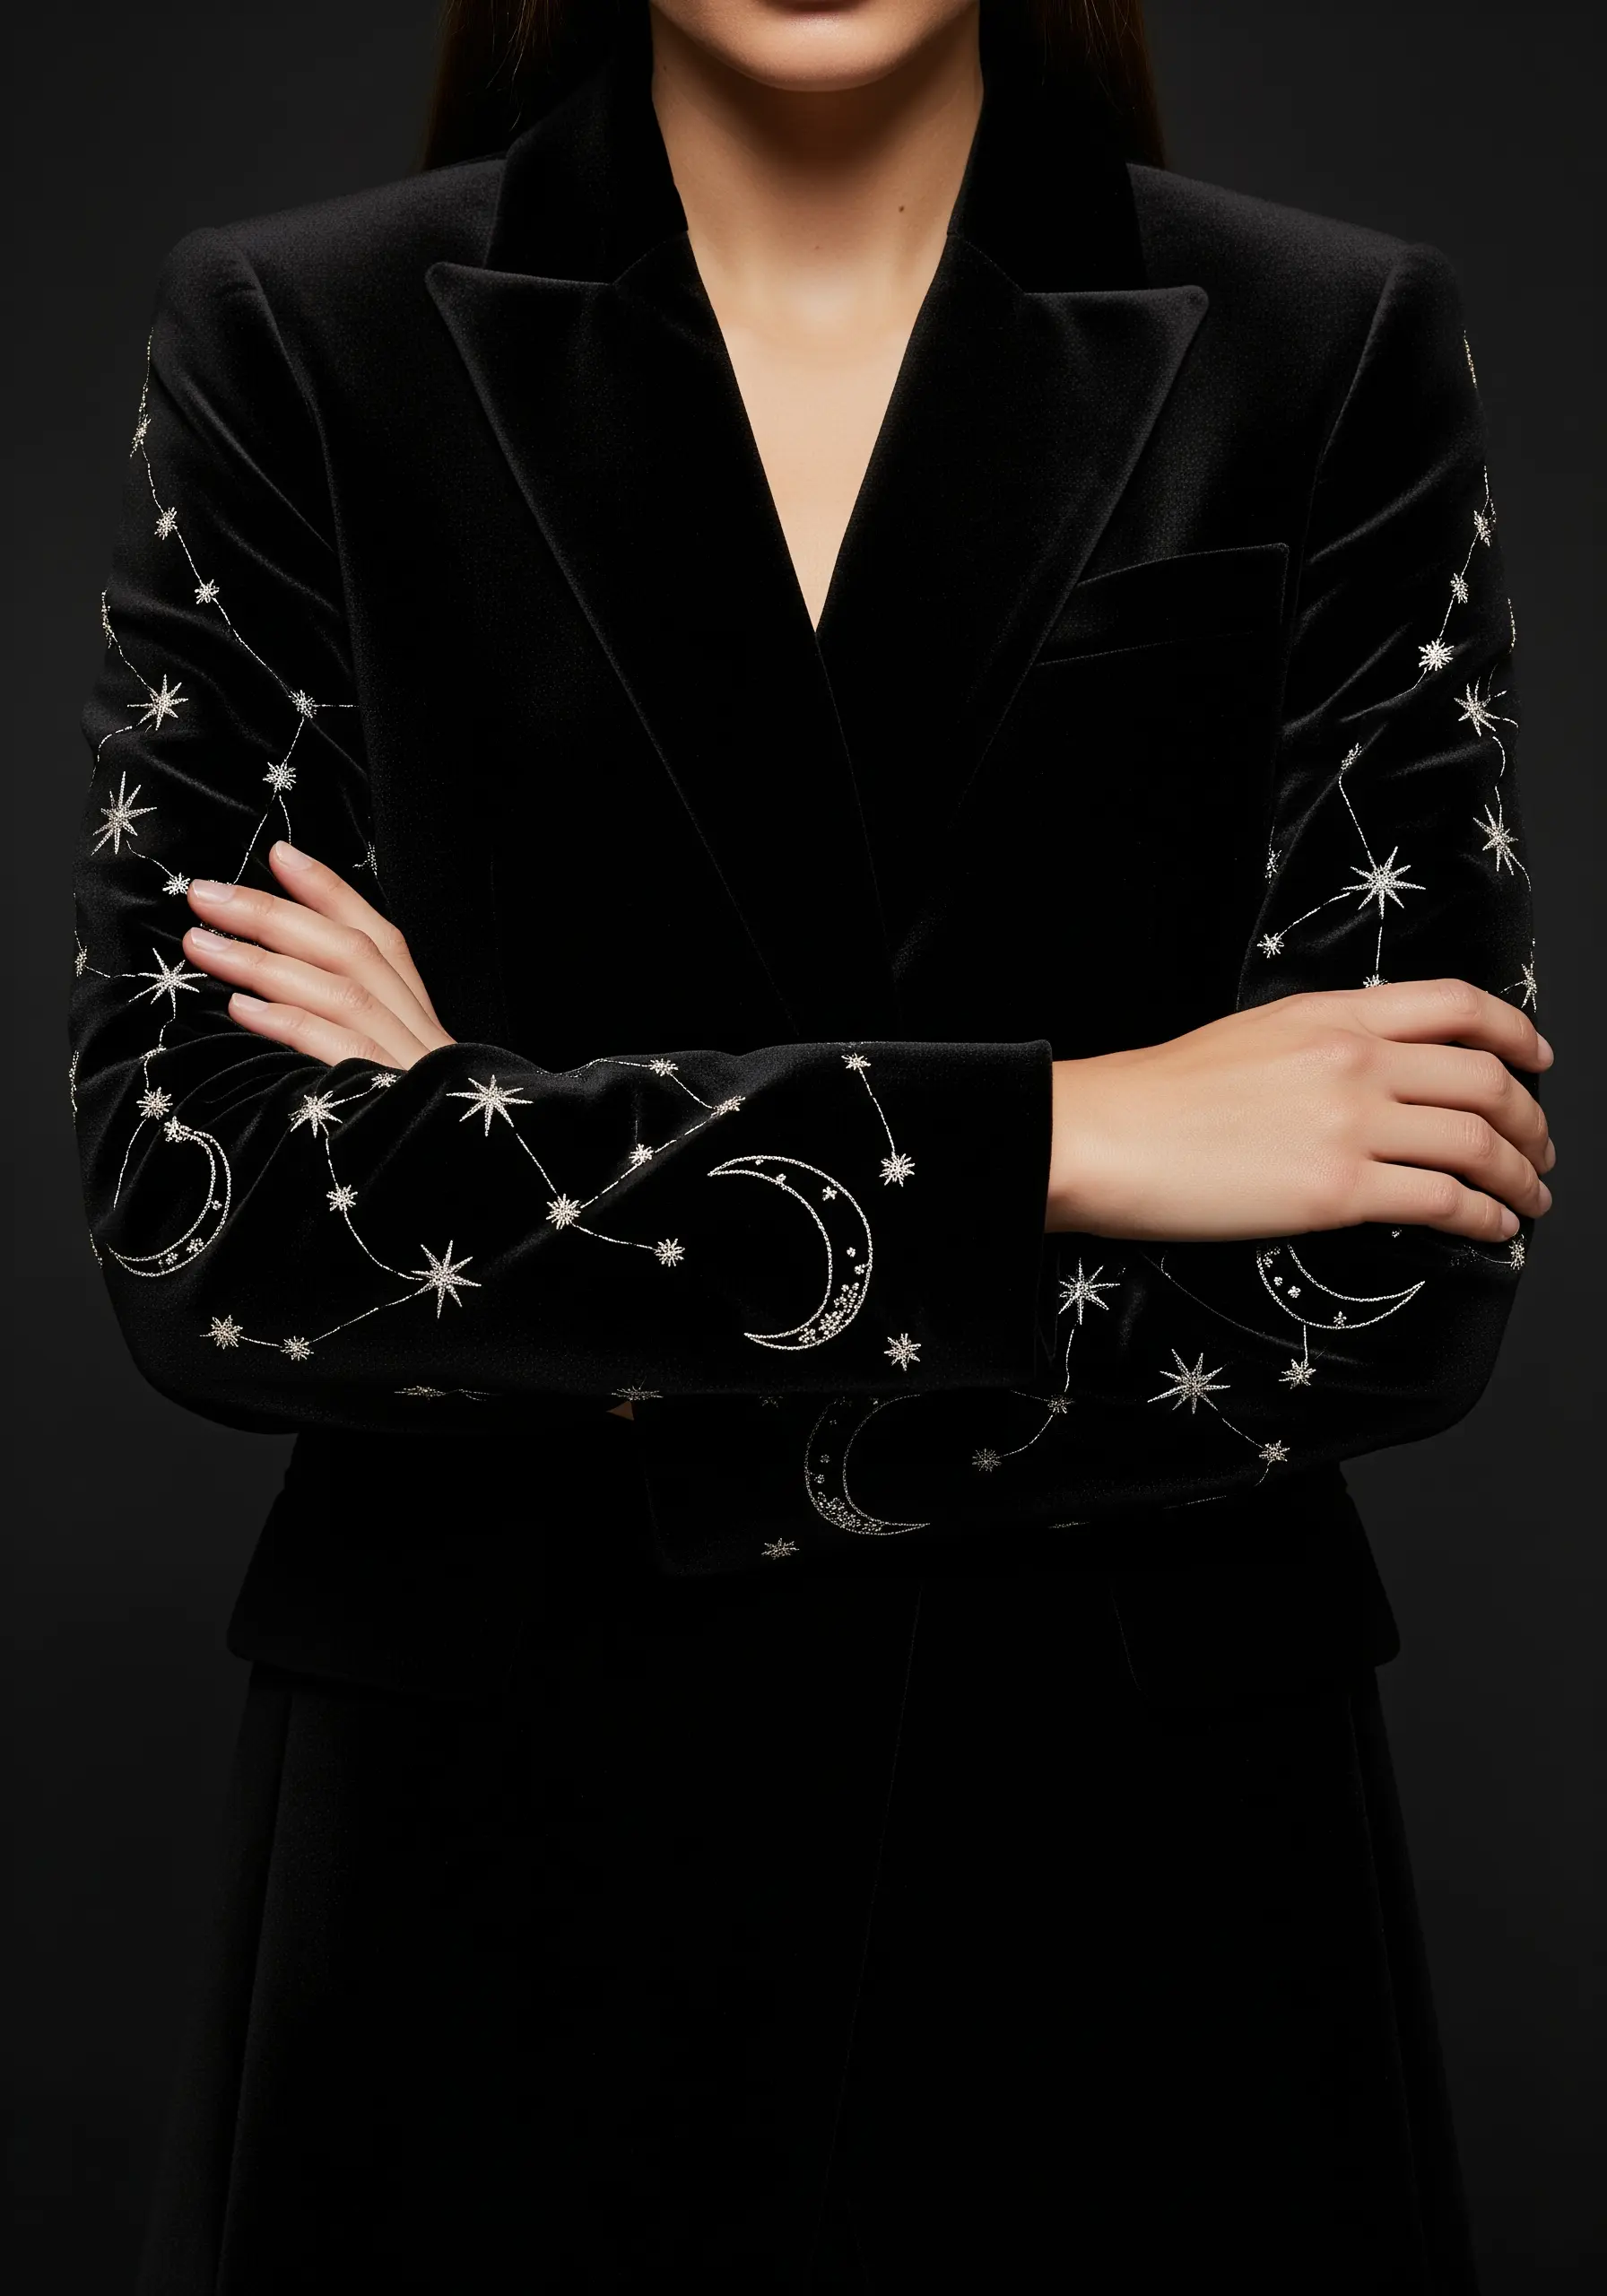
Embroidering on a plush fabric like velvet requires stitches that sit on top of the pile rather than sinking into it.
Use a silver or pale gold metallic thread to stand out against the deep, dark fabric.
Simple stitches are most effective: use small straight stitches to form constellation lines and sparkling stars, and tiny French knots or seed beads for distant celestial bodies.
The key is to work gently and avoid pulling your stitches too tight, allowing the thread to rest elegantly on the surface of the velvet, creating a truly magical, starry-night effect.


