
Before you pick up your needle for the next project, I want you to look closer. Not at grand tapestries, but at the tiny, overlooked botanicals—the single clover, the forget-me-not, the seed pod. This is where true embroidery mastery is cultivated.
In these small-scale studies, every single stitch matters. There’s no room for imprecision. But this isn’t about achieving a sterile perfection; it’s about learning to see the world with an artist’s eye and translate that vision into thread with intention.
Here, you will learn not just what to stitch, but how to think about your stitching. You’ll discover how a change in thread weight can create delicacy, how stitch direction can build form, and how a surprising texture can turn a simple motif into a piece of art. Let’s begin.
1. Define Petal Shape with Aida Cloth
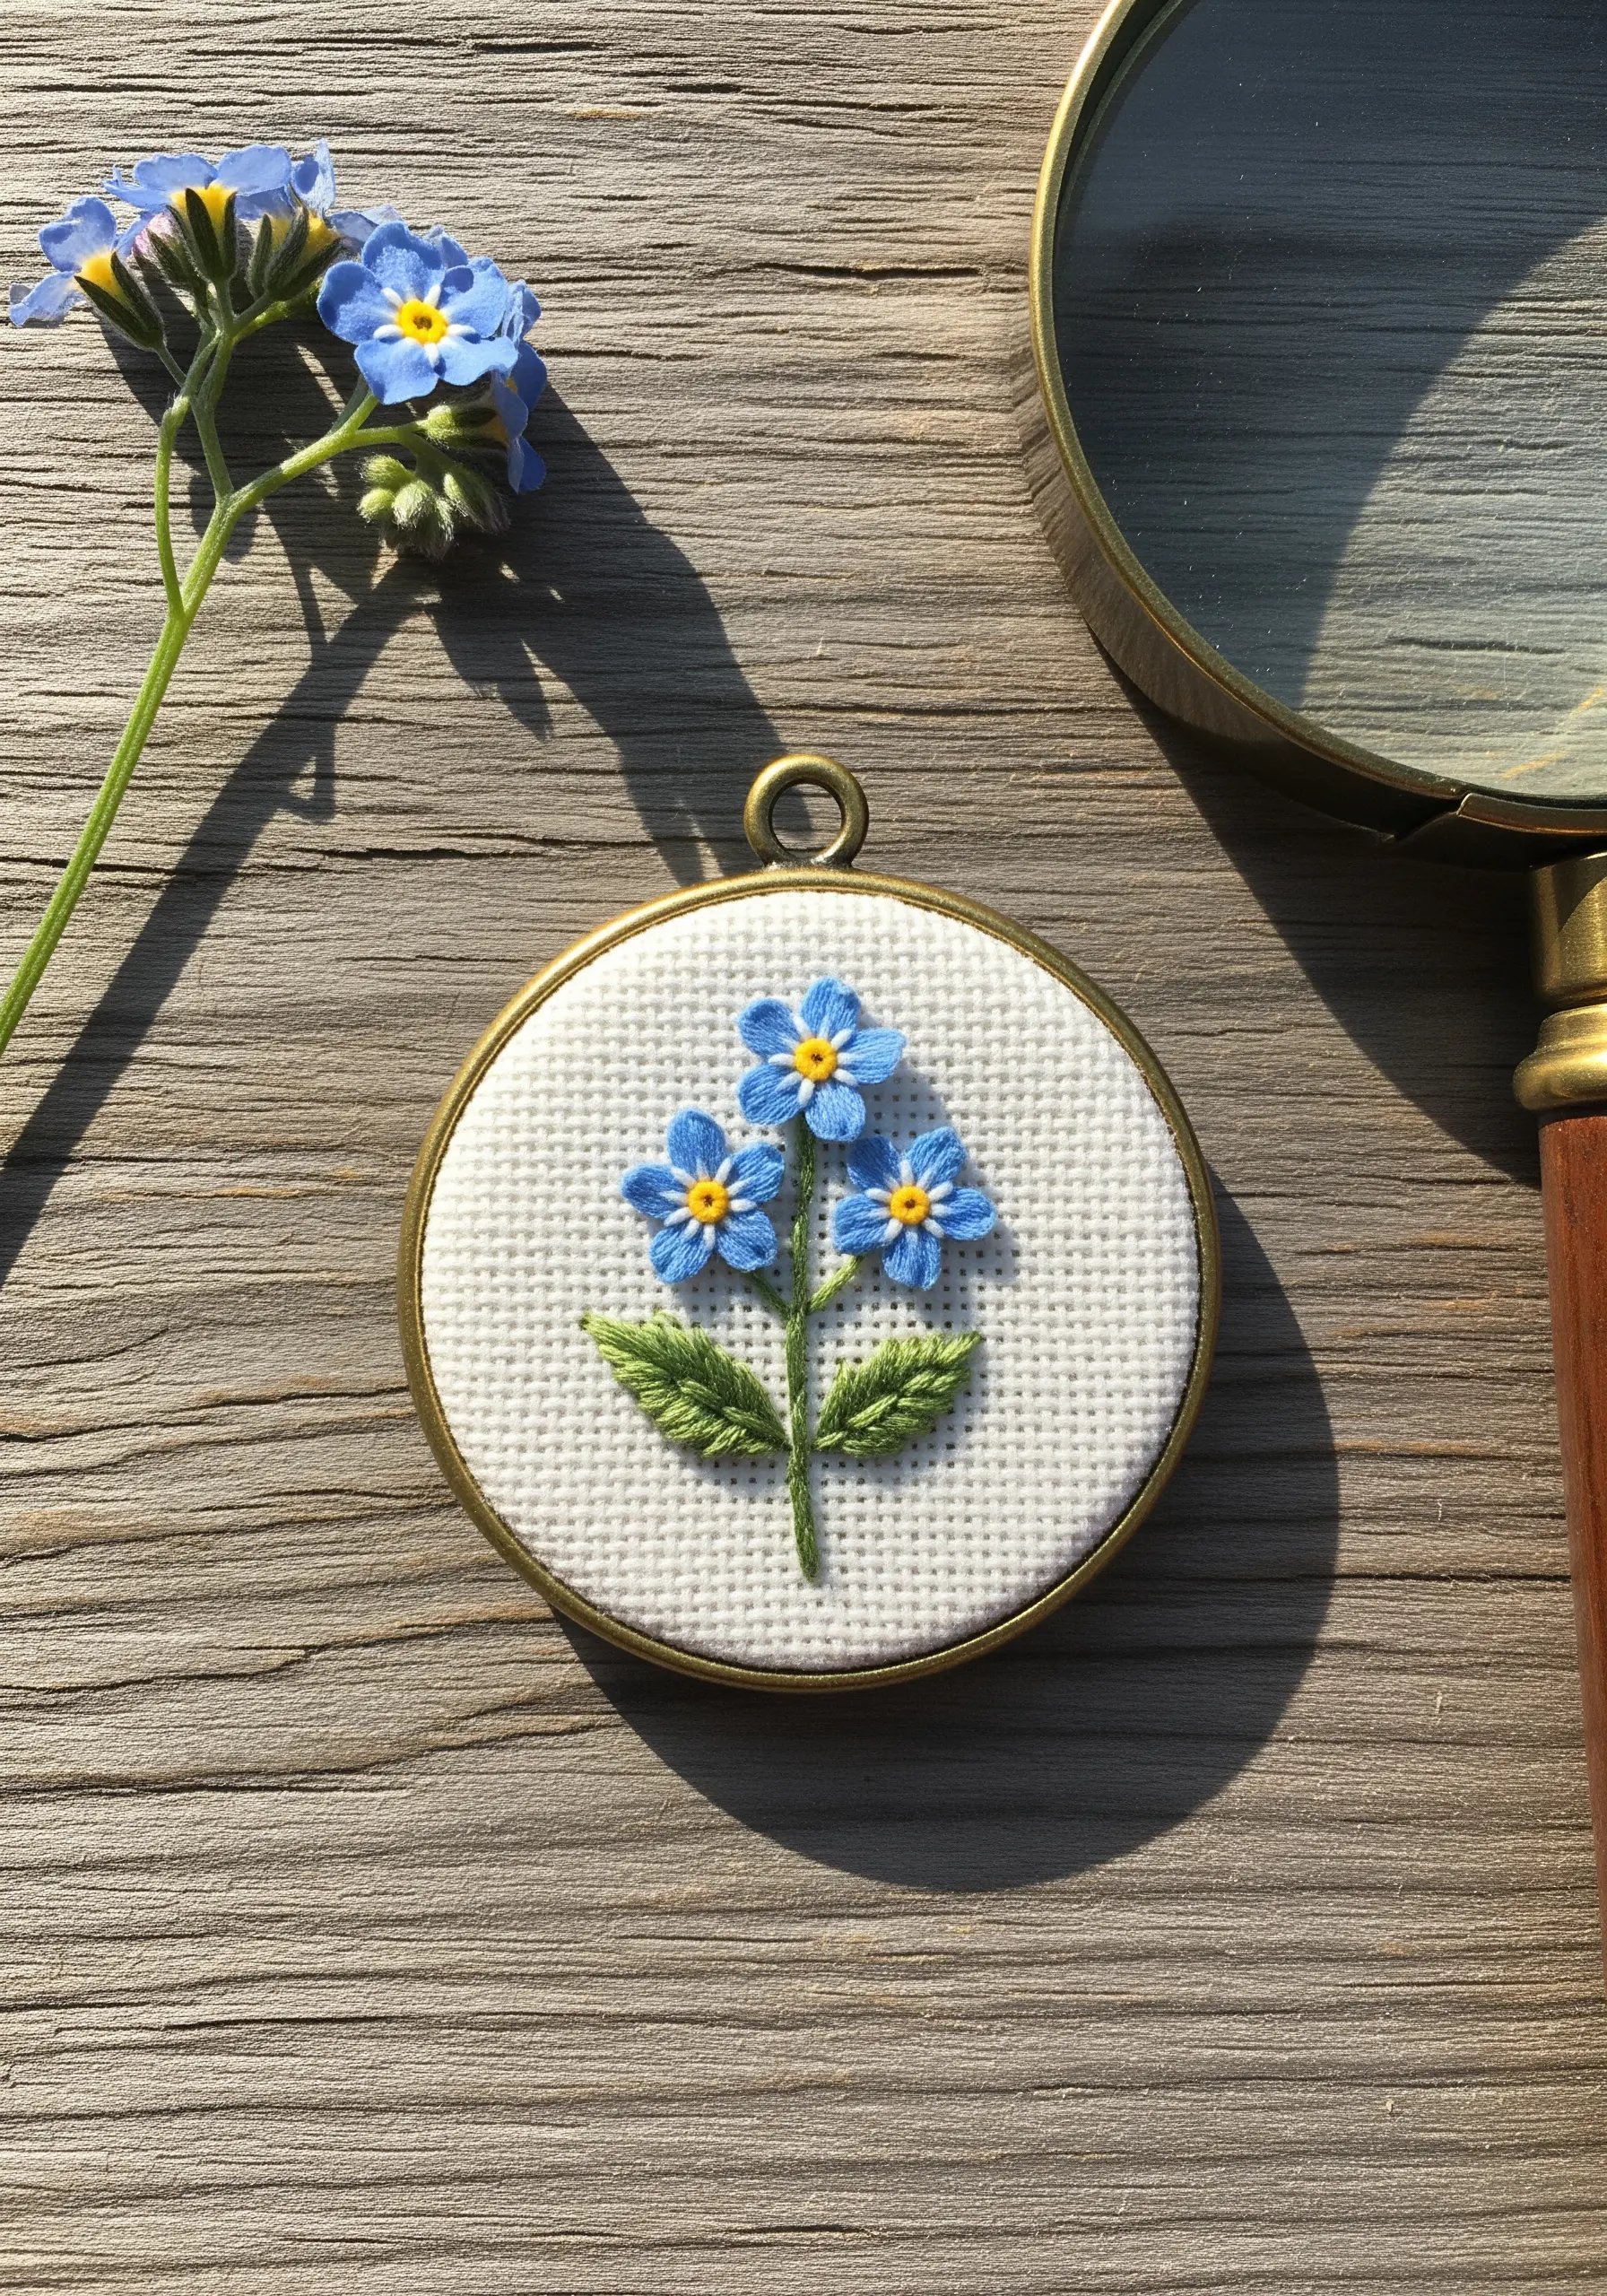
When working with Aida or evenweave fabric, use the grid to your advantage for perfectly symmetrical forget-me-nots.
Position each lazy daisy stitch for the petals so it crosses the same number of squares, ensuring every flower in your cluster is uniform and balanced.
A single, contrasting yellow French knot in the center grounds the vibrant blue and draws the eye inward.
For the leaves, a fishbone stitch will create a central vein and add a touch of realism that contrasts with the graphic nature of the petals.
2. Capture Ephemeral Movement on Dark Fabric
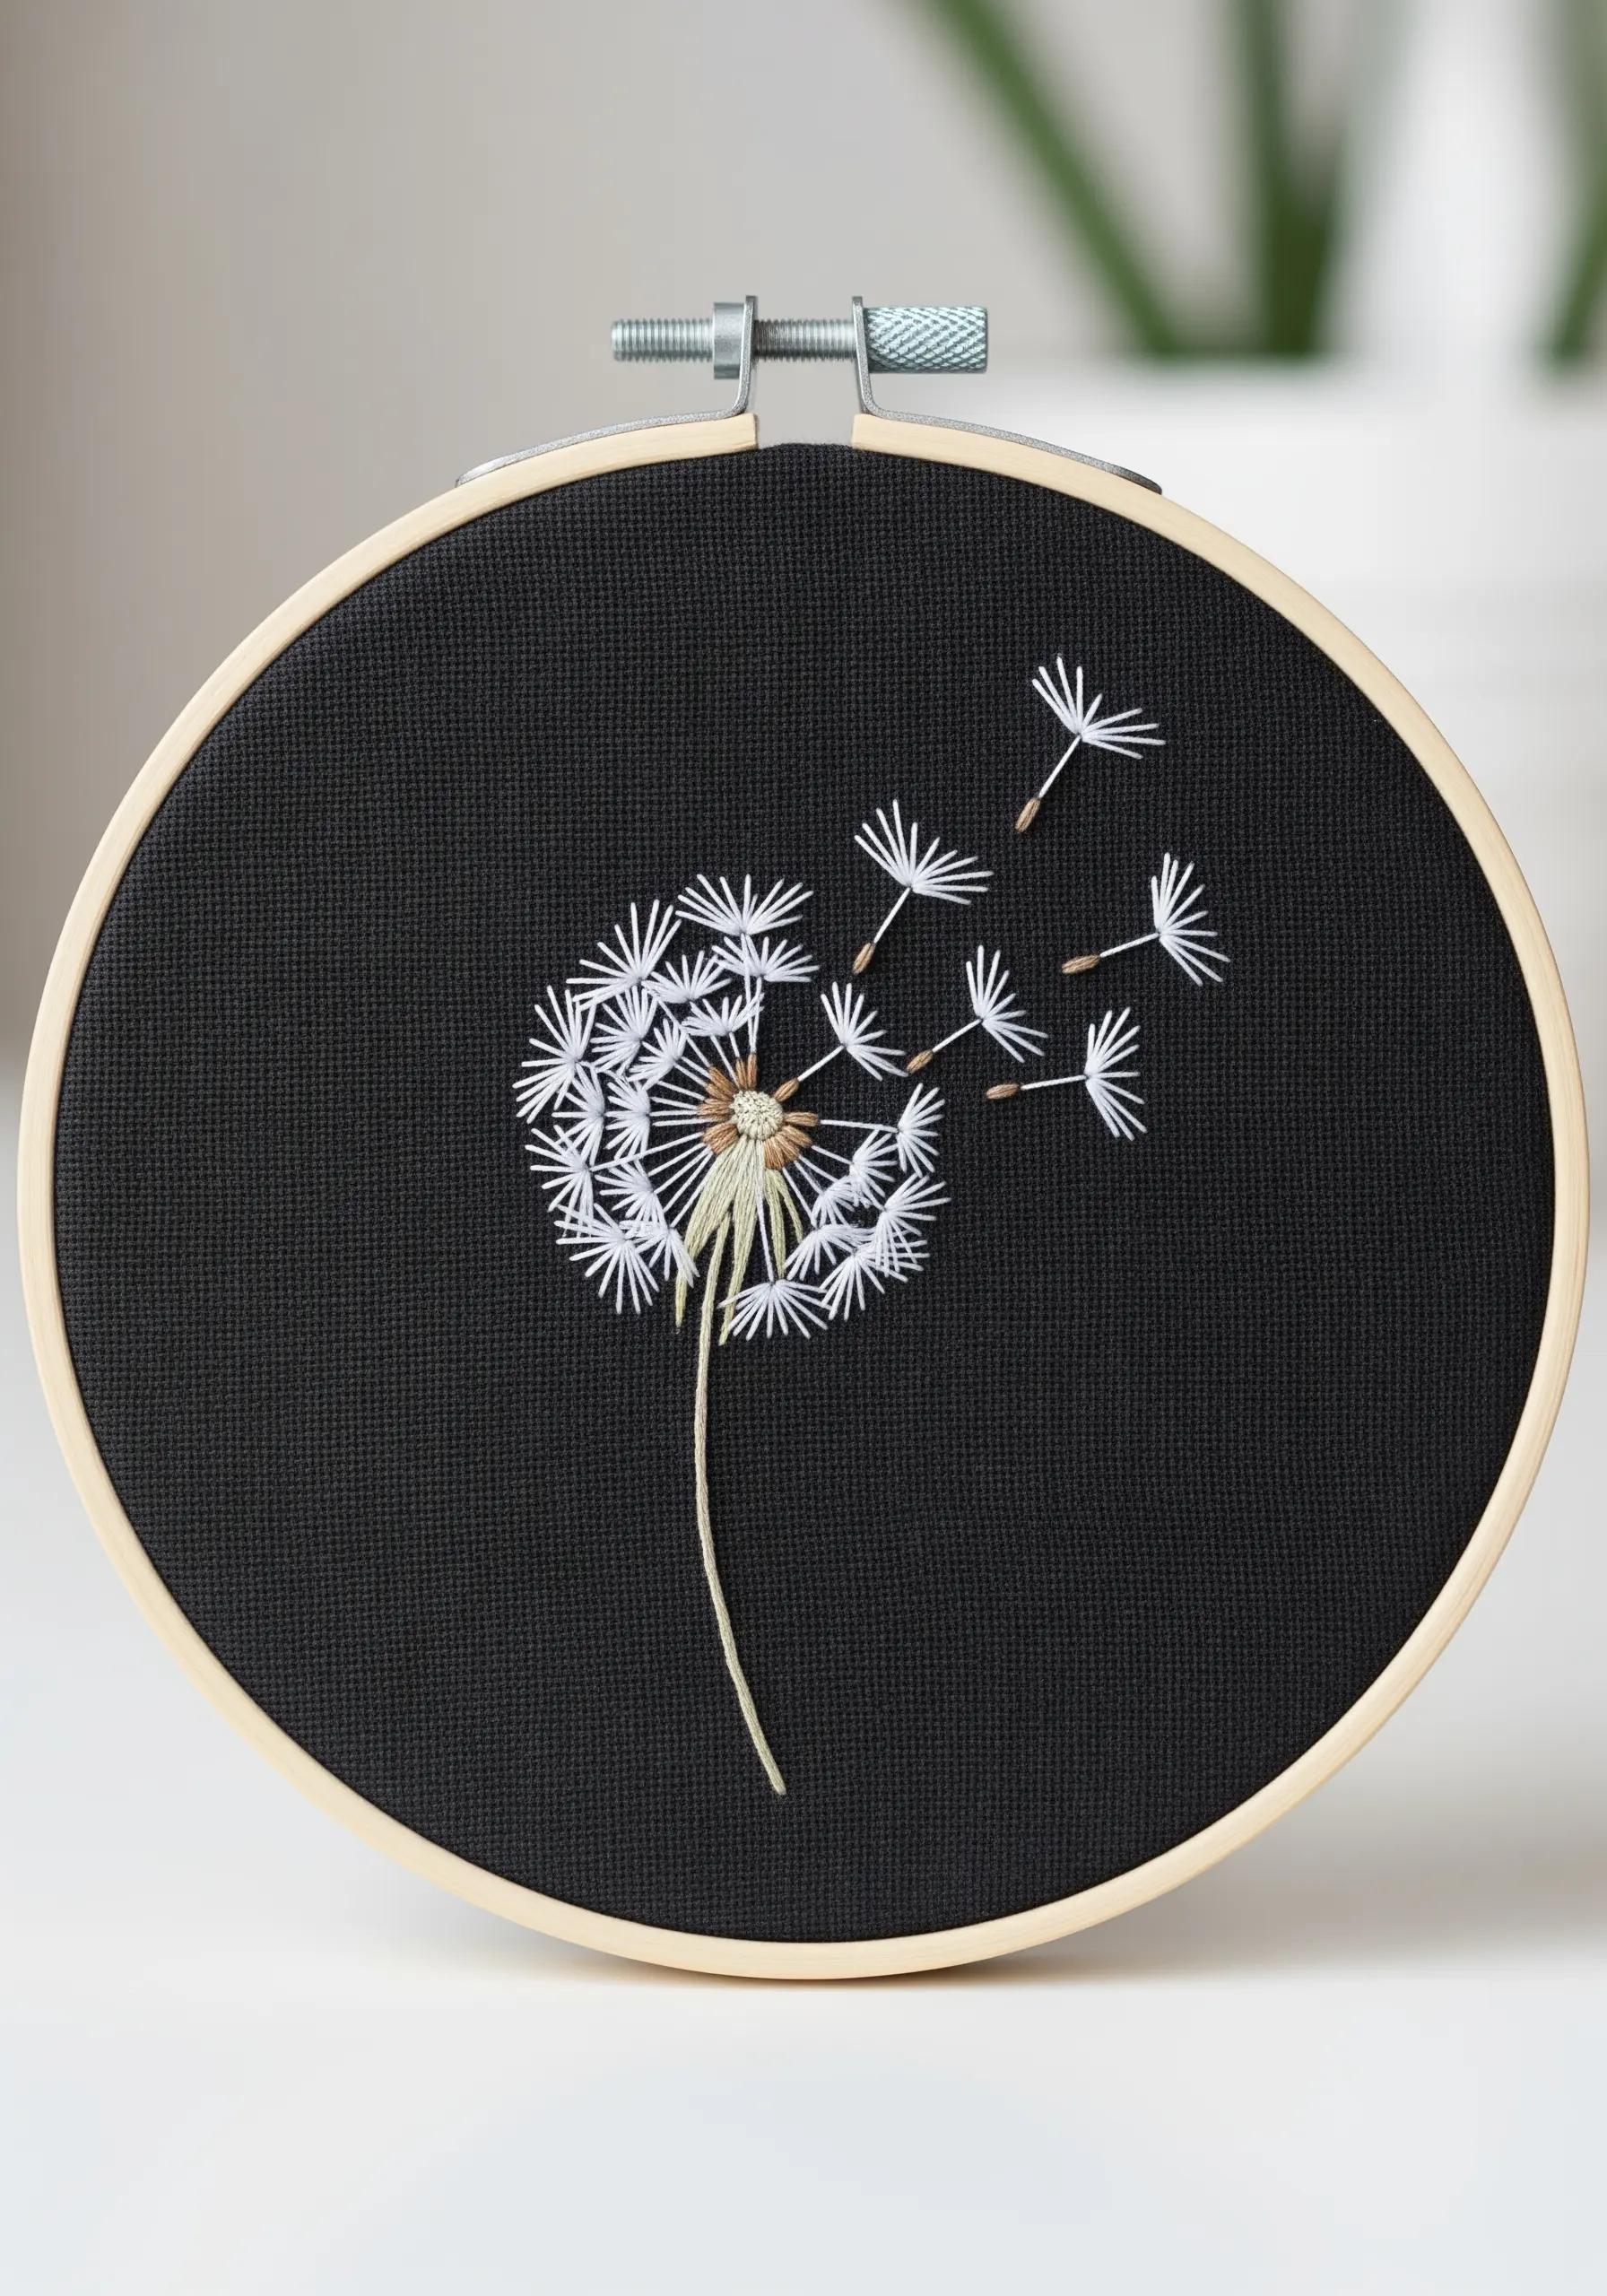
To give your dandelion seeds a weightless, floating quality, stitch them on high-contrast black fabric using a single strand of white floss.
Use a combination of straight stitches and detached chain stitches (lazy daisies) for the seed heads, varying their length and direction to create a sense of motion.
For the core, use a beige or taupe thread with tightly packed seed stitches to build texture that grounds the delicate white floss.
This contrast between the solid core and the airy seeds is what makes the composition so dynamic and believable.
3. Build Dimensionality in a Miniature Mushroom Patch
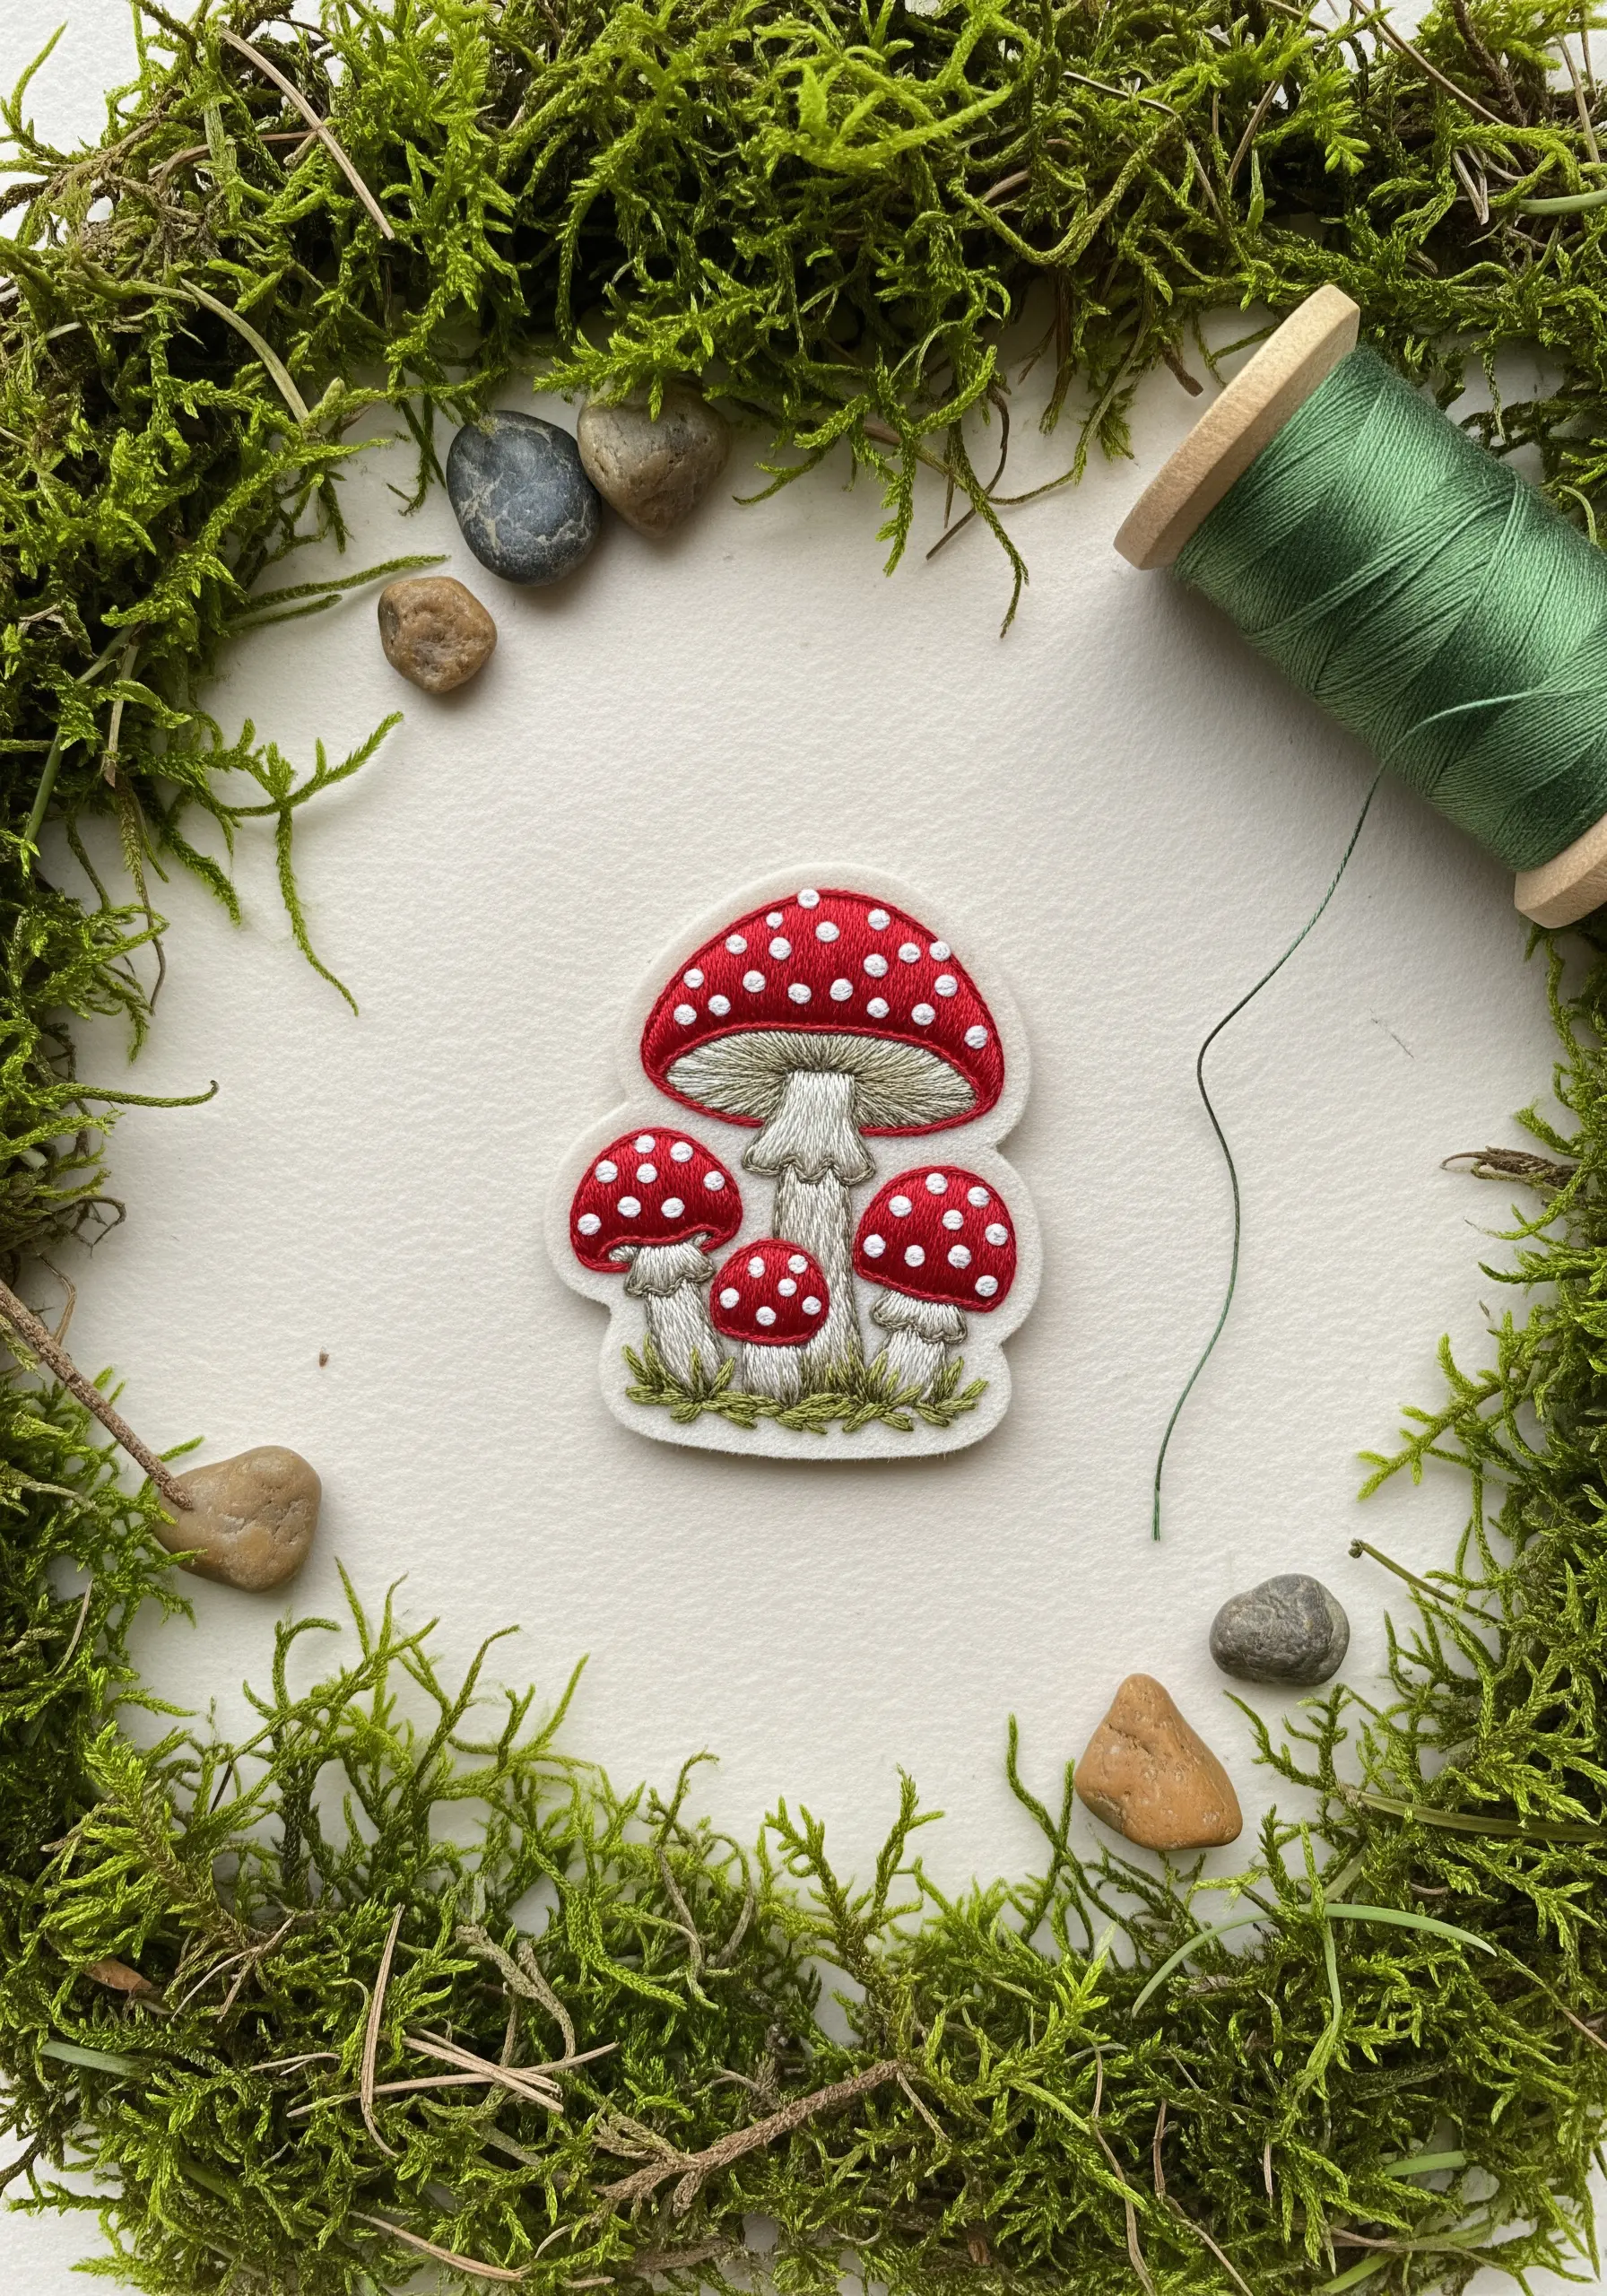
Create a clean, professional finish for your patch by outlining the entire design with a tight satin stitch before cutting it out.
For the mushroom caps, fill the shape with satin stitch and then add crisp white French knots on top, varying their size slightly for an organic feel.
Introduce depth in the grass by using short, vertical straight stitches in three or four different shades of green, mimicking natural growth.
This layering of stitches—satin fill, knots, and straight stitches—is what gives such a tiny embroidery its rich texture and visual interest.
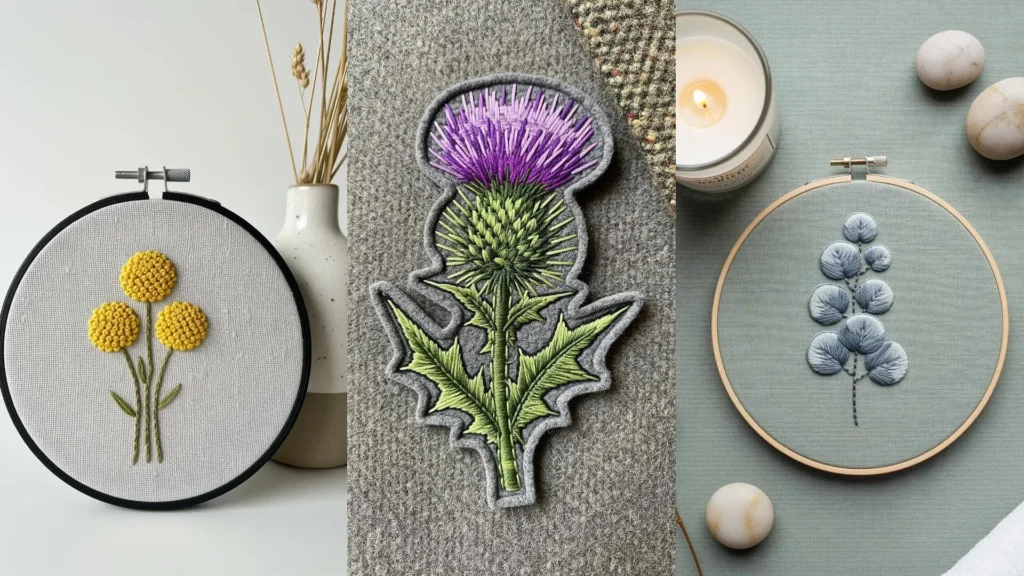
4. Cluster French Knots for Realistic Lavender
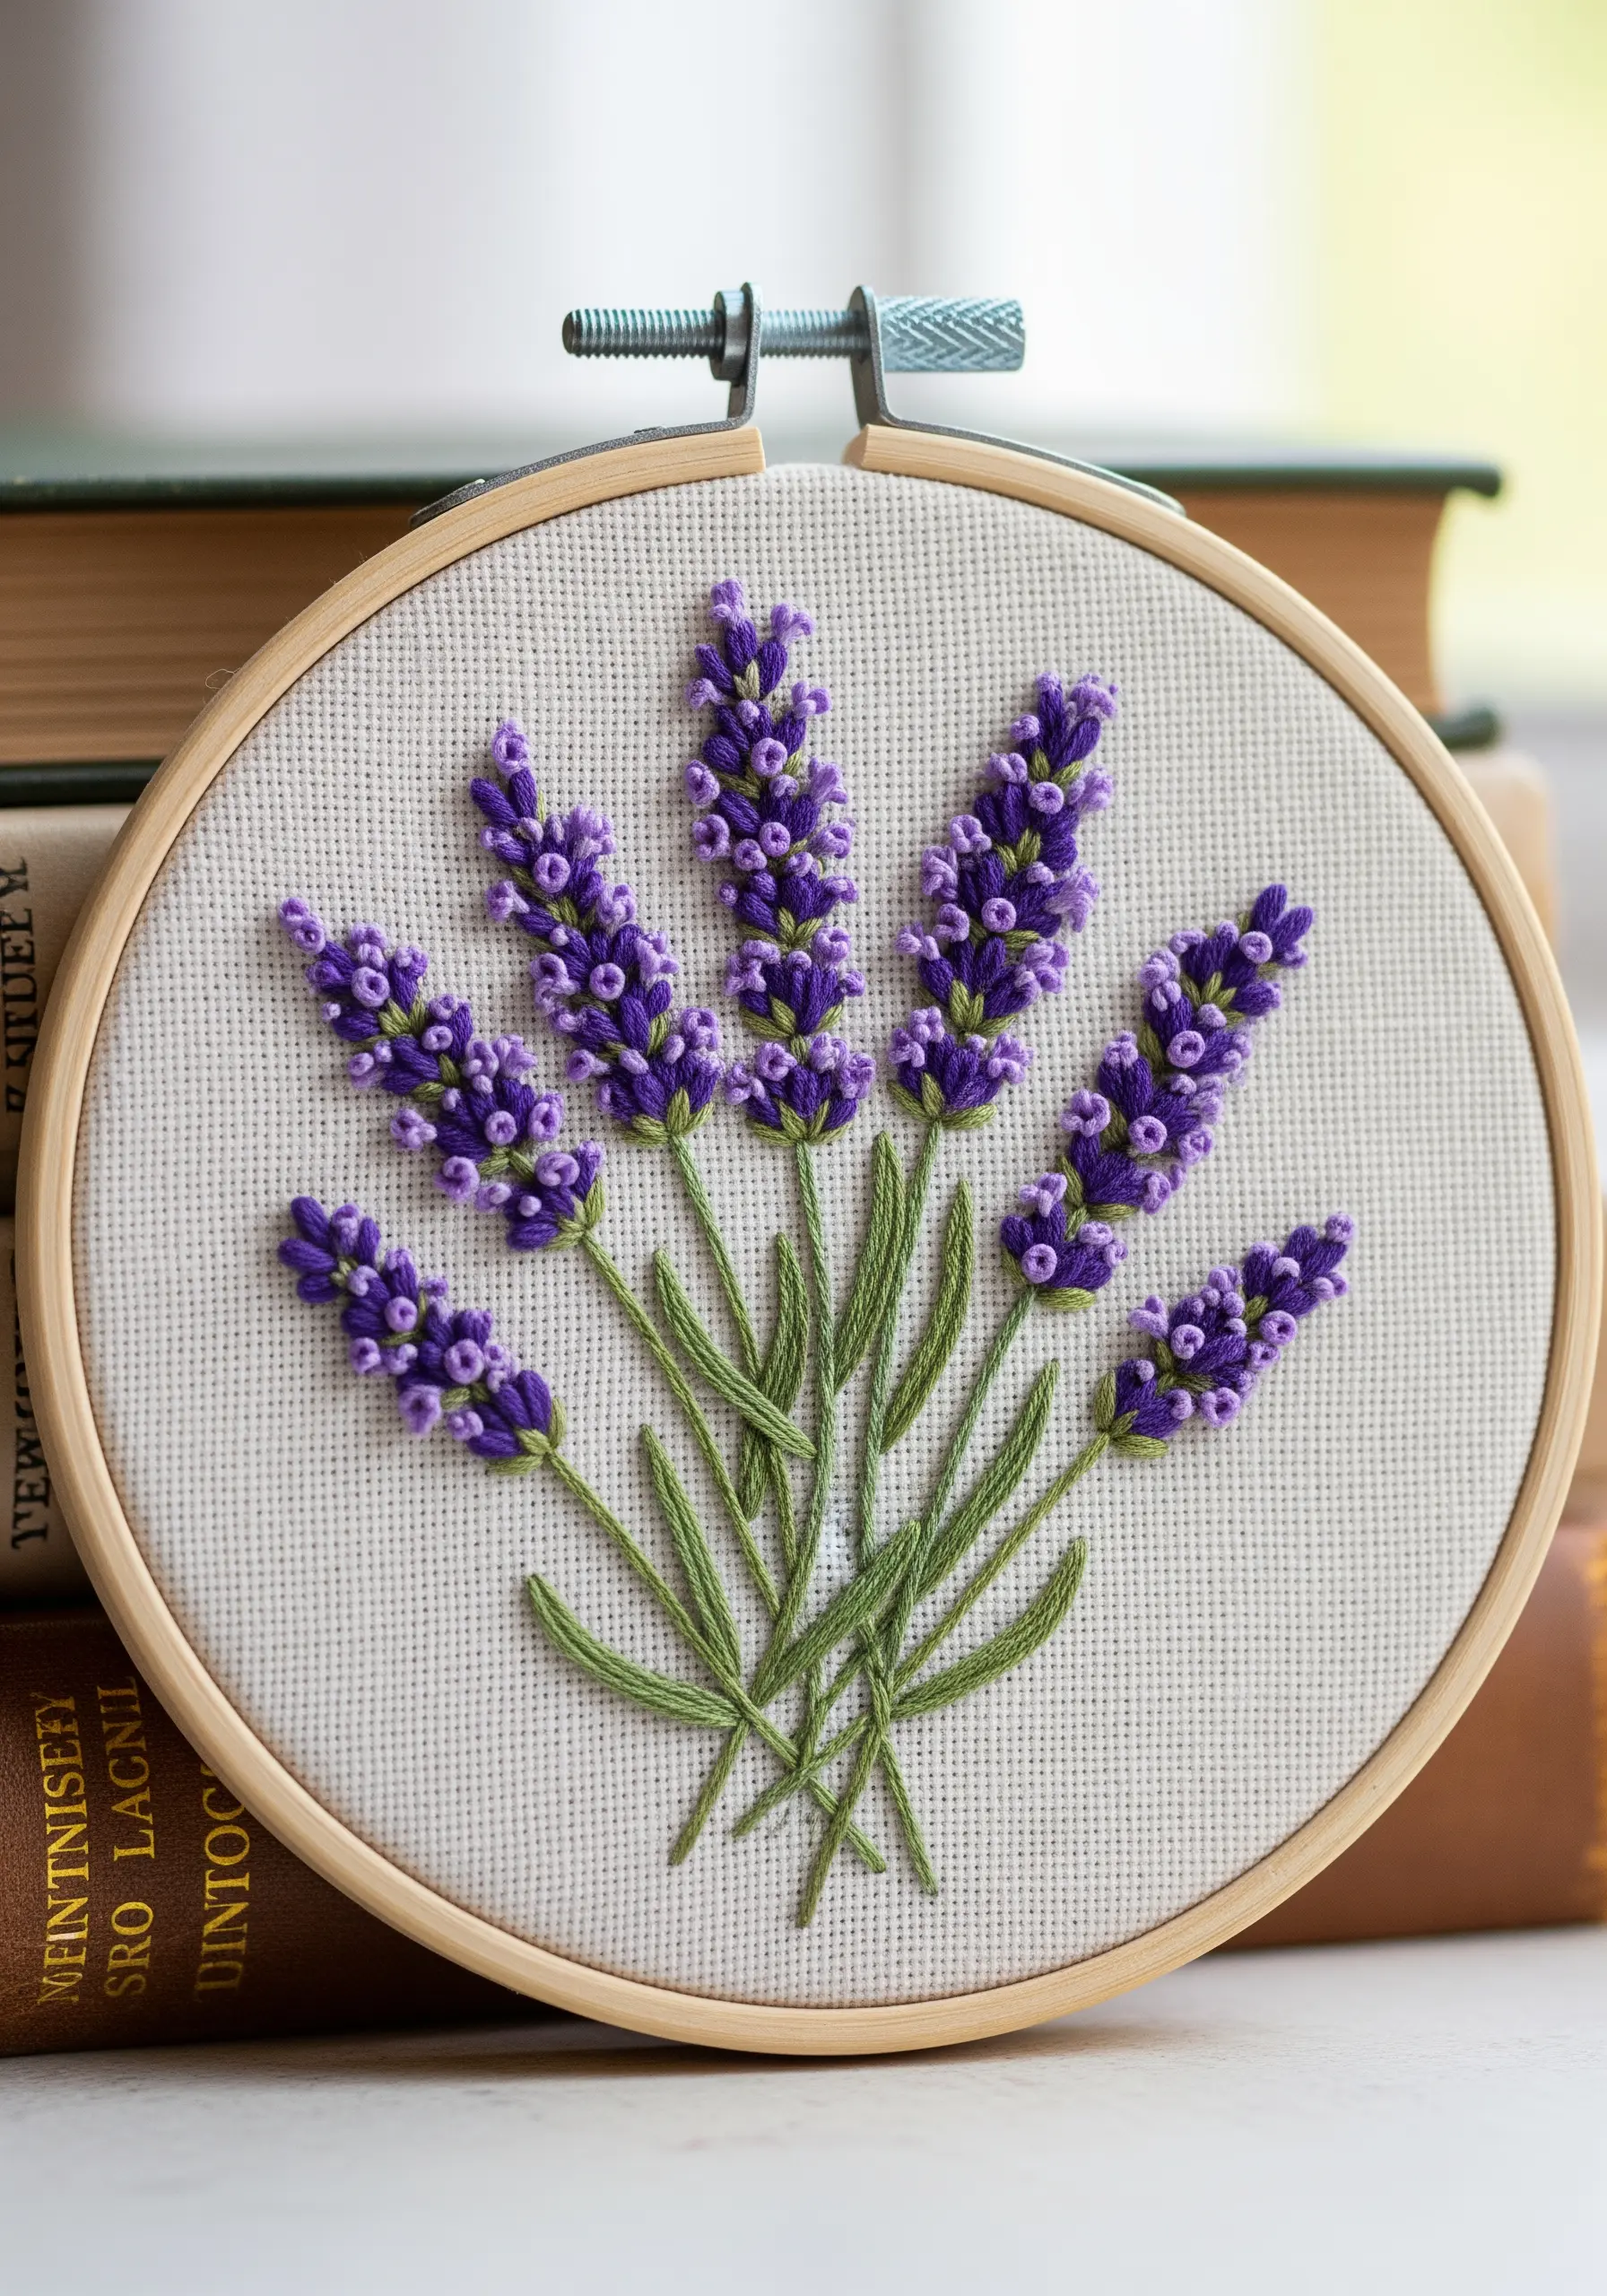
Instead of struggling with complex stitches, create convincing lavender sprigs by clustering French knots.
Work your knots closely together at the top of the stem, gradually spacing them out as you move downward—this mimics the natural budding pattern of the flower.
Use at least two shades of purple, randomly placing the lighter and darker knots to add depth and avoid a flat, uniform look.
The simplicity of the stem stitch for the stalks provides a quiet foundation that allows the textured buds to become the focal point.
5. Illustrate Botanical Detail with Precision Outlines
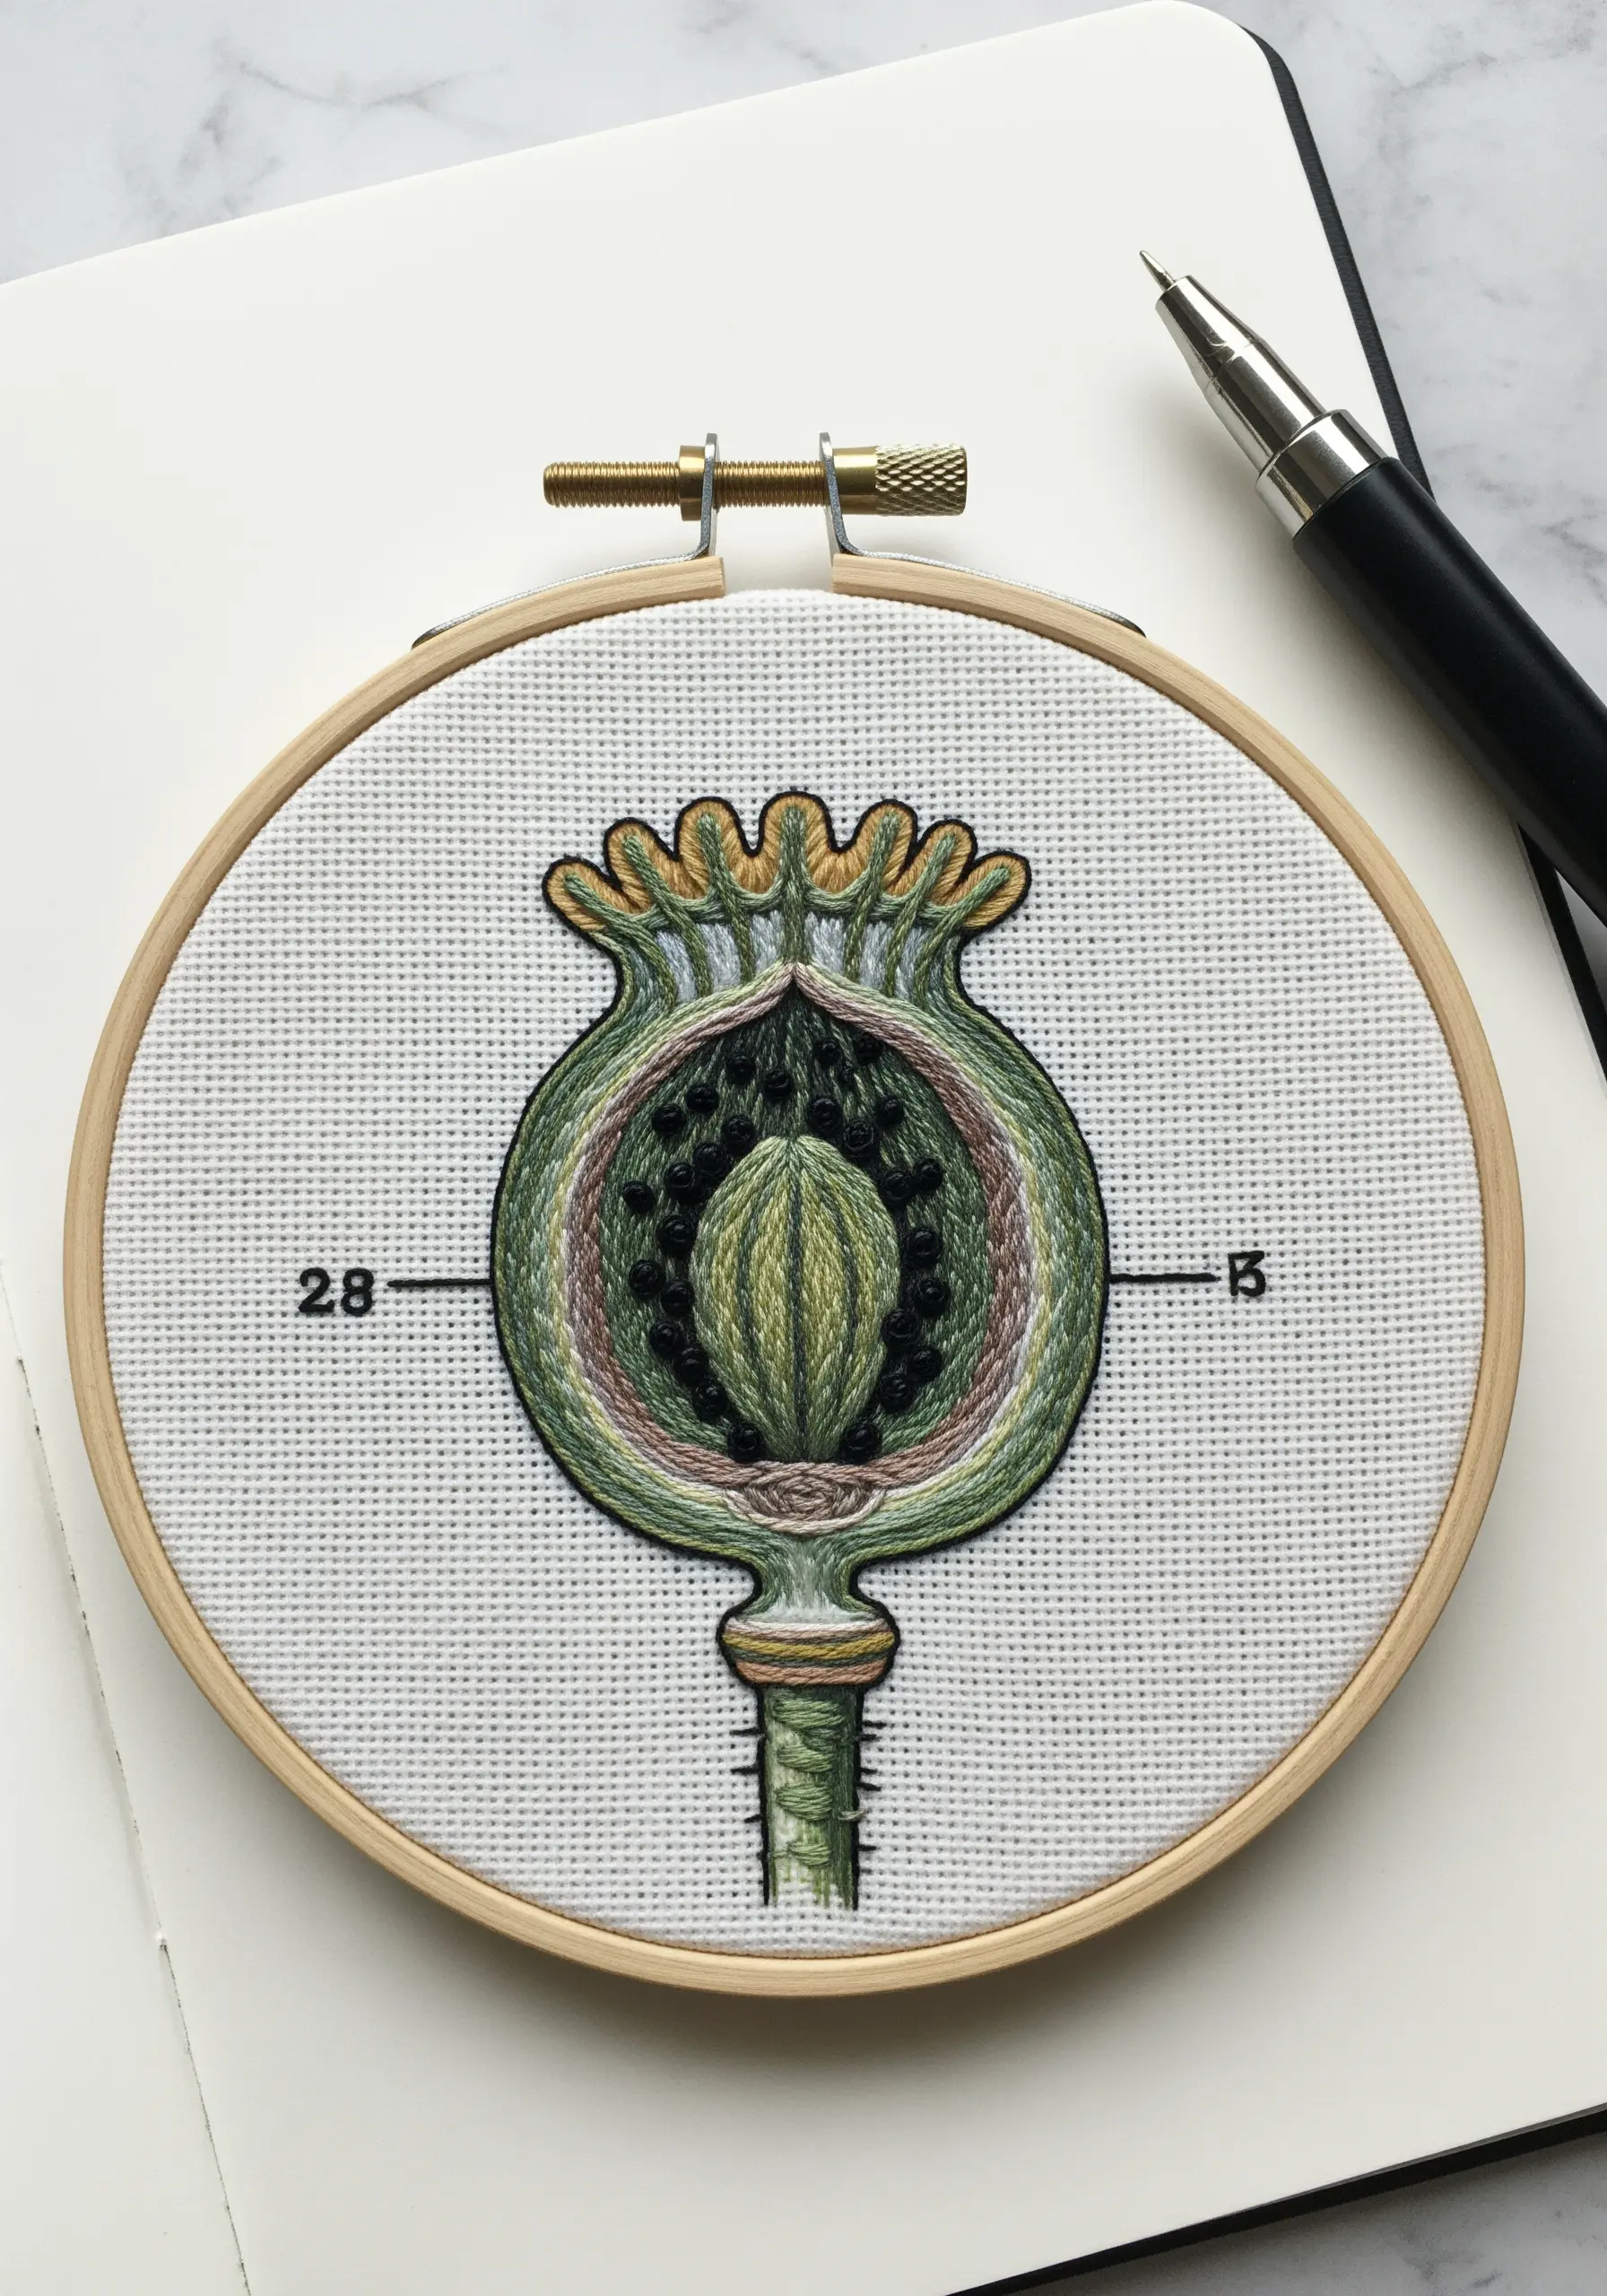
For scientific-style illustrations like this poppy pod, a clean outline is non-negotiable. Use a two-strand split stitch to create sharp, unwavering lines.
Inside the pod, use black French knots for the seeds and fill the remaining sections with a single-strand long-and-short stitch to achieve subtle, painterly color transitions.
The key to this style is the contrast between the bold, graphic outline and the delicate, blended fill, giving it the look of a vintage botanical chart.
Choose Aida cloth for this project; its gridded structure helps maintain the symmetrical, technical feel of the illustration.
6. Add a Polished Accent to Apparel
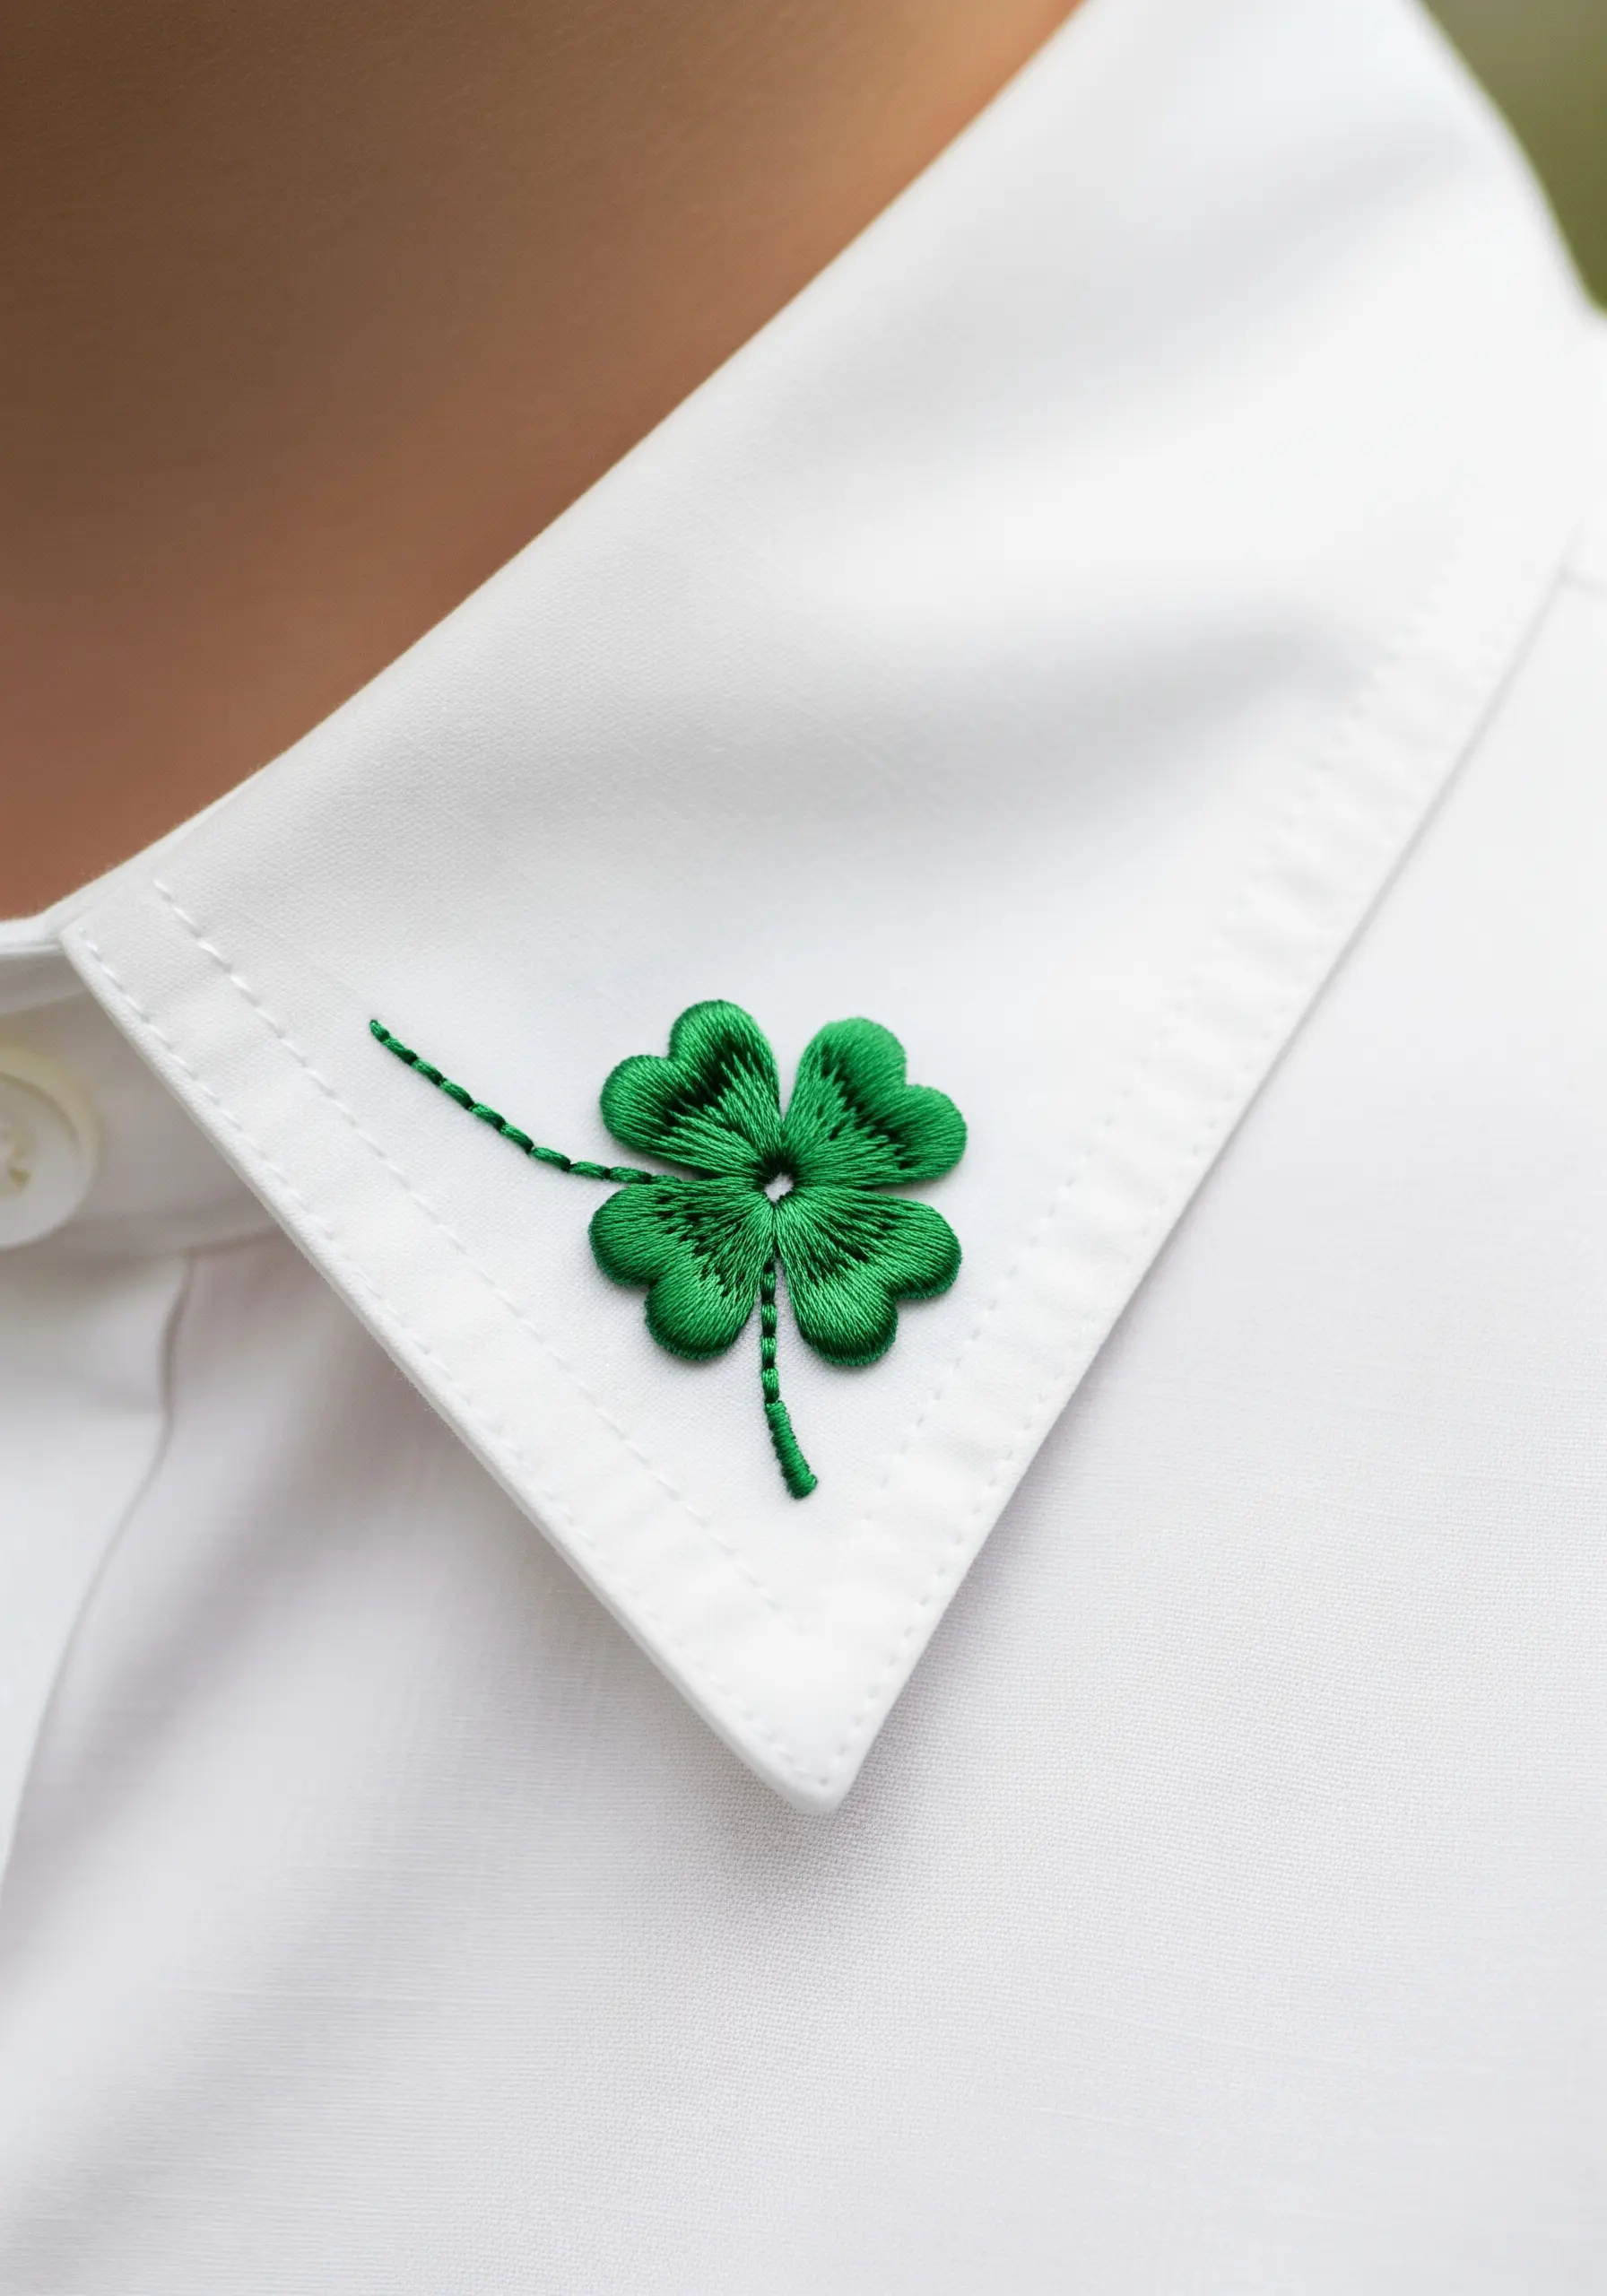
When embroidering on clothing, especially a crisp collar, always use a lightweight fusible stabilizer on the back to prevent fabric puckering.
Achieve a perfectly smooth satin stitch by ensuring each stitch lays flat and parallel to the one before it. Use the weave of the fabric as a subtle guide for straightness.
For the clover’s stem, switch to a single strand of floss and use a delicate backstitch. This difference in thread weight makes the leaves feel full and the stem appropriately slender.
This tiny detail transforms a simple shirt into a personalized, bespoke piece.
7. Sculpt a 3D Succulent Garden
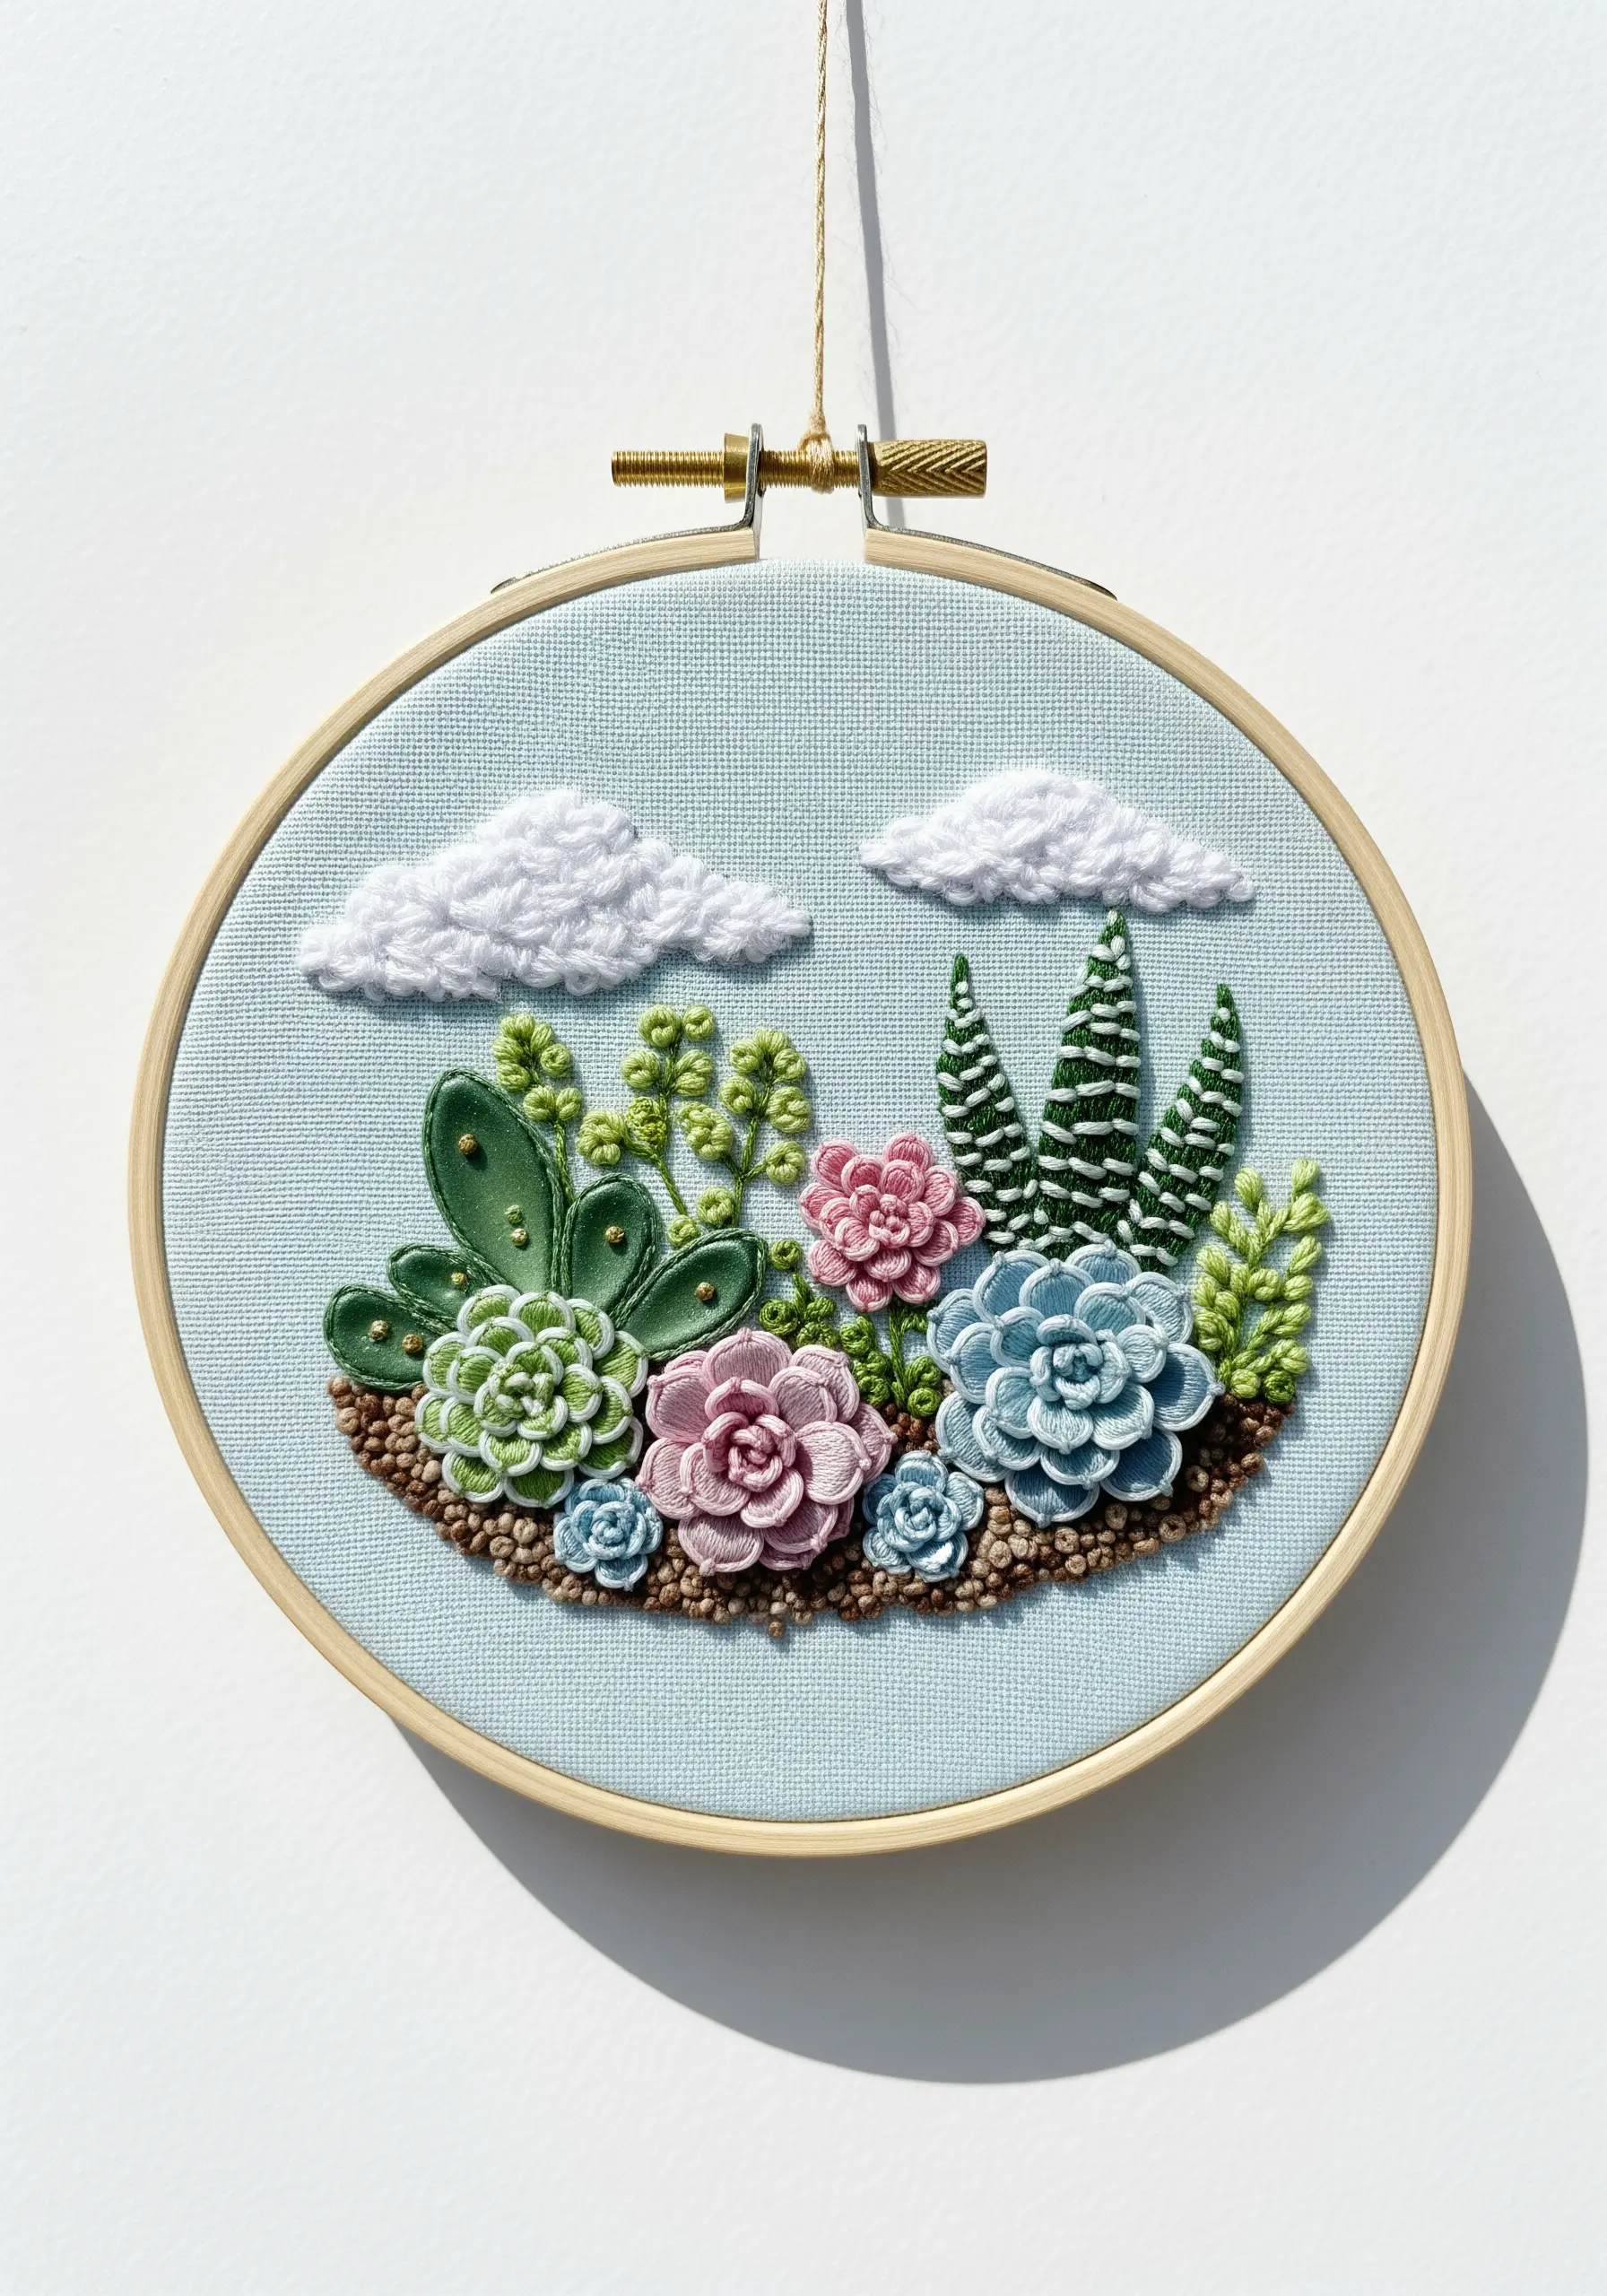
Create a tactile, high-relief garden by assigning a different textural stitch to each element.
Use woven wheel stitches for the rose-shaped succulents, varying the number of spokes to change their size and fullness. For spiky plants, try a detached buttonhole stitch worked in rows.
The fluffy clouds are achieved with turkey work, trimmed short for a dense, cumulus effect, while the soil is a bed of French knots in earthy tones.
This combination of 3D techniques transforms your hoop into a miniature, touchable world.
8. Blend Thread and Beads for Ethereal Texture
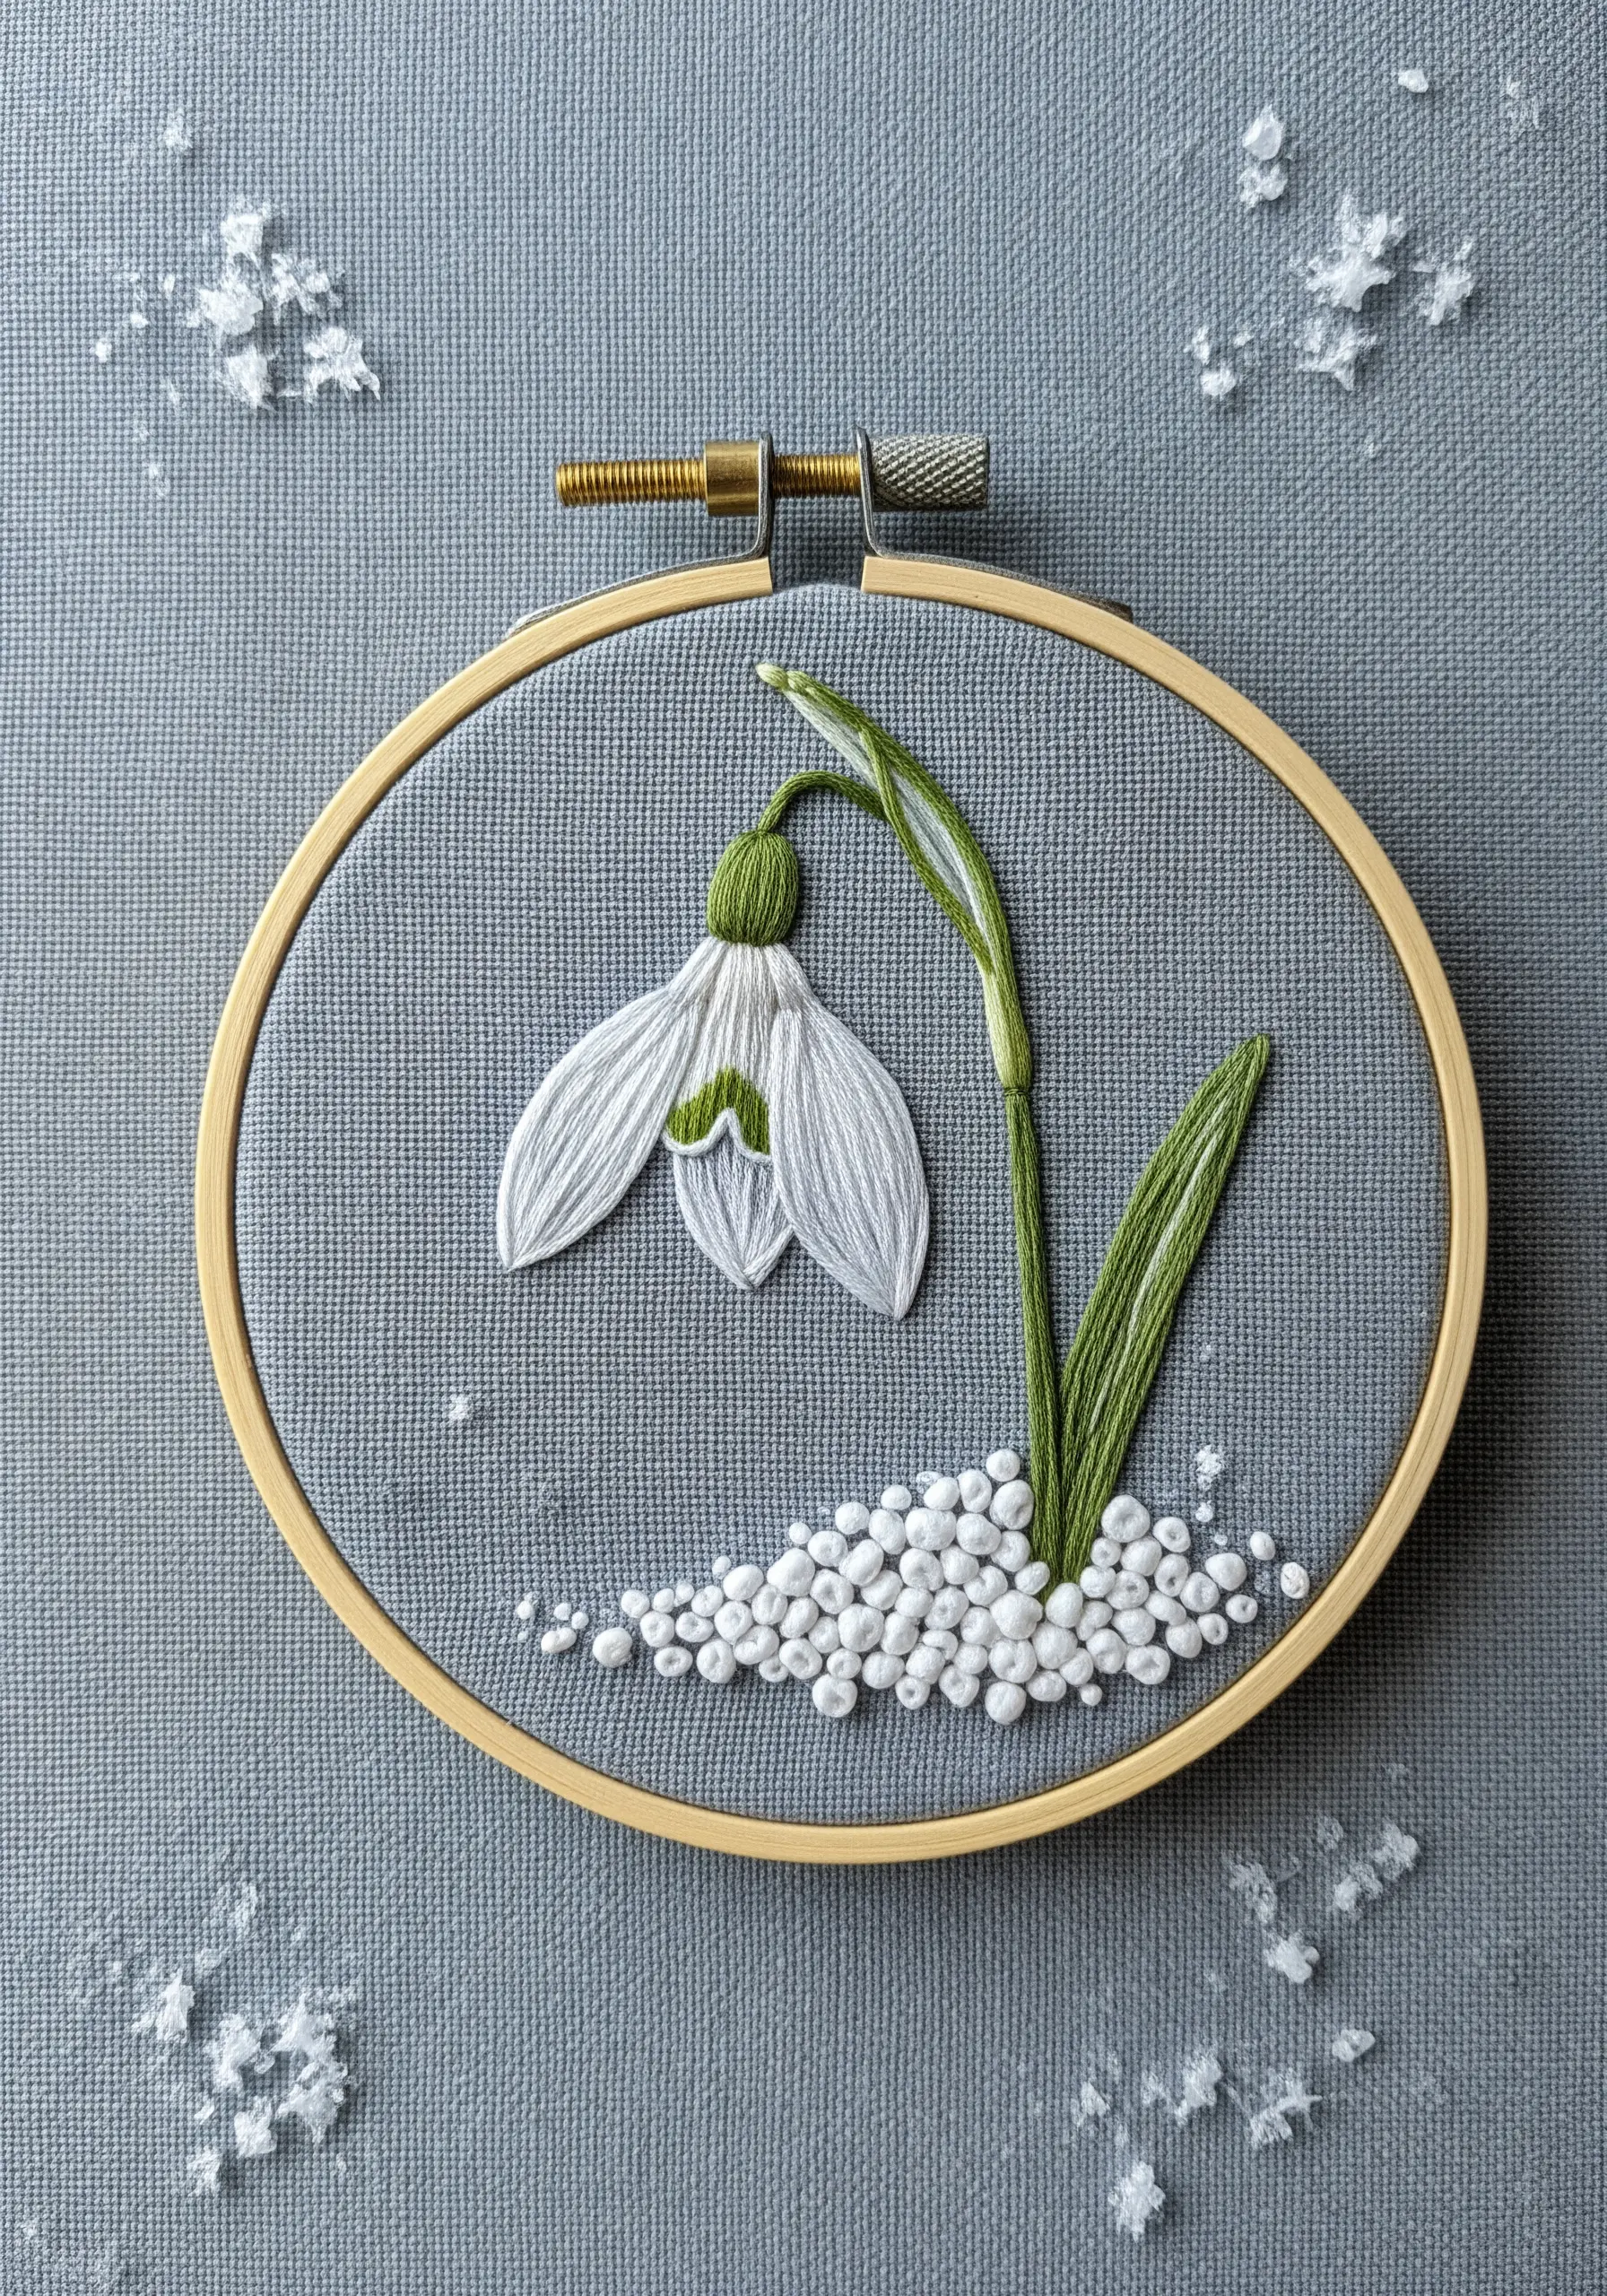
Capture the delicacy of a snowdrop petal using long-and-short stitch with a single strand of floss. Blend shades of white, off-white, and the palest green to create form and shadow.
Contrast the softness of the thread with the hard, smooth texture of tiny white beads for the snow. This mixed-media approach adds an unexpected and sophisticated layer of realism.
Stitch on a muted gray or blue fabric to make the white elements stand out, evoking the quiet light of a winter morning.
9. Engineer Petal Direction for Lifelike Pansies
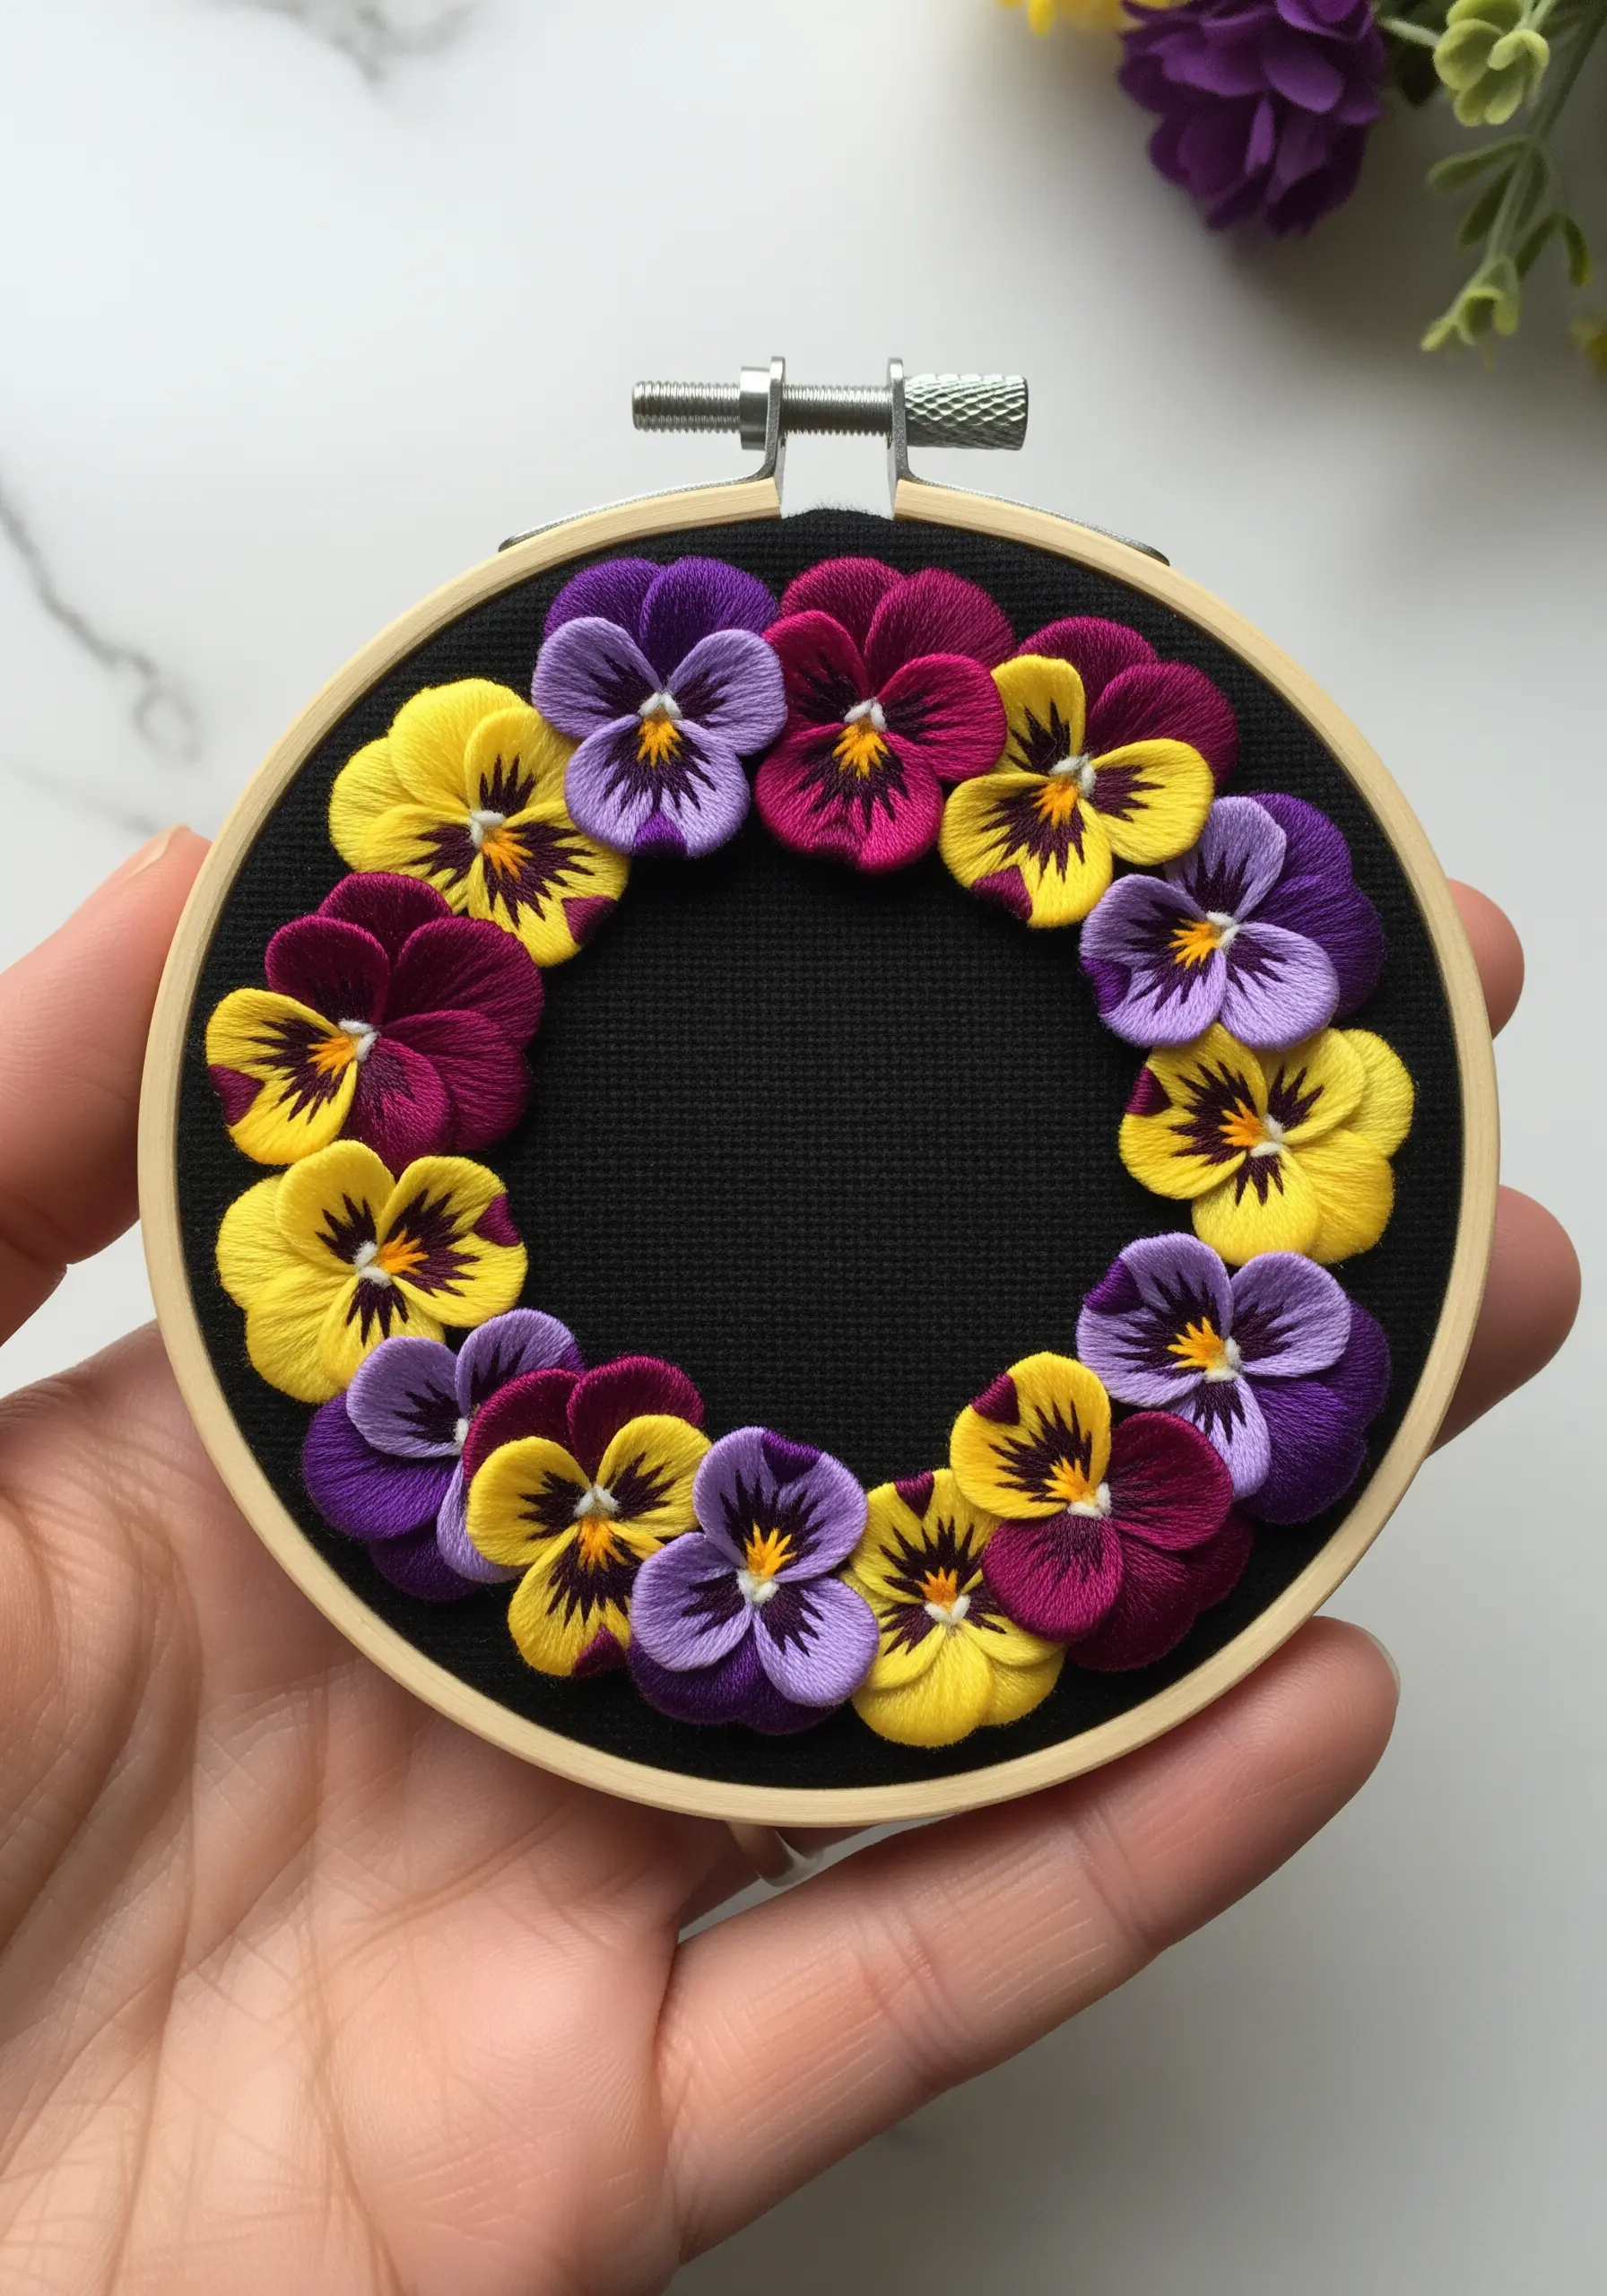
The secret to realistic pansy petals lies in the direction of your satin stitches. Always stitch from the outer edge of the petal inward toward the center.
This simple technique forces the thread to follow the natural curve of the petal, creating a sense of shape and movement.
Use two or three contrasting colors within a single petal, blending them slightly where they meet to mimic the flower’s distinct markings.
A few straight stitches in a dark, contrasting color at the very center will anchor the design and make your vibrant wildflower thread palette pop.
10. Create a Fern with Rhythmic, Repetitive Stitches
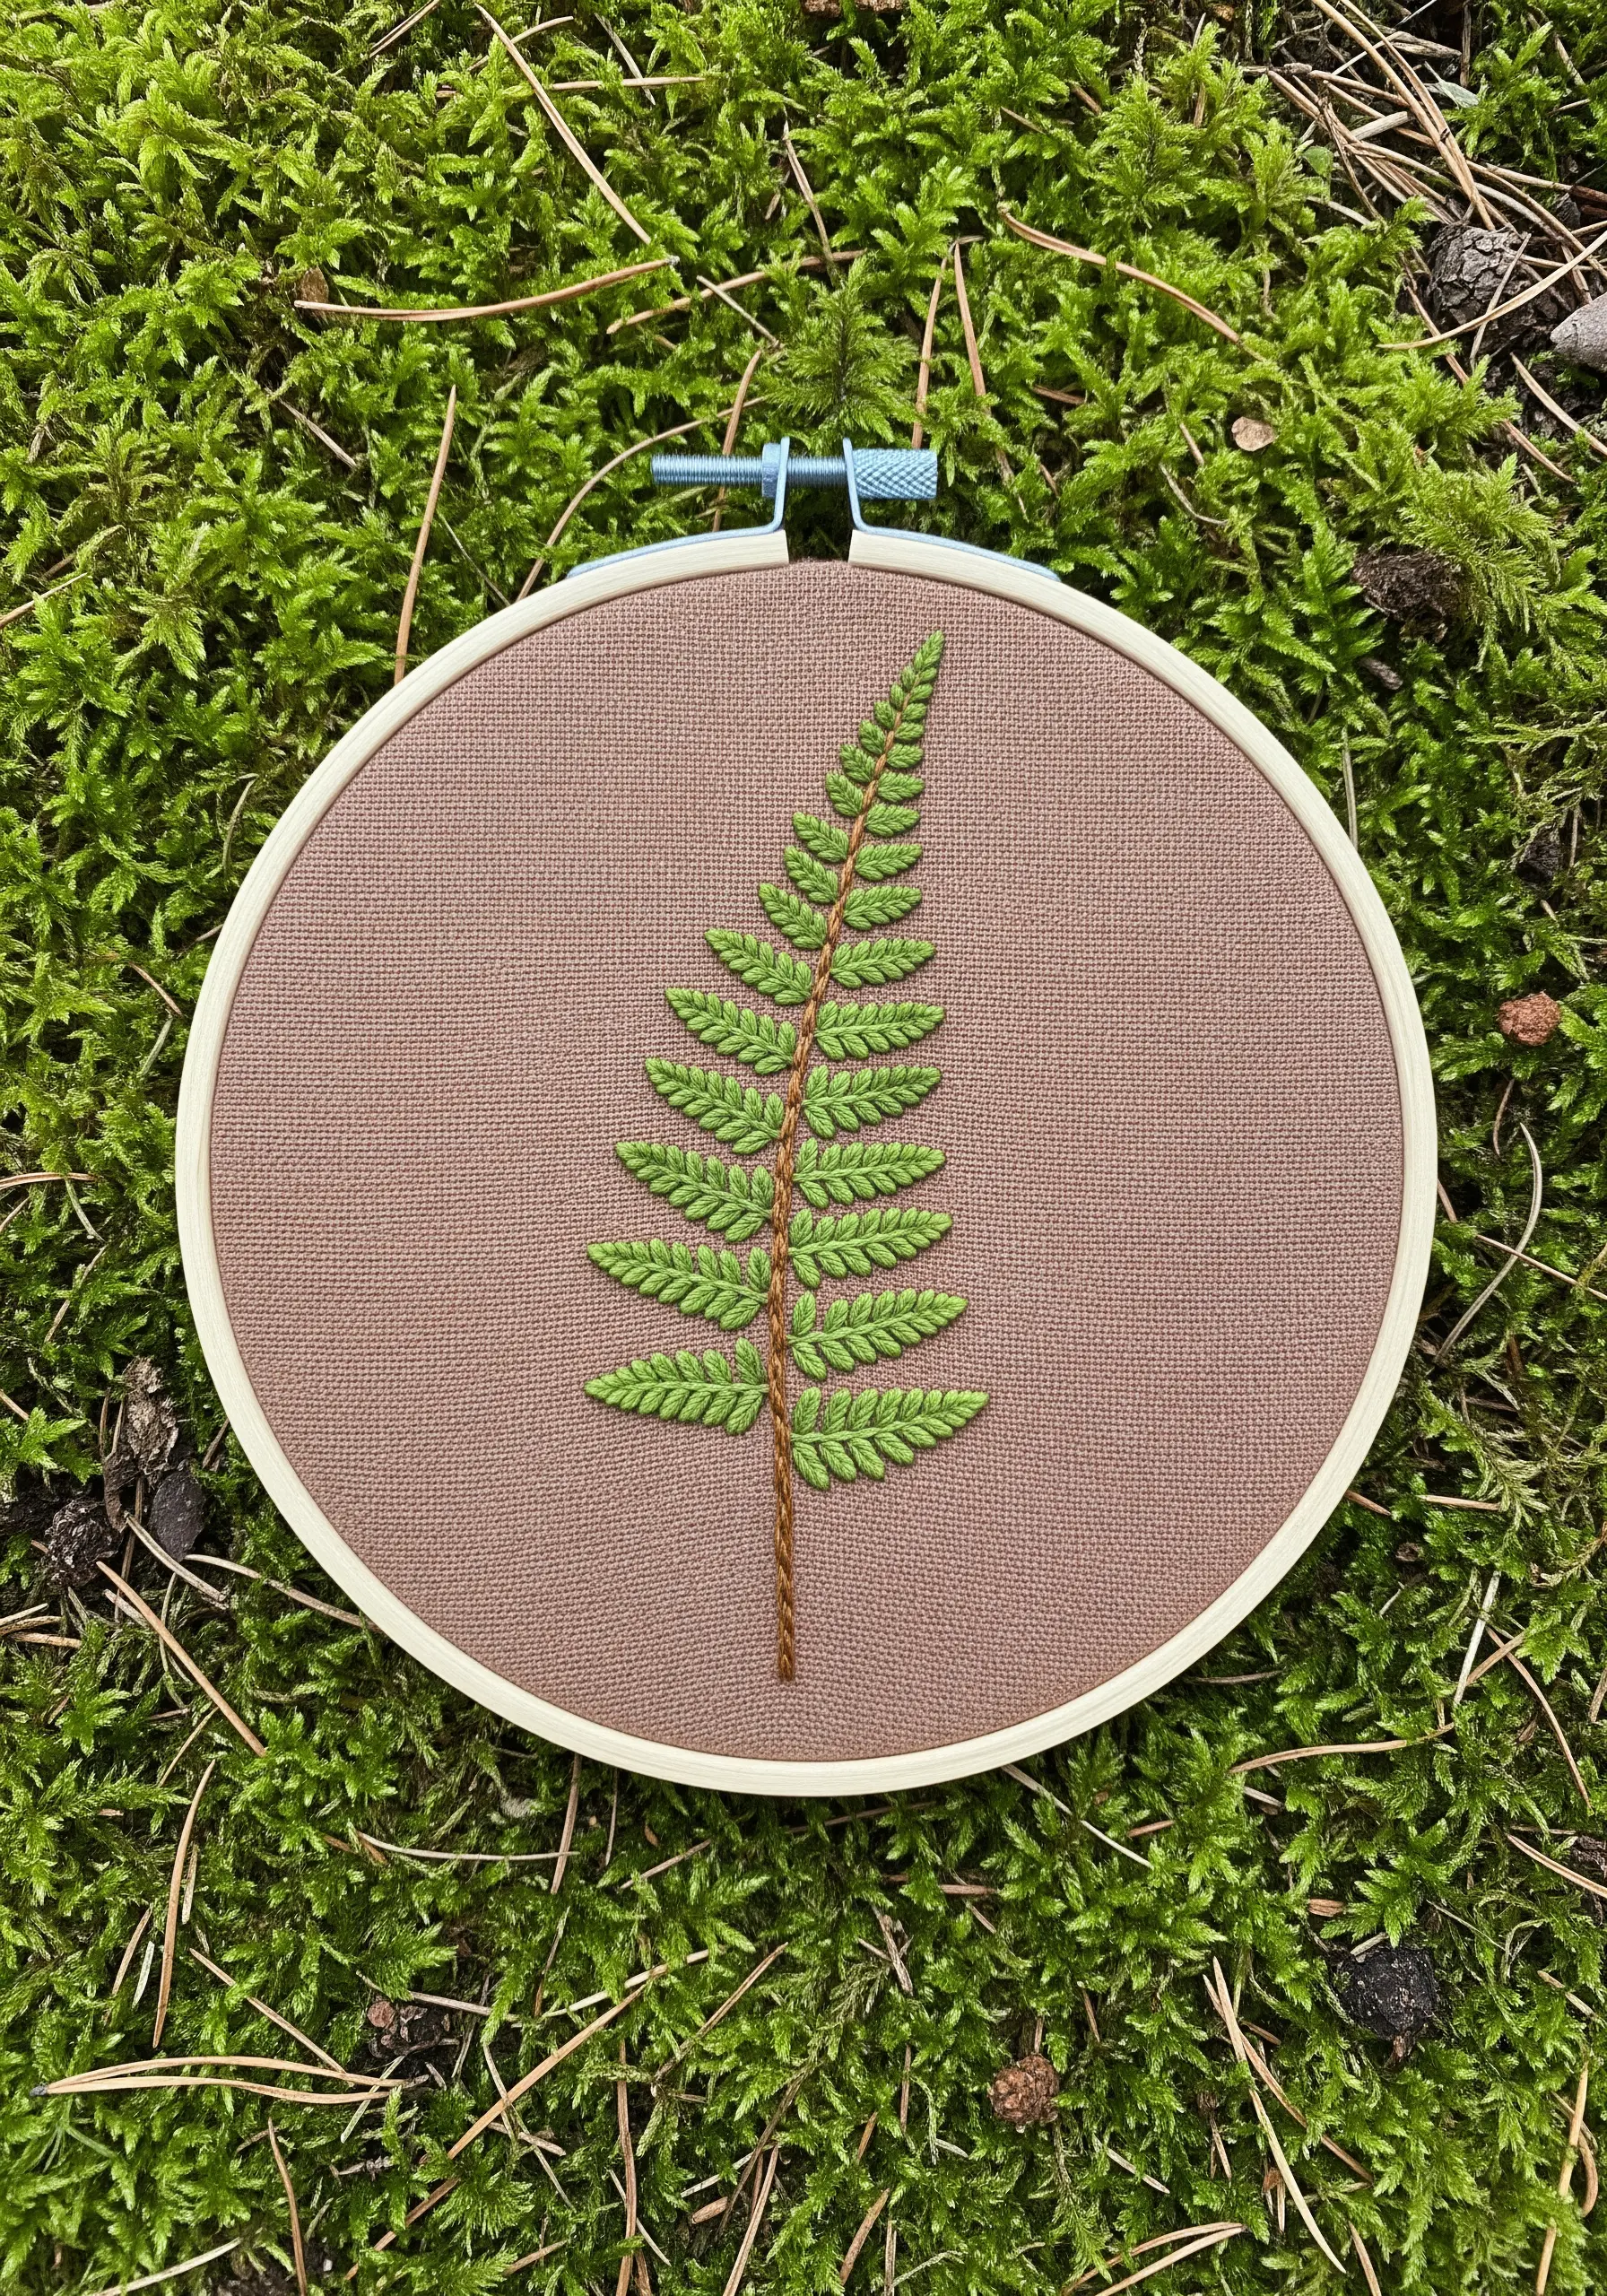
Embrace the power of repetition to stitch this elegant fern. Each tiny leaflet is a single detached chain stitch (lazy daisy).
The key to a polished result is consistency. Aim for uniform size and tension in every single stitch to create a clean, graphic pattern.
Work the central stem last, using a whipped backstitch to create a smooth, raised line that neatly covers the base of your leaflets.
Using a slightly darker green for the leaflets’ outlines adds a subtle definition that elevates the entire piece from simple to sophisticated.
11. Weave Dense Knots for a Bold, Graphic Floral
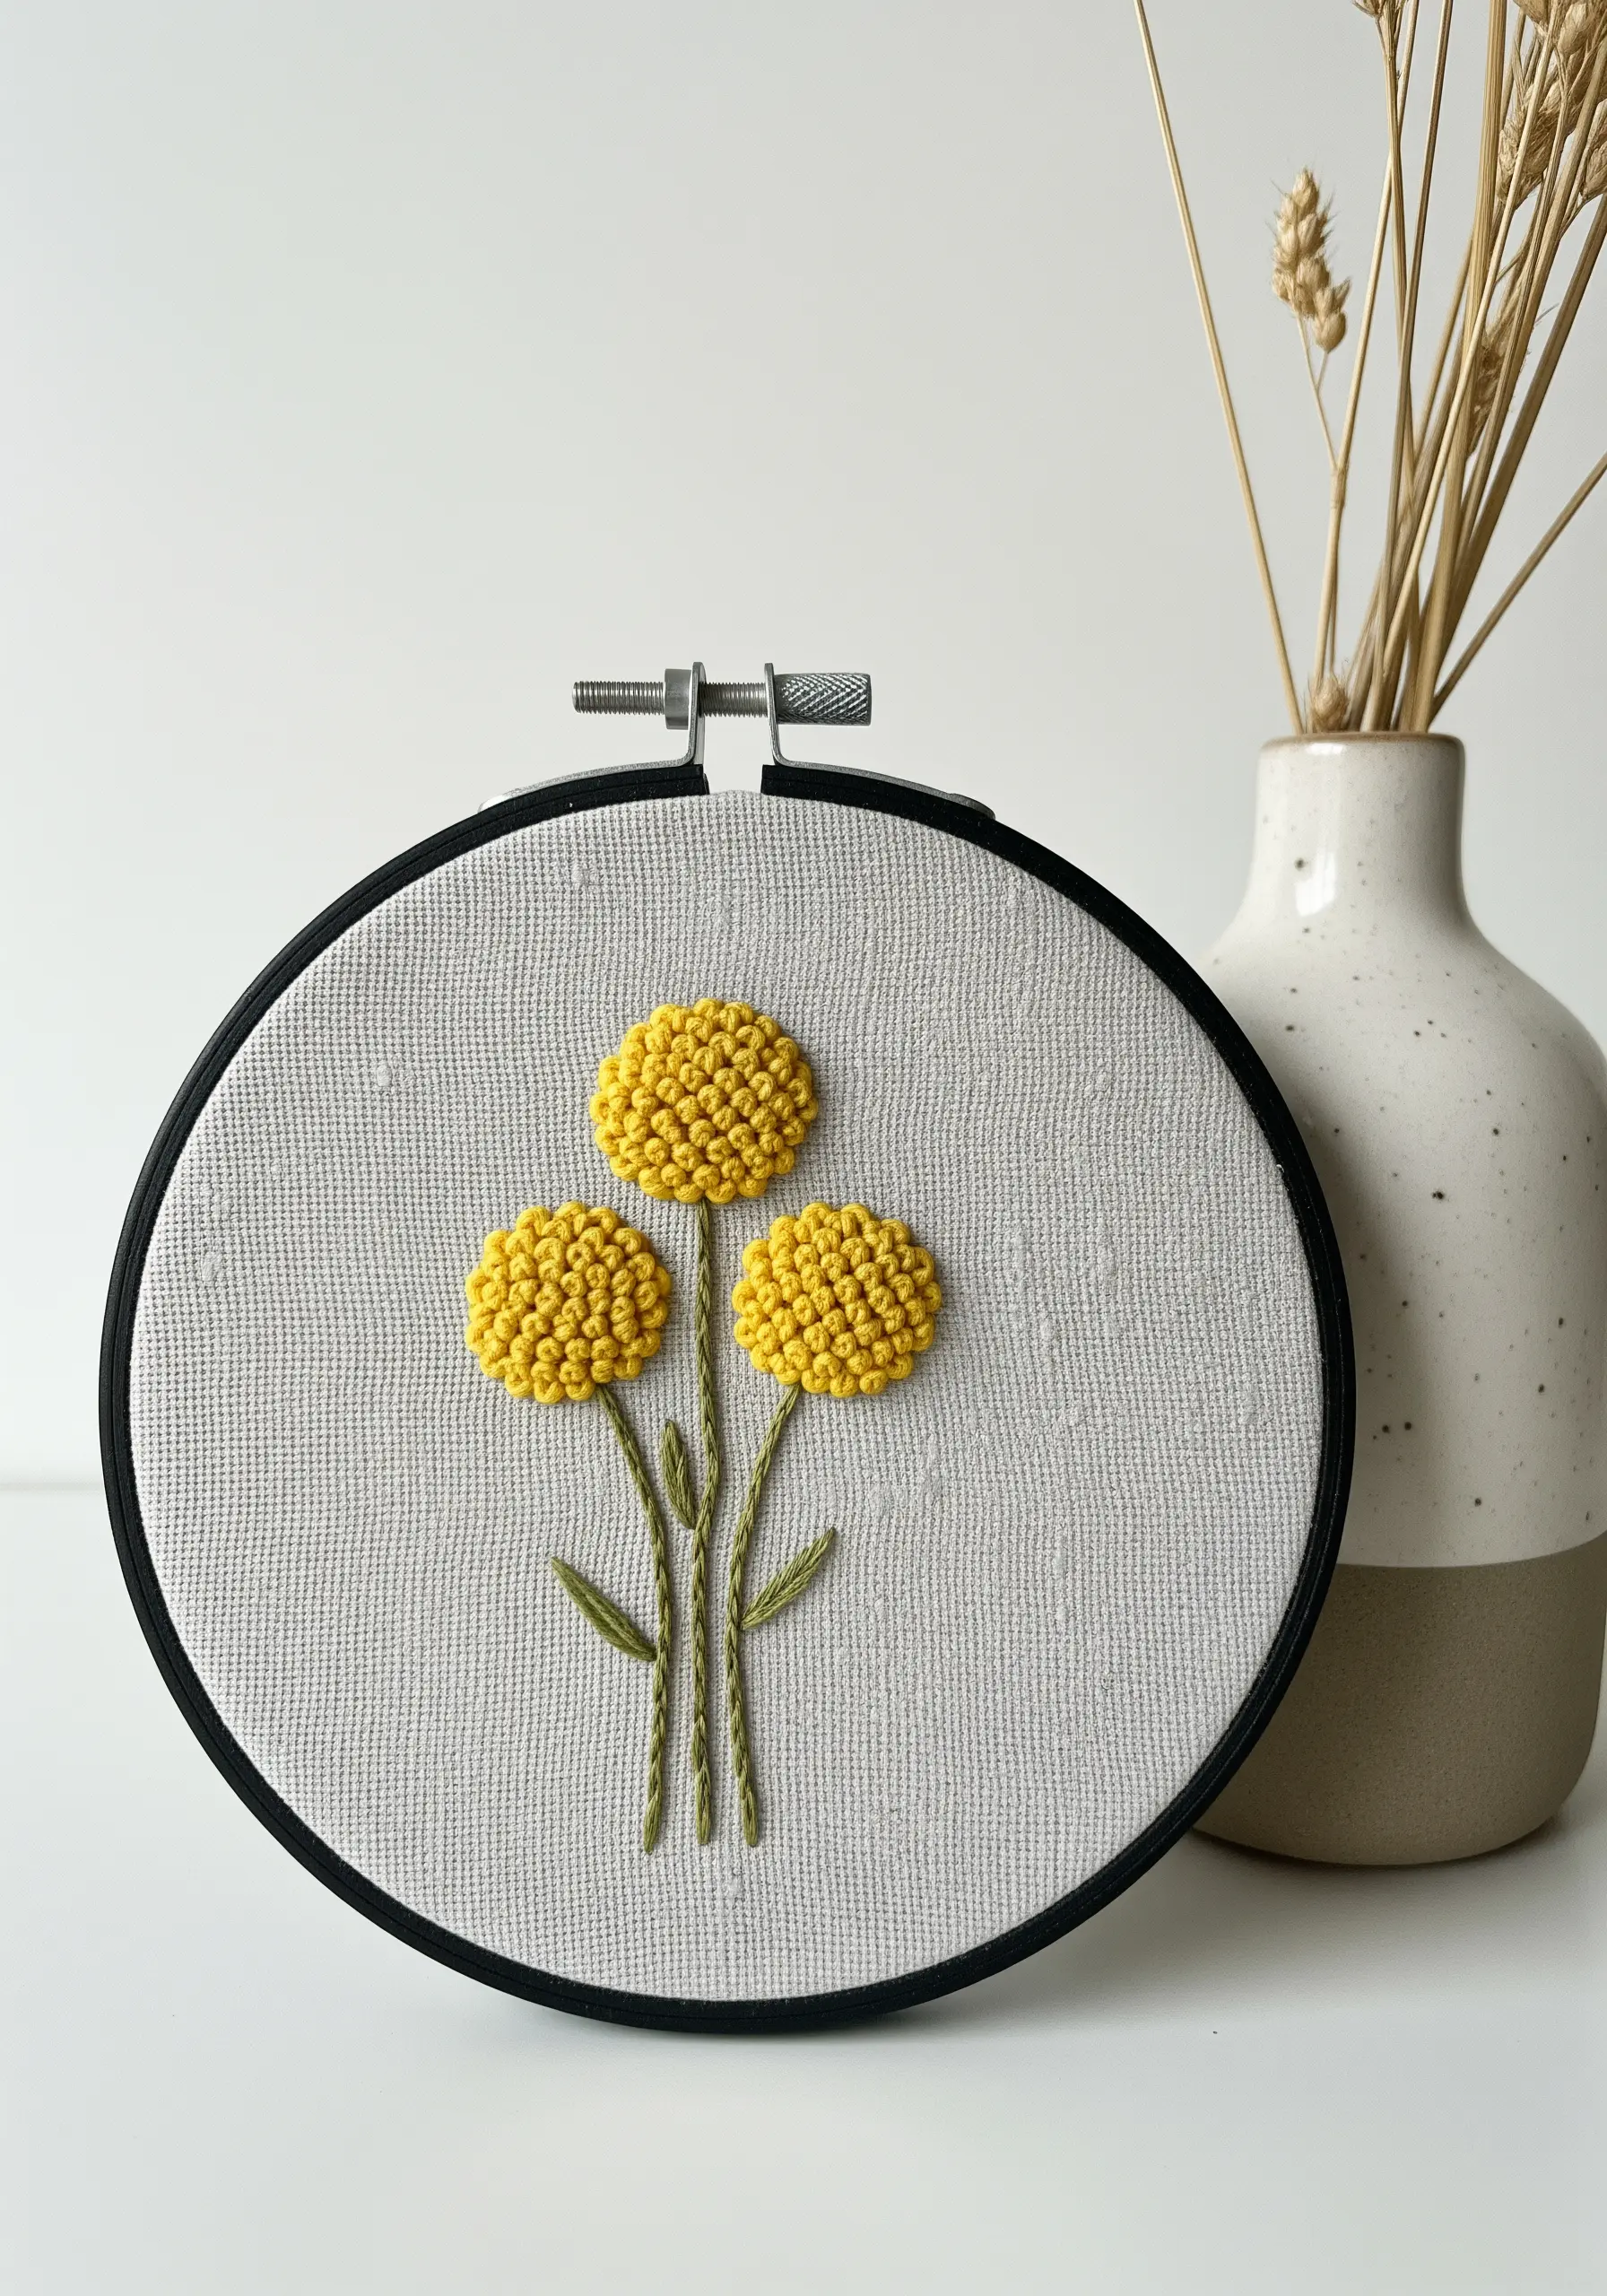
To create these spherical Craspedia flowers, use French knots or bullion knots packed tightly together within a drawn circle.
Work the knots from the outside edge of the circle inward, filling the shape completely to create a dense, highly textured, and three-dimensional effect.
Use a full six strands of floss for plump, substantial knots that build volume quickly.
Keep the stems and leaves minimal with simple stem stitches; this ensures the heavily textured flower heads remain the undisputed stars of the show.
12. Suggest Transparency with Appliquéd Organza Wings
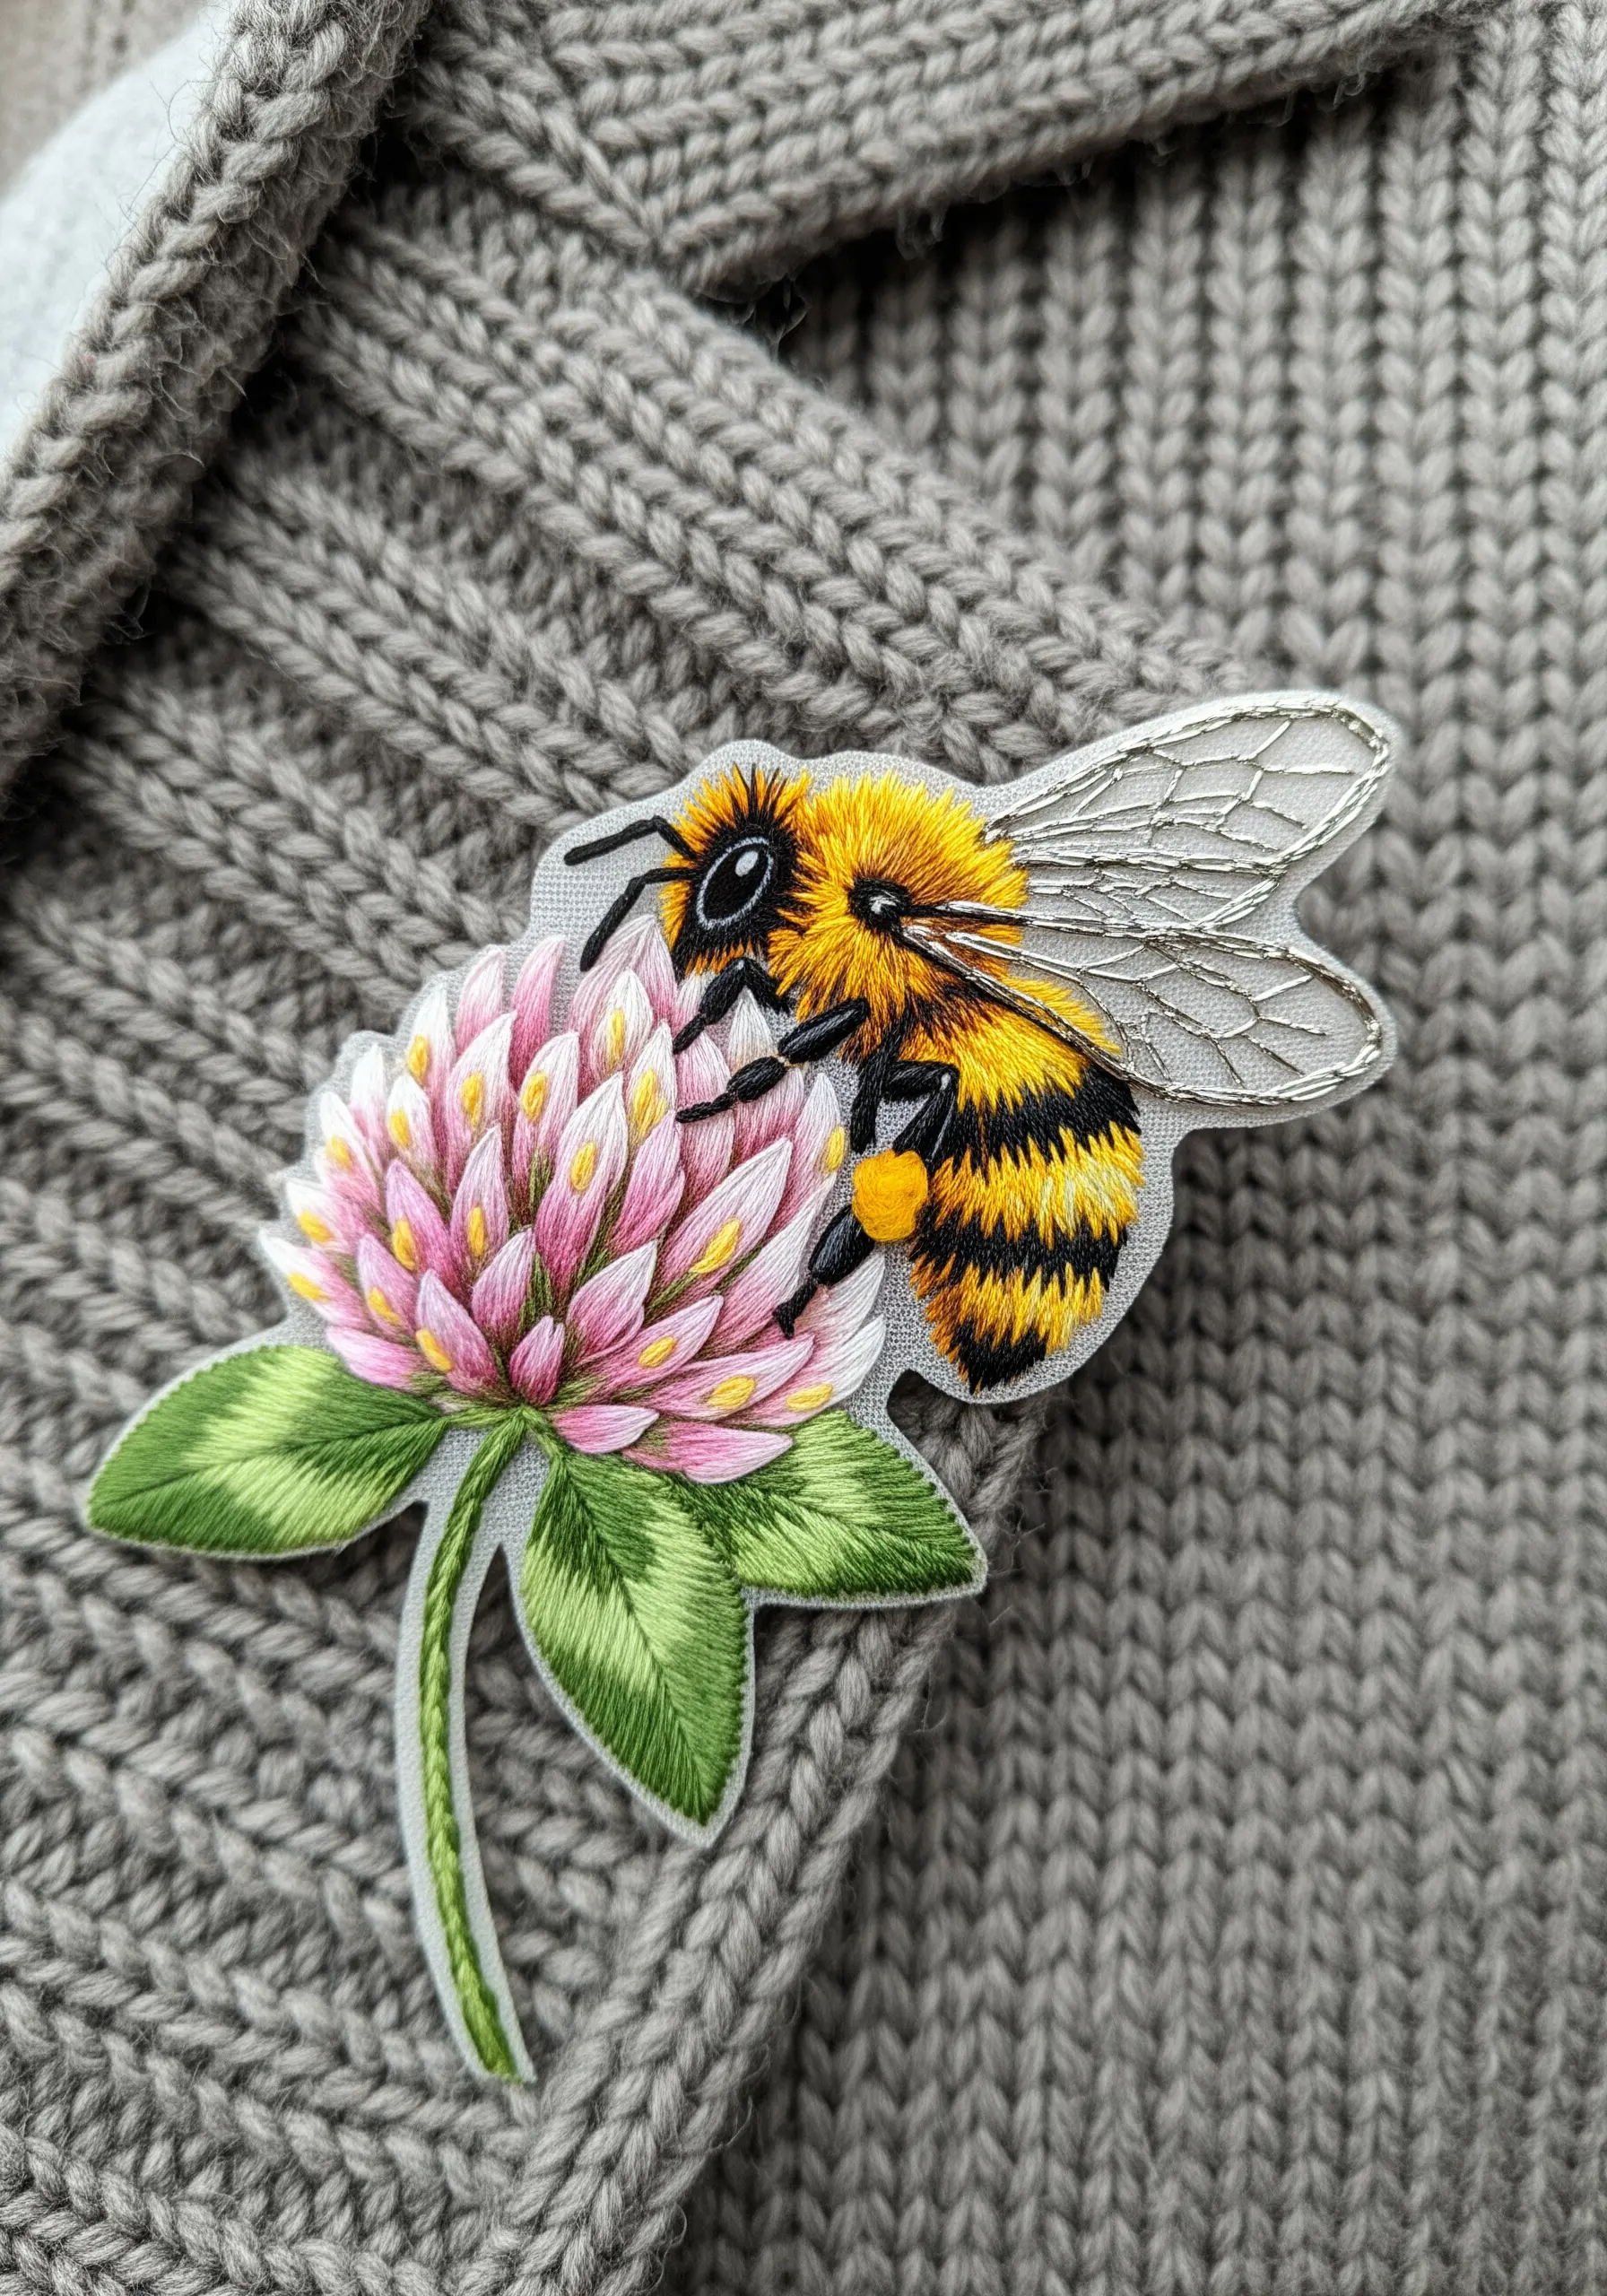
To give insect wings a delicate, translucent quality, don’t stitch them directly onto your main fabric. Instead, embroider the vein details onto a small piece of sheer organza.
Use a single strand of gray or silver metallic thread and a simple backstitch for the veins. Carefully cut out the wing shape, leaving a tiny margin.
Tack the organza wing onto your main design with a few tiny, nearly invisible stitches. This appliqué technique creates a layered, realistic effect that direct embroidery can’t replicate.
13. Cultivate a Mossy Texture with a Riot of Knots
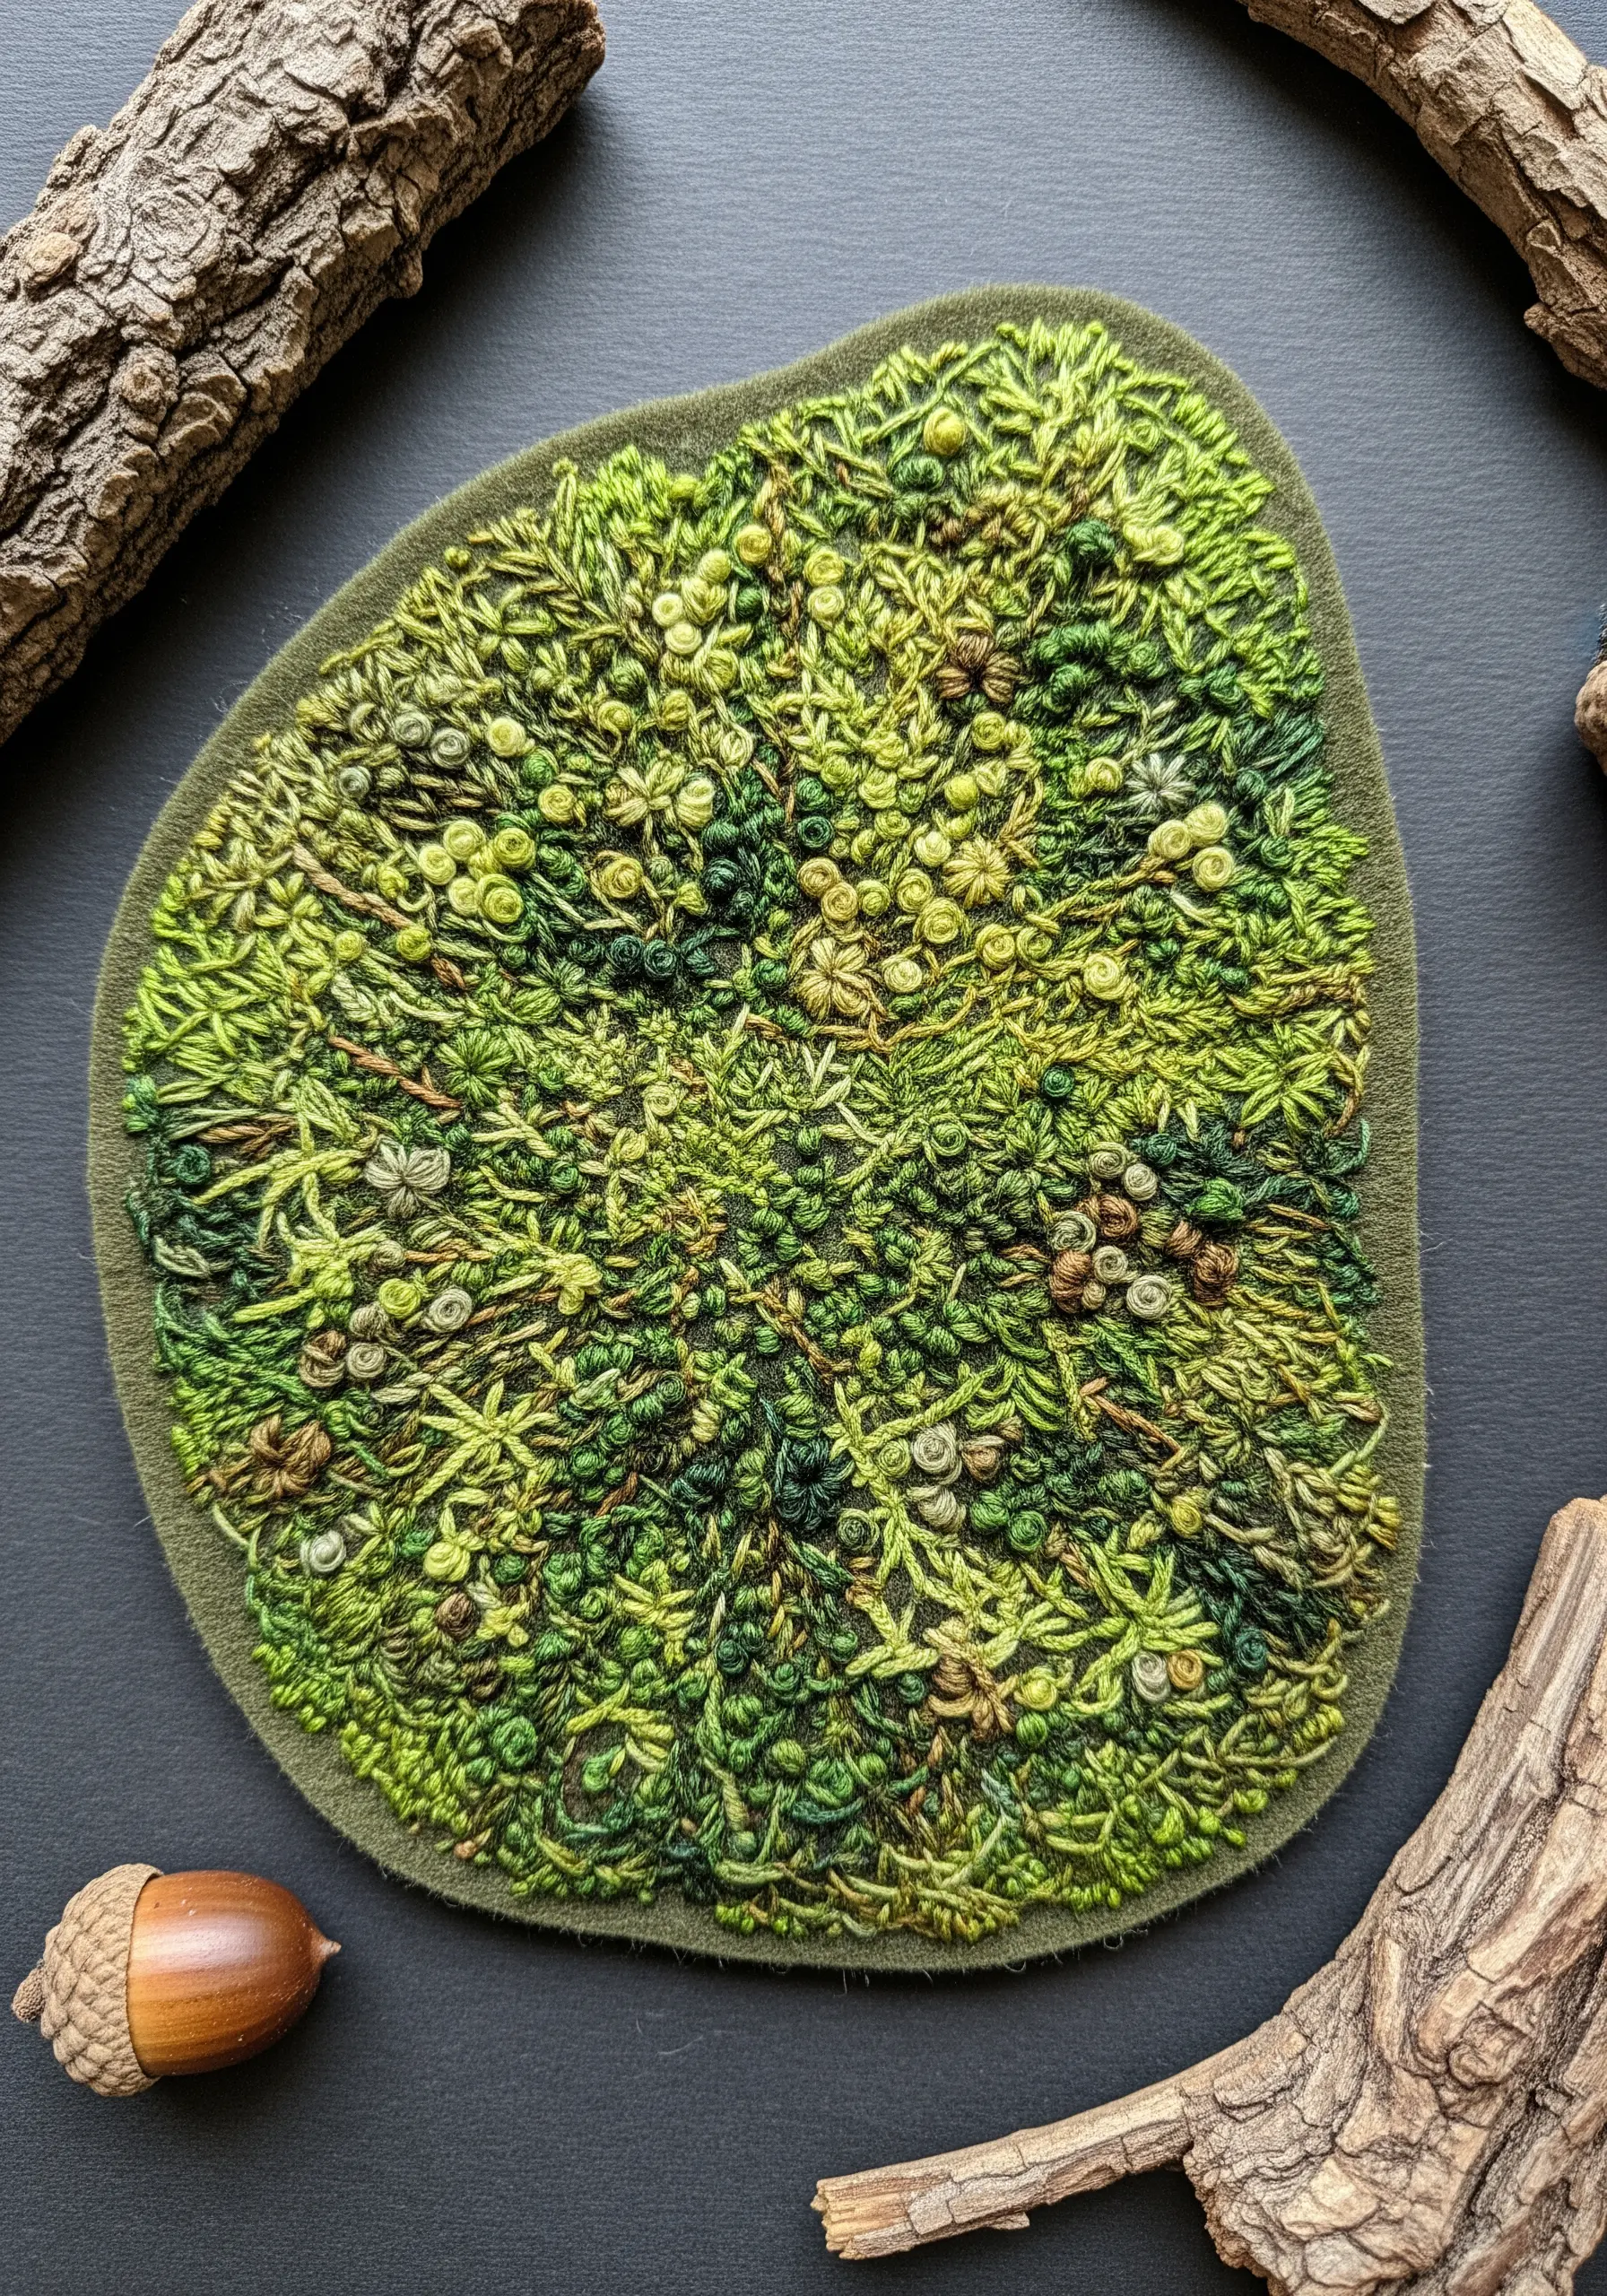
Recreate the rich, chaotic texture of moss by combining hundreds of French knots, colonial knots, and tiny seed stitches.
The key to realism is color variation. Use at least ten different shades of green, olive, and brown, clustering them in organic patches rather than mixing them evenly.
Vary the height of your knots by changing the number of thread strands and how many times you wrap the needle. This variety is essential for capturing an authentic, uneven surface.
This is one of the best ways to capture nature’s textures using just a needle and thread.
14. Achieve Delicate Airiness with Thread Weight Contrast

The elegance of Baby’s Breath lies in its contrast between delicate stems and full blossoms. Replicate this by strategically varying your thread weight.
For the tiny white blossoms, use three or four strands of floss to create plump, perfectly round French knots that feel substantial.
For the branching stems, switch to a single strand of green floss and use a light backstitch or split stitch. This creates a whisper-thin line that looks like it could barely support the flowers, achieving that signature airy quality.
15. Blend Colors Seamlessly for a Root Vegetable Gradient
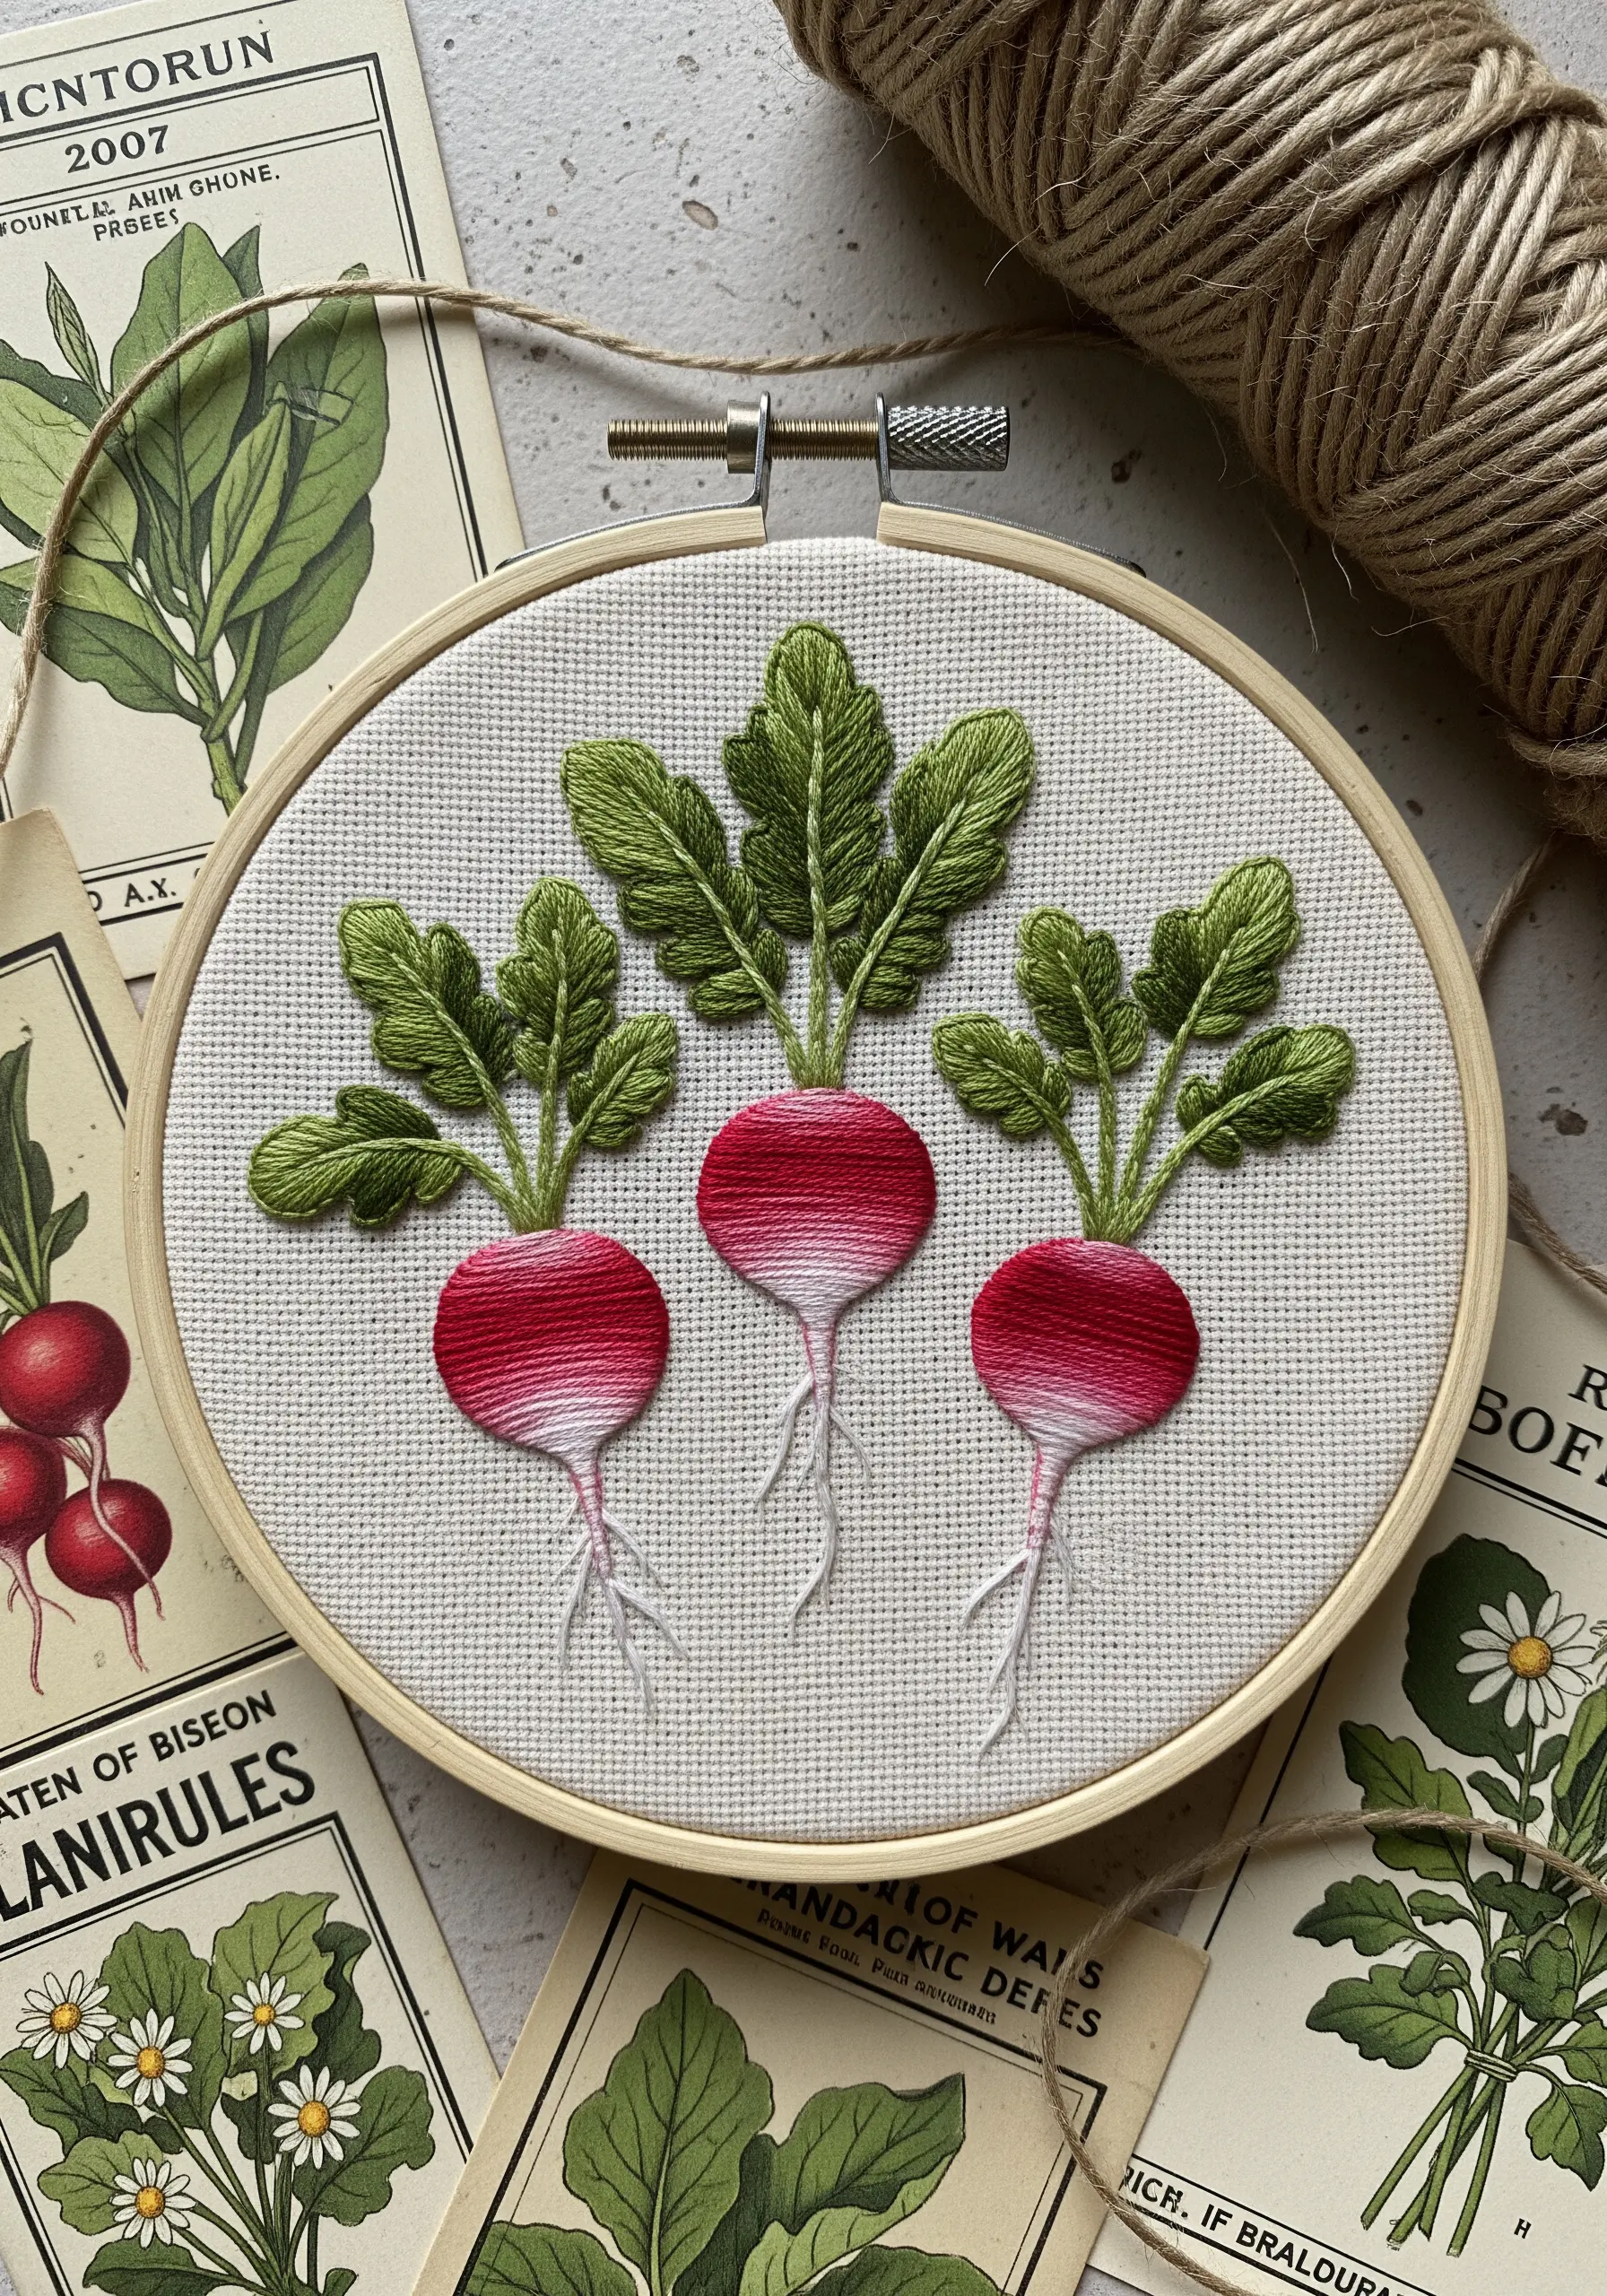
To capture the natural color transition of a radish, use long-and-short stitch instead of a standard satin stitch.
Start with the darkest red at the top, then introduce a lighter pink, and finally white, allowing the stitches of each color band to overlap and interlock.
This technique creates a soft, painterly blend that looks far more realistic than harsh, blocked-off colors.
For the leaves, use a fishbone stitch to create that defined central vein and natural leafy texture in one go.
16. Construct Queen Anne’s Lace with Clustered Stitches
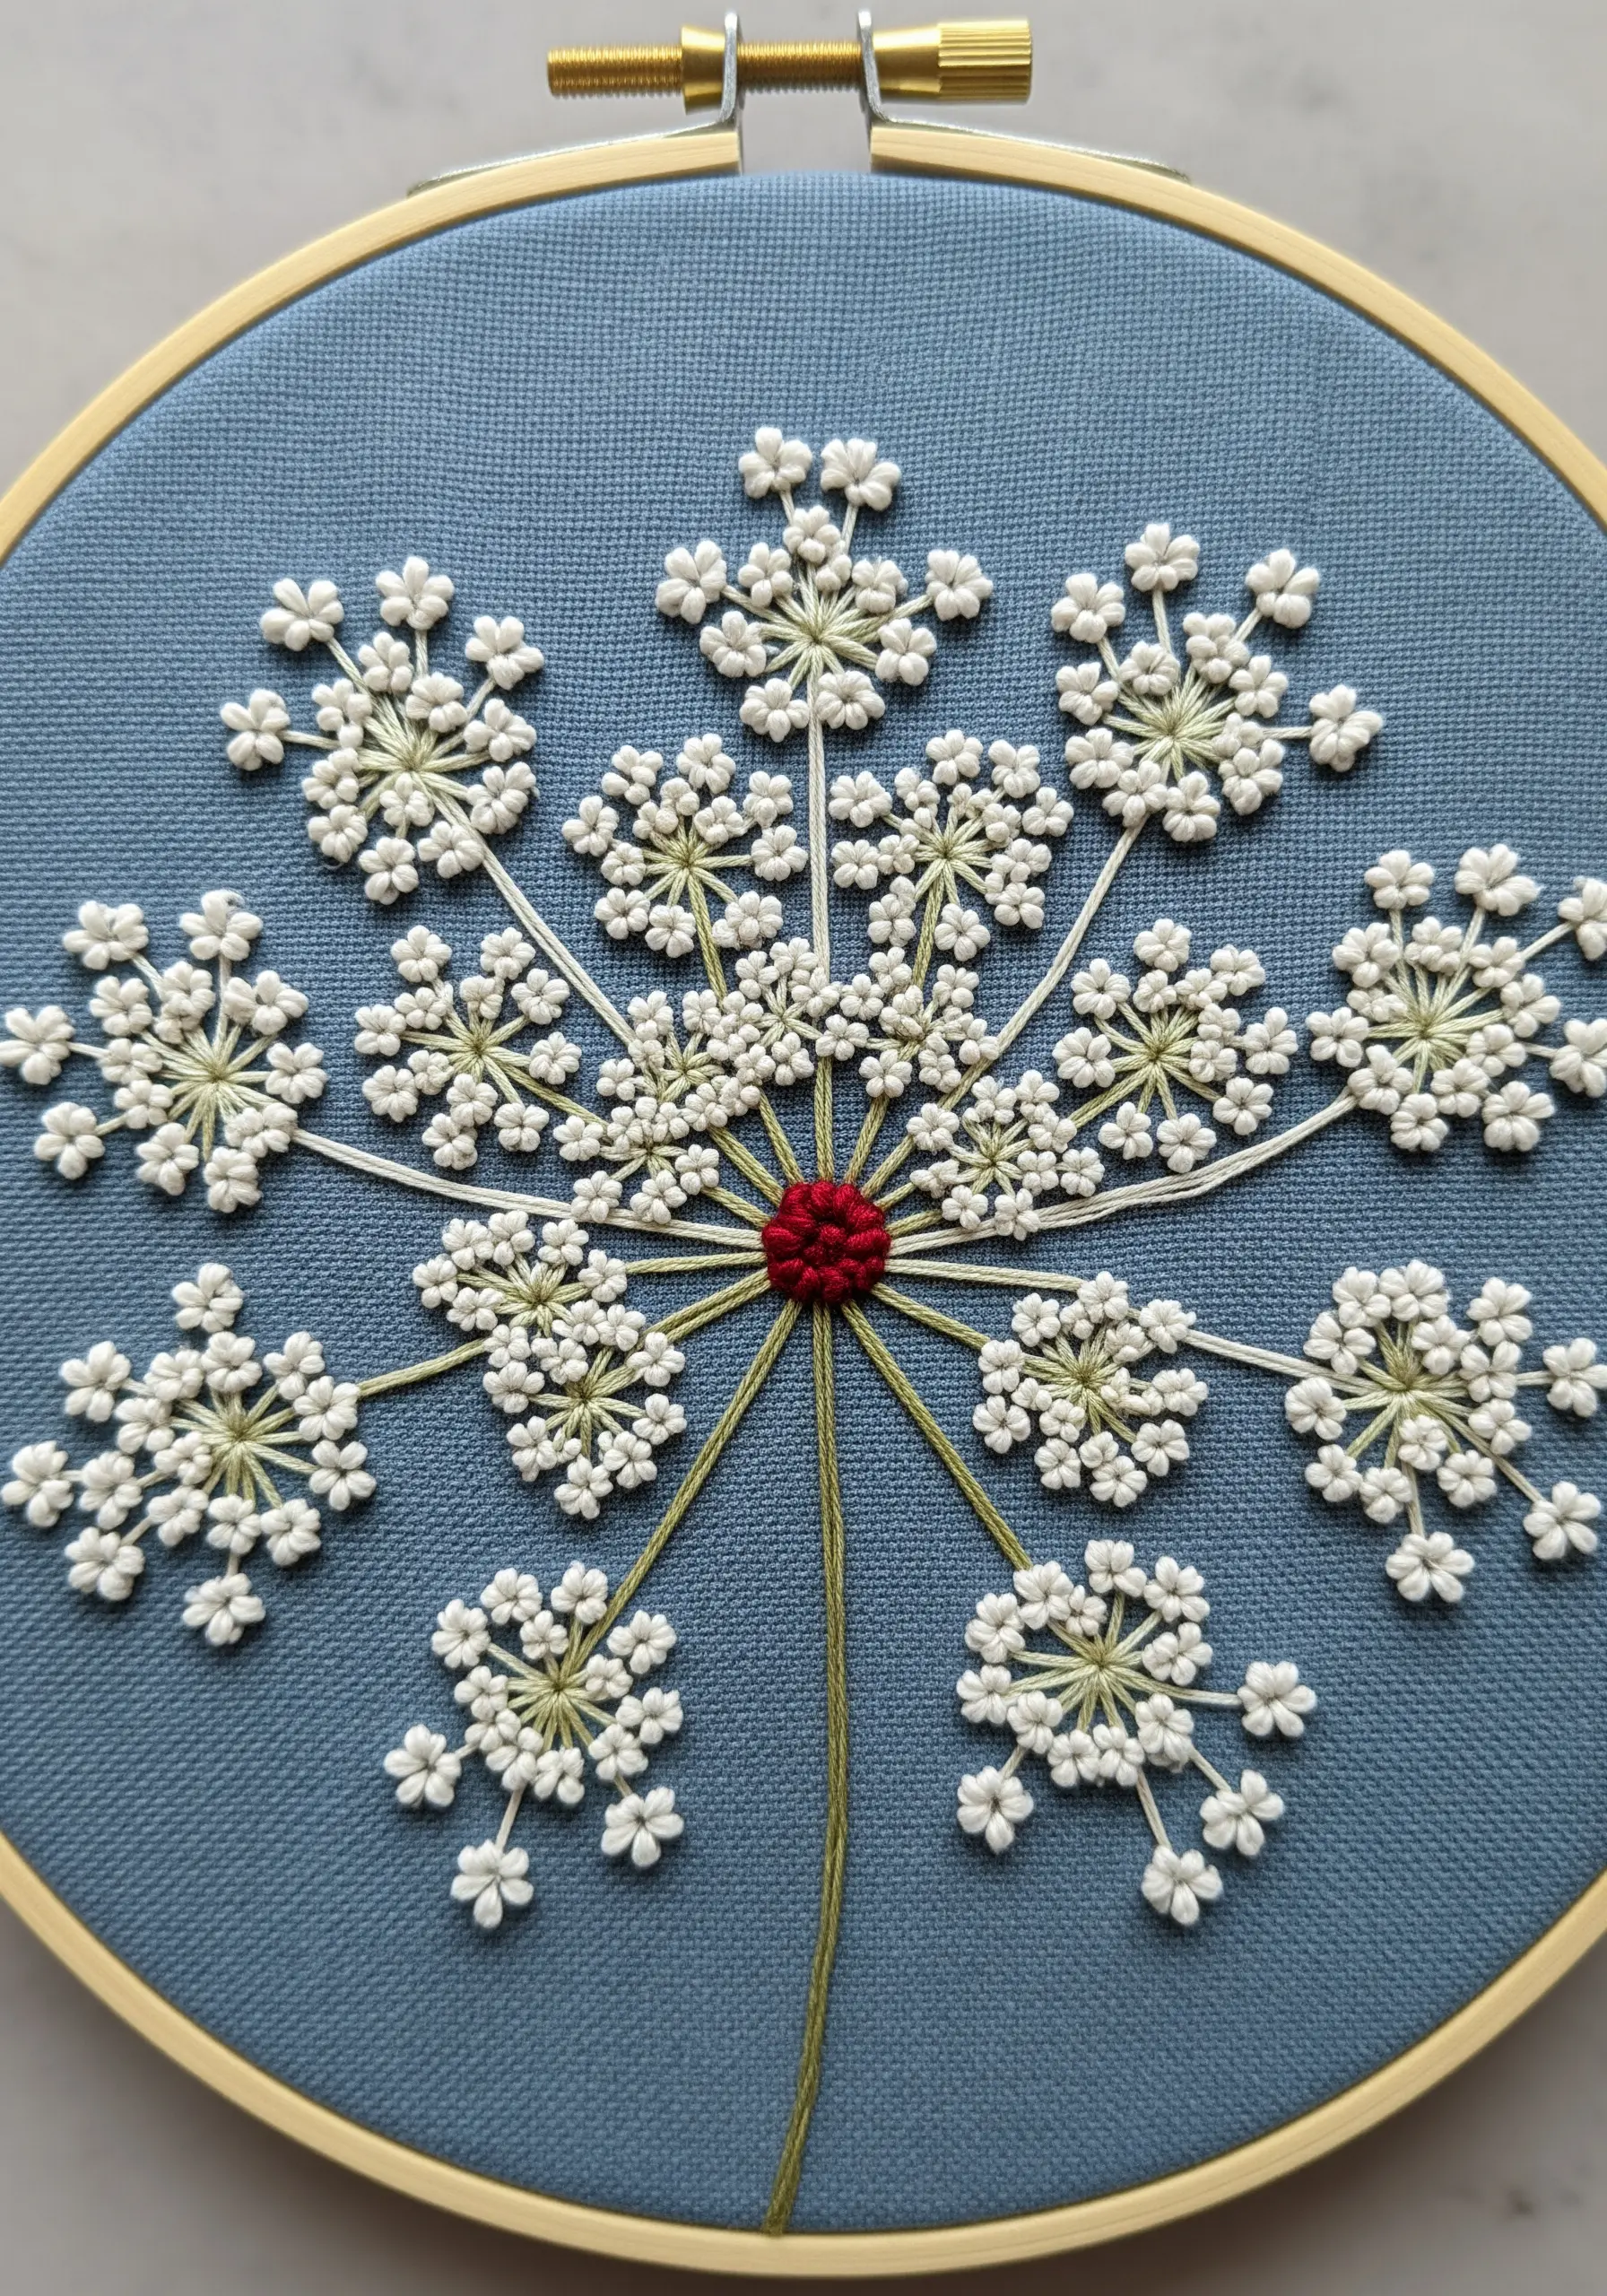
Capture the complex structure of a Queen Anne’s Lace flower head by building it in layers.
First, create the framework of radiating stems with long, single straight stitches originating from a central point.
Then, at the end of each stem, stitch a tiny cluster of 4-5 white detached chain stitches (lazy daisies) fanning outwards.
Add a single French knot in a contrasting color, like pale green or deep red, to the center of each floret to complete the illusion of depth and detail.
17. Tell a Story with Varied Stitch Textures
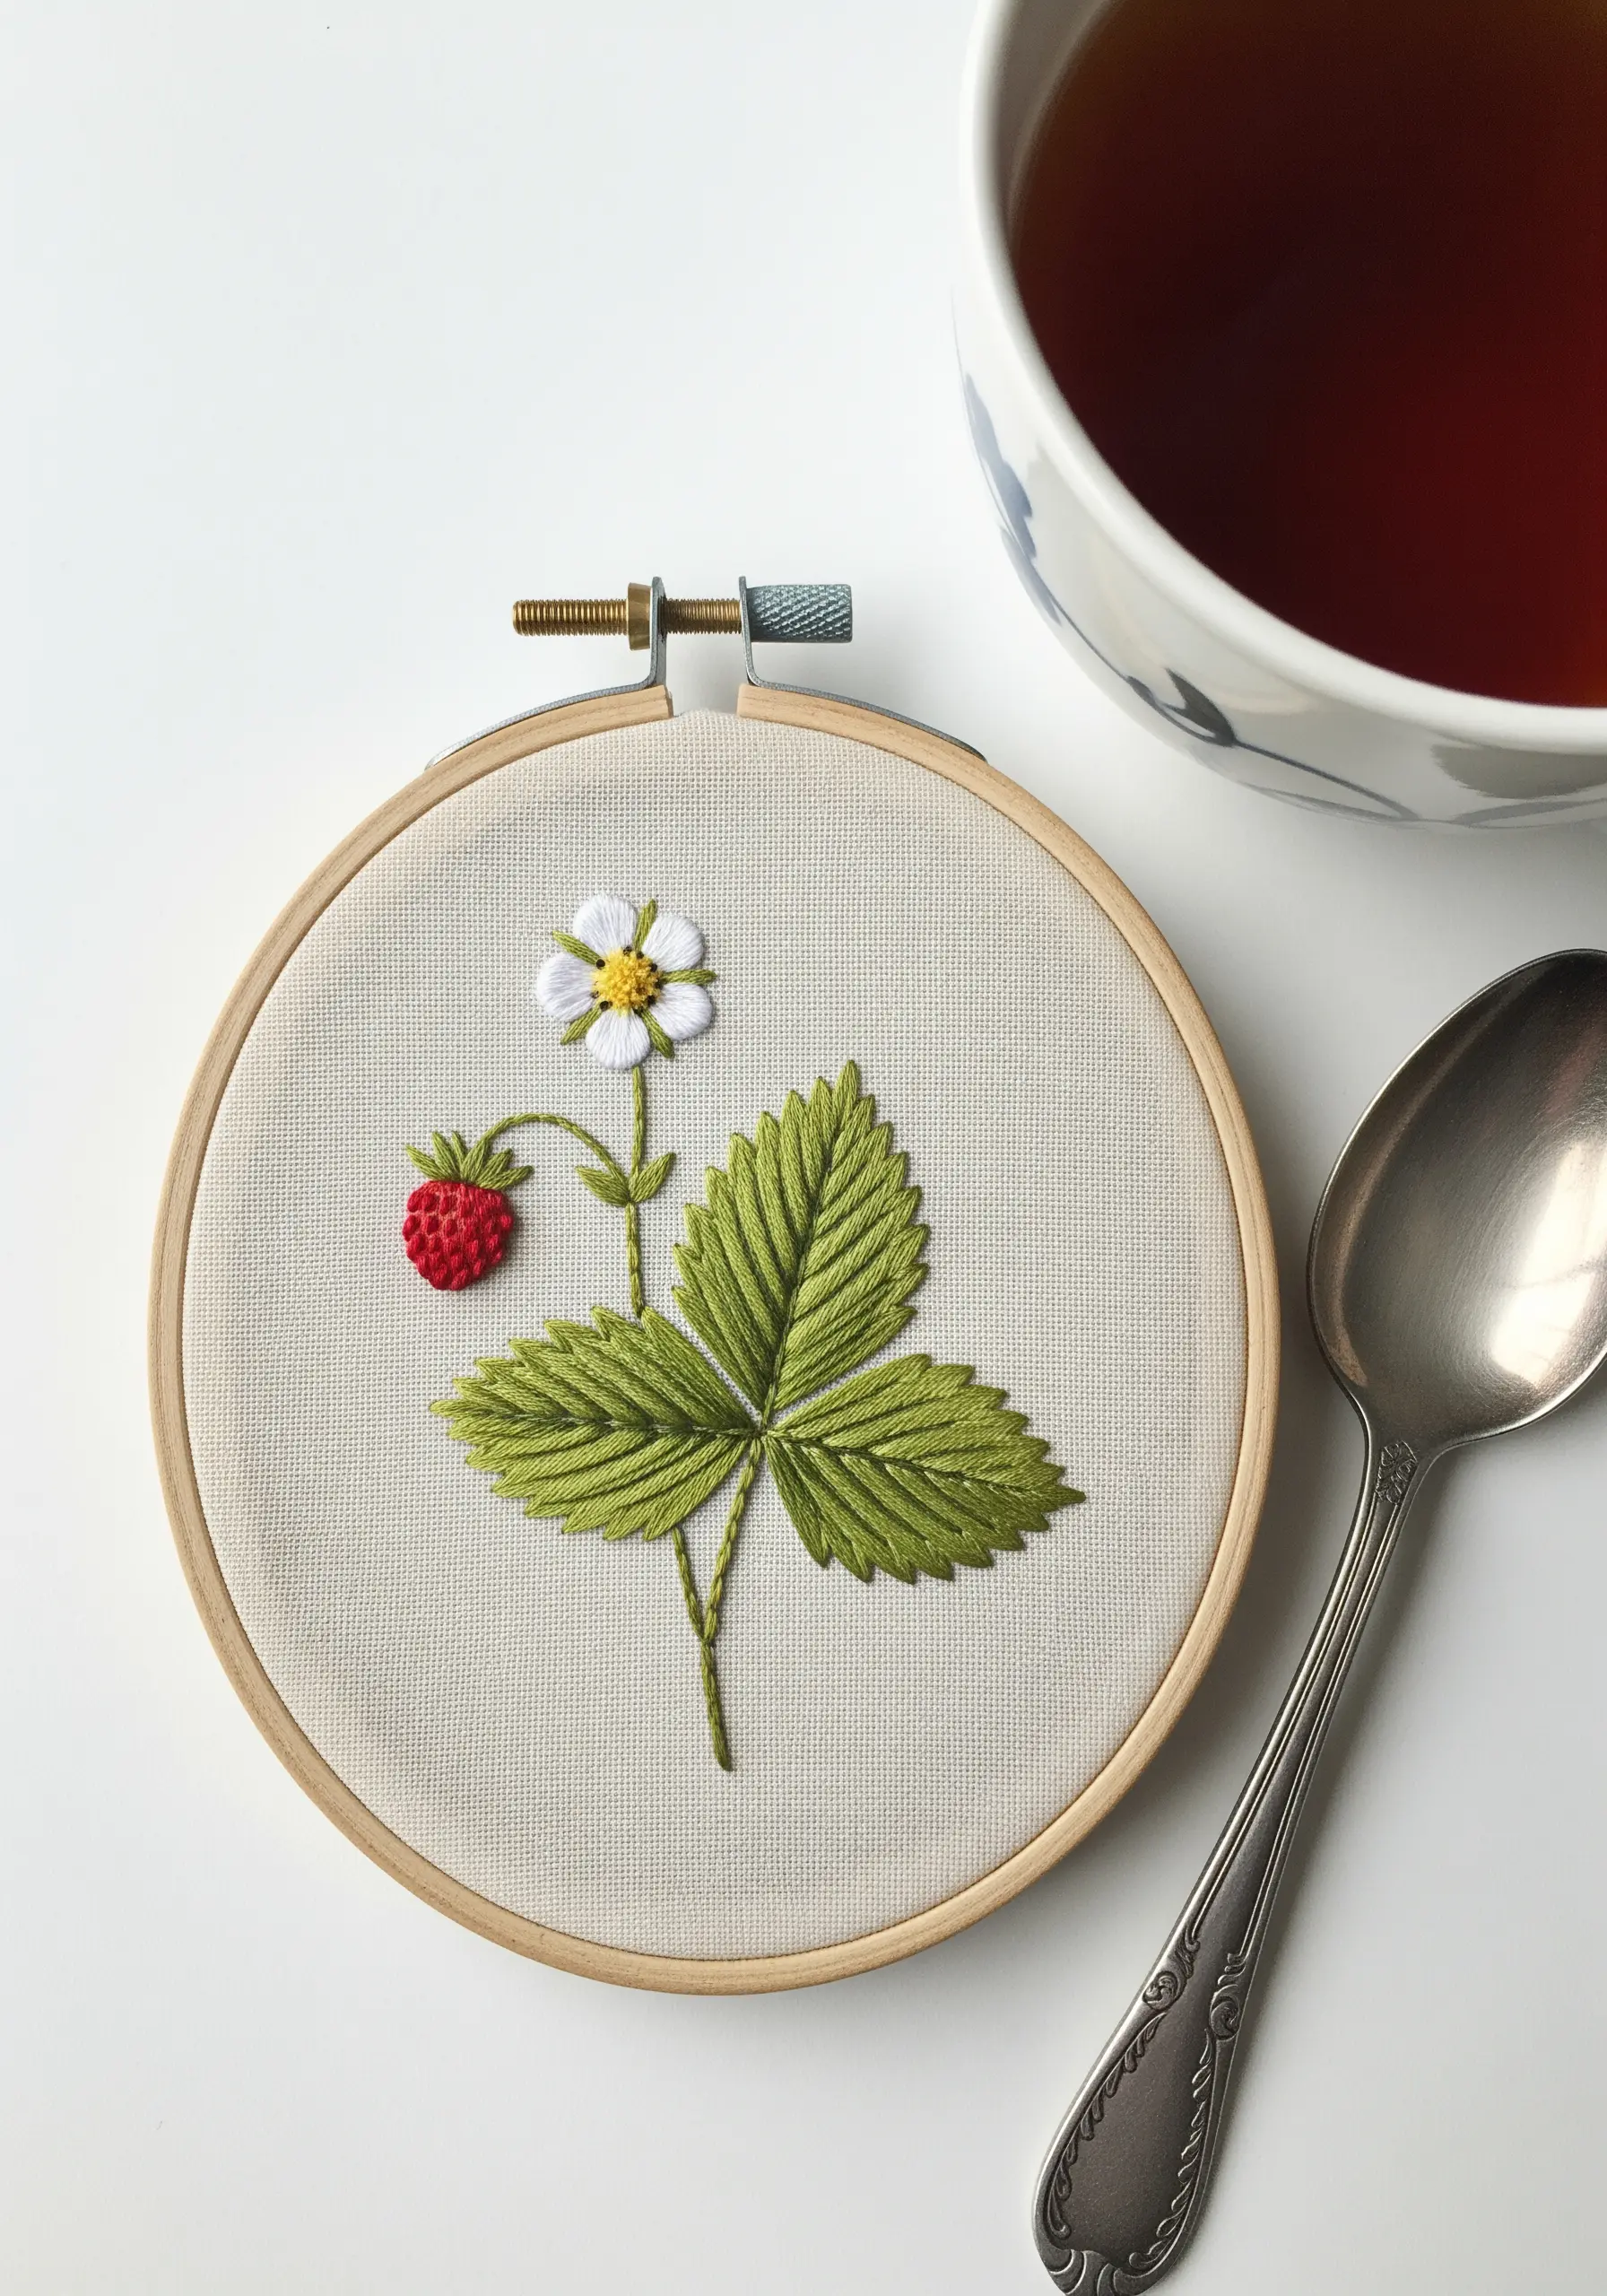
Bring a simple botanical sprig to life by assigning a specific, textural stitch to each part of the plant.
Use a smooth, directional satin stitch for the strawberry’s body, adding tiny white seed stitches on top for detail.
Give the leaf dimension with a fishbone stitch, which creates a beautiful central vein, and form the flower with simple lazy daisy stitches around a French knot center.
This thoughtful combination of stitches makes the small composition feel rich, detailed, and dynamic.
18. Master Iridescence with Advanced Thread Painting
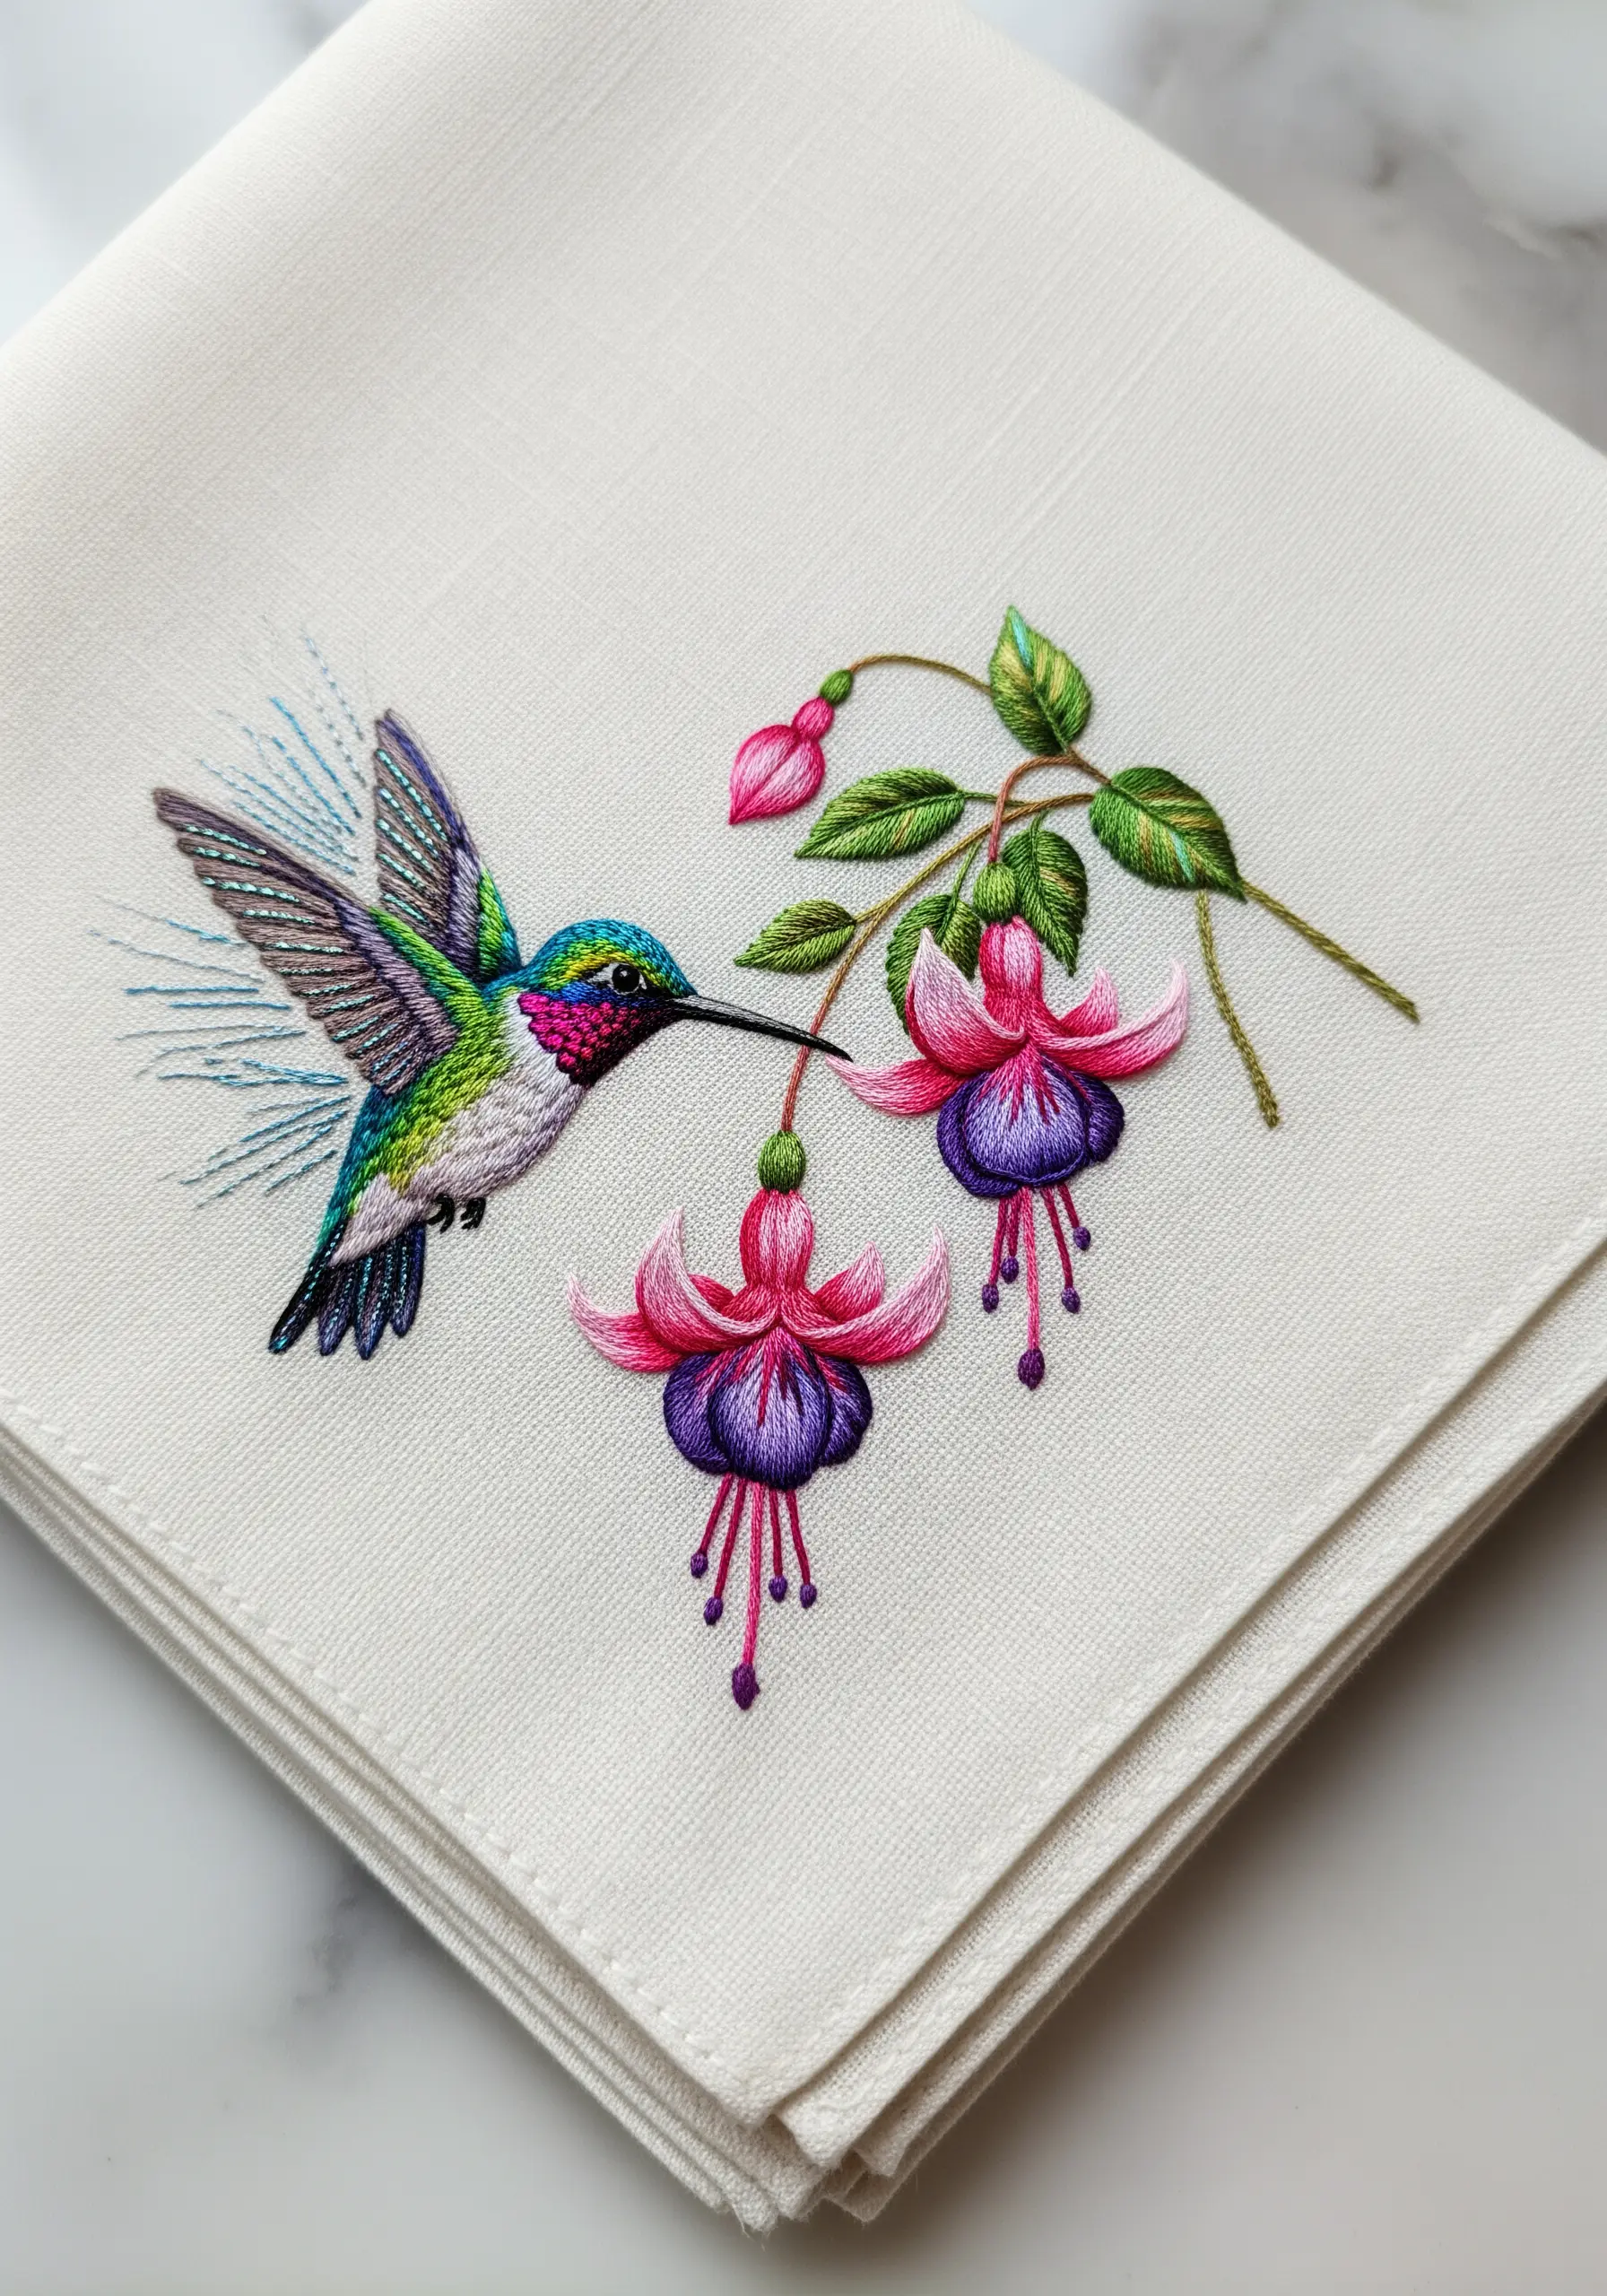
To capture the iridescent sheen of a hummingbird’s feathers, you need to think like a painter. Work with a single strand of floss and use short, directional long-and-short stitches.
Lay jewel-toned colors—emerald, sapphire, amethyst—right next to each other, allowing them to blend optically. The magic is in the rapid, subtle color shifts.
For the fuchsia petals, use a padded satin stitch to give them a plump, three-dimensional quality that contrasts with the flat, smooth texture of the bird’s body.
This level of detail requires patience, but it transforms your embroidery from craft into fine art.
19. Contrast Rugged and Delicate Textures

Create a convincing stone wall by using a rugged, textured thread like wool or crewel yarn. Fill the area with a random assortment of French knots and short straight stitches in various grays and browns.
Against this rough, muted background, stitch your wildflowers using bright, silky cotton floss and delicate stitches like lazy daisy and tiny satin stitches.
This intentional contrast in both texture and color is what makes the composition so compelling—the soft flowers look even more fragile and beautiful against the hard stone.
20. Map Your Colors for a Perfect Autumn Gradient
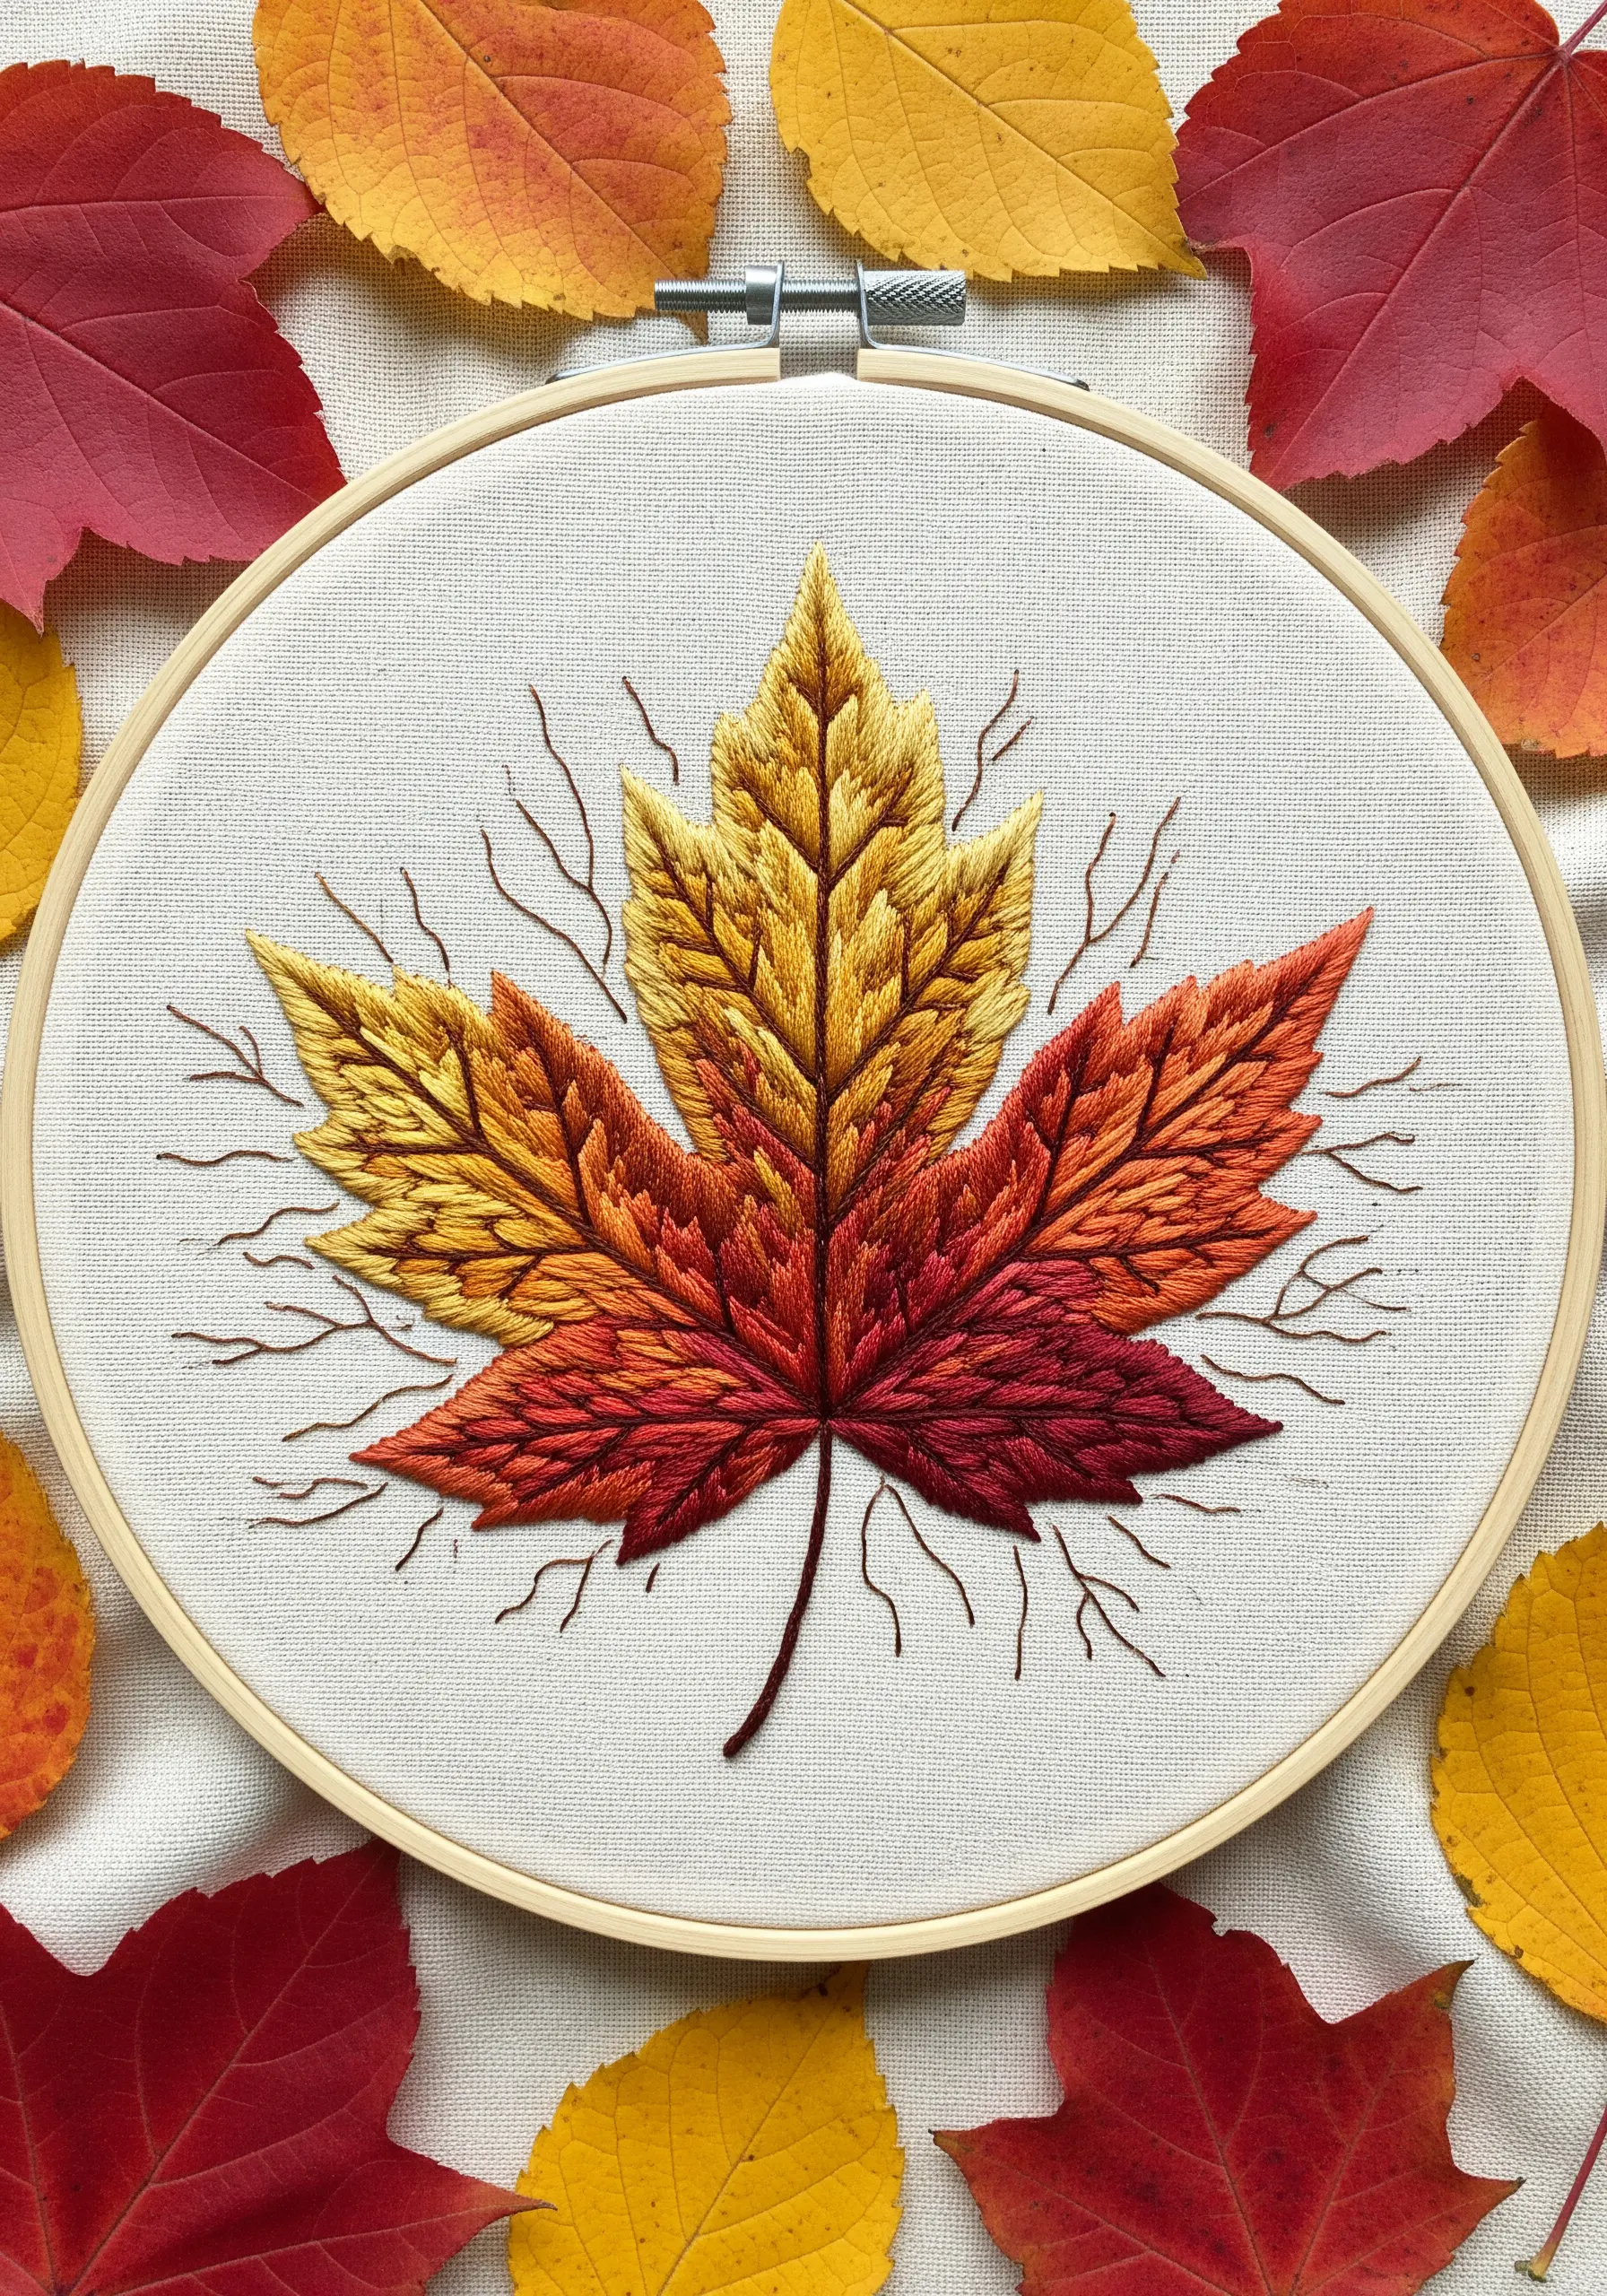
For a flawless gradient like this maple leaf, lightly sketch your color zones onto the fabric with a water-soluble pen before you begin.
Fill each section with long-and-short stitch, allowing the stitches at the borders of each color zone to interlock and blend softly into the next.
Stitch the veins last, directly on top of your color fill, using a simple backstitch in a contrasting dark brown. This adds definition and structure, making the leaf pop.
The tiny, free-form straight stitches around the leaf add a sense of rustic energy and movement.
21. Stitch Realistic Rosemary for Elegant Table Linens
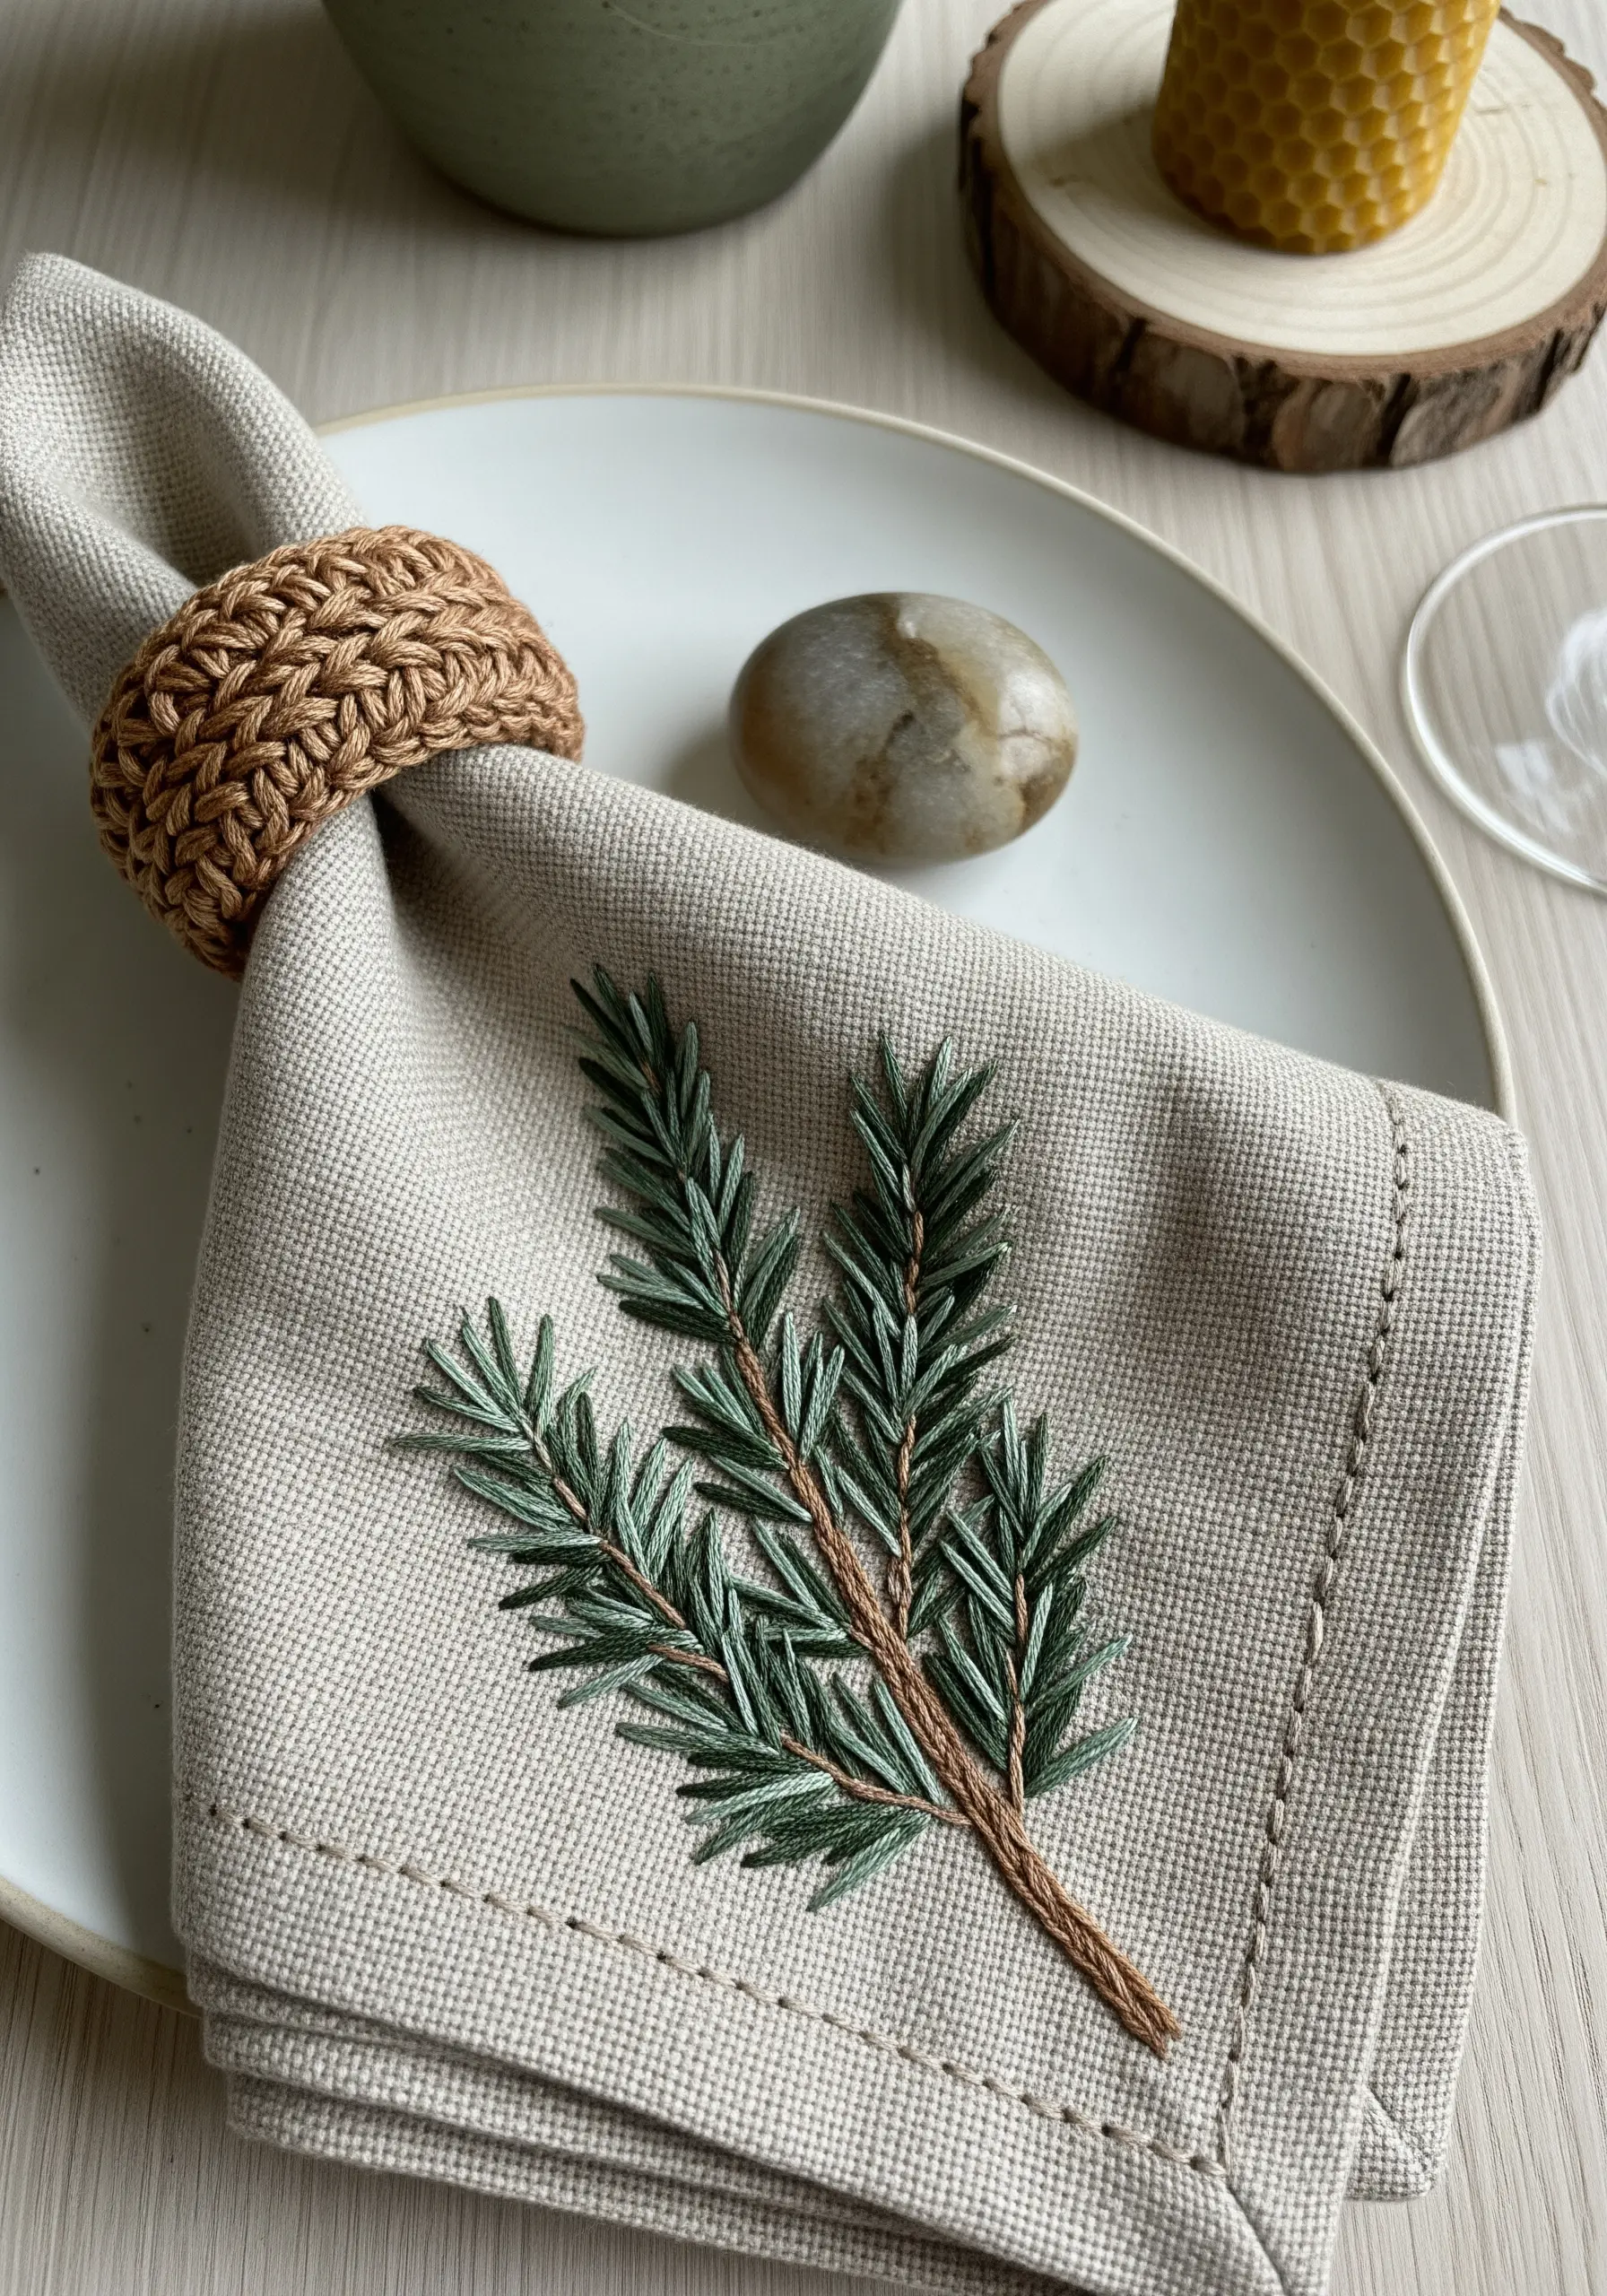
When embroidering functional items like napkins, always use high-quality, colorfast cotton floss that can withstand washing.
Create the woody stem with a raised stem stitch or whipped backstitch in brown. Then, add the needles using short, angled straight stitches in two or three shades of green-gray.
By varying the shades of green and slightly overlapping the stitches, you create a realistic, dimensional rosemary sprig that feels both organic and incredibly elegant.
This is a perfect example of how table linen embroidery motifs can elevate an entire dining experience.
22. Embroider on Paper for Unique Gift Tags

Working on paper requires a different approach. First, gently pre-punch your stitching holes along your design lines with a fine needle to prevent tearing.
Use simpler stitches that don’t put too much stress on the paper. Satin stitch for the holly leaves and padded satin stitch or bullion knots for the berries are excellent choices.
Keep your thread tension slightly looser than you would on fabric. This prevents the paper from buckling and gives the stitches a soft, pillowy look.
This technique turns a simple gift tag into a treasured, handmade keepsake.
23. Layer Your Stitches for Blossoming Depth
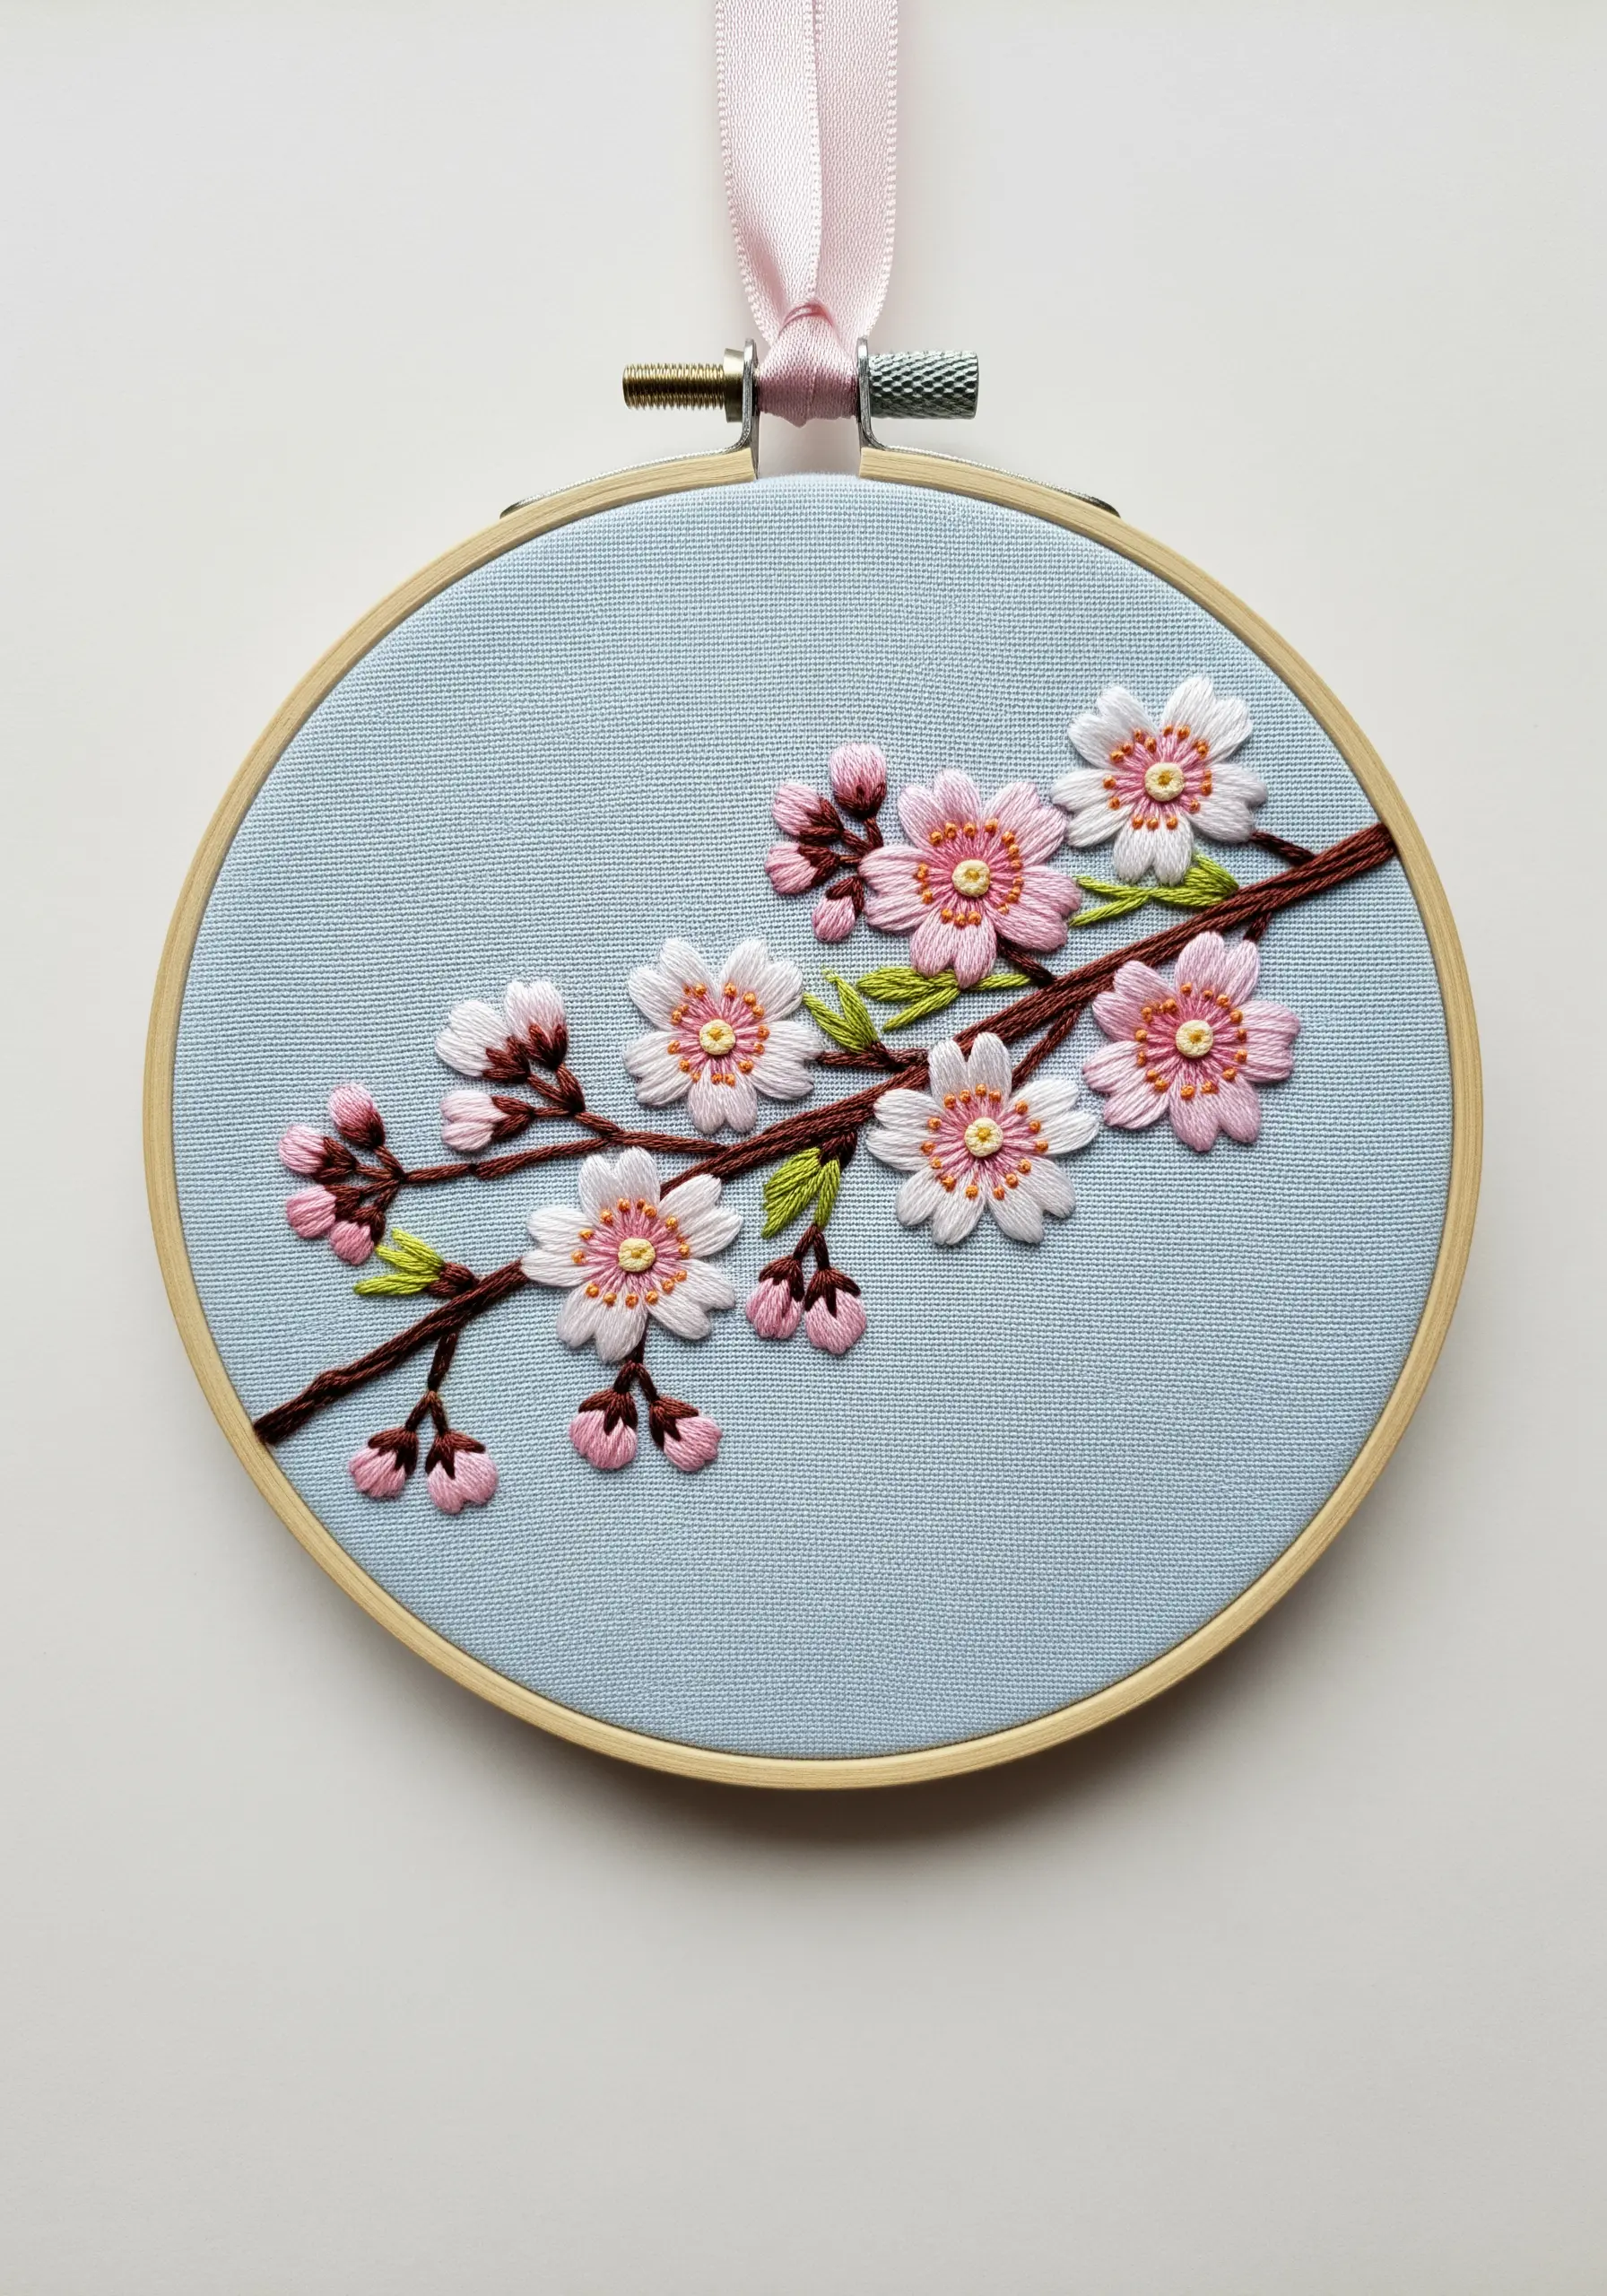
Give your cherry blossoms a lush, full appearance by layering your stitches. Don’t be afraid to place one lazy daisy stitch directly on top of another.
Use a slightly lighter shade of pink for the top layer of petals and a darker shade underneath. This subtle color shift creates an illusion of shadow and depth.
For the flower centers, combine yellow French knots with tiny red straight stitches to add a complex, realistic touch that draws the eye.
24. Capture the Texture of Wheat with Overlapping Stitches
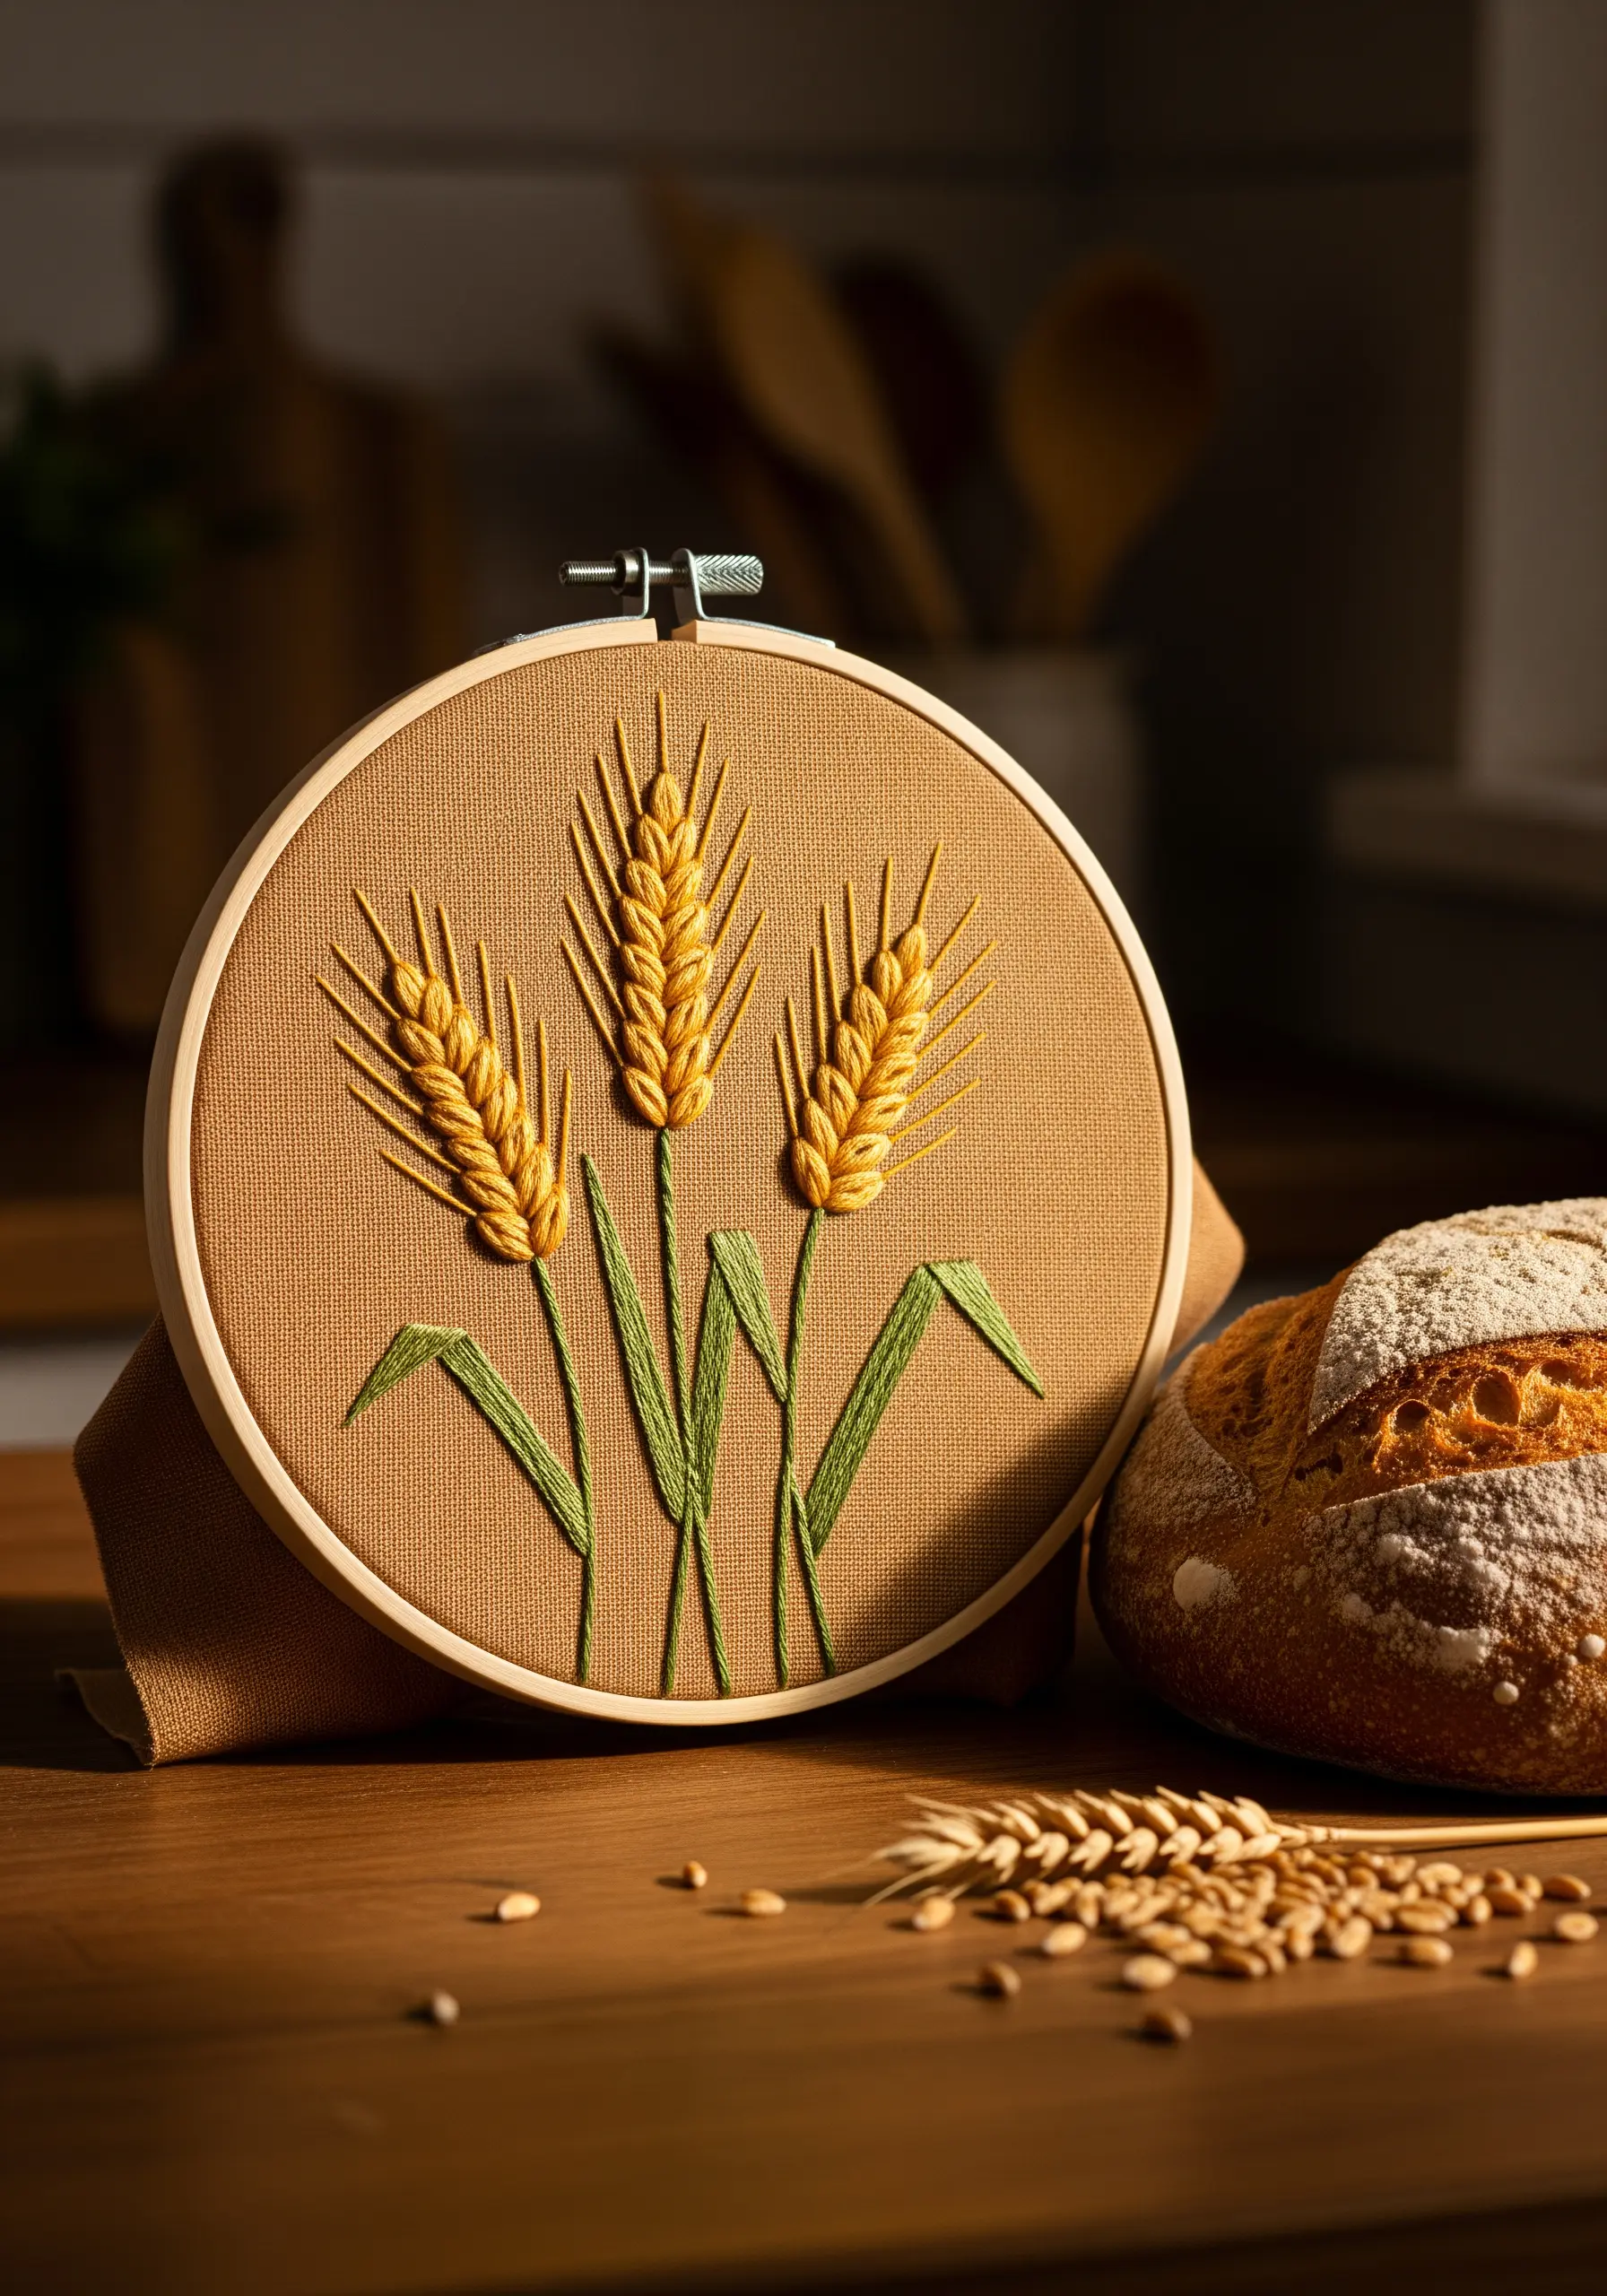
To form the grains on a stalk of wheat, use a fly stitch worked repeatedly down a central line. The V-shape of the fly stitch perfectly mimics the shape of the grain husks.
Alternatively, you can use a series of slightly overlapping satin stitches, angled upwards and outwards from the stem.
The key to realism is ensuring the stitches are plump and tightly packed. Use a full six strands of floss in a warm, golden yellow.
Finish with a few long, delicate straight stitches at the very top for the awns, adding a final touch of authenticity.
25. Create Modern Elegance with Metallic Line Art
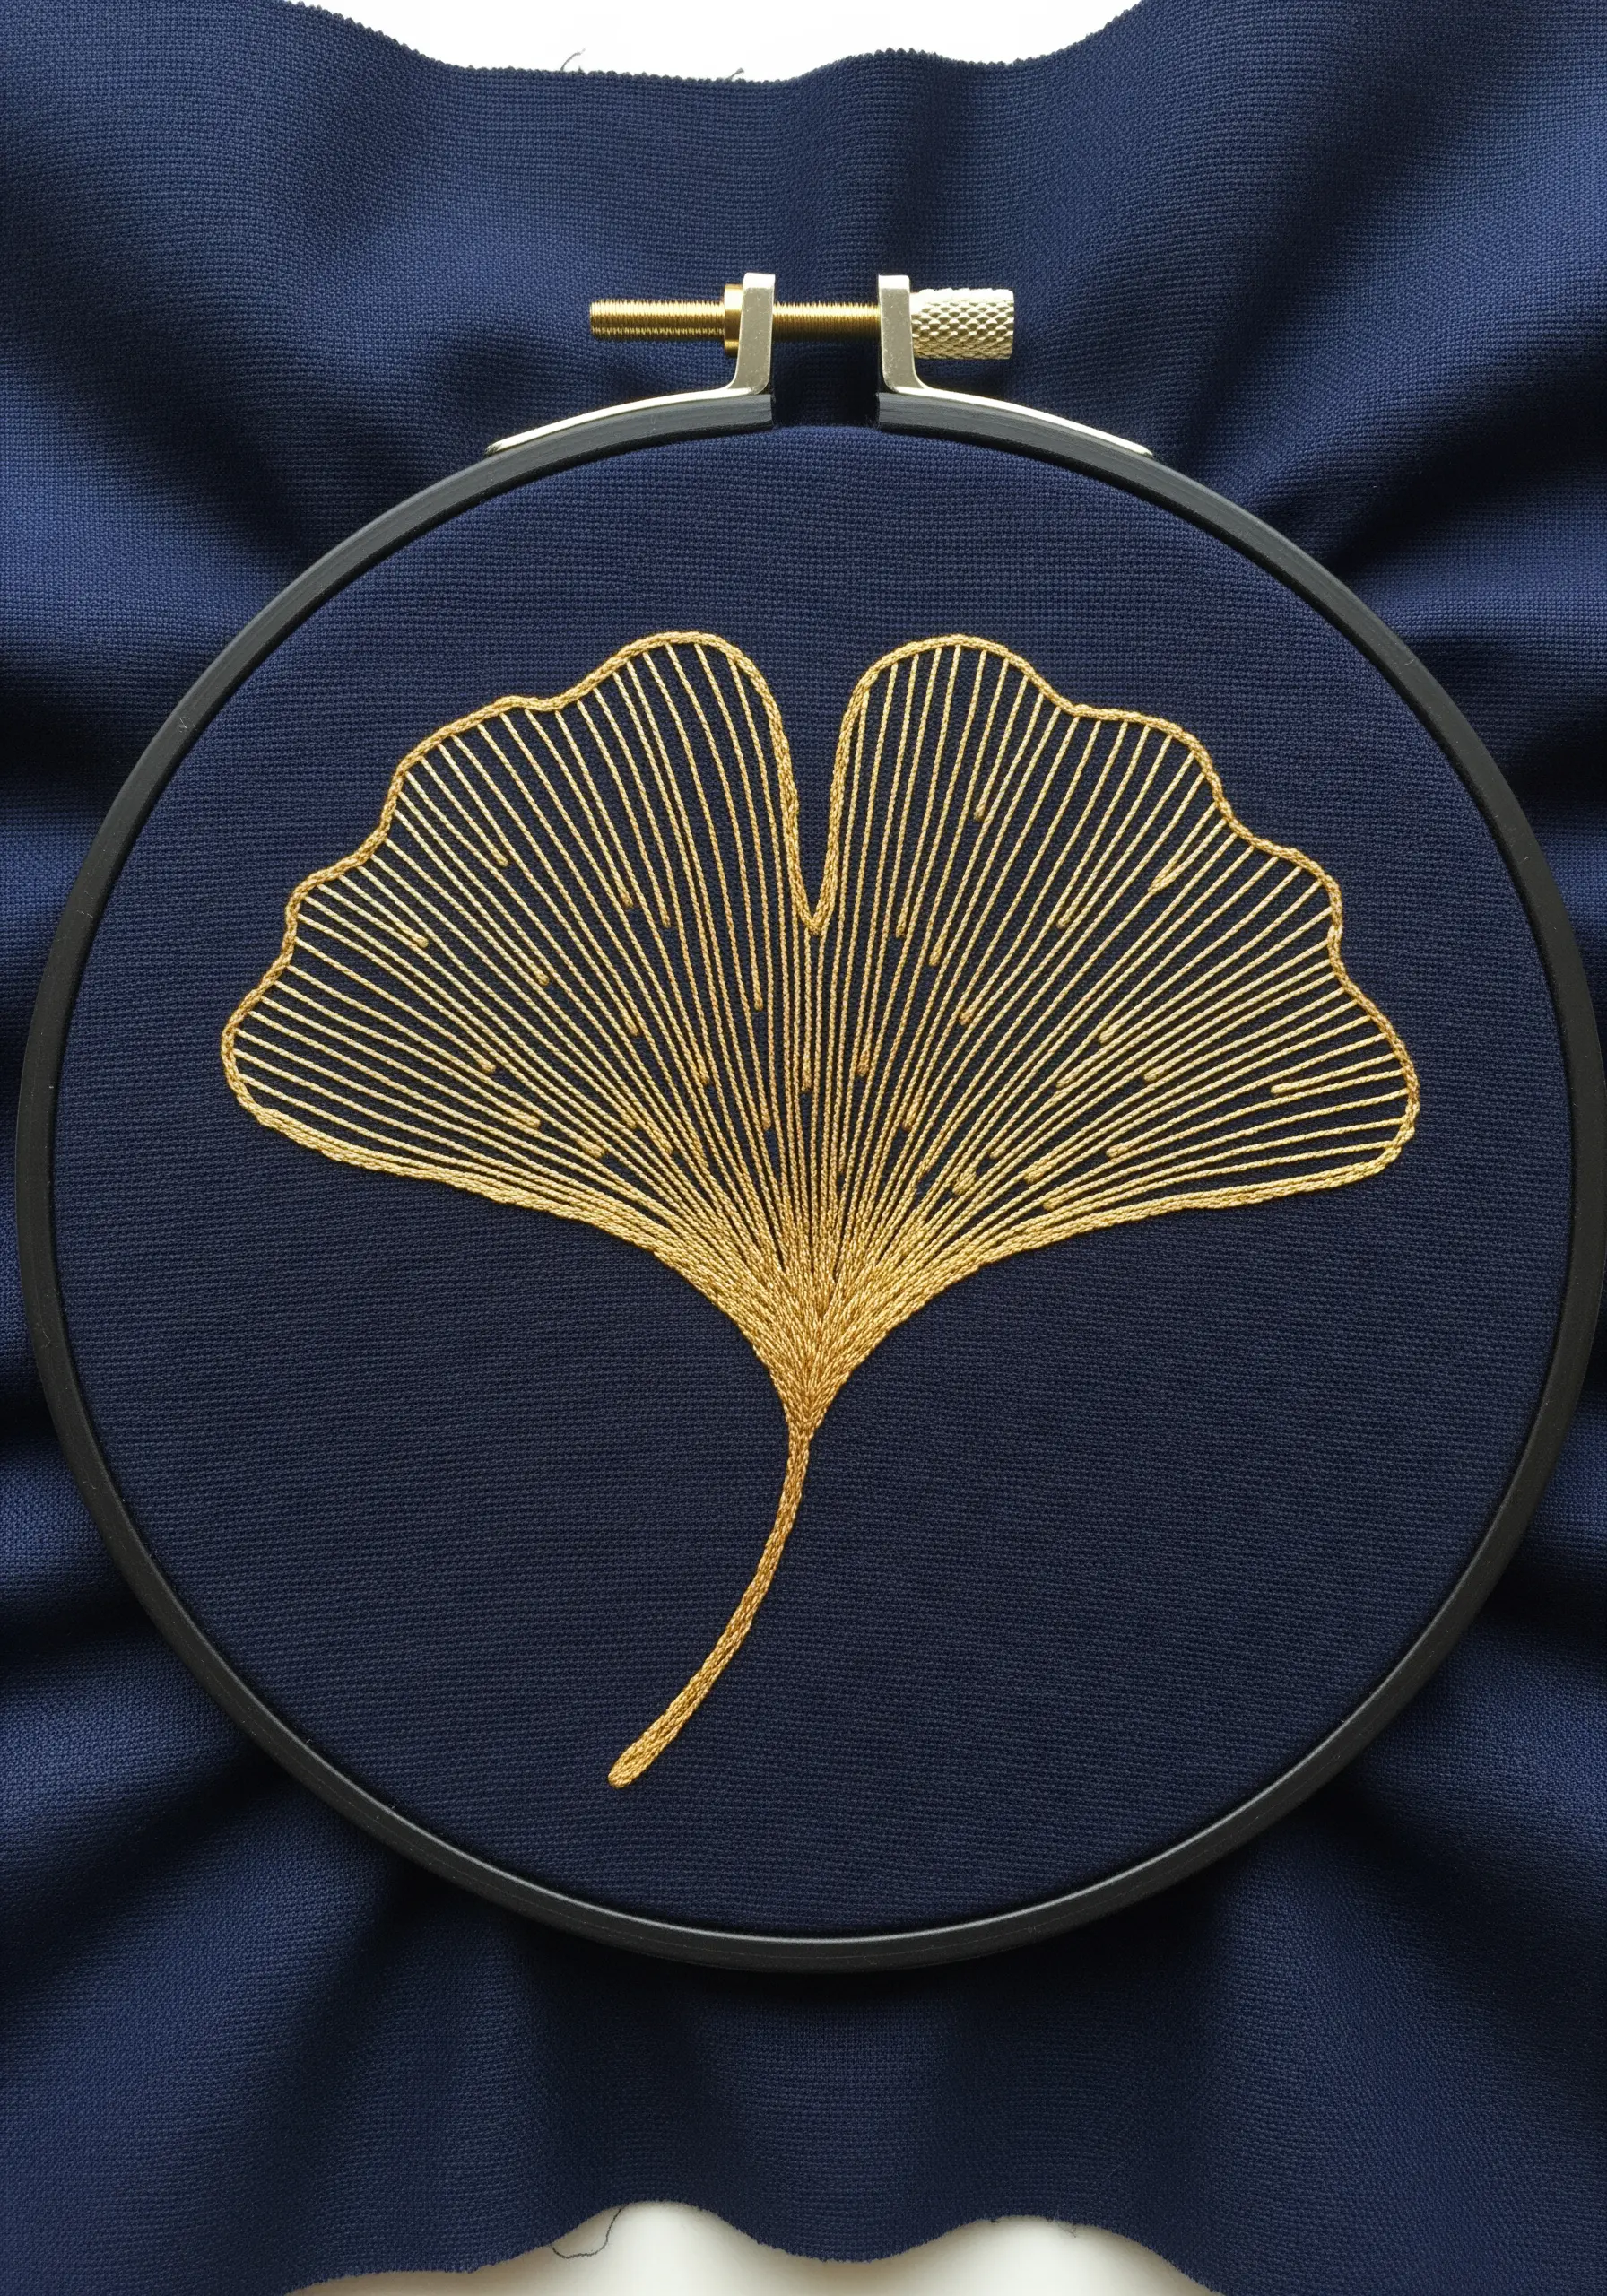
This stunning ginkgo leaf proves that you don’t need complex fill stitches to make an impact. The entire design is composed of carefully placed straight stitches.
To achieve this clean, graphic look, use a fine metallic thread against a dark, solid-colored fabric like navy or black linen.
Draw your guidelines with a chalk pencil before you start to ensure perfect spacing and a graceful, fanning shape.
This minimalist line art nature embroidery is all about precision, tension, and the beauty of negative space.
26. Arrange a Balanced and Playful Wildflower Bouquet
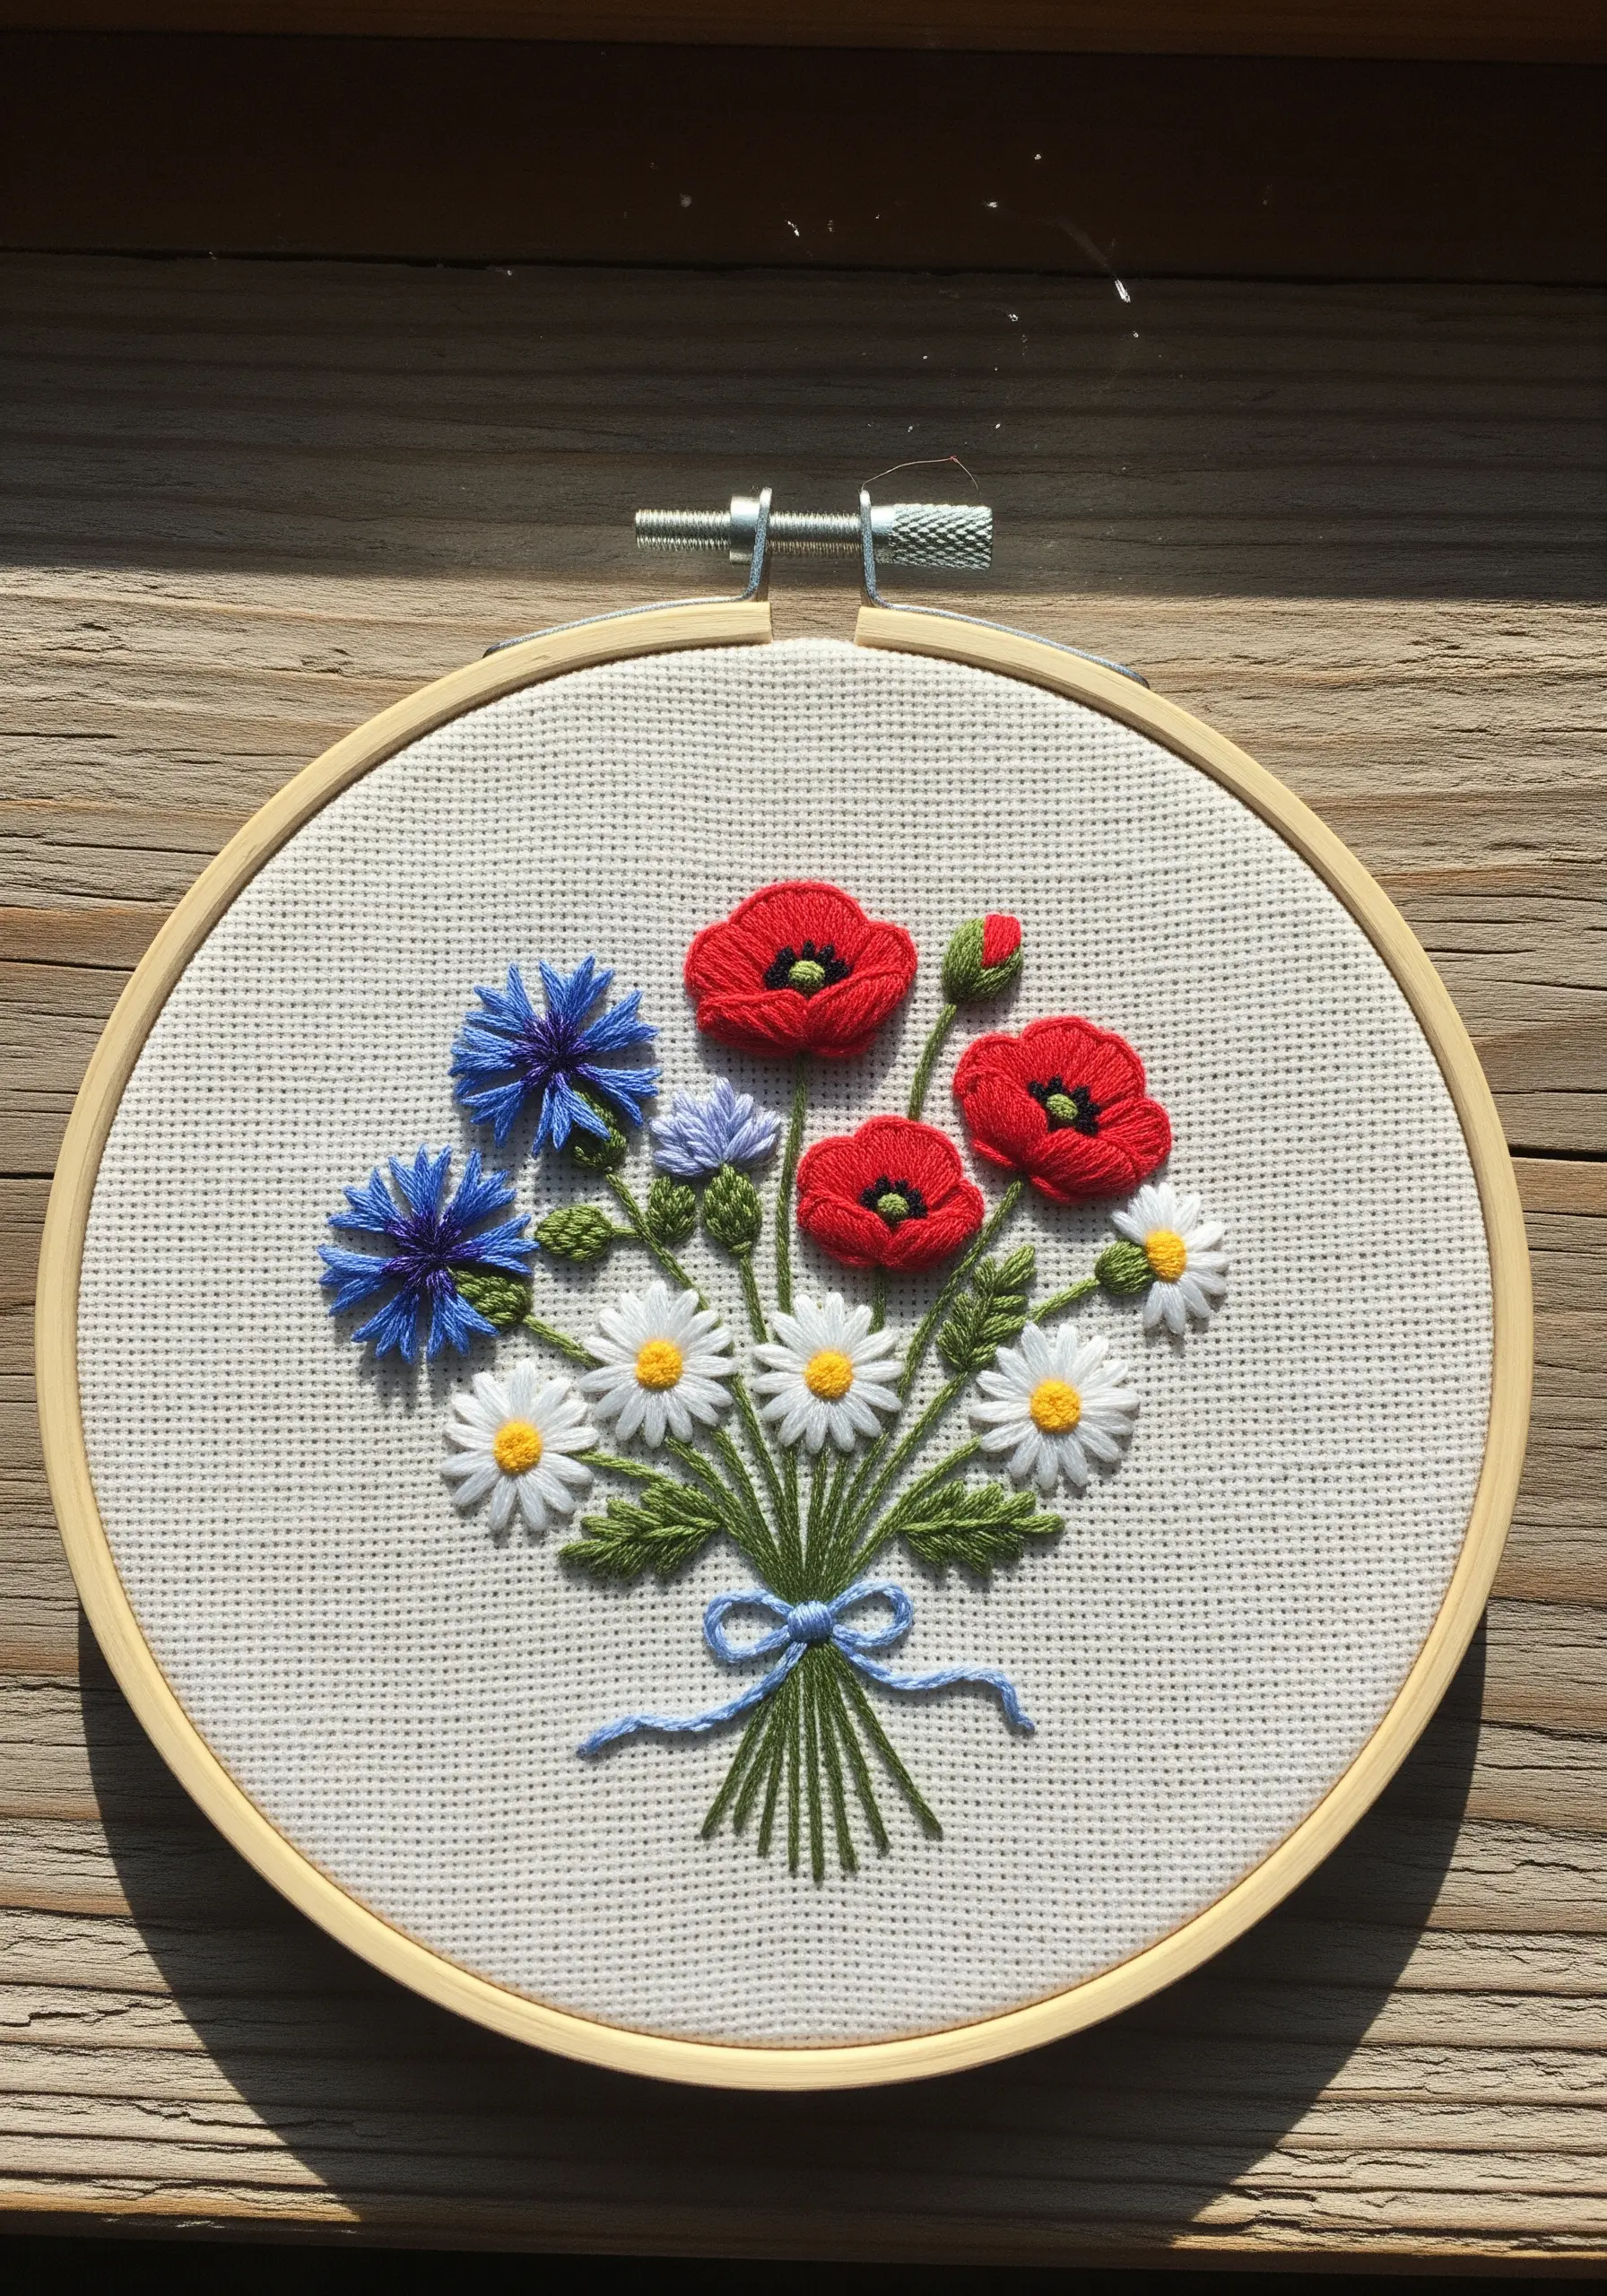
When creating a stitched bouquet, think like a florist. Vary the heights, shapes, and textures of your flowers for a dynamic composition.
Combine different stitches: use lazy daisy for daisies, bullion knots or woven wheels for poppies, and fanned-out straight stitches for cornflowers.
Don’t be afraid to overlap elements. Tucking some leaves and smaller buds behind the main flowers creates a sense of depth and abundance.
Tie it all together at the bottom with a simple bow, which provides a visual anchor for the entire arrangement.
27. Replicate Spiky Textures with Strategic Stitching
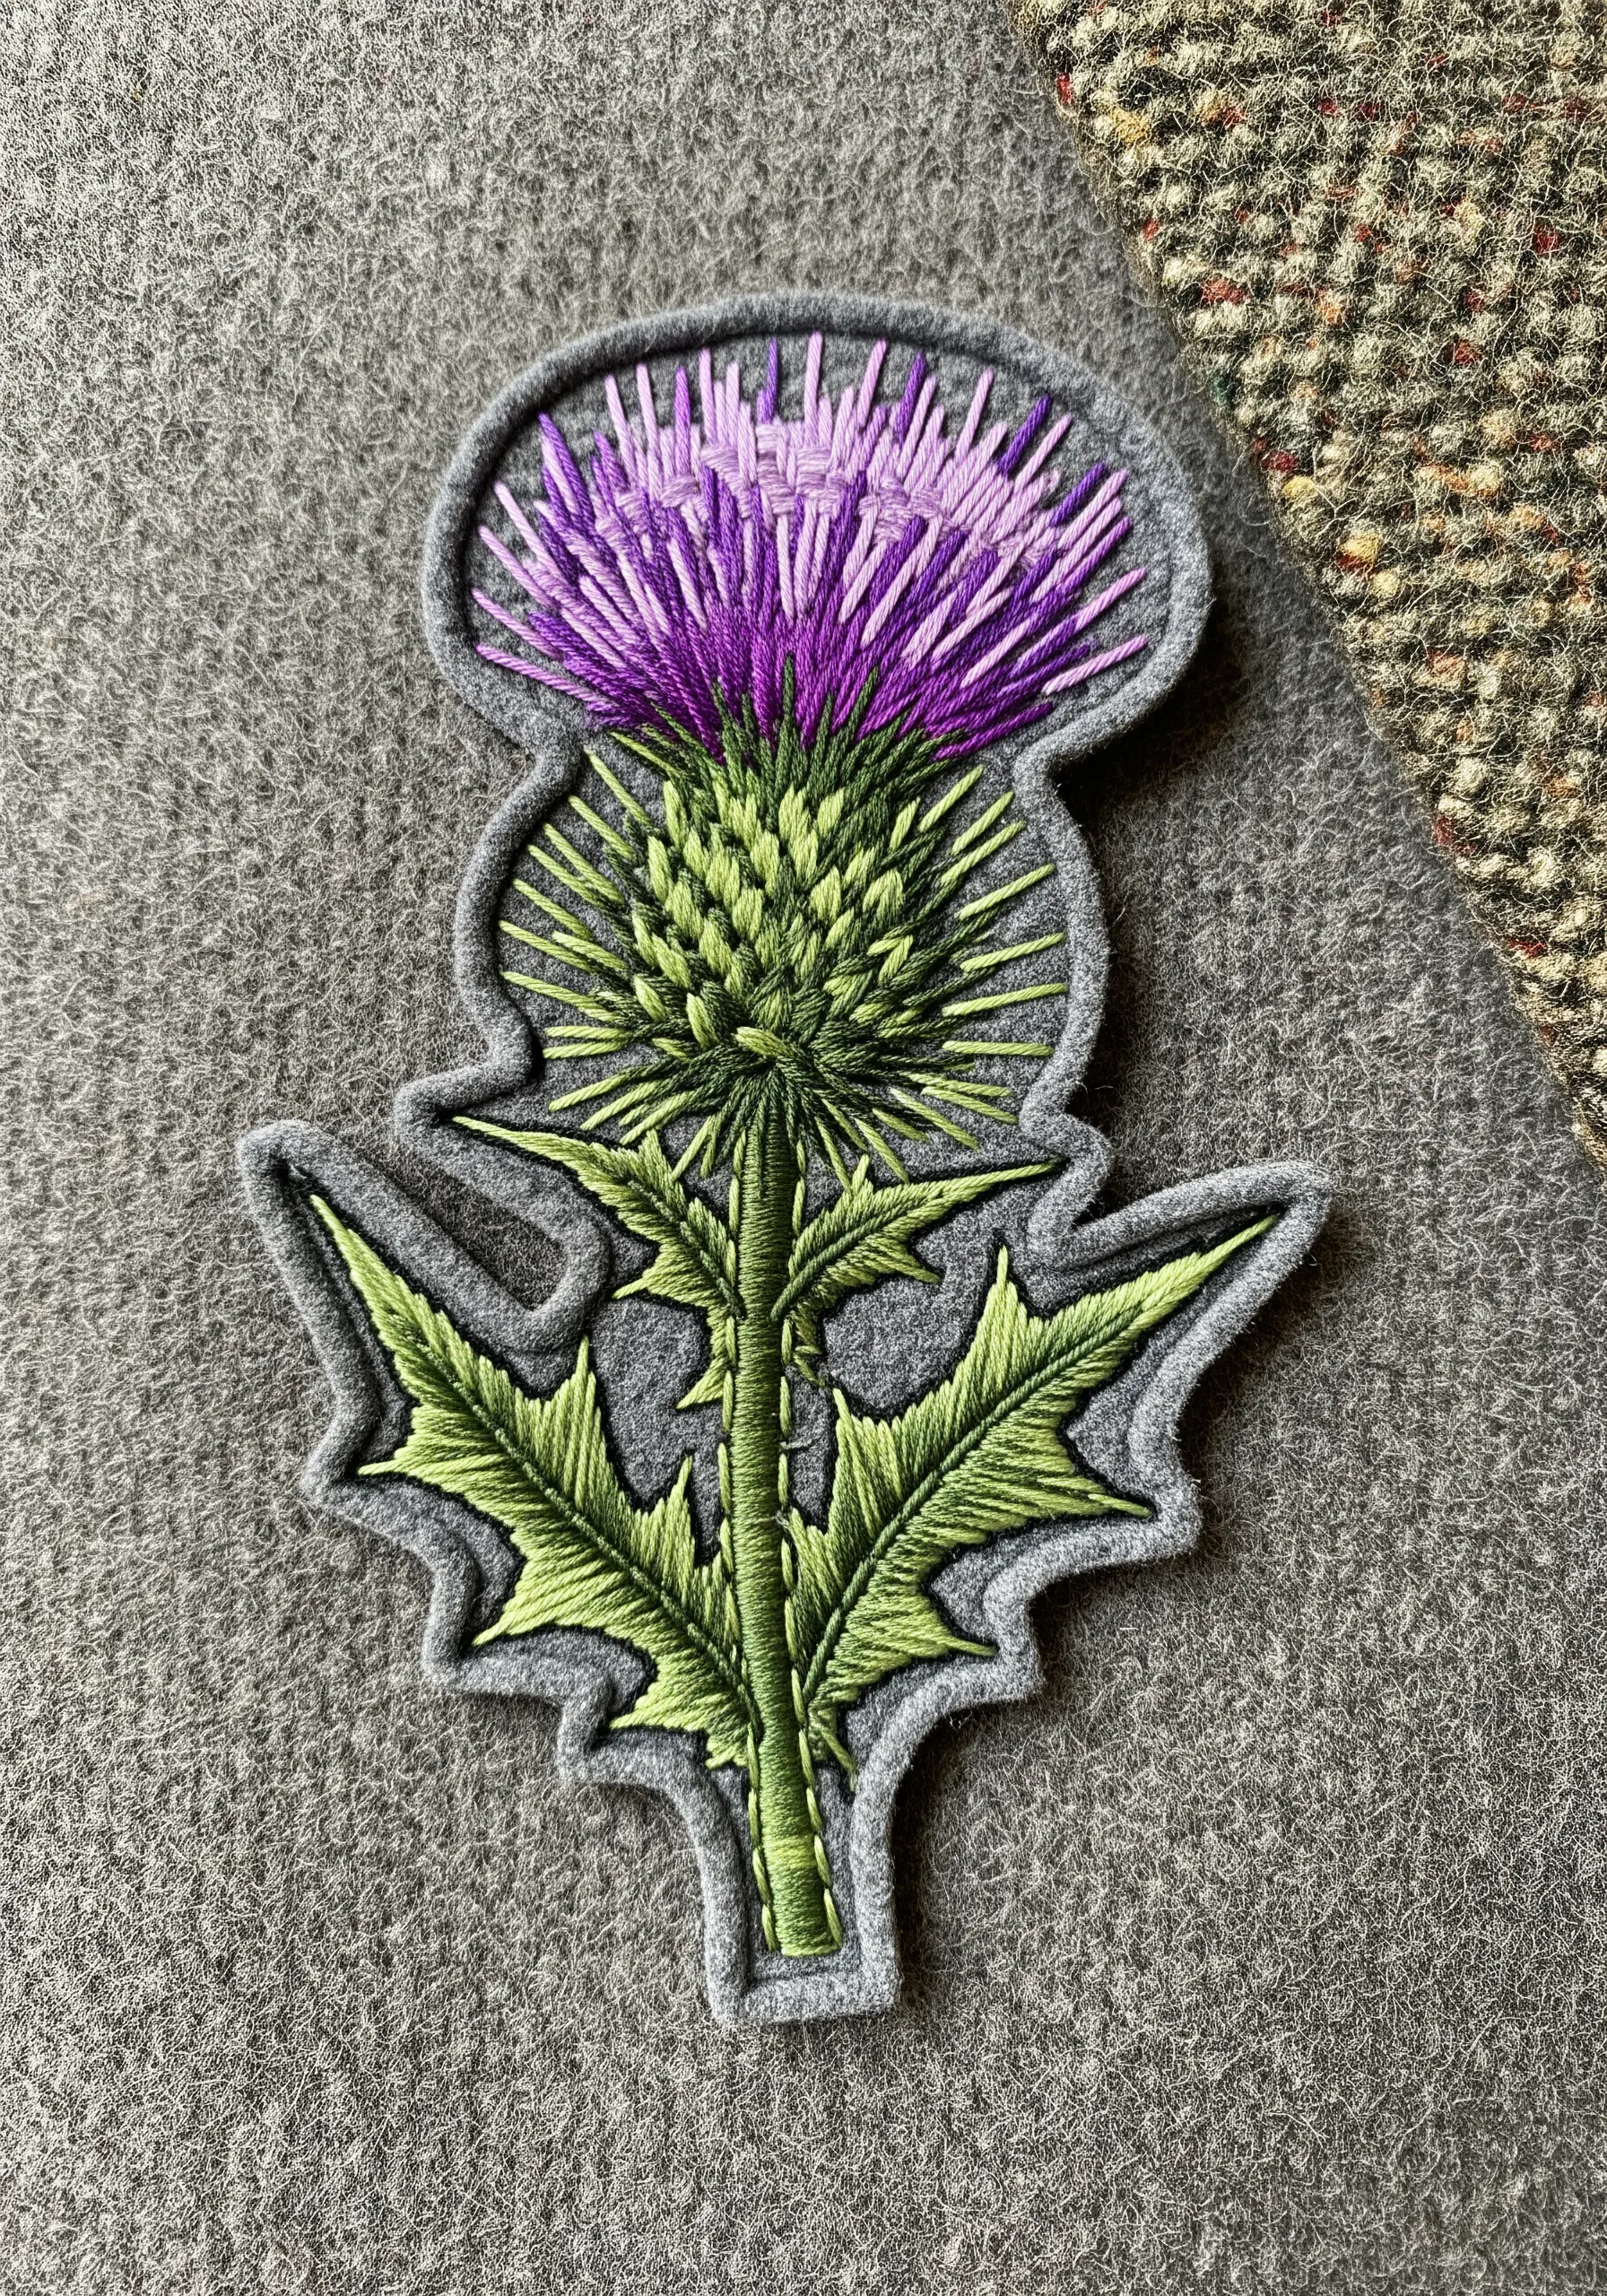
To create the spiky bloom of a thistle, use long straight stitches fanning out from the base. Layer two or three shades of purple and lilac, with the lightest color on top, to create dimension.
For the sharp, pointed leaves, outline them first with a crisp split stitch. Then, fill them with satin stitches angled sharply toward the leaf points.
This combination of fanned straight stitches and angular satin fill is perfect for creating convincing thorns and spikes, making it an ideal choice for a rugged botanical patch.
28. Elevate Micro-Embroidery with Padded Satin Stitch
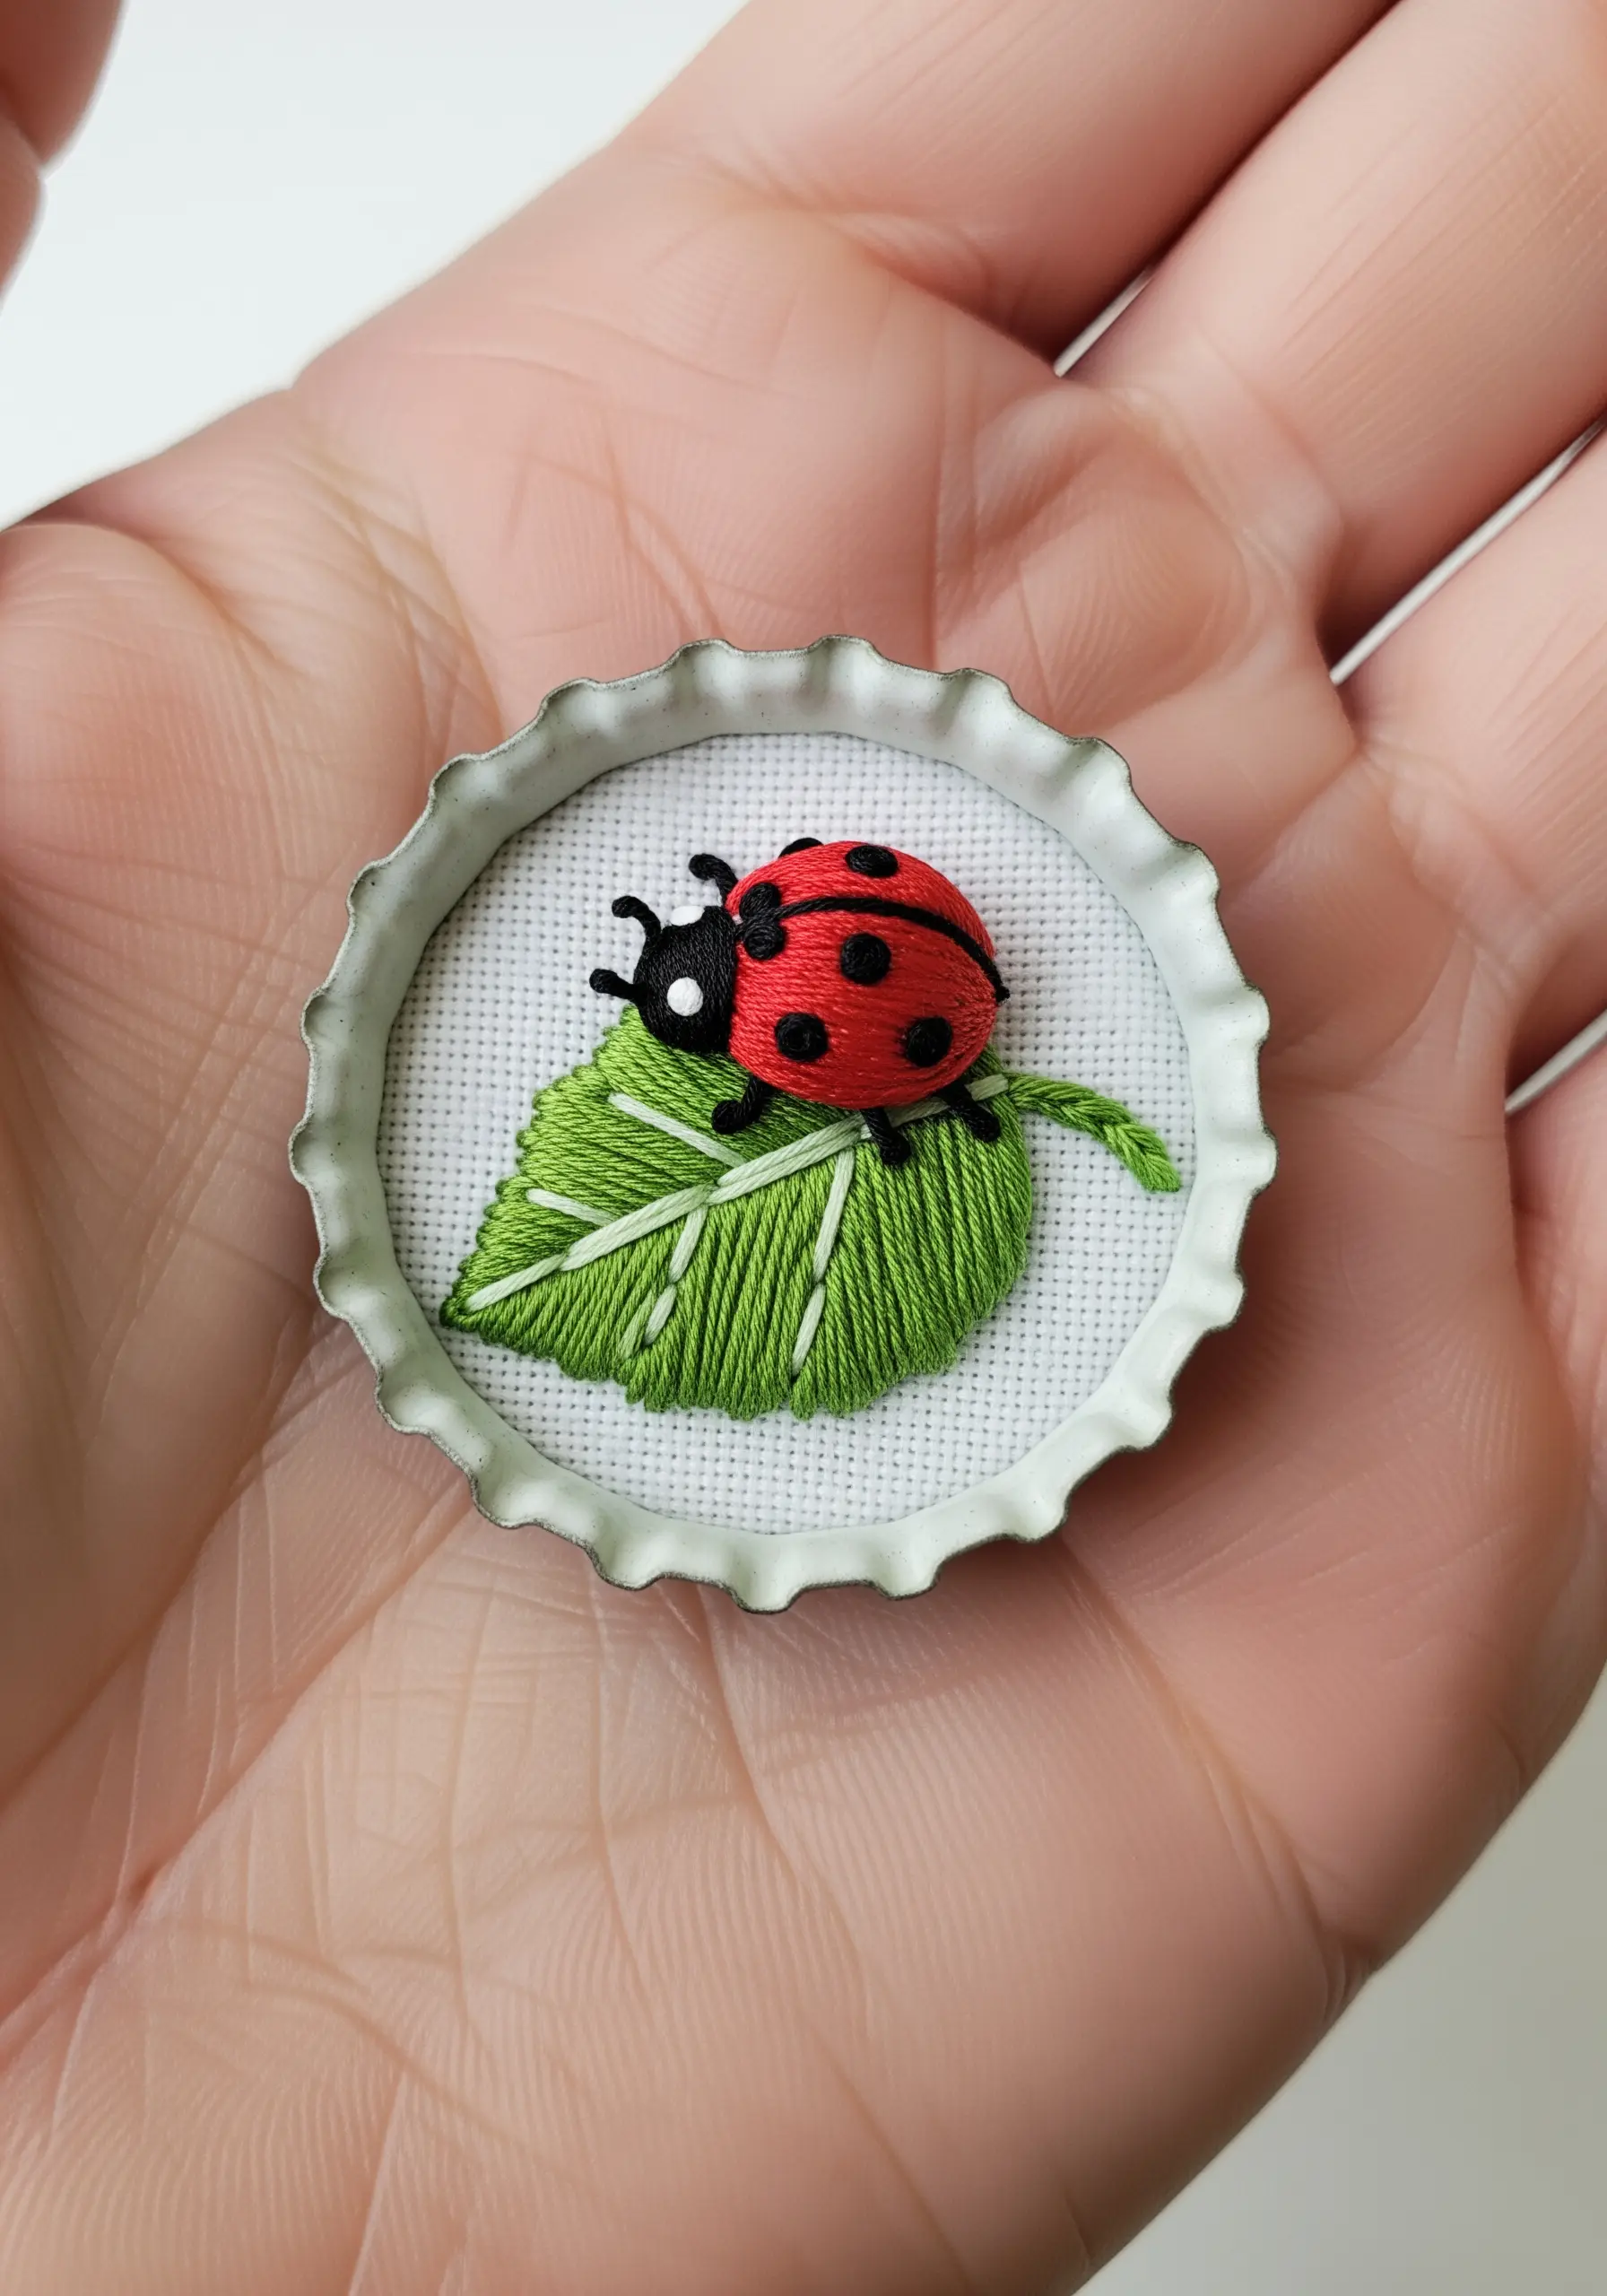
When working on a tiny scale, like inside a bottle cap, adding dimension is key to making your subject stand out.
Before stitching the ladybug’s red body, lay down a small patch of seed stitches as padding. Then, work your satin stitch over this base.
This simple step raises the satin stitch, giving the ladybug a rounded, three-dimensional shell that catches the light.
Use a single strand of floss for all details—the spots, legs, and leaf veins—to maintain clarity and precision in such a small space.
29. Capture the Dusty Finish of Eucalyptus Leaves
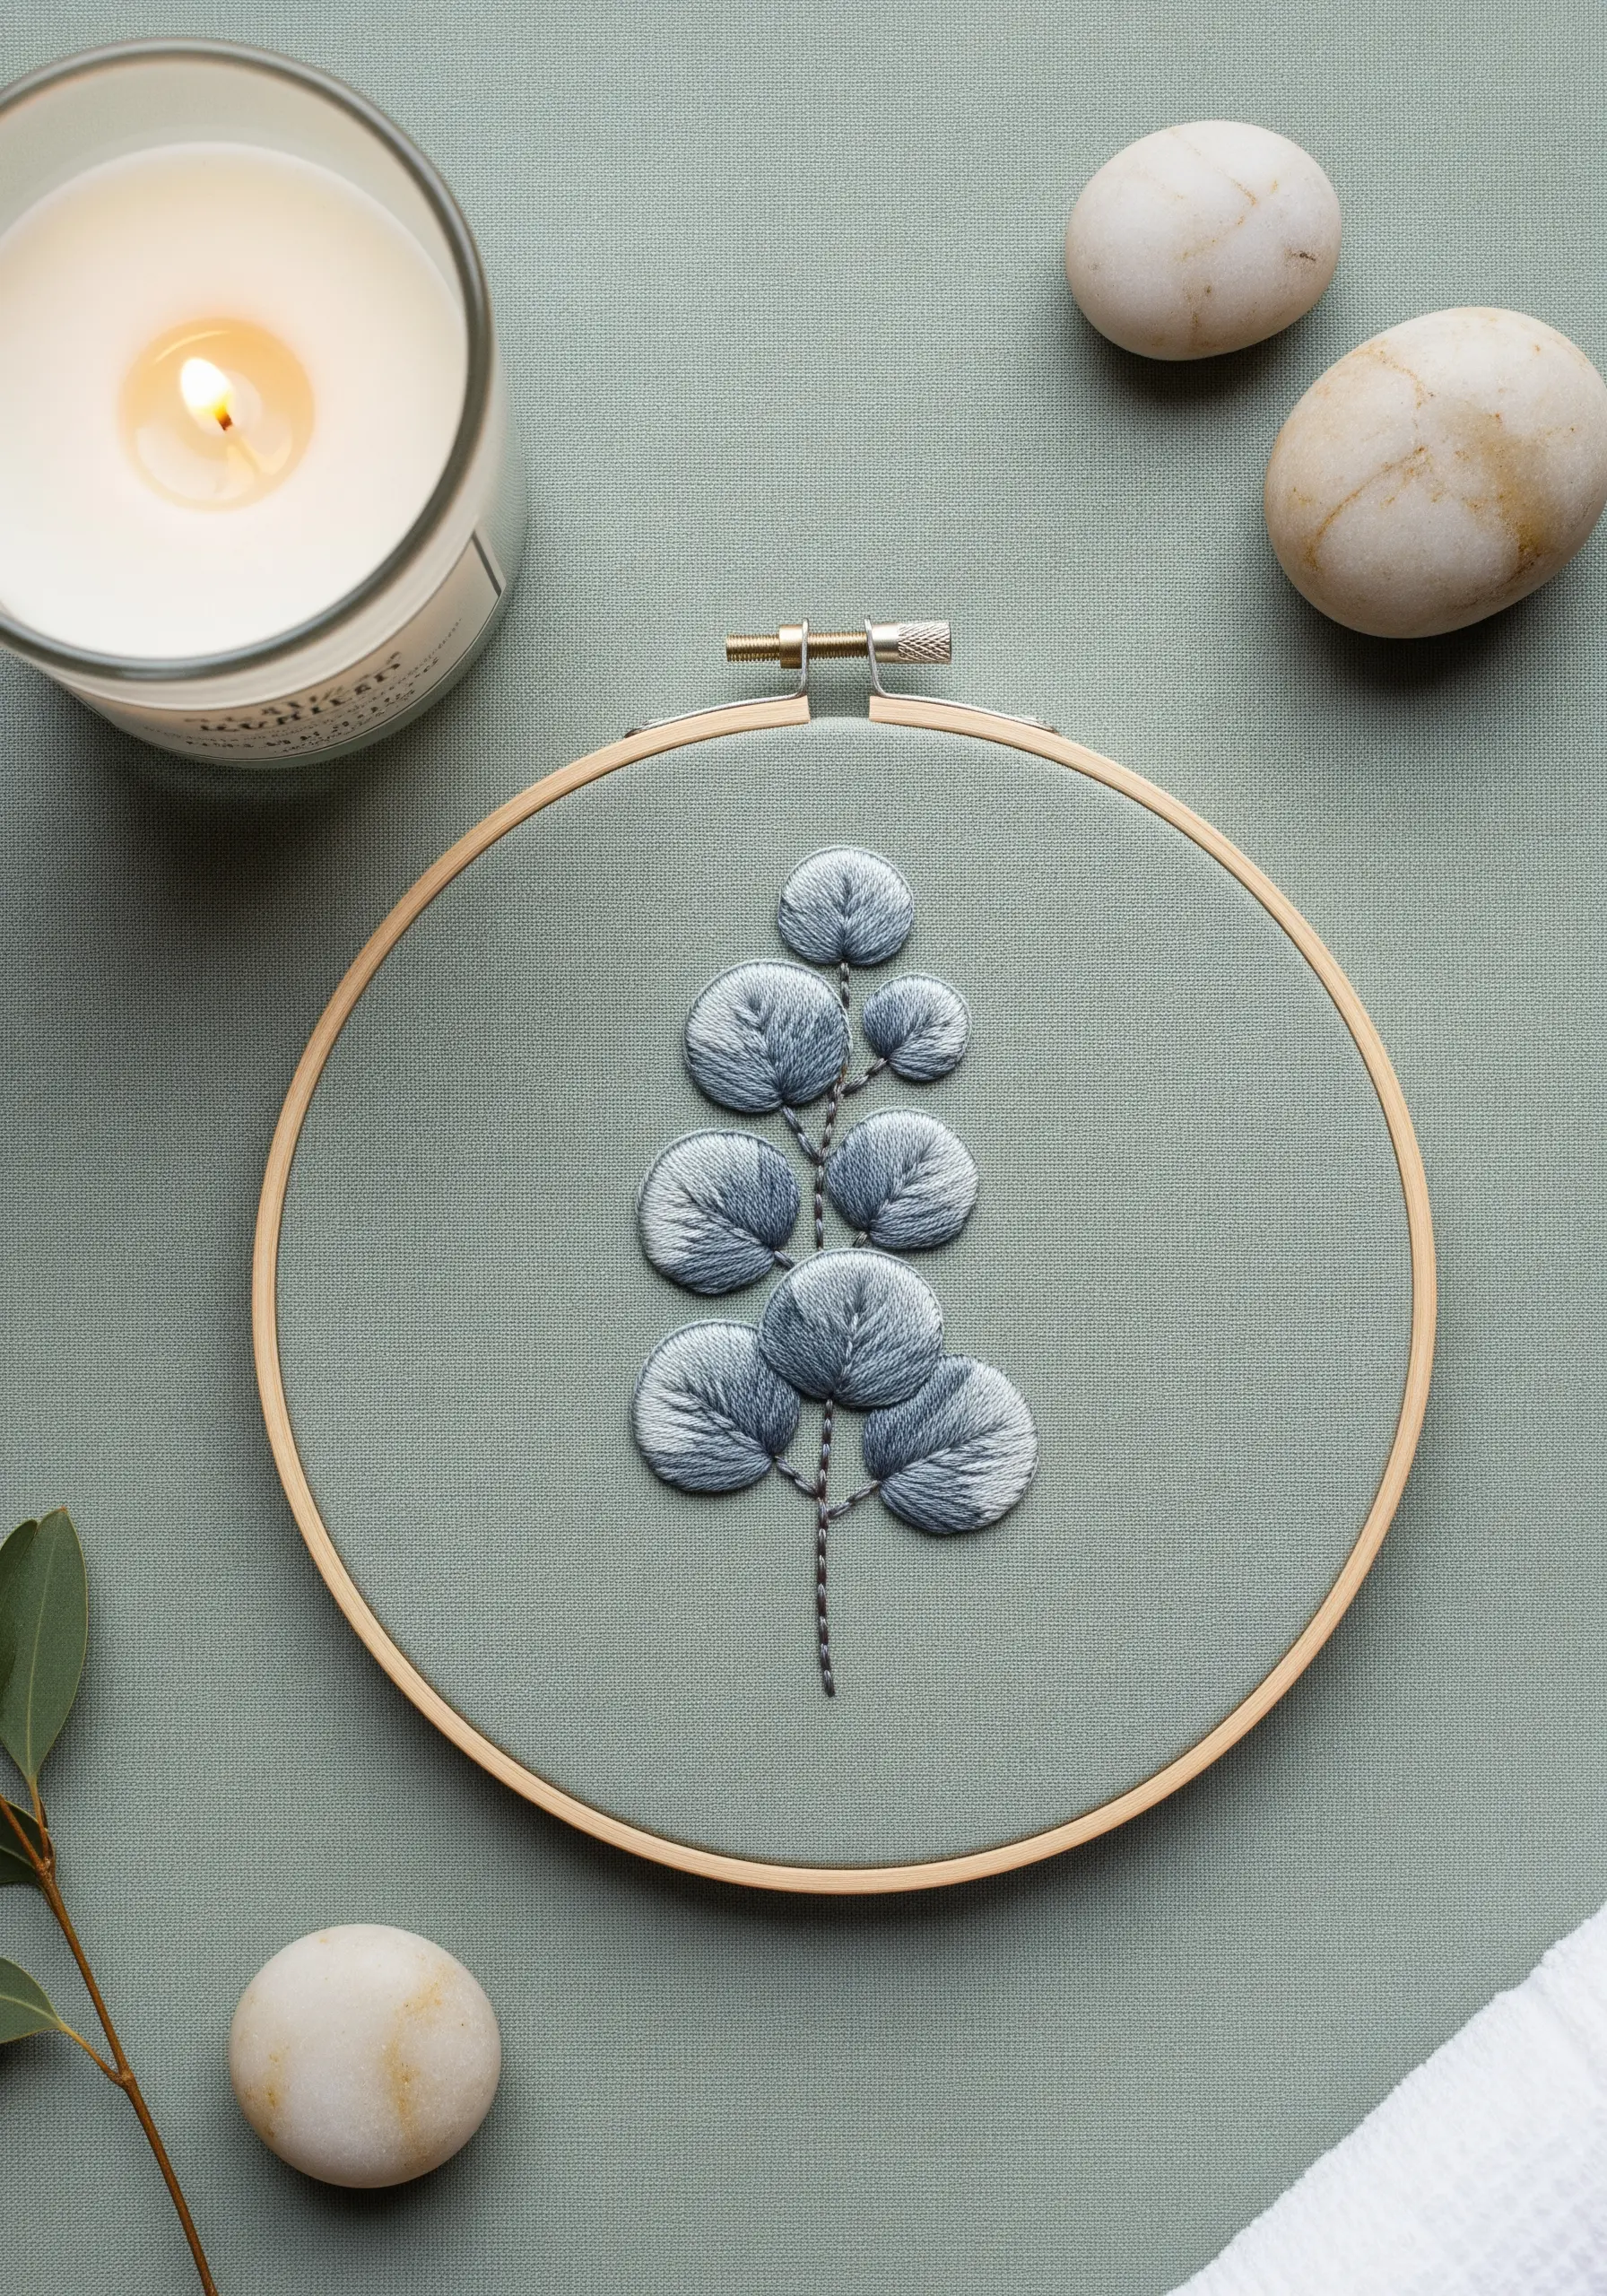
The beauty of eucalyptus is its soft, matte, silvery-green color. Replicate this by using a muted, dusty color palette and avoiding high-sheen rayon threads.
Fill each leaf with a directional long-and-short stitch, ensuring the stitches flow from the stem outwards to the edge of the leaf.
Create the subtle central highlight by working a few stitches in a much lighter gray or white down the middle of the leaf *first*, then blending your main color around it.
This under-stitching technique produces a softer, more integrated highlight than adding it on top.
30. Sculpt Ruffled Petals with Directional Thread Painting

To capture the magnificent, complex folds of an iris, the direction of your stitches is everything. This is the heart of advanced floral thread painting techniques.
Instead of stitching in straight lines, let your needle follow the curves and waves of each petal. Your stitches should ripple and turn just like the real flower.
Work with a single strand of floss and a wide palette of purples, yellows, and browns, blending them meticulously to create shadows and highlights that define the ruffles.
Stitching on black fabric makes the vibrant colors appear even more luminous and dramatic.
31. Create Rich Soil Texture with French Knots
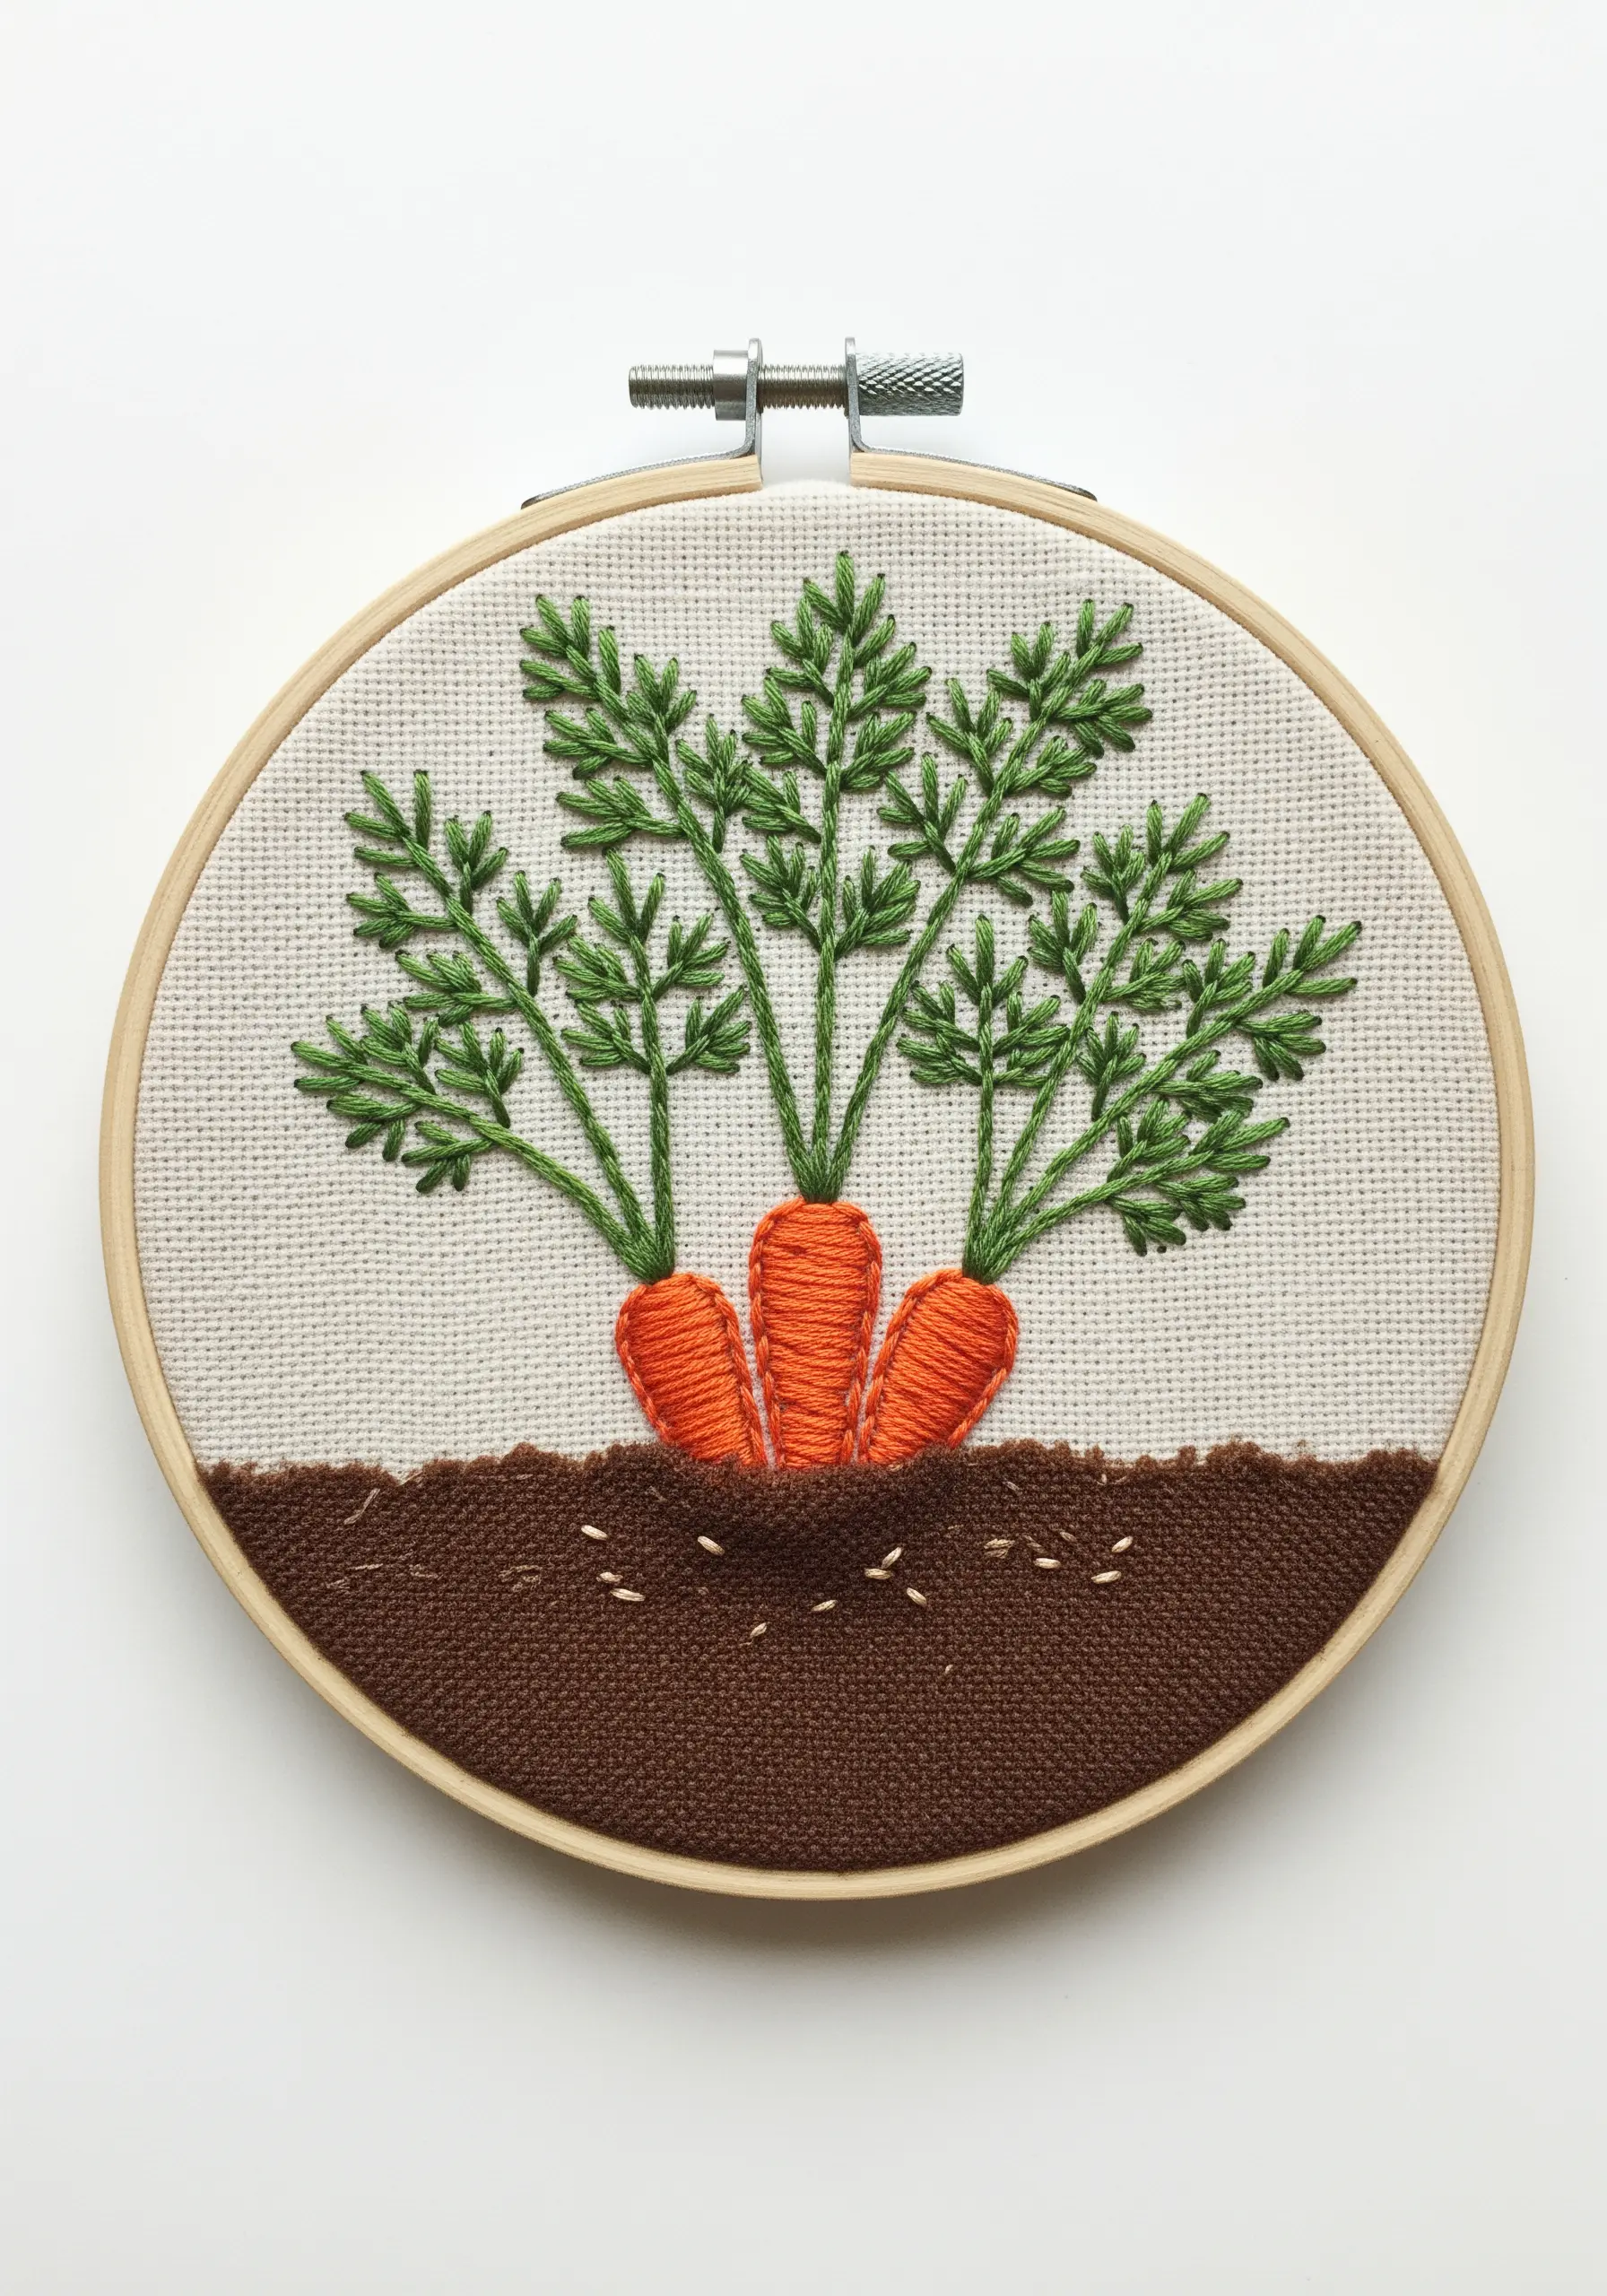
To give your underground vegetables a place to grow, create a convincing soil texture using a dense bed of French knots.
Use several shades of brown, from dark umber to a lighter sienna, to give the soil depth and realism. A few scattered, lighter-colored seed stitches can suggest small pebbles or nutrients.
For the feathery carrot tops, use fern stitch. This stitch naturally creates a central stem with branches fanning out, making it the perfect choice for delicate foliage.
32. Define Cactus Ribs with Shading and Outlines
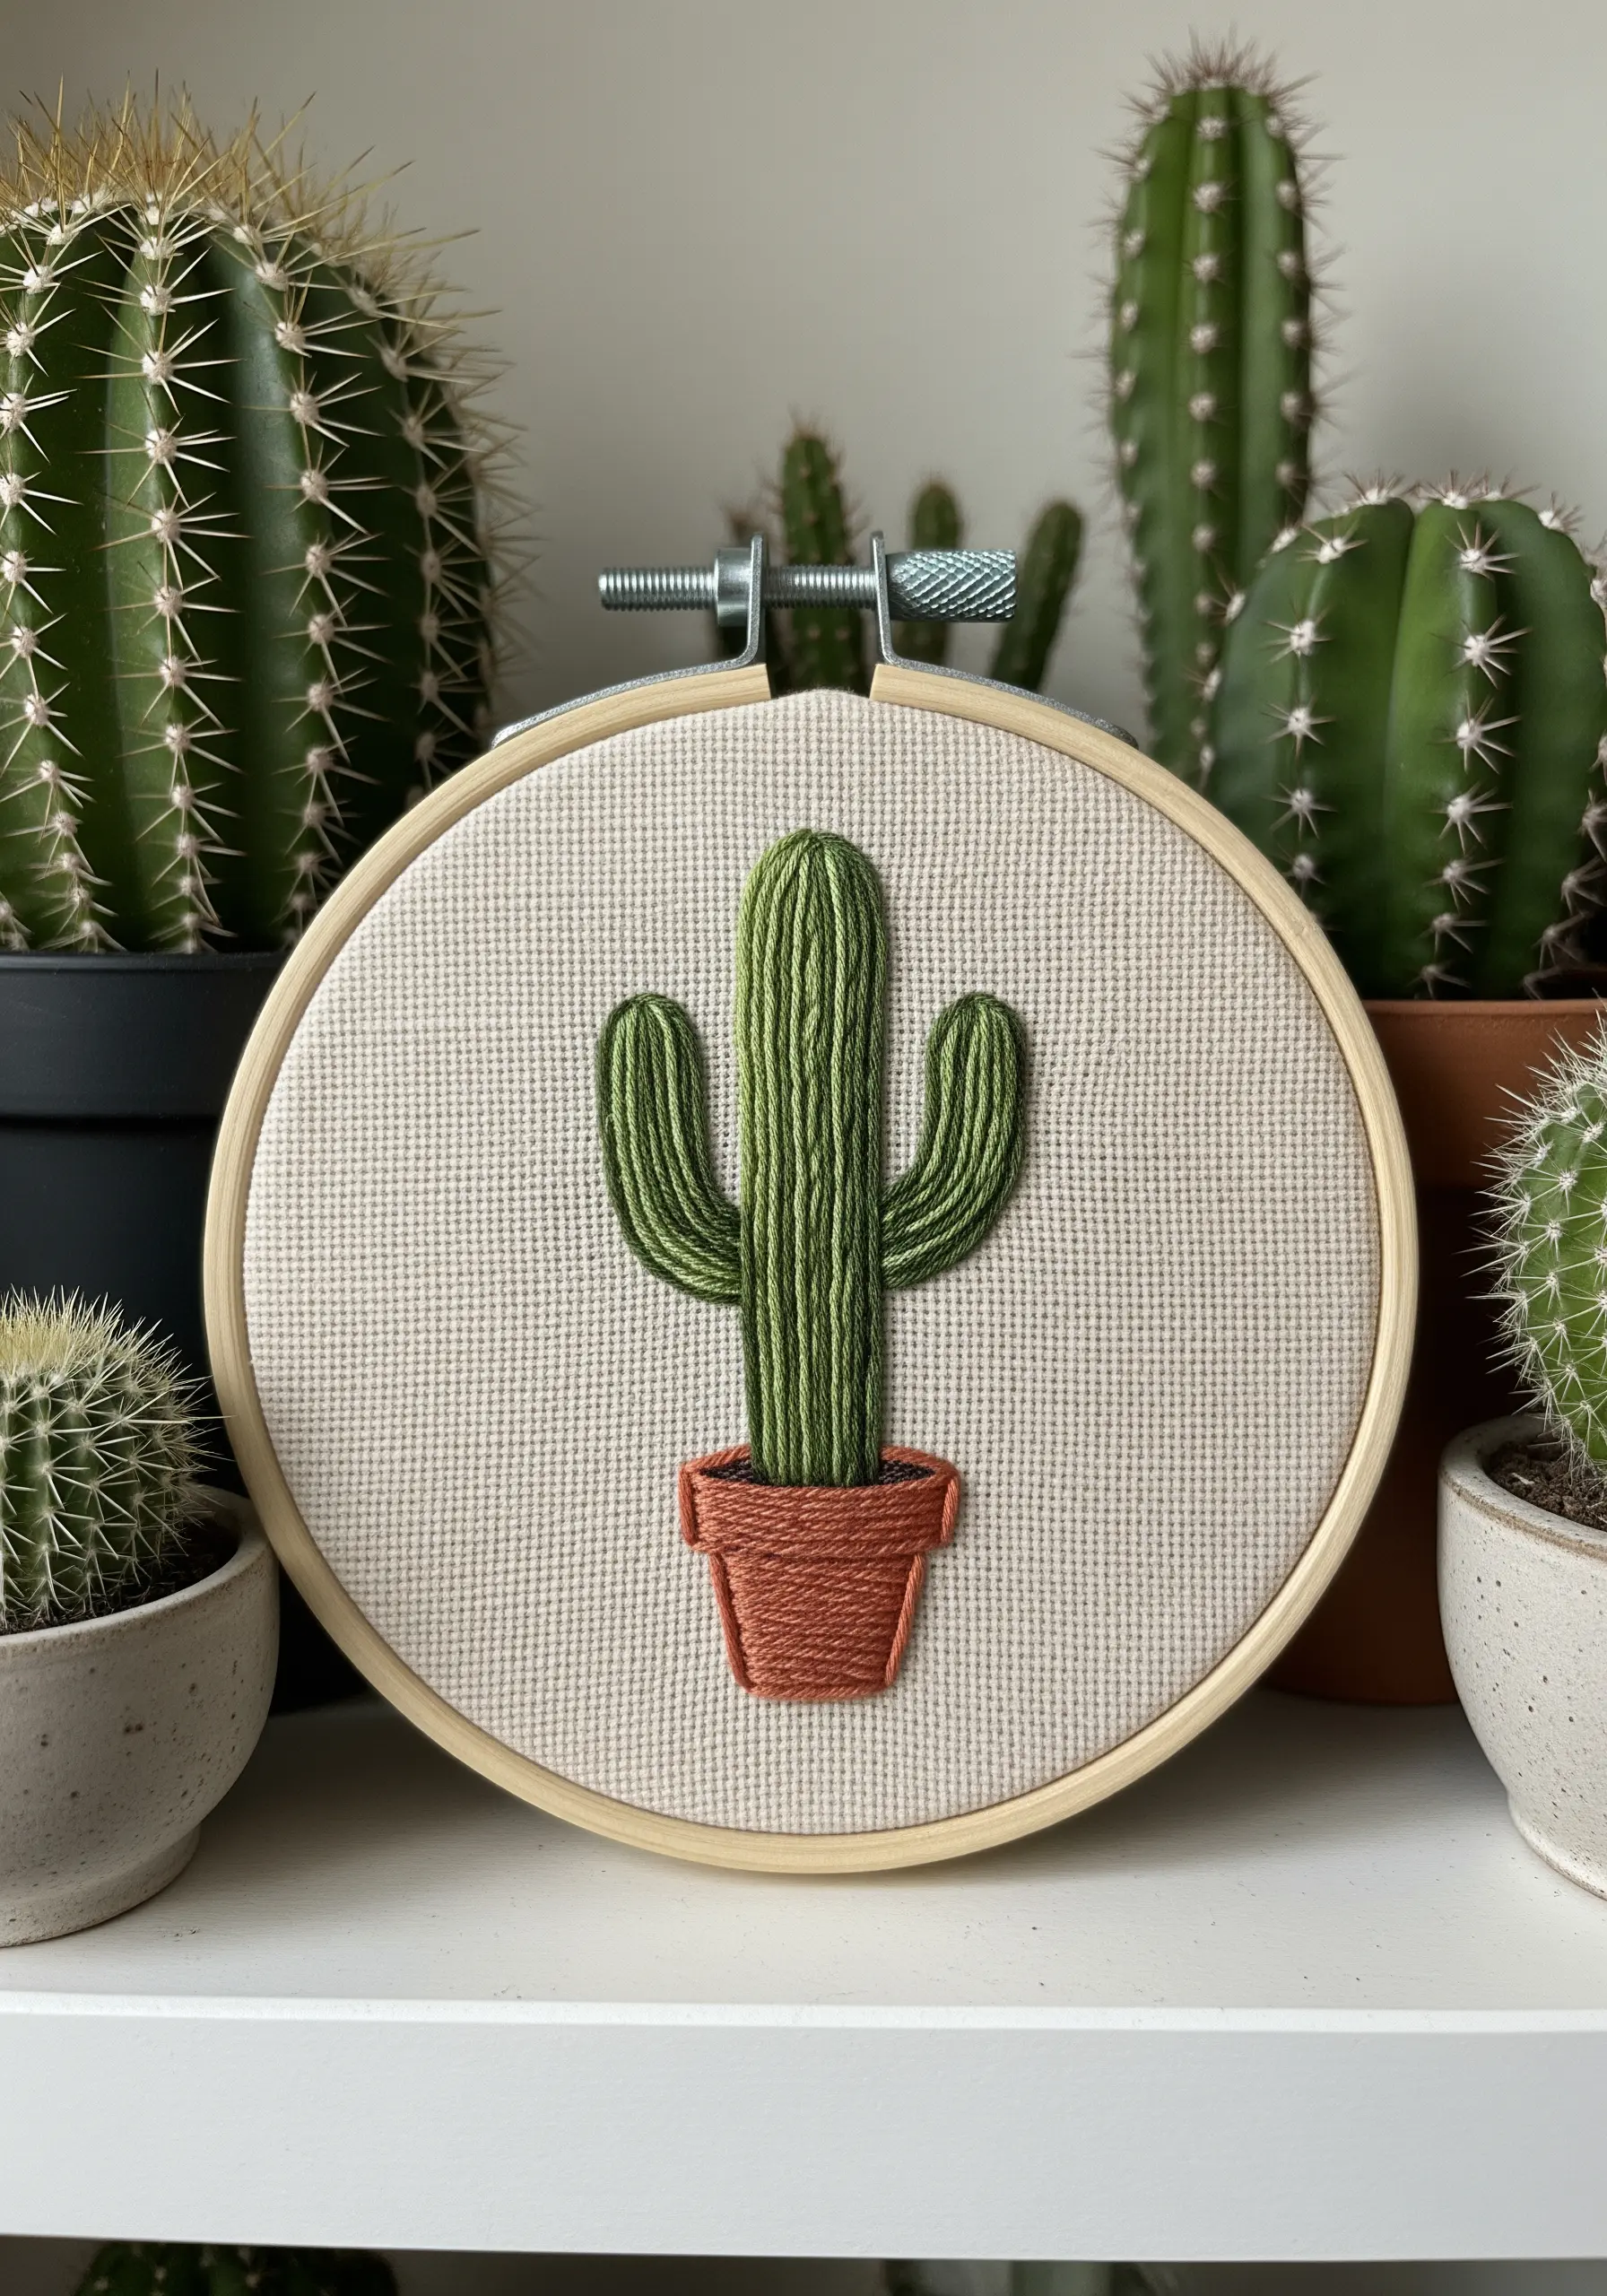
To give a simple cactus shape a three-dimensional, rounded form, you need to create the illusion of its characteristic ribs.
Outline each vertical rib with a split stitch using a darker shade of green. Then, fill the space between the outlines with a slightly curved satin stitch in a lighter green.
The darker outlines act as shadows in the crevices, while the lighter fill color creates the highlighted, bulging shape of the ribs.
This simple color-blocking technique is incredibly effective for adding instant dimension to simple botanical shapes.


