

Have you ever looked at a patch of moss and wished you could capture its intricate, velvety texture in thread? You can, and it’s simpler than you think. The key isn’t a dozen complex stitches, but a mastery of one or two, used with intention.
This collection is designed to help you move beyond merely stitching a design and start building tactile worlds. We’ll explore how the humble French knot, when massed together in organic tones, can mimic everything from forest floors to lichen on ancient stone. You will see how adjusting thread weight, stitch density, and color harmony can create depth, shadow, and emotion.
Forget the pressure to be perfect. Instead, focus on the feeling you want to evoke—the cool dampness of a cliffside, the soft resilience of a mossy riverbank. Your needle and thread are all you need to translate the quiet beauty of nature into art that you can not only see, but feel.
1. Build a Living Wall with Dimensional Stitches
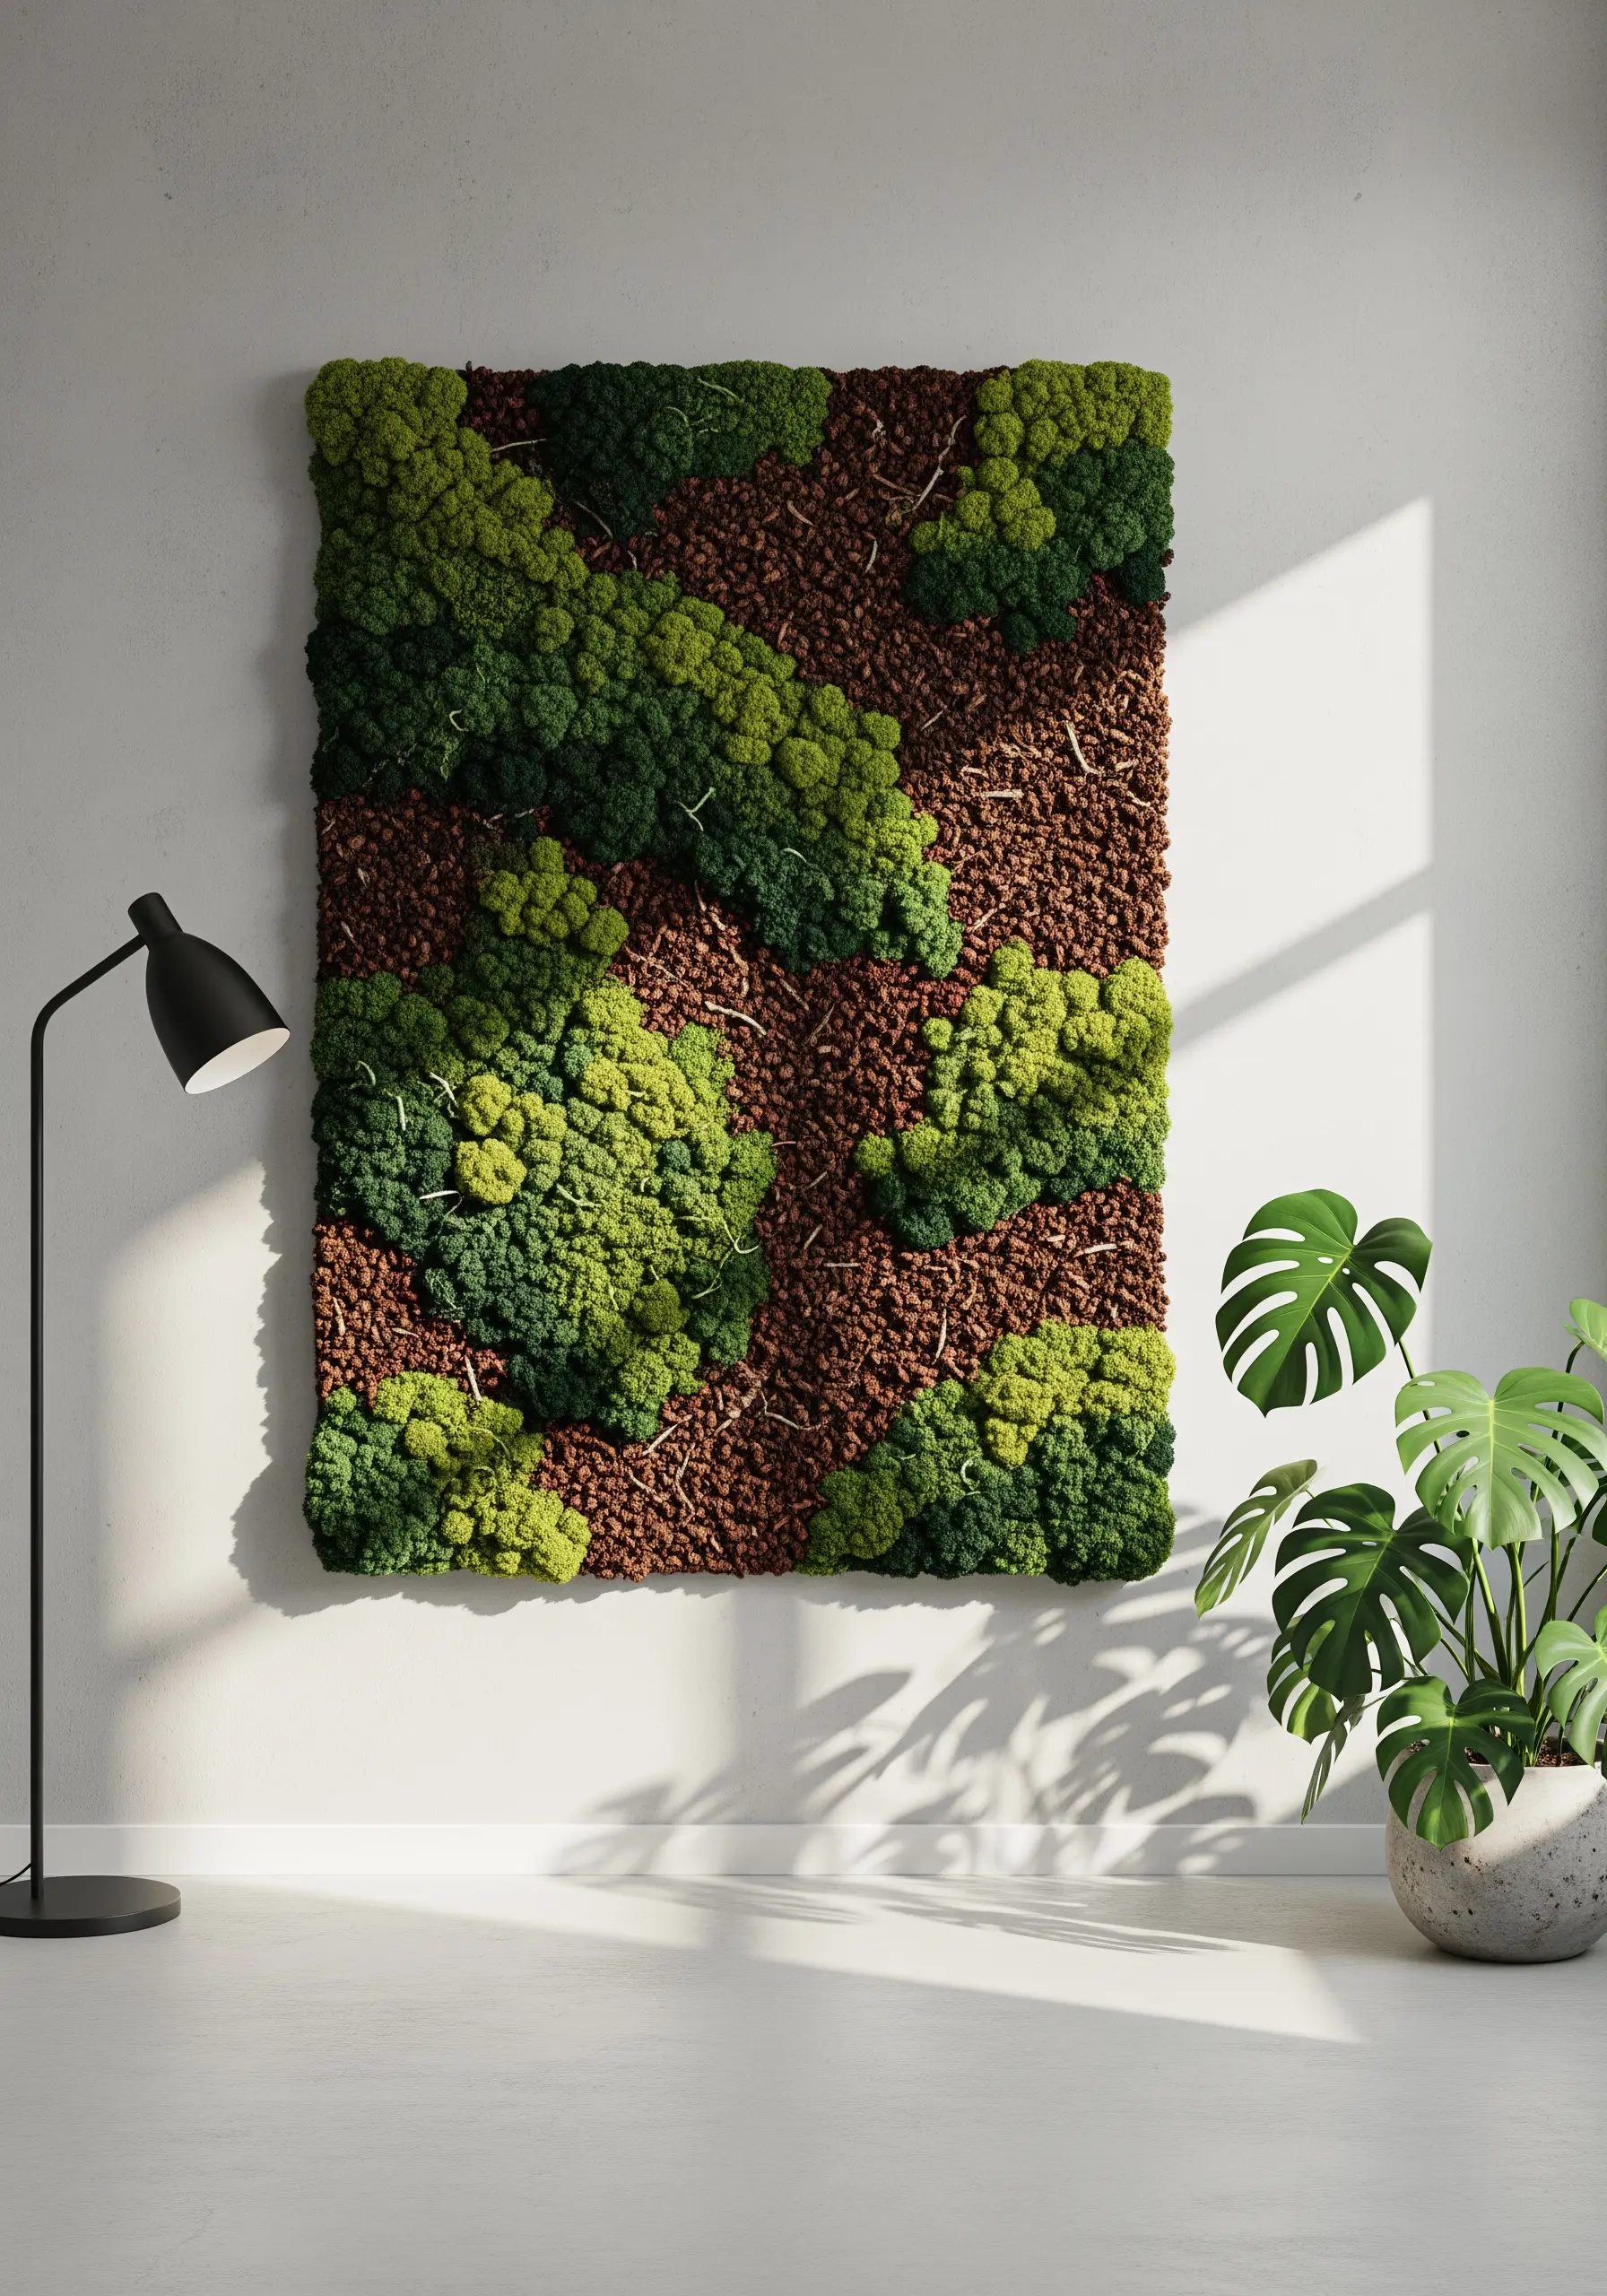
To create a truly immersive moss wall, think in layers, not just stitches.
Use a dense foundation of French knots with thick, matte wool thread for the base moss in shades of olive and forest green.
For the raised, lighter green clusters, switch to a punch needle technique or create tightly packed turkey work loops and trim them to a uniform height for a velvety finish.
The earthy ‘soil’ between the moss can be achieved with couched chenille thread or densely packed seed stitches in dark umber and sienna, which adds a subtle texture that doesn’t compete for attention.
2. Define Abstract Shapes with Negative Space
Let the unstitched fabric be an active part of your design.
Use the natural linen or cotton canvas as your grounding element, allowing its texture to contrast with the plush, stitched areas.
Before filling with French knots or punch needle loops, outline your organic shapes with a simple, two-strand backstitch.
This technique contains the textured areas, creating crisp, intentional edges that make the entire composition feel deliberate and polished.
This focus on form and texture makes for perfect abstract embroidery patterns.
3. Translate Birch Bark with Mixed-Stitch Techniques
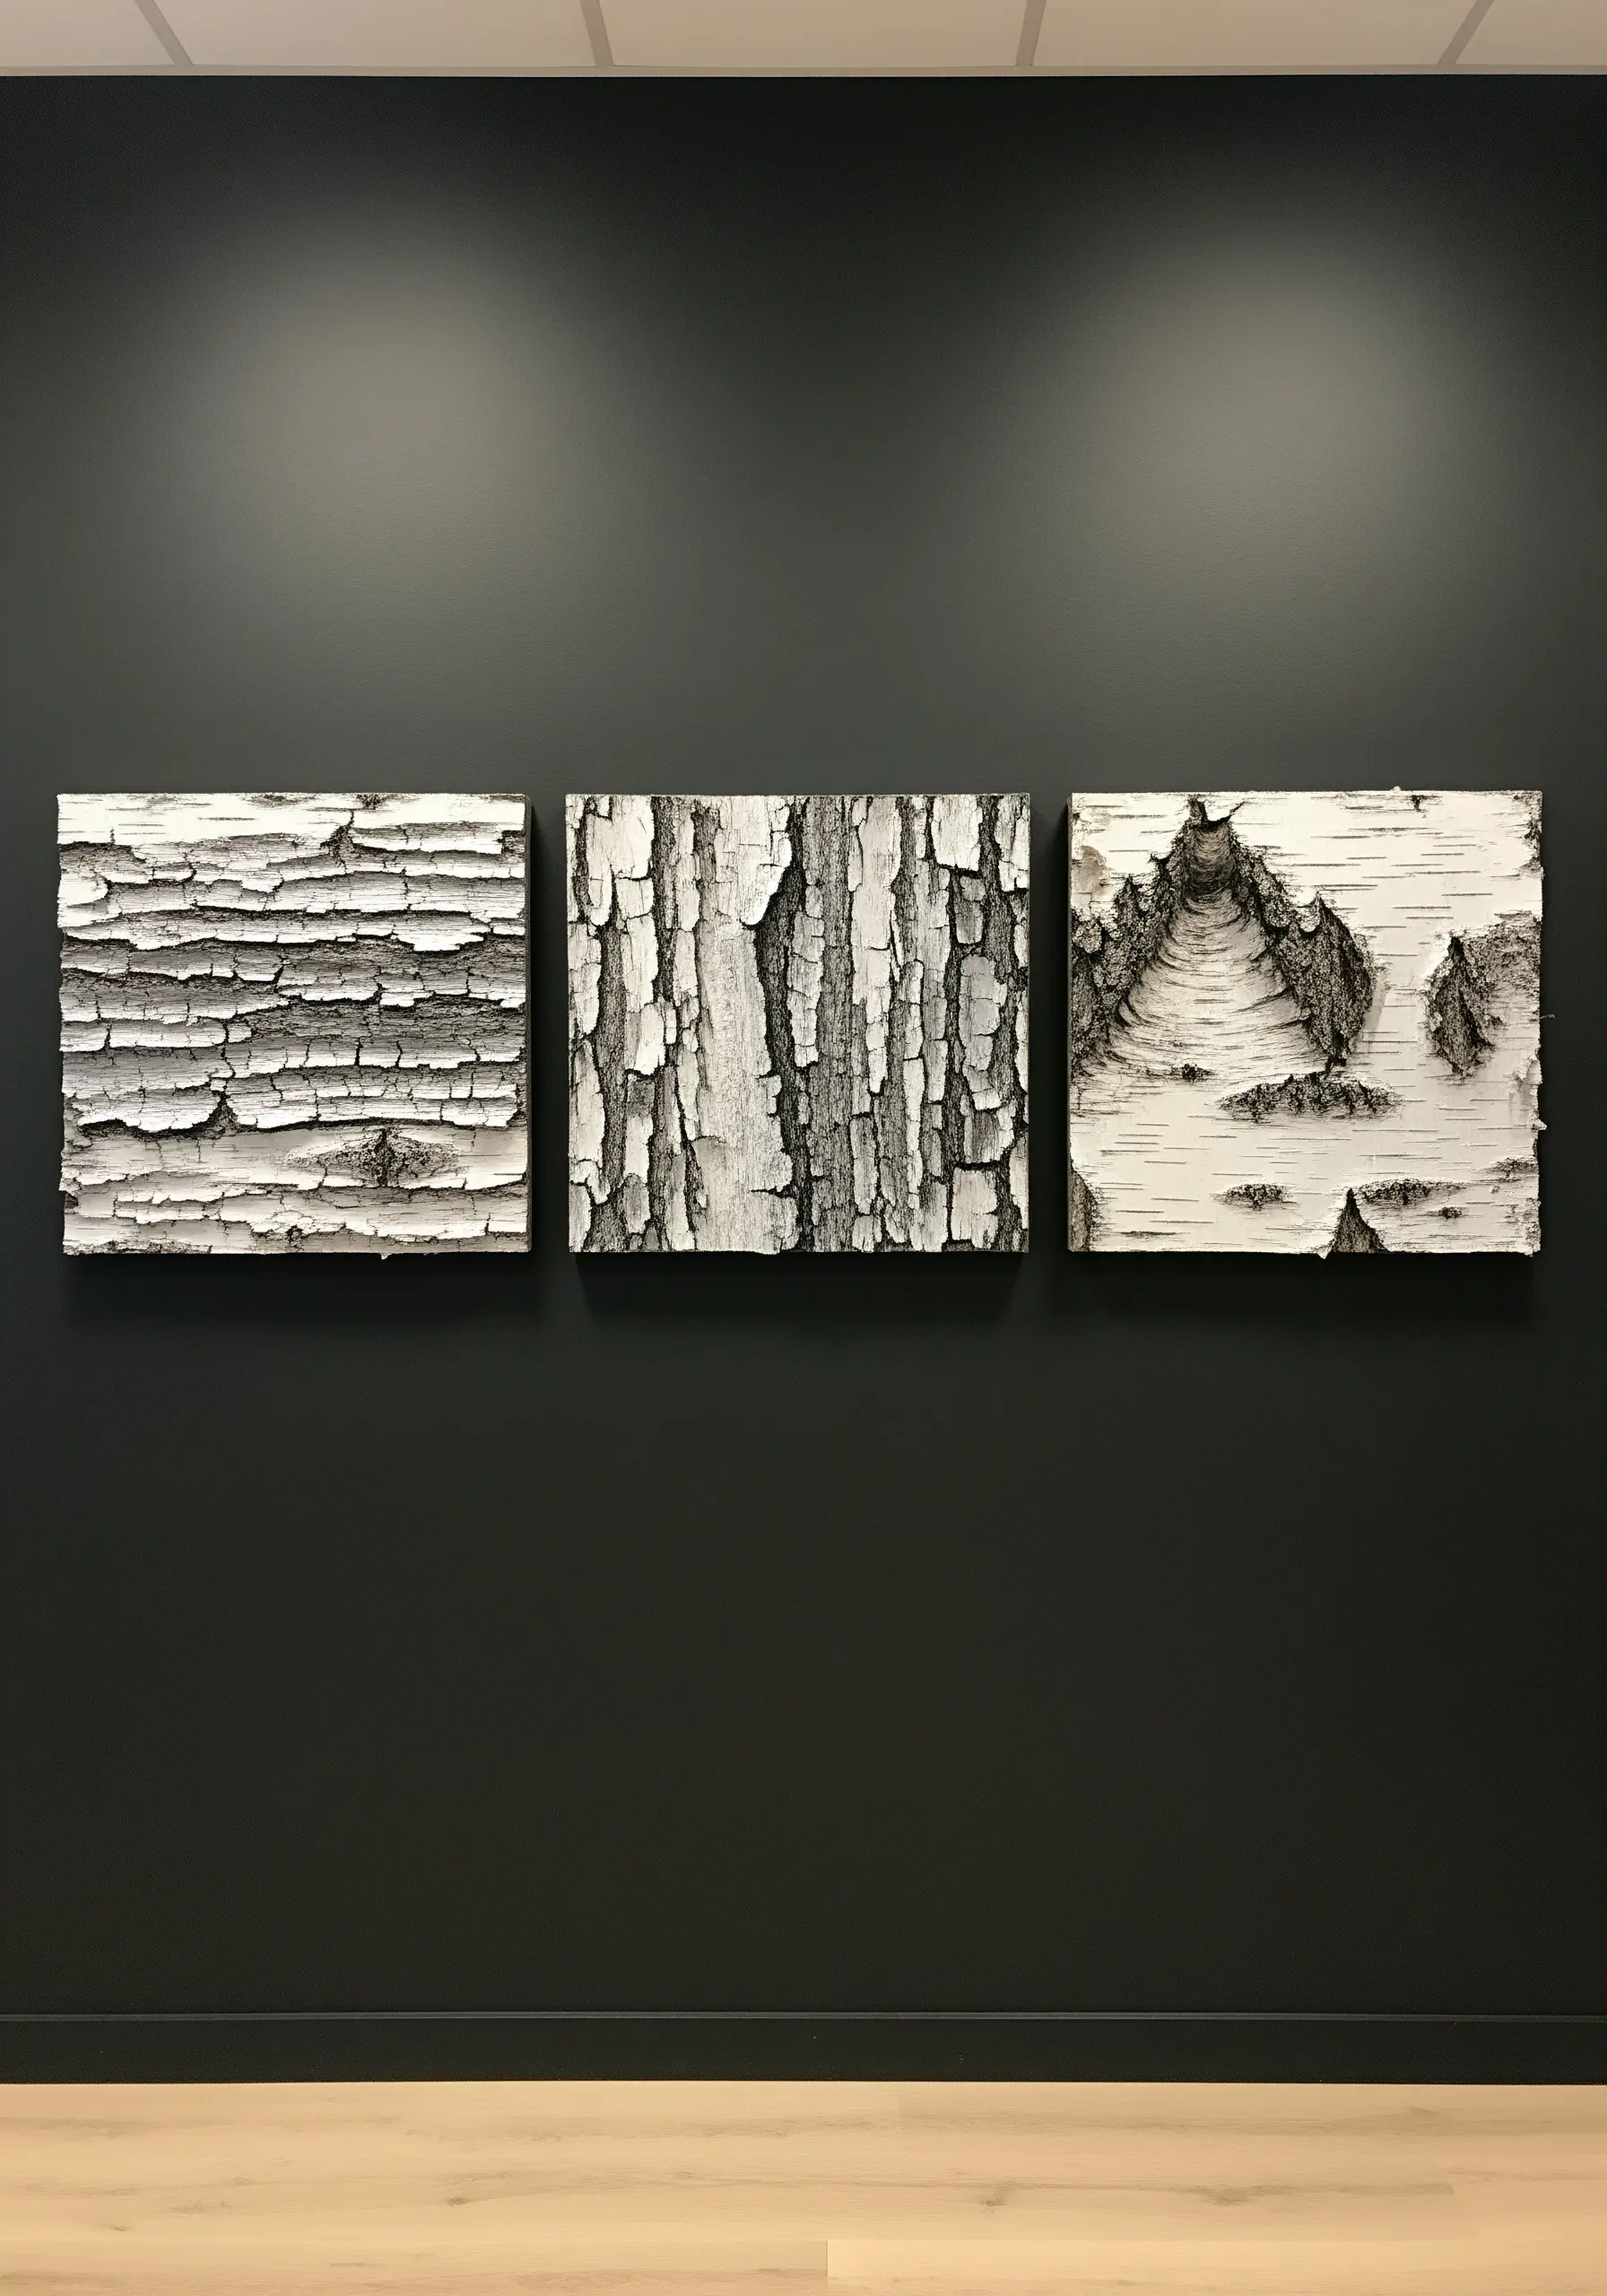
Capture the delicate, peeling texture of birch bark by moving beyond a single stitch.
Lay down a foundation of long, vertical satin stitches in off-white and pale grey, varying the stitch length slightly for an organic feel.
Then, add shadows and depth with fine, single-strand backstitches in charcoal grey.
For the peeling effect, appliqué tiny scraps of frayed linen or use raised stem stitch bands, allowing the threads to lift slightly from the canvas.
This monochrome approach turns a simple natural detail into a sophisticated triptych.
4. Create Atmospheric Perspective with Stitch Density
Suggest depth in a landscape by adjusting the texture and density of your stitches.
In the foreground, use chunky French knots and bullion knots with thick wool yarn to create a rich, tangible texture that feels close to the viewer.
As you move toward the horizon, transition to smaller, more sparsely placed knots using finer cotton floss.
For the distant elements like the sky or water, switch to a smooth satin stitch or even leave the fabric bare—this visual shift effectively mimics how details soften with distance.
5. Mount Your Art on Unconventional Shapes
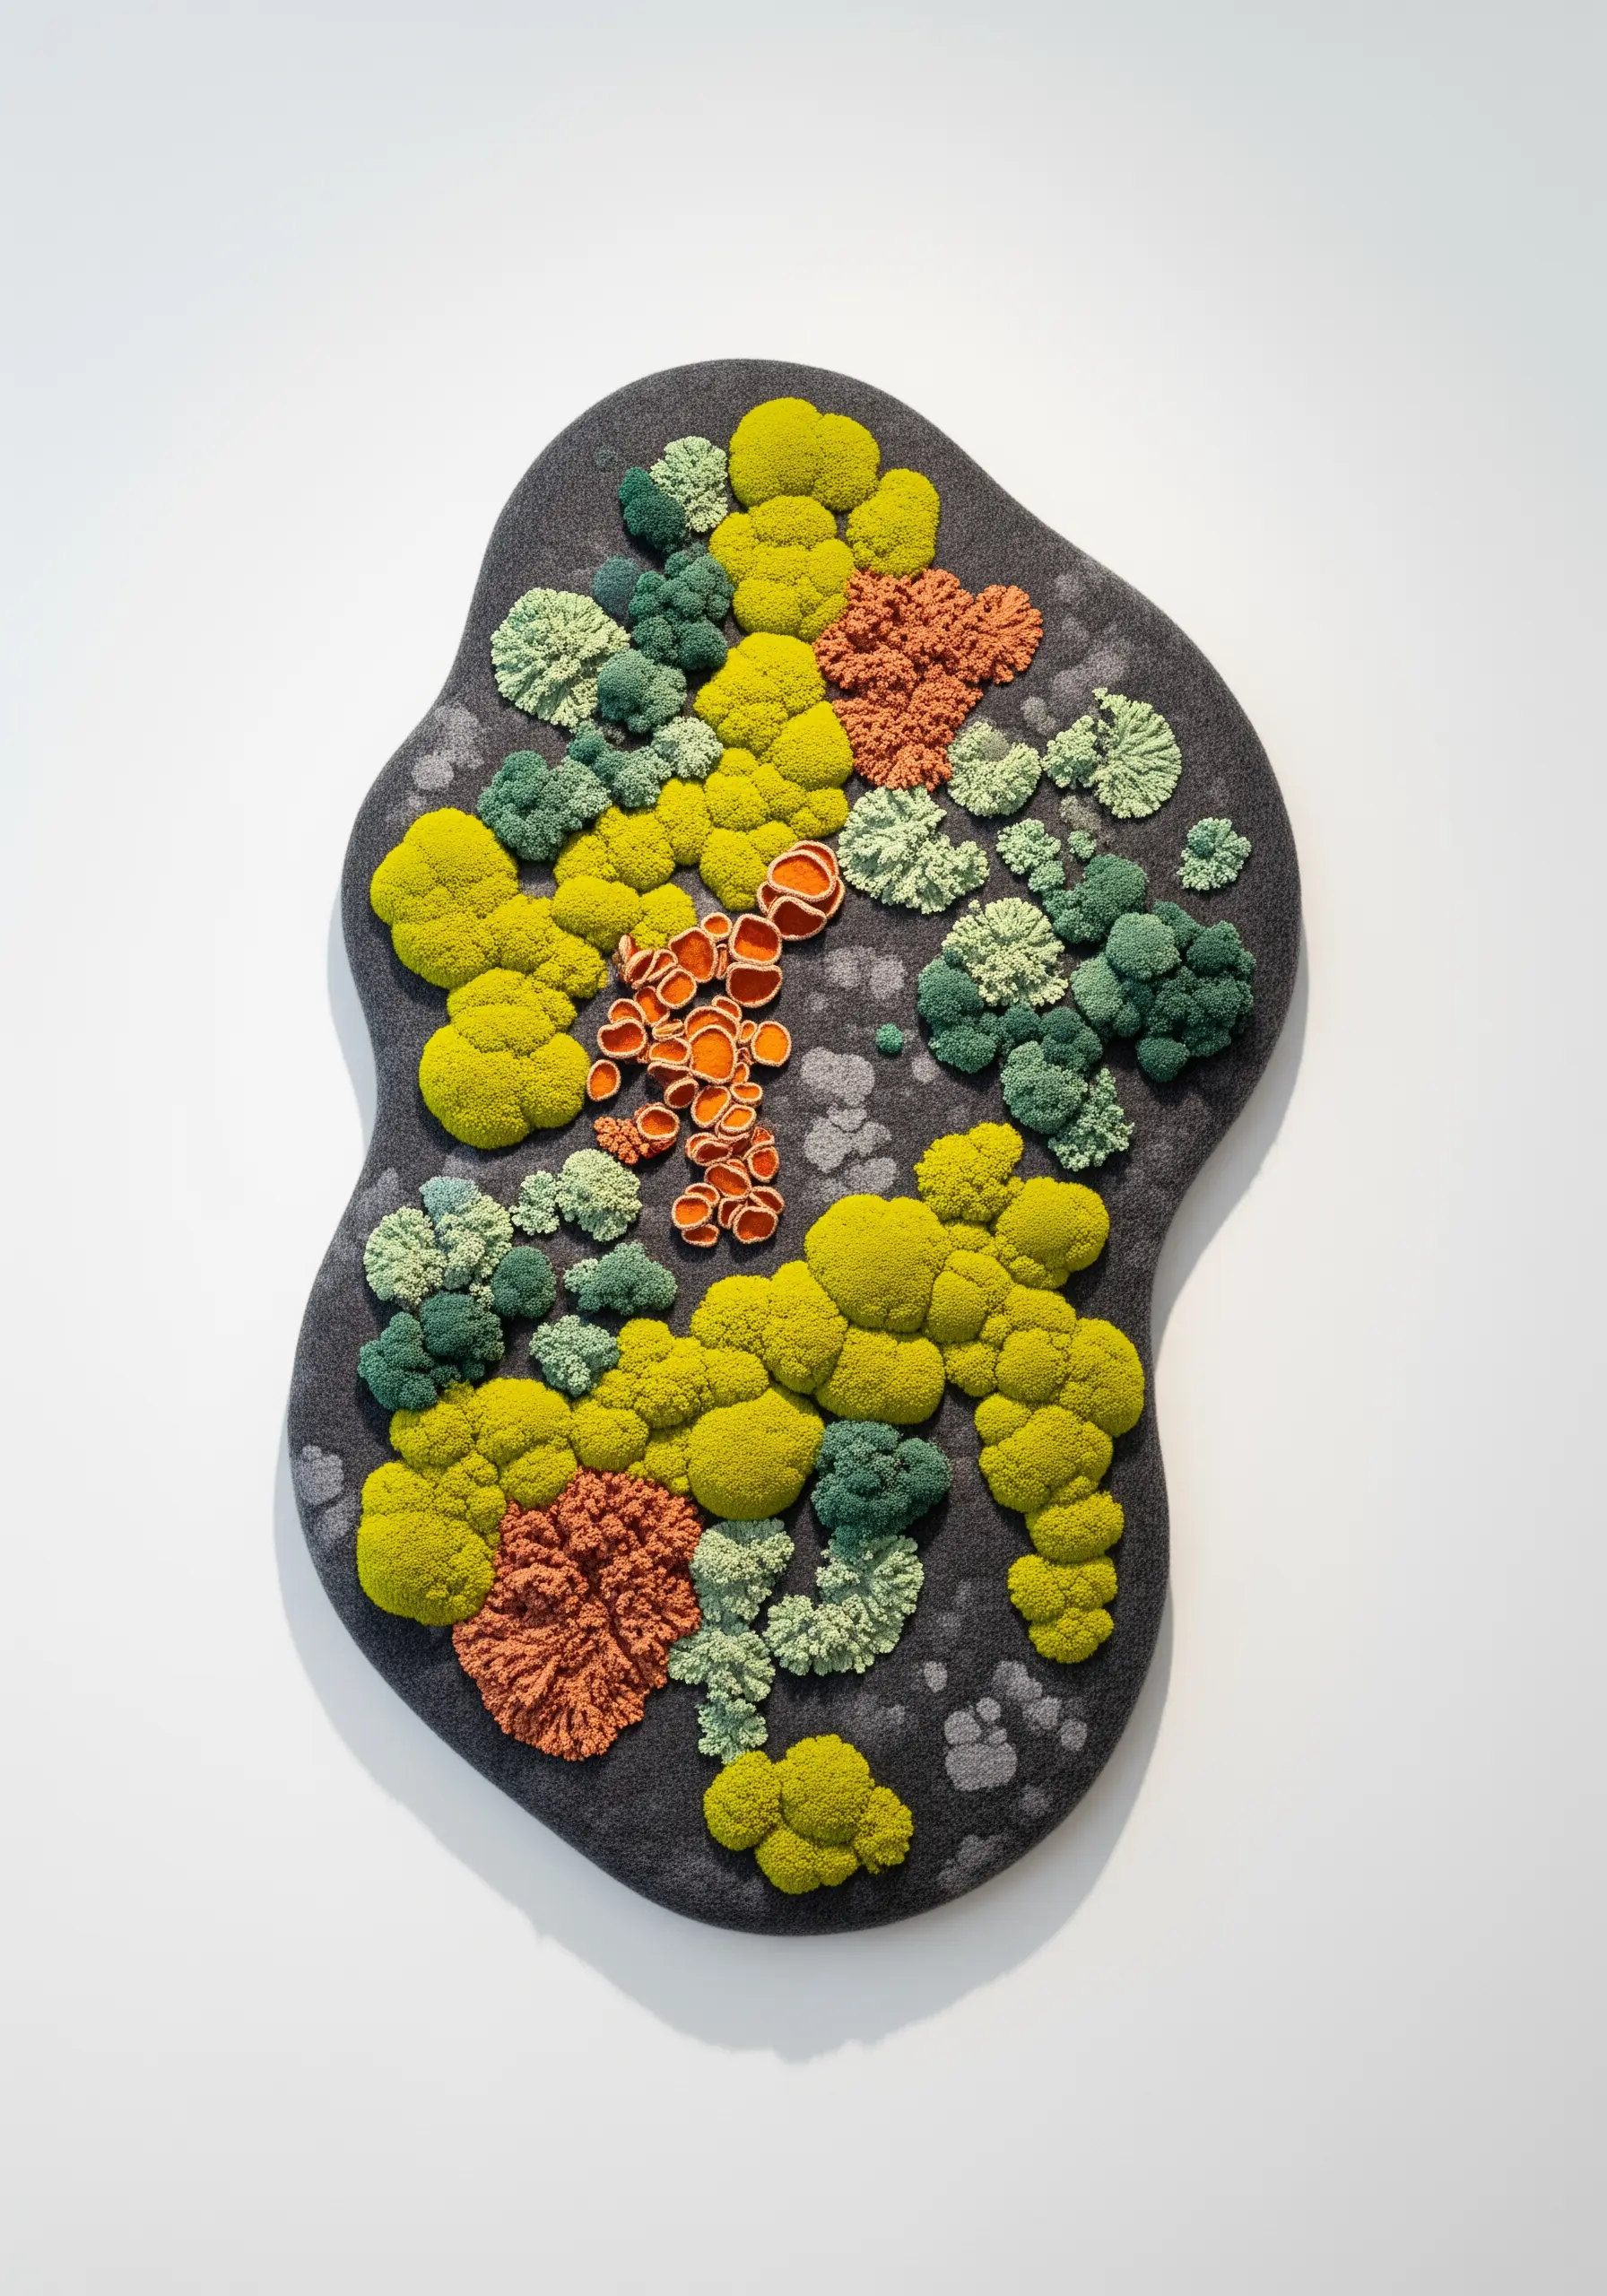
Break free from the hoop by mounting your textured embroidery on a custom-cut shape.
Use a sturdy backing like felt, foam core, or thin plywood cut into an organic, amoeba-like form.
Embroider your design on a larger piece of fabric, then wrap and secure it tightly around the backing board with glue or staples.
This technique elevates your piece from a craft project to a fiber art installation, giving it a unique sculptural presence on the wall.
Introduce a pop of contrasting texture, like woven wheel stitches in bright orange, to mimic lichen growth.
6. Stitch Moss Between Padded Stones
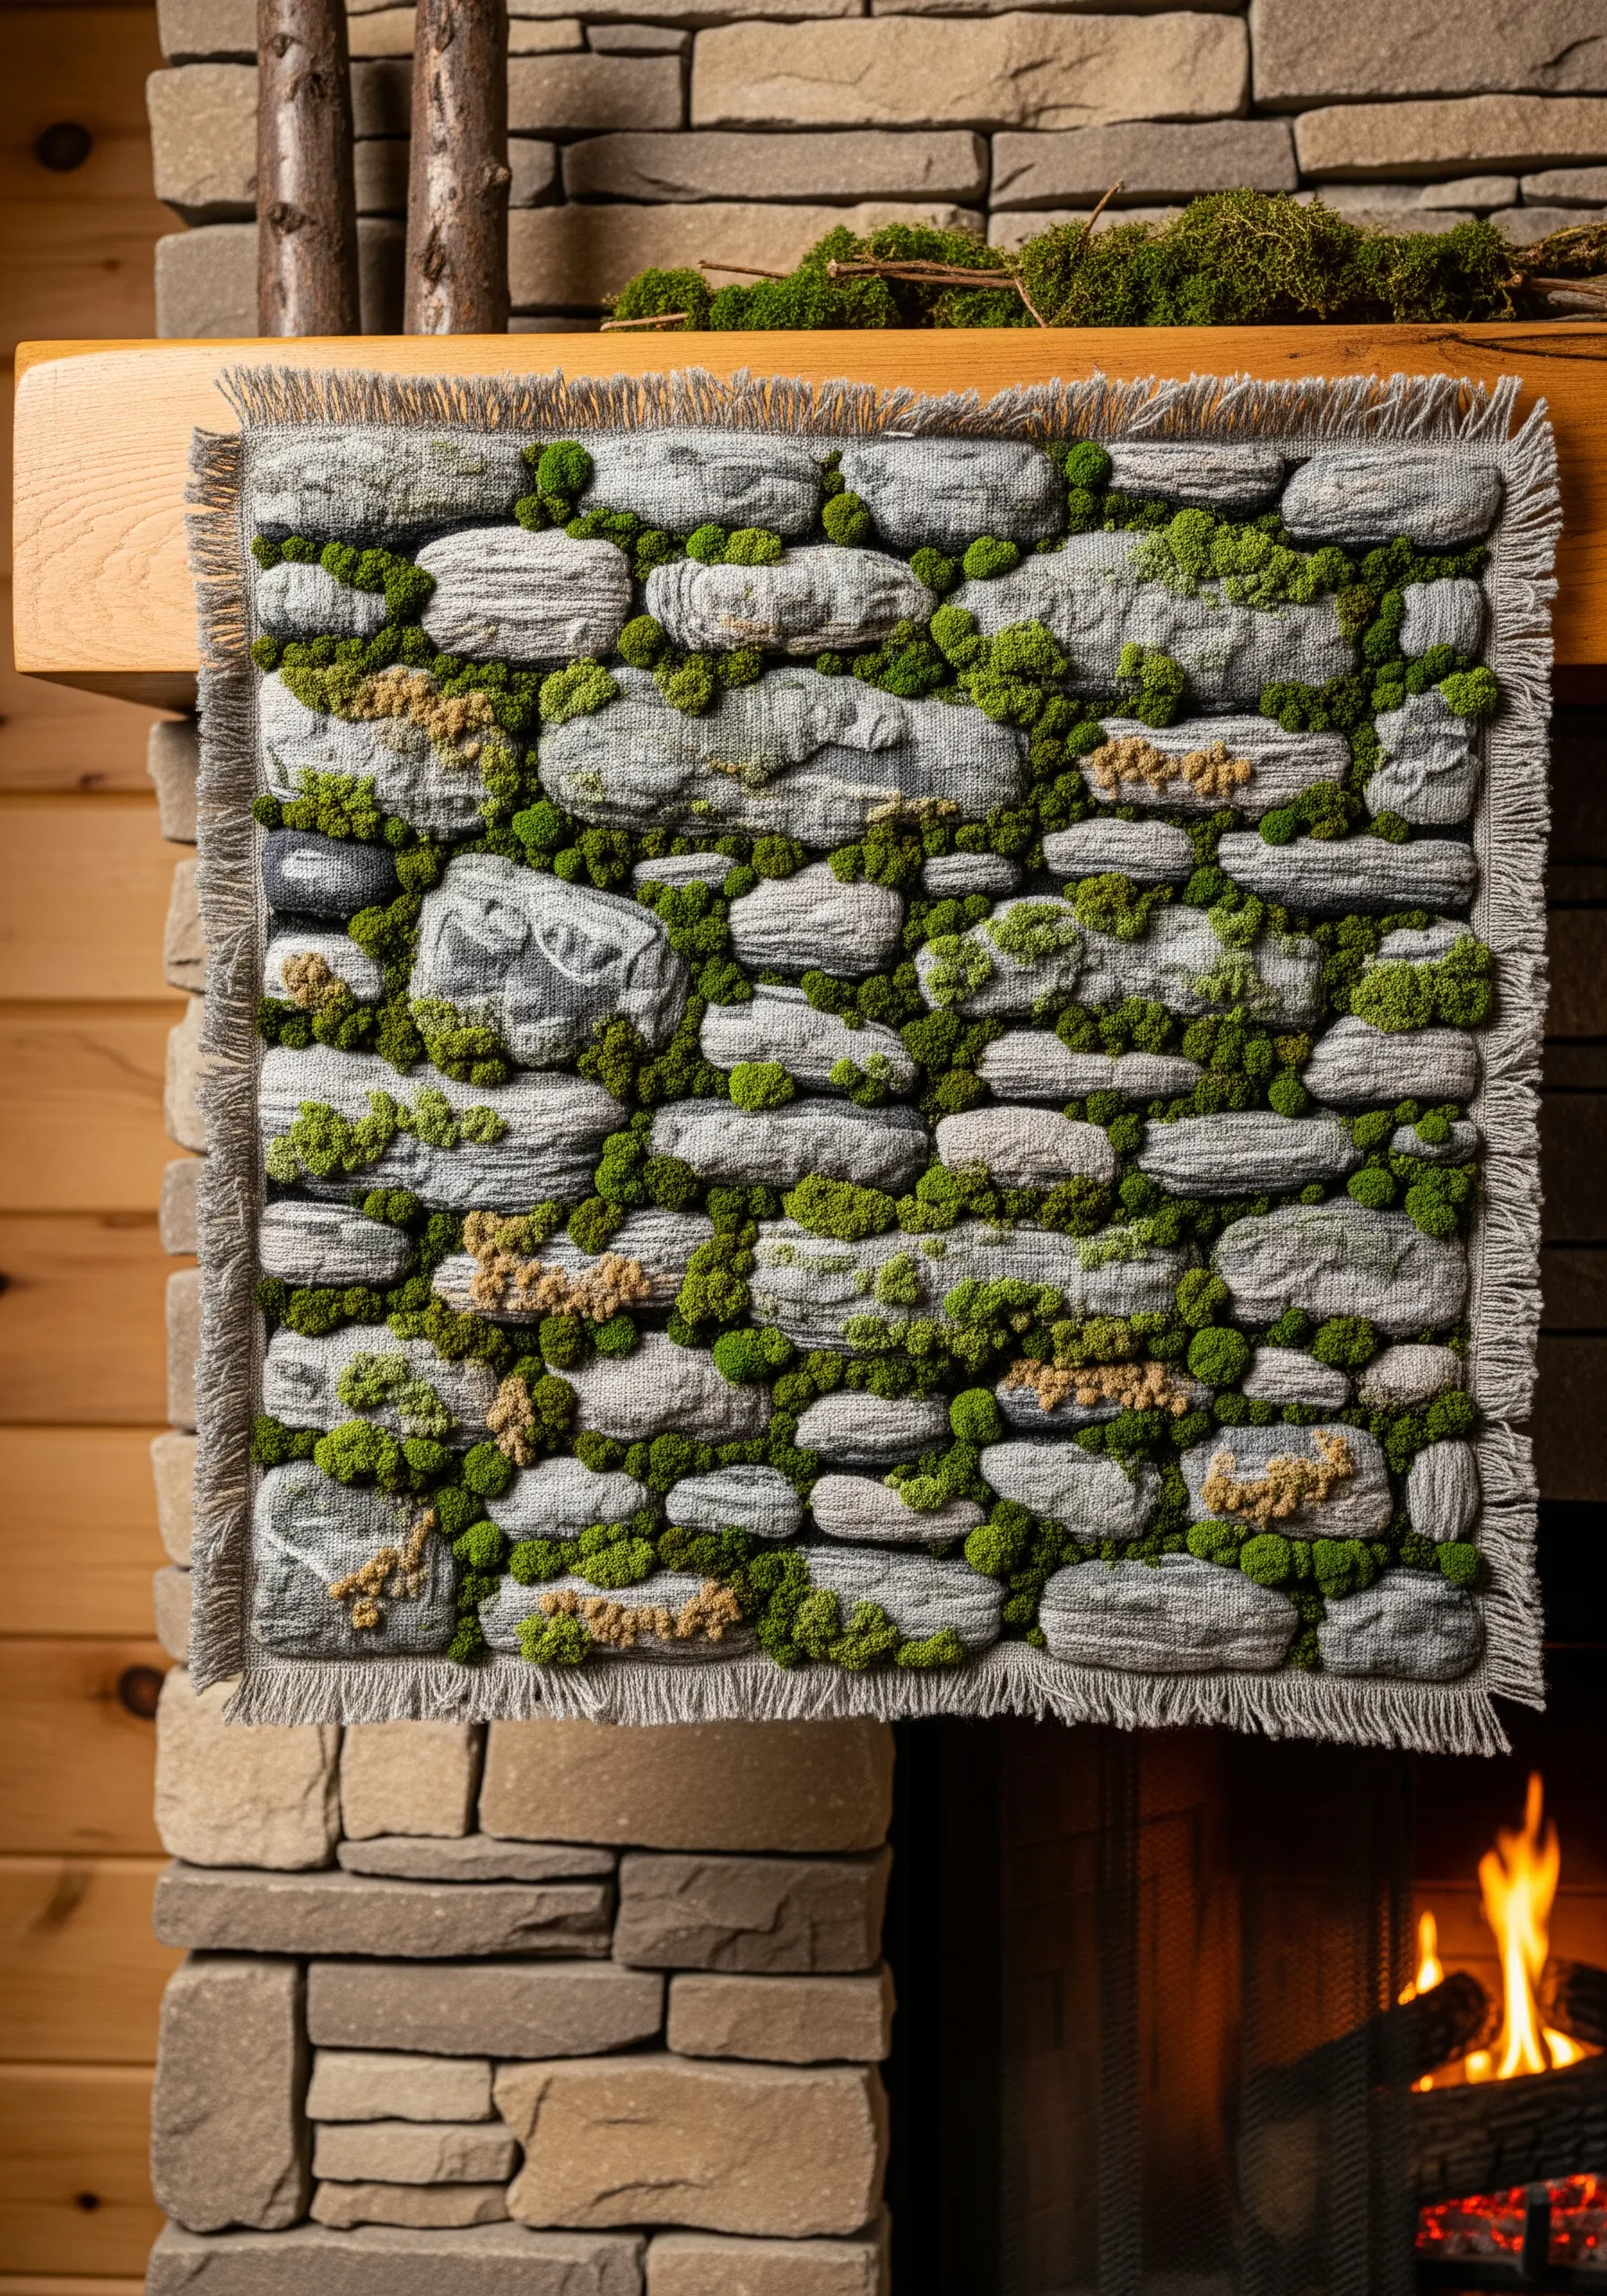
Create a convincing stone wall effect by giving your stones dimension before adding the moss.
Outline each stone shape and fill it with a layer of felt padding or several layers of long, rough stitches.
Cover the padding with a smooth satin stitch in varied grey tones, which will create a rounded, 3D effect.
Finally, fill the crevices between the stones with tiny French knots in bright green, making it appear as though moss is naturally growing in the gaps.
This layering technique is key to achieving realistic nature-texture embroidery projects.
7. Map and Fill Large-Scale Textured Landscapes
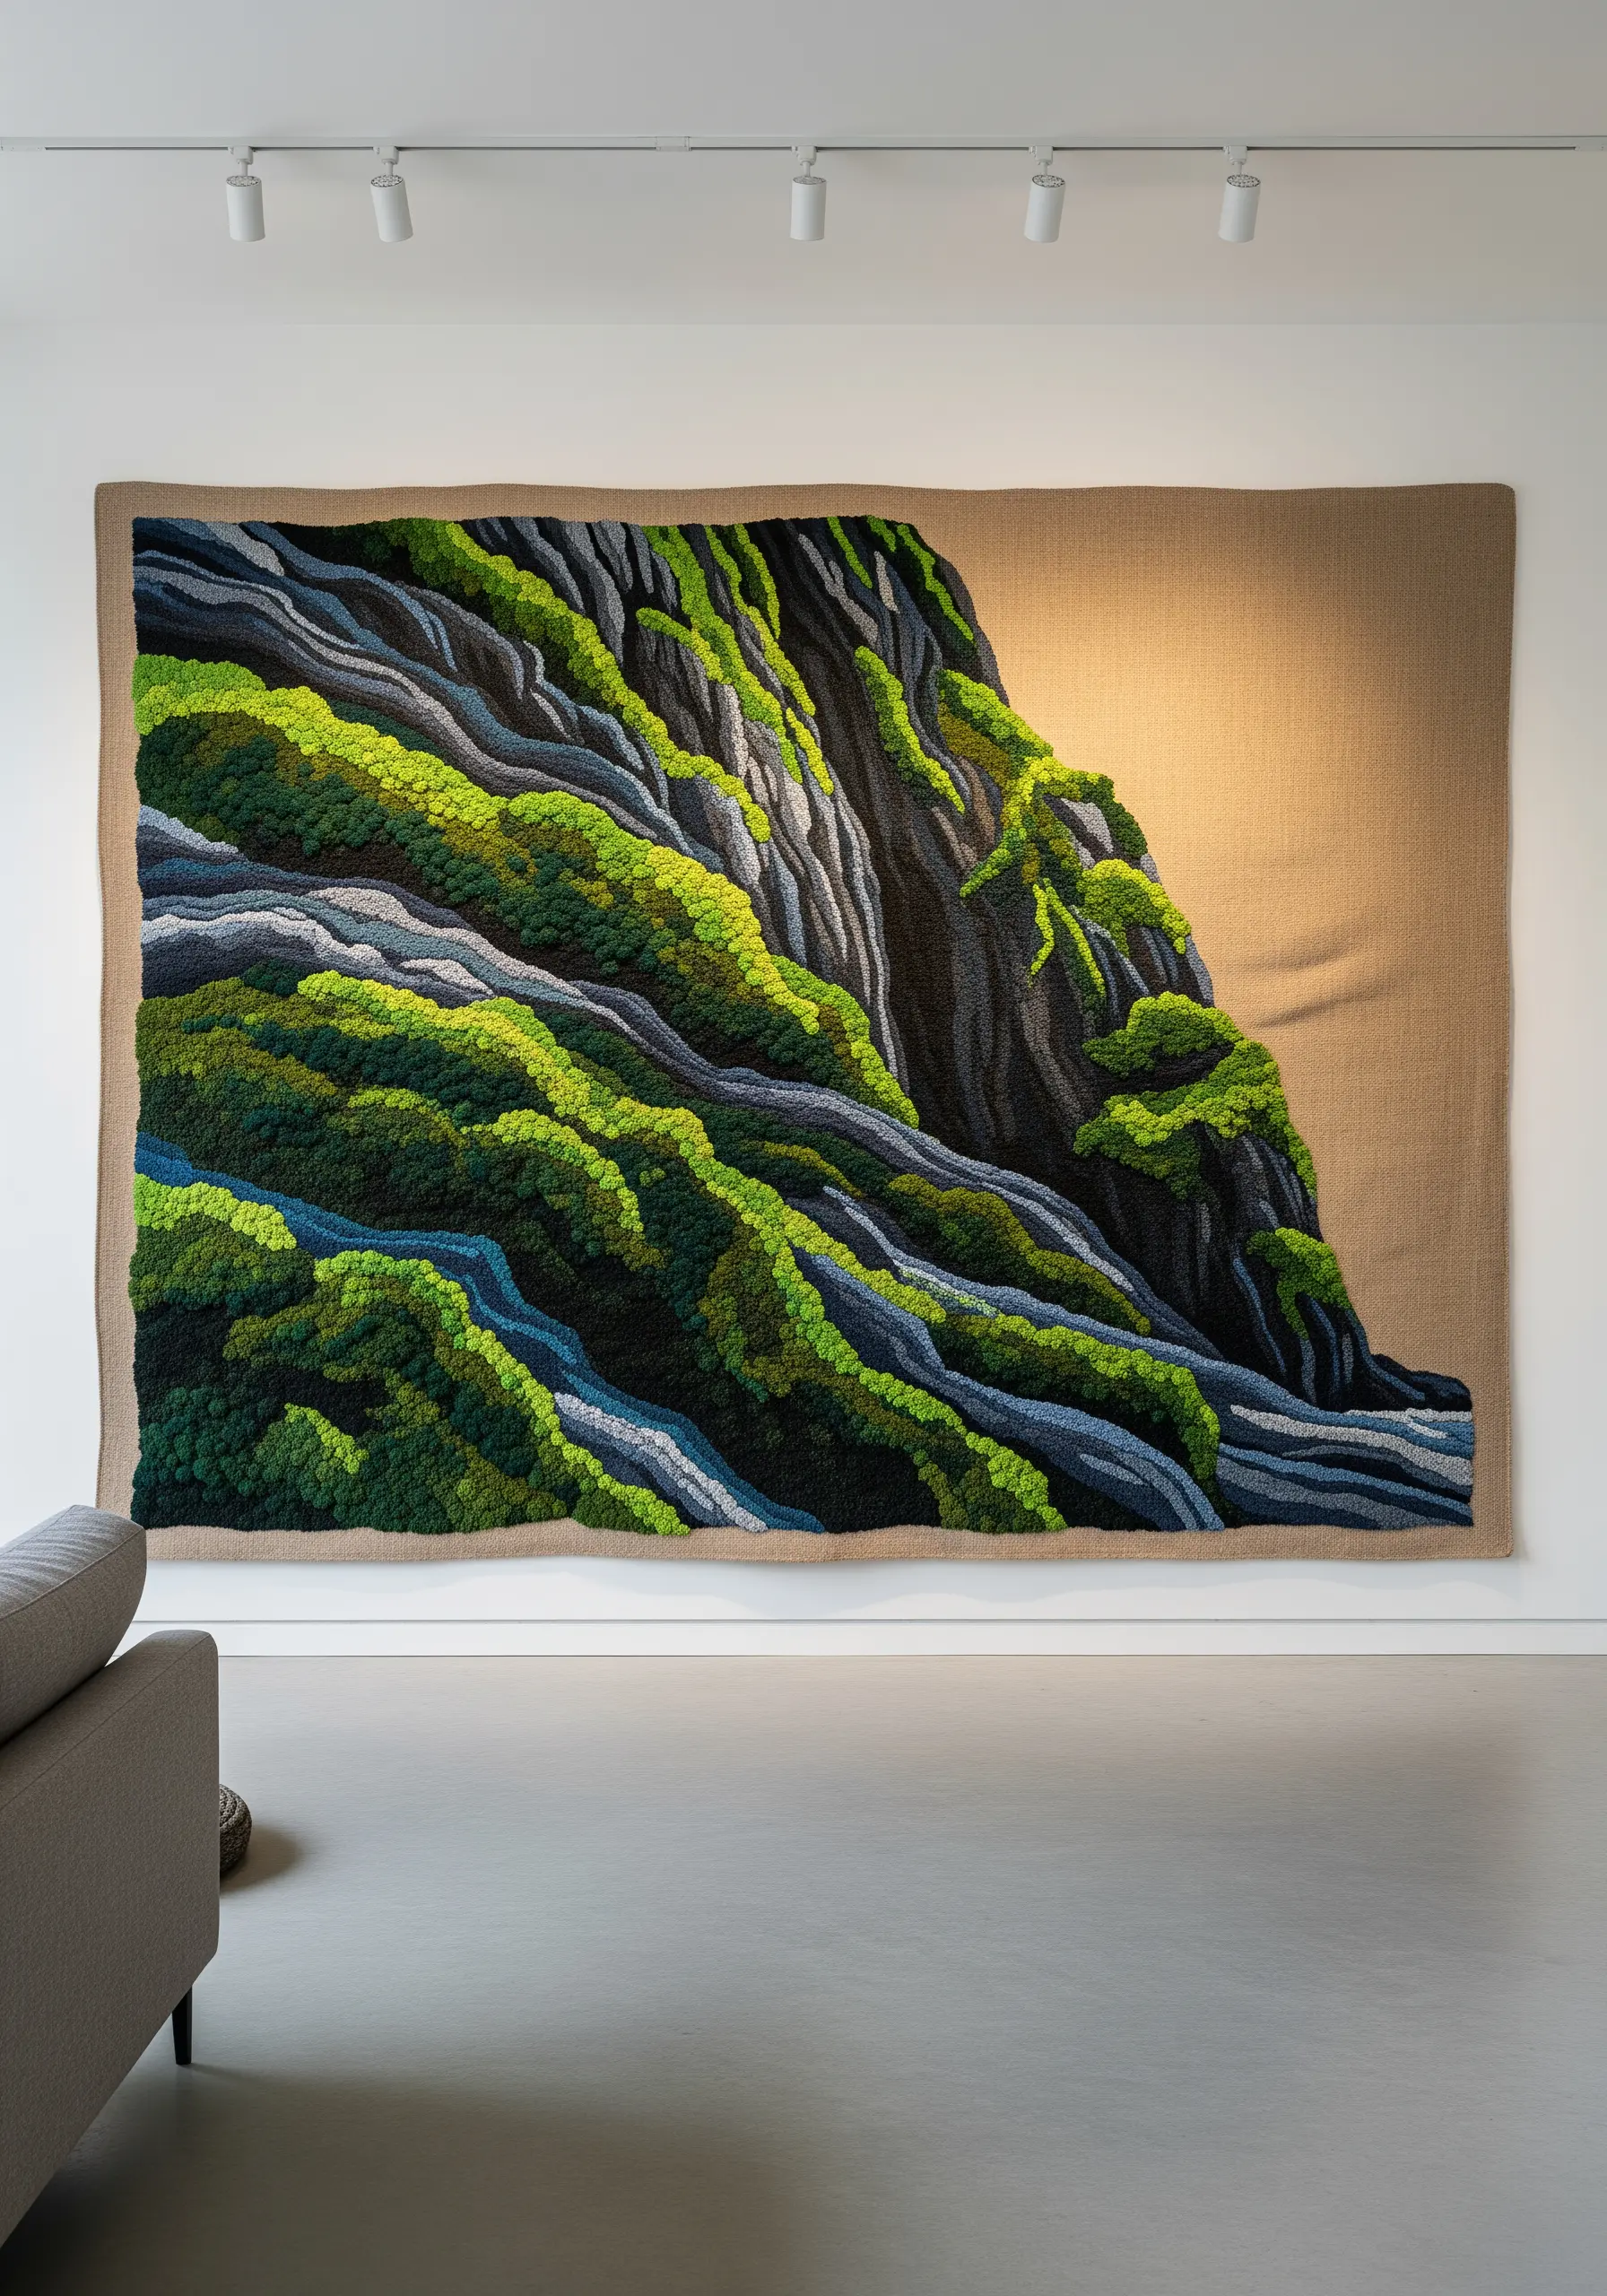
For an ambitious piece like a cliffside, planning is everything.
Lightly sketch your main color zones onto a large-scale canvas or heavy-duty linen.
Work one color section at a time, filling it with dense French knots or punch needle work.
To add subtle dynamism, slightly change the direction of your stitches within each colored block—this mimics the chaotic yet patterned growth of vegetation on a real cliff.
Using a neutral, earthy fabric as the base makes the vibrant greens and blues feel even more lush.
8. Craft a Miniature Moss Terrarium with Mixed Media
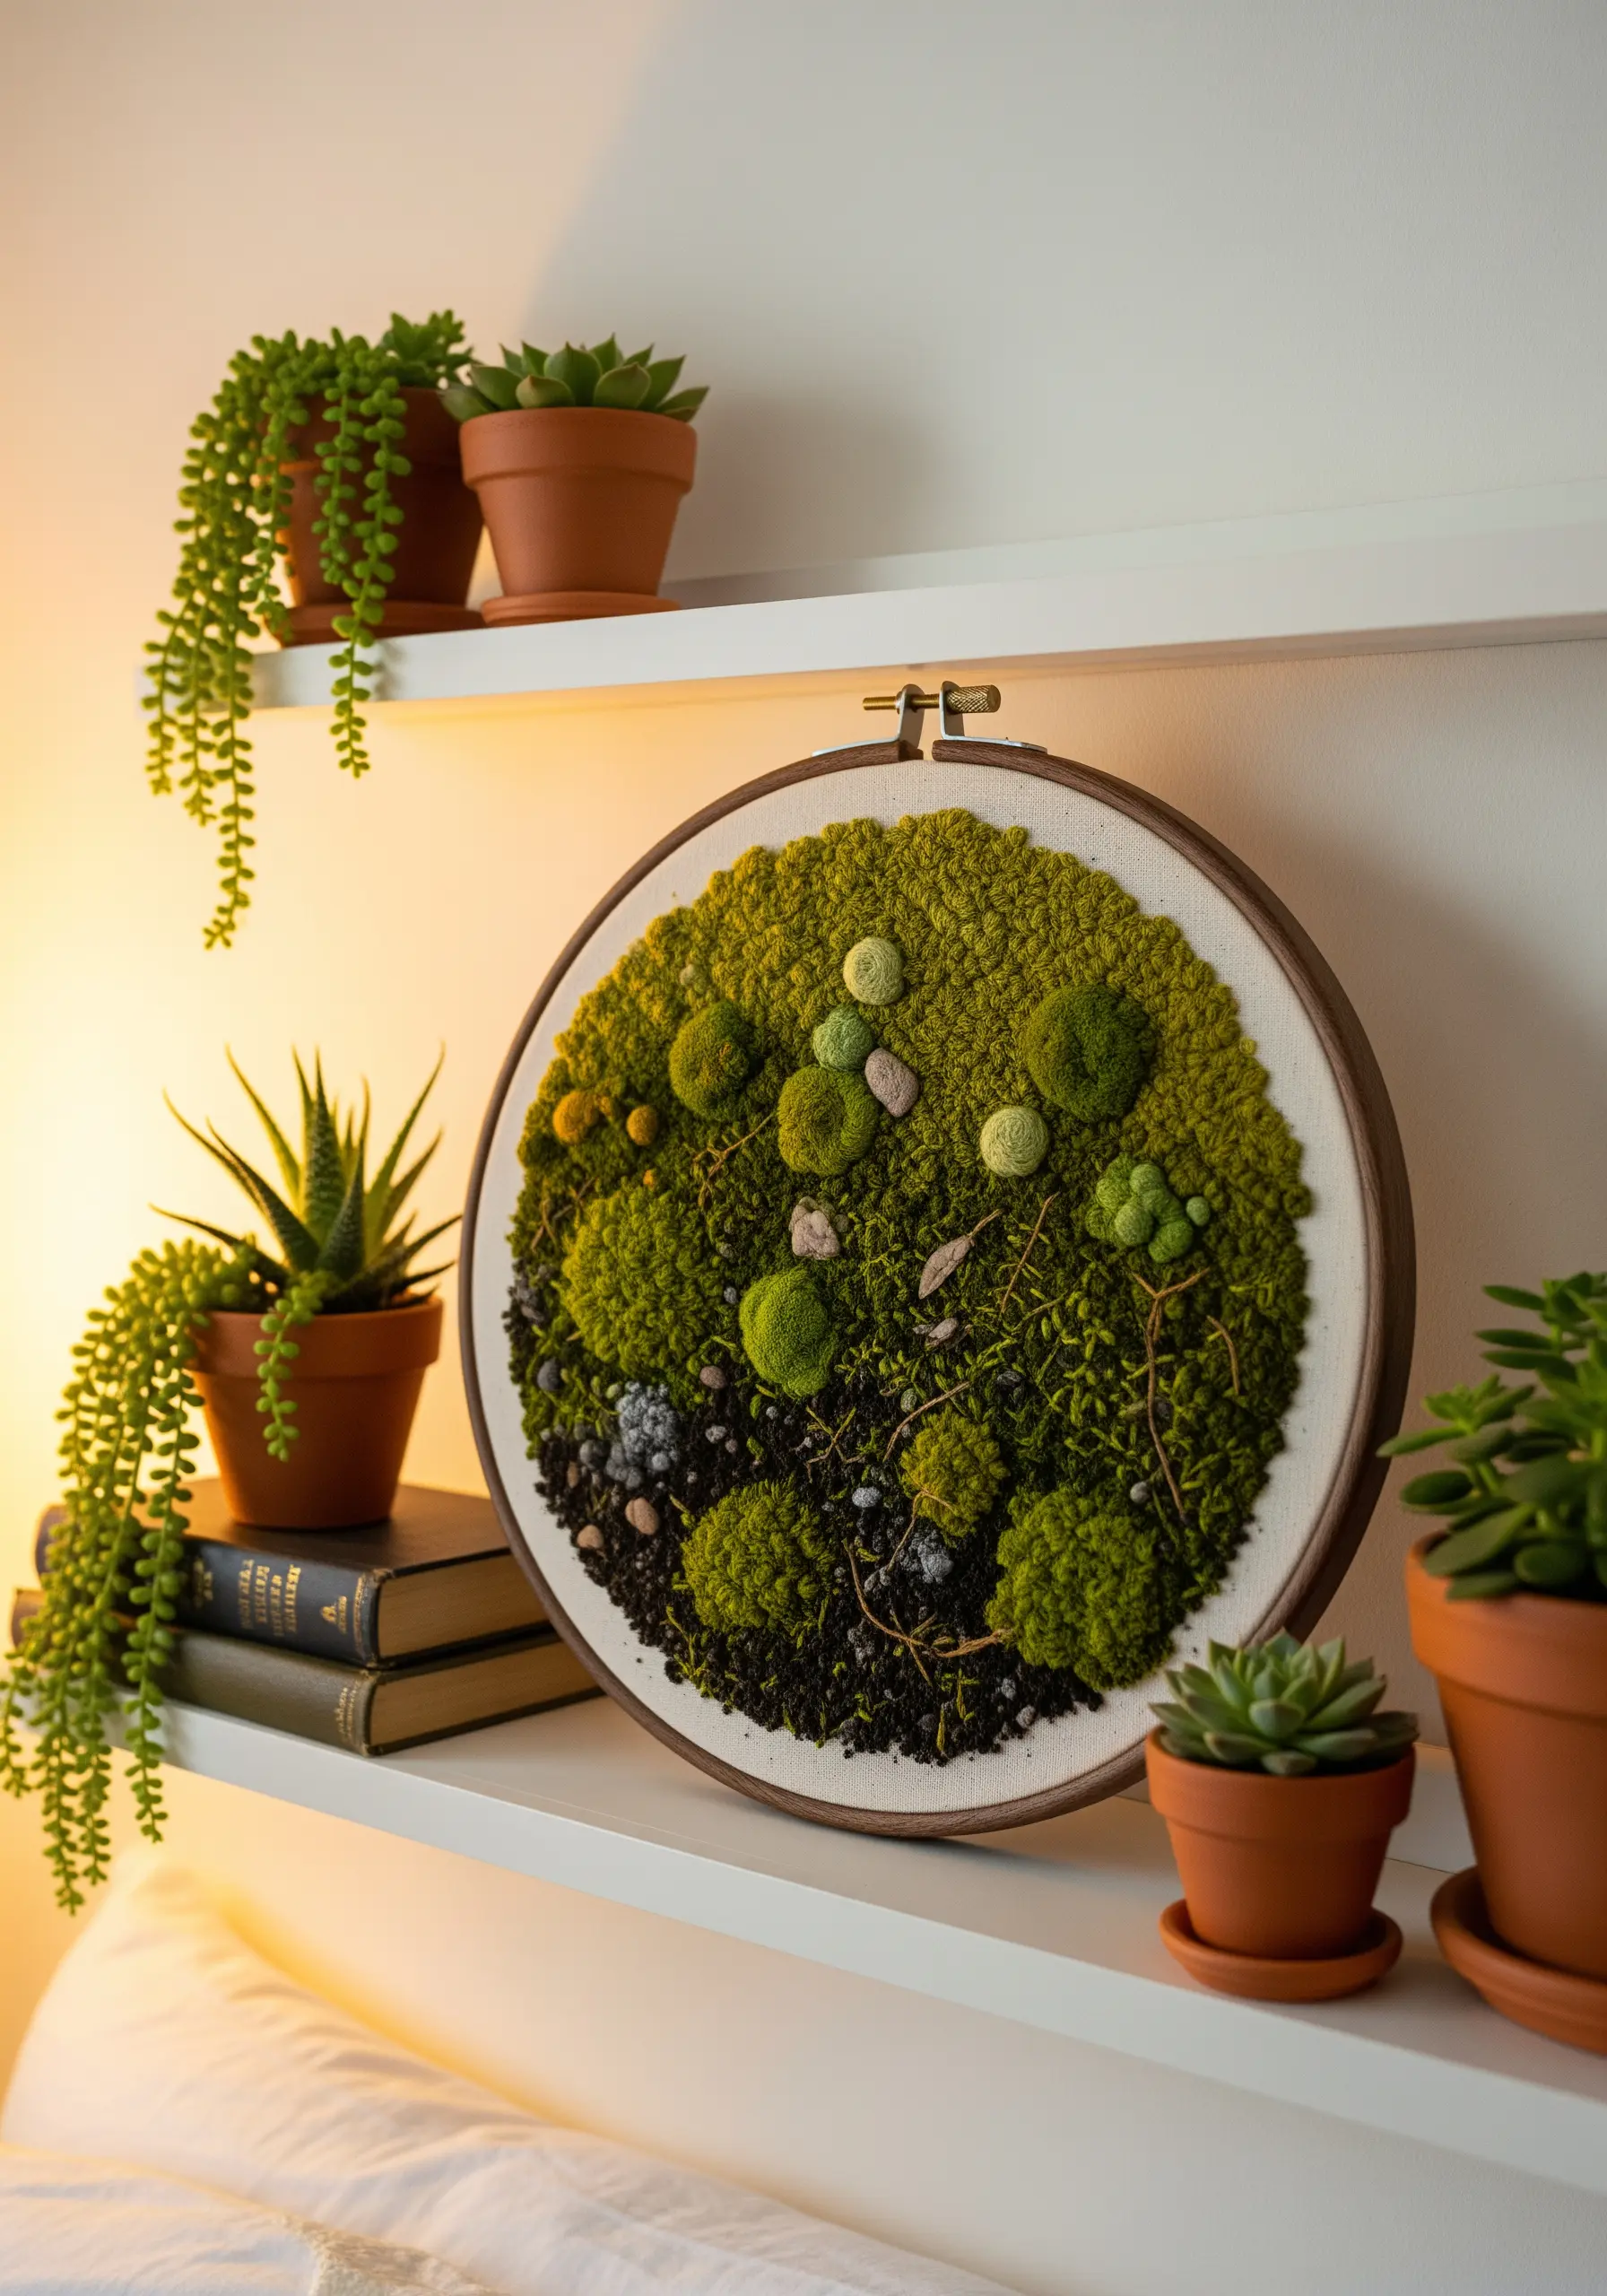
Transform a simple hoop into a tiny, self-contained world by incorporating non-thread elements.
Create a base of ‘soil’ using tiny black and grey seed beads or real sand fixed with PVA glue.
Build up your mossy mounds with a variety of stitches: dense French knots for ground cover, taller turkey work loops for lush clumps, and bullion knots for unique textures.
Adding a few real miniature pebbles or pieces of dried lichen can elevate the realism, turning your hoop into a cherished mini embroidery idea.
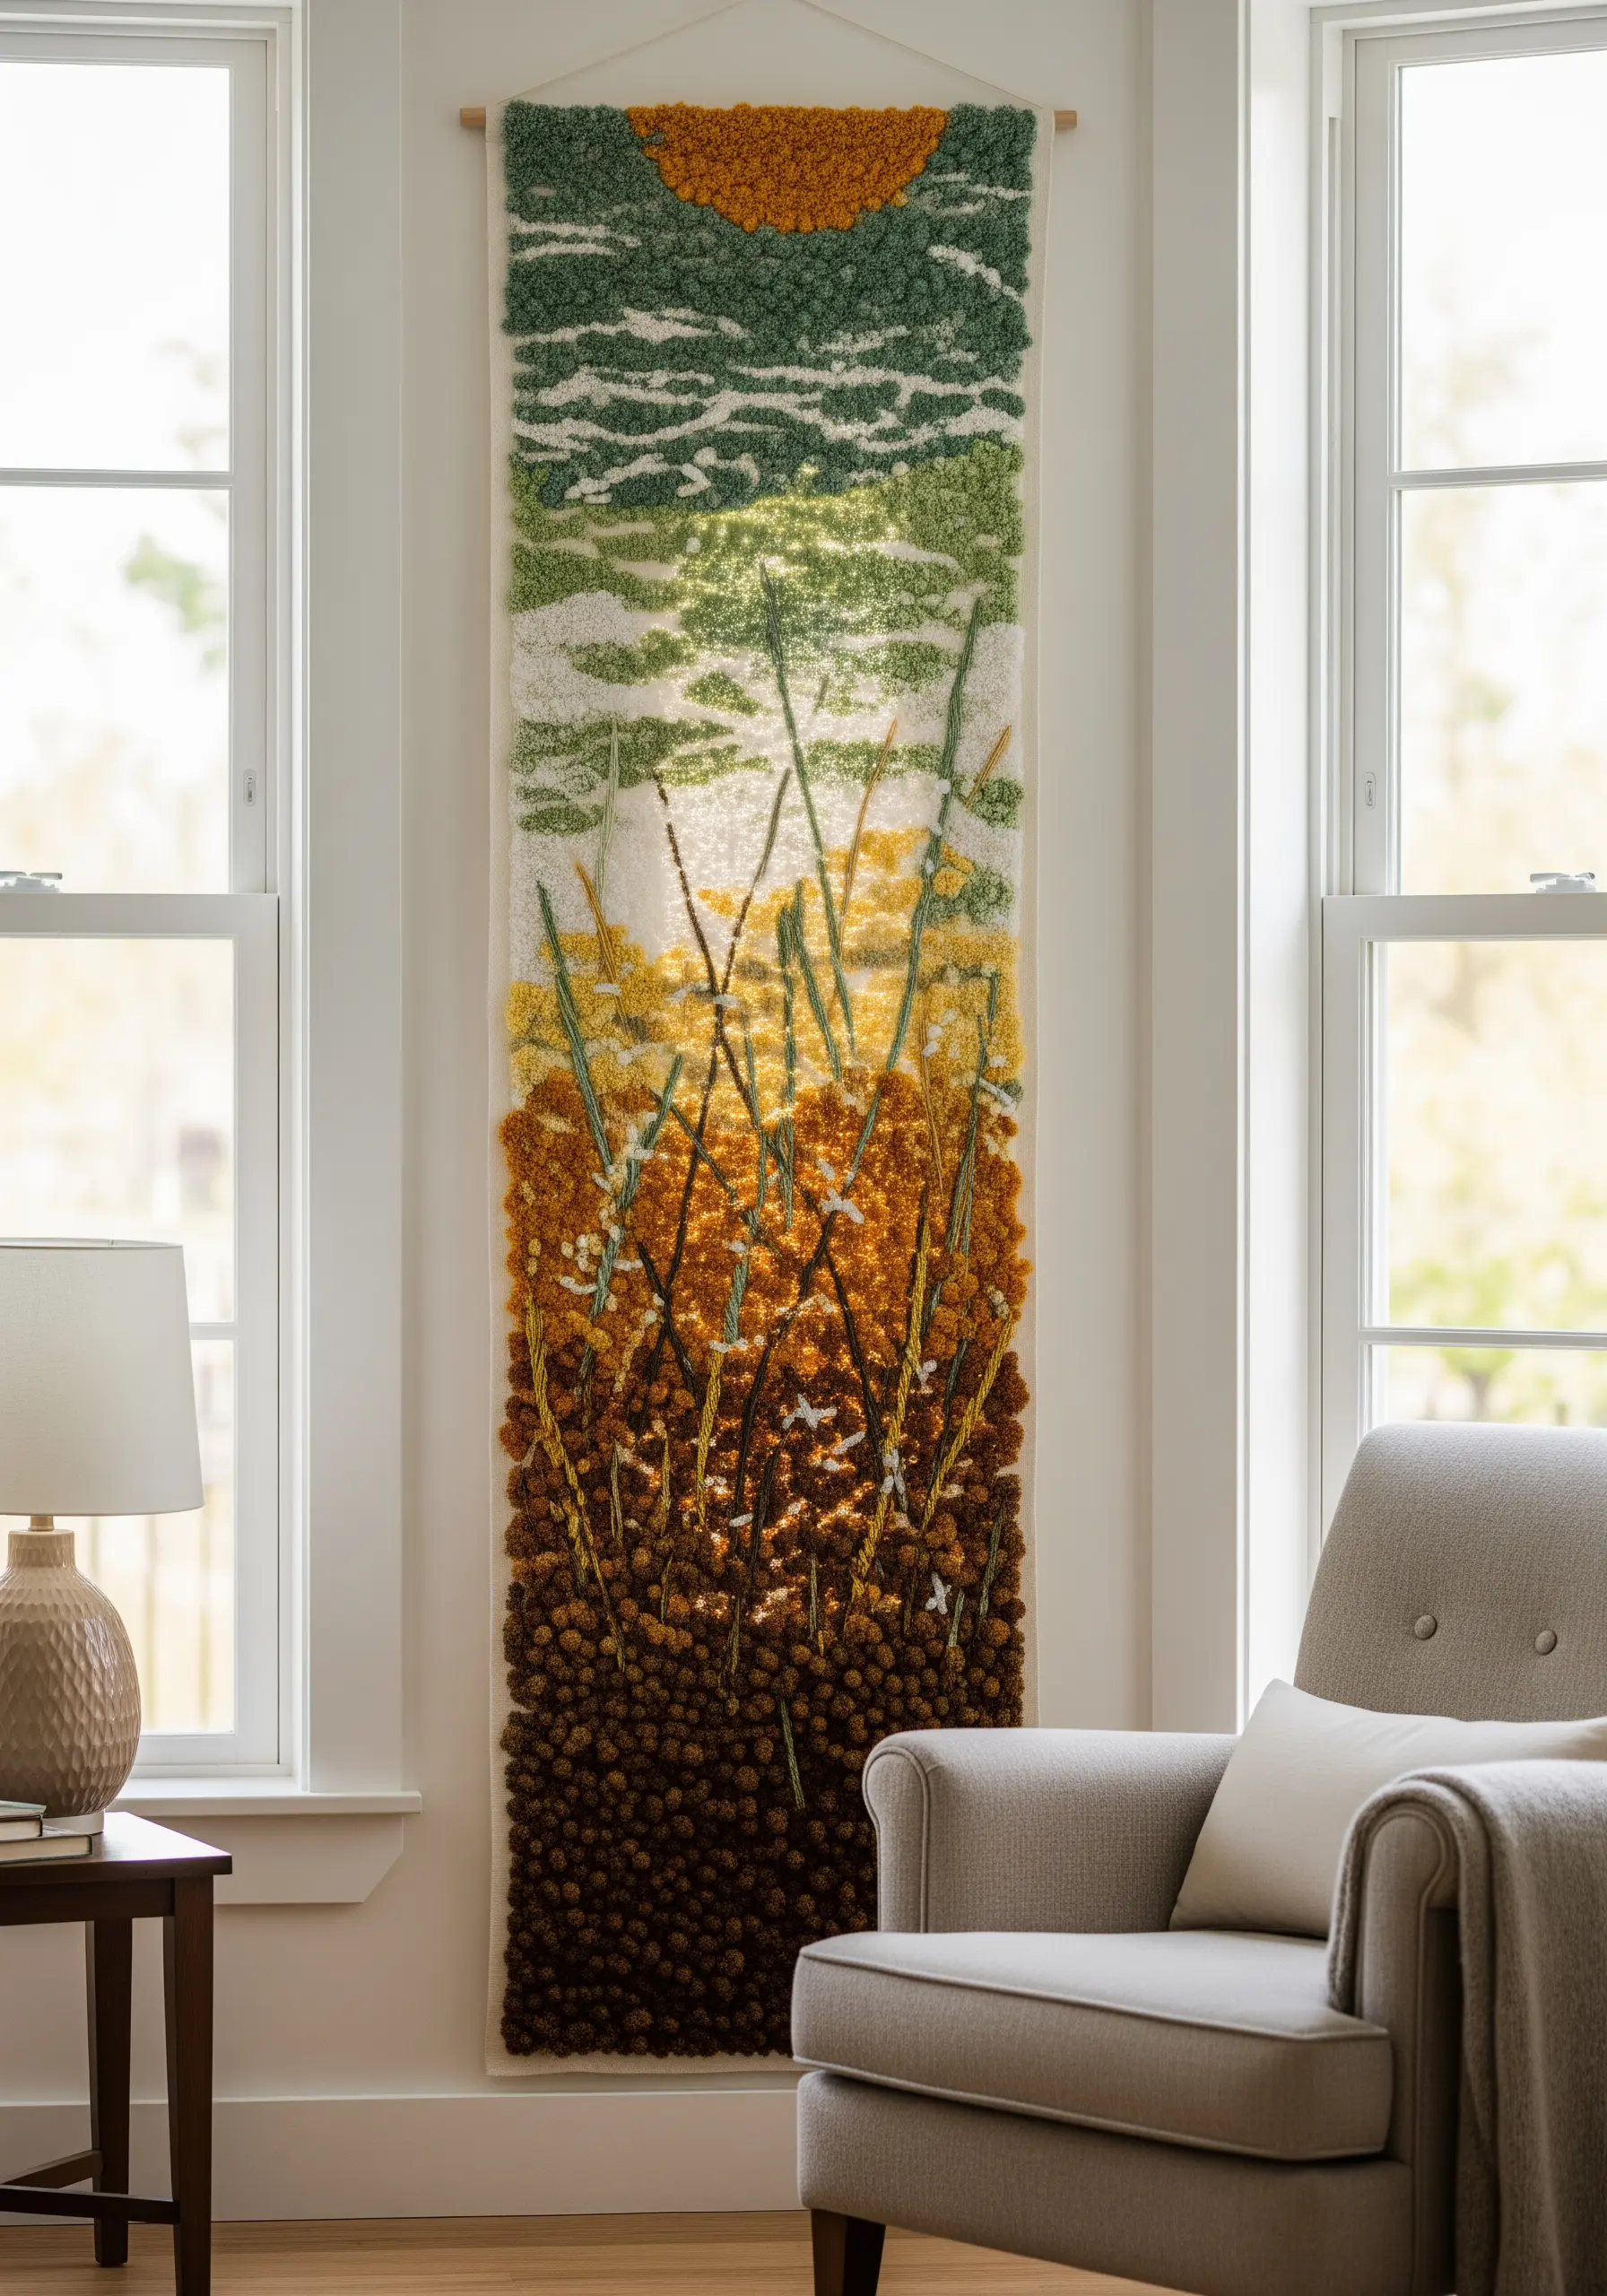
9. Use Color Gradients to Create Visual Flow
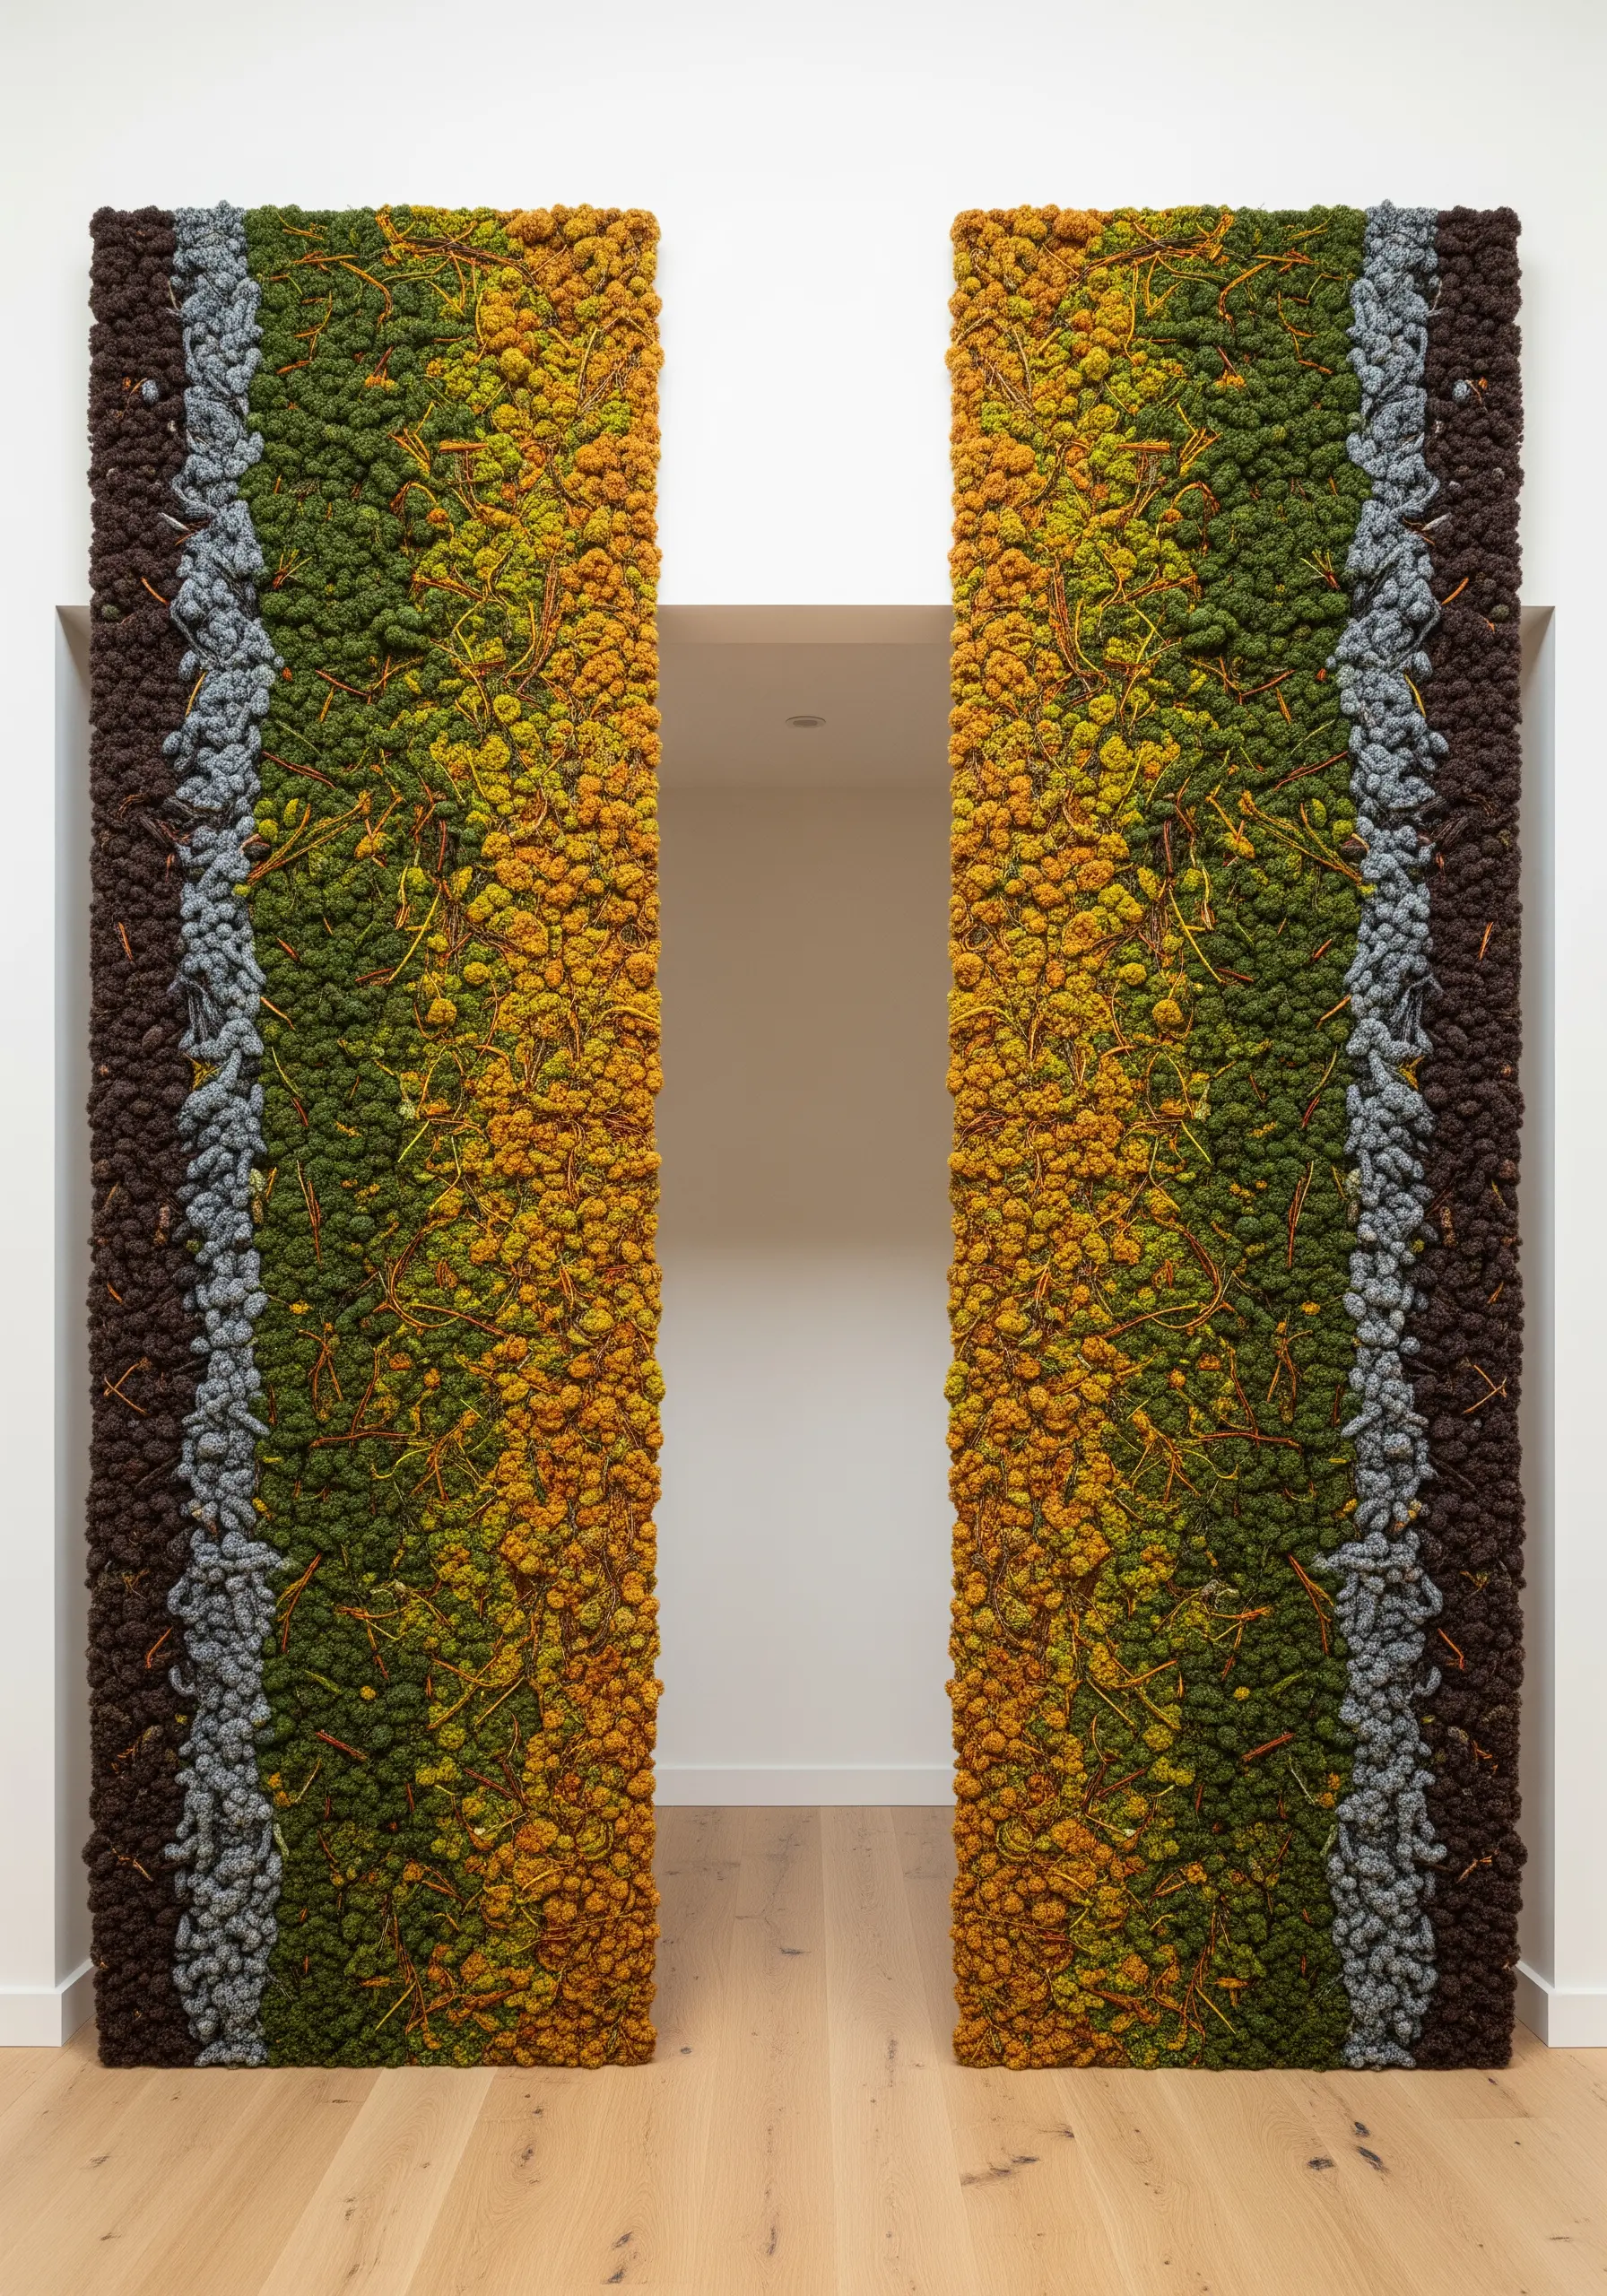
Guide the eye through a large piece using intentional color transitions.
For these tall panels, create a subtle gradient from dark earth tones to vibrant ochre and deep green.
Achieve this smooth blend by using a single strand of floss for each French knot and mixing your colors strategically.
Instead of stitching in solid blocks, lightly intersperse knots of the adjacent color near the transition lines to blur the edges, creating a soft, painterly effect that feels completely organic.
10. Achieve a Lush Finish with Densely Packed Knots
The secret to a carpet-like moss texture is eliminating any visible fabric between your stitches.
Work in tight, concentric circles or rows, ensuring each French knot touches the next.
Using a slightly thicker thread, like pearl cotton or fine wool, will help fill the space more quickly and create a plusher, more uniform surface.
This technique is meditative and results in a highly tactile piece where the rich, blended color becomes the undeniable focal point of your modern hand-stitched patterns.
11. Combine Appliqué and Stitching for Autumnal Foliage
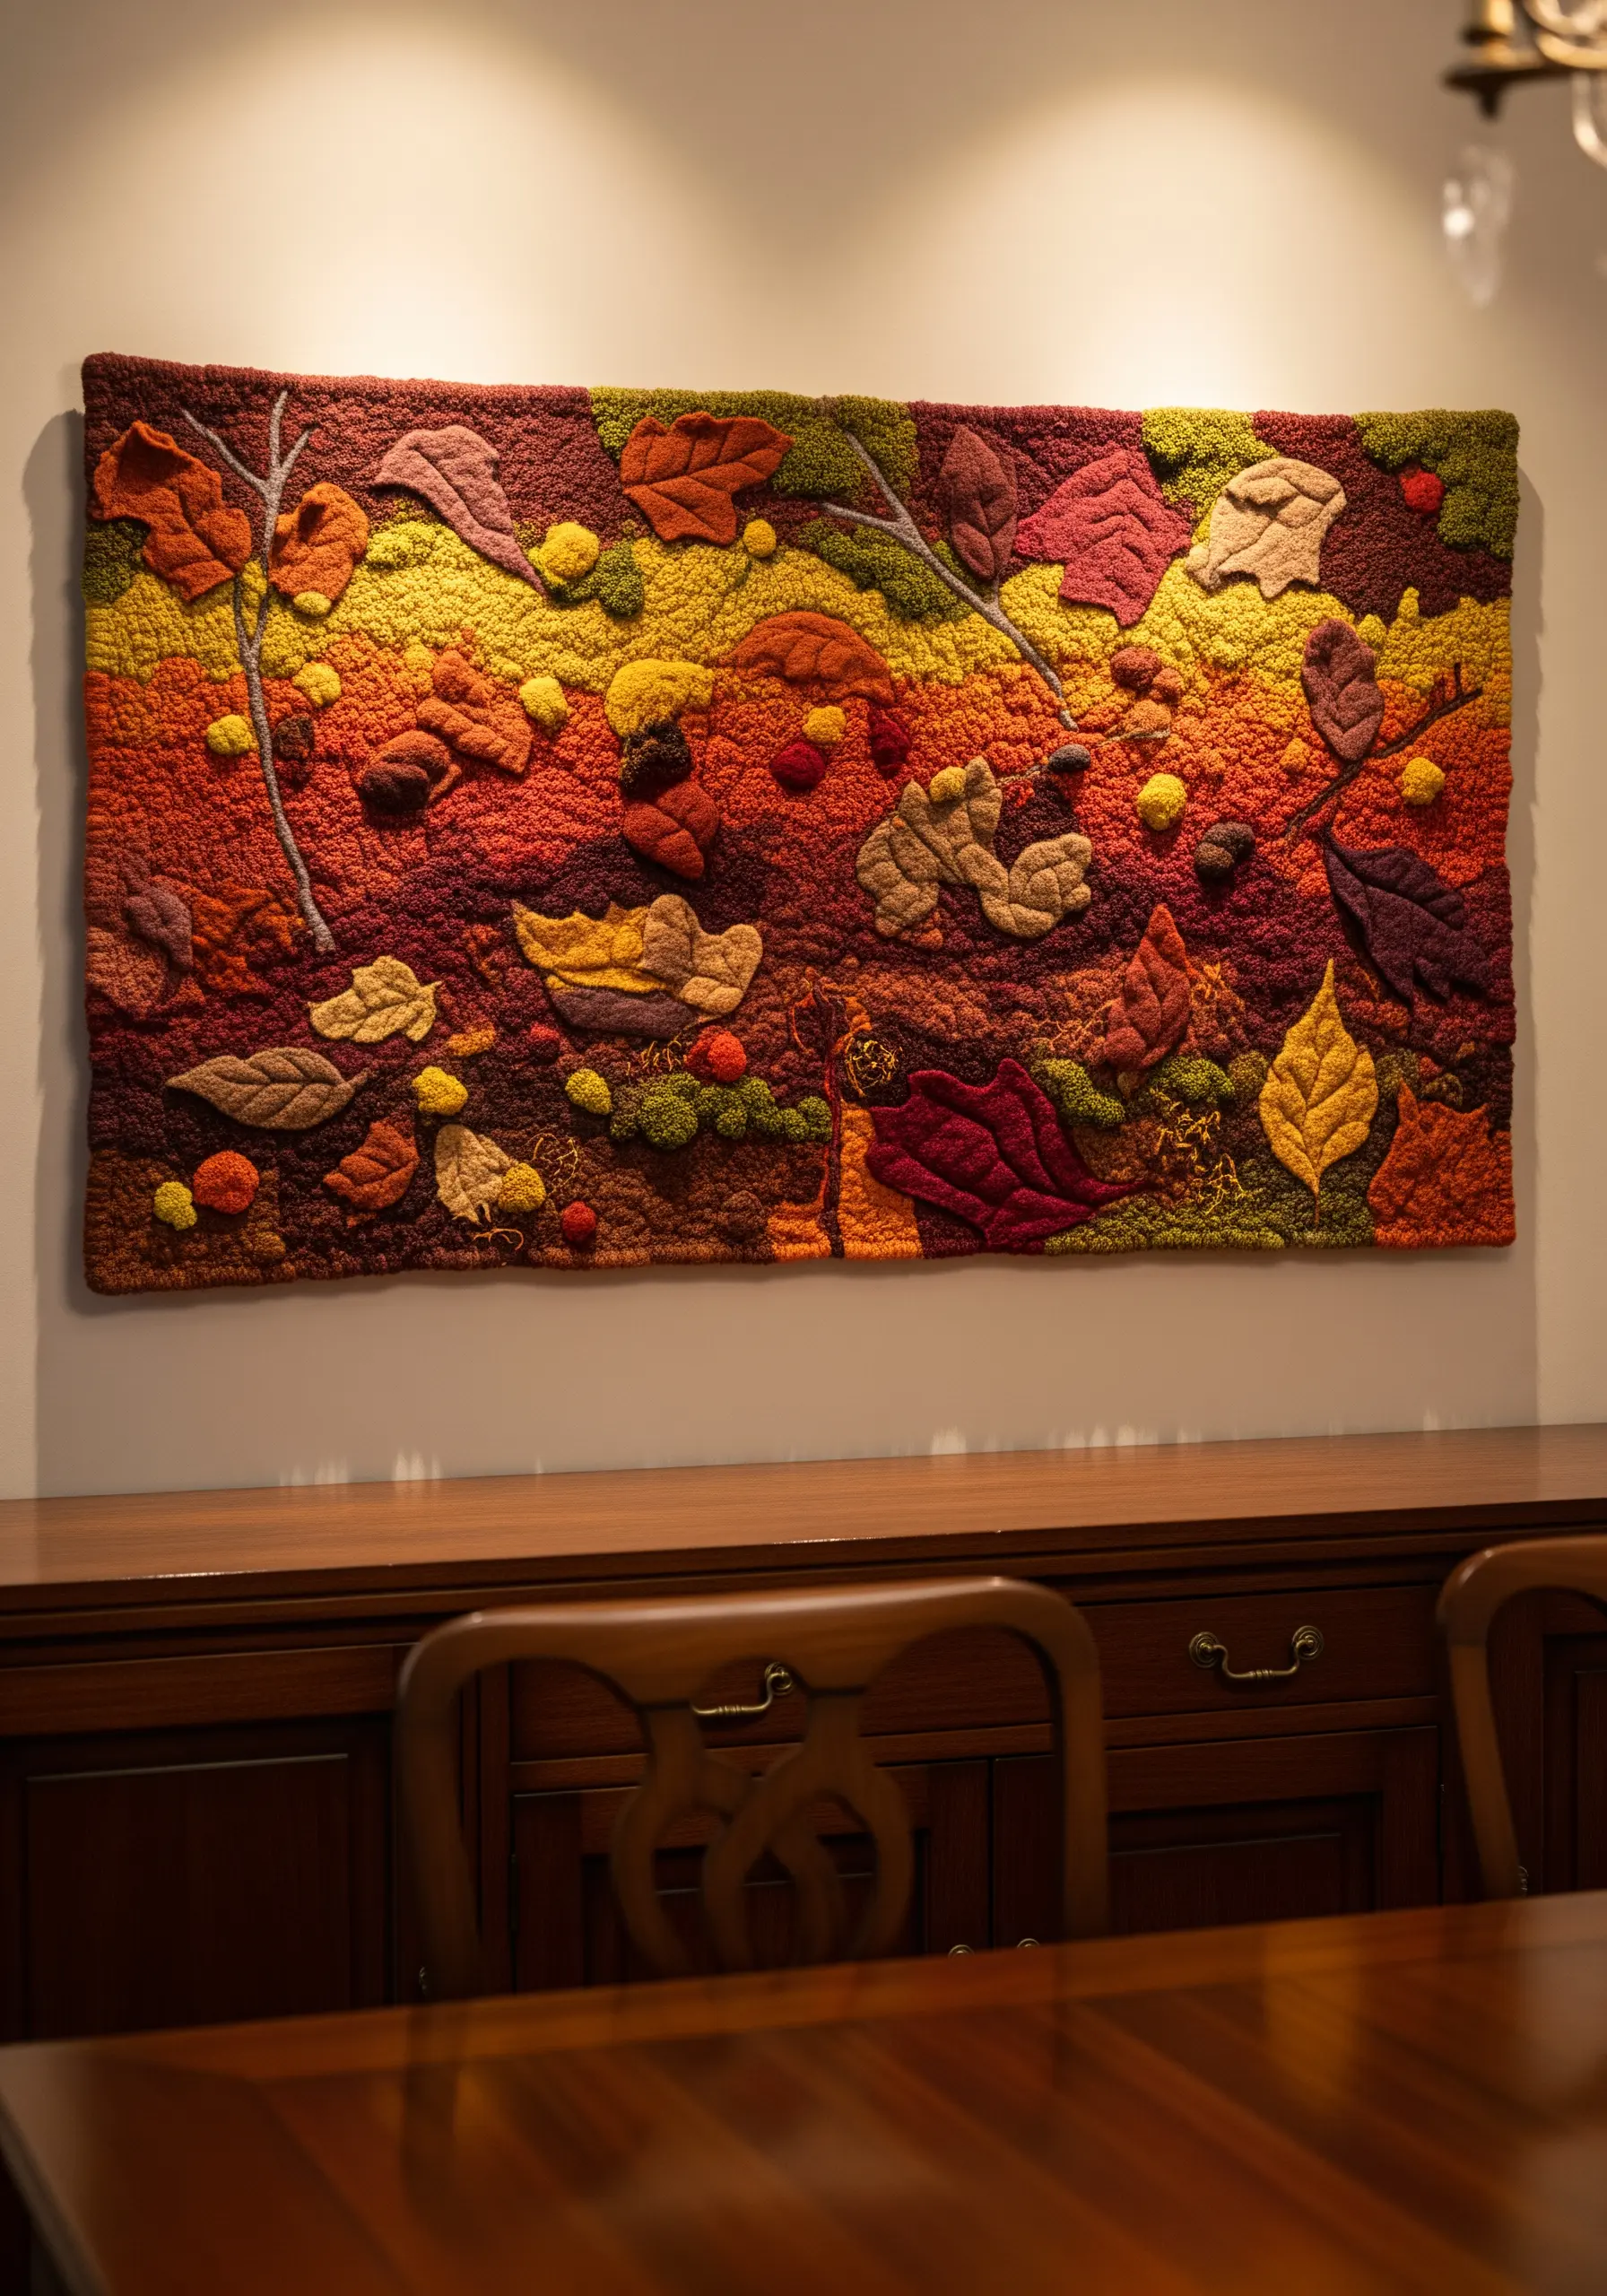
Capture the complex colors of autumn leaves by using fabric as your base.
Cut leaf shapes from felt or cotton in shades of ochre, rust, and burgundy and appliqué them onto your background fabric.
Then, use variegated embroidery floss to add veins and color shifts with simple straight stitches or seed stitches.
This method allows you to achieve rich, multi-tonal effects much faster than thread painting, and the raised appliqué adds a wonderful sense of depth to the overall composition.
12. Frame a Monochrome Texture Study
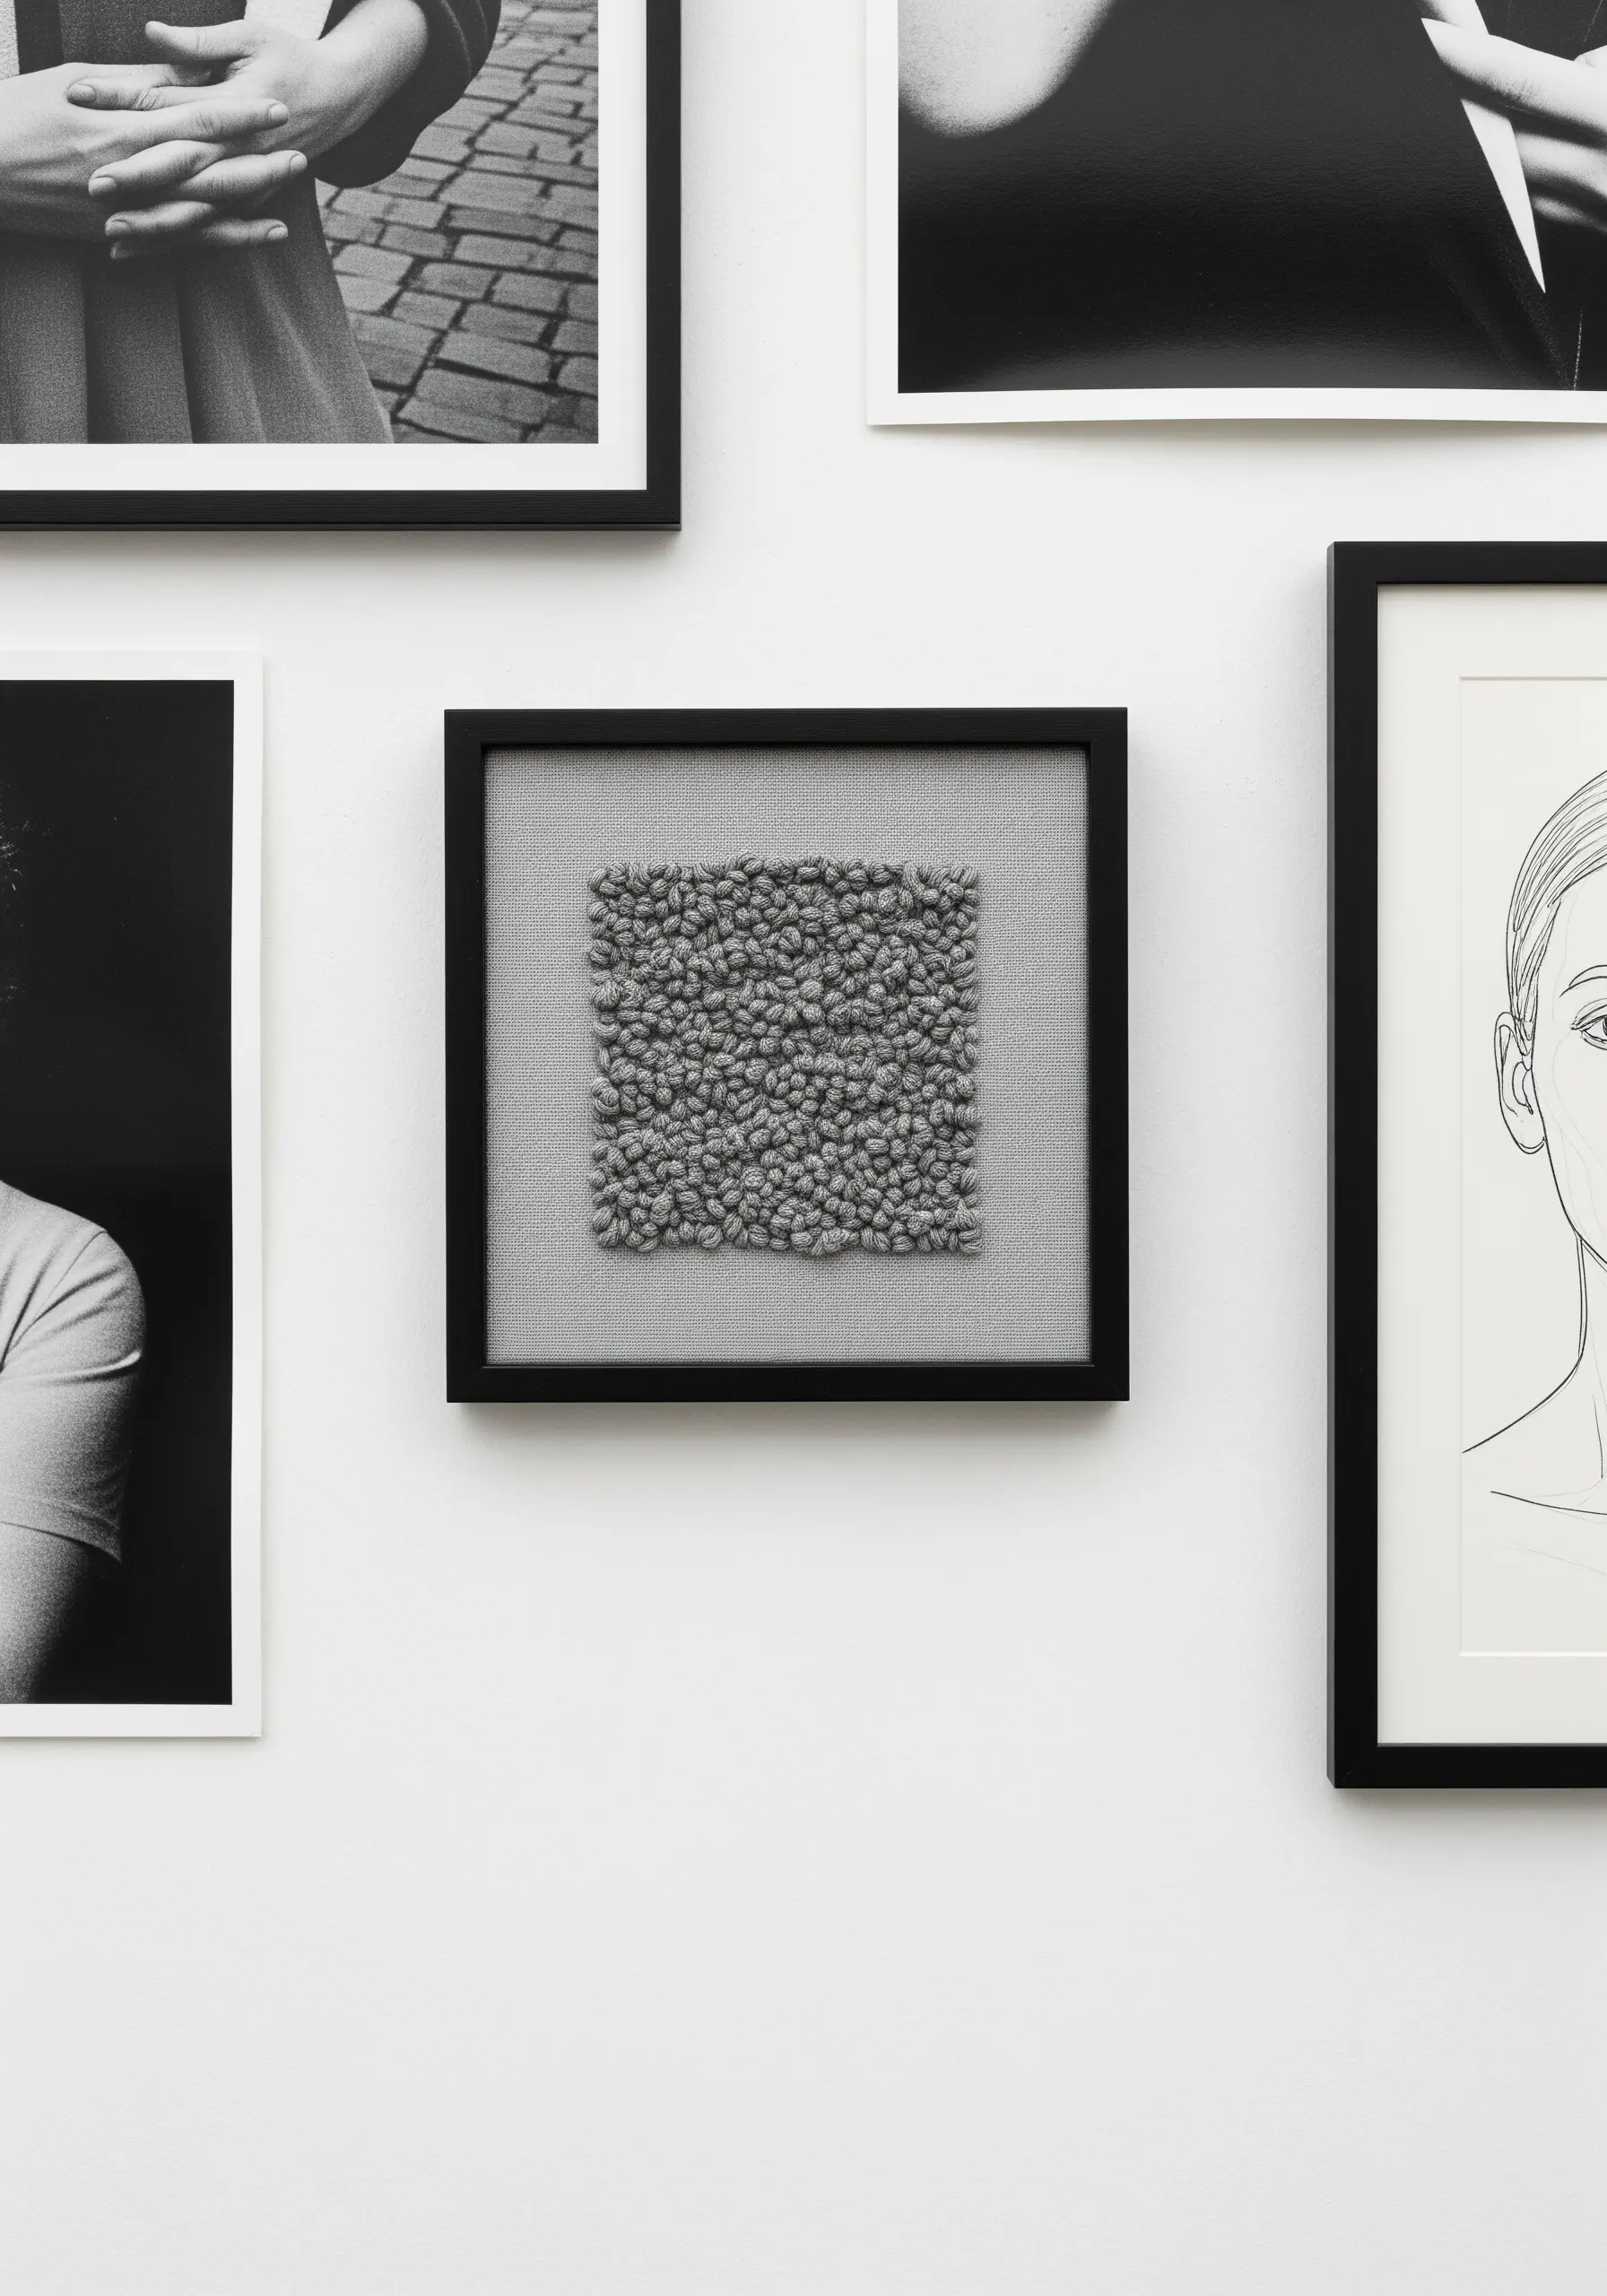
Isolate a single stitch in a single color to create a powerful minimalist statement.
Fill a small square area with colonial knots or French knots, focusing on making each stitch as consistent as possible in size and tension.
Mount the finished piece on a neutral fabric with a generous border and place it in a simple, modern frame.
This approach elevates a humble stitch into a piece of minimalist stitched art, encouraging the viewer to appreciate the texture and form itself.
13. Integrate Found Natural Elements into Your Work
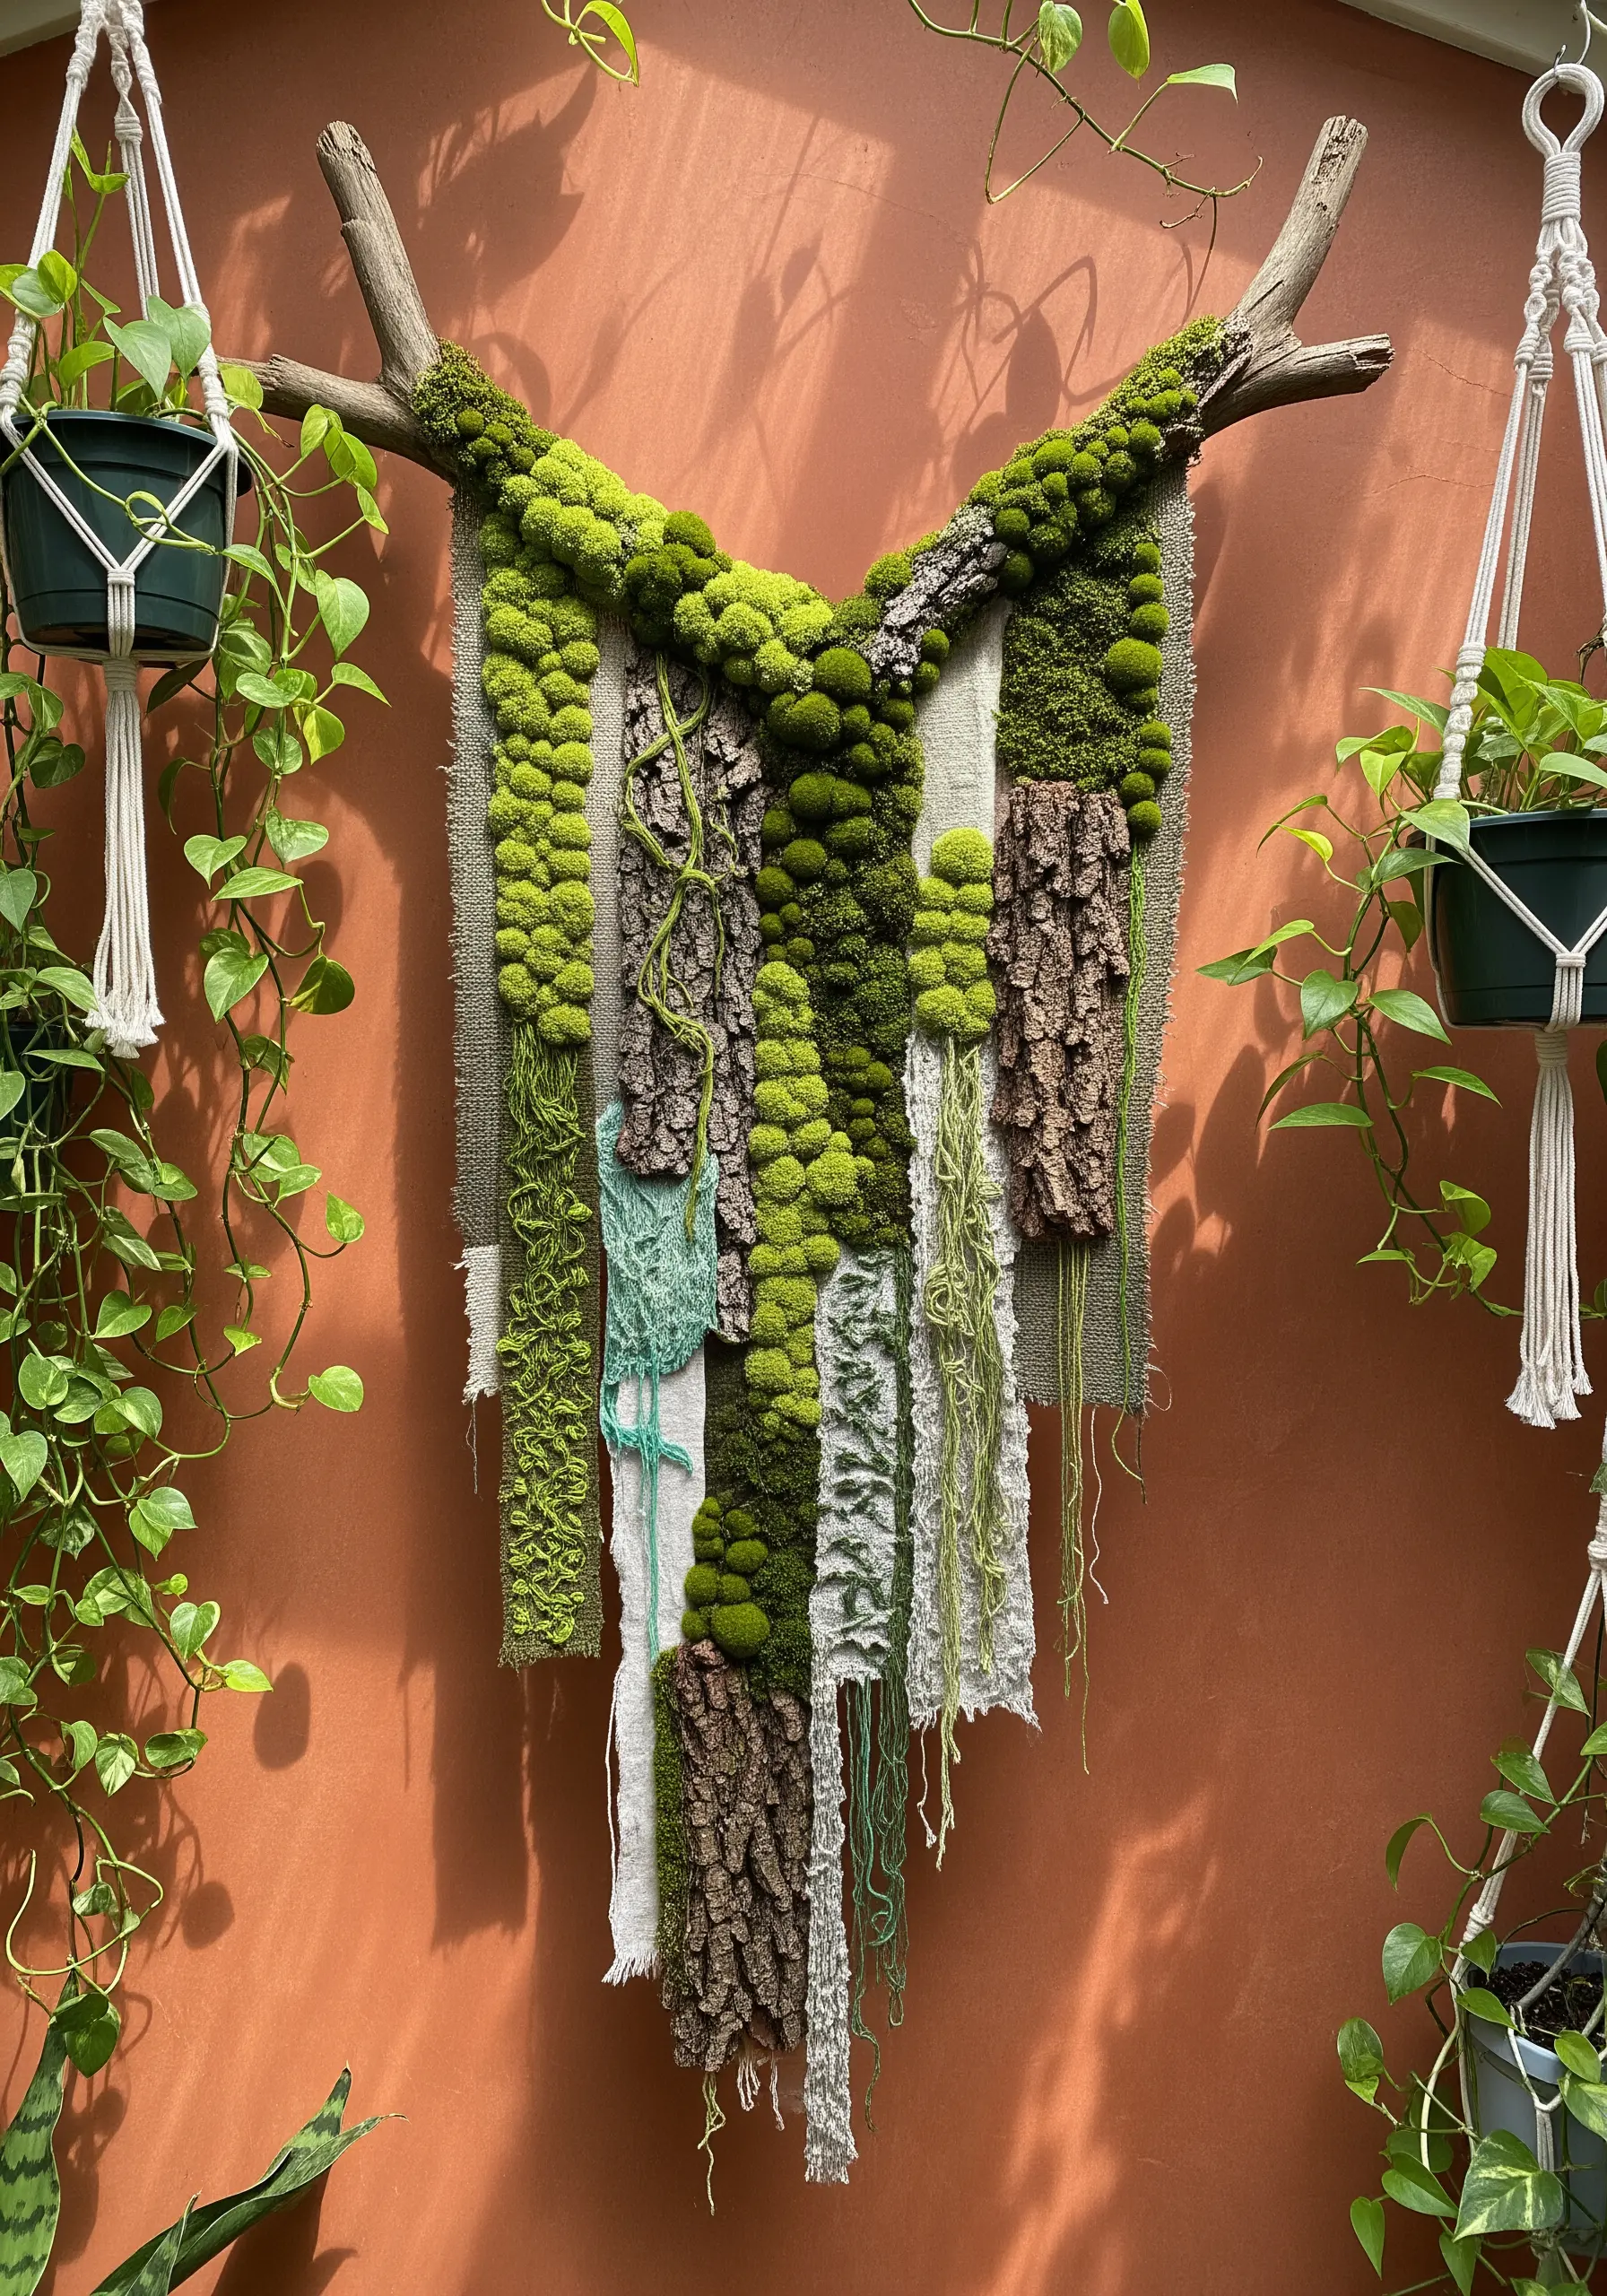
Anchor your textile art with a piece of nature itself.
Use a beautiful piece of driftwood or a fallen branch as the hanger for your wall art.
Incorporate other natural materials directly into the piece by couching on strips of real bark or stitching over dried leaves.
By embroidering mossy textures on fabric strips that hang alongside these found objects, you create a dynamic dialogue between the represented and the real.
This is one of the most effective ways to turn natural textures into stunning embroidery art.
14. Create Geological Layers with Couching
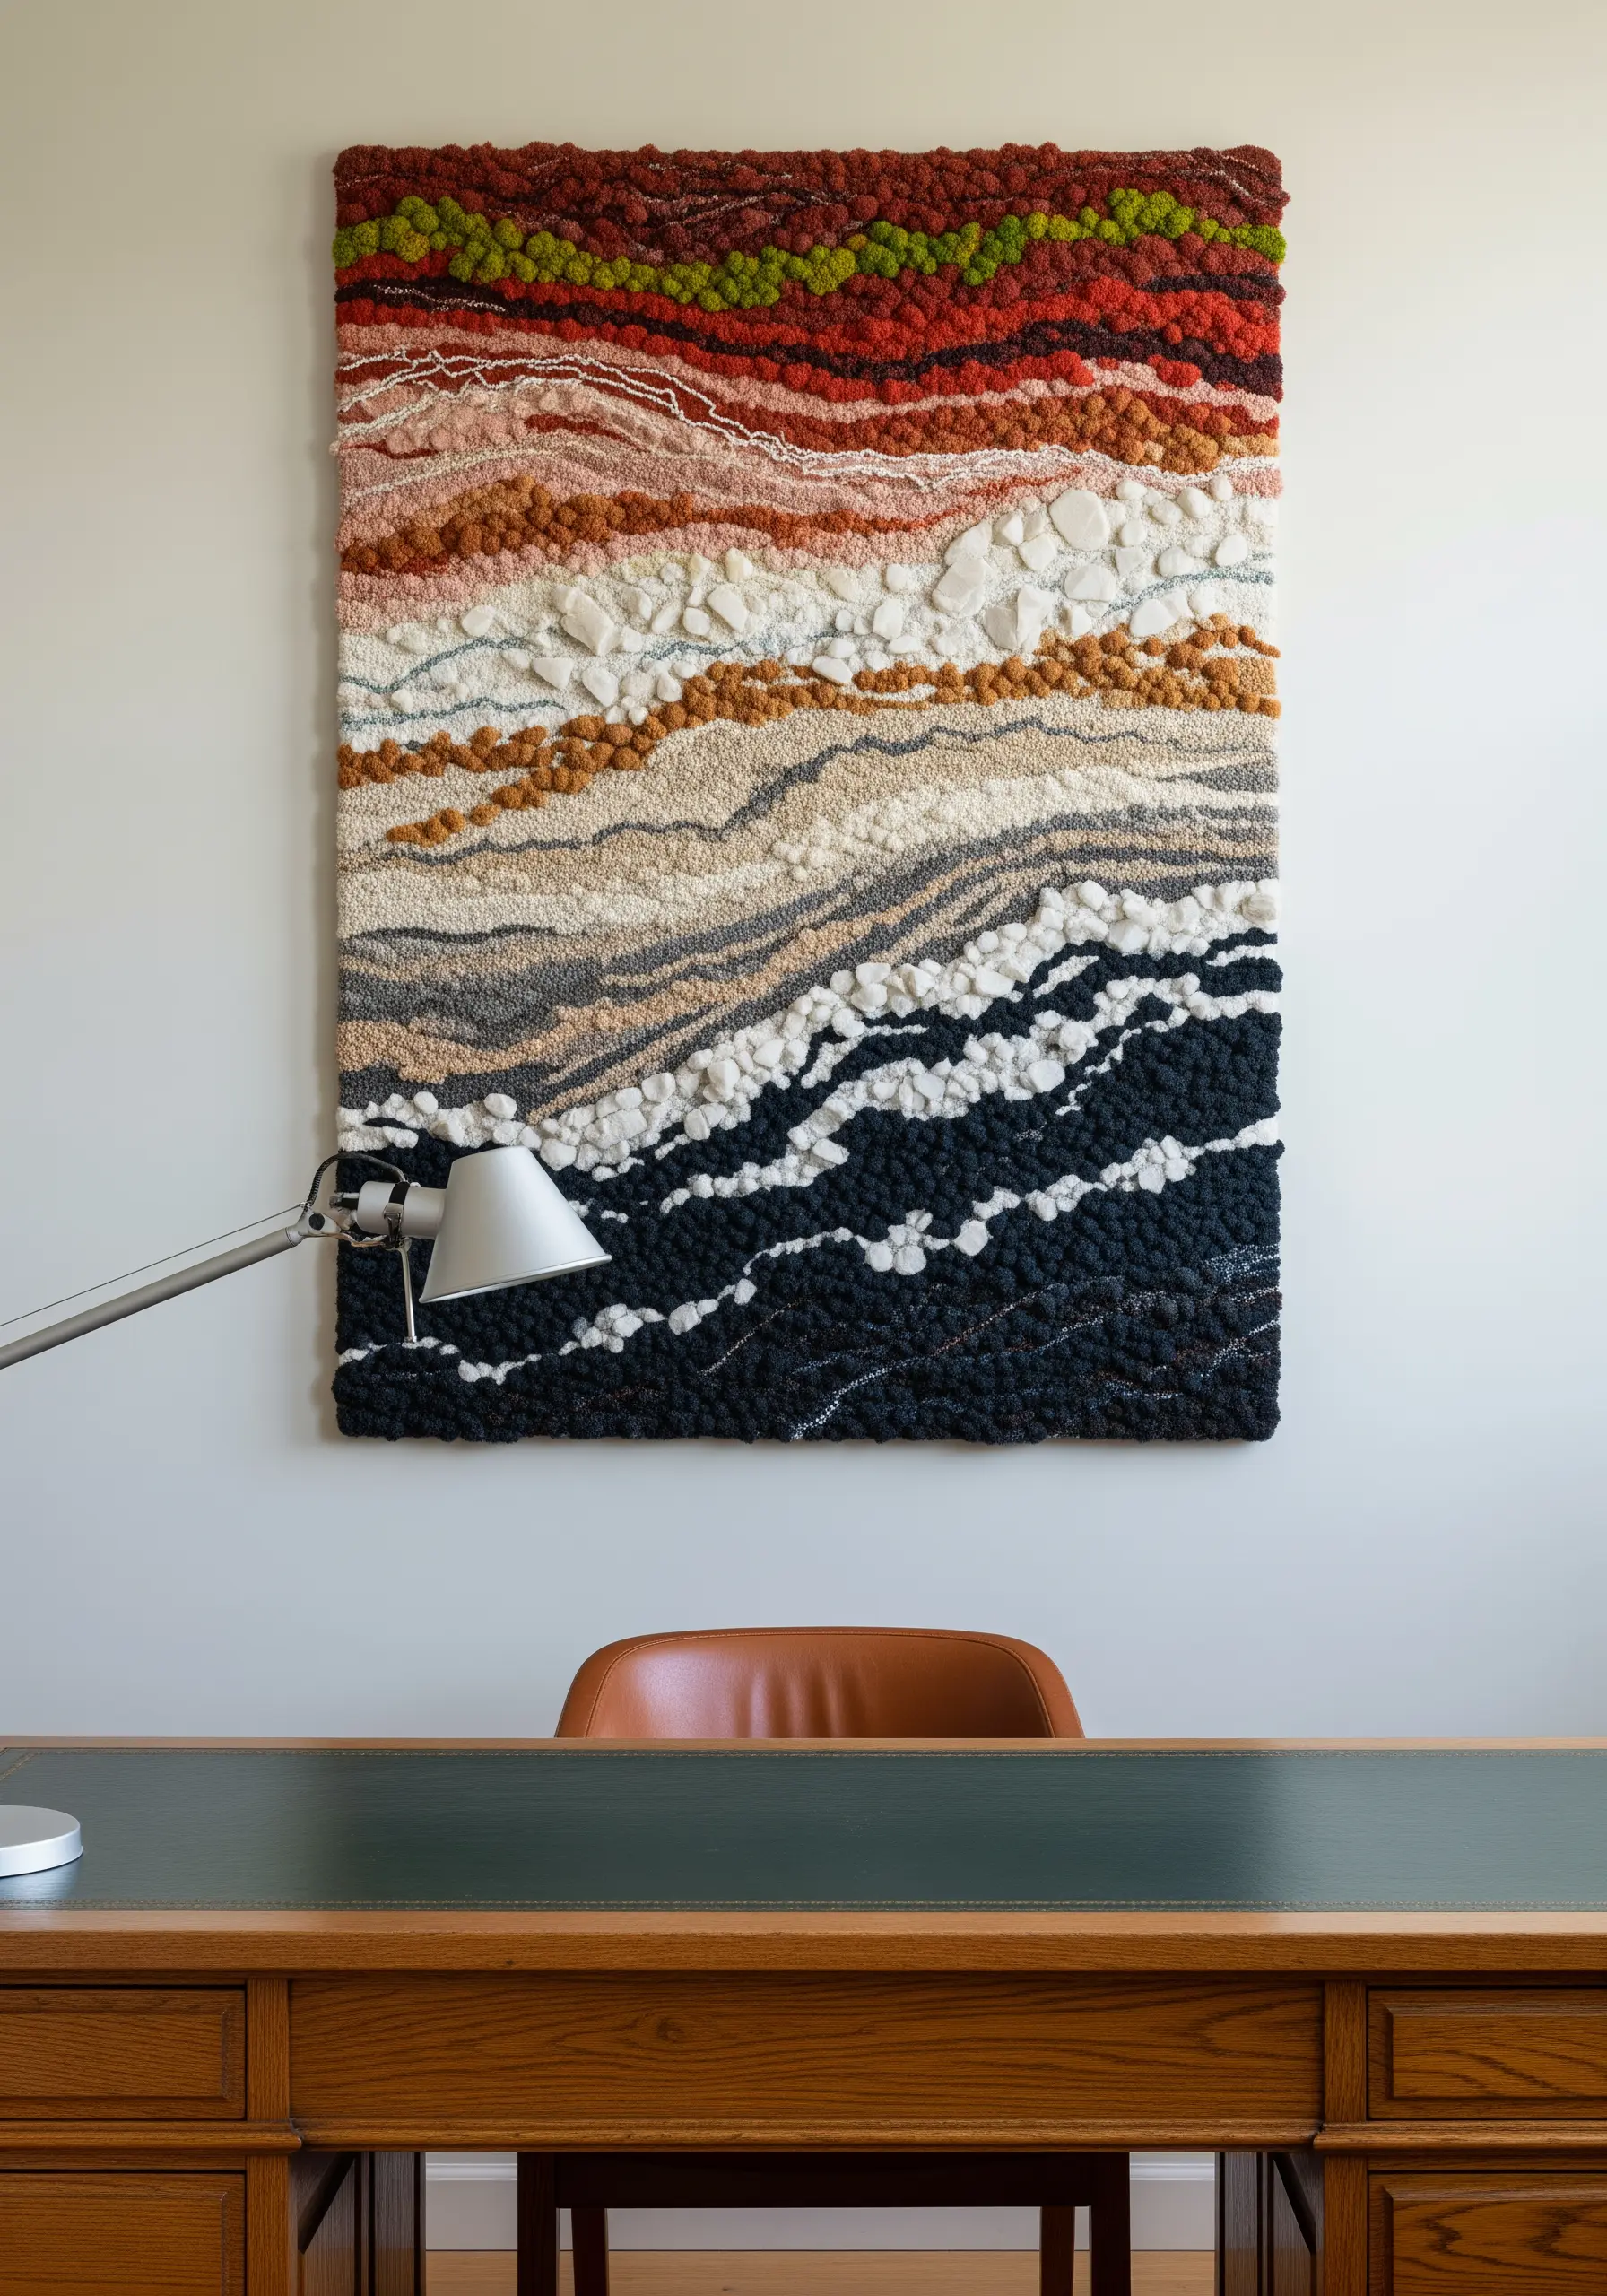
Define the flowing lines of geological strata by couching thick, contrasting yarns onto your fabric.
Lay down a strand of chunky wool or roving in your desired pattern and use a thinner, matching thread to tack it into place with small, perpendicular stitches.
This creates a bold, raised line that cleanly separates the different textured sections.
Fill the areas between these lines with French knots, seed stitches, or satin stitches to represent different rock and soil layers, enhancing the abstract landscape feel.
15. Add Dimension to a Printed Fabric Base

Create an ethereal, misty forest by stitching onto a printed fabric panel.
Choose a fabric with a soft, atmospheric print of a forest or landscape. This printed layer instantly provides depth and context for your stitches.
Selectively embellish the foreground elements—like tree trunks and mossy ground—with textural stitches.
Use raised stem stitch for the trees and dense French knots for the moss, leaving the background untouched. This contrast makes the embroidered elements pop, creating a stunning 3D effect.
16. Weave Your Base, Stitch Your Details
Combine the structured art of weaving with the freeform nature of embroidery for a truly unique piece.
Create a woven background with simple blocks of neutral or complementary colors using a frame loom.
Once the weaving is complete, use it as your canvas. Add clusters of mossy texture by stitching French knots or applying punch needle loops directly into the woven fabric.
This hybrid technique results in incredible depth and a compelling mix of smooth and rough surfaces, creating mixed-fiber wall hangings that are rich with personality.
17. Scale Up with Punch Needle and Thick Yarn
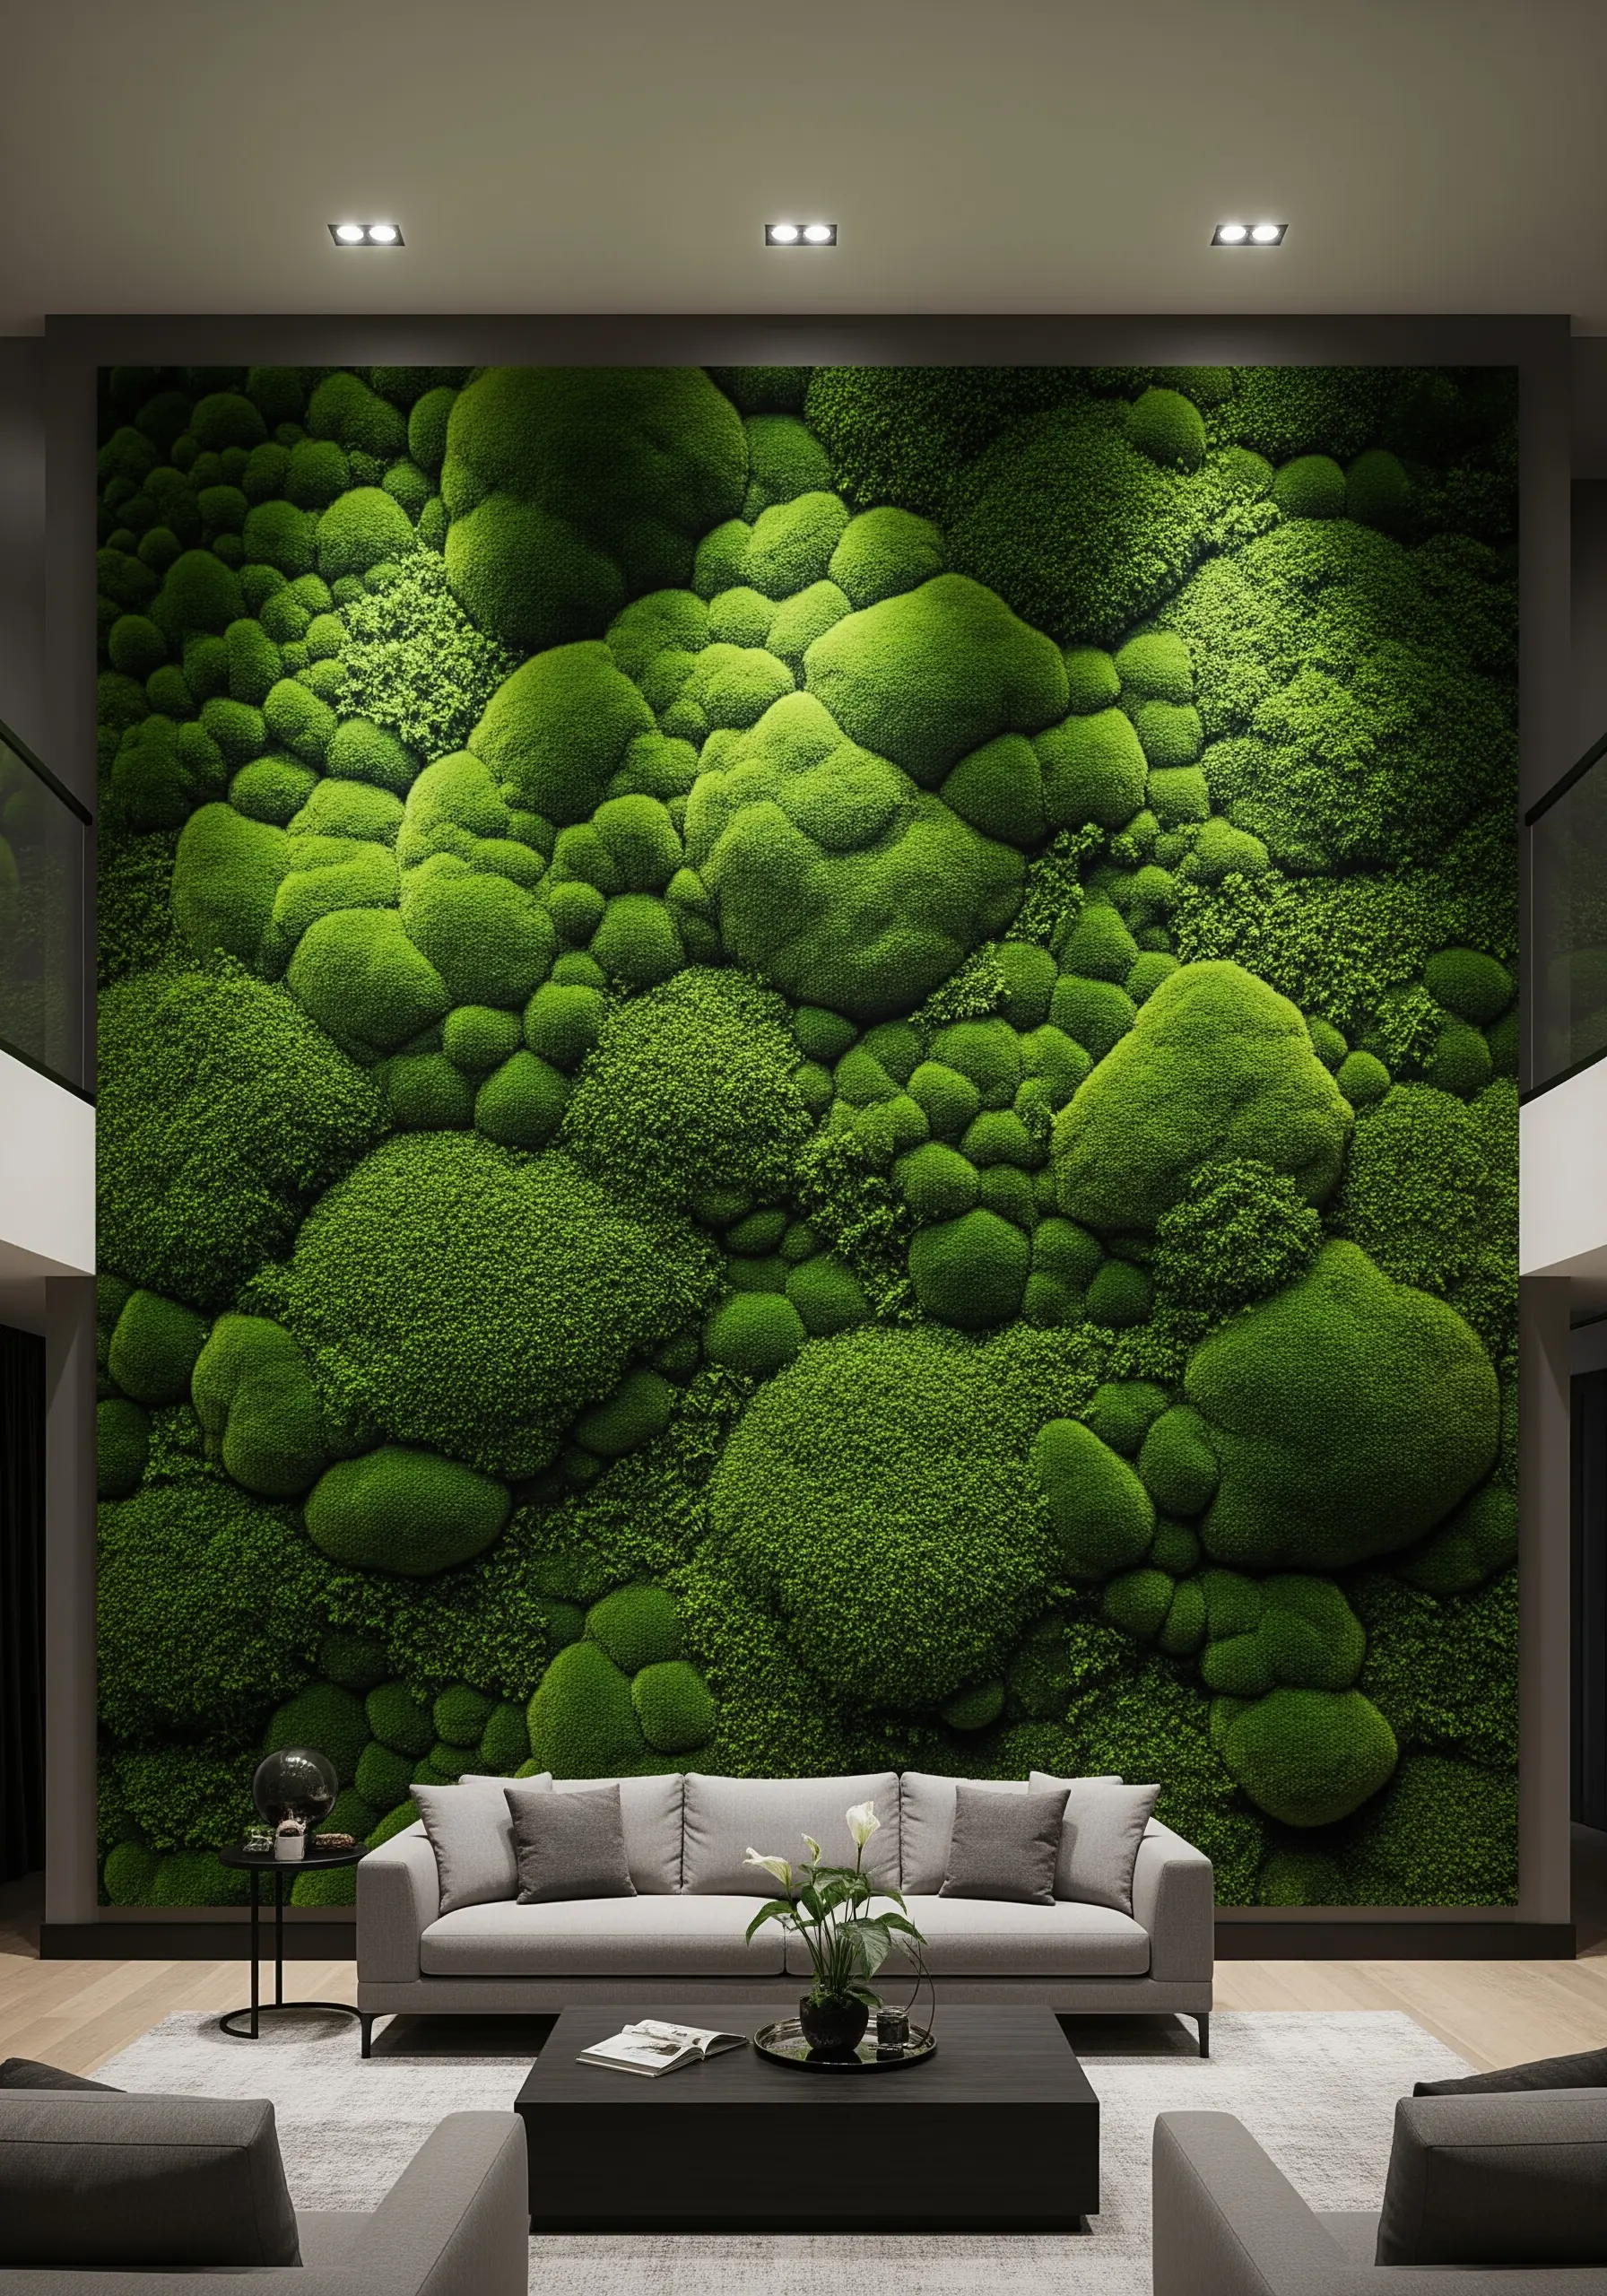
For a statement wall that needs to be filled, hand stitching with floss isn’t always practical.
Switch to a punch needle and thick, chunky yarn to cover large areas with mossy texture efficiently.
To create the soft, rounded mounds, work from the back of the fabric, varying the height of your loops by adjusting how far the needle punches through.
Working in modular panels that you can later assemble on the wall makes a project of this scale manageable and achievable.
18. Evoke Calm with a Stitched Zen Garden
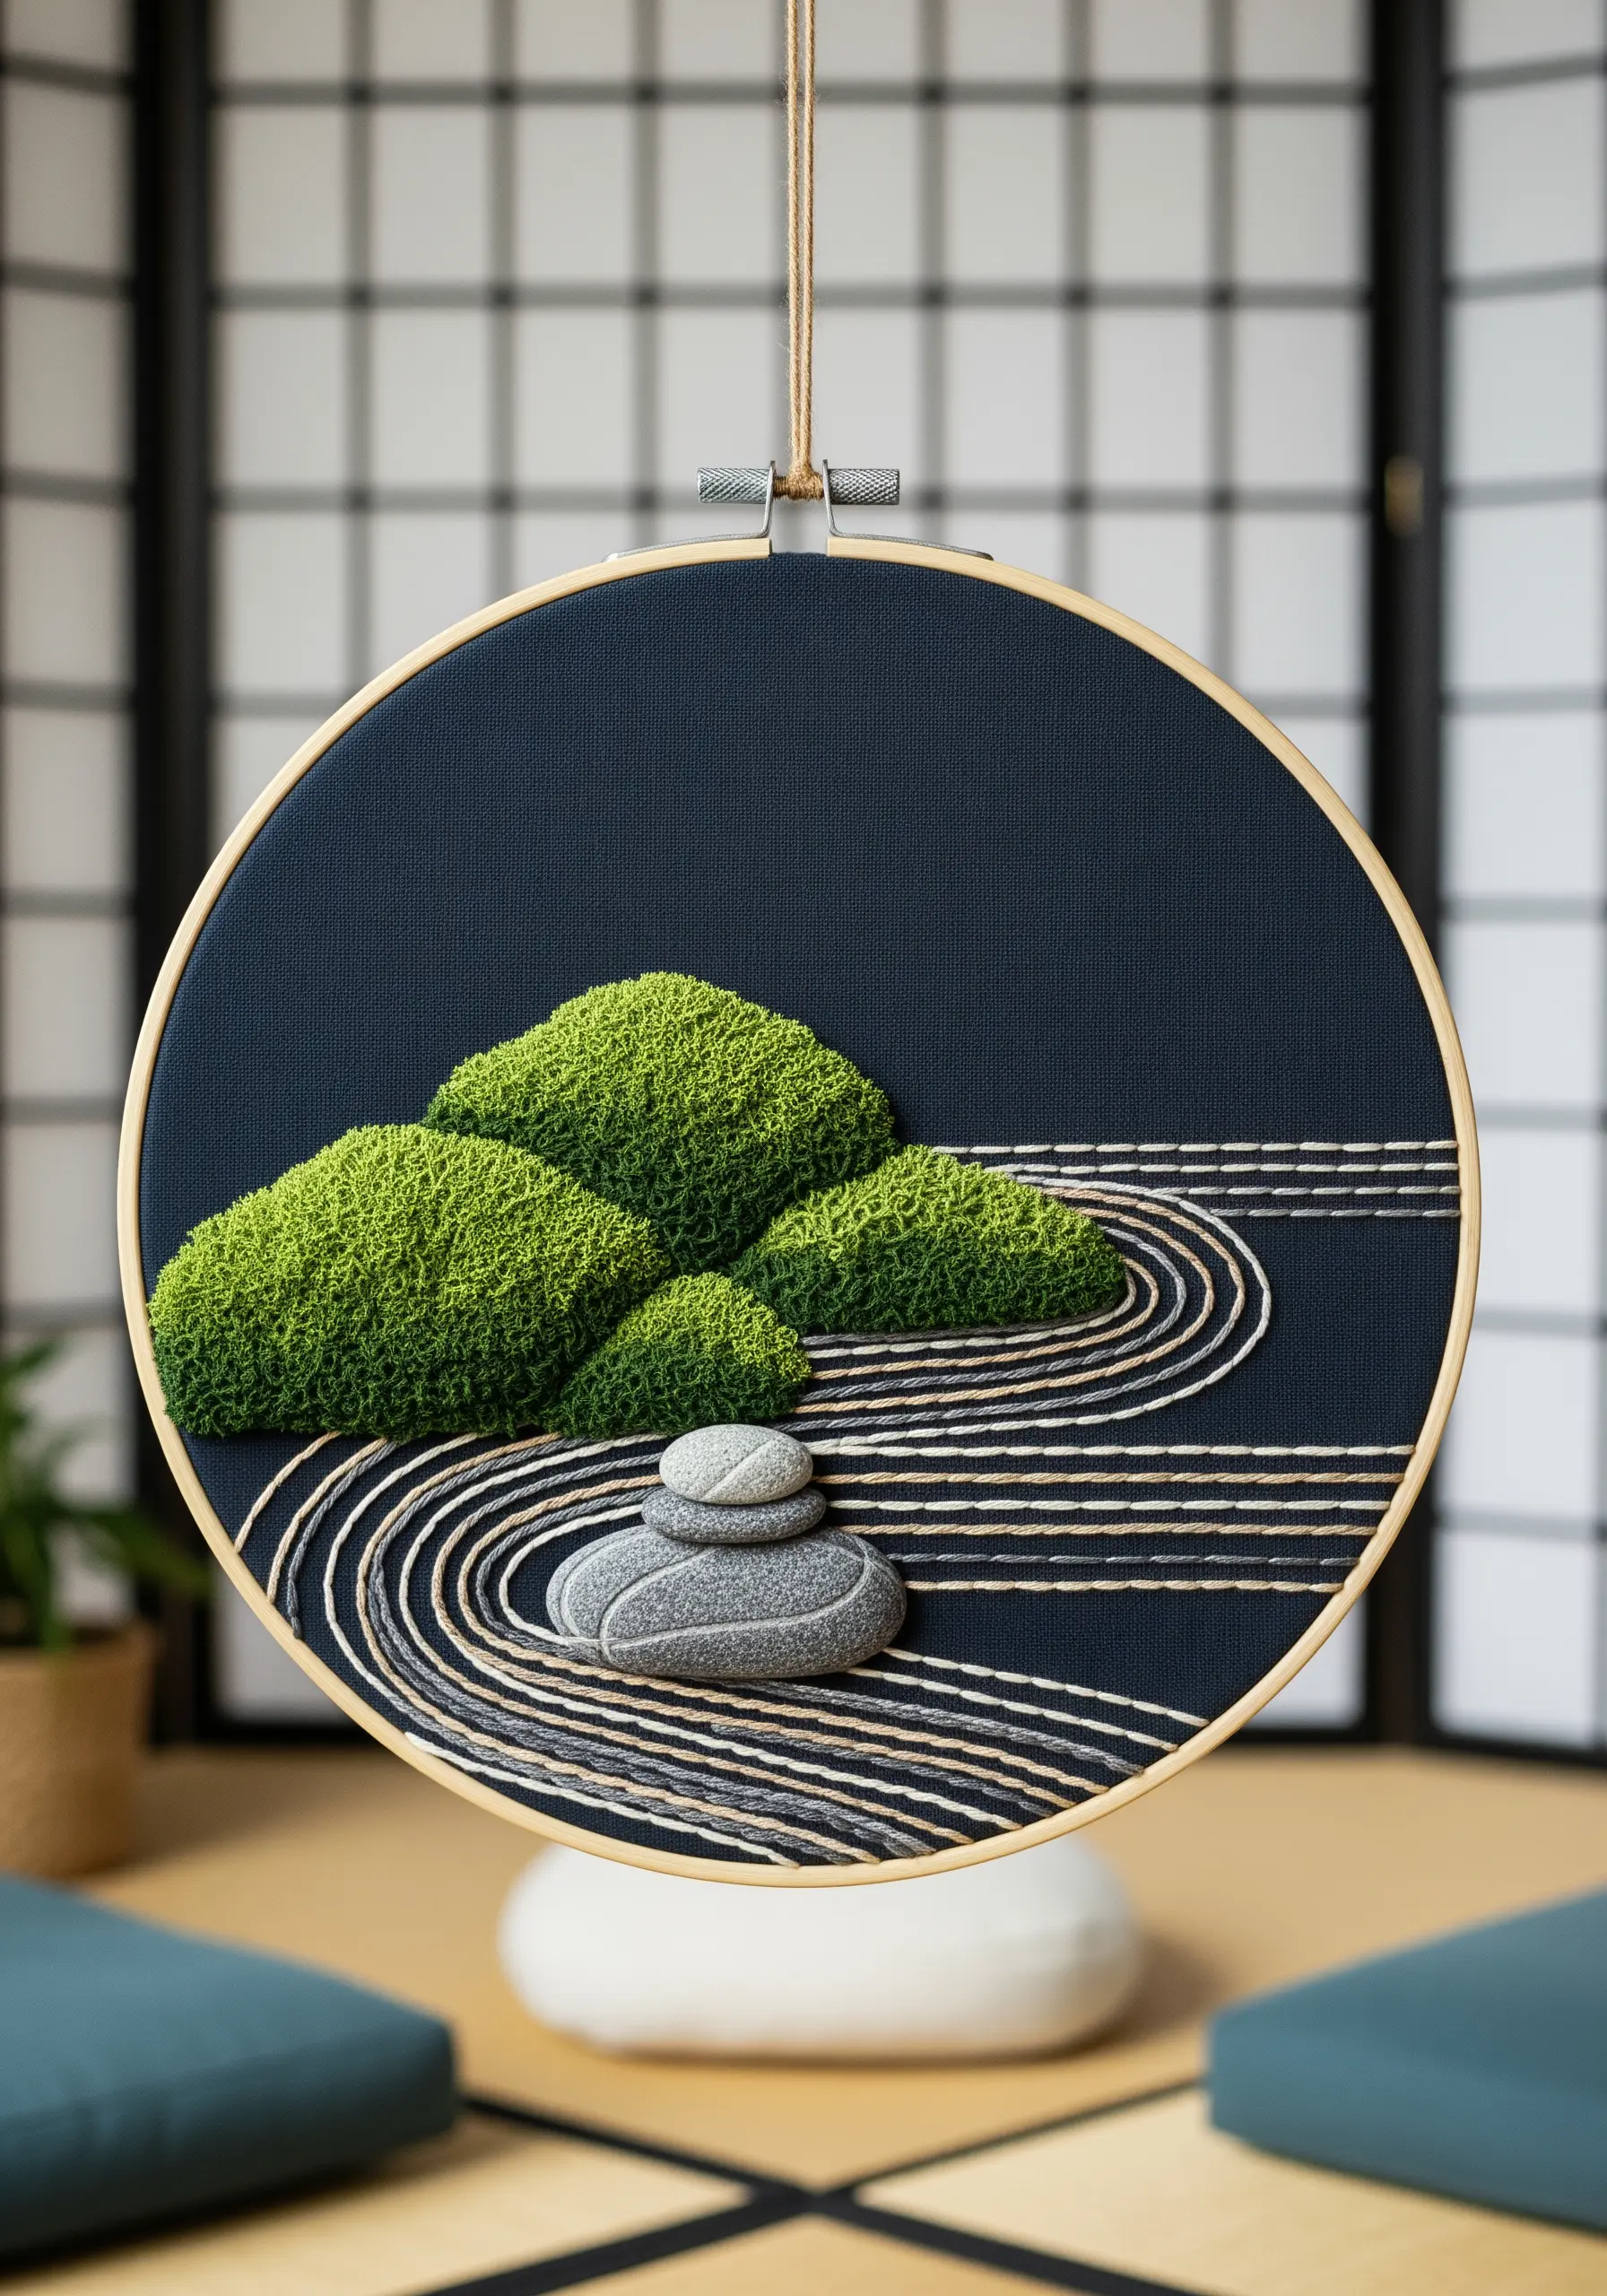
Capture the essence of tranquility by focusing on precision and minimalism.
Use a dark, tightly woven fabric like navy cotton twill as your base to make the other elements stand out.
Create the raked sand lines with perfectly spaced rows of whipped backstitch in a contrasting off-white thread.
Form the mossy islands with dense clusters of tiny French knots. The stones can be made from padded satin stitch or by attaching real, smooth pebbles for a touch of authentic nature.
This design is a beautiful example of how minimalist embroidery ideas can convey a powerful sense of peace.
19. Apply Moss Stitch to Geometric Color Blocking
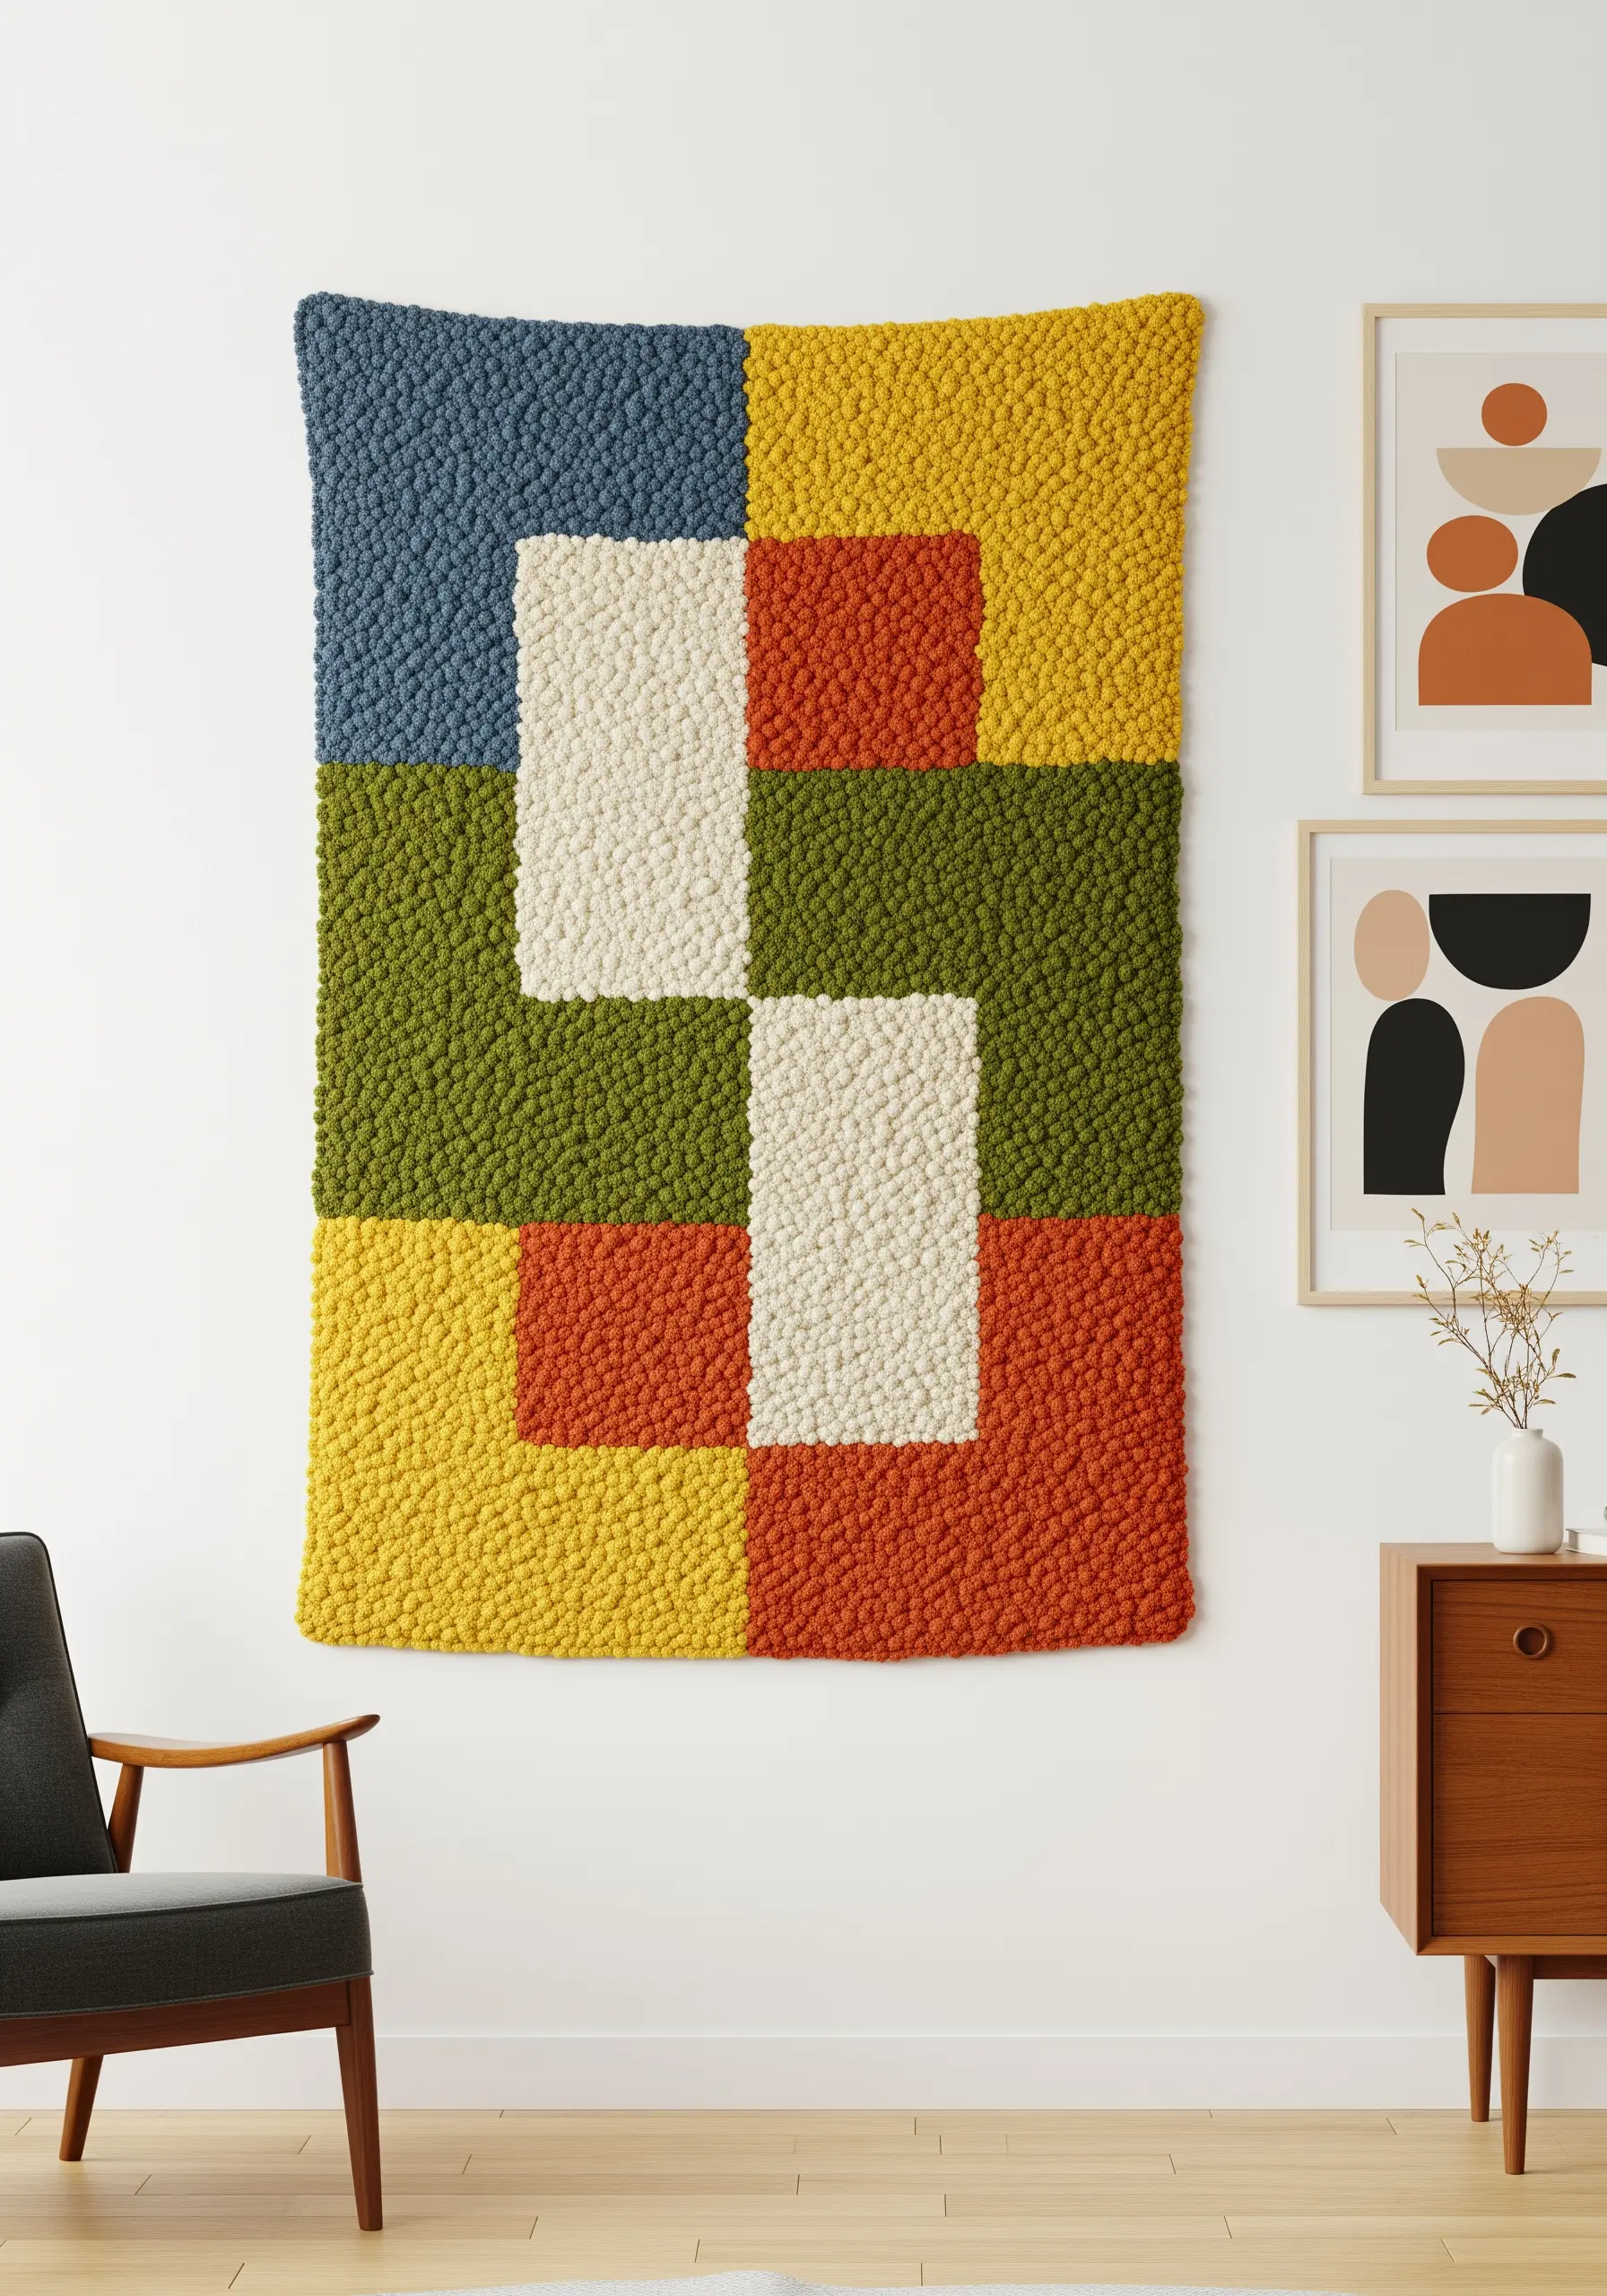
Juxtapose the organic chaos of moss stitch with the clean order of a geometric pattern.
Plan your design on paper first, then transfer the grid to your fabric with a water-soluble marker.
To achieve razor-sharp edges between your color blocks, work the stitches along the inside of your marked lines, packing them tightly against the border.
This disciplined approach to a wild texture creates a stunning piece of modern art that feels both playful and sophisticated.
20. Contrast Soft Stitches with Reclaimed Wood
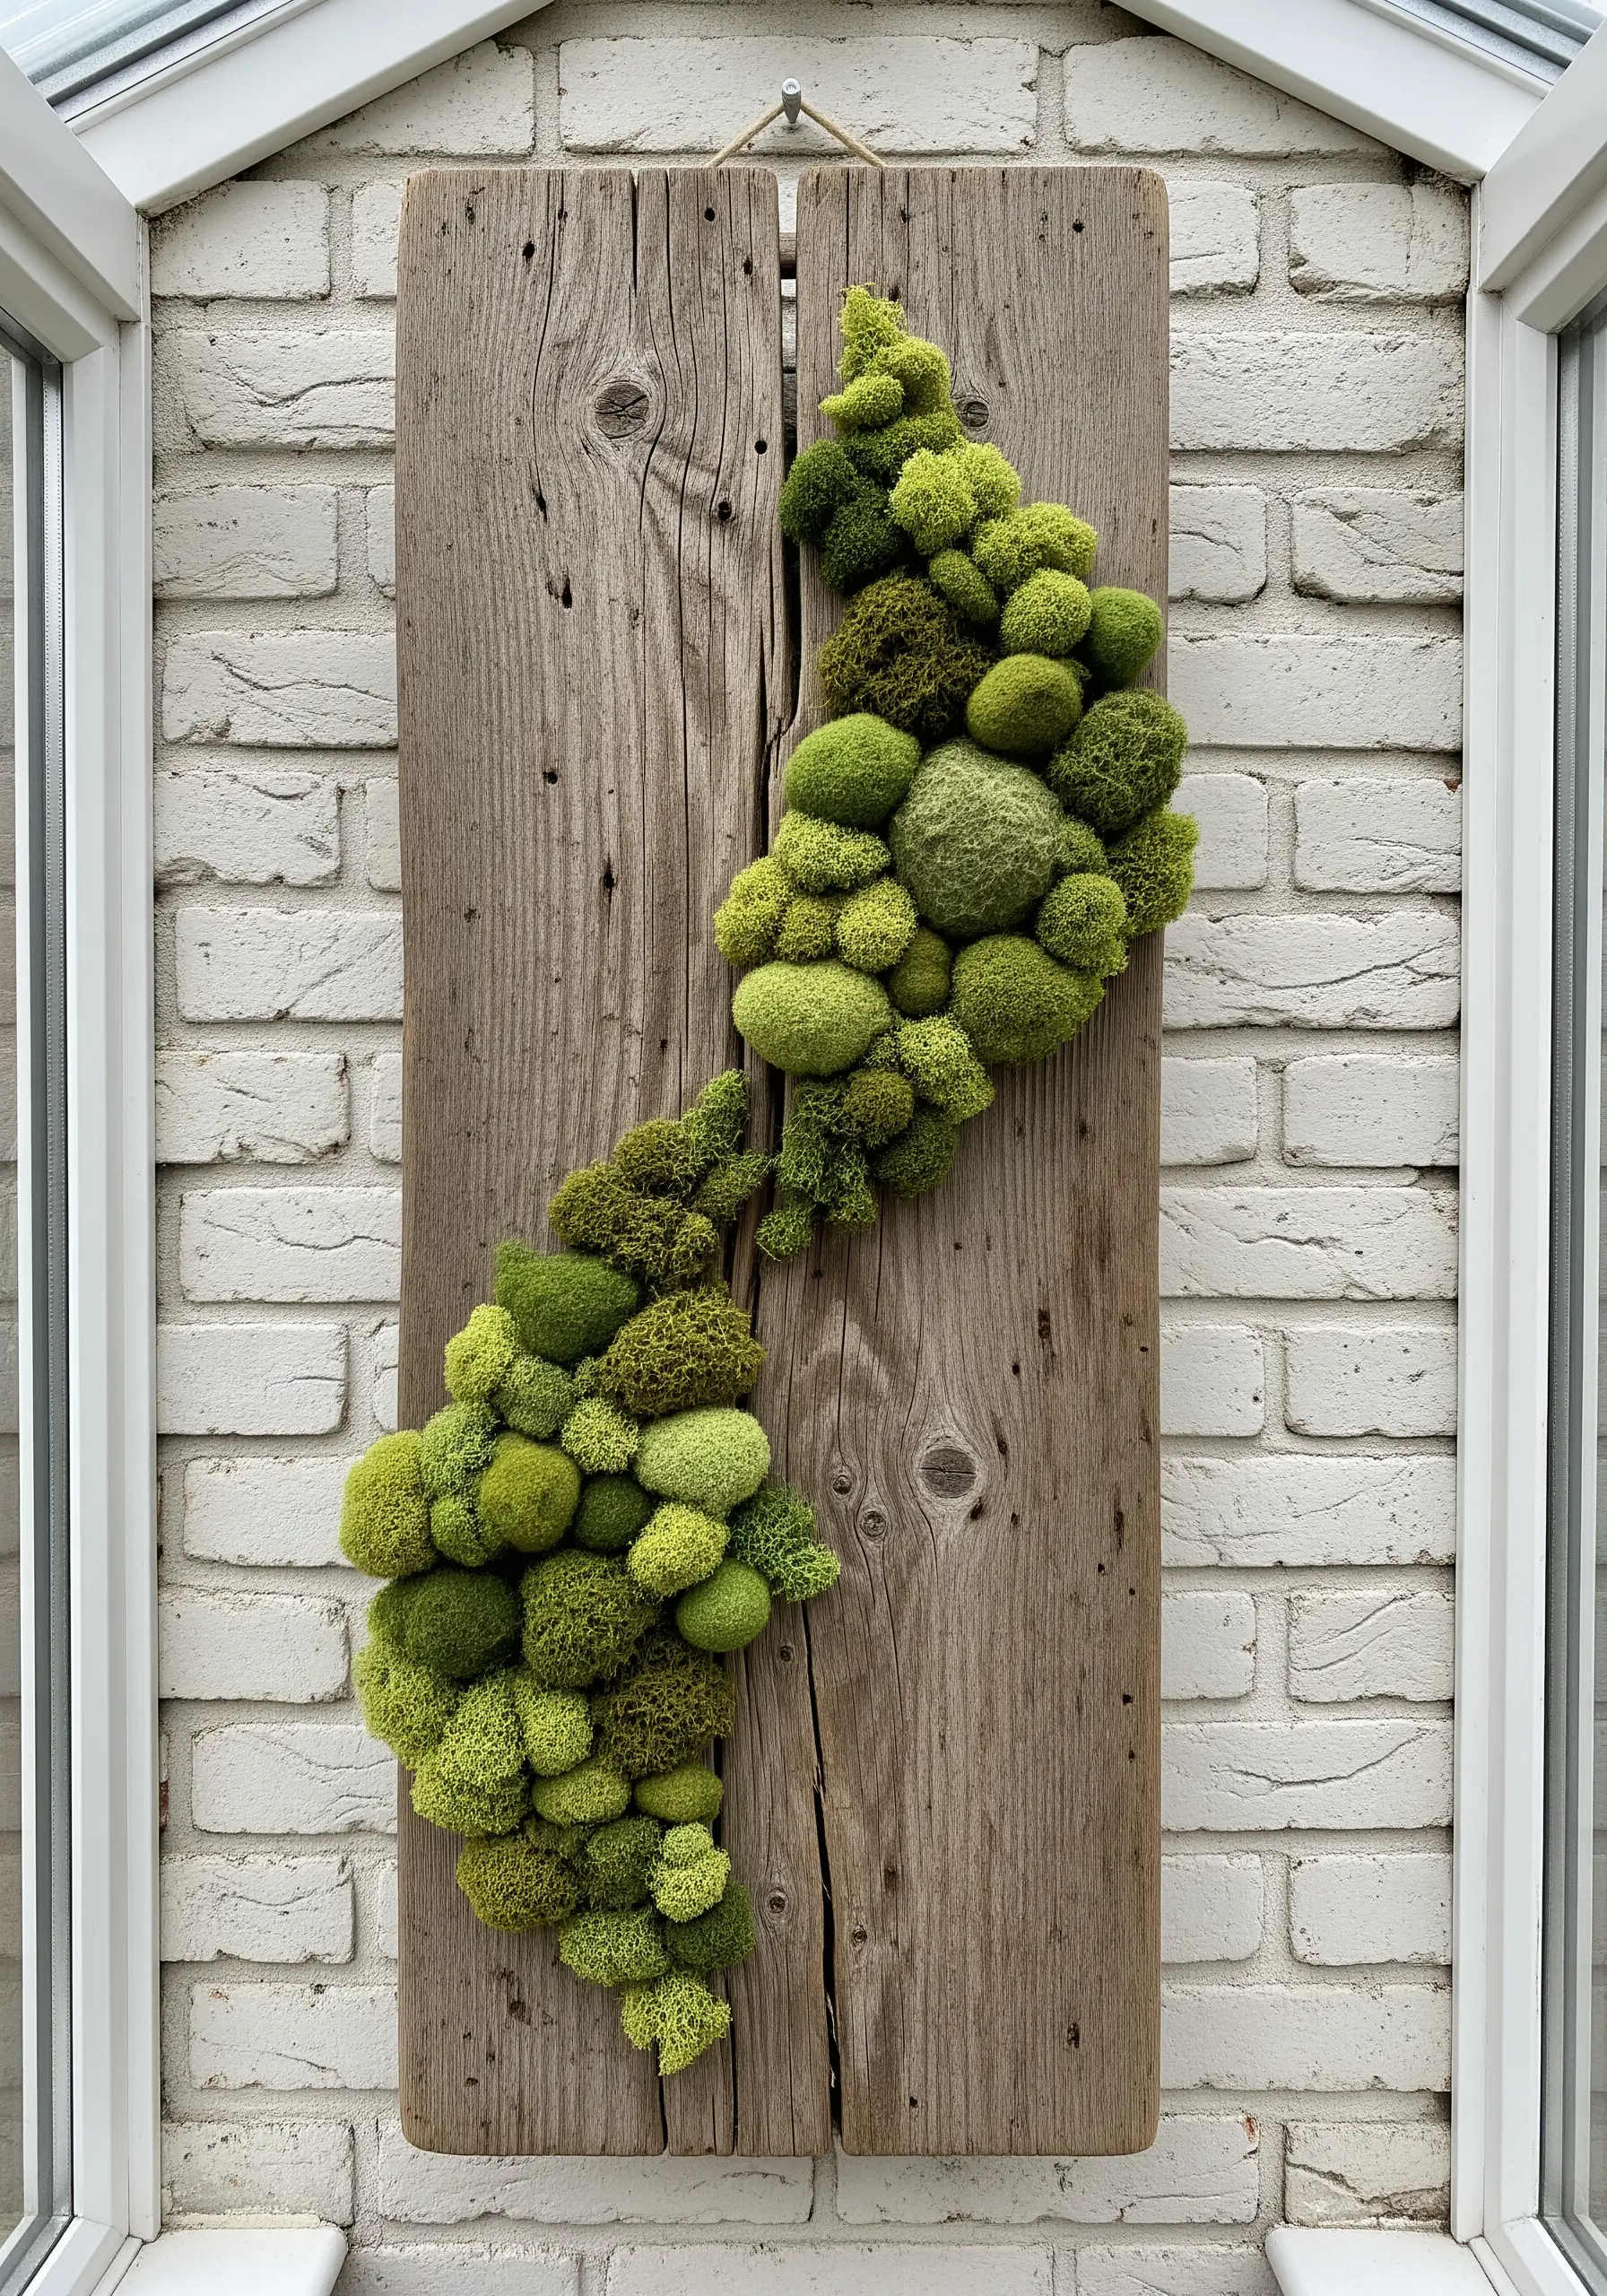
Create a striking visual and tactile contrast by pairing soft, vibrant embroidery with weathered, natural wood.
Embroider your mossy design onto a piece of durable fabric like linen or felt, leaving extra space around the edges.
Then, mount the embroidered fabric onto the reclaimed wood panel, wrapping it tightly for a clean finish.
The organic, flowing shape of the moss against the hard, linear grain of the wood makes both textures stand out more powerfully.
21. Recreate Volcanic Rock and Lichen Textures
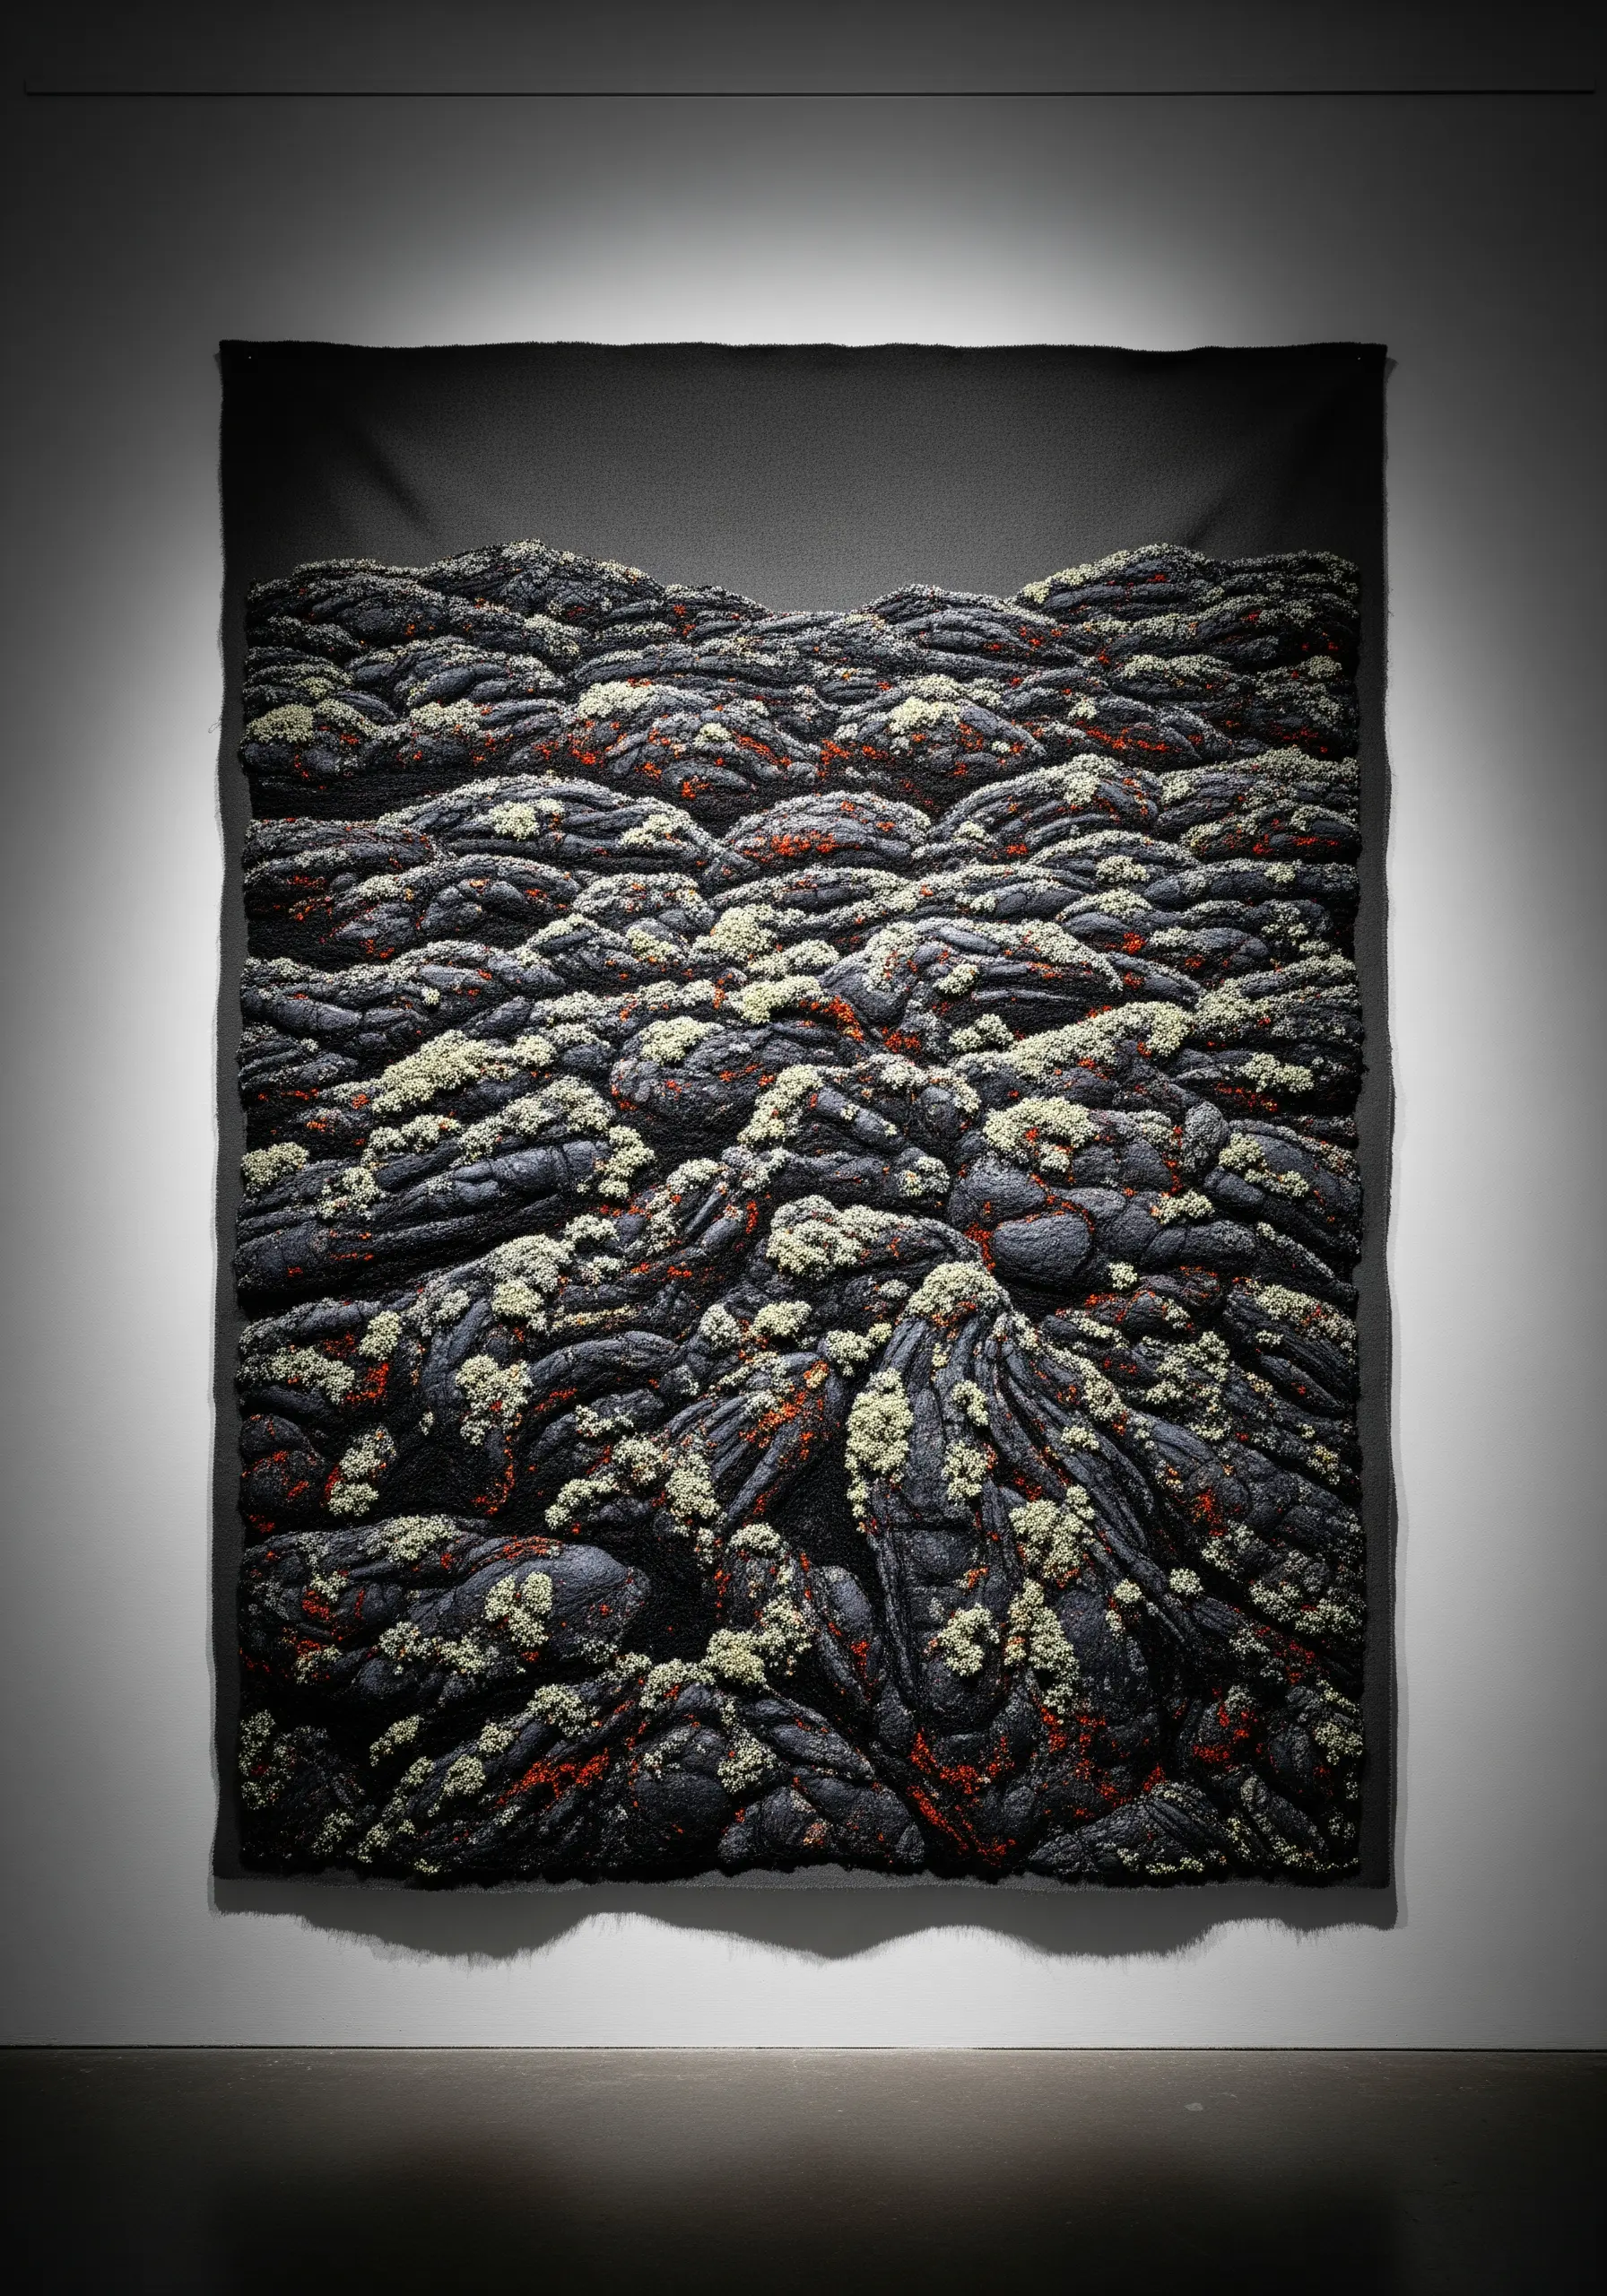
Capture the raw, dramatic texture of a lava field by thinking sculpturally.
Create a base of uneven, lumpy terrain using padded appliqué with dark grey or black fabric scraps.
Stitch over this base with black satin stitch, varying the direction to catch the light differently and create the look of cooled lava.
Finally, add tiny, scattered French knots and seed stitches in pale green, white, and rust to represent the hardy lichen that grows on the rock.
This is a masterclass in embroidery ideas inspired by stones, sand, and soil.
22. Stitch Ethereal Textures on Sheer Fabric
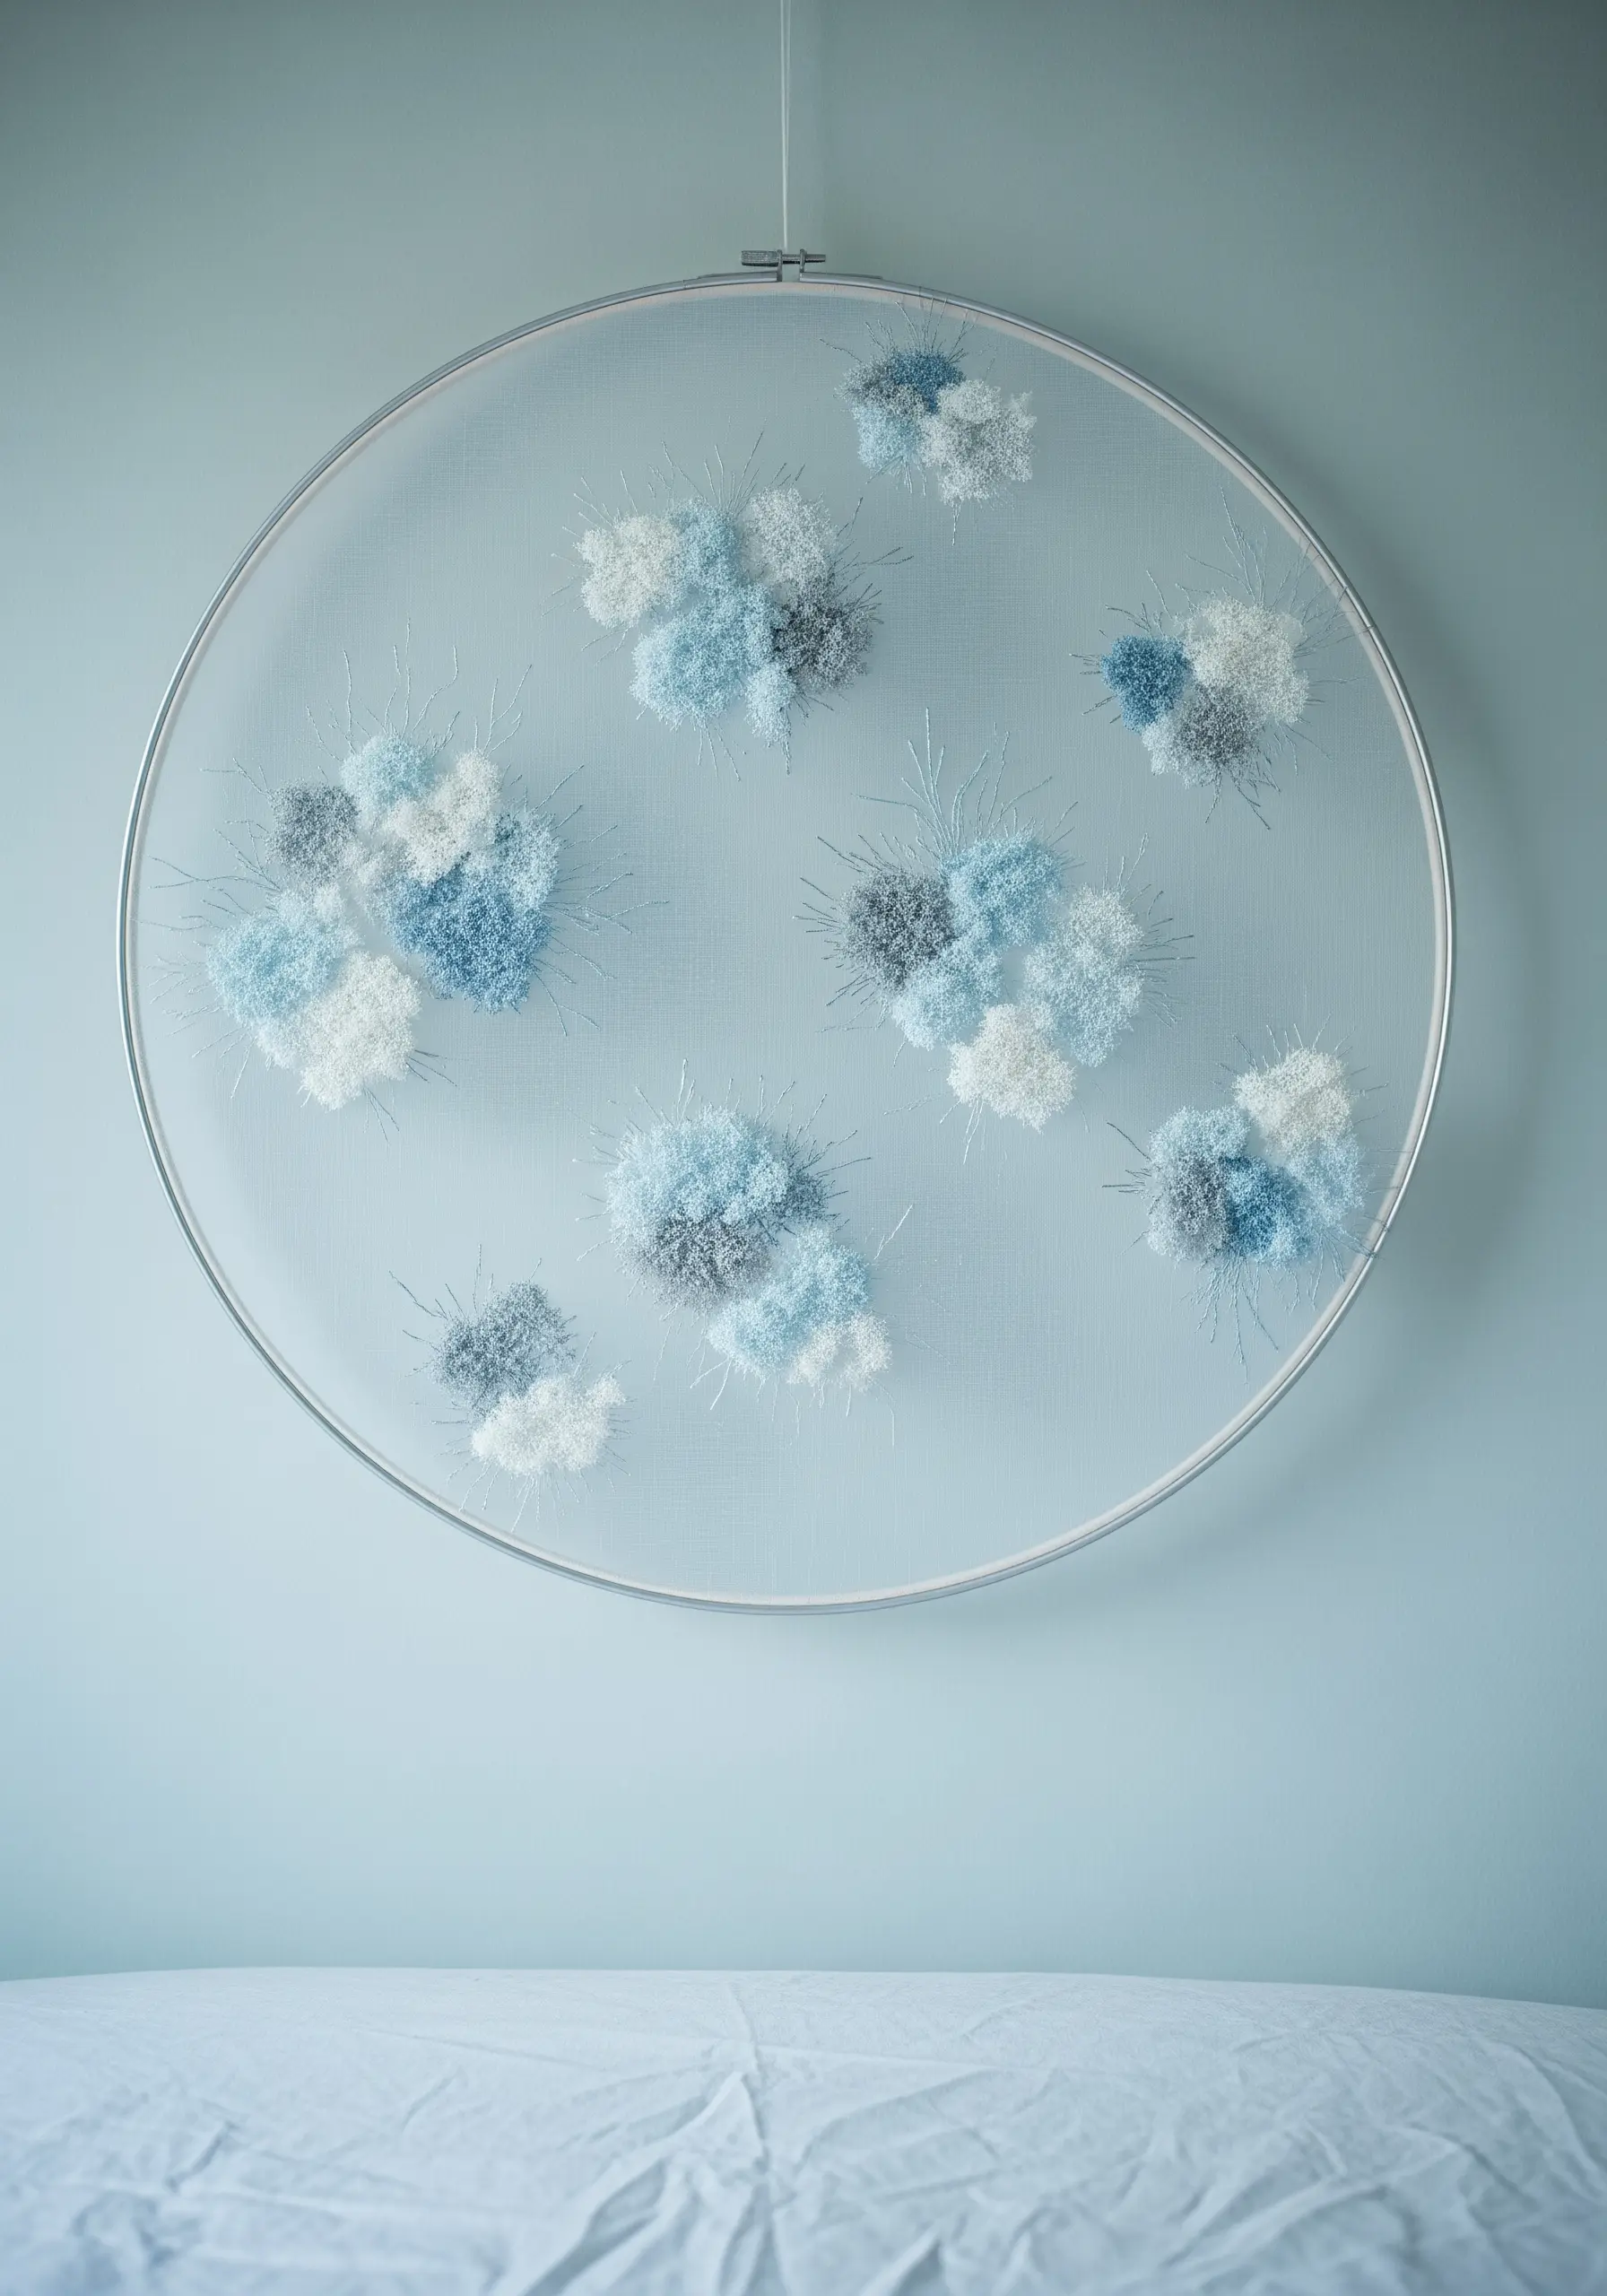
Create delicate, floating motifs by using organza or tulle as your canvas.
To make the clusters, use turkey work and leave the loops uncut for a soft, diffuse effect, or trim them for a tighter, pom-pom look.
The key challenge is securing your threads invisibly. Instead of knots, leave long tails when you start and finish, and carefully weave them back through the dense stitches of the motif itself.
The transparency of the fabric makes the textured clusters appear to float in mid-air, perfect for a serene bedroom.
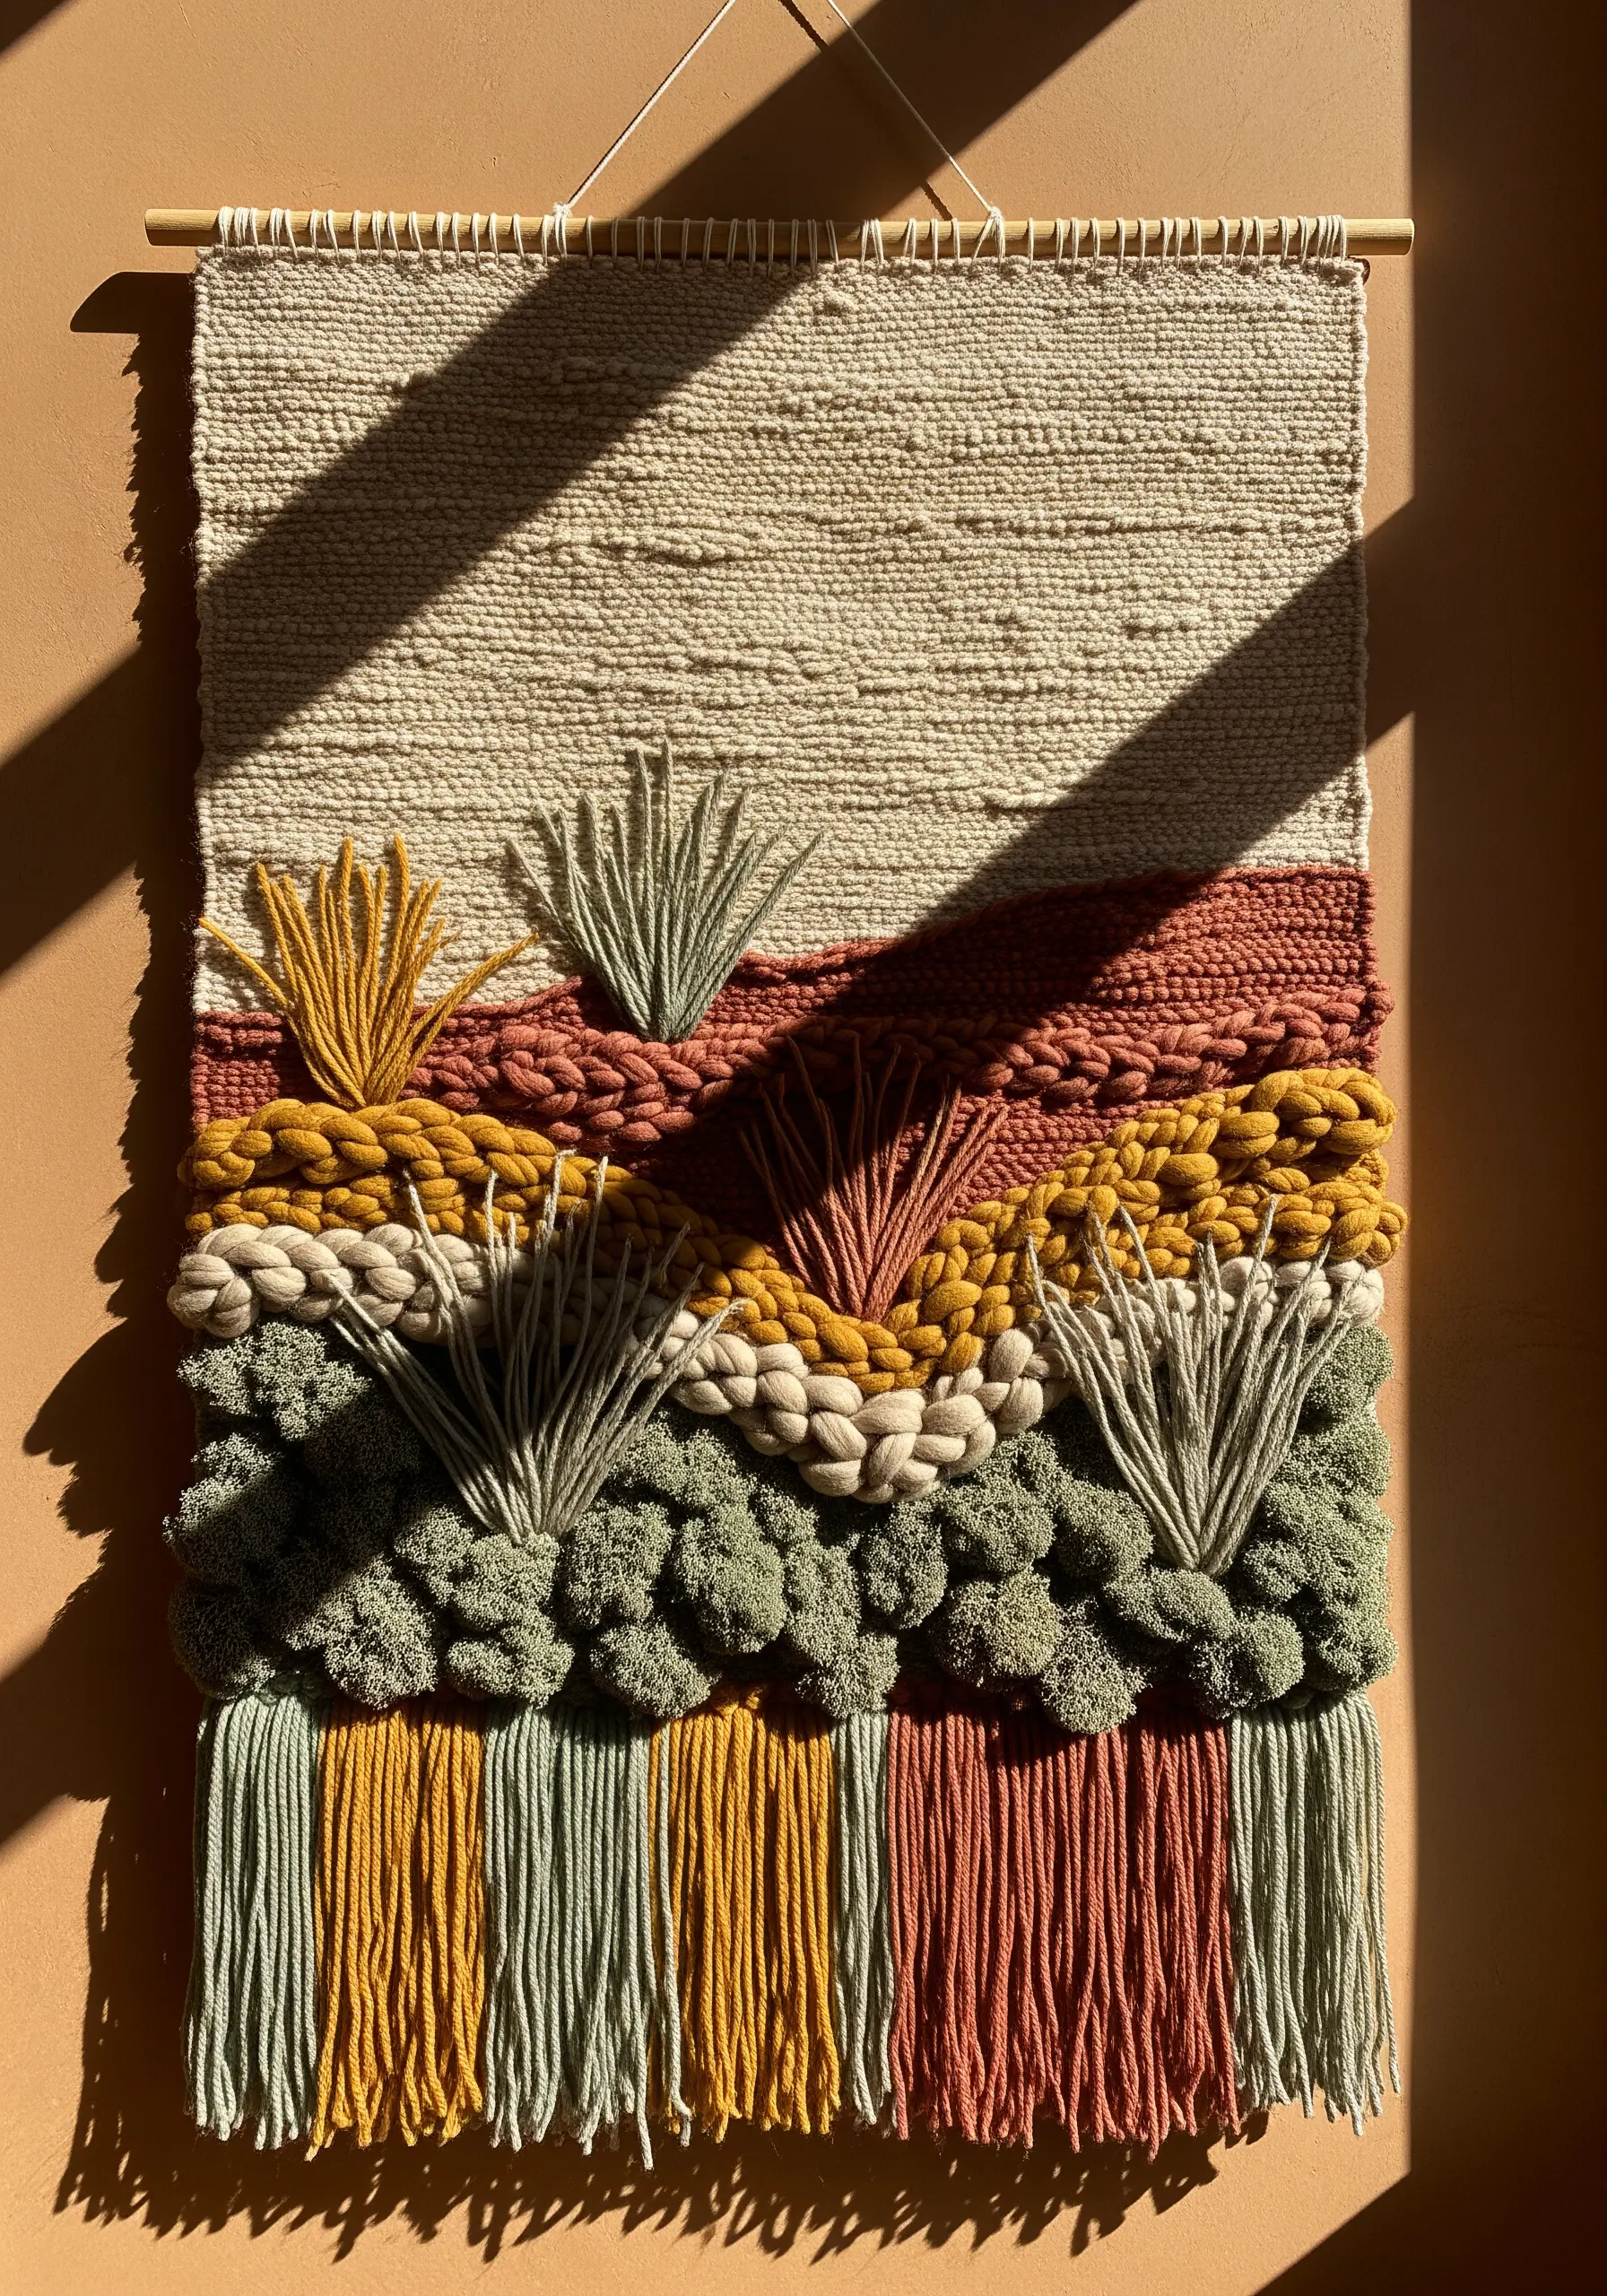
23. Capture a Golden Wheat Field in Thread
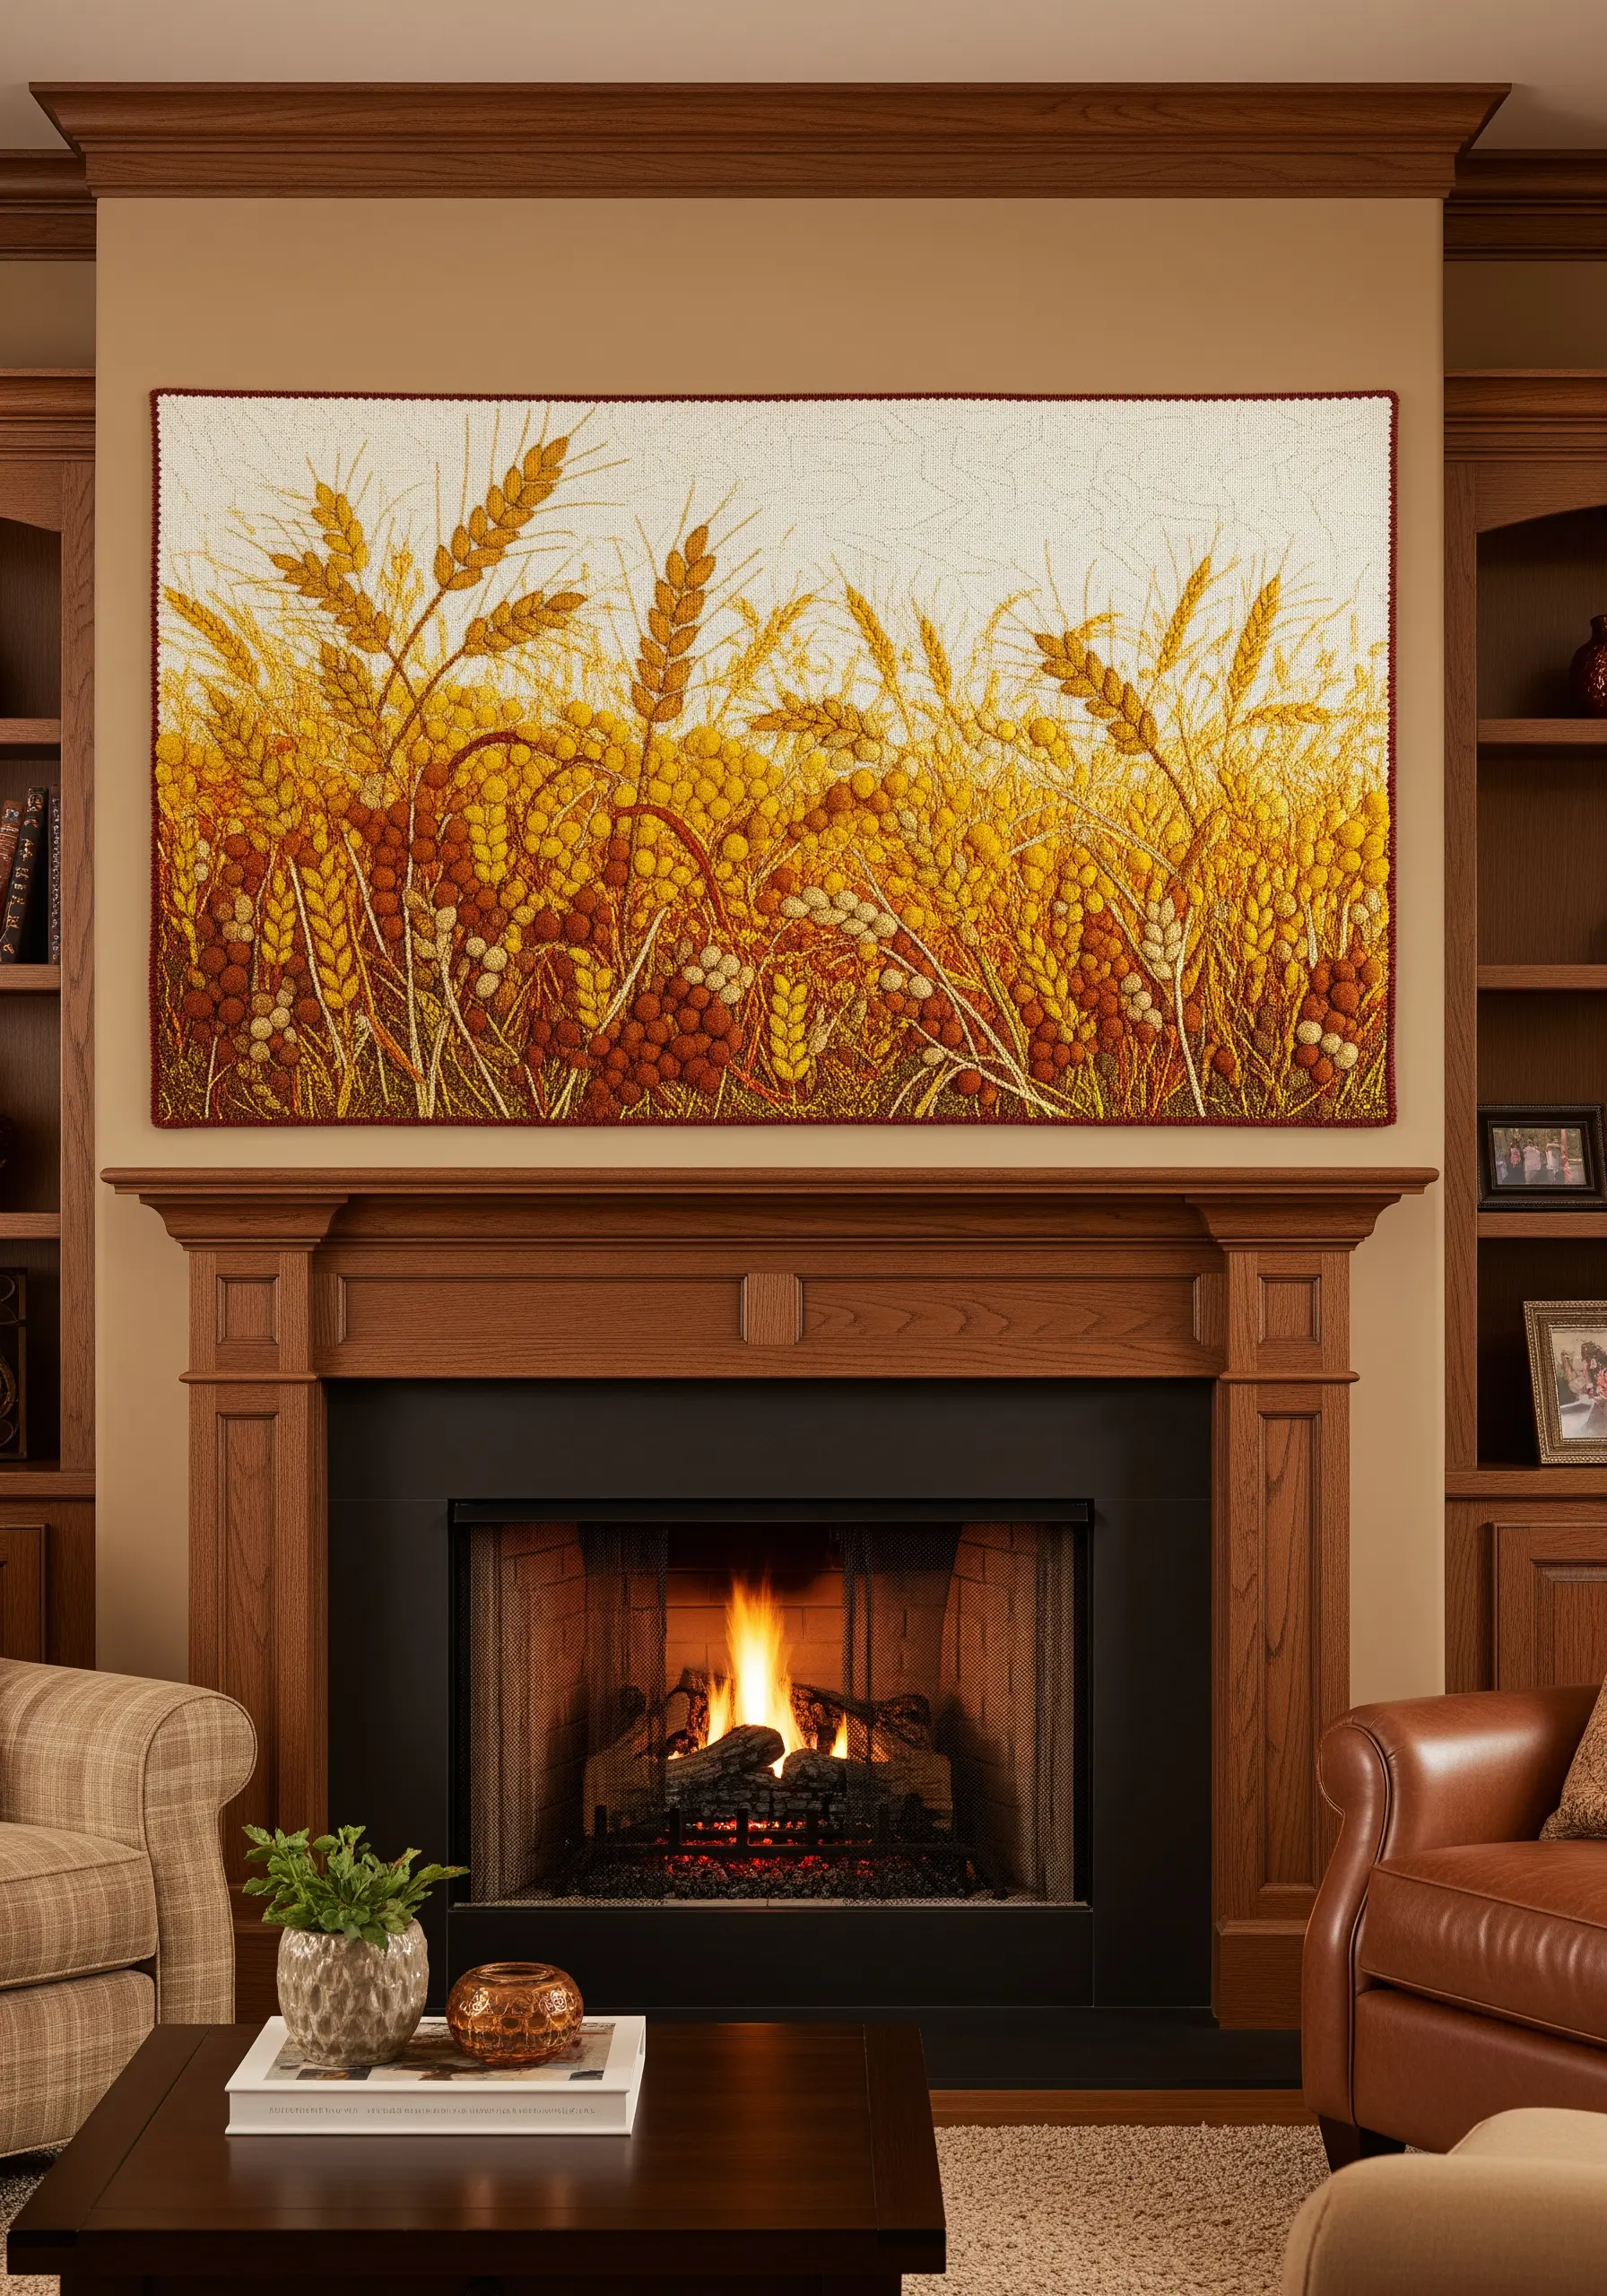
Evoke the richness of a harvest landscape with a combination of two simple stitches.
Use bullion knots or clusters of French knots in golden yellow, ochre, and warm brown to form the heavy heads of grain.
For the stalks and leaves, use long, graceful straight stitches or stem stitches in lighter shades of wheat and cream.
Using variegated threads for both the grains and the stalks will add instant depth and a sun-drenched, natural feel to the entire piece.
24. Depict a Marsh Scene with Varied Textures
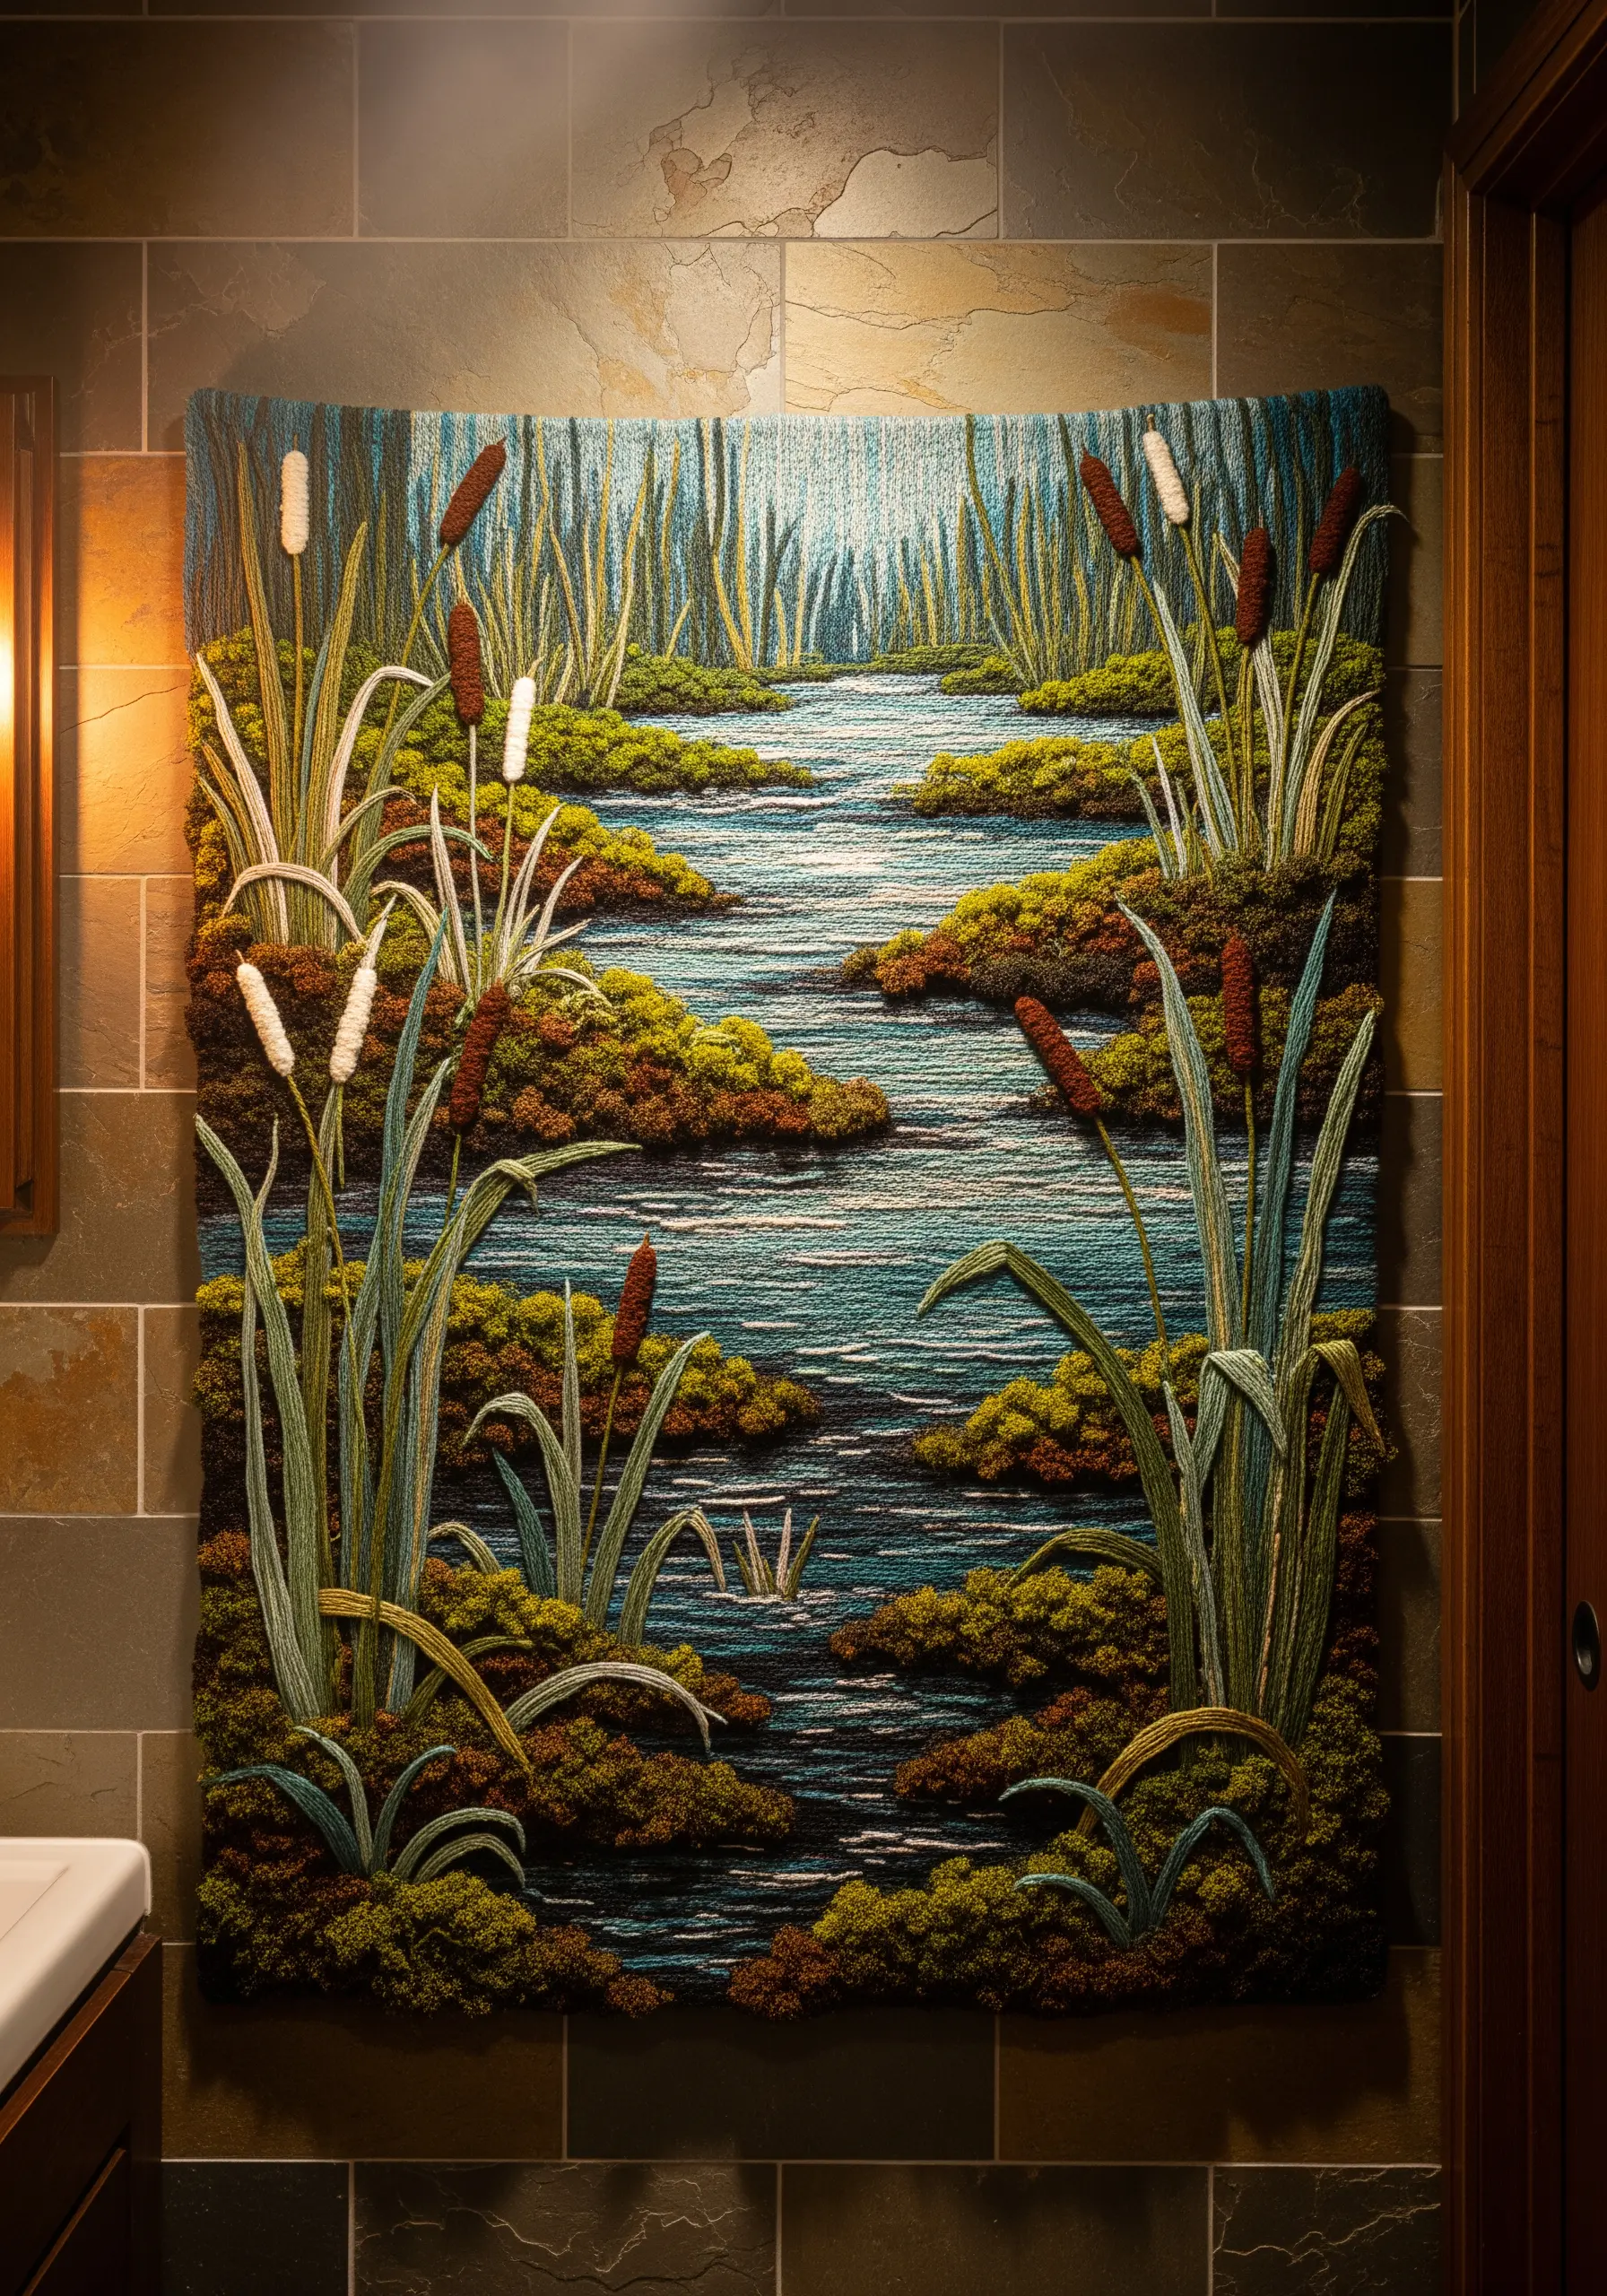
A successful landscape embroidery relies on using different stitches to represent different natural elements.
Create the illusion of water with horizontal satin stitches or seed stitches in shades of blue and grey, allowing some of the background fabric to show through for sparkle.
Use long, brown bullion knots for the cattail heads and a clean stem stitch for the reeds.
The mossy banks are perfect for dense, multi-toned French knots, providing a soft, earthy border for the cool water.
25. Build Ancient Stone Ruins with Thread
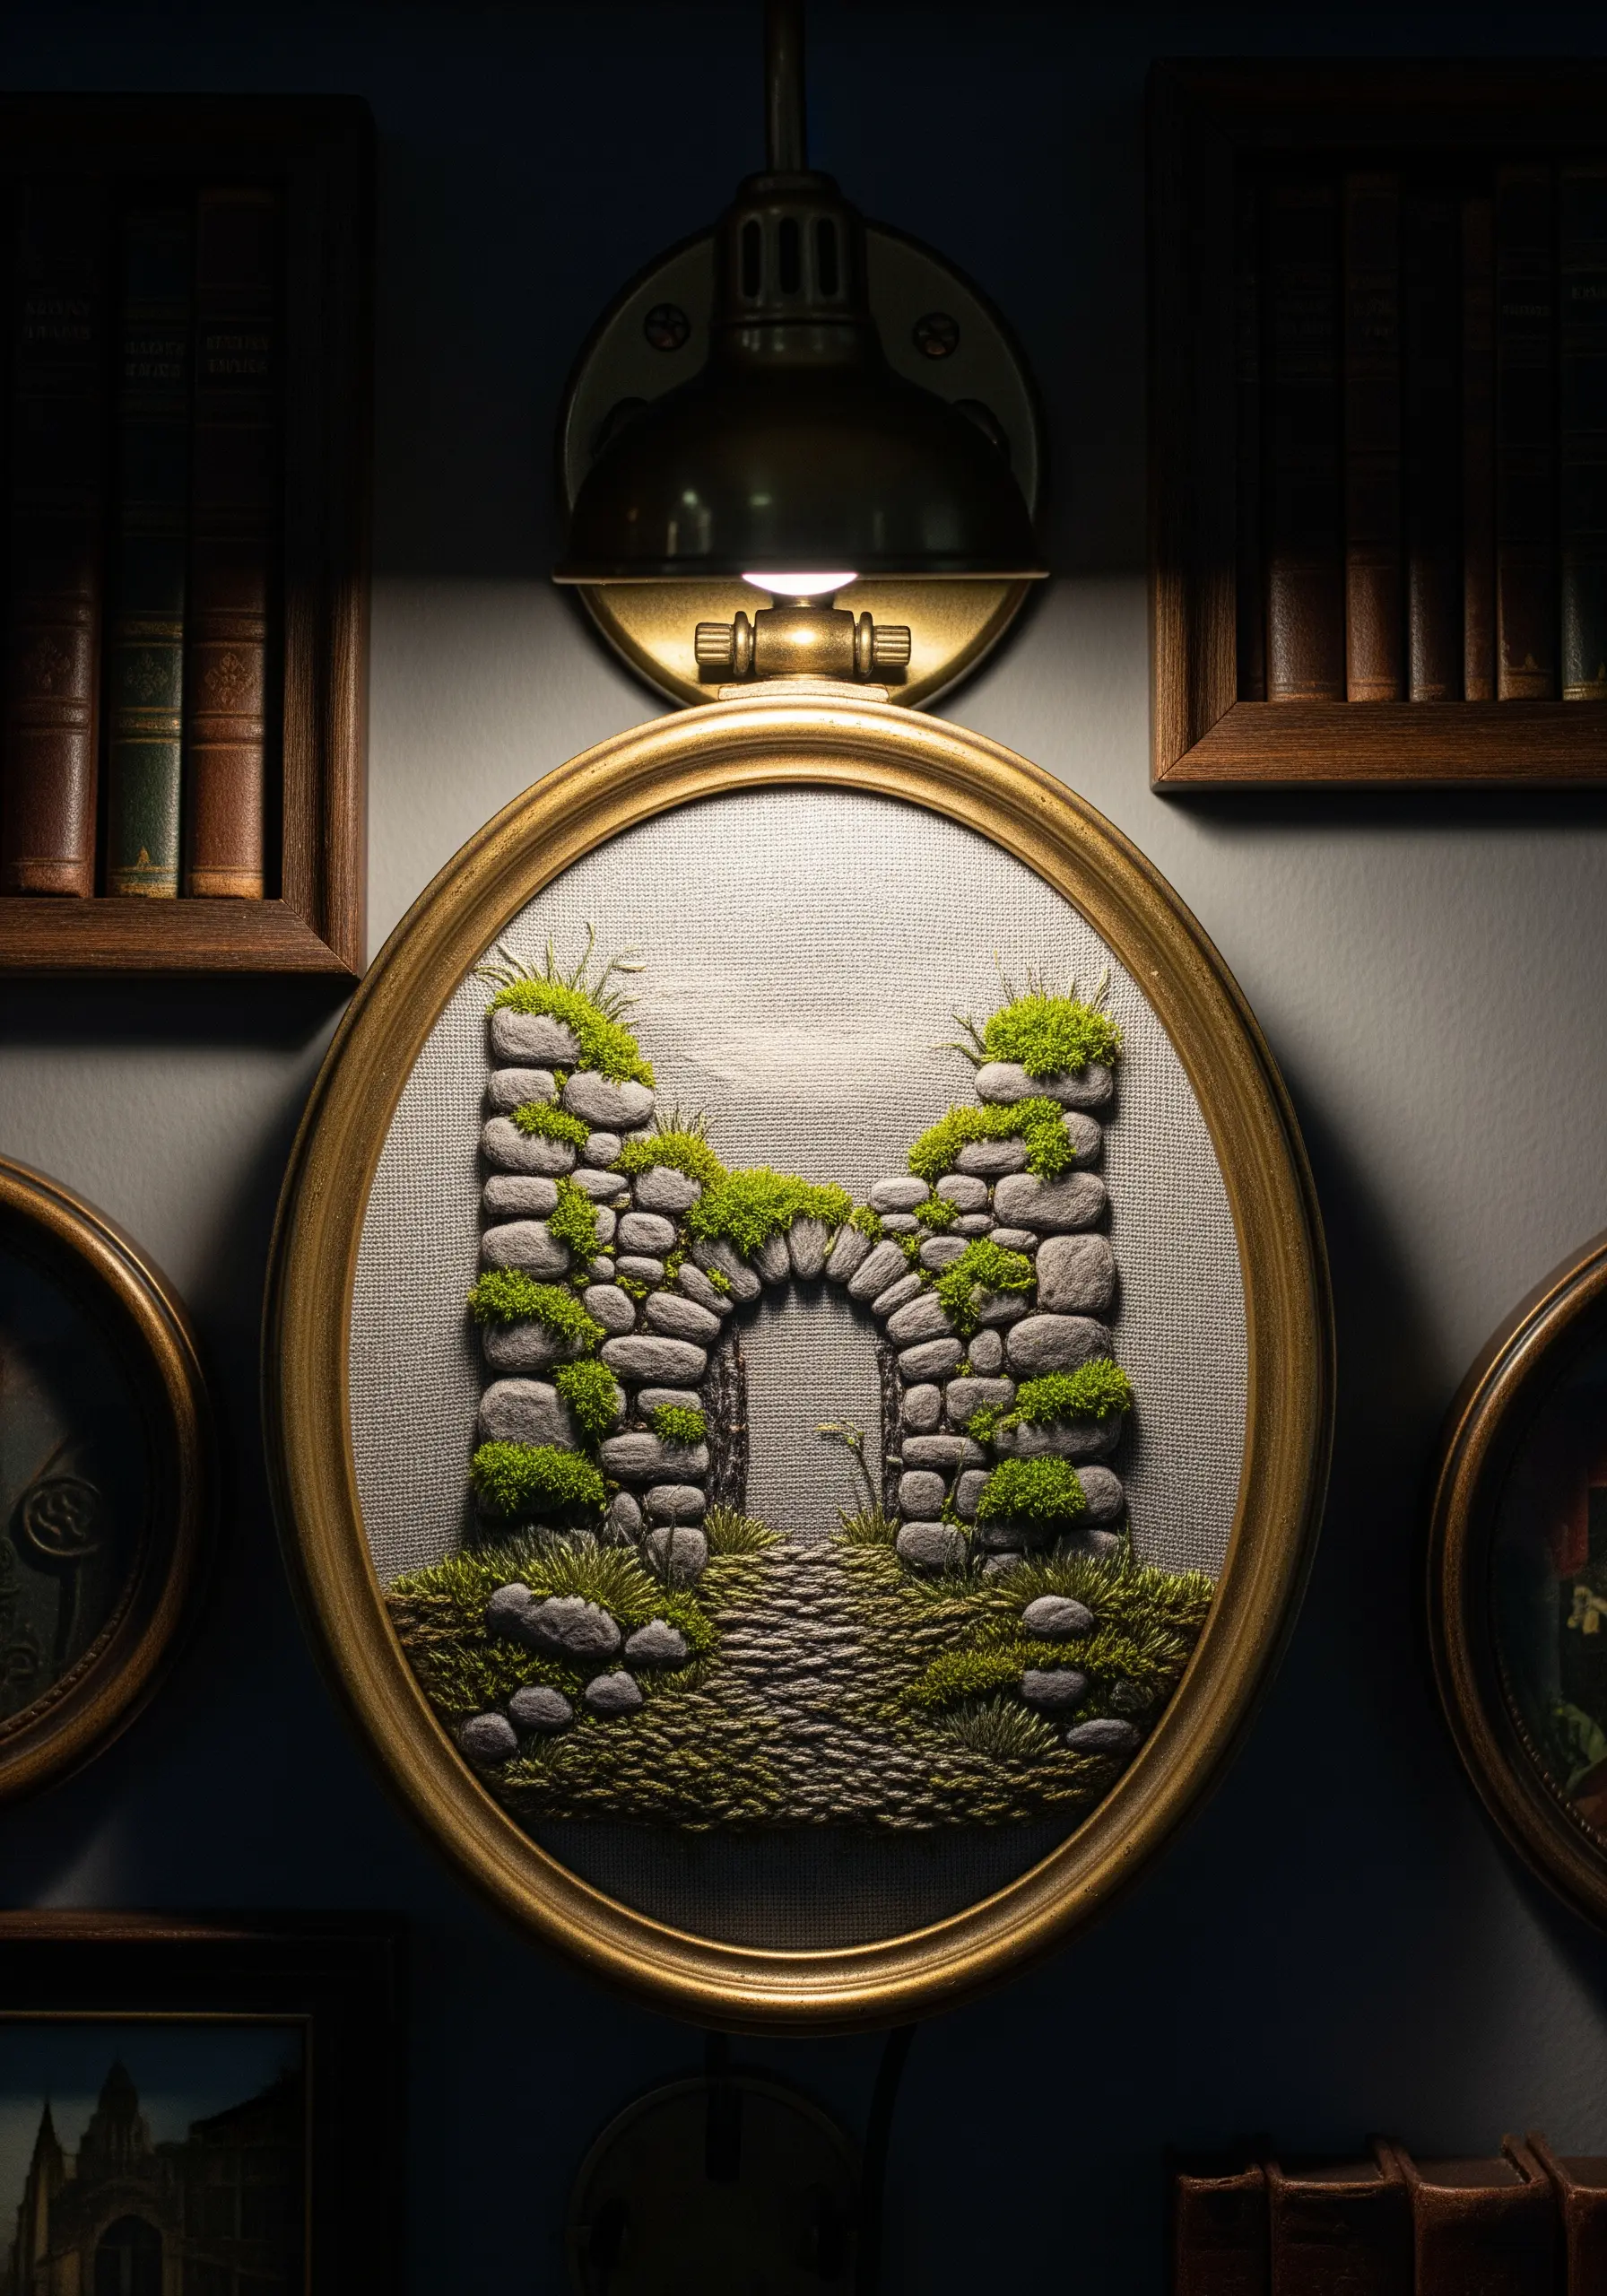
Give your embroidered architecture a sense of history and weight with careful stitch choices.
Outline each stone in the archway with a single strand of dark grey backstitch to create definition.
Fill the stones with a light, random scattering of seed stitches in various grey and beige tones—this gives them texture without making them bulky.
Finally, add vibrant green French knots sparingly, as if moss has been slowly reclaiming the structure over centuries. This detail brings the entire scene to life.
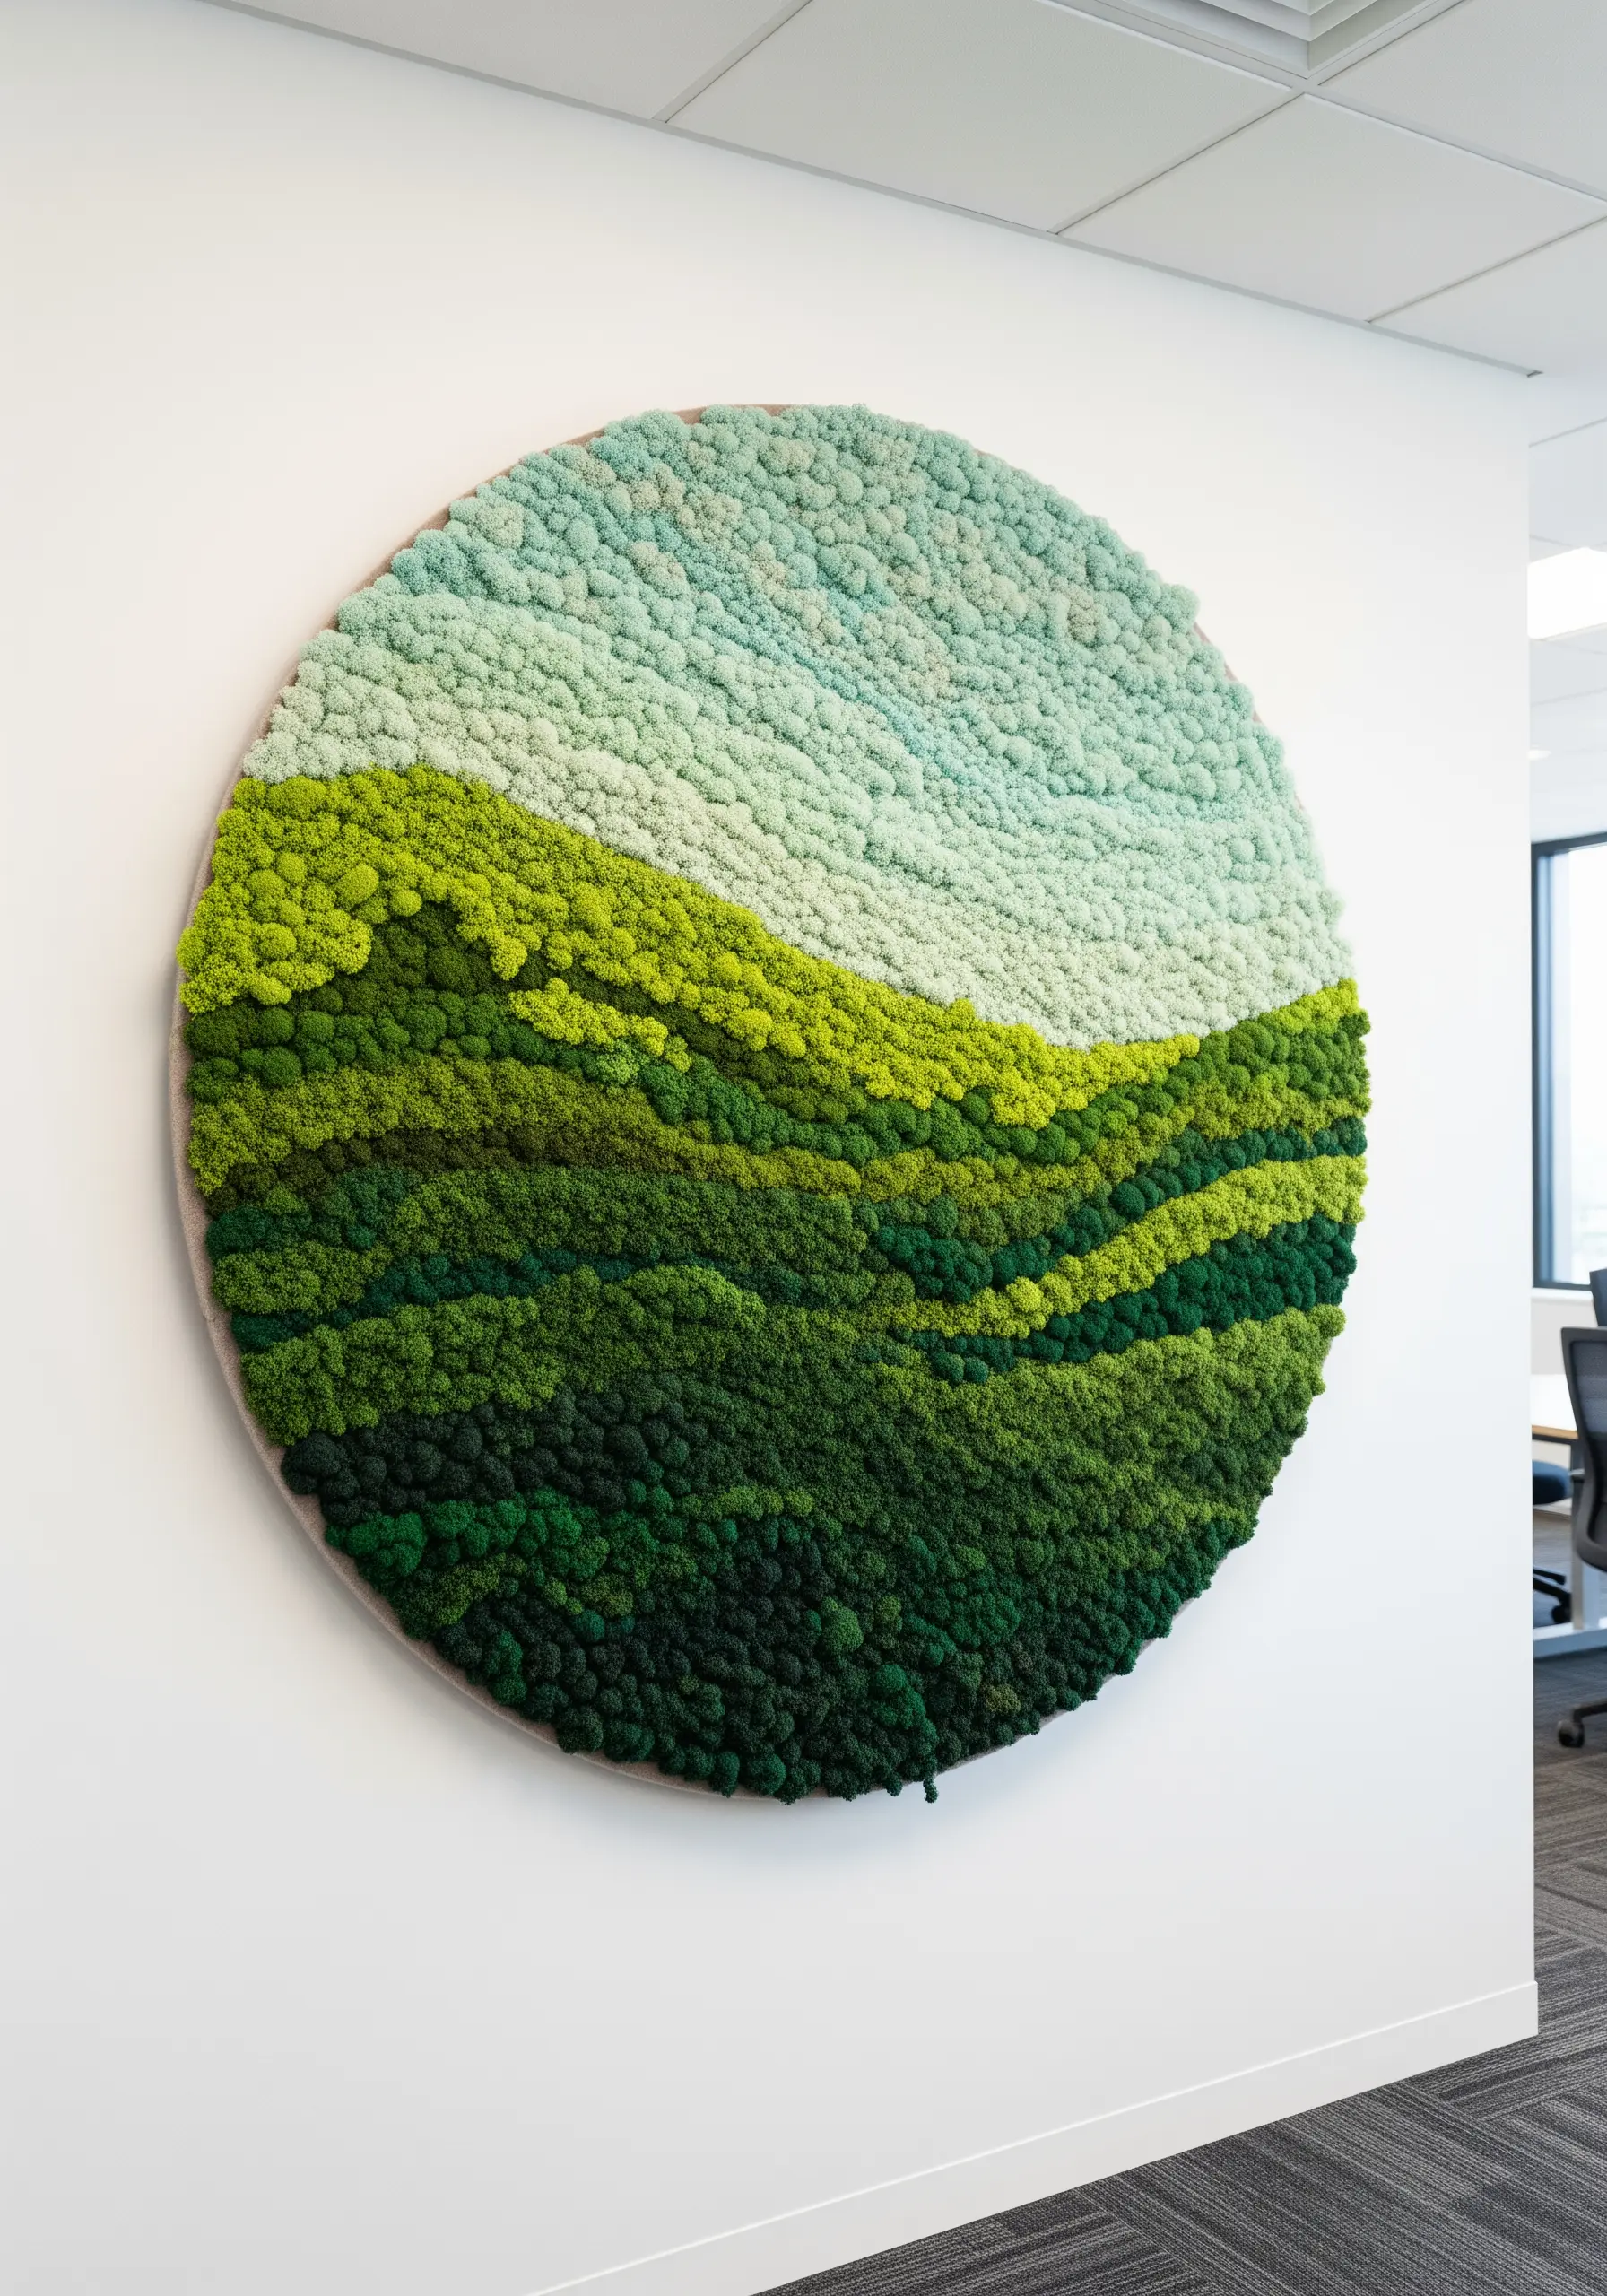
26. Explore Color and Form with Textured Circles
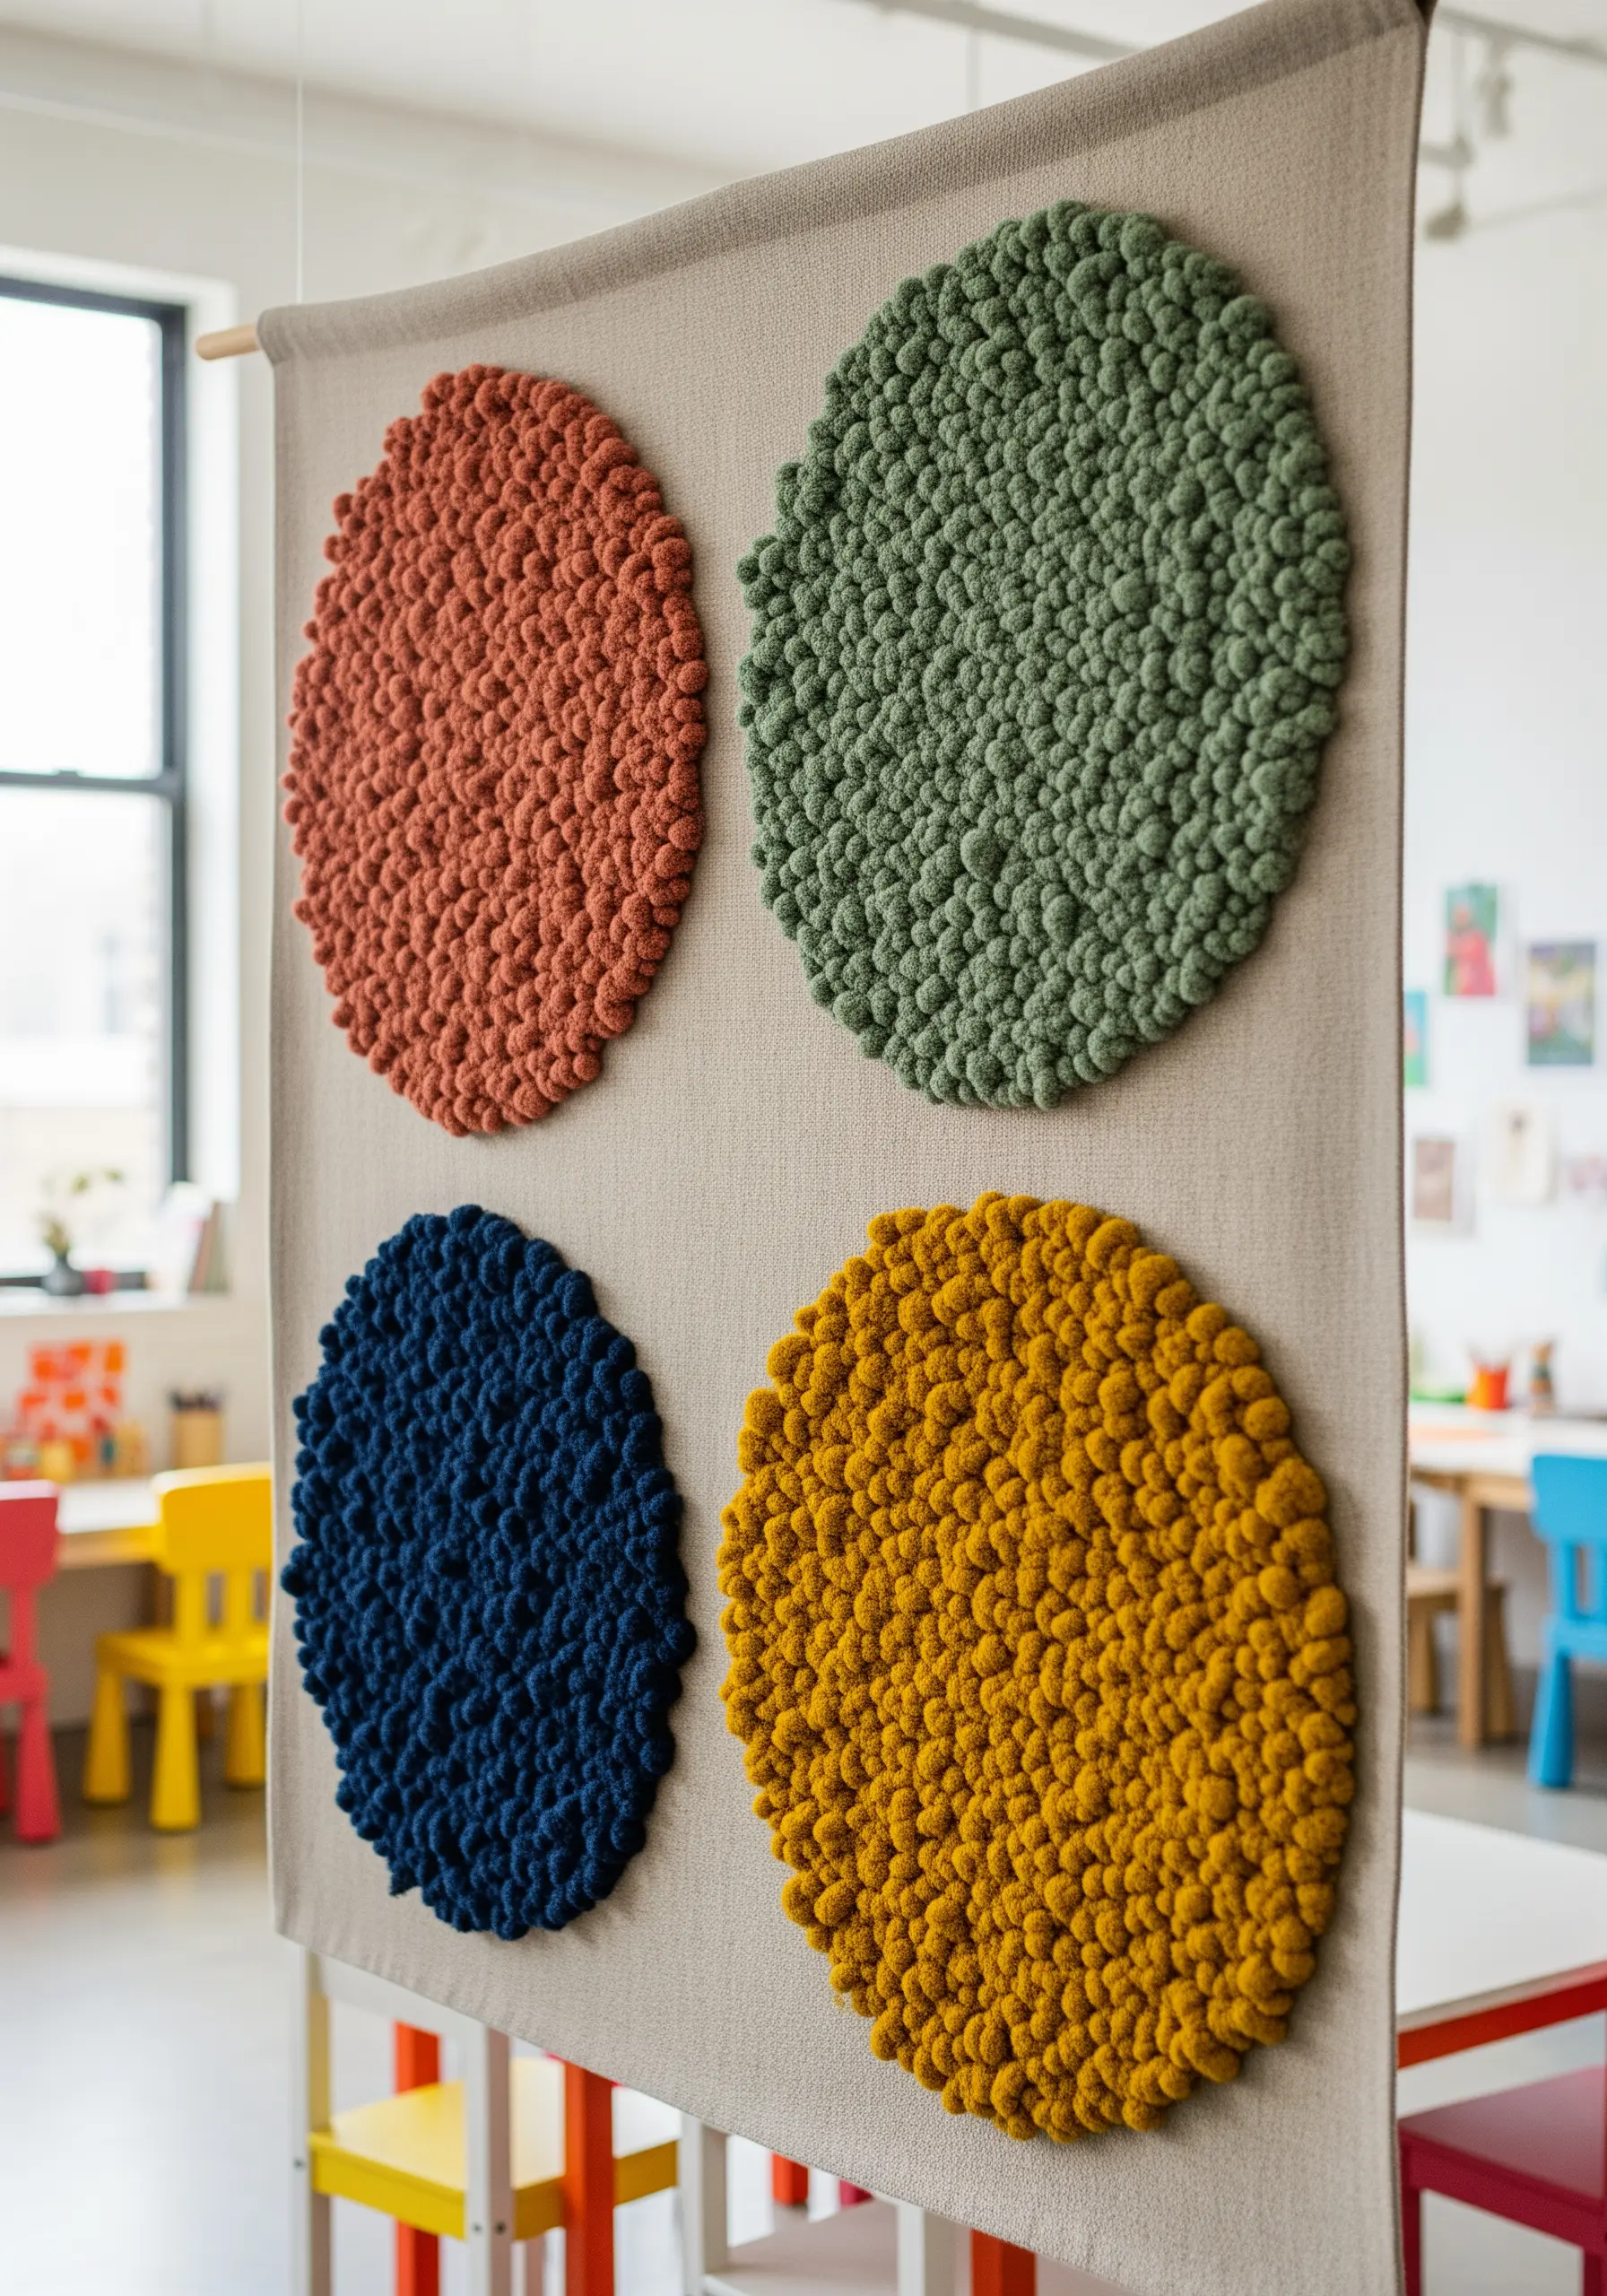
Use a simple shape like a circle to focus entirely on the interplay between color and texture.
This format is perfect for using up leftover thread from other projects. Dedicate each circle to a specific color family—warm reds and oranges, cool blues, or earthy greens.
Stitching them on a neutral linen background makes the colors pop. This exercise not only creates a beautiful piece of modern art but also hones your ability to create consistent French knots.
27. Create a Vortex of Texture and Shadow
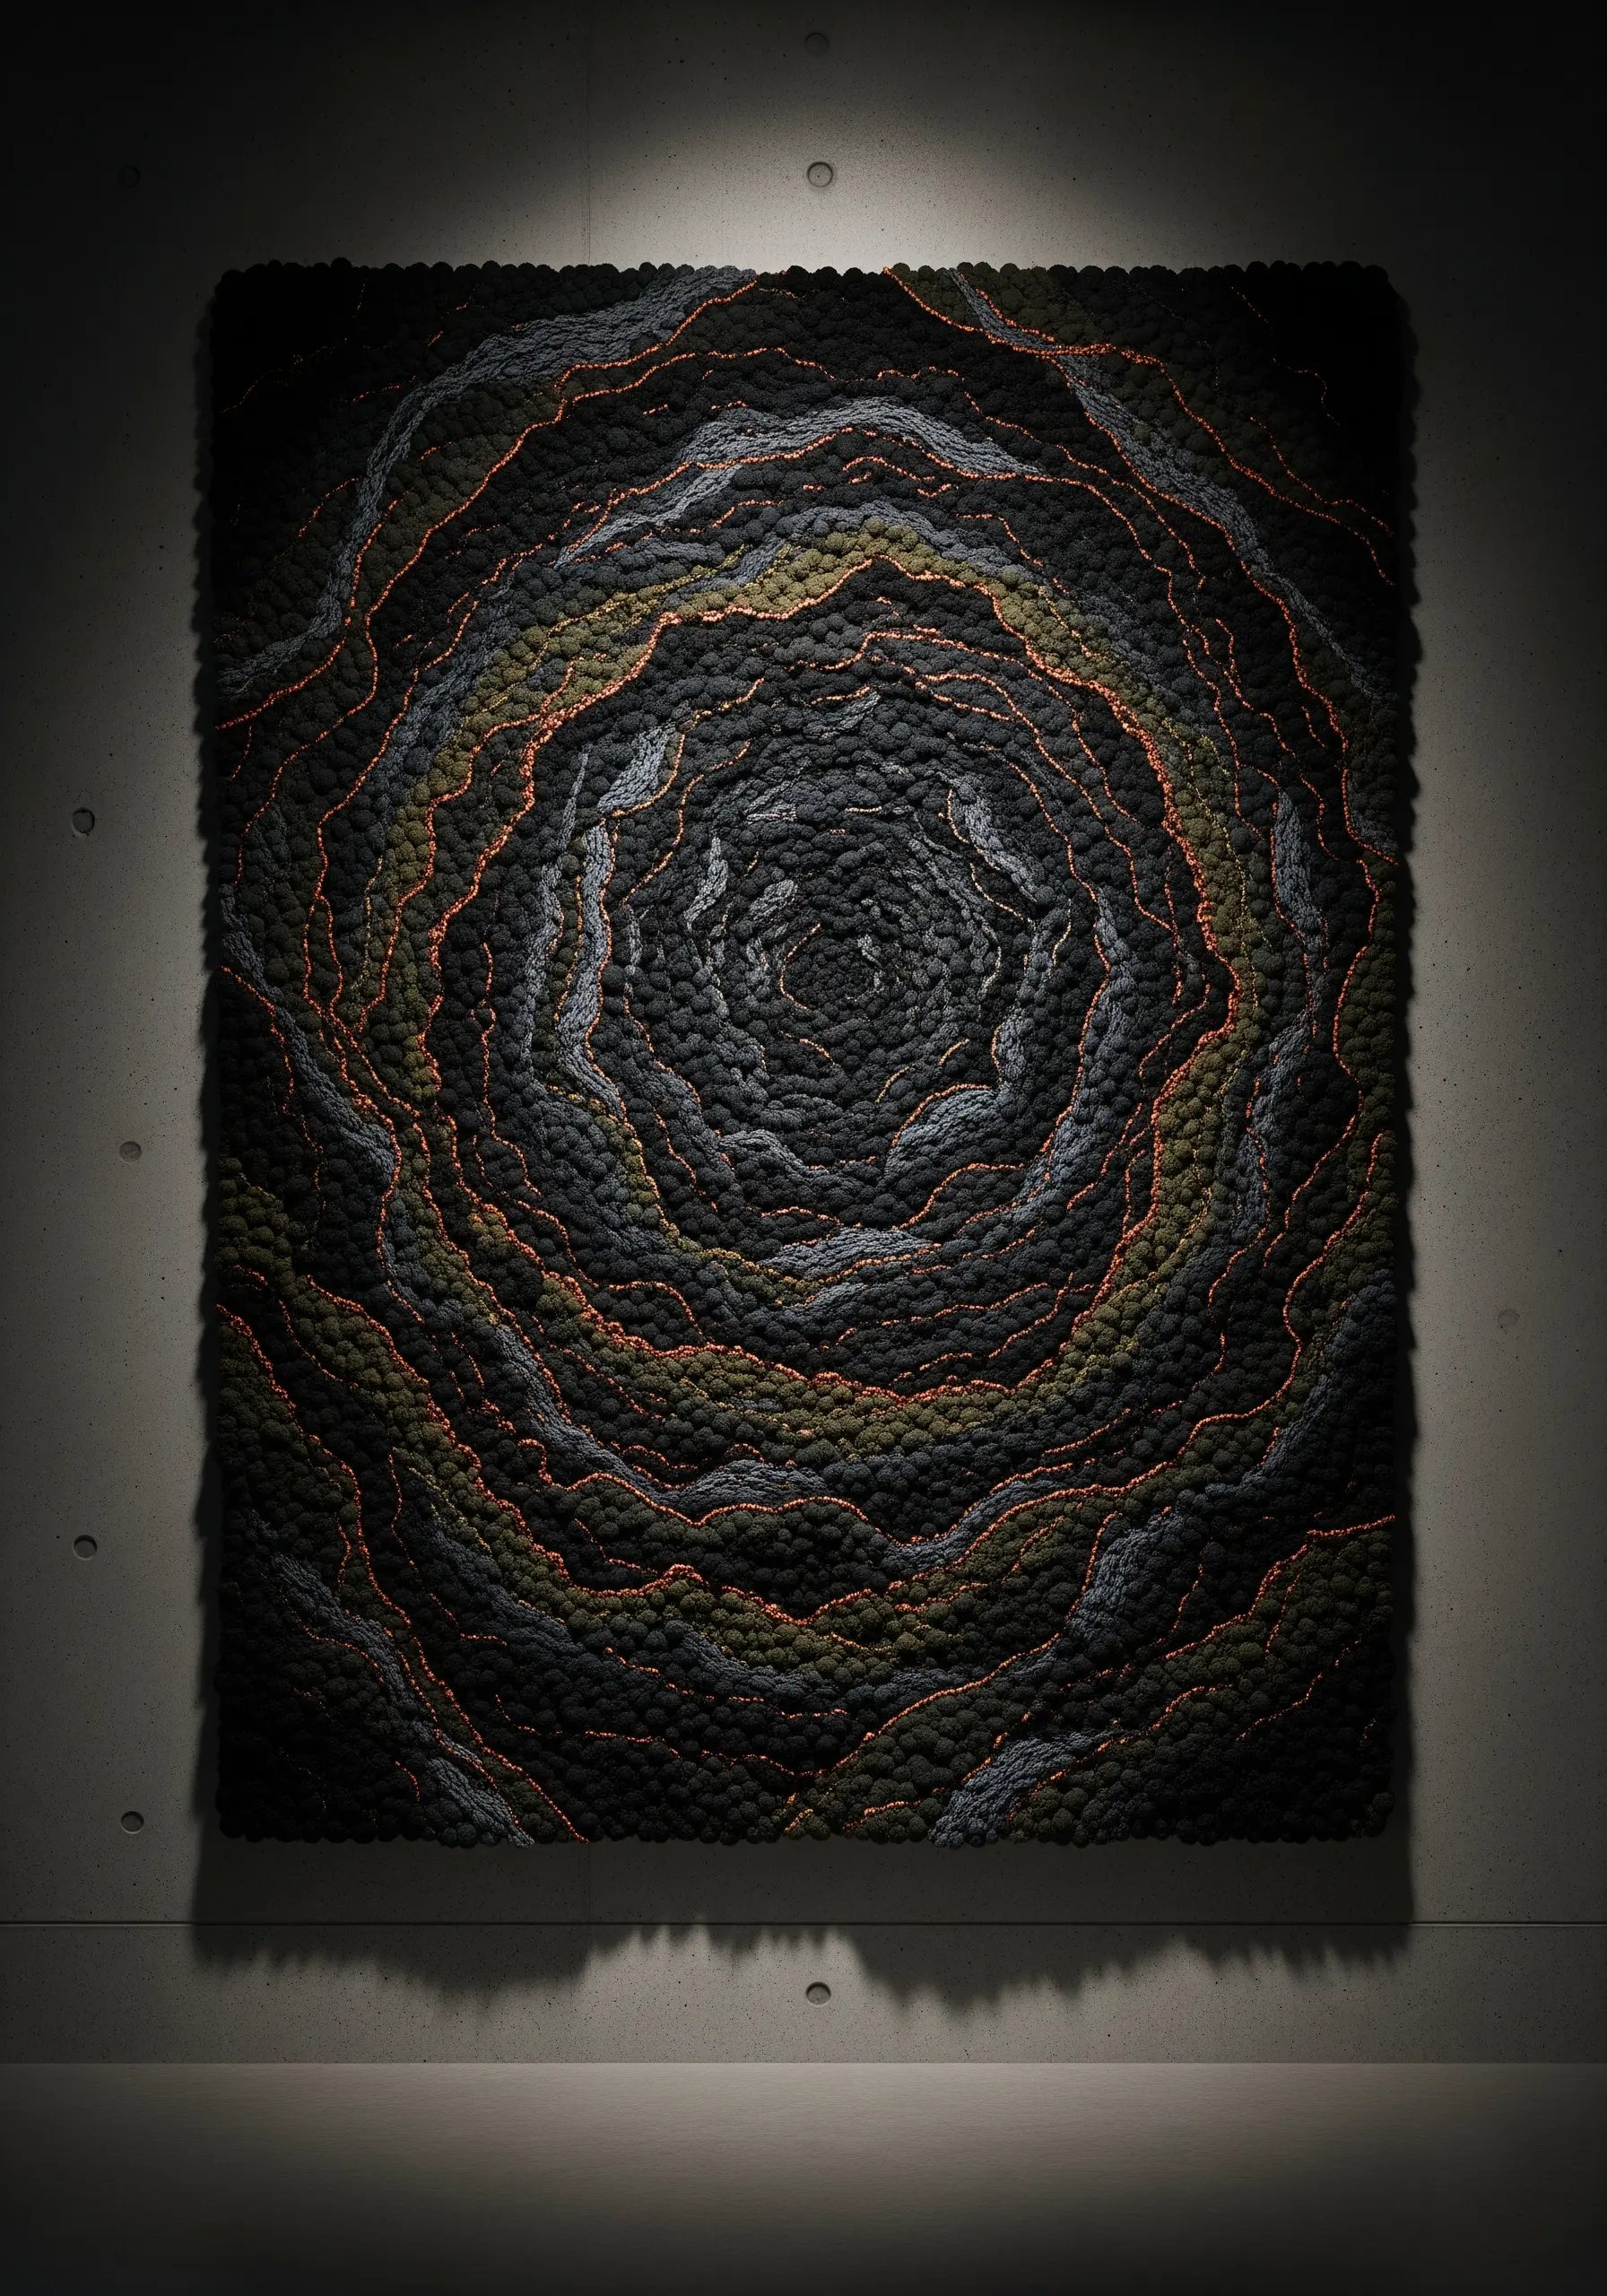
Draw the viewer in by creating a composition with a strong central focus and radiating energy.
Start with a dense cluster of French knots at the center and work your way outwards in irregular, concentric rings.
Vary the color subtly as you expand, perhaps moving from dark grey to charcoal mixed with hints of deep green or bronze.
Adding a few strategically placed metallic threads along the edges of the rings will catch the light and add a hint of cosmic energy.
28. Imply a Landscape with a Single Textured Horizon
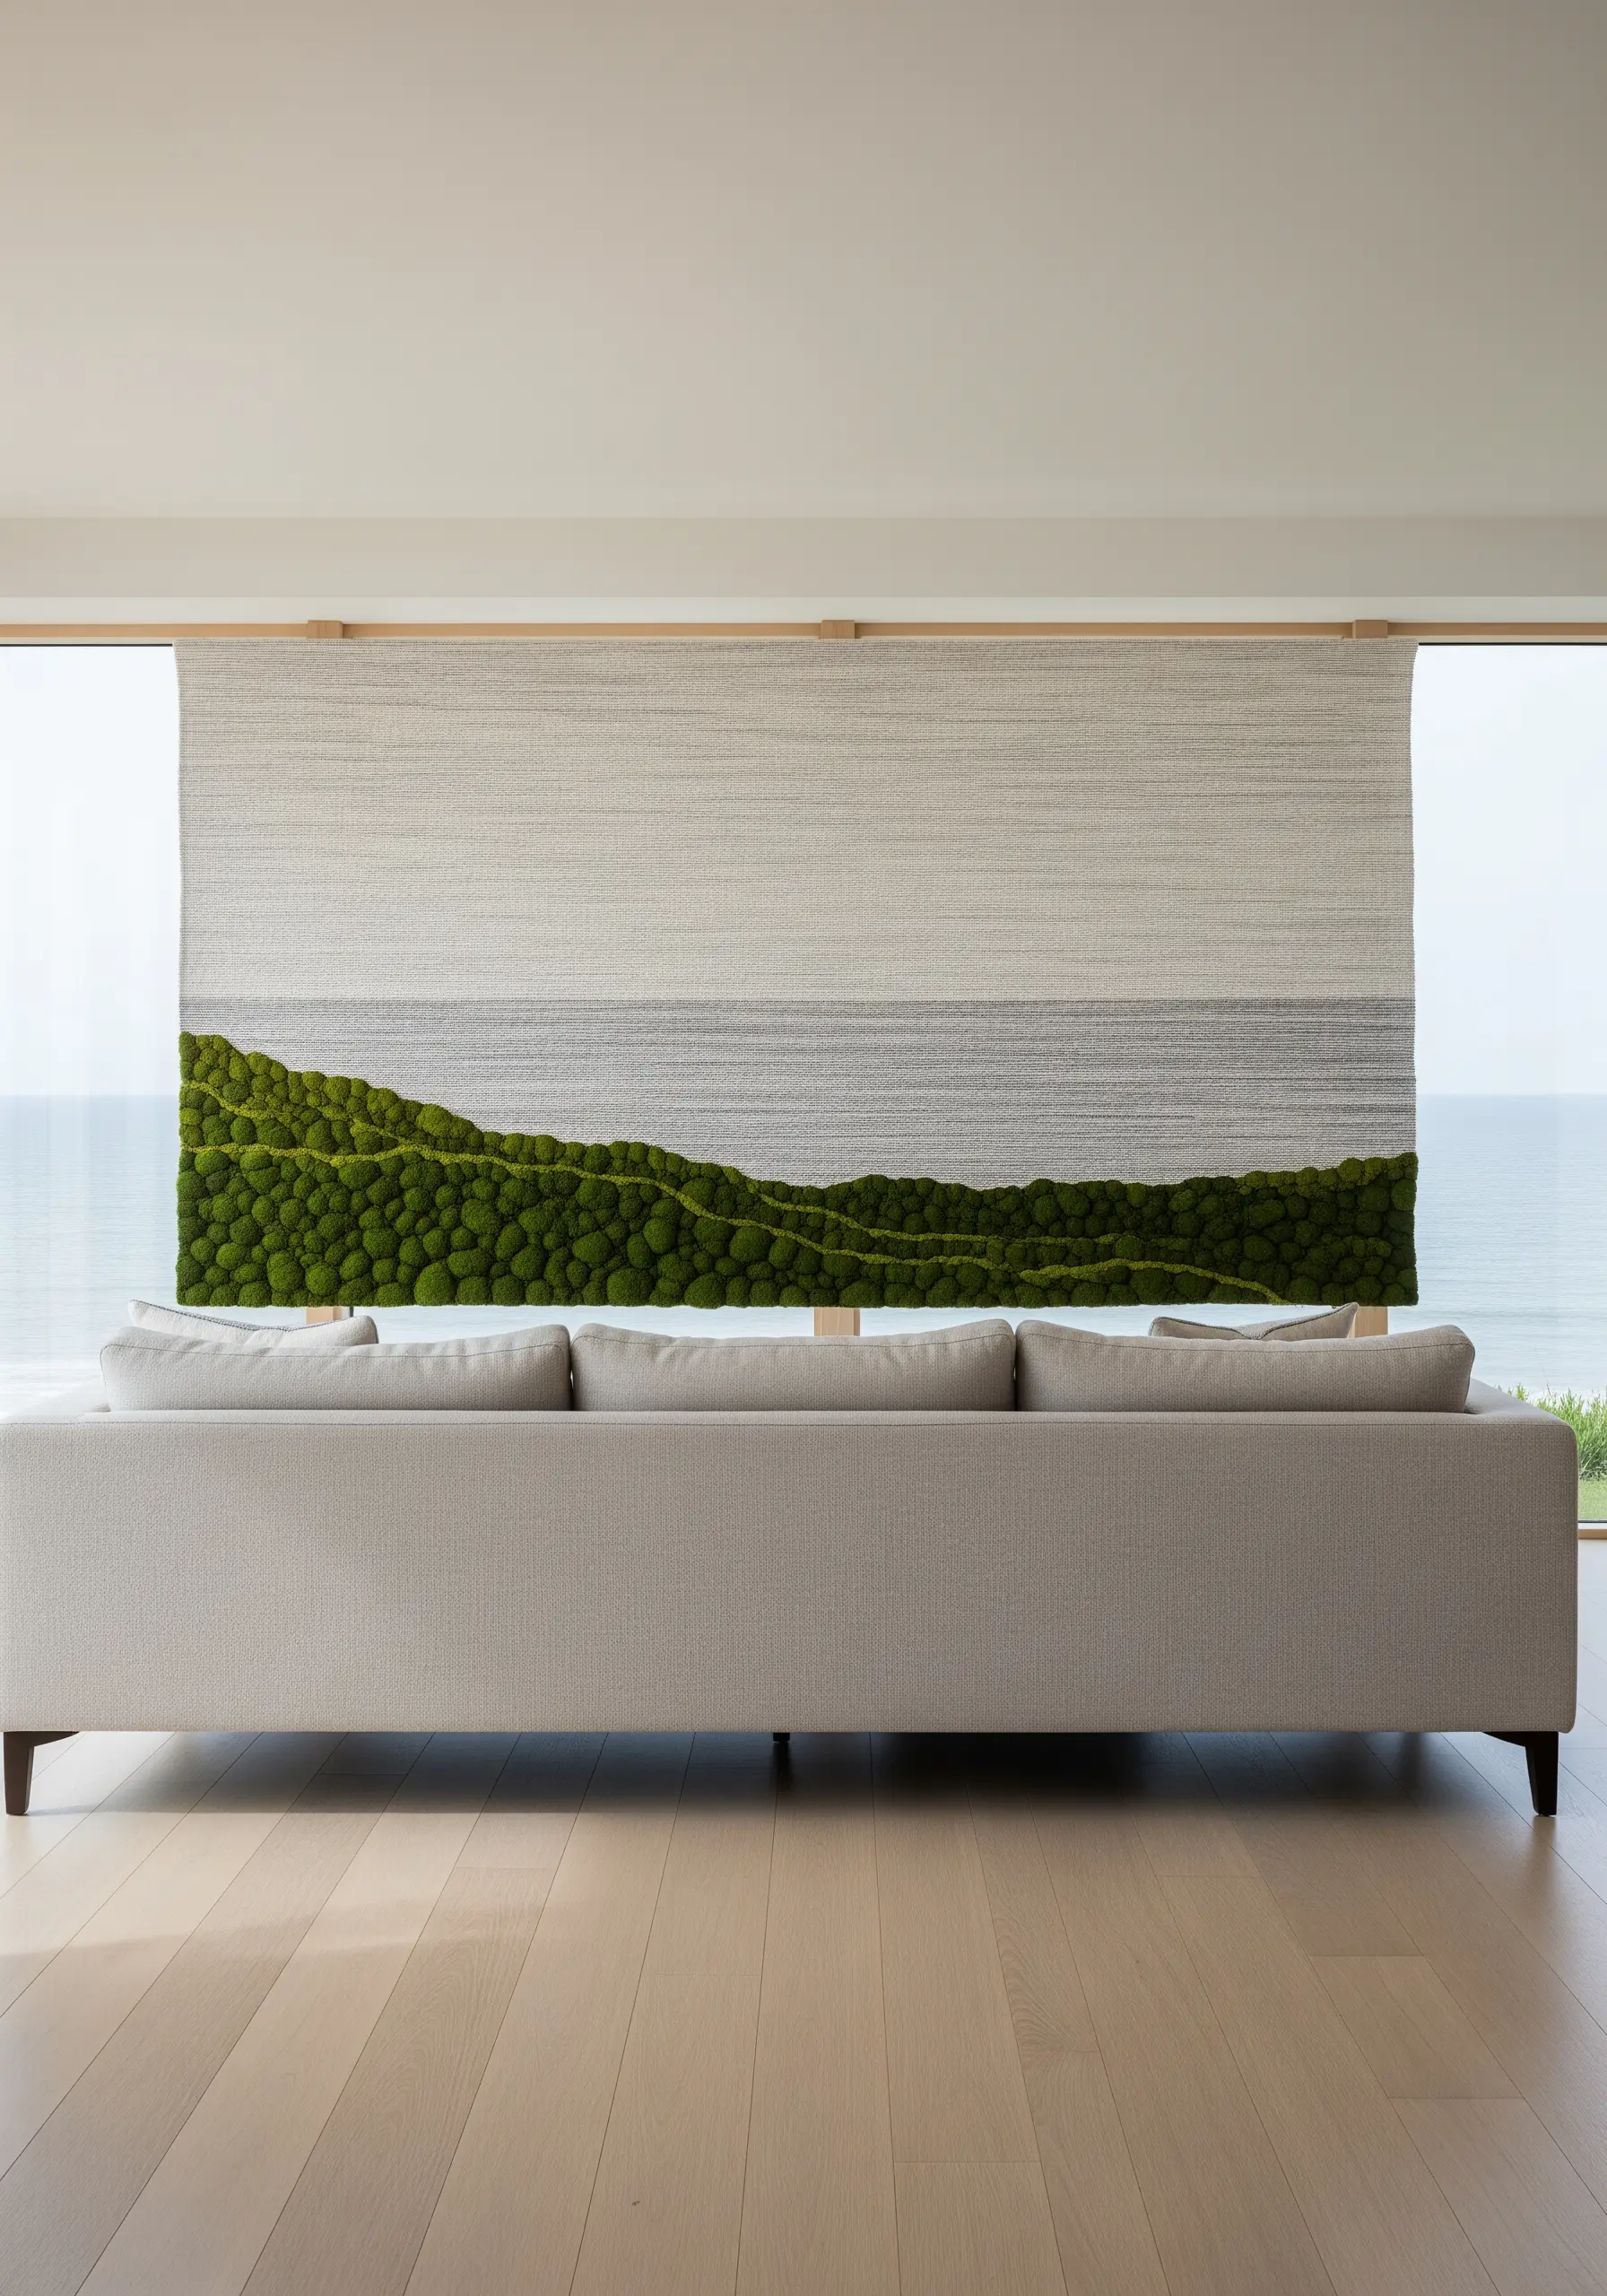
Sometimes, the most powerful compositions are the simplest.
Create a minimalist seascape or landscape by dividing your canvas into just two sections.
Fill the top two-thirds with subtle, horizontal seed stitches in shades of grey and cream to suggest a calm sea or an overcast sky.
Then, create a dense, vibrant, and slightly uneven band of green moss stitch along the bottom third.
This stark textural contrast is all you need to evoke the feeling of a lush shoreline meeting the water.
29. Design a Waterfall with Flowing Fibers
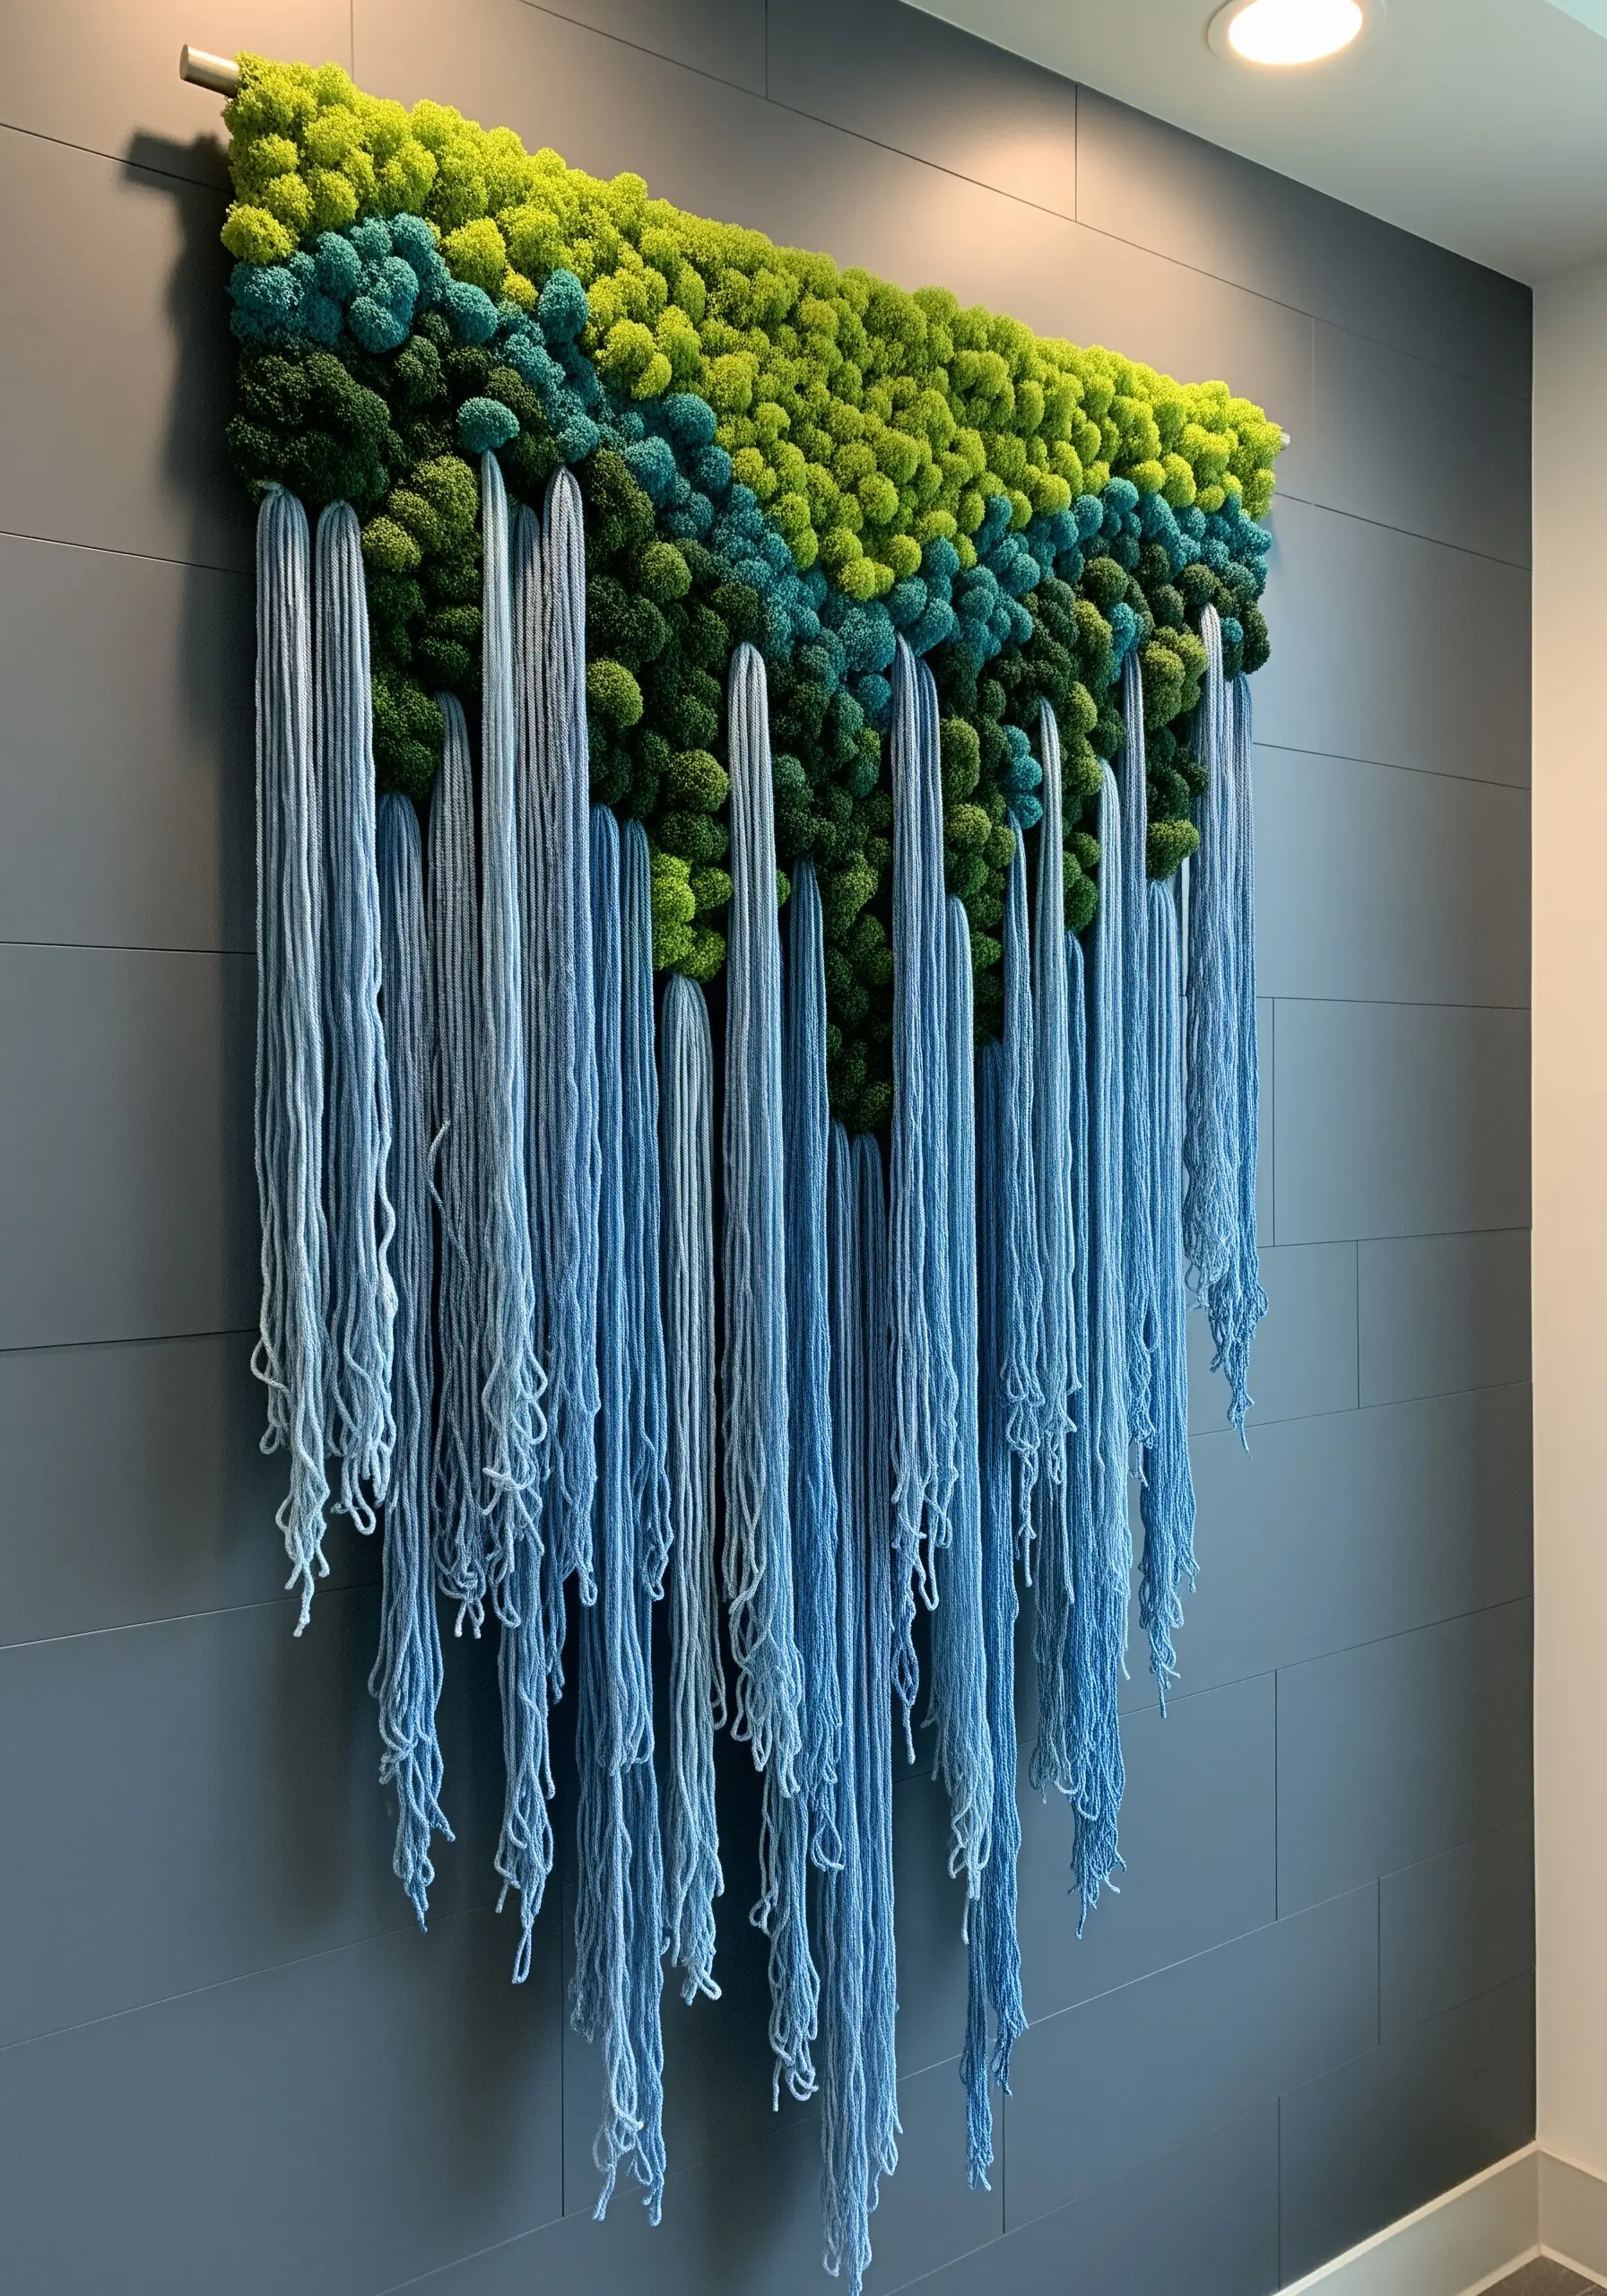
Let your materials flow beyond the canvas to create a sense of movement.
Build up a dense, mossy top section using punch needle or French knots in blues and greens.
To create the waterfall, thread long strands of yarn through the fabric from back to front, securing them with a small stitch, and let both ends hang loose.
Use different shades and thicknesses of blue and white yarn, and trim the ends at varying lengths to create a natural, cascading effect that breaks the rectangular frame.
30. Capture Hyperrealistic Bark and Lichen
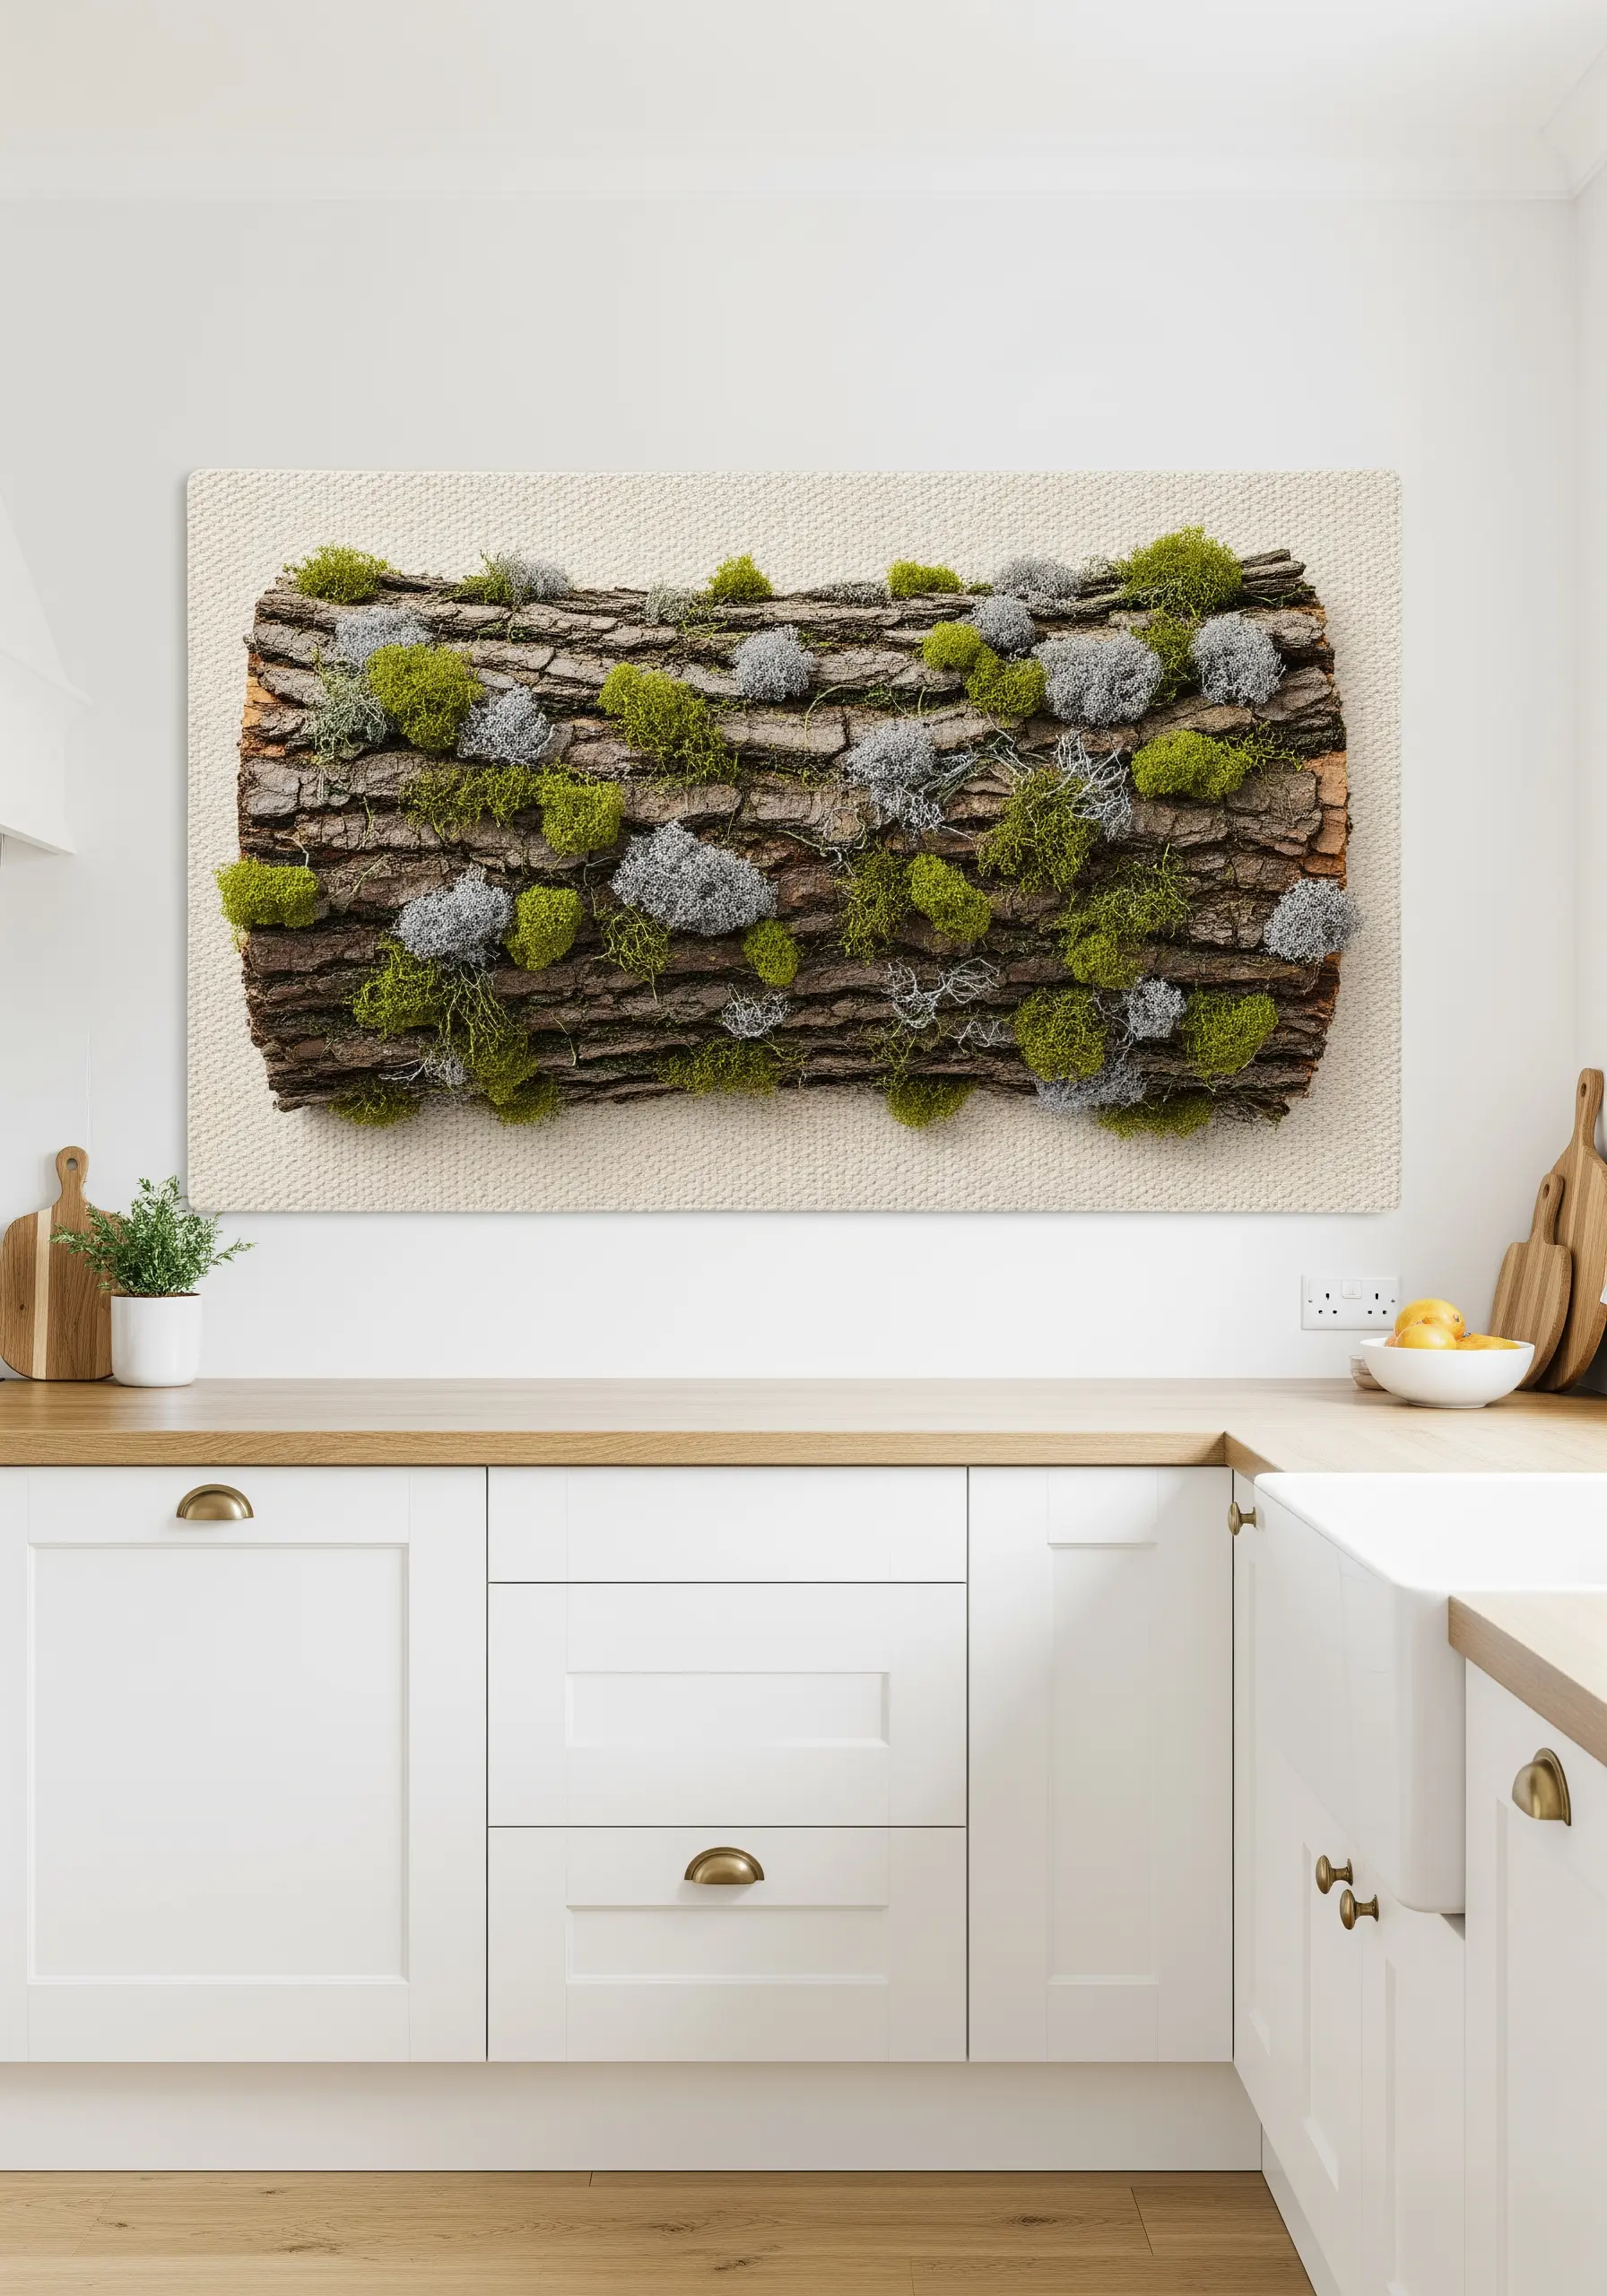
To achieve a truly realistic wood texture, you need to combine multiple techniques in one piece.
Use a base of wrapped fabric or padded appliqué to create the log’s round shape.
Cover it with long vertical stitches in brown and grey. Add deep crevices and texture by couching down darker, thicker threads.
For the moss and lichen, use a mix of tiny green French knots and turkey work loops in pale grey-green, trimmed very short. This level of detail transforms your embroidery into a stunning botanical study.
31. Float Mossy Islands on a Woven Canvas
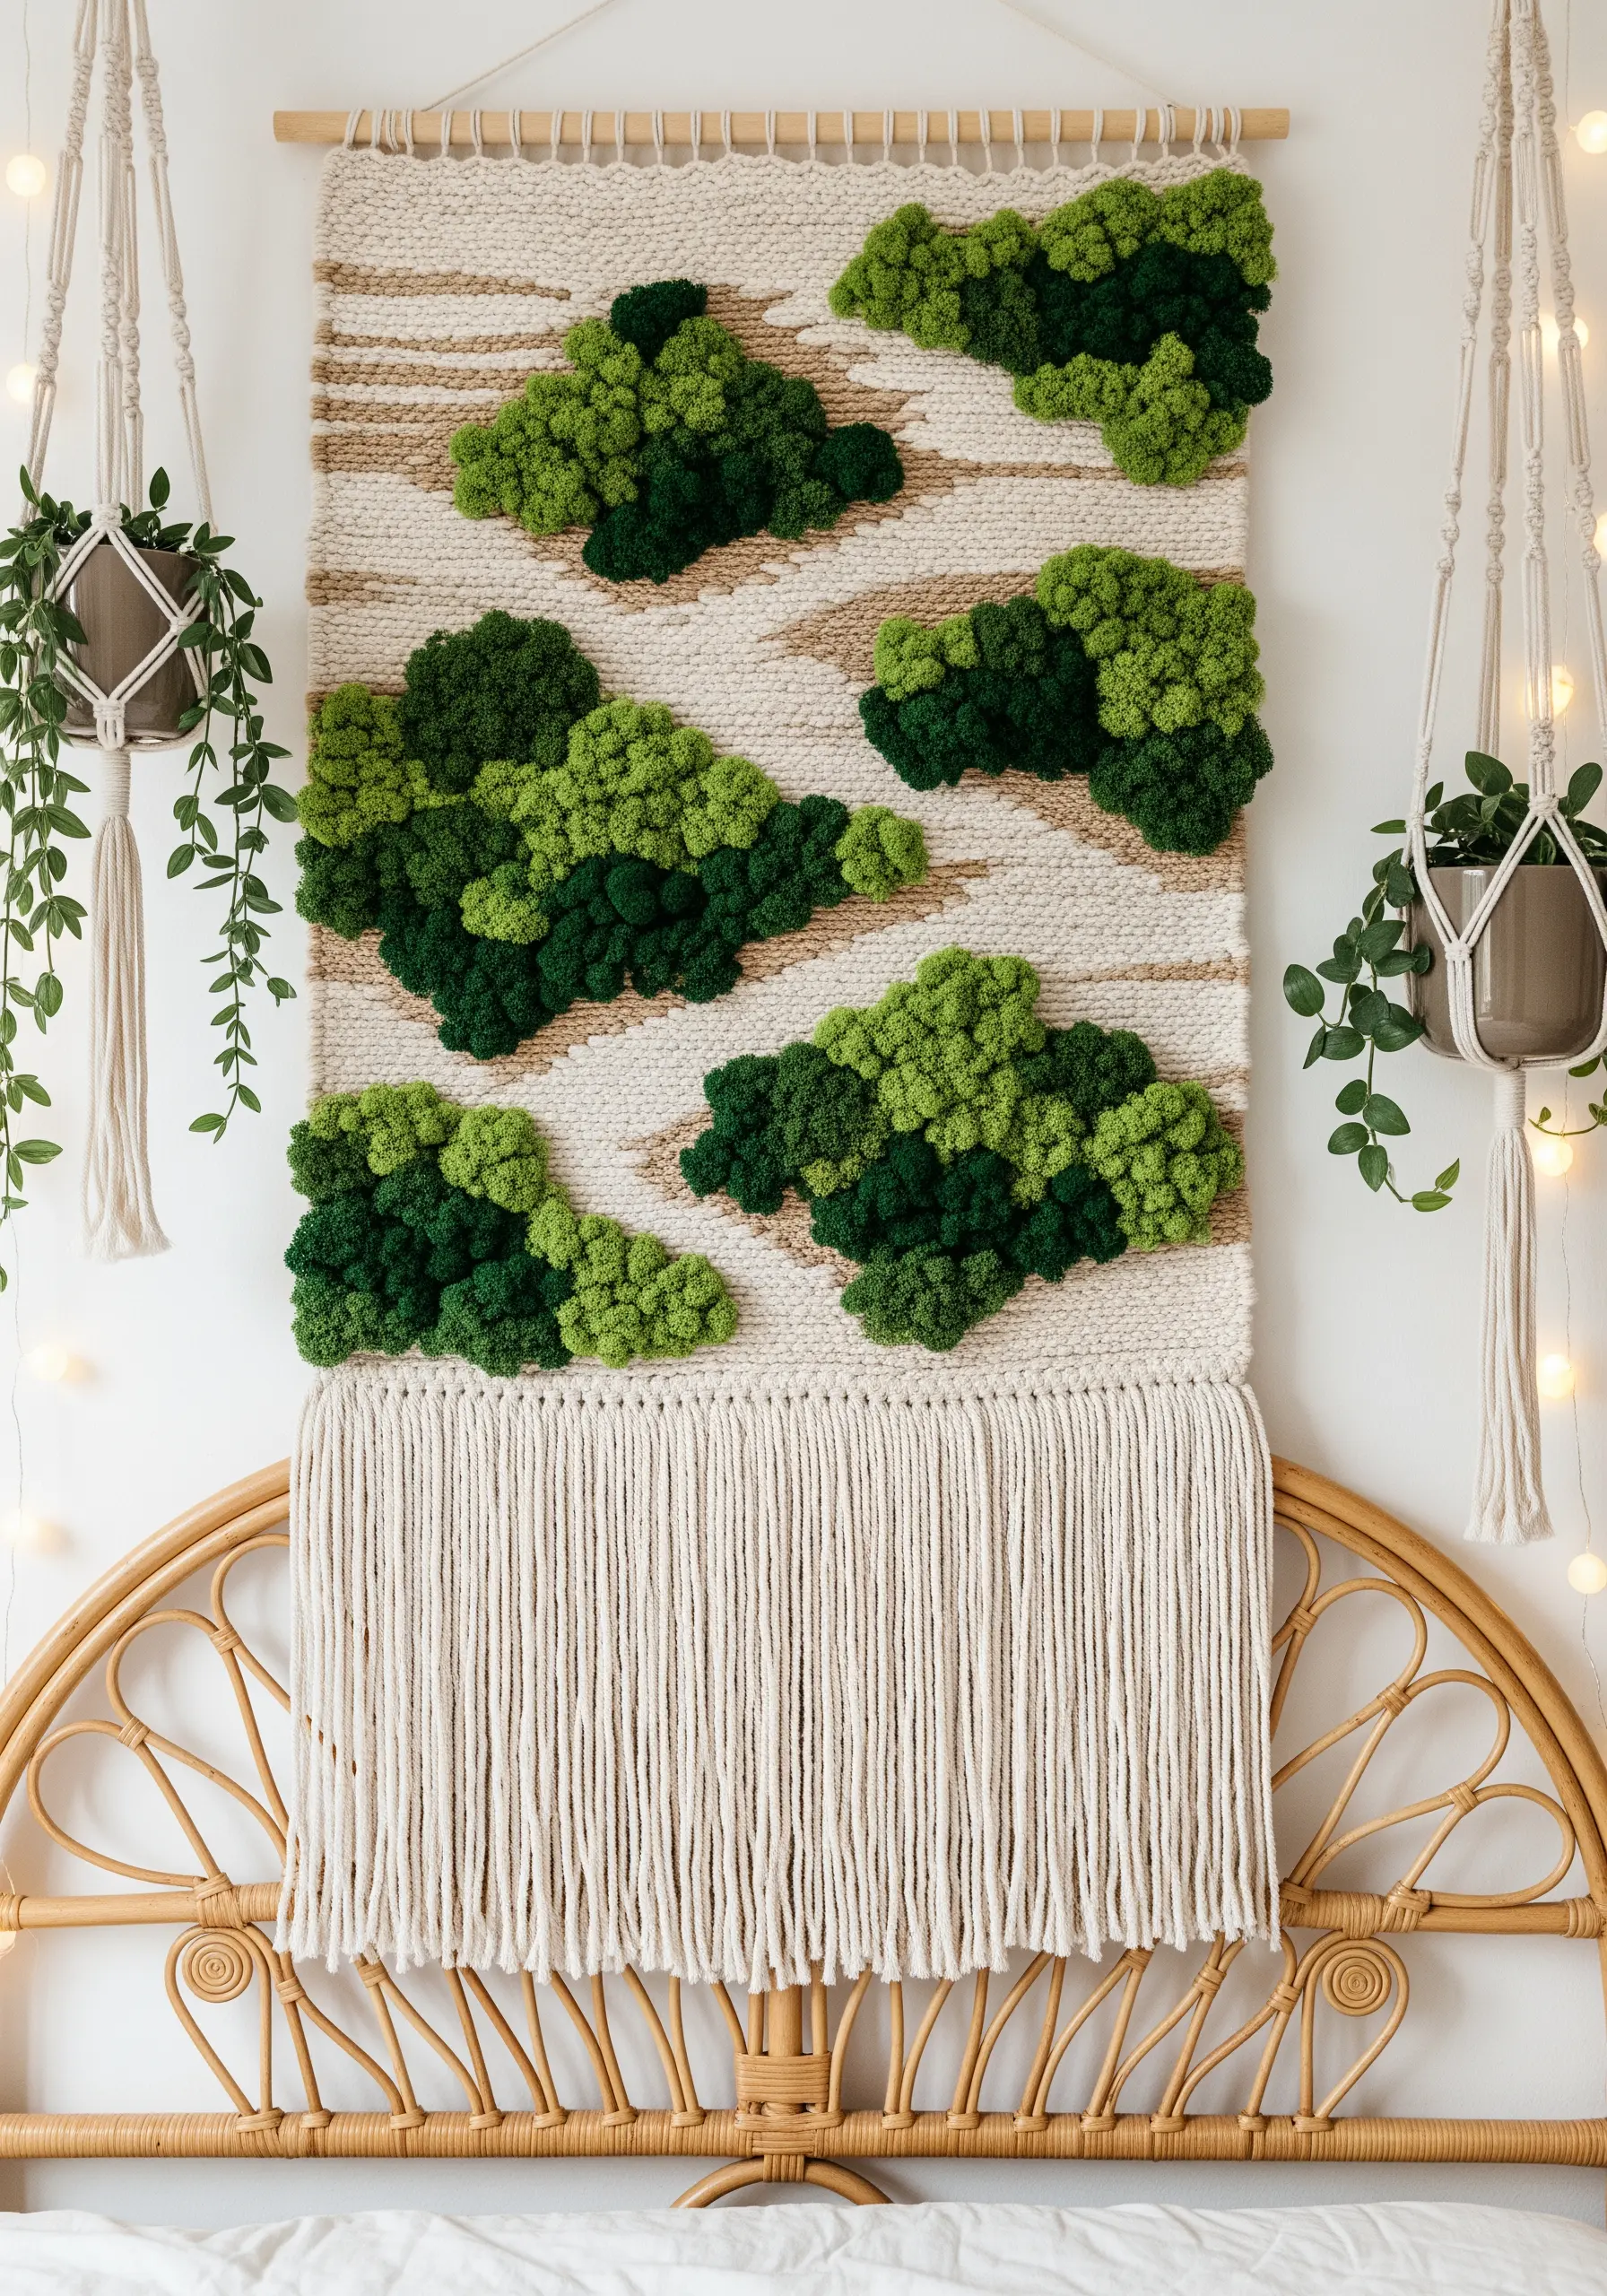
Create a sense of lightness and balance by placing your textured elements thoughtfully on a simple background.
Weave a simple, neutral-colored panel using a plain weave structure—this creates a calm, grid-like canvas.
Instead of covering the whole surface, add organic, cloud-like shapes of dense moss stitch, allowing plenty of the woven background to show through.
This composition feels airy and balanced, highlighting the unique beauty of both the weaving and the embroidery.
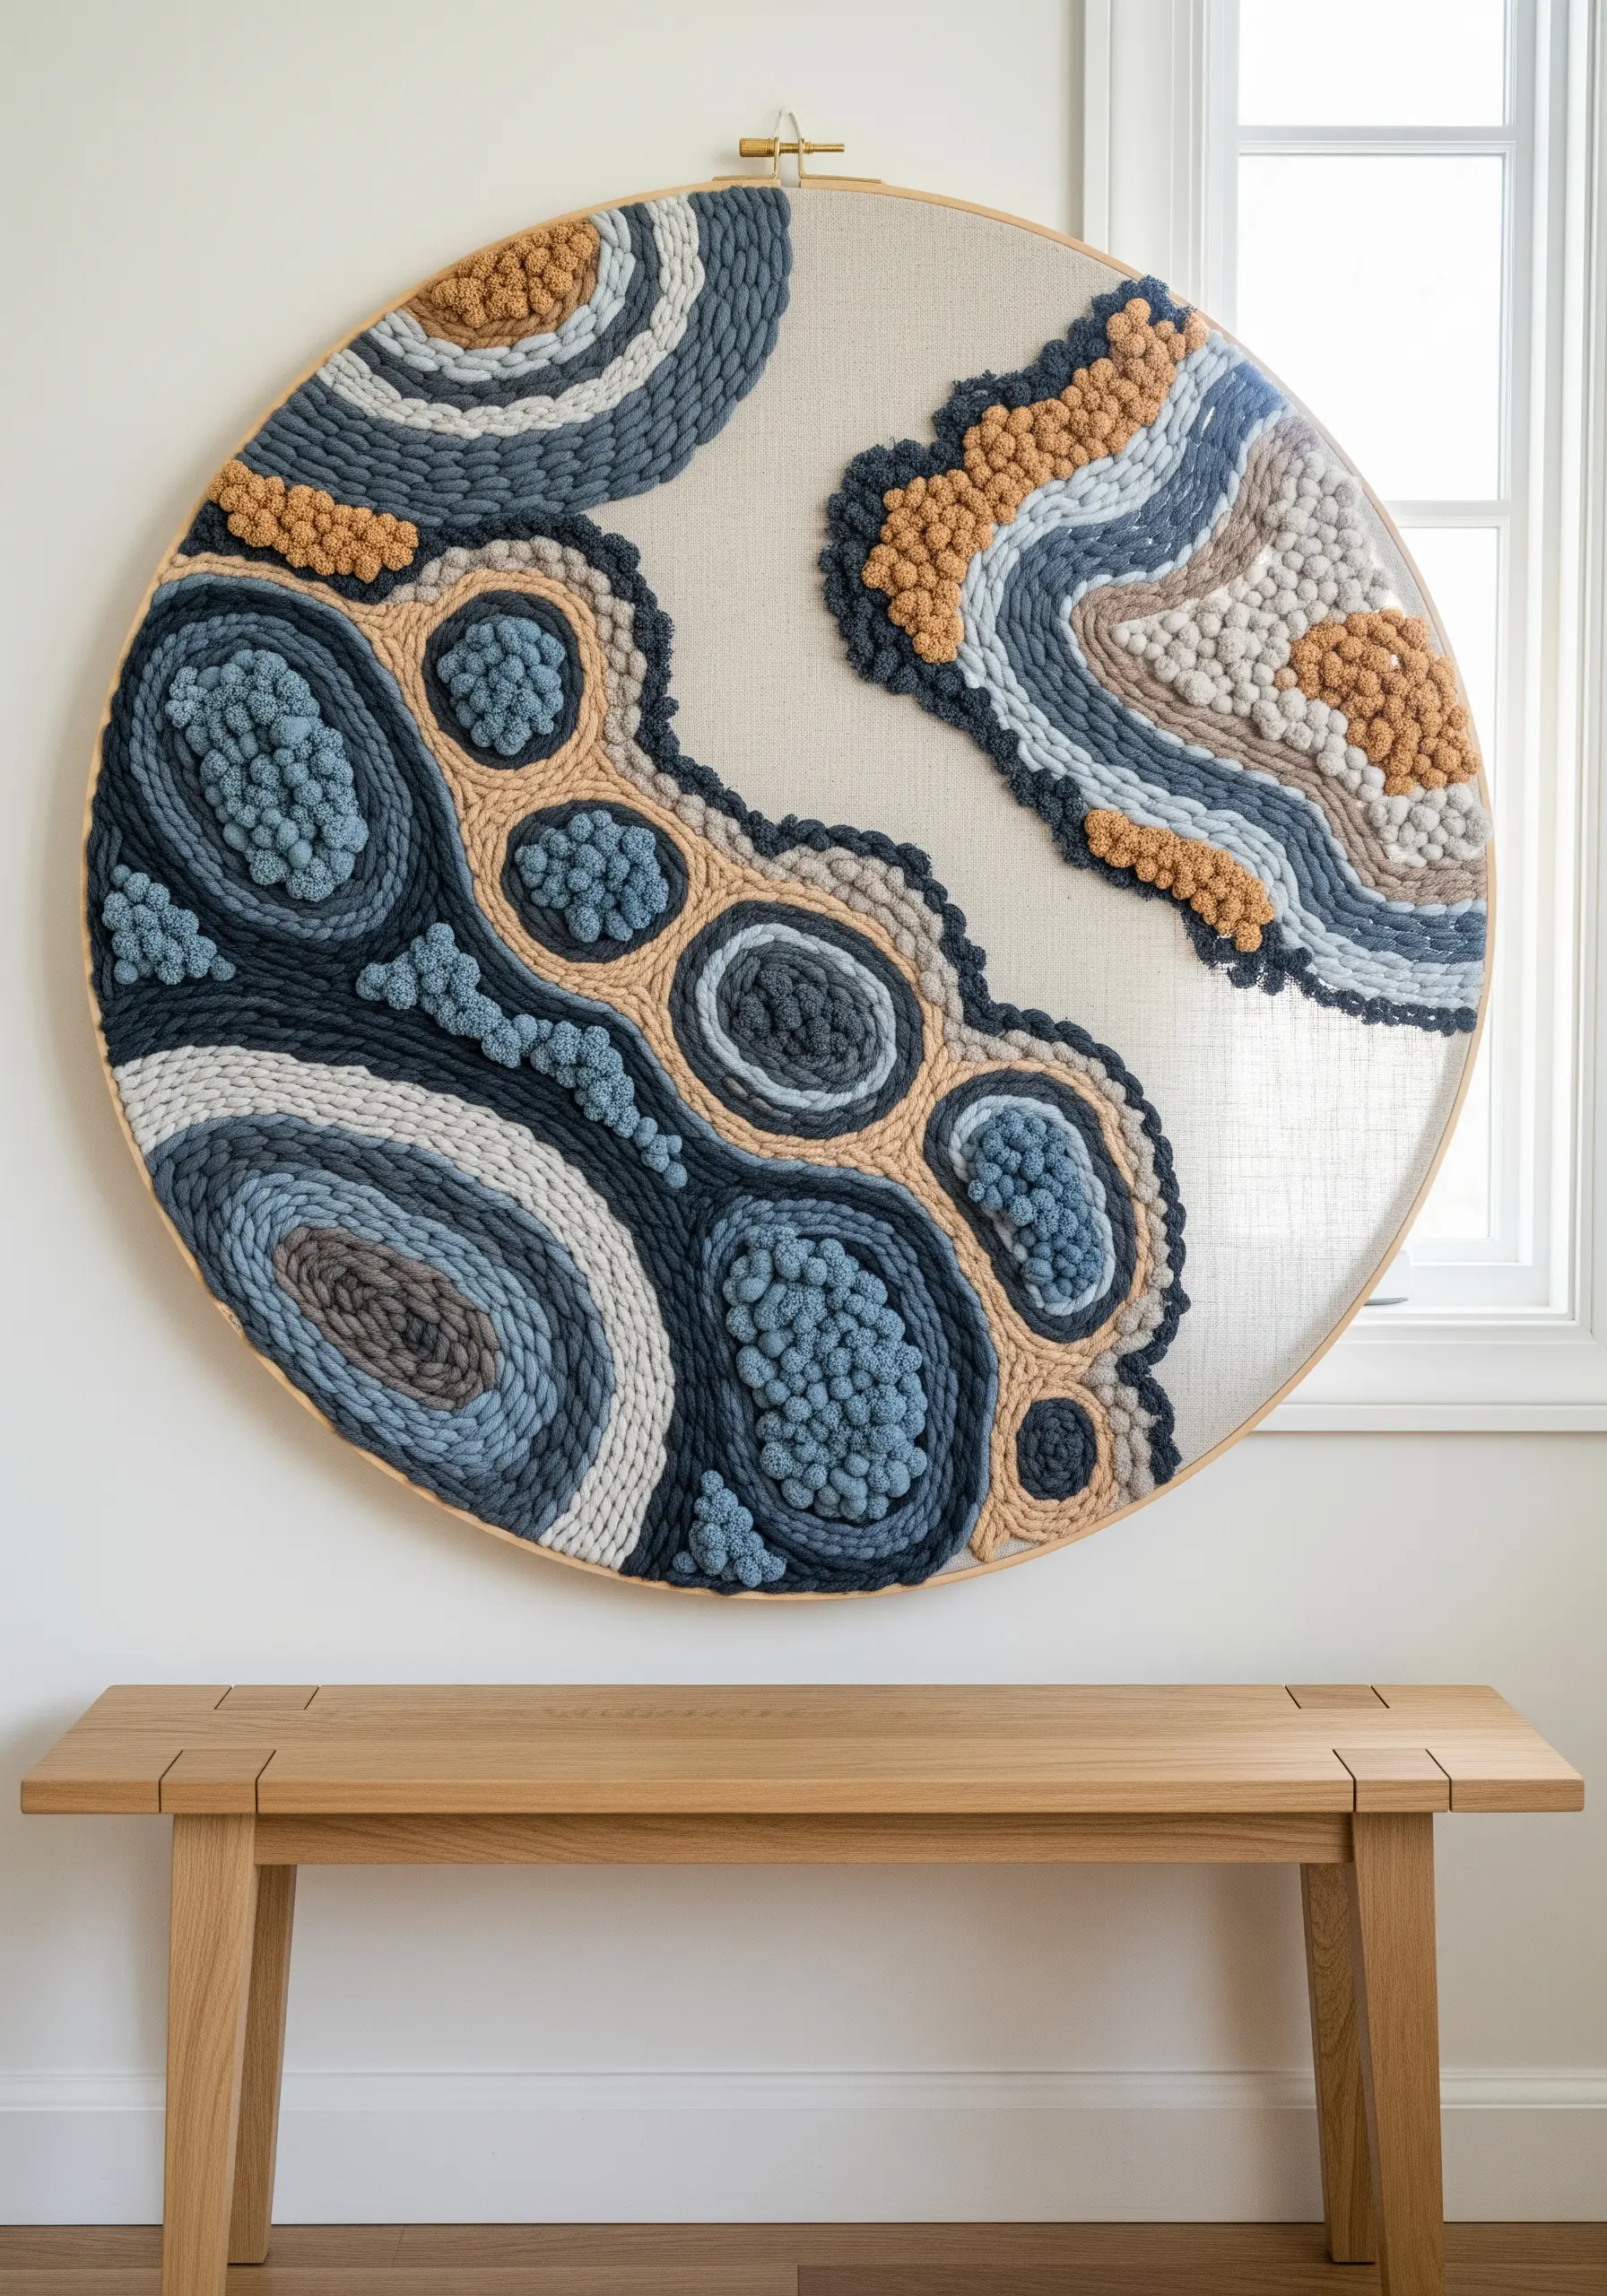
32. Stitch an Abstract Topographical Map
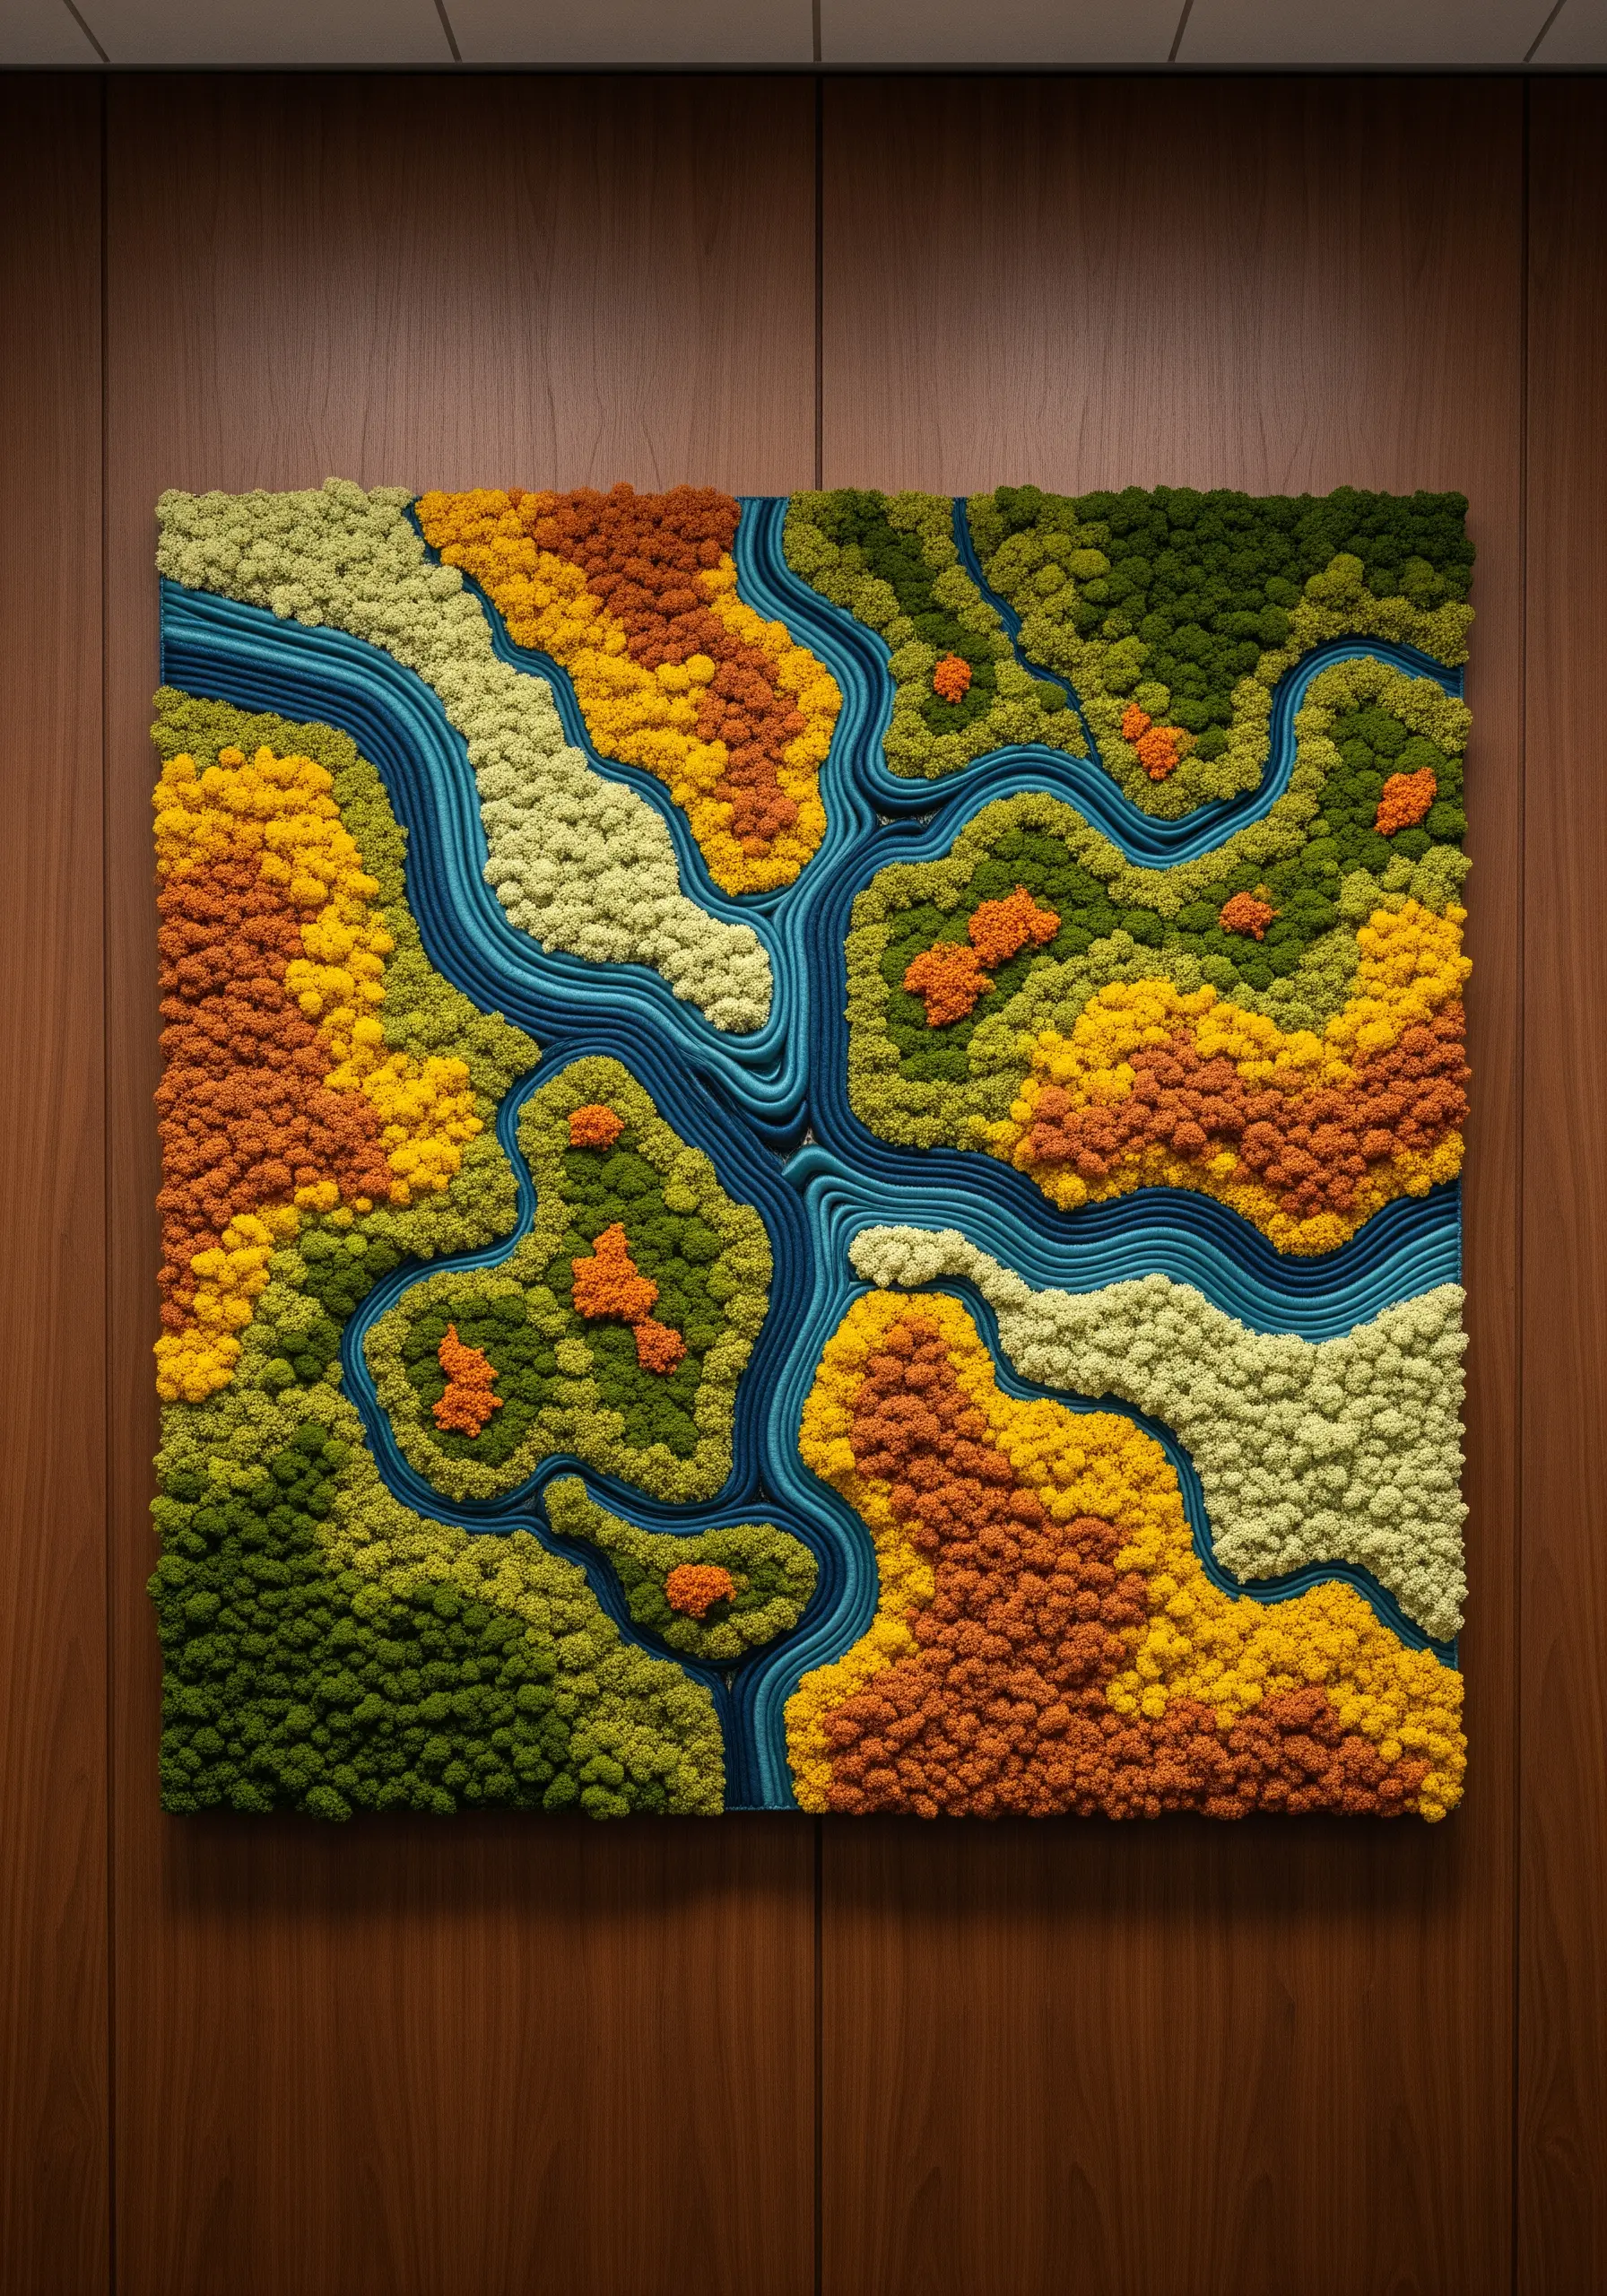
Turn the science of cartography into a work of abstract art.
Use couched, thick blue yarn to create the bold, graphic lines of rivers or waterways.
Fill the surrounding landmasses with blocks of color using dense French knots. Assign different colors—greens, ochres, rusts—to represent different types of terrain or elevations.
This creative approach transforms a familiar concept into a unique and highly personal piece of abstract thread embroidery.


