

Have you ever looked at a piece of paper and felt it was missing something? A certain warmth, a texture that invites you to look closer. Combining paper collage with embroidery isn’t just about decorating a surface; it’s about giving your art a new voice and a tangible depth.
Think of thread as a line that can do more than draw. It can create shadows, build form, and carry emotion in a way that ink or paint cannot. When you stitch into paper, you’re not just adding color—you are physically altering the material, creating relief, and blending the delicate nature of paper with the strength and texture of fiber.
Here, you will discover how to use thread not as an afterthought, but as an integral part of your composition. From creating sculptural sea foam with French knots to tracing memories onto a vintage map, these techniques will help you transform flat paper into expressive, tactile wall decor that feels intentional, personal, and deeply resonant.
1. Stitch a Celestial Map on Painted Paper
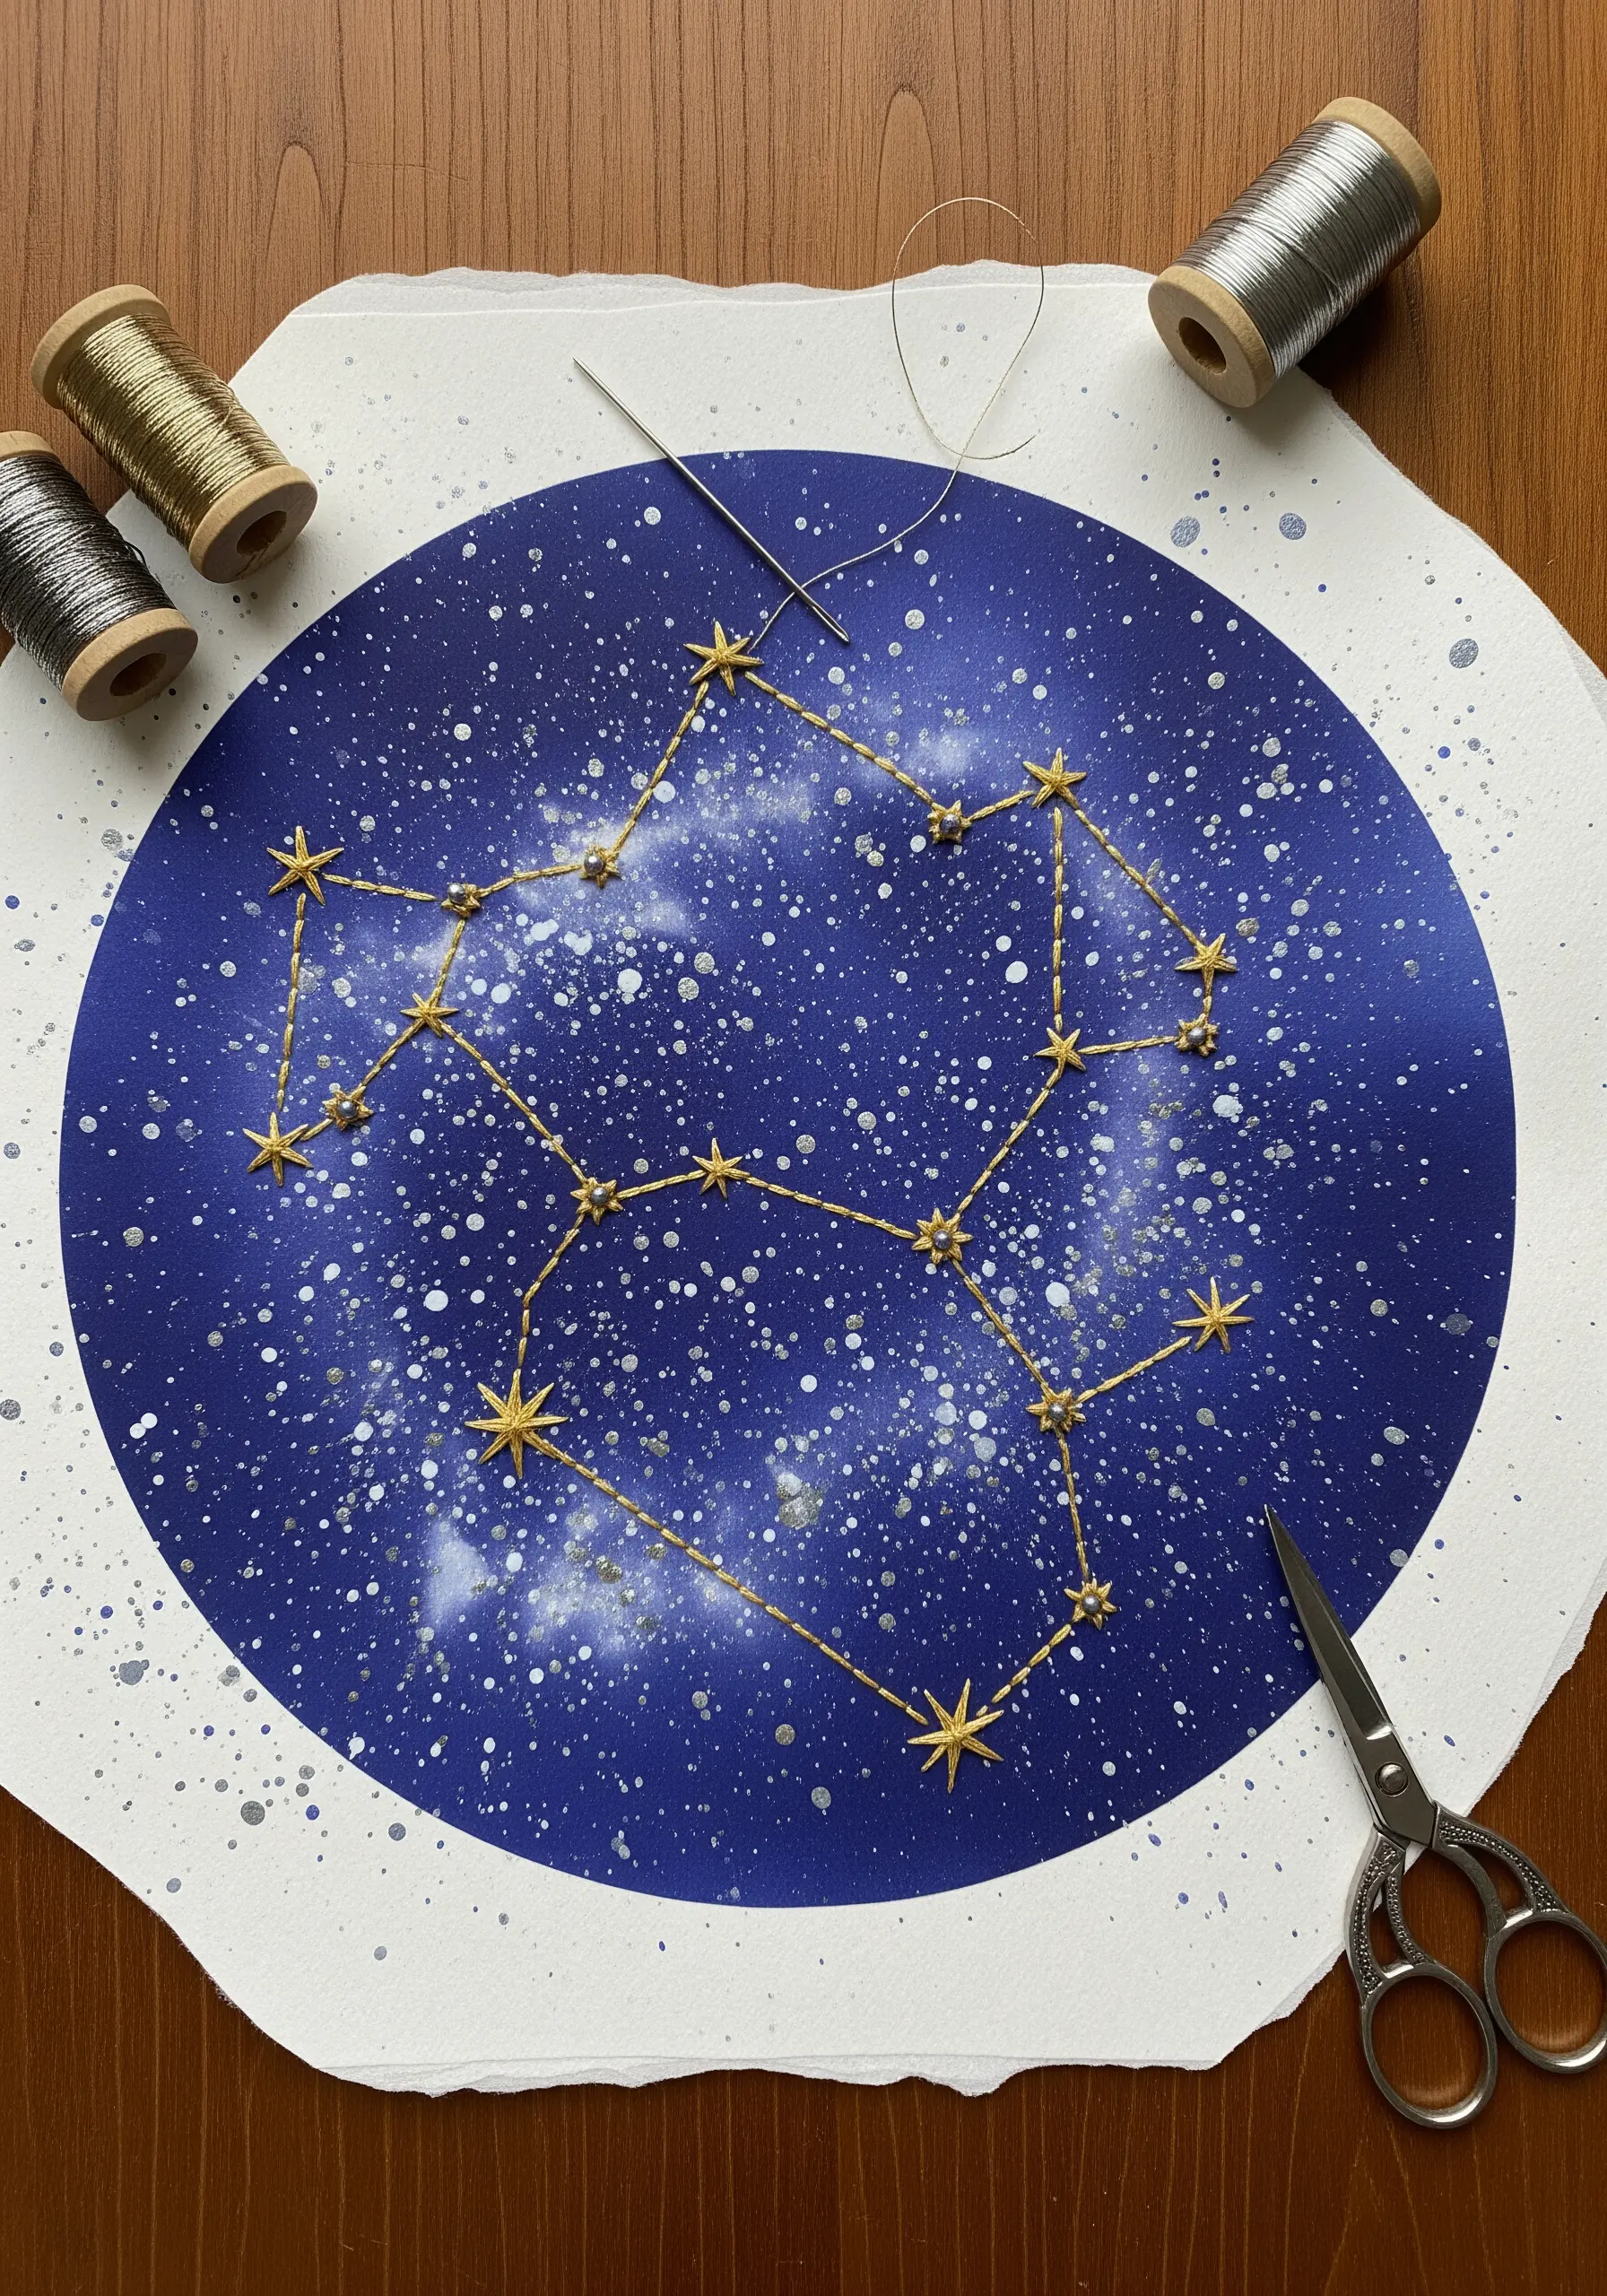
Transform a simple watercolor background into a celestial masterpiece by stitching constellations directly onto the paper.
Use a high-sheen metallic thread to catch the light, creating a stark, beautiful contrast against the matte paint.
Plot your constellation points first with a pin, then use a simple backstitch or couching stitch to connect them, ensuring clean lines.
For the stars, create texture with layered French knots or small, distinct star stitches to make them pop against the flat surface.
This method turns a flat painting into one of your favorite handmade art objects.
2. Imply Texture with Graphic Line Stitches
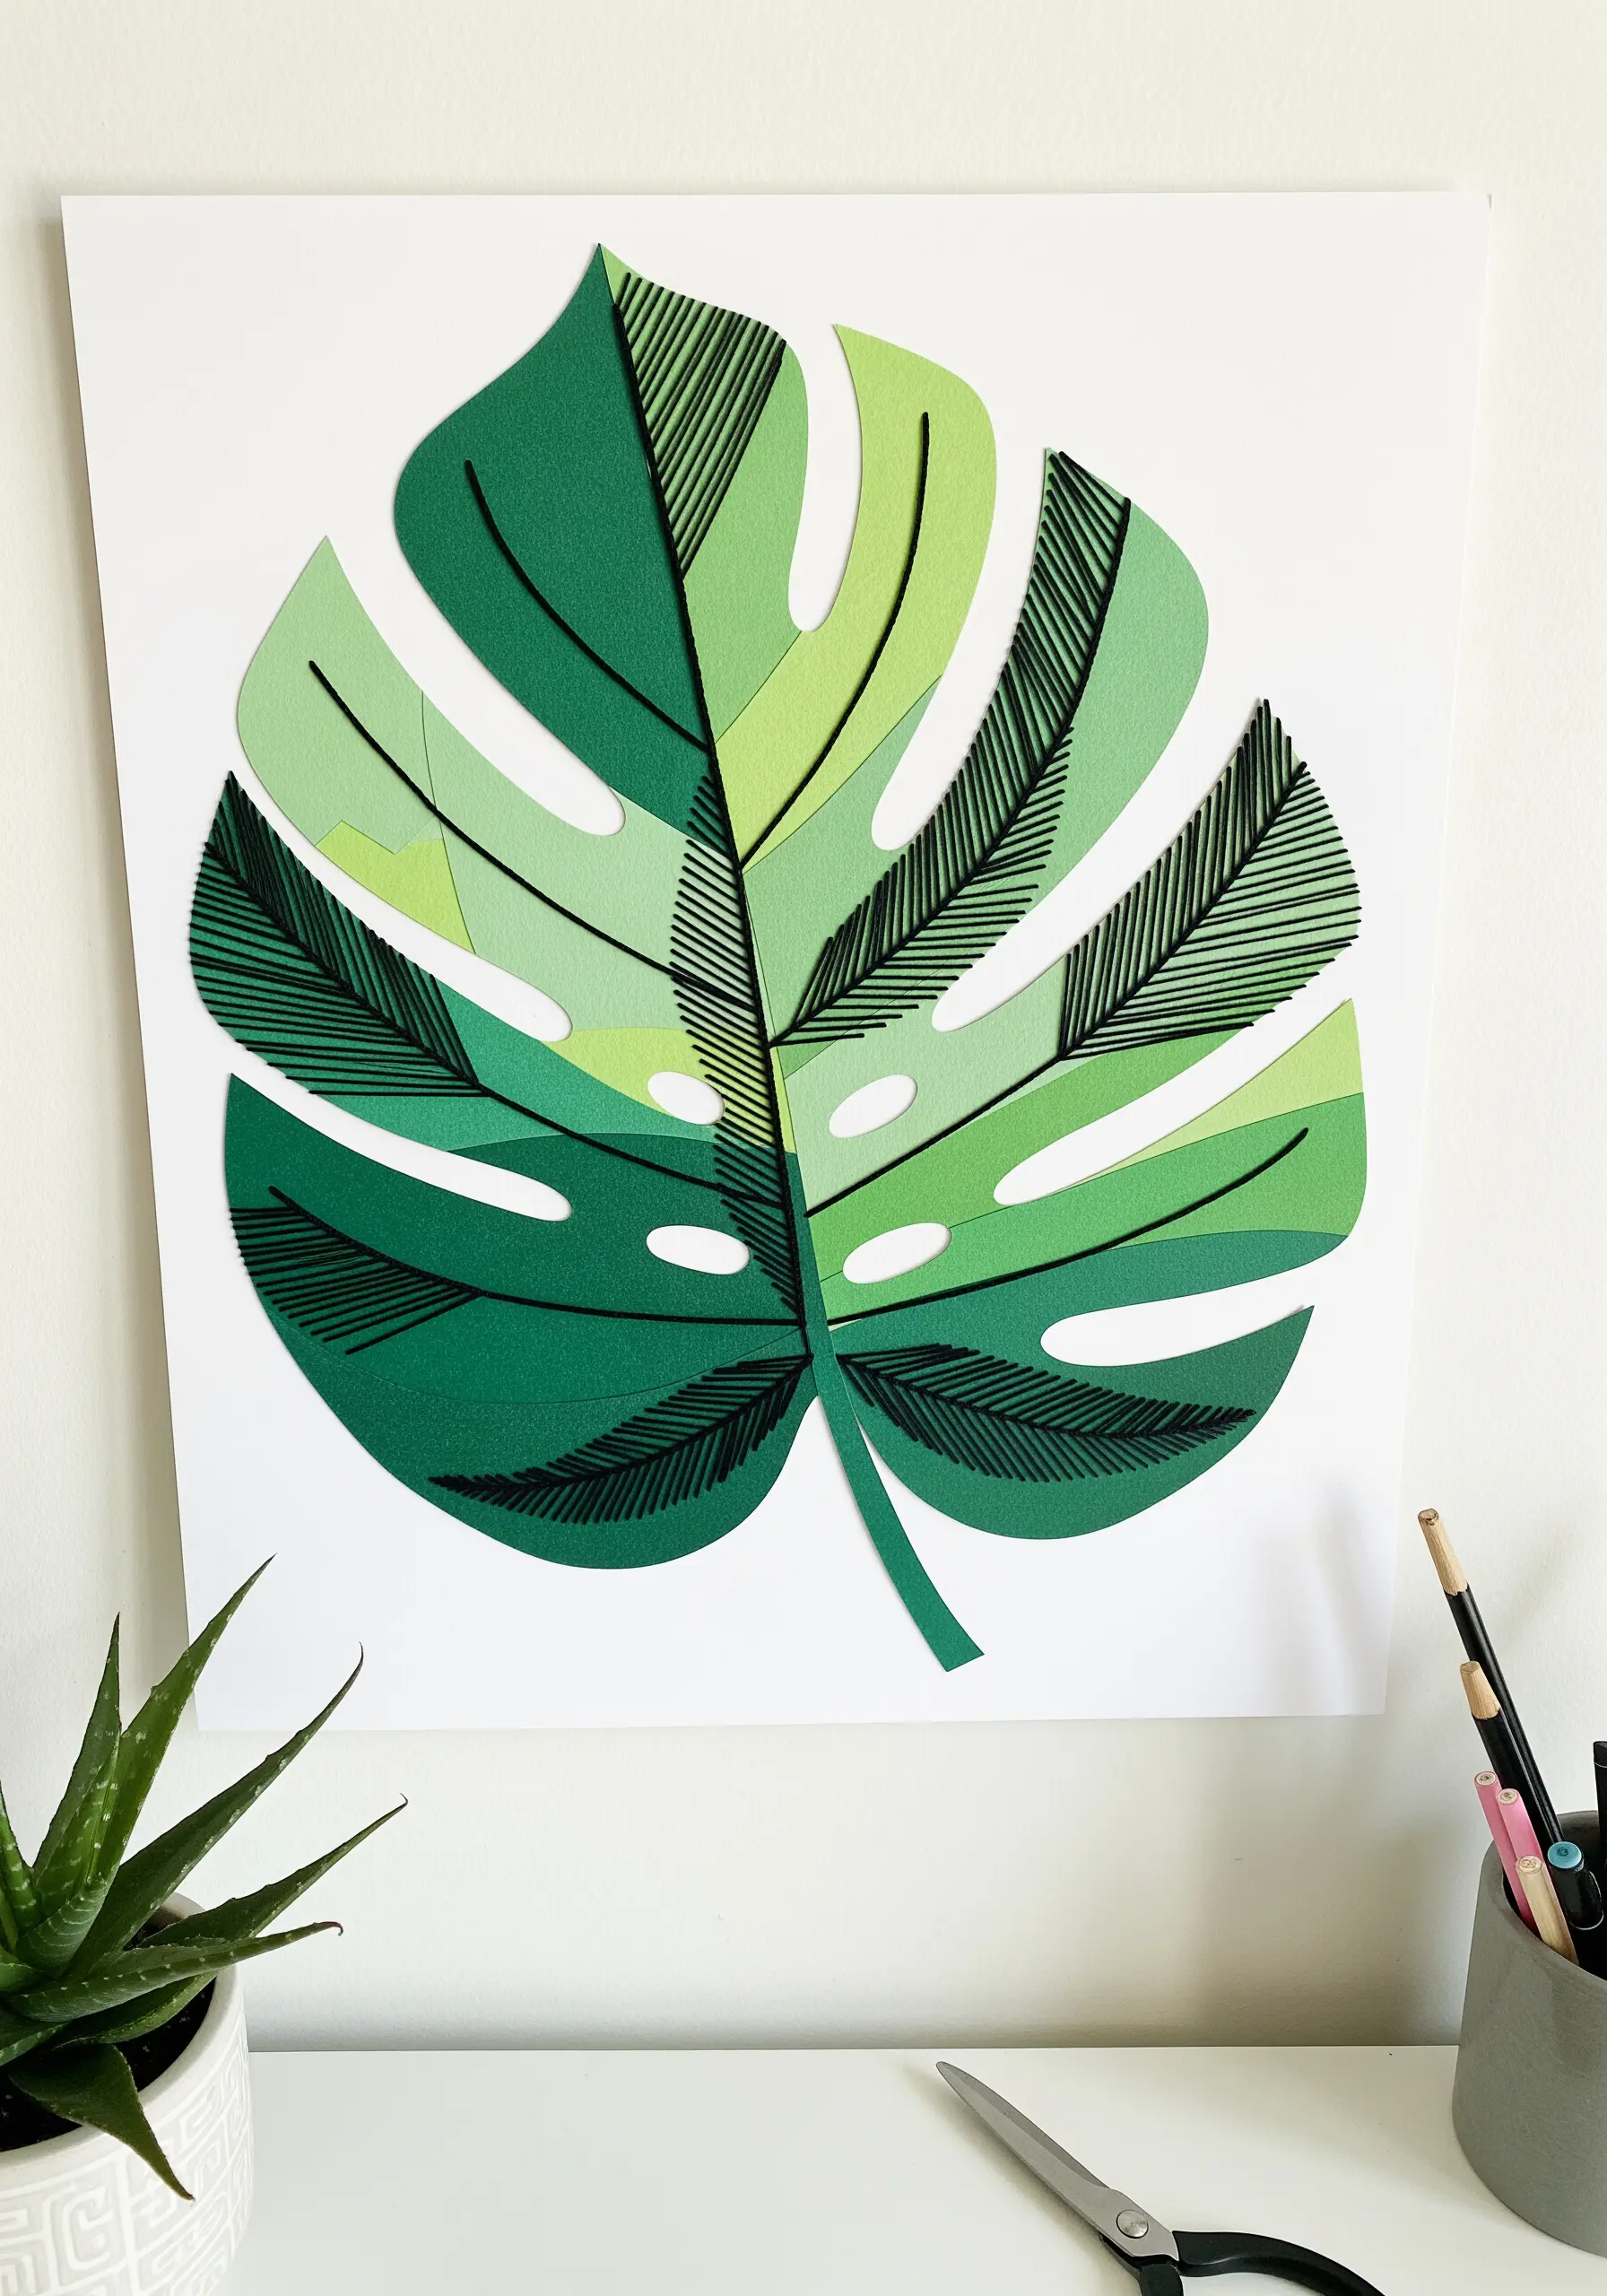
Elevate a simple paper collage by adding stitched details that suggest texture rather than filling it completely.
On this layered monstera leaf, use straight stitches in a contrasting color, like black, to define the veins and create a sense of shadow and depth.
Vary the angle and density of your stitches on different paper segments to enhance the collage effect and guide the viewer’s eye.
This technique maintains the minimalist feel of the paper art while introducing a tactile, graphic quality that paint alone cannot achieve, perfect for modern botanical stitches.
3. Create Radiating Landscapes with Thread
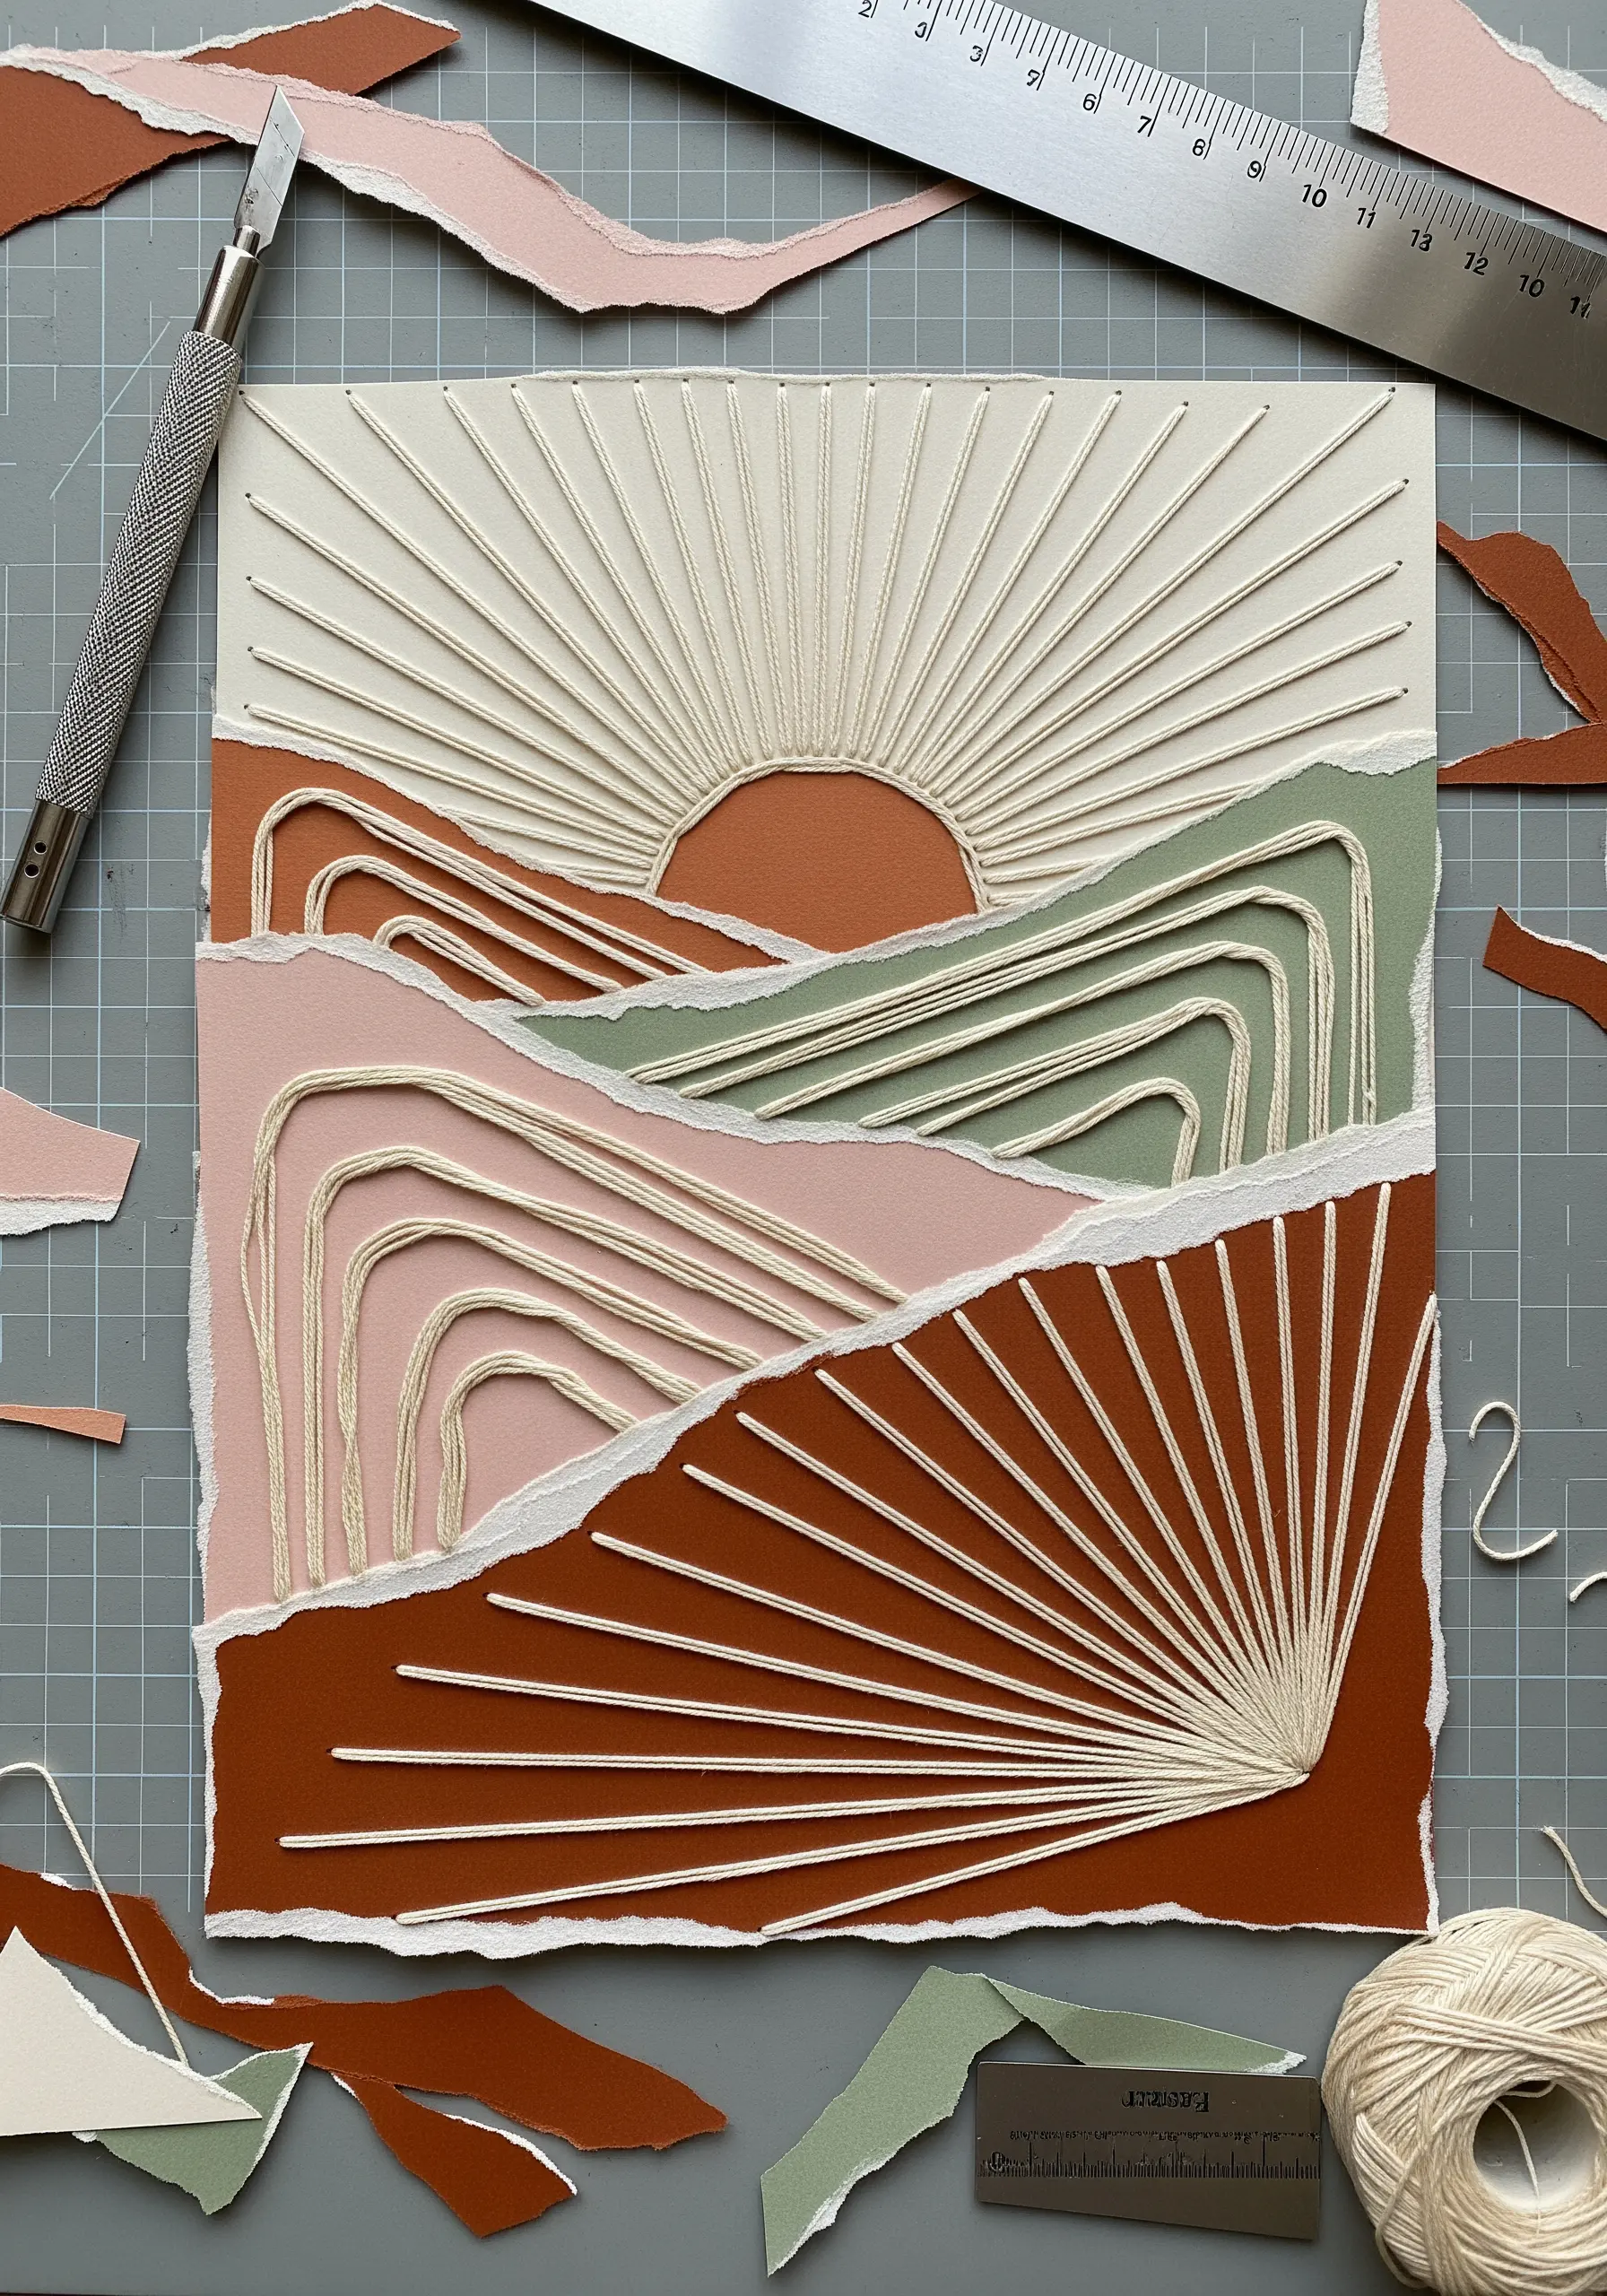
Capture the energy of a sunrise or sunset by using thread to create powerful, radiating lines over a torn-paper collage.
First, layer your paper to build the landscape, tearing the edges to create soft, organic horizons.
Use a ruler and pencil to lightly mark anchor points for your stitches, ensuring they converge accurately to create a sense of perspective.
Select a smooth, sturdy thread like perle cotton that will lie flat and taut, turning simple lines into mesmerizing wall art.
4. Build Architectural Form with Wrapped Thread
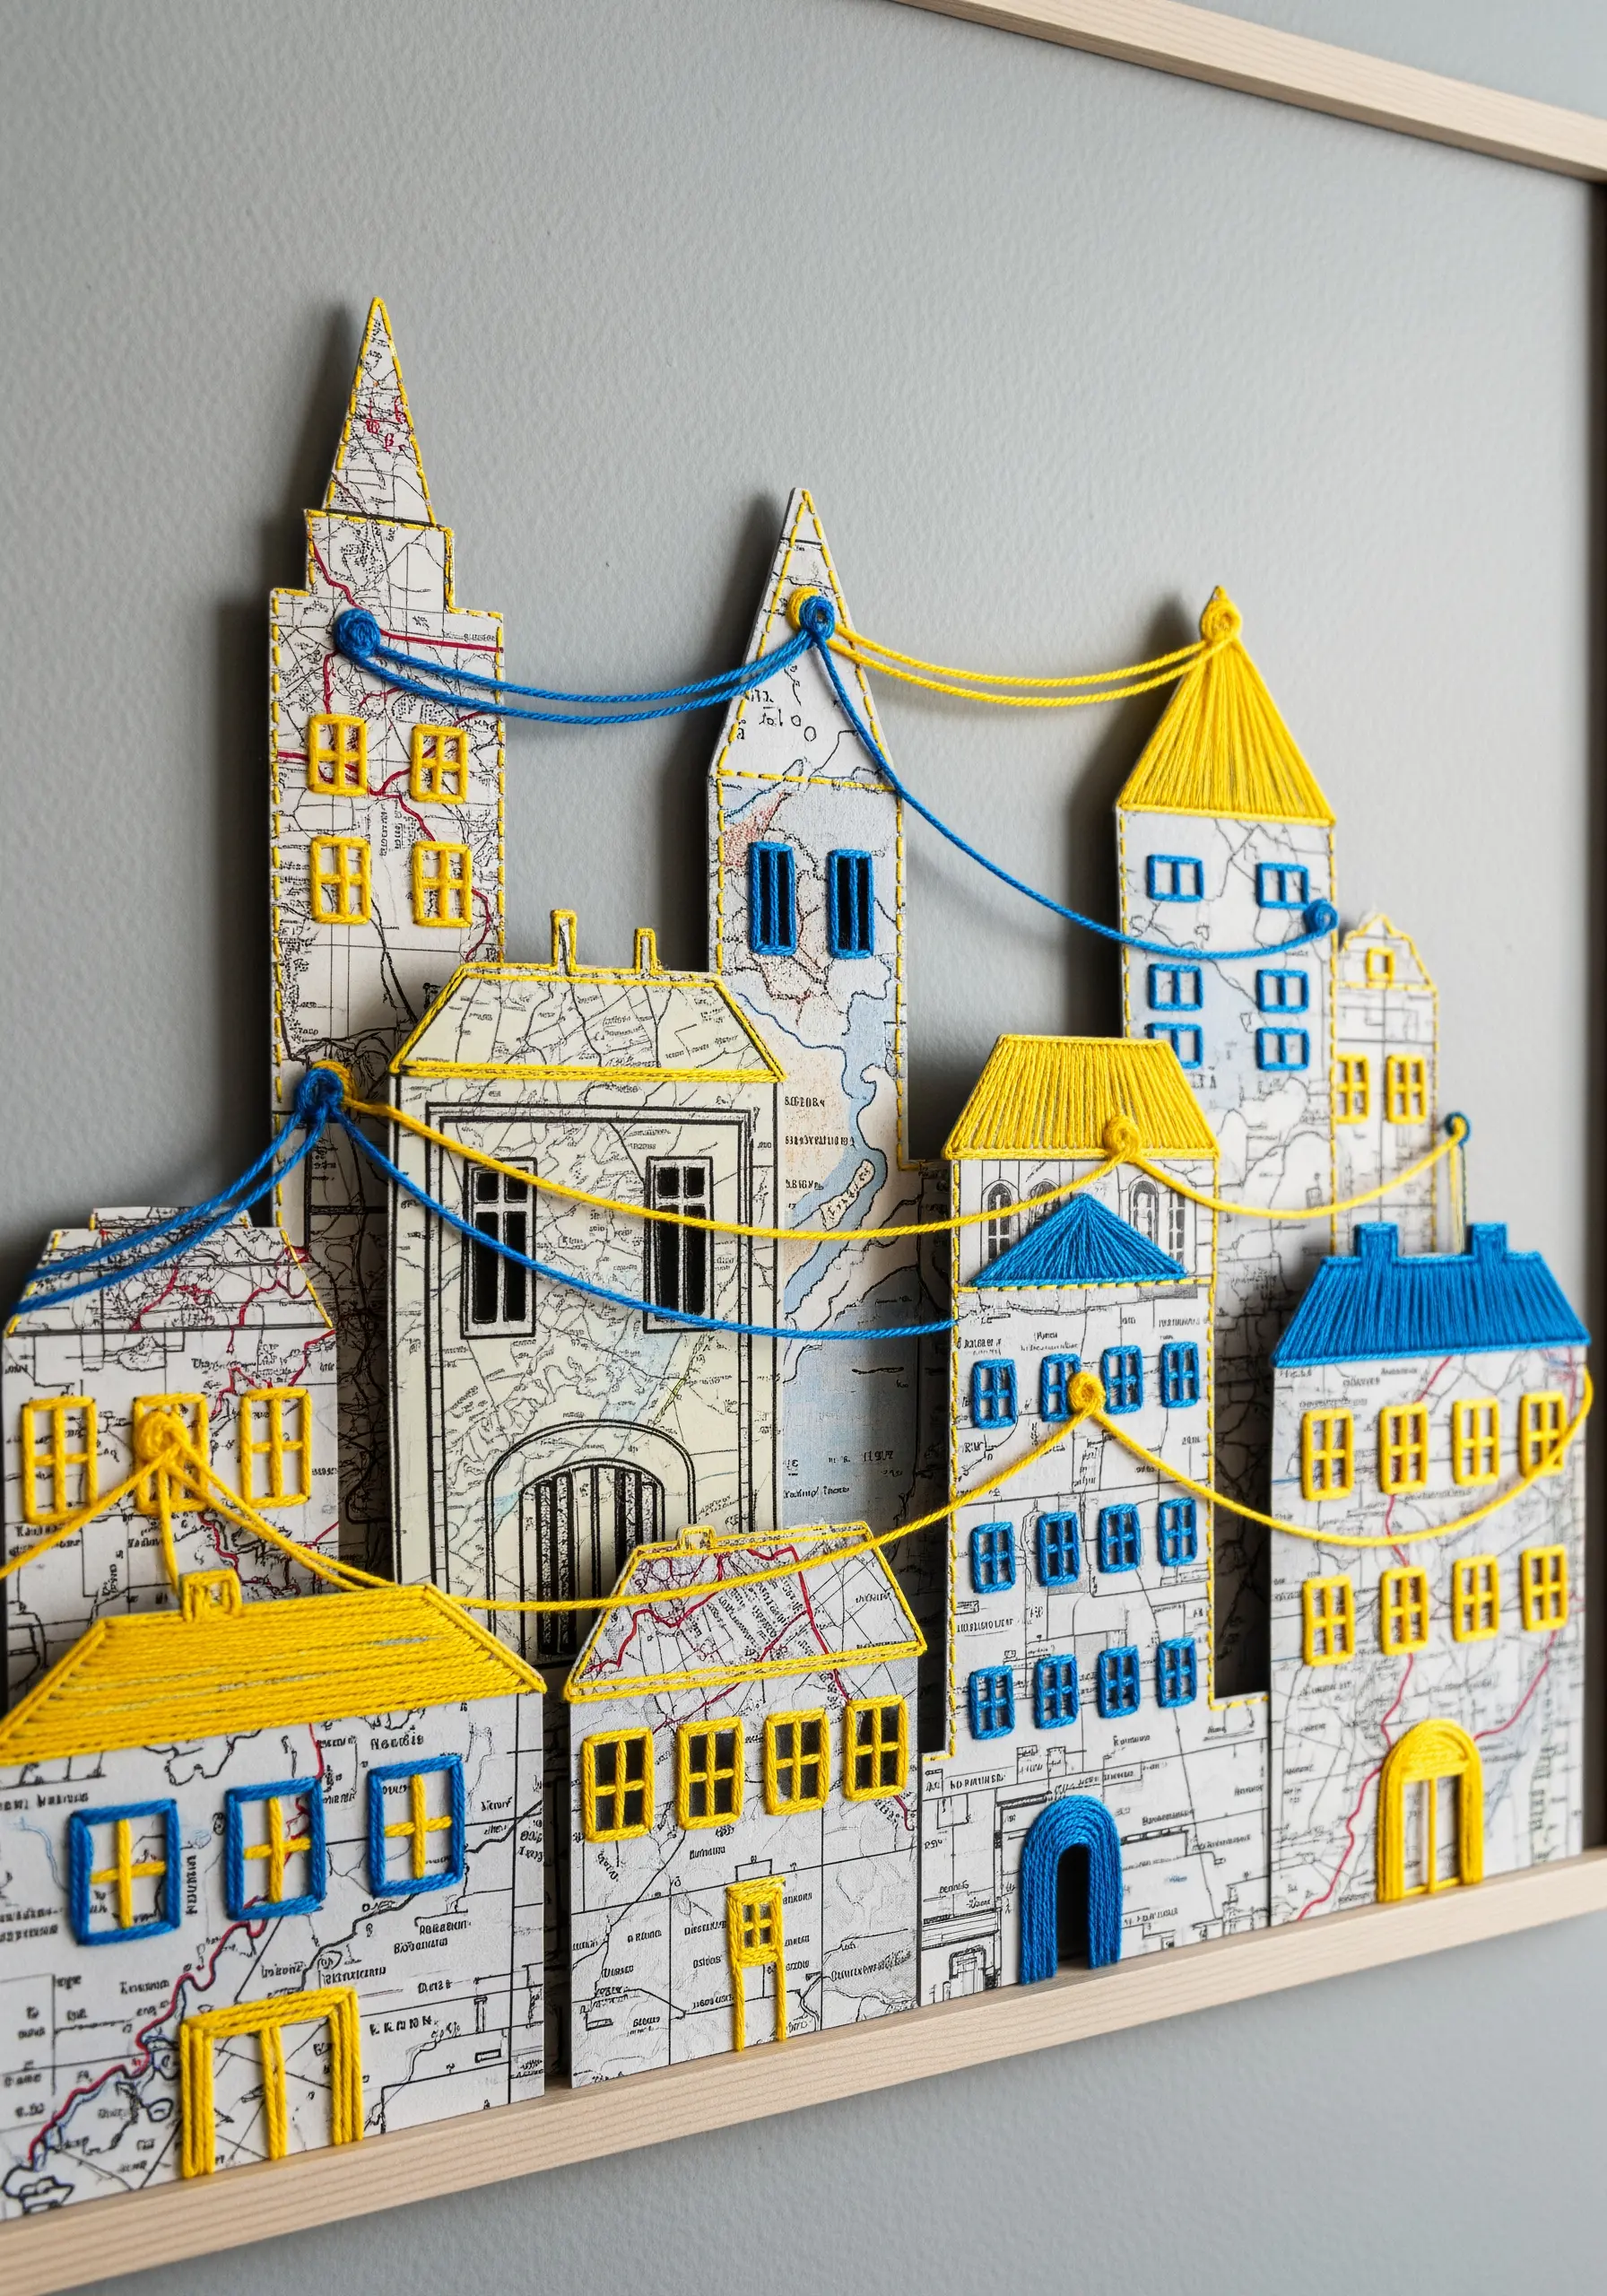
Move beyond surface stitching by wrapping thread around paper cutouts to create solid blocks of color and three-dimensional form.
Use old maps or patterned paper for your building shapes to add a layer of history and texture to your cityscape.
Choose a thicker thread or yarn in bold, contrasting colors to make the wrapped sections stand out as architectural features.
Connect the buildings with draped, twisted threads to add a sense of dynamic energy and narrative to the composition.
This is one of the most creative ways to use embroidery for a unique wall piece.
5. Contrast Flat Collage with Voluminous Stitches
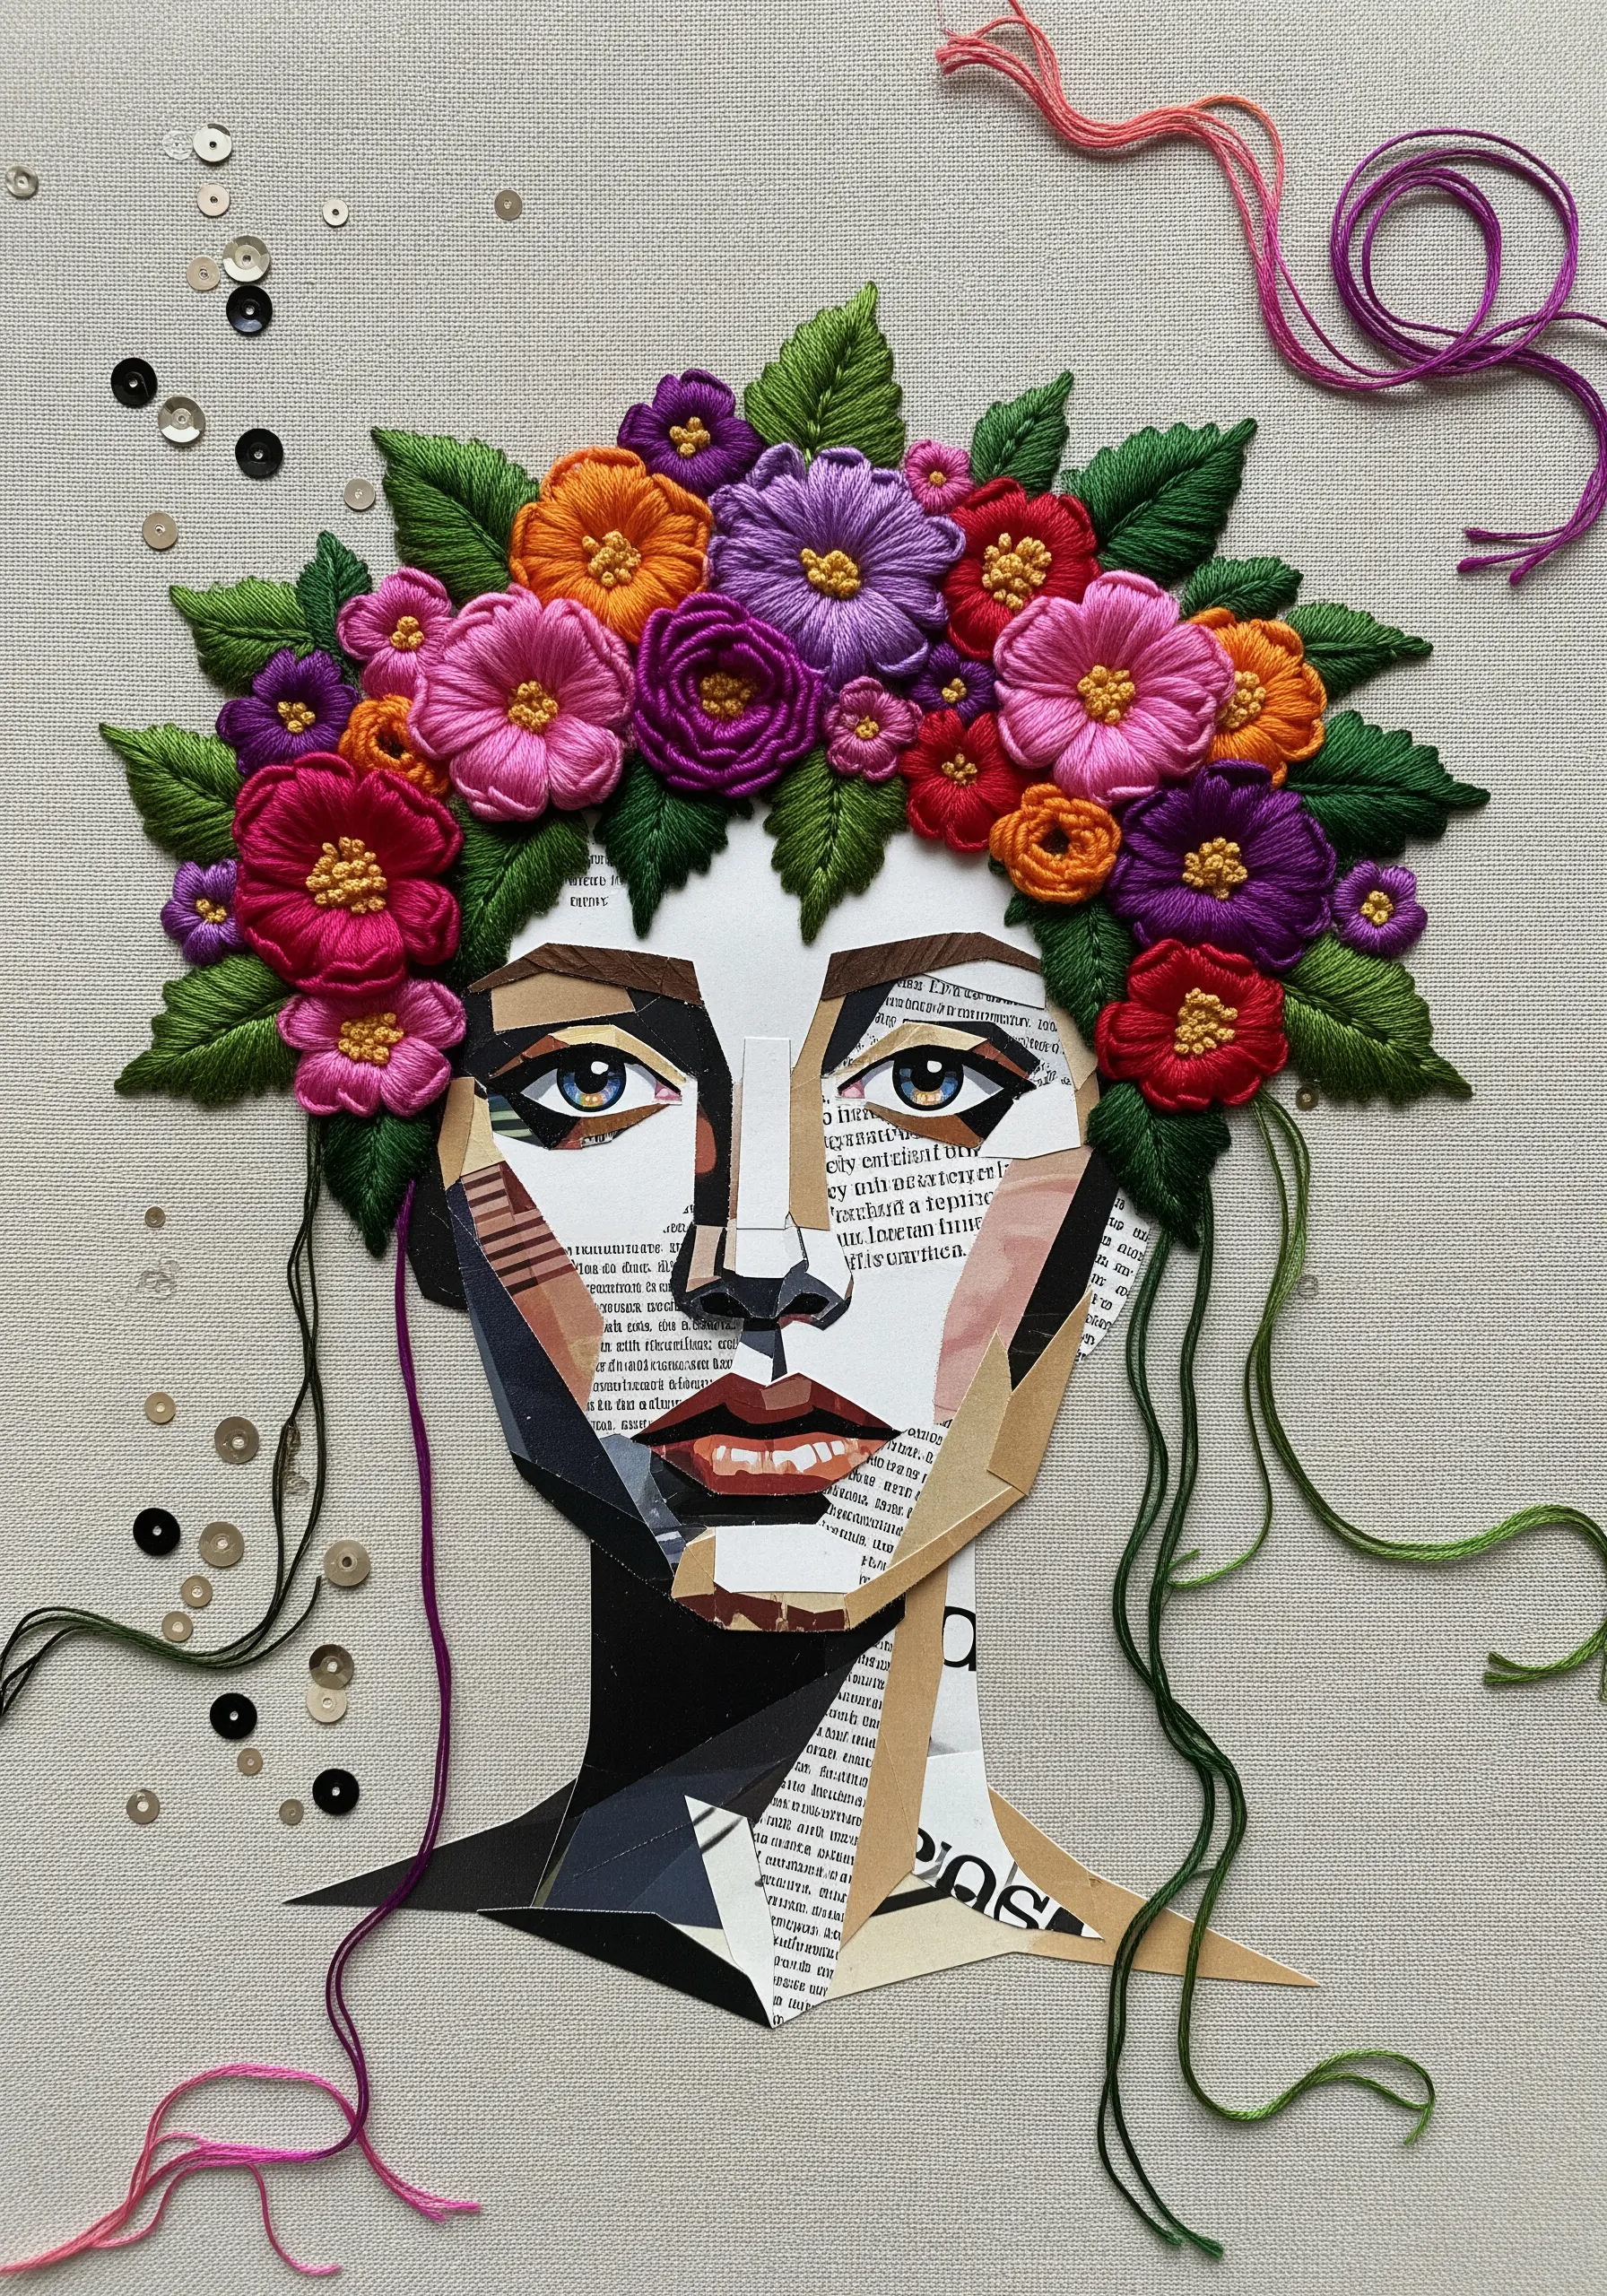
Create a stunning mixed-media portrait by combining a sharp, geometric paper collage with soft, dimensional floral embroidery.
Build the face from magazine clippings or textured paper to establish a strong, graphic base.
For the floral crown, use classic stitches like satin stitch, woven wheel (or spider wheel) stitch, and French knots to create plush, highly-textured petals.
Allow some threads to hang loose, which softens the transition between the precise paper edges and the organic florals, adding a touch of whimsy.
This technique is perfect for creating bold bohemian floral embroidery ideas.
6. Sculpt Sea Foam with Knots and Coils
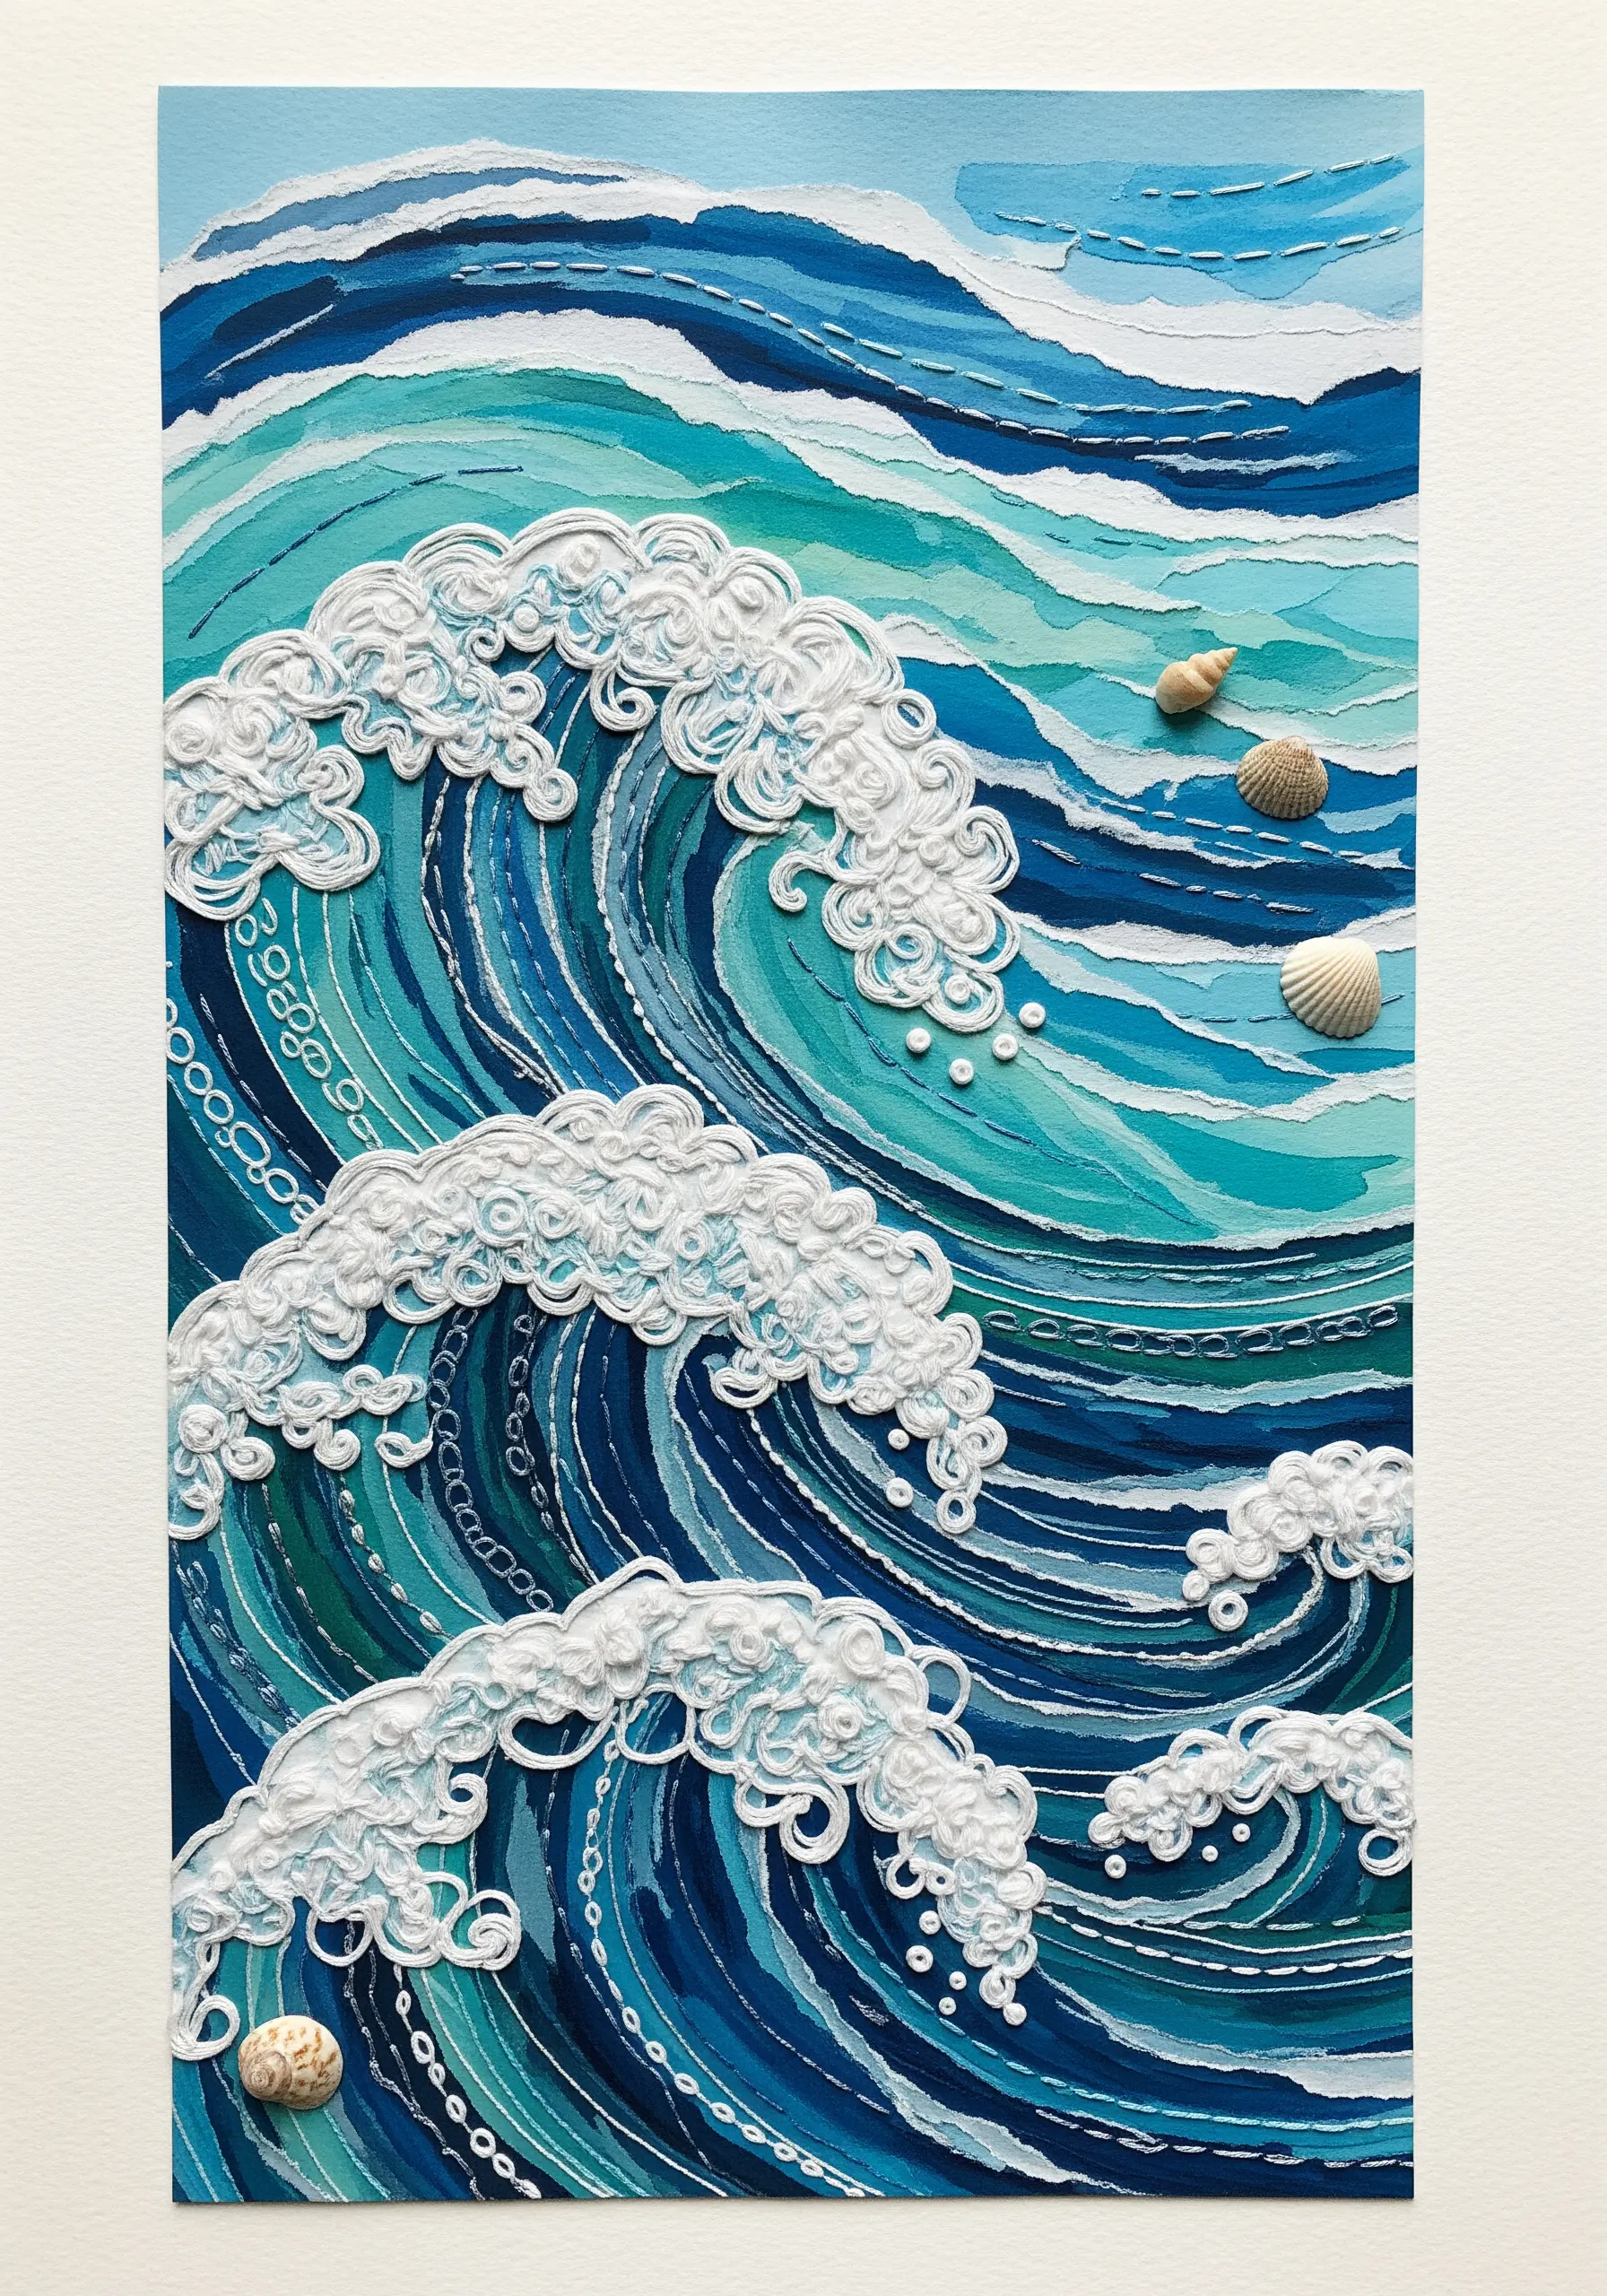
Evoke the power of the ocean by using sculptural stitches to mimic the texture of crashing waves on a painted paper base.
Layer torn paper painted in shades of blue and turquoise to create the undulating water.
Use a thick white thread to stitch dense clusters of French knots and bullion knots for the sea foam, varying their size and spacing to create movement.
You can also couch down coiled threads to define the crest of the waves, adding another layer of dimension to your ocean-inspired hoop embroidery.
7. Define a Minimalist Portrait with a Single Thread
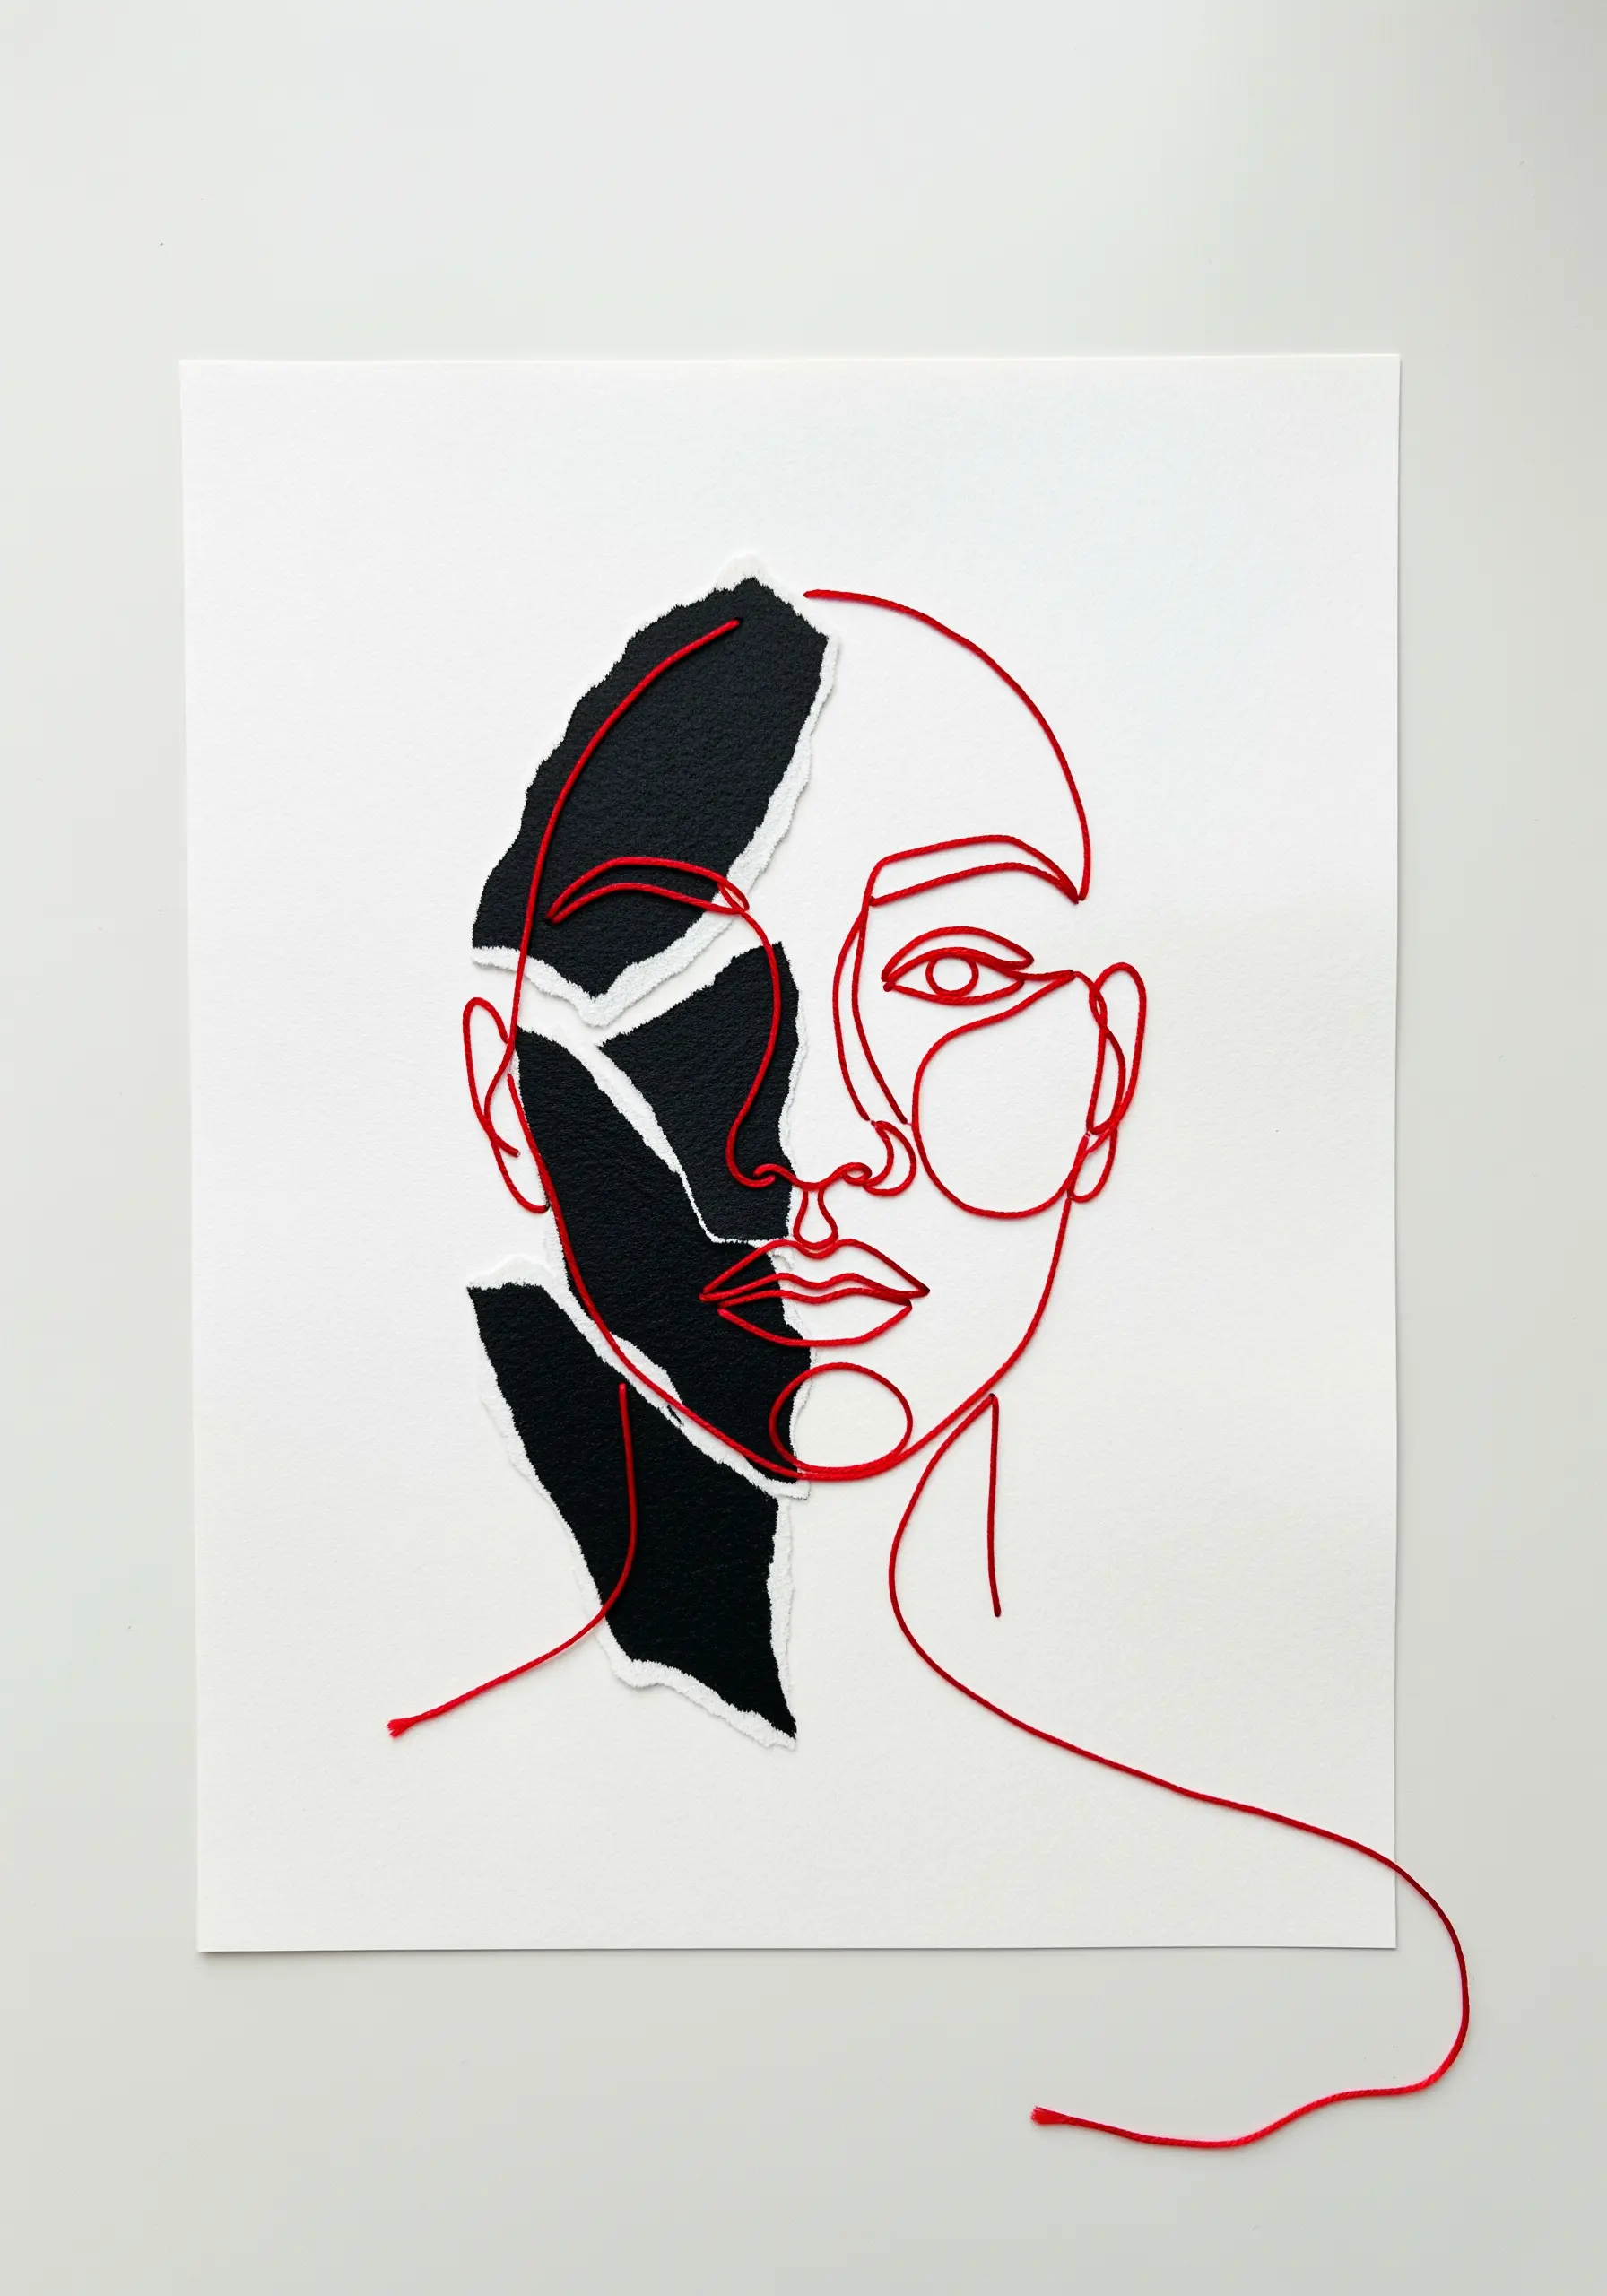
Explore the intersection of form and void by using a single, continuous thread to complete a minimalist line art portrait.
Start with a torn paper collage to suggest shadow and duality, creating a strong negative space for the thread to interact with.
Use a couching technique, securing the main red thread with tiny, nearly invisible stitches from a second thread, allowing you to create fluid curves on paper without piercing it repeatedly.
This approach transforms a simple line drawing into a piece of delicate, emotional wall decor.
8. Juxtapose Warm and Cool Textures
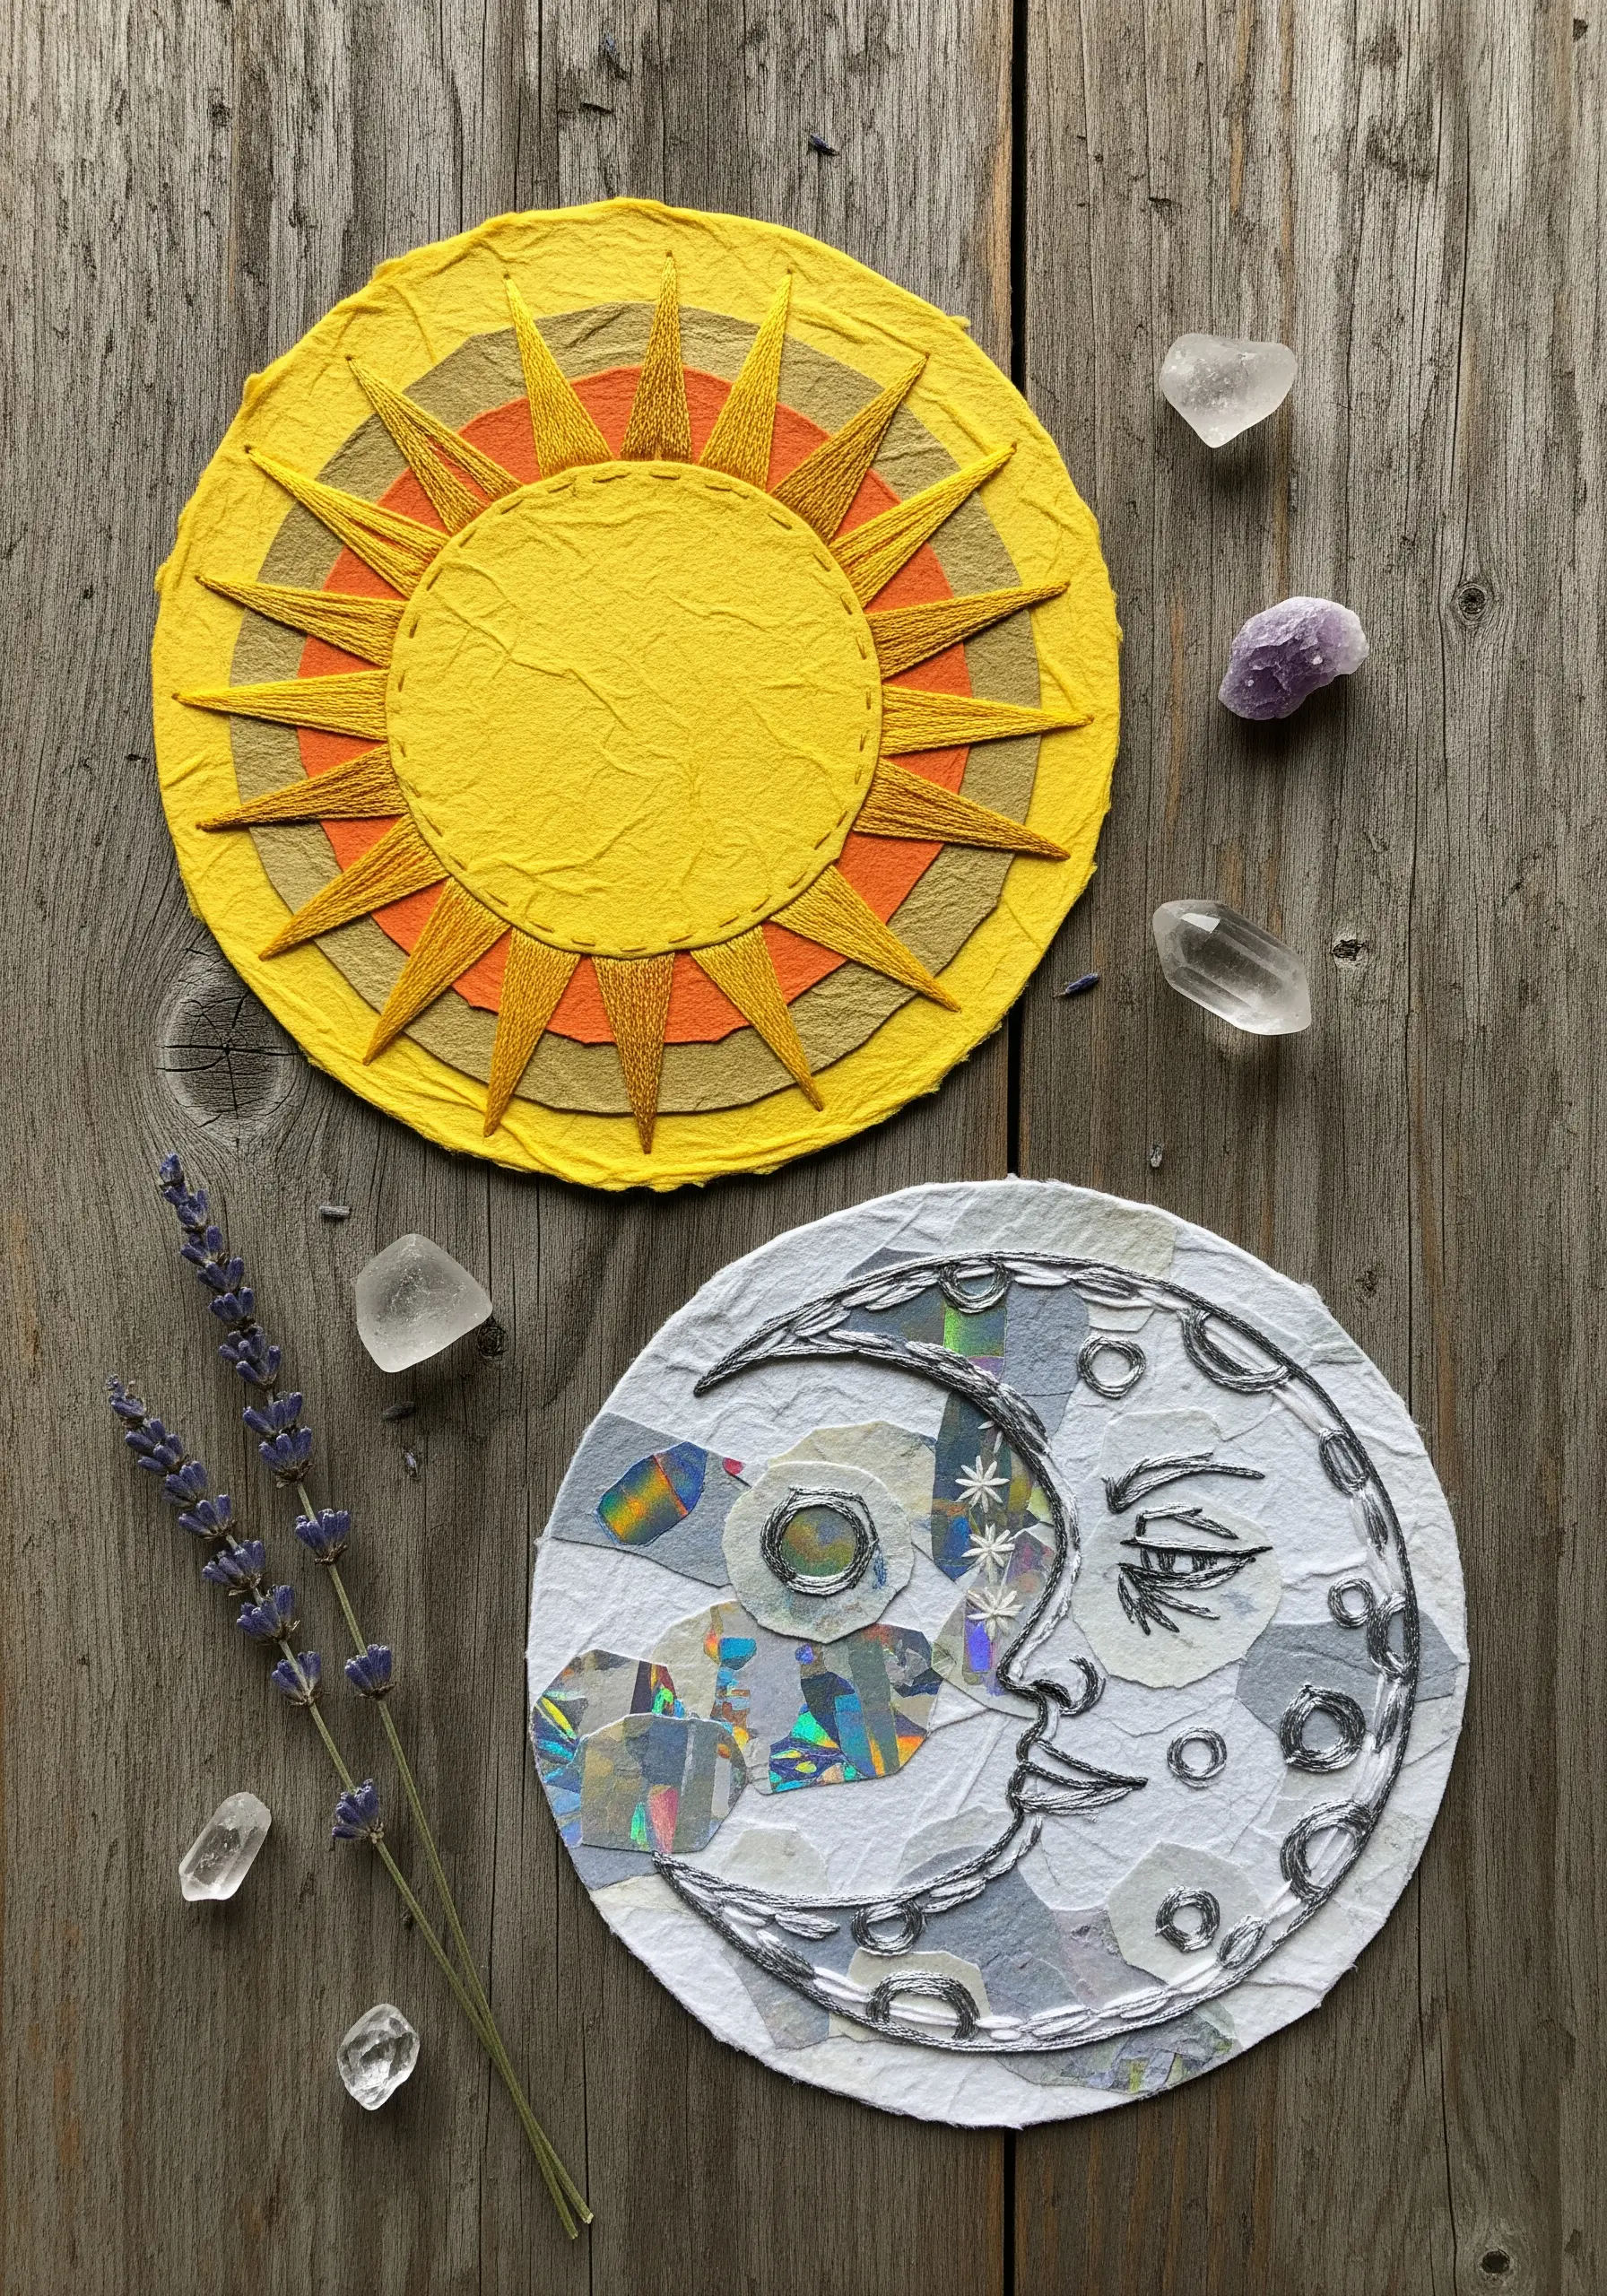
Create a celestial pair by contrasting the warm, structured energy of the sun with the cool, chaotic shimmer of the moon.
For the sun, use layered, warm-toned paper and precise satin stitches to create sharp, radiating sunbeams.
For the moon, create a collage with iridescent and textured white papers, then use a silver metallic thread for a loose, expressive outline with a simple backstitch.
This contrast in both material and technique makes for a compelling visual story and is a great way to explore abstract thread texture hacks.
9. Create Organic Forms with Stitched Appliqué
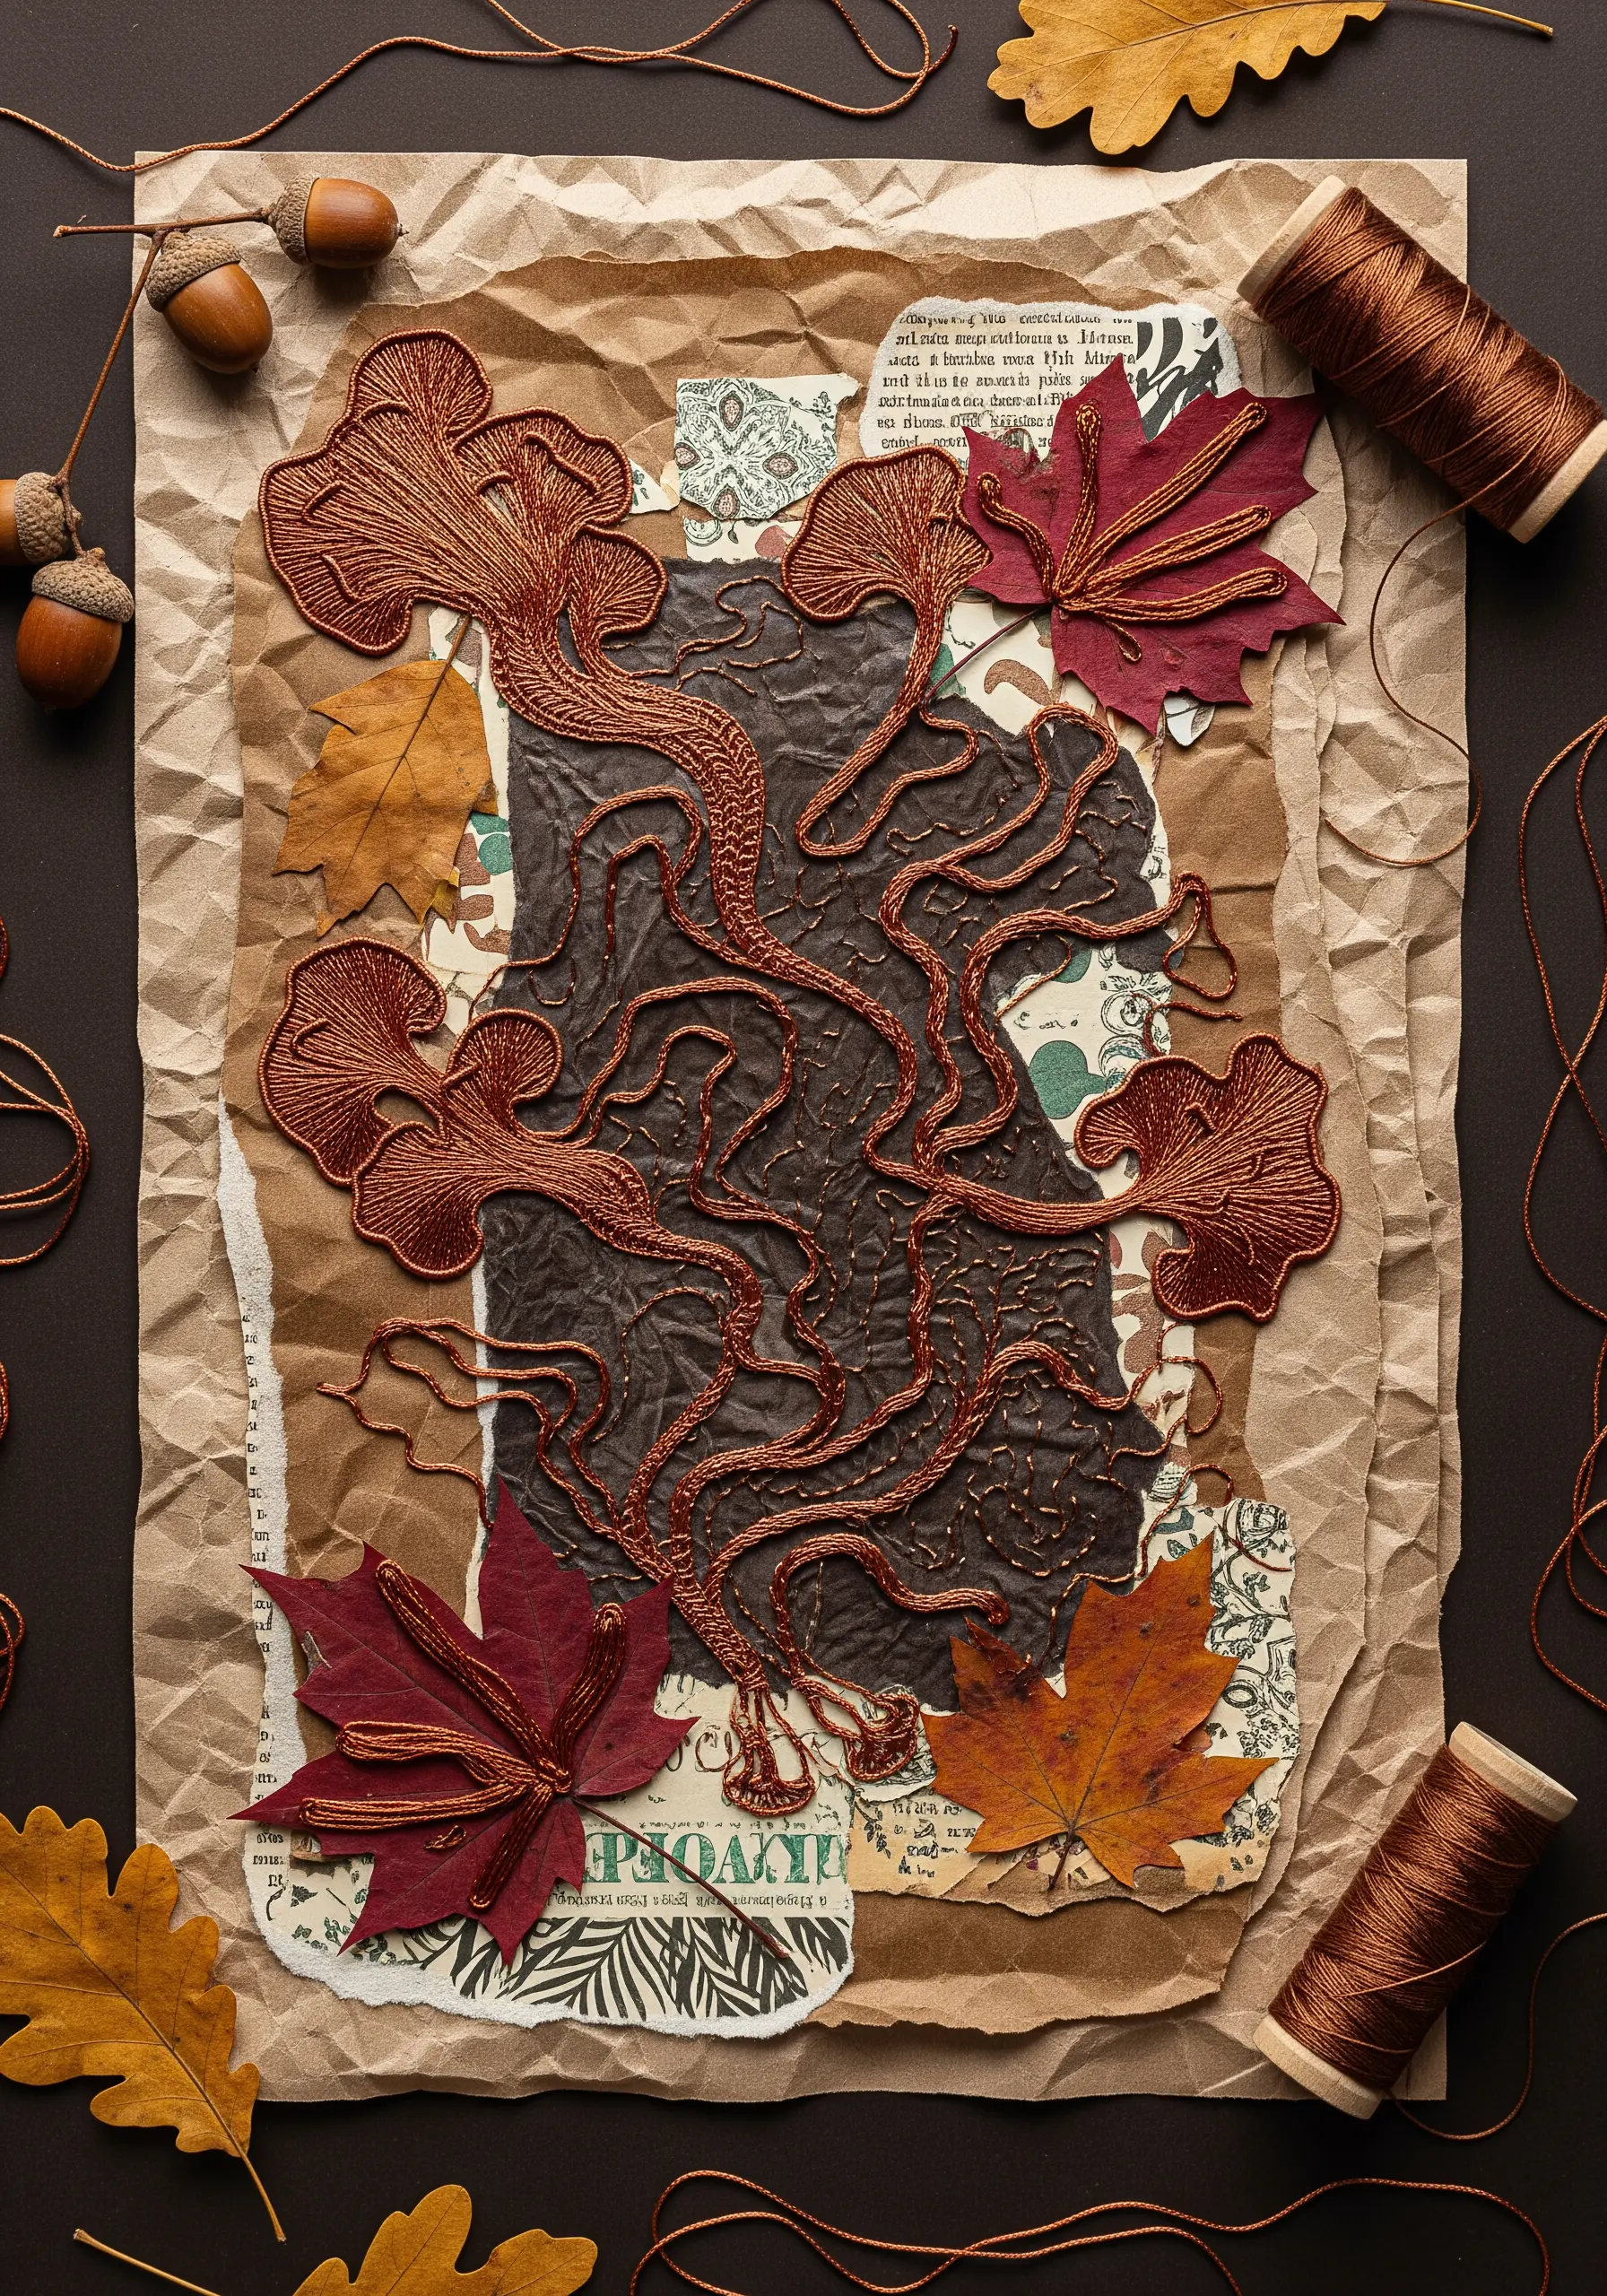
Give your paper collage an organic, raised effect by first embroidering your motifs on fabric, then applying them to the paper base.
Embroider your root-like forms on a piece of dark fabric using a dense satin stitch for a smooth, solid finish.
Carefully cut out the embroidered shapes, leaving a tiny fabric border, and then glue them onto a layered background of kraft paper and vintage book pages.
This creates a stunning, high-relief effect that makes your stitching appear to grow from the page, perfect for earthy texture embroidery patterns.
10. Add Subtle Detail with Minimal Stitches
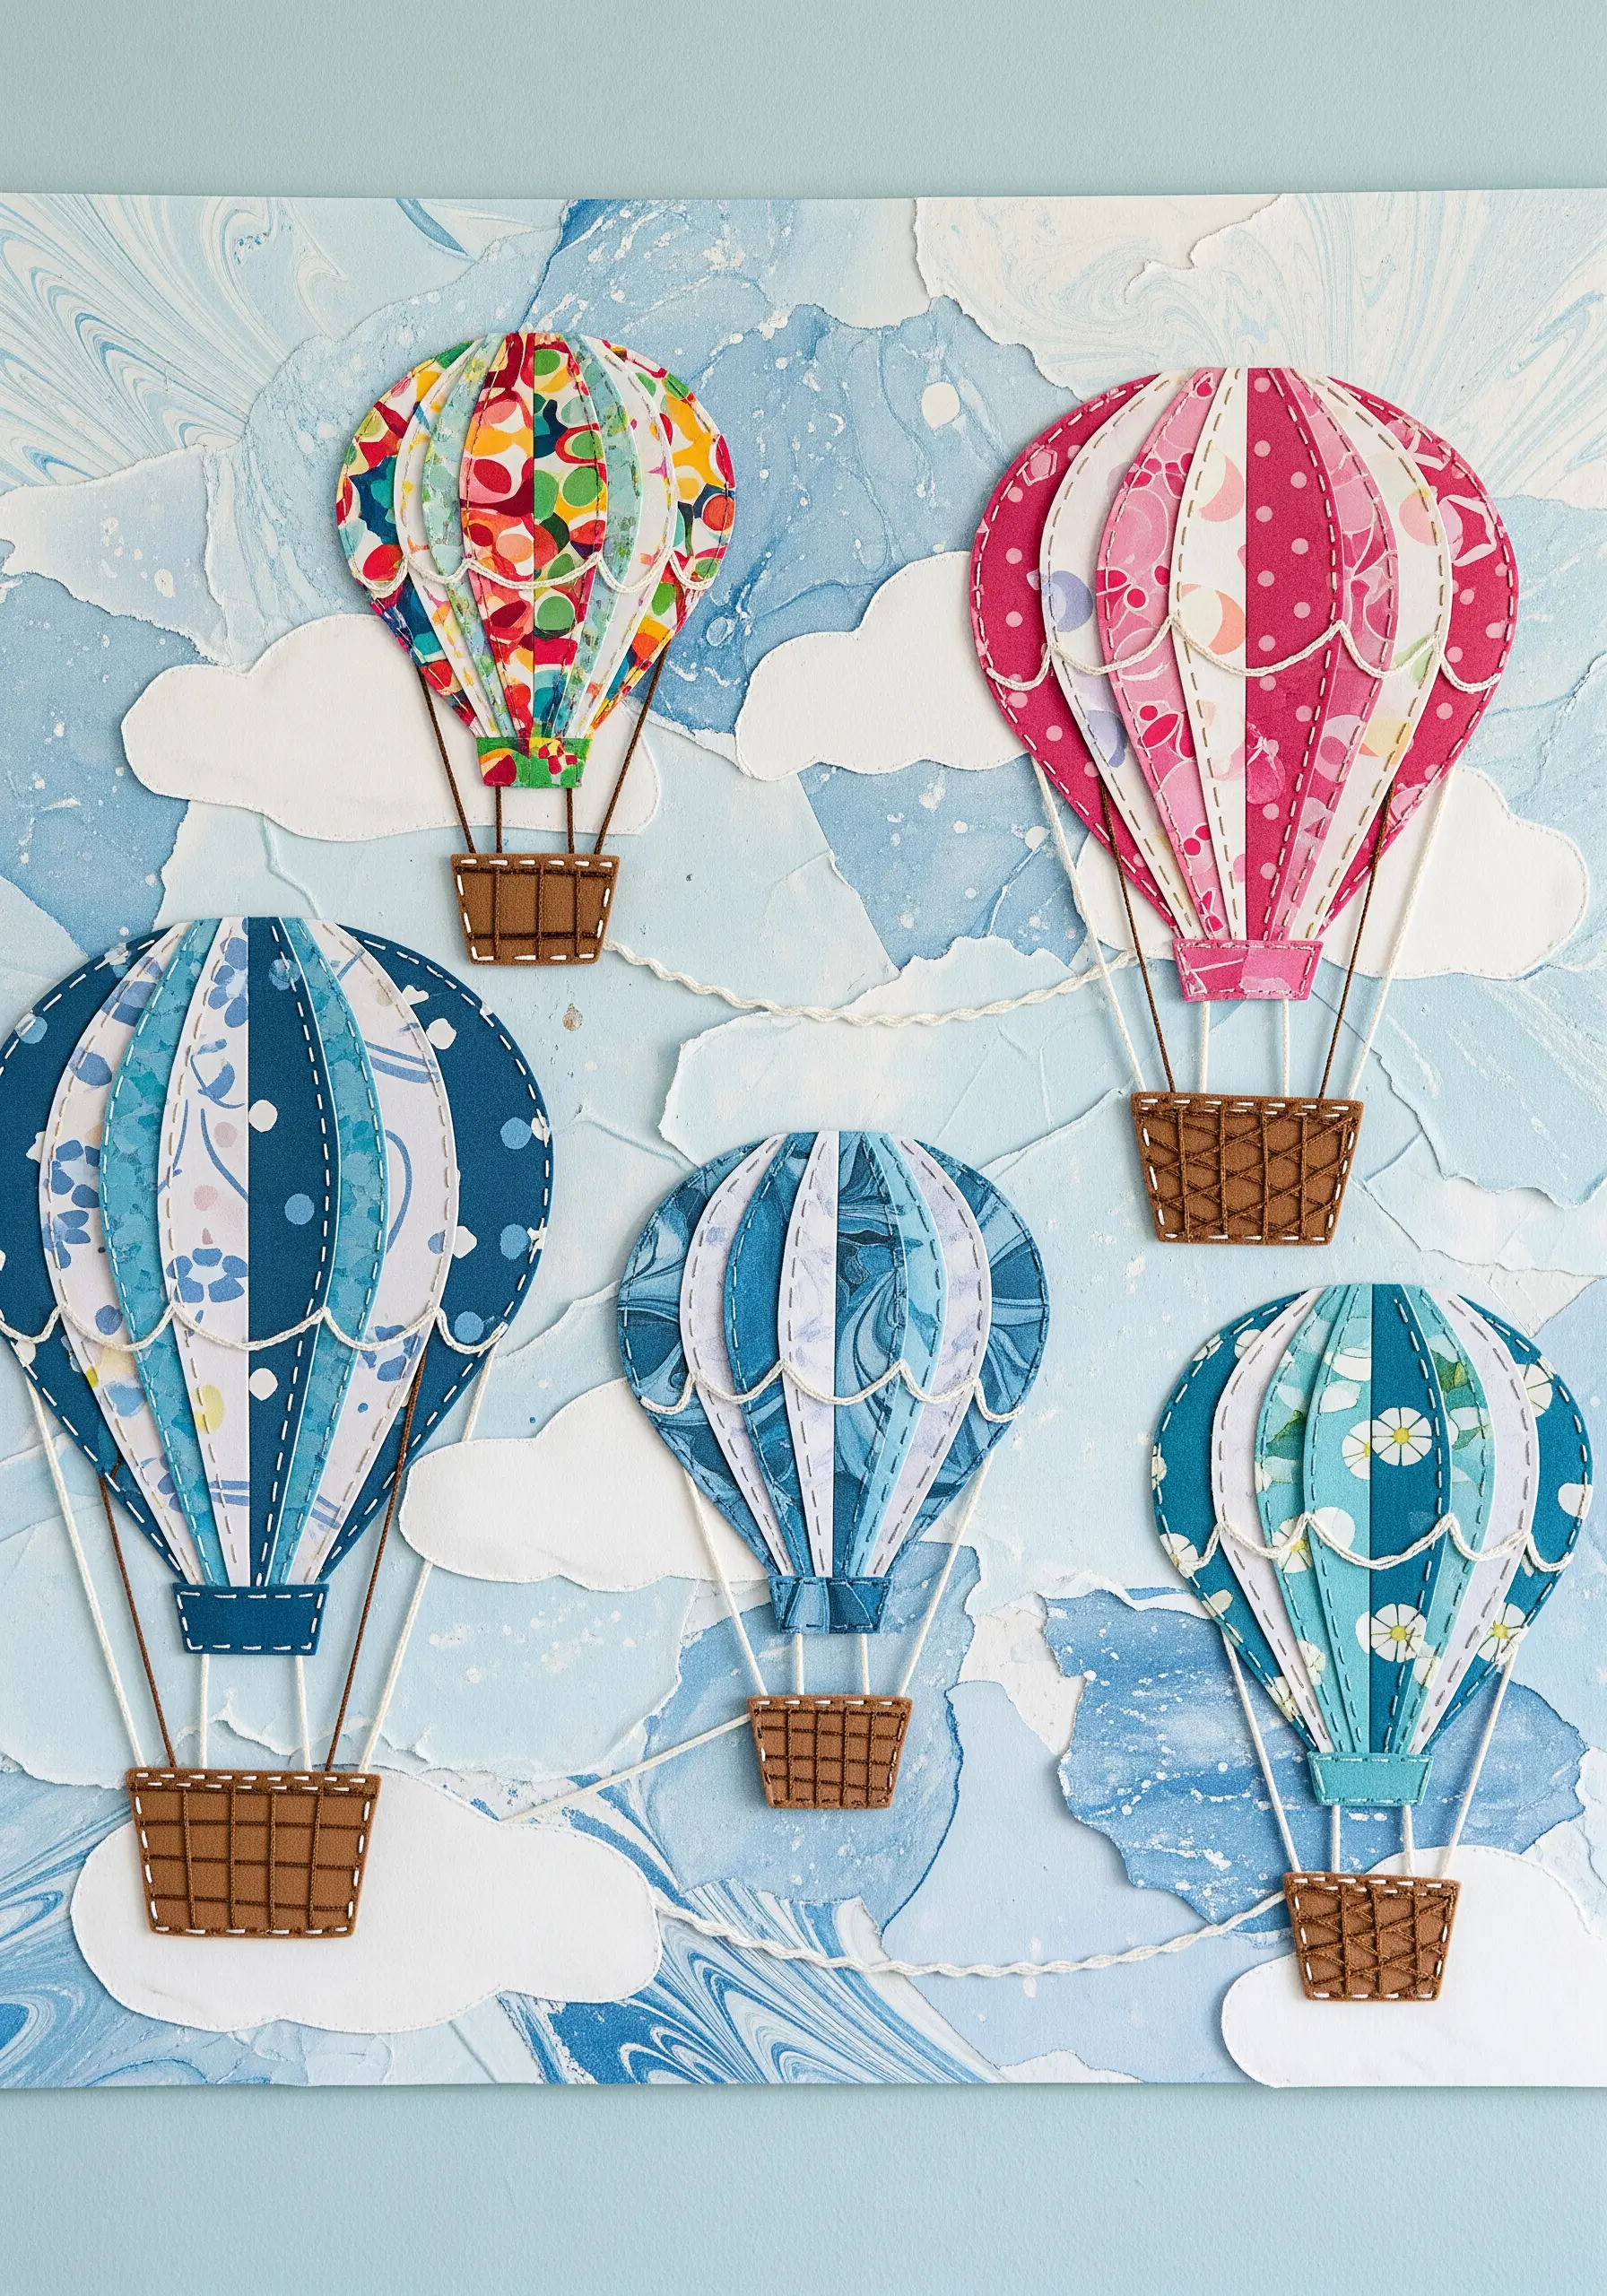
Enhance a whimsical paper collage without overwhelming it by adding small, thoughtful stitched details.
For these hot air balloons, use a simple running stitch along the paper seams to add definition and a handmade touch.
Use a satin stitch to create the baskets, which provides a solid, textural contrast to the patterned paper of the balloons.
This selective use of embroidery adds just enough texture to make the piece feel special and is one of the best small embroidery ideas that double as cute wall art.
11. Weave Geometric Brilliance on Black Paper
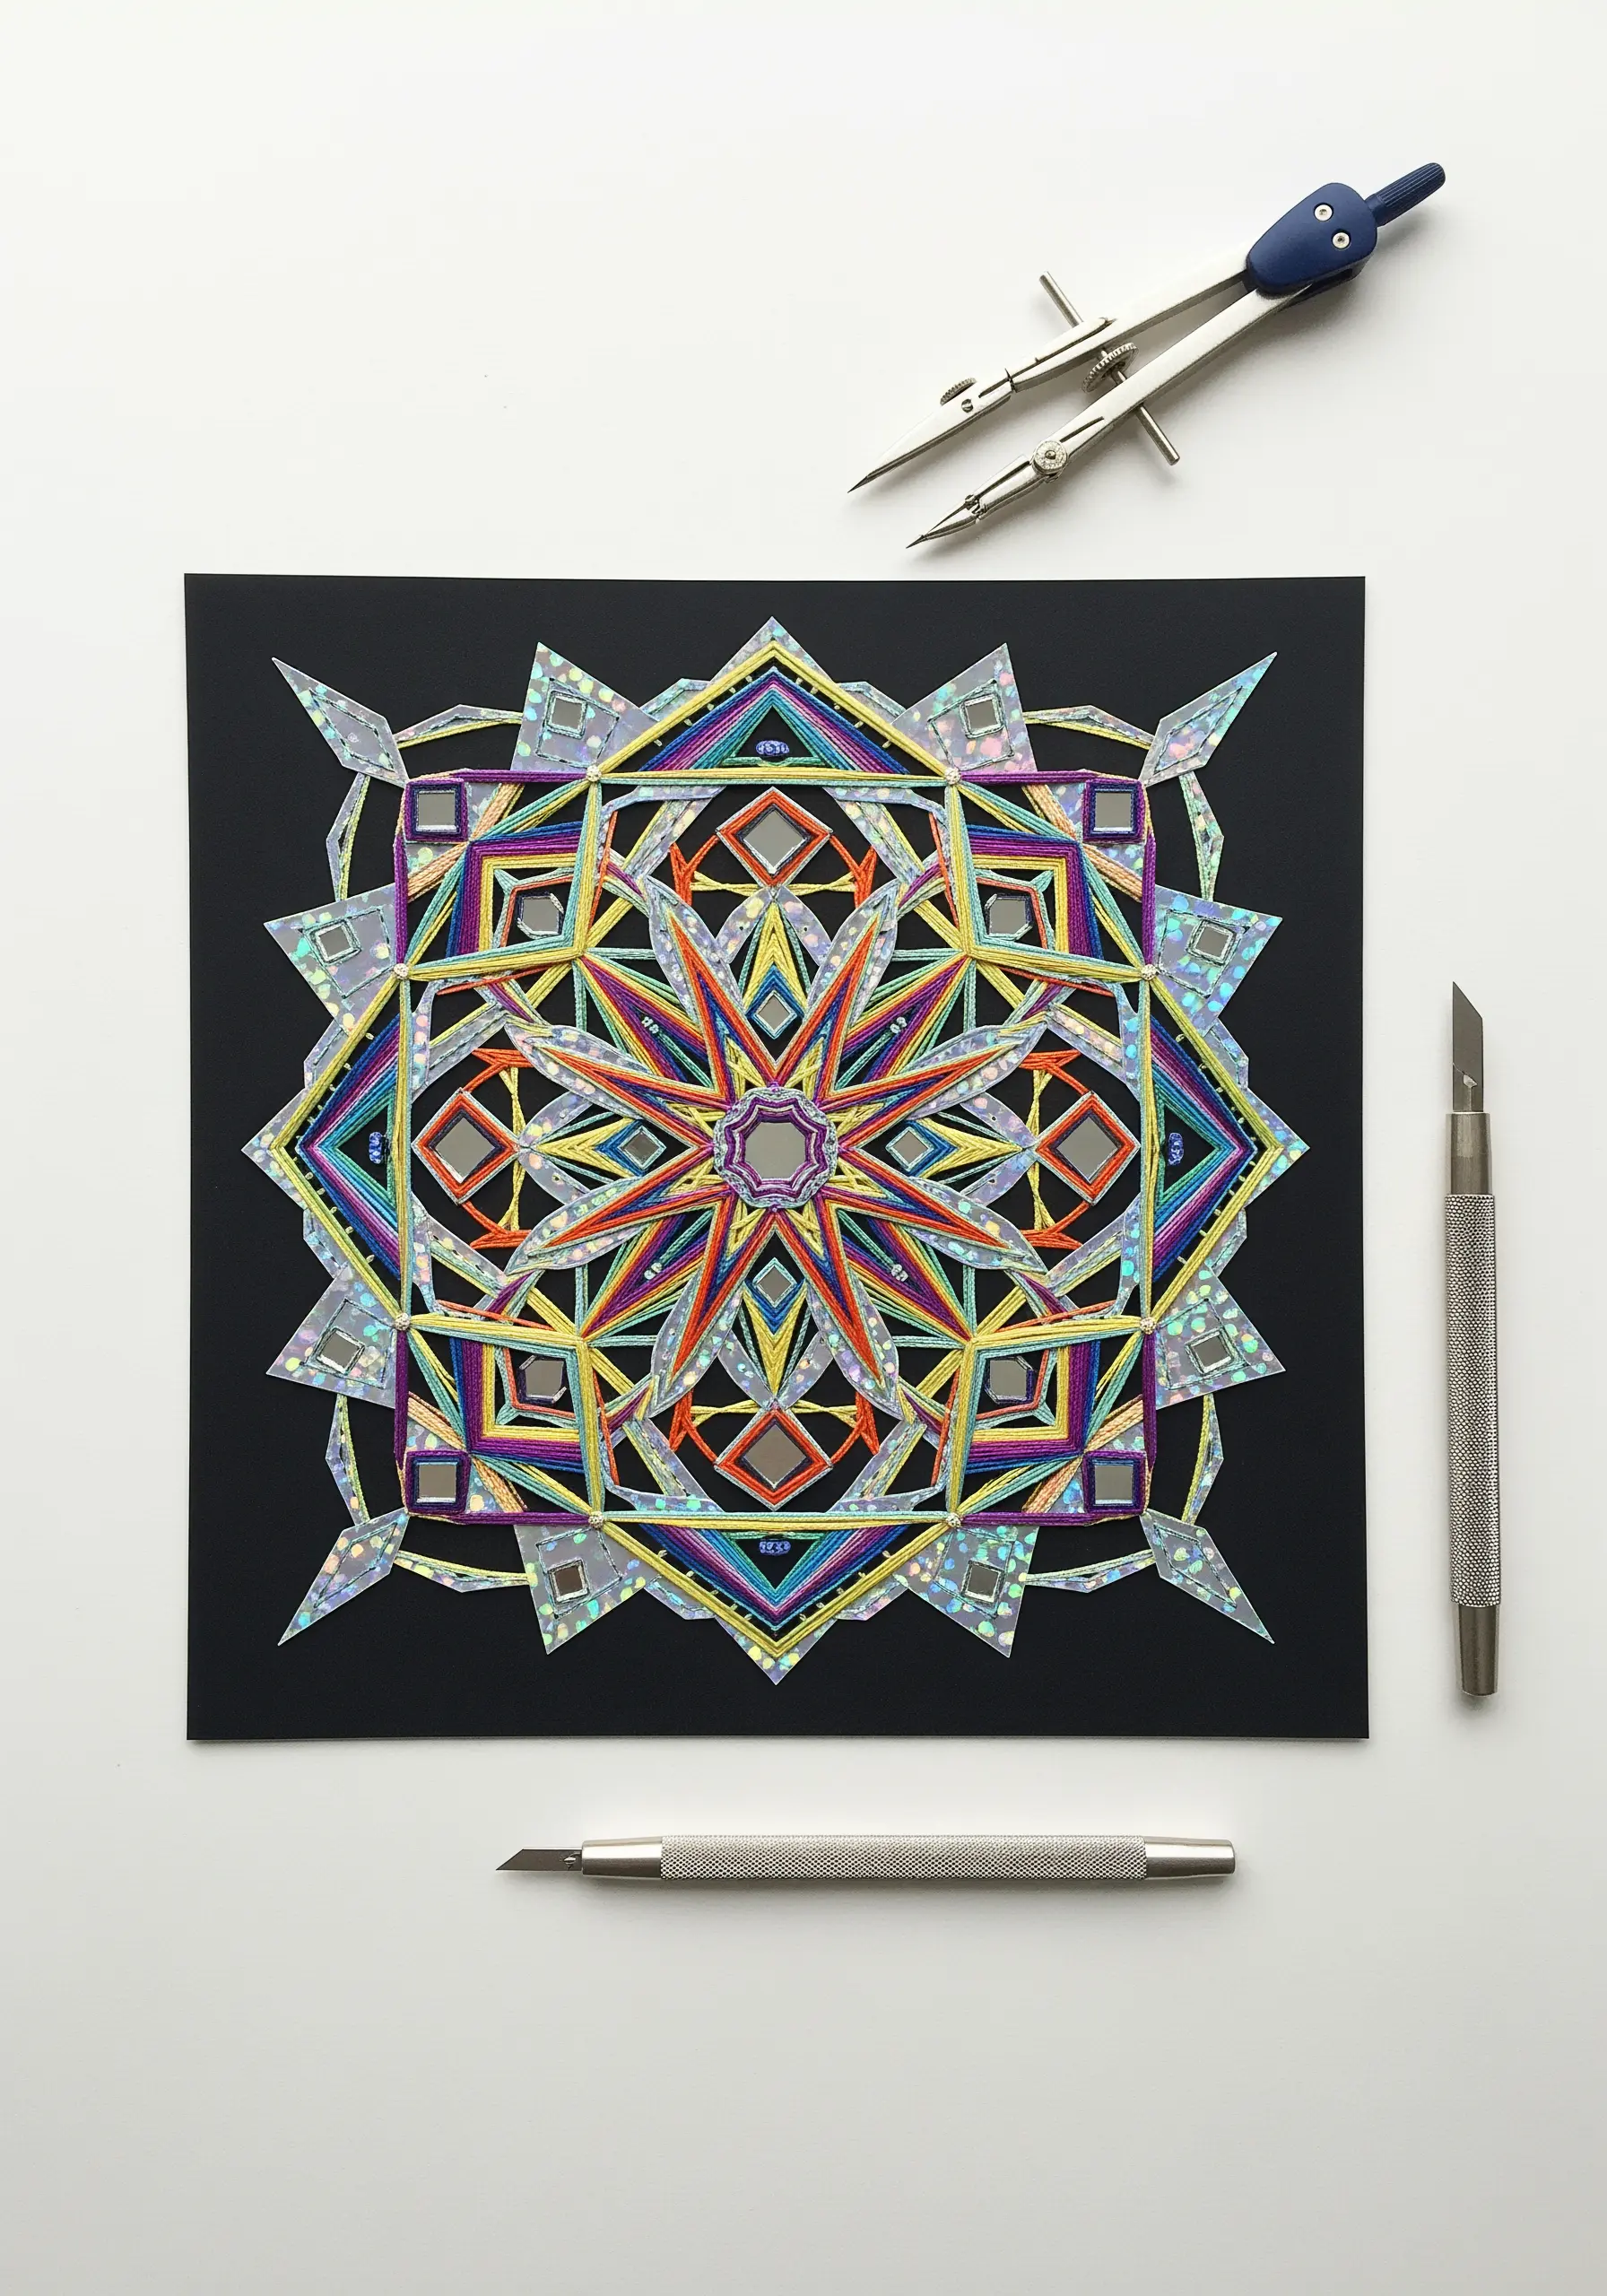
Create a mesmerizing, string-art-style mandala by stitching directly onto a dark, sturdy cardstock.
The black background makes vibrant thread colors pop and allows metallic or holographic paper accents to shine.
Use a compass and ruler to draw your geometric guidelines faintly in pencil, then pierce your holes with an awl before you begin stitching for clean entry points.
Layering threads in different directions and incorporating small pieces of holographic paper creates a kaleidoscopic effect full of depth and light, turning it into a modern thread mandala.
12. Document a Journey with Stitched Pathways
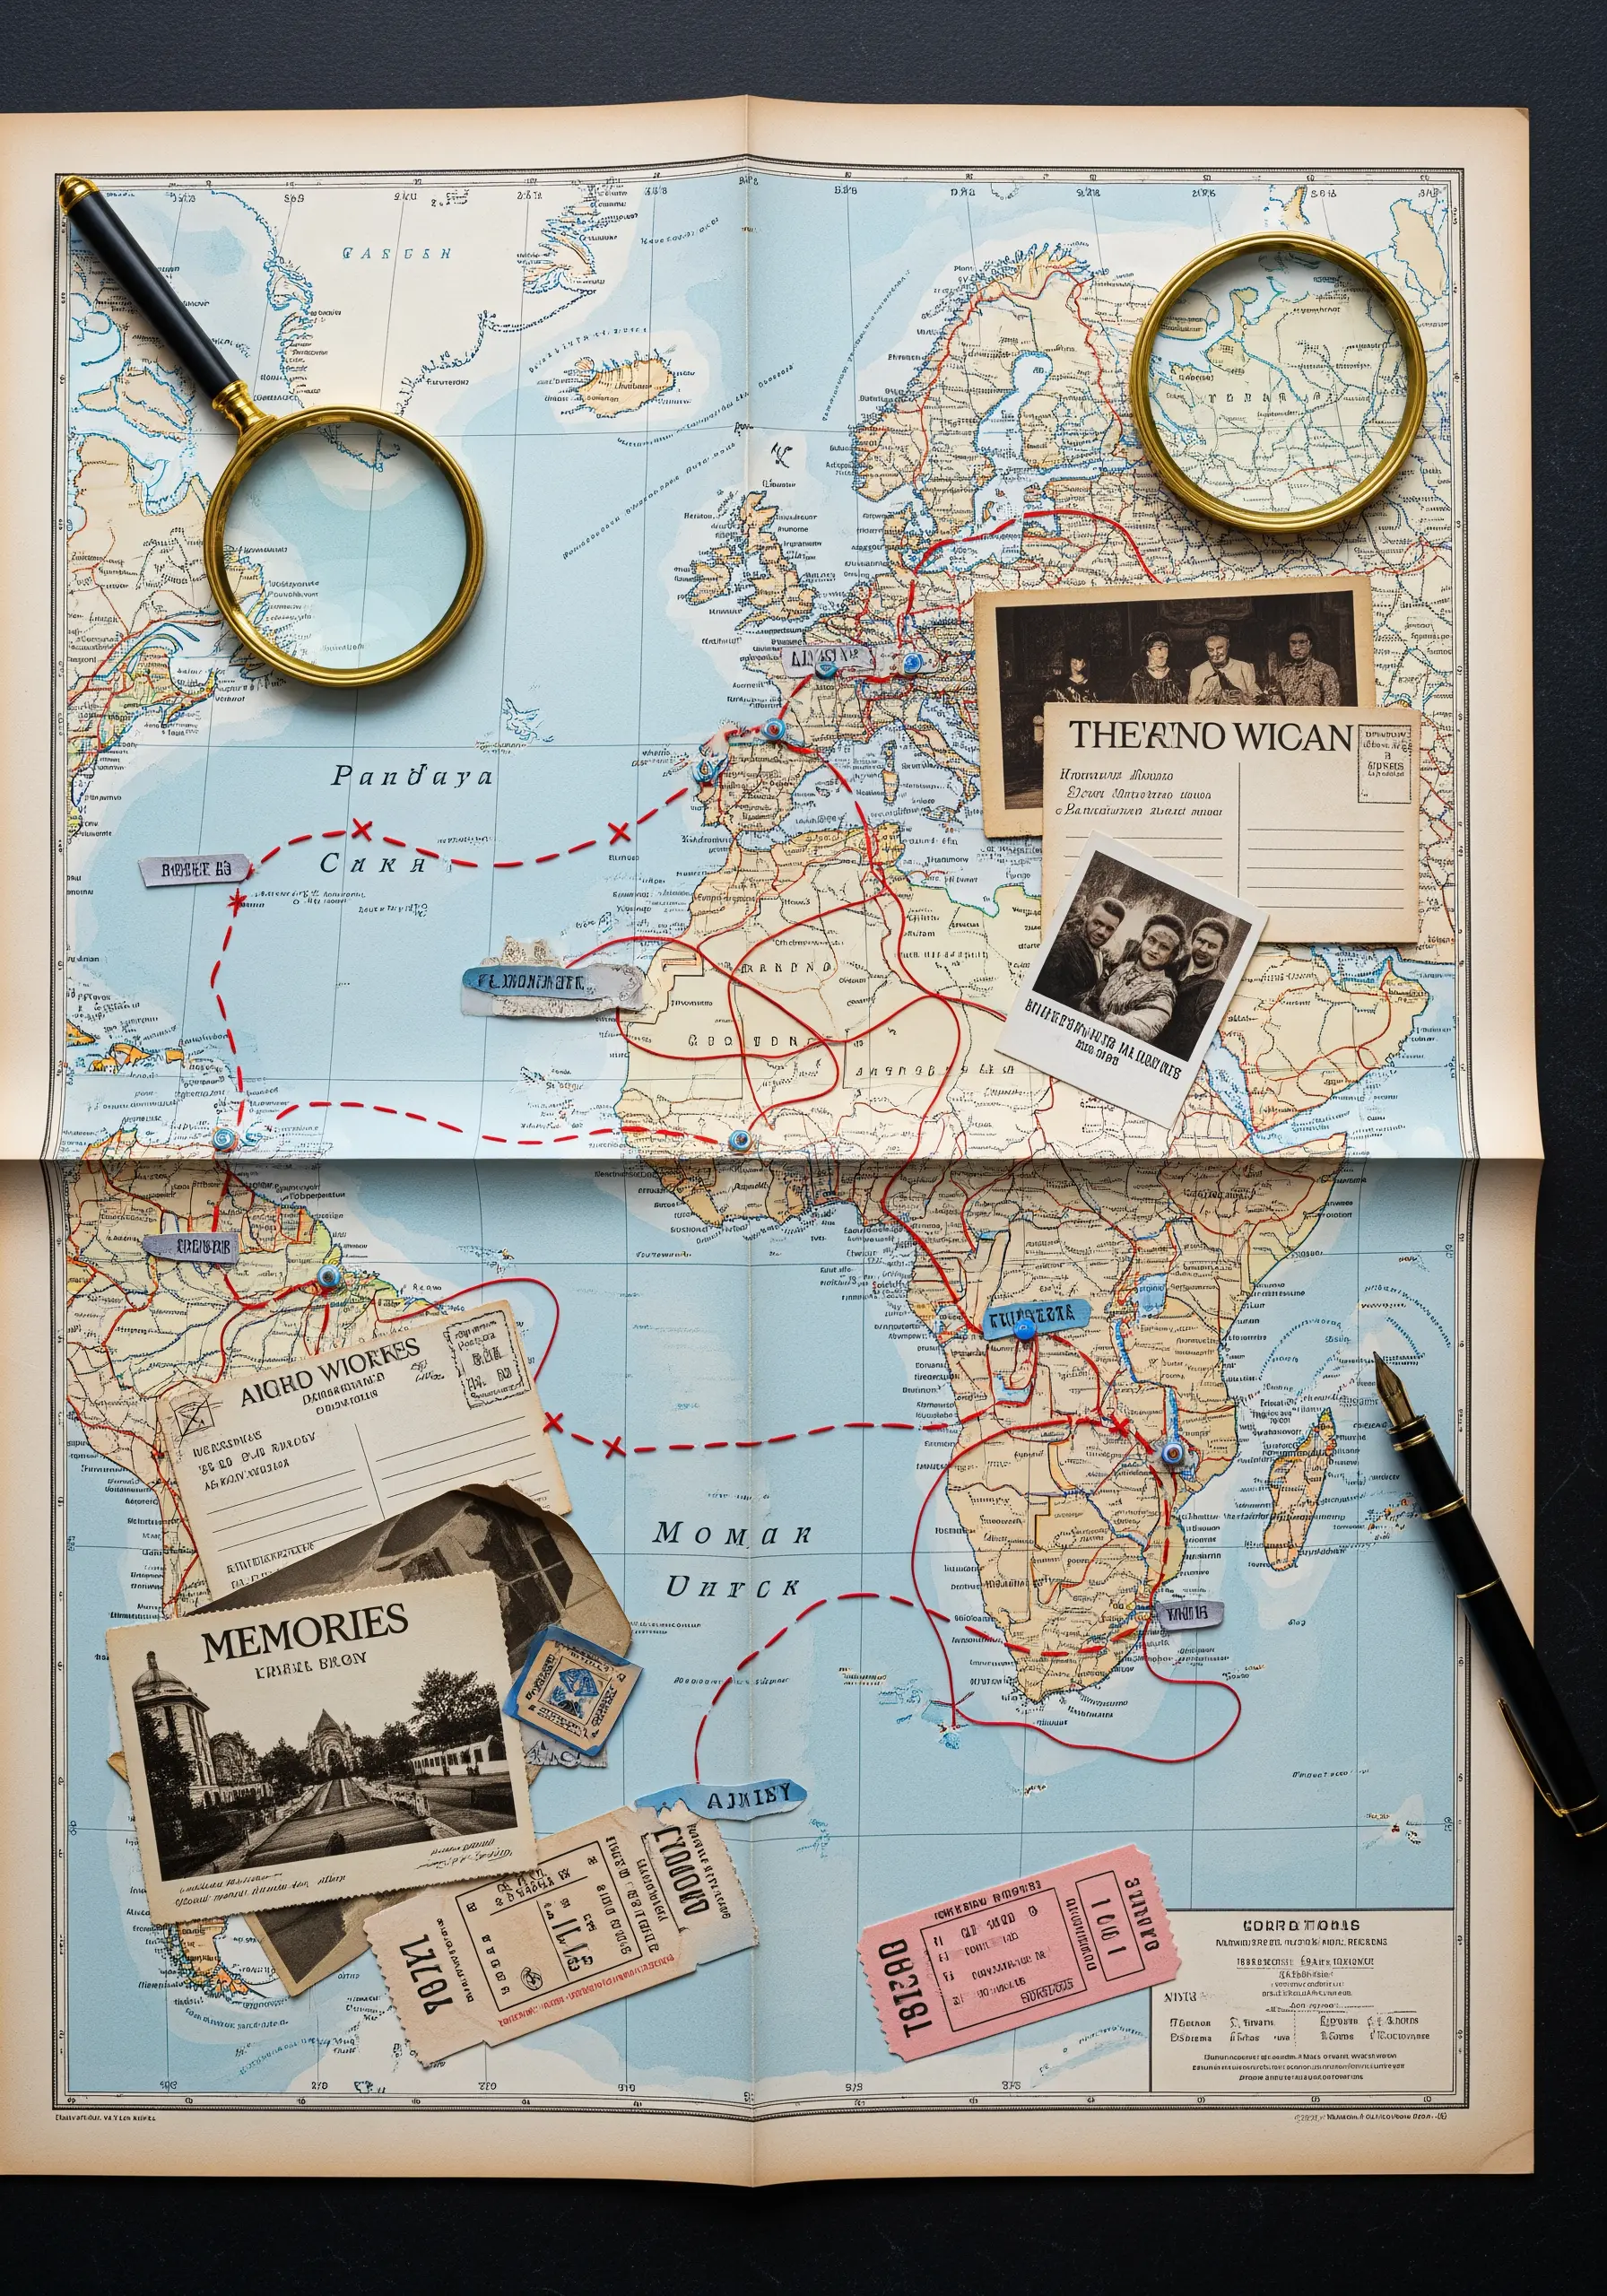
Turn a vintage map into a personal story by using thread to trace a journey or connect meaningful locations.
Select a thread color that stands out against the map’s palette—a bold red or bright blue works well.
Use a simple backstitch to create the path, which is clear and easy to follow visually.
You can further personalize it by tucking in small photos or ephemera, attaching them with a few discreet stitches, creating a beautiful piece of minimal travel-themed embroidery.
13. Give Typography a Plush, Tactile Finish
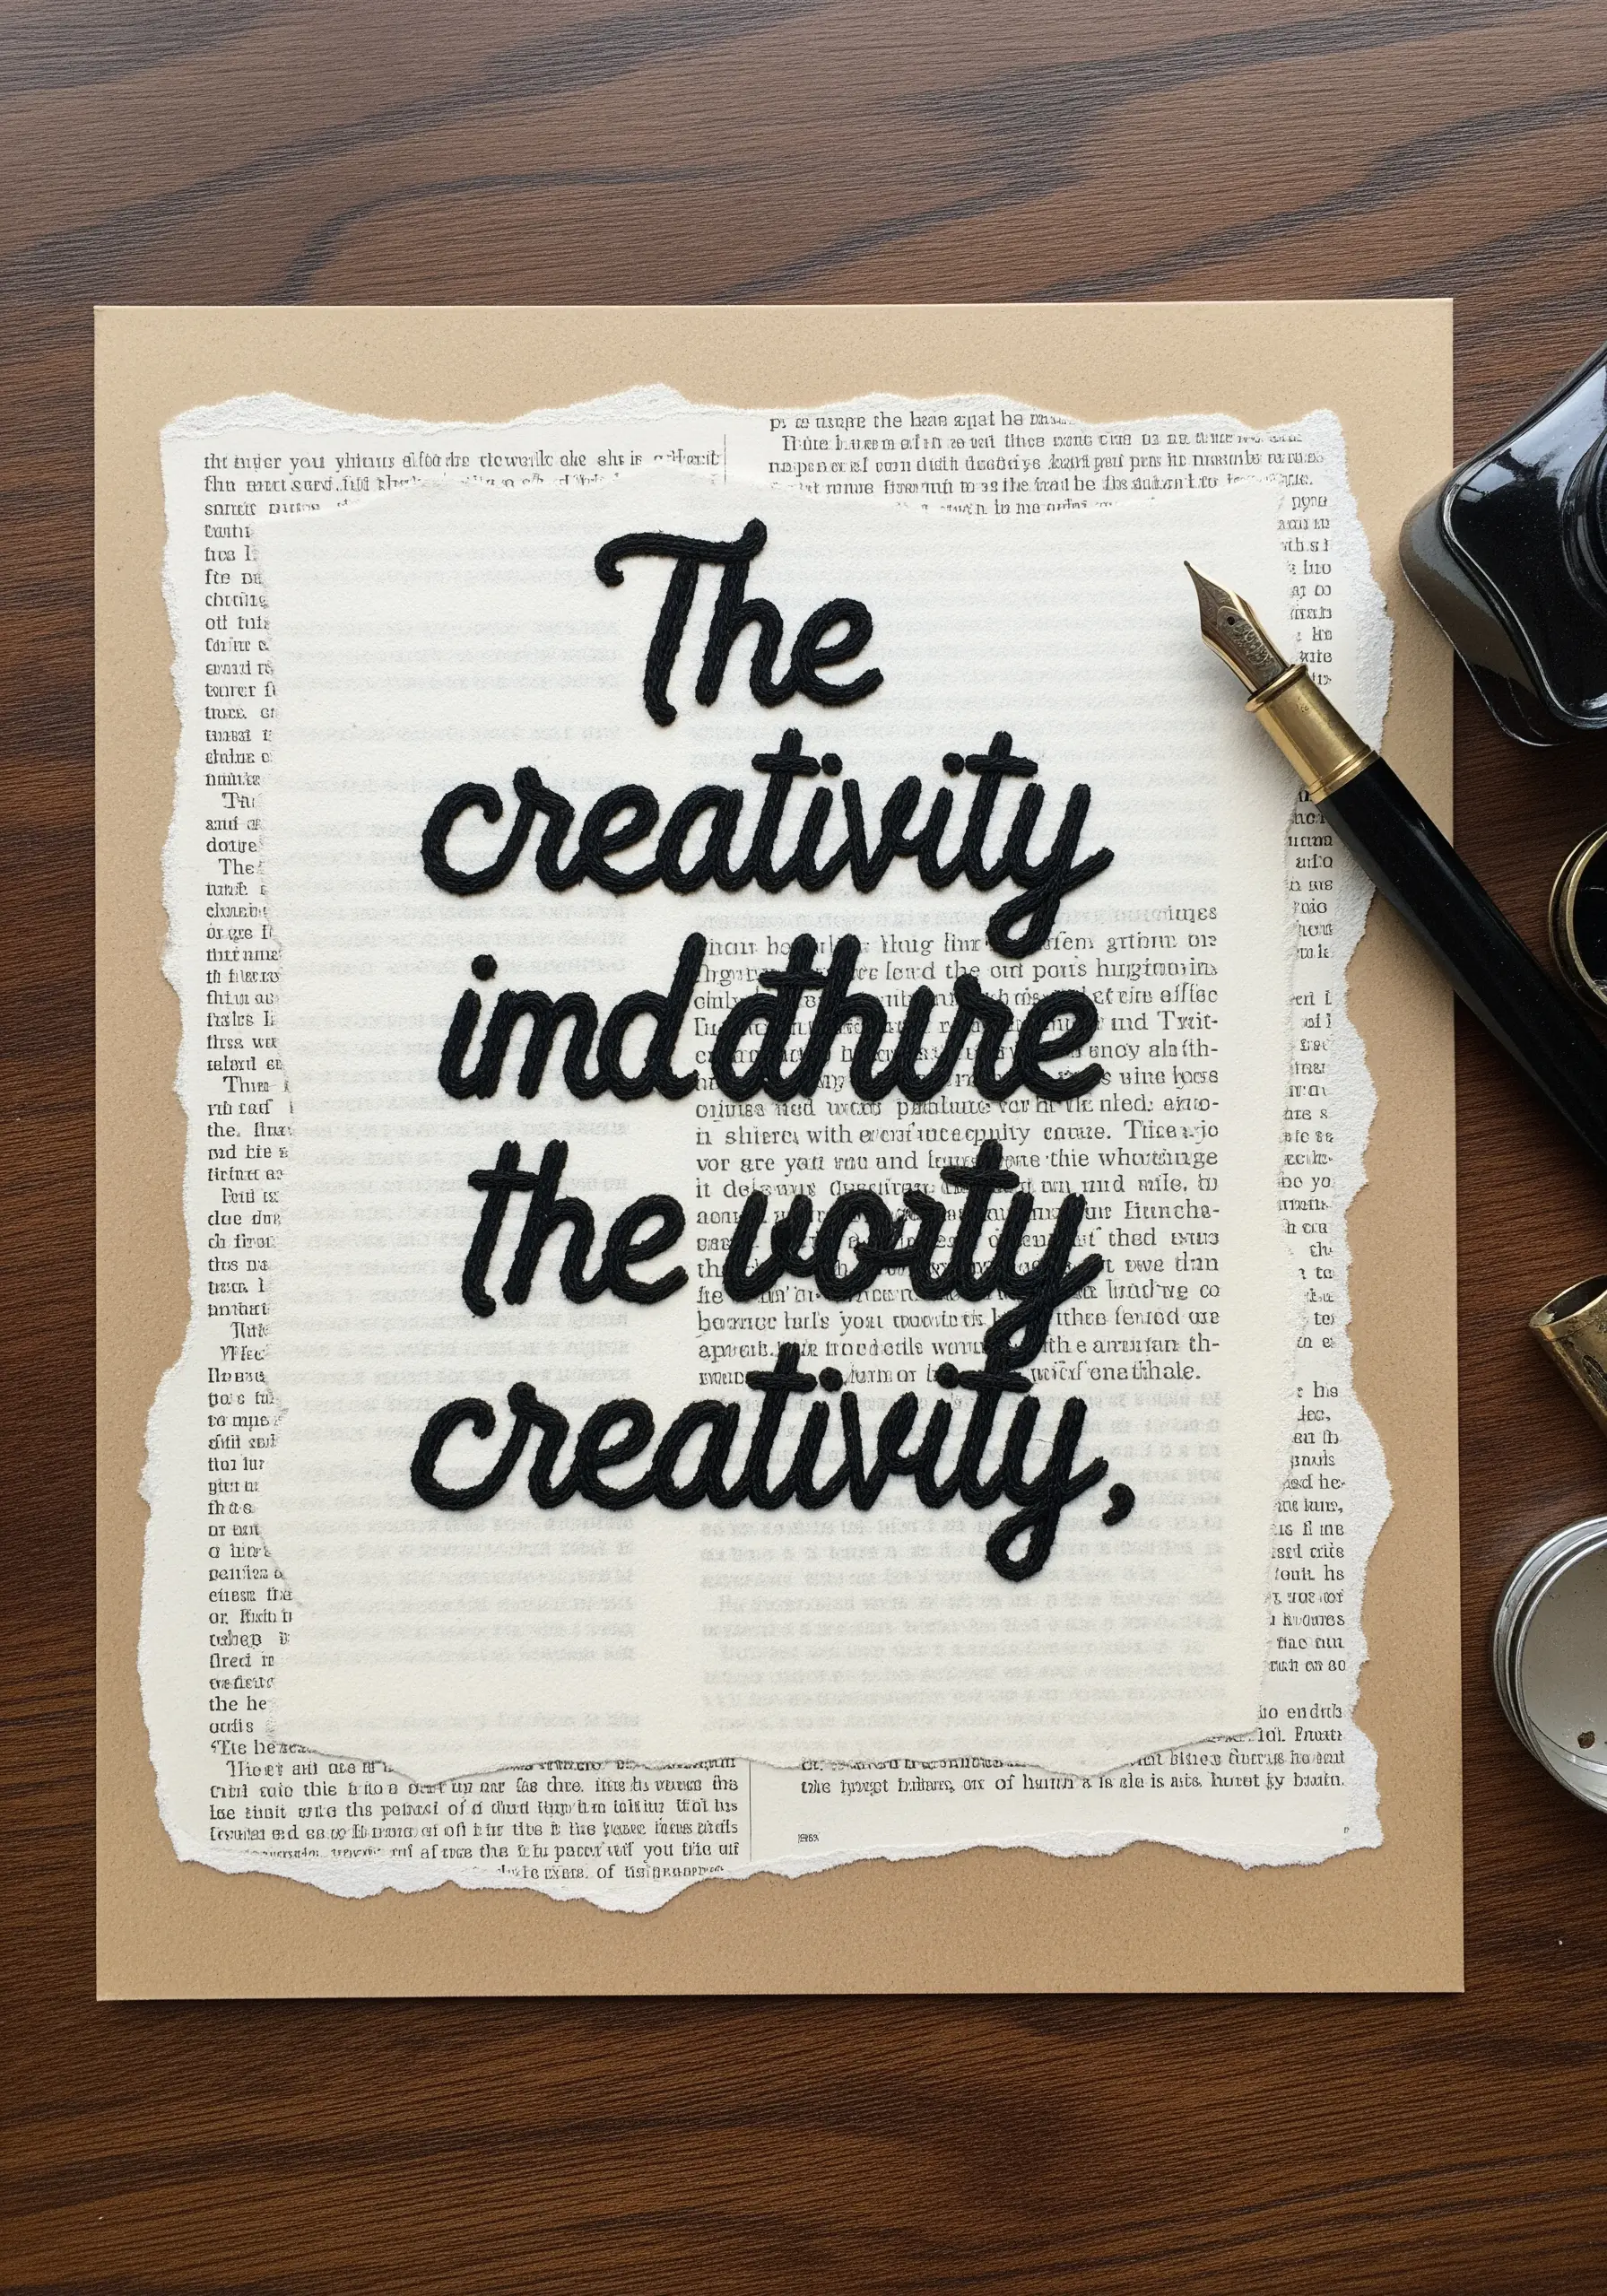
Make words literally stand off the page by rendering them in a dense, raised embroidery stitch on a paper background.
Choose a thick, soft thread like chenille or fine yarn to create a velvety, high-relief texture.
Outline your letters first, then fill them with a dense satin stitch or chain stitch, ensuring your stitches are tight and uniform.
This technique contrasts the hard, flat nature of text with a soft, inviting tactility, perfect for contemporary typography stitch designs.
14. Build a Coral Reef with Sculptural Stitches
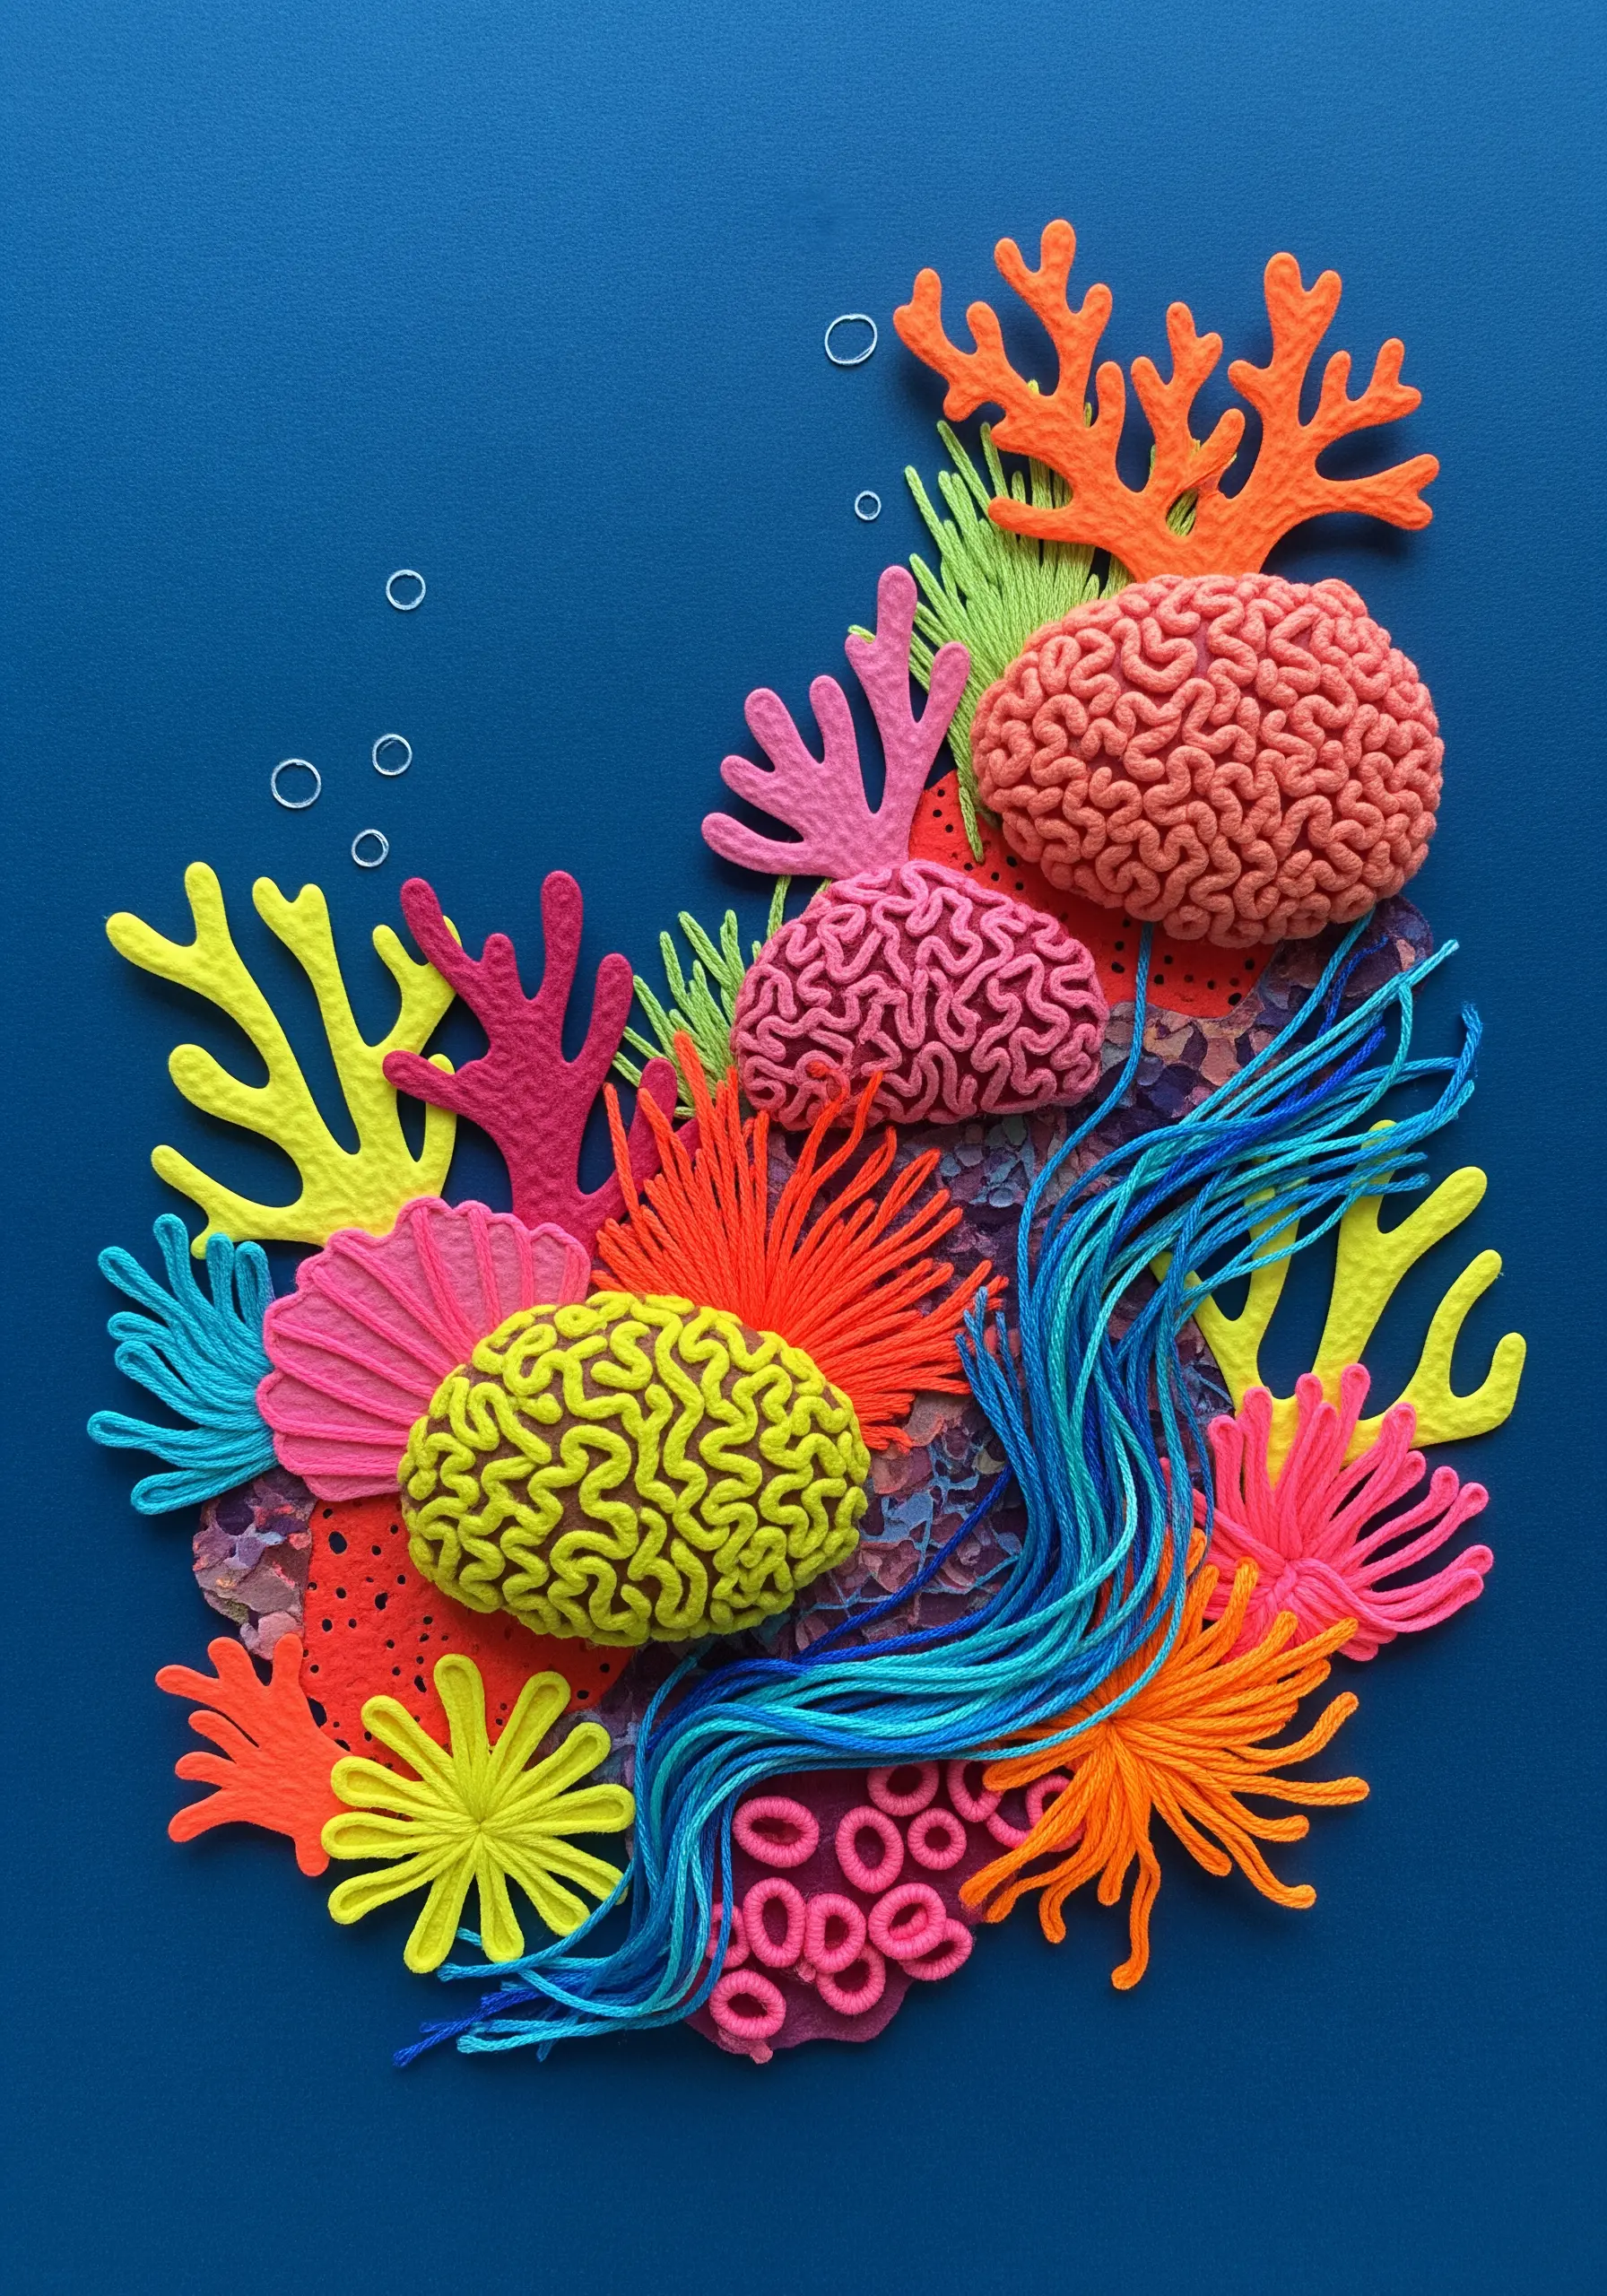
Create a vibrant, underwater world by combining paper cutouts with highly textural, sculptural embroidery stitches.
Use stitches like the woven wheel, French knot clusters, and Turkey work to mimic the complex structures of brain coral and sea anemones.
Let some threads hang loose and flow across the composition to suggest ocean currents and movement.
The combination of flat paper shapes and three-dimensional thread work creates an incredibly dynamic and engaging piece of playful mixed-fiber art.
15. Create a Patchwork of Stitched Tiles
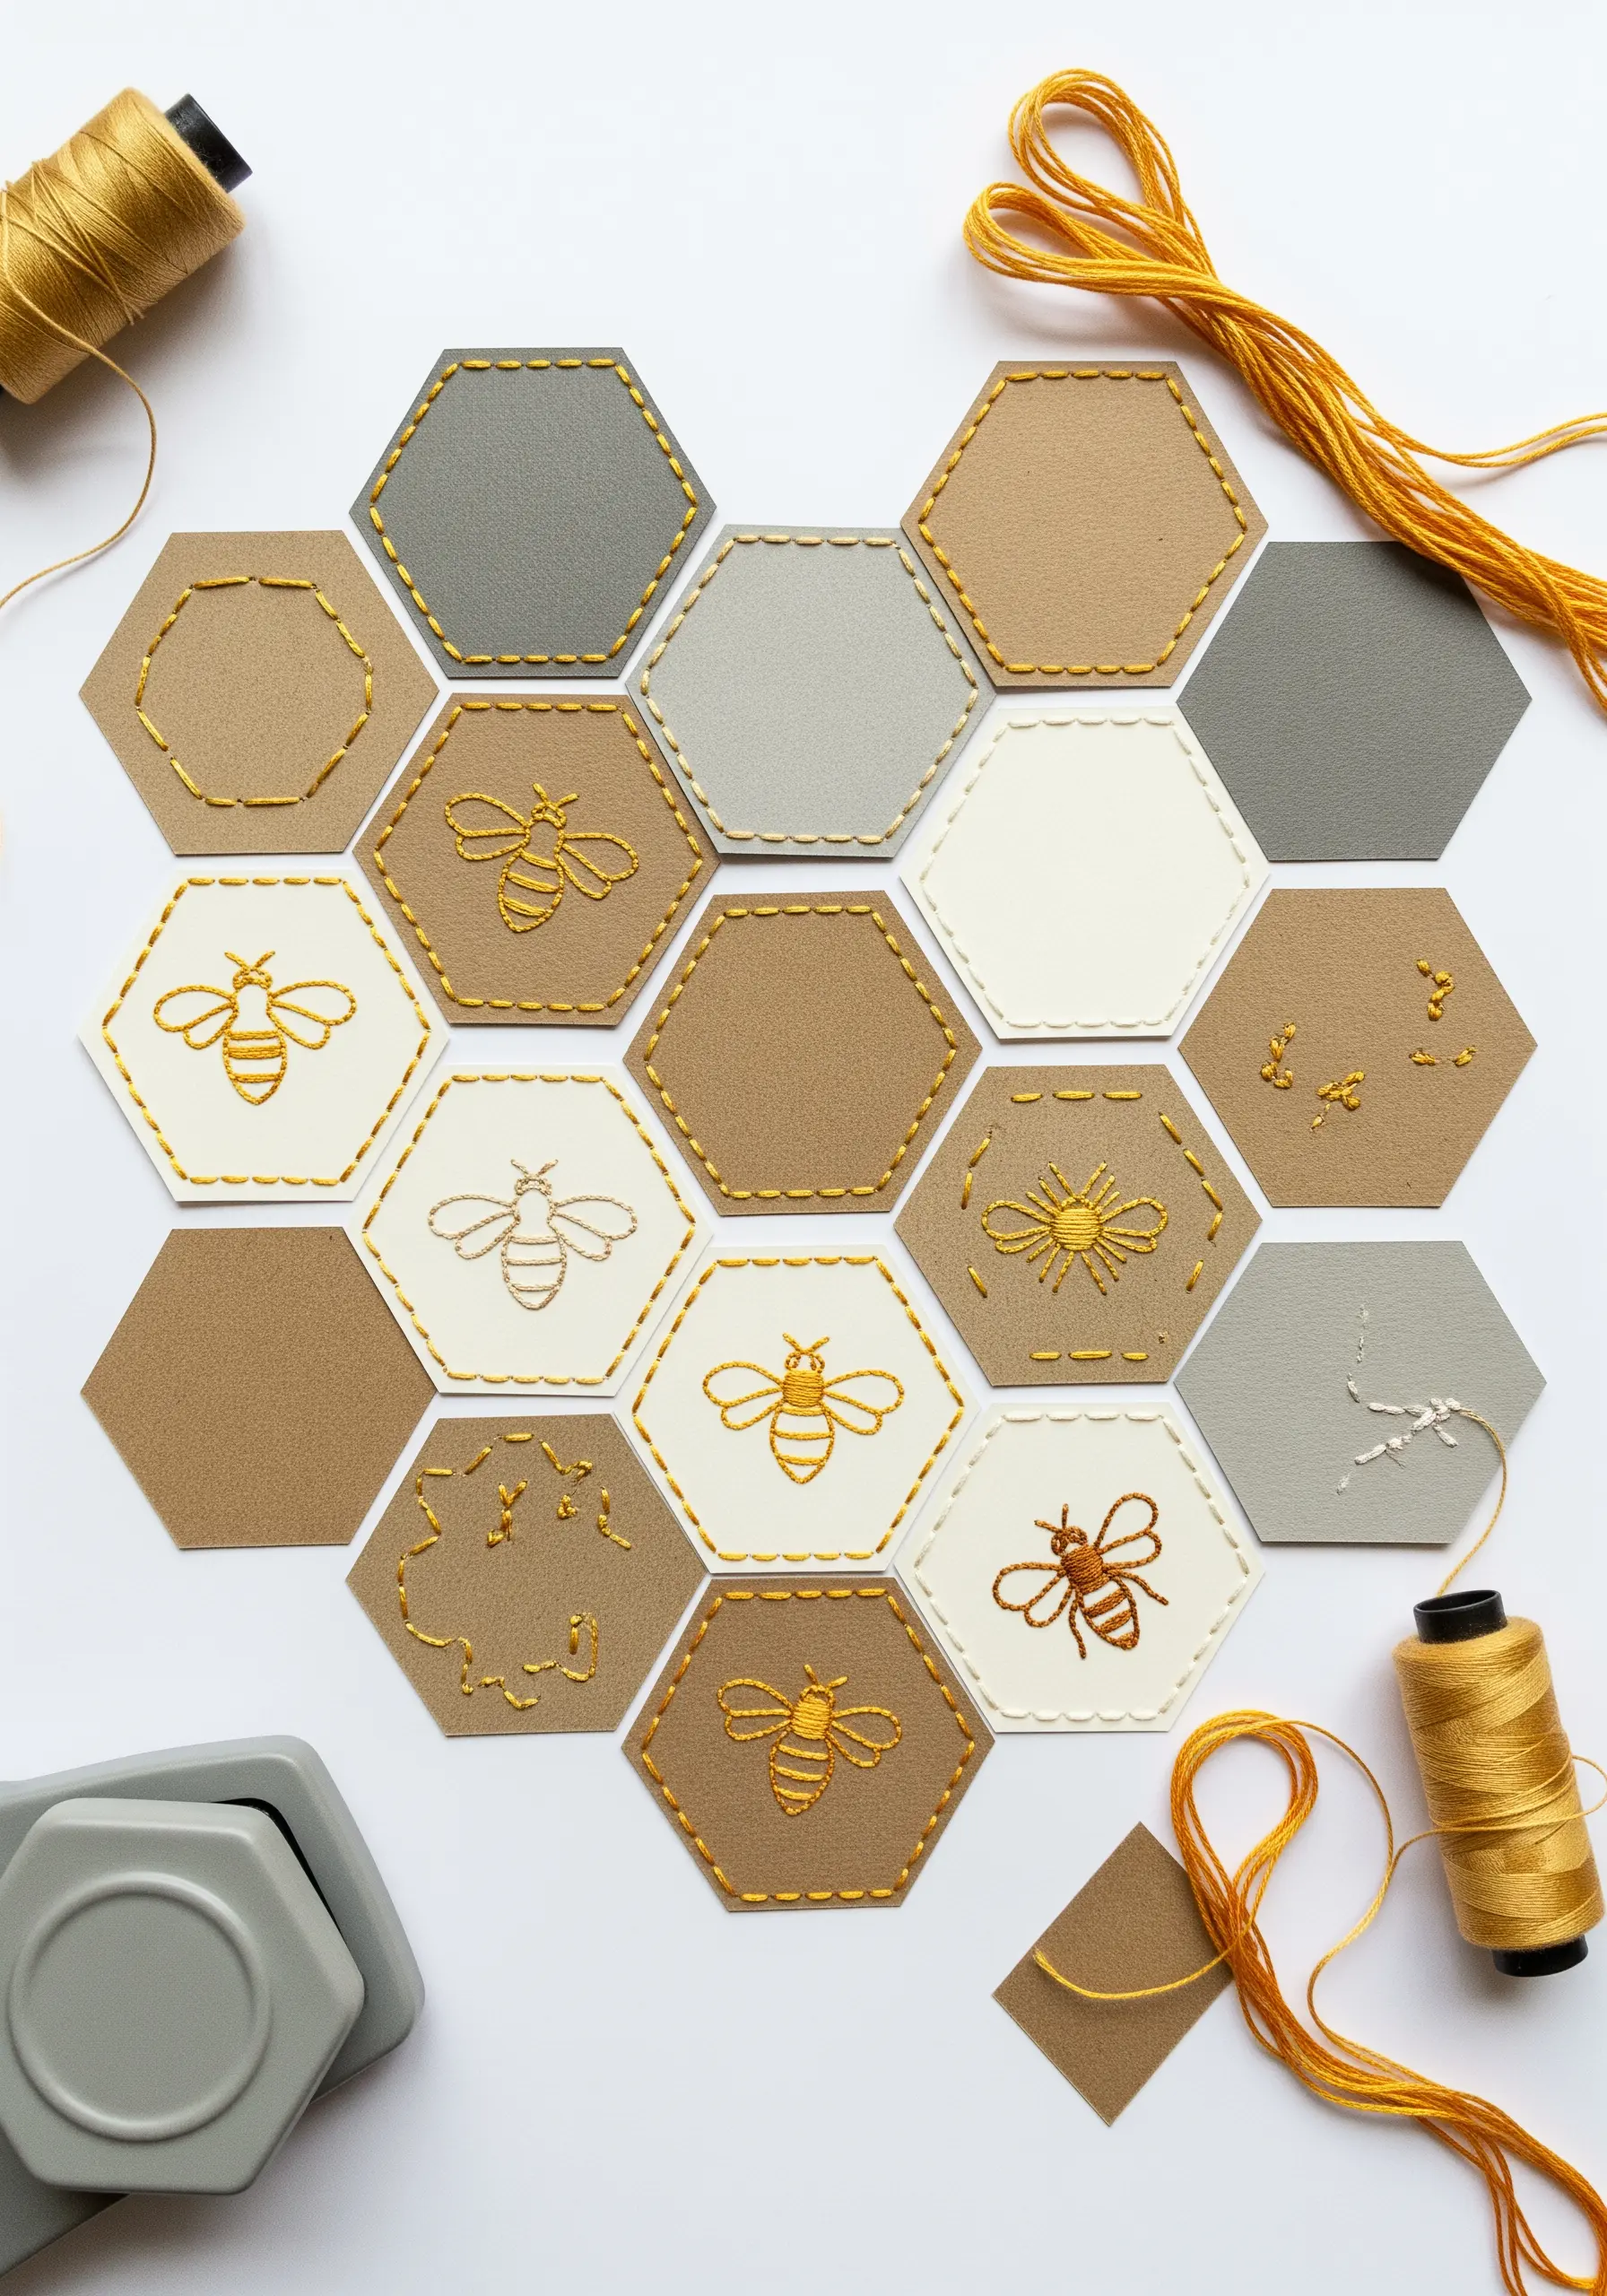
Design a modular piece of art by embroidering small motifs on individual paper tiles, then arranging them into a larger composition.
Use a hexagon paper punch for uniformity and choose a muted, earthy paper palette for a cohesive look.
Keep the embroidery simple—a running stitch border or a minimalist bee motif—to maintain the clean, graphic quality.
This approach allows for creative freedom in the final arrangement and makes for one of those small embroidery ideas that look complex but are simple to execute.
16. Weave Narrative into Nature with Collage
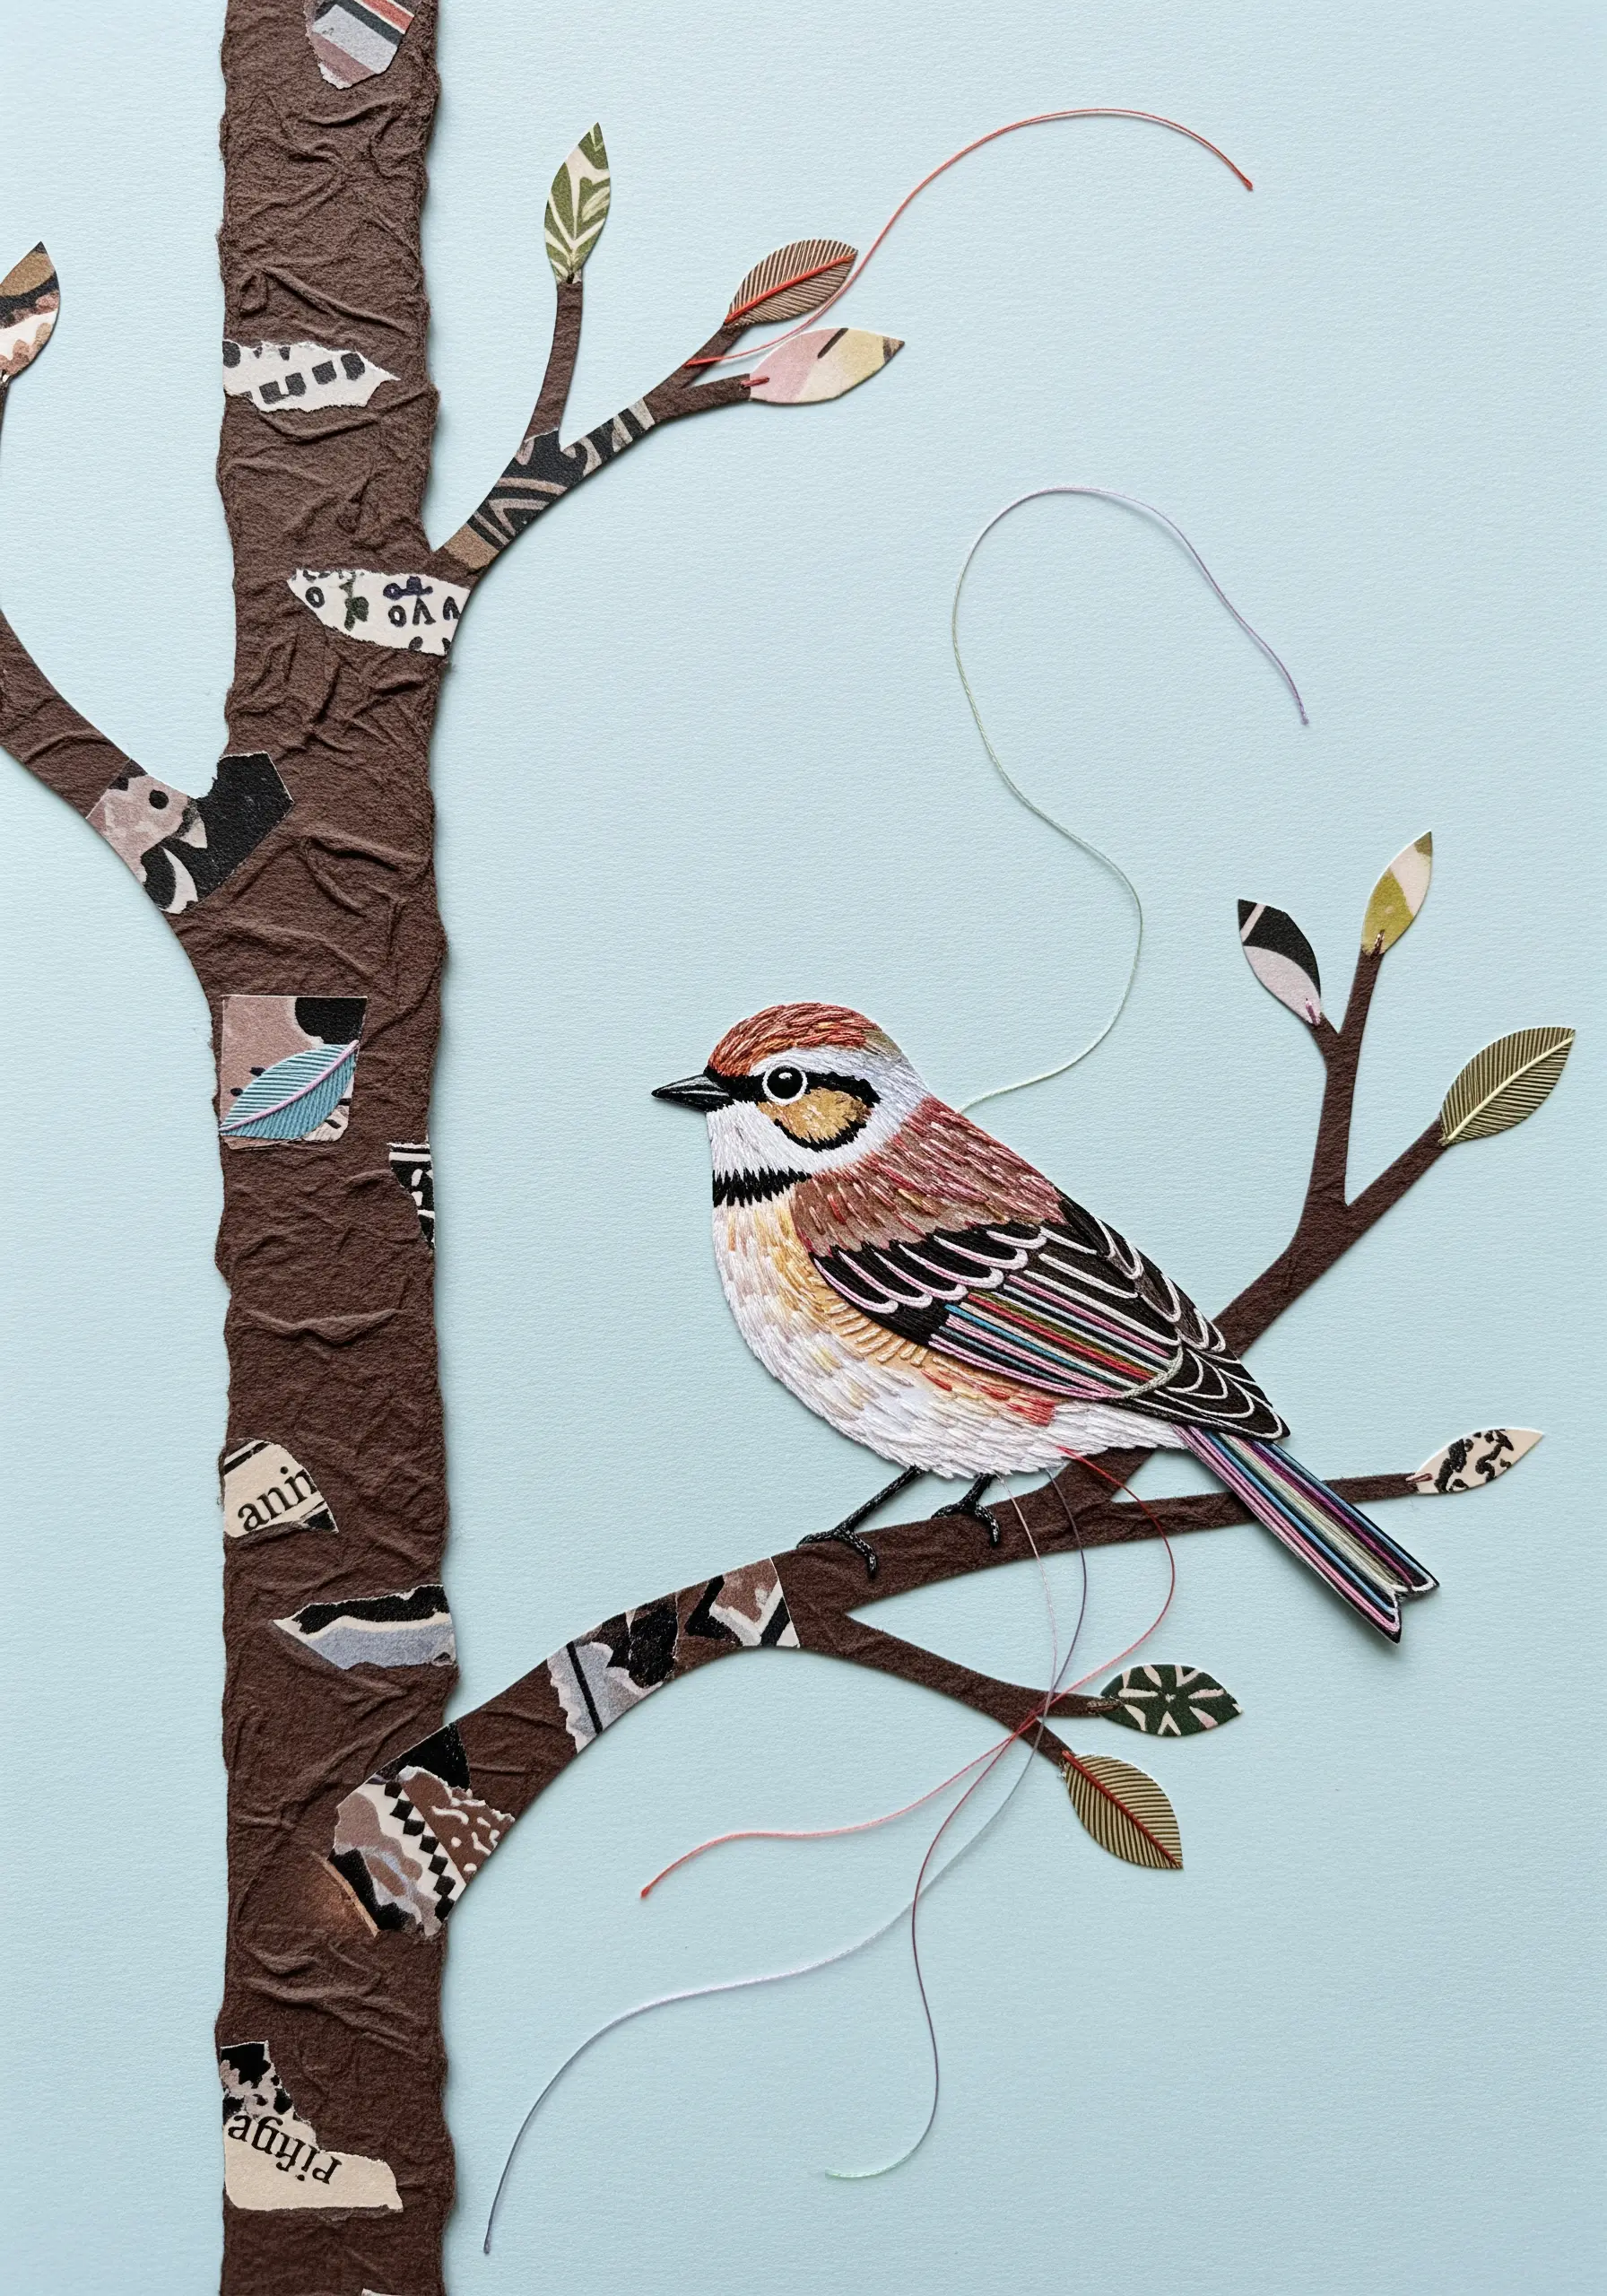
Add a layer of hidden meaning to your nature-inspired artwork by incorporating collaged paper with text and patterns into your design.
Use scraps of book pages, maps, or patterned paper to create texture on the tree bark and leaves.
A few carefully placed threads trailing from the branches add a sense of delicate movement and imperfection.
This thoughtful integration of materials turns a simple bird illustration into a piece rich with story and detail, making for unique collage art ideas.
17. Recreate Pop Art with Bold Threadwork
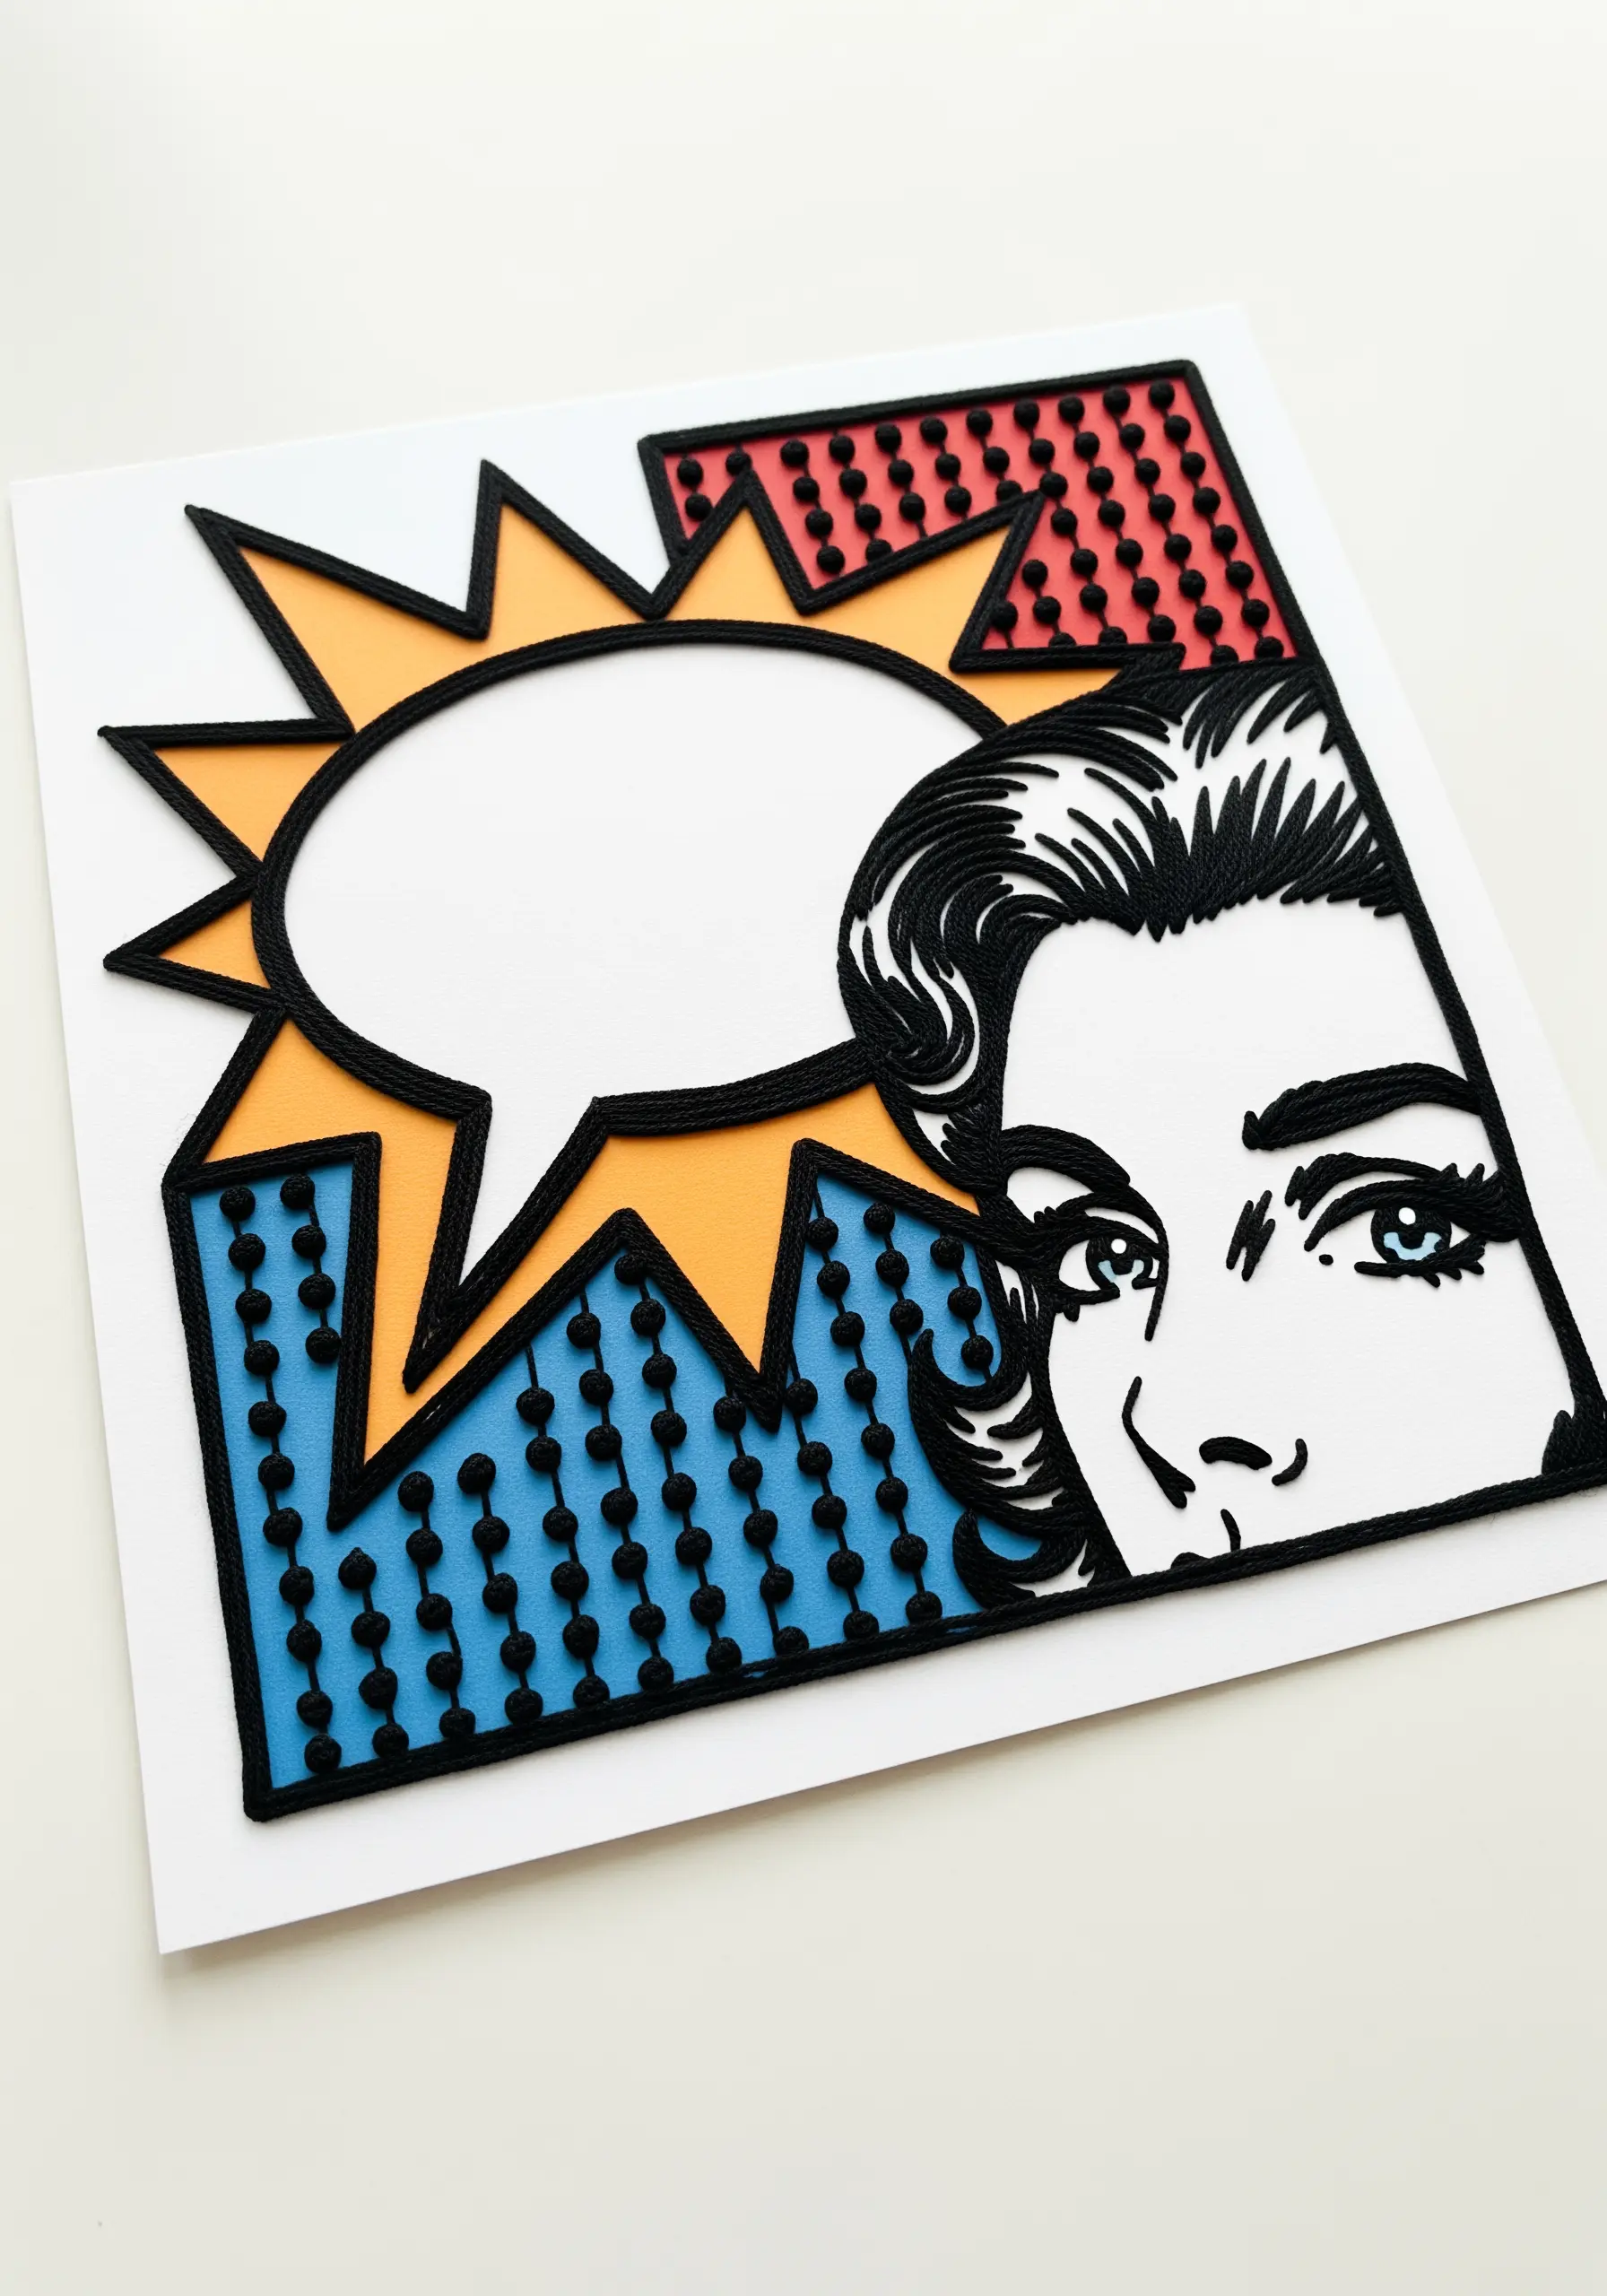
Capture the graphic energy of pop art by translating its bold lines and Ben-Day dots into thread.
Use a thick black thread and a dense satin stitch or couching to create the strong, defining outlines characteristic of the style.
For the dotted patterns, use evenly spaced French knots, which provide a wonderful textural interpretation of printed dots.
The contrast between the flat paper cutouts and the raised, tactile thread makes the artwork pop in a uniquely modern way, similar to these iconic pop-art stitch motifs.
18. Embody Organized Chaos with Thread and Collage
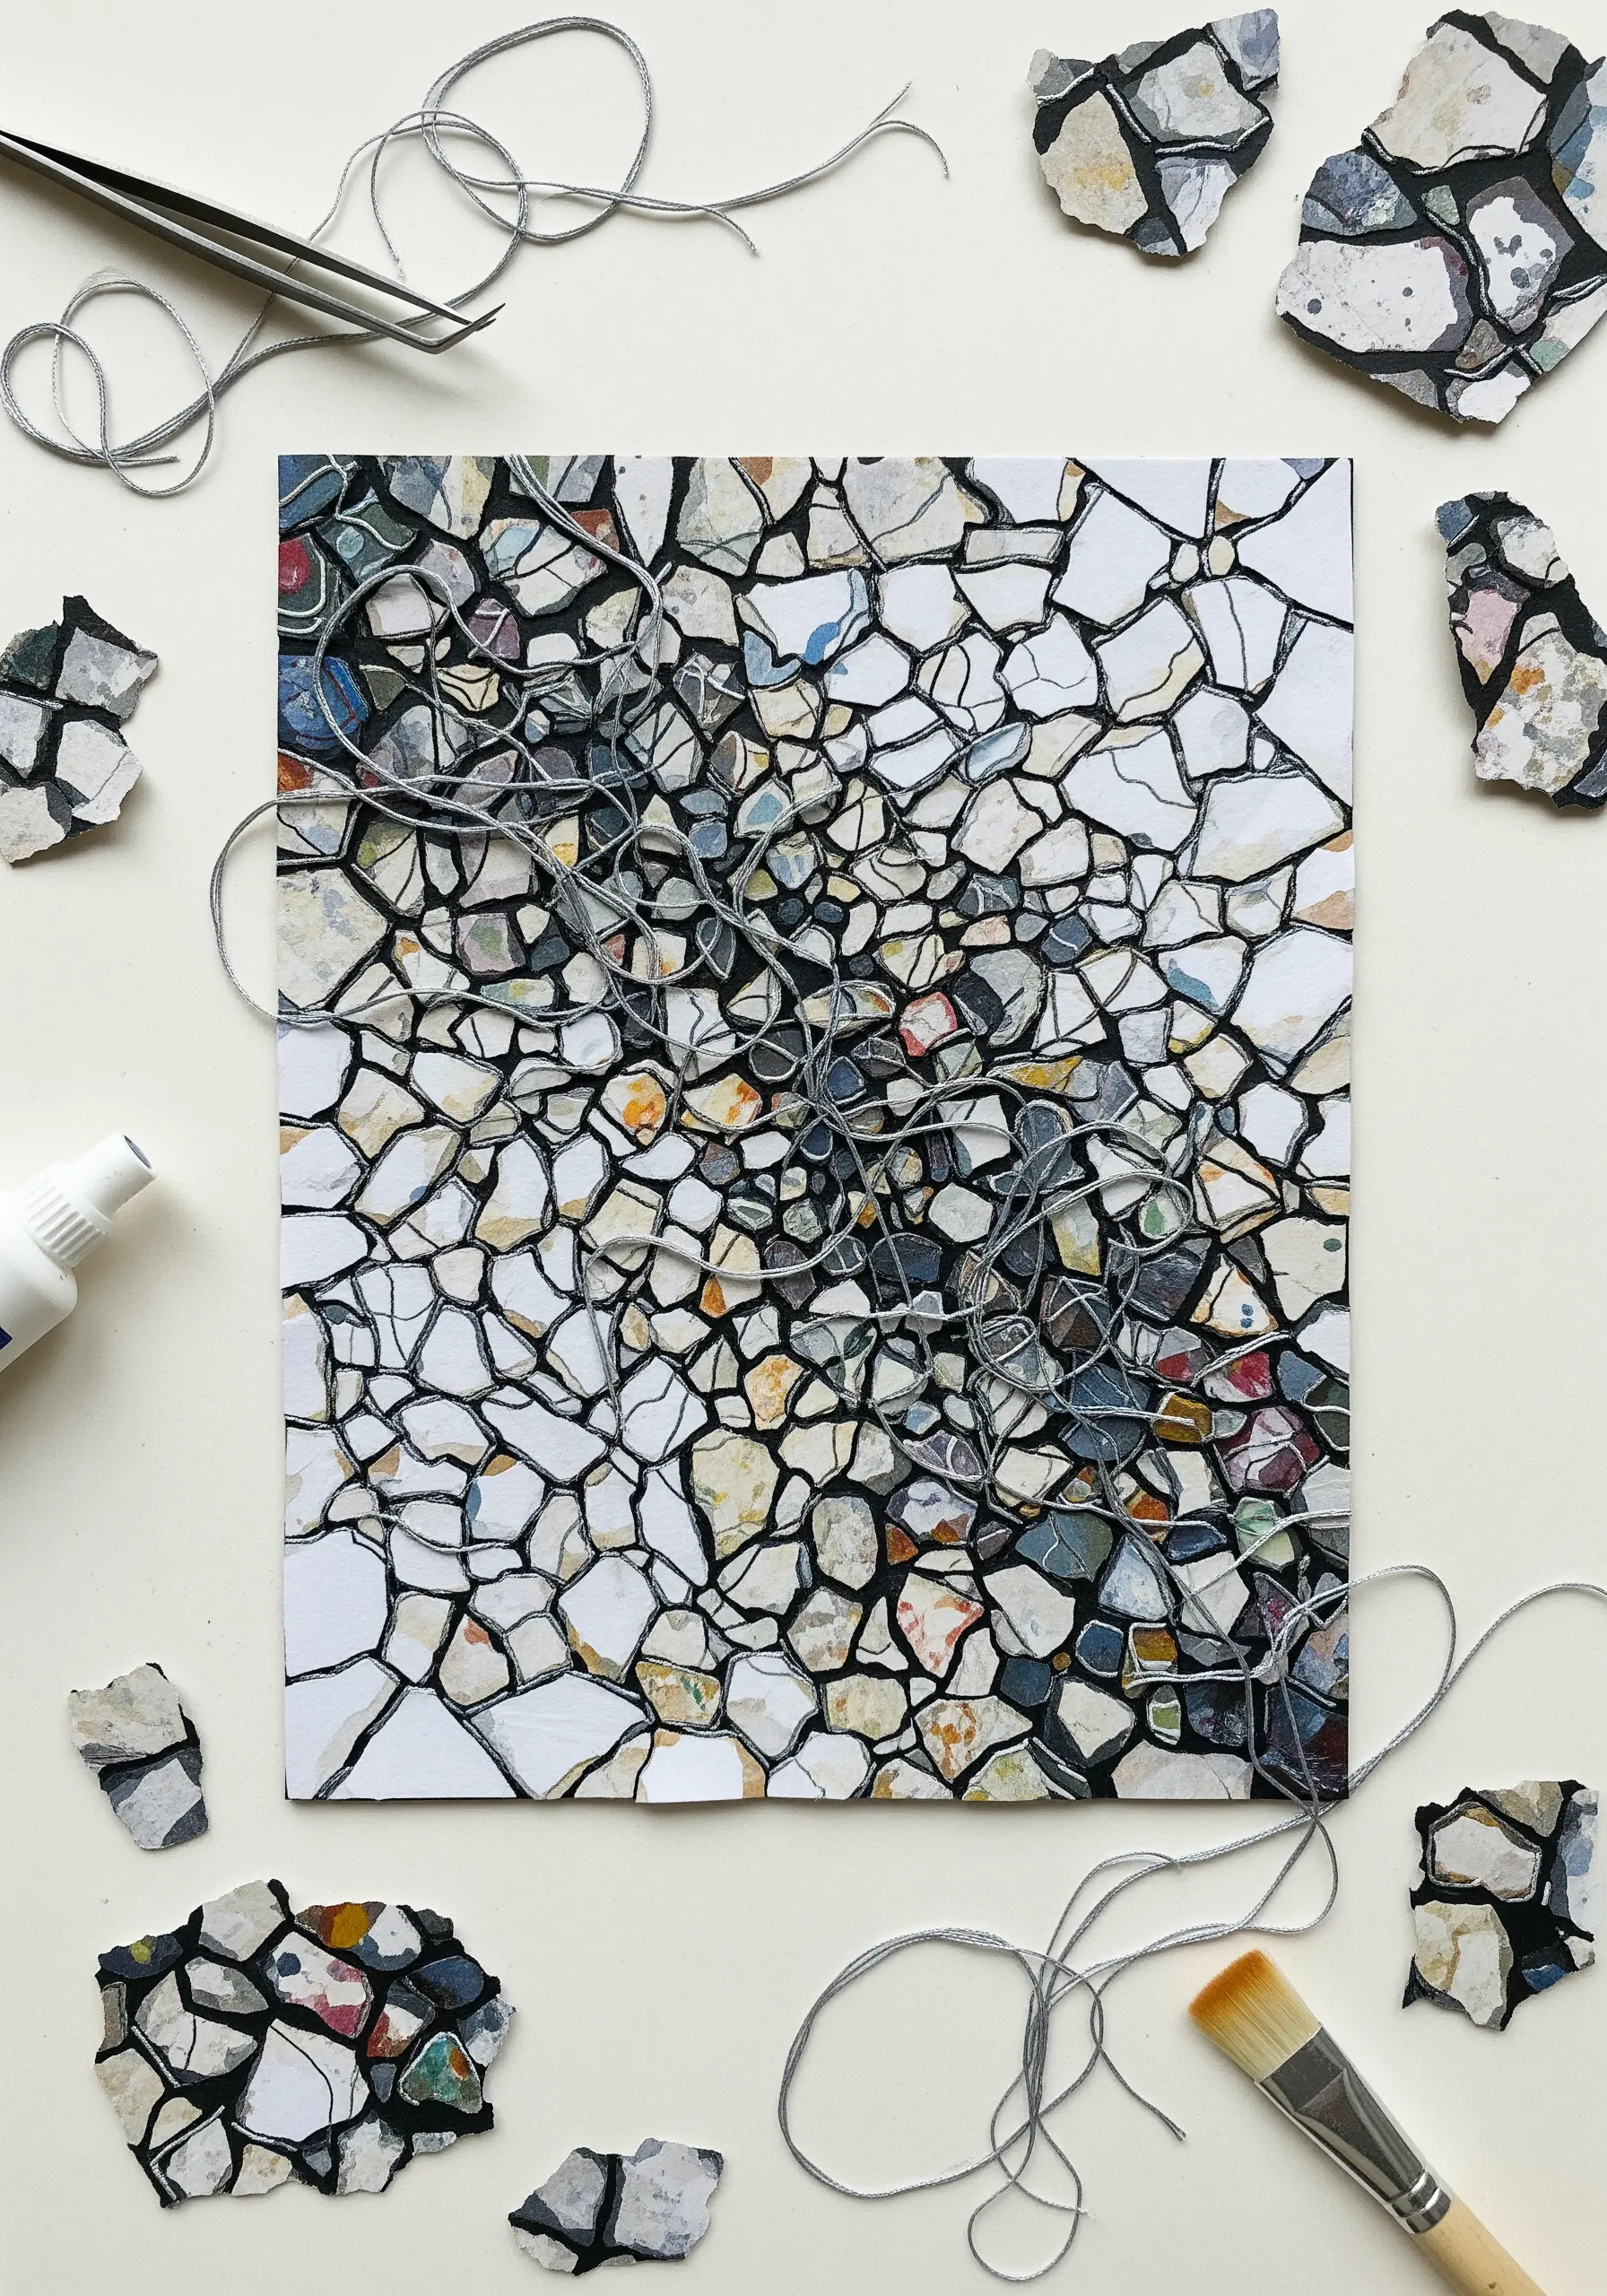
Create a dynamic, abstract piece by layering loose threads between a background and a top layer of collaged paper fragments.
Start by arranging a tangle of thread on your base paper—don’t try to control it too much.
Then, glue down your mosaic-like paper pieces on top, allowing some of the thread to be visible in the gaps.
This method adds an element of chaotic, organic line work that would be difficult to achieve with stitching alone, making for one of the more interesting ways to combine embroidery and mixed media.
19. Illuminate a Scene with Light and Luminous Thread
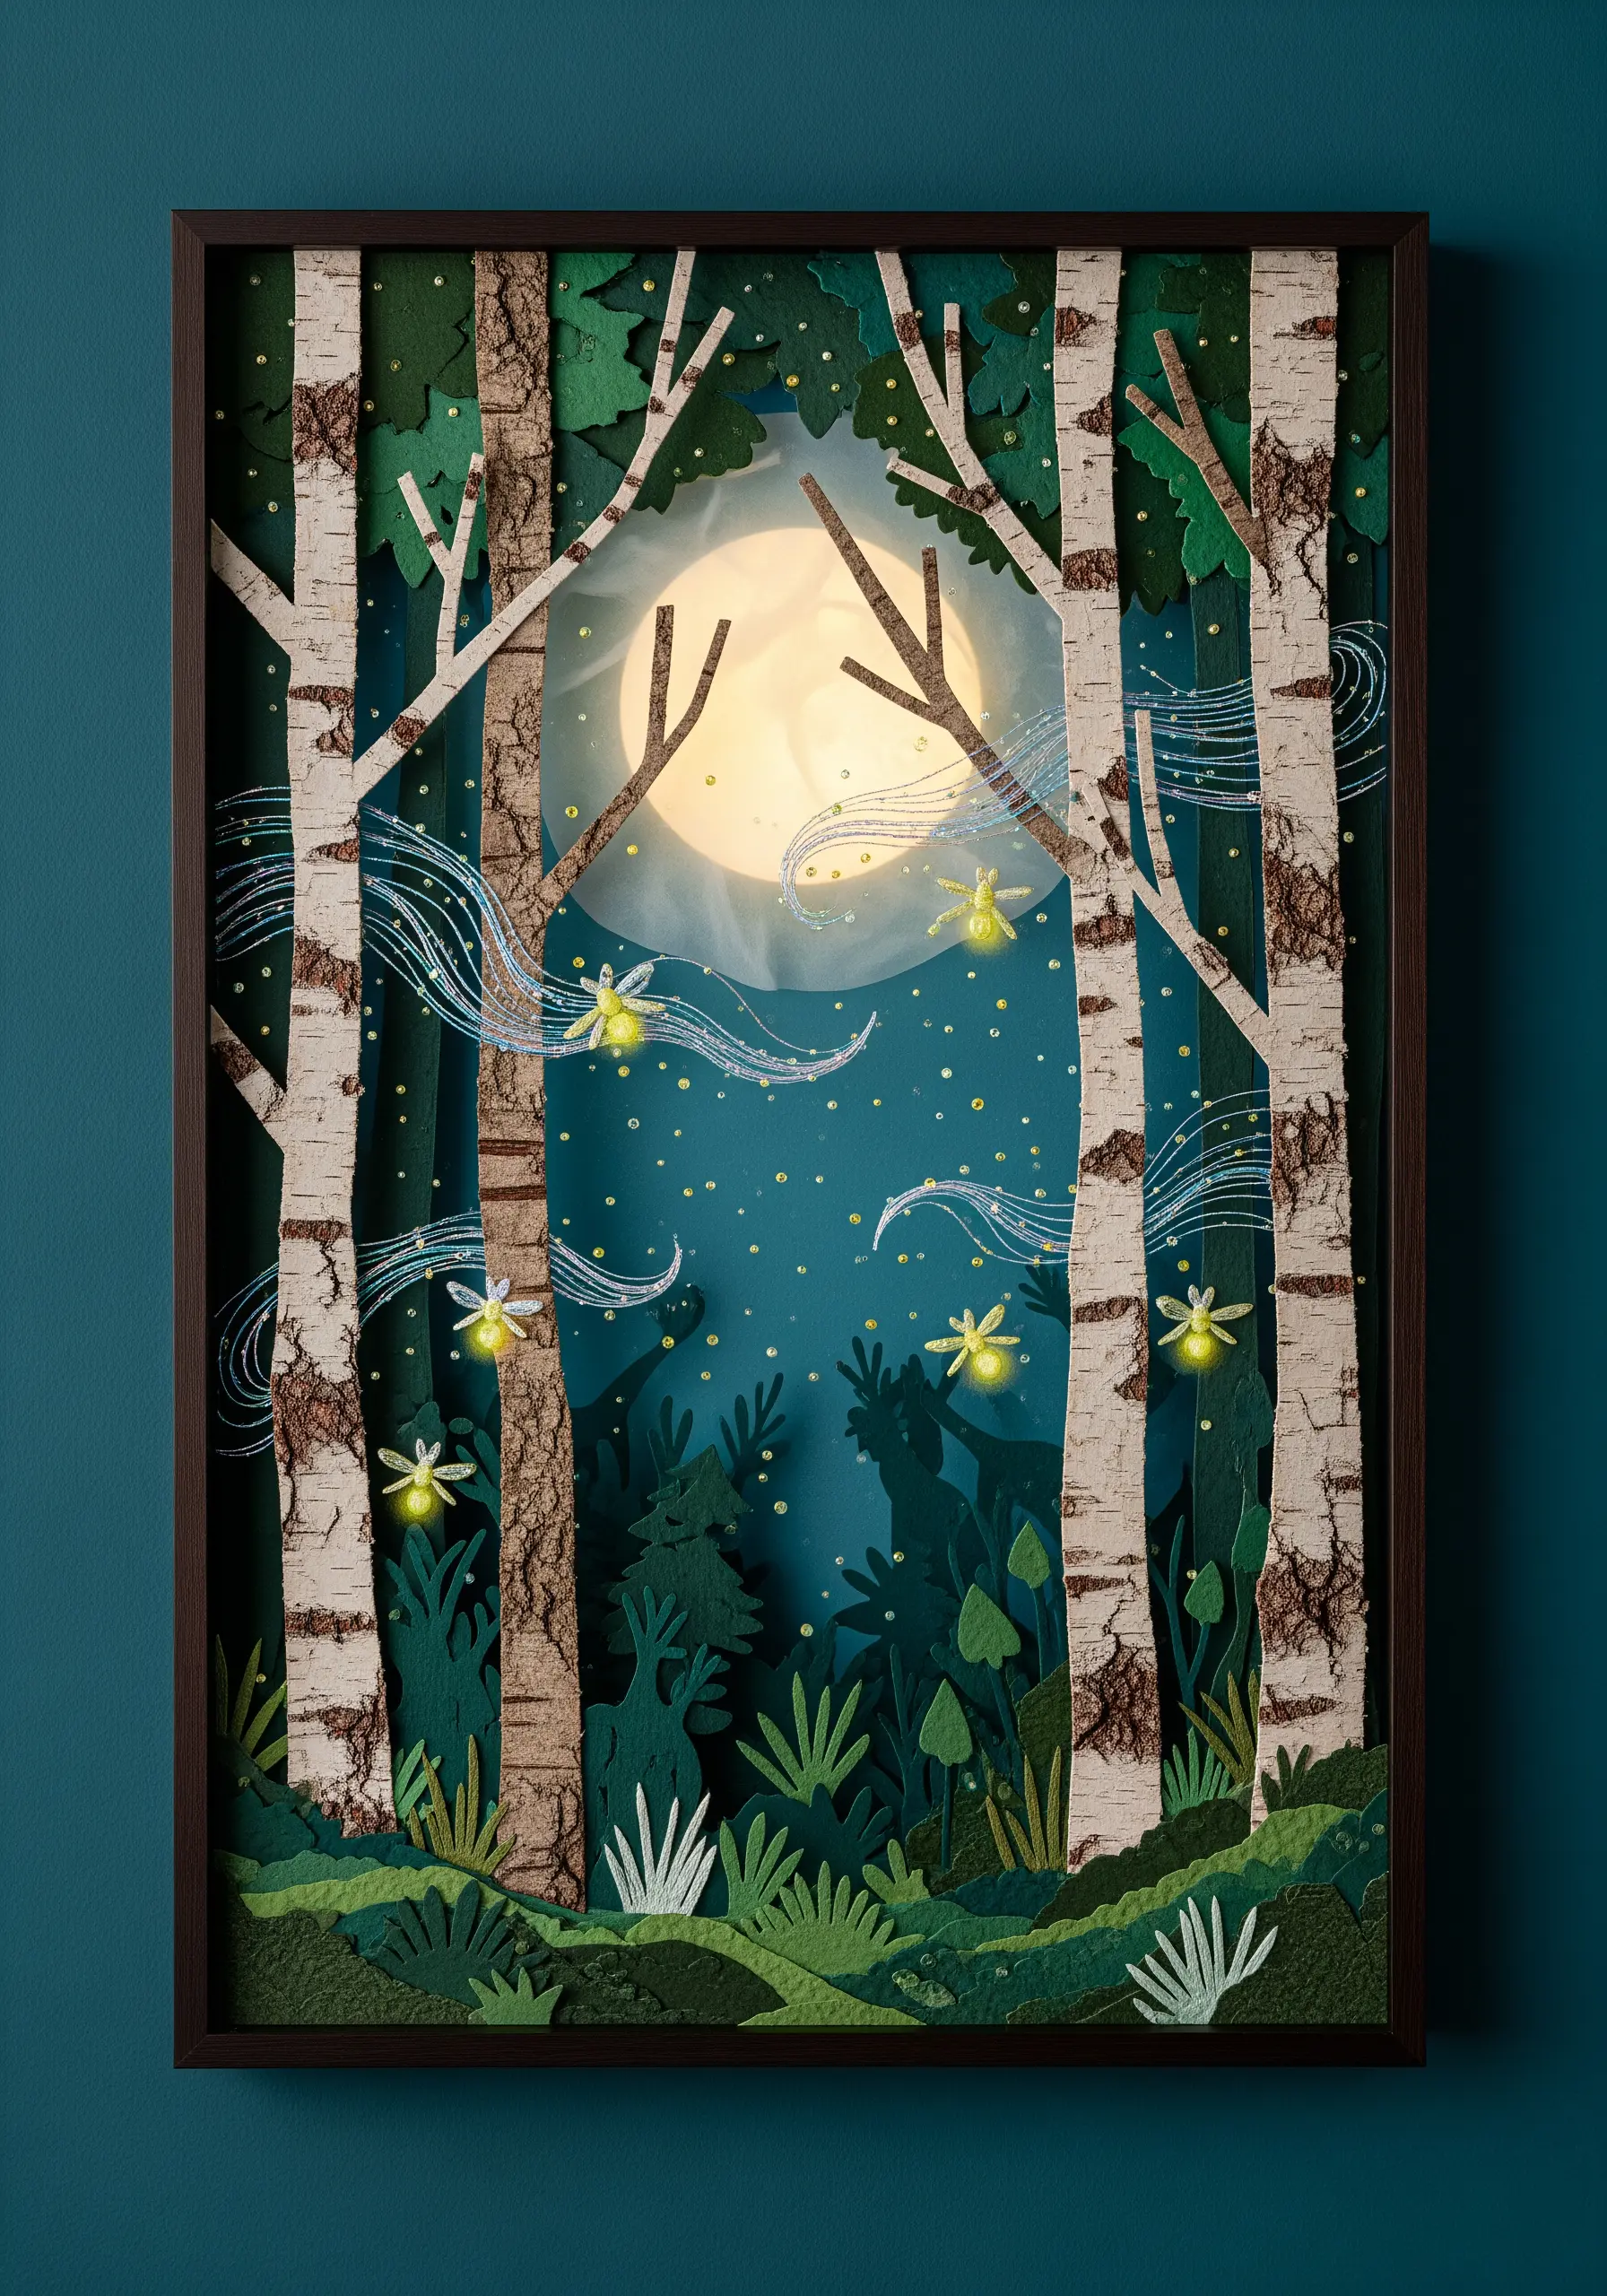
Craft a magical, layered diorama by combining papercraft with threads that suggest light and movement.
Build your forest scene in layers, using darker paper for the foreground to create depth.
To create the effect of fireflies or magical wisps, use a shimmery, light-colored thread like a metallic or rayon floss, stitched in gentle, swirling patterns.
Placing a light source behind a vellum moon can further enhance the enchanting atmosphere, creating a truly unique fiber art installation.
20. Design a Botanical Chart with Paper and Thread
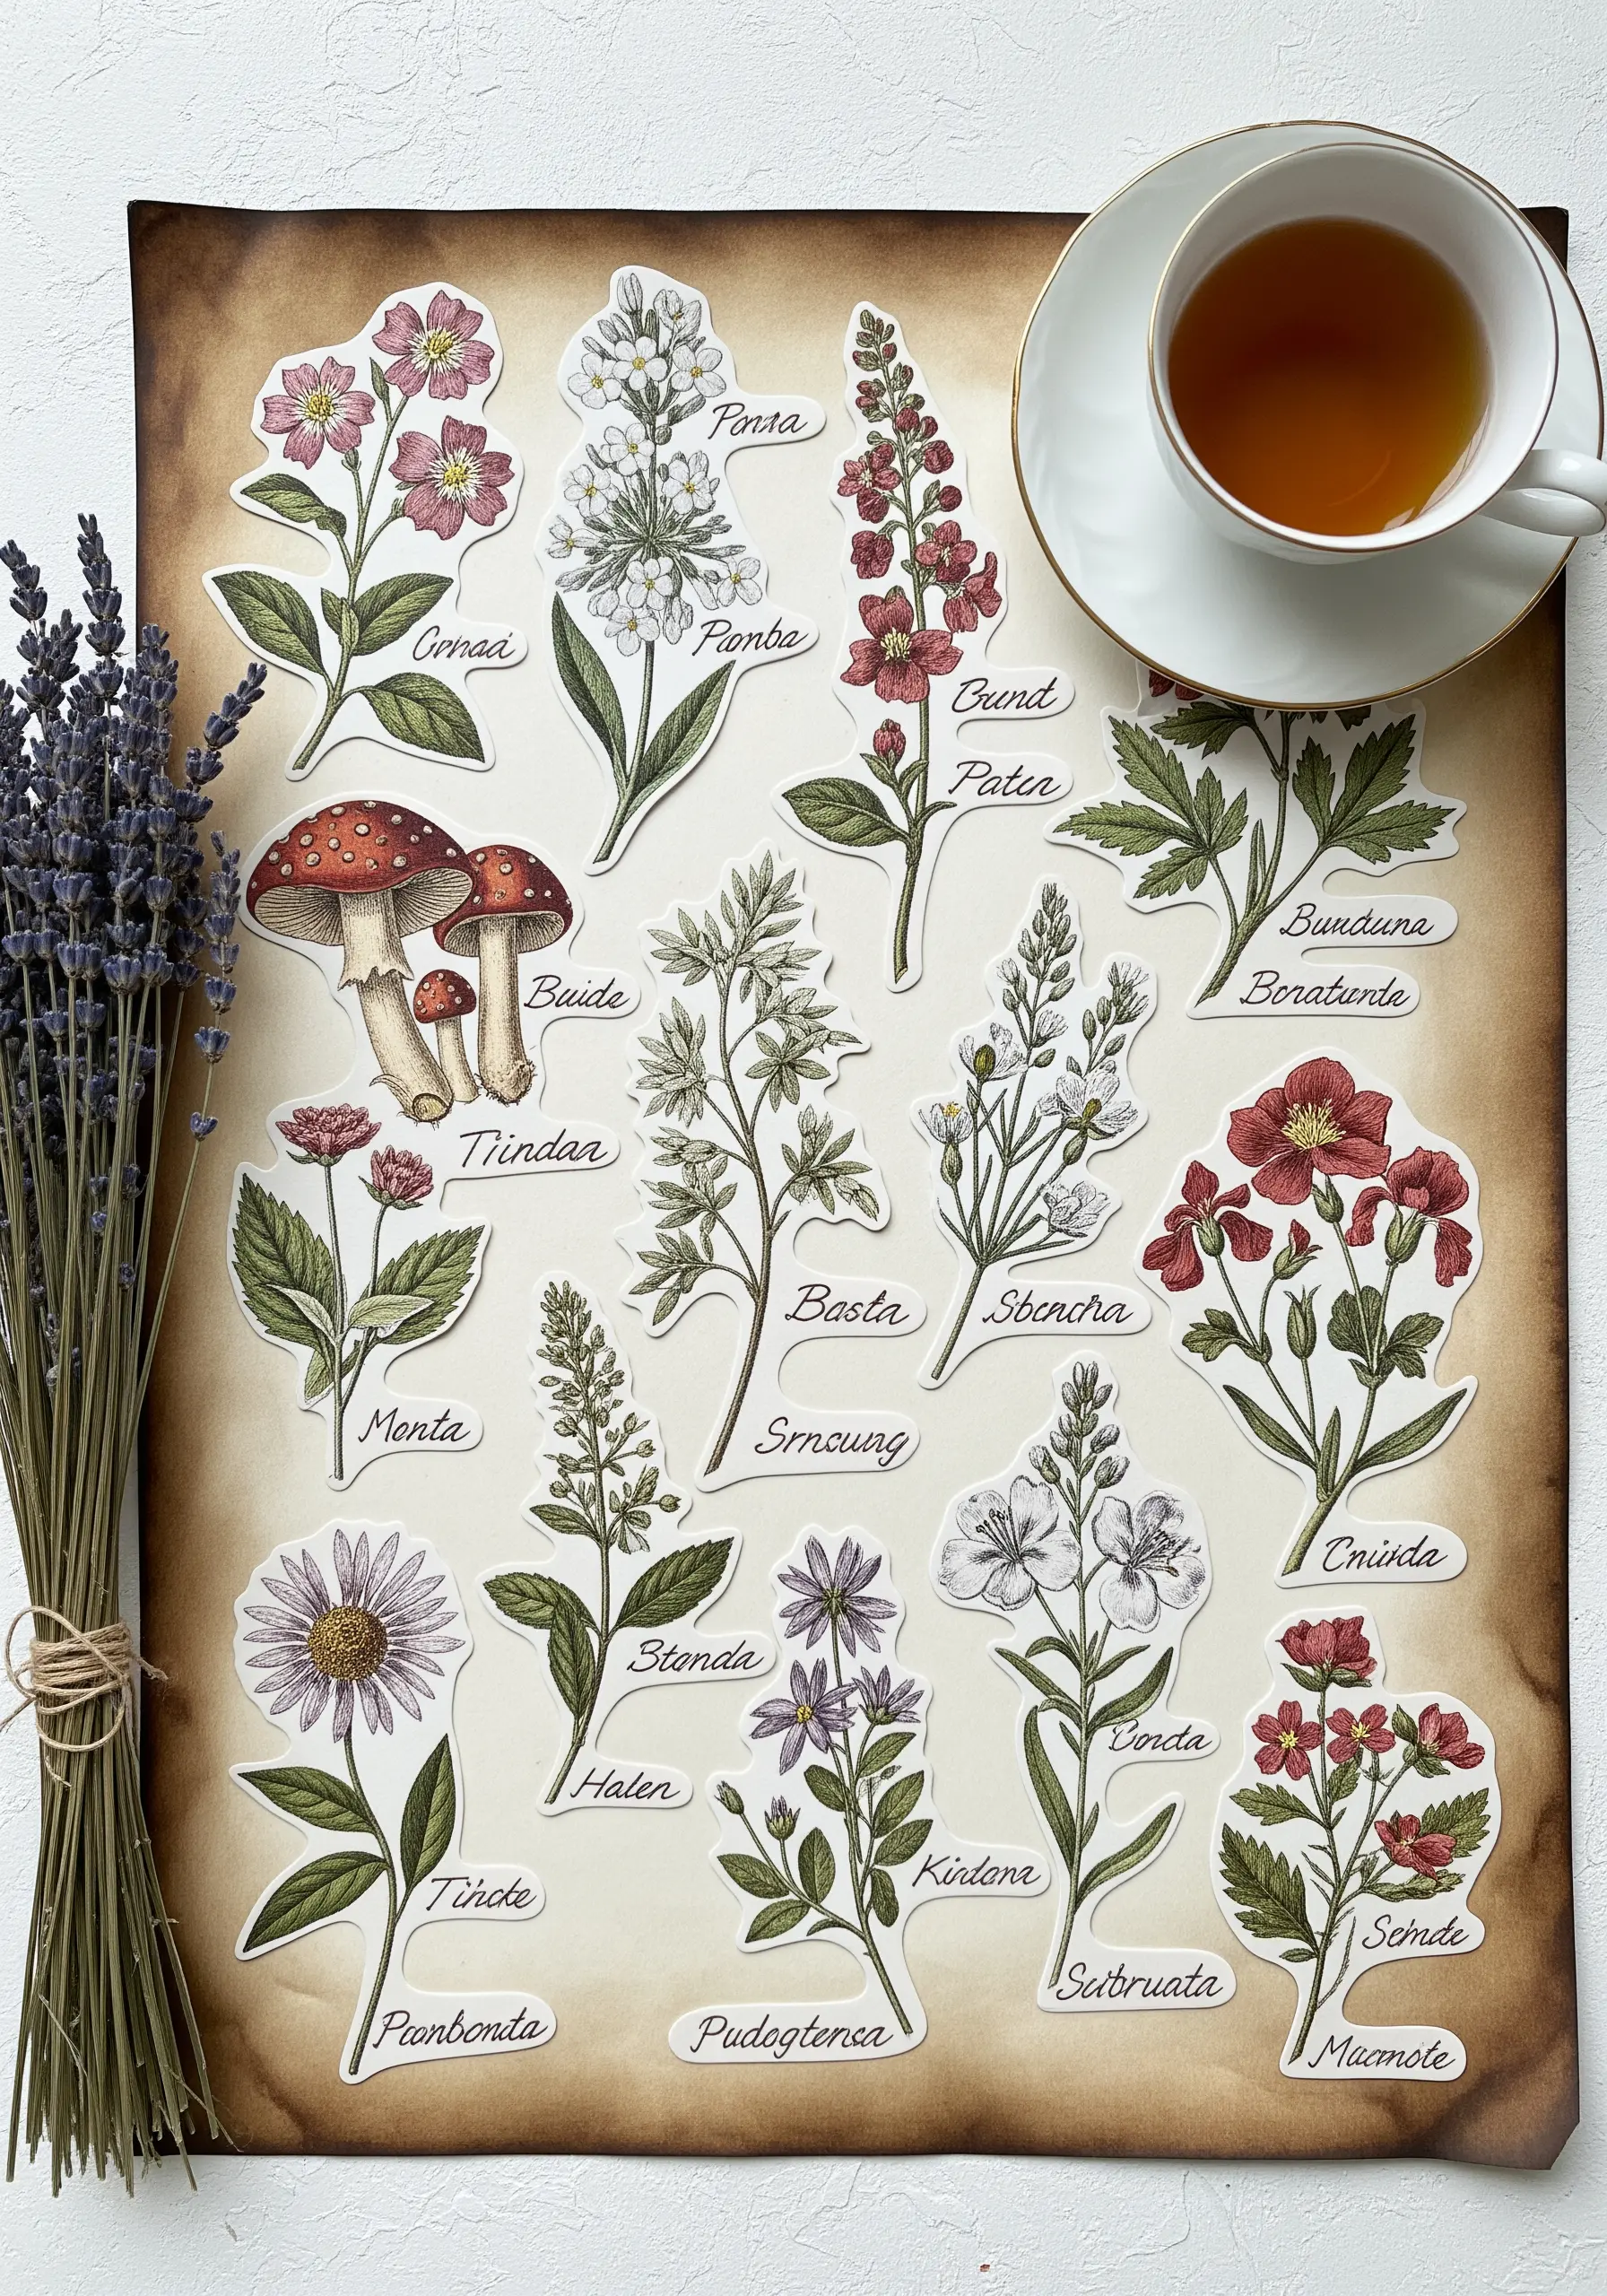
Evoke the charm of a vintage botanical illustration by outlining paper cutouts with a fine, dark thread.
Arrange your printed and cut-out floral specimens on a tea-stained or parchment-like paper for an aged look.
Use a single strand of thread and a delicate backstitch around the edge of each cutout. This defines the shapes and gives them a subtle, embroidered lift from the page.
This technique is a beautiful way to combine graphic design with the delicate touch of hand embroidery, and one of many paper DIY tricks to make your embroidery pop.
21. Stitch a Vibrant Sunrise Over Paper Mountains
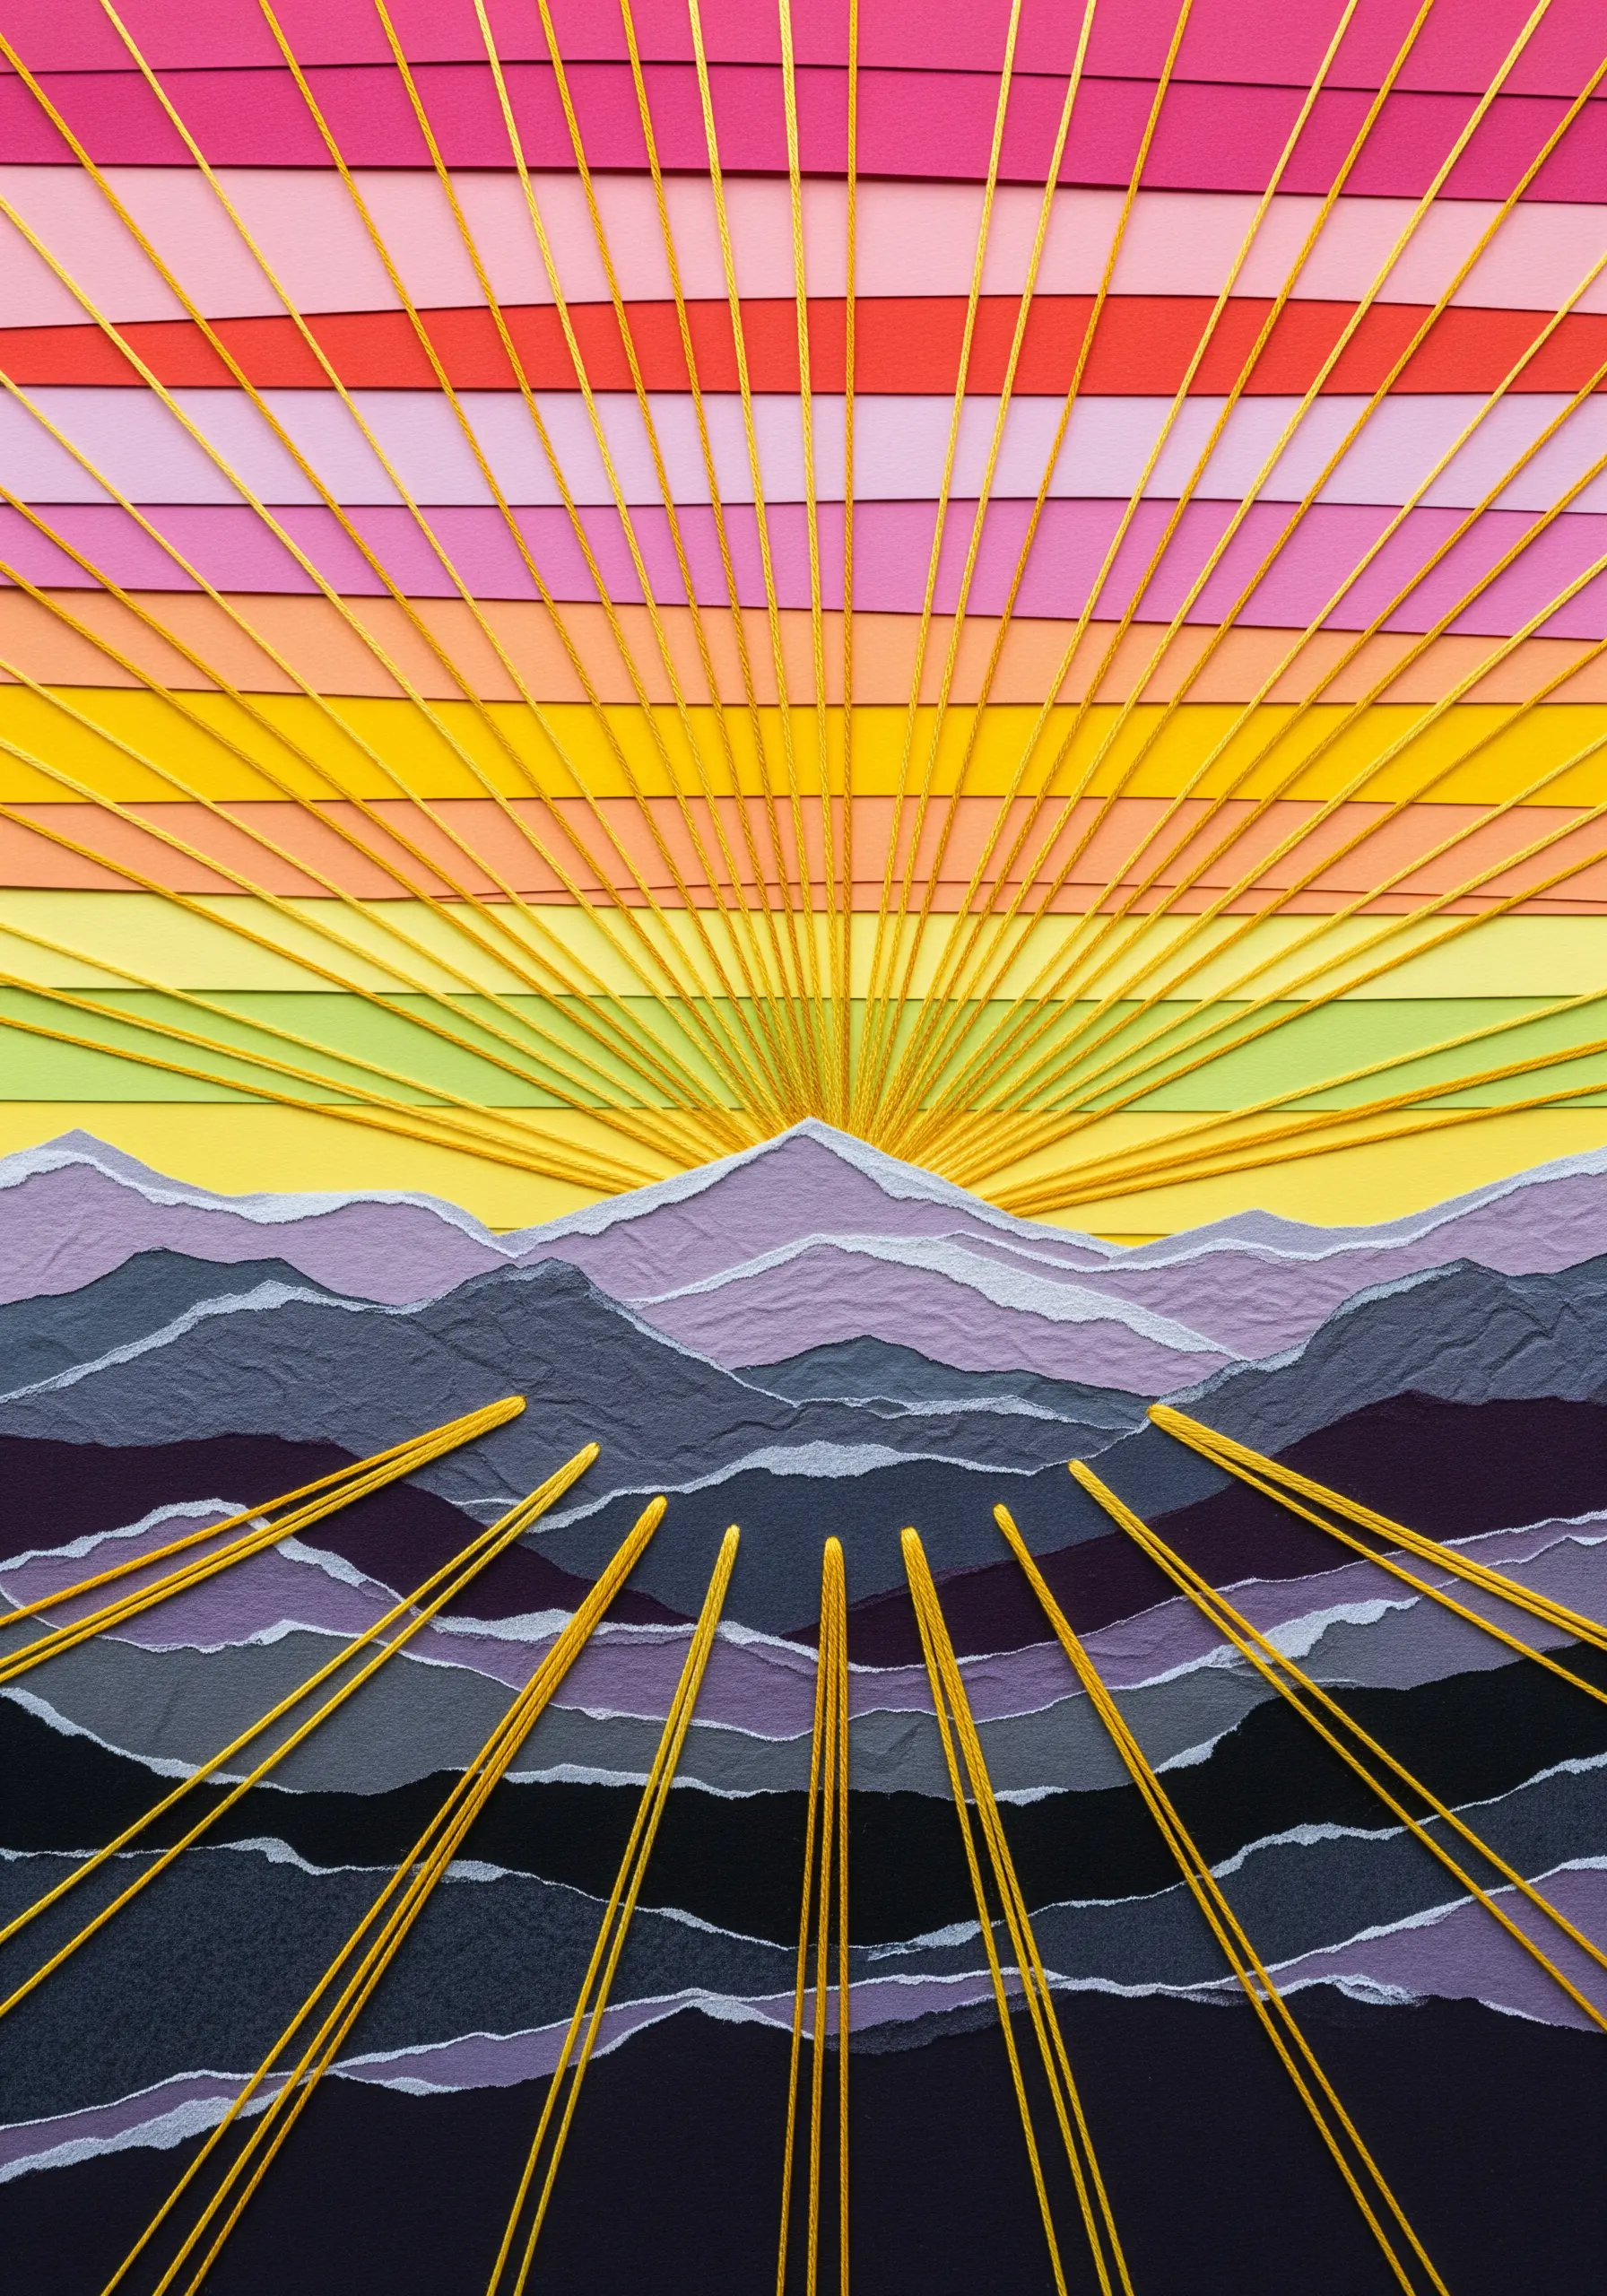
Combine a vibrant paper-strip sky with dramatic, stitched sun rays to create a landscape bursting with color and energy.
Layer strips of colored paper for the sky and torn, textured paper for the mountains to establish a rich, multi-dimensional background.
Use a bold, high-contrast thread, like this metallic gold, for the sun’s rays. Stitching them as long, taut straight stitches ensures they look sharp and intentional.
This is a powerful way to use abstract thread designs to direct the eye and create a strong focal point.
22. Create Woven Textures on a Paper Loom
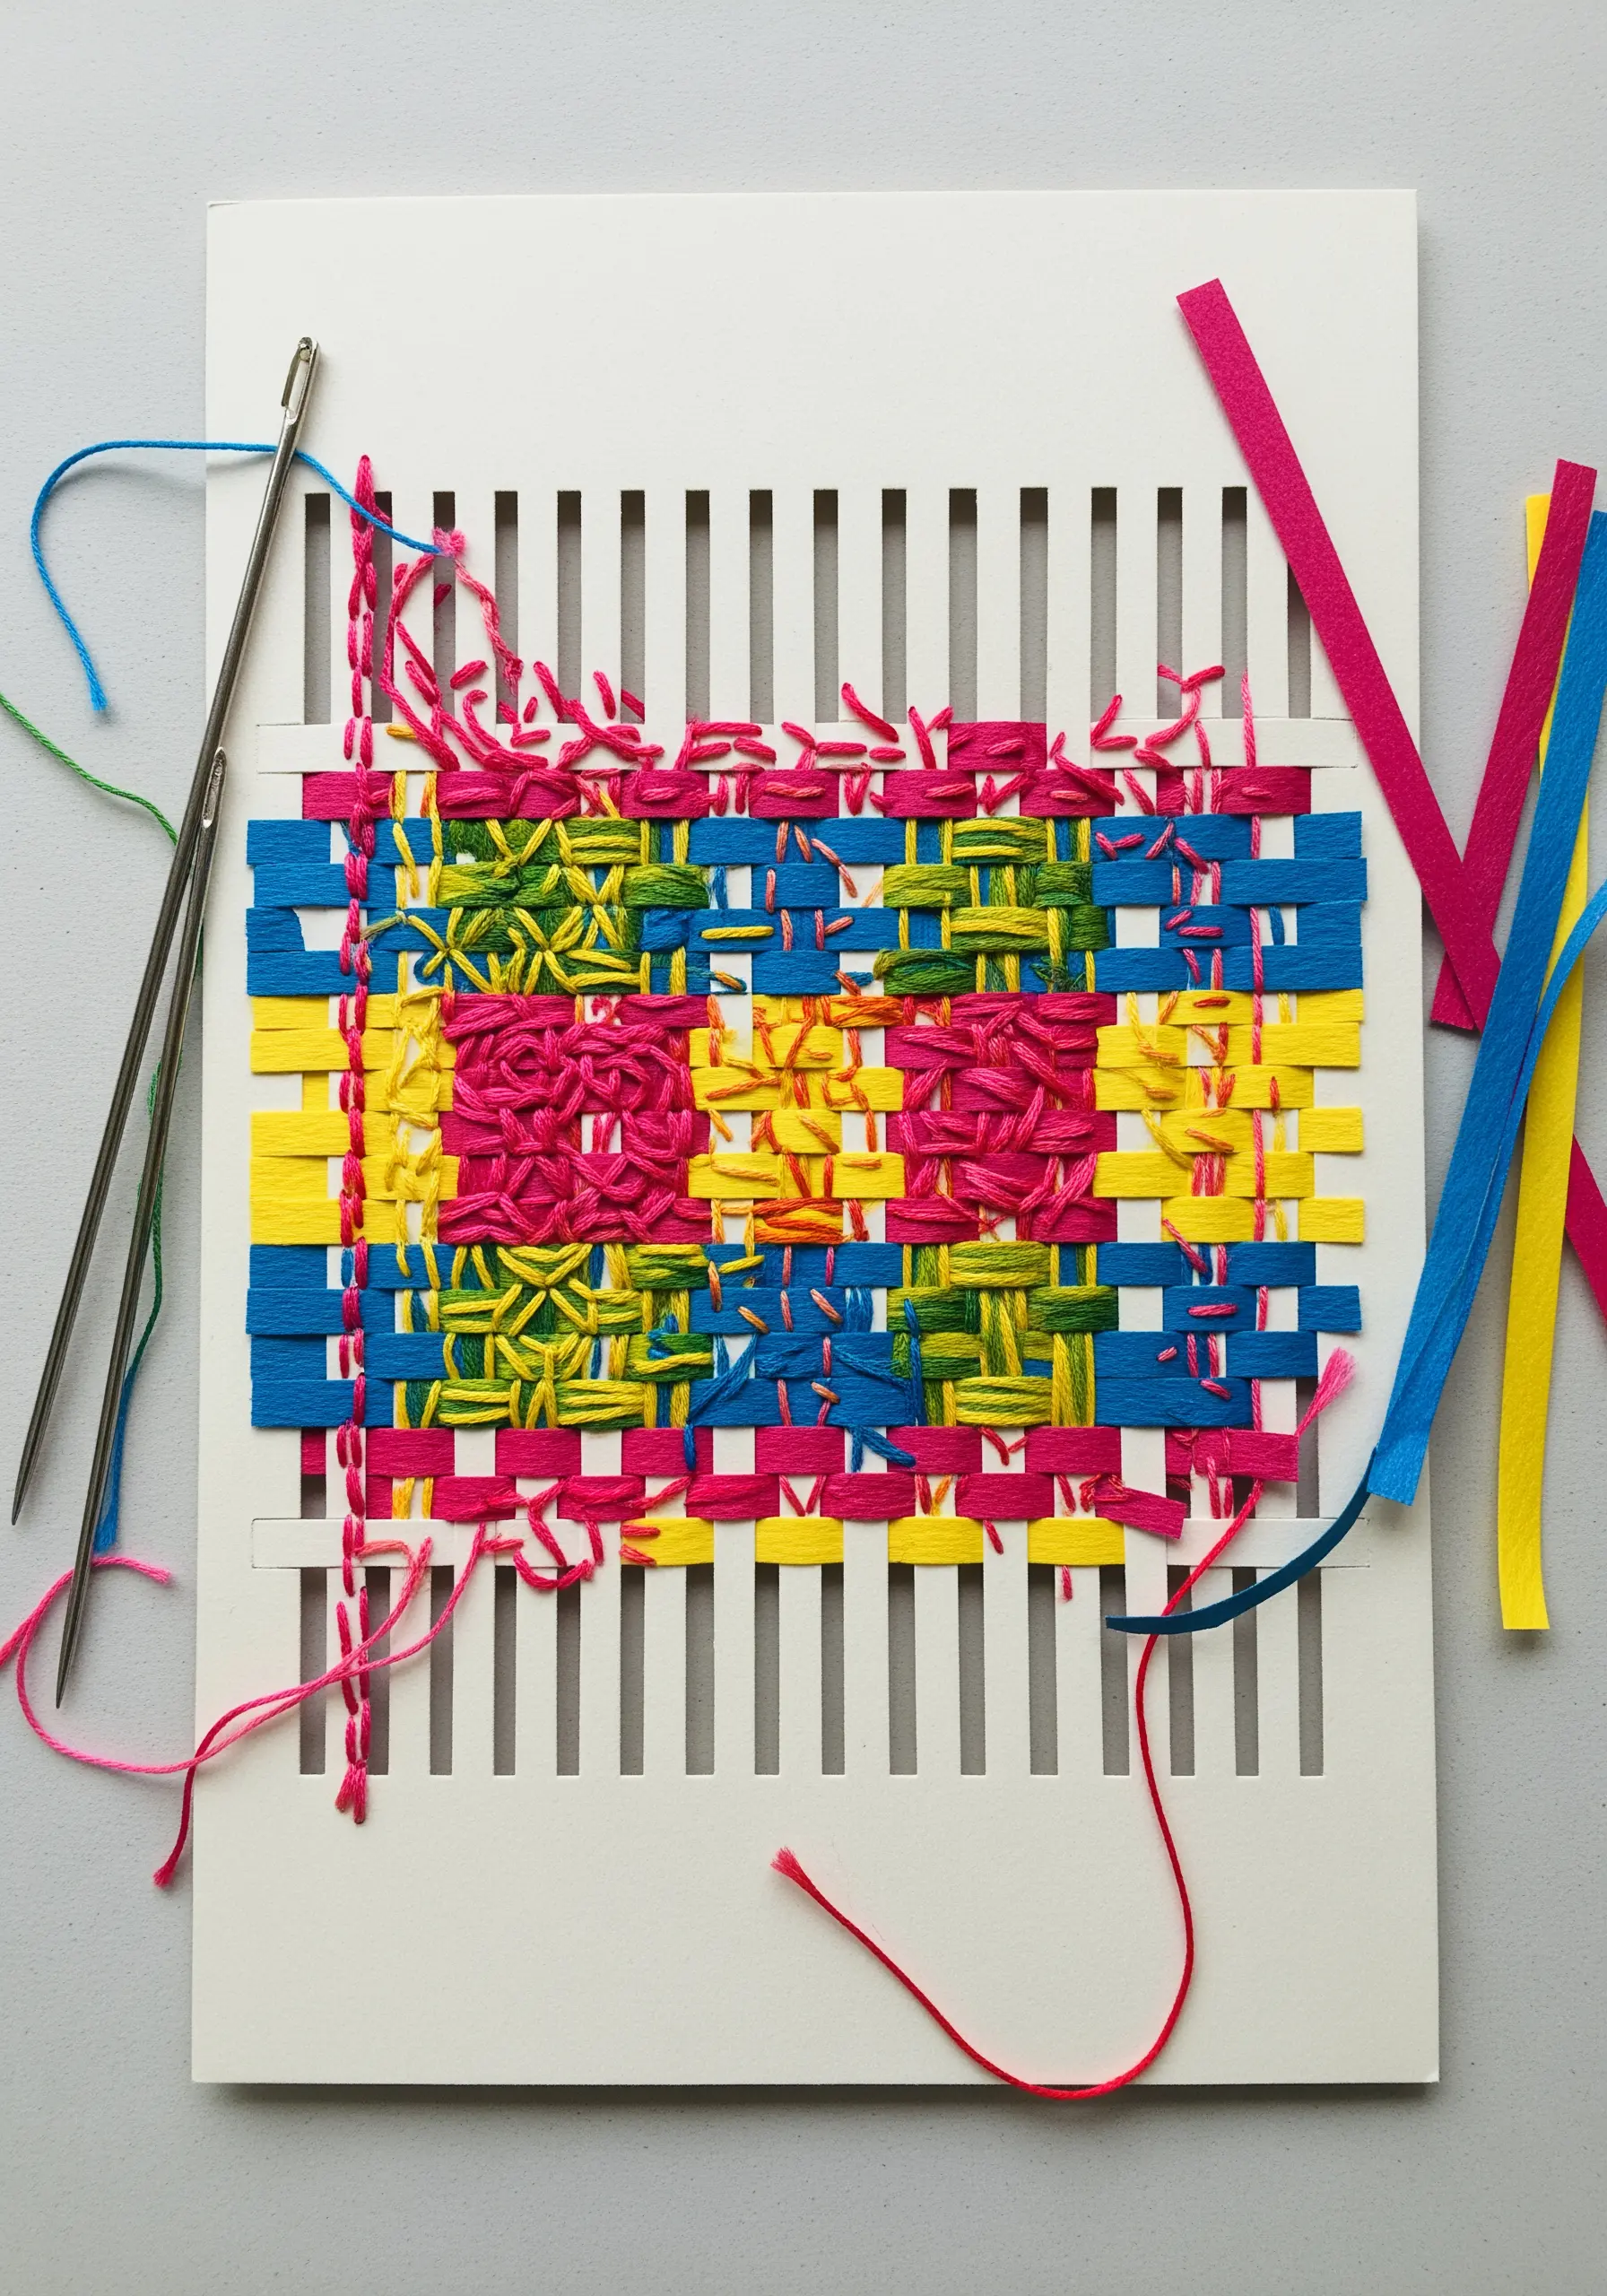
Explore the intersection of weaving and embroidery by creating your own simple loom from heavy cardstock.
Carefully cut vertical slits in a piece of cardstock to create your warp threads.
Weave strips of colored paper or fabric through the slits to create your base design, then use the woven structure as a canvas for freestyle embroidery.
This approach allows you to build complex, layered textures and is one of the most fun mixed-fiber projects that look complicated but are actually easy to master.
23. Add Three-Dimensional Volume with French Knots
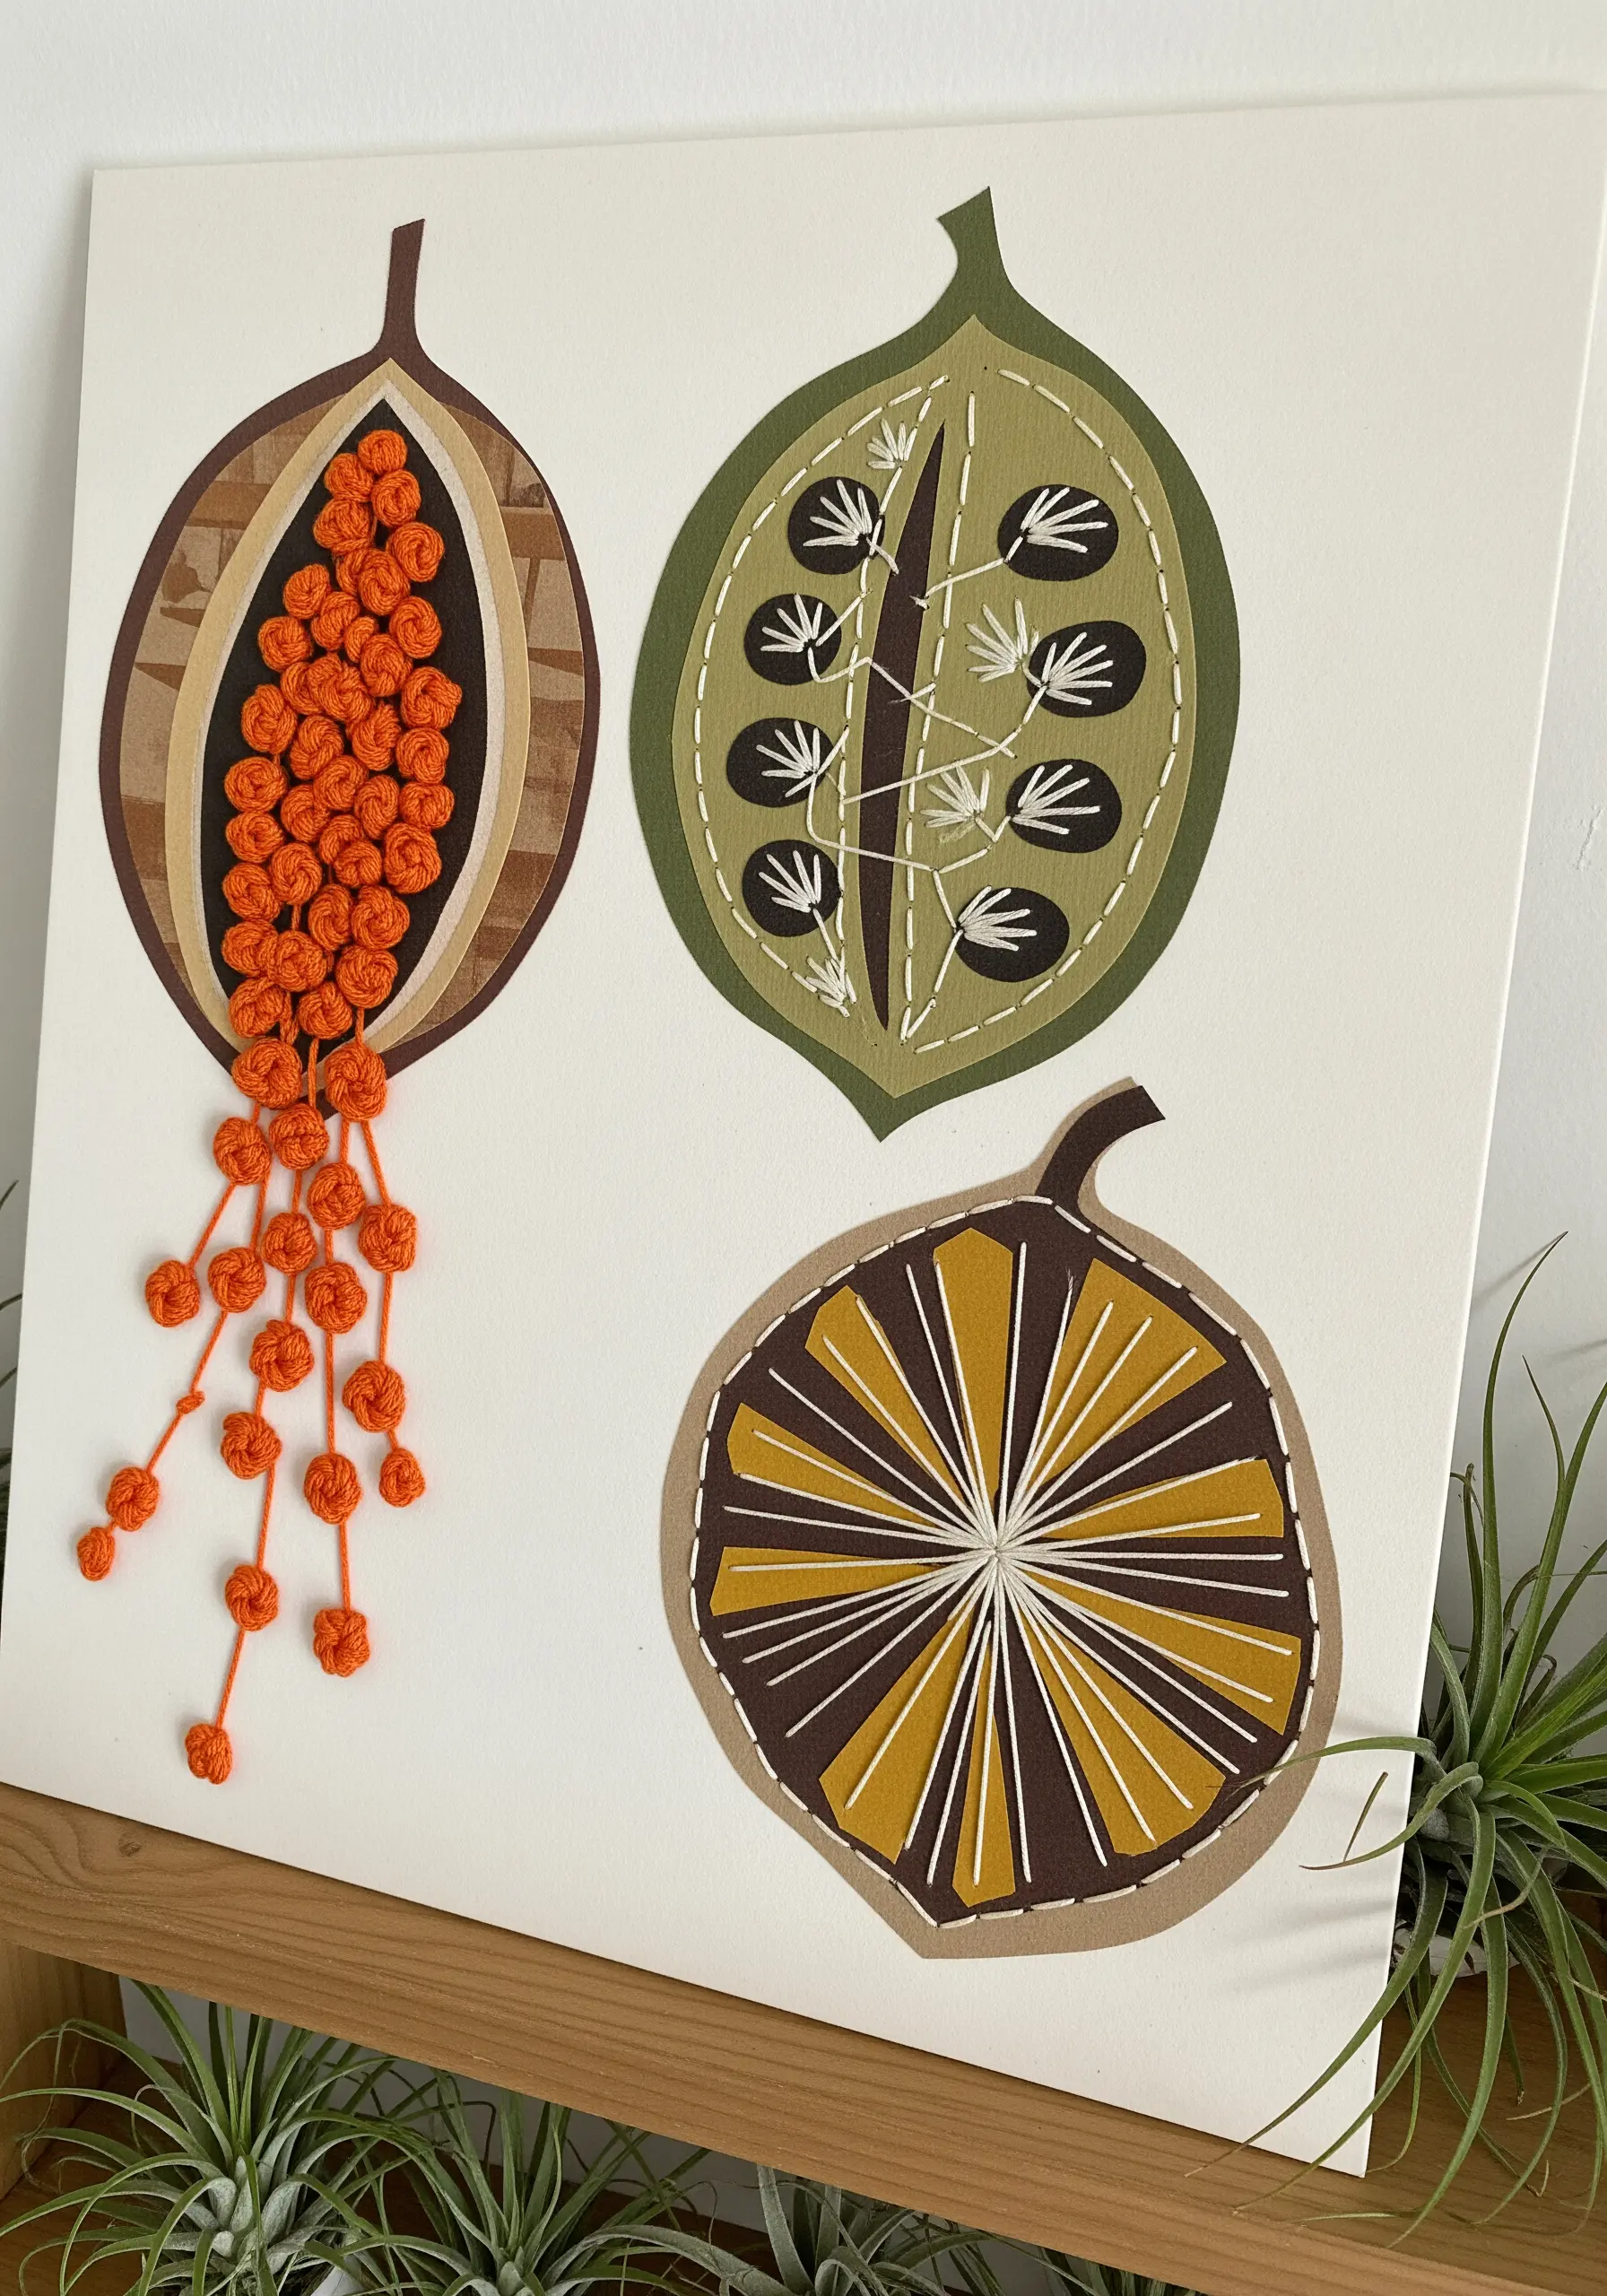
Make elements of your design literally spill off the canvas by using dense clusters of French knots to create sculptural volume.
In this piece, the French knots perfectly mimic the texture of seeds, providing a tactile contrast to the flat paper and simple line stitches used elsewhere in the design.
To create the cascading effect, stitch the knots onto a small piece of fabric, cut it out, and then attach it to the paper so it hangs freely.
This technique is perfect for adding surprising, dimensional details to your fabric collage embroidery.


