

A plain white t-shirt is not a blank canvas—it’s an invitation. It’s a chance to add a small, quiet mark that tells a story, holds a memory, or simply makes you smile. Forget dense, heavy designs that compromise the drape of the fabric. The true art of modern apparel embroidery lies in restraint.
Here, we move beyond the basics. You will discover how a change in stitch direction can create the illusion of light, how combining textures can build a world in a square inch, and how thoughtful placement can turn a simple garment into a personal treasure.
This is your guide to making embroidery that feels intentional, polished, and deeply you. It’s about adding just enough to transform everything. Let’s begin.
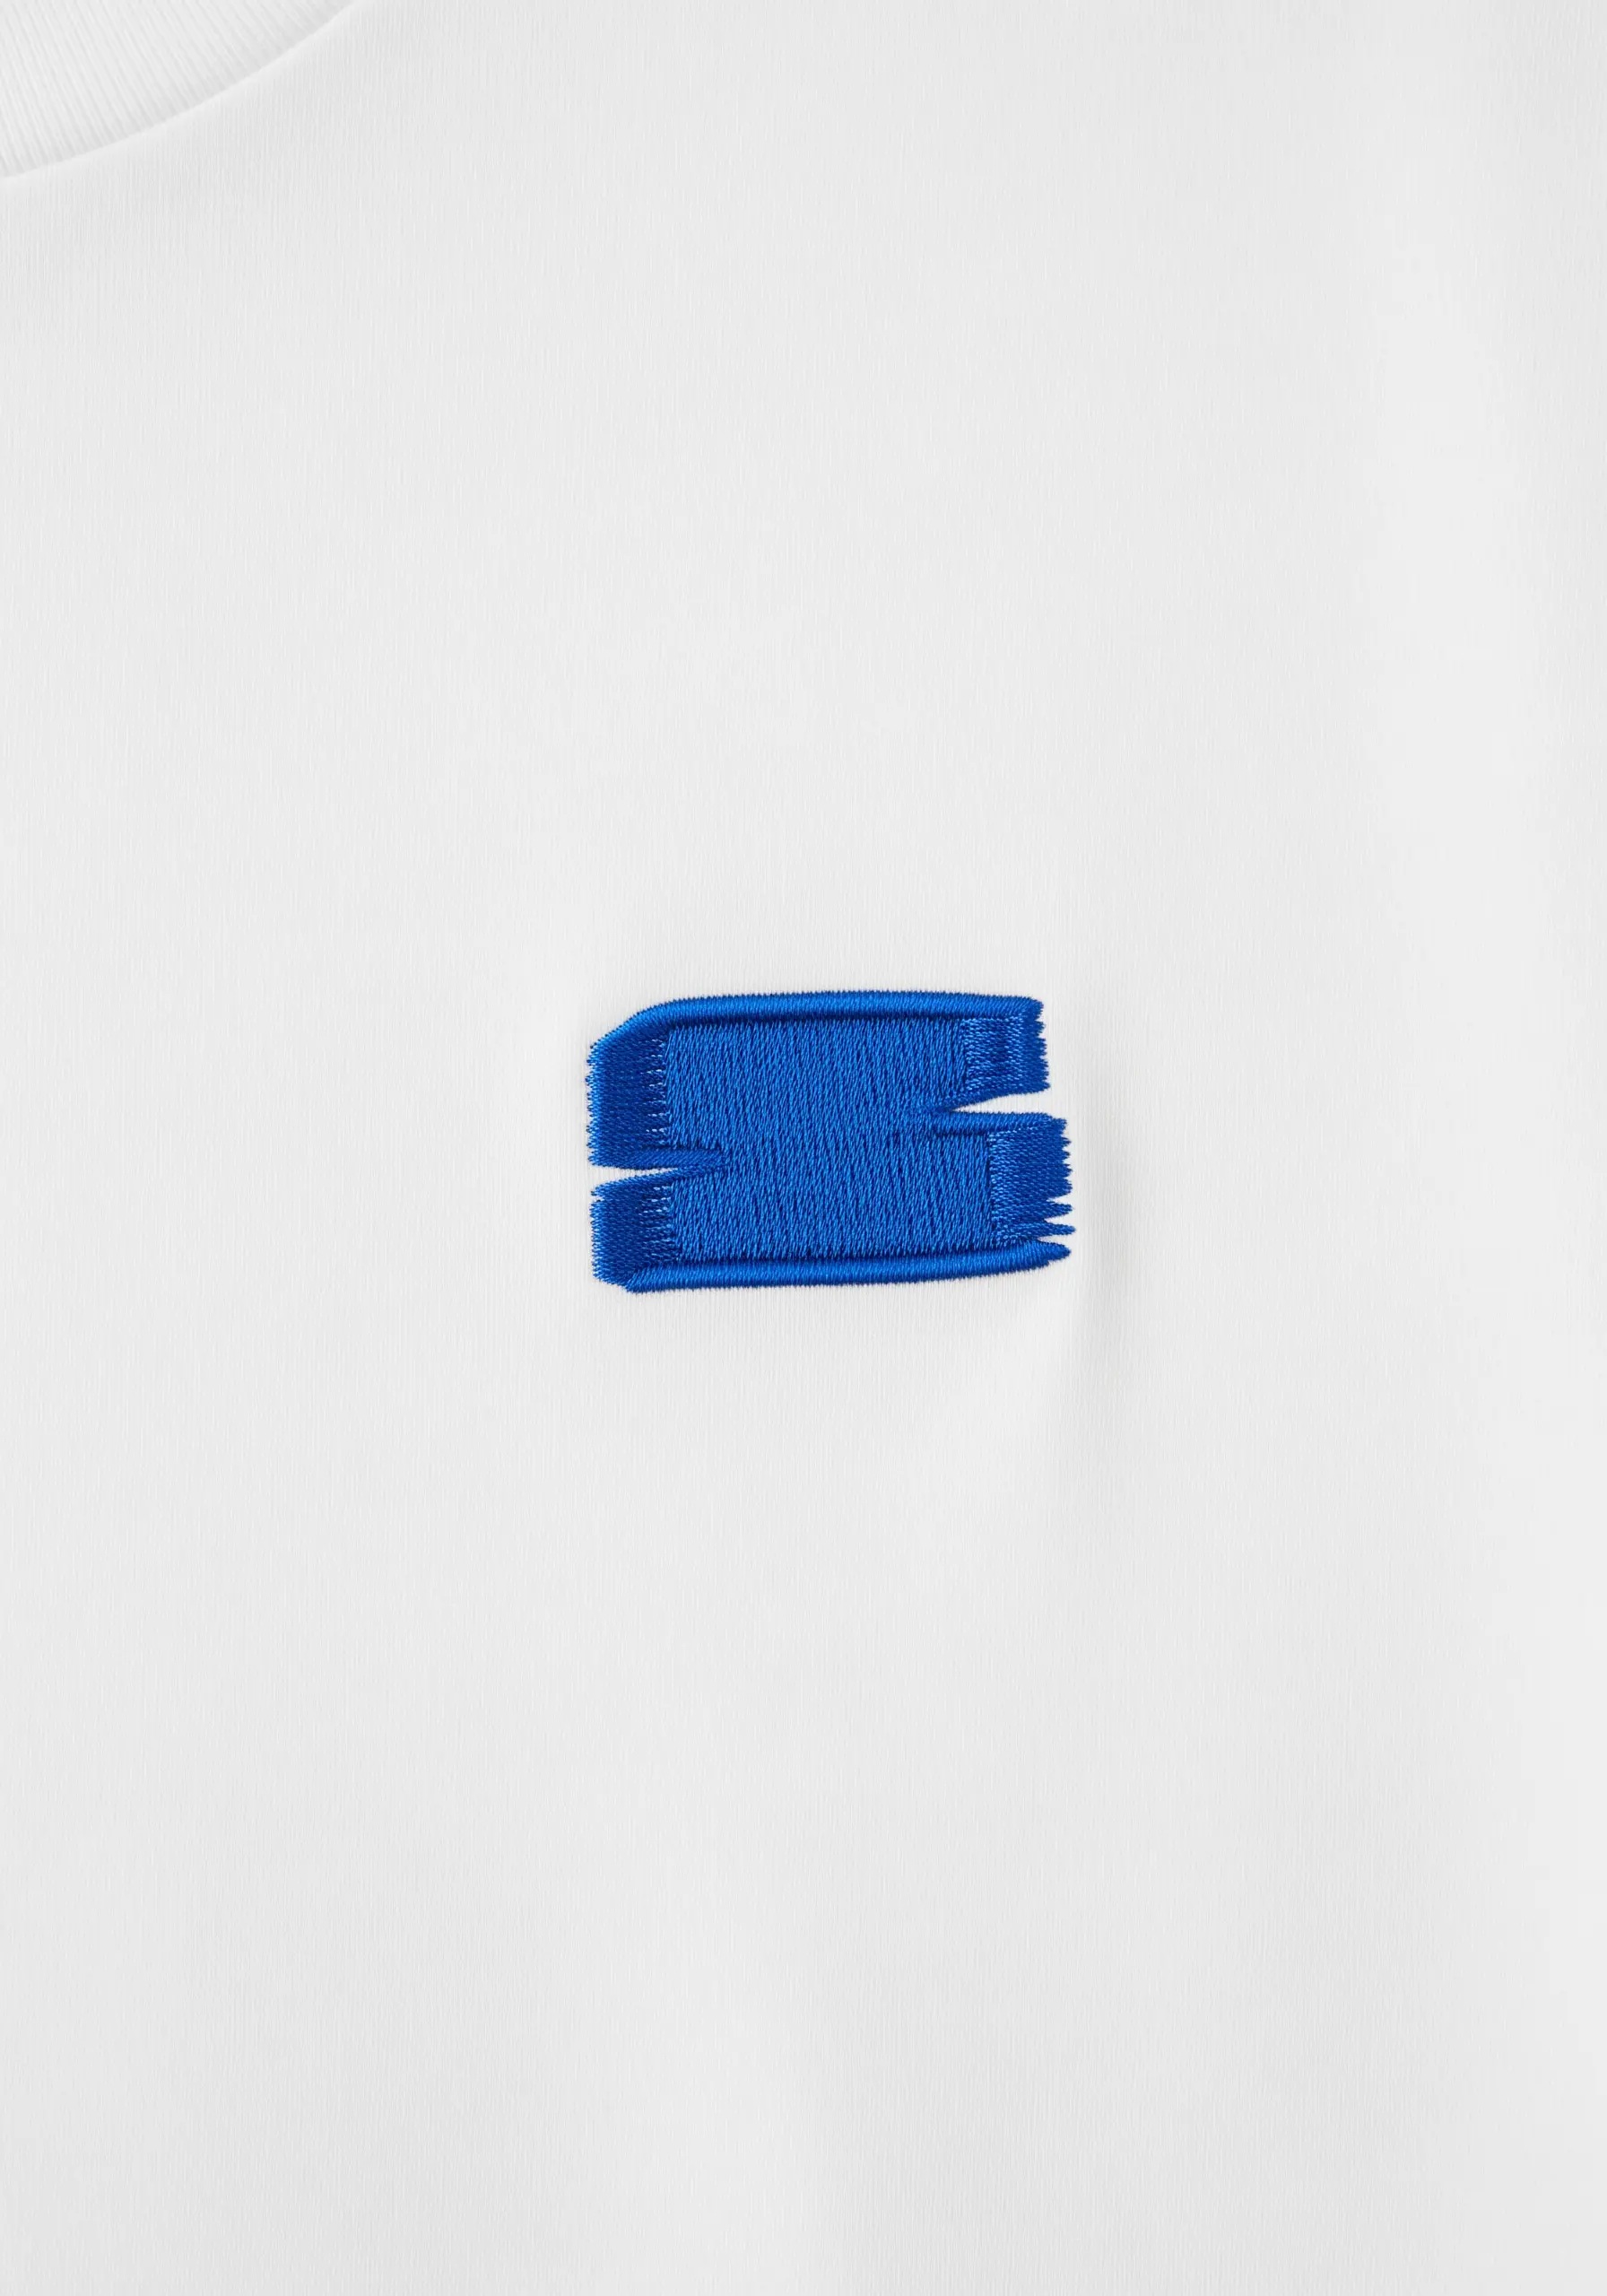
1. Architectural Precision with Parallel Lines
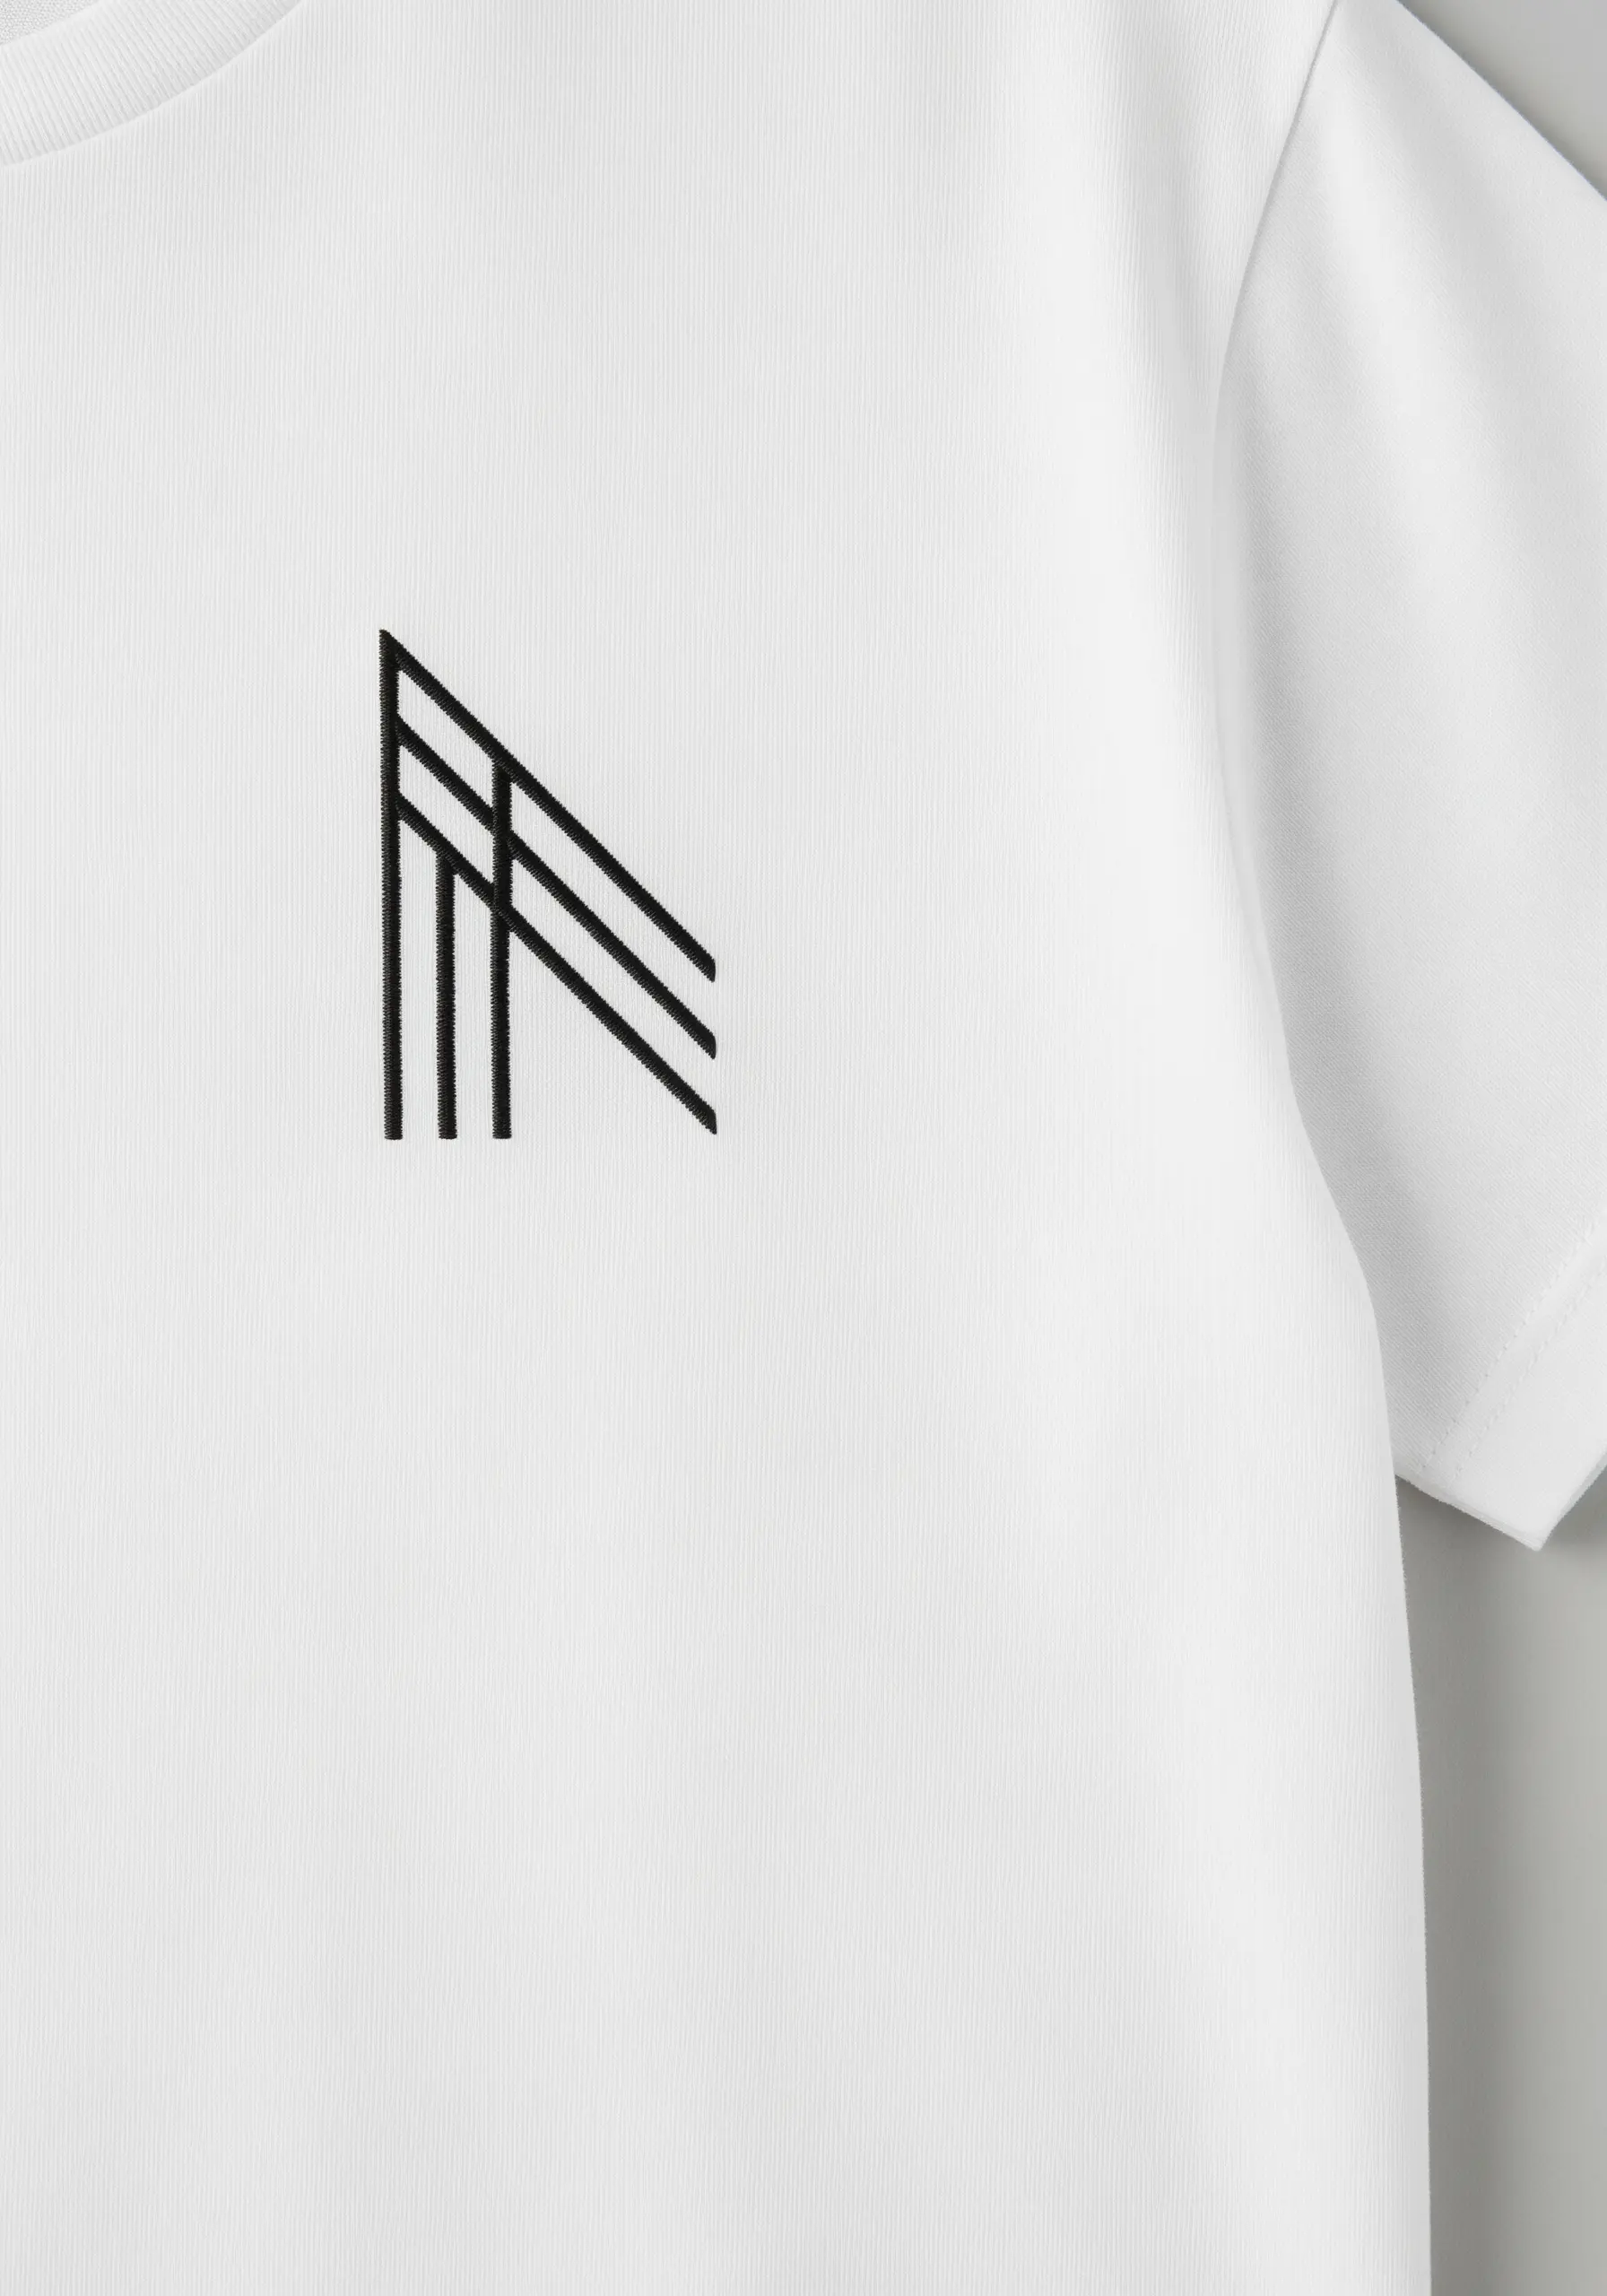
Create a sharp, graphic mark using a dense satin stitch for each vertical and diagonal line.
To ensure your lines are perfectly parallel, draw them on with a water-soluble marker first, using a ruler for guidance.
Use a four-strand floss for a bold, substantial feel that stands out against the soft t-shirt fabric without being bulky.
This technique transforms simple geometry into a statement of minimalist confidence.
2. The Playful Path of a Dotted Line
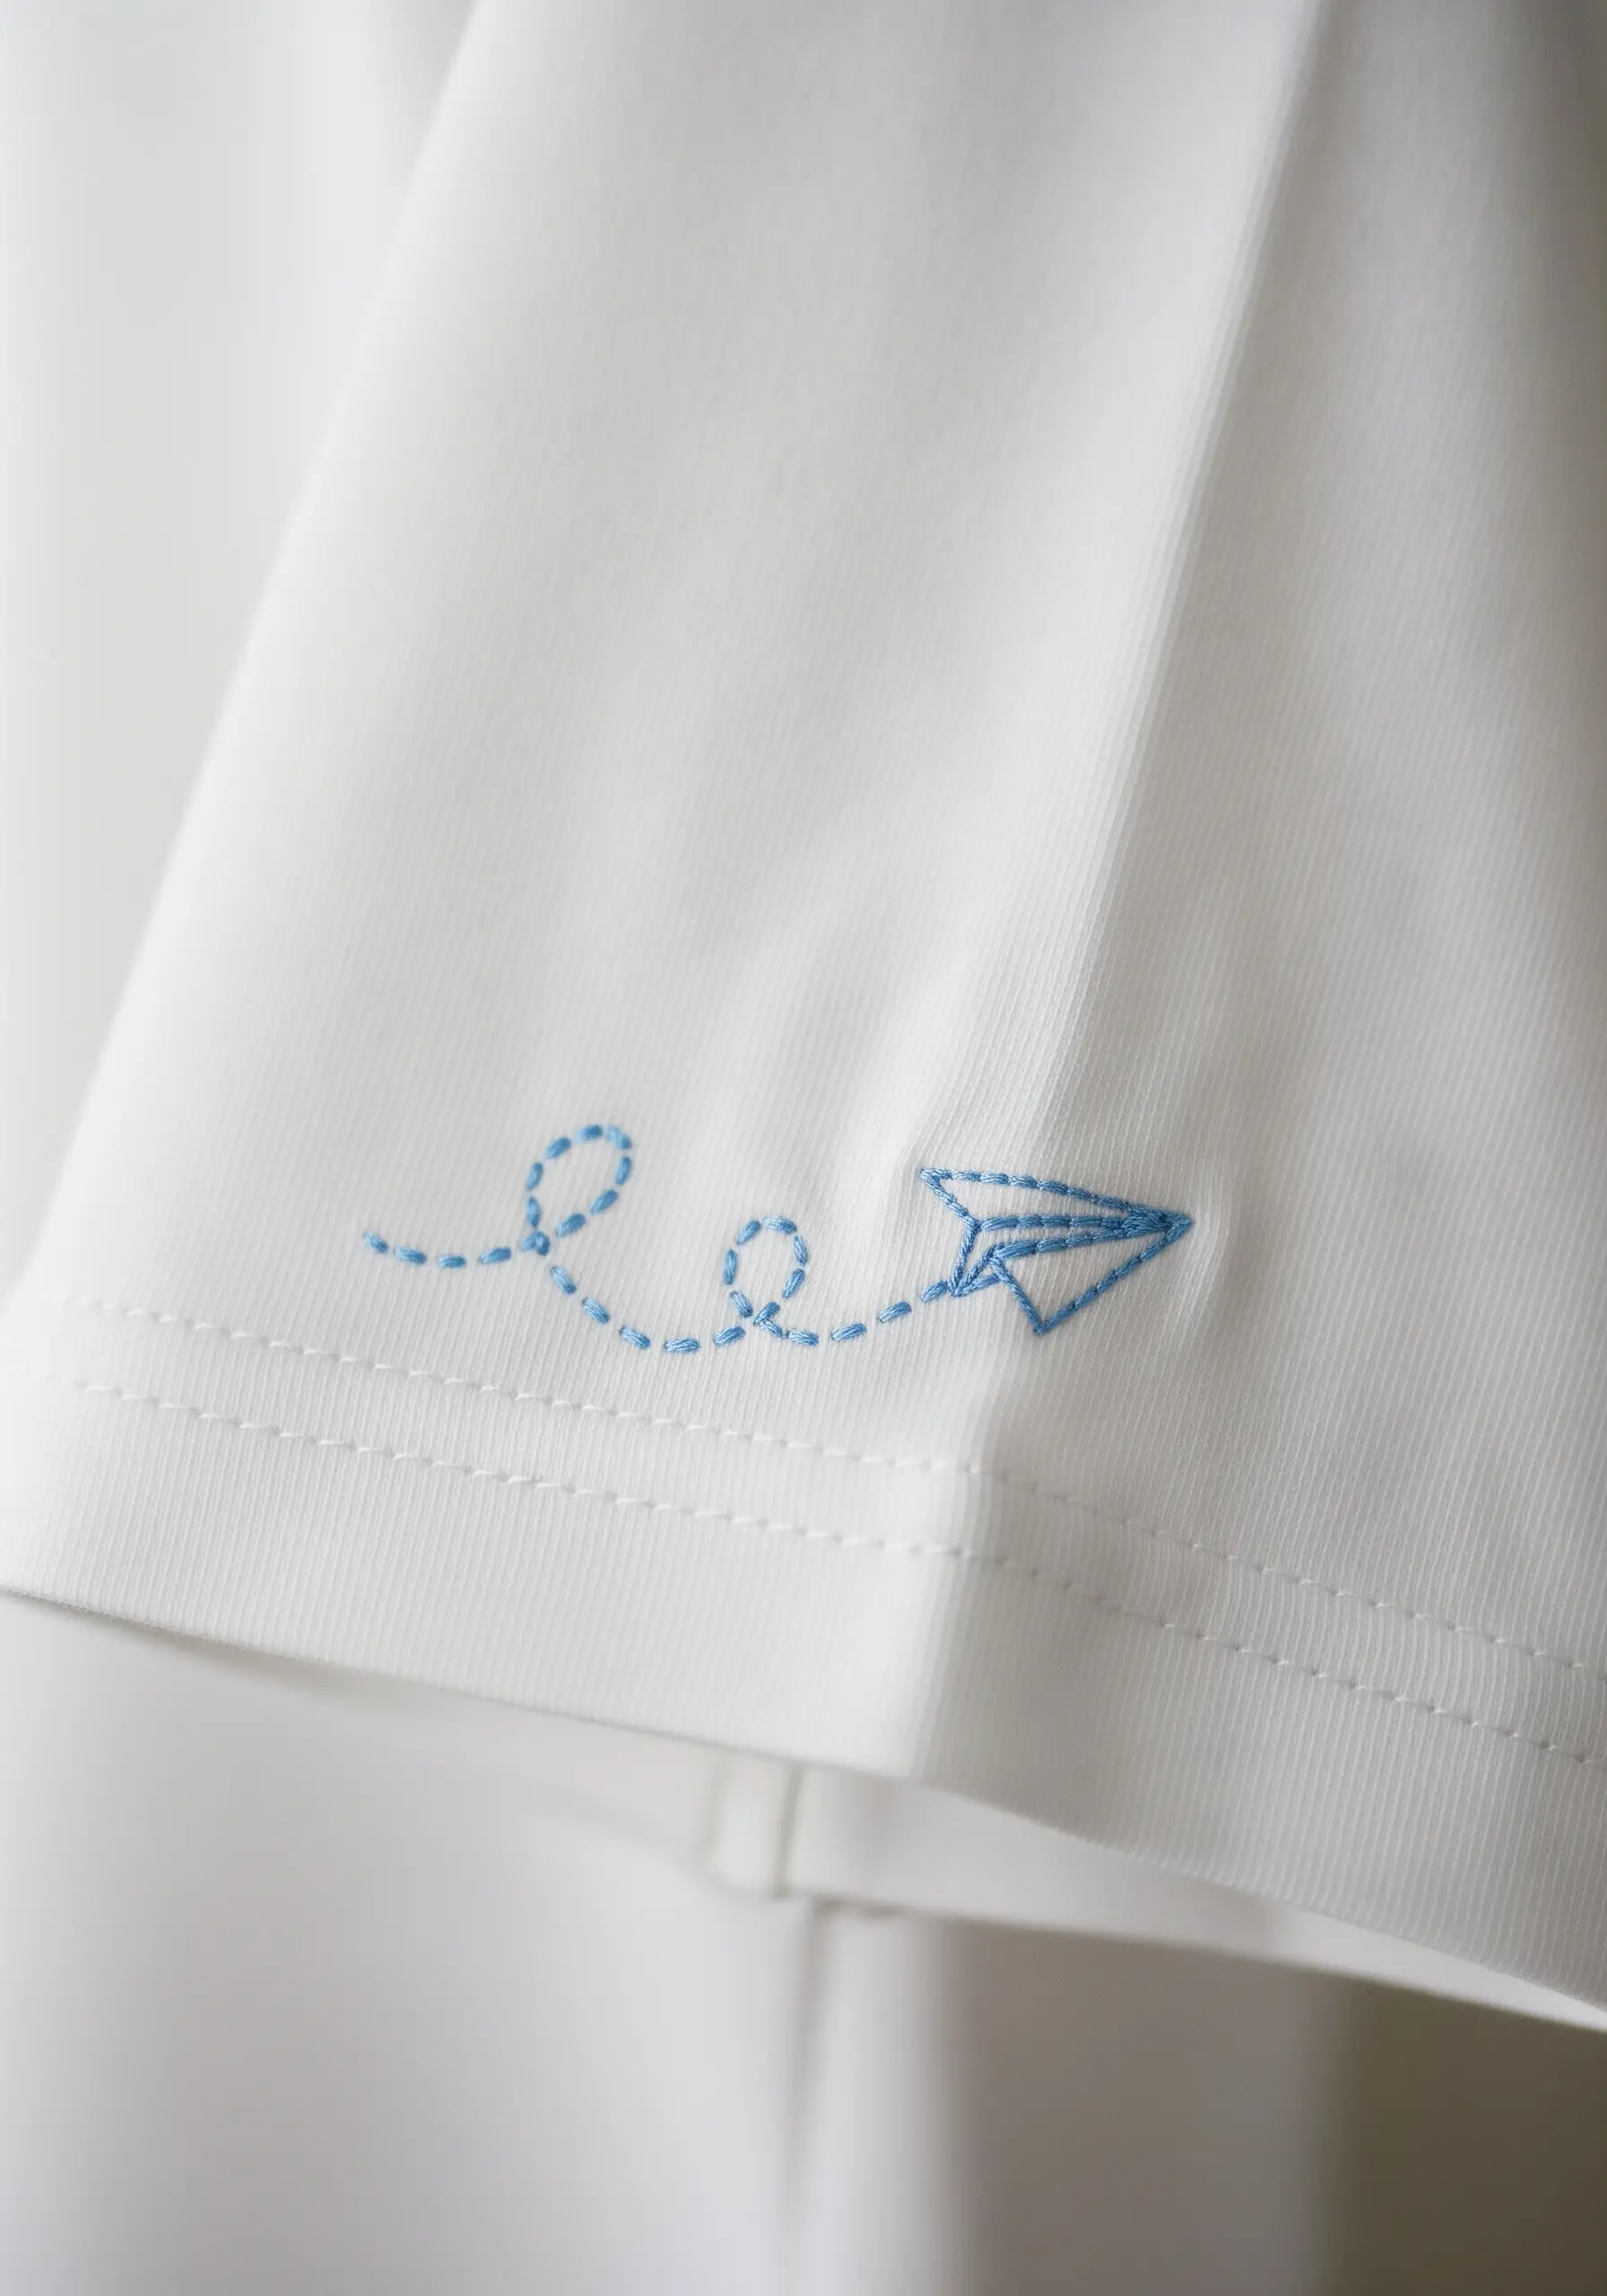
Capture a sense of movement and whimsy by using a simple running stitch for the trail of the paper plane.
Keep the stitches evenly spaced to create a clean, rhythmic dotted line that guides the eye.
For the plane itself, use a split stitch or a fine backstitch to achieve crisp, sharp outlines that define the shape clearly.
Placing this delicate design on the sleeve cuff adds an unexpected detail that feels personal and charming.
3. Textured Lavender on a Pocket Canvas
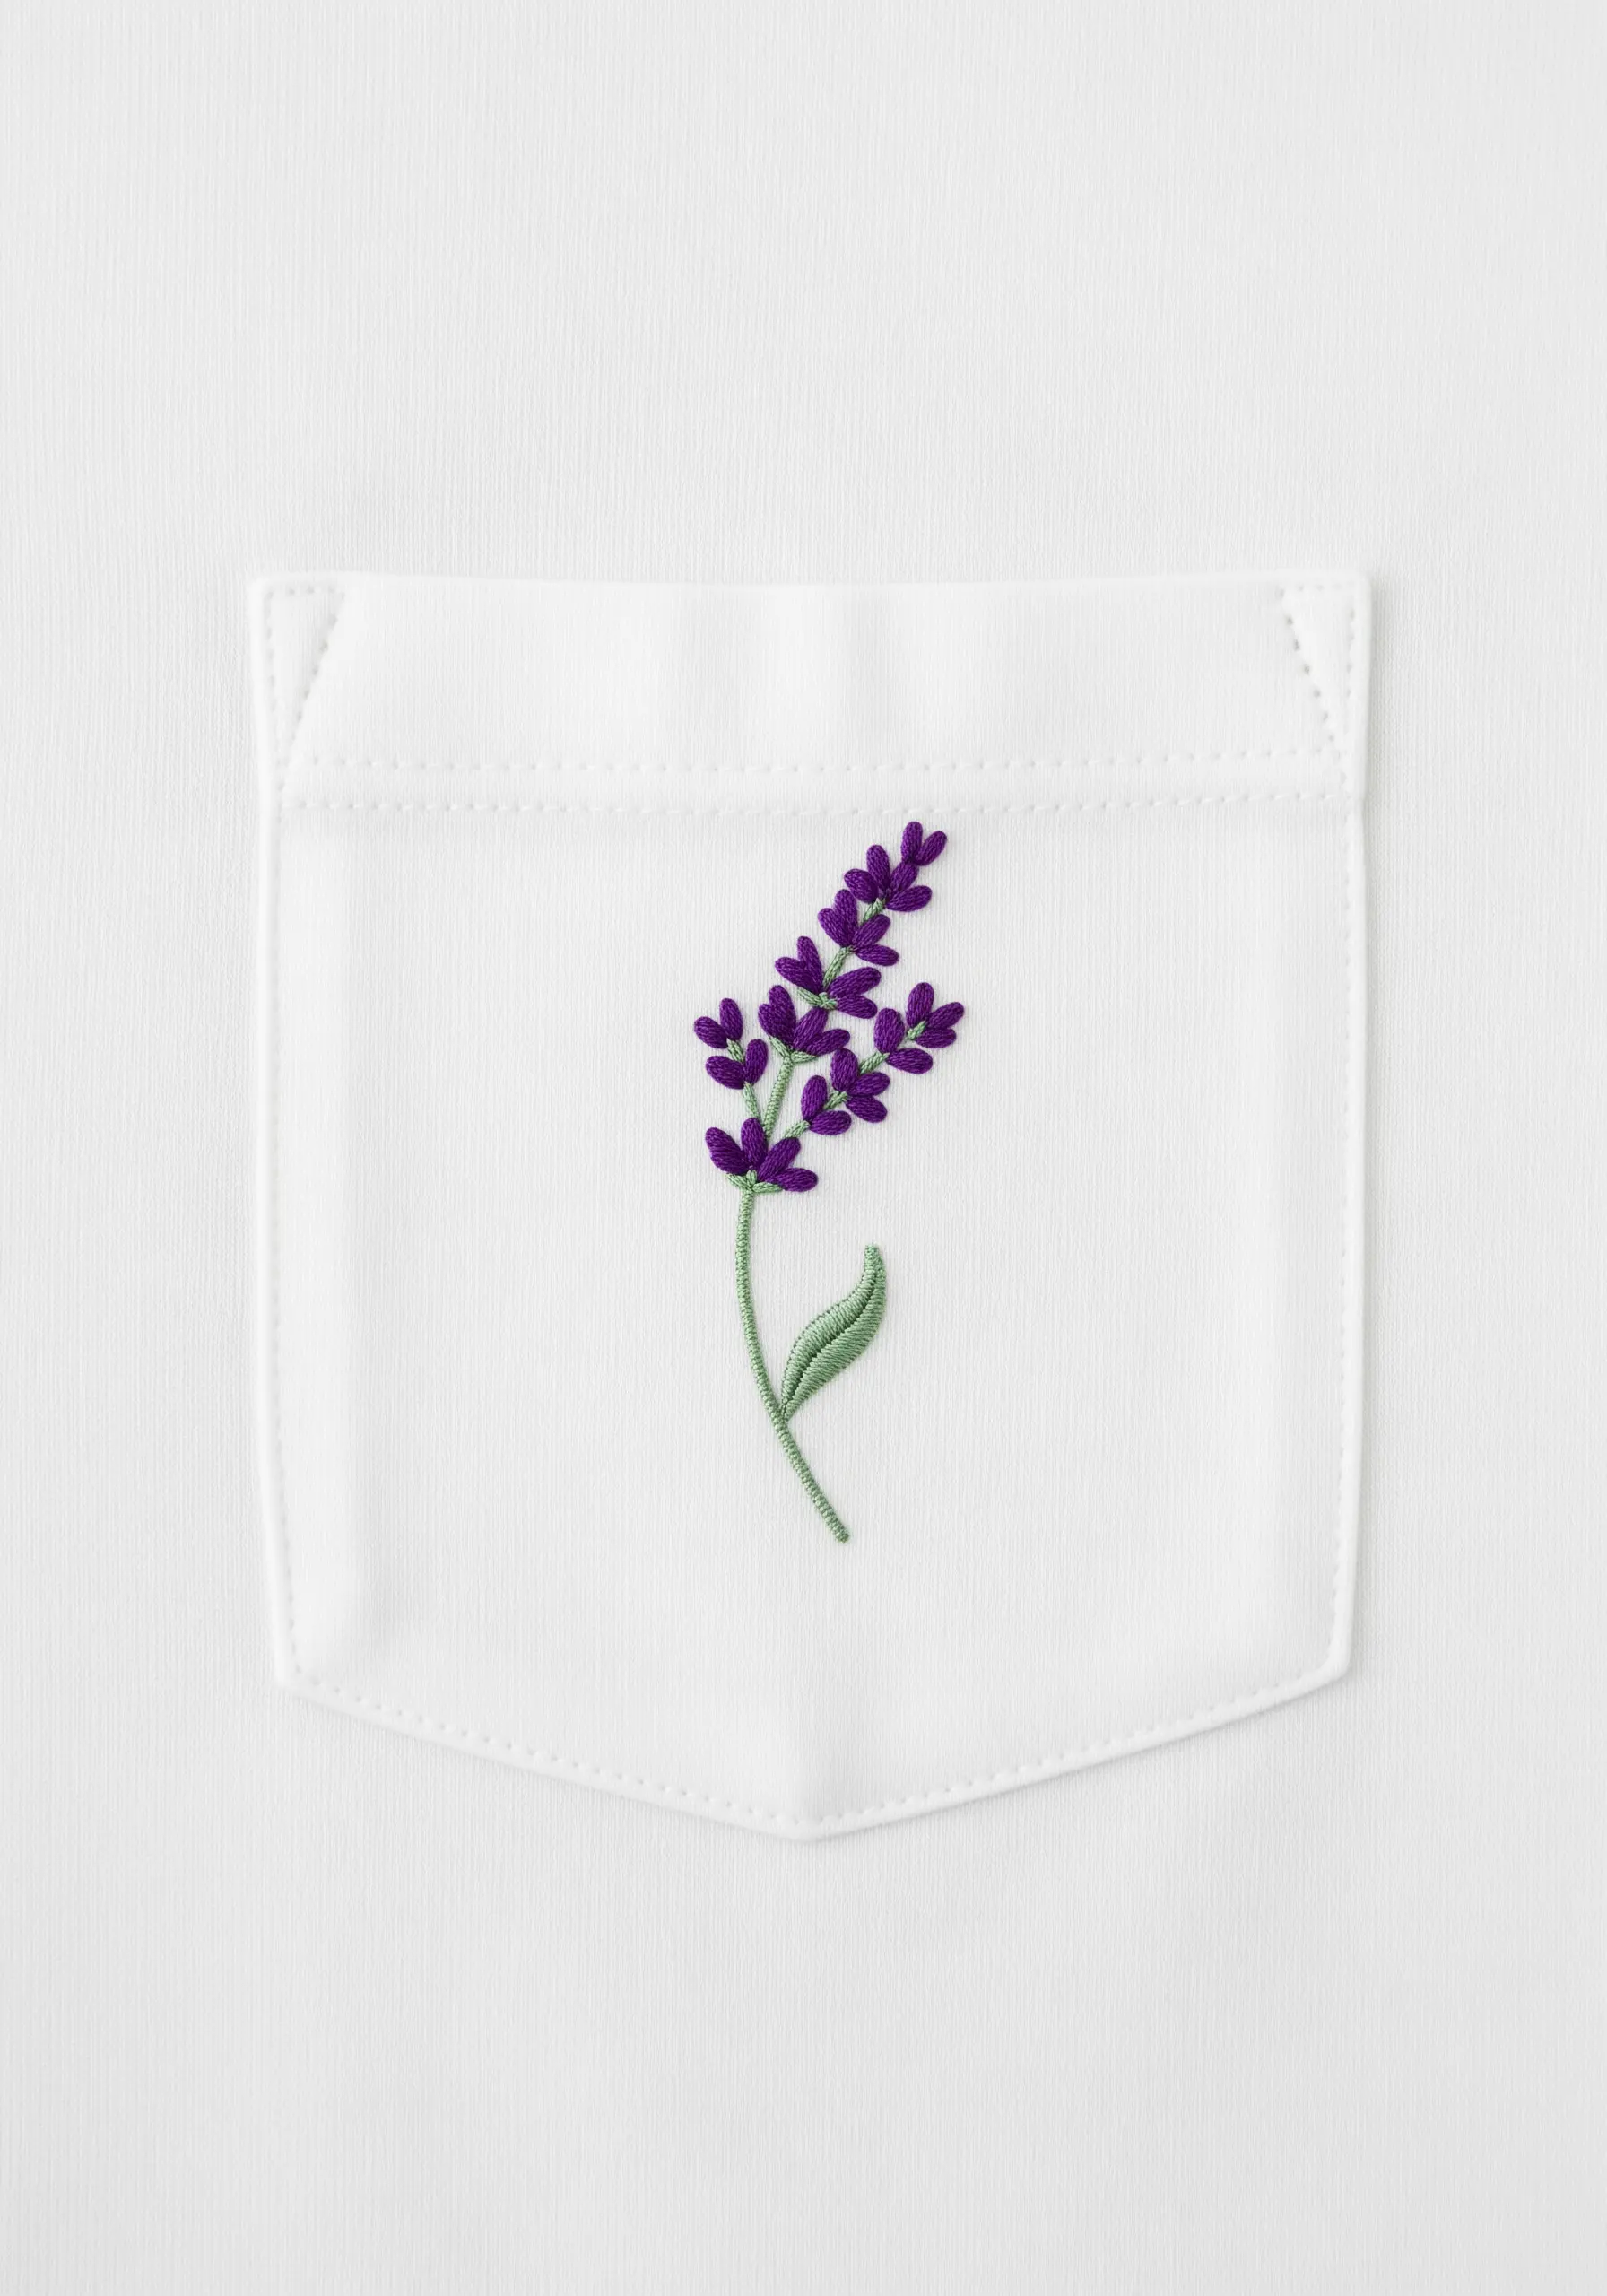
Combine French knots and straight stitches to give your lavender sprig a realistic, three-dimensional texture.
Use tightly packed French knots for the blossoms, varying the size slightly to mimic a natural bloom.
For the stem, a whipped backstitch creates a smooth, solid line that contrasts beautifully with the textured flowers.
Stitching directly onto a pocket turns it into a focal point, transforming a basic garment into a piece of wearable botanical art.
4. A Subtle Sunrise with Metallic Thread
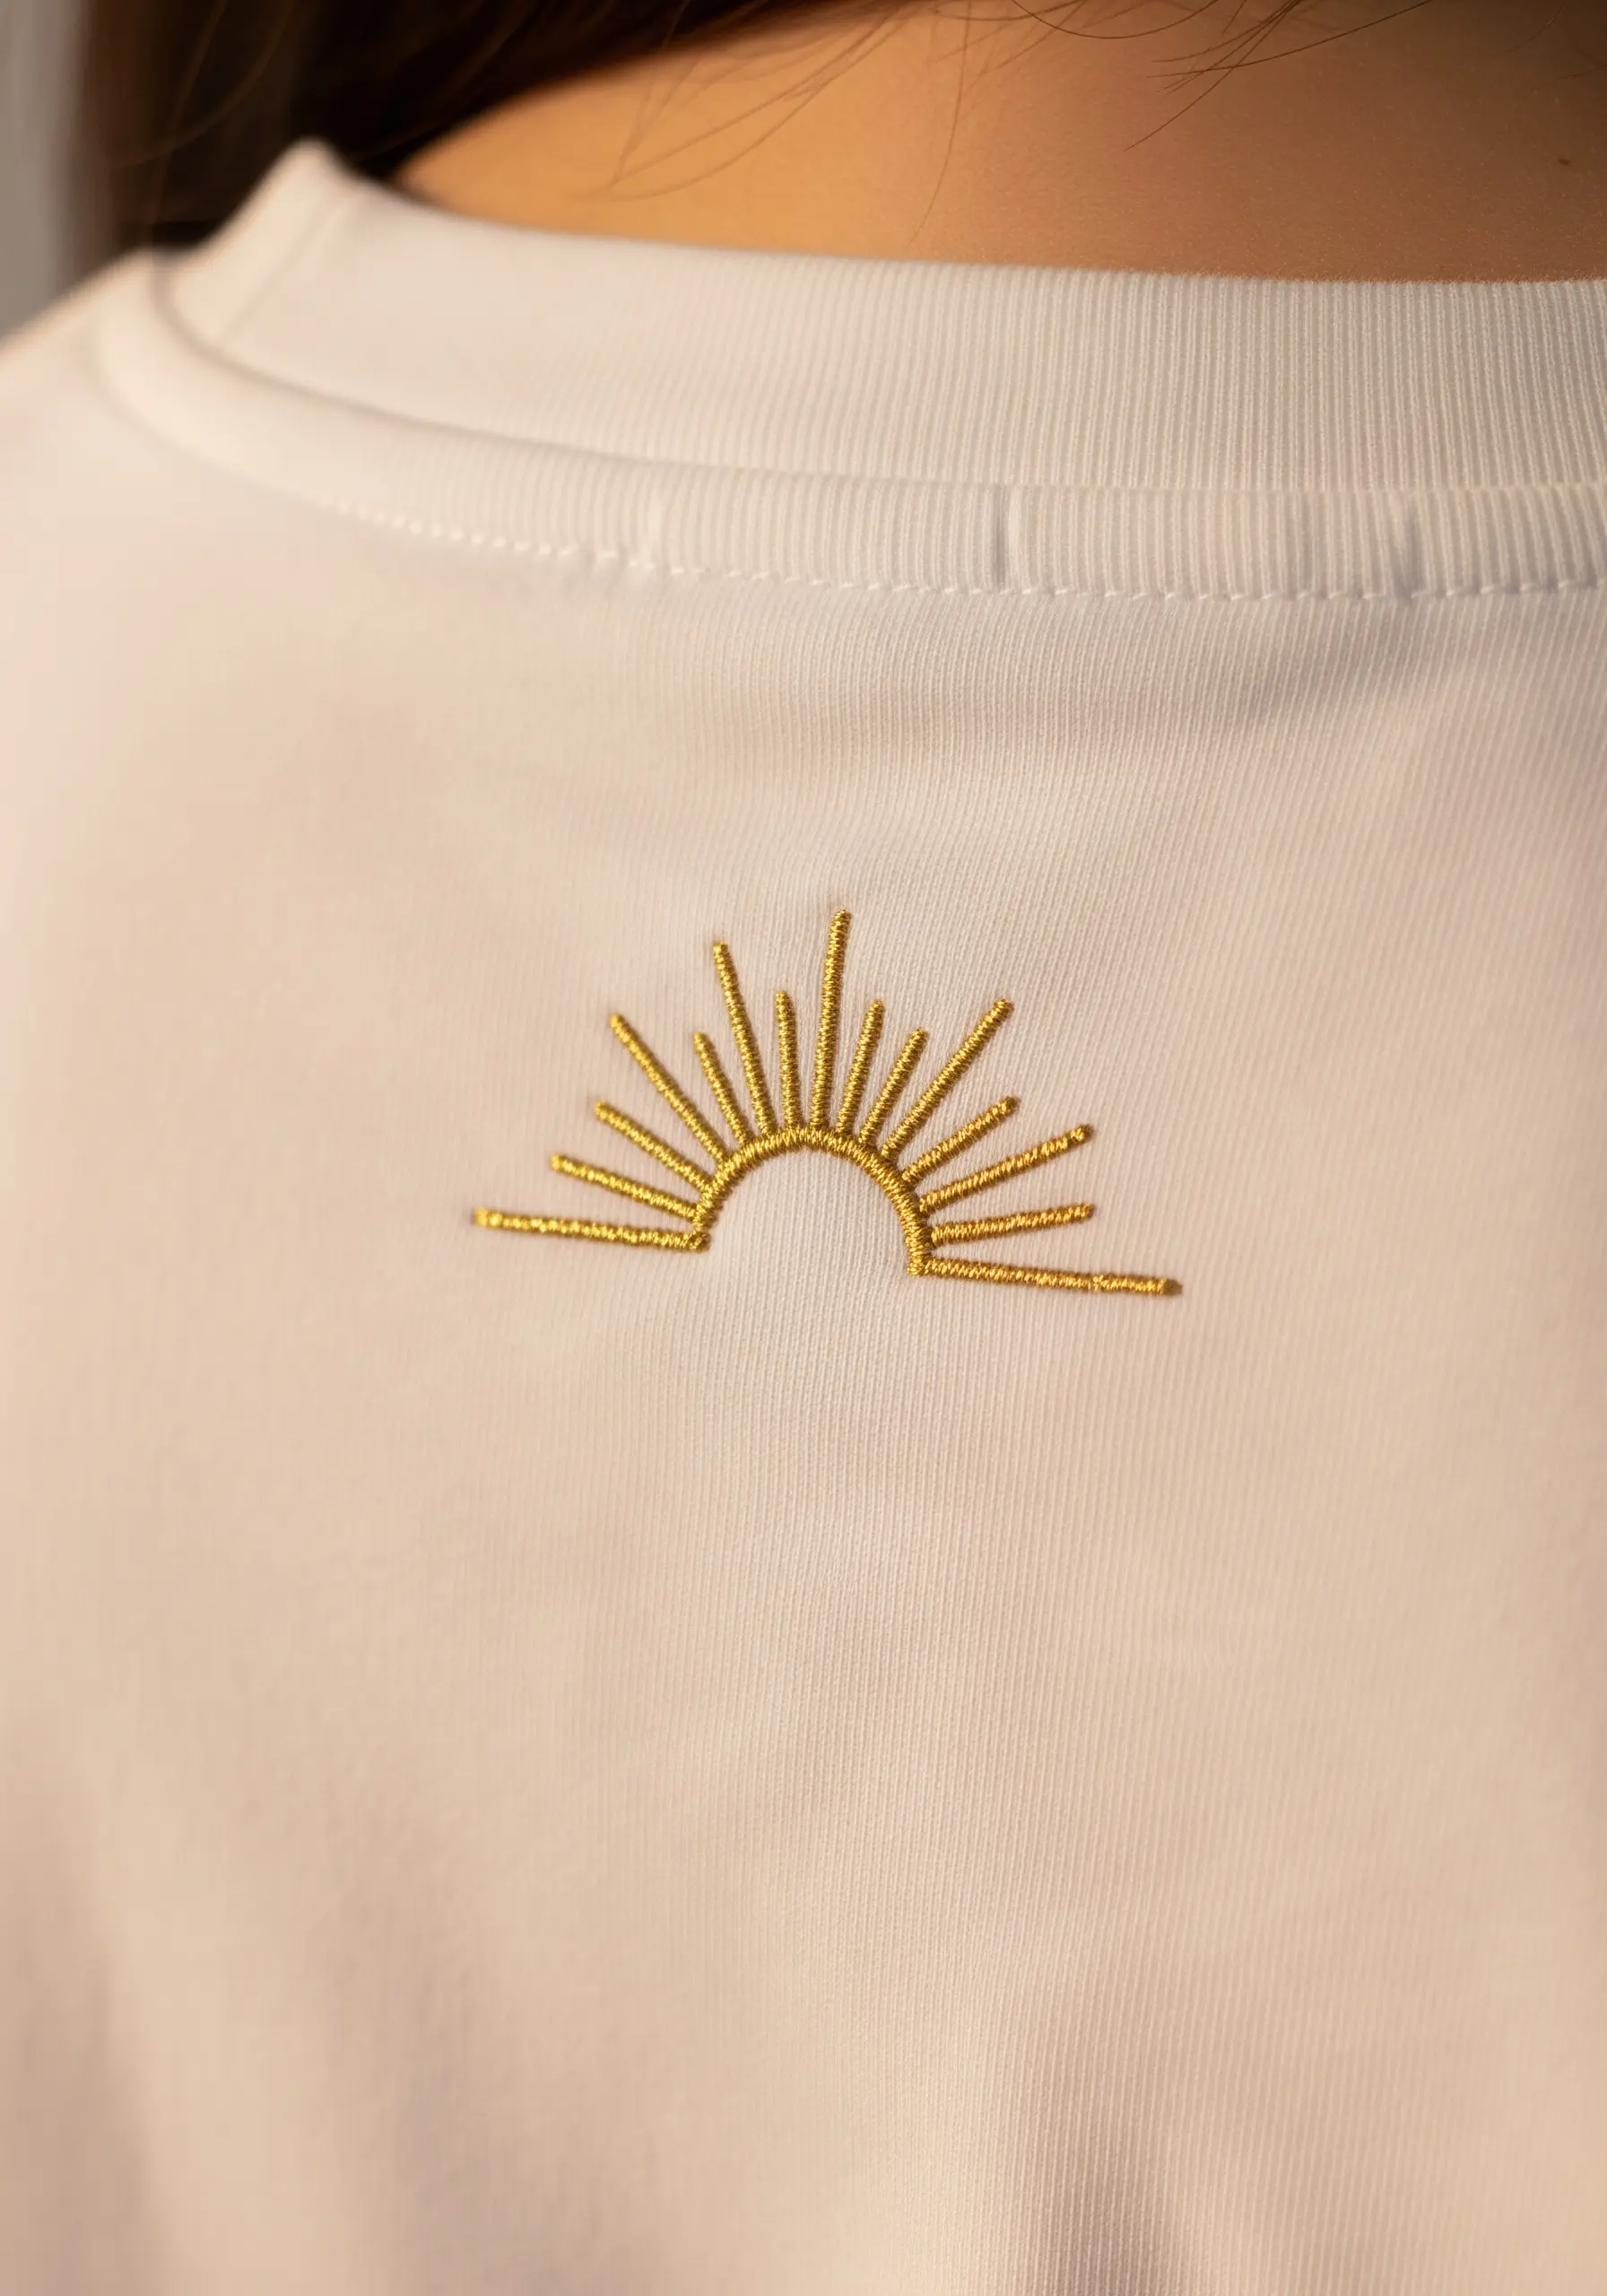
Elevate a simple backstitch outline by choosing a high-quality metallic floss.
To prevent fraying, use shorter lengths of thread (around 12 inches) and consider a thread conditioner like beeswax.
The placement just below the back collar is key—it offers a subtle, luxurious flash of gold that feels like a hidden secret.
This design proves that gold thread luxury can be achieved with minimal effort and maximum impact.
5. The Expressive Power of a Single Line
Capture the essence of a portrait with a continuous line, using a whipped backstitch to ensure it flows without interruption.
Work with just two strands of floss to keep the line delicate and artistic, allowing it to feel more like an ink drawing than heavy stitching.
This is one of the most effective abstract line art embroidery styles because its beauty lies in its uninterrupted flow and simplicity.
Choose a thread with a slight sheen, like a cotton perle, to give the line a subtle pop against the matte fabric.
6. Minimalist Dots with Satin Stitch
Create perfectly round, raised dots using a satin stitch worked within a tiny circle.
To achieve that smooth, button-like finish, lay your stitches closely together, ensuring they all run in the same direction.
Use a stabilizer on the back of the t-shirt fabric to prevent puckering around such a small, dense design.
Placing three dots near the collarbone creates a subtle, intriguing detail that mimics a modern piercing or a graphic constellation.
7. Delicate Script with a Stem Stitch
For fine, flowing script, the stem stitch is your best friend—it wraps around curves smoothly and creates a rope-like texture.
Use only two strands of embroidery floss to keep the lettering delicate and readable, preventing it from becoming bulky.
Choose a meaningful word or a short mantra; the personal connection is what makes this simple embellishment so powerful.
Placing it near the hemline gives the design a discreet, personal touch.
8. Sketch-Style Mountain Range
Create an illustrative, hand-drawn look using a simple backstitch for the main outlines of the mountains.
Add depth and texture with sporadic seed stitches inside the peaks to suggest snow or rock formations without overwhelming the design.
Using a variegated or slightly off-black thread adds a softness that feels more organic than a stark, solid color.
This technique is a beautiful way to translate the grandeur of a mountain landscape thread painting into a minimal, wearable form.
9. A Miniature Garden of Texture

Build a small, touchable cluster by combining multiple textural stitches like French knots, bullion knots, and woven wheel roses.
Stick to a tight, neutral color palette (creams, grays, whites) to let the textures shine without the distraction of bright colors.
Vary the height and density of your stitches to create a dynamic, organic shape that feels like a tiny, wild garden.
These contemporary texture techniques turn a small area into a rich, sculptural focal point.
10. Clean-Lined Bee with a Satin Fill
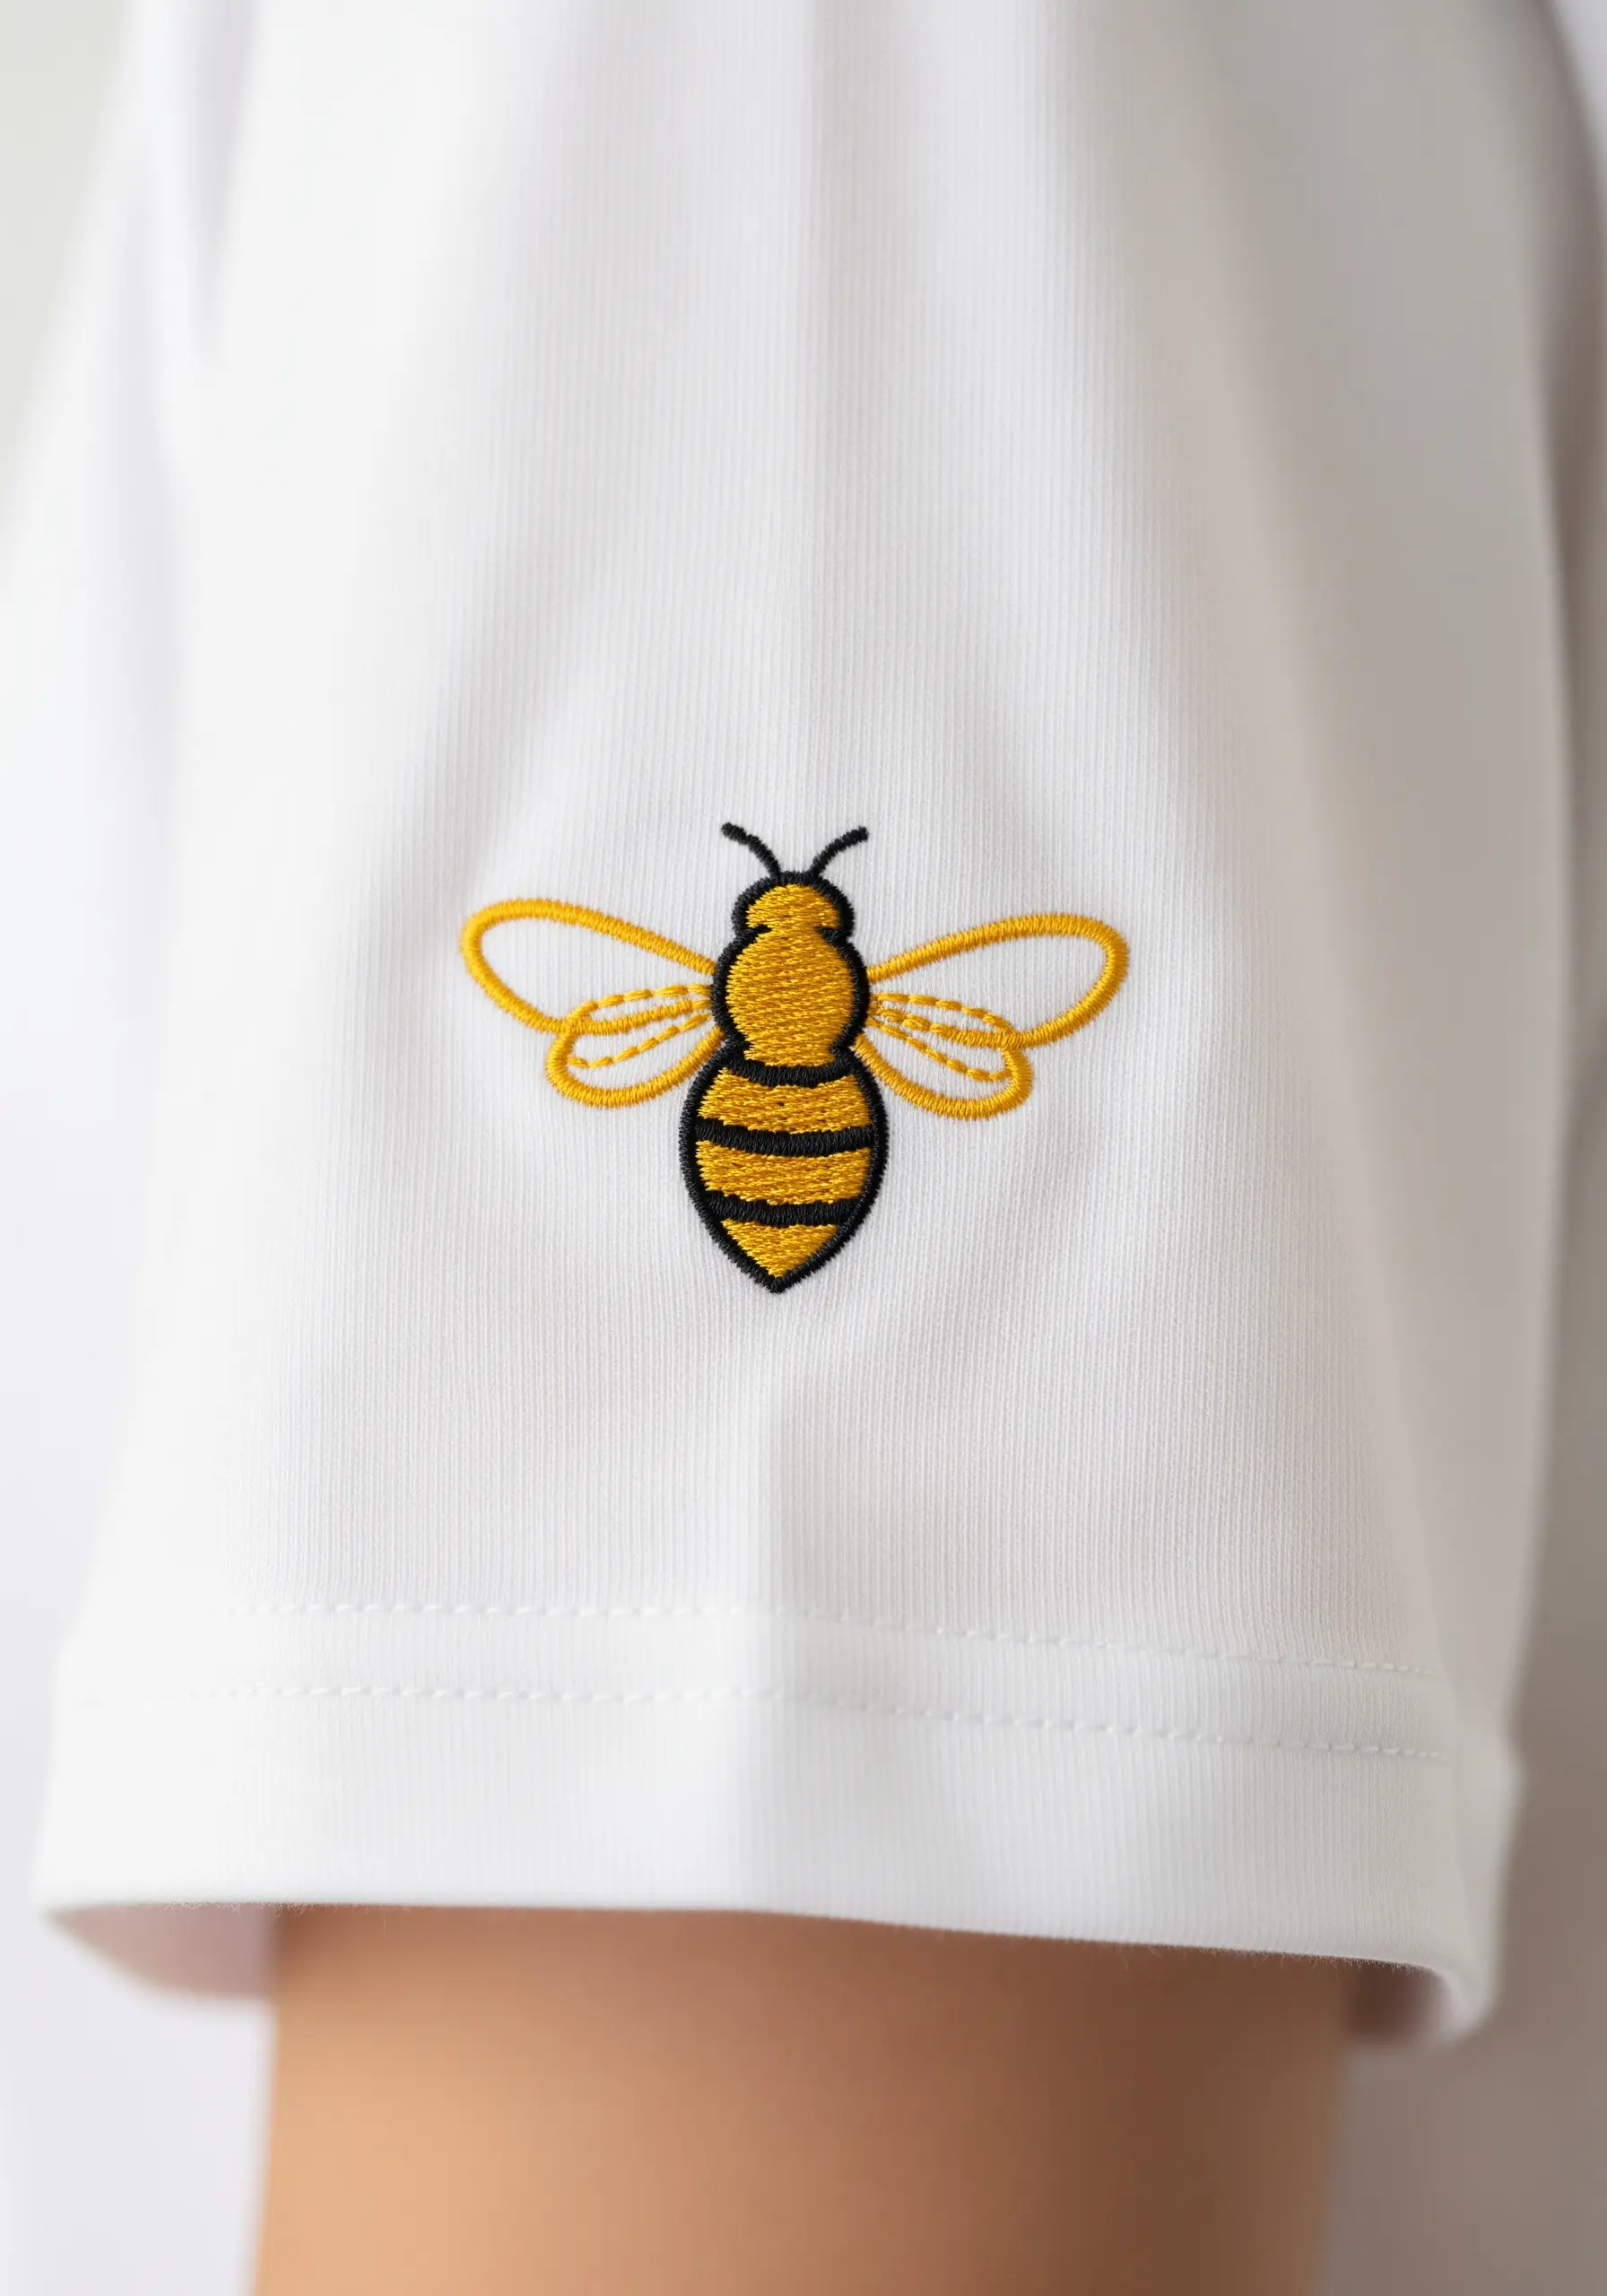
Achieve this clean, graphic bee by first outlining the entire shape with a split stitch.
Then, fill the sections with a smooth satin stitch, using the split stitch outline as a raised edge to tuck your needle under for perfectly crisp borders.
For the delicate wings, use a single strand of floss in a simple backstitch to keep them light and airy.
The sleeve is the perfect home for a motif like this—a playful and unexpected discovery.
11. The Graphic Gaze
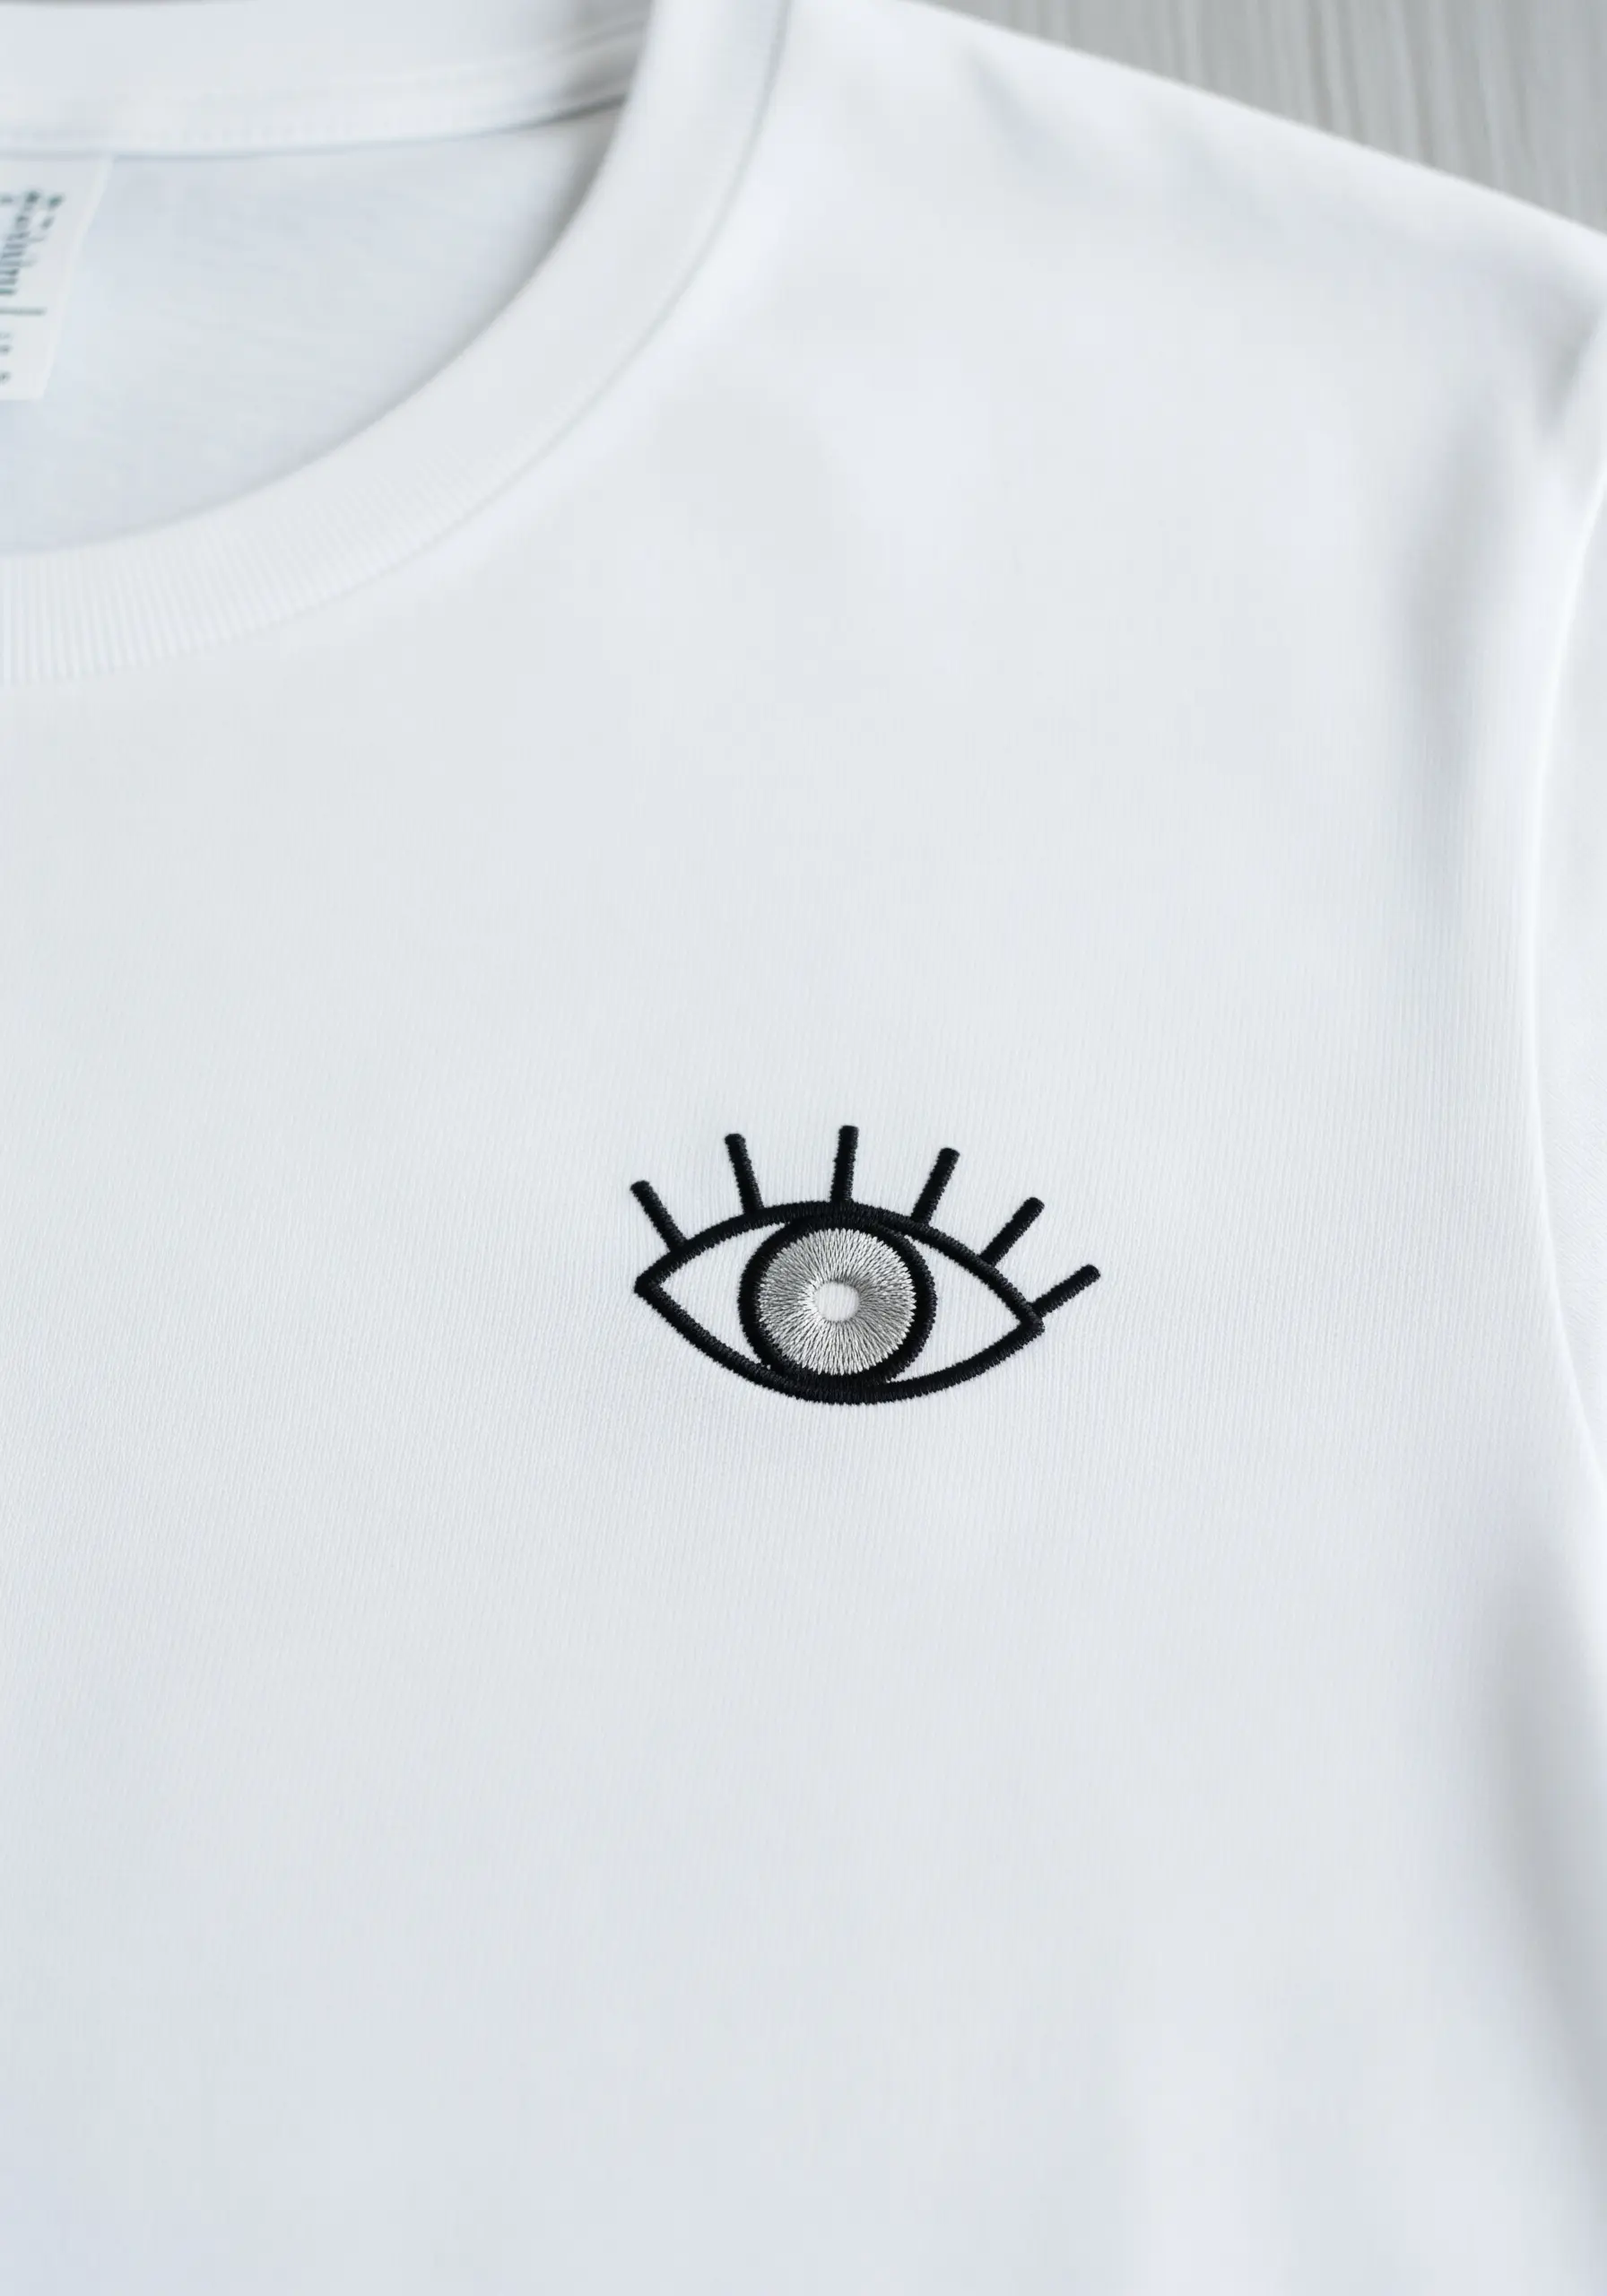
Create a mesmerizing iris by stitching a spiral of backstitch or filling it with concentric circles of satin stitch.
Use a light gray or silver thread for the center to create a subtle highlight that gives the eye depth and dimension.
Frame the eye with bold, graphic lashes using single straight stitches, tapered at the ends for a sharp, clean finish.
This motif transforms a simple symbol into a piece of modern, stylized art.
12. A Constellation of Stitches and Studs
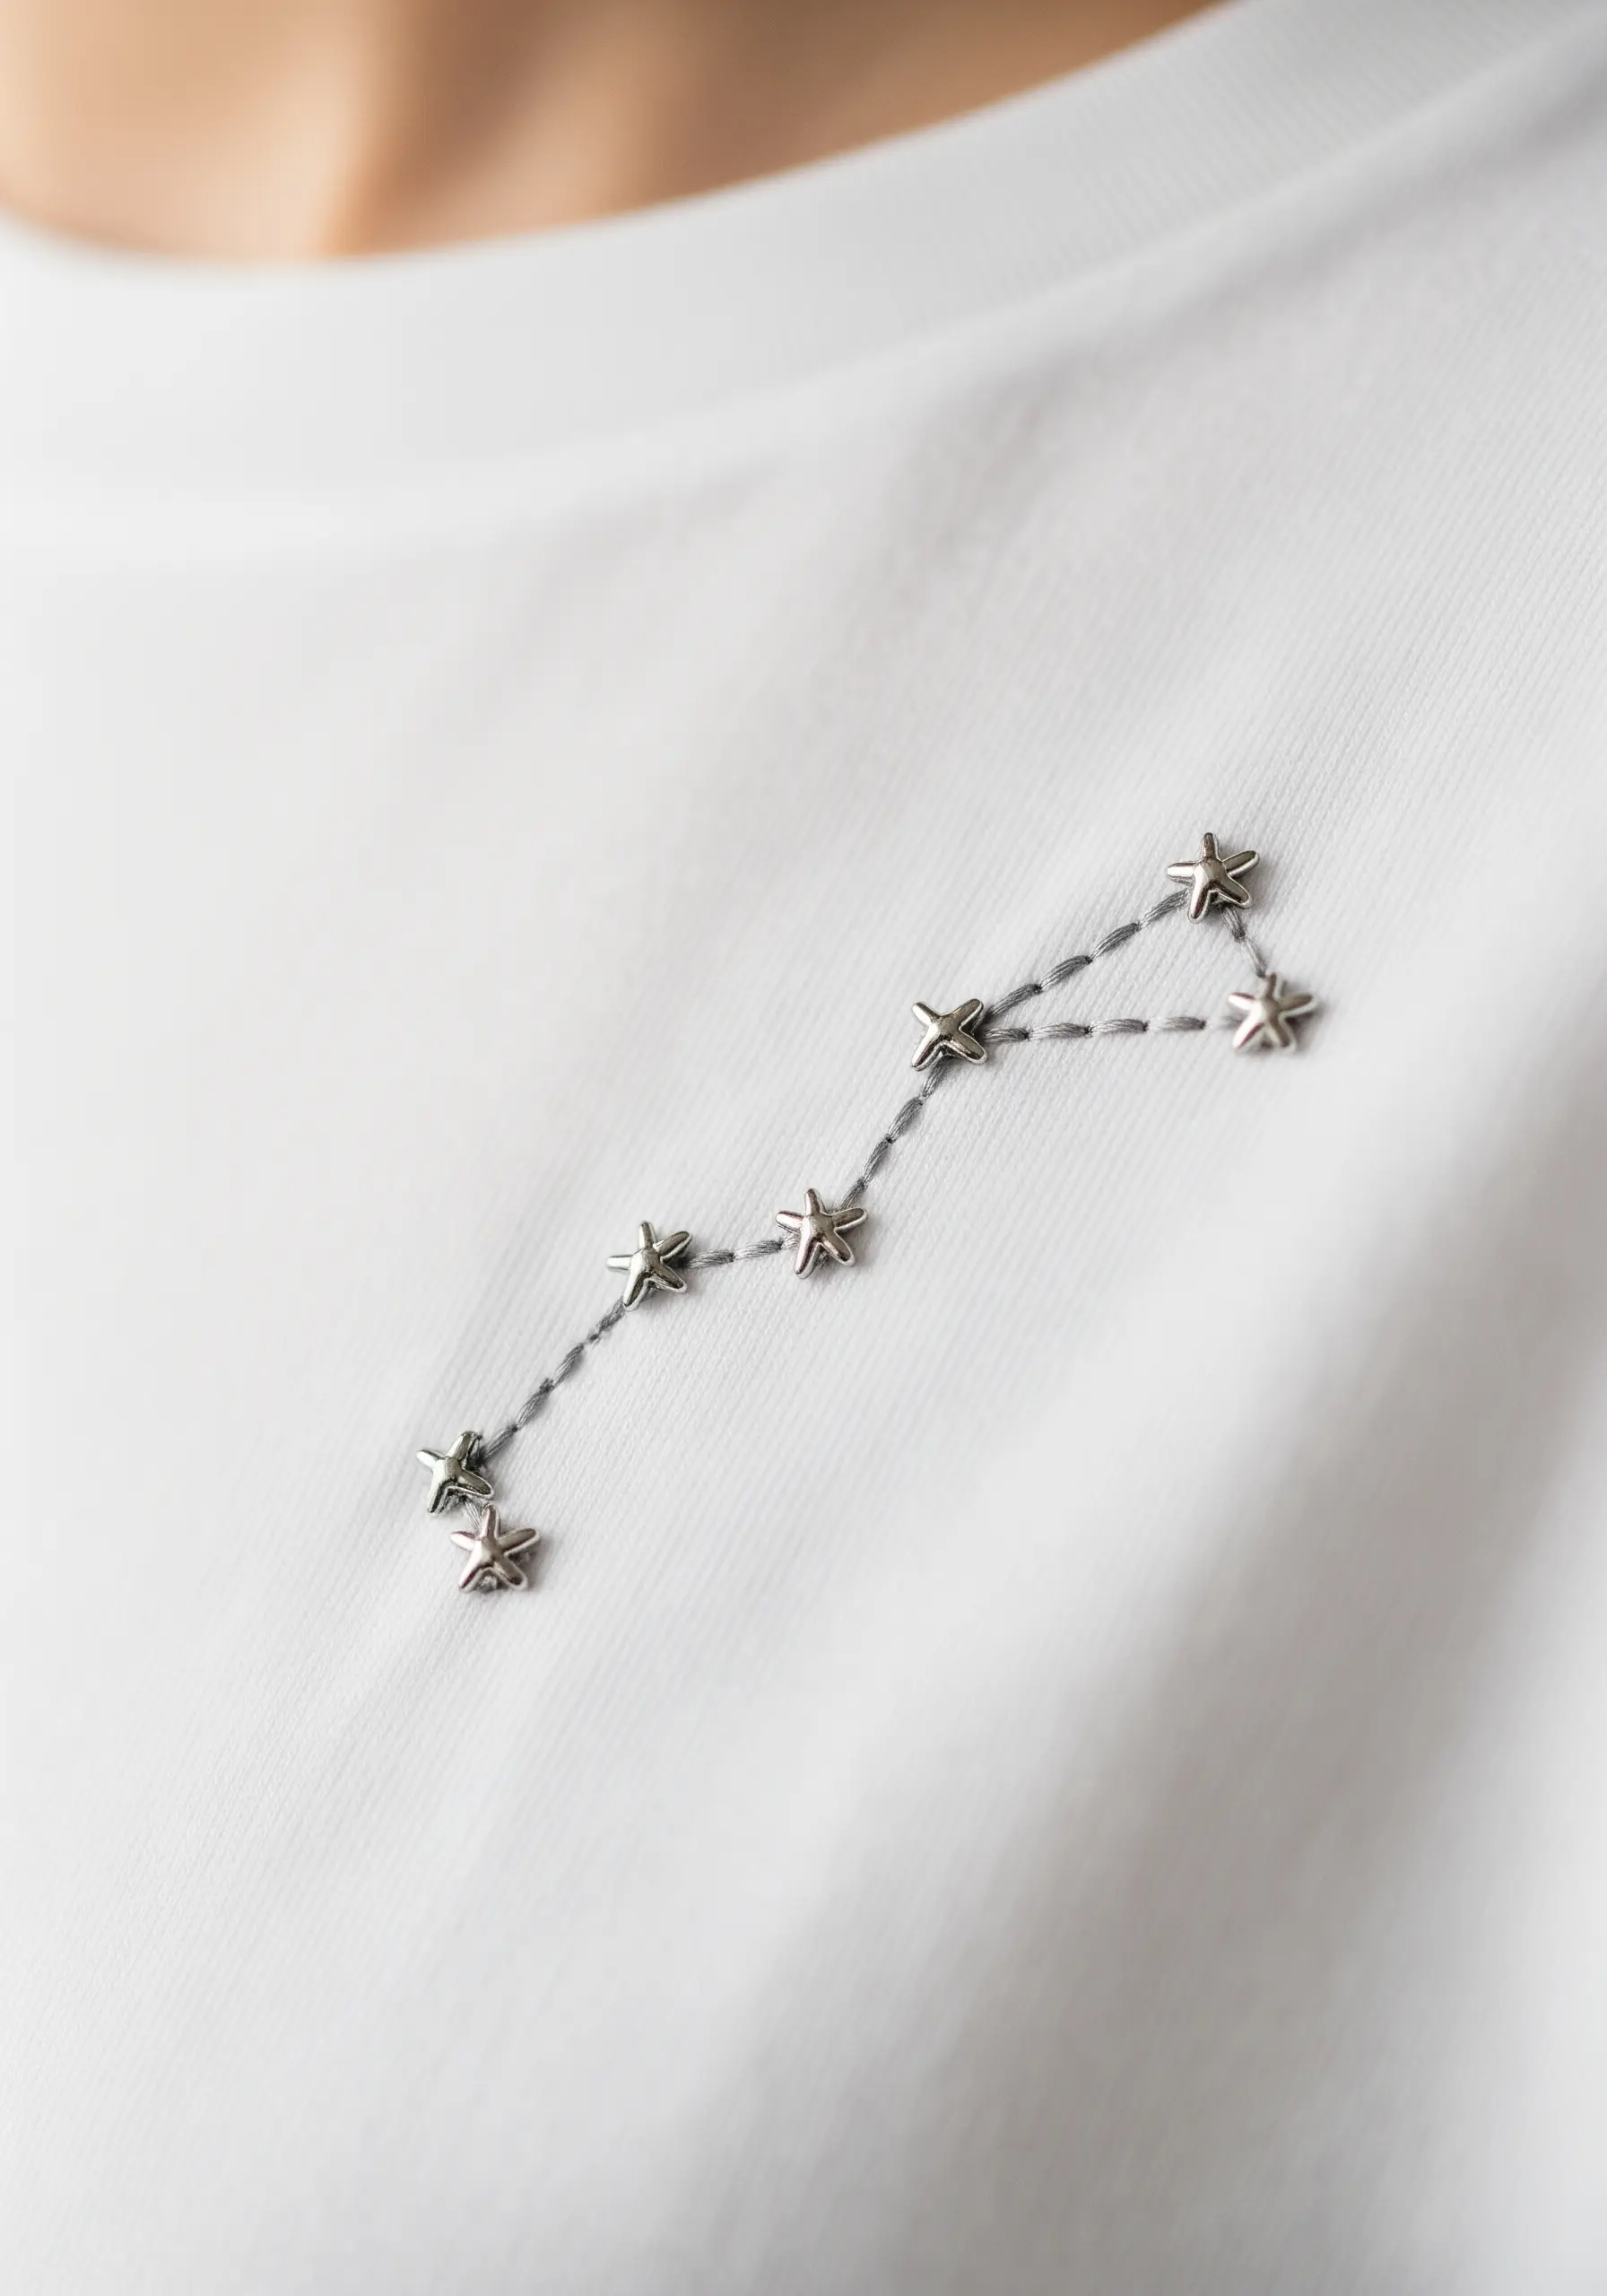
Combine embroidery with hardware for a celestial design that has both texture and shine.
Use a simple backstitch with two strands of gray floss to connect the ‘stars,’ keeping the lines delicate.
Instead of French knots, stitch on small metallic beads or apply iron-on studs for a polished, star-like glimmer.
This mixed-media approach adds a layer of sophistication and makes the design truly unique.
13. Dynamic Movement with Wavy Lines
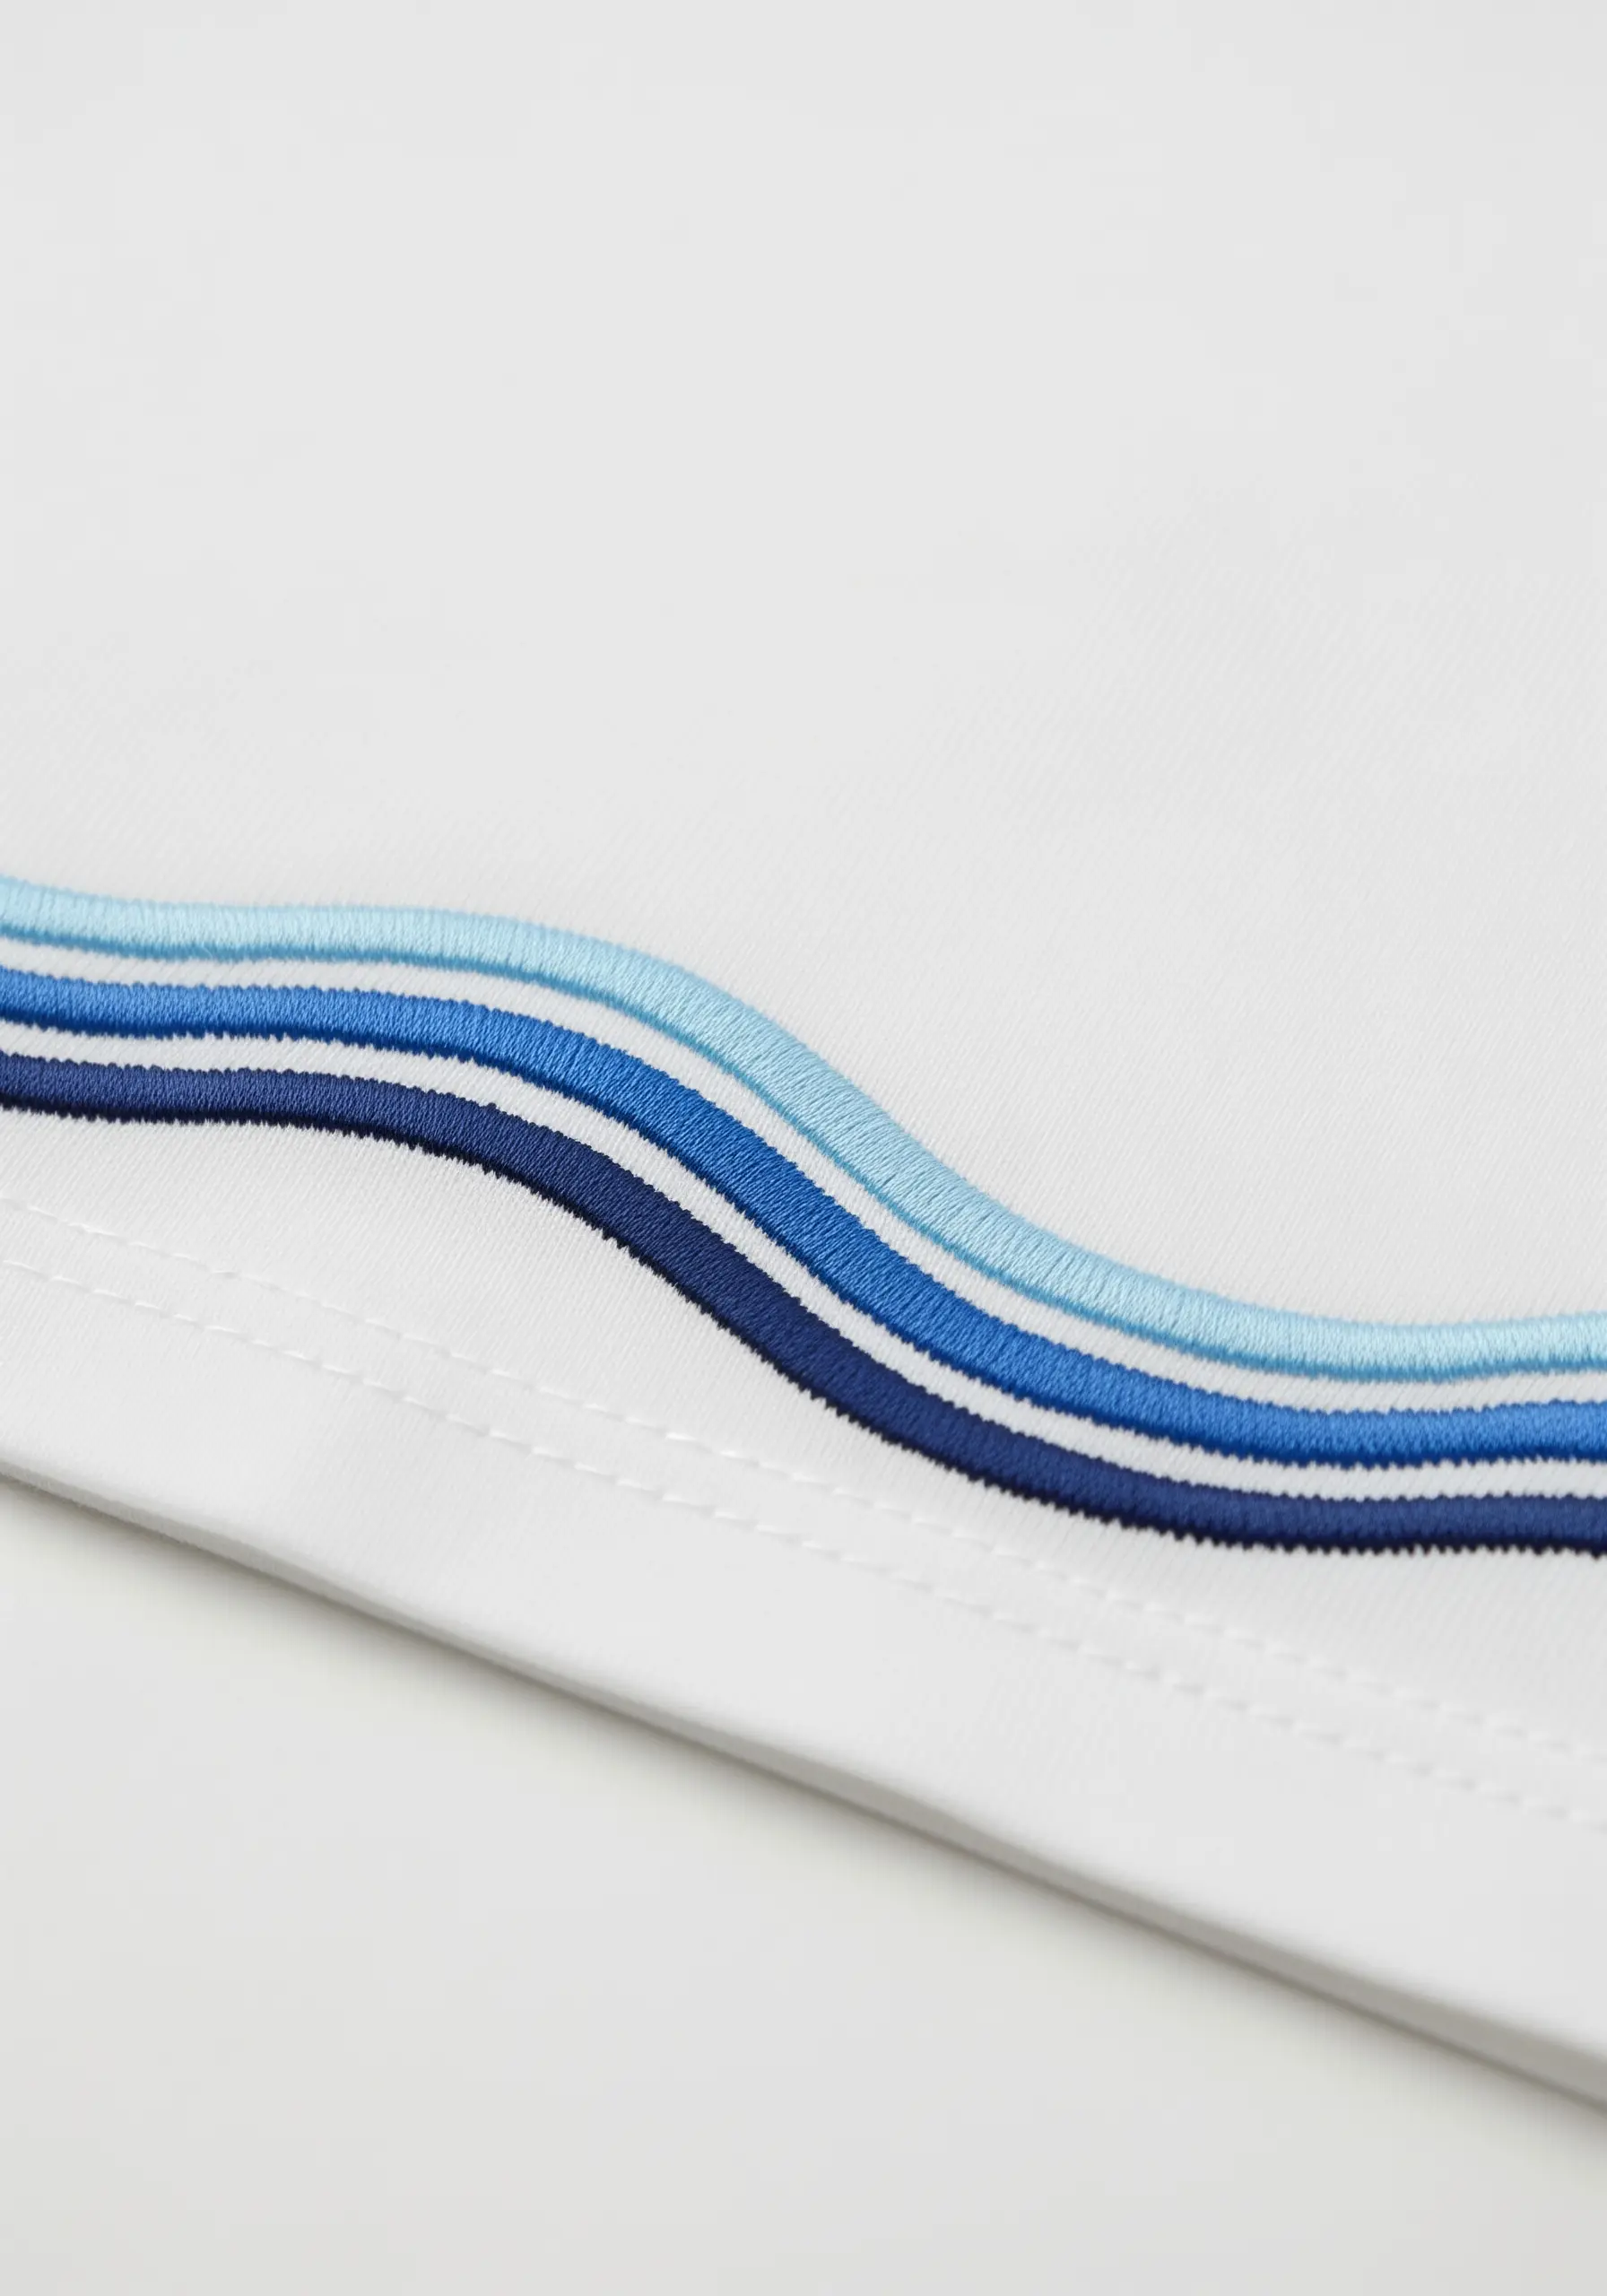
Suggest motion and rhythm by embroidering a series of parallel, flowing lines across the hem or sleeve.
Use a satin stitch for each stripe, ensuring your stitches lie flat and uniform for a smooth, ribbon-like effect.
Create a color gradient by choosing three or four shades of the same color, moving from dark to light.
This technique adds a sophisticated, sporty elegance that elevates a plain white tee instantly.
14. Ginkgo Leaf with Thread-Painted Detail

Mimic the delicate veins of a ginkgo leaf by using long-and-short stitch, angling your stitches outward from the center.
First, create a clean outline with a split stitch to act as a guide and provide a crisp edge for your fill stitches.
Using a single color of thread, like this brilliant gold, emphasizes the shape and texture of the leaf, turning it into a radiant silhouette.
This is one of the most elegant leaf shape ideas for embroidering because it relies on stitch direction, not color, to create beauty.
15. The Painterly Brushstroke Effect
Recreate the energetic texture of a paint stroke with a deliberately uneven satin stitch.
Start with a dense satin stitch in the center, then allow the stitches at the ends to become longer and more sparse, mimicking the drag of a brush.
Don’t be afraid of slight imperfections; the organic, slightly rugged edges are what make this design feel authentic and artistic.
This is a quick, expressive way to add a pop of bold color with a satisfyingly tactile finish.
16. Minimalist Roman Numeral Lettering

For ultra-fine lettering like Roman numerals, use a single strand of floss and a simple backstitch.
To ensure perfect alignment and spacing, print your date or number in the desired font and trace it onto the fabric with a fine-tipped fabric pen.
Stitching this personal detail on the inside collar or just below the back neckline makes it a subtle, meaningful mark known only to you.
It’s one of the most elegant minimal typography embroidery patterns for adding a personal story to your clothing.
17. The Perfect Satin Stitch Heart

The secret to a plump, perfect satin stitch heart is managing the direction of your stitches.
Start from the center ‘V’ and angle your stitches outwards on both sides, keeping them parallel to each other.
To get that flawlessly sharp edge, outline the shape first with a tiny split stitch, which will give you a firm boundary to stitch against.
A tiny motif on the sleeve hem adds a flash of color and personality every time you move your arm.
18. Geometric Symbol with a Whipped Backstitch
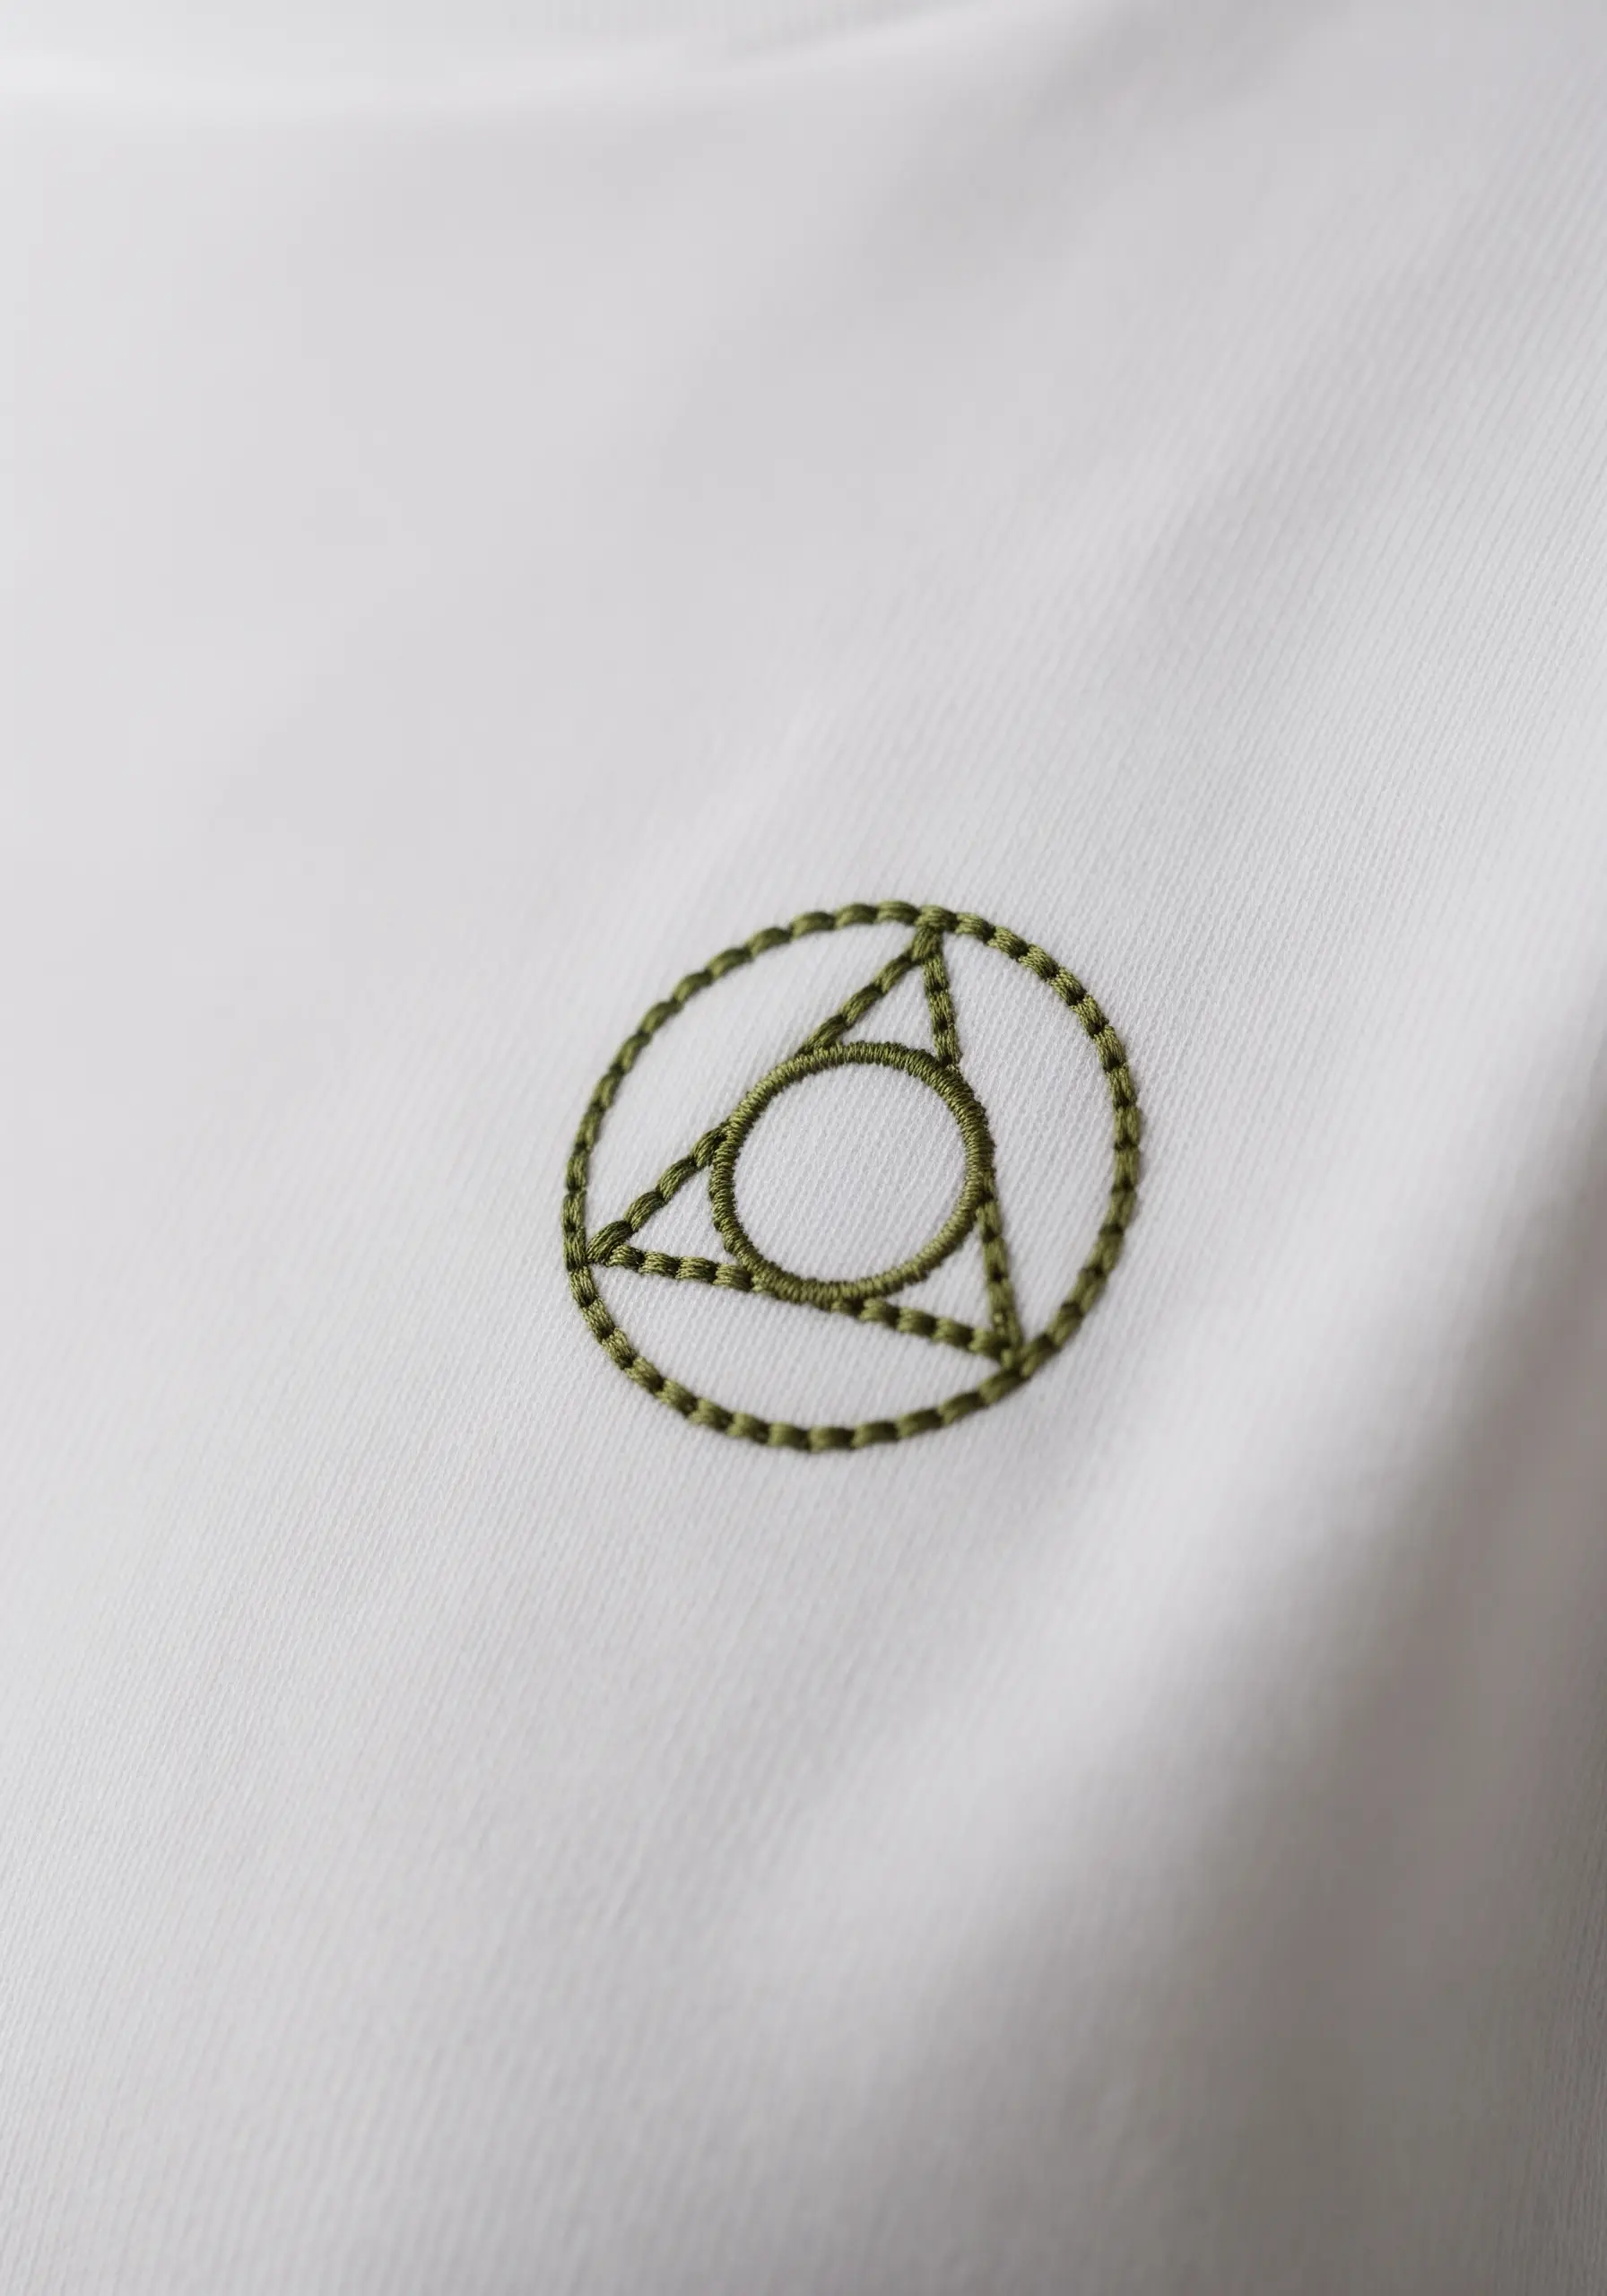
For geometric designs that require bold, clean lines, a whipped backstitch is superior to a simple backstitch.
First, lay down a standard backstitch along your design lines. Then, without piercing the fabric, whip a second thread around each stitch.
This technique creates a raised, rope-like line that is perfectly smooth and has no gaps, ideal for symbols and logos.
Using an olive green thread offers a sophisticated, earthy alternative to standard black.
19. Soft Shading on Succulent Petals

Achieve that soft, realistic gradient on succulent leaves by using the long-and-short stitch technique.
Work with two or three closely related shades of green and blue, using a single strand of each to blend them seamlessly.
Stitch from the outer edge of each petal inward, letting the colors overlap naturally to create depth and dimension.
This approach transforms simple houseplant embroidery motifs into miniature thread paintings.
20. A Swallow in Flight on the Shoulder
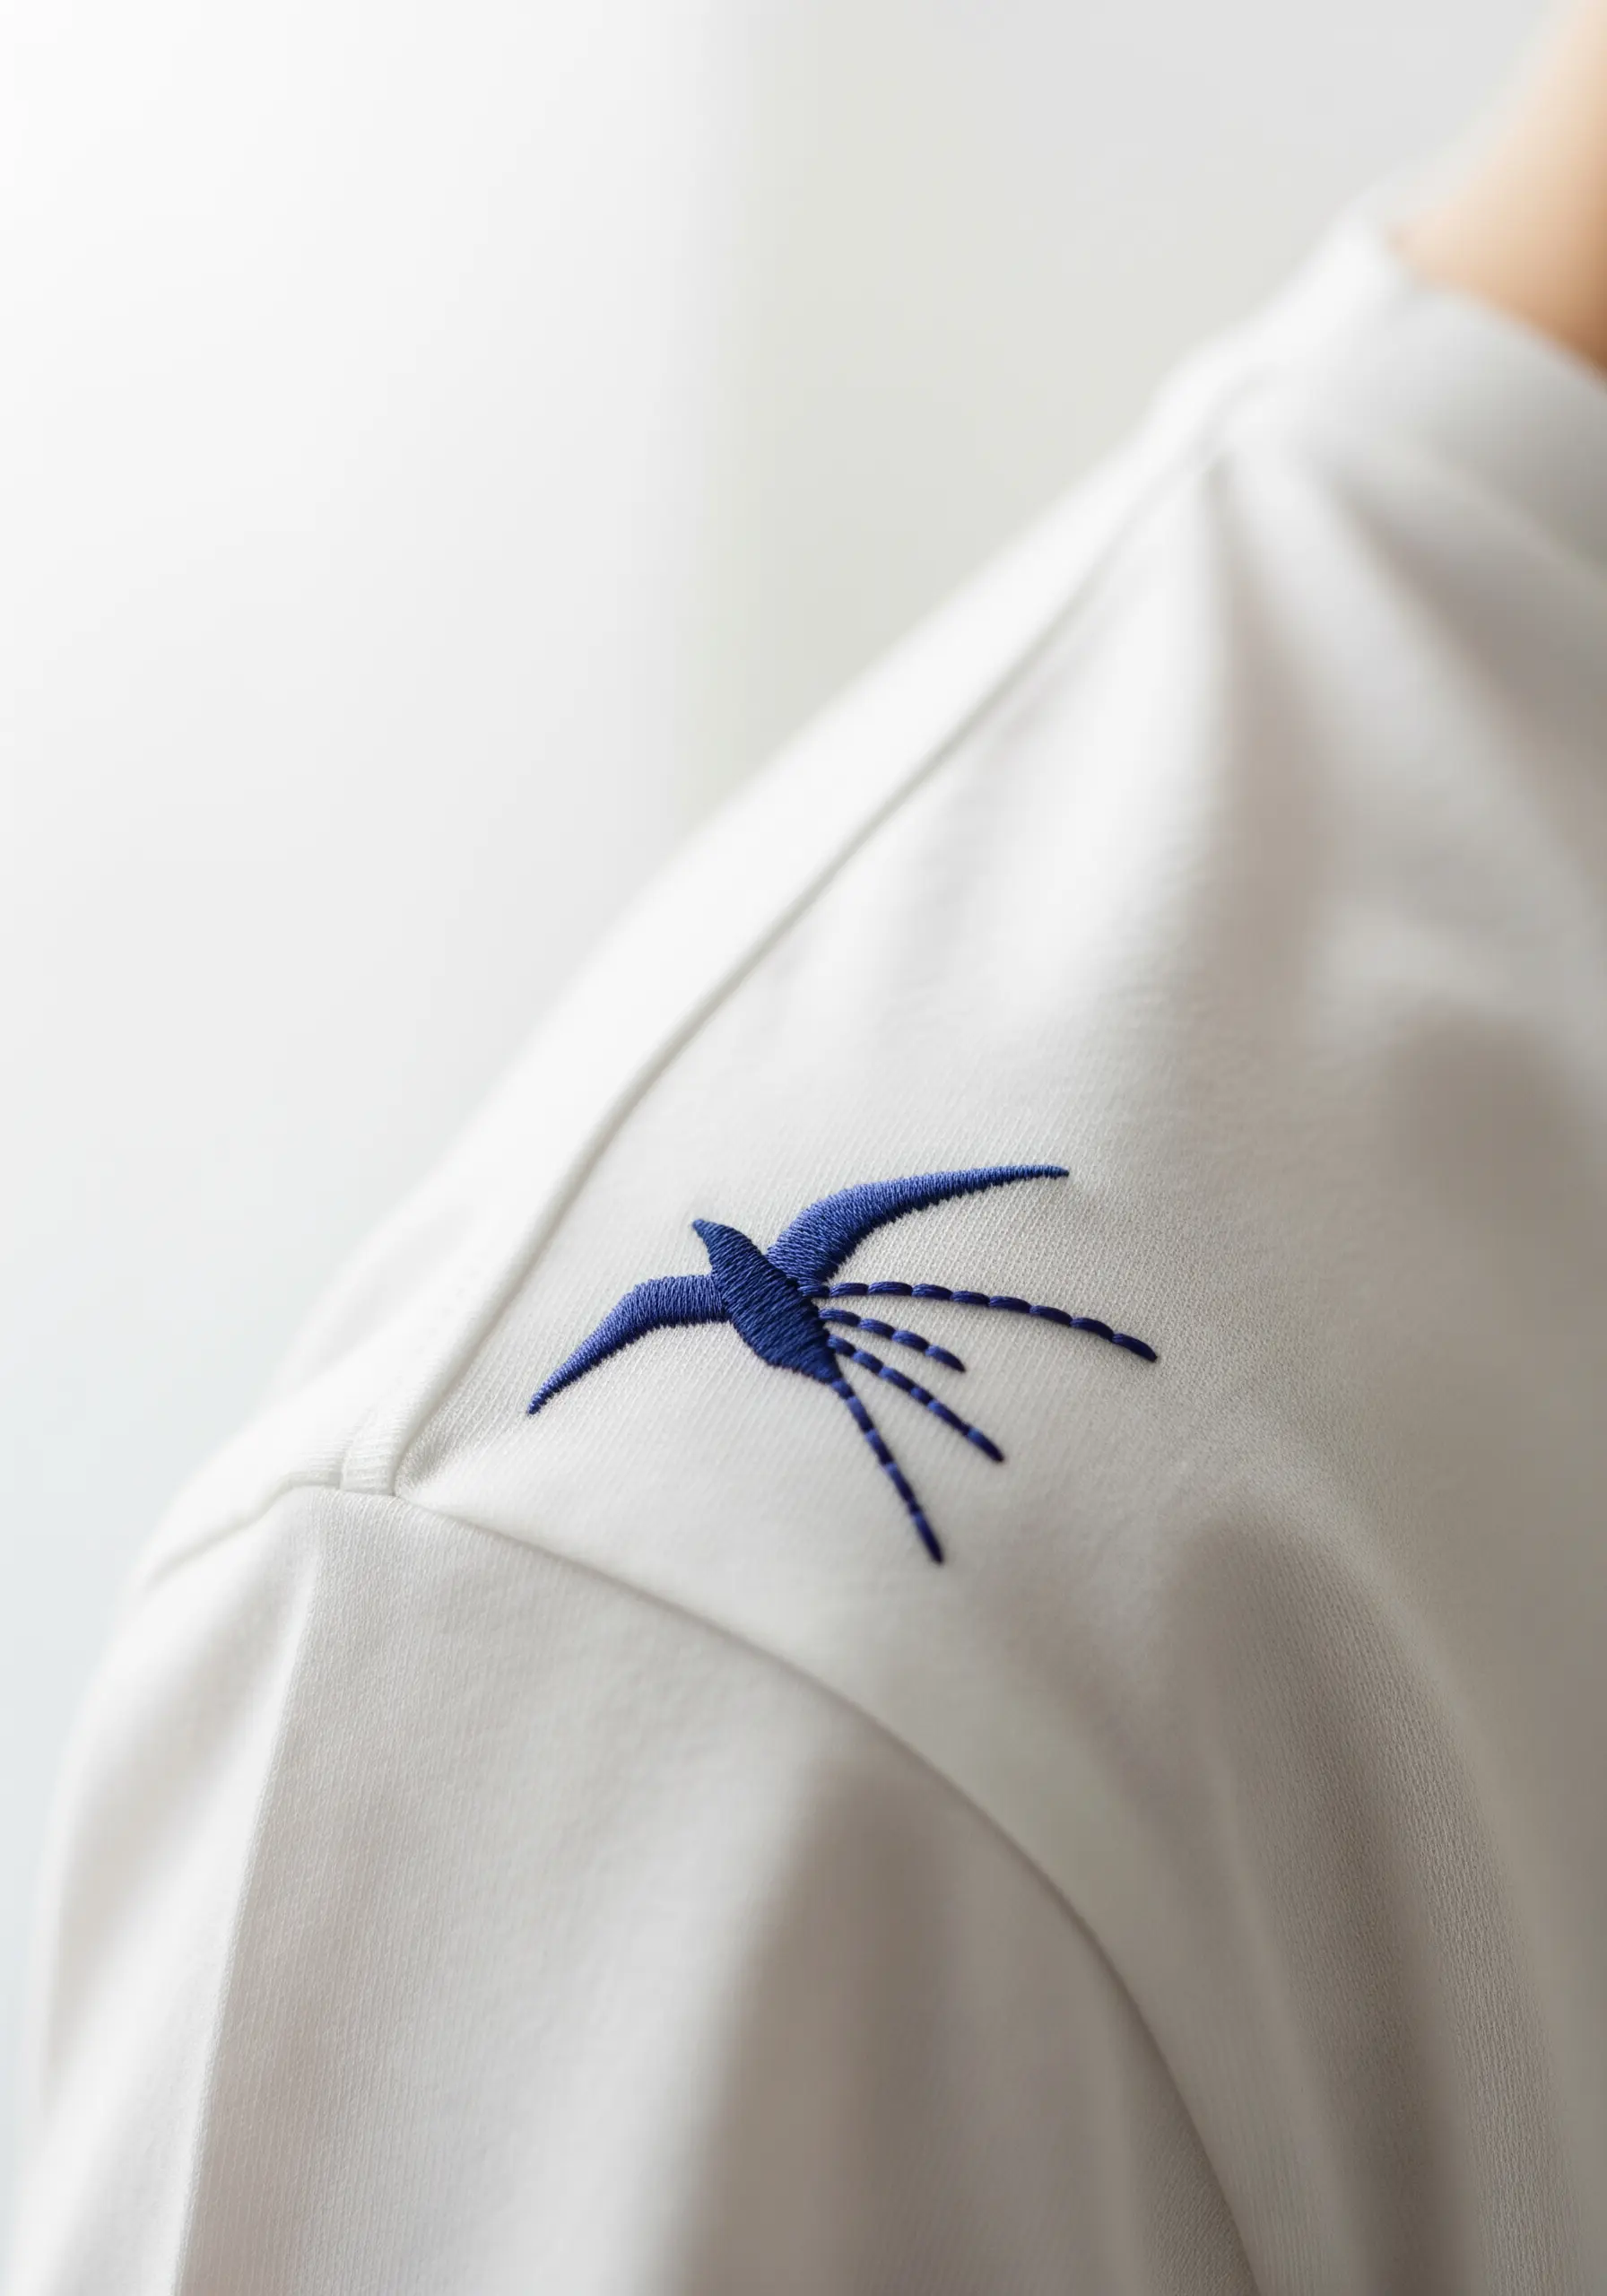
Capture the grace of a bird in motion by placing it on the shoulder, as if it has just landed.
Use a smooth satin stitch for the body to create a solid, bold silhouette.
For the tail feathers, switch to long, delicate straight stitches to convey a sense of lightness and speed.
This unexpected placement is what makes the design feel dynamic and alive.
21. A Woven Cross for Bold Texture
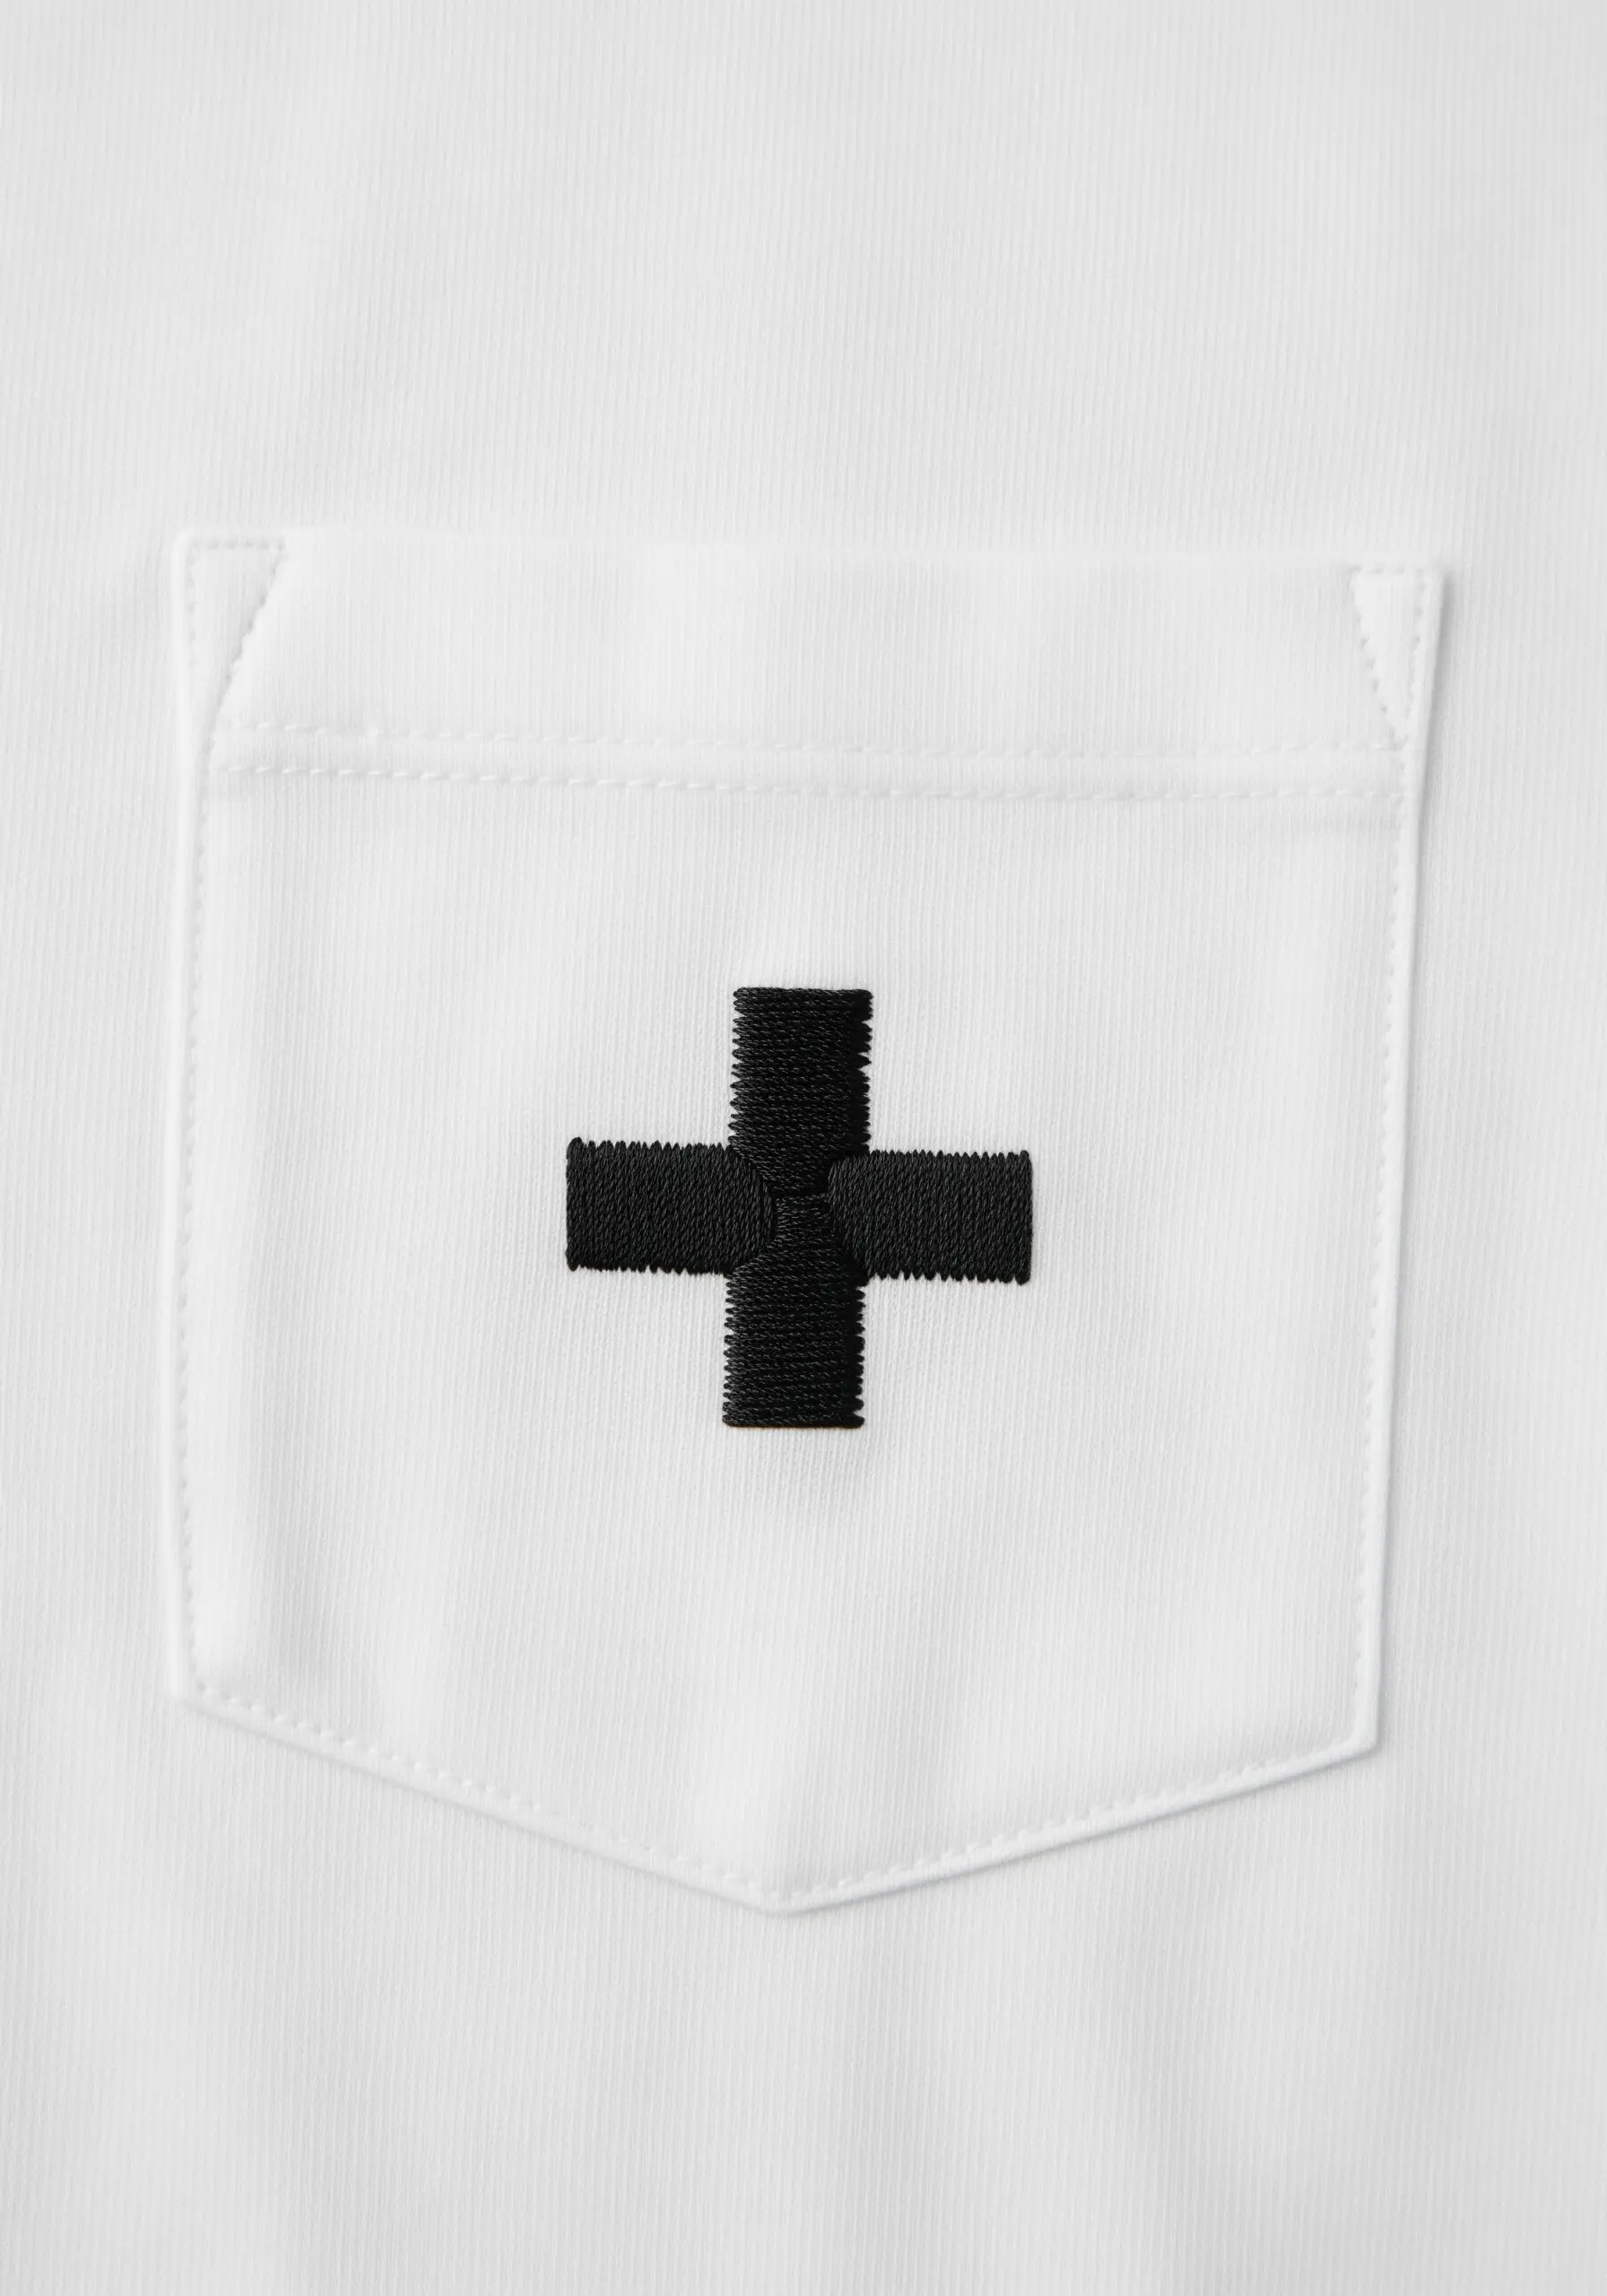
Instead of a flat satin stitch, create this bold plus sign using a woven bar technique for a raised, textural effect.
Lay down several parallel foundation stitches, then weave your working thread over and under them without piercing the fabric.
This method builds a thick, substantial shape that has a beautiful hand-woven appearance and stands up well on stretchy knit fabric.
It’s a powerful way to make a simple geometric shape feel tactile and significant.
22. A Vertical Line of Woven Knots
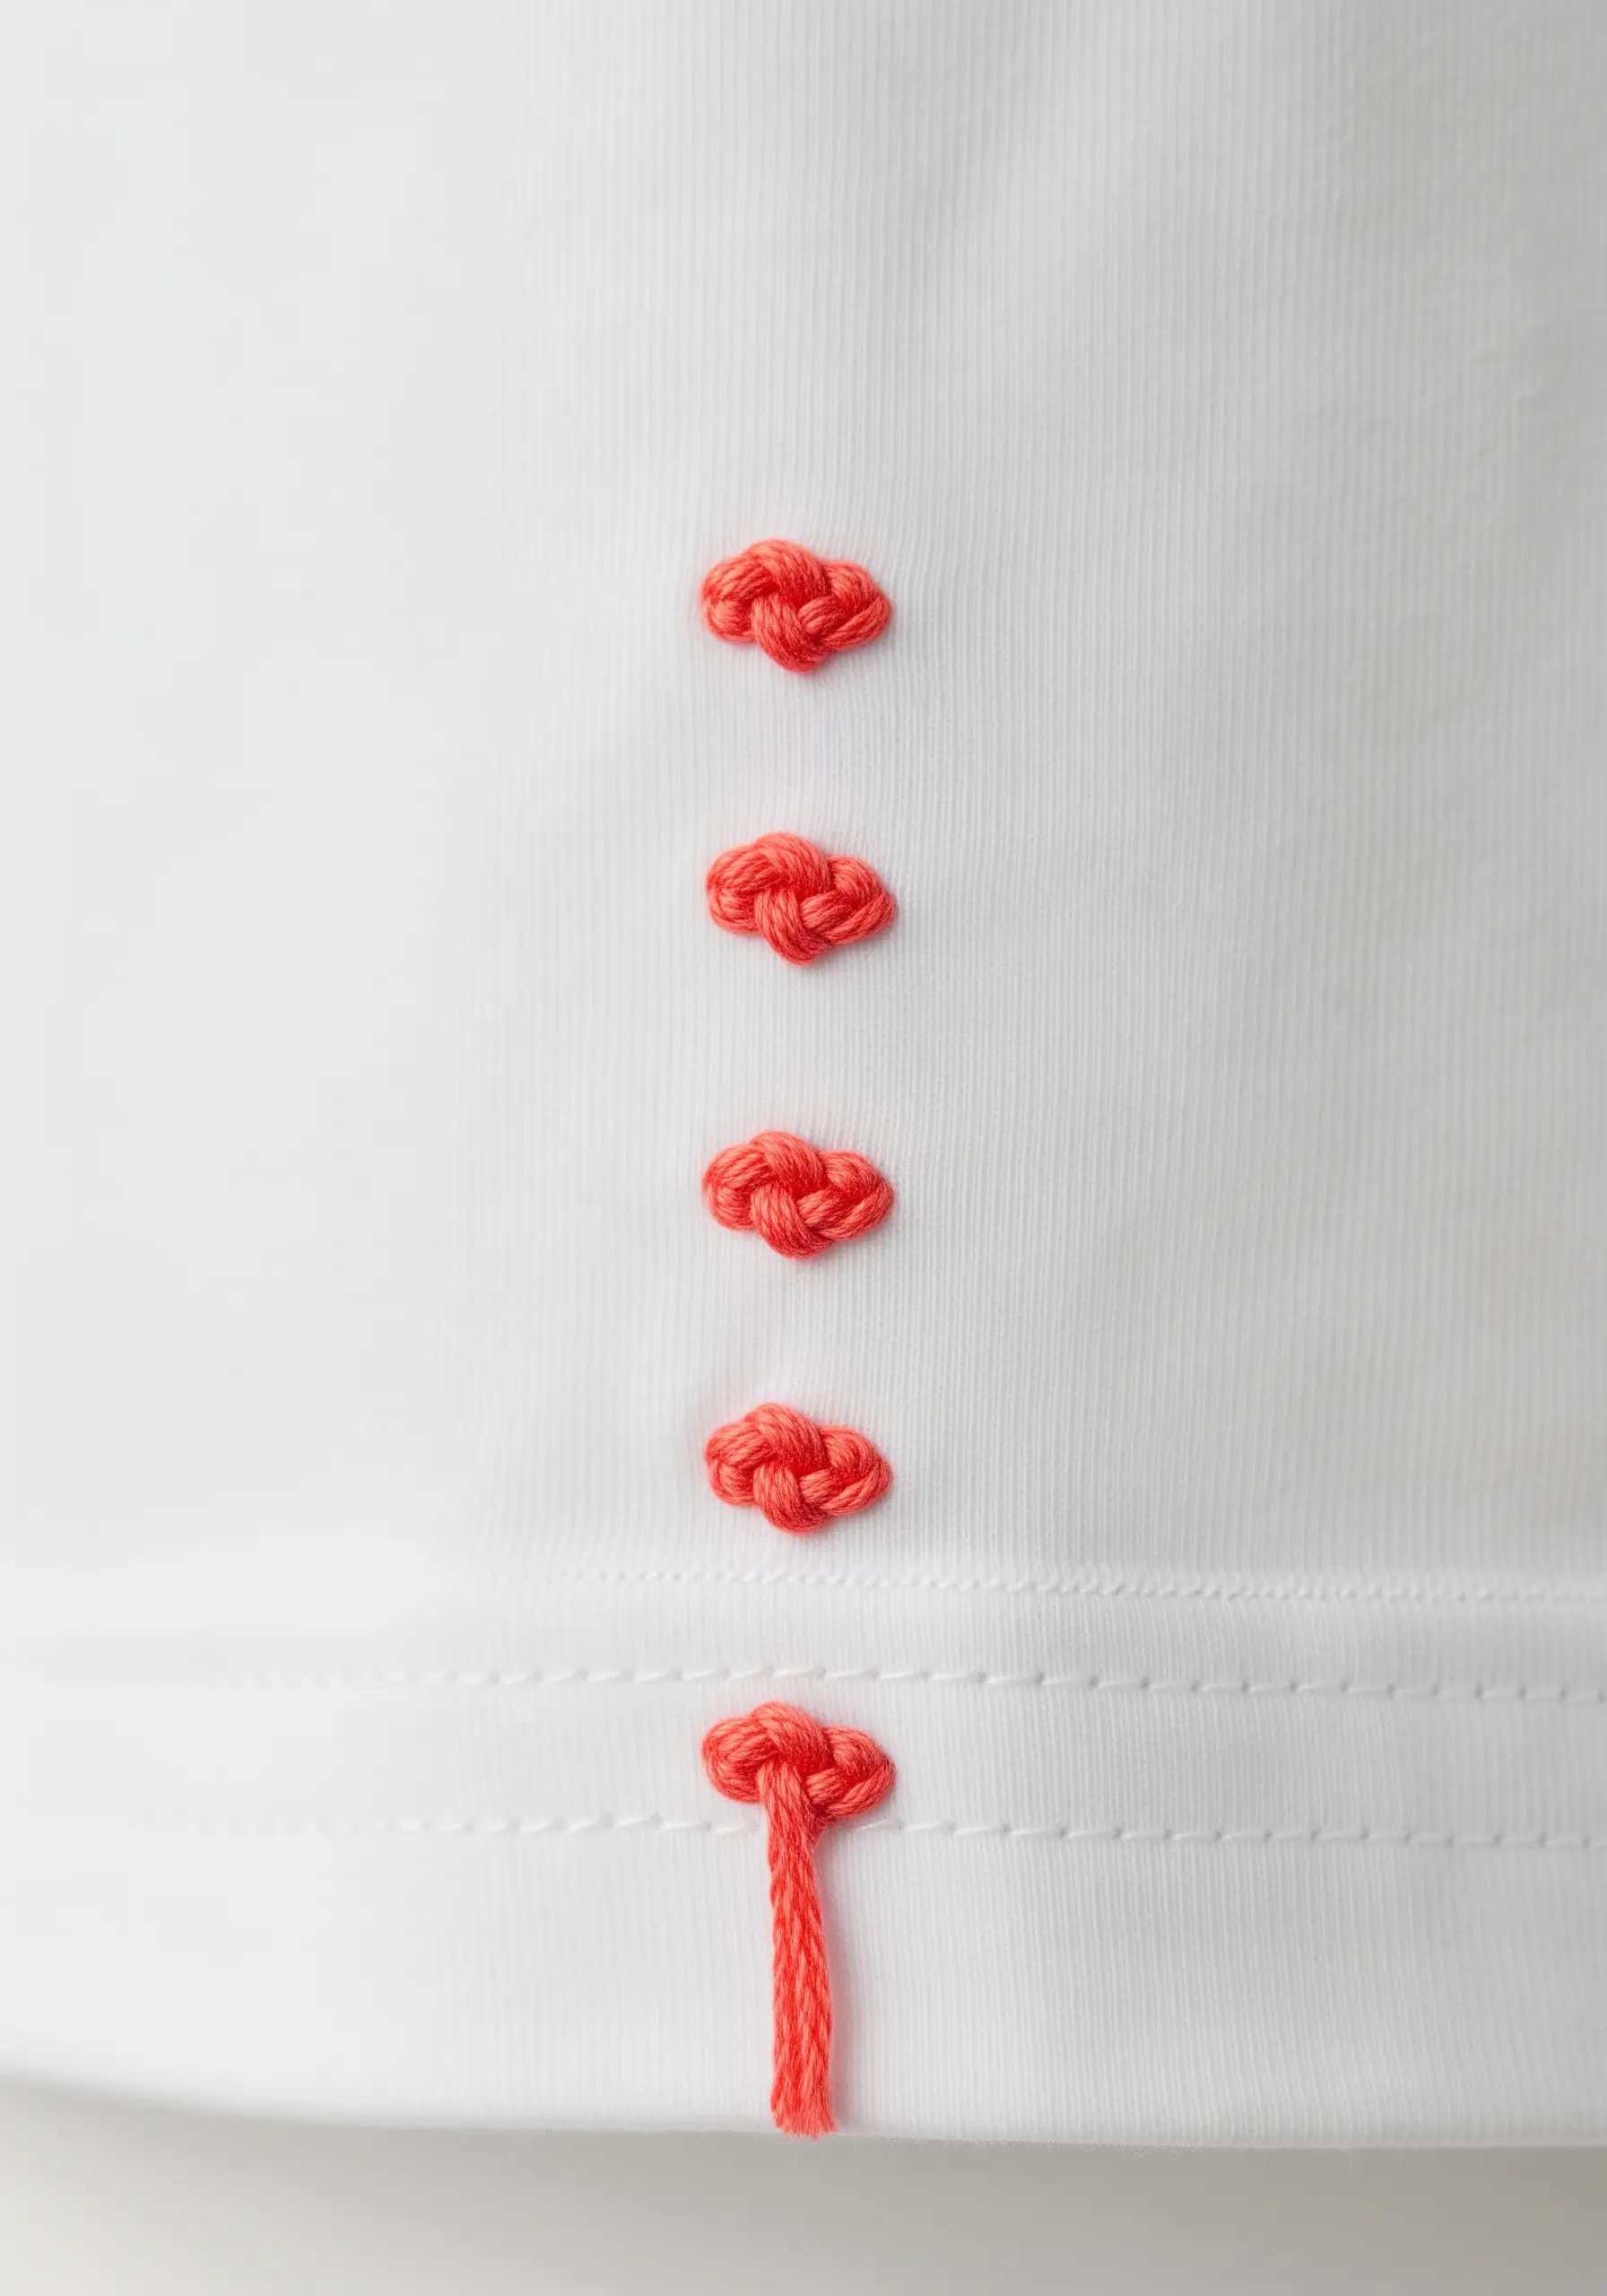
Create these beautiful, textured dots using a woven picot stitch or a classic bullion knot.
For a bullion knot, wrap the thread around your needle 5-6 times before pulling it through to create a tight, worm-like coil that you can shape into a dot.
Arranging them vertically mimics the look of buttons, adding a refined, decorative detail along a seam or near the hem.
The final stitch with a dangling thread adds a deconstructed, artistic touch that feels intentional and modern.
23. The Delicate Drift of Dandelion Seeds
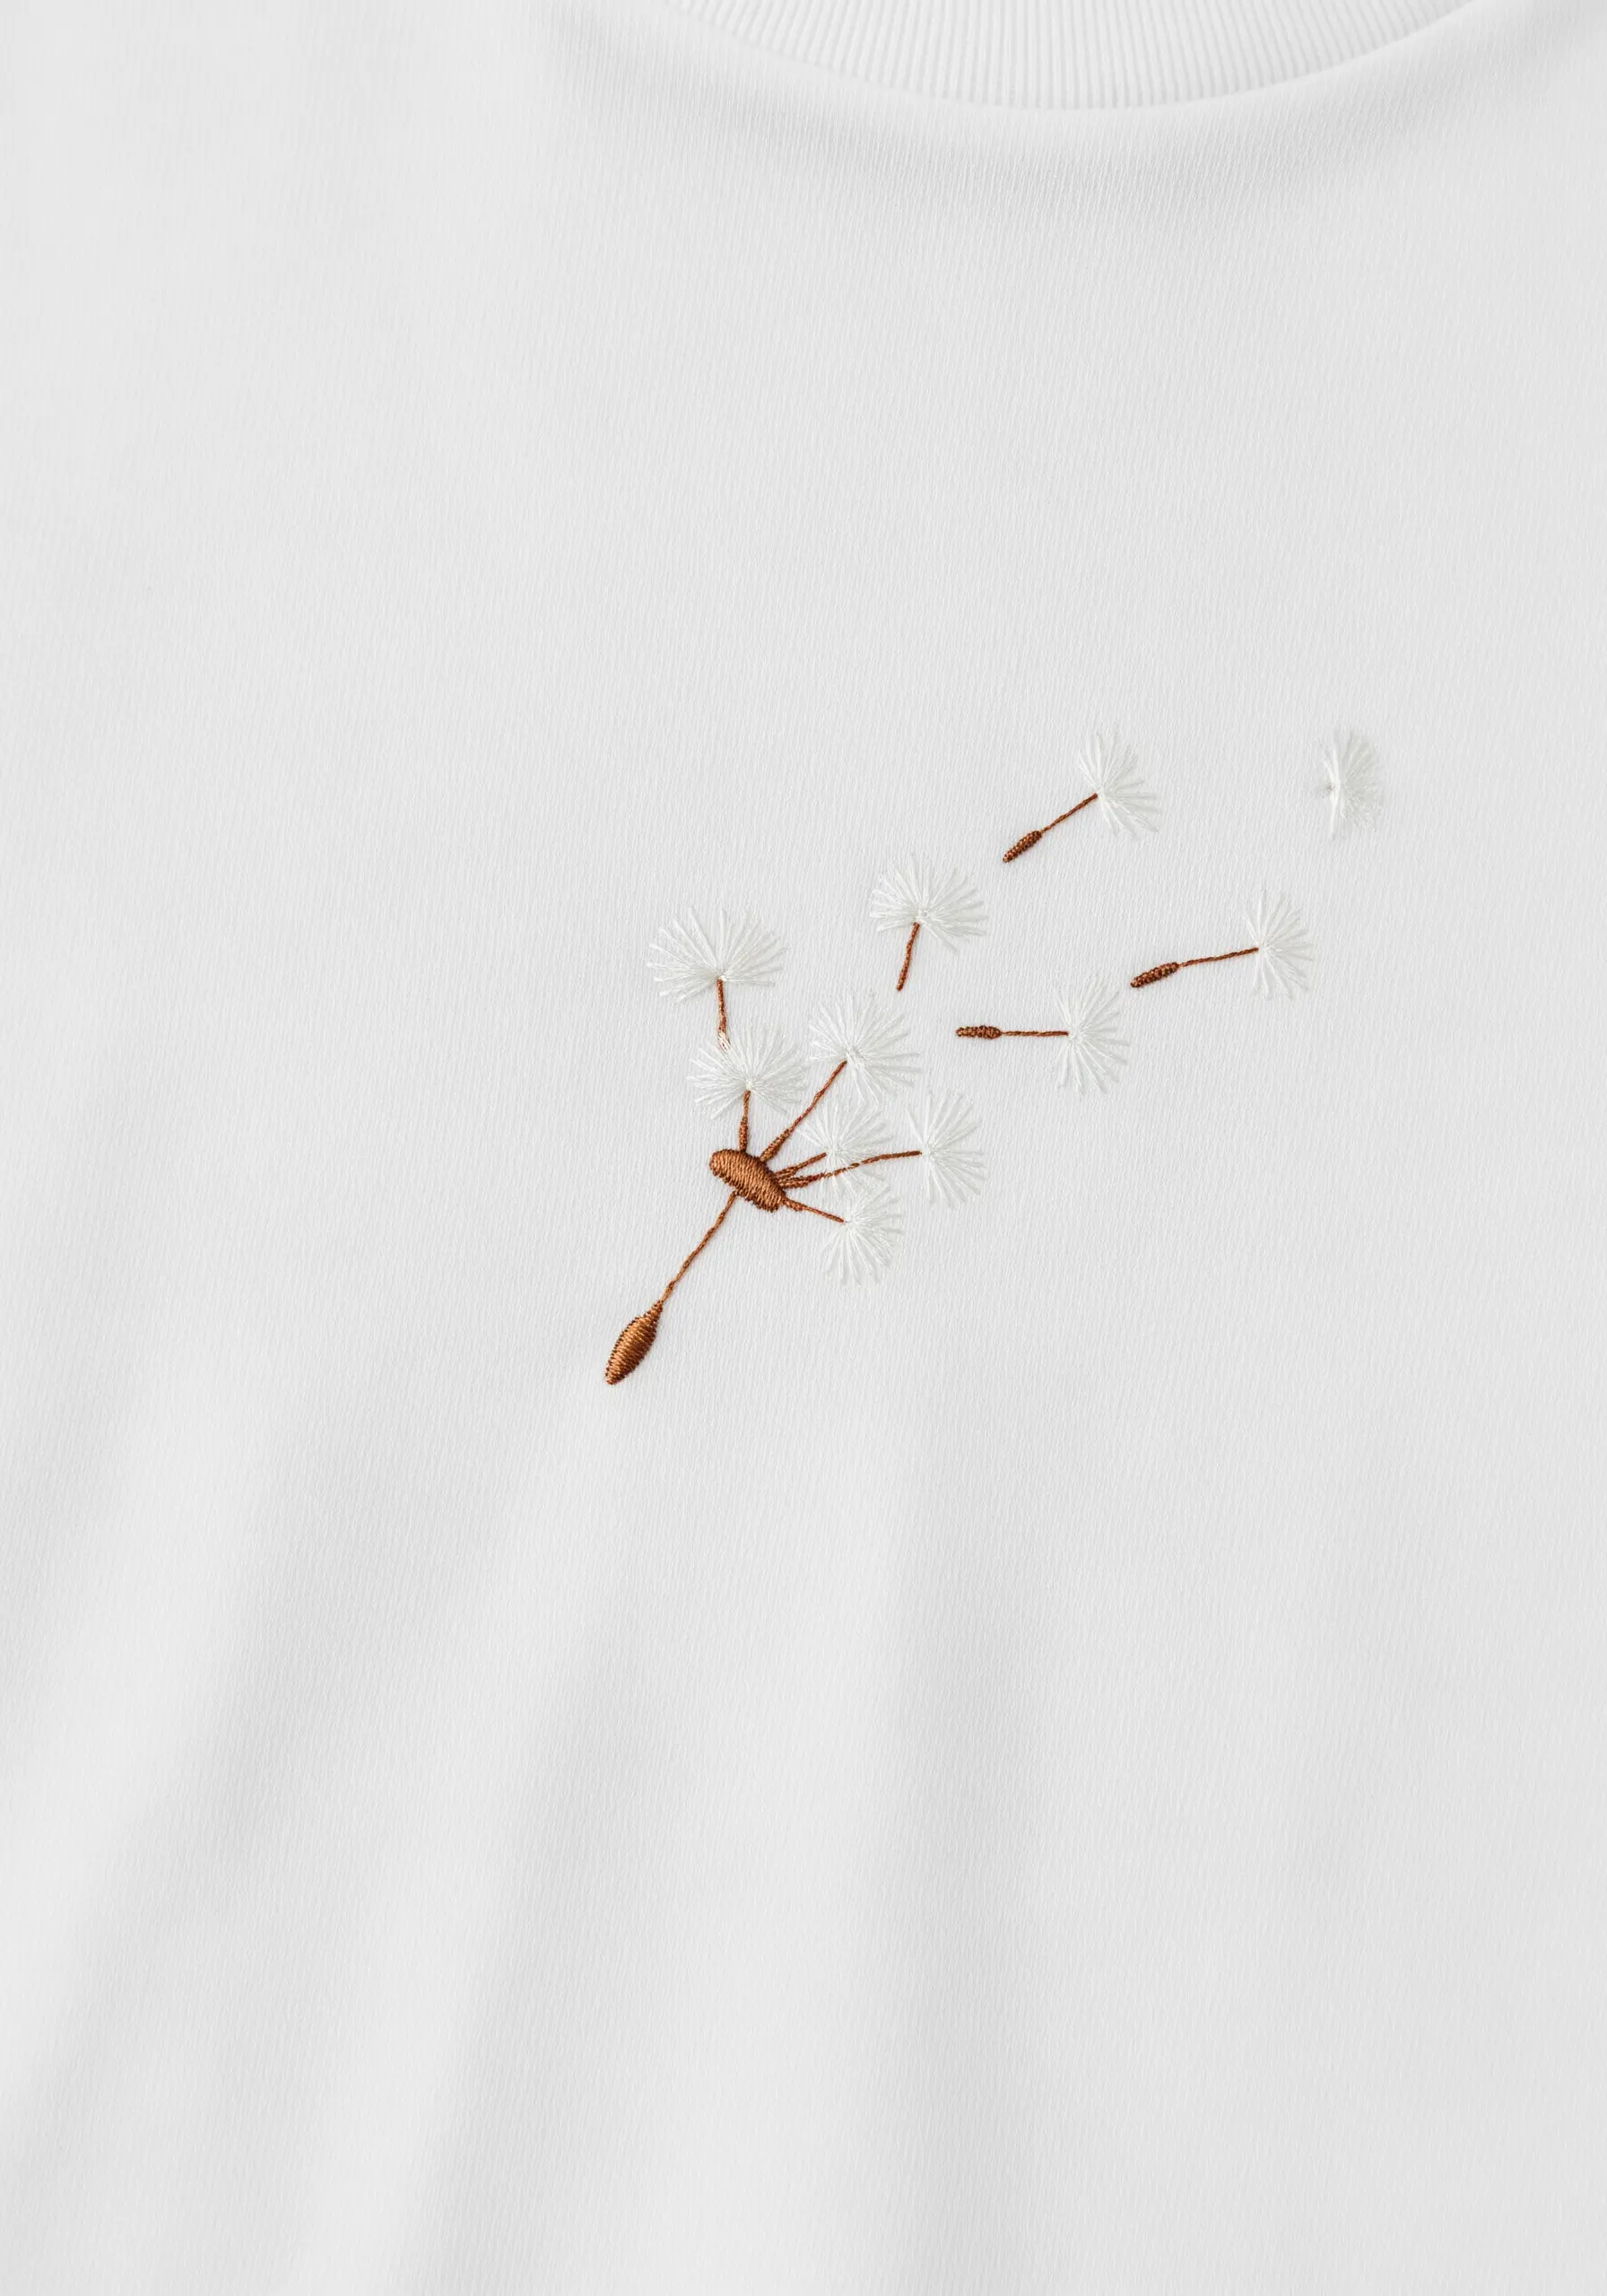
Capture the ethereal quality of a dandelion with a combination of delicate, lightweight stitches.
Use a satin stitch for the main seed pod and tiny straight stitches for the individual seed stems.
For the fluffy pappus, use a detached chain stitch (lazy daisy) or a few fanned-out straight stitches with a single strand of white floss.
This composition creates a beautiful sense of movement, as if the seeds are floating away on a breeze.
24. High-Energy Neon Bolt
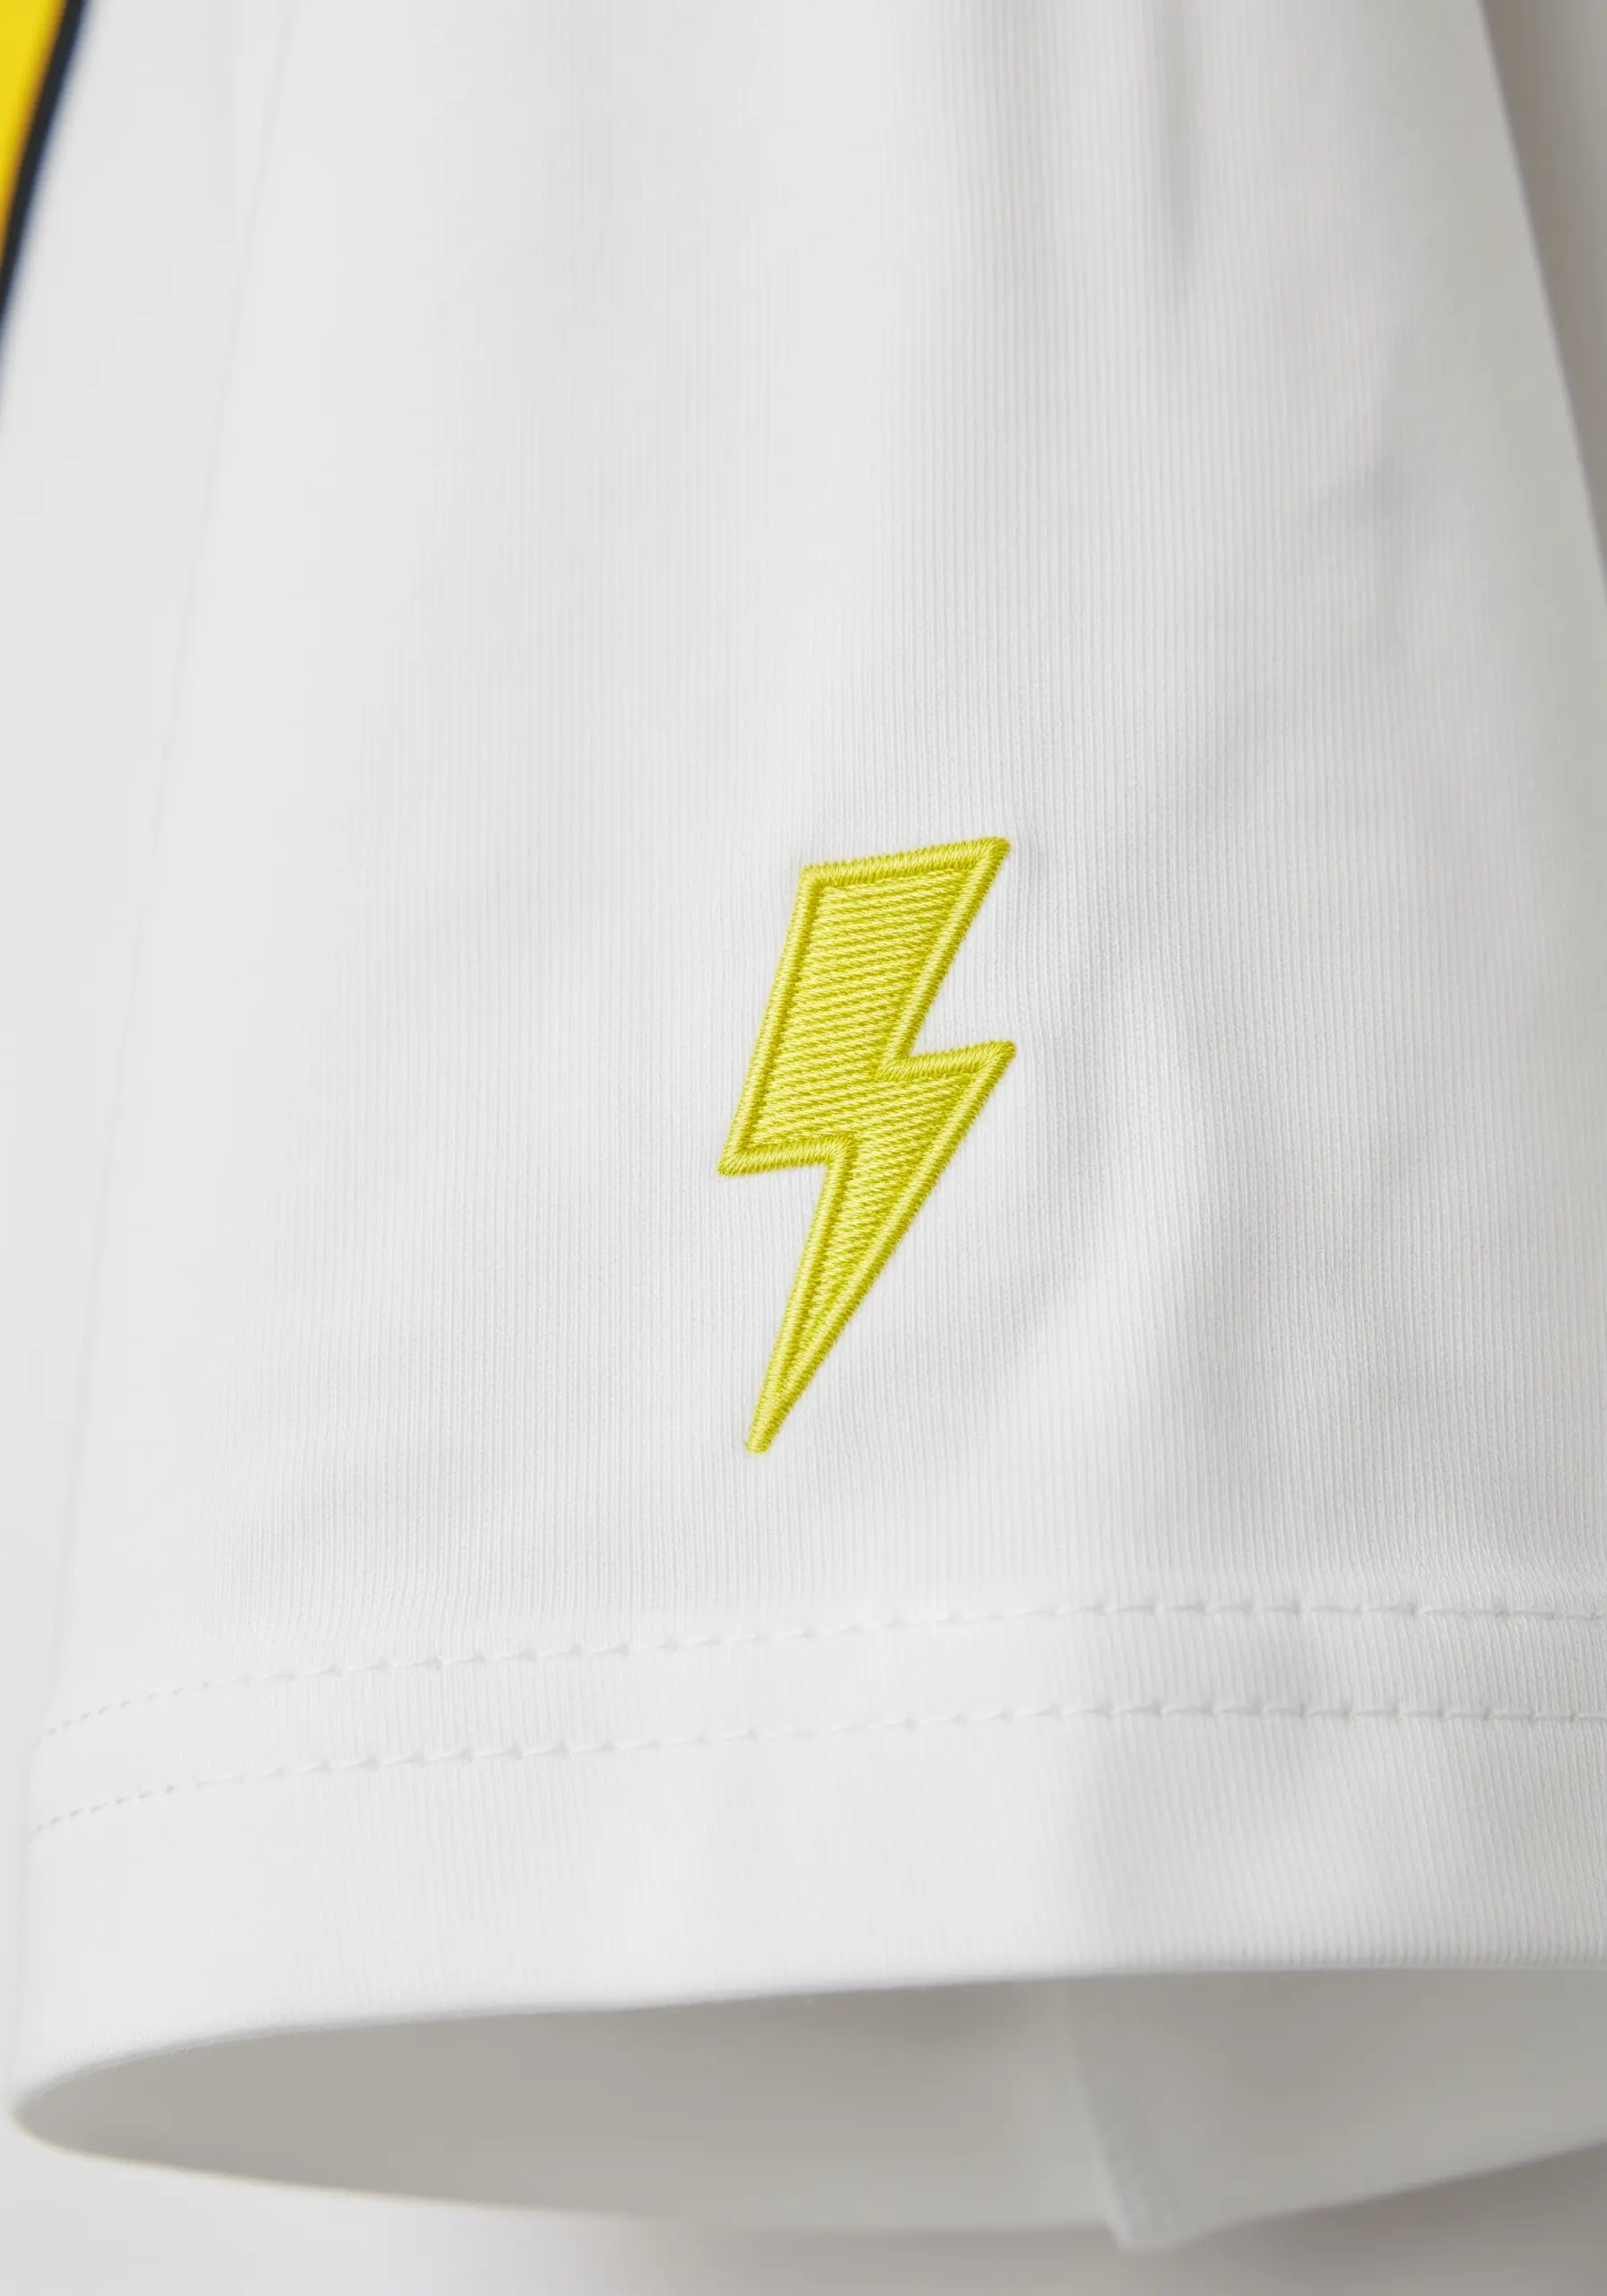
Make a simple shape pop by using a high-contrast, neon-colored thread against the white fabric.
To get those razor-sharp edges on the lightning bolt, outline it first with a tight split stitch.
Then, fill the shape with a diagonal satin stitch, which adds a subtle sense of energy and movement to the static icon.
This is a perfect example of how color choice and stitch direction can completely define the mood of a design.
25. The Classic Ampersand

To embroider elegant typography, the key is a perfectly smooth satin stitch that follows the curves of the letterform.
Break the ampersand down into smaller sections and change the angle of your satin stitch for each part to maintain a consistent, full coverage.
Choosing a deep, rich color like burgundy gives this classic symbol a sophisticated and scholarly feel.
It’s a timeless motif that represents connection and continuation.
26. A Moon with Subtle Shading
Create a realistic, three-dimensional crescent moon by using two shades of gray and a long-and-short stitch.
Use the darker shade along the inner curve and the lighter shade on the outer edge, blending them gently in the middle.
Keep your stitches curved to follow the shape of the moon, which enhances the illusion of a spherical object.
This subtle shading technique elevates a simple shape into a beautiful, miniature celestial portrait.
27. Abstract Shoal of Fish

Suggest the movement of a school of fish using nothing more than short, horizontal straight stitches.
Create a sense of depth and energy by using several shades of blue and green, scattering them randomly within the group.
Vary the length and spacing of the stitches slightly to give the composition a natural, organic flow.
This abstract technique is one of the most clever minimal ocean-inspired embroidery pieces, capturing an essence rather than a literal image.
28. Micro-Embroidery Fox
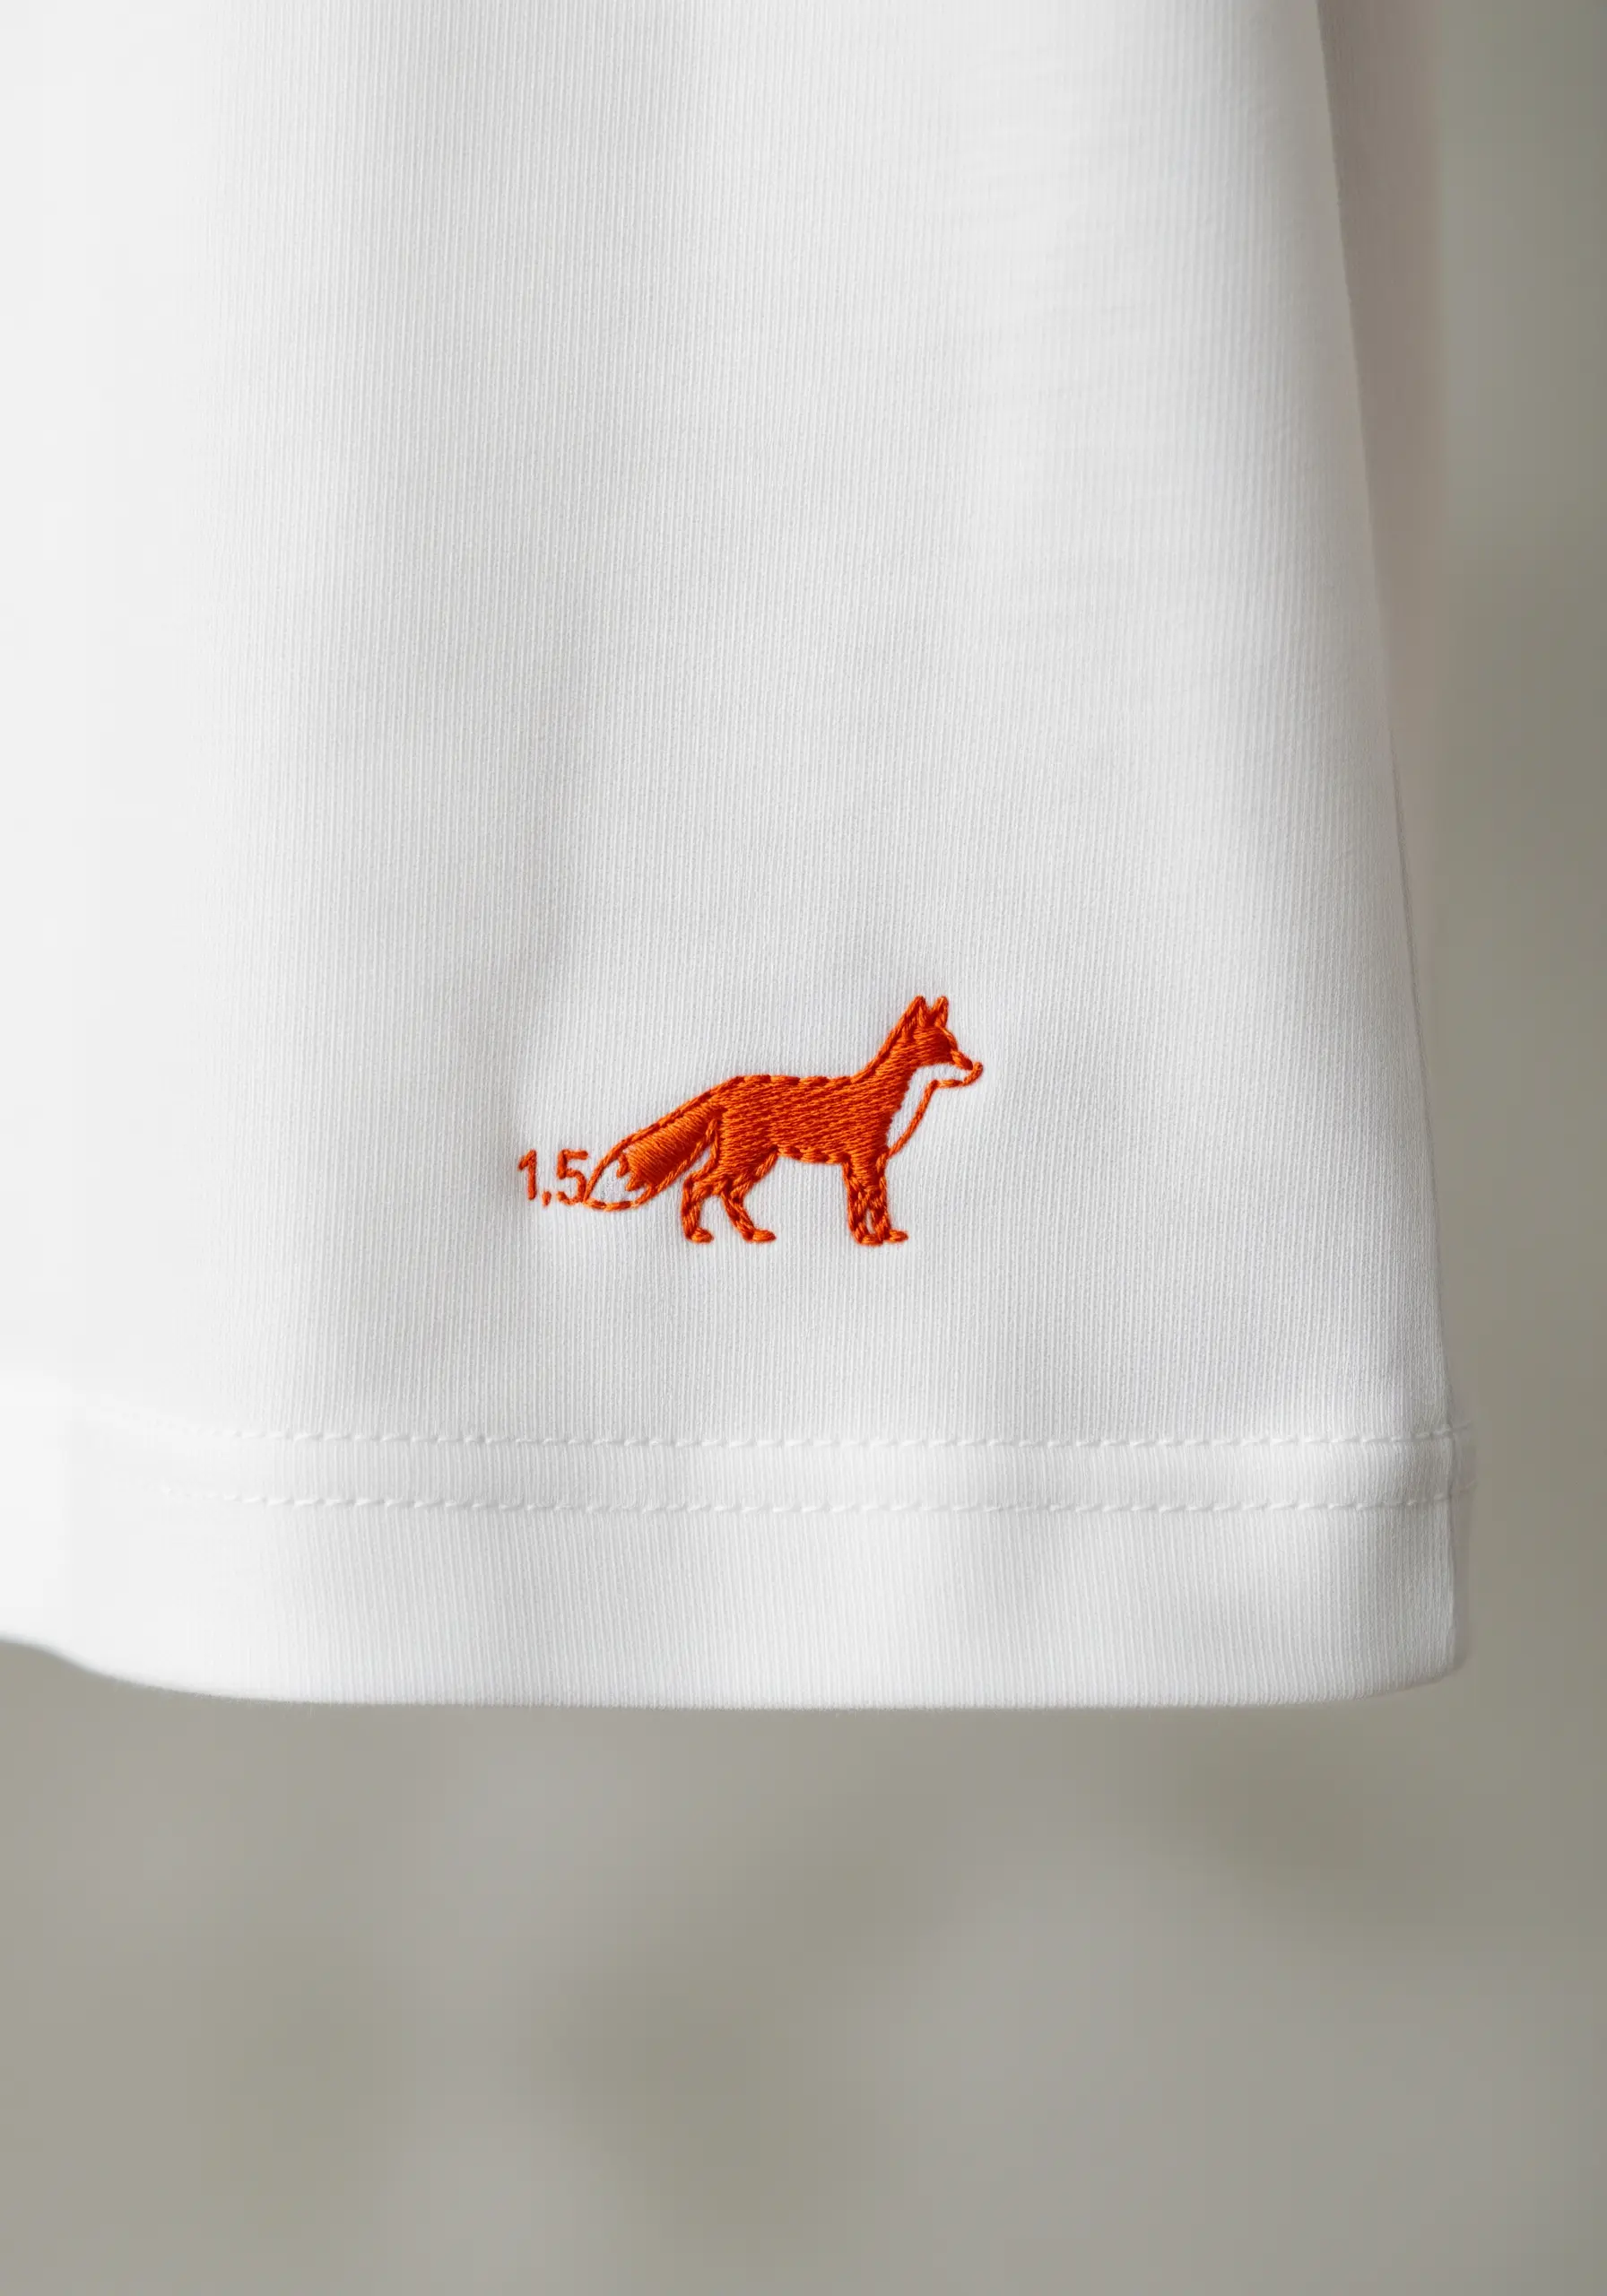
For incredibly small designs, precision is everything. Use a single strand of floss and a sharp, fine needle.
Work the body with tiny satin stitches and use miniature backstitches for the legs, tail, and facial details.
To add a playful, modern twist, incorporate a tiny stitched number or symbol next to the main motif.
This tiny animal embroidery proves that a design doesn’t need to be large to be full of character.
29. The Perfectly Stitched Coffee Bean
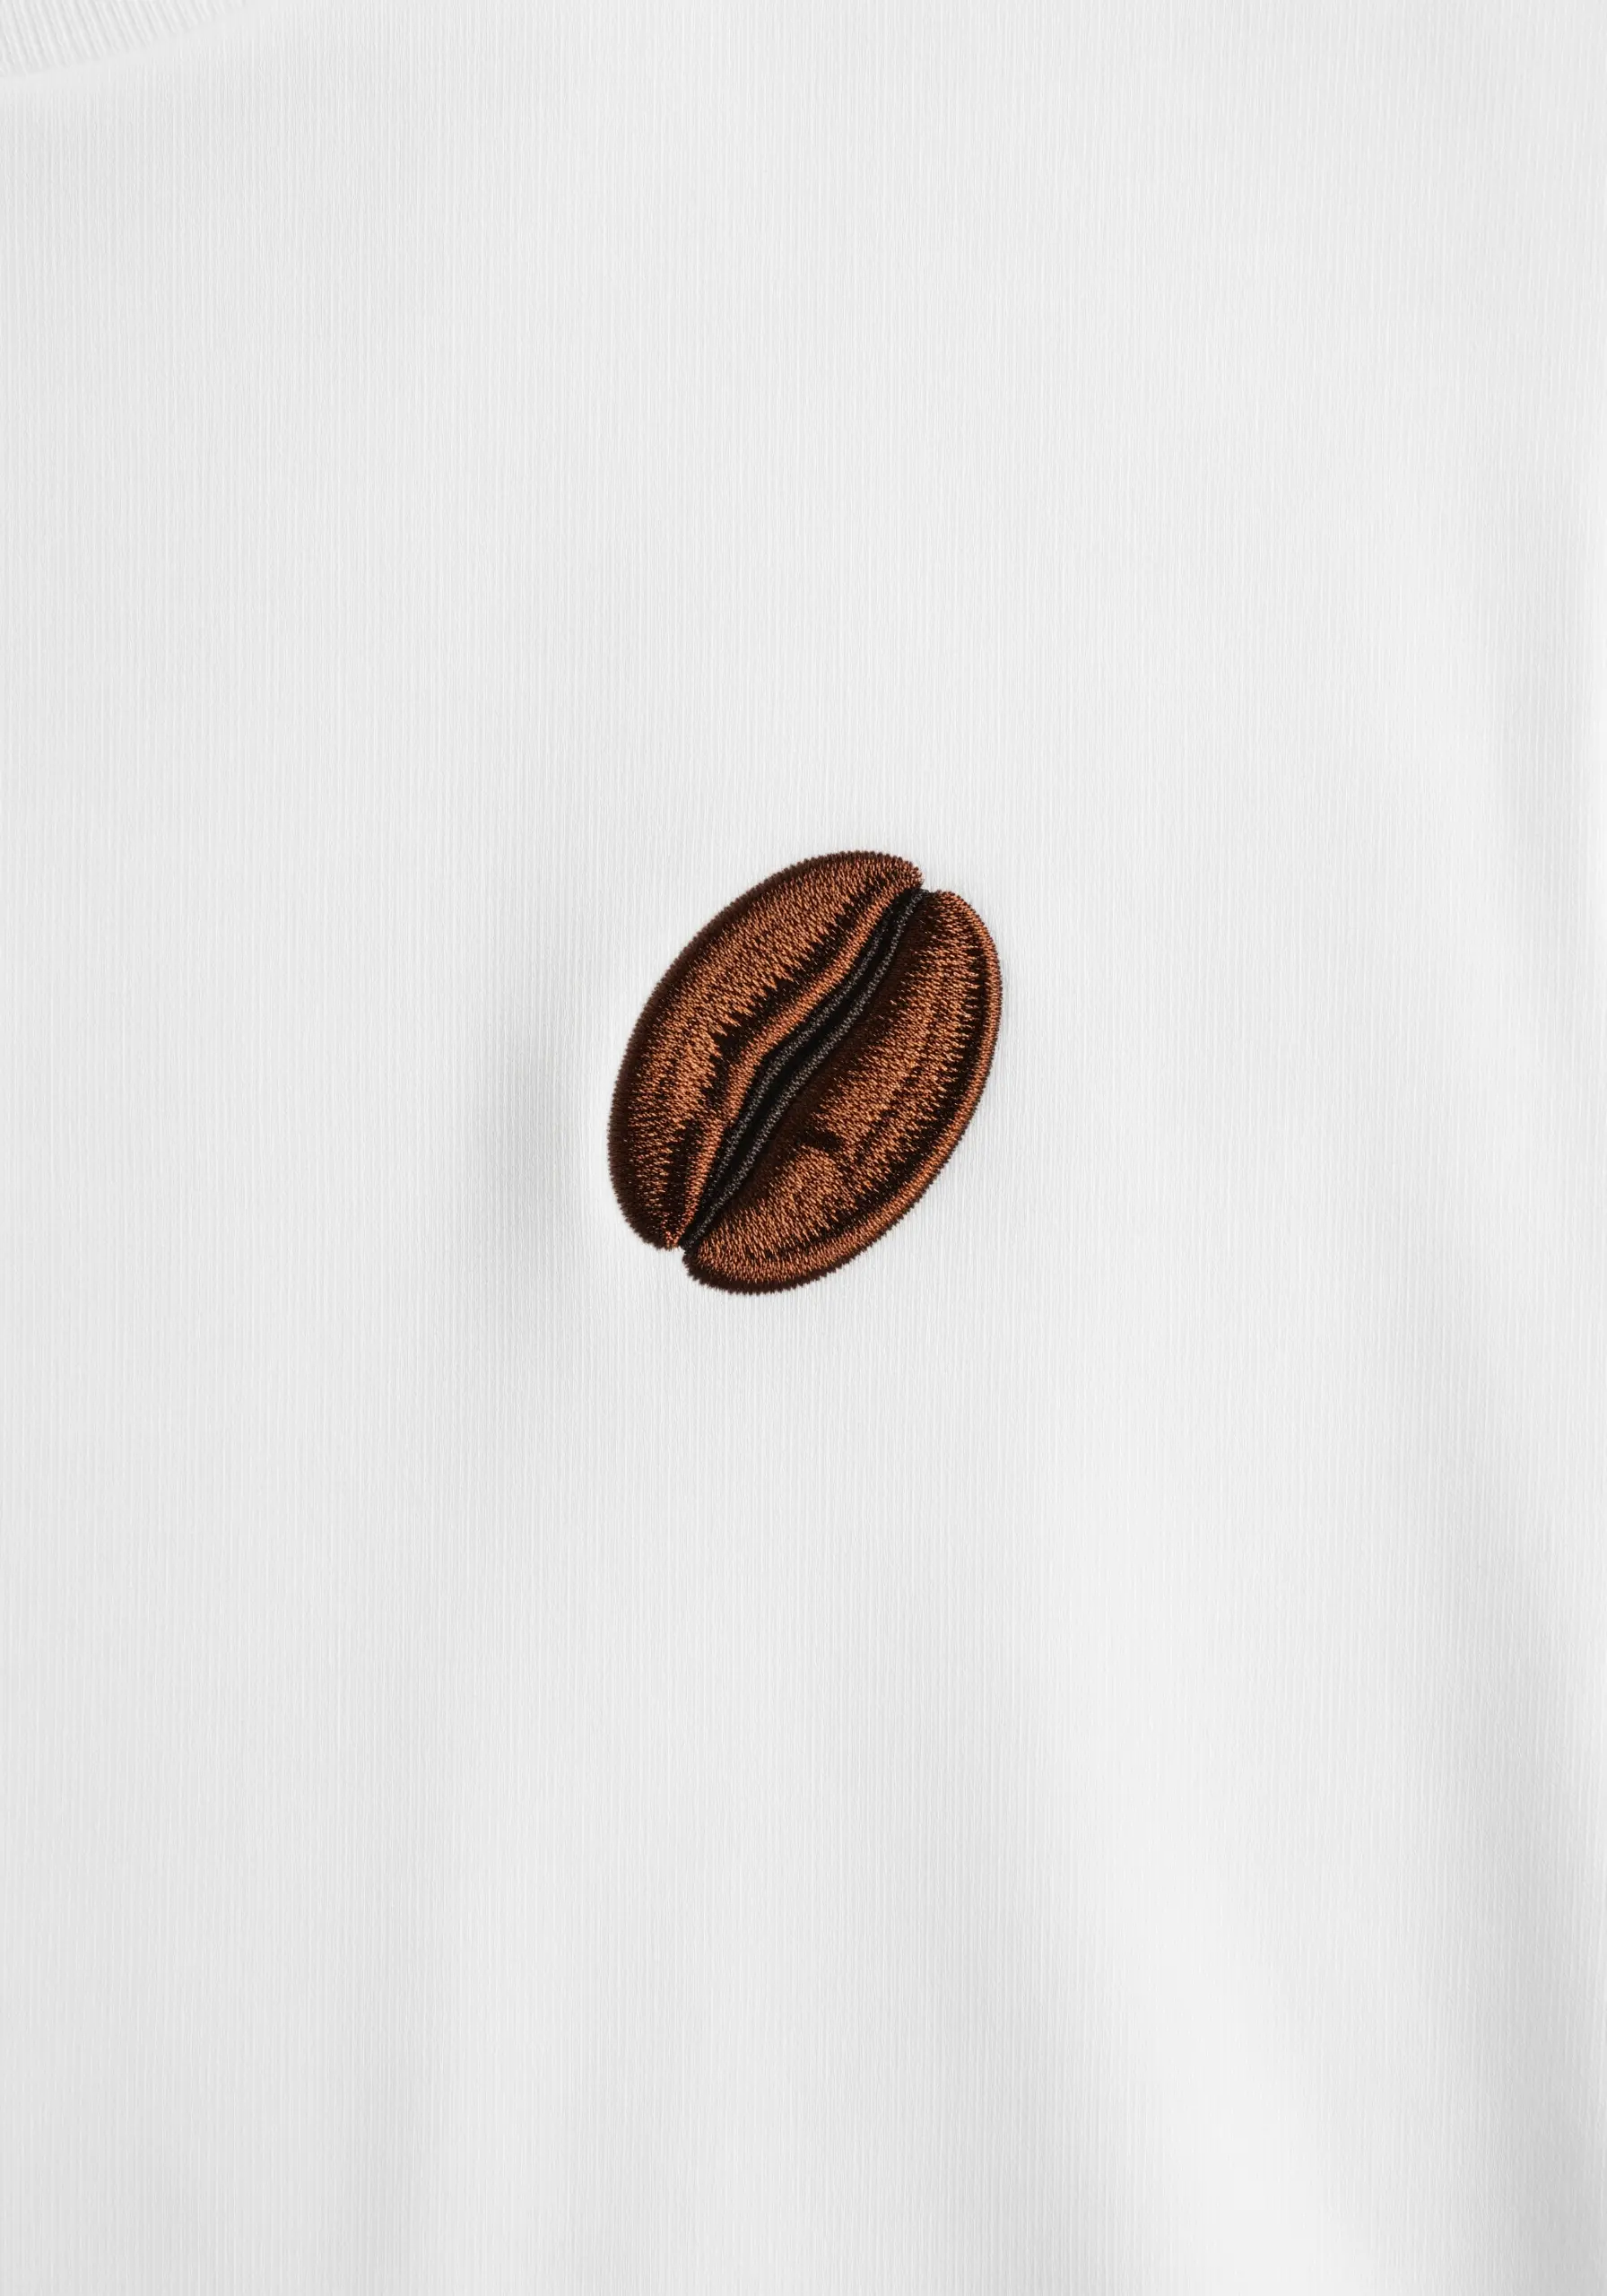
The key to making this coffee bean look realistic is the direction and tension of your satin stitches.
Stitch each half of the bean with curved stitches that follow its rounded shape, leaving a narrow gap in the center.
Use a slightly darker brown thread to add a single line of split stitch in the center crevice to create a shadow.
This small tribute is perfect for coffee lovers and a great exercise in shaping with thread.
30. The Padded Satin Stitch Circle
To give a simple circle a raised, 3D effect, build a foundation of padding stitches underneath.
First, fill the circle with a layer of small straight stitches or seed stitches. Then, cover this padding with a smooth, horizontal satin stitch.
The padding lifts the top layer of thread, creating a satisfyingly plump and perfectly round motif with a professional finish.
This is a fantastic technique for making basic shapes feel luxurious and substantial.
31. A Chili Pepper with a Satin Sheen
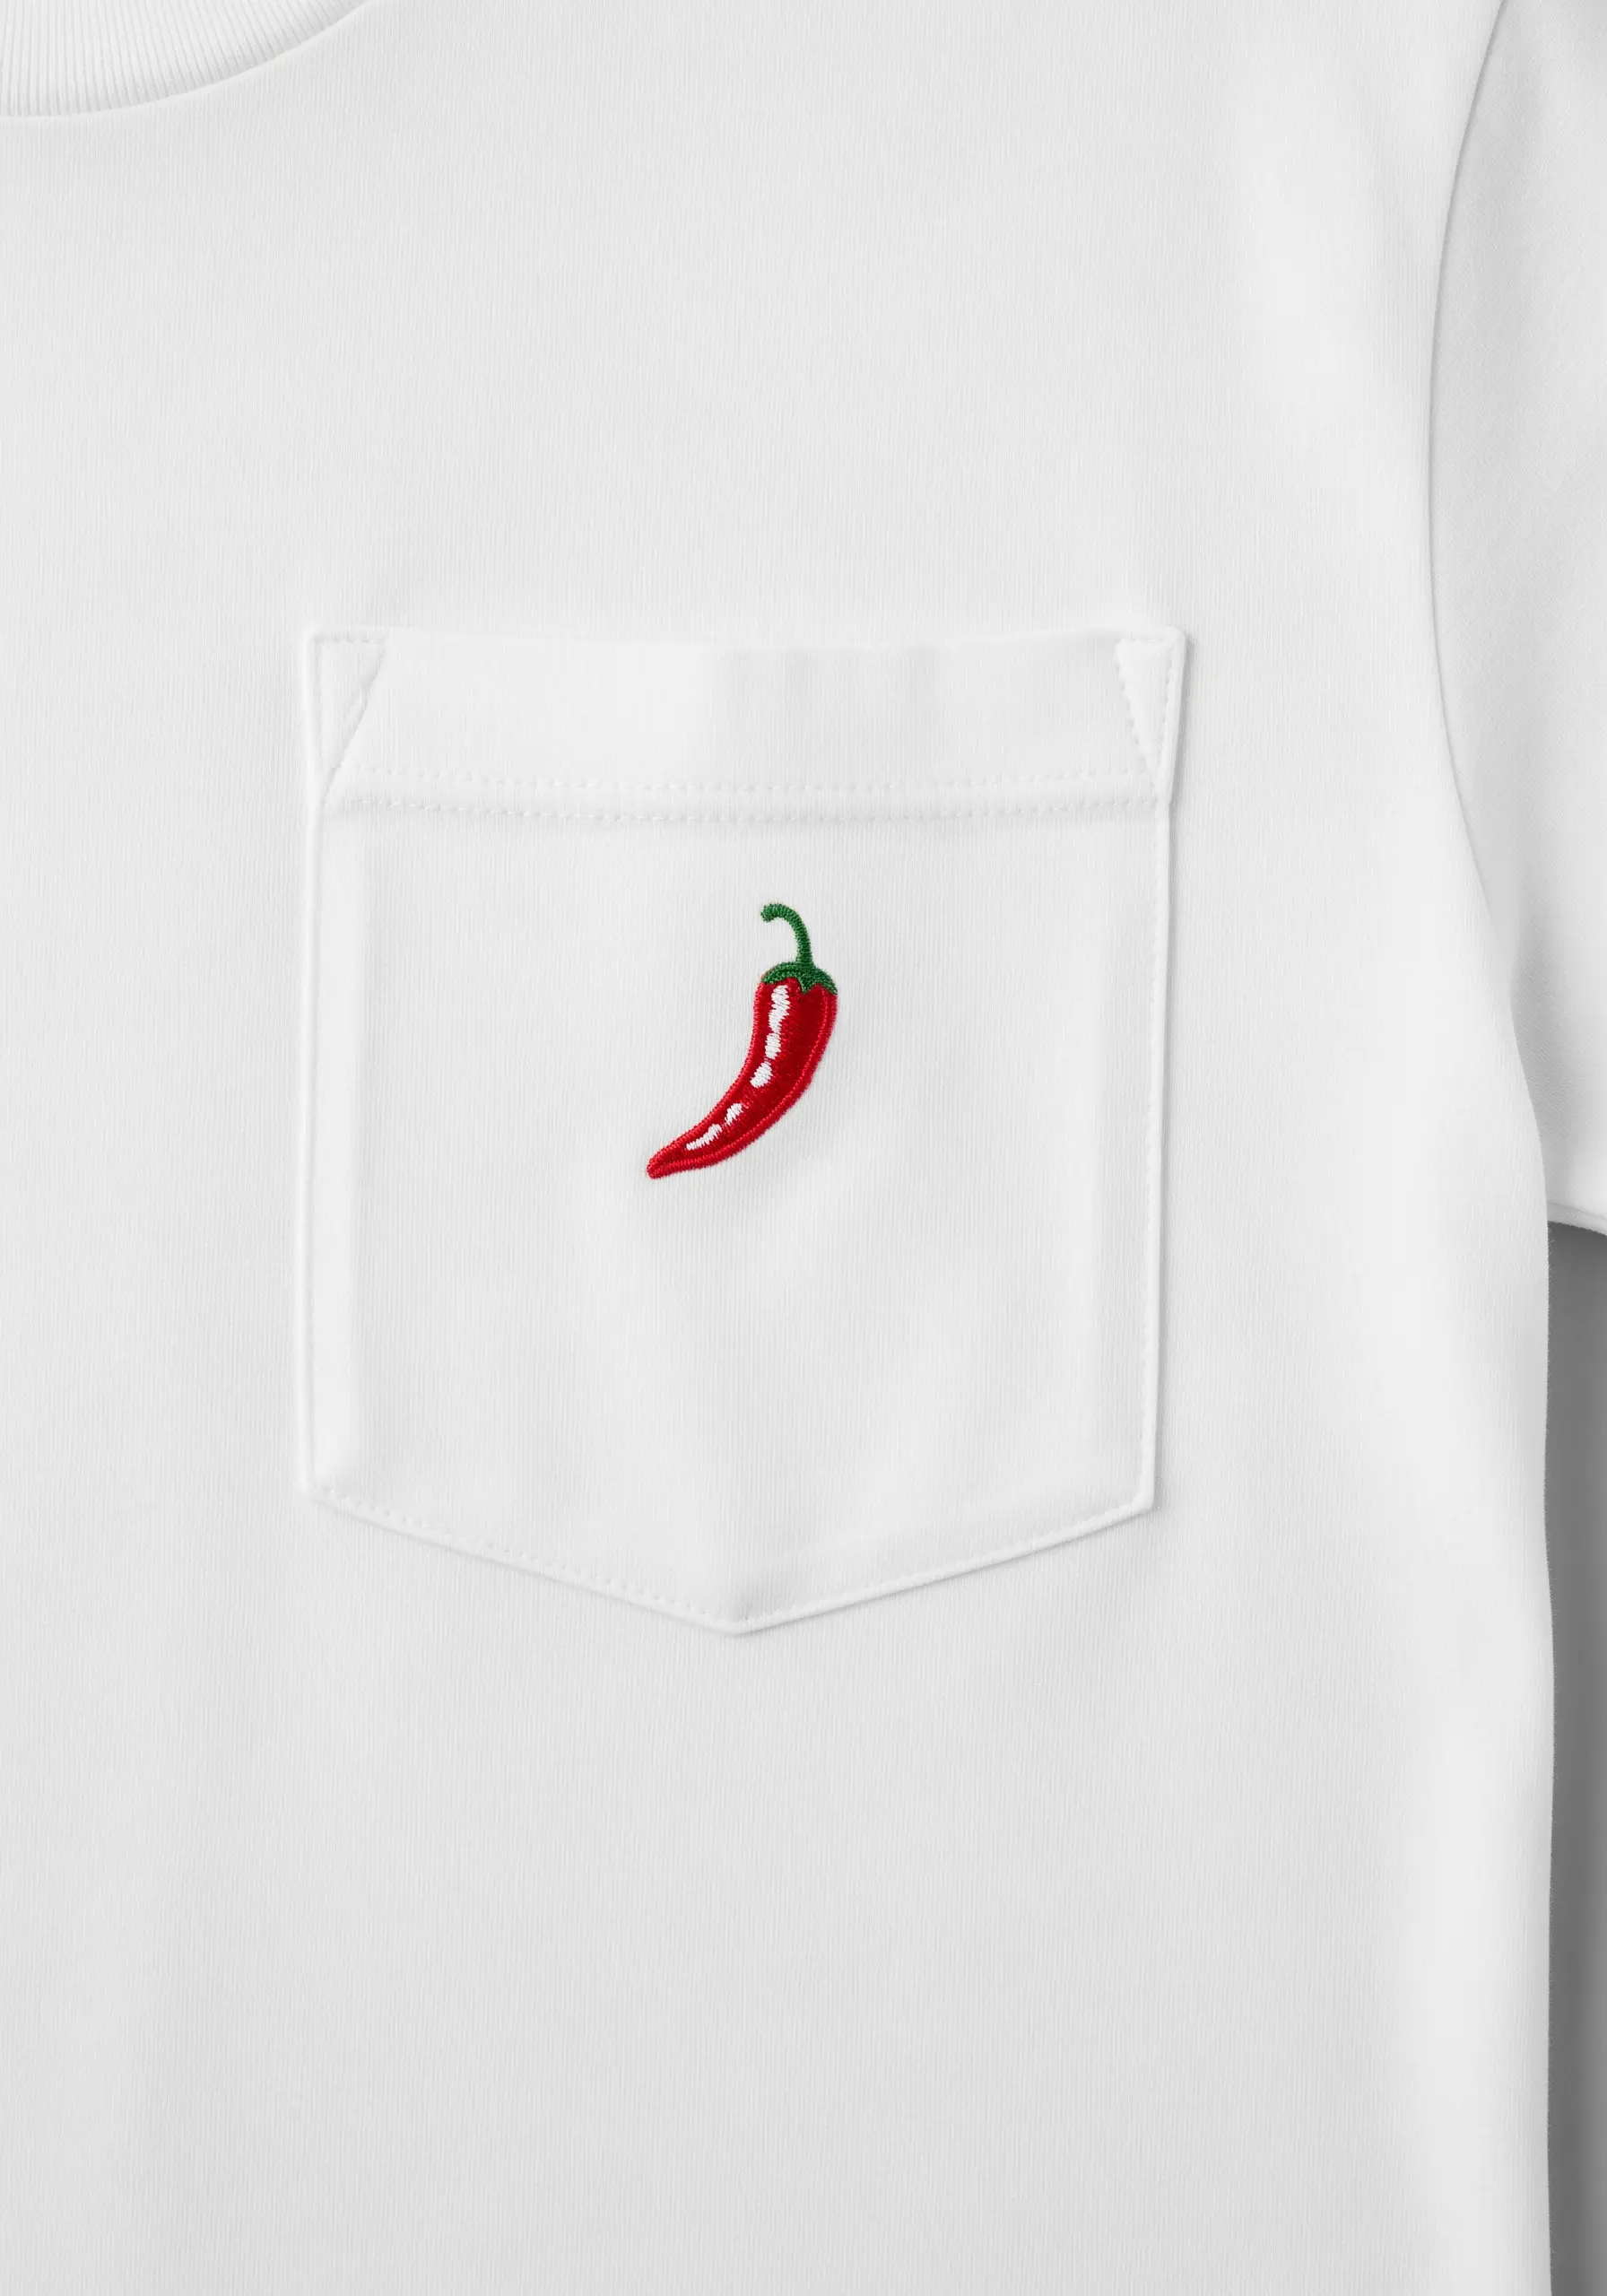
Give a simple shape like a chili pepper a glossy, realistic look by paying attention to light and shadow.
Use a satin stitch that follows the curve of the pepper to create a sense of volume.
Incorporate a single strand of a lighter red or white thread to add a small highlight along one edge, mimicking a reflection.
This tiny detail is what elevates the design from a flat shape to a vibrant, three-dimensional object.


