

Embroidery on clothing shouldn’t feel like a compromise between your vision and what the fabric can handle. It’s about choosing a design that enhances the drape and movement of the garment, turning a simple skirt into a story you can wear.
In these patterns, you’ll discover how to create depth without stiffness and detail without overwhelming the piece. We’ll move beyond simple outlines and fills, focusing on techniques like thread painting for realistic fur, padded satin stitch for dimensional texture, and strategic use of negative space to let your motifs breathe.
Consider this your guide to stitching with intention. Each idea is a chance to practice a specific skill that will elevate all your future projects—making your work not just beautiful, but thoughtful and technically sound.
1. Create a Meadow Border with Layered Depth
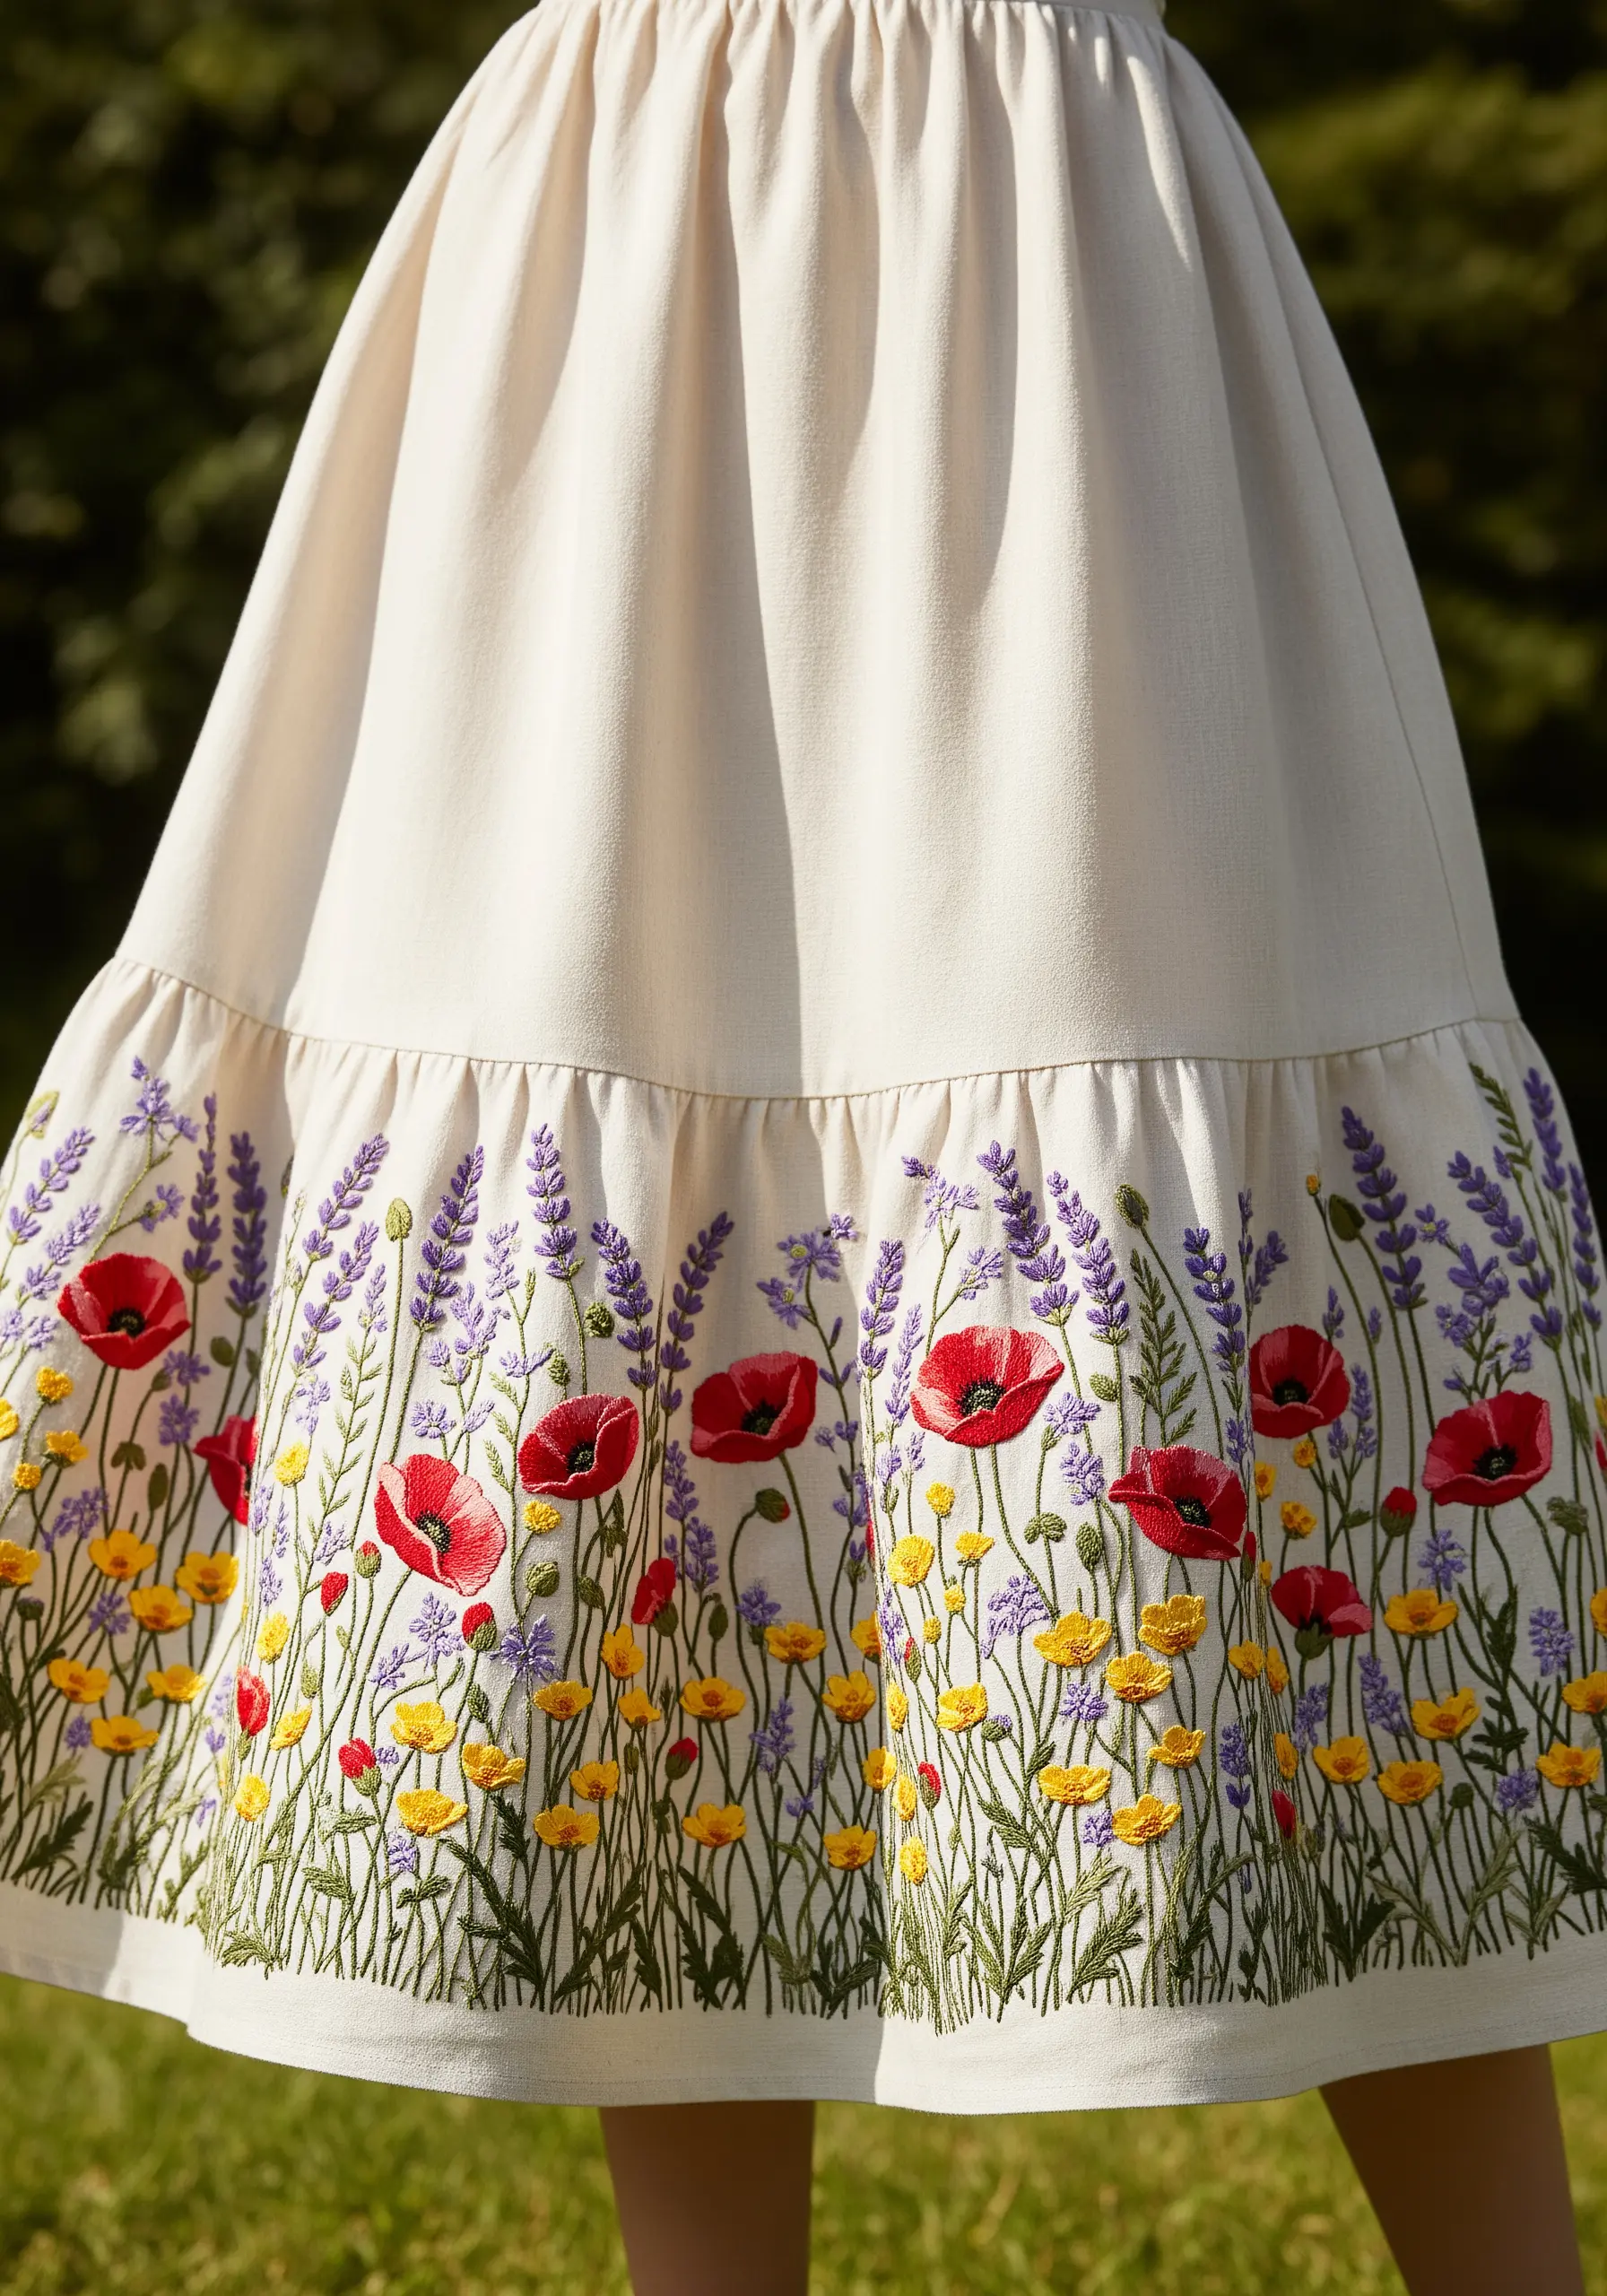
To prevent a dense floral border from looking flat, build your meadow in layers, starting from the back.
First, stitch the tallest elements like lavender using a simple stem stitch with two strands of floss for a delicate feel.
Next, add the mid-ground flowers using satin stitch for the petals, ensuring your stitches radiate from the center for a natural look.
Finally, fill in the foreground with clusters of French knots and short straight stitches in varied greens to create the illusion of thick grass. This layering technique gives your design a lush, realistic dimension.
2. Stitch Realistic Texture on Woodland Creatures
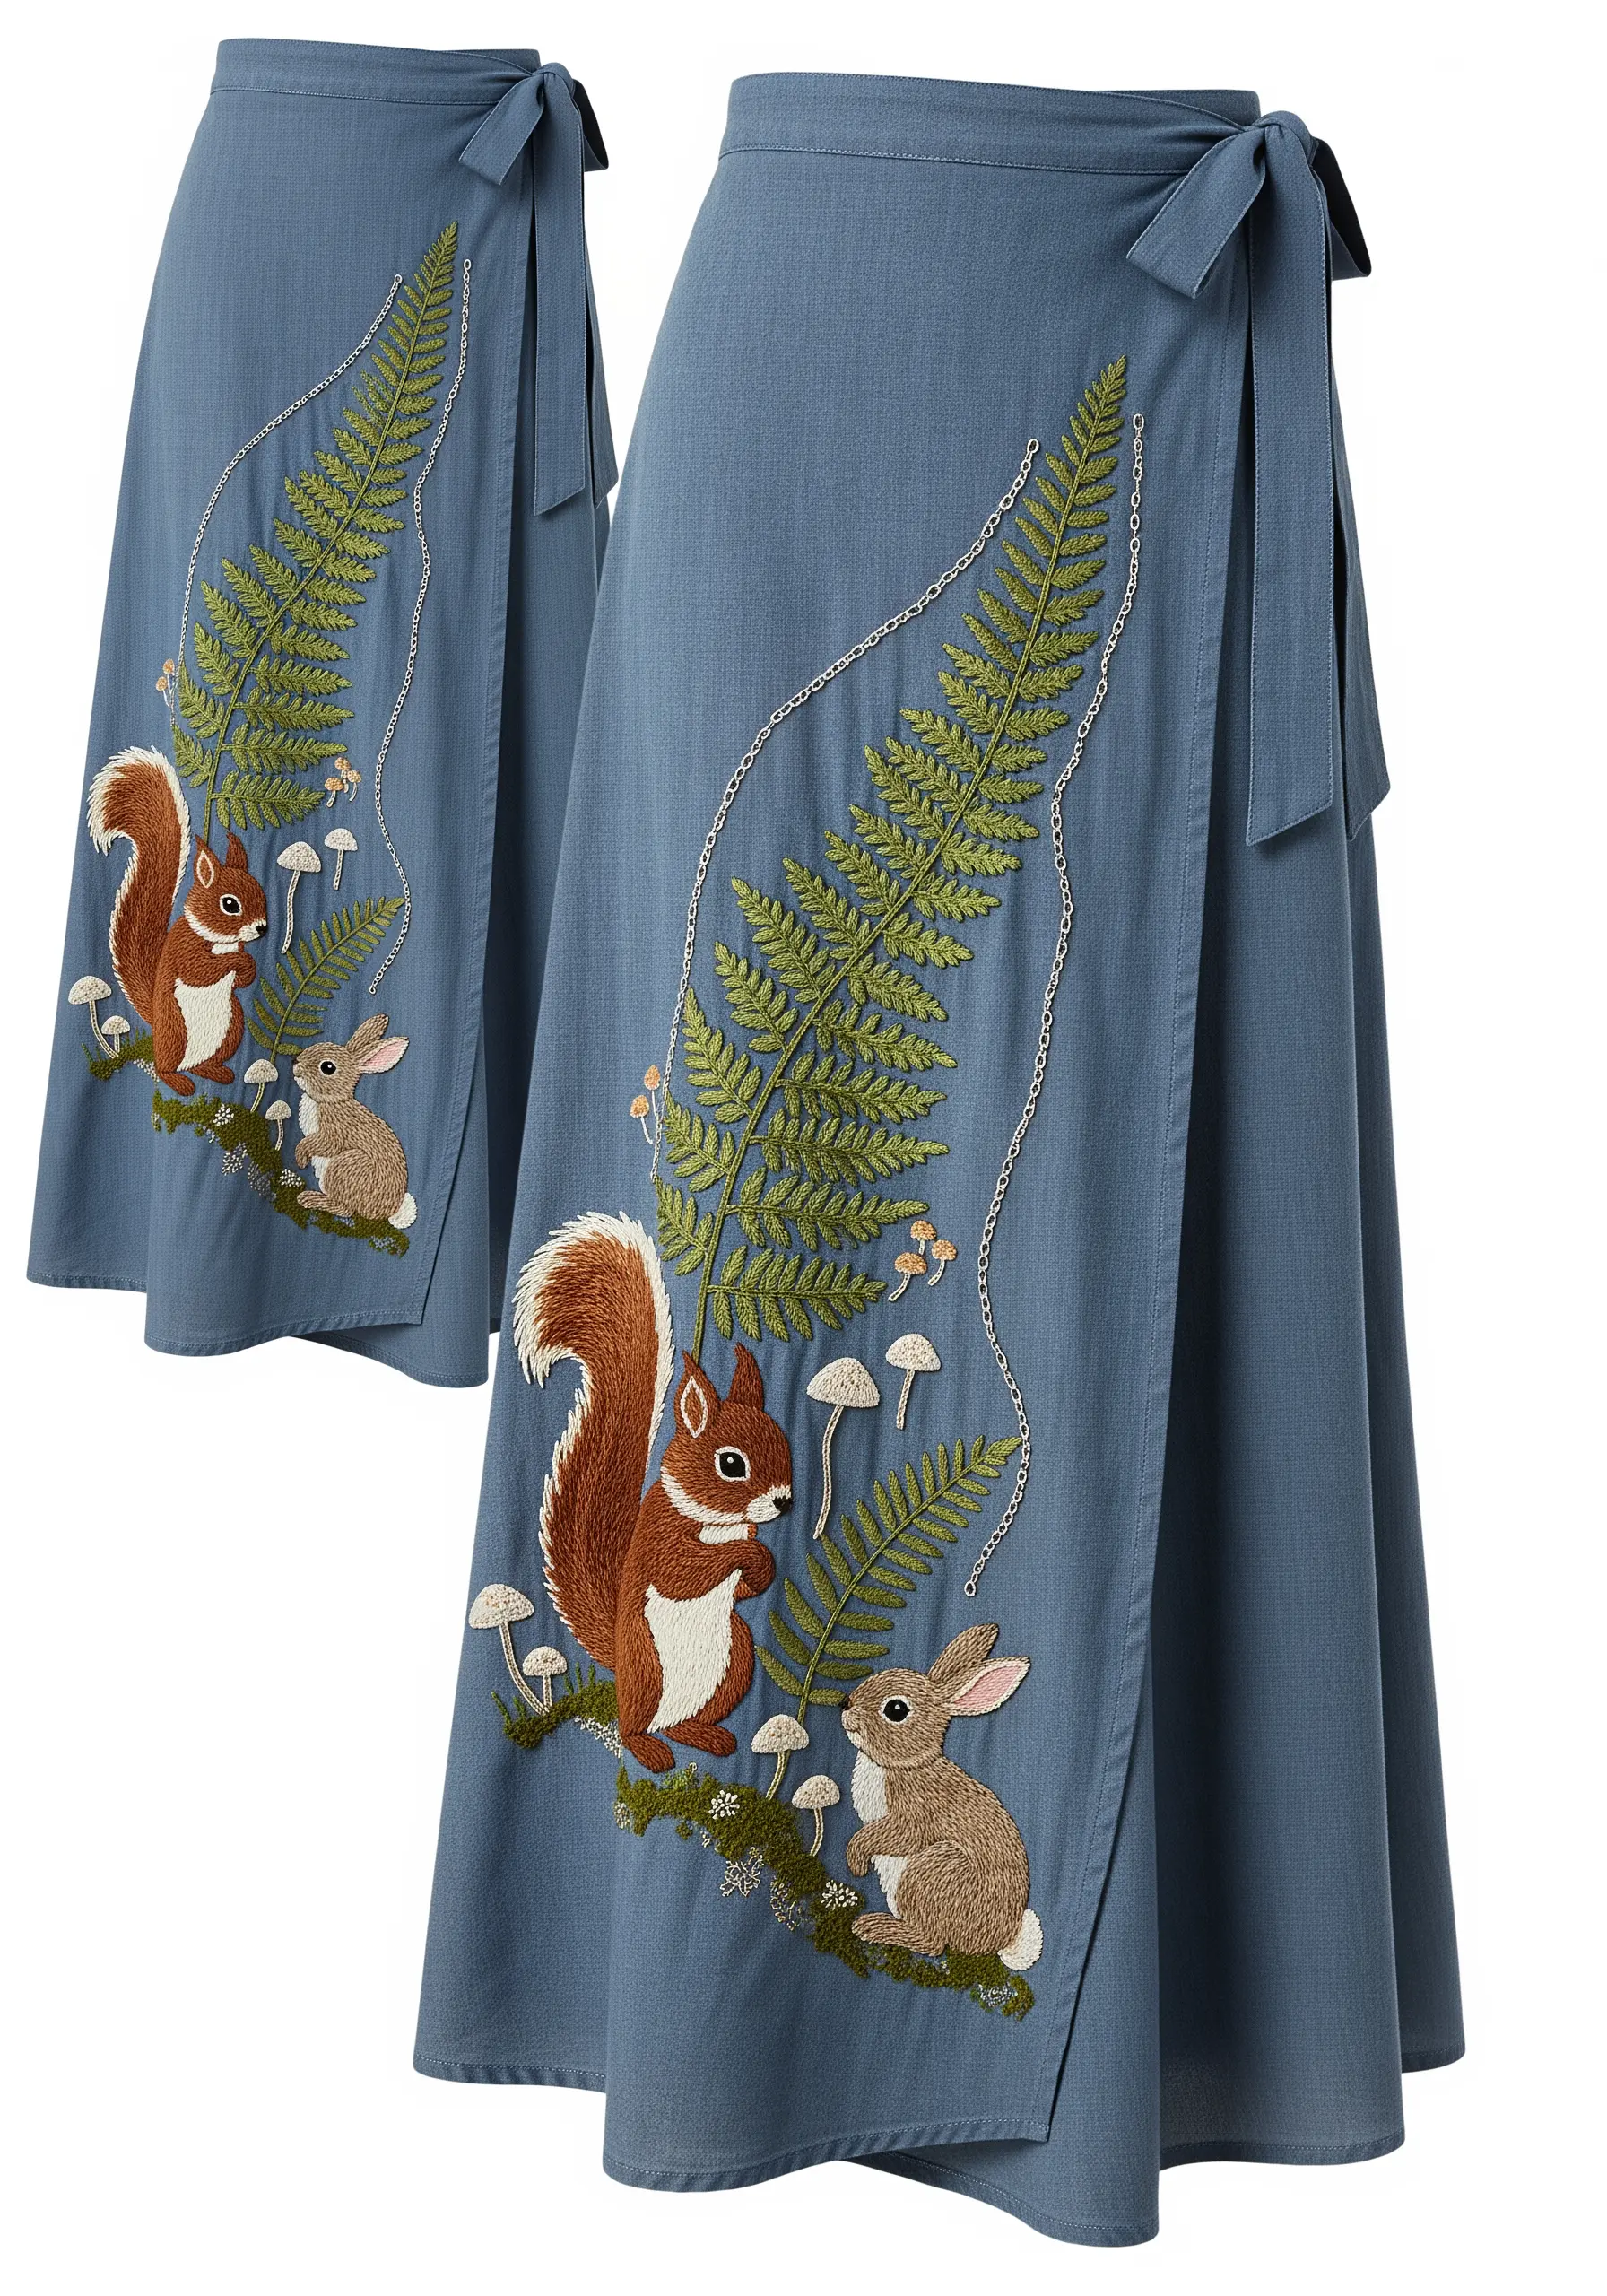
Bring animals to life by focusing on fur and foliage textures.
Use long-and-short stitch with two or three shades of brown for the squirrel’s body, blending the colors to create a soft, realistic gradient.
For the fern, use fishbone stitch for each leaflet. This creates a central spine and overlapping stitches that perfectly mimic a real frond’s structure.
Keep the mushrooms simple with a satin stitch and a few French knots to avoid distracting from the main characters.
3. Frame Functional Pockets with Botanical Designs
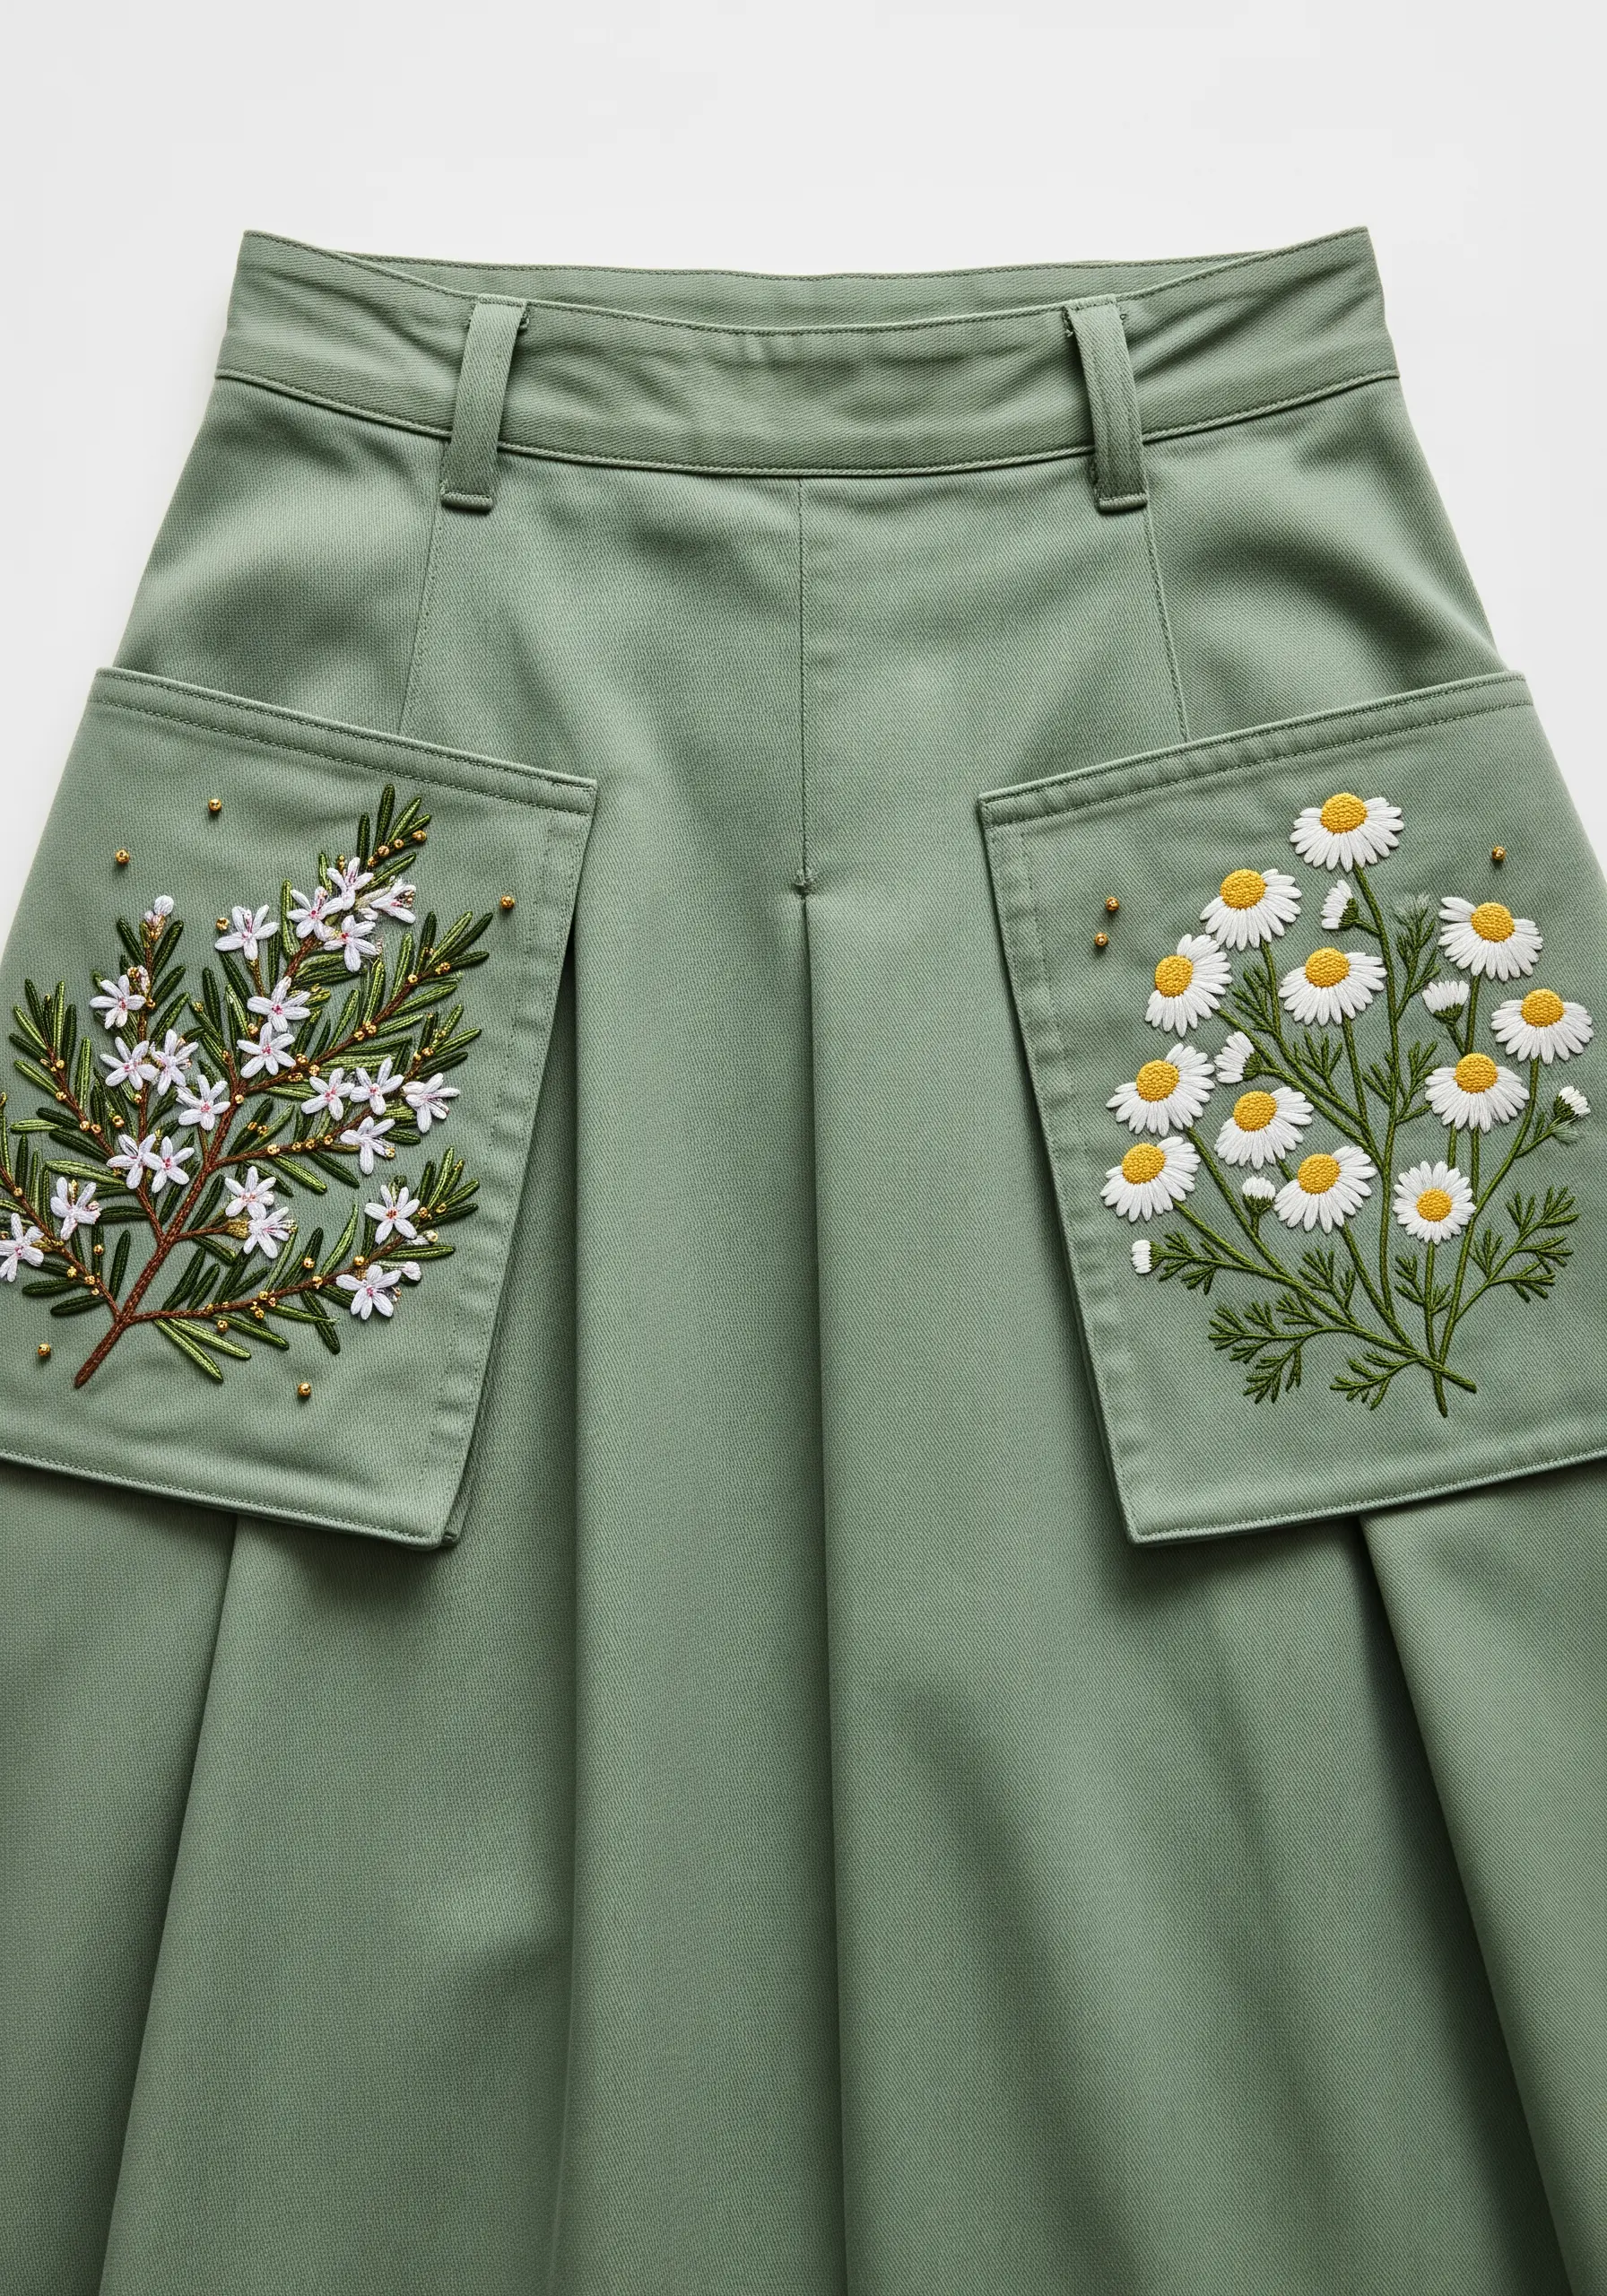
Turn practical elements like patch pockets into intentional design features.
Embroider your motifs before attaching the pockets to the skirt; it’s far easier to work with a flat piece of fabric.
Use a fine split stitch for the branches to create clean, sharp lines.
For the tiny white blossoms, a cluster of five detached chain stitches makes a perfect flower, while gold French knots add a touch of texture and light, elevating the entire composition.
4. Achieve a Metallic Sheen with Thread Direction
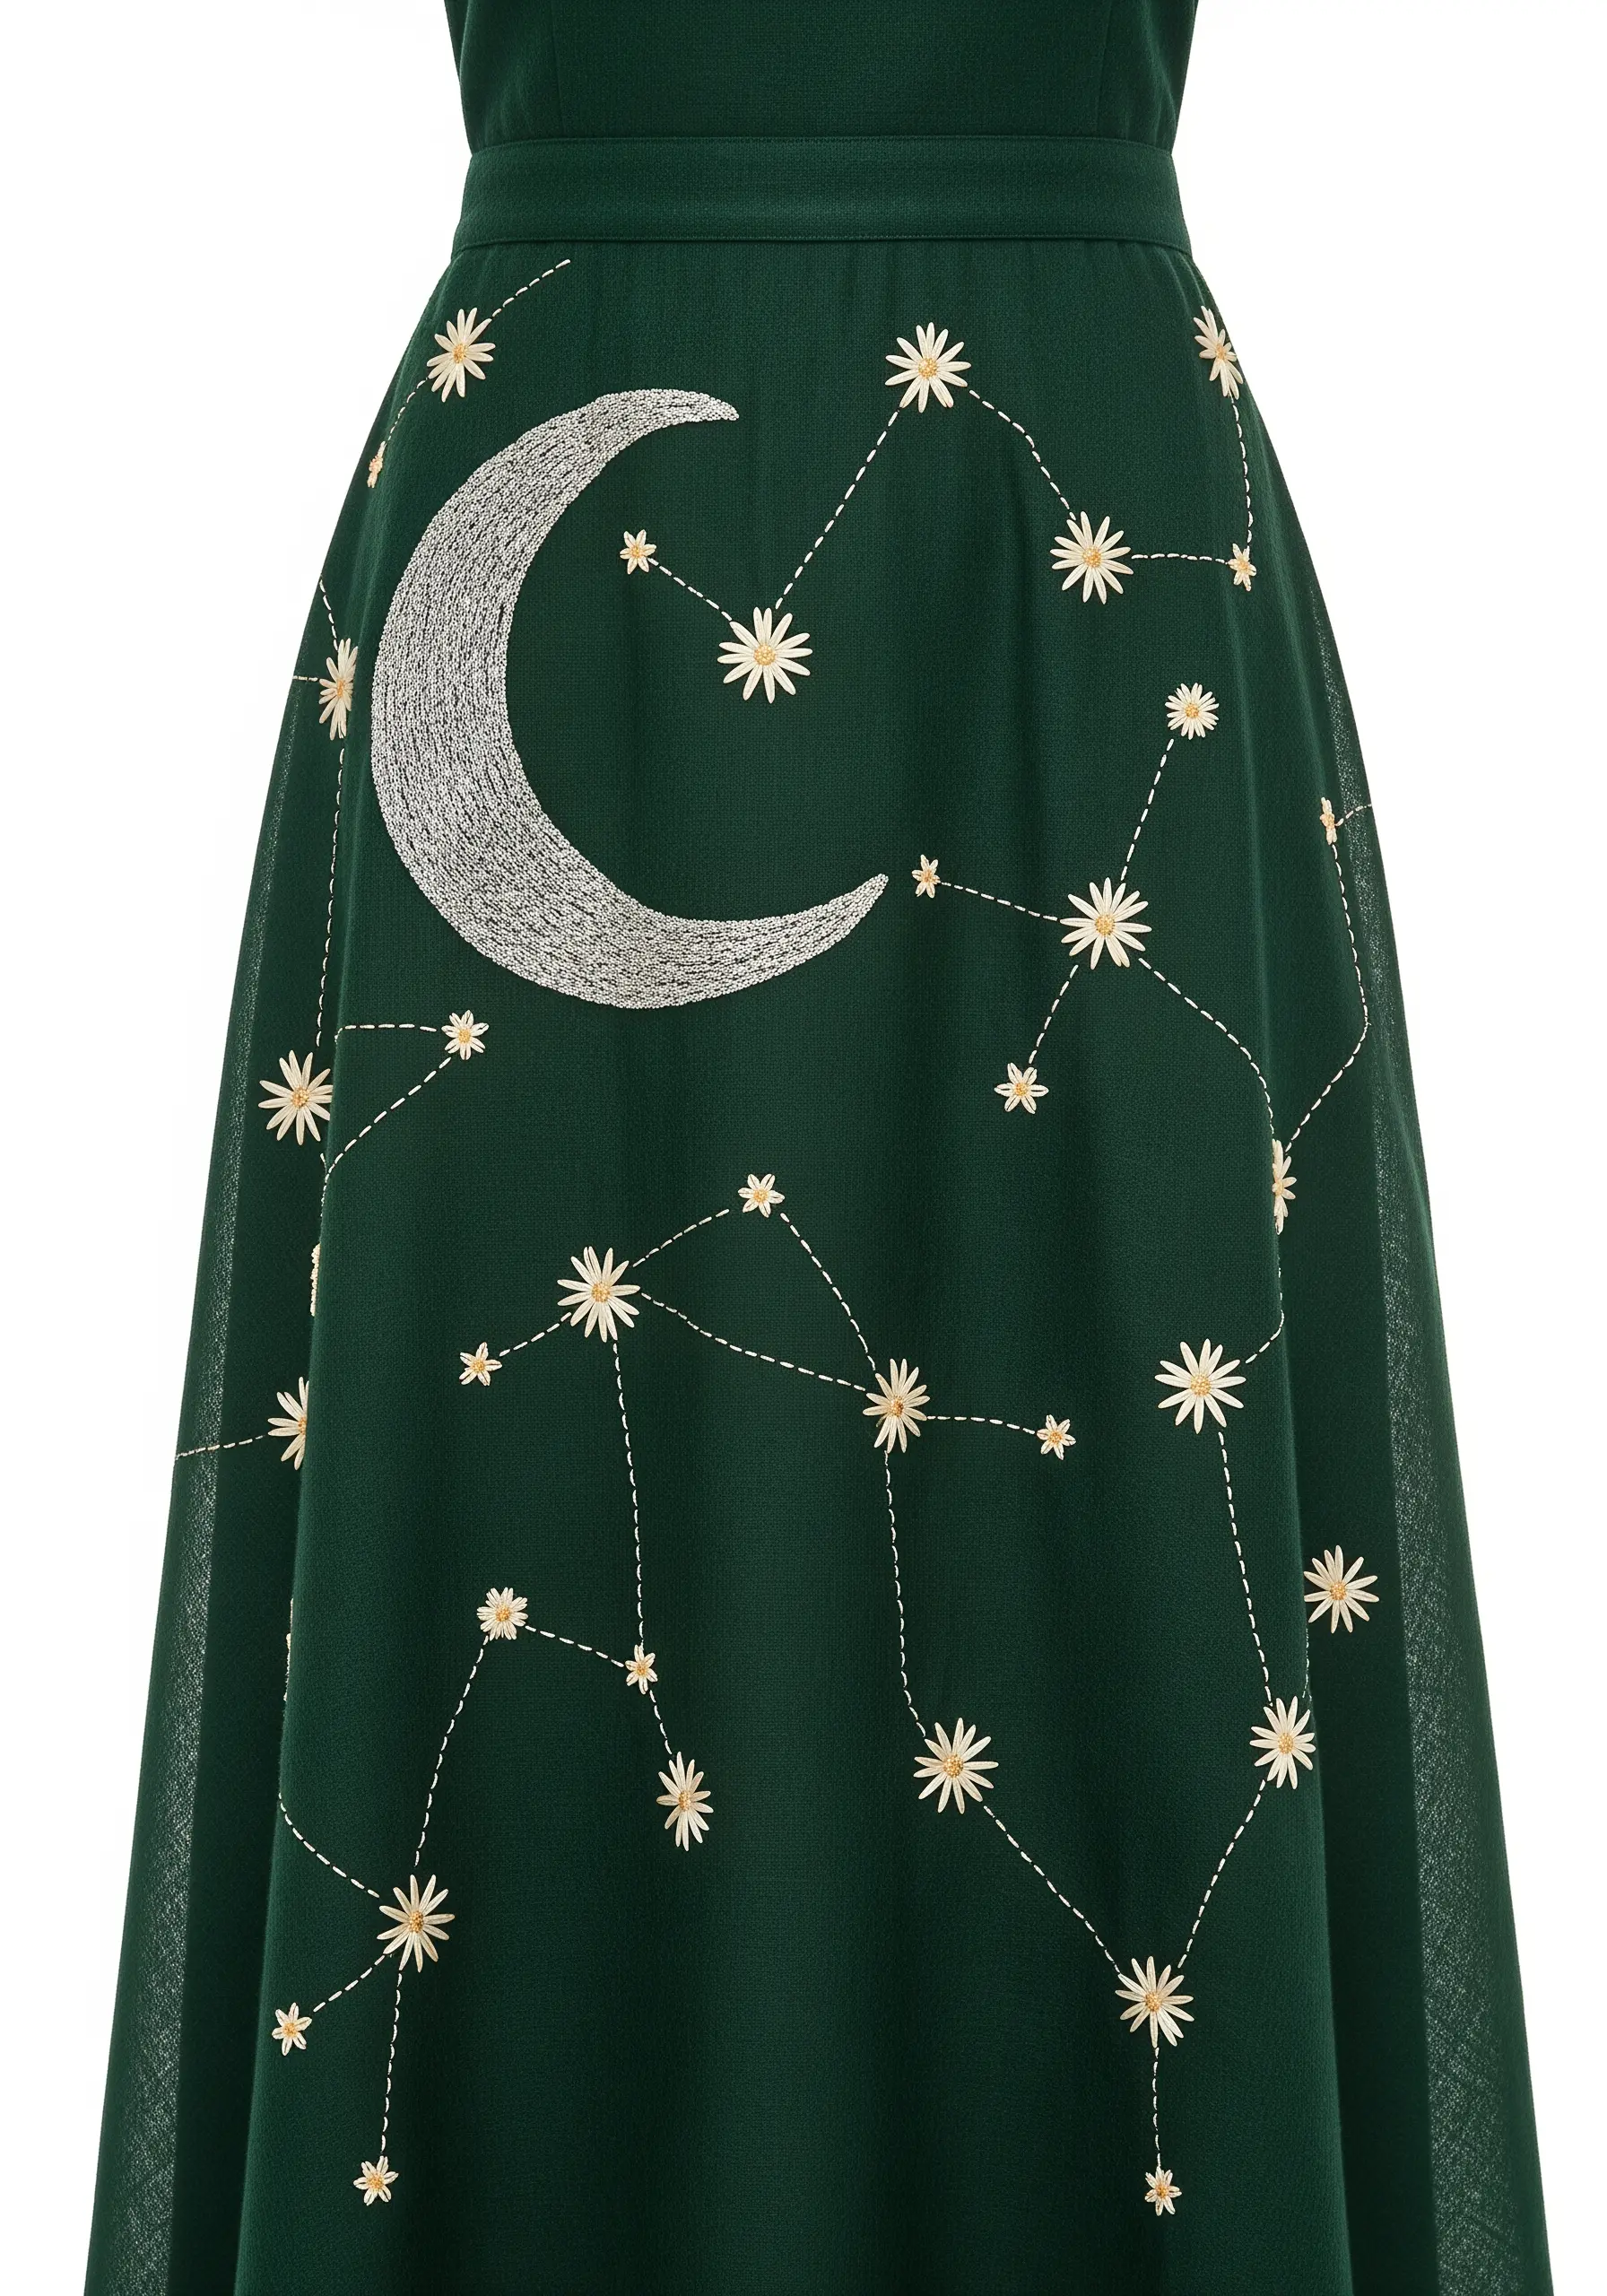
To make a crescent moon shimmer, the direction of your stitches is everything.
Fill the moon with a tightly packed satin stitch using a silvery-grey or metallic thread, ensuring all stitches lie perfectly parallel in a slight curve.
This uniform direction creates a smooth surface that reflects light like polished metal, giving it a powerful glow against the dark fabric.
Contrast this smooth texture with tiny, star-like straight stitches scattered randomly to complete the celestial scene.
5. Add Dimension with Padded Satin Stitch
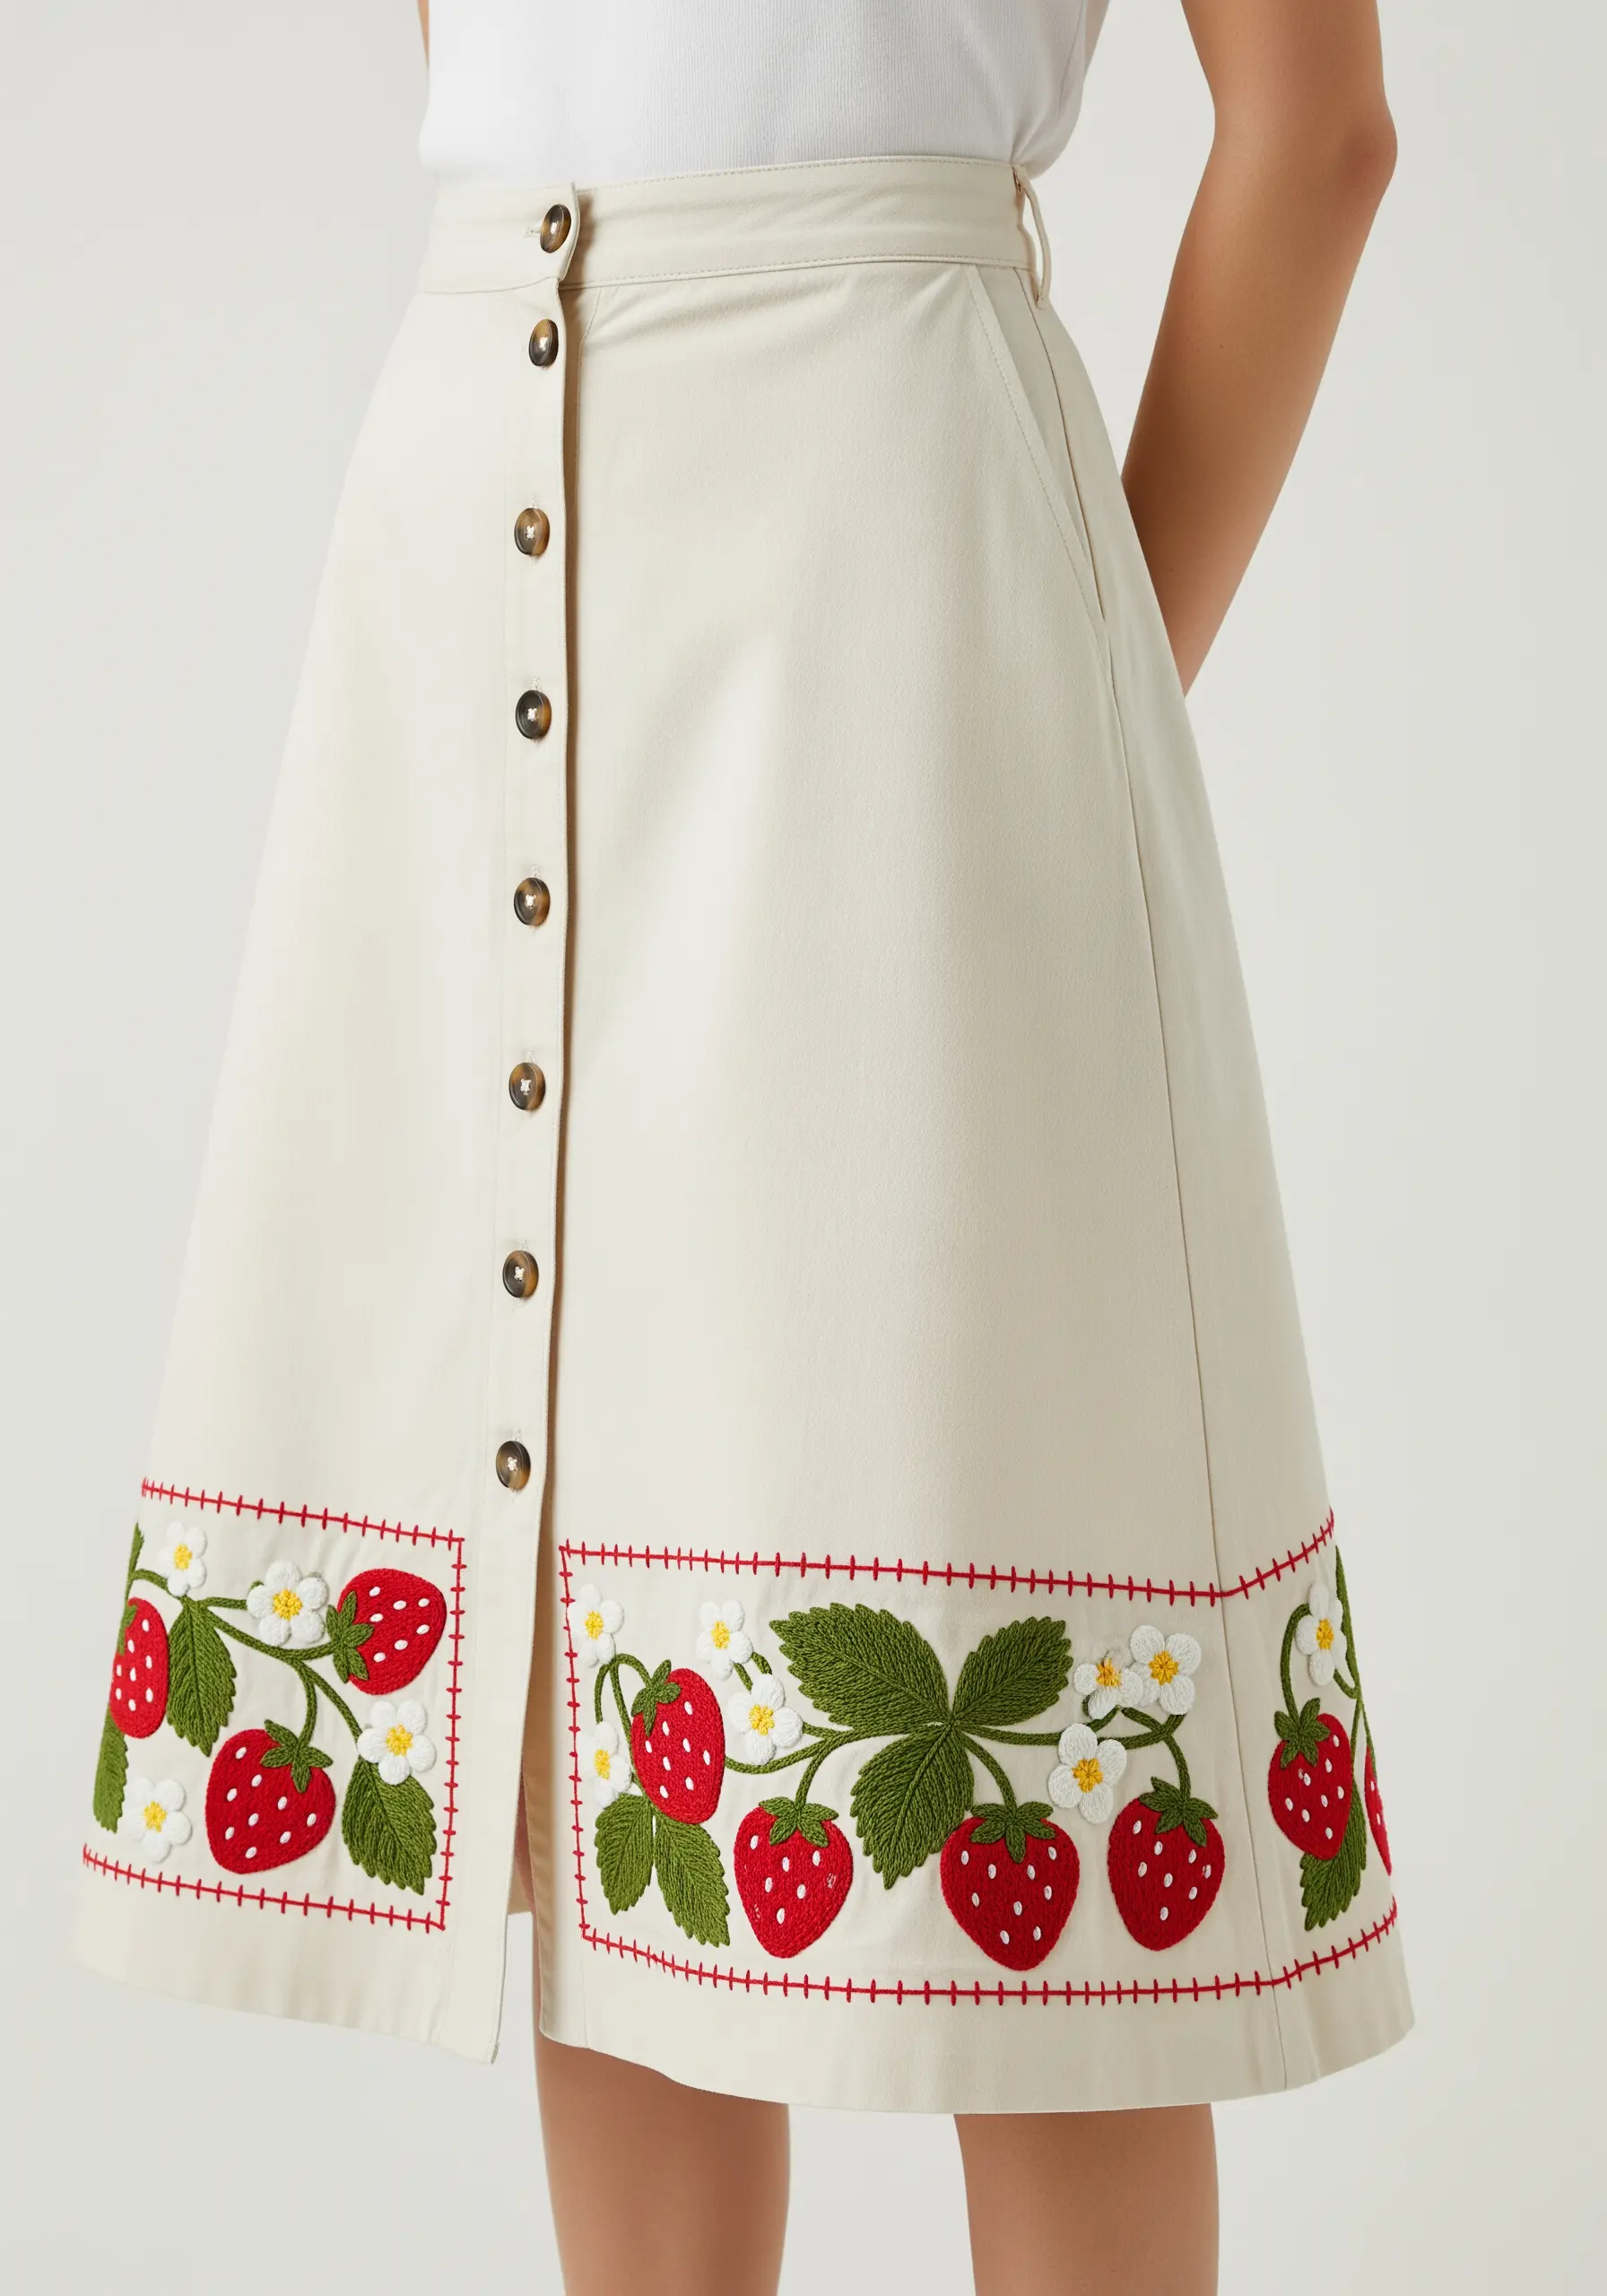
Give your embroidered strawberries a plump, three-dimensional look using padded satin stitch.
Before you begin the red satin stitch, fill the strawberry shape with a base layer of small, dense seed stitches. This raises the surface slightly.
Stitch your final satin stitch layer directly over this padding. The added height makes the fruit pop from the fabric, creating a more tactile and visually interesting design.
For the leaves, use a fishbone stitch to create a natural-looking central vein.
6. Construct a Whimsical Mushroom Wreath
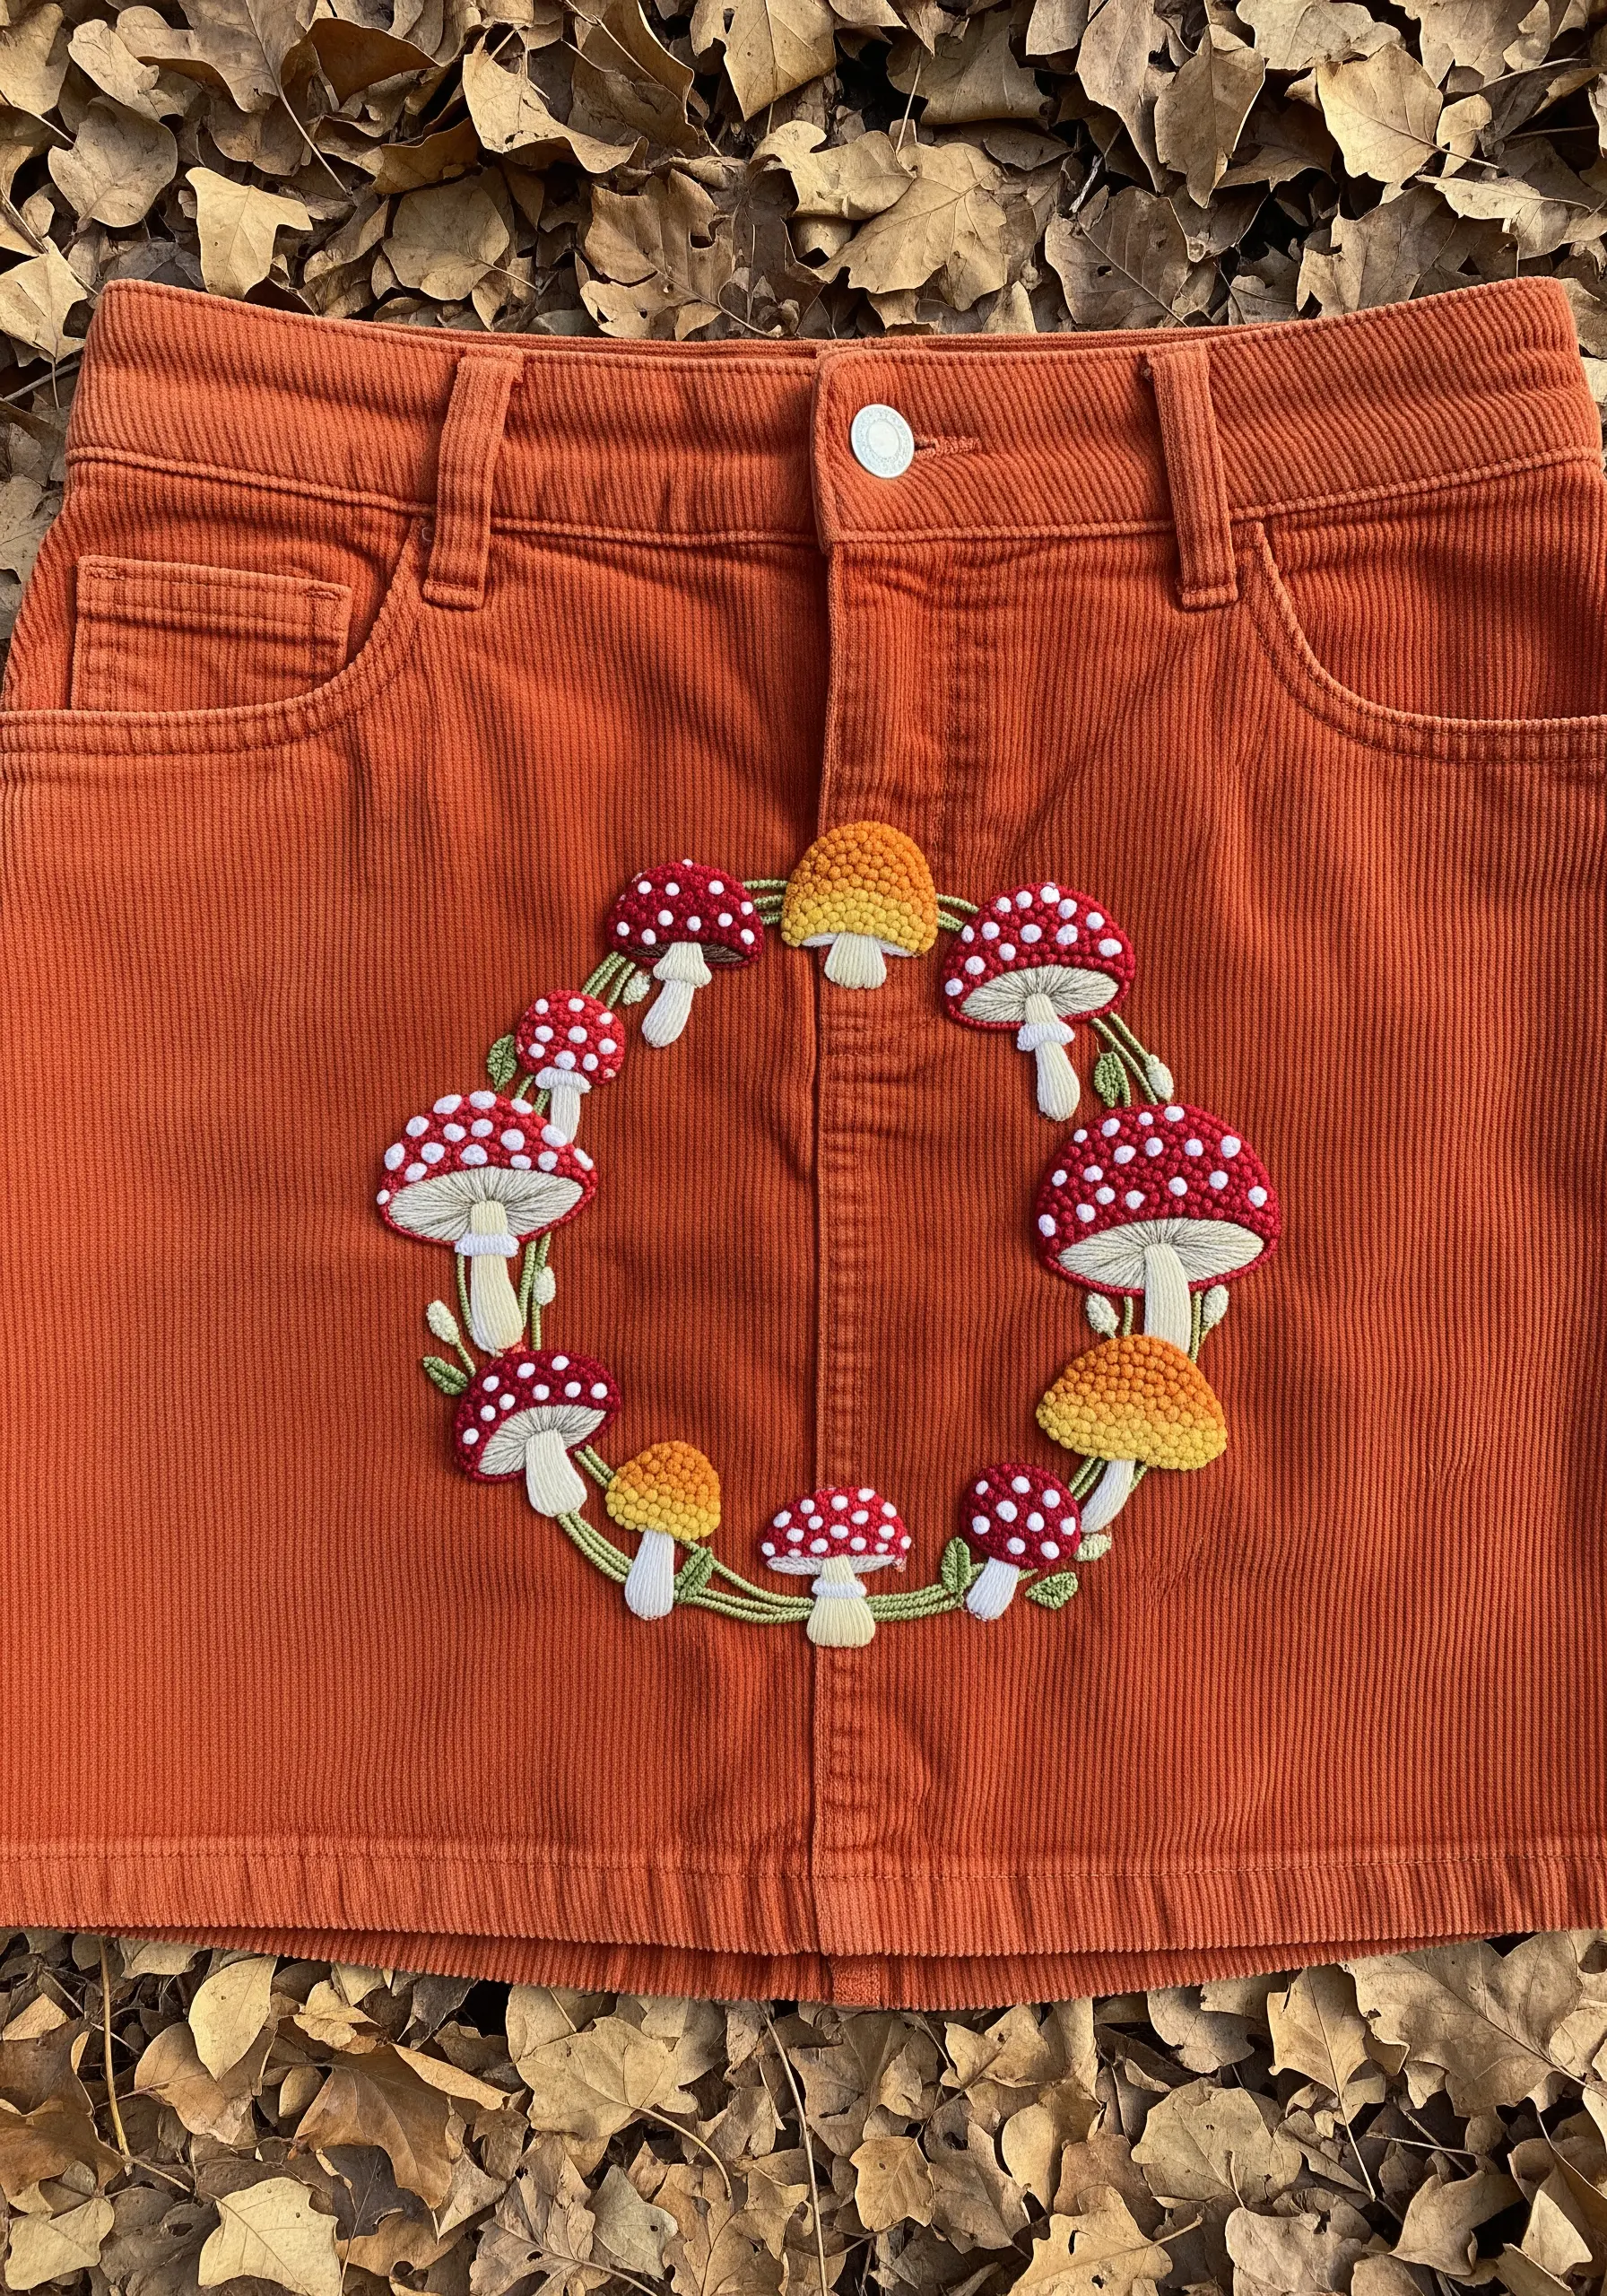
This charming mushroom wreath gets its playful dimension from padded satin stitch and beadwork.
Create a raised effect on the mushroom caps by first laying down a small piece of felt cut to shape or building up a base of foundation stitches.
Cover this padding with red satin stitch, then add tiny white seed beads instead of French knots for perfectly uniform spots.
This combination of soft thread and hard beads provides a delightful textural contrast that enhances the fairytale feel.
7. Capture Ephemeral Movement with Dandelion Seeds

To capture the feeling of dandelion seeds floating on the wind, prioritize lightness and variation.
Use only a single strand of white floss for the parachute-like pappus, creating it with a combination of straight stitches and detached chain stitches fanning out from a central point.
Vary the length and angle of each seed’s stem to create a sense of natural, chaotic movement across the fabric.
The scattered, asymmetrical placement is what makes this design feel so alive and delicate.
8. Define Tiers with Contrasting Motifs
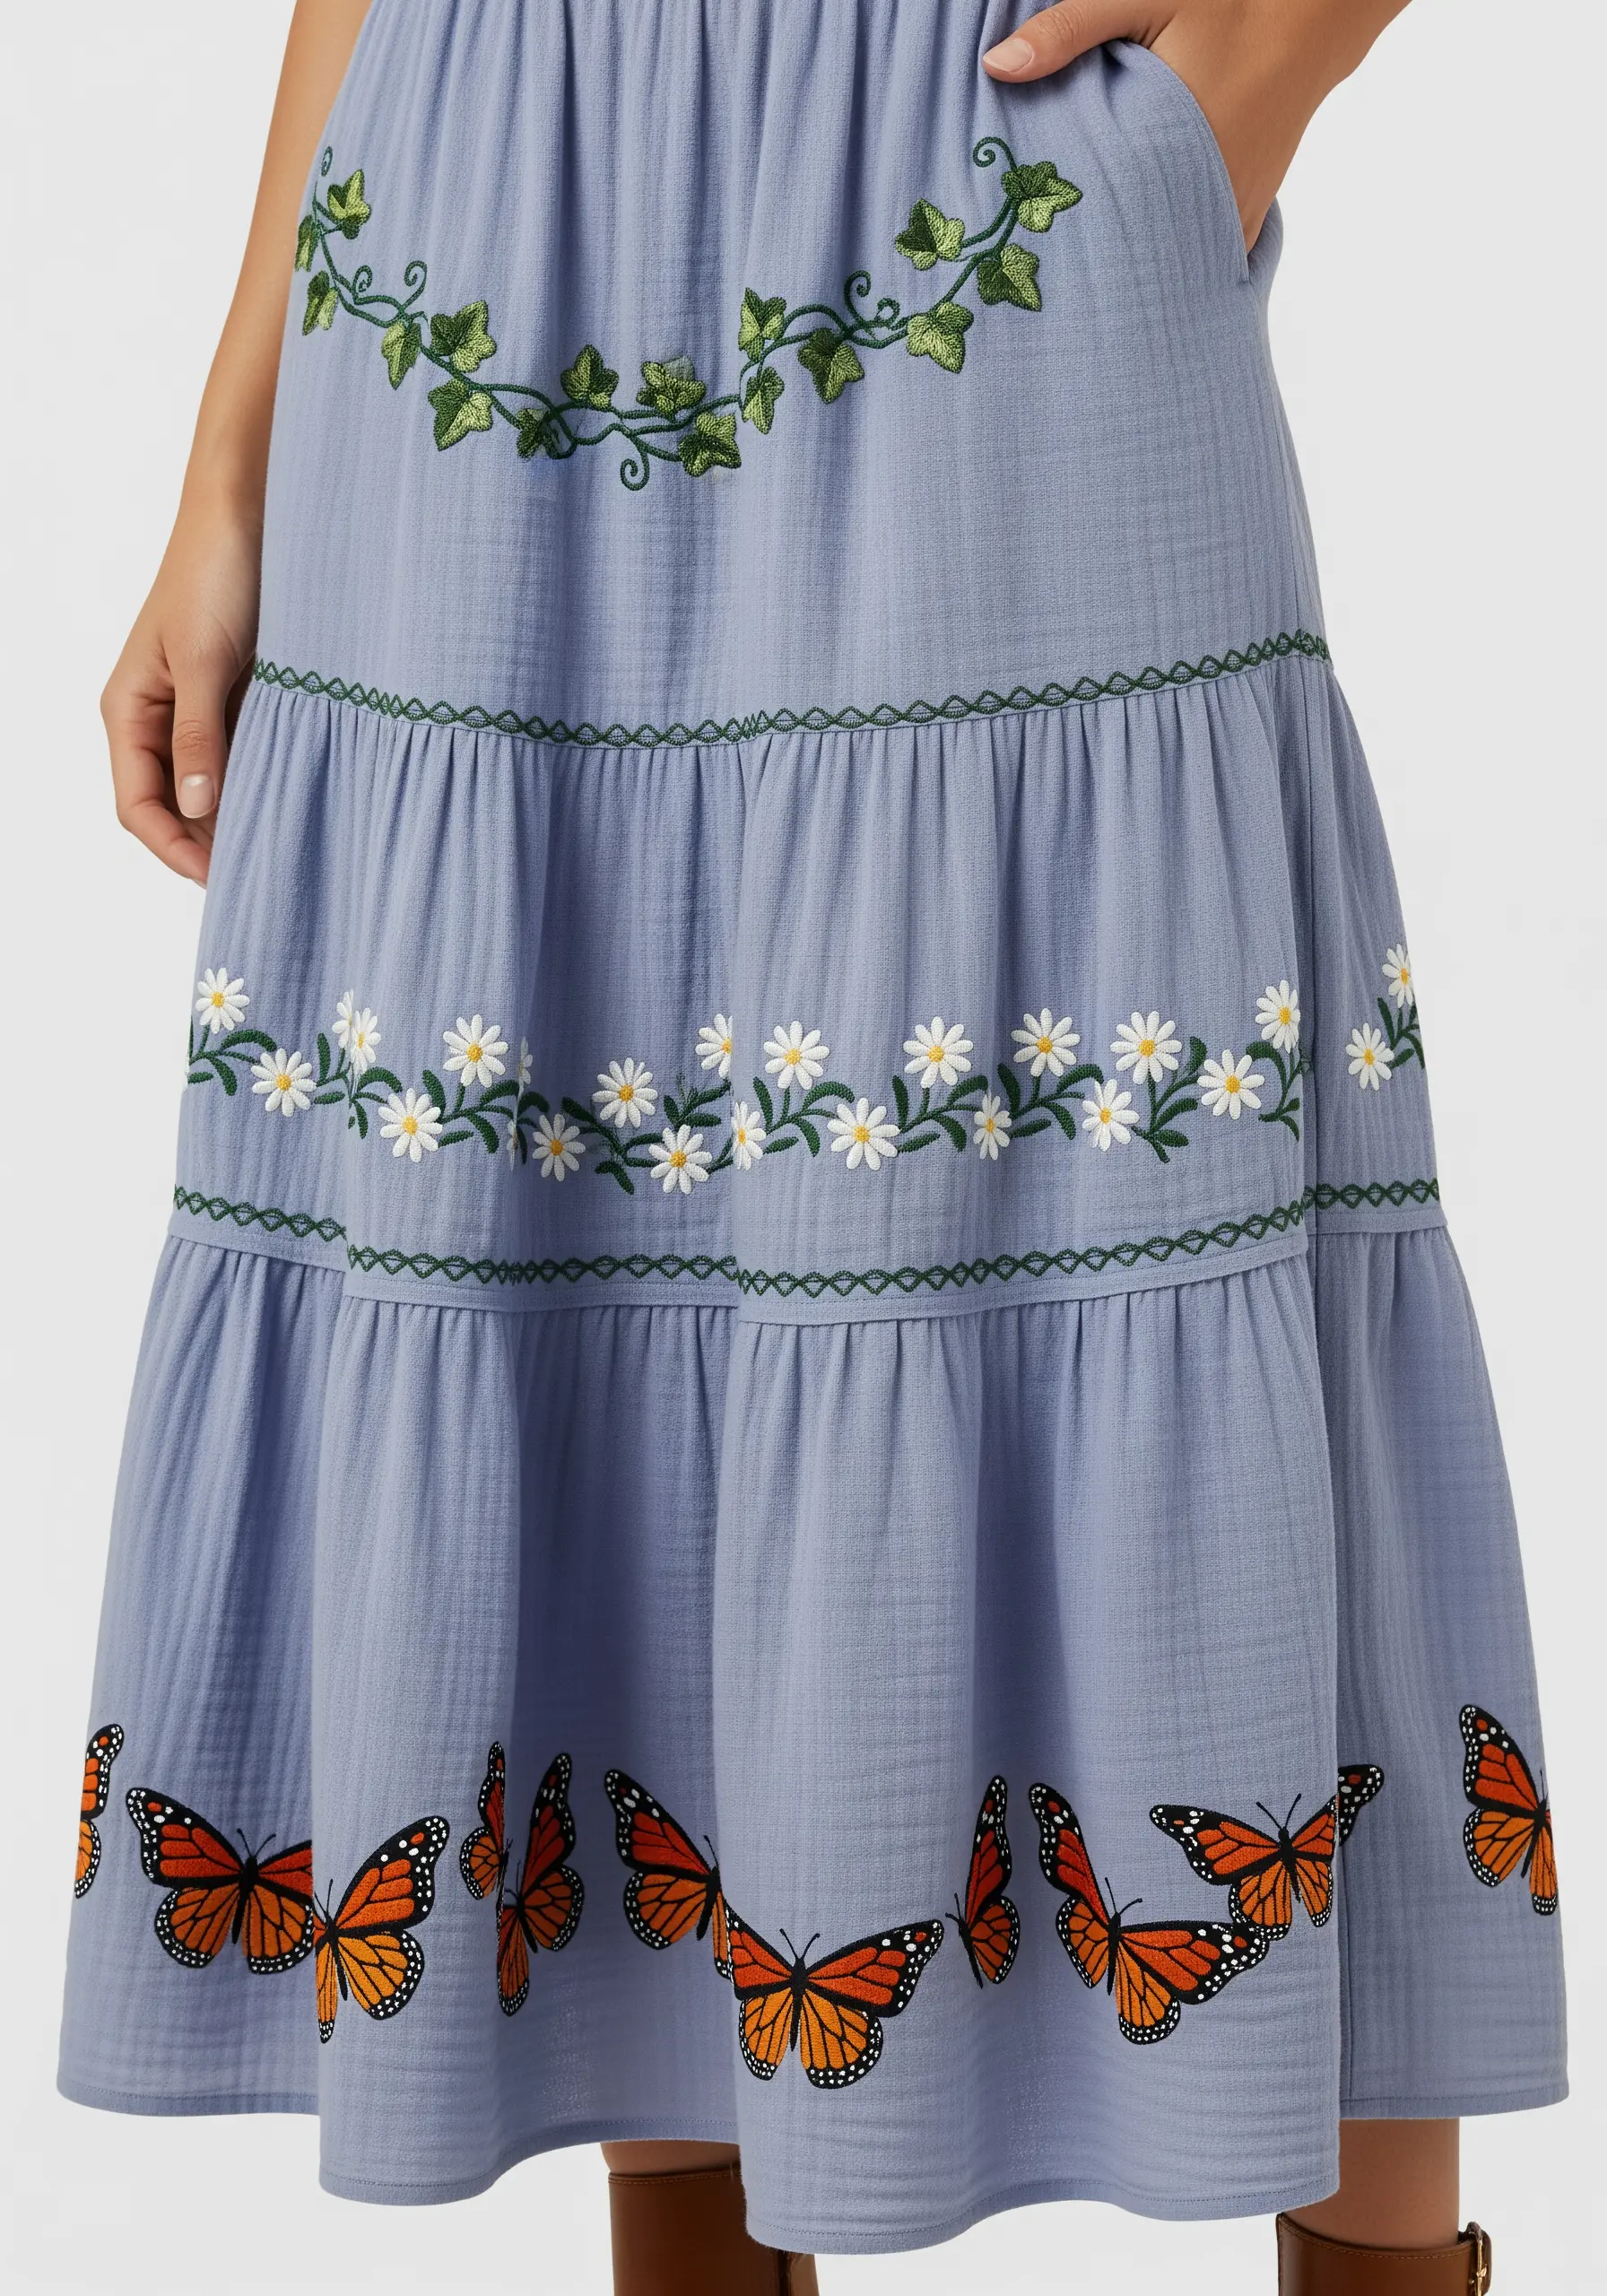
When embroidering a tiered skirt, use different motifs for each level to create visual interest and emphasize the garment’s structure.
Place a delicate, climbing vine of ivy along the top tier’s seam, using stem stitch for the vine and satin stitch for the leaves.
Stitch a simple daisy chain on the middle tier, and reserve the boldest motif—the monarch butterflies—for the wide bottom hem.
This progression from simple to complex draws the eye downward and celebrates the skirt’s construction.
9. Create a Touch of Magic with Sequins and Metallics
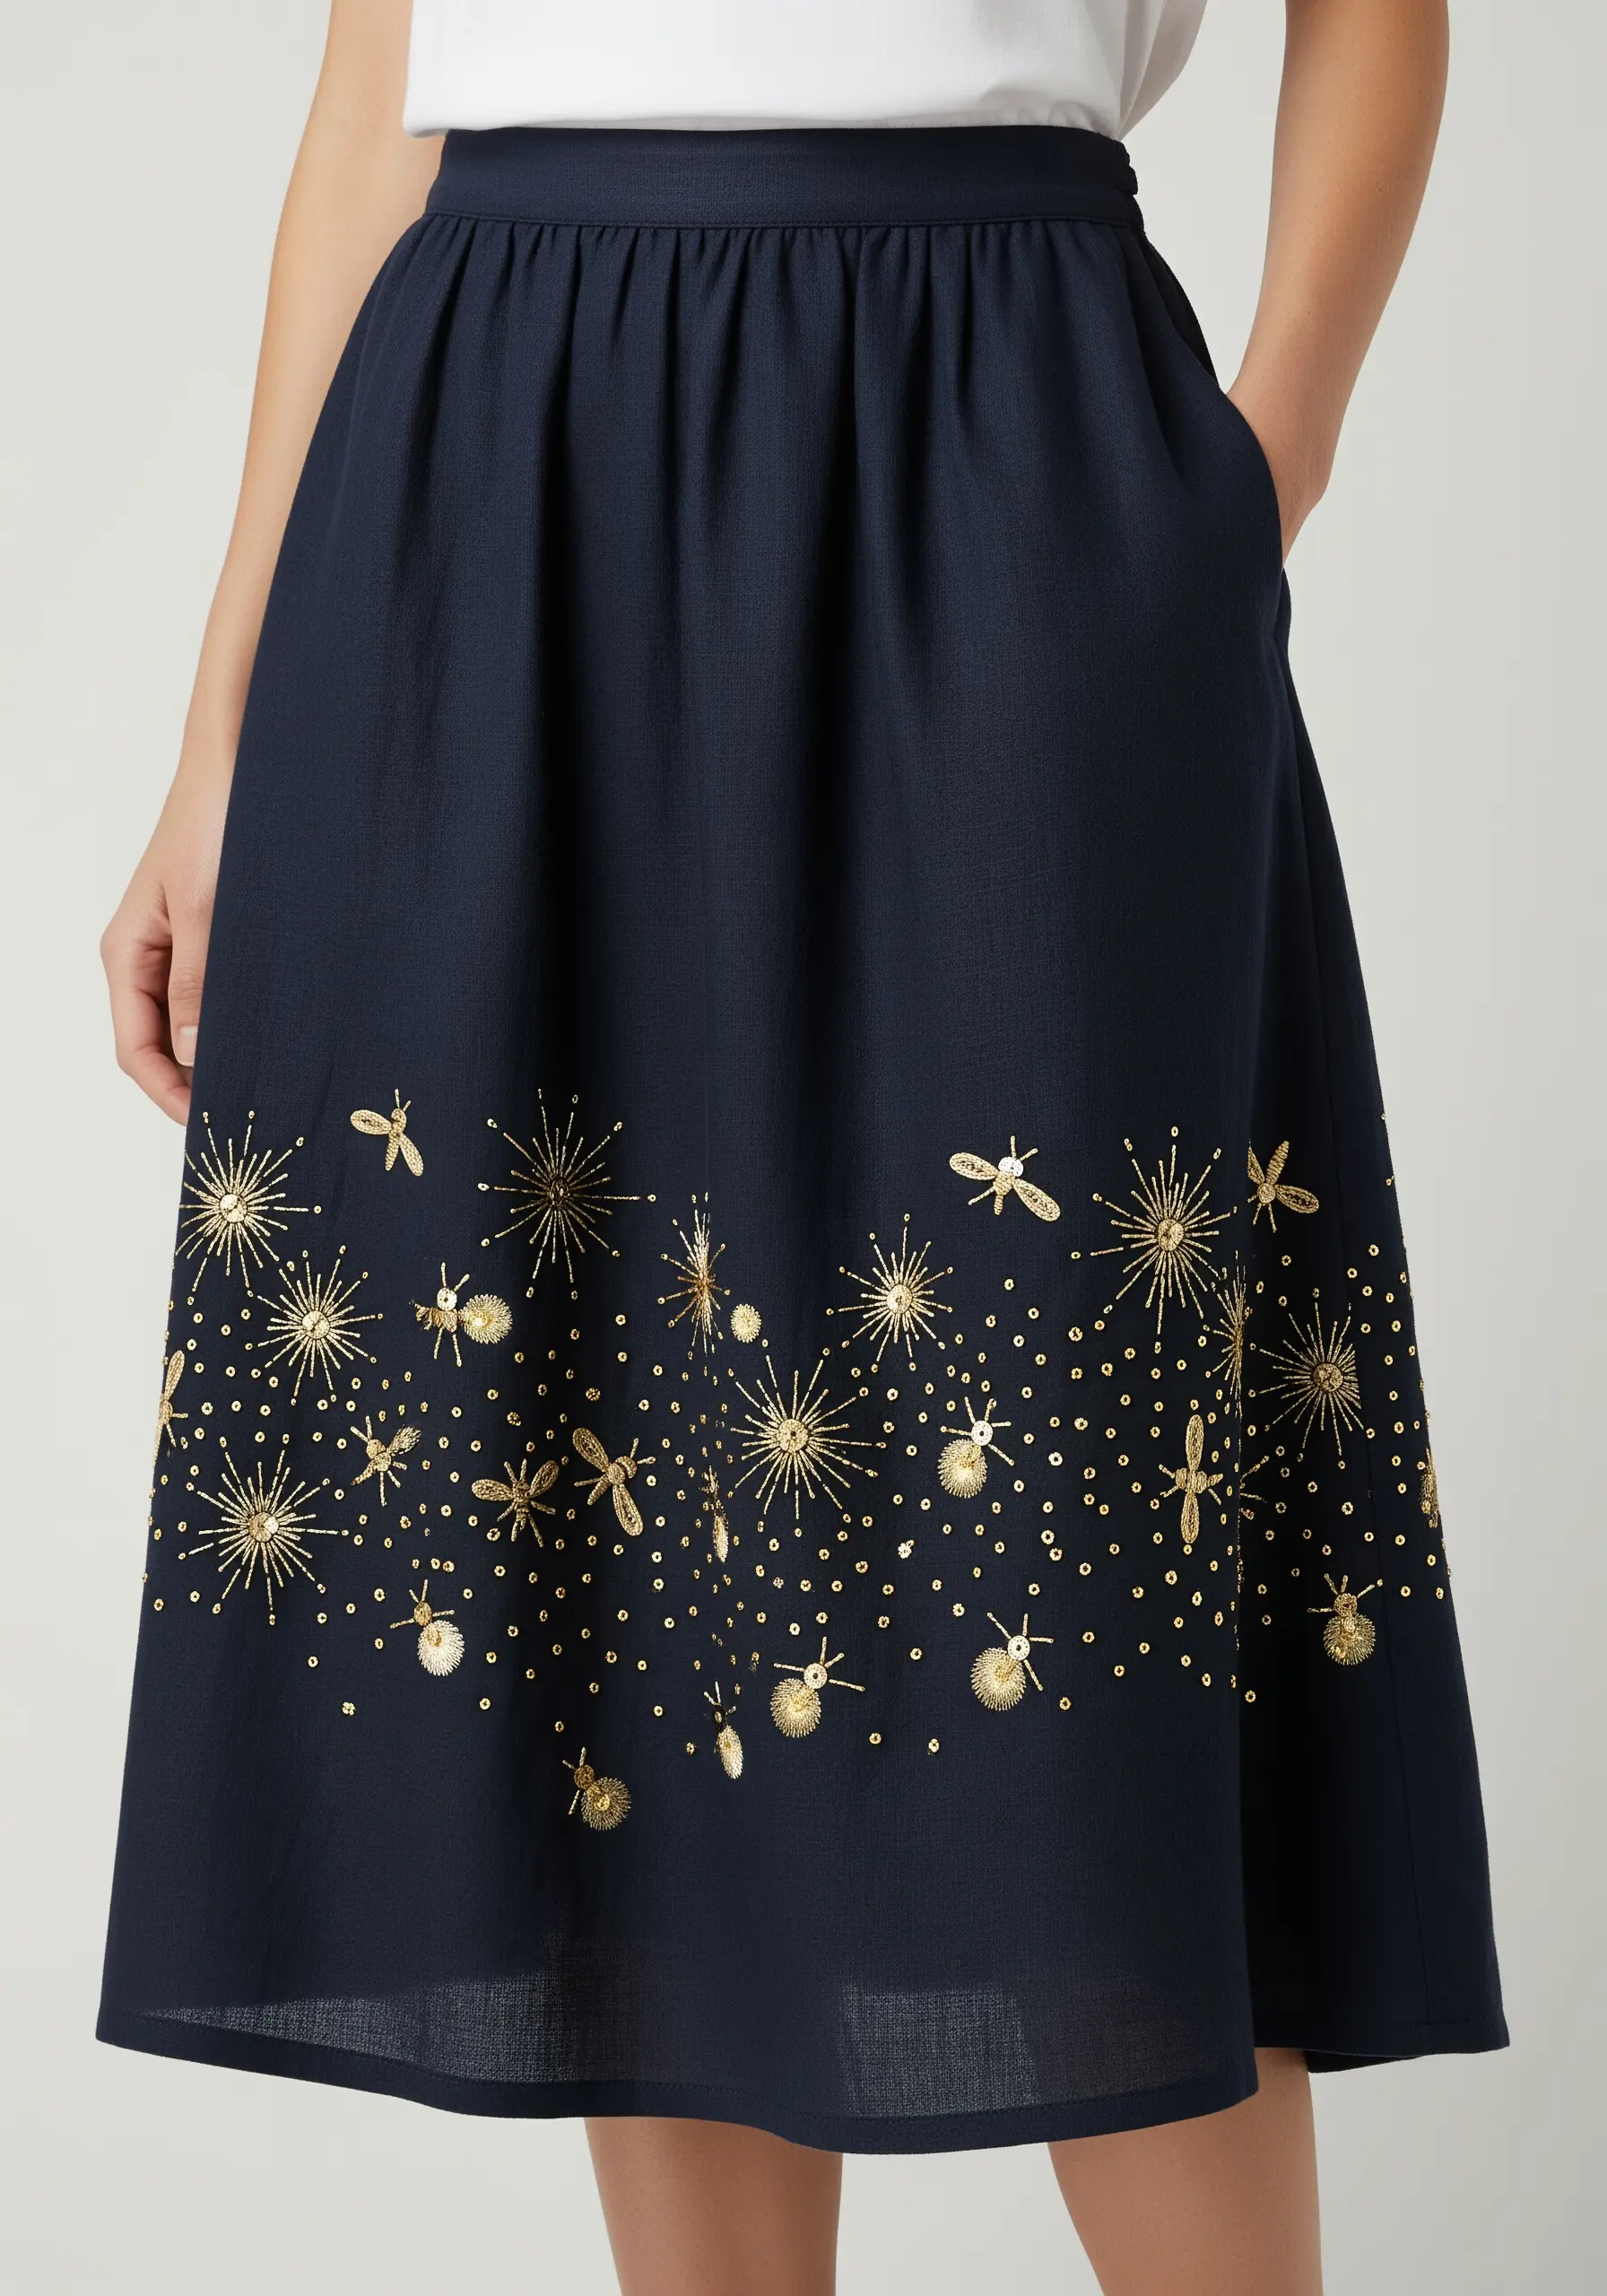
Elevate a simple stitched border by incorporating metallic threads and sequins for a touch of sparkle.
Use a gold metallic thread for the starbursts, working straight stitches of varying lengths that radiate from a central point.
Instead of relying solely on thread, stitch a single gold sequin at the center of some starbursts or scatter them like fairy dust throughout the design.
This mix of matte thread, metallic sheen, and sequin sparkle adds a dynamic, magical quality, especially on dark fabric.
10. Achieve Realism with Appliqué and Thread Painting
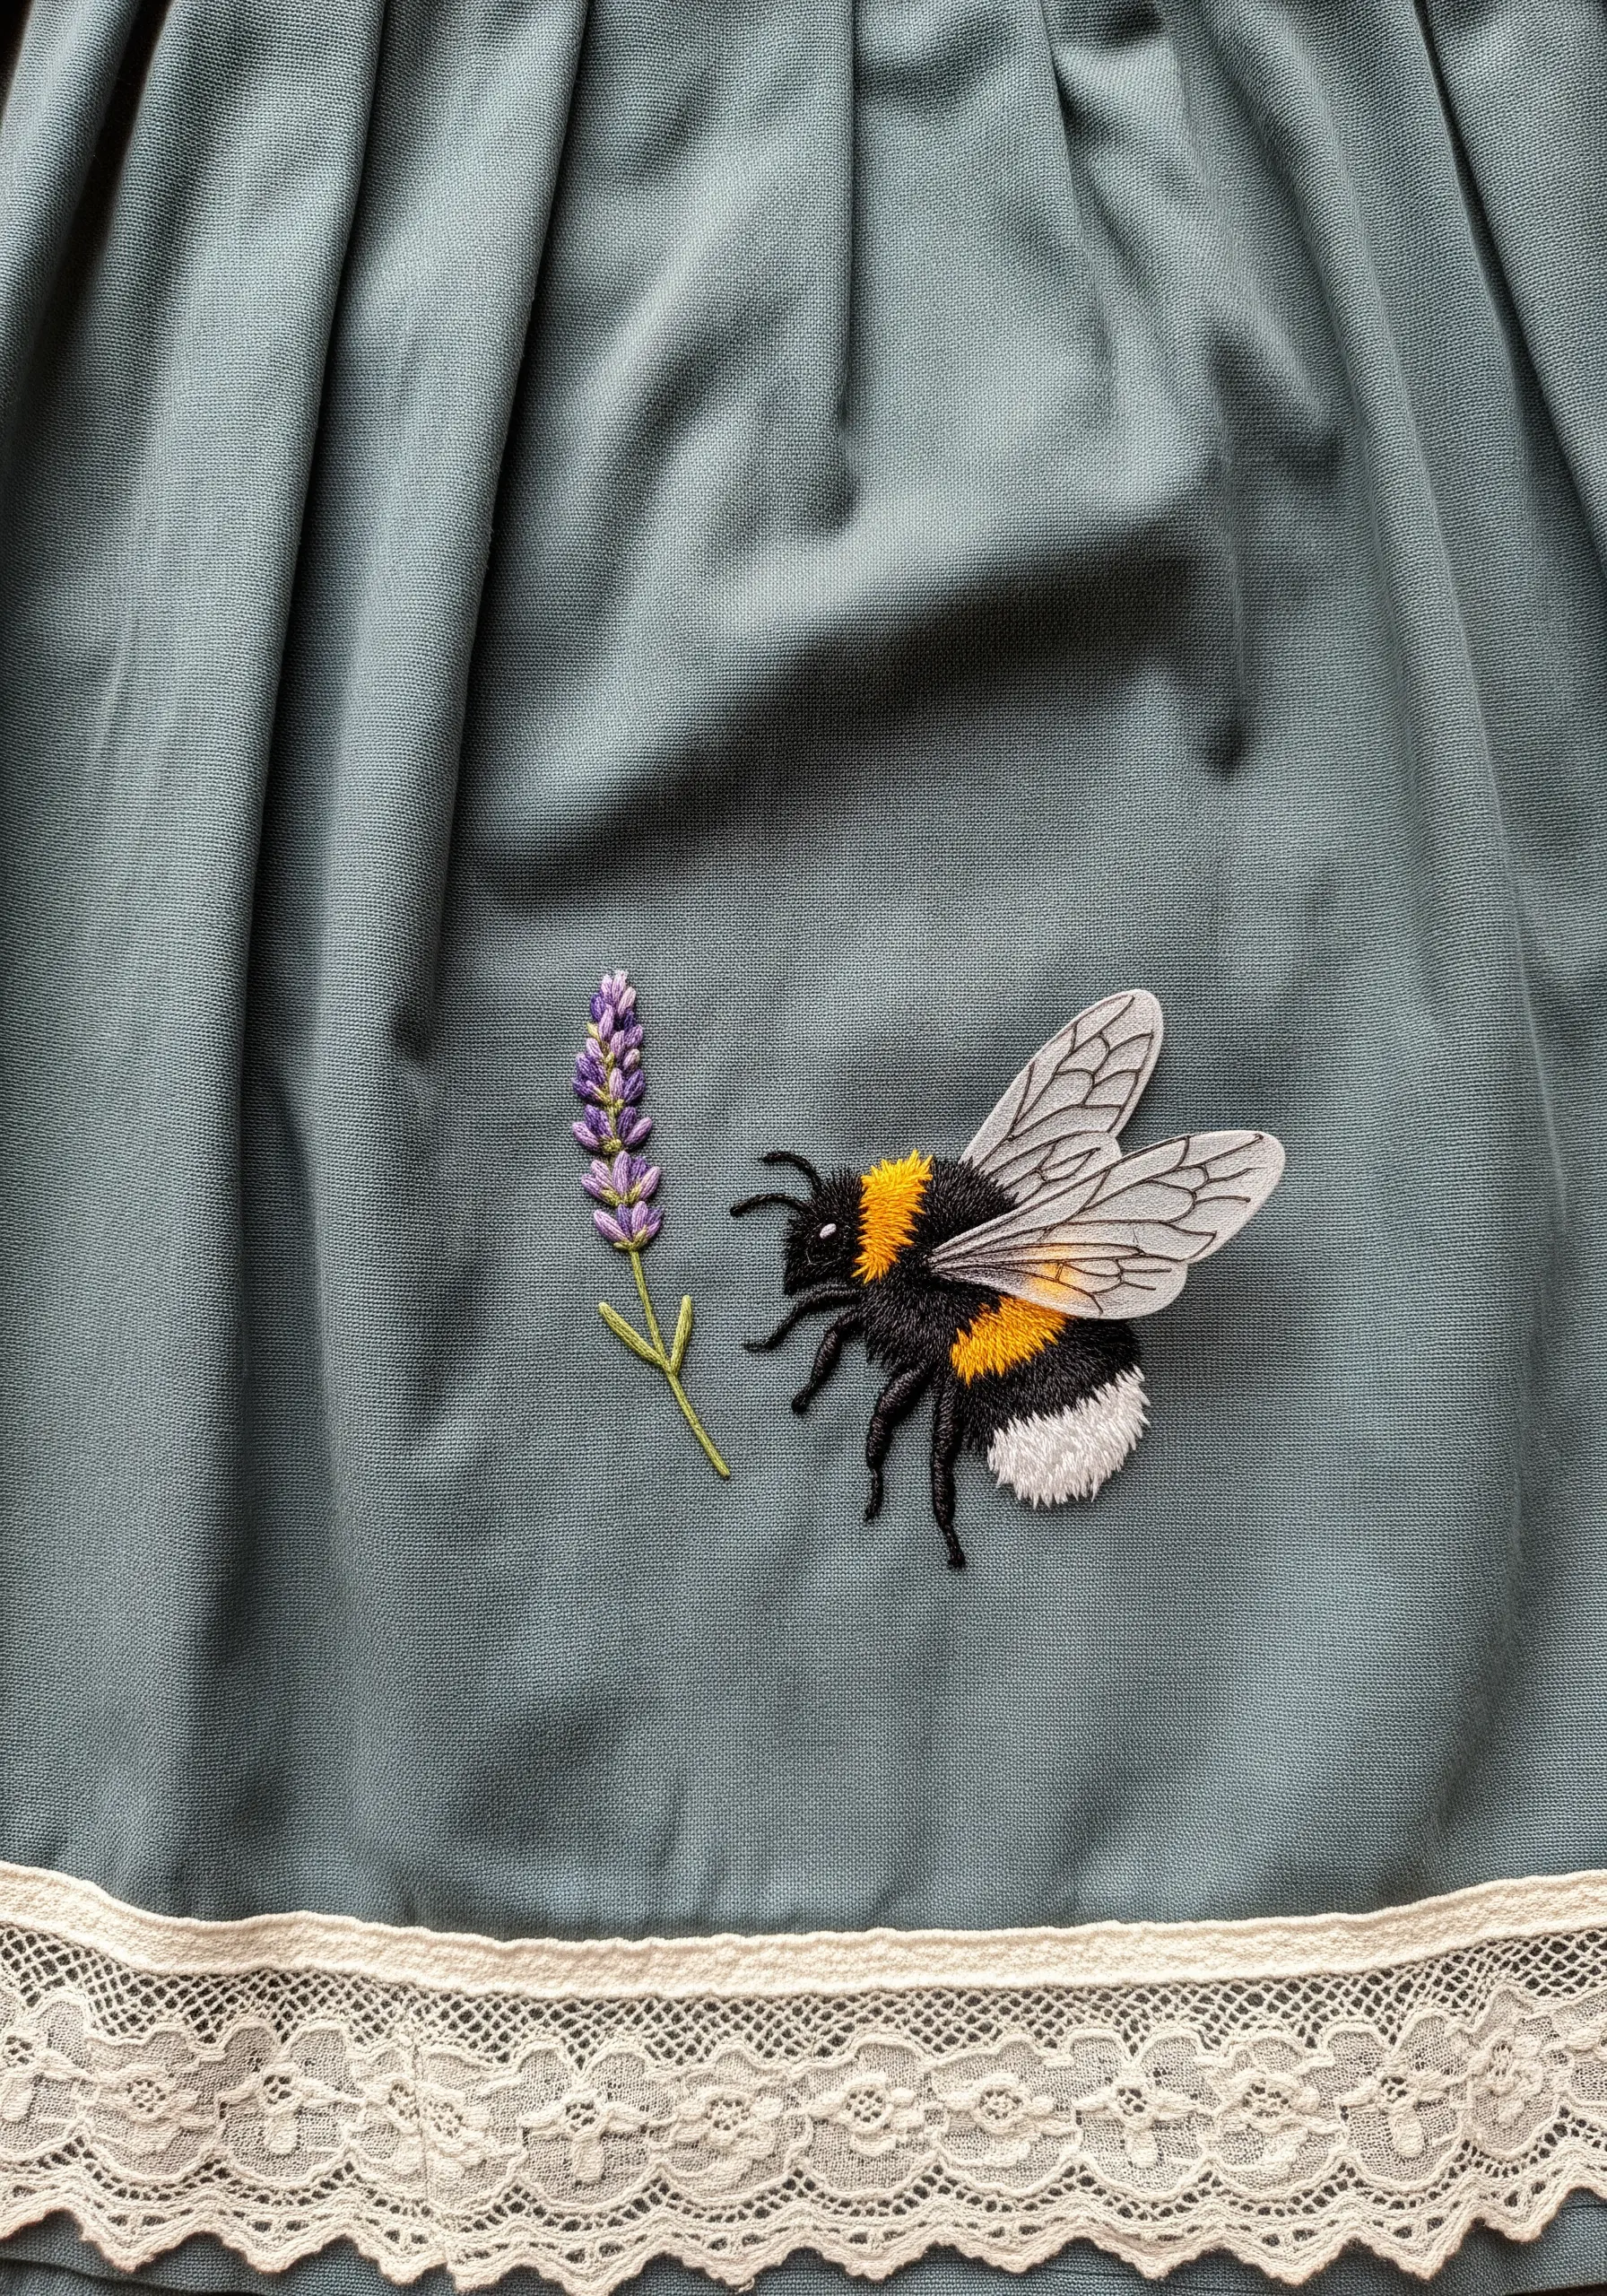
For hyper-realistic insect wings, combine sheer appliqué with delicate thread painting.
Cut the wing shapes from a fine, sheer fabric like organza and carefully appliqué them onto your skirt using tiny, almost invisible stitches around the edge.
Use a single strand of black or grey floss to embroider the delicate veins of the wings directly onto the organza.
This technique creates a translucent, layered effect that is impossible to achieve with thread alone, making the bee look astonishingly lifelike.
11. Balance Intricate Detail with Negative Space
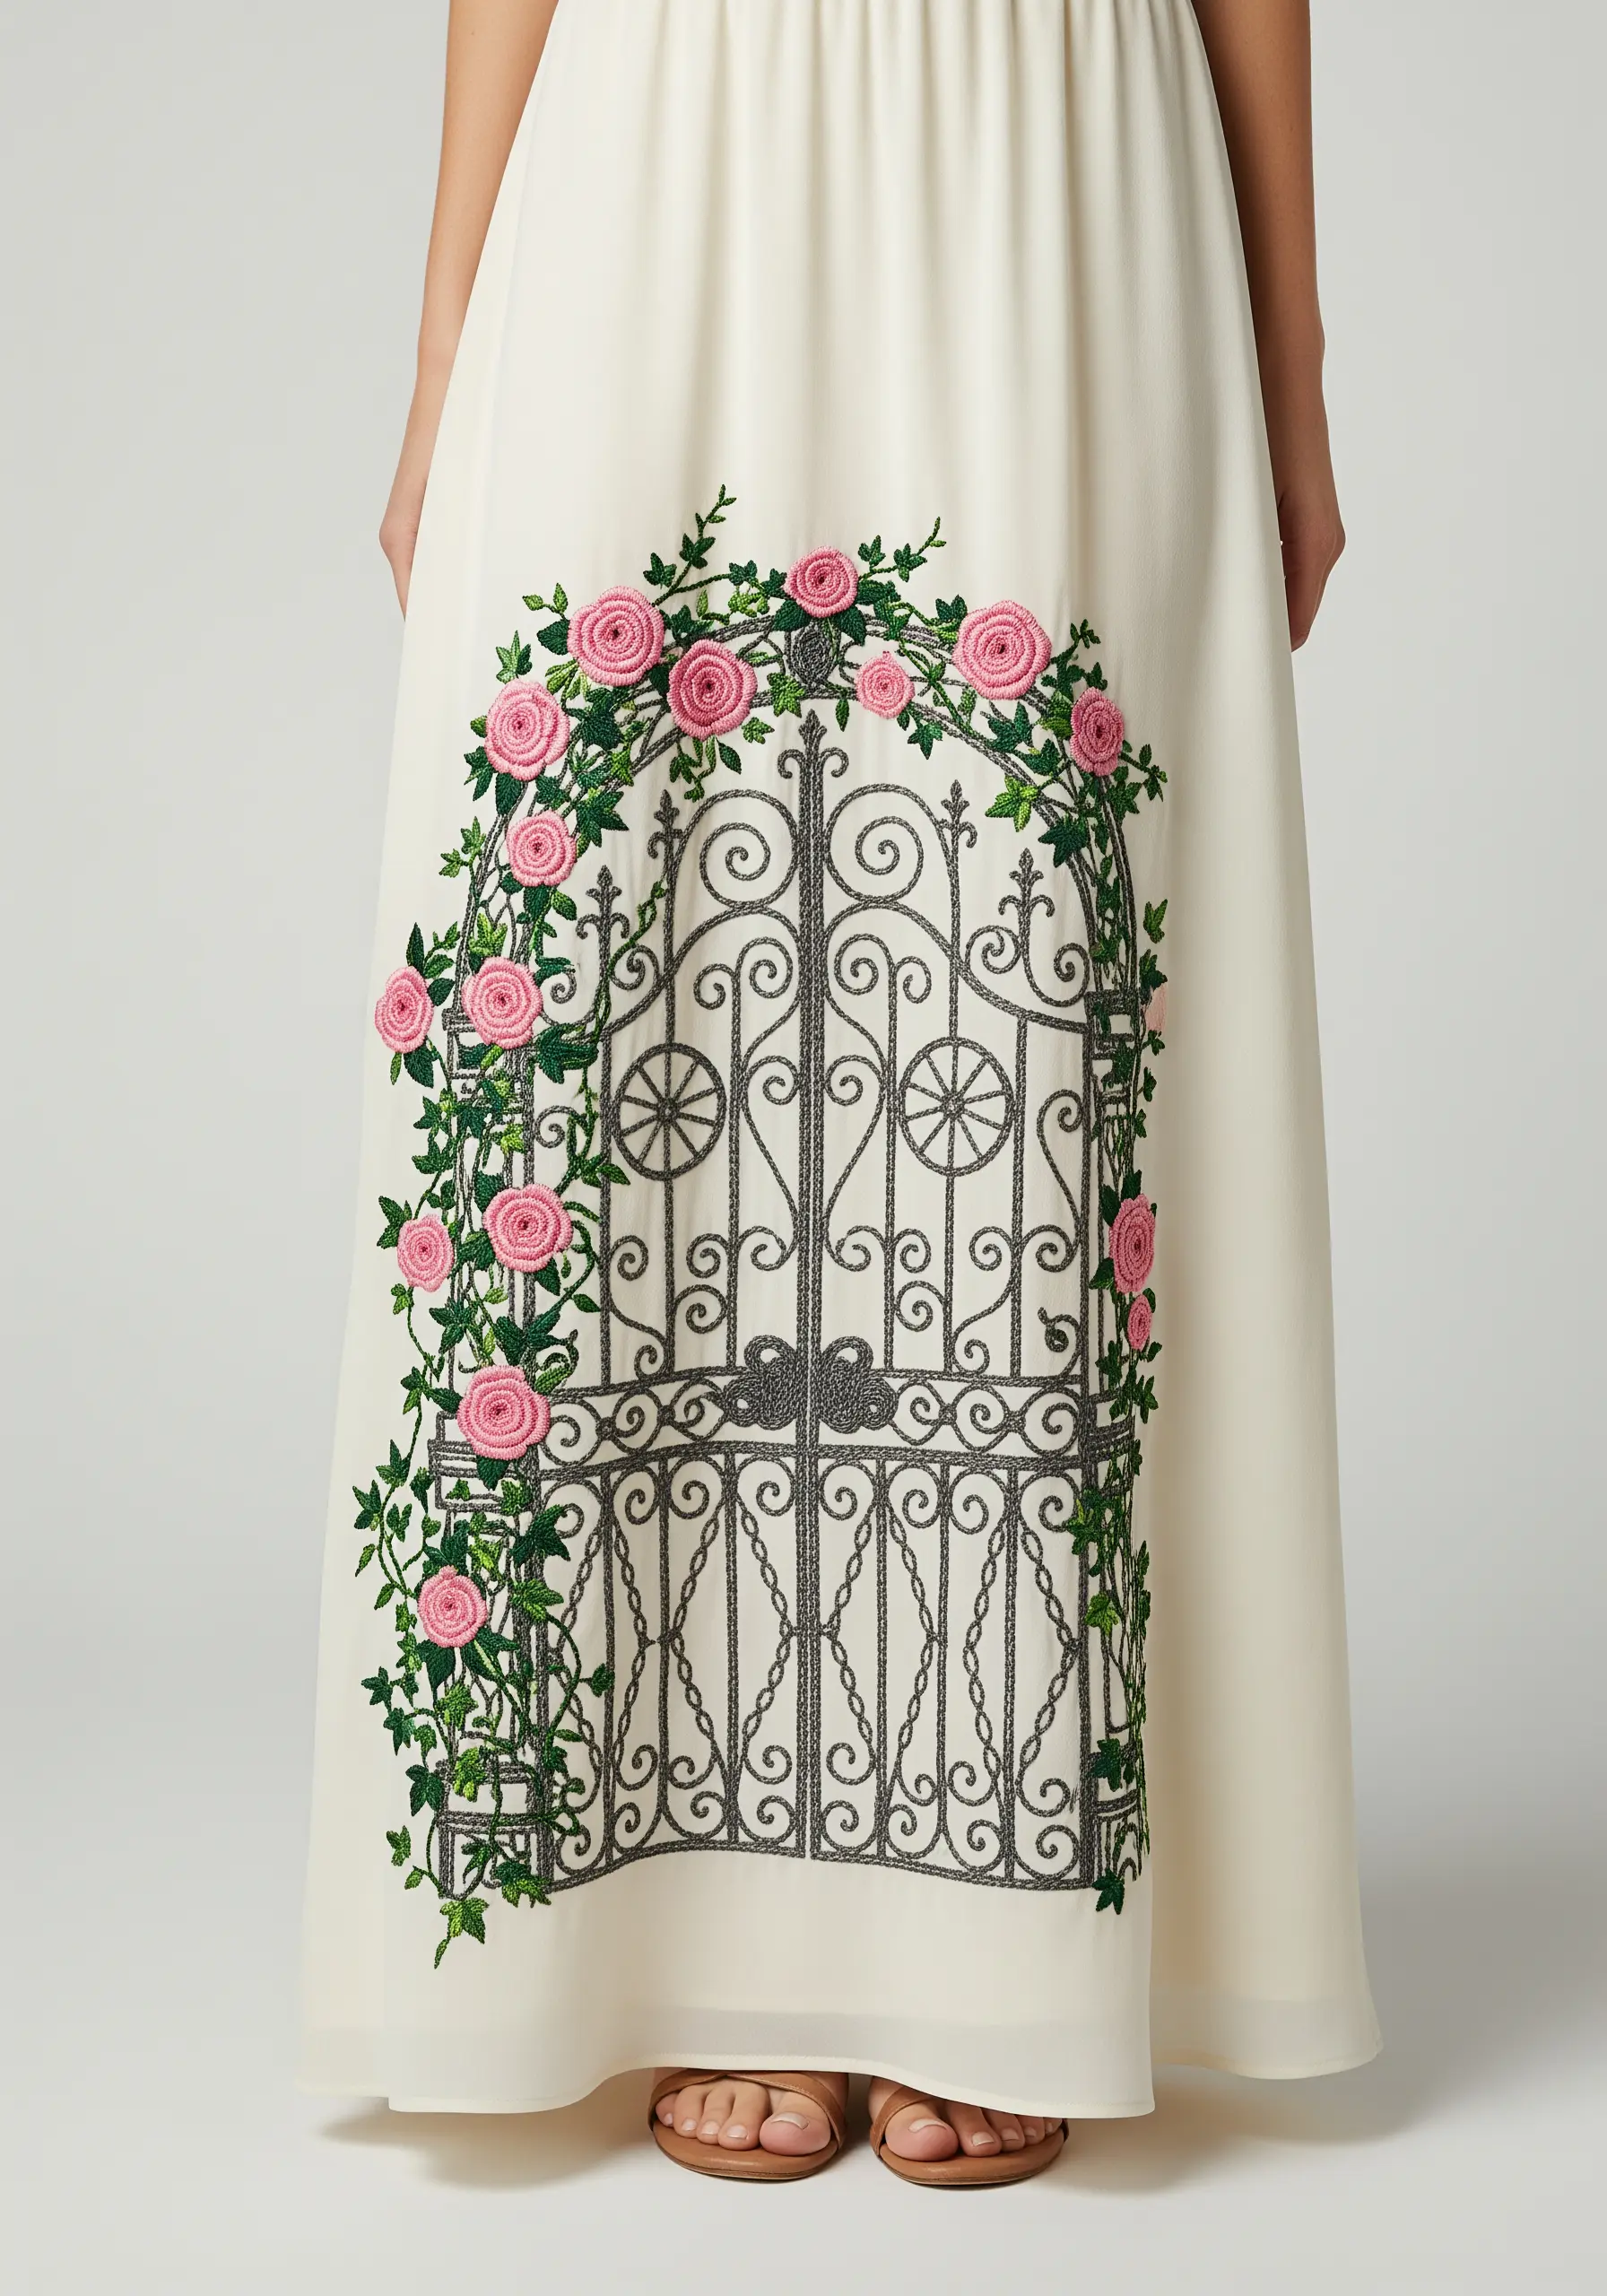
When stitching a large, detailed motif like an iron gate, use negative space to your advantage.
Embroider the gate using a dark grey or black thread in a simple backstitch or stem stitch to create the intricate linework.
By leaving the spaces within the gate unstitched, you allow the skirt’s base color to show through, creating depth and preventing the design from becoming heavy or stiff.
The soft, colorful roses woven through the gate provide a beautiful contrast to the hard, graphic lines.
12. Create a Scattered Pattern with Dainty Sprigs
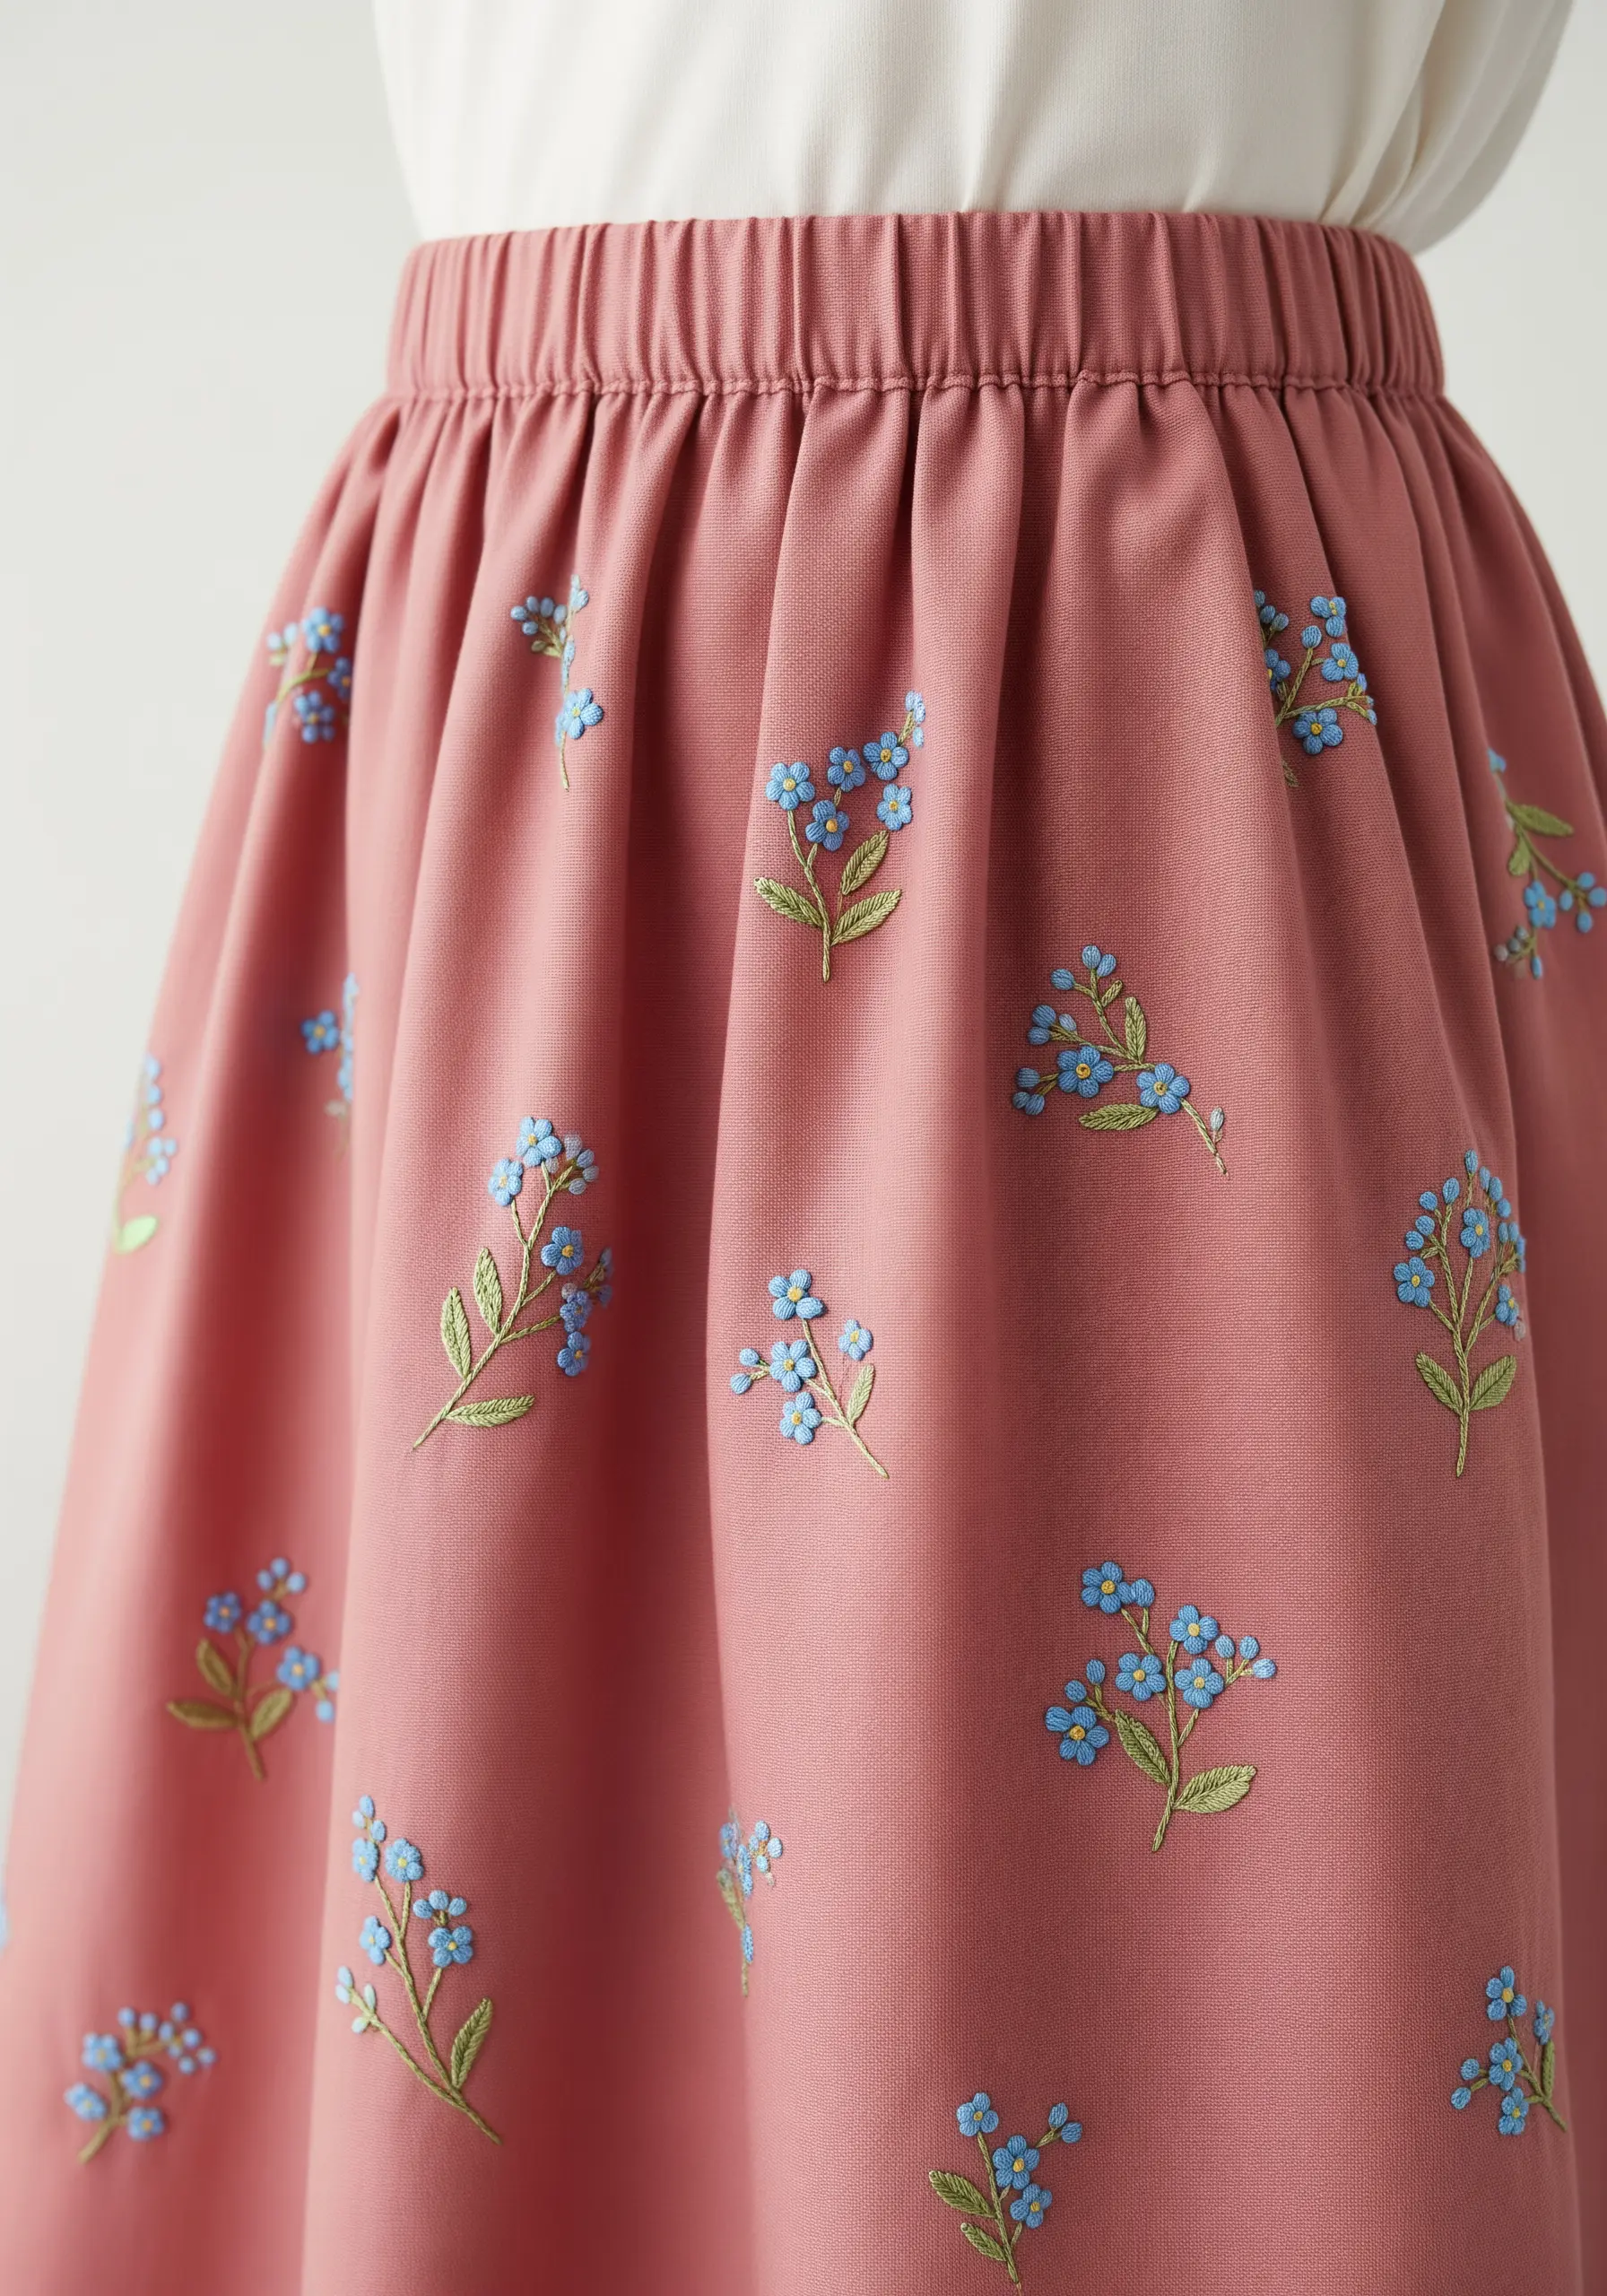
A scattered pattern of small motifs can feel more organic and less rigid than a structured border.
To achieve this look, stitch tiny sprigs of forget-me-nots at random intervals and angles across the fabric.
Use stem stitch for the stems and leaves, and place a cluster of five or six French knots for each blossom.
This simple, repetitive motif is quick to stitch and creates a charming, all-over pattern that adds interest without overwhelming the garment.
13. Master Realistic Feathers with Directional Stitching
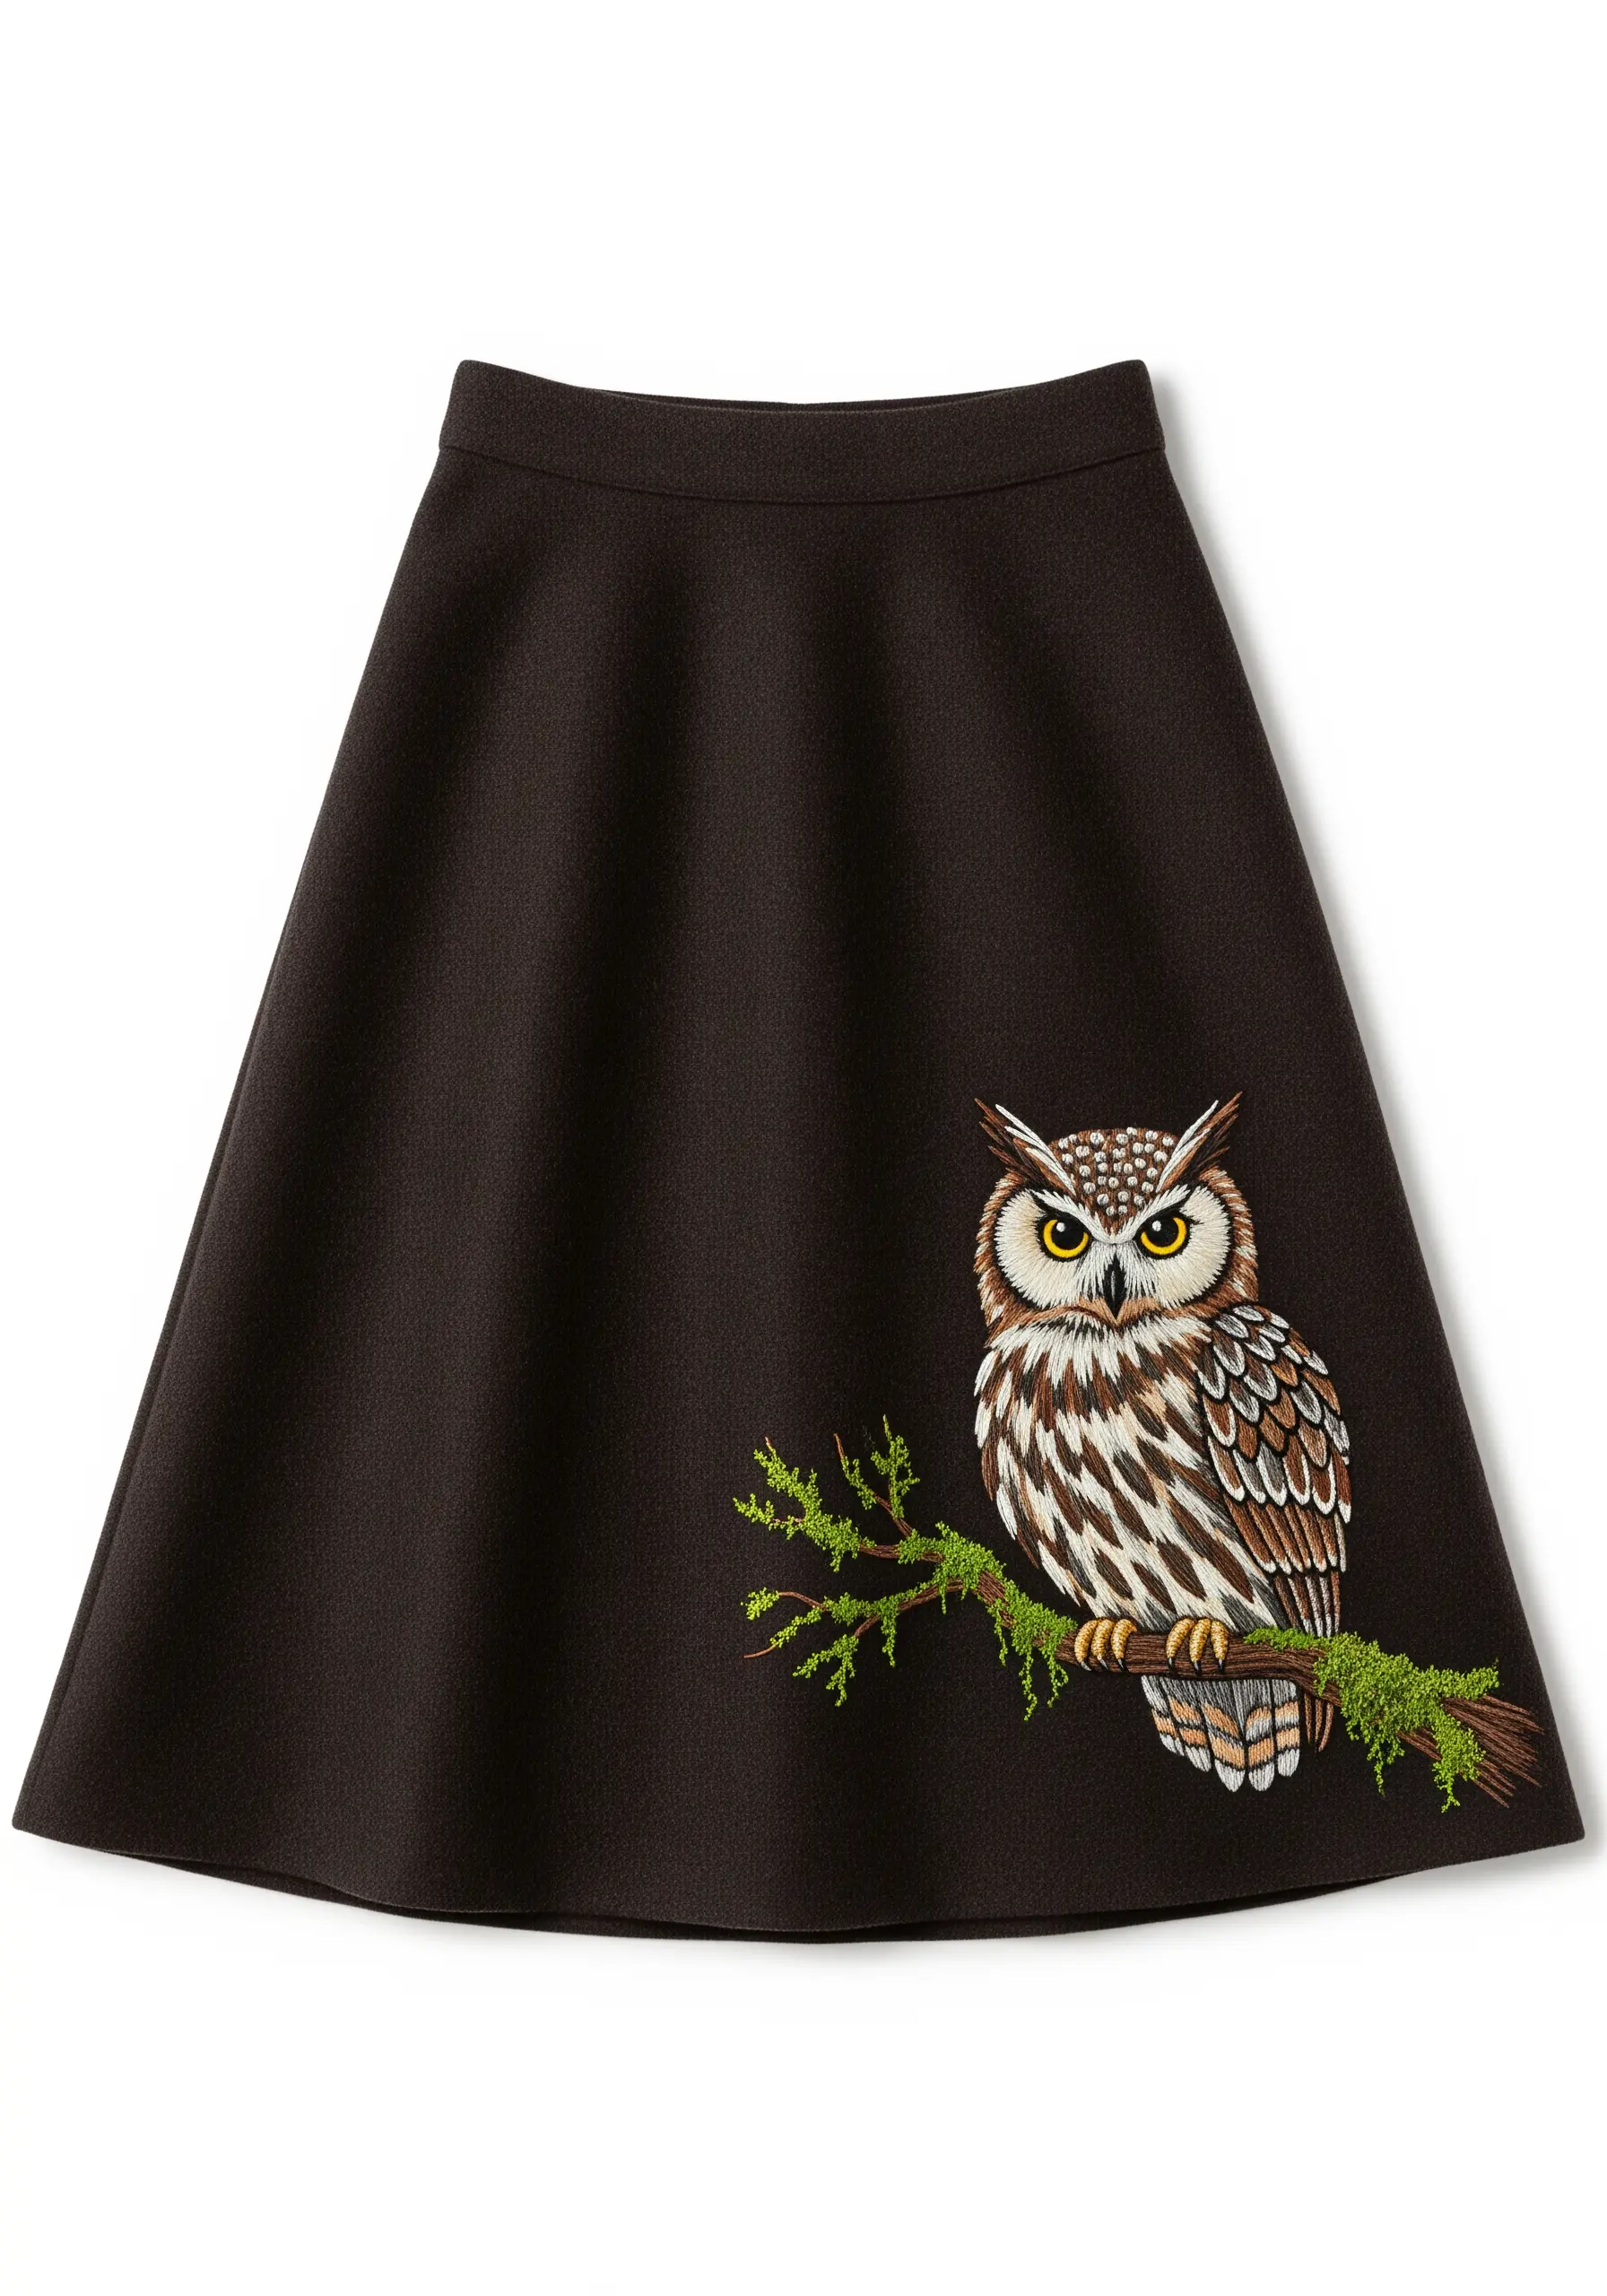
To create a realistic owl, pay close attention to the direction of your stitches to mimic the flow of feathers.
Use long-and-short stitch for the body, angling your stitches downward and outward from the center, just as feathers would lie.
Incorporate multiple shades of brown, cream, and grey, blending them subtly to create depth and shadow.
For the fine details around the eyes and beak, switch to tiny straight stitches to maintain sharpness and definition.
14. Capture the Delicacy of Pressed Botanicals
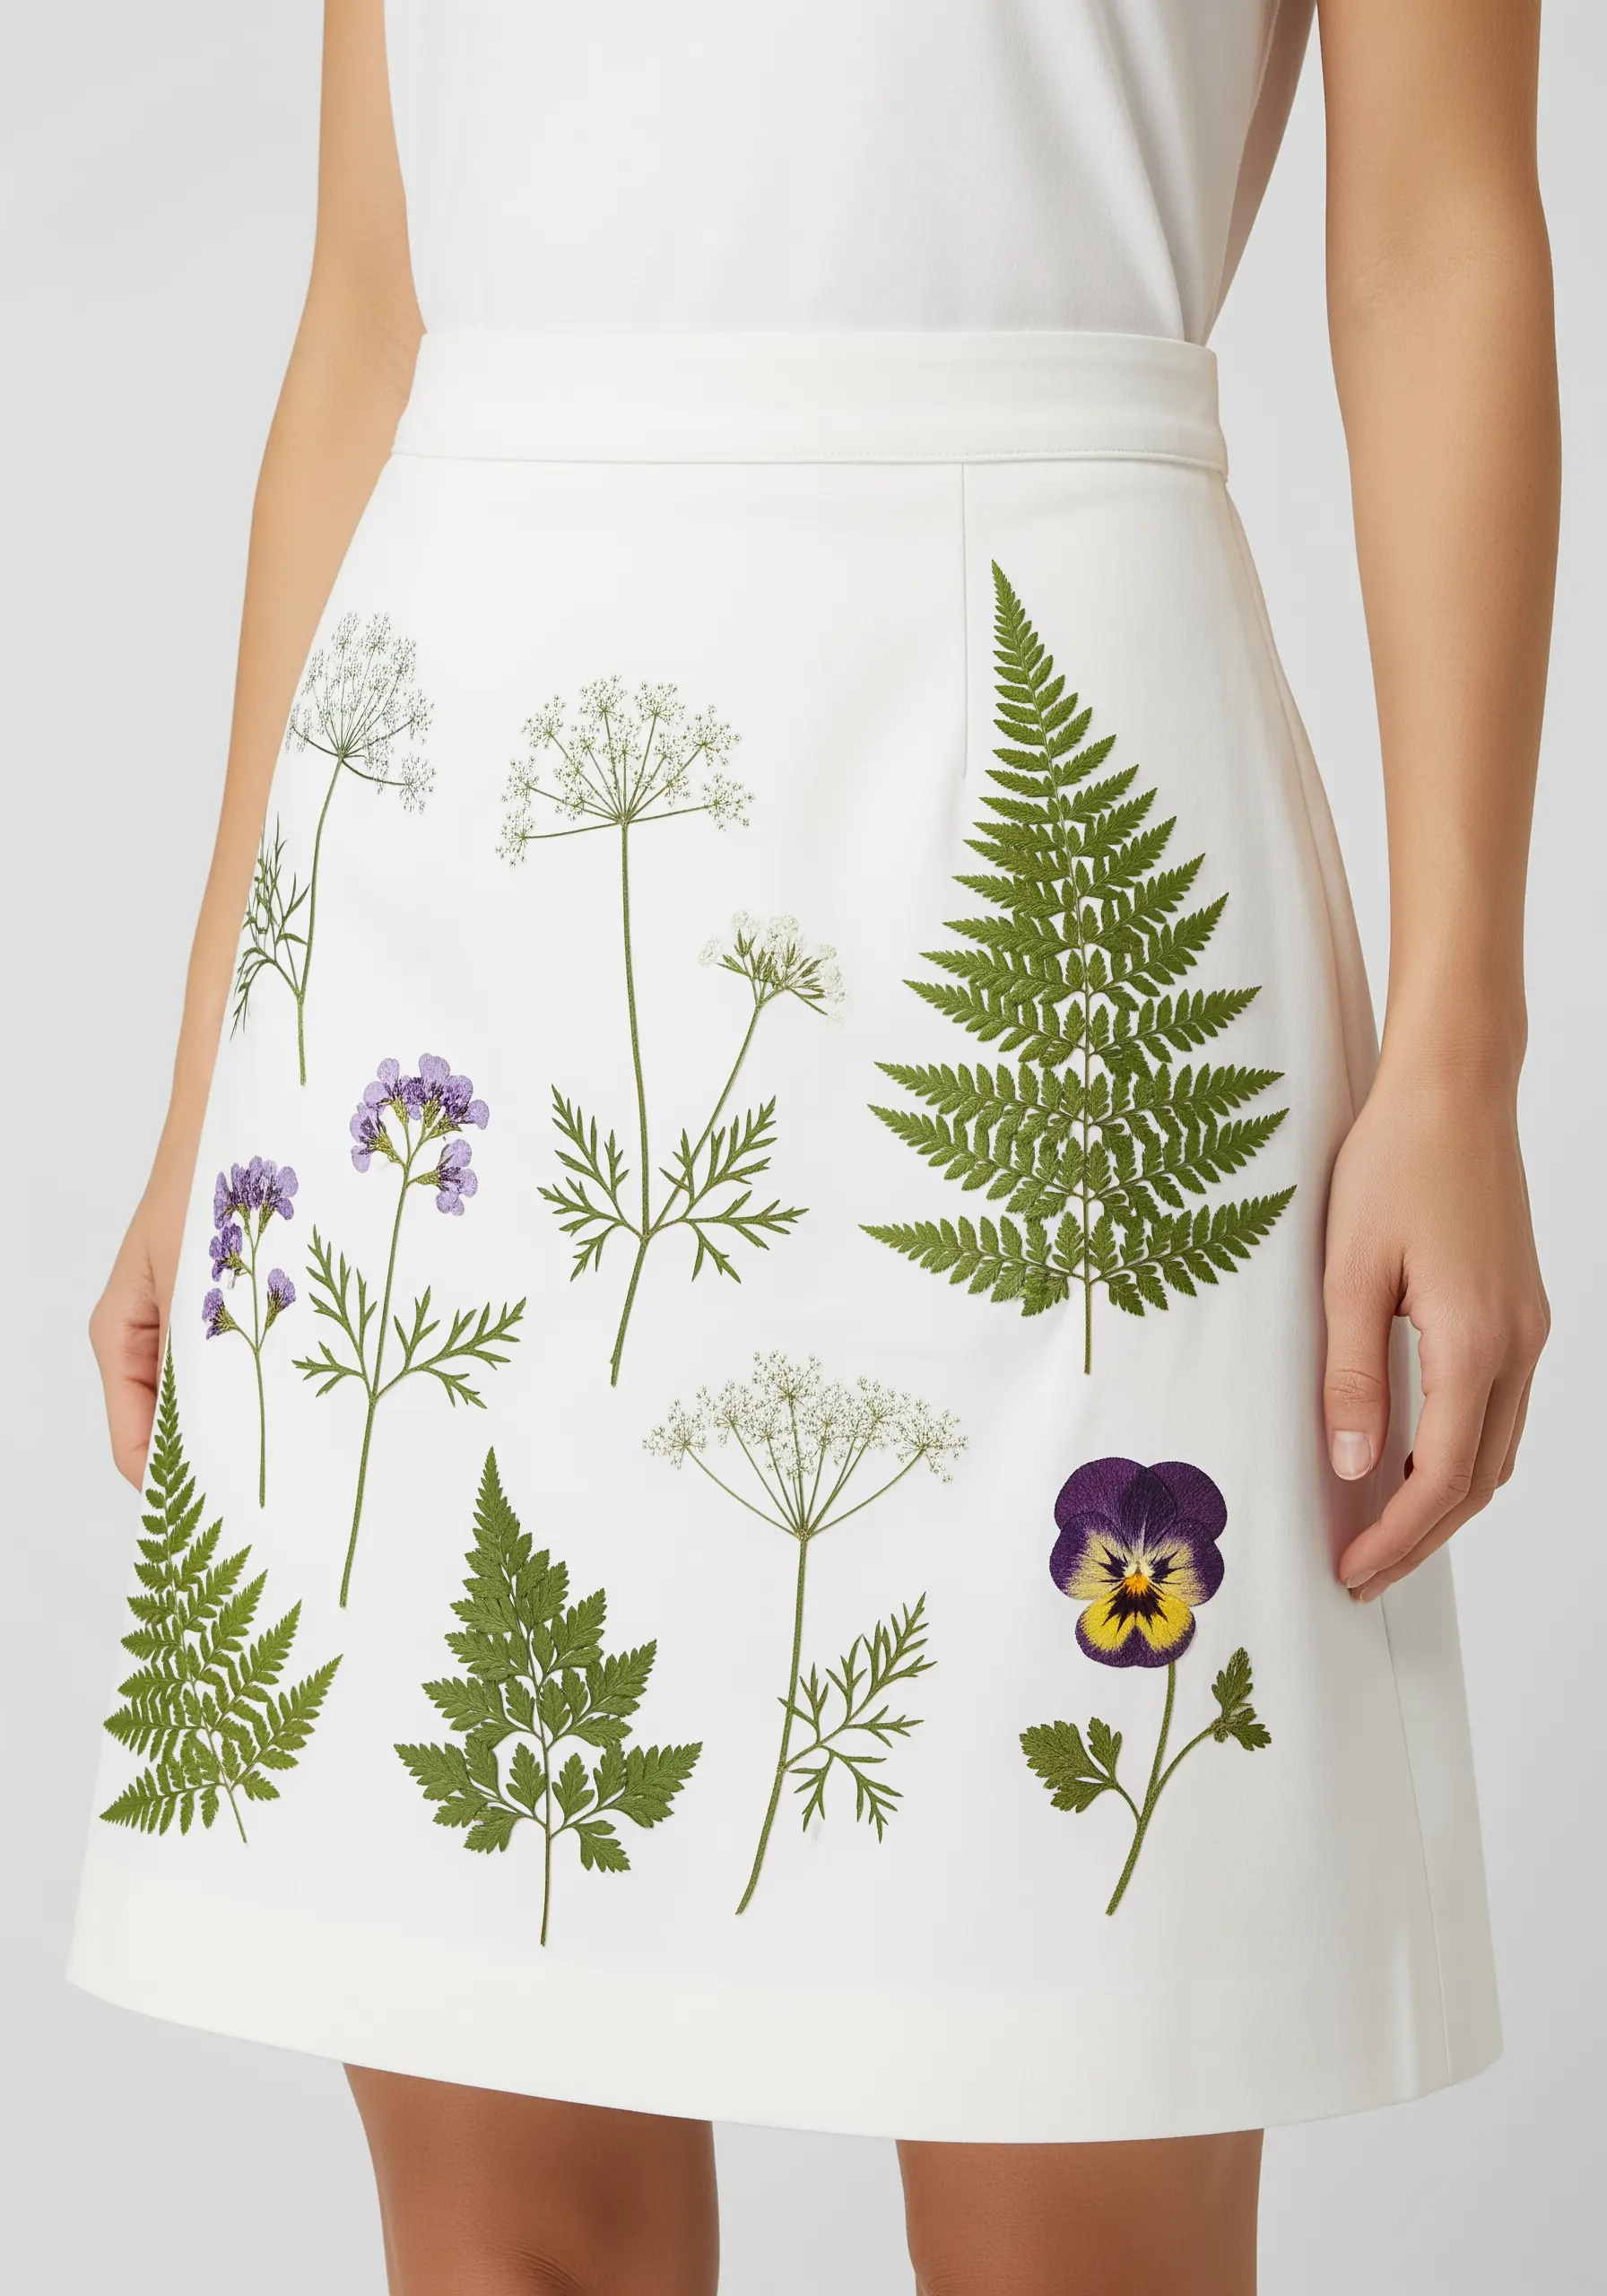
Recreate the look of pressed flower designs by using the finest stitches and threads.
Use a single strand of floss for all elements to maintain a delicate, almost-transparent quality.
Outline the fern leaves with a tiny split stitch, then fill them with sparse, open fishbone stitches to suggest texture without adding bulk.
For the Queen Anne’s lace, use clusters of tiny French knots. The key is to embrace imperfection and asymmetry, just as you would find in nature.
15. Add Tactile Dimension with Beaded Berries
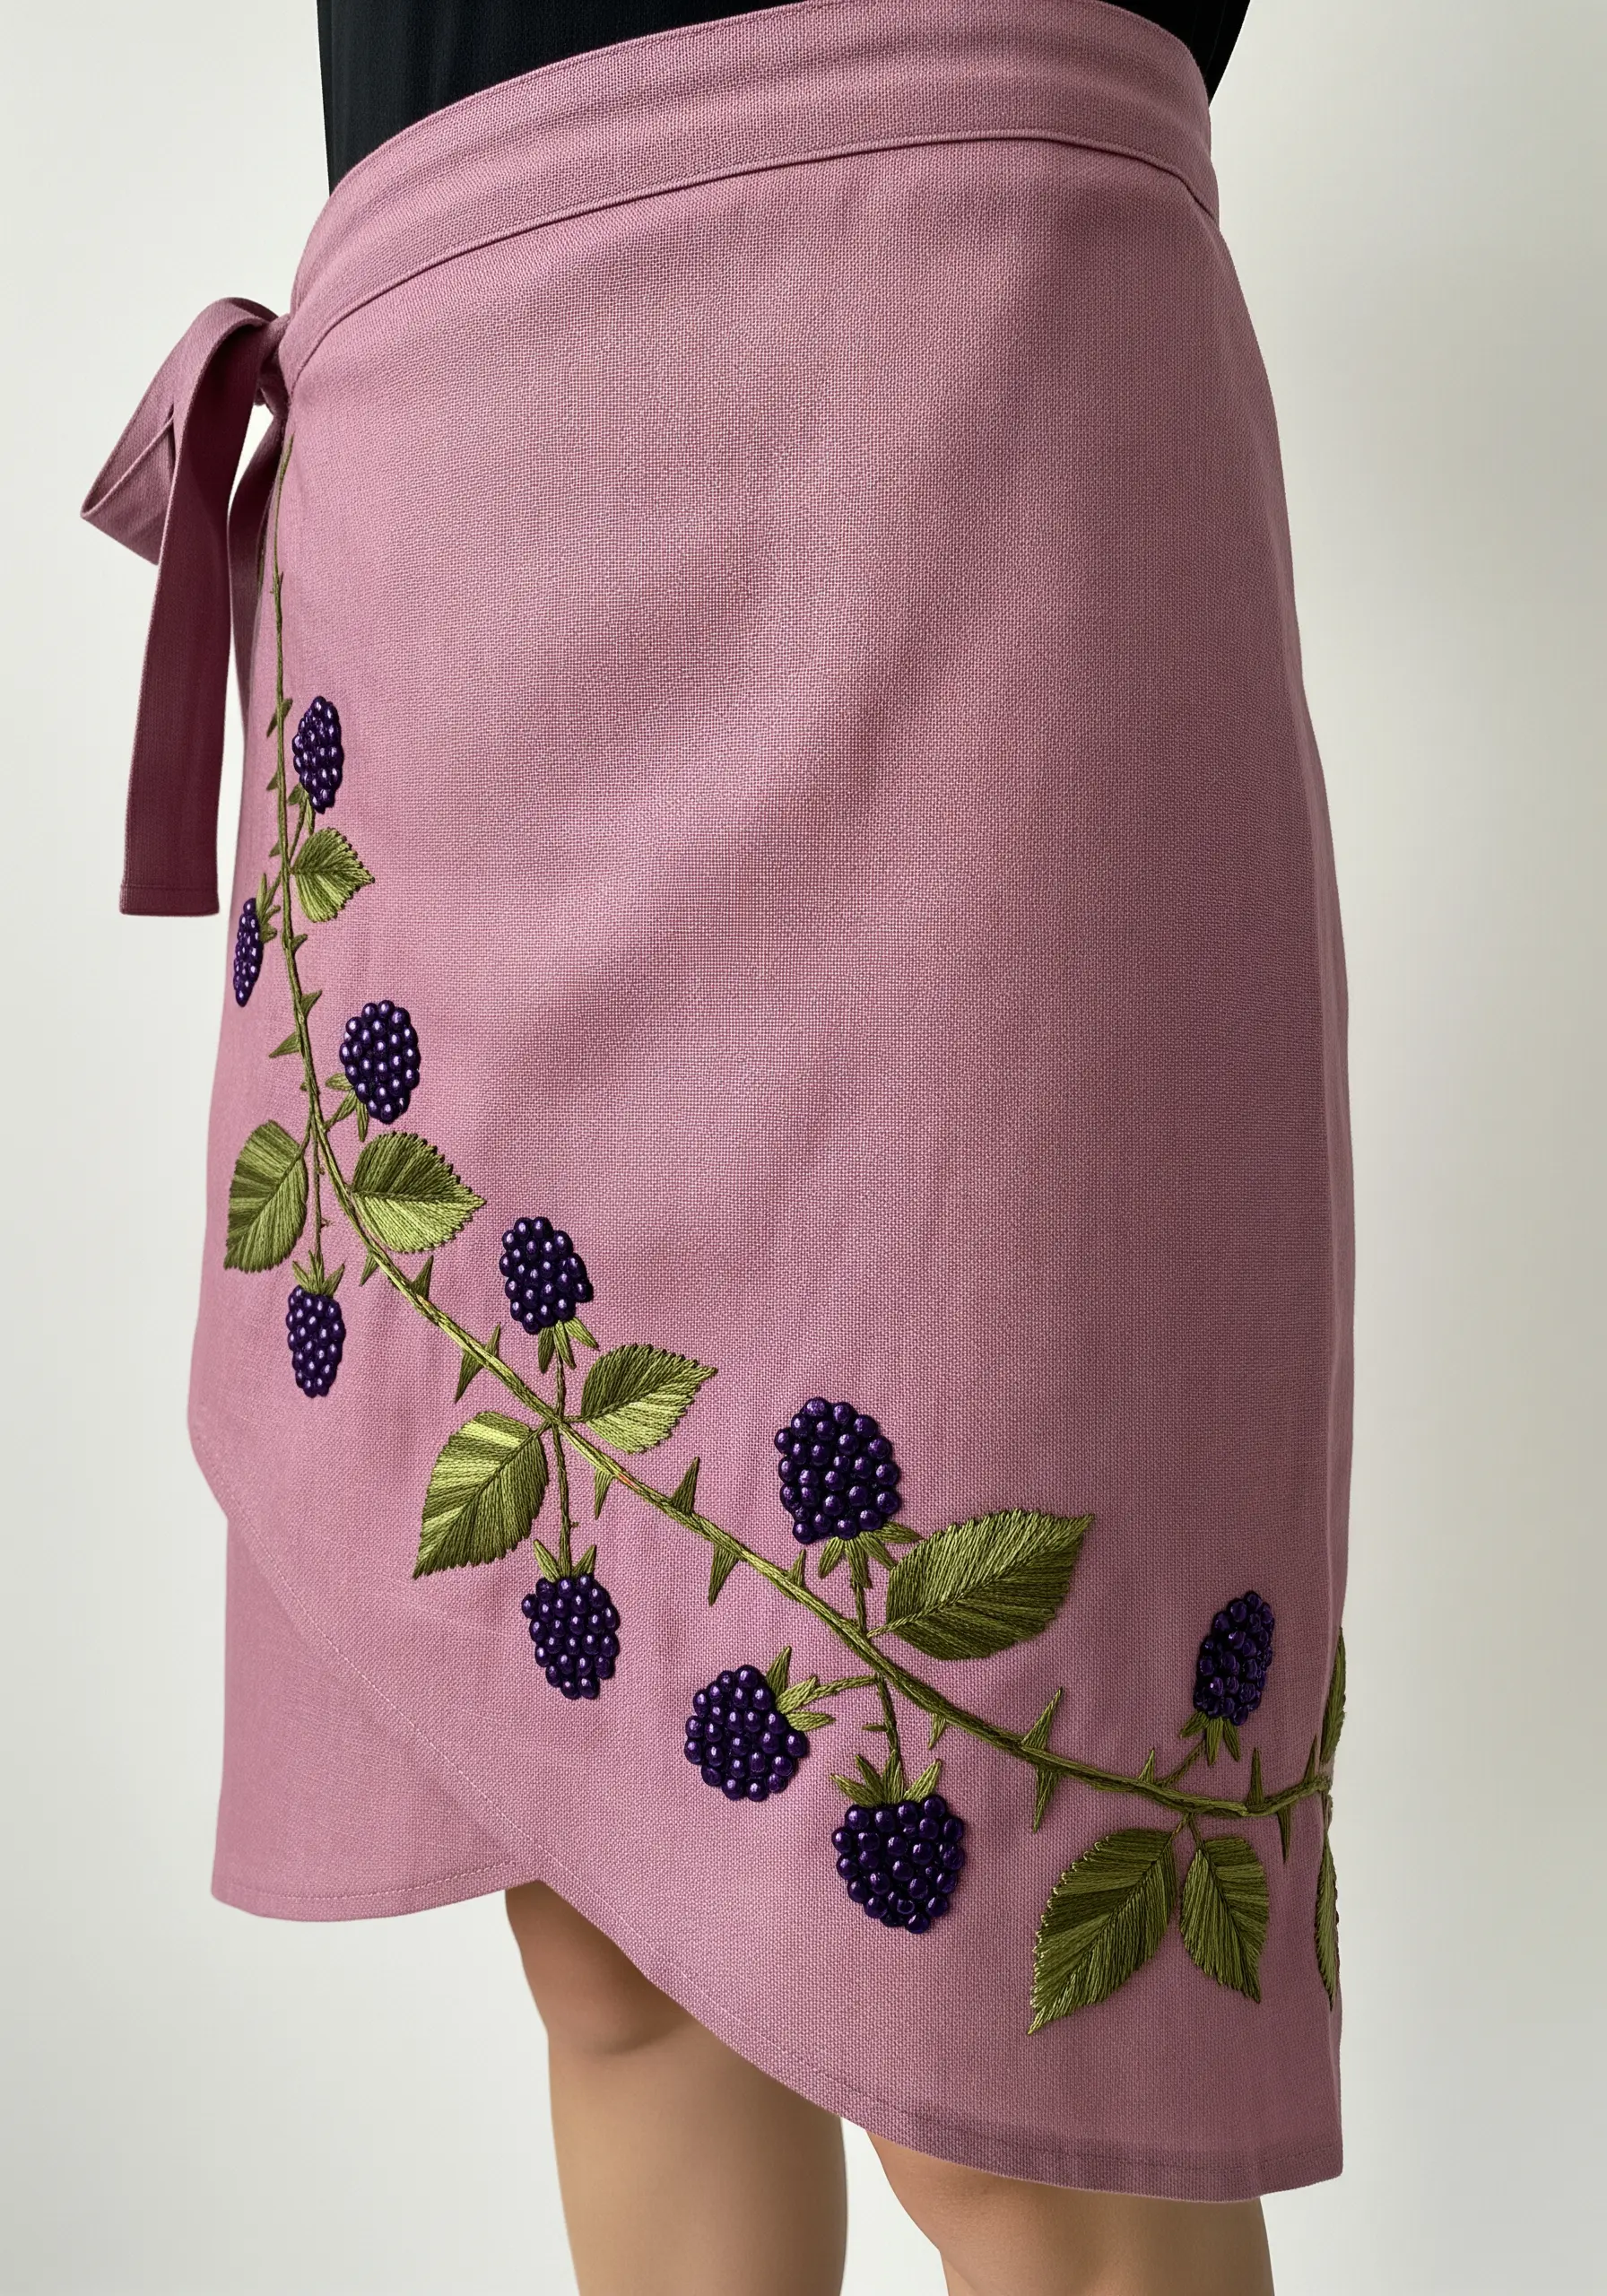
Combine embroidery with beading to create stunning, multi-dimensional effects.
Stitch the blackberry vines and leaves first, using satin stitch for the leaves to give them a nice sheen.
For the berries, instead of using French knots, sew on clusters of small, dark purple or black seed beads.
This technique not only adds a beautiful, light-catching texture but also gives the berries a plump, realistic shape that stands out from the flat fabric.
16. Create a Playful Garden Scene with Appliqué
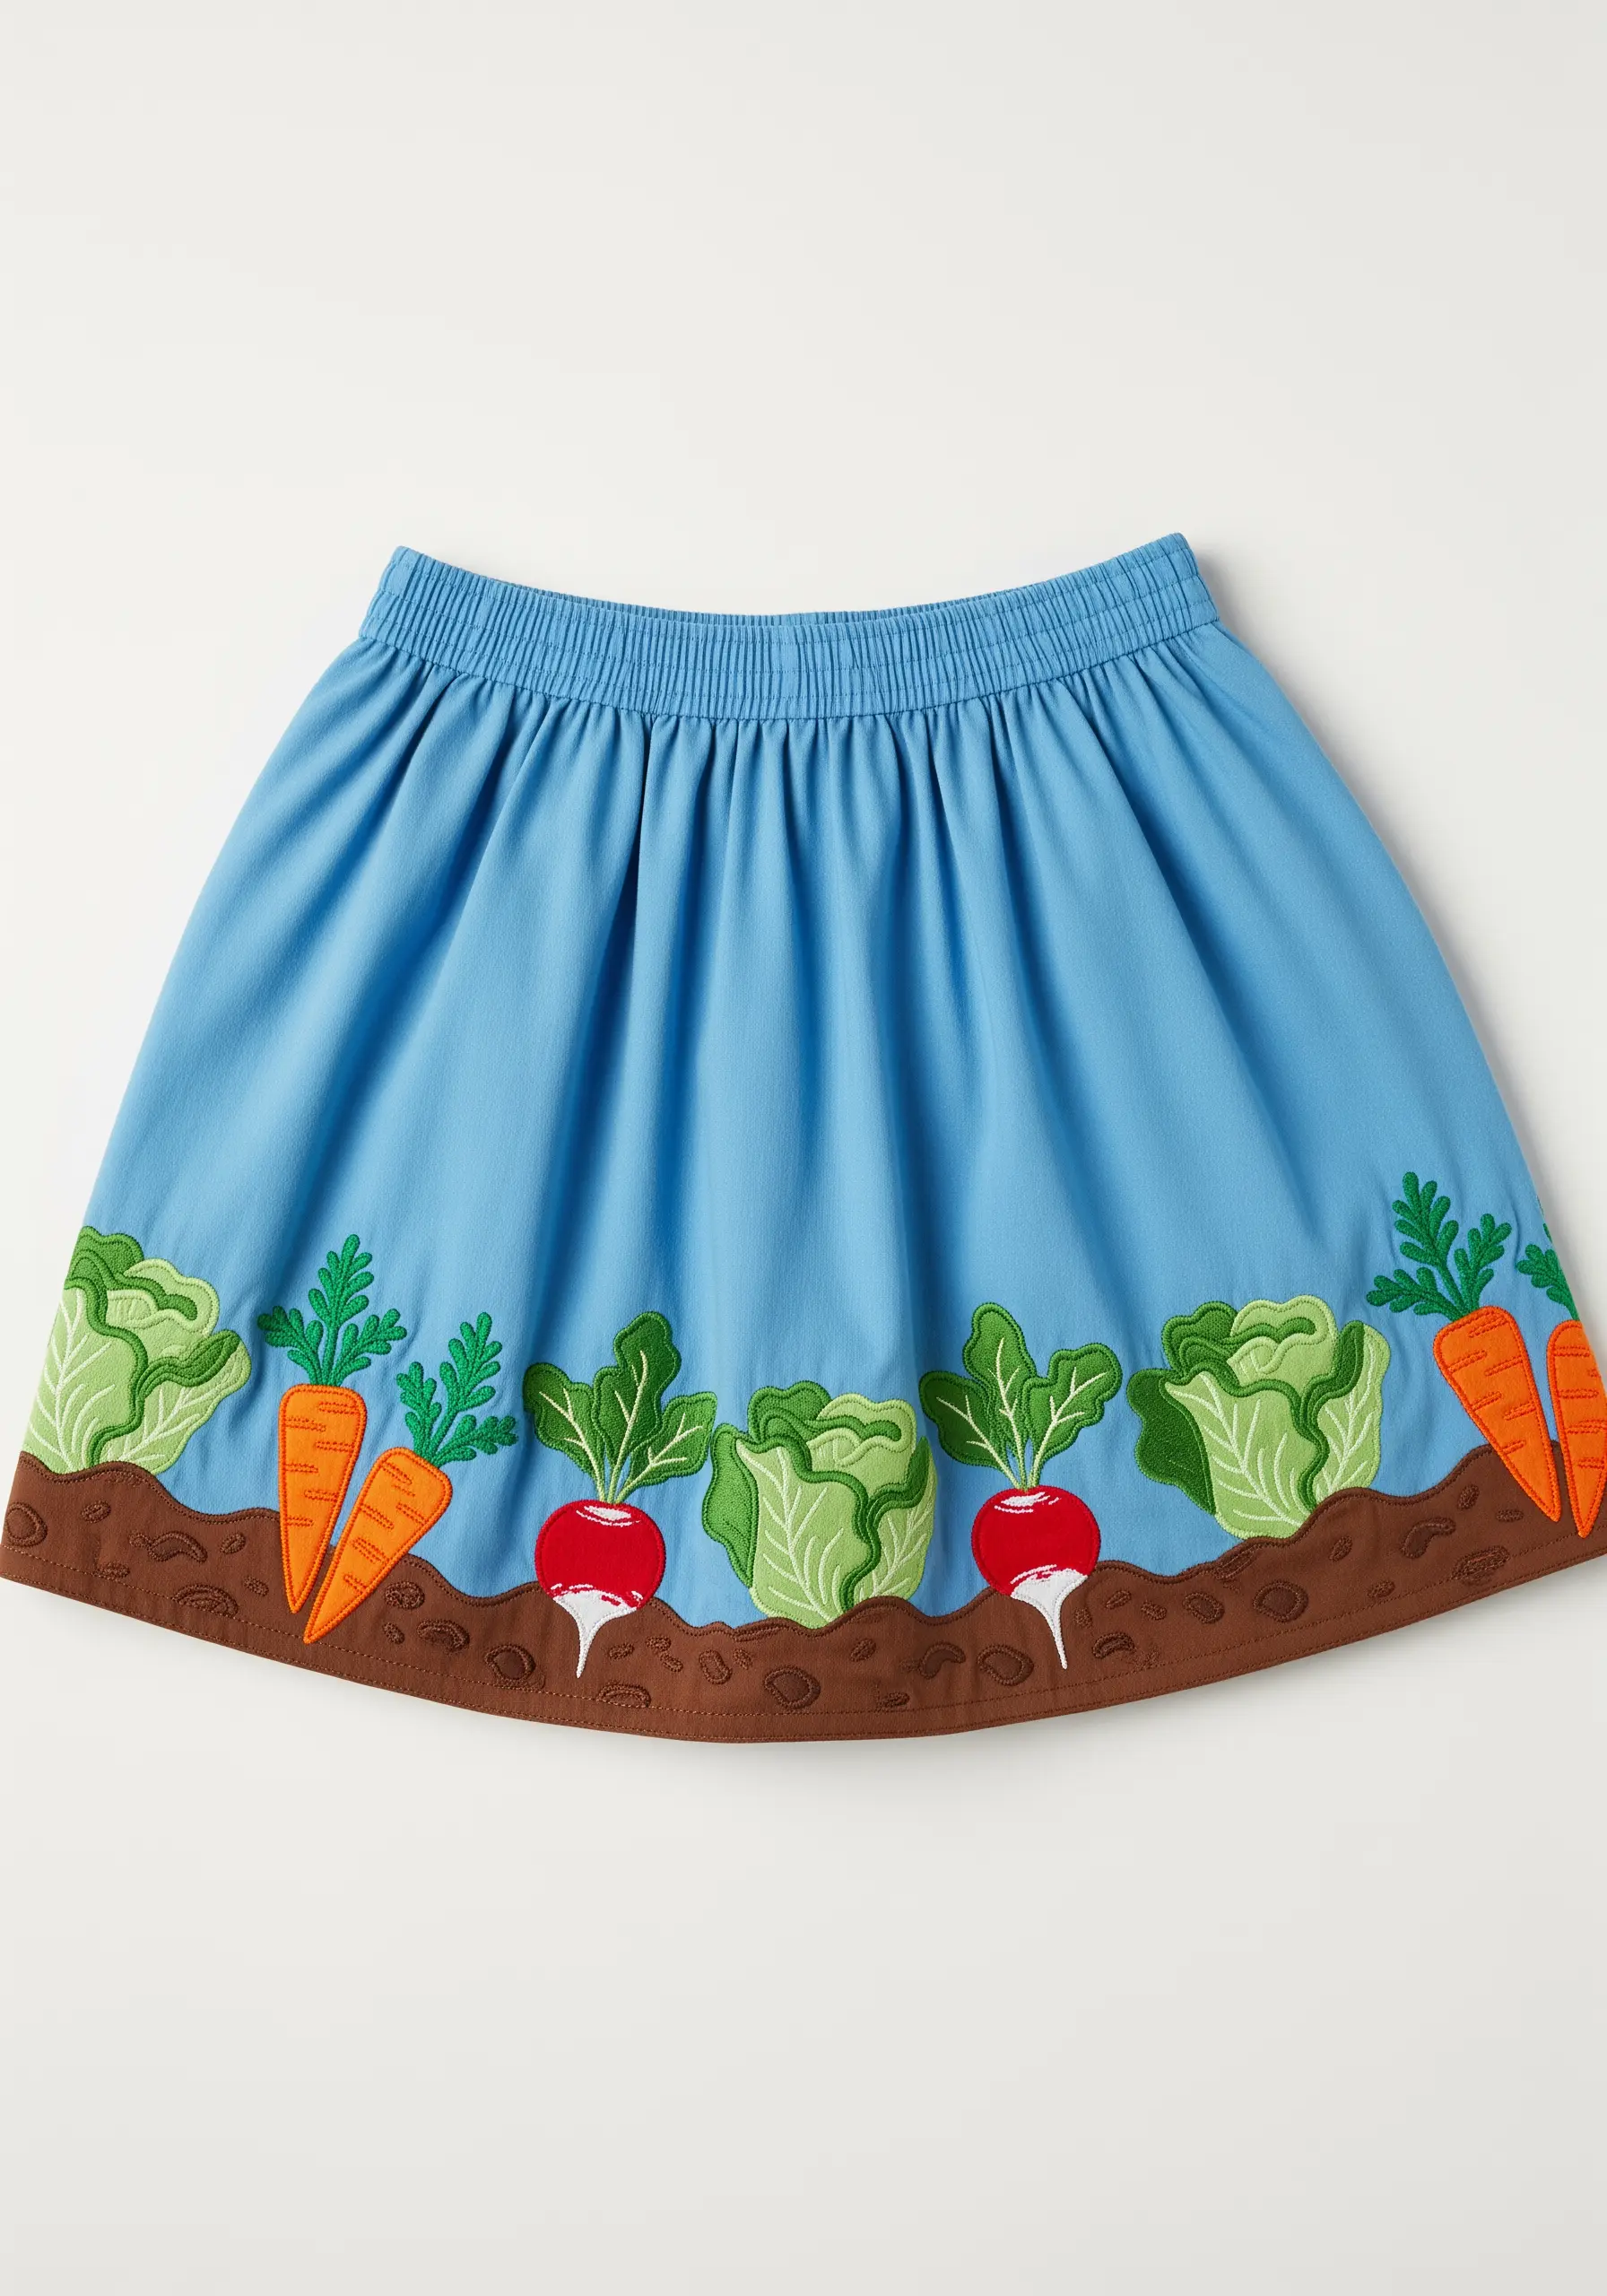
For a bold, graphic look, use fabric appliqué as the base for your embroidered details.
Cut the shapes of the soil, lettuce, and carrots from different colored fabrics and secure them to the skirt with an iron-on adhesive.
Stitch around the edges of each shape with a satin stitch or blanket stitch to secure them permanently and give them a clean, finished look.
Finally, add small embroidered details like the lines on the carrots or the texture in the soil to bring the scene to life.
17. Suggest Water’s Movement with Variegated Thread
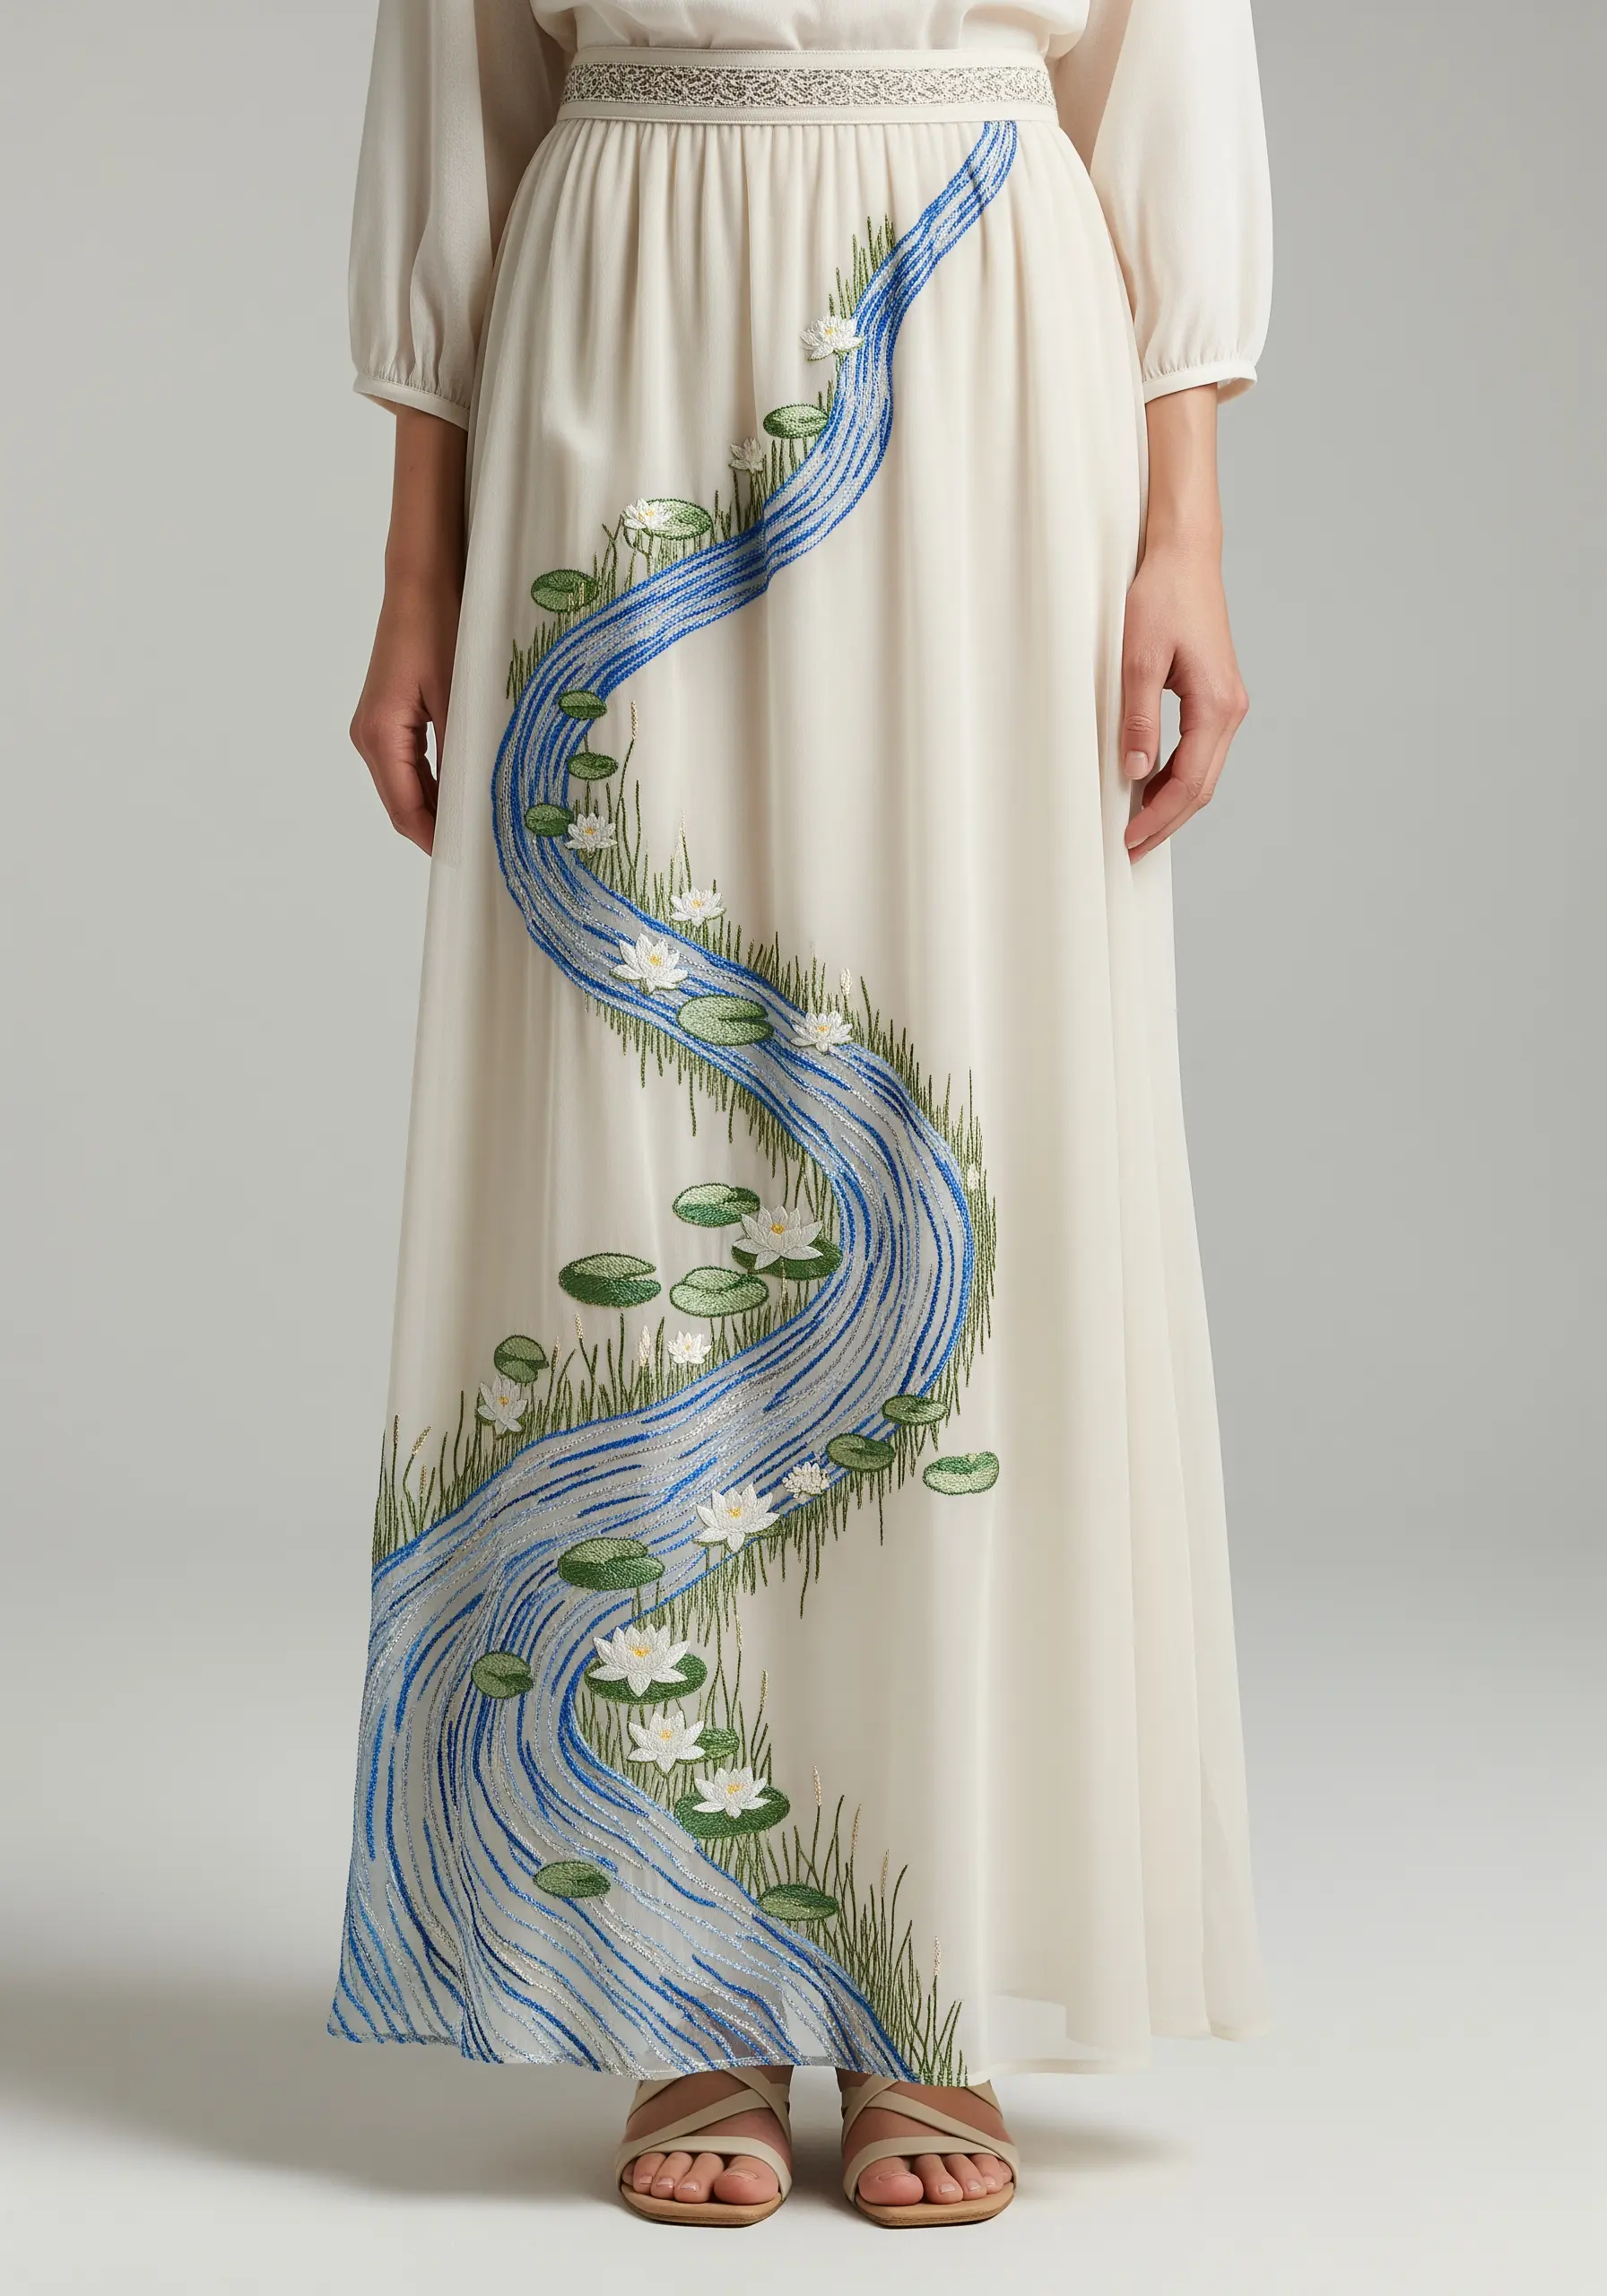
To create the illusion of flowing water without complex shading, use variegated blue thread.
As you fill the river shape with long, flowing straight stitches or satin stitches, the thread will naturally shift in color from light to dark blue.
This subtle color variation mimics the way light reflects off moving water, creating highlights and shadows with minimal effort.
Add a few metallic silver threads running through the water to suggest extra sparkle and motion.
18. Mimic Cross-Stitch for a Nostalgic Feel
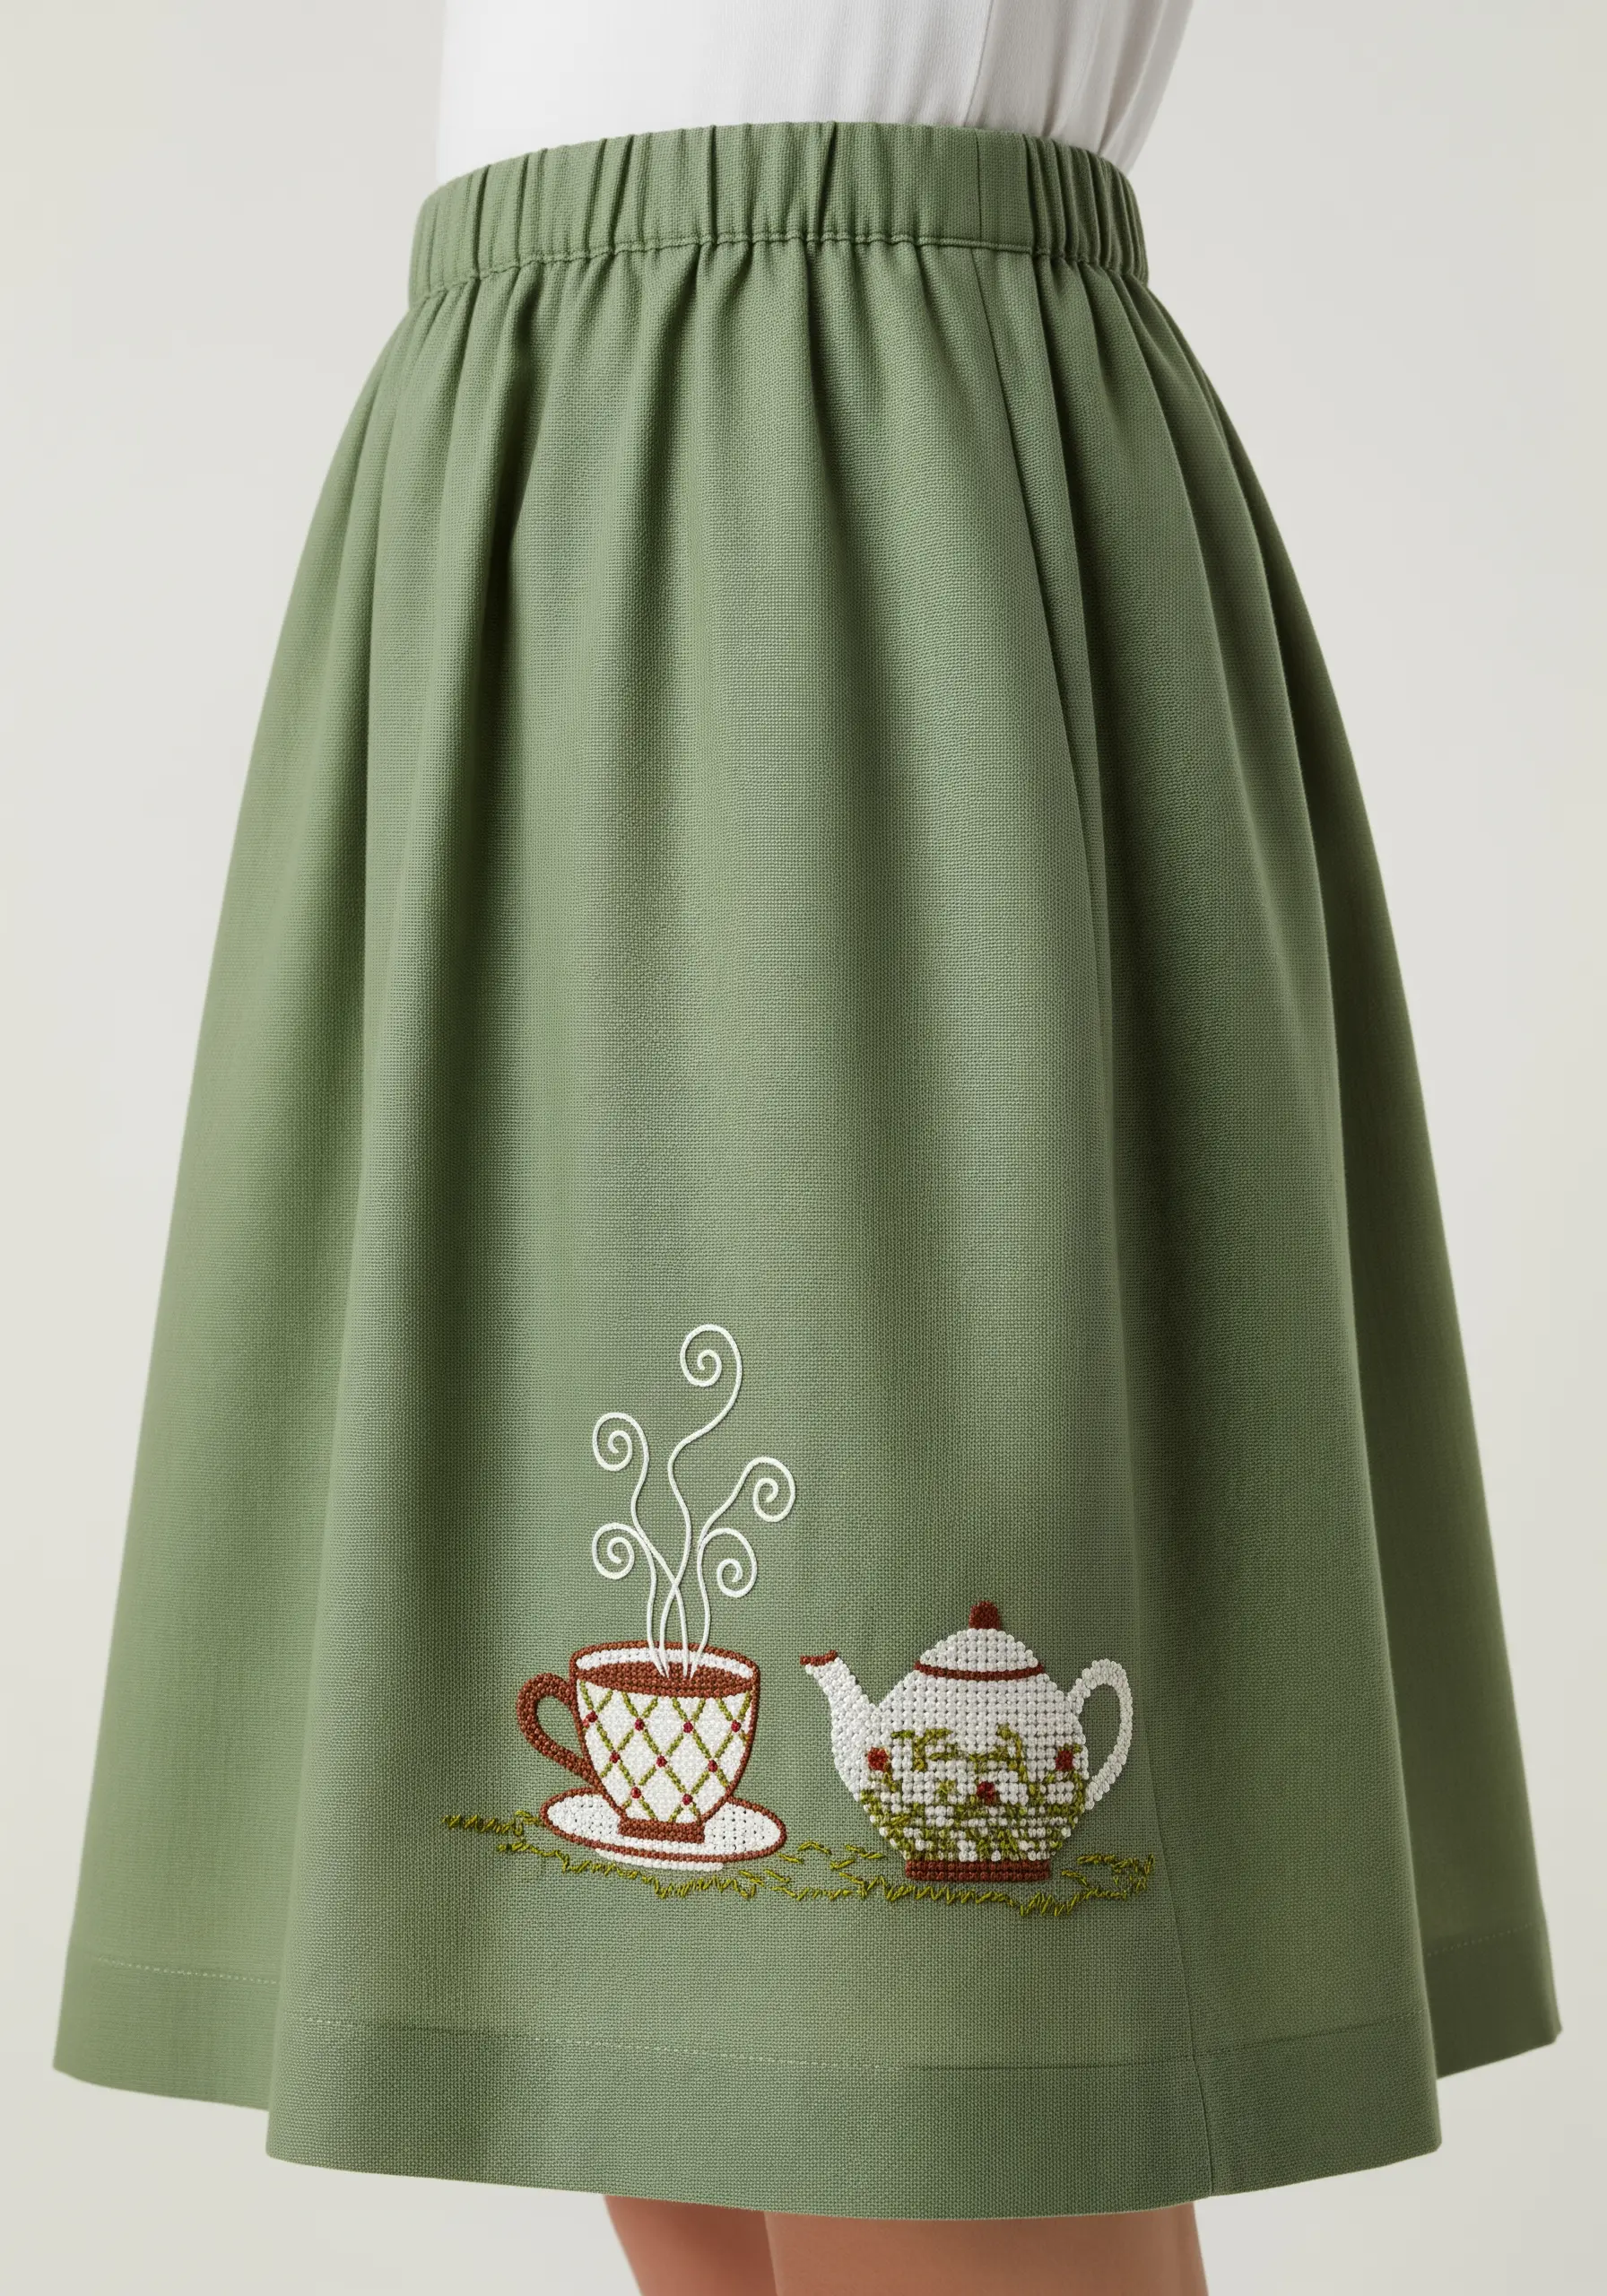
Evoke a sense of nostalgia by incorporating the look of cross-stitch into your surface embroidery.
Instead of true cross-stitch, you can use tiny straight stitches to form small ‘X’ shapes on the fabric, which is much faster and more flexible for curved designs.
Use this technique to create a gridded, pixelated effect for patterns on the teacup and teapot.
Combine this with delicate surface stitches like backstitch for the outlines and steam swirls to create a charming mix of textures.
19. Achieve Realistic Petals with Color Blending
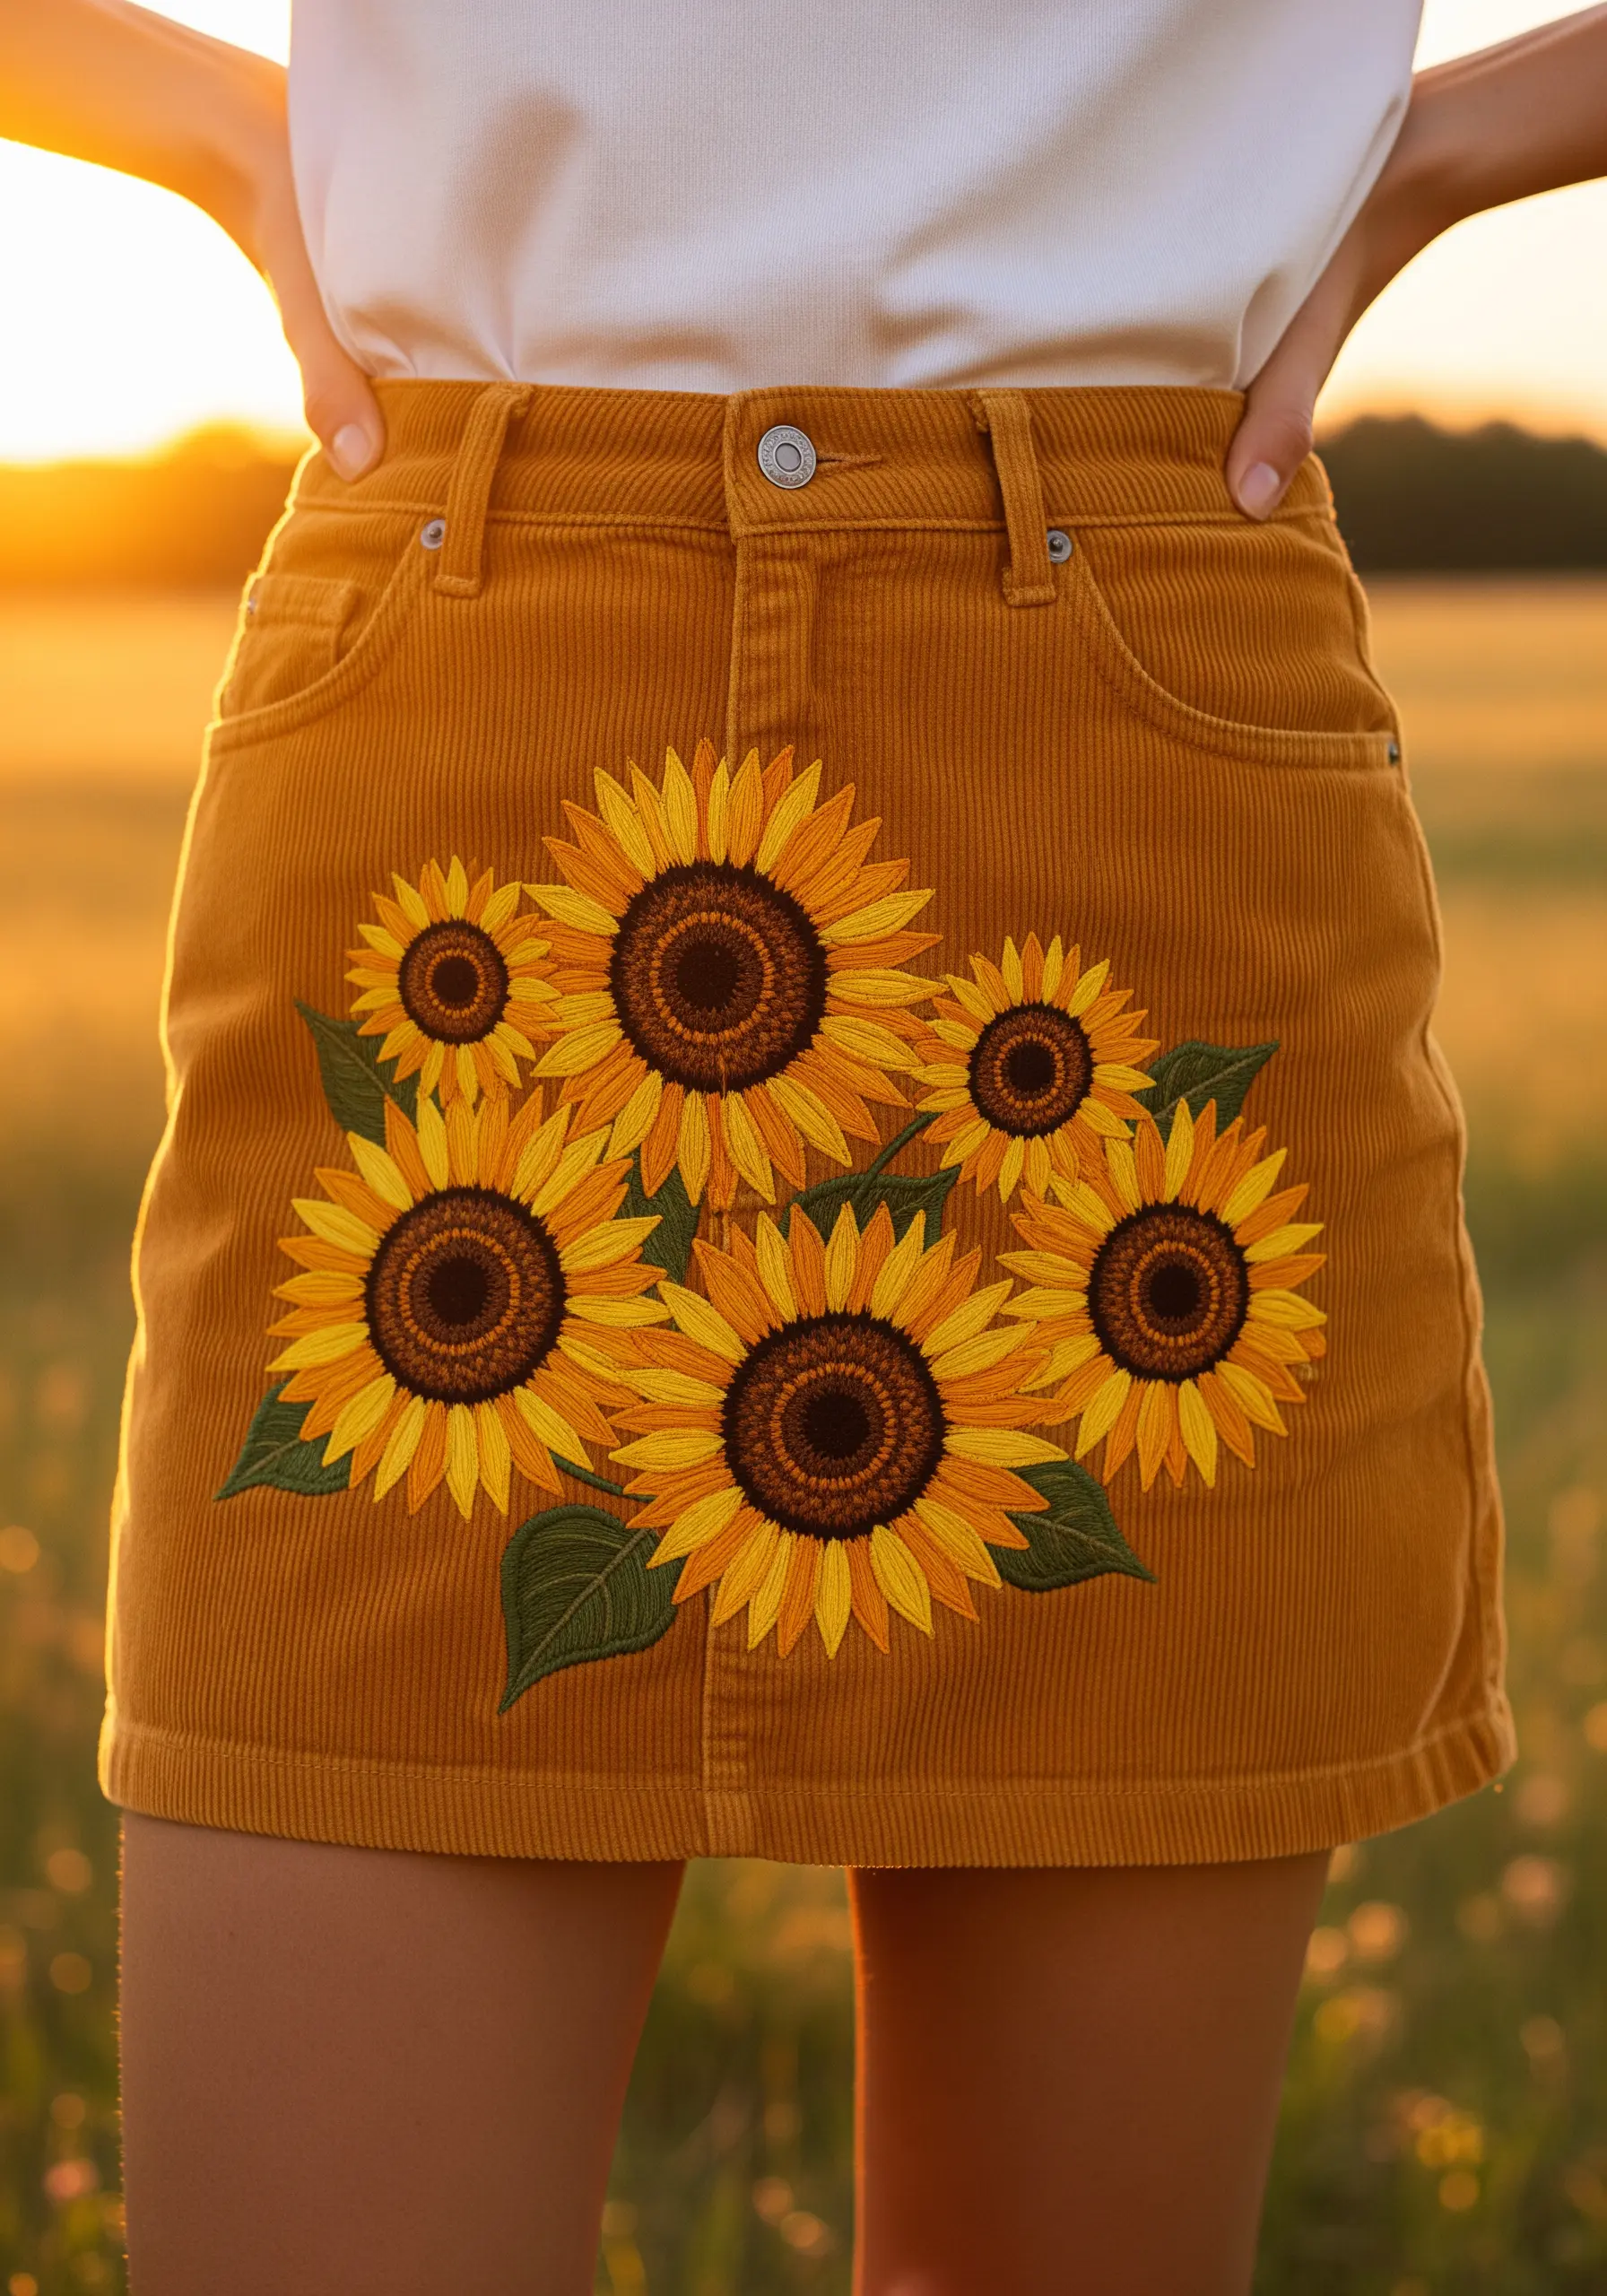
Make your sunflowers look vibrant and realistic by carefully blending multiple shades of yellow and orange.
Use long-and-short stitch to fill each petal, starting with the darkest shade at the base and gradually transitioning to the lightest shade at the tip.
Don’t be afraid to use three or even four distinct colors per petal. The subtle gradient is what creates a convincing, sun-kissed look.
For the center of the flower, a dense fill of French knots in dark brown and black provides the perfect seed-like texture.
20. Define Feather Layers with Strategic Outlines
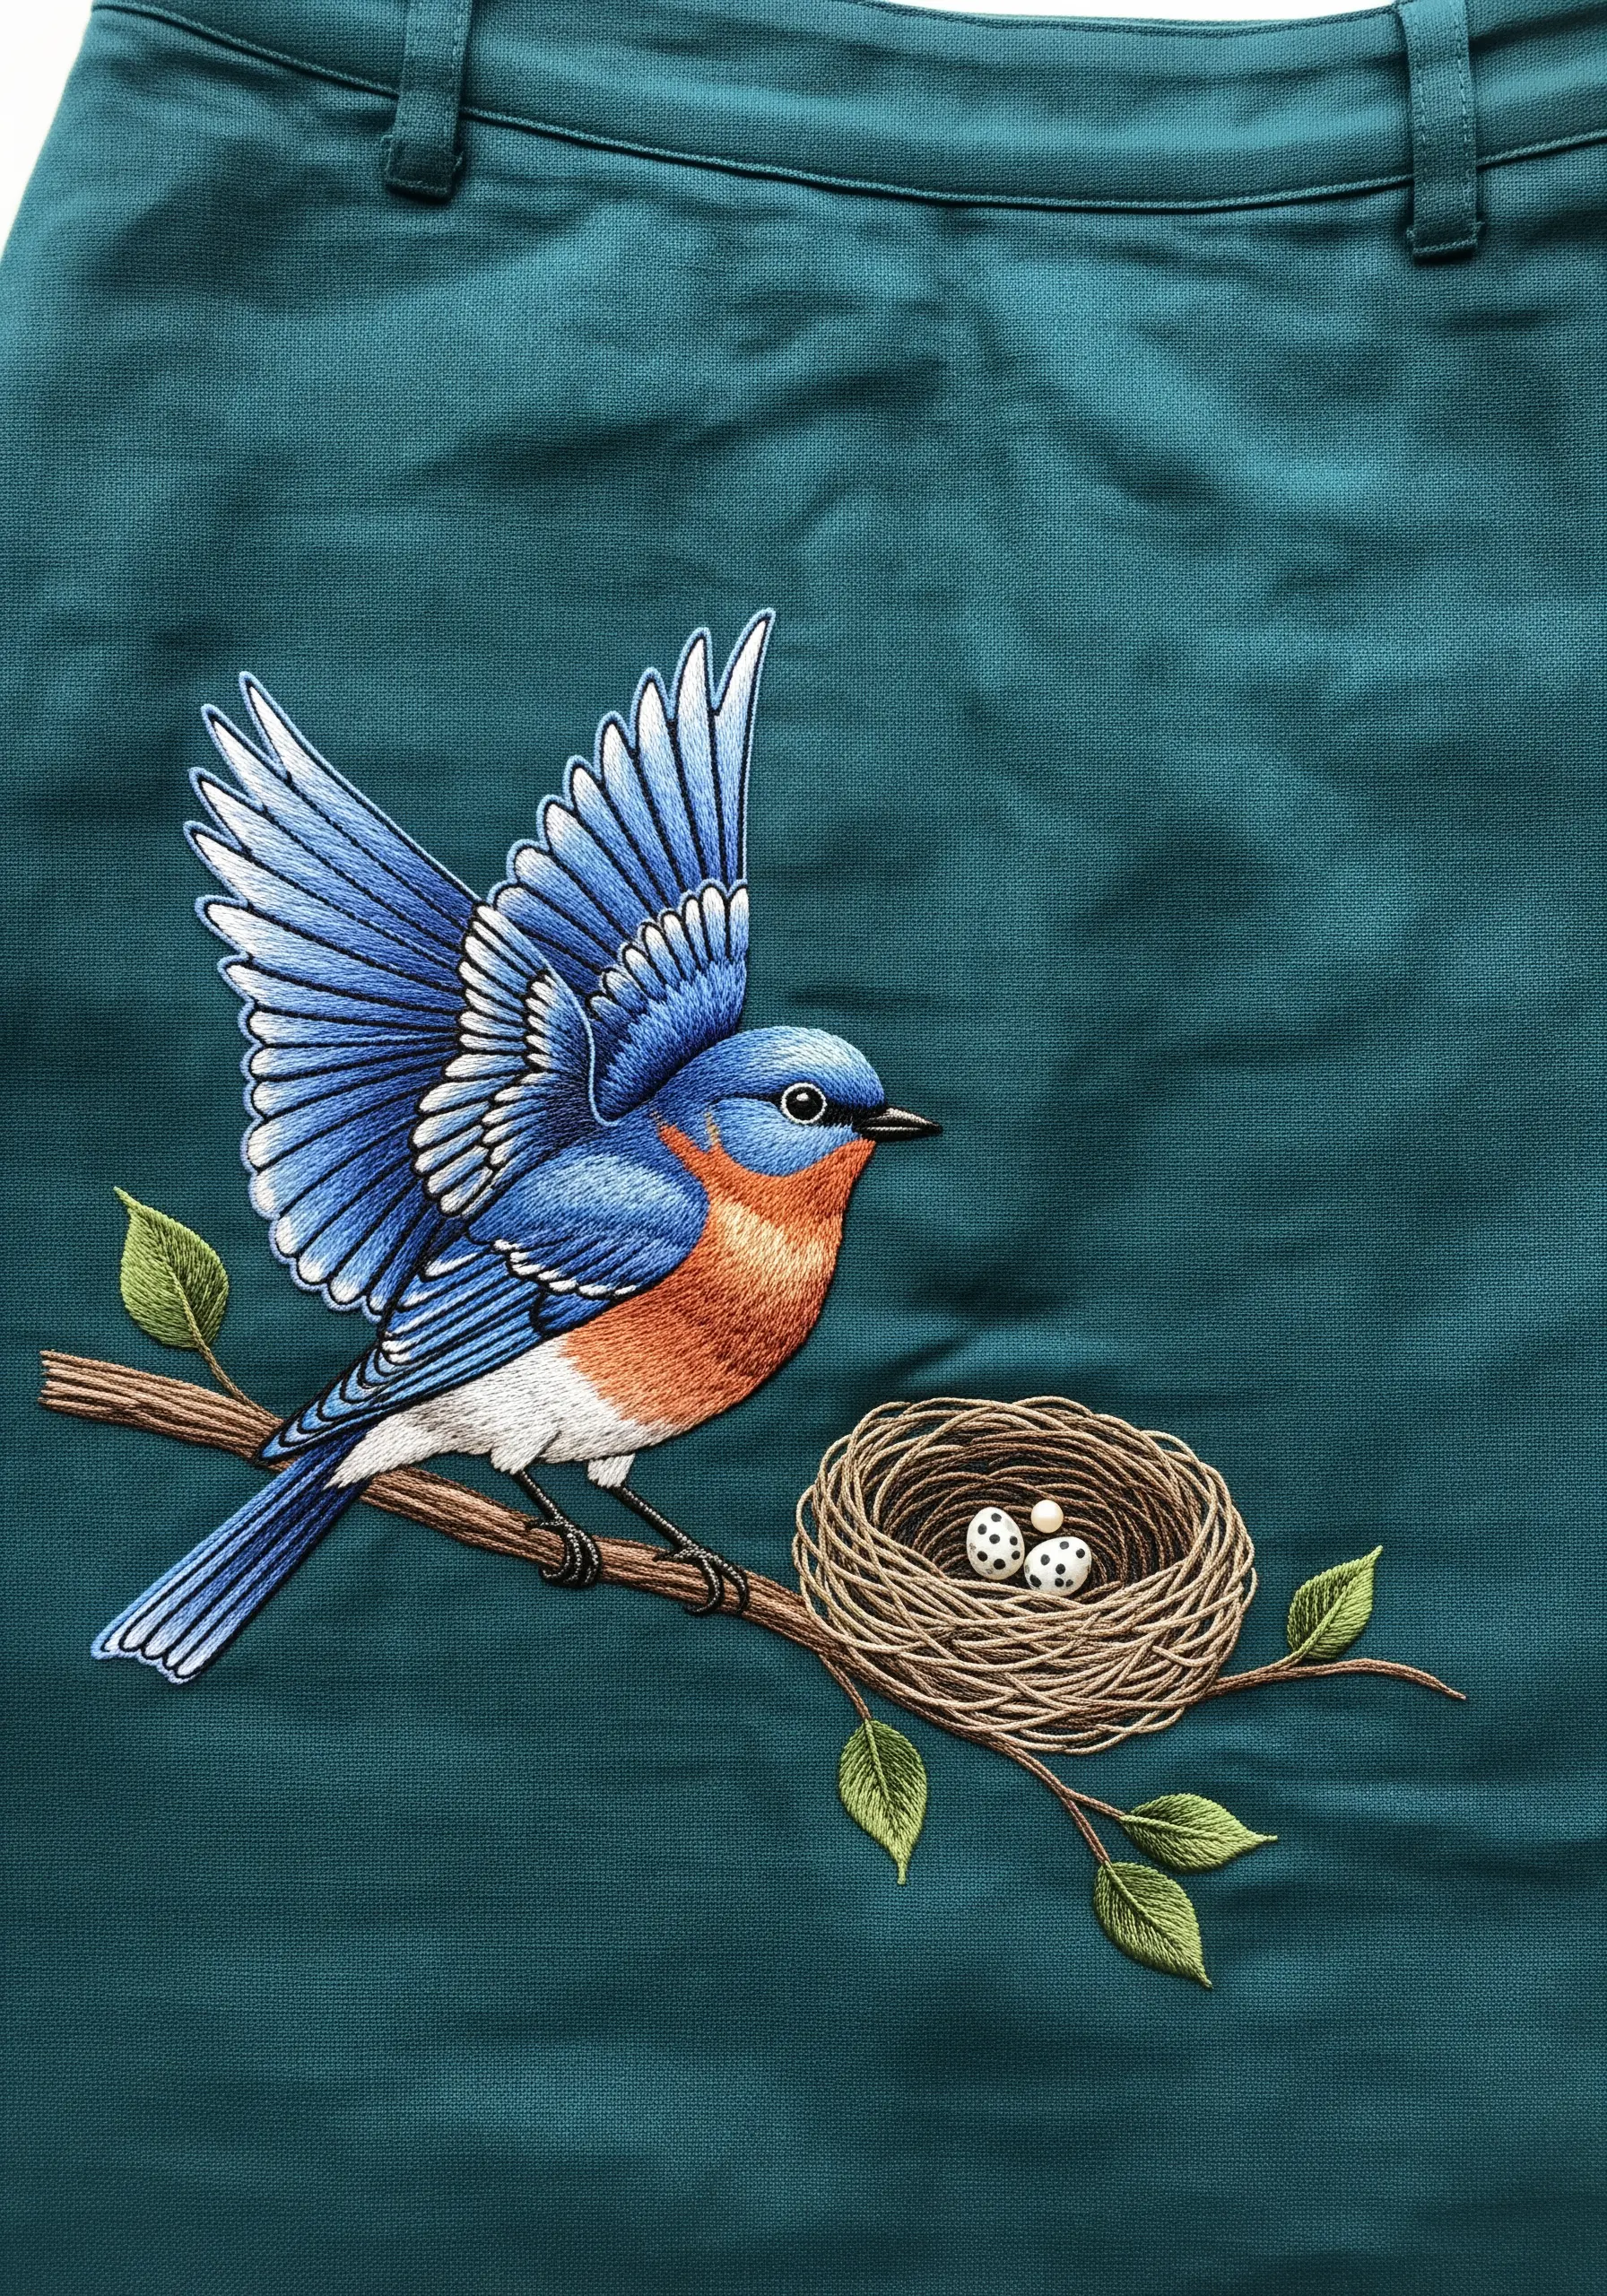
To keep the details of a bird’s wing from becoming muddy, use strategic outlines to define feather sections.
Fill the larger areas of the wings and body with directional long-and-short stitch, blending shades of blue for a smooth look.
Then, go back with a single strand of a darker blue or black thread and use a simple backstitch to lightly outline each individual feather or section of feathers.
This simple step adds immense clarity and definition, making the intricate details sharp and readable.
21. Use French Knots for Delicate Floral Texture
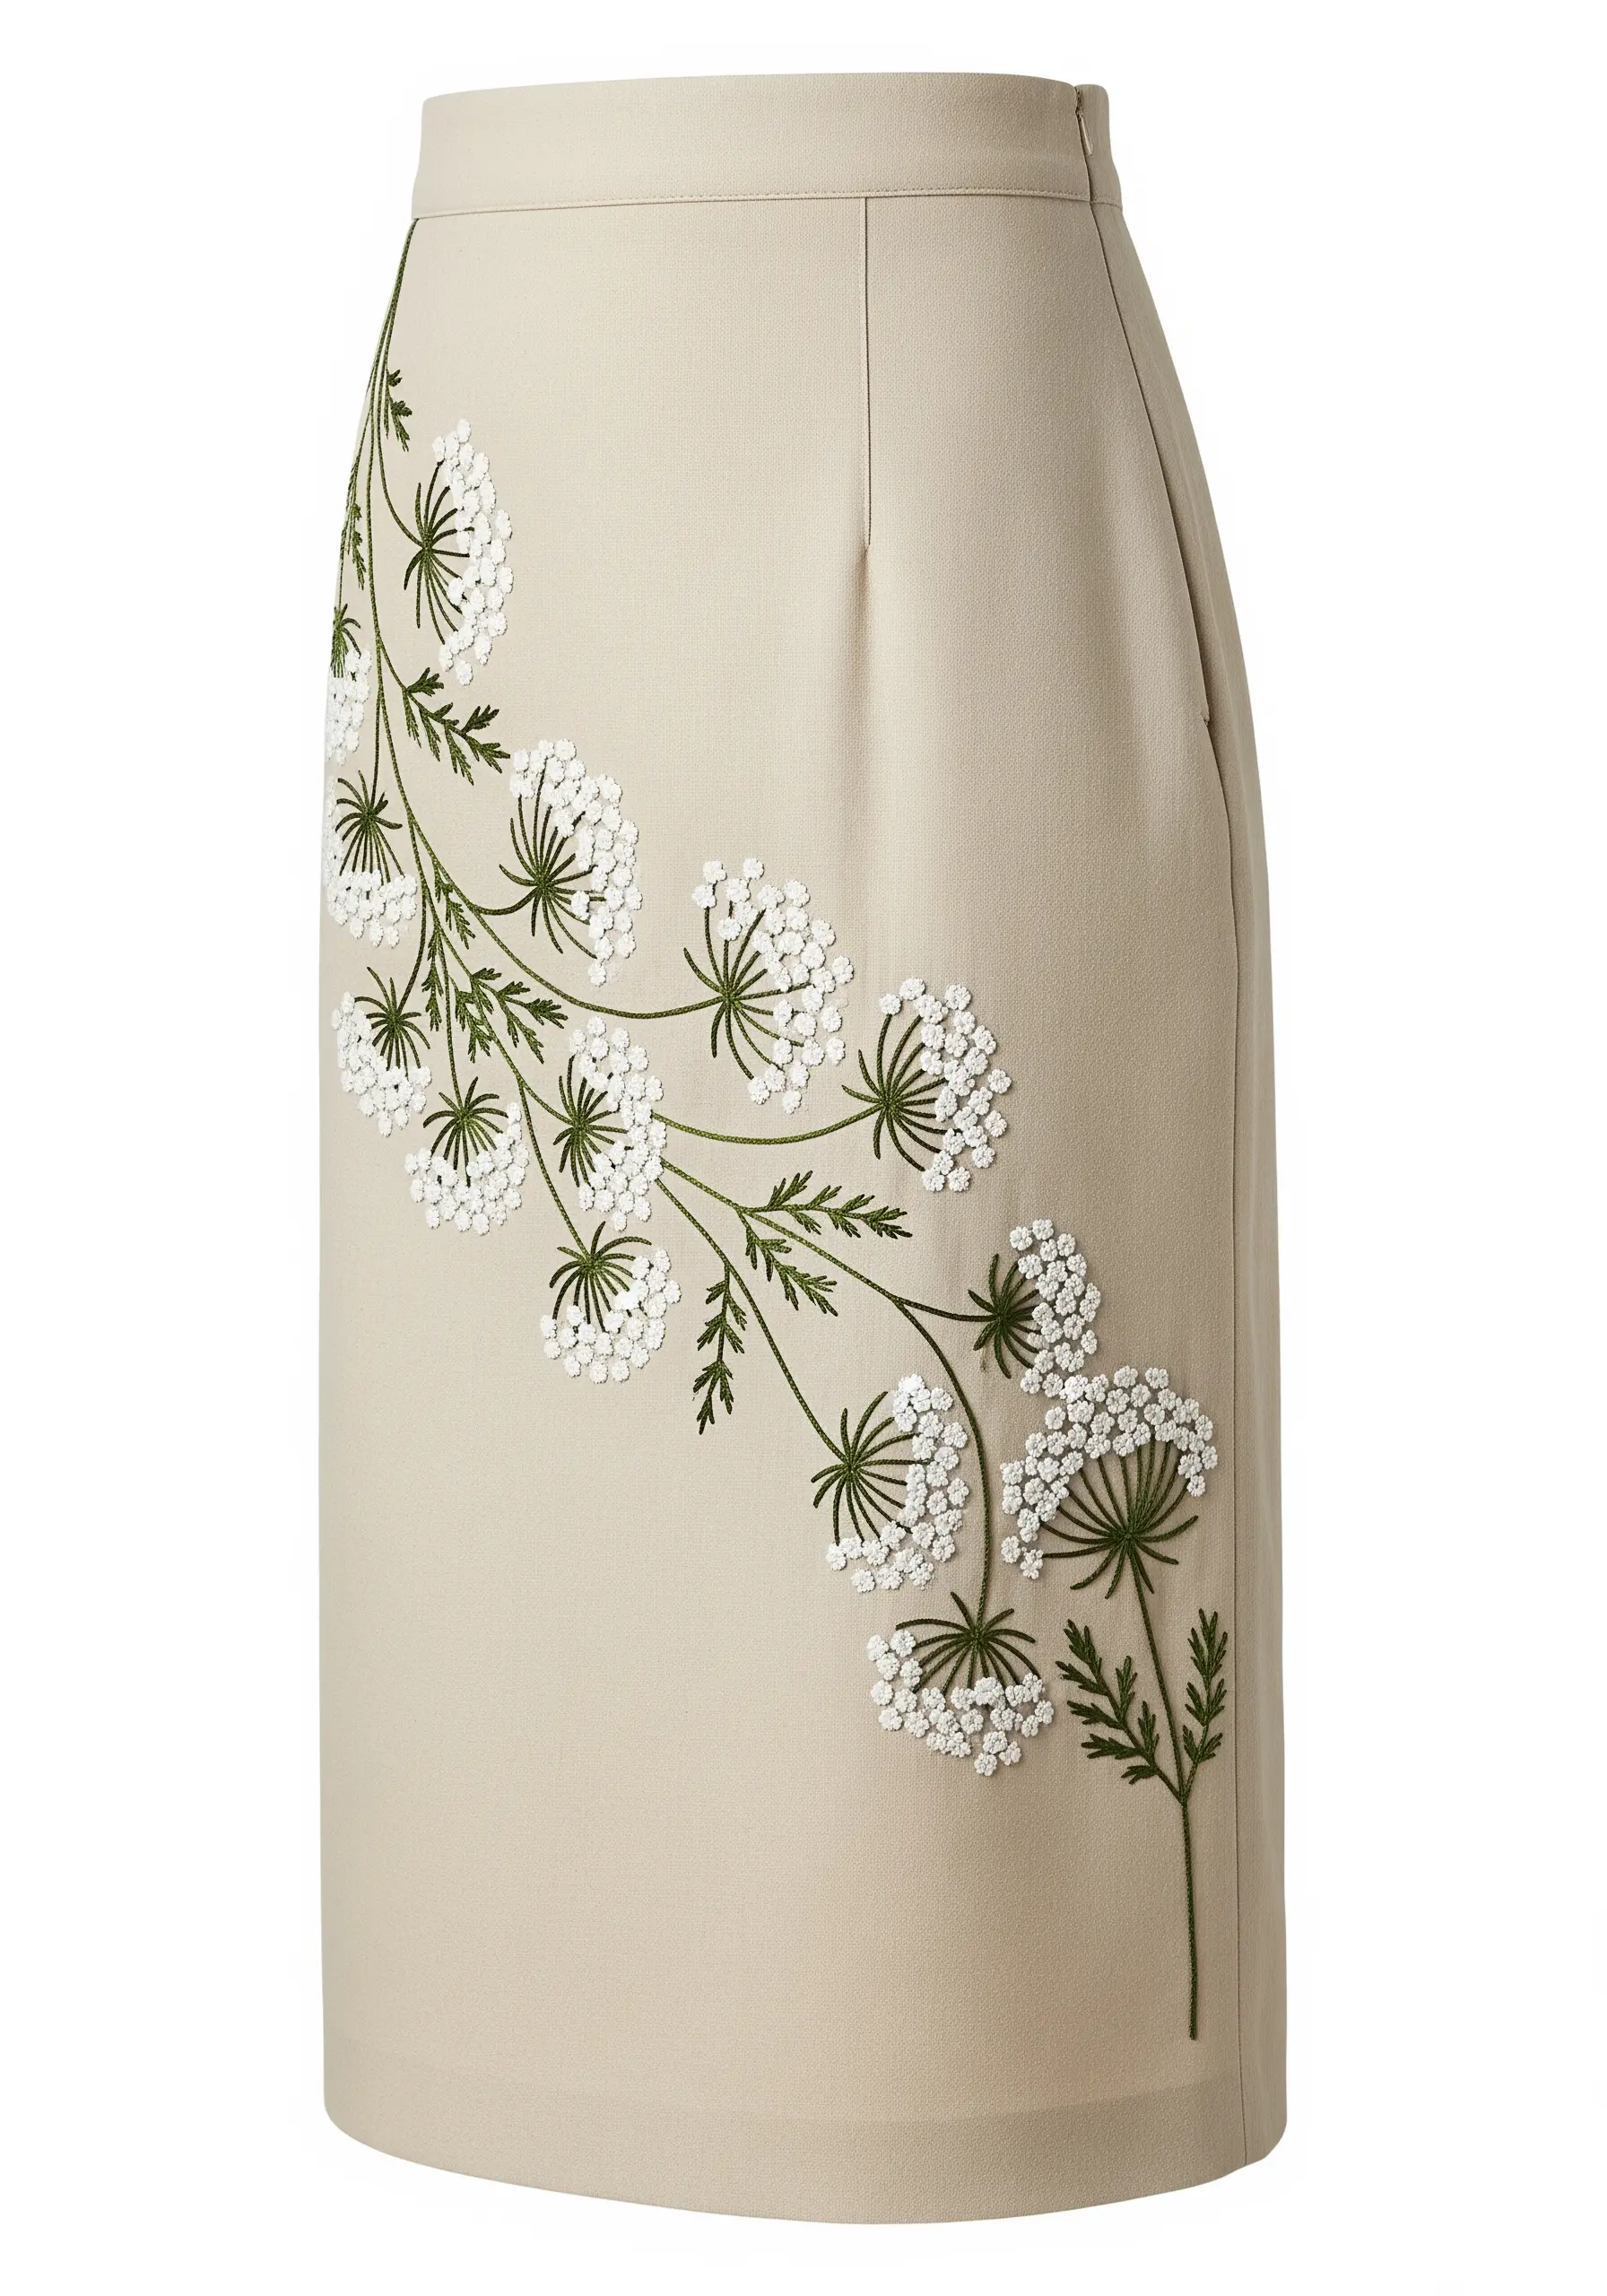
Create the airy, clustered look of Queen Anne’s lace by mastering the French knot.
Instead of satin stitching each tiny flower, use a dense grouping of white French knots to form the flower heads.
For a more delicate and realistic look, use only one or two strands of floss and wrap the needle just once or twice. This keeps the knots small and dainty.
The contrast between the textured knots and the fine stem-stitched stems is what makes this design so elegant.
22. Weave a Basket with Contrasting Stitches
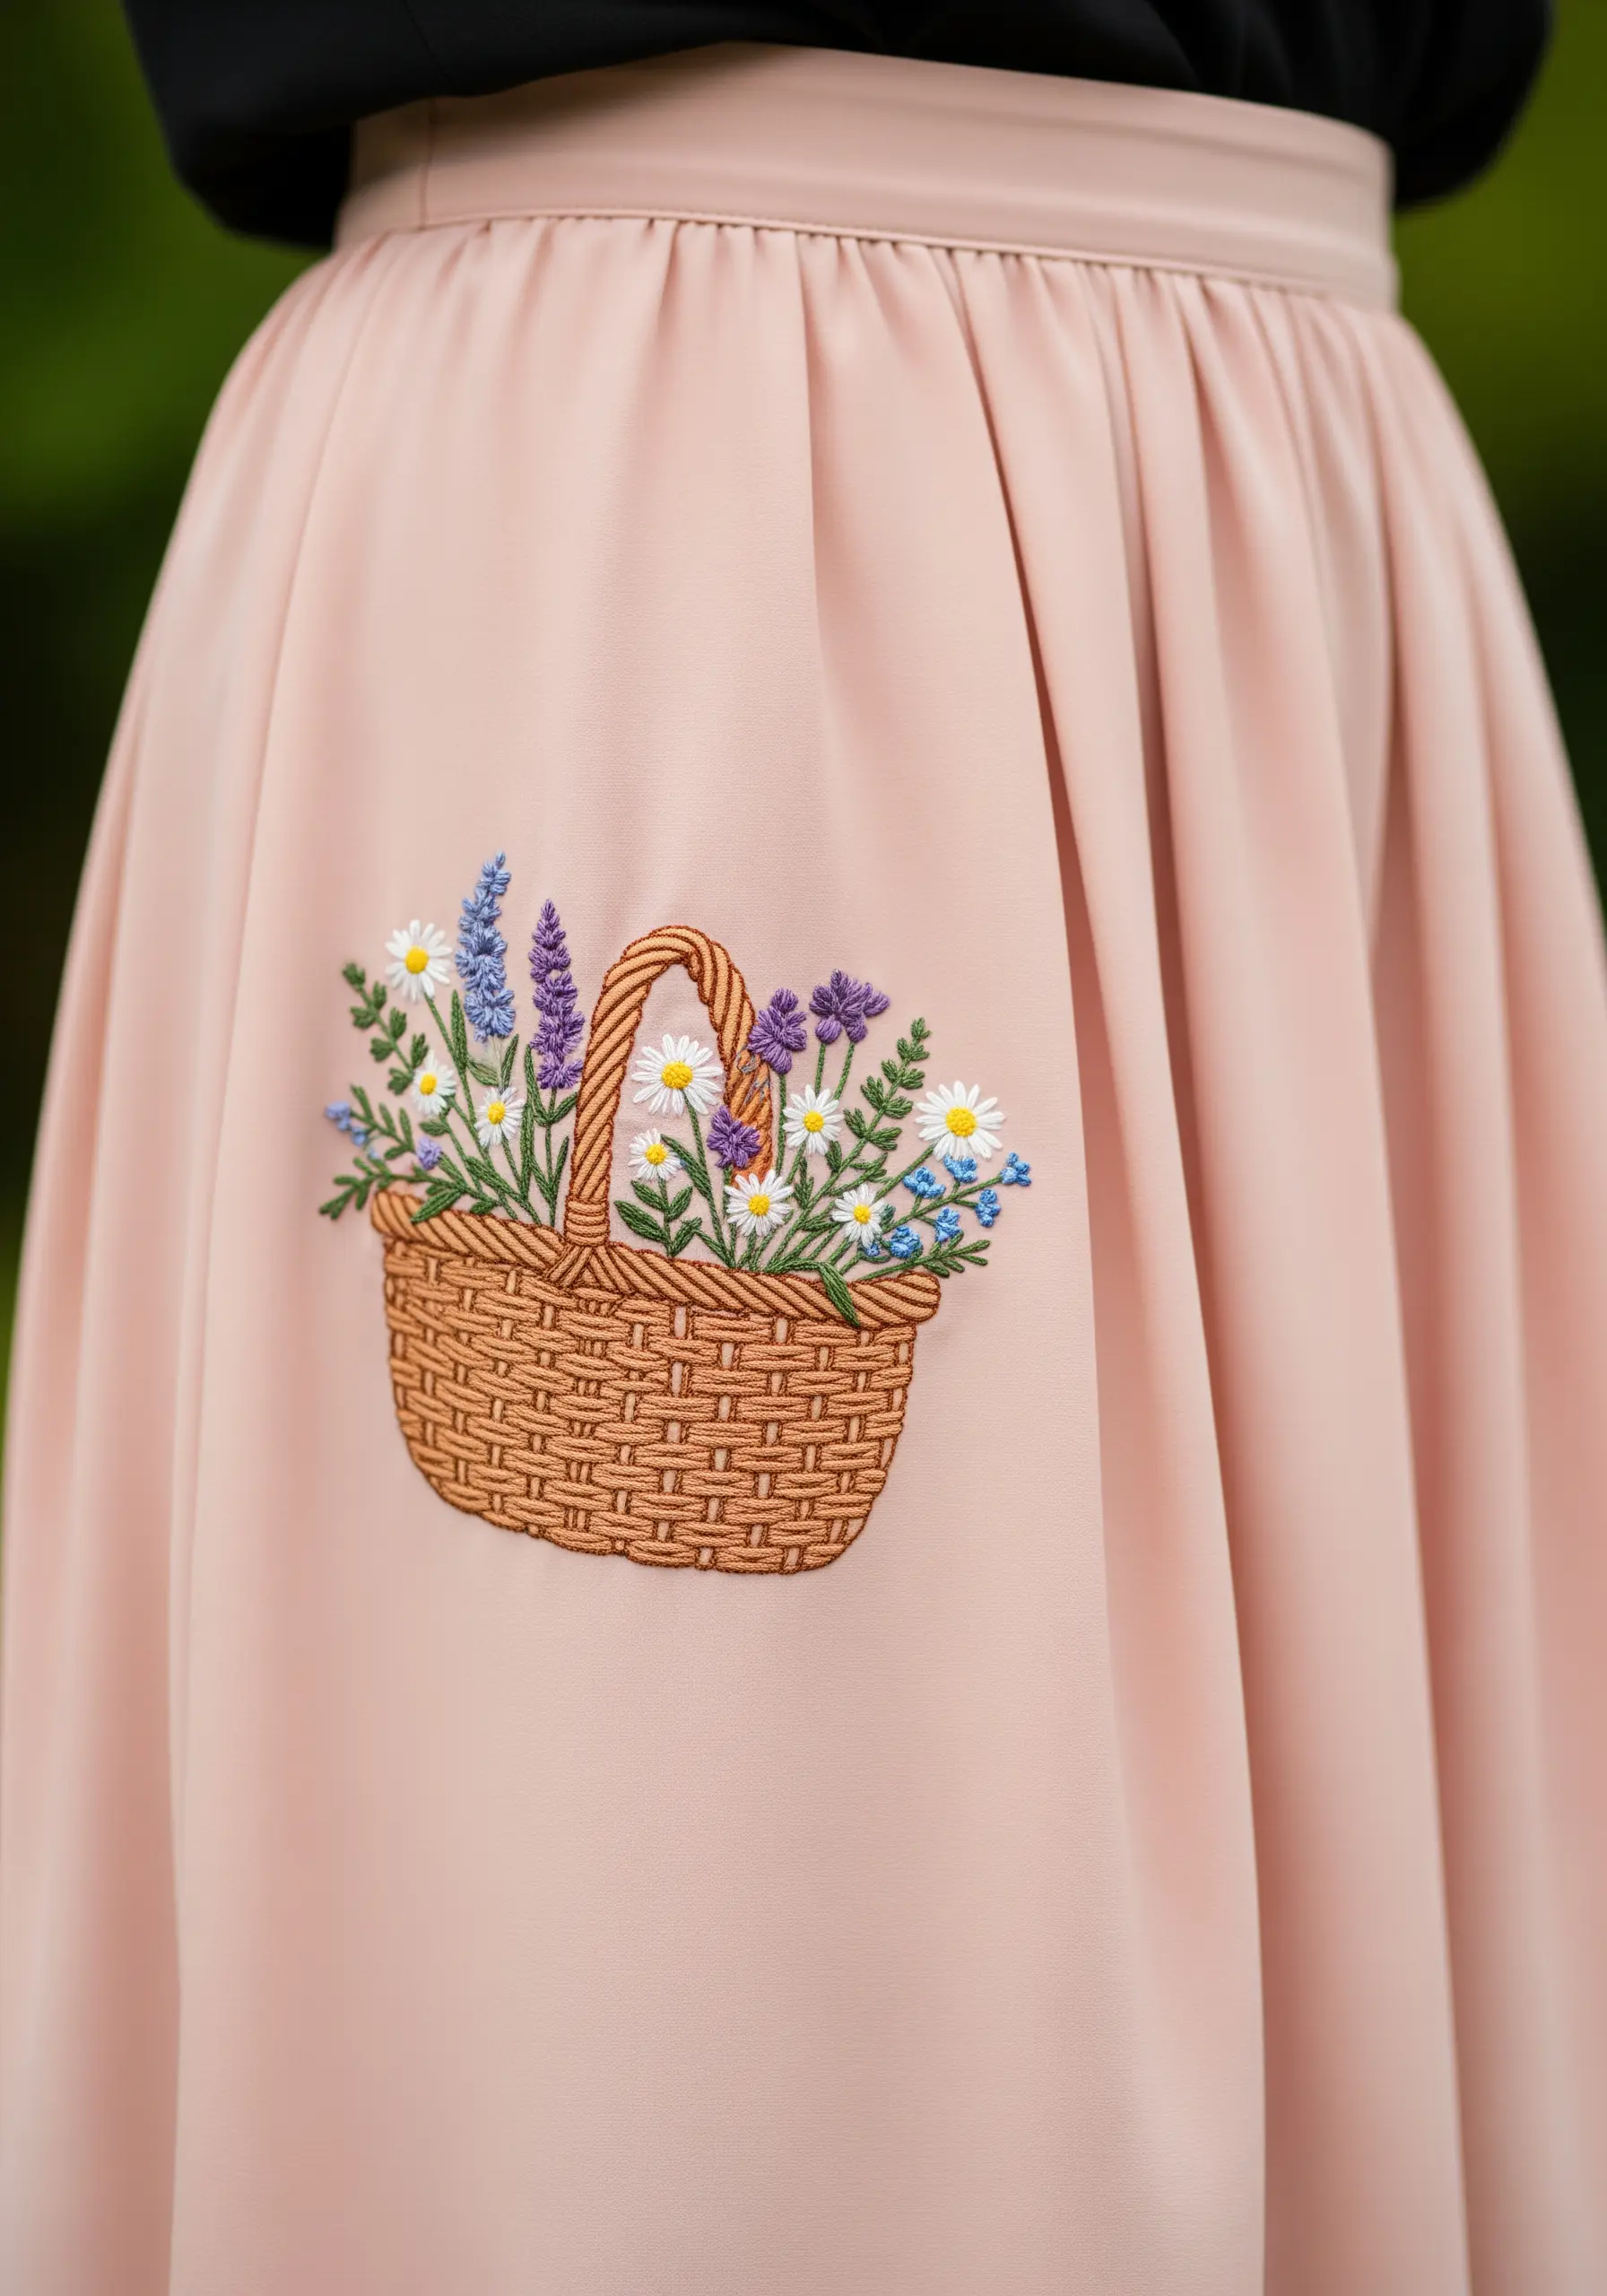
To create the illusion of a woven basket, use two different stitches that mimic the texture of wicker.
First, create the vertical ribs of the basket with spaced-out straight stitches.
Then, use a weaving stitch, passing your threaded needle over and under these straight stitches without piercing the fabric.
For the basket’s rim and handle, switch to a thicker, raised stitch like a chain stitch or a whipped backstitch to create a defined edge. This textural contrast makes the basket look remarkably three-dimensional.
23. Create Lush Roses with Silk Ribbon
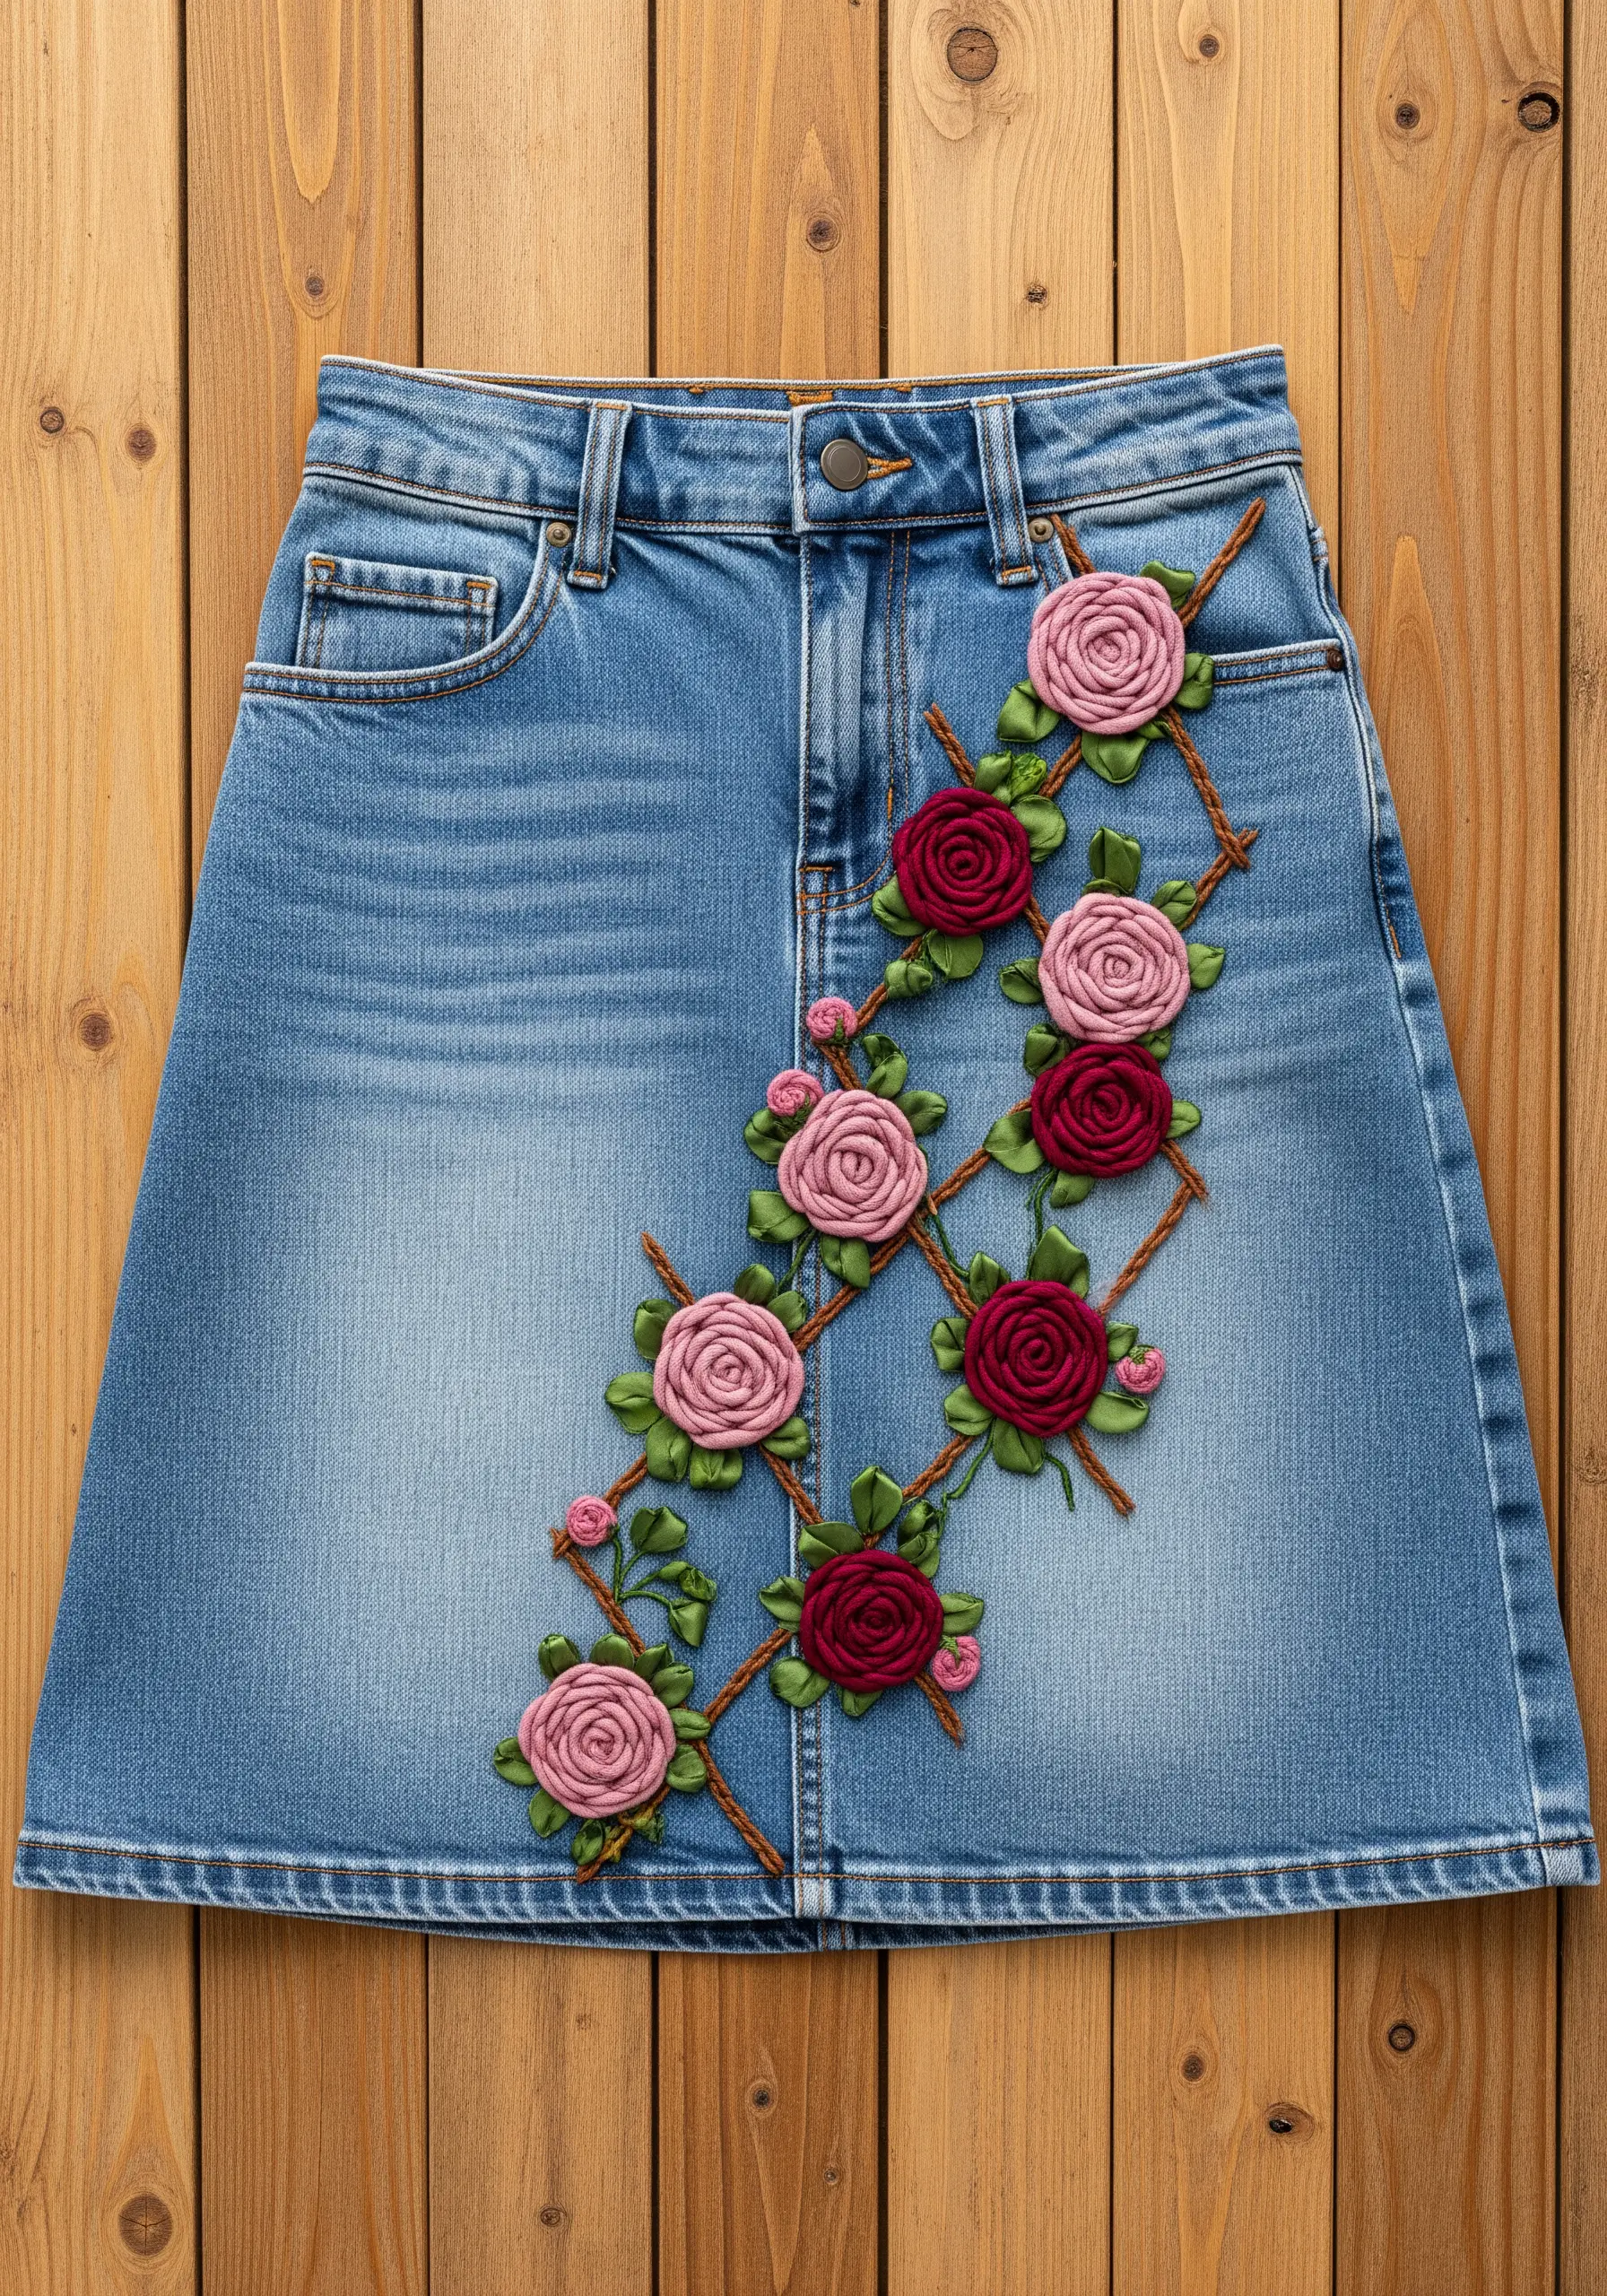
For incredibly plush, dimensional flowers, switch from floss to silk ribbon.
These roses are likely created using the spider web rose stitch. You first create a small star of straight stitches with floss, then weave the ribbon over and under the spokes until the shape is filled.
Using a wide silk ribbon allows you to build volume quickly and creates soft, natural-looking folds in the petals.
Combine these floral-inspired ribbon embroidery ideas with traditional floss embroidery for the leaves and stems to create a rich, mixed-media effect.
24. Stitch a Celestial Map with Fine Linework

To create a detailed celestial map that remains elegant and not cluttered, the key is using a very fine thread.
Use a single strand of white or silver floss for all the lines and text. This ensures the constellations remain crisp and legible against the dark fabric.
Use a simple backstitch for all linework. Its precision is perfect for geometric patterns and tiny lettering.
The scattered botanical motifs add a whimsical, cottagecore touch that softens the scientific accuracy of the star chart.
25. Build a Thatched Roof with Layered Straight Stitches
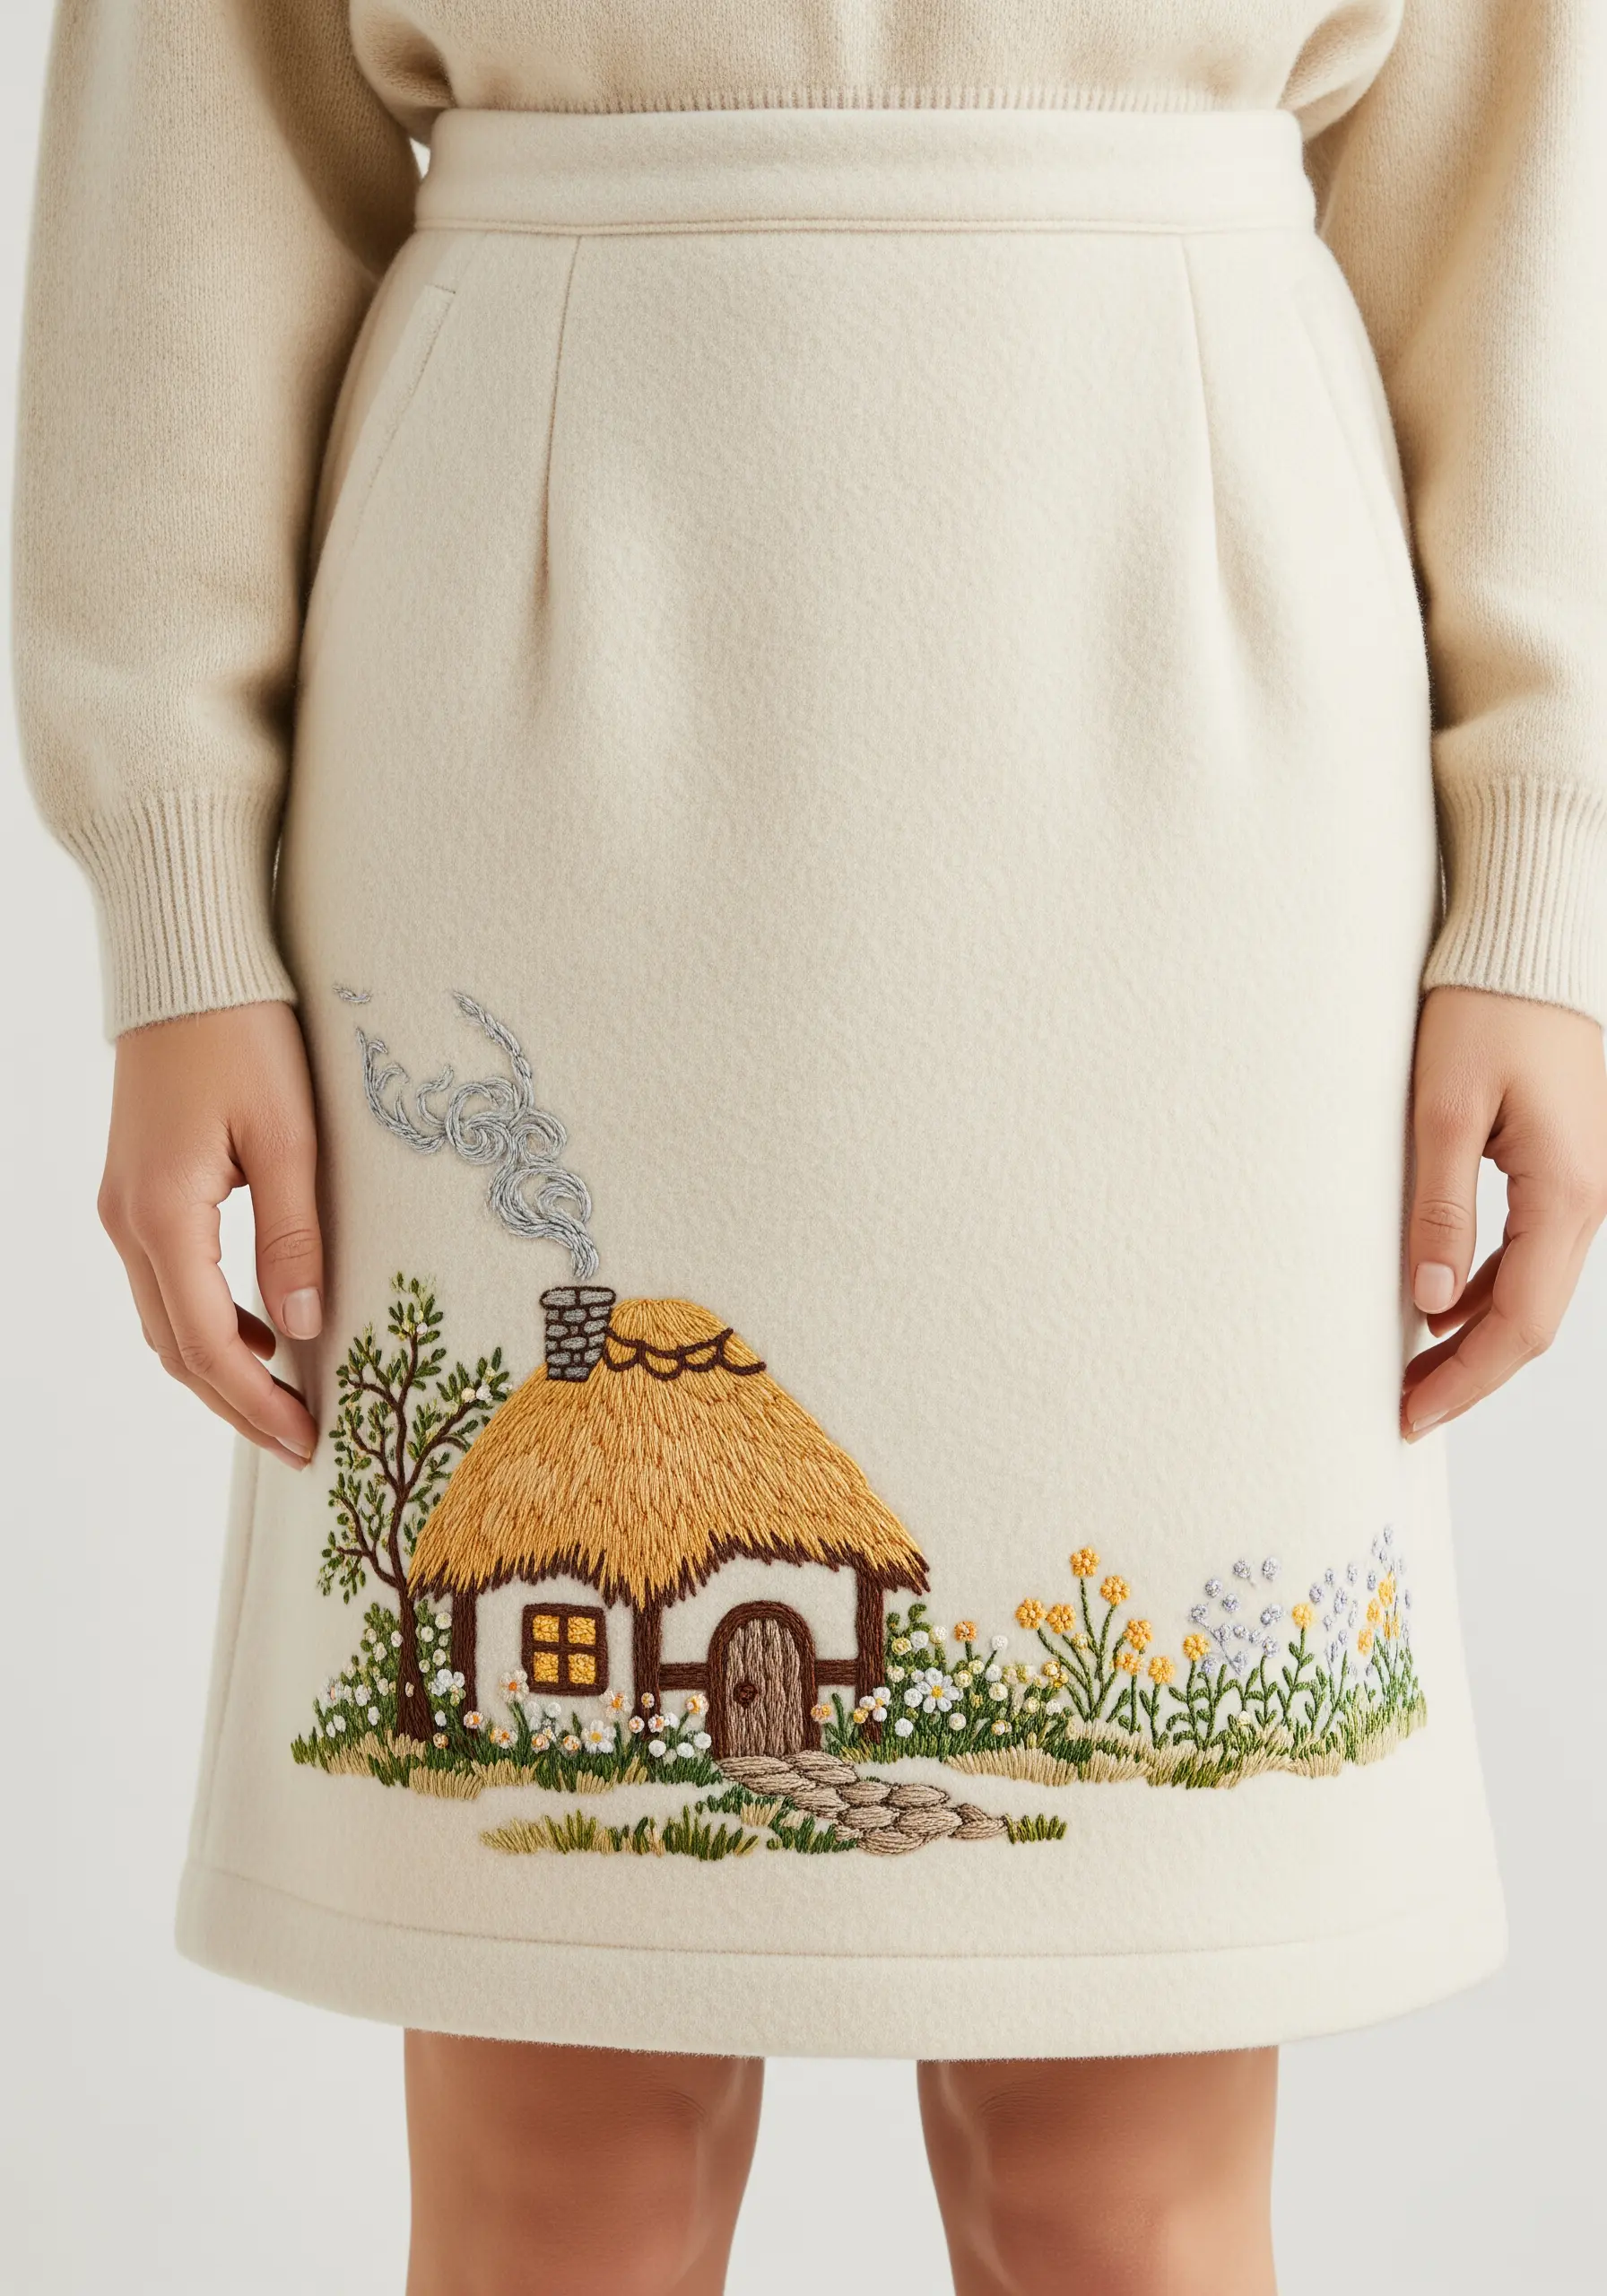
To achieve the textured, layered look of a thatched cottage roof, think like a roofer.
Use long, straight stitches in several shades of gold and straw-yellow. Don’t lay them down flat and perfectly parallel.
Instead, work in small, overlapping sections, angling your stitches slightly differently in each one. Let some stitches overlap others messily.
This chaotic layering is what creates the convincing illusion of bundled straw, giving your rustic vintage embroidery an authentic, touchable texture.
26. Use Negative Space for Bright White Fur
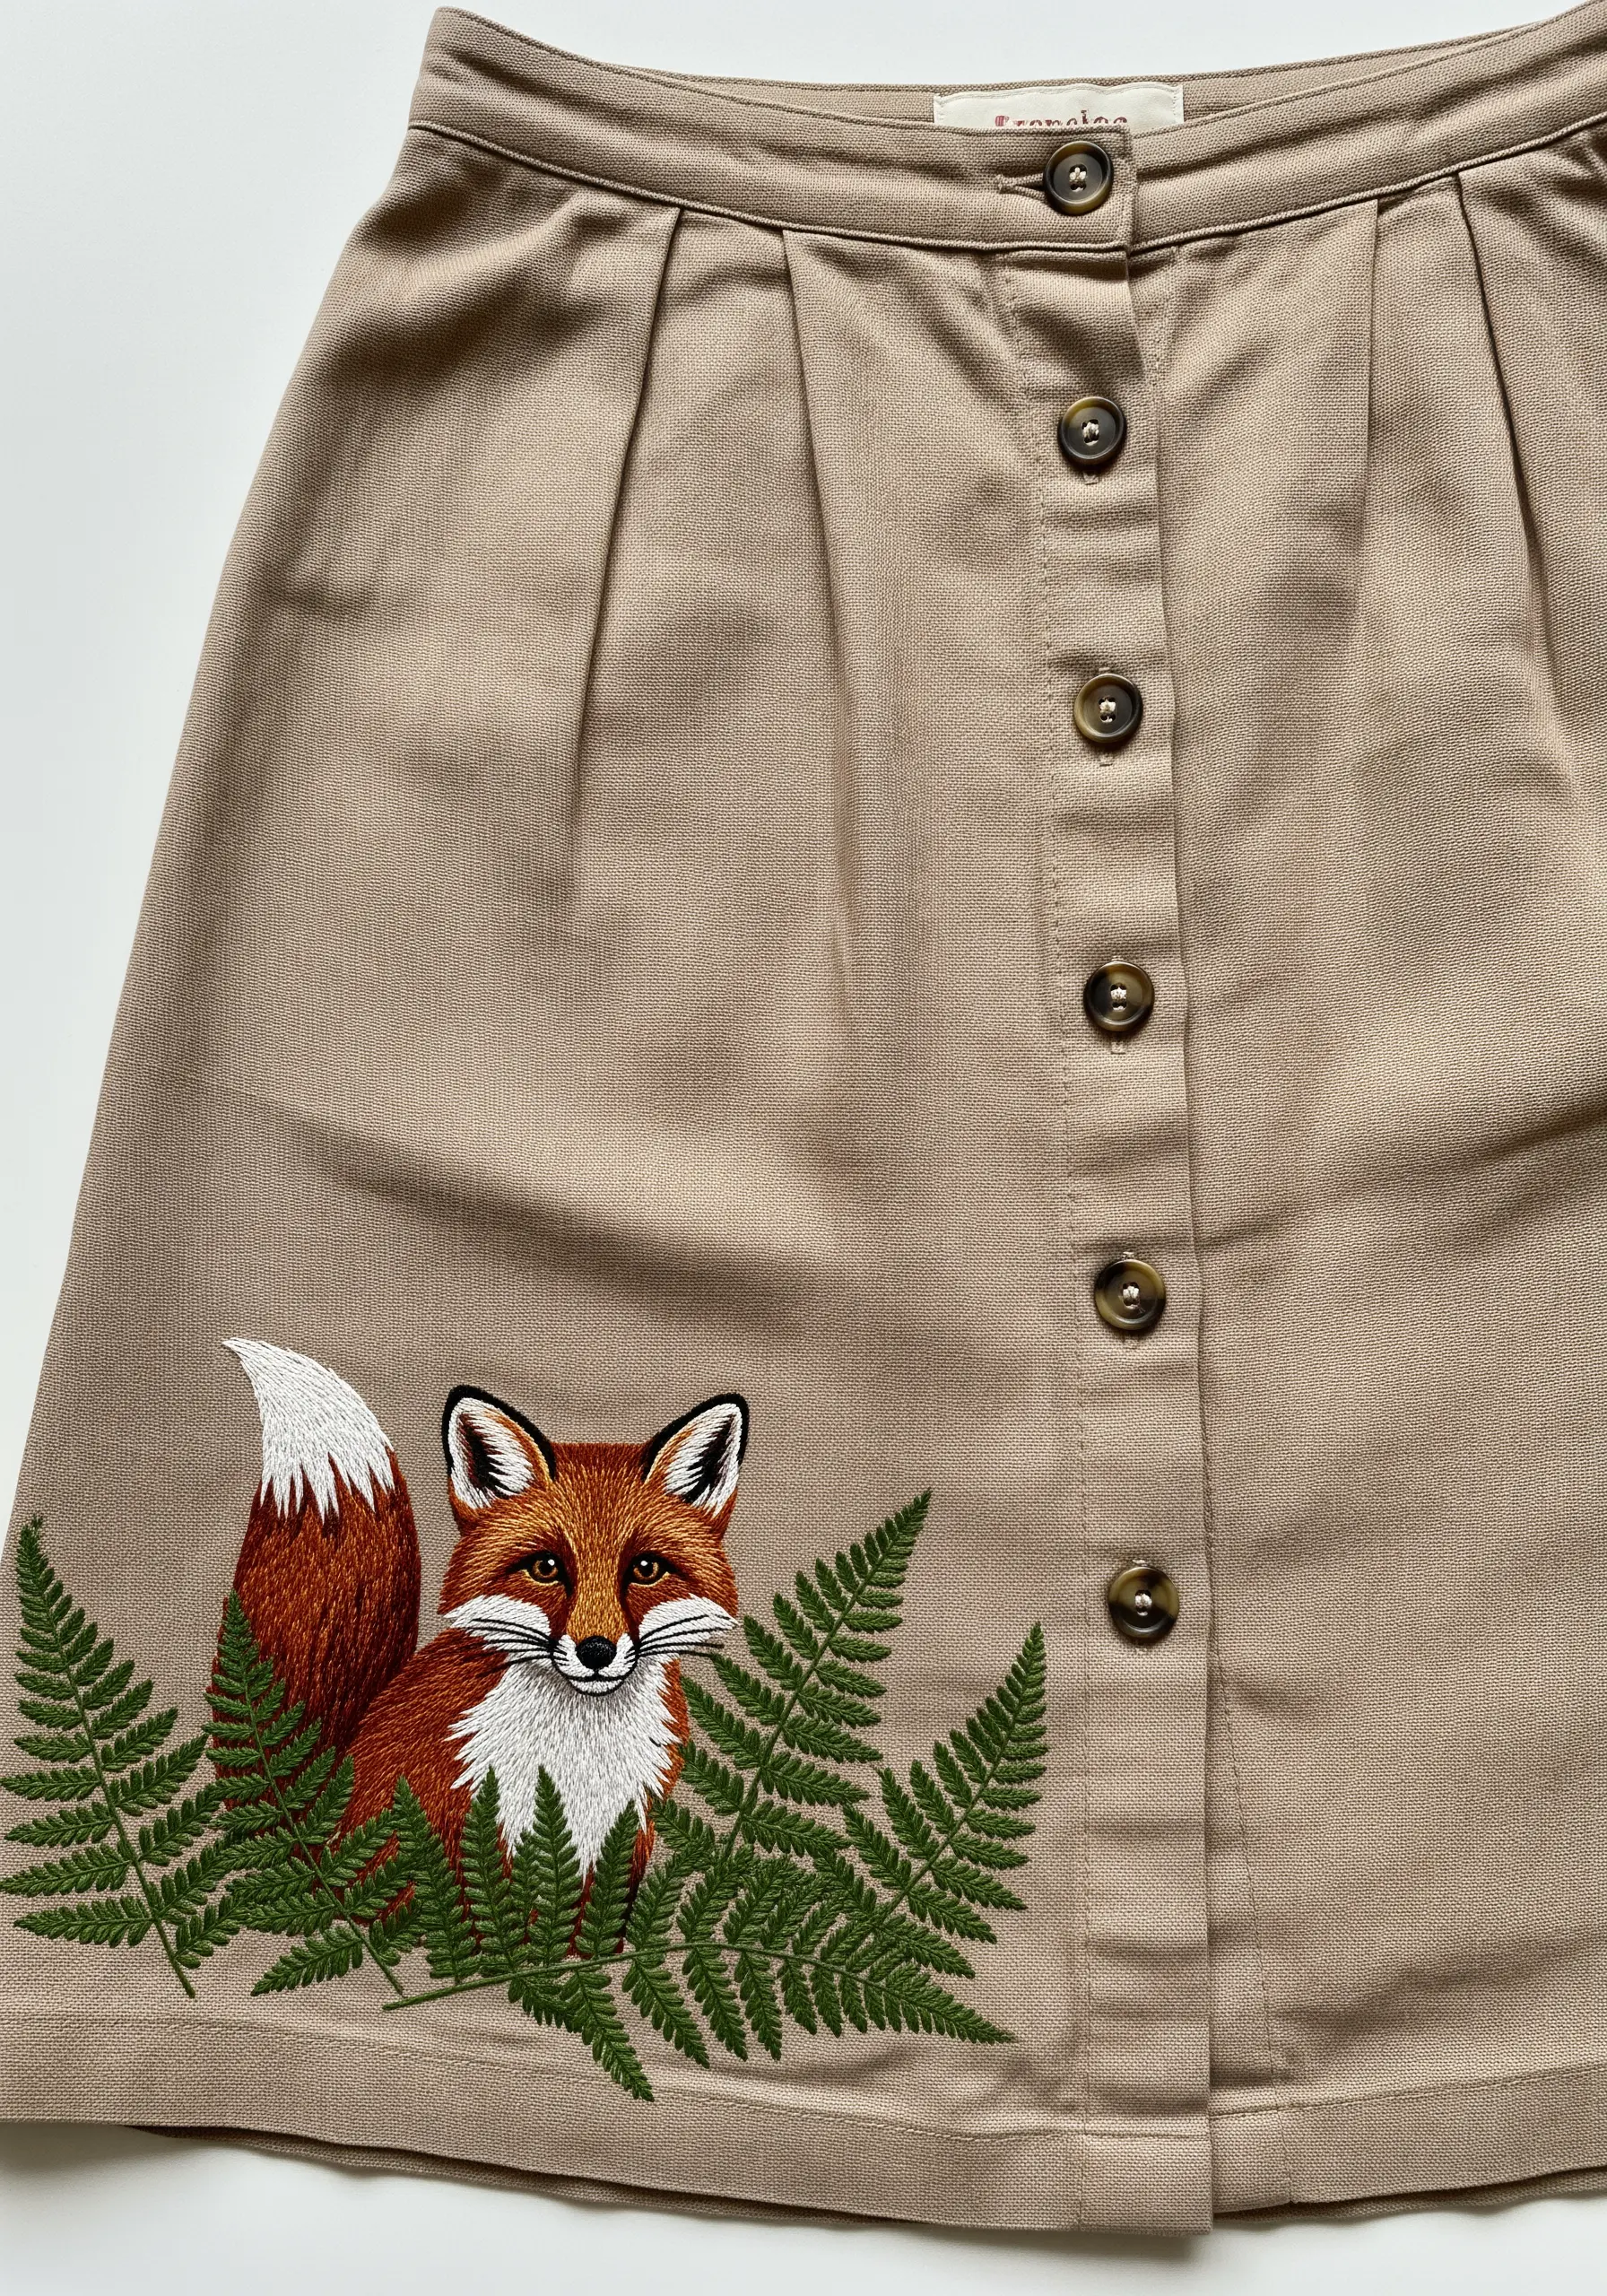
When embroidering white fur on a light-colored fabric, you can use the fabric itself as part of the design.
Instead of filling the entire white area of the fox’s chest and tail tip with dense satin stitch, use sparse, directional straight stitches.
This technique, known as negative space embroidery, allows the base fabric to show through, suggesting the color and texture of white fur without adding unnecessary bulk or thread.
It creates a softer, more integrated look and makes the richly colored parts of the fox appear even more vibrant.
27. Create Cascading Wisteria with French Knot Clusters
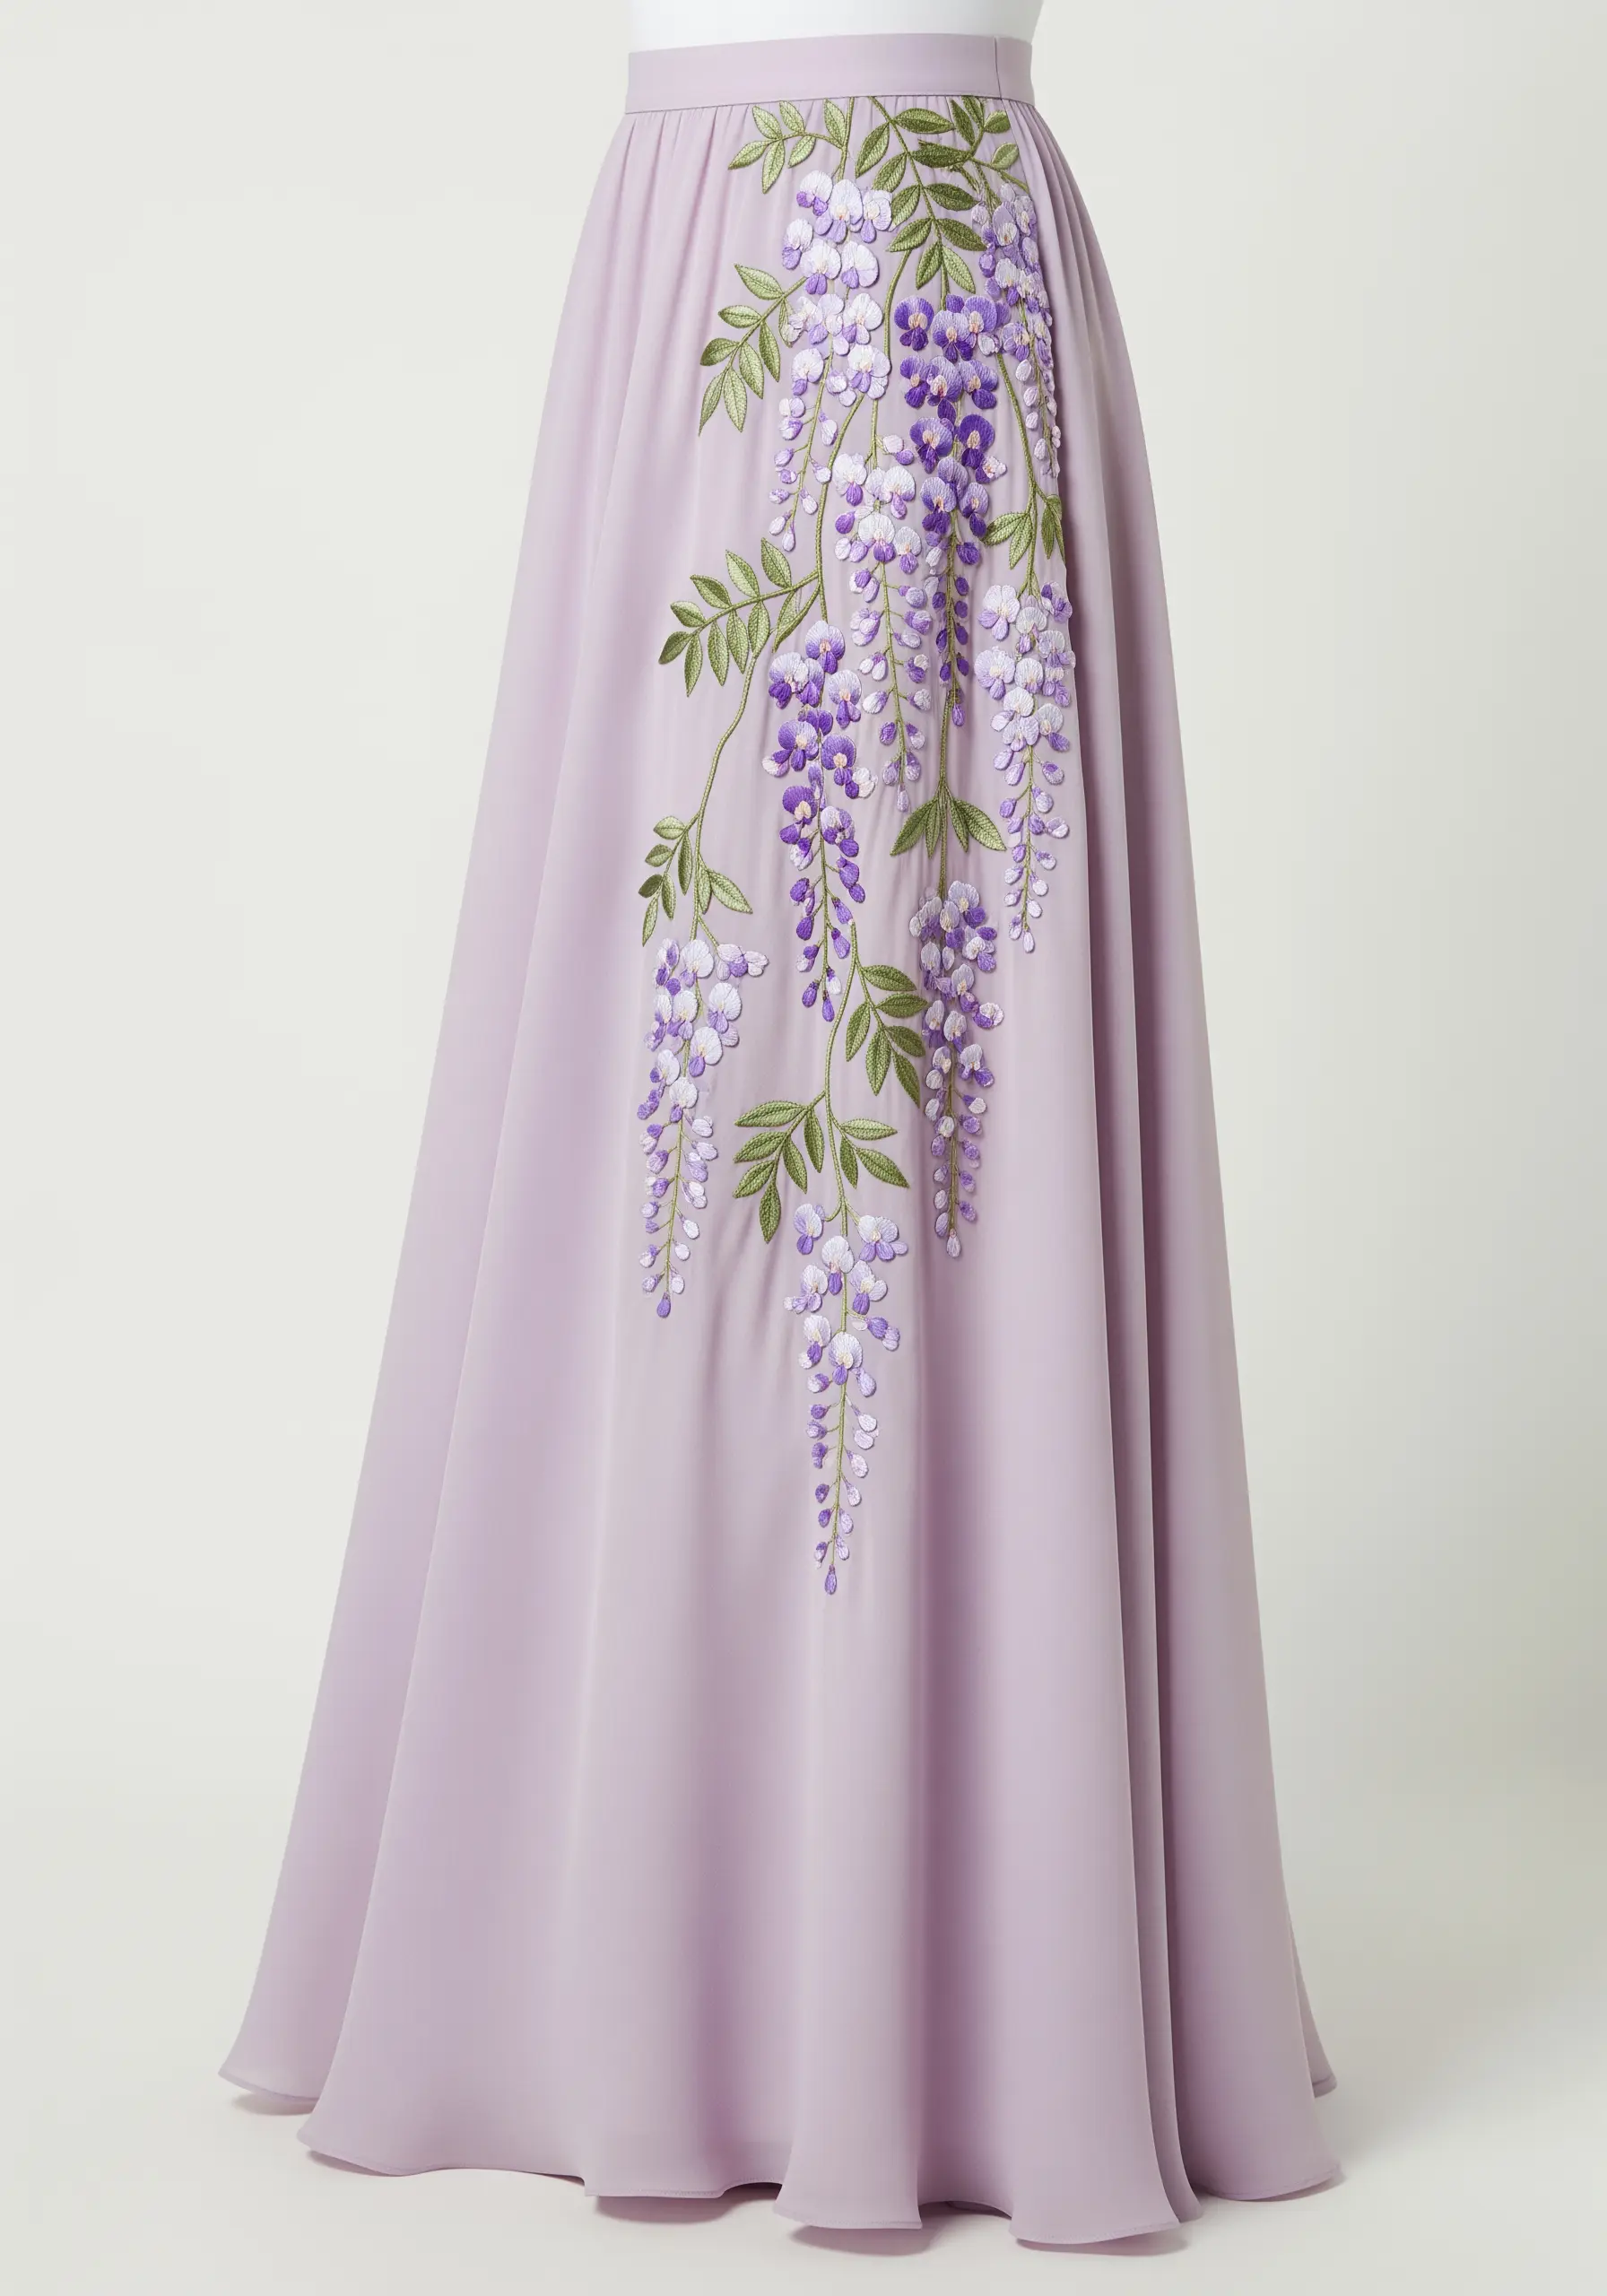
Capture the signature drape of wisteria by varying the density of your French knots.
Start at the top of each blossom cluster with dense, tightly packed French knots in a medium purple.
As you work your way down, gradually increase the space between the knots and switch to a lighter shade of lavender or even white.
This gradient in both color and density creates a beautiful, cascading effect that perfectly mimics the way wisteria flowers grow and hang.
28. Achieve Iridescence with a Strategic Color Palette
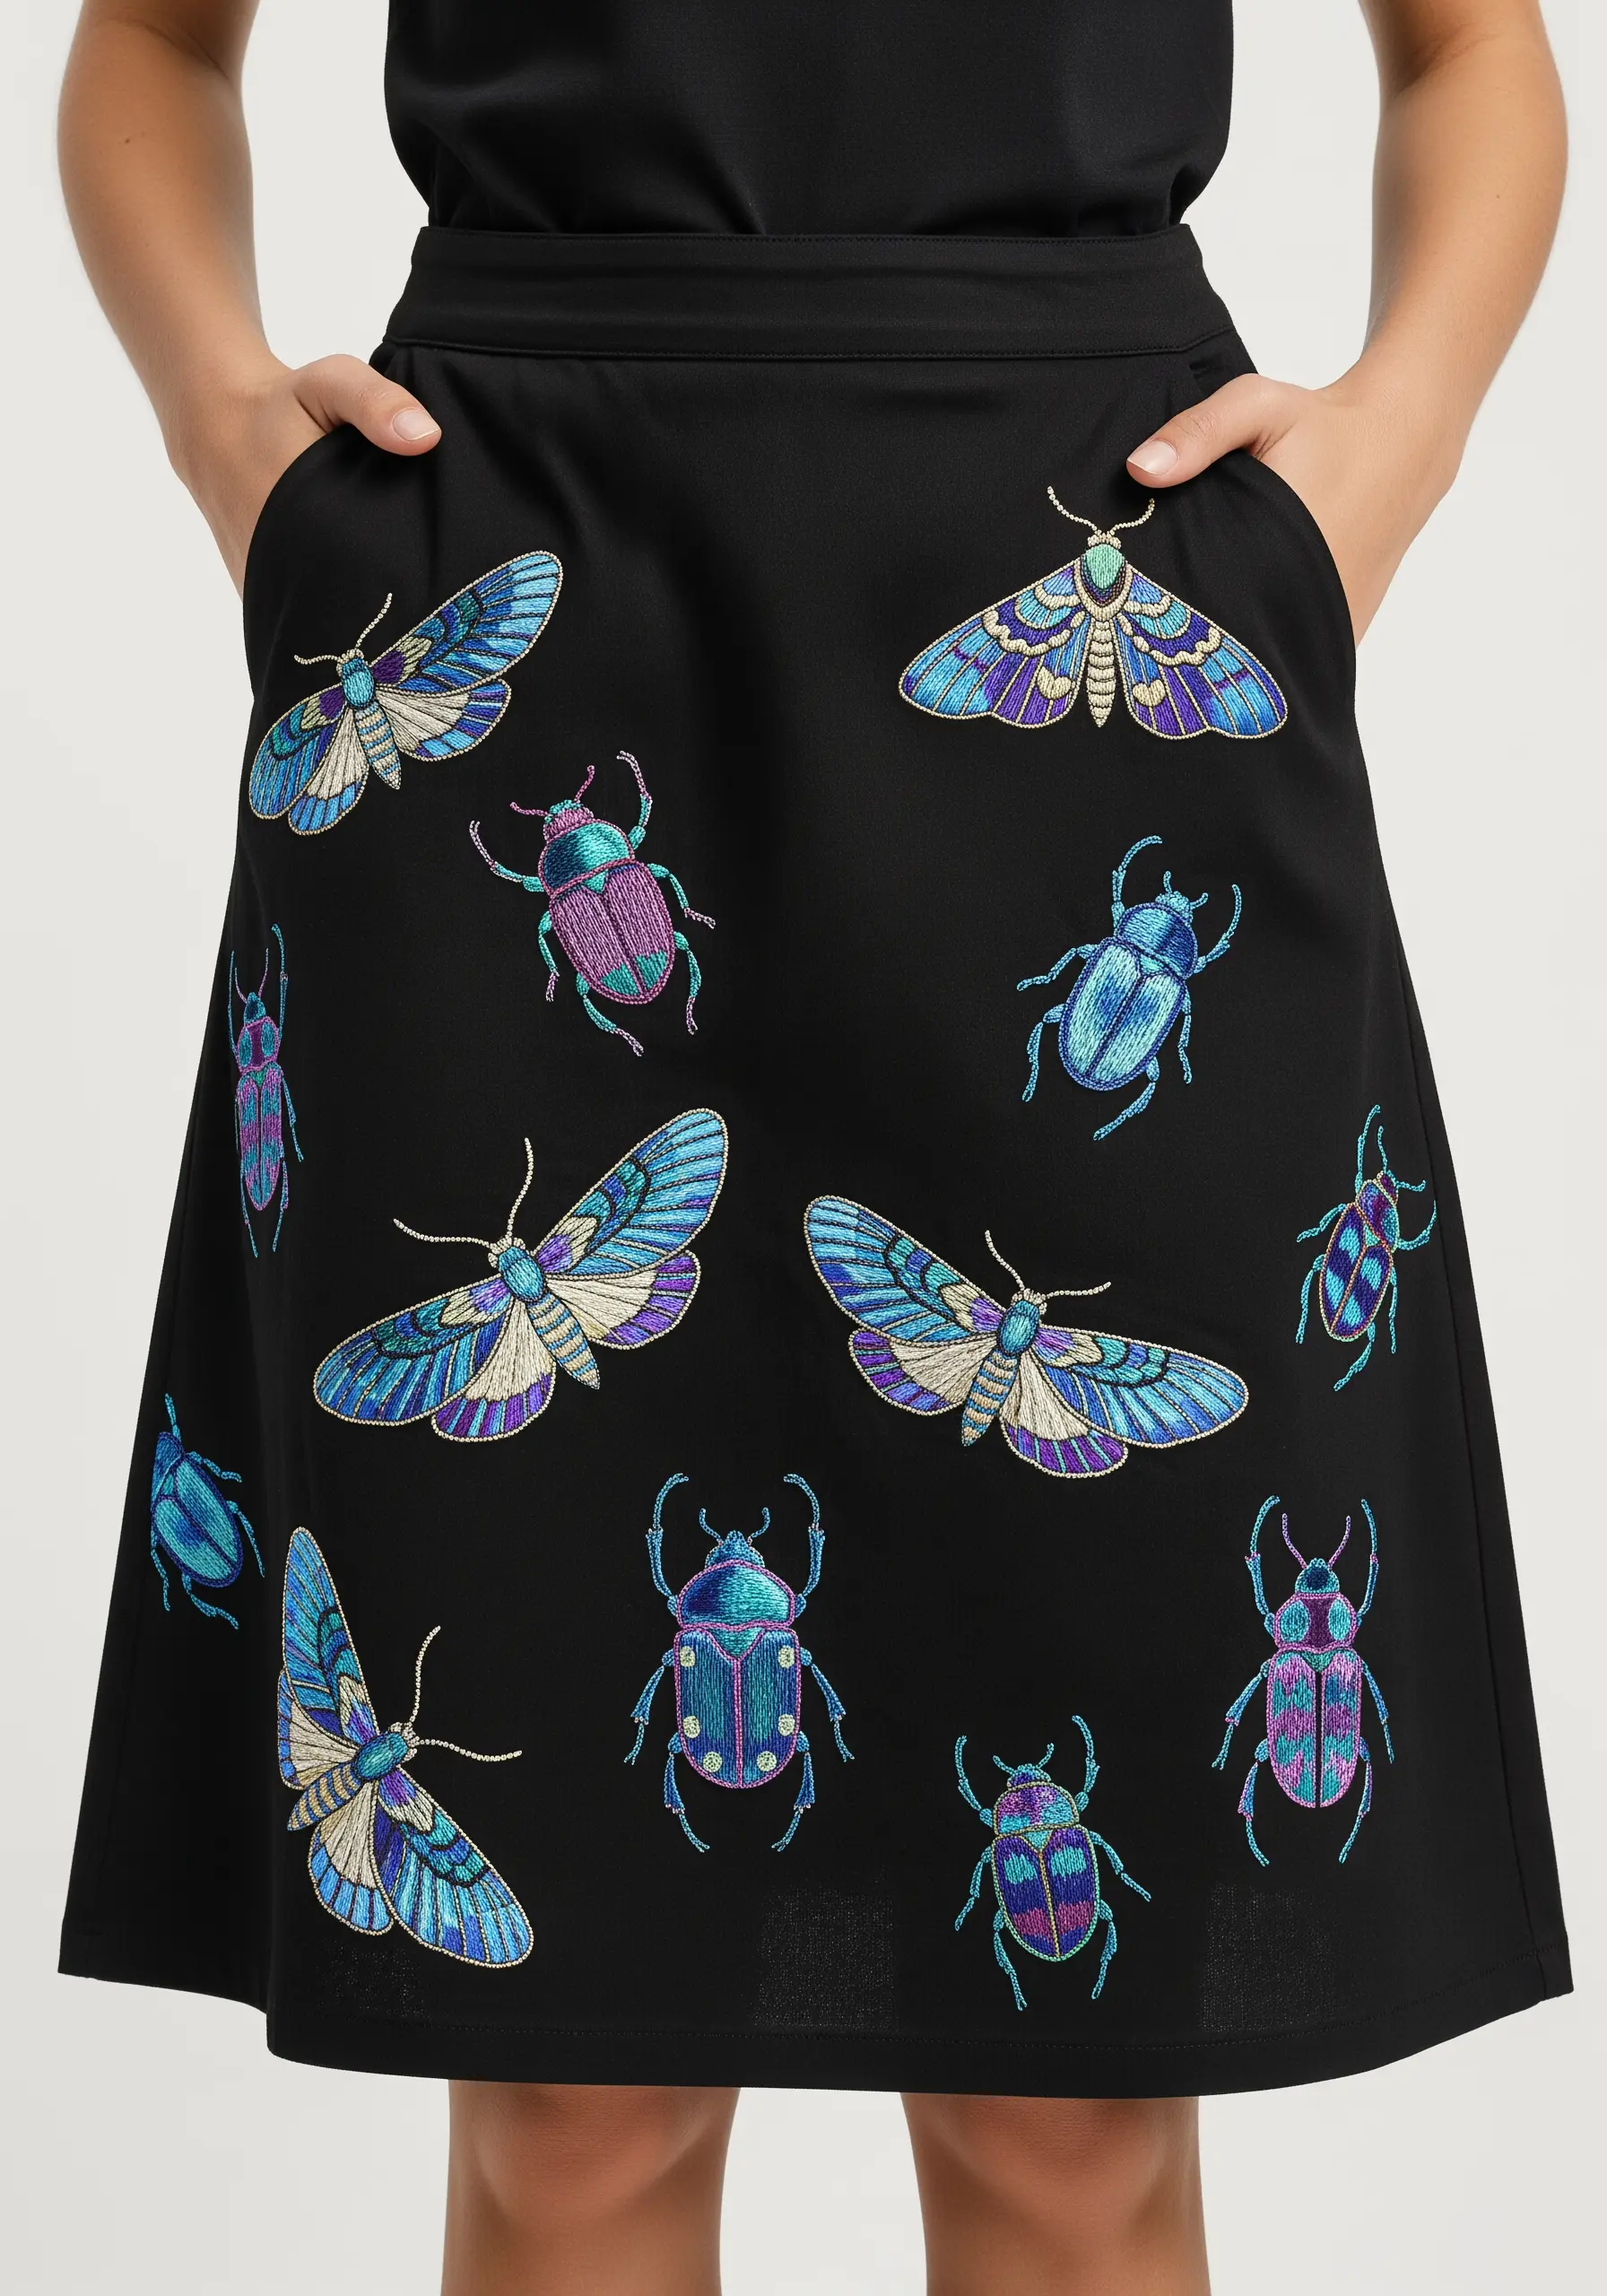
To make beetle wings look iridescent, you don’t need special metallic thread—you just need a smart color palette.
Place contrasting, vibrant colors directly next to each other: turquoise next to purple, bright blue next to gold.
Use long-and-short stitch to fill the sections, allowing the colors to blend just slightly where they meet.
This technique of juxtaposing unexpected colors tricks the eye into seeing a shimmering, iridescent effect, giving your insects a magical, jewel-toned finish.
29. Combine Appliqué and Embroidery for Clean Silhouettes
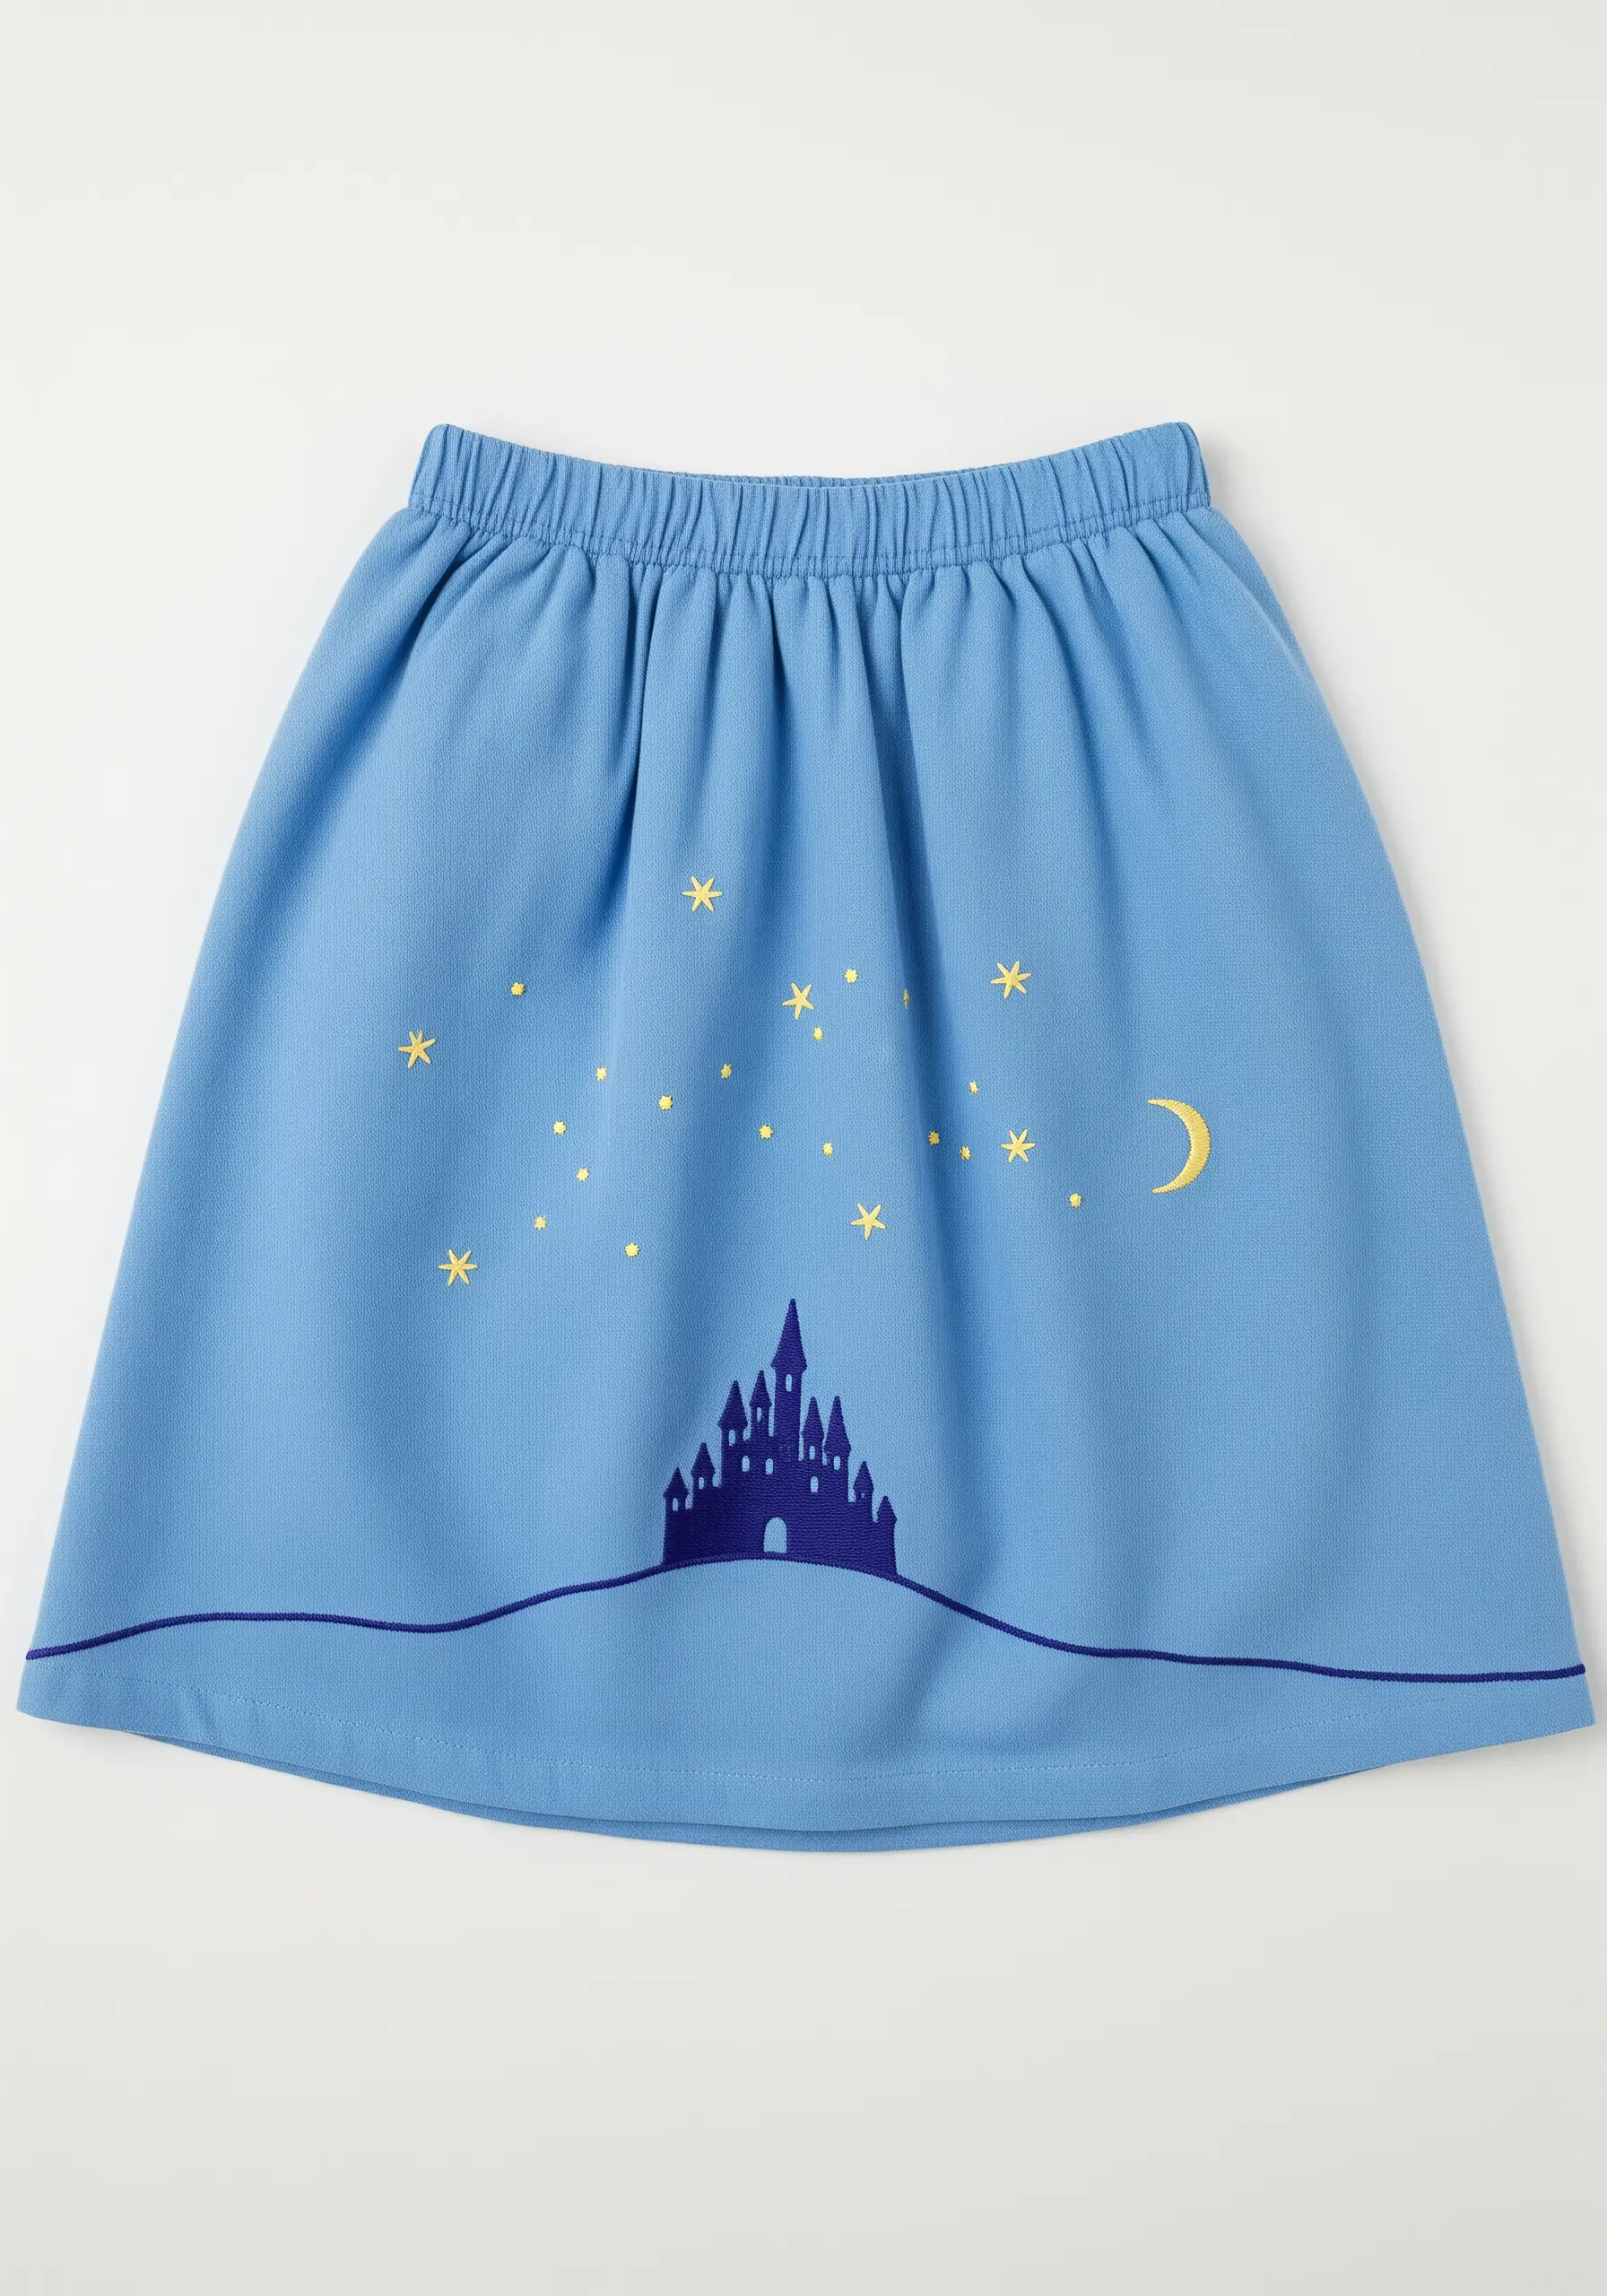
For a design with a bold, clean silhouette like this castle, combine appliqué with embroidery.
Cut the castle shape from a piece of dark blue felt or non-fraying fabric and appliqué it to the skirt using a neat running stitch or fusible web for a perfectly sharp edge.
Then, add the smaller details like the stars and moon with simple embroidery stitches directly onto the base fabric.
This mixed-media approach is much faster than filling a large shape with satin stitch and guarantees a crisp, graphic result.


