

Sometimes, the most satisfying creative moments are the small ones—an hour or two with just a needle, thread, and a quiet corner. An entire afternoon is a luxury, and these cozy patterns are designed to honor that time, giving you a beautiful, finished piece without the pressure of a week-long project.
Here, you won’t just find patterns; you’ll find techniques. We’ll explore how a simple change in stitch direction can mimic the ridges on a seashell, how layering threads can create the soft gradient of an autumn leaf, and how a few French knots can bring a mushroom cap to life.
Think of this as your guide to making small but mighty works of art. Each project is an invitation to slow down, enjoy the mindful rhythm of your stitches, and create something truly lovely that you can hold in your hands by the time the sun sets.
1. Render Steam with a Whipped Chain Stitch

To give the steam rising from your coffee cup a delicate, almost weightless quality, choose a whipped chain stitch over a standard backstitch.
First, create a simple chain stitch outline for the swirls.
Then, using the same color or a slightly lighter shade, whip the thread under each chain loop without piercing the fabric.
This technique rounds out the sharp edges of the chain stitch, creating a soft, continuous line that perfectly mimics gentle vapor.
It’s a small adjustment that adds significant polish and a professional touch to a simple design.
2. Create Tactile Mushroom Caps with French Knots
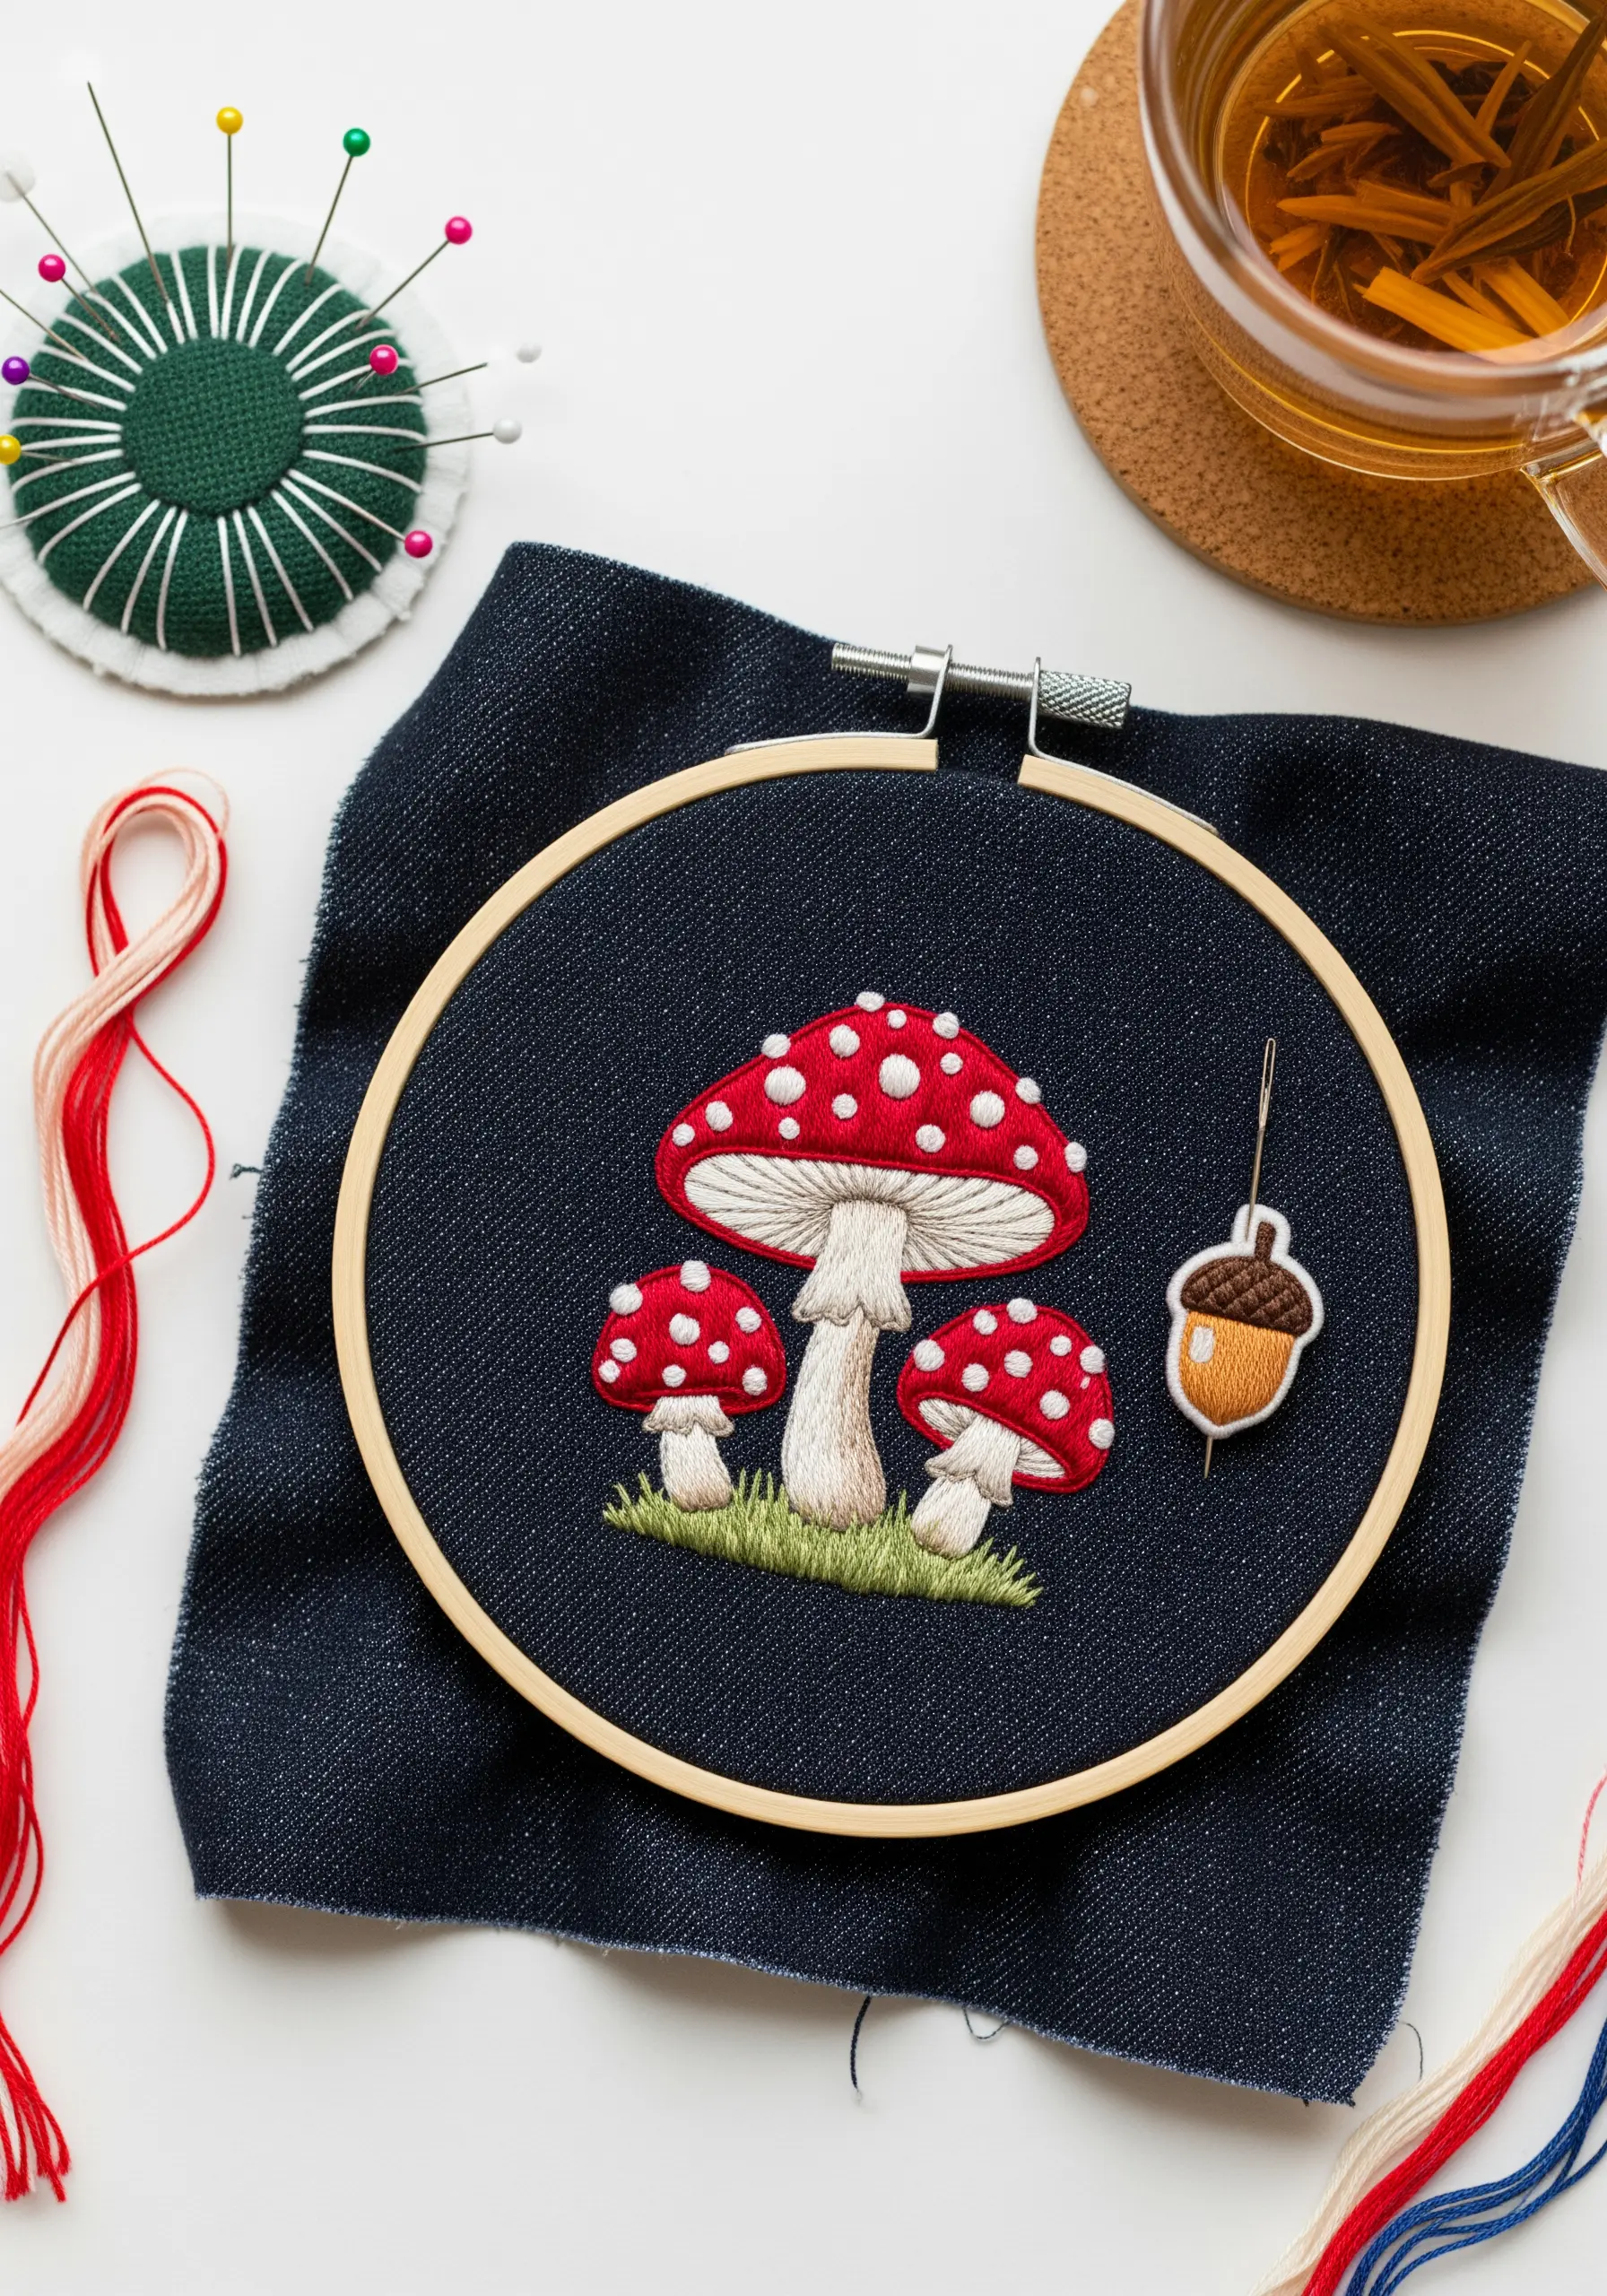
For an instantly dimensional mushroom, contrast a smooth satin stitch cap with textured French knots.
After filling the red areas, use a bright white thread to scatter French knots across the surface, varying their placement for a natural look.
This technique not only adds tactile interest but also catches the light beautifully, making the motif pop against the dark fabric.
For the stems, use vertical satin stitches in an off-white or pale gray to suggest gills and add subtle shading.
These forest floor botanical stitch ideas bring a touch of woodland charm to any project.
3. Achieve Graphic Impact with Bold Outlines
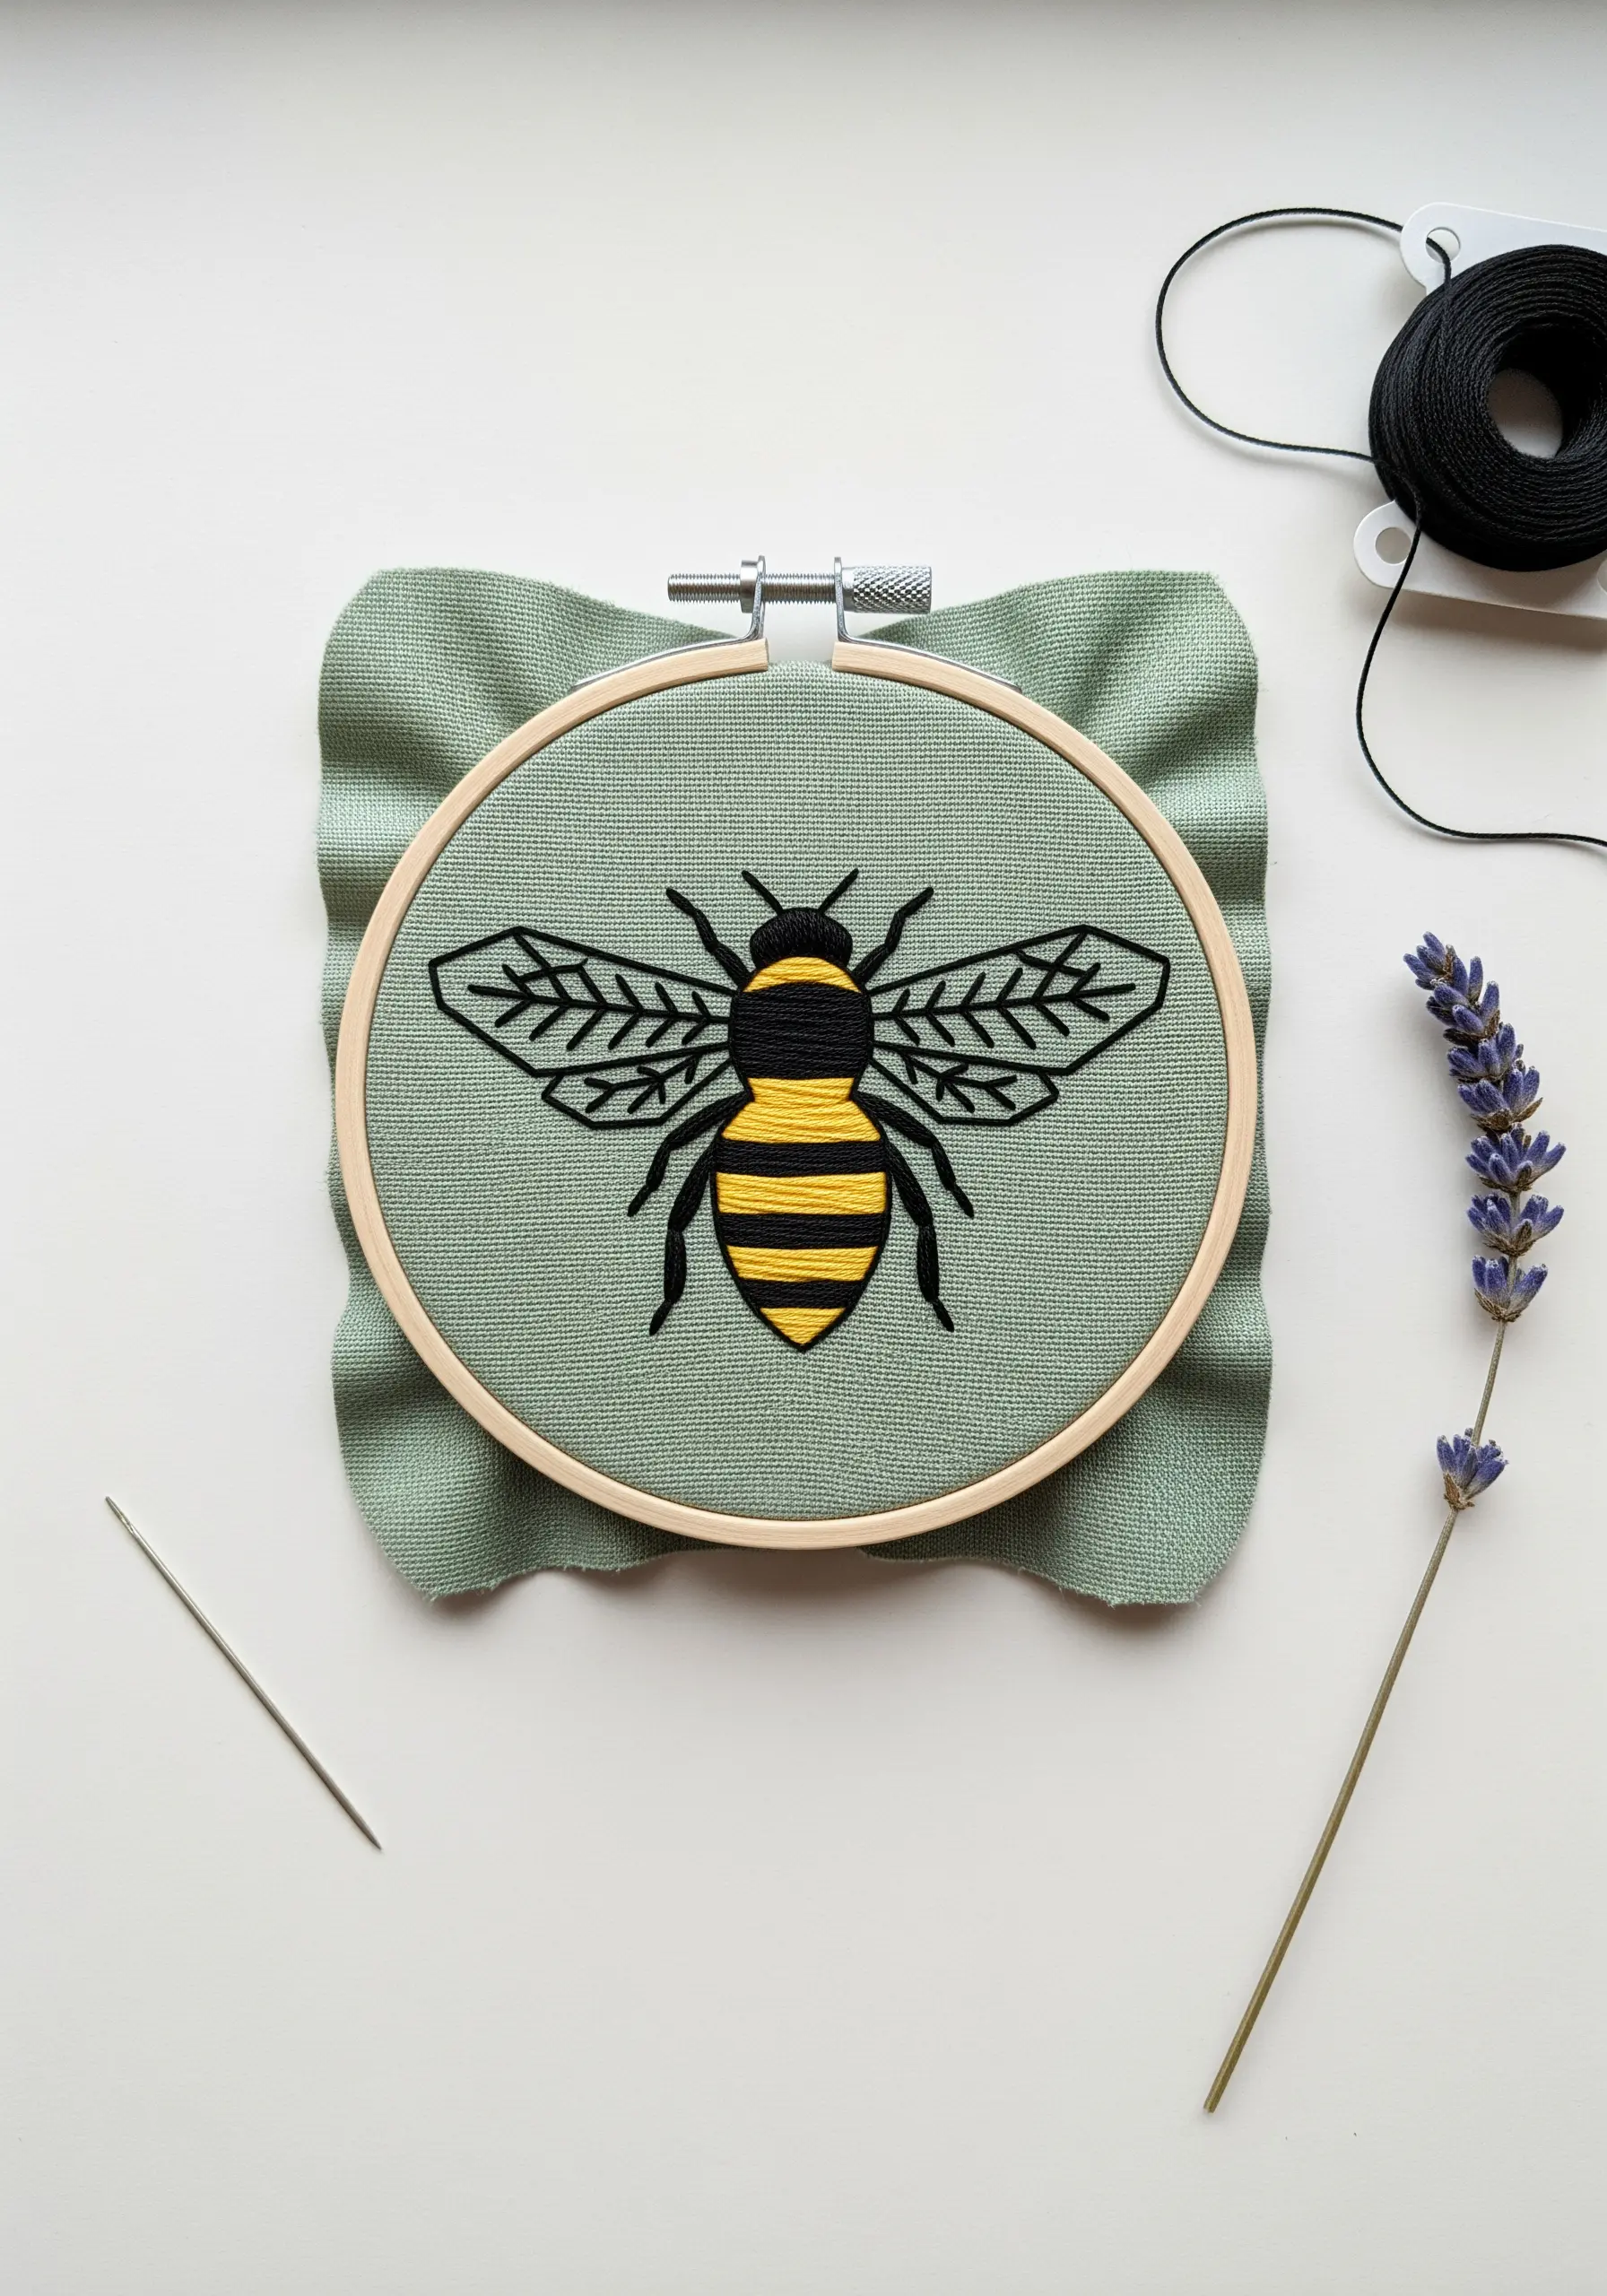
When a design is graphic and clean, the outline is everything.
Instead of a simple backstitch, use a stem stitch for the bee’s body and wings.
A stem stitch creates a slightly raised, rope-like line that gives the motif substance and a clean, defined edge.
Fill the stripes with a dense, horizontal satin stitch, ensuring your stitches lay close together for opaque color blocking.
This combination of a strong outline and solid fill is perfect for creating a modern, illustrative style that feels both bold and polished.
4. Blend Autumnal Hues with a Long-and-Short Stitch
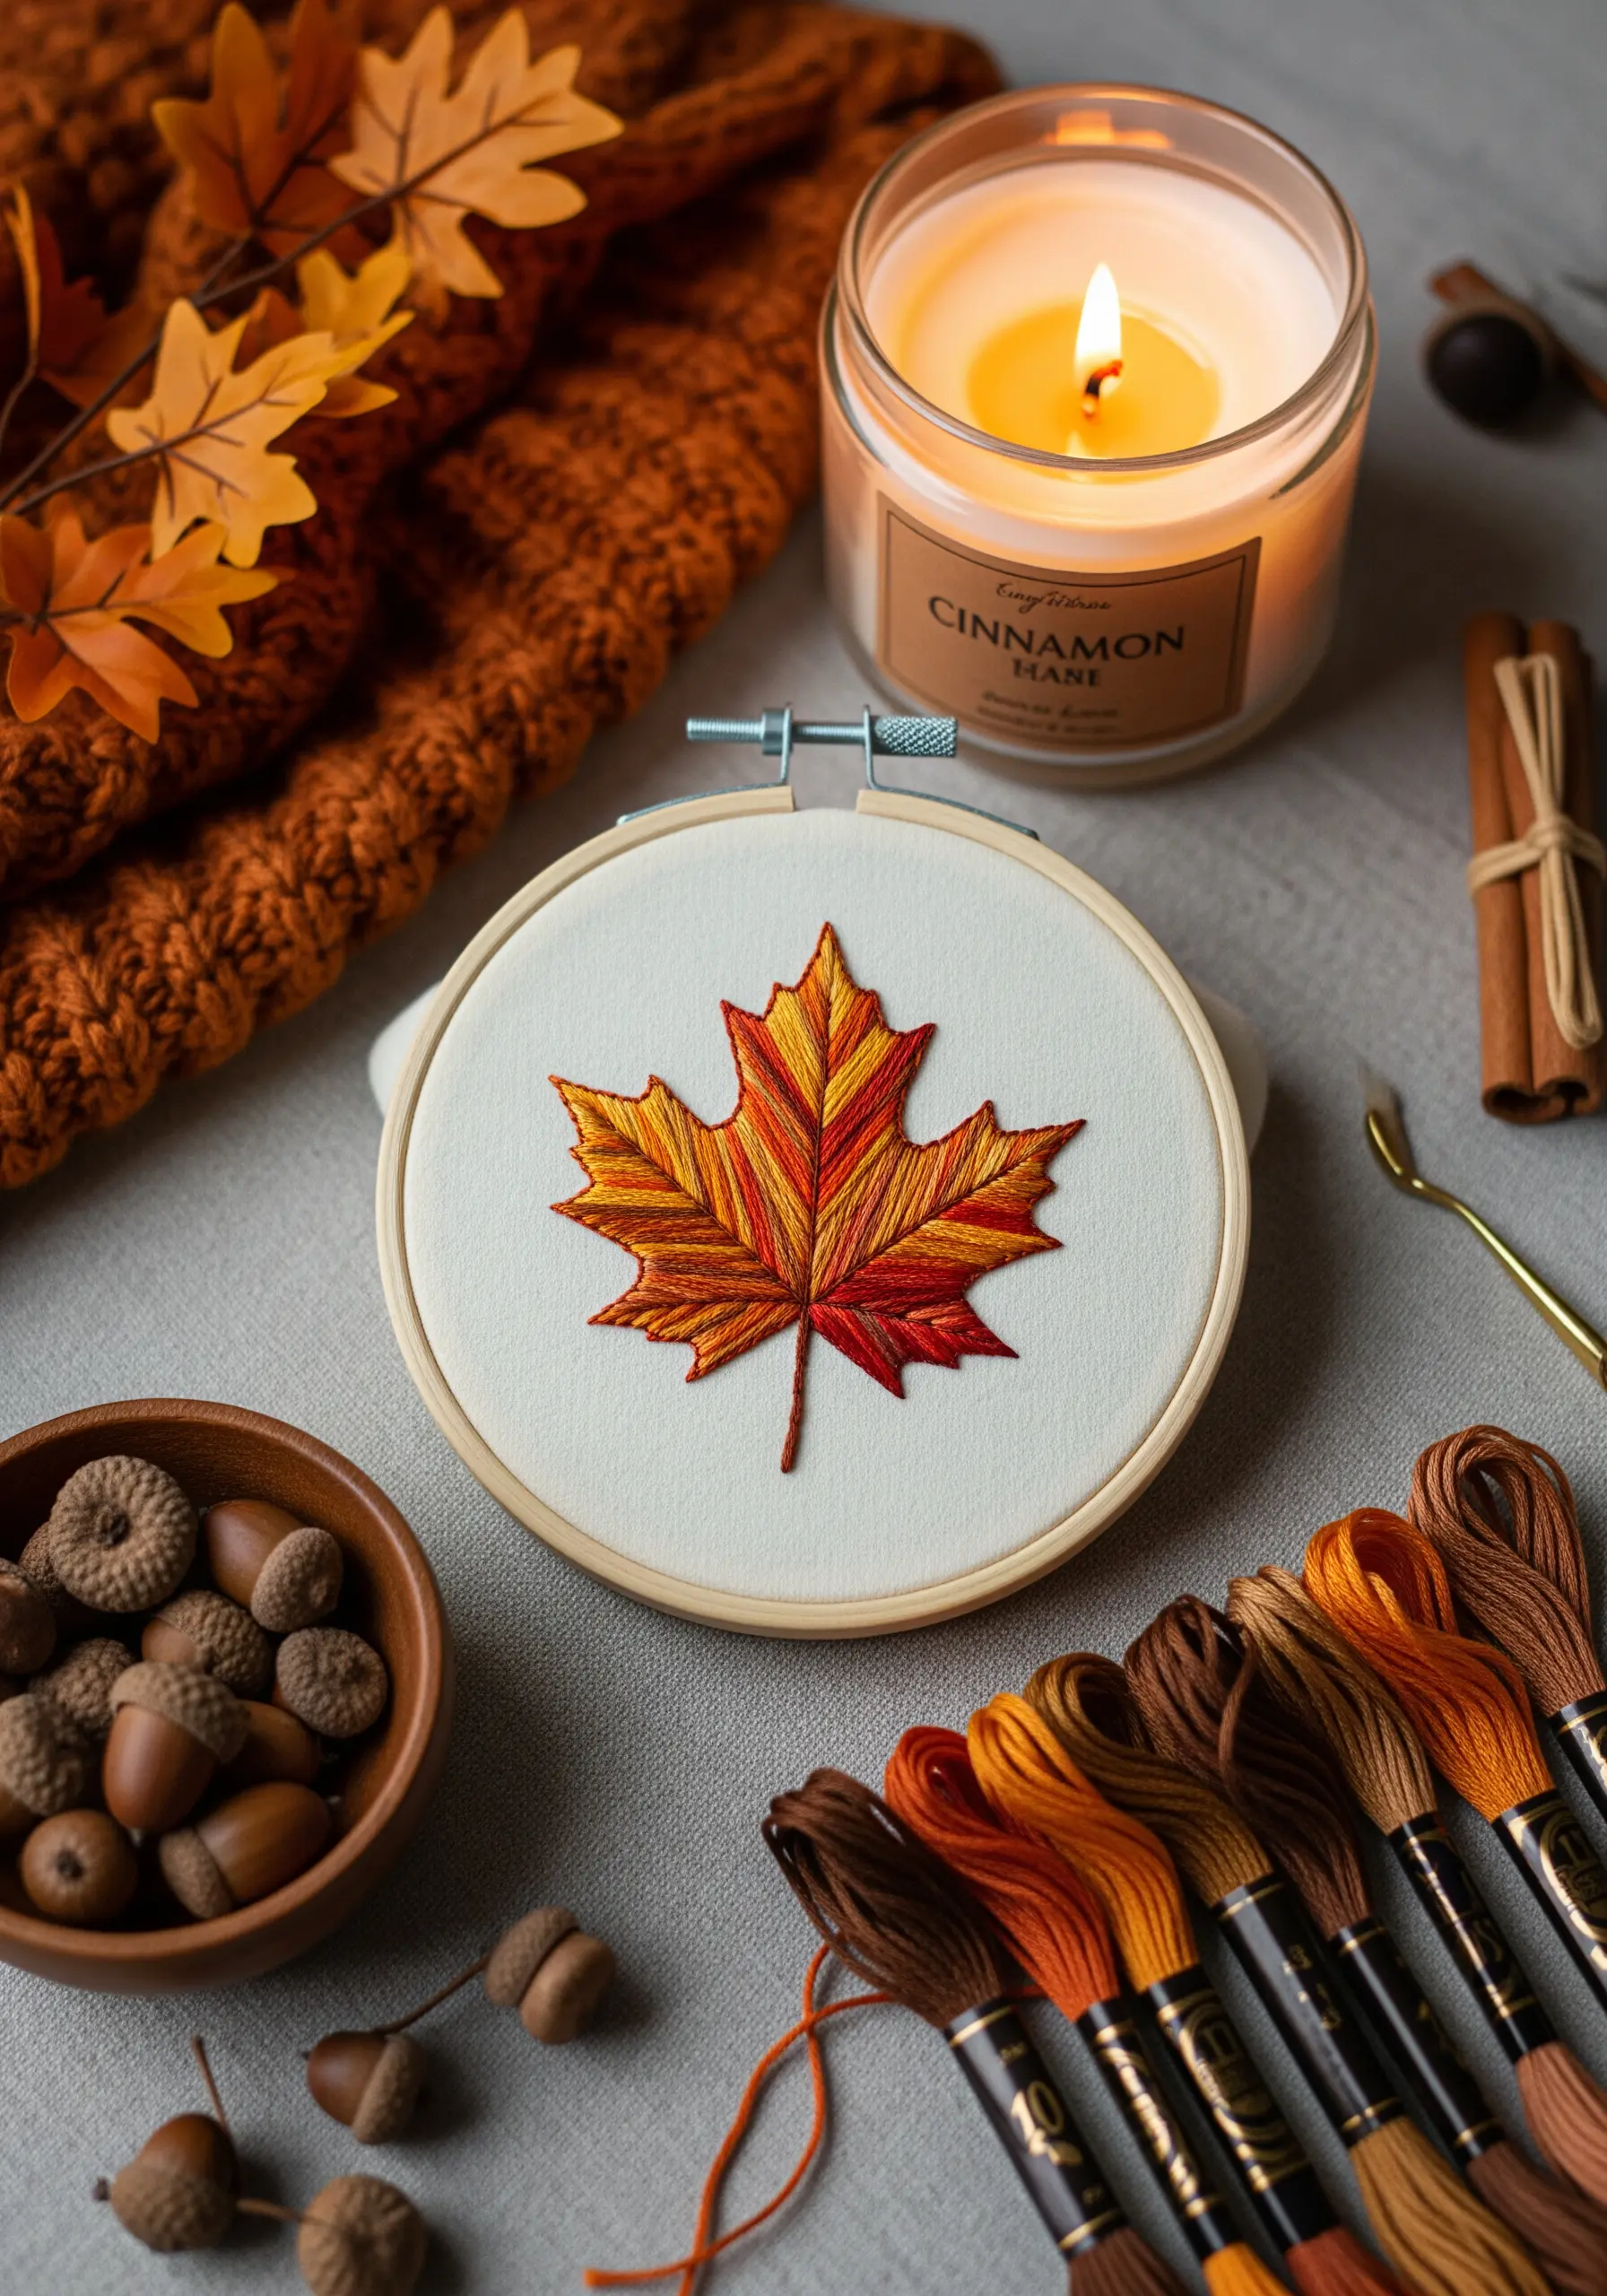
Capture the gentle gradient of an autumn leaf by using a long-and-short stitch instead of color blocking.
Start with your darkest color at the base of a section, then introduce the next shade by staggering your stitch lengths, blending them into the first color.
Work in rows, allowing the colors to merge organically.
This thread-painting technique creates a soft, realistic transition between hues that a satin stitch can’t replicate.
For crisp edges, outline the entire leaf with a split stitch before you begin filling it, which provides a defined border for your stitches to meet.
Explore more ways to layer leaf stitching for three-dimensional results.
5. Add Celestial Shimmer with Metallic Thread
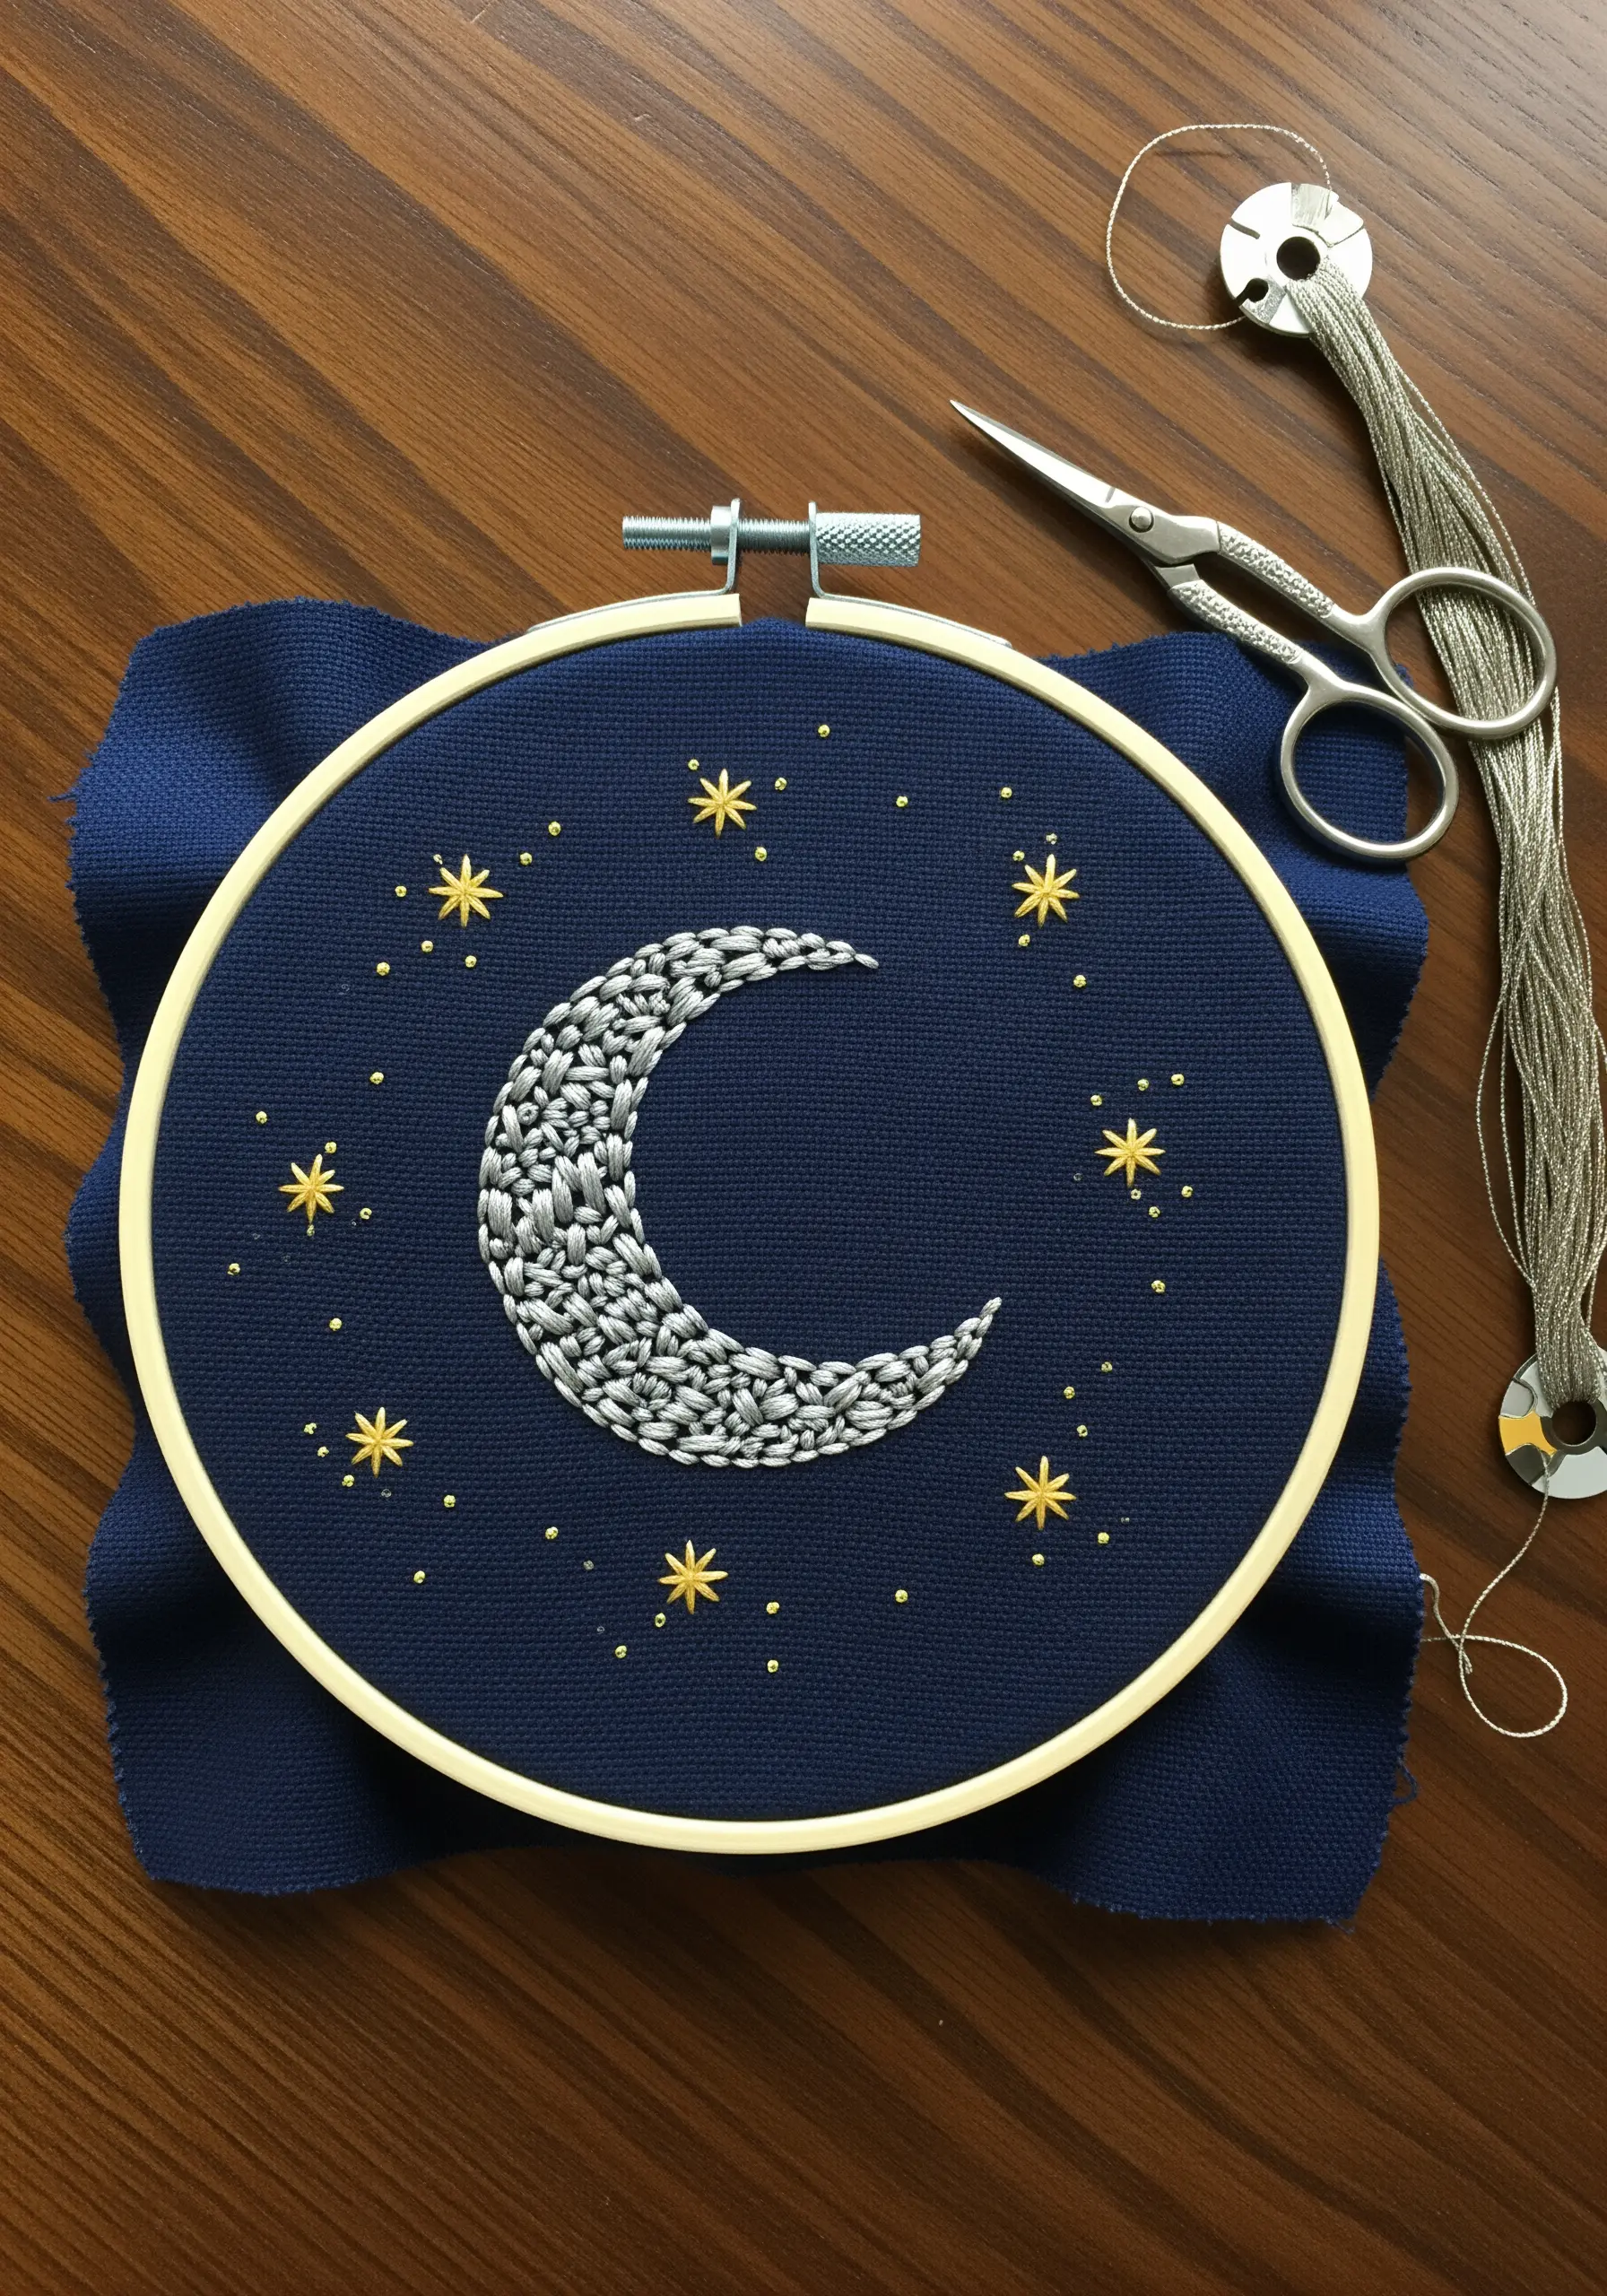
Elevate a simple night sky design by swapping standard cotton floss for metallic thread.
Fill the crescent moon with a dense seed stitch using a silver or pearlescent metallic thread, which creates a textured, light-reflecting surface that mimics the moon’s craters.
For the stars, stitch tiny star shapes or single straight stitches with gold metallic thread.
Working with metallic floss can be tricky; use a thread conditioner and a slightly larger needle to prevent fraying and ensure smooth stitches.
Explore these dreamy galaxy string art concepts to turn basic threads into cosmic art.
6. Embrace Simplicity with Cross-Stitch on Aida

For a quick and satisfying project with a charming, nostalgic feel, cross-stitch is unbeatable.
Using Aida cloth with its built-in grid makes stitch placement effortless and ensures perfect uniformity.
Work one color at a time, completing a row of half stitches (///) and then returning to complete the crosses (XXX).
This method, known as the Danish method, keeps the back of your work tidy and uses thread more efficiently.
This graphic style is perfect for DIY cozy embroidery bookmarks or small framed pieces.
7. Craft 3D Lavender with Bullion Knots
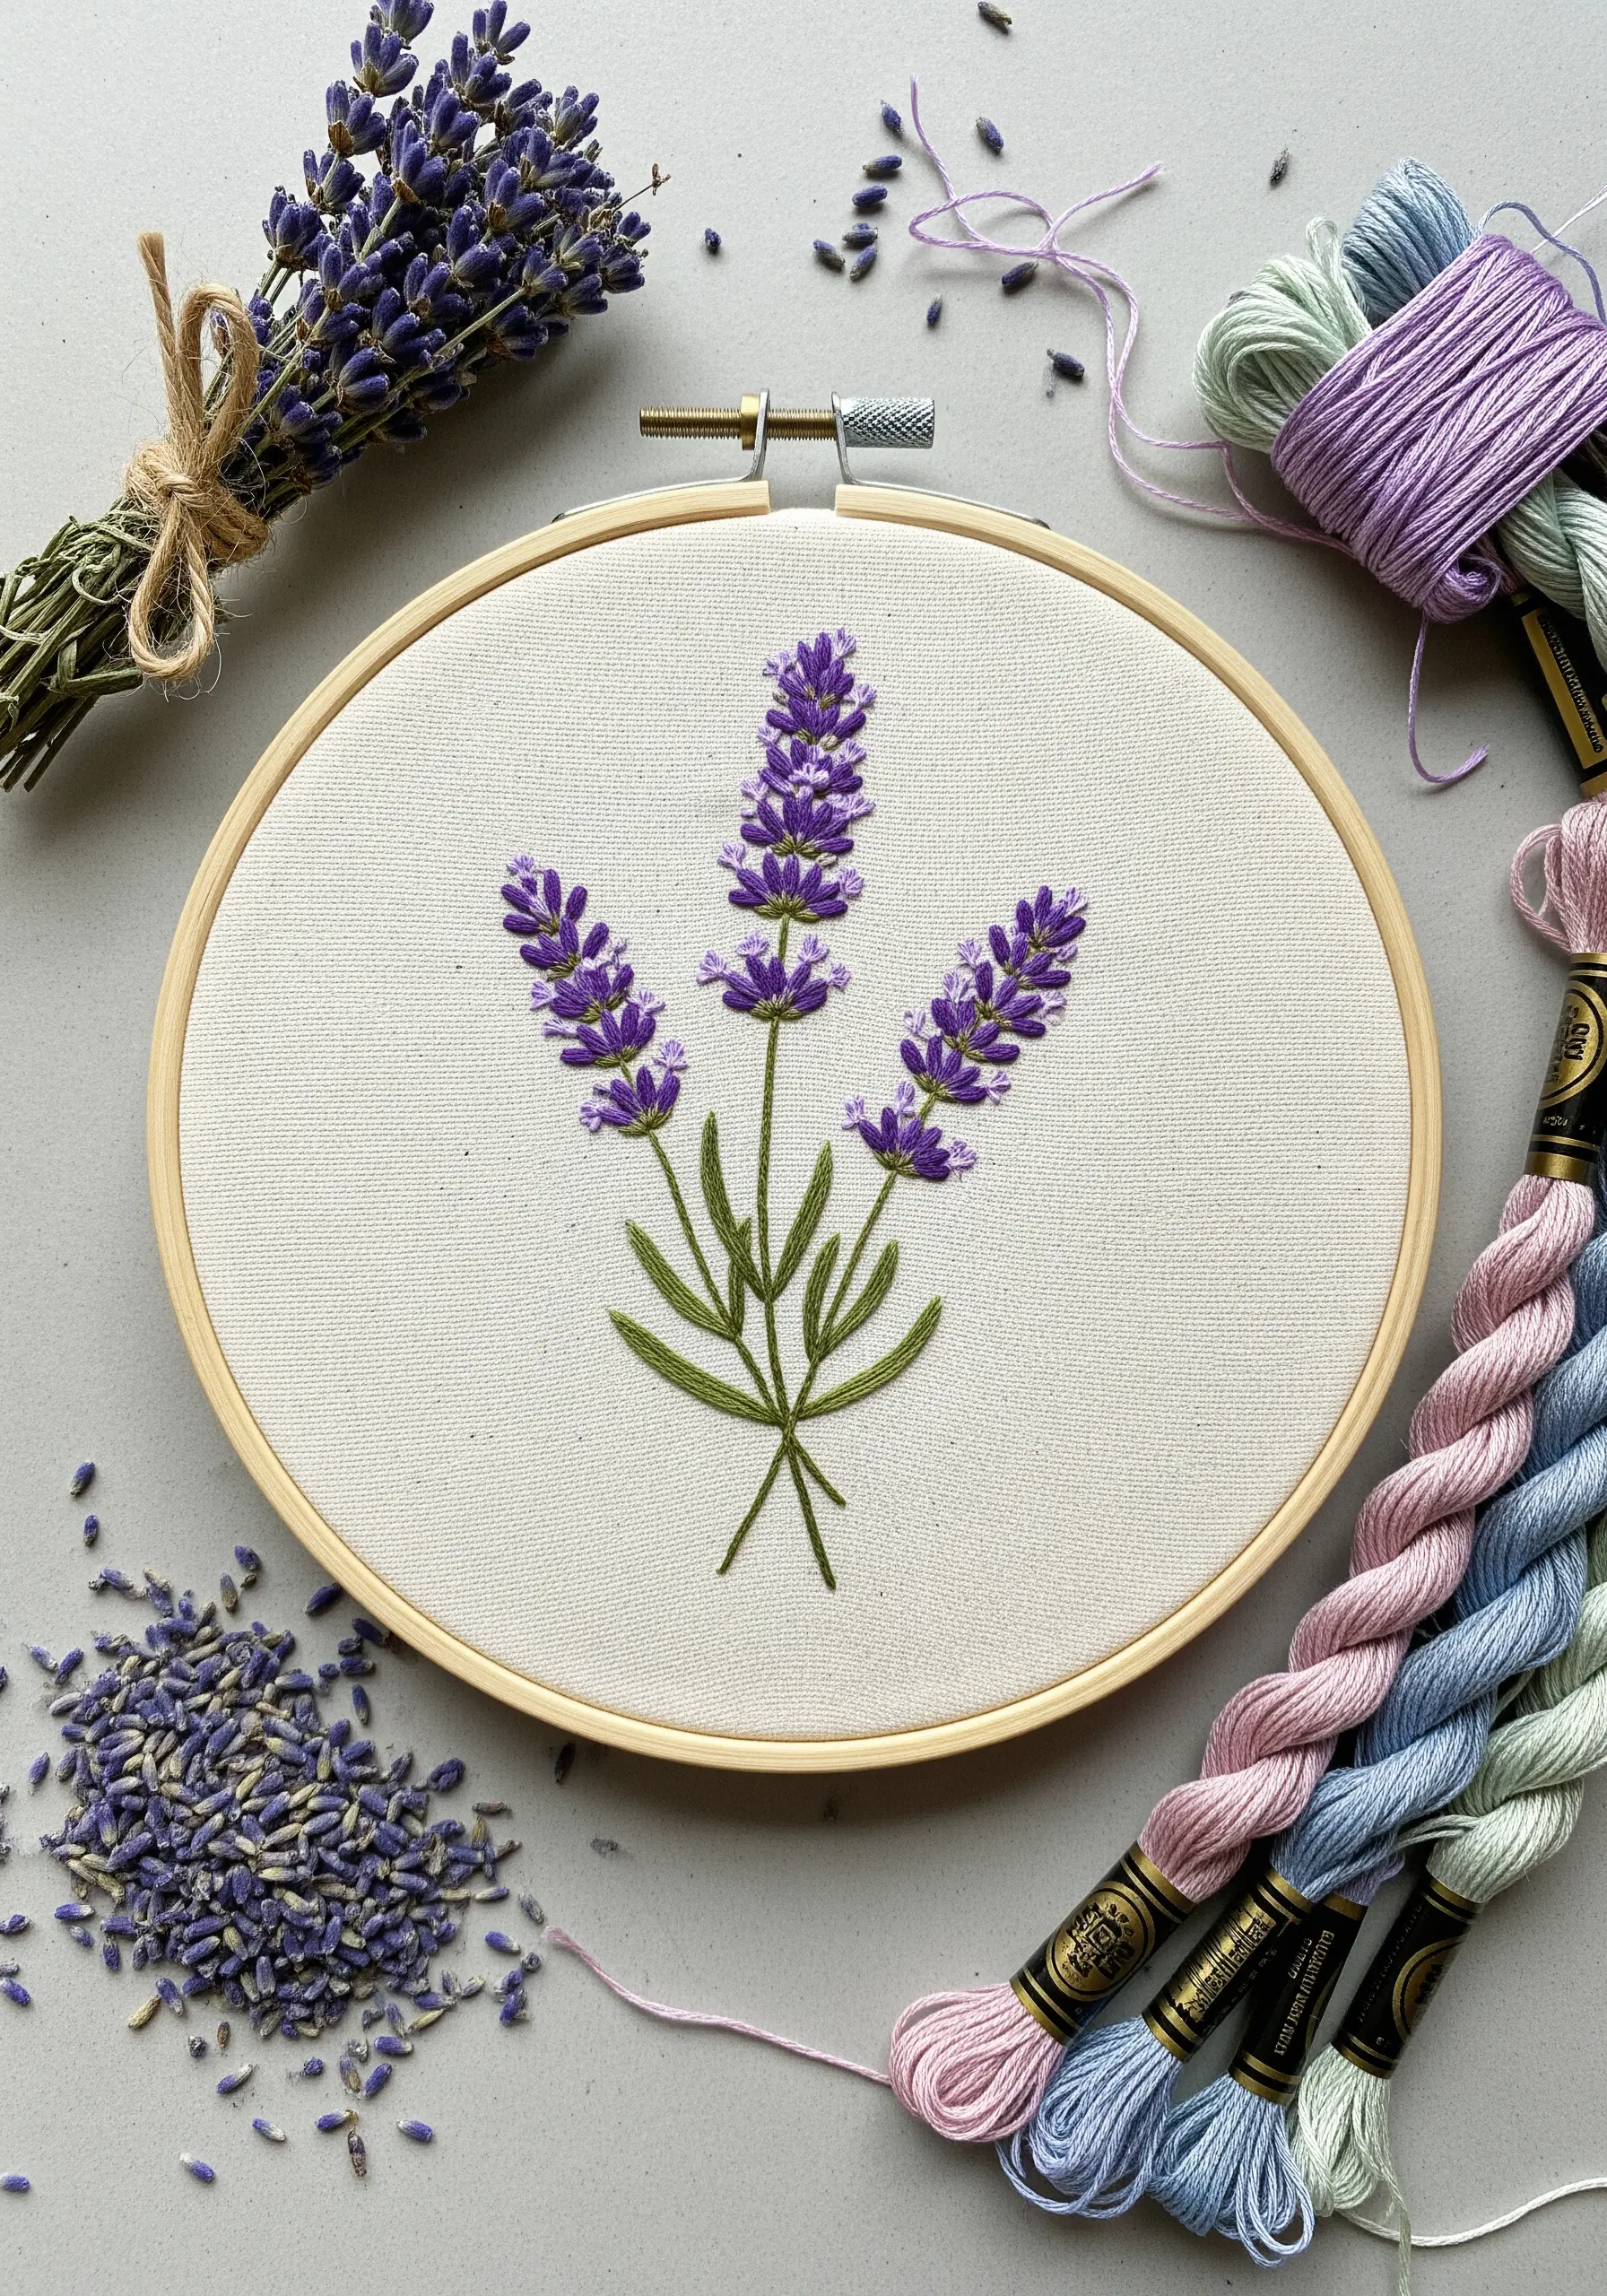
Give your lavender sprigs realistic texture and dimension by using bullion knots for the flower buds.
To create a bullion knot, wrap the thread around your needle several times before pulling it through the fabric, forming a small, raised coil.
Vary the number of wraps to create different-sized buds, clustering them tightly at the top of the stem and spacing them out as you move down.
For the stems, a simple stem stitch in a contrasting green provides the perfect delicate base.
These lavender field embroidery ideas are perfect for creating a calming atmosphere.
8. Design an Icy Snowflake with Whipped Stitches

To create a snowflake that feels both delicate and frosty, combine a basic backstitch outline with whipped stitches and metallic thread.
First, stitch the entire snowflake shape using a simple backstitch with white cotton floss.
Next, take a single strand of silver metallic thread and whip it around the backstitches without piercing the fabric.
This adds a shimmering, icy layer that catches the light and gives the design a crisp, jewel-like quality perfect for festive season embroidery wall hangings.
9. Stitch a Delicate Floral Teacup
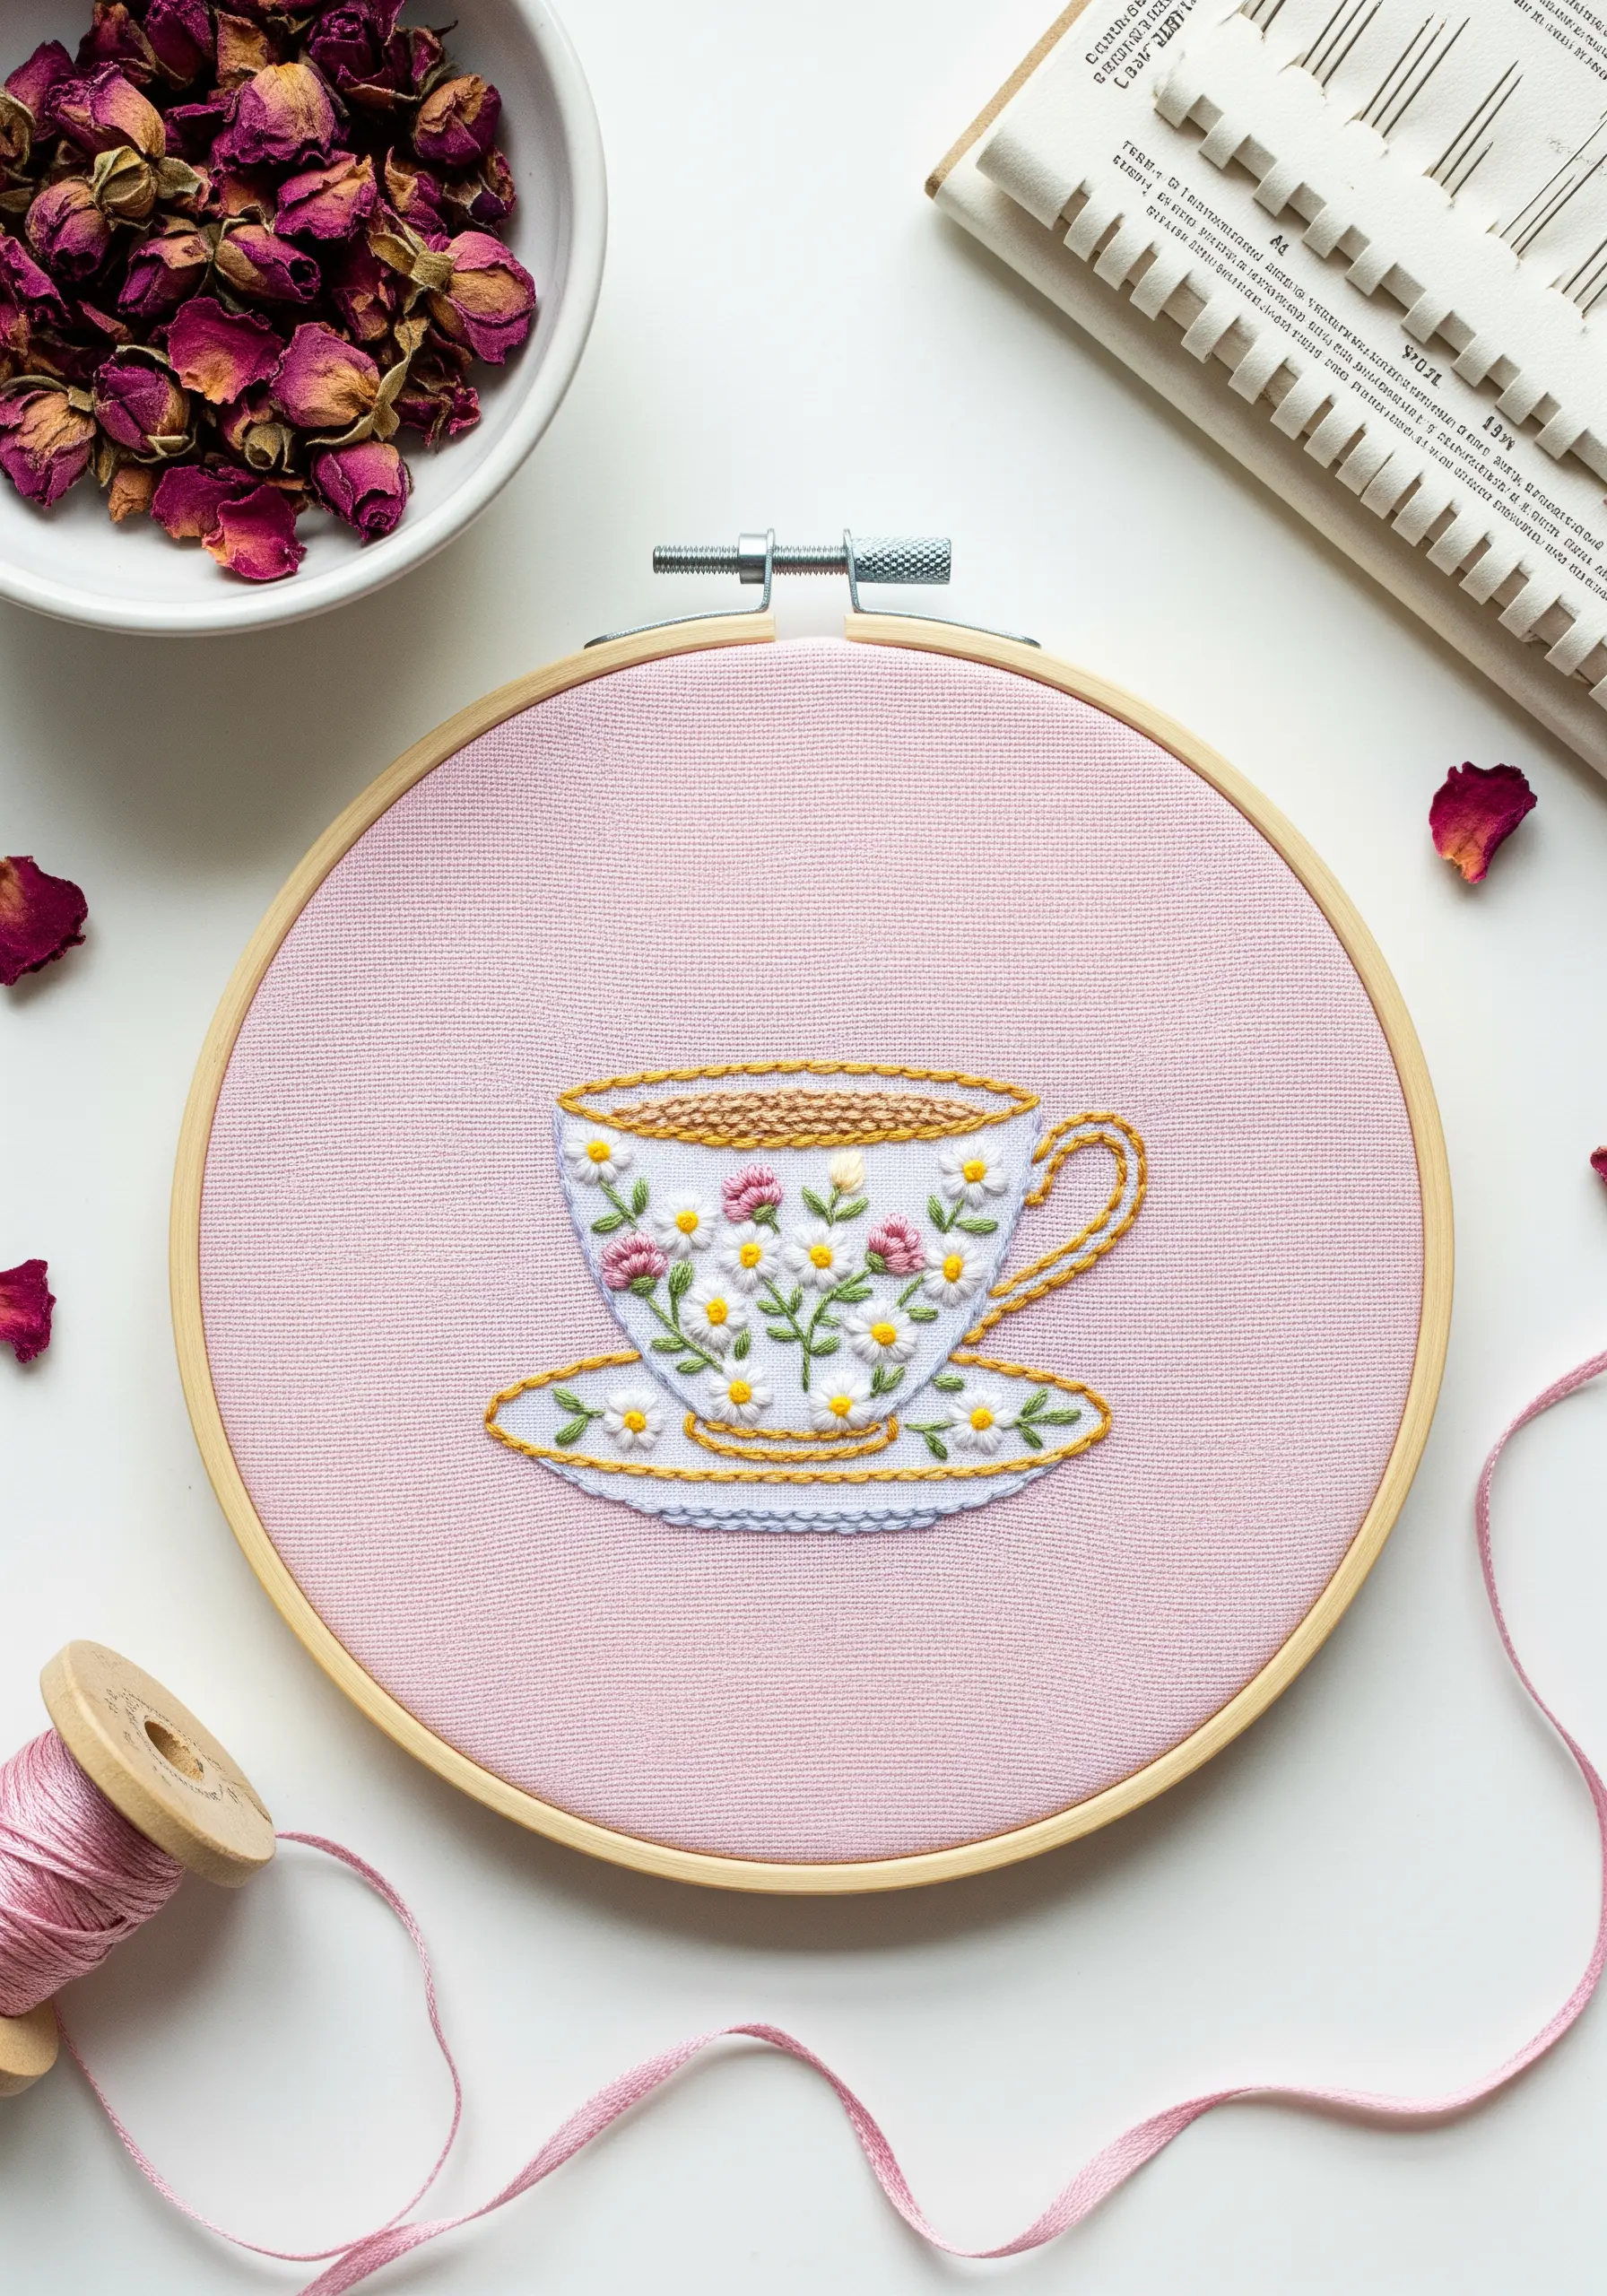
Transform a simple teacup outline into a piece of vintage-inspired art with tiny floral details.
Use lazy daisy stitches with a single strand of floss to create the petals, and place a tiny French knot in the center of each flower.
For the teacup’s rim and handle, use a split stitch with a single strand of gold metallic thread to add a touch of elegance.
Filling the cup’s body with a field of these tiny scattered florals is faster than satin stitch and adds far more character.
10. Capture Elegance with Minimal Line Art
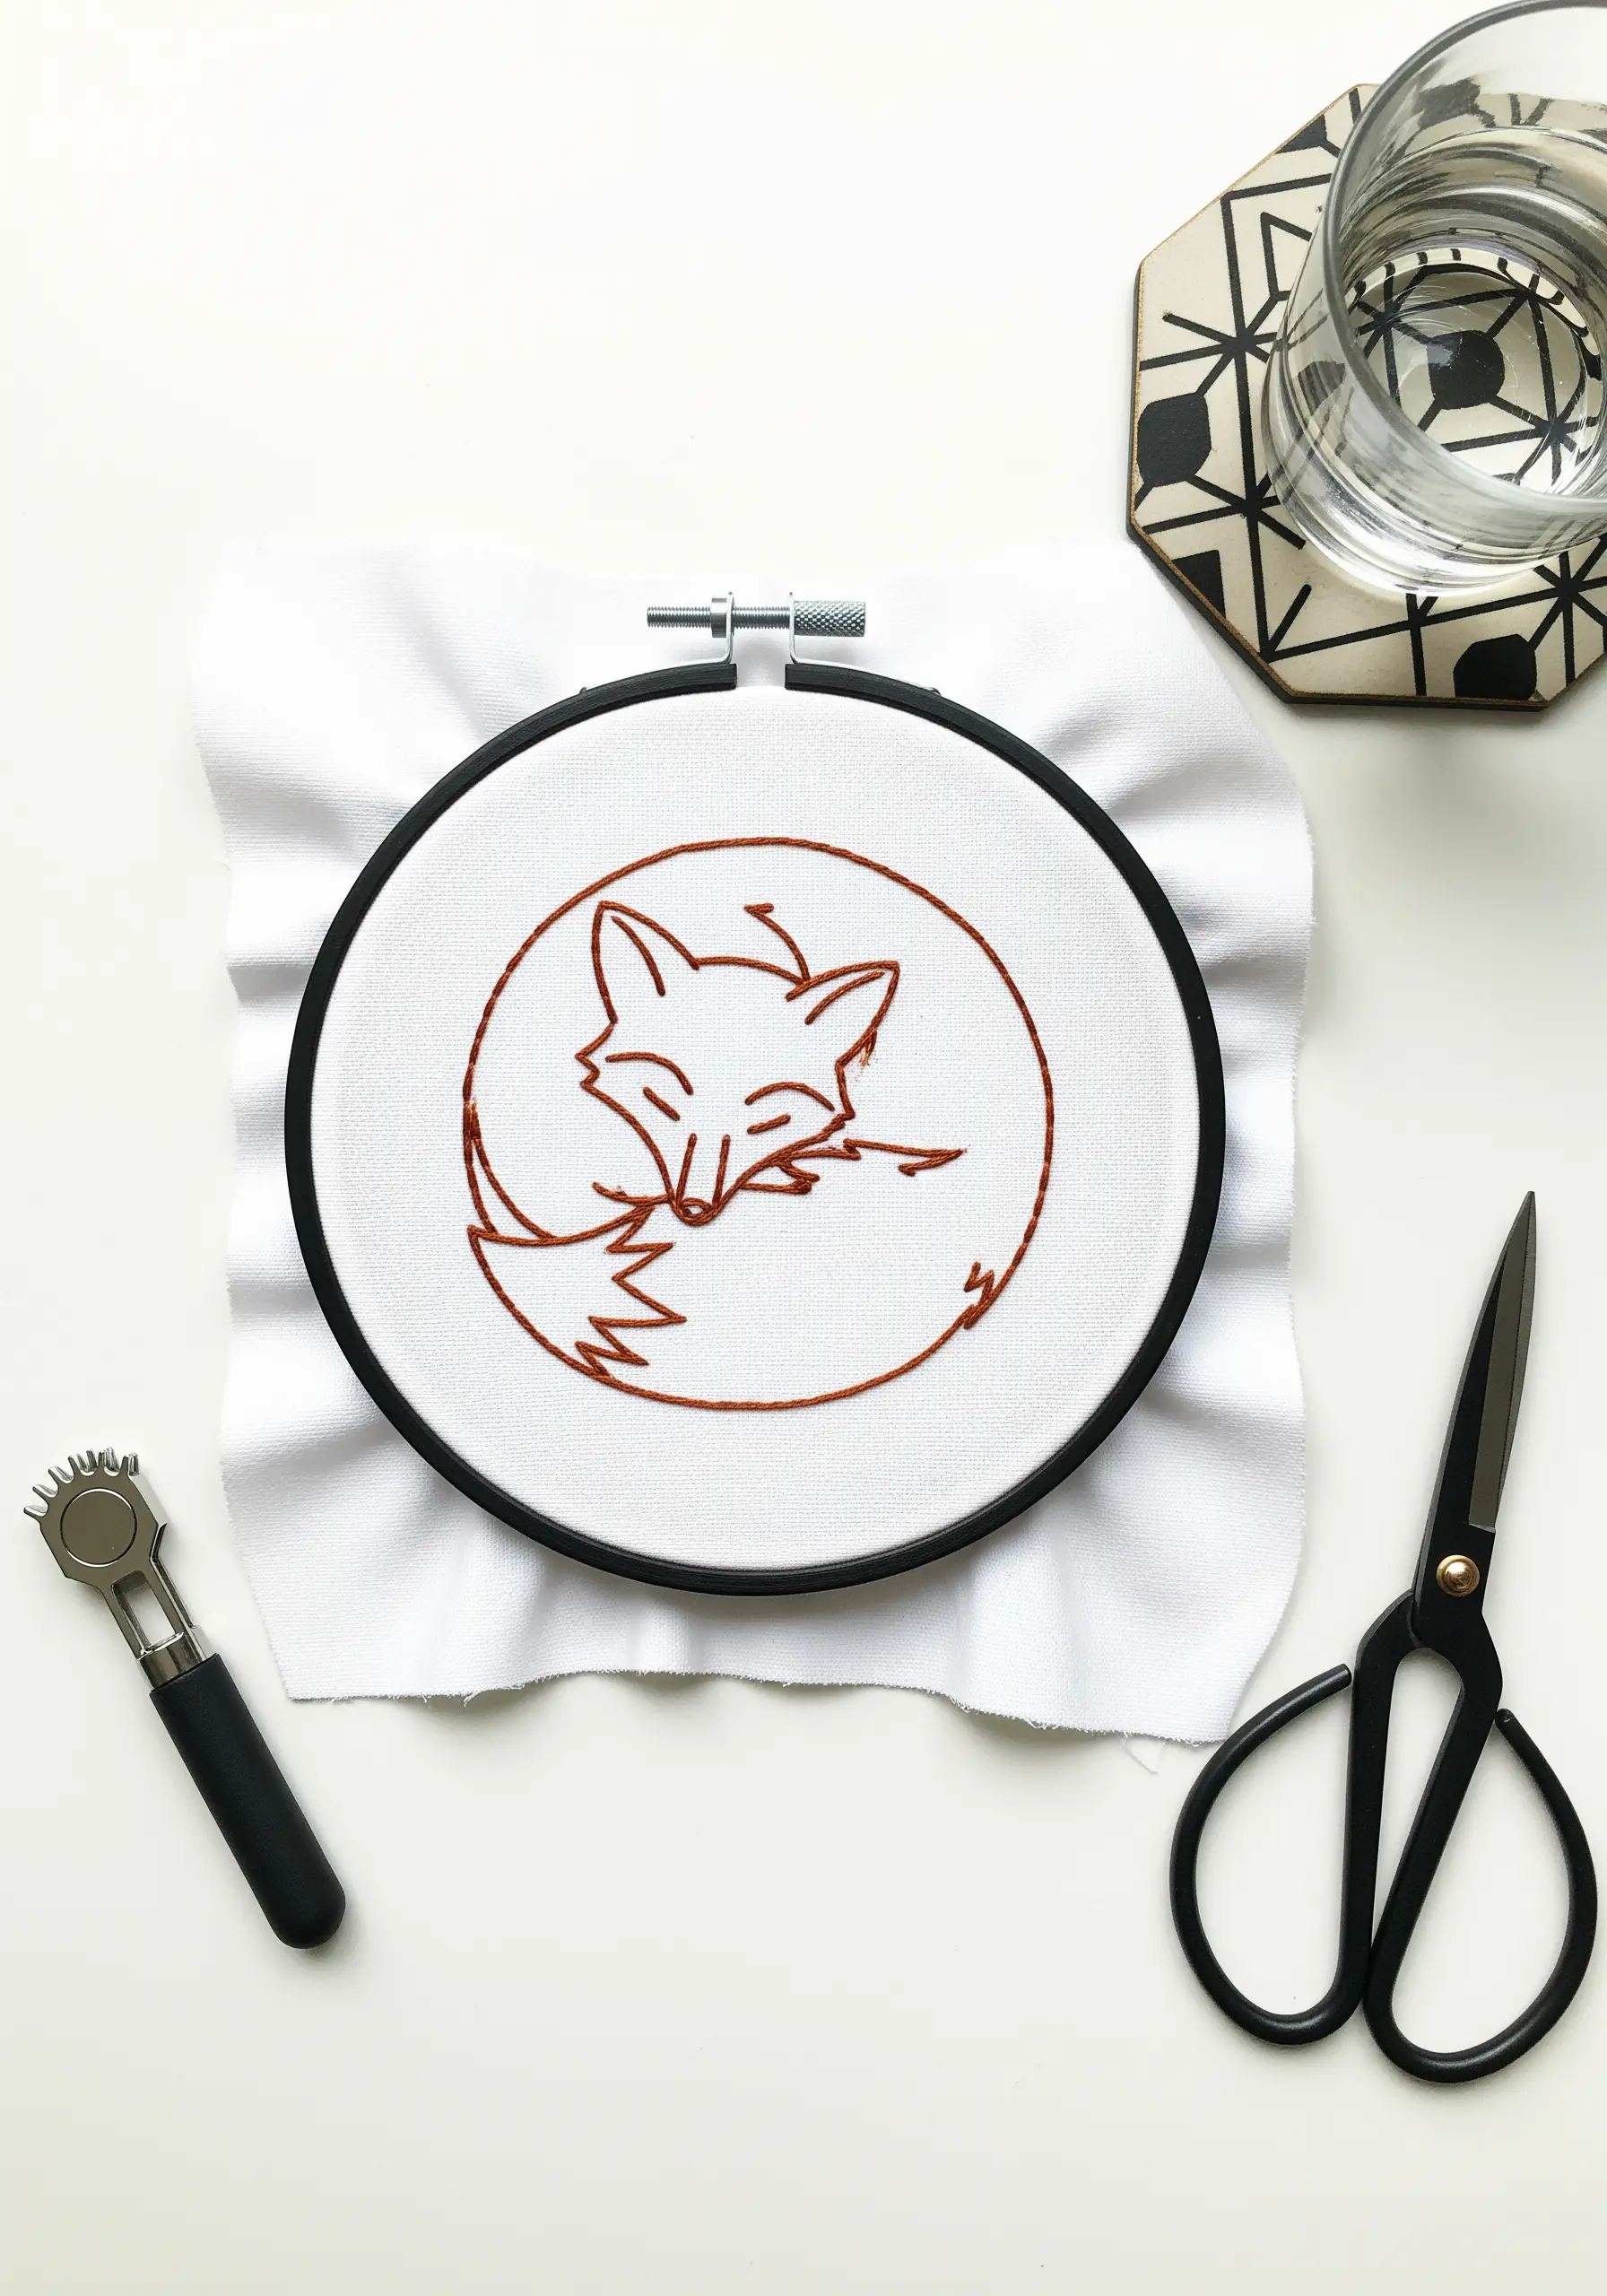
Sometimes, the most impactful design is the simplest.
Create this sleeping fox using only a stem stitch or a whipped backstitch to ensure a smooth, continuous line.
Using three strands of floss gives the line enough weight to be substantial without appearing bulky.
The key to successful line art is consistency in your stitch length and tension.
This clean, modern approach is ideal for minimalist line art animal designs and can be completed in a single sitting.
11. Build a Textured Hedgehog with Layered Stitches
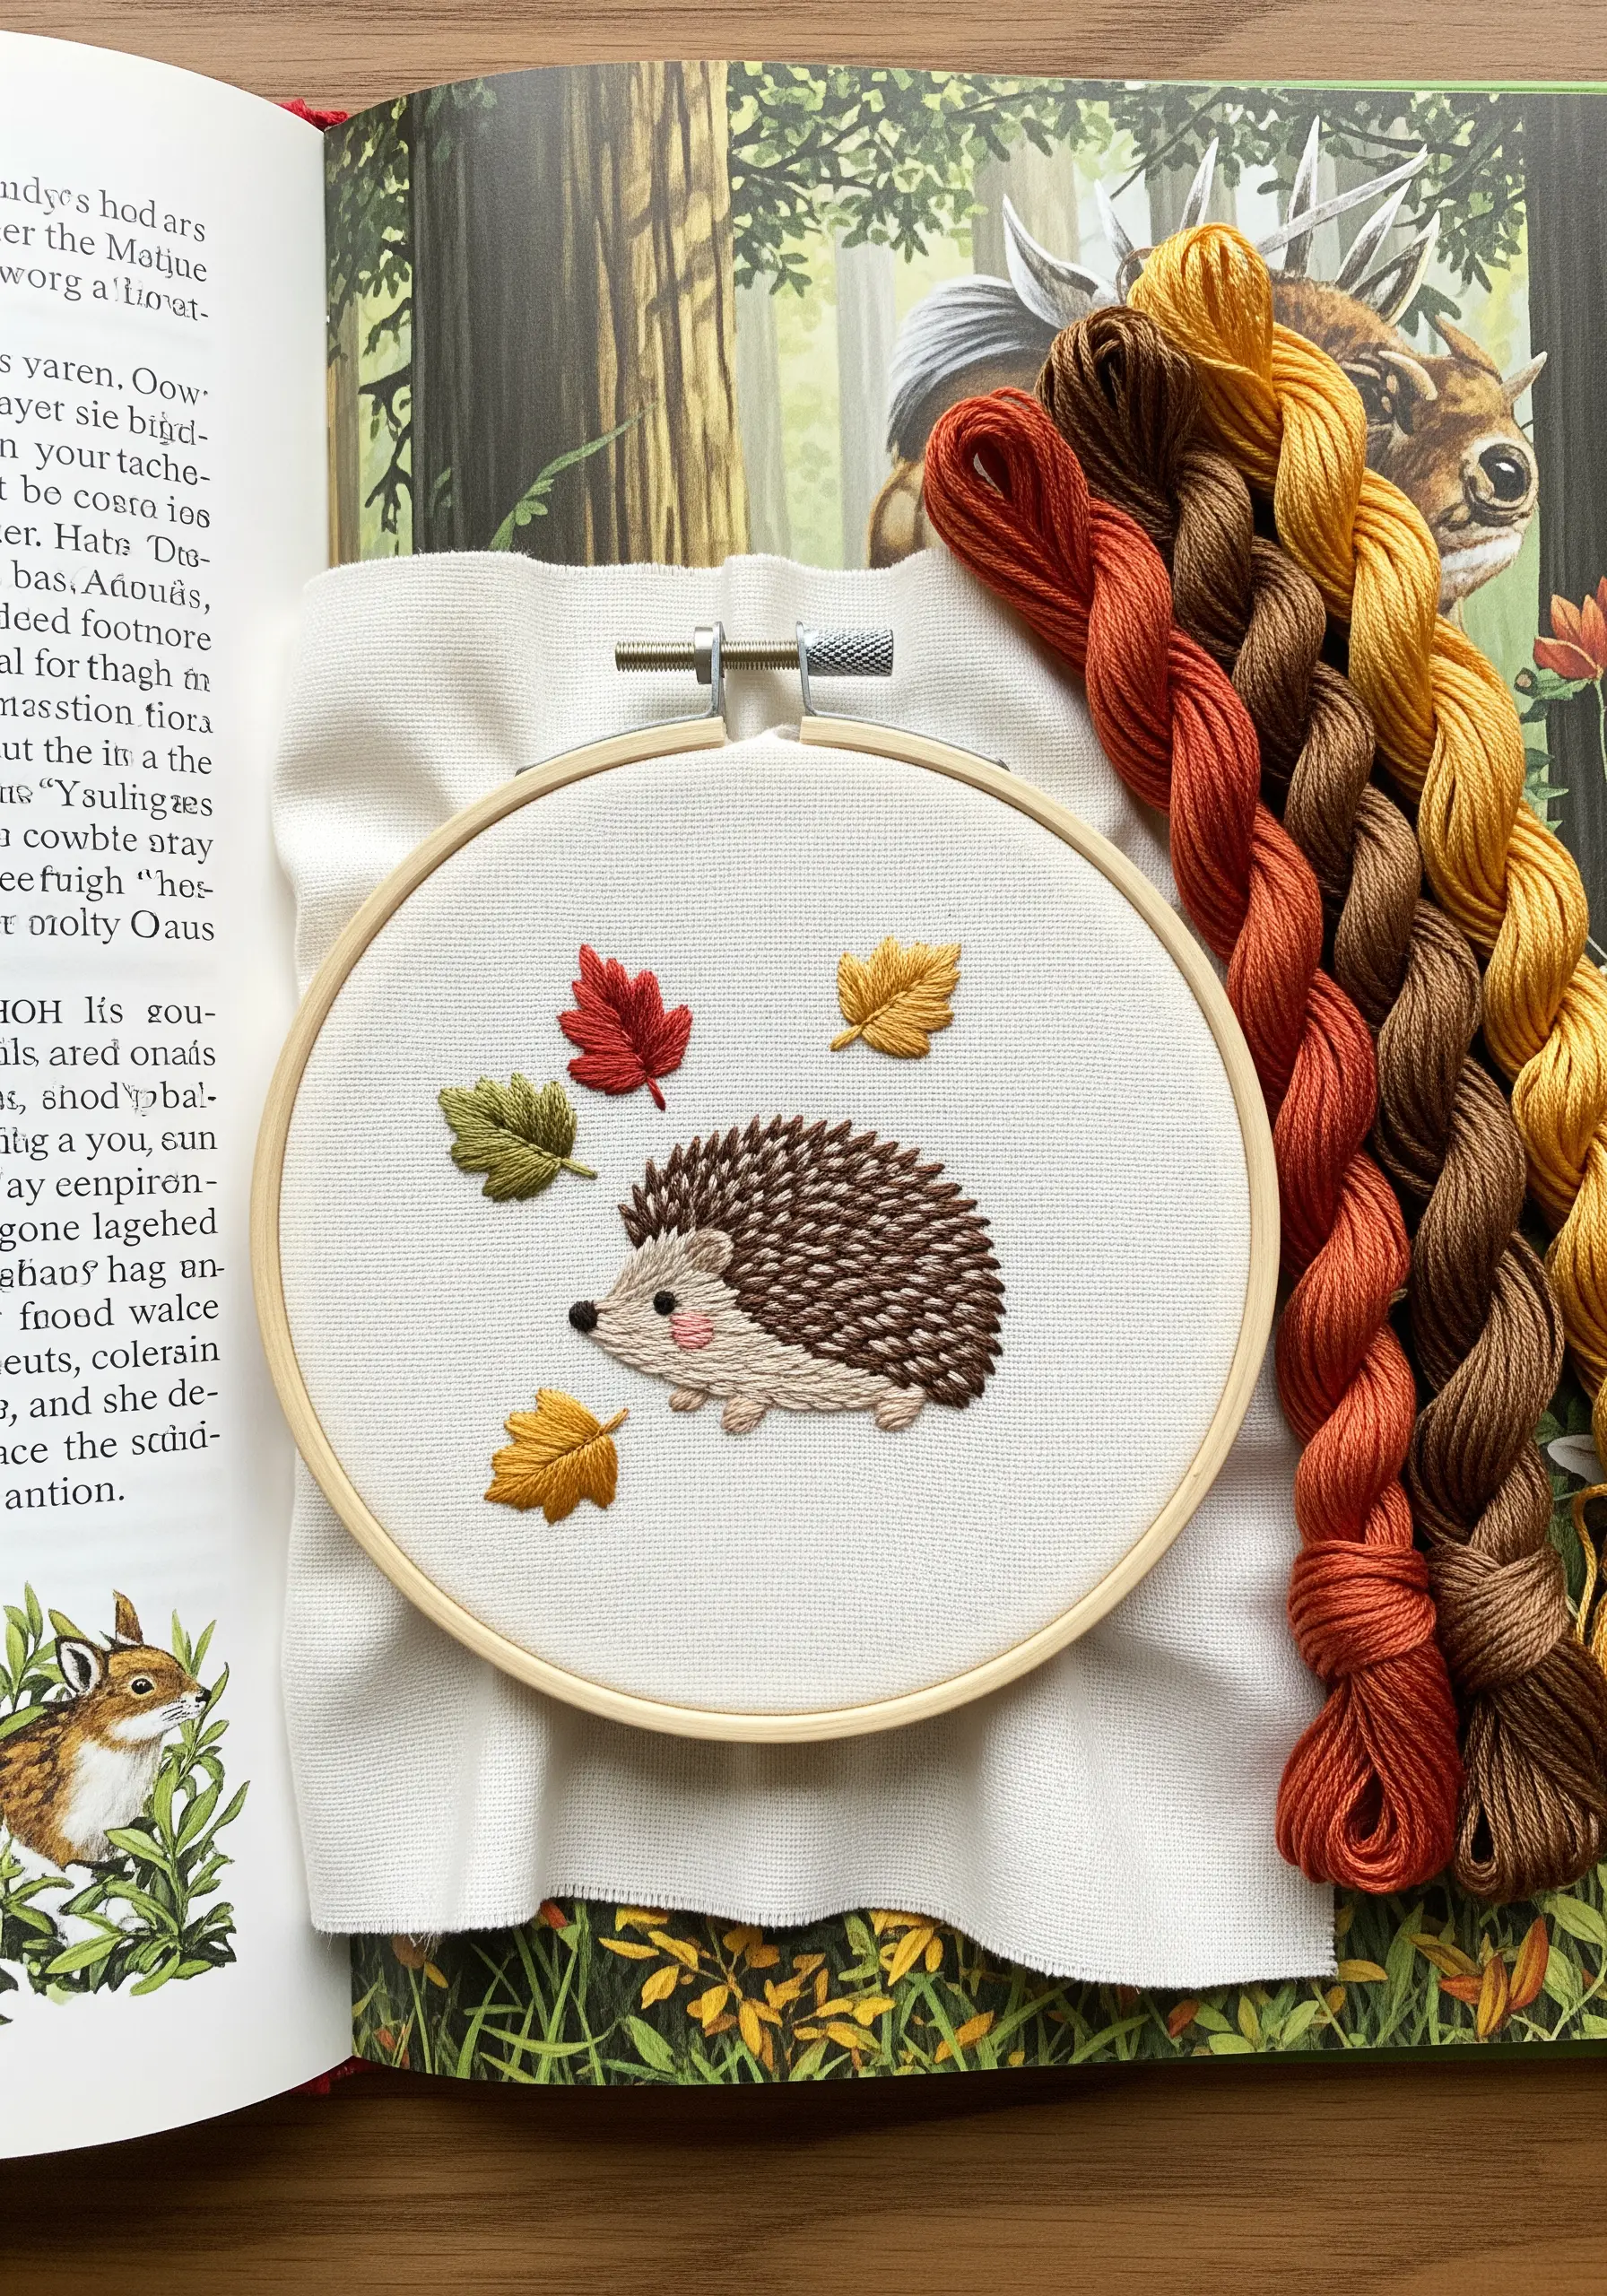
To create the spiky texture of a hedgehog’s back, use layered, angled straight stitches.
Start by filling the body with a base layer of satin stitches in a light brown.
Then, using a darker brown, add shorter, angled straight stitches over the top, layering them like shingles to mimic quills.
This technique is not only fast but also adds wonderful depth and a touchable quality to your work.
For more inspiration, check out these adorable forest animal embroidery ideas.
12. Add Dimension with a Padded Satin Stitch

Make your strawberry motif look plump and juicy with a padded satin stitch.
Before you begin your red satin stitch, fill the entire strawberry shape with small, underlying straight stitches using a less precious thread, like a spare white or cream.
Then, stitch your final satin stitches directly over this padded base.
The extra layer raises the surface, creating a subtle 3D effect that makes the motif stand out, especially on a patterned fabric like a kitchen towel.
Use tiny yellow French knots for the seeds as a final touch.
13. Create a Radiant Sunrise with Straight Stitches

For a clean, modern landscape, let simple stitches do the heavy lifting.
Use a dense satin stitch for the sun and long, radiating straight stitches for its rays.
To keep the rays perfectly straight and taut, bring your needle up at the sun’s edge and down at the outer point of the ray, pulling gently.
Varying the spacing and length of the rays adds visual interest.
This minimalist approach uses negative space effectively and is much quicker than complex thread painting, which you can explore in these mountain landscape thread painting techniques.
14. Suggest Rainy Days with Teardrop Stitches

Capture the feeling of a cozy, rainy afternoon with a simple windowpane design.
Use a whipped backstitch in white for a smooth, rounded window frame.
For the raindrops, create small, detached chain stitches (lazy daisies) without the anchoring stitch, pulling the loop into a teardrop shape.
Stitch them in varying shades of blue and scatter them asymmetrically to mimic rain trickling down glass.
This simple combination of stitches evokes a mood with minimal complexity.
15. Mimic Citrus Texture with a Split Stitch Fill
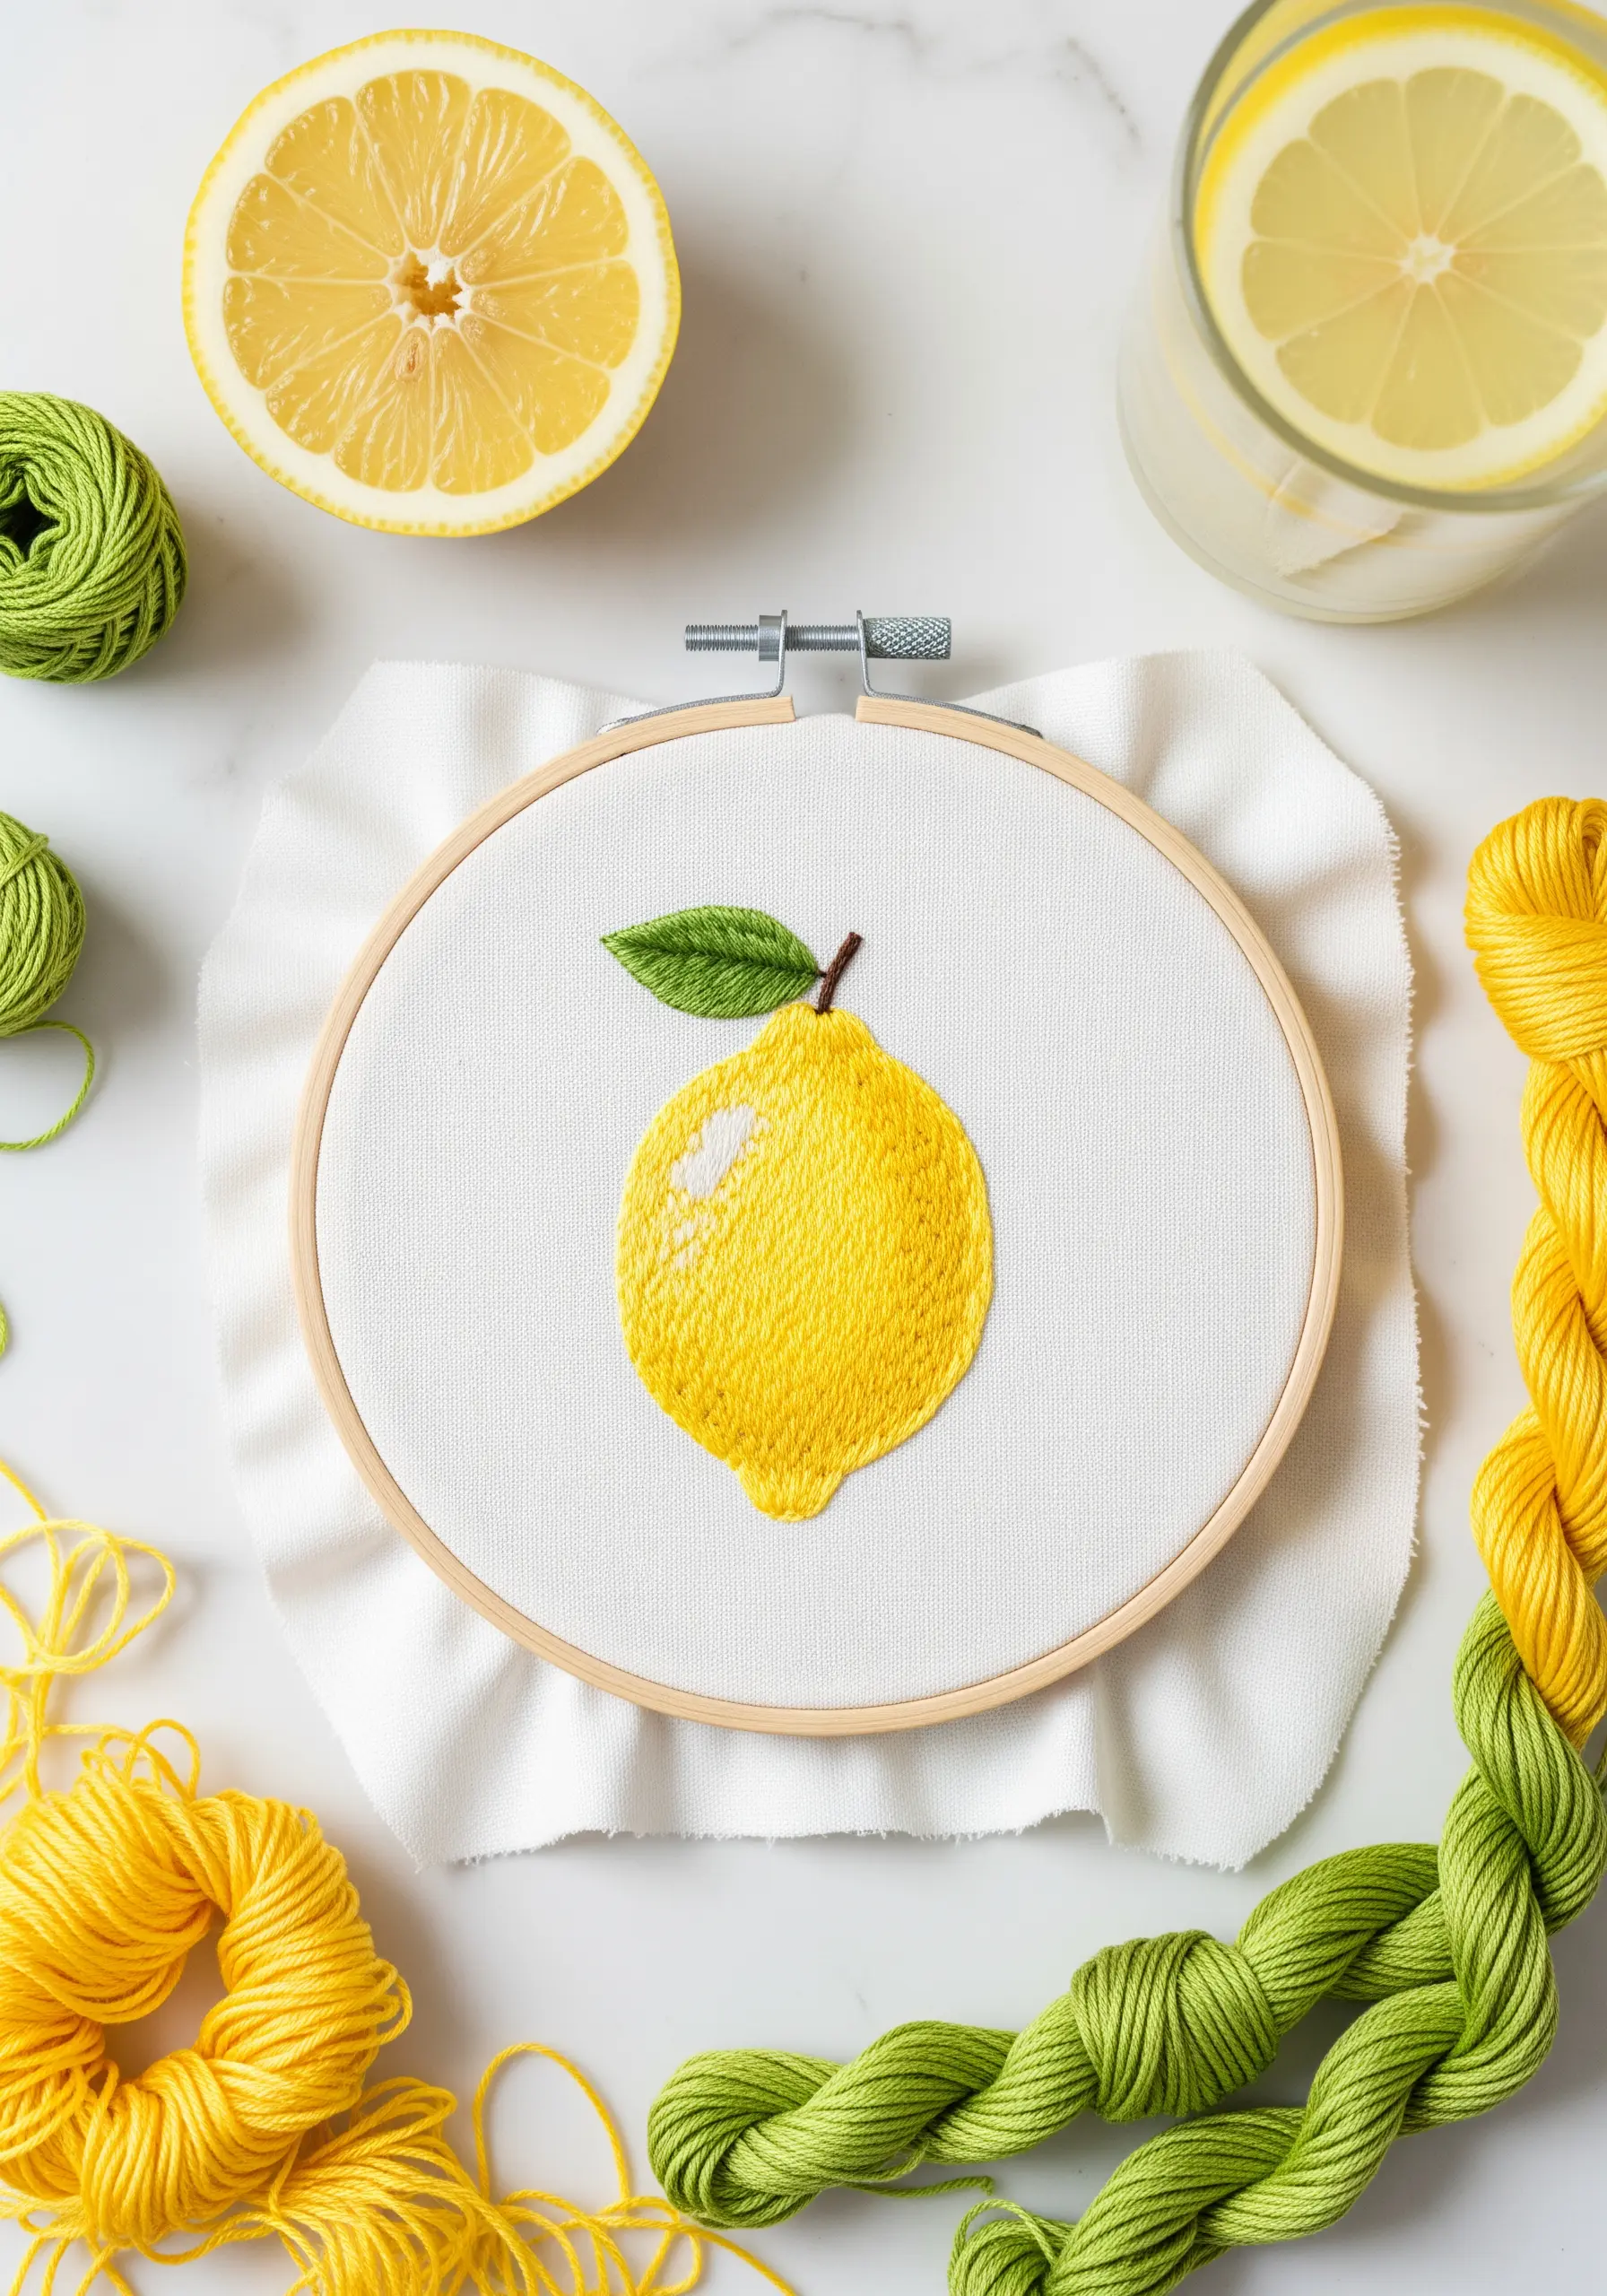
Instead of a perfectly smooth satin stitch, give your lemon a more realistic texture using a split stitch fill.
Work in slightly curved rows that follow the contour of the fruit.
By splitting the previous stitch as you go, you create a woven, textured surface that subtly mimics the dimpled peel of a lemon.
Use two or three shades of yellow, blending them slightly, to give the fruit a rounded, sun-kissed appearance.
Leave a small sliver of fabric unstitched to act as a natural highlight.
16. Layer Pinecone Scales with Fishbone Stitch
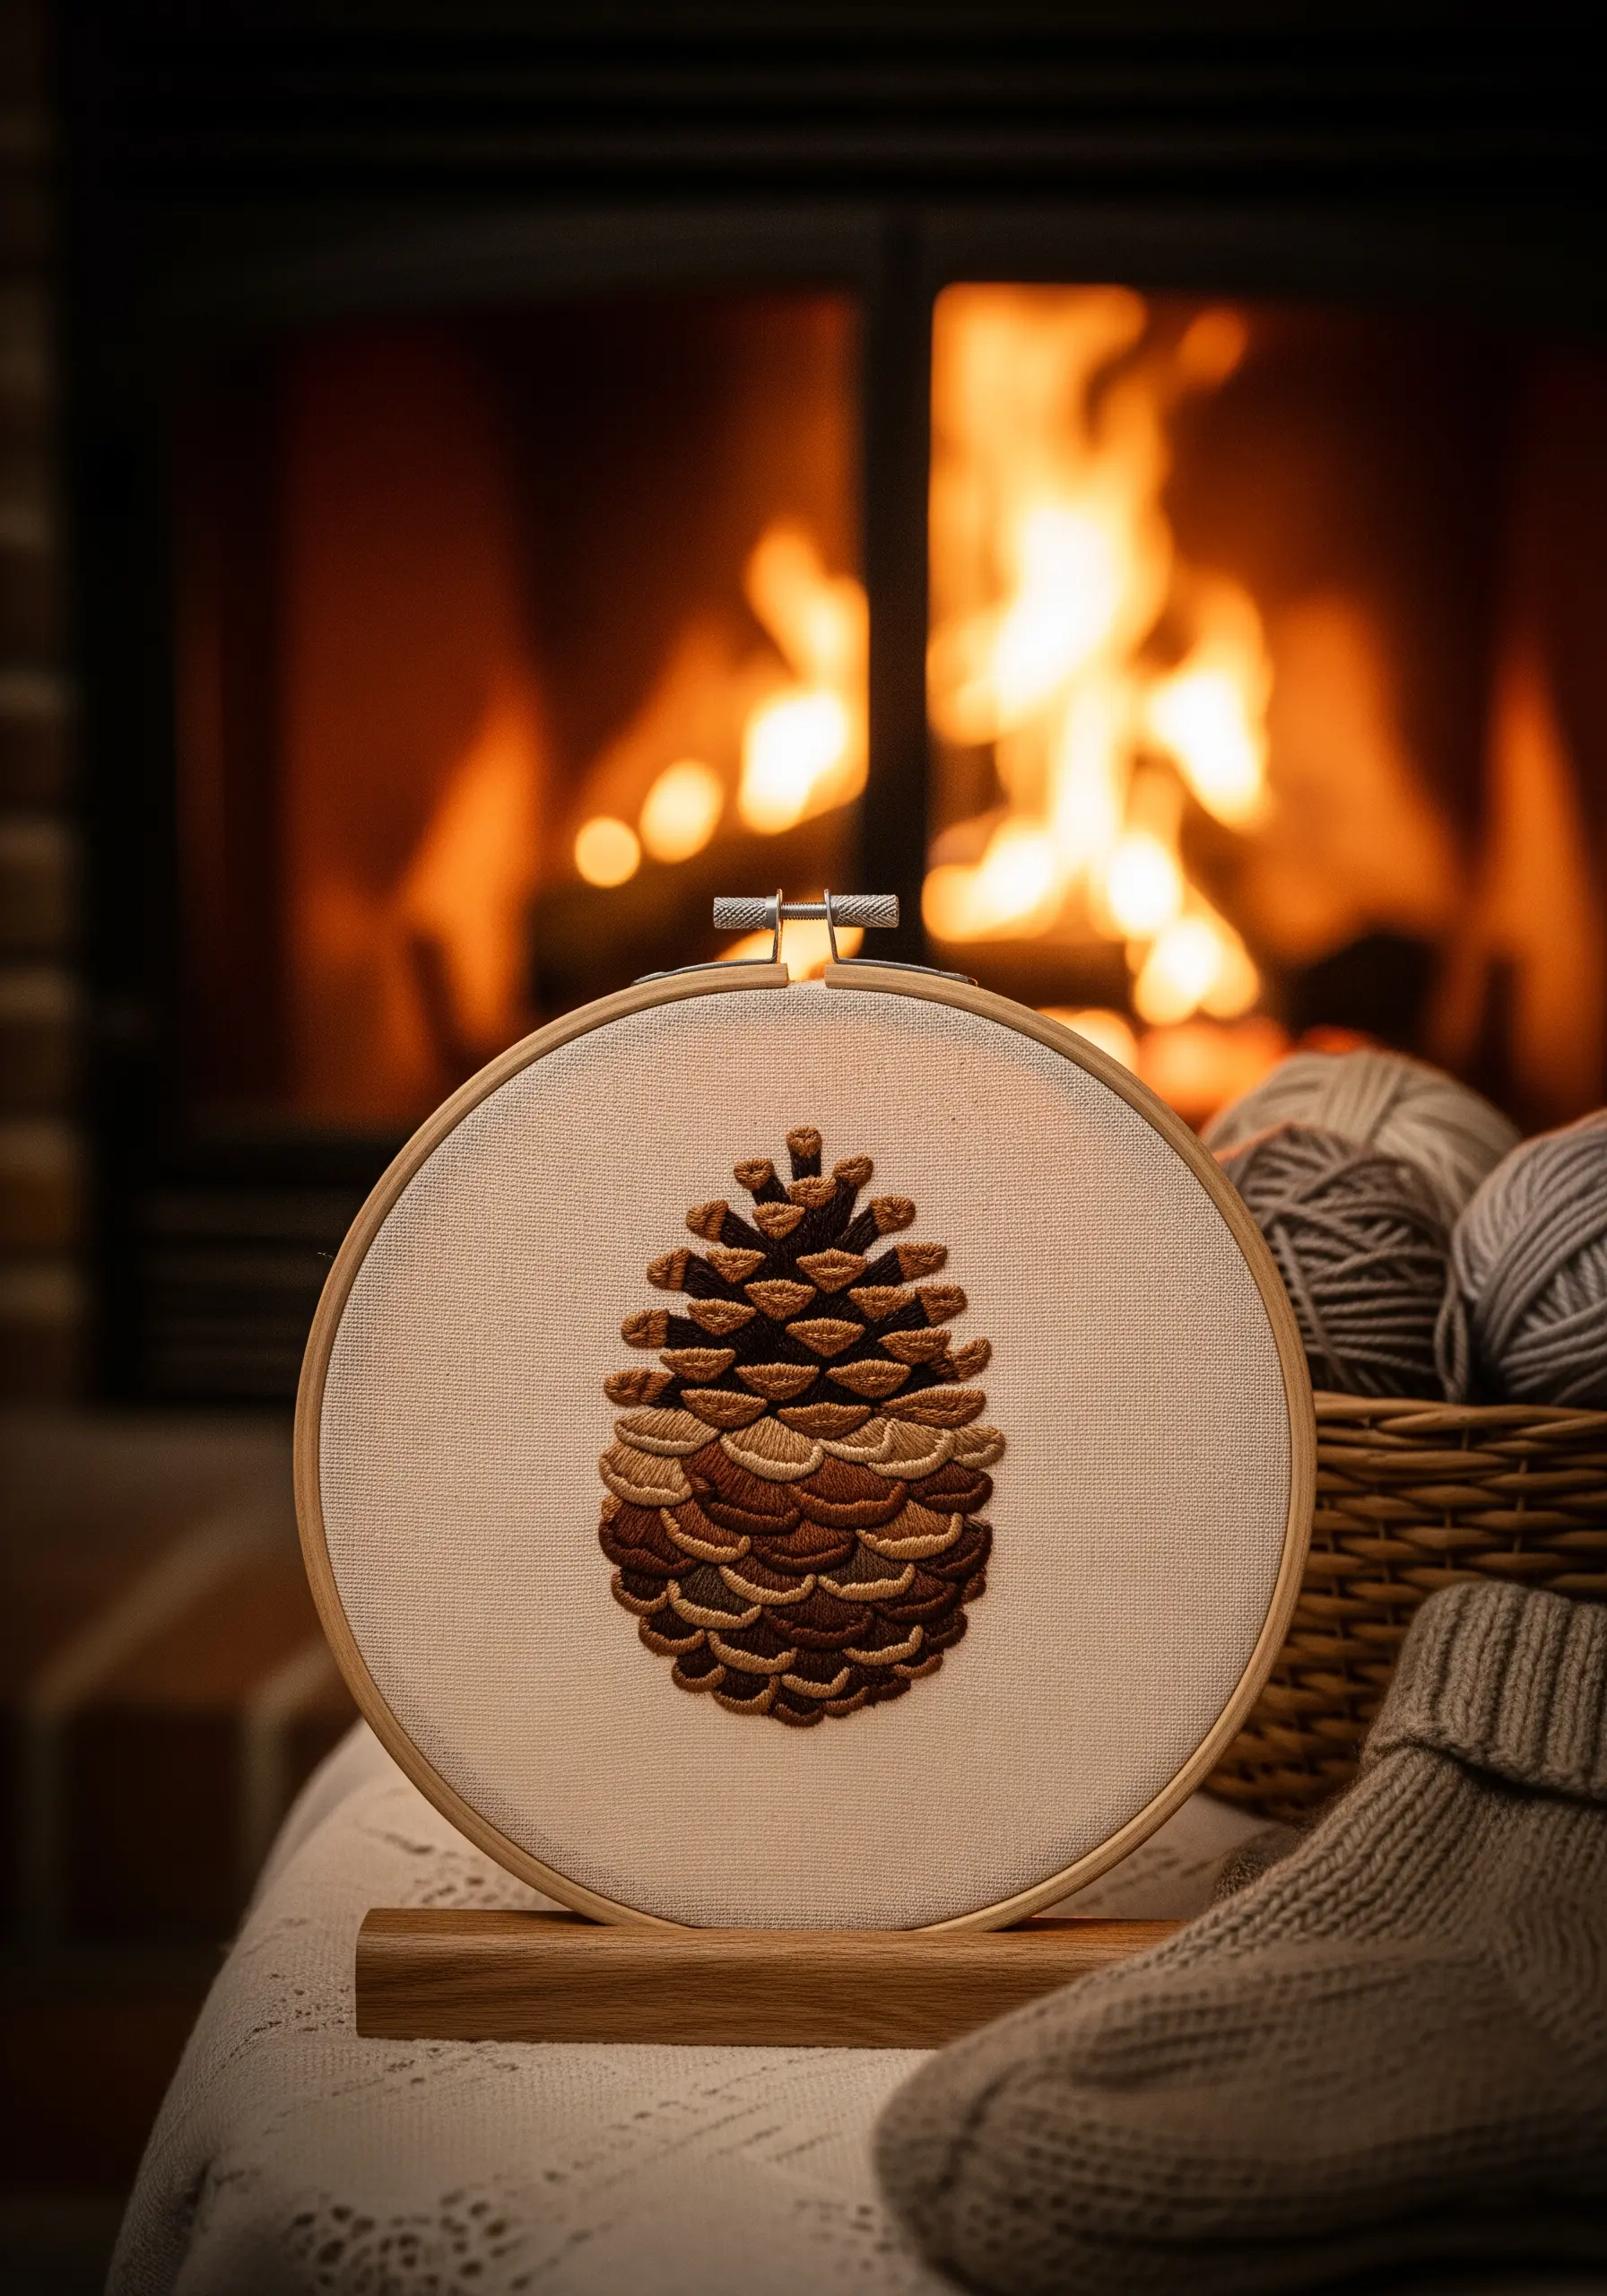
To create the beautiful, overlapping scales of a pinecone, use a series of short, angled fishbone stitches.
Start at the bottom and work your way up, letting each row of stitches slightly overlap the one below it.
Use three or four shades of brown, from dark to light, to create depth and dimension.
This method builds texture and color variation simultaneously, resulting in a design that looks far more complex than it is to stitch.
It’s one of many nature-inspired texture patterns you can master quickly.
17. Form Delicate Blossoms with Lazy Daisy Clusters
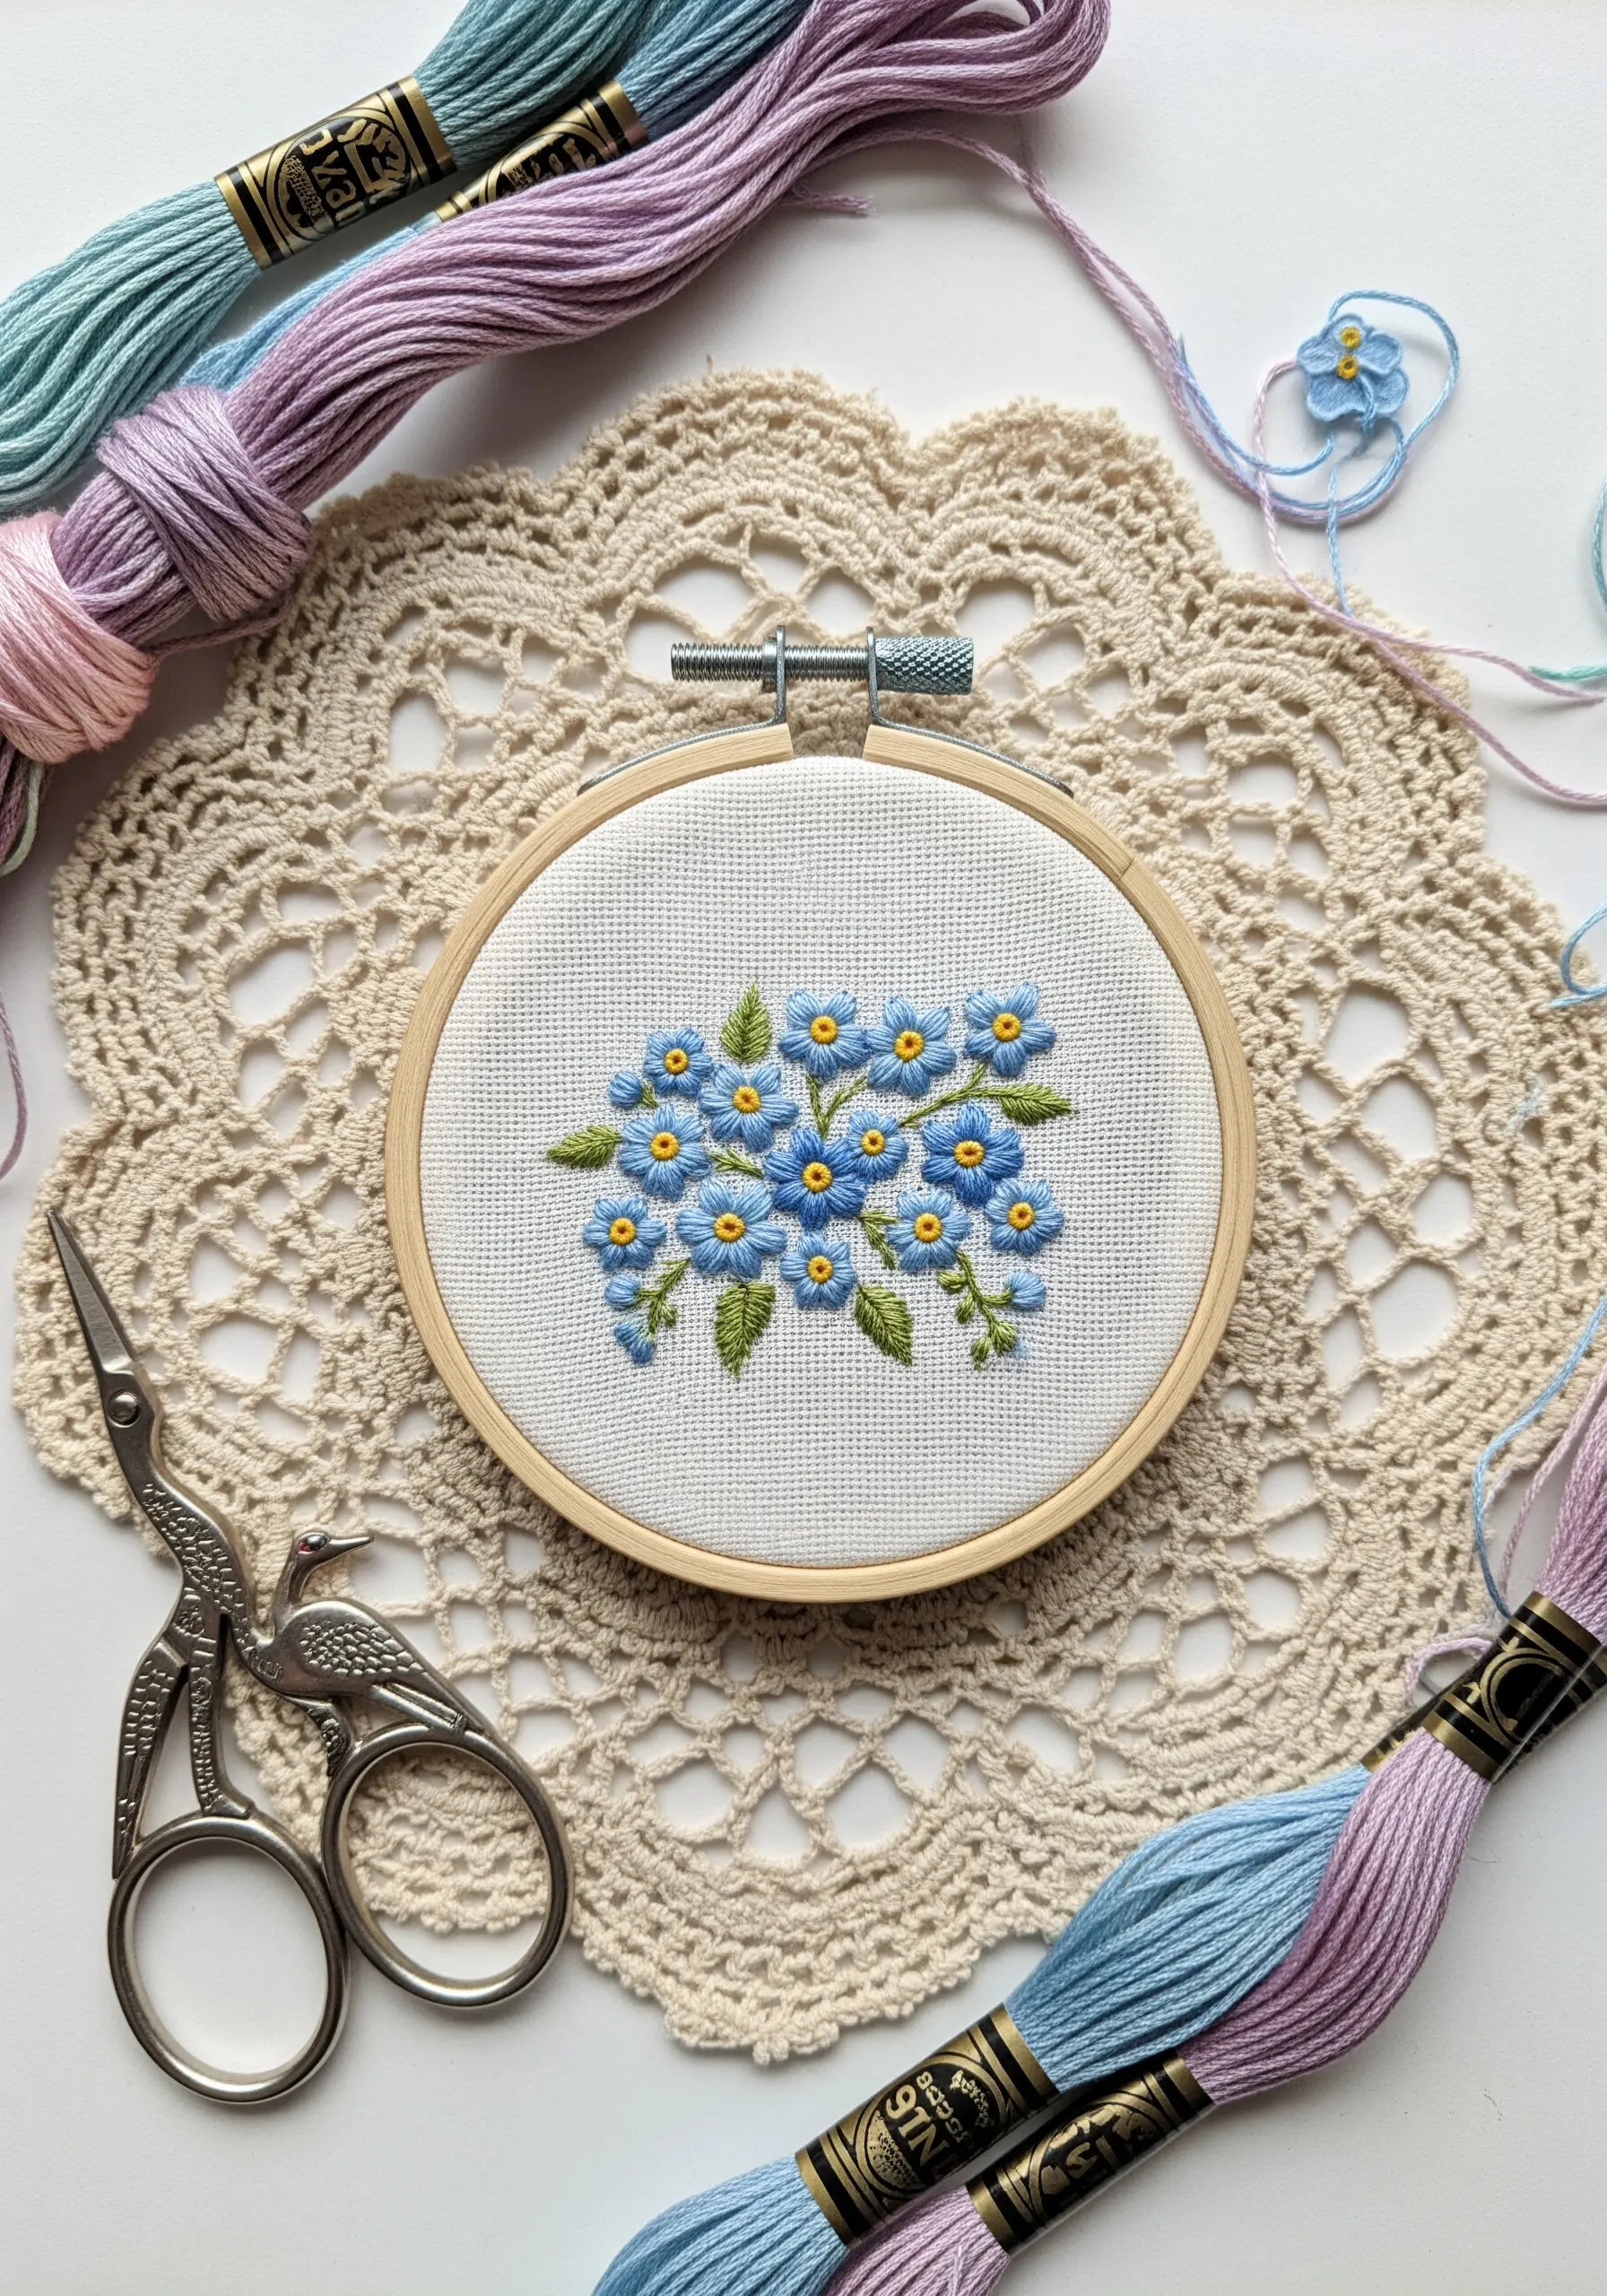
For tiny, delicate flowers like forget-me-nots, the lazy daisy stitch is your best friend.
Arrange five small lazy daisy stitches in a circle to form the petals, keeping them loose for a soft, open look.
Place a single yellow French knot in the center of each flower to complete the blossom.
By clustering these simple flowers together, you can create a lush, dense bouquet effect with very little effort.
Combine them with varied wildflower thread palettes for a garden-fresh feel.
18. Create a No-Sew Patch for Apparel
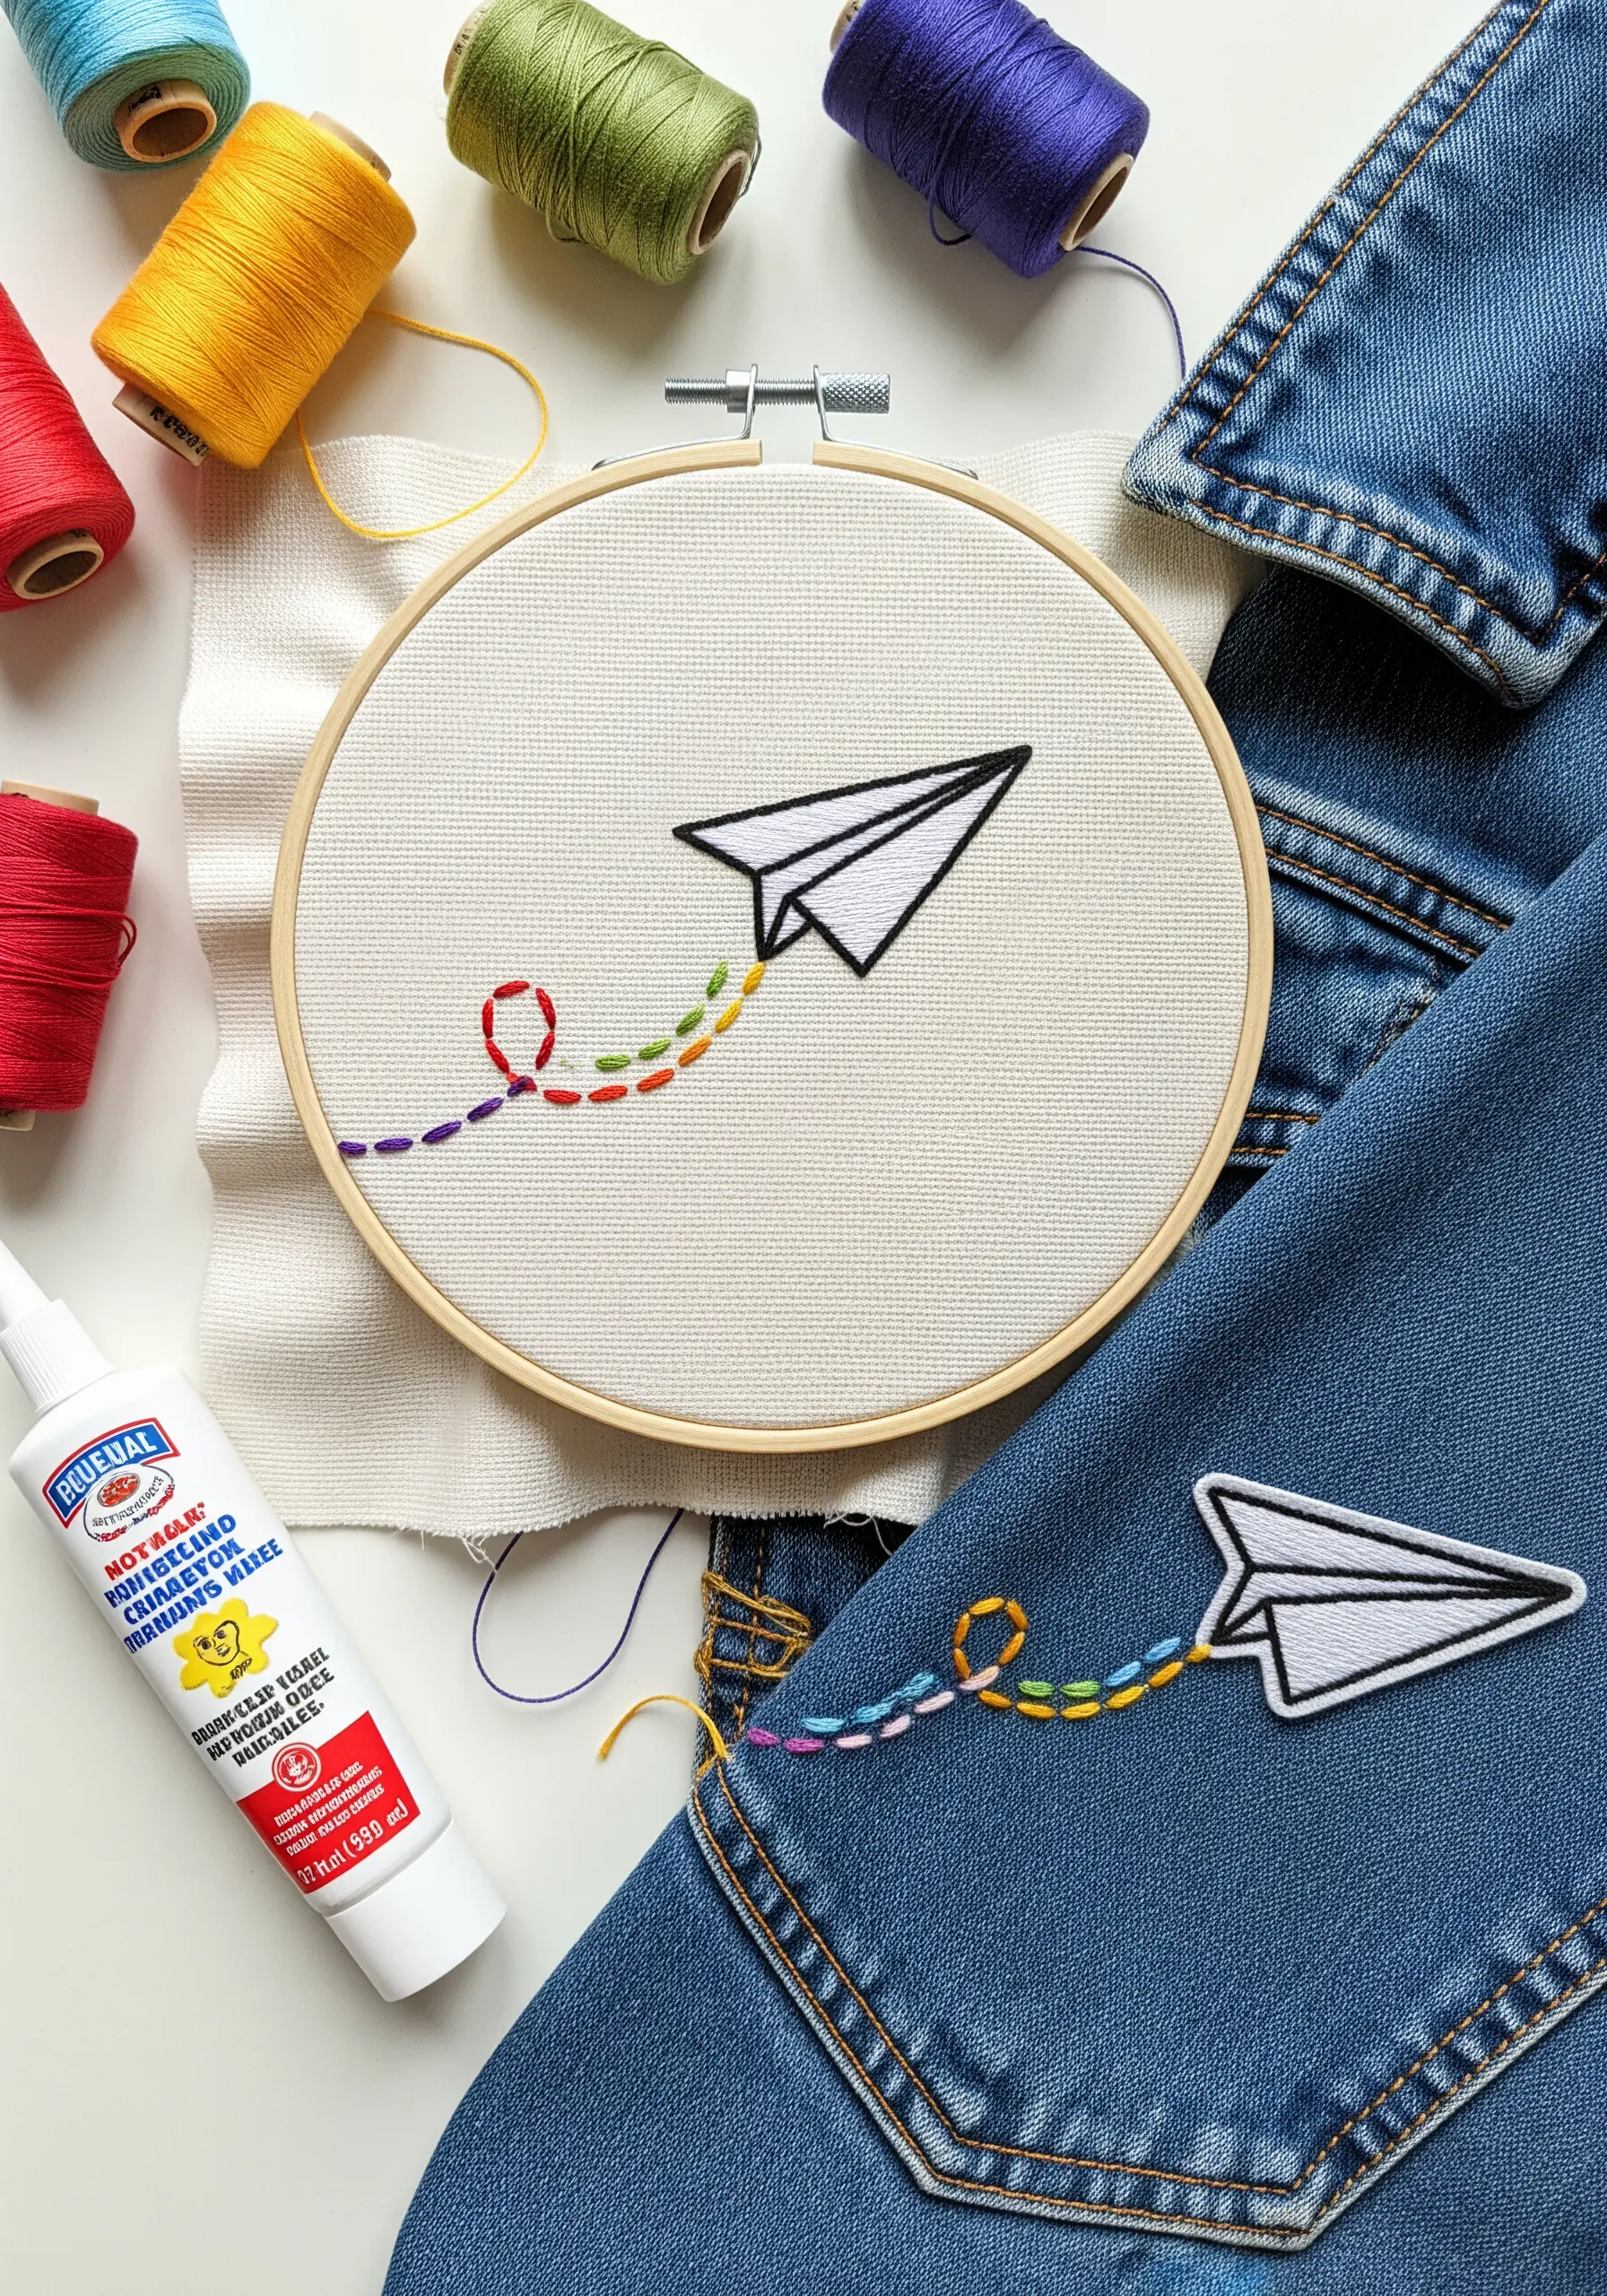
Take your embroidery off the hoop by creating a standalone patch.
Stitch your design onto a piece of stiff felt or two layers of cotton fabric with stabilizer.
Once finished, carefully trim around the design, leaving a small border.
To create a clean edge, work a tight satin stitch or buttonhole stitch around the raw edge of the patch.
Finally, apply fabric glue or a fusible backing to attach it to a jacket or bag for instant customization.
This is a great technique for tiny hoop patch-style embroidery.
19. Replicate Shell Ridges with Directional Stitches

Capture the delicate structure of a seashell by paying close attention to stitch direction.
Use long straight stitches or a split stitch, fanning them out from the base of the shell to the scalloped edge.
This technique naturally creates the illusion of the shell’s radiating ridges.
Incorporate single strands of off-white, pale pink, and light brown, placing them strategically to mimic natural color variations.
The success of these minimal ocean-inspired embroidery pieces lies in the thoughtful direction of each stitch.
20. Define Wings with a Satin Stitch Fill

For a clean, illustrative butterfly, treat the wing sections like a stained-glass window.
First, complete all the black outlines and details using a precise backstitch.
Then, fill each contained section with a dense satin stitch, angling your stitches to follow the shape of the wing segment.
This method ensures crisp, clean lines between colors and gives the wings a smooth, almost enameled appearance.
For the leaves, try using delicate leaf stitch techniques like the fishbone stitch for a central vein.
21. Suggest Texture with a Whipped Backstitch
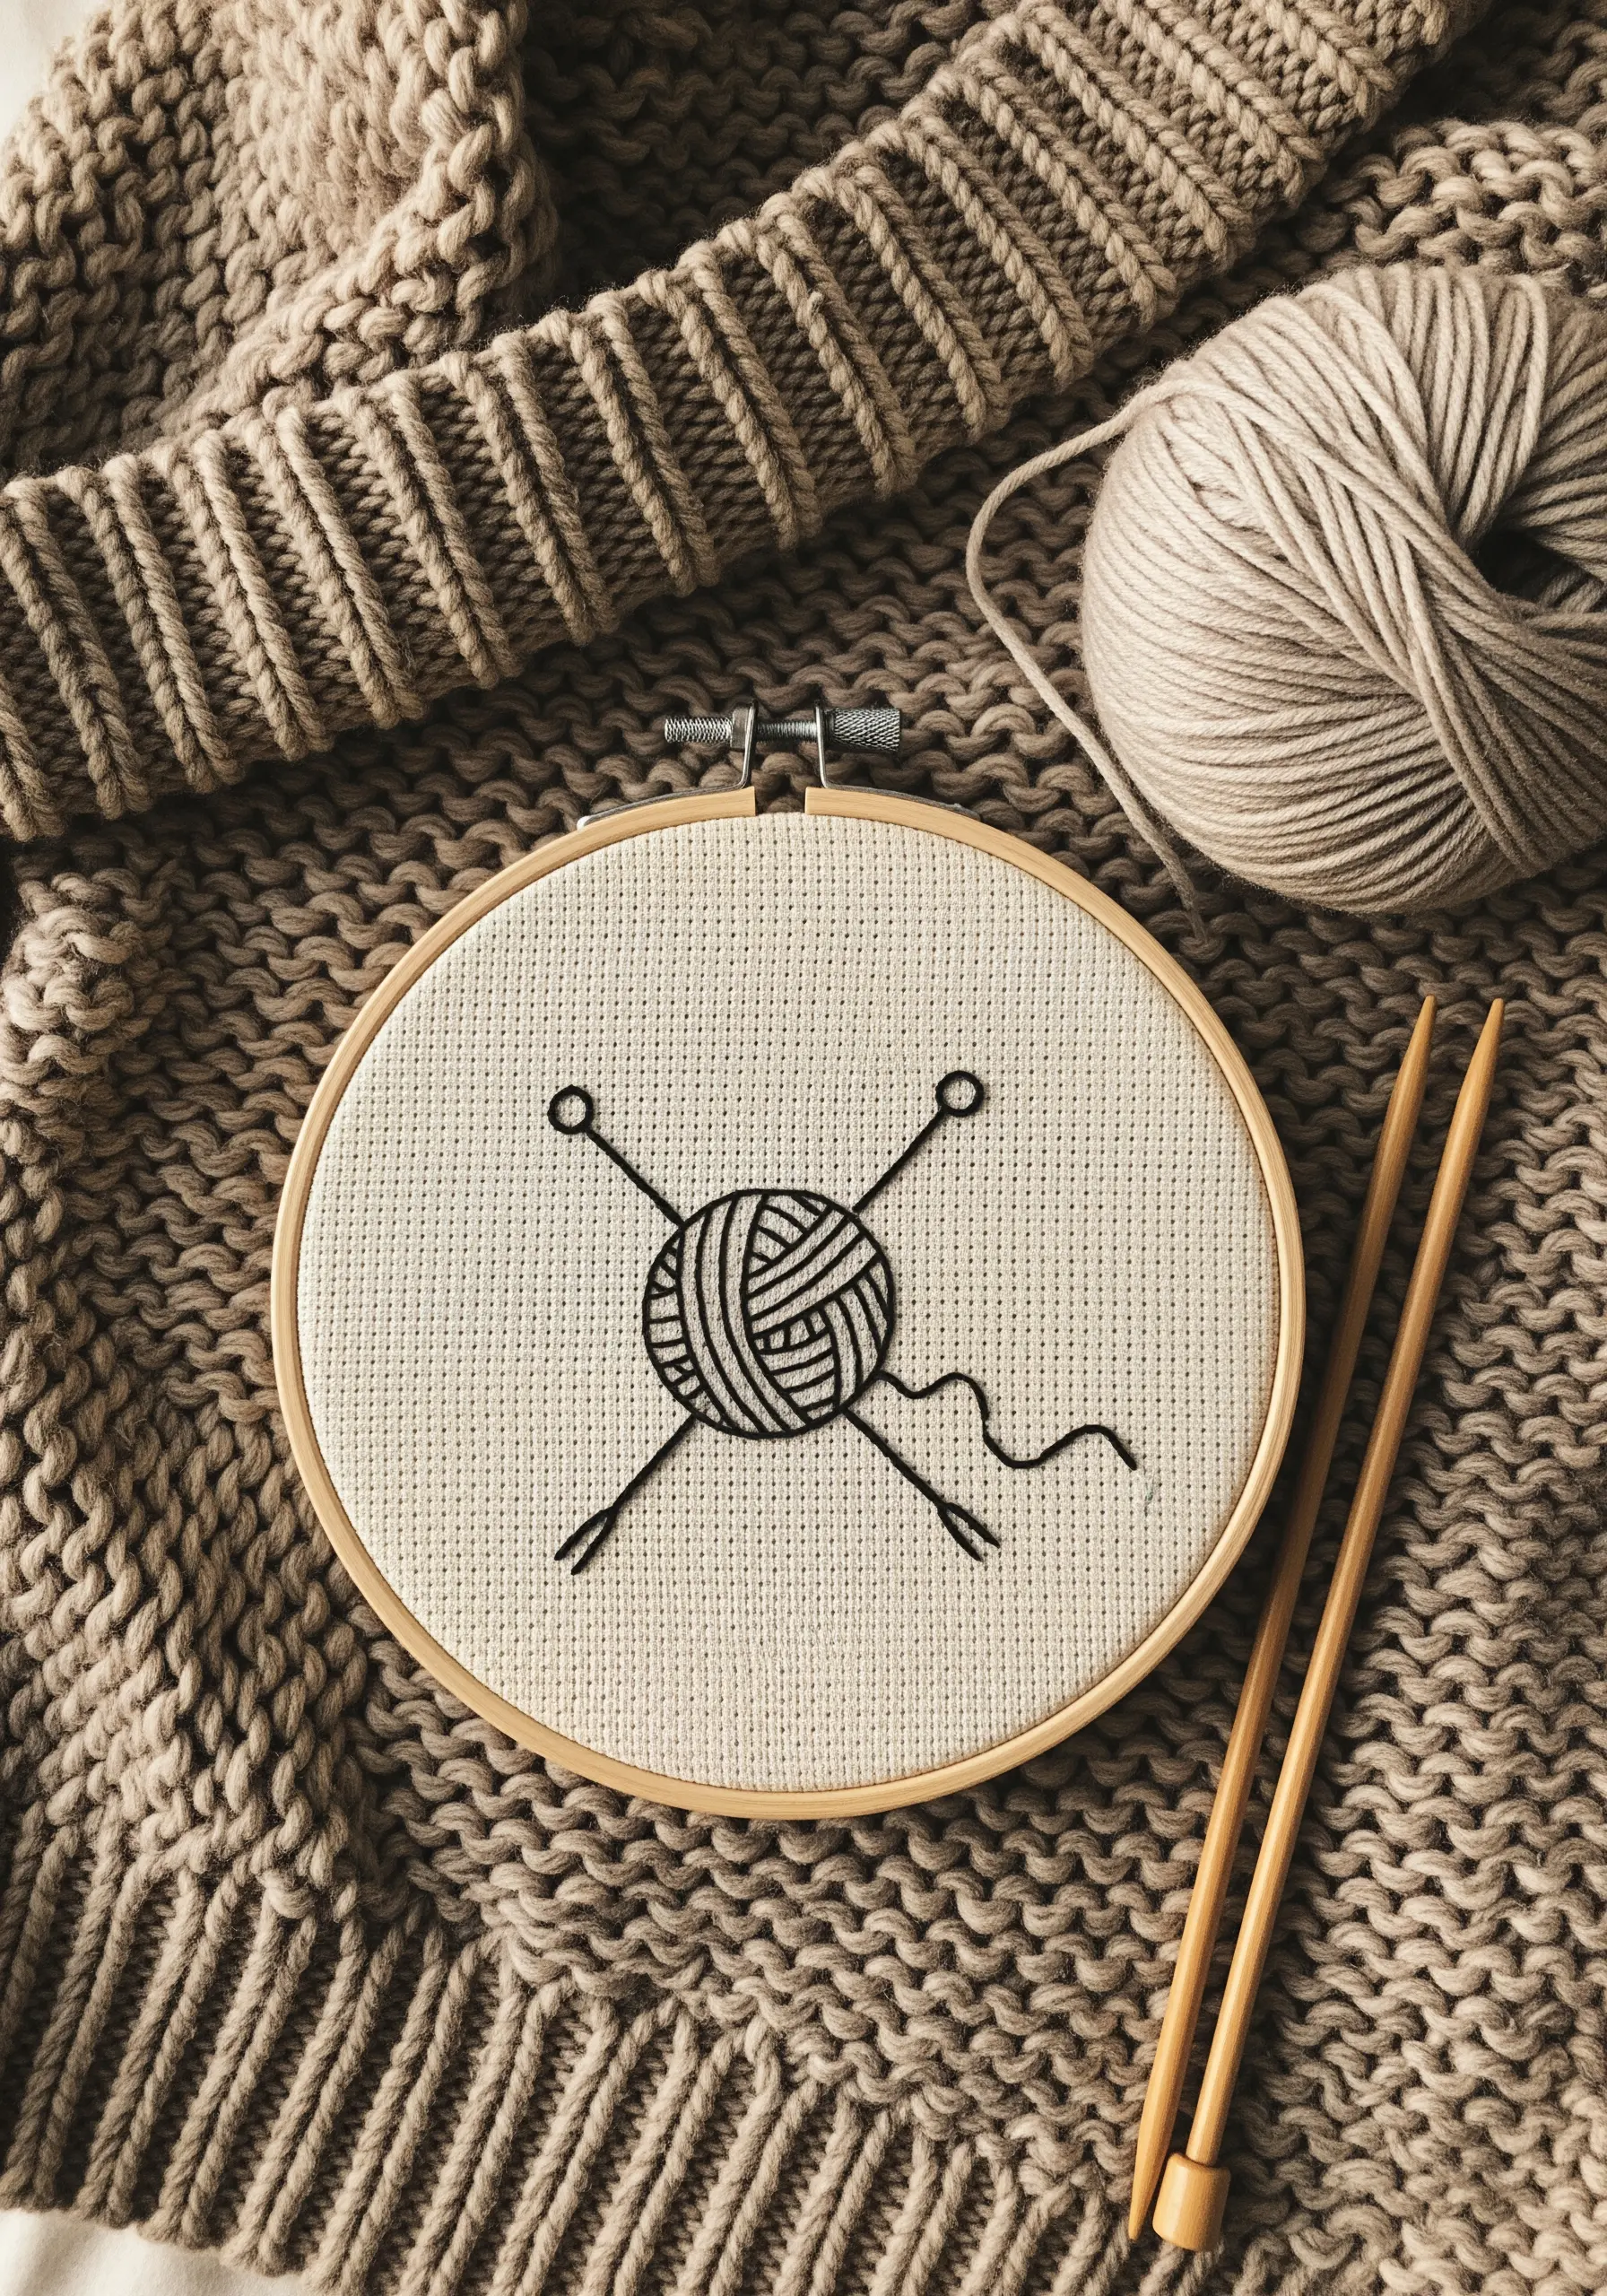
To create the look of a cozy ball of yarn without intricate stitching, use a simple whipped backstitch.
First, create a spiral or overlapping pattern with a standard backstitch using two strands of black thread.
Then, take a single strand of the same color and whip it around the backstitches, which smooths the lines and gives them a rounded, cord-like appearance.
This technique adds a subtle dimension and texture that elevates a simple line drawing, and it’s a great entry point into yarn wall art techniques.
22. Weave a Macrame Planter with Knotted Stitches
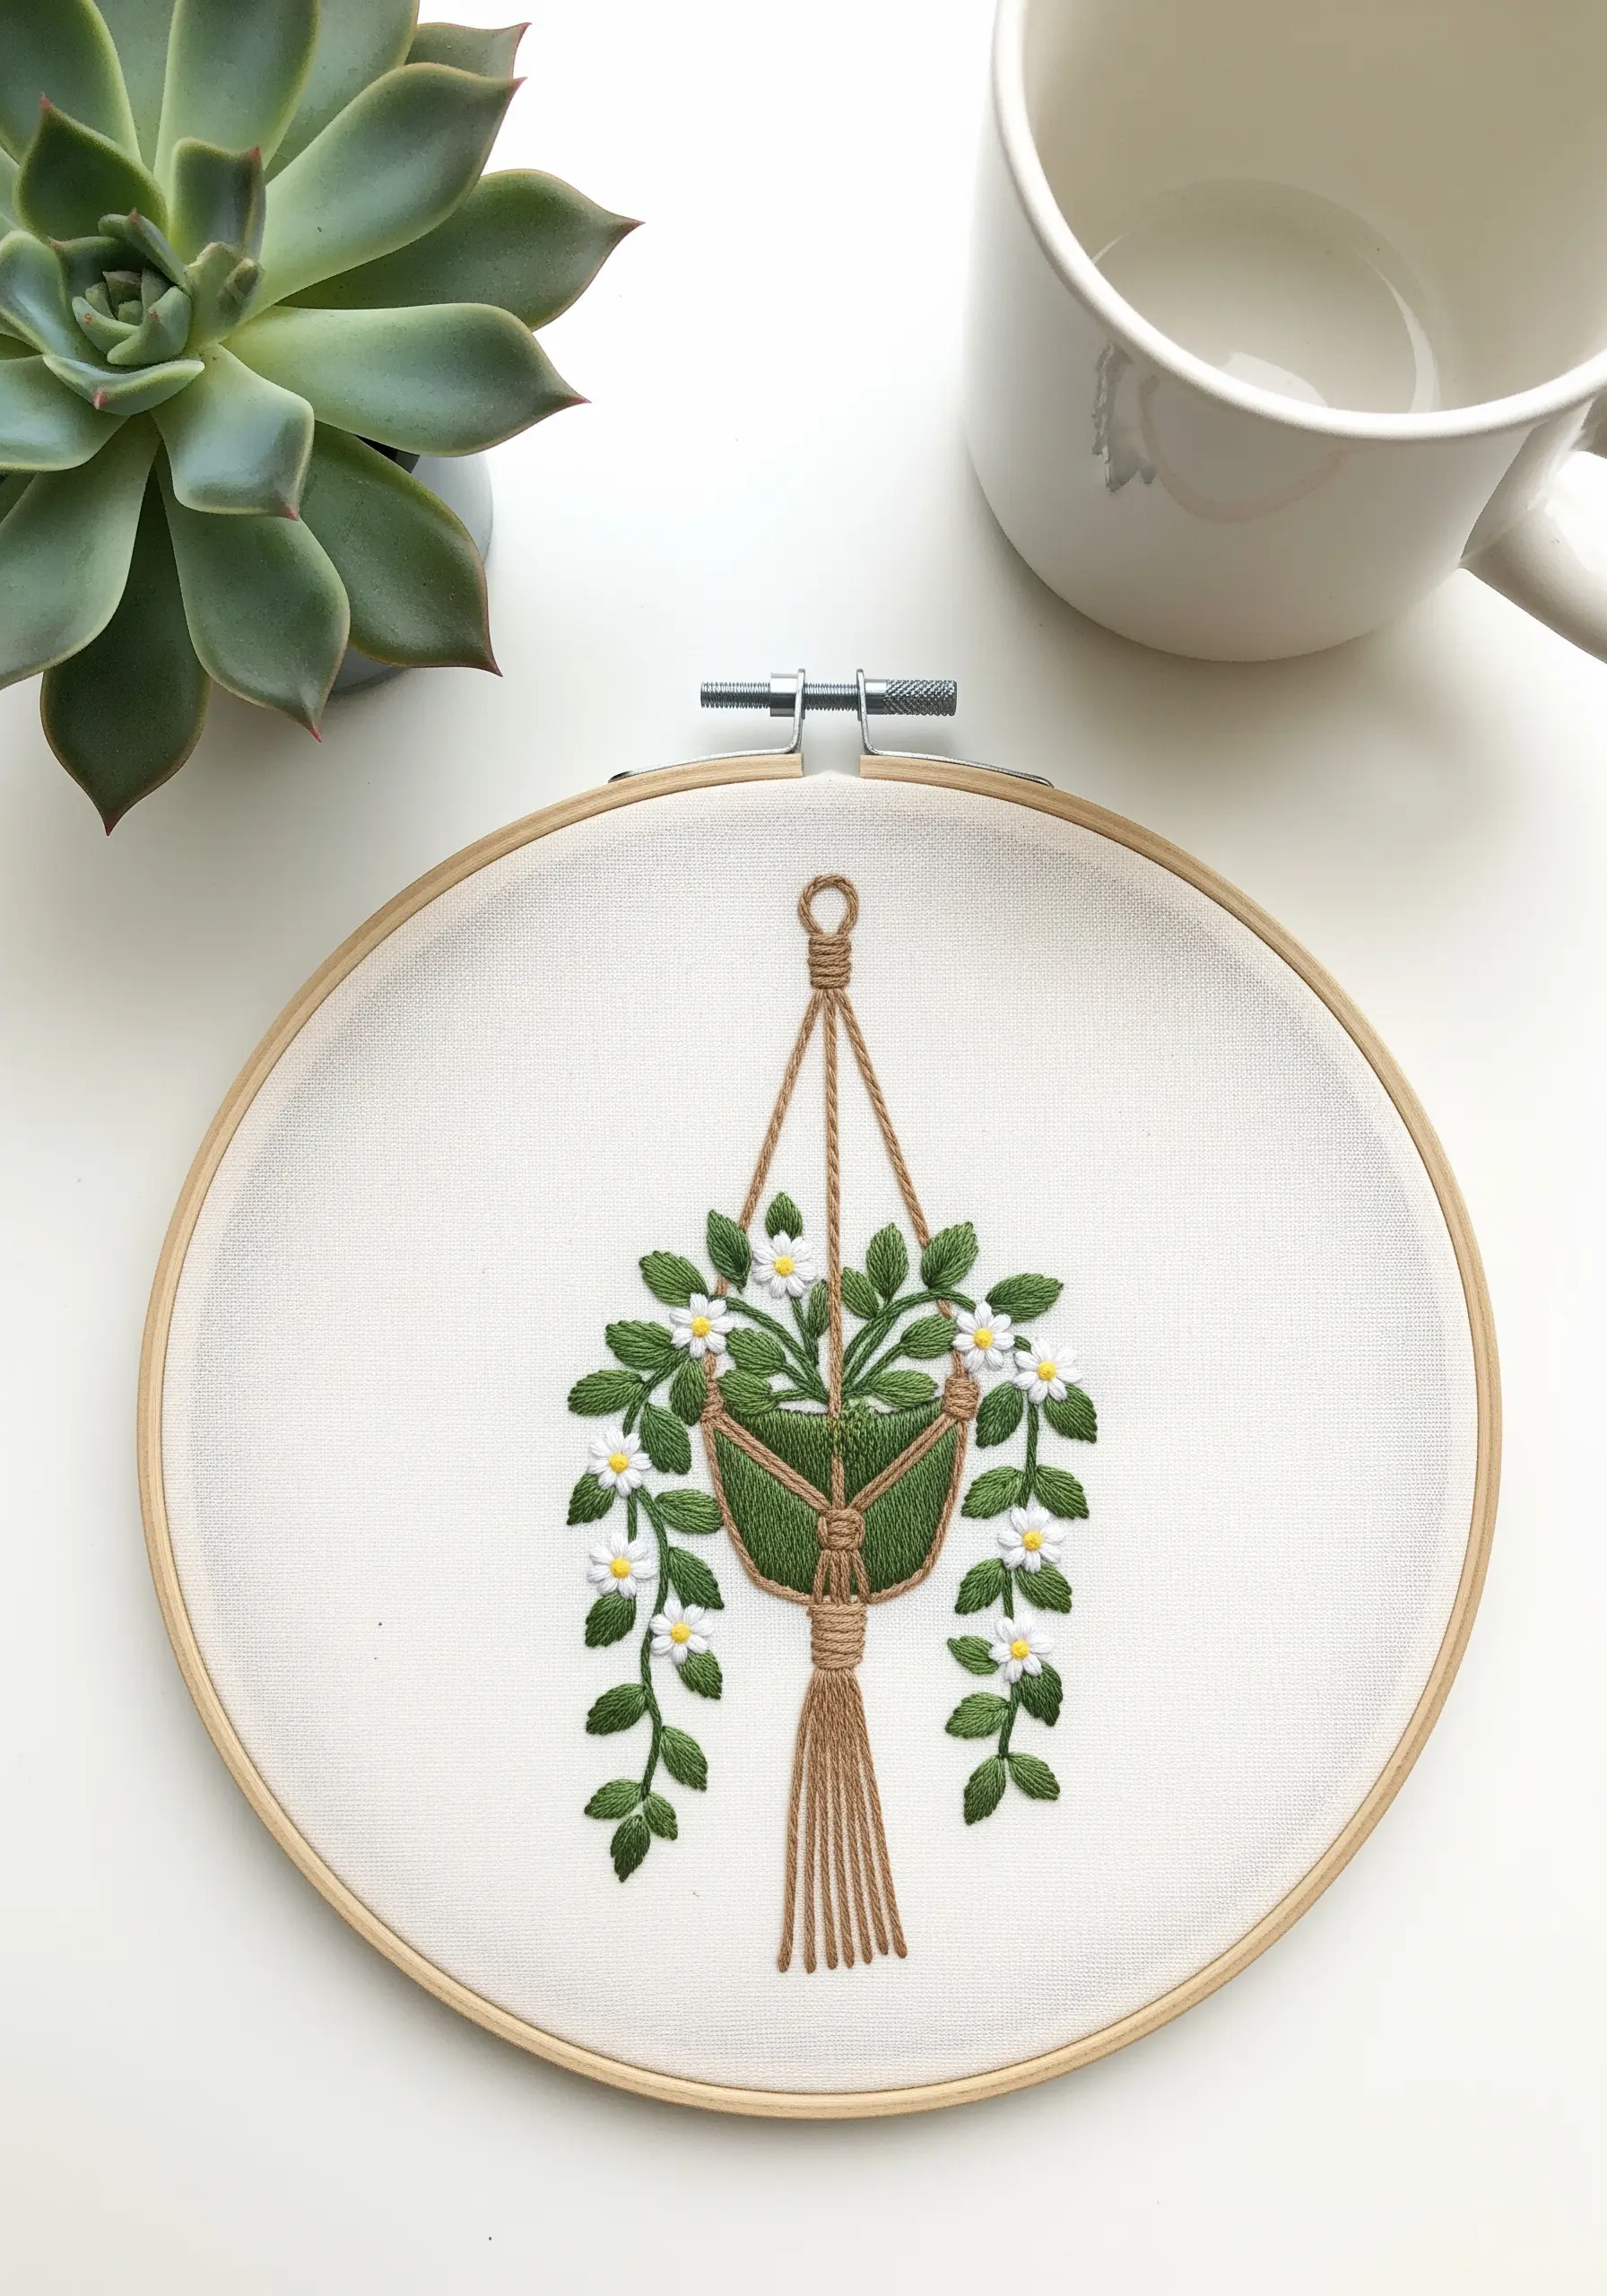
Mimic the look of a macrame plant hanger using clever stitch choices.
Use a series of Palestrina knots or twisted chain stitches for the ropes to create a textured, knotted effect.
For the basket holding the plant, a woven fill stitch or a dense satin stitch provides a solid base.
Fill the planter with simple lazy daisy flowers and fishbone stitch leaves.
This project is perfect for practicing several stitches and is a nod to other popular houseplant embroidery motifs.
23. Create Fluffy Frosting with 3D Stitches

Make your embroidered cupcake look good enough to eat by giving the frosting a fluffy, three-dimensional texture.
Use a series of raised stem stitch bands or tightly packed bullion knots, working in a swirl from the outside in.
This creates a wonderfully plush, touchable surface that stands high off the fabric.
For the final touch, scatter colorful French knots across the frosting to act as sprinkles.
A simple vertical satin stitch is all you need for the cupcake liner to provide contrast.
24. Achieve Folk Art Charm with Cross-Stitch

The gridded nature of cross-stitch lends itself perfectly to creating charming, geometric folk art patterns.
On Aida fabric, each ‘X’ becomes a pixel, allowing you to build intricate-looking designs with one simple, repeated stitch.
Work your design in blocks of color for a clean and efficient process.
This style is ideal for holiday motifs and small ornaments, giving them a timeless, handcrafted feel that is perfect for festive holiday pillow embroidery designs.
25. Imply Feathers with Minimal Straight Stitches
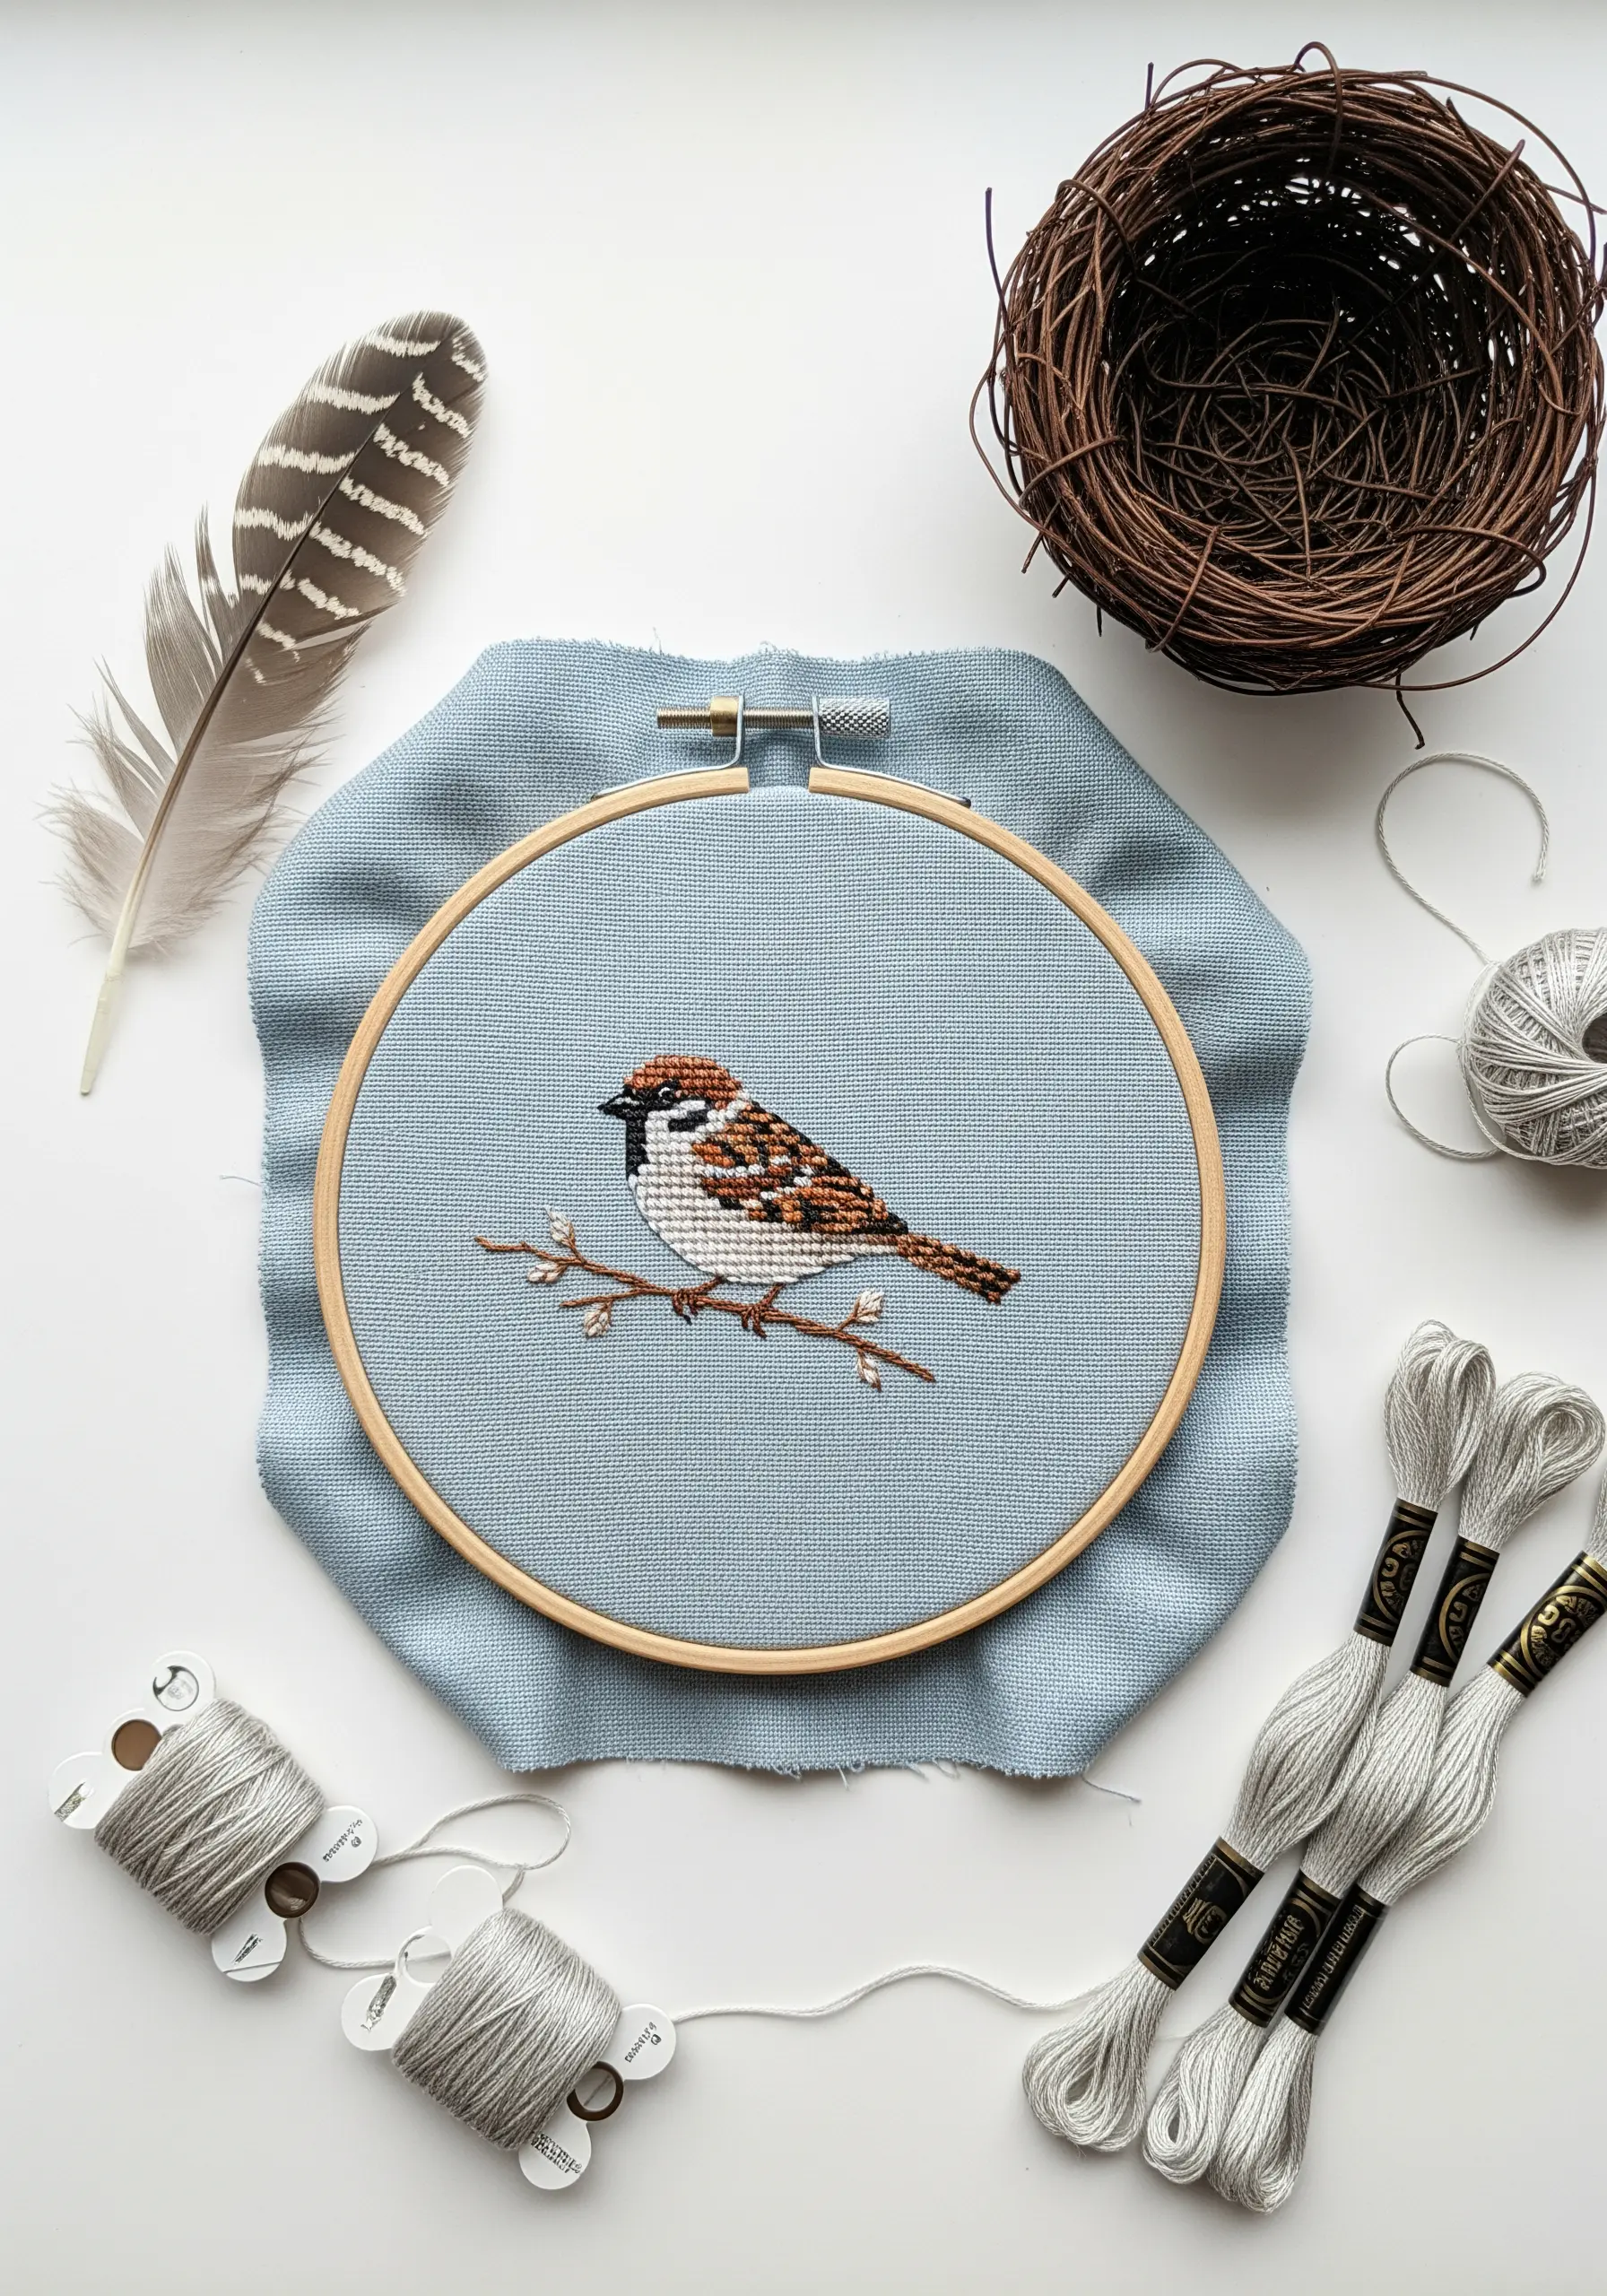
You don’t need to fill an entire area to suggest texture.
To create the soft, mottled feathers of a sparrow, use a sparse thread painting technique.
Use single, short straight stitches in various shades of brown, beige, and white, layering them lightly where colors transition.
Letting the fabric show through in places creates a lighter, more delicate feel than a dense fill.
This approach is faster and gives your work a soft, painterly quality, which you can see in other bird and butterfly embroidery patterns.


