

Think of embroidery floss not just as thread, but as a line you can draw with, a texture you can build, and a color you can blend with painterly precision.
The secret to transforming a simple motif into a cherished piece of art lies in the choices you make before the first stitch. It’s about seeing the potential in a simple outline—a unicorn’s mane, a dinosaur’s silhouette—and knowing which technique will bring it to life with depth and personality.
Let’s move beyond basic fills and predictable patterns. In these ideas, you’ll discover how to use stitch direction, thread weight, and negative space to create work that feels both modern and timeless. This is your guide to stitching with intention.
1. Sculpt a Unicorn’s Mane with Directional Satin Stitch
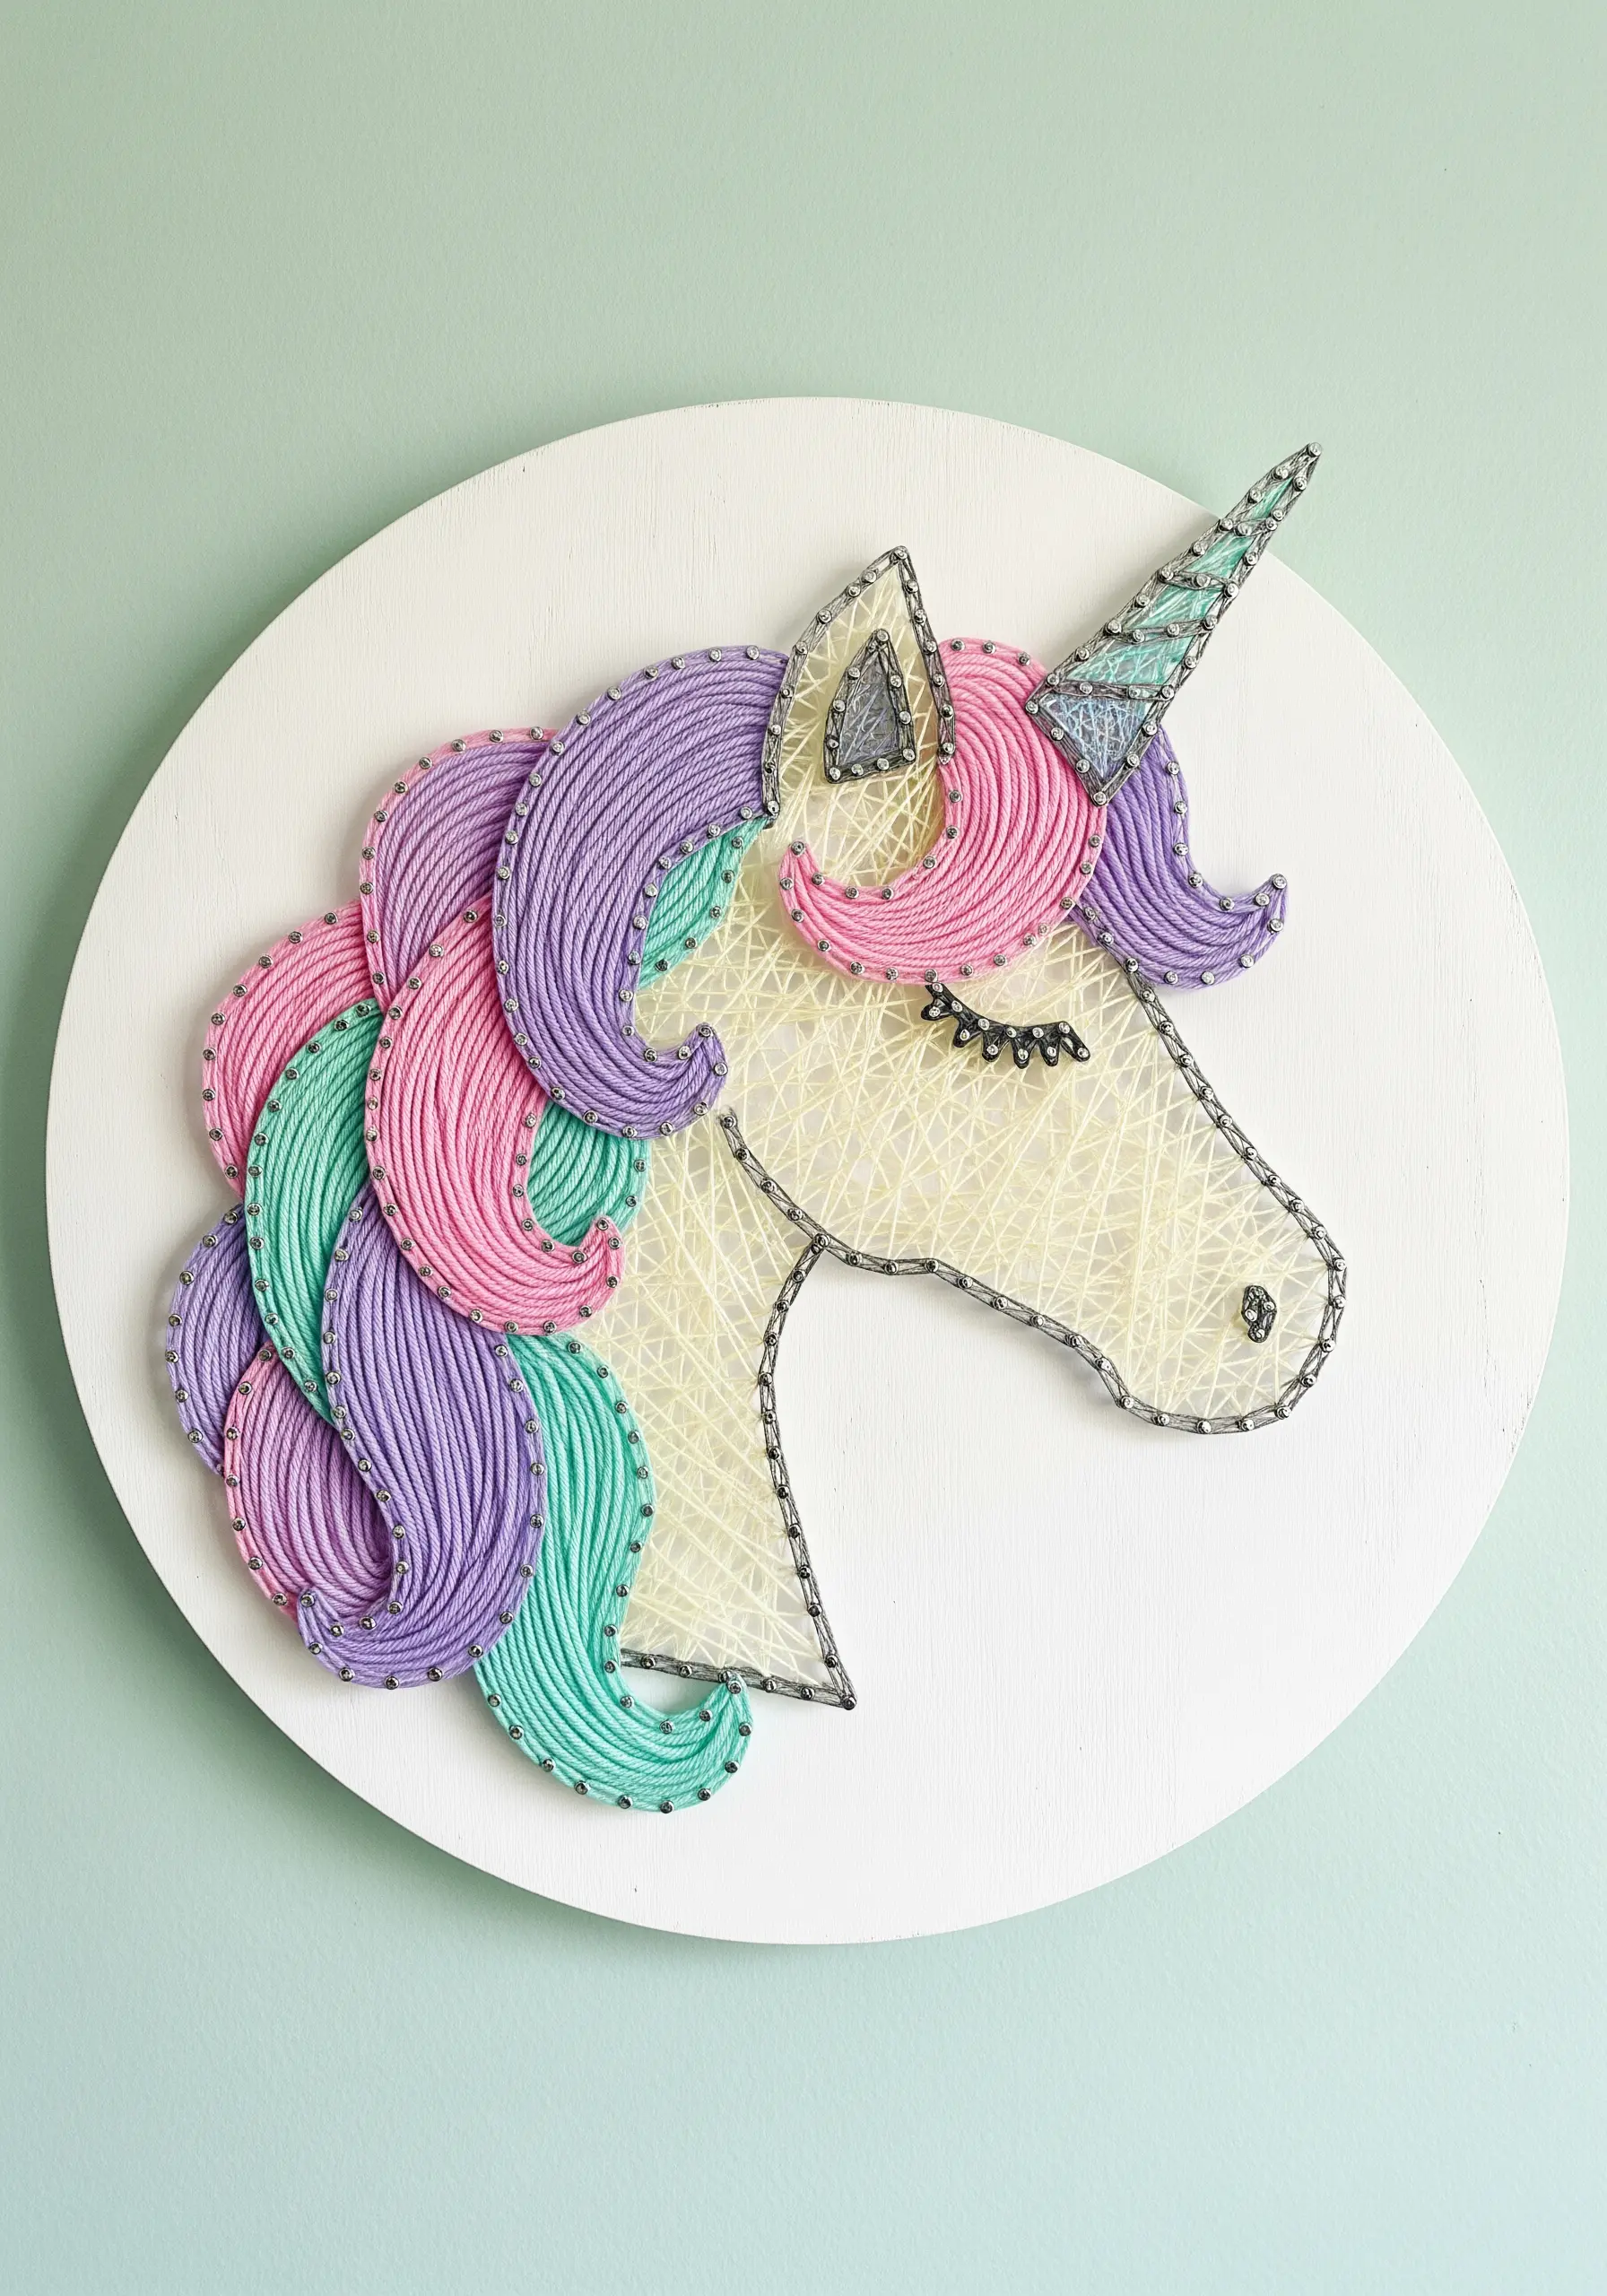
To translate the flowing layers of a unicorn’s mane, think of your satin stitches as individual locks of hair.
Instead of filling each colored section with uniform, parallel stitches, change the angle of your stitches to follow the curve of the shape.
This simple adjustment creates a sense of movement and light, making the mane feel dynamic and alive.
For a crisp outline, first work the perimeter in a split stitch using a darker or metallic thread; this raised edge gives your satin stitches a perfect boundary to meet.
2. Create Sharp Edges with Geometric Satin Stitch
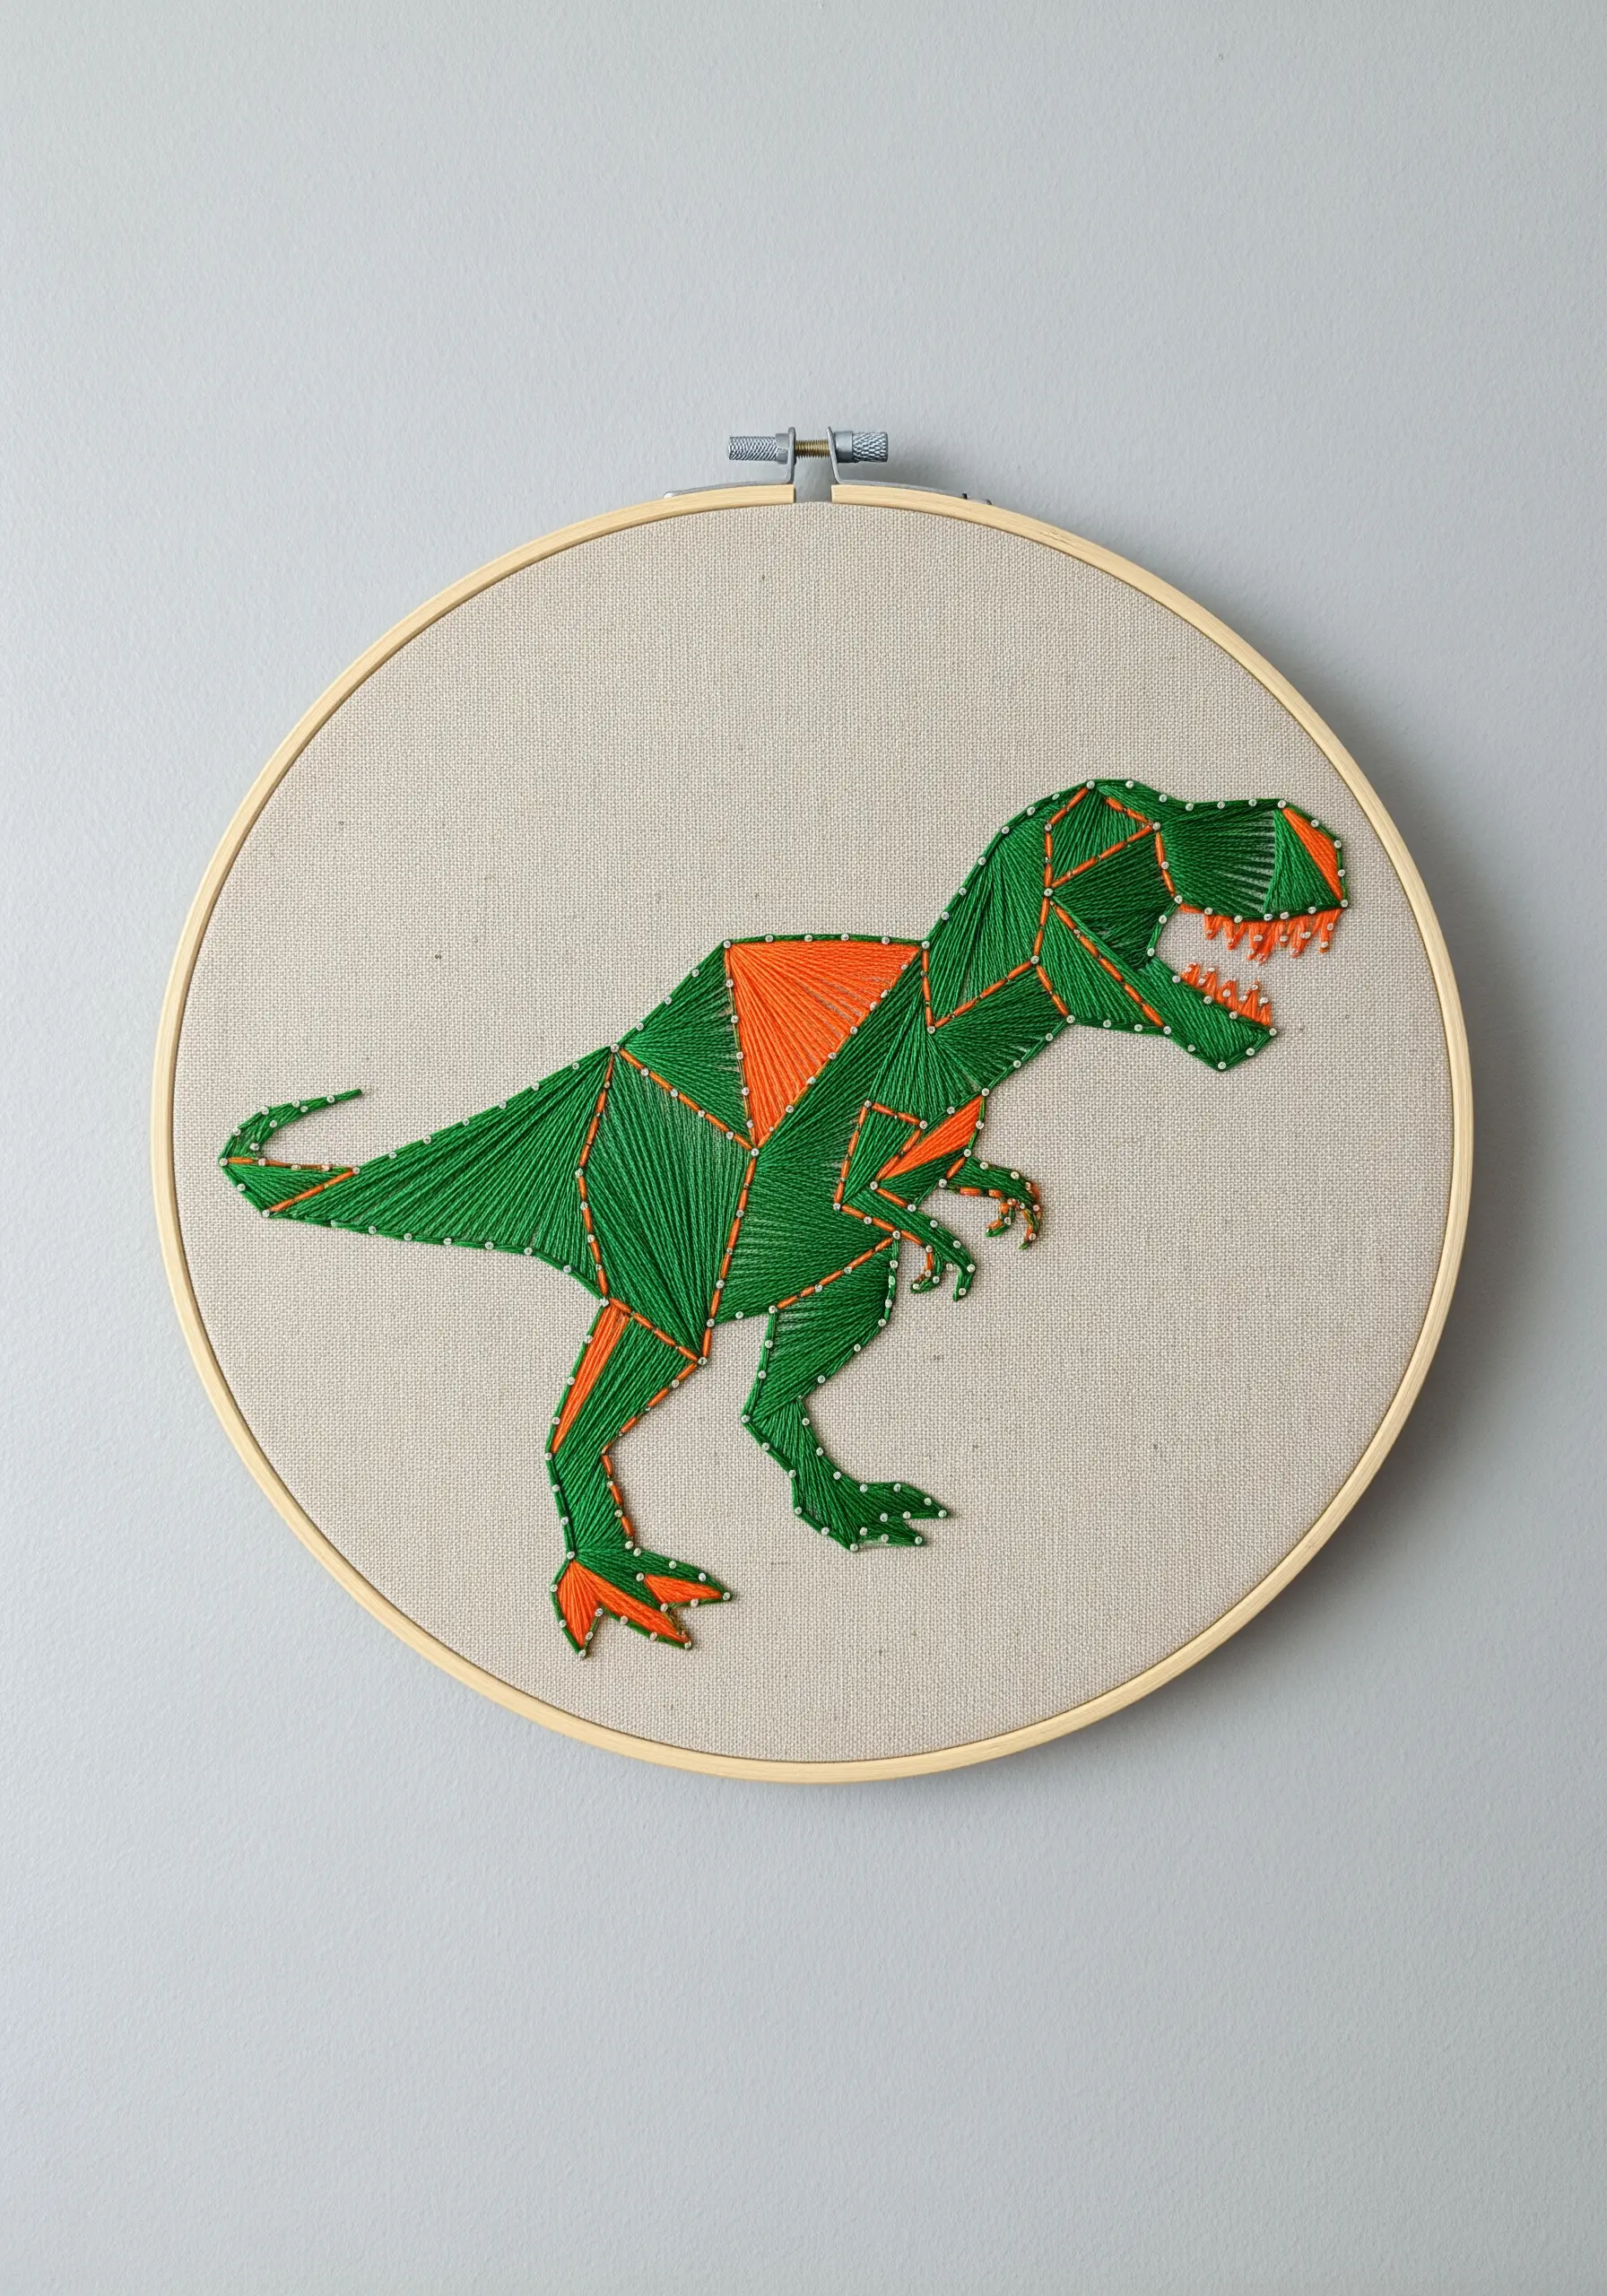
The power of a geometric design lies in its clean lines and defined shapes, a style perfectly suited for a modern dinosaur motif.
To achieve those sharp, faceted sections, outline each polygon with a single backstitch line before filling it in.
Fill each shape with satin stitches, ensuring your needle enters and exits just outside the backstitch line. This technique tucks the outline slightly, creating an incredibly sharp and satisfying edge.
Using a contrasting pop of color for a few sections, like the orange here, draws the eye and gives the piece a contemporary, graphic feel.
3. Blend a Rocket’s Flame with Thread Painting
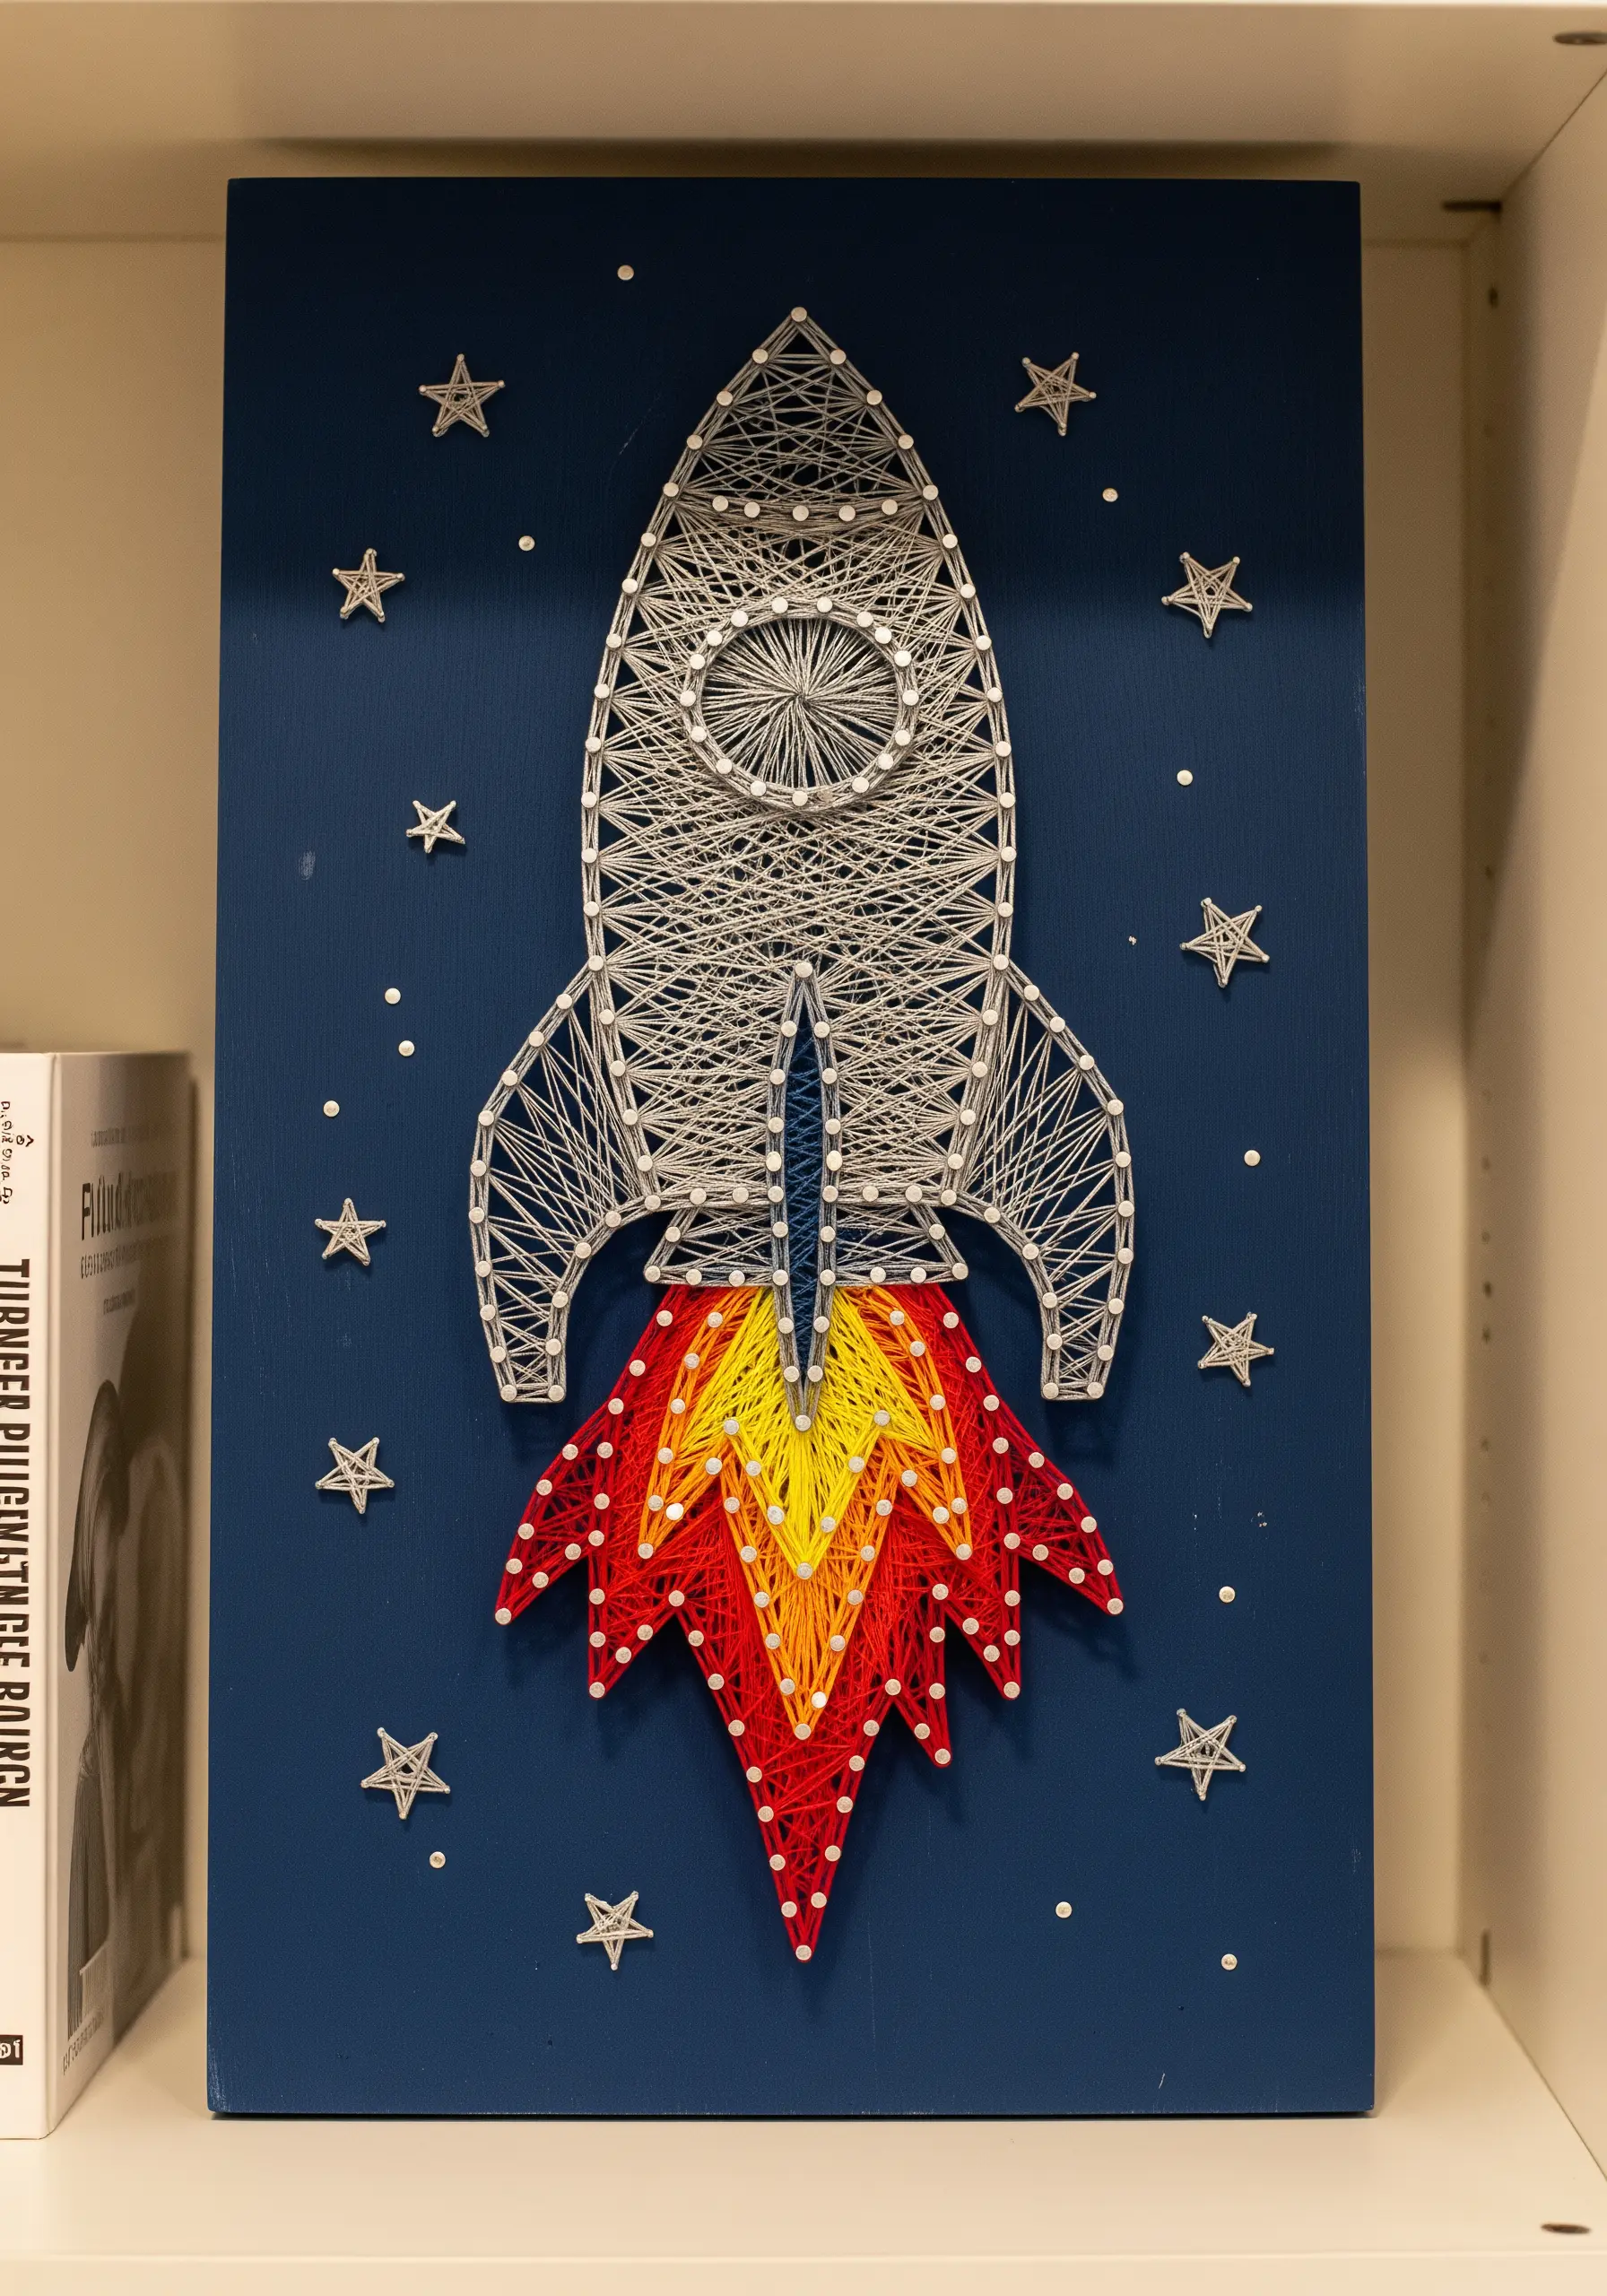
Capture the energy of a rocket launch by blending colors seamlessly in the flame.
Instead of hard color blocks, use a long-and-short stitch to create a soft gradient from red to orange to yellow.
Begin with the darkest color at the bottom, making your first row of stitches varied in length. Then, bring your next color up through the previous stitches, interlocking them like a zipper to create a smooth, painterly transition.
For the rocket body, use a silver metallic thread in long, vertical straight stitches to mimic a metallic sheen and contrast with the soft flame.
4. Master 3D Texture with Turkey Work Stitches
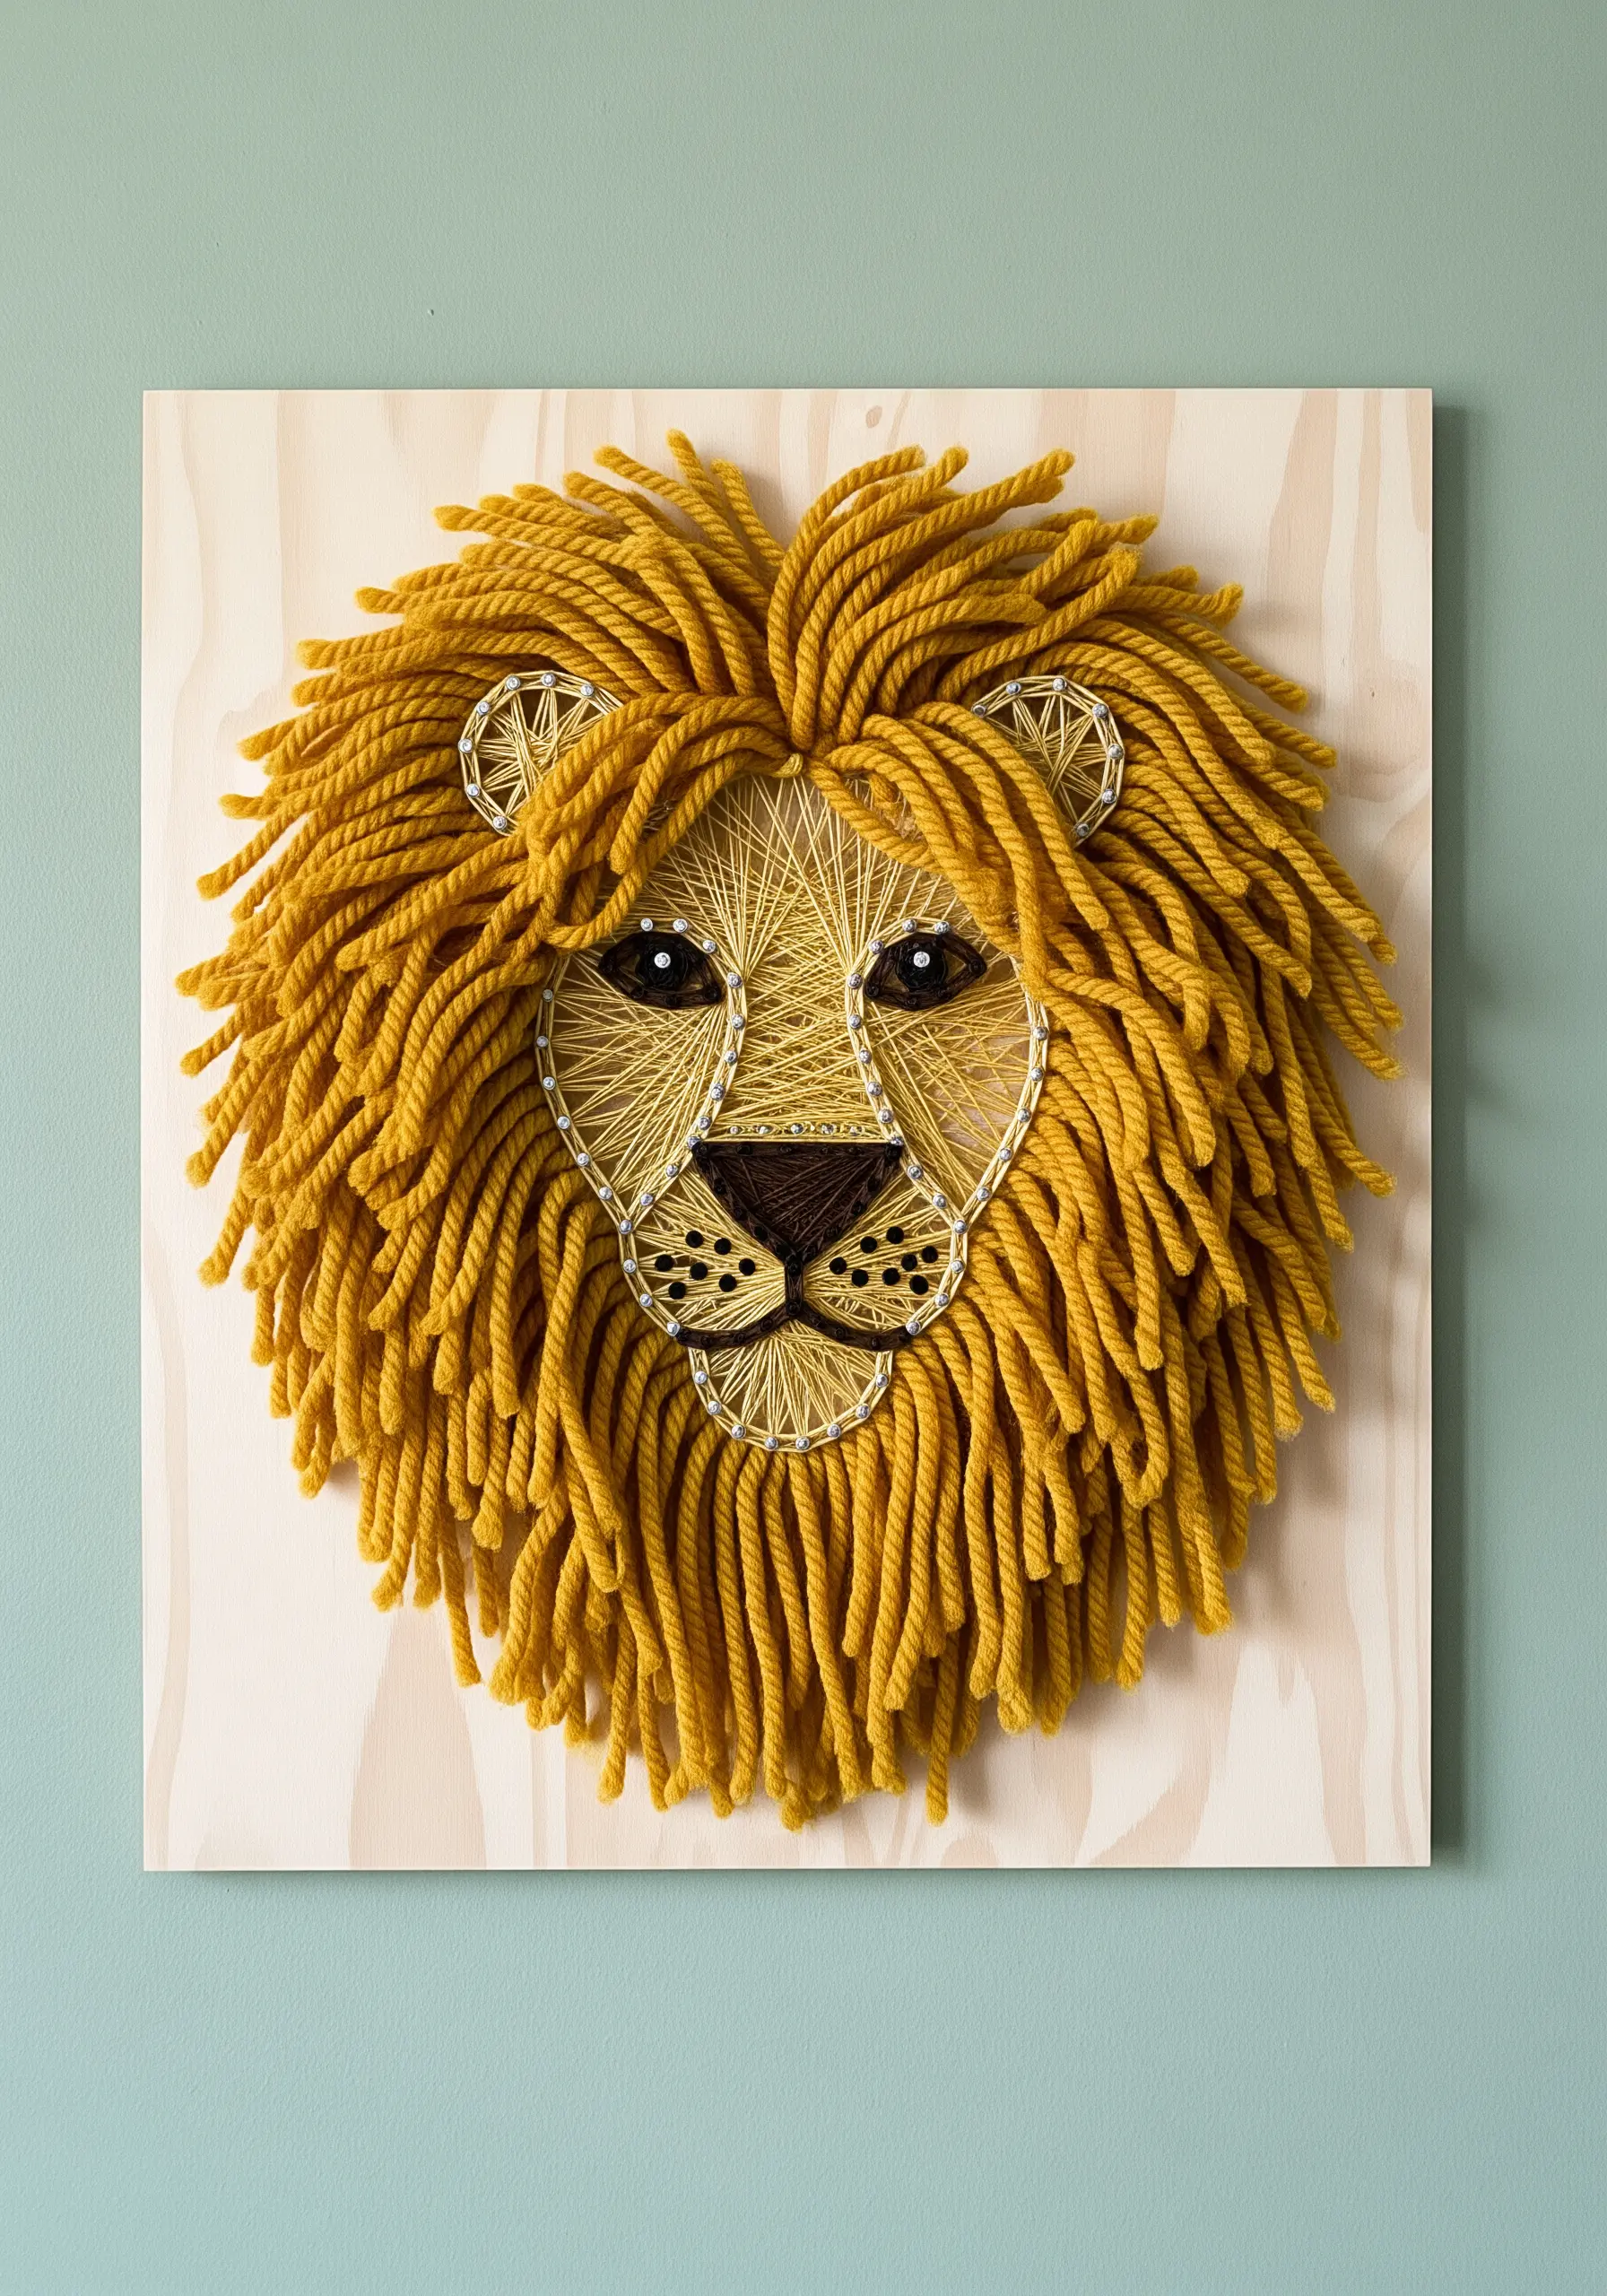
A lion’s mane needs to be bold and textural, something a flat stitch can’t fully capture. This is the perfect opportunity to use the Turkey work stitch (or Ghiordes knot).
This technique creates loops of thread on the surface of your fabric, which you can then trim to your desired length to create a plush, high-pile effect.
Use a thick, chunky yarn in a warm gold or mustard to give the mane volume and a soft, tactile quality.
Contrast the dimensional mane with a flat, tightly stitched face using satin stitch for a professional-looking finish that makes the texture pop.
5. Achieve Perfect Stripes with Vertical Satin Stitch
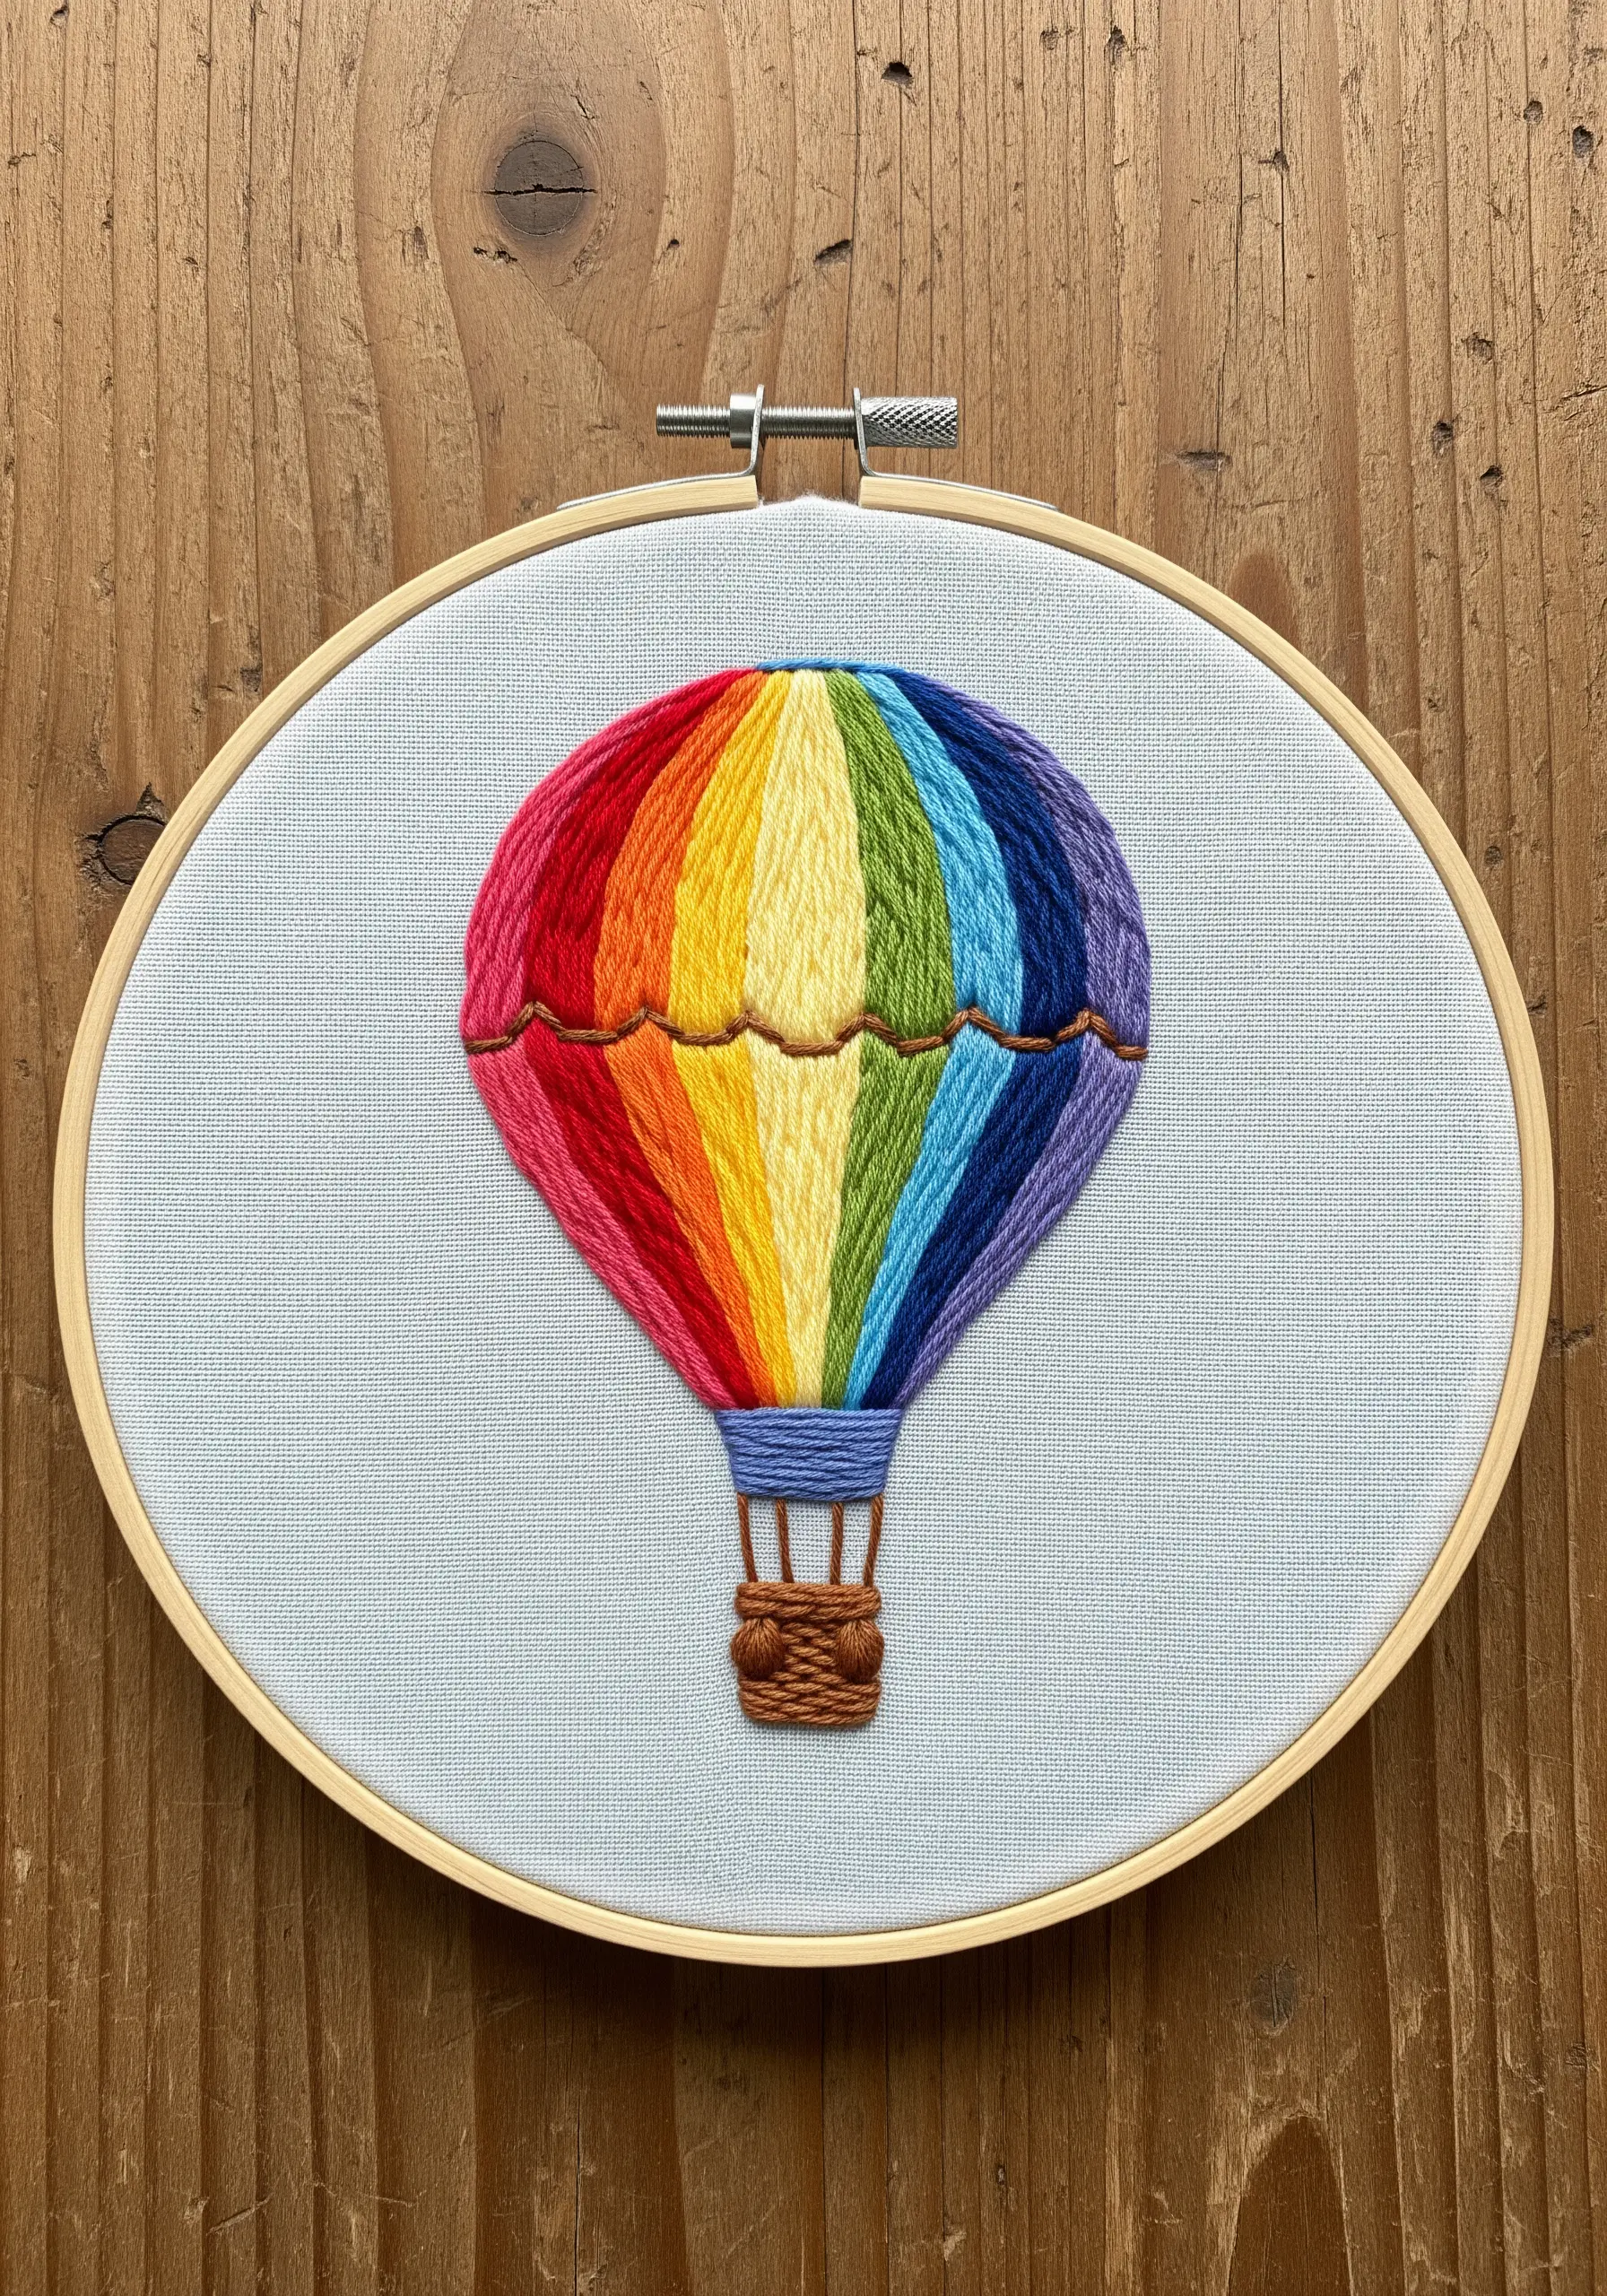
For a clean, classic hot air balloon, the key is perfectly uniform vertical stripes. Keep your satin stitches consistently straight and evenly tensioned to prevent fabric puckering.
To make this easier, lightly draw parallel guide lines with a water-soluble pen before you begin stitching each color block.
For the basket, switch to a basketweave stitch. This textural stitch provides a wonderful contrast to the smooth satin of the balloon, adding a touch of realism.
Using a full six strands of floss will ensure rich color saturation and a satisfyingly plump finish.
6. Suggest Form with Contoured Stitch Direction
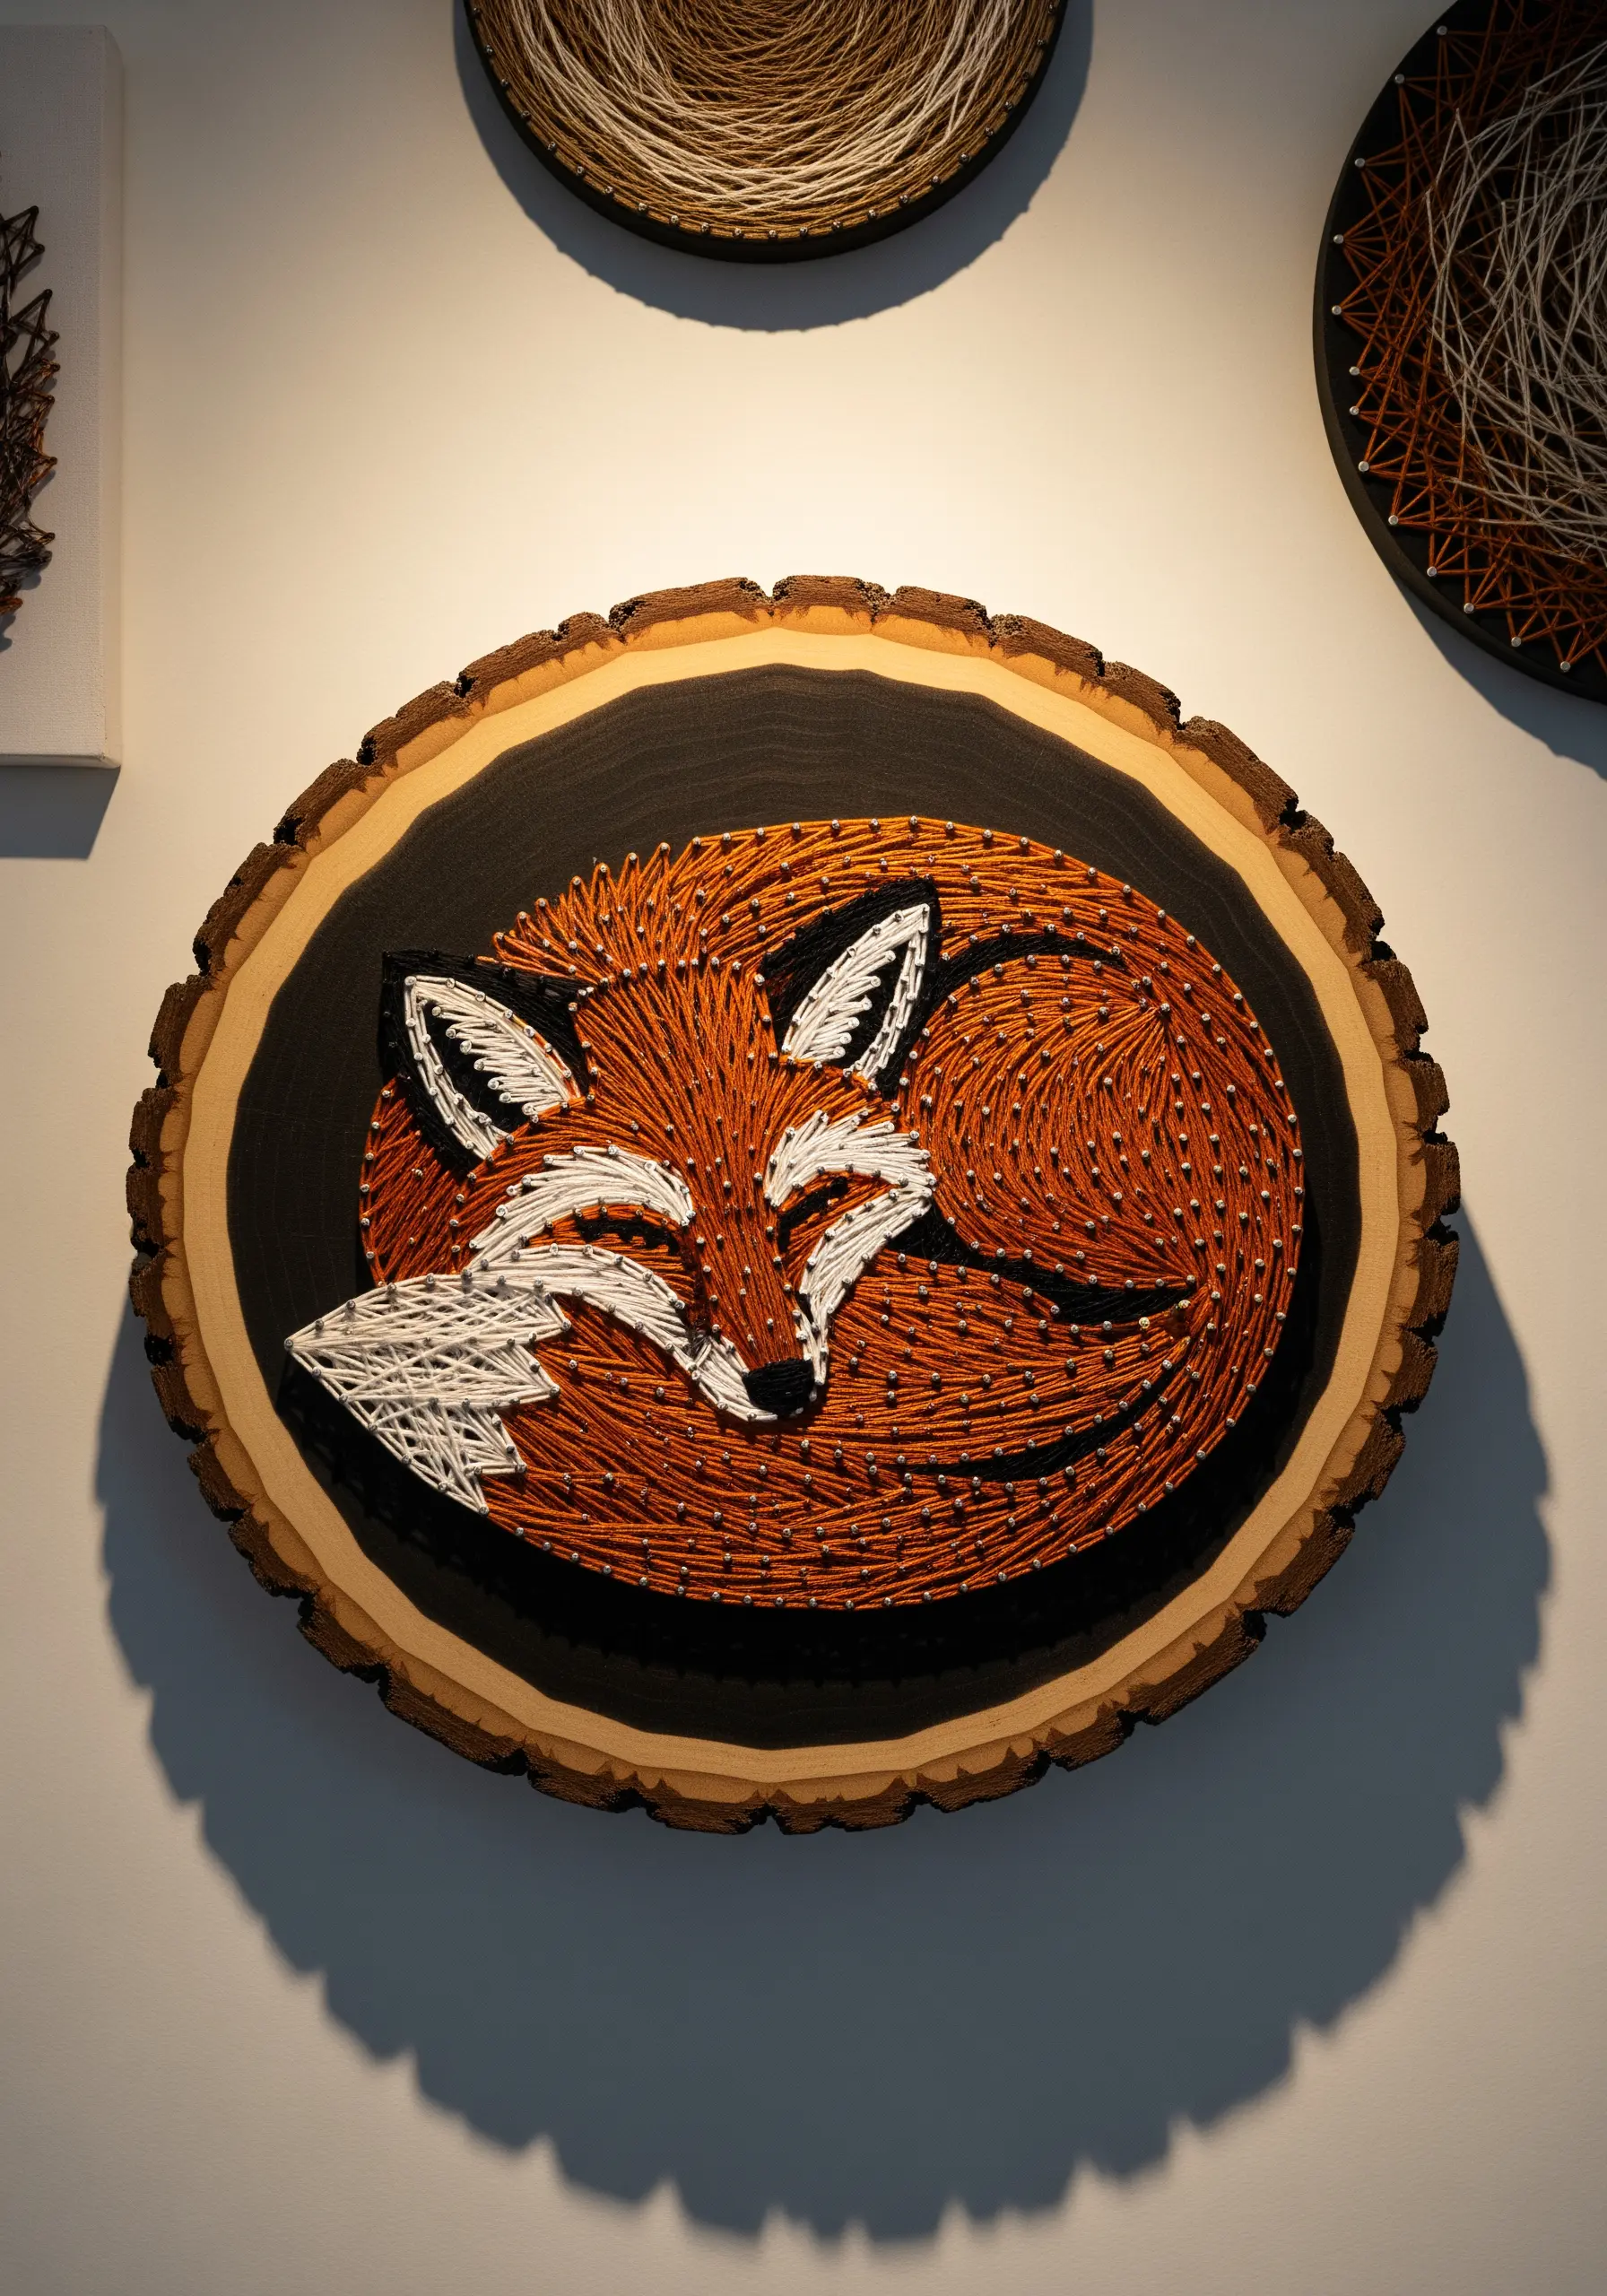
You can create the illusion of a curved, sleeping form without any complex shading, simply by controlling your stitch direction.
Fill the fox’s body with long satin stitches, but angle them to follow the curve of its back and tail. This contouring makes the flat shape feel rounded and dimensional.
For the white sections, stitch in the opposite direction to create a subtle textural contrast that defines the tail tip and chest.
Mounting your finished piece on a rustic wood slice instead of a traditional hoop enhances the woodland theme and makes for a beautiful nature-inspired framed embroidery display.
7. Create Delicate Detail with Open Fill Stitches
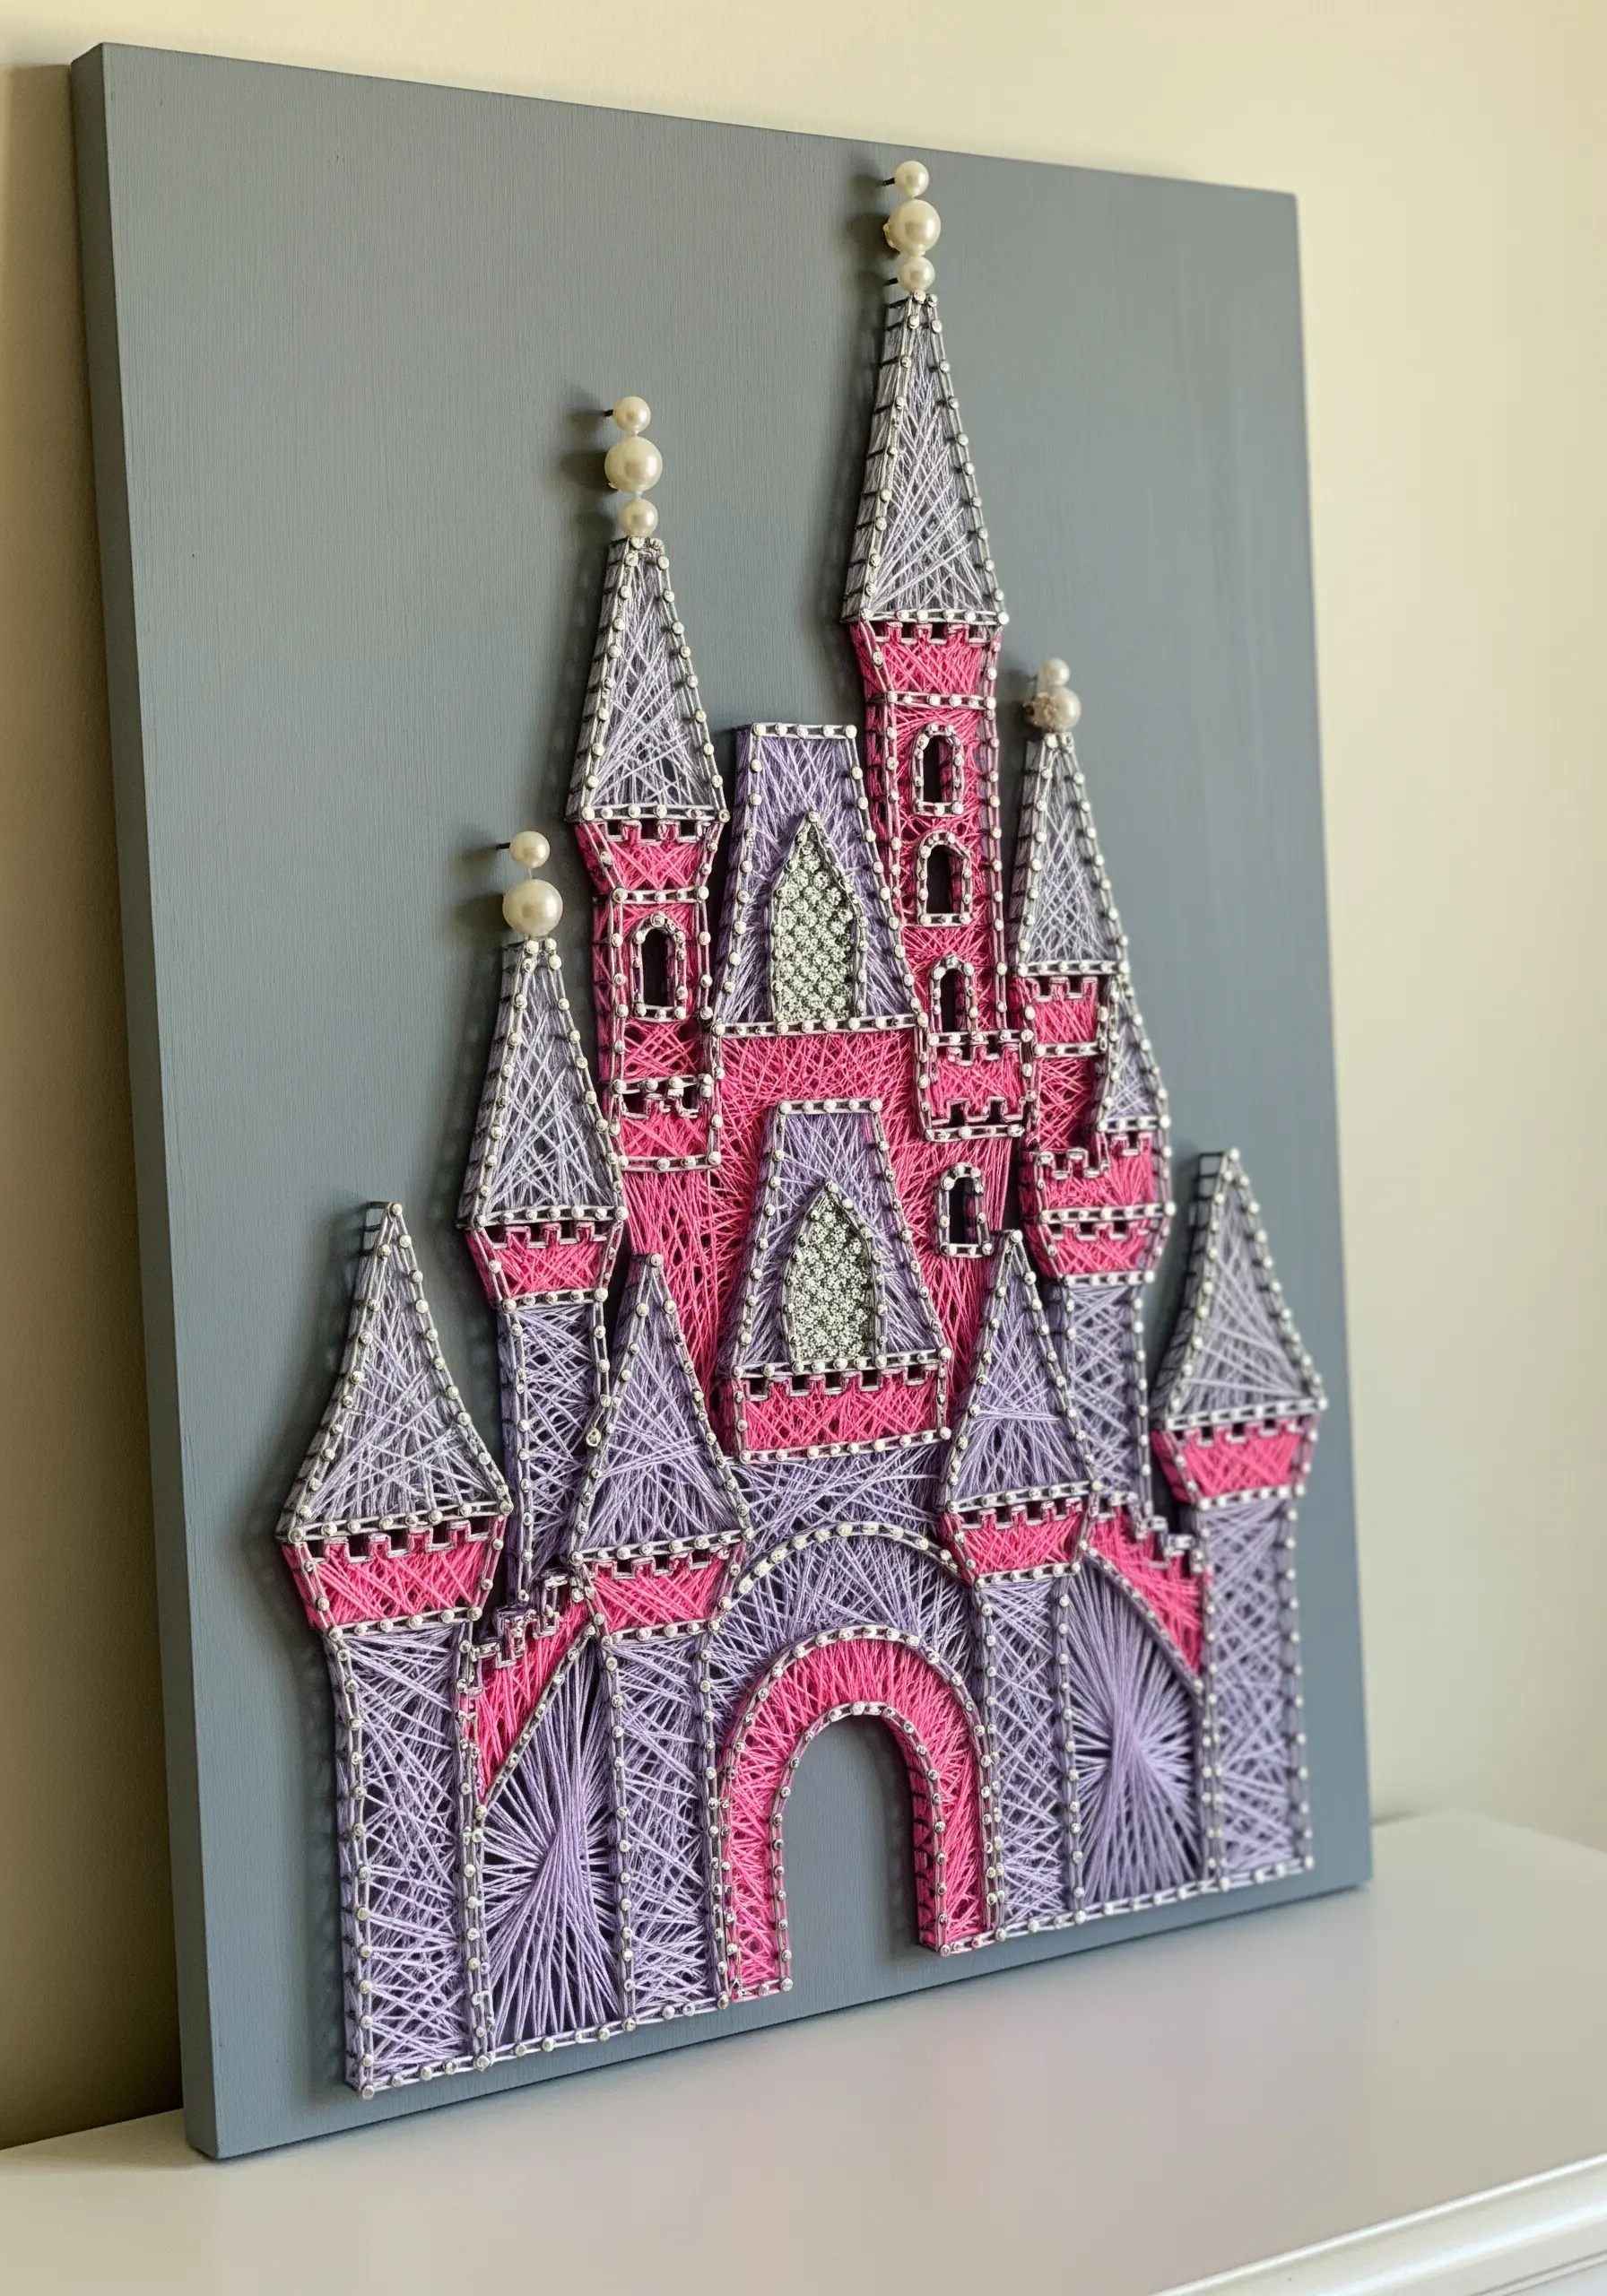
A detailed castle doesn’t need to be filled with dense, heavy stitching. Instead, use open fill techniques to suggest texture and light.
Outline the main sections in a dark backstitch, then fill the areas with a light lattice work of long straight stitches or a sparse seed stitch.
This approach allows the background color to show through, creating an airy, illustrative quality that feels magical and delicate.
For a final touch of fairytale sparkle, stitch on tiny pearl beads at the peaks of the turrets.
8. Use Straight Stitches for a Graphic, Web-Like Fill
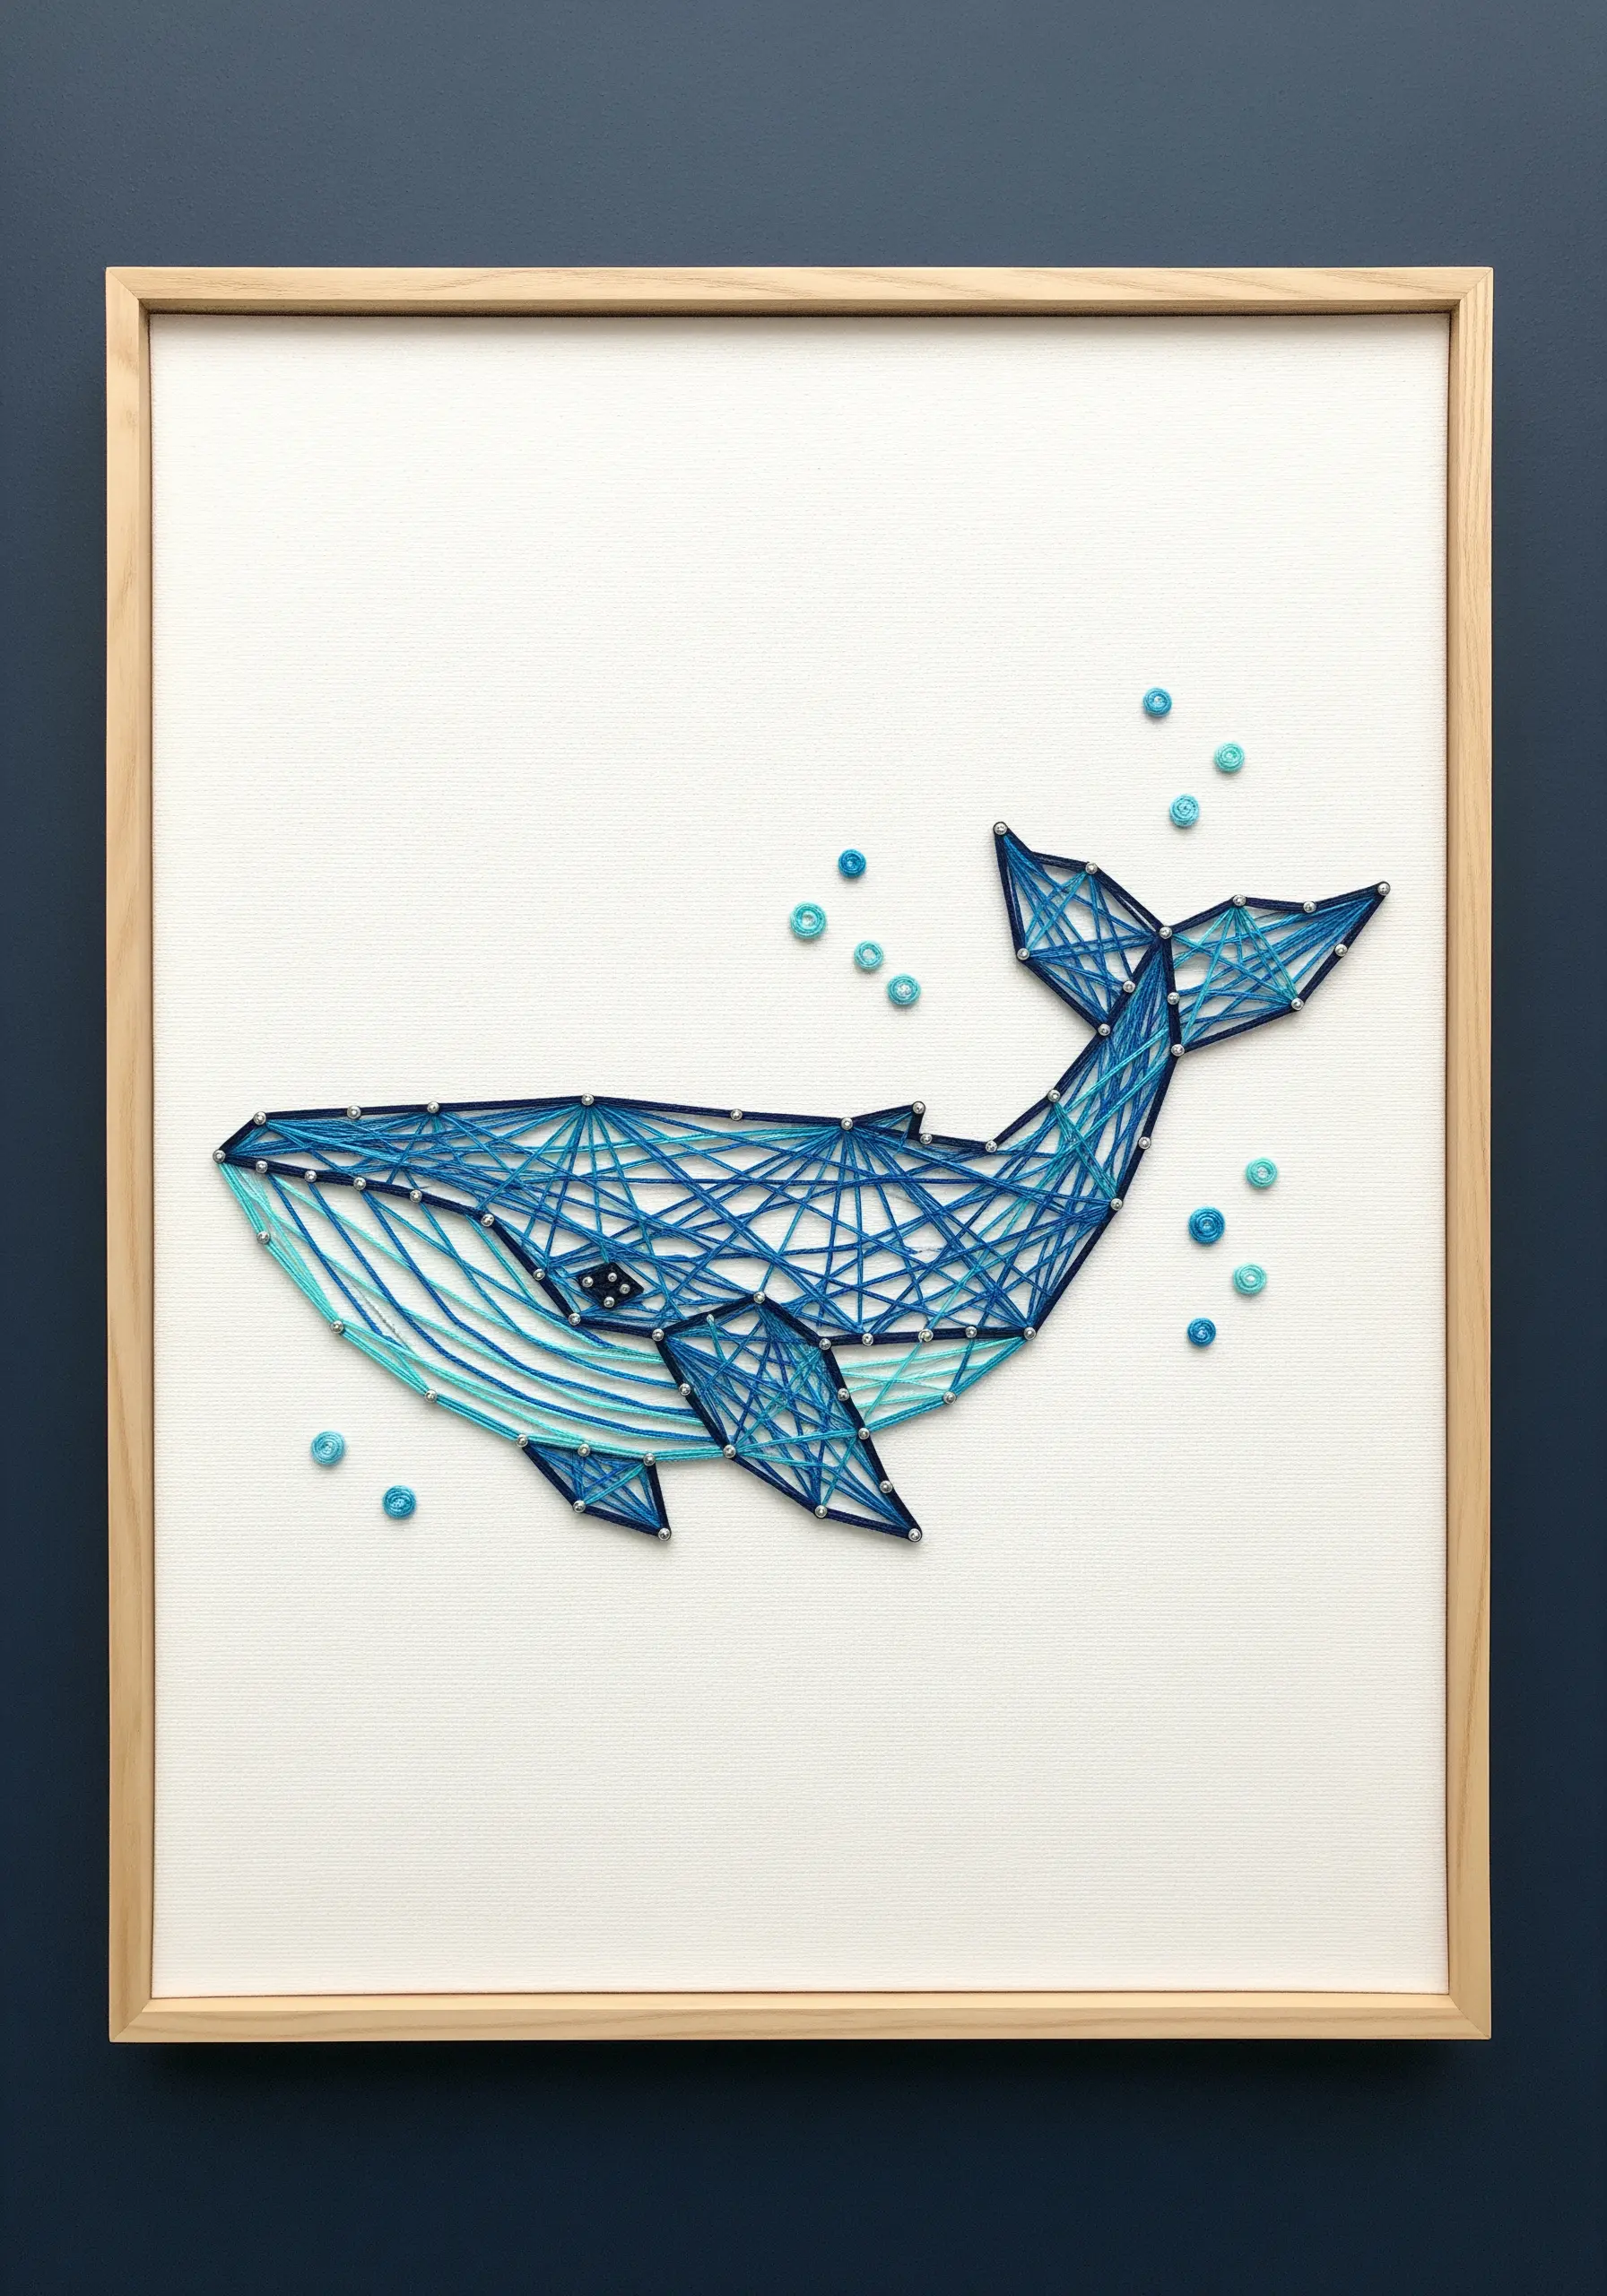
Emulate the geometric look of string art by using long, intersecting straight stitches as a fill.
After outlining your whale in a neat backstitch, carry your thread back and forth across the shape at different angles, creating a web-like pattern.
Use two or three shades of blue to add depth and visual interest to the fill. This technique is much faster than satin stitch and results in a dynamic, modern aesthetic.
Scatter a few blue French knots or seed beads around the whale to create the effect of playful air bubbles.
9. Stitch a Perfect Spiral with a Coiled Stem Stitch
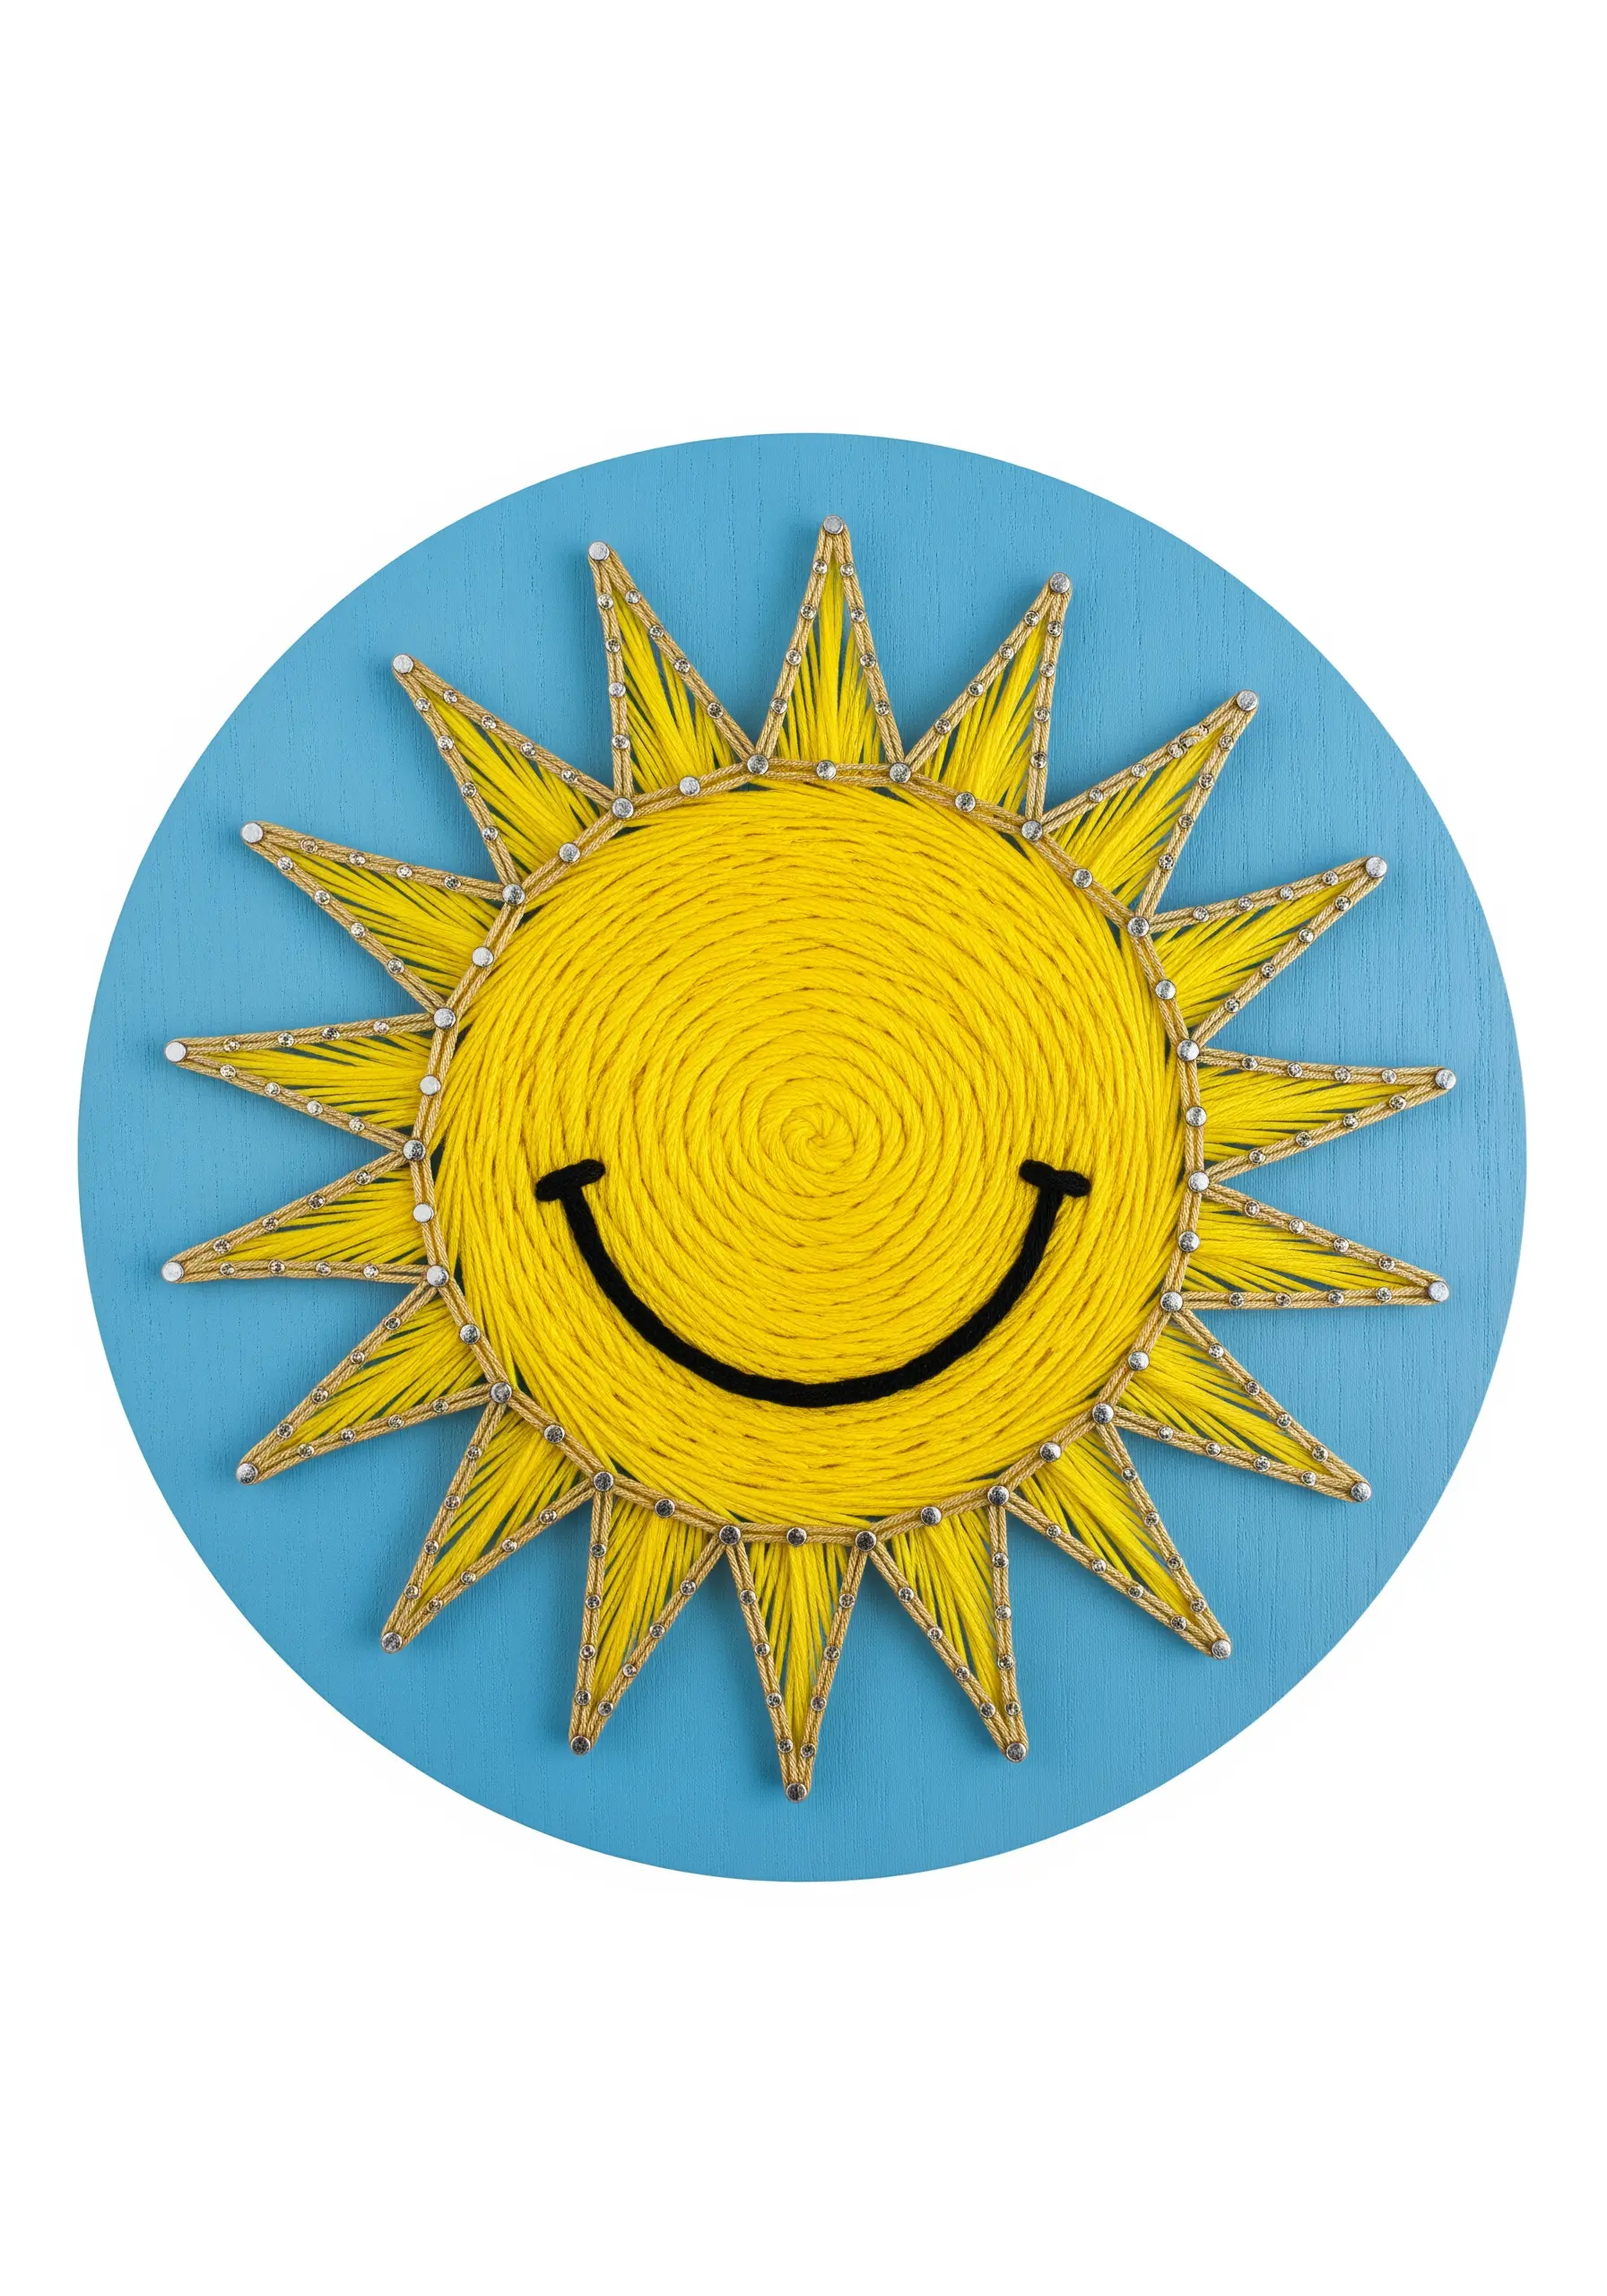
To create the cheerful, spiraling center of a sun, a stem stitch is your best tool. It creates a rope-like texture that naturally coils.
Start at the very center of the circle and work your way outward in a continuous spiral. The slight overlap of the stem stitch will form a beautifully defined, concentric pattern.
For the sun’s rays, use long, tapered satin stitches, making them slightly wider at the base and narrower at the tip for a sharp, graphic look.
Using a thick thread like pearl cotton or all six strands of embroidery floss will make the spiral texture even more pronounced.
10. Play with Negative Space for Pattern Definition
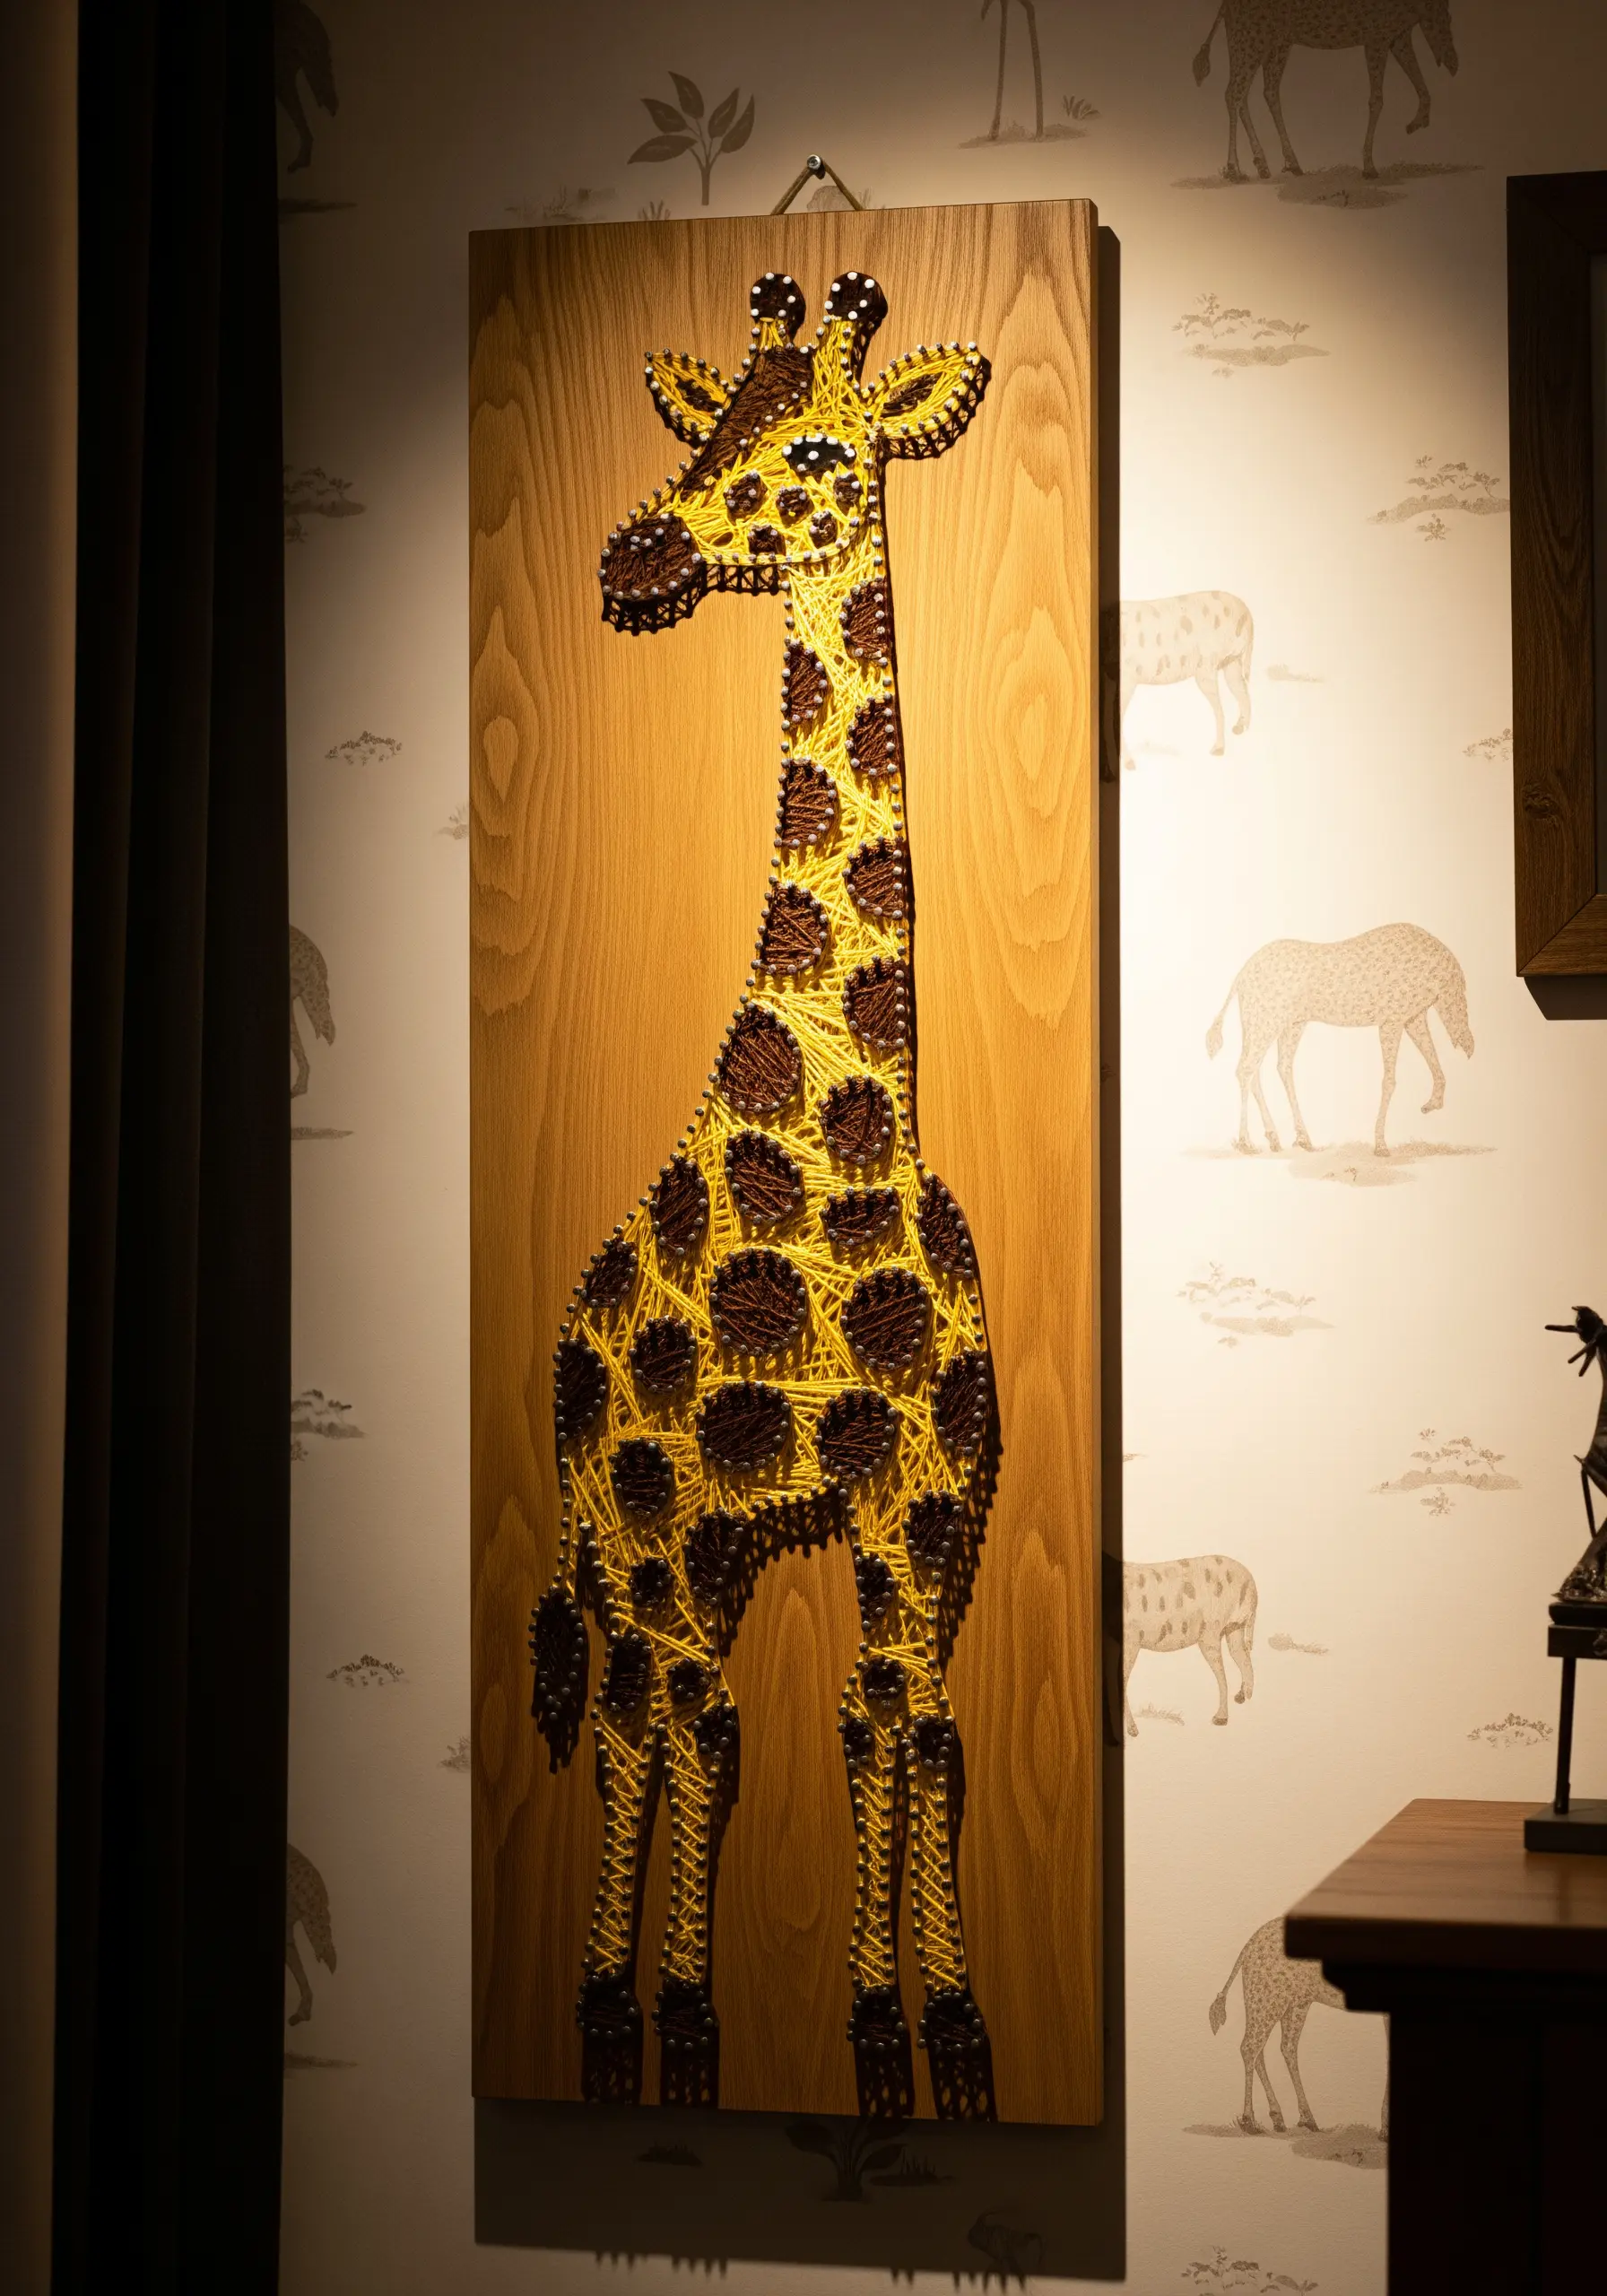
You don’t always need to fill an entire shape with thread. For a patterned animal like a giraffe, let the background fabric do some of the work.
Simply stitch the spots using a rich brown satin stitch, leaving the underlying fabric visible as the giraffe’s main color. This creates a clean, graphic look that feels sophisticated.
Outline the entire silhouette with a single strand of gold or yellow thread to define the shape without overpowering the spots.
This negative space technique is modern, saves thread, and highlights the beauty of your chosen fabric.
11. Weave a Shimmering Moon with Metallic Threads
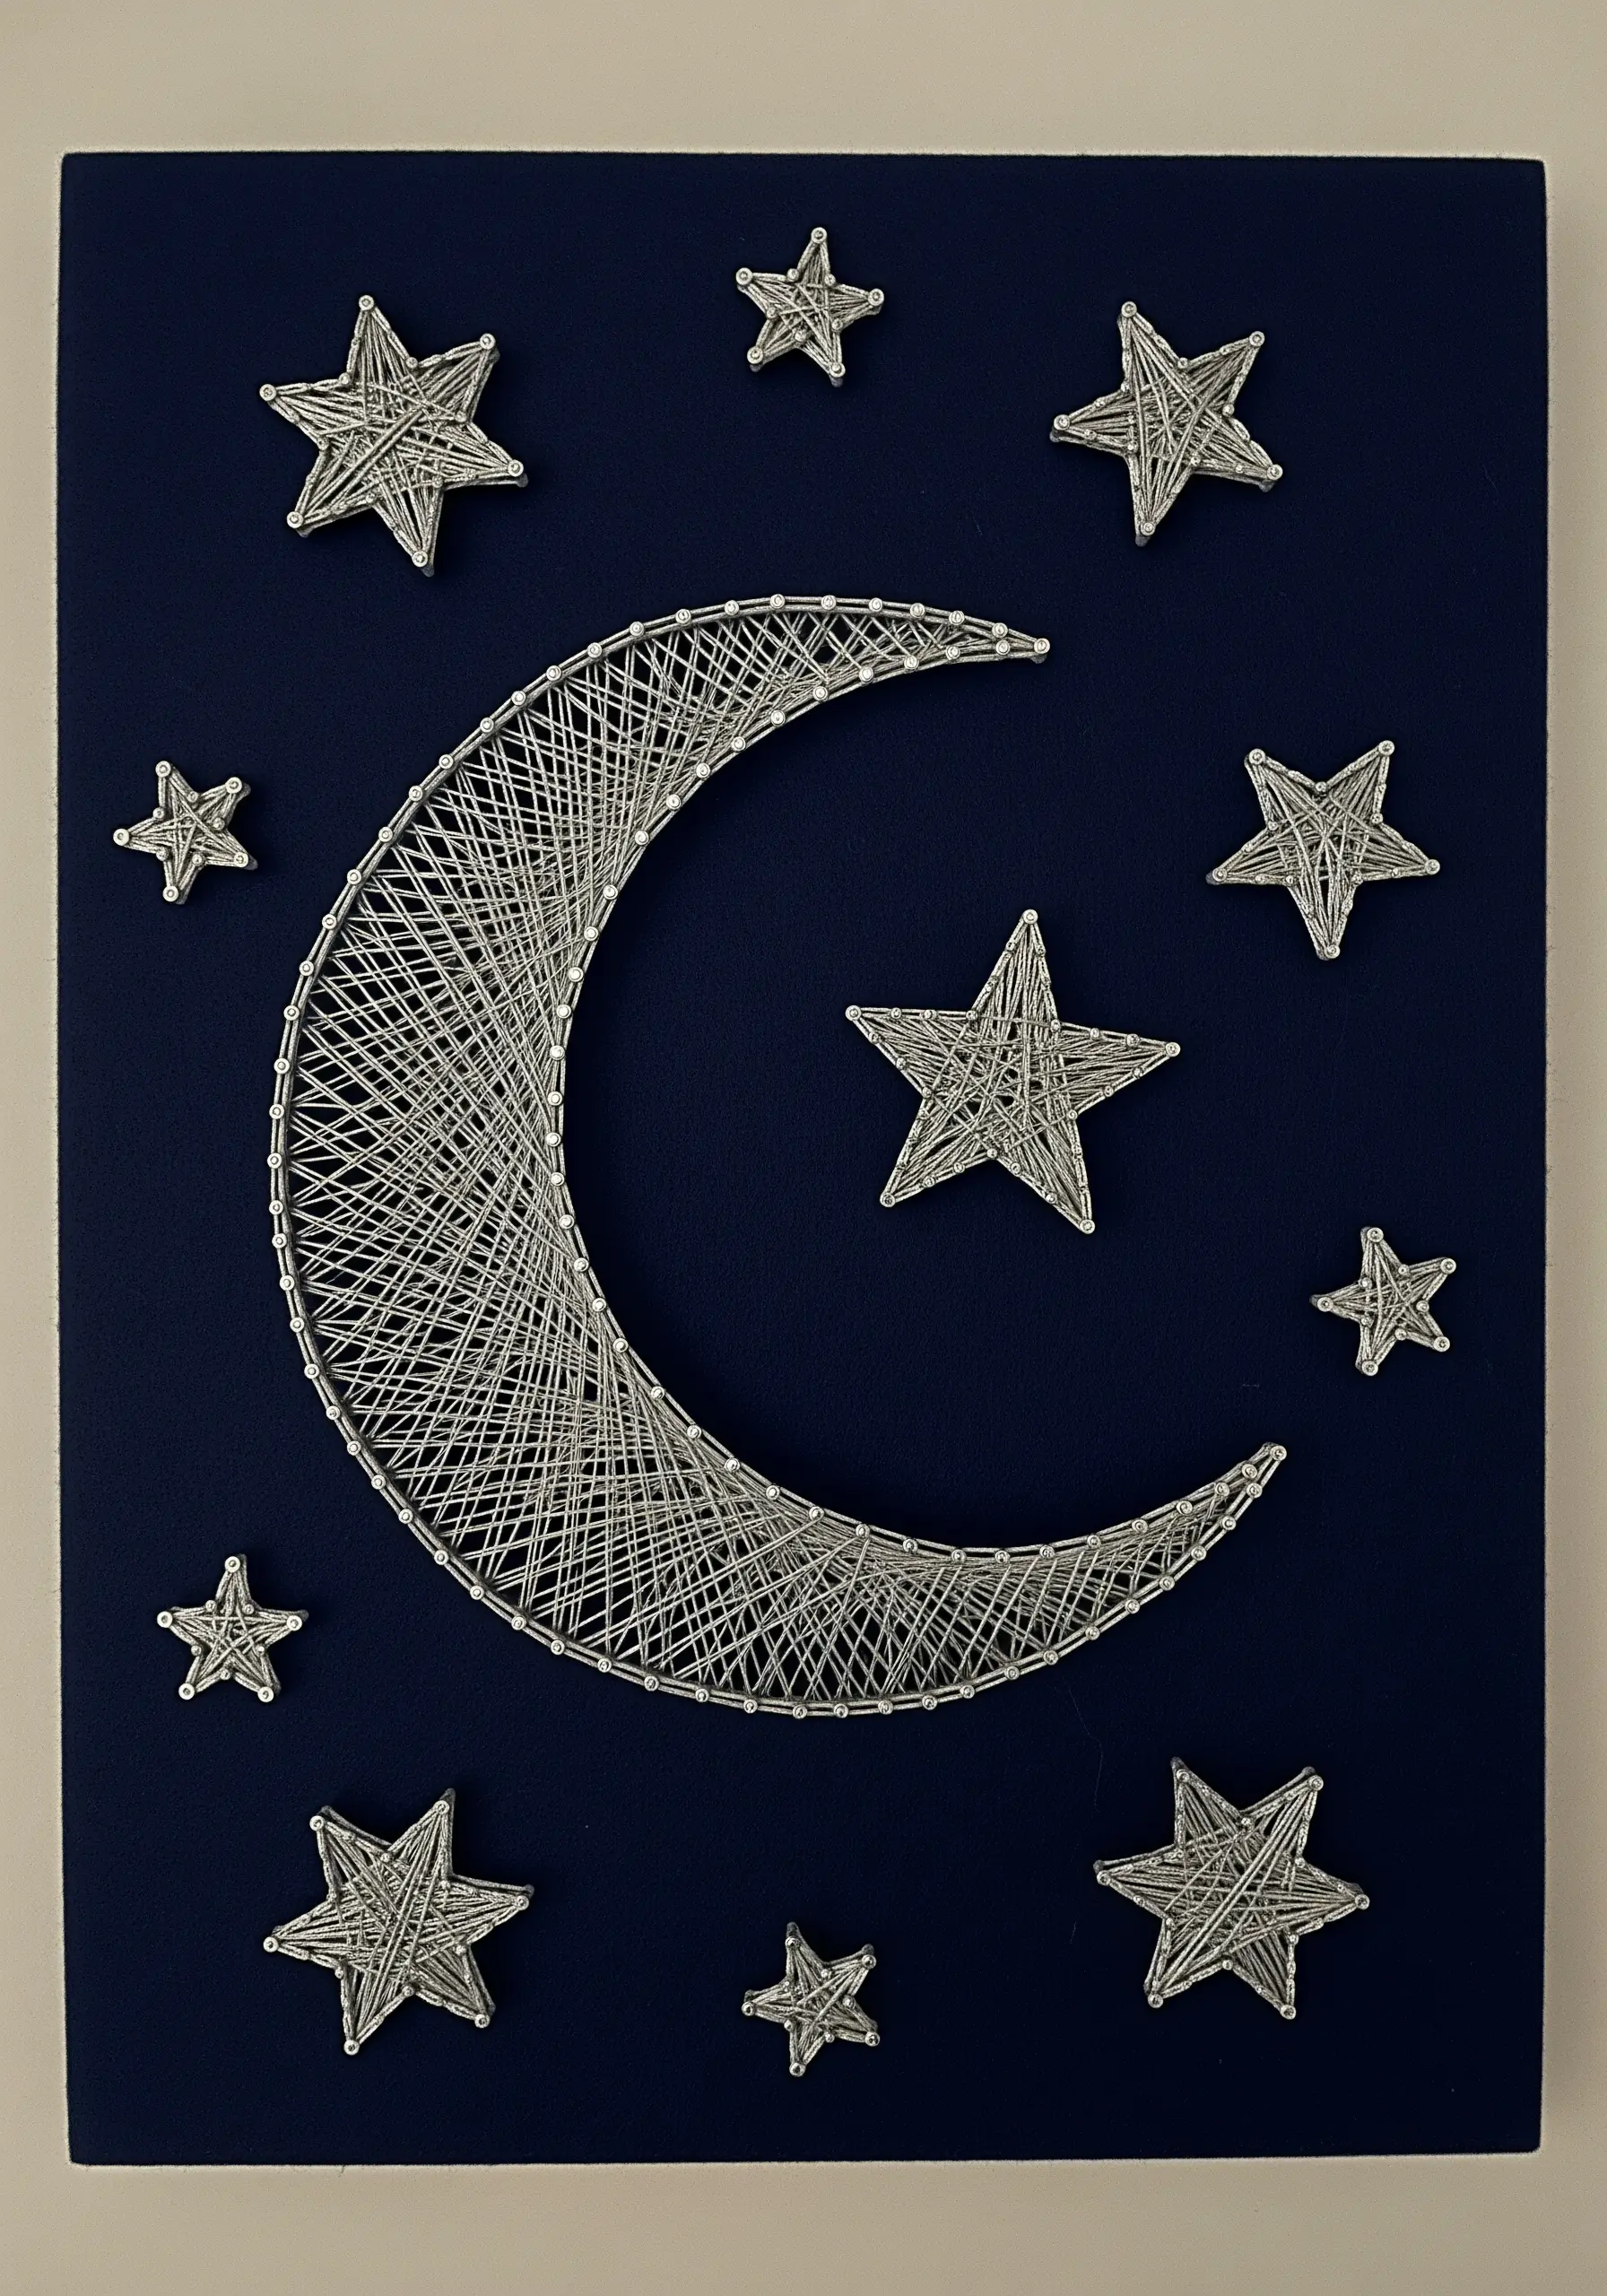
Create a celestial scene with depth and sparkle by using metallic thread for your moon and stars.
Instead of a flat fill, layer long straight stitches across the crescent moon shape, overlapping them to build a woven, shimmering texture that catches the light beautifully.
This technique mimics the layered effect of string art and gives the moon a magical, ethereal quality.
For the stars, use simple star stitches or detached chain stitches (lazy daisies) with a French knot in the center to make them twinkle against the dark fabric.
12. Add Dimension with Variegated Floss and Beads
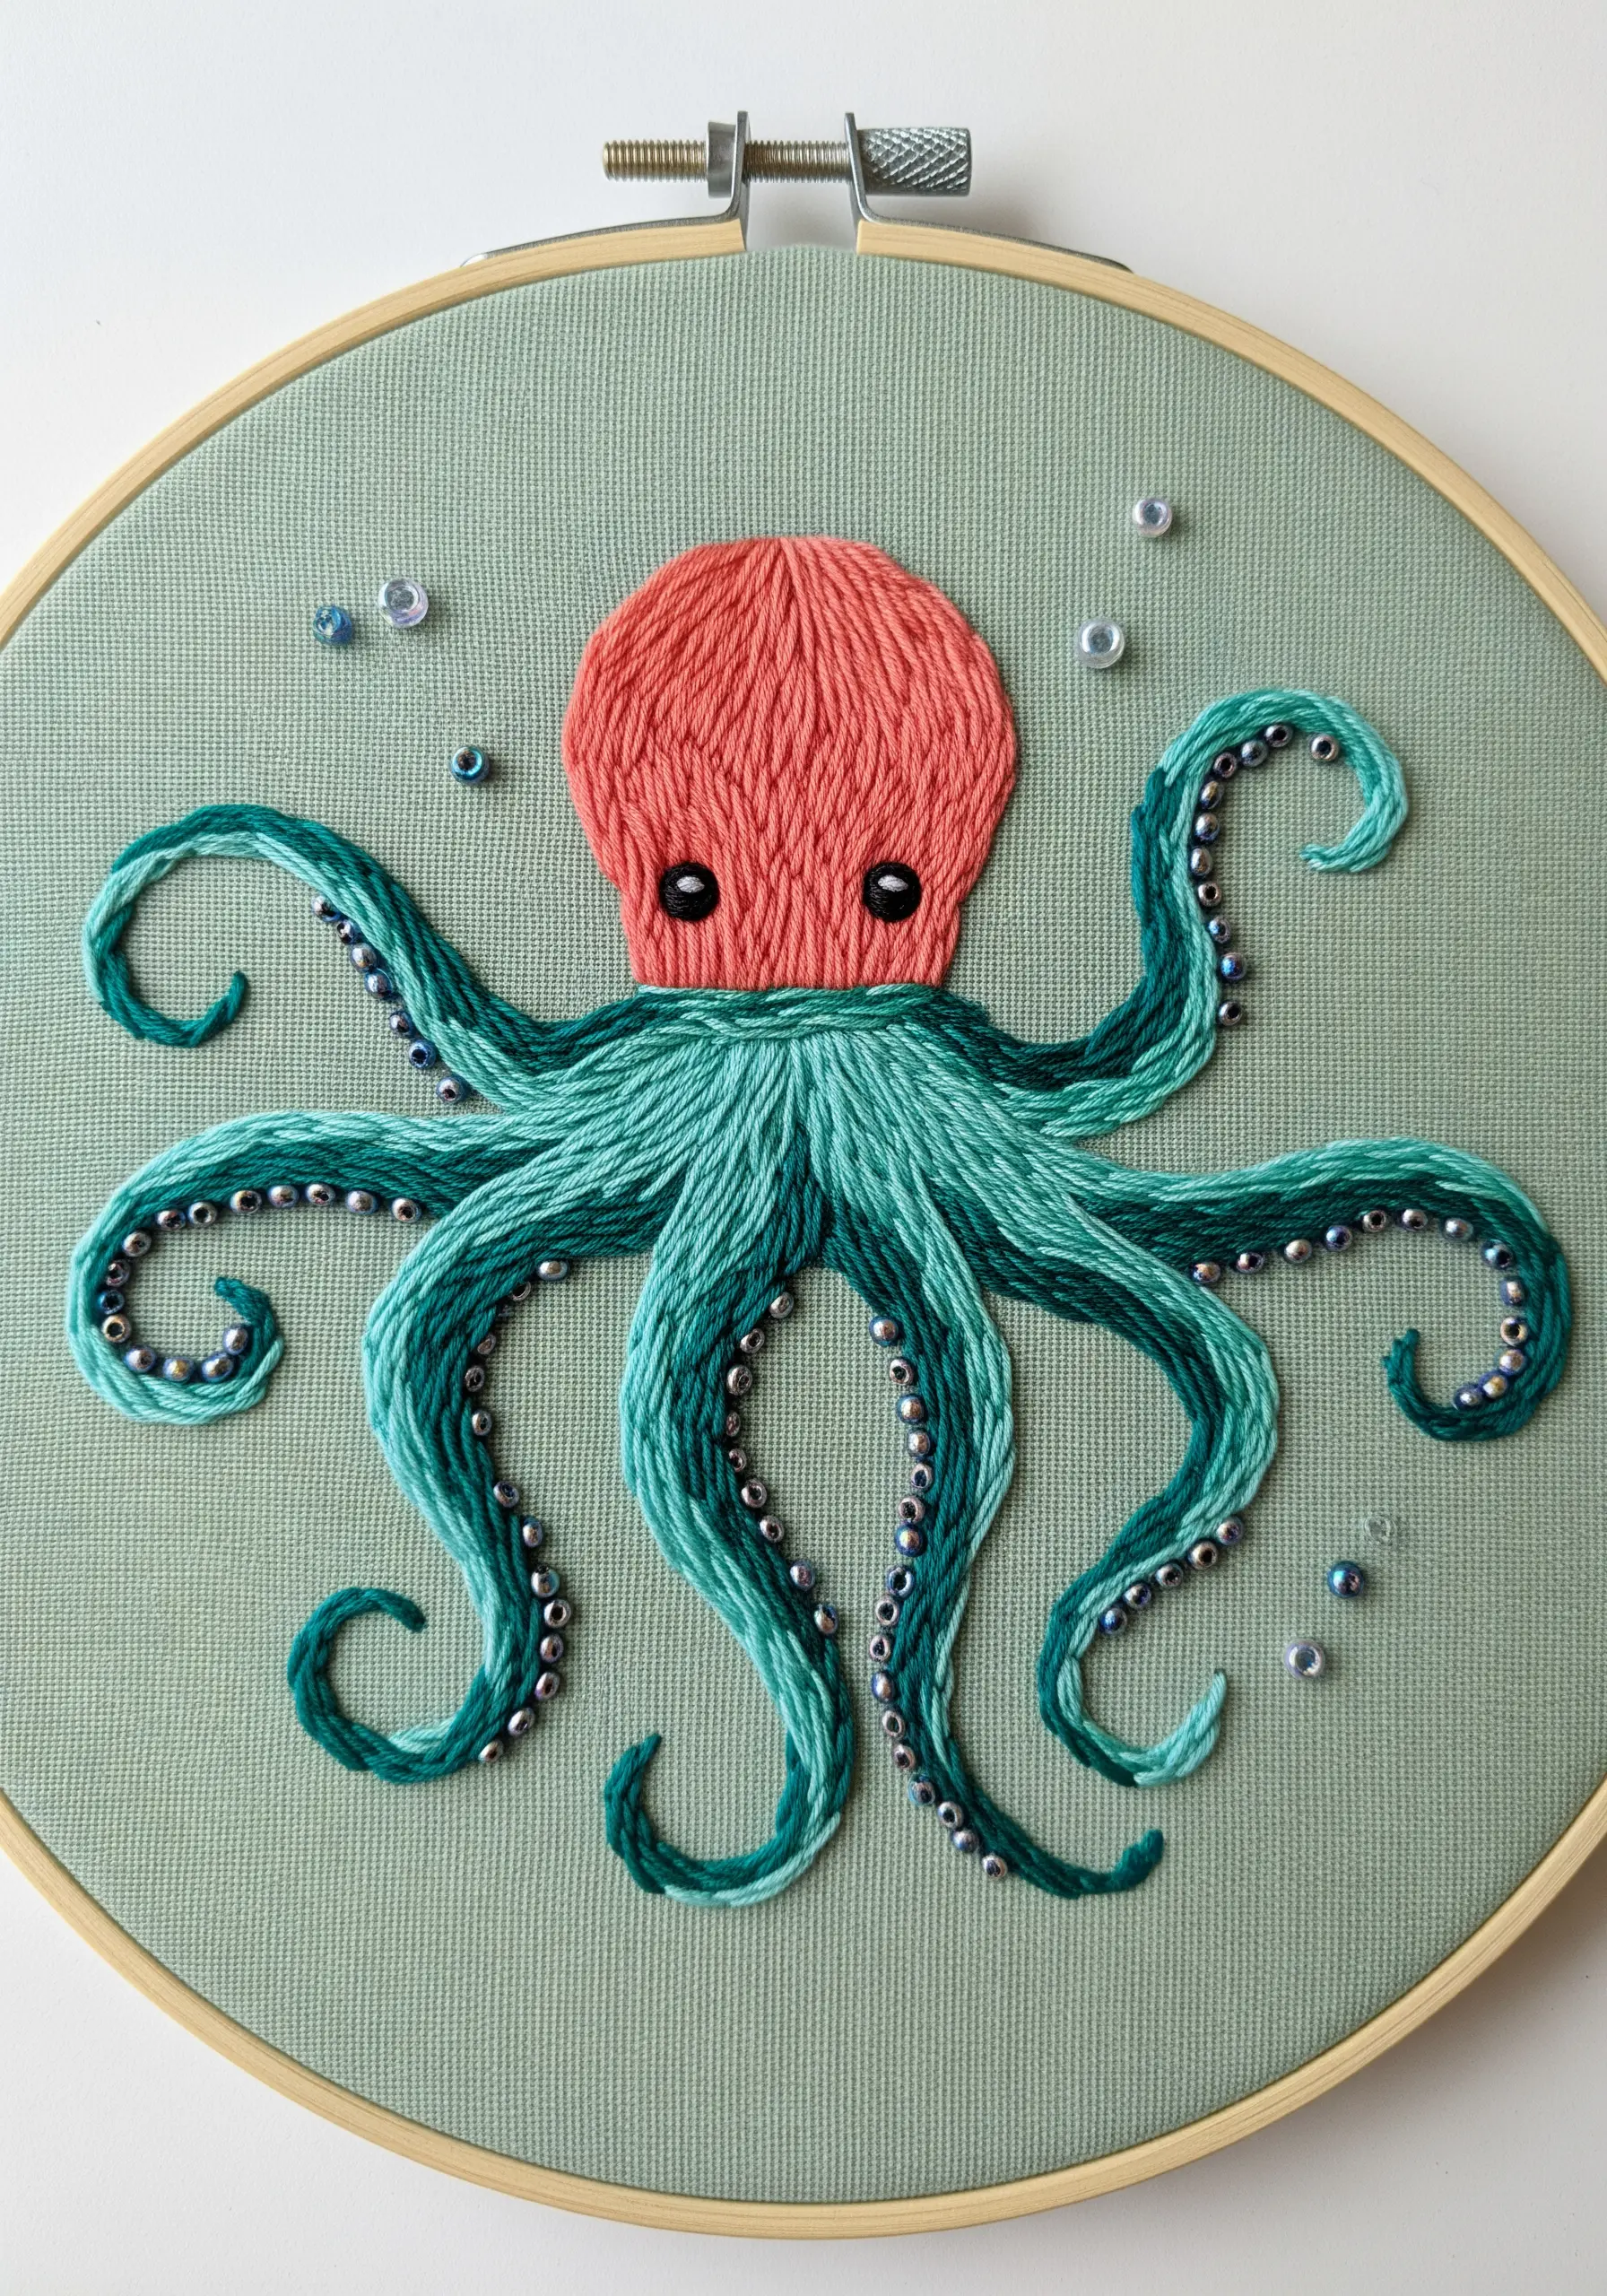
Bring an octopus to life by adding subtle color shifts and shimmering textures.
Use a variegated teal floss for the tentacles; the thread’s built-in color changes will create natural-looking gradients and depth with every stitch.
A whipped backstitch or a heavy chain stitch will give the tentacles a rounded, three-dimensional feel. For extra sparkle, strategically place small, iridescent beads along the curves of the tentacles.
Fill the head with a contrasting color like coral using a smooth satin stitch to make the entire creature pop.
13. Design a Landscape Triptych with Color Blocking
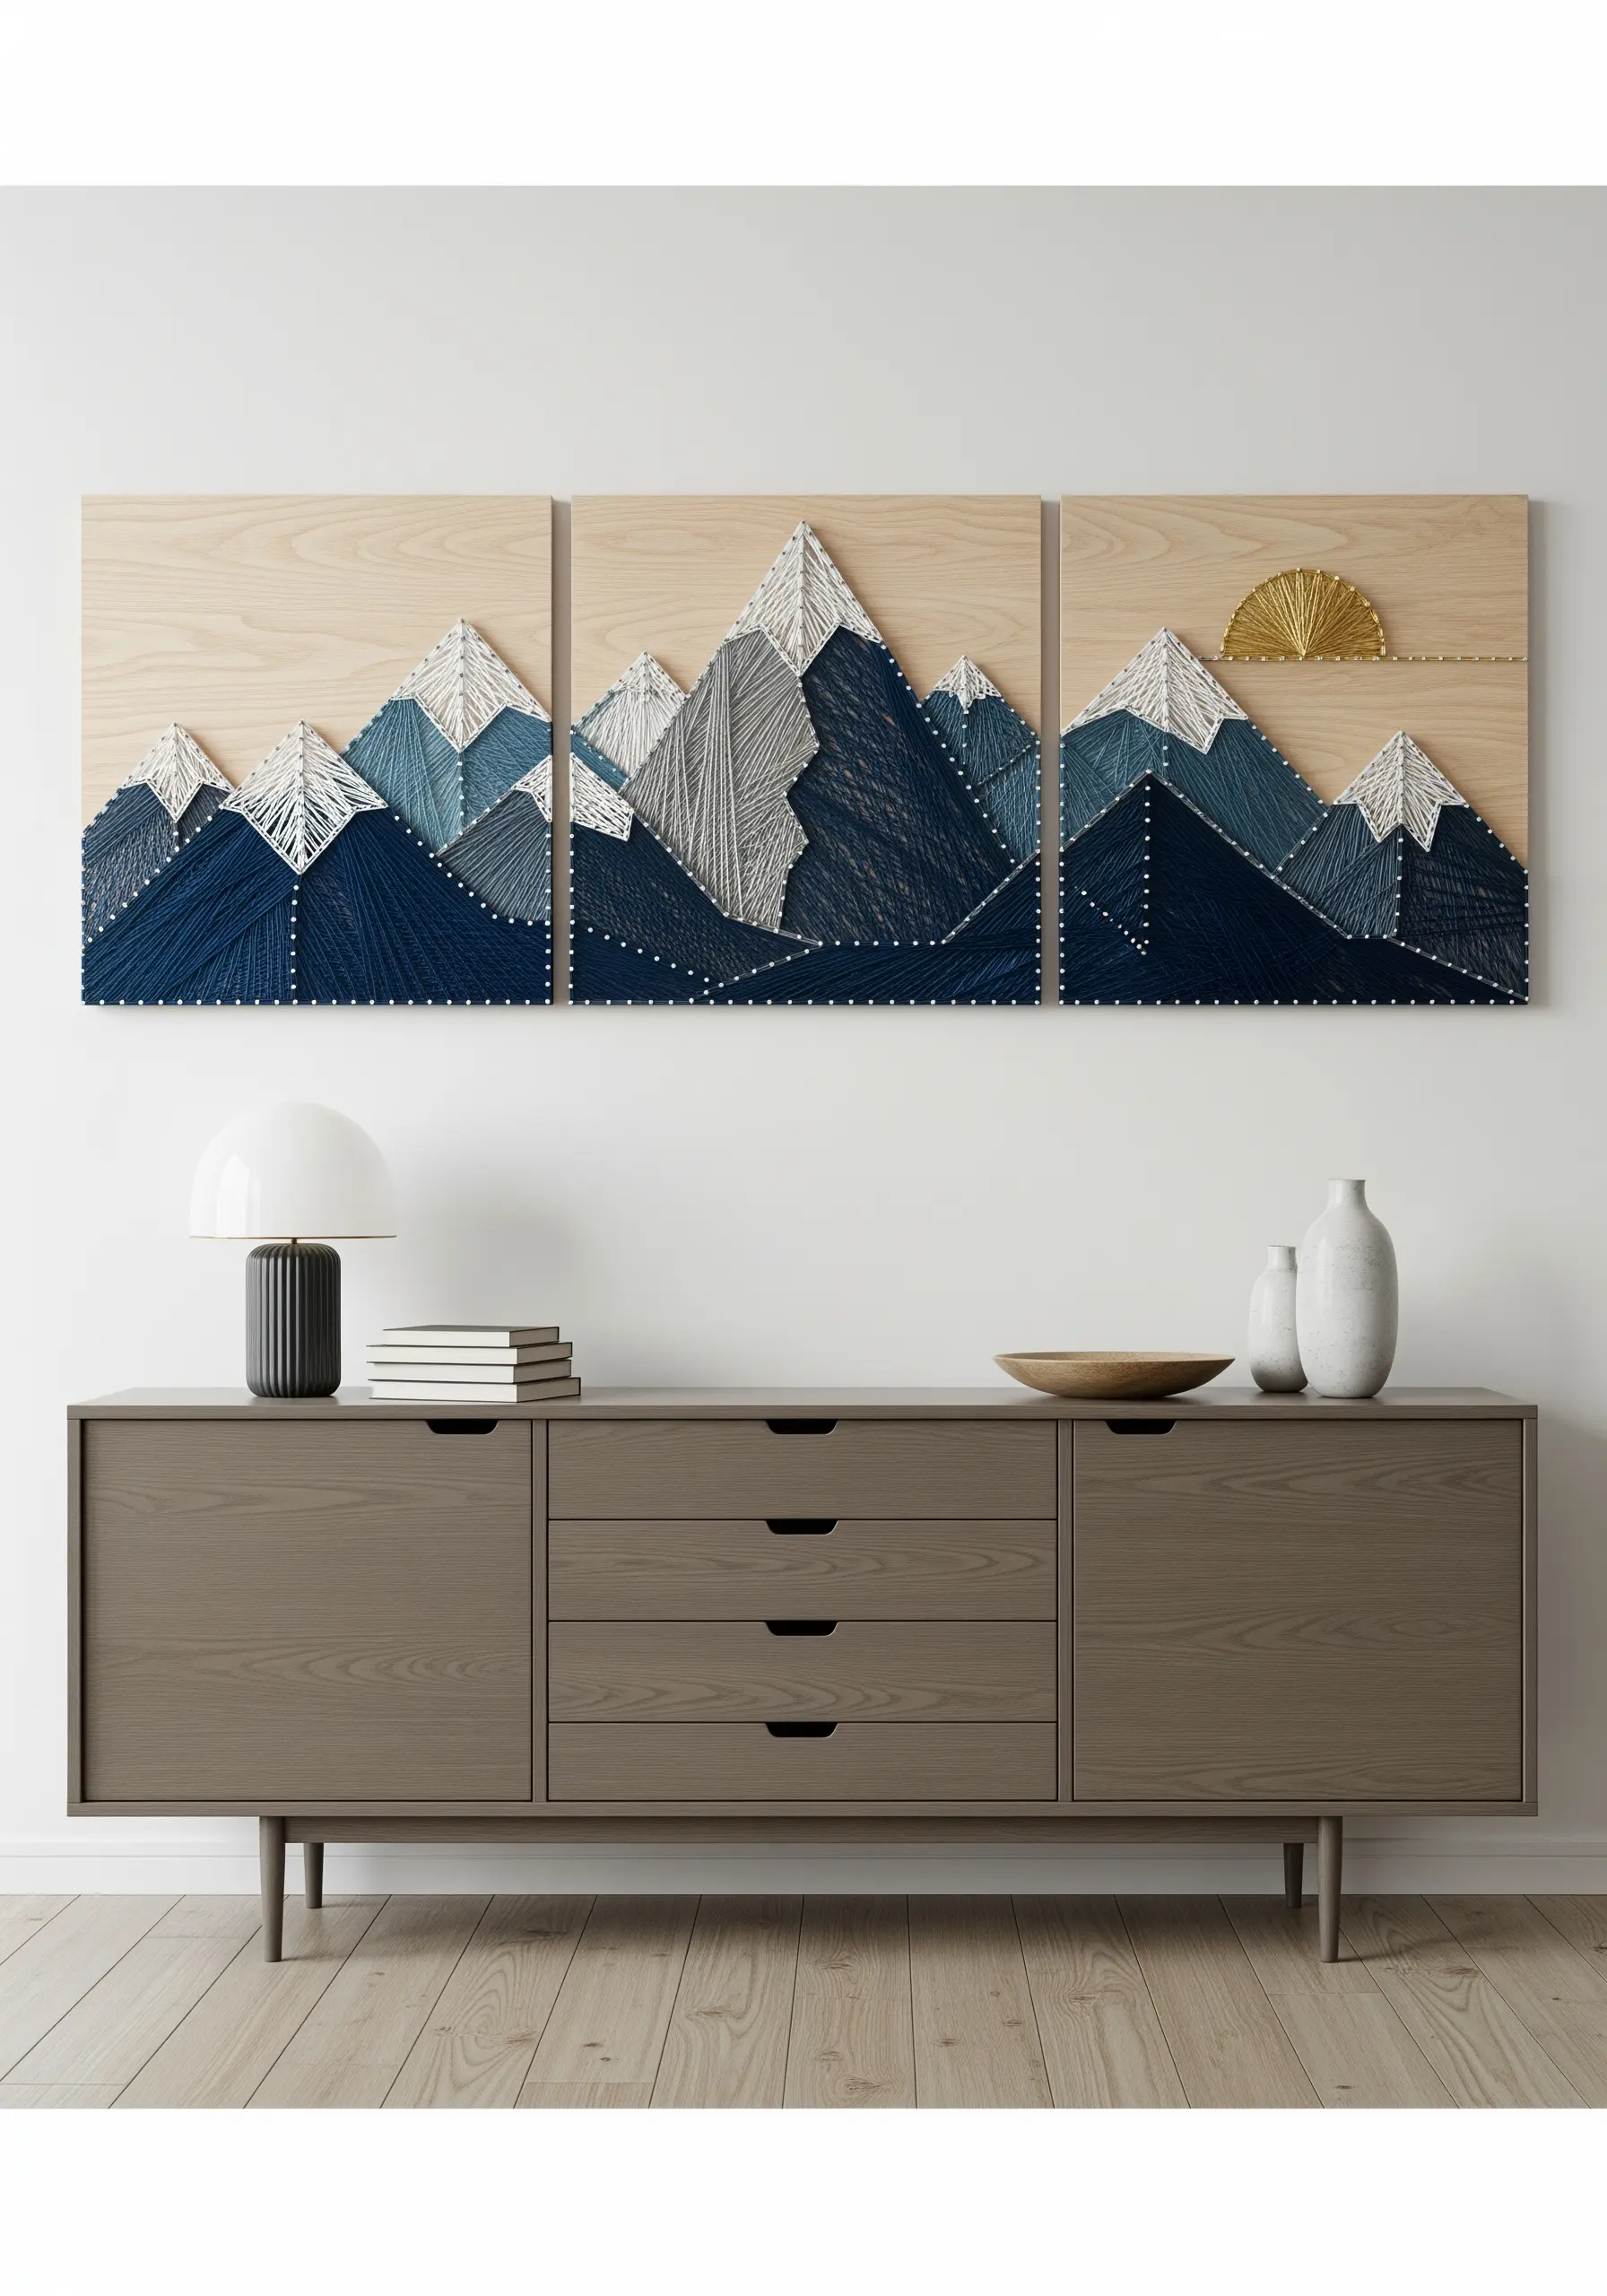
Tell a bigger story by splitting a single scene across multiple panels. This mountain range triptych is a perfect example of modern embroidery wall art.
Assign a different palette of blues and grays to each panel to create a sense of atmospheric perspective and depth.
Fill each mountain section with long straight stitches or satin stitch, changing the stitch direction in adjacent shapes to create textural contrast.
This is one of those modern thread art projects that looks complex but is based on simple, repetitive stitches.
14. Create a Skeletal Effect with Open Straight Stitches
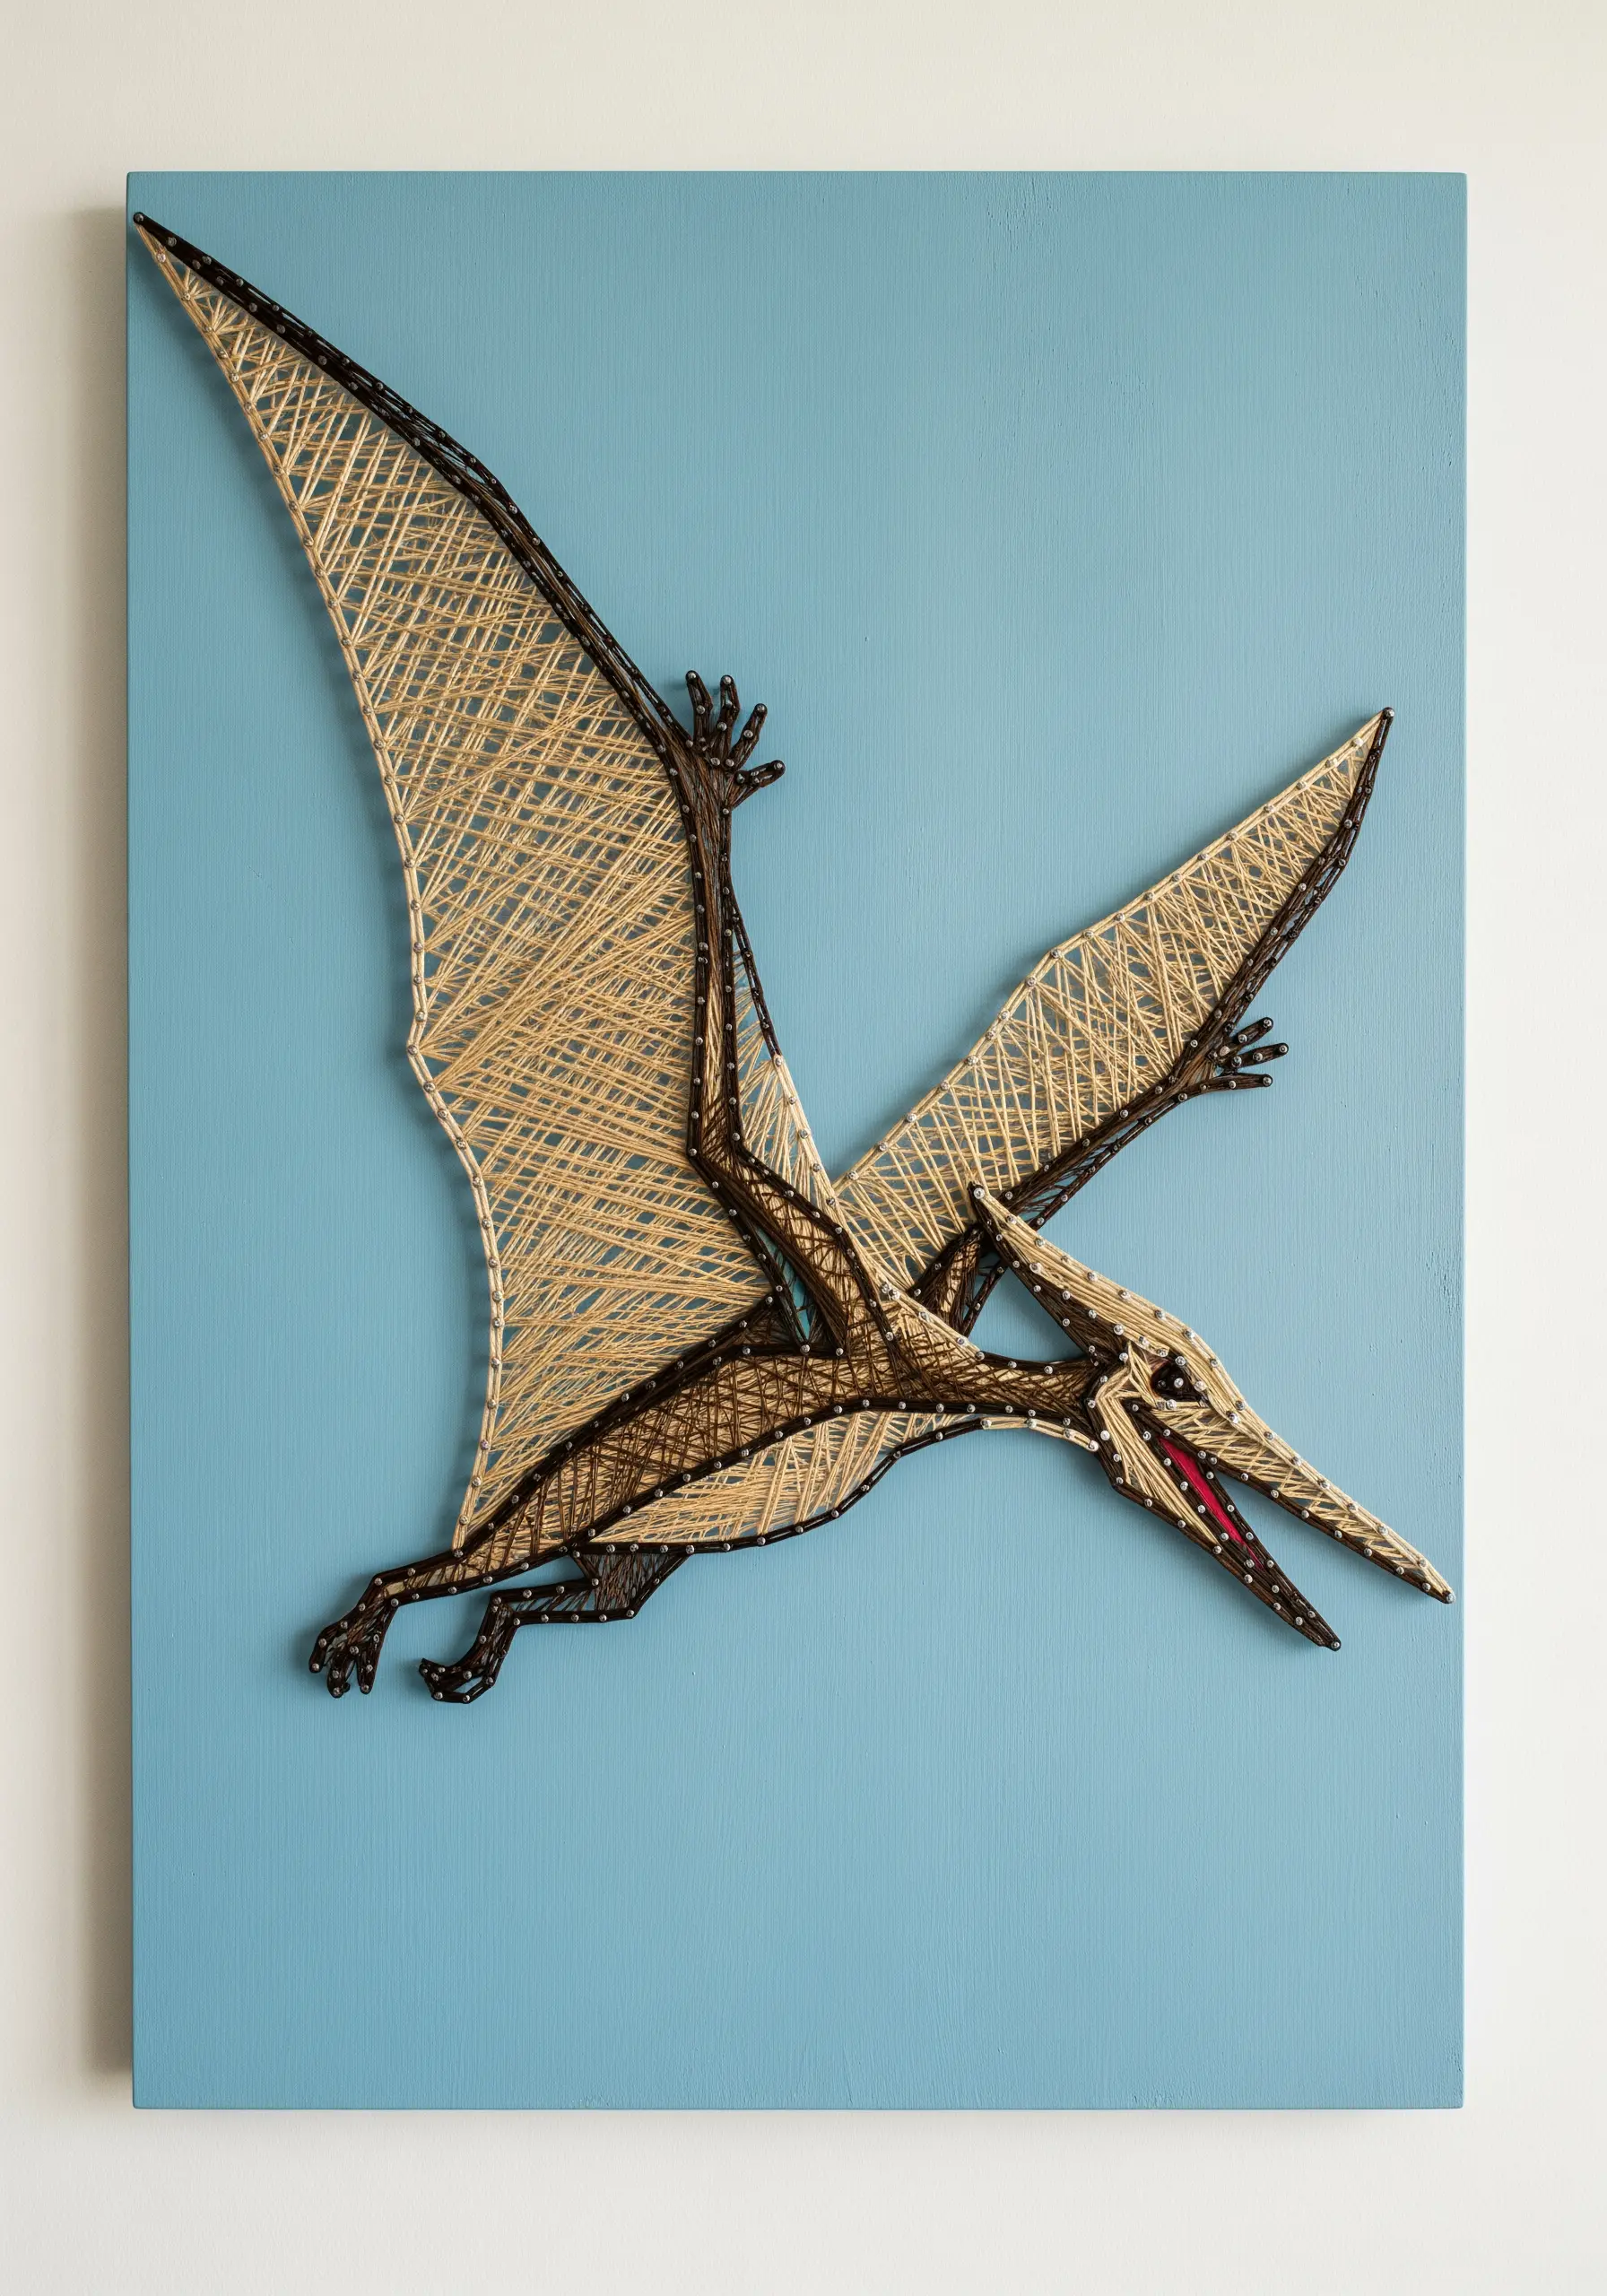
For prehistoric creatures like a pterodactyl, an open fill can suggest a light, skeletal wing structure more effectively than a solid one.
After creating a strong backstitch outline, use long straight stitches to span across the wing sections, leaving plenty of negative space.
This technique gives the wings a delicate, fossil-like appearance while adding dynamic lines and energy to the piece.
Use a single pop of red for the inside of the mouth to draw attention to the face and add a touch of fierceness.
15. Build Delicious Texture with Knots and Couching
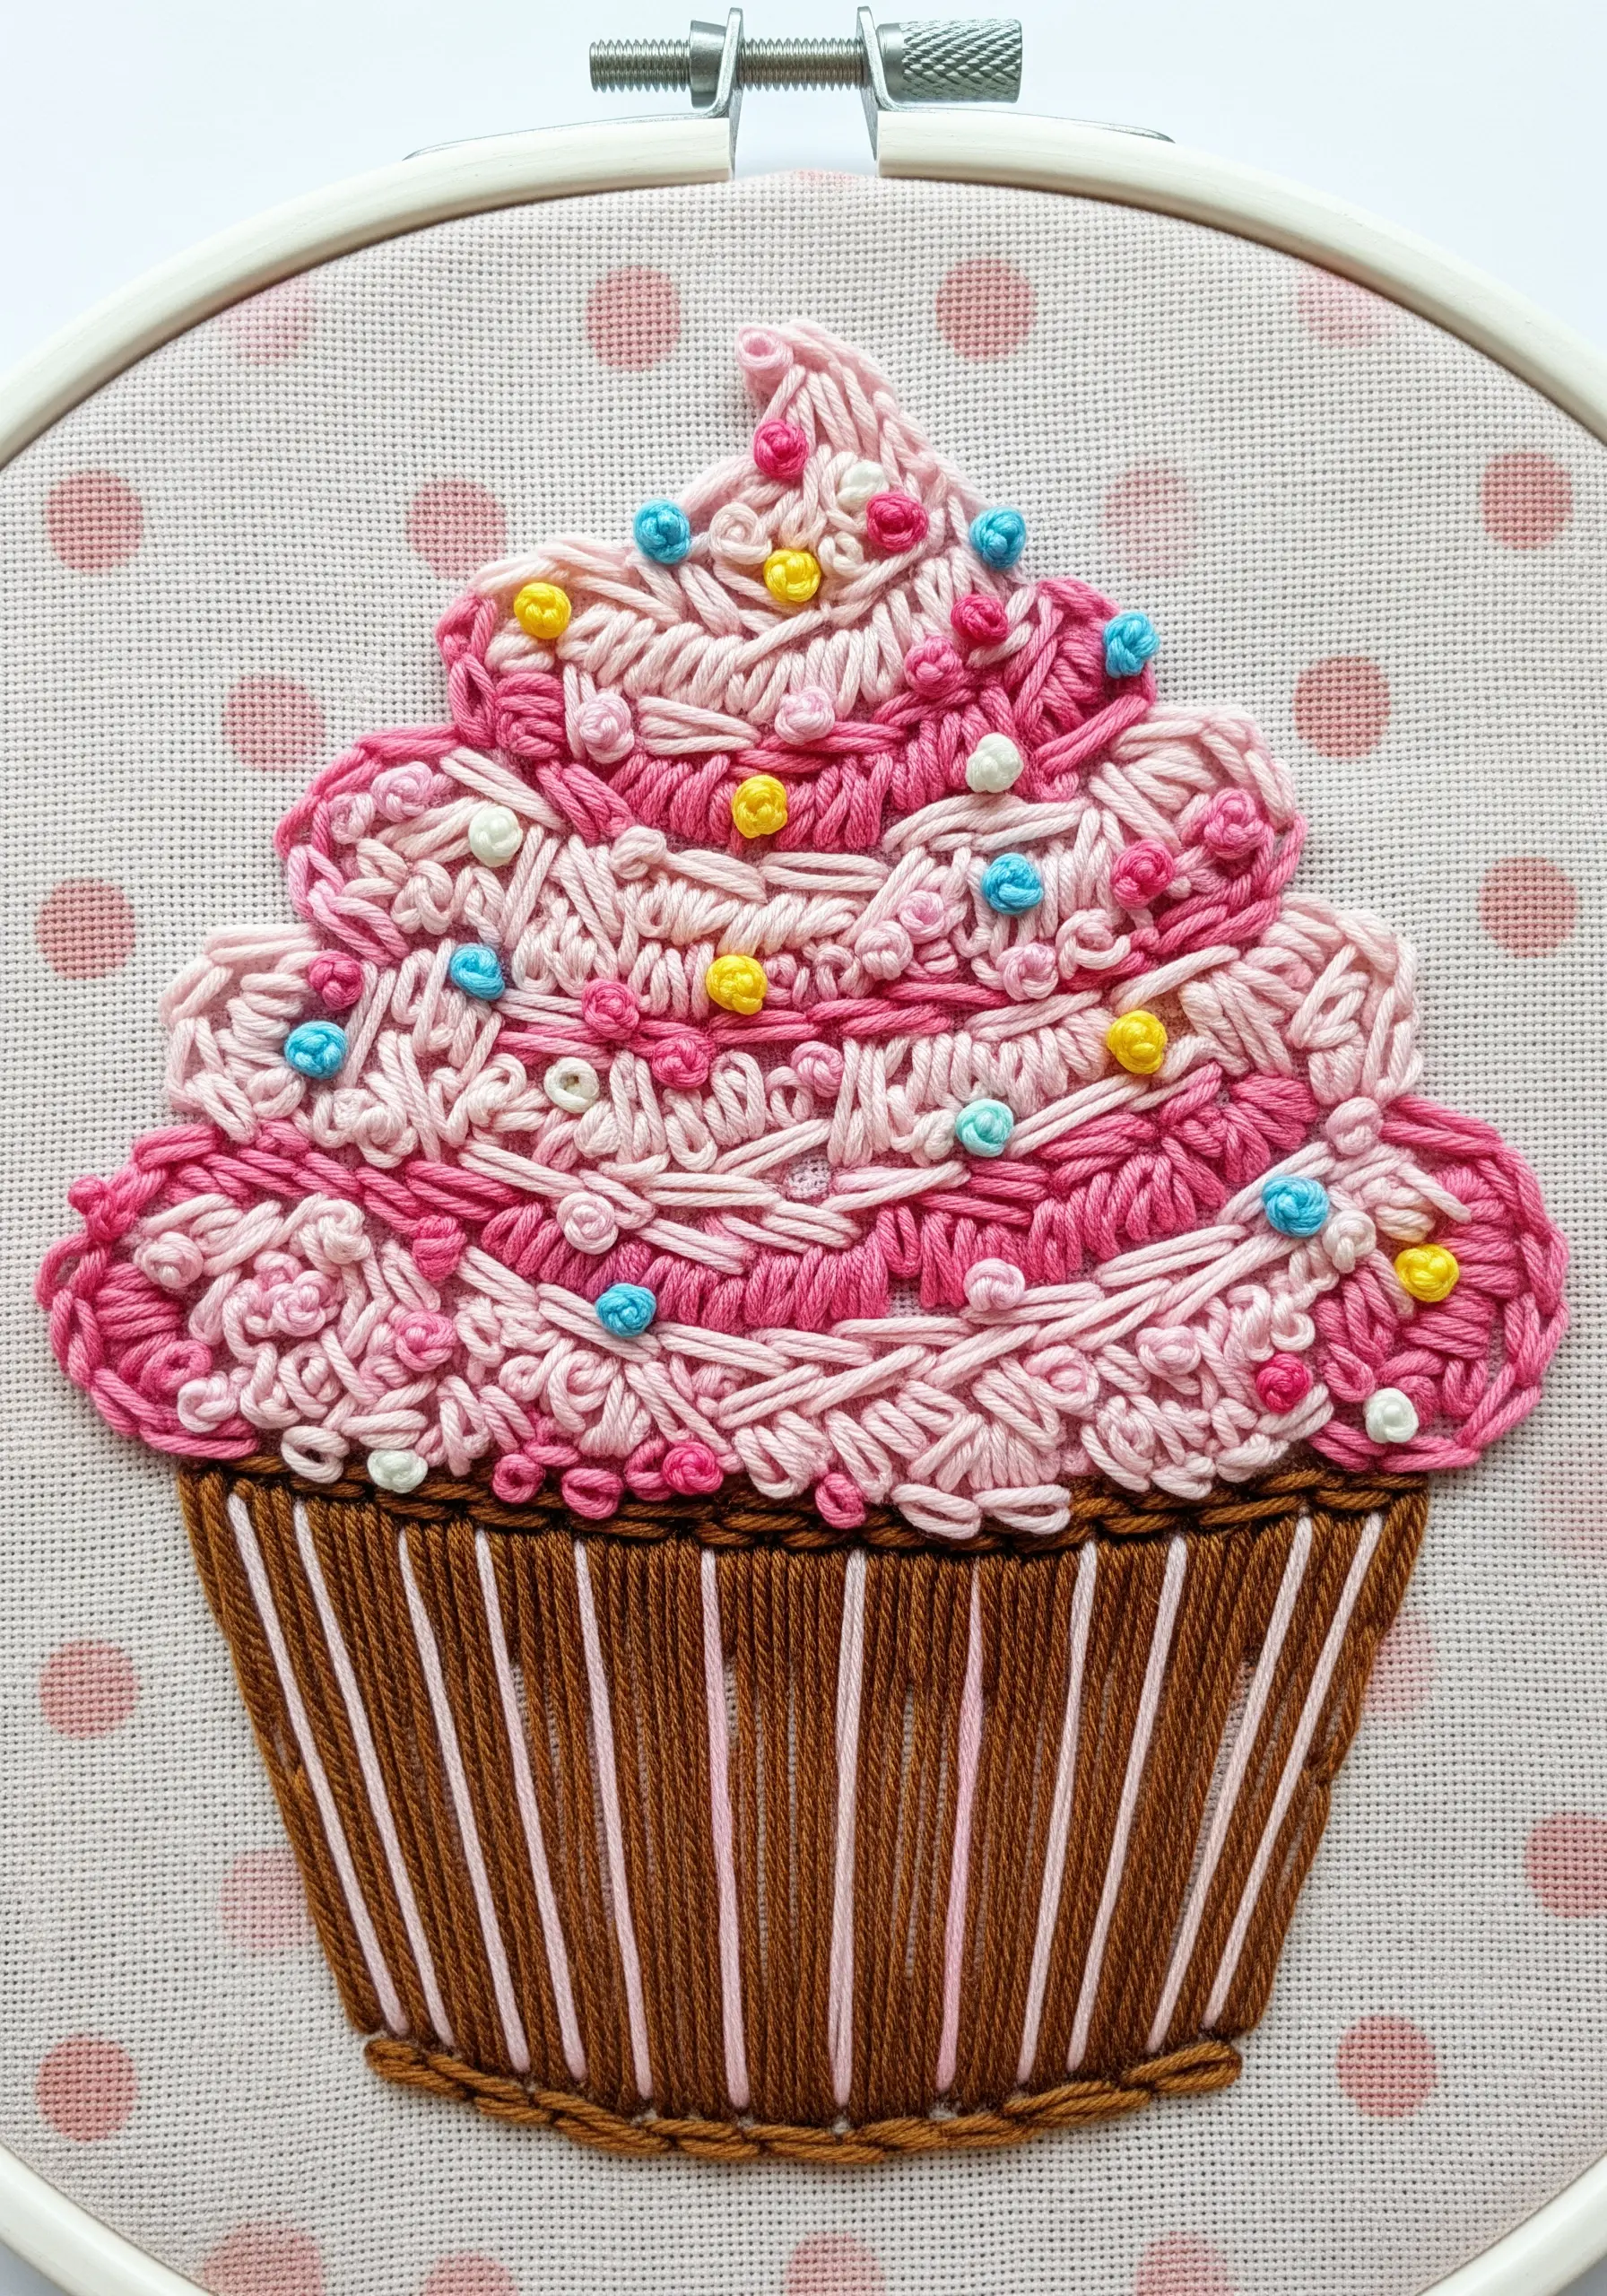
To make your embroidered cupcake look good enough to eat, focus on building up layers of texture for the frosting.
Combine different stitches: use thick, loopy bullion knots for the swirls, scatter French knots for richness, and try couching a thick, twisted yarn for the decorative piping.
Stitching on a few colorful seed beads as sprinkles is the perfect finishing touch that adds a bit of shine and playfulness.
The combination of these high-relief stitches creates a truly three-dimensional effect that’s both fun to stitch and beautiful to look at.
16. Imply Fur with a Simple Woven Fill Stitch
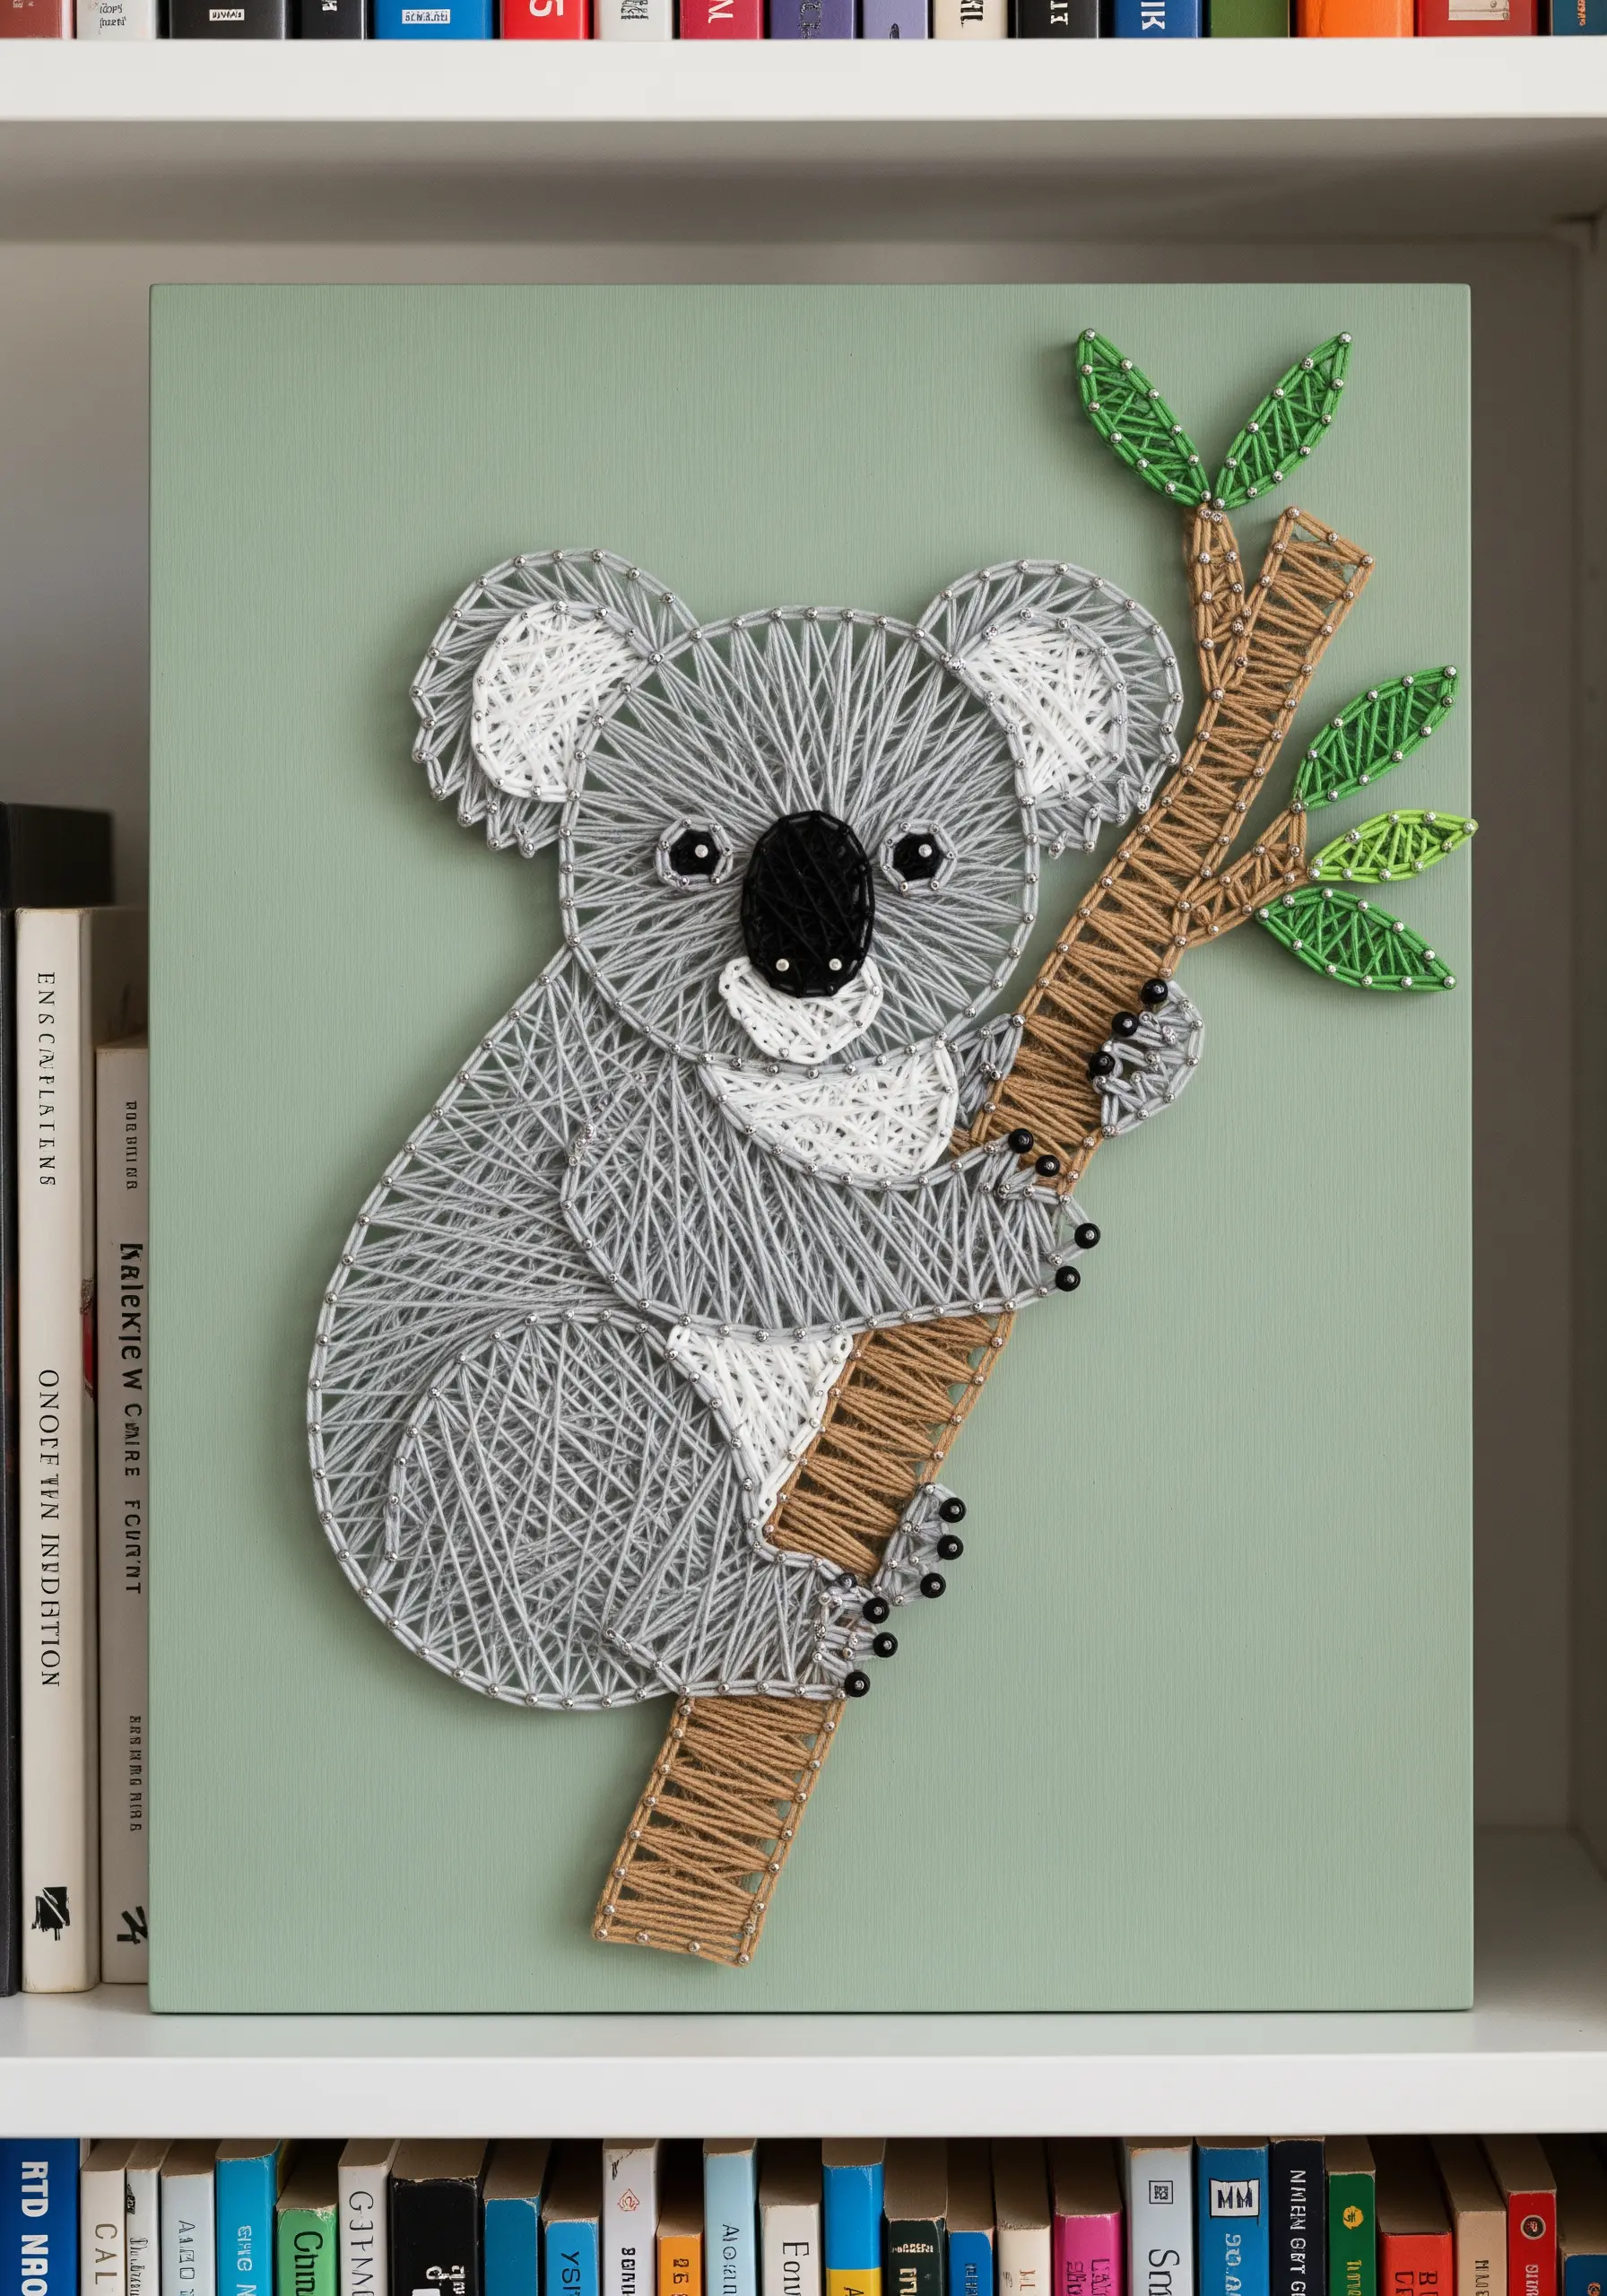
You can create the impression of soft fur without using complex, fluffy stitches. A simple woven fill is all you need.
First, lay down a series of parallel straight stitches across the koala’s body. Then, use a second thread to weave over and under these foundation stitches, creating a dense, textured mat of thread.
This technique is faster than satin stitch and results in a beautiful, tactile surface that suggests a soft coat.
Use bright white French knots for the inner ears to add a pop of fluffy contrast against the sleek grey body.
17. Craft Fluffy Clouds with Wool Roving
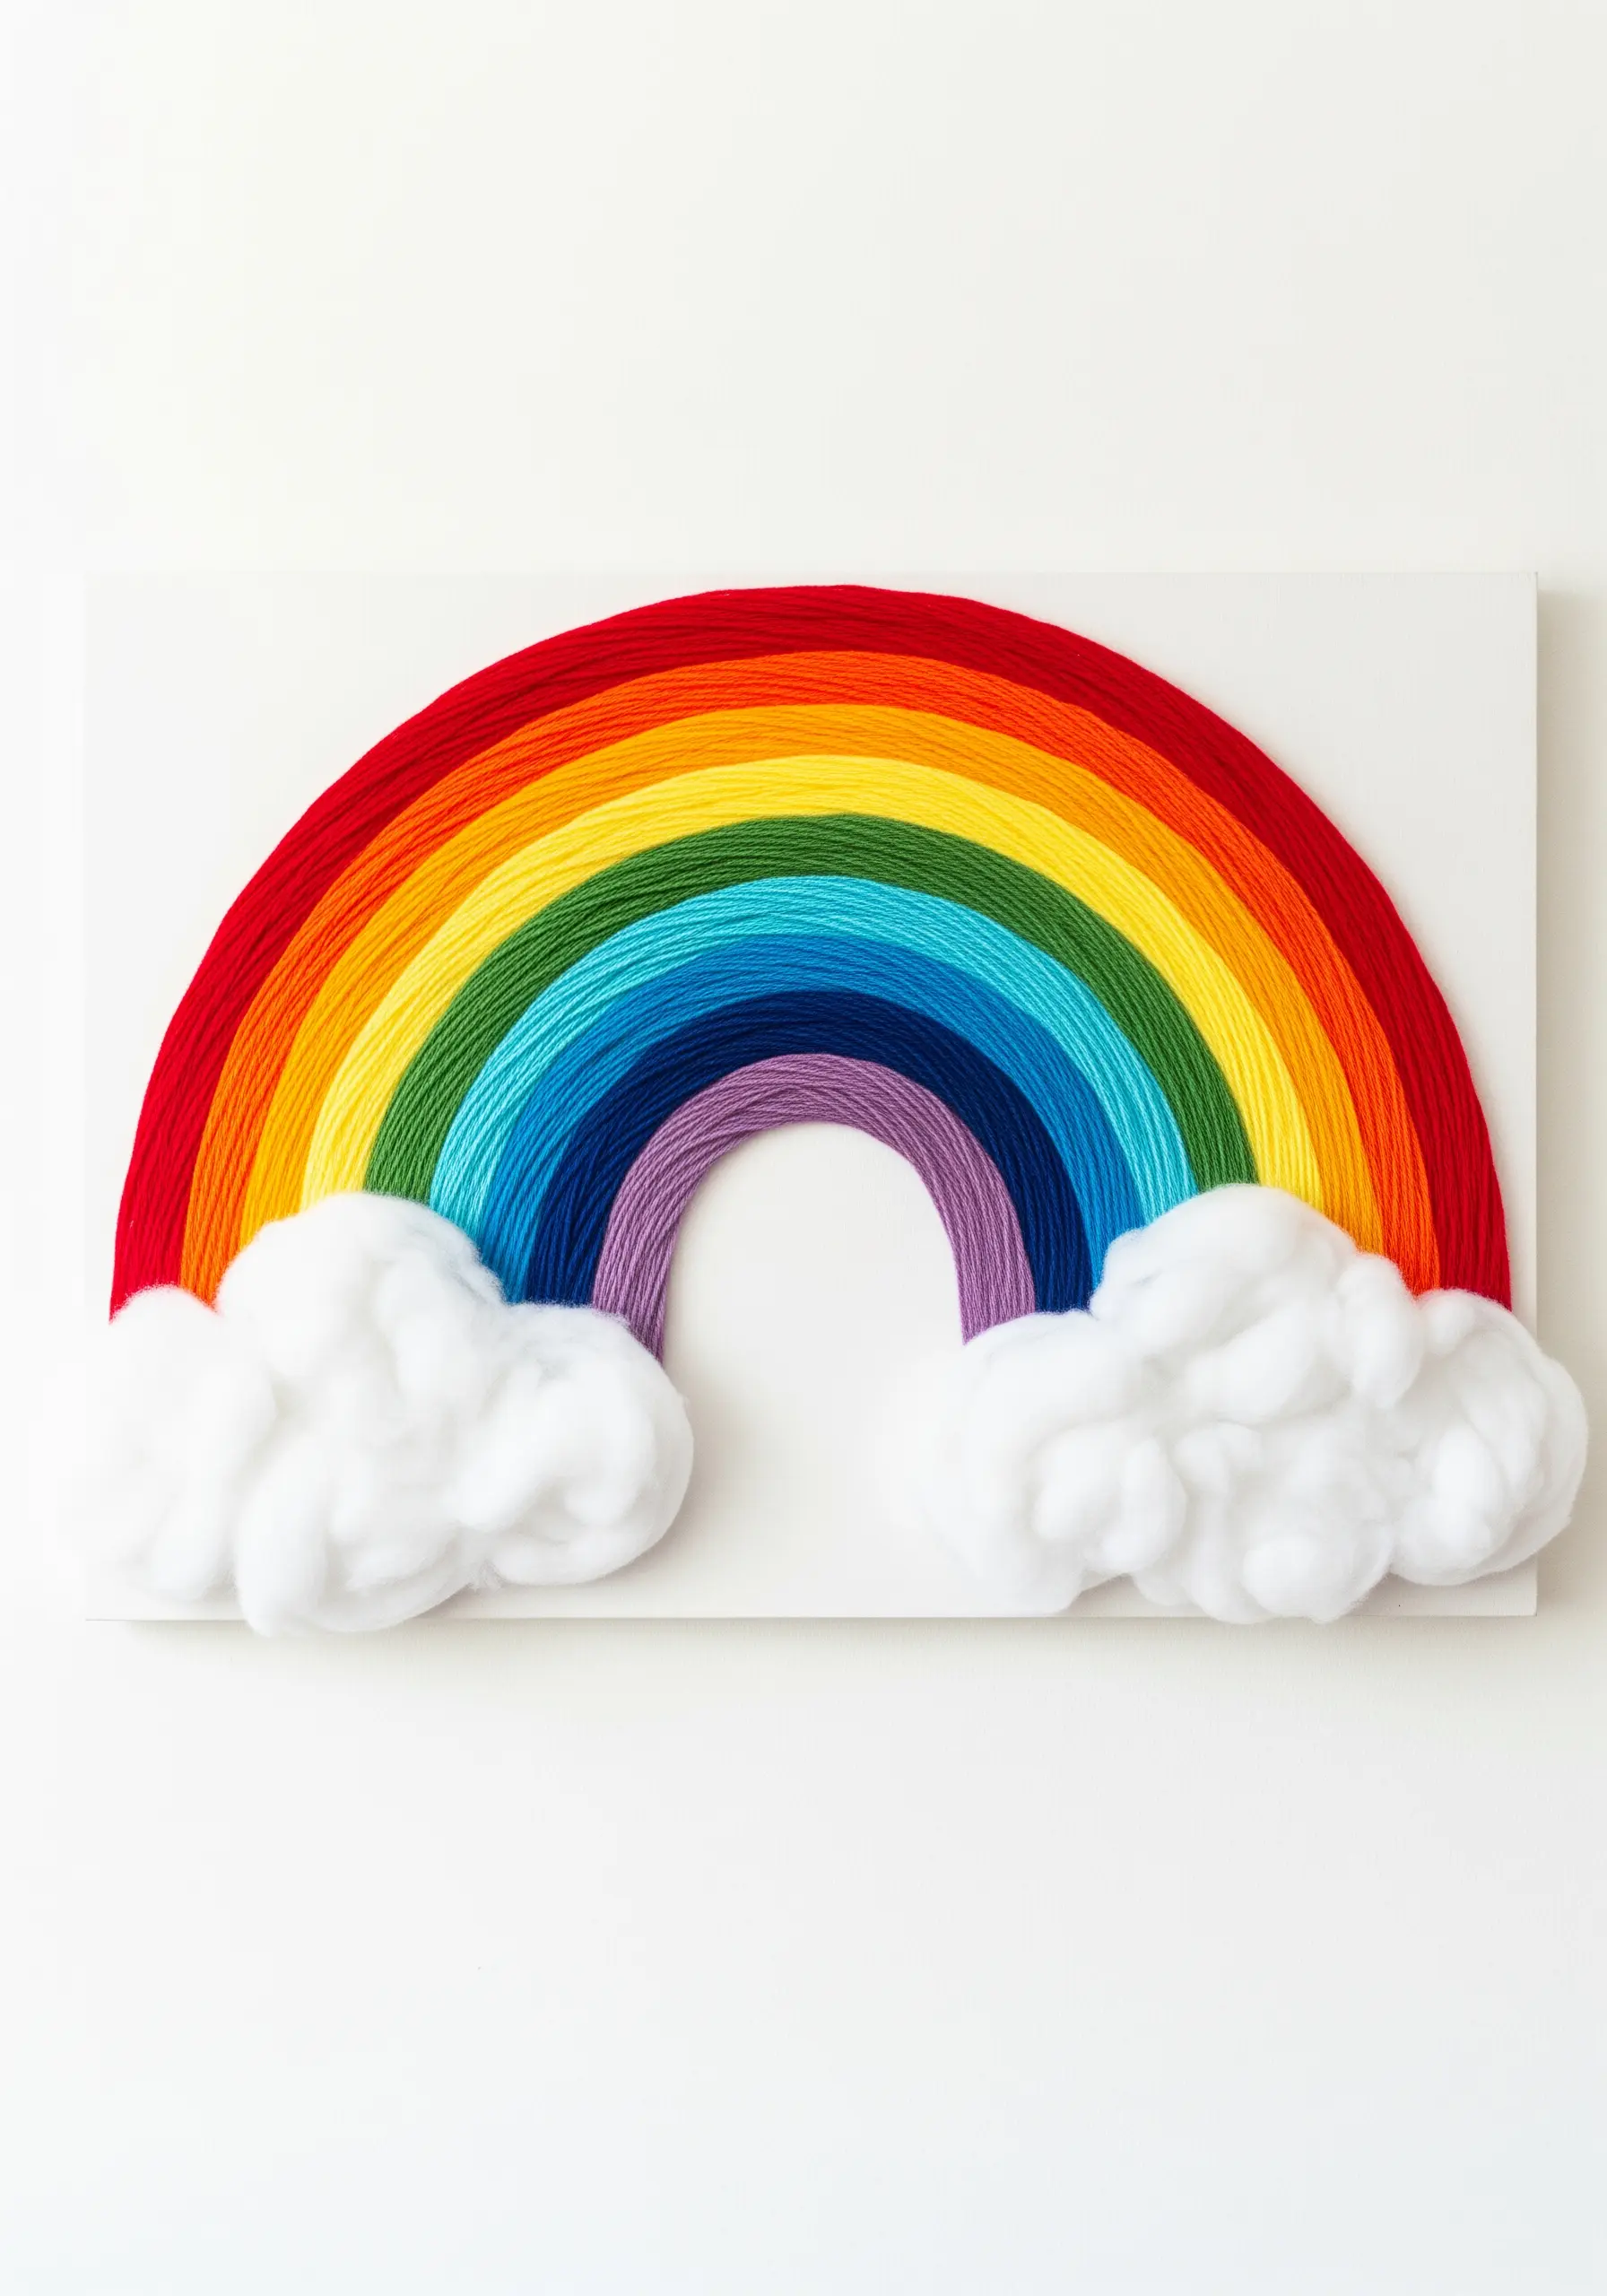
Take your rainbow to the next level by adding incredibly soft, three-dimensional clouds. Instead of thread, use wool roving.
To apply it, simply pull apart wisps of the wool, arrange them into a cloud shape on your fabric, and then use a single strand of matching white floss to tack the roving down with tiny, invisible stitches.
This mixed-fiber technique adds a wonderful tactile element that children especially love.
For the rainbow itself, use a bold satin stitch with all six strands of floss to create smooth, vibrant arcs of color.
18. Embrace Minimalism with a Delicate Geometric Outline
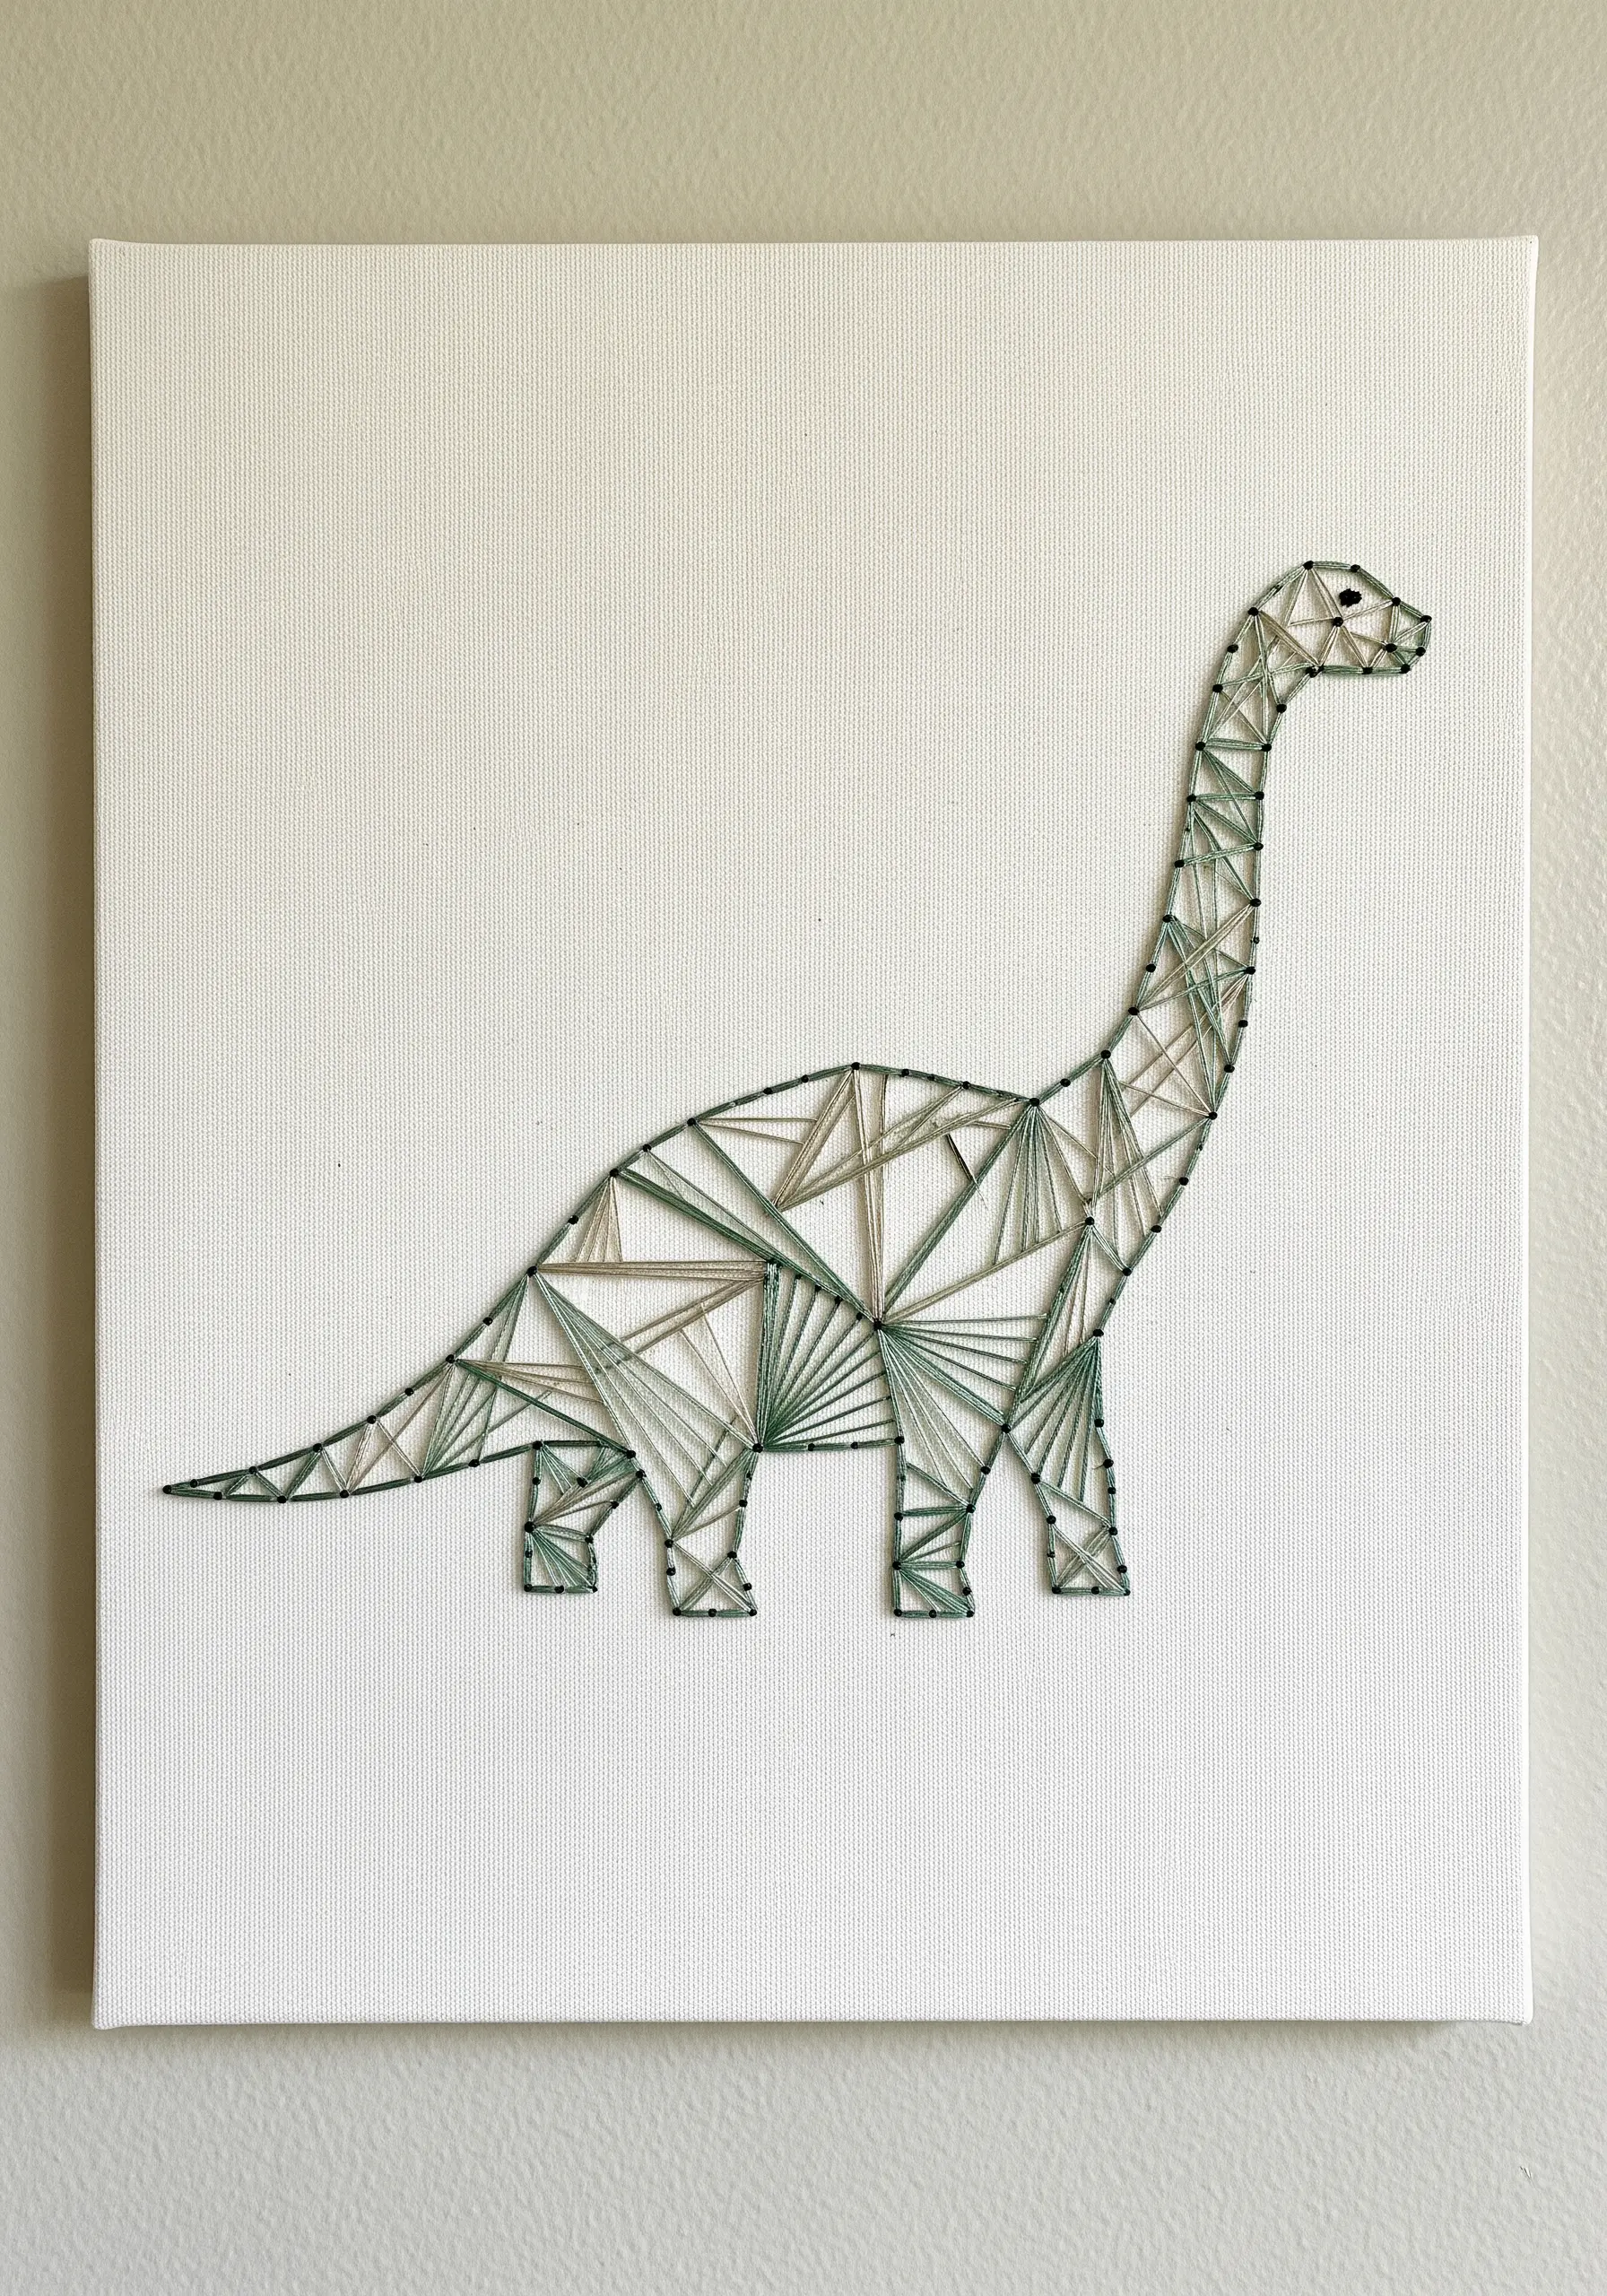
Sometimes, less is more. For a gentle giant like a brontosaurus, a minimalist approach can be incredibly elegant.
Instead of a dense fill, use long straight stitches to create a delicate, web-like pattern within a simple backstitch outline.
Use only two or three subtle, earthy shades of green to keep the design calm and sophisticated. The beauty of this style is in its restraint and the way it utilizes negative space.
This is one of those minimalist embroidery patterns that works beautifully in a modern nursery.
19. Use Contrast and Density for Dramatic Effect
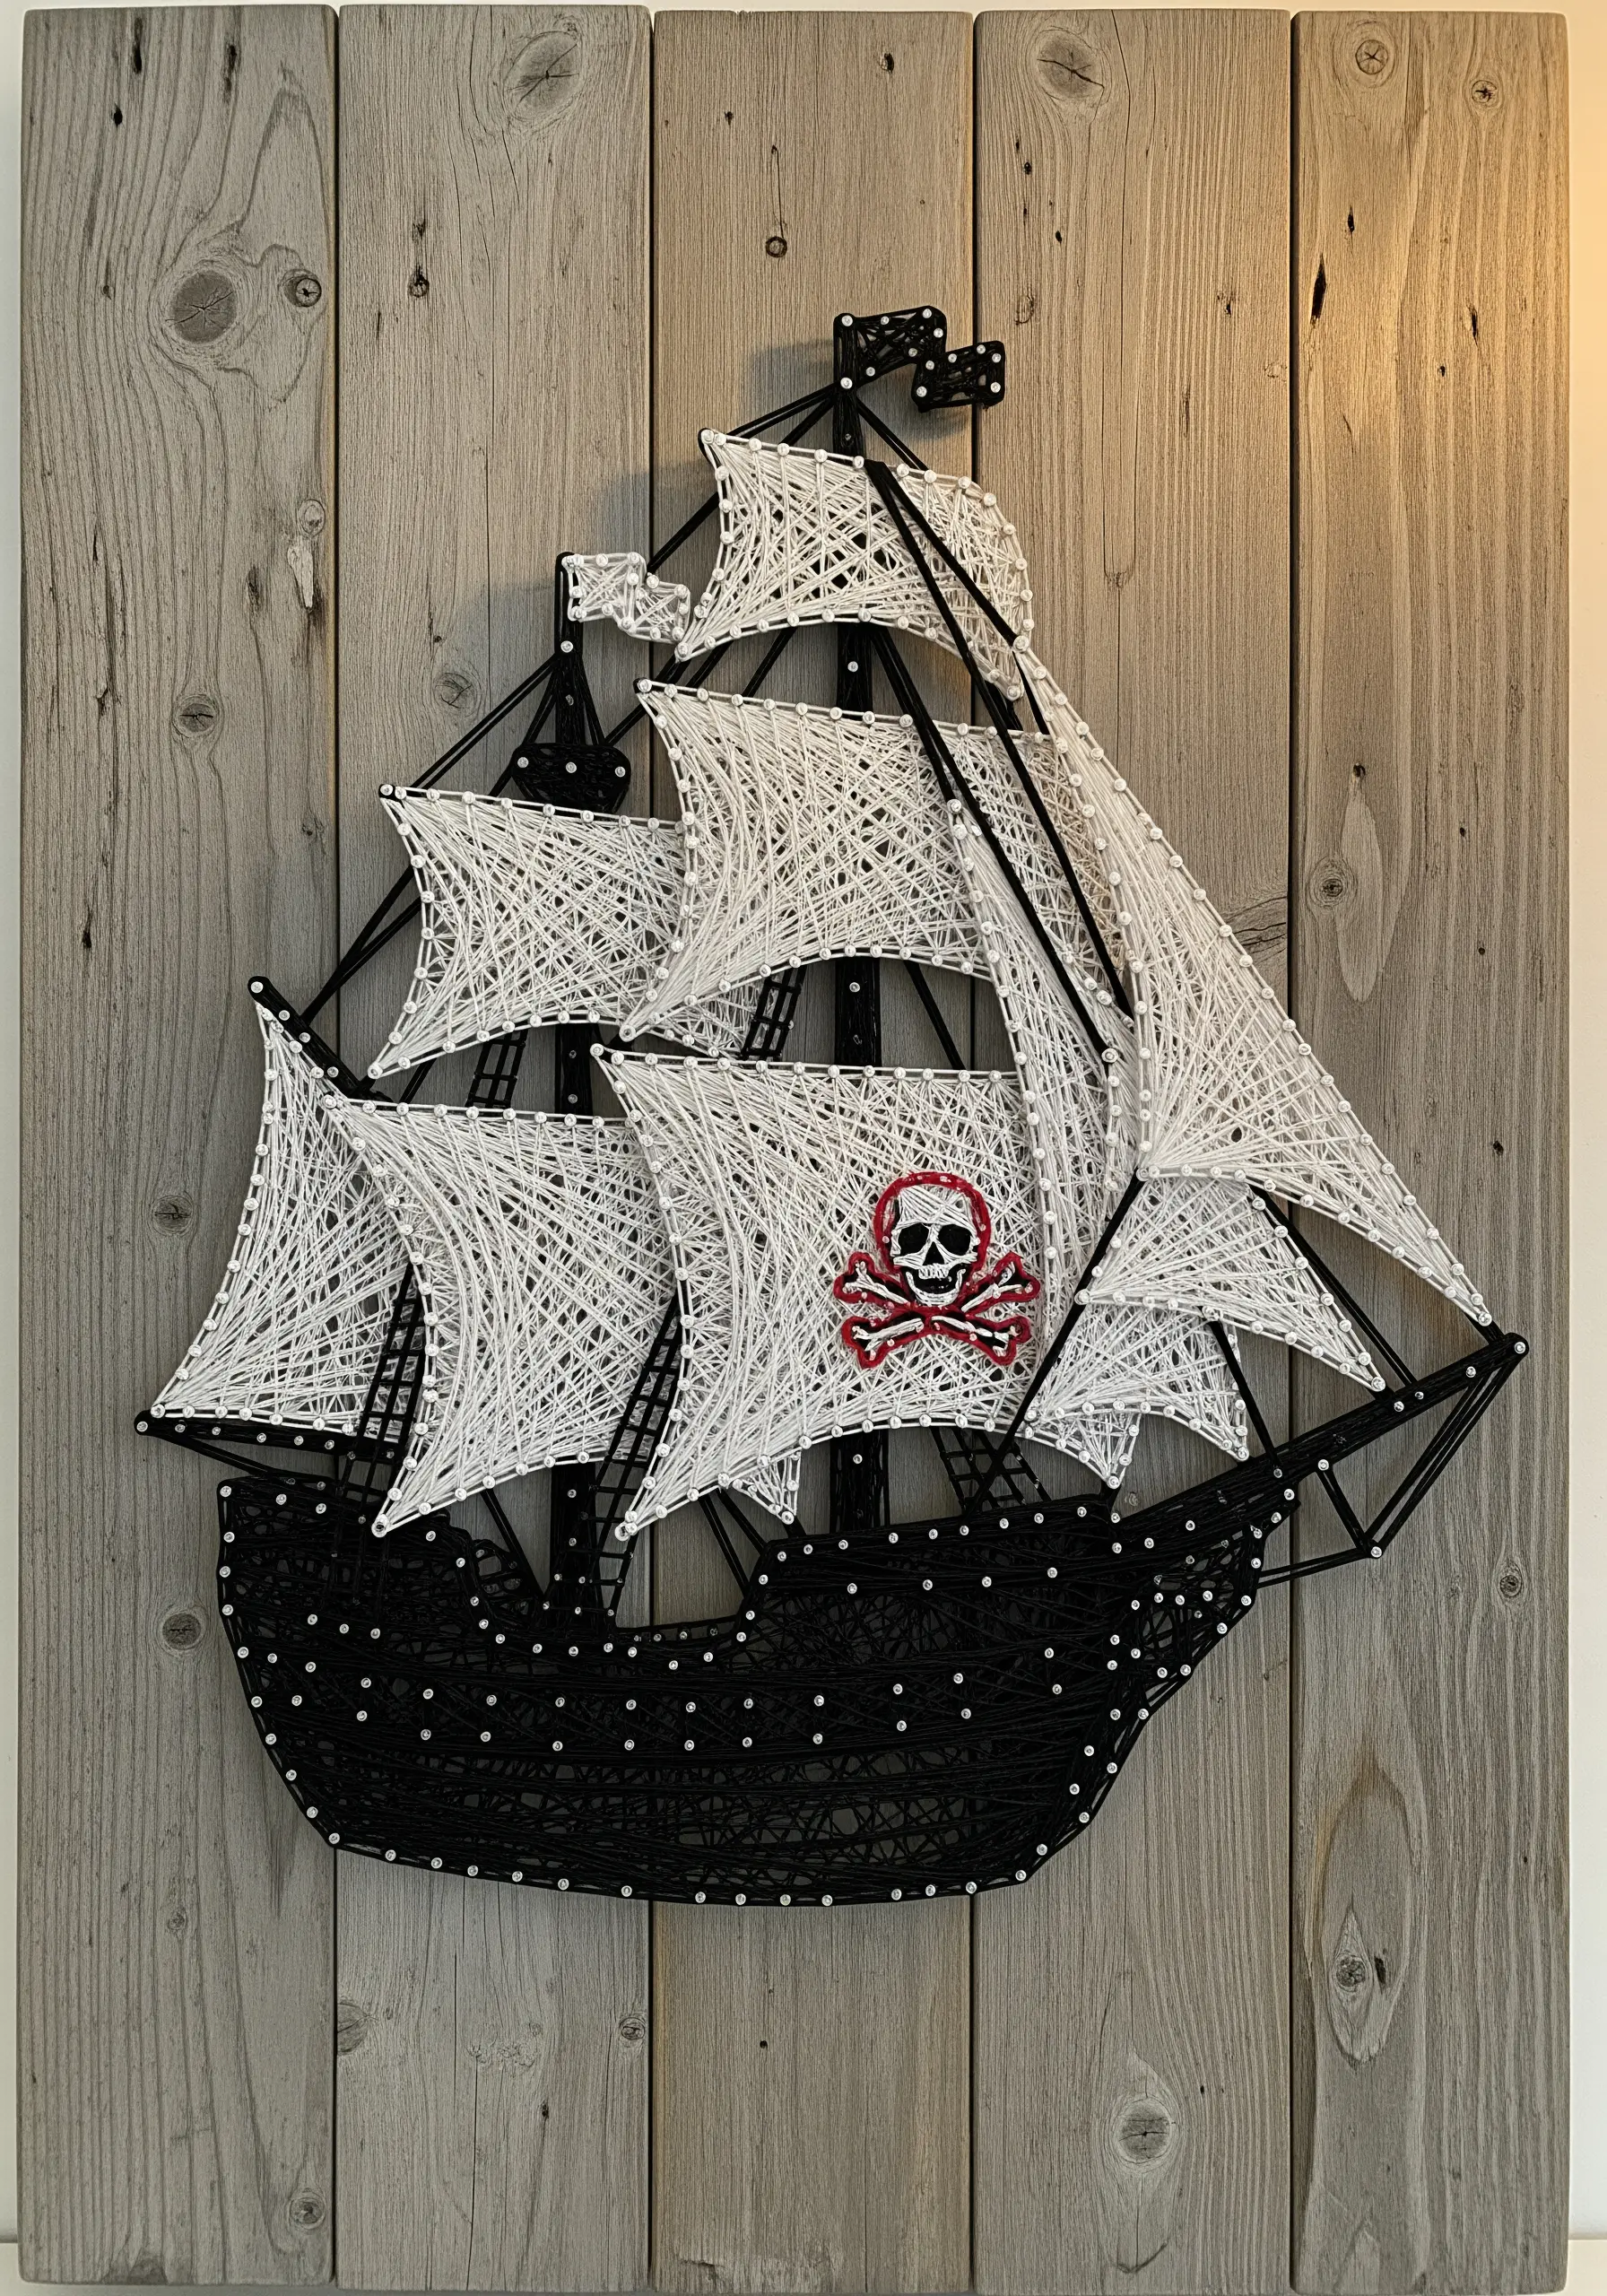
Create a bold and adventurous pirate ship by playing with stitch density and high-contrast colors.
Fill the hull of the ship with a dense, solid black satin stitch to give it weight and presence.
For the sails, use an open fill of spaced-out white straight stitches. This makes them feel light and windswept, creating a powerful contrast with the heavy hull.
A tiny, detailed skull and crossbones in red provides the perfect focal point and a splash of menacing color.
20. Master the Ombré Effect with Blended Threads
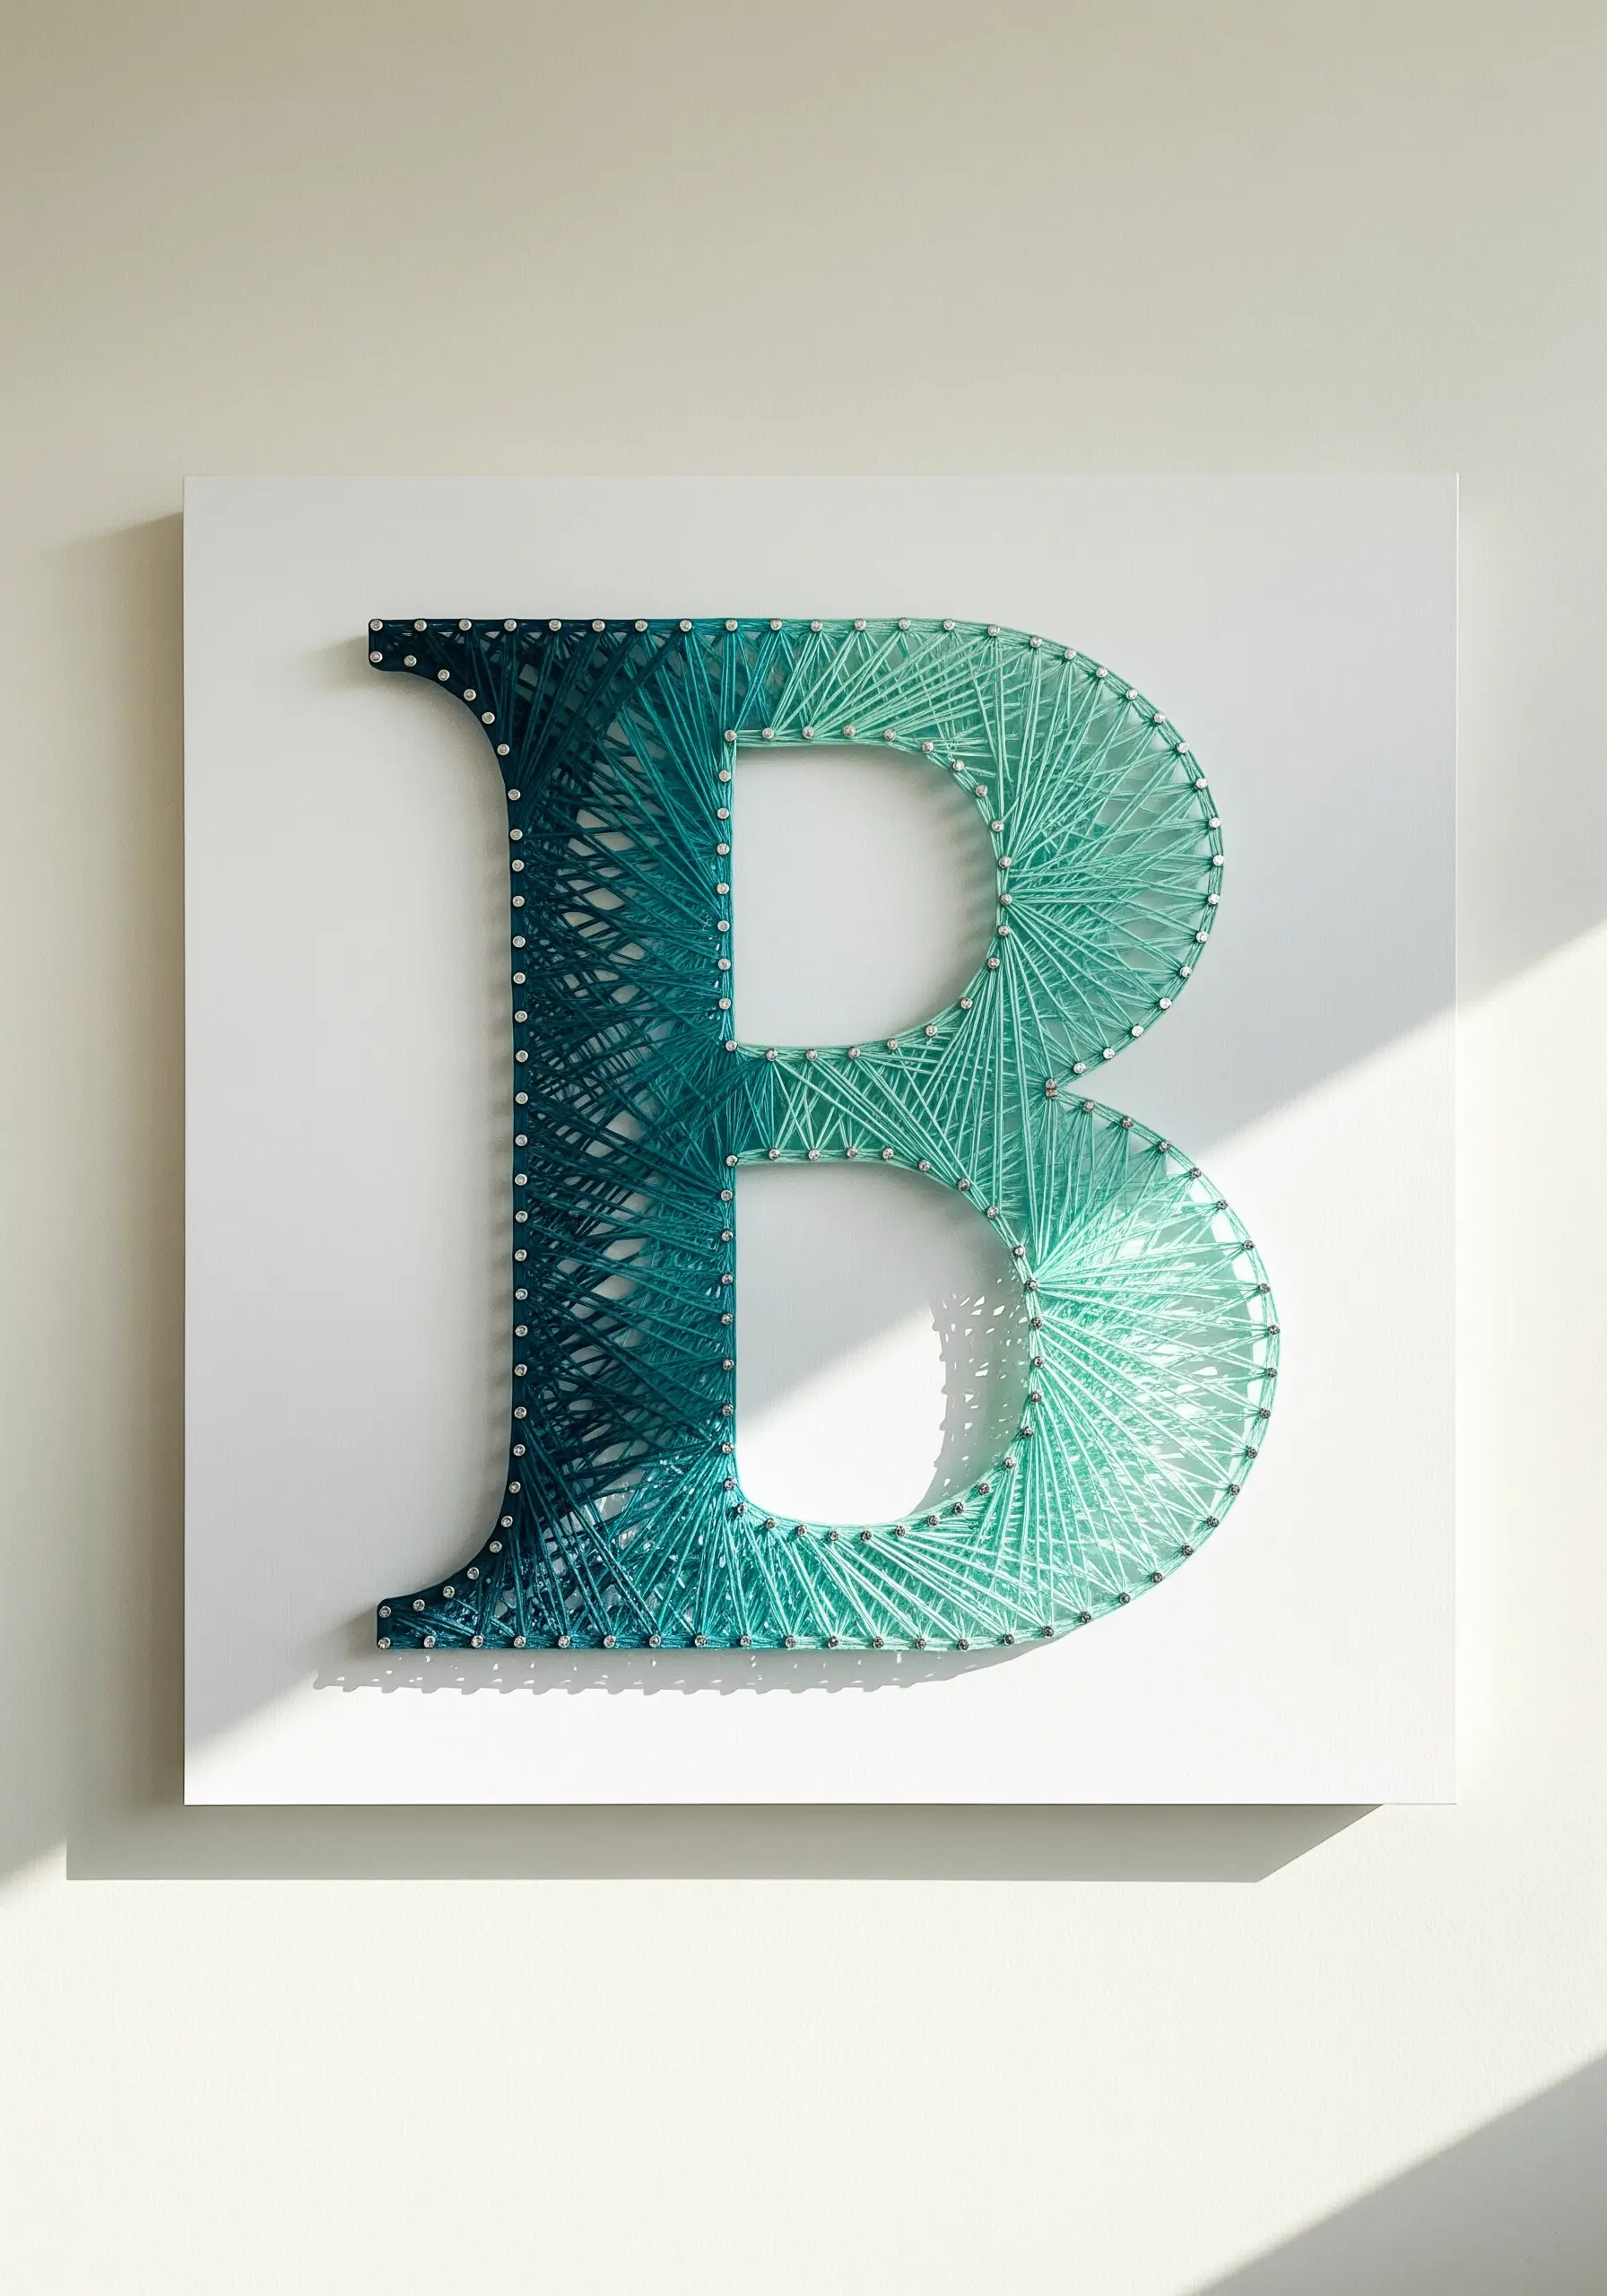
A gradient monogram is a sophisticated and personal piece of art for any child’s room. The key to a smooth ombré is careful color selection and blending.
Choose three to five shades of a single color, from dark to light. Begin stitching your satin fill with the darkest shade, then gradually introduce the next shade, splitting your stitches into the previous color to blur the line between them.
This long-and-short stitch blending technique creates a seamless, professional-looking color transition that gives the letter both depth and style.
It’s a beautiful way to create personalized name monogram wall embroidery with a modern twist.
21. Stitch Iridescent Scales with Variegated Metallic Floss

Capture the magic of a mermaid’s tail by using threads that do the color work for you.
Choose a variegated metallic or silk floss that blends shades of purple, green, and blue. As you stitch, the colors will shift randomly, creating a shimmering, iridescent effect with no extra effort.
To create the scale pattern, use a simple fishbone stitch or fill small, overlapping semi-circles with satin stitches.
Stitching on a black or dark navy fabric will make these magical colors pop even more.
22. Create Contour with Directional Thread Painting
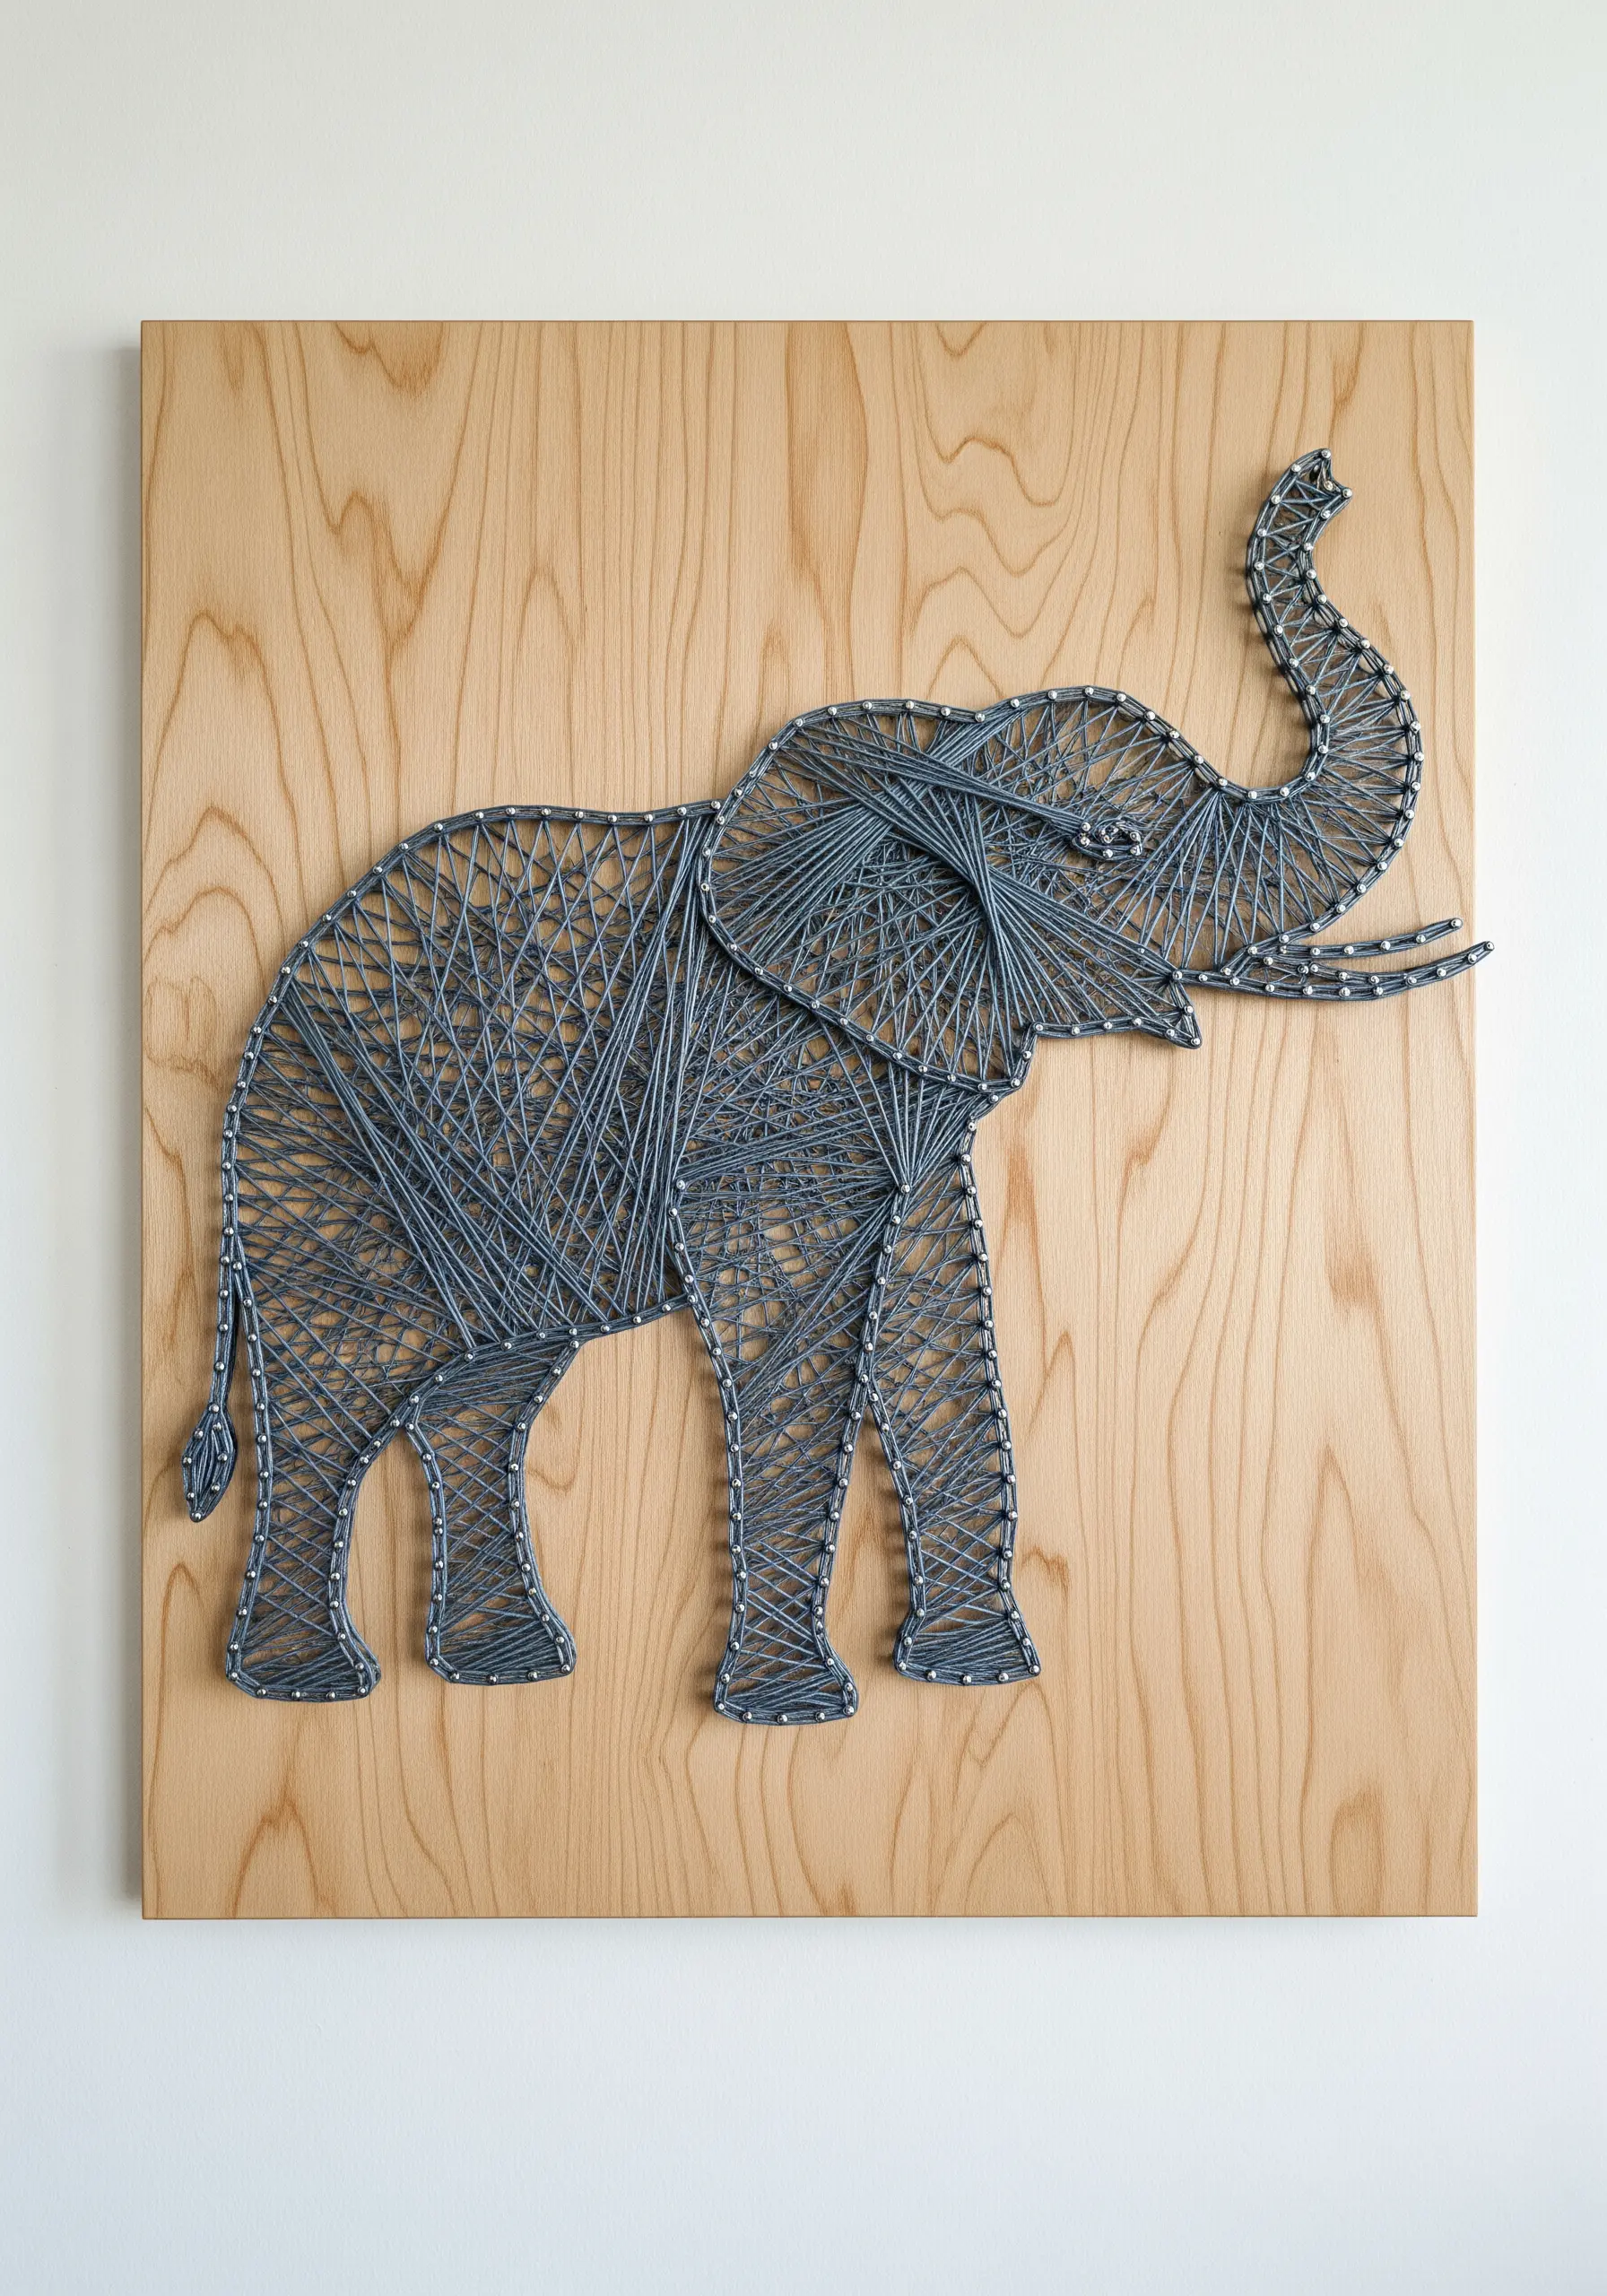
Give a simple elephant silhouette a sense of weight and form through the art of thread painting.
Using just a single strand of floss, fill the shape with straight stitches, but pay close attention to their direction. Angle the stitches to follow the curves of the legs, the roundness of the belly, and the drape of the ears.
This subtle manipulation of stitch direction acts like a pencil sketch, creating highlights and shadows that give the animal a beautiful, lifelike quality.
Mounting the finished piece on a natural wood board provides a warm, organic backdrop.
23. Layer Organza for Sheer, Delicate Wings
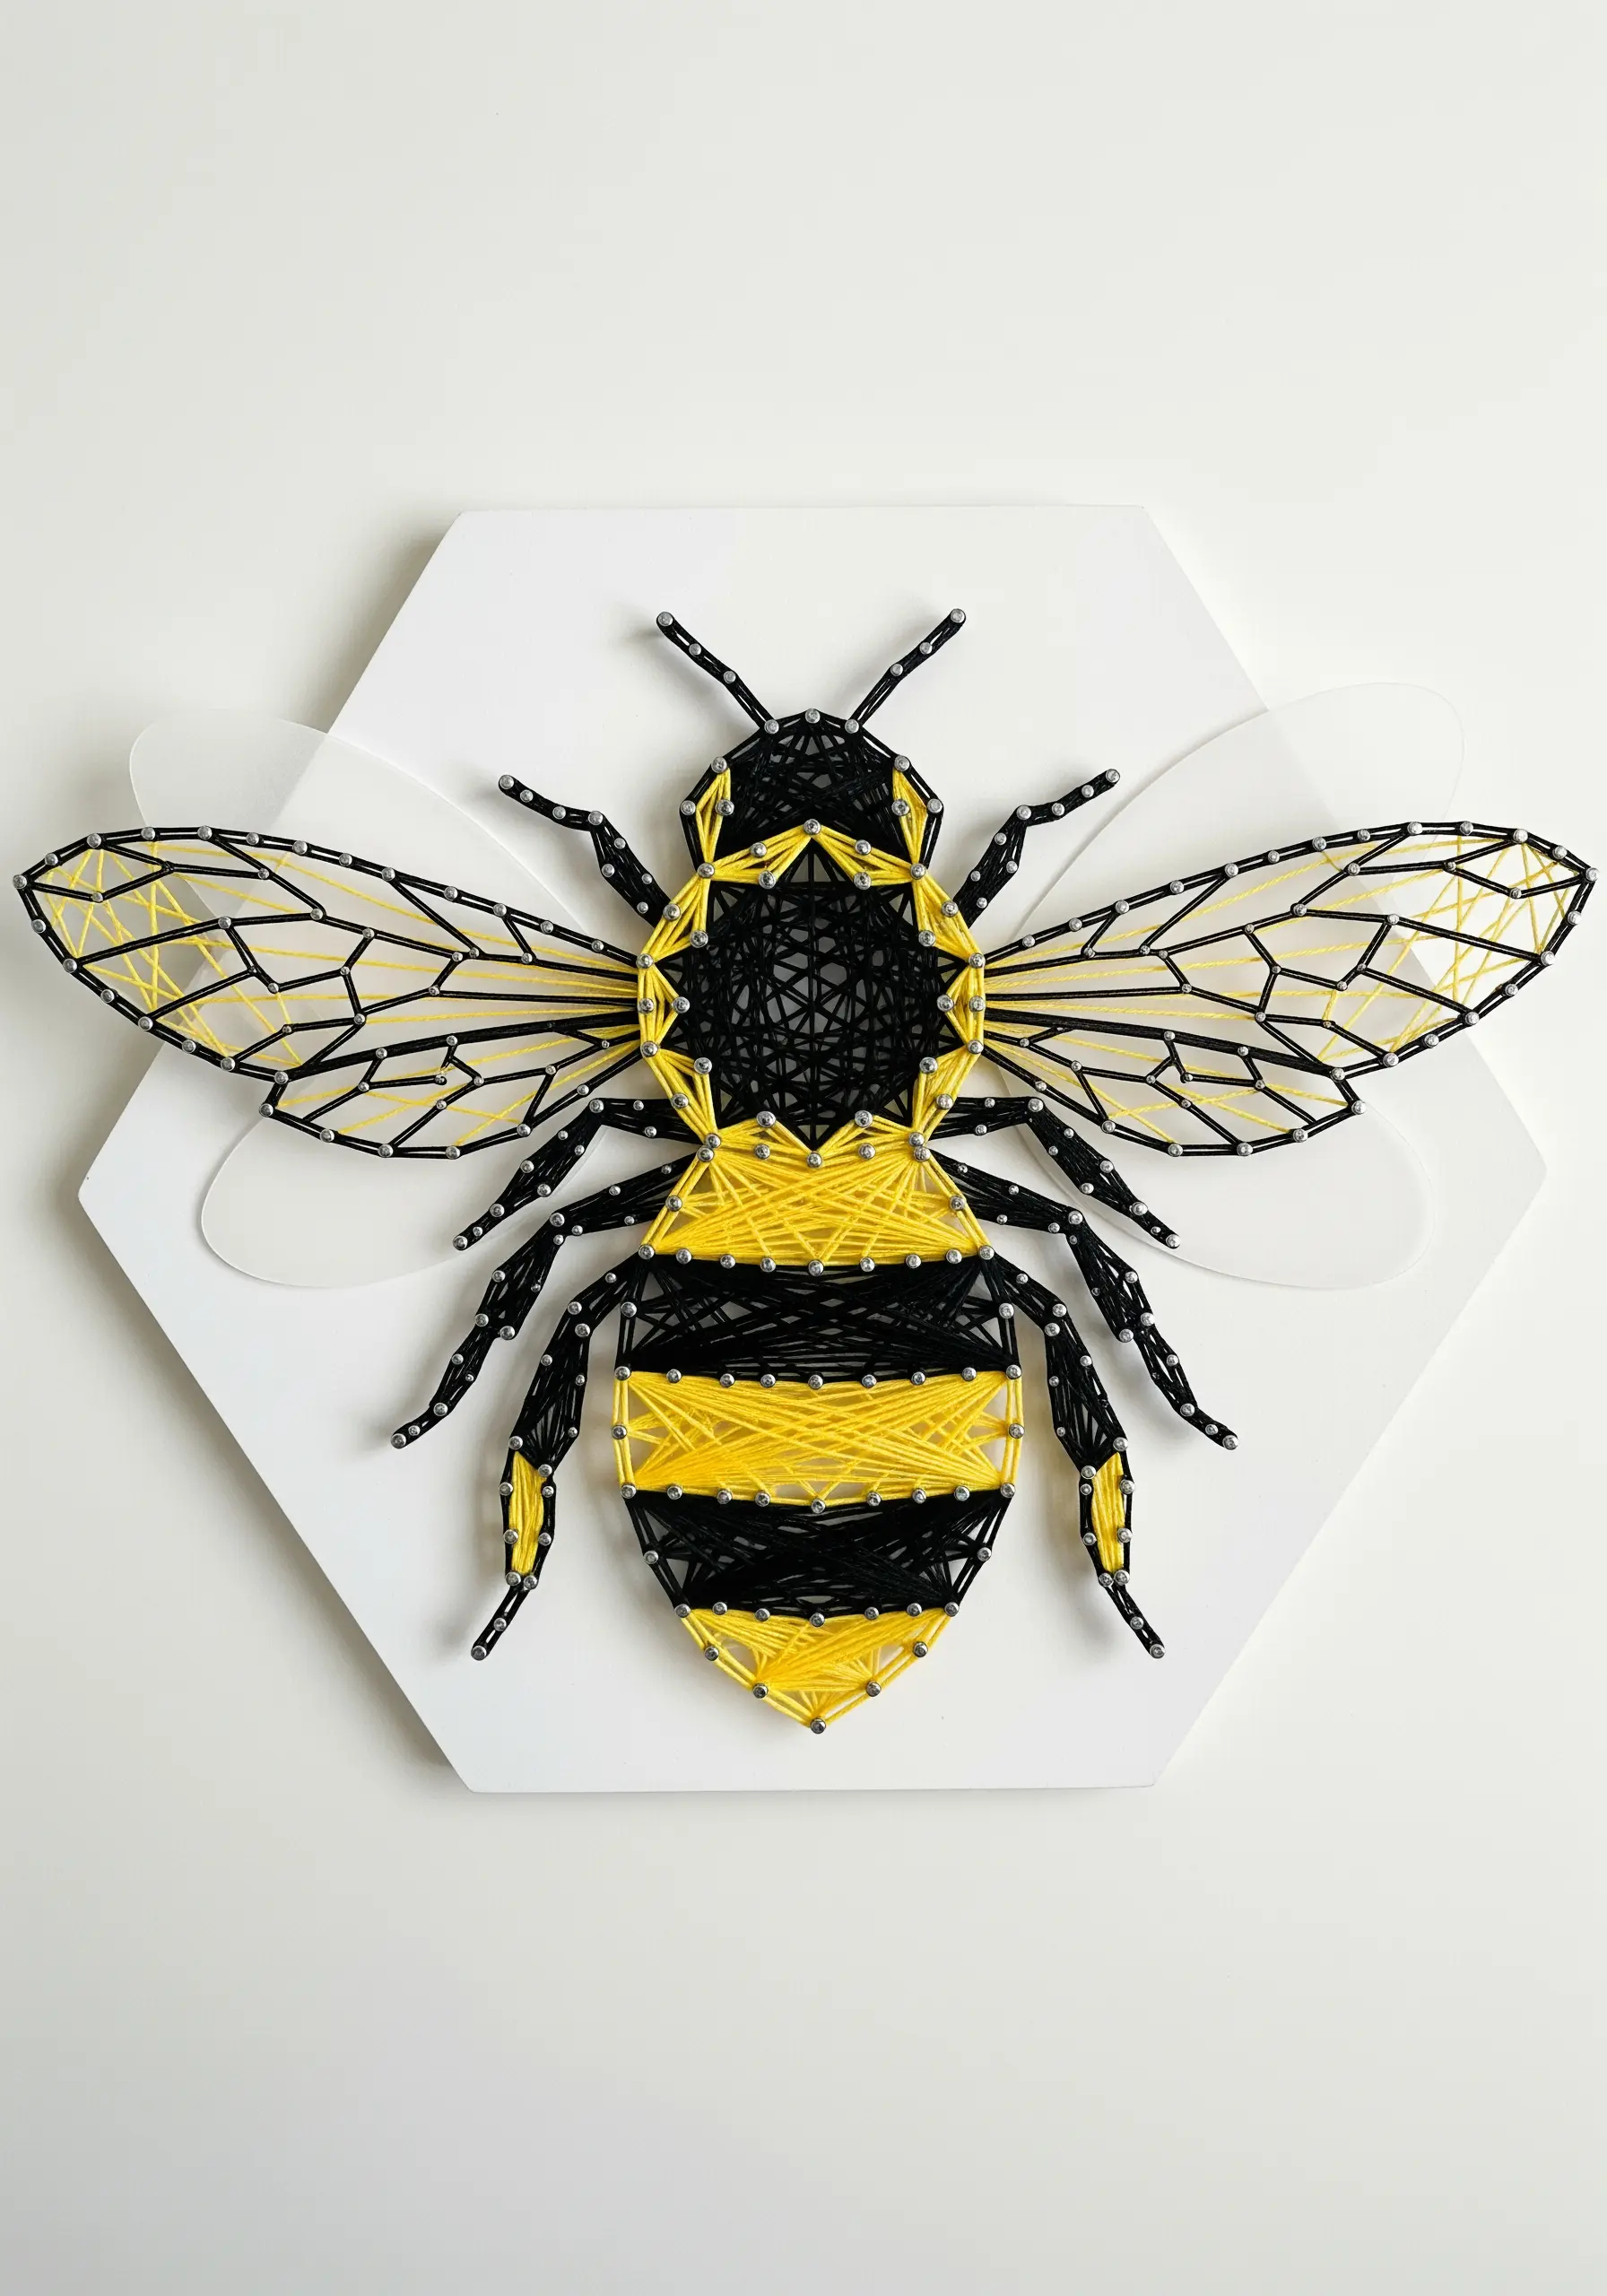
To give your embroidered bee realistic, transparent wings, incorporate a layer of sheer fabric.
Cut out wing shapes from stiff organza or tulle. Place them on your main fabric and secure them with a few defining backstitches to represent the veins.
This mixed-media technique adds an incredible level of detail and realism, making the bee look as if it could fly right off the fabric.
For the body, use bold, alternating stripes of black and yellow satin stitch for a classic, graphic look.
24. Build Lush Foliage with a Radial Straight Stitch

You can create the impression of a full, leafy treetop using only simple straight stitches.
Working from the branches outward, stitch radial lines of varying lengths and shades of green. This technique, sometimes called a ‘stitch burst,’ is incredibly effective at building texture and color variation.
Layering shades from dark to light green adds depth and realism, suggesting sunlight filtering through the leaves.
For the trunk, use a plaited braid stitch or a heavy stem stitch with brown thread to create a solid, textured base.
25. Achieve a Polished Look with Crisp Outlines
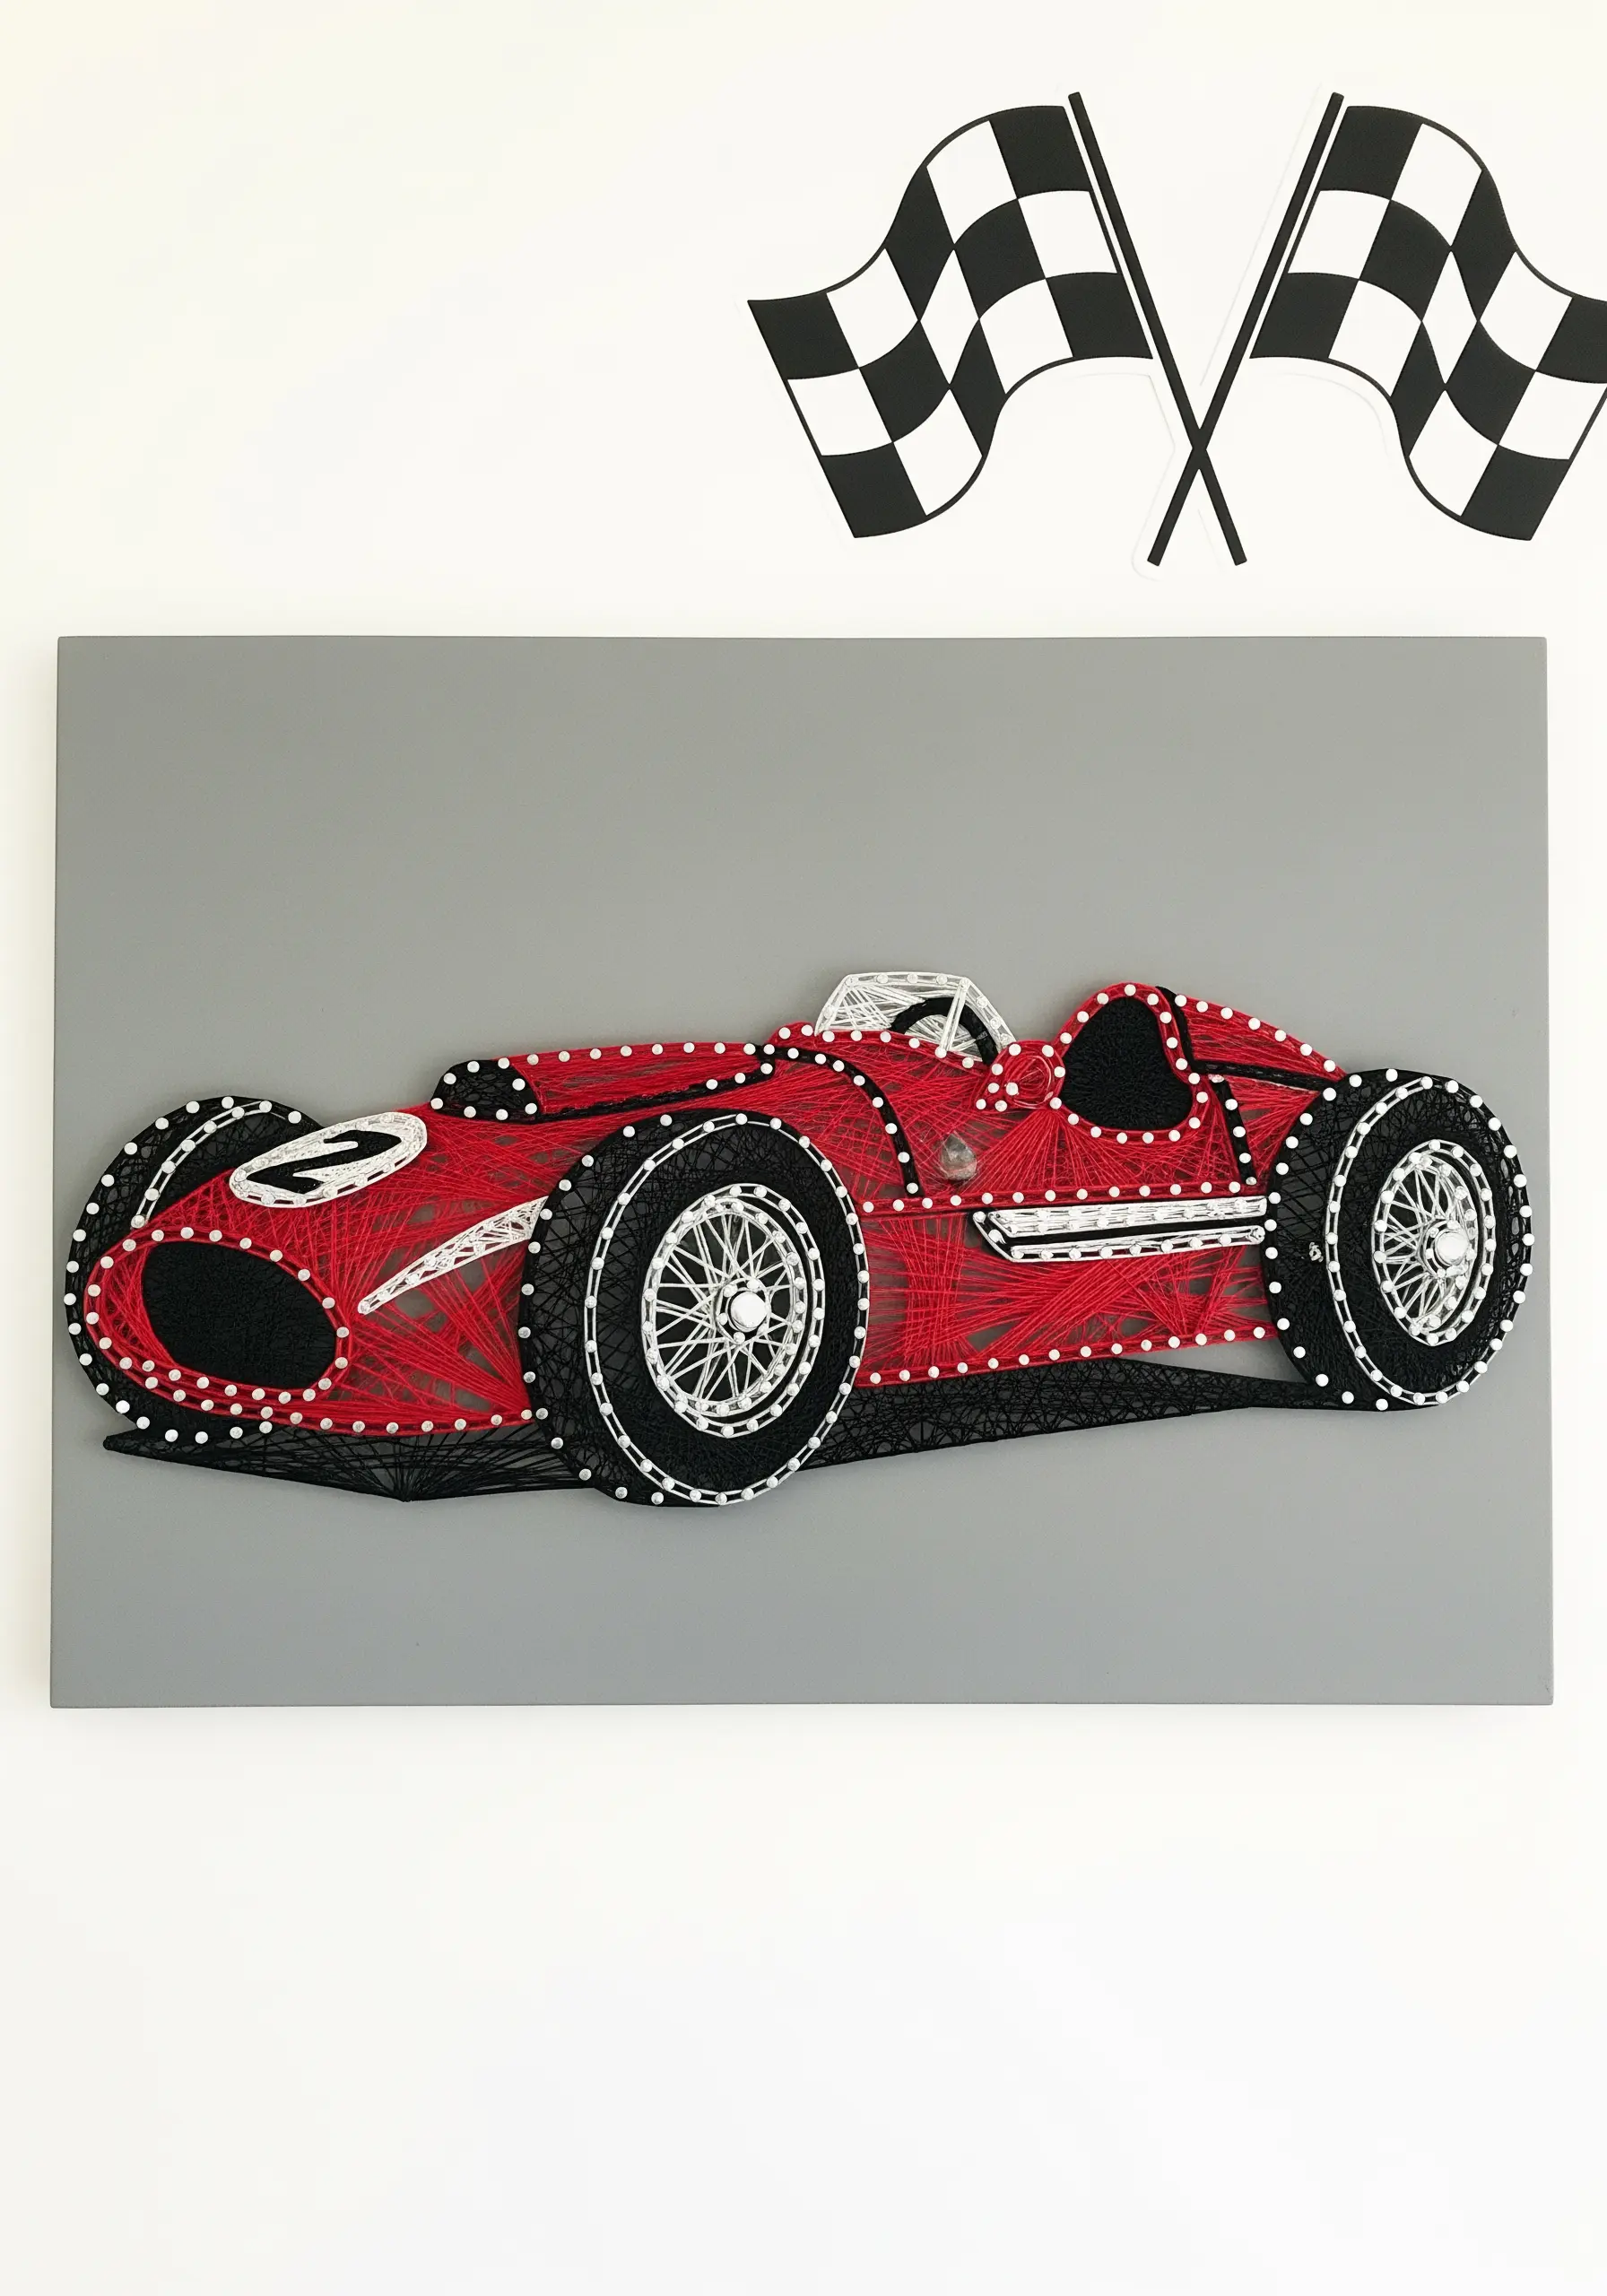
For graphic subjects like a race car, a clean, sharp outline is essential for a polished and professional finish.
Before filling any sections, stitch the entire outline of the car using a whipped backstitch in black. This creates a smooth, raised line that contains your fill stitches perfectly.
Fill the body with a vibrant red satin stitch, keeping your stitches neat and parallel. The contrast between the slick red fill and the bold black outline gives the design a powerful, illustrative quality.
Use a silver metallic thread for the wheel spokes to add a realistic, gleaming detail.
26. Define Shapes with Contrasting Fill Stitches
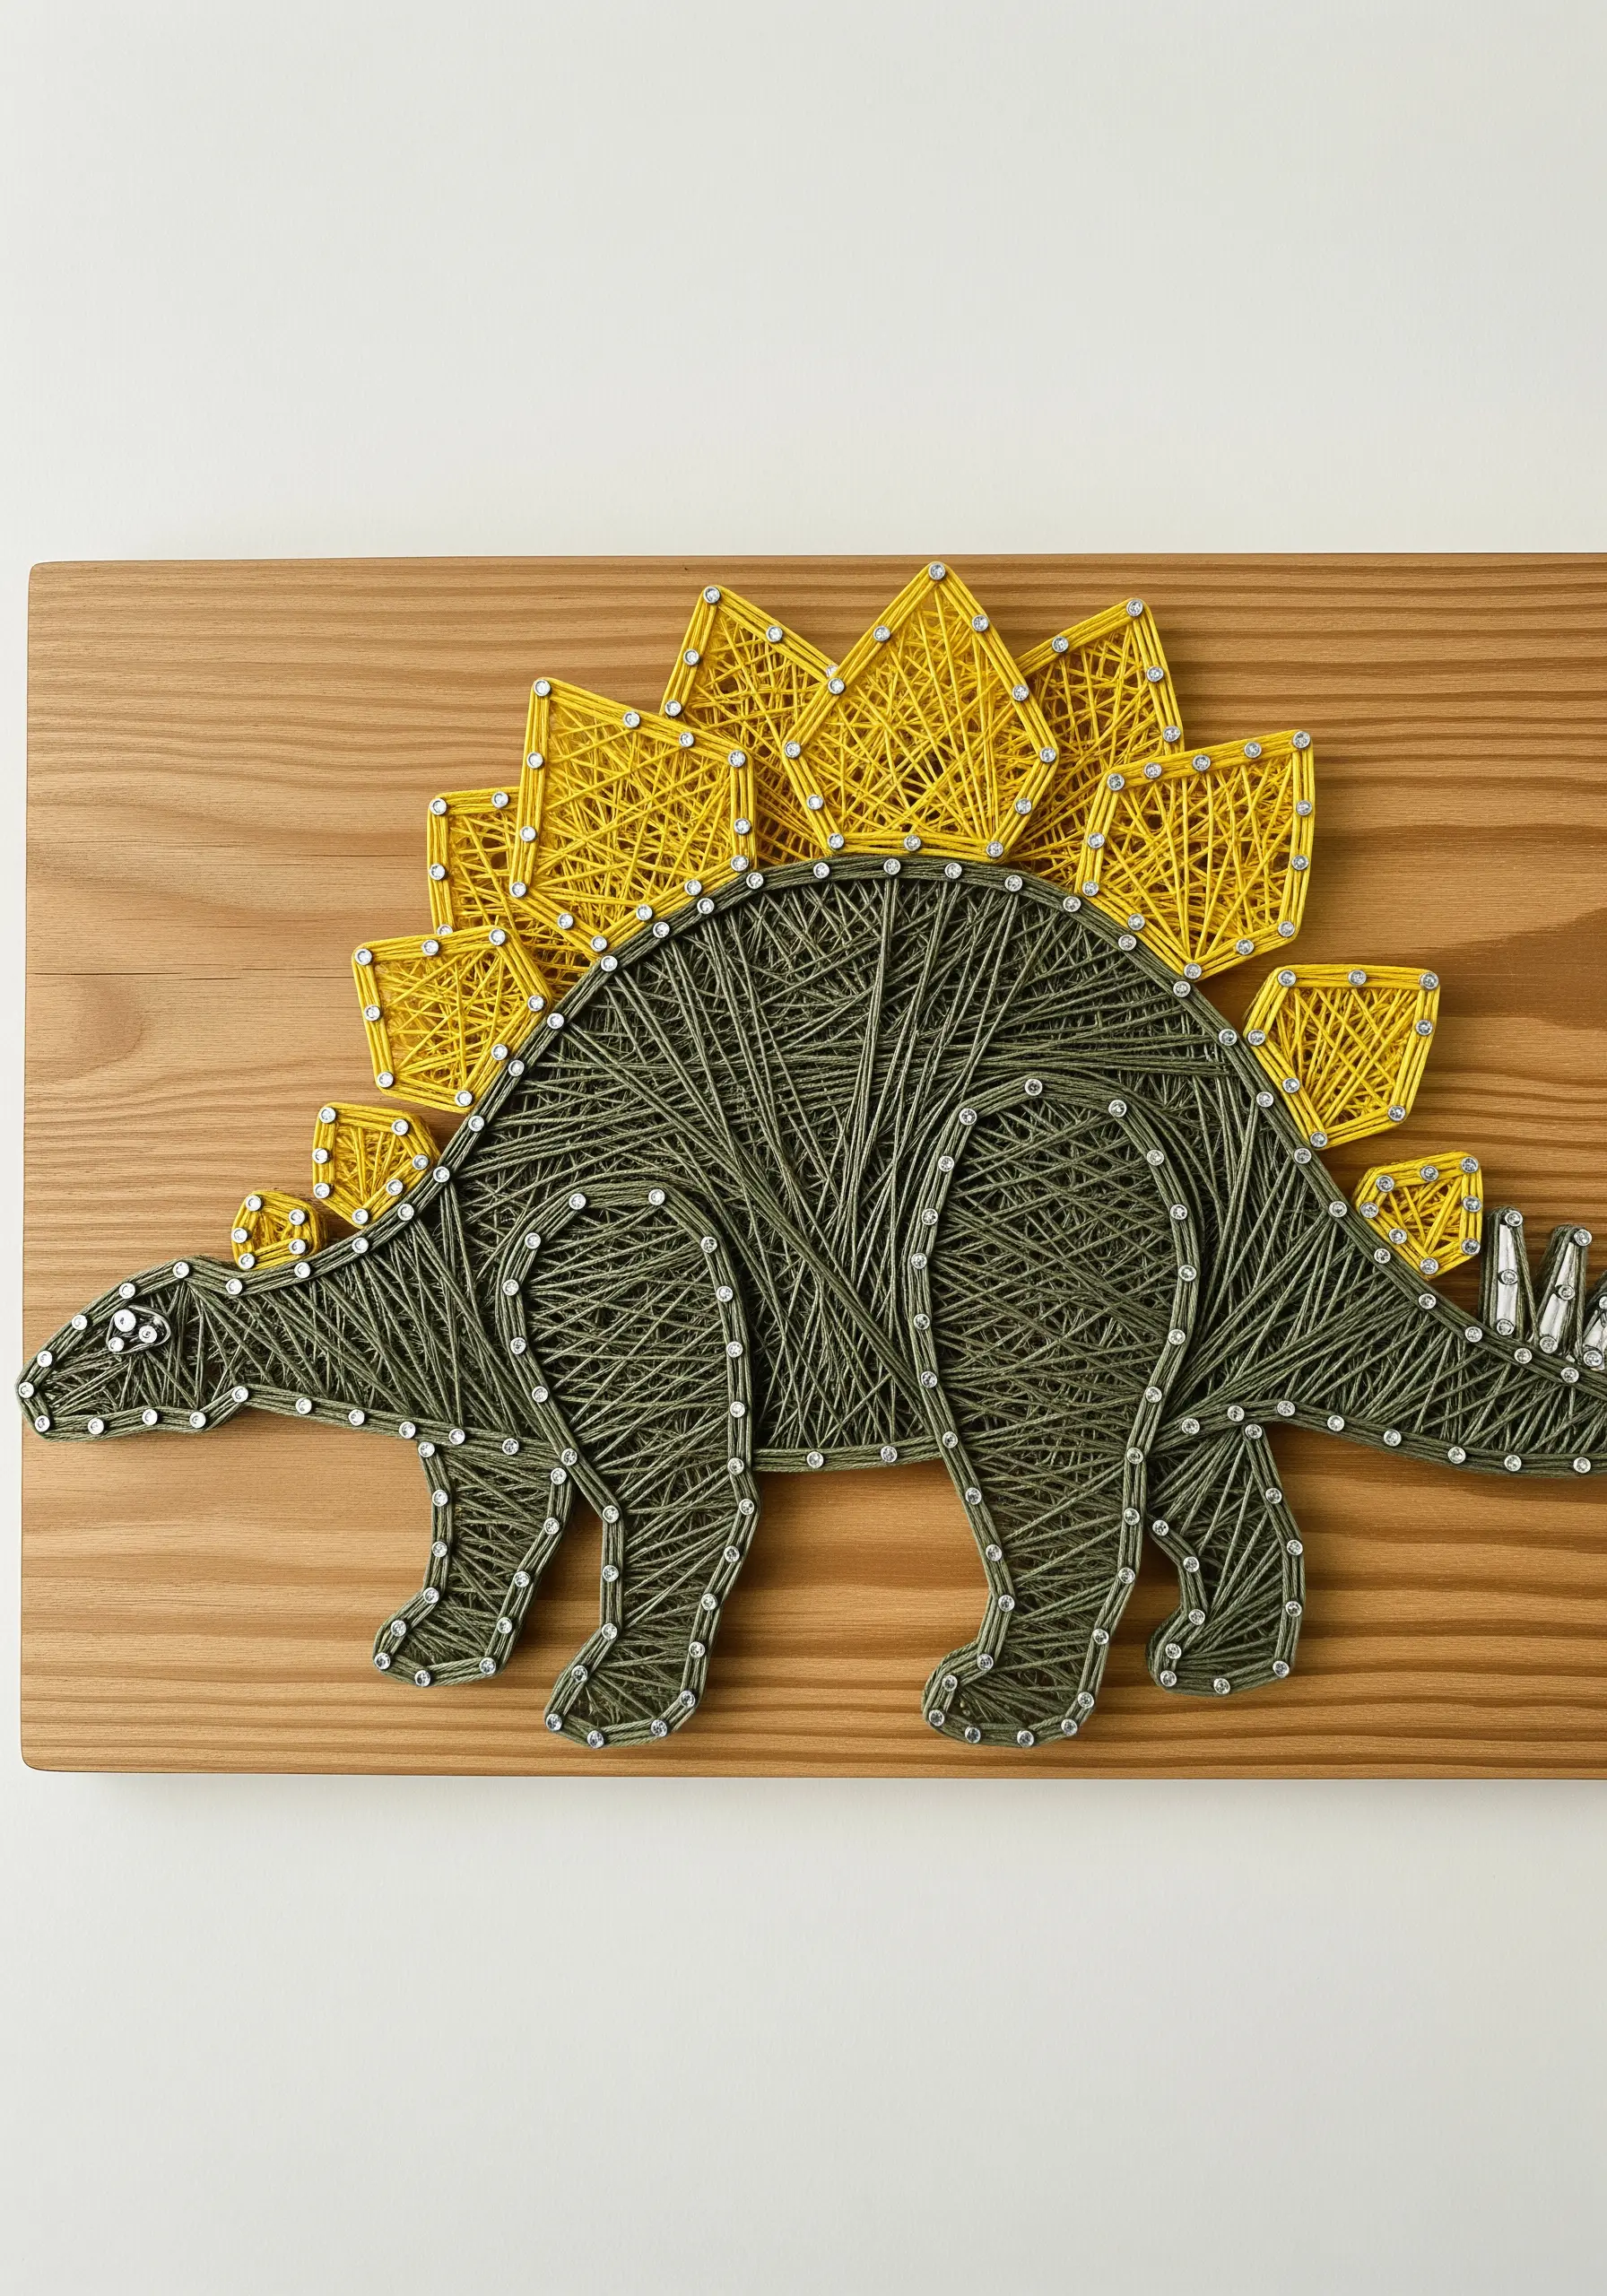
Make different parts of your design stand out by assigning them unique fill stitches. This is especially effective for a creature like a stegosaurus with its distinct plates.
Fill the main body with a woven fill or a dense pattern of crisscrossing straight stitches in a muted olive green. This creates a tough, hide-like texture.
For the back plates, switch to a bright, clean satin stitch in a vibrant yellow. The smooth, bold finish of the satin stitch will pop dramatically against the textured body, clearly defining the dinosaur’s most famous feature.
27. Go Off-Hoop with Mixed-Media Tentacles
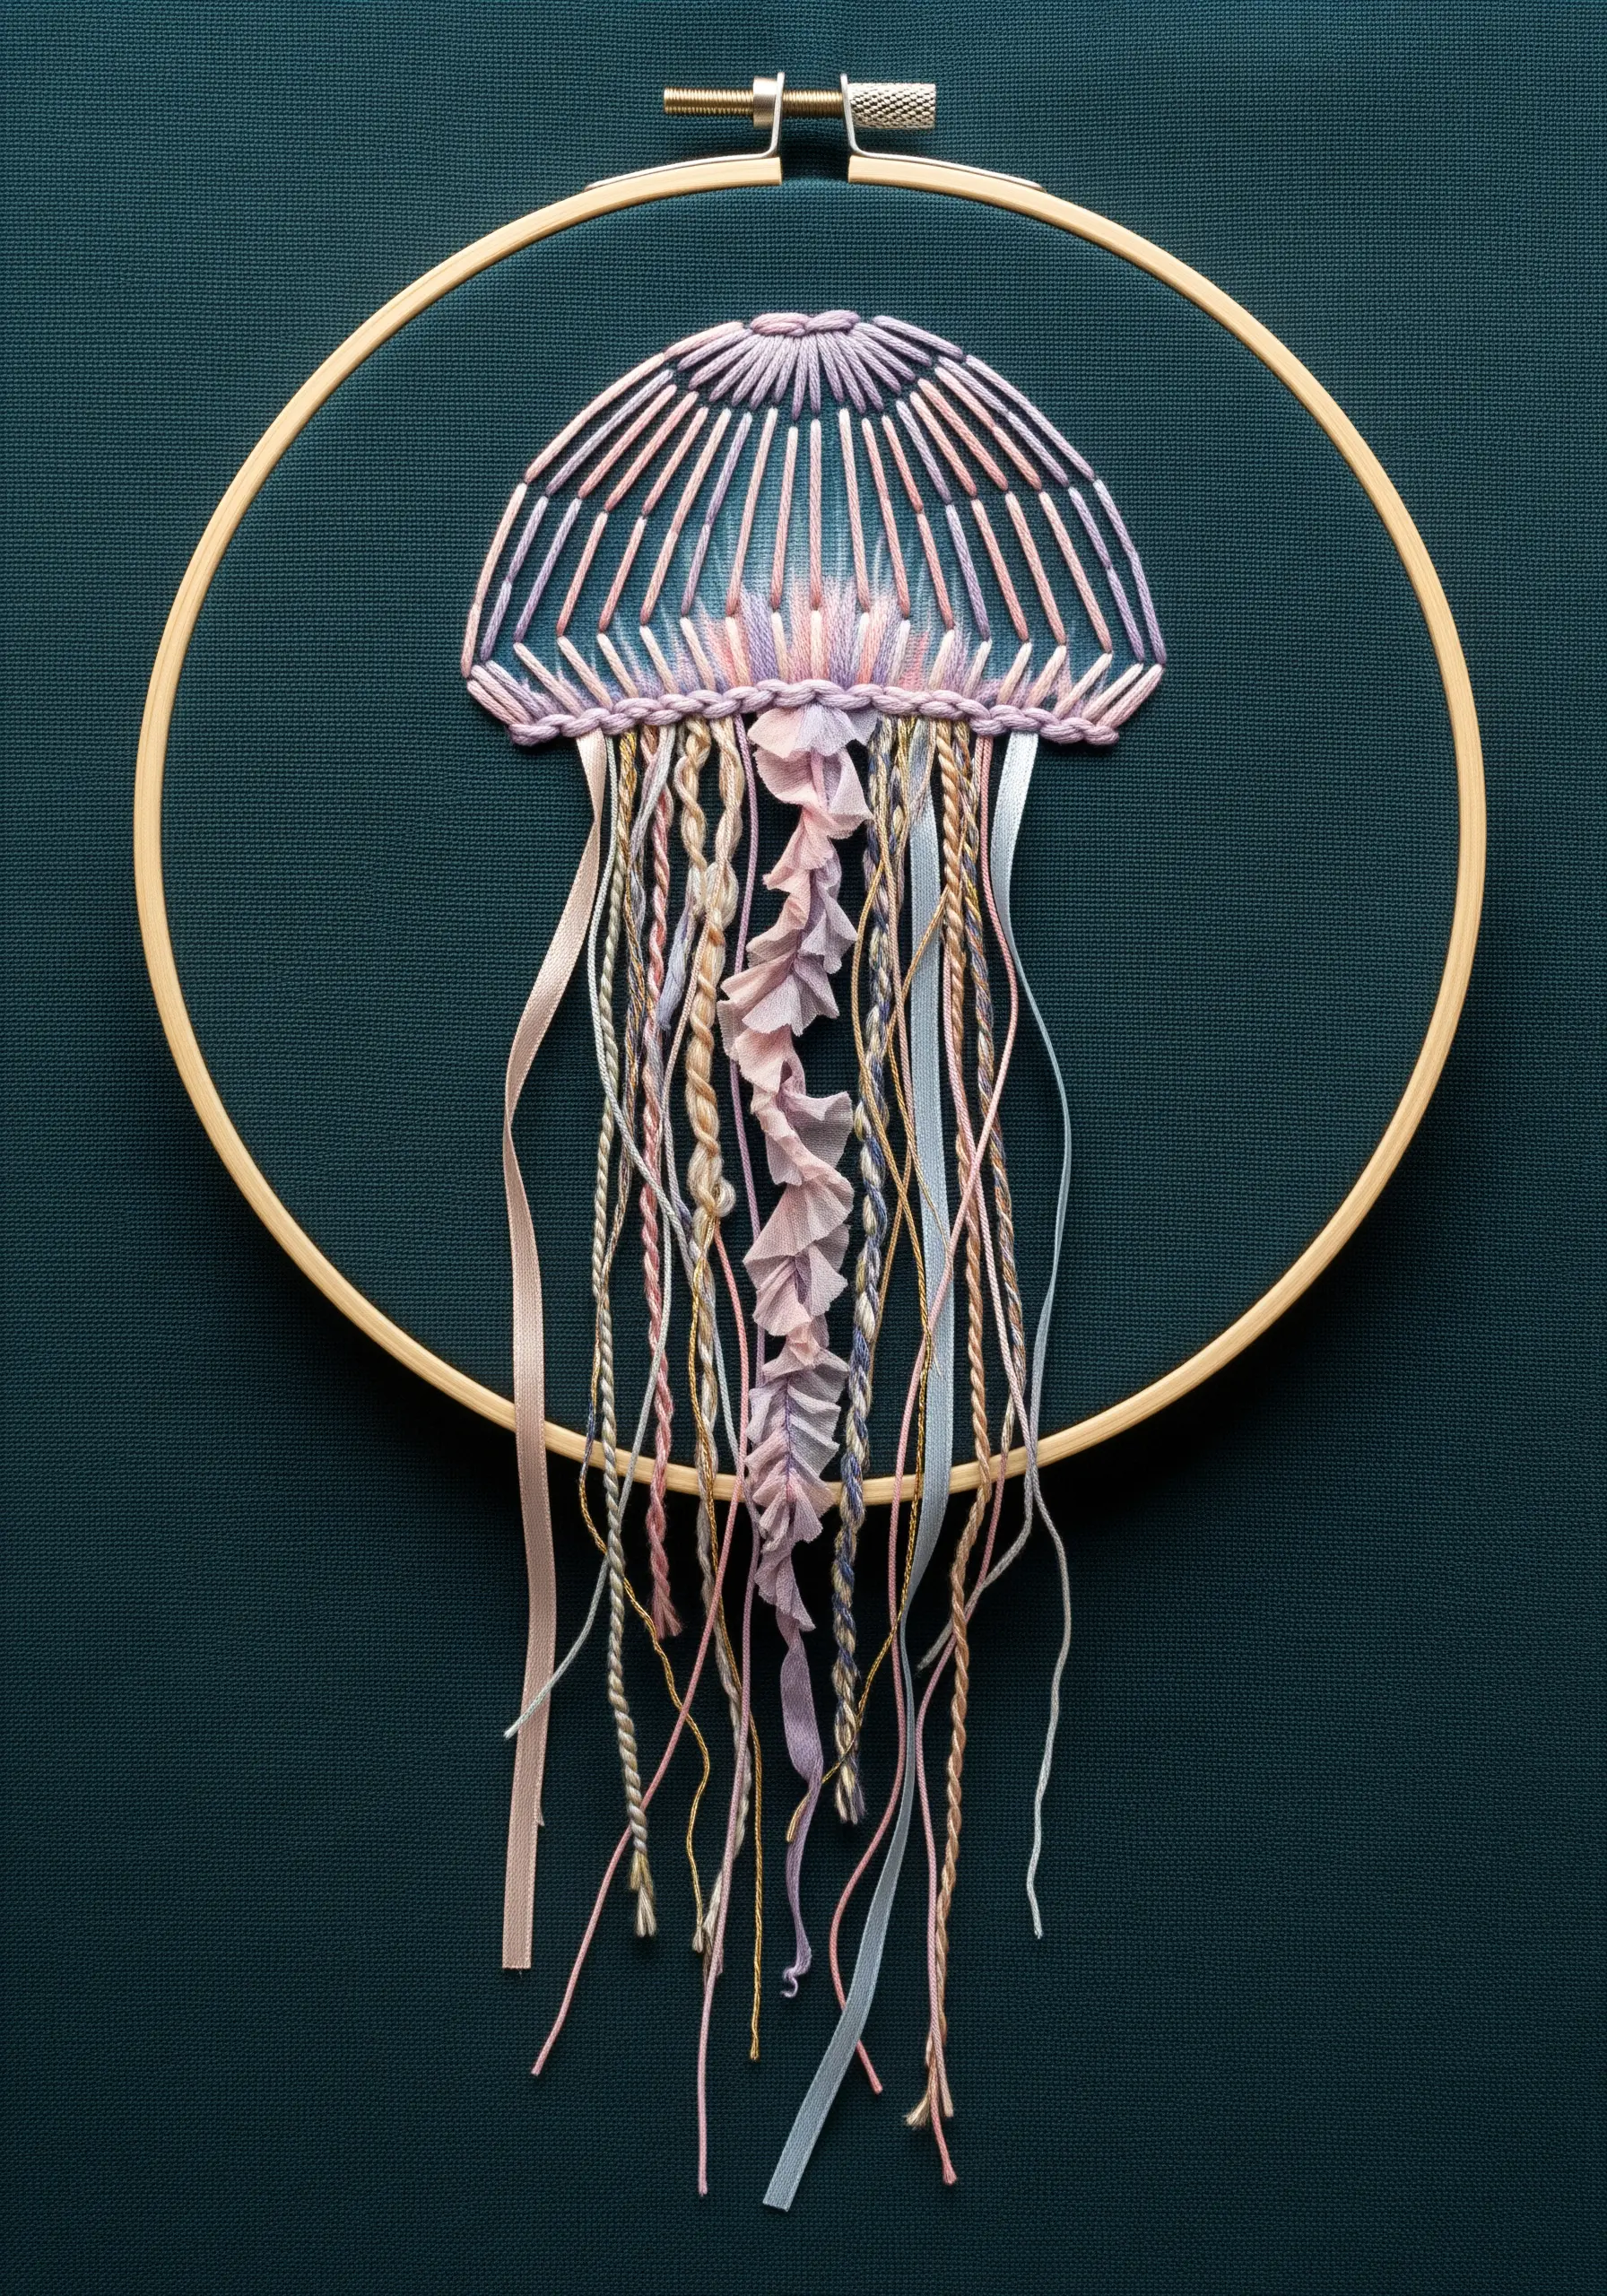
Create a truly spectacular jellyfish by letting its tentacles flow freely beyond the stitched bell.
Stitch the bell of the jellyfish onto the fabric using satin stitch or long-and-short stitch. Then, for the tentacles, thread your needle with various materials—silk ribbons, metallic cords, braided floss, chunky yarn—and let them hang down from the base.
This mixed-media embroidery wall art technique creates incredible movement and tactile interest, turning your hoop into a sculptural piece.
Don’t be afraid to mix textures and lengths for a more organic, flowing look.
28. Create Intricate Patterns with Varied Fills
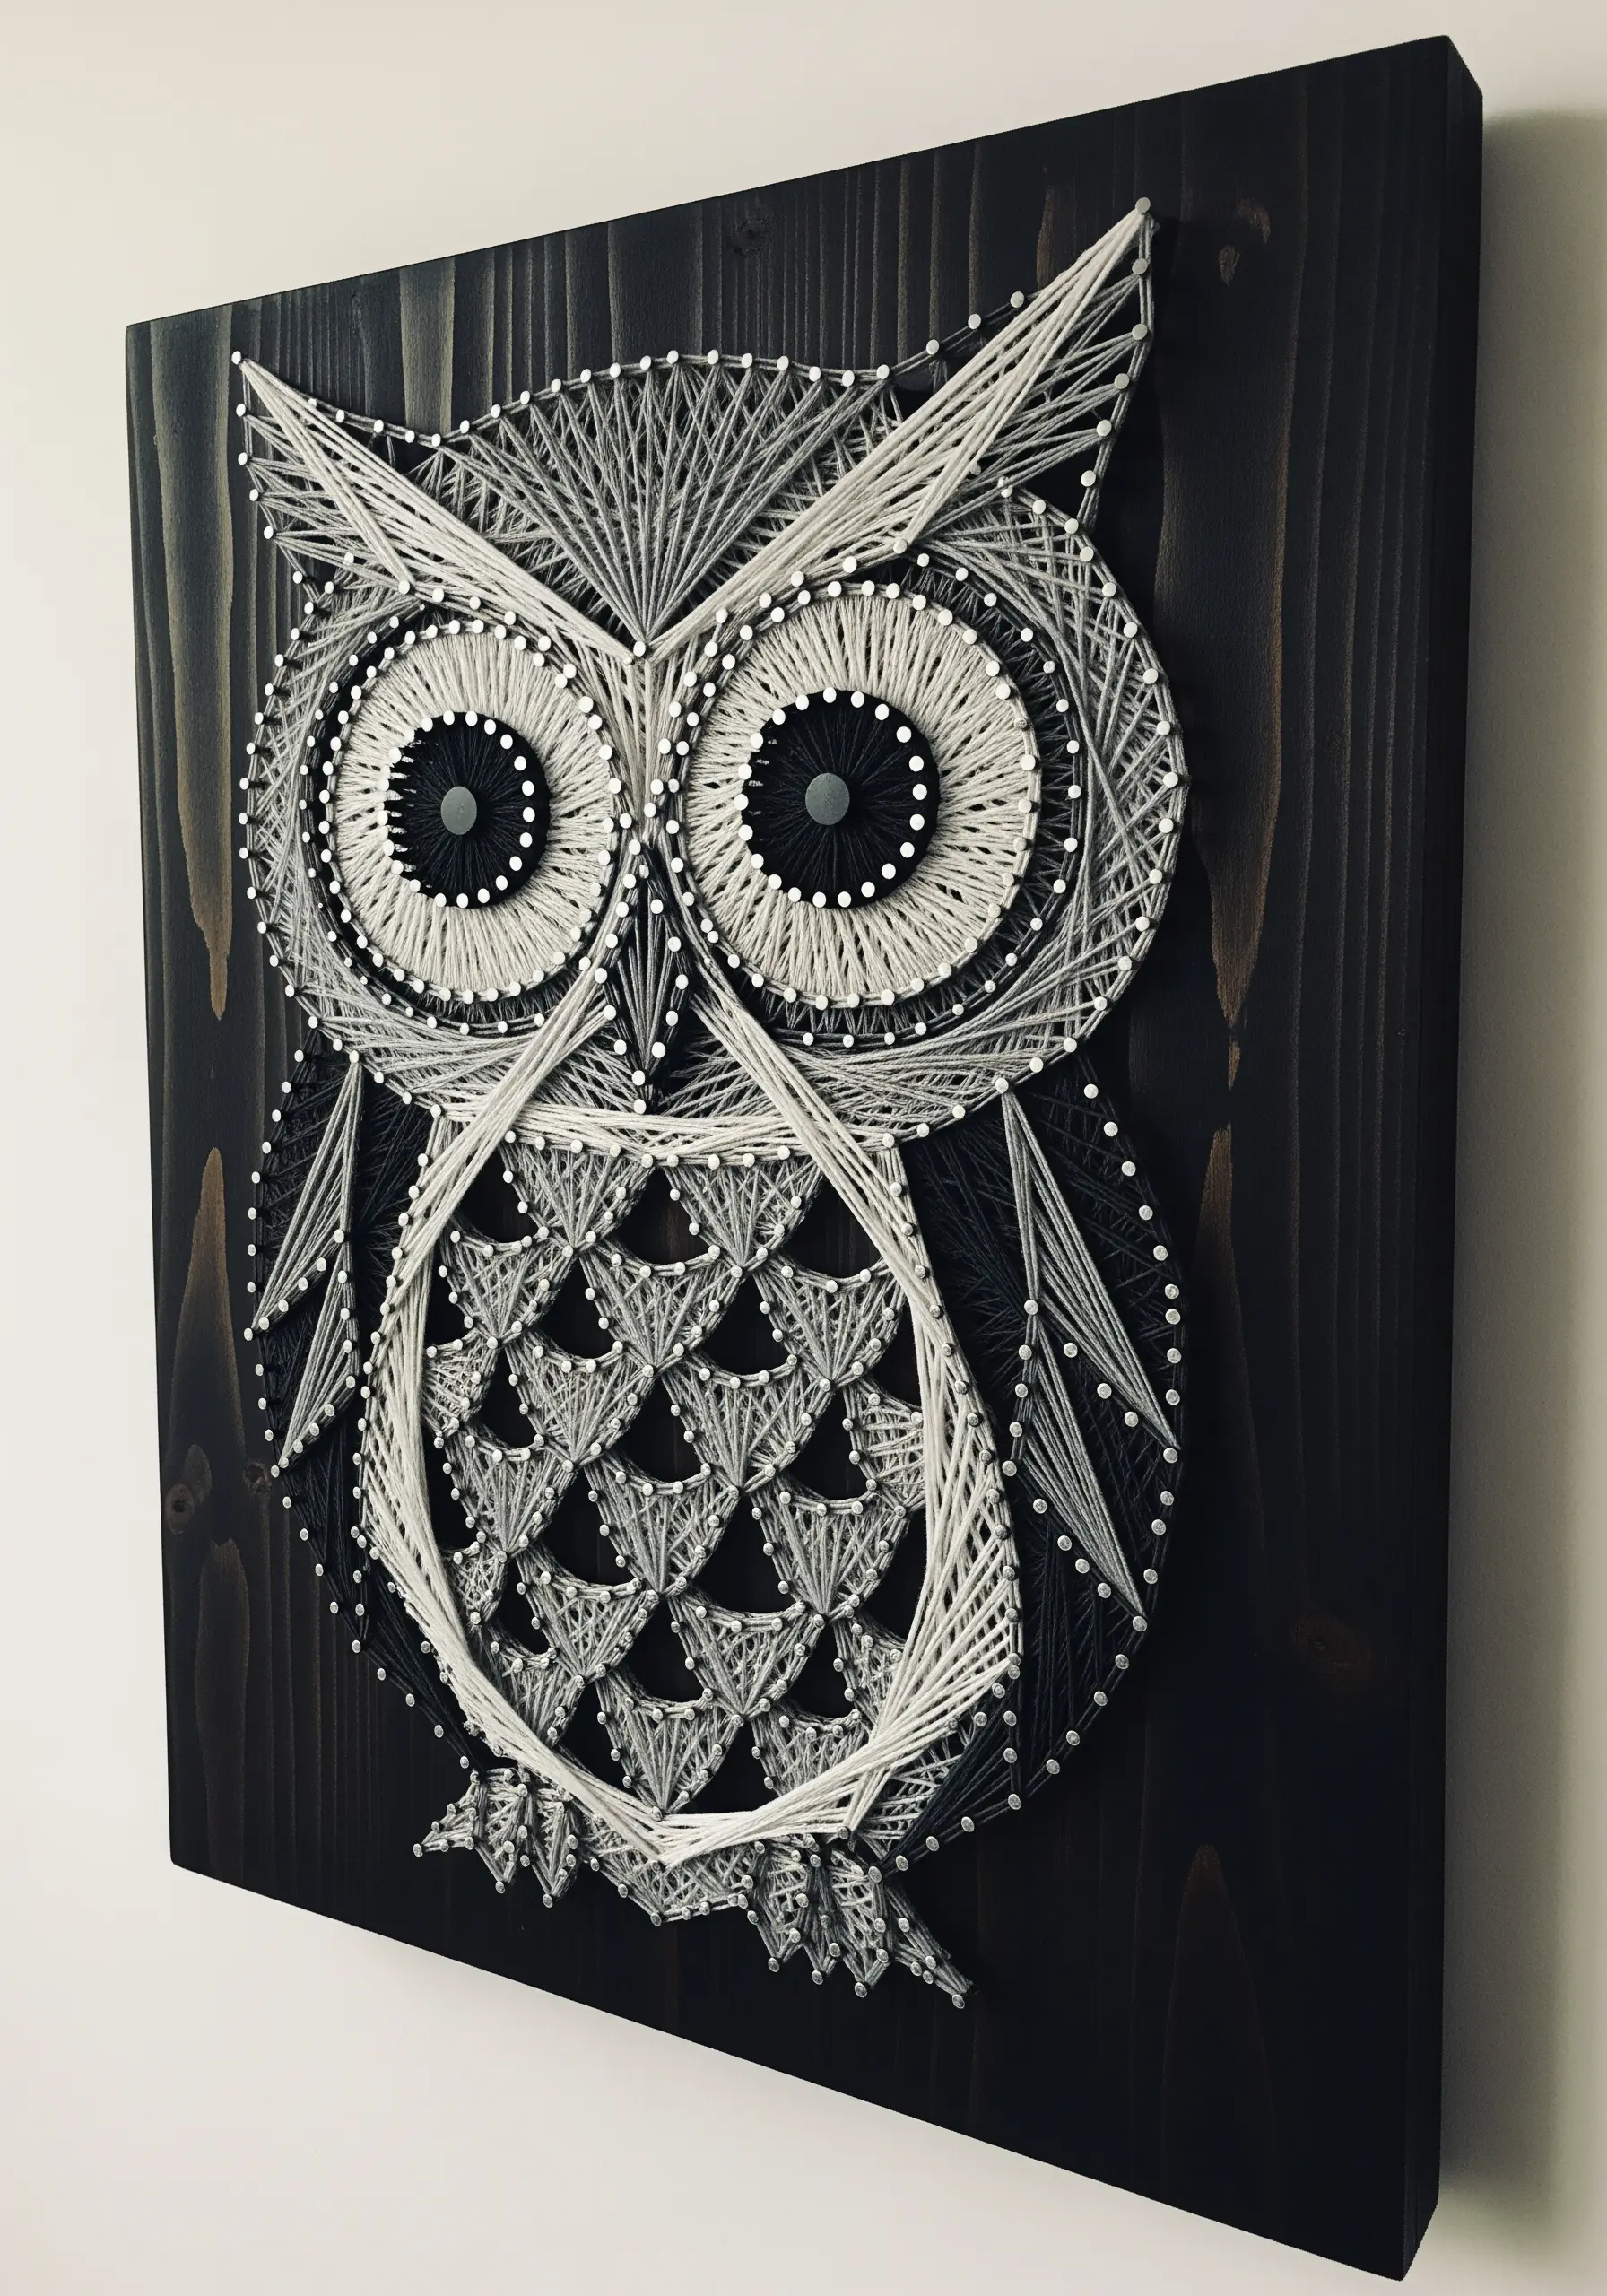
Elevate a simple owl silhouette by incorporating different geometric patterns within its body.
Instead of one uniform fill, divide the owl into sections. Fill the chest with a repeating pattern of fly stitches or detached chain stitches to suggest feathers.
For the eyes, use concentric circles of black and white satin stitch to create a wide-eyed, graphic expression. The wings can be filled with simple, layered straight stitches.
This sampler-style approach adds a huge amount of visual interest and makes the piece a joy to stitch.
29. Add Dimension with Vertical Chain Stitch Fill
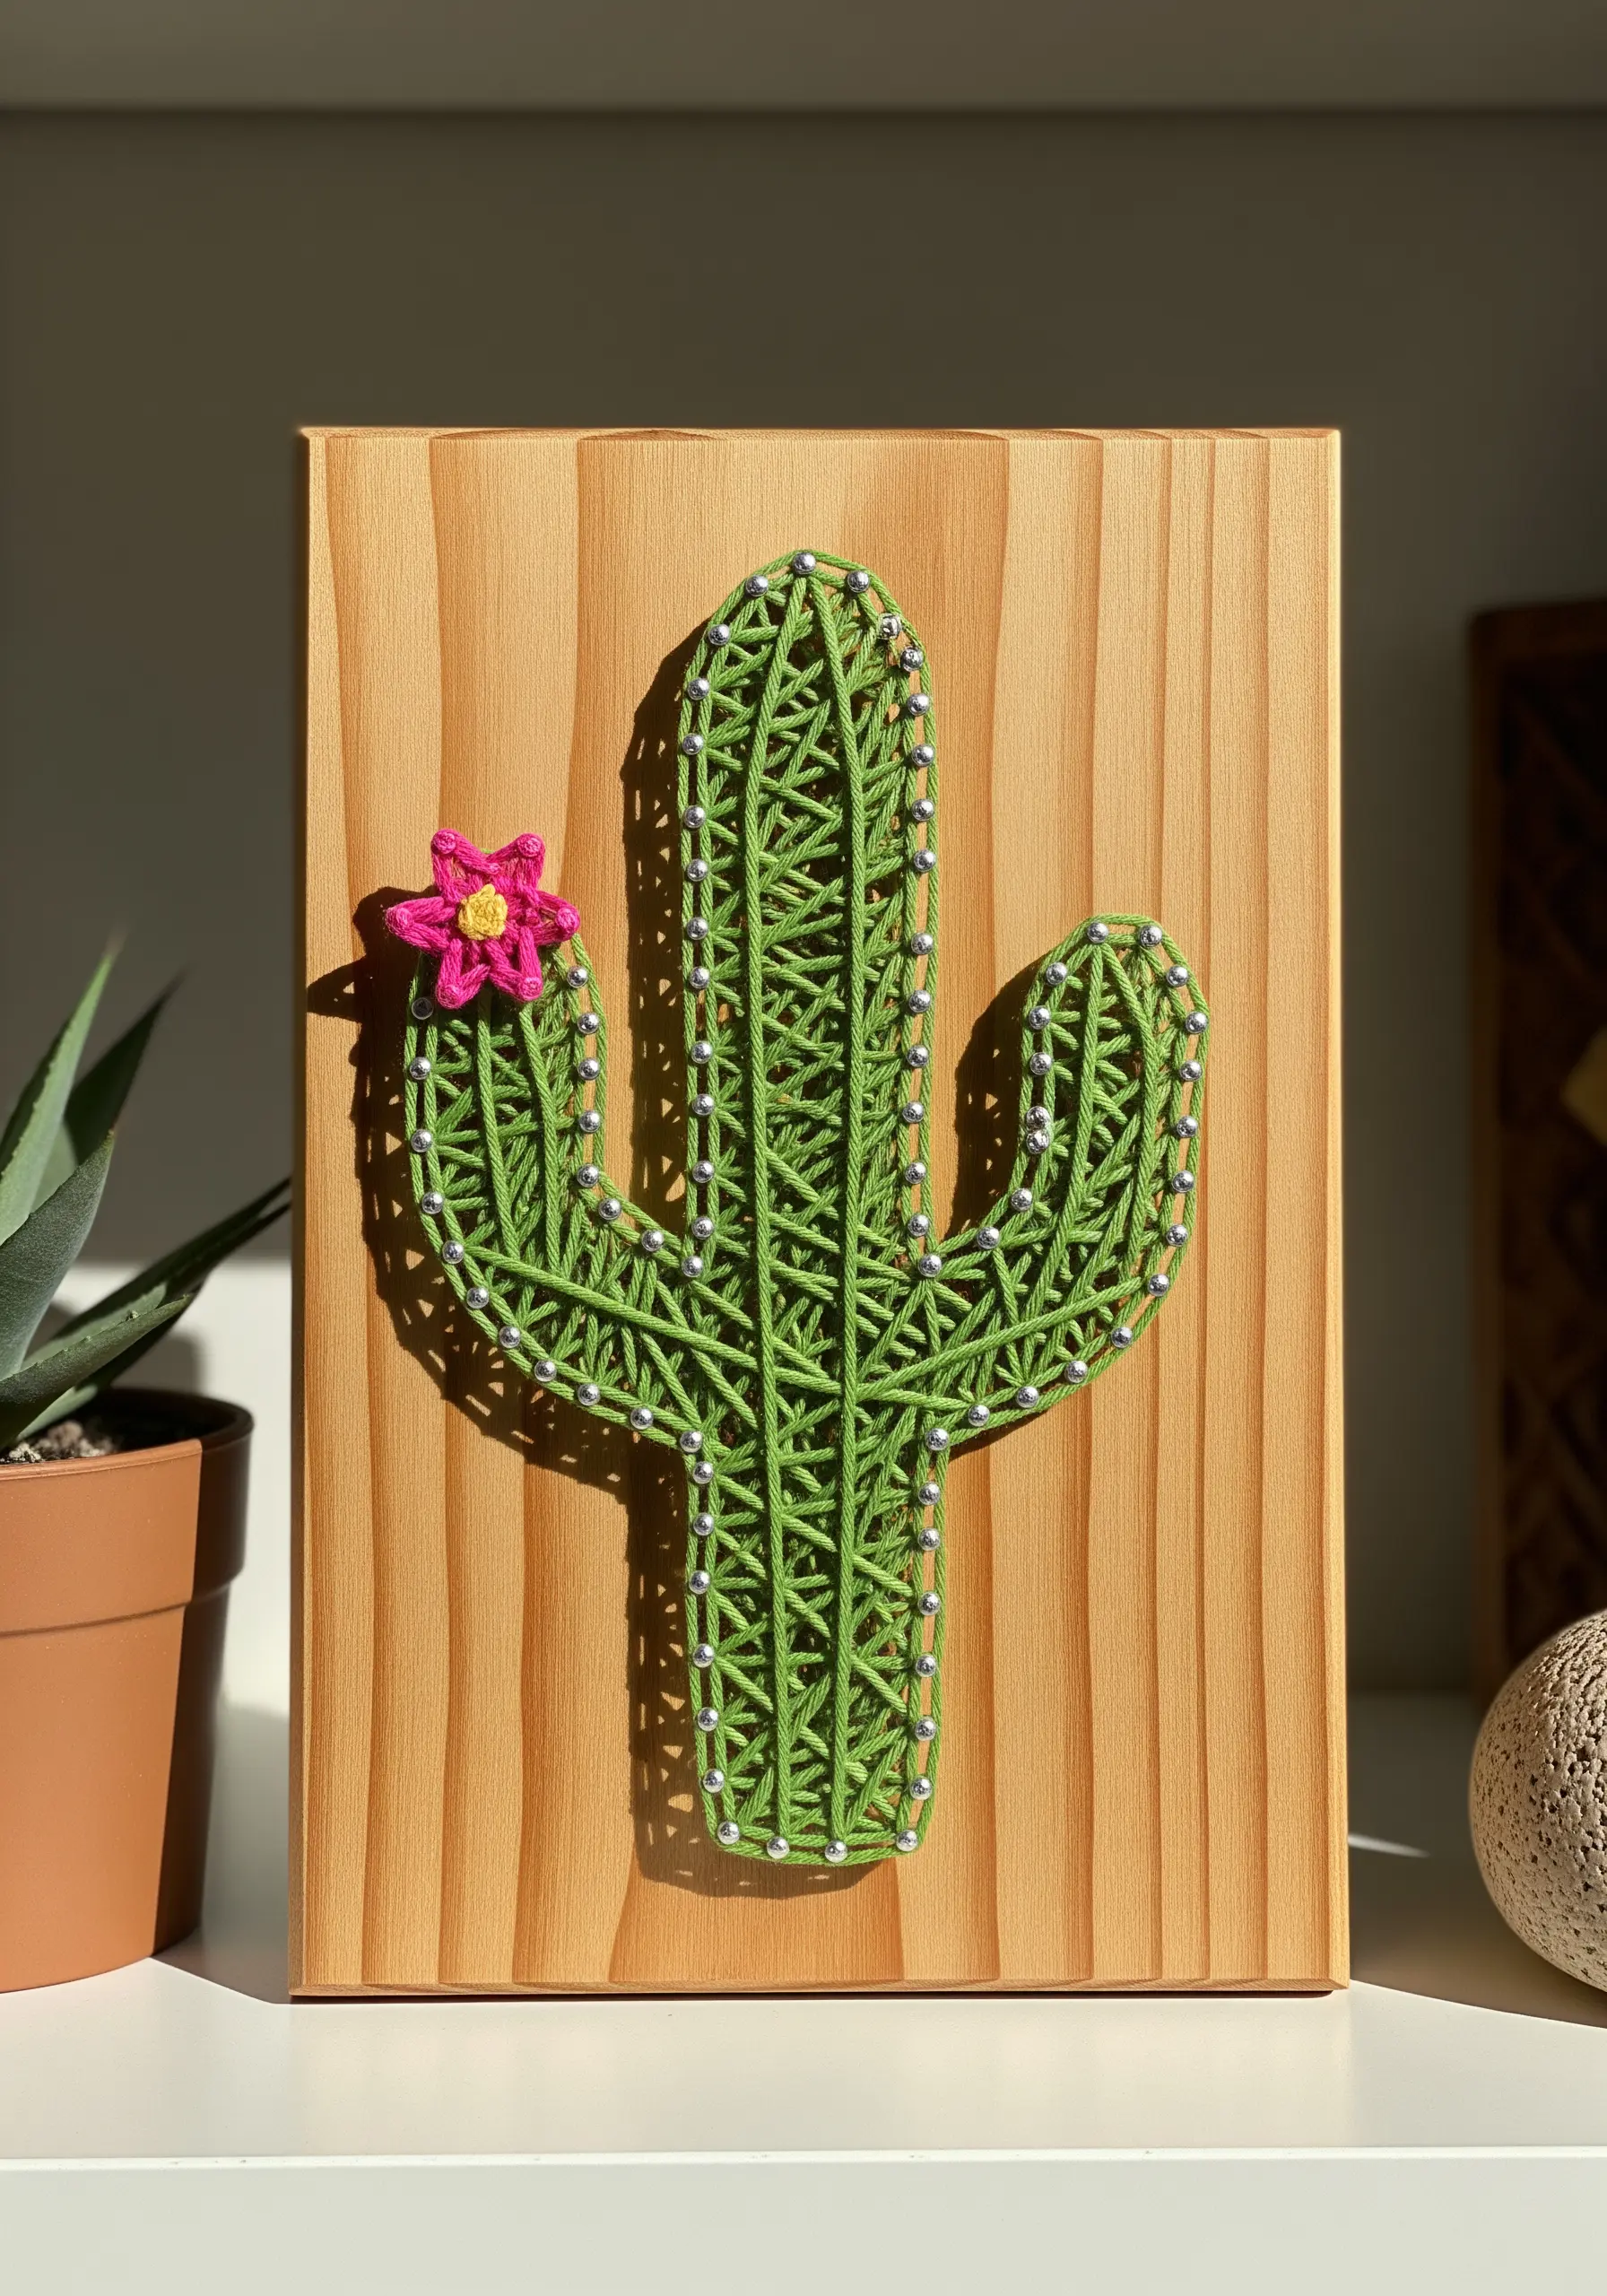
A simple cactus shape becomes far more interesting with a textural fill stitch. A vertical chain stitch is a perfect choice.
Working in neat, parallel rows, the chain stitch creates a looped, ribbed texture that mimics the natural surface of a cactus. It gives the piece a subtle 3D quality that a flat satin stitch lacks.
Use a thick thread or all six strands of floss to make the texture more pronounced.
For the flower, a woven wheel stitch (or spider web rose) in a contrasting pink creates a beautiful, dimensional blossom.
30. Craft a Solar System with Varied Textures

Depict a solar system by giving each planet its own unique stitched identity. This is a fantastic project for practicing different circular stitches.
The sun can be a radiant burst of yellow and orange straight stitches. Make Saturn’s rings by wrapping metallic thread around a satin-stitched planet.
For Jupiter, you can try stripes of satin stitch, while other planets can be filled with circular satin stitch, French knots, or woven wheel stitches to create different textures and patterns.
It’s one of those dreamy galaxy string art concepts reimagined for needle and thread.
31. Blend Wing Colors with Strategic Threading
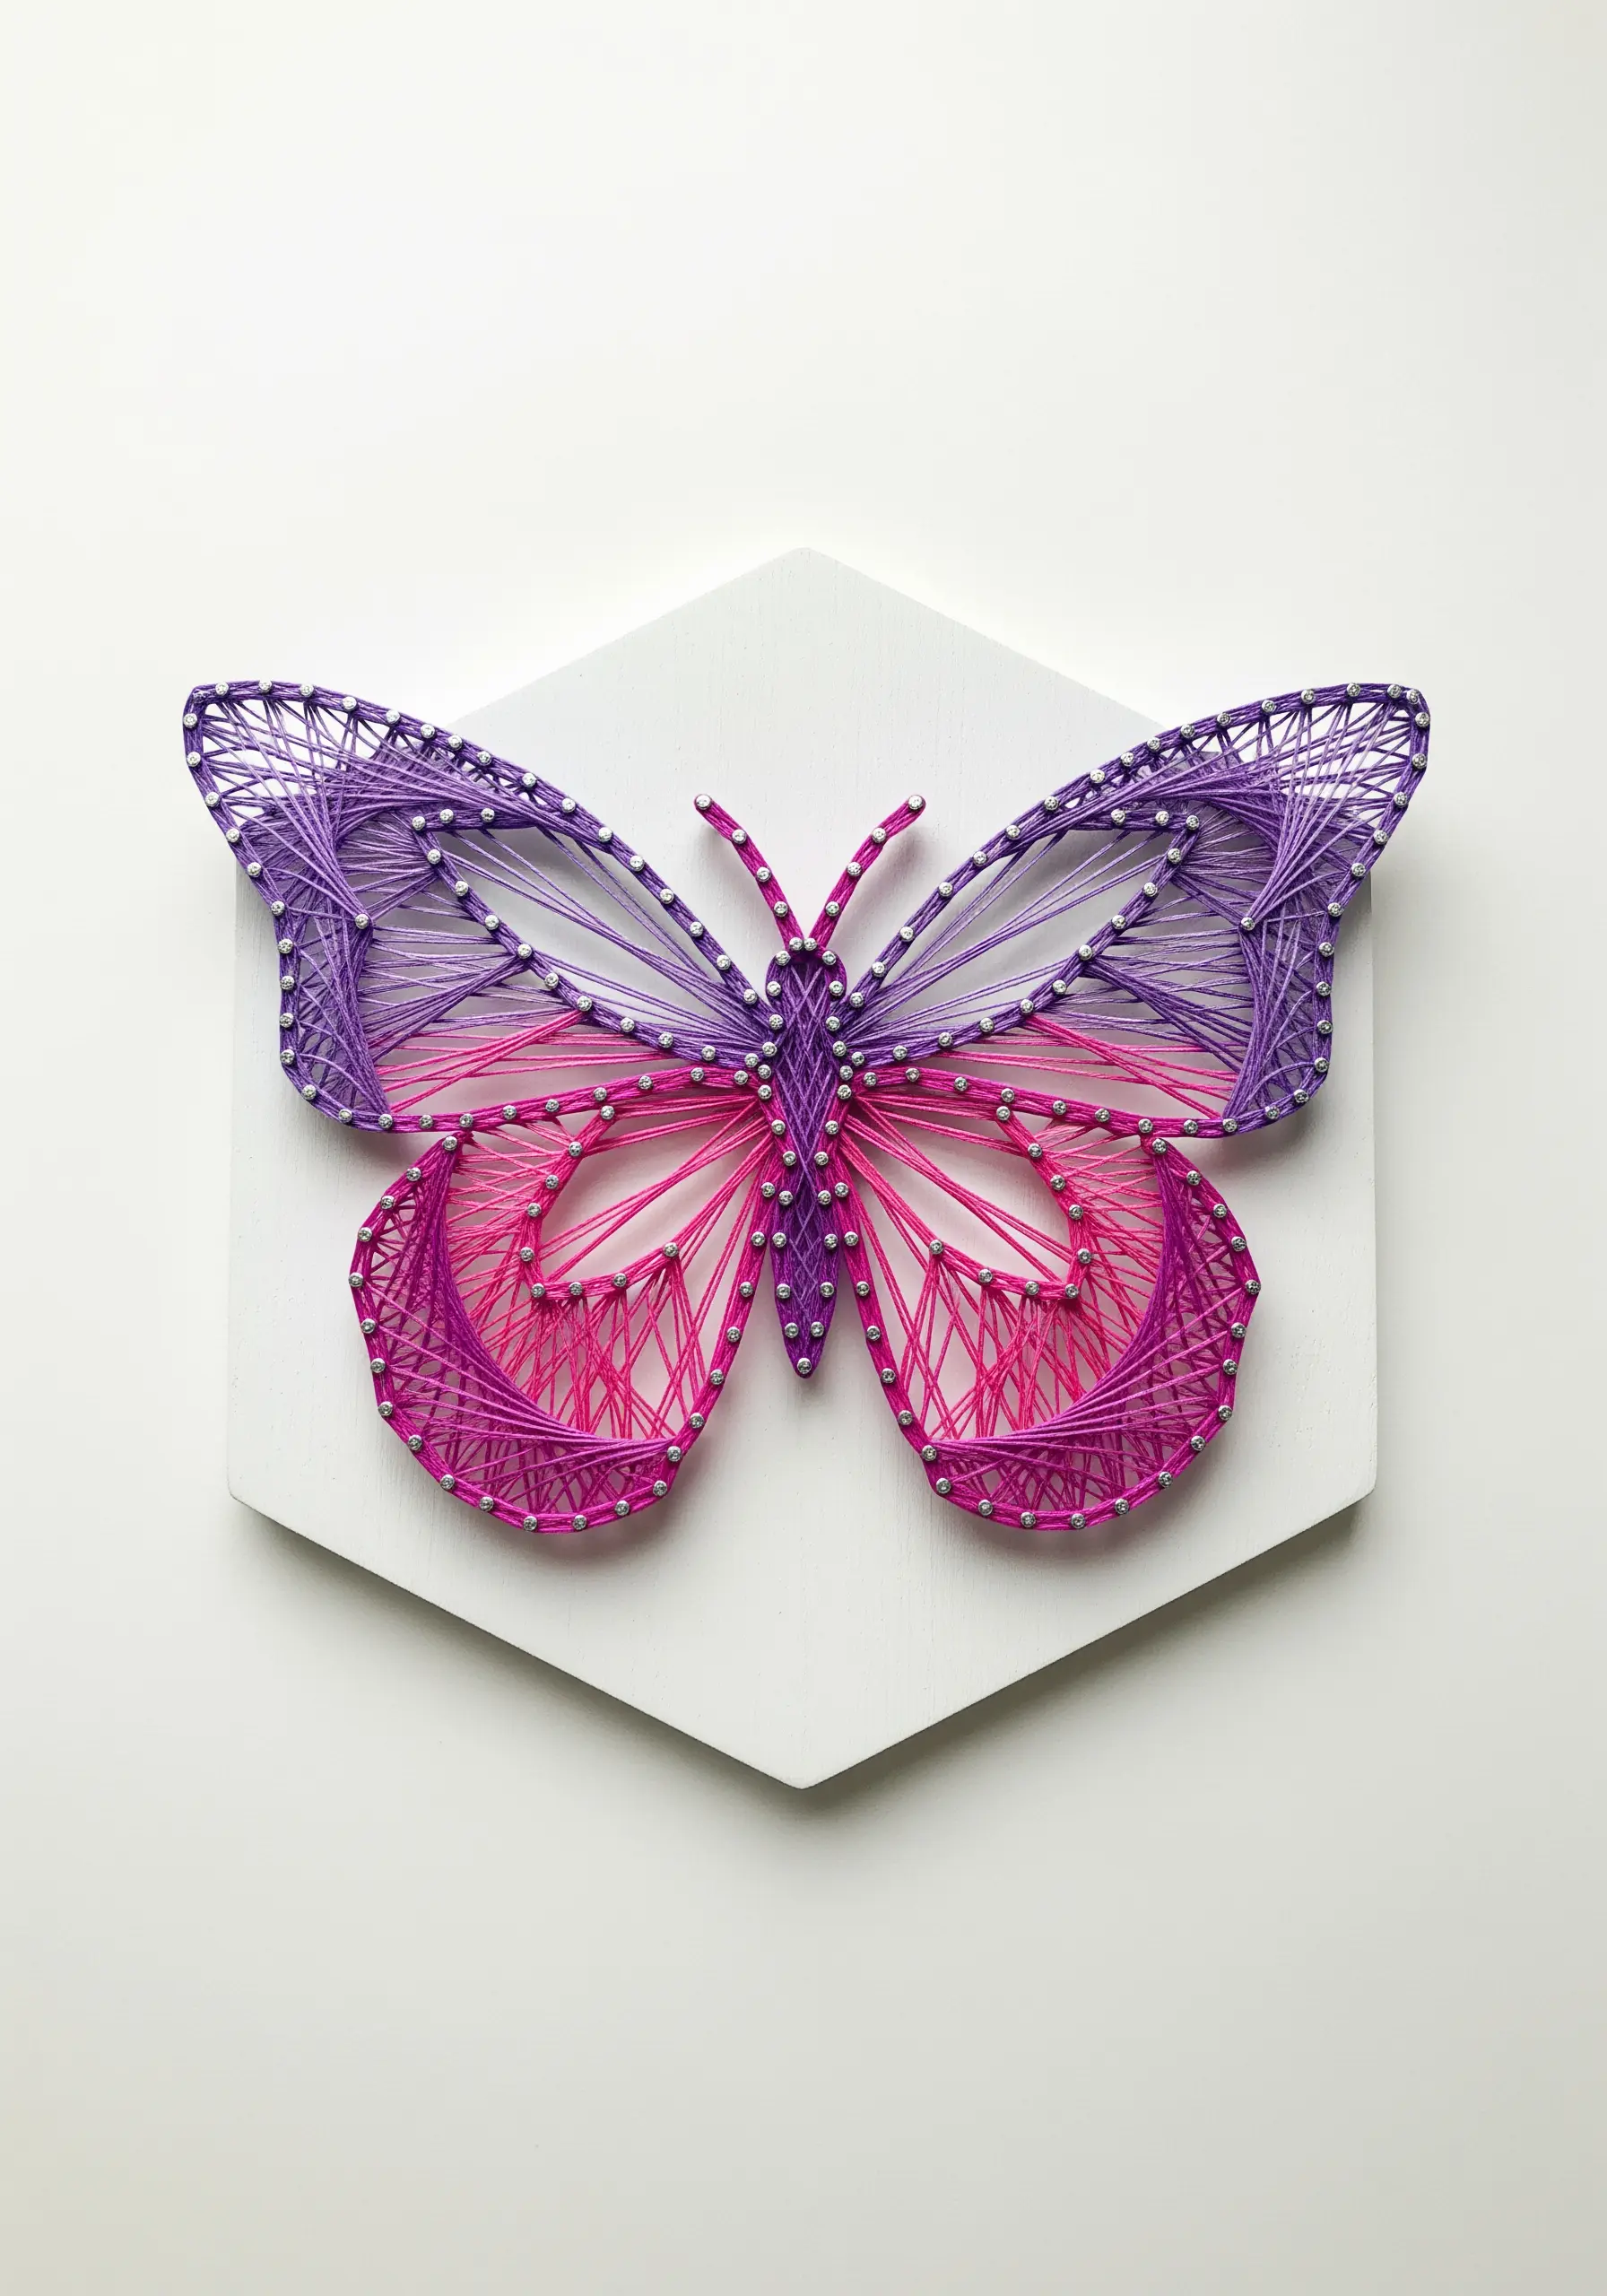
Create a beautiful butterfly with ombré wings by blending two colors with a long-and-short stitch.
Start with the purple at the top edge of the wing, creating an initial row of stitches that vary in length. For the next row, use pink thread and bring your needle up through the purple stitches, interlocking the colors.
This technique creates a soft, seamless transition between the two shades, giving the wings a delicate, almost painted appearance.
Using fewer strands of floss (two or three) will enhance the delicacy of the design.
32. Create a Fluffy Fleece with Chunky Bullion Knots

The key to a fantastically fluffy sheep is using the right stitch and the right material. Chunky bullion knots are the answer.
Using a thick, soft wool yarn instead of standard embroidery floss will dramatically enhance the texture. Create tightly packed bullion knots of varying sizes to form the sheep’s woolly coat.
The high-relief, loopy texture is incredibly tactile and fun to create.
Contrast the voluminous body with a simple, flat-stitched face and legs in black thread to make the fleece appear even more plush and three-dimensional.
33. Use Stitch Direction to Create Faceted Dimension
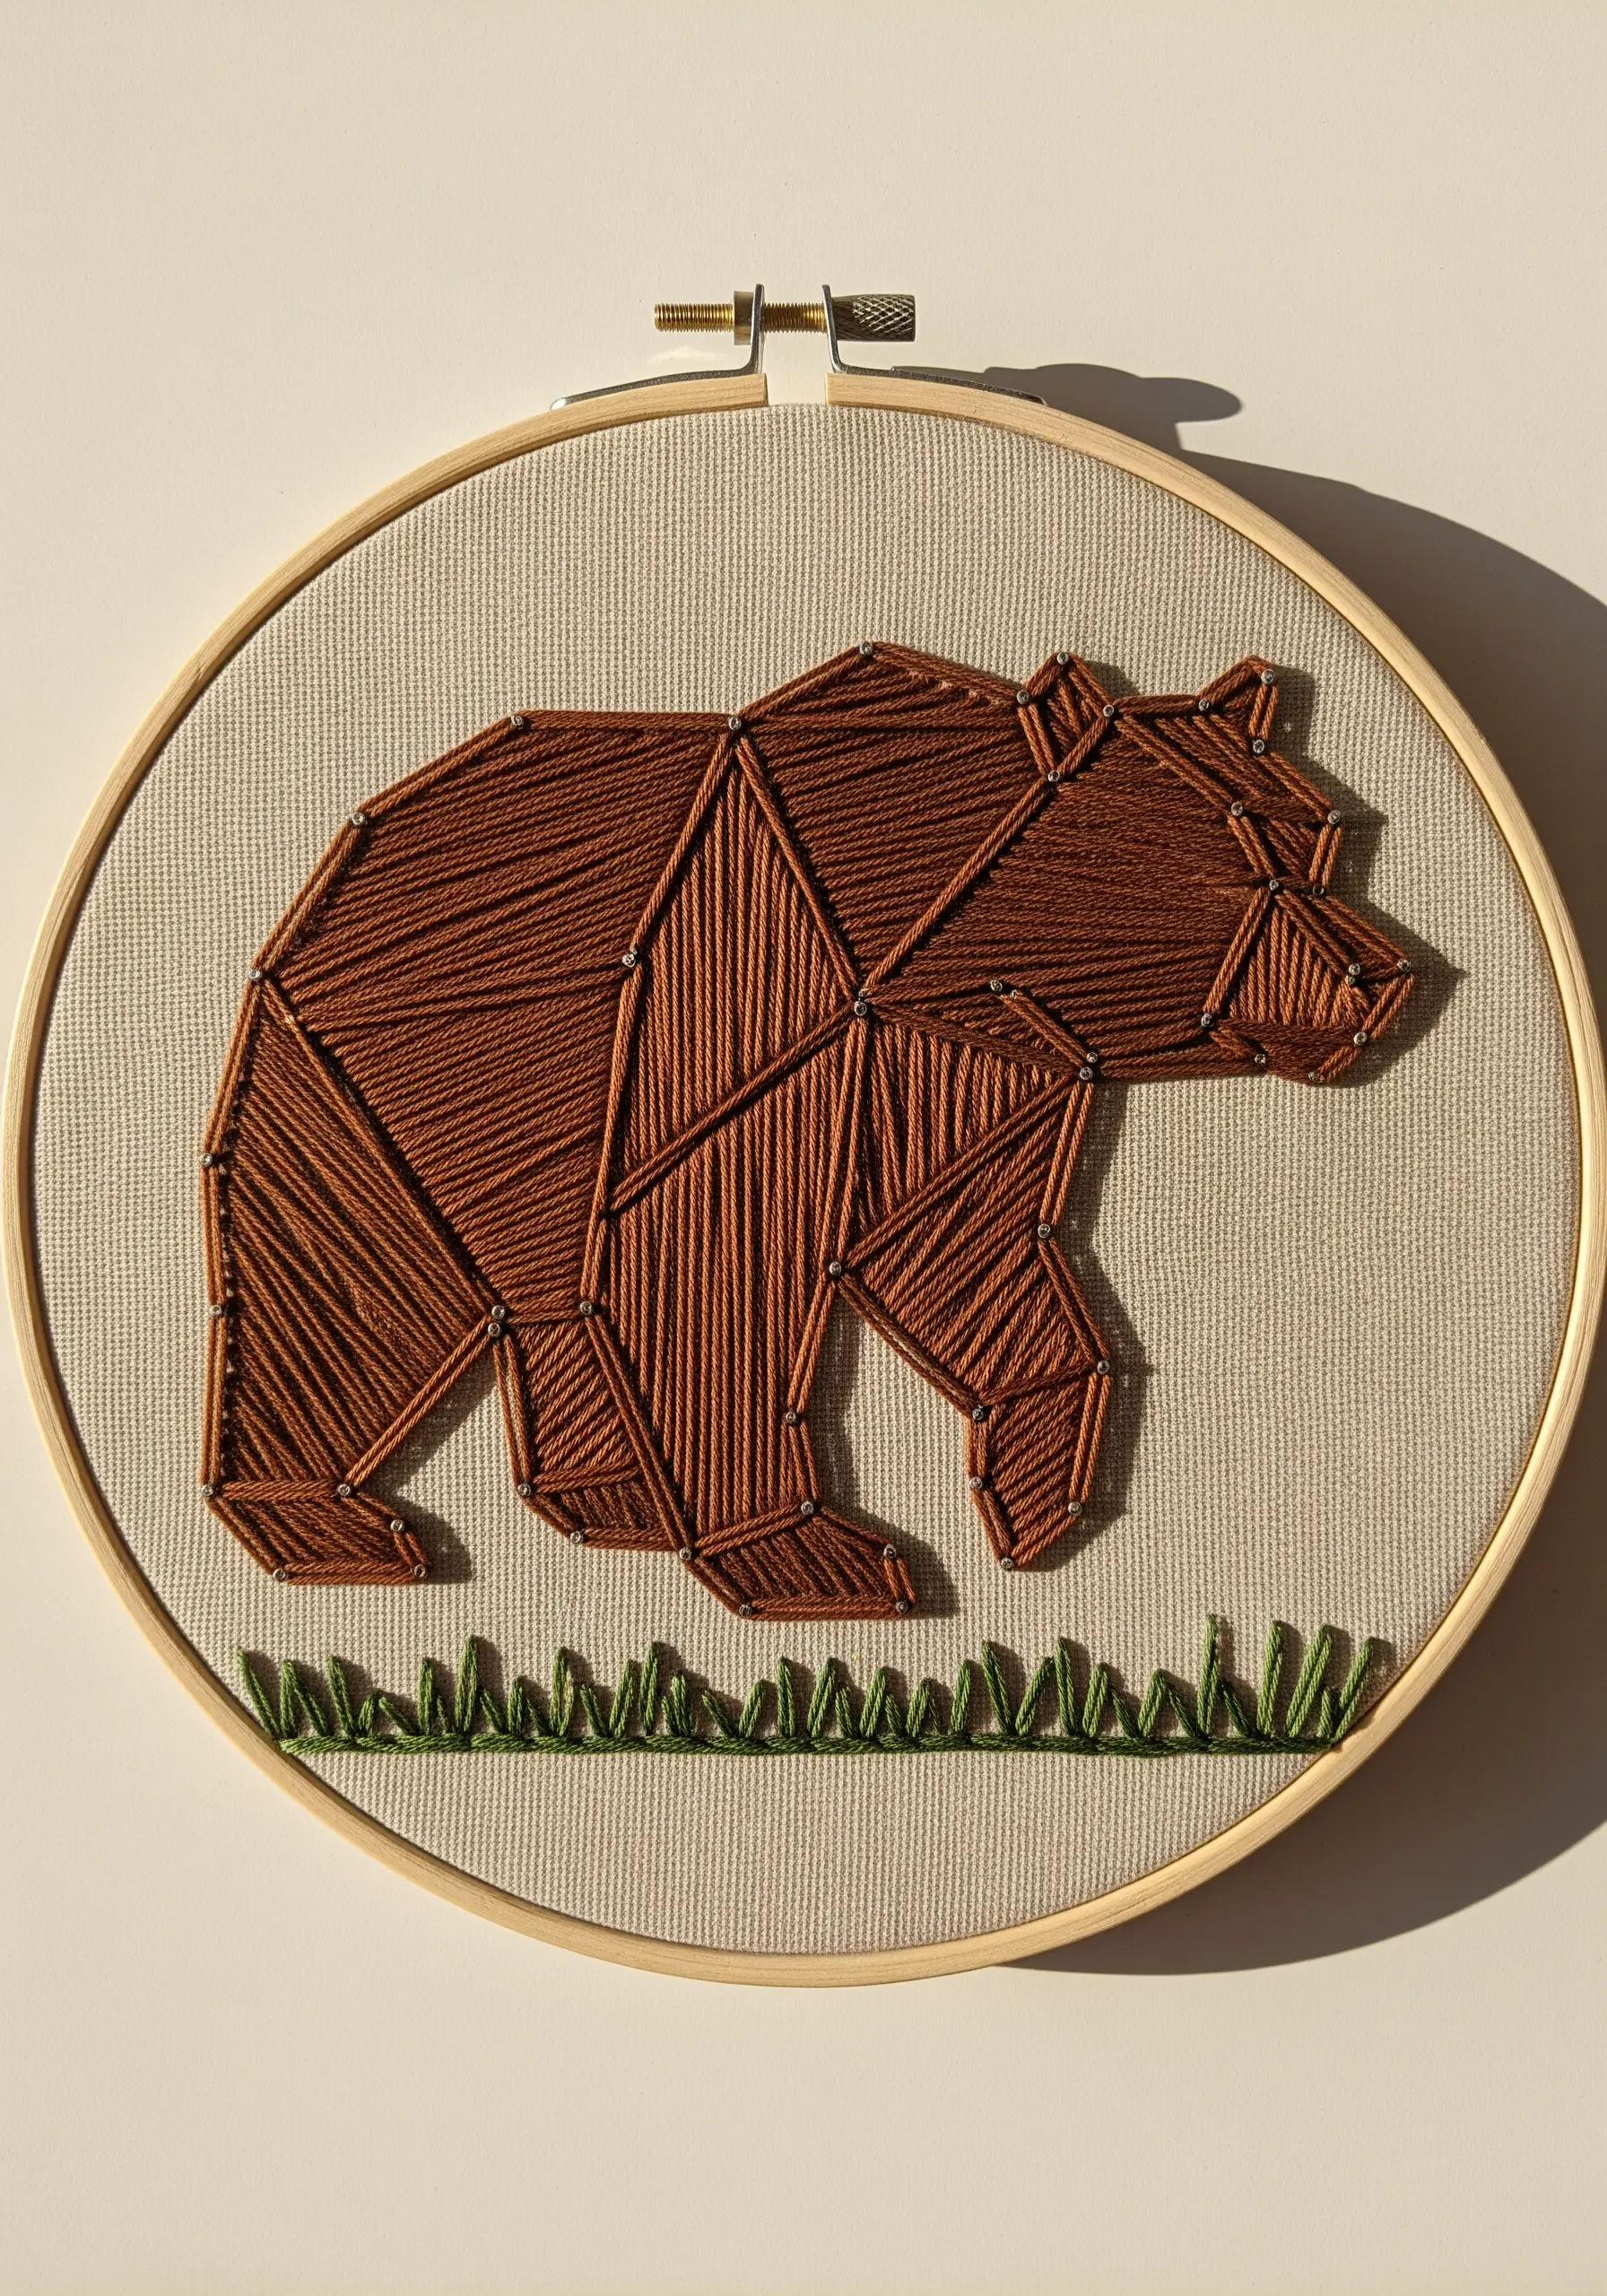
Even with a single color, you can make a geometric animal look dimensional by carefully planning your stitch direction.
Within each triangular or polygonal section of the bear, angle your satin stitches differently from the adjacent sections.
This simple change in direction will catch the light in different ways, creating the subtle illusion of facets, planes, and shadows. It gives the flat design a sophisticated, almost 3D quality.
A few blades of grass in a simple straight stitch ground the composition and add a touch of contrasting color.


