

A tote bag is more than just something to carry your belongings in—it’s a canvas. It’s an opportunity to experiment with stitches that do more than just add color; they add dimension, feeling, and a story that is uniquely yours.
You don’t need to learn a hundred new stitches to make your work stand out. Instead, let’s focus on techniques that transform the surface of the fabric. We will explore how to make your outlines bolder, your fills more textural, and your finished pieces feel intentional and polished.
Consider this your invitation to play with thread in a new way. Move beyond the flat and familiar, and discover the satisfaction of creating embroidery you can not only see, but truly feel. Each stitch is a step toward making an everyday object into a small work of art.
1. Sculptural Appliqué with Padded Satin Stitch
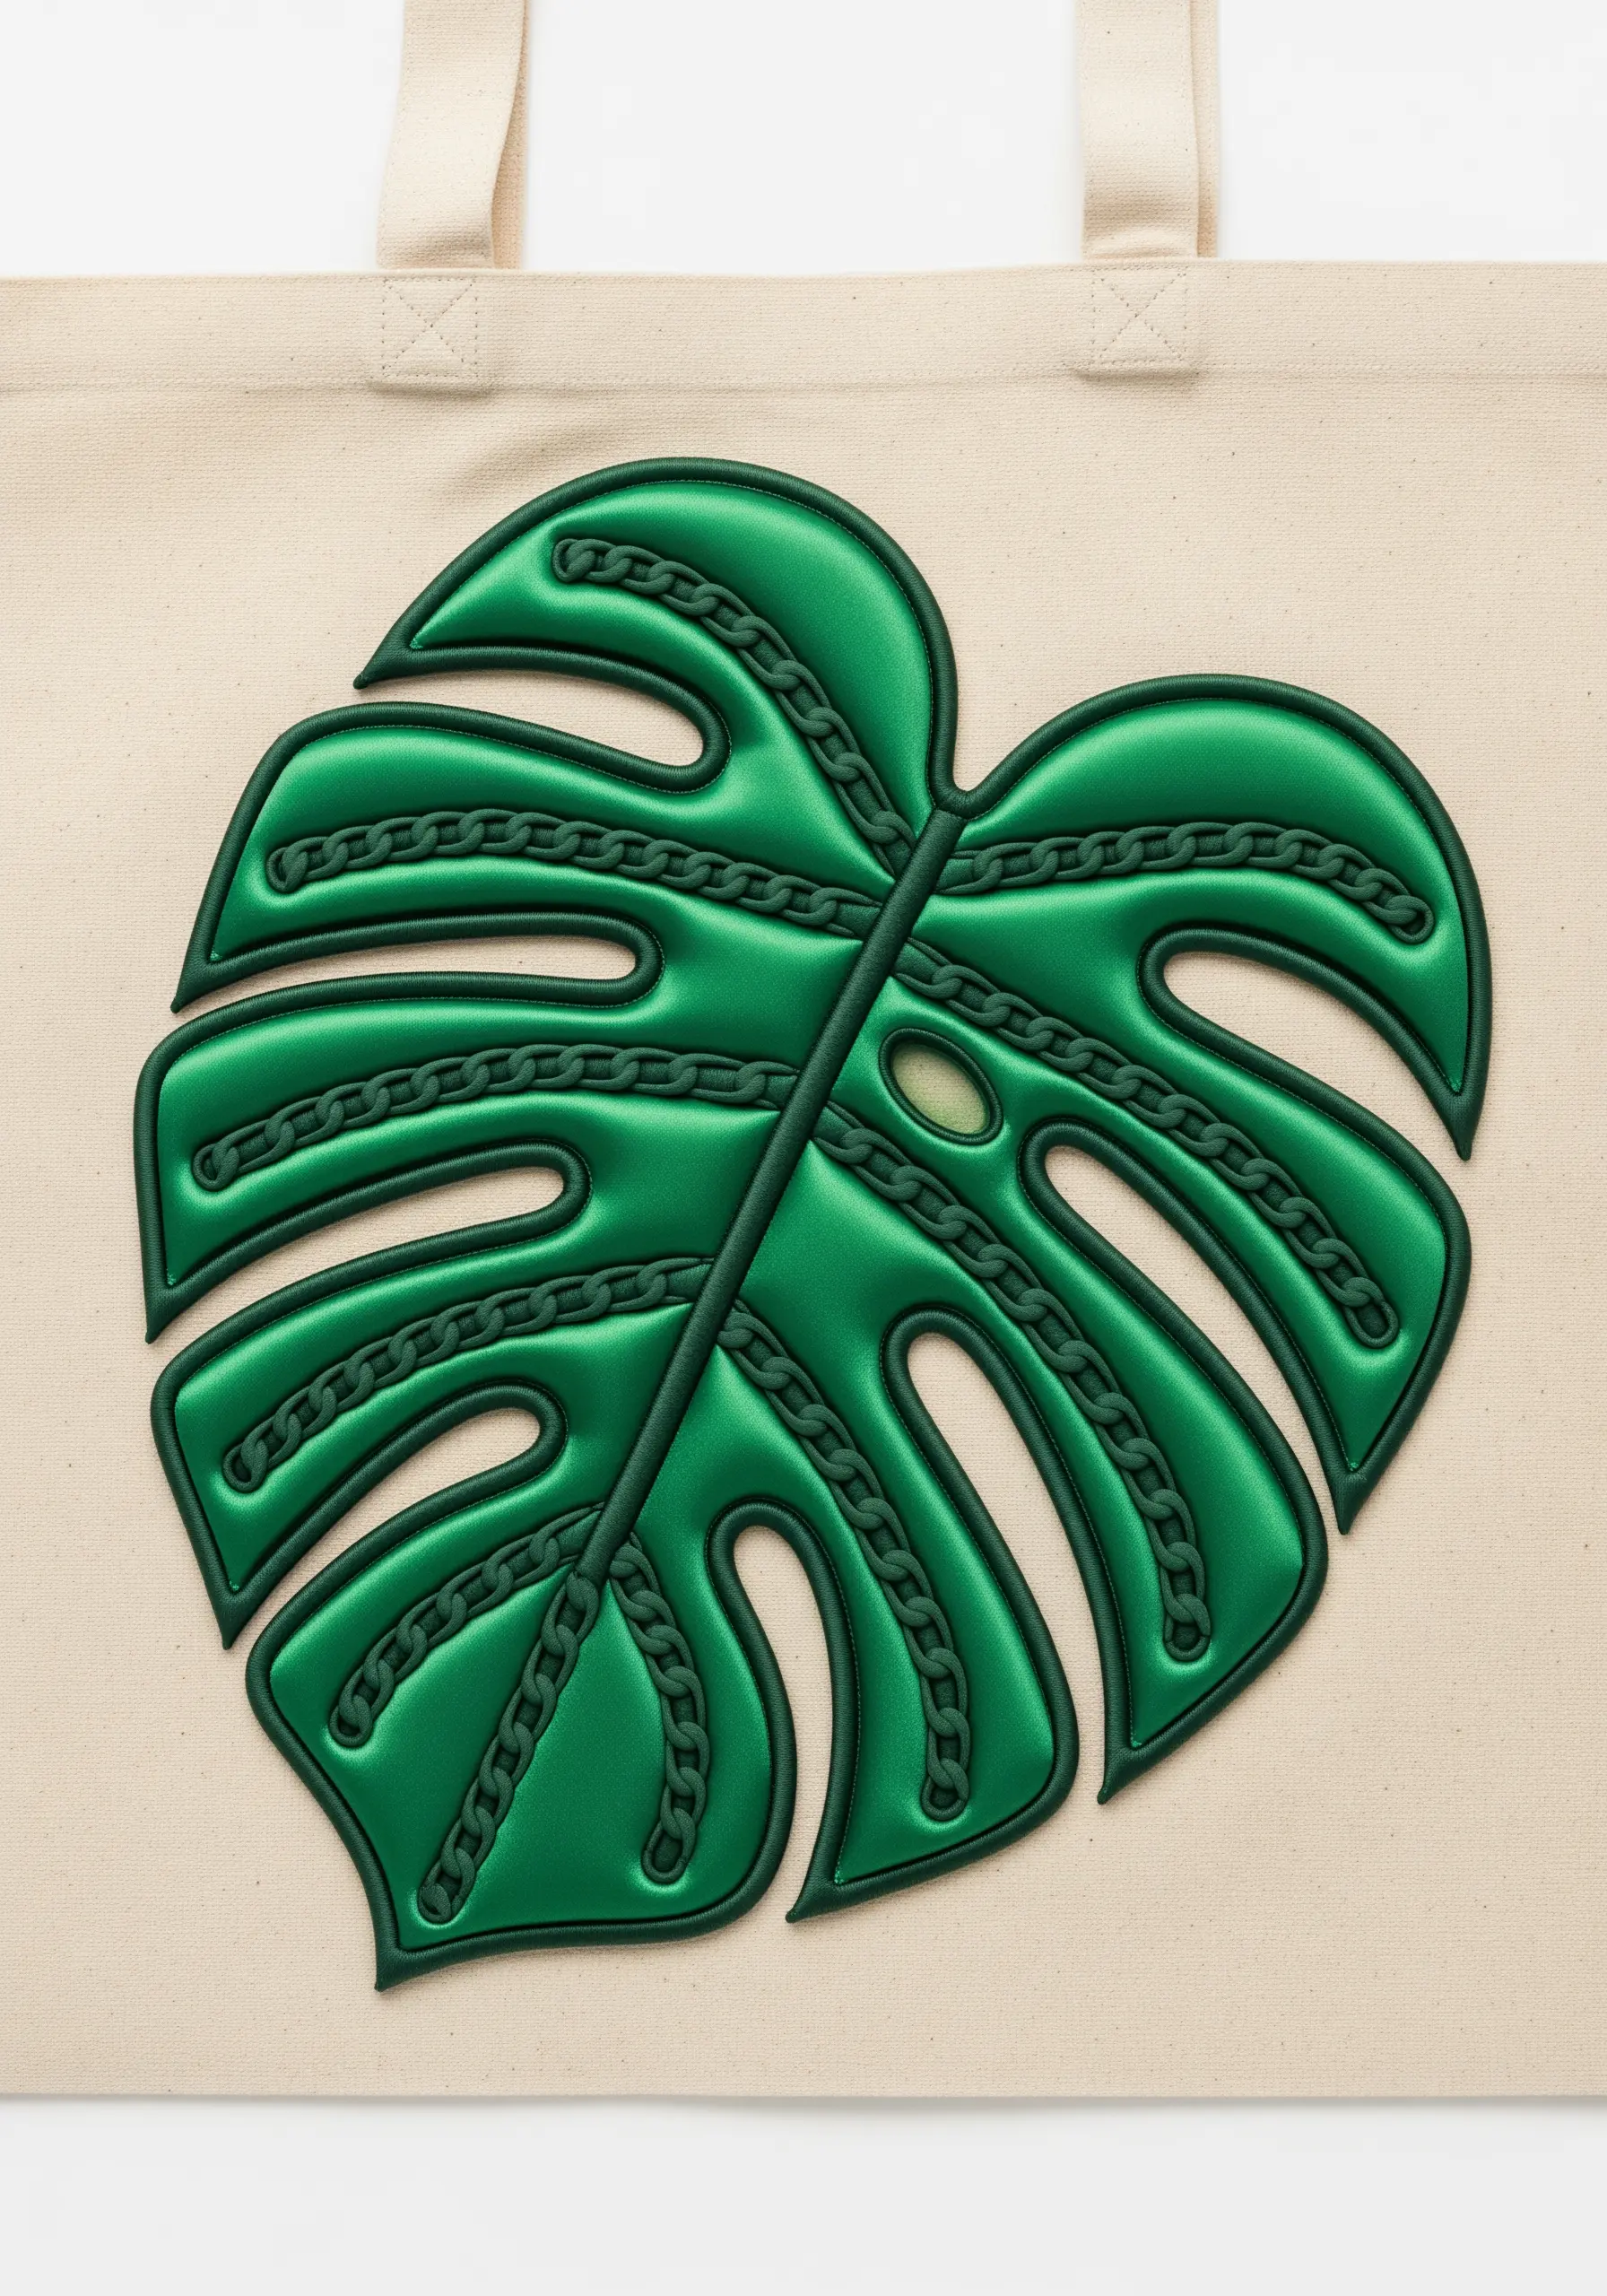
To achieve this bold, three-dimensional effect, you’re not just stitching on fabric; you’re stitching over a raised foundation.
Cut your monstera leaf shape from a thin piece of craft foam or felt and lightly glue it to your tote bag.
Work your satin stitches over this padded layer, pulling the thread taut enough to hug the shape’s curves but not so tight that it puckers the canvas.
The subtle chain stitch details are added last, providing a secondary texture that contrasts beautifully with the smooth, glossy finish of the satin stitch.
This method transforms a simple graphic into a tactile, high-impact design element.
2. Create a Celestial Field with French Knots
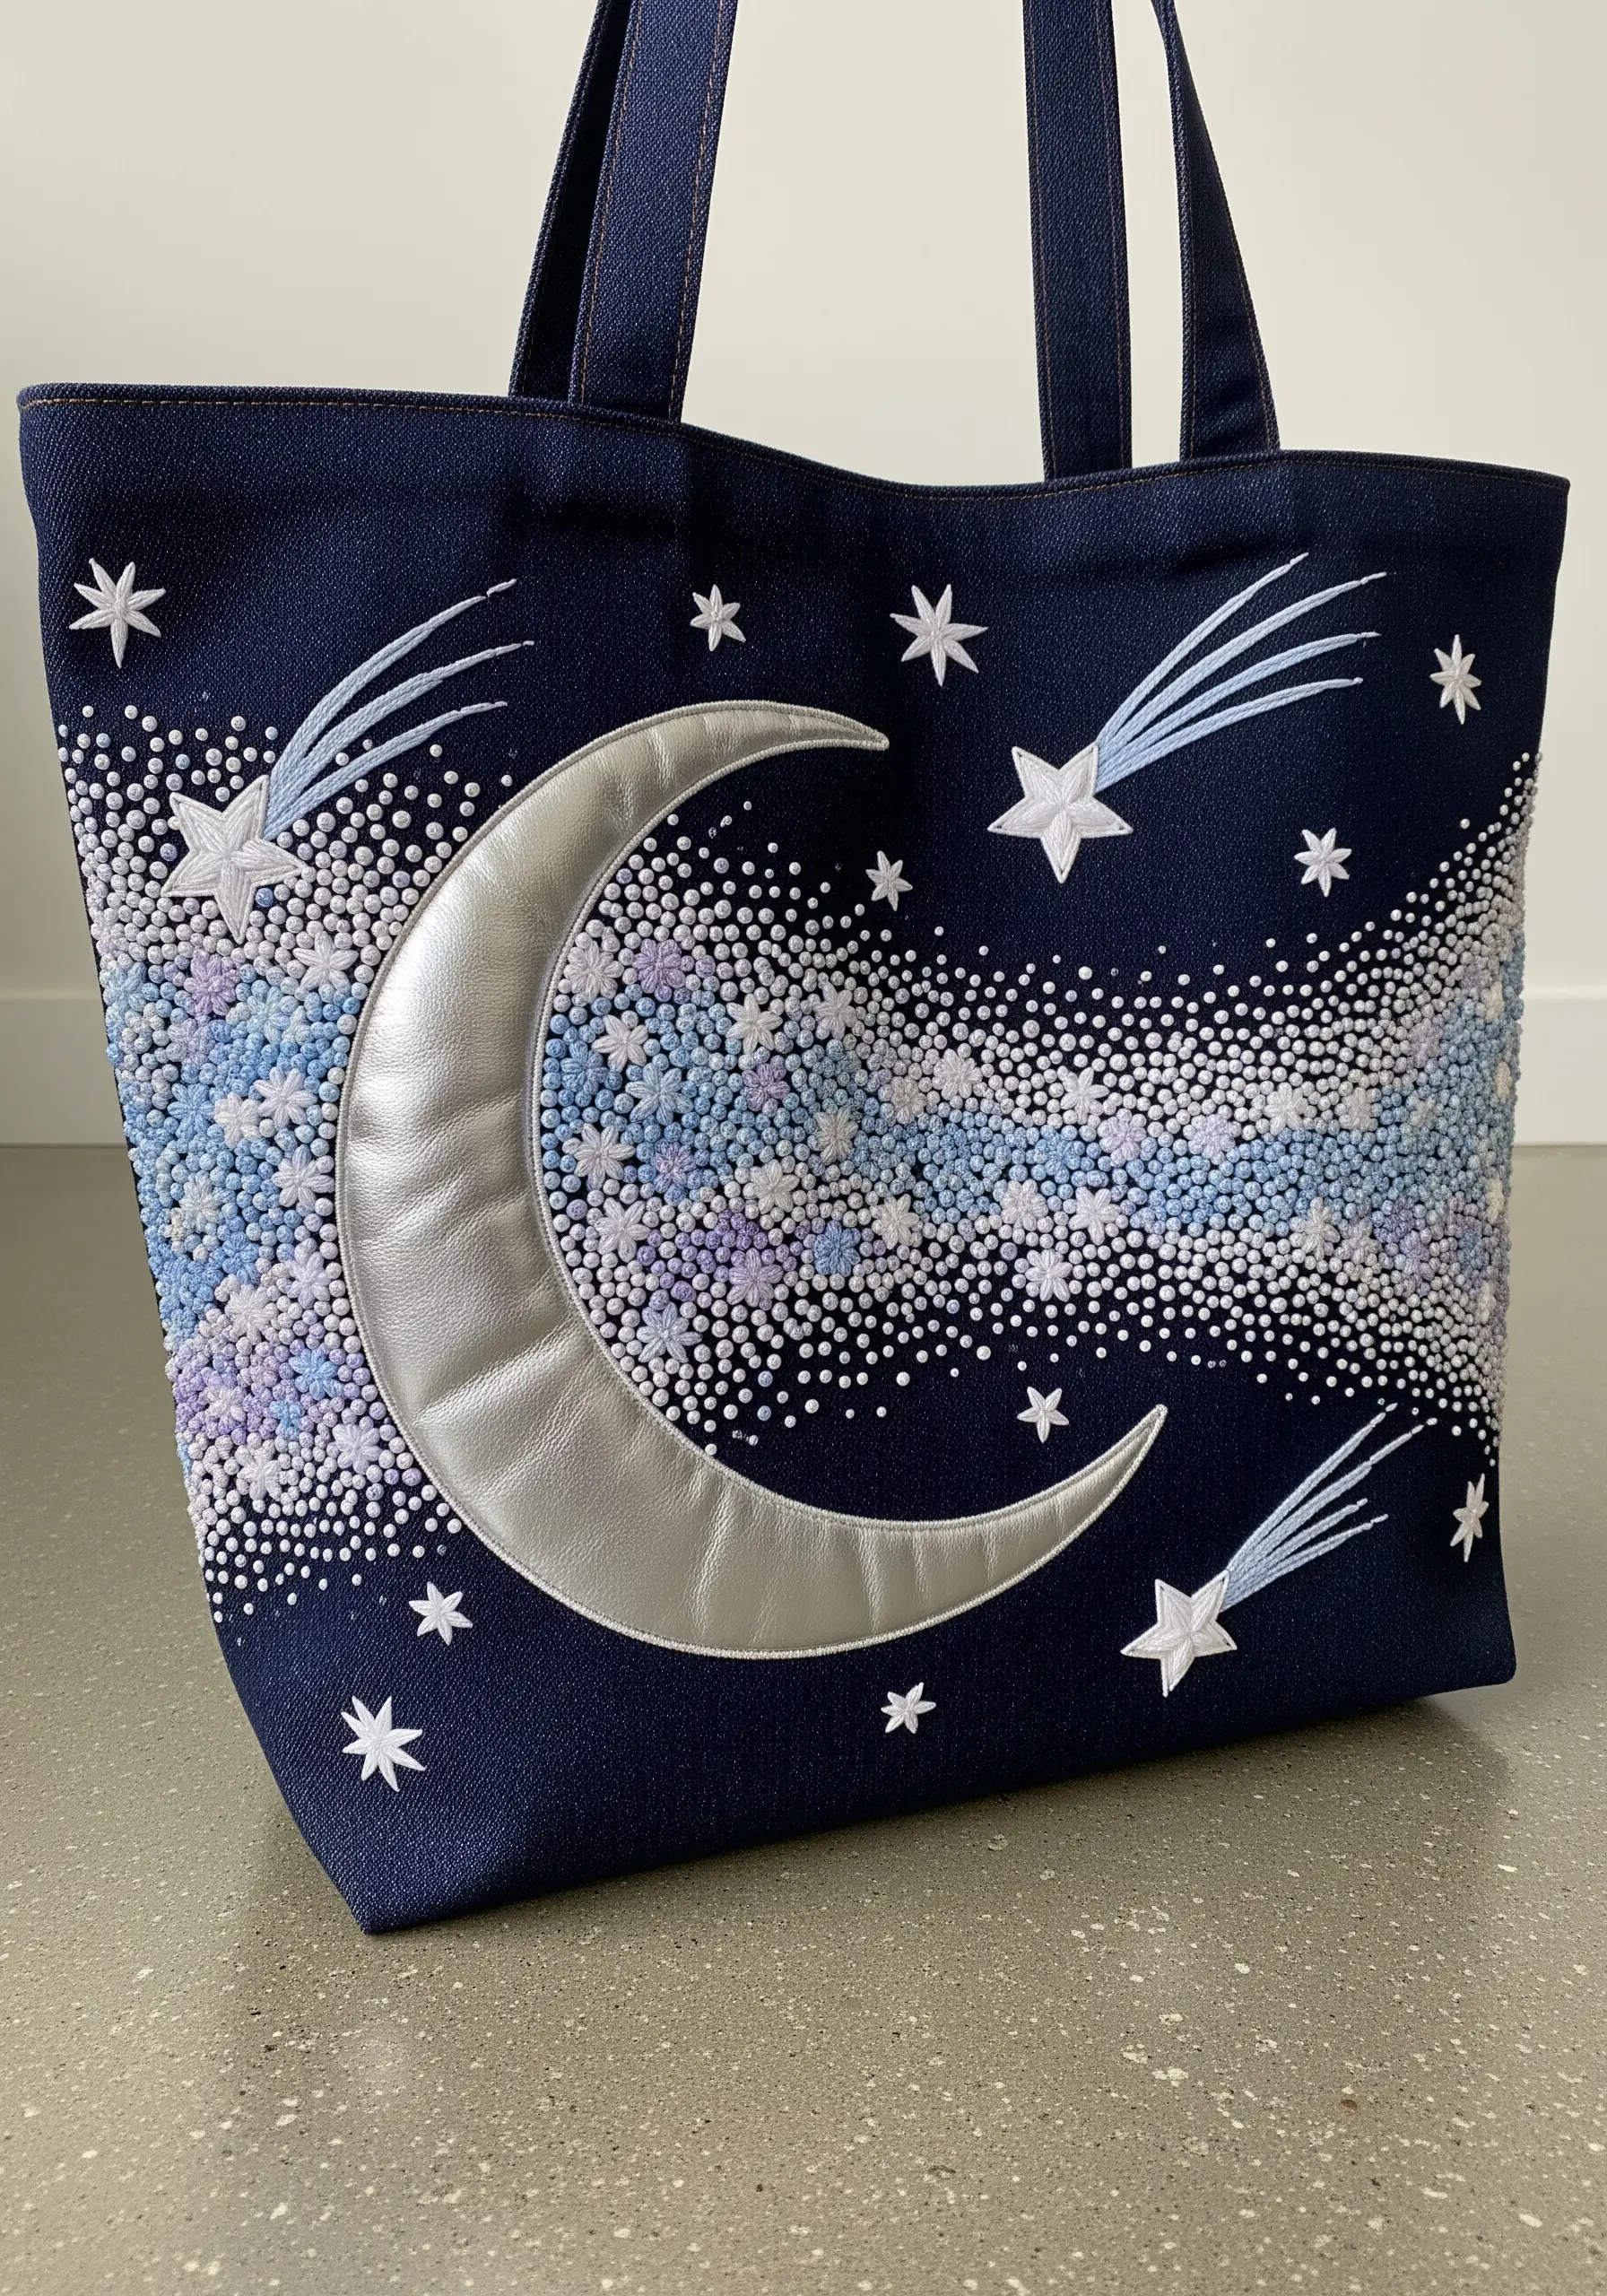
Combine appliqué with textural stitching to build a scene with incredible depth.
First, secure a piece of metallic faux leather for the moon, outlining it with a clean backstitch to create a sharp edge.
Then, fill the surrounding space with a dense galaxy of French knots, using two to three strands of floss.
Vary the number of times you wrap the thread around the needle (once for small stars, twice for larger ones) to create a dynamic, uneven texture that mimics a starry cloud.
This contrast between the smooth appliqué and the granular knots makes the entire design feel more alive.
3. Achieve Realism with Thread Painting
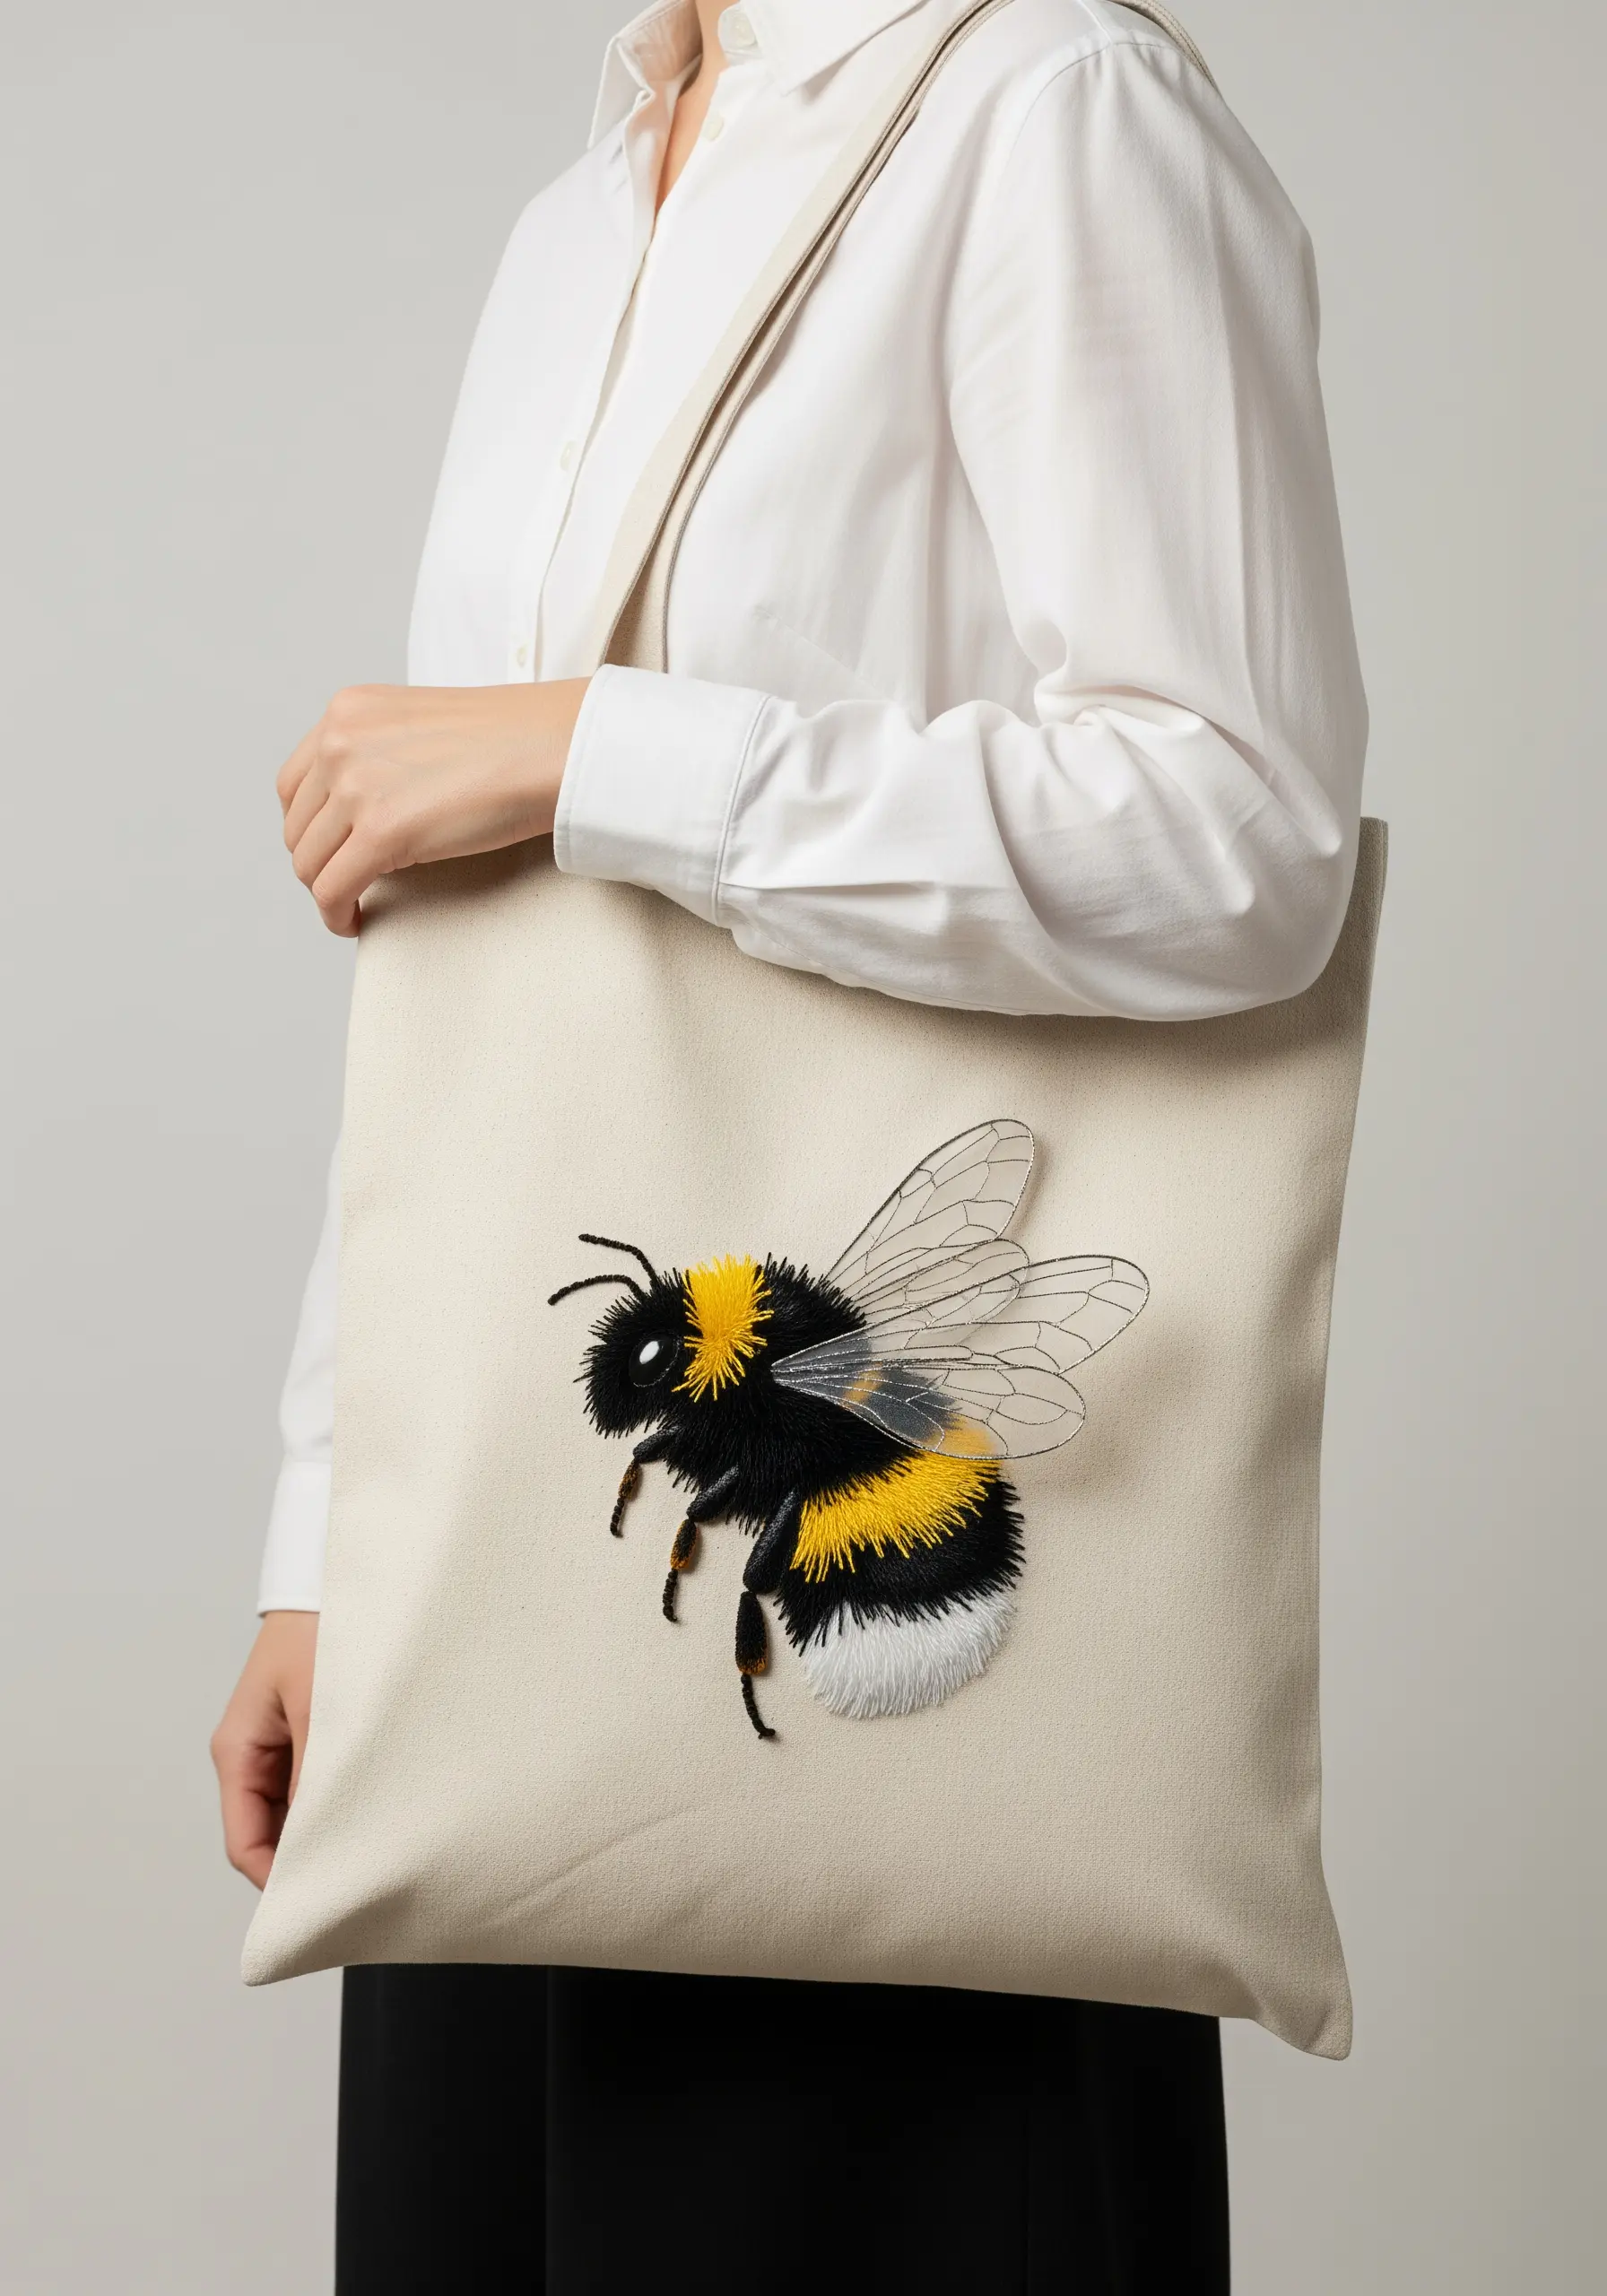
Bring a simple bee to life using the long-and-short stitch, a technique also known as thread painting.
To create the soft, fuzzy texture of the bee’s body, use a single strand of floss and blend shades of yellow, black, and white seamlessly.
Vary the direction and length of your stitches to follow the natural contours of the bee’s form, which creates the illusion of light and shadow.
For the delicate wings, switch to a single strand of a light gray or semi-translucent thread and use sparse outline stitches to suggest transparency without overwhelming the design.
4. Define Graphic Shapes with Couching
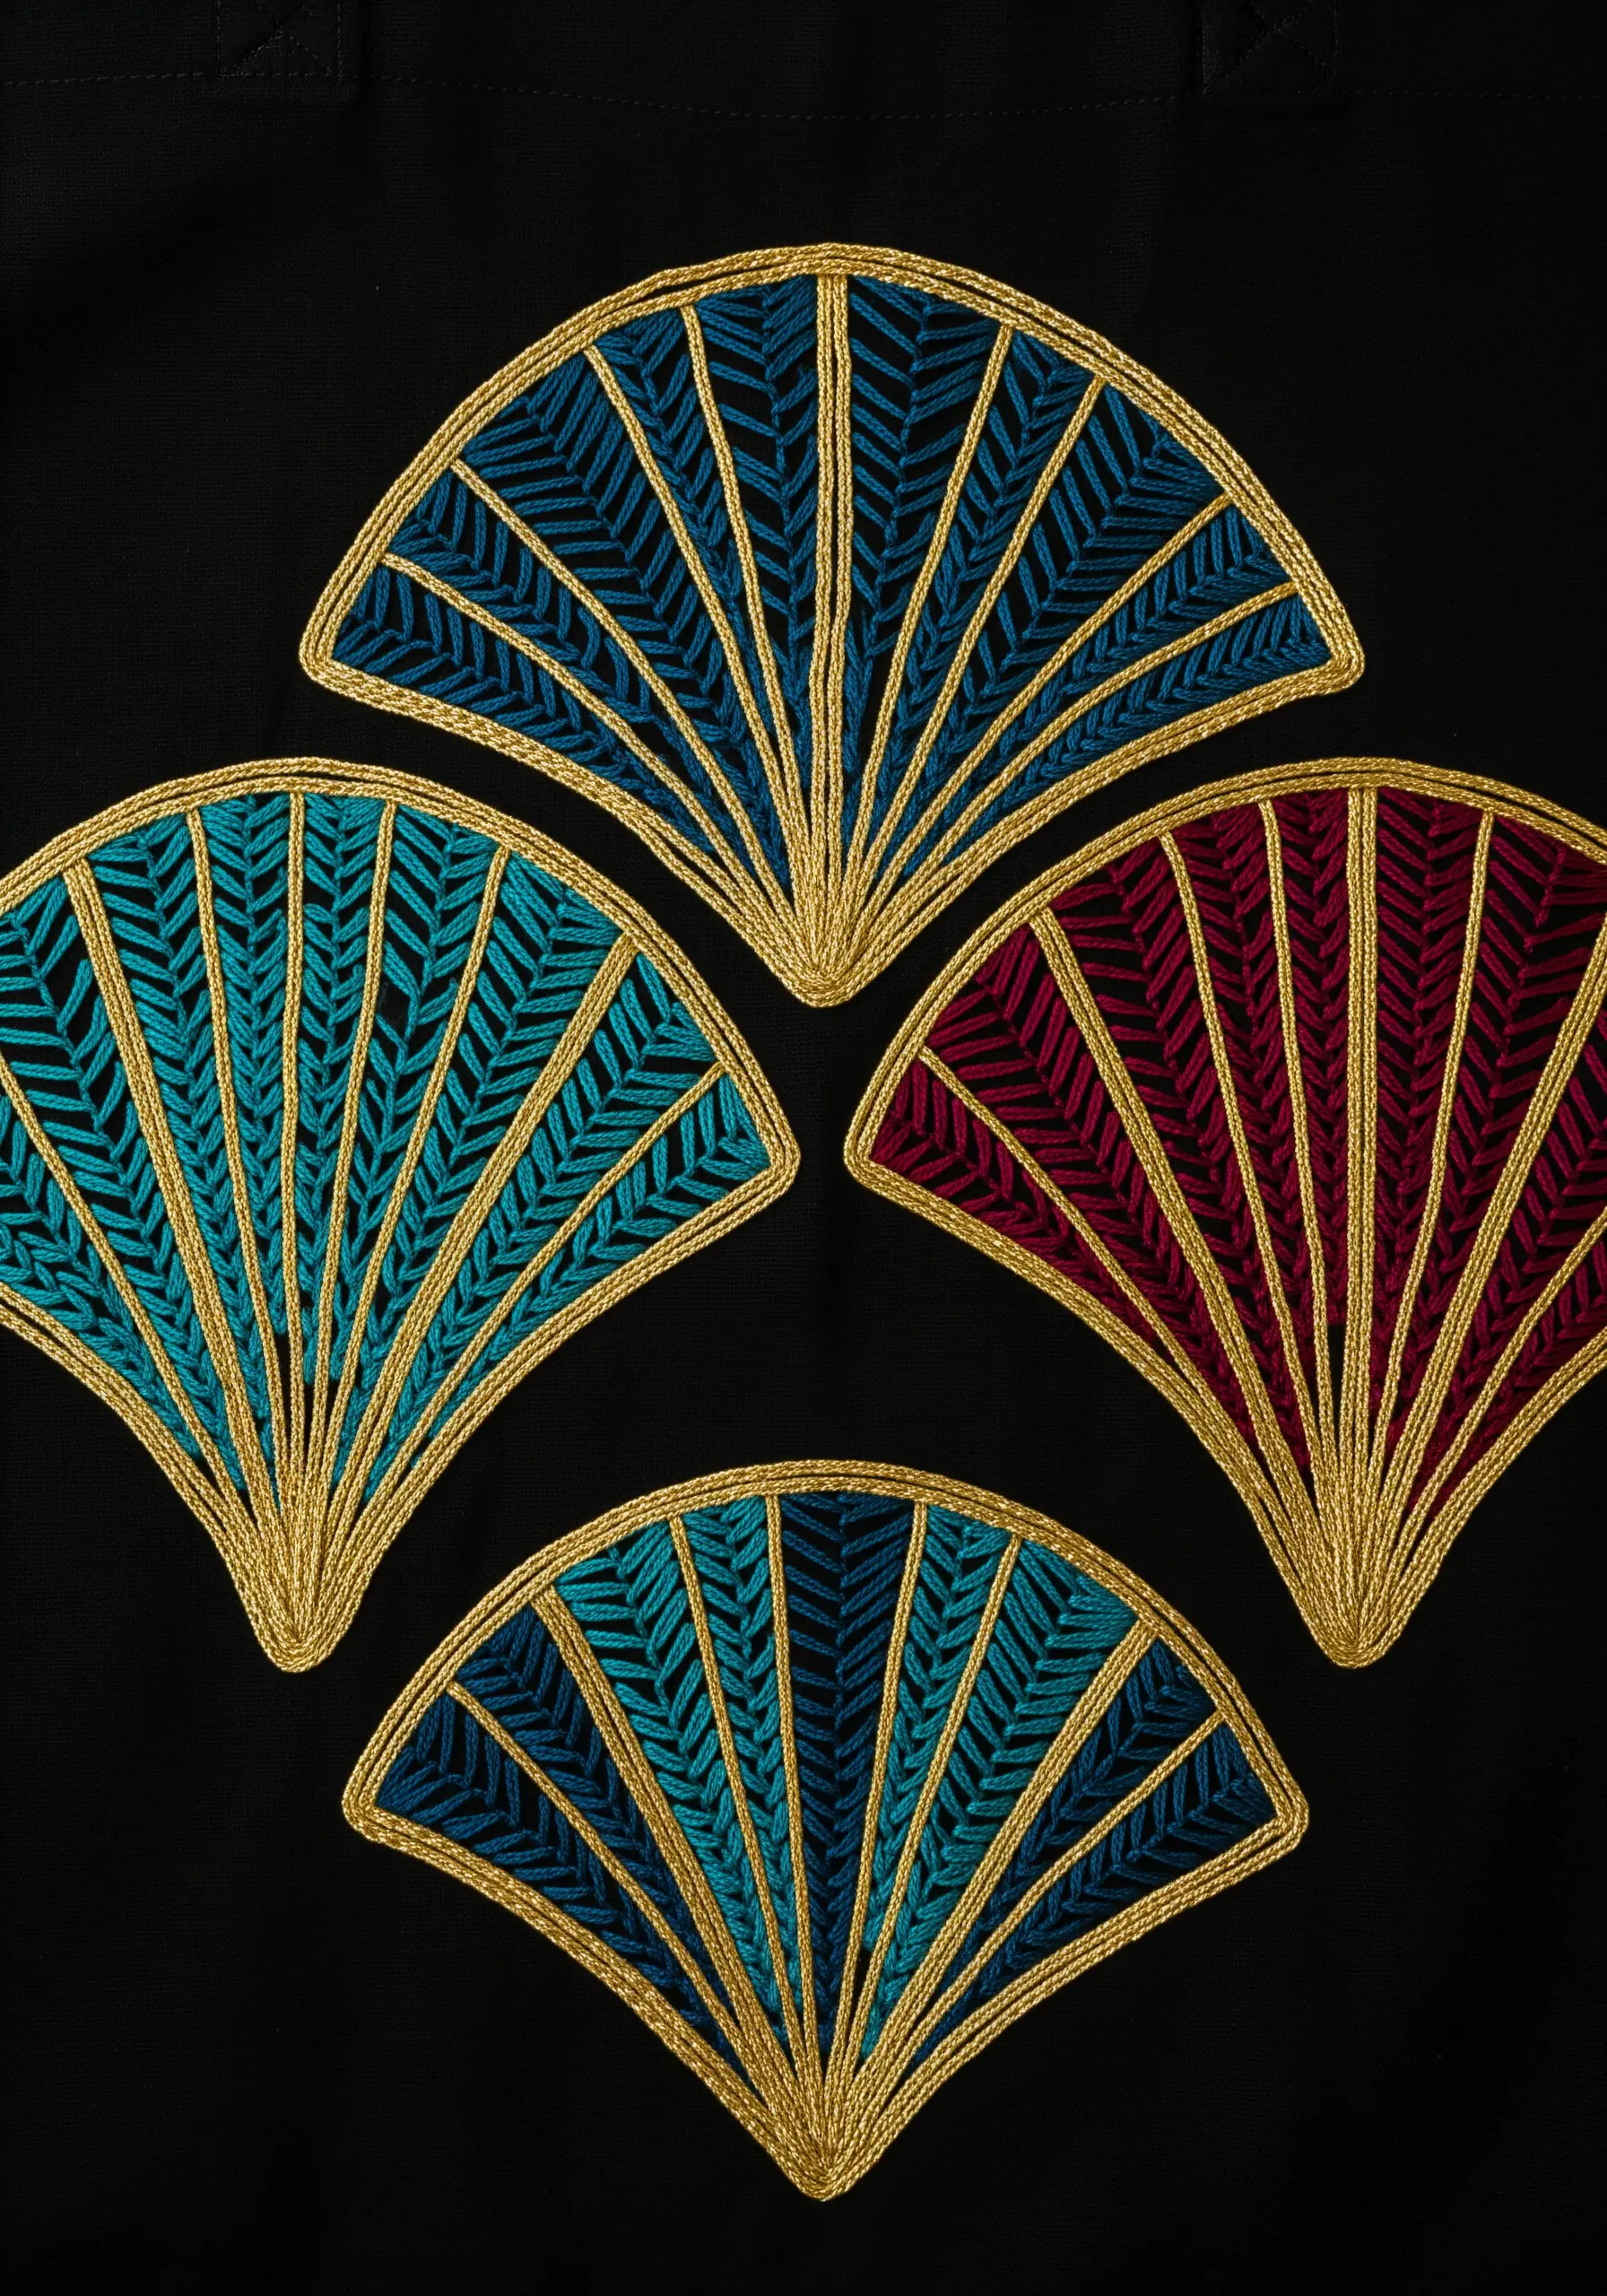
For crisp, unwavering outlines on geometric patterns, couching is your most reliable technique.
Lay down a thick cord or several strands of metallic floss along your design line, then use a second, finer thread to tack it down with small, perpendicular stitches.
This method produces a perfectly uniform, raised border that satin stitch alone cannot achieve, giving your work a clean, professional finish.
Fill the inner sections with a disciplined brick stitch or angled satin stitch, which adds a sense of order and complements the bold outlines.
5. Build Organic Texture with Raised Fishbone Stitch
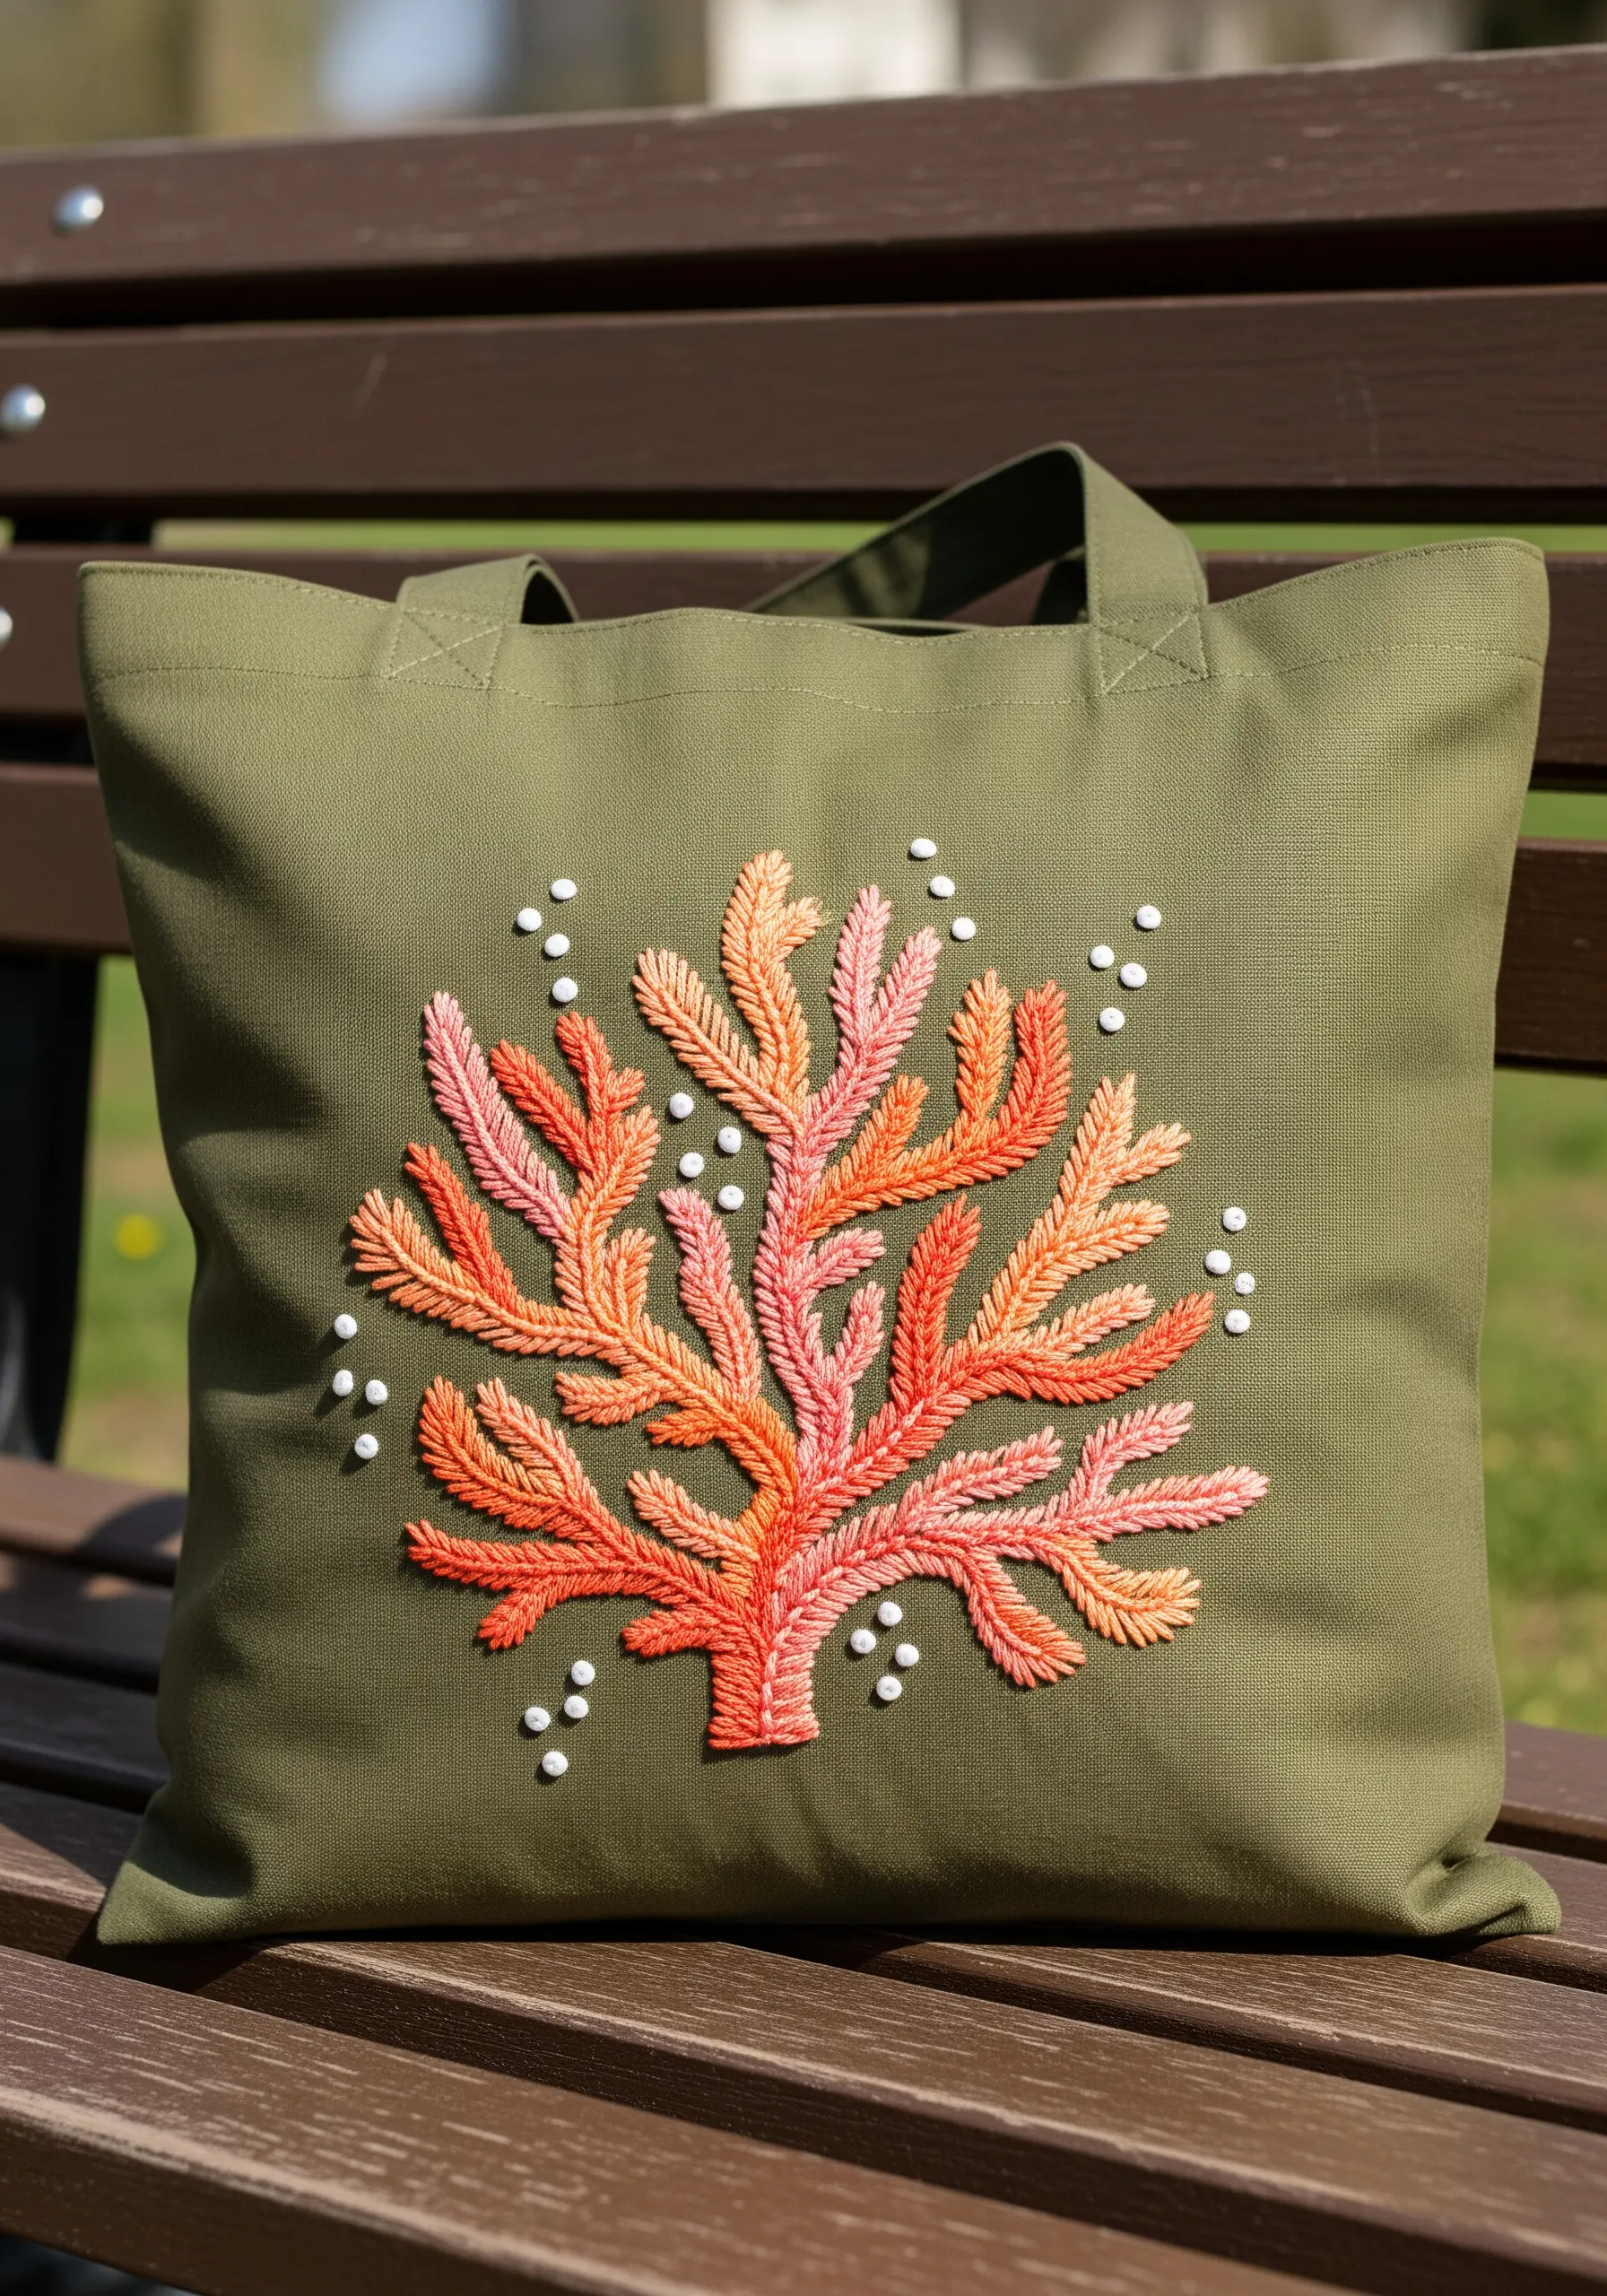
Give botanical elements like coral or ferns a natural, raised texture by using a padded fishbone stitch.
Instead of stitching flat against the fabric, work your fishbone stitches more loosely and densely, allowing the threads to build upon each other.
Use a variegated thread or switch between two similar shades (like coral and orange) to create subtle color gradients that enhance the organic feel.
The scattered French knots add a final touch of detail, like bubbles or sea spray, balancing the composition with points of interest.
6. Master Petal Shading with Directional Satin Stitch
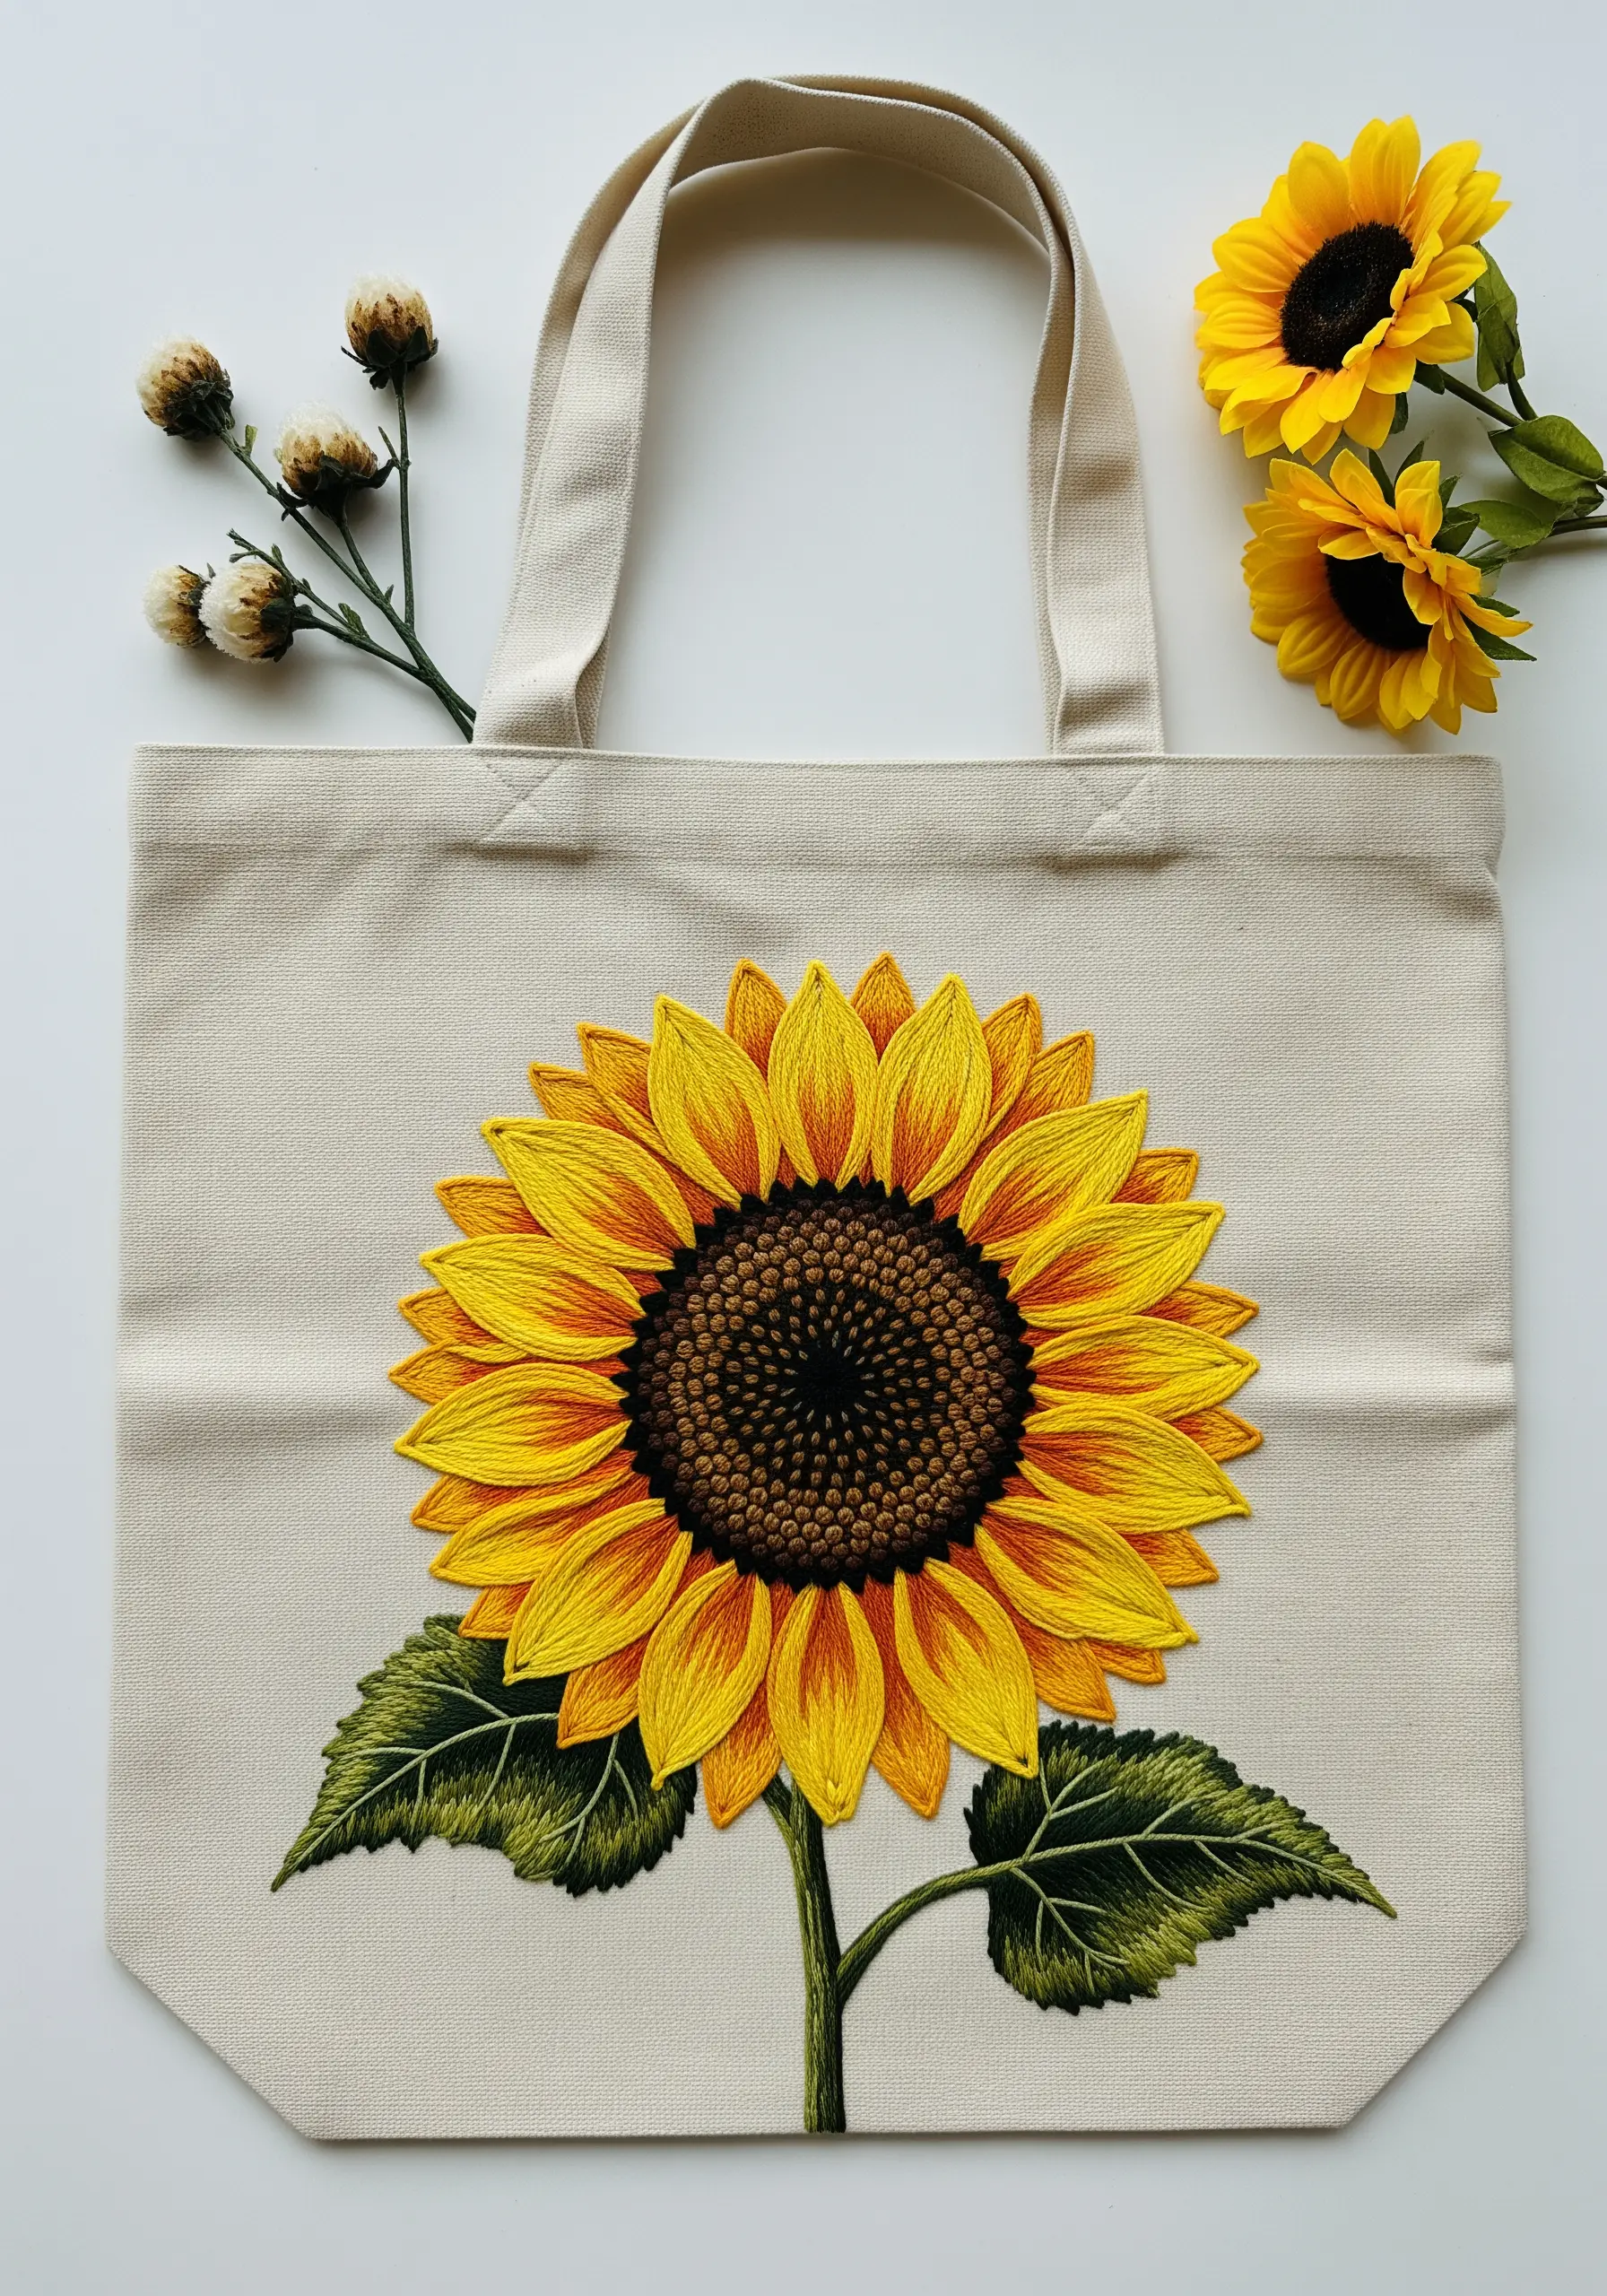
Create realistic sunflower petals by paying close attention to the direction of your satin stitches.
Instead of filling each petal with uniform, straight stitches, angle them to radiate from the center, following the natural curve of the petal.
Introduce at least three shades of yellow and a touch of orange or brown near the base to create a gradient that suggests depth and sunlight.
For the center, a dense field of French knots or colonial knots in dark brown and black provides a wonderfully tactile contrast to the smooth, silky petals.
7. Sculpt Plush Lettering with Turkey Stitch
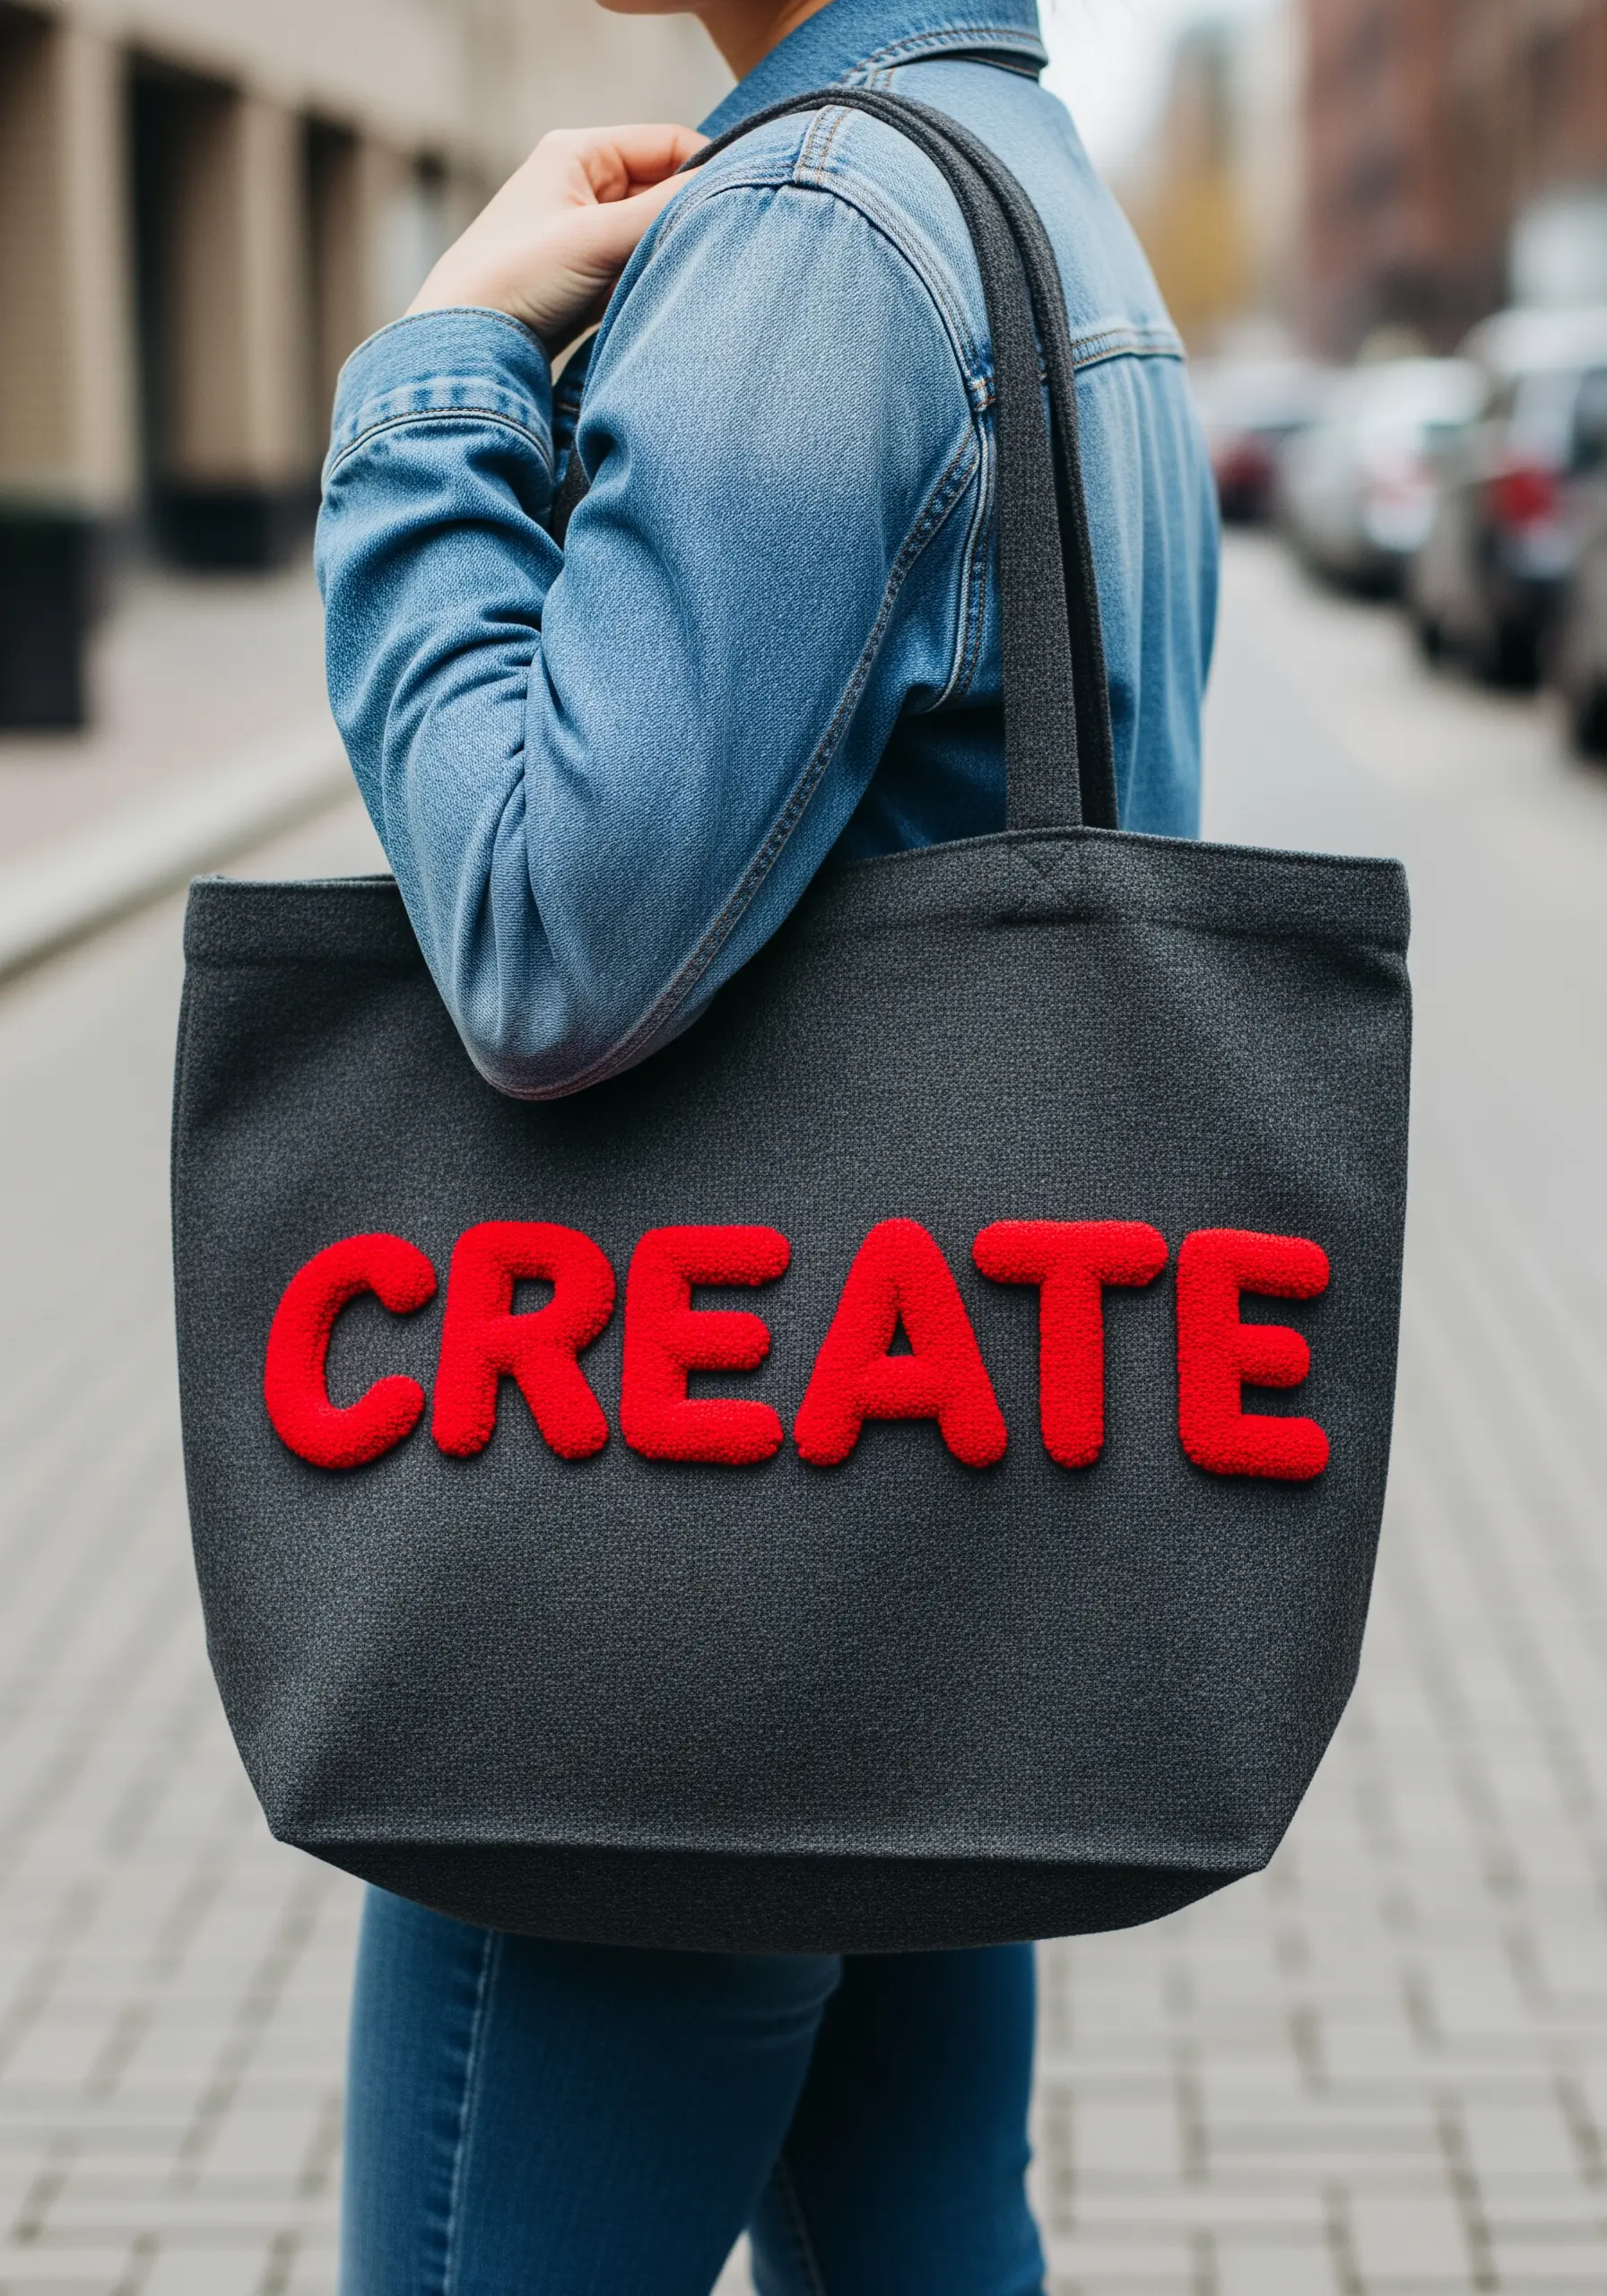
For typography that literally stands out, the turkey stitch is your best friend.
This technique involves creating a series of loops, securing them at the base, and then snipping them open to form a dense, brush-like pile.
To get a clean, block-letter shape, draw your outline precisely and fill it completely with loops before trimming.
Use a thick thread like crewel wool or all six strands of embroidery floss for maximum plushness. This stitch adds a playful, tactile quality that is perfect for tote bag embroidery quotes.
8. Form Delicate Buds with Bullion Knots
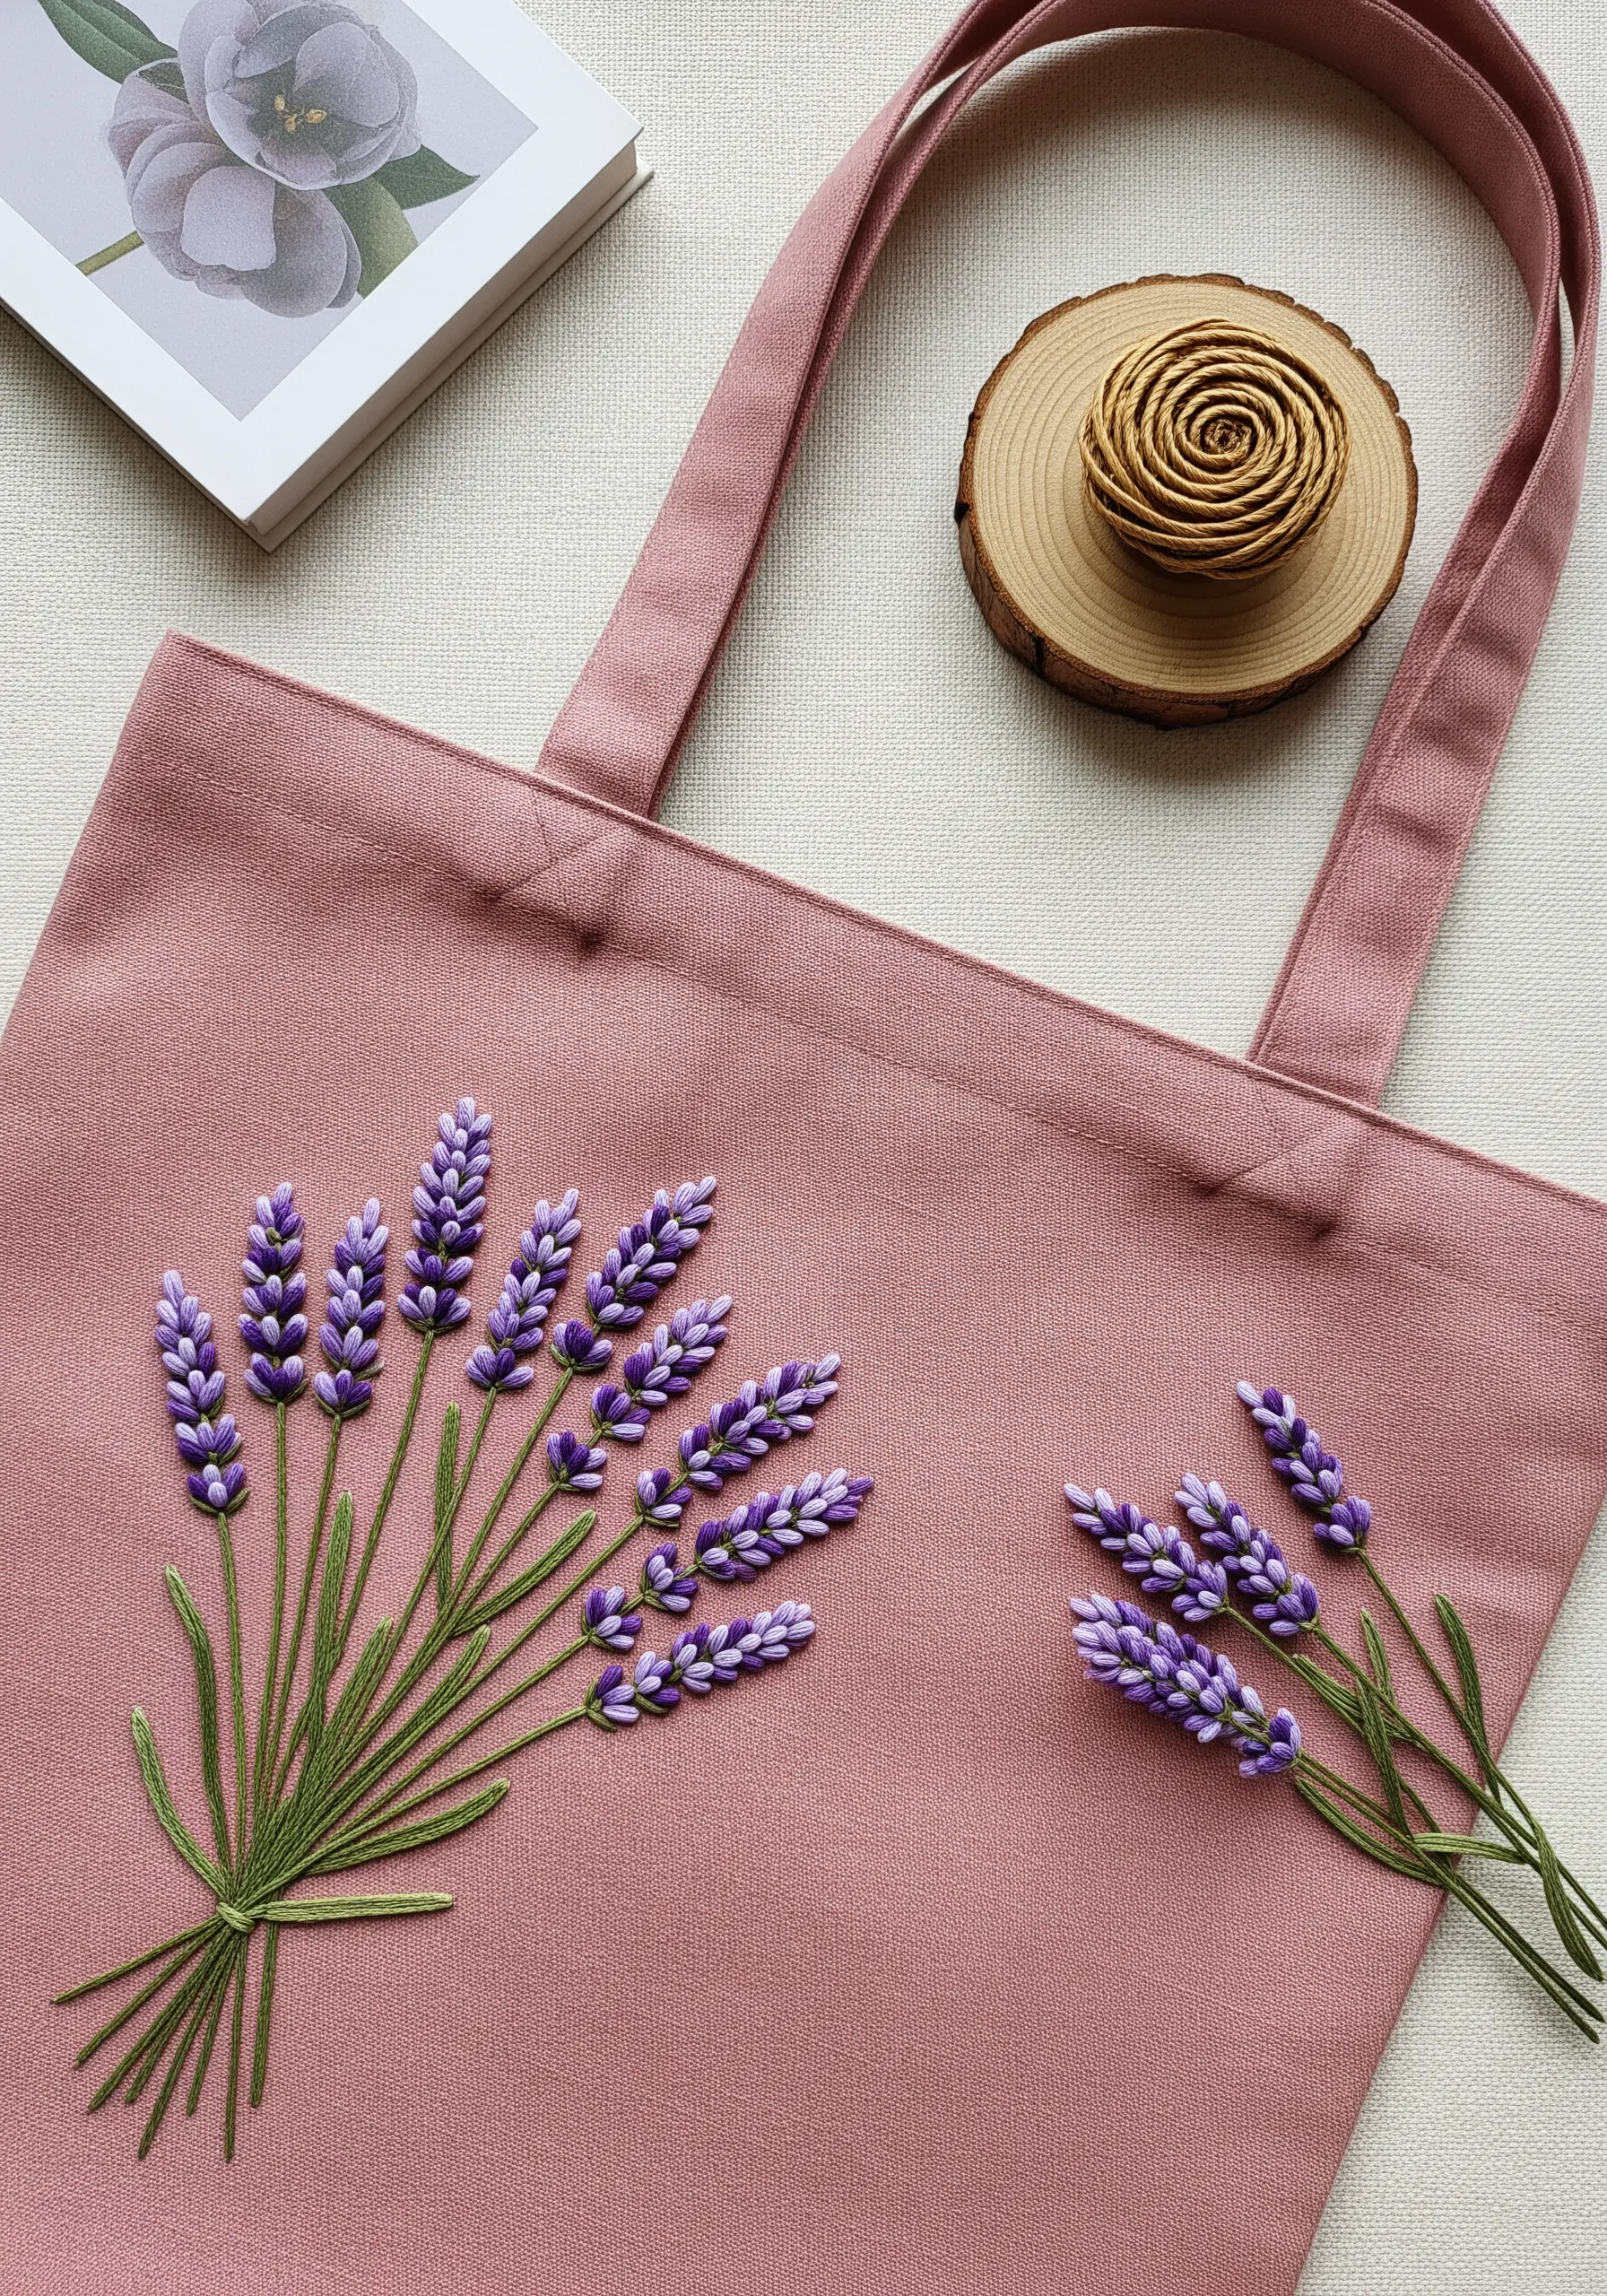
Create the iconic texture of lavender blossoms using carefully placed bullion knots.
To make a bullion knot, wrap your thread multiple times around the needle before pulling it through the fabric, creating a small, raised coil.
For a realistic lavender sprig, vary the number of wraps and the angle of each knot, clustering them tightly at the top and spacing them out toward the stem.
Use a few shades of purple and lilac to add dimension, and connect them with delicate straight stitches for the stems, creating an elegant, gorgeous floral embroidery effect.
9. Create a Painted Look with Thread Blending
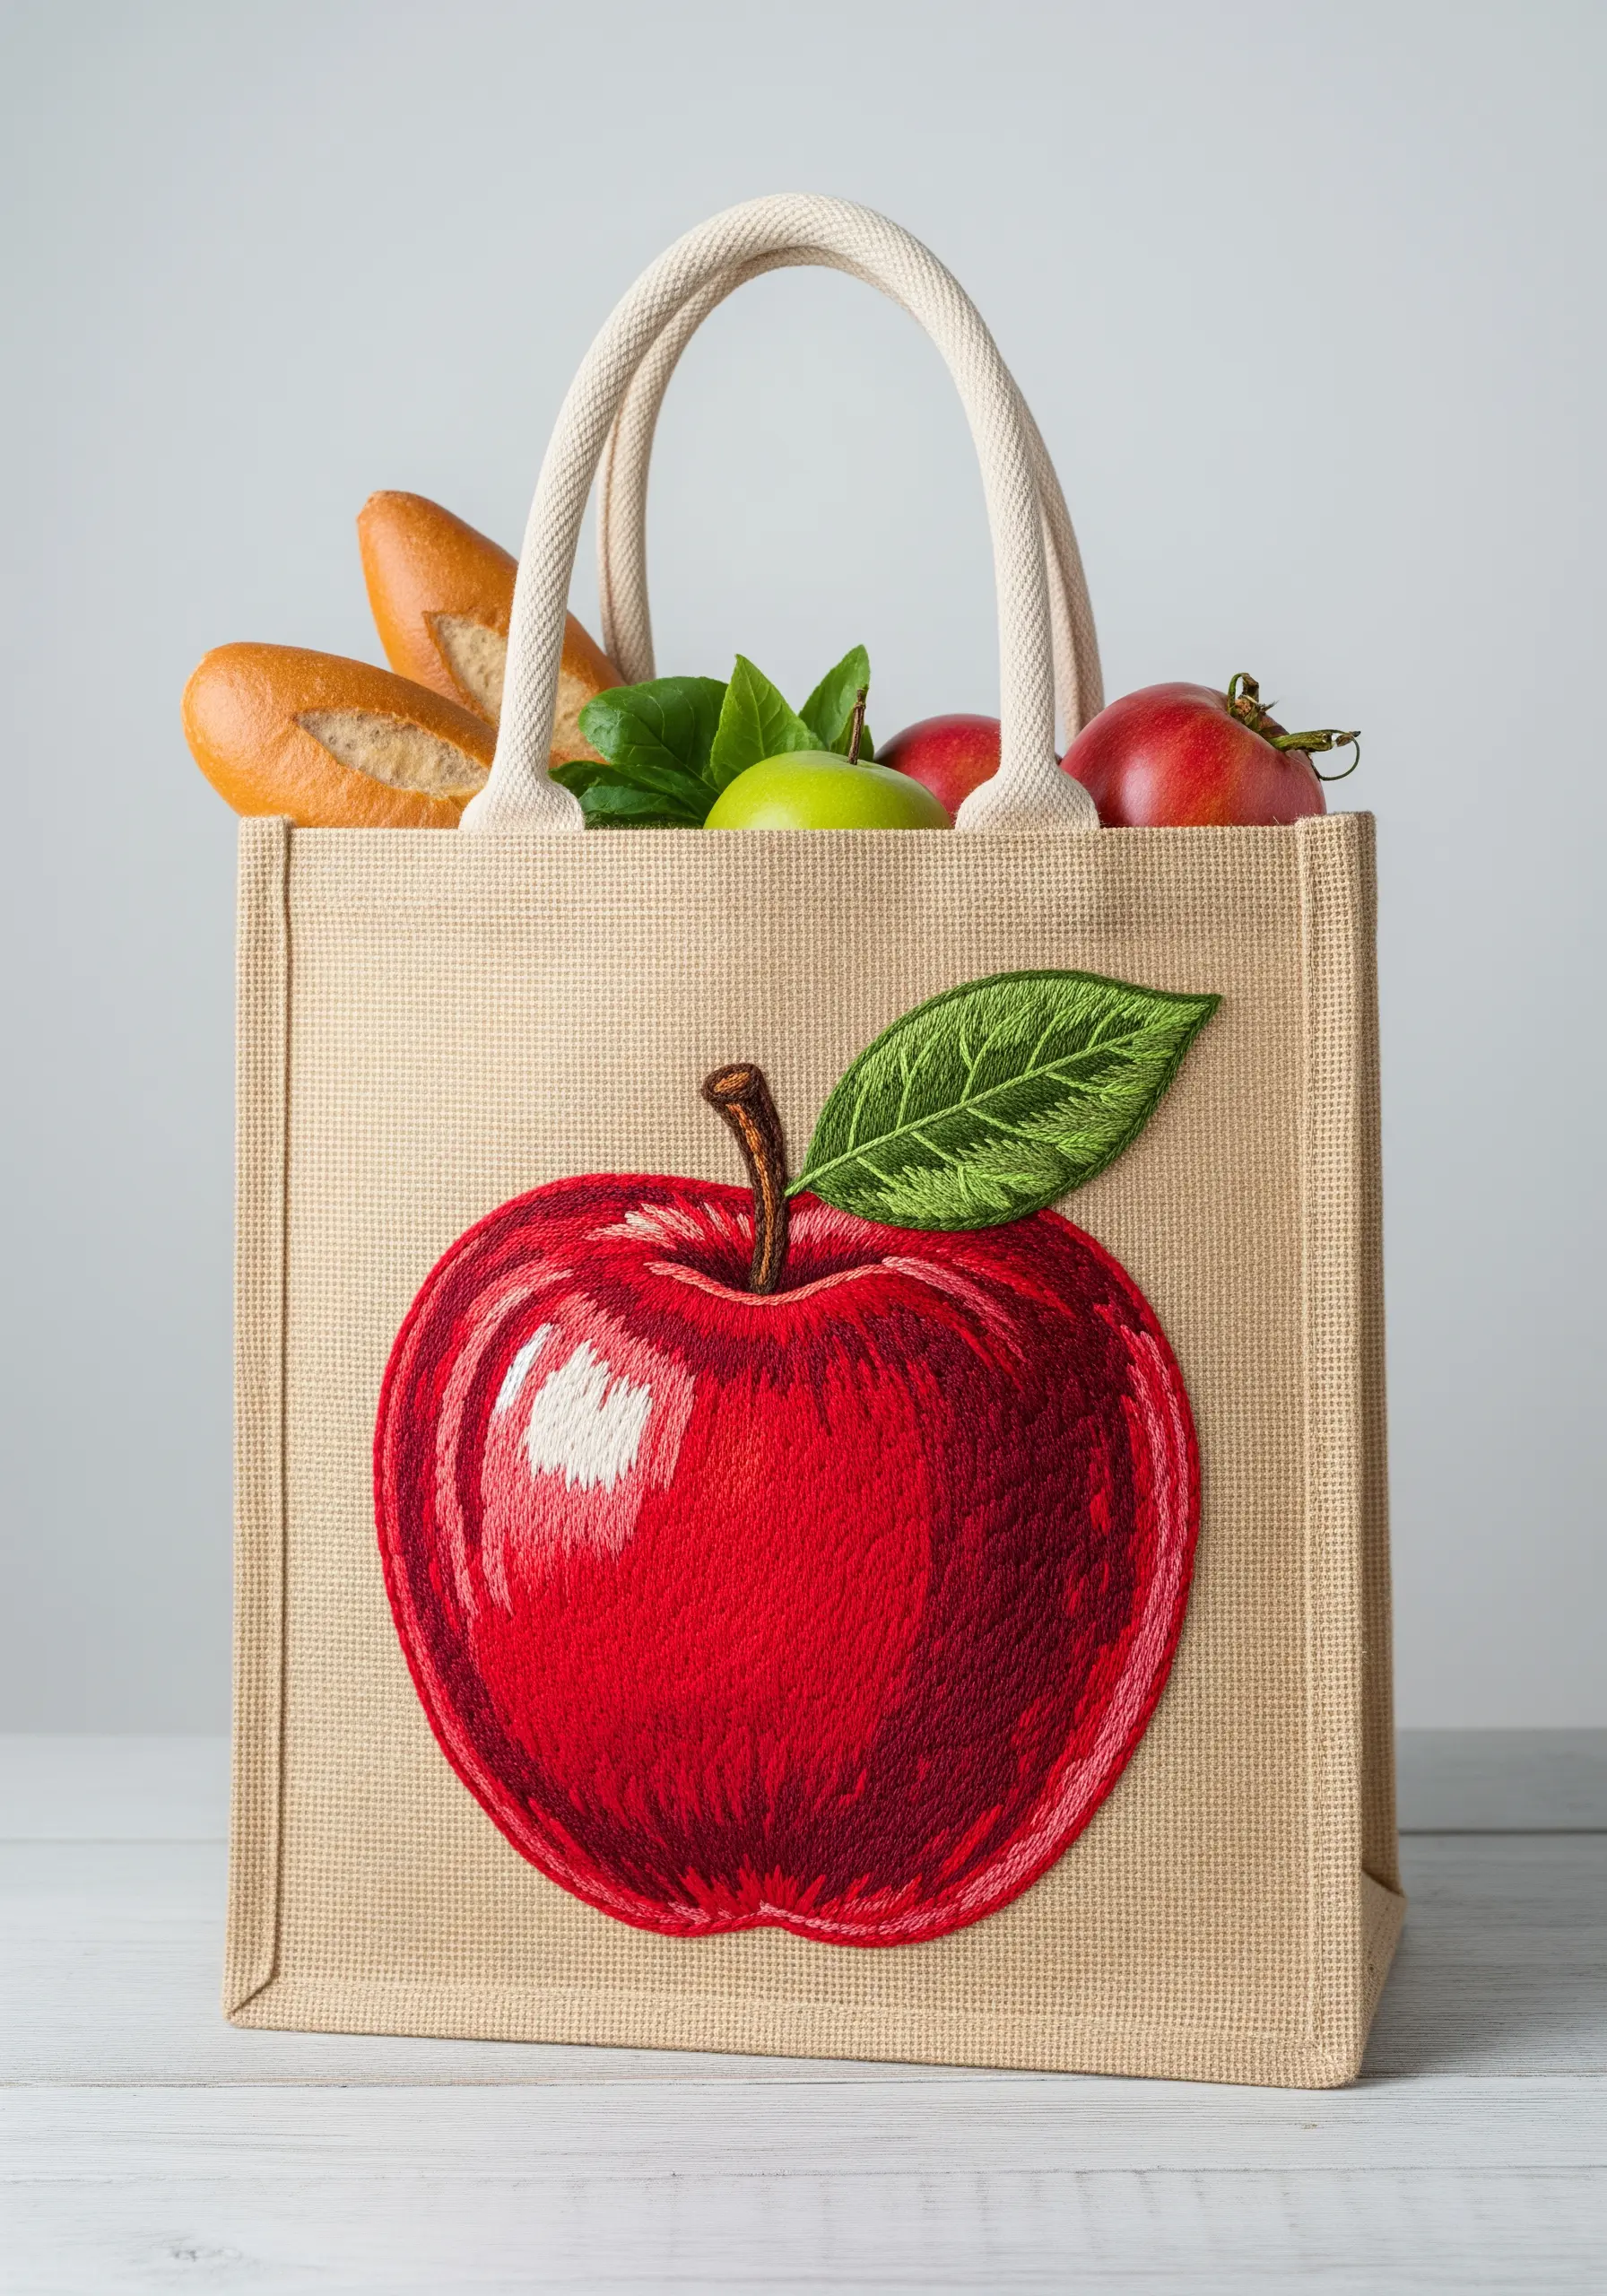
To give a simple shape like an apple a glossy, painted appearance, blend your colors using the long-and-short stitch.
Instead of blocking out solid colors, use at least four shades of red and work them into one another with overlapping stitches of varying lengths.
This smooths the transition between hues and creates the illusion of a curved, reflective surface.
Leave a small area for a highlight, filling it with white or a very pale pink, to complete the realistic, shiny effect. For the leaf, try using leaf vein stitch methods for extra detail.
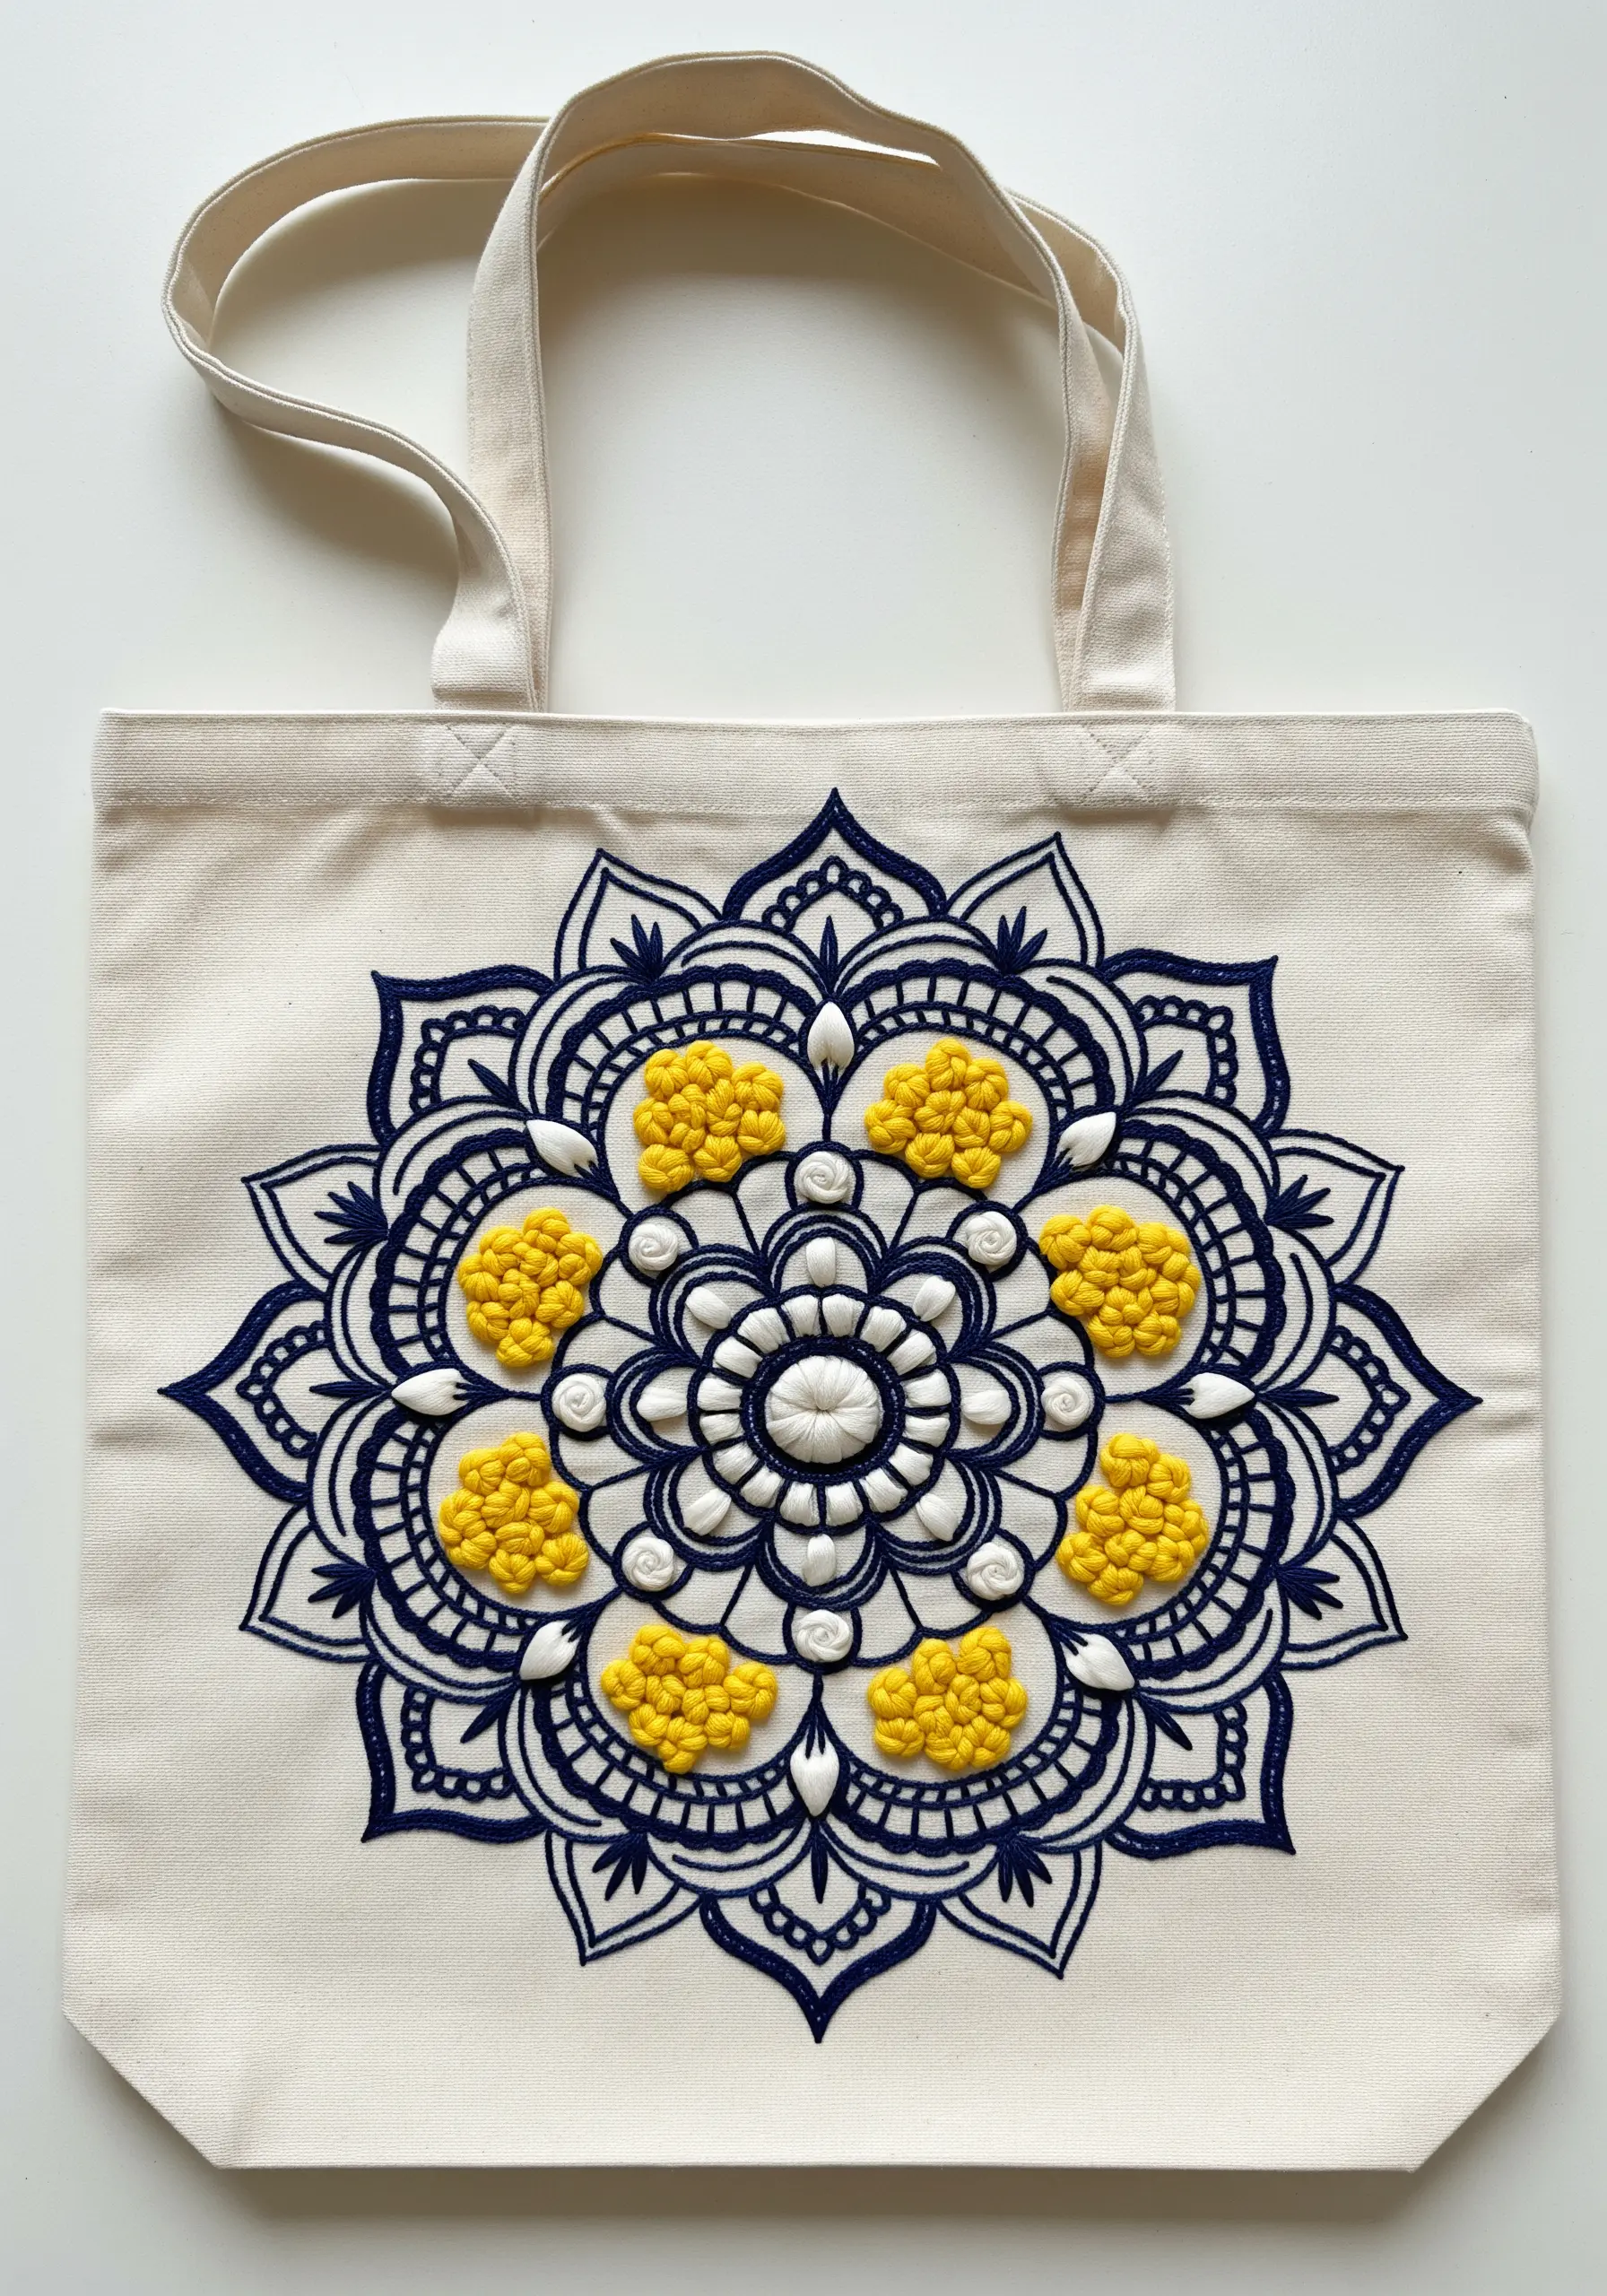
10. Explore a Sampler of Raised Textures
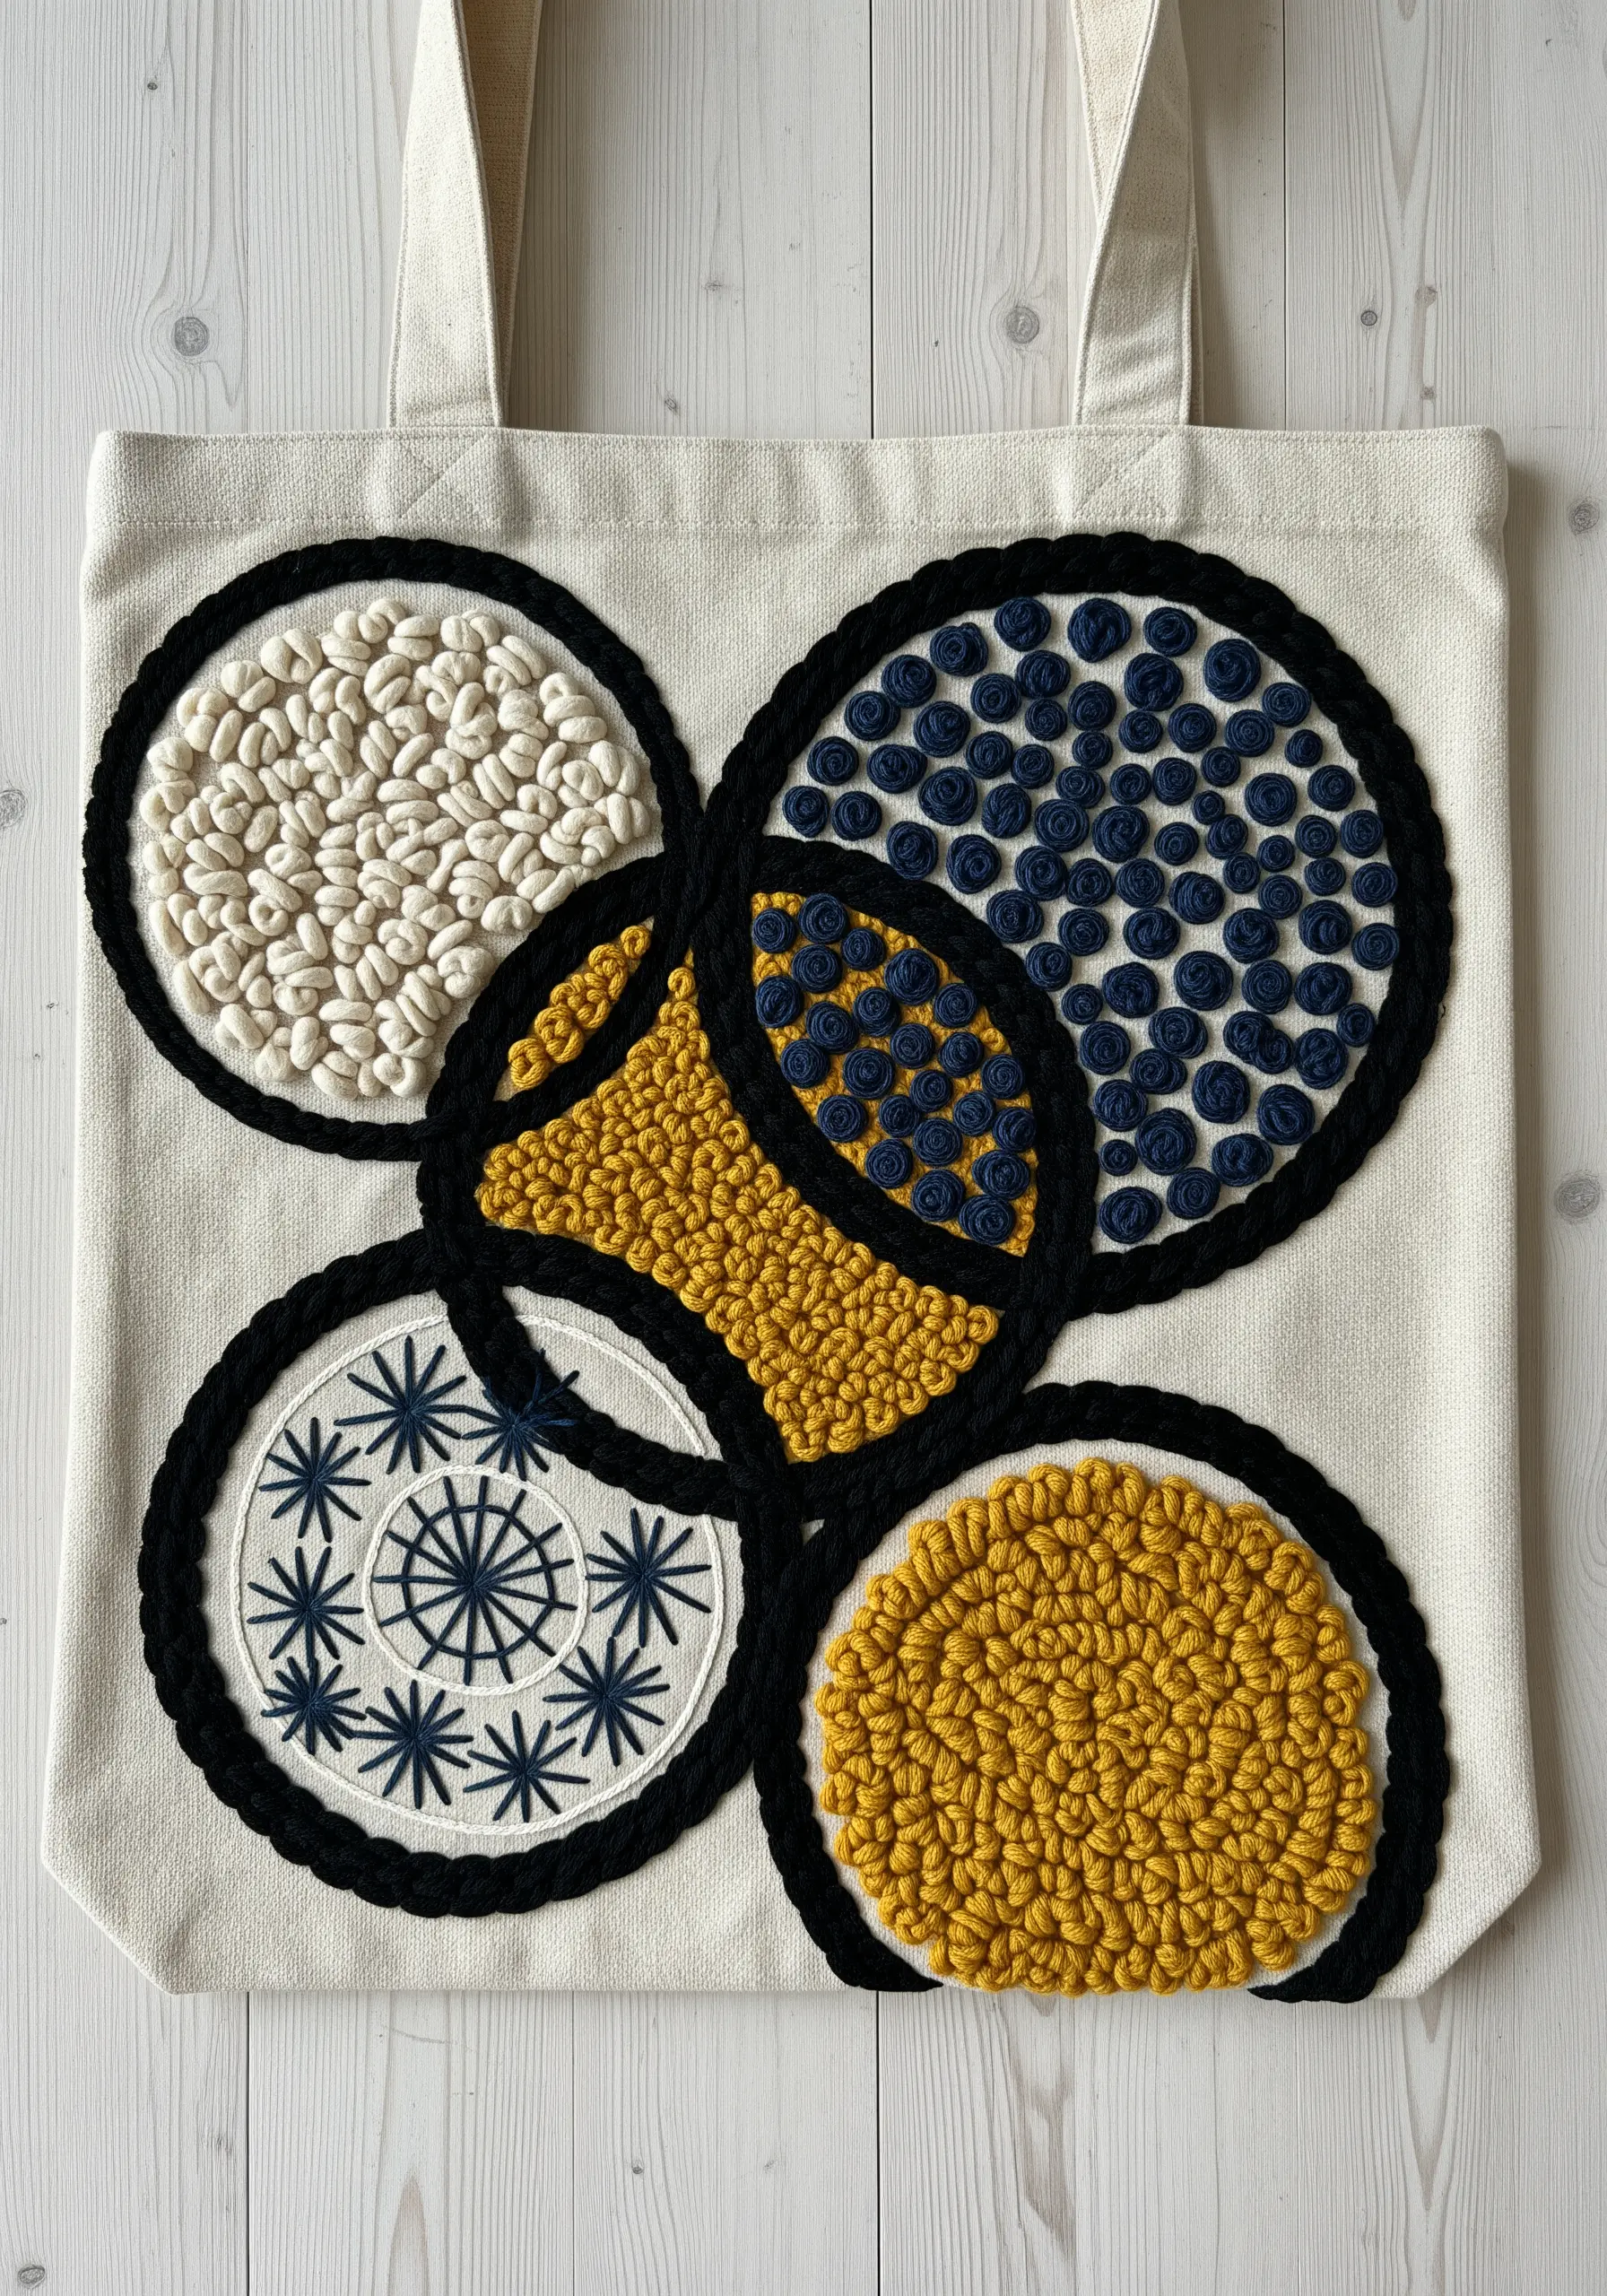
Turn a simple geometric design into a tactile showcase by filling each section with a different raised stitch.
Combine dense French knots, woven wheel stitches, padded satin stitch, and even simple straight-stitch patterns within bold, couched outlines.
This approach transforms a flat graphic into an engaging, multi-textured piece.
Using a limited color palette—here, cream, mustard, and navy—ensures the focus remains on the texture, preventing the design from feeling chaotic. This style is perfect for abstract embroidery patterns.
11. Layer Appliqué for Landscape Depth
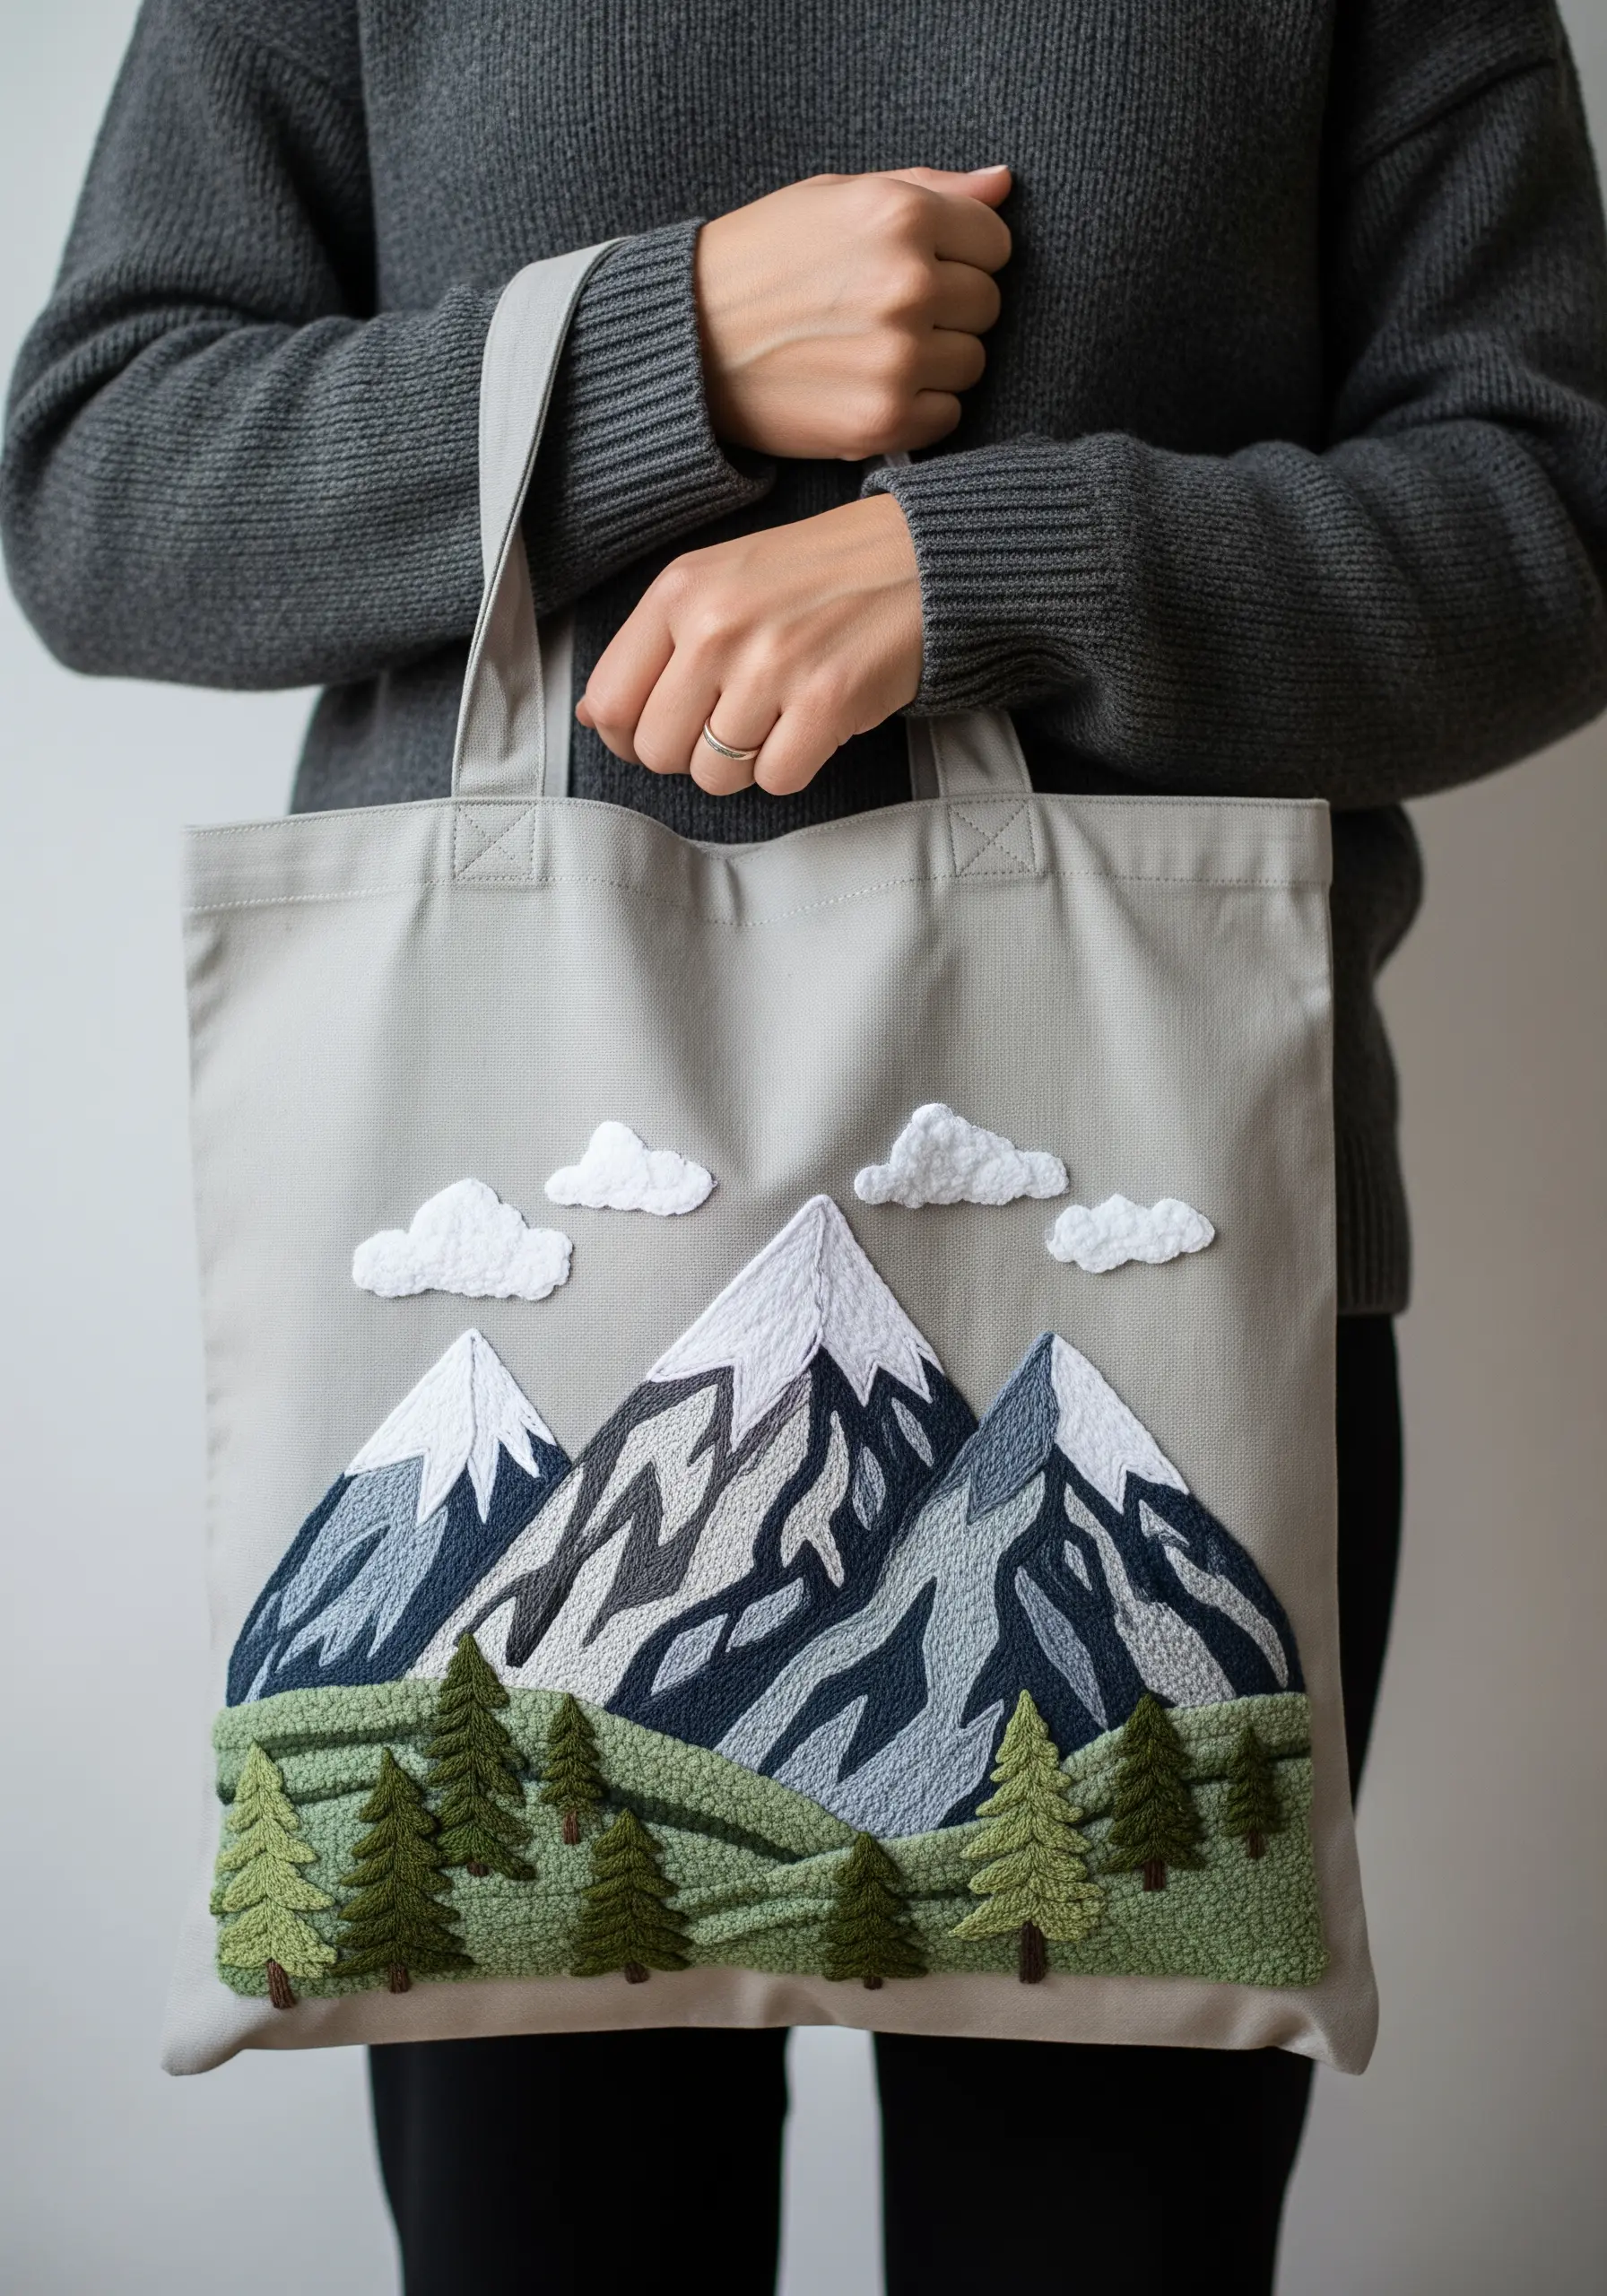
Build a dynamic landscape by layering fabric appliqué with textural embroidery.
Cut basic shapes for your mountains, snow, and hills from felt or cotton canvas in different colors.
Secure each piece with a simple running stitch, then go over them with directional satin stitches, French knots, and long-and-short stitches to add shading and texture.
This mixed-media technique allows you to cover large areas quickly while still adding the rich, handmade detail that makes embroidery special. It’s a great way to approach mountain landscape thread painting.
12. Use Metallic Threads for Iridescent Effects
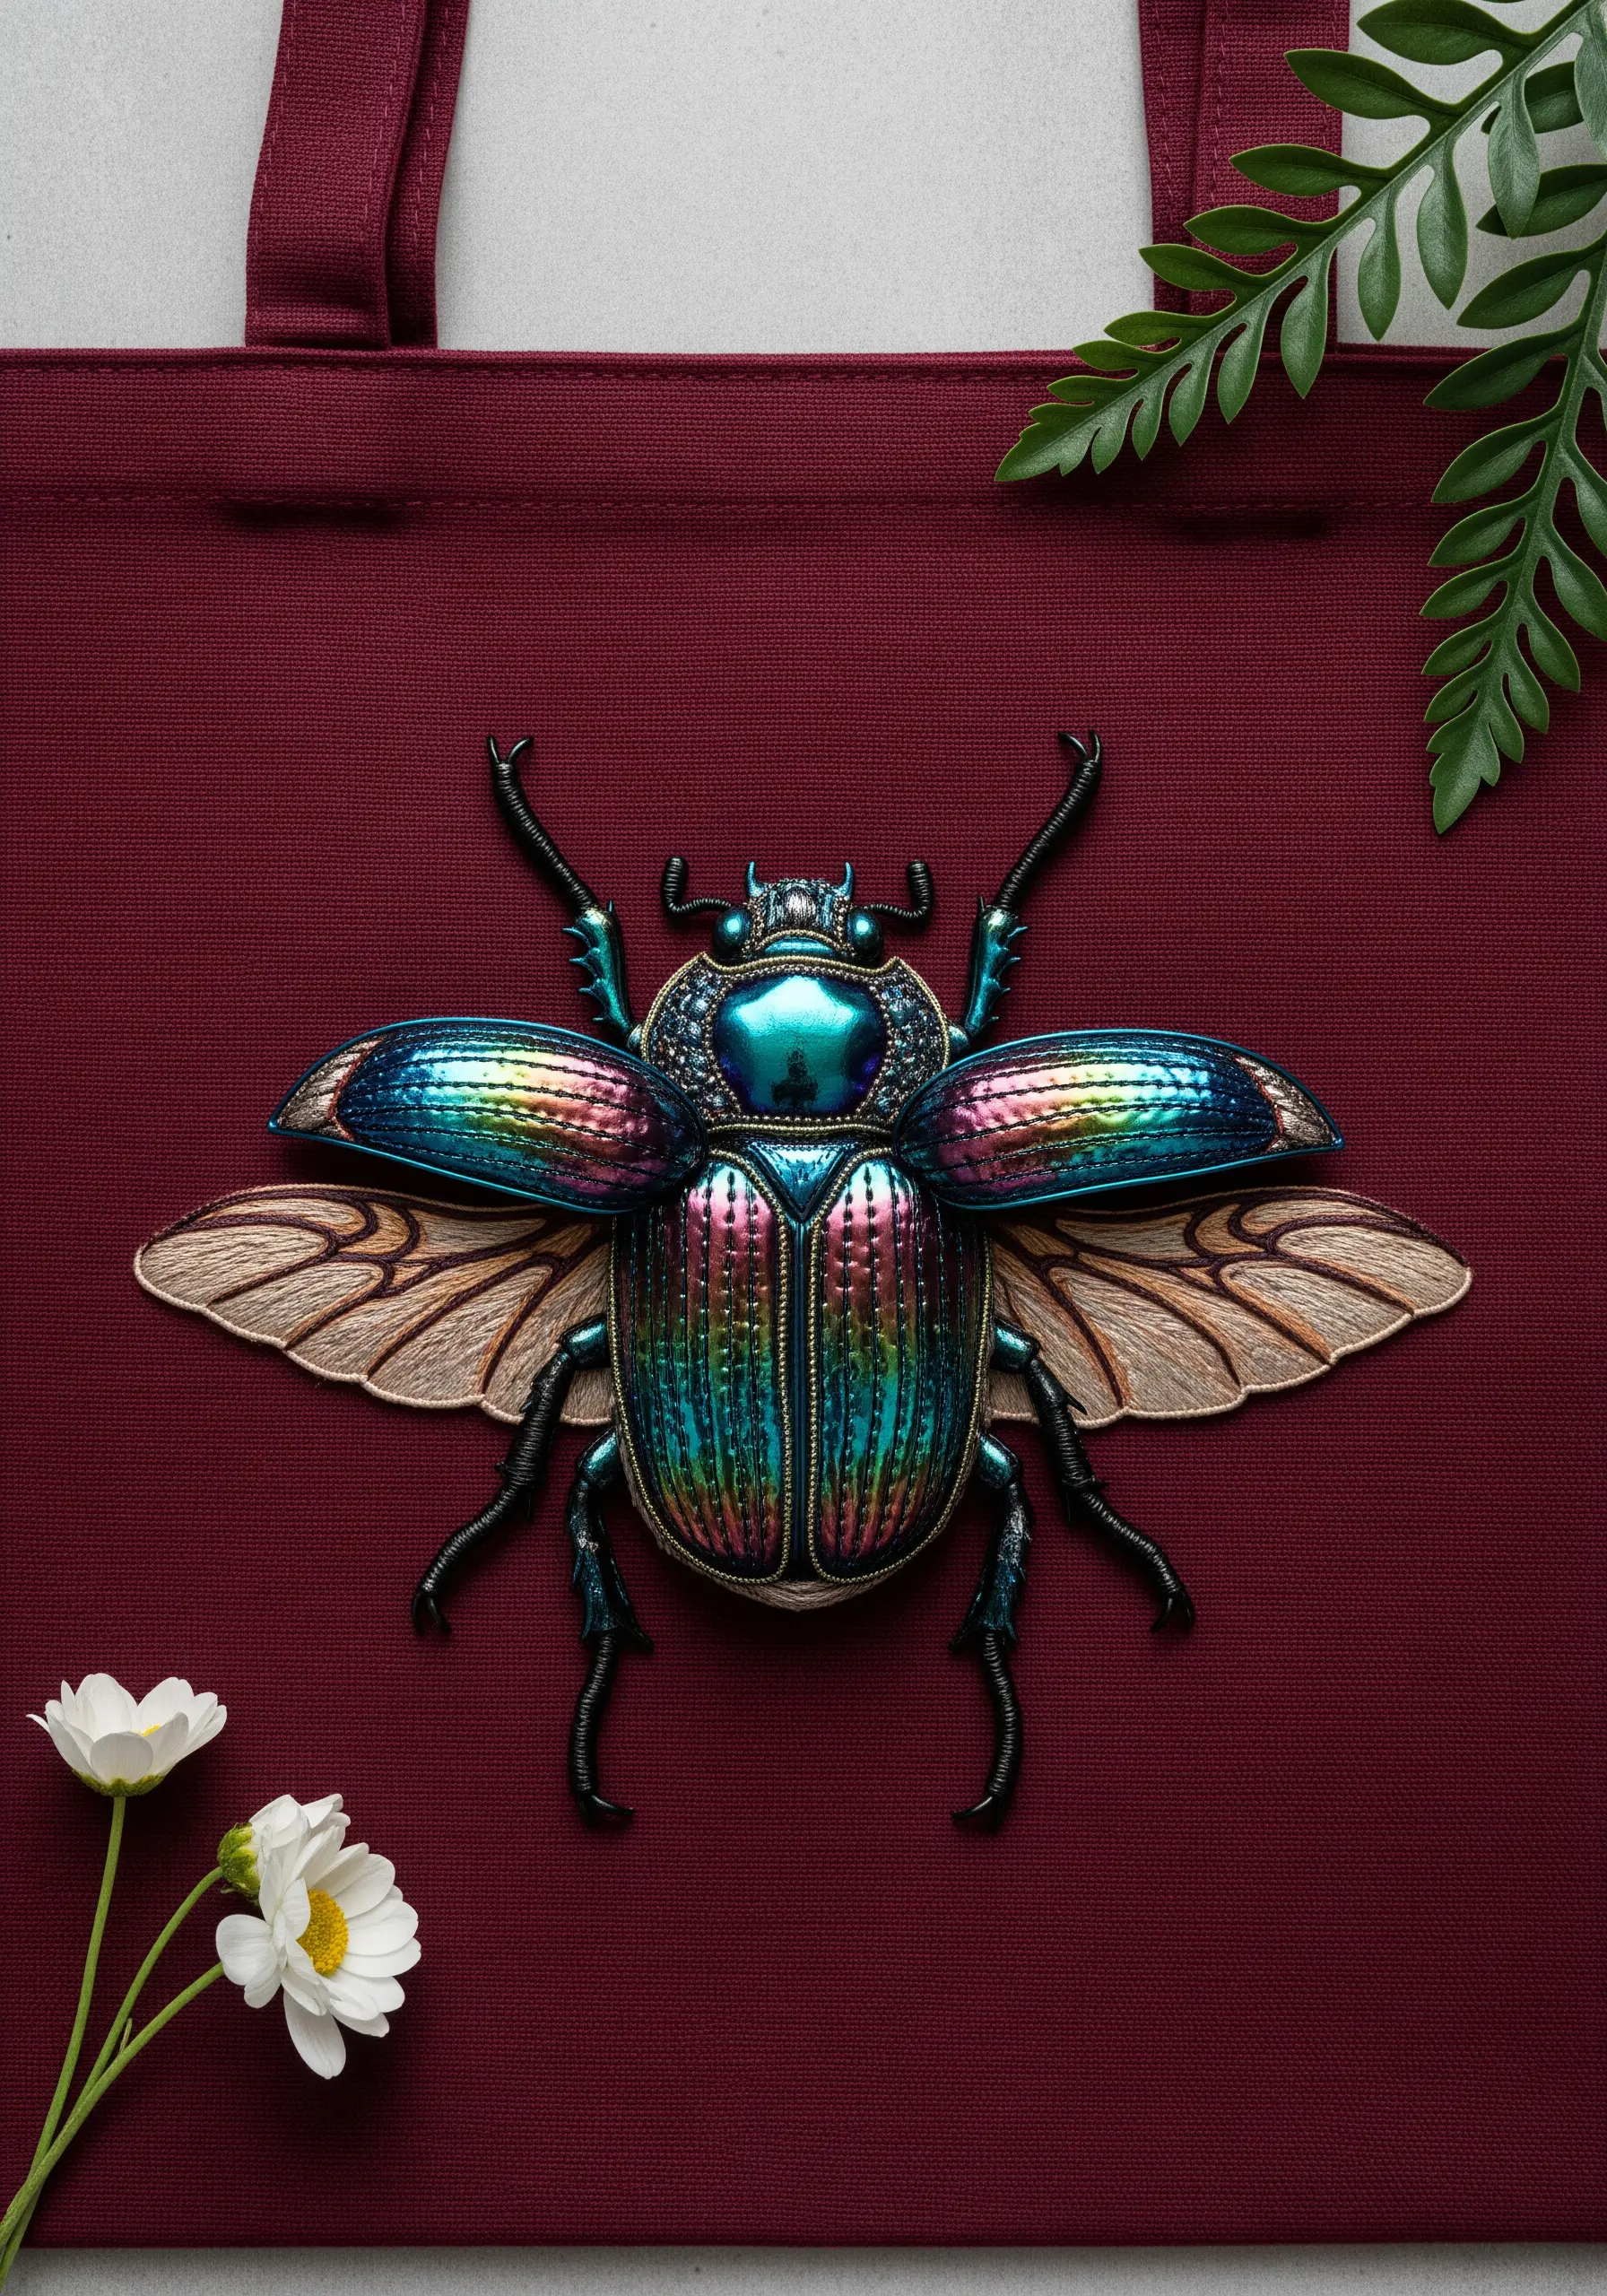
Capture the shimmering, multi-tonal look of a beetle’s shell by strategically using metallic and satin floss together.
Outline sections with a dark, solid color to define the shape, then fill them with long satin stitches using iridescent or color-shifting metallic thread.
To prevent metallic thread from tangling, use shorter lengths and a thread conditioner like beeswax.
For the delicate wings, use a single strand of organza or sheer fabric as an appliqué base and stitch over it with fine, translucent thread for a realistic, ethereal quality.
13. Imply Transparency with Thread on Appliqué
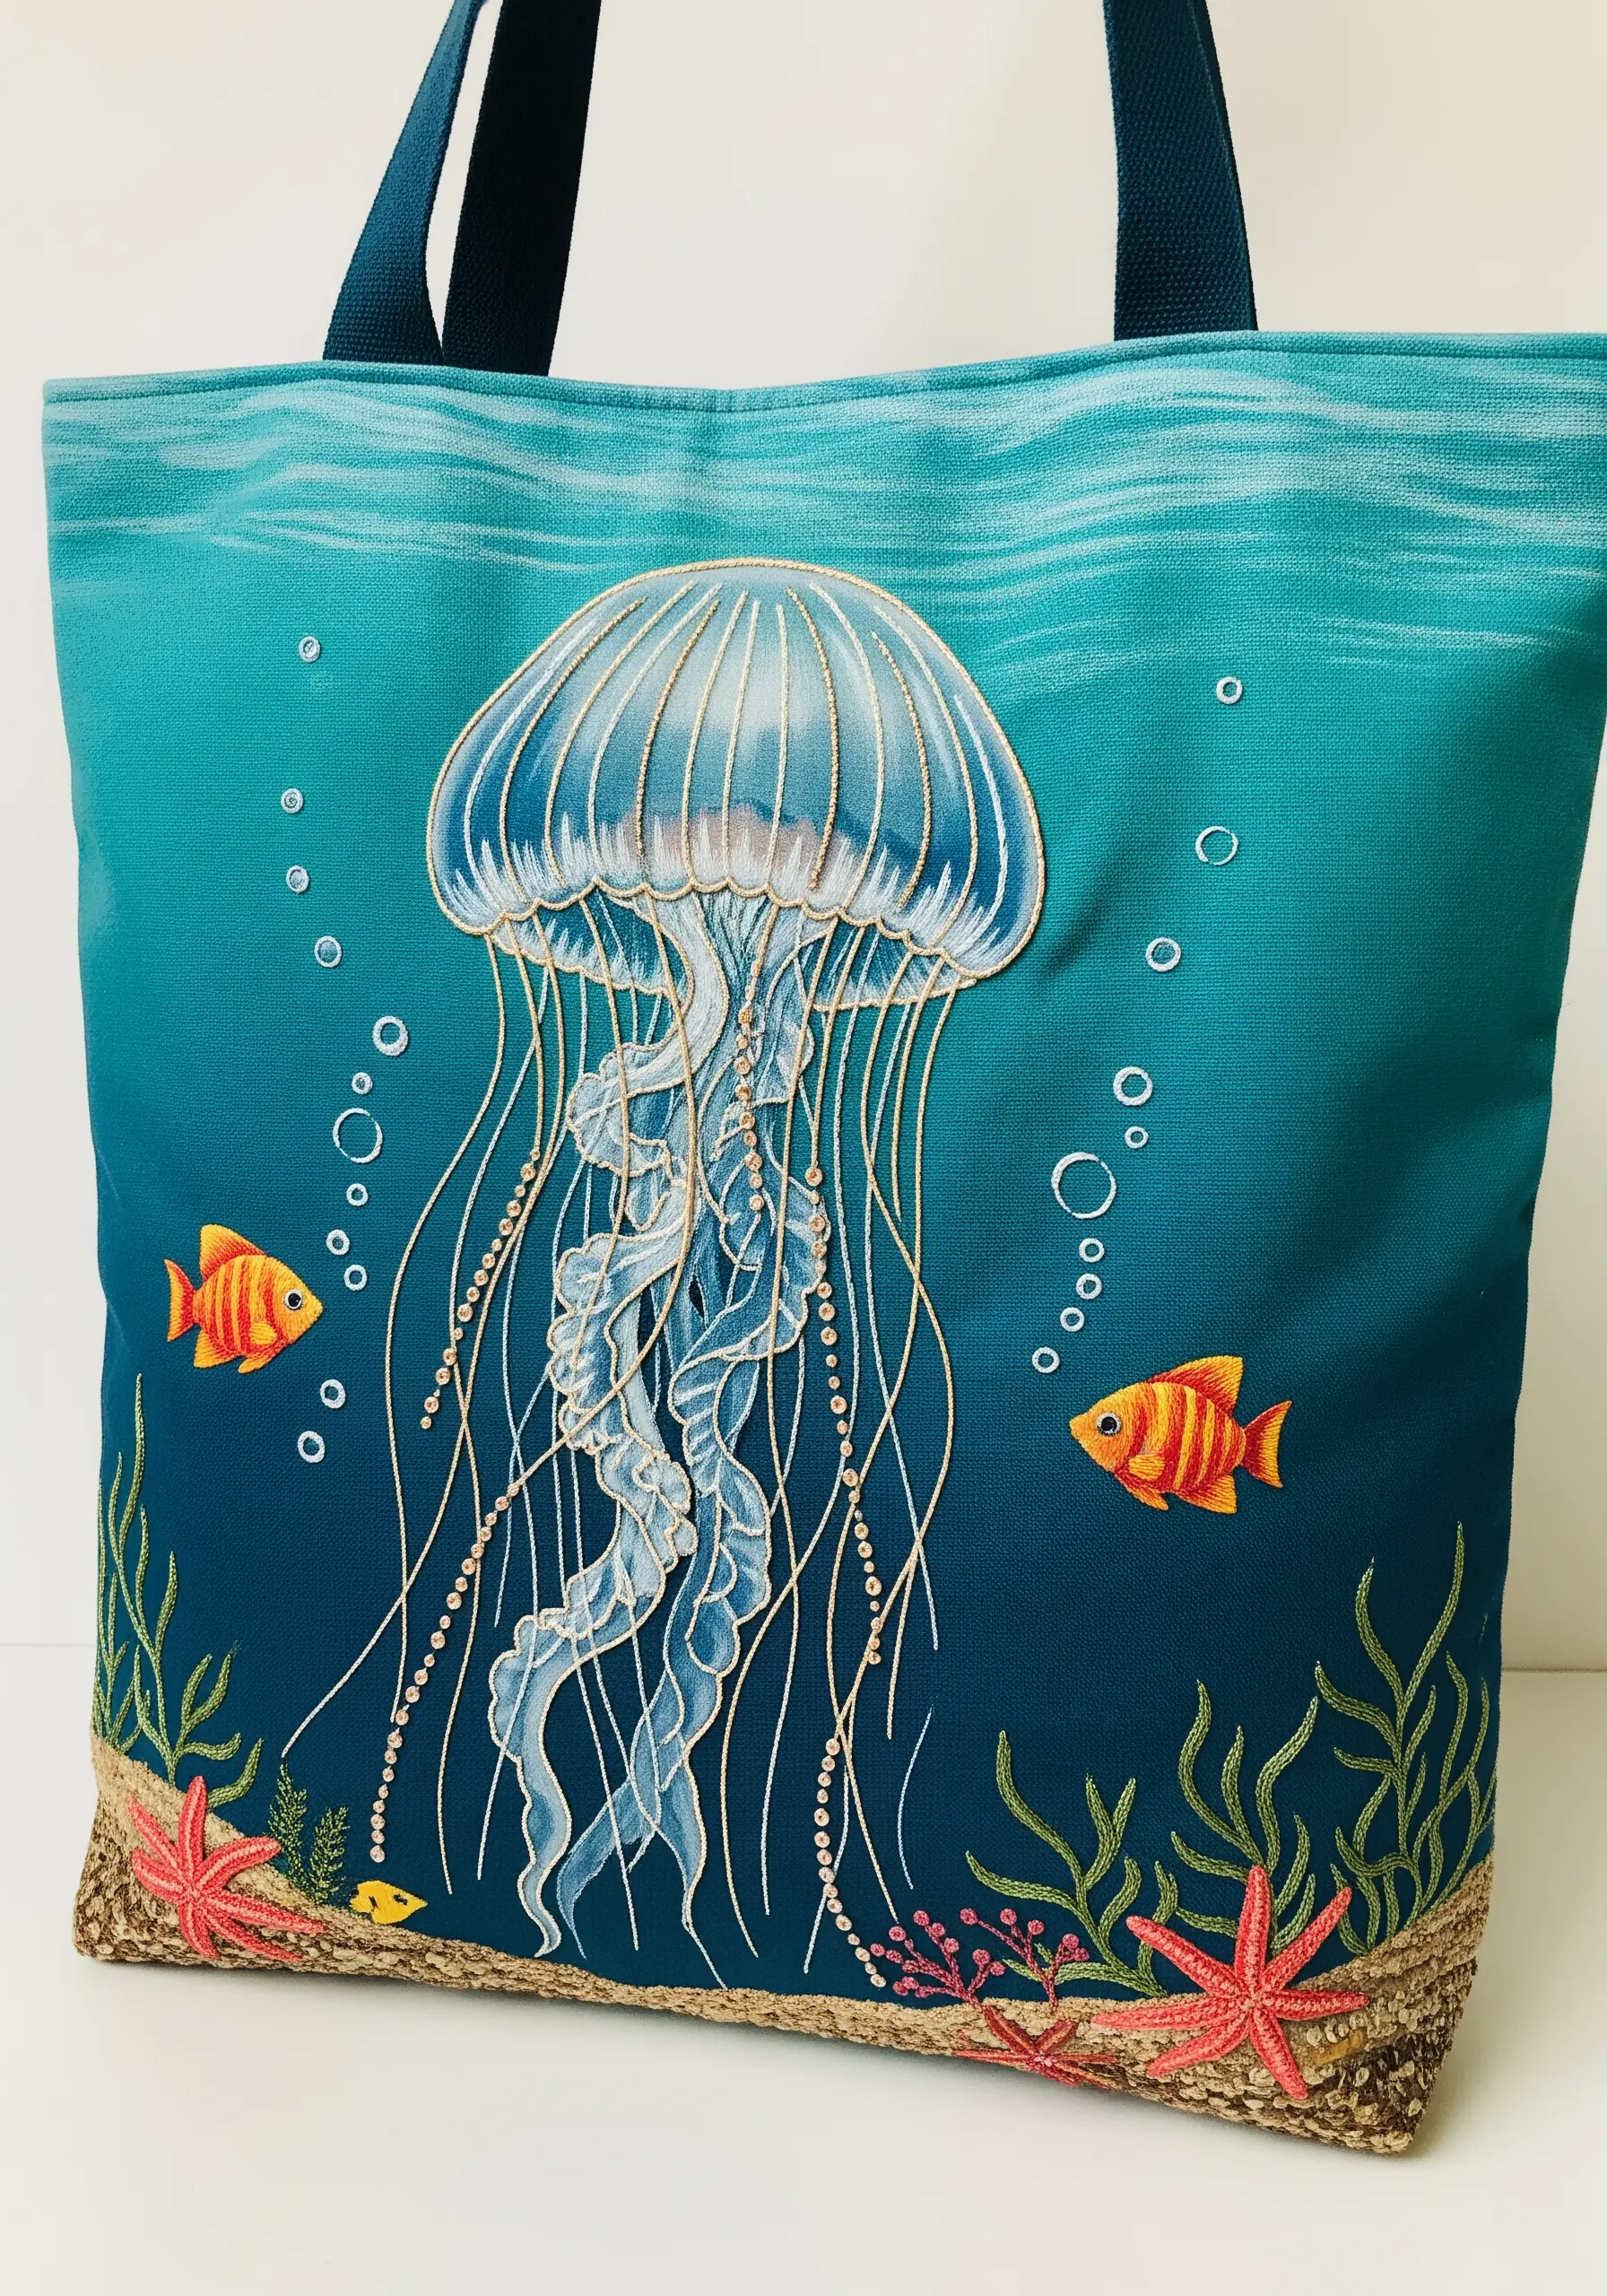
Create the illusion of a translucent jellyfish by combining sheer appliqué with delicate line work.
Cut the bell shape of the jellyfish from a piece of white or pale blue organza and stitch it down with a fine, matching thread.
Embroider the internal structures and tentacles directly over the organza and surrounding fabric using stem stitch and backstitch in shades of blue and white.
This layering technique makes the jellyfish appear to float weightlessly against the background, giving the entire piece a beautiful, ethereal feel.
14. Add Selective Texture to Graphic Prints
Elevate a pre-printed or stenciled tote bag by adding small, concentrated areas of textural embroidery.
Instead of embroidering the entire design, choose specific elements to fill with a highly tactile stitch, like the dense French knots used here.
This creates a powerful focal point and adds a surprising, handmade element to a graphic design.
The contrast between the flat ink and the raised, three-dimensional thread makes the entire piece more dynamic and visually interesting.
15. Master Precision with Minimalist Line Art
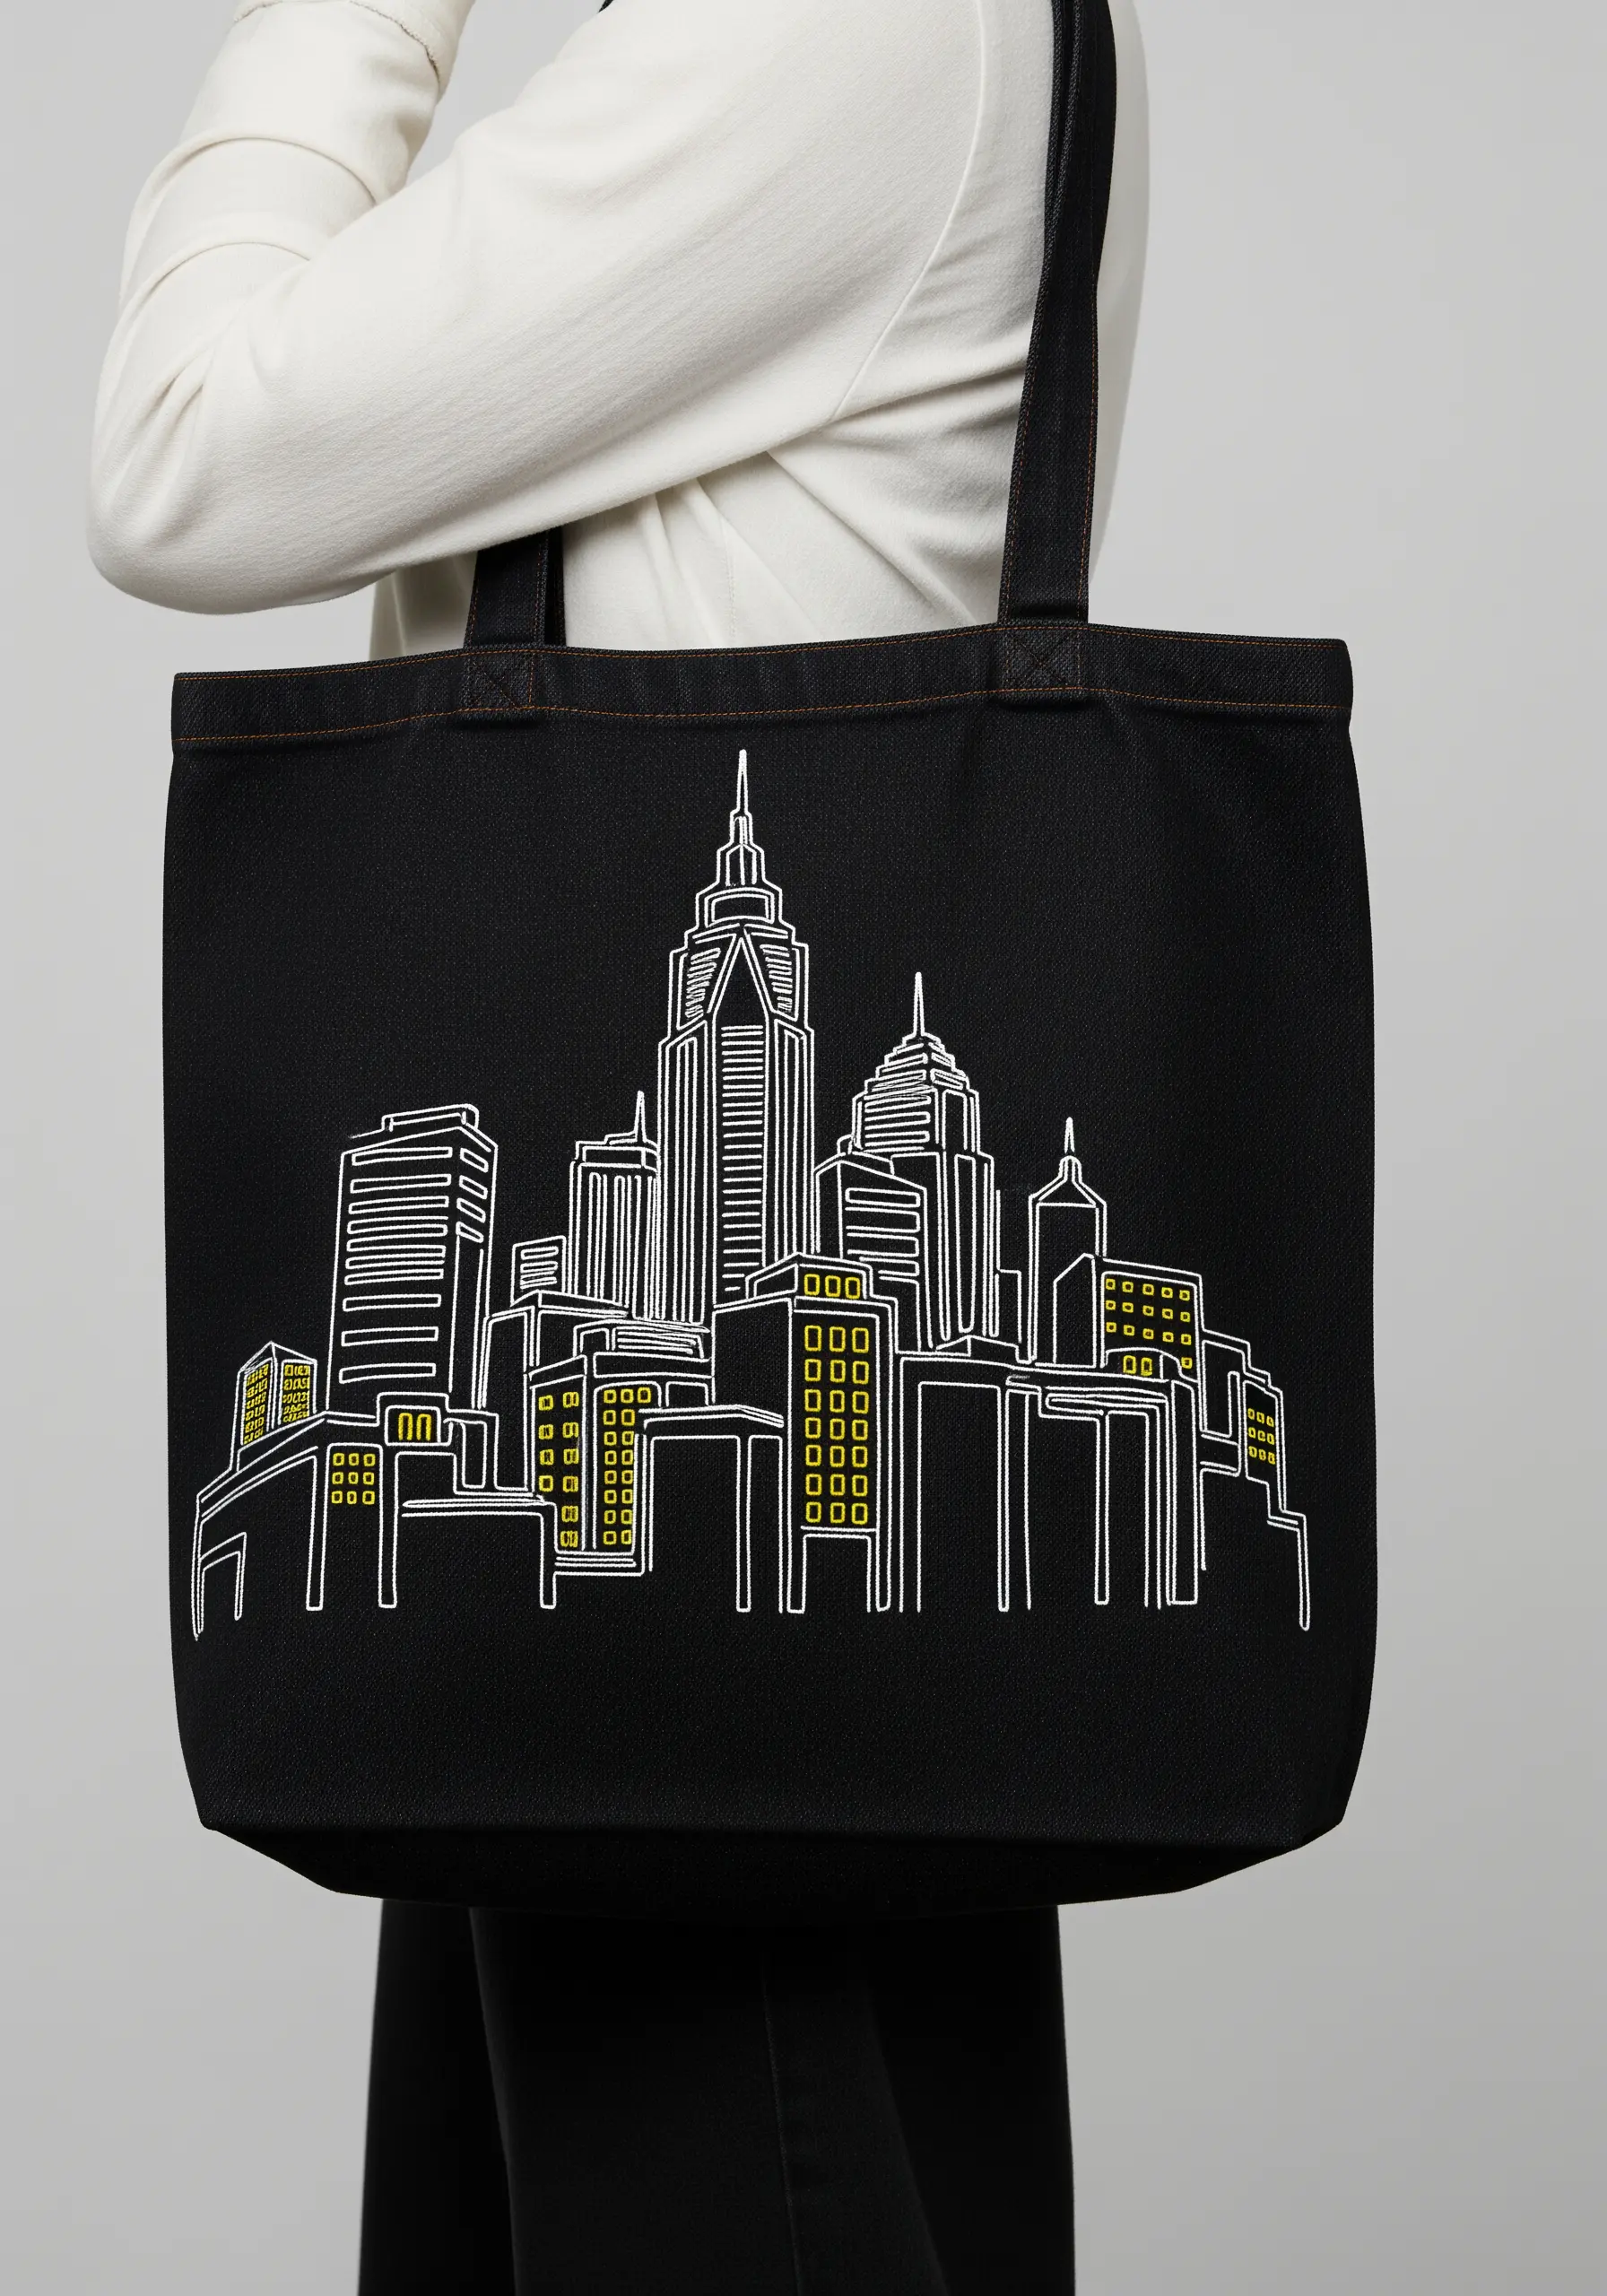
For a crisp, architectural design, focus on the precision of your backstitch or stem stitch.
Use a medium-weight thread (three or four strands) to ensure your lines are bold and visible against the dark fabric.
To keep your lines perfectly straight and your corners sharp, mark your pattern carefully with a water-soluble pen and use a smaller needle to make precise entry and exit points.
The selective use of yellow satin stitch for the windows adds a pop of color and draws the eye without disrupting the clean, minimalist aesthetic.
16. Create Dimension with Padded Satin Stitch
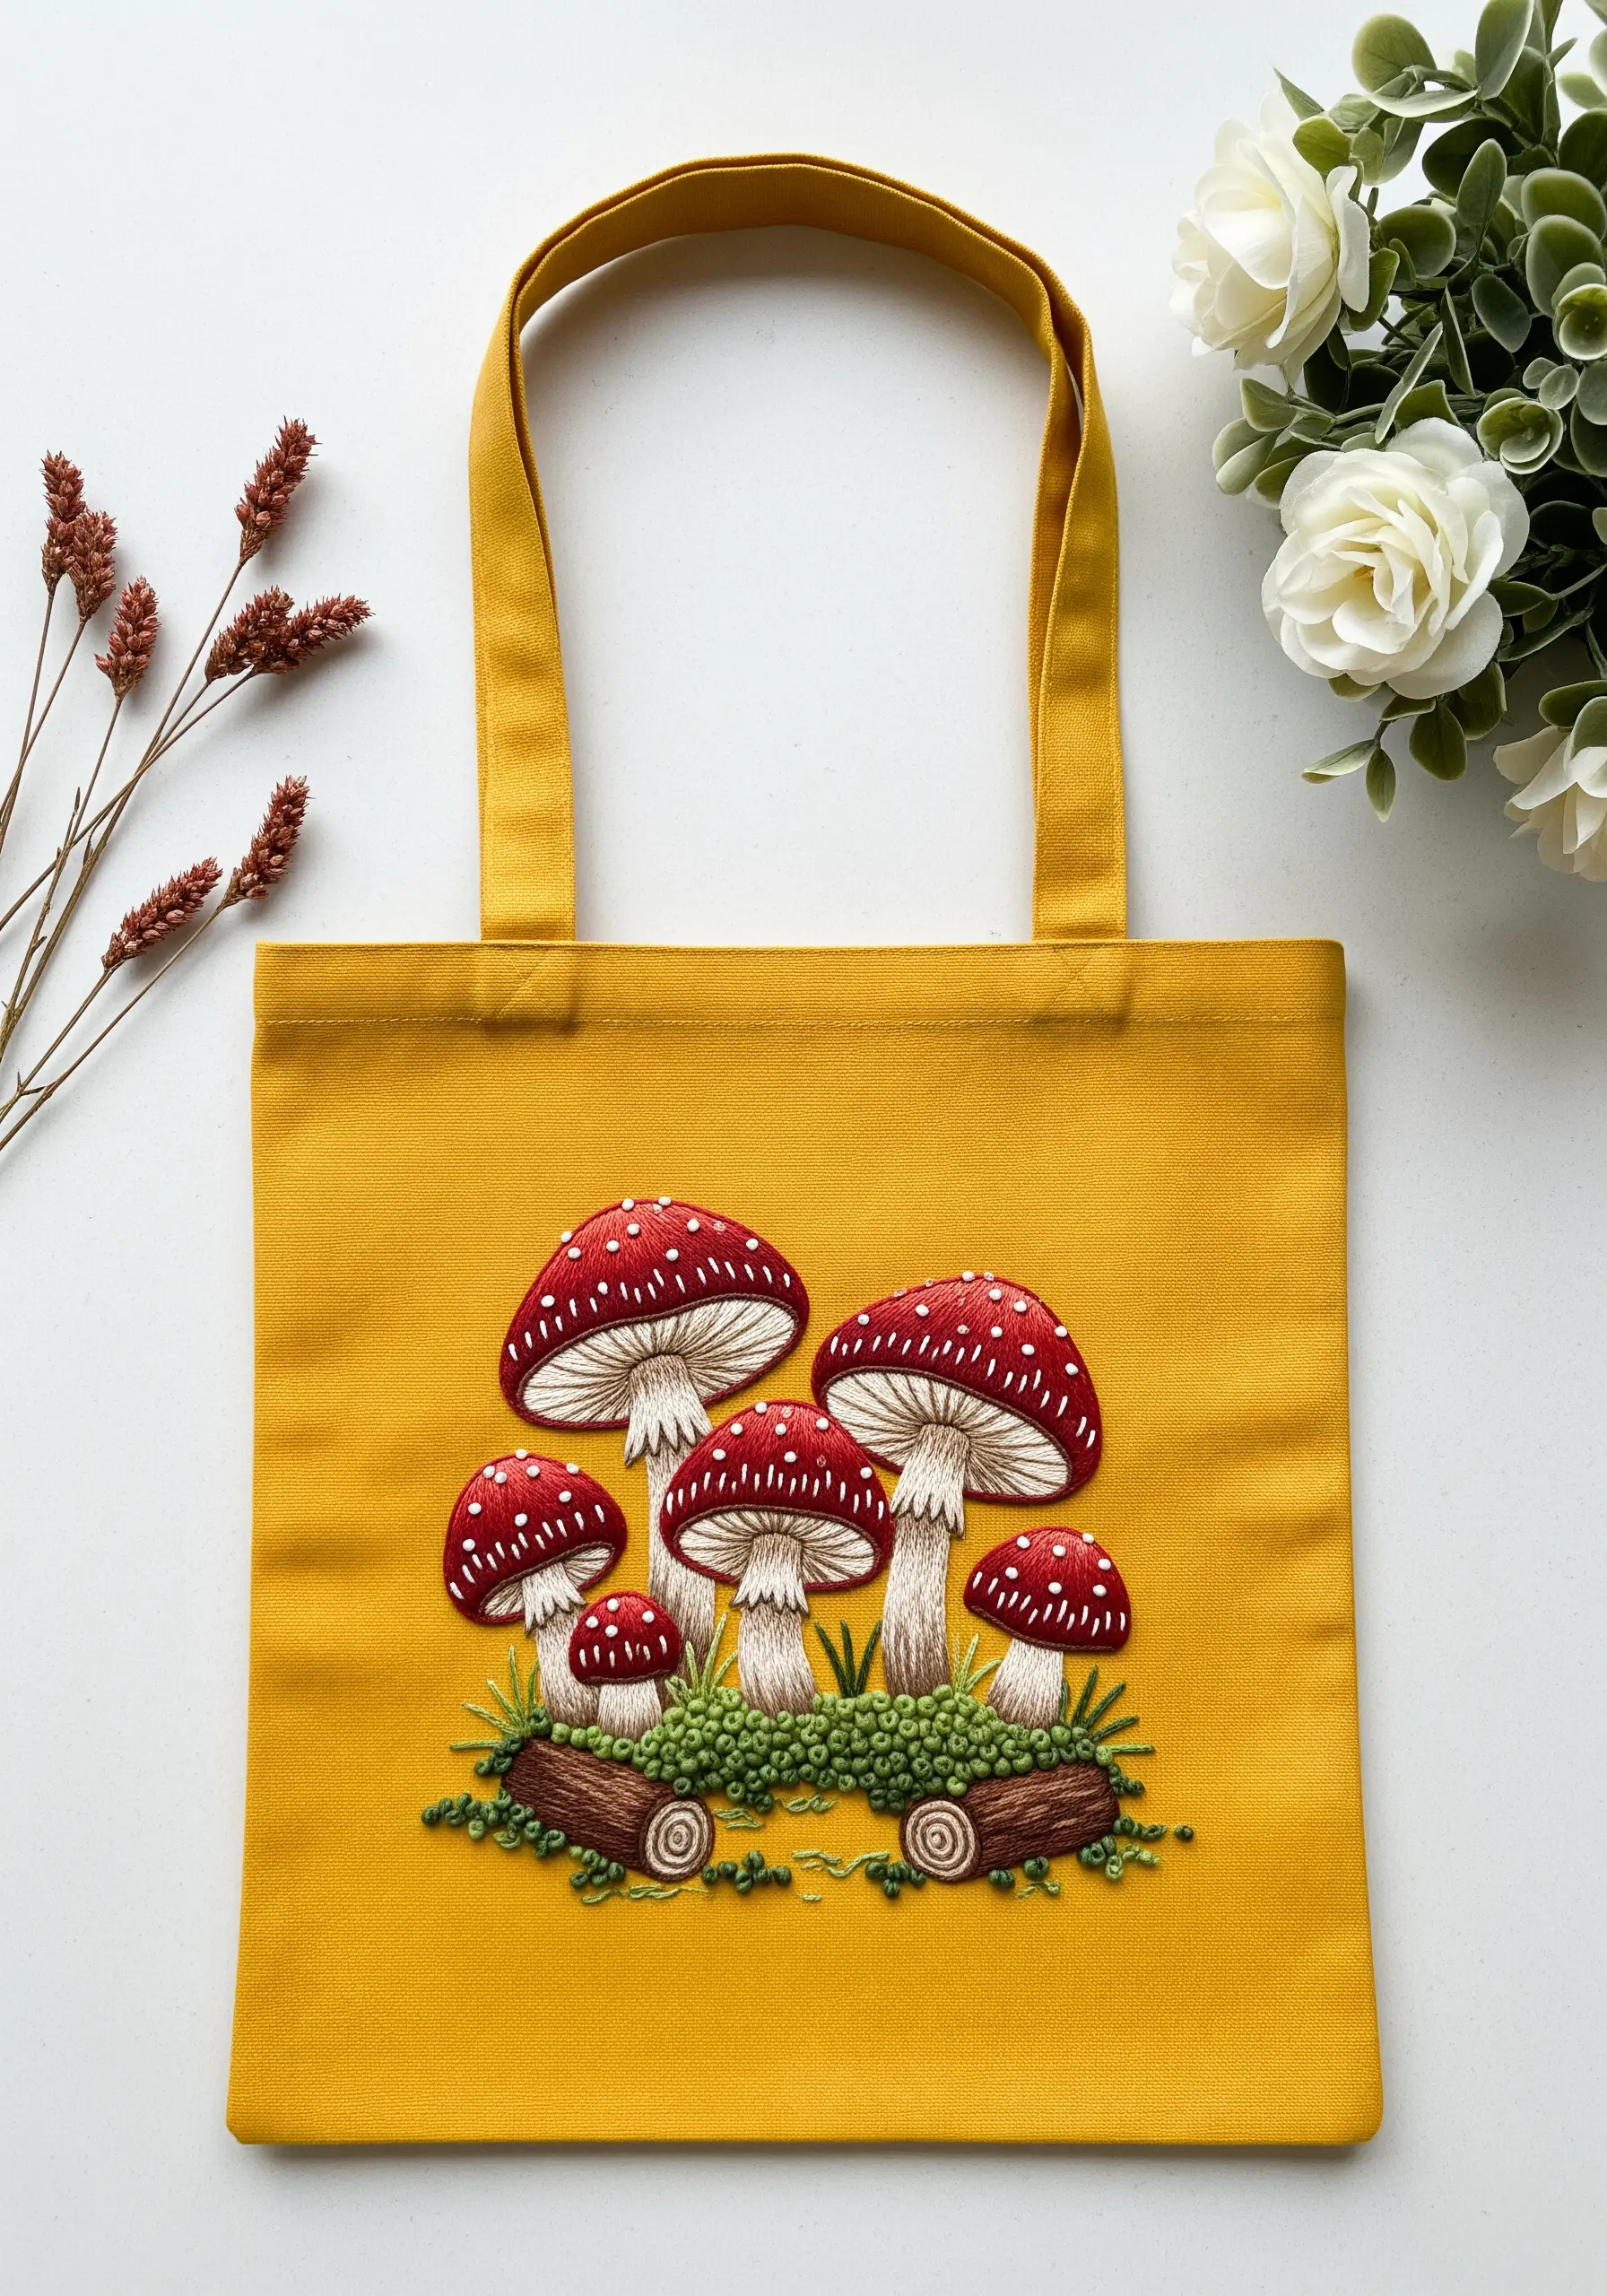
Give your motifs a raised, cartoon-like appearance with padded satin stitch.
Before you begin your main stitching, fill the area of the mushroom caps with a base layer of straight stitches or small seed stitches.
Then, work your final satin stitch layer directly on top. This underlay of thread provides padding, lifting the top layer and creating a smooth, rounded, 3D surface.
Use this technique on elements you want to bring forward, making your composition feel more dynamic and less flat.
17. Blend Colors for a Feathered Gradient
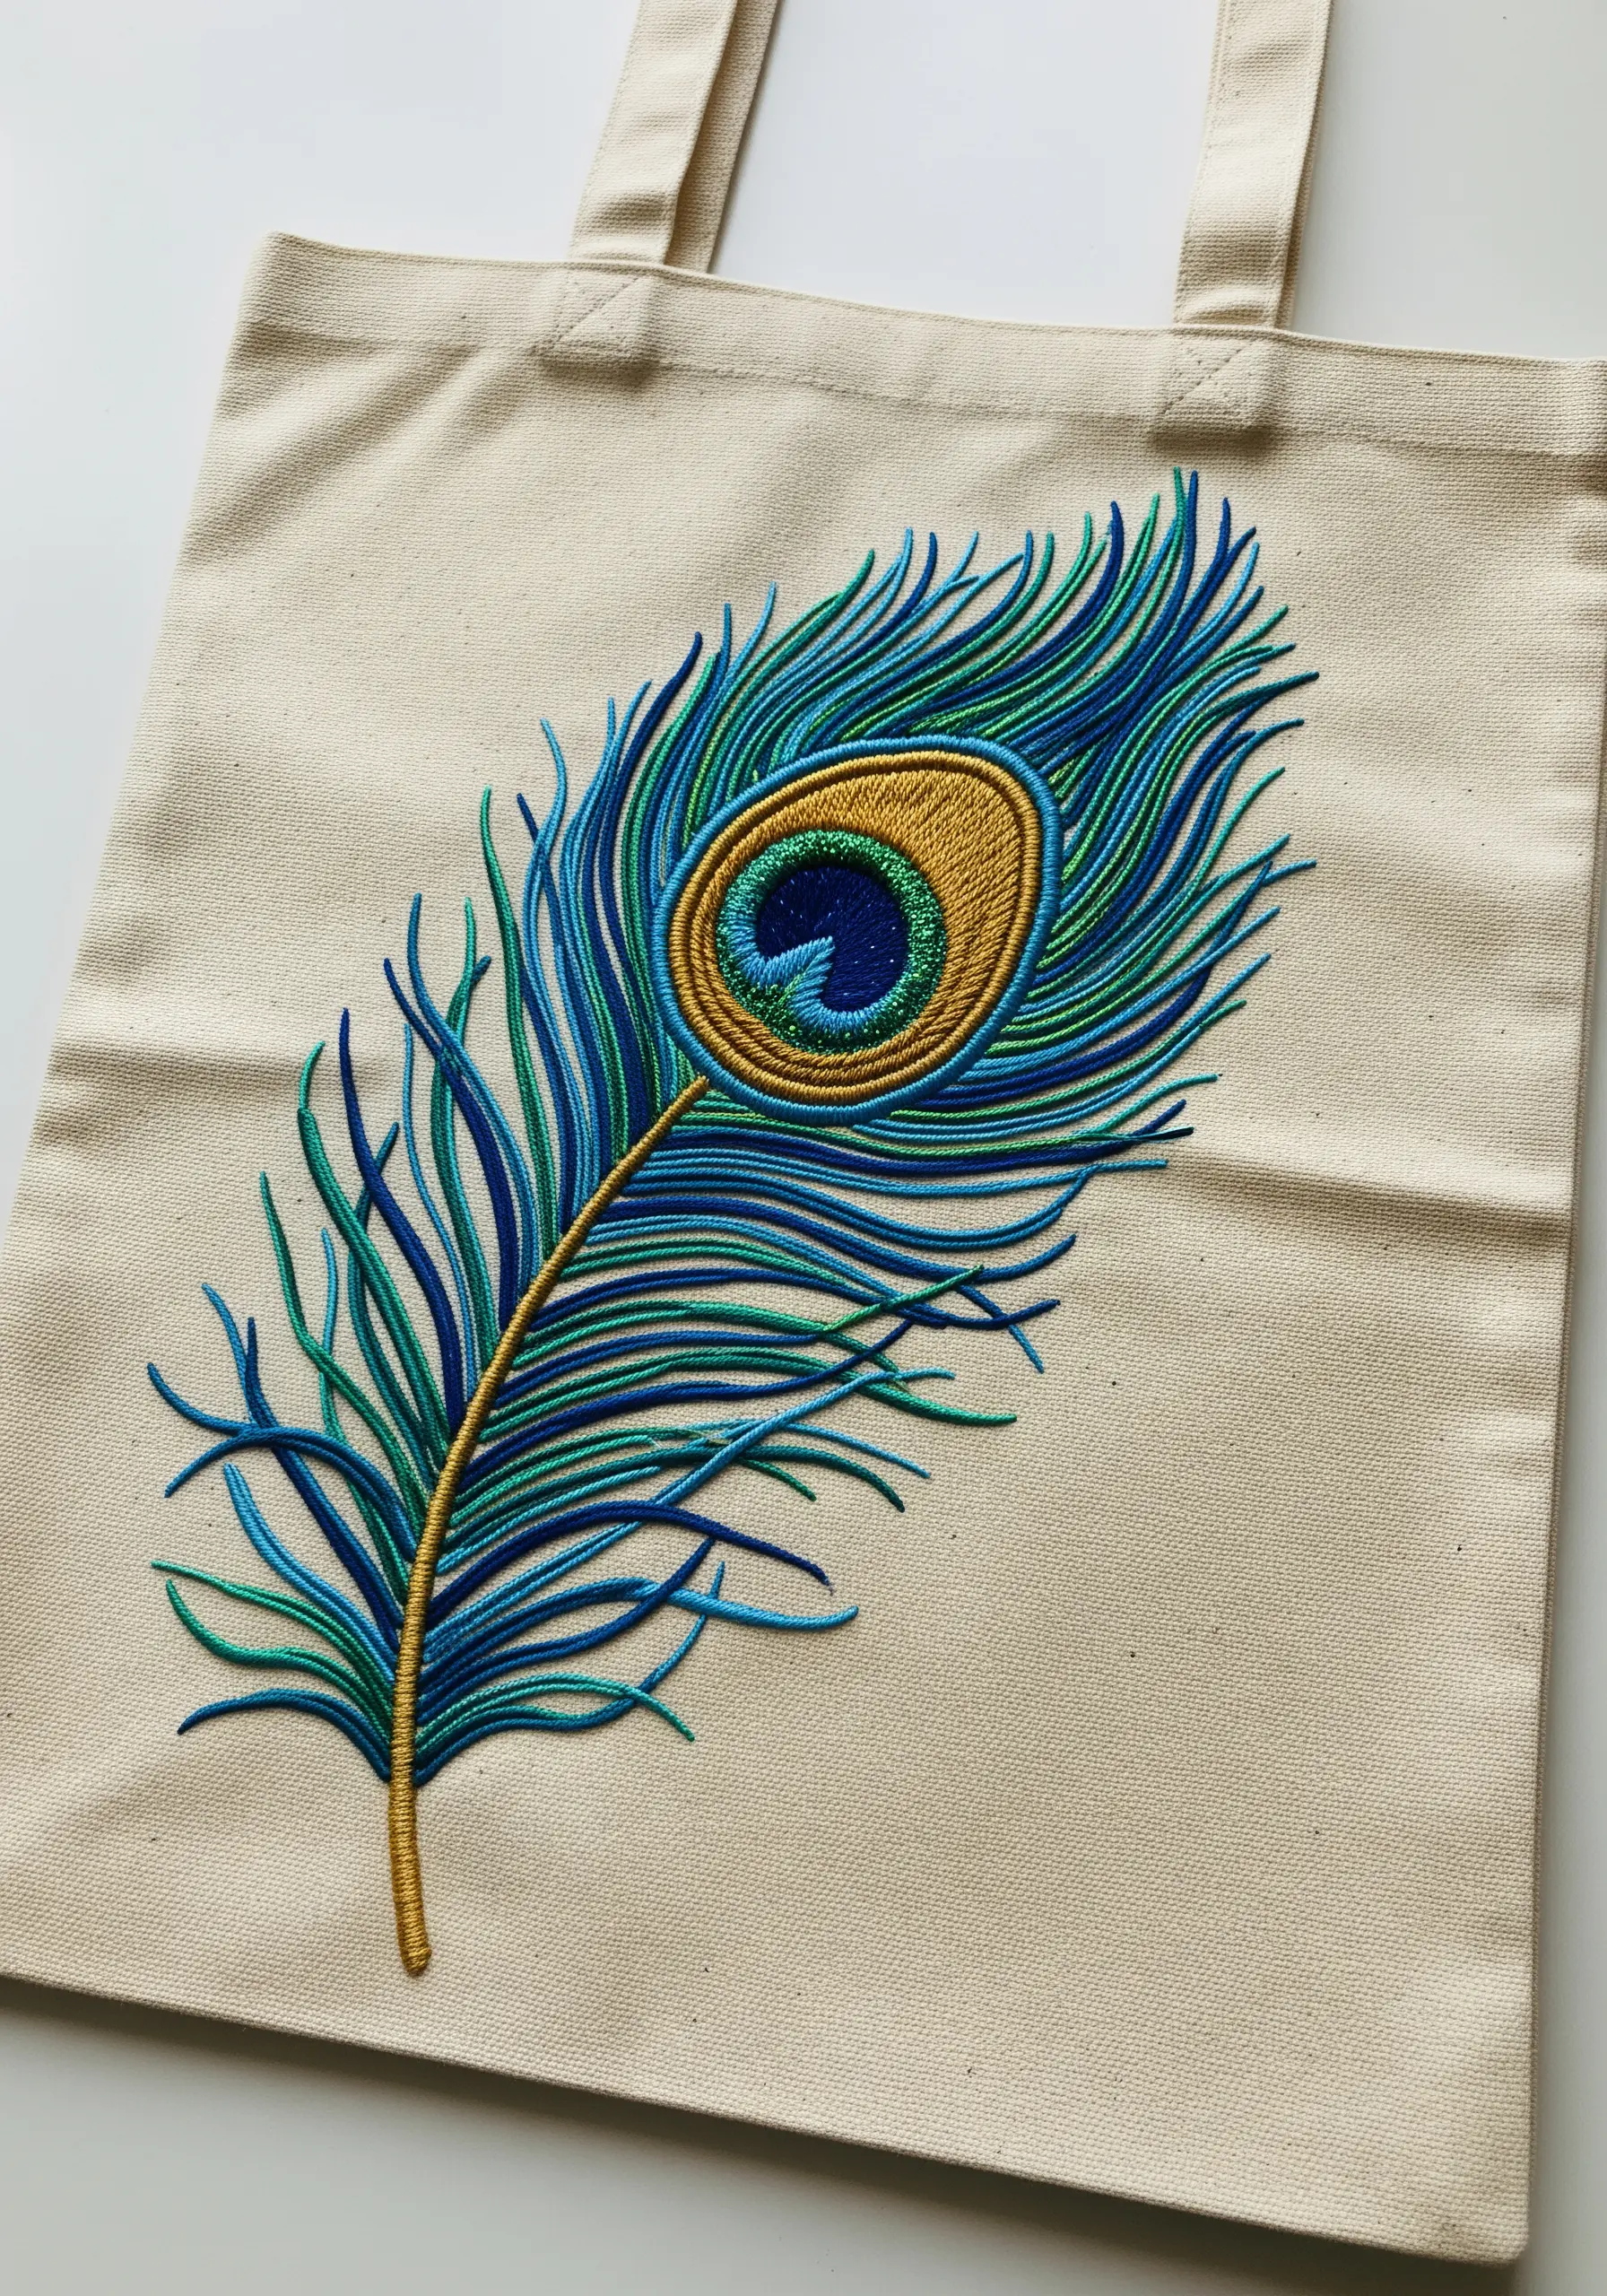
Recreate the soft, blended look of a peacock feather by using long, graceful stitches that mimic its natural barbs.
Start with the central ‘eye’ of the feather, using concentric circles of satin stitch in metallic and jewel tones.
For the surrounding fronds, use a fishbone stitch or long-and-short stitch, allowing different shades of blue and green to overlap and blend naturally.
The key is to keep your stitches long and slightly curved, all flowing outward from the central stem, to create a sense of movement and softness.
18. Combine Weaving and Stitching for Abstract Forms

Create unique, highly textural abstract shapes by weaving thick yarn or fabric strips directly onto your tote.
For the triangles and blue circles, create a base of straight stitches and then weave your primary material over and under them, much like a woven wheel stitch but on a larger scale.
The fluffy white shapes can be made with a turkey stitch or by creating pom-poms and stitching them securely to the bag.
This mixed-fiber approach results in a playful, sculptural design that pushes the boundaries of traditional embroidery.
19. Layer French Knots for Cascading Florals
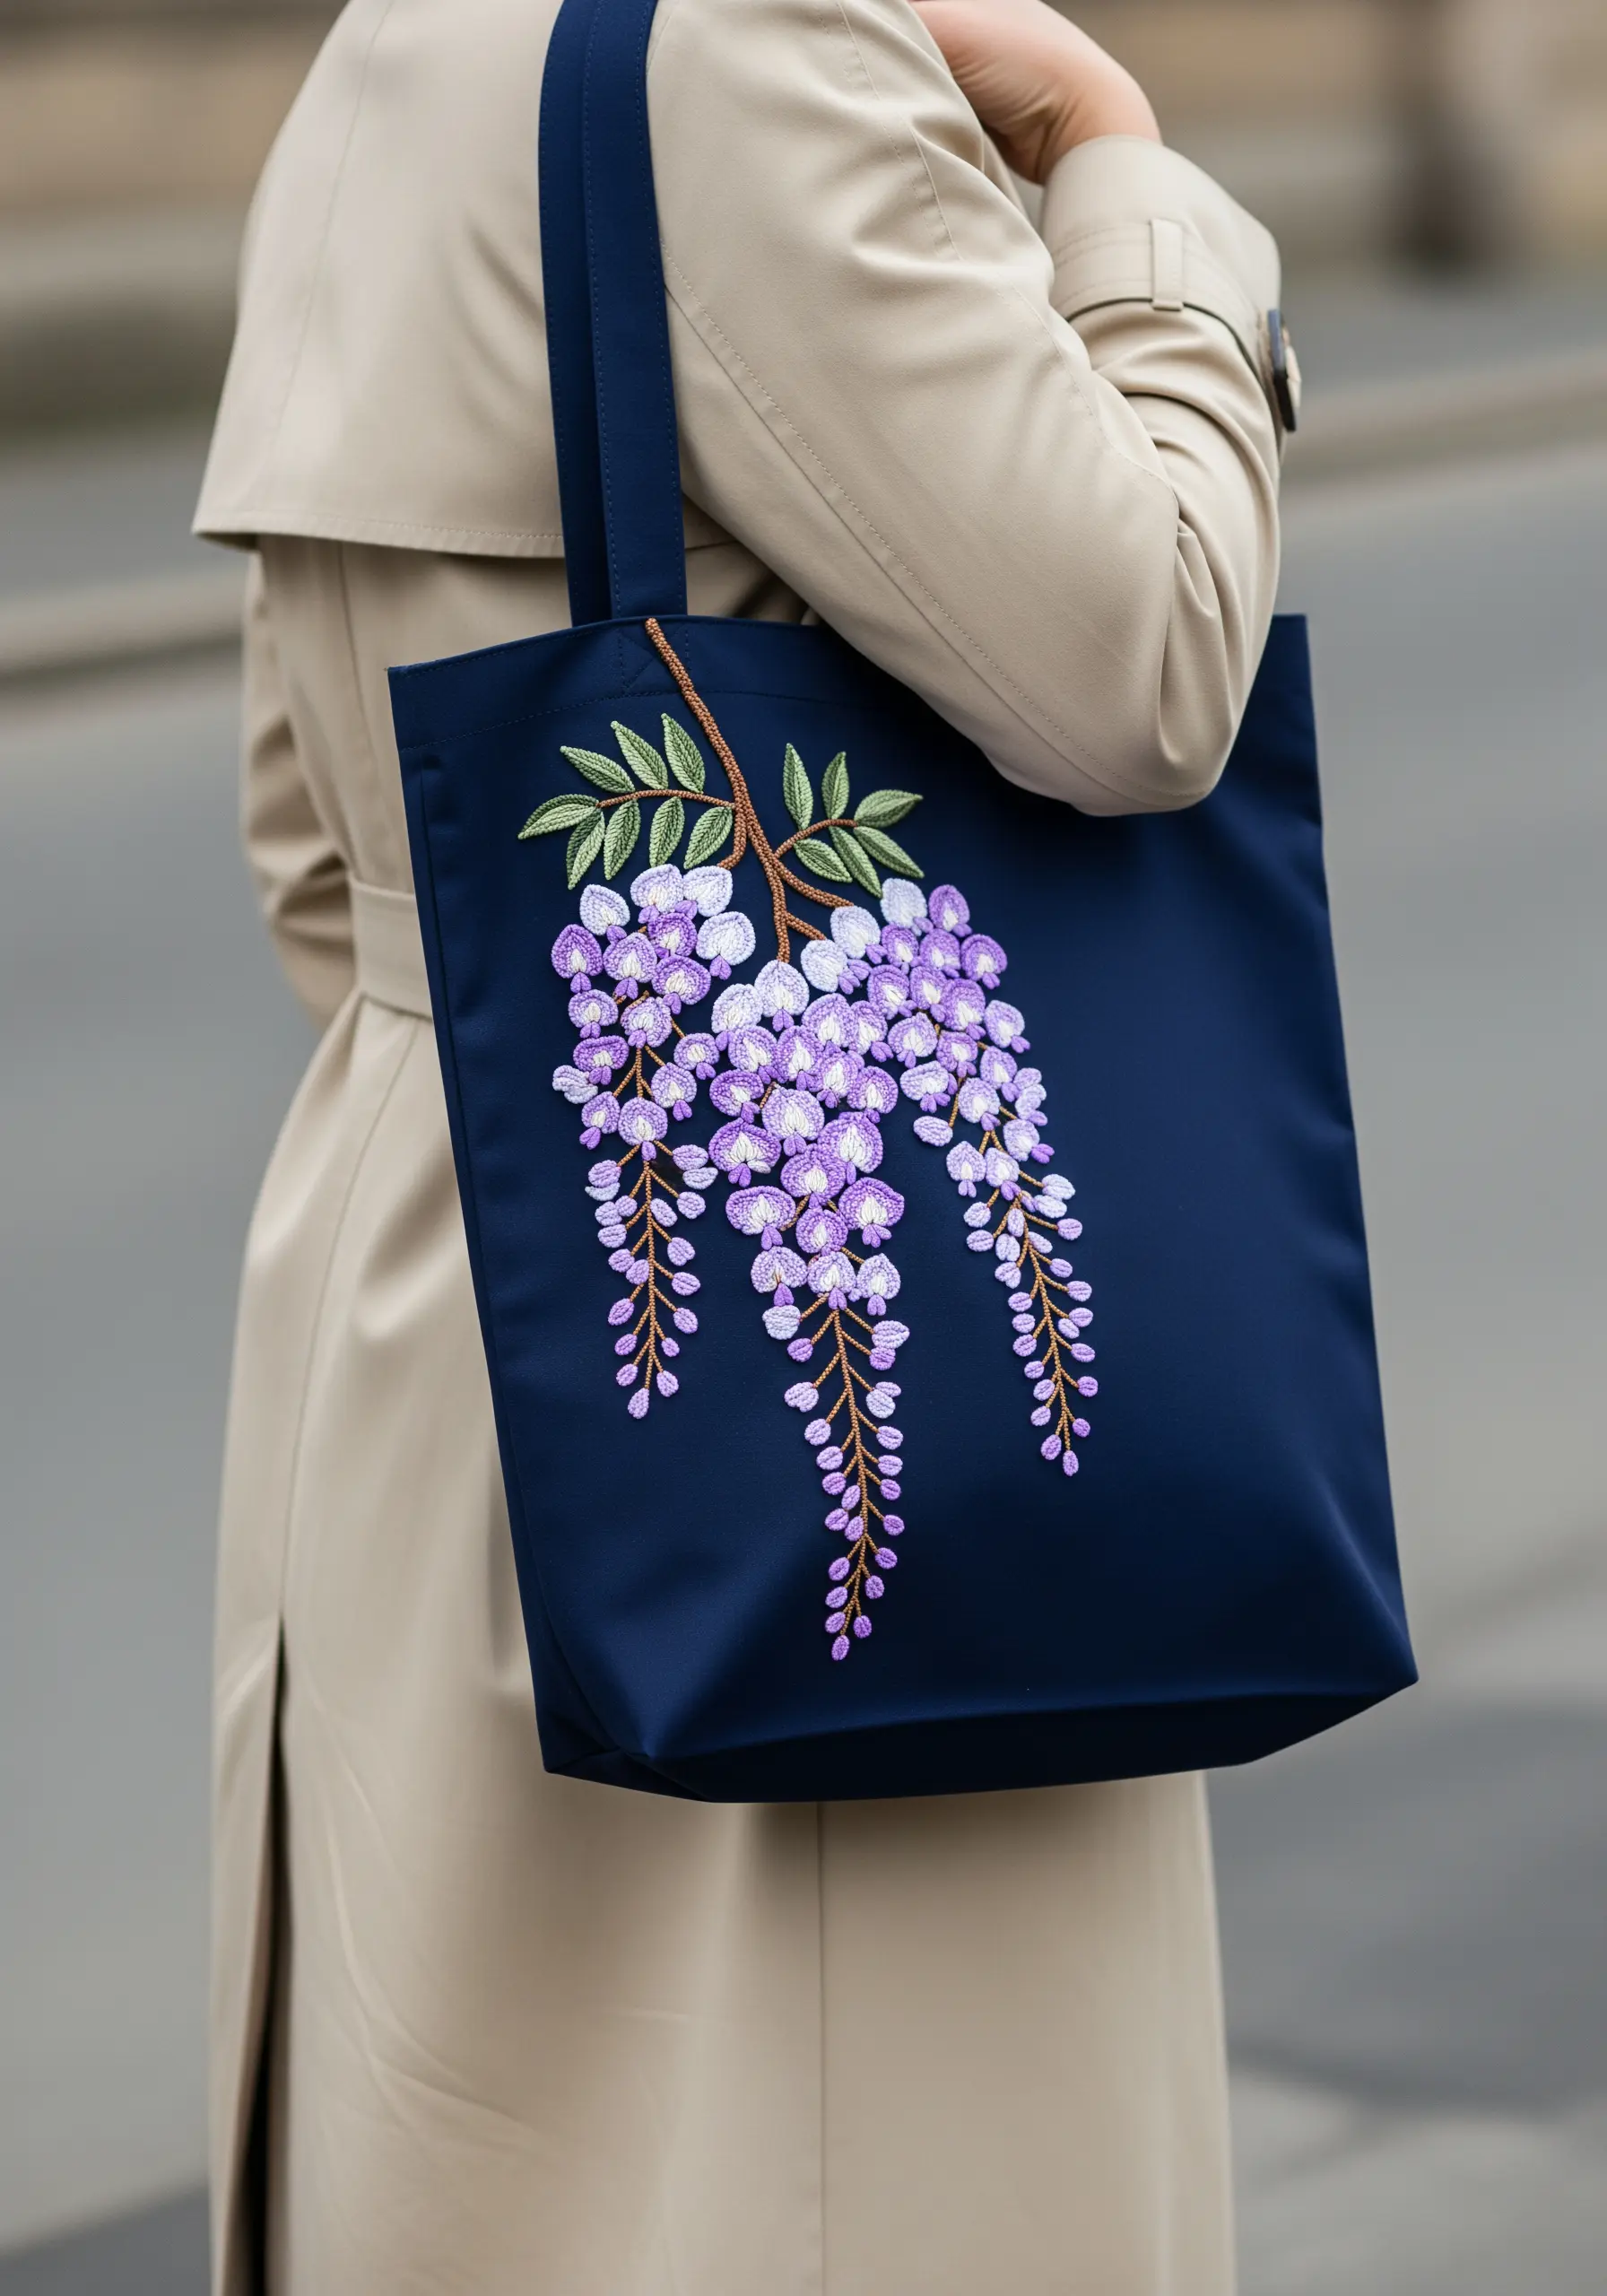
To capture the lush, clustered appearance of wisteria, rely on the power of layered French knots.
Use several shades of purple, lavender, and white to create a sense of light and shadow within each cluster.
Stitch the knots in the background first, then add more on top in lighter colors to create a truly three-dimensional, cascading effect.
Don’t place your knots in perfect rows; an organic, slightly irregular placement will make the flowers look much more natural and full.
20. Add Detail with Beaded Sprinkles
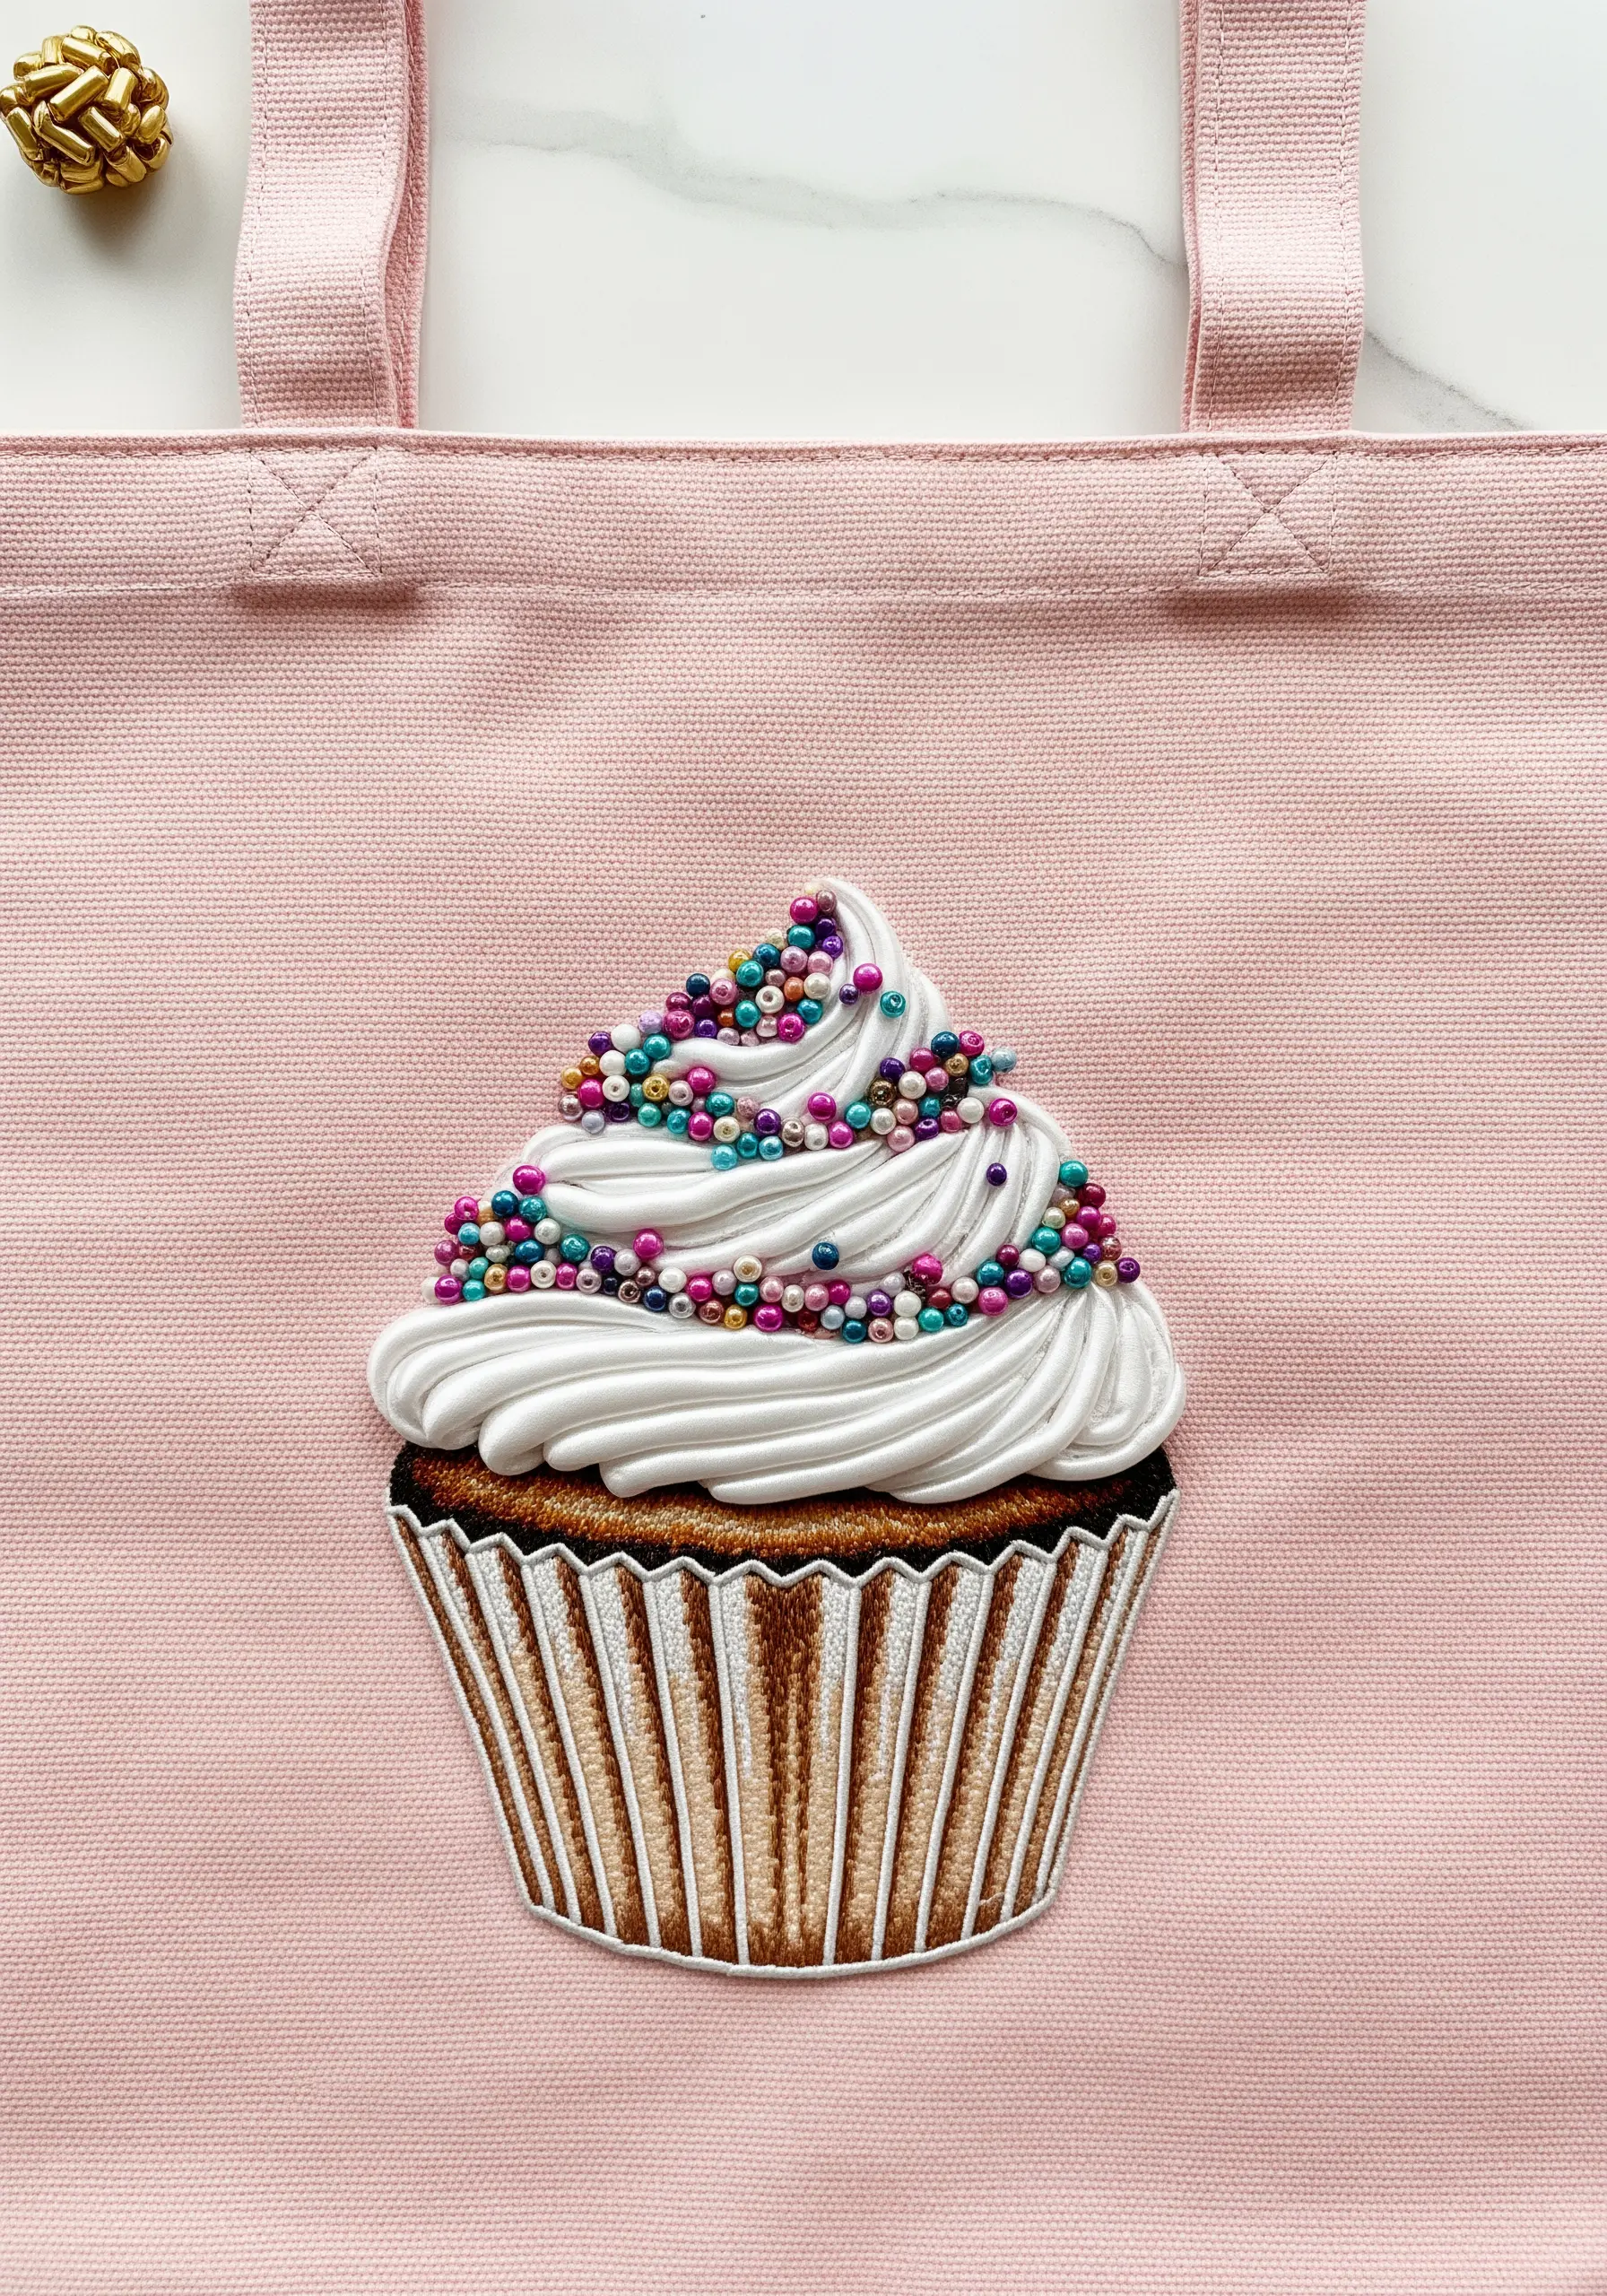
Integrate seed beads into your embroidery to add a touch of sparkle and fine texture.
After completing the main embroidered sections—like the smooth satin stitch frosting and the ribbed cupcake liner—scatter beads over the top.
Secure each bead with a tiny stitch using a thread that matches the bead’s color to make the stitch nearly invisible.
This mixed-media approach is perfect for depicting small, detailed elements like sprinkles or dewdrops, adding a final layer of realism and charm that thread alone cannot replicate.
21. Couch Thick Cord for a Macrame Effect
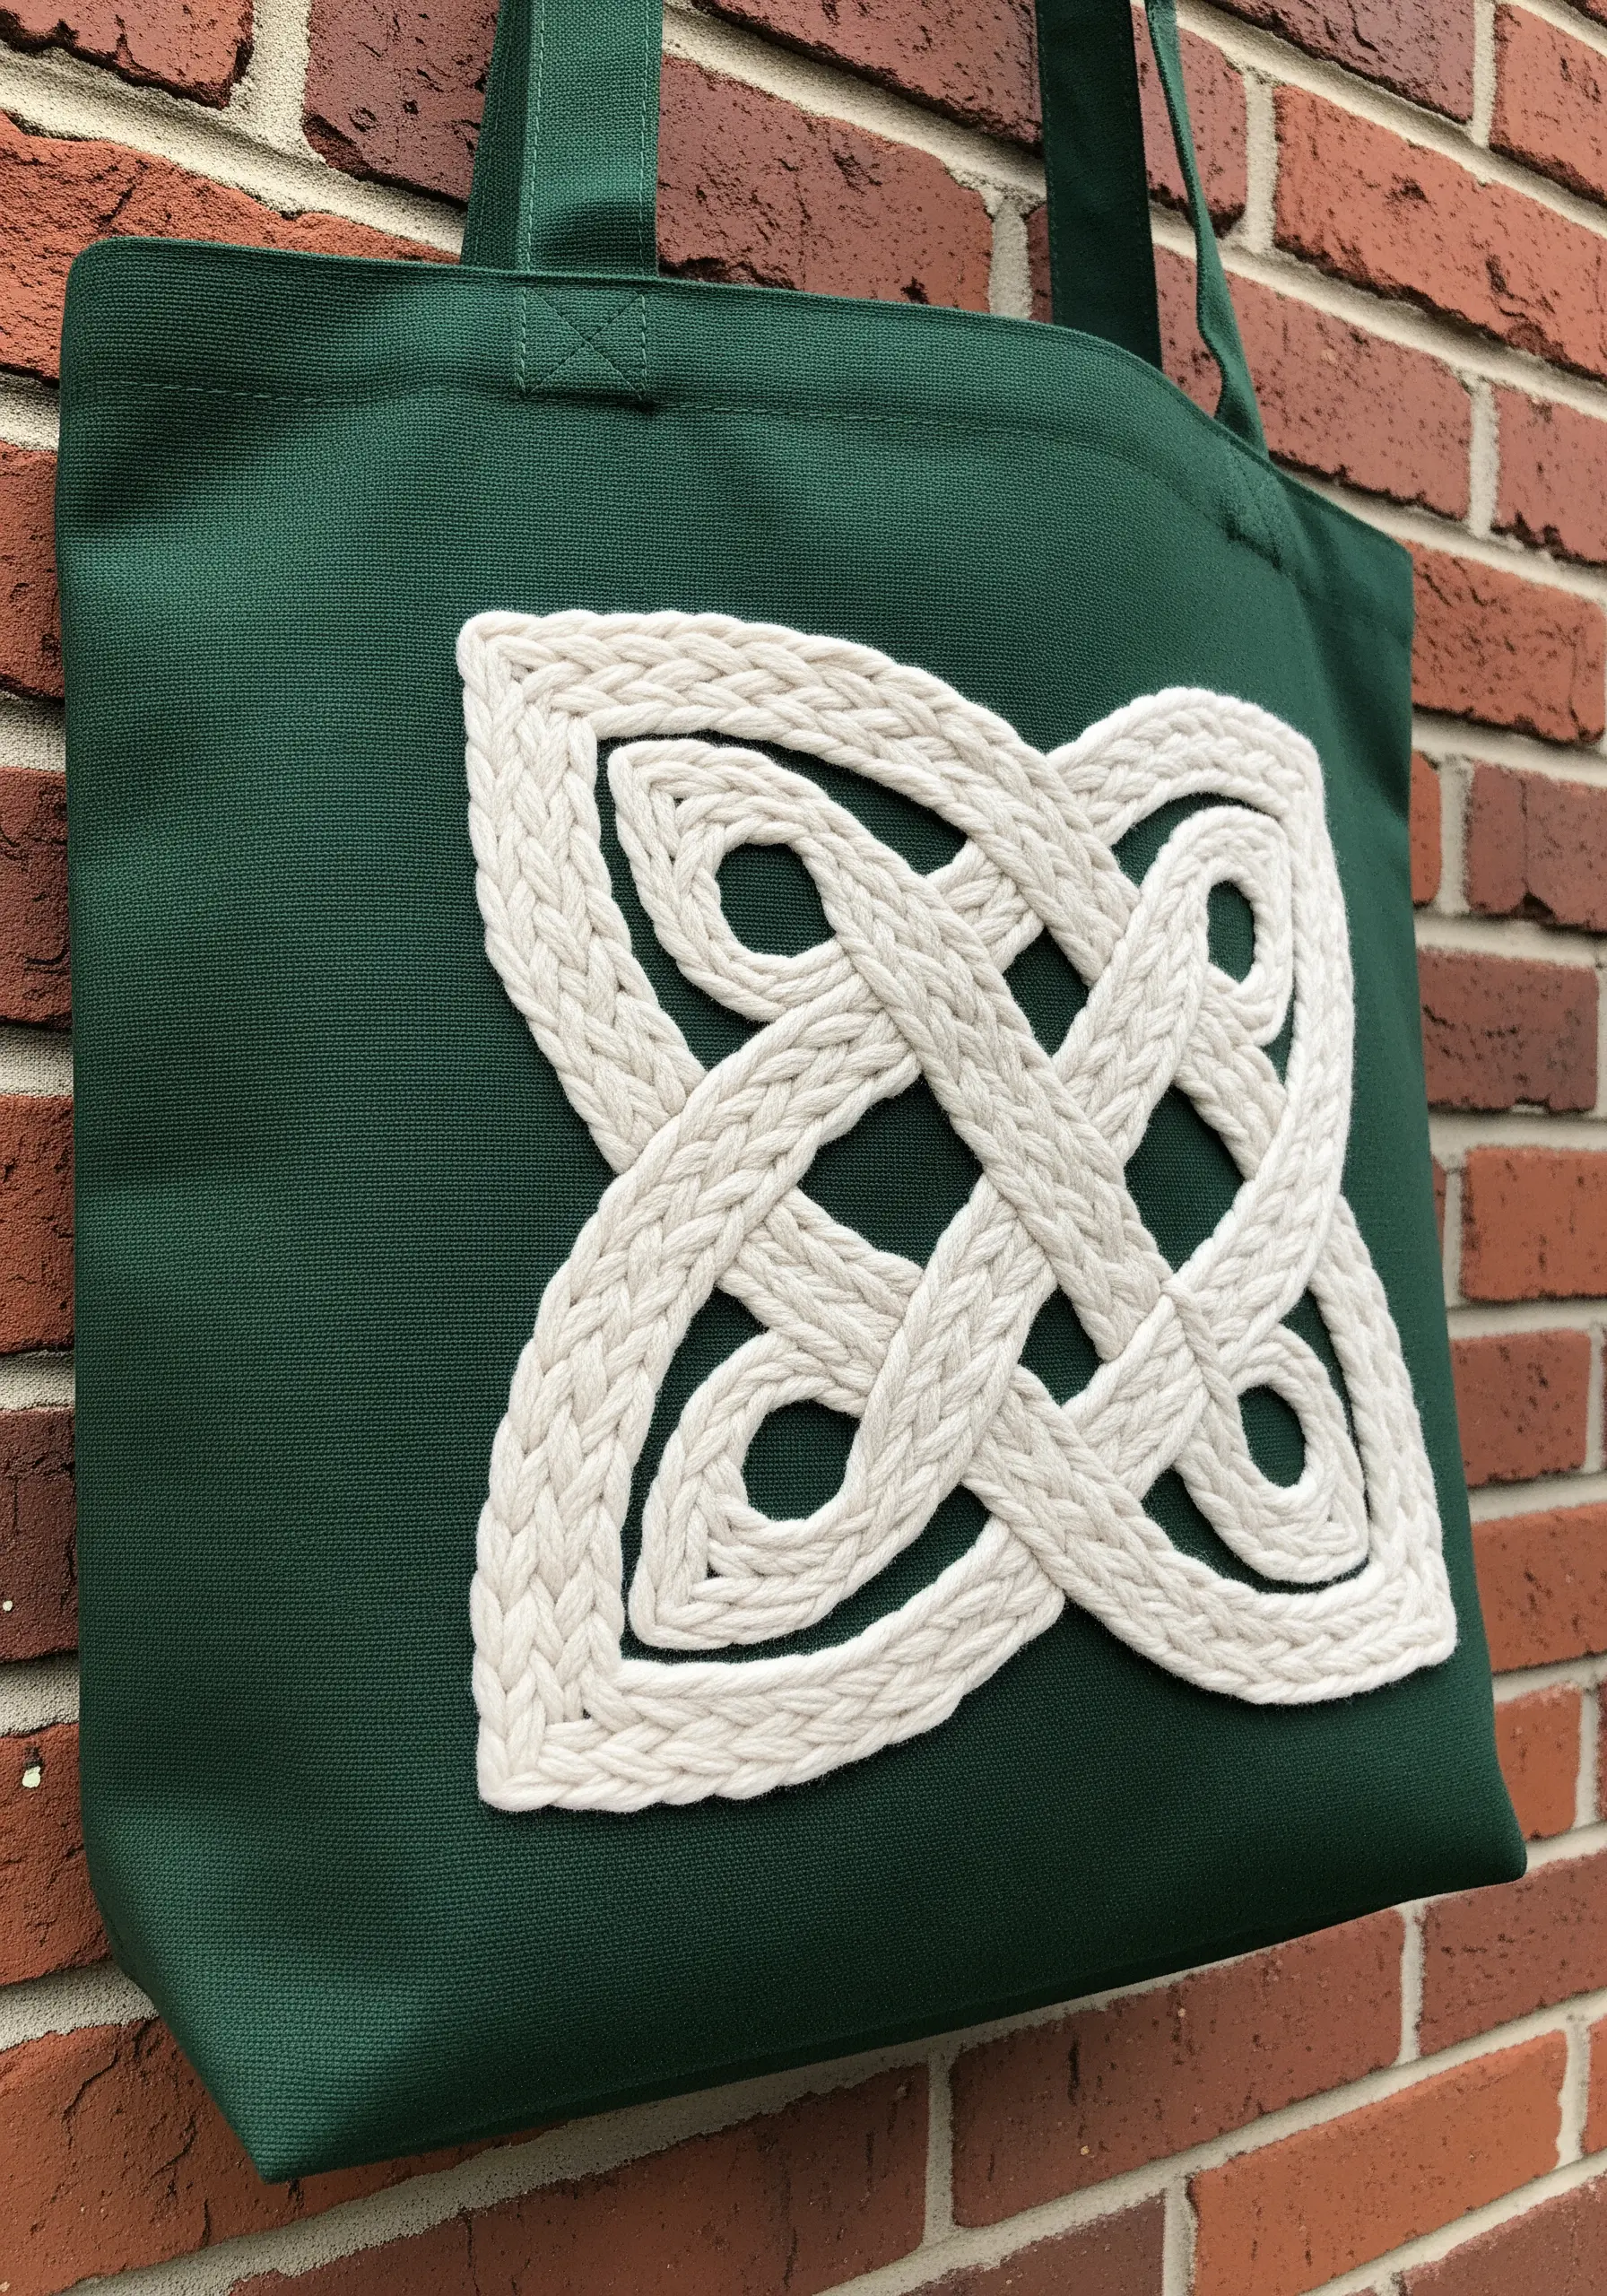
Achieve the bold, woven look of macrame without needing to tie a single knot.
Choose a soft, thick cotton cord or rope and lay it on your fabric following the lines of a Celtic knot or another interwoven pattern.
Using a strong, matching embroidery thread, secure the cord to the tote bag with small, evenly spaced couching stitches that sink into the cord’s texture, becoming almost invisible.
This technique is surprisingly fast and creates a dramatic, tactile statement piece. It is a great application of yarn wall art techniques on a portable surface.
22. Create Motion with Rolled Fabric Coils
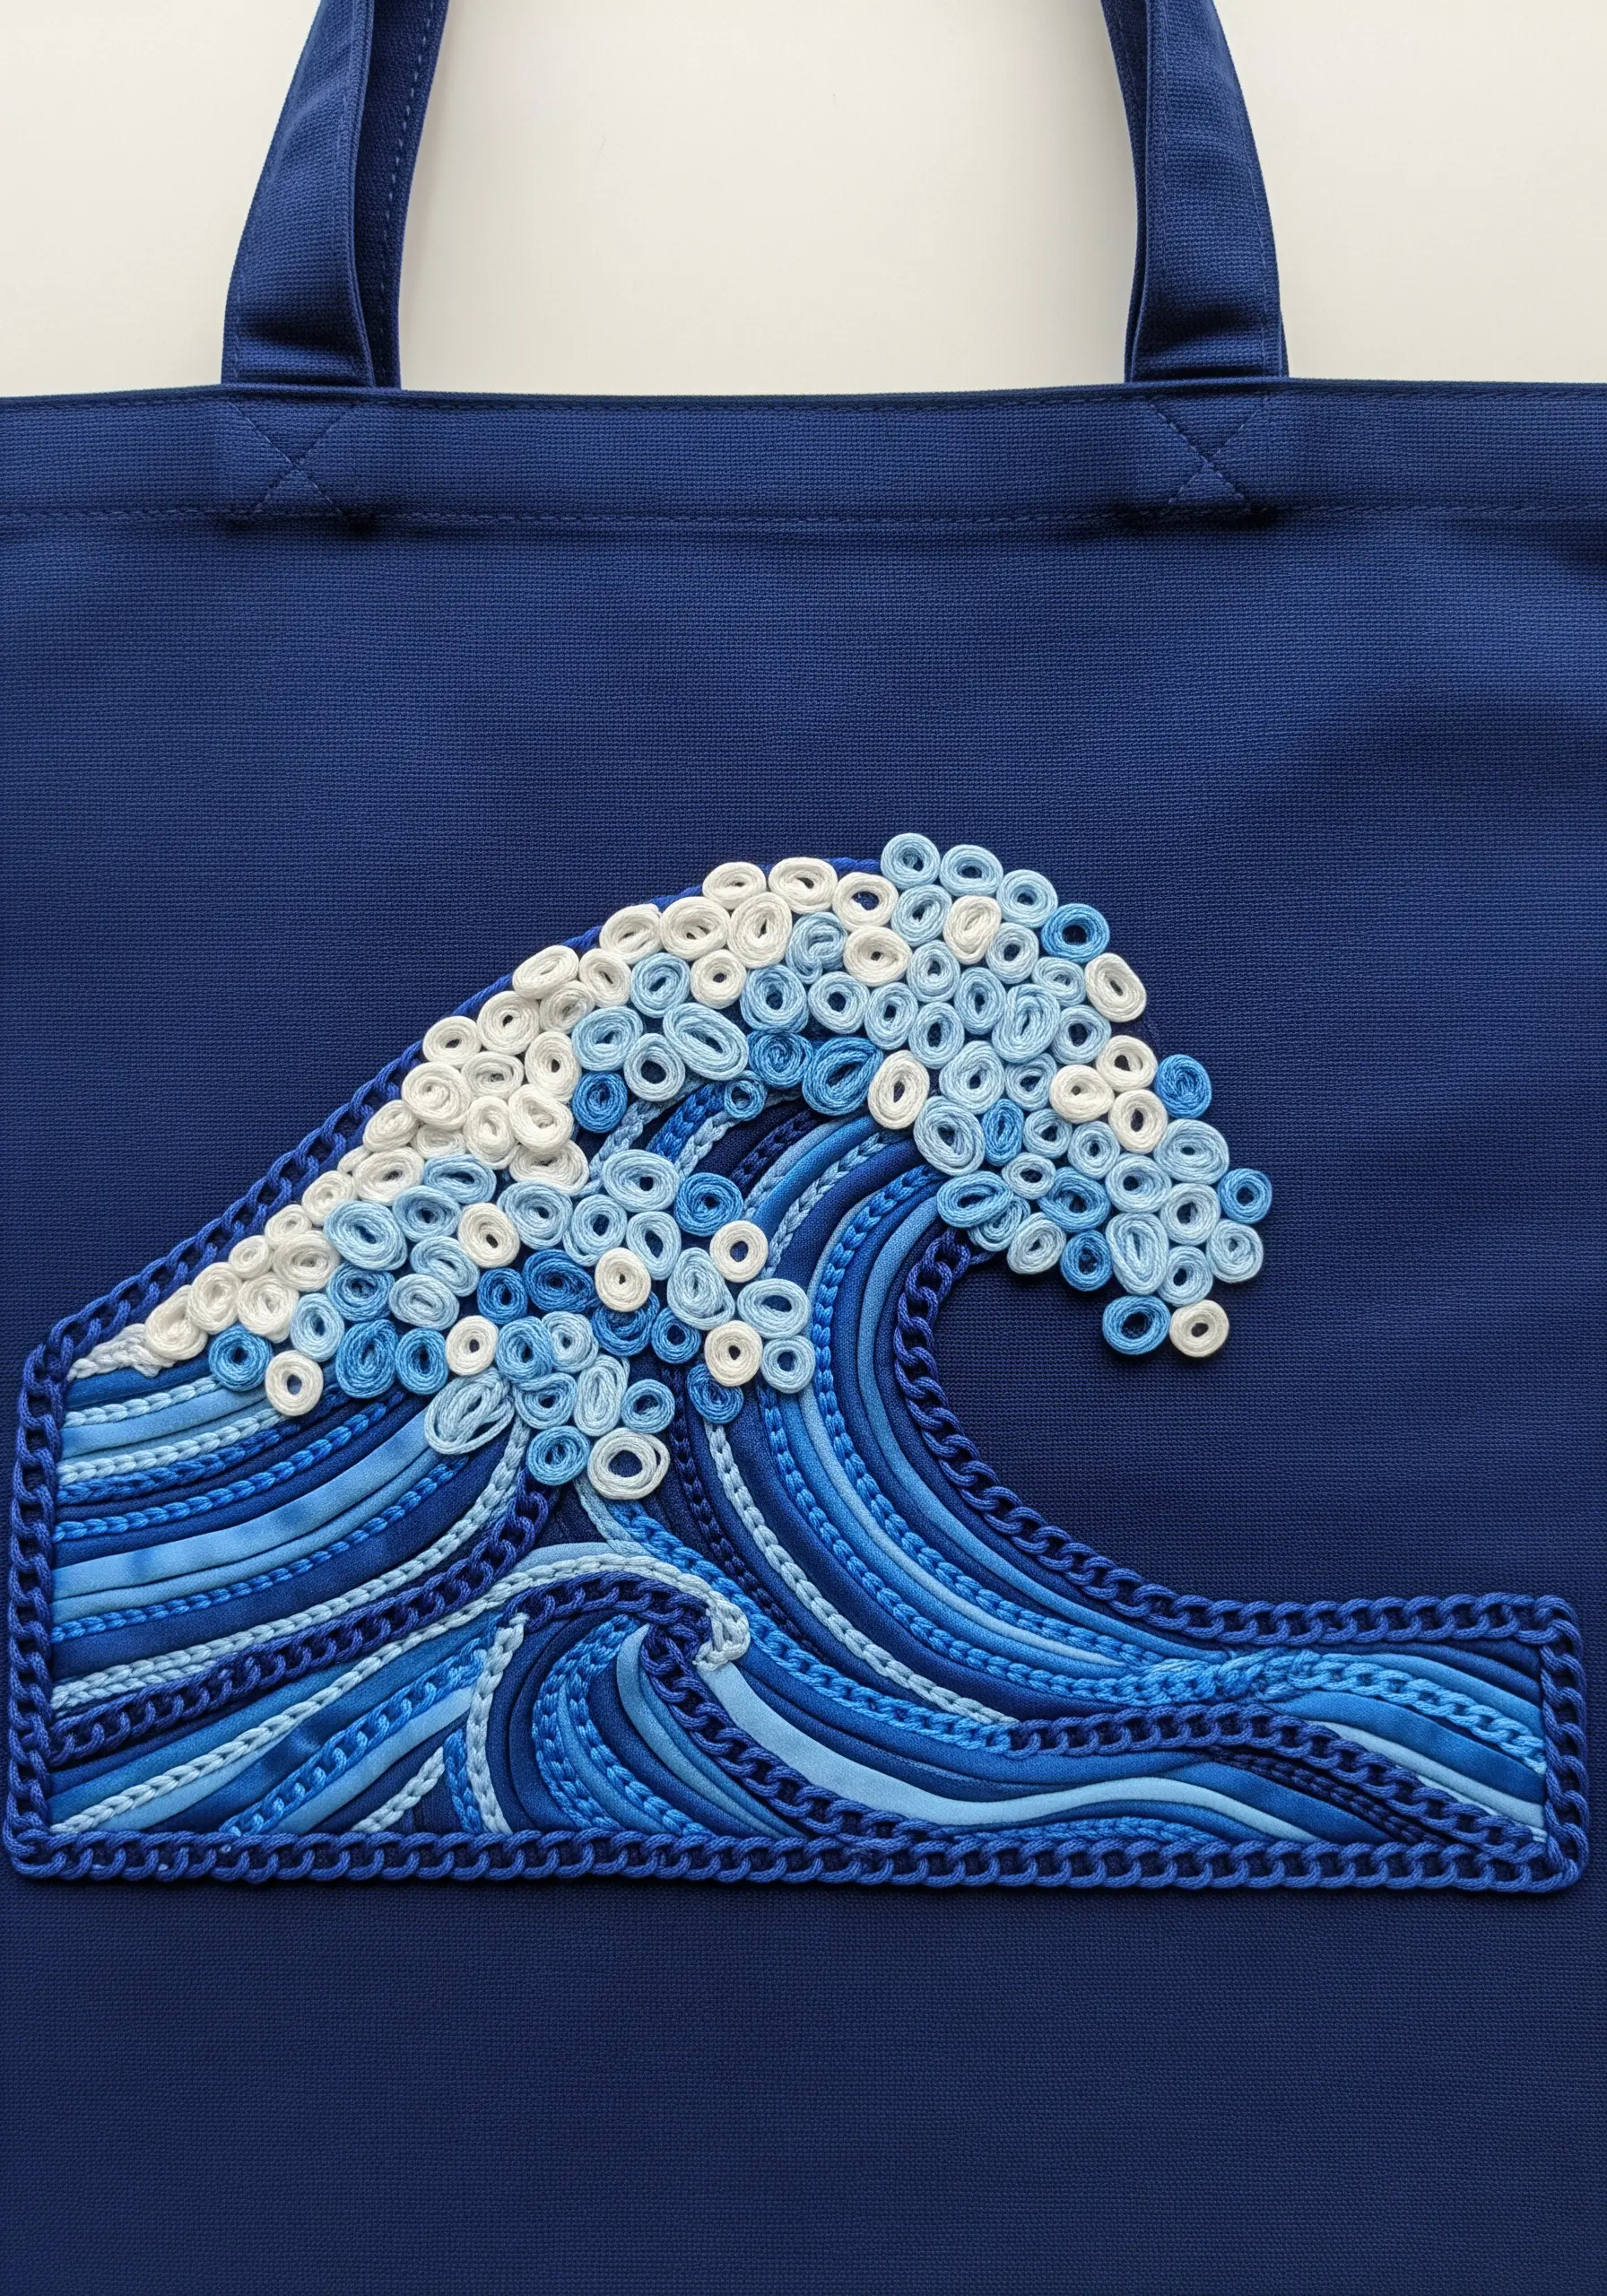
Build incredible texture and a sense of movement by incorporating fabric quilling into your design.
Cut thin strips of cotton fabric in your desired colors, roll them into tight coils, and stitch them down on their edges to secure them.
Arrange these coils to create the frothy crest of a wave, contrasting their bubbly texture with the smooth, linear chain stitches and satin stitches below.
This innovative method adds a sculptural quality and is a fantastic way to use up small fabric scraps.
23. Sculpt 3D Florals with Woven Wheels
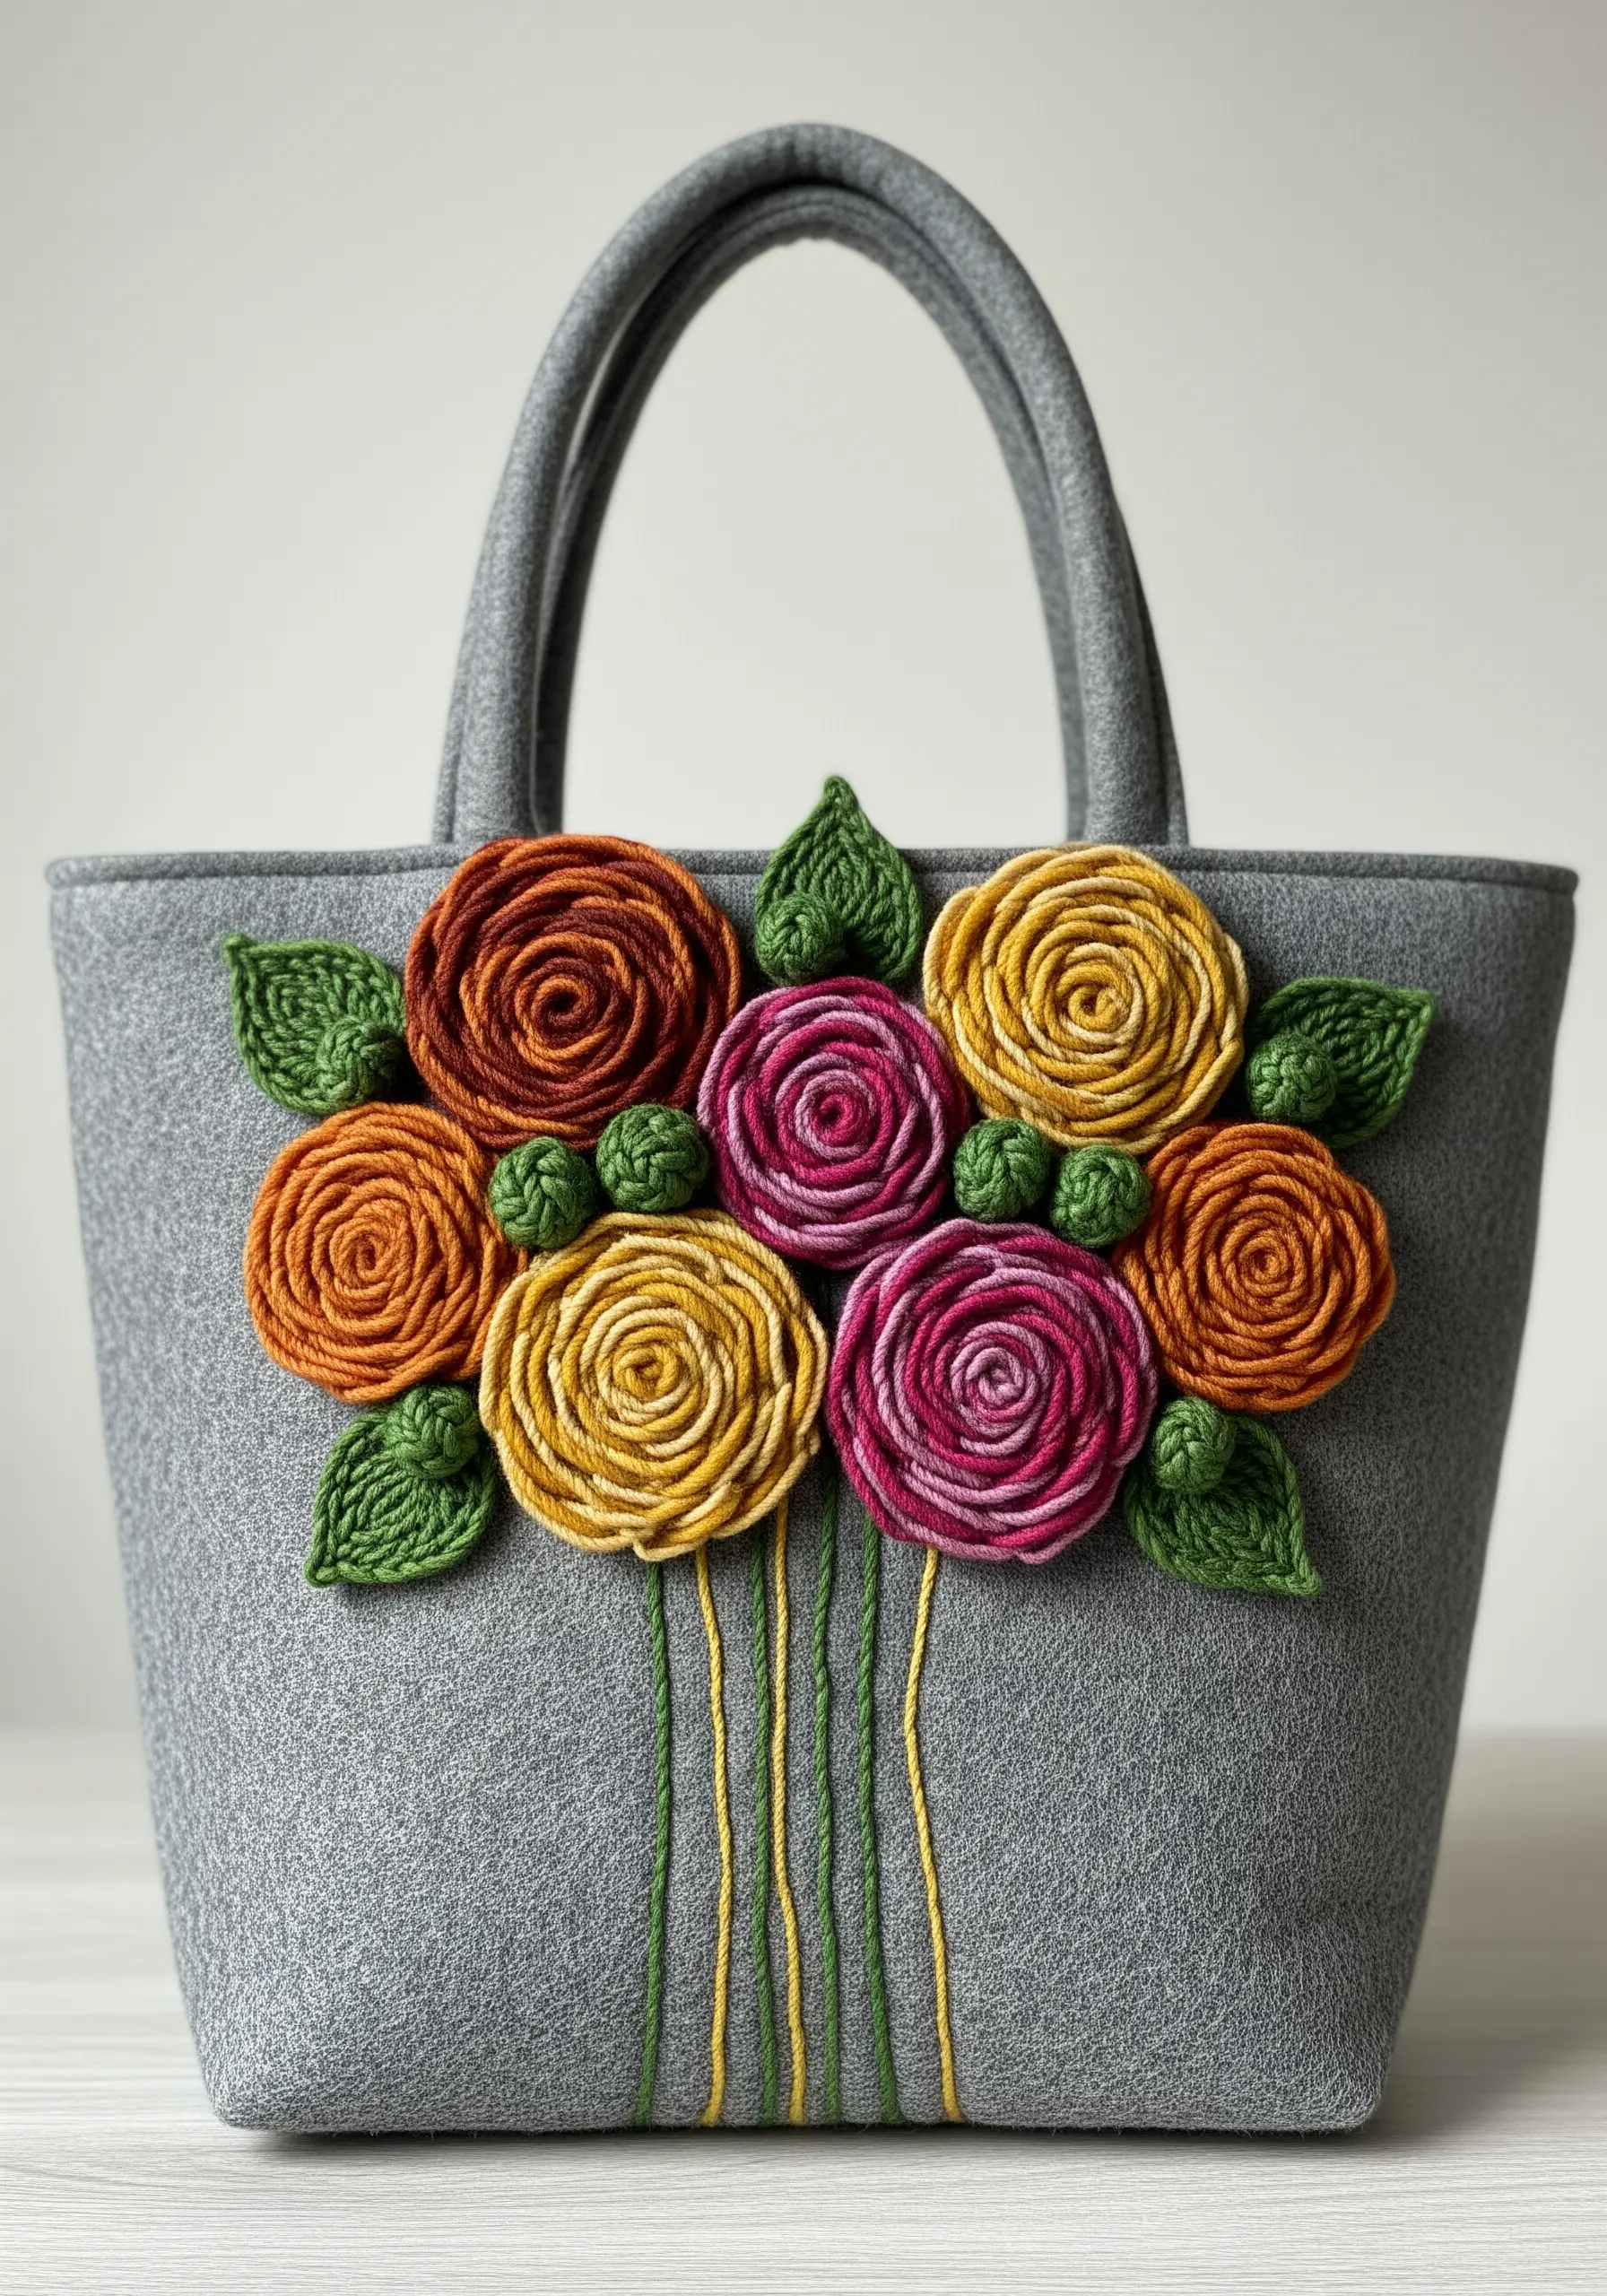
Create beautiful, fully dimensional roses with the woven wheel stitch (also known as the spider web rose).
Start by making a small star of straight stitches as your foundation (typically five or seven spokes).
Then, using a thicker thread like crewel wool or multiple strands of floss, weave your needle over and under the spokes until they are completely covered, building a raised, circular rose.
Because these stitches sit on top of the fabric, they are perfect for felt or other thick materials that can be difficult to pierce repeatedly.
24. Combine Outline and Fill for a Pop Art Effect
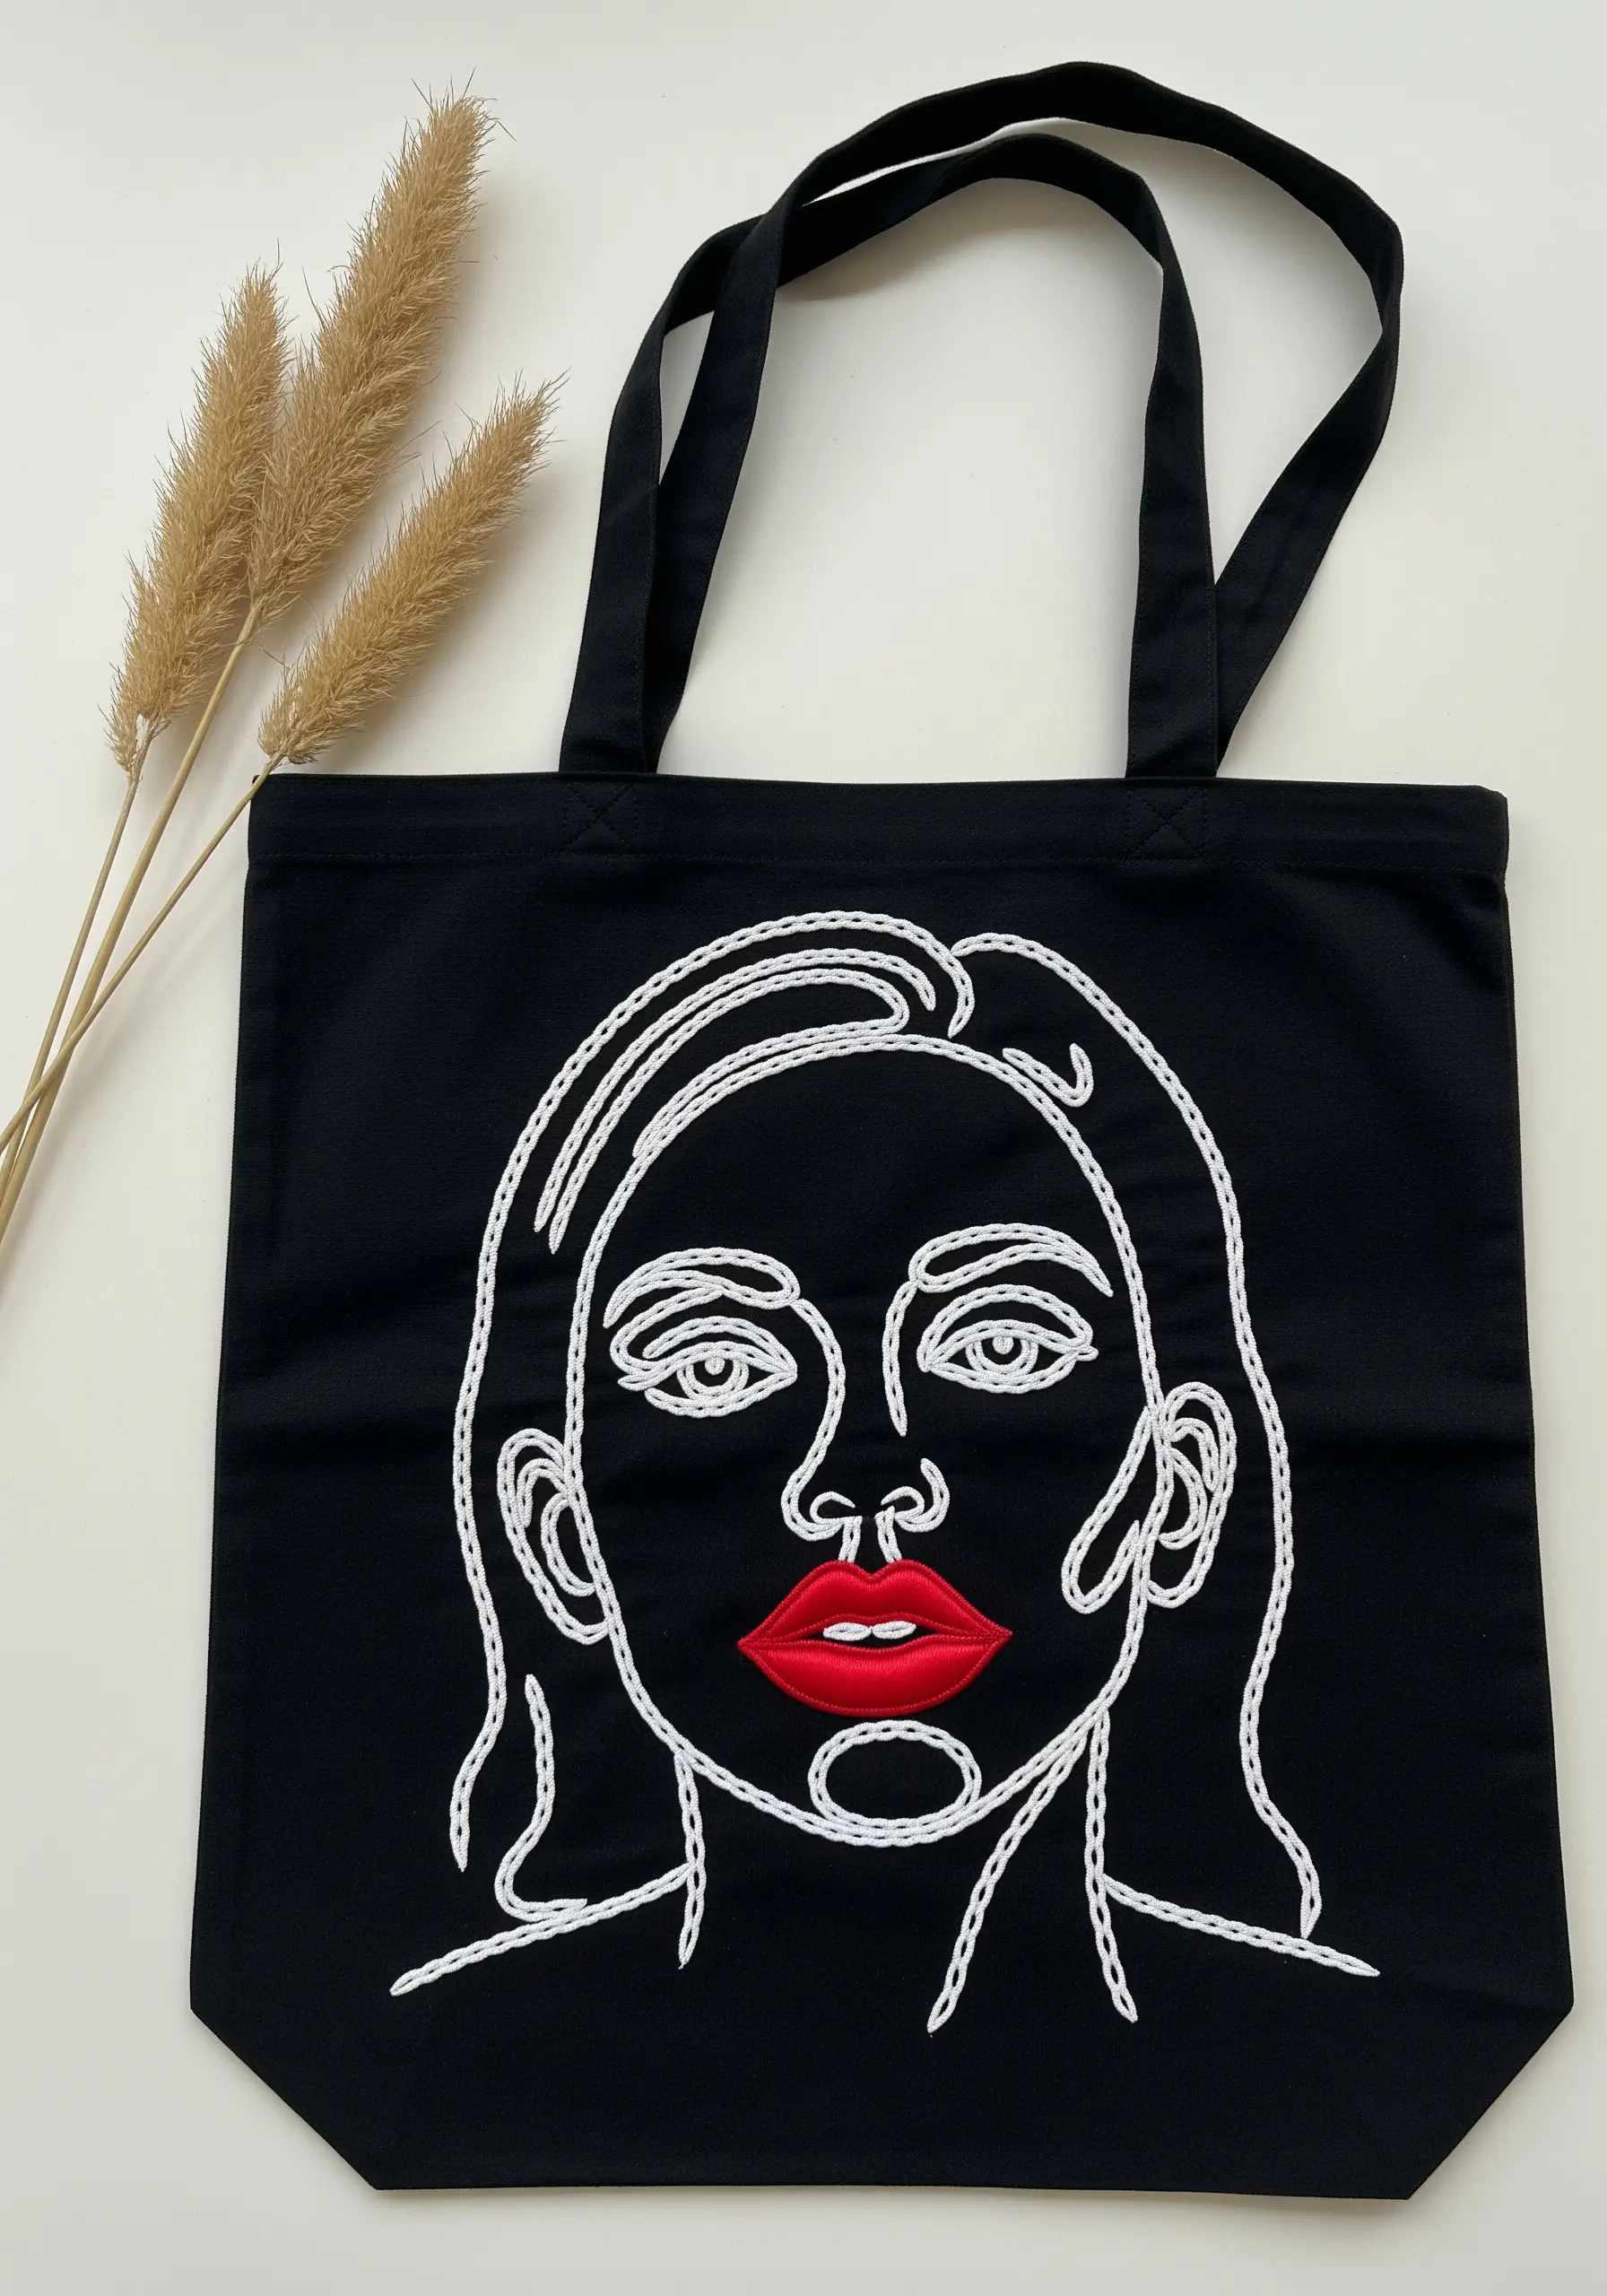
Achieve a striking, graphic look by pairing a simple outline stitch with a single, bold area of satin stitch.
Use a clean backstitch or stem stitch in a high-contrast color, like white on black, to define the entire portrait.
Then, select one feature—in this case, the lips—to fill with a solid, vibrant color using a smooth satin stitch.
This minimalist approach directs the viewer’s focus immediately, creating an artistic, modern statement that feels both effortless and intentional.


