

A simple canvas tote bag holds so much potential. It’s more than just a practical accessory; it’s a blank surface waiting for your unique creative voice. You already have the skill to follow a pattern, but now you’re ready to move beyond that—to make choices that transform your stitching from a hobby into a personal art form.
Elevating your work isn’t about learning dozens of complex new stitches. It’s about intention. It’s in the deliberate choice of a whipped backstitch for a bolder line, the subtle shift between two shades of gray to create depth, or the decision to fill a shape with texture instead of just color. Neutral tones, in particular, allow these details to shine, focusing the eye on the quality of your craft and the elegance of your design.
Think of these ideas not as strict rules to be followed, but as invitations to experiment. Let them inspire you to look at your threads, your stitches, and your canvas with a fresh perspective. Your needle is your tool, and with a few intentional choices, you can turn any blank tote bag into a sophisticated, chic accessory that is unmistakably yours.
1. The Art of the Satin Stitch Arch
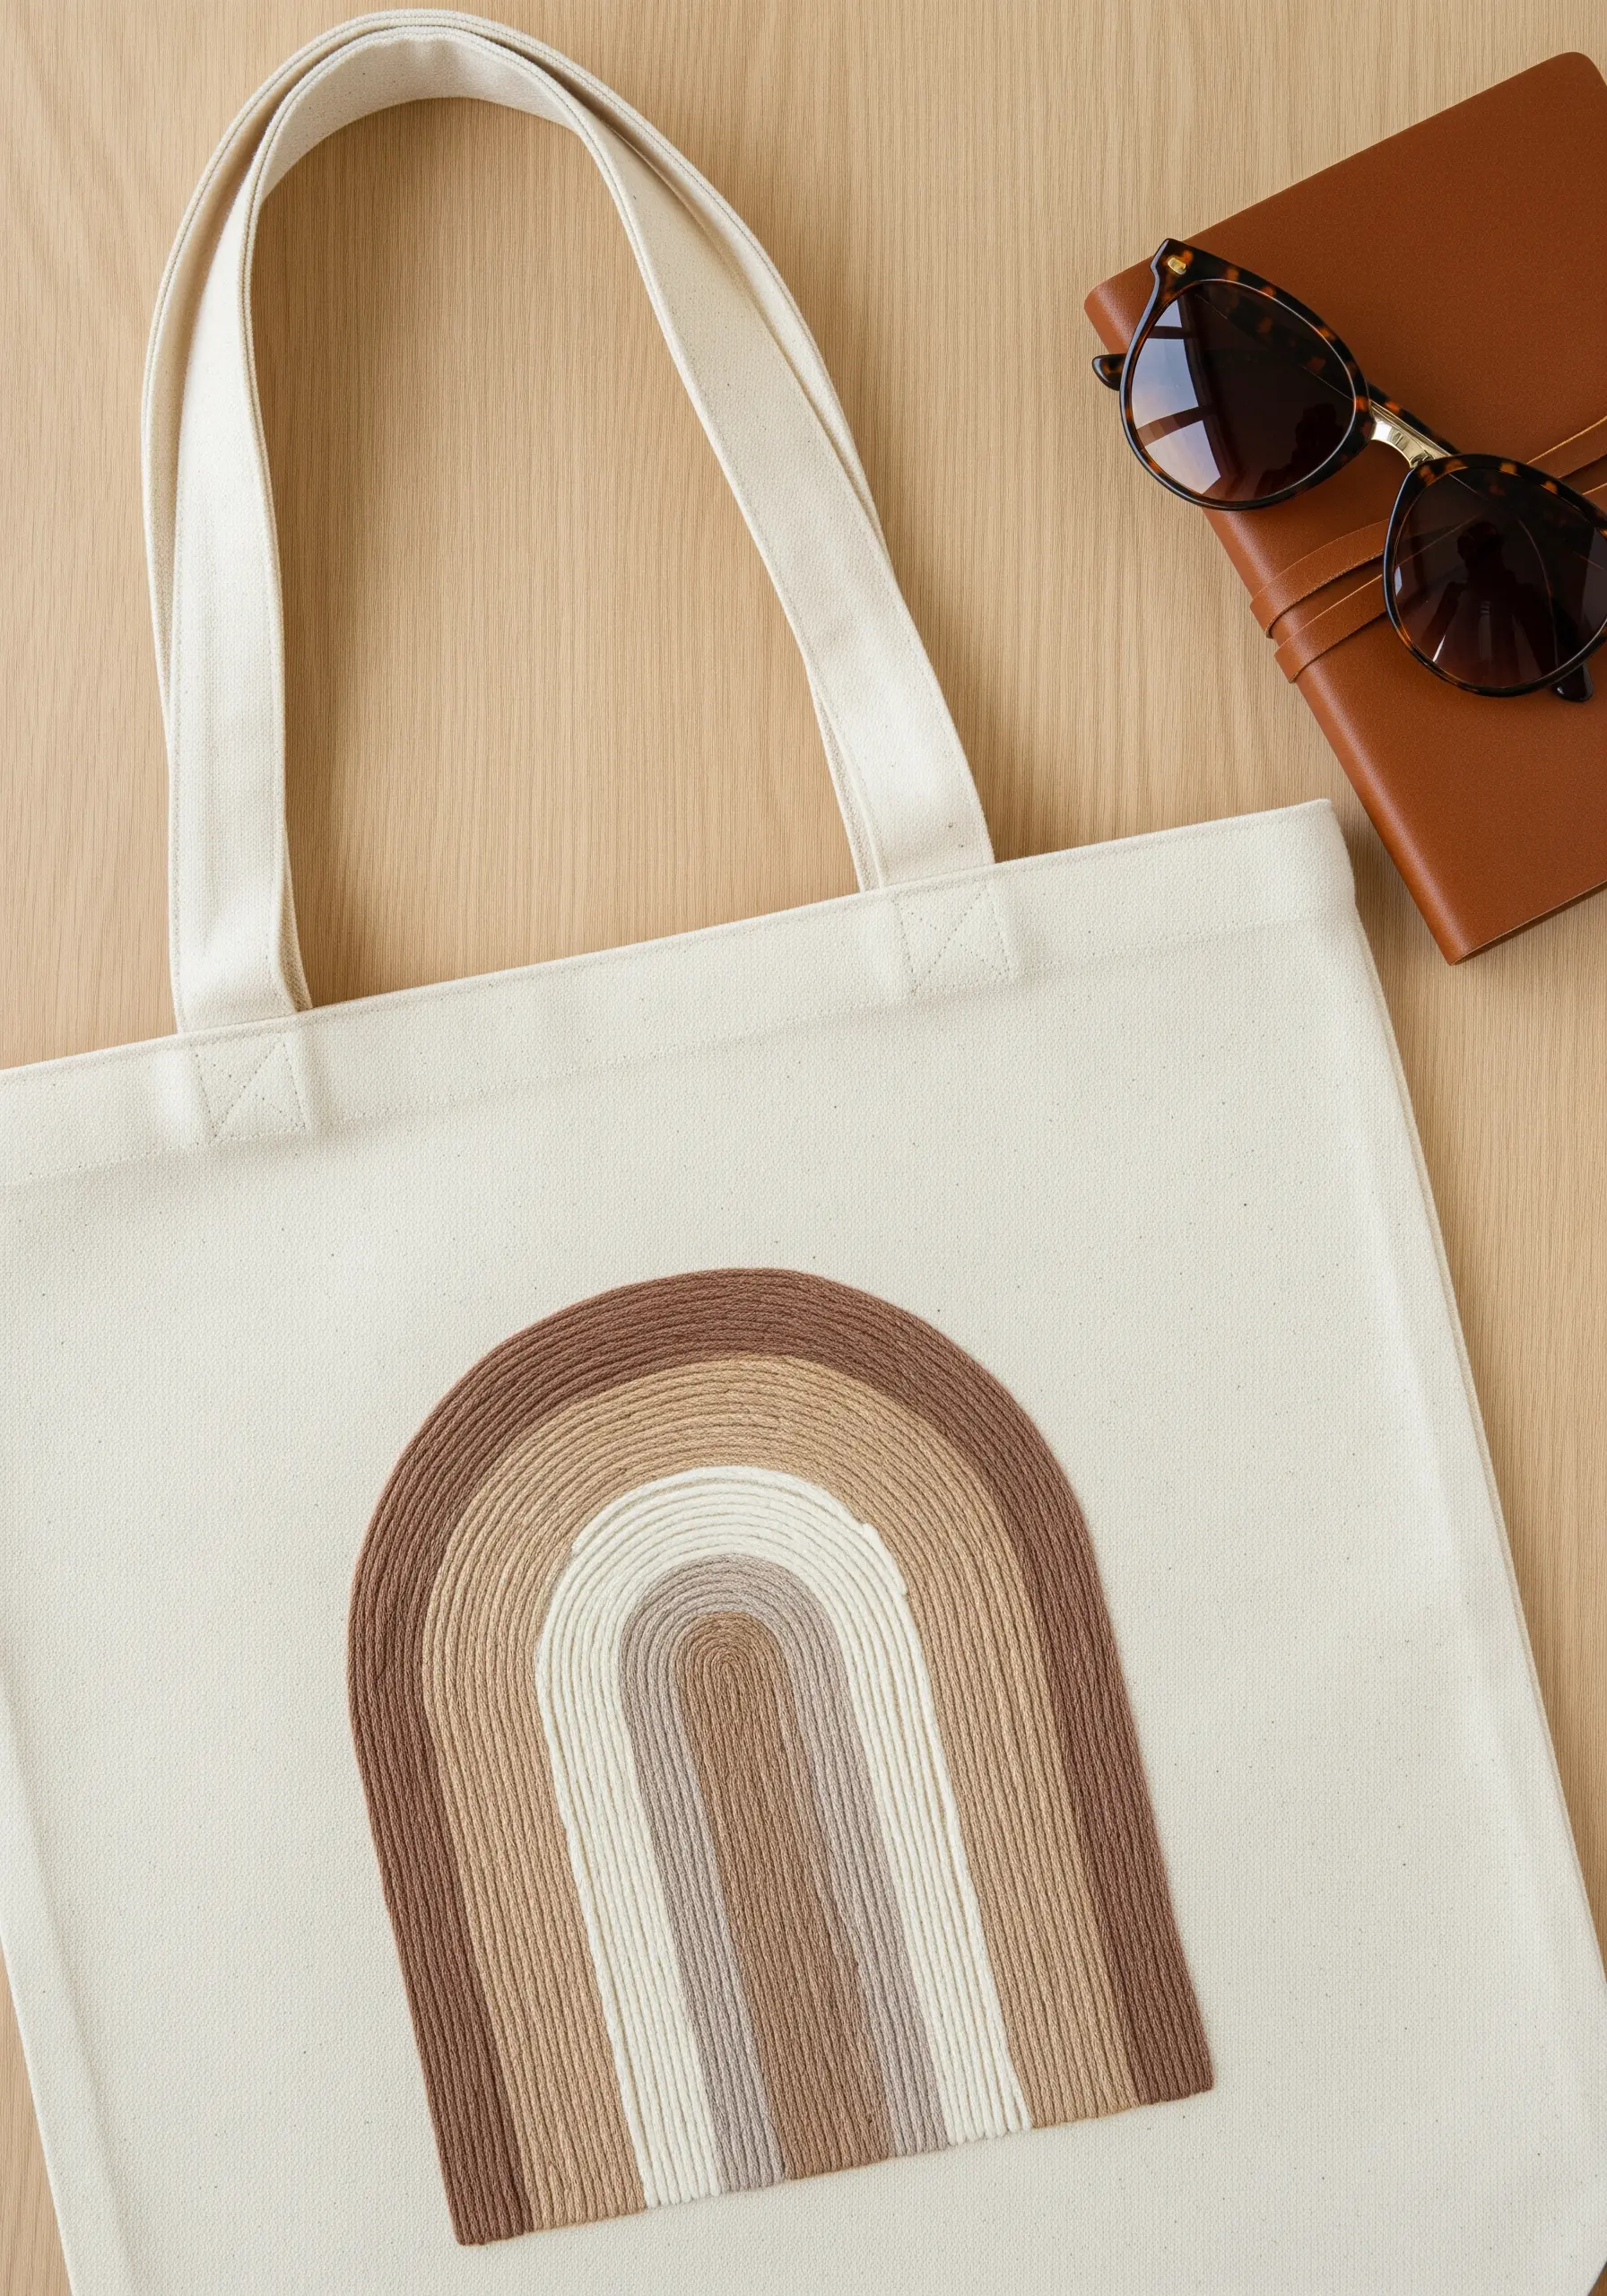
To achieve this perfectly smooth, dense texture, the secret is in the details of your satin stitch.
Work with fewer strands of floss—two or three at most—and use a laying tool (or a larger tapestry needle) to ensure the threads lie flat and parallel with every single stitch.
This technique eliminates gaps and creates a reflective, seamless surface that gives the simple arch its power.
The neutral color progression from deep brown to soft cream feels sophisticated because the focus remains on the flawless, tactile quality of the embroidery itself.
2. Sculpting Leaves with Directional Satin Stitch

You can create the illusion of light and shadow on leaves simply by changing the direction of your satin stitch.
Instead of stitching straight across, angle your stitches from a central line outwards toward the leaf’s edge, mimicking the natural growth of its veins.
Using two very close shades of muted green-gray, one for each half of the leaf, will add a subtle depth that feels incredibly realistic.
For the delicate stem, use a whipped backstitch to create a raised, cord-like line that provides a clean foundation for the foliage.
3. Dimensional Line Art with Couching
Create a high-impact, sculptural line by using the couching technique instead of a standard outline stitch.
Lay a thick cord, a piece of yarn, or several strands of floss bundled together onto the fabric surface.
Then, use a single, contrasting strand to tack it down with small, perpendicular stitches.
This method is much faster than filling a thick line with satin stitch and creates a bold, raised effect that stands out dramatically against the tote bag’s fabric.
4. Celestial Details with Metallics and French Knots
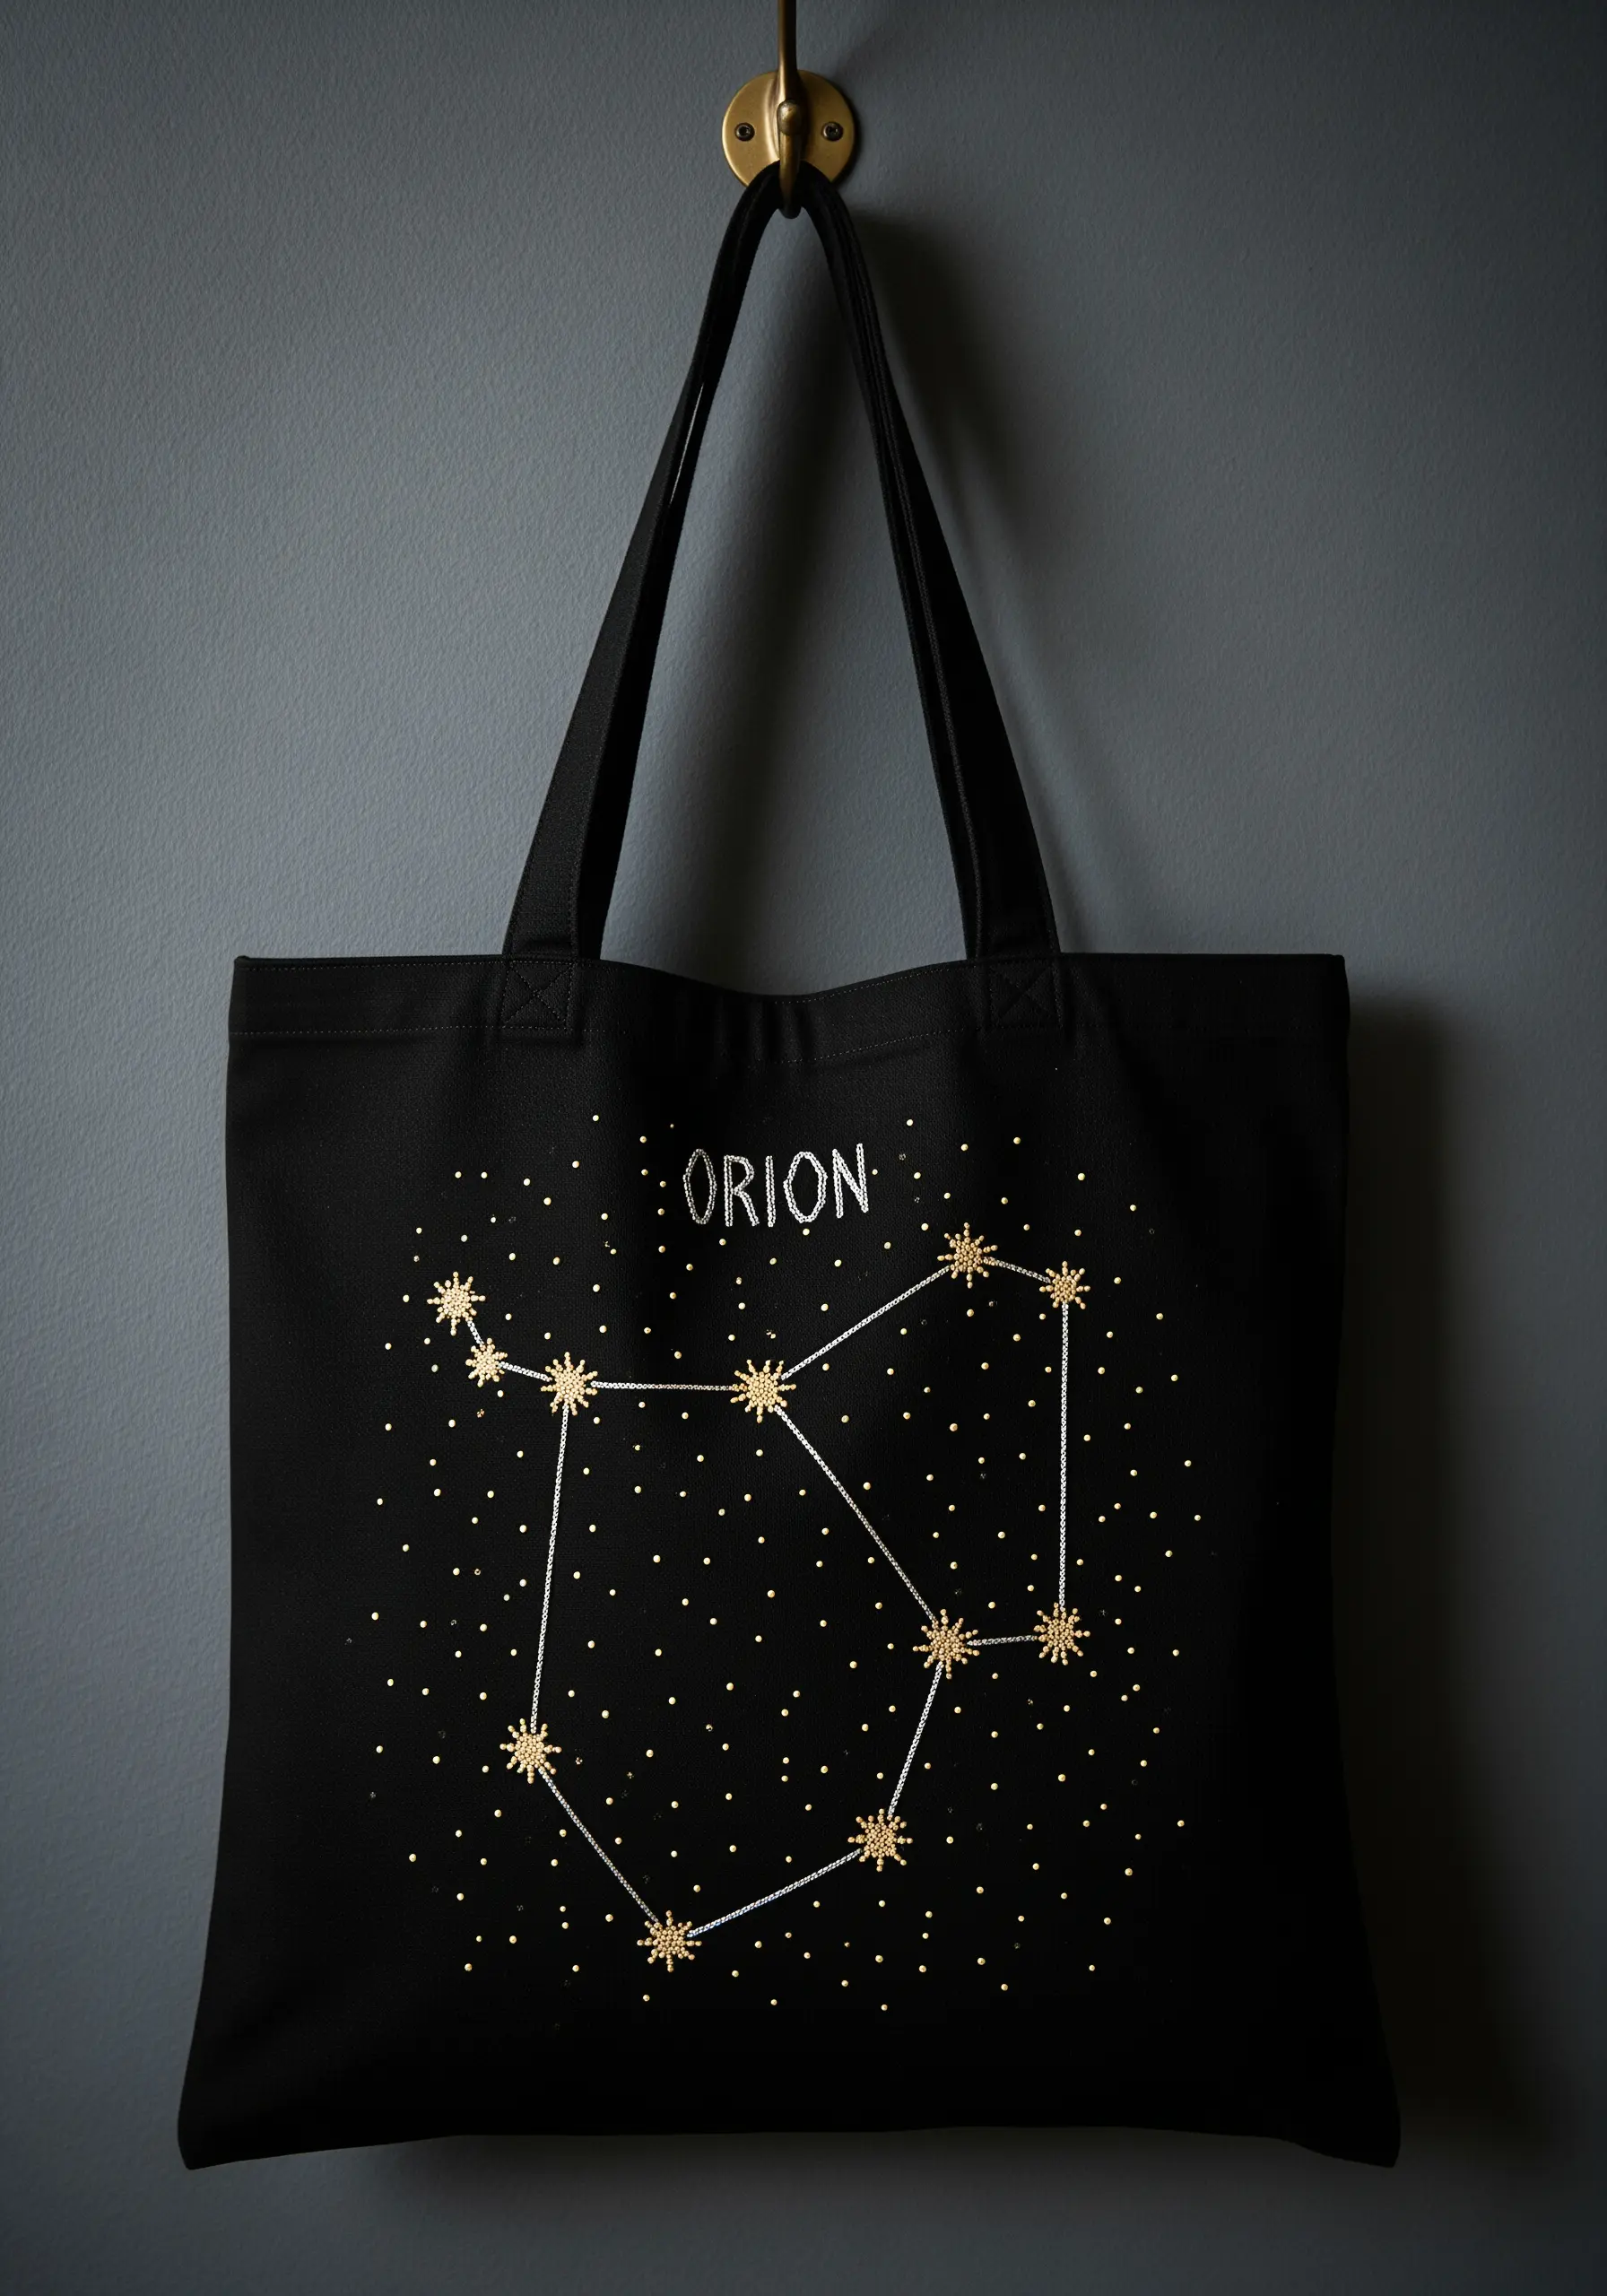
Bring a constellation to life by combining different thread textures and stitch types for a dynamic finish.
Use a fine, single-strand metallic thread for the connecting lines, stitched with a simple backstitch for precision.
For the stars, switch to a thicker metallic floss or multiple strands of a standard thread to create prominent satin-stitched starbursts.
Add a few scattered French knots to represent smaller, distant stars—the mix of sharp lines and soft dots is what makes the design shimmer.
5. Mastering the Sunray Gradient with Negative Space
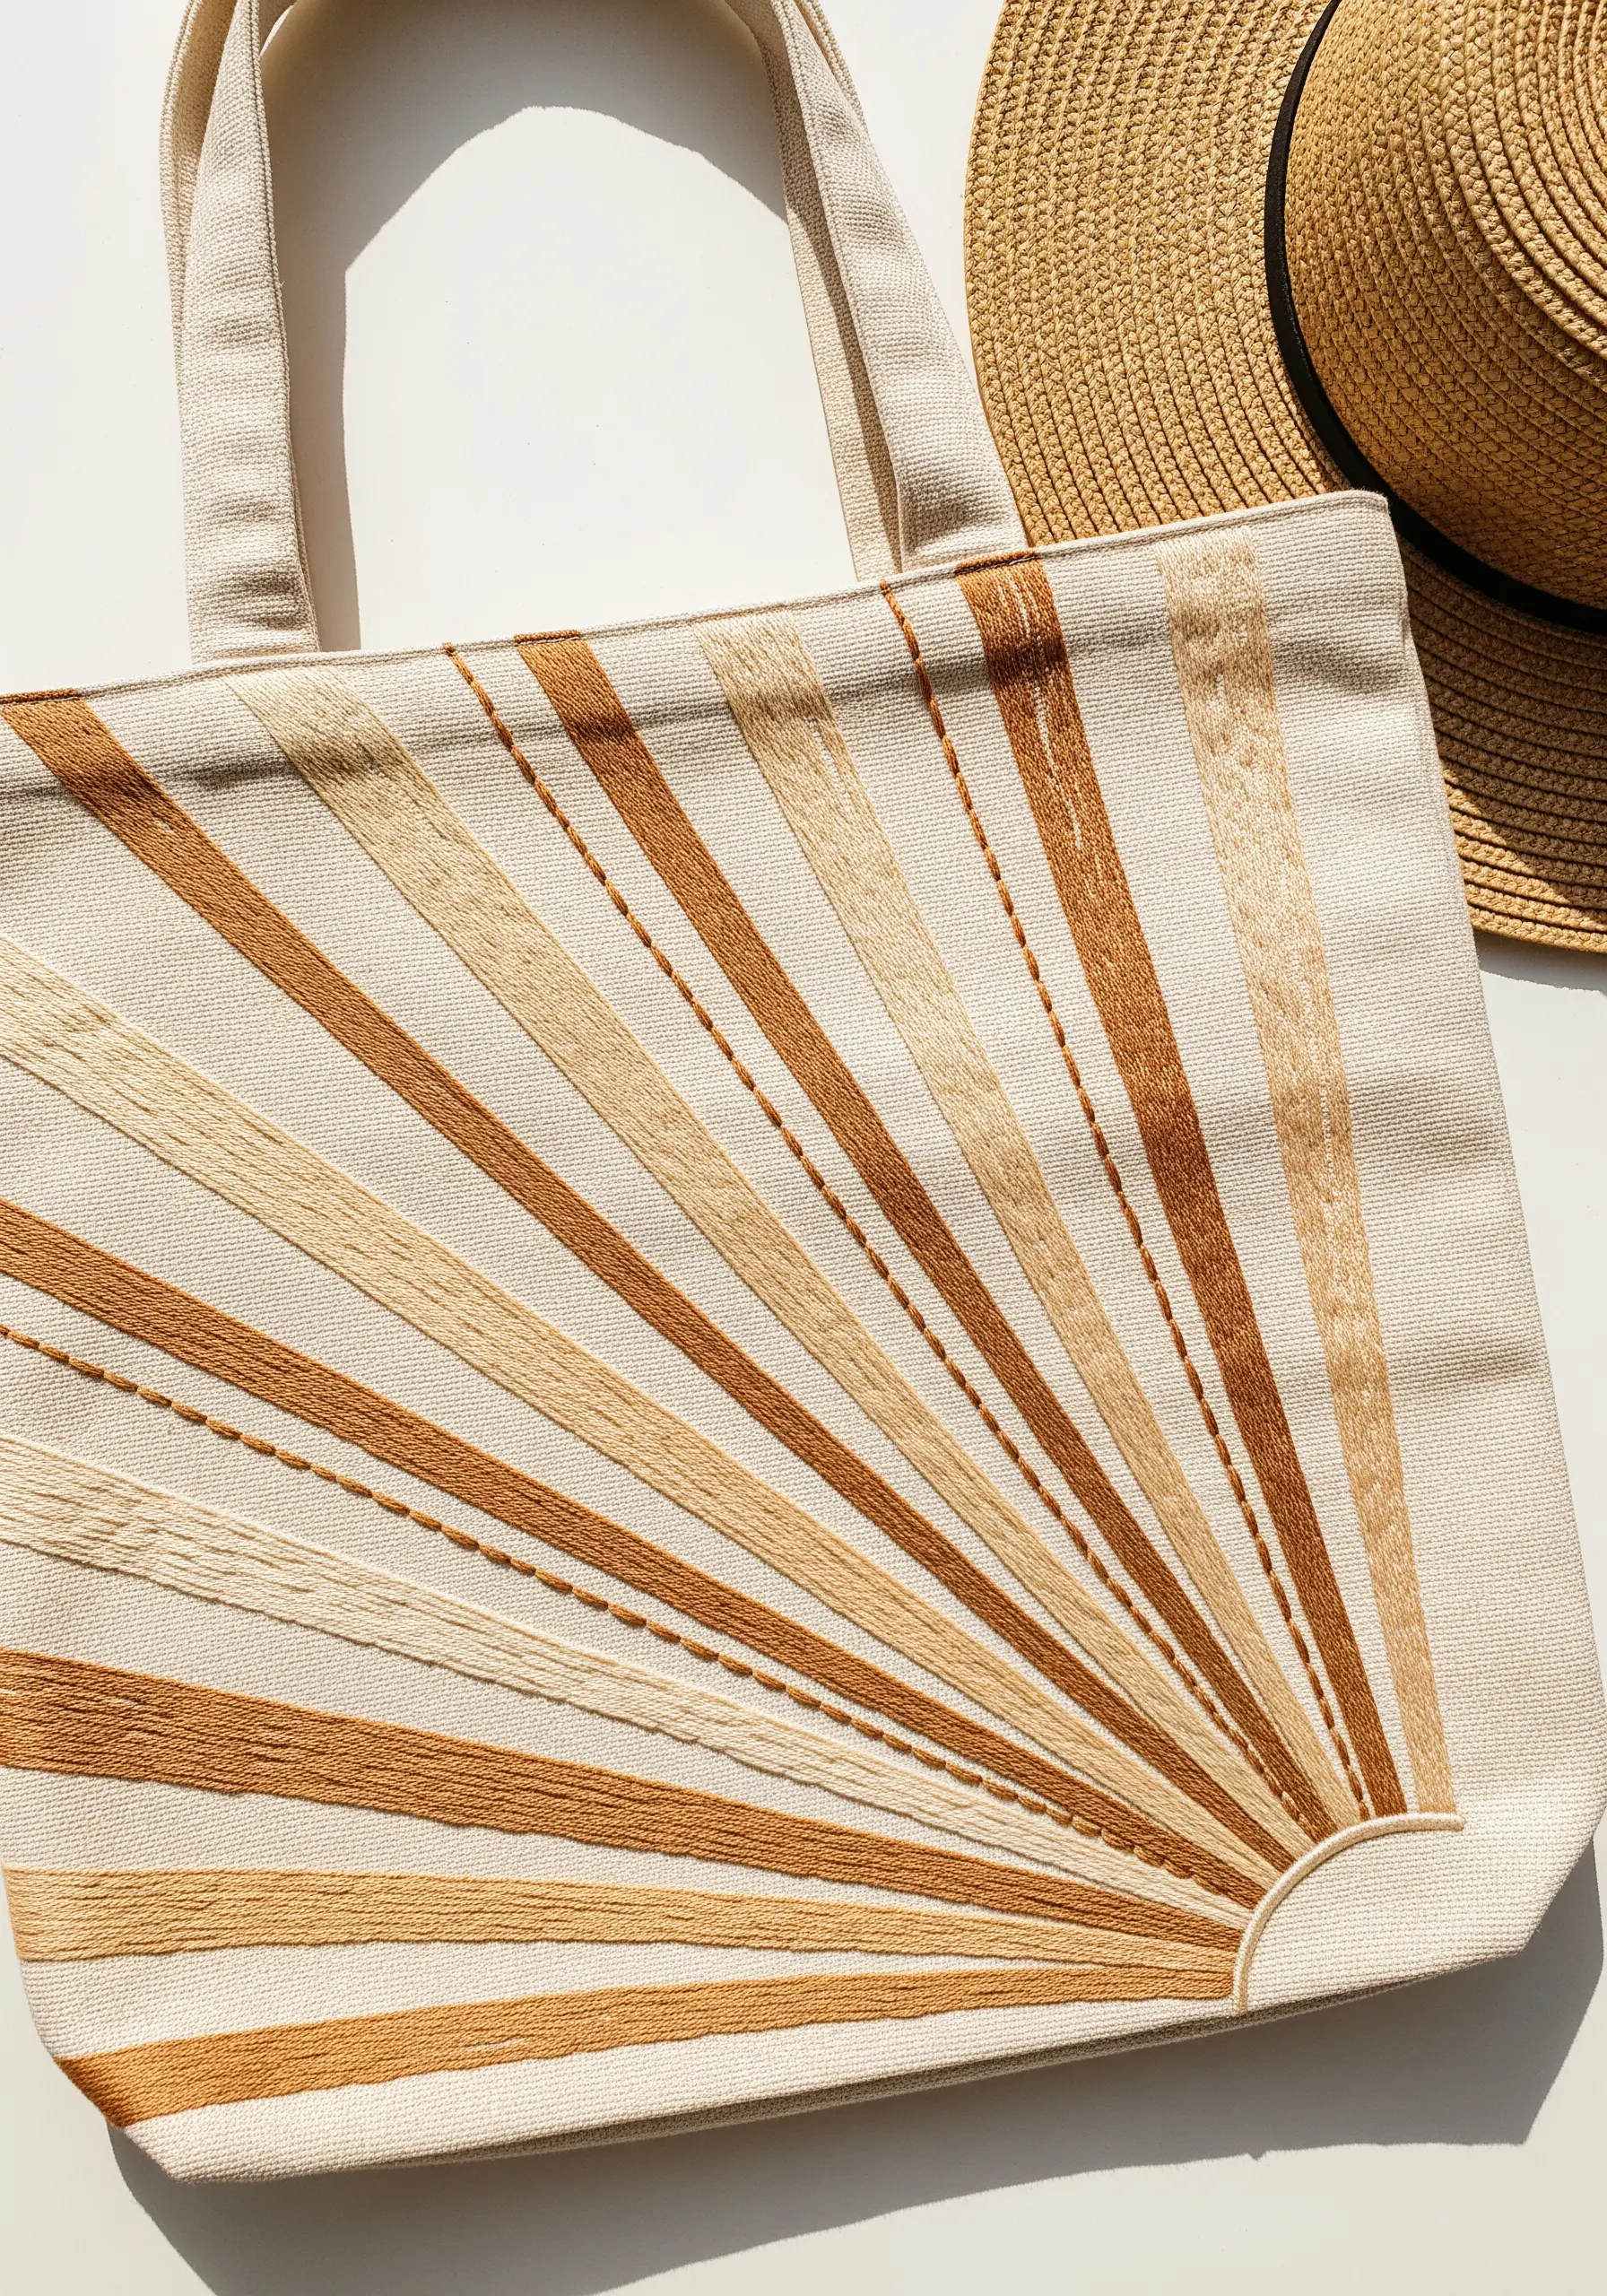
This radiating design gets its clean, graphic look from the interplay between stitched sections and the unstitched canvas.
To keep your lines perfectly sharp, outline each ray with a single split stitch before filling it with a directional satin stitch.
Varying the number of strands you use for each ray—perhaps four for the wider bands and two for the thinner ones—will add a subtle but effective layer of texture.
This technique turns a simple sunburst into a sophisticated piece of modern thread abstract designs.
6. The Meditative Rhythm of Pattern Stitching
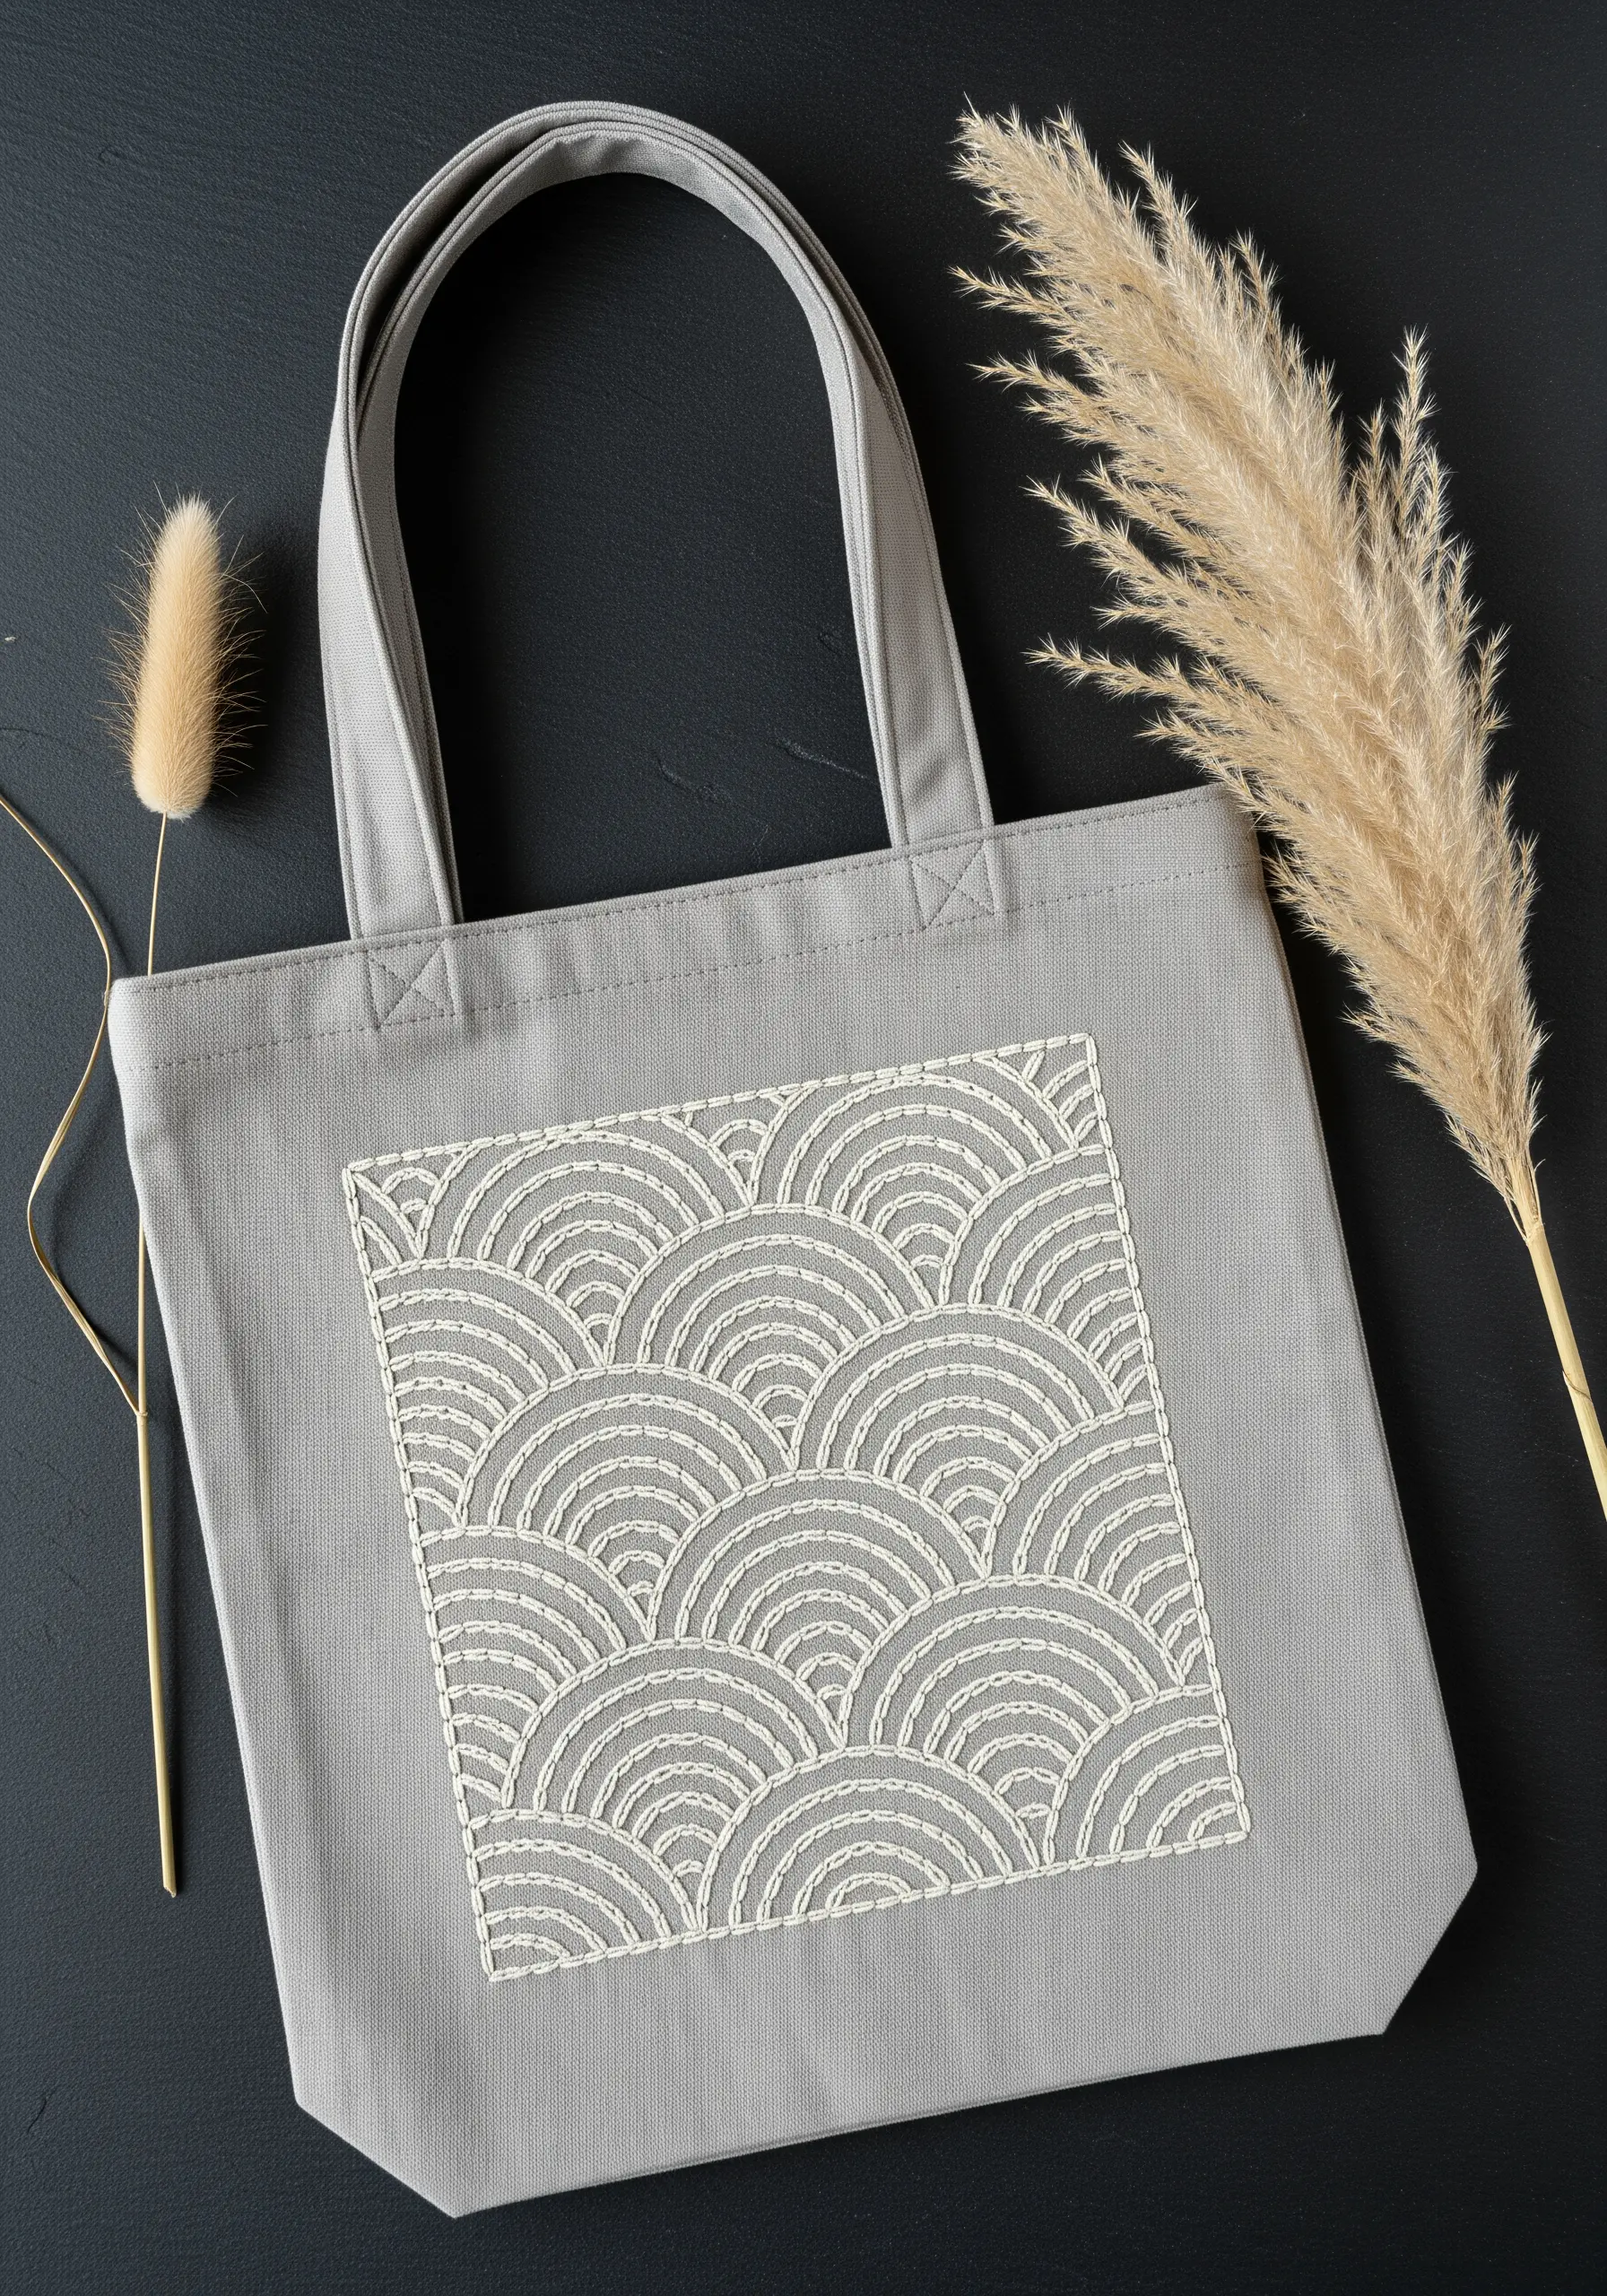
A repetitive pattern like the Japanese Seigaiha wave relies on consistency to achieve its calming, elegant effect.
Use a whipped backstitch or a simple chain stitch to create clean, raised lines that give the pattern a satisfying texture.
The key is maintaining uniform stitch length and tension throughout the entire design, which turns the act of stitching into a meditative practice.
Using a single off-white thread on a muted gray bag creates a sophisticated, tone-on-tone look where the texture speaks louder than the color.
7. A Sampler of Geometric Textures
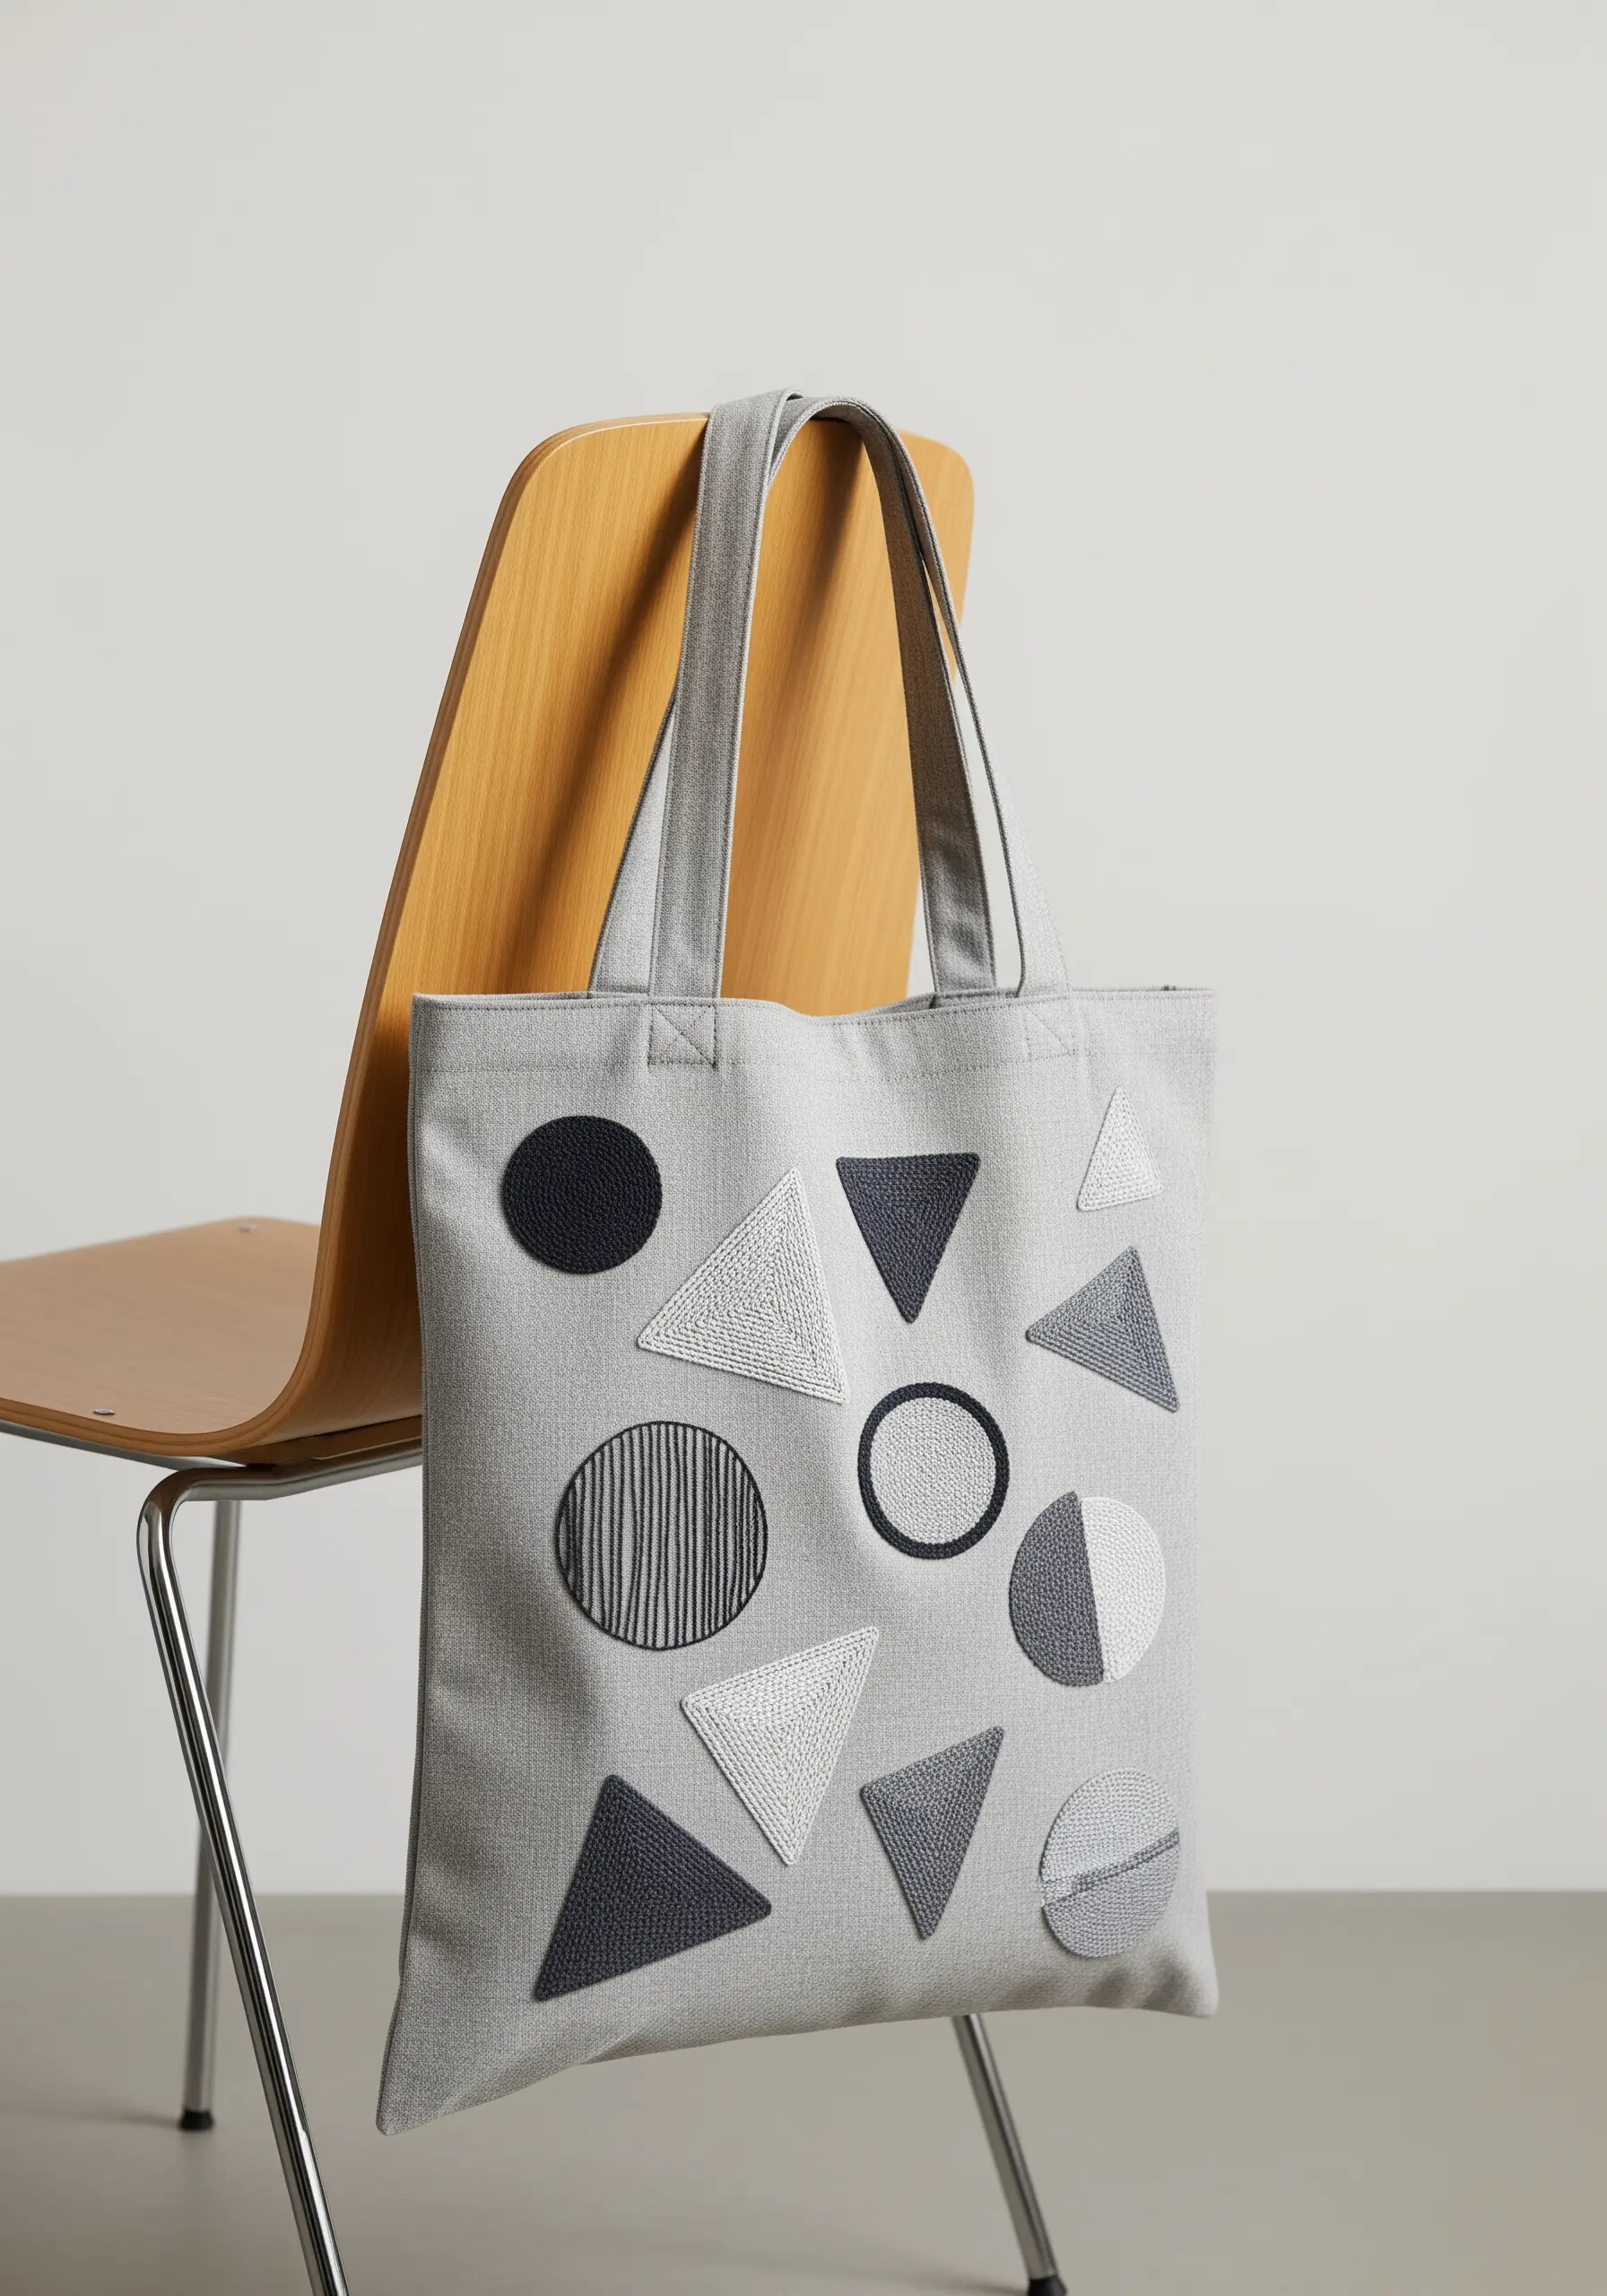
Elevate simple geometric shapes by turning them into a canvas for exploring texture.
Instead of just filling with one stitch, assign a different fill to each shape: use long-and-short stitch for a smooth, blended surface, seed stitch for a dotted texture, and tightly packed straight stitches for a linear grain.
This approach transforms a basic composition into a sophisticated tactile study, proving that texture can be just as expressive as color.
These geometric stitch patterns make any accessory look instantly modern.
8. Architectural Lines for Graphic Landscapes
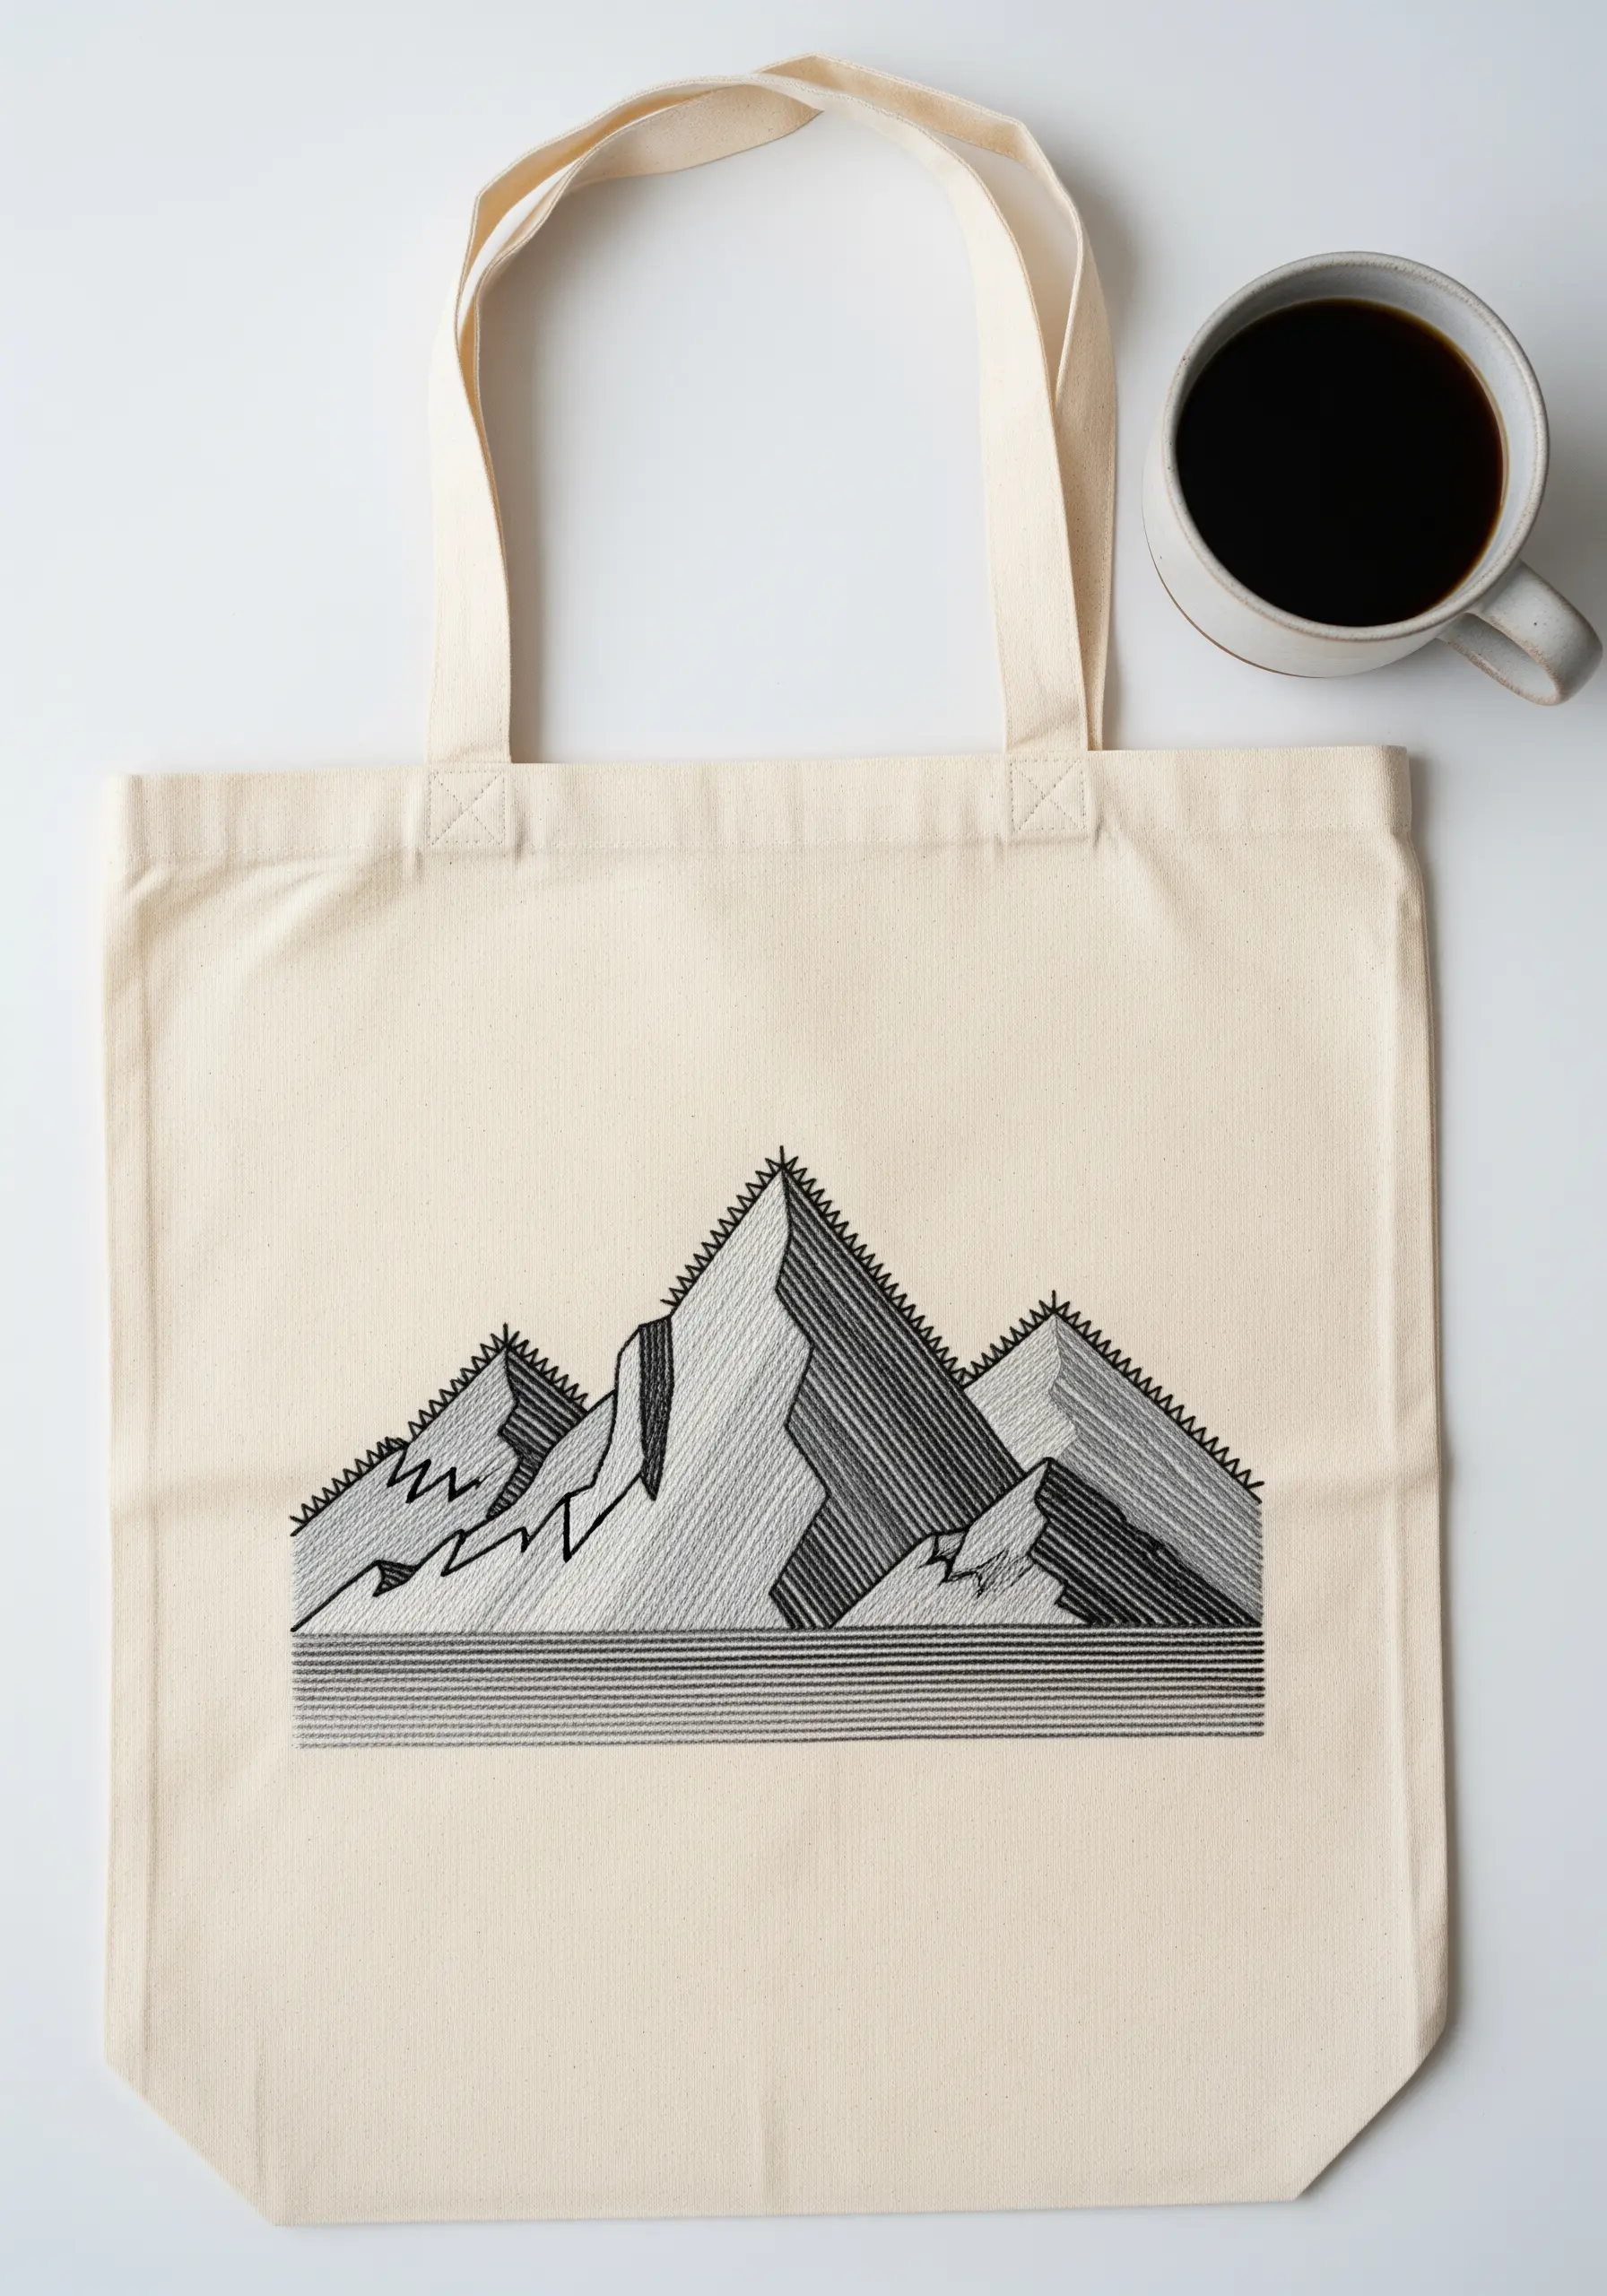
Create depth in a minimalist landscape by treating your thread like an artist’s pen, varying the line weight for effect.
Use a thick, bold satin stitch or a whipped backstitch for the main outlines of the mountain peaks to give them presence.
For the shading and finer details, switch to a single strand of floss and use hatching—simple, parallel straight stitches—to create a sense of shadow and form.
This contrast between heavy and light lines gives the simple drawing a professional, illustrative quality.
9. Building Sculptural Clusters with Woven Wheels
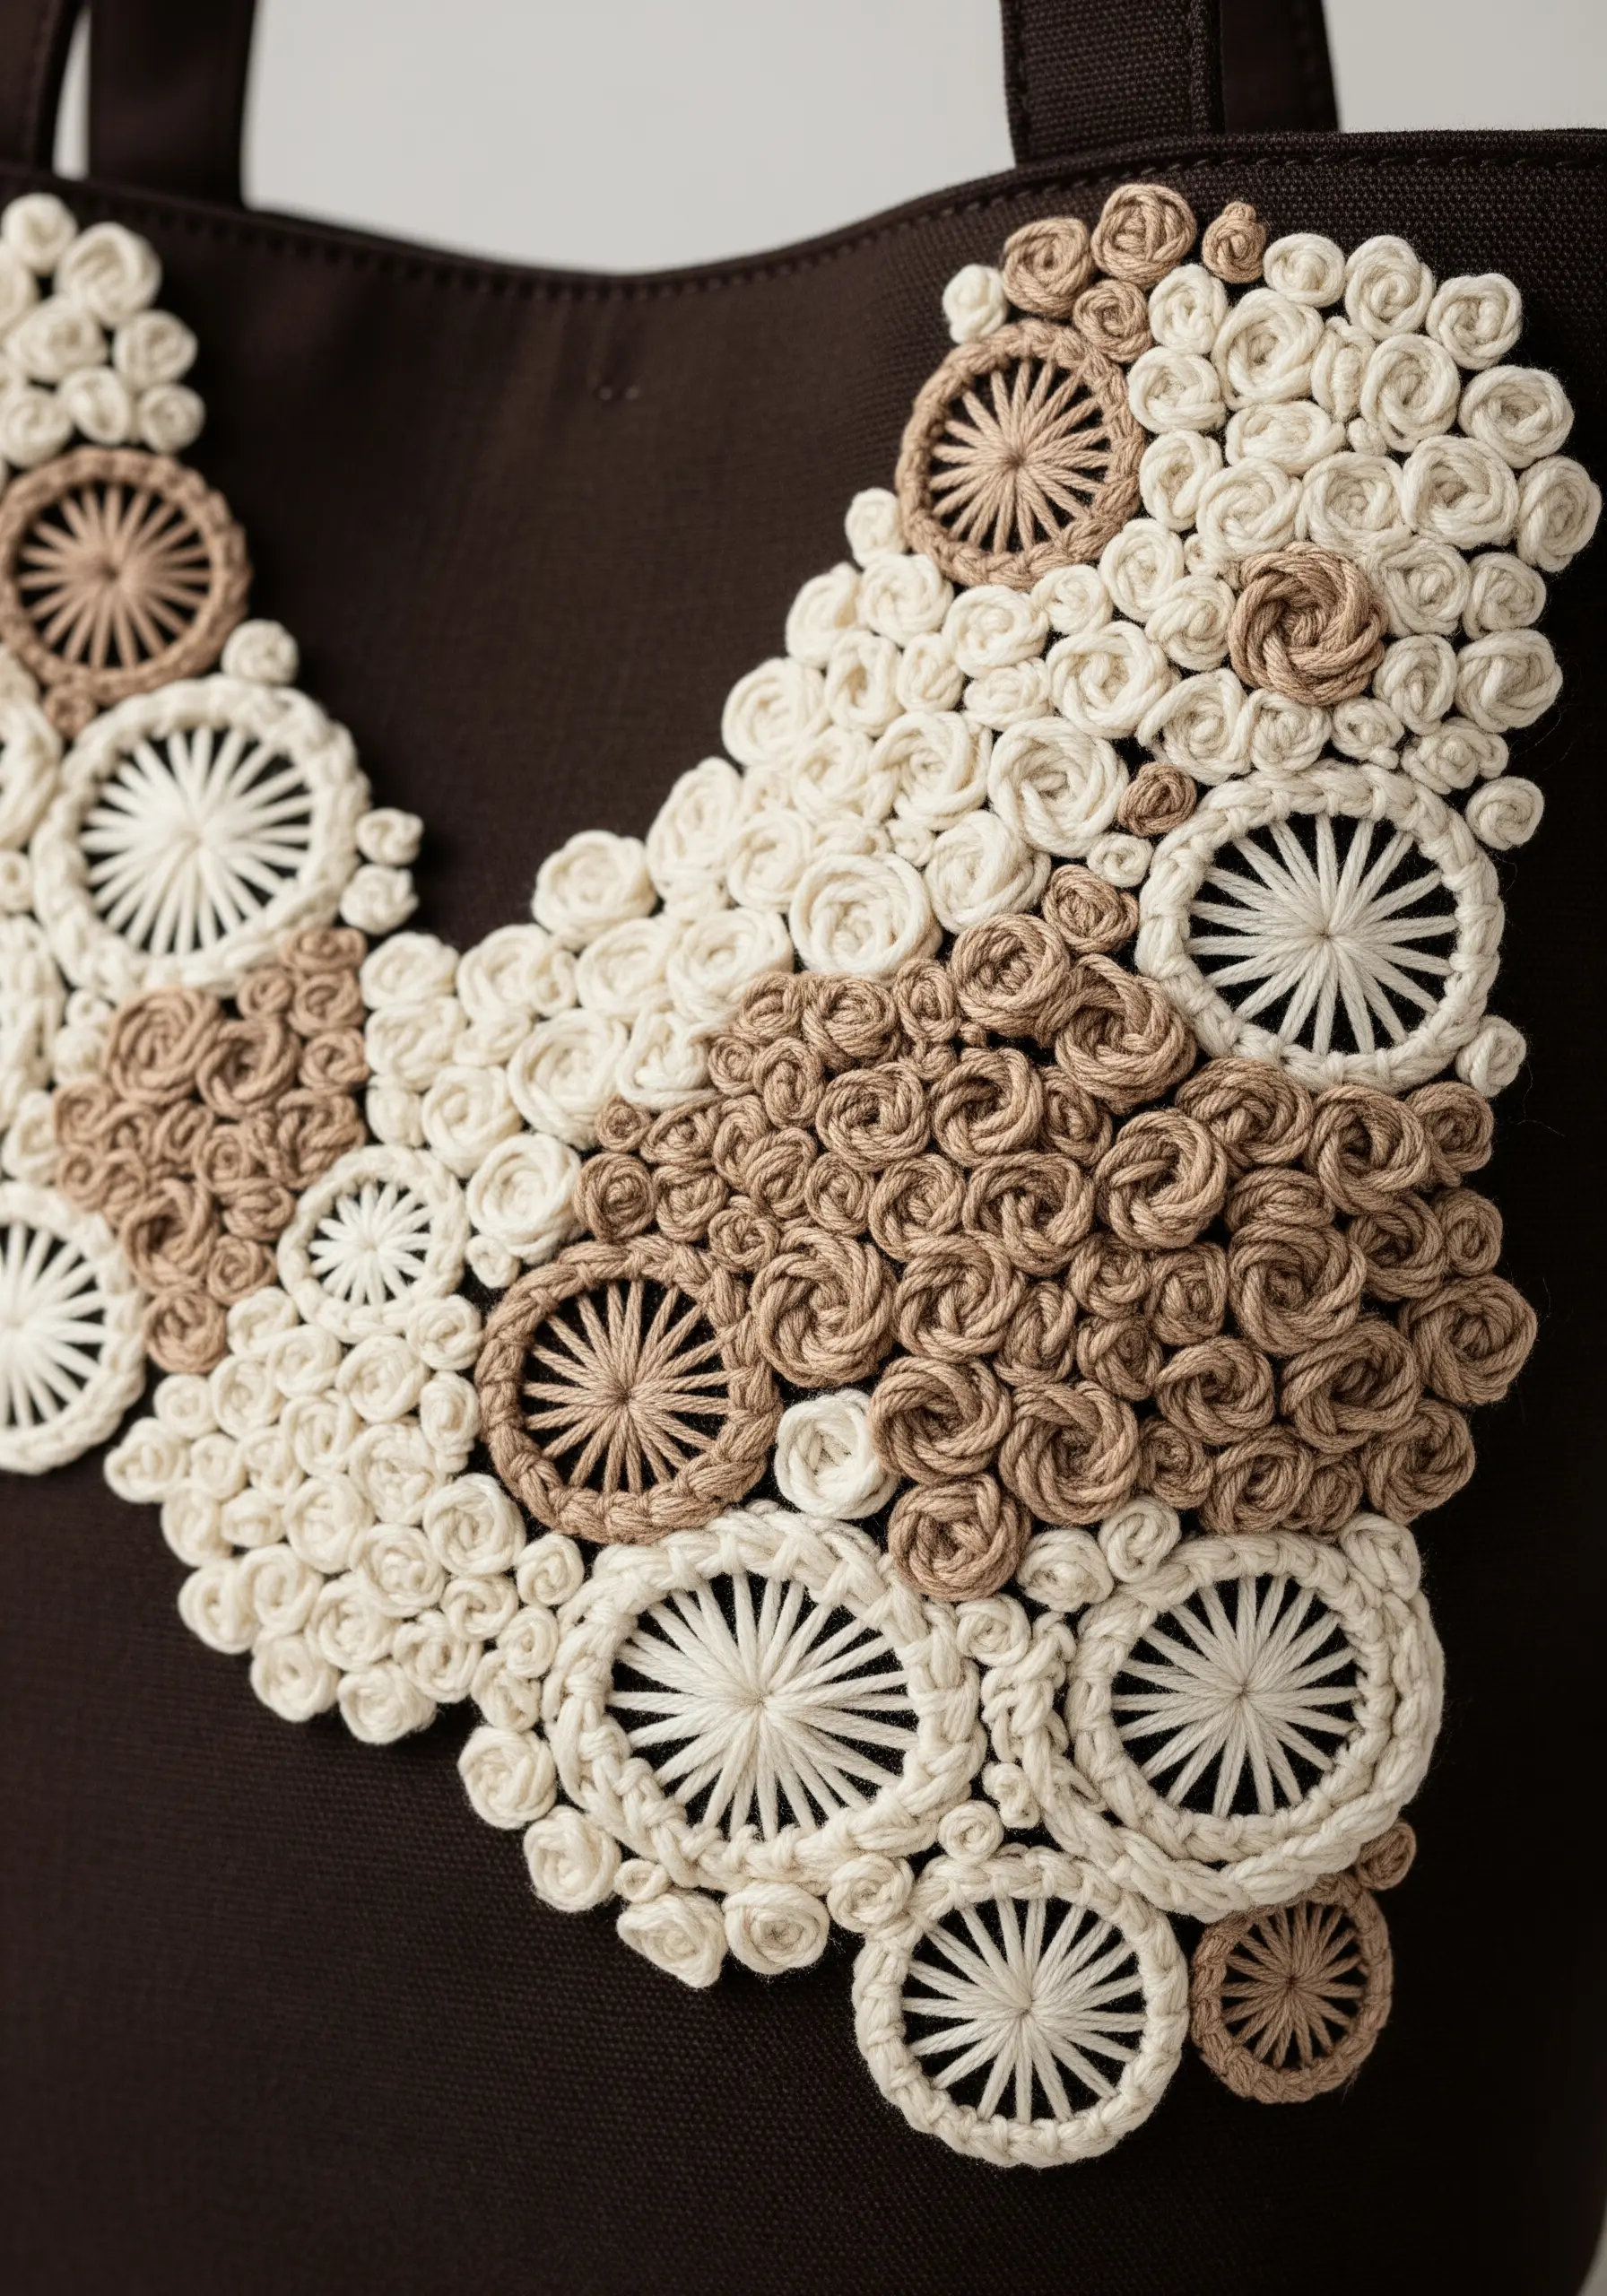
This design is all about creating a rich, three-dimensional surface that invites touch.
Layer highly textured stitches like woven picot wheels, bullion knots (for tight, rose-like coils), and French knots as filler.
To create visual interest, vary the size and tightness of your stitches: use more spokes for flatter wheels and more wraps for longer bullion knots.
By sticking to a refined palette of cream and taupe, you allow the intricate statement textured embroidery techniques to stand out without becoming overwhelming.
10. The Elegance of Thread-Painted Botanicals
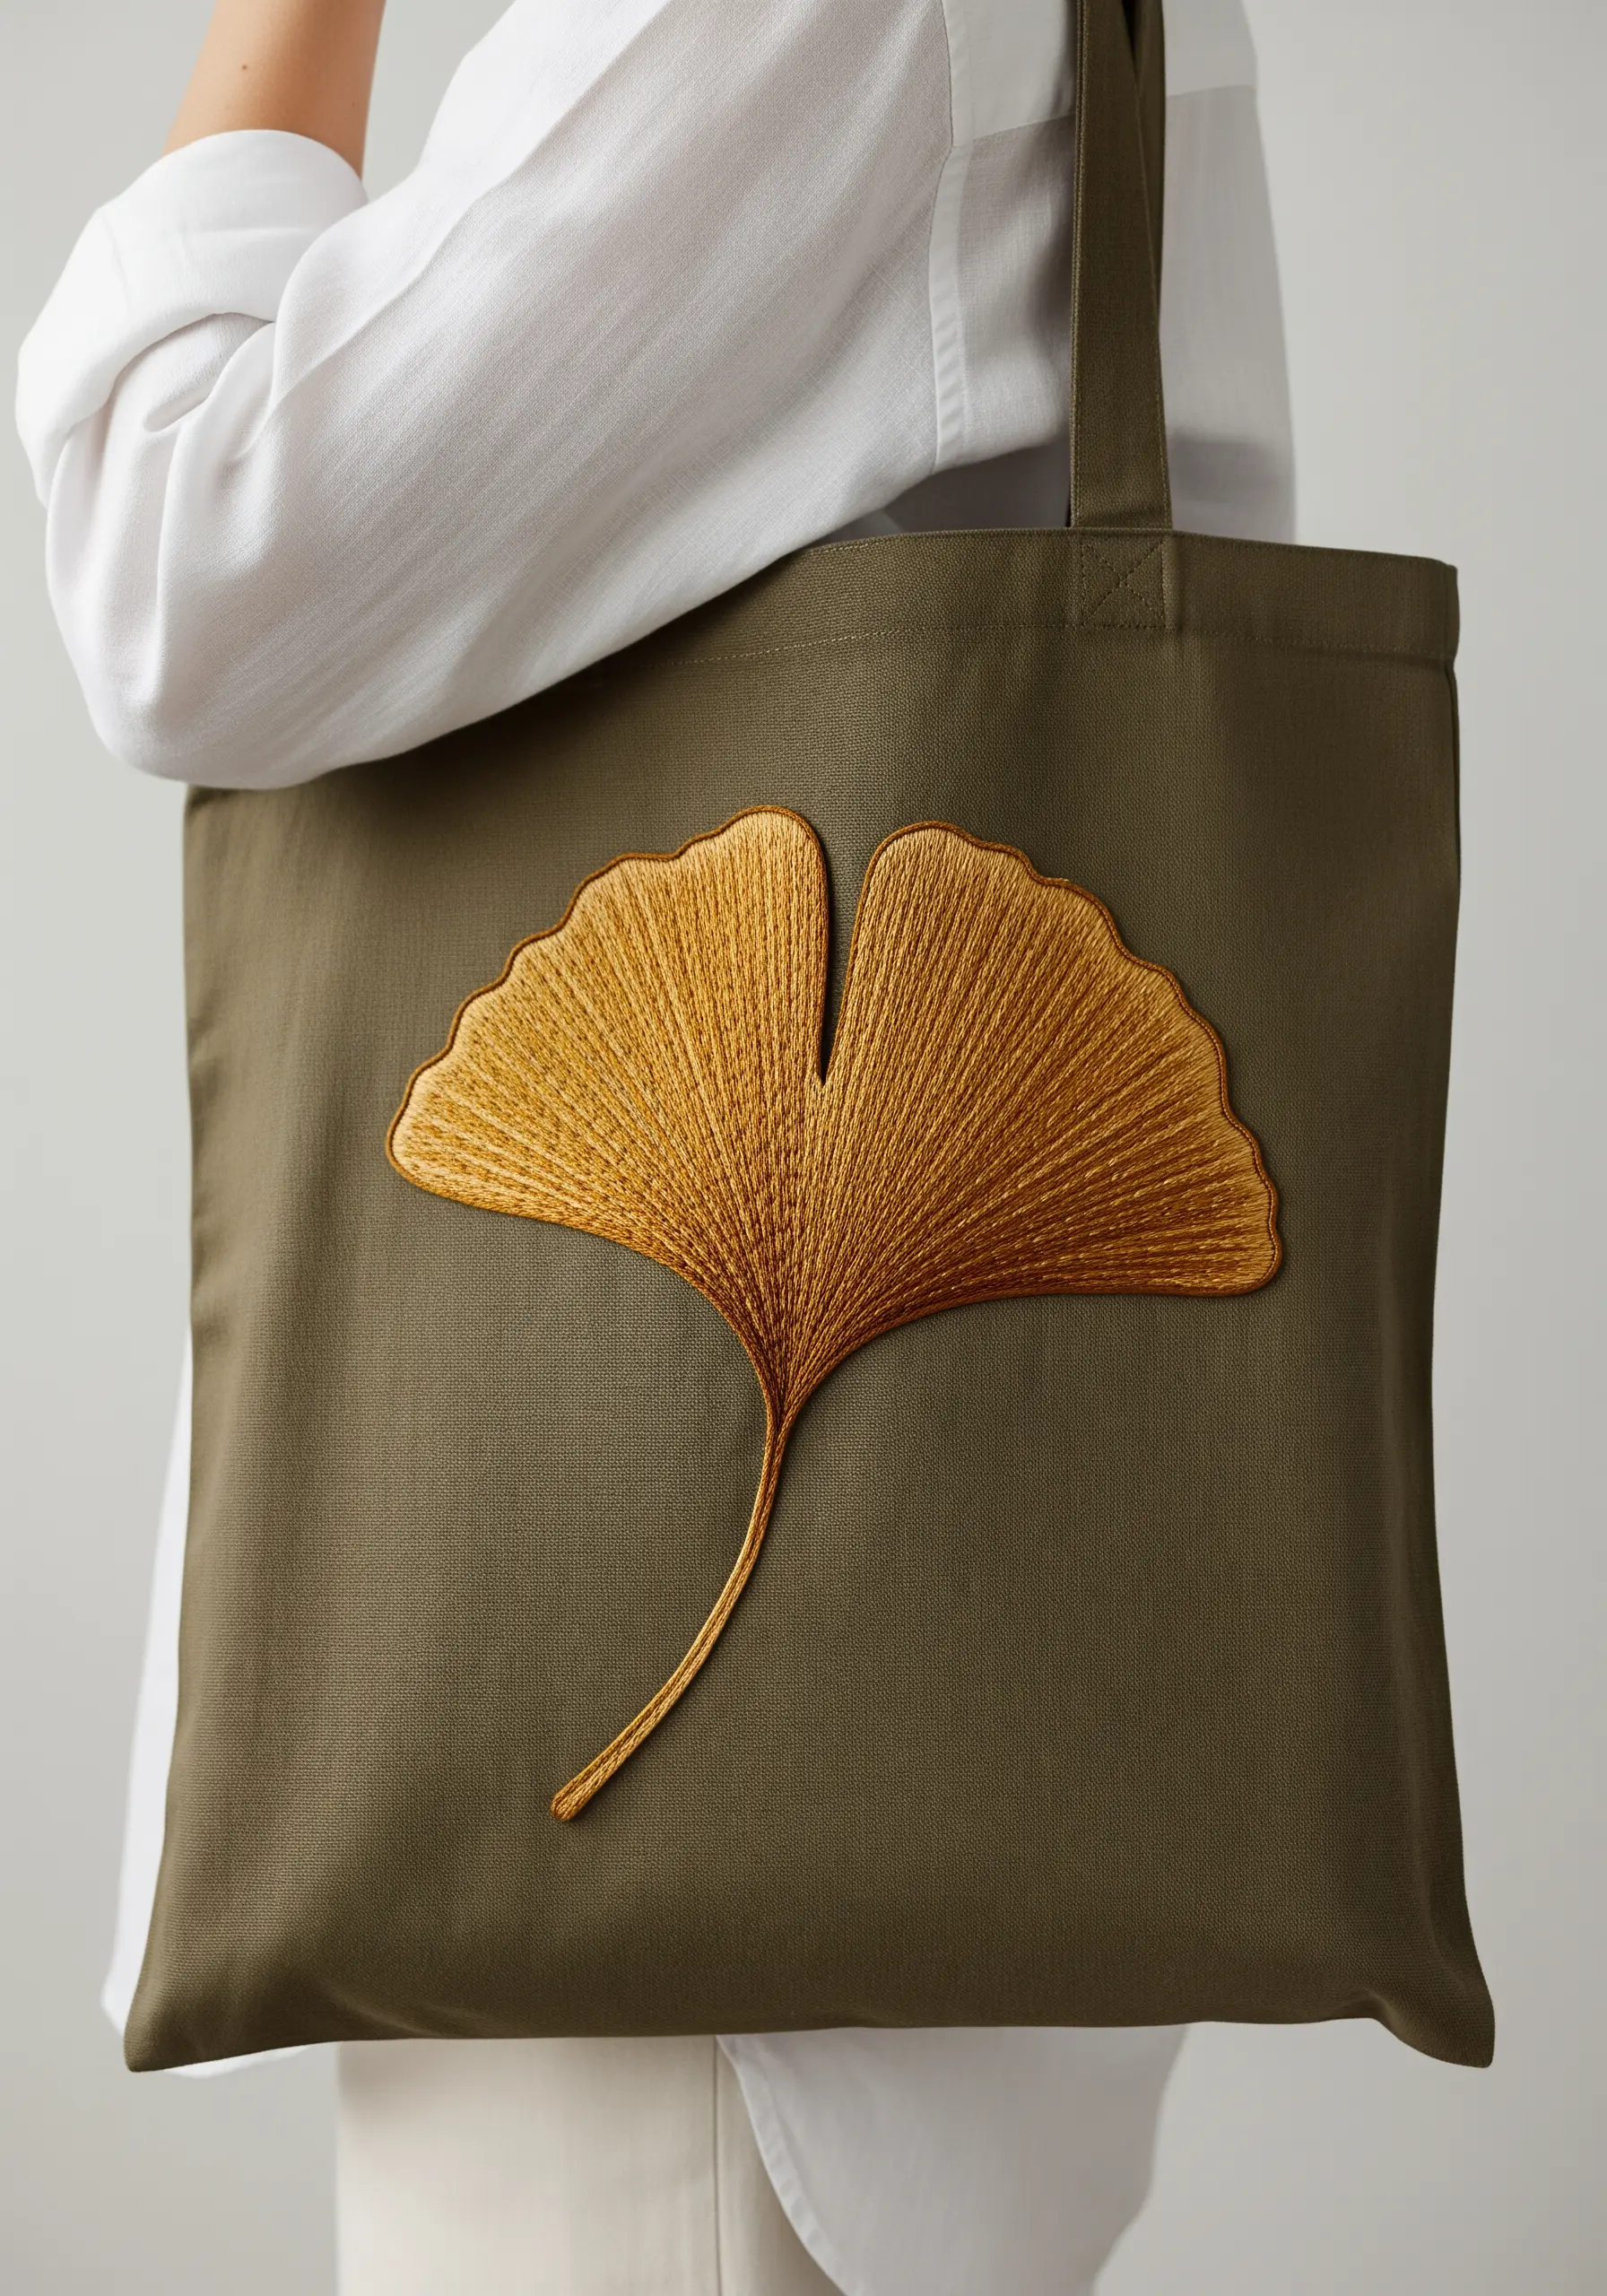
Achieve this stunningly realistic, painterly effect with the long-and-short stitch, the foundation of thread painting.
Work with a single strand of floss and choose three to four closely related shades of gold and ochre.
Your stitches should follow the natural direction of the leaf’s veins, blending seamlessly from one color to the next to create highlights and shadows.
Before you begin filling, outline the entire leaf with a delicate split stitch to ensure a crisp, defined edge that contains your thread painting perfectly.
11. Minimalist Composition with Line and Form

This design demonstrates the power of balance and restraint in creating a chic, modern aesthetic.
Create visual tension by contrasting thin, sharp lines (a simple backstitch works perfectly) with a solidly filled circle.
To achieve that flawlessly smooth fill, use a circular satin stitch, spiraling from the outside edge toward the center.
The split-color detail adds a graphic focal point, while the strategic use of negative space makes the composition feel intentional and uncluttered.
12. Adding Subtle Sparkle with Seed Beads
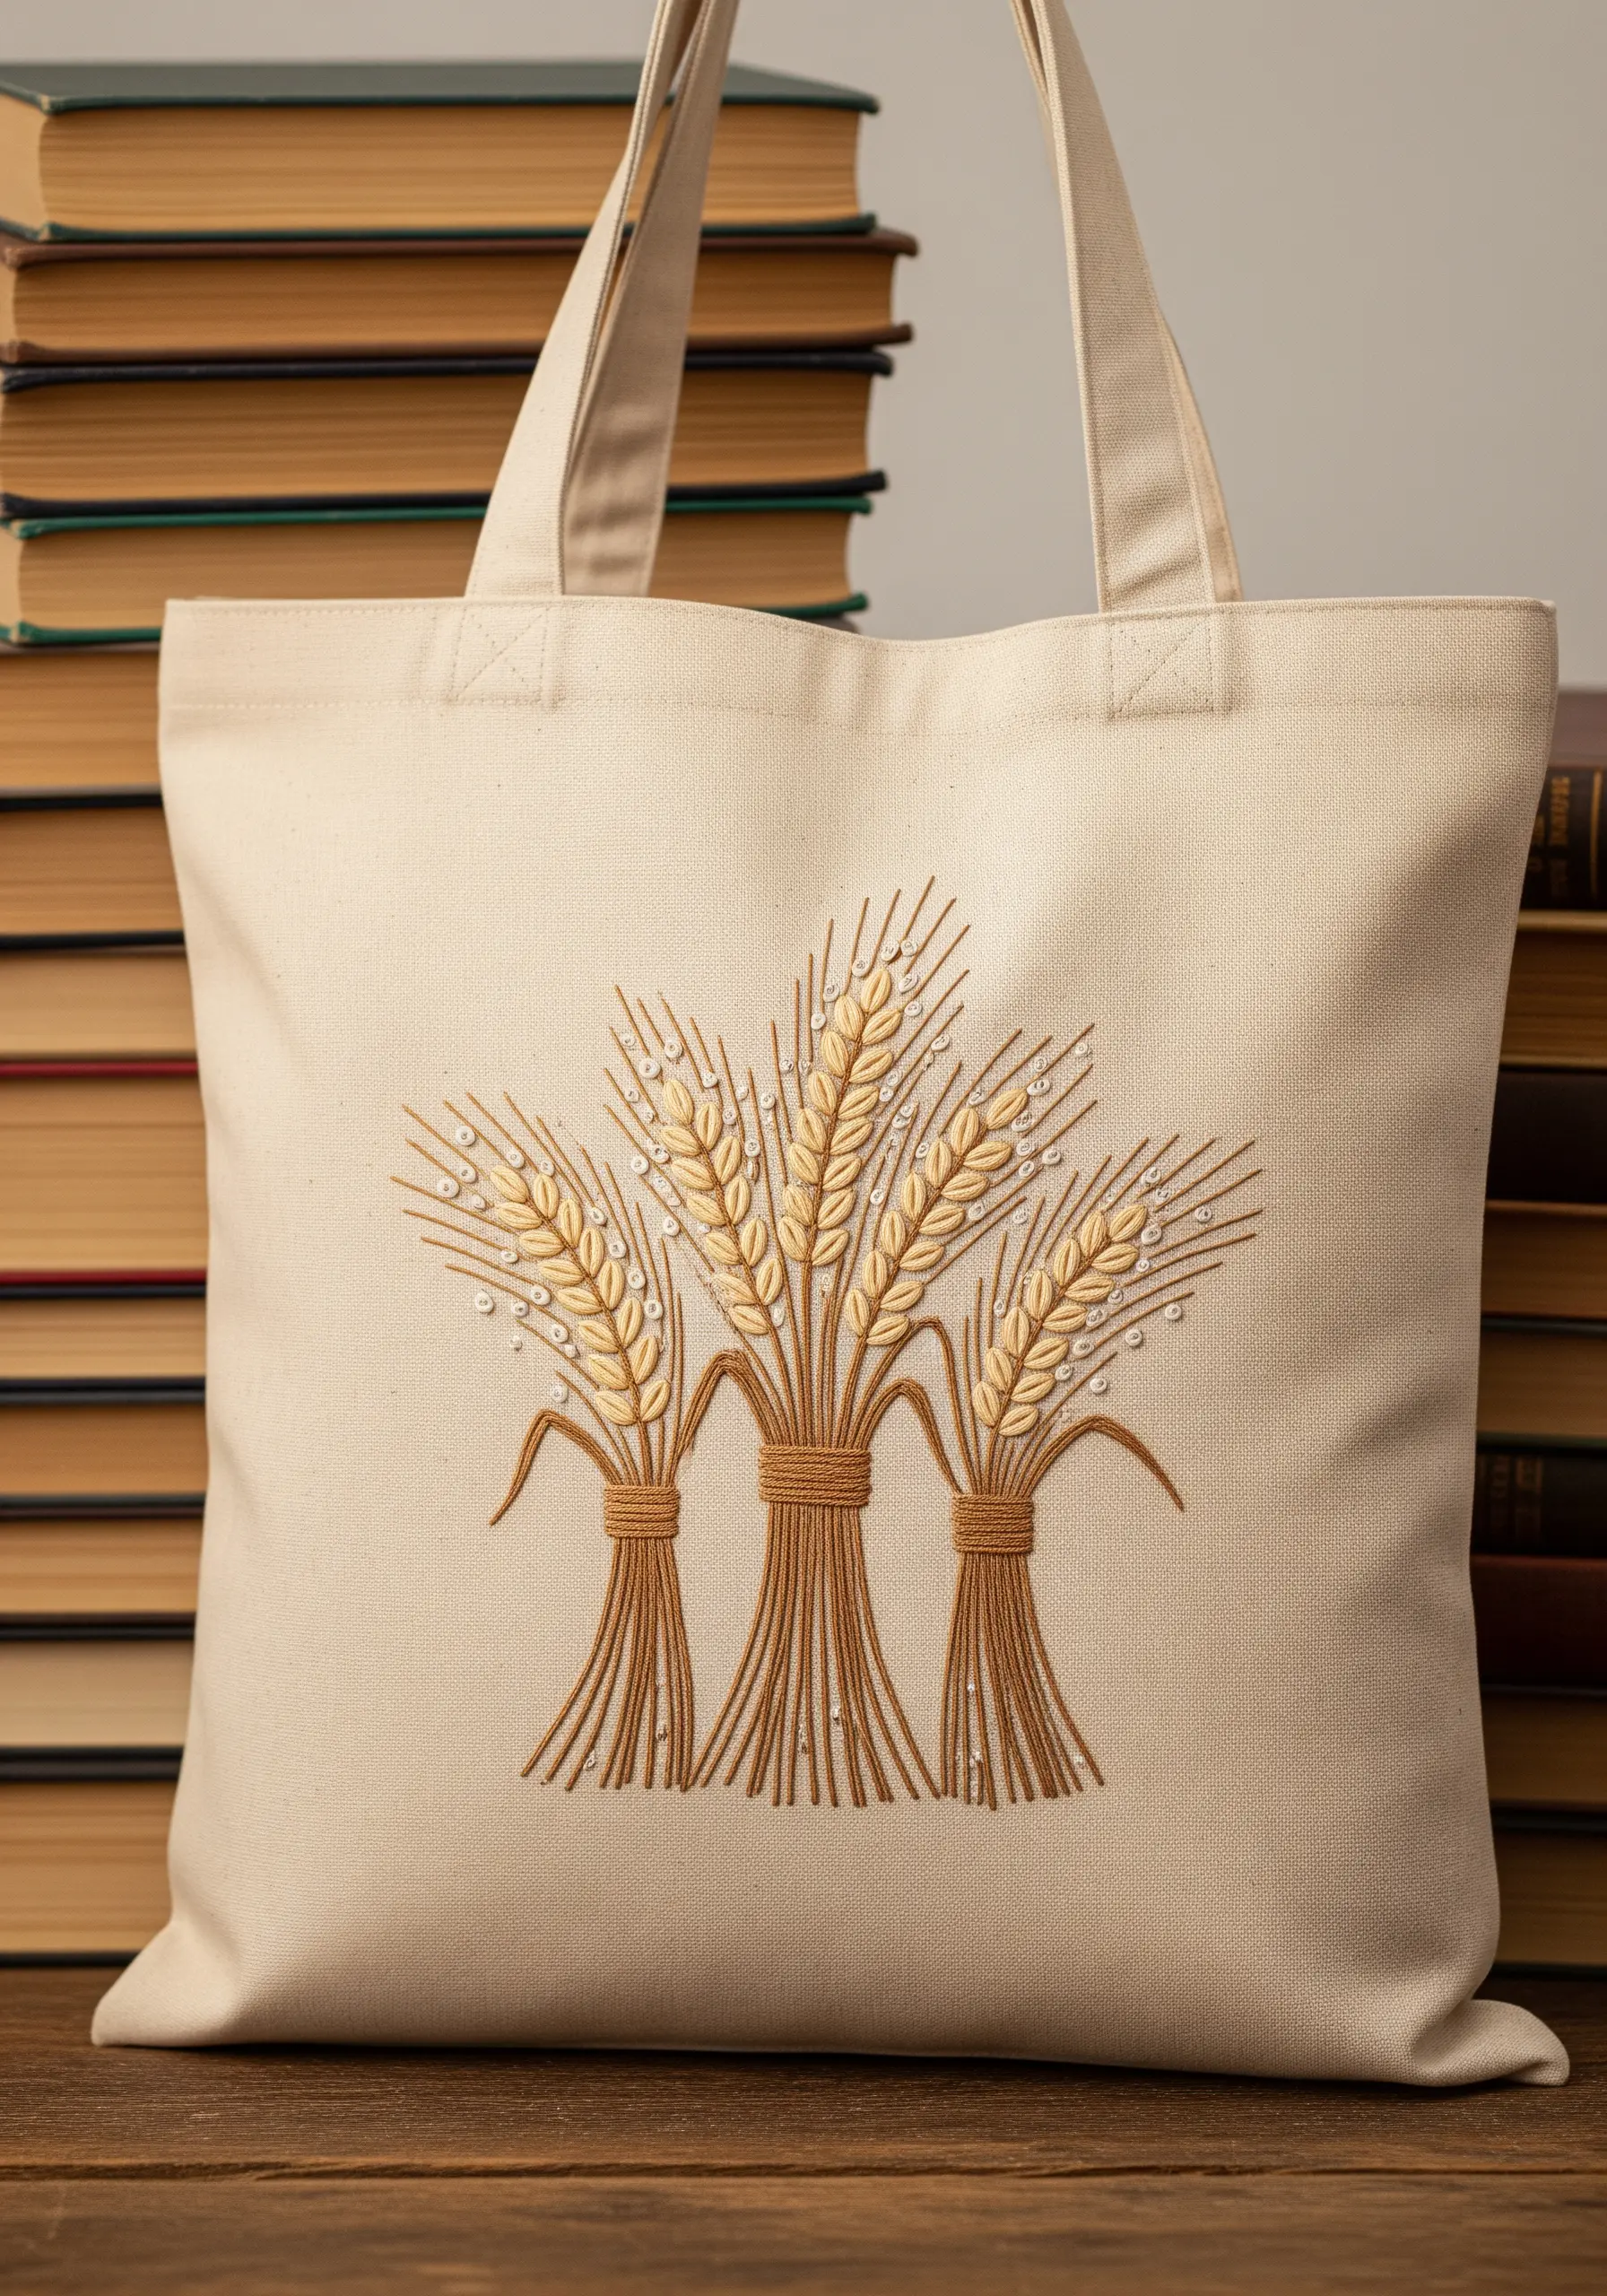
Instantly elevate a simple botanical design by incorporating the delicate shimmer of seed beads.
First, complete your thread work—using fishbone stitch for the wheat heads and a smooth stem stitch for the stalks.
Then, go back and strategically add clear or silver-lined seed beads to mimic glistening dewdrops, securing each one with a tiny stitch.
This restrained touch of sparkle catches the light and gives your piece a surprisingly luxe finish without overpowering the embroidery.
13. The Fluidity of a Single Corded Line
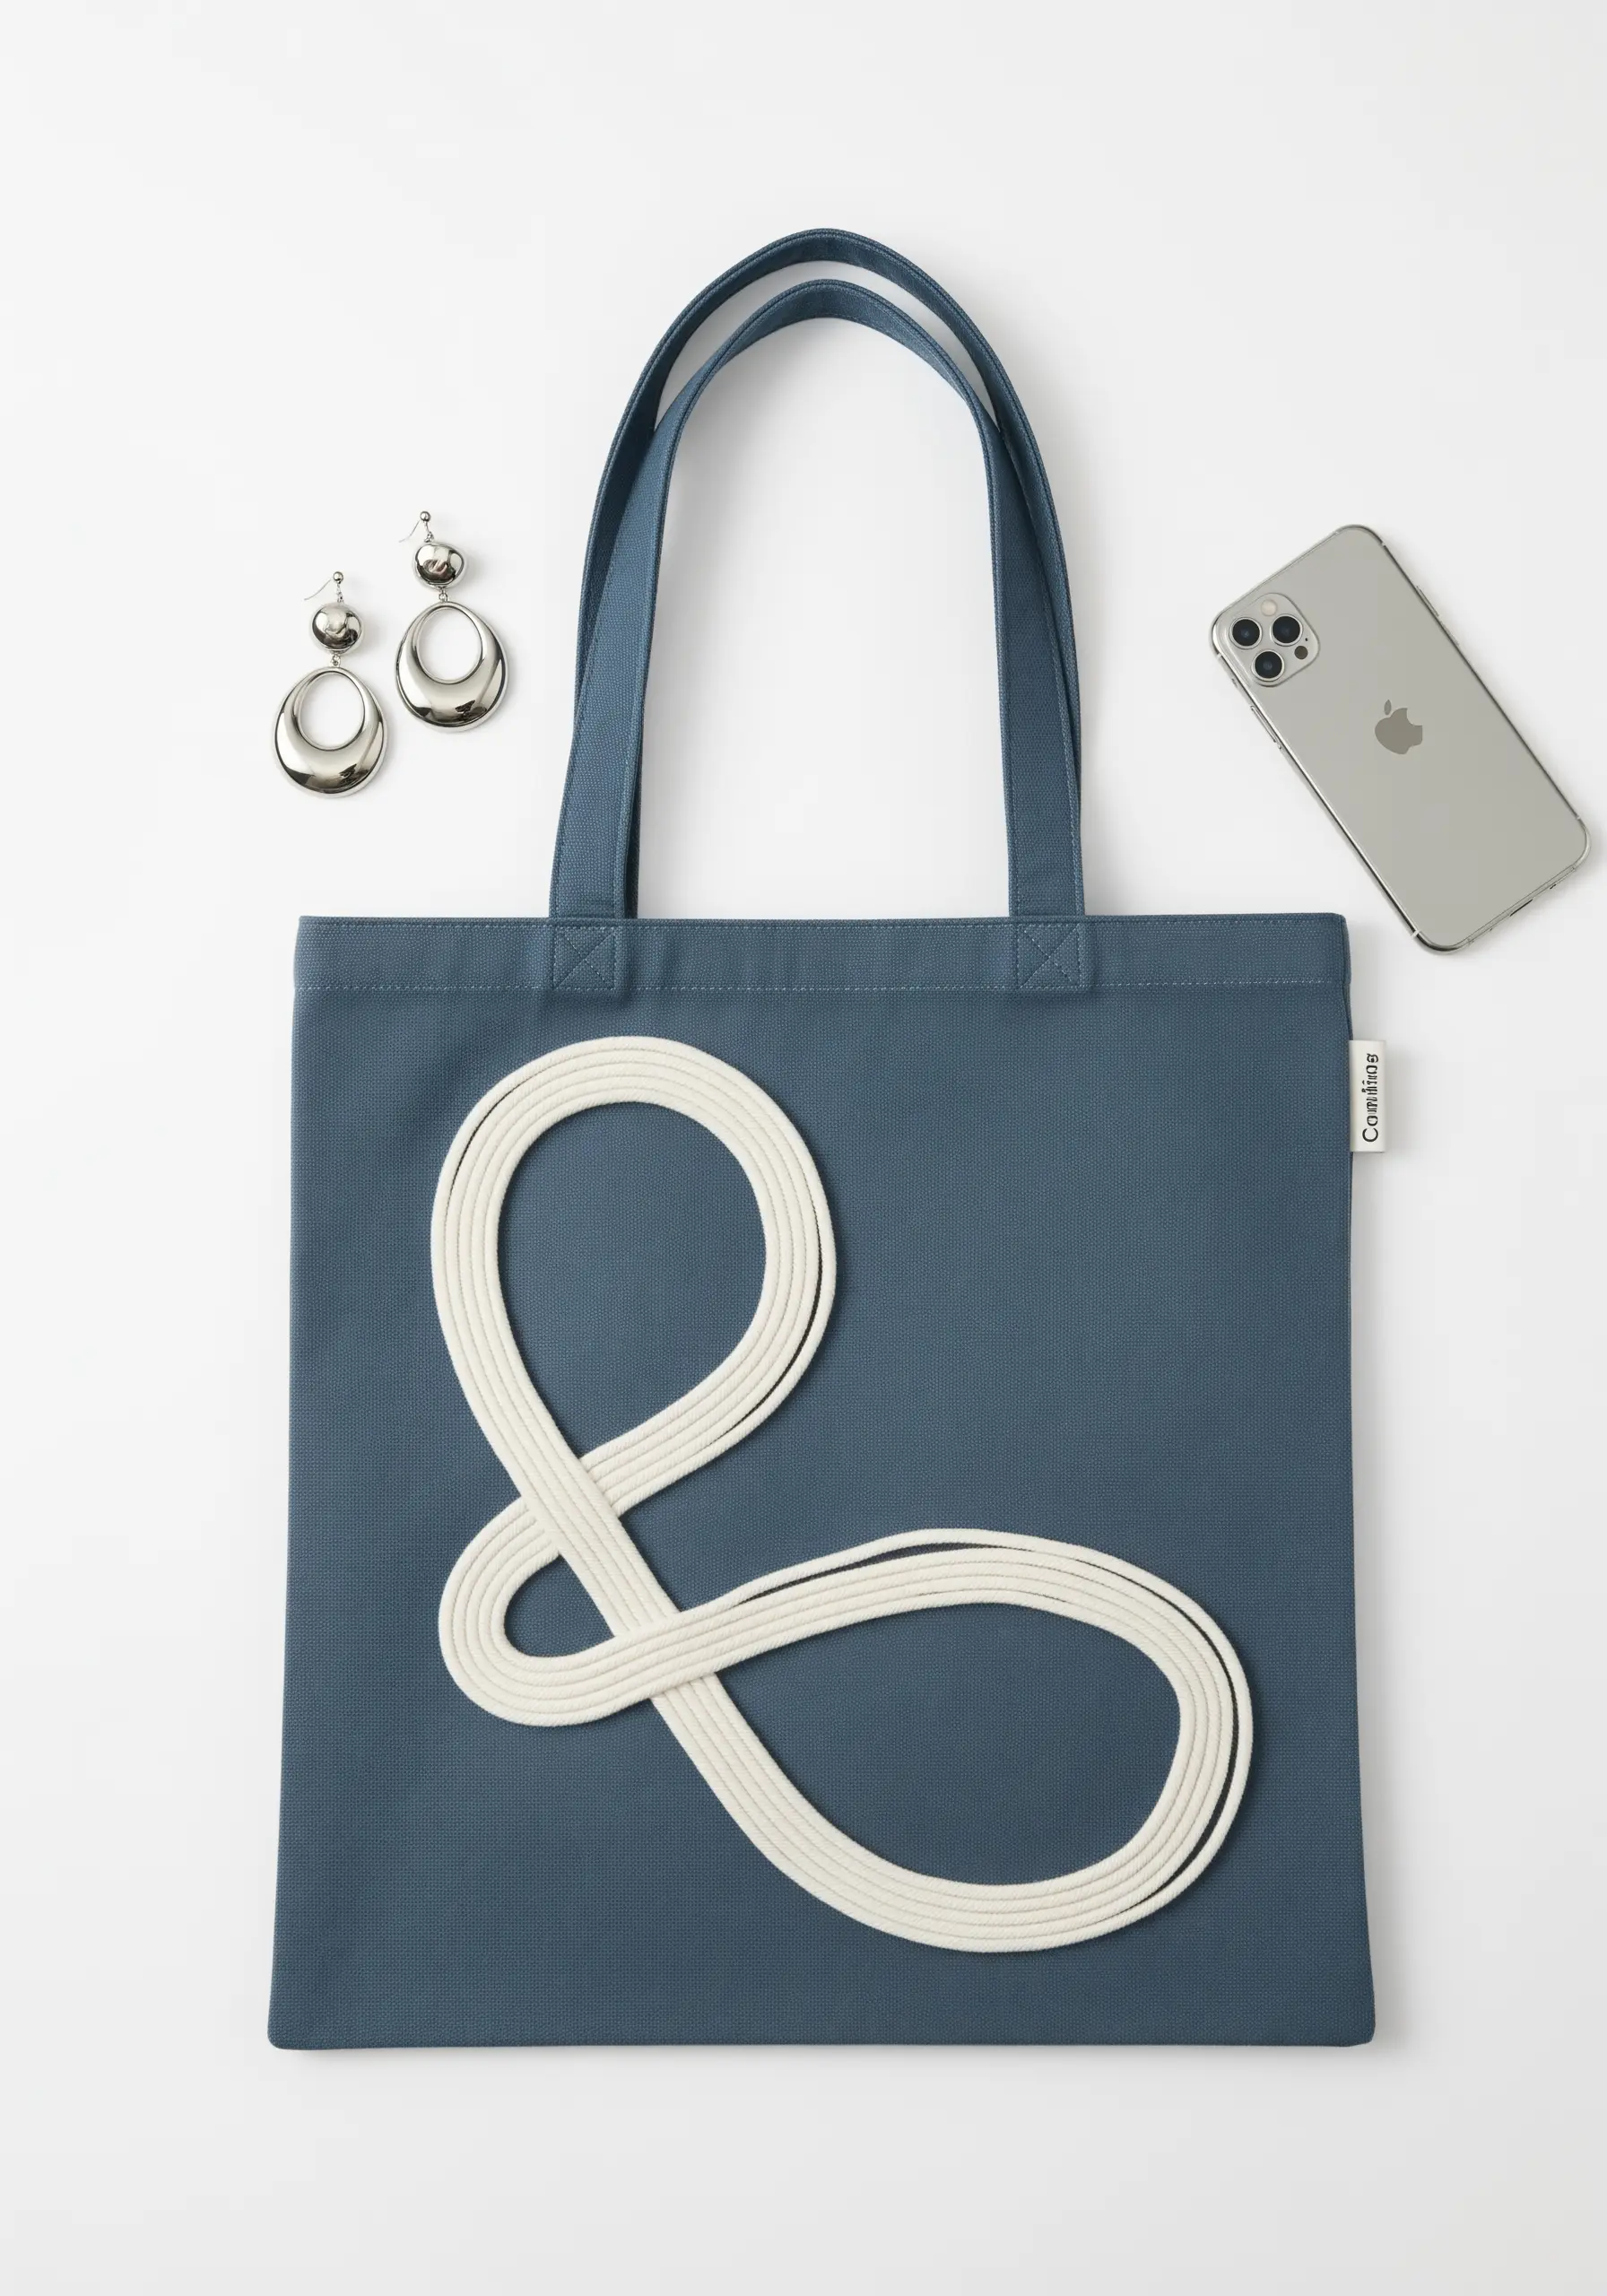
For a bold, graphic look that feels both modern and soft, try couching a thick cotton cord instead of using embroidery floss.
Simply lay a piece of soft rope or macrame cord onto your tote in the desired shape.
Then, use a matching, thinner thread to tack it down with small, discreet stitches.
The result is a highly tactile, three-dimensional line that makes a powerful statement with very little stitching time involved.
14. Creating Fluffy Texture with Turkey Work
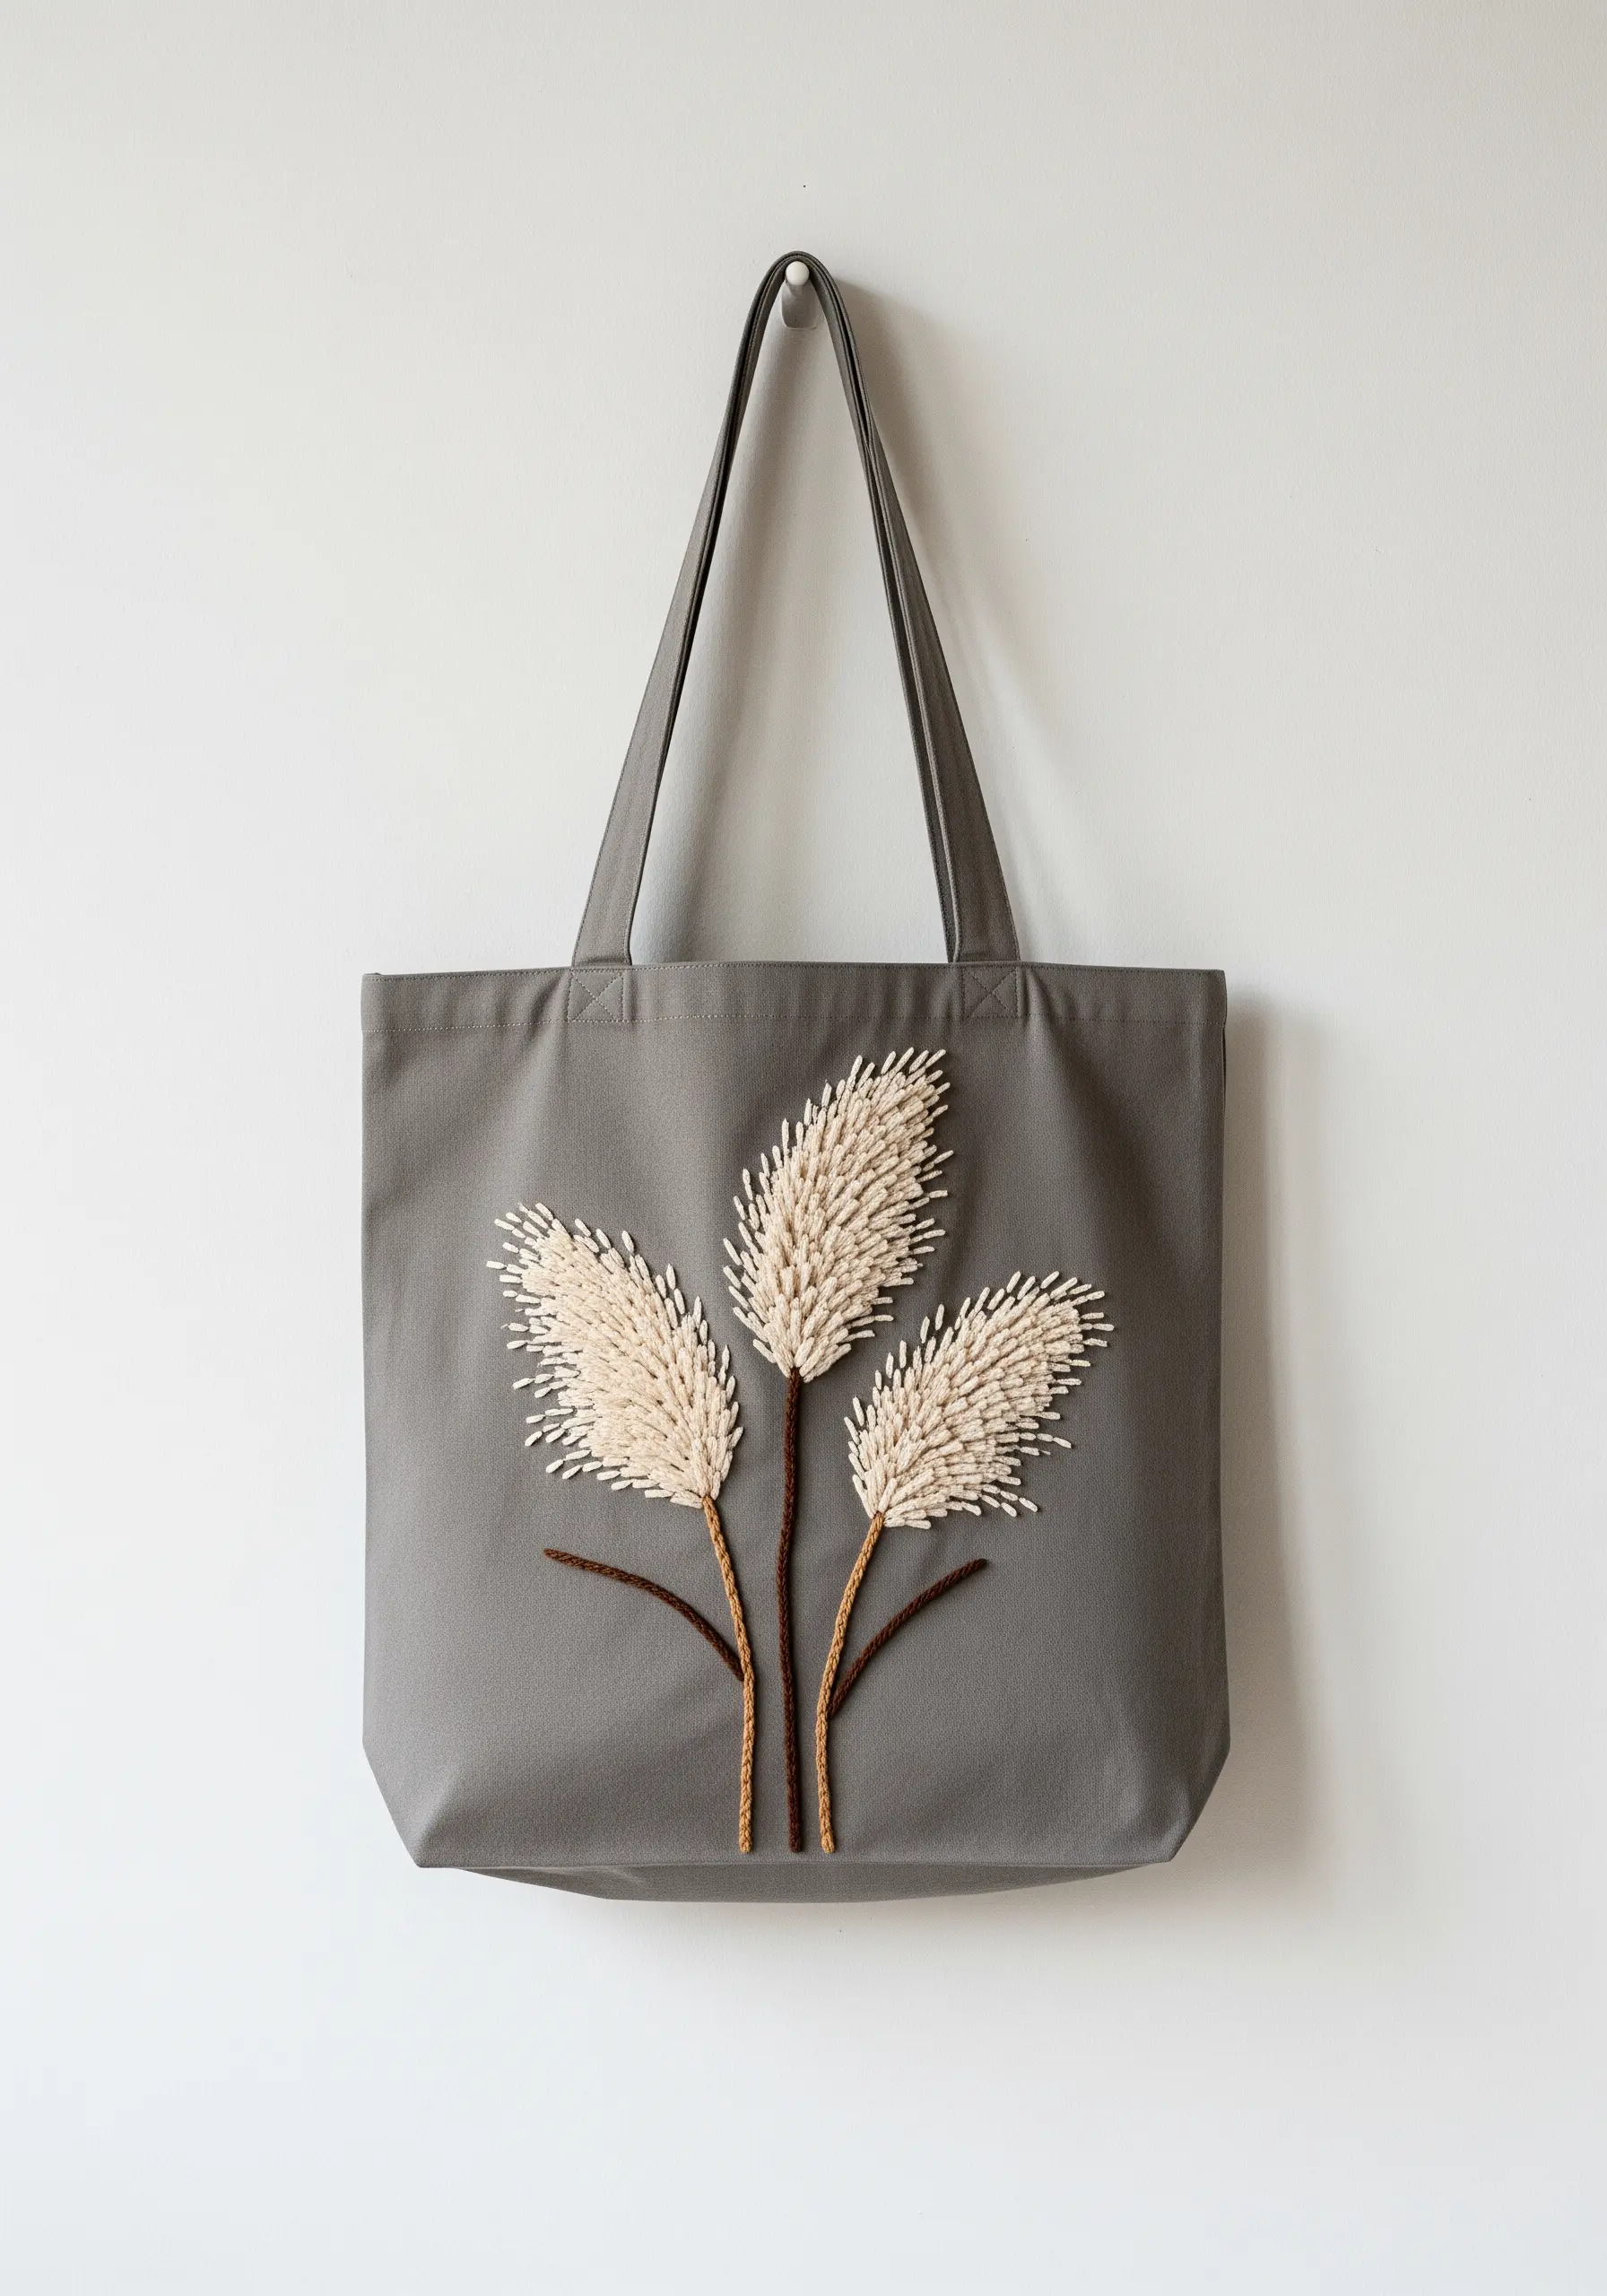
To capture the signature fluff of pampas grass, the turkey work stitch is your best tool.
This technique involves creating loops on the surface of the fabric, which you can then trim to your desired length to create a soft, brush-like texture.
Use a matte cotton floss in a natural off-white for the most realistic effect, and contrast the fluffy heads with simple, smooth stem stitches for the stalks.
This is one of the most effective organic texture embroidery designs you can master.
15. Graphic Typography with a Modern Edge
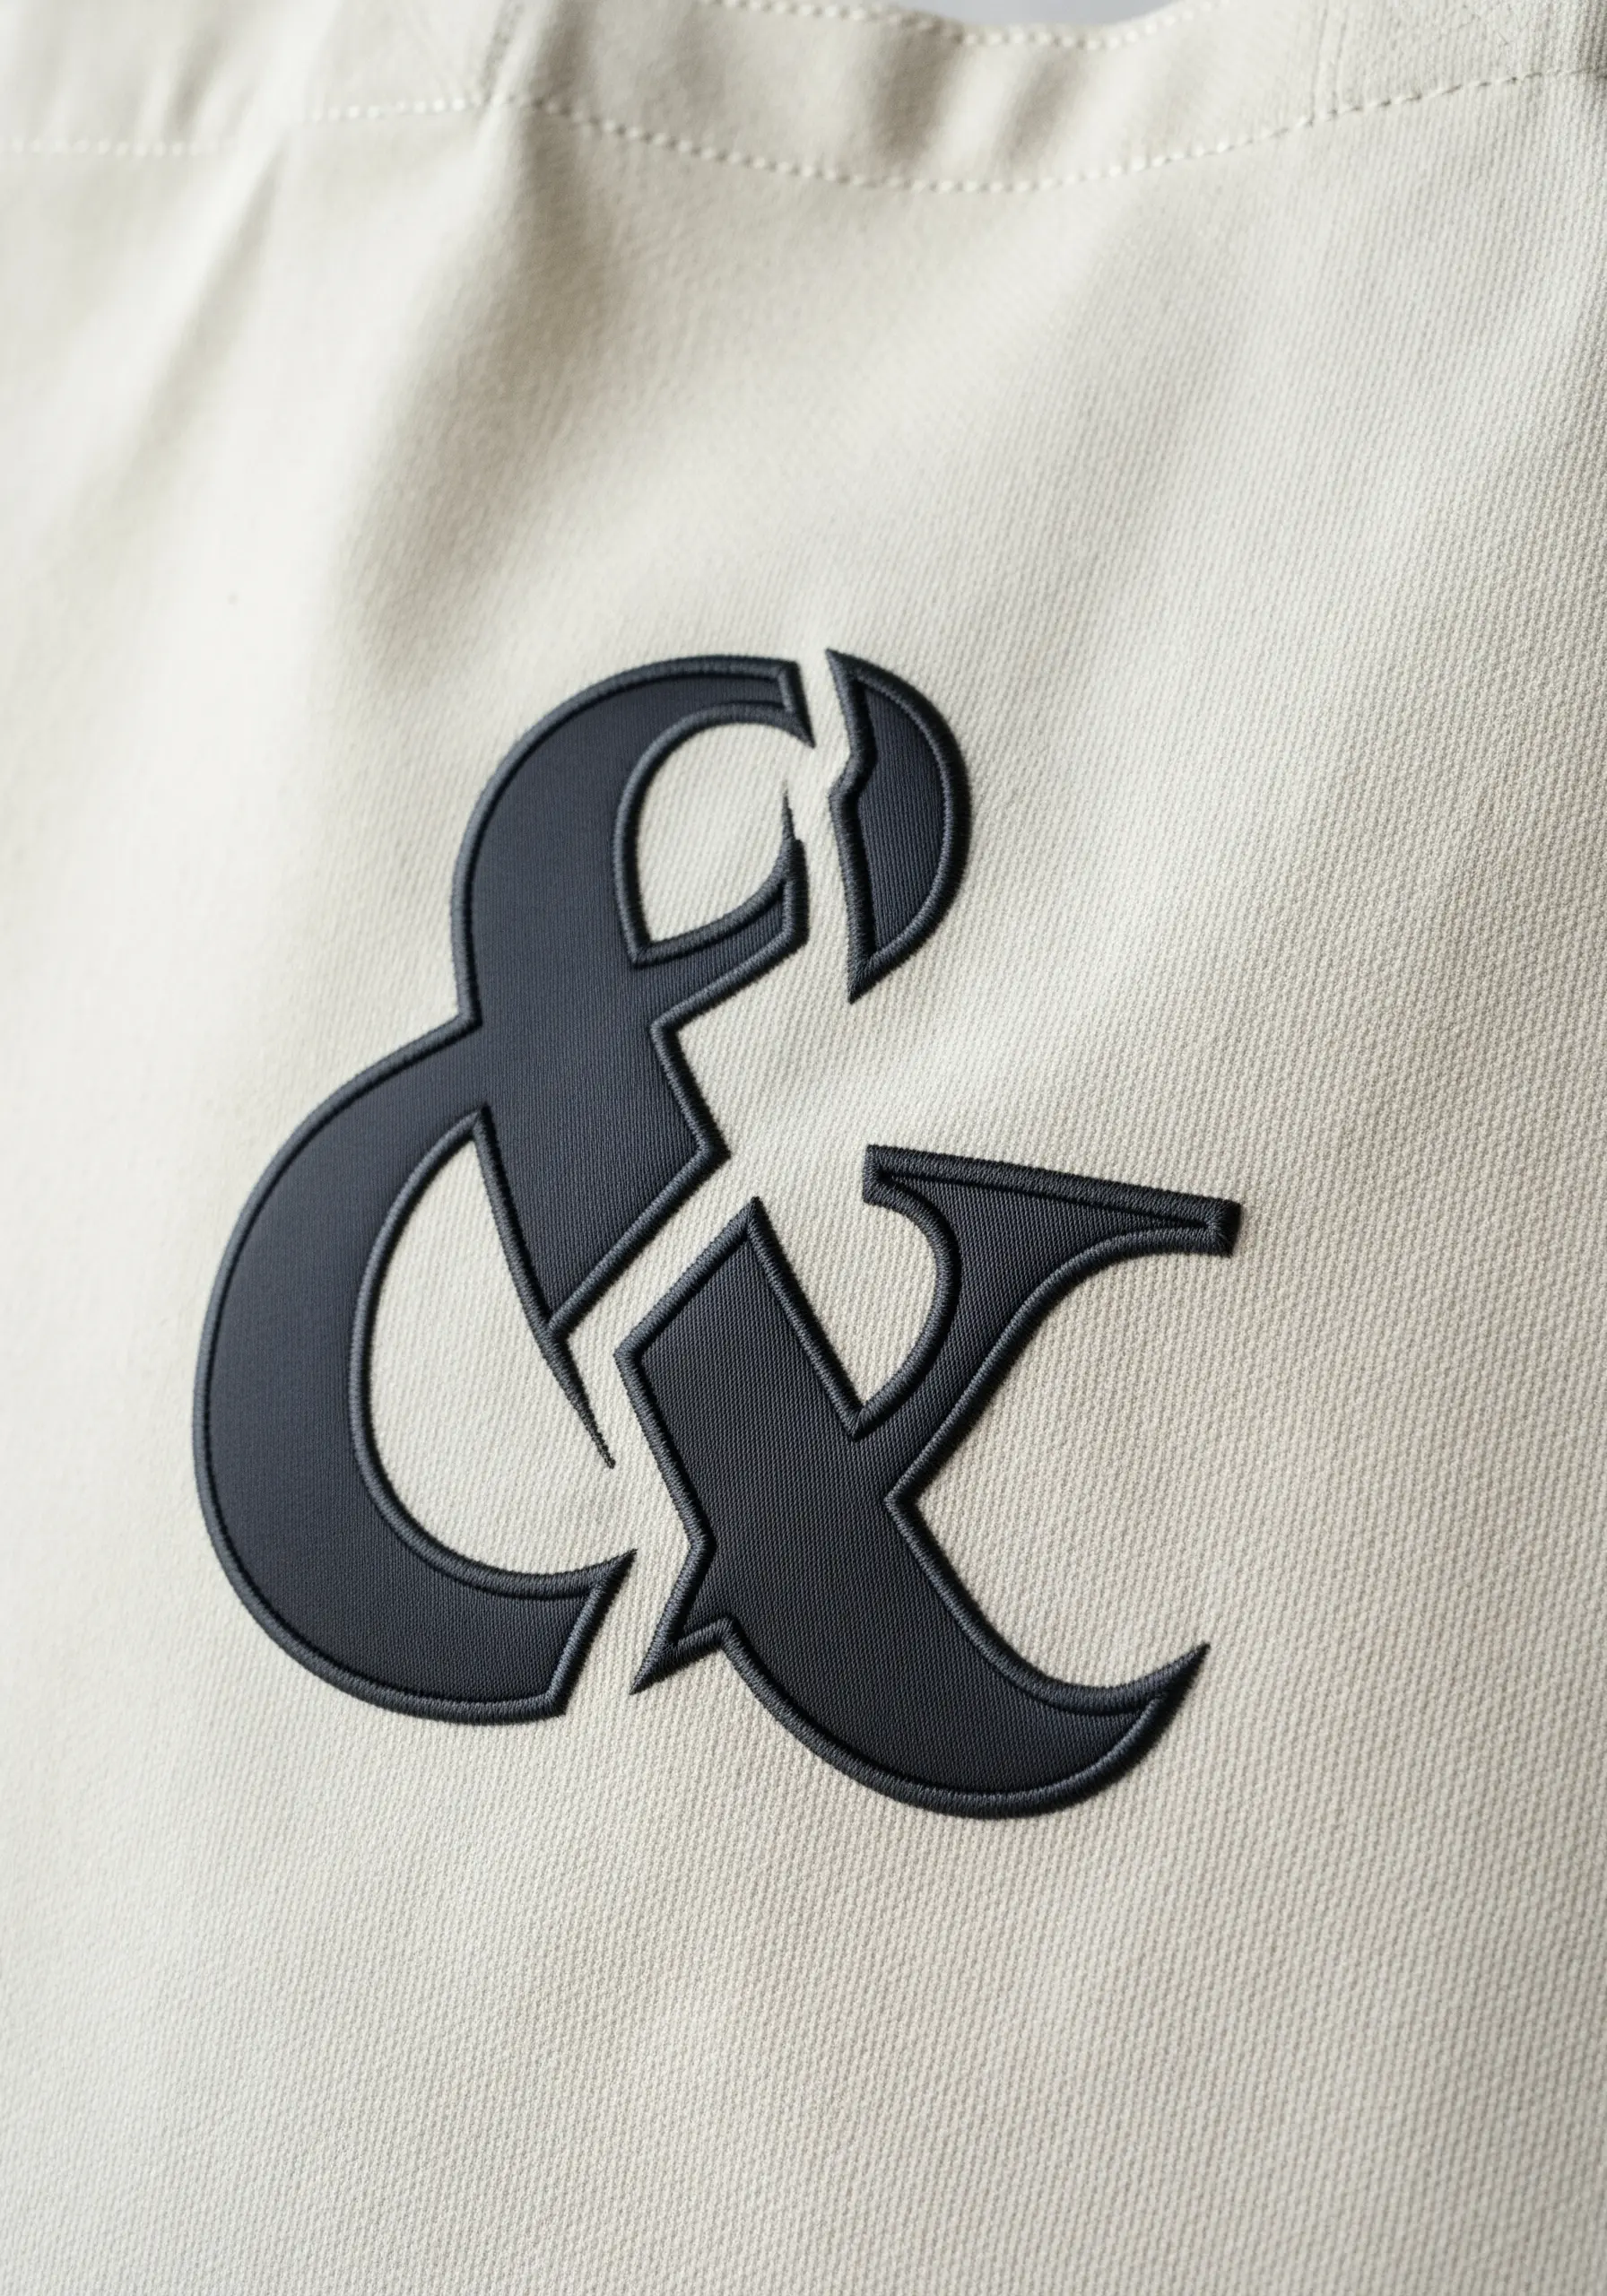
Give classic typography a dynamic twist by introducing a ‘glitch’ or ‘broken’ effect using negative space.
For that ultra-smooth, ink-like fill, a perfectly executed satin stitch is essential.
Pay close attention to the angle of your stitches, allowing them to shift and follow the curves of the letterform naturally.
To guarantee the sharpest possible edges, always outline the entire shape with a split stitch before you begin filling it in.
16. Delicate Botanicals with Fishbone Stitch
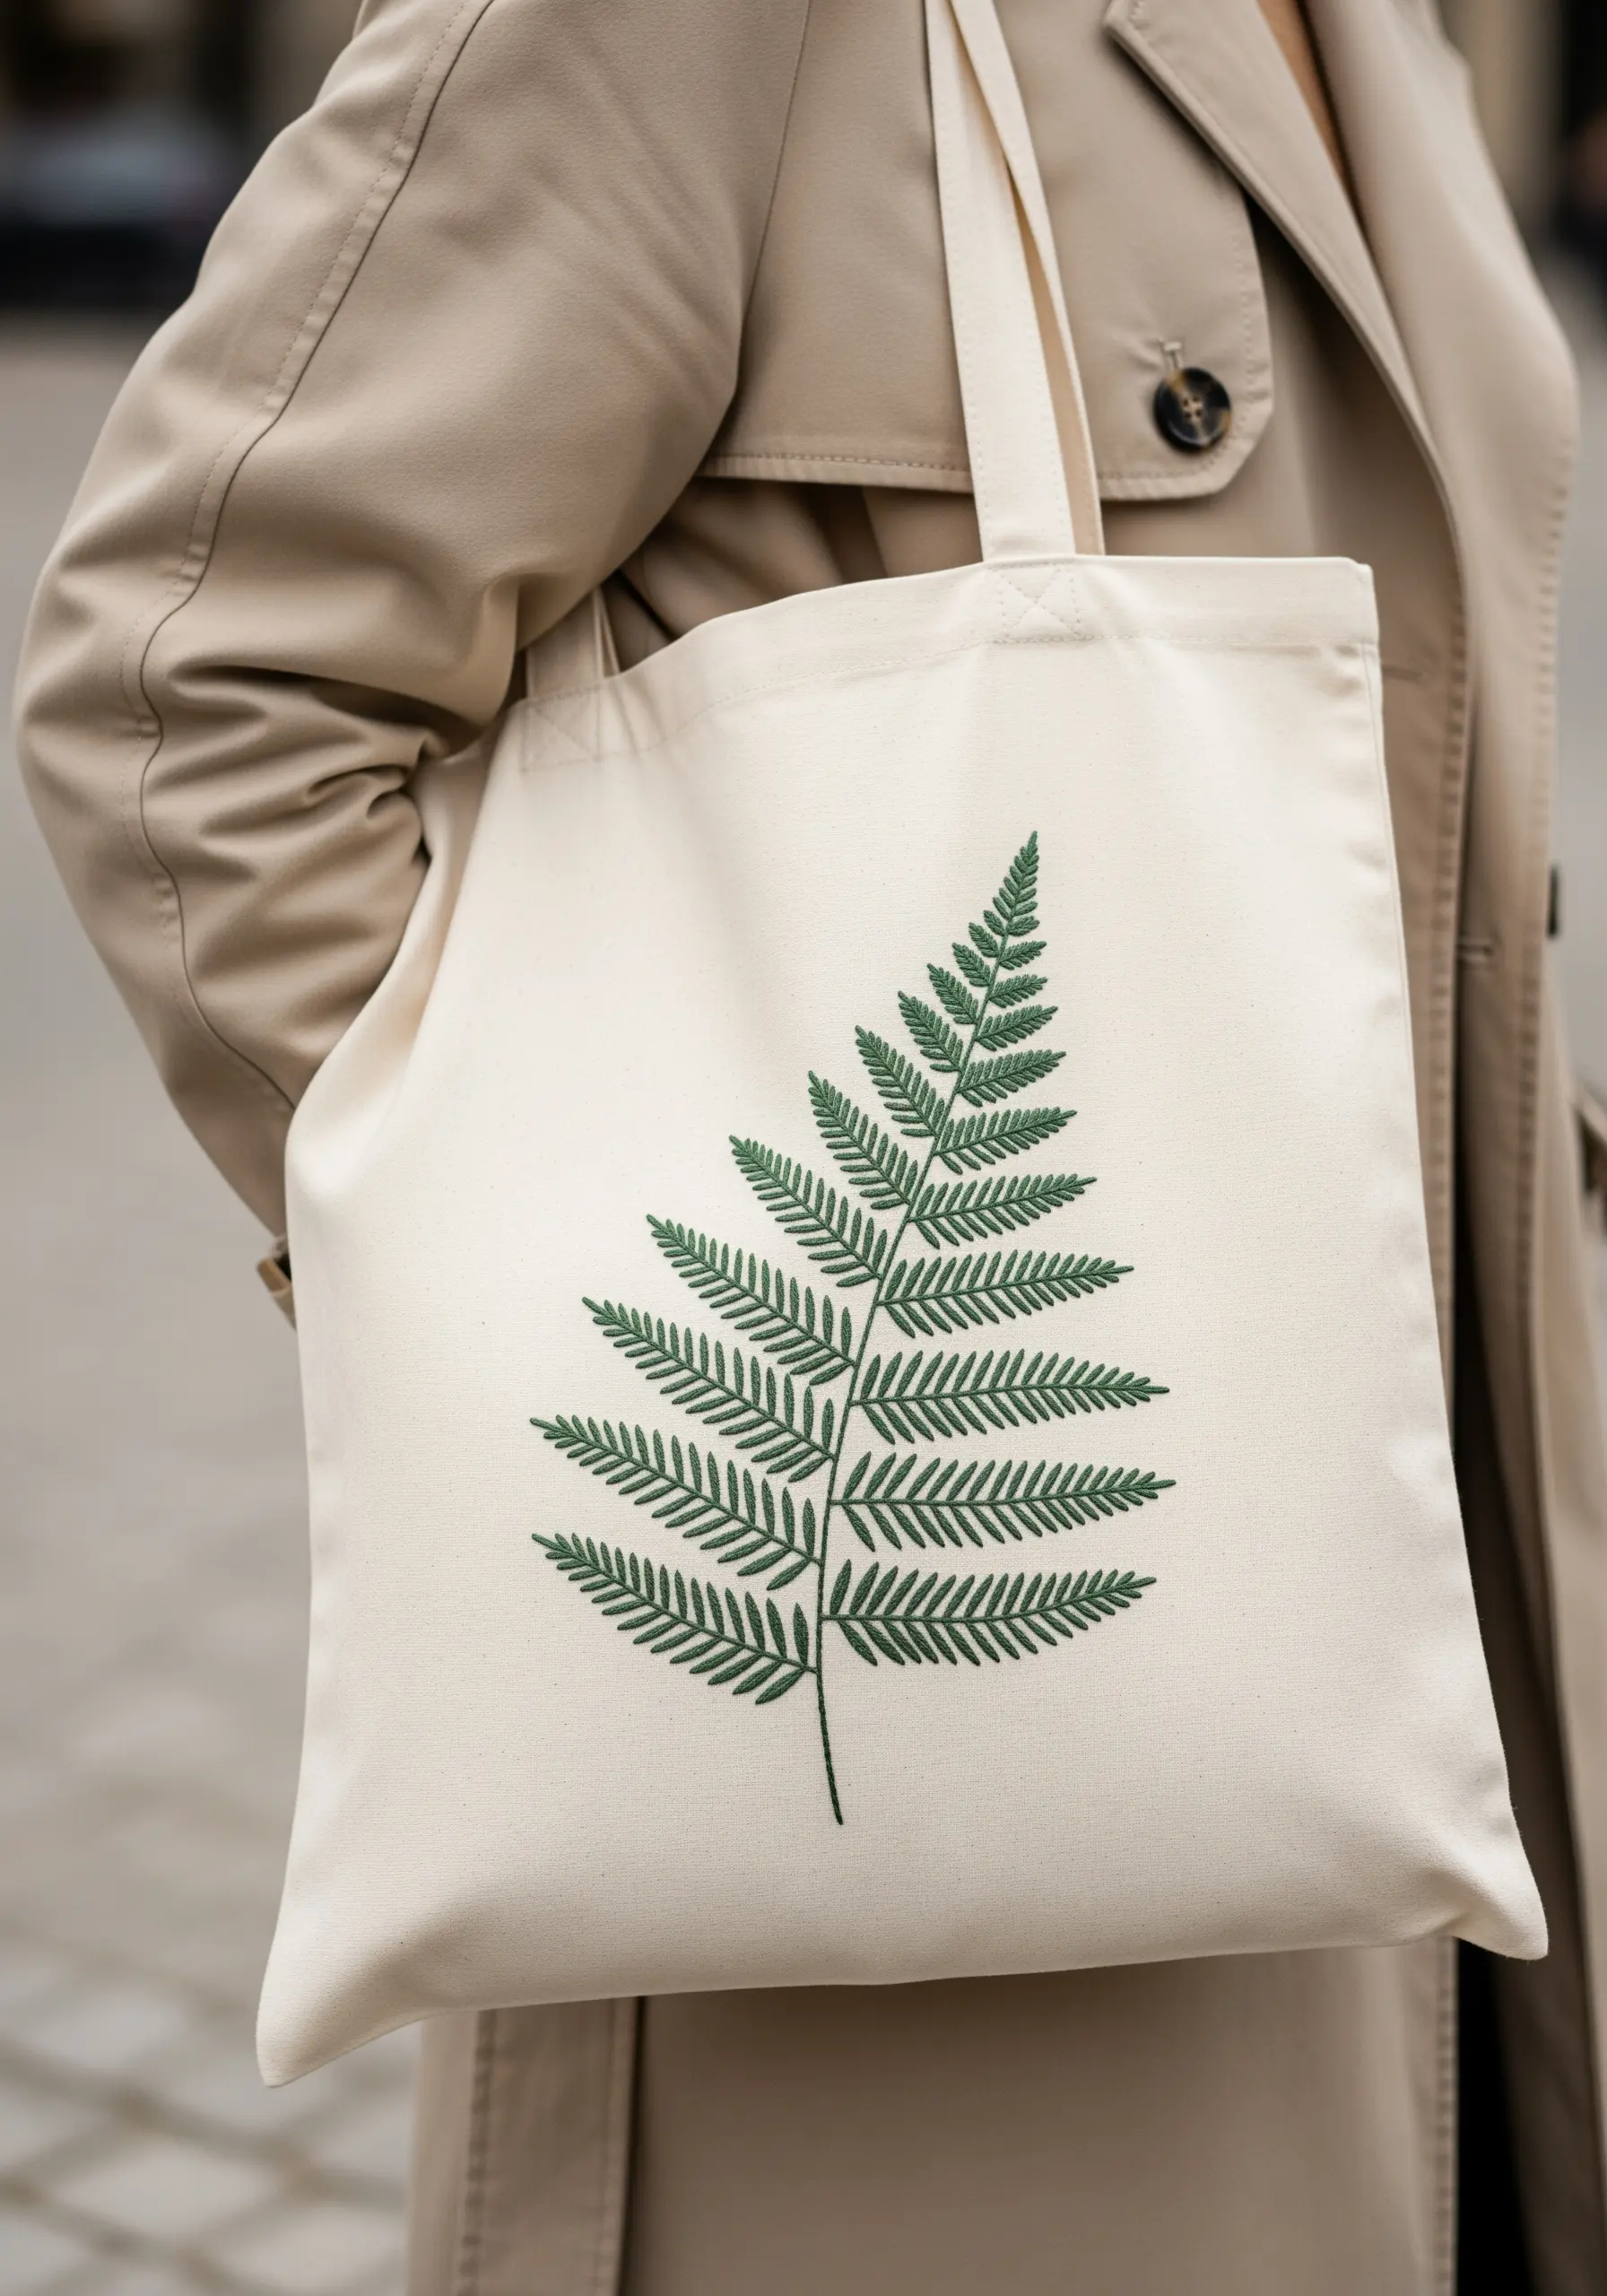
The fishbone stitch is the ideal choice for creating leaves that have a defined central vein, like this elegant fern.
It’s a surprisingly simple stitch that naturally forms the shape and texture of the leaf as you work from the tip downwards.
For a clean, graphic appearance, use a single color and three or four strands of floss.
The key to a beautiful result is keeping your stitches neat and consistently angled away from the central spine, creating a lovely herringbone-like texture.
17. Intricate Fills with French Knots and Seed Stitch
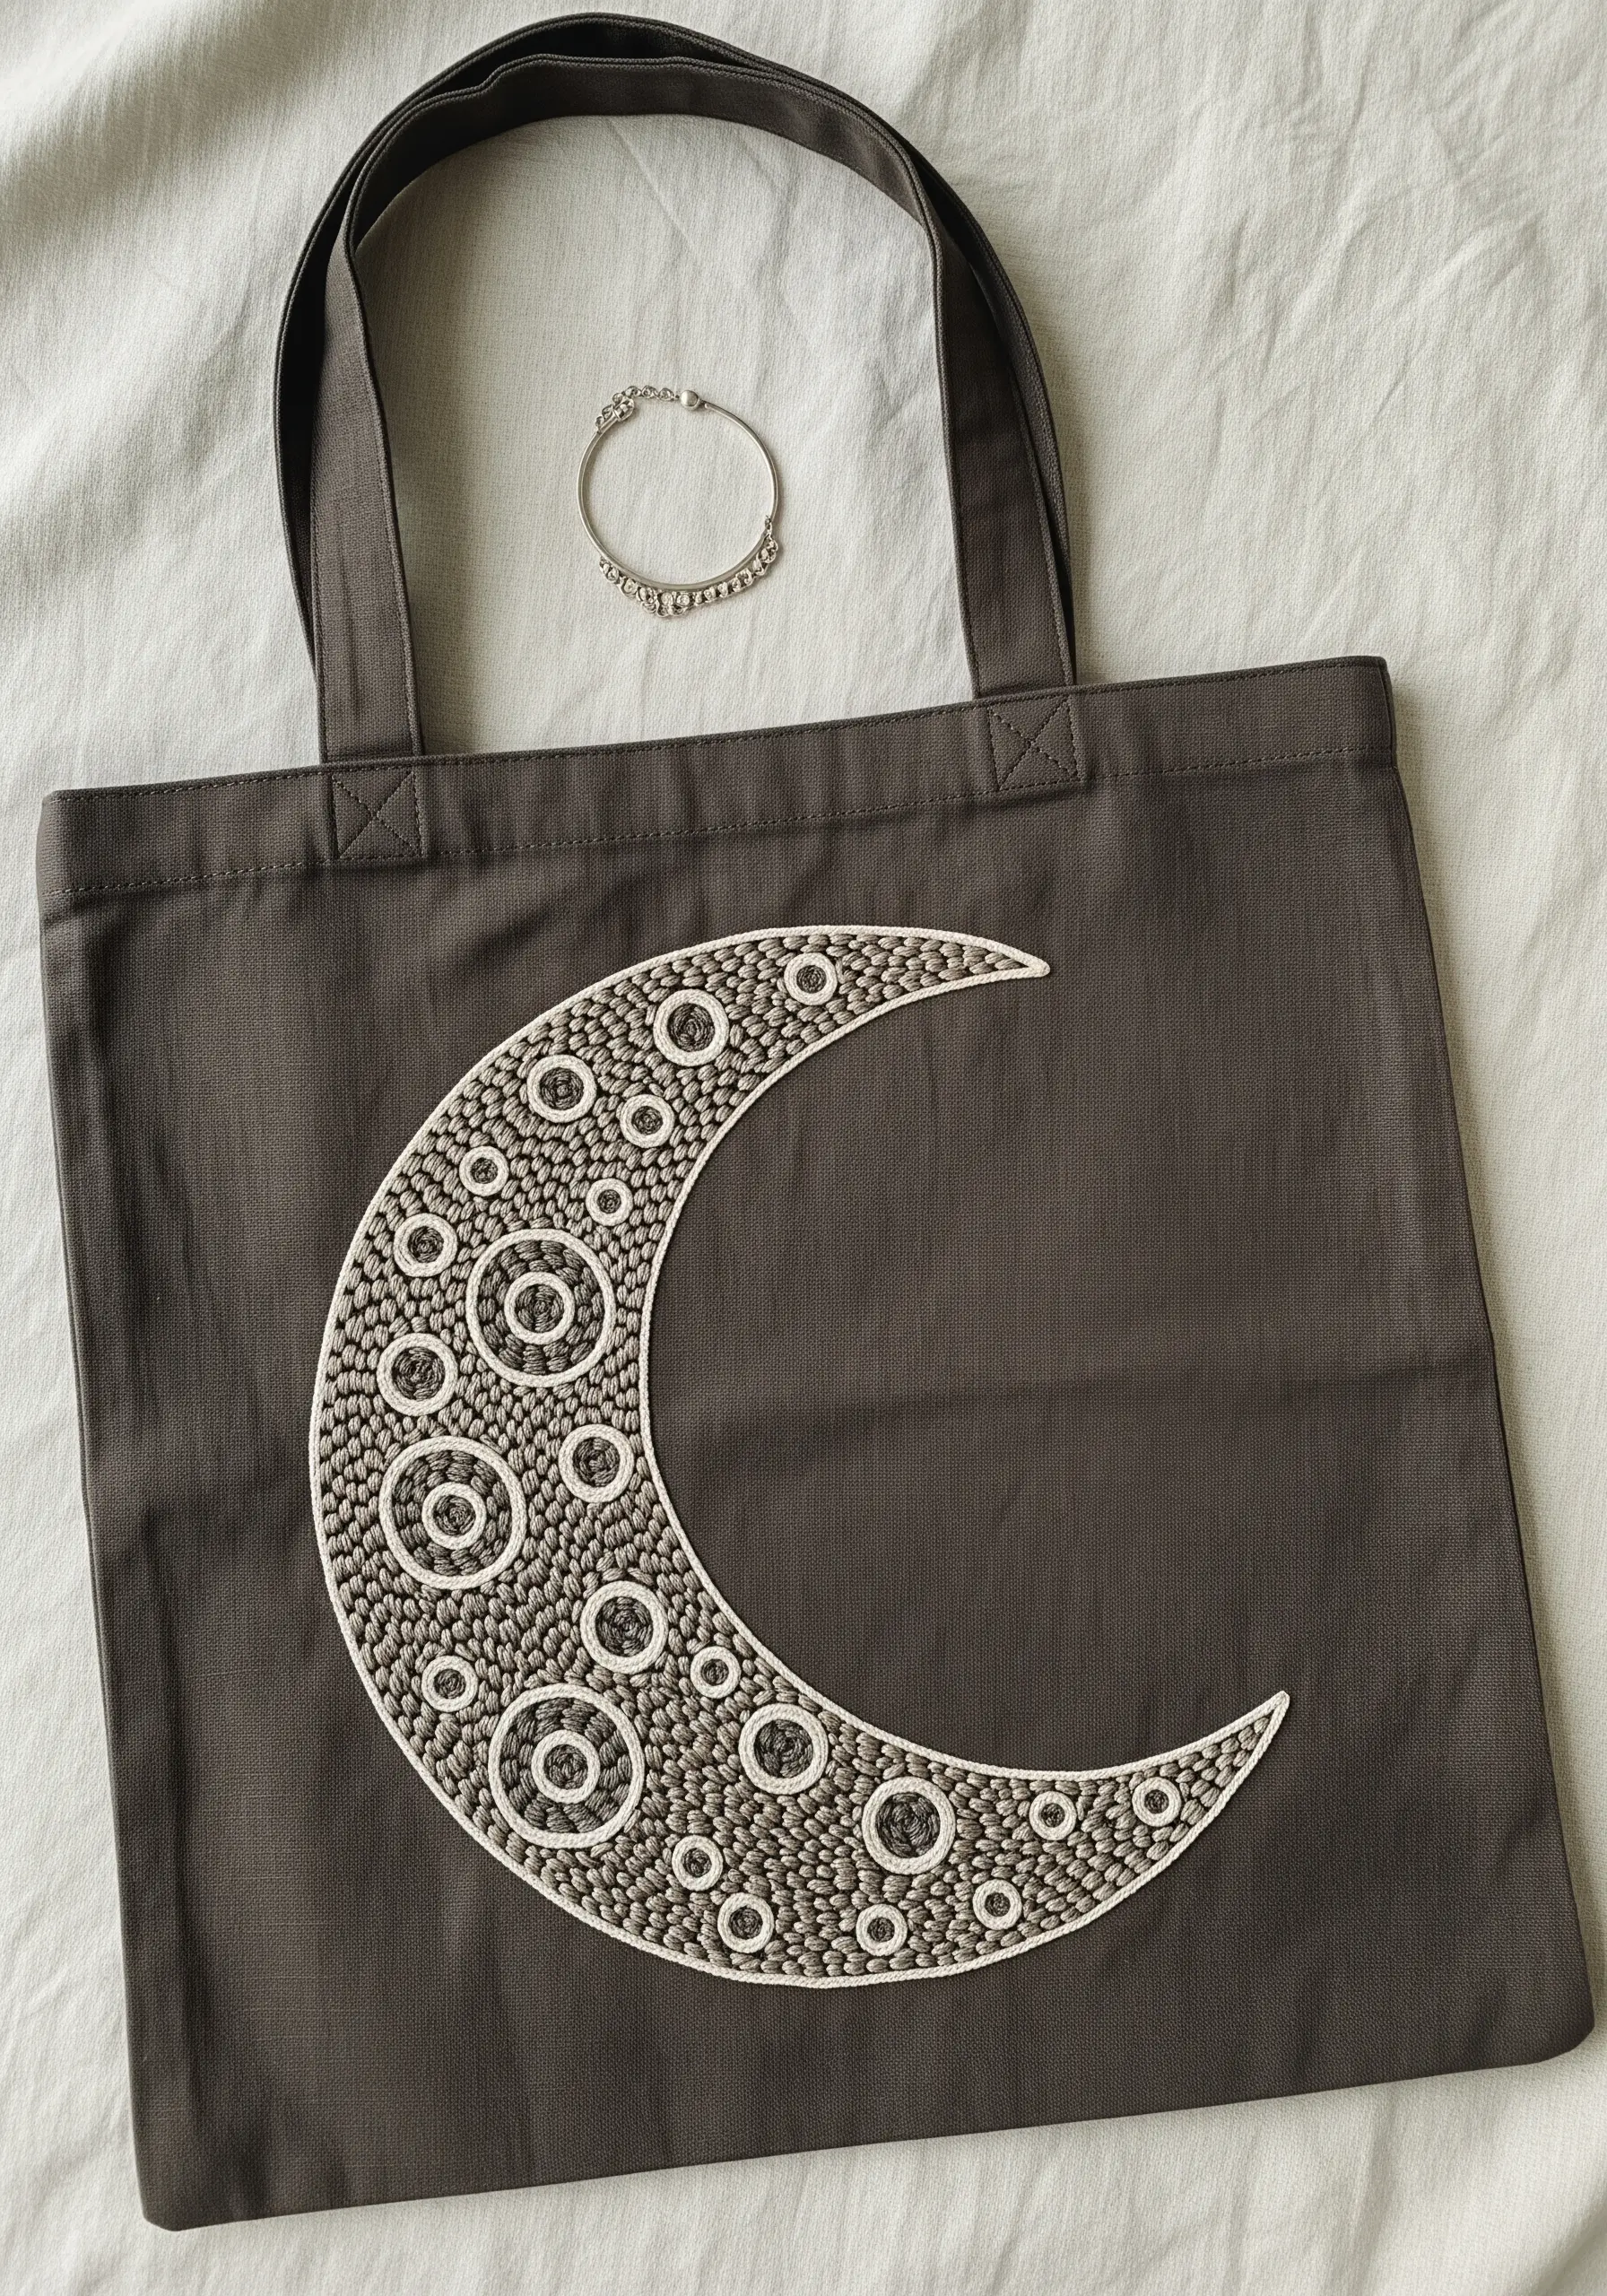
Transform a simple shape into a captivating mosaic by filling it with a variety of stitch textures.
First, create a strong border for the crescent moon using a clean chain stitch or whipped backstitch.
Then, fill the interior with contrasting textures: tightly packed French knots in a dark gray for a bumpy, stippled effect, and concentric circles made with off-white seed stitches for a smoother, more linear feel.
This detailed fill work makes the simple shape feel like a precious object.
18. Architectural Layering with Color Blocking
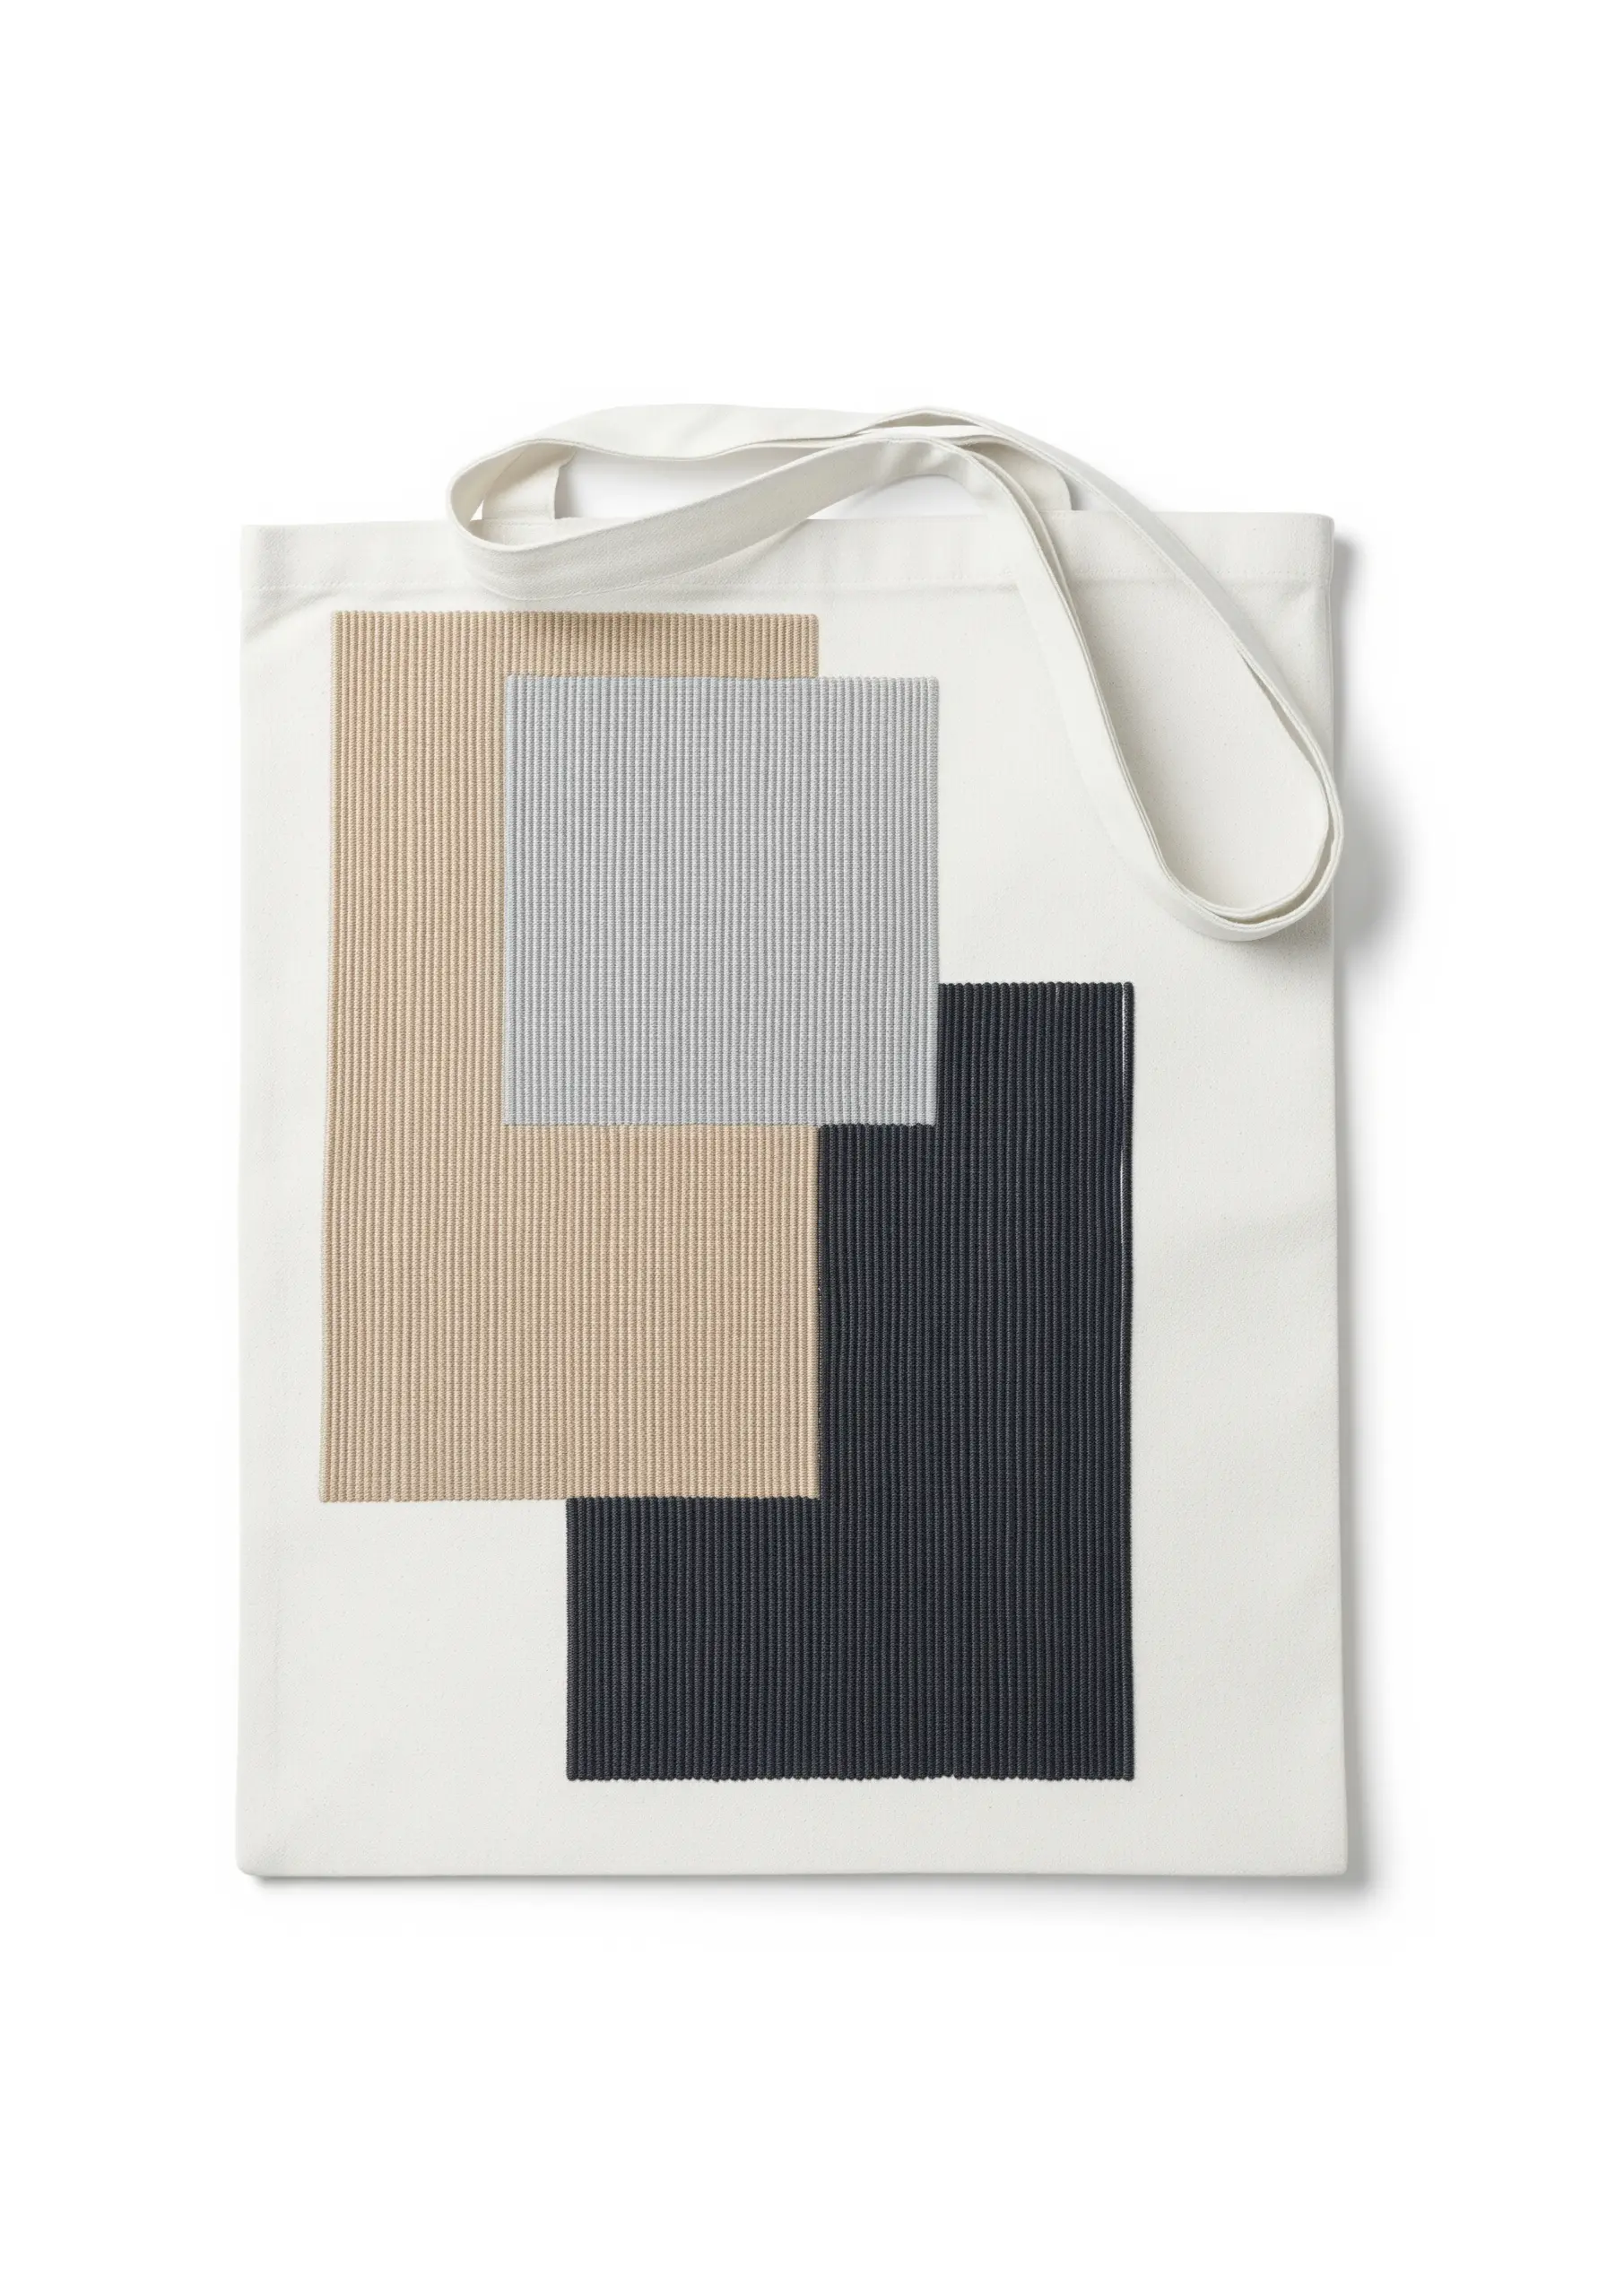
This design achieves a sophisticated sense of depth through the simple principles of layering and uniform texture.
Stitch each rectangle using a perfectly straight, vertical satin stitch, ensuring your stitches lie flat and even to create a woven, fabric-like appearance.
Using a stabilizer on the back of your tote is crucial here to prevent the large filled areas from puckering the canvas.
The overlapping composition and muted color palette give it a modern, architectural feel.
19. The Power of a Bold, Simple Outline
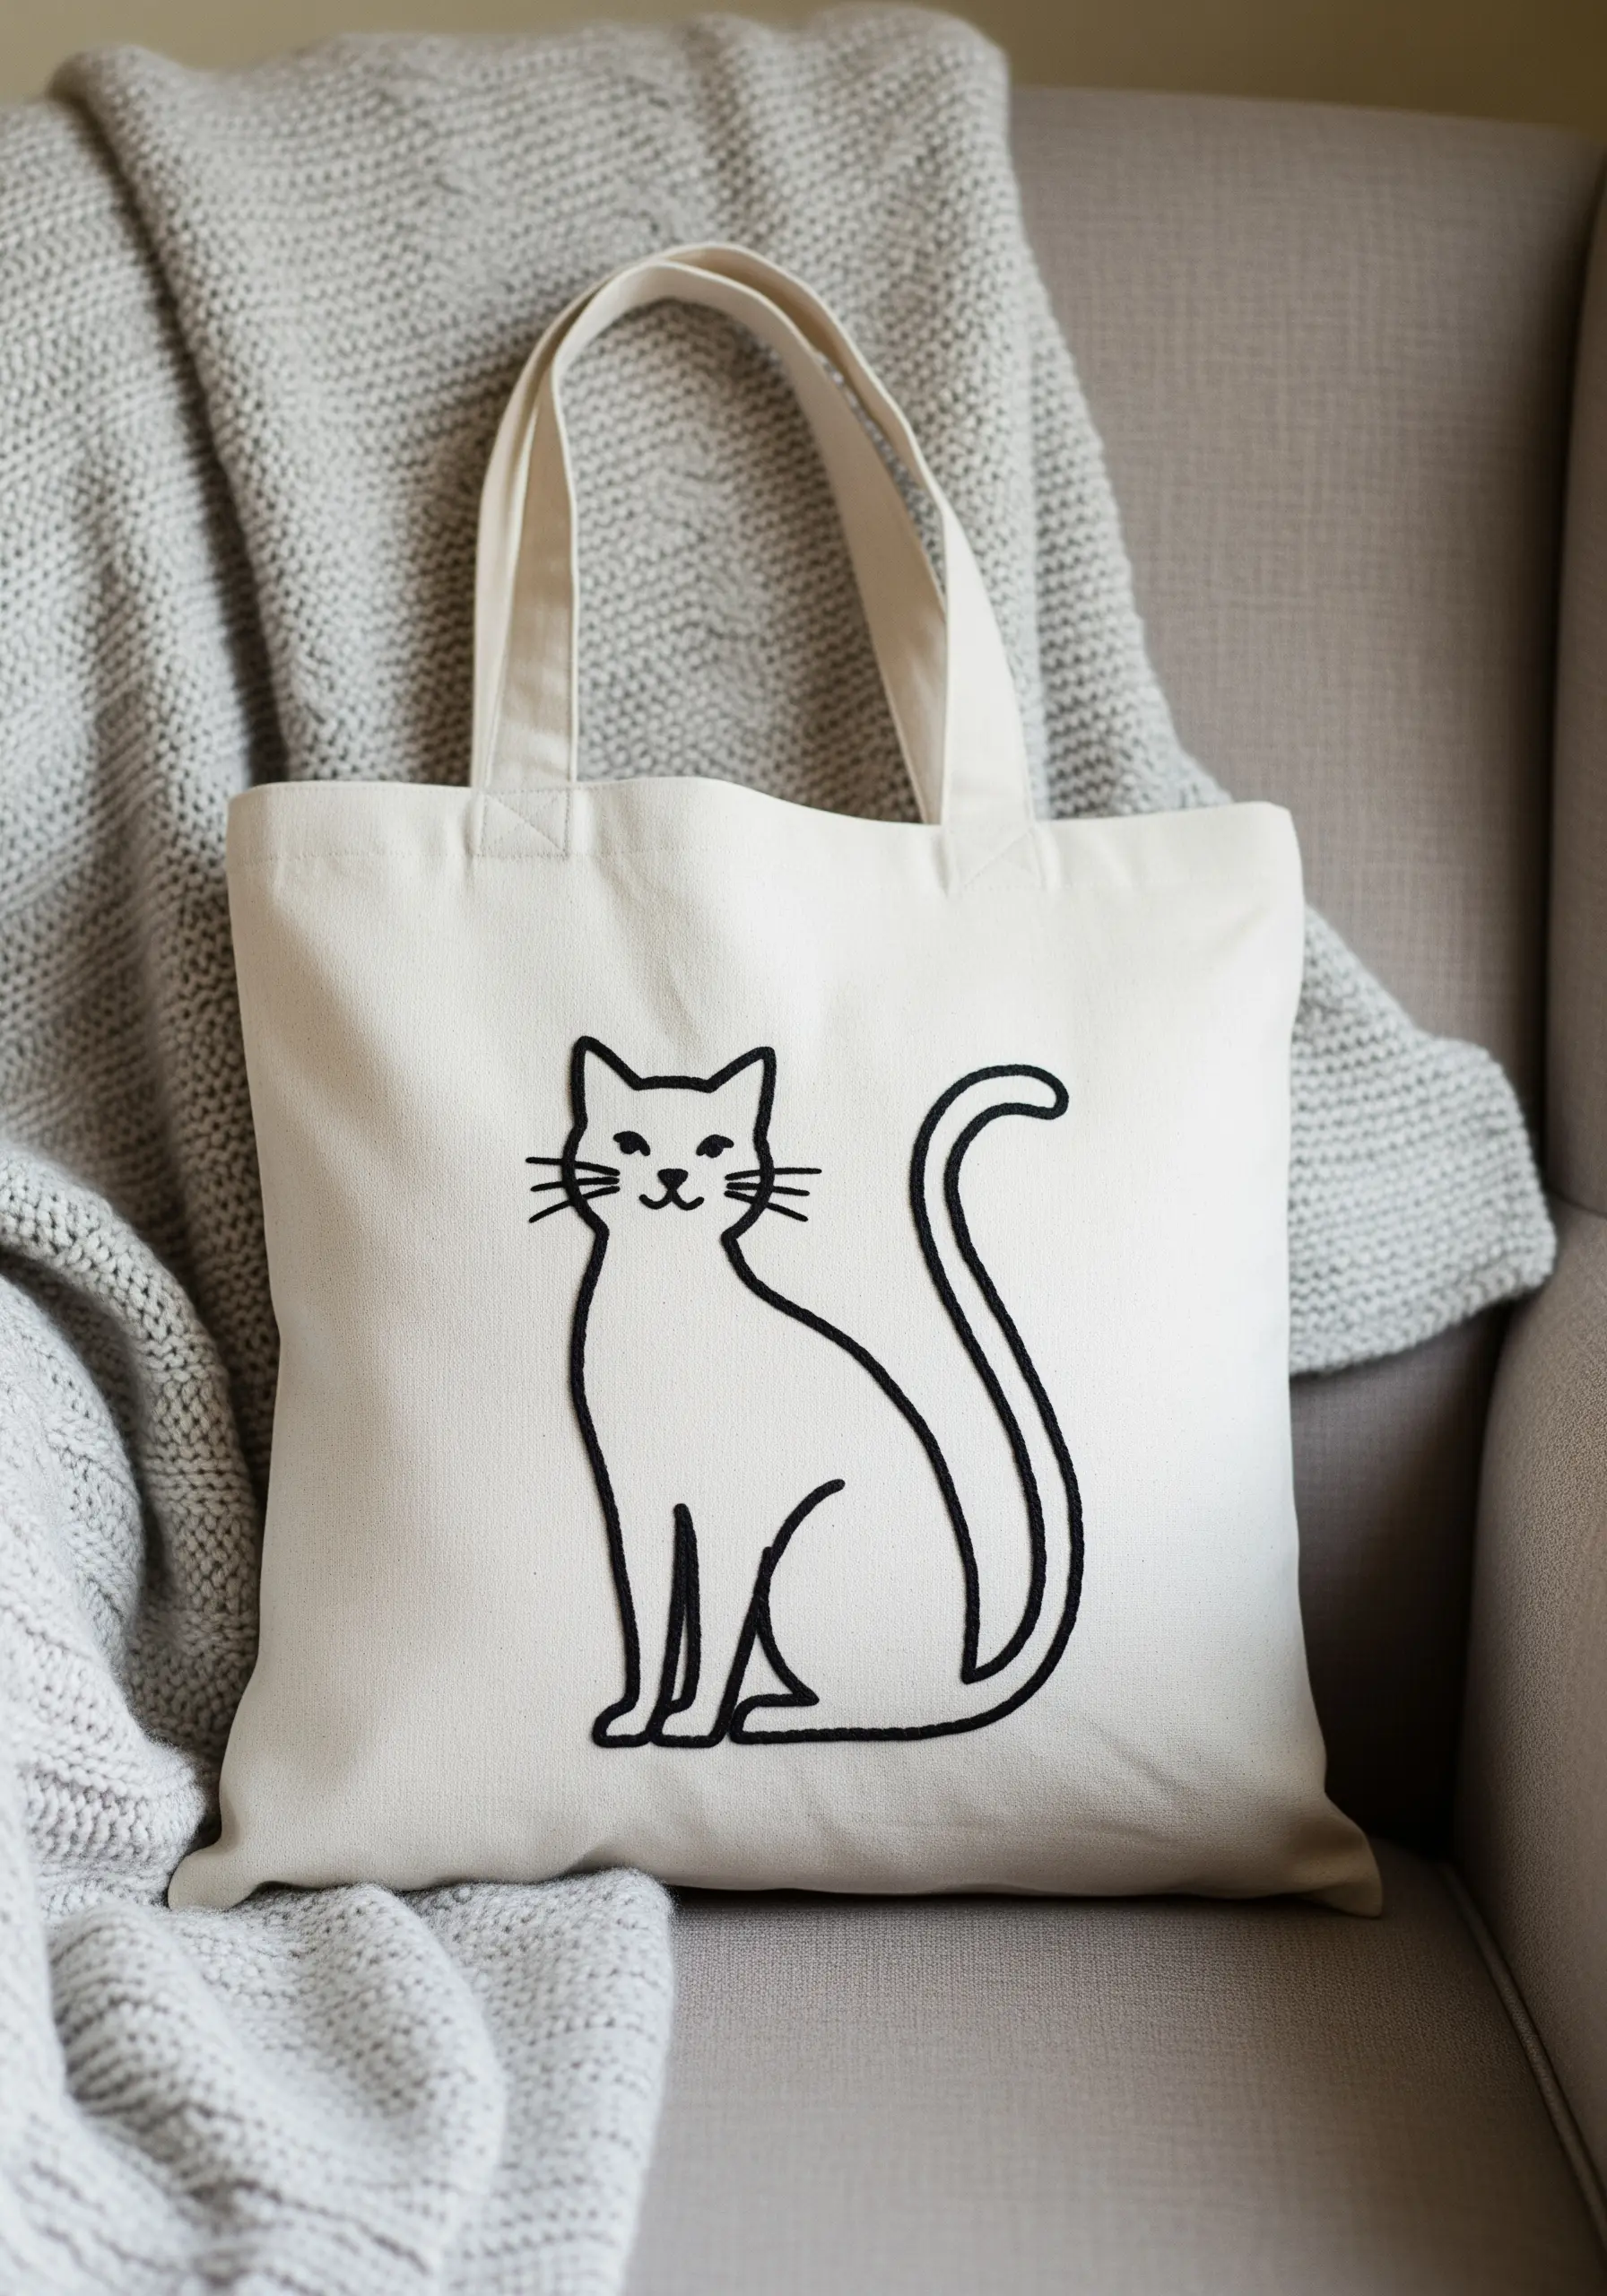
Sometimes, the most impactful design is a single, confident line.
To achieve a thick and smooth outline that feels substantial, use a whipped backstitch or a chain stitch with four to six strands of floss.
Both techniques create a raised, rope-like line that has more presence than a simple backstitch.
For the delicate details like whiskers, switch to a single strand of floss to create a beautiful contrast in line weight.
20. Playful Realism with Thread Painting
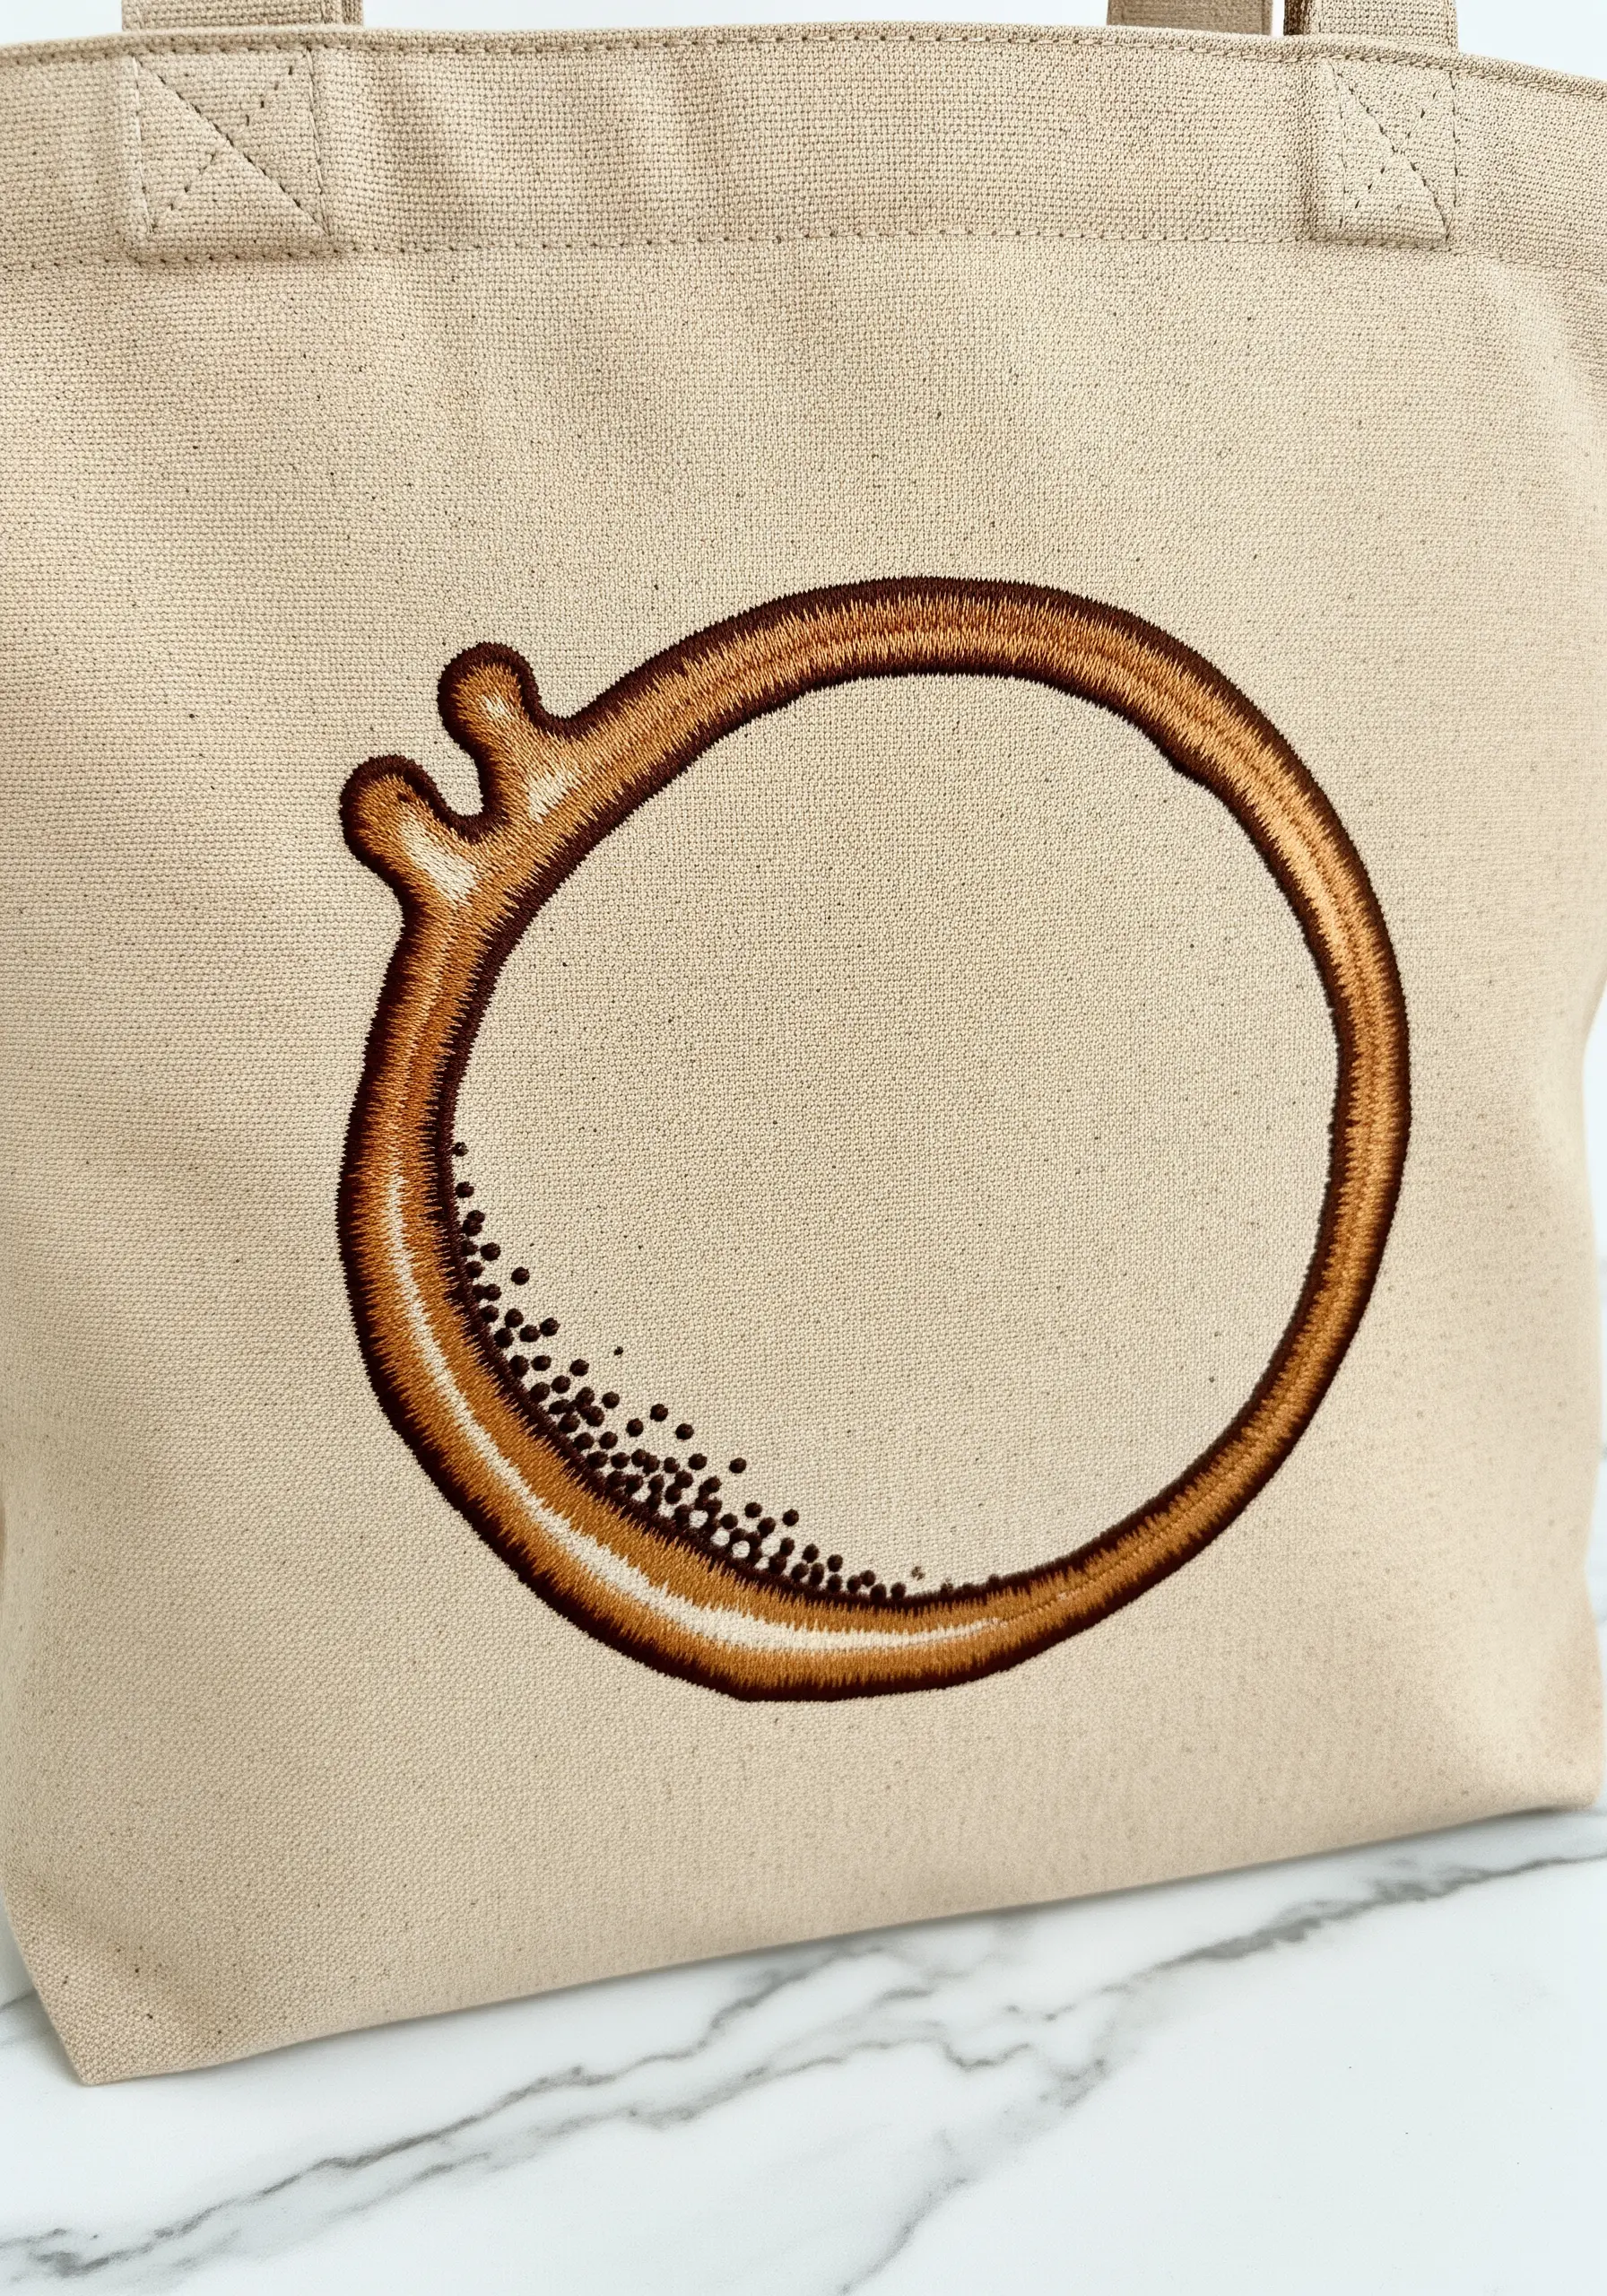
Capture the unexpected charm of a coffee stain by using thread painting techniques to mimic its liquid properties.
Select three to four shades of brown, from a light tan to a deep espresso, and work with single strands of floss.
Use a long-and-short stitch to blend the colors organically, creating the gradient effect of a drying liquid stain.
For the scattered drips, add a few tiny, well-placed French knots in the darkest brown to complete this witty and skillful illusion.
21. Capturing Movement with Delicate Stitches
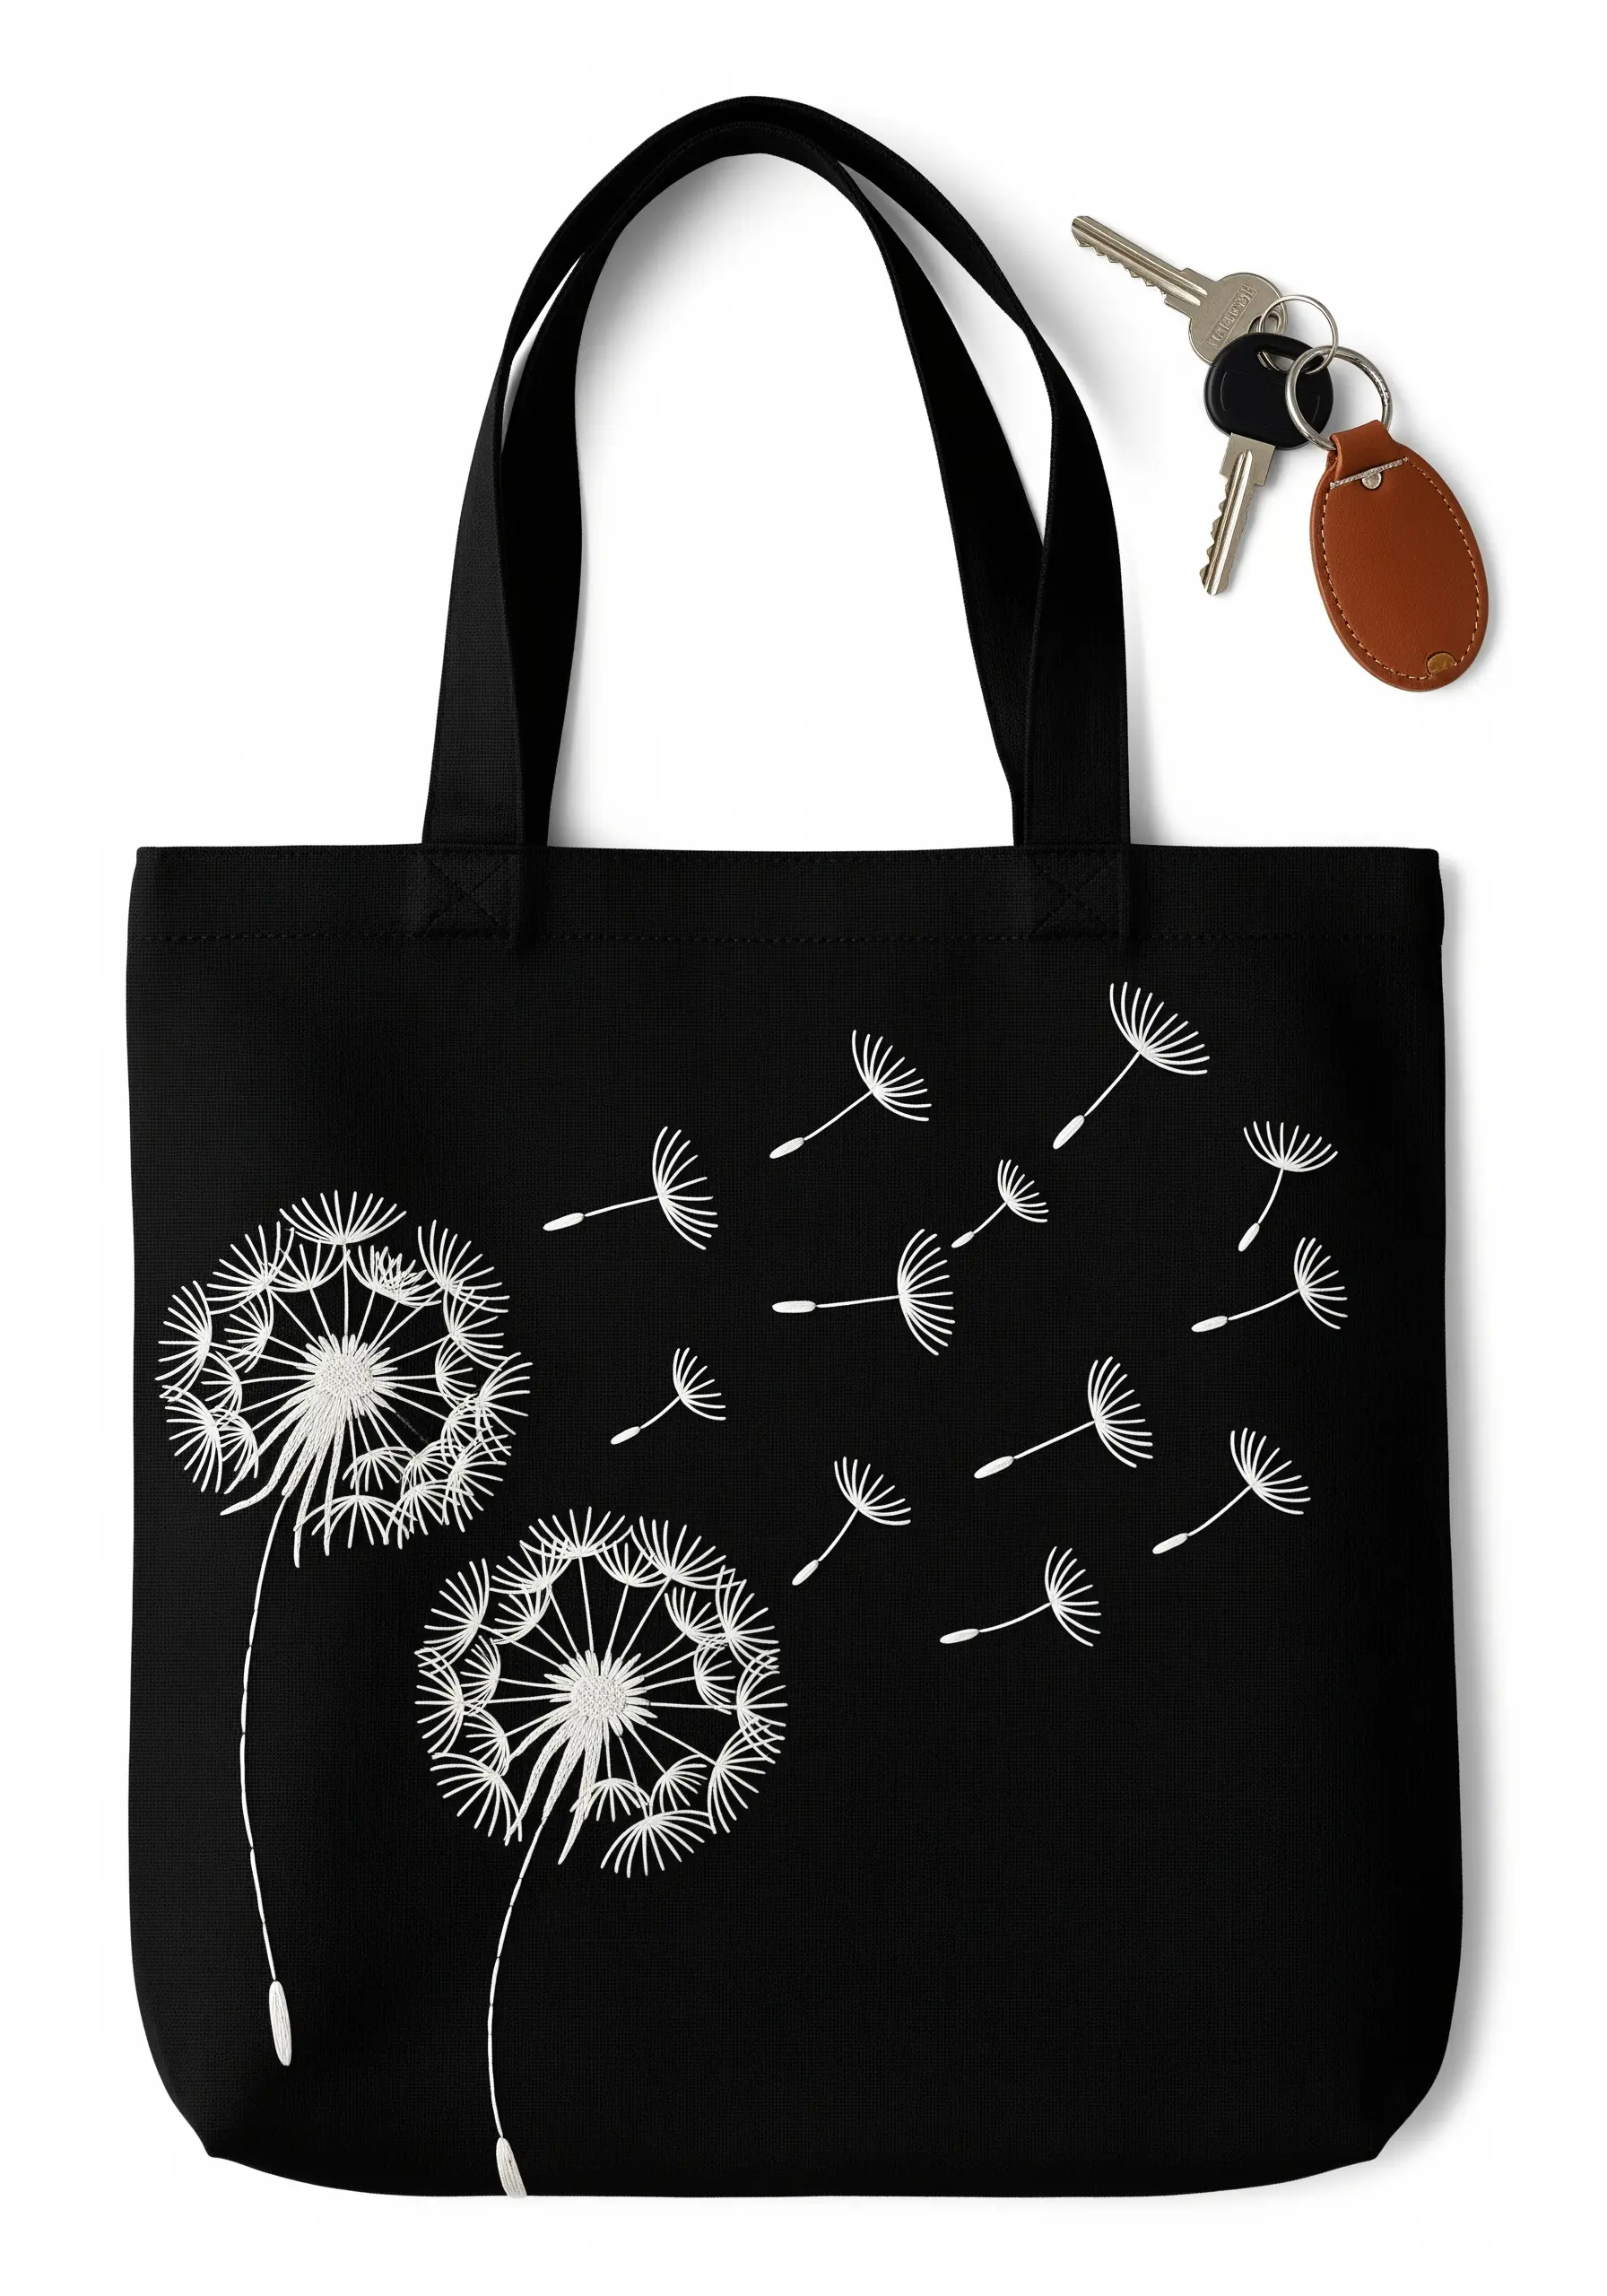
To convey the feeling of lightness and motion, your stitch choice is paramount.
Use a single strand of white floss to create the dandelion seeds, ensuring they feel almost weightless.
A combination of delicate straight stitches for the parachute-like fluff and a tiny French knot at the base is all that’s needed for each seed.
For the main dandelion head, use a dense cluster of straight stitches radiating from the center, which provides a visual anchor for the seeds floating away.
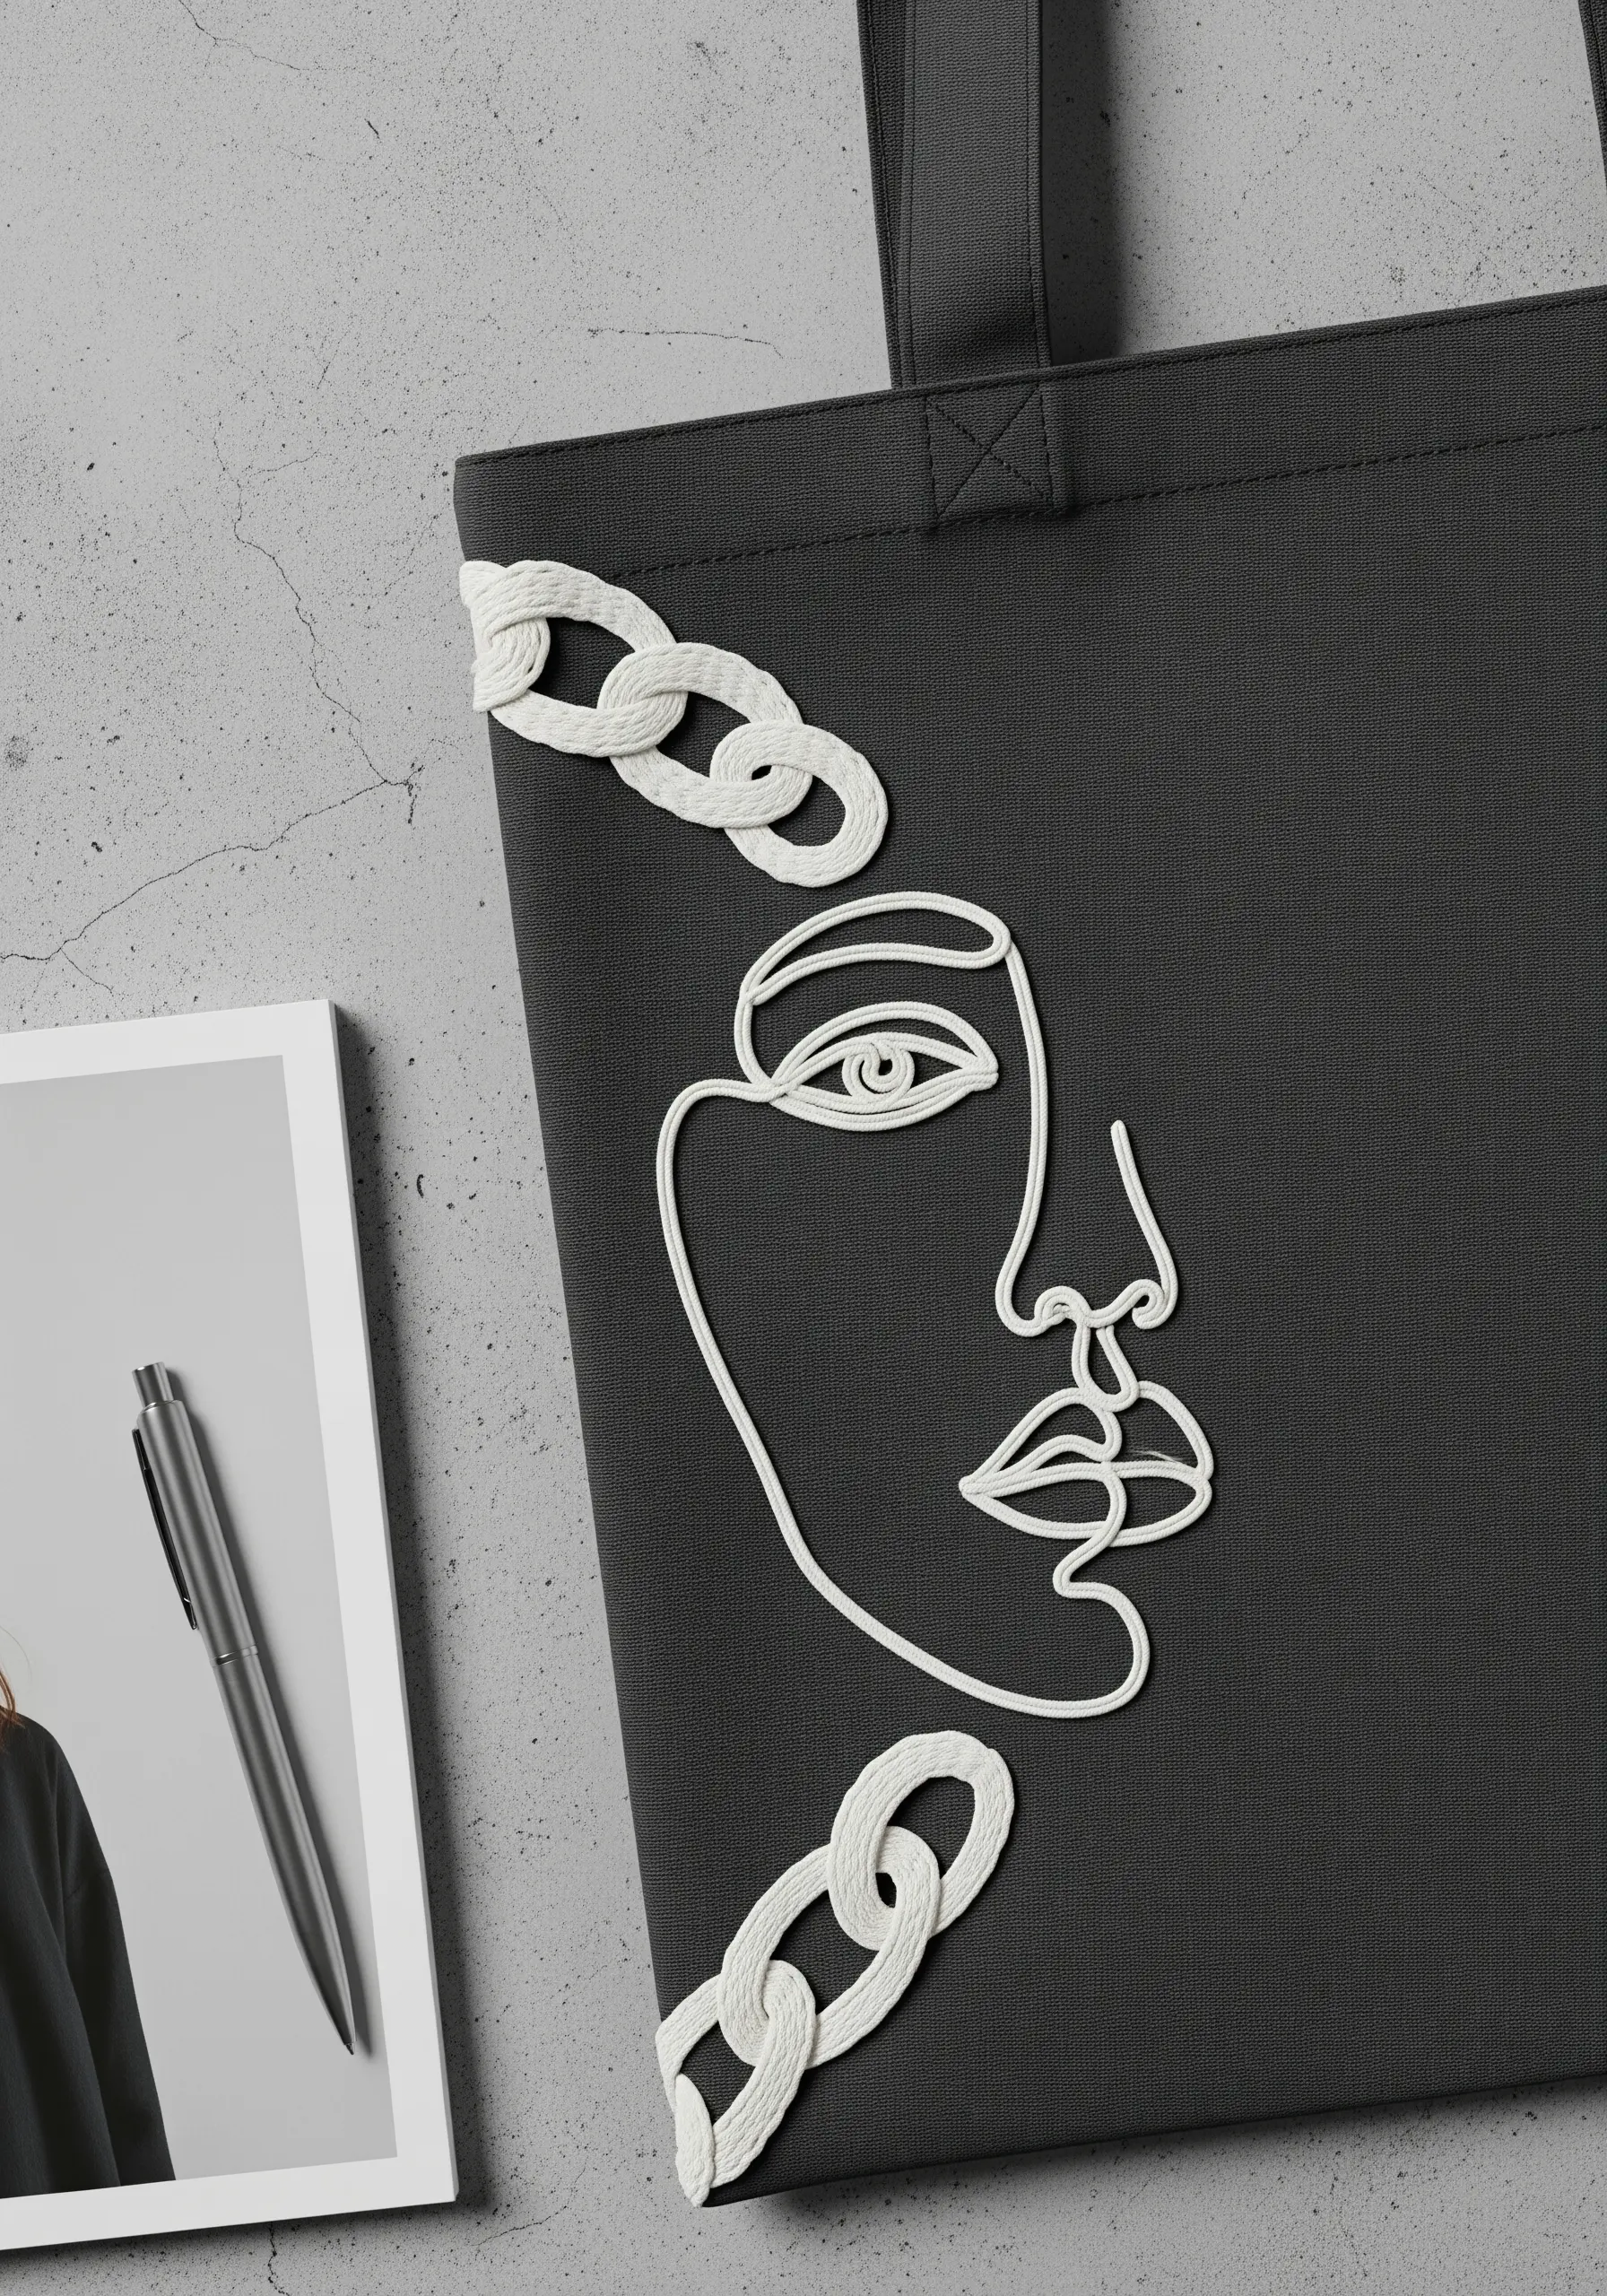
22. Expressive Storytelling with a Single Line
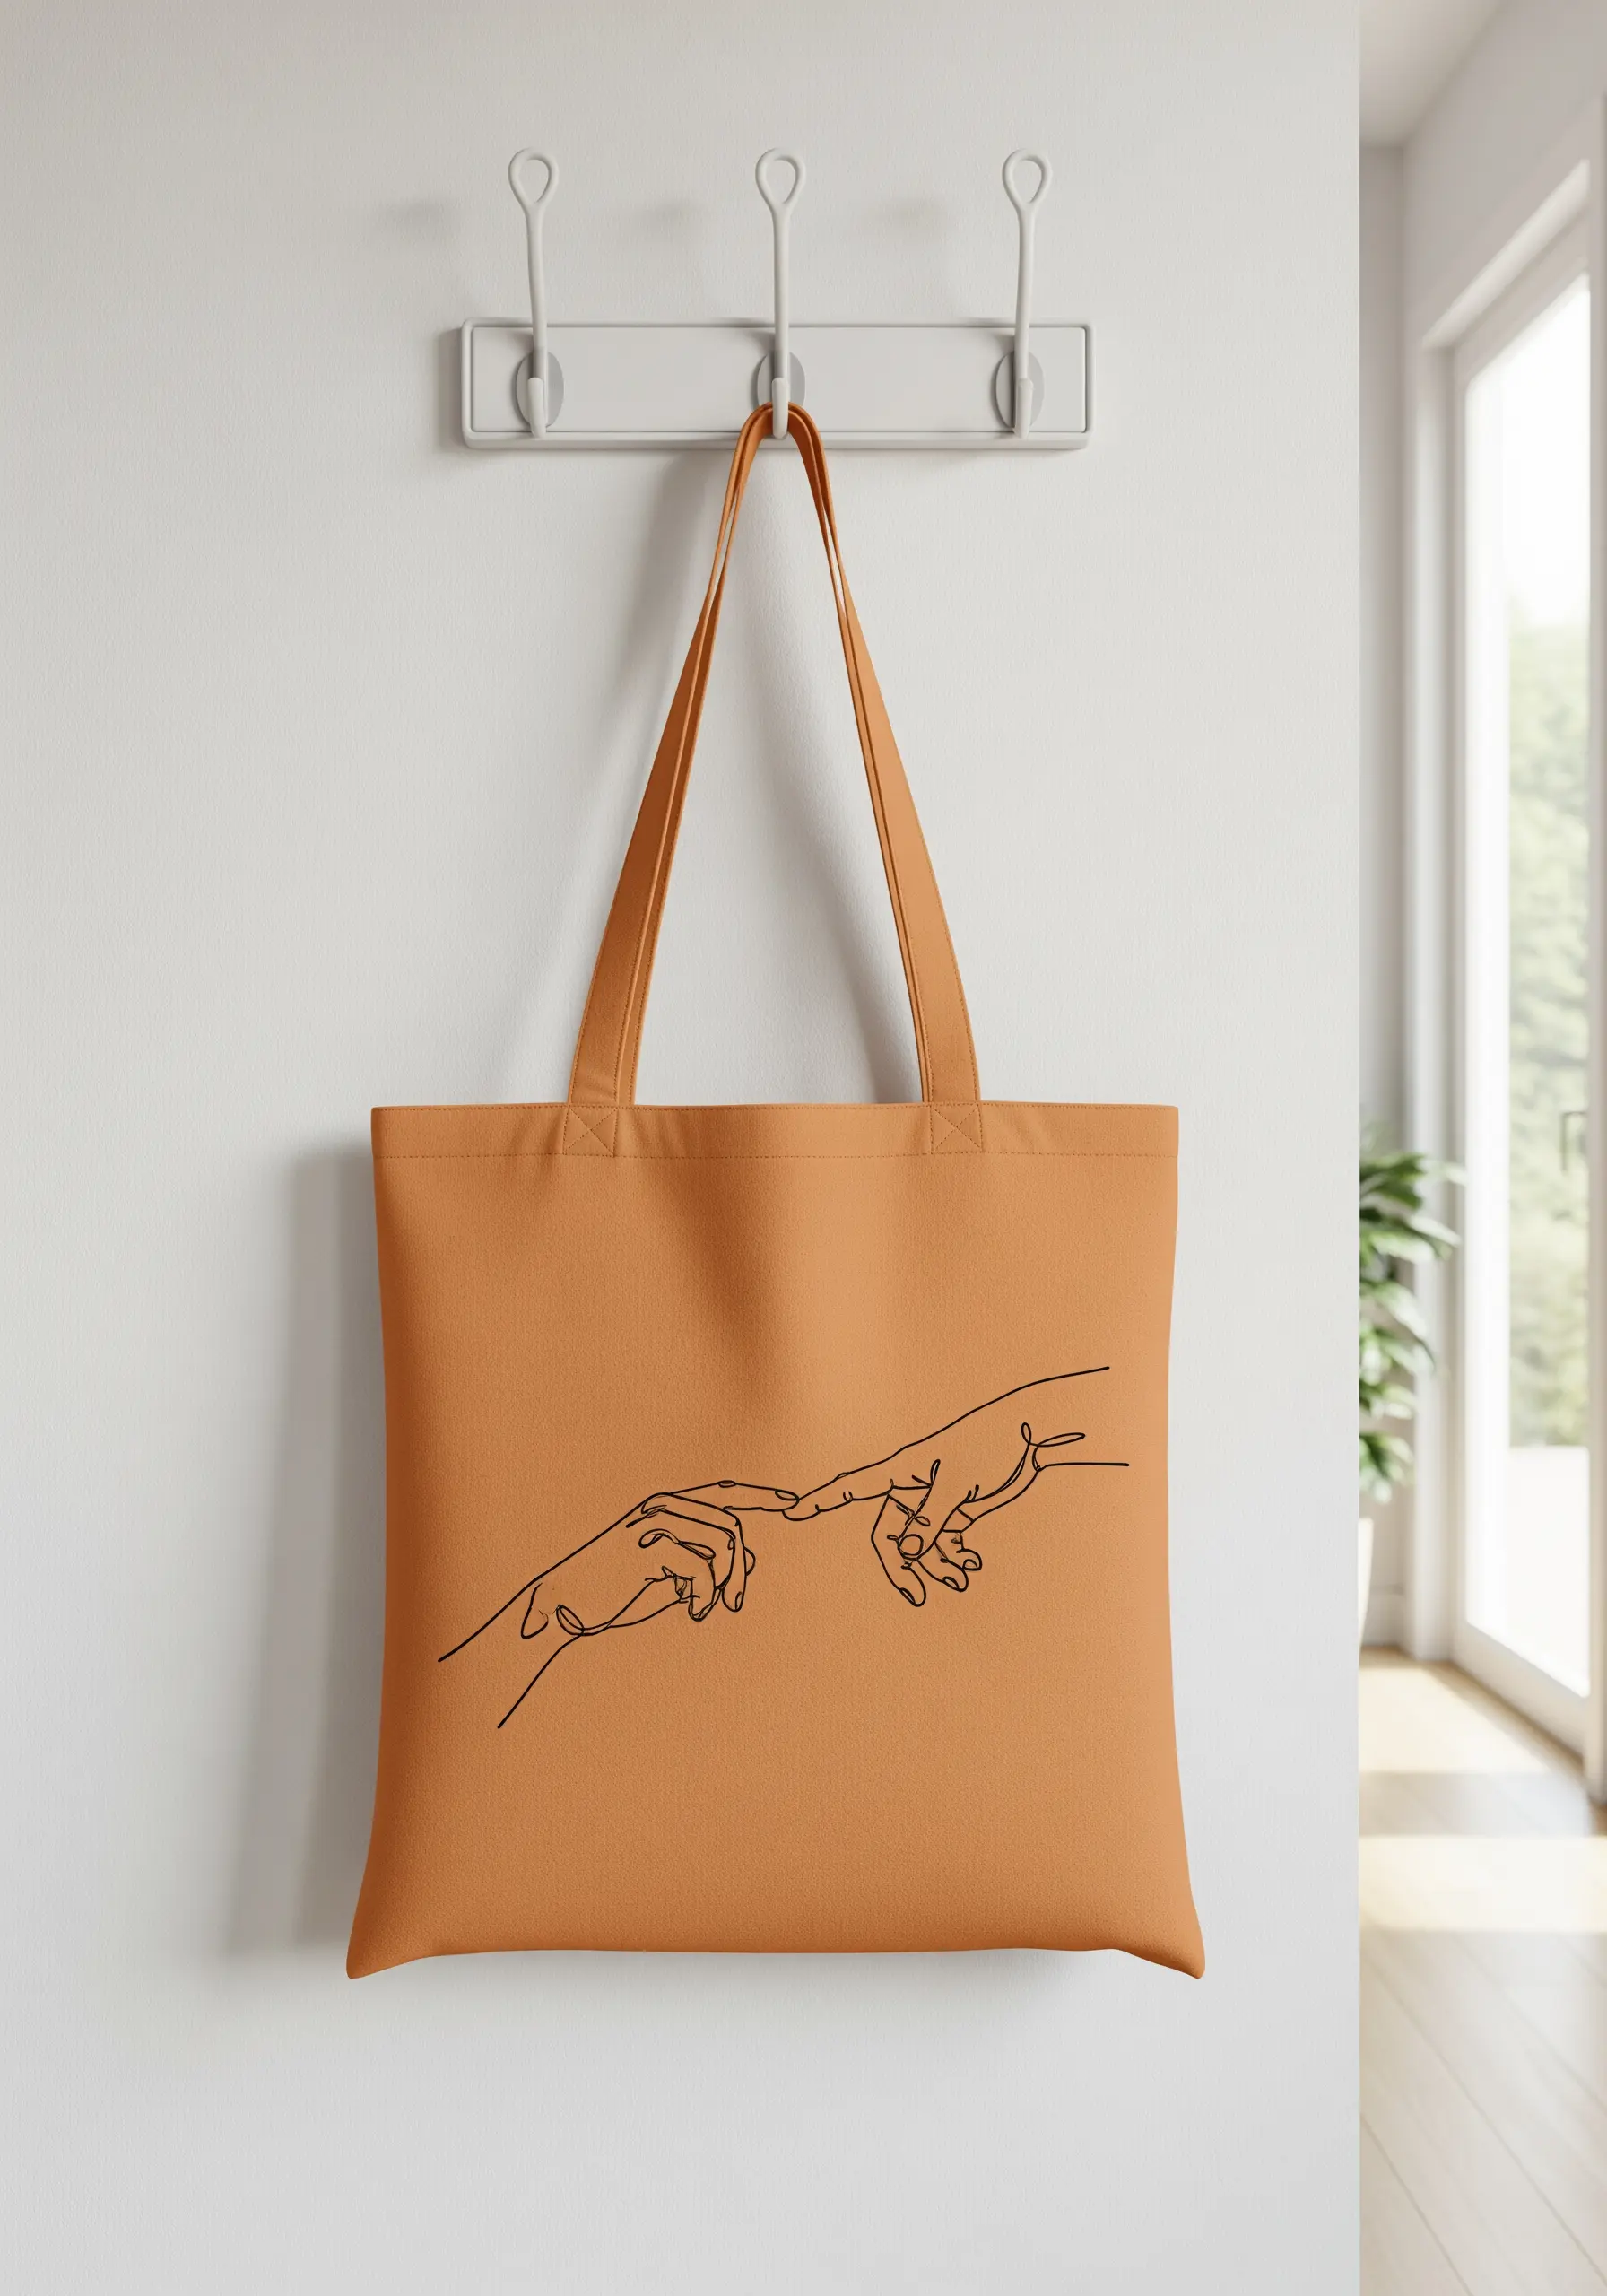
The elegance of one-line art lies in its continuous, unbroken flow, and you can replicate that feel with thread.
Use a whipped backstitch or a stem stitch to create a smooth, slightly raised line that avoids the segmented look of a standard backstitch.
Plan your stitch path carefully before you start to minimize the need for jumps on the back of the fabric.
This modern line art thread design requires only a single strand of black floss for a timeless, powerful statement.
23. Integrating Woven Chains for Graphic Texture
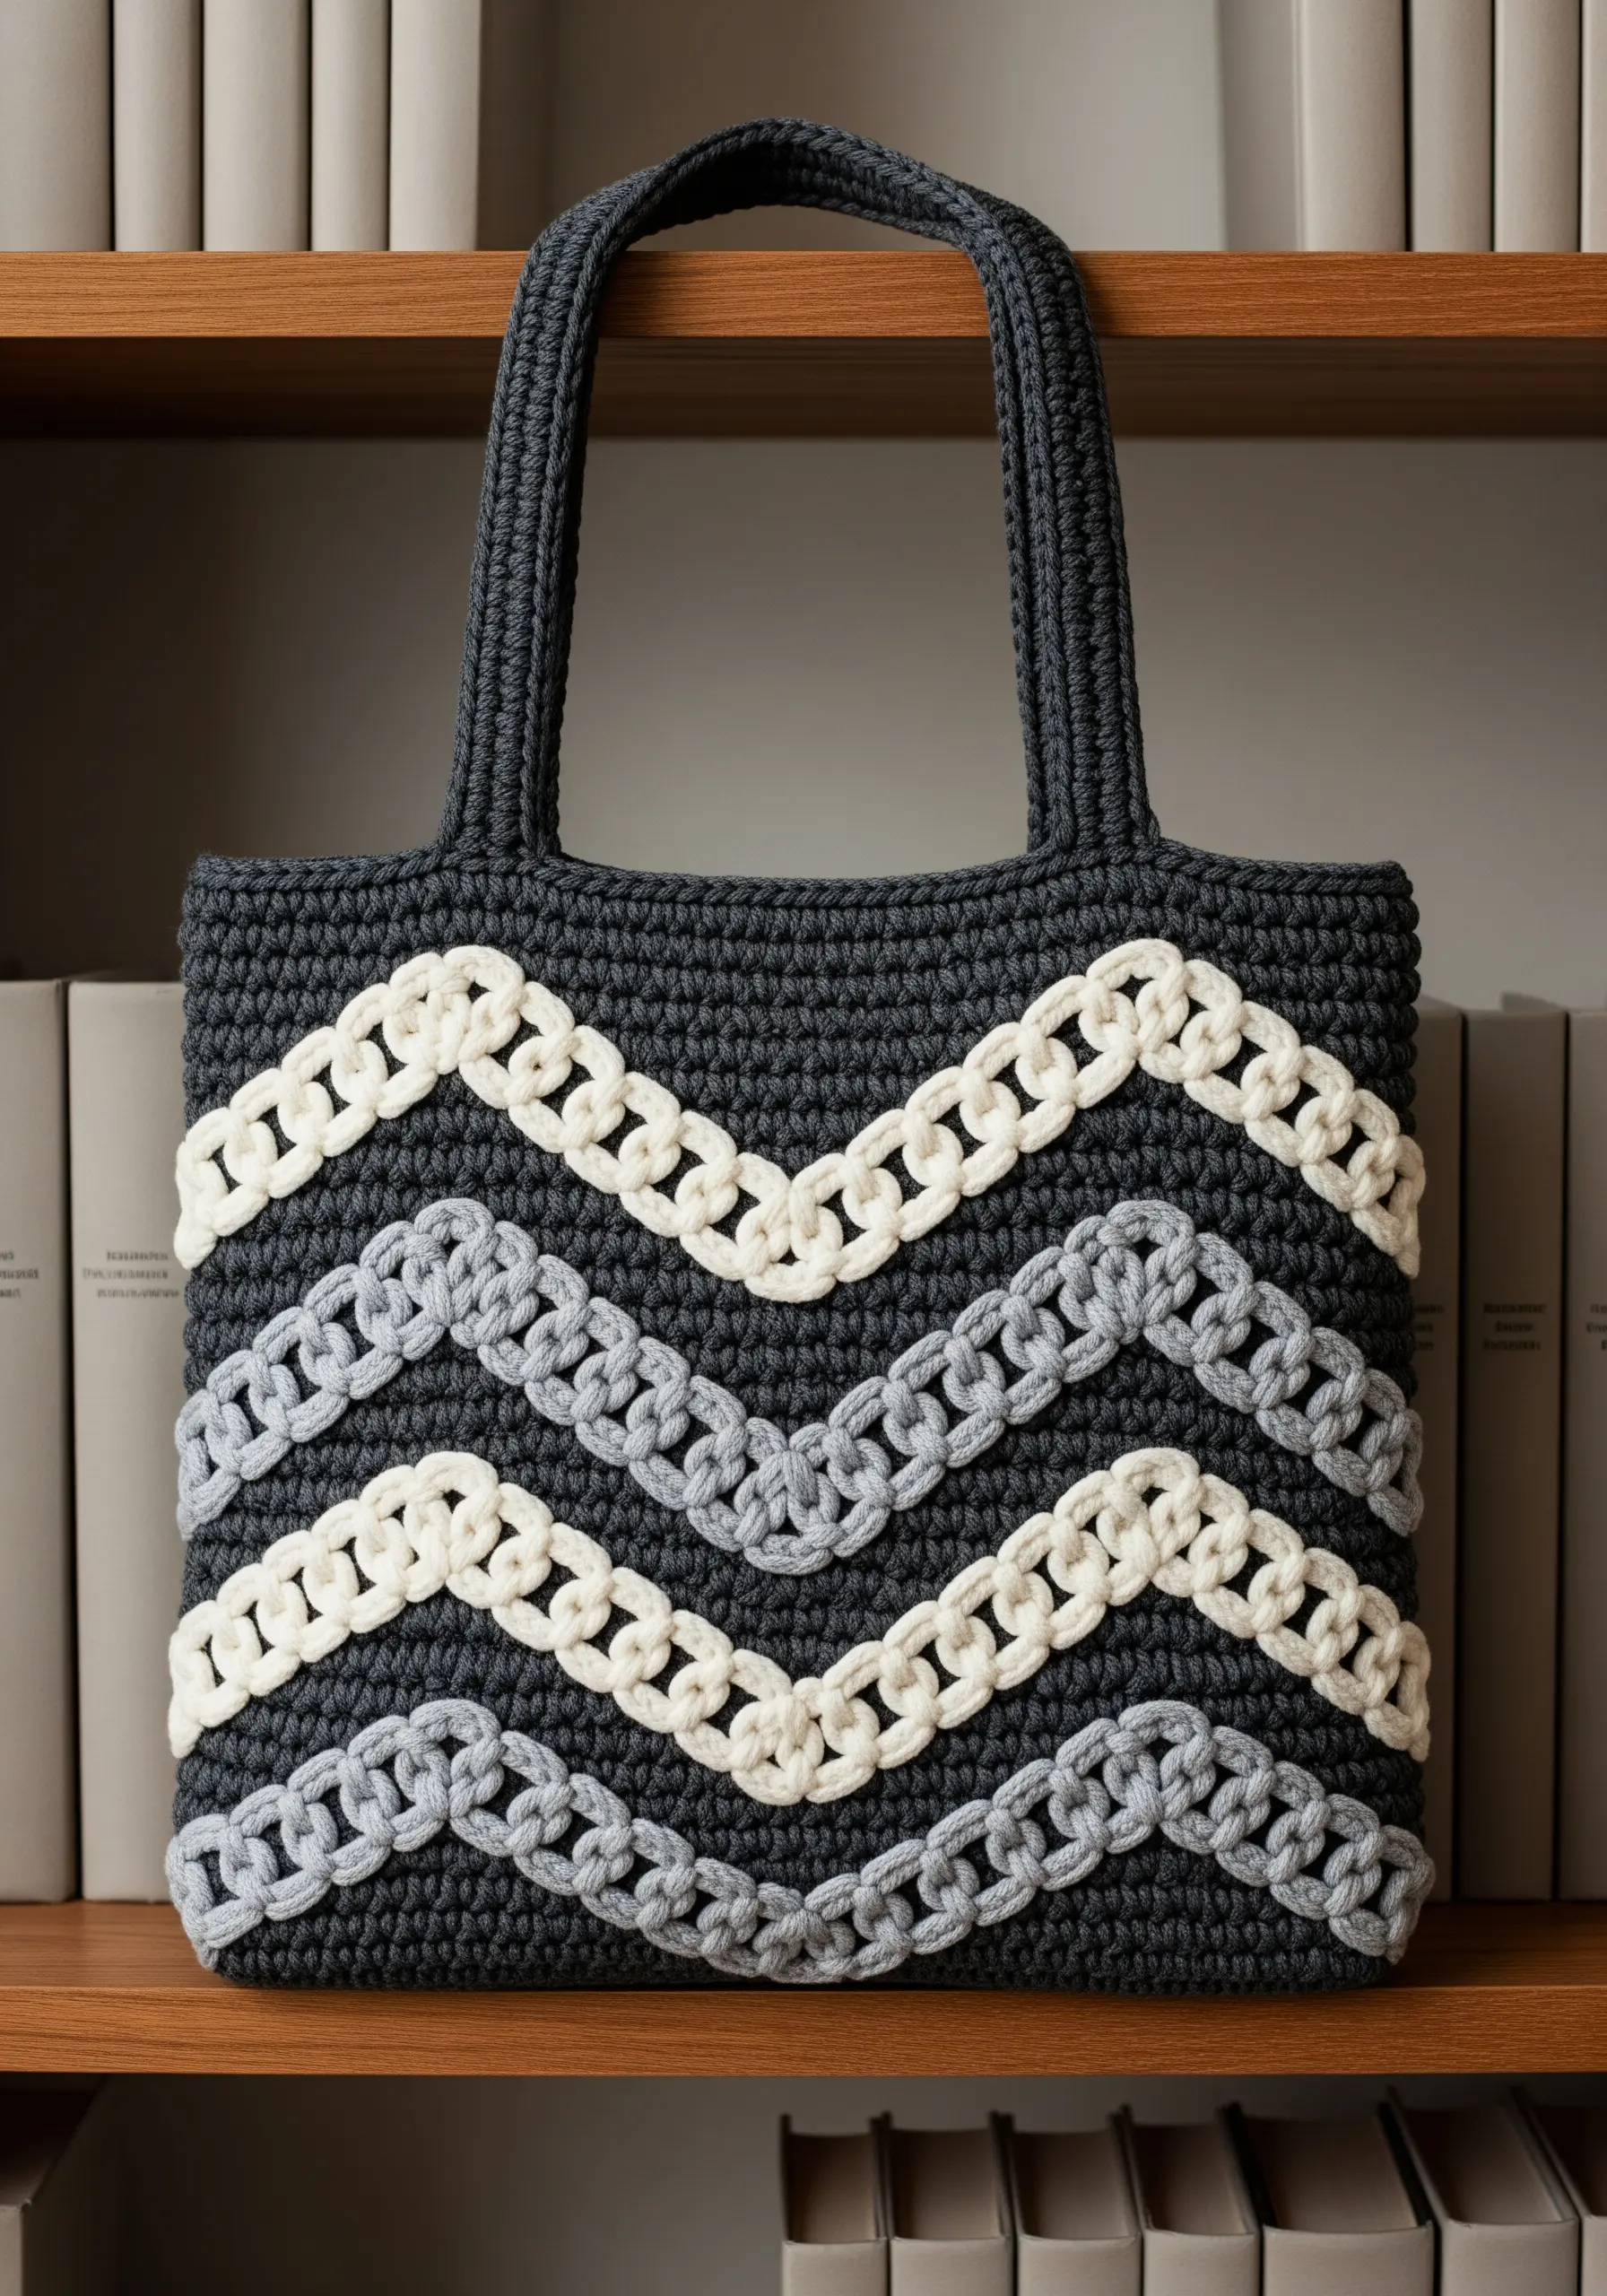
This is a brilliant hybrid technique that combines a crocheted or knitted base with a woven embroidery element.
After you’ve created the fabric of the bag, take a contrasting color of thick yarn or cord and weave it through the stitches, following a path to create a chain-link pattern.
This adds a bold, graphic layer and a three-dimensional quality that is both visually striking and structurally interesting, pushing the boundaries of traditional embroidery.
24. The Rhythmic Flow of Parallel Lines
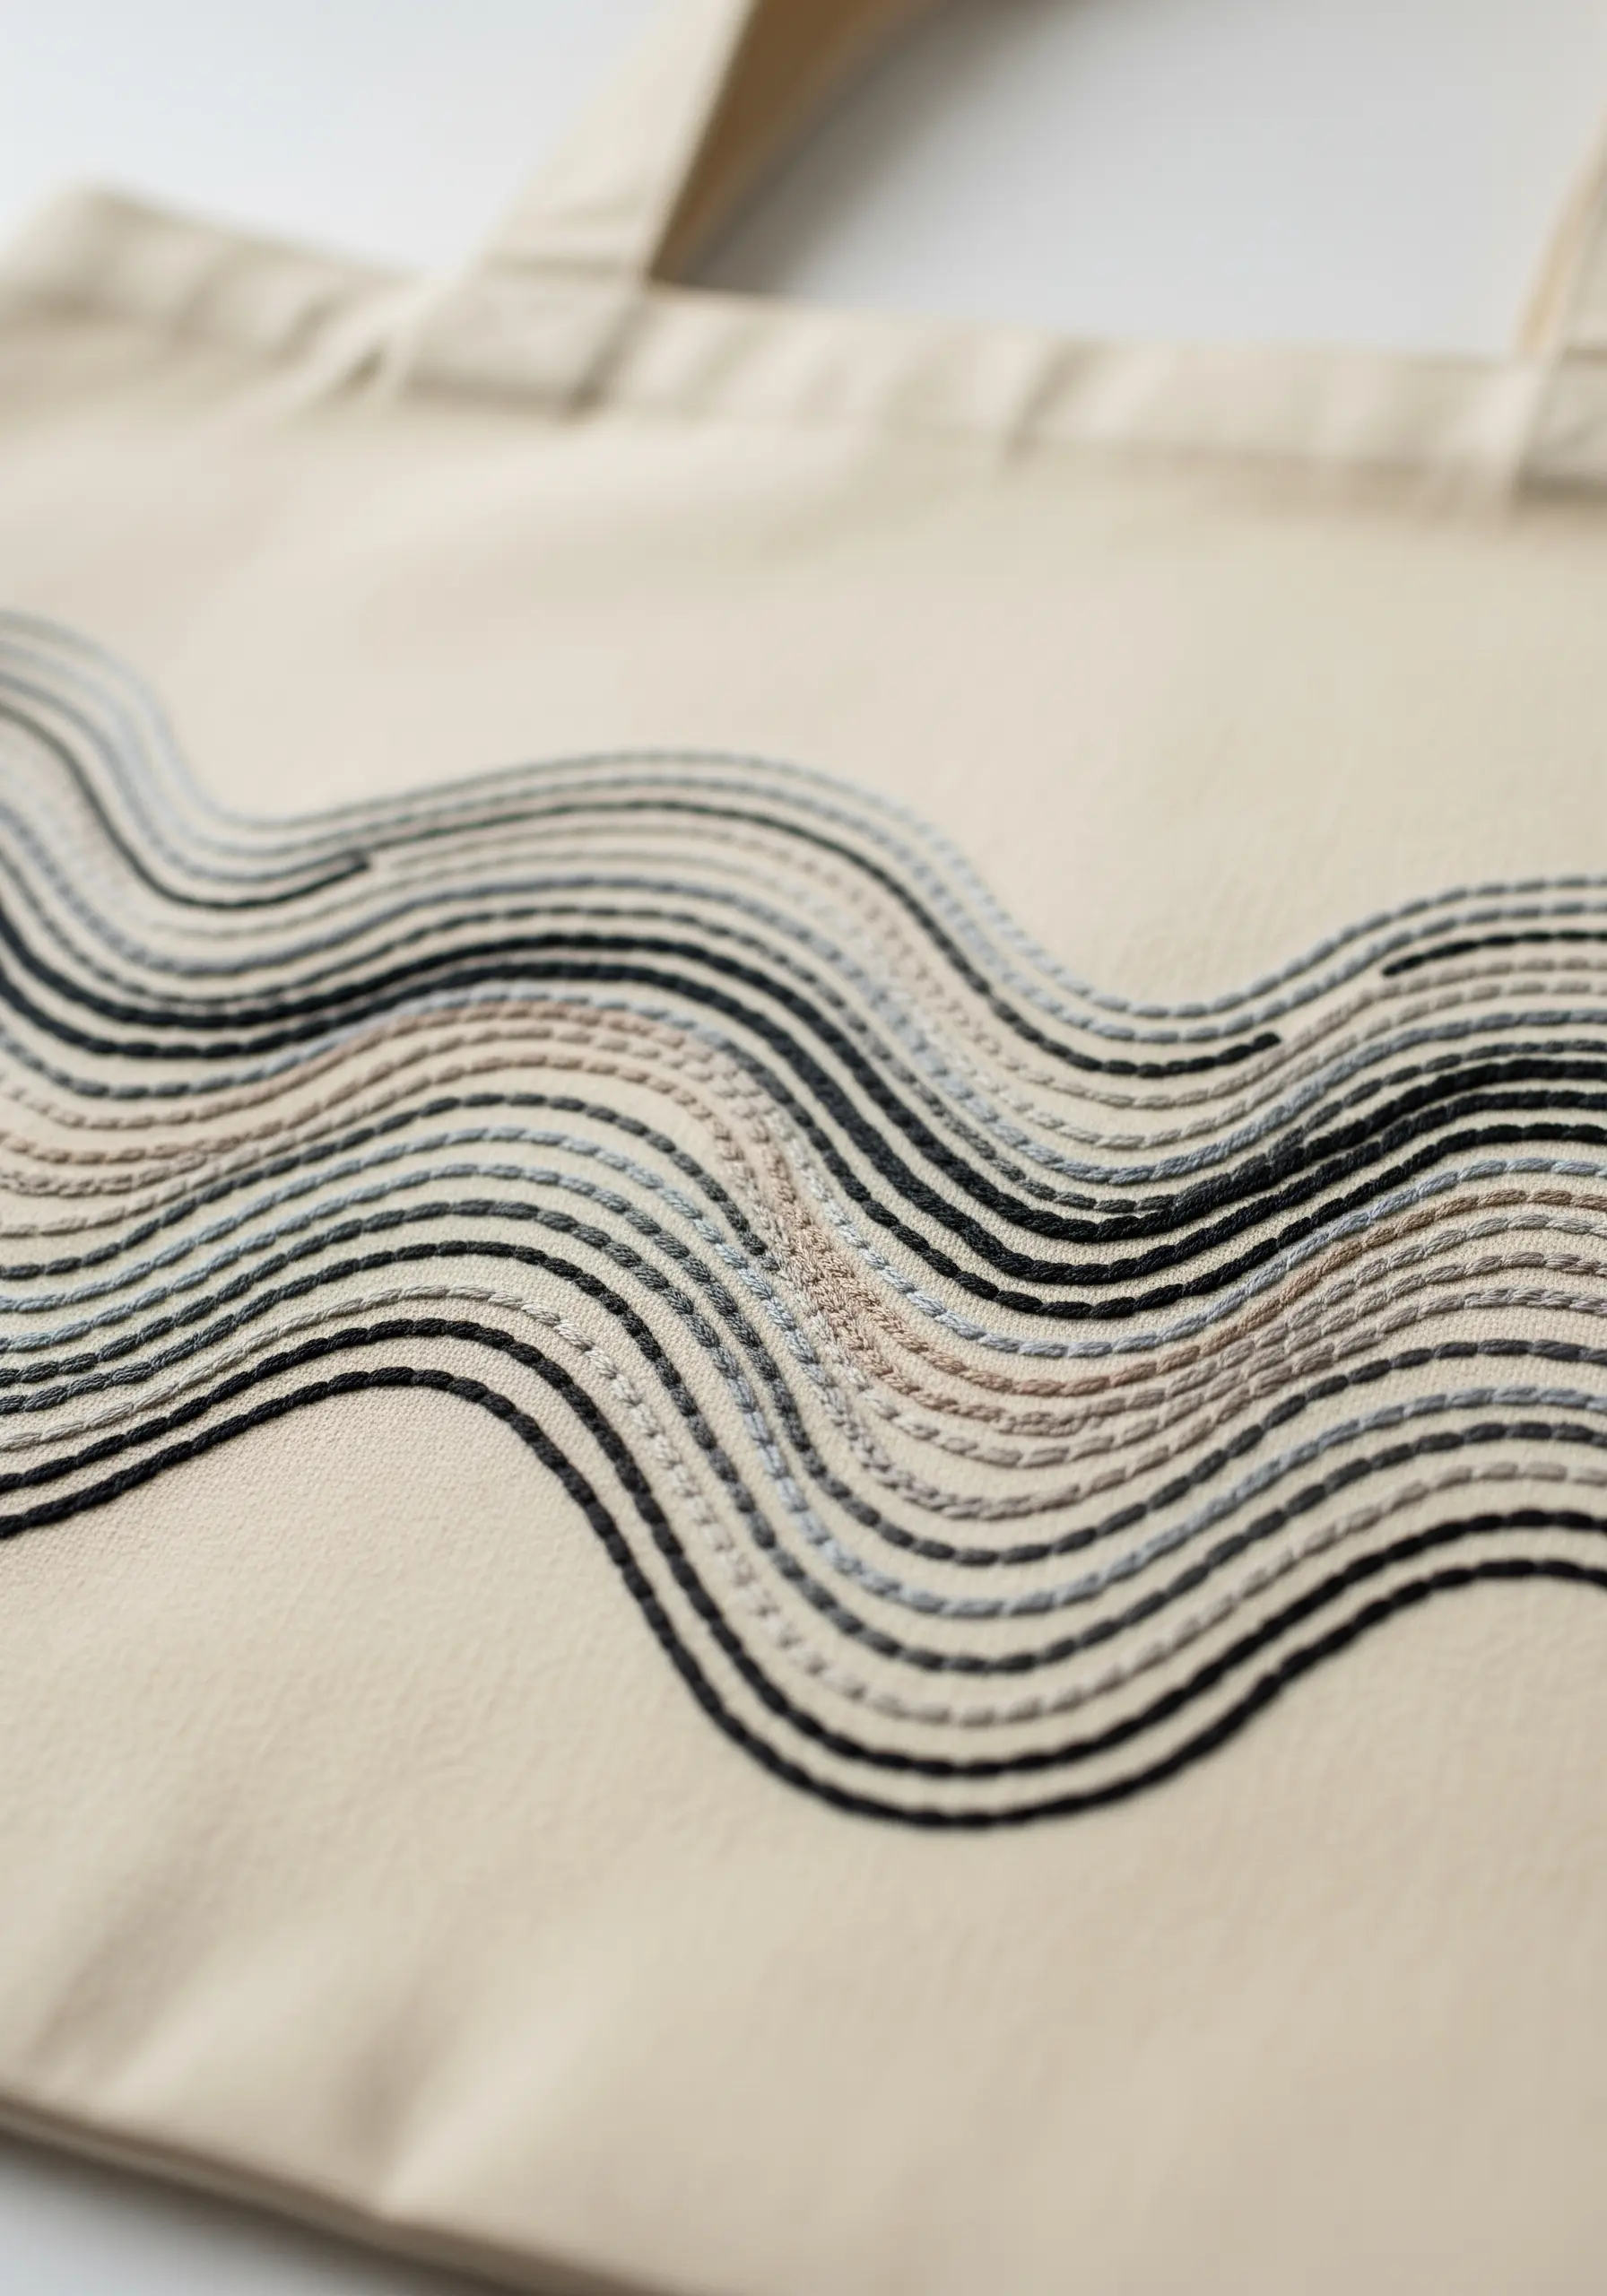
This deceptively simple design creates a powerful sense of calm, flowing movement through precision and repetition.
Stitch parallel wavy lines using a basic backstitch, focusing on maintaining a perfectly even distance between each row.
You can introduce subtle depth by methodically changing the thread color every few rows, creating a soft, topographical gradient with a limited palette of grays, black, and taupe for a sophisticated finish.
25. Architectural Elegance in White Line
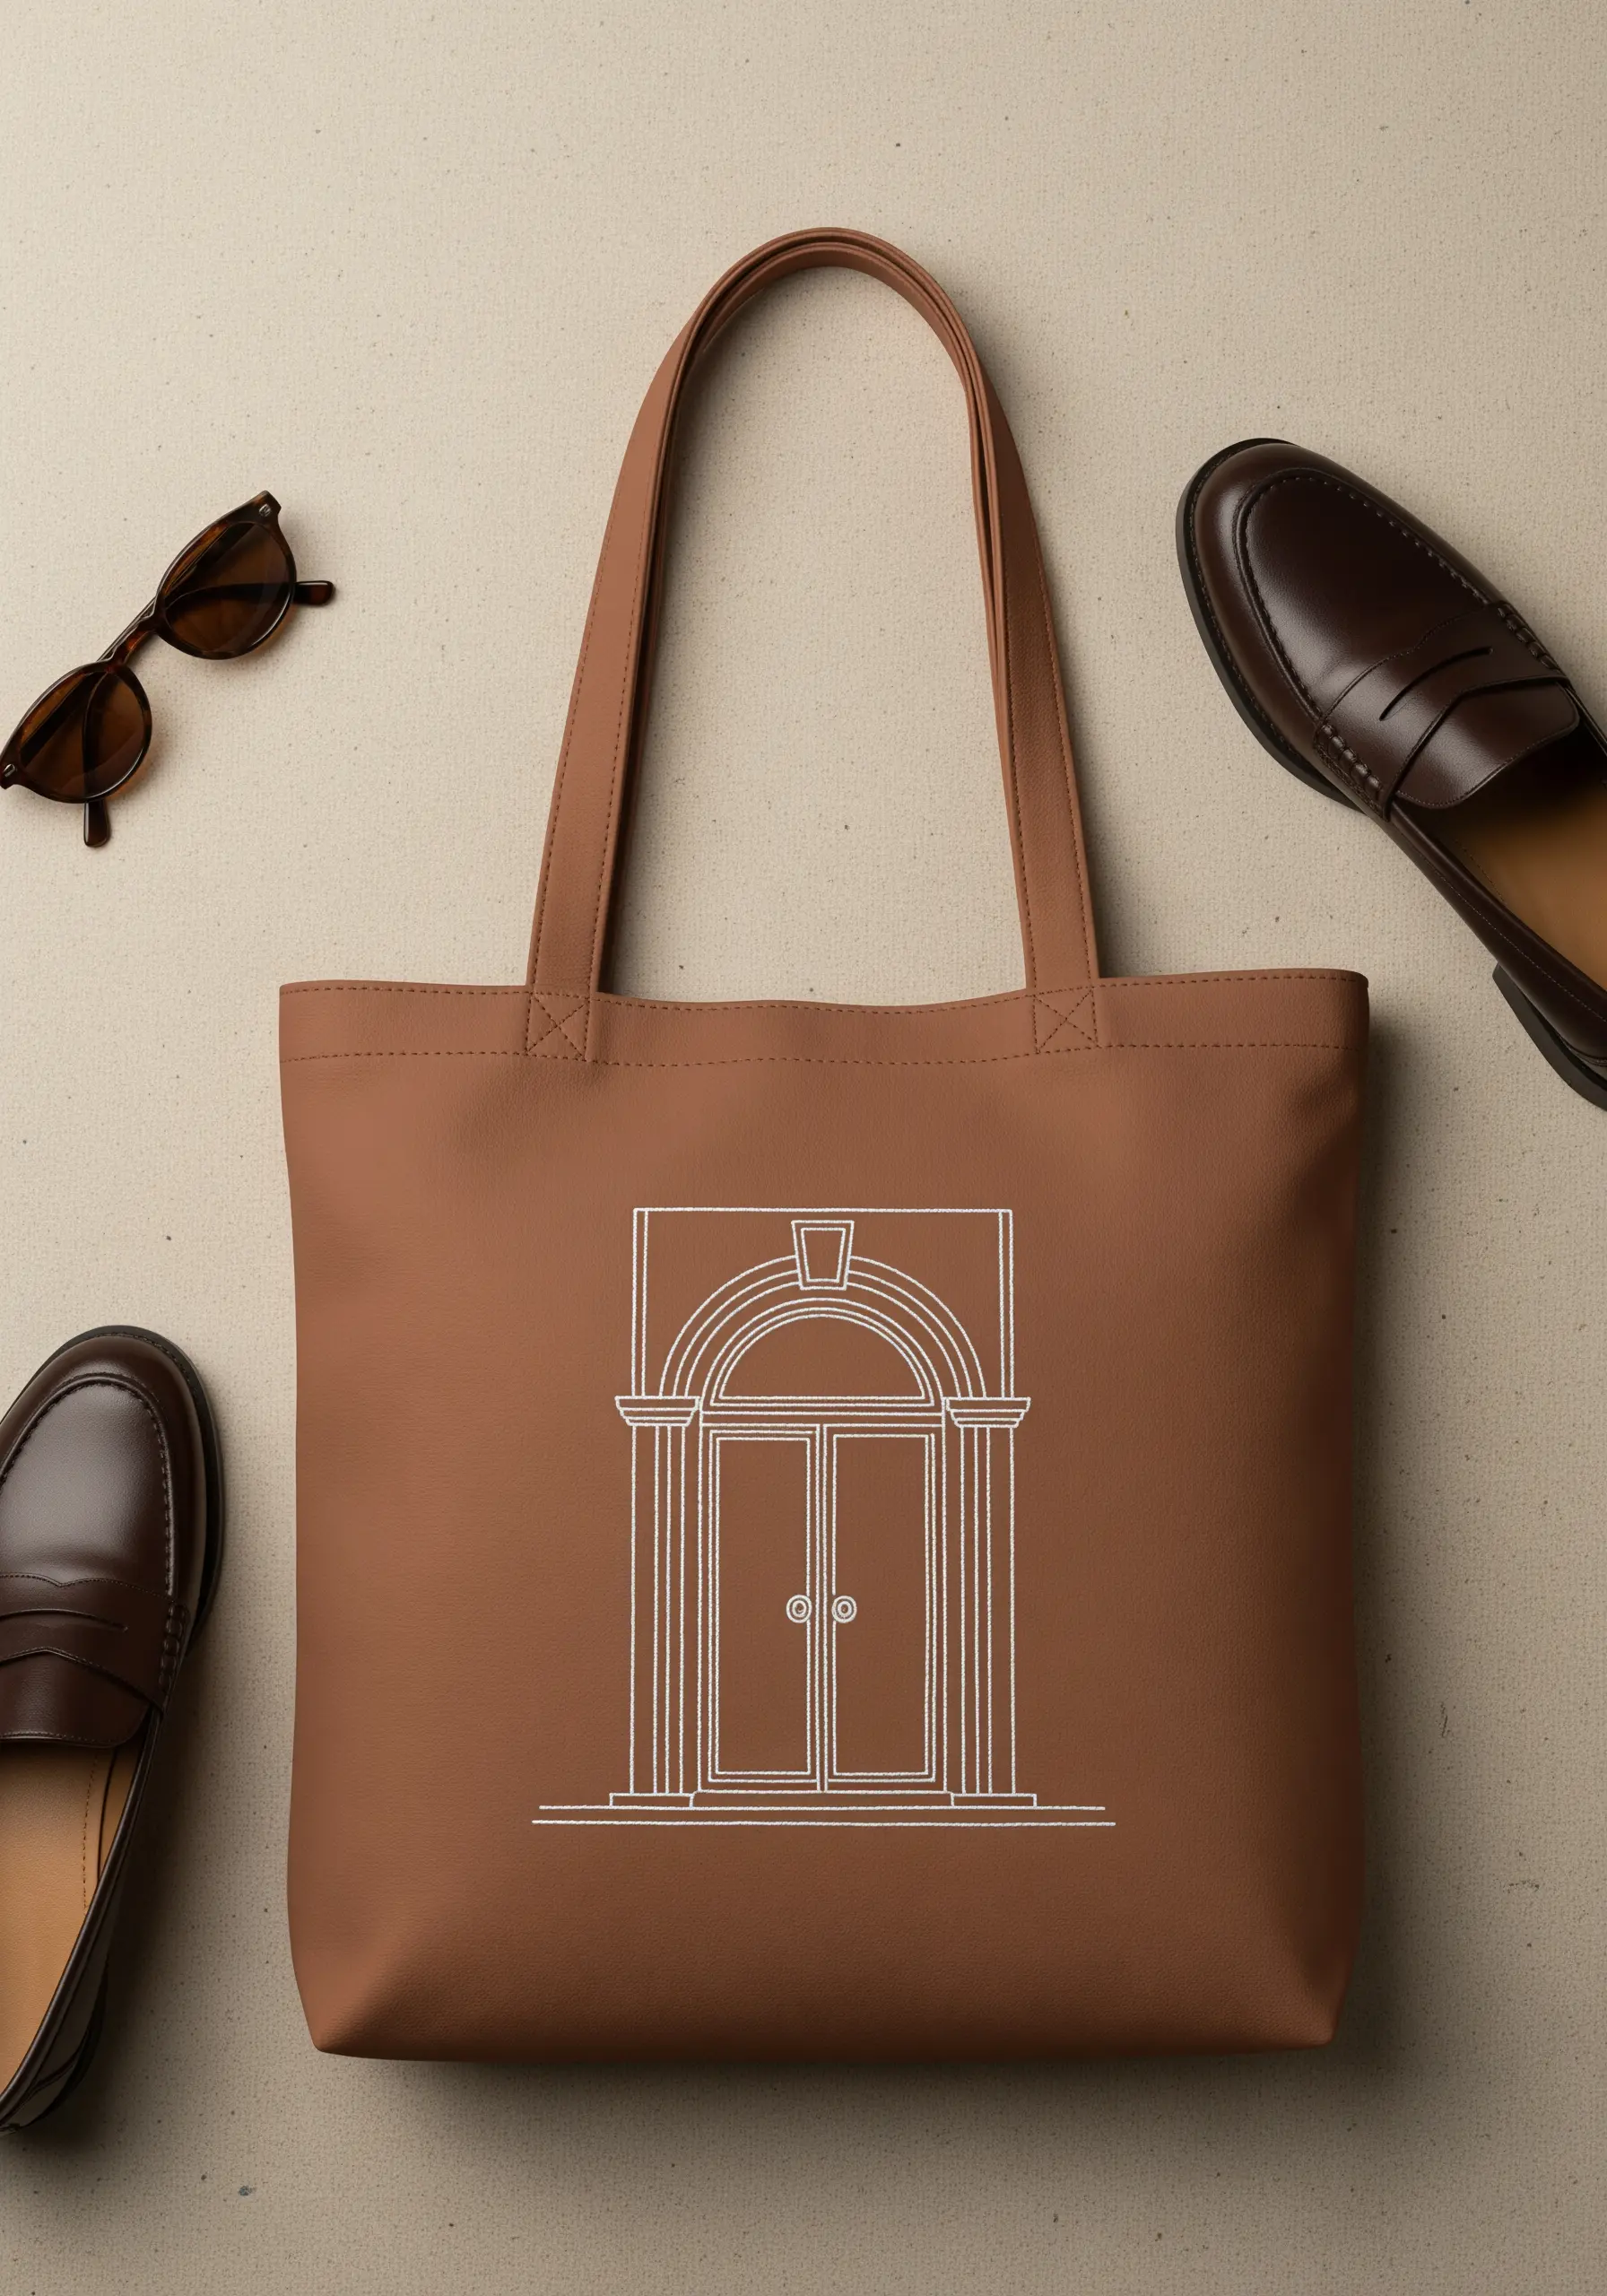
You can transform a simple architectural sketch into a piece of chic, wearable art with just one color of thread.
Use a bright white floss on a colored canvas for maximum visual contrast.
A clean backstitch using three strands of floss will give you a solid, defined line that is substantial but not bulky.
The key is to use small, even stitches, especially around corners, to ensure all the architectural details remain crisp and precise.
26. Illustrative Detail with Shading Stitches
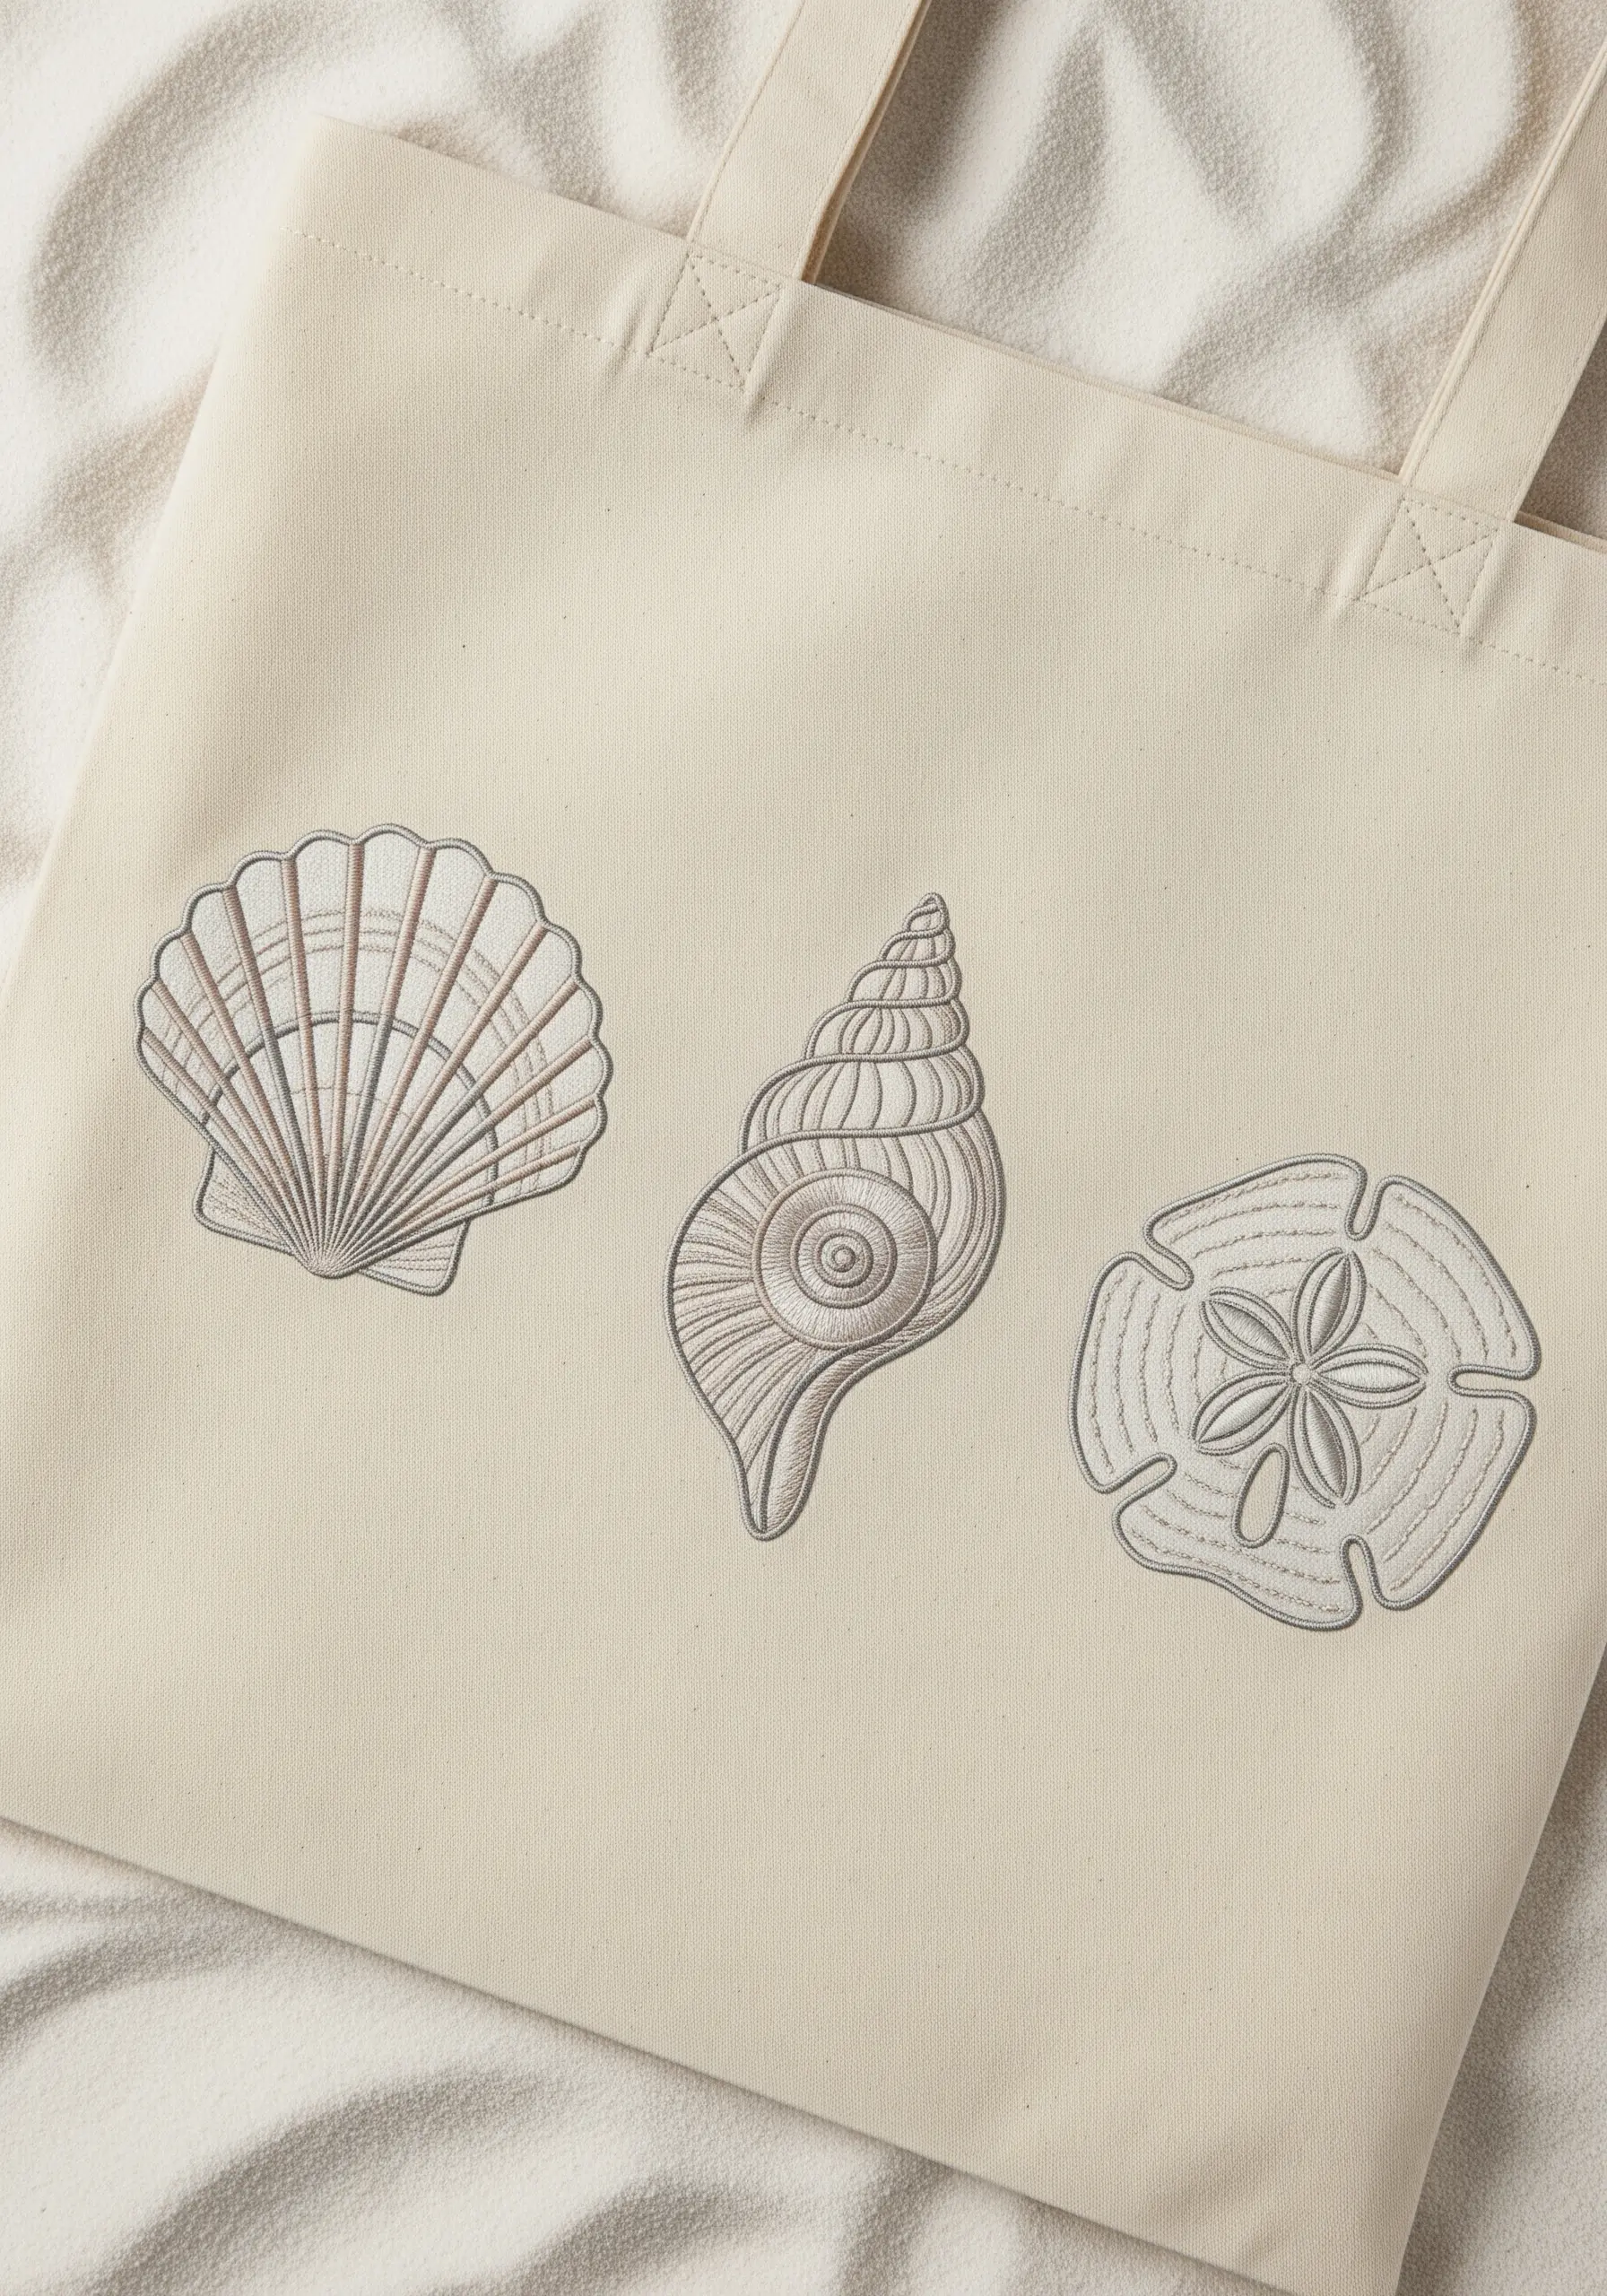
To achieve this beautifully detailed, illustrative look, you need to use your needle like a drawing pencil.
Work with a single strand of floss in a range of complementary neutral tones.
Outline each shell with a precise split stitch to define its shape.
Then, use long-and-short stitches for the larger areas of shadow and delicate straight stitches to render the fine ridges and lines that give each shell its unique character and realistic, three-dimensional form.
27. Minimalist Pattern with Repetitive Marks

Create a modern, high-impact pattern using one of the simplest stitches imaginable.
Each plus sign is merely two small, intersecting straight stitches.
The design’s power comes from the precision of the repetition and the perfection of the grid-like placement.
Use a water-soluble marker and a ruler to map out your grid before you begin stitching. A high-contrast color combination, like crisp white on black, makes this minimalist pattern feel bold and intentional.
28. Geometric Meets Organic with Textured Fills
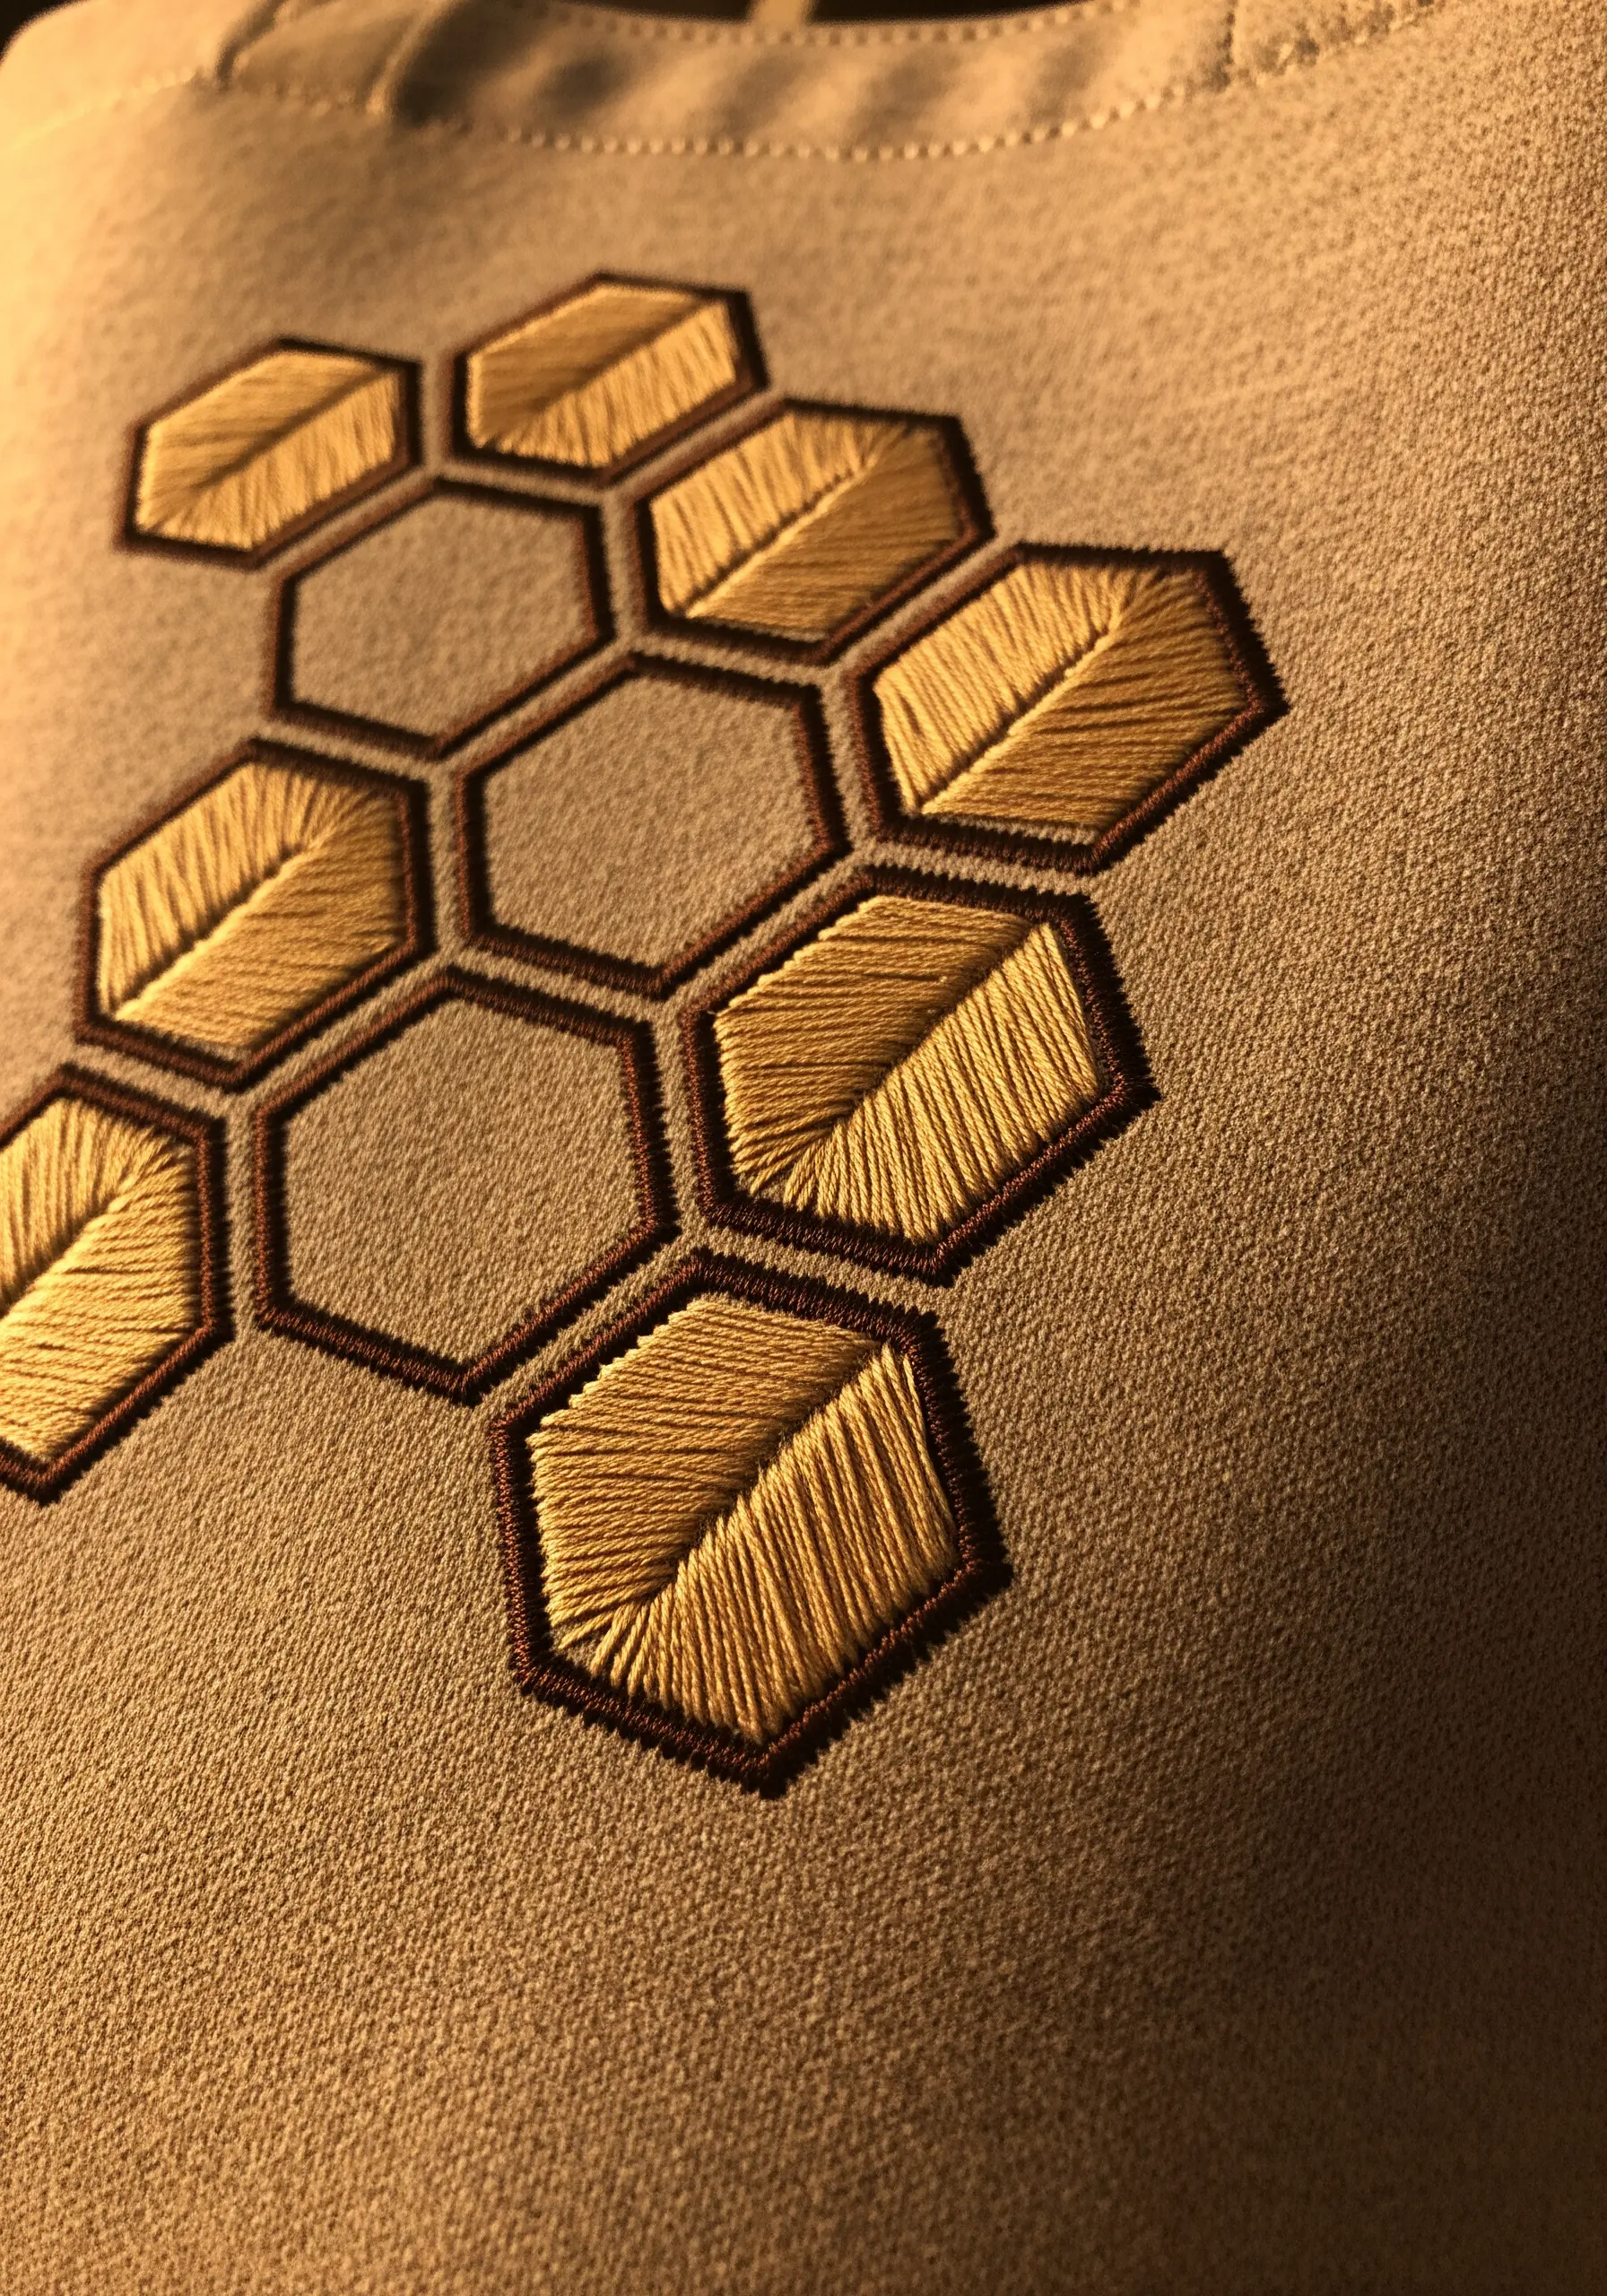
This design creates a beautiful tension by combining the rigid structure of a honeycomb pattern with soft, organic details.
Outline the hexagonal shapes with a clean, dark backstitch to establish the grid.
Then, fill select cells with a lustrous gold satin stitch.
To create the leaf-like texture within some of the filled shapes, simply change the direction of your satin stitches to imply a central vein.
This contrast between empty, smooth, and textured cells makes the design visually dynamic and engaging.


