
You’ve mastered the basic stitches, and your hoops are lovely, but you feel a desire for something more—something with presence, that feels less like a practice sampler and more like a true art object.
The shift from a good stitcher to a textile artist often happens when you begin to think beyond the hoop. It’s about understanding how thread can interact with light, form, and different materials to create pieces that command a space and tell a richer story.
Here, you won’t find simple patterns. Instead, you’ll discover techniques and concepts that will push your creativity. We’ll explore how to build texture, work in three dimensions, and combine embroidery with unexpected materials to create objects that are not only beautiful but truly impressive.
1. Build Tactile Landscapes with Punch Needle
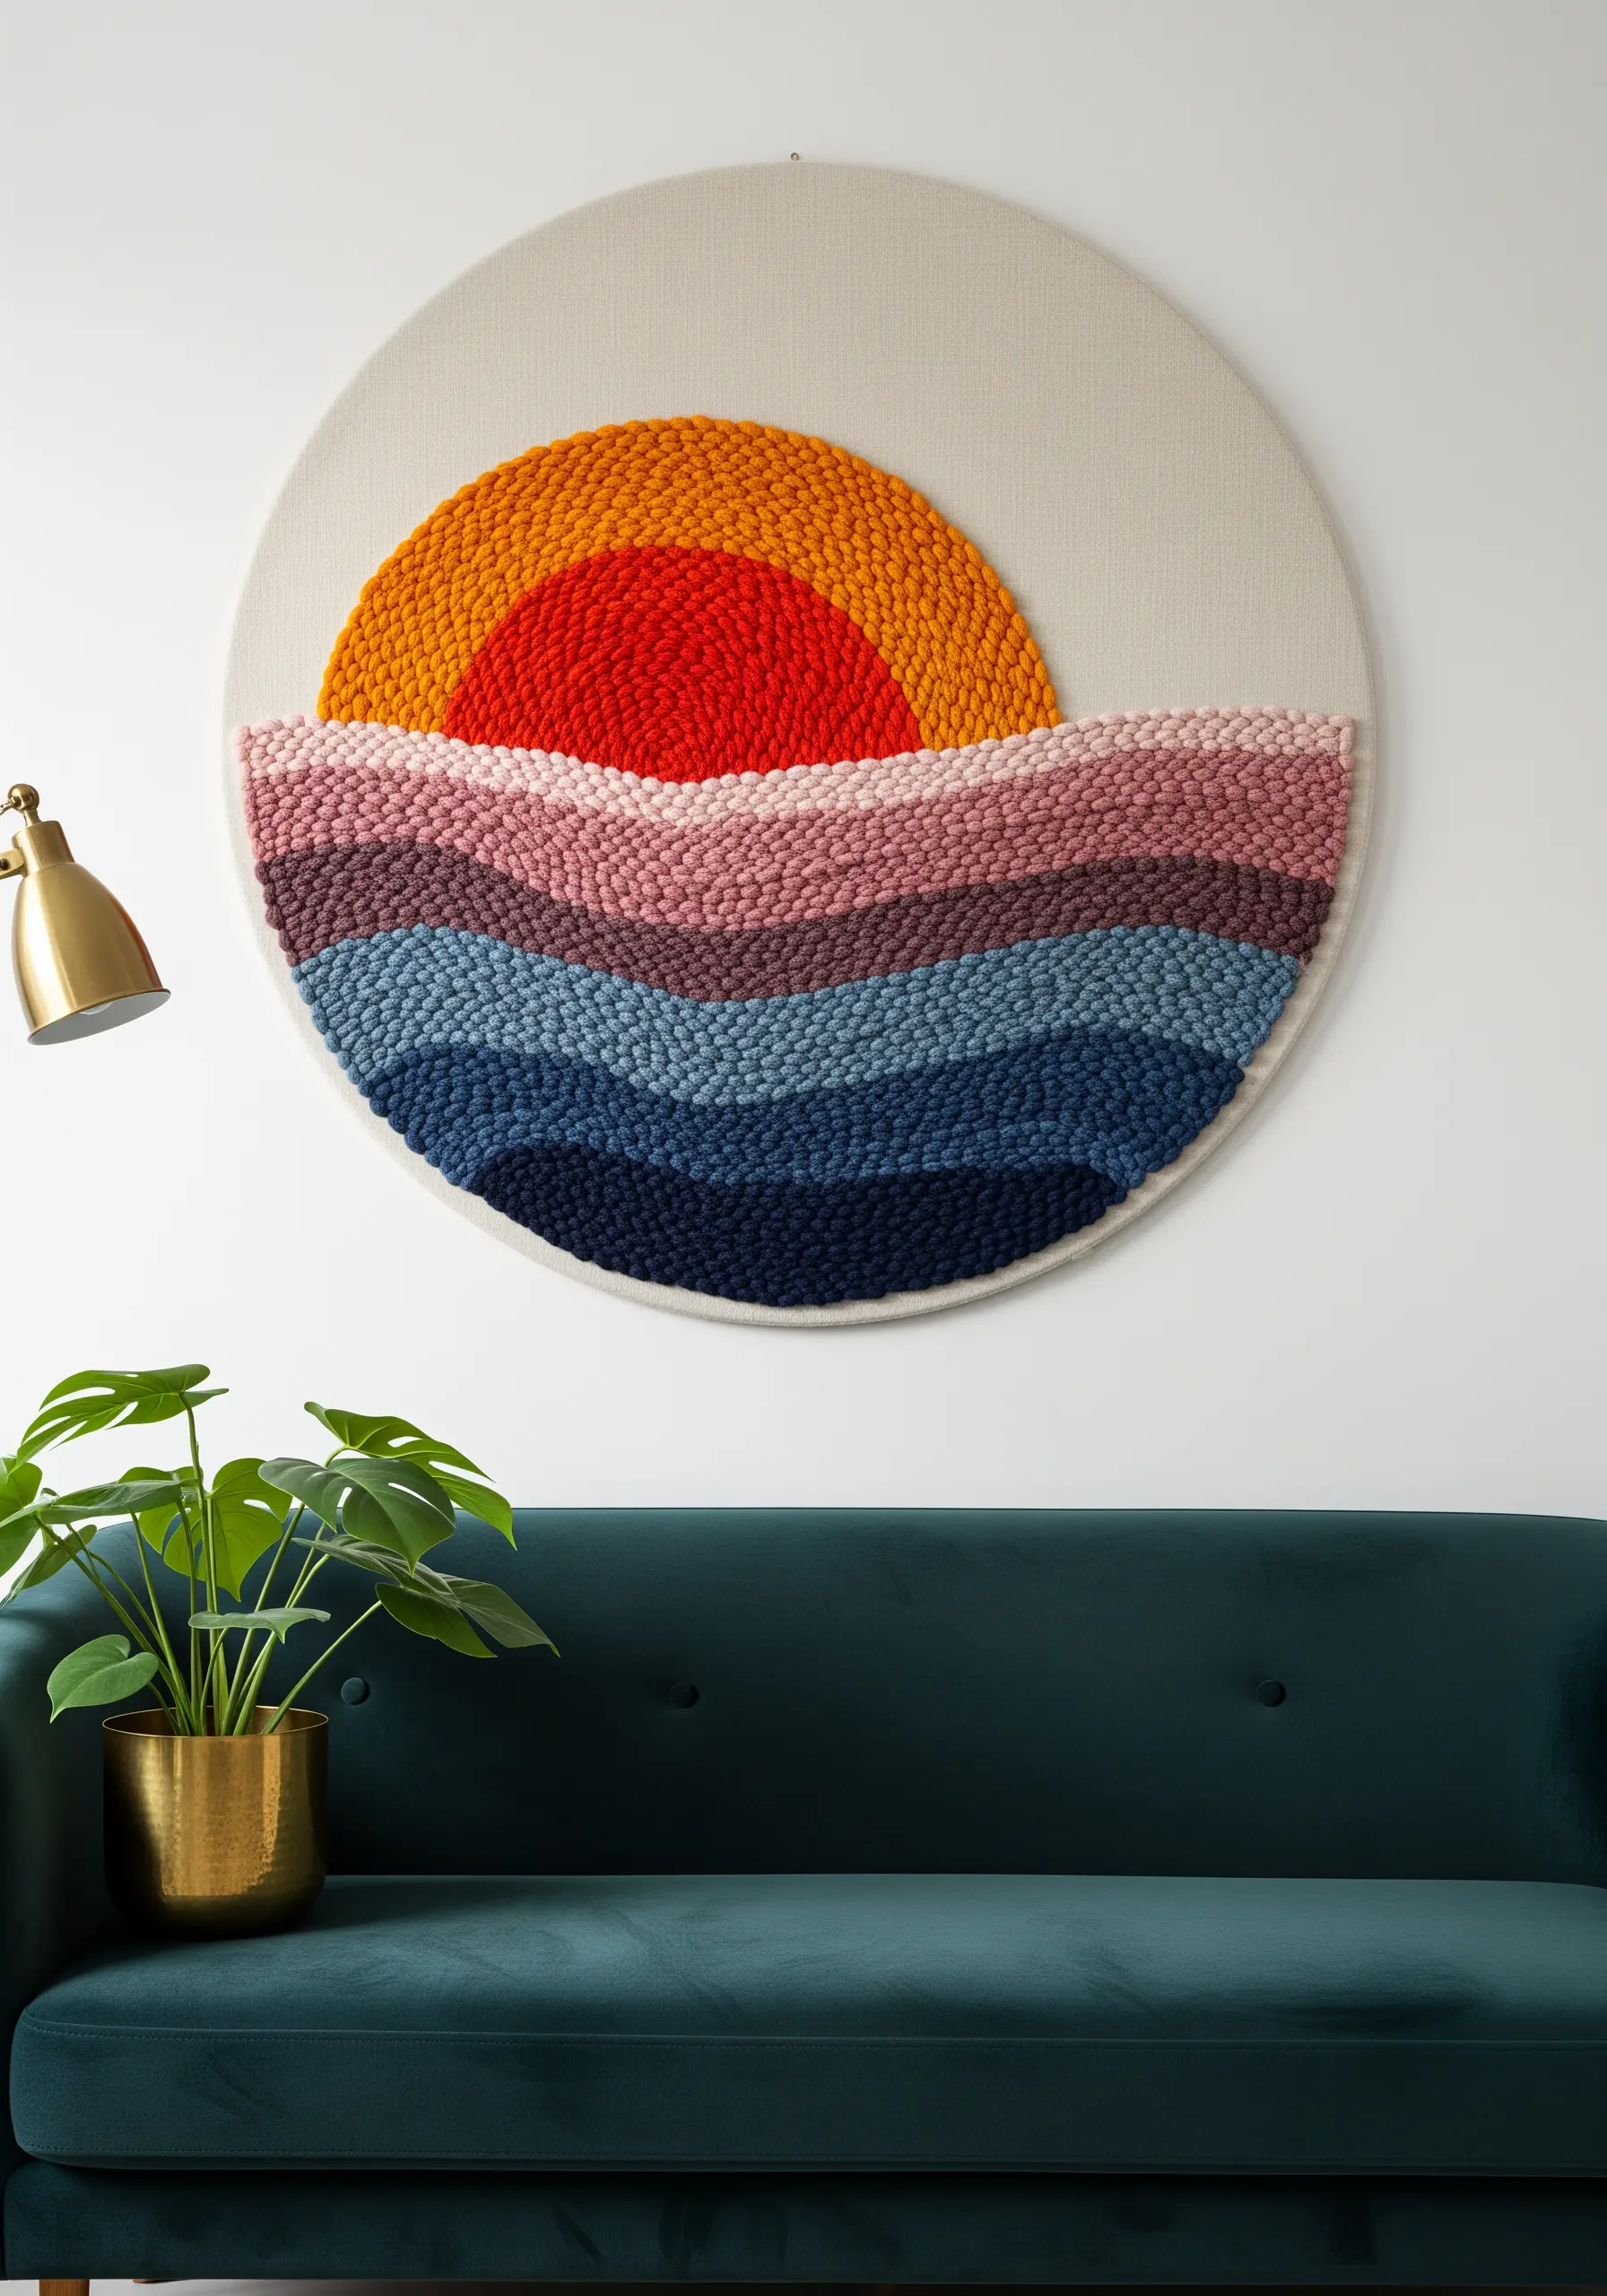
Move beyond flat stitches and explore the rich texture of punch needle art to create statement wall decor.
Use a thicker yarn for the foreground elements and a thinner one for the background to create natural depth.
You can control the texture by adjusting your loop height—shorter loops create a dense, velvety finish, while longer loops feel more plush and sculptural.
This technique allows you to fill large areas with color and texture quickly, making it perfect for creating yarn wall art that looks like gallery pieces.
2. Translate Stitching into 3D Beaded Sculptures
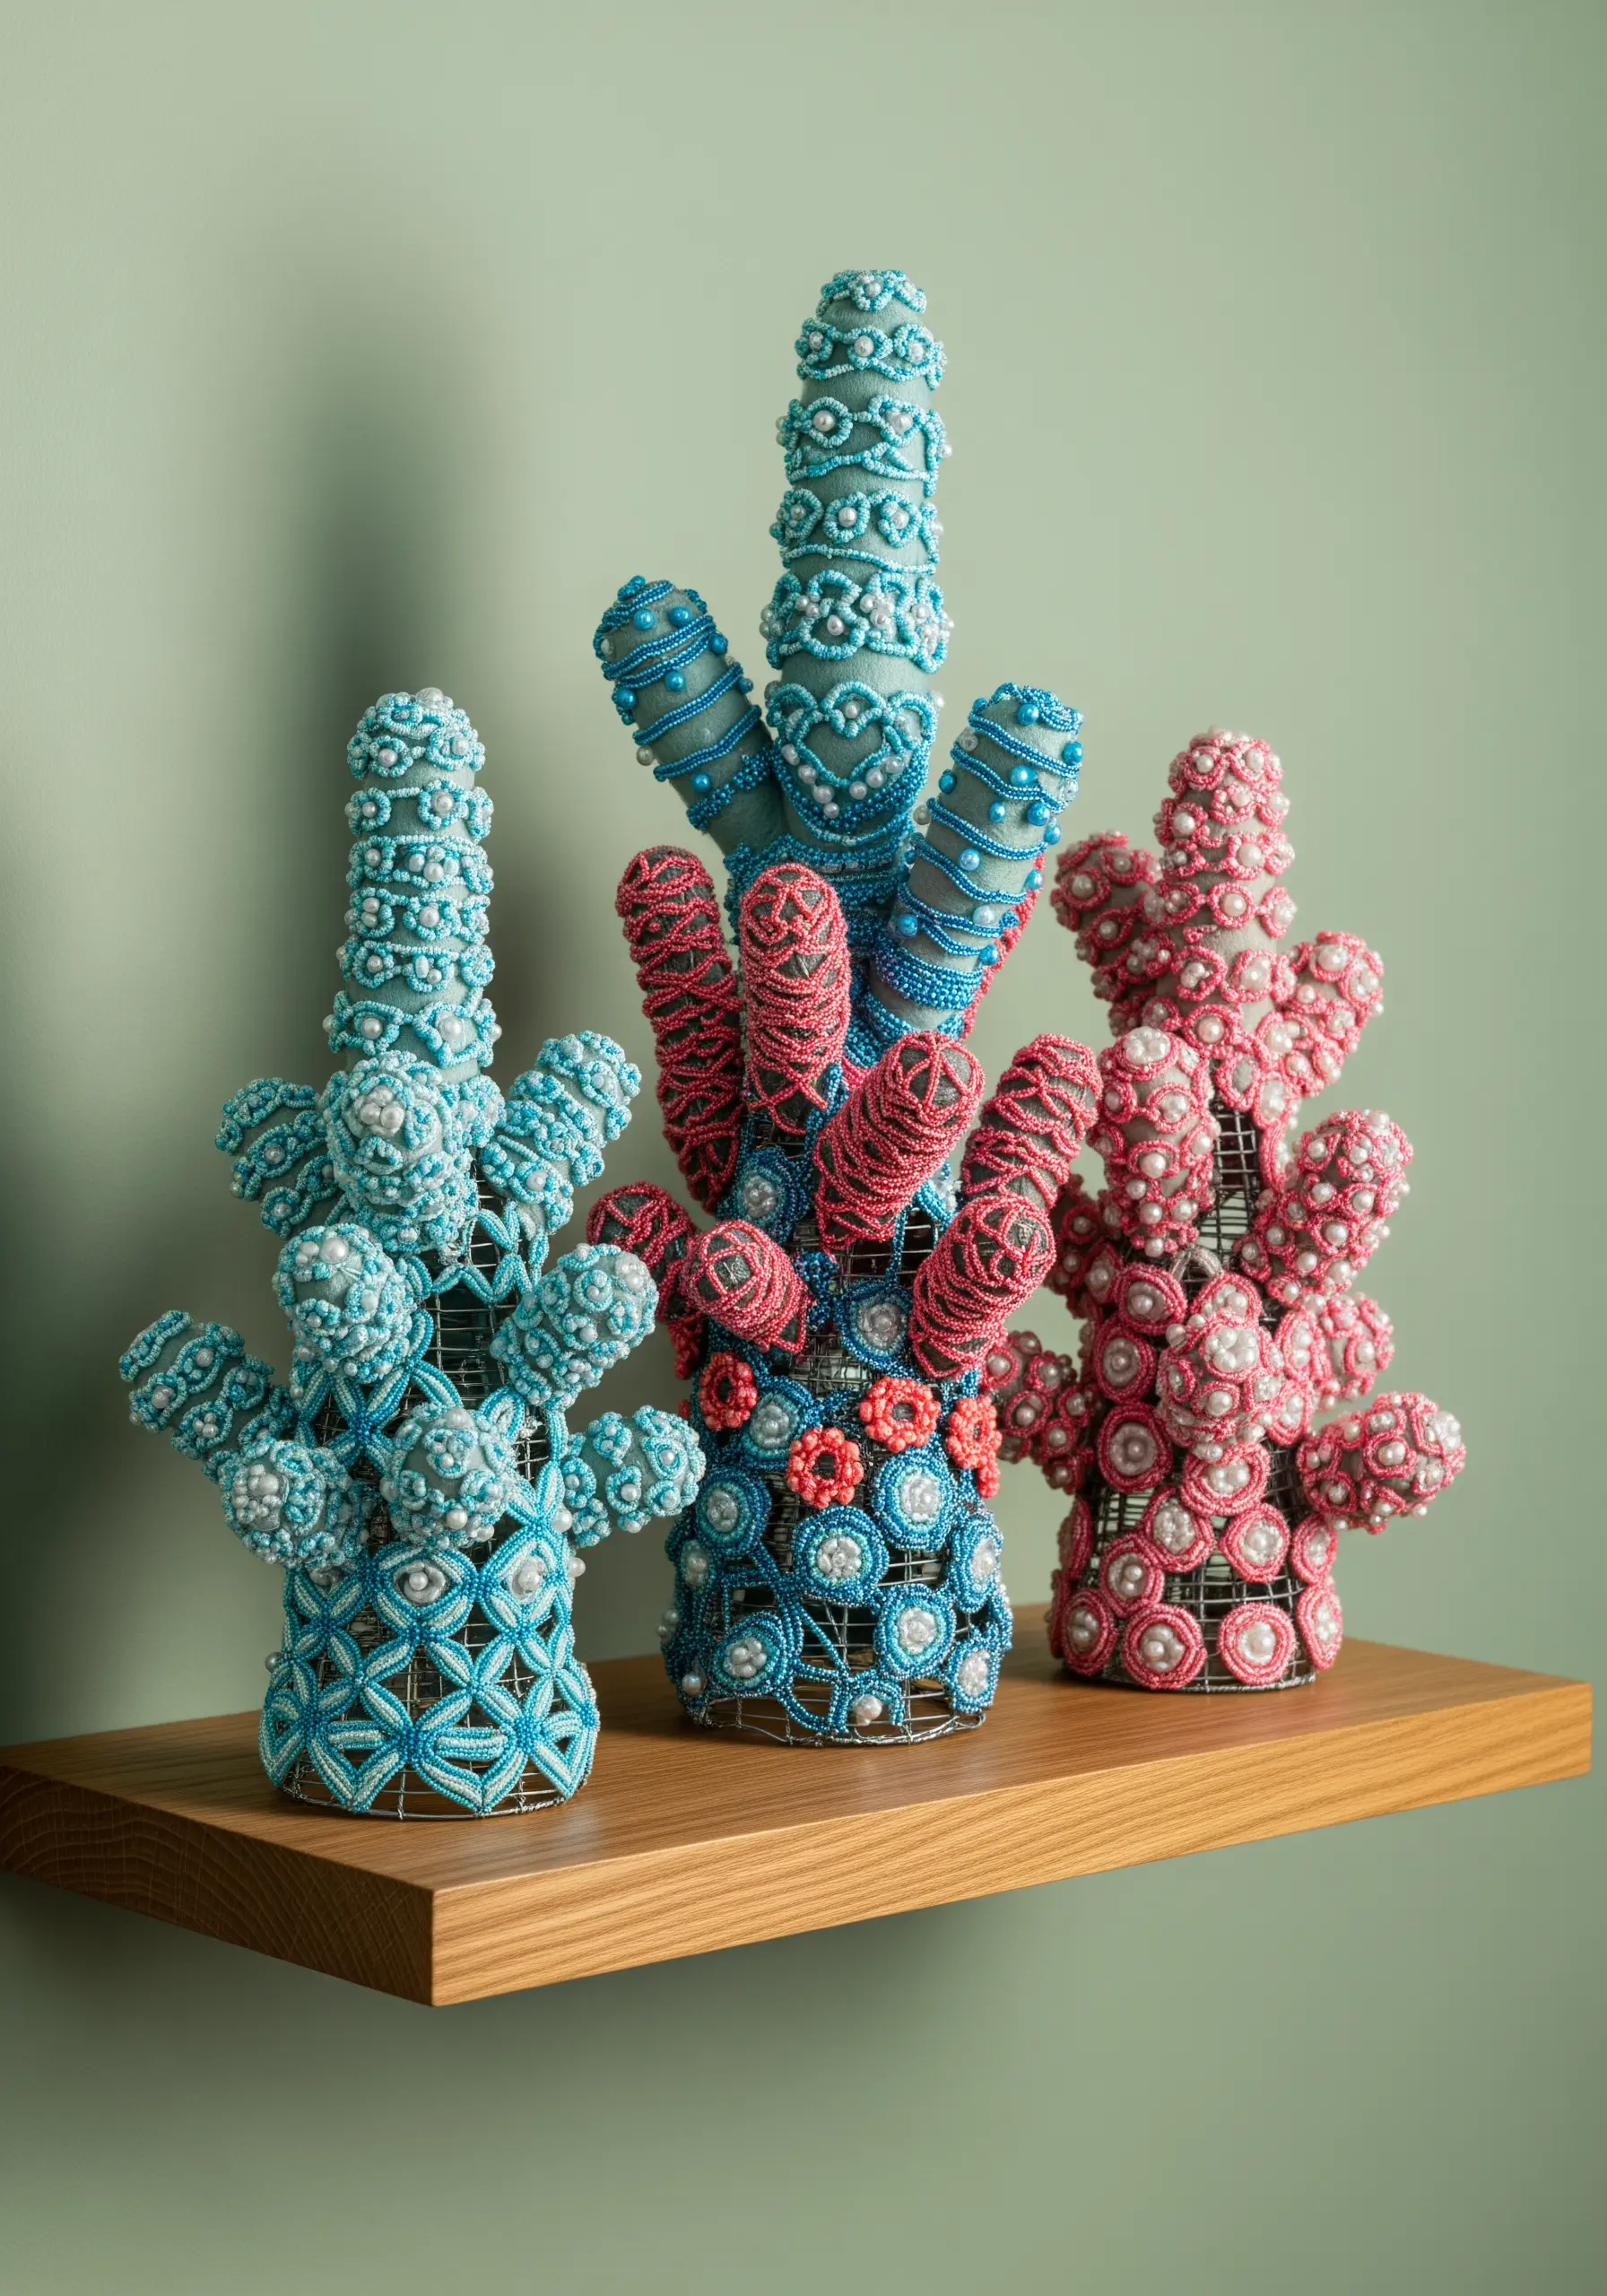
Apply your knowledge of pattern and texture to three-dimensional forms by creating beaded sculptures.
Start with a simple wire armature or a pre-made form as your base.
Use bead-weaving techniques like peyote or netting stitch to create a flexible ‘fabric’ of beads that you can wrap and secure around the structure.
This method transforms the meticulousness of bead embroidery into a freestanding art object with intricate detail from every angle.
3. Create Immersive Scenes with Layered Embroidery
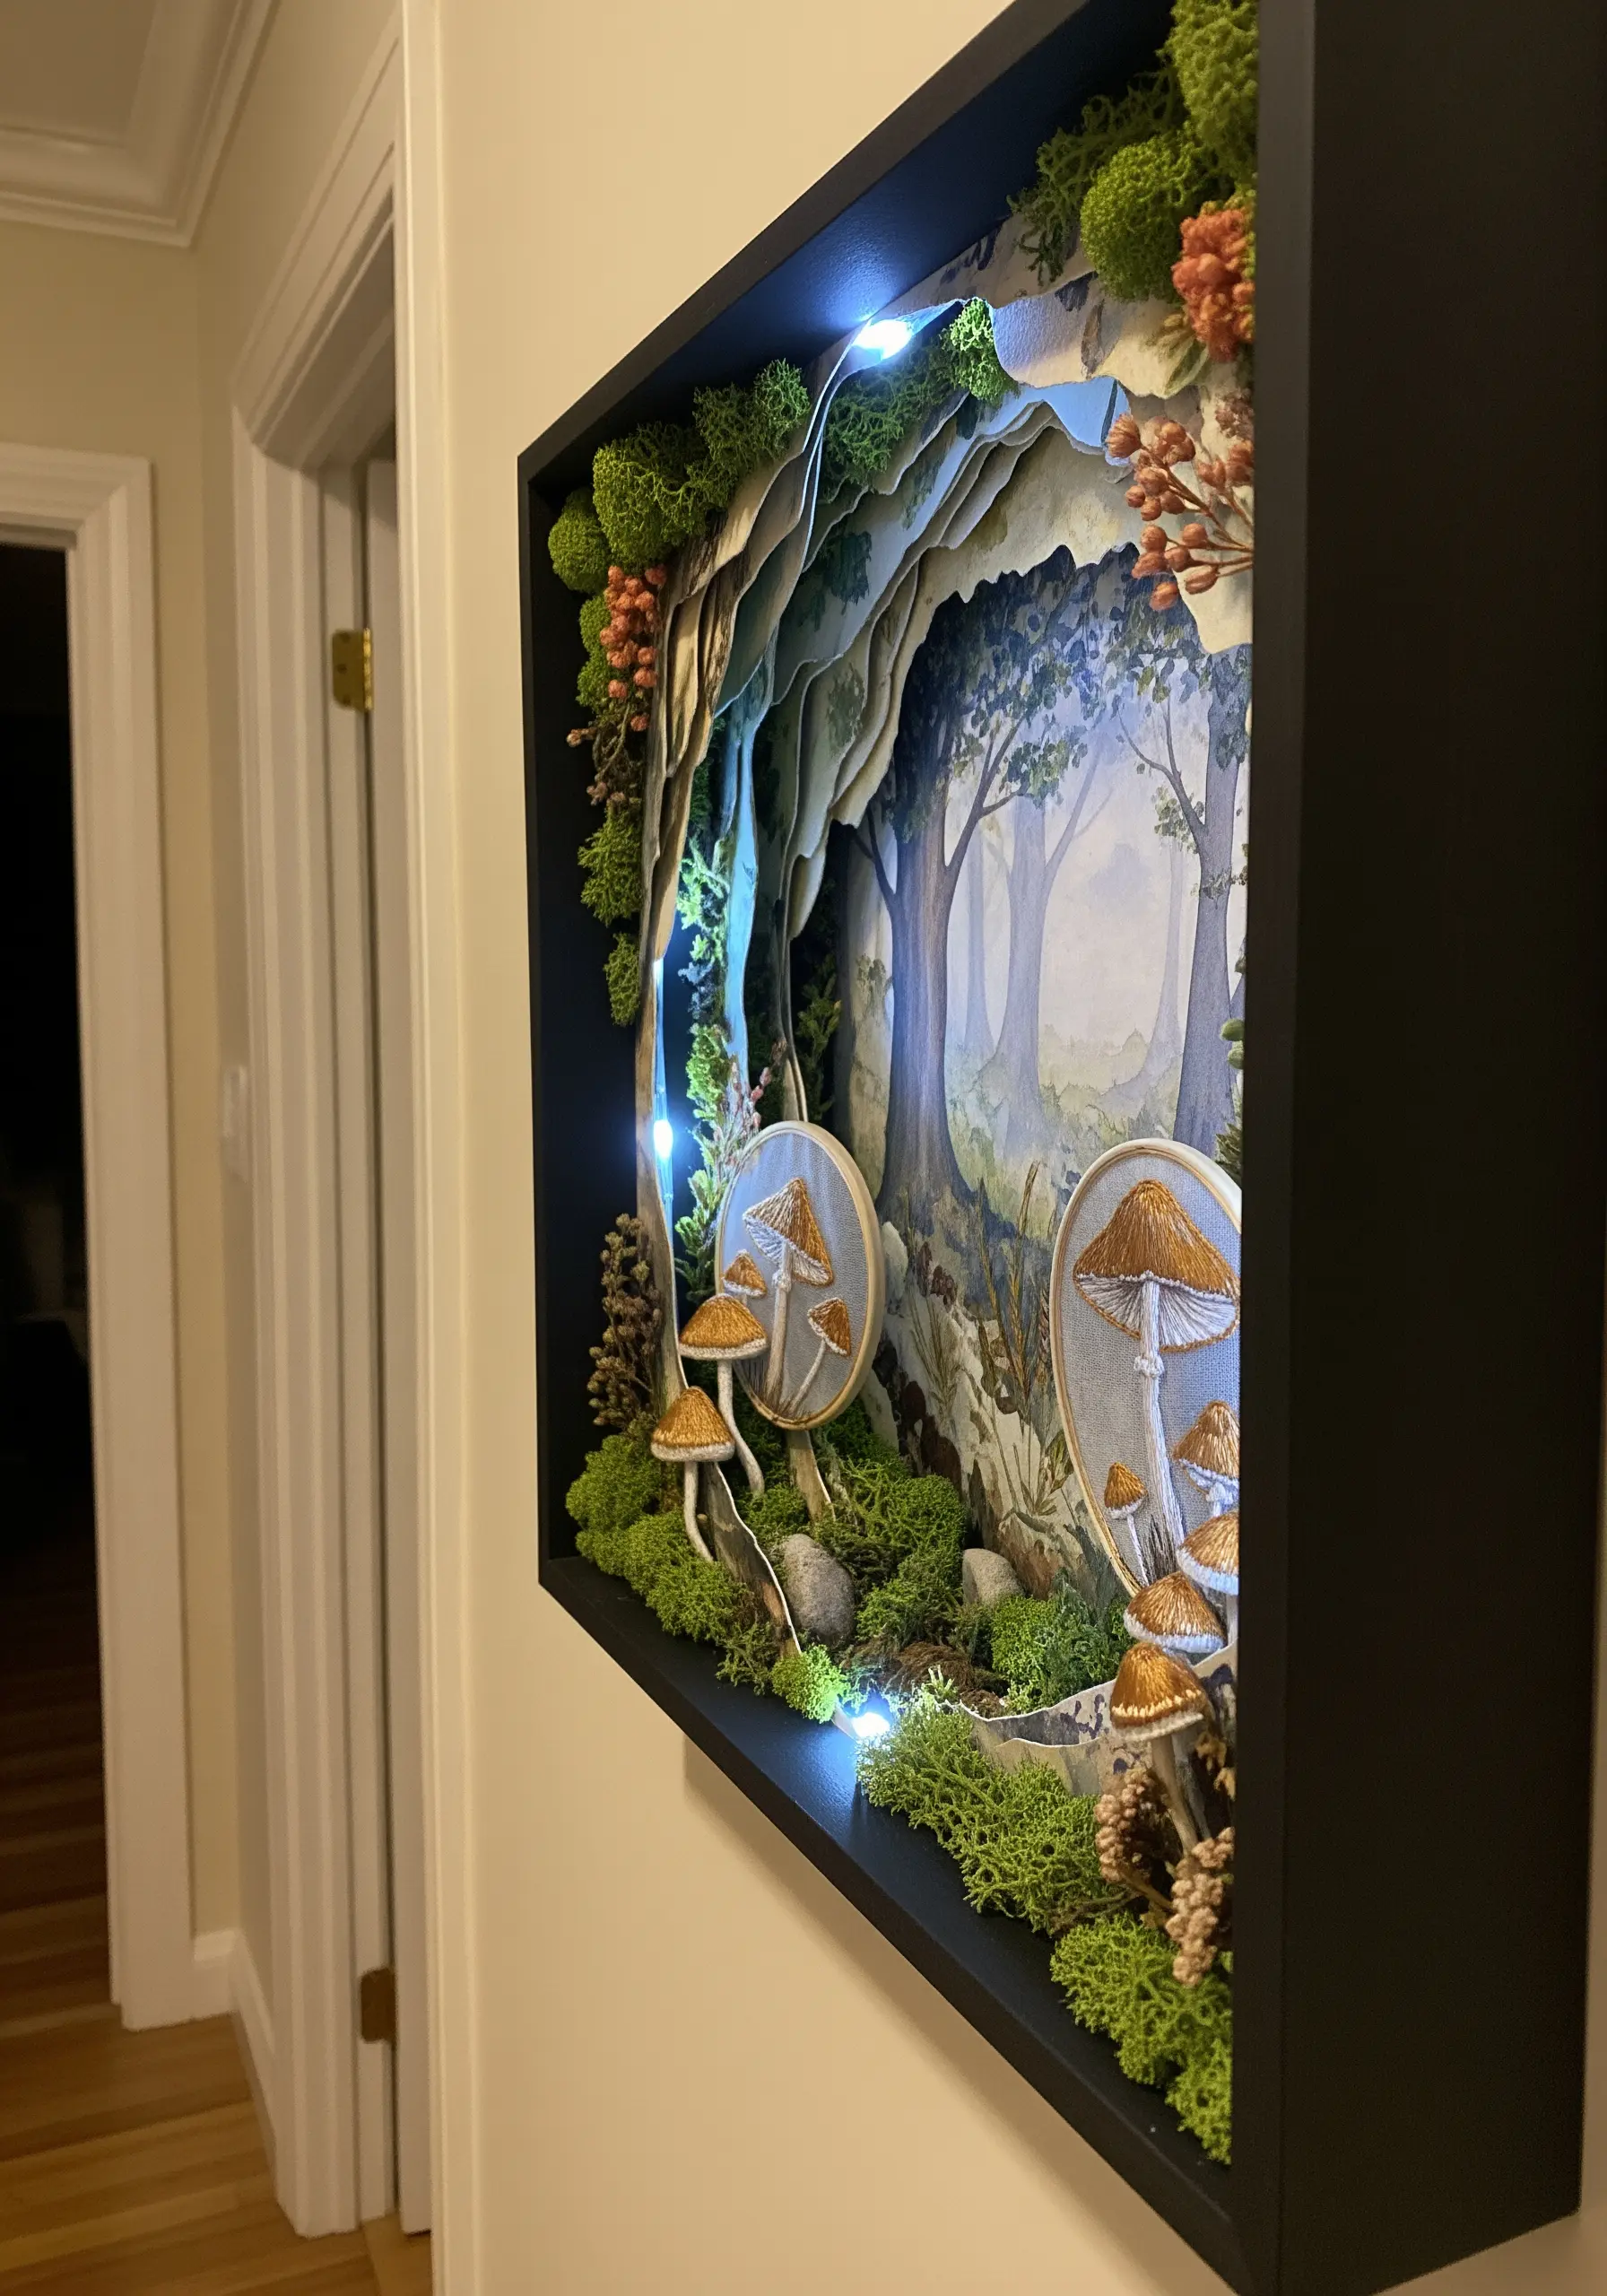
Elevate your hoop art by turning it into a diorama inside a shadow box frame.
Stitch key elements—like mushrooms or foliage—on separate pieces of fabric, then cut them out and position them at different depths within the box.
Use small props like real moss, twigs, or tiny stones to build a realistic environment around your stitched pieces.
Incorporate battery-powered fairy lights behind the layers to add a magical glow that highlights the textures and creates dramatic shadows.
4. Upholster a Mirror Frame with Patterned Fabric
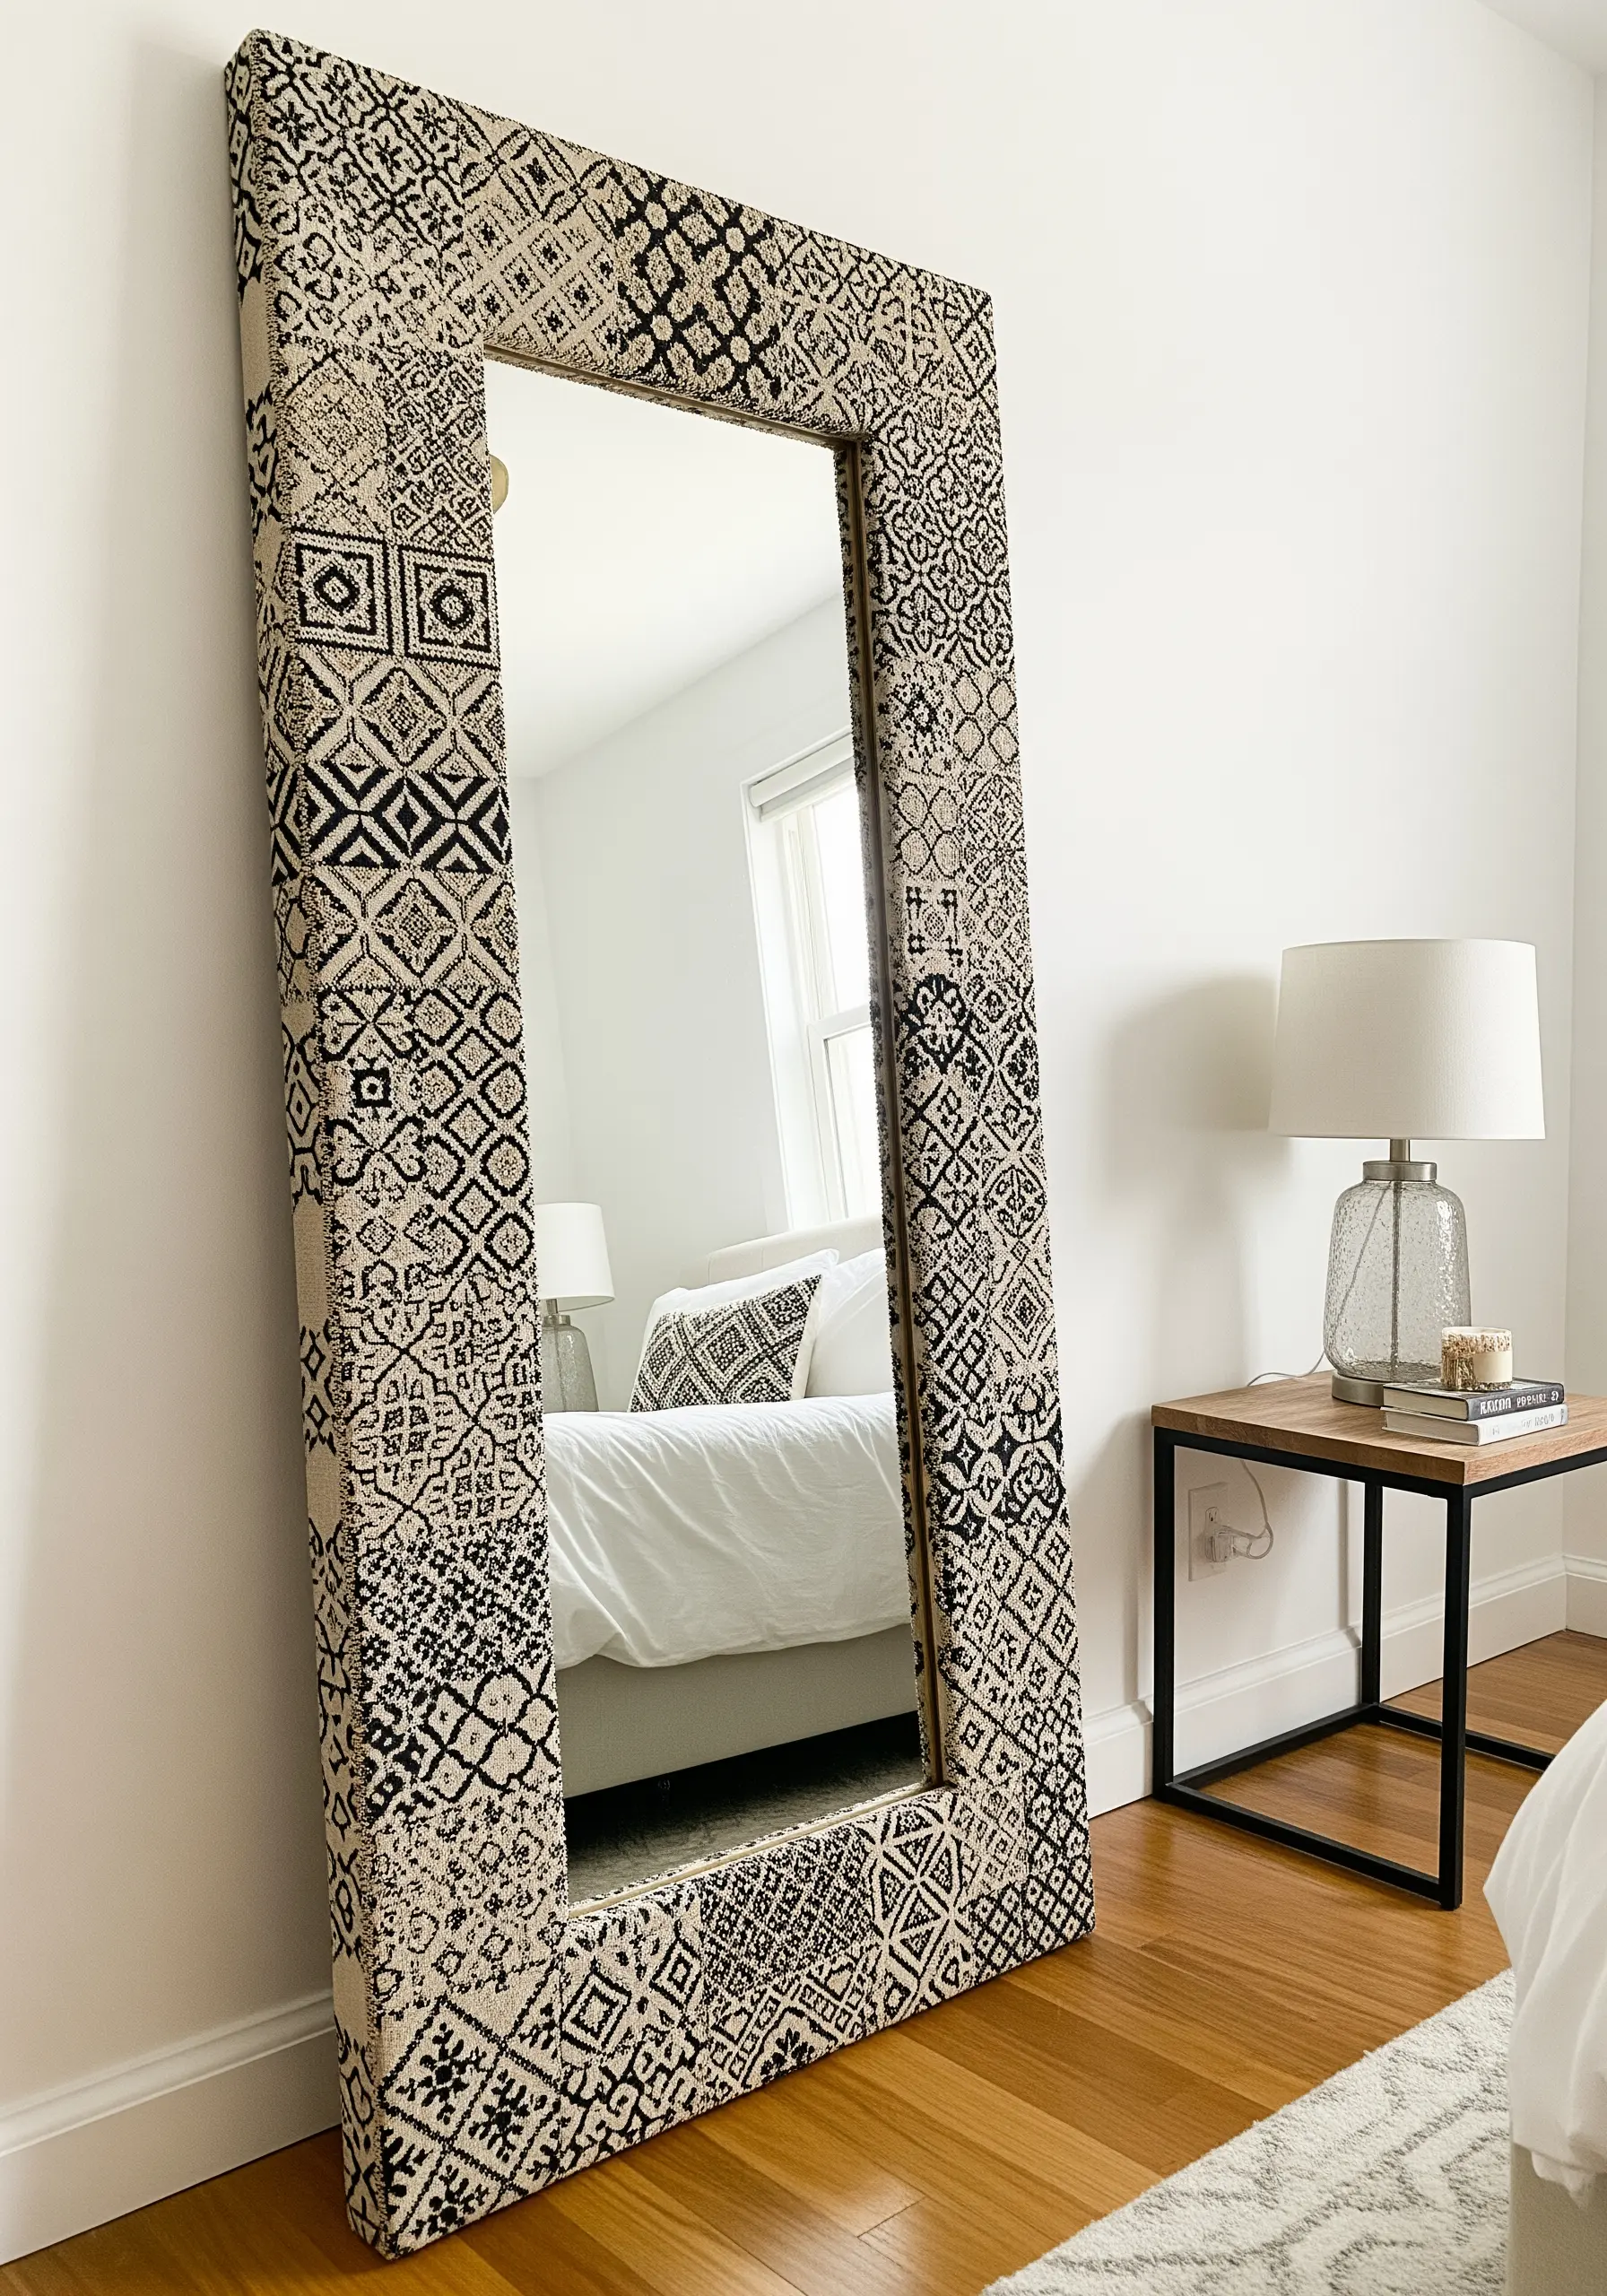
Transform a simple, inexpensive floor mirror into a designer piece by upholstering its frame with a bold textile.
Choose a durable, medium-weight fabric like canvas or a woven jacquard; its thickness will hide imperfections in the frame underneath.
Secure the fabric with a staple gun on the back of the frame, pulling it taut for a smooth finish.
The key to a professional look is creating neat, folded corners, much like wrapping a gift, before you staple them down.
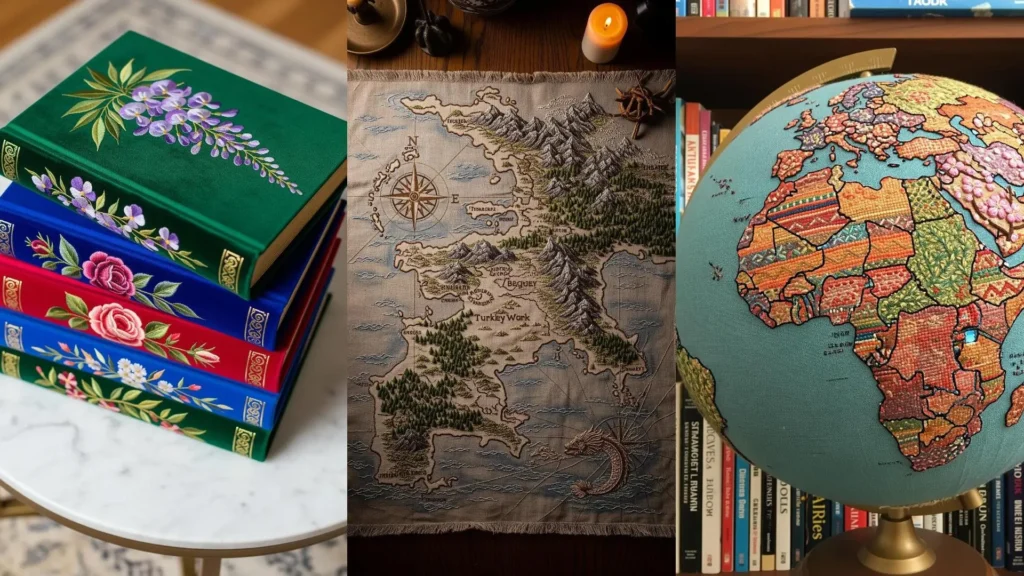
5. Embroider on Velvet for Luxe Book Covers
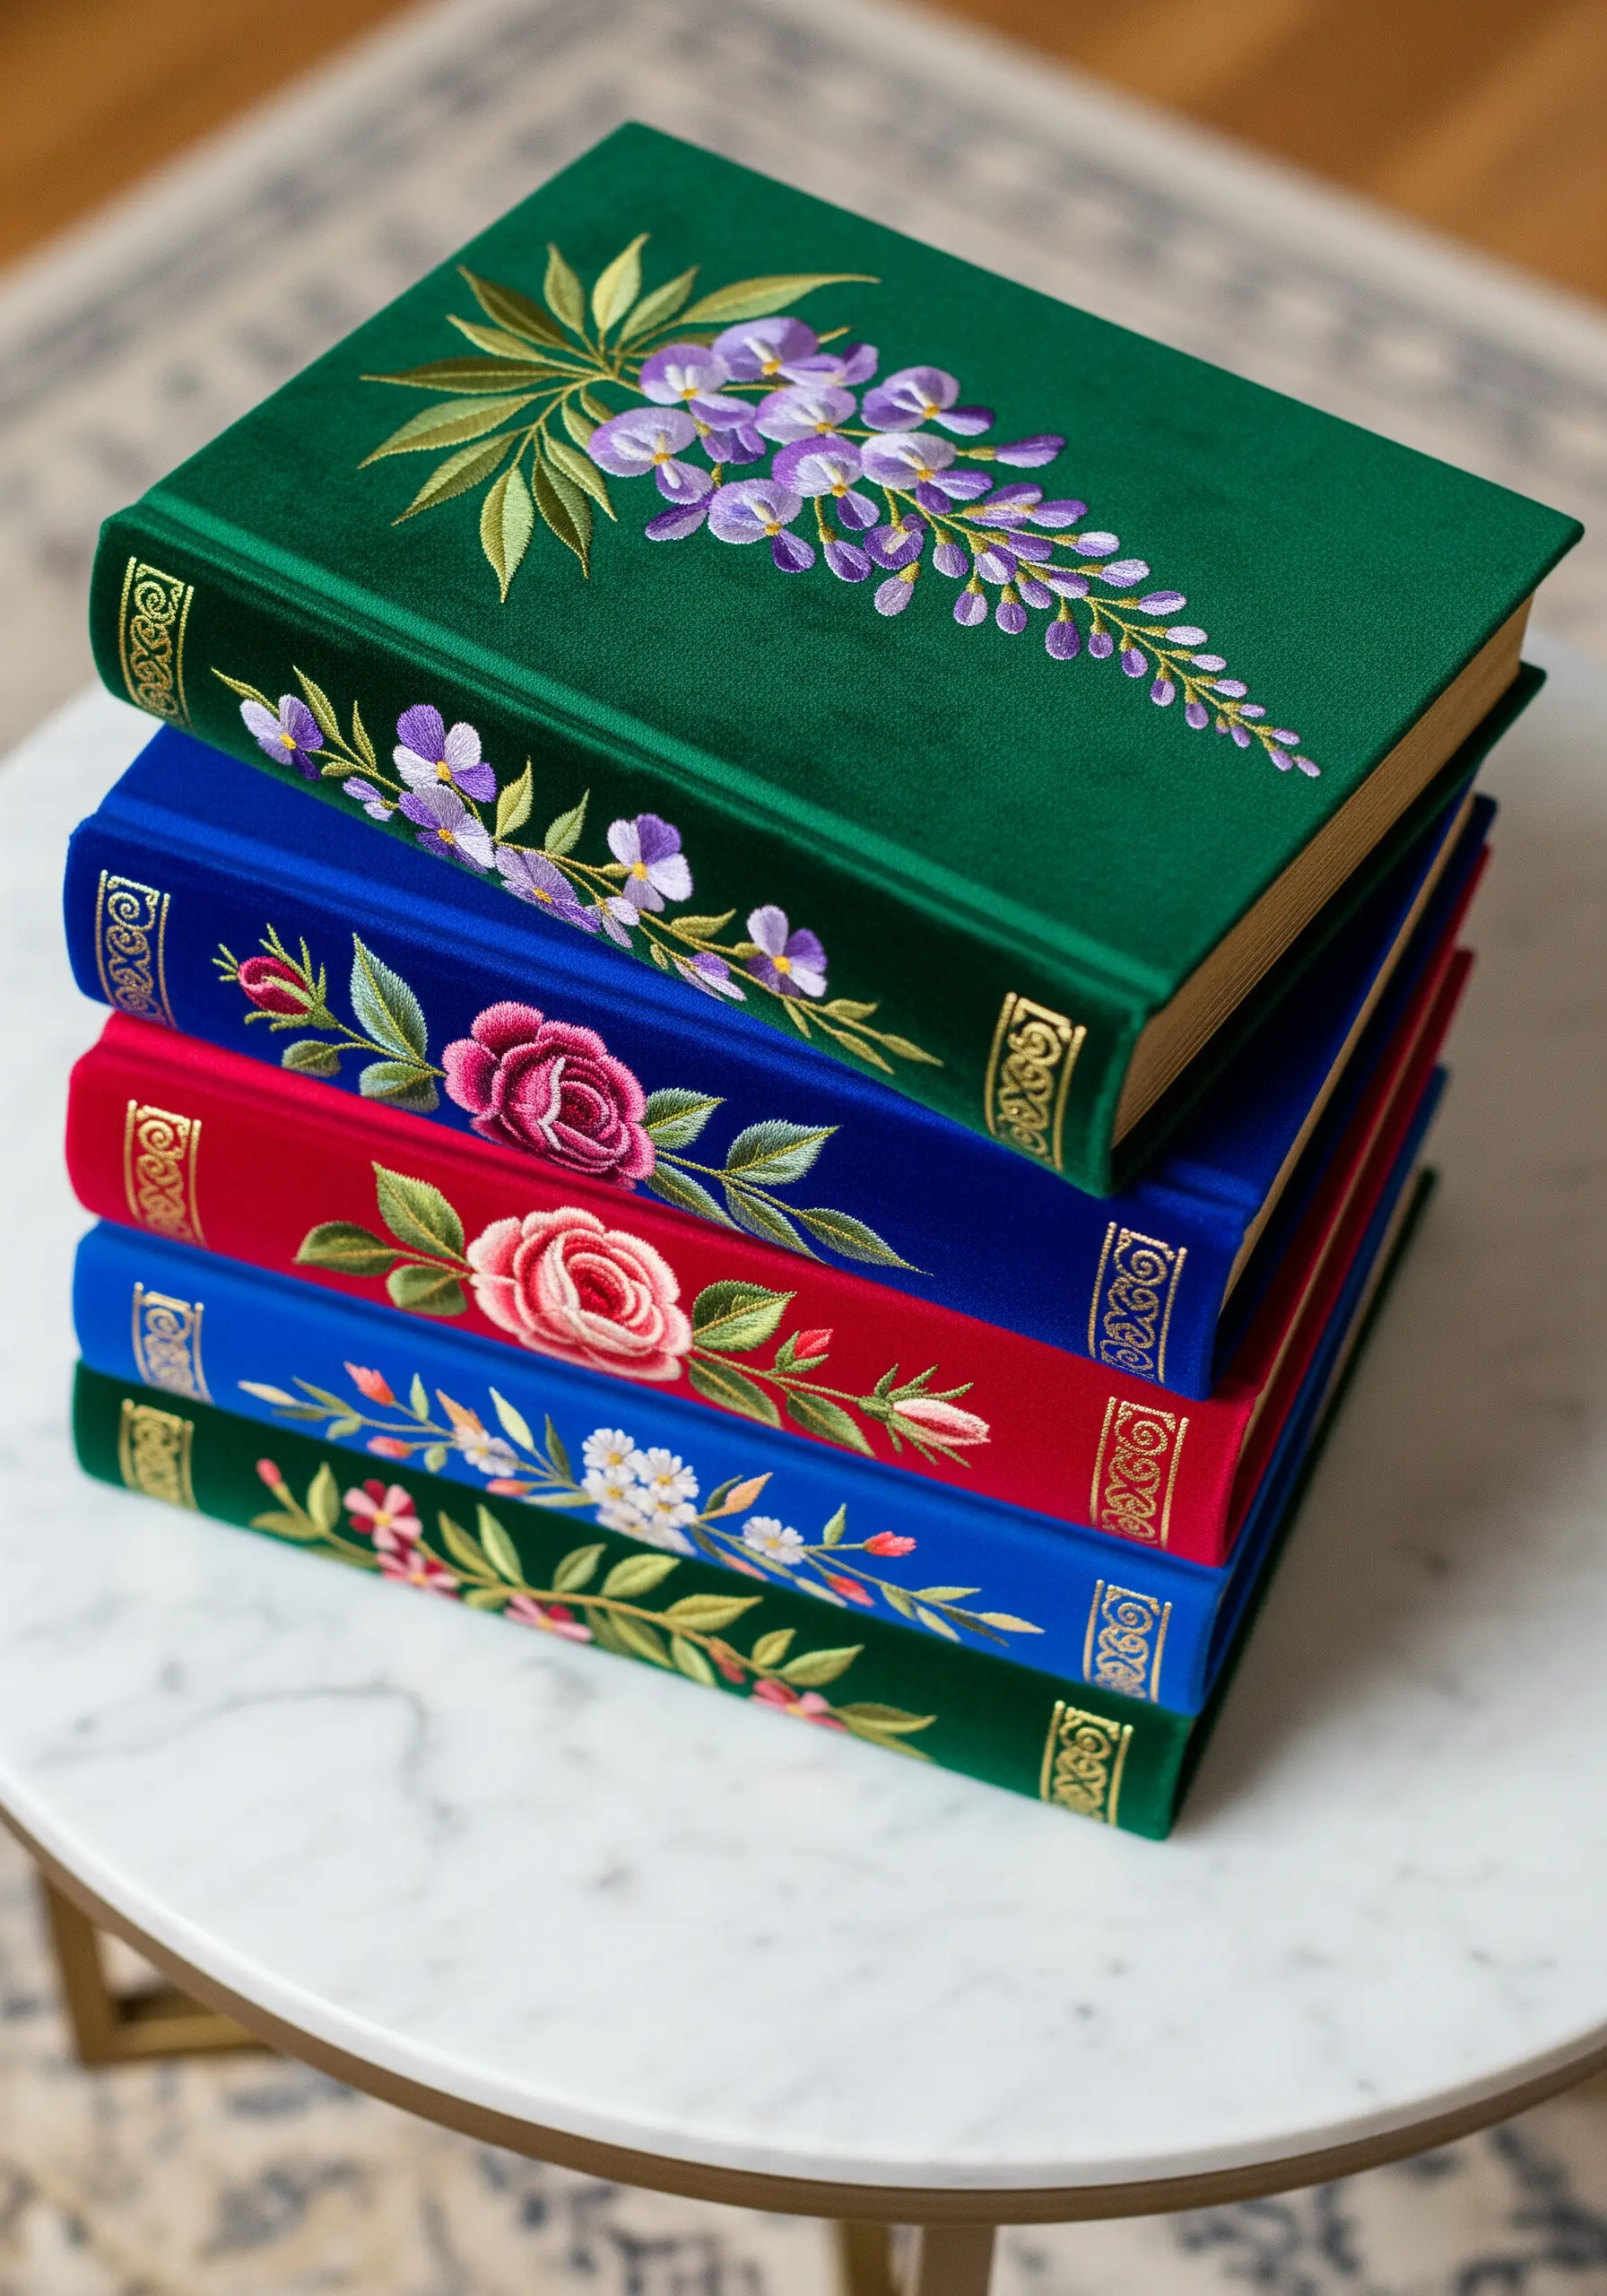
Create heirloom-quality keepsakes by embroidering directly onto velvet-bound journals or decorative books.
Always use a tear-away stabilizer on the back of the velvet to prevent the stitches from sinking into the pile and to keep the fabric from shifting.
Achieve smooth, painterly gradients on the florals by using the long-and-short stitch technique with single strands of thread.
A fine, sharp needle will part the velvet fibers cleanly, resulting in crisp outlines and a professional finish that feels incredibly luxurious to the touch.
6. Stitch a Celestial Lampshade That Glows

Turn a plain lampshade into a celestial masterpiece by stitching a design and weaving in lights.
Choose a lampshade made from a light-colored, loosely woven fabric like linen or burlap, which is easy to pierce with a needle.
Use a dark, high-contrast thread like black or navy to stitch your design, adding sequins or metallic beads to represent stars.
Once the embroidery is complete, carefully wrap a string of micro LED fairy lights around the inside of the frame to make your cosmic creation gently illuminate from within.
7. Design an Elegant Mobile with Thread Art
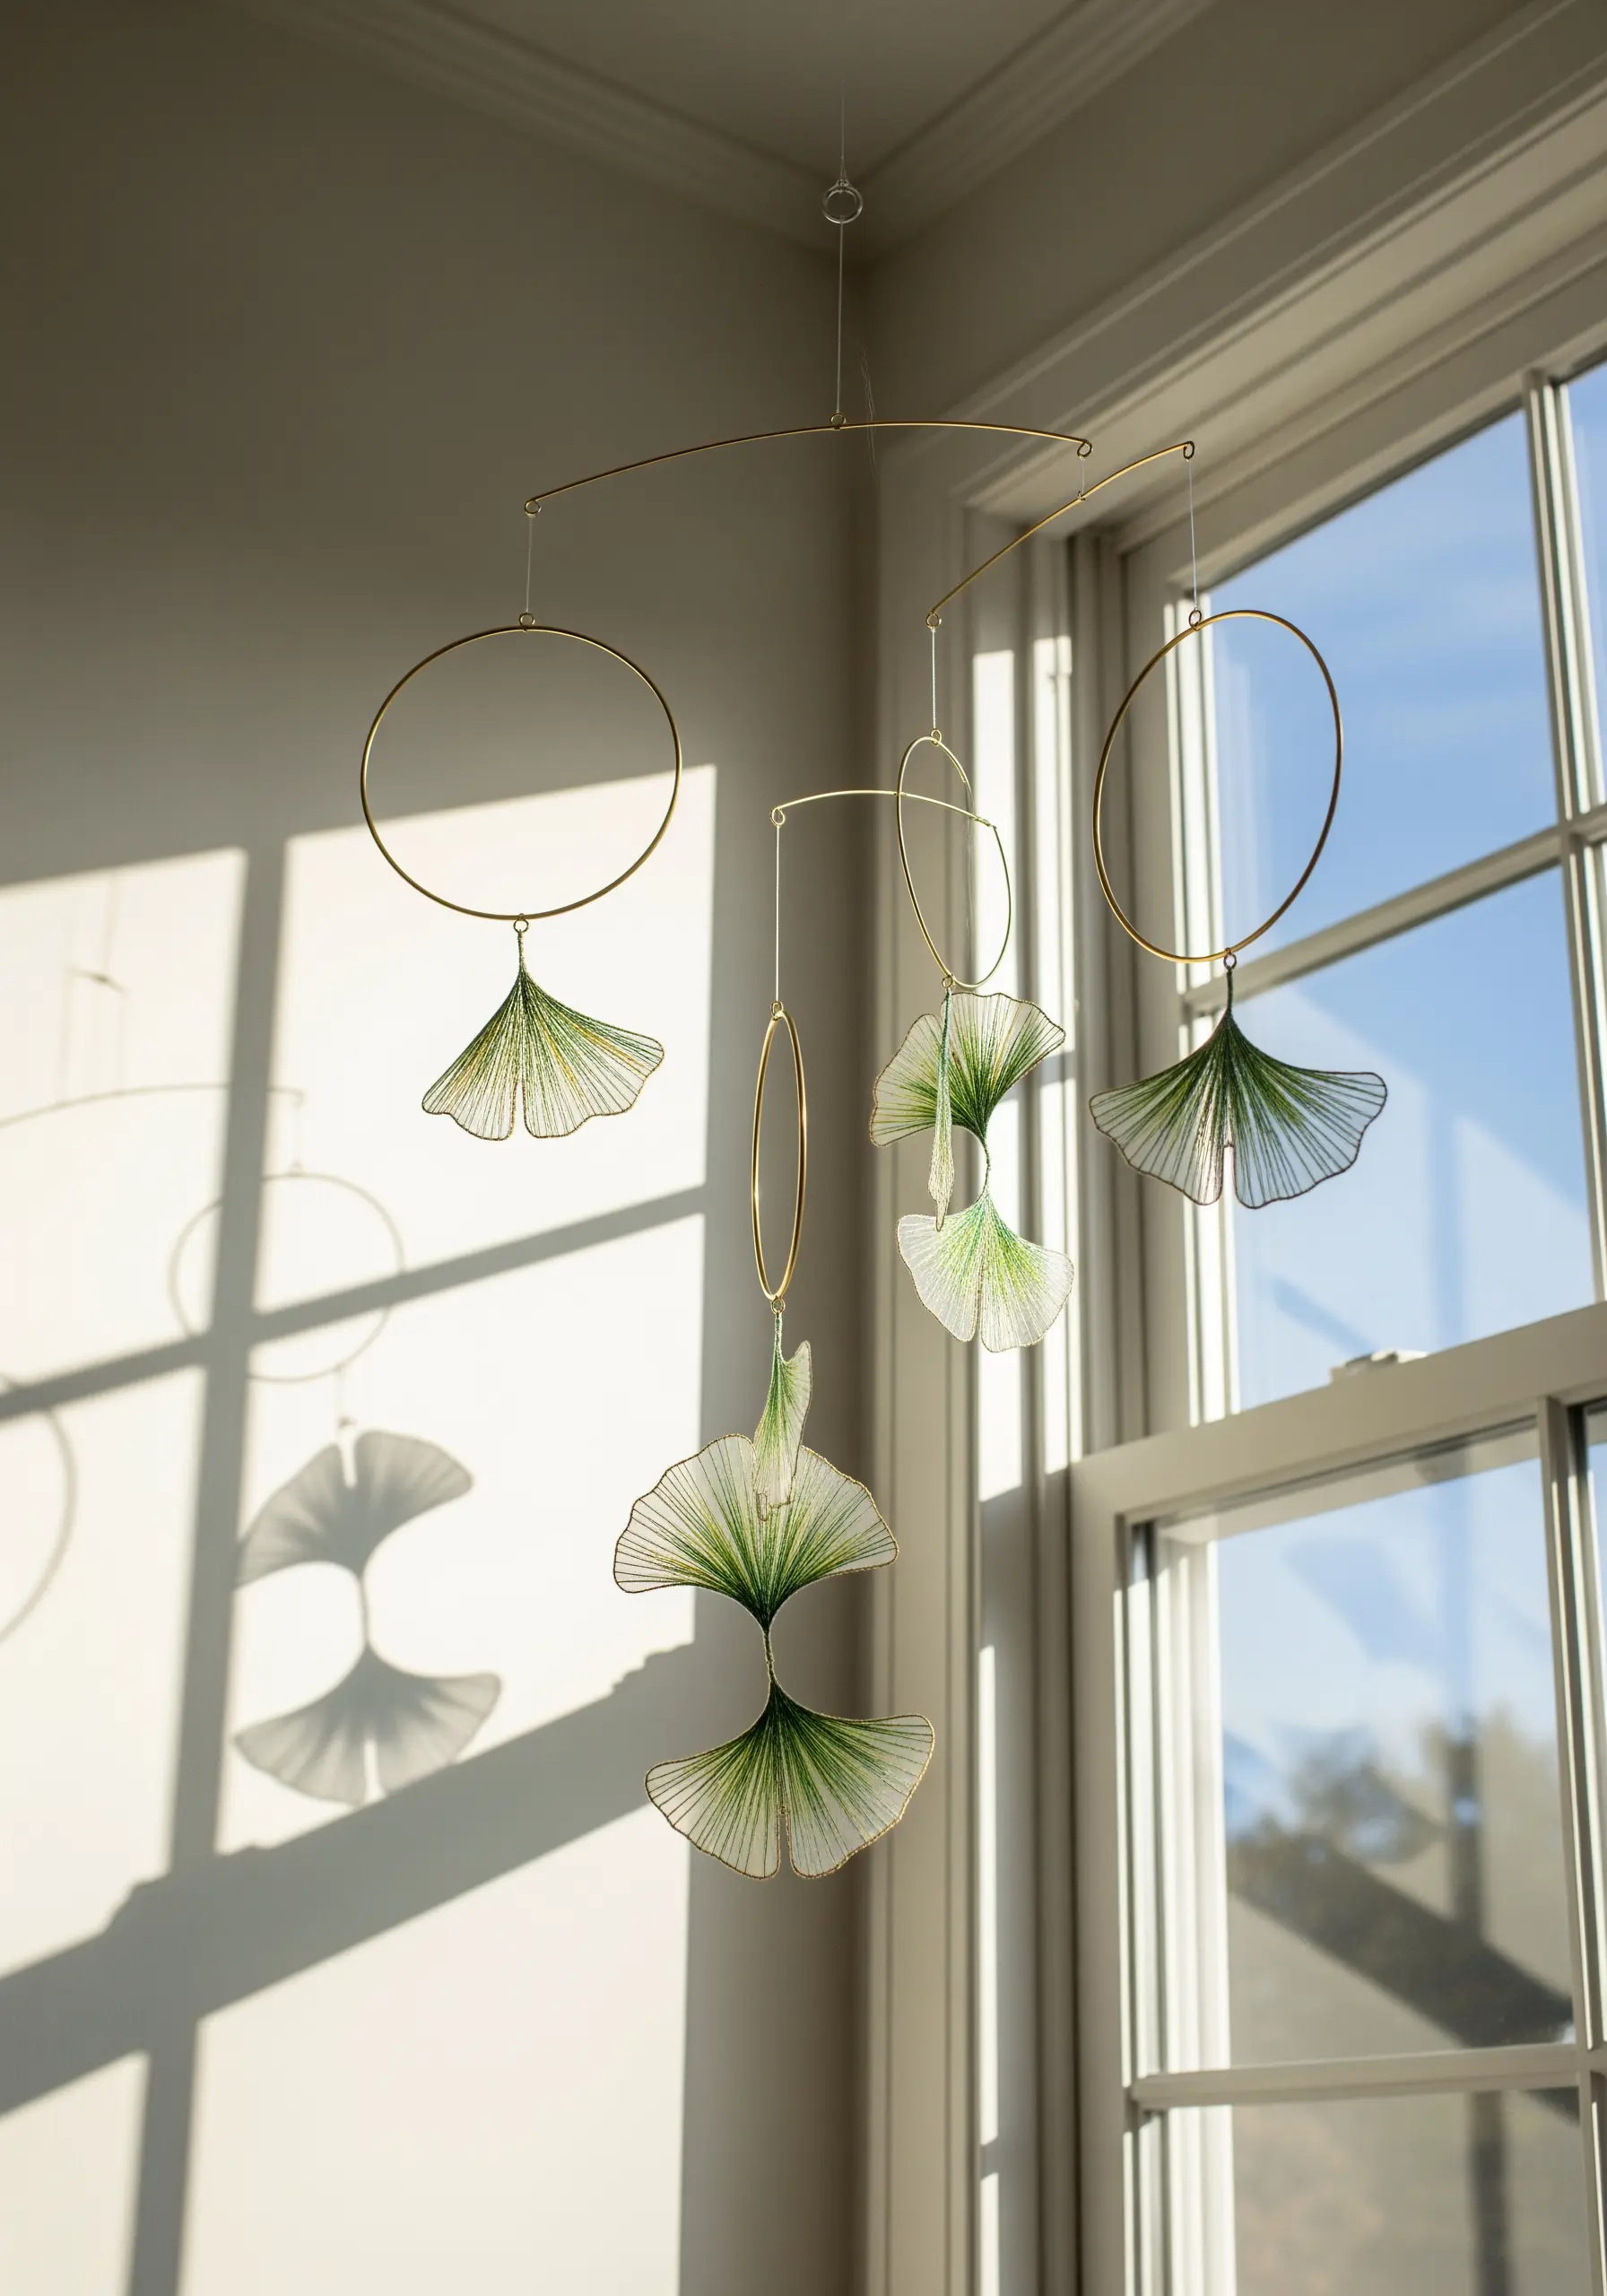
Construct a delicate, kinetic sculpture using metal hoops and precisely strung thread.
Create the leaf shapes by wrapping embroidery floss across brass frames in a fan pattern, securing the thread through pre-drilled holes or by wrapping it tightly around the frame.
Use a single, continuous strand of thread for each shape to ensure even tension and a clean, graphic look.
The negative space is just as important as the thread, creating beautiful shadows and a sense of weightlessness as the mobile turns.
8. Weave a Textured Landscape Wall Hanging
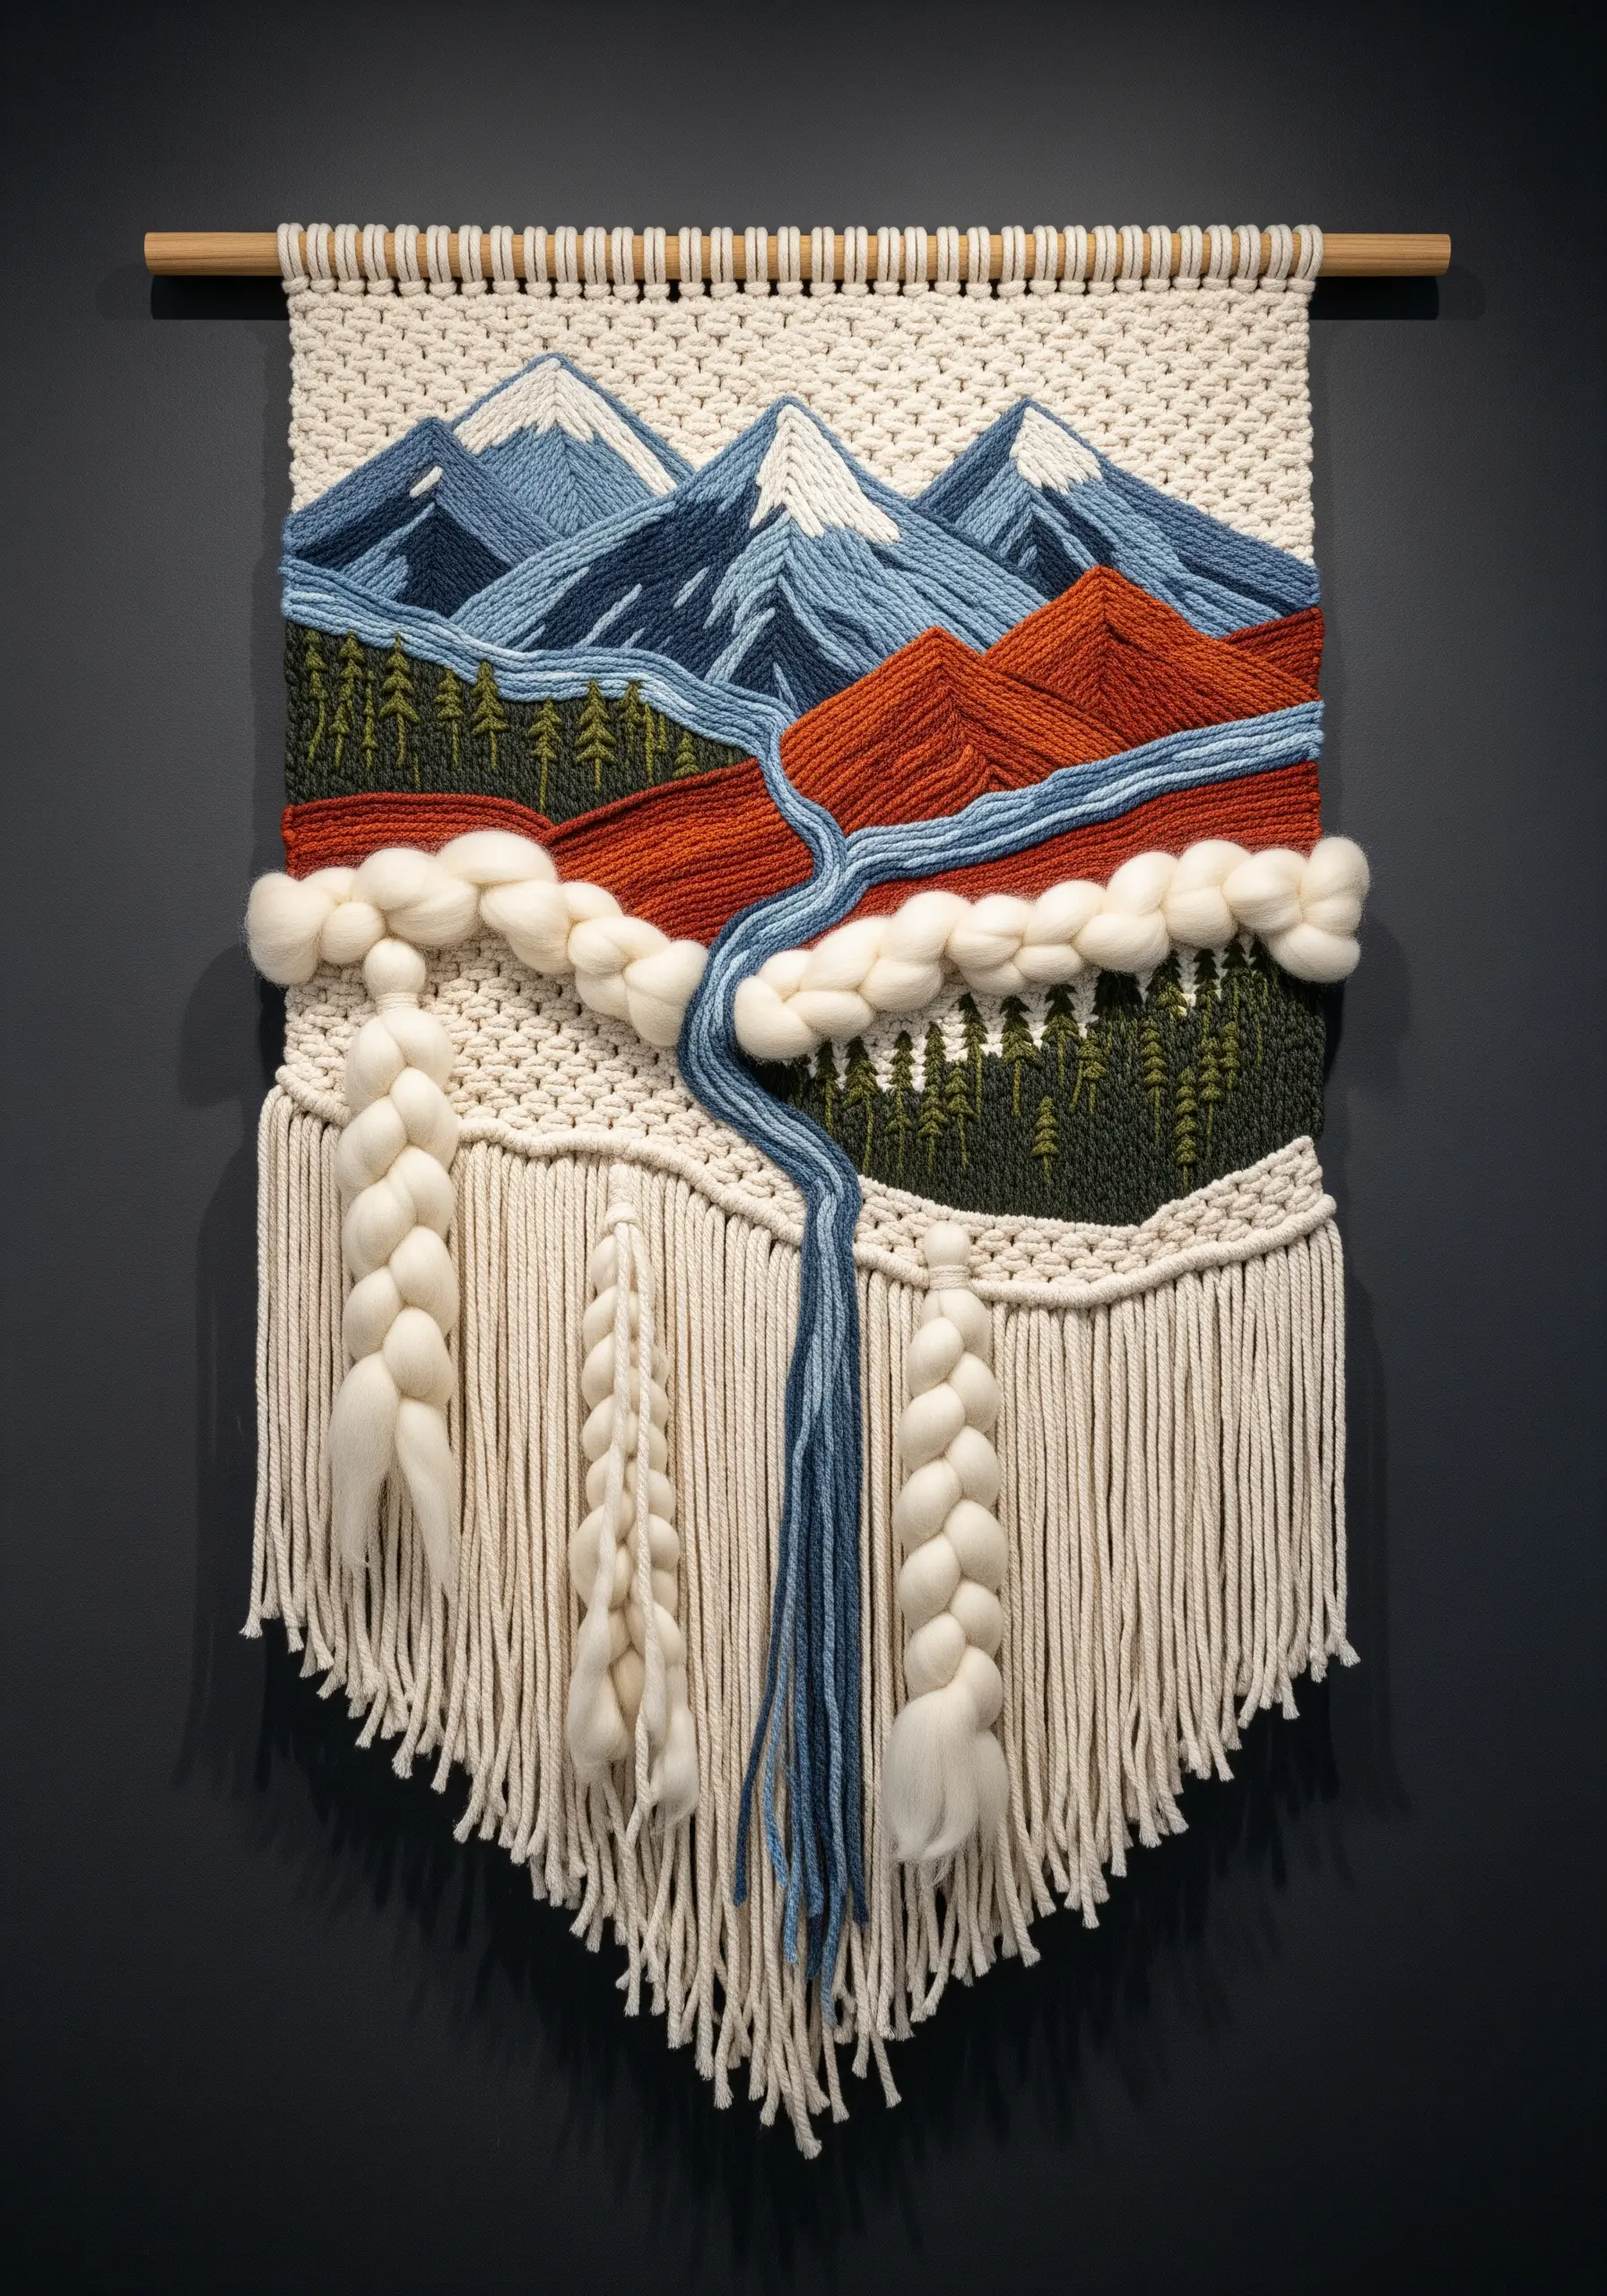
Go beyond the hoop by weaving a textural tapestry that tells a story through fiber.
Combine different weaving techniques on a single loom: use a simple tabby weave for the sky, soumak stitch to outline the mountains, and plush Rya knots for clouds.
Varying the weight of your yarn is crucial for creating depth—use chunky, unspun roving for soft, dimensional clouds and finer wool for the detailed forest treeline.
This approach allows you to build a scene with organic texture and a tangible sense of dimension that draws the viewer in.
9. Achieve Iridescence with Blended Satin Stitch
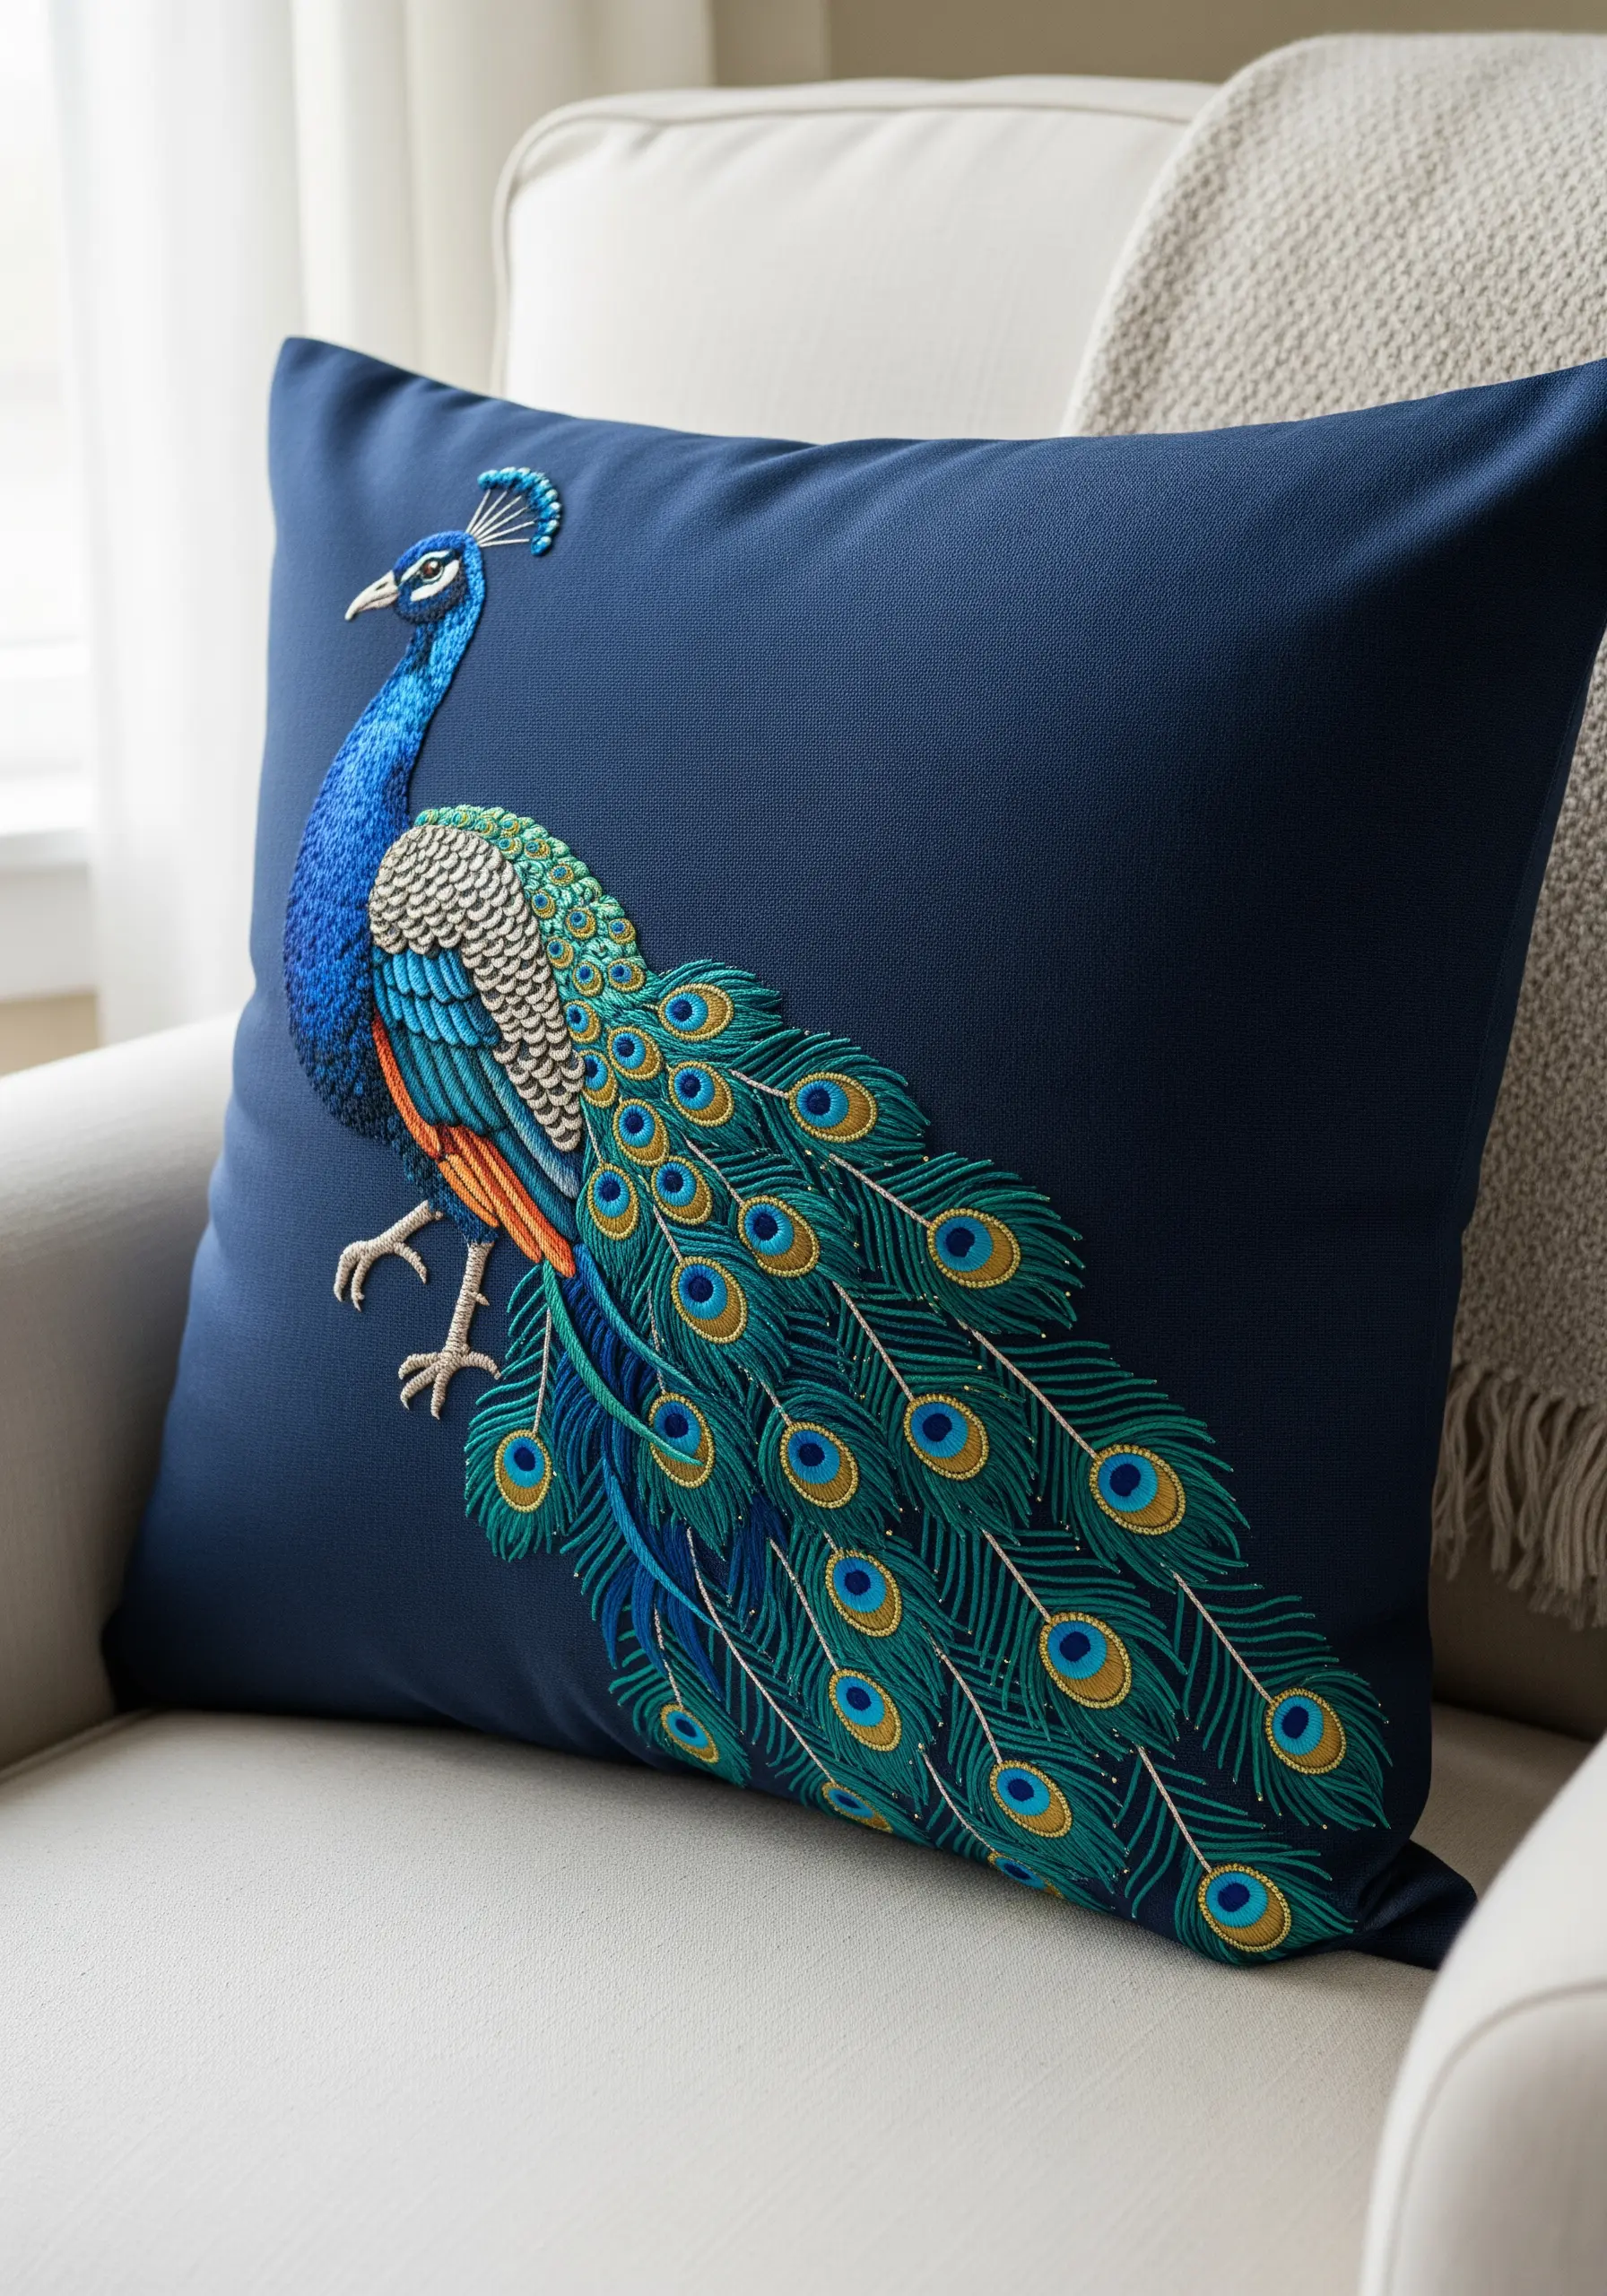
Capture the stunning shimmer of a peacock’s feathers by strategically blending your thread colors.
Instead of using one solid color for a section, fill your needle with two strands of closely related shades—like one turquoise and one royal blue—to create a subtle, iridescent effect.
Incorporate a single strand of fine metallic thread alongside your cotton floss in the gold and green areas to add a realistic shimmer that catches the light.
This technique of blending satin stitches creates a dynamic, multi-tonal surface that makes the embroidery feel alive.
10. Elevate Simple Motifs into a Framed Triptych
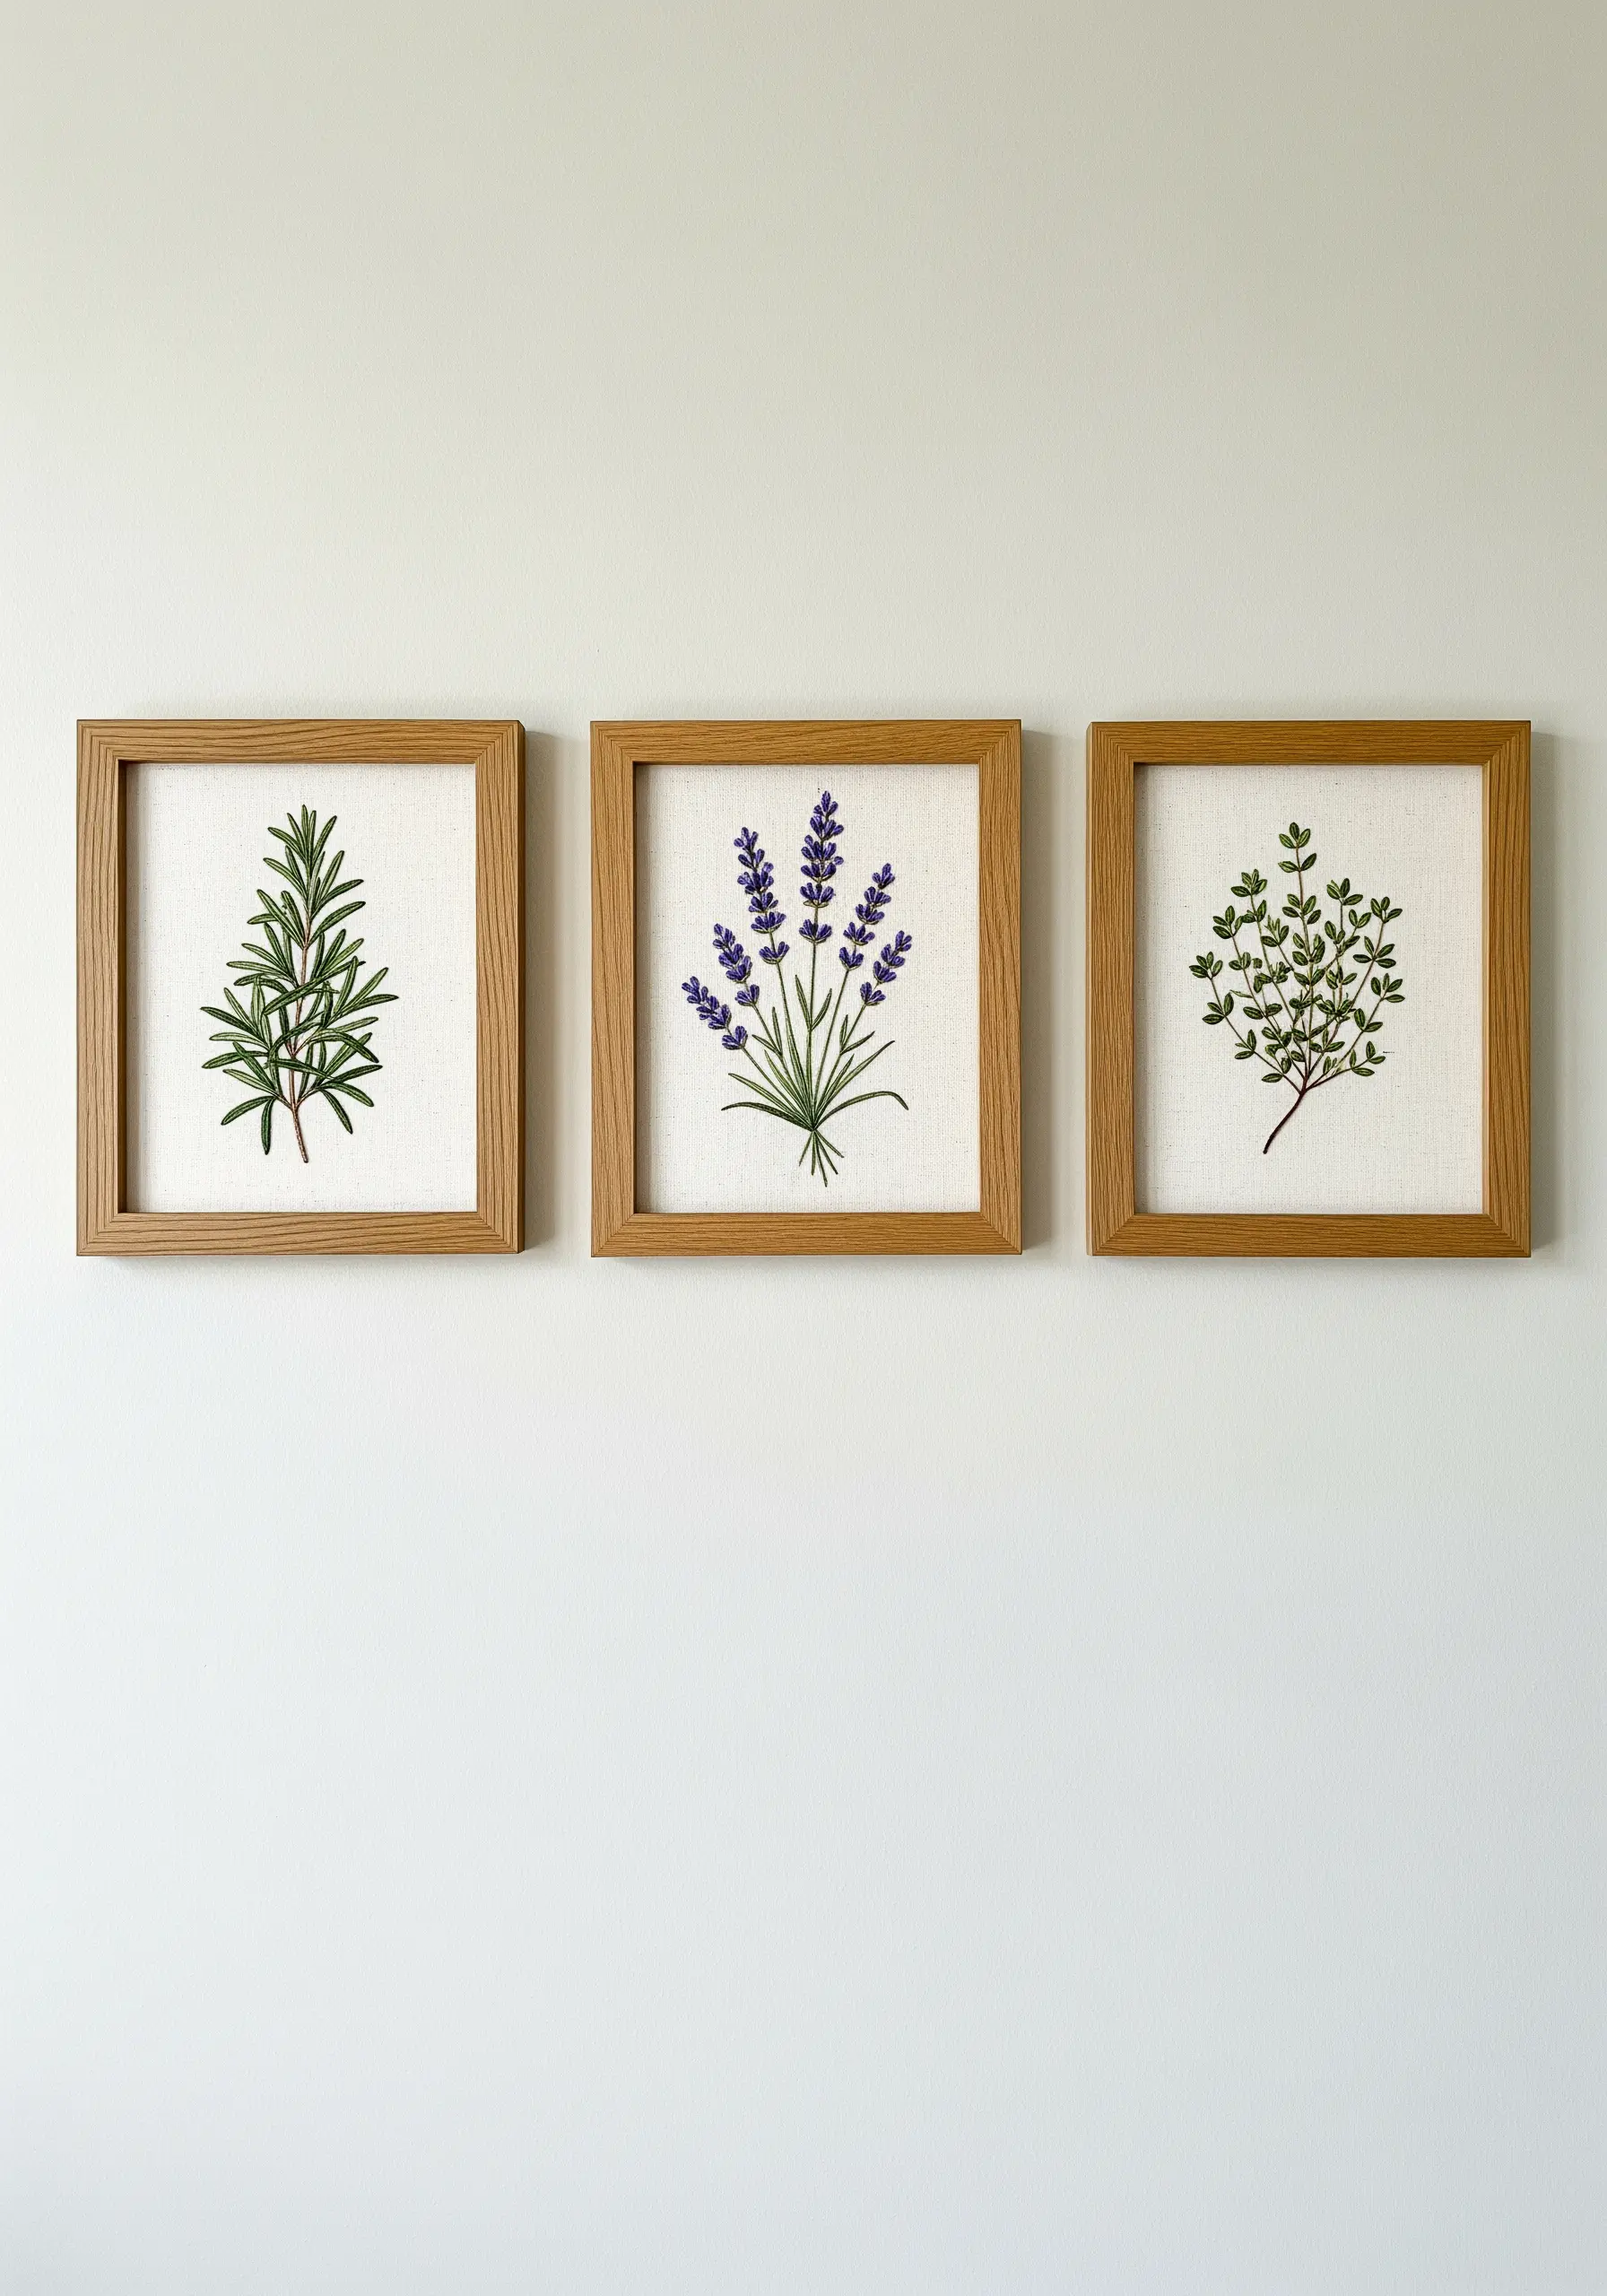
Turn simple botanical studies into a sophisticated art installation by stitching and framing them as a cohesive set.
Keep the embroidery clean and minimalist by using a delicate backstitch or stem stitch for the outlines and a light fill with seed stitches for texture.
Choose a high-quality, neutral fabric like linen or unbleached cotton to serve as a quiet backdrop that lets the stitched details shine.
Mounting and framing your garden herb embroidery patterns in identical frames creates a powerful sense of intention and transforms them from craft into art.
11. Recreate Kintsugi with Golden Thread
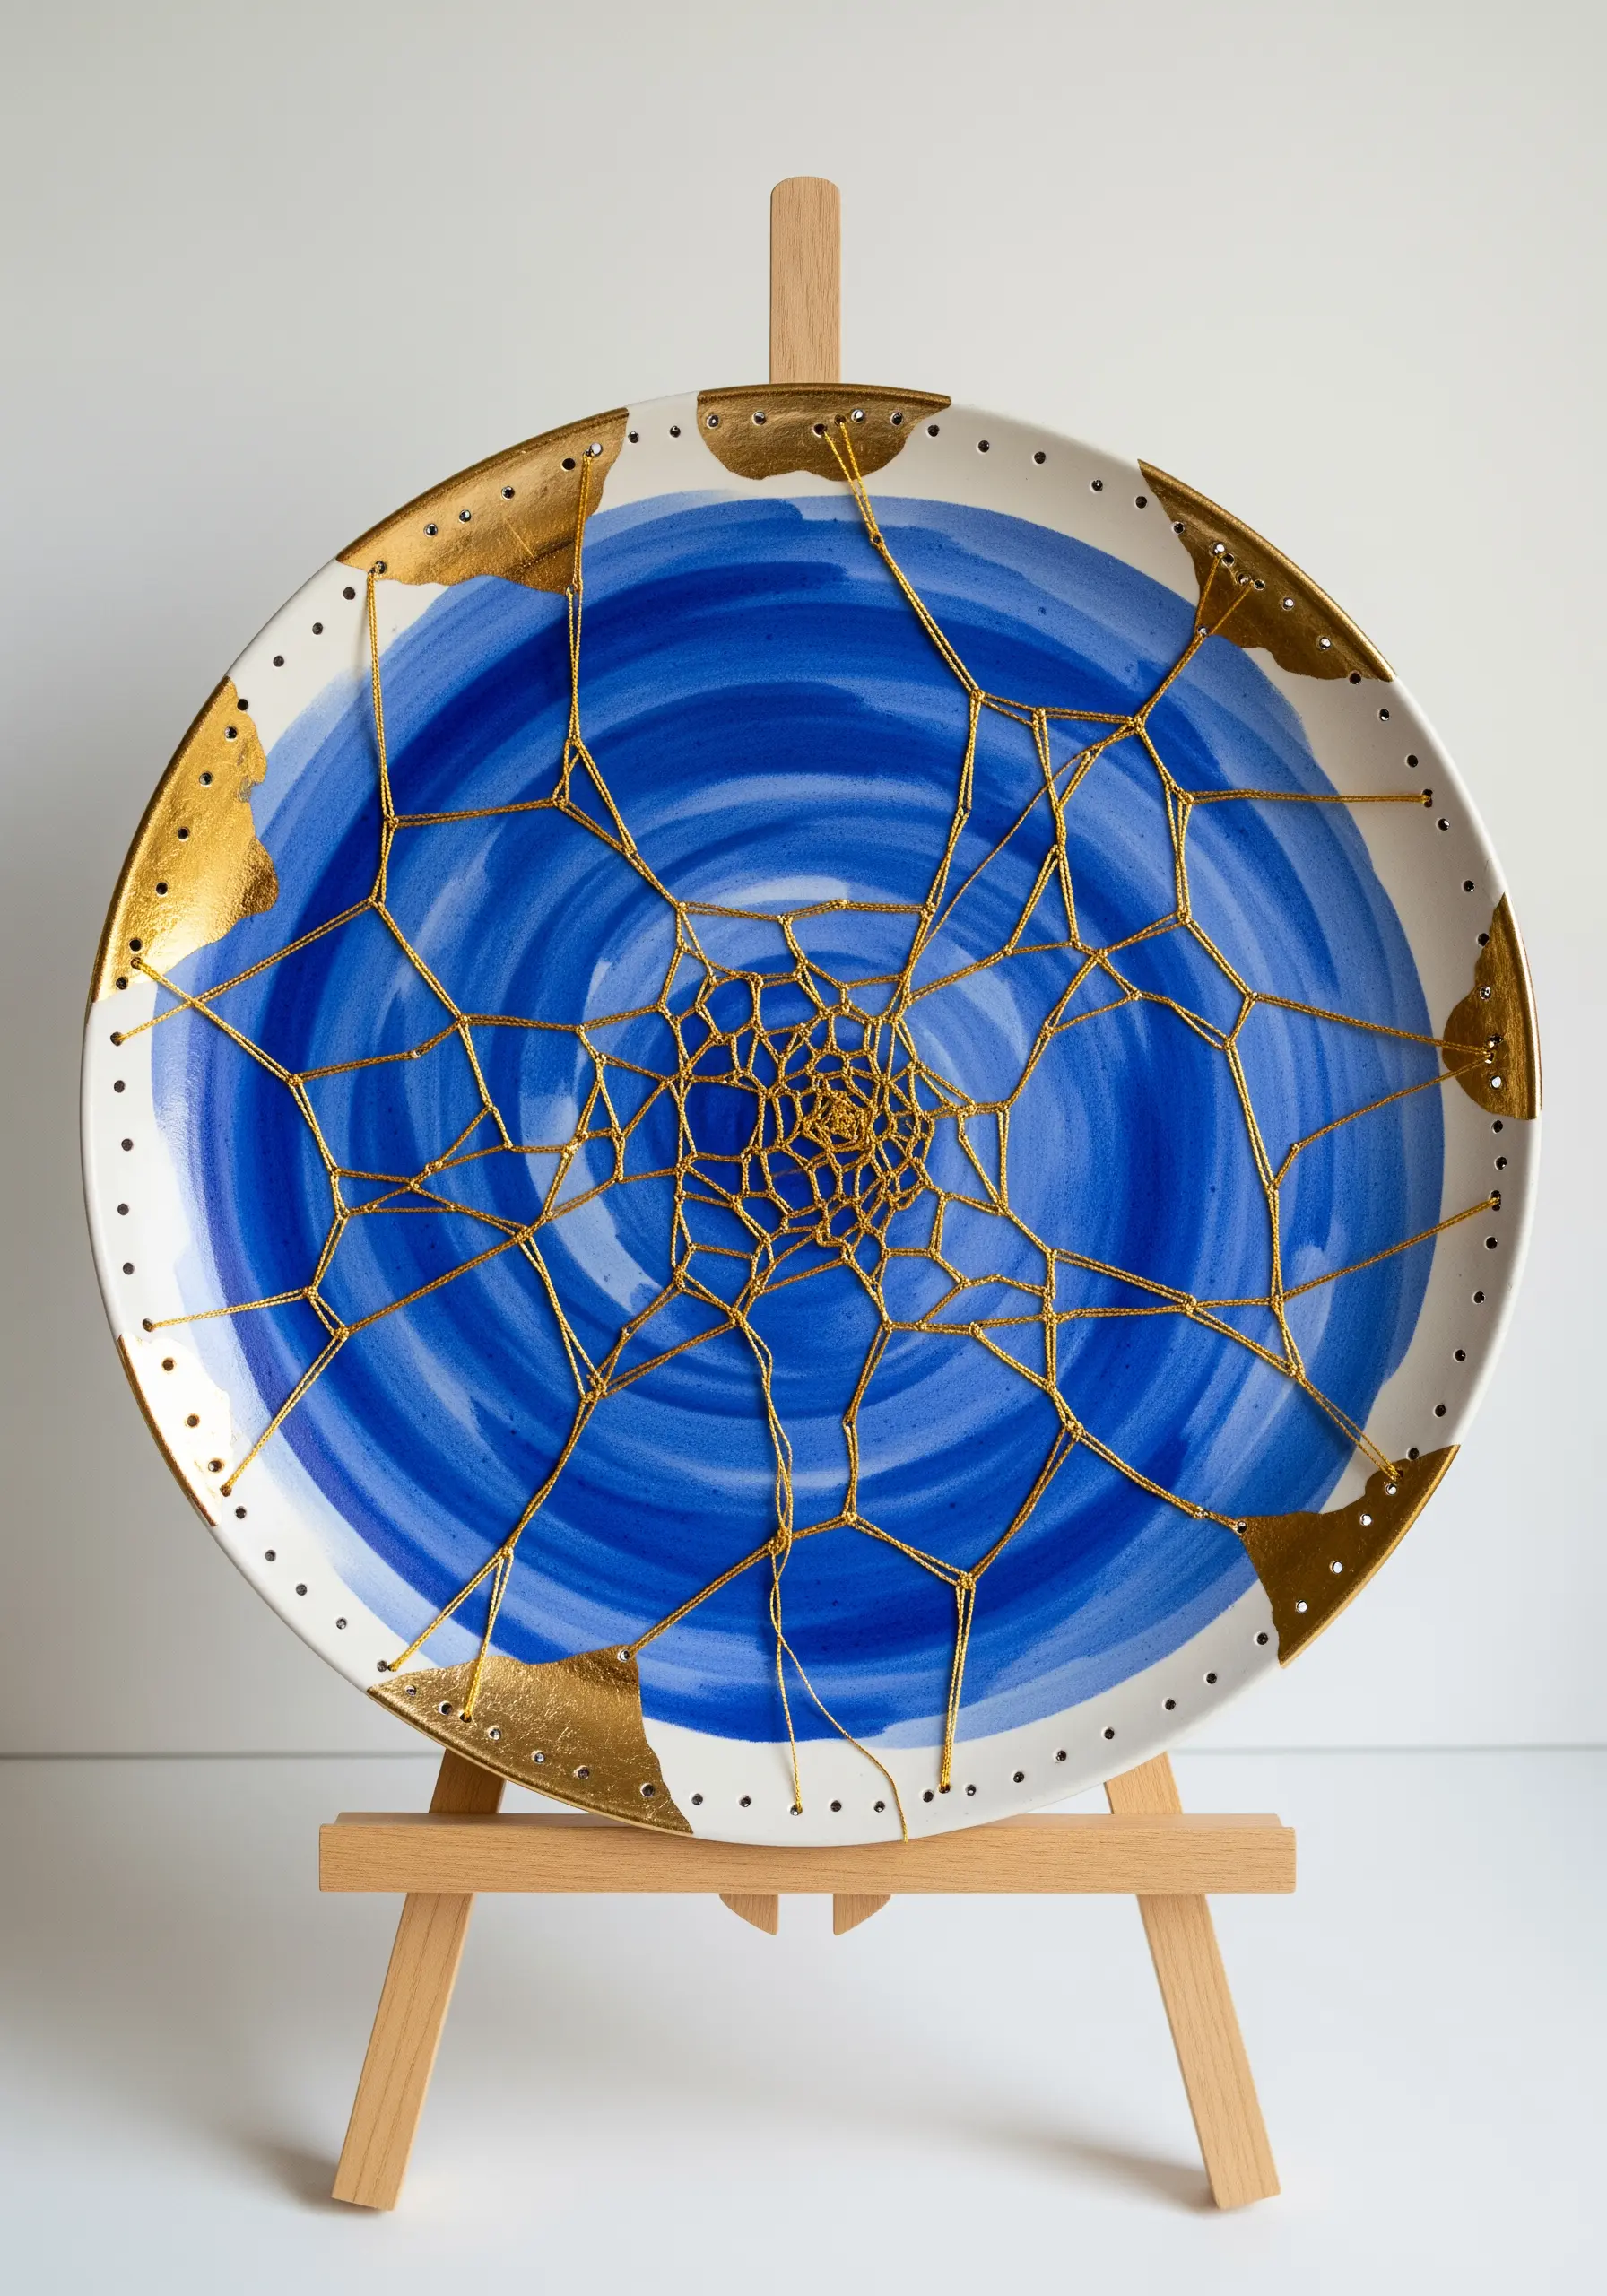
Embrace the Japanese art of repairing broken pottery by creating a thread-based interpretation of Kintsugi.
Start with a plain ceramic plate and use a fine-tipped drill bit to carefully pierce holes along a hand-drawn ‘crack’ pattern.
Use a lustrous gold metallic thread or fine cord to stitch through the holes, creating a web-like network that mimics the golden joinery of true Kintsugi.
This project is a beautiful meditation on imperfection and transforms a simple object into a piece of conceptual art.
12. Preserve Your Stitchwork Under High-Gloss Resin
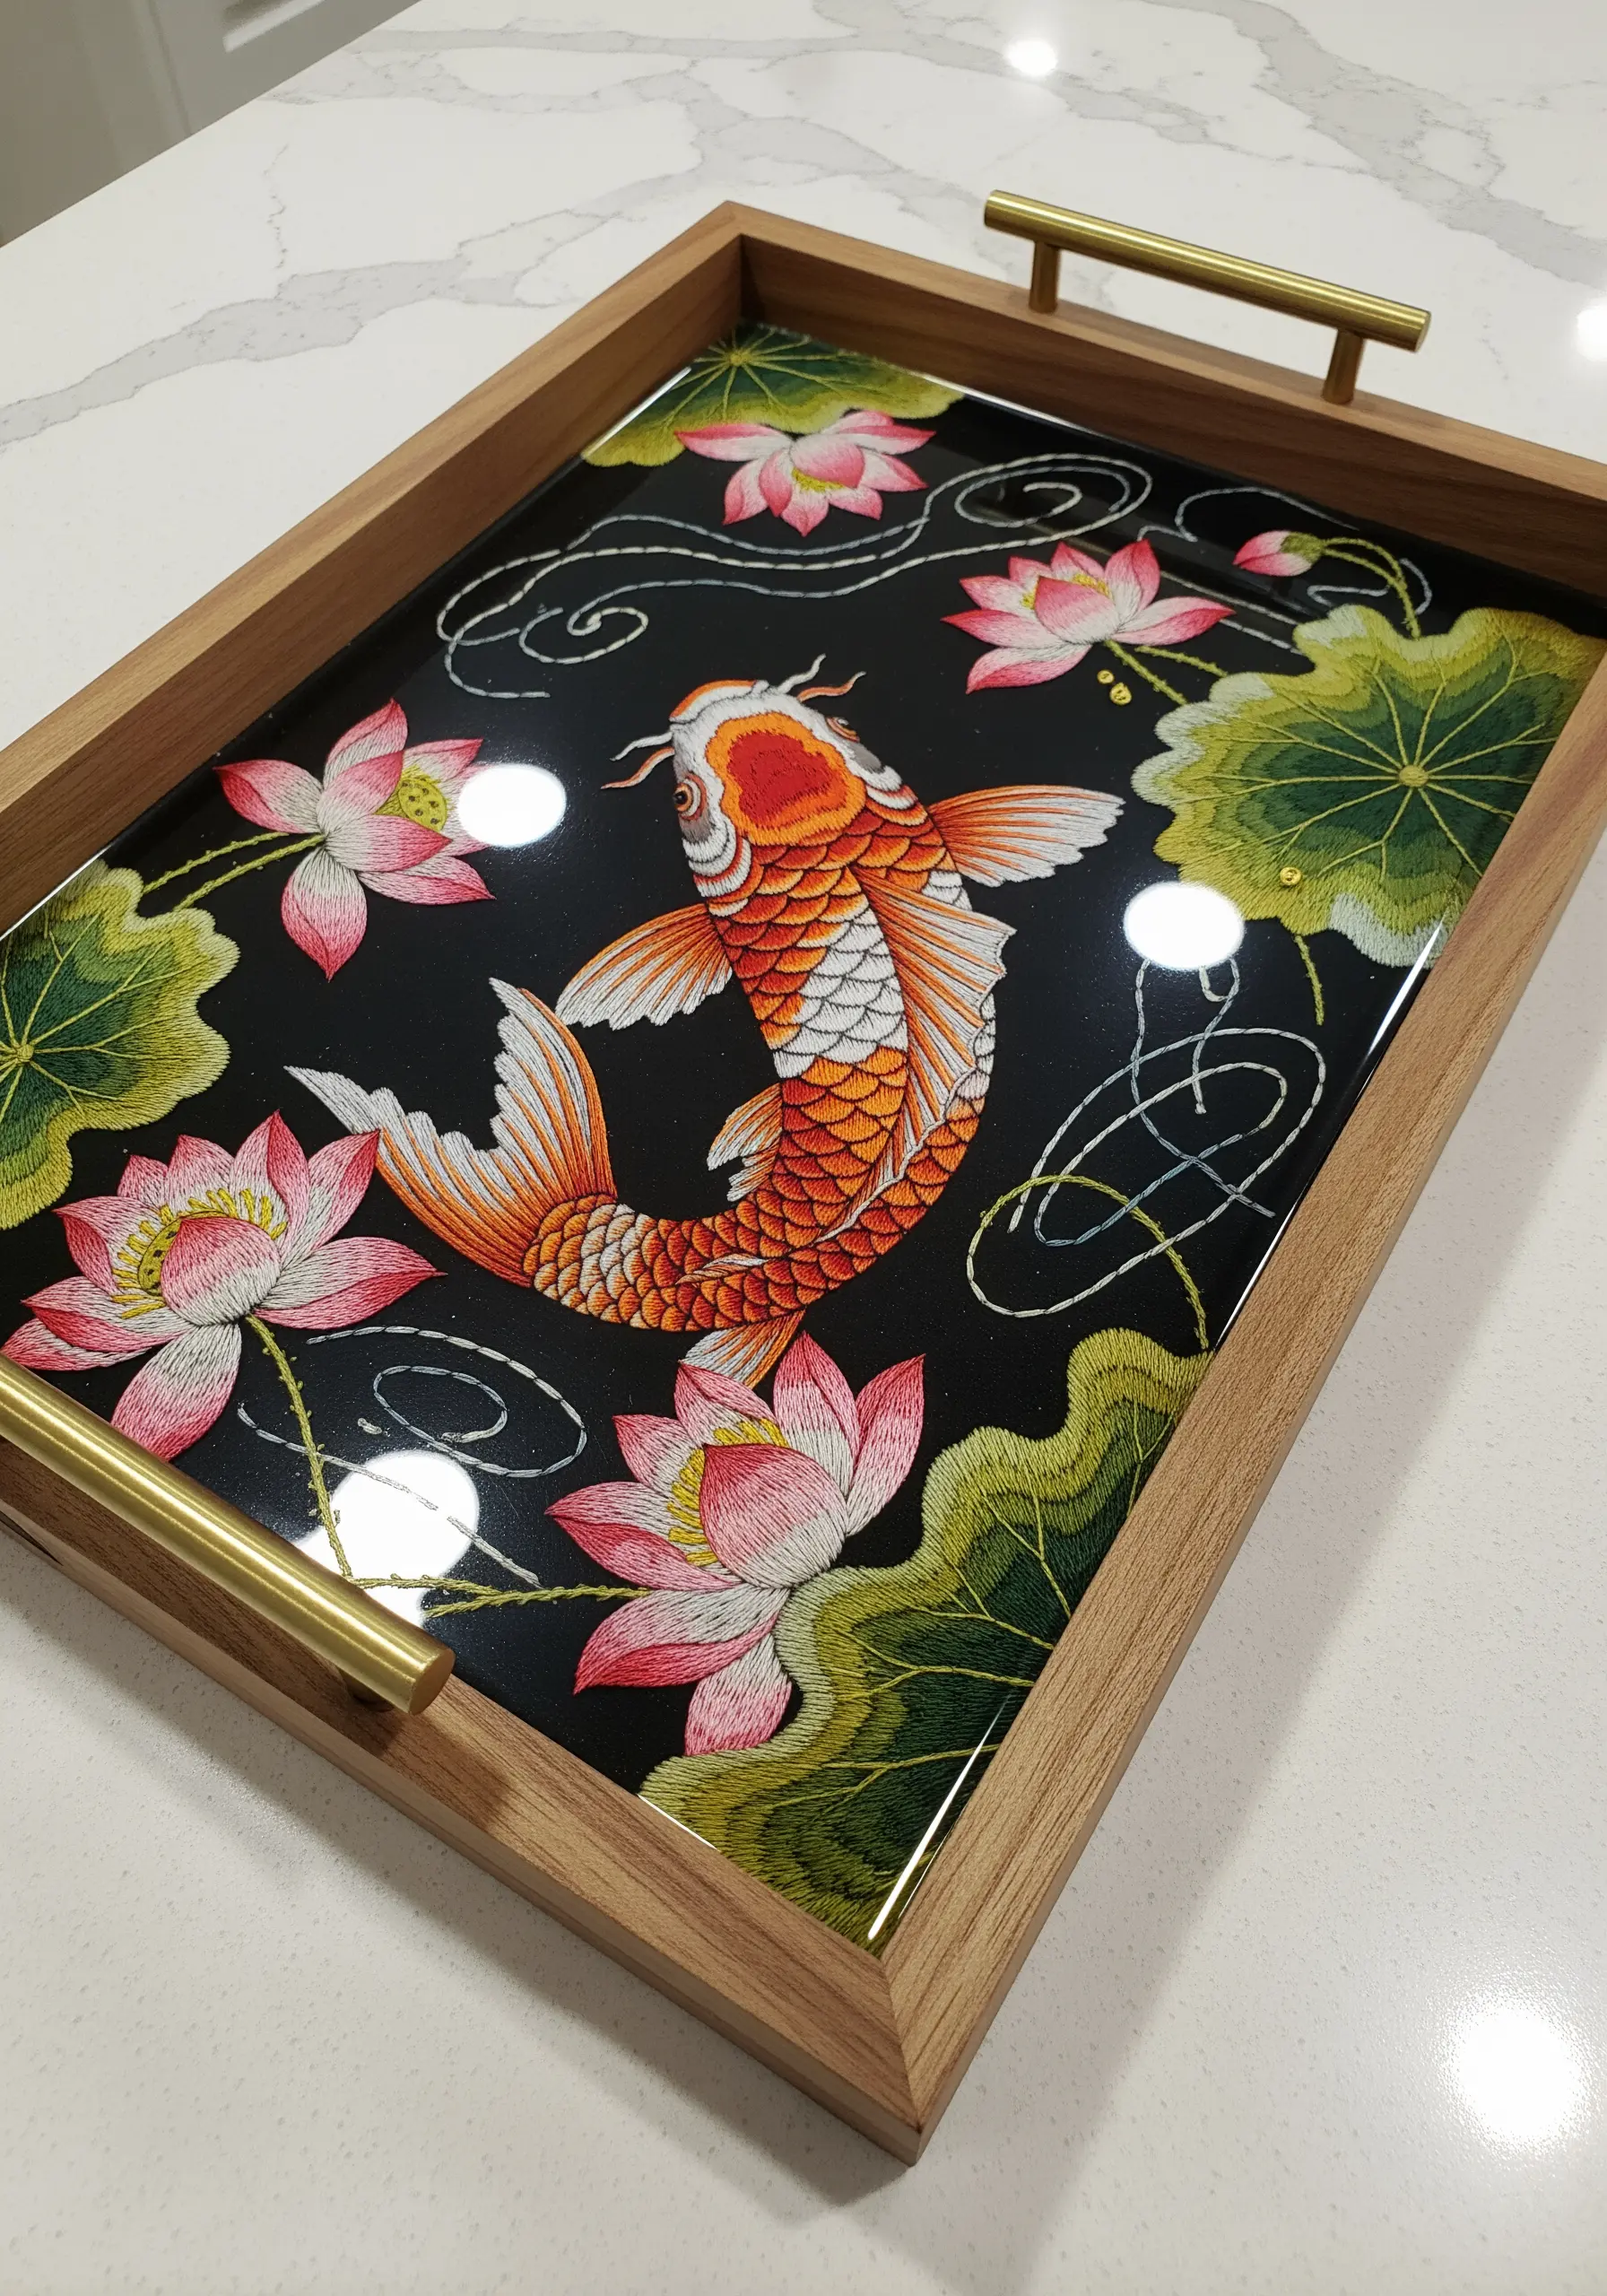
Protect and display a detailed embroidery piece by encasing it in resin to create a functional tray.
First, complete your embroidery on a piece of fabric cut to the exact size of the tray base.
Mount the fabric onto the base with a strong adhesive, ensuring it’s perfectly flat. It is crucial to seal the entire fabric surface with a thin layer of Mod Podge to prevent the resin from seeping in and discoloring the thread.
Pour a self-leveling art resin over the sealed embroidery to create a durable, glass-like finish that magnifies every stitch.
13. Sculpt a Vessel with Coiled Rope and Thread
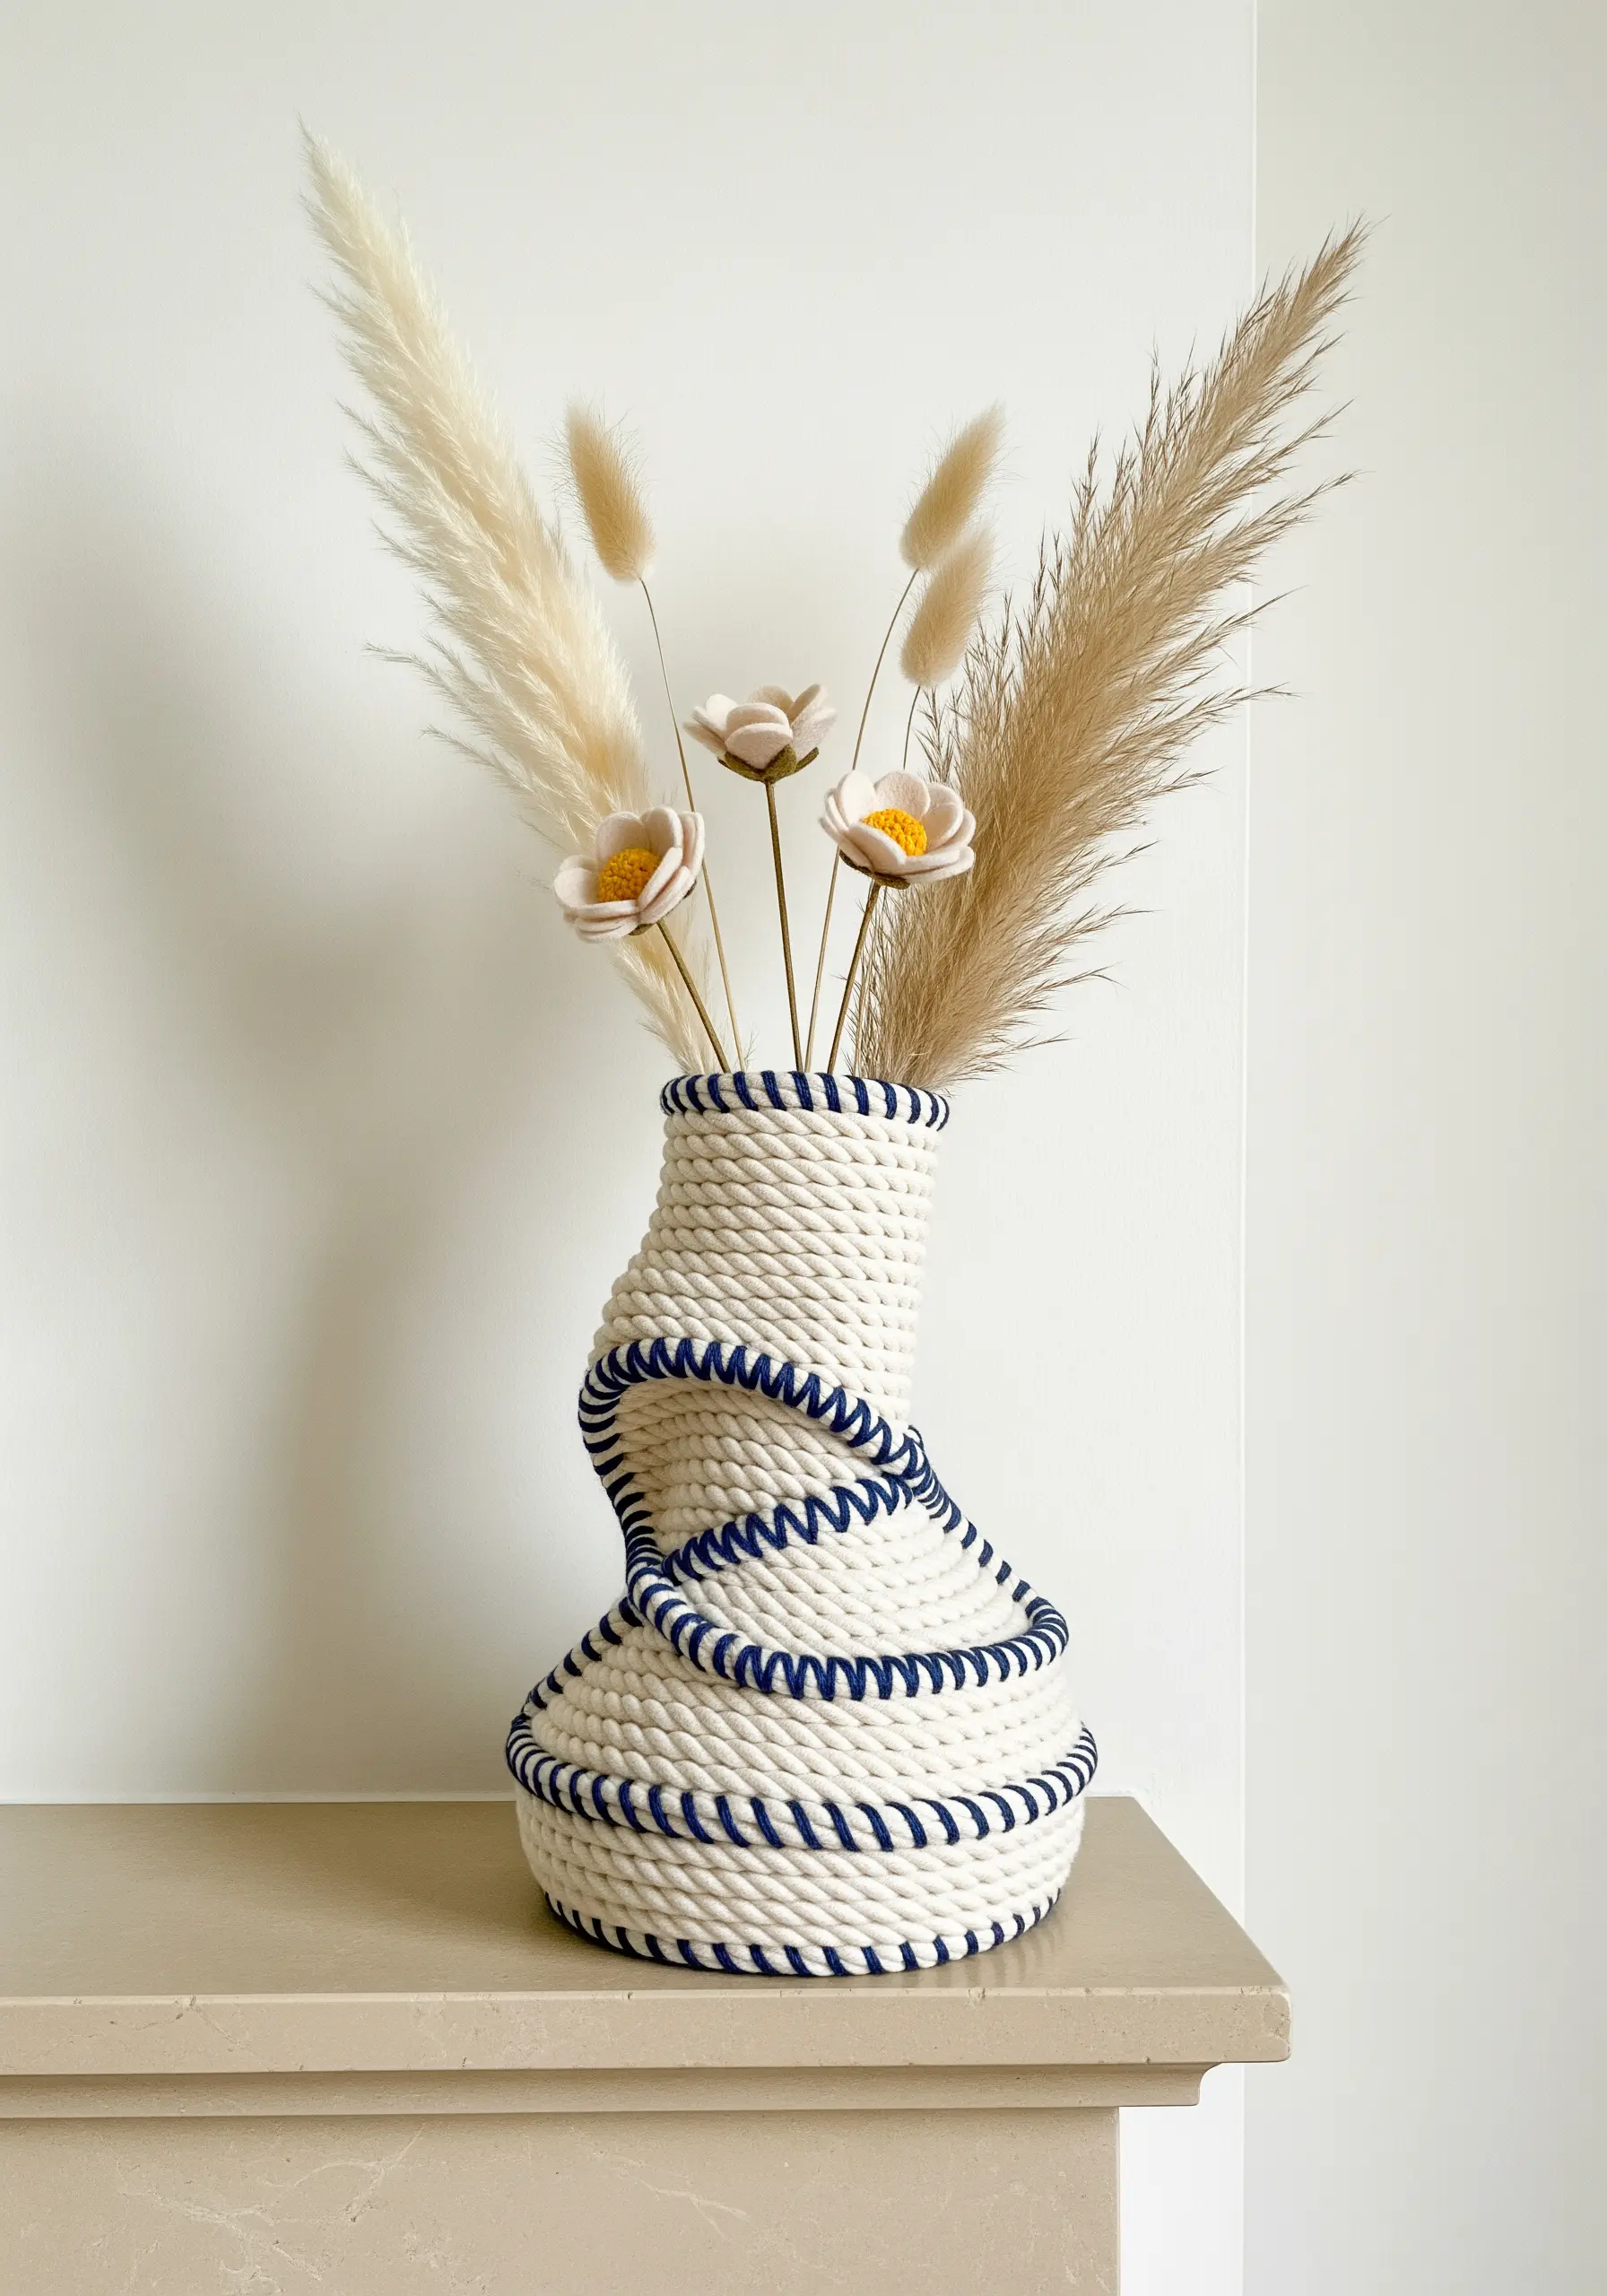
Construct a decorative vase using cotton rope and simple wrapping techniques—no pottery wheel required.
Begin coiling a thick cotton rope into a flat base, stitching the coils together with a durable upholstery thread and a large needle.
To build the walls, stack the coils vertically, shaping the vessel as you stitch. Create the decorative navy spiral by tightly wrapping sections of the rope with colored embroidery floss before you stitch them into place.
This technique allows you to create sculptural forms using soft, flexible materials.
14. Design a Dimensional Family Tree
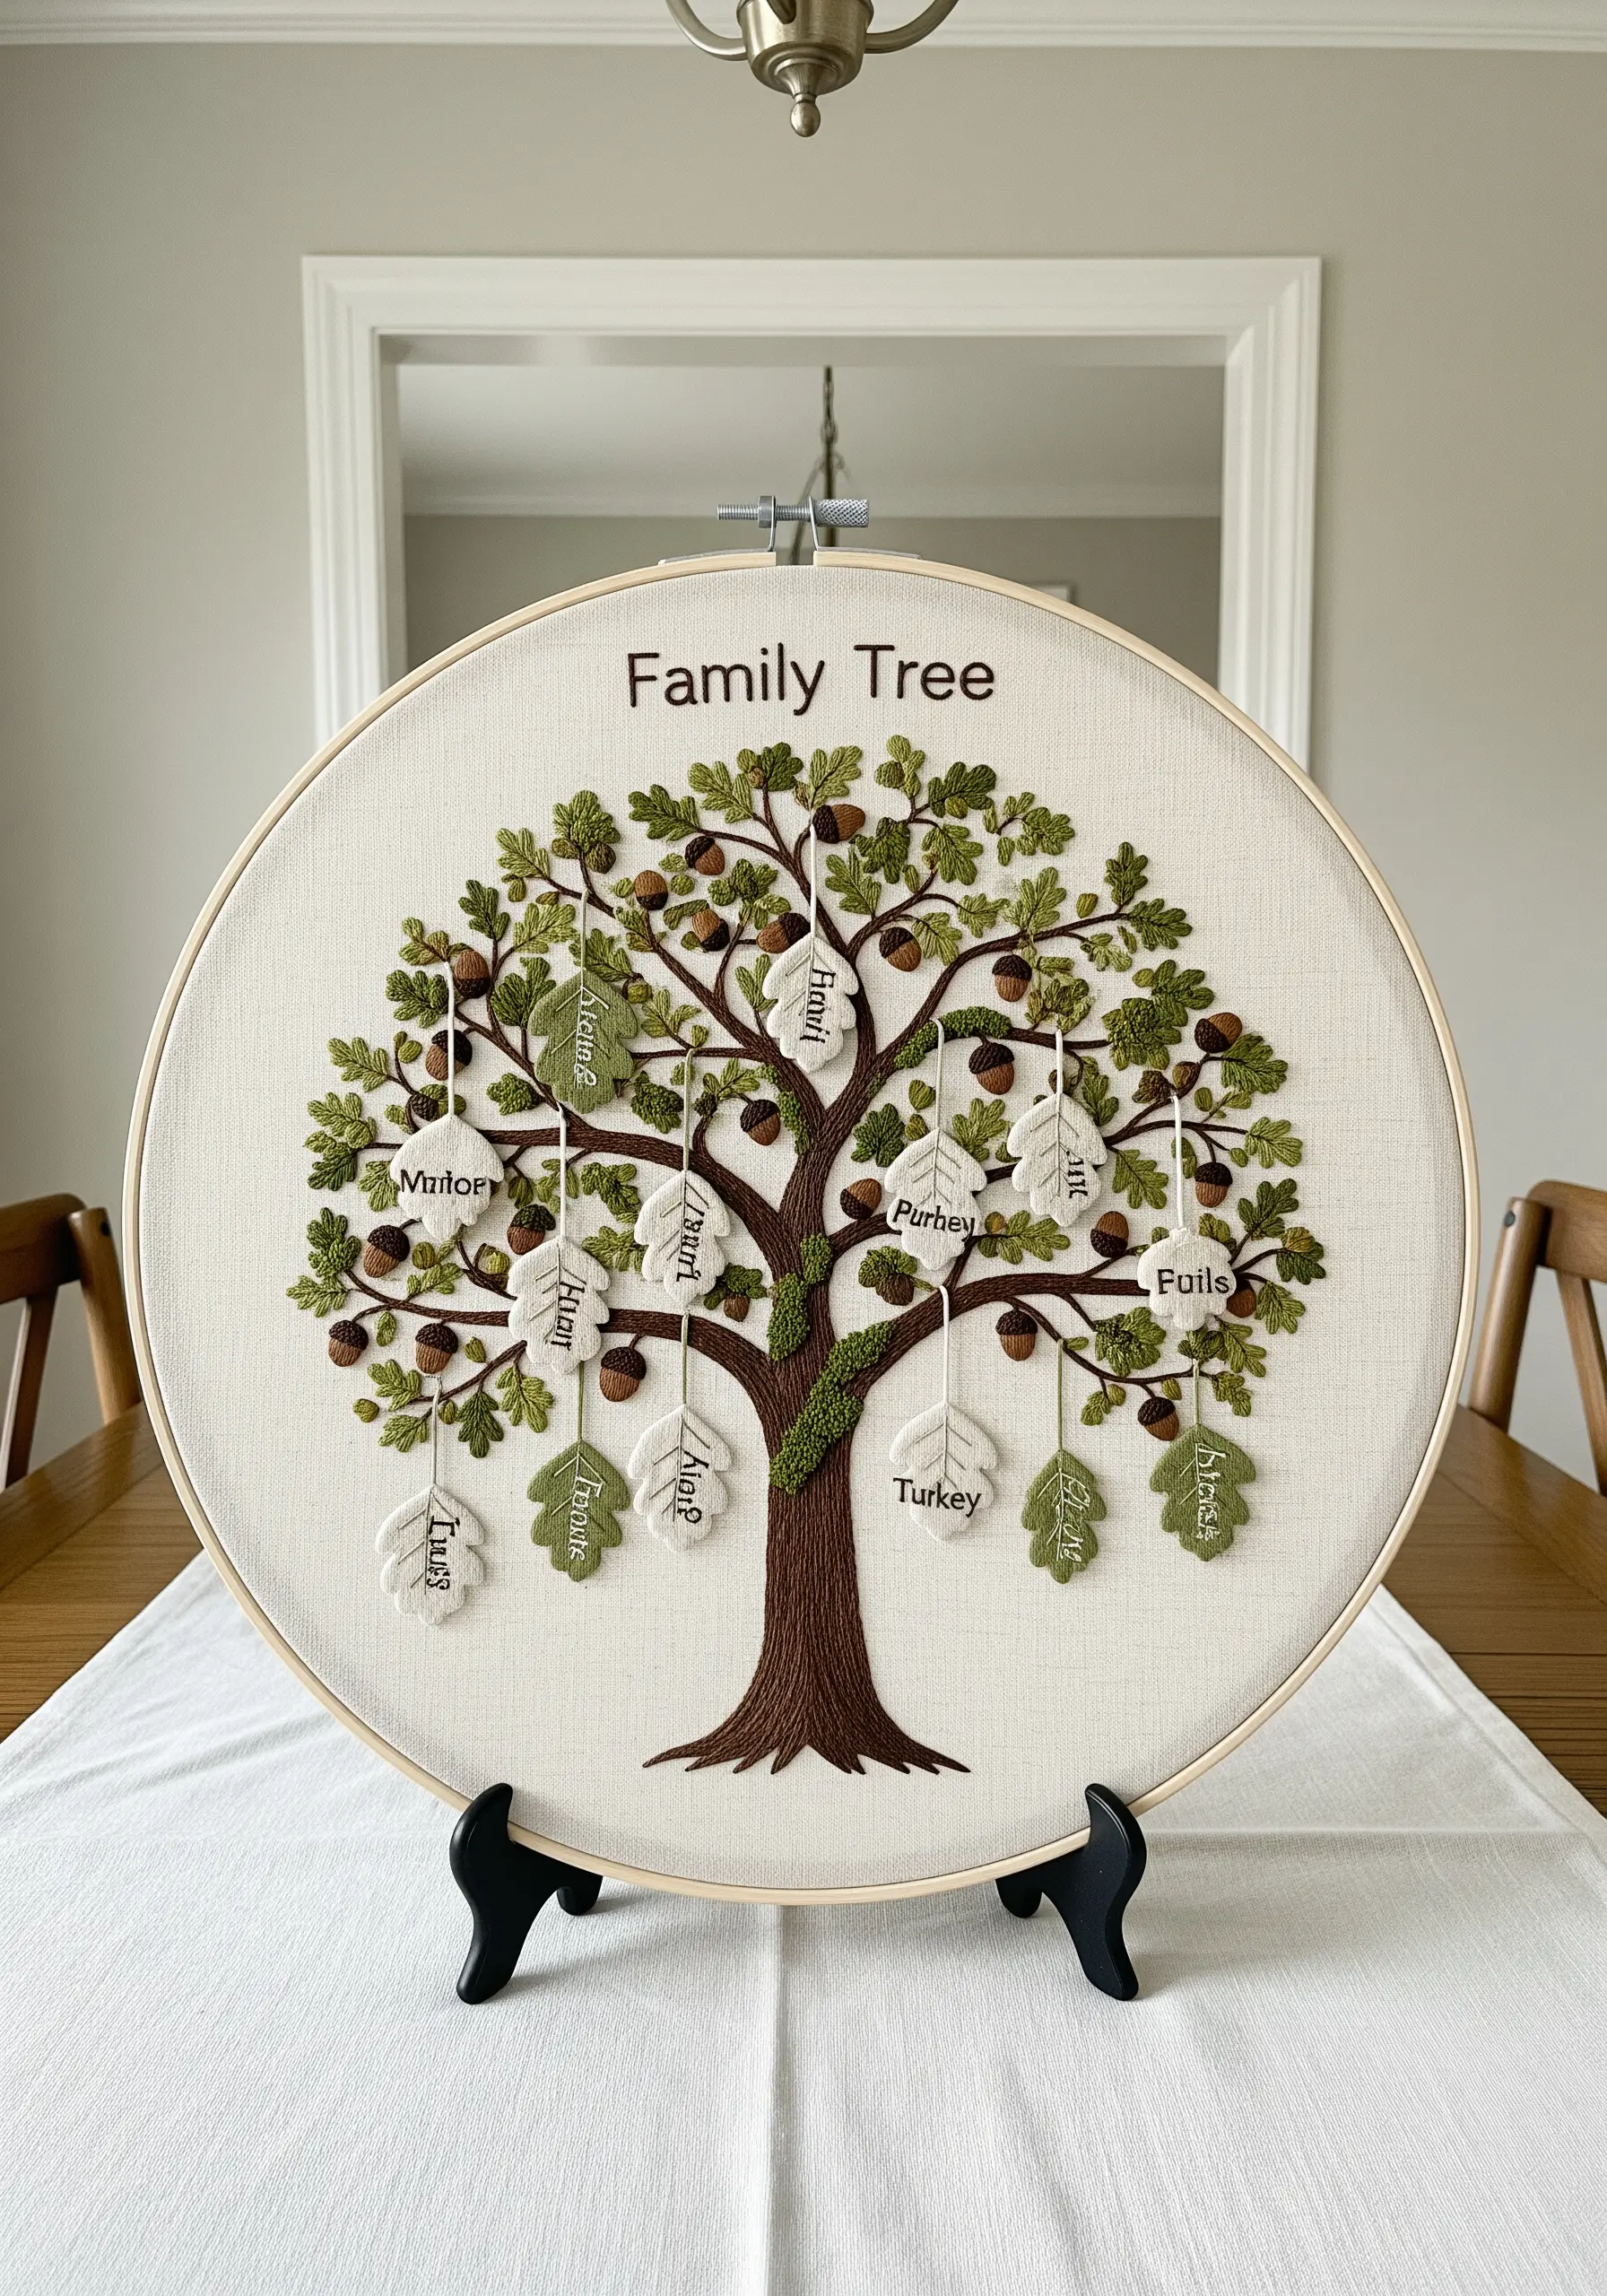
Create a living heirloom by adding three-dimensional elements to a classic family tree embroidery.
Stitch the trunk and branches directly onto the main fabric. For the leaves, embroider names onto separate small pieces of felt or linen.
Cut out each leaf and attach it to a branch with a single, small stitch at the stem, allowing it to hang freely.
This technique adds gentle movement and a beautiful, layered look that makes the piece feel more personal and alive.
15. Paint with Thread on a Quilted Canvas
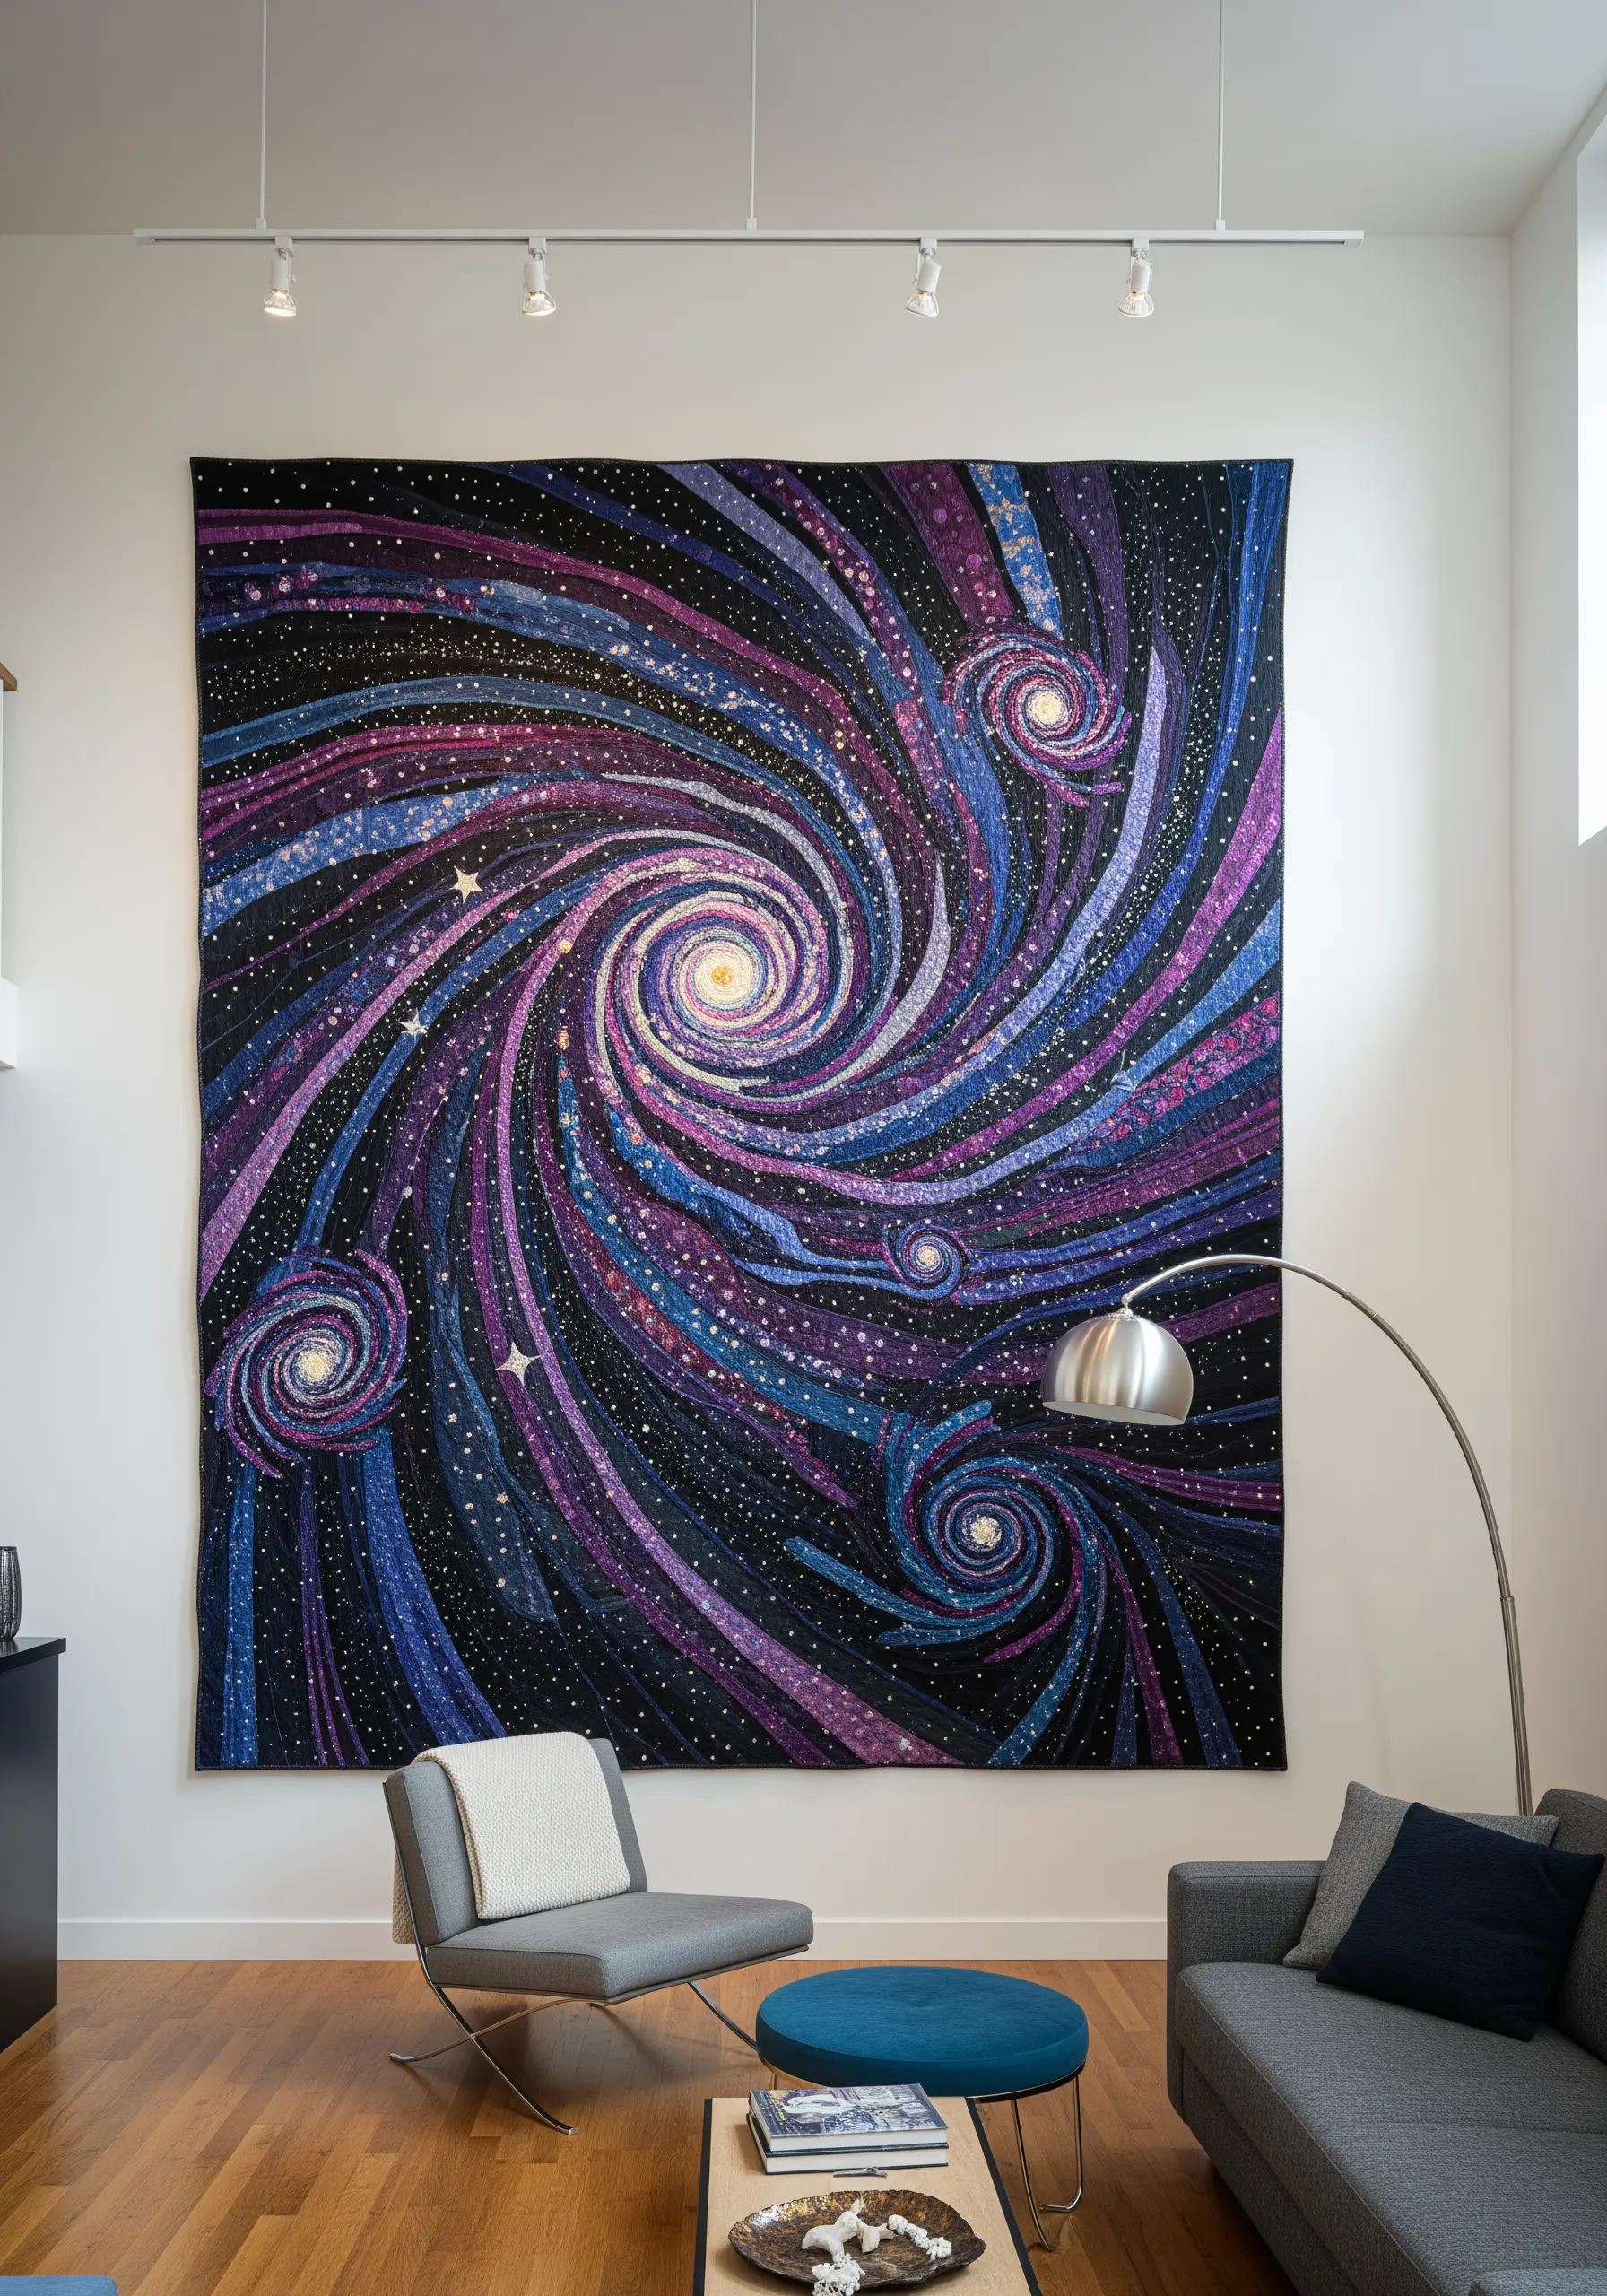
Use a large-scale quilt as the canvas for an immense and impactful piece of thread art.
After piecing together the fabric background, use free-motion machine embroidery or dense hand stitching to add layers of detail and texture.
Create the swirling galactic arms with thousands of tiny stitches in varying shades of purple, blue, and black, blending the fabric pieces together seamlessly.
A scattering of French knots or seed stitches using white or metallic thread will mimic distant stars and add a final layer of sparkle.
16. Achieve an Engraved Look with Stitched Leather
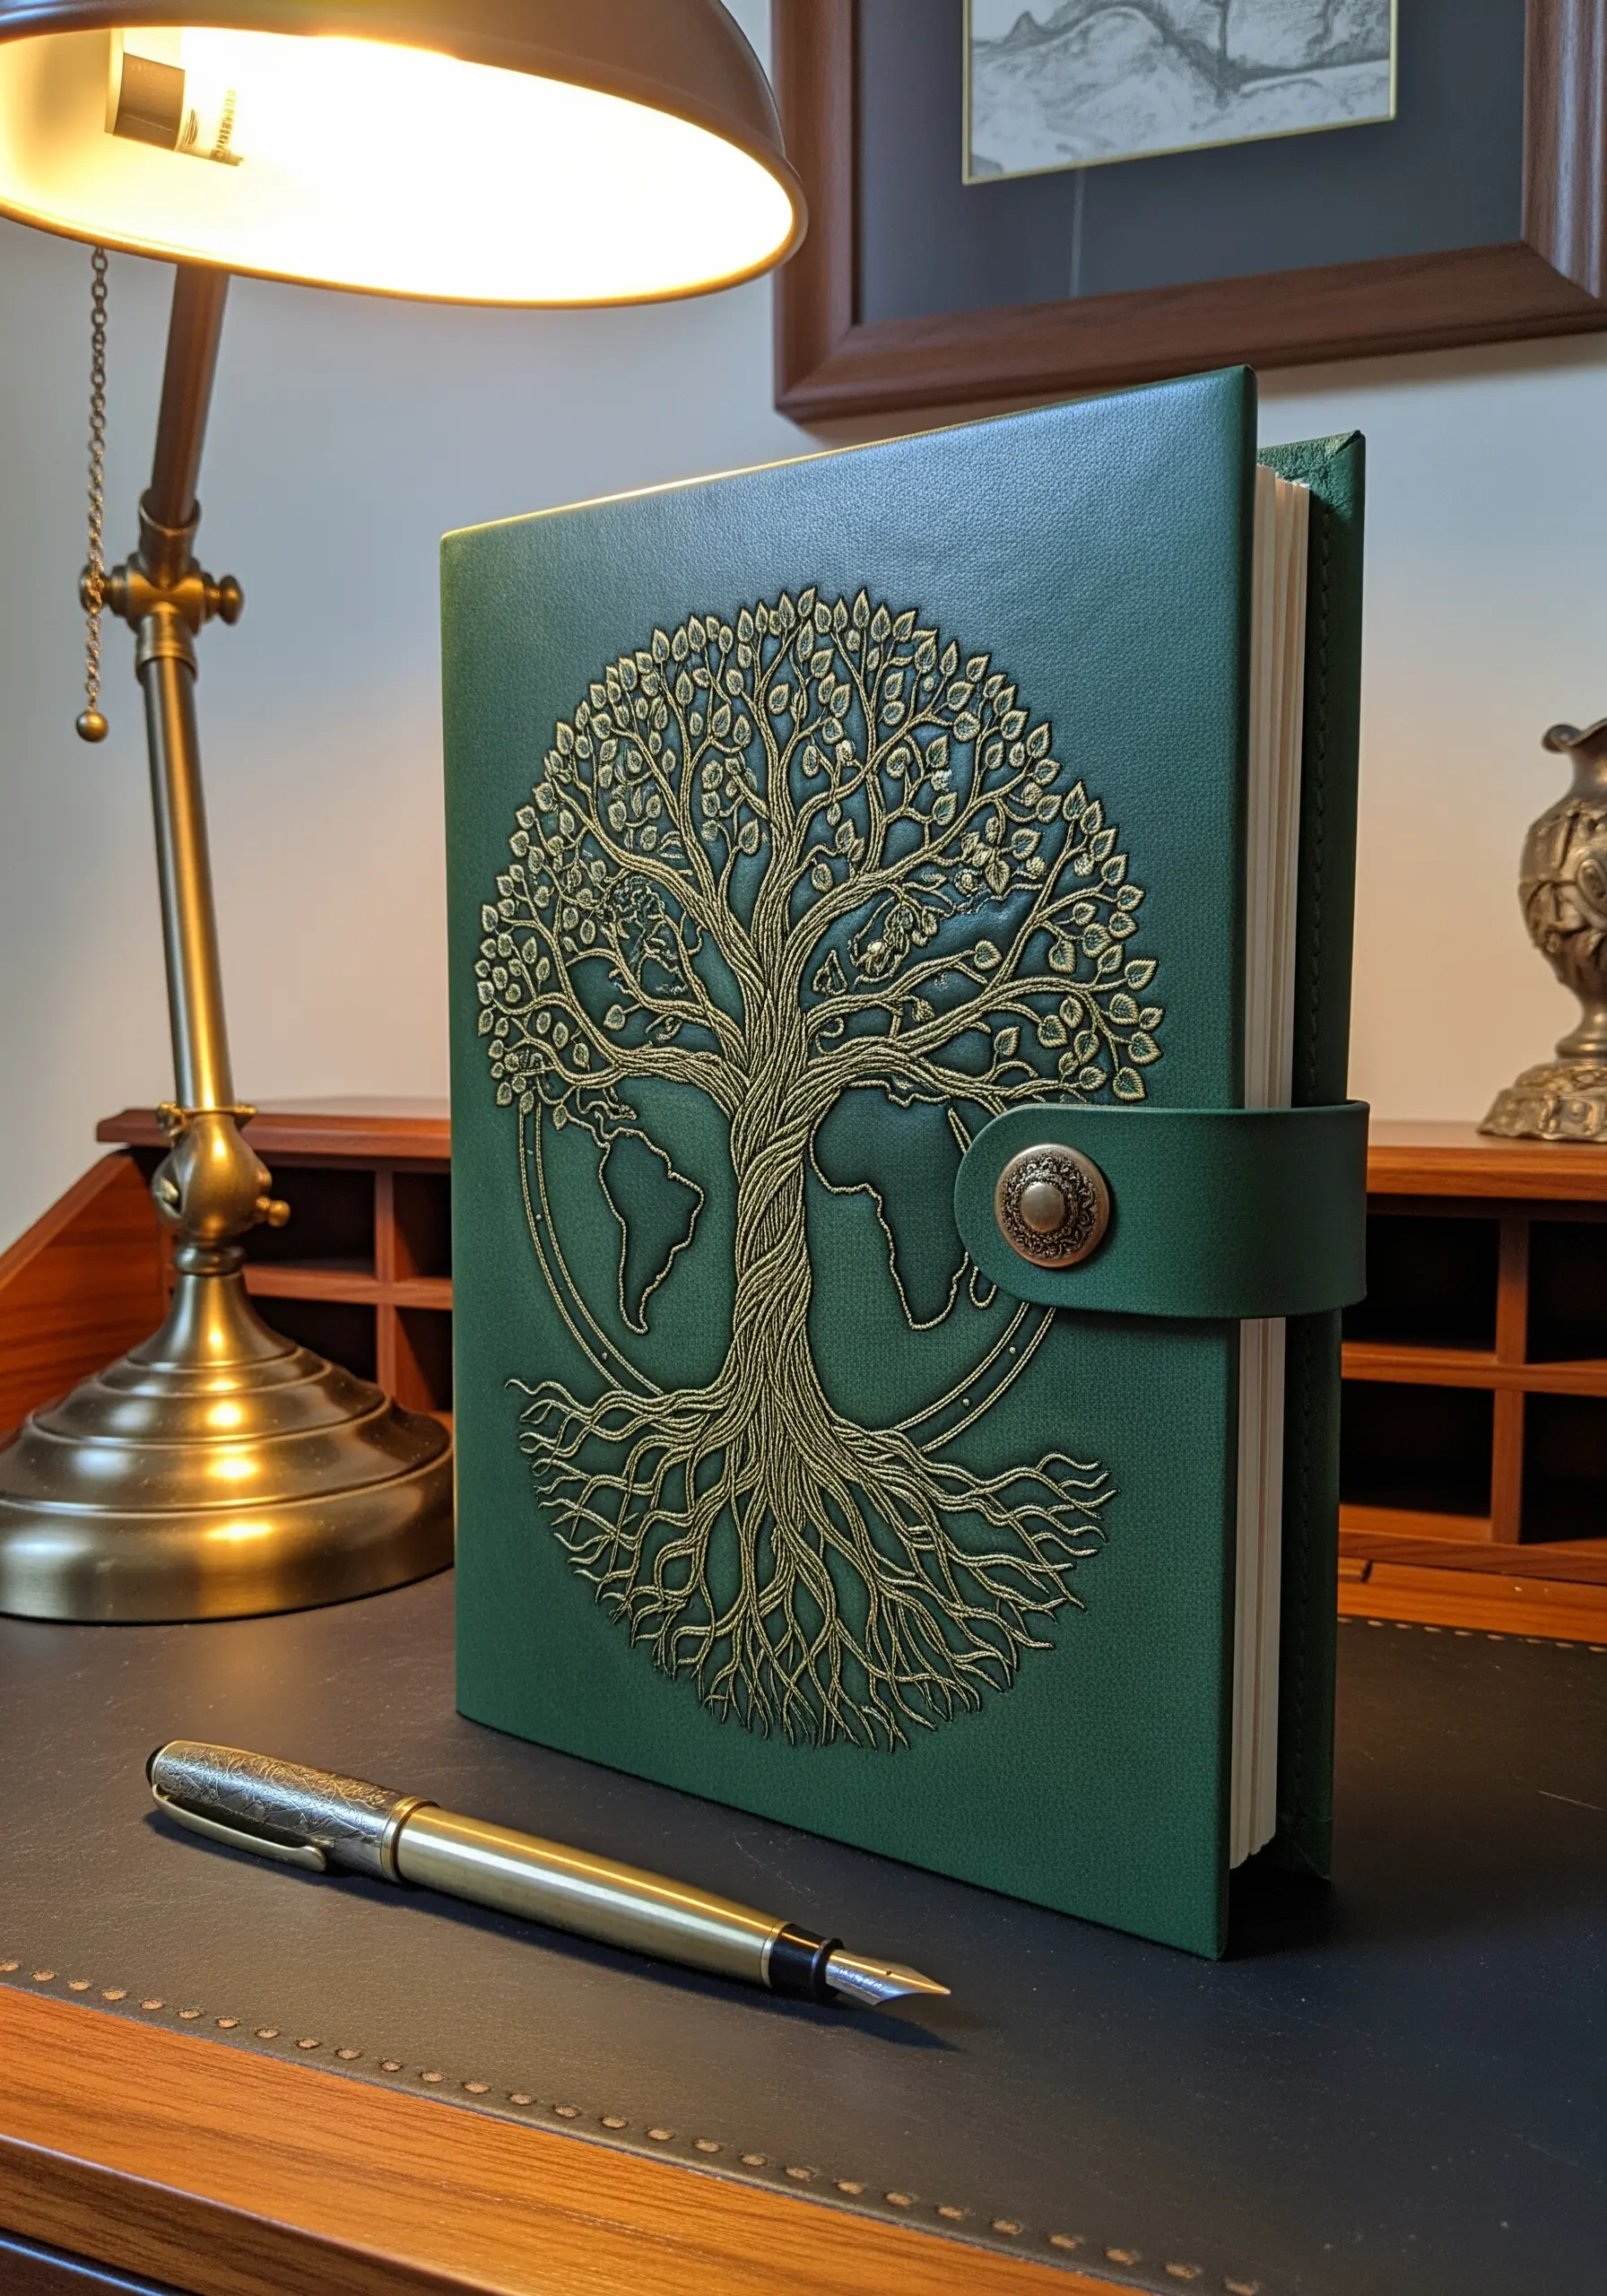
Mimic the appearance of intricate leather tooling using a needle and thread.
Instead of stitching directly through the leather, which can cause tearing, use a sharp awl to pre-punch holes along your design lines.
Then, use a strong, waxed thread and a blunt tapestry needle to stitch through the holes with a simple backstitch or running stitch.
This technique gives you clean, defined lines and a debossed effect, creating a durable and highly detailed design on a journal cover or other leather goods.
17. Compose Abstract Art with Thread and Wood
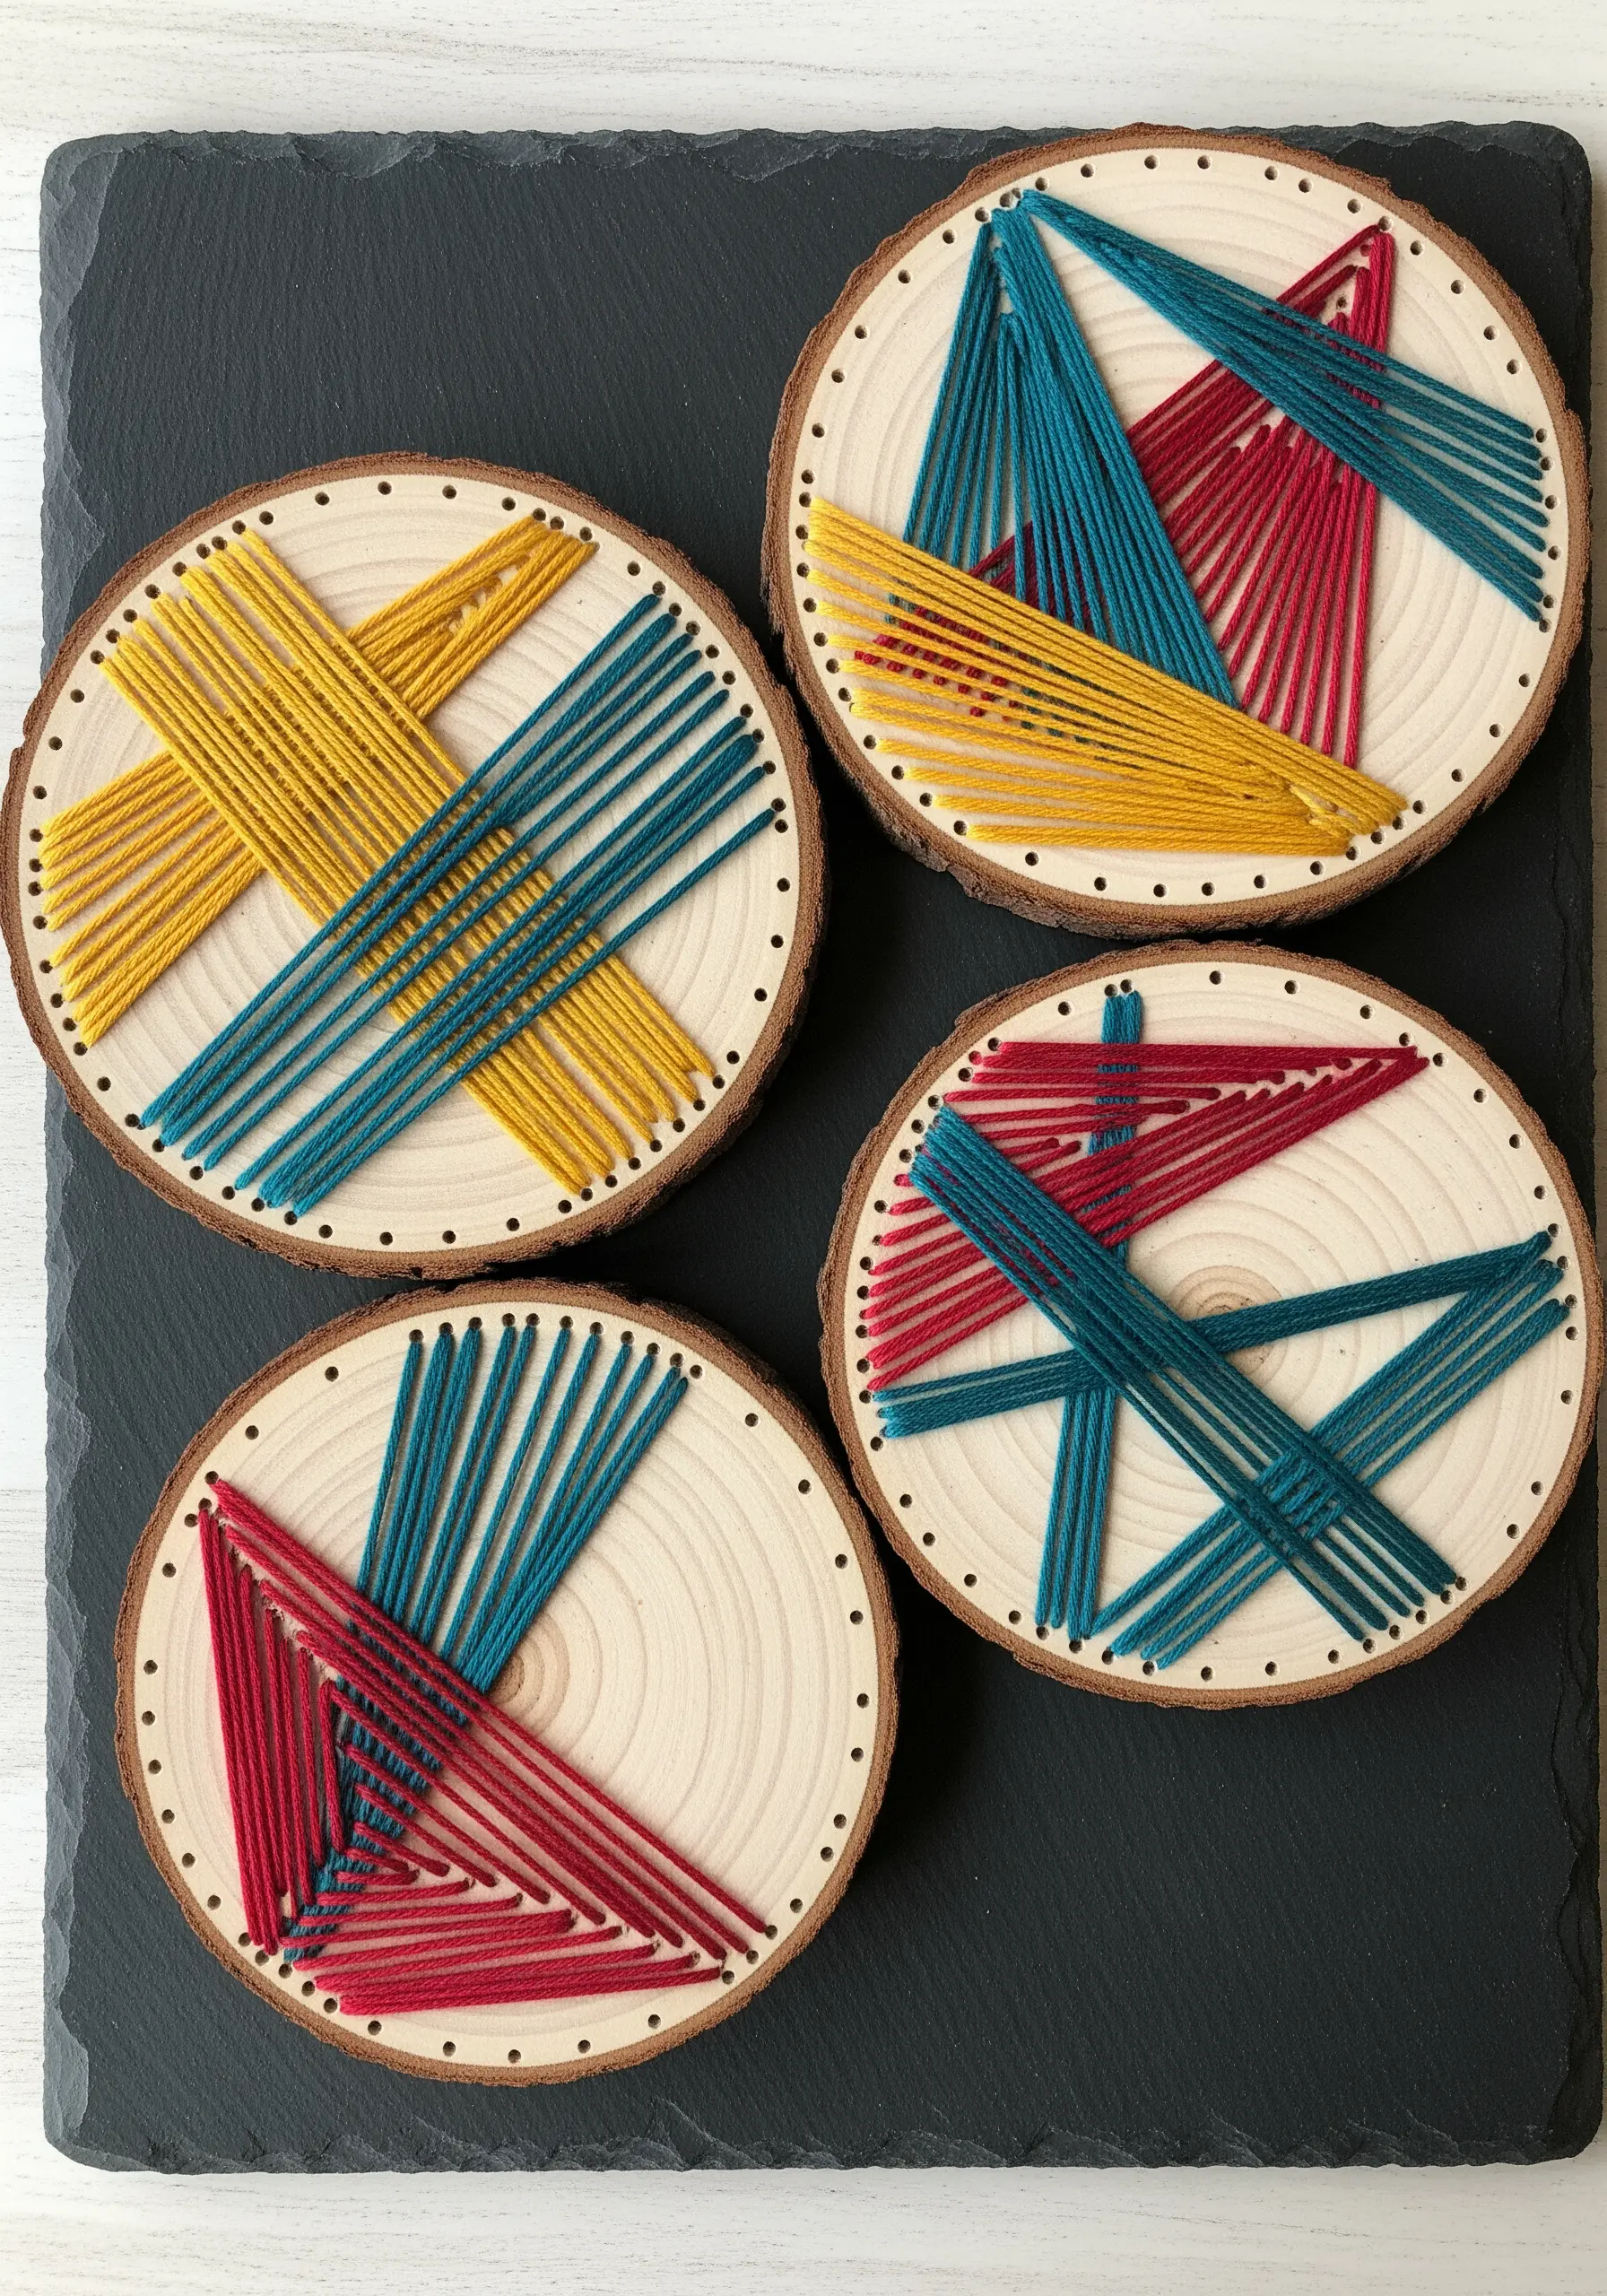
Explore color, line, and tension by creating geometric string art on natural wood slices.
Plan your design by lightly marking where you will place your anchor points—small nails or pins—around the edge of the wood.
Create overlapping planes of color by wrapping your thread from one side of the design to the other in straight, taut lines.
The beauty of minimalist string art comes from the precise geometry and the way the threads interact to create new shapes and patterns in the negative space.
18. Sculpt with Stitched and Layered Paper
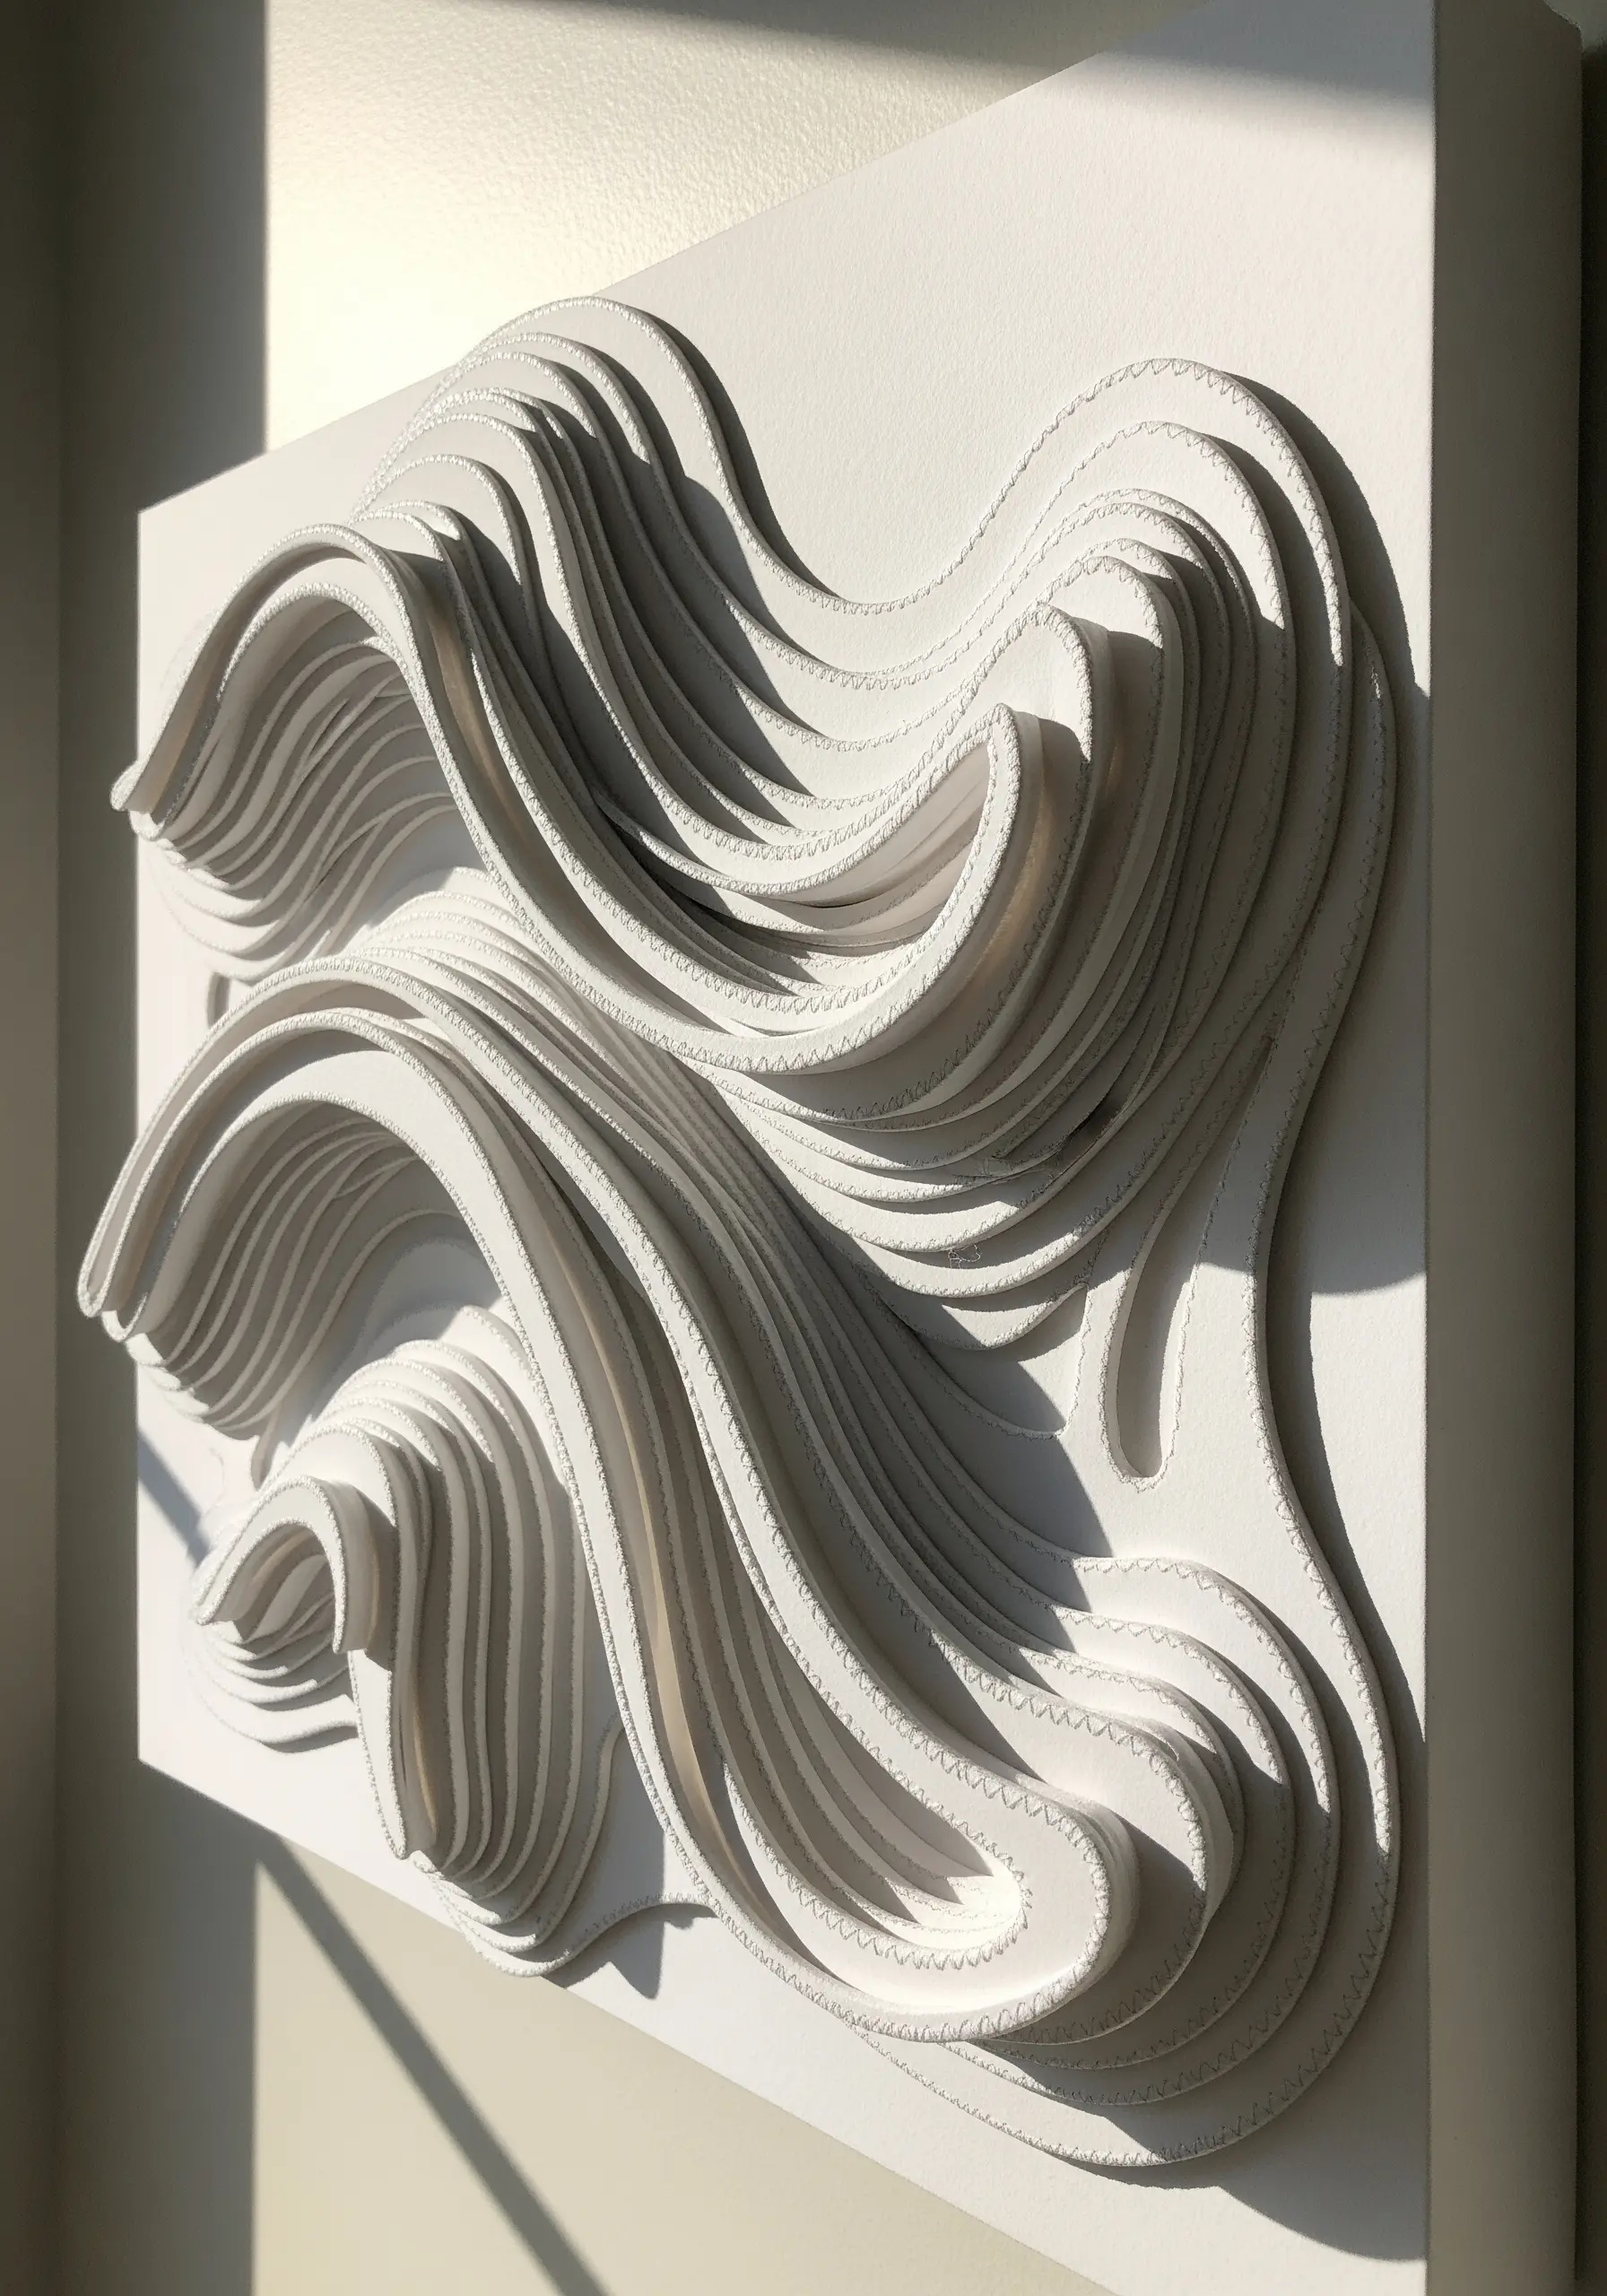
Combine paper craft with simple stitching to build a stunning, low-relief wall sculpture.
Cut multiples of the same organic shape from heavy cardstock or watercolor paper.
Use a simple running stitch along the edges of each paper piece; this not only adds a delicate textural detail but also reinforces the paper.
Layer the stitched pieces on top of one another using small foam spacers to create separation, which produces deep shadows and a powerful sense of movement.
This is a great way to create embroidery paper art with sculptural depth.
19. Map the World with Fabric Appliqué
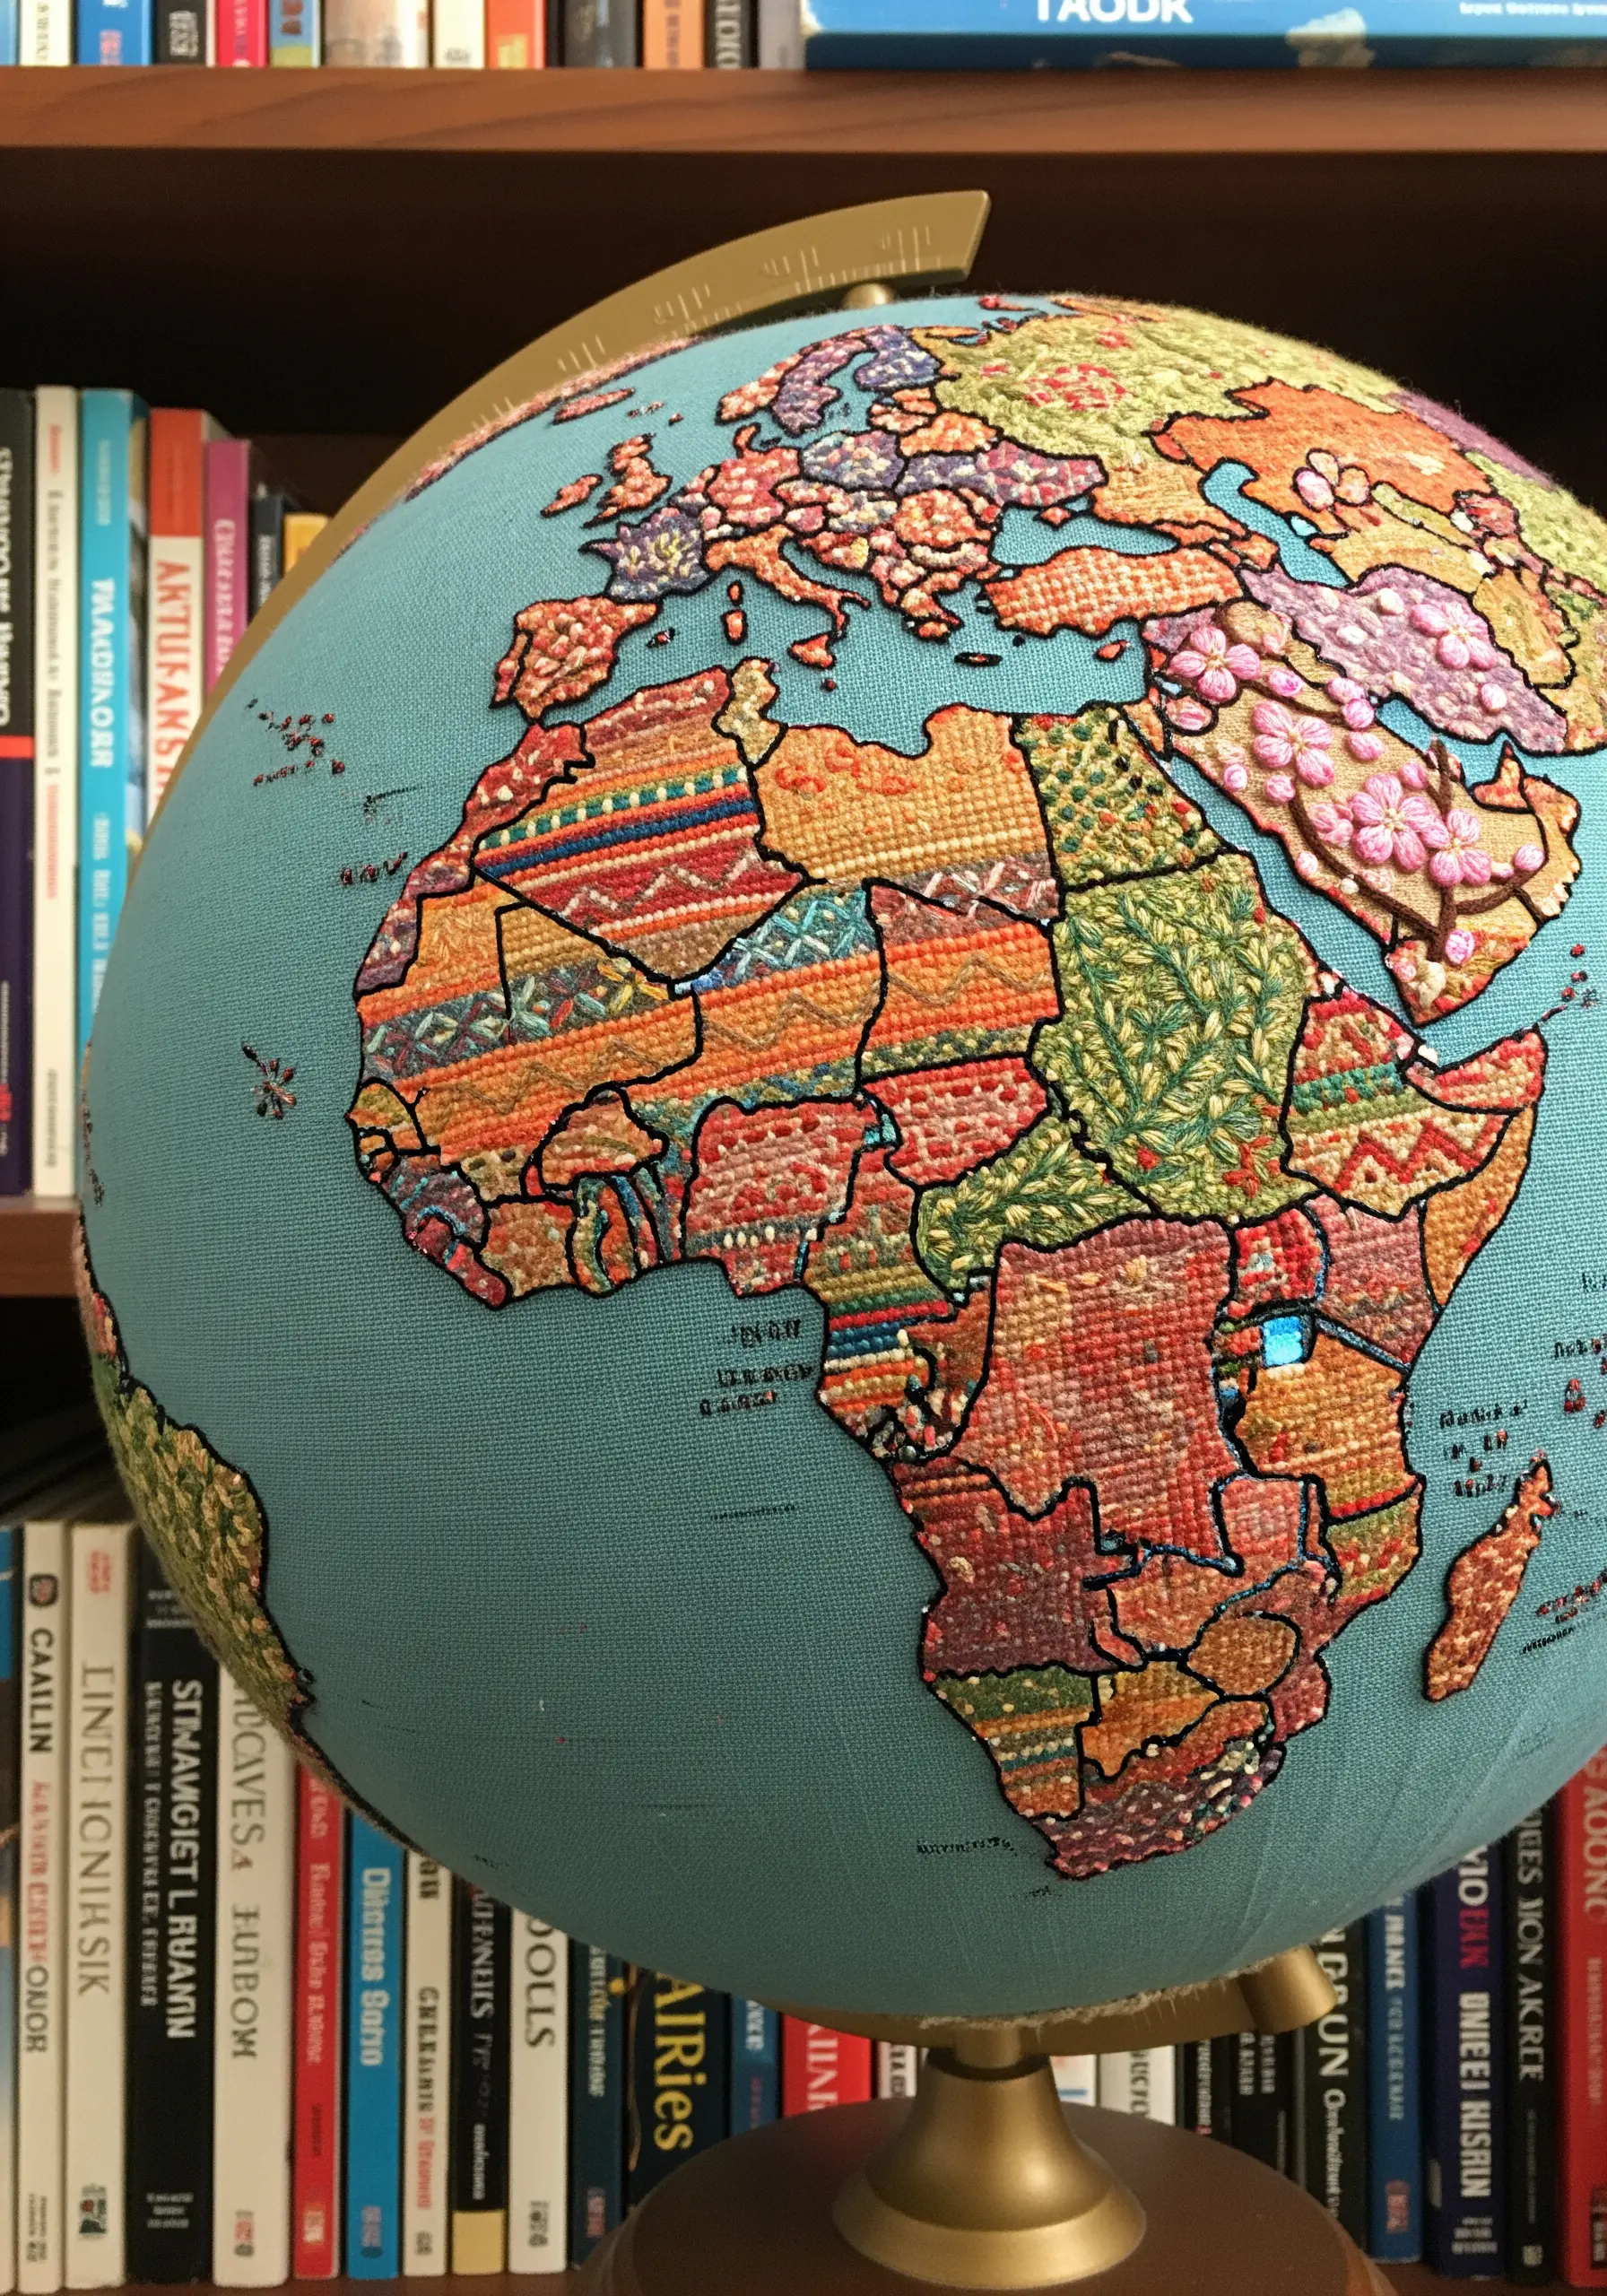
Create a truly unique and personal globe by covering it with tiny, embroidered fabric ‘countries’.
Use a variety of patterned fabrics and embroidery stitches to represent the diverse cultures and landscapes across the globe.
Trace each country’s shape onto your chosen fabric, add your stitched details, and then carefully cut it out.
Apply the finished fabric patches to the globe with a strong fabric glue, using a curved needle and thread to add fine black outlines for a clean, cartographic finish.
20. Frame a View with a Mandala Curtain
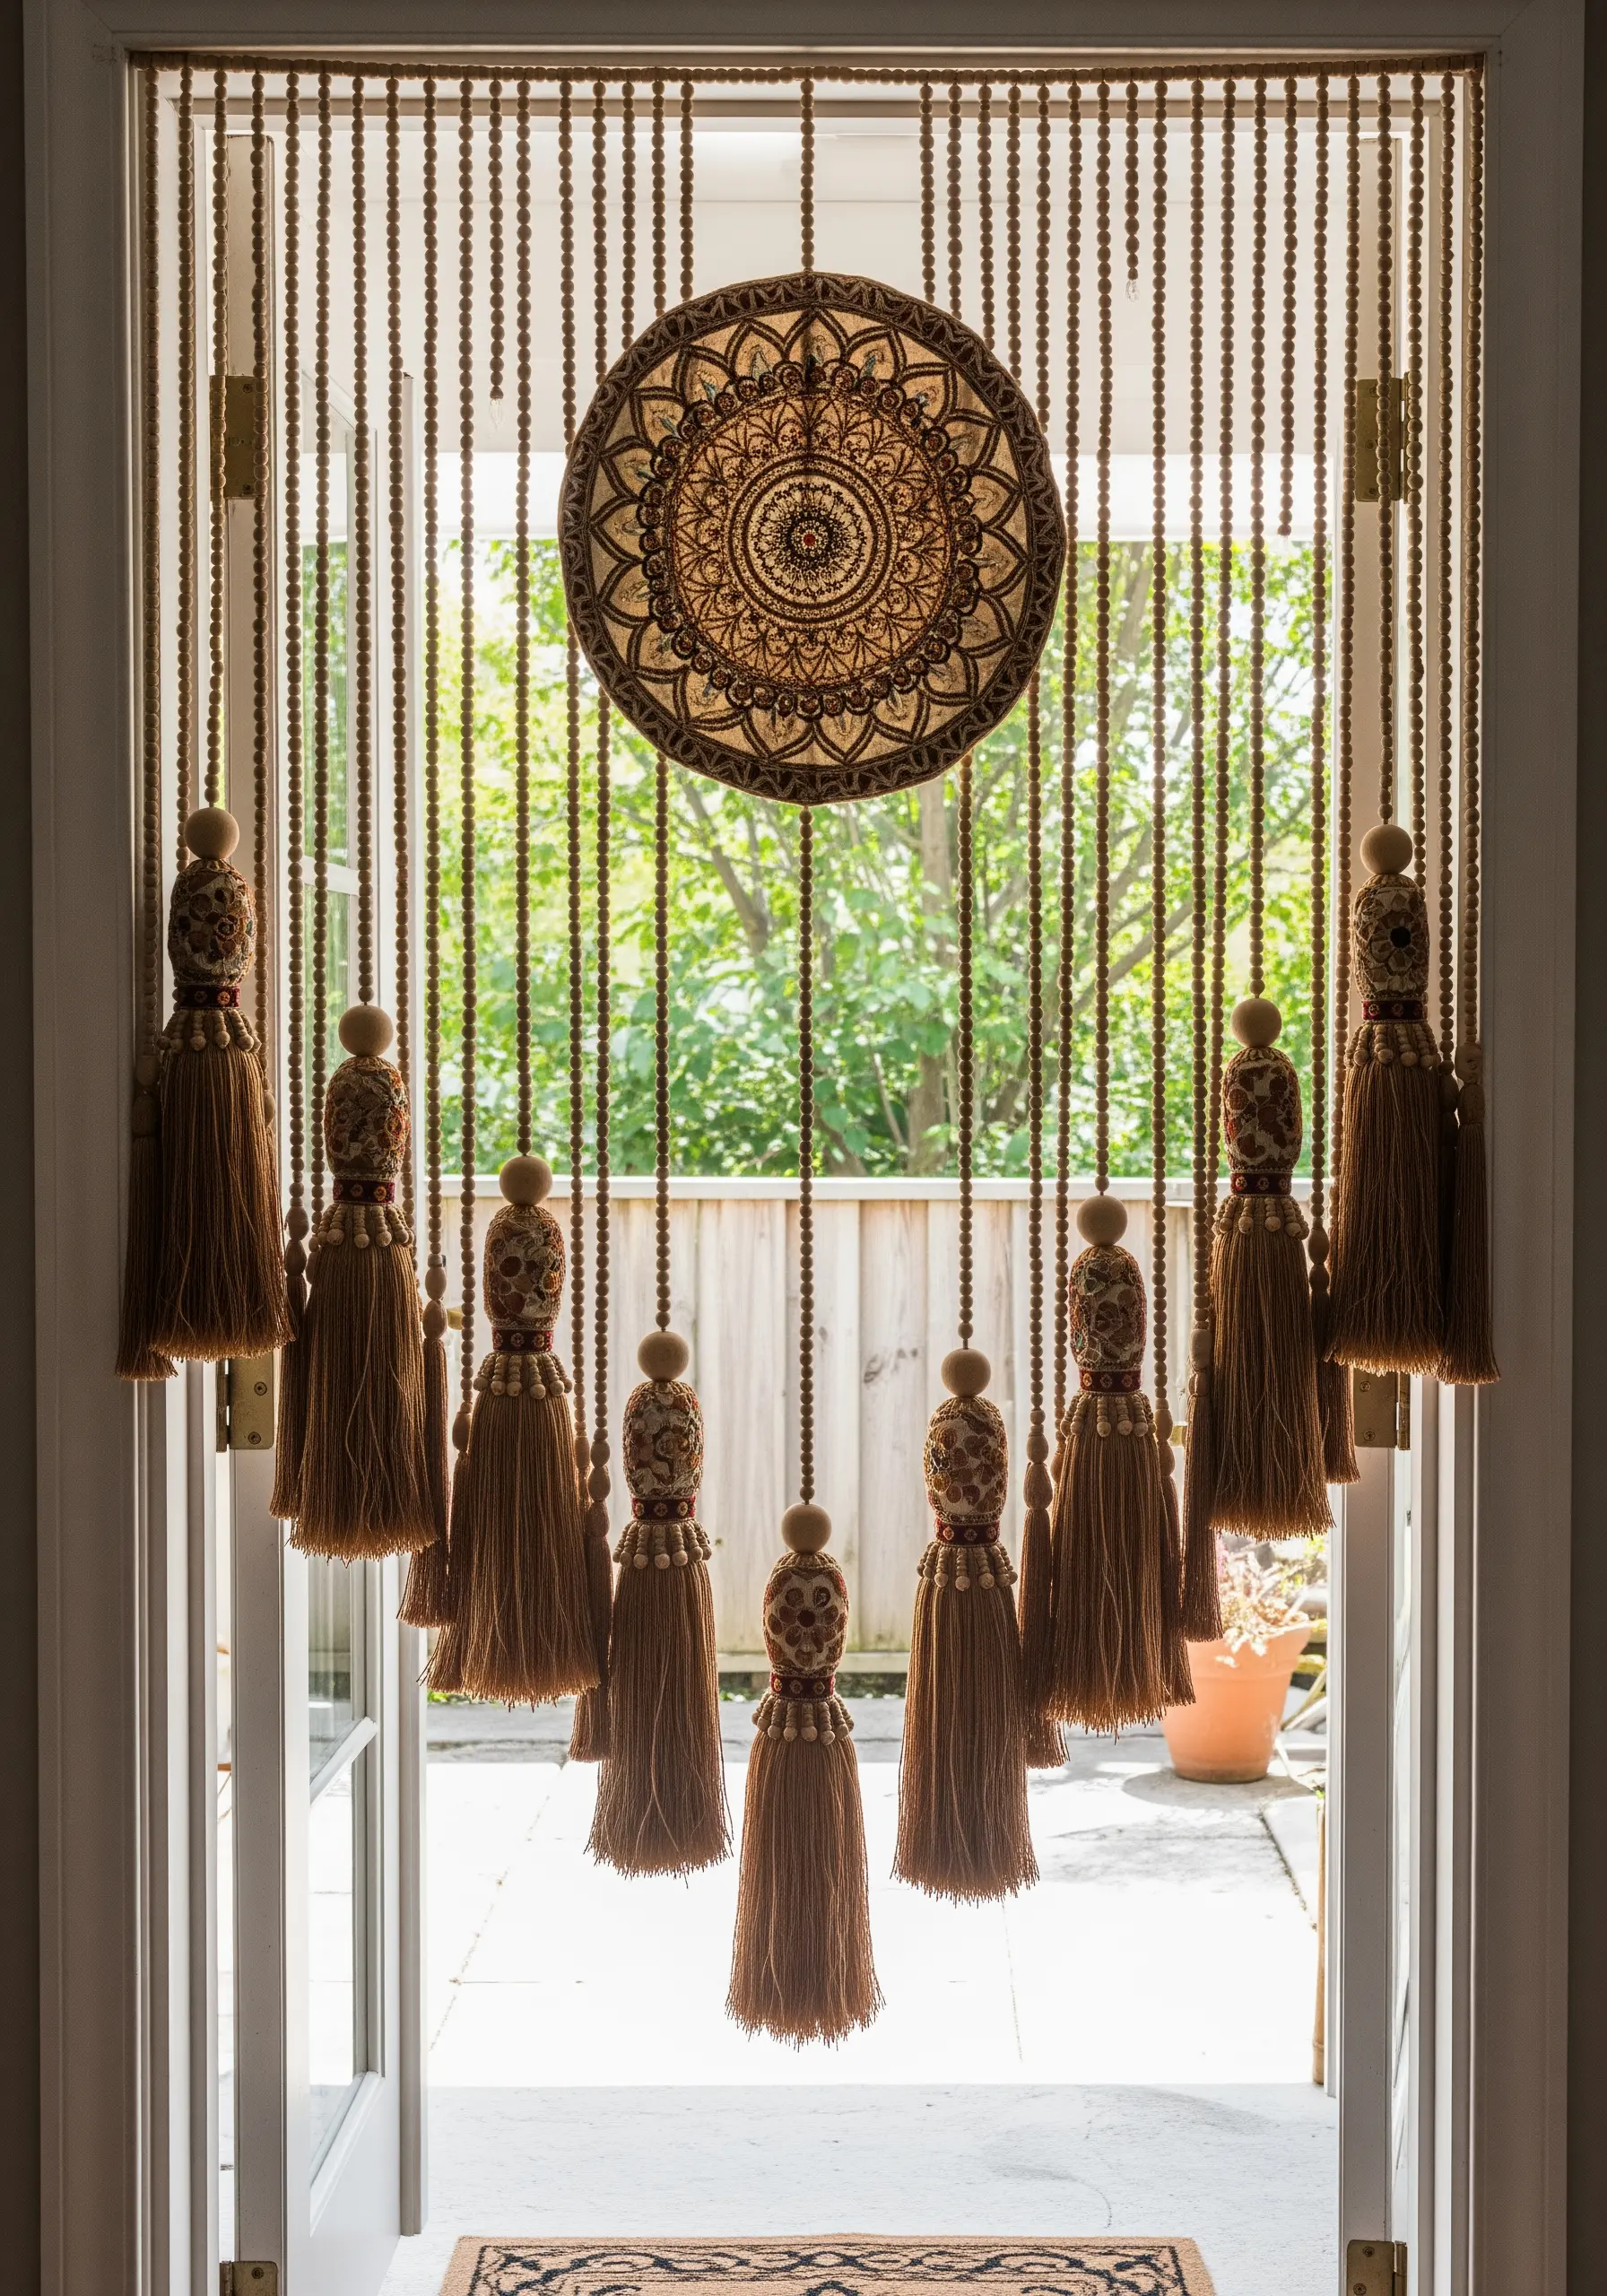
Combine woodworking, beading, and macrame to craft a stunning doorway curtain that serves as a piece of art.
The central element can be a large, thin wooden disc decorated with pyrography (wood burning) or intricate painting.
Create the hanging strands by threading wooden beads onto durable cord, finishing each one with a handmade tassel.
Attaching these strands to a mounting bar allows you to create a functional and beautiful object that filters light and frames the space beyond.
21. Give Felt Sculptures Personality with Stitch
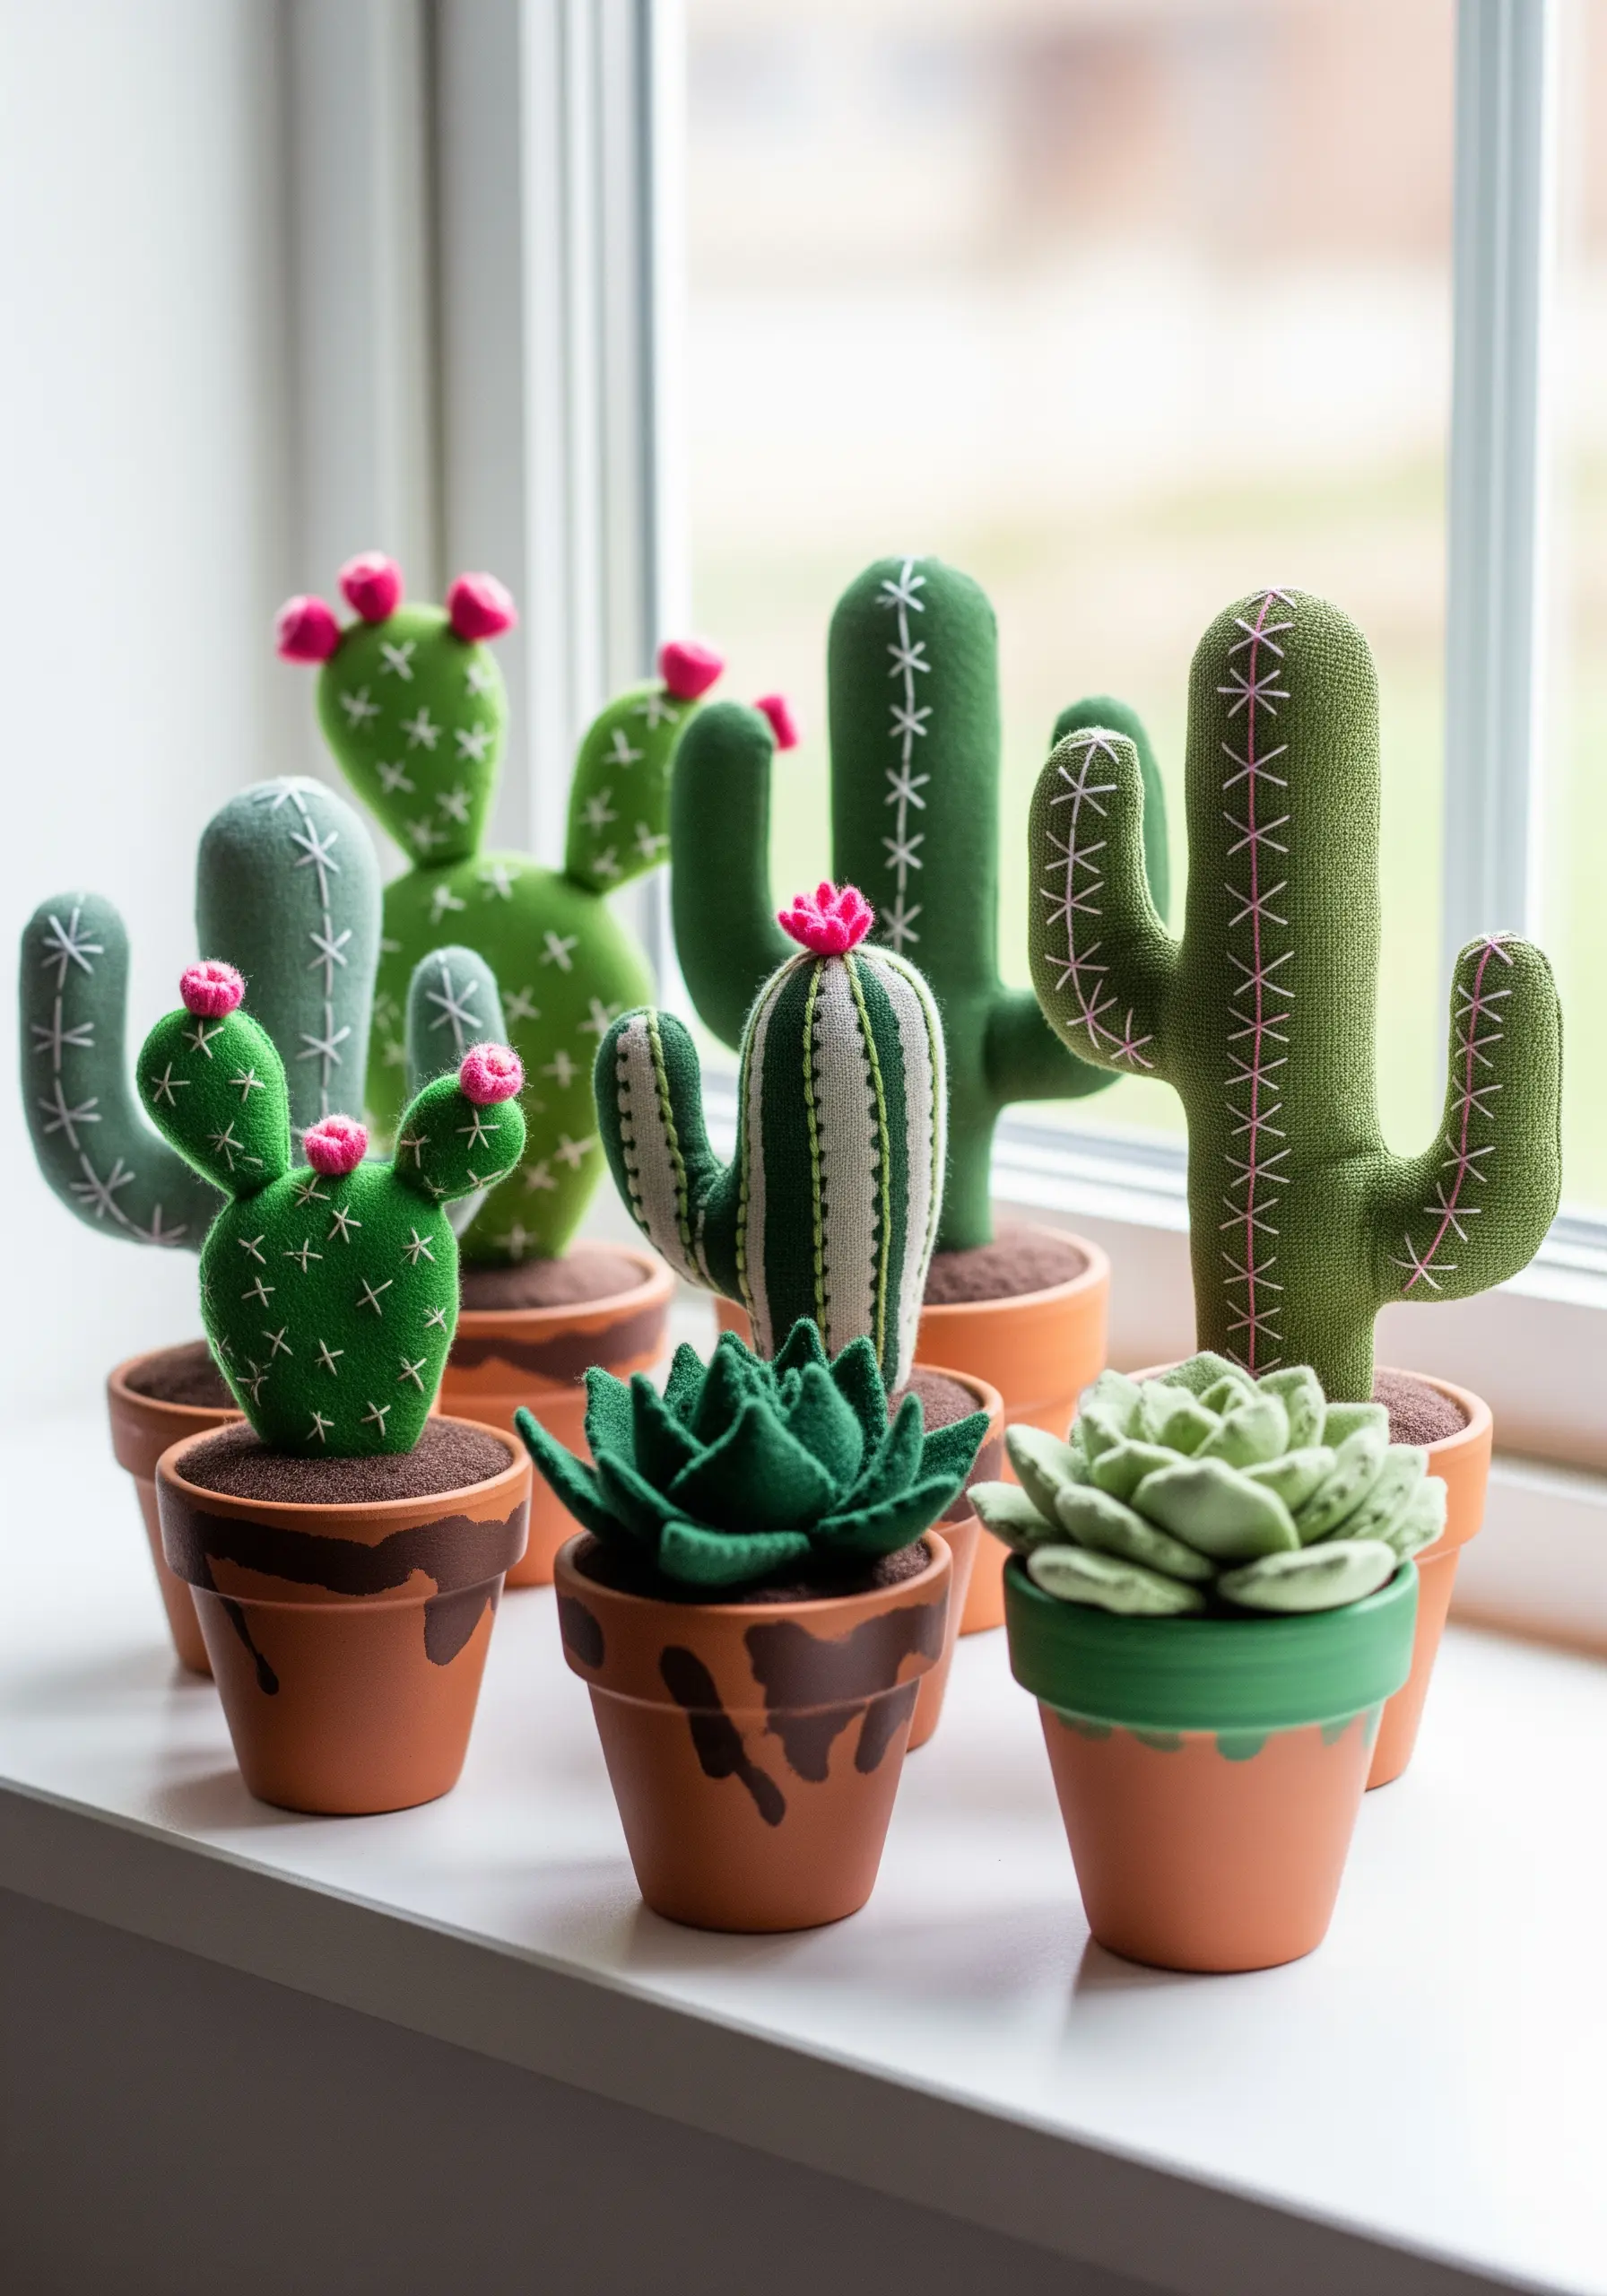
Bring simple felt creations to life with a few well-placed embroidery stitches.
Before you sew your 3D cactus shapes together, embroider the details onto the flat felt pieces—it’s far easier than stitching on a stuffed object.
Use simple stitches to create effective textures: a basic backstitch becomes sharp spines, while small pink French knots make perfect, delicate flowers.
This approach adds a layer of handcrafted charm and transforms simple shapes into characterful sculptures.
22. Create a Painterly Effect with Fabric Appliqué
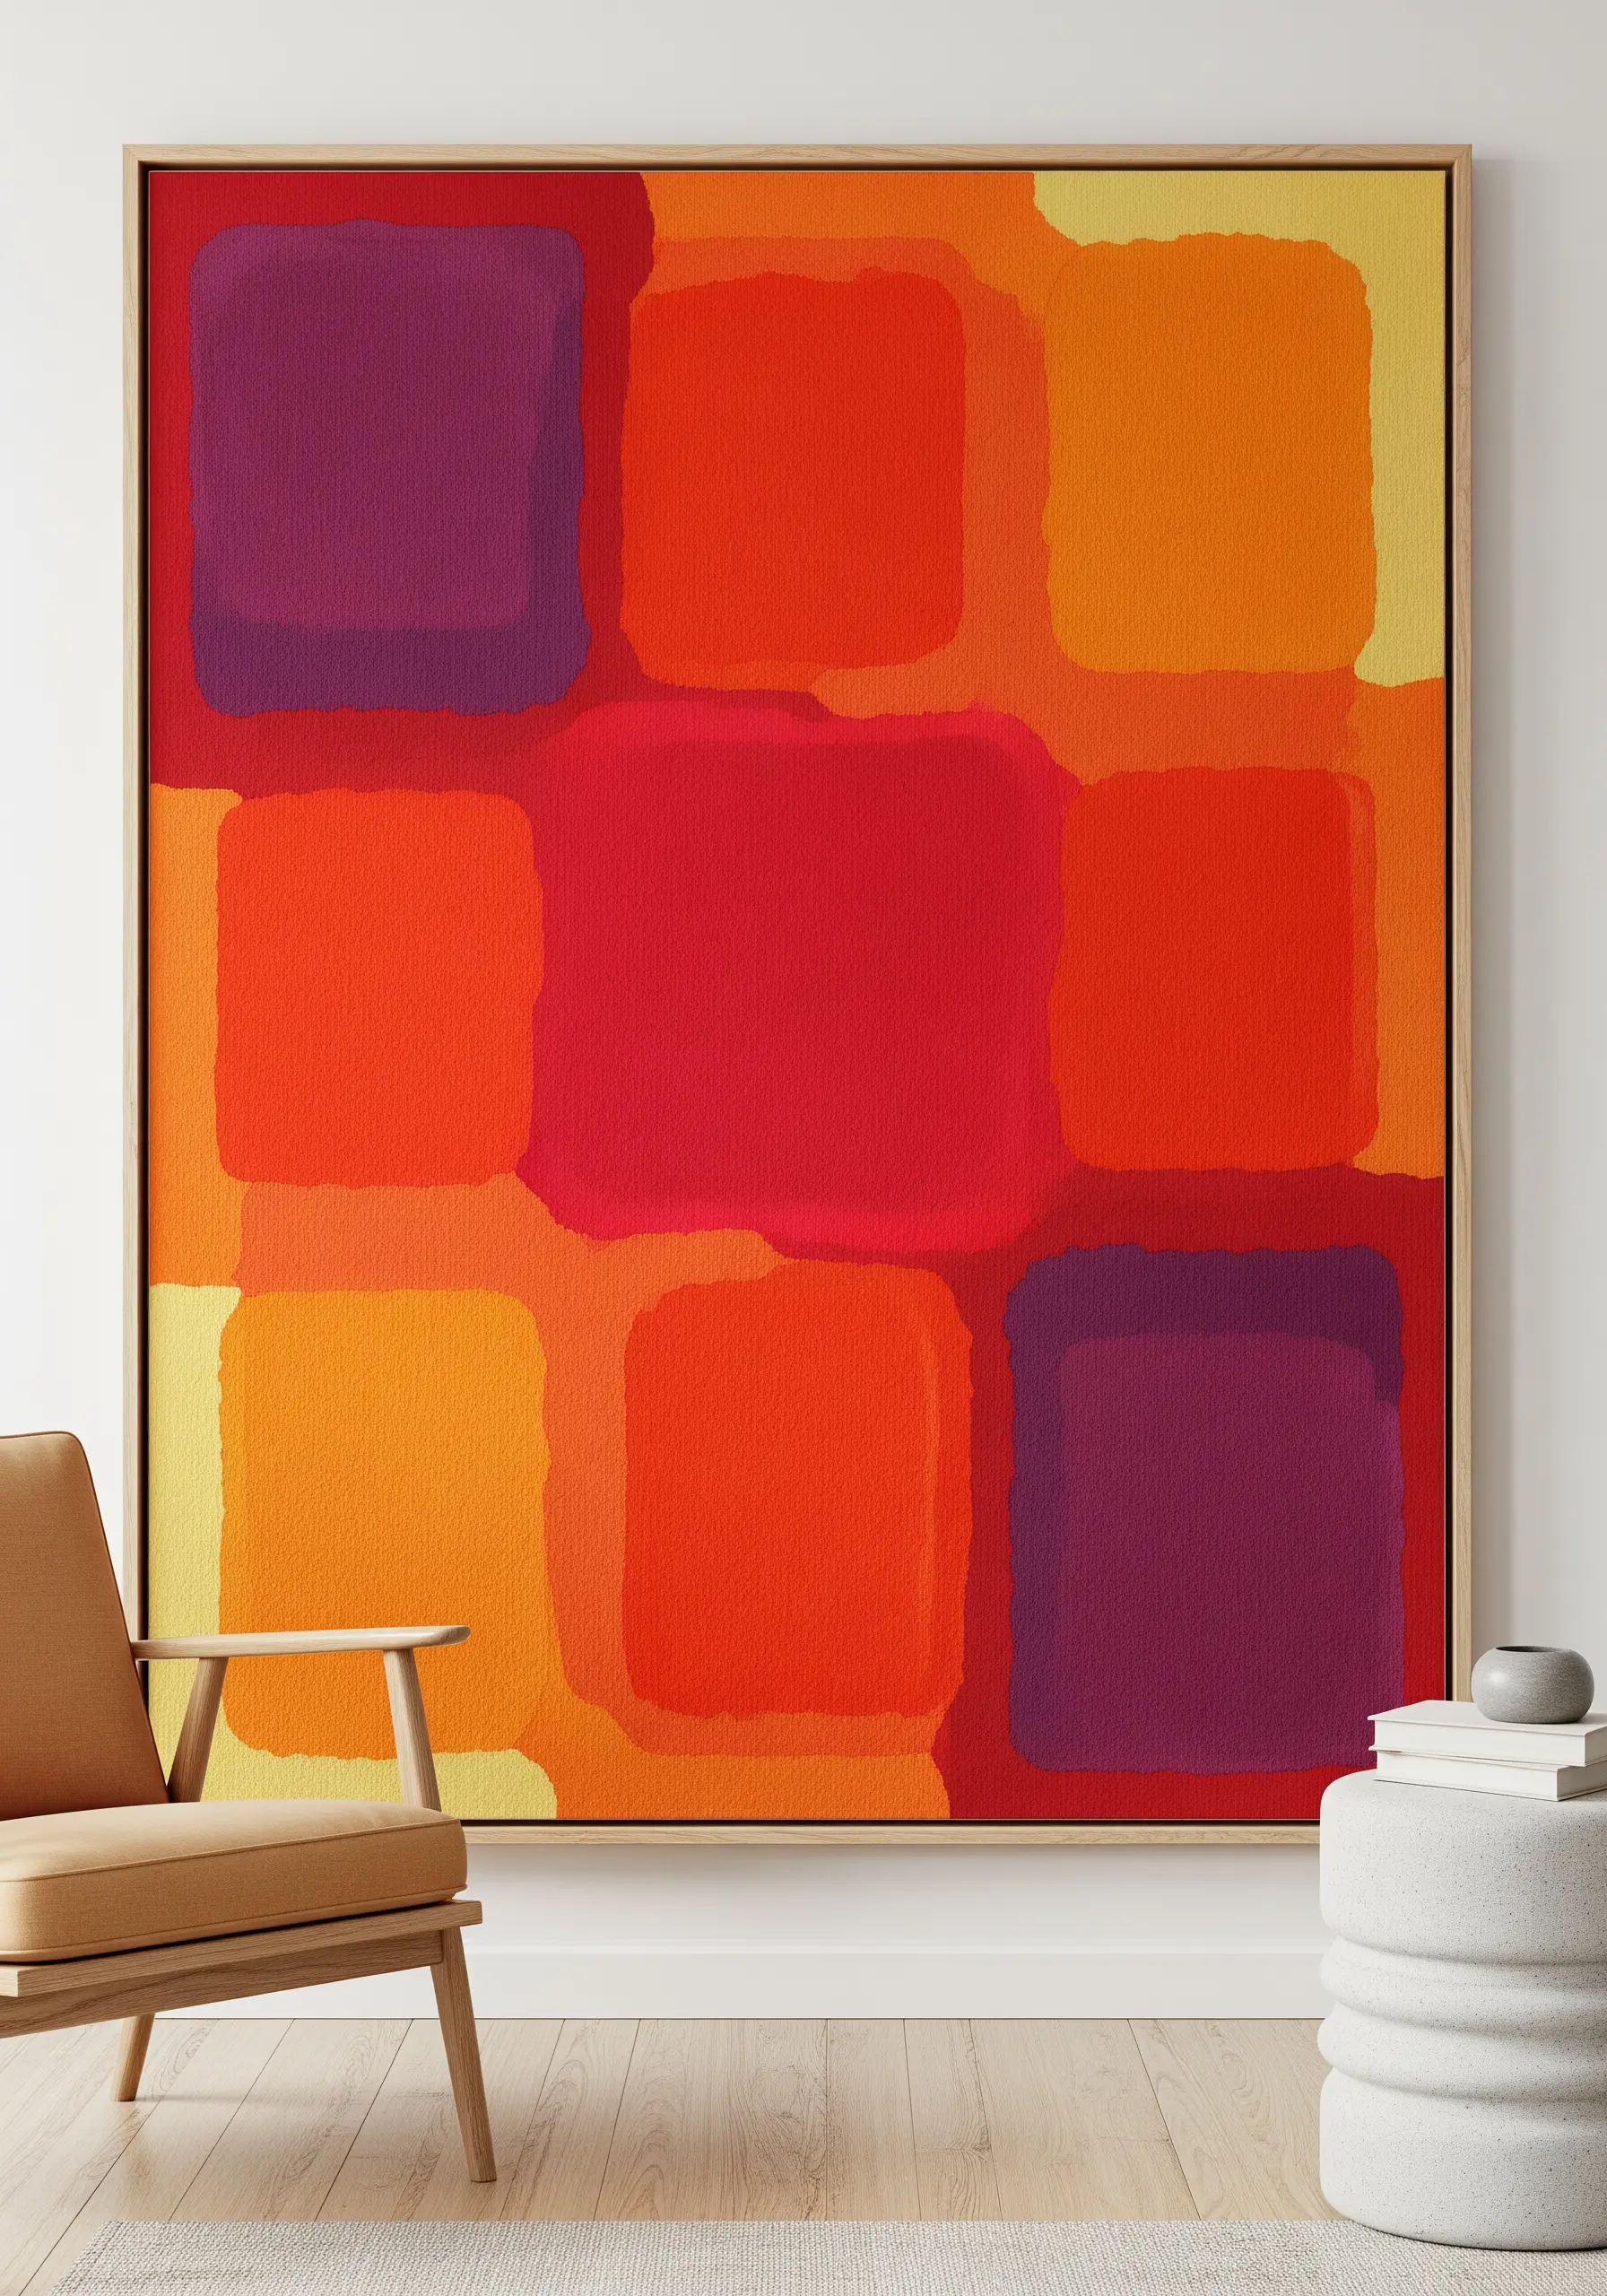
Achieve the soft, blended look of a color field painting using fabric and thread instead of paint.
Cut large, organic shapes from different colors of linen or thin cotton canvas.
Arrange the fabric pieces on a large backing canvas, allowing their edges to slightly overlap. Secure them with an iron-on fusible web.
Use a dense satin stitch or free-motion embroidery along the overlapping edges to blend the shapes together, creating a soft, painterly transition between the color blocks.
23. Render a Fantasy Map with Textural Stitches
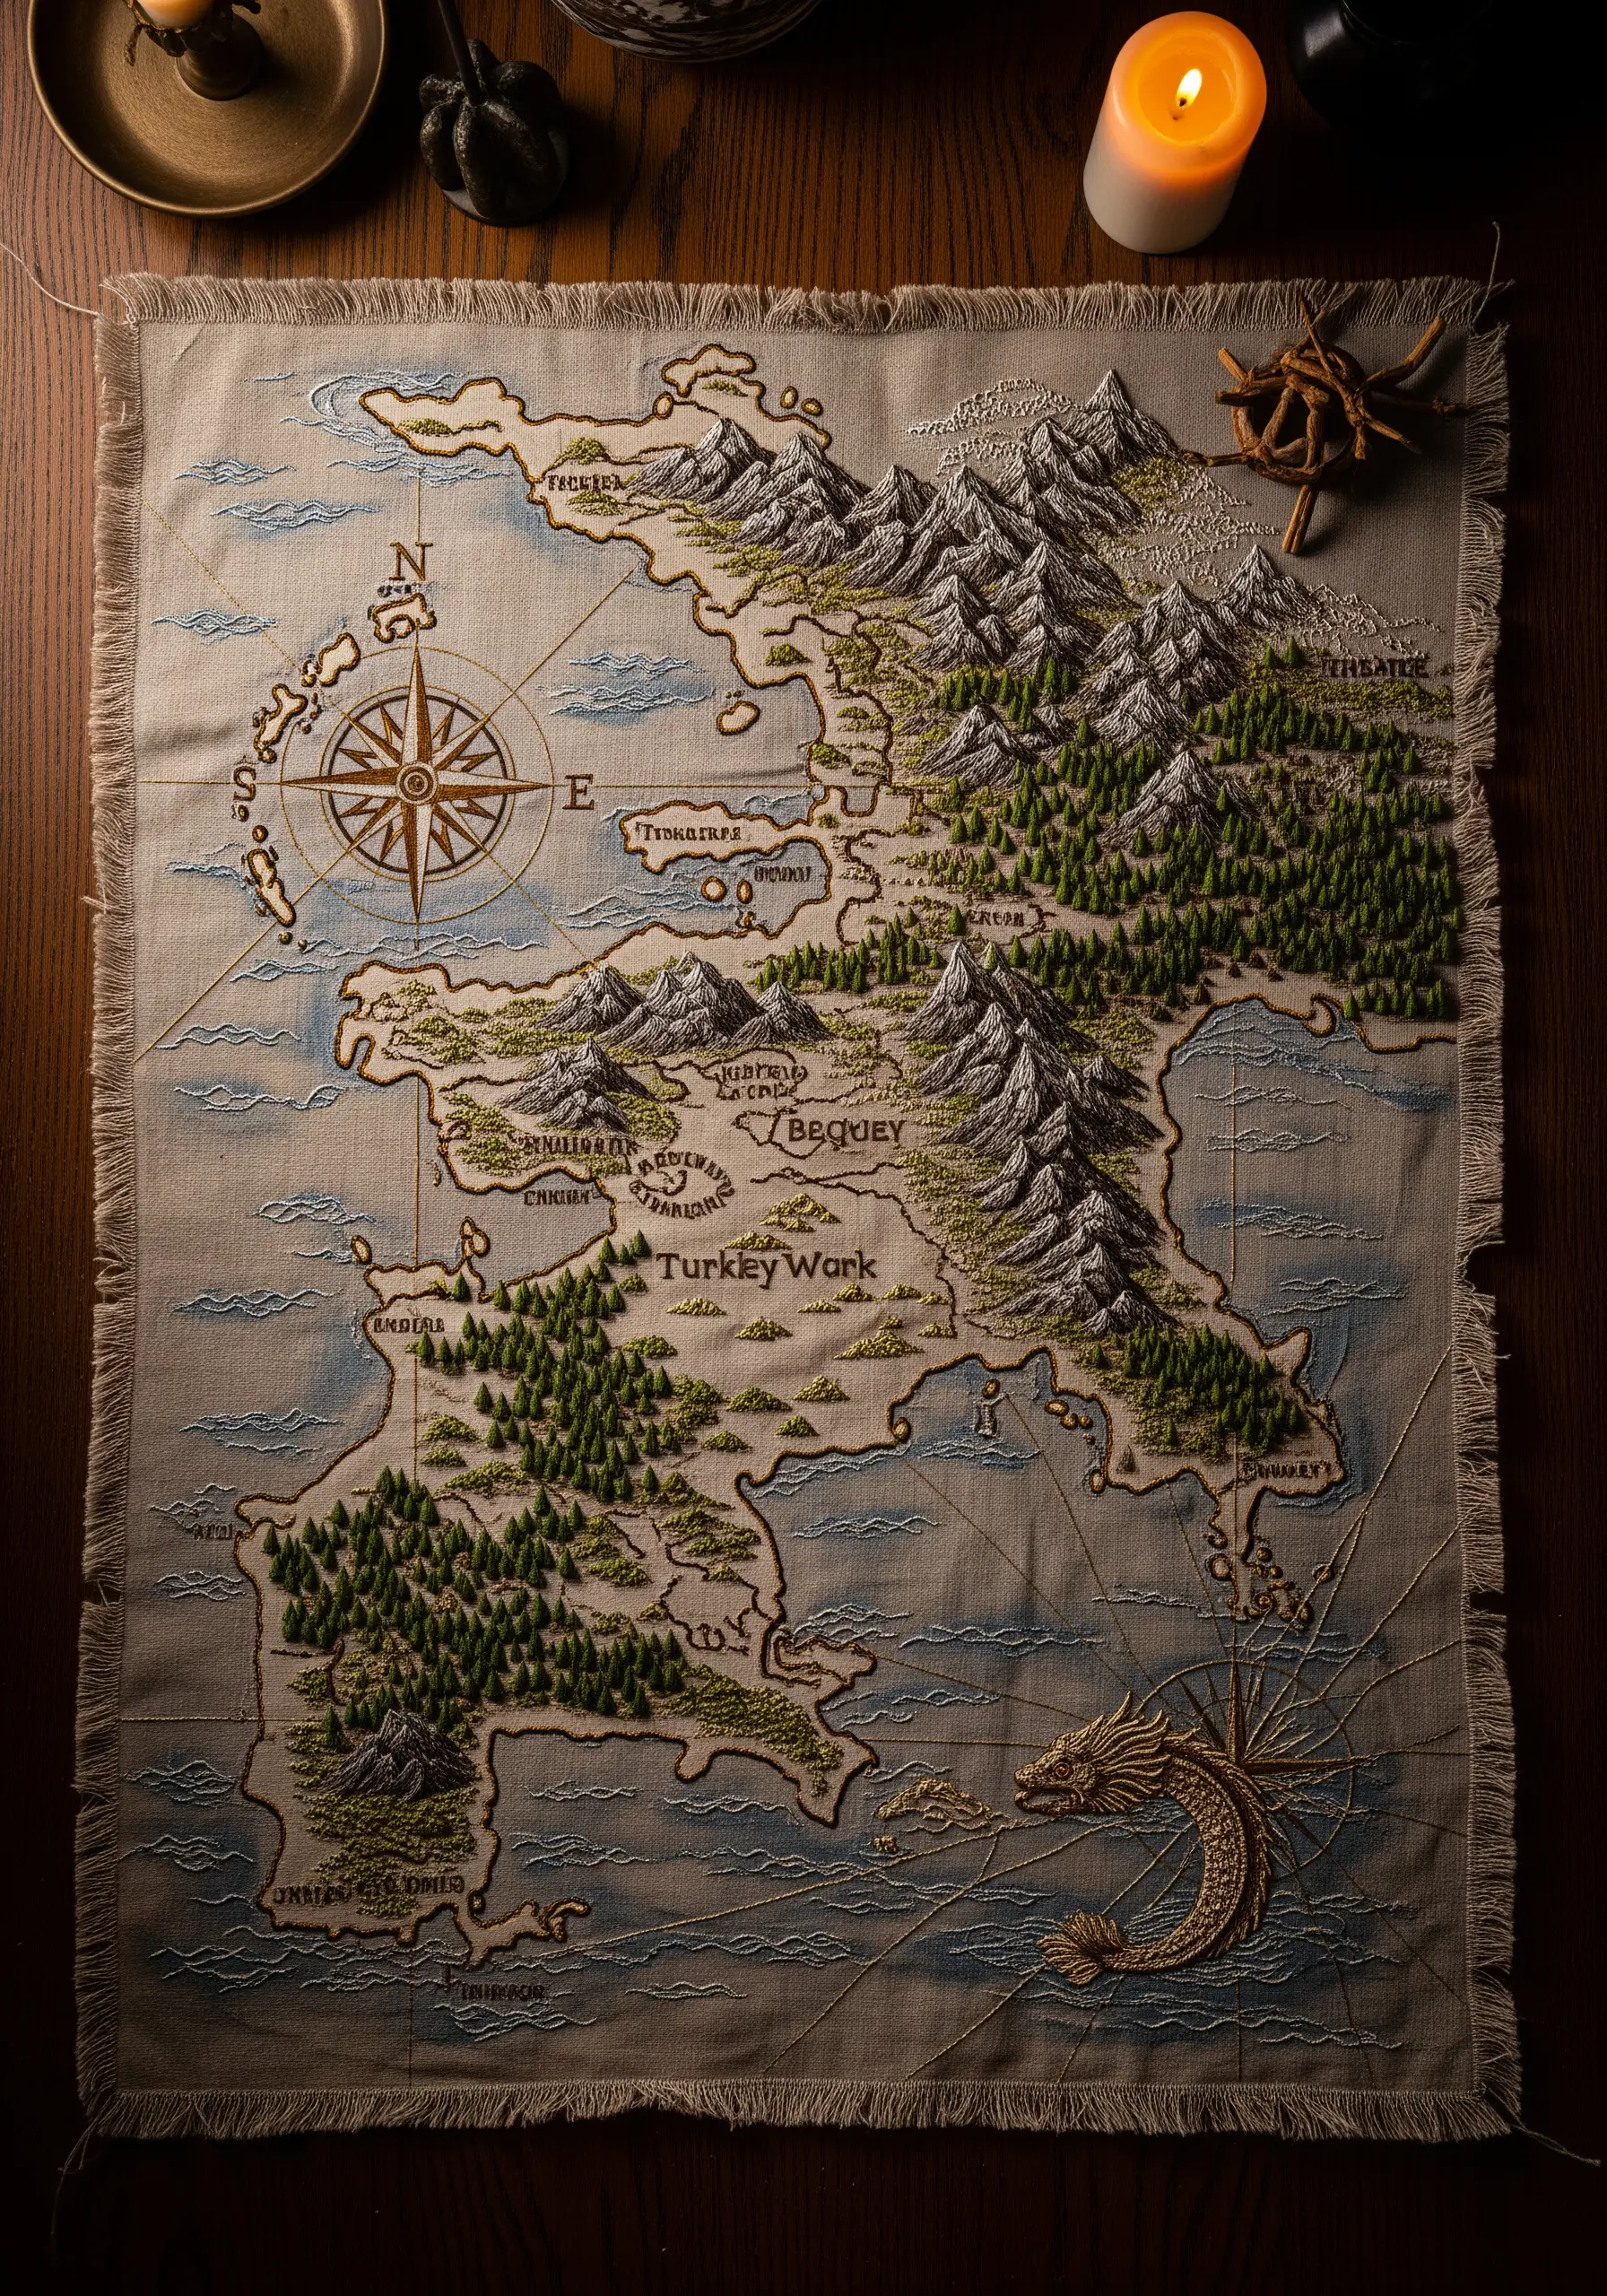
Bring a fantasy world to life by assigning different embroidery stitches to its various geographical features.
Use dense French knots and bullion stitches in shades of grey to build up the rocky, three-dimensional texture of mountain ranges.
Create lush forests with a combination of turkey work for a shaggy, raised effect and seed stitches for dense undergrowth.
For the water, use long, wavy satin stitches in variegated blue thread to suggest movement and depth, turning your map into a tactile, immersive world.


