

You have the threads, the needles, and the desire to create something beautiful. But perhaps you feel stuck, repeating the same stitches or wondering how to translate the ideas in your head into polished, intentional art. Let’s set aside the complex patterns for a moment and explore the elegant intersection of embroidery and paper.
This is where you can refine your technique with immediate, visible results. Stitching on paper demands precision—it teaches you thread tension, clean lines, and the impact of a single, well-placed stitch. It’s a practice in mindfulness that directly translates to more confident work on fabric.
Here, you’ll find ideas that build your skills without overwhelming you. From creating texture on a simple card to combining thread with paint and collage, each project is designed to elevate your craft. Consider this your private workshop for turning simple materials into art that feels uniquely yours.
1. Botanical Embroidery on Deckled-Edge Paper

Stitching on paper offers a crispness that fabric cannot, making it perfect for delicate botanical illustrations.
First, choose a heavy-gauge paper, like watercolor or cotton rag, that won’t tear easily.
Lightly sketch your design, then use a fine awl or a spare needle to pre-pierce your stitching holes along the lines.
For the lavender-inspired embroidery designs, use two strands for the French knot buds to give them texture and a single strand for the stem’s backstitch to keep it sleek.
This method prevents buckling and ensures each stitch is clean and intentional.
2. Geometric Thread Art for Modern Greetings

Create striking, graphic cards by transforming simple straight stitches into complex geometric patterns.
Start by drawing a grid of dots on your cardstock and piercing each one with a needle.
For the sunburst, work from a central point to the outer edge, pulling the thread taut each time to create sharp, radiating lines.
For the mountain or triangle patterns, you can use a cross-stitch technique on a pre-punched grid or weave thread between the points to build color blocks.
This is less about embroidery and more about tension and precision, making it an excellent exercise in control.
3. Celestial Constellation with Metallic Threads

Capture the magic of the night sky by combining metallic thread with beads on a dark fabric background.
Choose a tightly woven cotton or linen in a deep navy to make your stitches pop.
Use a single strand of silver metallic thread for the constellation lines, connected with small star stitches—five tiny straight stitches radiating from a central point—for the main stars.
For added dimension, scatter tiny silver beads and secure them with a single stitch, mimicking distant stars and creating a piece that subtly glitters as it catches the light.
Explore these dreamy galaxy string art concepts for more celestial inspiration.
4. Layered Felt Collage with Stitched Details

Combine the softness of felt with the sharp detail of embroidery to create dimensional, tactile artwork.
Cut your primary shapes from different colors of felt and arrange them in layers to build your subject, like this fox.
Instead of trying to stitch complex fills, use embroidery as an accent. A few well-placed backstitches for whiskers, French knots for eyes, and a running stitch along the edge of the white fur adds definition and character.
This mixed-media approach allows you to create charming fabric collage embroidery animals with minimal stitching.
5. Delicate Stitching for Personalized Bookmarks

Transform simple cardstock bookmarks into treasured keepsakes with just a few thoughtful stitches.
Use a single strand of embroidery floss to keep the design delicate and prevent tearing the paper.
For wispy motifs like the dandelion seeds, use tiny straight stitches and French knots.
A simple backstitch is perfect for the vine, while a row of fly stitches can create a clean line of hearts.
The key is to use minimal tension on your thread—just enough for it to lie flat without pulling or warping the paper.
6. Monogram Art with Pressed Floral Accents

This design beautifully marries the precision of embroidery with the organic elegance of nature.
Stitch your monogram on high-quality, deckled-edge paper using a whipped backstitch. This stitch wraps a thread around a standard backstitch, creating a raised, cord-like line that adds sophistication.
Once the stitching is complete, artfully arrange and secure pressed flowers with a tiny dab of acid-free craft glue.
The contrast between the controlled stitch and the wildness of the botanicals is what makes this piece so compelling.
7. Abstract Thread Art on a Watercolor Wash

Let go of patterns and embrace intuitive making by stitching over a painted background.
Start by applying a loose watercolor wash to thick paper, letting the colors bleed into one another.
After it dries completely, use bold, contrasting threads to add a structural element with intersecting straight stitches.
Choose a thicker thread, like cotton Perle, which will stand out more prominently against the soft, blended colors. This is one of those gorgeous embroidery projects to combine with paper and paint where composition is about feeling, not perfection.
8. Faux Leather & Stitched Leaf Garland
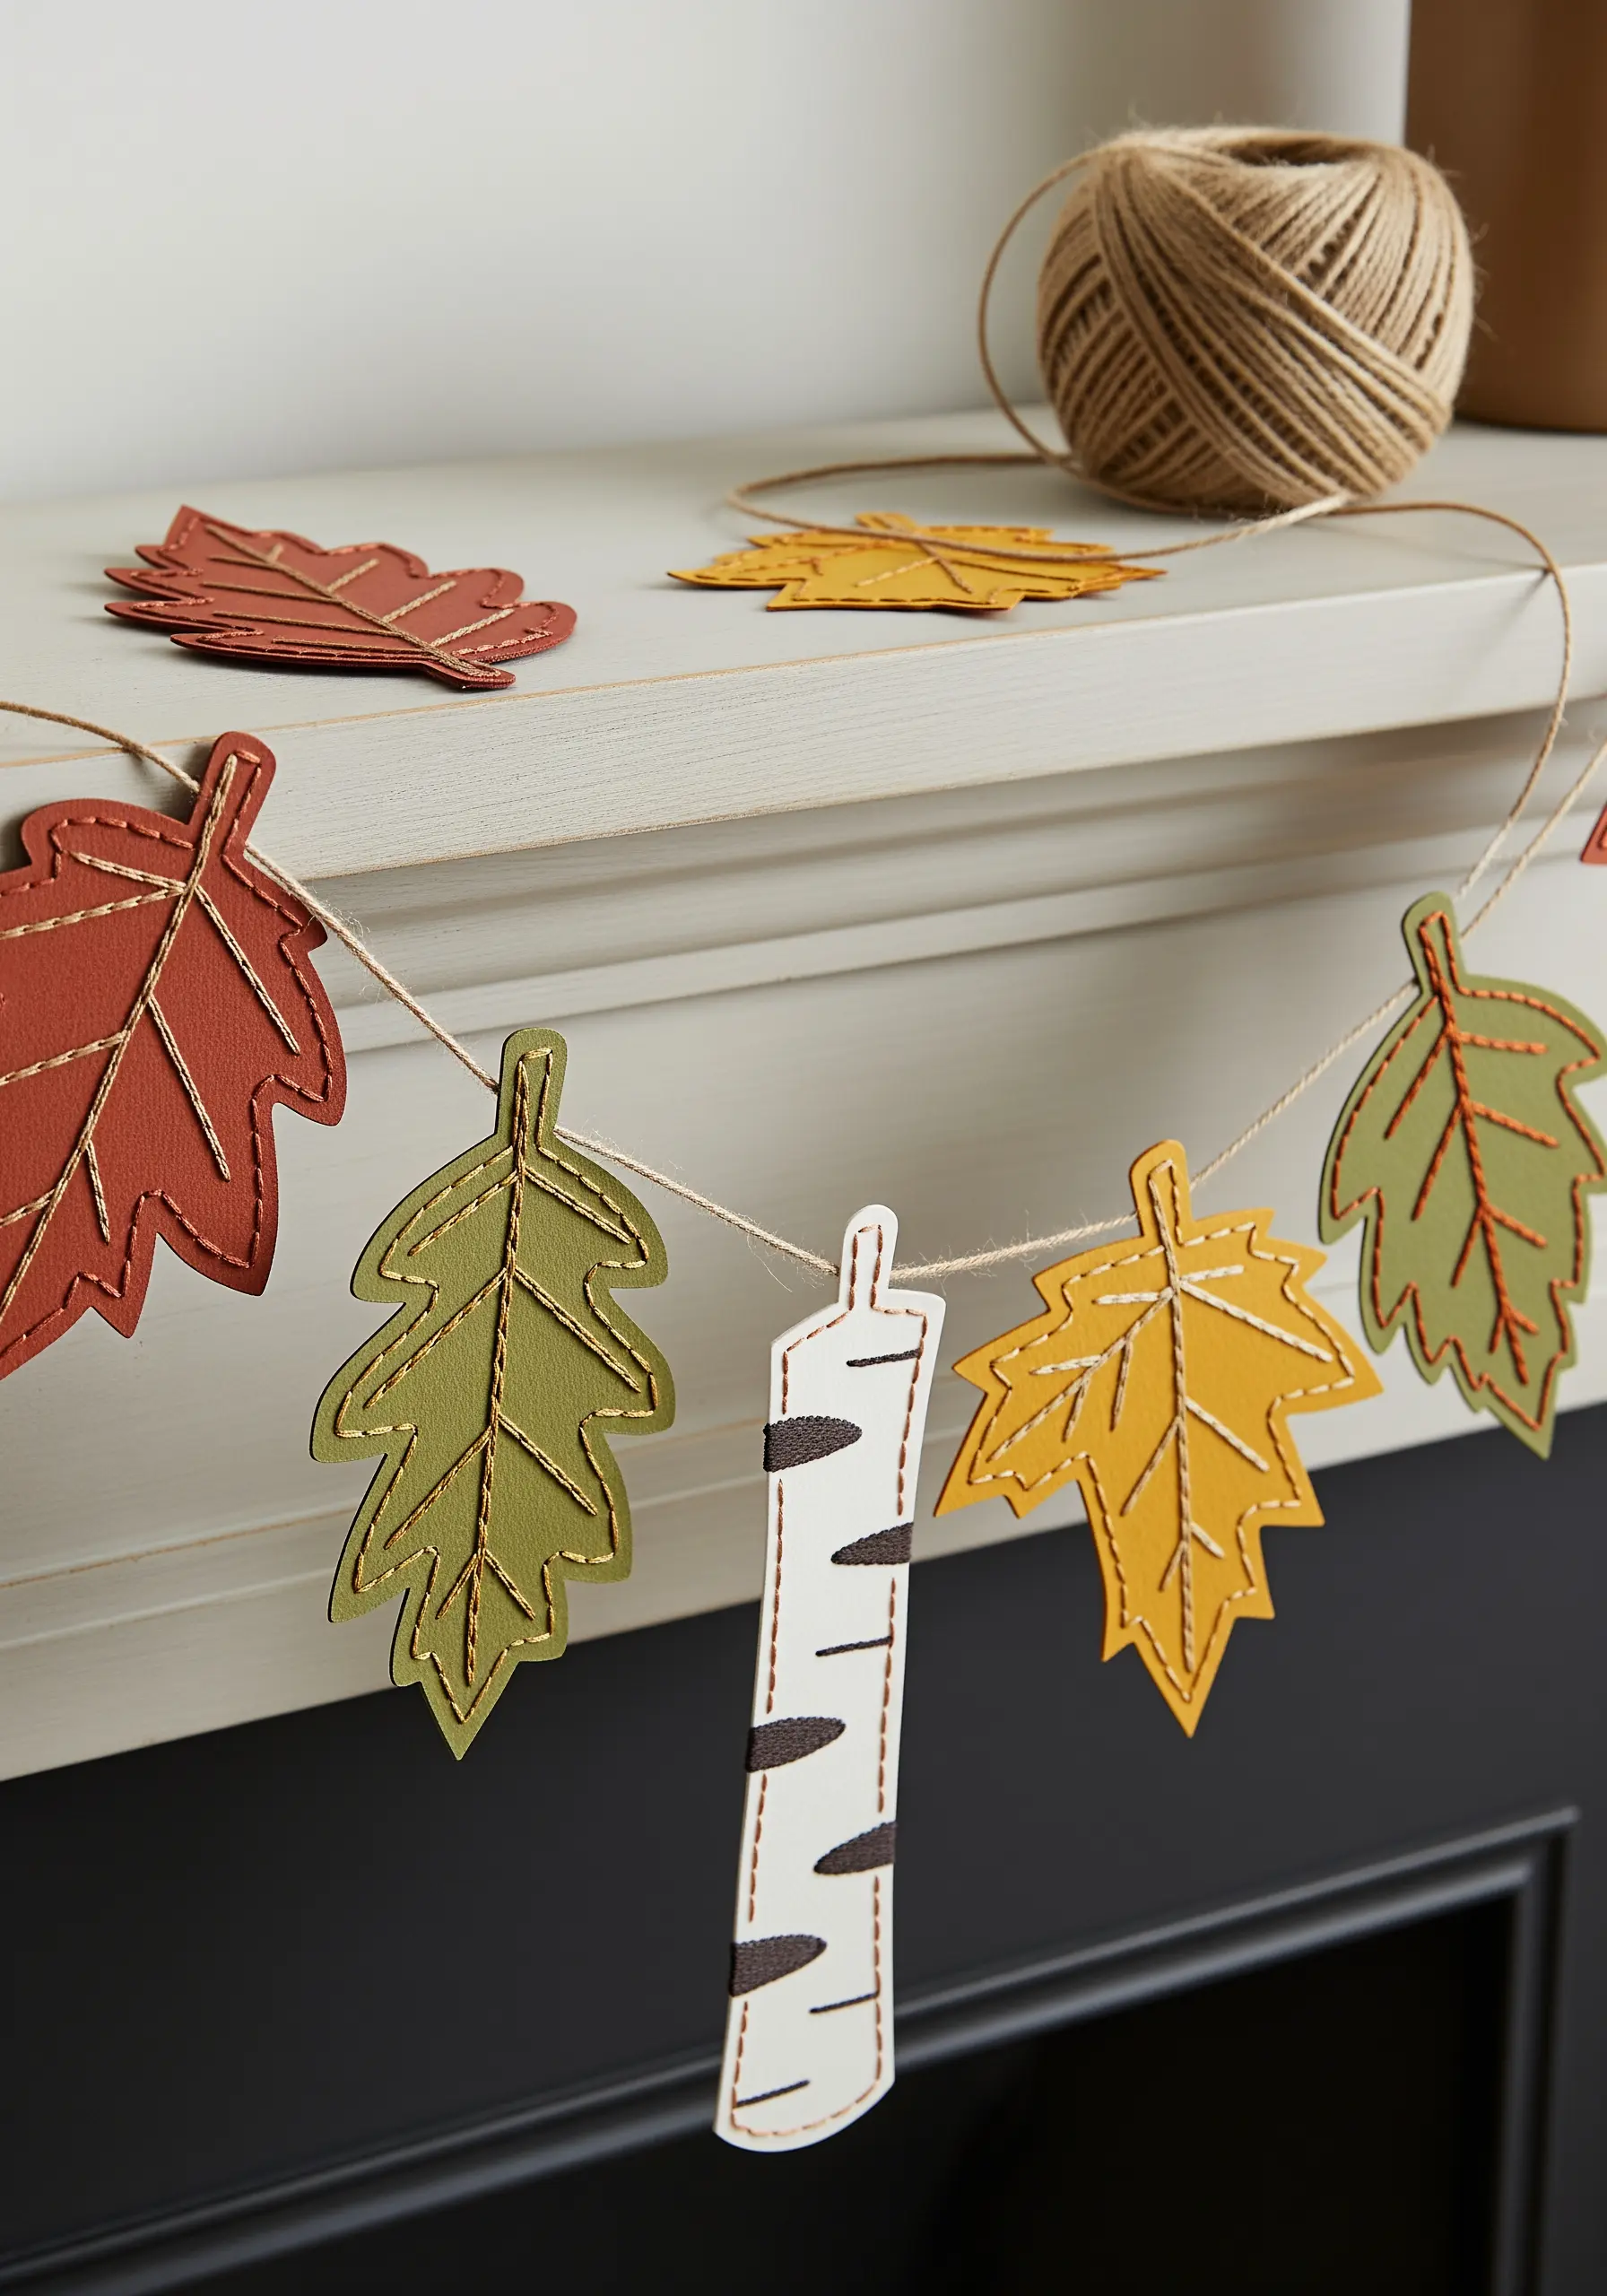
Create durable, reusable decor by stitching onto unconventional materials like faux leather or heavy cardstock.
Cut out your leaf shapes and use a contrasting thread color to make the vein details stand out.
A simple backstitch or running stitch provides a clean, graphic line that adds just the right amount of texture.
For tougher materials, pre-piercing your holes is essential for a smooth stitching experience.
String them together on a piece of natural twine for a rustic garland that you can use year after year.
9. Playful Fruit Motifs with Satin Stitch
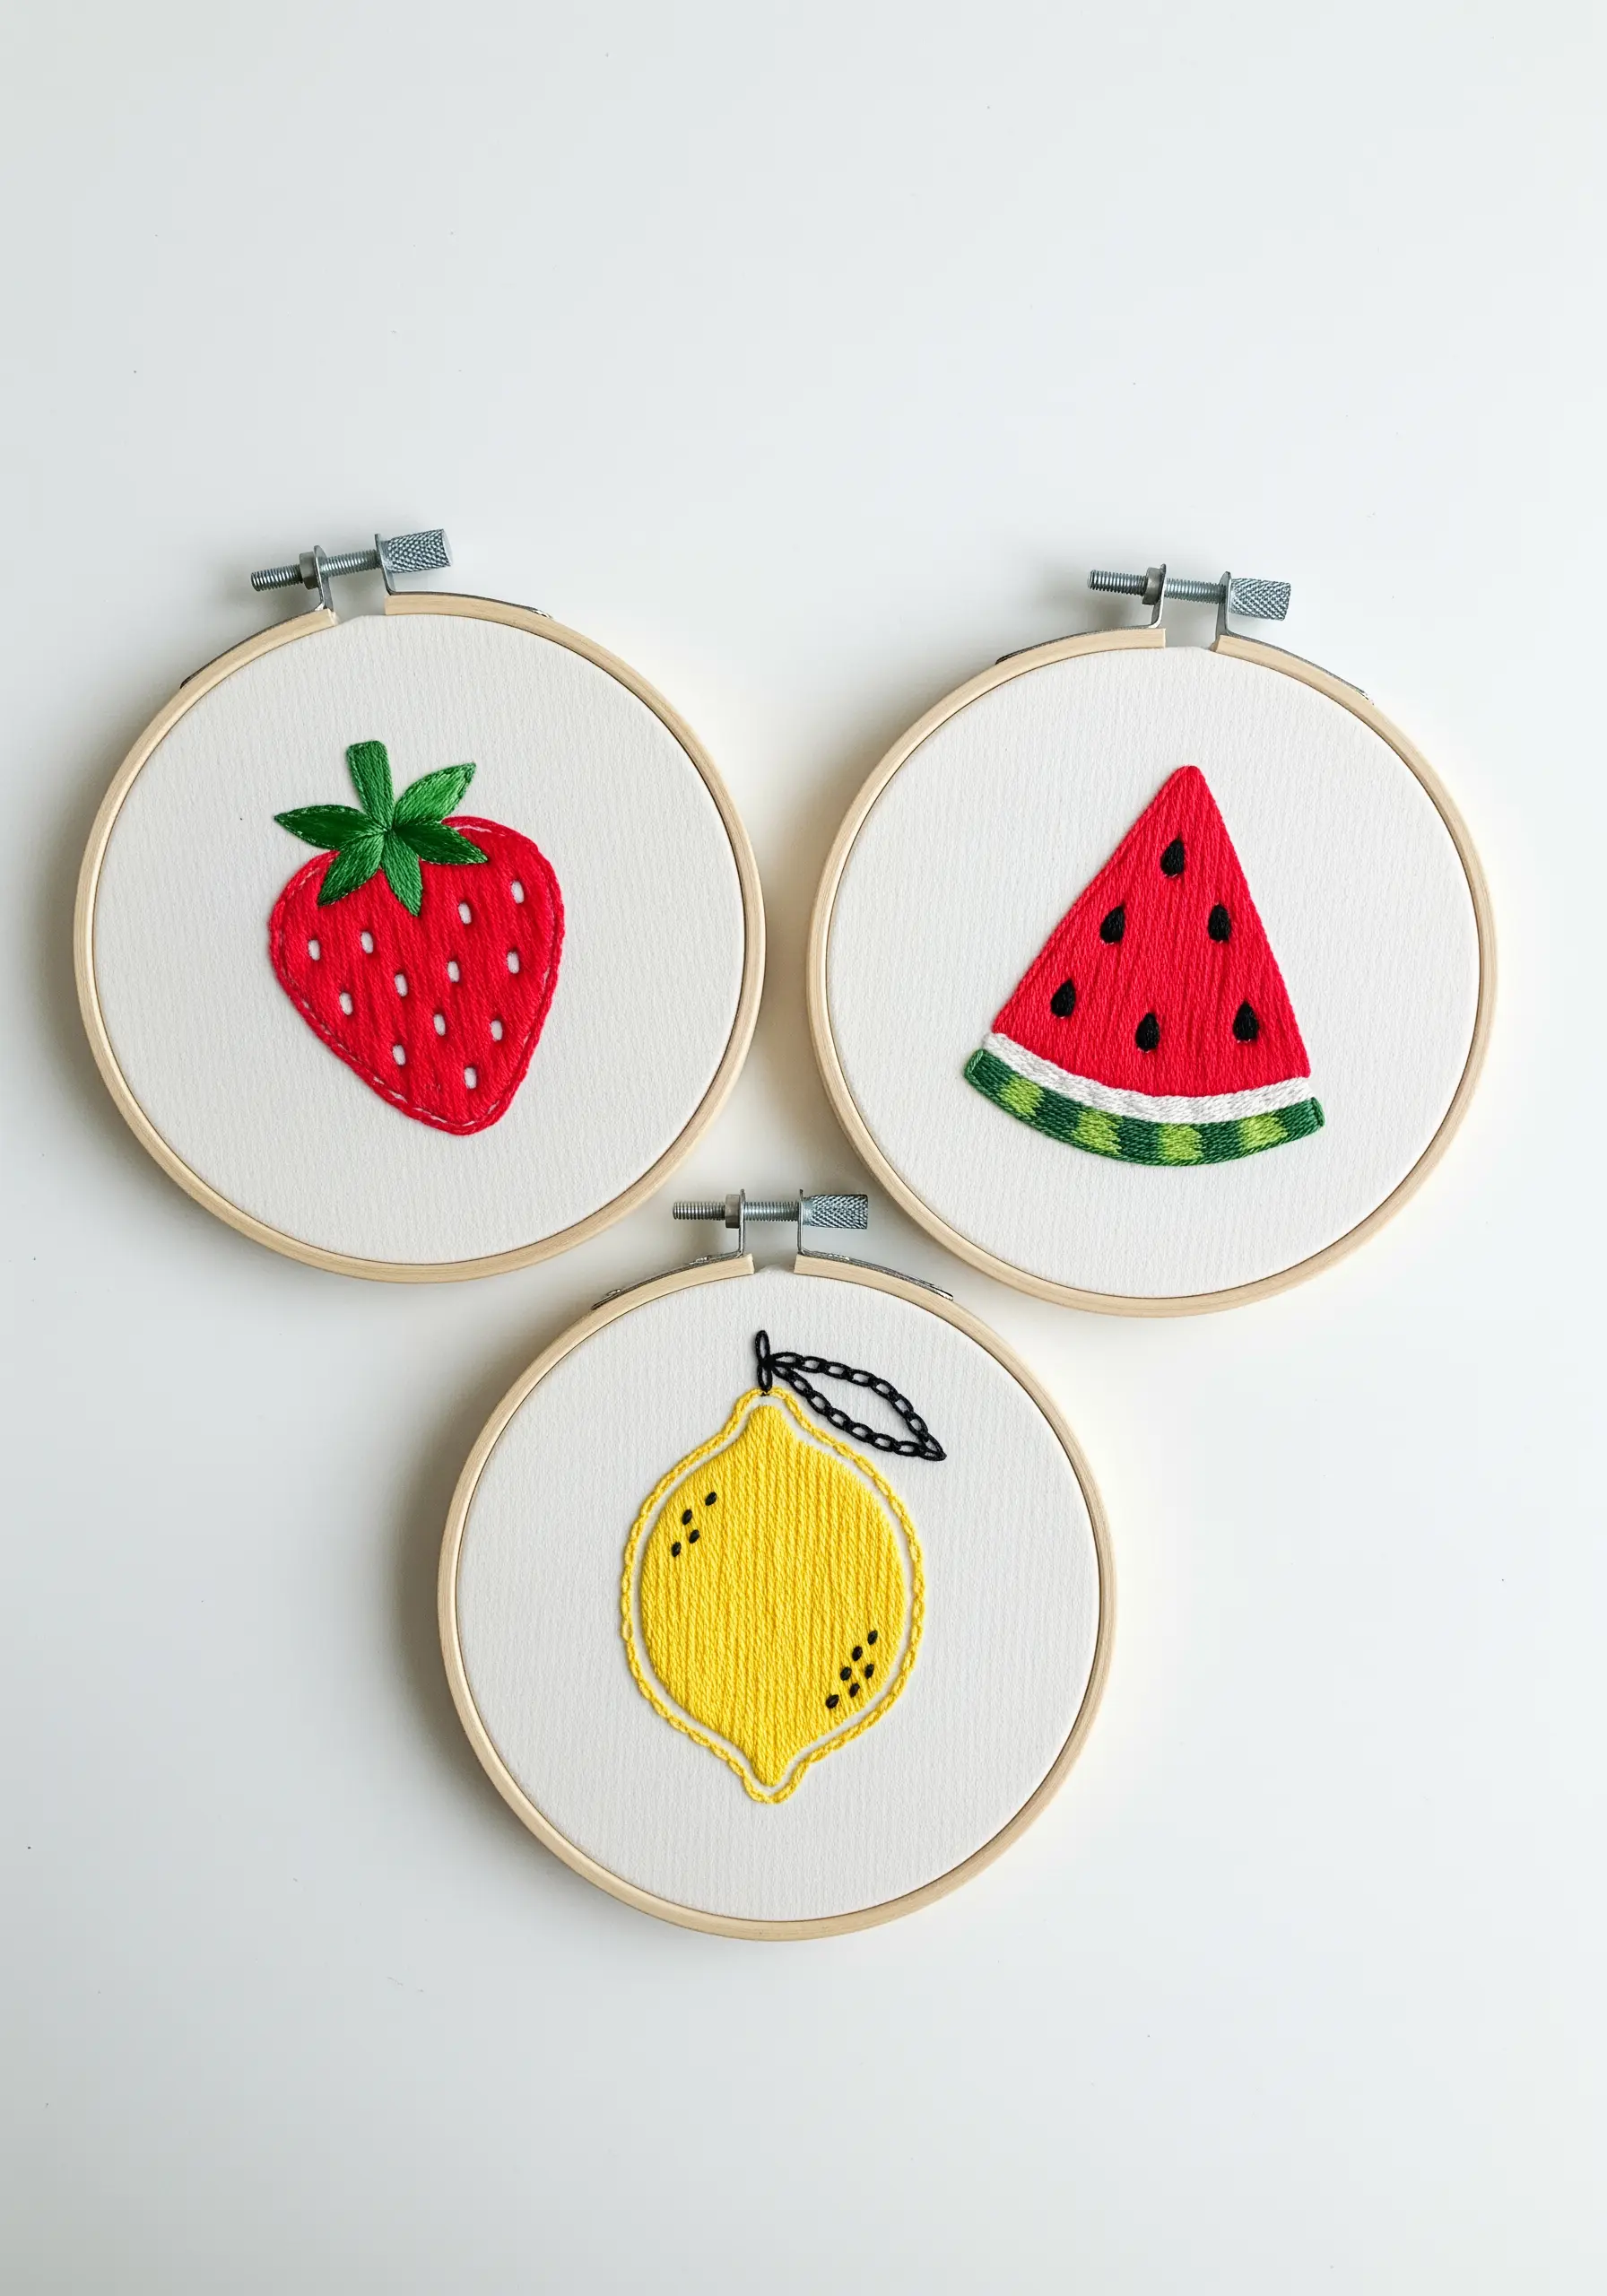
Mastering a smooth, professional-looking satin stitch is a game-changer, and these simple fruit motifs are perfect for practice.
The secret to a perfect edge is to first outline your shape with a split stitch. This creates a slightly raised border for your satin stitches to tuck against, preventing gaps and ensuring a clean line.
Use two or three strands of floss for good coverage, and focus on keeping your stitches parallel and even.
These quick, cute stitch designs are a rewarding way to build a fundamental skill.
10. Embroidered Vellum Lantern Sleeve

Stitching on vellum paper creates an ethereal effect, especially when illuminated from within.
Because vellum is delicate, always pre-pierce your holes with a fine needle before you begin stitching.
Use a simple satin stitch for the flower petals and a stem stitch for the branches to create a delicate cherry blossom vine.
Once complete, form the paper into a cylinder and place it over a battery-operated LED candle. The light diffuses beautifully through the paper and highlights the texture of your stitches.
11. Festive Stitched Holiday Gift Tags

Elevate your gift-giving with a small, personal touch that shows you care.
On sturdy cardstock tags, use fundamental stitches to create charming holiday motifs.
A backstitch is perfect for clean outlines, like the candy cane or bow. A filled satin stitch works beautifully for the Christmas tree, and scattered star stitches create a perfect snowflake.
These small-scale projects are a wonderful way to create personalized embroidered gifts without a huge time commitment.
12. Paper Succulents with Faux Stitch Details

This project introduces a textile sensibility to papercraft, adding unexpected texture and charm.
After cutting your succulent leaf shapes from cardstock, use a sewing machine (with no thread) to punch a neat line of holes along the edges.
Alternatively, you can use a piercing tool and a ruler for a more hands-on approach.
Then, simply use a contrasting thread to work a running stitch through the pre-made holes before assembling the 3D plant. It’s a clever way to blend two crafts into one cohesive piece.
13. A Beginner’s Stitch Sampler on Cardstock

Before you even touch fabric, practicing on paper can dramatically improve your technique.
Cardstock doesn’t have the ‘give’ of fabric, so it forces you to focus on even tension and precise needle placement.
Draw a simple grid, pierce your entry and exit points for each stitch, and work through the basics: running stitch, backstitch, chain stitch, and satin stitch.
Mastering these modern embroidery stitches every beginner needs on paper first will make your work on linen or cotton infinitely cleaner.
14. Minimalist House Outline on Paper

This piece demonstrates the power of simplicity and the elegant contrast between different stitch textures.
Use a simple backstitch for the house outline, focusing on keeping your stitches uniform in length for a clean, architectural look.
For the word ‘Home’ and the smoke, switch to a padded satin stitch. Create a base of small straight stitches, then cover them with satin stitches going in the opposite direction.
This technique gives the lettering a raised, almost embossed quality that stands out beautifully against the flat outline.
15. Stitched Paper Shapes for Nursery Decor

Add a soft, handcrafted touch to a nursery mobile or wall art with the simplest of stitches.
Cut your cloud, moon, and star shapes from high-quality cardstock—perhaps with a pearlescent or metallic finish for a subtle shimmer.
Using a light-colored thread, add a simple starburst stitch (a few straight stitches crossing in the center) to each shape.
It’s an incredibly simple detail that elevates the paper cutouts, turning them into a cohesive and charming piece of nursery stitch art.
16. Detailed Thread Painting on Paper Feathers
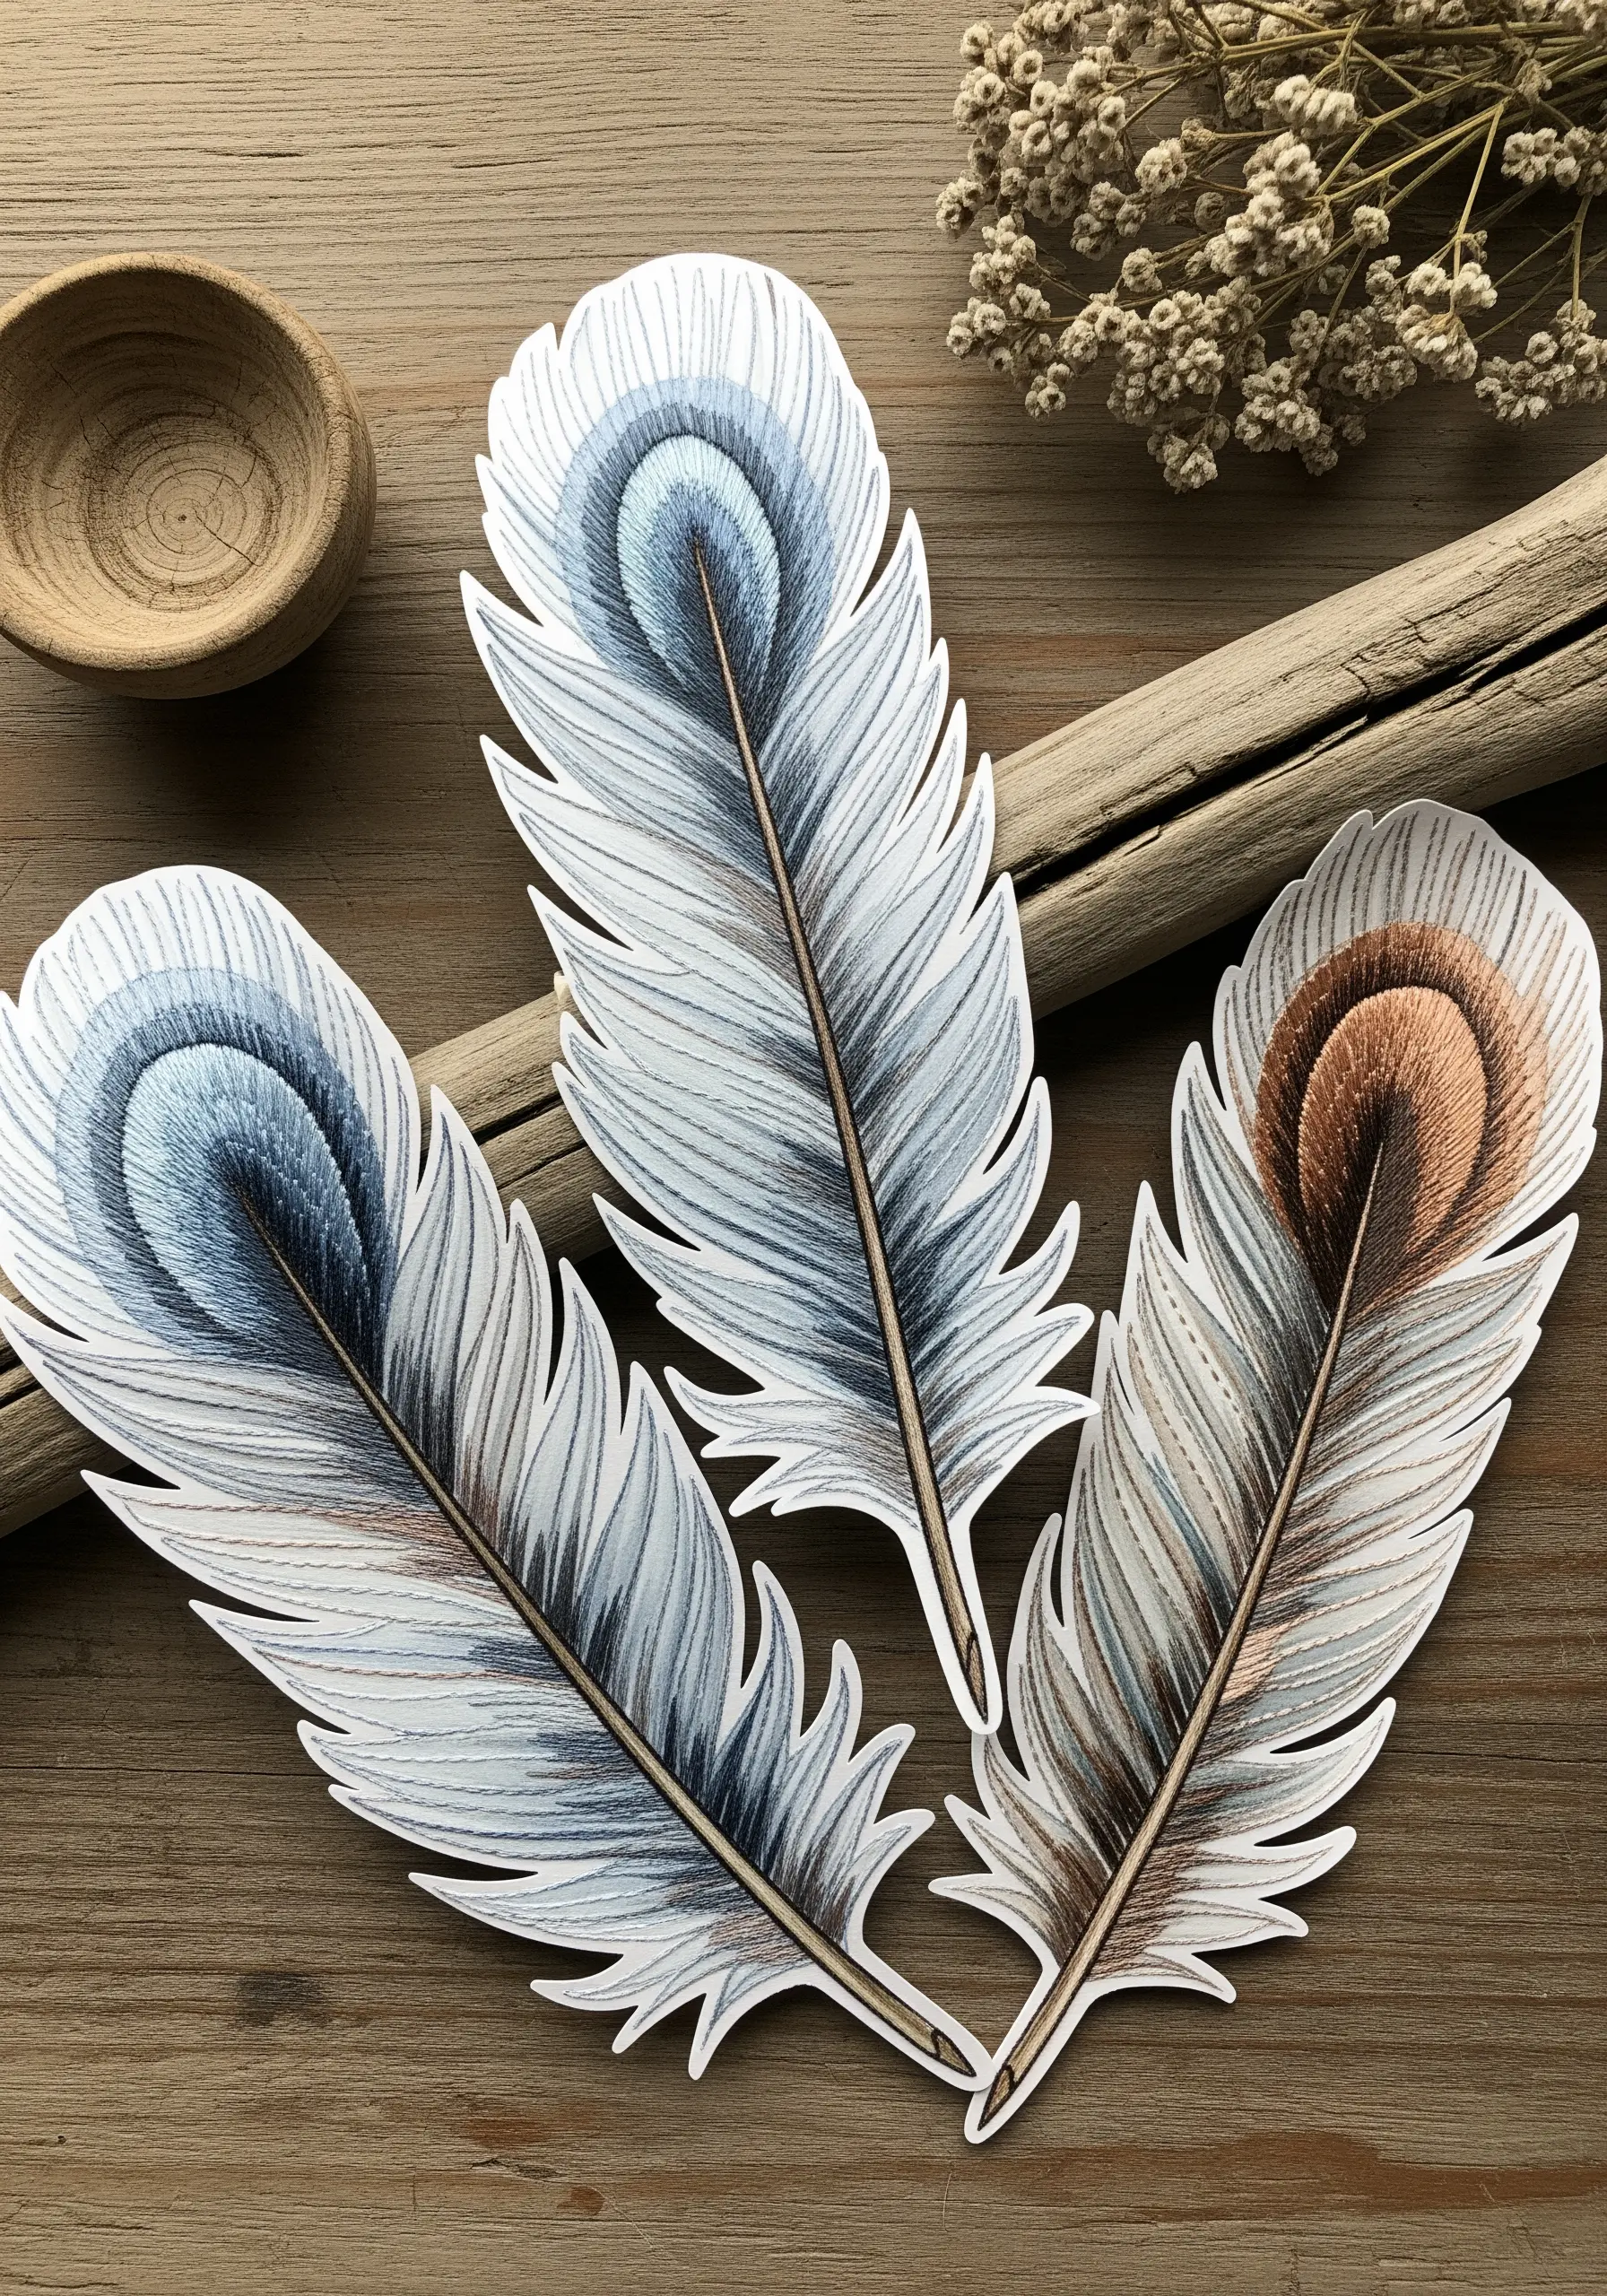
This is a wonderful introduction to the principles of thread painting, using paper as your canvas.
Cut out your feather shape from sturdy cardstock. Use a single backstitched line for the central shaft.
Then, using long straight stitches, create the feather’s barbs, angling them up and away from the center.
Blend different shades of thread together to create soft gradients and realistic depth. This method teaches you all about color blending and directionality, key skills in more advanced embroidery.
17. Mixed-Media Butterfly with Paper Collage

Create a stunning piece of art by framing vibrant paper collage with bold, textural embroidery.
First, create your butterfly by decoupaging small scraps of colorful paper onto a cardstock base.
Once it’s completely dry, use a strong, textural stitch like the chain stitch to outline each segment of the wings.
A metallic gold or high-contrast black thread will define the shapes and give the entire piece a polished, cohesive finish. These are the kinds of DIY collage ideas where paper meets thread in a truly artistic way.
18. Minimalist Embroidered Coasters

Upgrade simple fabric coasters into a stylish, personalized set with clean, modern line art.
Choose simple motifs and stitch them using a neat backstitch for the outlines. Use three strands of floss to ensure the line is visible and substantial.
For small filled areas, like the coffee beans, a tidy satin stitch provides a pleasing textural contrast to the outlines.
This is an excellent way to practice stitch consistency on a small, manageable scale, creating minimal embroidery projects that double as thoughtful gifts.
19. Stitched Heart Sampler on Various Papers

This project is a brilliant exercise in understanding how different materials affect your stitching.
Select a variety of paper surfaces—handmade paper with floral inclusions, vellum, corrugated cardboard, and smooth cardstock.
Using the same simple backstitched heart motif and the same thread, stitch one on each surface.
You will immediately learn how to adjust your tension and handle your needle differently for each texture, a crucial skill for anyone interested in mixed-media embroidery.
20. 3D Paper Art with Structural Thread Details

In this project, thread moves beyond decoration and becomes a key structural component.
After constructing the 3D balloon from precisely folded paper panels, use embroidery floss or fine twine for the rigging.
This not only adds a realistic detail but also helps hold the form together and connects the balloon to the basket.
Wrapping the basket with twine adds another layer of texture. It’s a fantastic lesson in how thread can be used for both aesthetic and functional purposes in your art.
21. Layered Paper Seascape with Stitch Embellishments

Create remarkable depth and texture by layering torn paper and adding delicate embroidered details.
Tear different shades of blue paper to create the ocean layers; the rough, deckled edge beautifully mimics the movement of water.
Once your paper collage is set, use thread to add the final storytelling touches. Simple backstitched fish and scattered French knots for bubbles bring the entire underwater scene to life.
This technique is perfect for creating ocean-inspired wall themes with a rich, tactile feel.
22. Appliqué Cityscape with Embroidered Light

This clever combination of paper appliqué and satin stitch creates a striking illusion of light and shadow.
First, cut your building silhouettes from black or dark gray cardstock and glue them onto a light-colored fabric background within a hoop.
Then, using a vibrant yellow thread, fill in small rectangular ‘windows’ with dense satin stitches.
The texture and sheen of the thread make the windows appear to glow against the flat, matte paper. Add a few white star stitches in the sky to complete the nocturnal scene.
23. Embroidered Geometric Photo Corners

Create your own custom photo corners that are both functional and a beautiful design element in themselves.
On a piece of cardstock, draw your nested triangle design and pre-pierce the holes for stitching.
Use a backstitch to create clean, solid lines. For a more dimensional and textured look, try a stem stitch, which creates a lovely roped effect.
These abstract geometric hoops and corners are a great way to use up scrap threads, and variegated floss works especially well here.
24. Textured Dandelion Embroidery on Paper
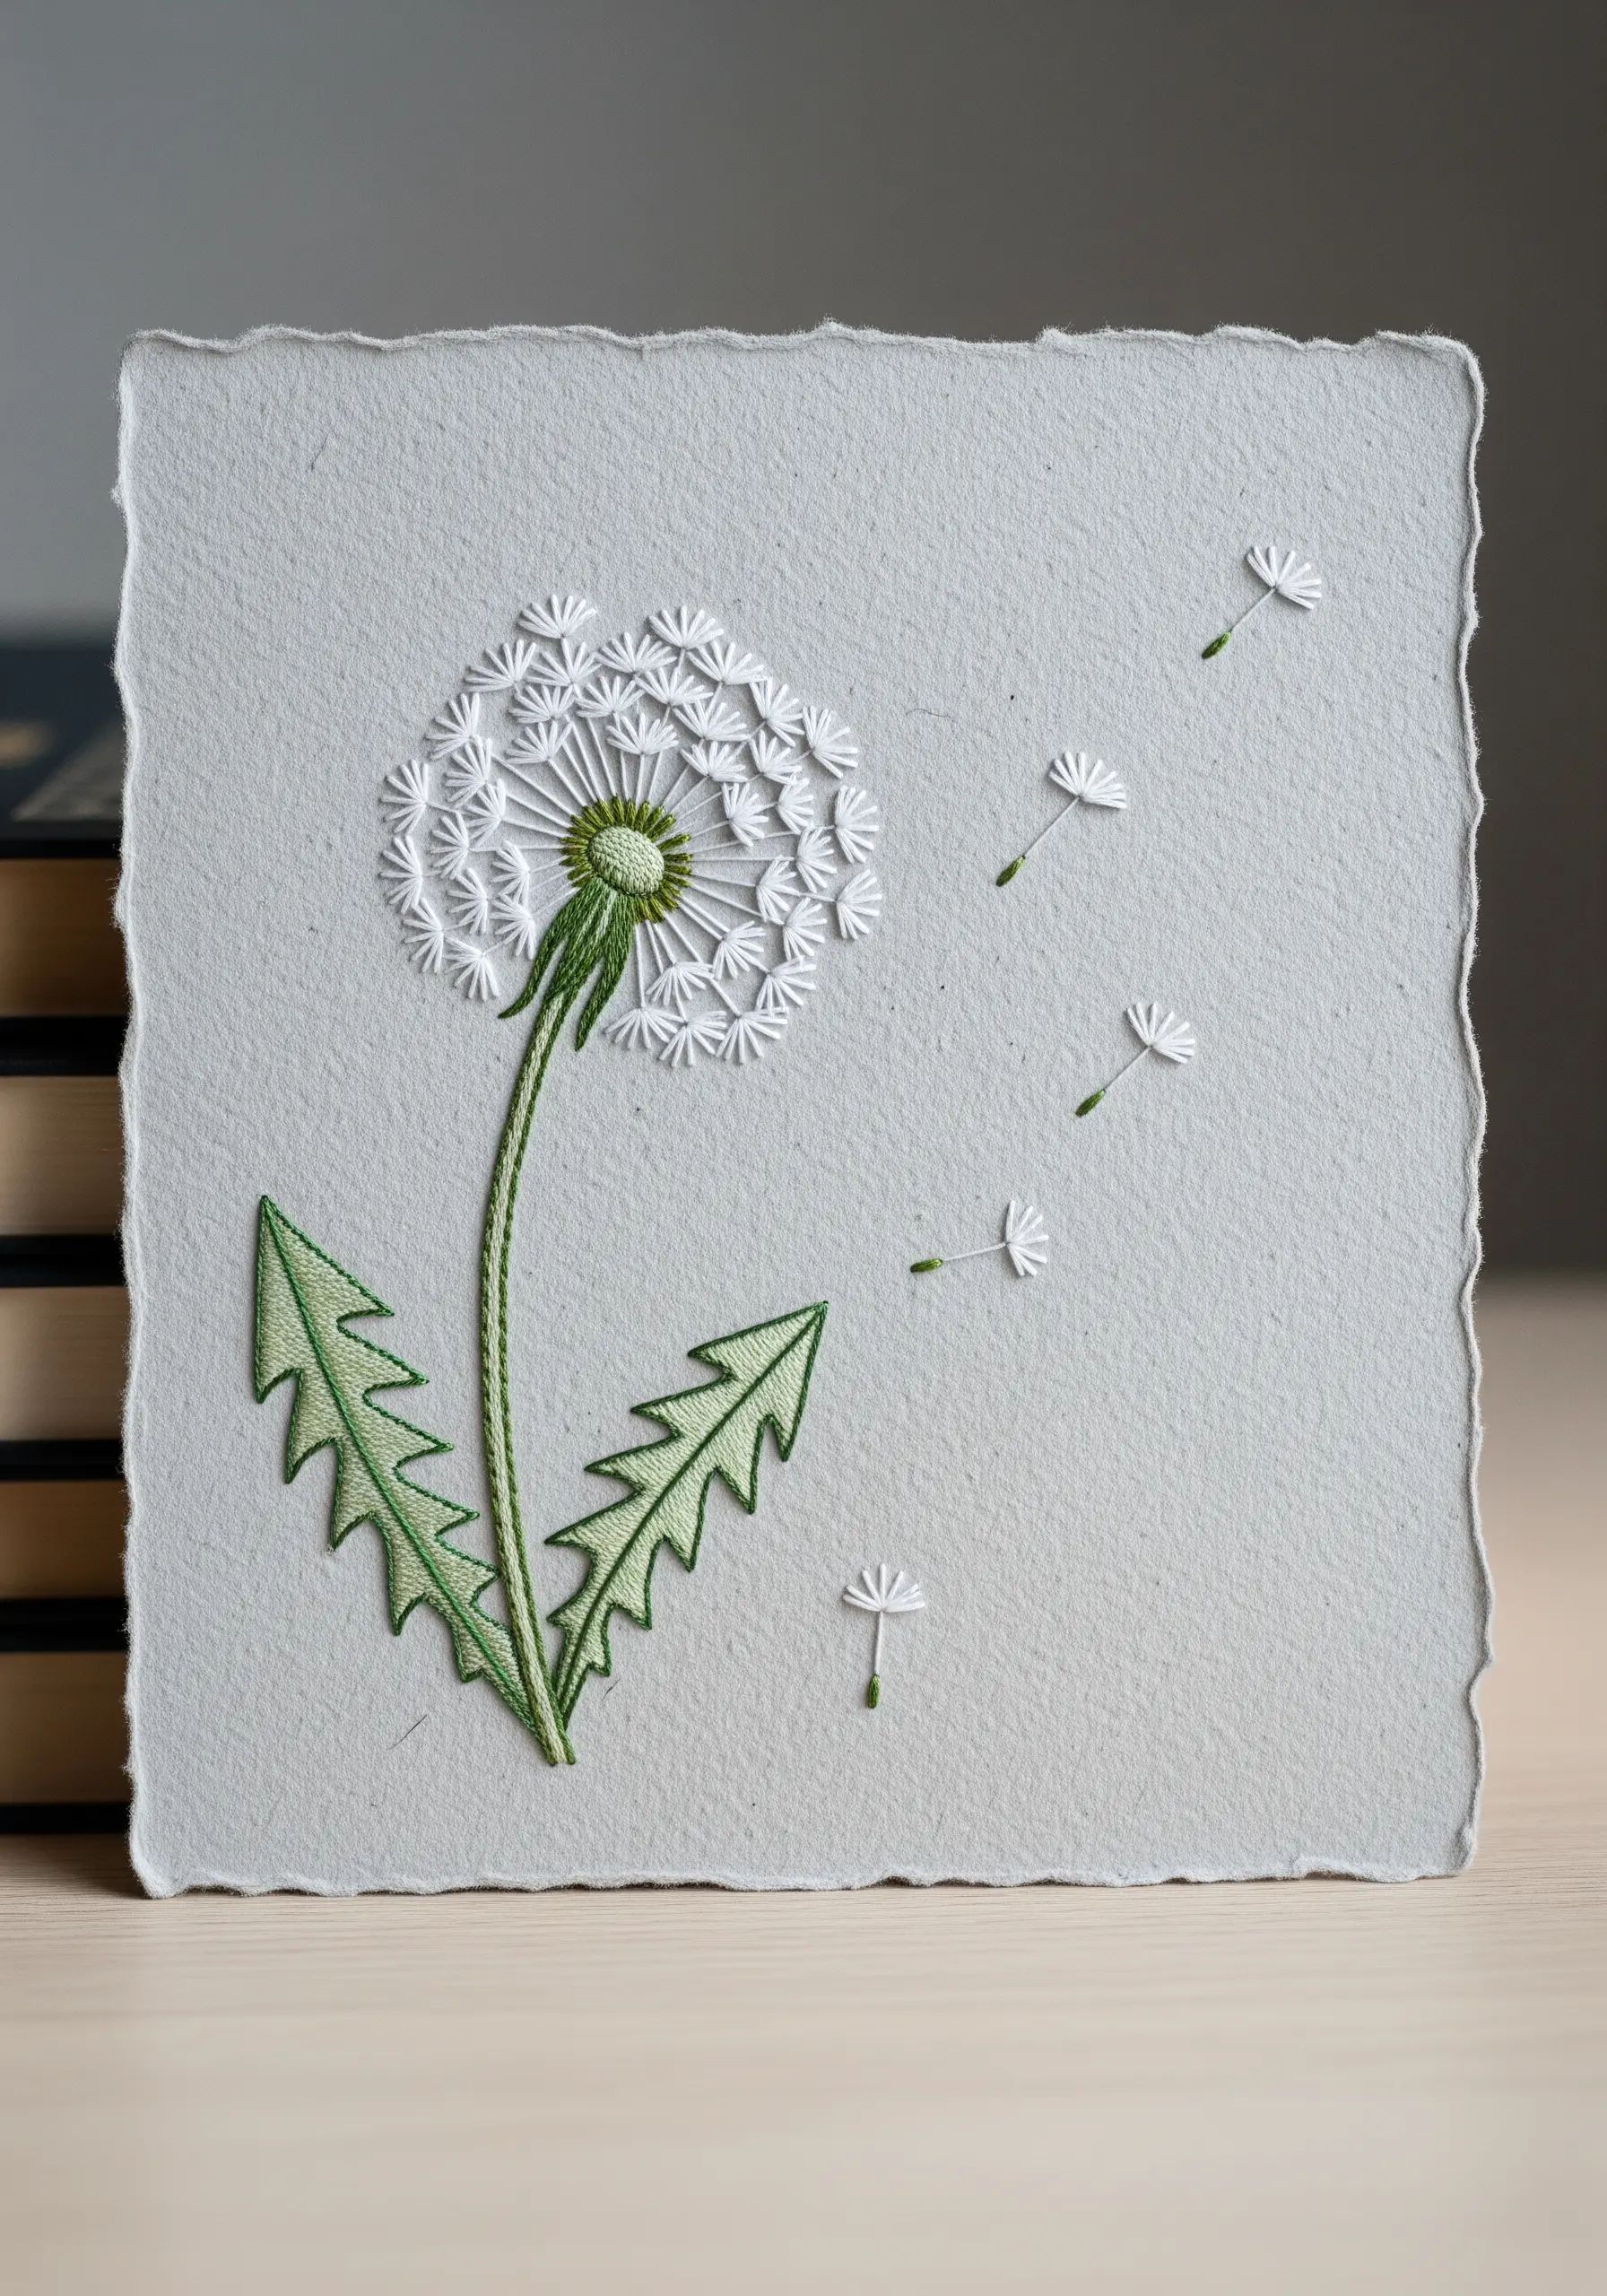
Capturing the airy delicacy of a dandelion puff is all about choosing the right stitches and thread weight.
Use a single strand of white floss to maintain a light, ethereal quality.
For the individual florets, a detached chain stitch (or lazy daisy) perfectly mimics the parachute shape.
A tiny straight stitch at the base of each one represents the seed. For the floating seeds, use the same combination.
This design is a masterclass in how simple stitches can be combined to create remarkably detailed and realistic dandelion and wildgrass stitch projects.


