

A mug rug is more than just a coaster; it’s a small canvas for quiet creativity. It’s a chance to turn a simple, functional object into a tiny work of art that brings a moment of calm to your day.
Here, you won’t find overly complex patterns. Instead, you’ll discover how small, intentional choices—like changing the direction of a stitch, adding a single metallic thread, or pairing two textures—can transform your work. These are the details that create a polished, professional finish.
Think of each mug rug as a study in technique. A place to perfect your satin stitch, explore color blending, or master the elegance of a single, perfect line. Let’s create something beautiful, stitch by stitch.
1. Render Steam with Metallic Thread
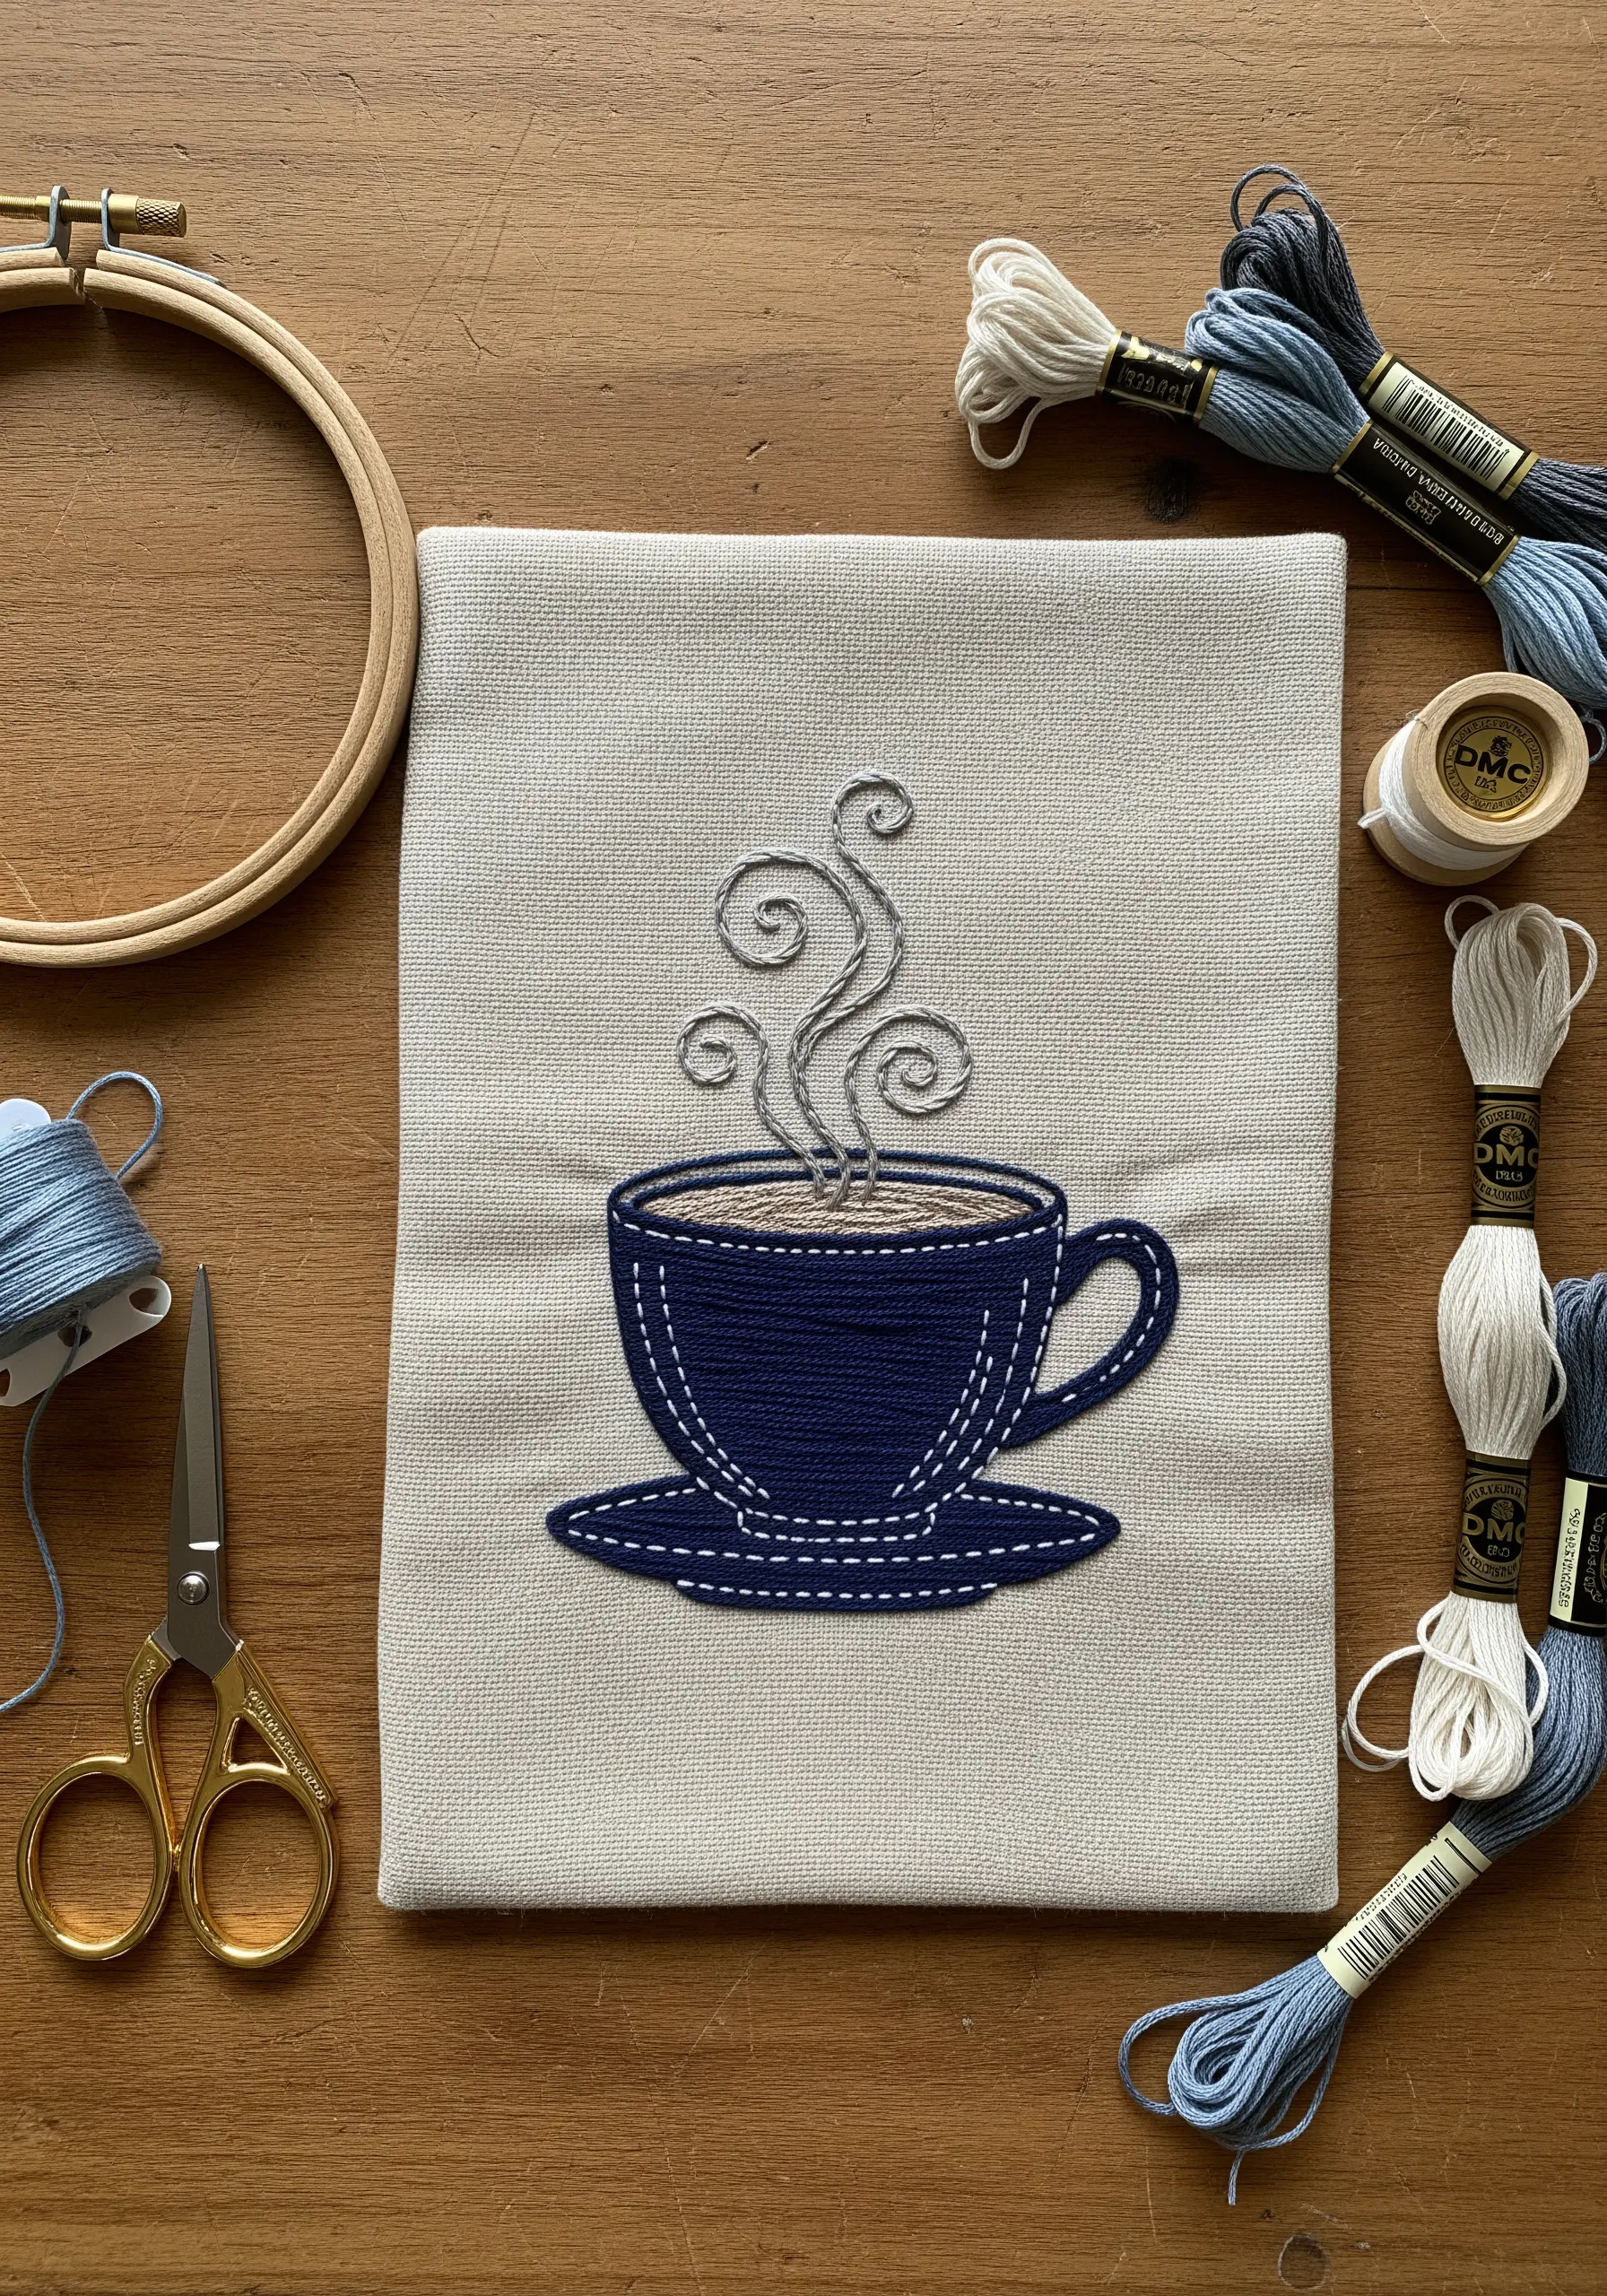
Give your coffee cup motif a touch of life by stitching the steam in a single strand of lightweight metallic thread.
Use a flowing, open backstitch to create elegant swirls that catch the light, contrasting beautifully with the solid satin stitch of the mug.
For the cup’s outline, choose a whipped backstitch or a tight chain stitch to create a raised, defined edge that makes the design pop from the fabric.
This contrast in texture—matte floss versus shimmering metallic—is what elevates a simple design into something special.
2. Capture Fur Texture with Directional Stitching

To create the soft, dense fur of a sleeping fox, rely on long-and-short stitch, paying close attention to the direction of your stitches.
Imagine how fur grows and angle your stitches to follow those natural contours, blending shades of orange, rust, and cream to build realistic depth.
Use just one or two strands of floss for a smoother gradient, especially around the face and tail where colors transition softly.
A sharp, dark backstitch outline contains the soft fill and gives the illustration a clean, polished look that feels both cozy and professional.
This method is foundational for creating pet portrait embroidery with lifelike dimension.
3. Imply Form with Varied Satin Stitch

Create dynamic, modern botanicals by varying the angle of your satin stitches within each leaf.
Instead of filling each shape uniformly, stitch one half of a leaf at a 45-degree angle and the other at a -45-degree angle to mimic a central vein and create subtle light play.
Combine filled leaves with simple backstitch outlines to introduce visual breathing room, a core principle of negative space embroidery techniques.
This selective use of texture makes the composition feel balanced and intentional, not overworked.
4. Build Landscapes with Color Blocking
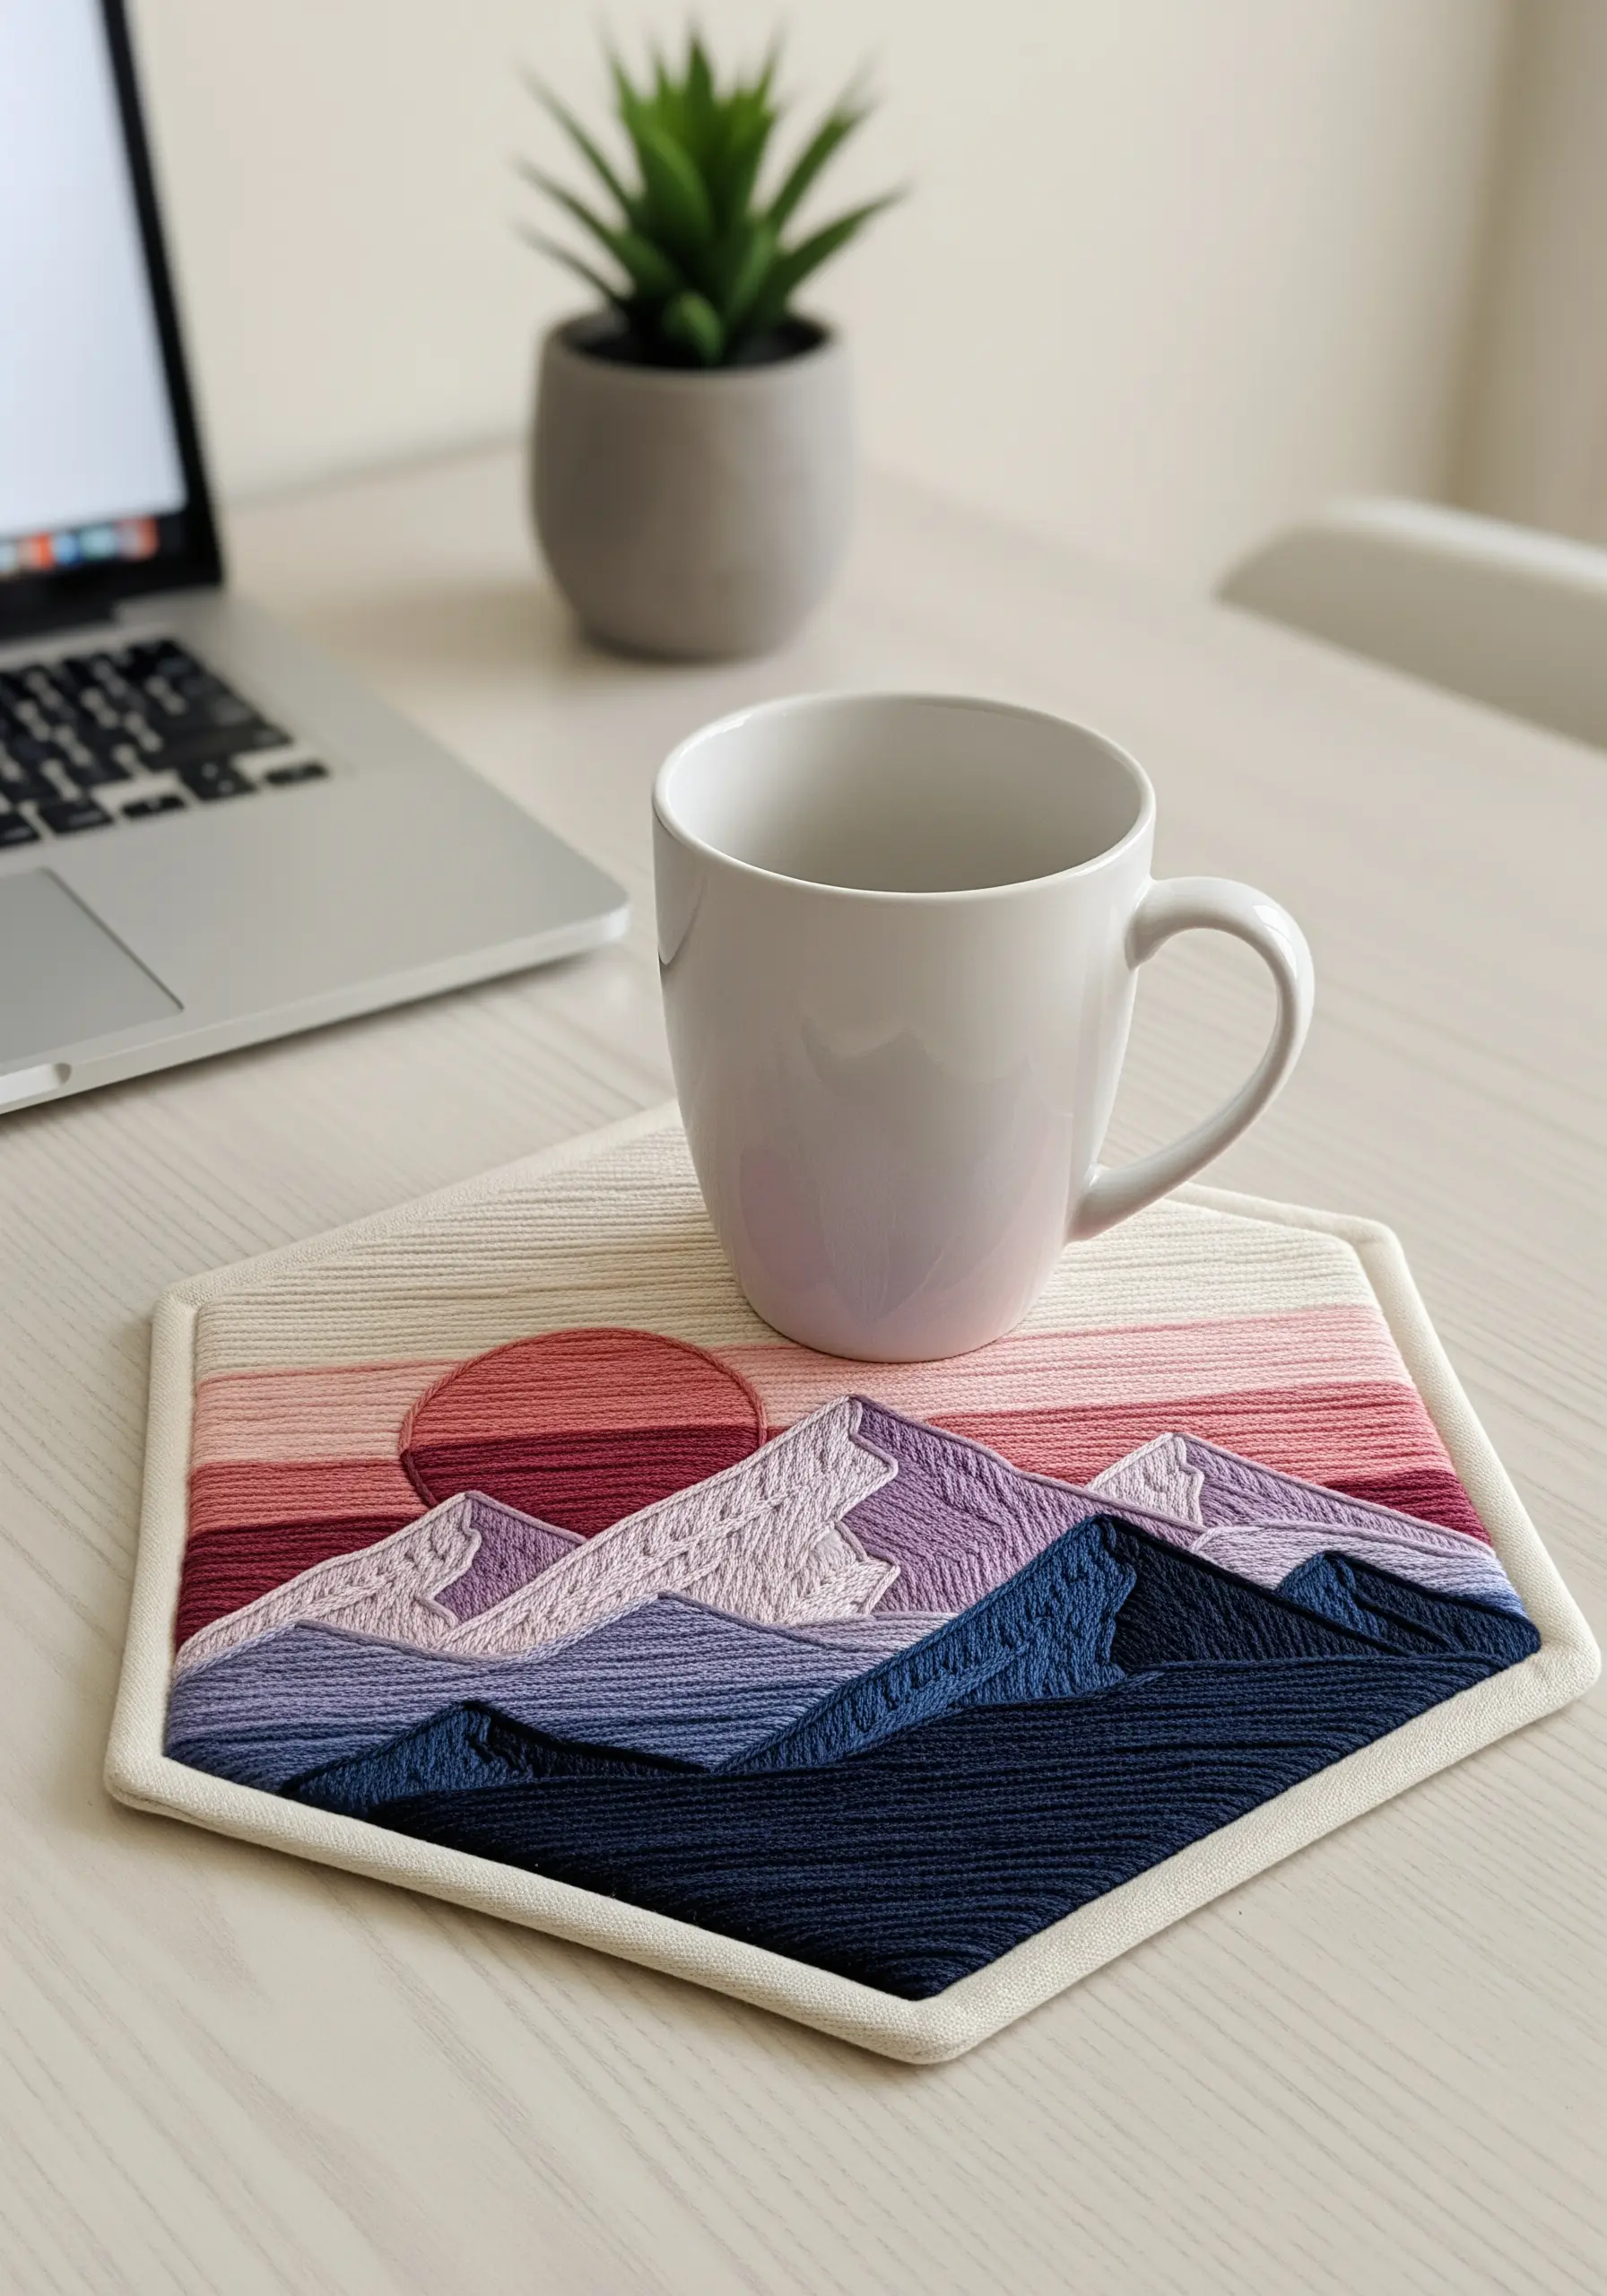
Construct a modern mountain range by treating each peak as a block of color filled with dense satin stitch.
To create a sense of atmospheric depth, use a gradient of colors from dark in the foreground to light in the background.
Ensure your stitches are perfectly parallel within each block for a clean, graphic effect. You can use a single strand of floss laid as a guide to keep your lines straight.
This technique turns a complex scene into a series of manageable abstract shapes and gradient ideas, resulting in a bold, contemporary piece.
5. Master Clean Edges on Small Motifs

For crisp, graphic motifs like a bee or honeycomb, precision is key.
Outline your shapes first with a single-thread split stitch, creating a subtle, raised barrier.
Then, fill the interior with satin stitch, tucking your needle just inside the split-stitch line. This simple preparation prevents uneven edges and gives your work a sharp, appliqué-like finish.
For the delicate honeycomb, a simple backstitch provides the necessary structure without adding bulk, balancing the composition perfectly.
6. Design with Minimalist Gridwork and Accents
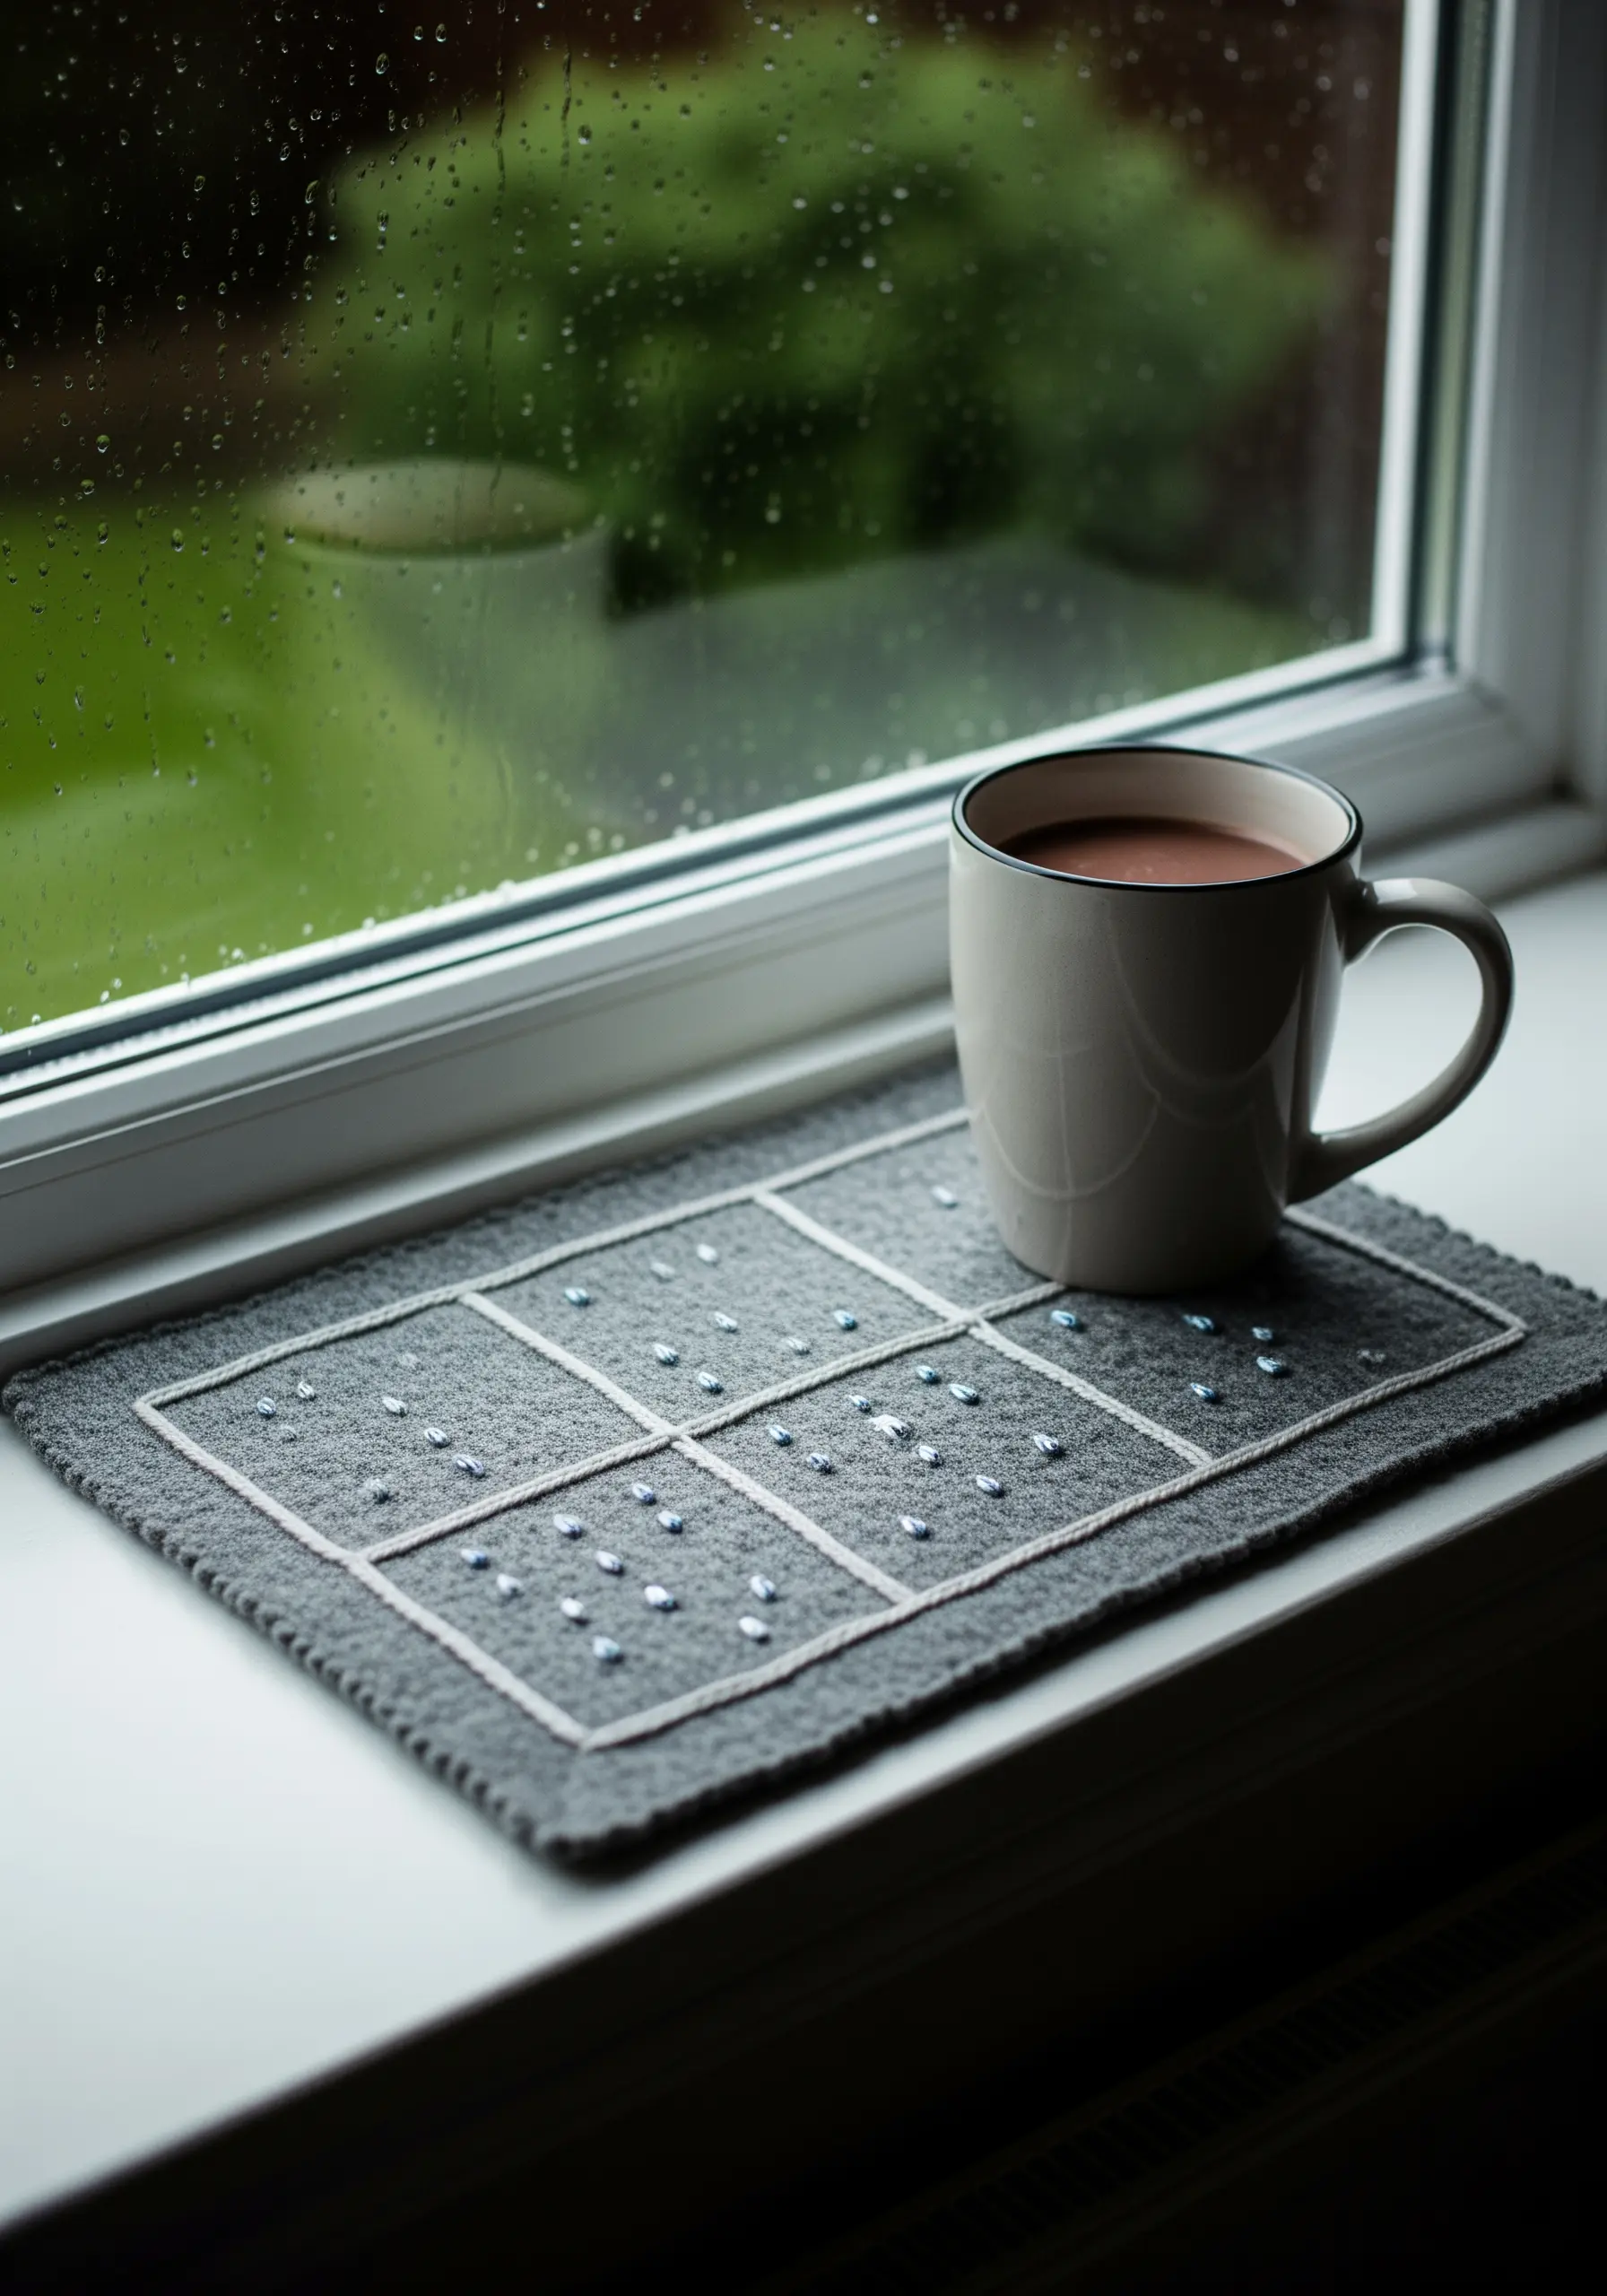
Create a sophisticated pattern using a simple grid of running stitches on a textured fabric like felt or wool.
The beauty of this design lies in its restraint. Use a contrasting but complementary thread color, like white on gray, to keep the look calm and modern.
Introduce a single, tiny seed bead or sequin at each intersection of the grid. This adds a subtle shimmer and tactile detail without overwhelming the minimalist aesthetic.
This approach proves that elegant, minimalist embroidery art pieces rely more on thoughtful placement than complex stitches.
7. Define Details with Single-Thread Outlines

When stitching detailed objects like a stack of books, use a single strand of black or dark gray floss to outline each shape before filling.
This technique, borrowed from illustration, creates visual separation and prevents colors from blurring together, ensuring each book looks distinct.
Fill the book covers with vertical satin stitches and the spines with horizontal ones to enhance the illusion of form and structure.
For tiny details like titles or decorative elements, use a single backstitch or a tiny straight stitch for perfect clarity.
8. Mimic Cable Knits with Textured Stitches
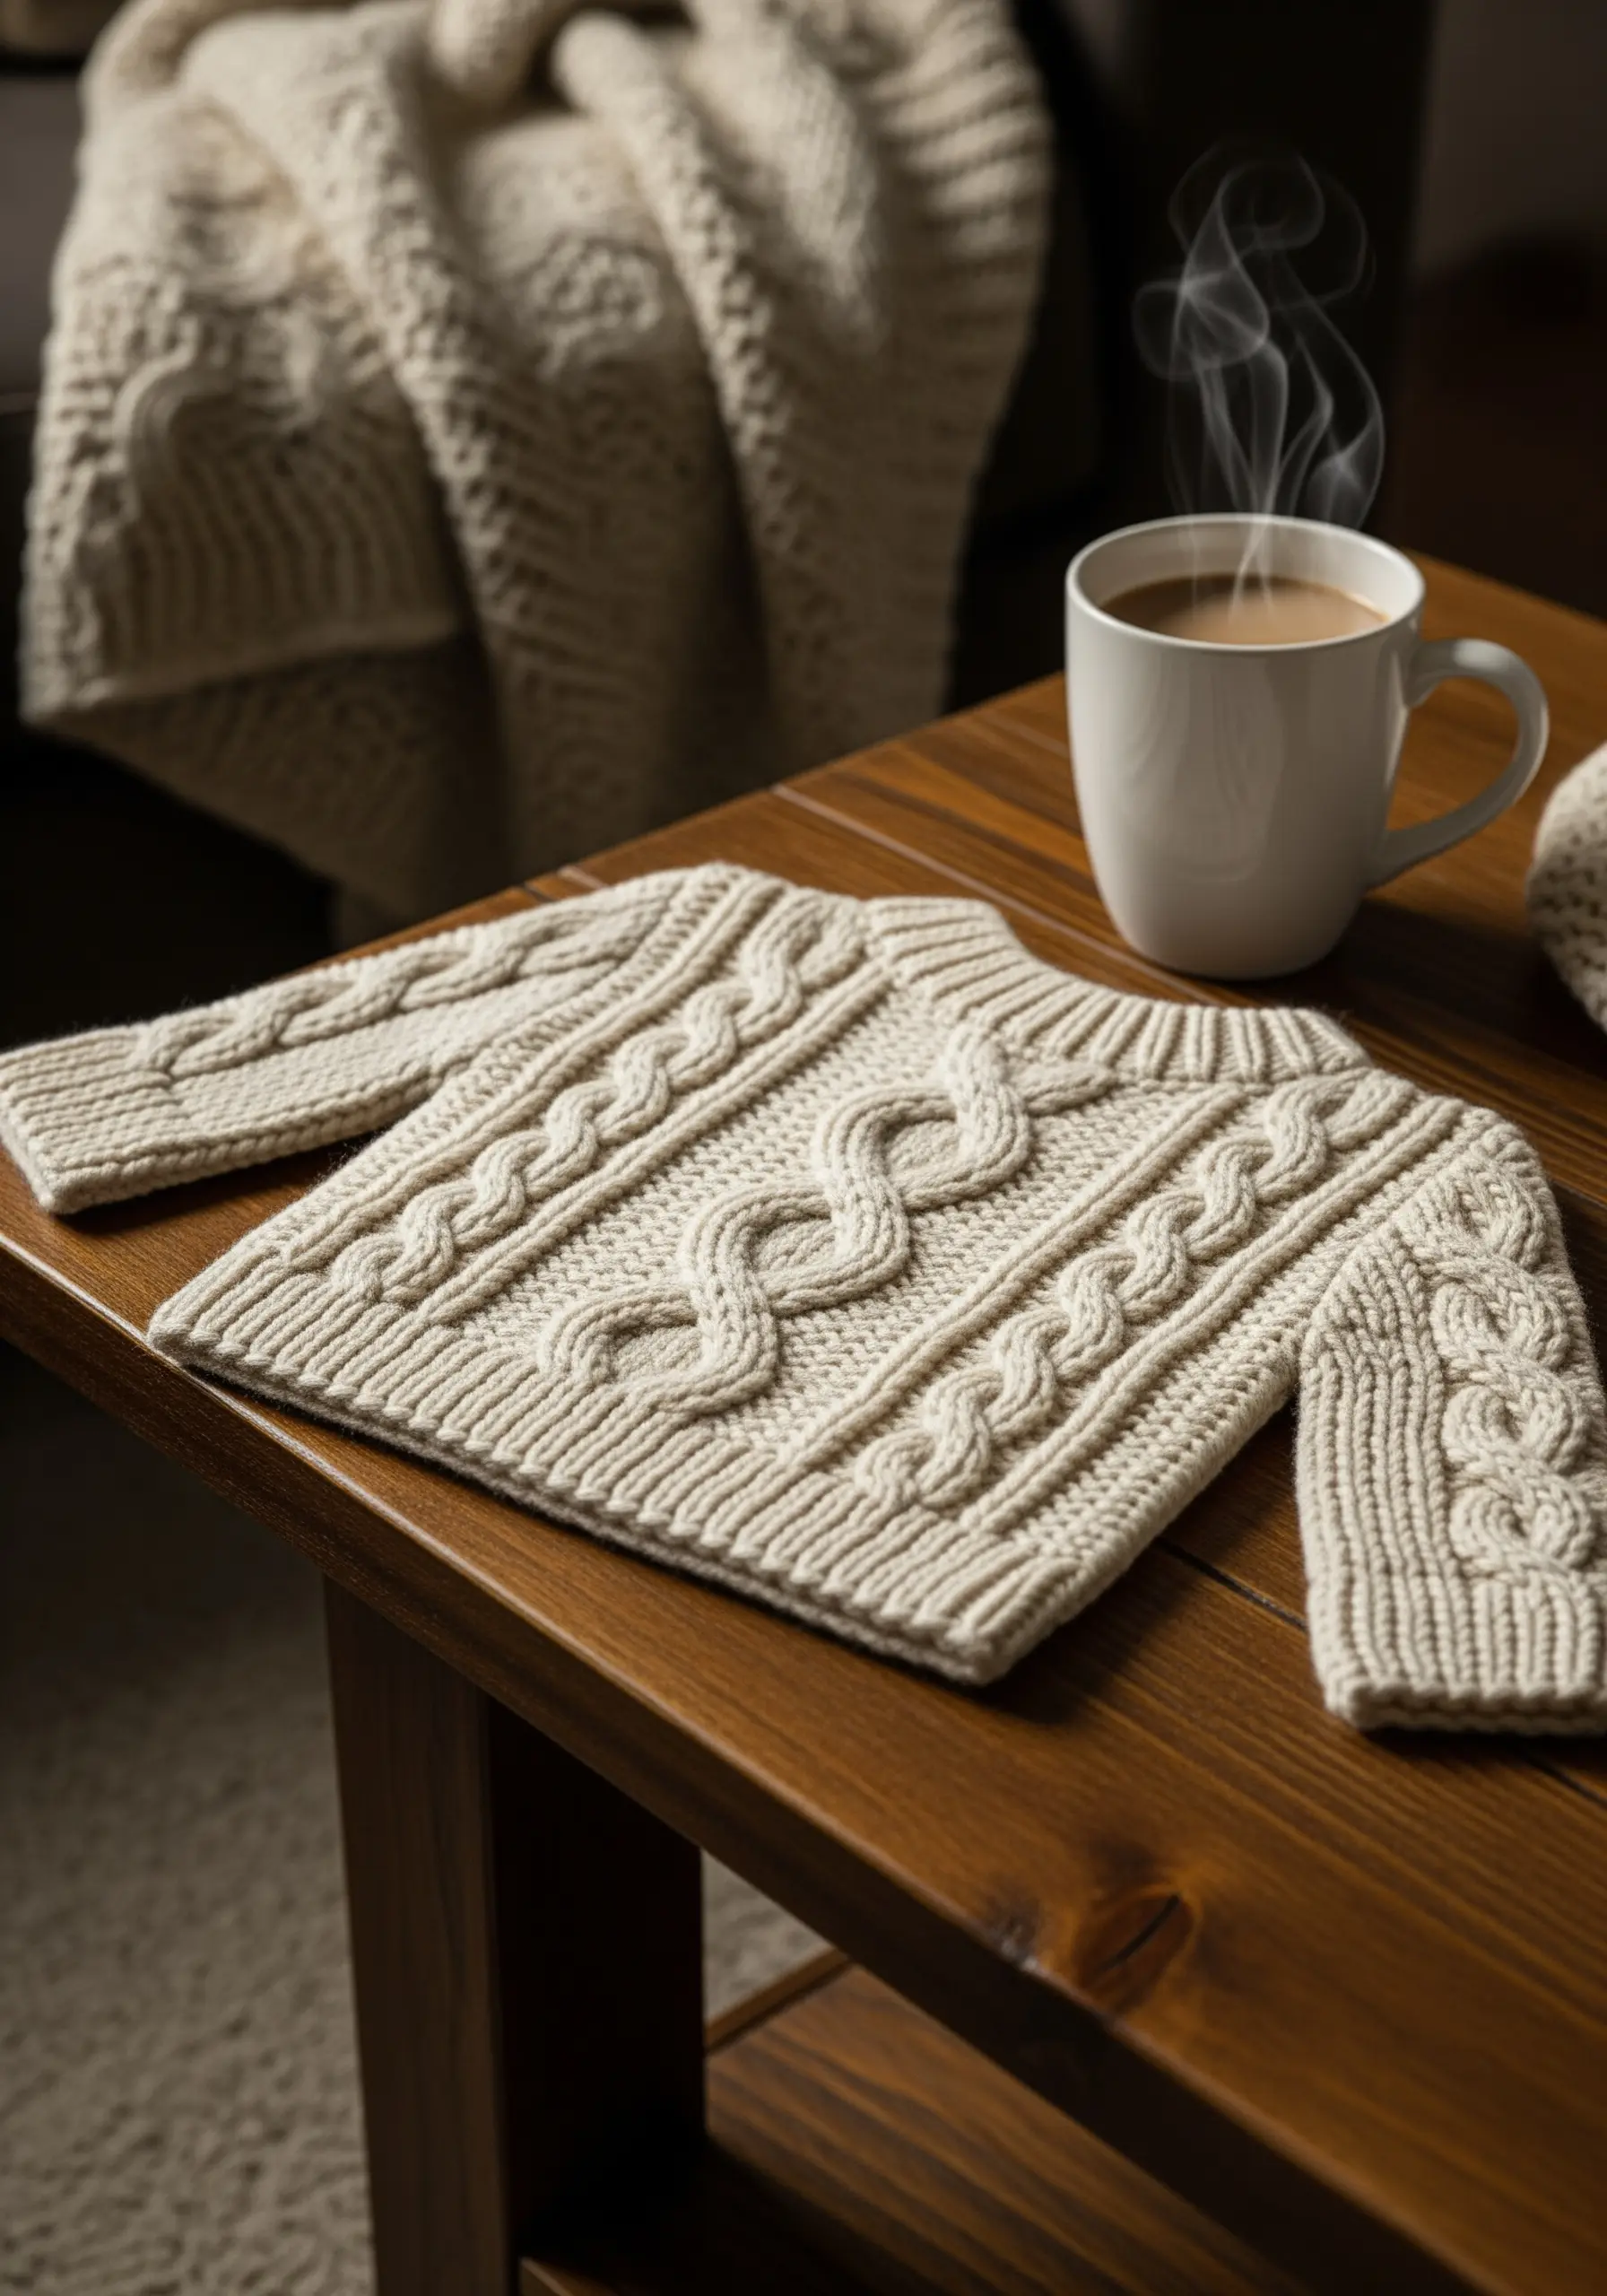
Recreate the cozy texture of a cable-knit sweater by using thicker threads or yarn instead of standard embroidery floss.
Use a raised stem stitch or a braid stitch to form the winding cables, which naturally create a high-relief, three-dimensional effect.
For the smaller textures, combine French knots and seed stitches worked in a ribbed pattern. This mimics the garter stitch background of a real sweater.
This tactile approach results in stunning 3D embroidery wall art that invites touch.
9. Create Contrast with Metallics on Dark Fabric

Make a celestial design shine by stitching it on dark blue or black fabric, which provides the perfect backdrop for metallic threads to stand out.
Fill the crescent moon with a textured long-and-short stitch using silver thread, varying the stitch direction to catch the light from multiple angles.
For the stars, use a simple star stitch or straight stitches in a contrasting metallic, like gold, to add warmth and visual interest.
These simple moon and stars embroidery ideas are effective because the high-contrast materials do the aesthetic work for you.
10. Blend Autumnal Hues with Thread Painting
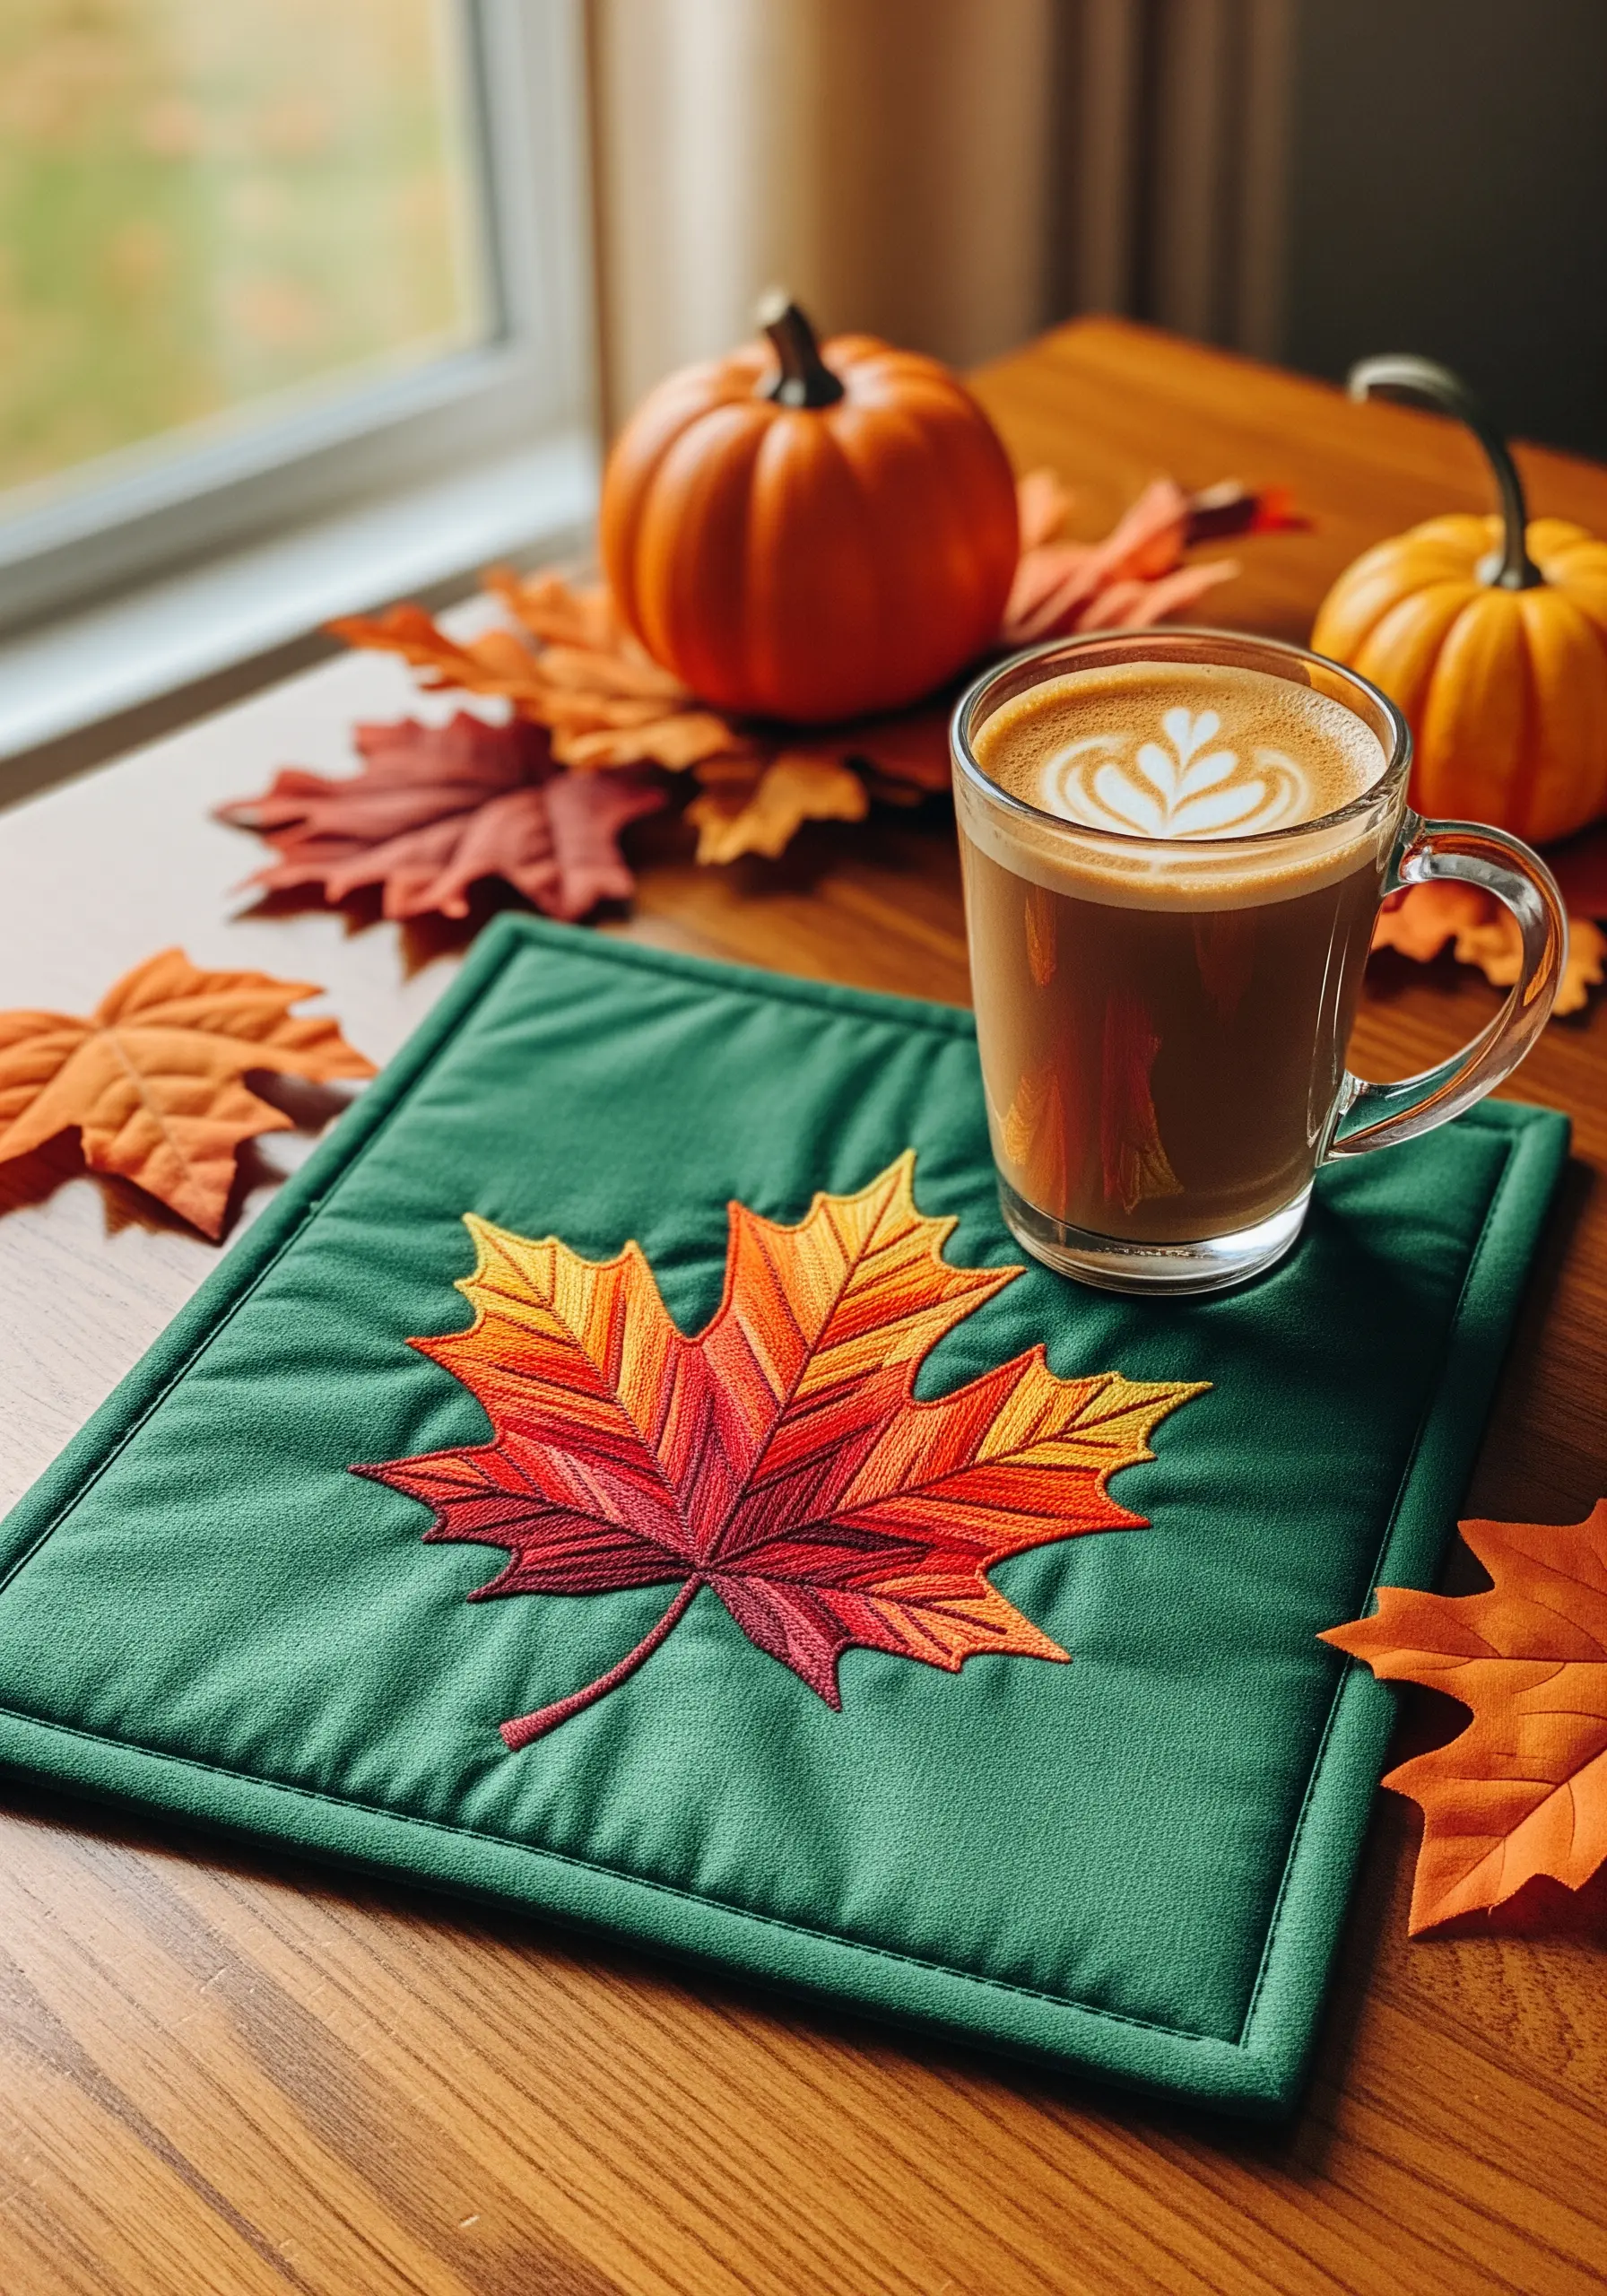
Capture the fiery gradient of an autumn leaf using the long-and-short stitch, also known as thread painting.
Start with the lightest color (yellow) at the center and work outward, blending in progressively darker shades of orange, red, and burgundy.
Always angle your stitches to follow the natural direction of the leaf’s veins, radiating from the center stem out to the pointed tips.
This directional stitching is what gives the leaf its realistic movement and flow, transforming it from a flat shape into a dynamic botanical element.
11. Harness the Power of Radiating Lines

Create a bold, graphic sunrise with minimal effort by focusing on clean, radiating lines.
Use a dense satin stitch to create the solid semi-circle of the sun. To keep the edge perfectly smooth, outline it with a split stitch first.
For the sun’s rays, use a single, long straight stitch for each one. Mark the start and end points precisely before you stitch to ensure they are perfectly even and spaced correctly.
This design demonstrates how powerful and effective simple geometry can be in embroidery.
12. Achieve Fluidity with Elegant Line Art
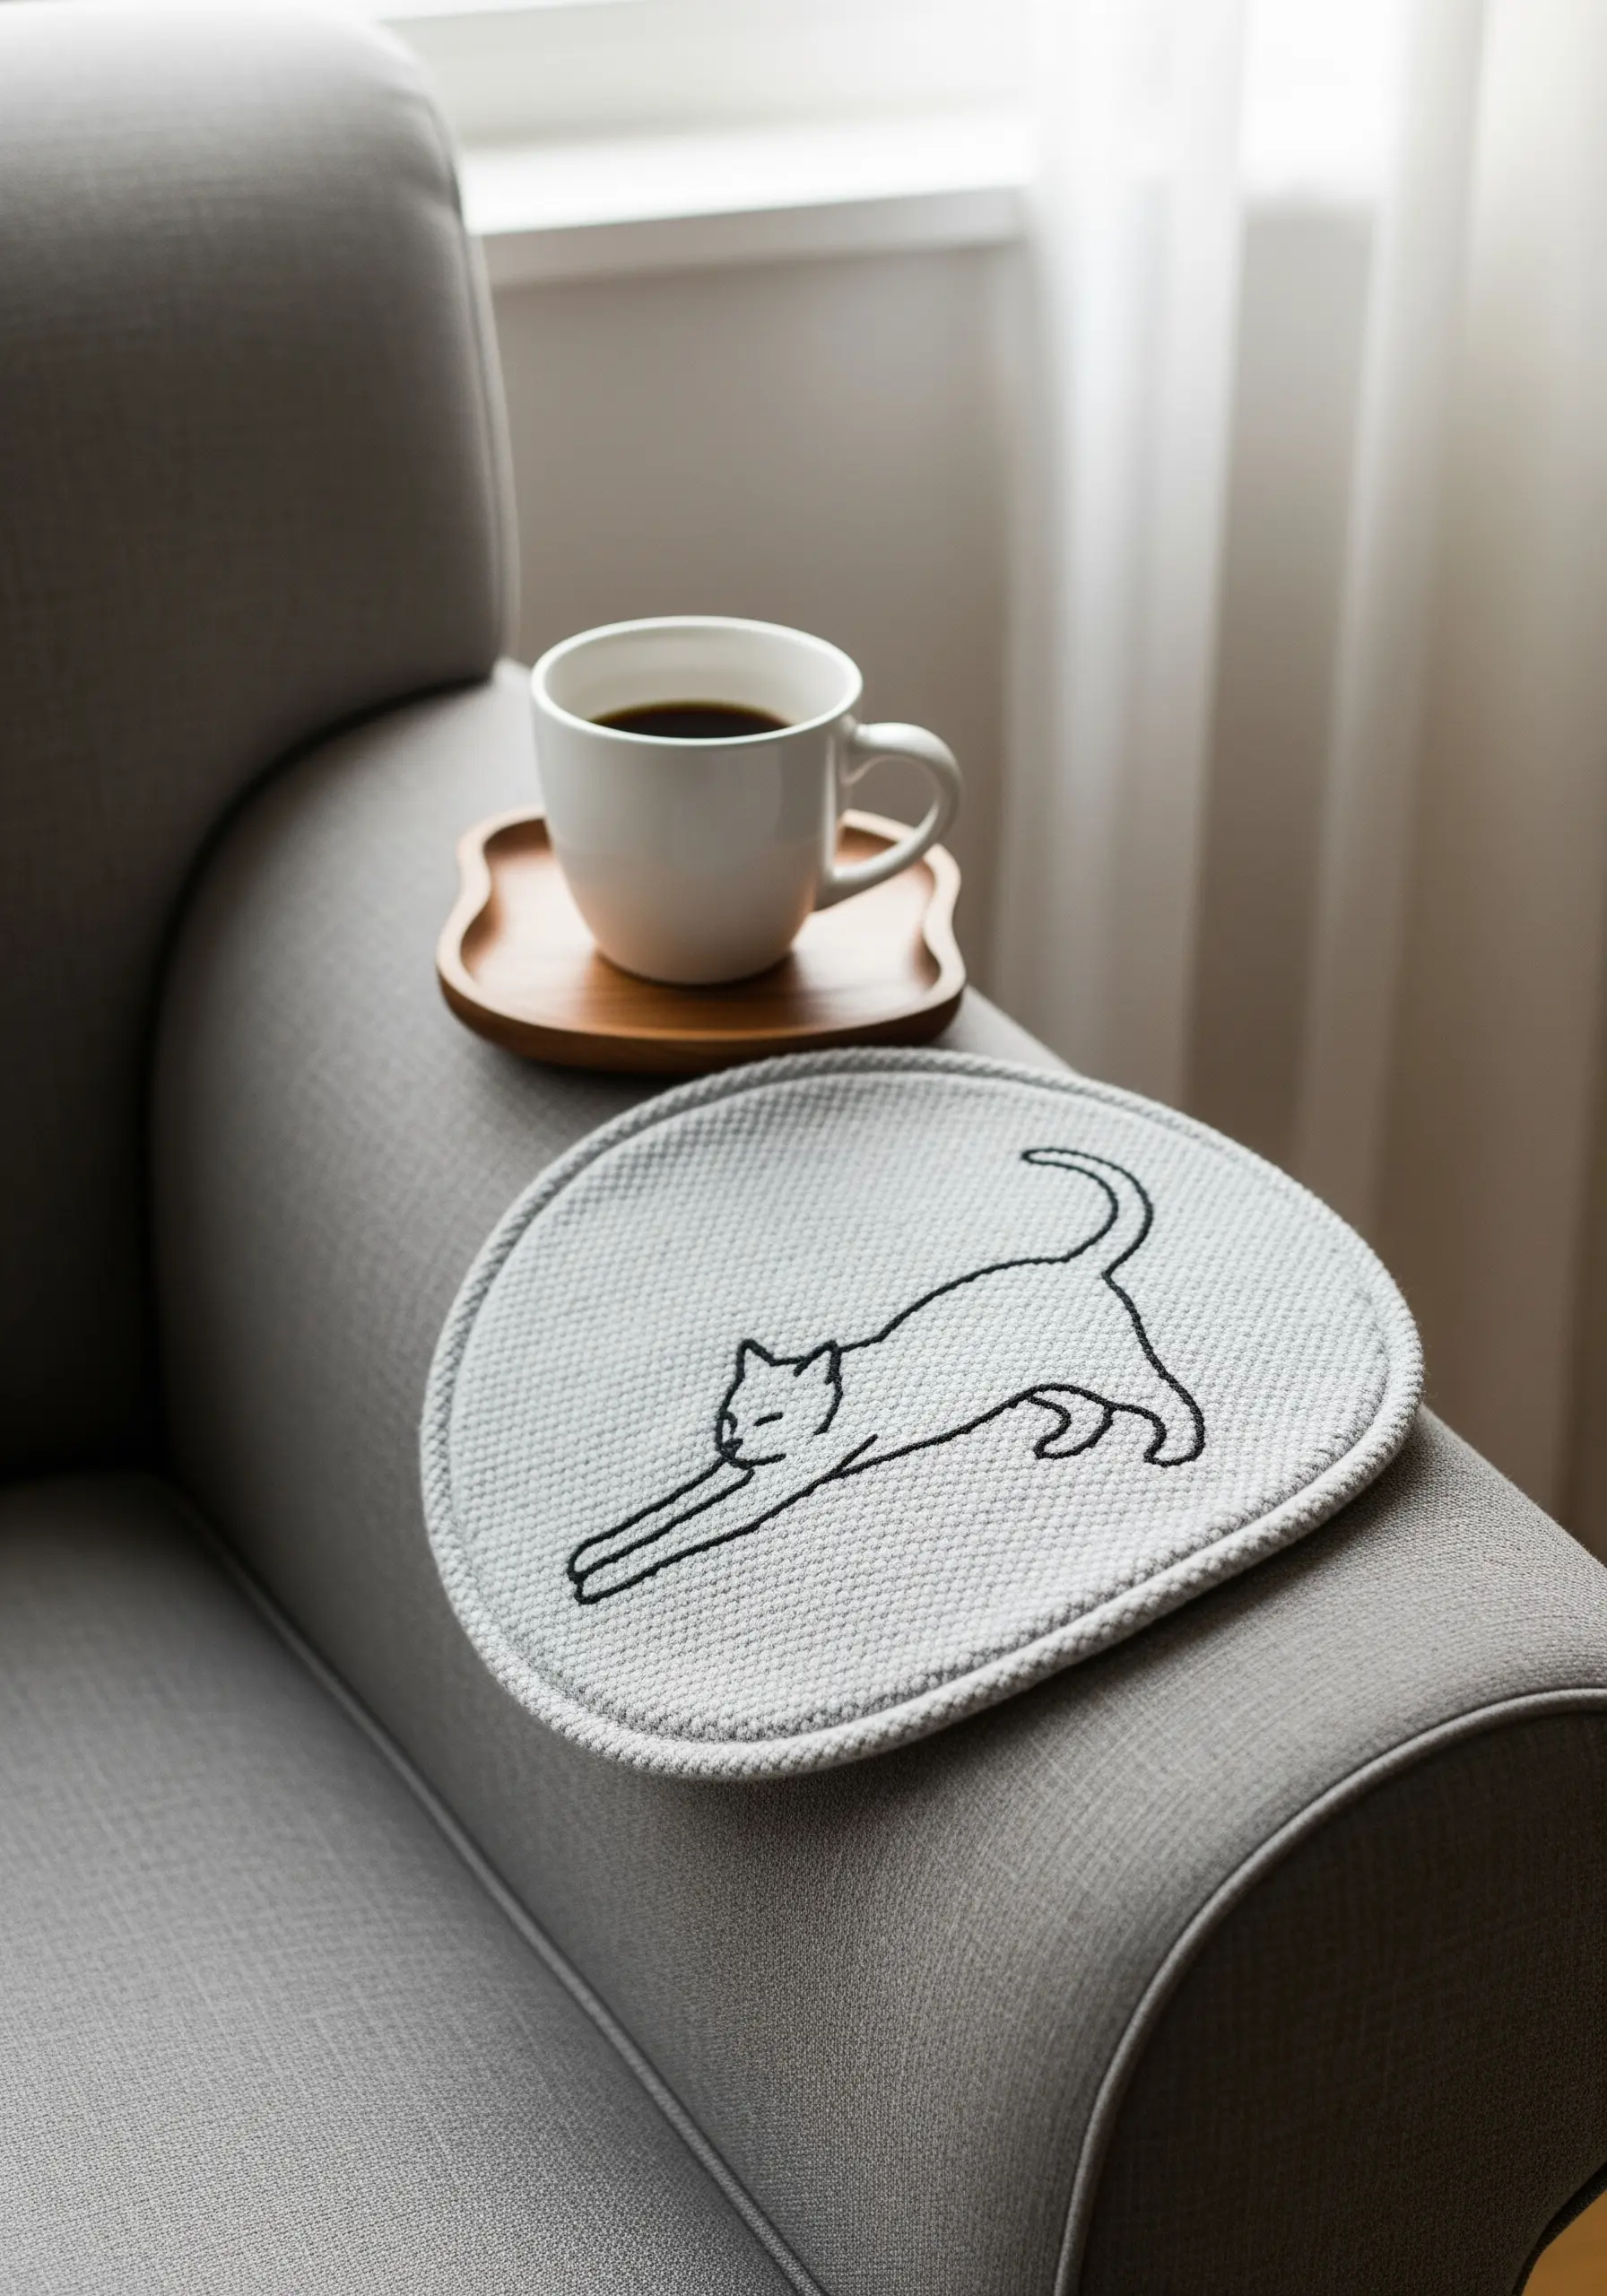
For a minimalist yet expressive design like a stretching cat, the quality of your line is everything.
Use a whipped backstitch to create a perfectly smooth, solid line that has the feel of an ink drawing. This stitch eliminates the segmented look that a standard backstitch can have on curves.
Choose a thread count that suits your desired line weight—two or three strands often provide the perfect balance of delicacy and presence.
This focus on a single, continuous line is the essence of creating elegant and modern line art thread designs.
13. Cultivate a Wildflower Meadow with Varied Stitches

Stitch a vibrant, textured meadow by assigning a different stitch to each type of flower, creating a rich tapestry of forms.
Use lazy daisy stitches for petals, French knots for flower centers and buds, and straight stitches for grasses and stems.
Layer your elements by stitching the flowers in the foreground last, so their petals and leaves overlap the stems behind them. This simple trick creates an immediate sense of depth.
Combining multiple simple stitches is the secret to successful wildflower thread painting techniques that feel lush and alive.
14. Perfect Your Script with Satin Stitch

Embroidering smooth, elegant script requires patience and precision. The best stitch for this is a closely worked satin stitch.
Break down each letter into smaller, manageable sections. For a word like “Calm,” you would stitch the ‘C’ in several small, angled satin stitch blocks.
Always keep your stitches parallel within each section and slightly overlap them where sections meet to create a seamless flow.
Using a lighter weight thread, like two strands, gives you more control and a more refined finish for any inspirational quote embroidery wall hangings.
15. Create Dimension with Padded Satin Stitch
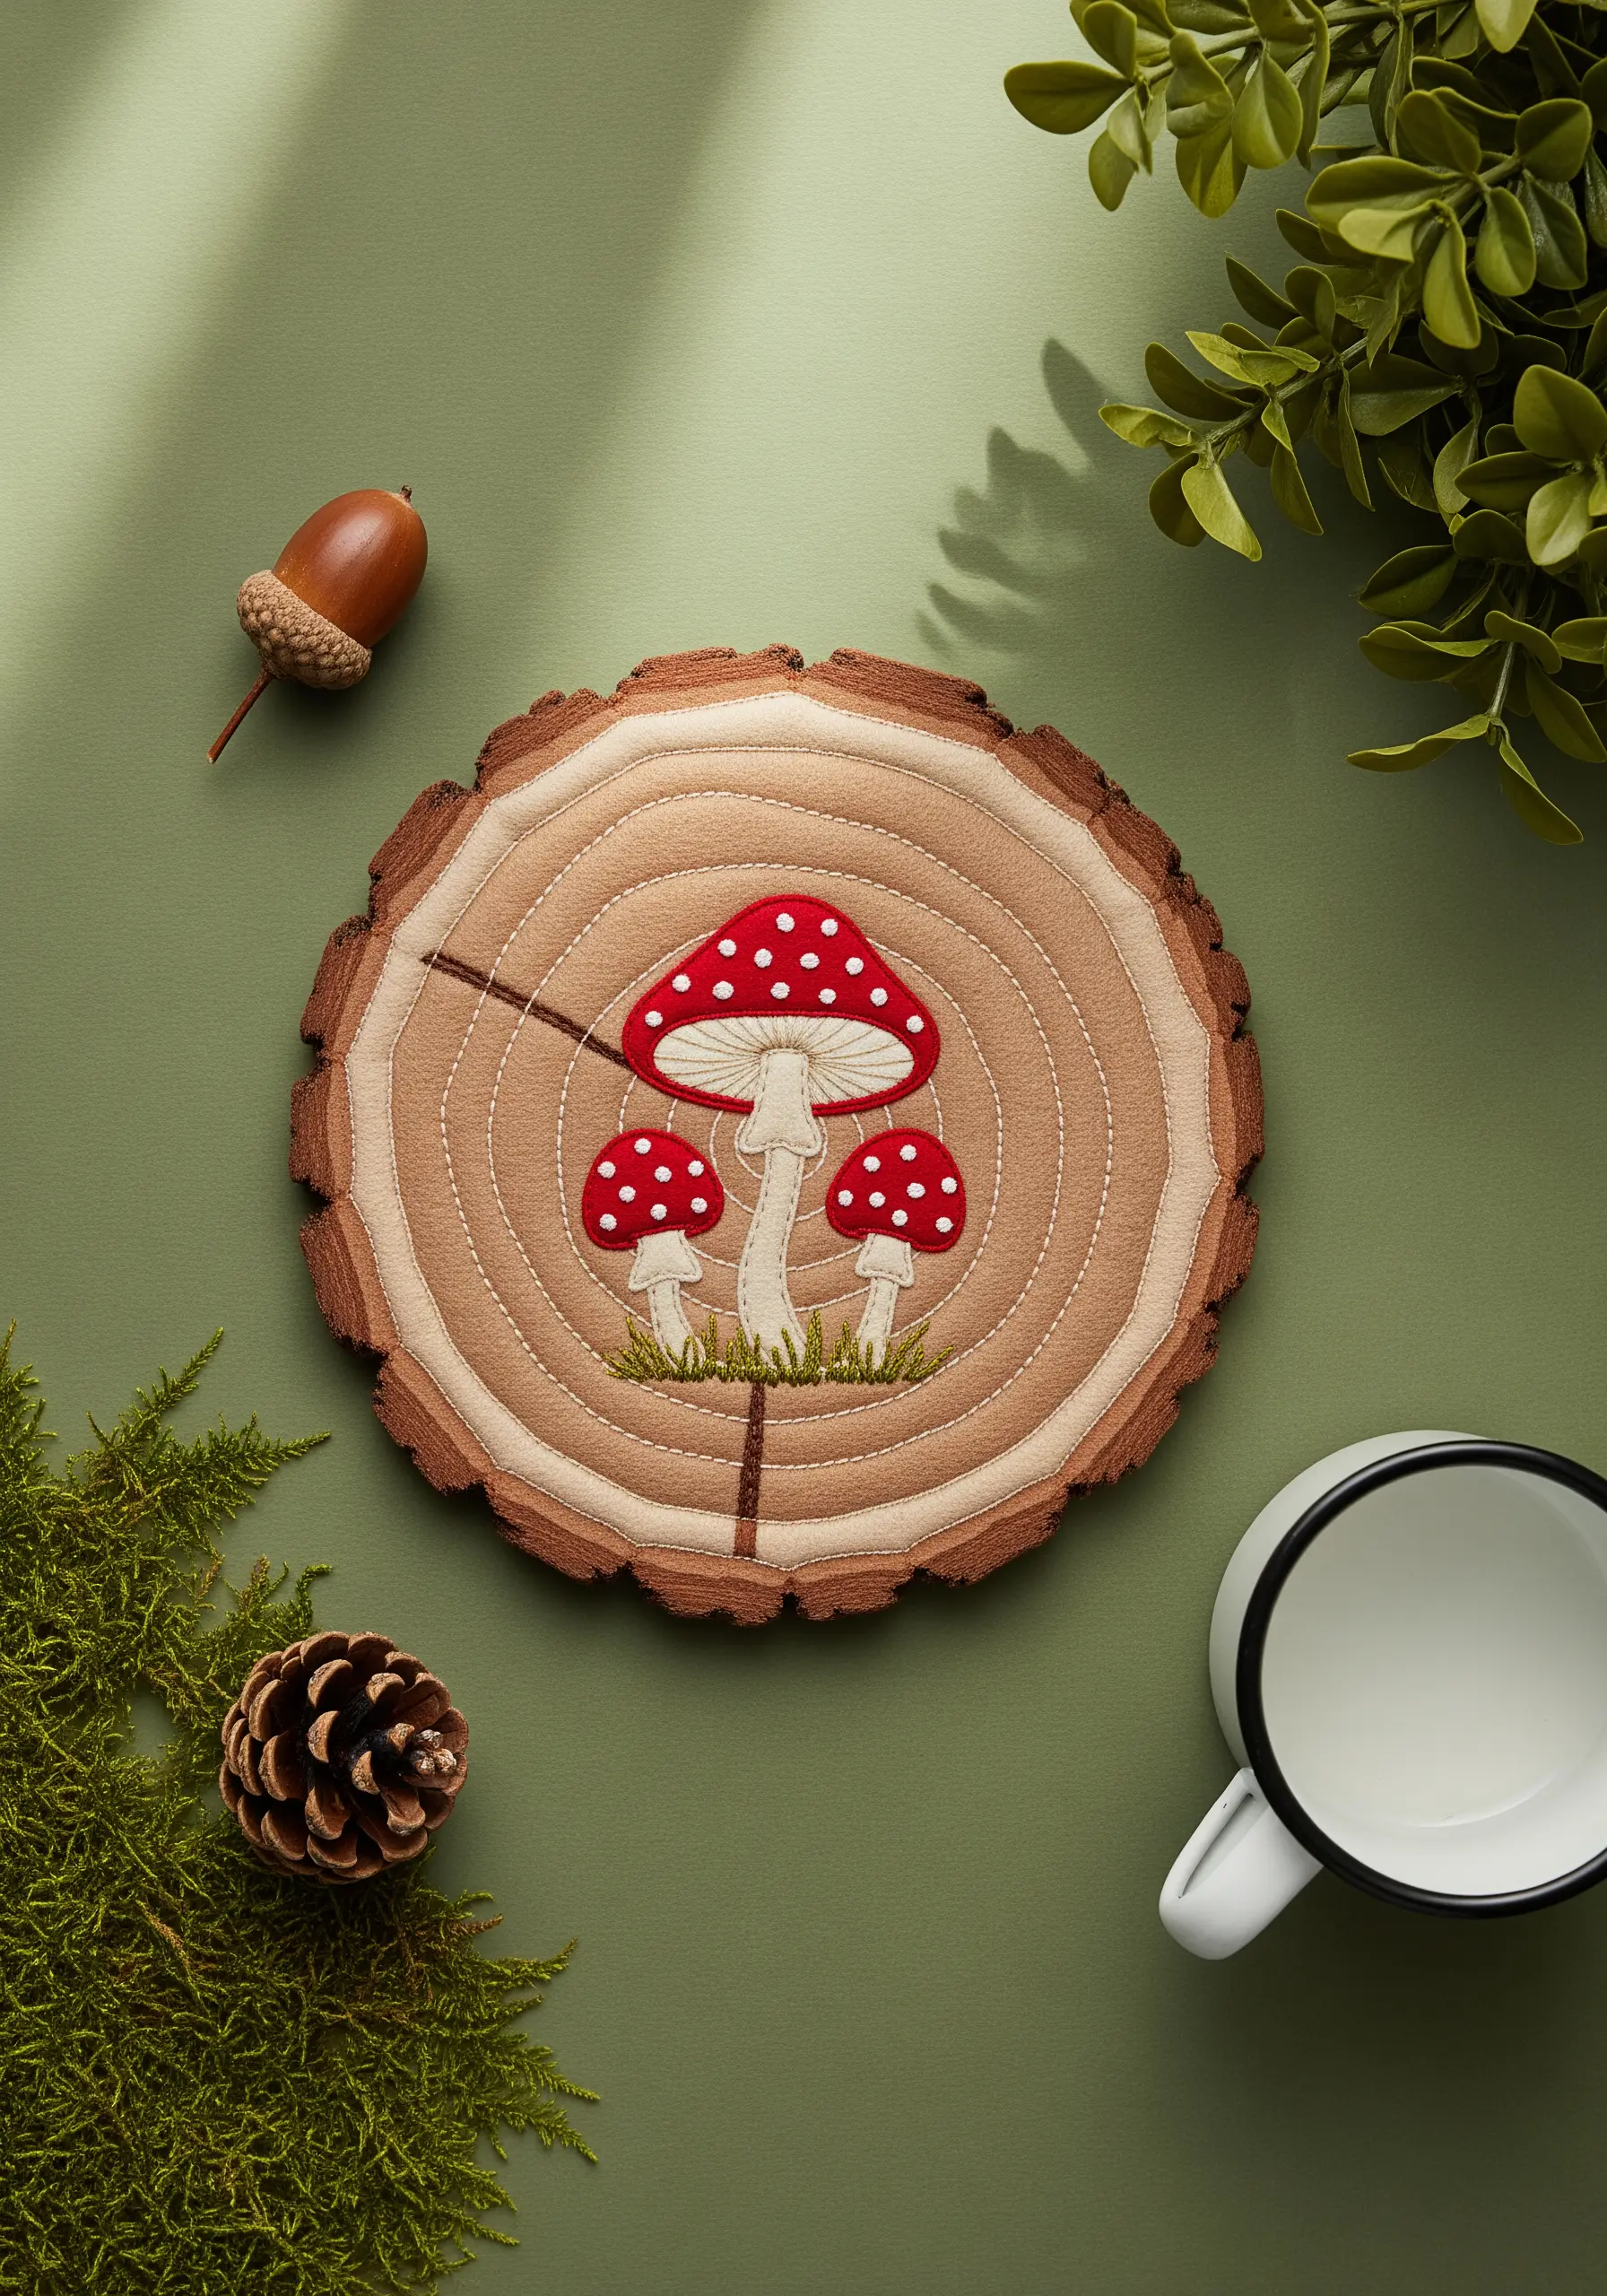
To make your mushroom caps look rounded and three-dimensional, use a padded satin stitch.
First, fill the shape of the cap with a foundation of small, simple seed stitches or a layer of straight stitches running perpendicular to your final satin stitch direction.
Then, work your final layer of satin stitch over this padding. The extra height lifts the stitches from the fabric, creating a subtle, puffy effect that catches the light.
Add a few white French knots or straight stitches for the iconic spots, and your mushroom will have a charming, tactile quality.
16. Define Small Leaves with Color Variation
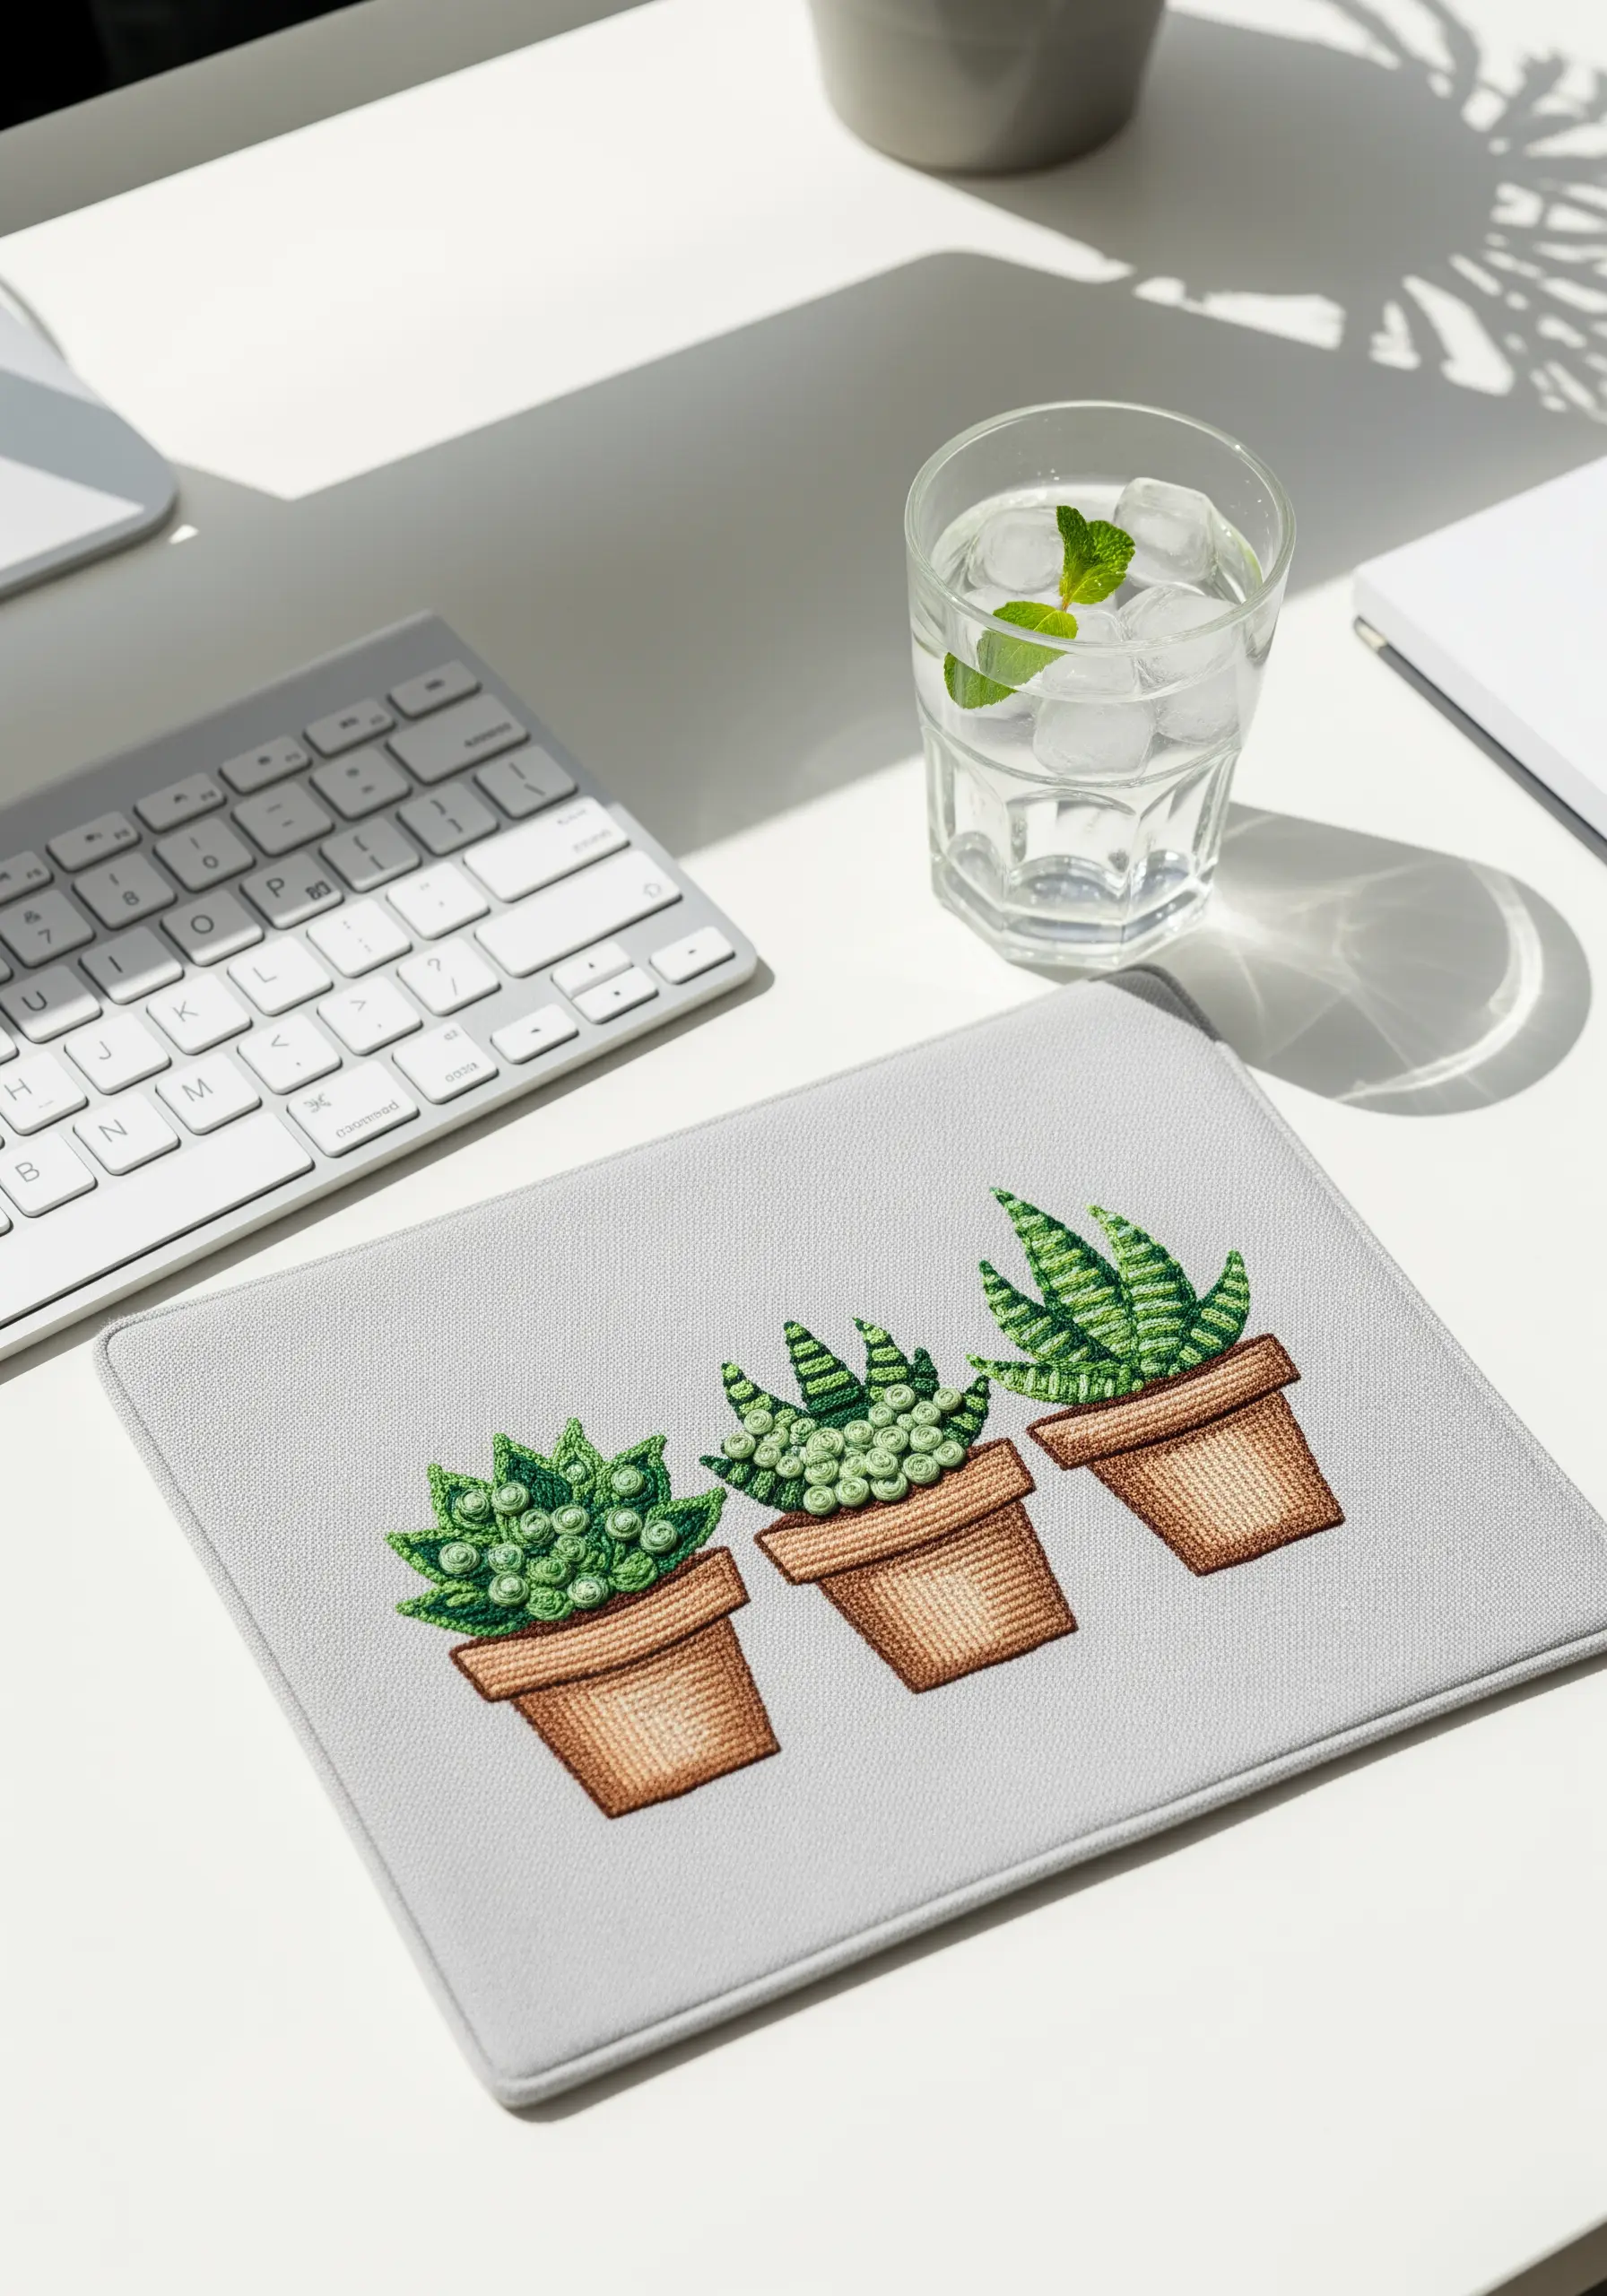
When stitching small, complex plants like succulents, subtle color changes are your most powerful tool for creating definition.
Use two or three similar shades of green for each plant. Use the darkest shade for the leaves at the back or bottom, and the lightest shade for the newest growth at the top.
Vary your stitch direction from leaf to leaf to further enhance the separation and create a sense of texture and movement.
This thoughtful approach to color placement is key to making plant-inspired embroidery patterns look realistic and vibrant.
17. Tell a Story with Minimalist Outlines
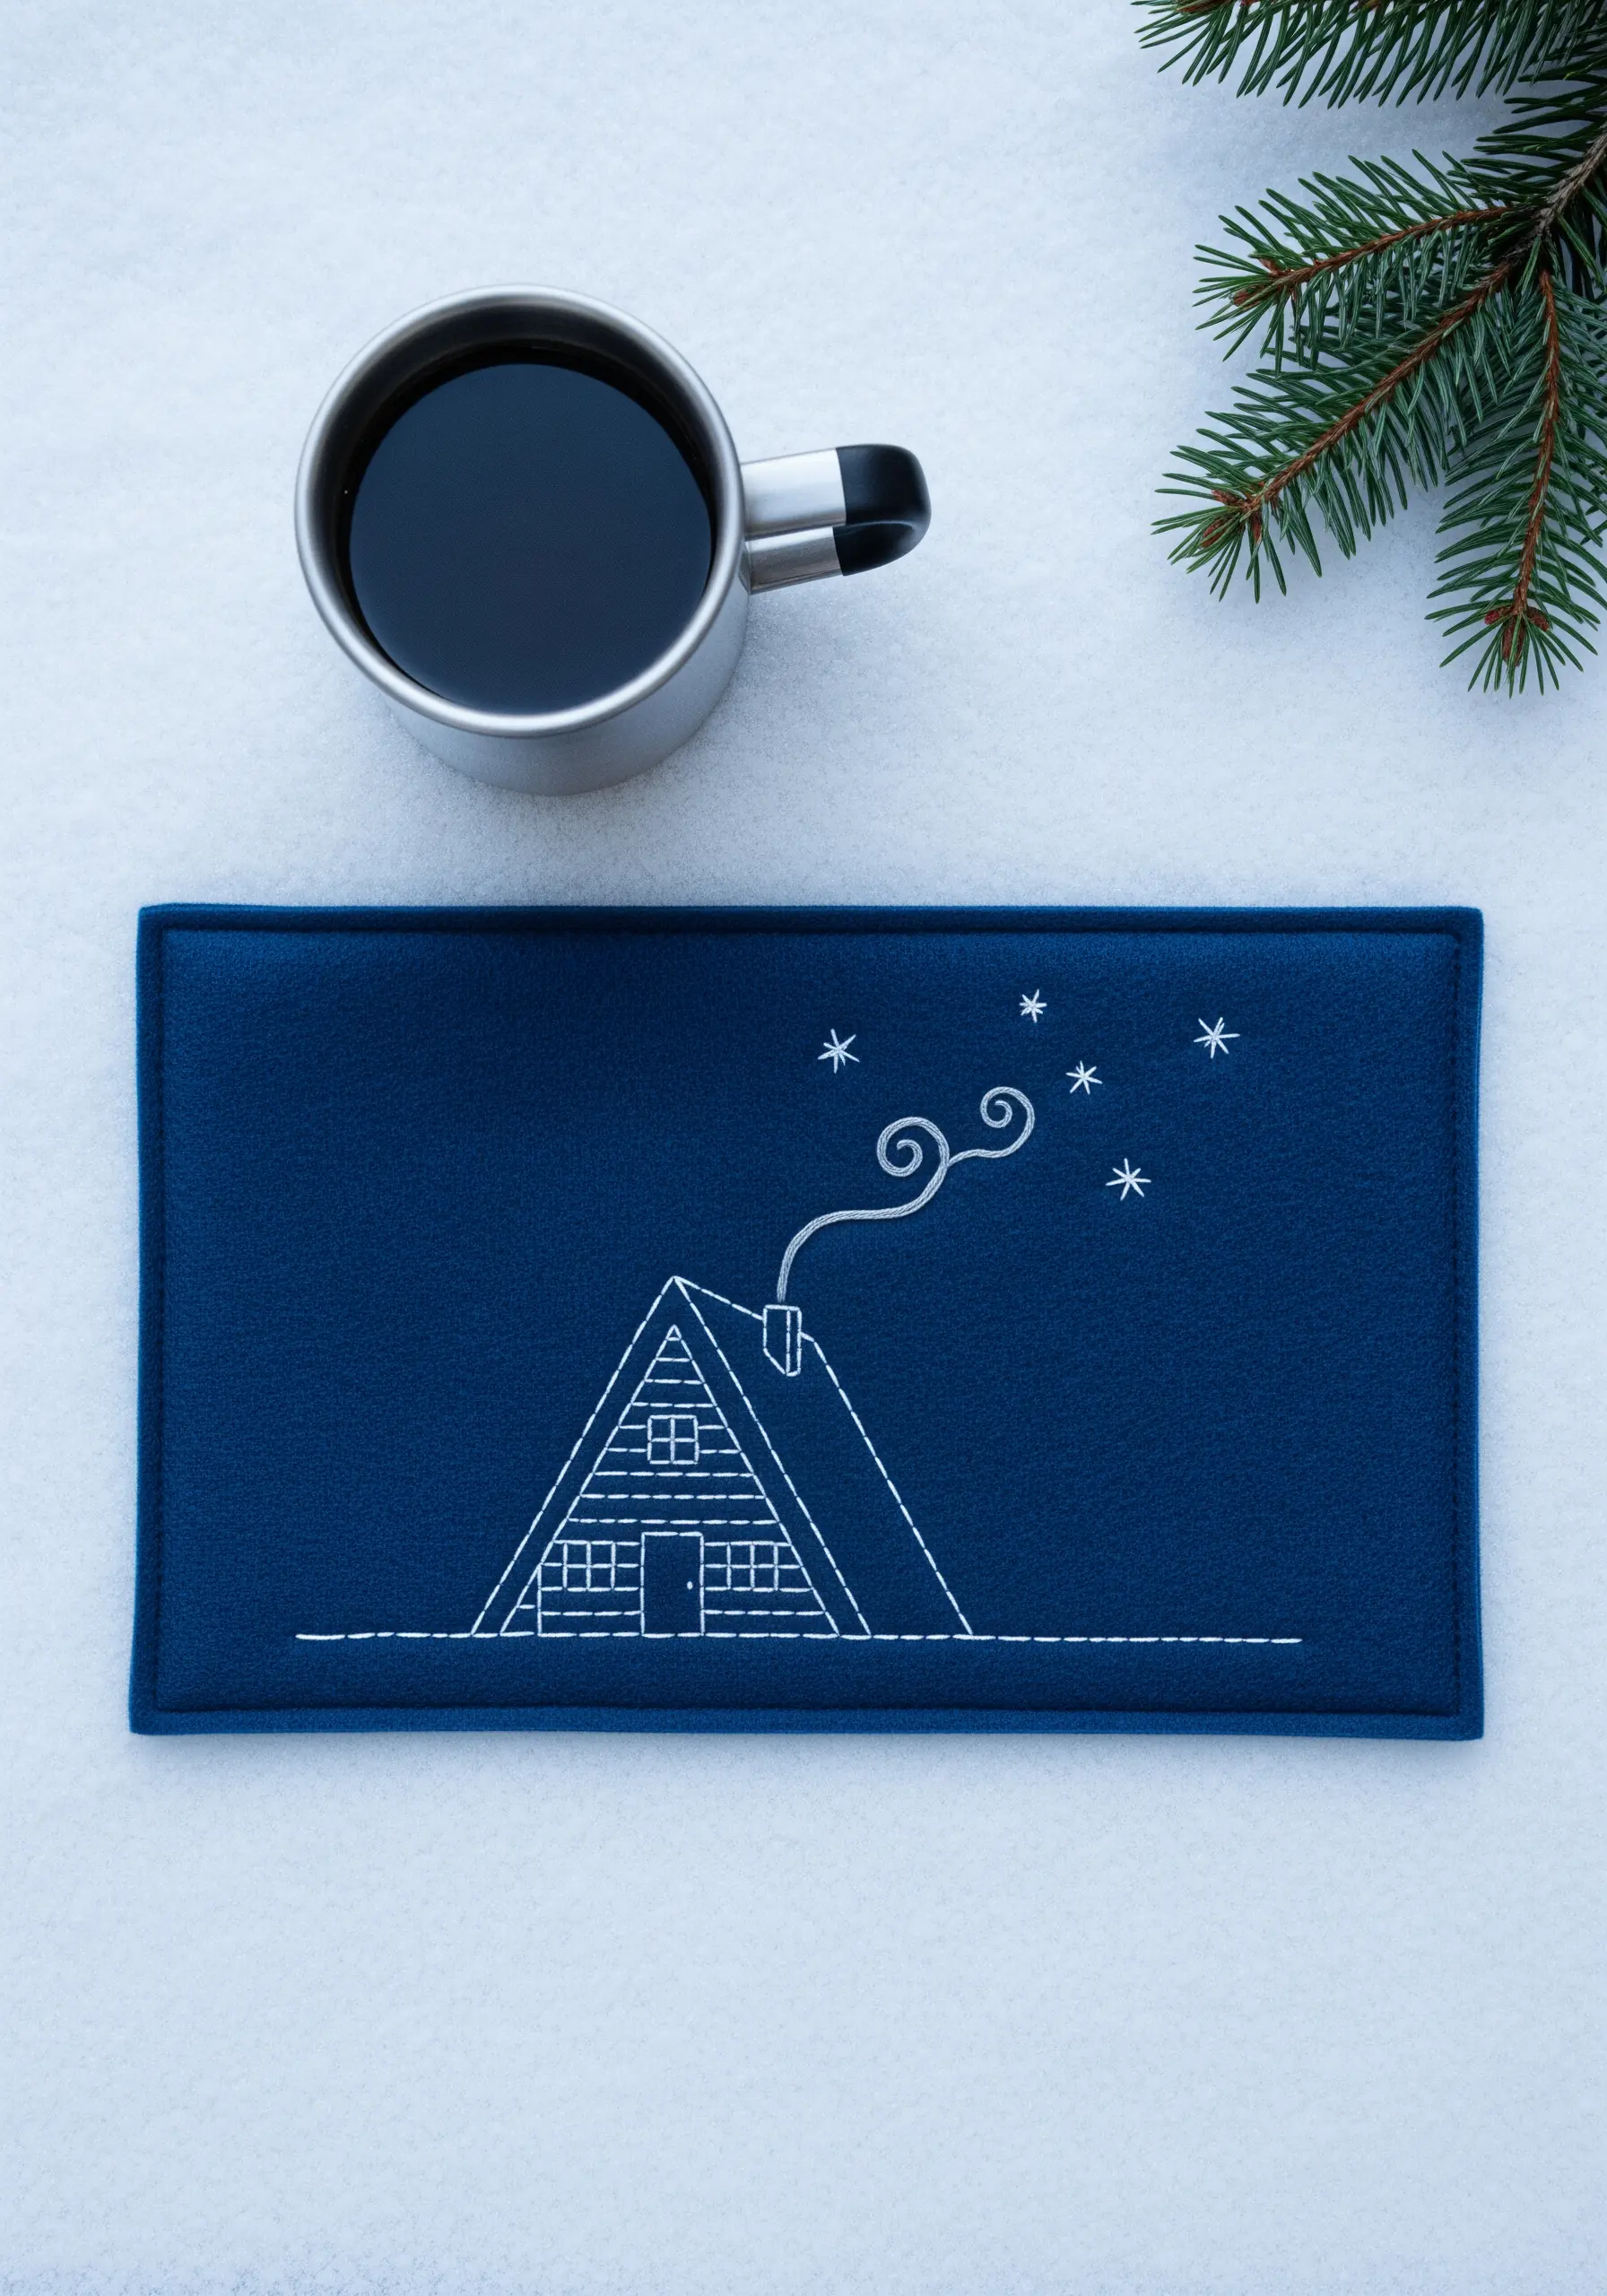
Evoke a cozy winter night with nothing more than a few well-placed lines.
Use a simple backstitch in a high-contrast color—like white on deep navy—to create a crisp, graphic illustration of an A-frame cabin.
The magic is in the details: a few tiny straight stitches for stars and a whimsical swirl of stem stitch for smoke curling from the chimney.
This design is a masterclass in minimalism, proving that you don’t need complex fills to create a strong sense of mood and place.
18. Weave Texture into Your Embroidery

Move beyond traditional stitches by incorporating weaving techniques into your mug rug for a bold, textural statement.
Create a foundation grid on your fabric using long straight stitches with strong embroidery floss.
Then, take a much thicker material, like chunky yarn or wool roving, and weave it over and under the grid stitches.
This method is a fast way to create a dimensional, tactile surface and is a fantastic entry point into creating more complex mixed-fiber embroidery projects.
19. Map the Stars with Beads and Stitches

Create an elegant constellation design by combining simple stitches with delicate beadwork.
Use a crisp backstitch or tiny seed stitches to form the connecting lines between the stars in the constellation.
For the stars themselves, use a combination of small, white star stitches and tiny, iridescent or silver seed beads. The beads will catch the light and add a subtle sparkle that mimics a real night sky.
Scatter a few extra beads randomly across the fabric to represent distant stars, completing the celestial effect.
20. Achieve Naturalism with the Fishbone Stitch

The fishbone stitch is the perfect choice for creating realistic leaves like this fern frond.
The stitch works from the tip of the leaf downwards, with alternating stitches crossing over a central spine. This technique naturally creates the texture and dimension of a real leaf with a defined midrib.
For added realism, use two slightly different shades of green thread in your needle at once. This will create subtle, natural-looking color variations throughout the leaf.
It’s a simple way to elevate any piece of nature-inspired embroidery.


