

Look closely at a piece of paper art. Notice the way layers create shadows, how a simple fold suggests form, or how a clean edge contrasts with a torn one. These are the details that give it life—and they are the very same principles that can elevate your embroidery from competent to captivating.
This isn’t about perfectly replicating paper in thread. It’s about translation. It’s about seeing the coiled precision of quilling and recognizing the potential of a bullion knot. It’s about understanding that the depth in a paper diorama can be achieved with layered appliqué and varied thread weights.
In each idea that follows, you’ll find a technique—a specific, actionable way to think about texture, dimension, and composition. These are not complex challenges, but intentional shifts in your approach. Let paper inspire you to build, layer, and sculpt with thread, transforming your needle into a tool for creating not just stitches, but stories.
1. Layered Landscapes with Appliqué and Thread Weight
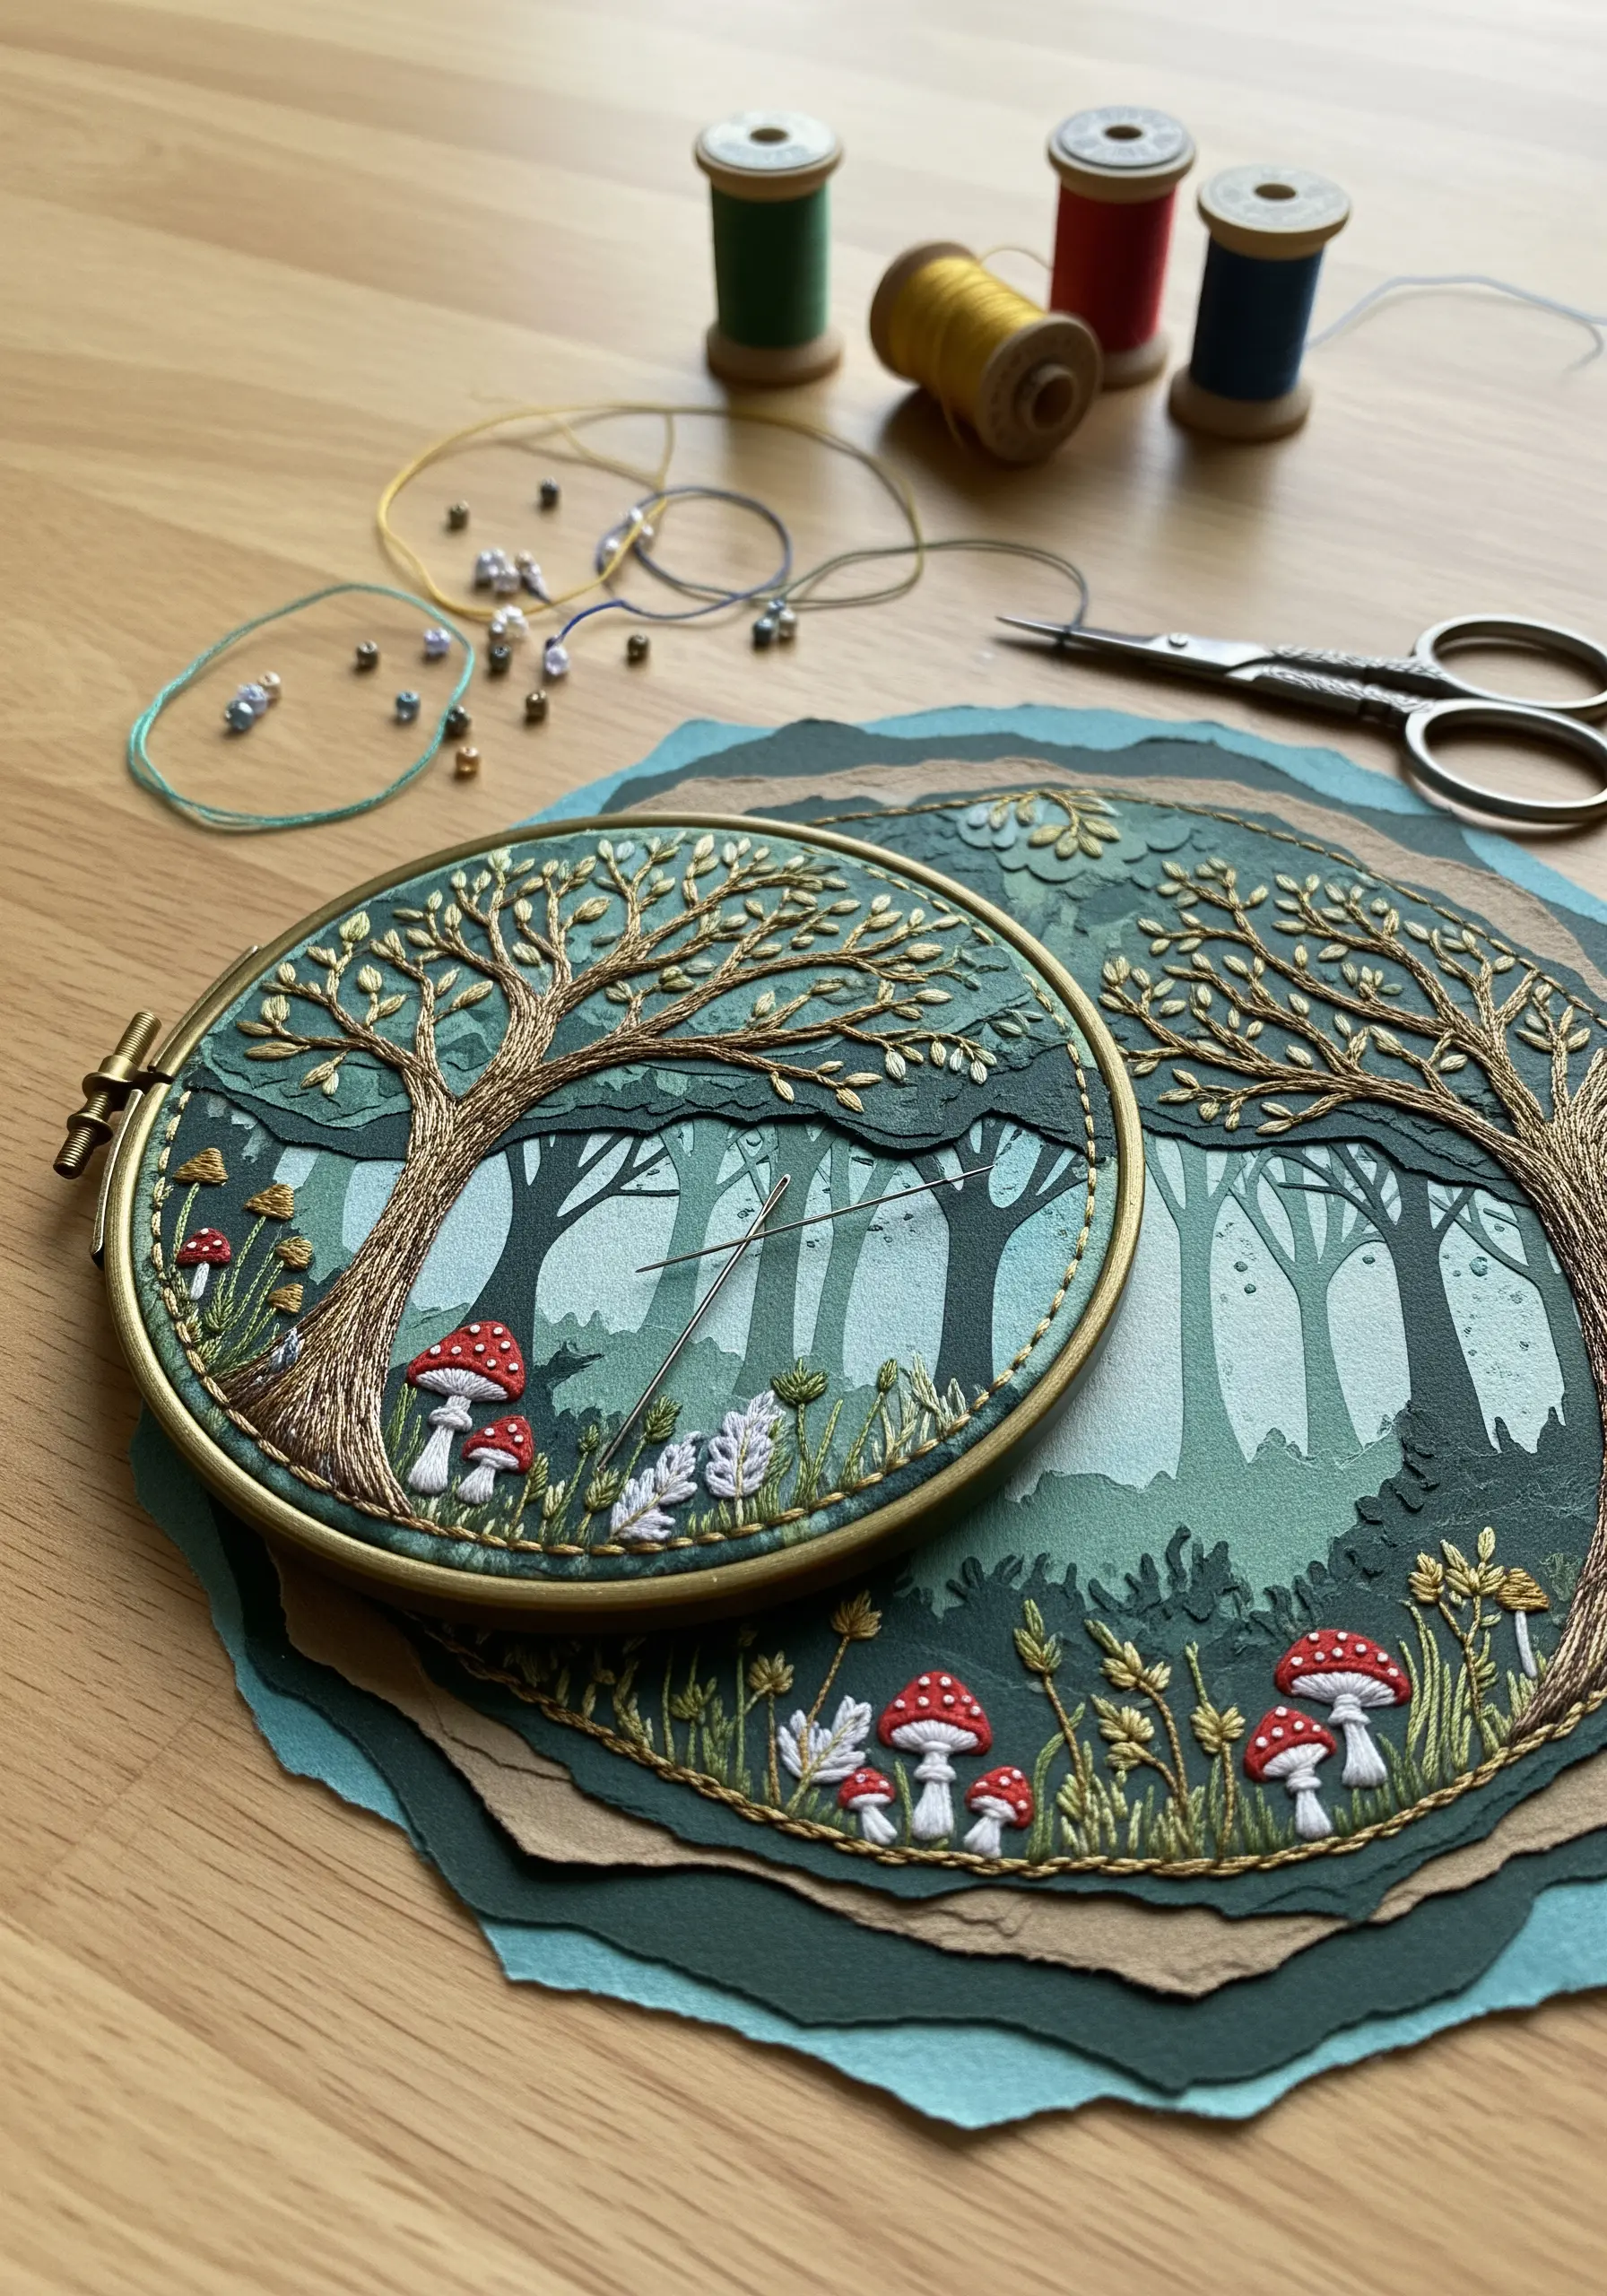
Create a deep sense of perspective in your nature scenes by translating layered paper into layered fabric.
Begin by cutting out your foreground, mid-ground, and background shapes from different colored fabrics, like cotton or felt.
Tack these down onto your base fabric, starting with the background elements and working forward, to build physical depth before you even add a stitch.
For distant trees, use a single strand of floss in a simple backstitch; for the foreground tree, switch to a thicker, six-strand floss or even a fine wool thread for the trunk to make it advance visually.
Use metallic thread for the branches to catch the light, just as golden paper would, creating a focal point that feels both integrated and special.
This technique turns a flat image into a tactile story, inviting the viewer to look deeper into the scene you’ve created.
2. Geometric Tension with Voids and Outlines
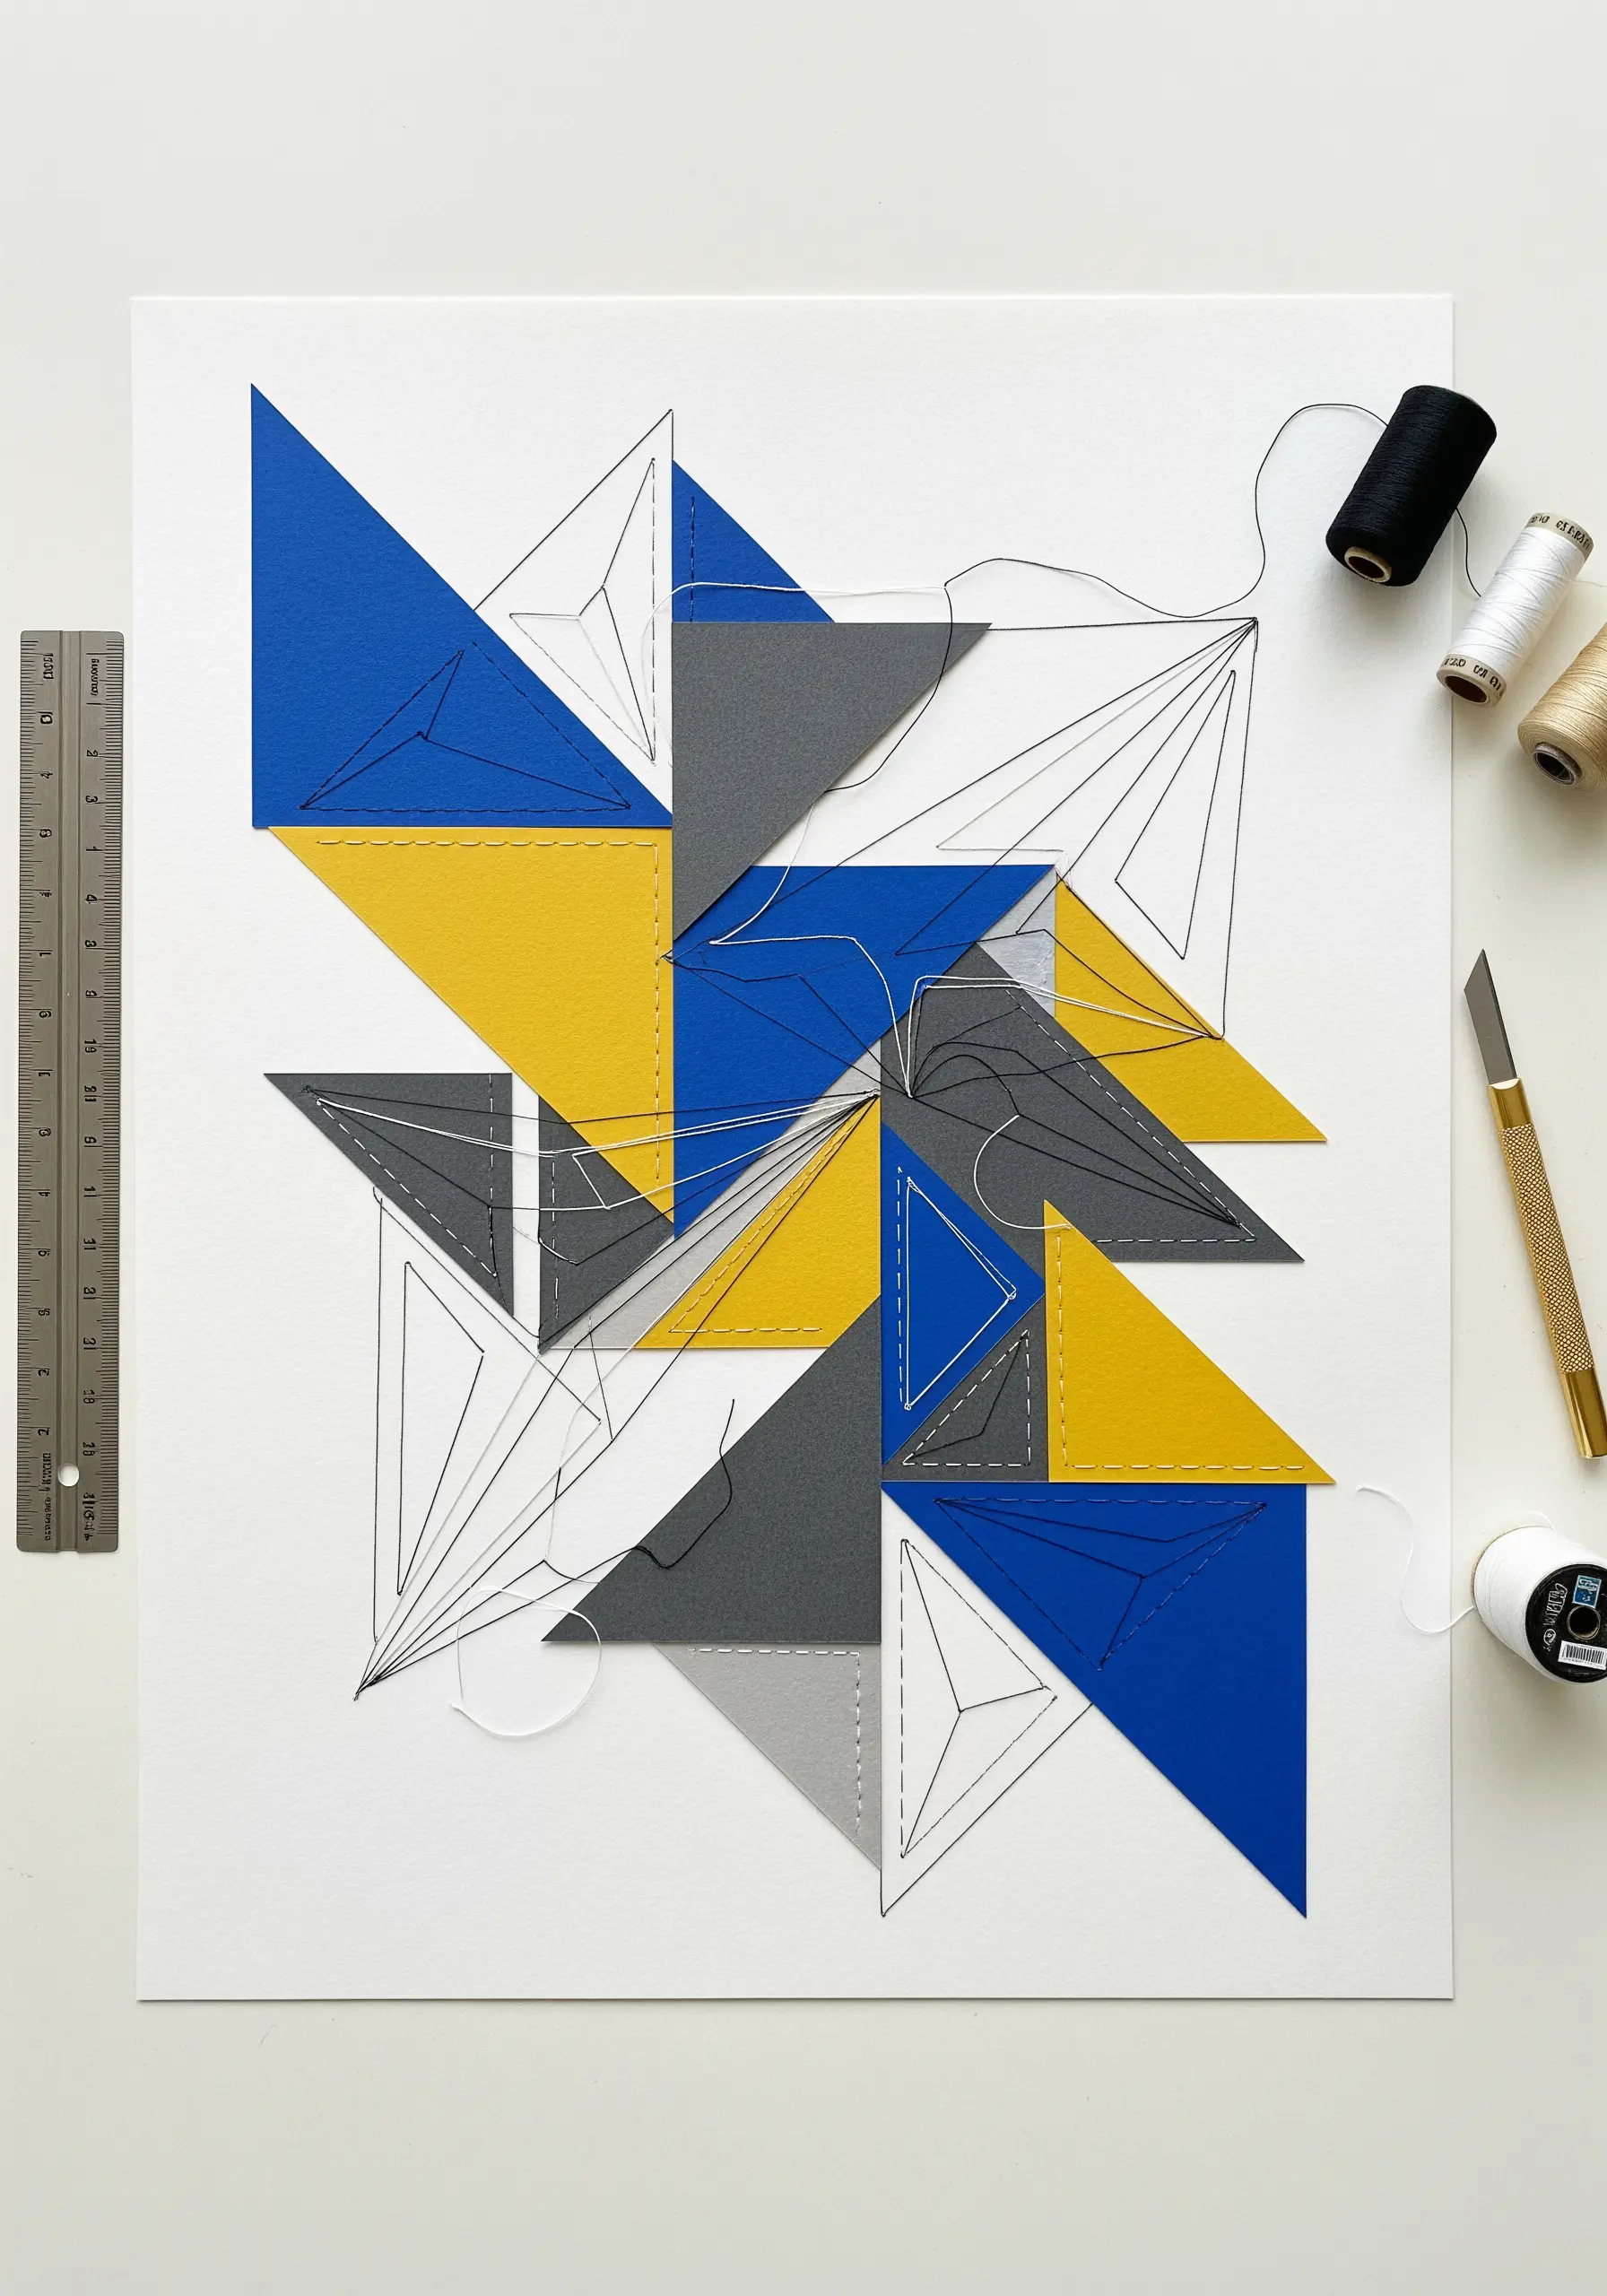
Translate the sharp precision of paper cutouts into thread by focusing on the power of the outline.
Instead of filling shapes with satin stitch, use a whipped backstitch or chain stitch to define their edges, allowing the fabric’s negative space to become an active part of the design.
This creates a visual tension that feels modern and intentional.
To replicate the folded paper effect, stitch lines that suggest three-dimensionality, as if one plane is casting a shadow on another.
Experiment with stitching directly onto heavyweight paper; use a thimble to protect your fingers and a sharp, sturdy needle to perforate the surface cleanly without tearing.
3. Celestial Depth with Stumpwork and Mixed Media
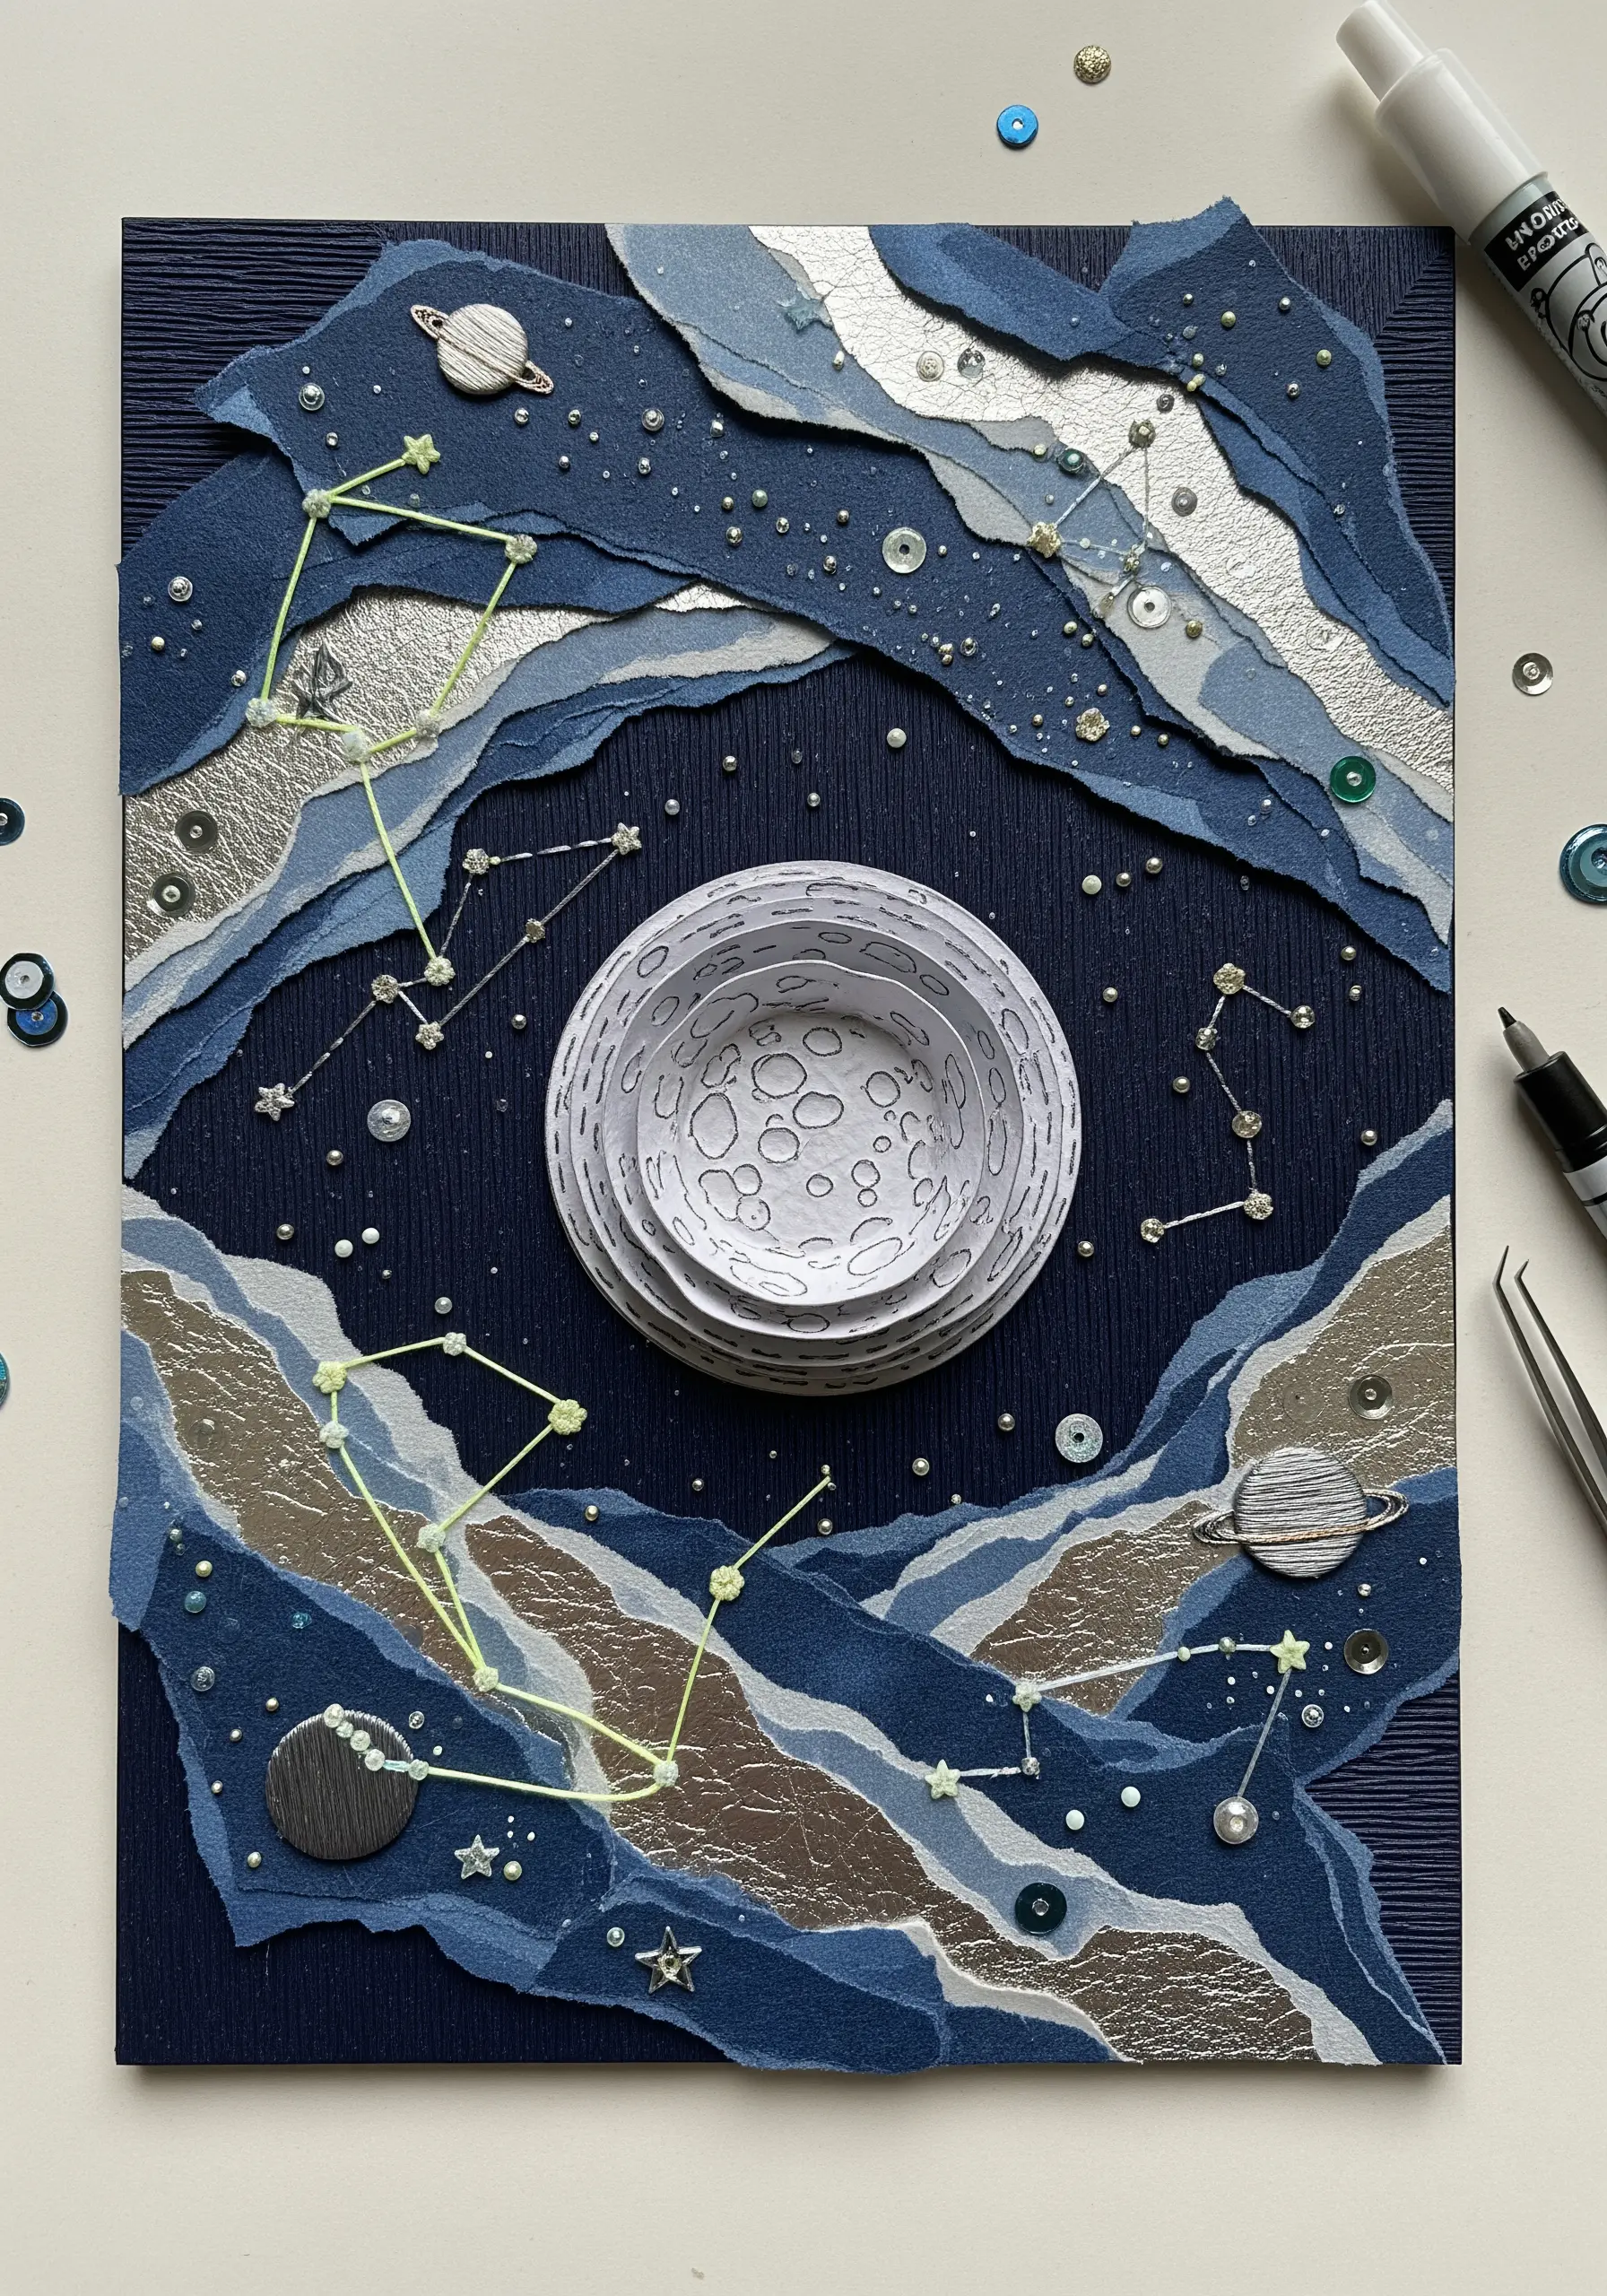
Capture a cosmic scene’s dimension by borrowing from stumpwork and collage techniques.
To create a 3D moon, use trapunto quilting—stitch the outline, make a small slit in the back of the fabric, and stuff it with batting before closing.
The layered, torn-paper effect of the nebulae can be recreated with frayed-edge appliqué using fabrics like silk or organza for a touch of shimmer.
Stitch constellations with a fine, bright thread, perhaps even glow-in-the-dark floss, and scatter sequins or tiny beads to represent distant stars.
This combination of raised forms and reflective elements will turn your hoop into one of those minimal celestial embroidery wall designs with incredible depth.
4. Appliqué Florals with Raised Stitch Embellishments

Elevate simple floral motifs by combining fabric appliqué with dimensional stitches.
Cut flower shapes from a complementary fabric and attach them to your base with a few small, hidden stitches.
Then, work directly on top of the appliqué pieces to add detail and texture.
Use bullion knots or cast-on stitches for petal edges, giving them a slight lift and a realistic curl.
Create the twisting golden vine with a plaited braid stitch or a heavy chain stitch using metallic thread for a rope-like effect.
Adding a central pearl bead anchors the design and provides a touch of classic elegance.
5. Textured Seascapes Using Fabric Manipulation
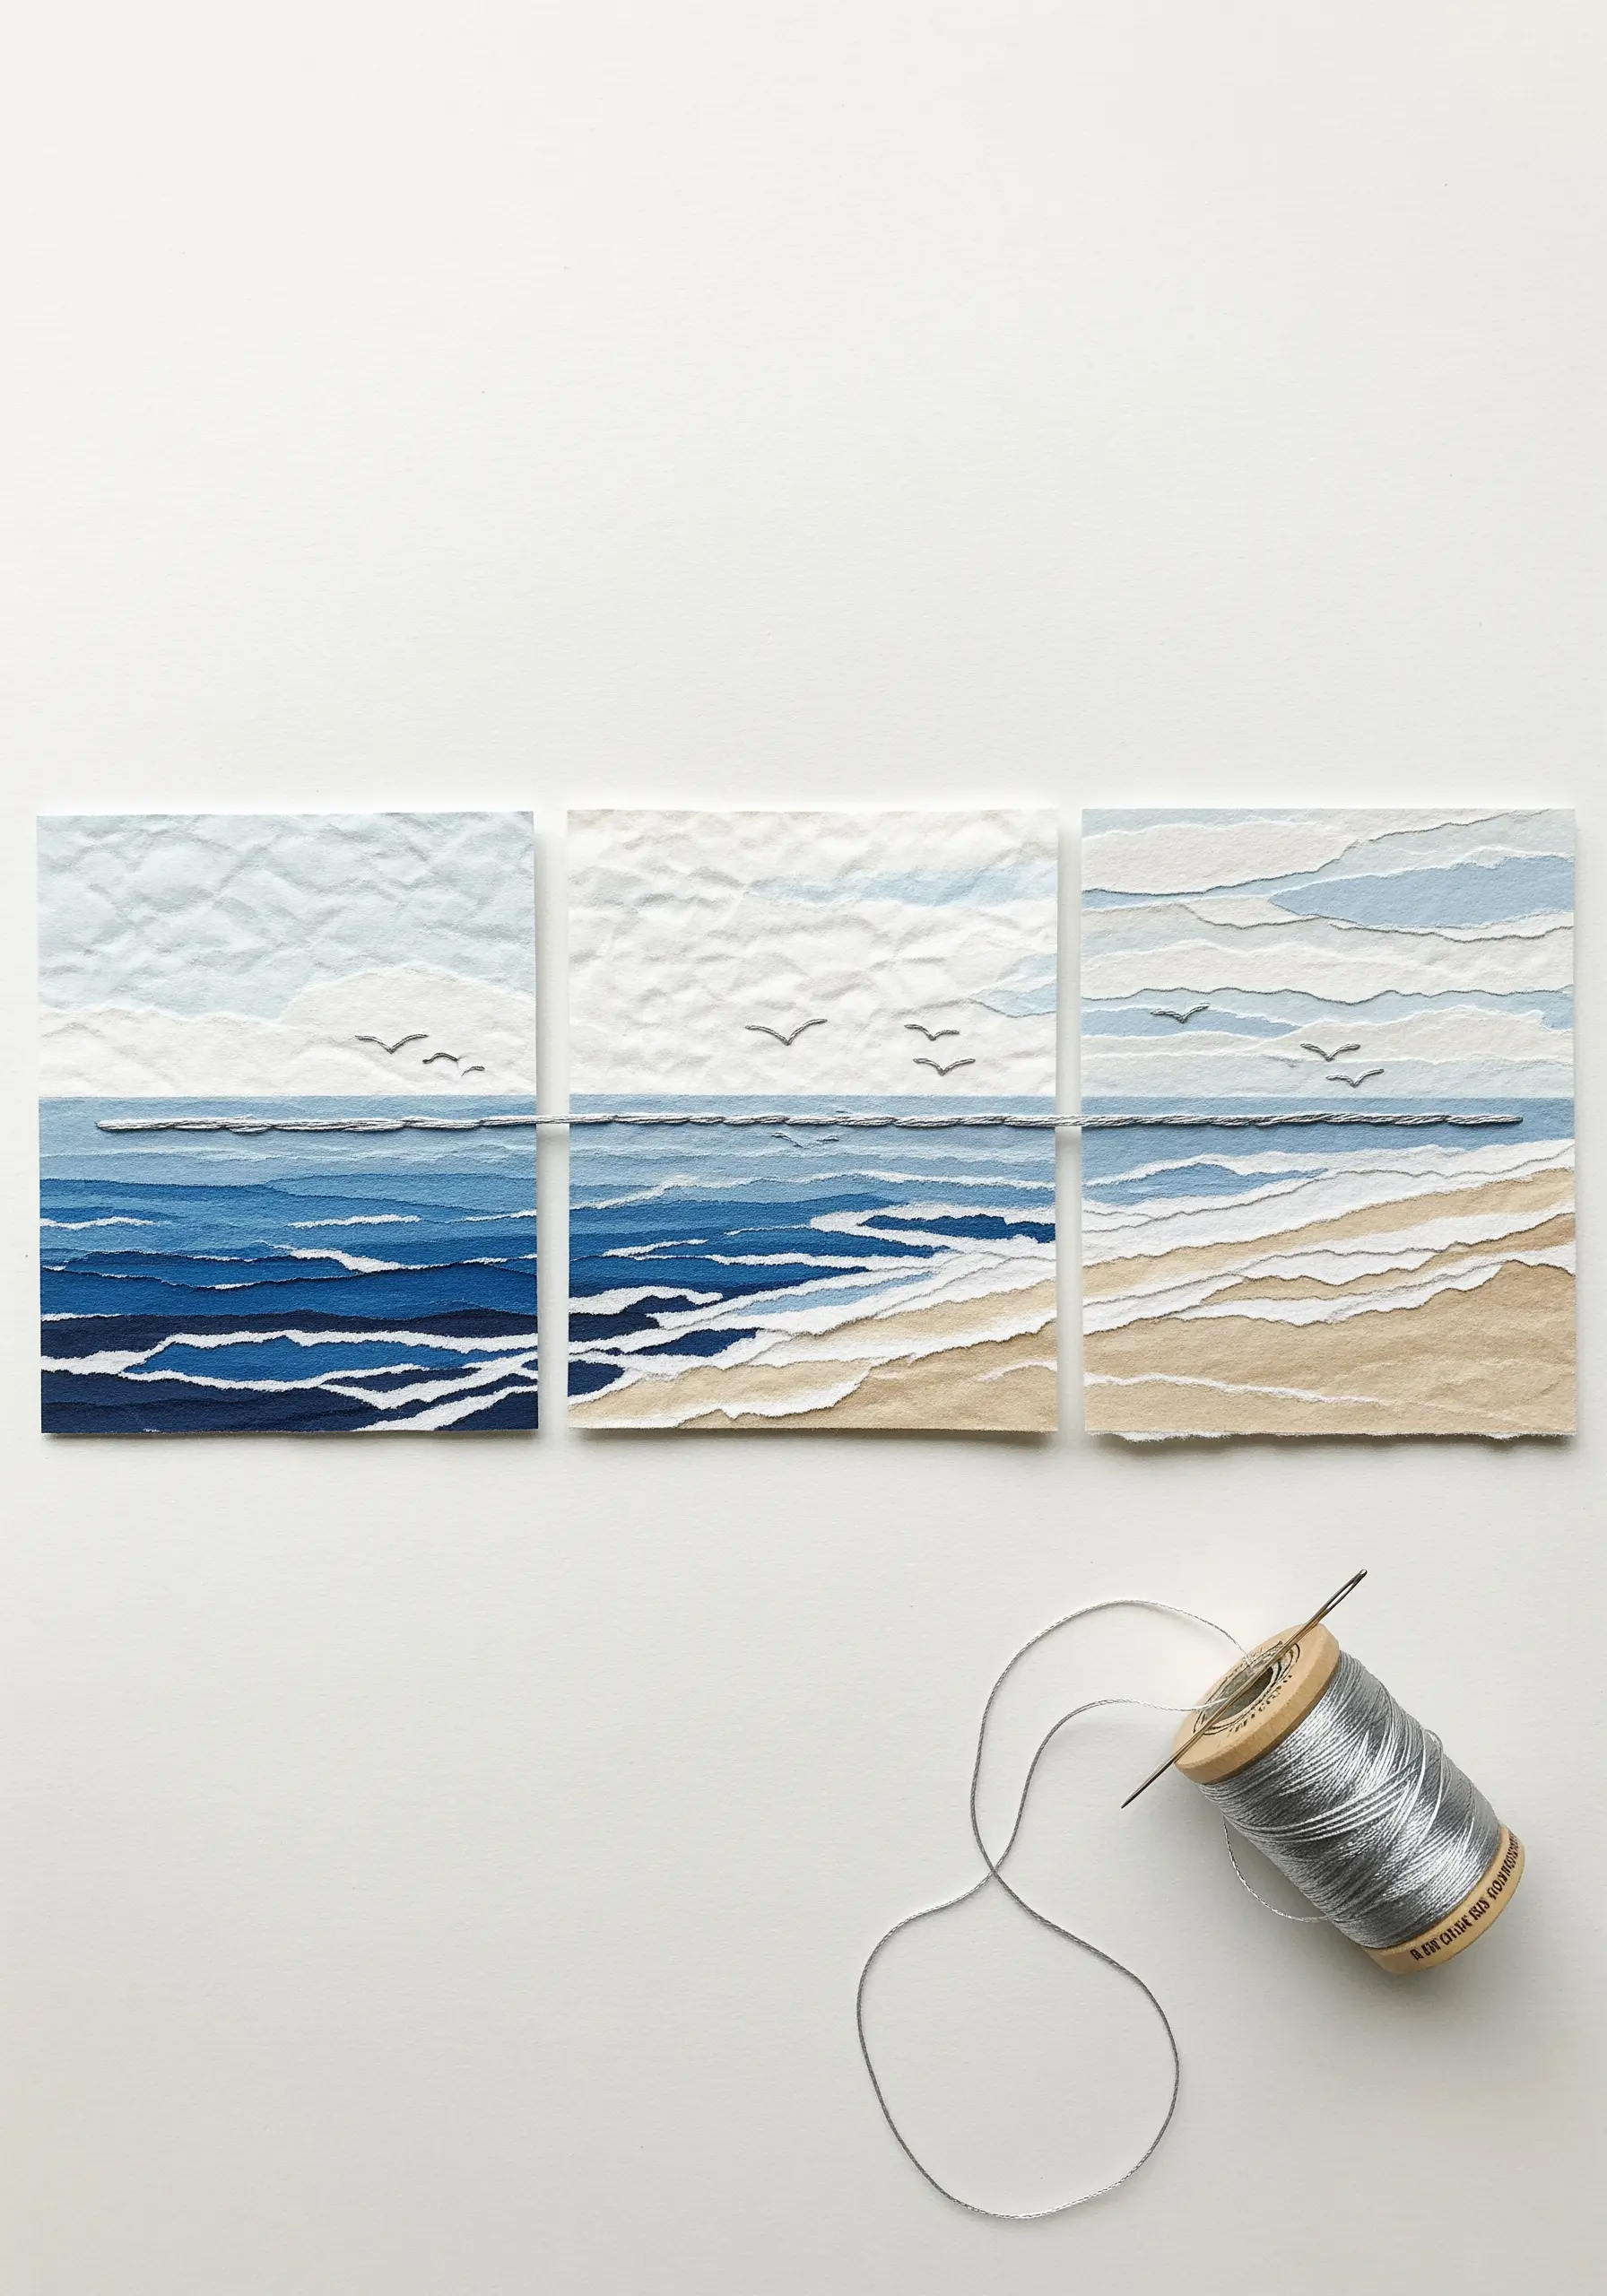
Mimic the beautiful, subtle texture of crumpled paper by manipulating your fabric before you stitch.
For the sky, try pleating or gently wrinkling a fine cotton or silk fabric before securing it in the hoop; the stitches will then catch the light on the uneven surface.
Use dense seed stitch or masses of French knots for the sea, varying your thread colors slightly to create the illusion of light on water.
Keep the horizon line perfectly straight and clean with a crisp backstitch—this contrast between the textured water and the sharp horizon is what gives the piece its calm, balanced feel.
This approach is perfect for coastal-inspired homes.
6. Quilled Effects with Coiled Stitches and Beads
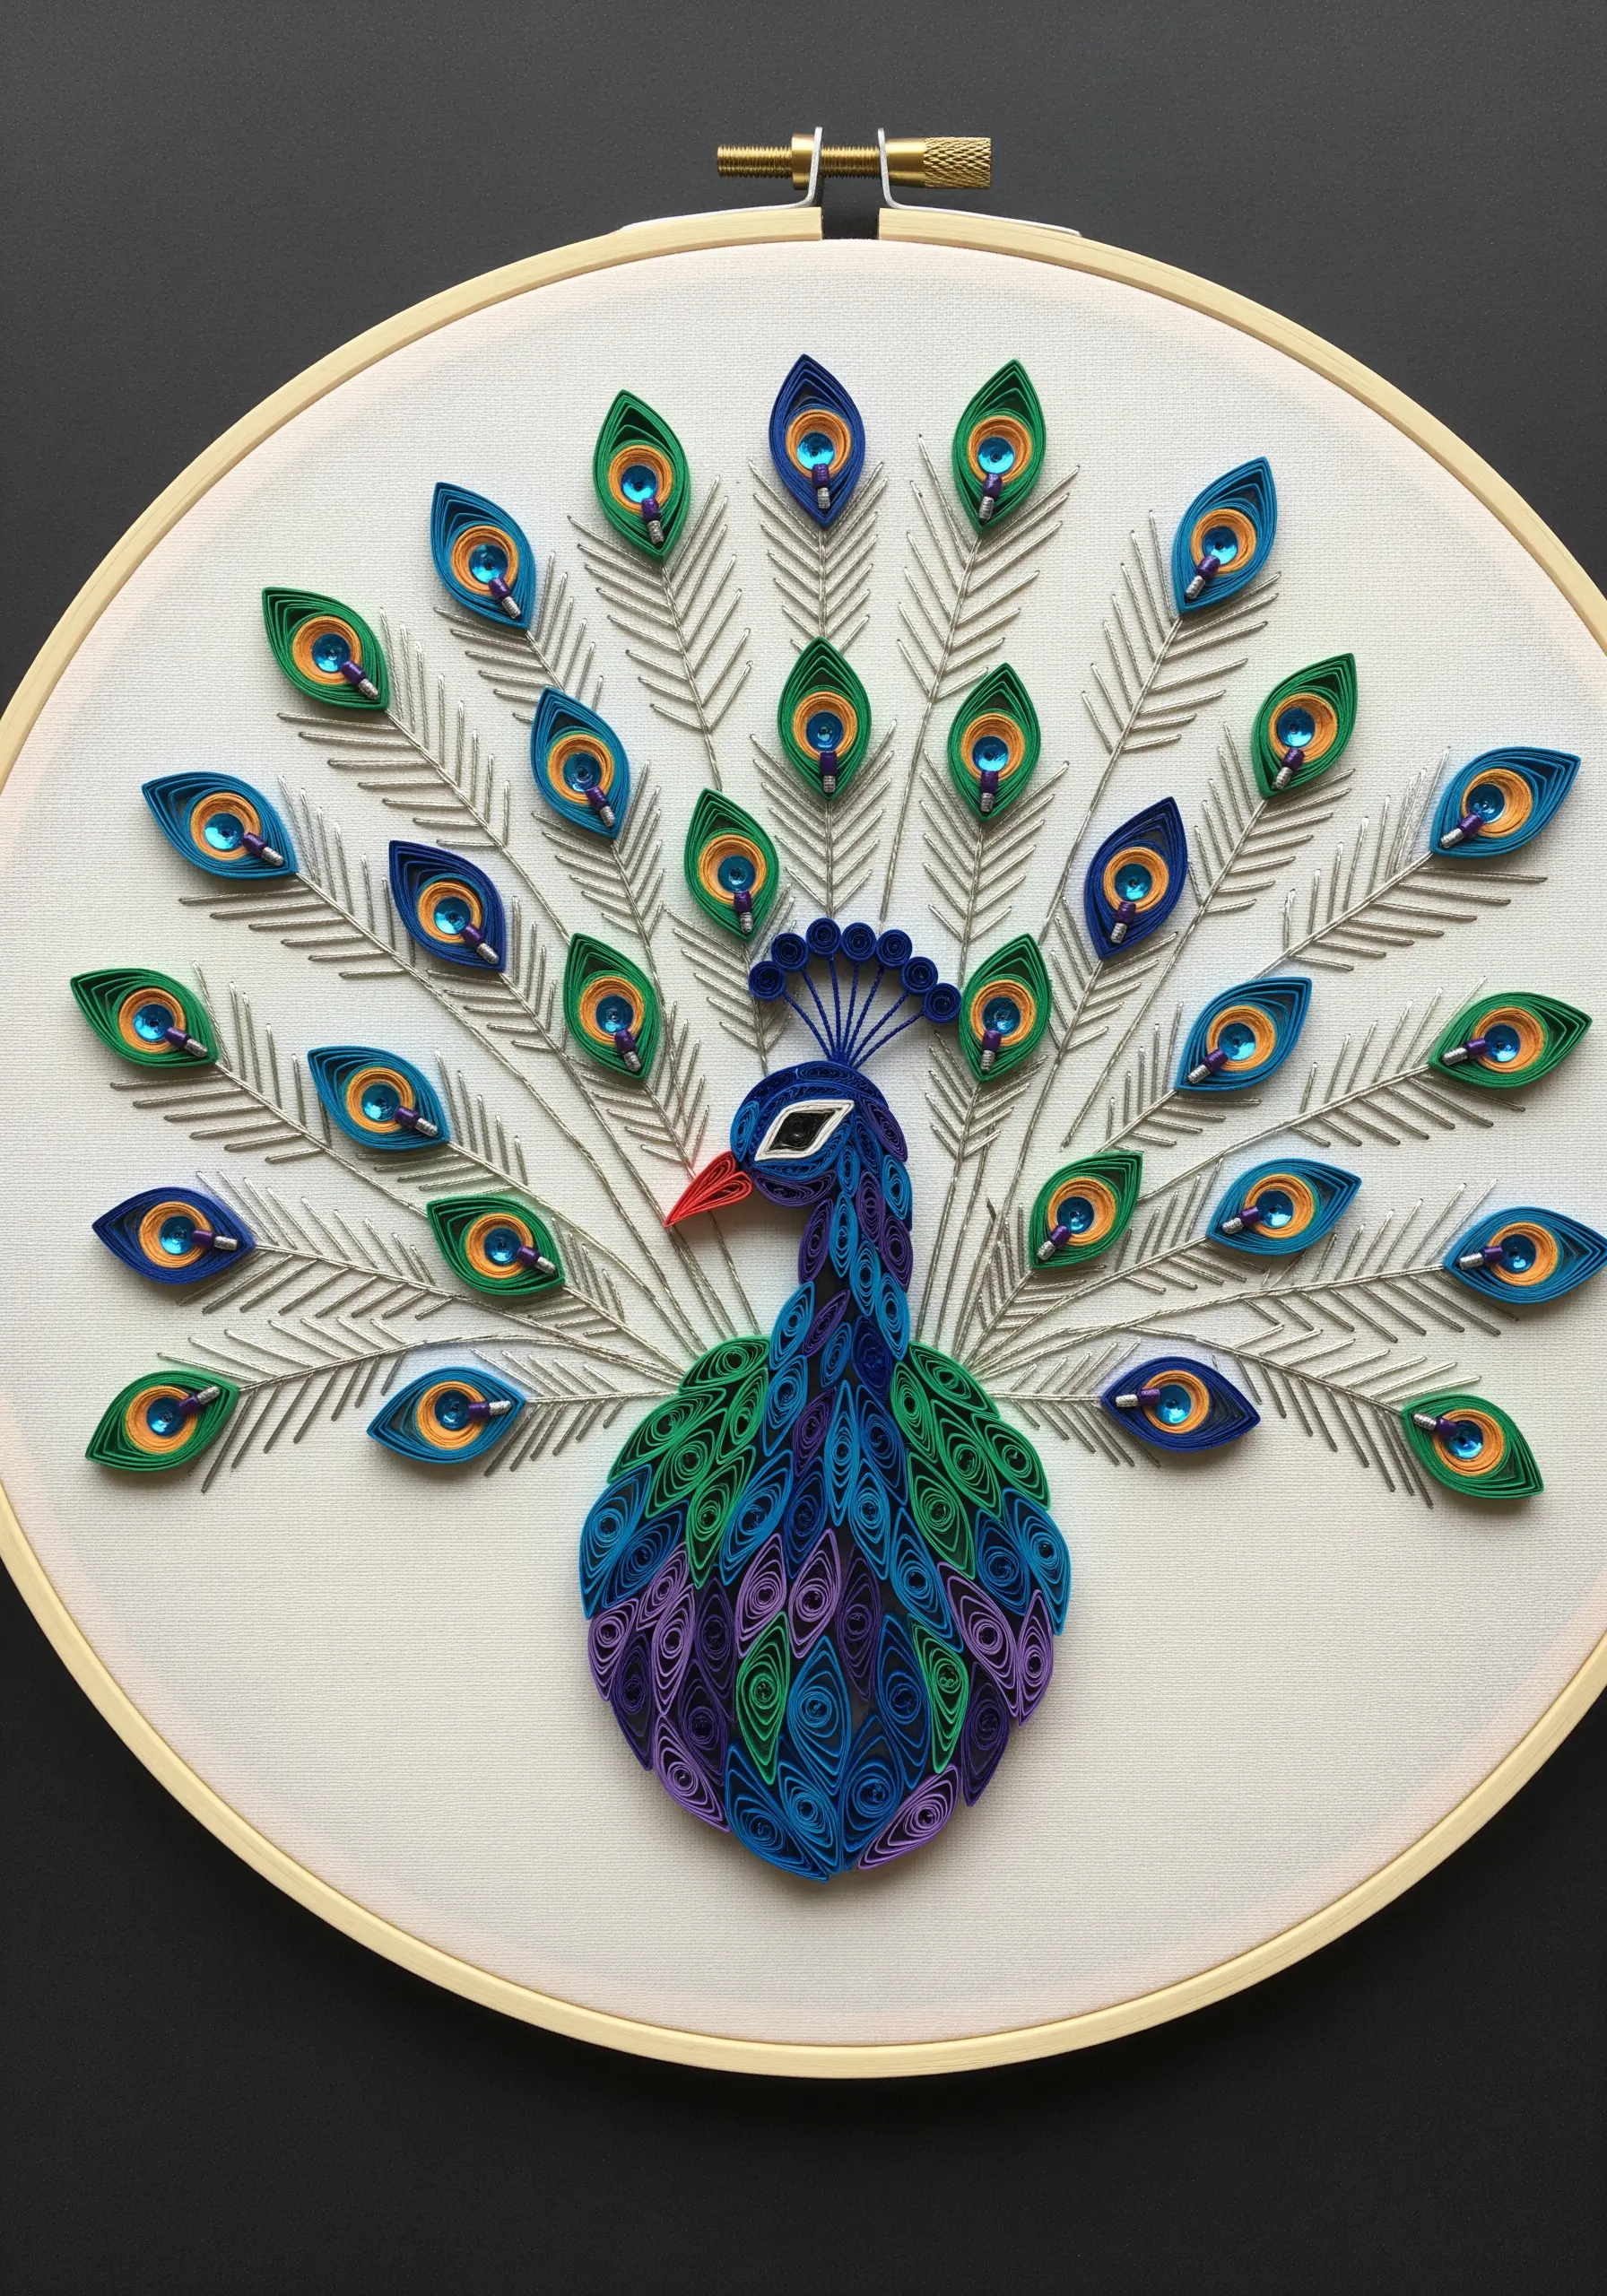
Recreate the tight, sculptural coils of paper quilling by using stitches that build volume and shape.
Bullion knots are your best tool here; vary their length and density to create the swirling patterns of the peacock’s body.
For the ‘eyes’ of the feathers, stitch a detached chain stitch and anchor a tiny, iridescent sequin or bead in the center to catch the light.
Use a delicate, silvery thread for the feather filaments—a whipped backstitch will give you a smooth, corded line that stands out against the fabric.
This technique transforms simple stitches into a highly detailed, majestic peacock design.
7. Architectural Details with E-Textiles
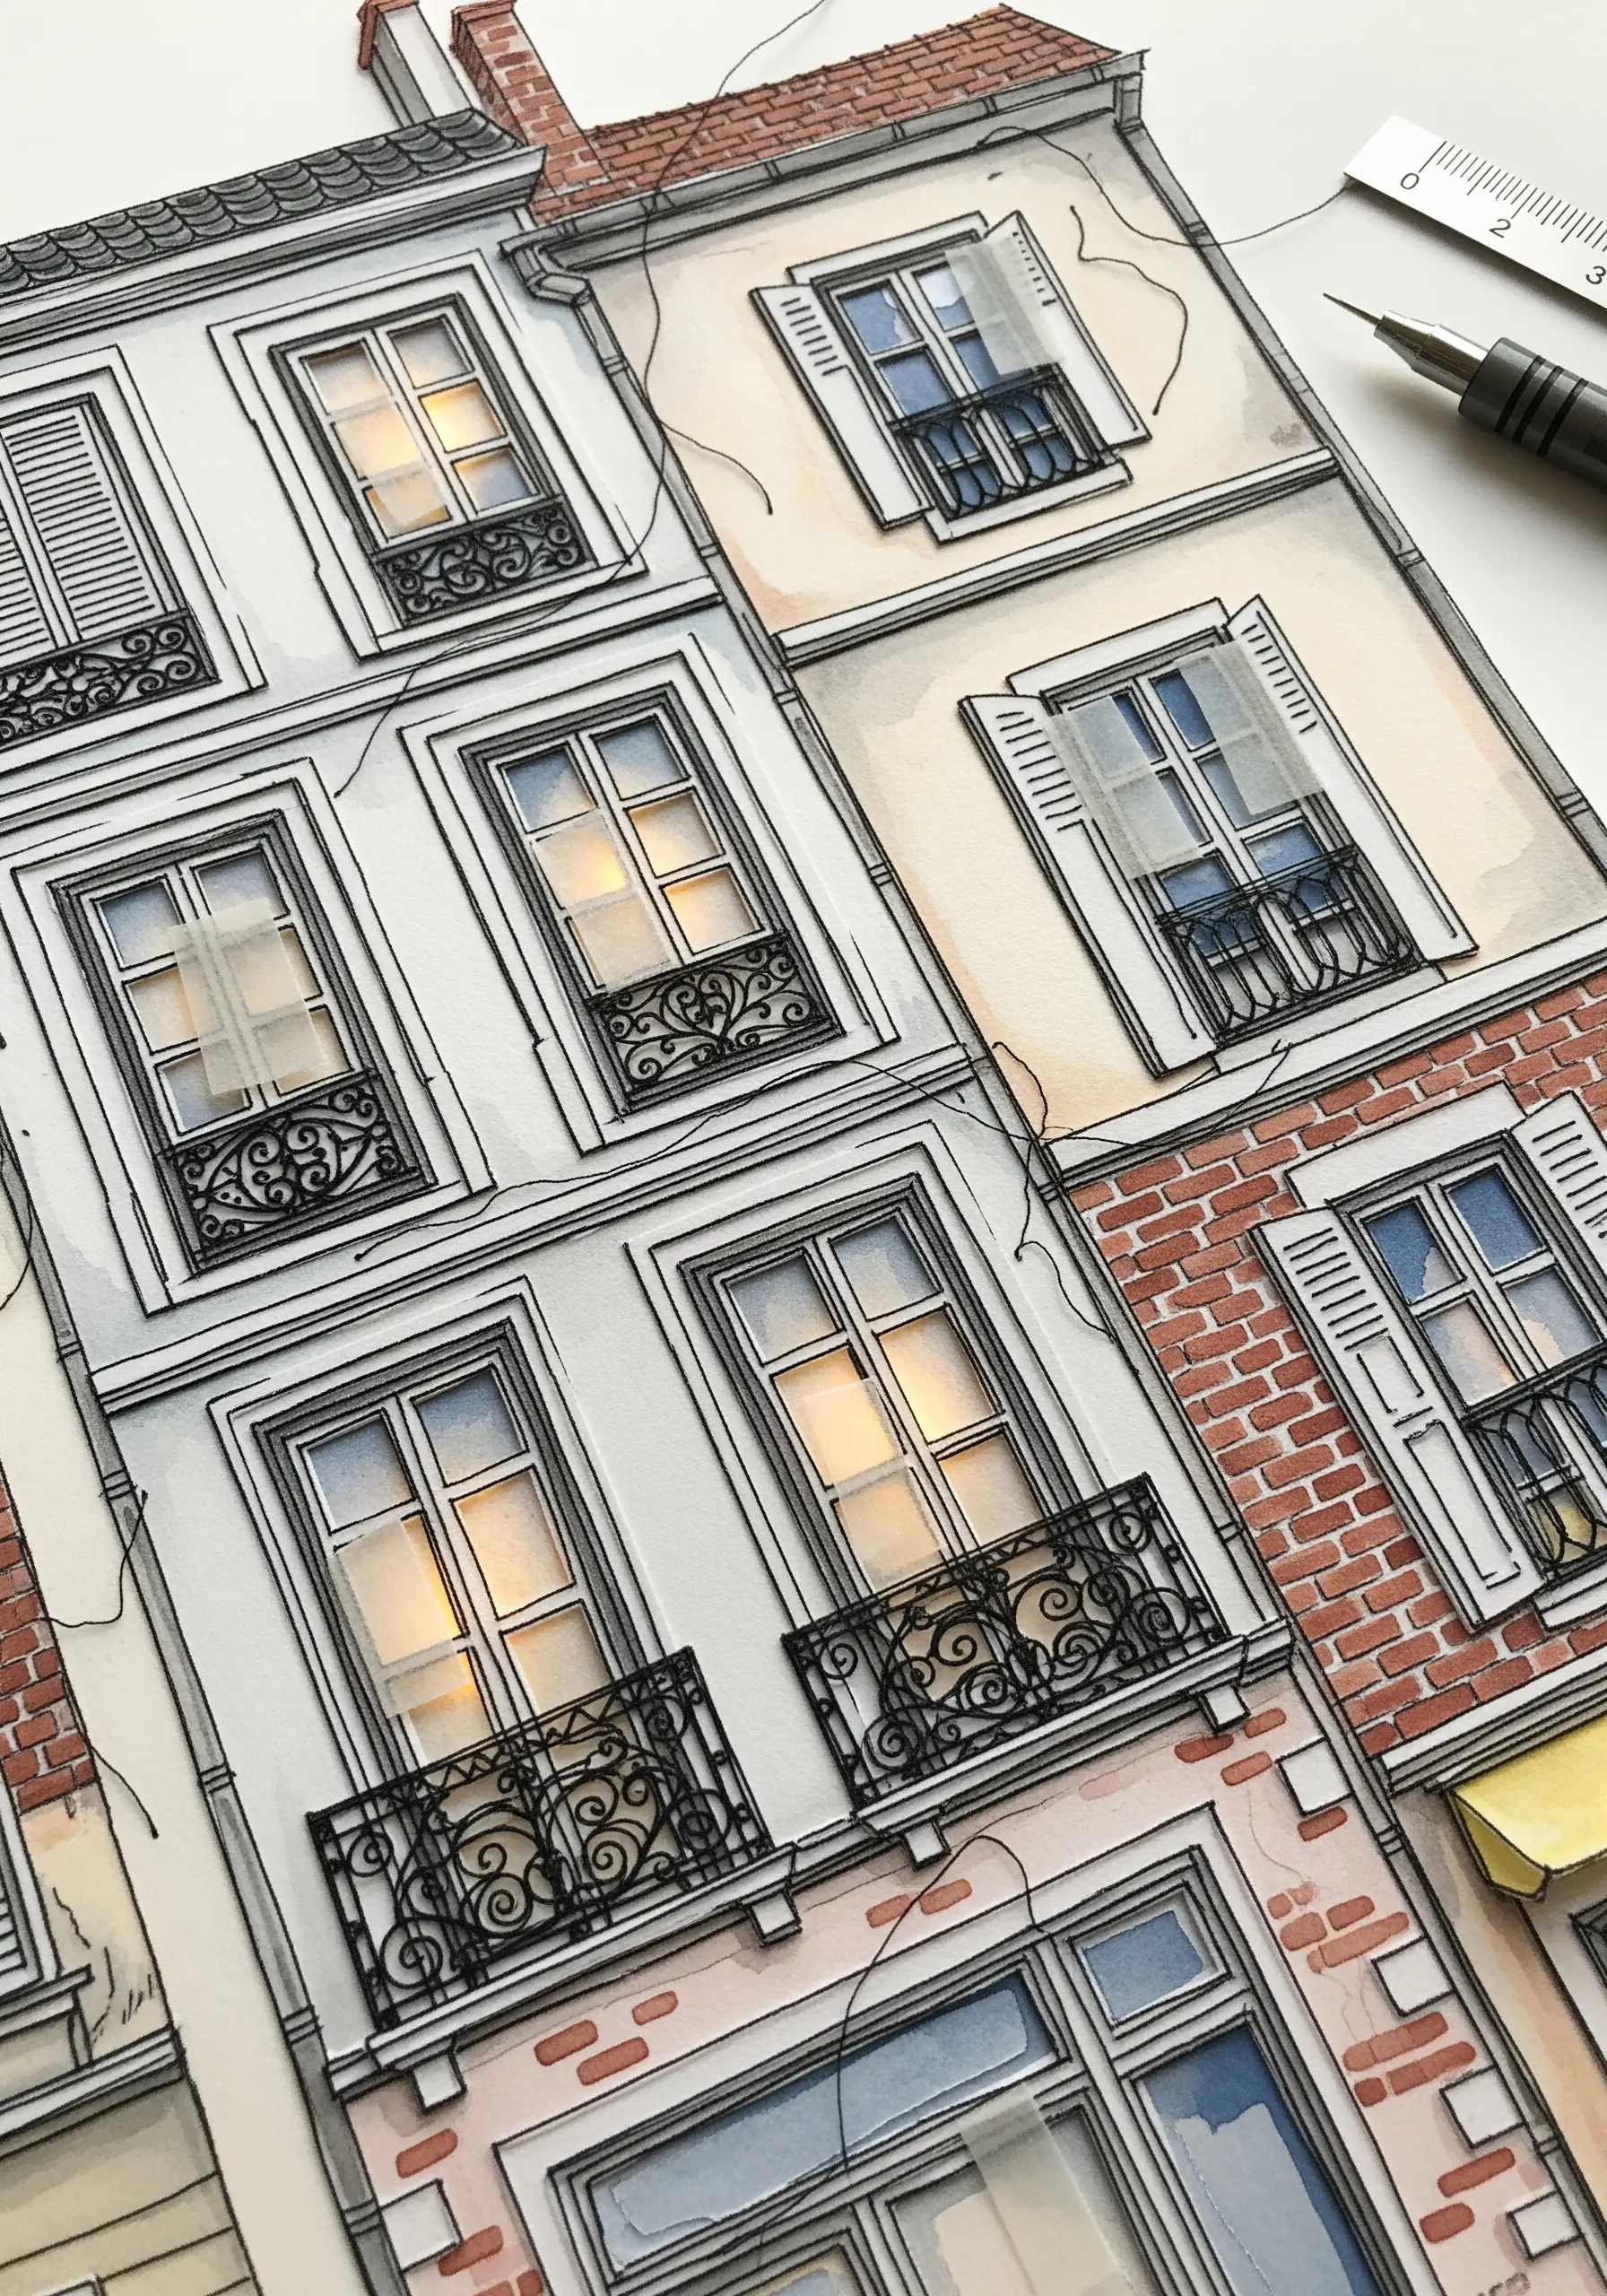
Move beyond traditional thread and incorporate light into your work for a truly modern effect.
This concept inspires the use of e-textiles—stitching with conductive thread to connect tiny LED lights to a concealed battery pack.
Plan your circuit on the back of your work, ensuring the positive and negative threads never cross.
You can hide the LEDs behind a layer of translucent fabric, like vellum or organza, to diffuse the light and create a soft, welcoming glow from the windows.
Use a single strand of black floss in a precise backstitch to render the fine architectural lines, letting the light be the star.
8. Botanical Portraits with Pressed Flowers and Thread
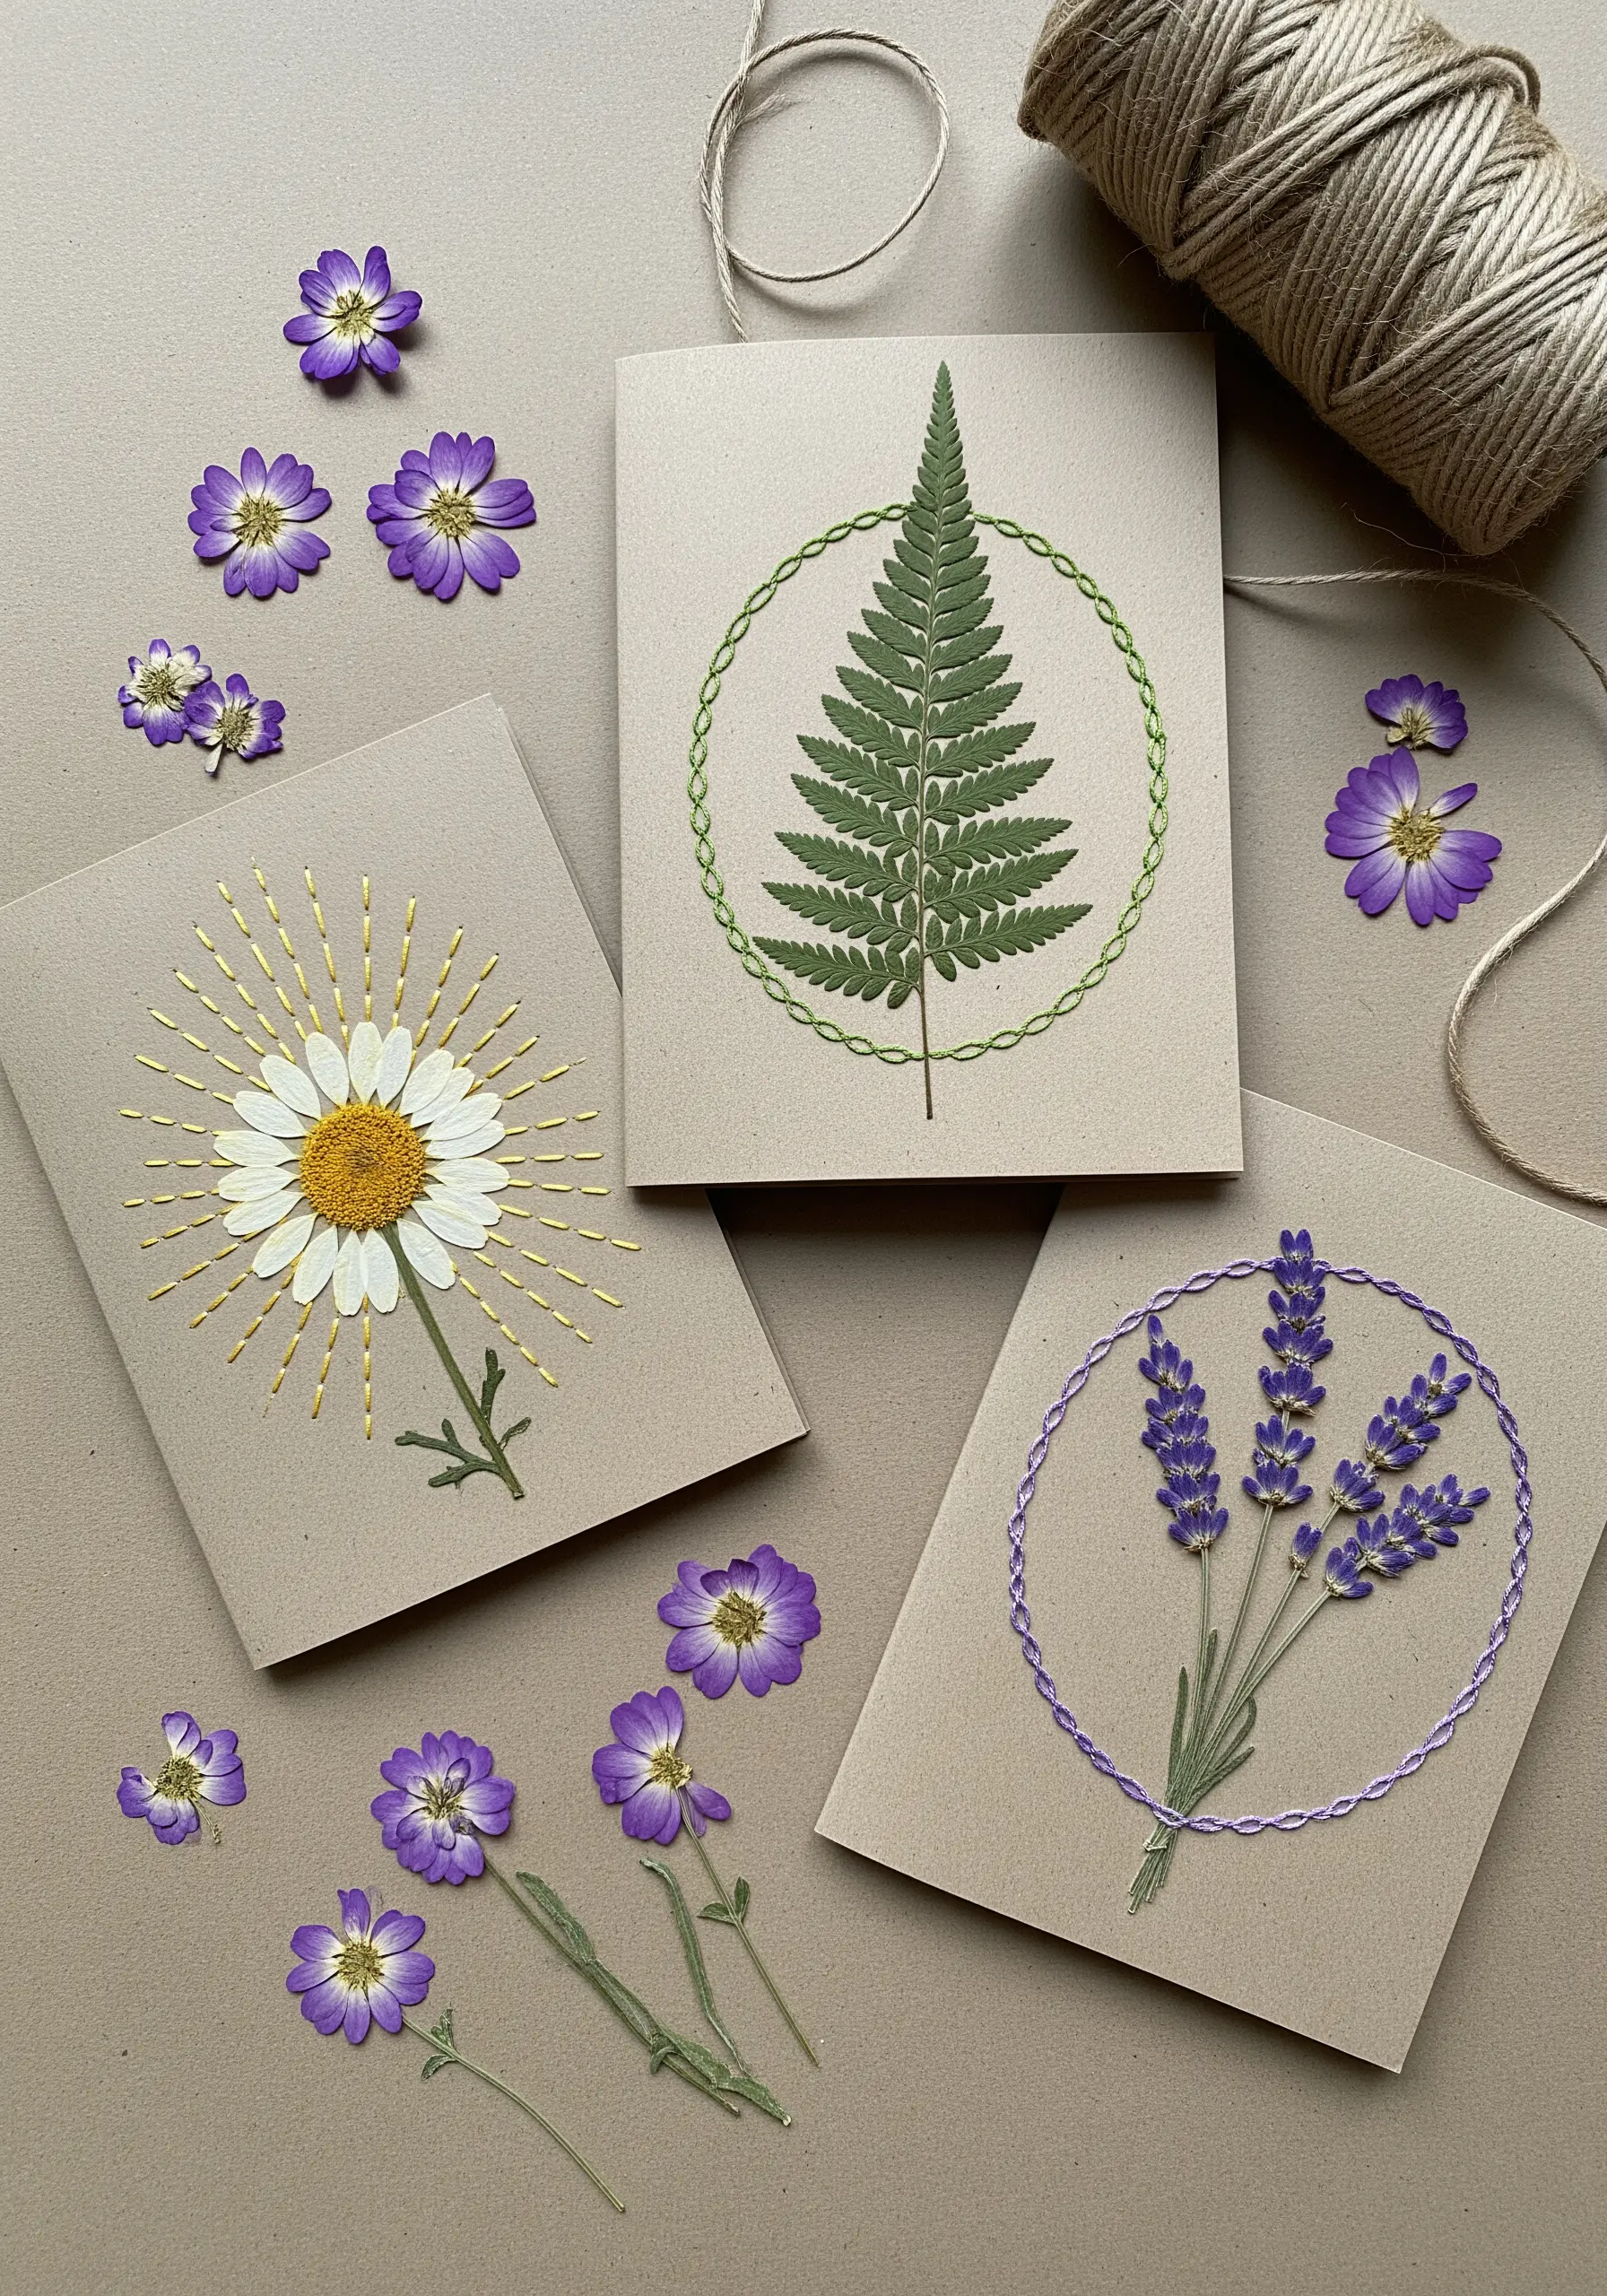
Combine the authentic beauty of nature with the delicacy of hand embroidery by stitching directly onto preserved botanicals.
Secure a pressed flower or fern to your cardstock or fabric with a tiny, discreet dab of acid-free glue.
Then, use a single strand of floss to add complementary details—radiating lines of a sunburst around a daisy, a circular frame around a sprig of lavender, or delicate veins on a leaf.
The key is restraint; the thread should enhance the natural element, not overpower it. This is one of the most elegant pressed flower art embroidery ideas.
9. Abstract Landscapes with Couching and Seed Stitch
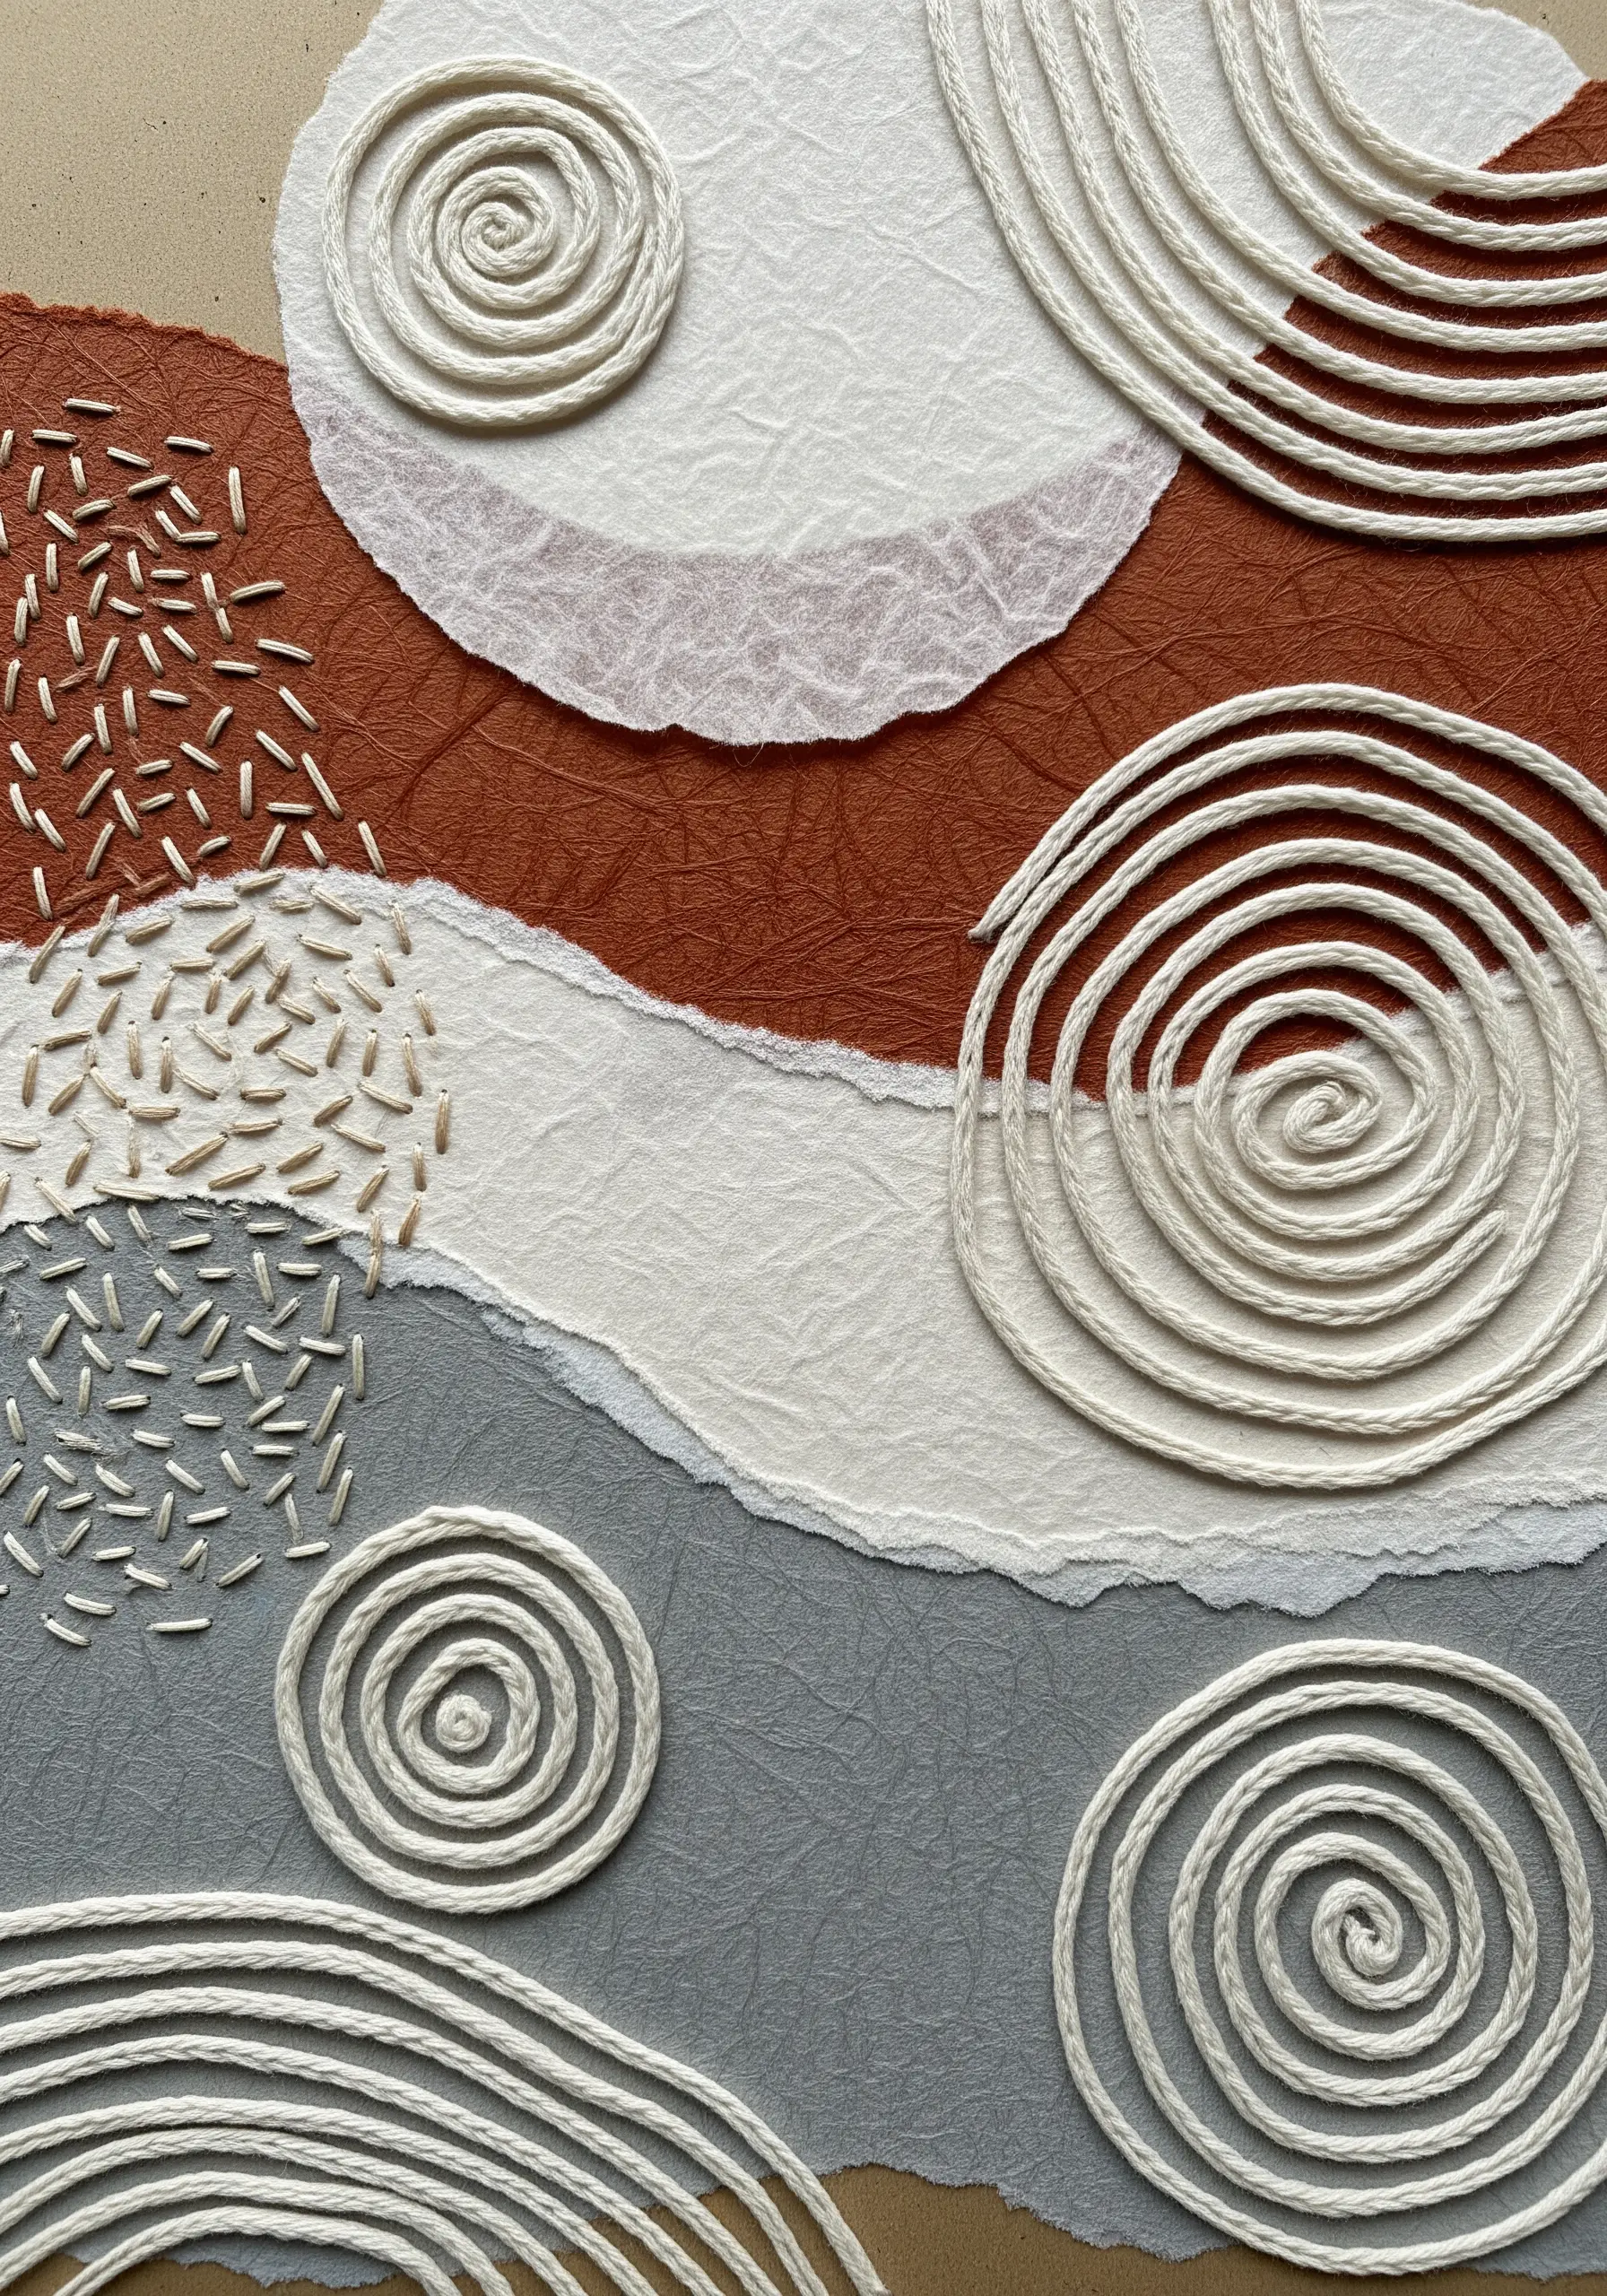
Translate a torn-paper collage into a tactile embroidery piece by focusing on texture and material.
Mimic the coiled paper spirals by couching thick yarn, cotton rope, or even bundled strands of floss onto your fabric.
Use small, coordinating tacking stitches to hold the thicker fiber in place, making them almost invisible.
Recreate the scattered grain effect with dense clusters of seed stitch or single straight stitches, varying their direction and spacing for an organic feel.
Using a base of textured, handmade paper or fabric with a visible weave will add another layer of depth to your finished piece.
10. Silhouette Studies with Textured Fill Stitches

Use a simple silhouette as a canvas for exploring a universe of stitches and textures.
Start with a clean appliqué of black felt or cotton for the profile to ensure a crisp, defined edge.
Inside this shape, let your creativity flow: fill the space with tightly packed French knots for a floral effect, use Turkey work for a soft, brush-like texture, or try woven picot stitches to create small, 3D roses.
You can also create geometric patterns with straight stitches or fill the area with constellations using star stitches and metallic thread.
This turns a simple shape into a stunning piece of abstract thread sculpting.
11. Atmospheric Perspective with Layered Organza
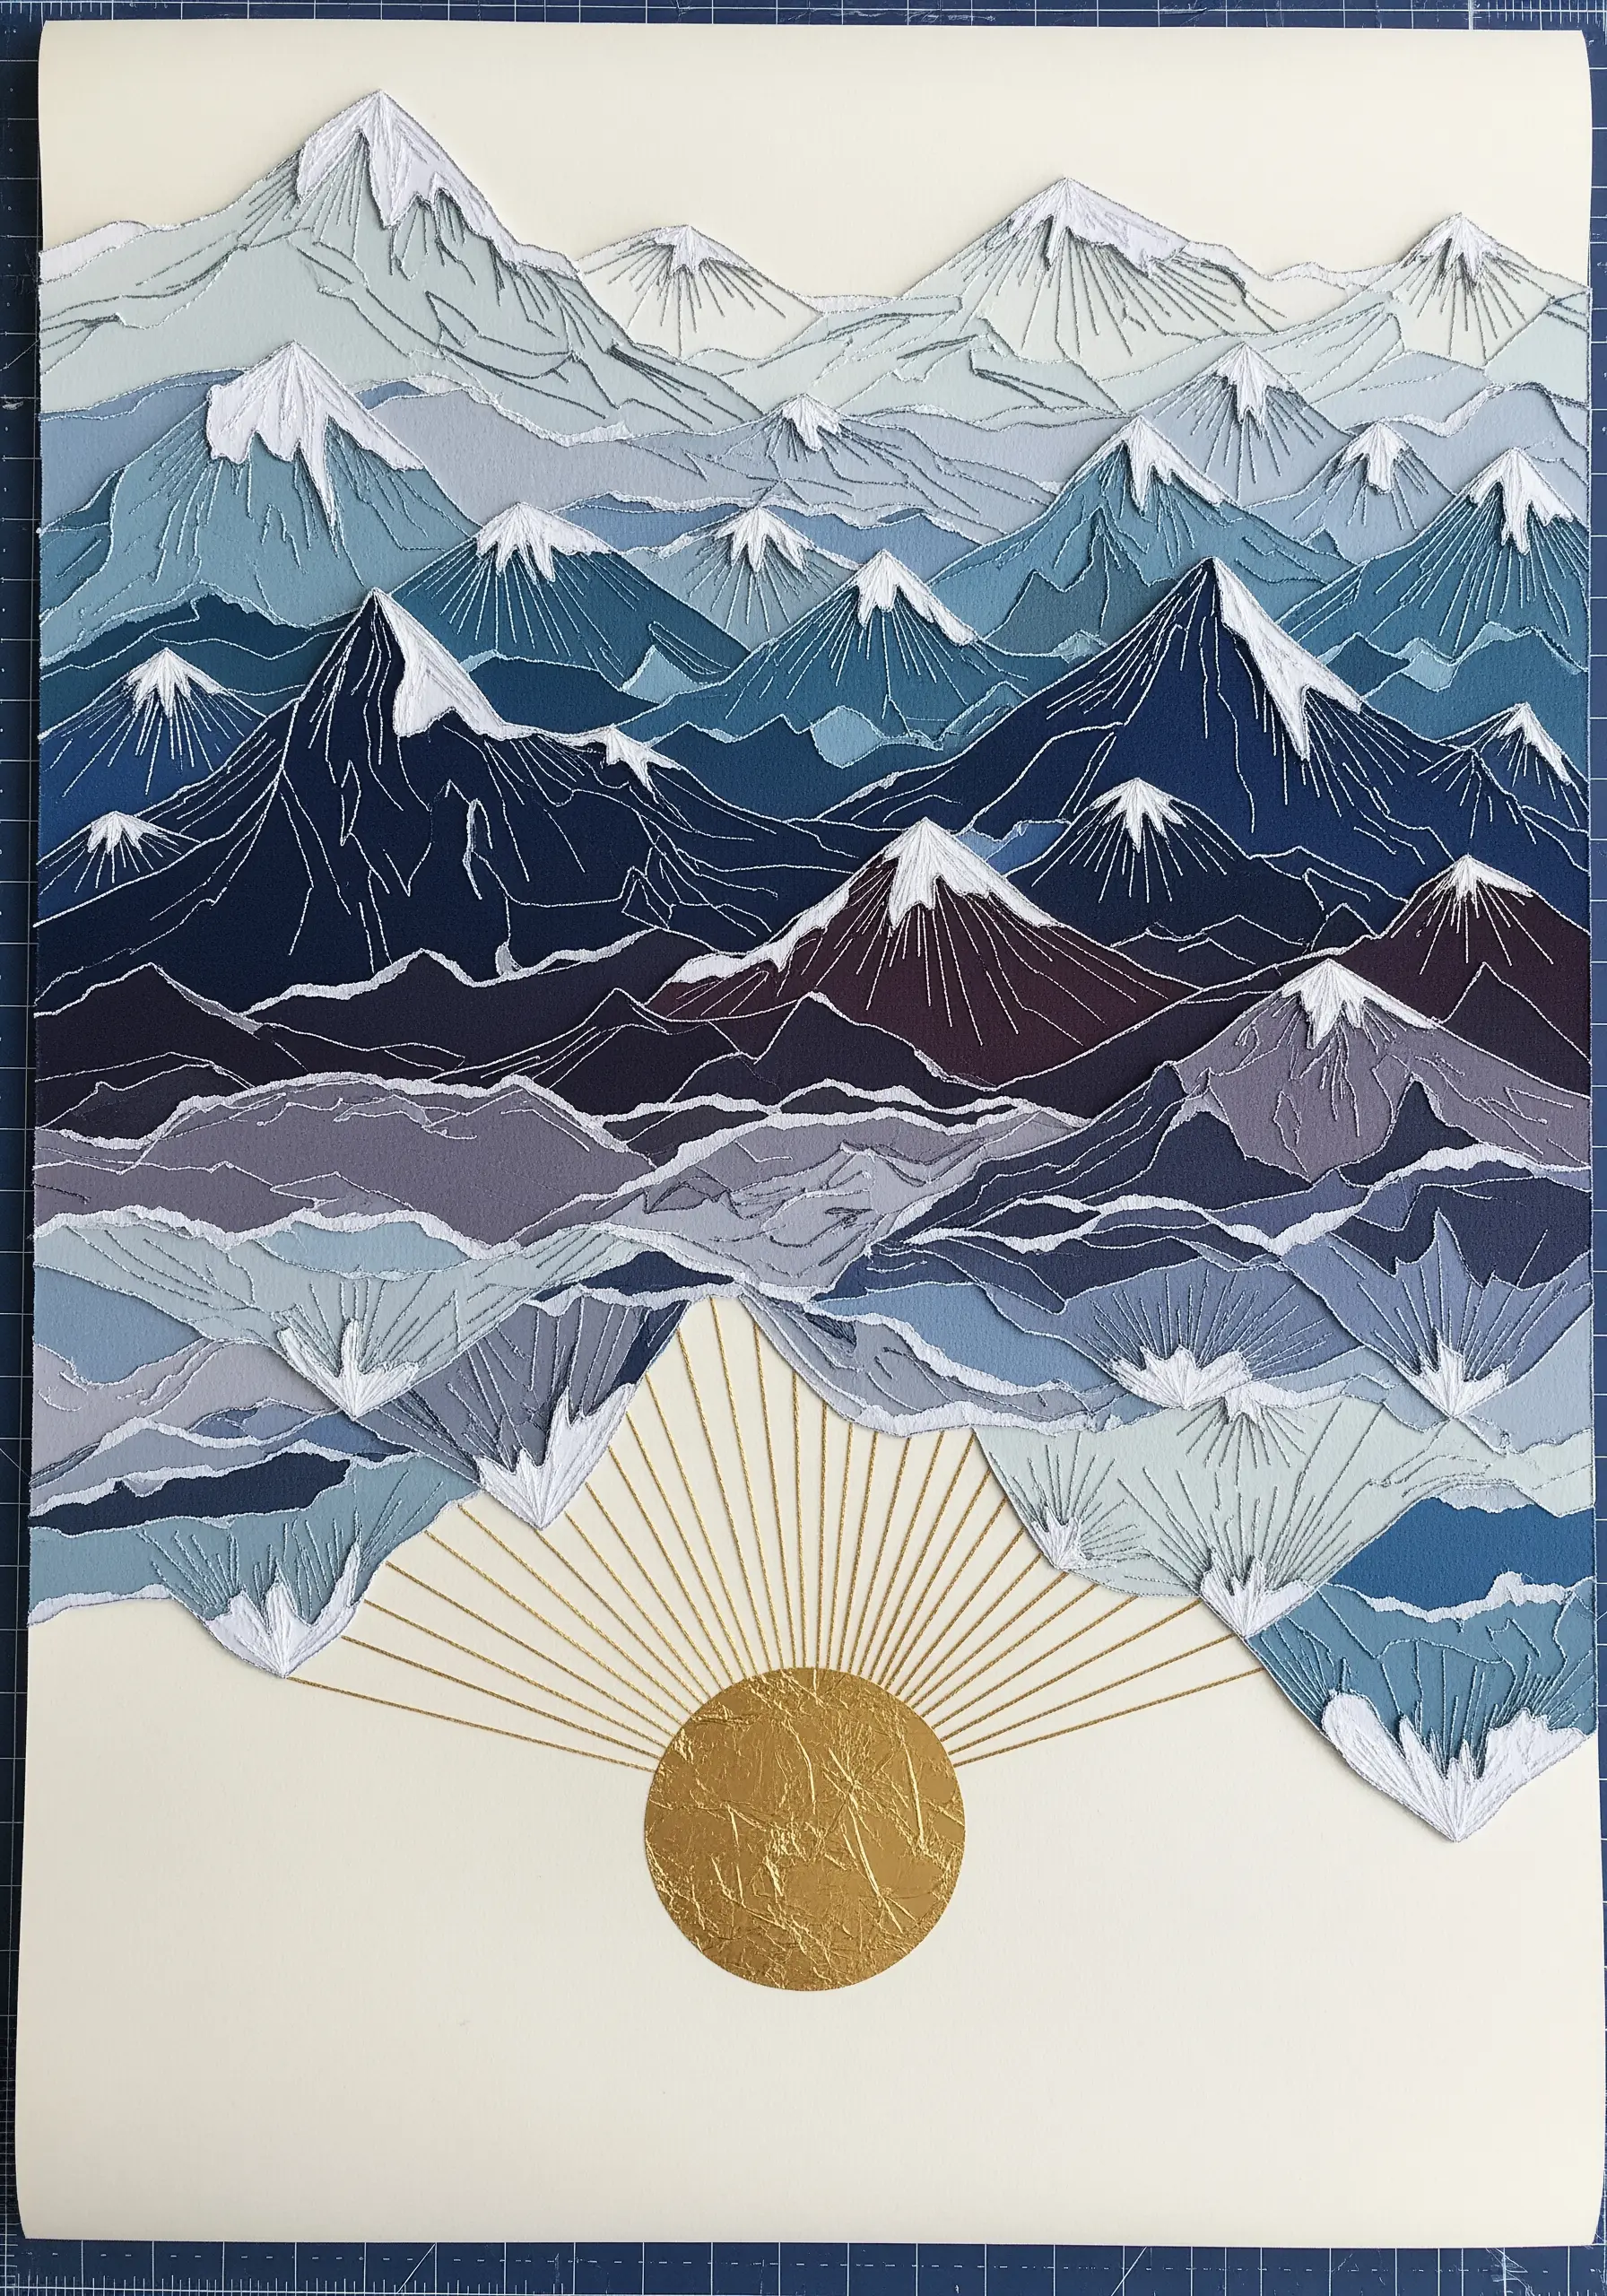
Capture the hazy, layered look of distant mountains by stitching on and through translucent fabrics.
Instead of opaque cotton, use layers of silk organza in varying shades of blue, grey, and purple.
The sheer quality of the fabric allows underlying layers to show through, creating an authentic sense of atmospheric depth.
Stitch the details of each mountain range onto its corresponding organza layer before stacking them.
Use a fine, single-strand thread for distant peaks and a slightly heavier thread for those in the foreground to enhance the illusion of distance.
12. Illuminating 3D Surfaces with Delicate Stitches
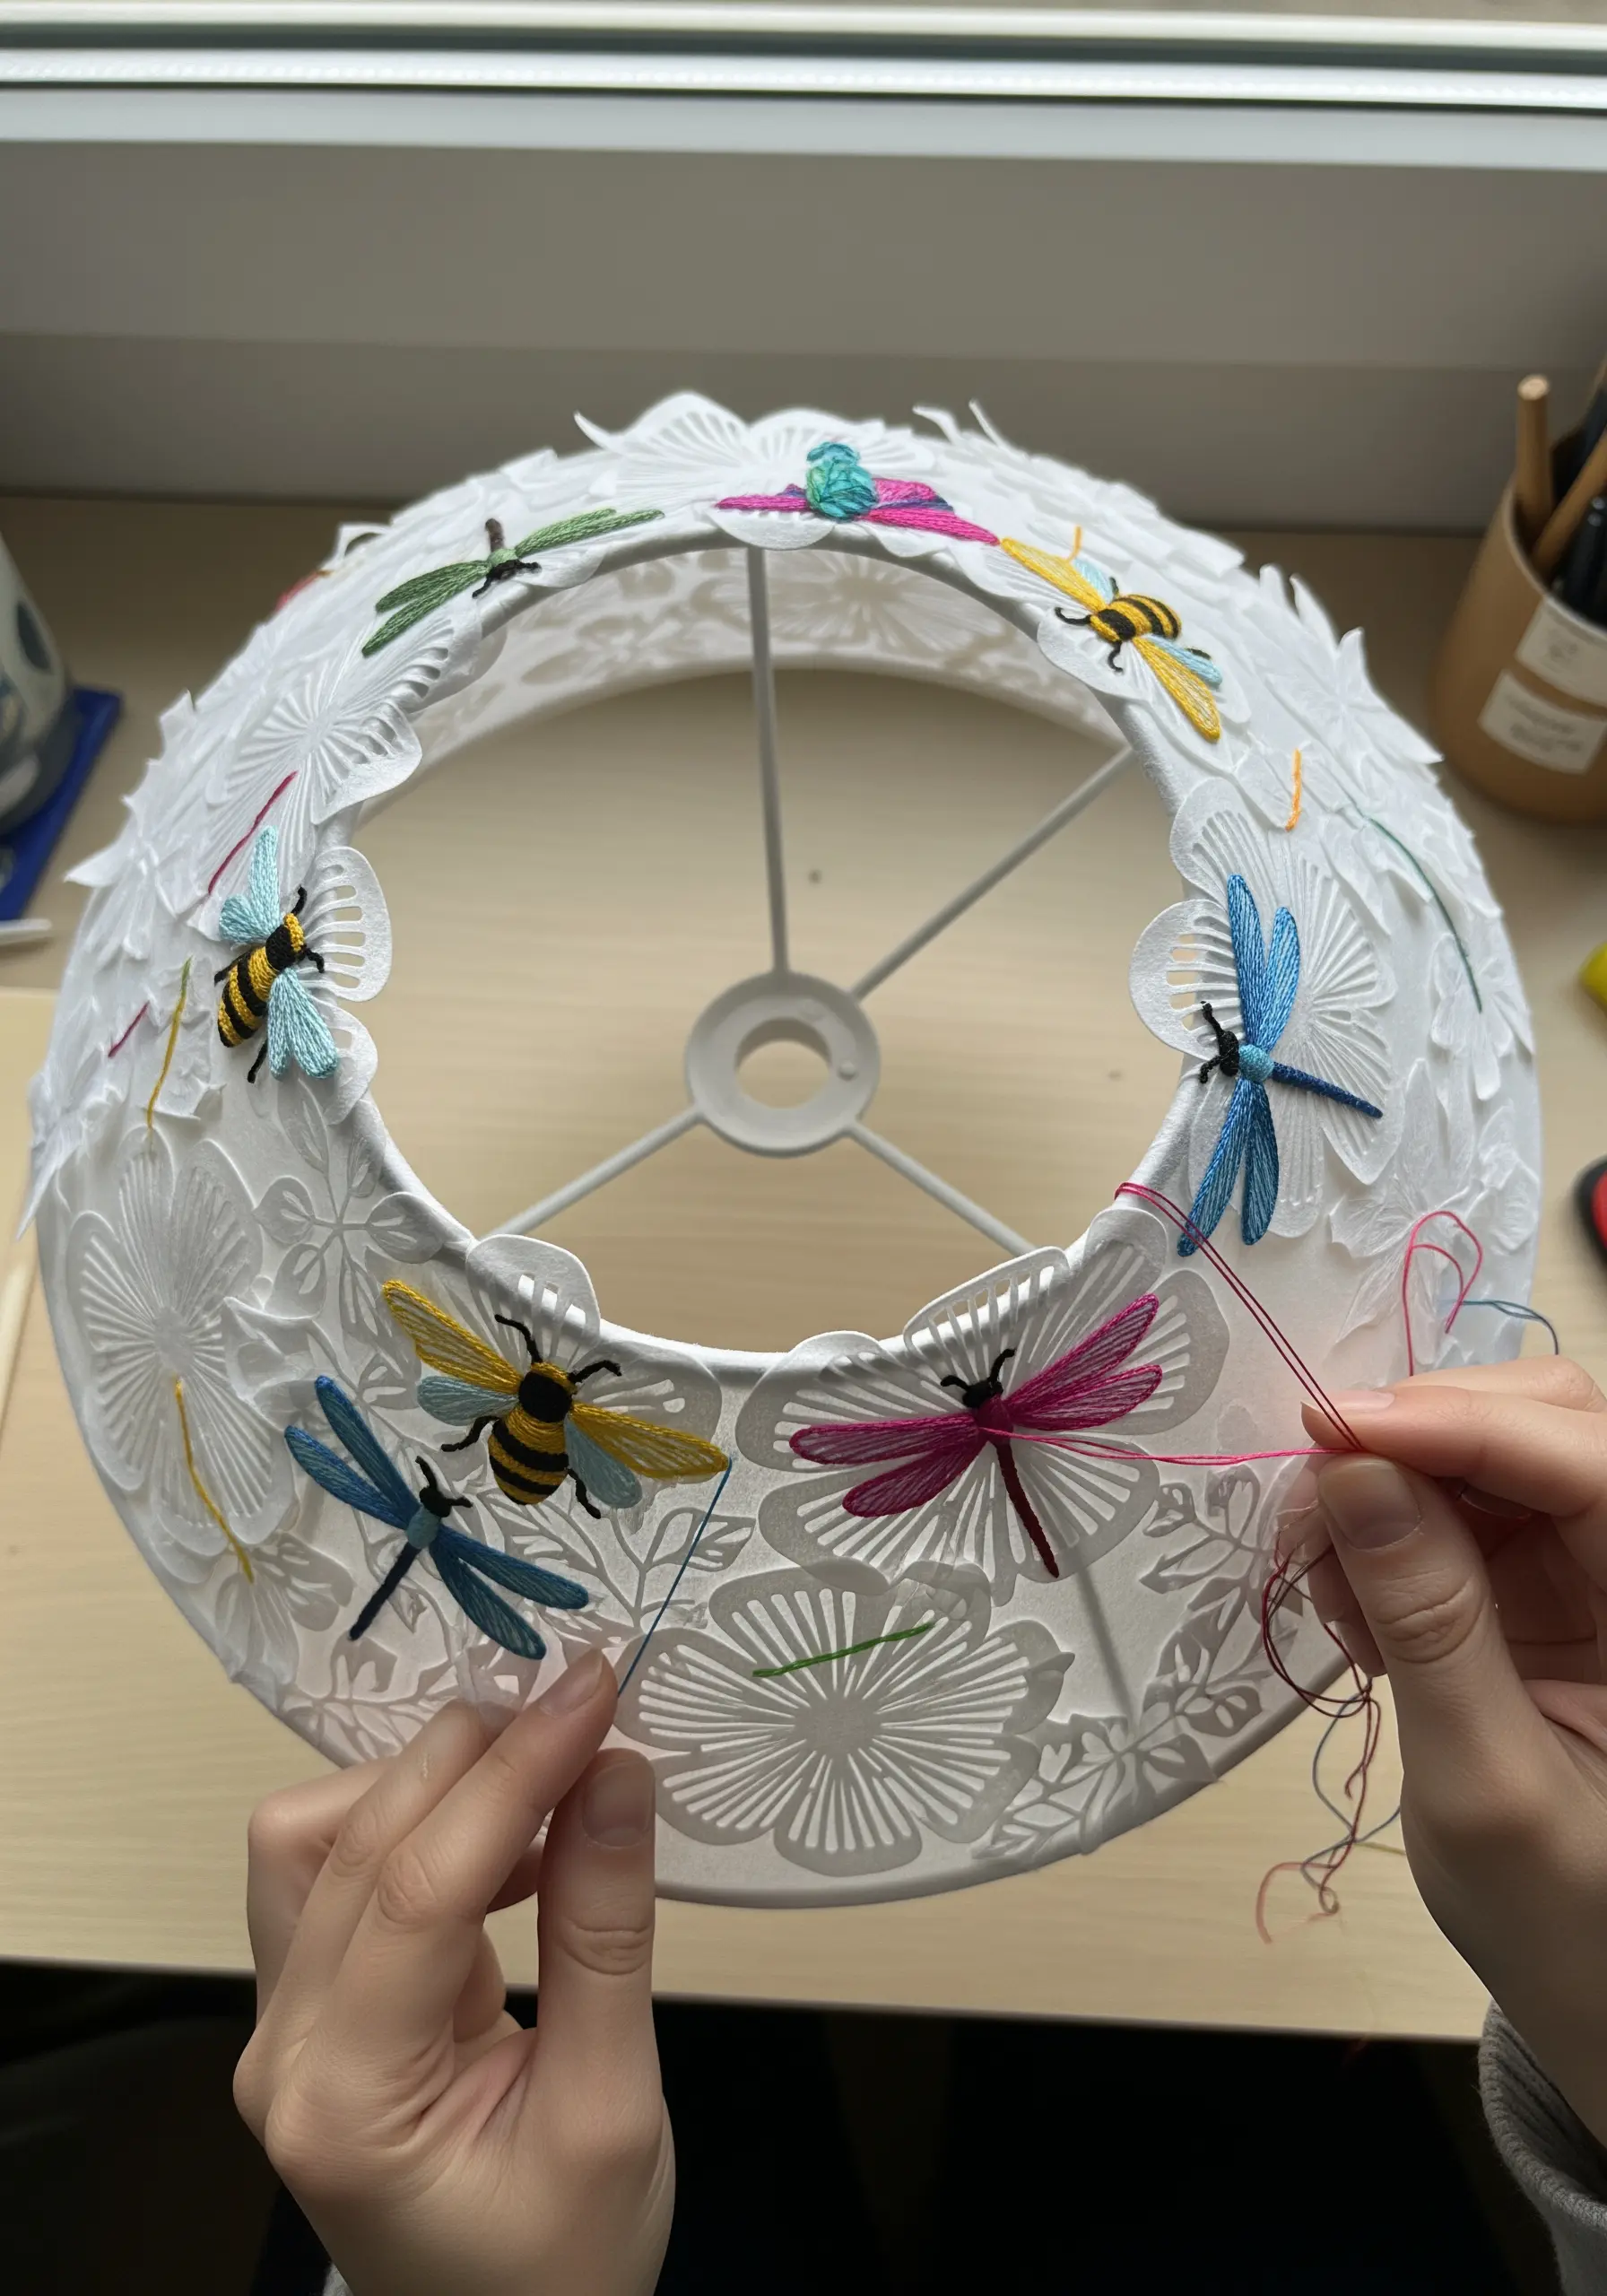
Take your embroidery off the hoop and onto functional objects like a paper lampshade.
Choose a simple design, as stitching on a curved, delicate surface requires precision.
Use a fine, sharp needle and a lightweight floss to avoid tearing the paper.
A simple satin stitch for the wings of dragonflies and bees works beautifully, as the light from the bulb will shine through the threads, making the colors glow.
Reinforce the back of the paper with a sheer, iron-on stabilizer where you plan to stitch for added durability.
13. Sculptural Coral Reefs with Stumpwork Techniques
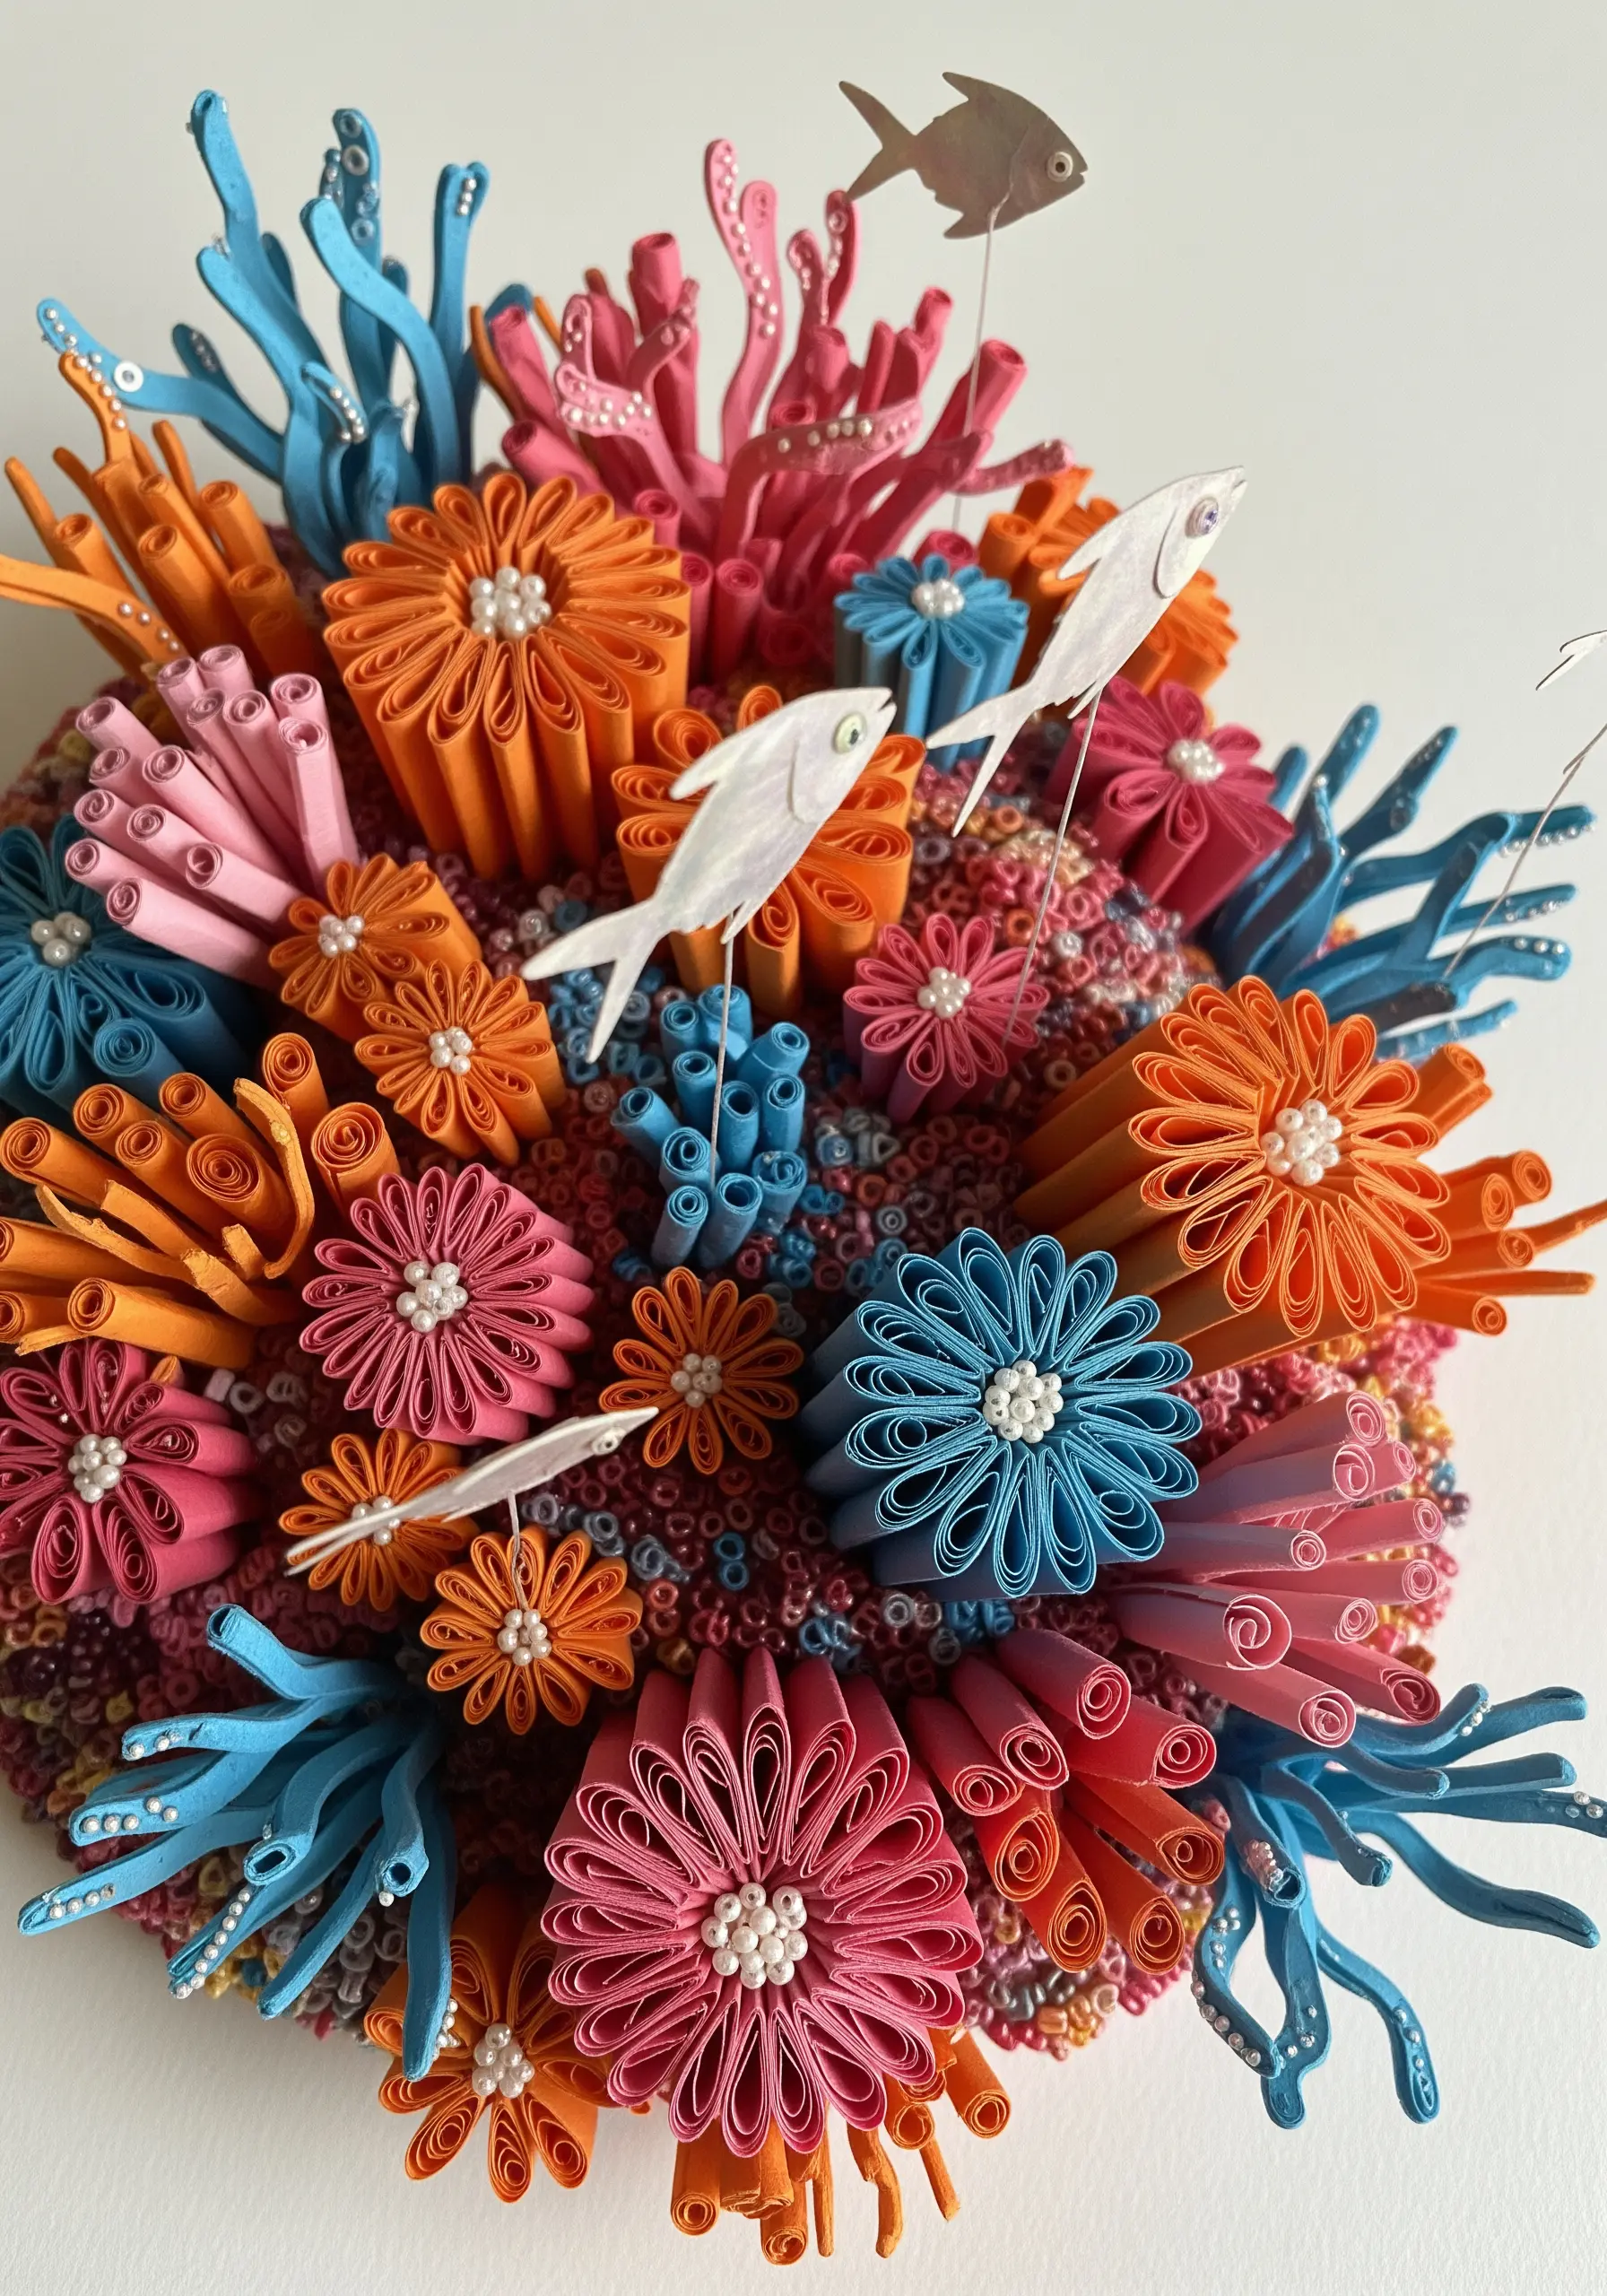
Build a vibrant, three-dimensional world by embracing sculptural stitching methods.
This paper art inspires the use of advanced stumpwork and Brazilian embroidery.
Create coral branches by wrapping thread around wire before stitching it down, allowing you to bend and shape them.
Use raised stem stitch bands and dense clusters of French knots for texture.
The floral coral forms are perfect for dimensional stitches like the cast-on or drizzle stitch, which create soft, looping petals that stand away from the fabric.
This is how you create 3D embroidery wall art pieces that feel truly alive.
14. Lace-Like Mandalas on Paper
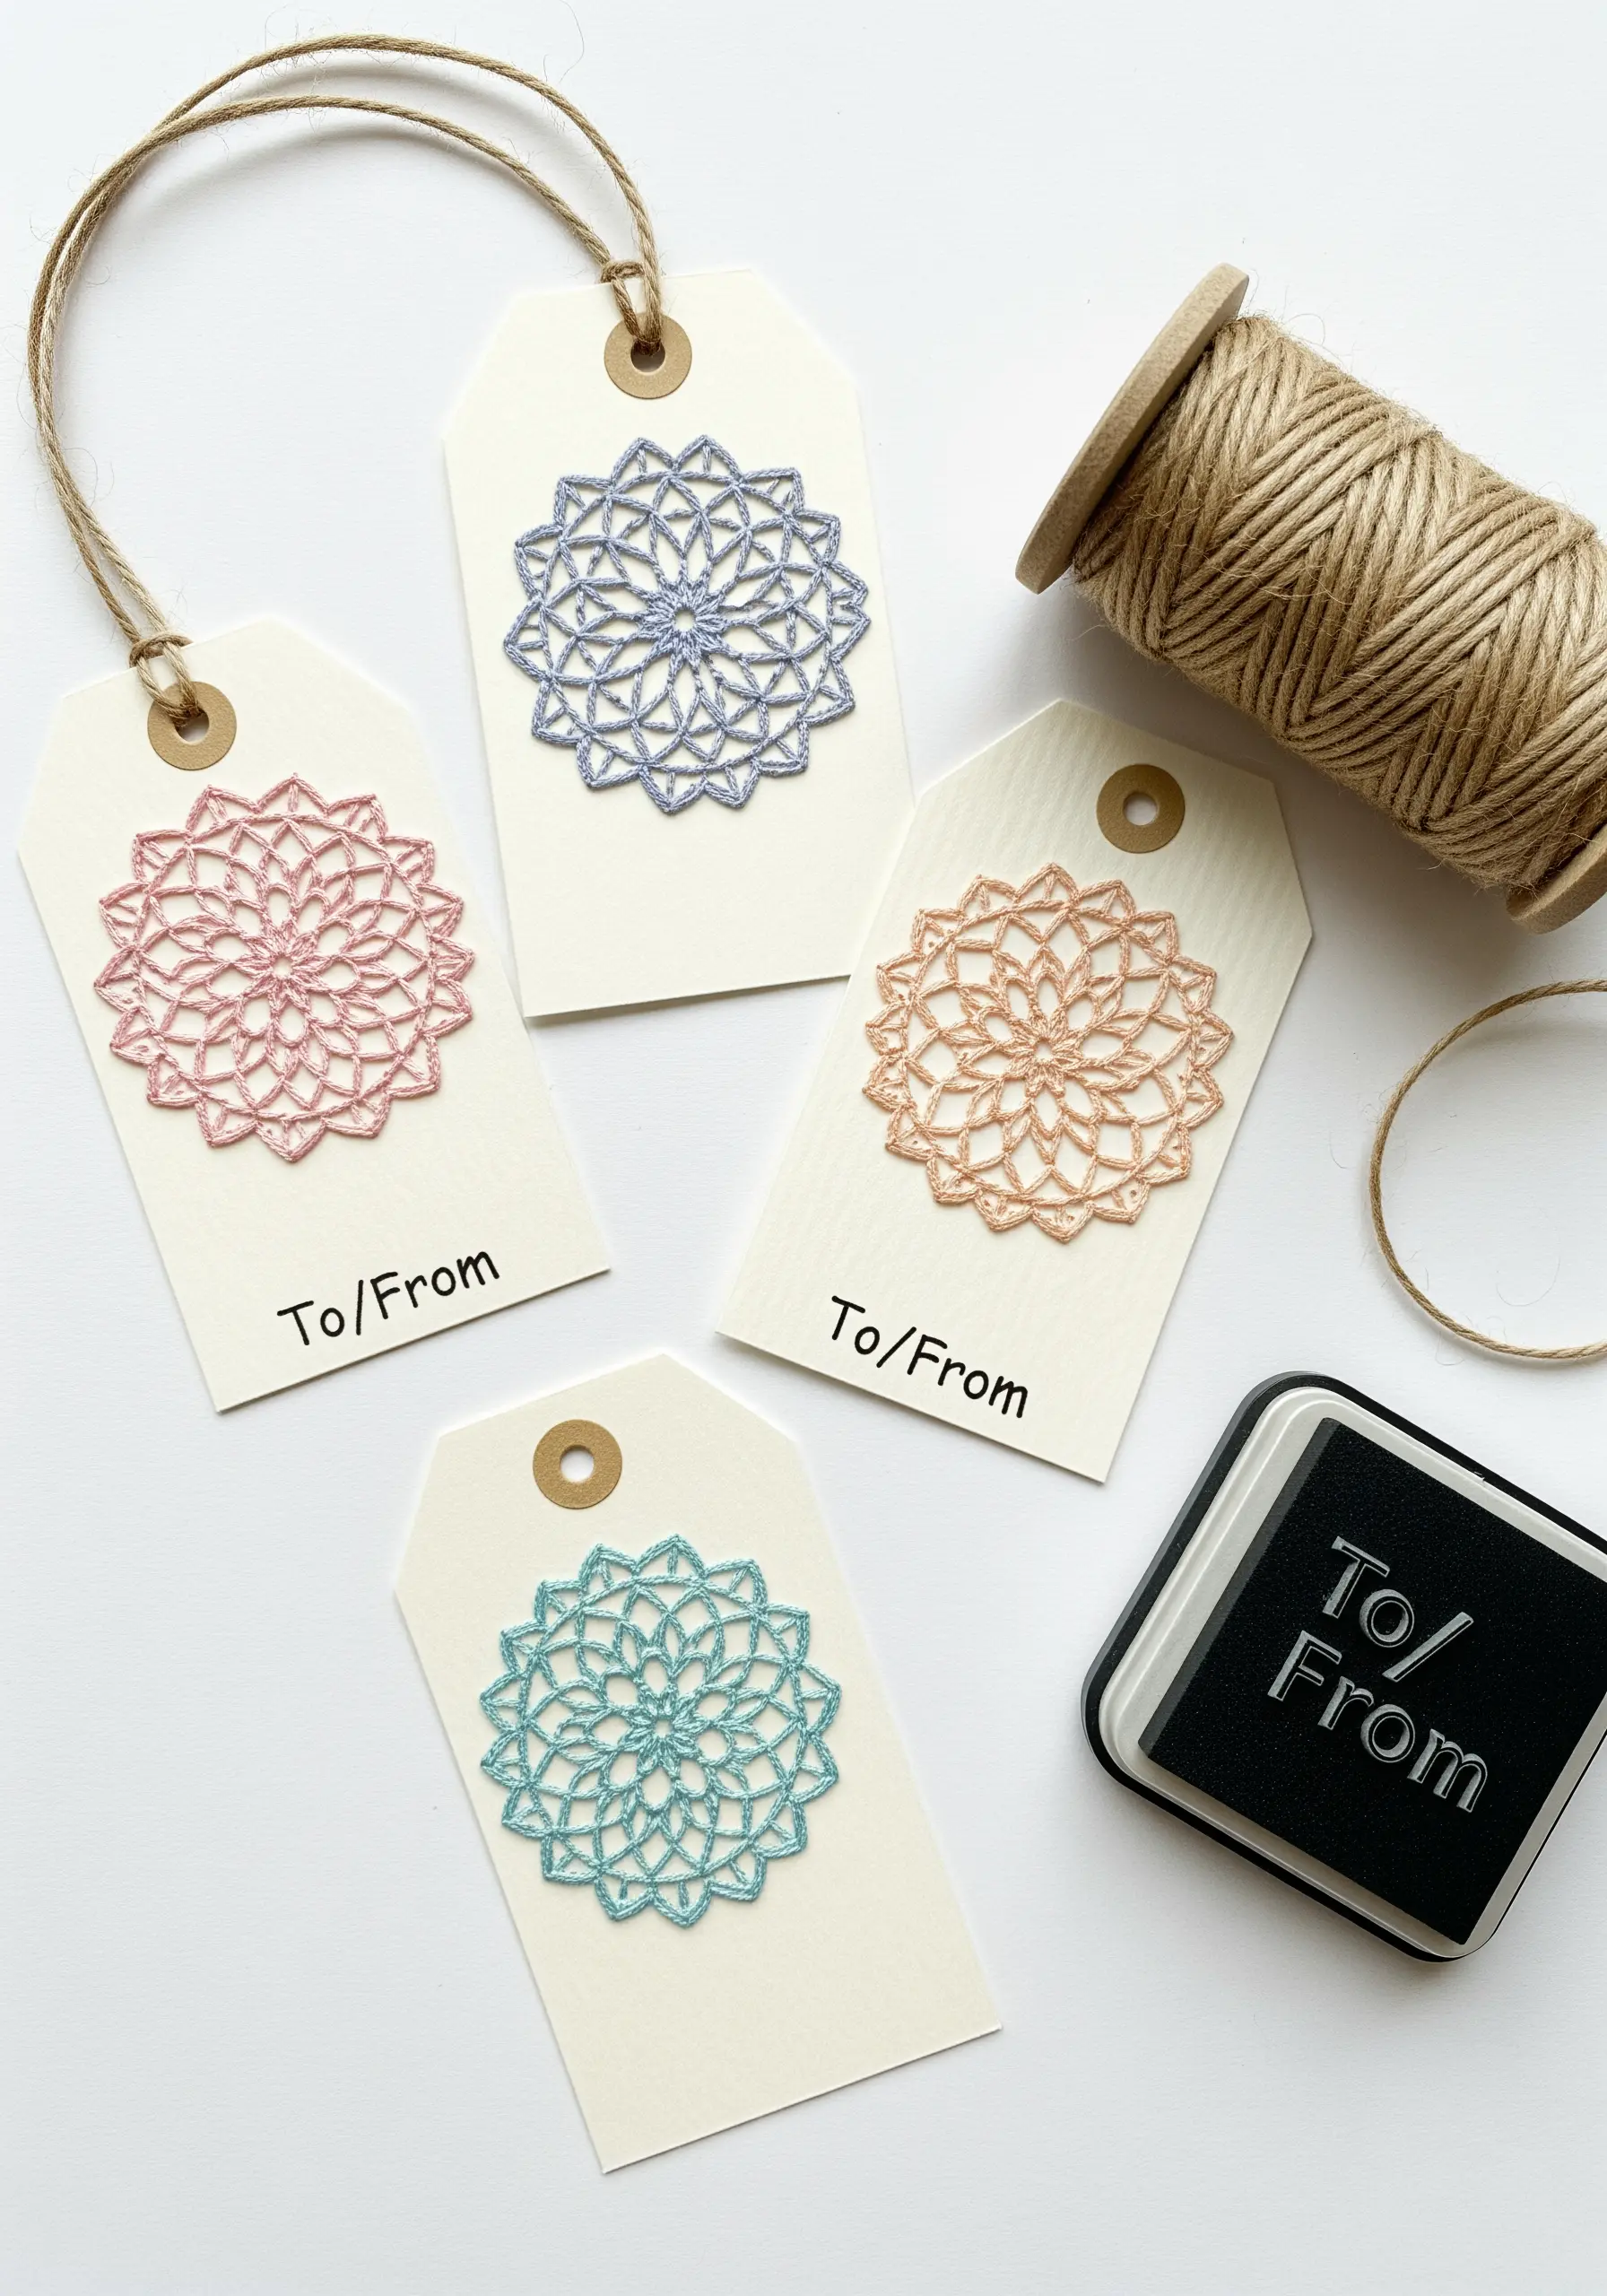
Create the illusion of delicate lace by stitching intricate patterns directly onto cardstock.
Use a single strand of floss and a sharp, fine needle to create your design.
Stitches like the fly stitch, detached chain stitch, and woven spider wheels are perfect for building up geometric, mandala-like forms.
Plan your design and pre-pierce the holes with your needle to ensure clean entry points and prevent accidental tearing.
This technique is perfect for creating exquisite DIY embroidered cards and mini-gifts that feel both personal and luxurious.
15. Autumnal Hues with Thread on Painted Surfaces
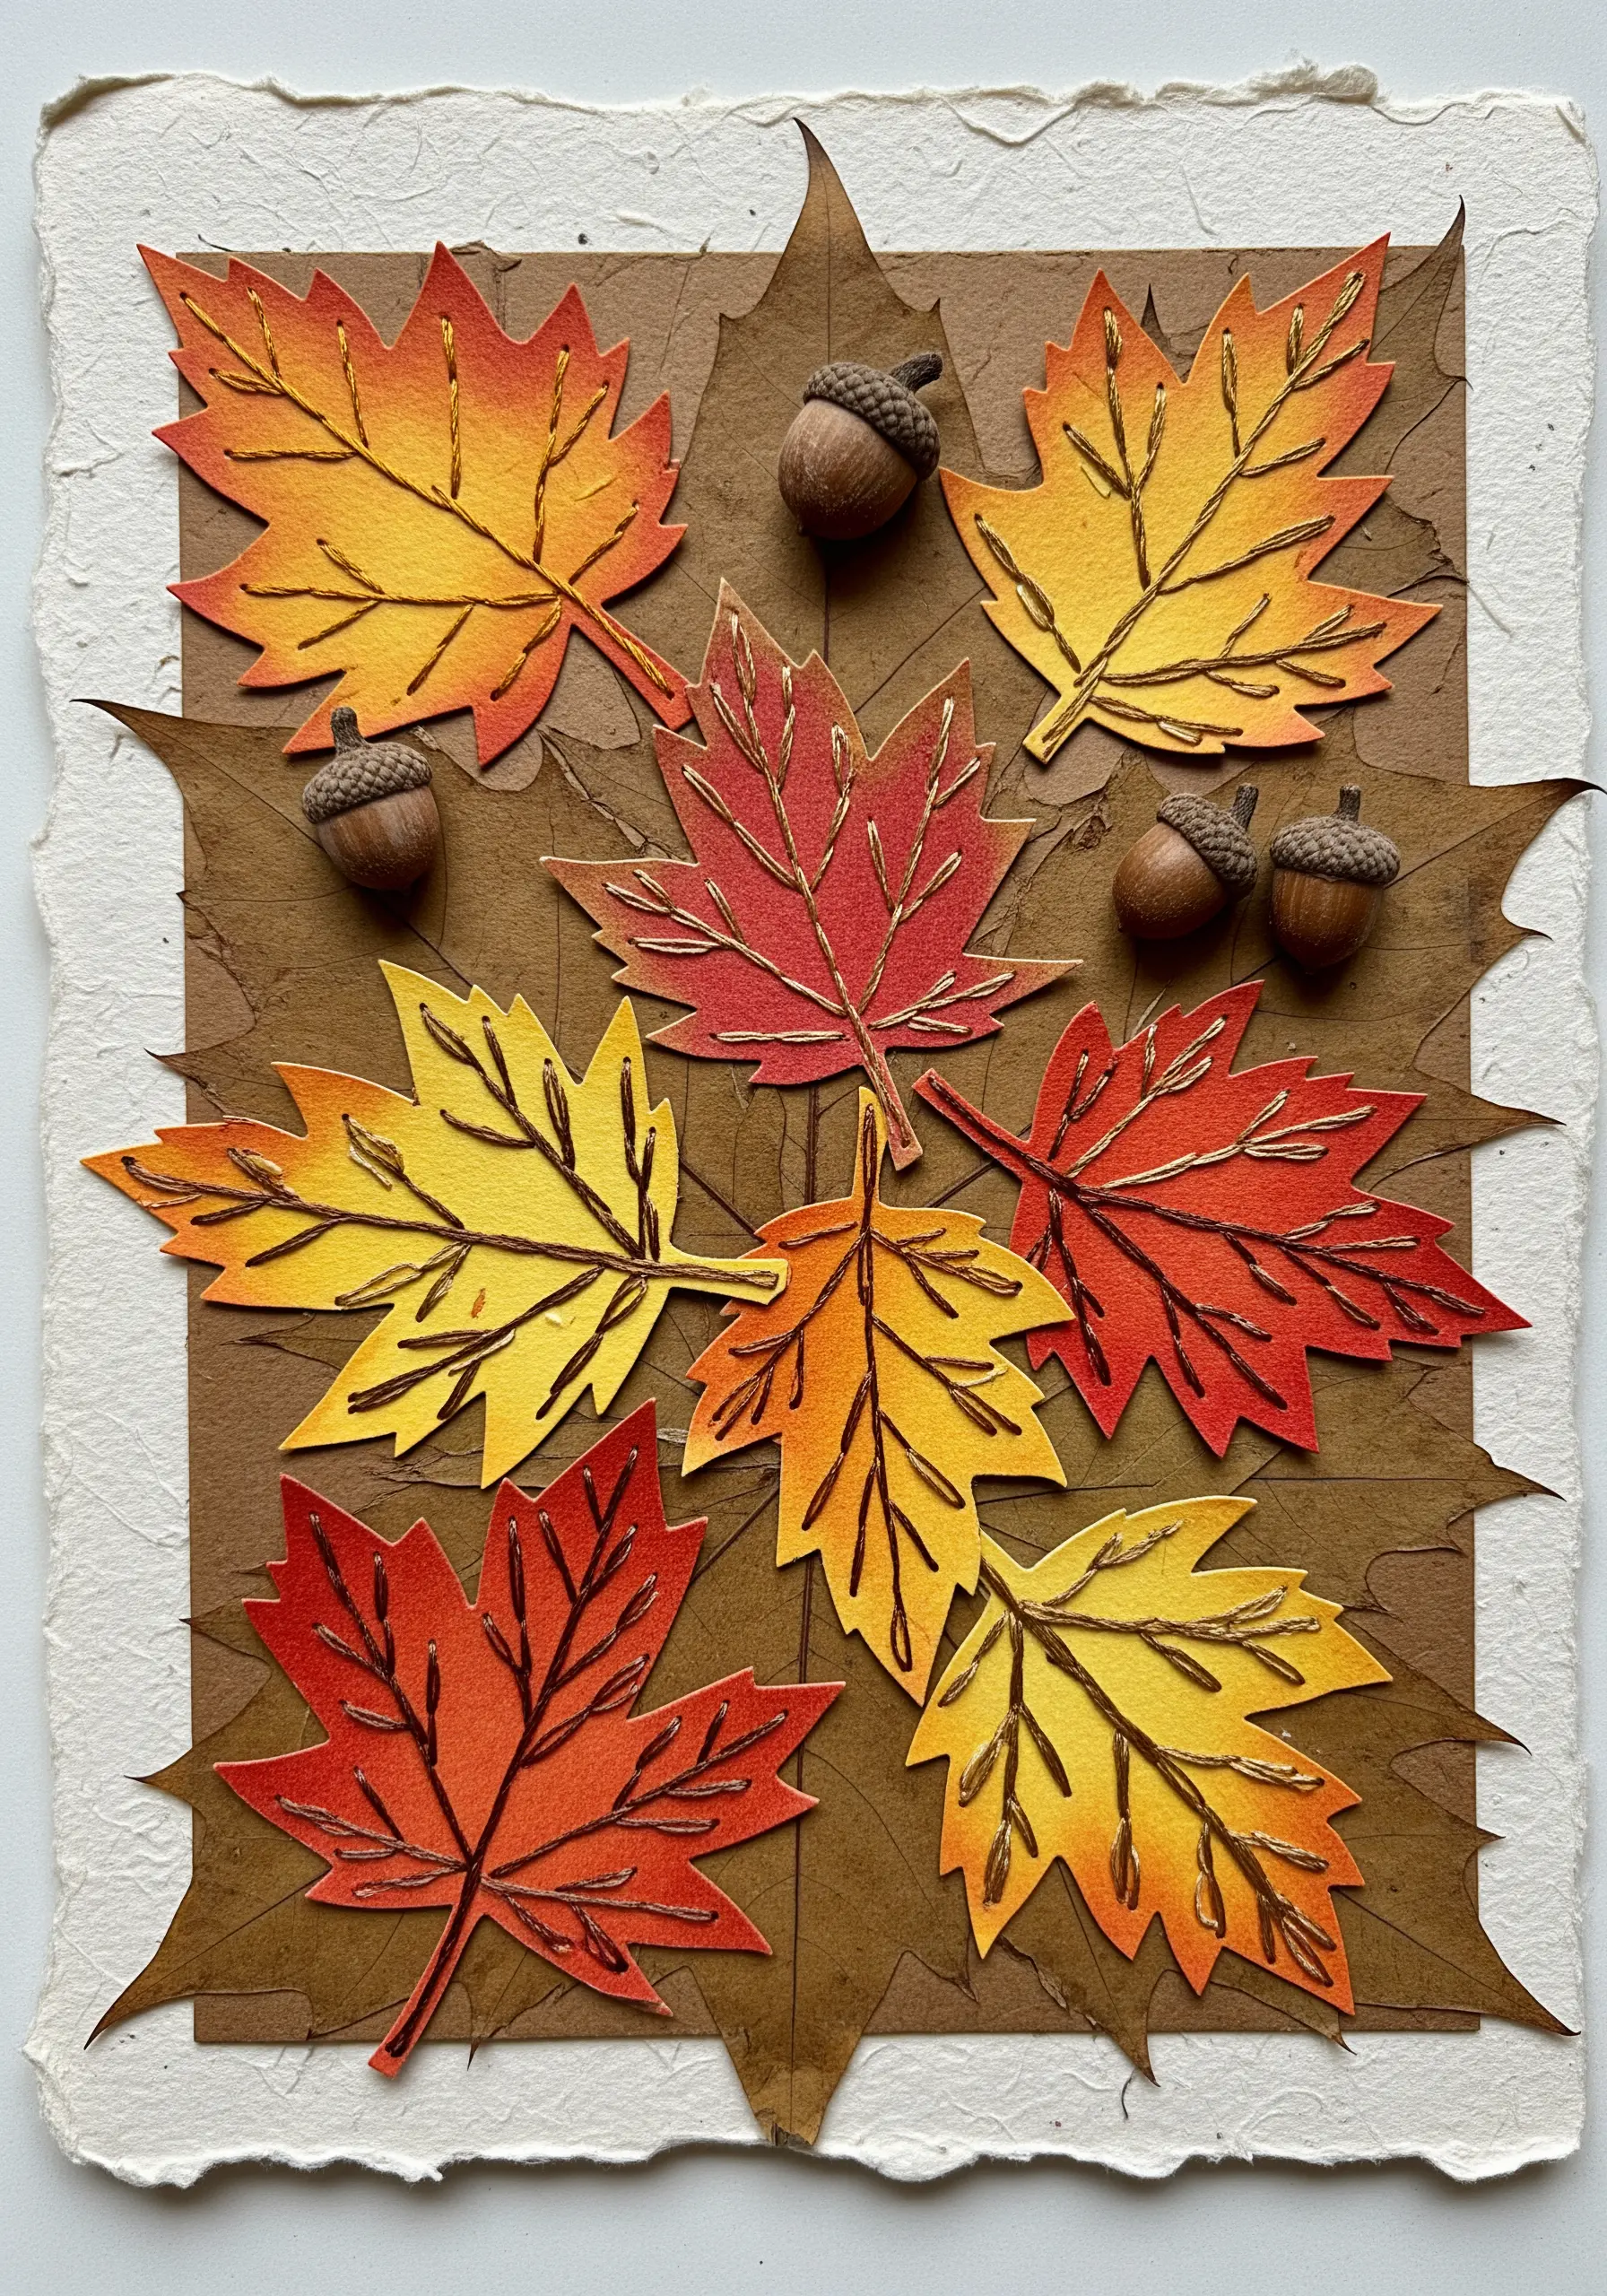
Combine the softness of watercolor with the sharpness of thread for rich, dynamic results.
Lightly paint your leaf shapes onto heavy watercolor paper or a stable fabric like cotton canvas, blending autumnal reds, yellows, and oranges.
Once the paint is completely dry, use a contrasting thread—like a metallic gold or a dark brown—to stitch the veins.
A simple backstitch or stem stitch is all you need; the goal is to add definition and a touch of sparkle that complements the painted base.
This mixed-media approach provides a depth of color that thread alone cannot achieve.
16. Whimsical Mobiles with Padded Appliqué
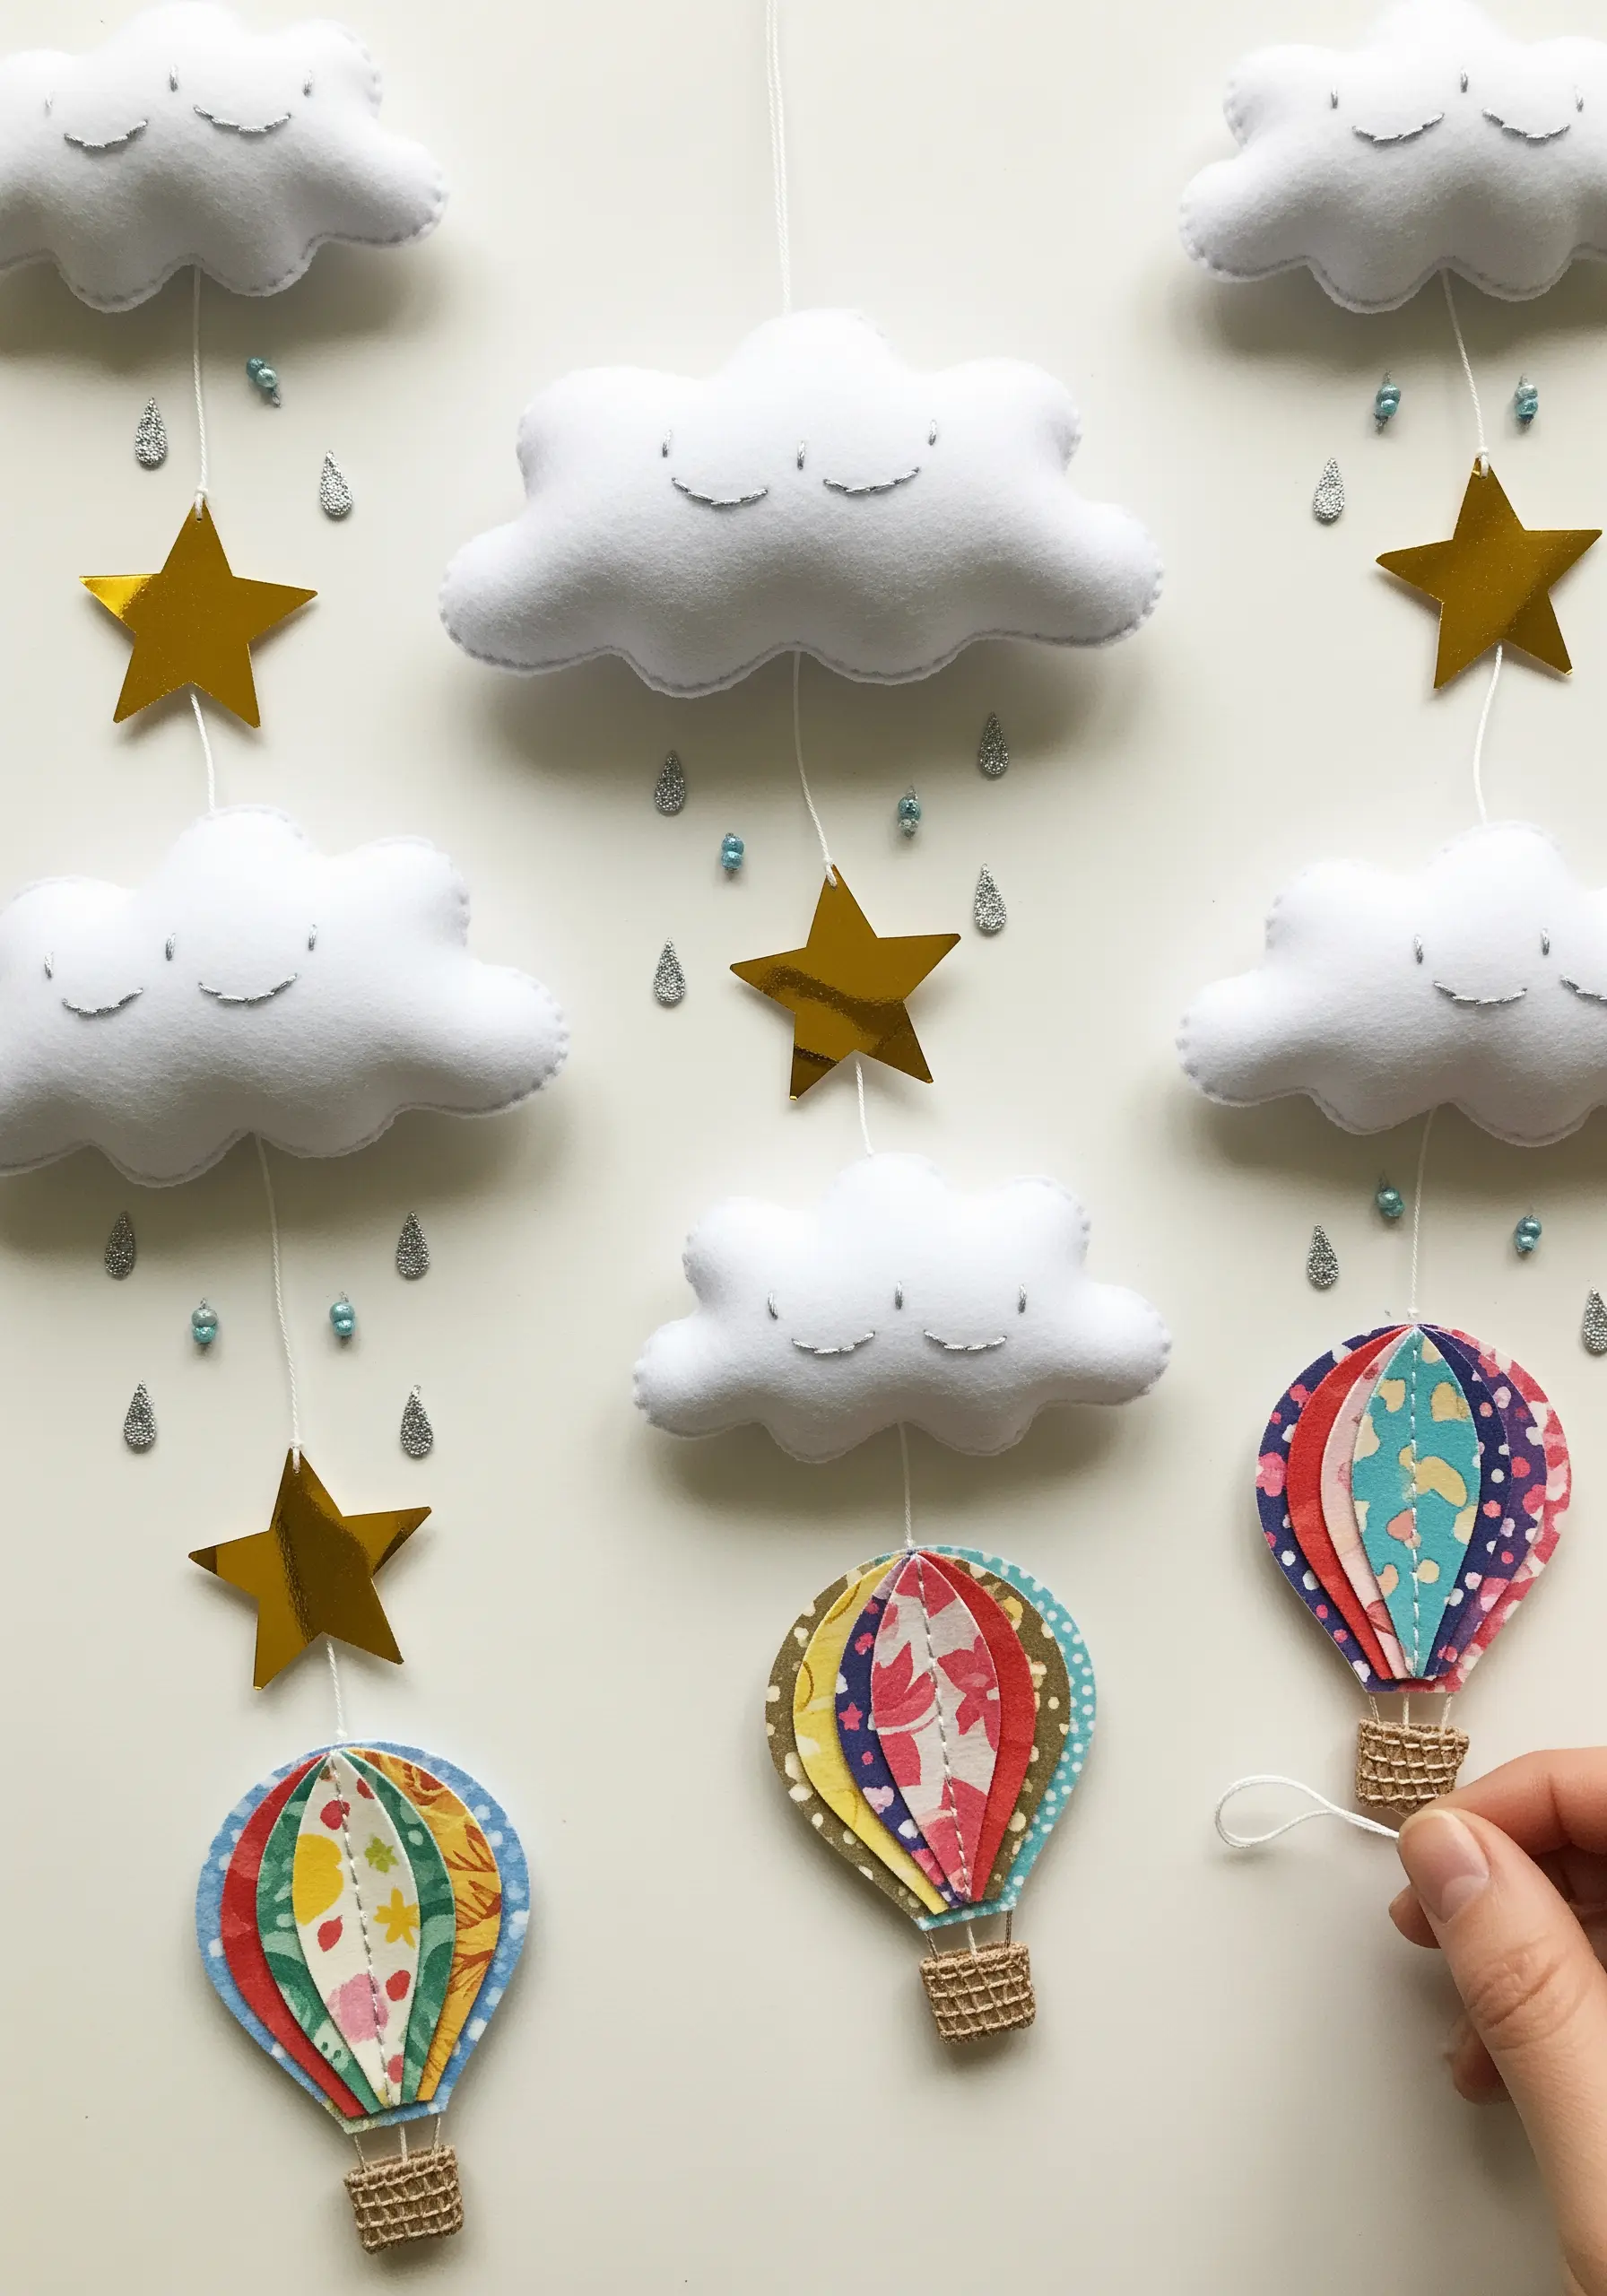
Construct charming, soft-sculpture elements for nursery decor using simple sewing and embroidery techniques.
Create the clouds from two pieces of white felt, stitched together and lightly stuffed with batting for a pillowy, 3D effect.
Use a few simple backstitches to give them sweet, sleepy faces.
The paper hot air balloons can be translated into layered fabric appliqué, using different patterns for each panel to create a playful, patchwork look.
This is a perfect project to create cute, soft baby room decor.
17. Realistic Insects with Thread Painting

Capture the fragile, intricate beauty of butterflies by using the thread painting technique.
This method, also known as needle painting or long and short stitch, allows you to blend colors seamlessly, just like paint.
Work with a single strand of floss and a sharp needle, making stitches of varying lengths to mimic the subtle gradations of color on the butterfly’s wings.
To make them even more realistic, consider stitching the wings as separate stumpwork elements on a wire frame, then attaching them to the body so they lift slightly from the fabric.
18. Woven Foundations for Textural Embroidery
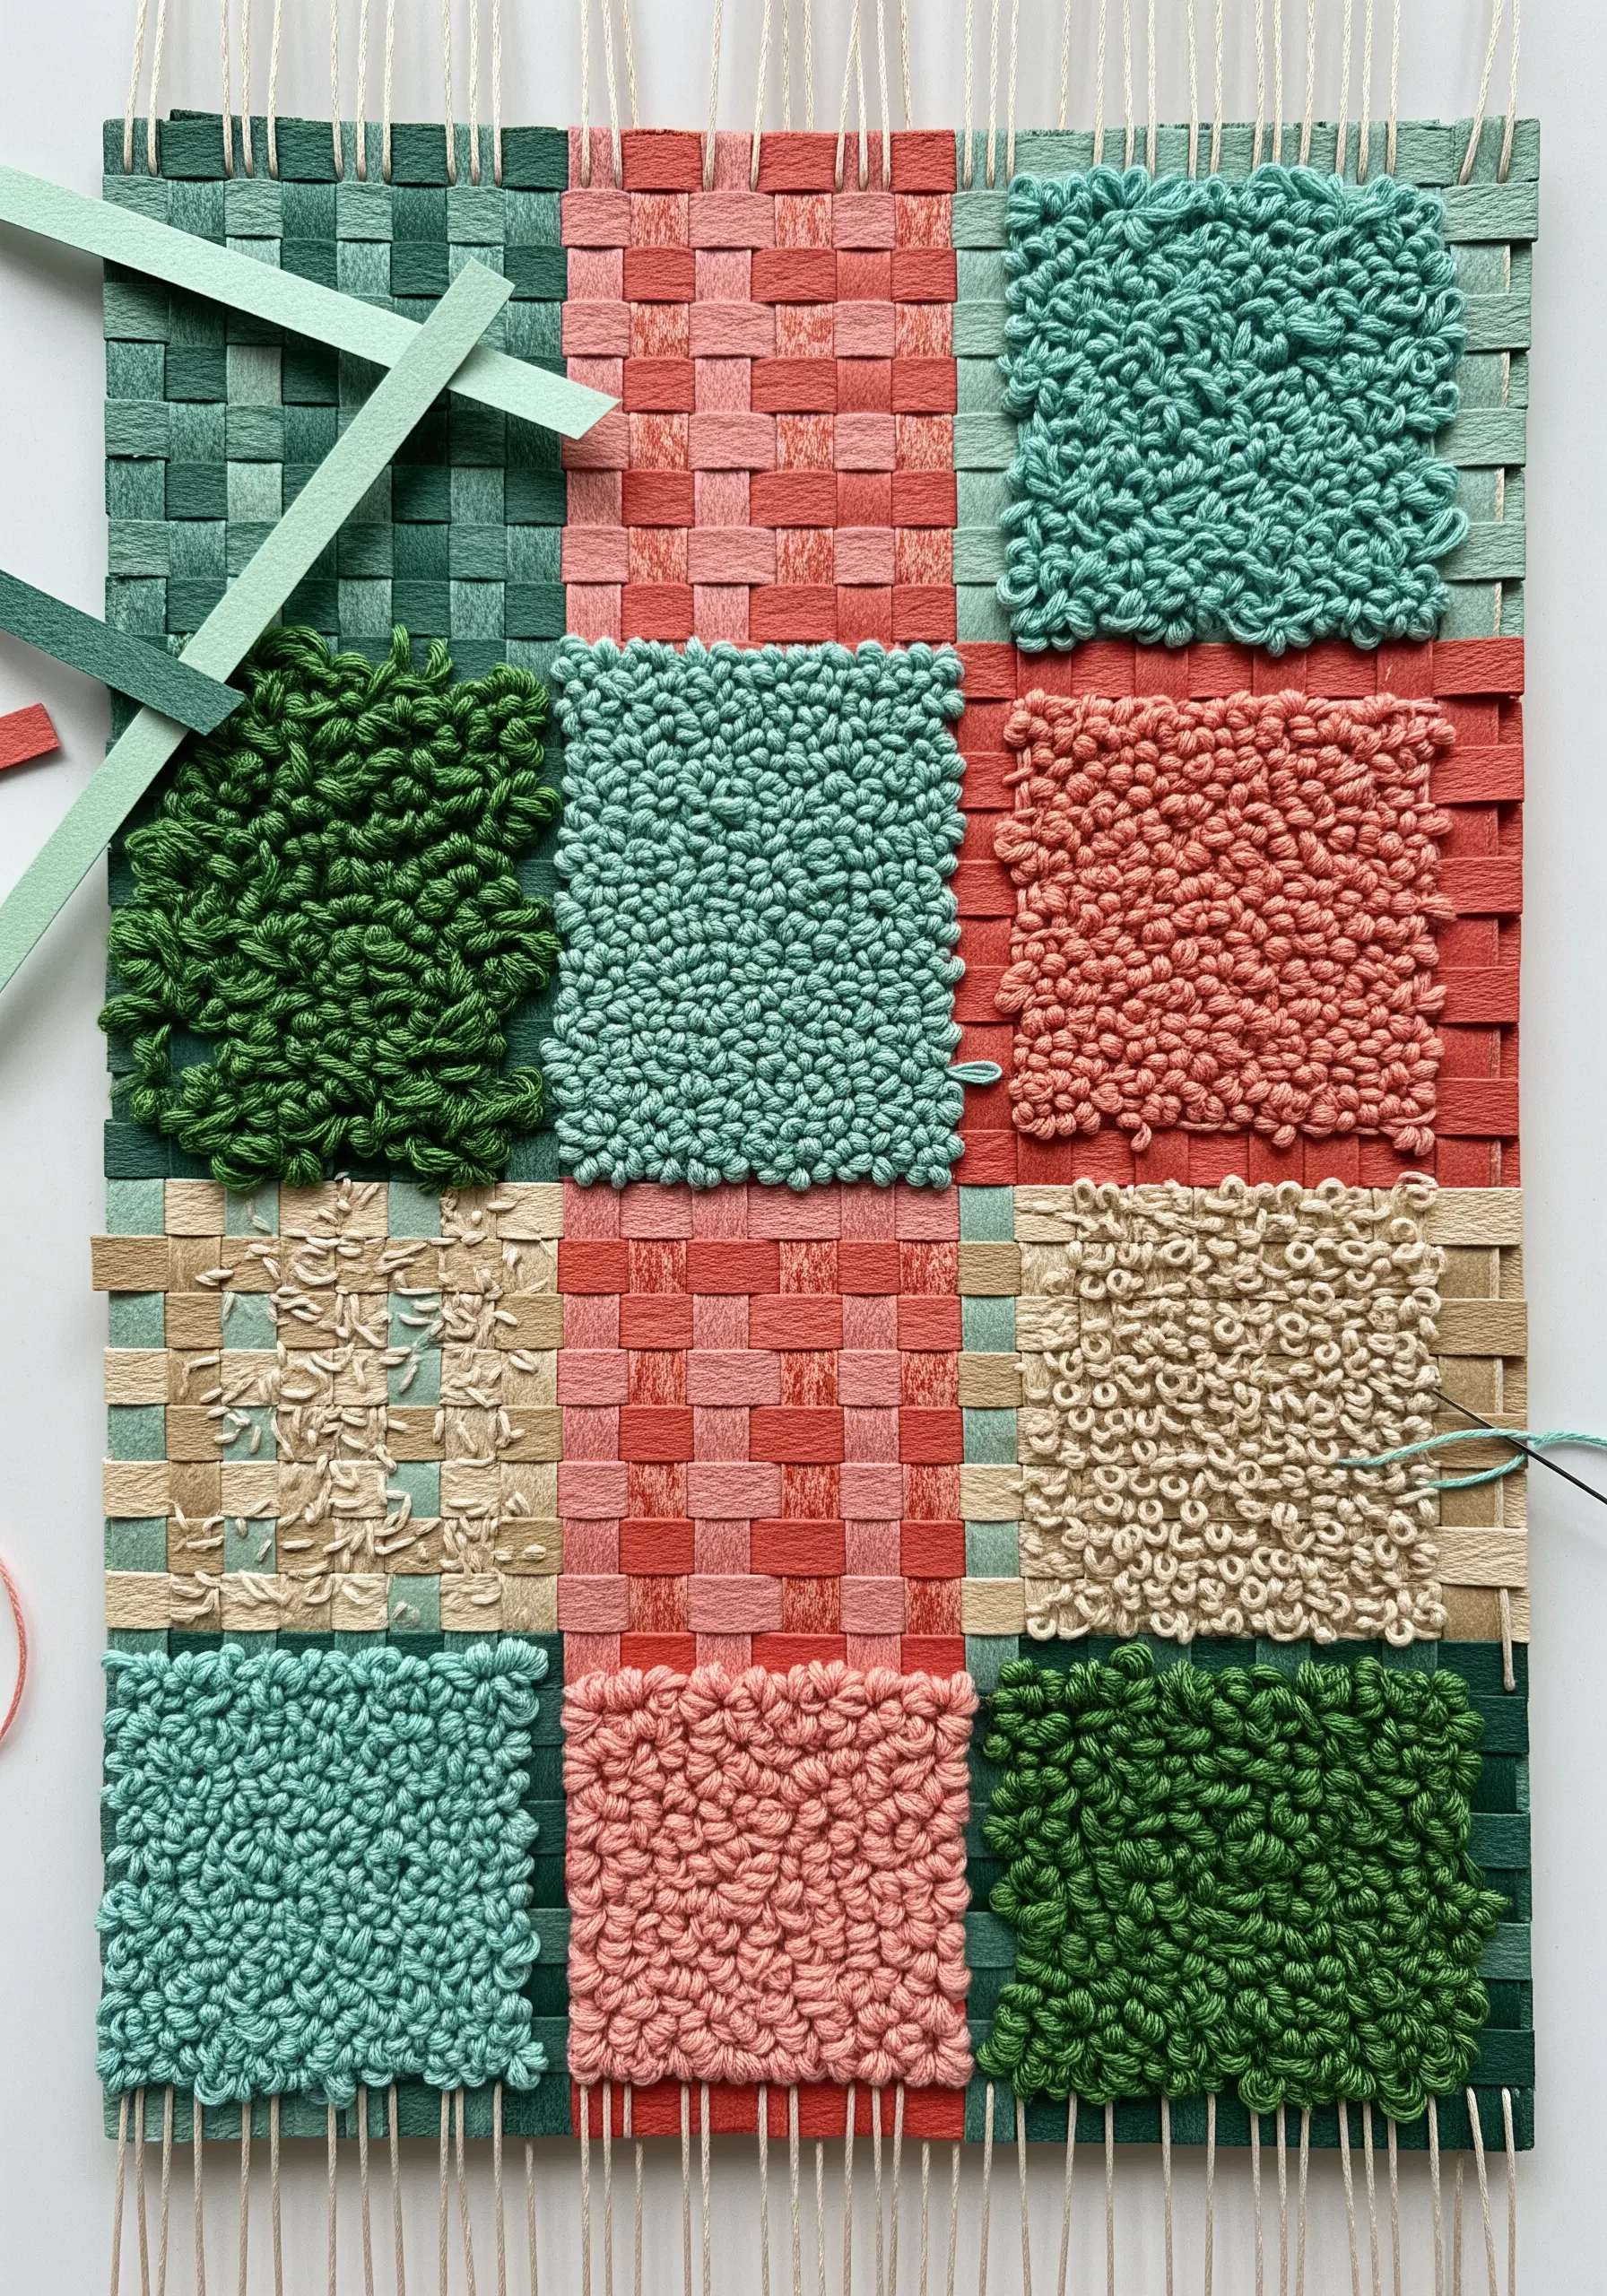
Create a truly unique embroidery canvas by weaving your own background fabric.
You can weave strips of paper, fabric, or ribbon through a warp of sturdy threads set up on a simple cardboard loom.
Once your woven panel is complete, use it as your base for embroidery.
Fill in entire woven squares with dense French knots or seed stitches, creating a patchwork of textures.
The contrast between the flat woven areas and the raised, knotted sections makes for a dynamic piece of mixed-fiber art.
19. Feather Delicacy with Satin Stitch and Turkey Work

Replicate the structure and softness of a feather with a strategic combination of stitches.
Use a smooth, perfectly aligned satin stitch for the main vane, ensuring your stitches lie flat and close together to create a seamless, elegant surface.
For the softer, downy part of the feather near the quill (the afterfeather), switch to Turkey work.
After you complete the looped stitches, trim them short and fluff them gently with your needle to create a realistic, airy texture.
This juxtaposition of smooth and soft textures is what brings the feather to life.
20. Surface Design with Directional Thread Painting
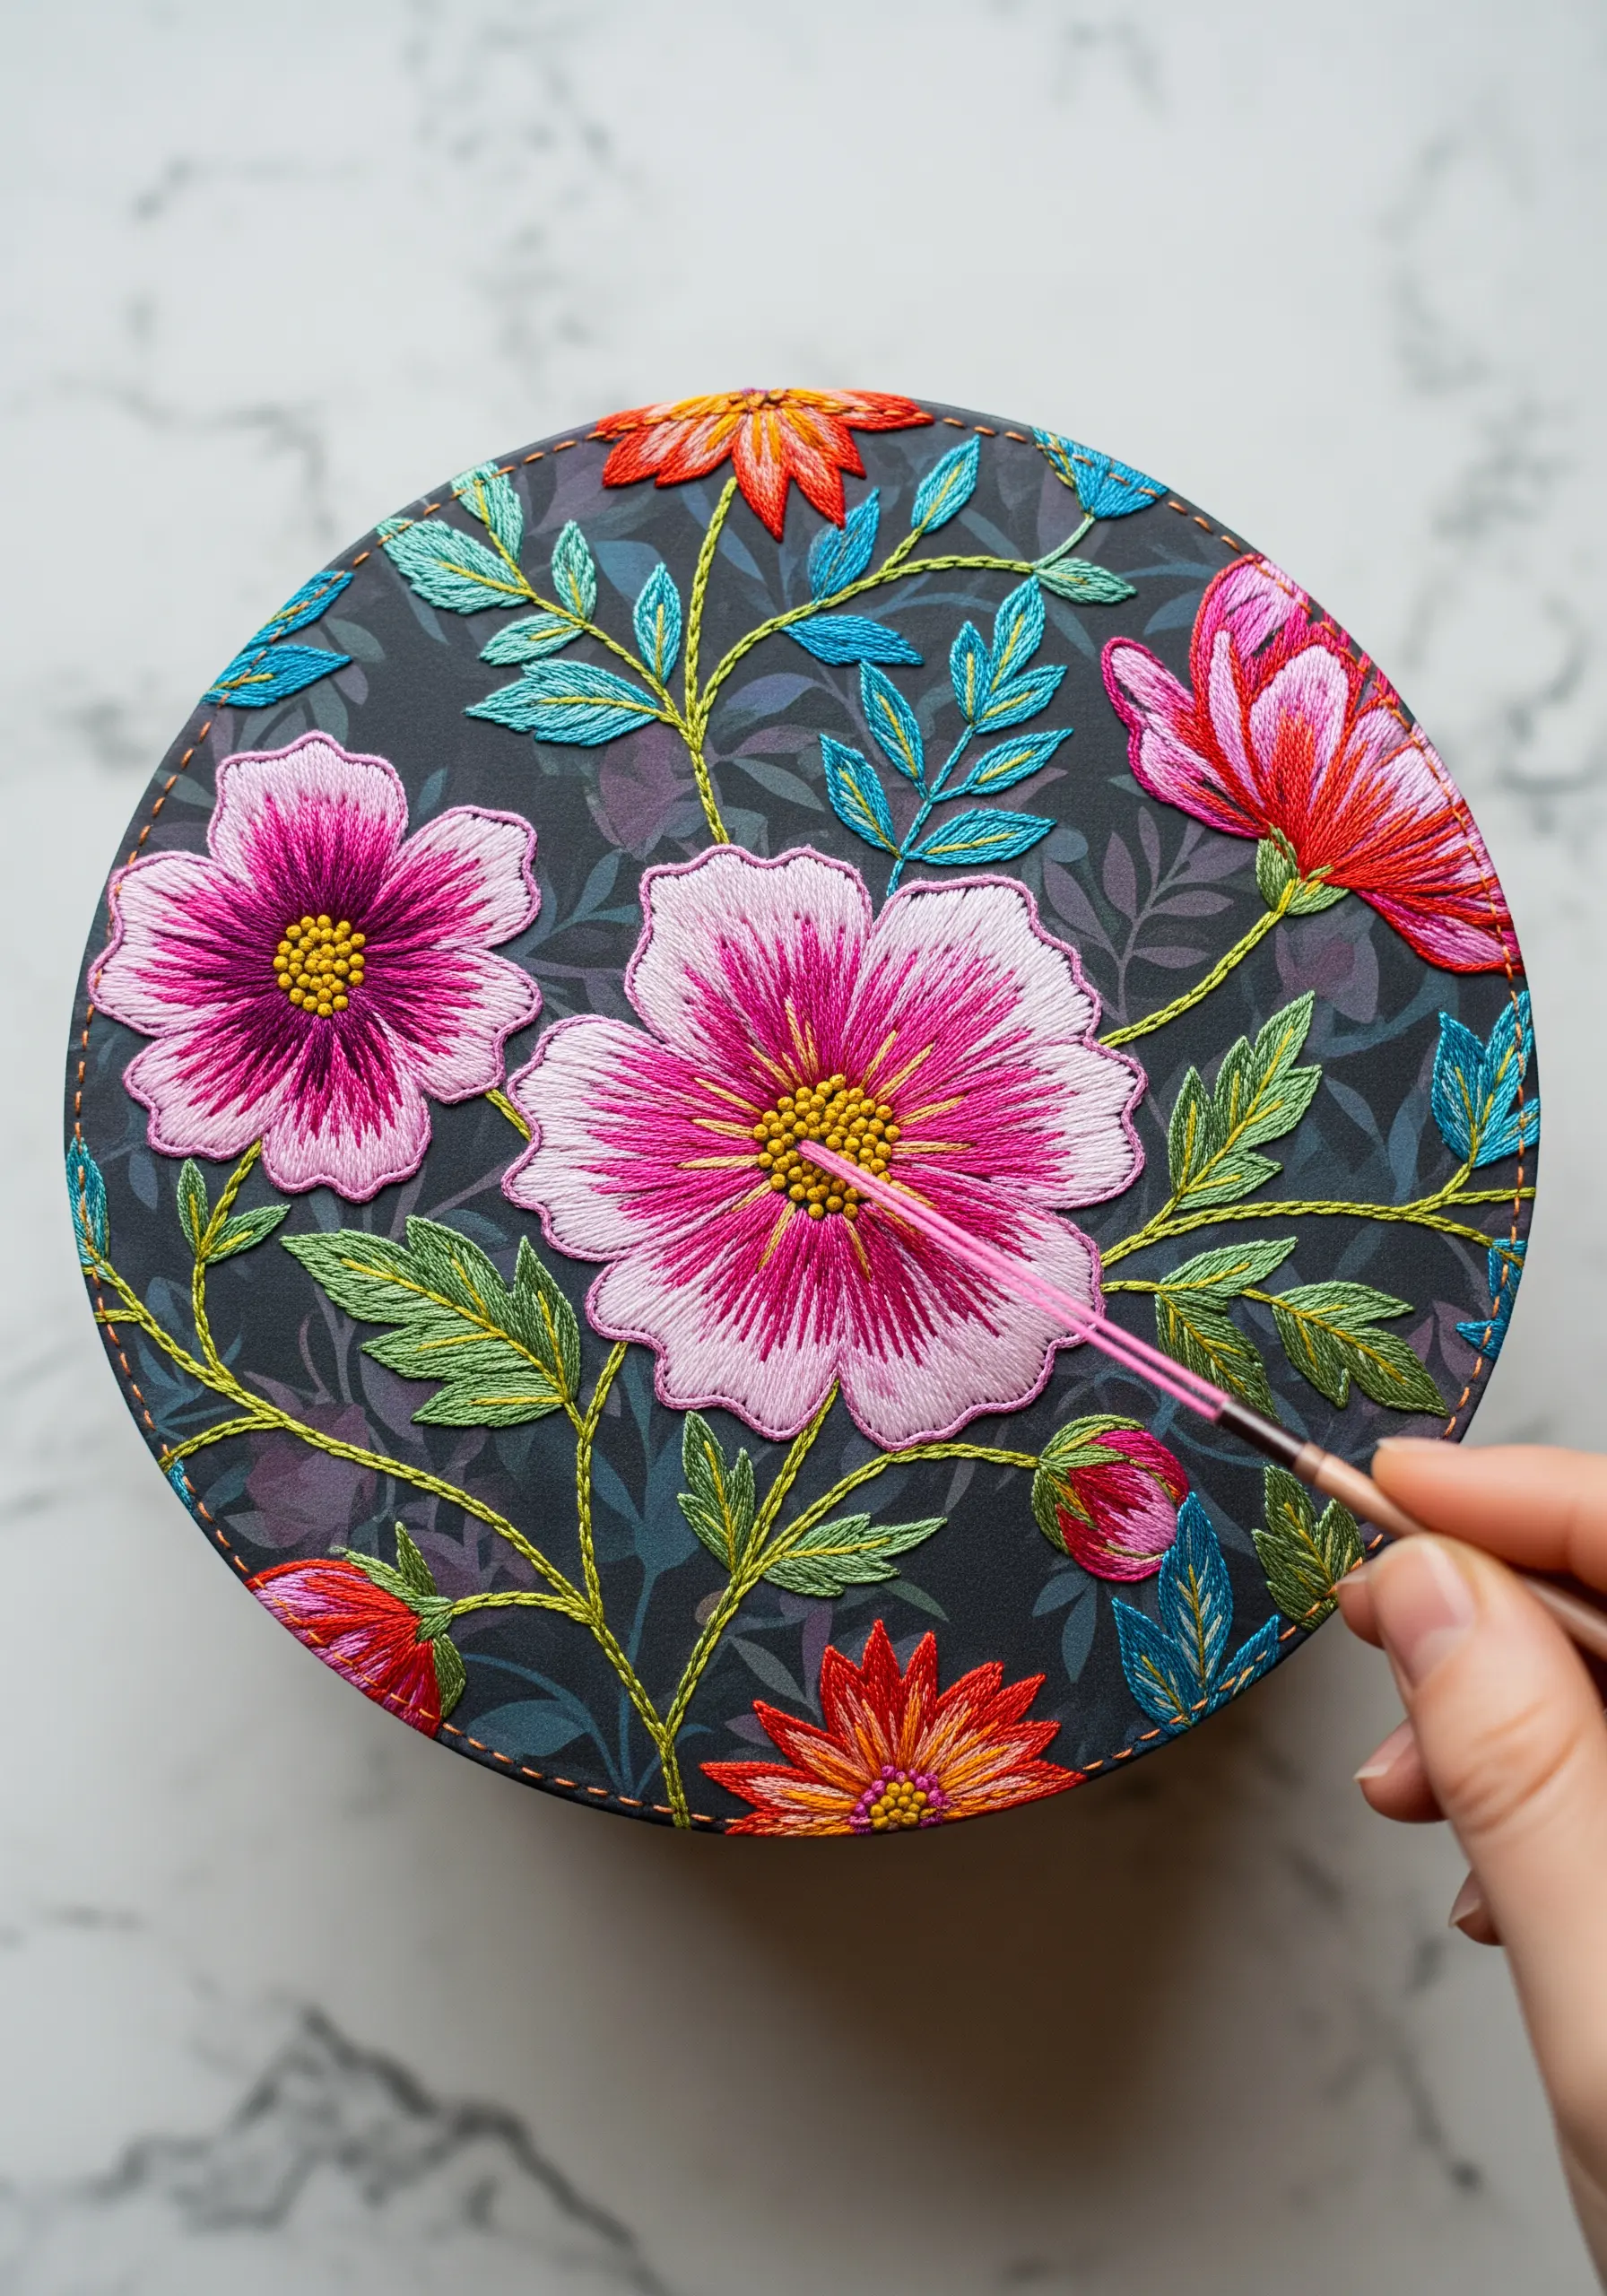
When embroidering on a printed fabric or a pre-decorated object, let the existing design guide your stitches.
Use long and short stitch to fill in the flowers and leaves, but pay close attention to the direction of your stitches.
Follow the natural curves of the petals and the veins of the leaves to create a sense of movement and realism.
Using just two or three shades of the same color for each element is enough to create depth without overwhelming the original pattern.
This makes your embroidery feel like an integrated, intentional enhancement, not an afterthought.
21. Anatomical Forms with Padded Satin Stitch
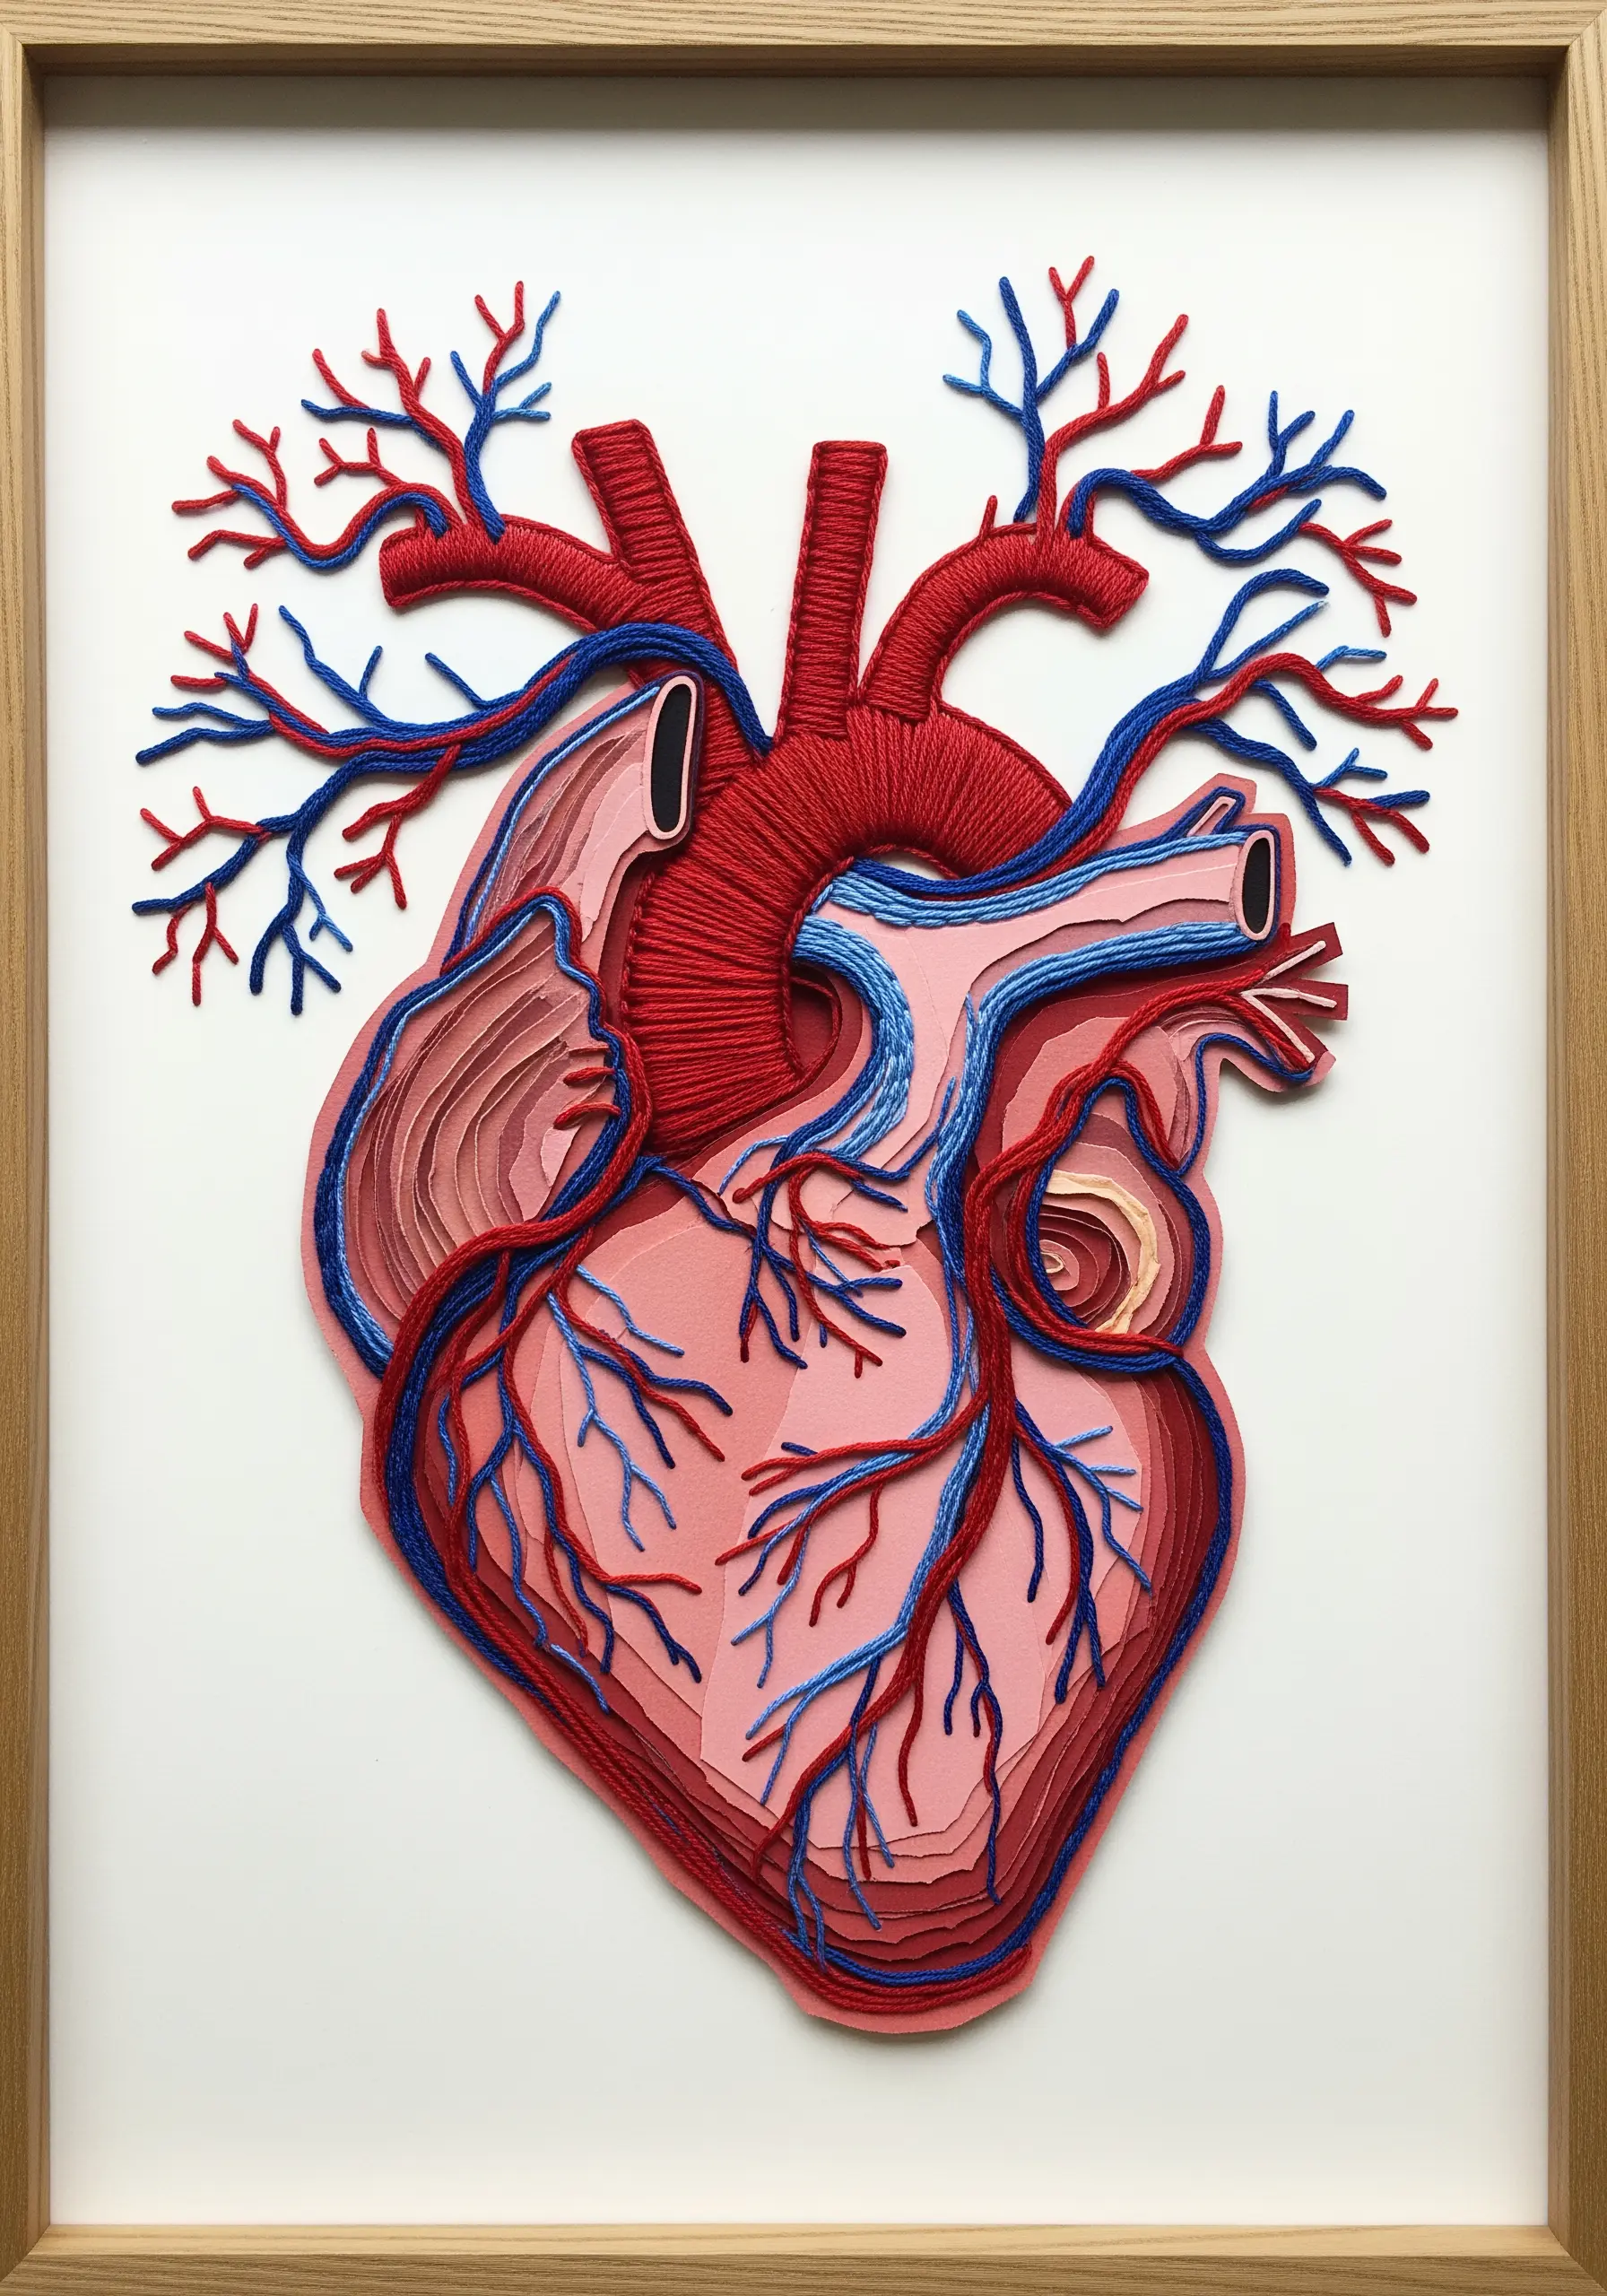
Give your designs physical dimension and a sculptural quality using padded embroidery techniques.
To create the raised effect of the heart and its vessels, first stitch a base layer of felt padding, or build up the area with multiple layers of satin or running stitches.
Then, cover this padding with a final, smooth layer of satin stitch, ensuring your stitches are perpendicular to the ones underneath for the best coverage.
For the larger vessels, try wrapping thread around the padded shape, which creates a clean, corded look that stands out dramatically.
22. Elegant Motifs on Patterned Backgrounds

Make a small embroidered motif the star of the show by placing it on a dynamic, patterned background.
Use hand-marbled fabric or a beautiful printed cotton as your base.
Choose a simple, iconic design like a leaf, bee, or starburst that won’t get lost in the pattern.
Stitch your motif using a raised or highly textural stitch—like a padded satin stitch or dense bullion knots—to help it stand out from the busy background.
Using a metallic or silk thread will also create a subtle shift in sheen that draws the eye.
23. A Sampler of Experimental Thread Techniques
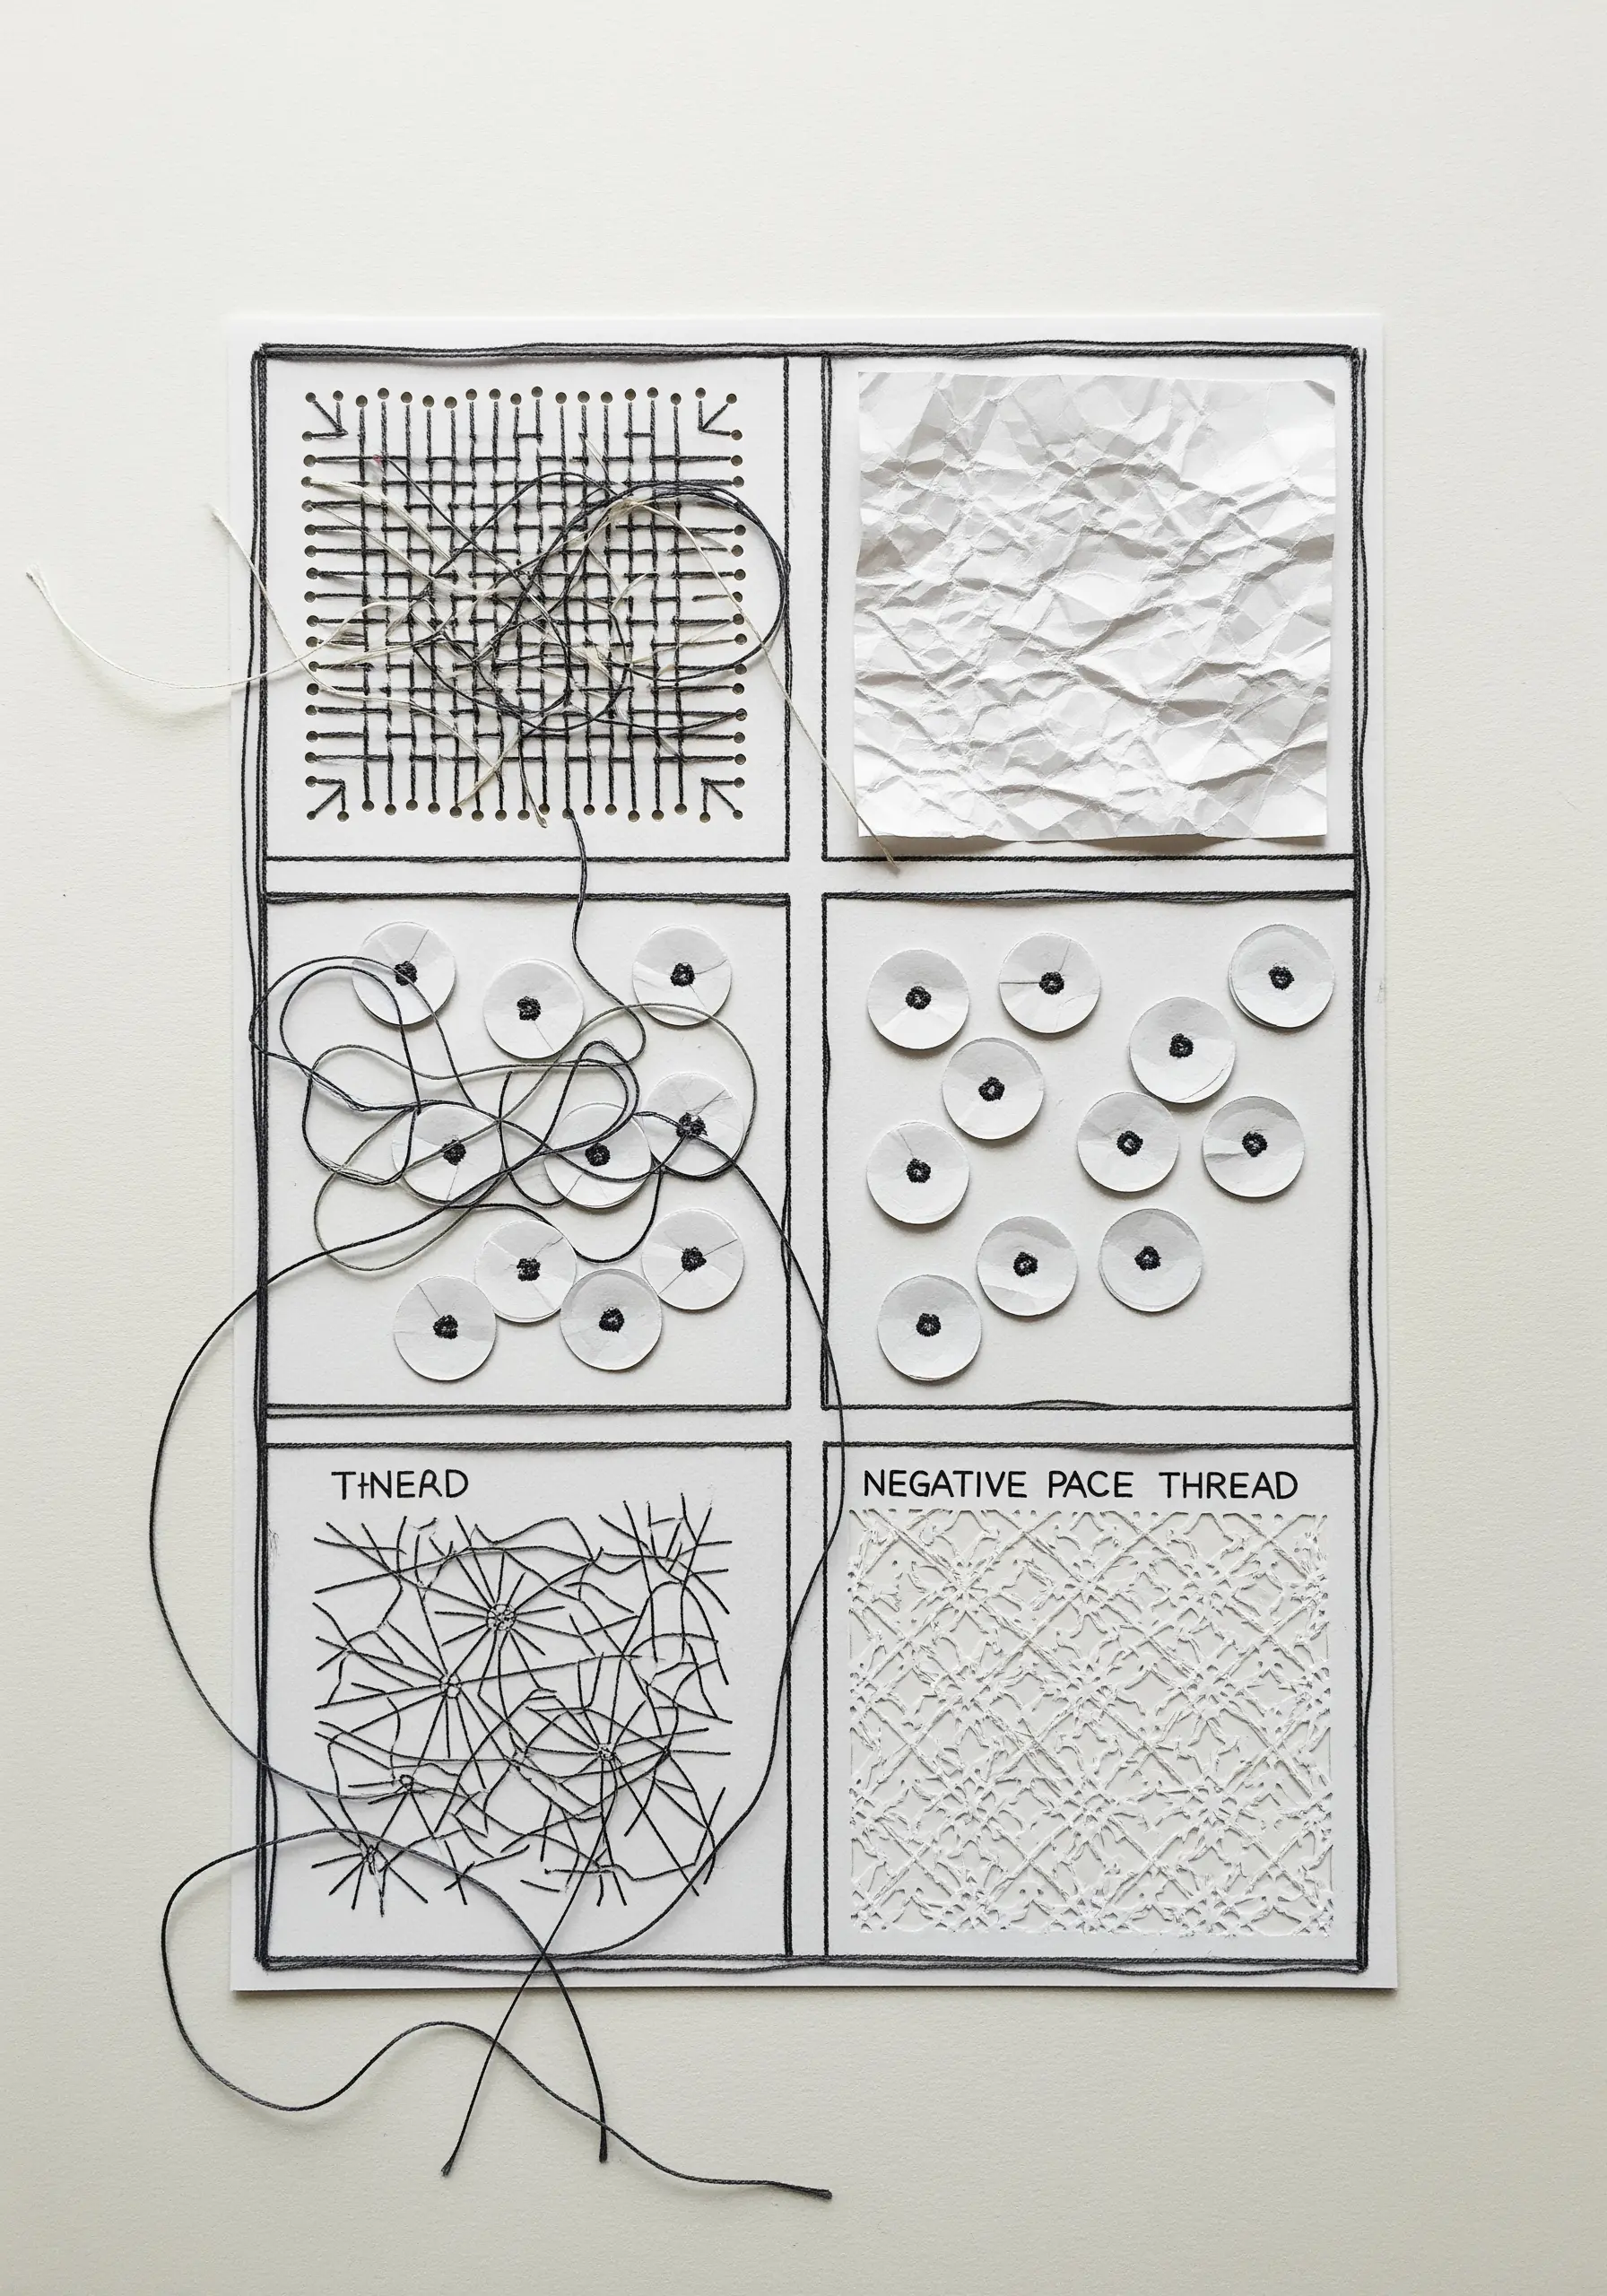
Dedicate a piece to pure experimentation, treating it as a visual dictionary of textures and ideas.
Divide your fabric into a grid and assign a different technique to each square.
Try weaving floss through a grid of straight stitches, creating loose, tangled thread sculptures anchored by beads, or exploring negative space by stitching the area *around* a shape.
This is your permission to play without the pressure of a finished product. You might discover your next signature style in these creative fabric collage bases.
24. Personalized Maps with Stitched Landmarks
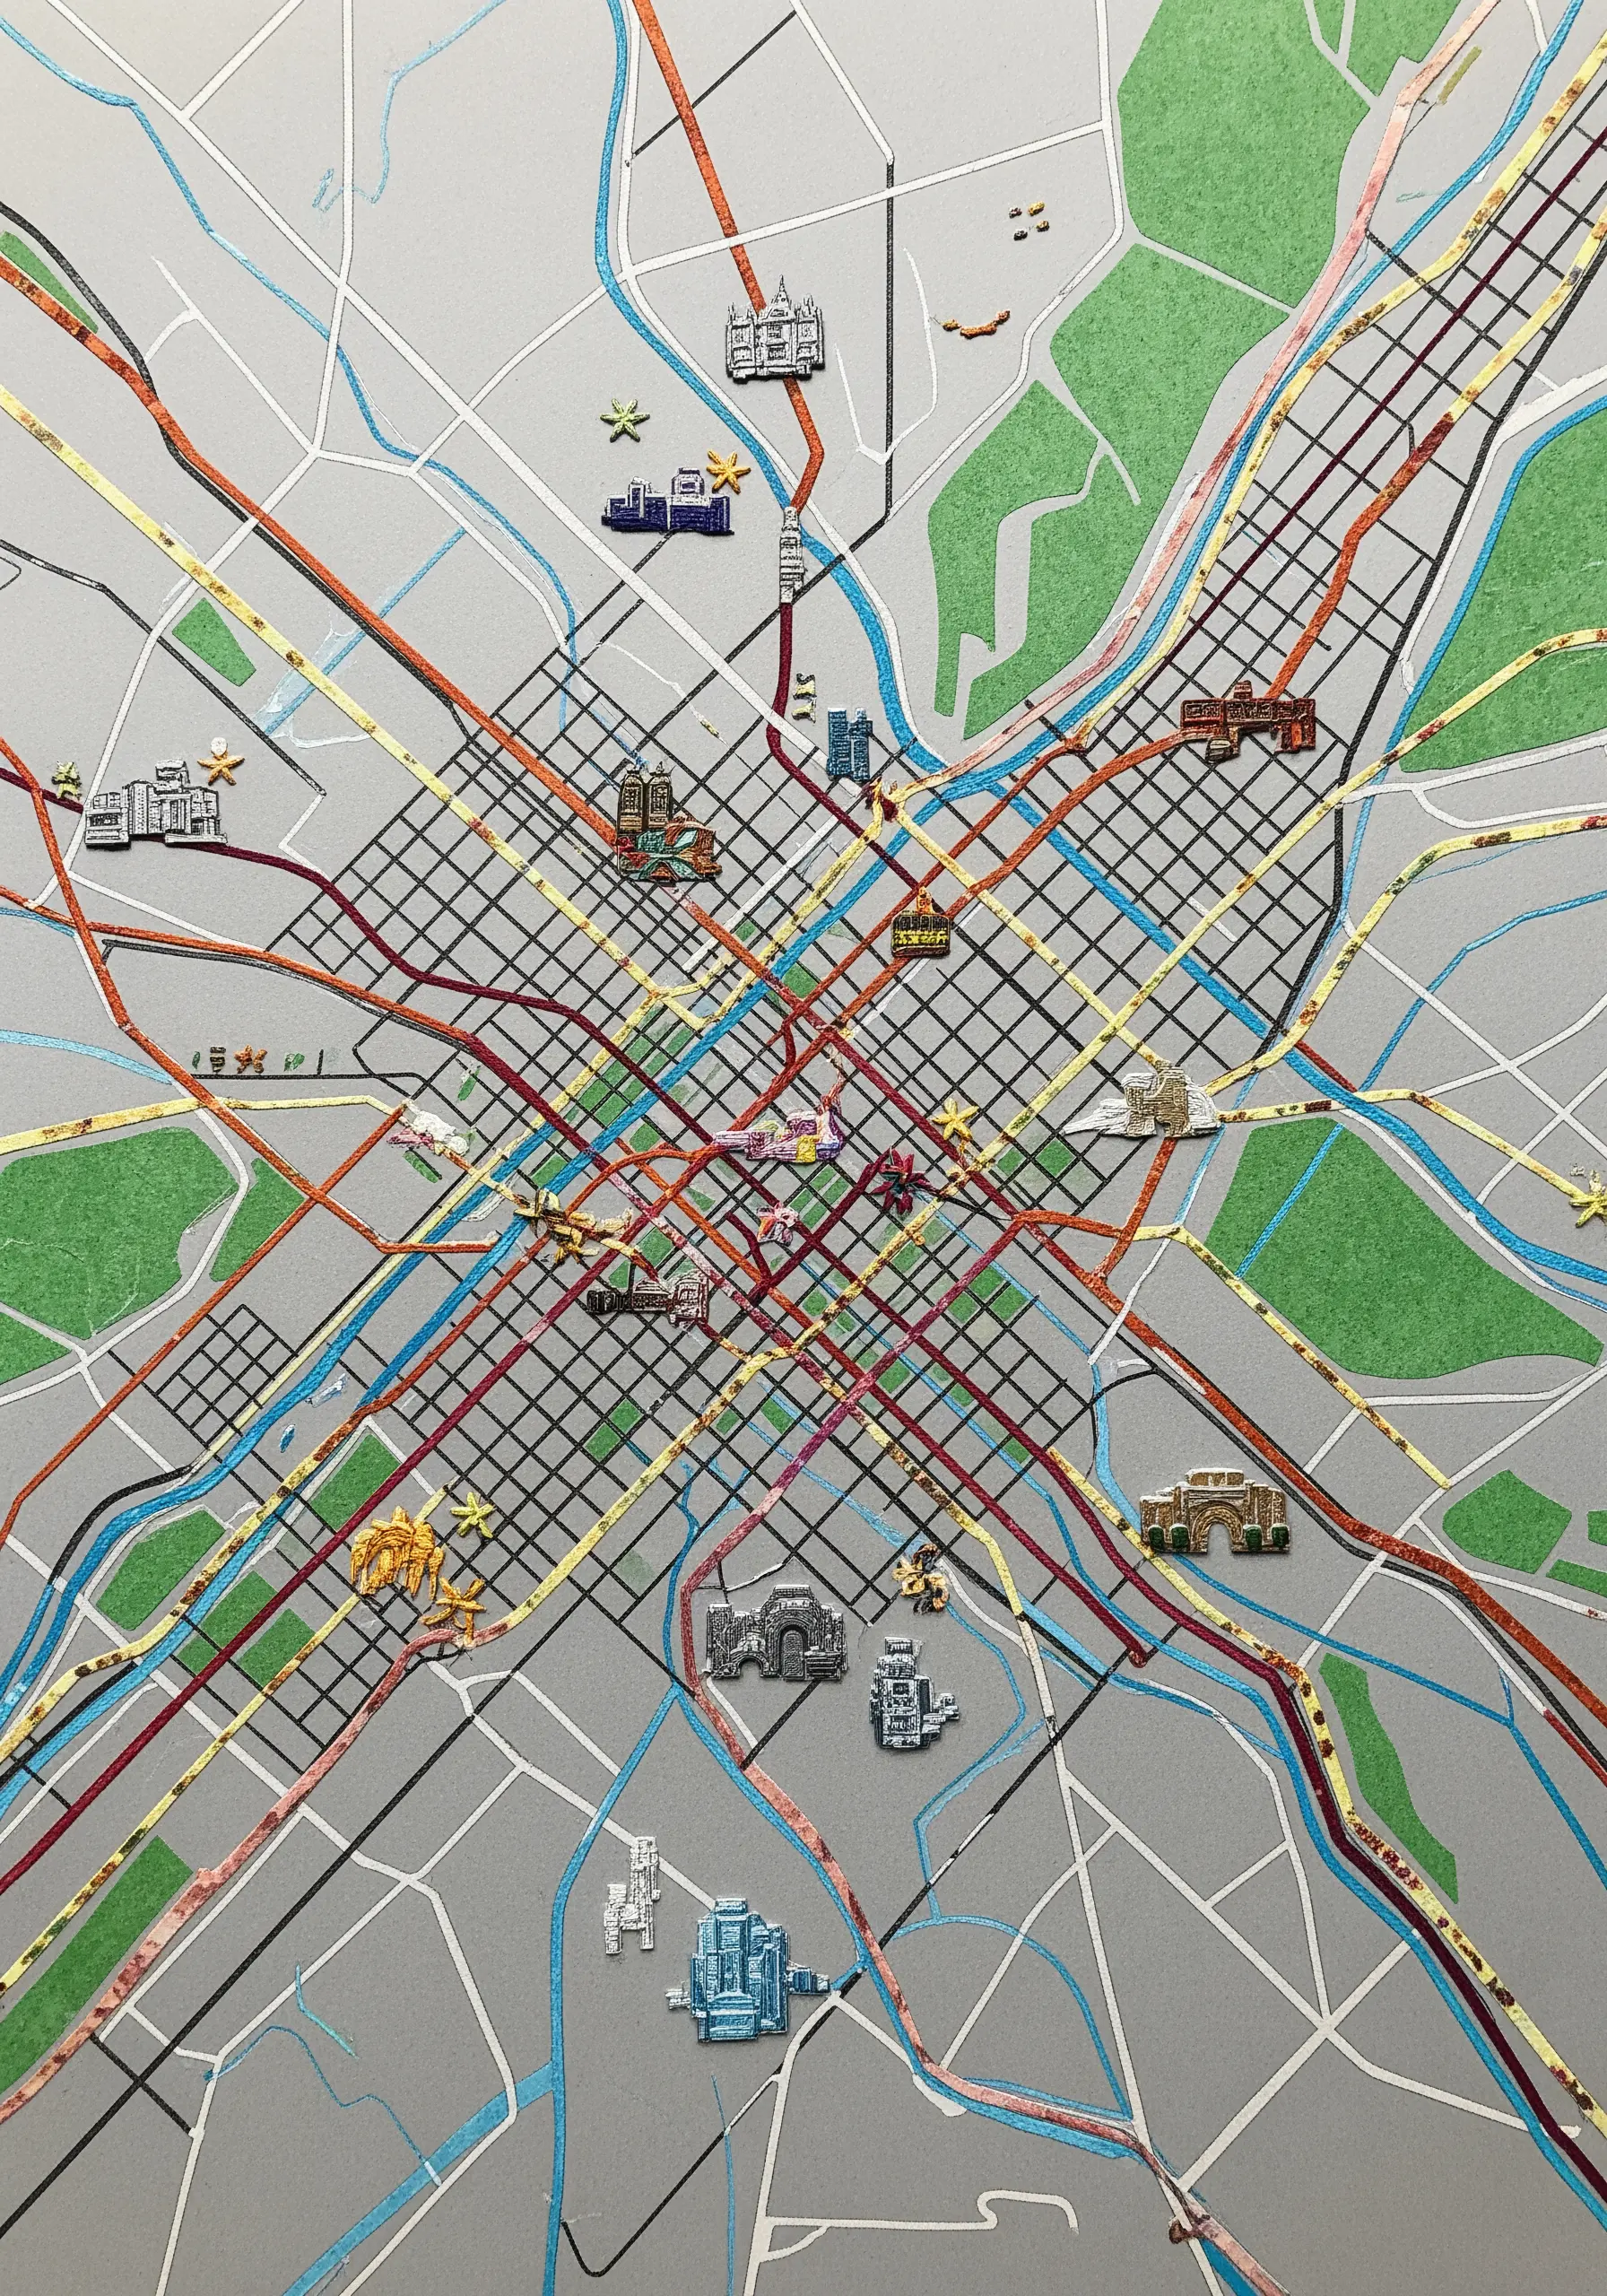
Transform a simple map into a personal story by adding embroidered details.
You can print a map onto fabric using iron-on transfer paper or have it professionally printed.
Use different colors of floss to trace important routes, like a memorable road trip or your daily commute.
Mark significant locations—your home, a favorite café, the place you met someone special—with a small, unique motif. A French knot, a tiny star stitch, or a miniature icon can turn a generic point on a map into a cherished memory.
25. Hyper-Realistic Textures with Knots and Straight Stitches
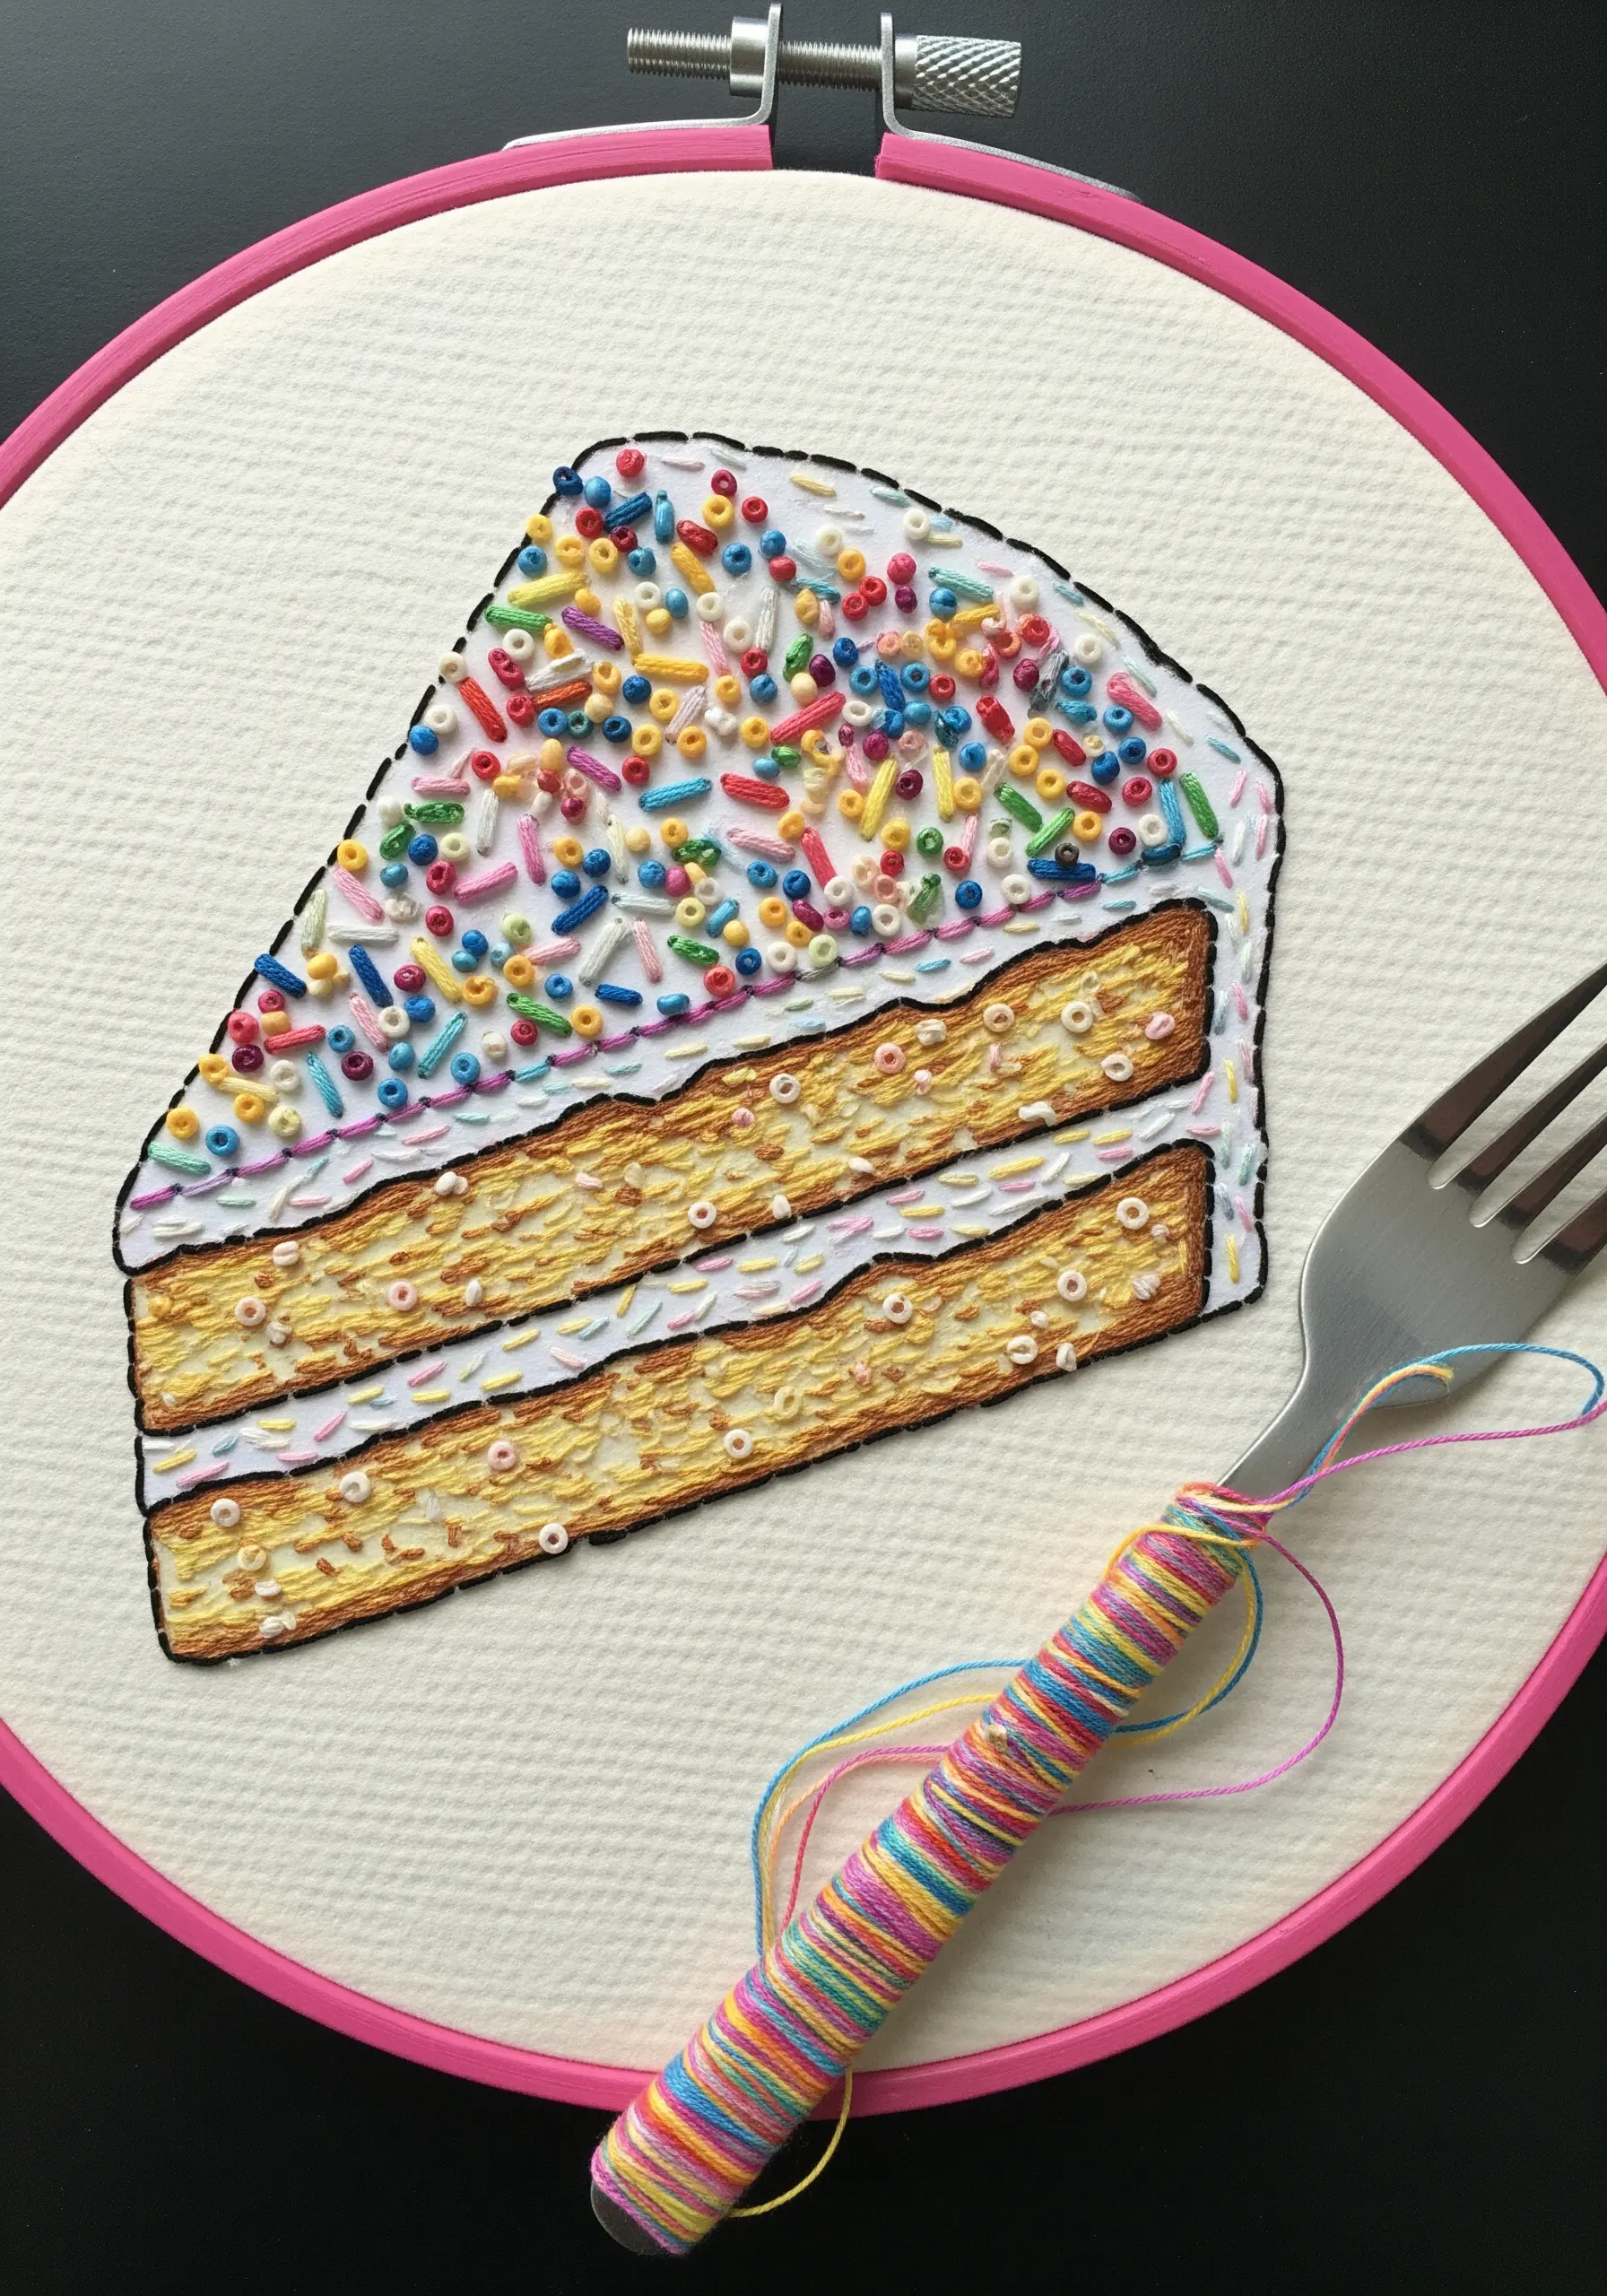
Capture the delicious texture of food by choosing your stitches thoughtfully.
For the airy crumb of the cake, use a scattered mix of single seed stitches and tiny French knots in several shades of beige and gold.
The randomness and variation in stitch type are crucial for a realistic effect.
The frosting can be a smooth, directional satin stitch, while the sprinkles are a joyful explosion of single straight stitches and tiny bullion knots in every color.
This attention to micro-textures is what makes a piece believable and engaging.
26. Perfect Gradients in Lettering with Satin Stitch
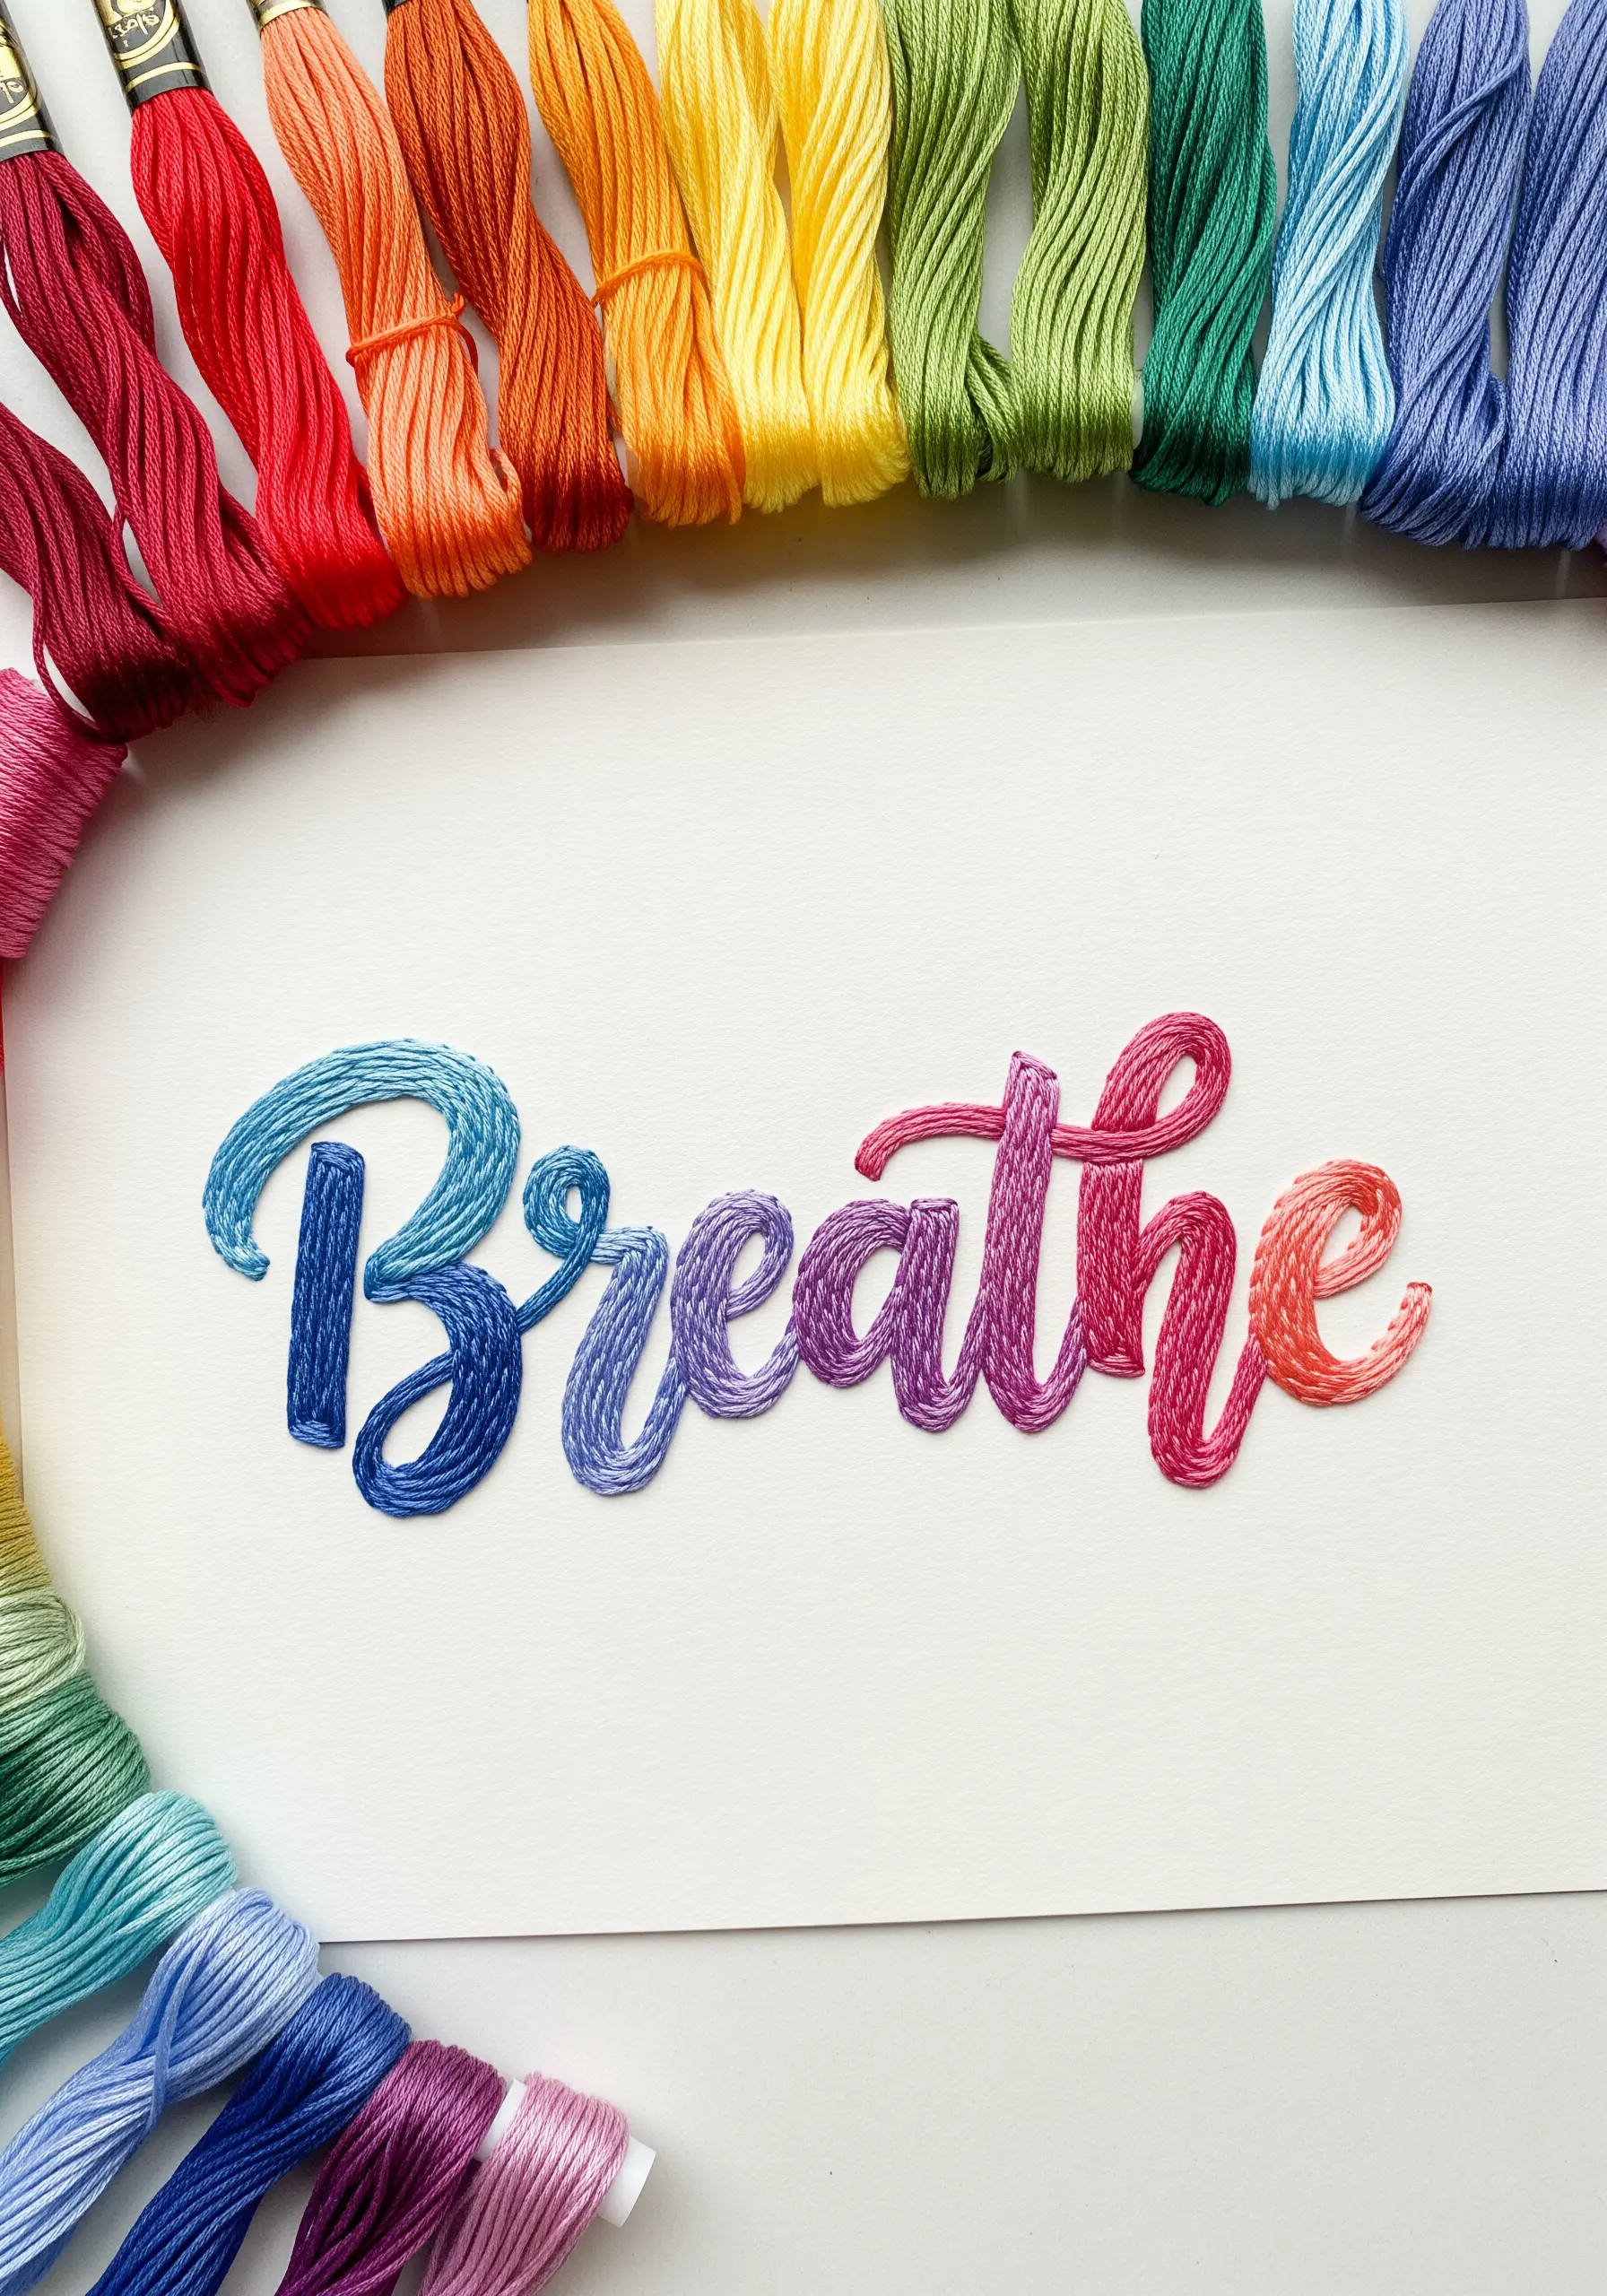
Achieve a seamless, painterly color blend in your embroidered text with a few key techniques.
First, outline your letters with a split stitch. This creates a slightly raised edge that makes your final satin stitches neater and easier to control.
Work with a single strand of floss for the smoothest possible finish.
To create the gradient, use two needles at once—one with each color—and interlock your long and short stitches in the transition area. This blends the colors organically, avoiding harsh lines.
These are the secrets behind beautiful inspirational quote embroidery wall hangings.
27. Intricate Mandalas with Shisha Mirror Work
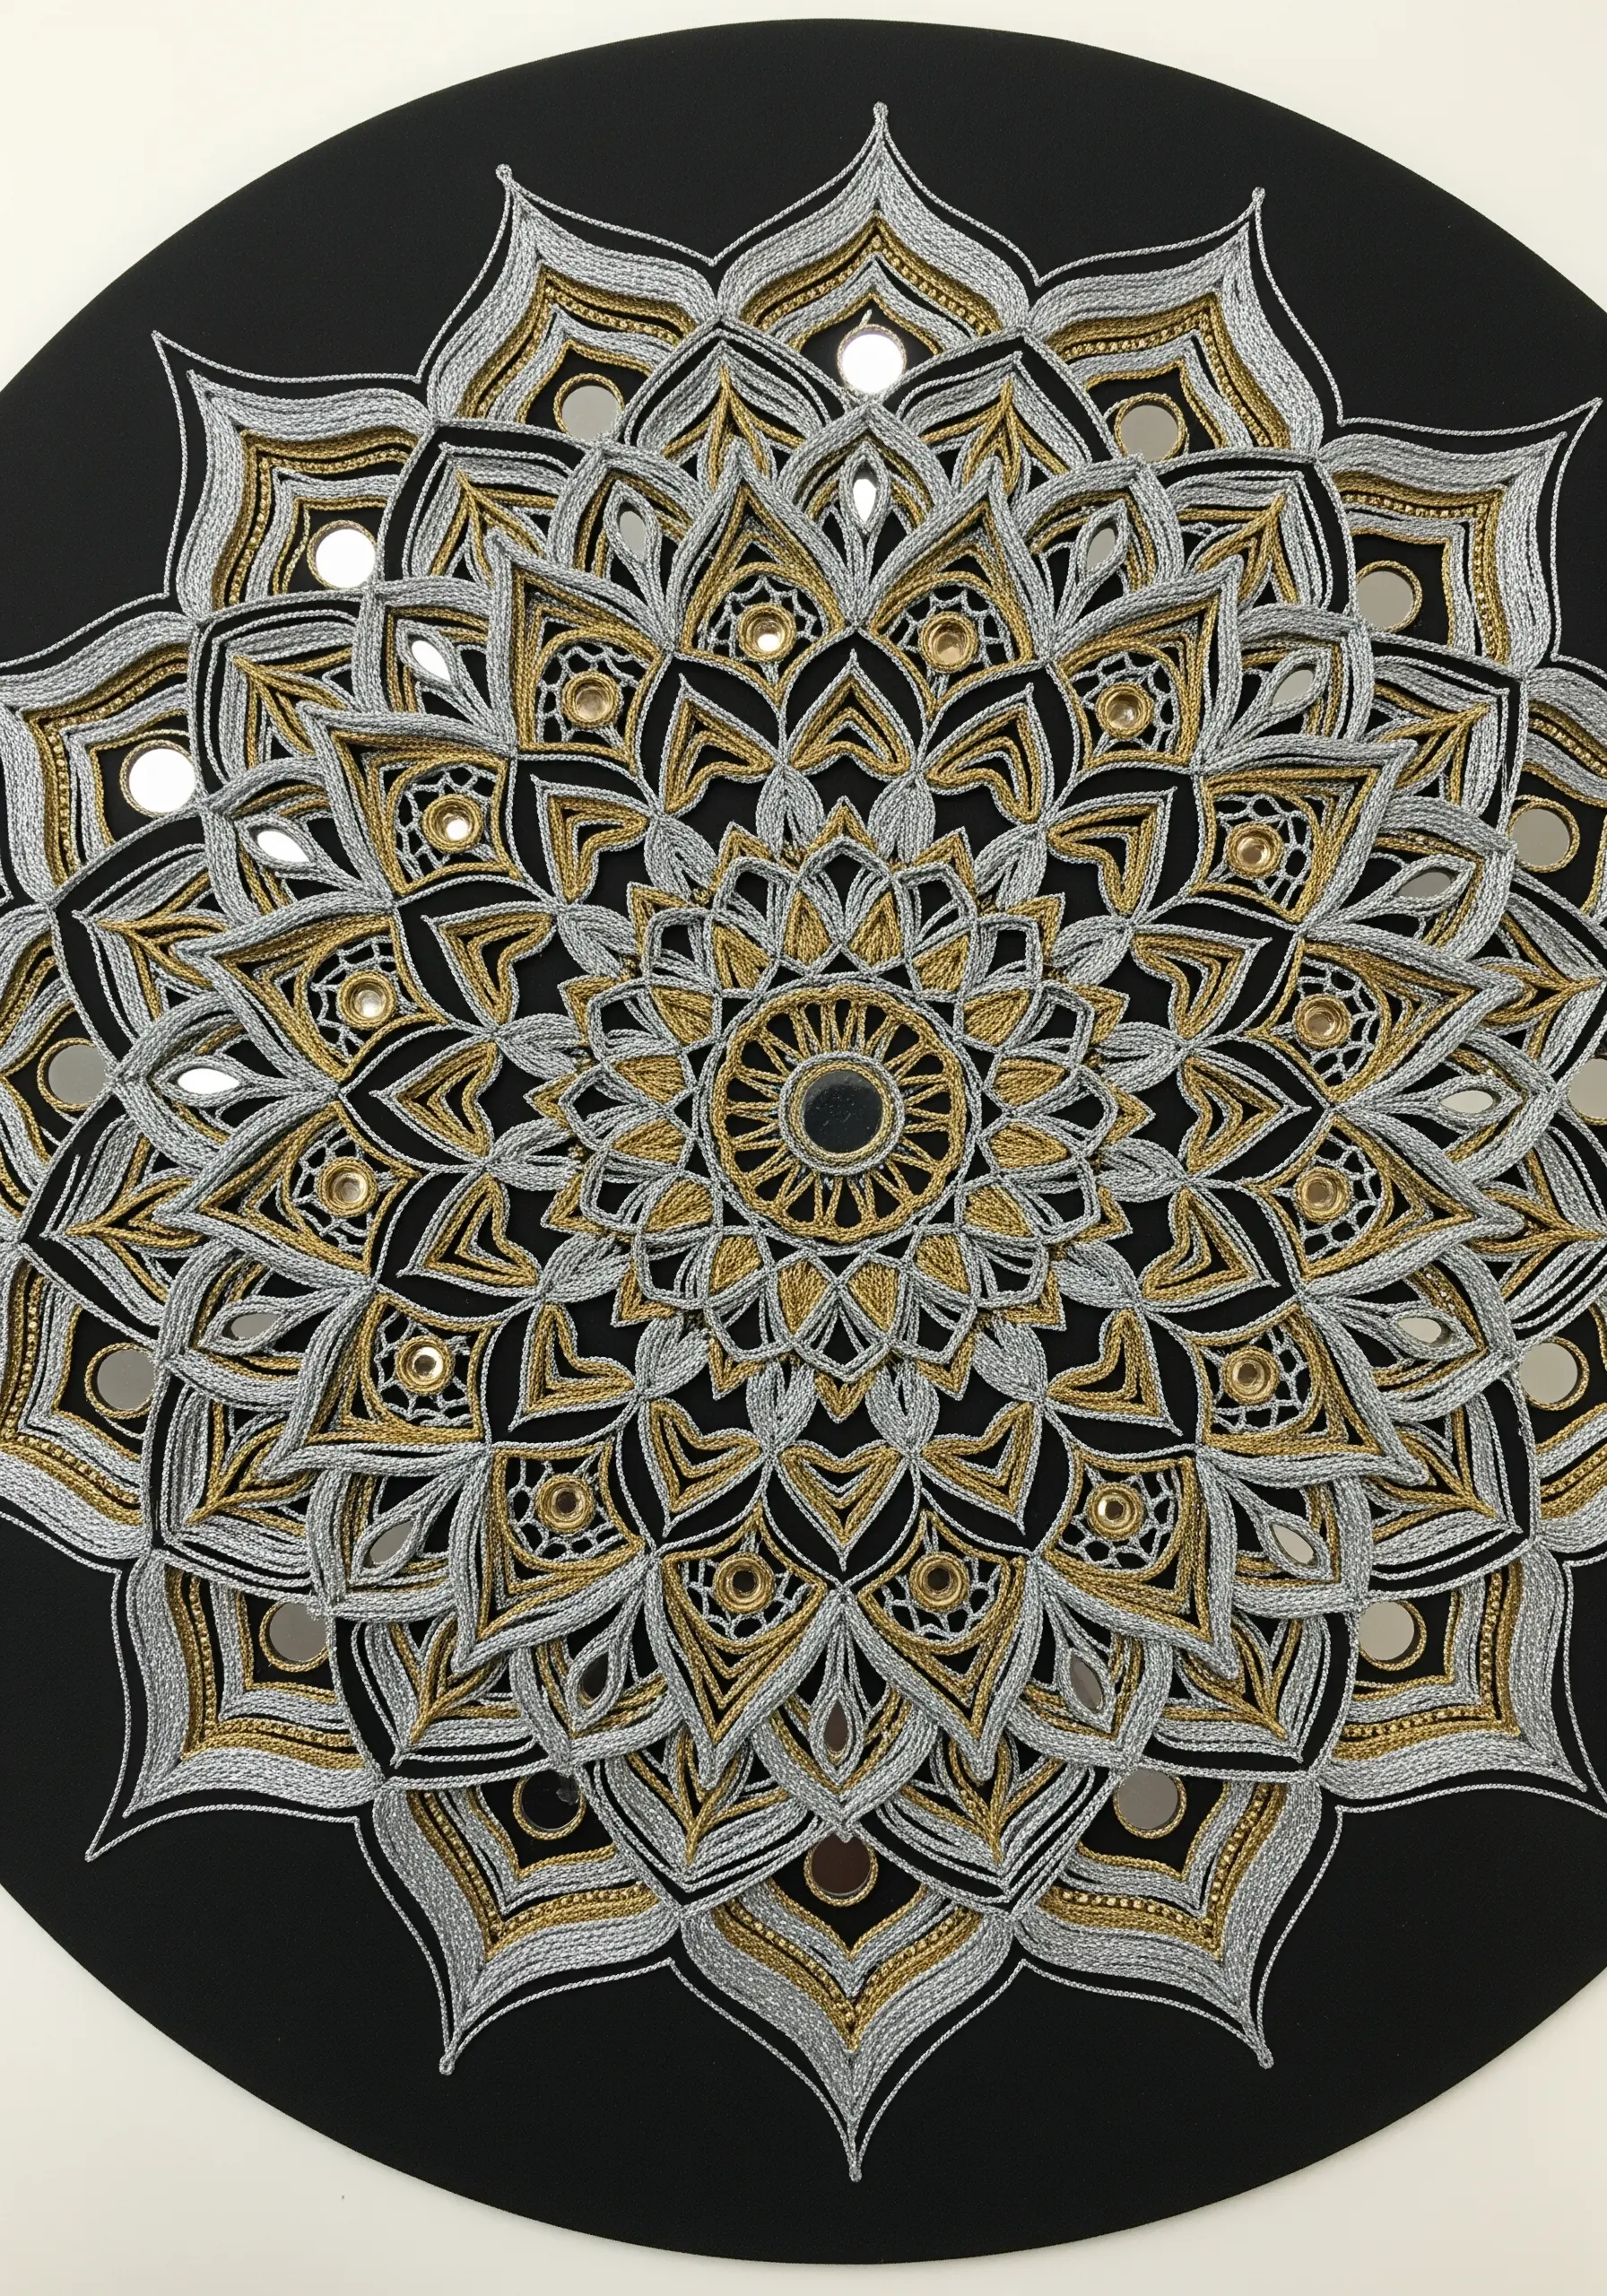
Integrate light-reflecting elements into your work for a touch of opulence and tradition.
This design is a perfect inspiration for trying Shisha embroidery, a traditional technique for attaching small mirrors to fabric.
You create a framework of foundation stitches over the mirror and then secure it with a decorative buttonhole or chain stitch border.
Surround your mirrors with intricate patterns using high-sheen metallic or silk threads to maximize the play of light.
The contrast between the matte black background and the shimmering threads and mirrors creates a mesmerizing, high-impact design.


