

Let’s set aside the idea that embroidery must be complex to be beautiful. The most captivating work often comes from a simple premise: exploring the relationship between thread, texture, and light within a quiet, restrained palette.
Using only neutral colors—creams, grays, tans, and blacks—isn’t a limitation. It’s an invitation to focus on what truly matters: the rhythm of a stitch, the contrast between a smooth yarn and a coarse linen, the way a shadow falls across a raised knot.
Here, you’ll find ideas that celebrate this thoughtful approach. Each one is a starting point for you to create abstract art that feels both modern and timeless, personal and profoundly calm. You have everything you need to begin right now.
1. Weave With Roving and Knots
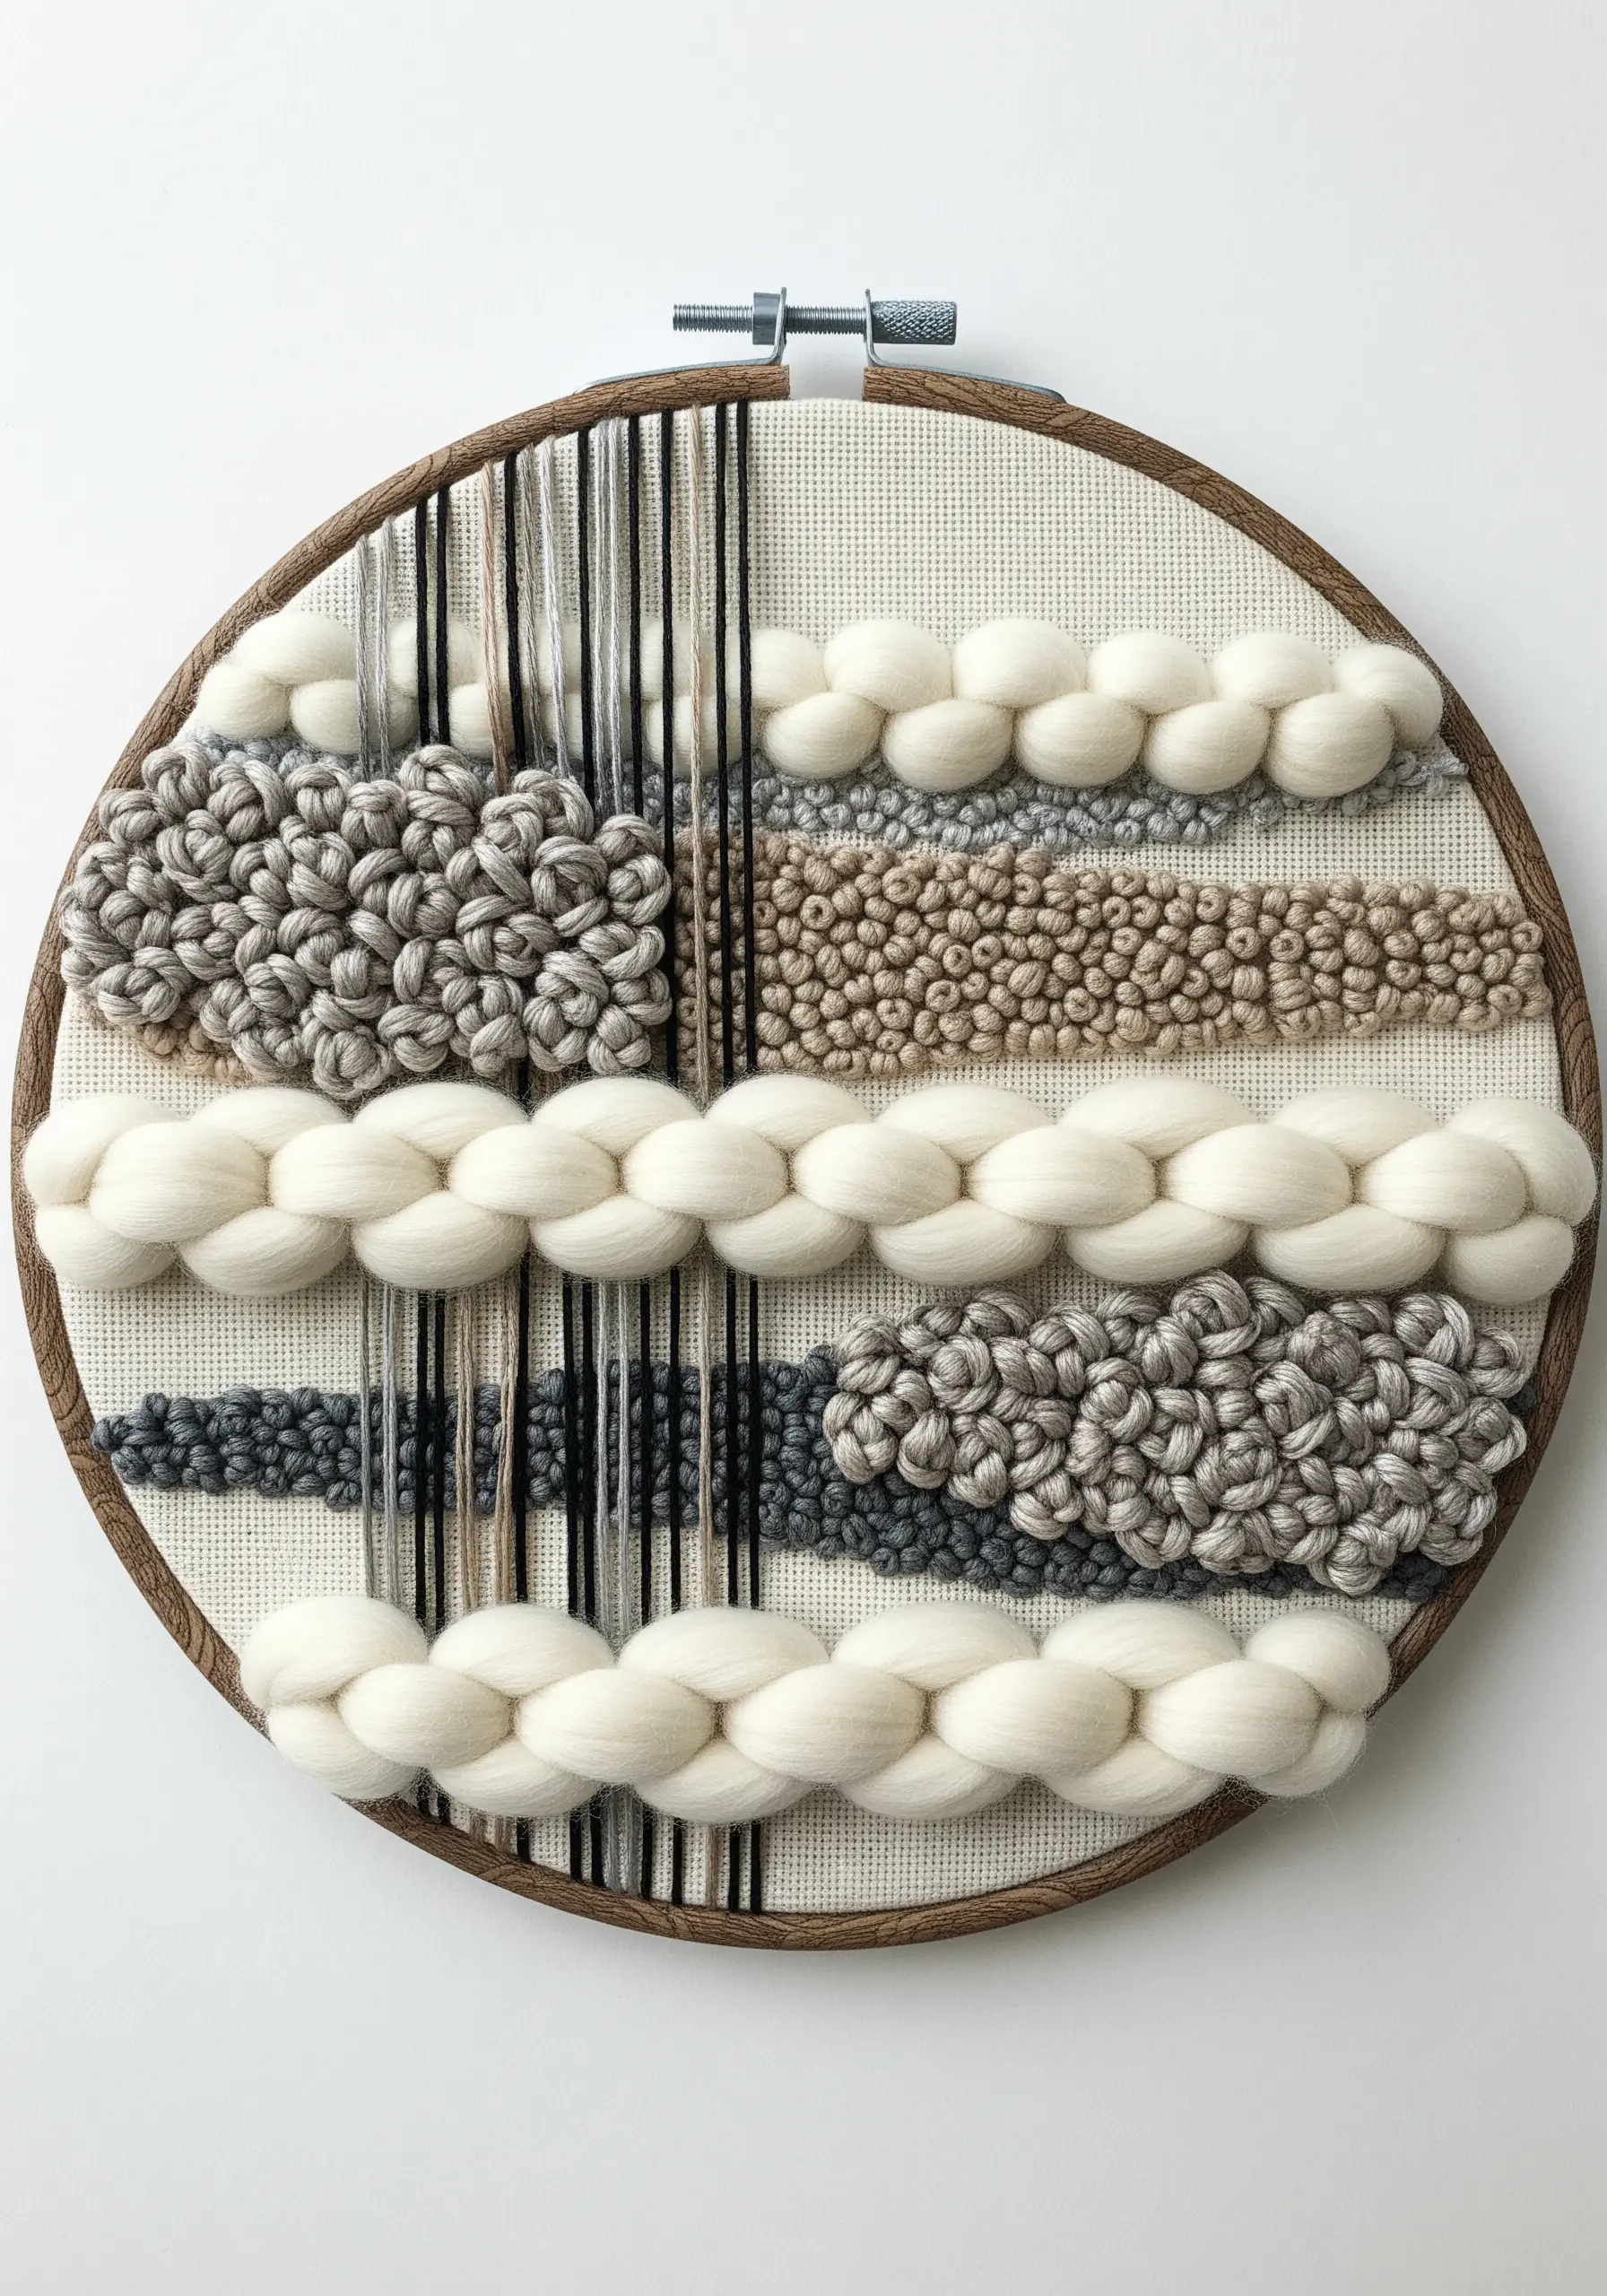
Create a composition that balances soft and hard textures within the same neutral palette.
Use thick, unspun wool roving for the soft, braided sections, gently couching it onto the fabric with a matching thin thread.
For contrast, fill adjacent areas with dense French knots using a matte cotton floss.
Finally, add vertical tension by stretching dark, fine threads from top to bottom, creating a linear element that cuts through the soft textures and unifies the piece.
2. Stitch Arcs on Sheer Layers
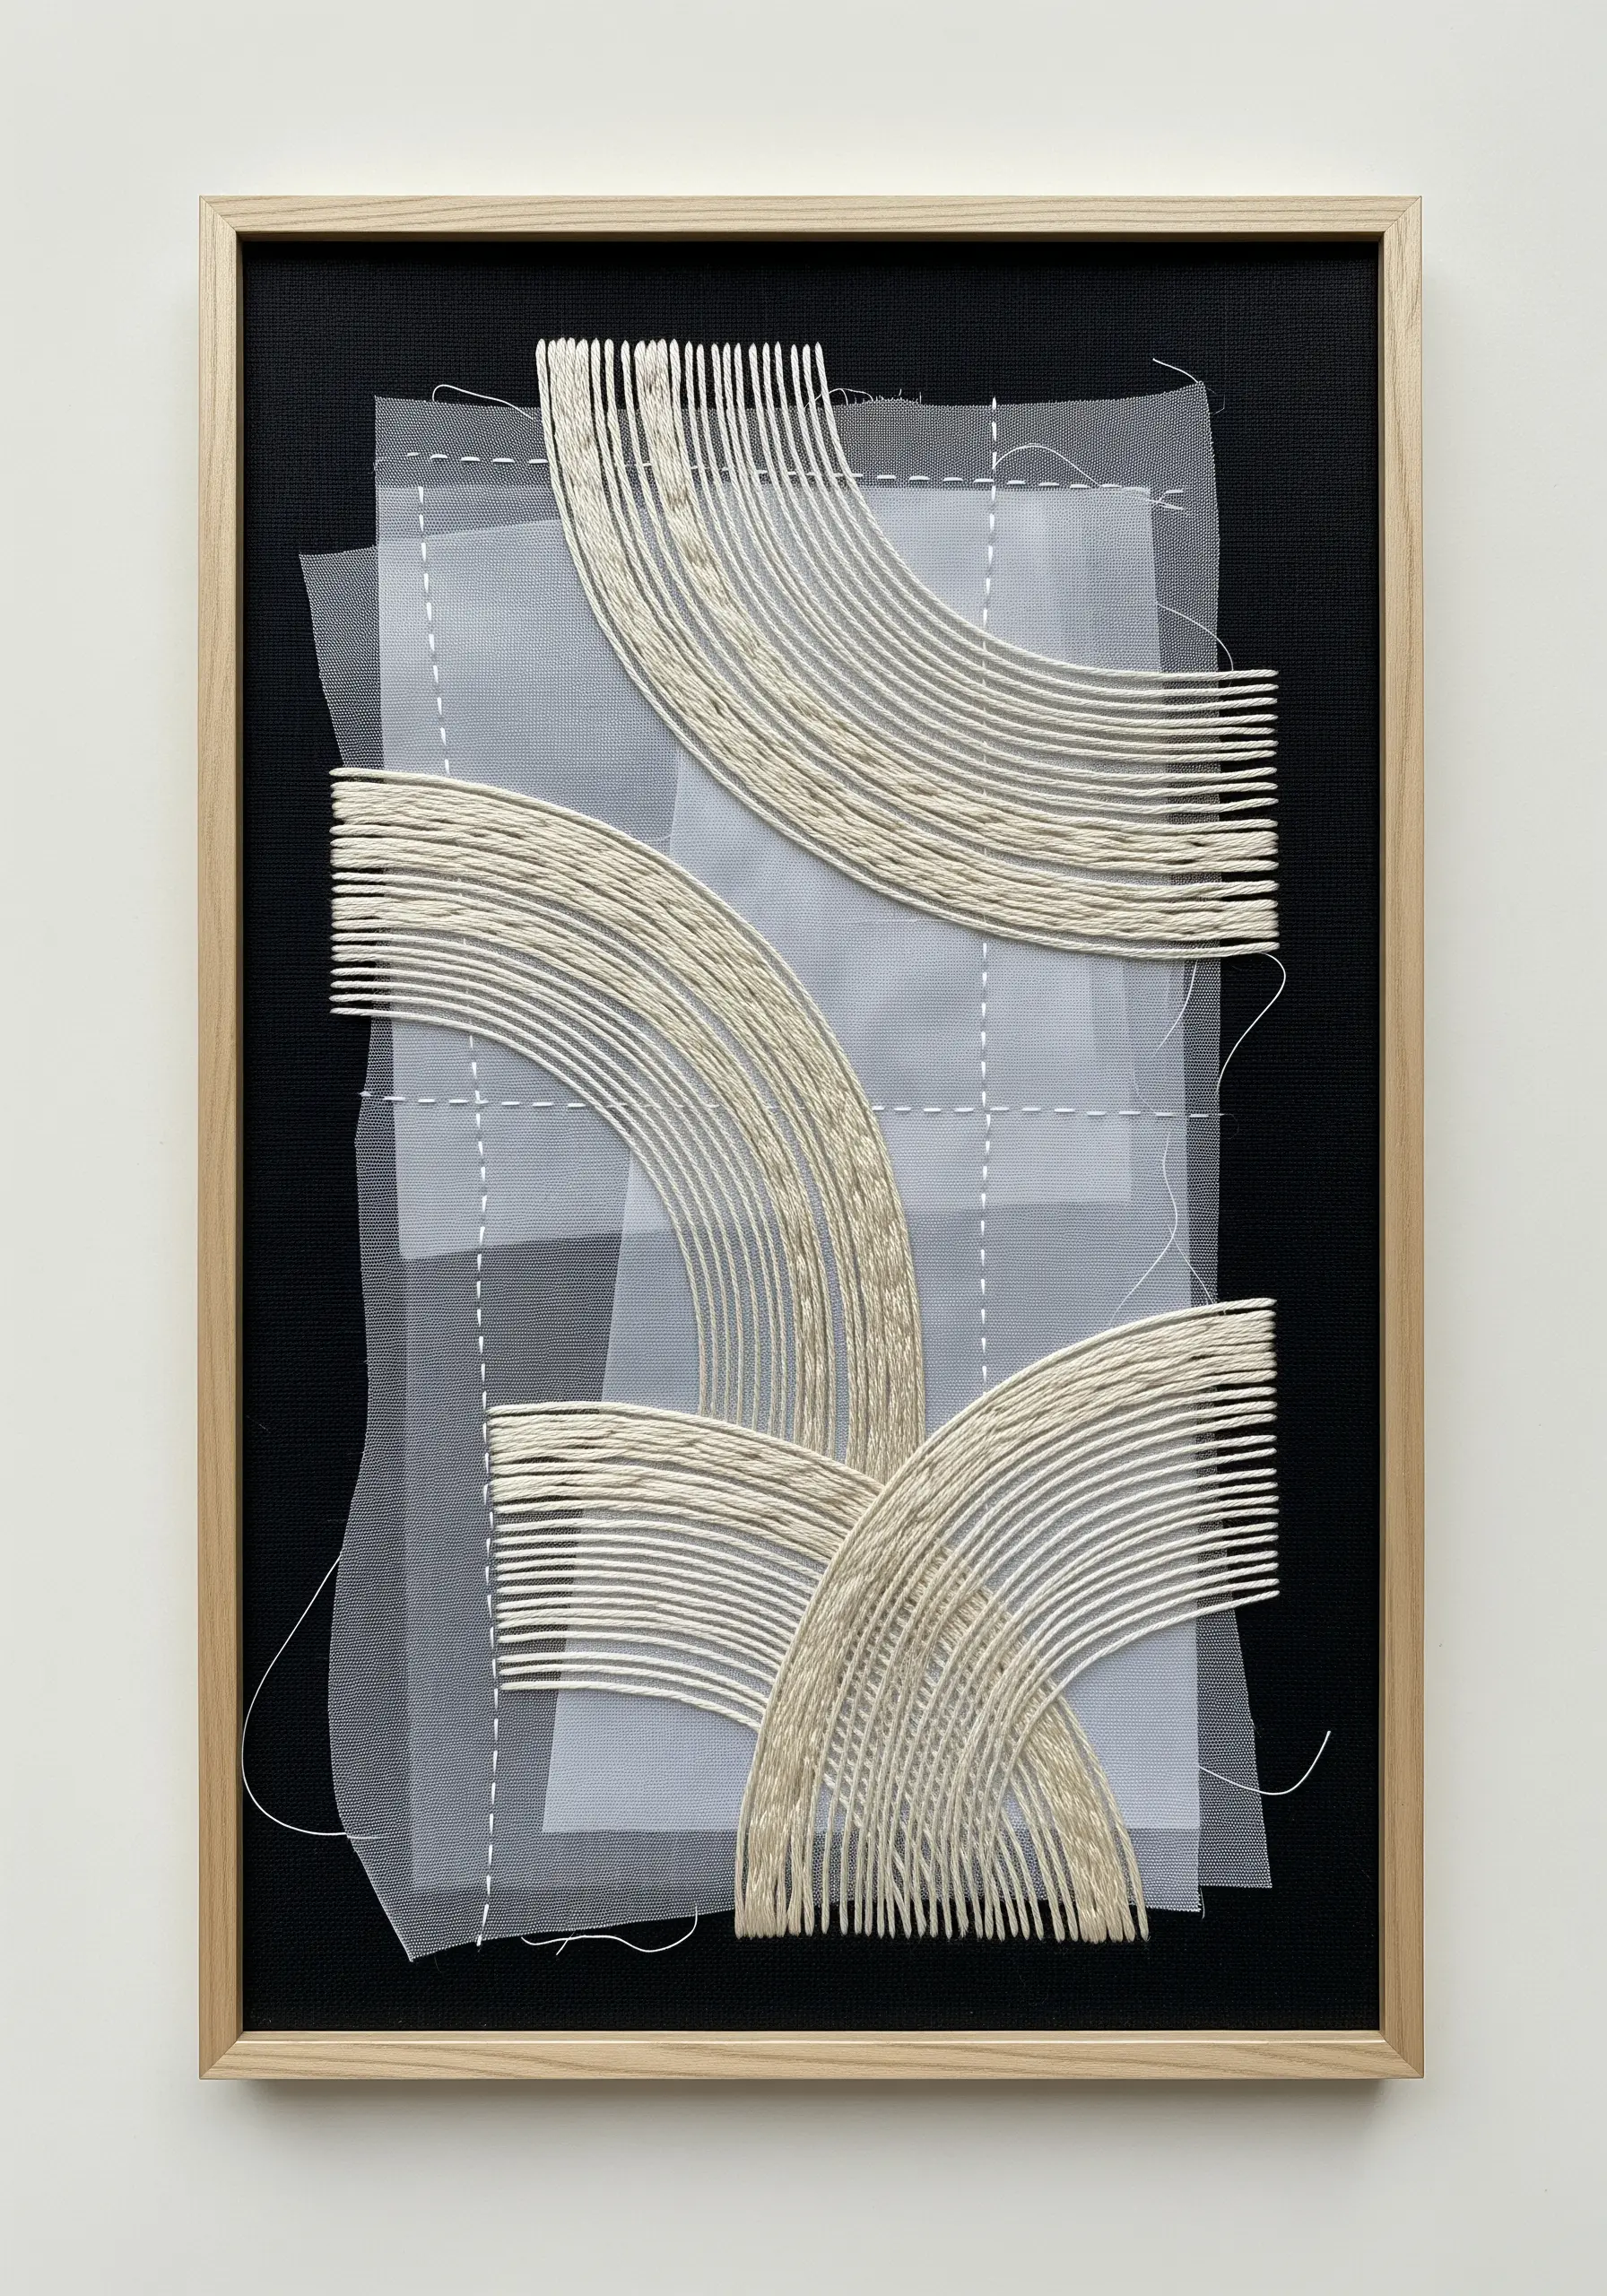
Create depth and movement by layering sheer fabrics like organza or tulle over a dark, solid background.
Tack the sheer layers down with a simple running stitch to create a subtle grid, which adds structure without overwhelming the design.
Work your primary motifs—in this case, sweeping arcs—with dense satin stitches directly onto the top sheer layer.
This technique makes the stitched forms appear to float, creating an ethereal effect that highlights the thread’s texture and sheen against the transparent ground.
These abstract framed embroidery patterns are perfect for minimalist interiors.
3. Deconstruct with Frayed Edges and Bold Stitches
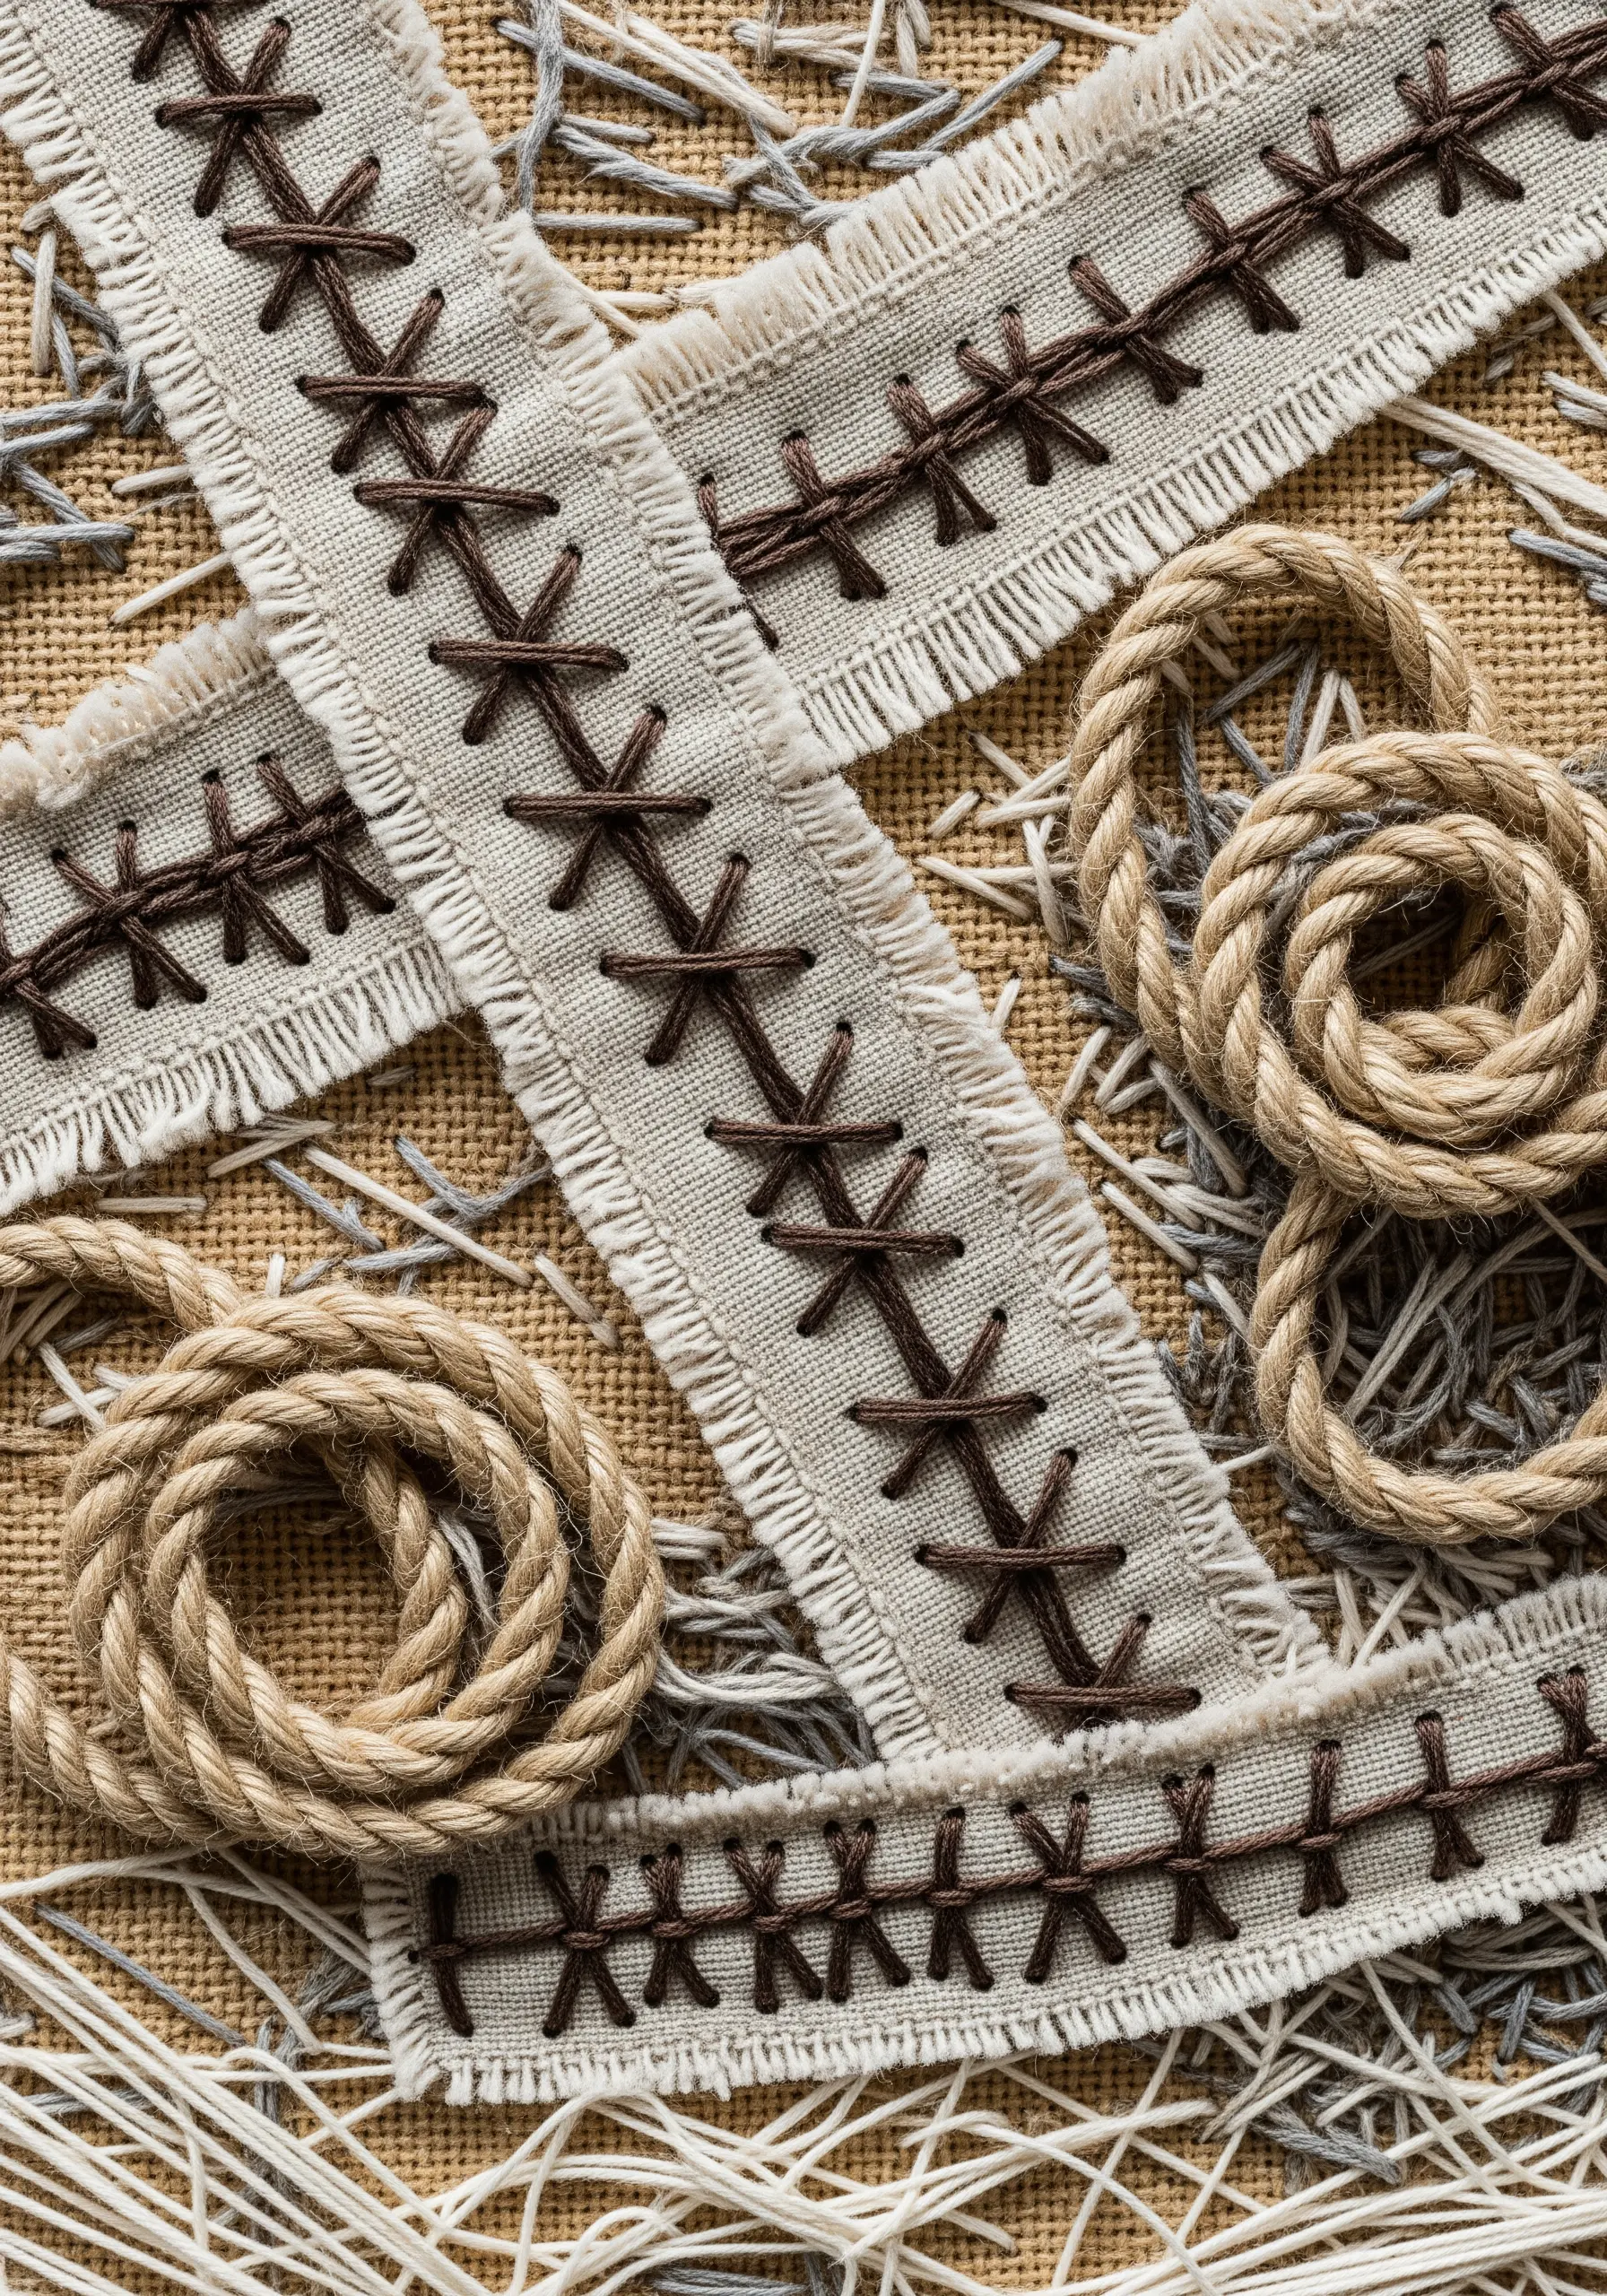
Embrace raw texture by working on a coarse fabric like burlap or jute.
Instead of finishing your edges, purposefully fray strips of linen or canvas and arrange them in a loose collage.
Use a thick, dark thread like sashiko or perle cotton to stitch them down with oversized, rustic cross-stitches or blanket stitches.
The combination of frayed materials and prominent, functional stitches creates a piece that feels both grounded and intentionally undone.
4. Compose with Geometric Thread Grids
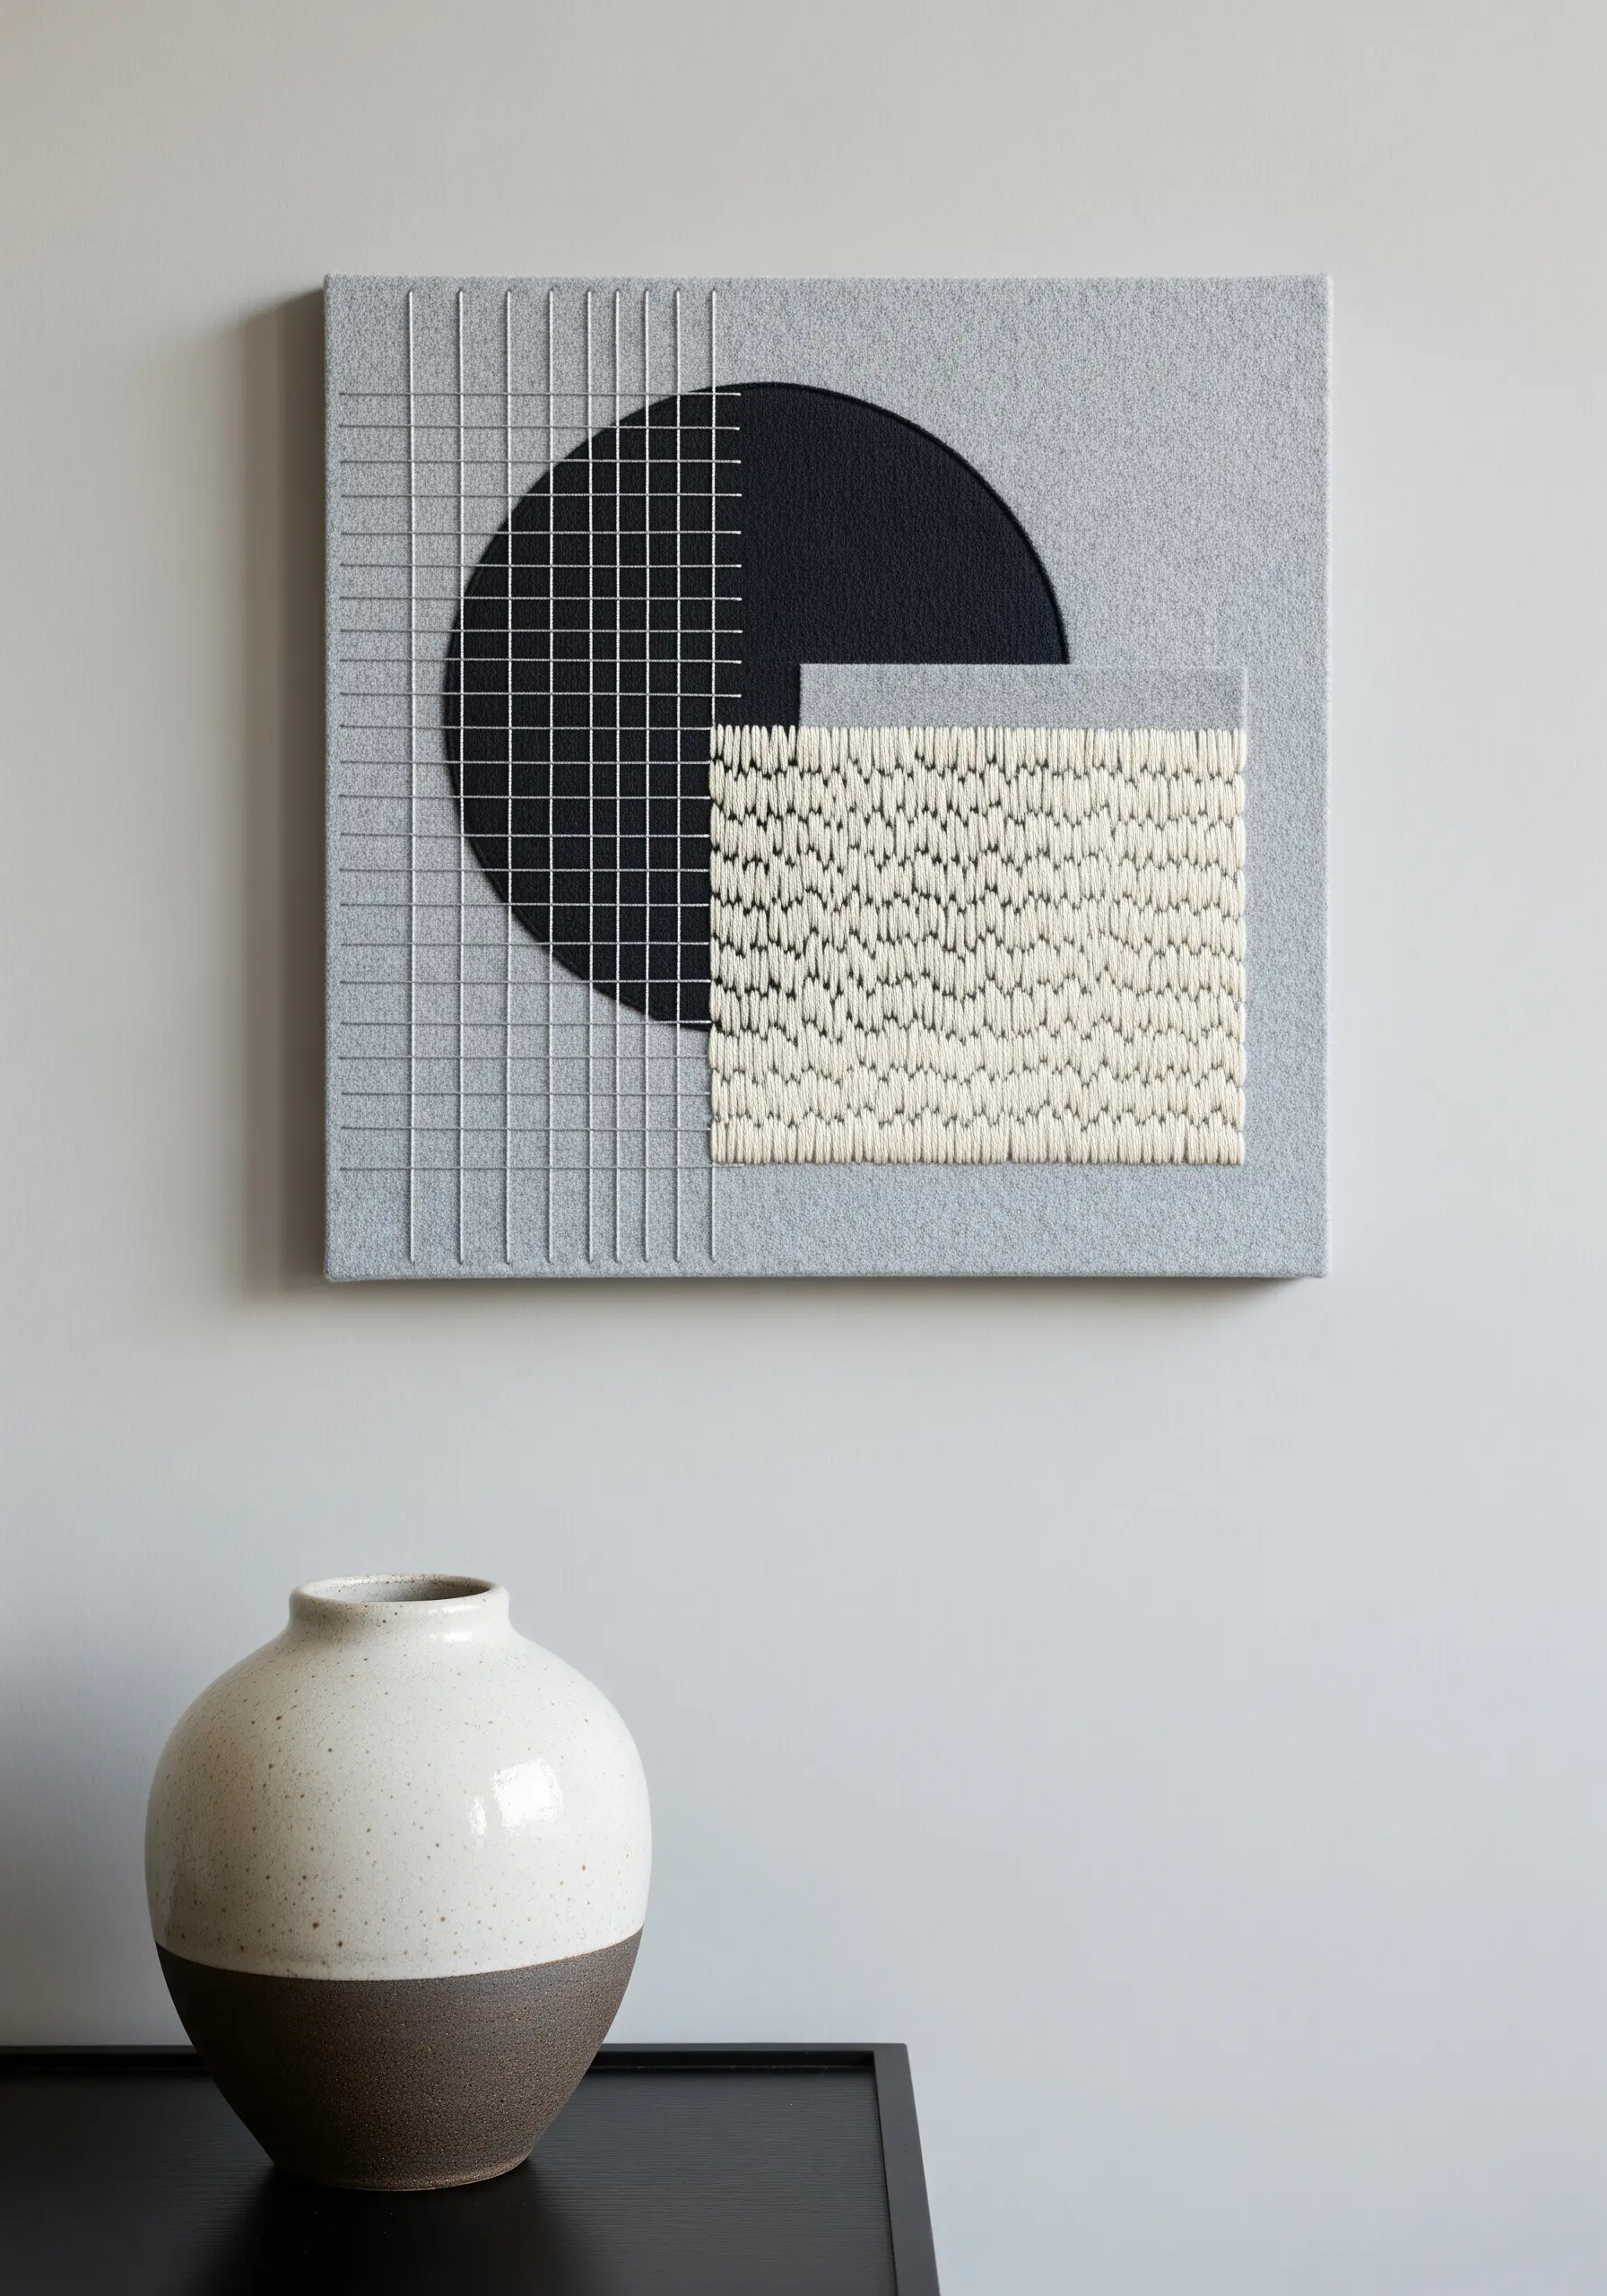
Build a modern, architectural piece by combining different textures on a felt-covered canvas.
Create a precise grid by wrapping a fine metallic or cotton thread around the canvas, securing it on the back.
Contrast this linear structure with a solid, cut-out shape from a different material, like black leather or dark felt.
For a final textural block, fill a designated area with a dense field of seed stitches or French knots, which provides a soft, organic counterpoint to the rigid grid.
5. Radiate with Open-Weave Lacing
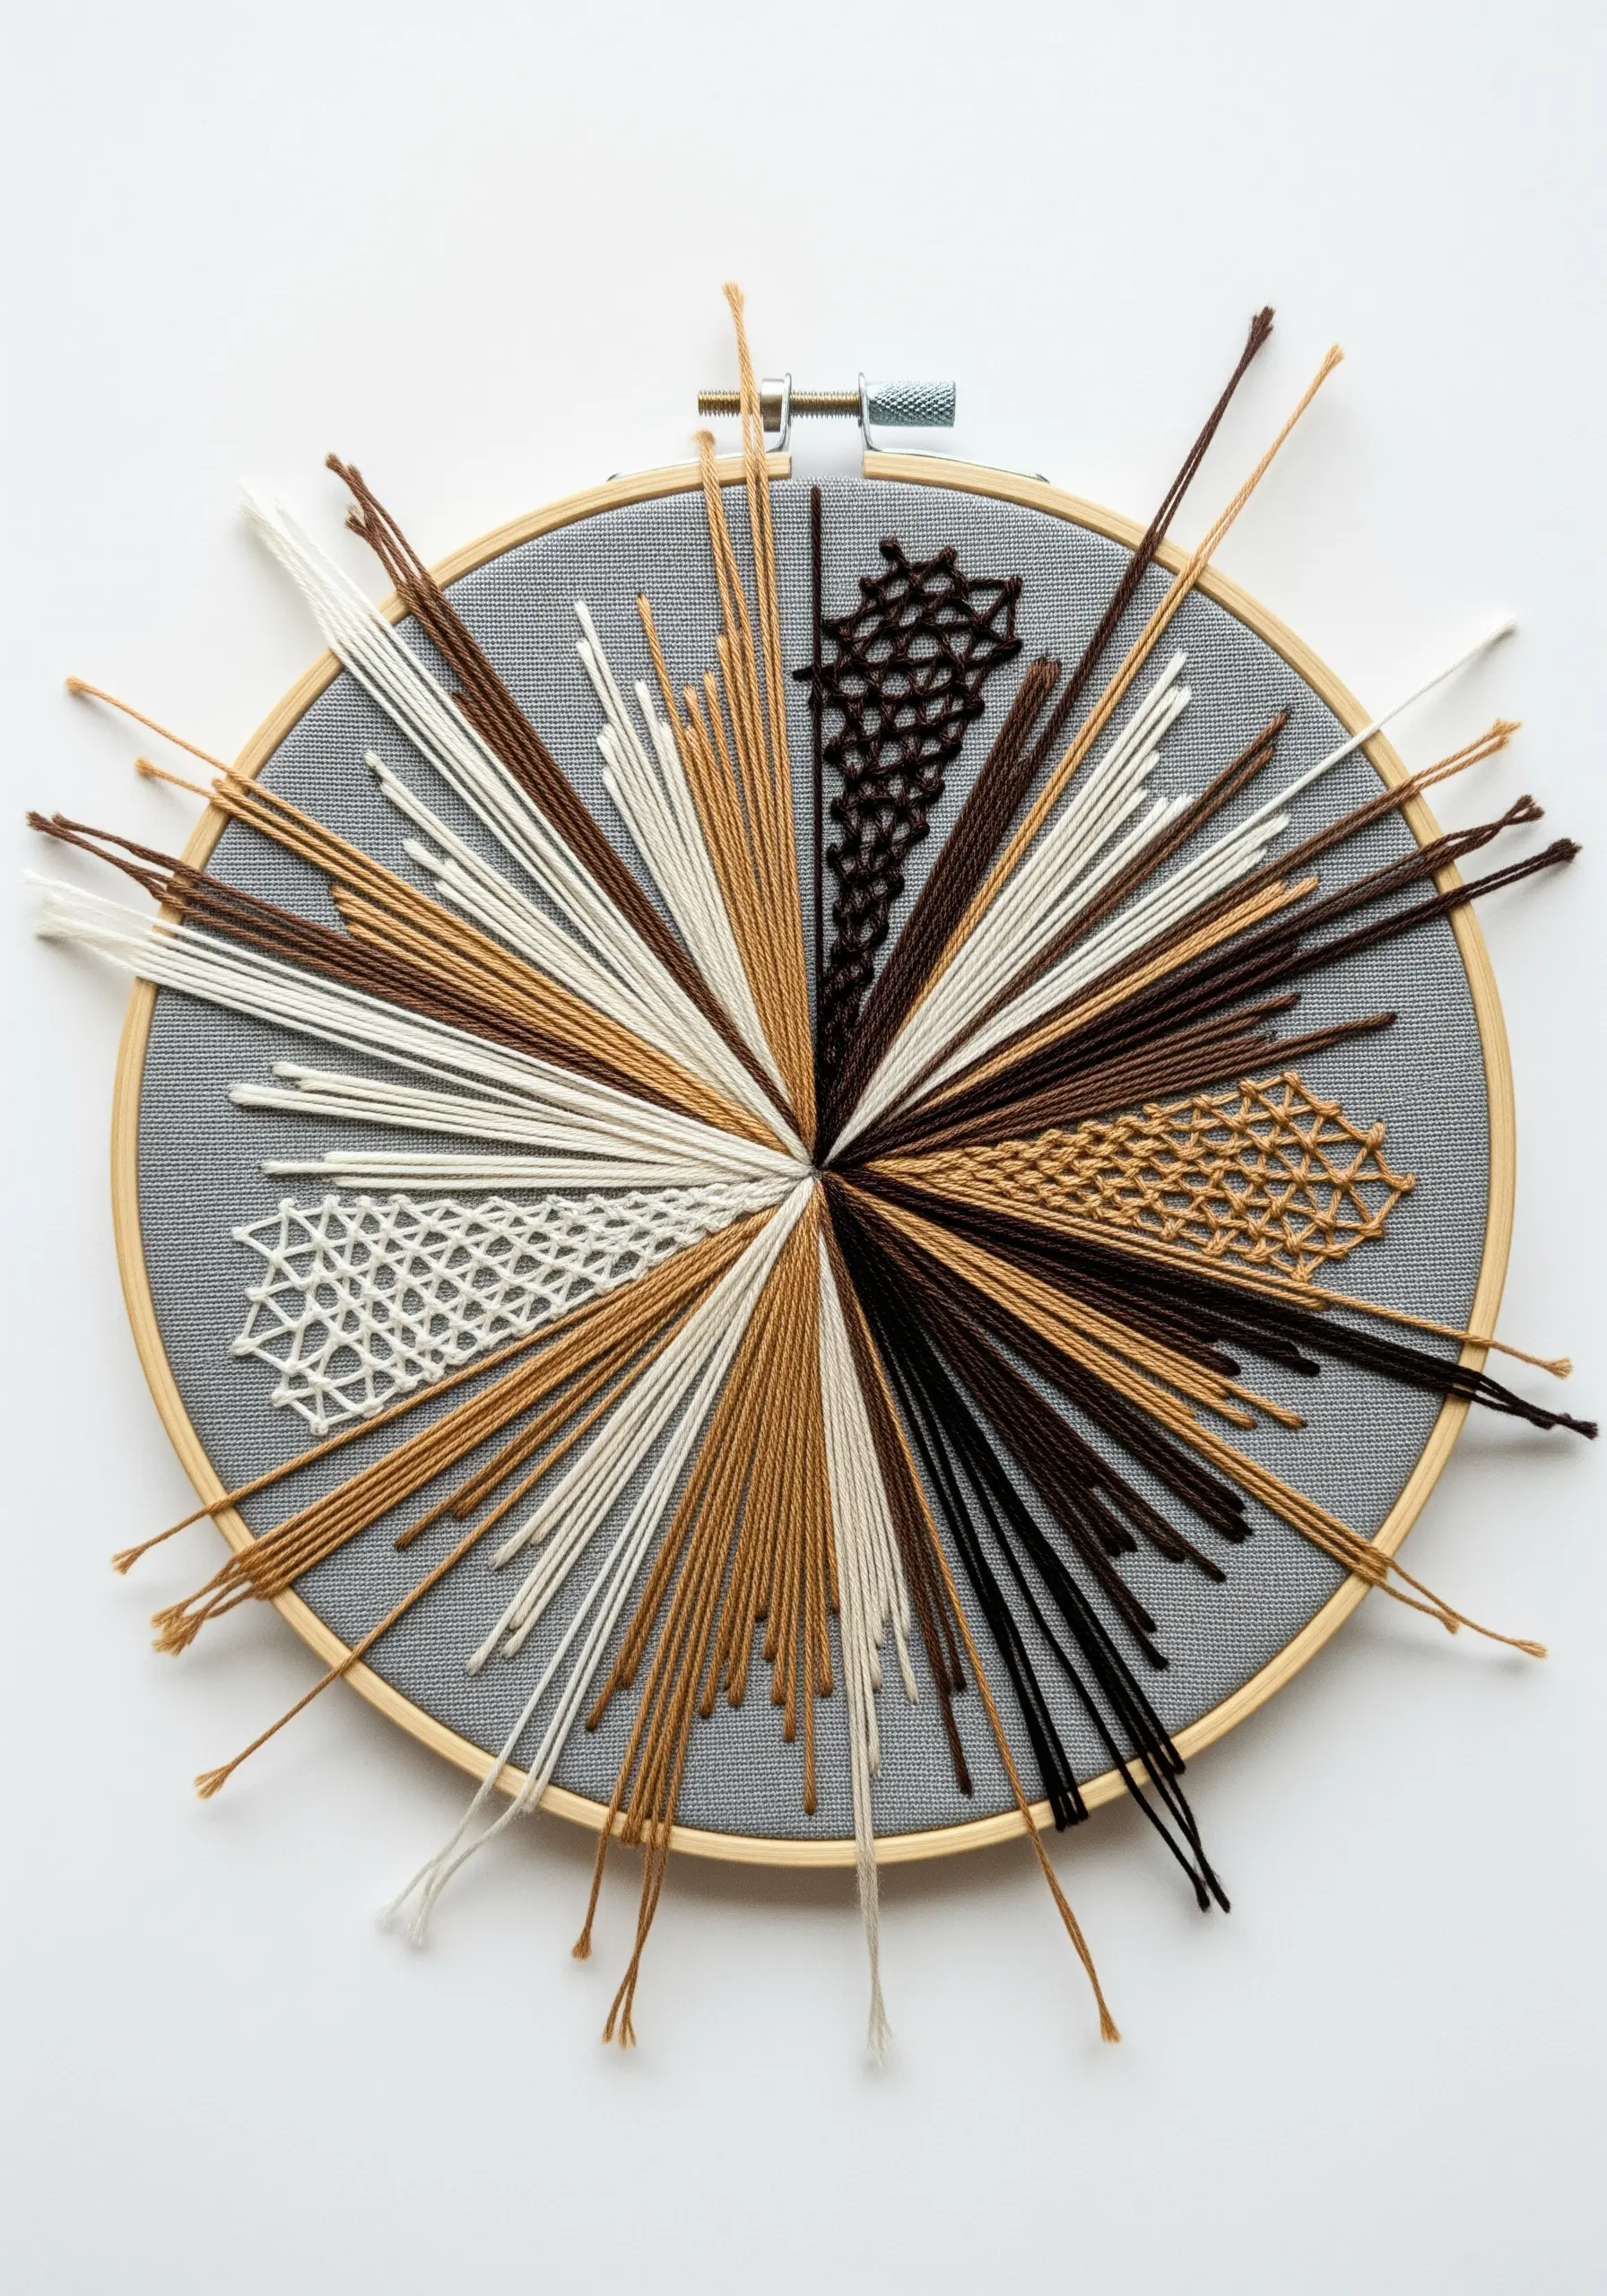
Use the embroidery hoop as a loom to create dynamic, radial compositions.
Begin by anchoring long straight stitches from a central point to the hoop’s edge, varying the colors and thread weights to build visual interest.
In select sections, use a blunt tapestry needle to weave a contrasting thread through these radial ‘spokes’ without piercing the fabric.
This lacework technique creates patterns of negative space, adding intricate detail and transforming simple straight stitches into a complex, airy design.
6. Draw with Appliqué and Chain Stitch
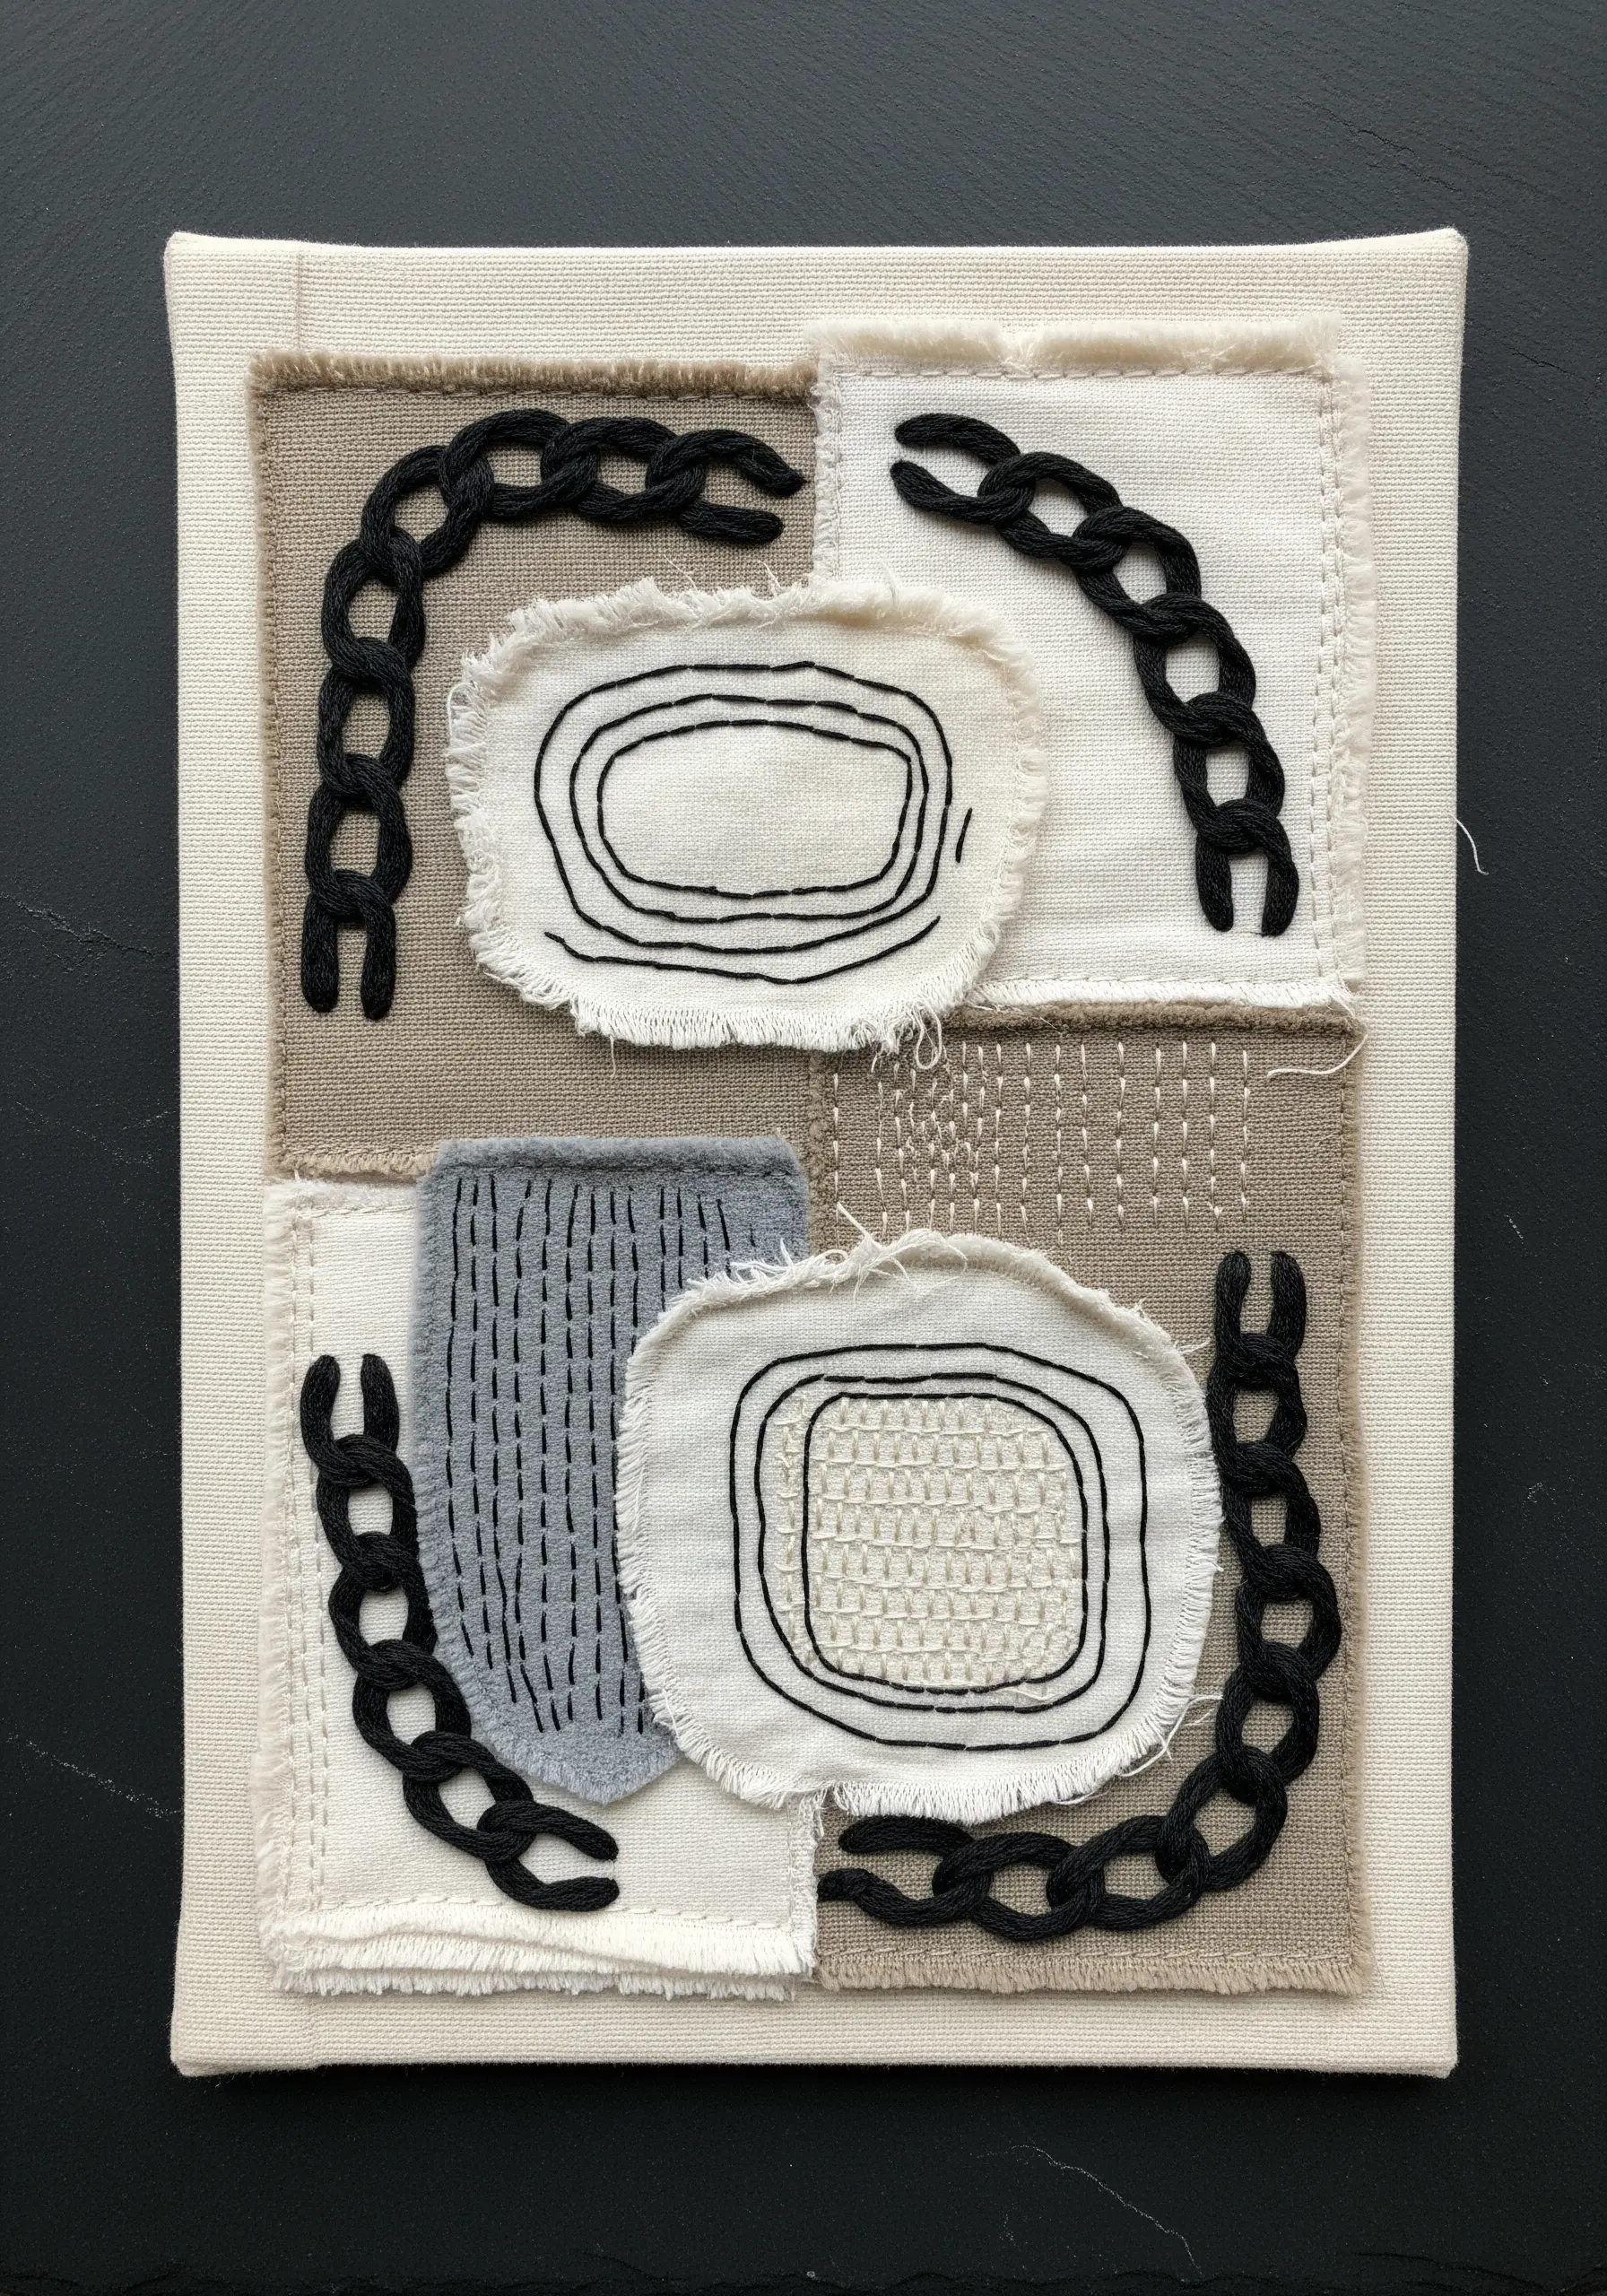
Build your design with layers of fabric scraps, embracing raw, unfinished edges for a modern, collage effect.
Arrange patches of linen, cotton, and felt in a block-like composition, tacking them down with a few hidden stitches.
Instead of traditional outlines, use a bold, dimensional stitch like the chain stitch to draw graphic elements over the fabric pieces.
This approach turns the thread into a confident drawing tool, unifying the disparate elements of your fabric collage embroidery ideas.
7. Sculpt with Coiled and Couched Yarn
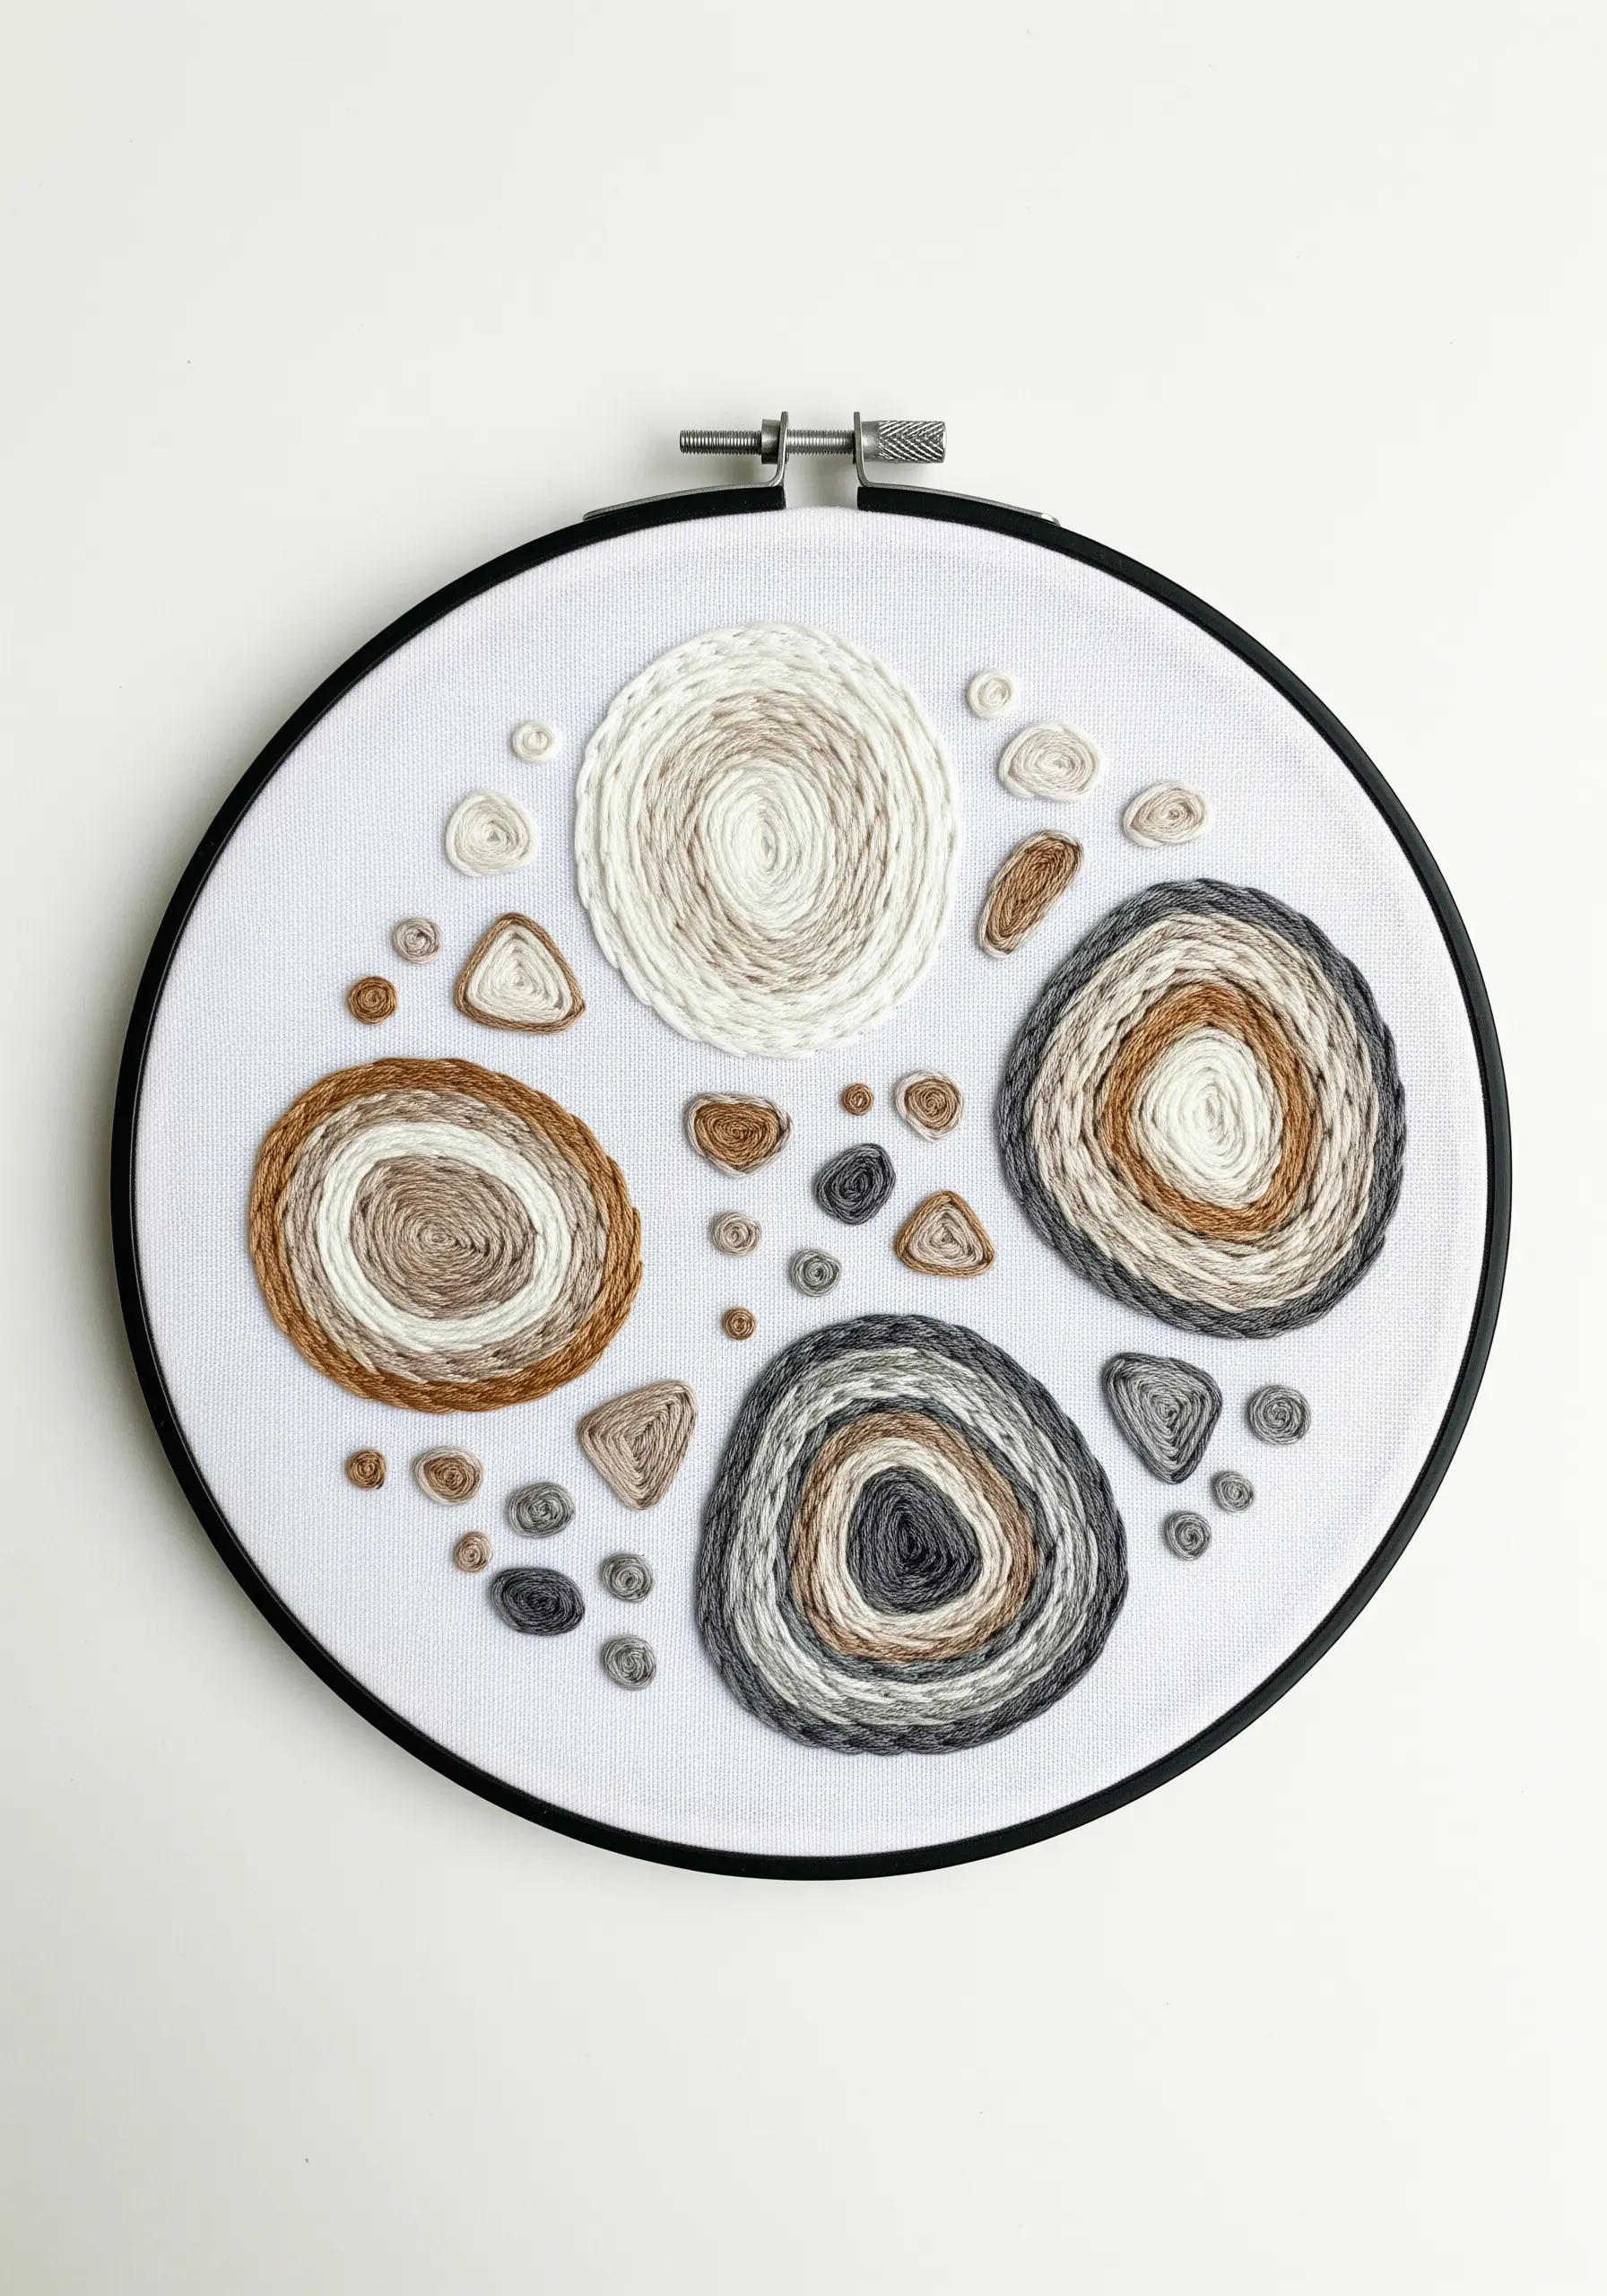
Create soft, dimensional forms by couching thick yarn onto your fabric.
Choose a variety of yarn weights and colors within your neutral palette to build subtle gradients and visual interest.
Carefully coil the yarn into organic, pebble-like shapes, using a single strand of matching sewing thread to tack it down every few millimeters.
The key is to make your couching stitches nearly invisible, so the yarn appears to be resting weightlessly on the fabric surface, creating a beautifully sculptural effect.
8. Juxtapose Scale with Roving and Thread
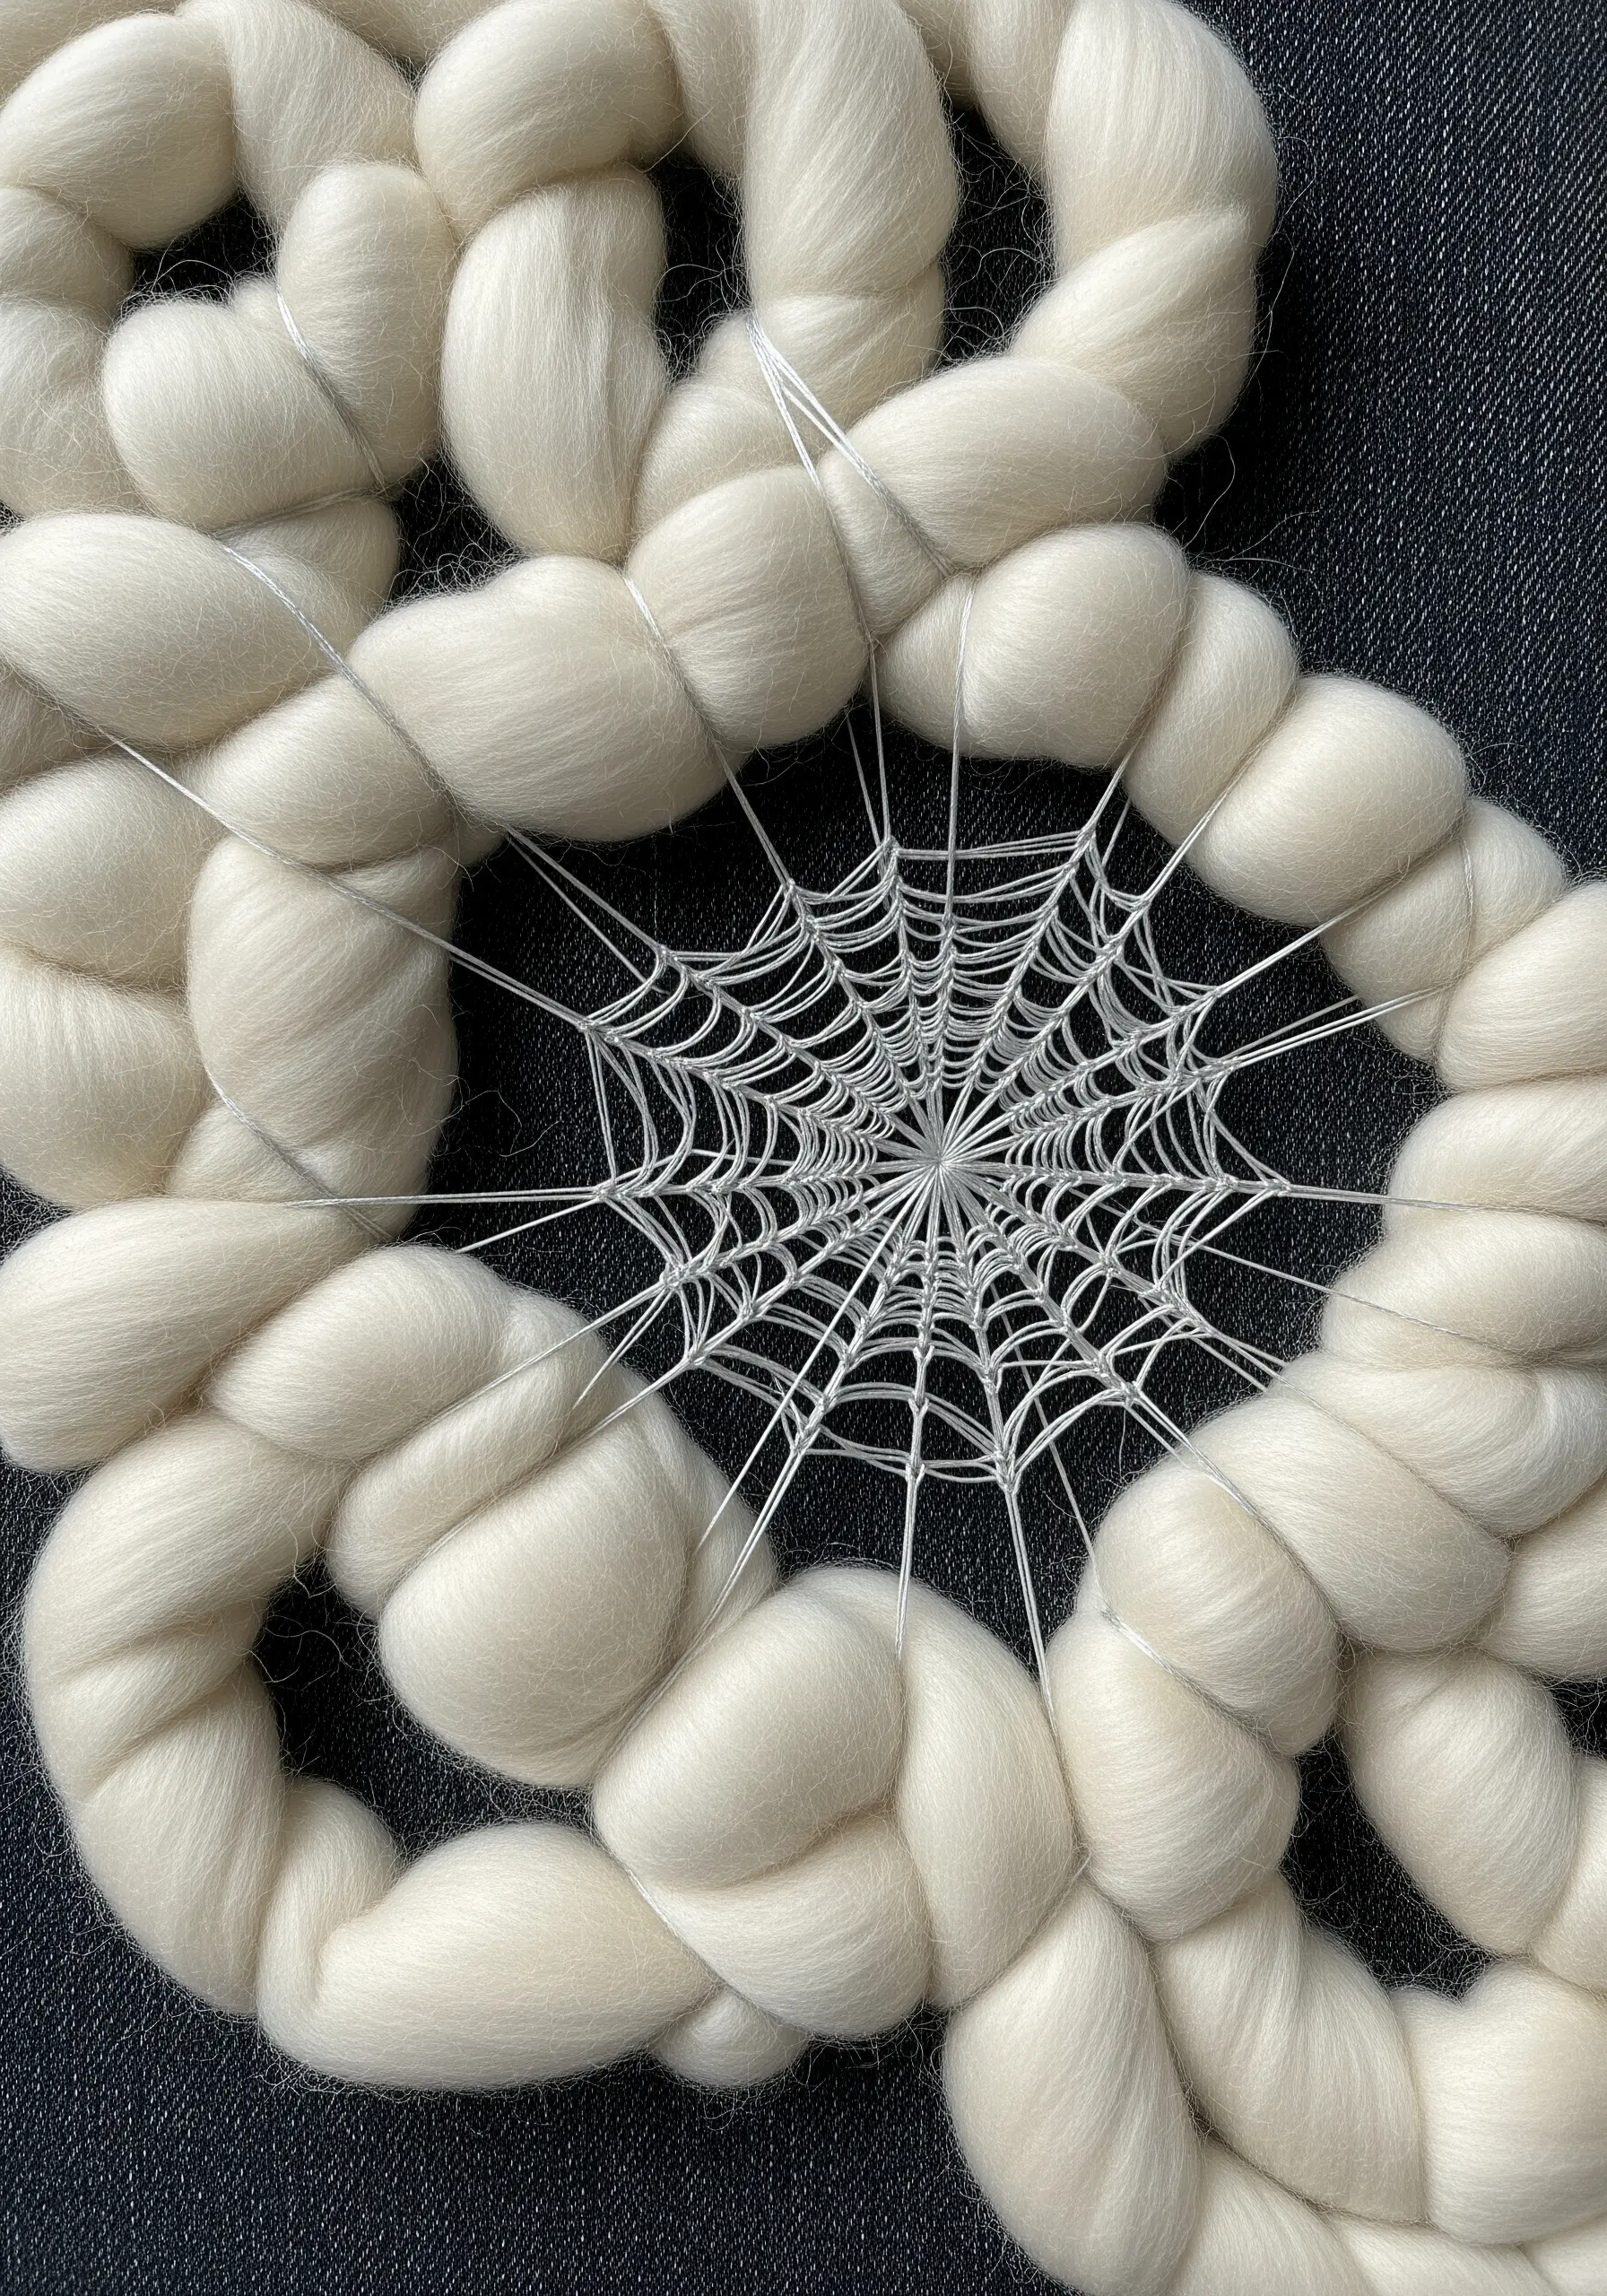
Create breathtaking drama by pairing materials of extremely different weights.
Use thick, plush wool roving to form a bold, soft frame or shape within your design.
In the negative space, work a delicate, intricate structure with a very fine, single strand of thread.
A spiderweb, created by anchoring radial threads and weaving a spiral, is a perfect choice. The contrast between the massive, soft wool and the fragile, precise threadwork is immediately captivating.
9. Weave a Minimalist Thread Tapestry
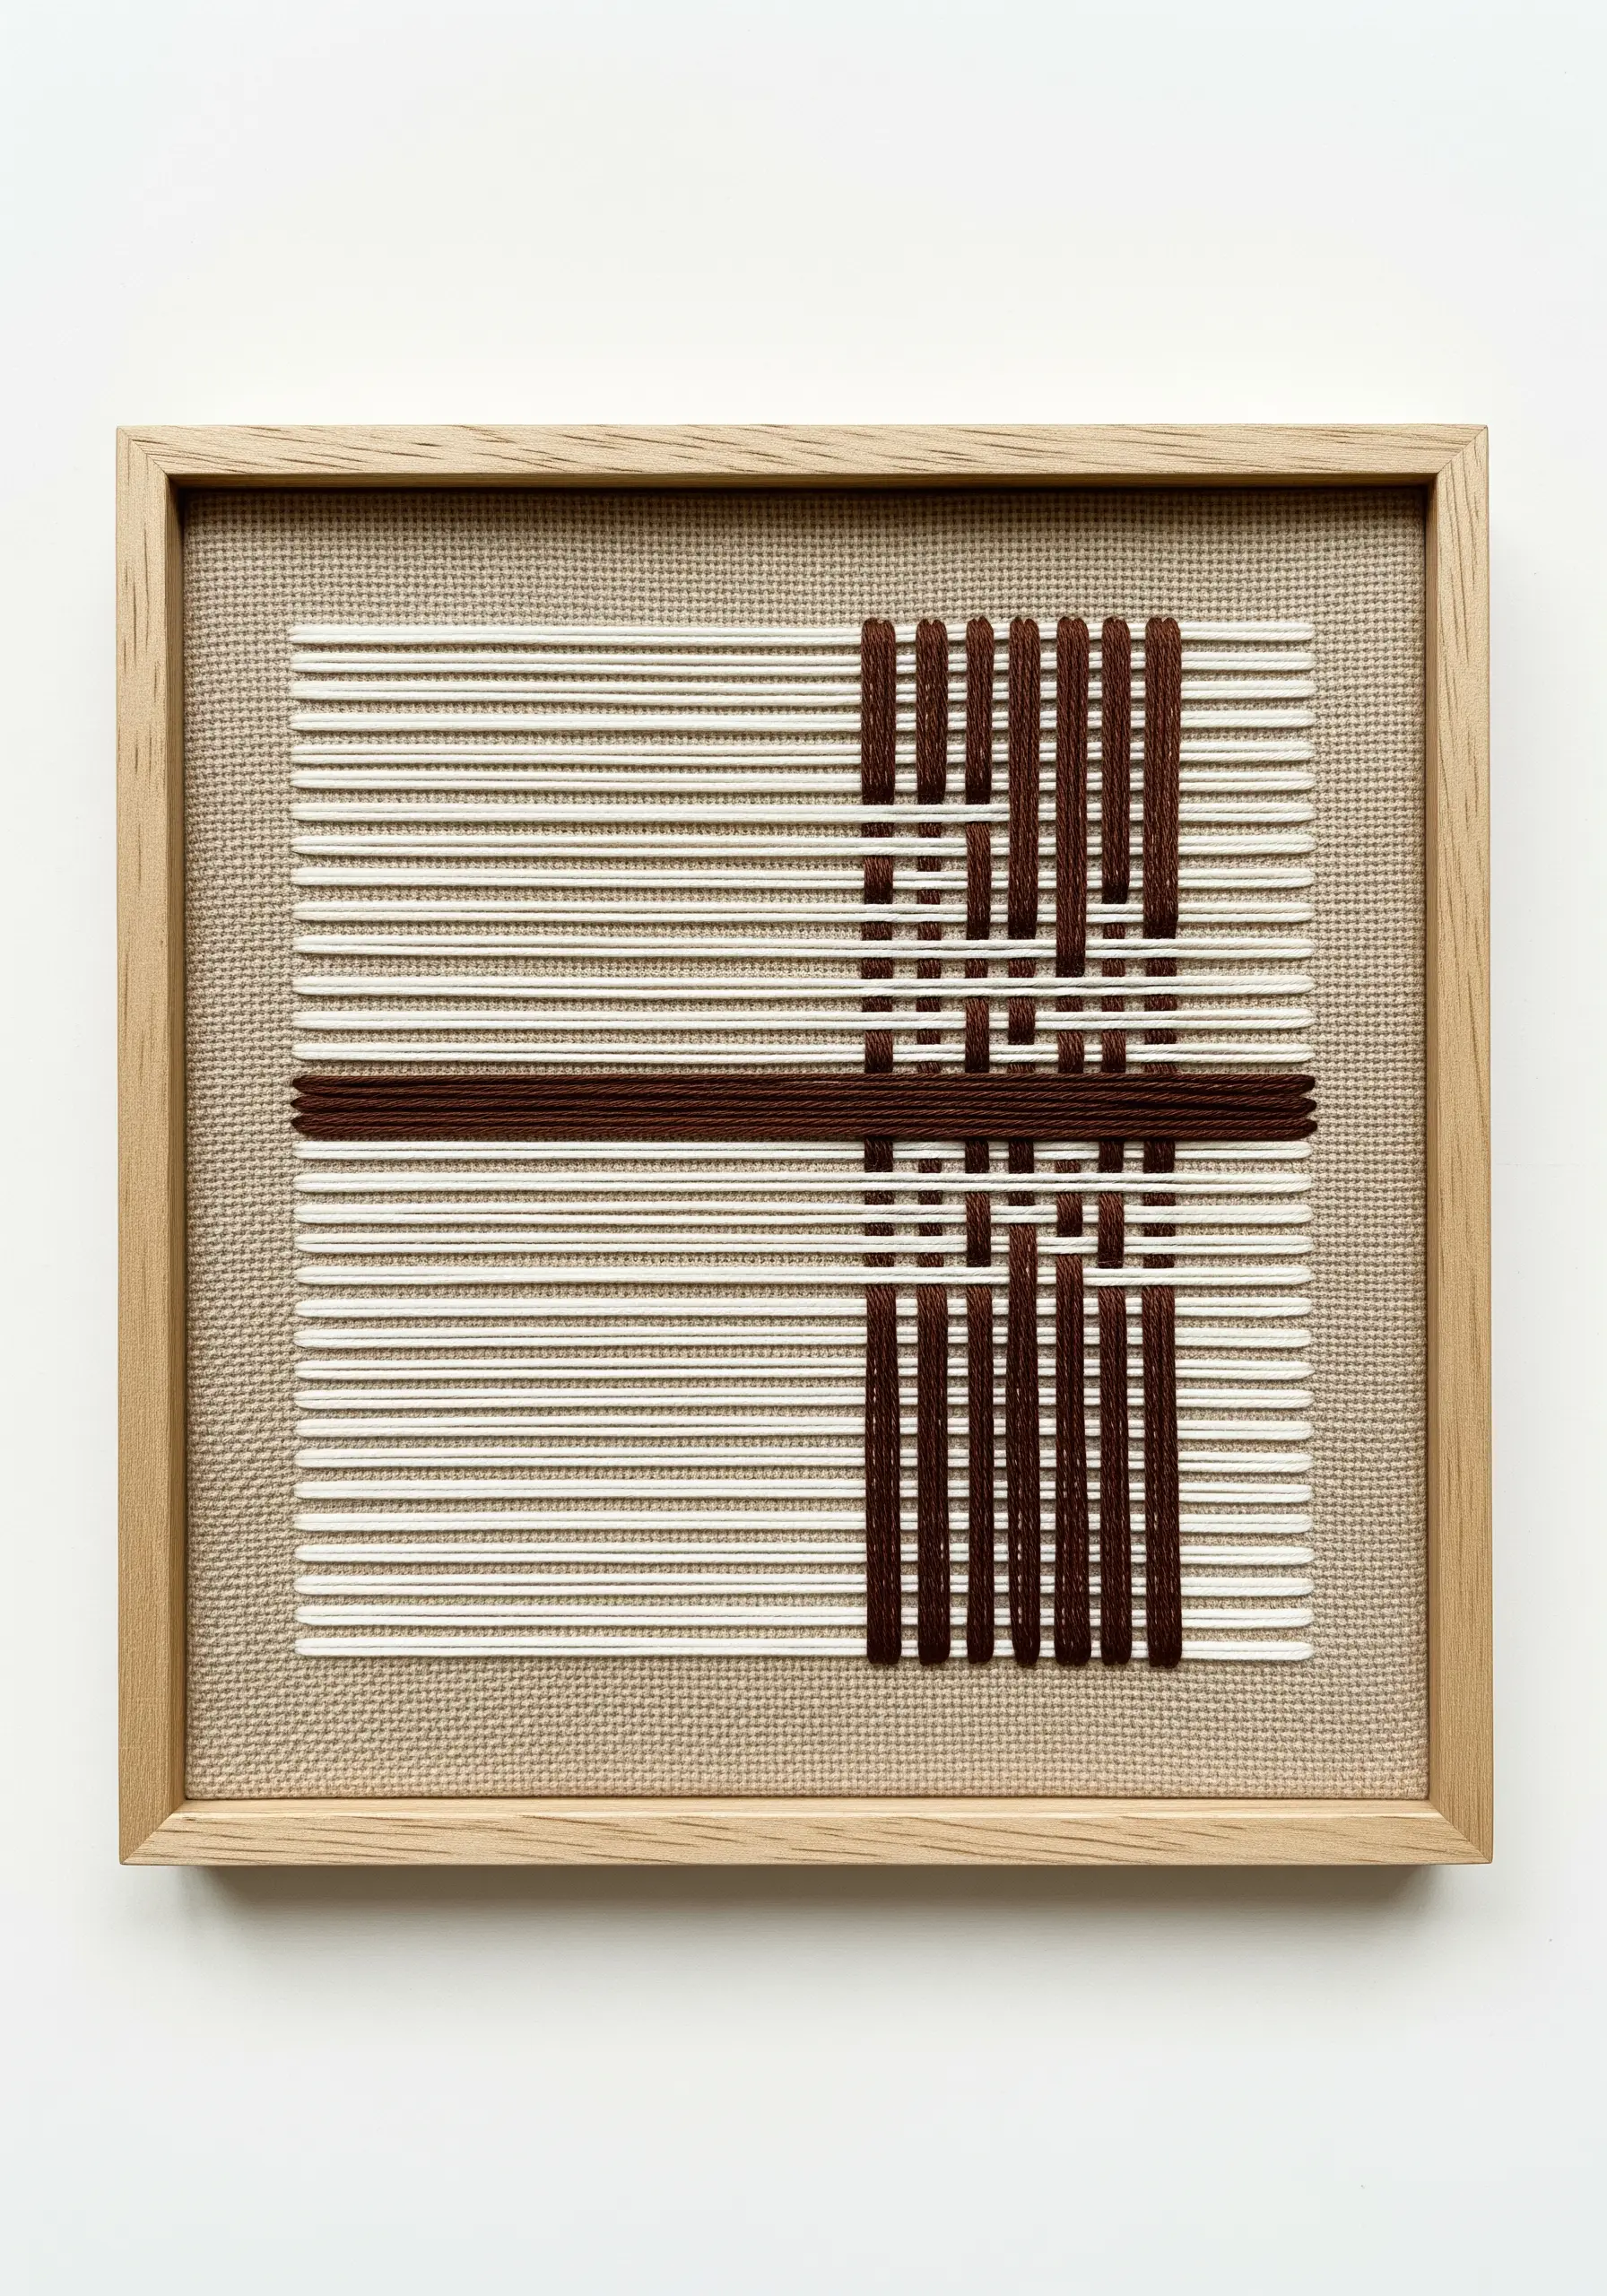
Translate the principles of weaving directly into your embroidery for a clean, graphic result.
Start by creating a ‘warp’ with long, parallel straight stitches stretched across your hoop or frame.
Then, using a blunt tapestry needle, weave a contrasting ‘weft’ thread over and under the warp threads without piercing the fabric.
By varying the rhythm of your weaving and leaving some warp threads exposed, you can create sophisticated, minimalist patterns that celebrate the pure interaction of line and color.
10. Express with Scribbled Machine Stitching
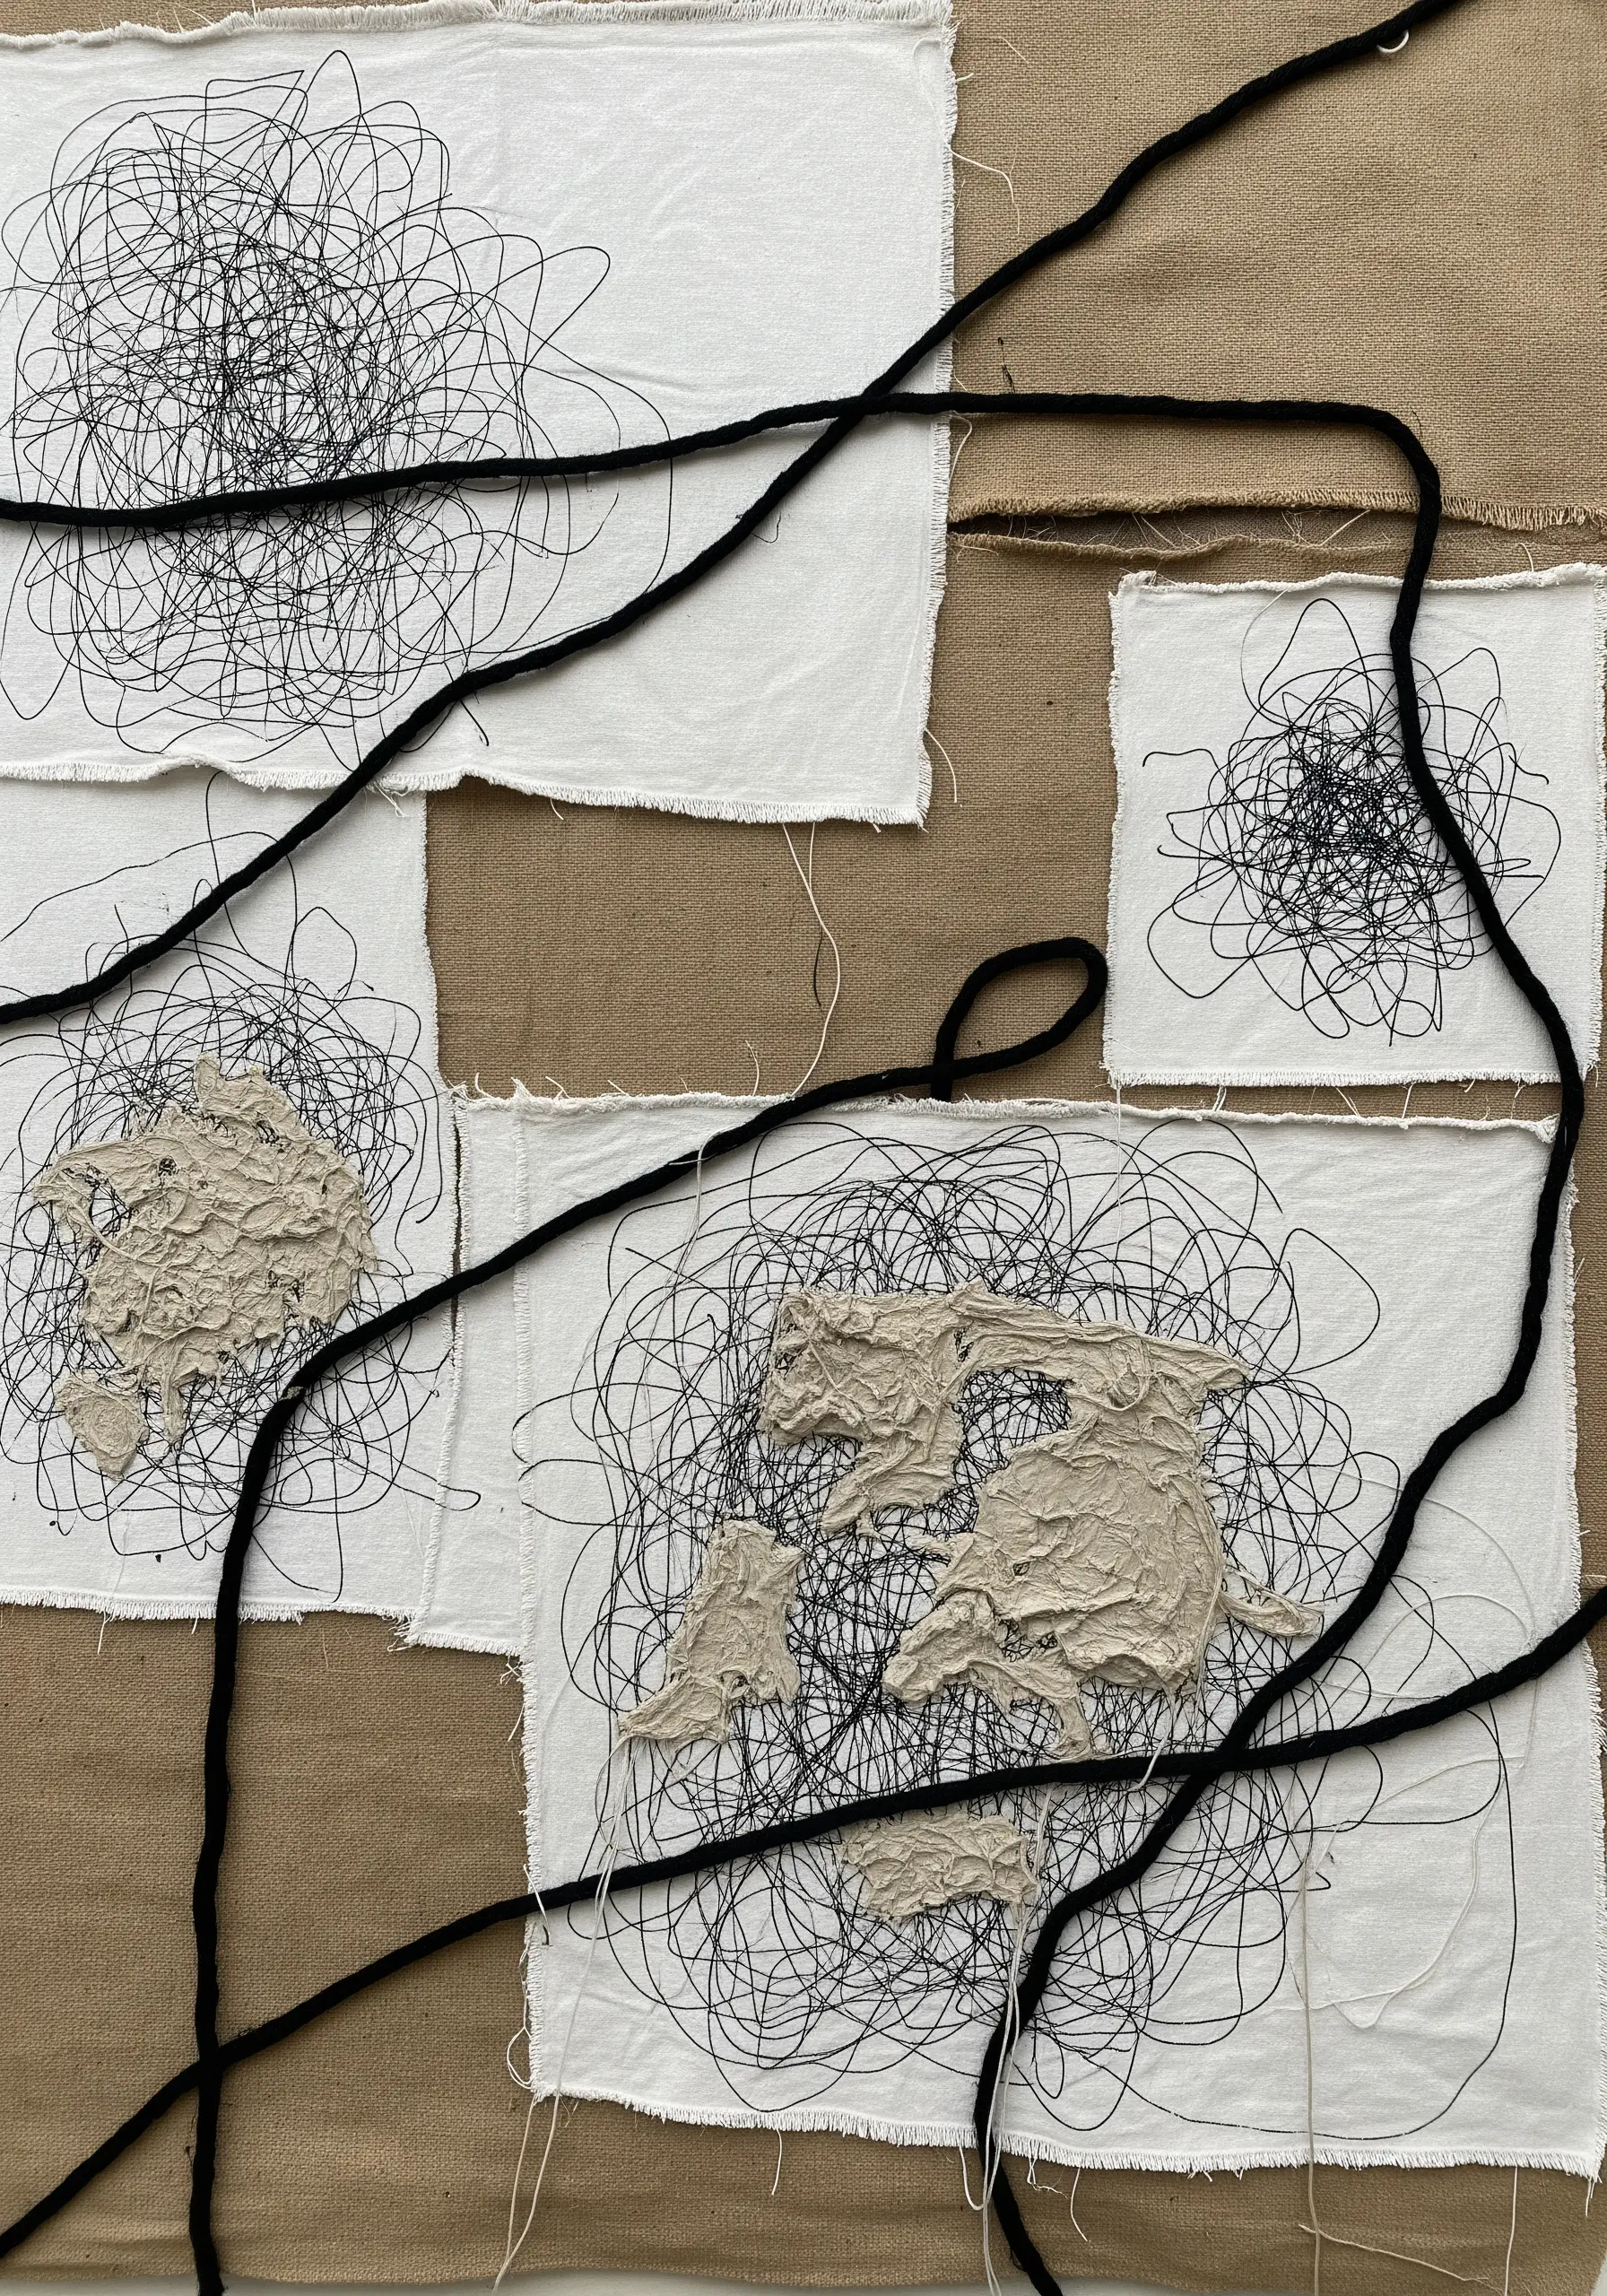
Use your sewing machine as a drawing tool for raw, expressive texture.
Lower the feed dogs on your machine and attach a darning or free-motion foot. This allows you to move the fabric freely in any direction.
On layered scraps of canvas, stitch chaotic, overlapping scribbles with a dark thread to build up dense patches of texture.
For even more dimension, apply a layer of thick gesso or modeling paste and allow it to crackle as it dries before adding bold, gestural yarn.
11. Center Your Design with Bullion Knots
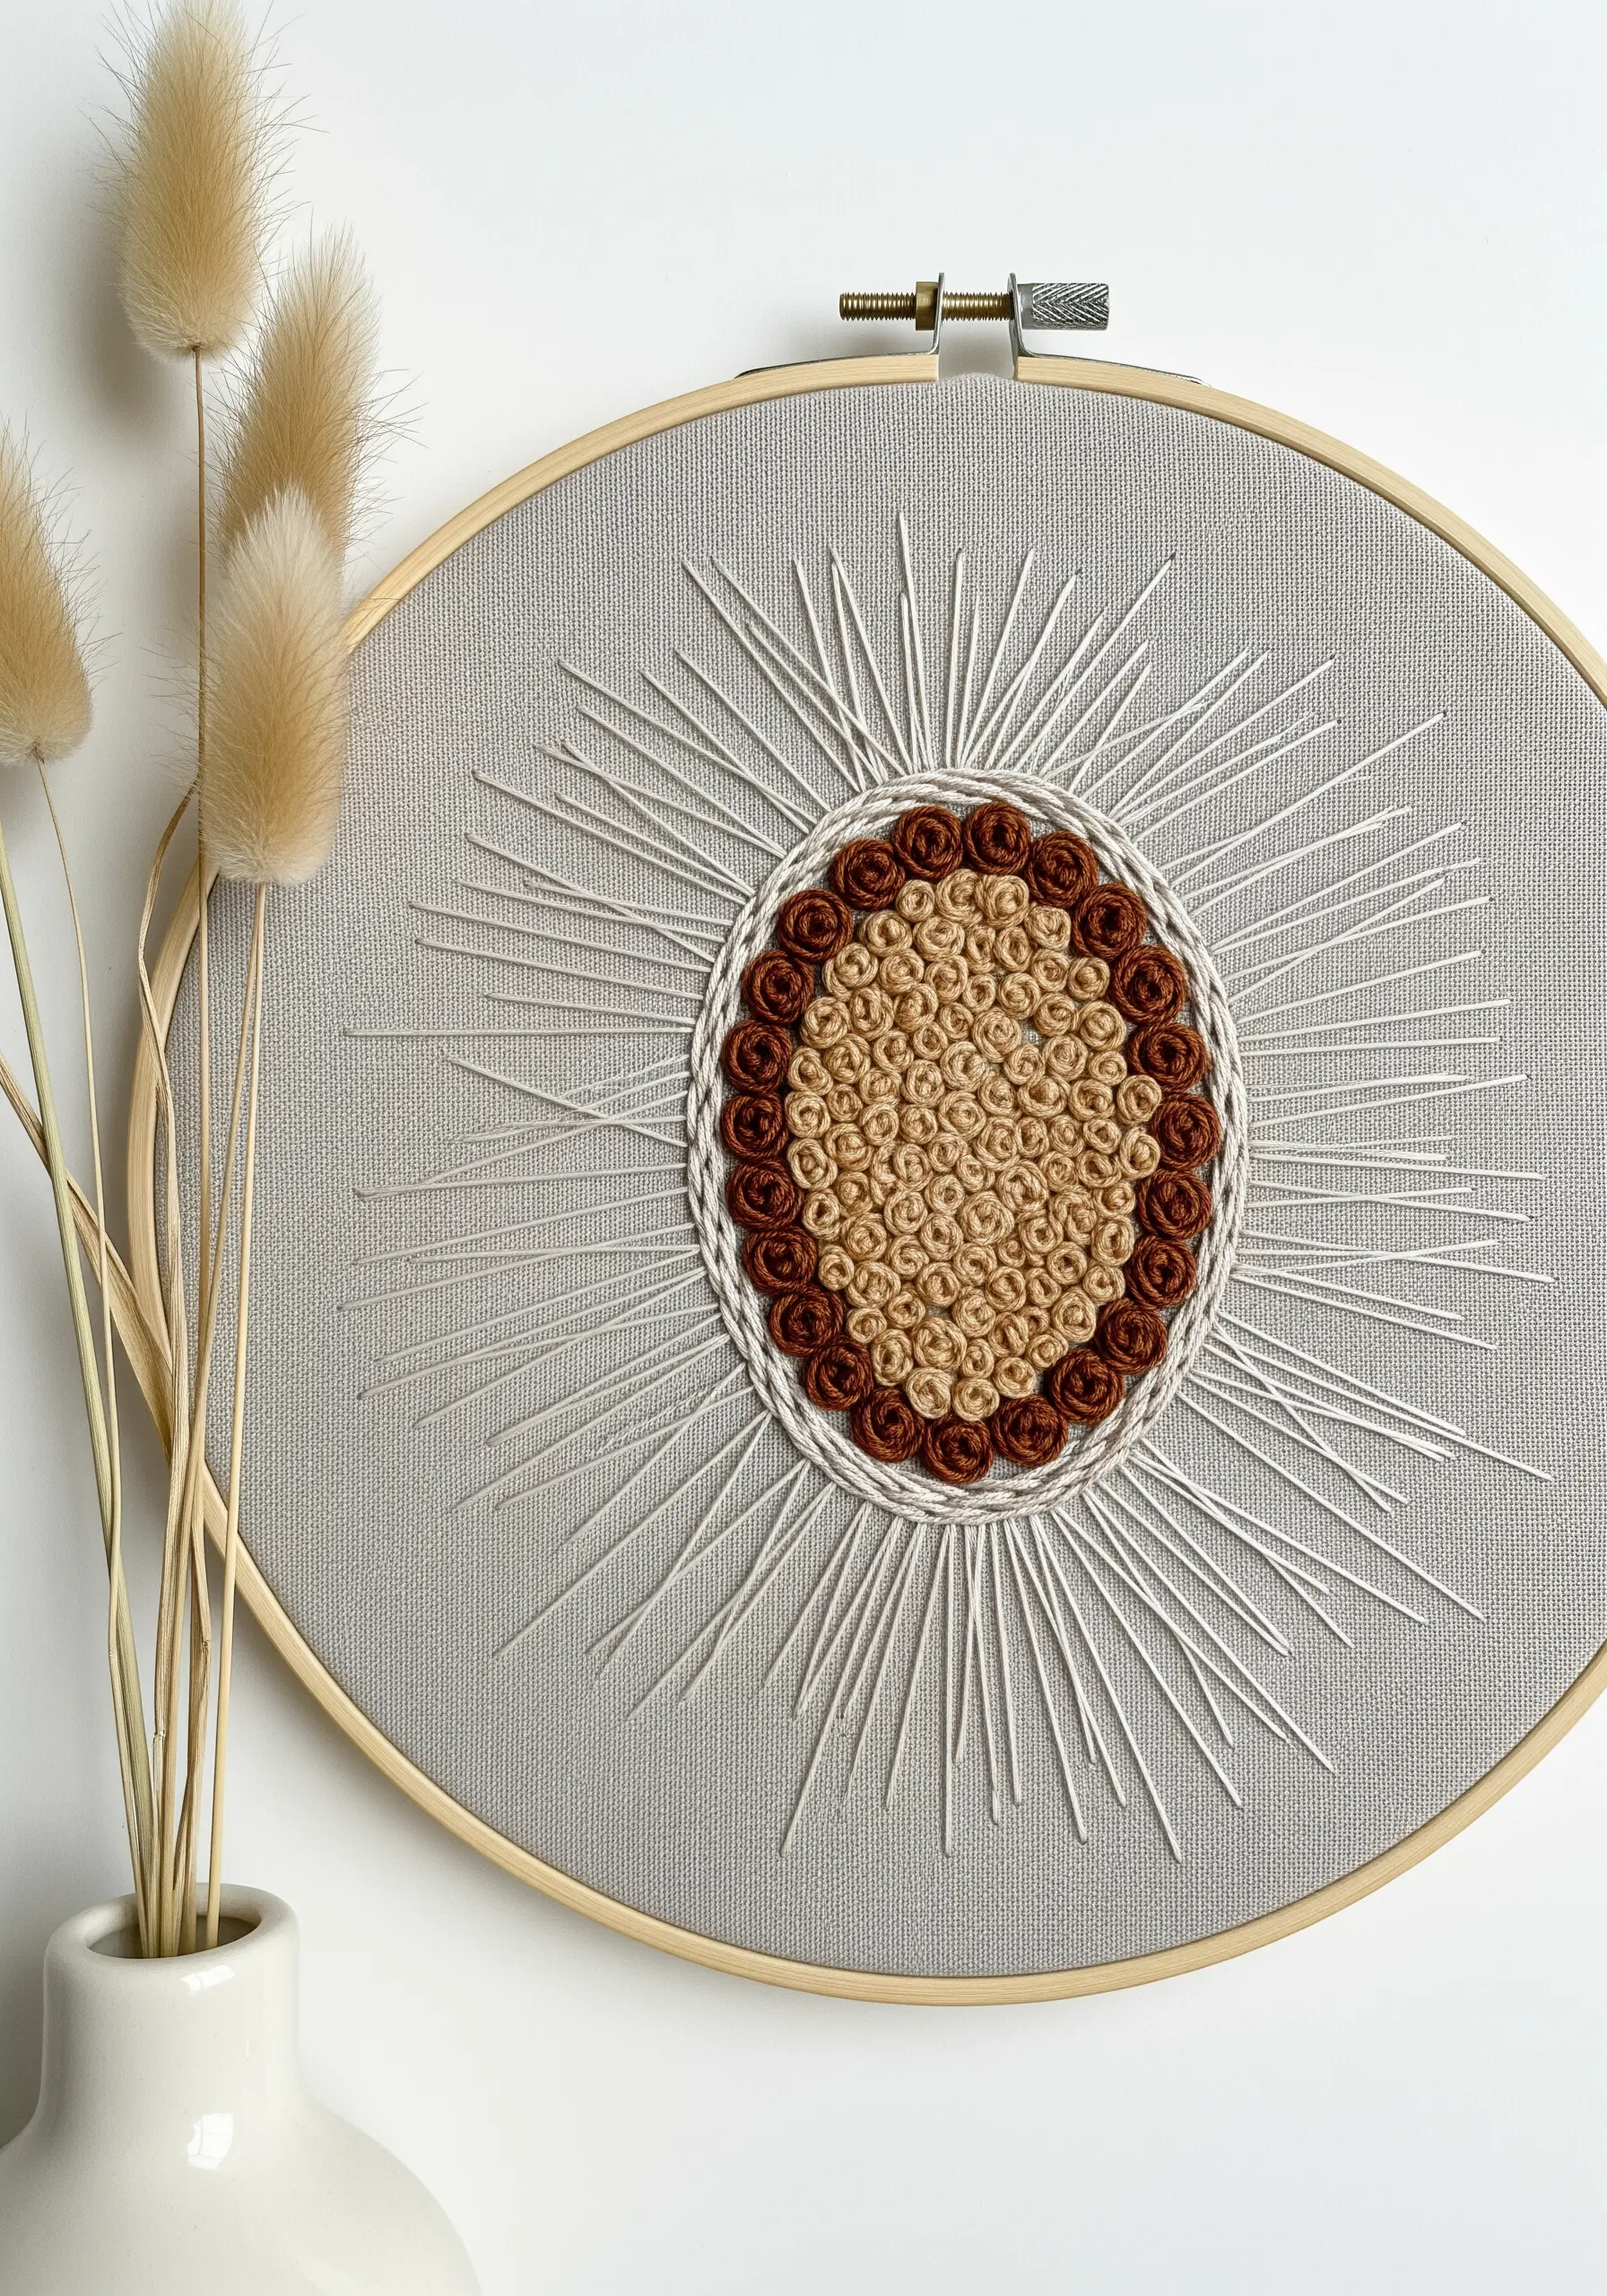
Create a dense, captivating focal point using bullion knots arranged in concentric circles.
To make a bullion knot, wrap the thread around your needle multiple times before pulling it through the fabric, creating a neat, worm-like coil.
Pack these knots tightly together, alternating colors like tan and brown, to form a rich, textured medallion.
Contrast this dense center by radiating simple, stark straight stitches outward, which draws the eye inward and emphasizes the complexity of the knots.
12. Build a Narrative with Mixed Stitches
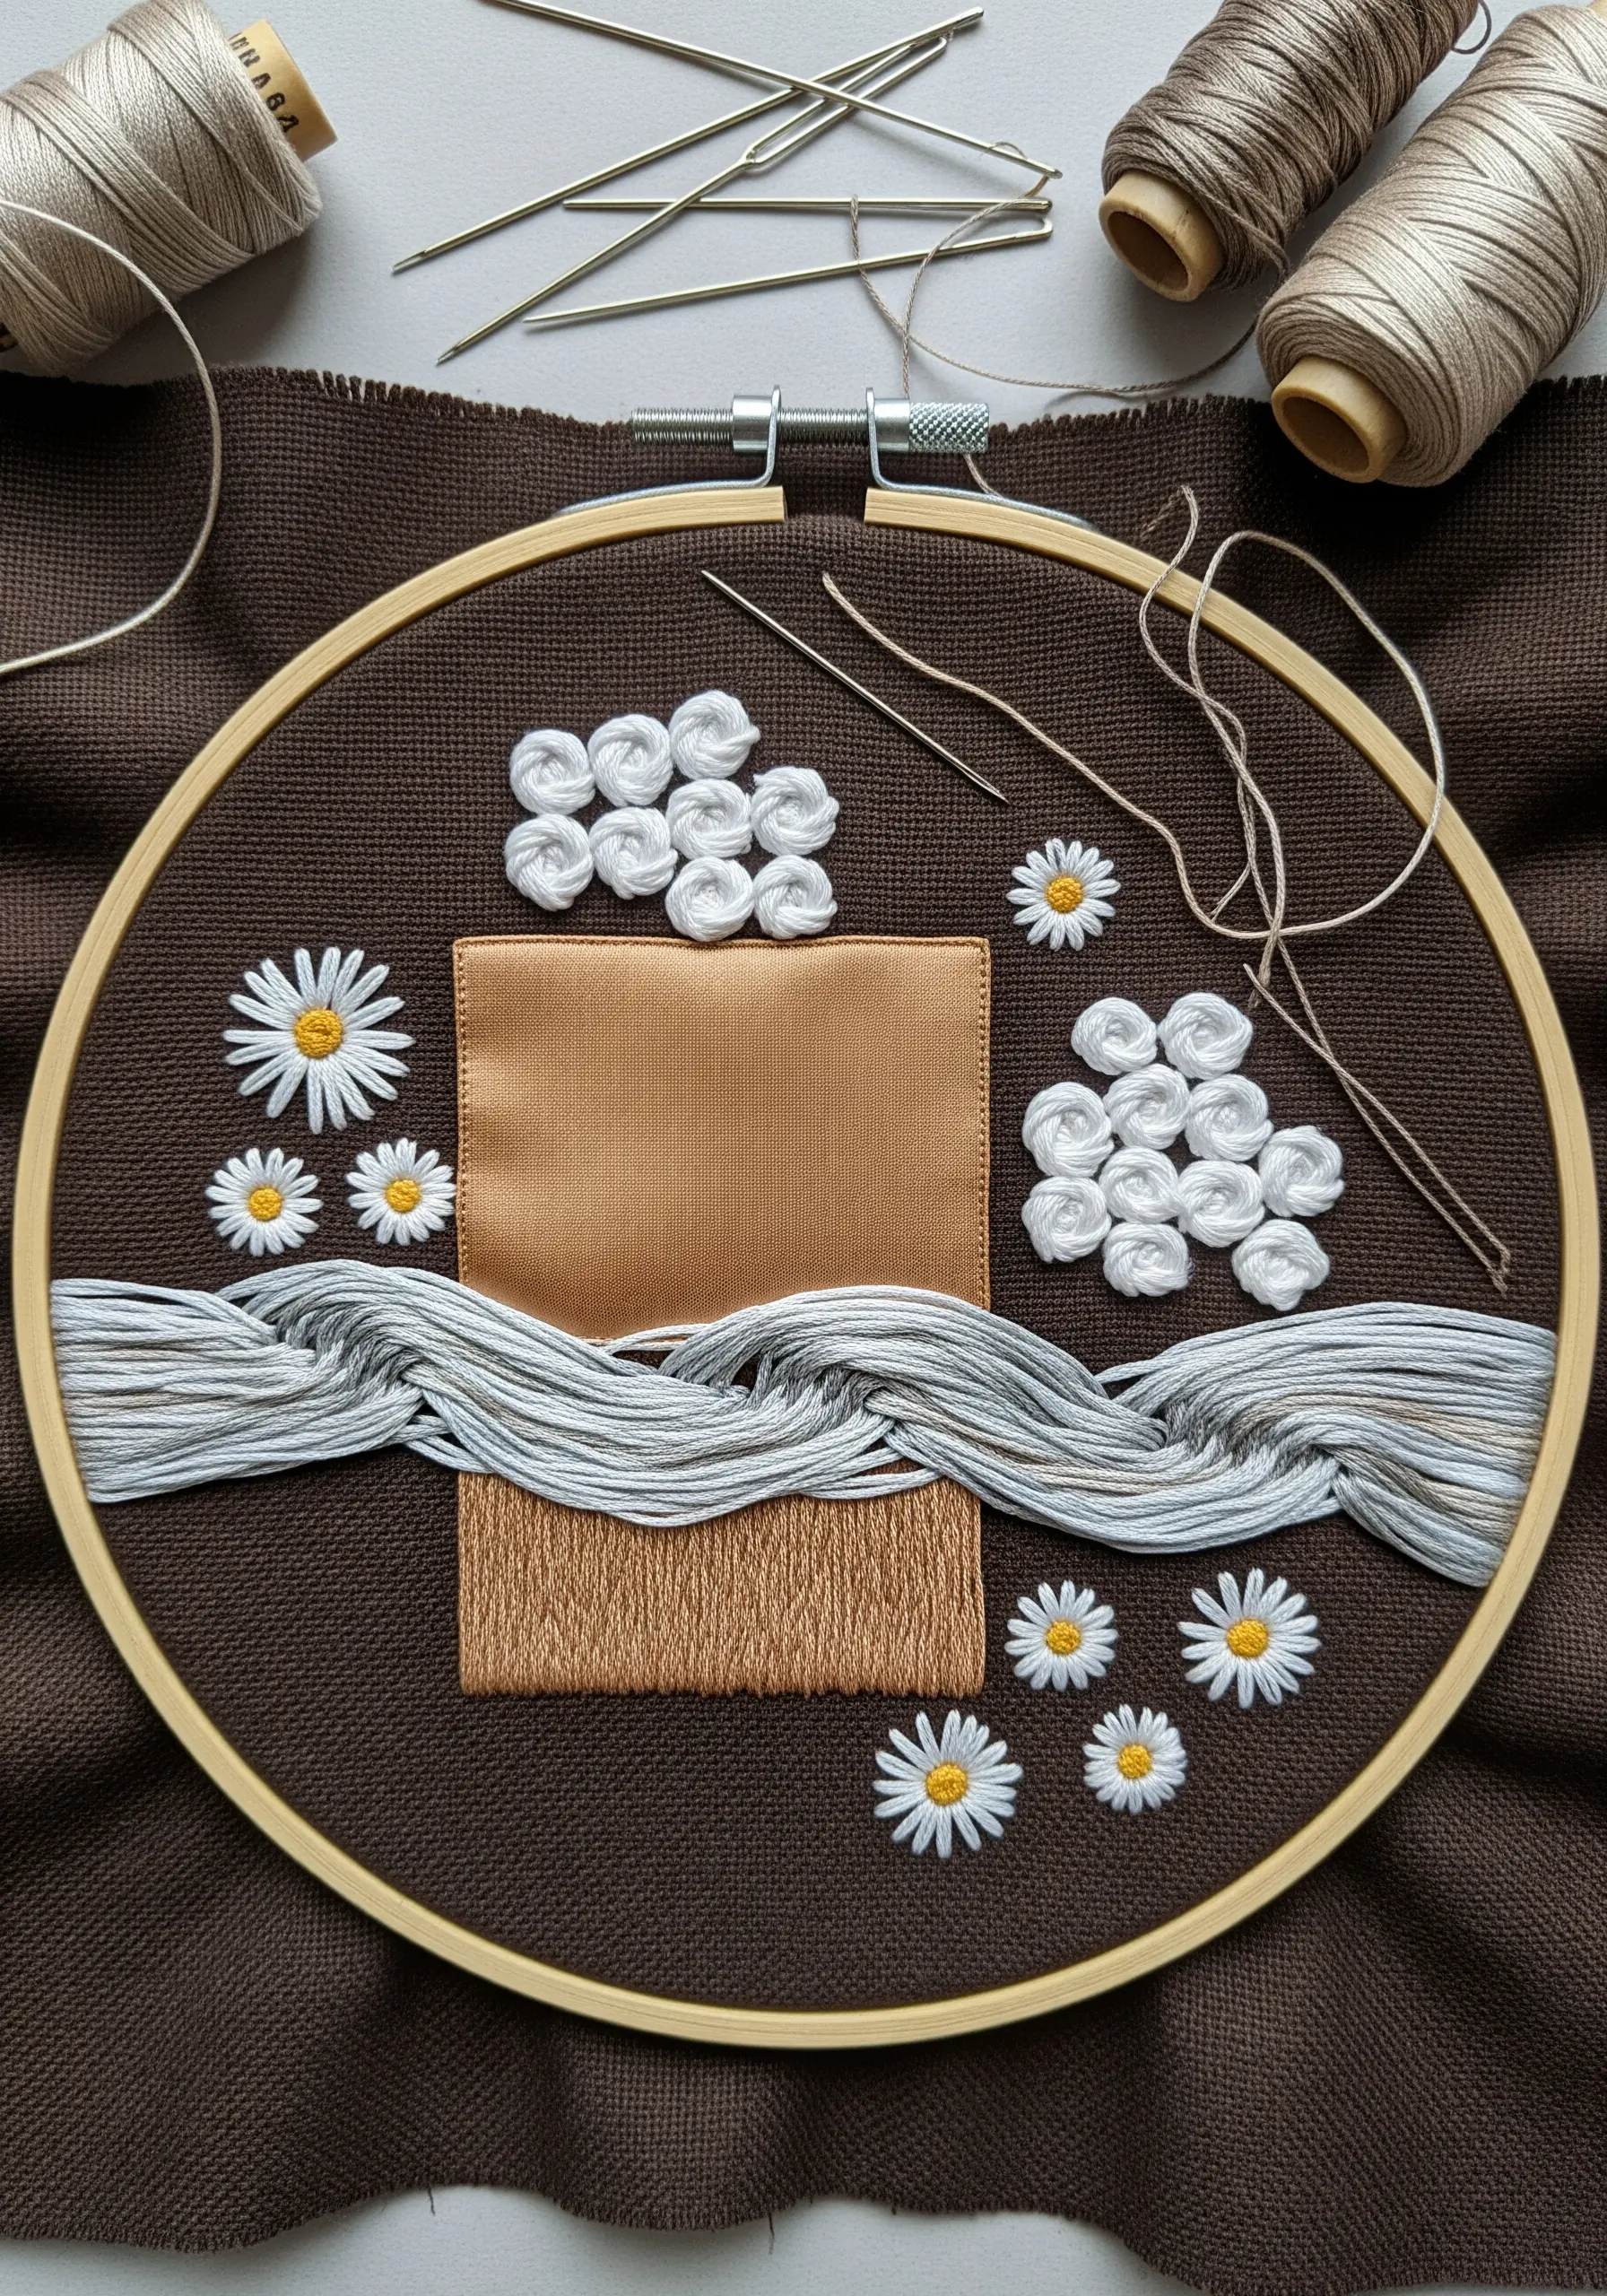
Move beyond purely abstract forms and use a collage of techniques to suggest a scene or story.
Combine fabric appliqué for solid shapes, bullion knots for fluffy, cloud-like textures, and couched threads for flowing, wavy lines.
Use recognizable motifs, like simple daisies made with detached chain stitches, to anchor the composition.
By thoughtfully placing these varied elements on a dark background, you can create a surreal landscape that invites interpretation and showcases your technical range.
13. Frame Your Weaving with a Rya Loop Fringe
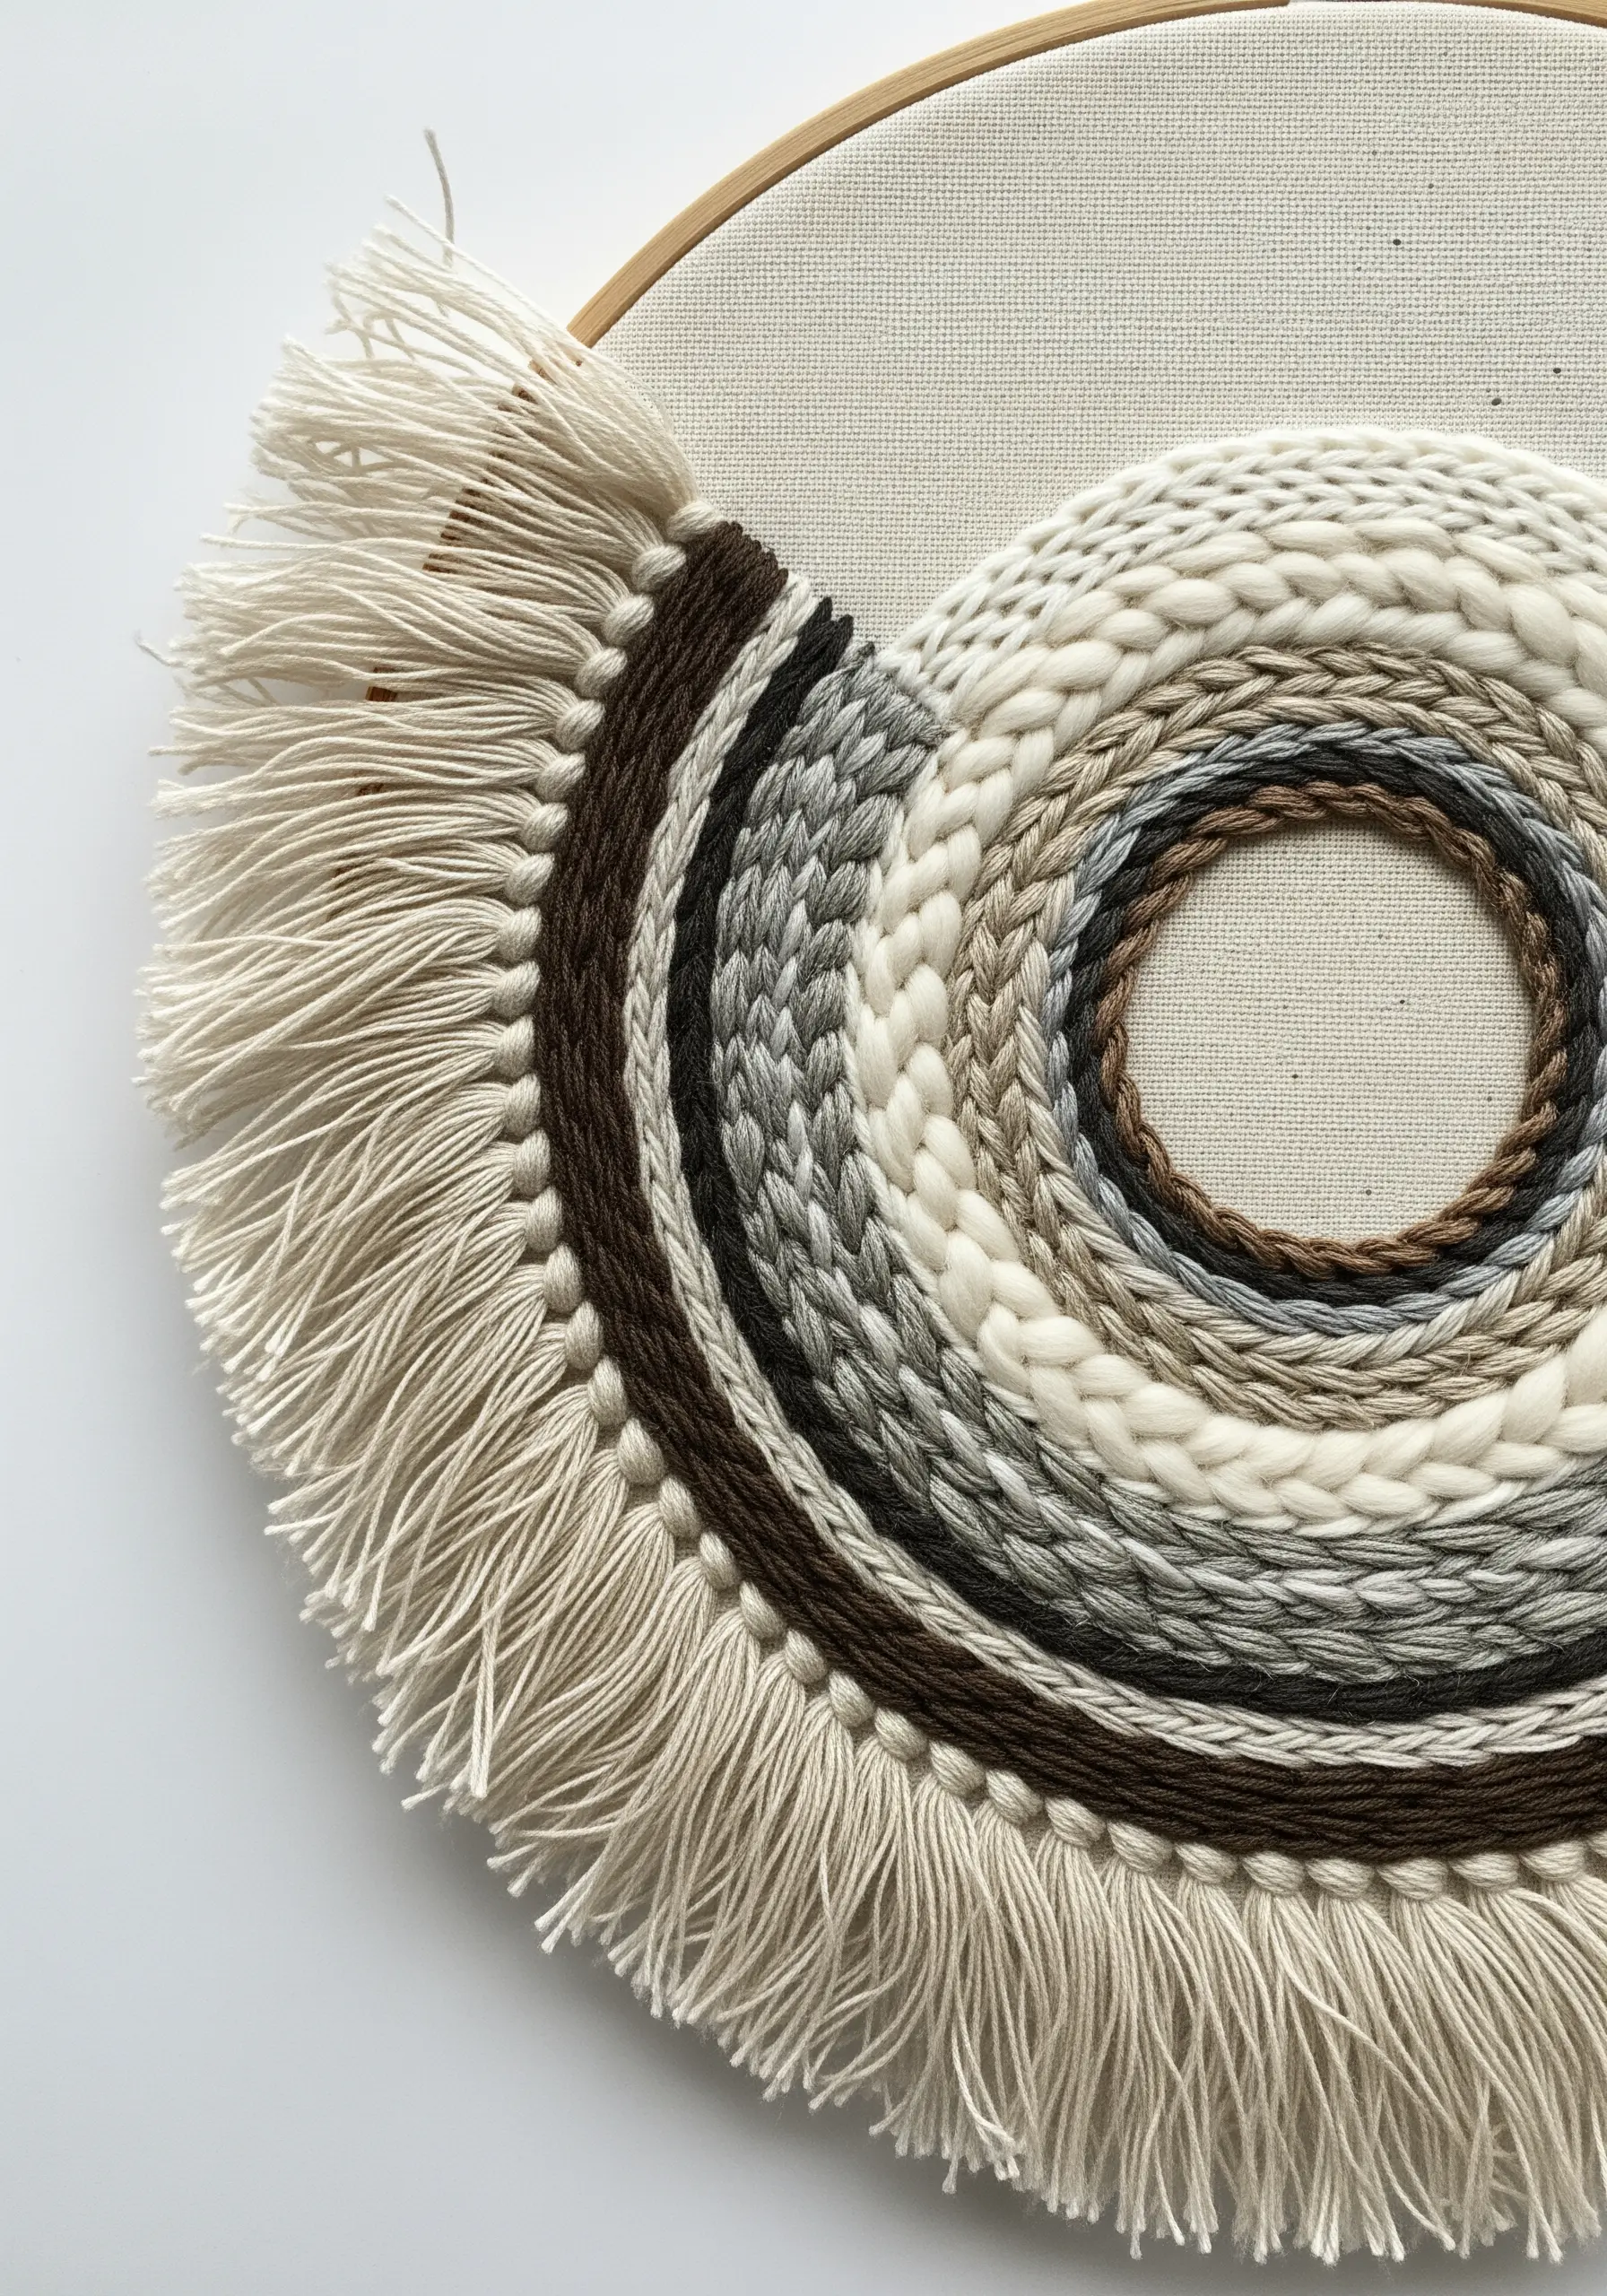
Add a professional finish to your hoop weavings with a perfectly trimmed fringe.
After completing your central woven section with techniques like soumak stitch and plain weave, add a border of Rya loops.
Create these by wrapping your yarn around a dowel or ruler and securing each loop to the fabric with a small stitch.
Once the circle is complete, carefully snip the loops and trim them to a uniform length. This creates a soft, tactile frame that elevates the entire piece.
14. Curate a Vertical Texture Sampler
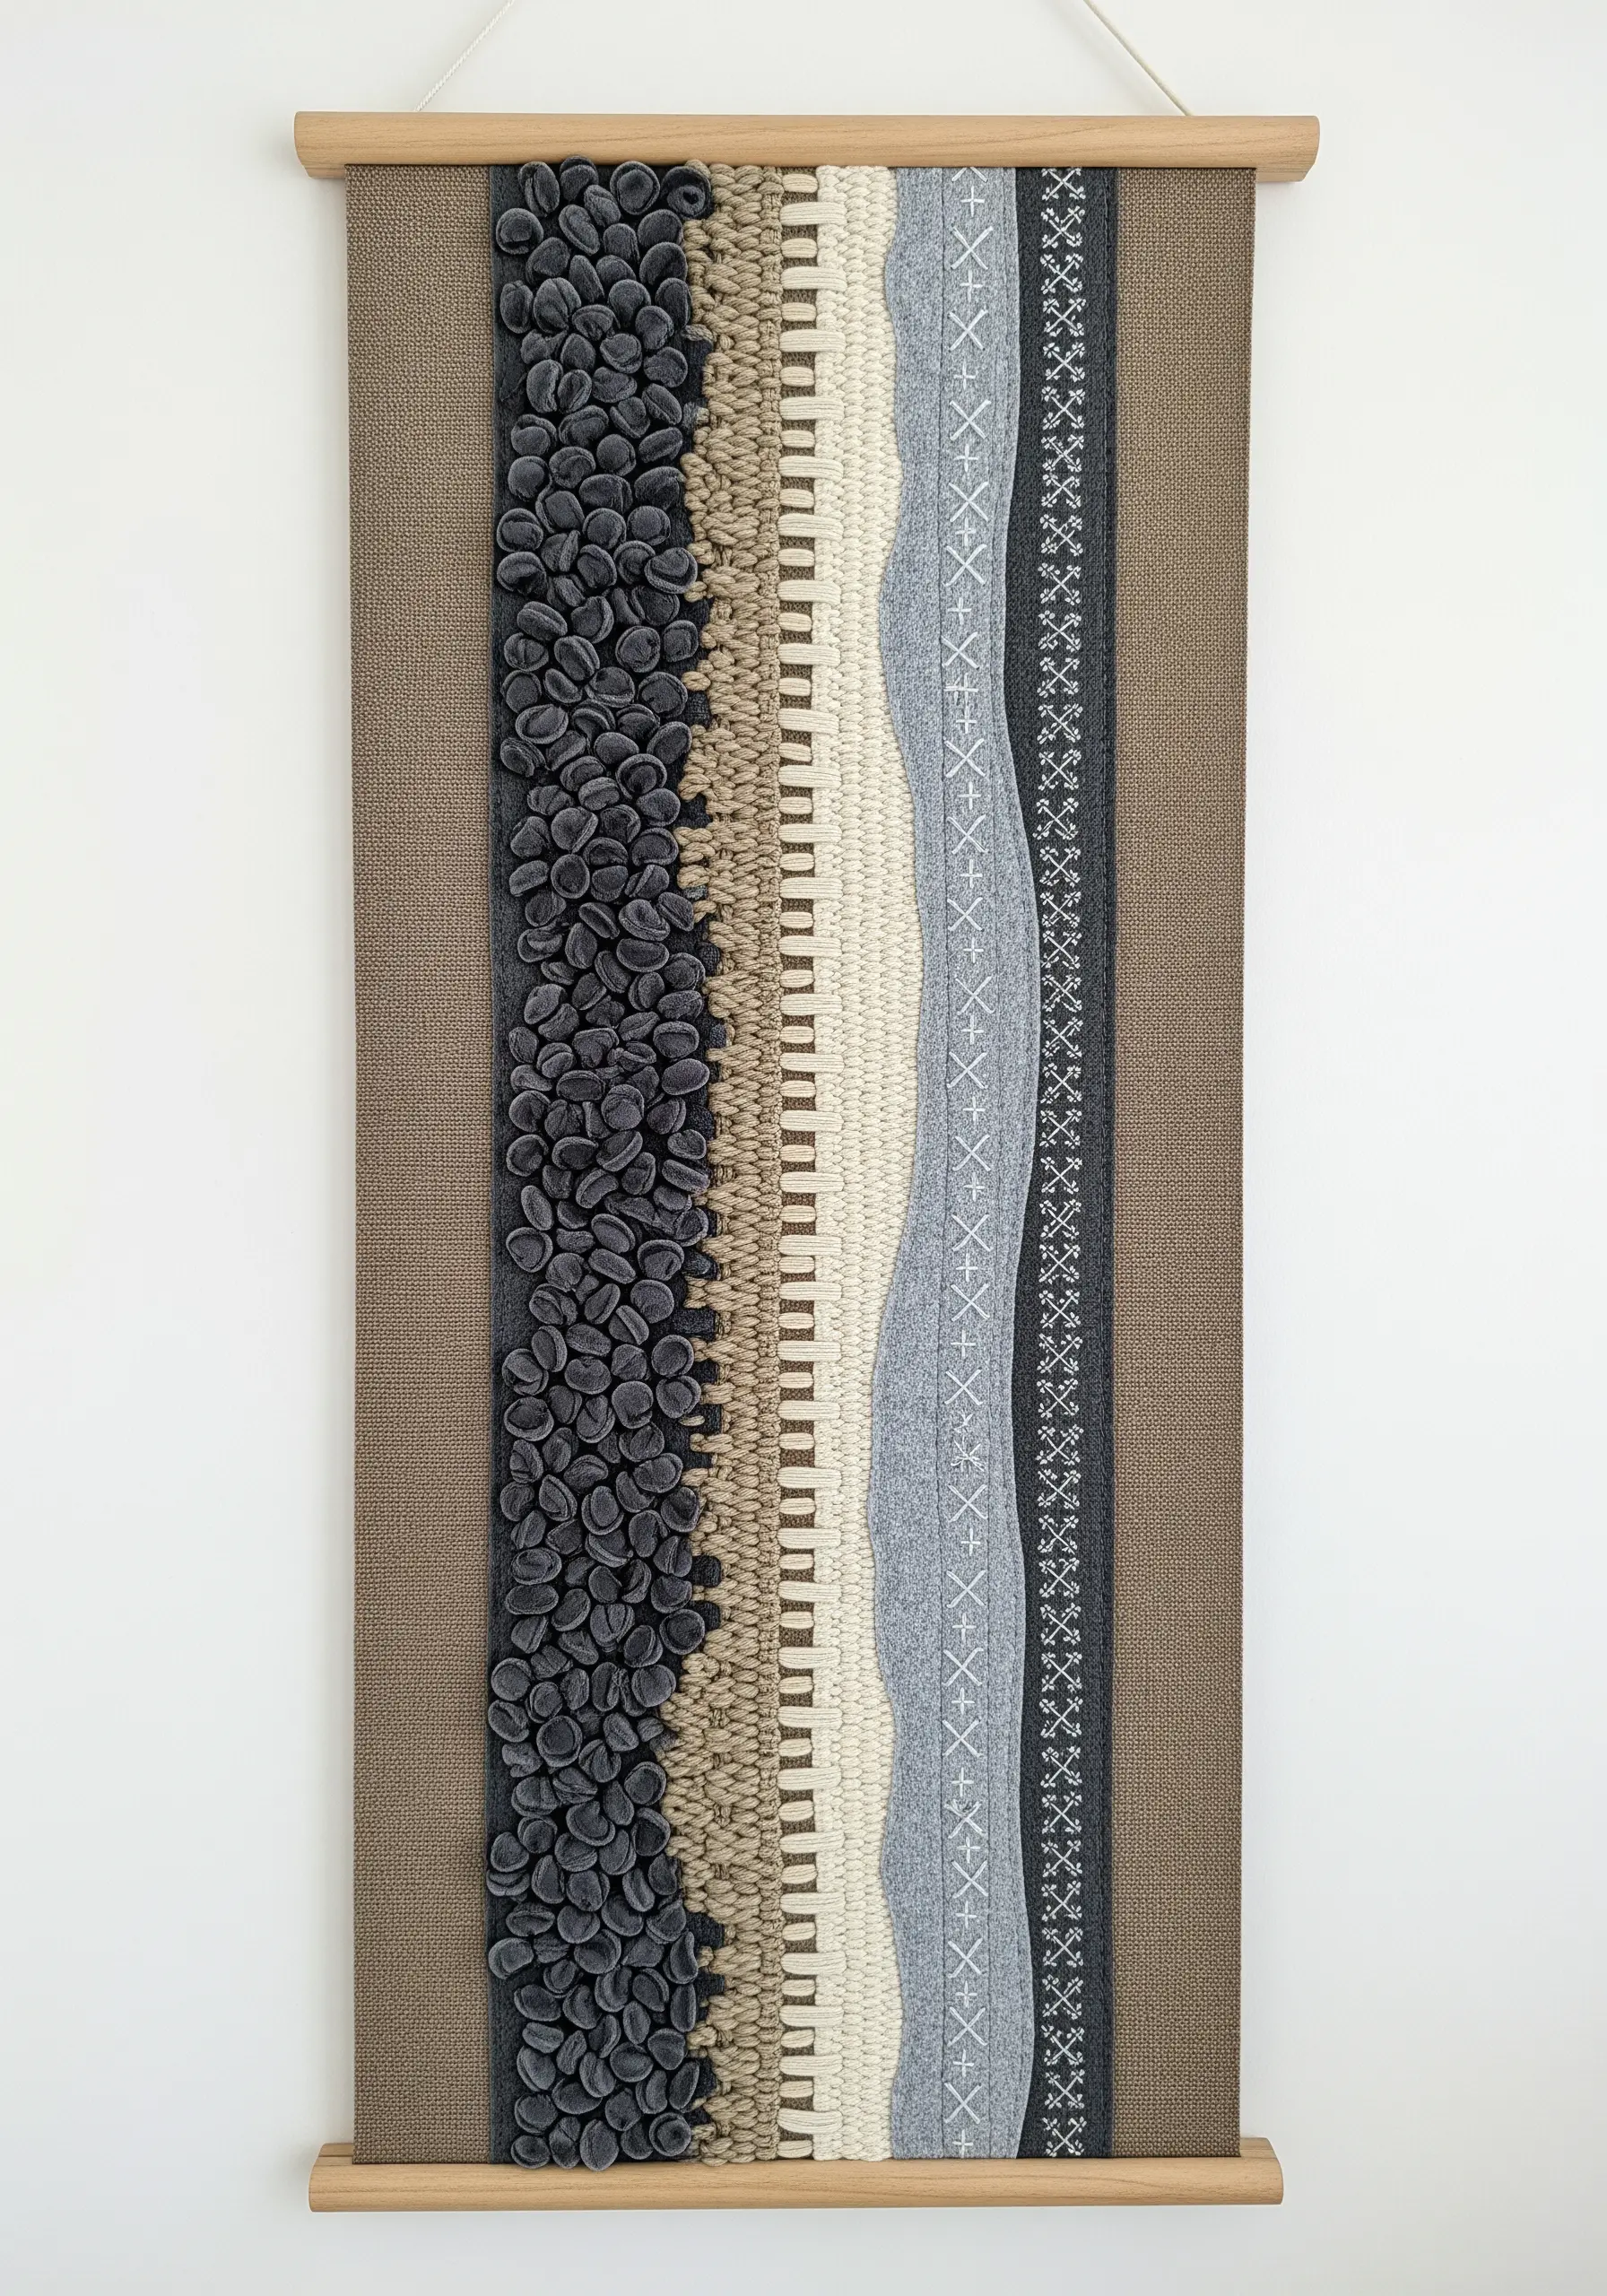
Design a sophisticated wall hanging by arranging different textures in vertical bands.
Dedicate each column to a single technique: one with plush, tufted velvet shapes, another with neatly woven yarn, and a third with linear embroidery.
Create movement by making the dividing lines between textures organic and wavy rather than perfectly straight.
This approach allows you to explore a range of materials and methods while maintaining a cohesive, elegant composition, perfect for a statement wall piece.
15. Float Fragments on a Sheer Canvas
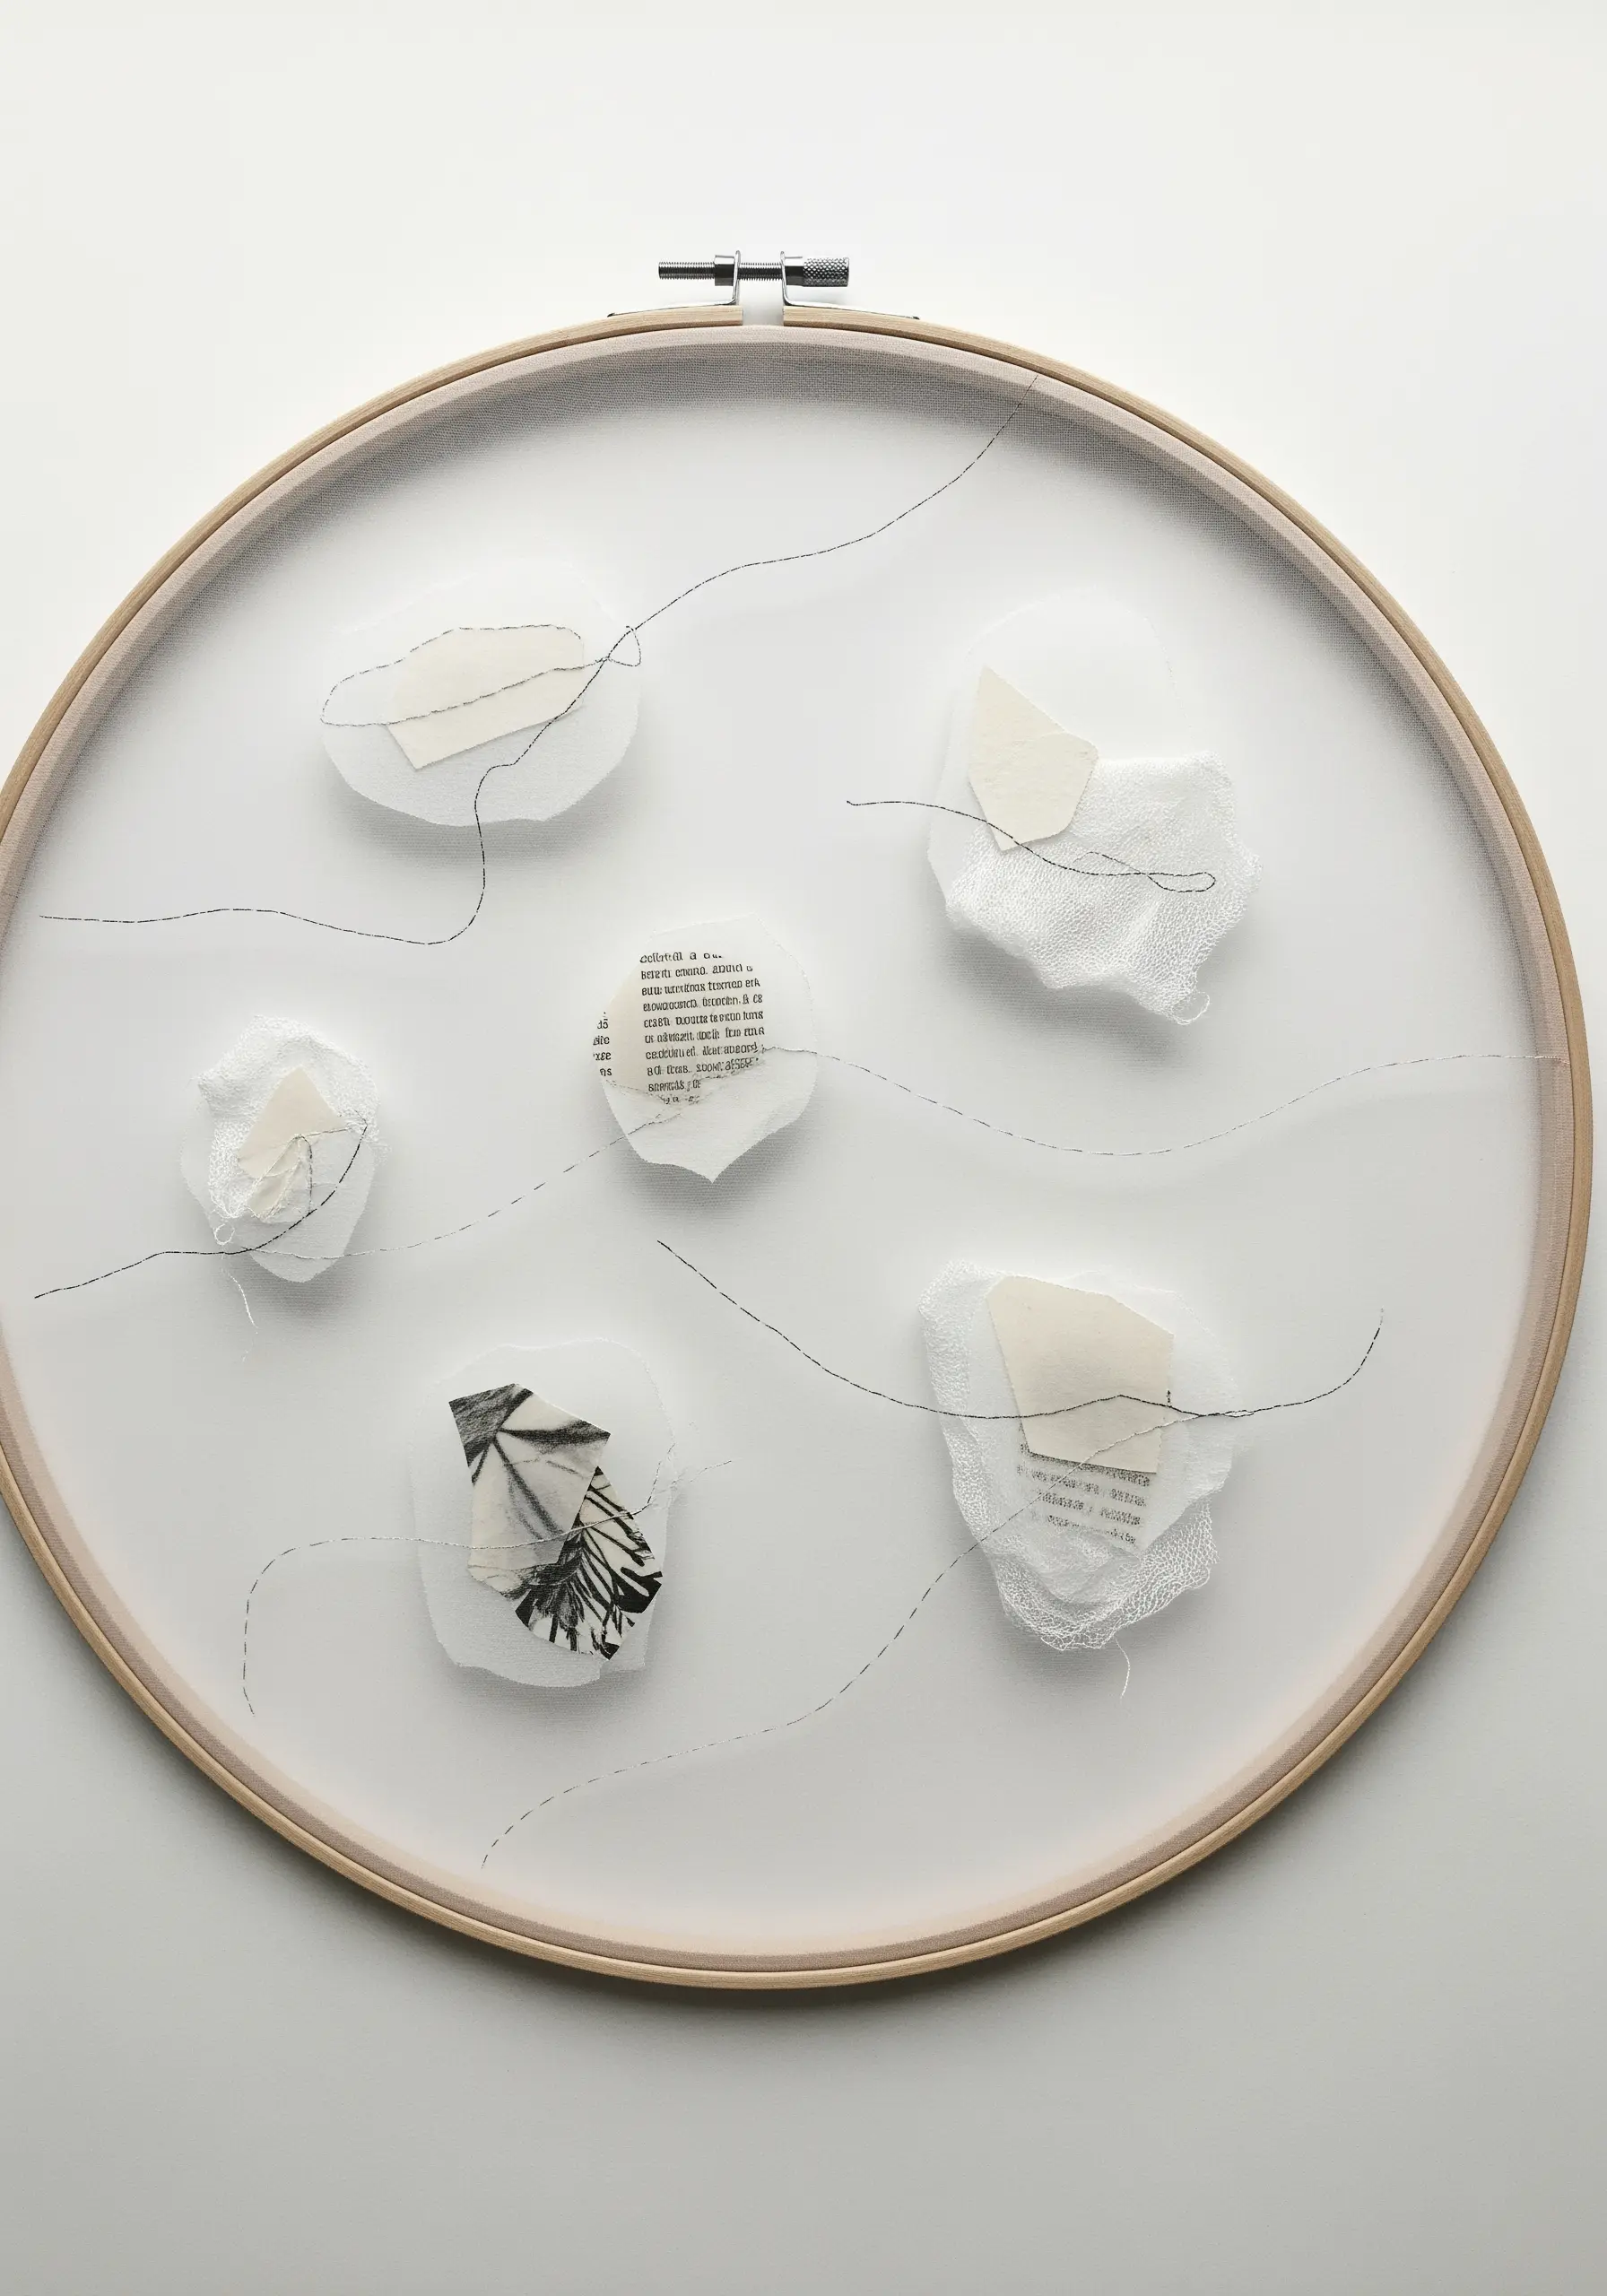
Create a delicate, ethereal composition by working on a taut layer of organza or voile.
Arrange small, abstract fragments of paper, gauze, and lightweight fabric onto the surface, allowing them to ‘float’ in the open space.
Secure each piece with a few tiny, nearly invisible stitches.
Finally, connect the floating islands with a fine, meandering line of backstitch, creating a sense of gentle movement and quiet connection. This is a beautiful way of combining paper layers with subtle embroidery.
16. Contrast Order and Chaos with Thread
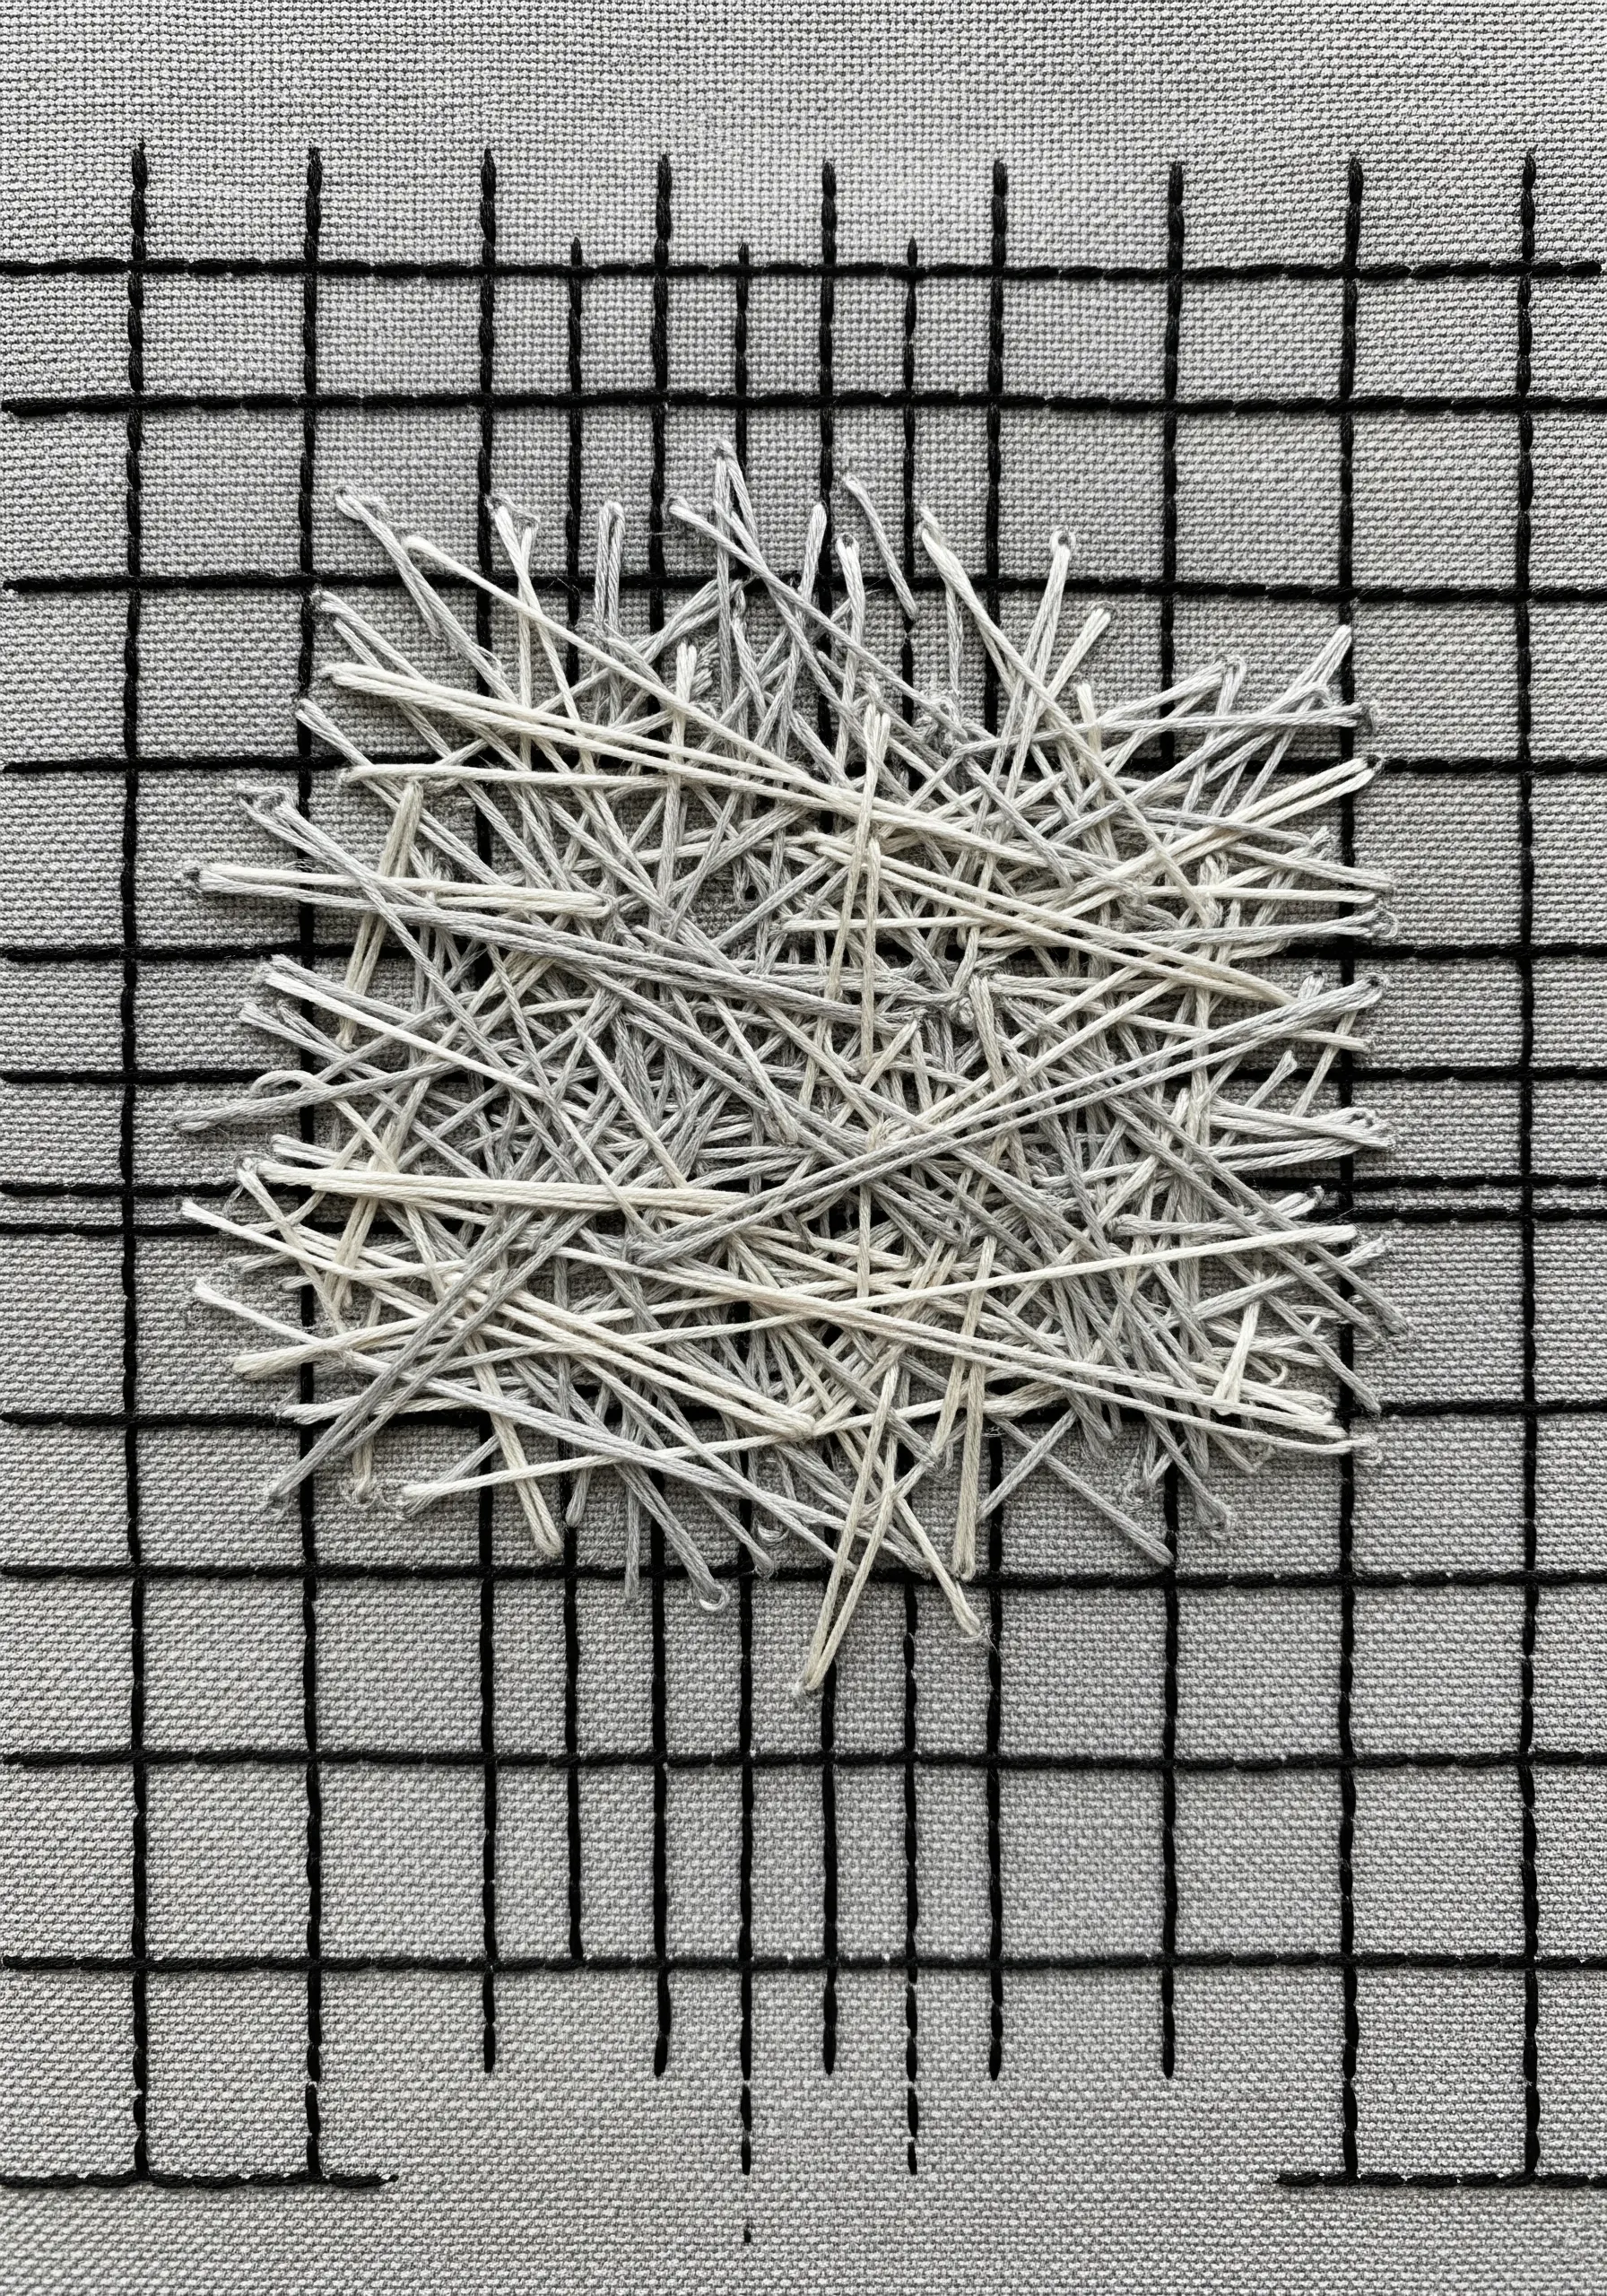
Explore the visual tension between structure and randomness in a single piece.
First, establish a rigid, architectural grid using a simple backstitch in a dark color.
Inside this orderly frame, create a chaotic tangle of short straight stitches using a lighter thread.
Layer the stitches in every direction without a clear pattern, allowing them to build up into a dense, almost solid mass. The stark contrast between the neat grid and the messy fill is visually striking and conceptually rich.
17. Blend Impasto Painting with Fiber Art
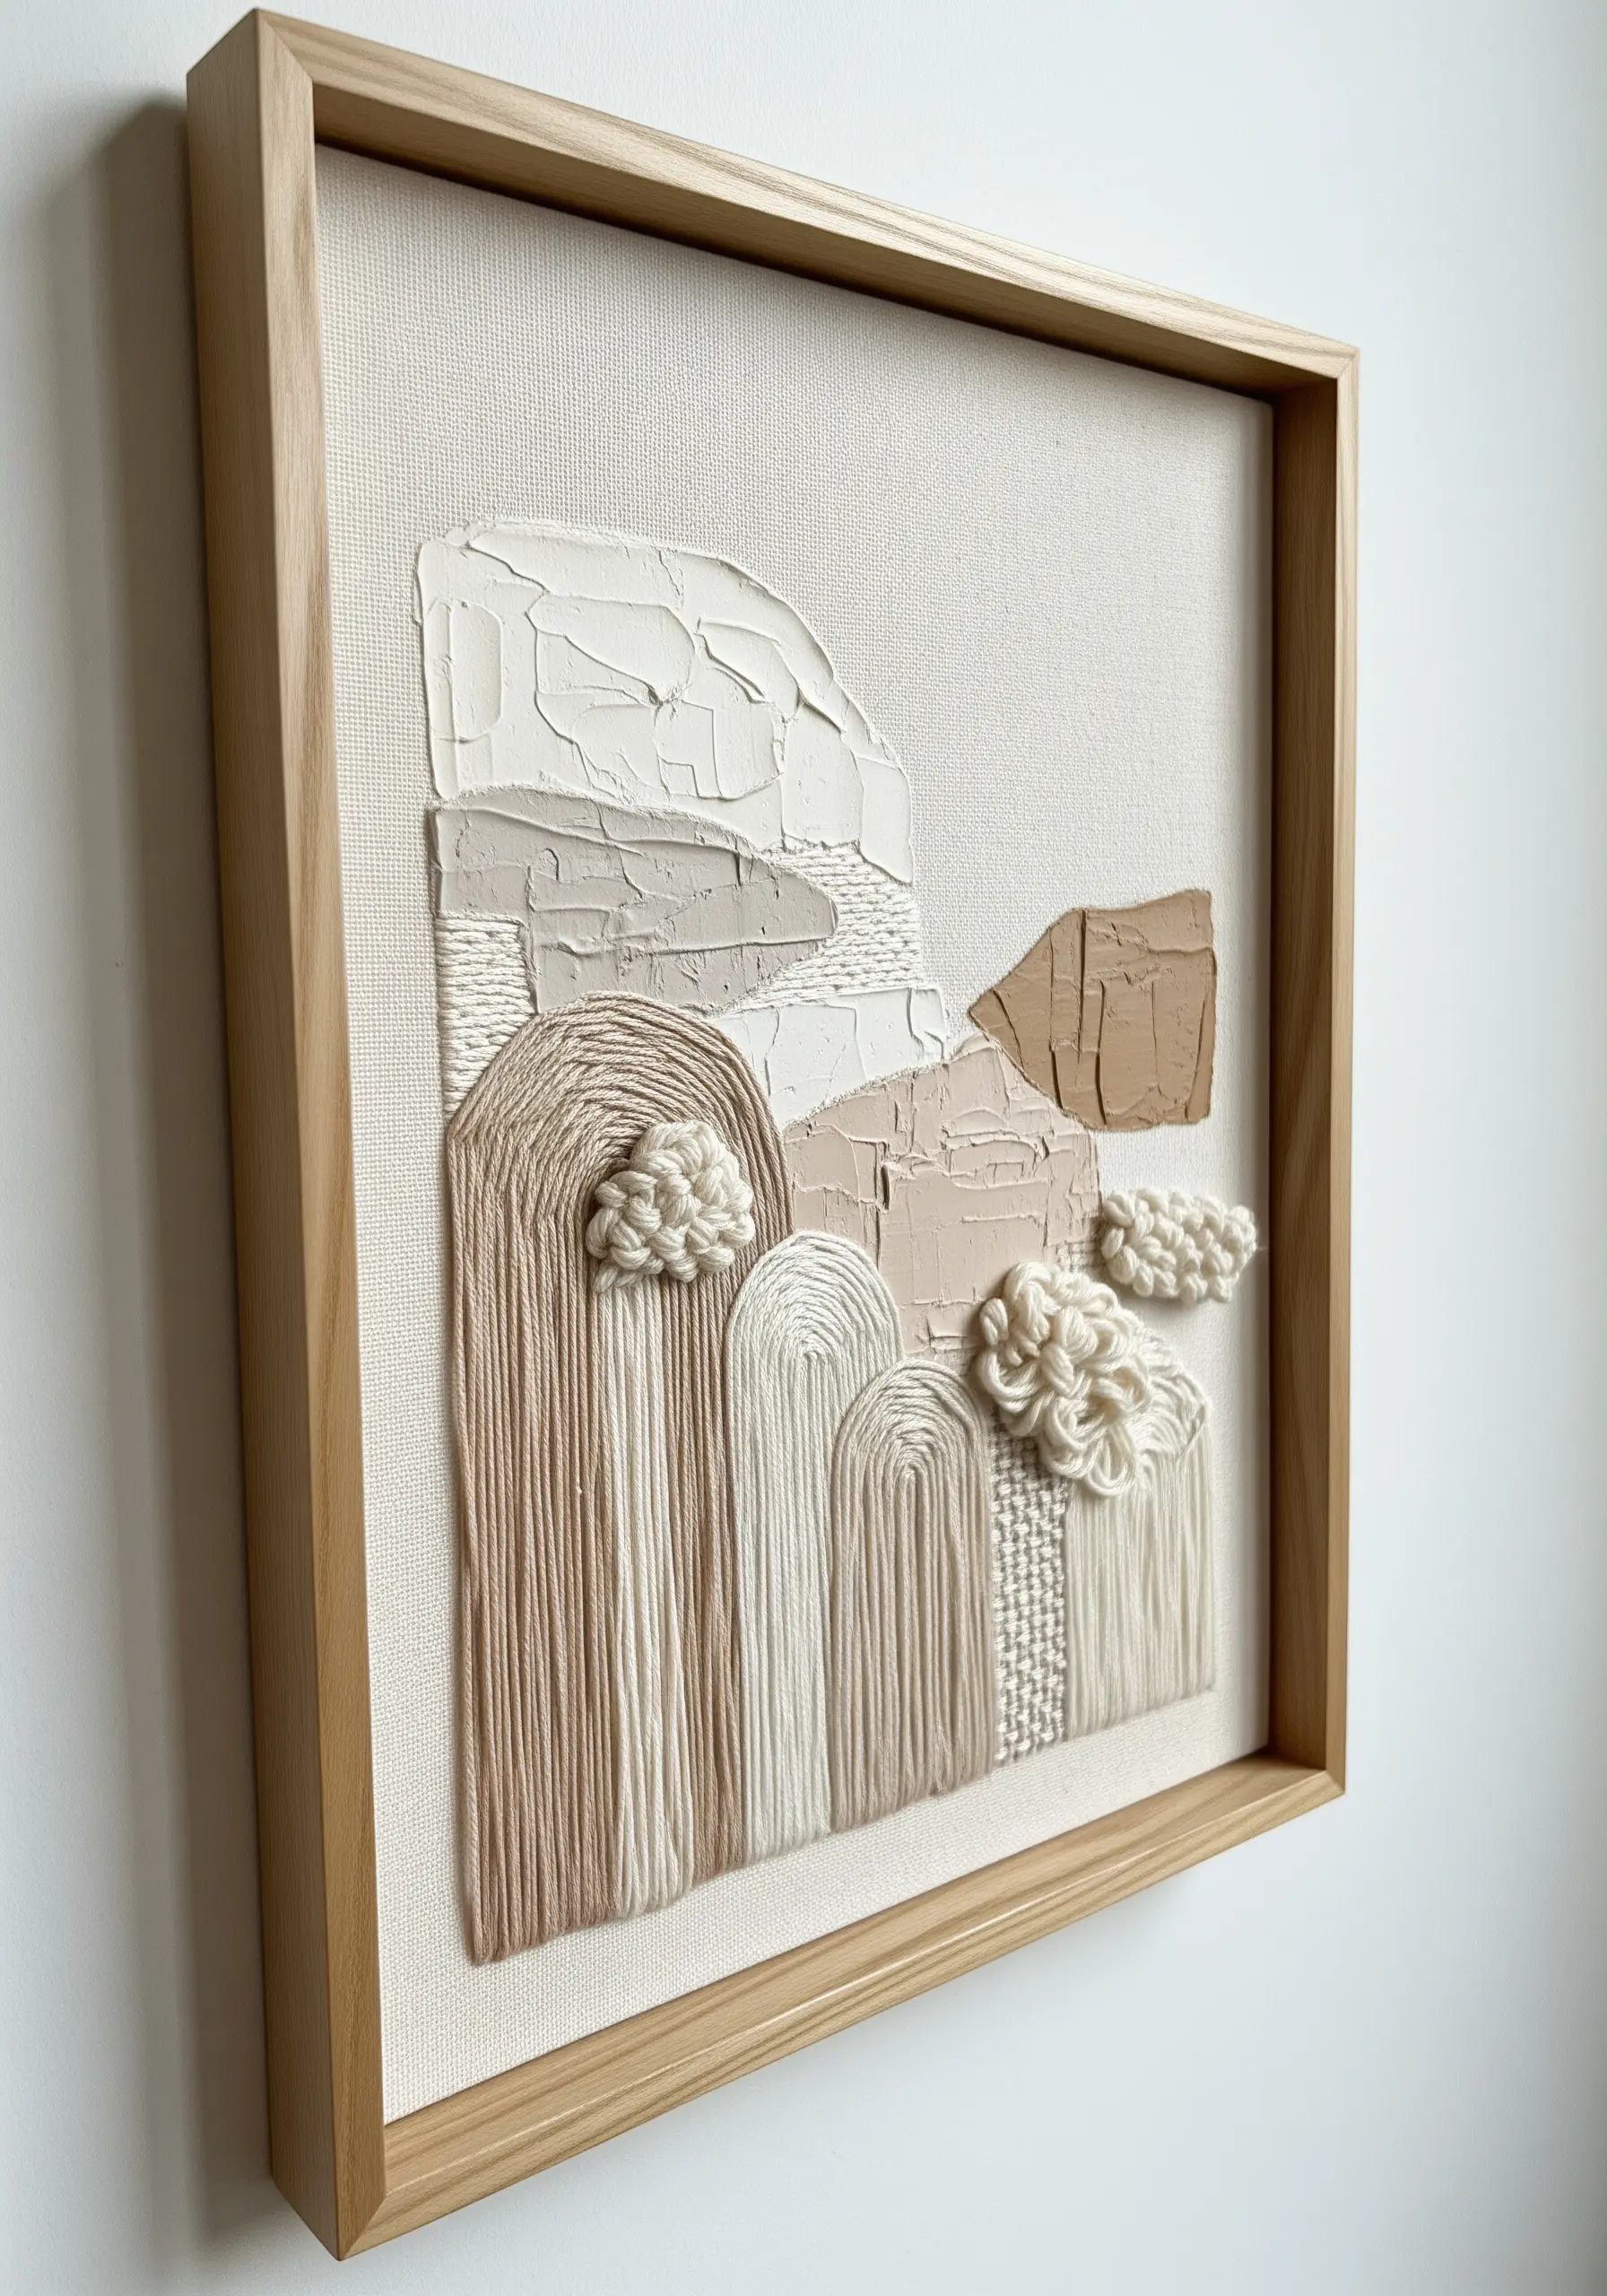
Combine the dimensionality of painting with the softness of thread for a truly unique mixed-media piece.
Use a palette knife to apply thick layers of modeling paste or acrylic gesso to your canvas, creating rough, sculptural shapes. Let it dry completely.
Then, add your embroidery, contrasting the hard, painted texture with soft elements like couched yarn arcs and fluffy woven knots.
This technique turns your canvas into a landscape of varied tactile sensations, making for incredible abstract mixed media embroidery ideas.
18. Embroider Directly onto Textured Paper
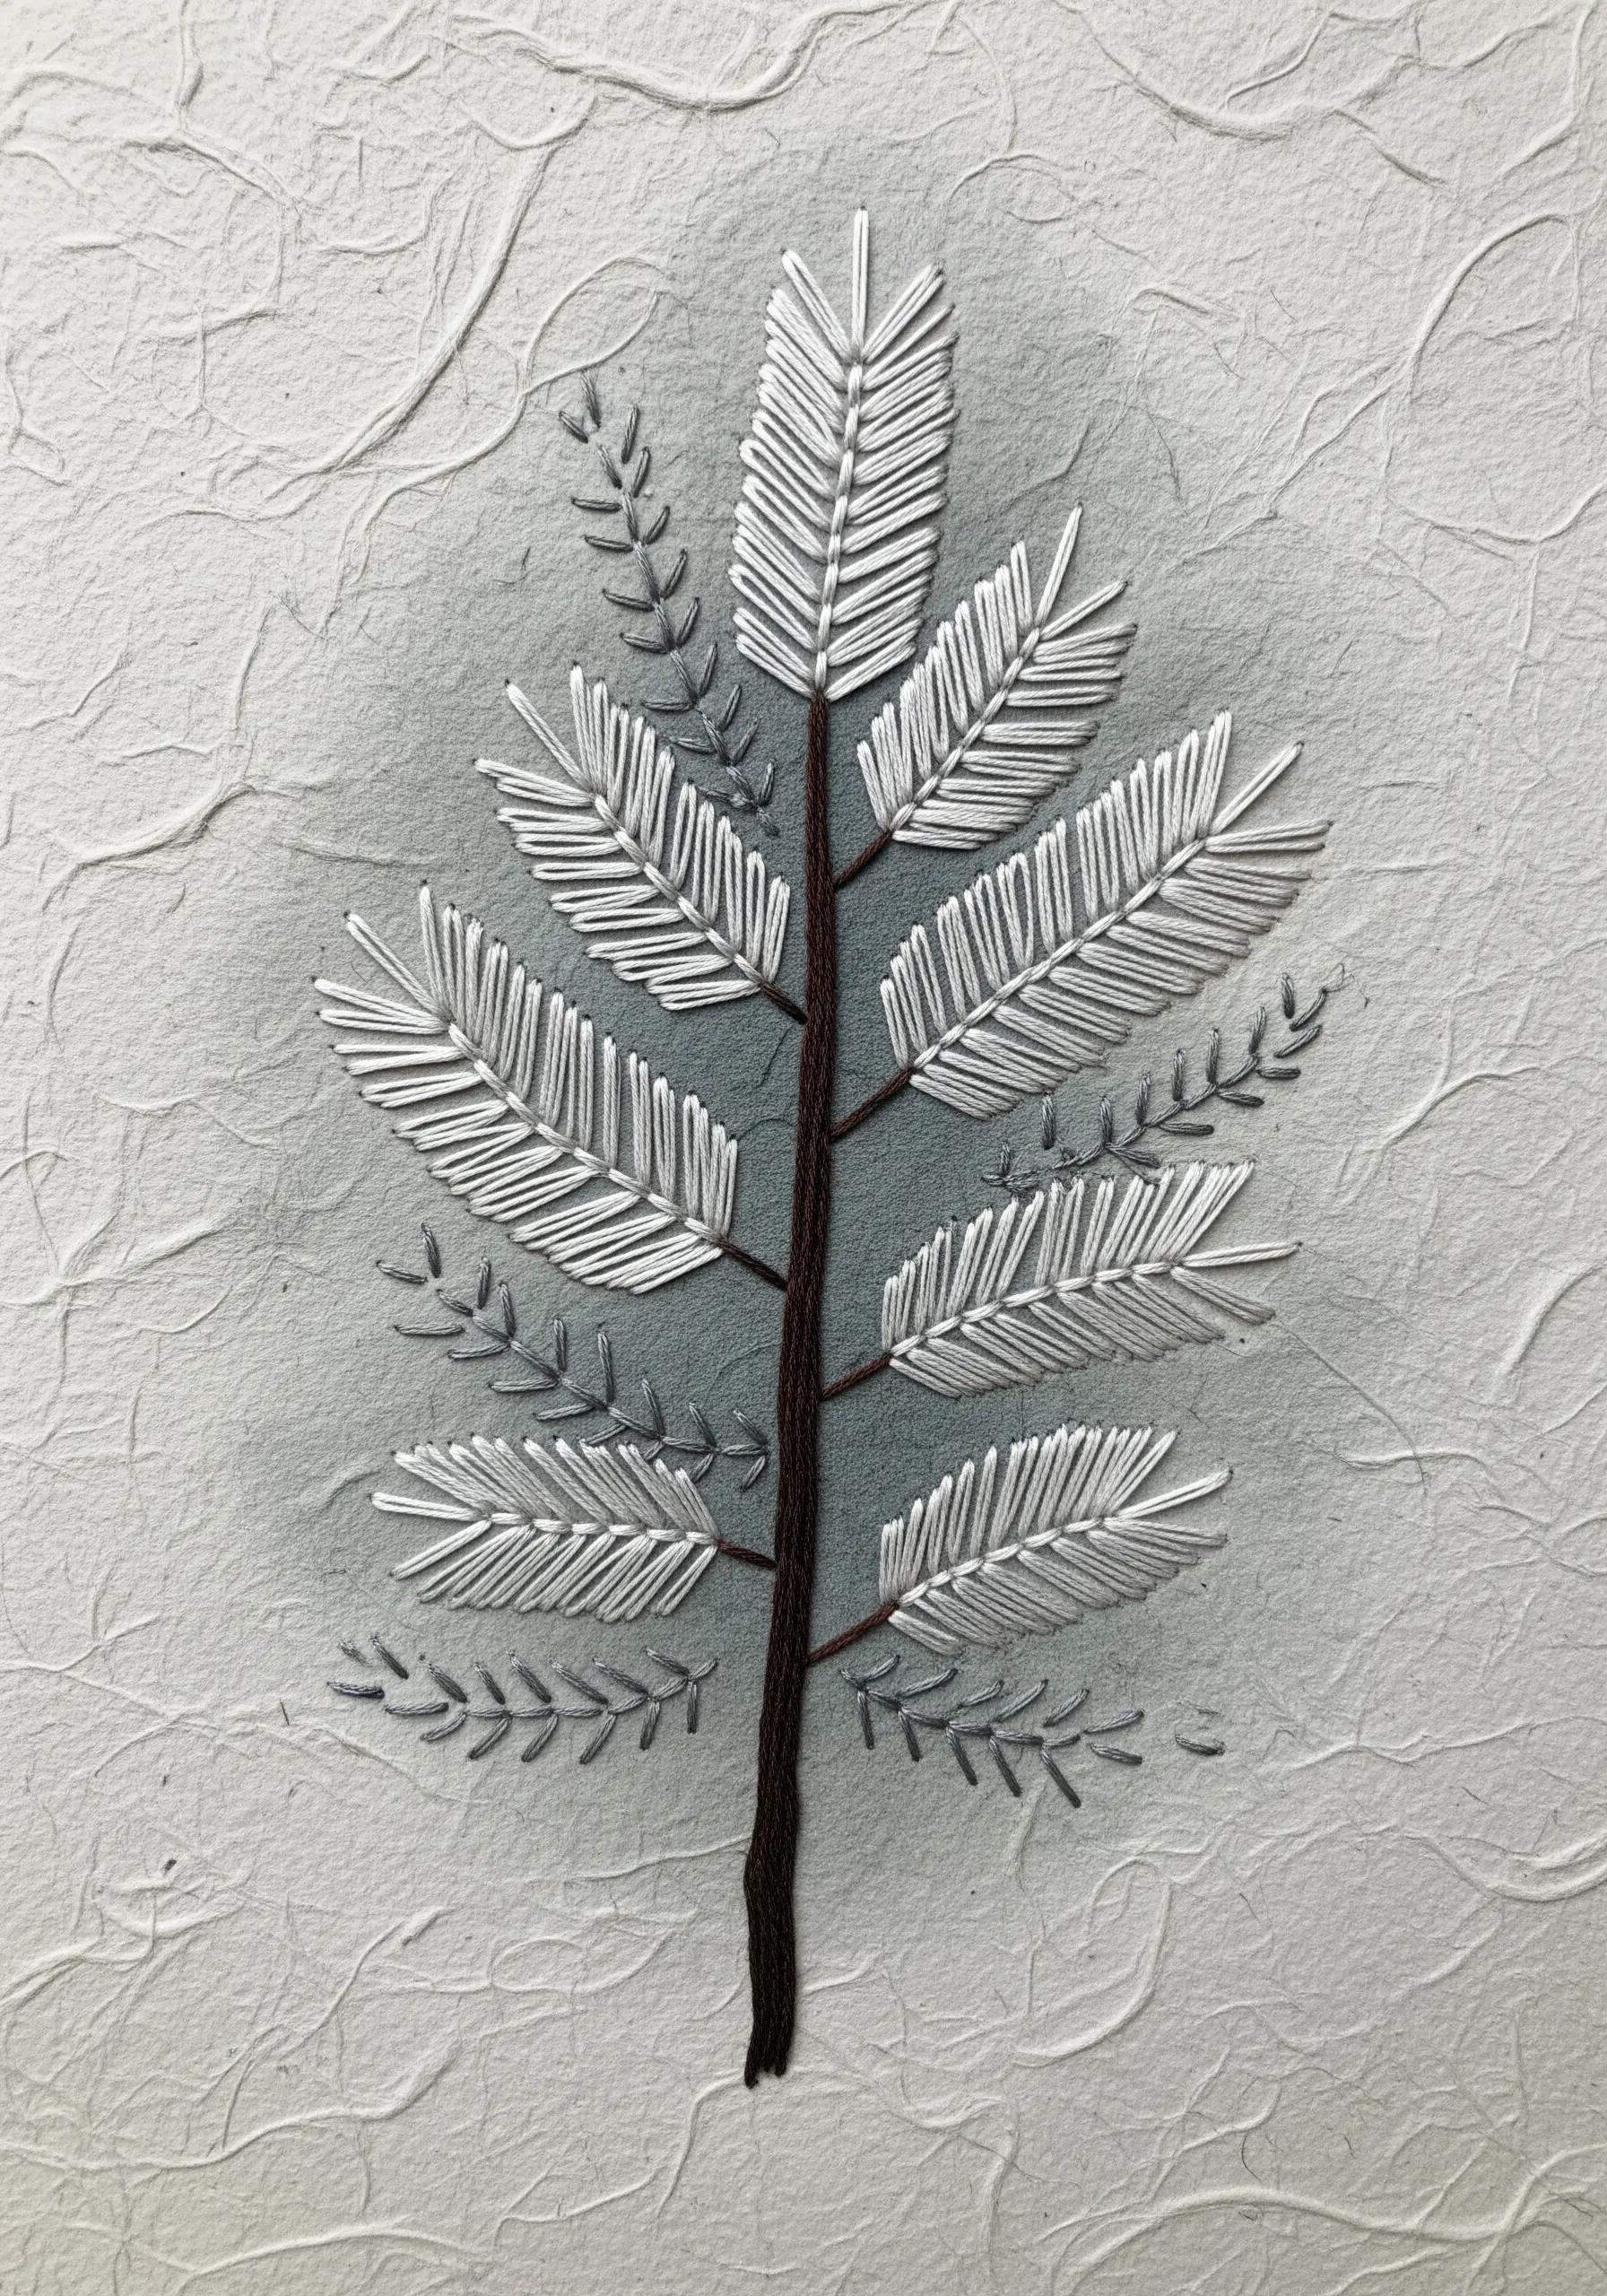
Take your stitching off the fabric and onto a new surface like handmade or watercolor paper.
Choose a paper with some visible fiber or texture, which adds its own character to the piece.
Use a sharp, fine needle to gently pre-pierce your stitching holes to prevent tearing.
A simple fishbone stitch for the leaves and a wrapped backstitch for the stem are perfect for creating clean, graphic botanical designs that allow the paper’s texture to shine through.
19. Cluster Woven Knots for High-Relief Texture
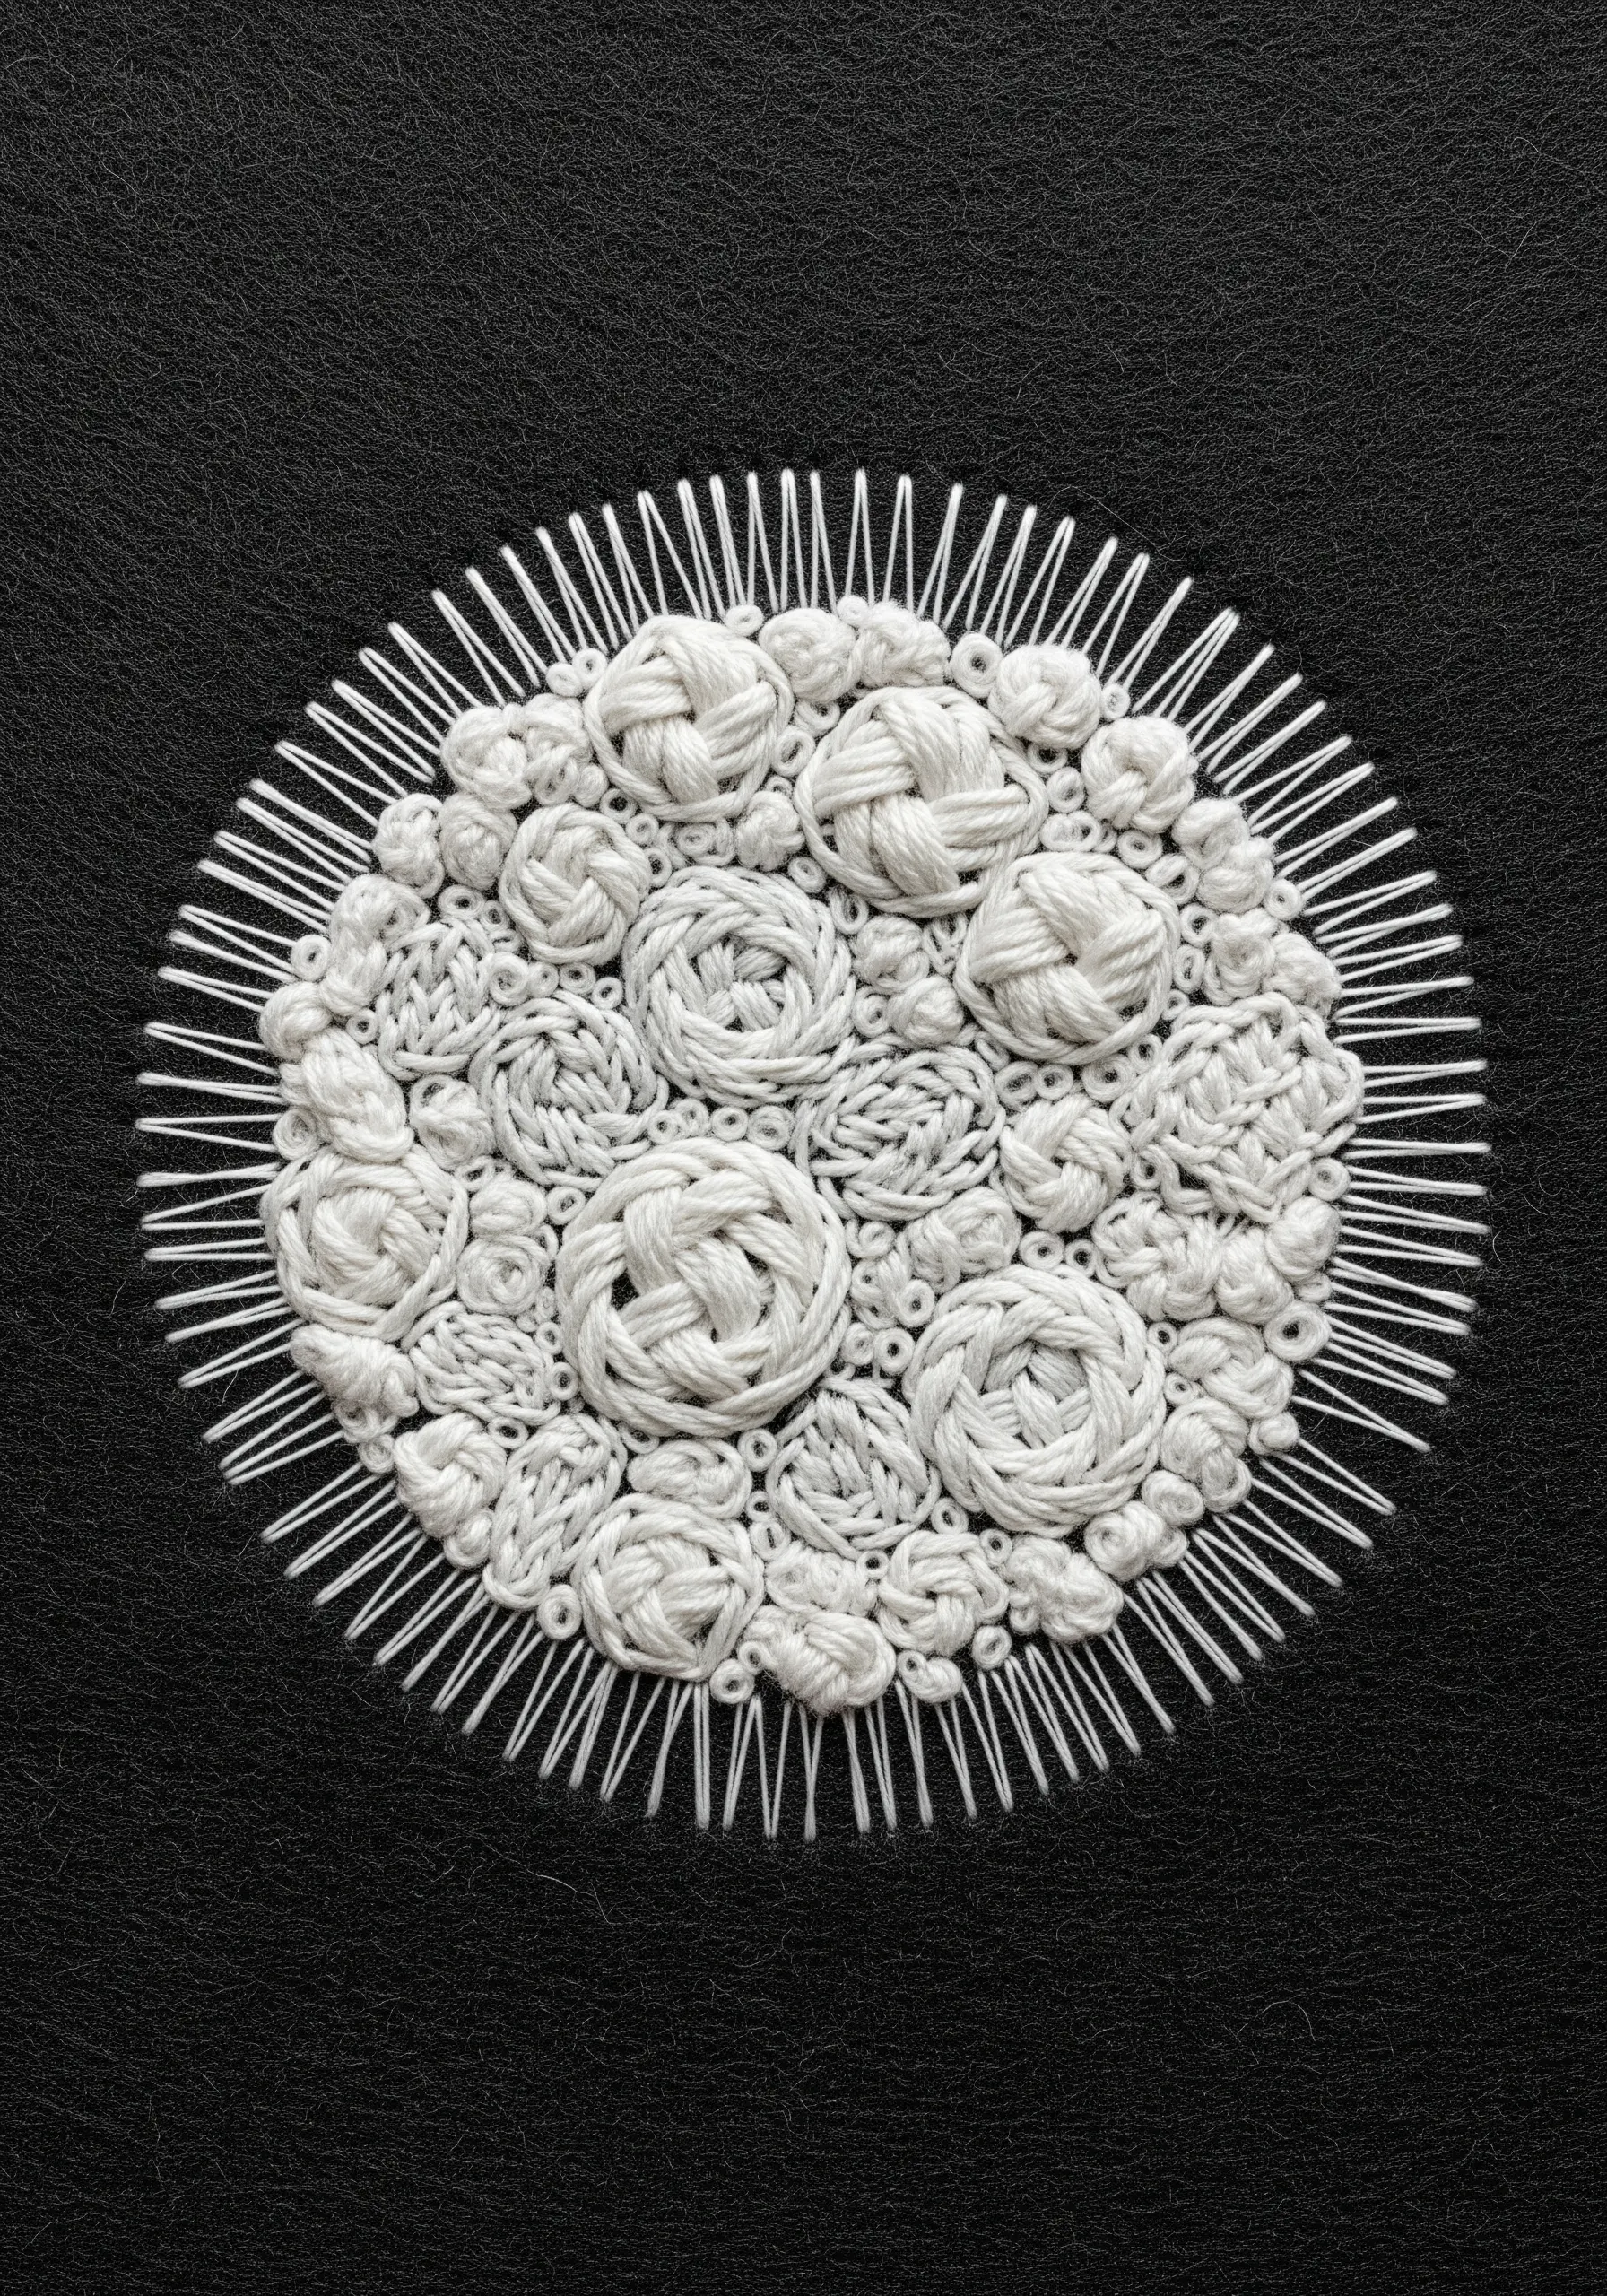
Create an incredibly dense and tactile surface by packing together various knotted and woven stitches.
Master a few key stitches: the woven wheel (or spider wheel), the colonial knot, and variations of the turkey stitch.
Work them in different sizes and cluster them tightly on a dark, contrasting fabric like black felt or linen.
Frame this dense core with a ‘halo’ of sharp, radiating straight stitches to create a dramatic contrast between the intricate center and the clean, open space around it.
20. Design a Flowing Triptych with Ribbon
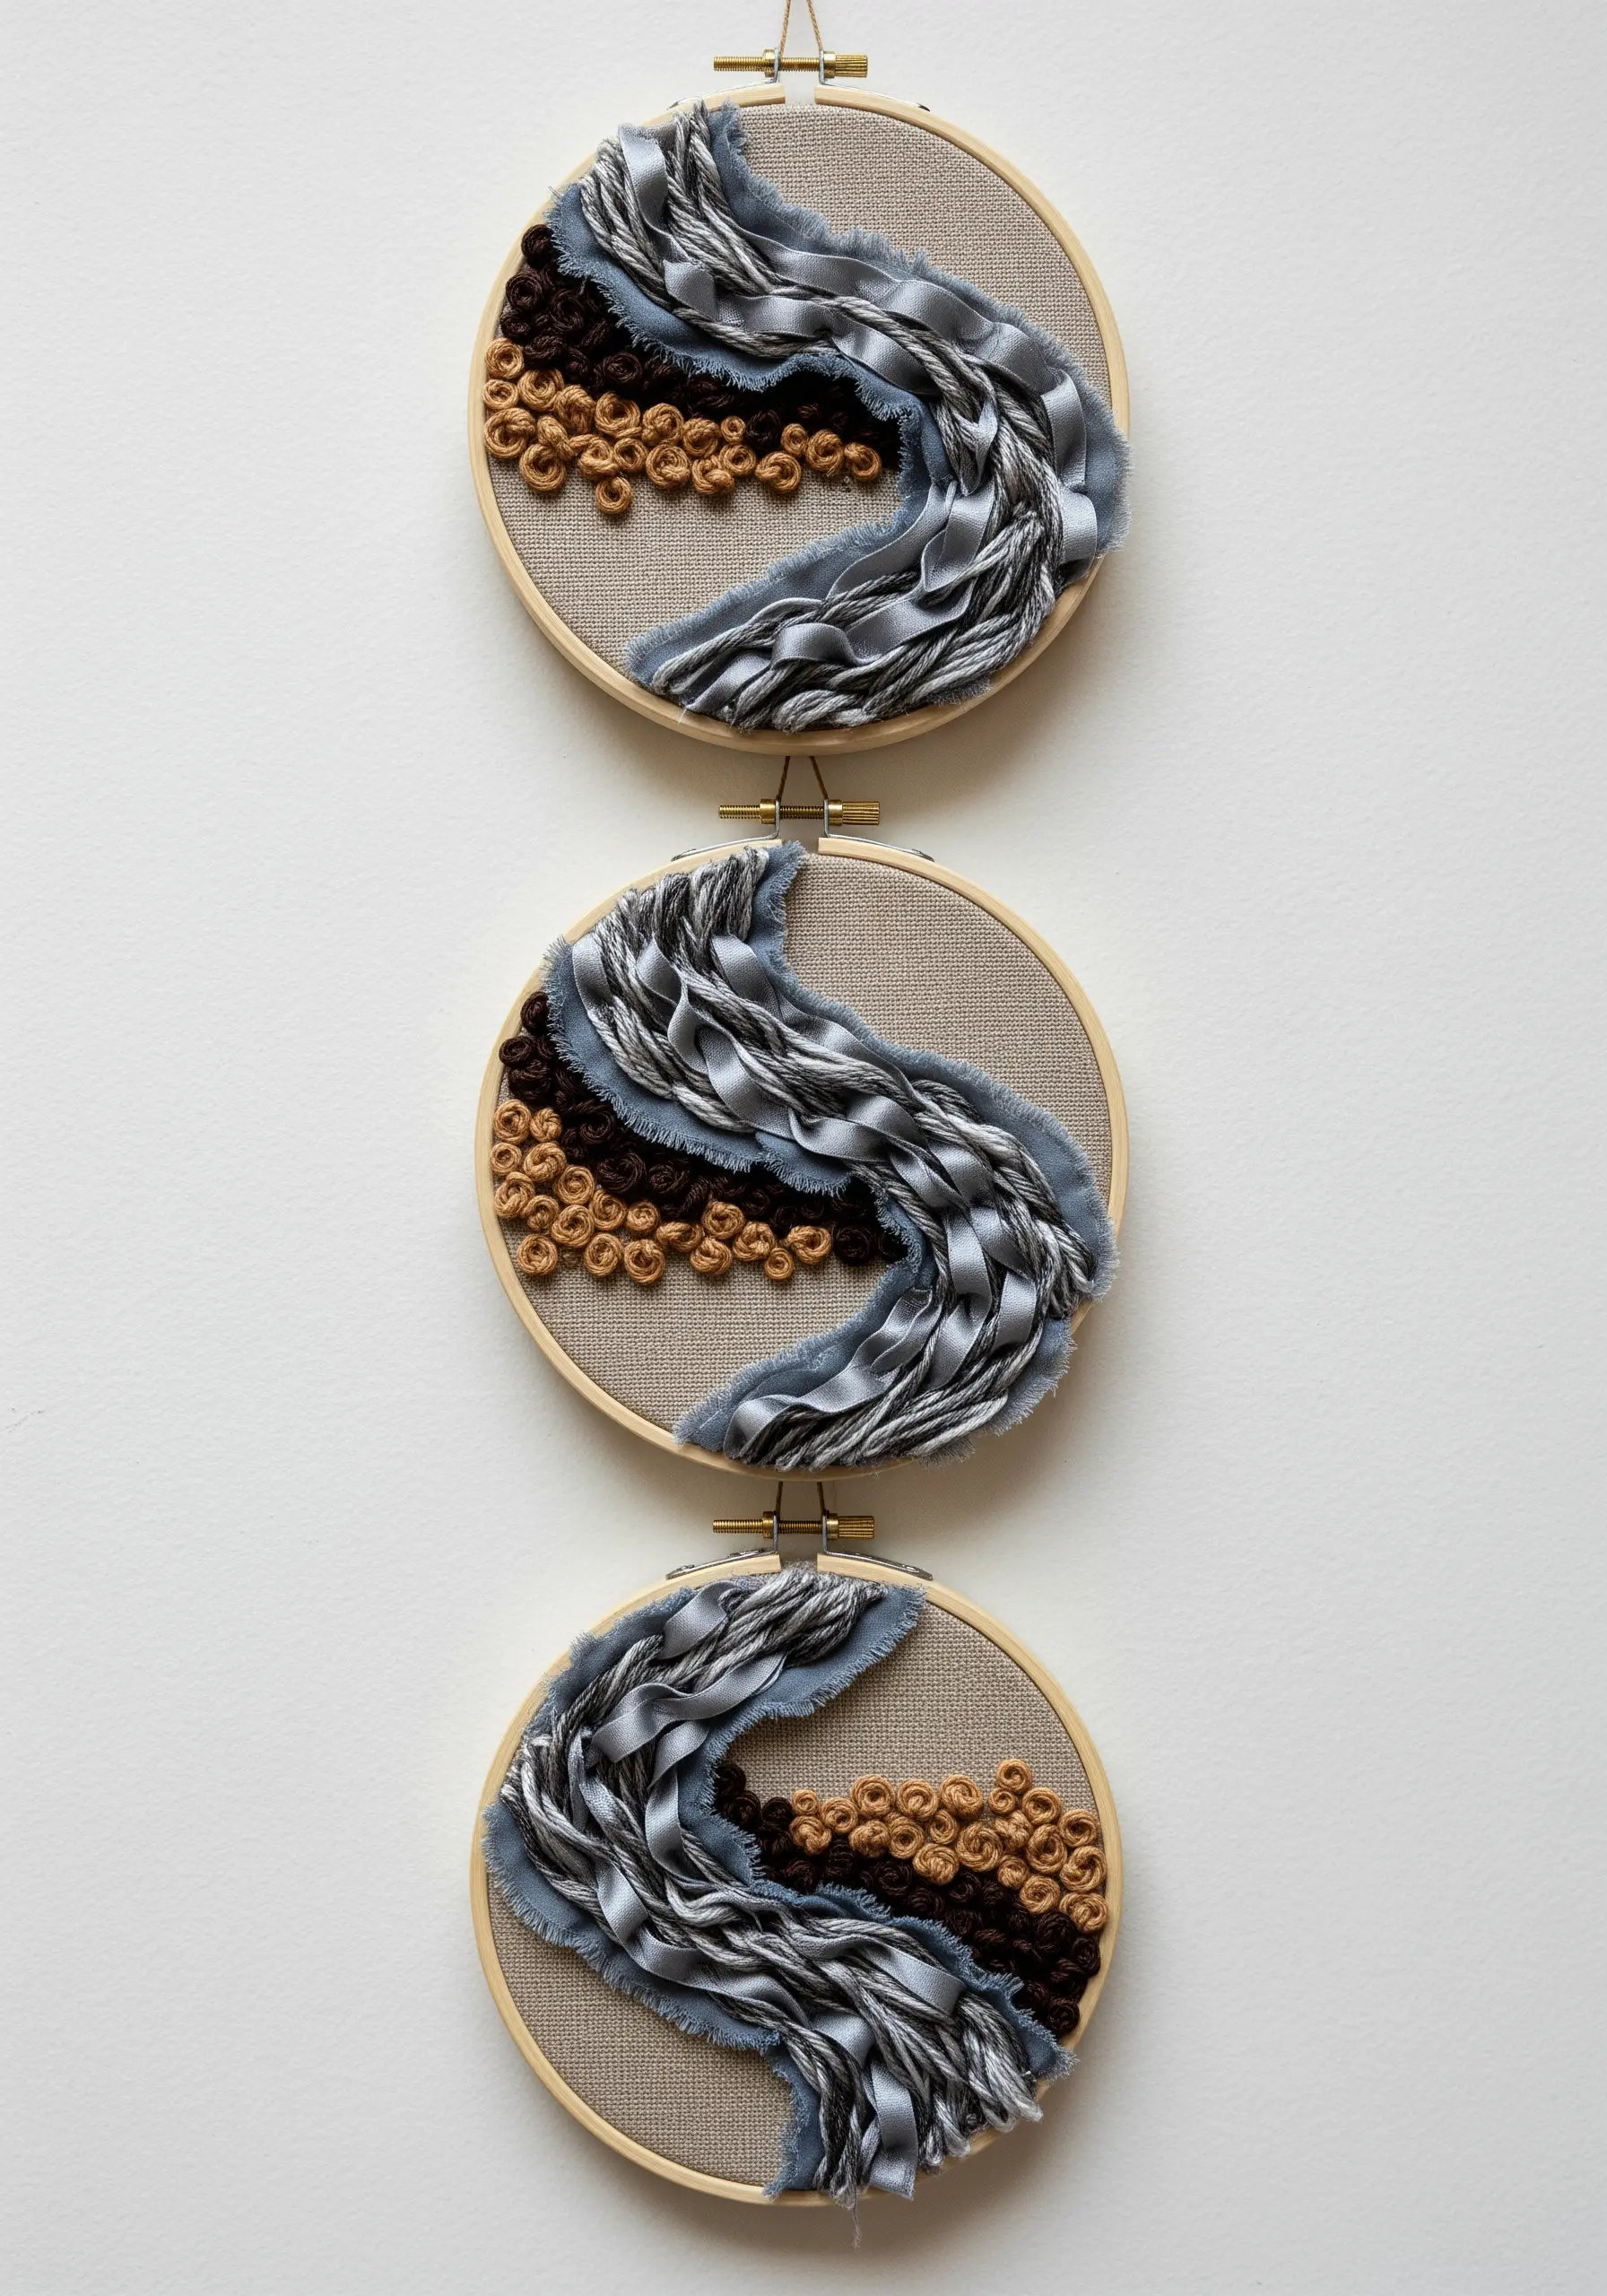
Create a large, cohesive statement piece by spreading a single design across three separate hoops.
Sketch a continuous, flowing line that moves from one hoop to the next to unify the composition.
Instead of thread, couch a wide, textural material like silk ribbon or frayed fabric strips along your sketched line.
Fill in the remaining areas with complementary textures, like fields of French knots, to balance the bold movement of the ribbon and complete the triptych.
21. Achieve a Bold, Woven Block Effect
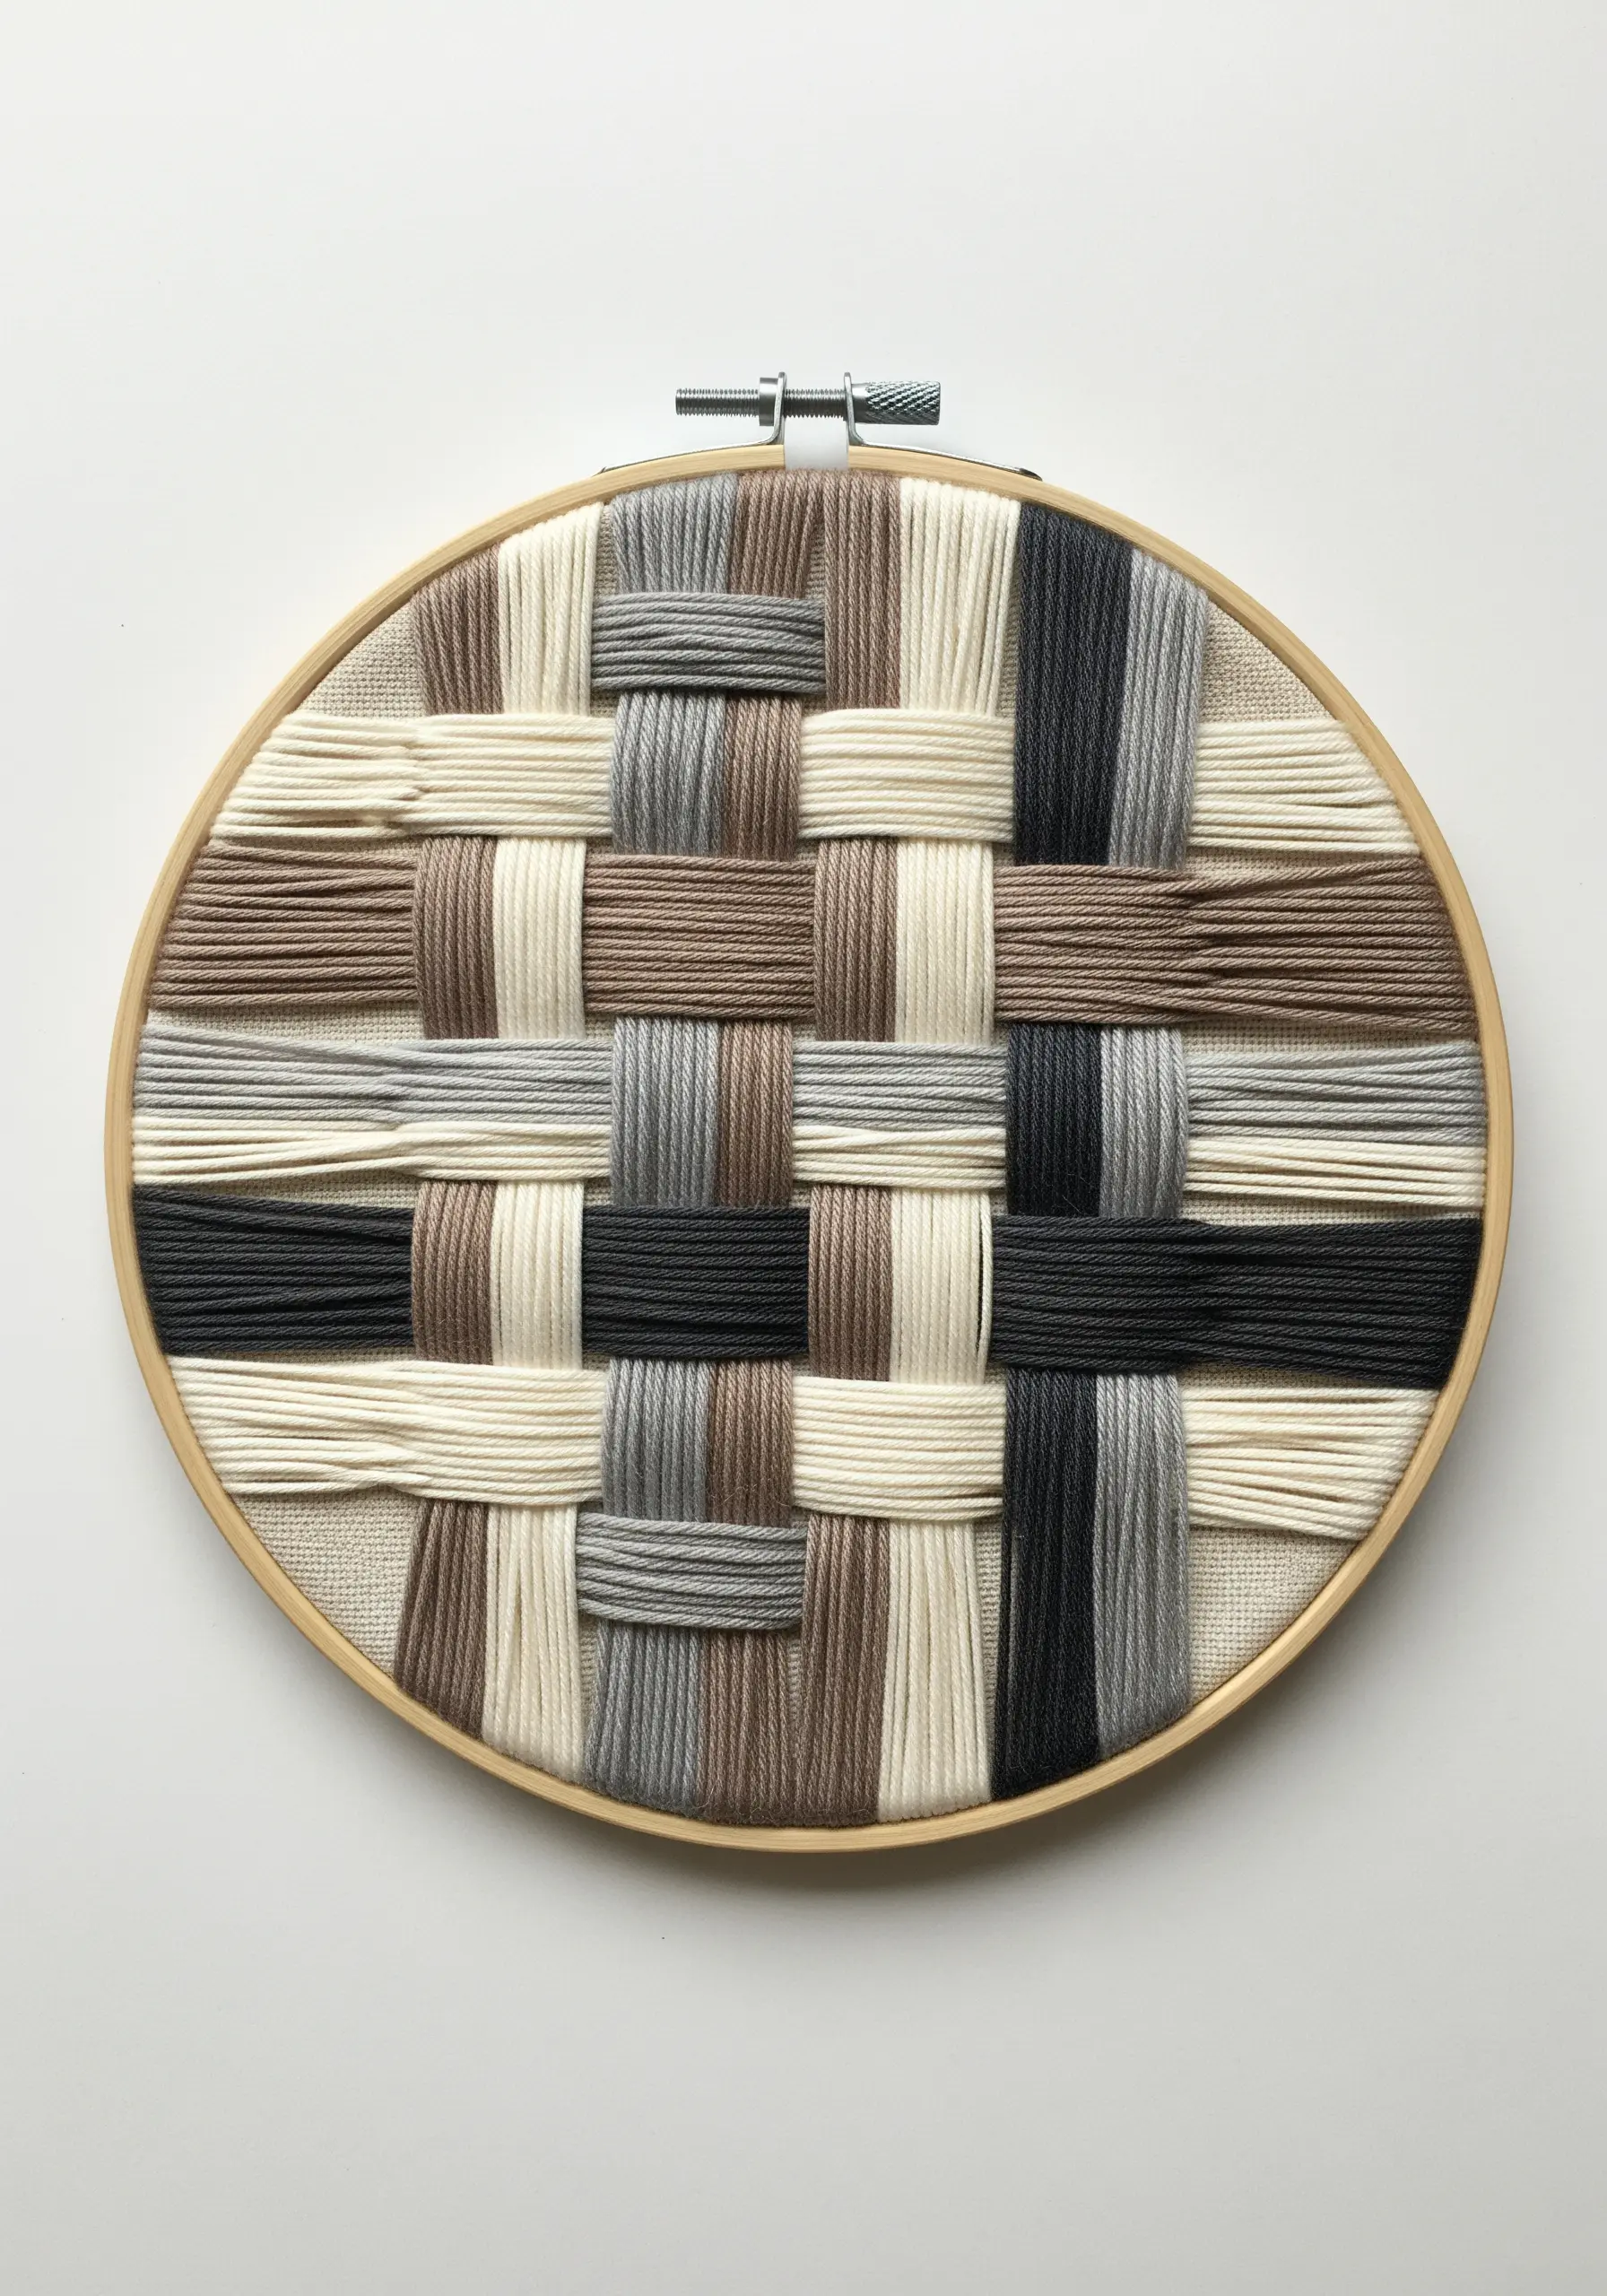
Create the look of a chunky woven textile using only yarn and an embroidery hoop.
First, create your warp by stretching parallel strands of yarn vertically across the hoop. You can stitch them into the fabric at the top and bottom or wrap them around the hoop itself.
Next, use a tapestry needle to weave bundles of yarn horizontally through the warp strands.
By using multiple strands of yarn at once and alternating colors, you can achieve a bold, graphic, and highly textured result with minimal effort.
22. Construct an Architectural Satin Stitch Skyline
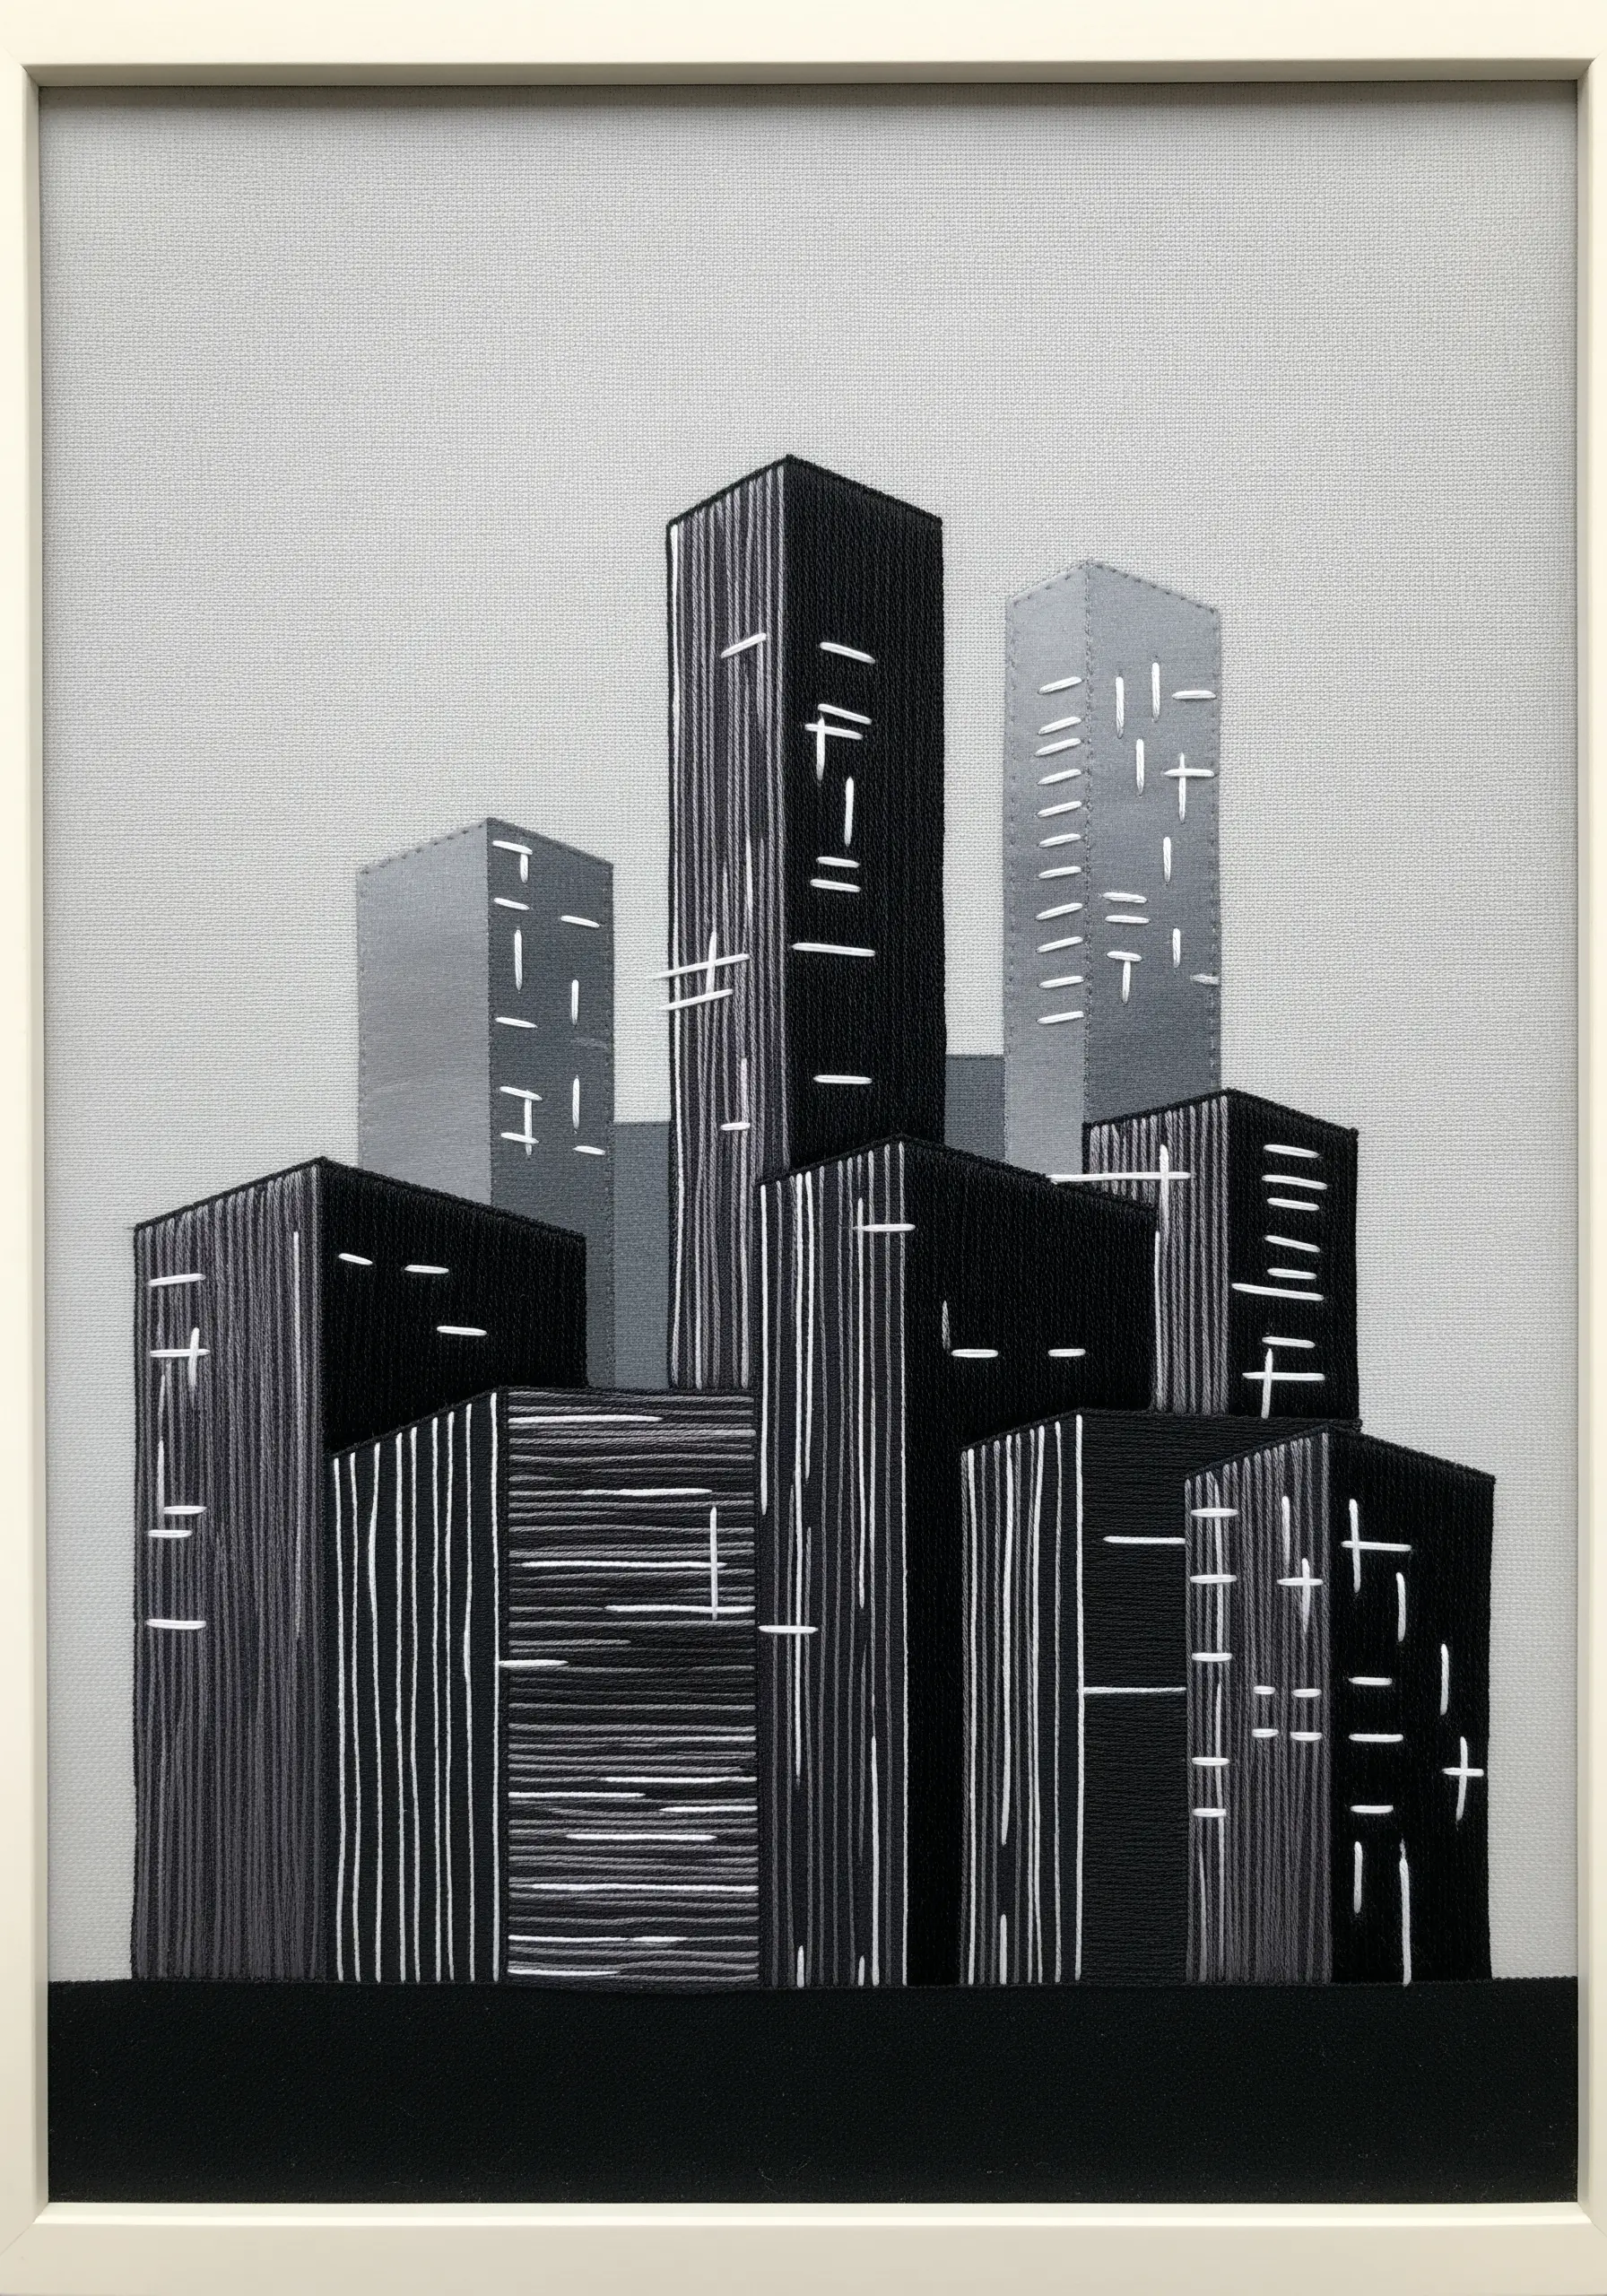
Use the direction of your stitches to create dimension and perspective in an architectural piece.
Block out simple skyscraper shapes and fill them with dense vertical satin stitches, varying the shades of grey and black to suggest depth and shadow.
The key to realism is keeping your stitches perfectly parallel and tight.
Add tiny, horizontal straight stitches in a contrasting white to represent windows, instantly transforming the abstract blocks into a recognizable and dynamic embroidered city skyline wall decor.
23. Compose an Asymmetrical Botanical Corner
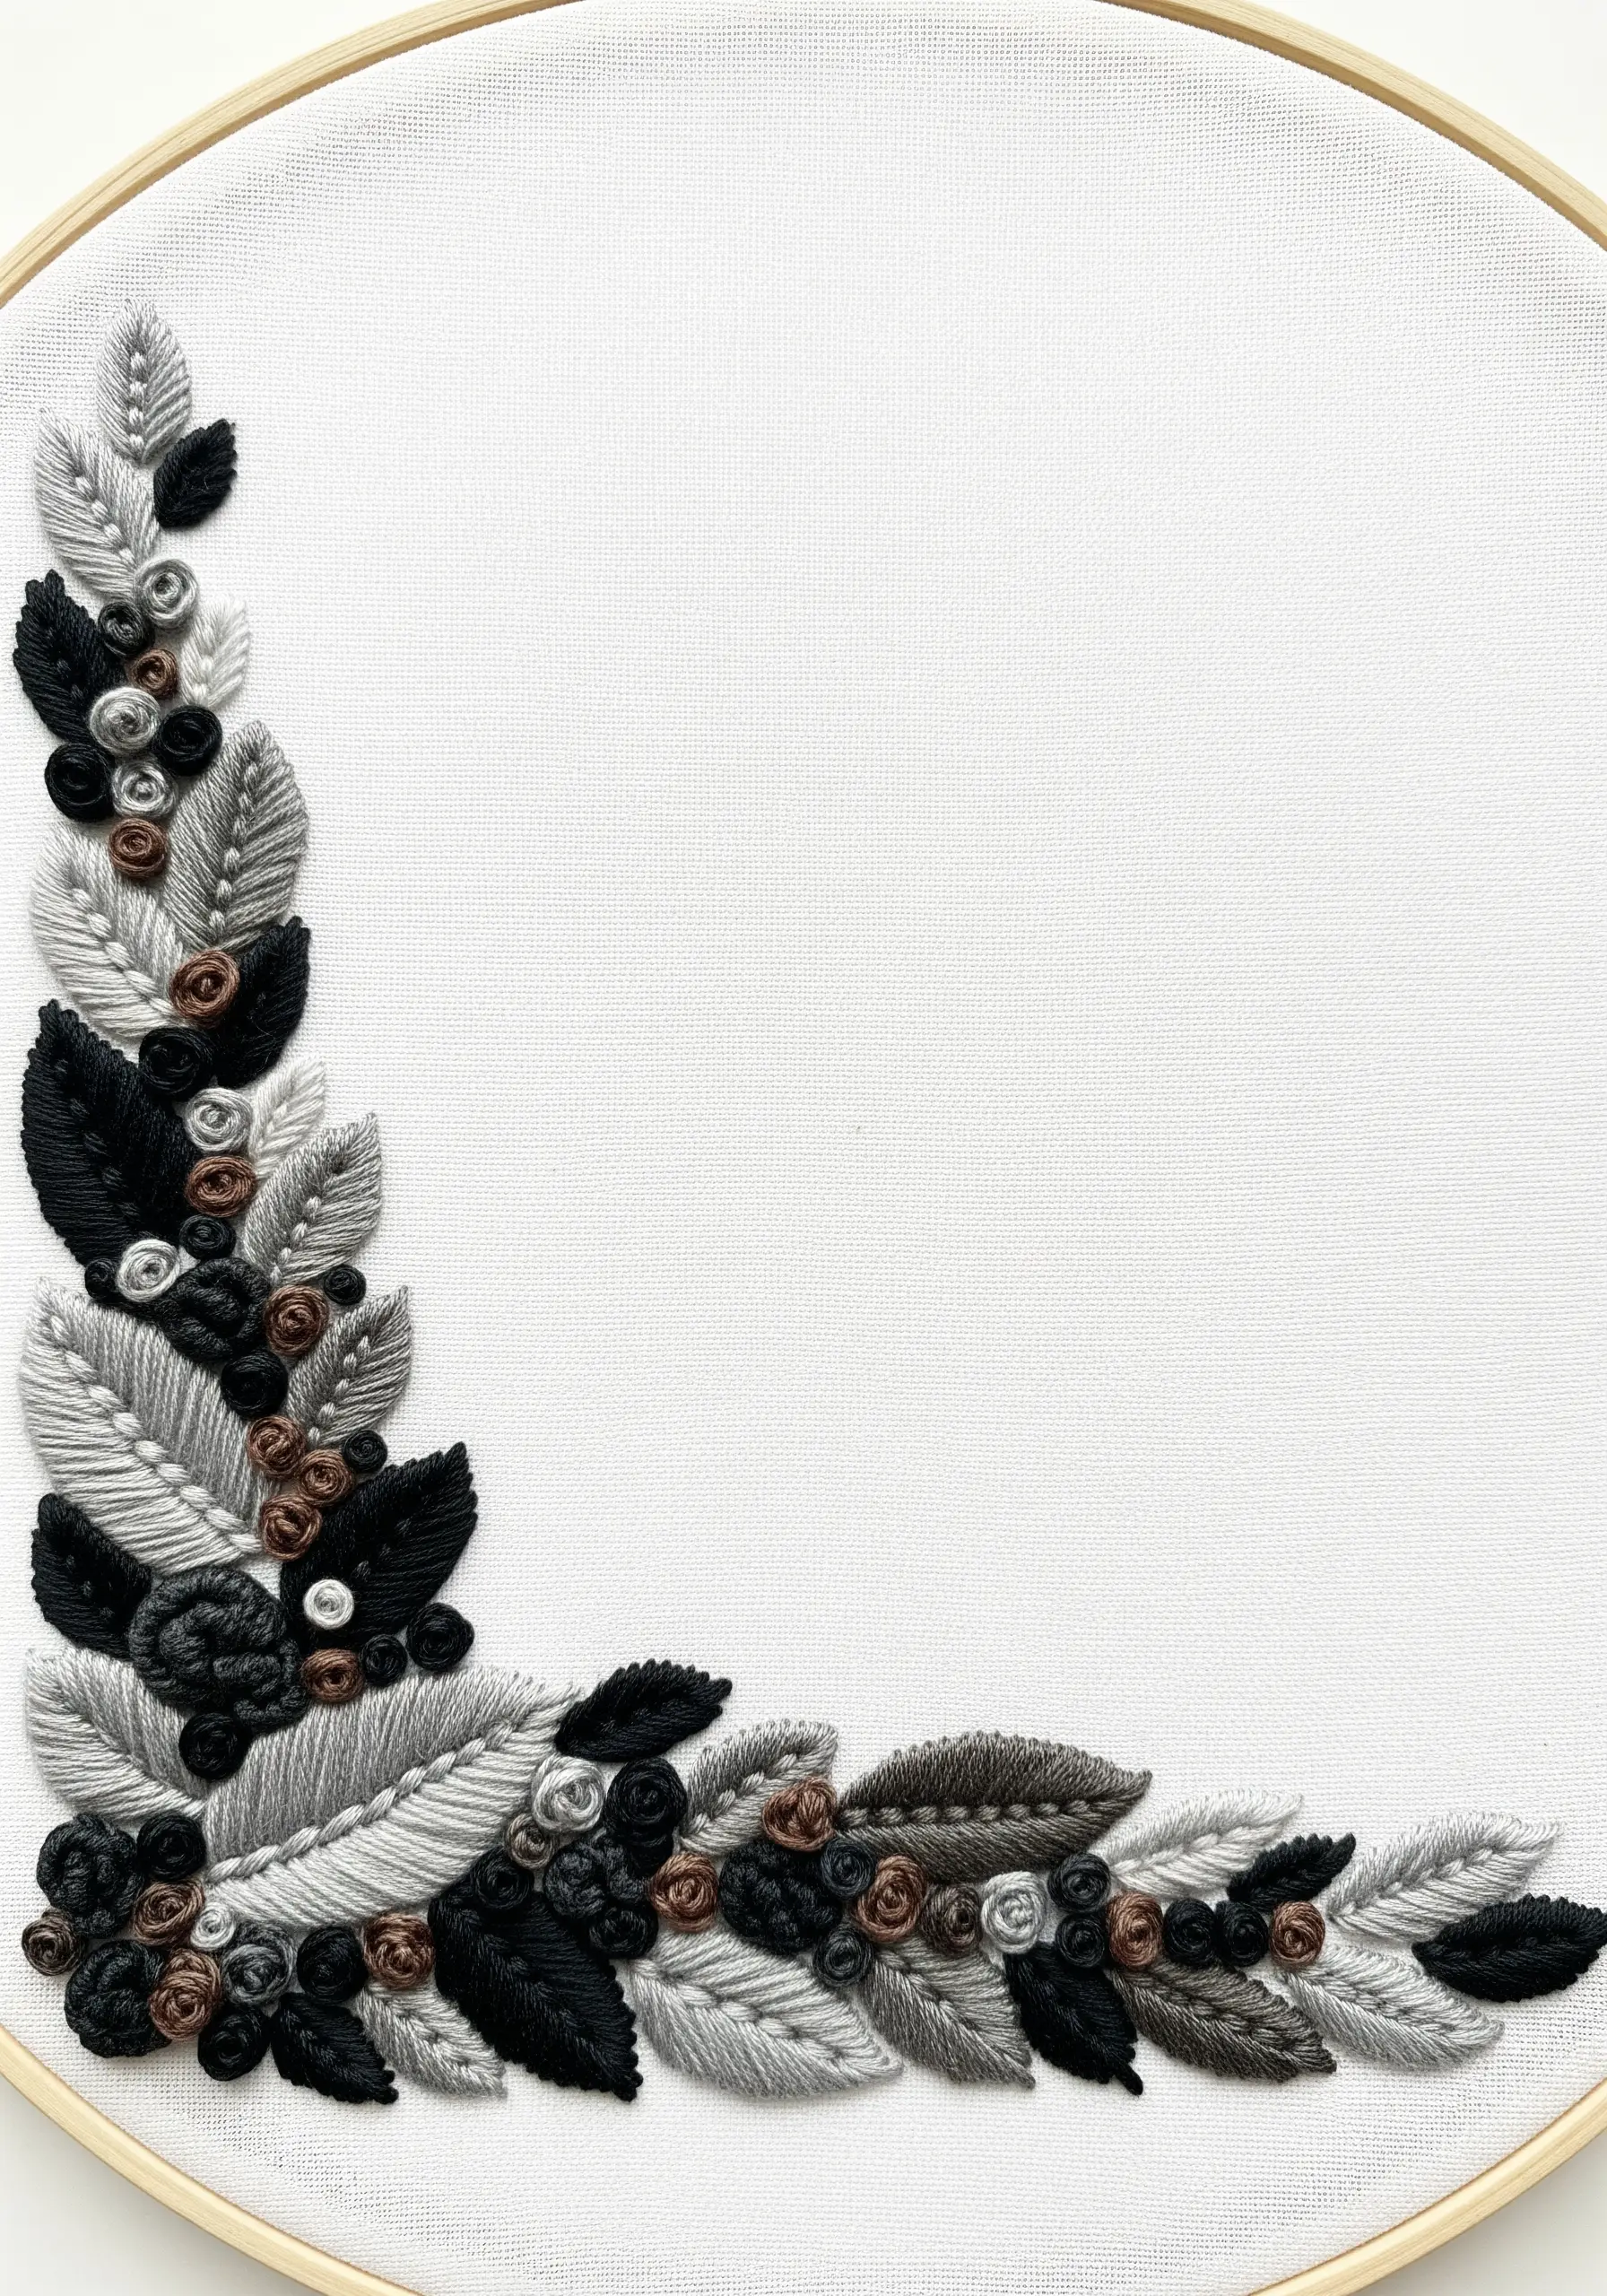
Guide the viewer’s eye by concentrating your stitching in one corner of the hoop, leaving the rest of the fabric open.
Create a lush arrangement using a limited neutral palette of black, charcoal, grey, and brown.
Use satin stitch and fishbone stitch for smooth, elegant leaves, and add textural contrast with bullion knots and woven wheel ‘roses’.
Overlapping the elements and varying their scale creates a sense of depth and abundance, making these monochrome floral embroidery ideas feel rich and dynamic.
24. Visualize Sound and Motion with Thread
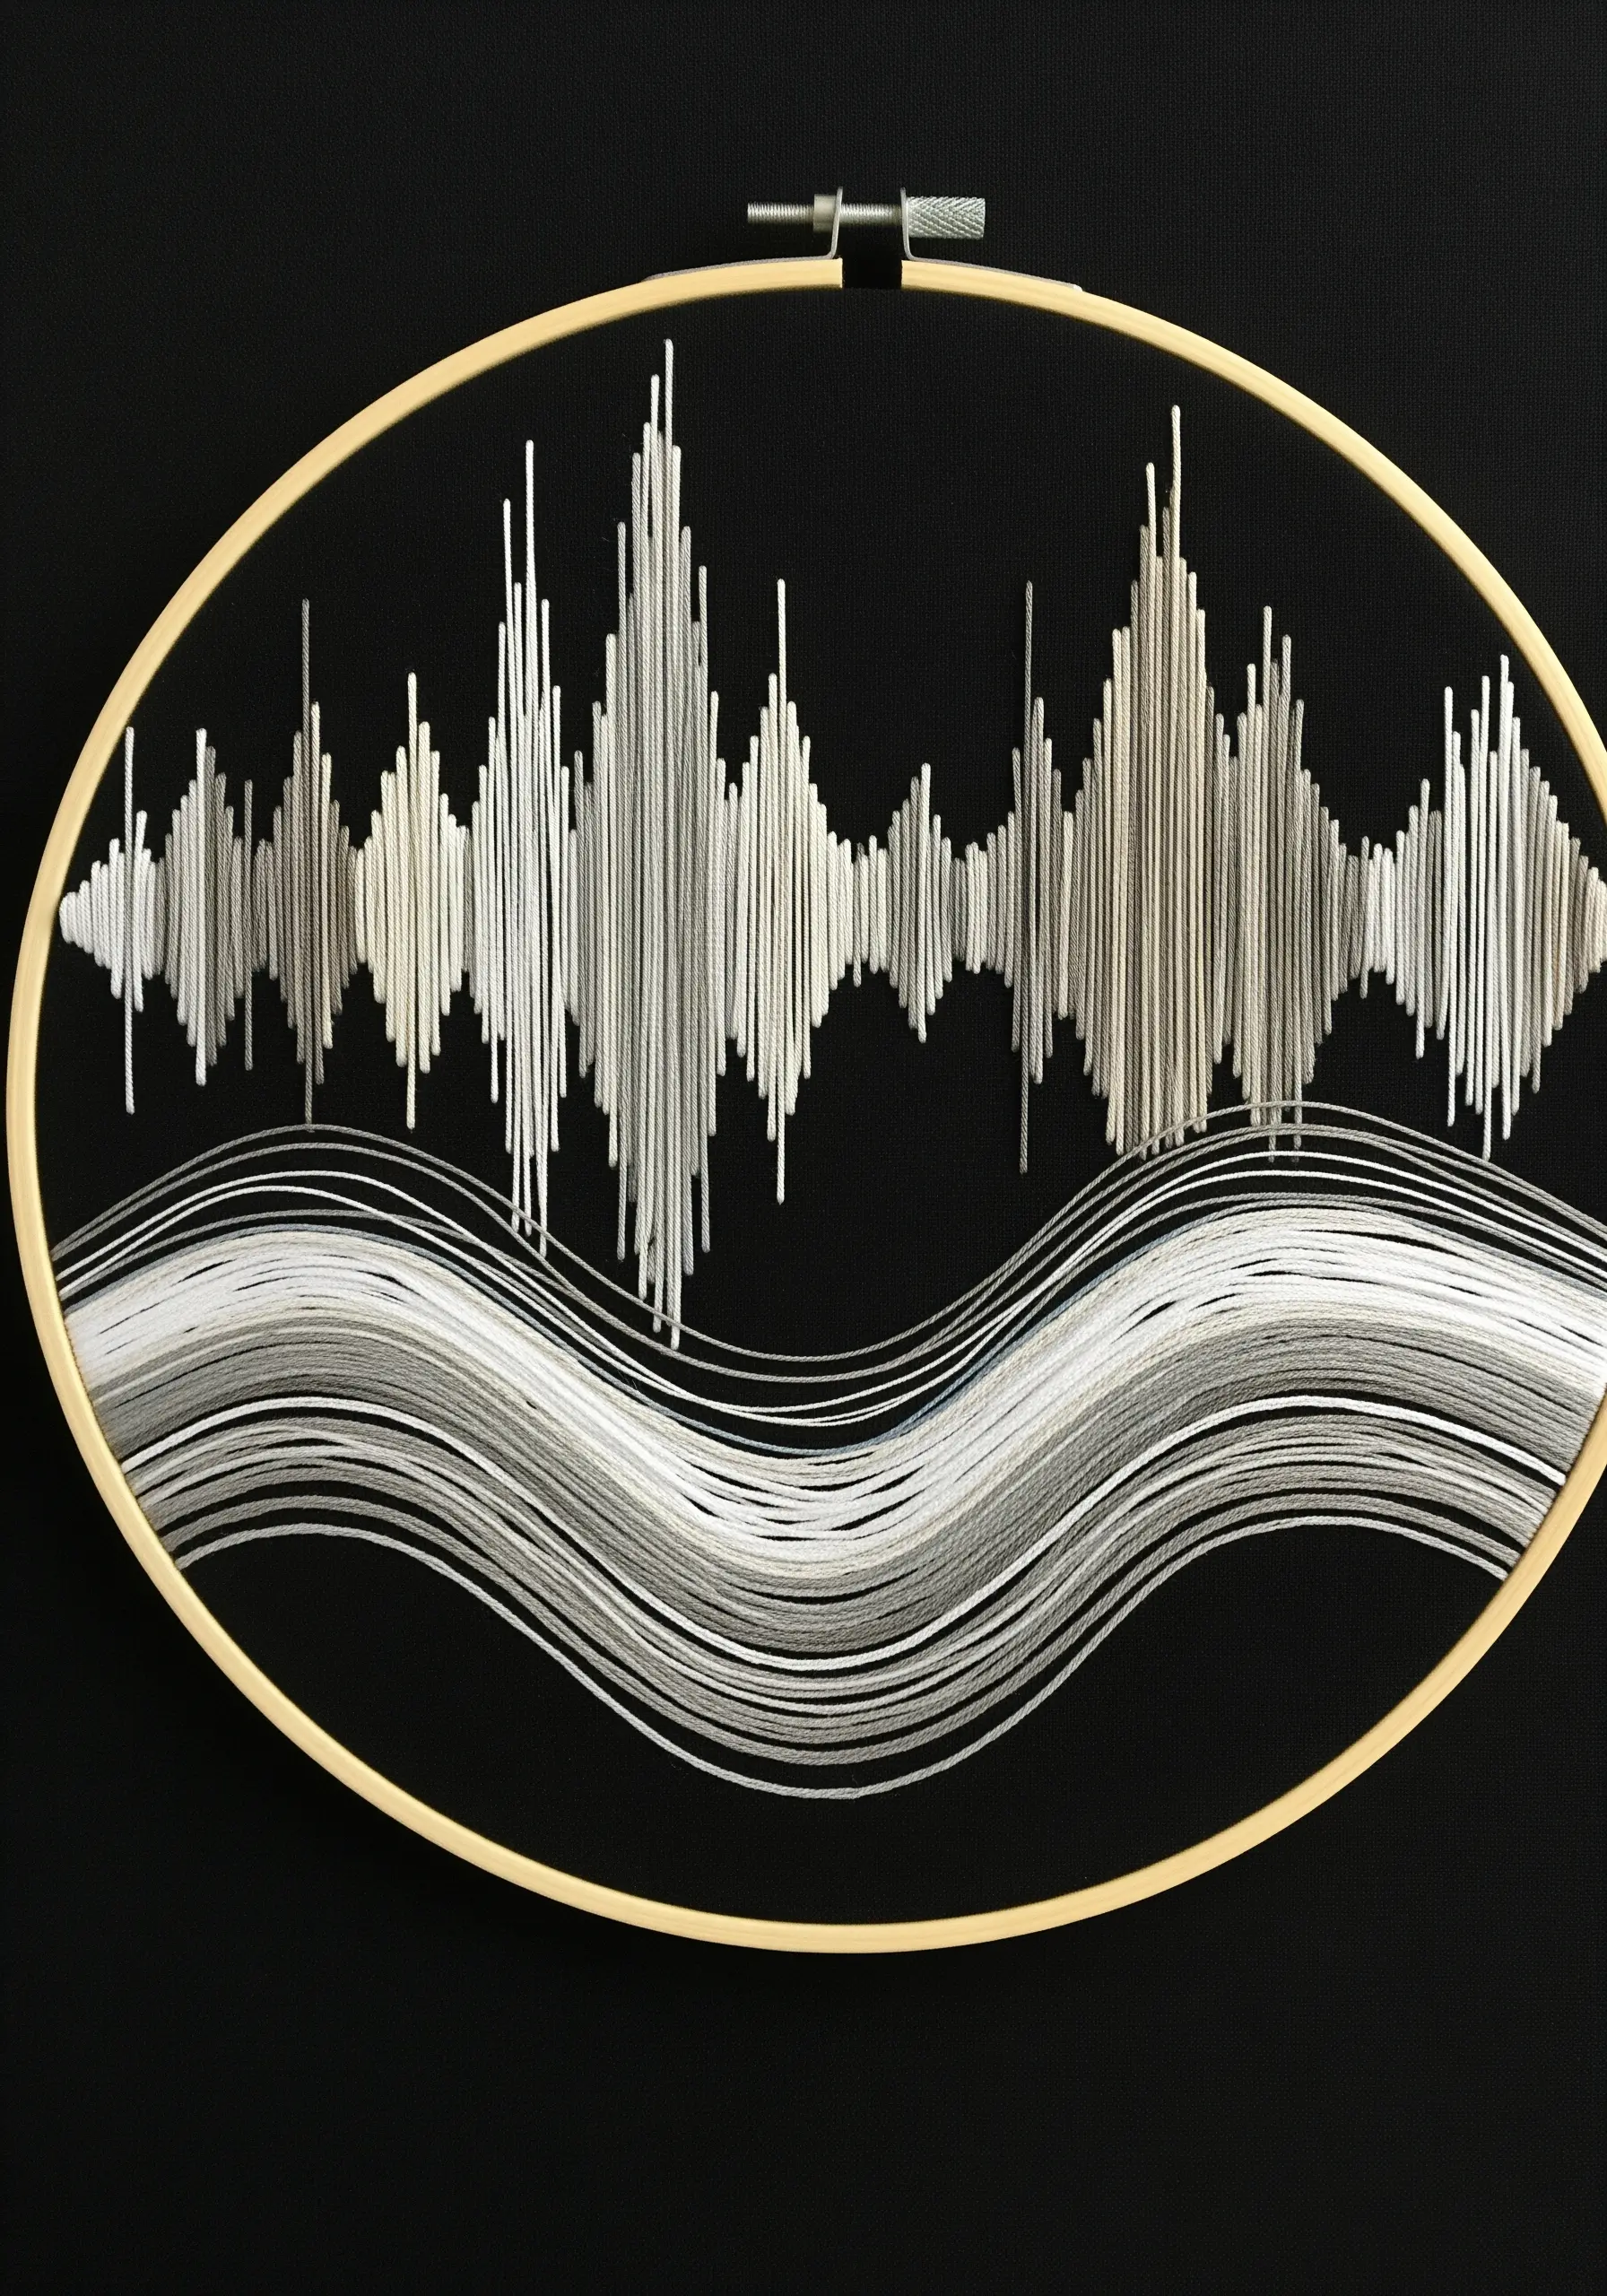
Translate abstract concepts like sound waves and water currents into stitched art.
For the sharp peaks of a soundwave, use tightly packed vertical straight stitches of varying lengths, blending whites and greys to create a gradient effect.
For the flowing water below, use long, horizontal stitches that gently curve and overlap.
This juxtaposition of jagged vertical lines and smooth horizontal lines on a stark black background creates a powerful visual metaphor for two different types of energy.
25. Anchor Appliqué with a Scalloped Edge
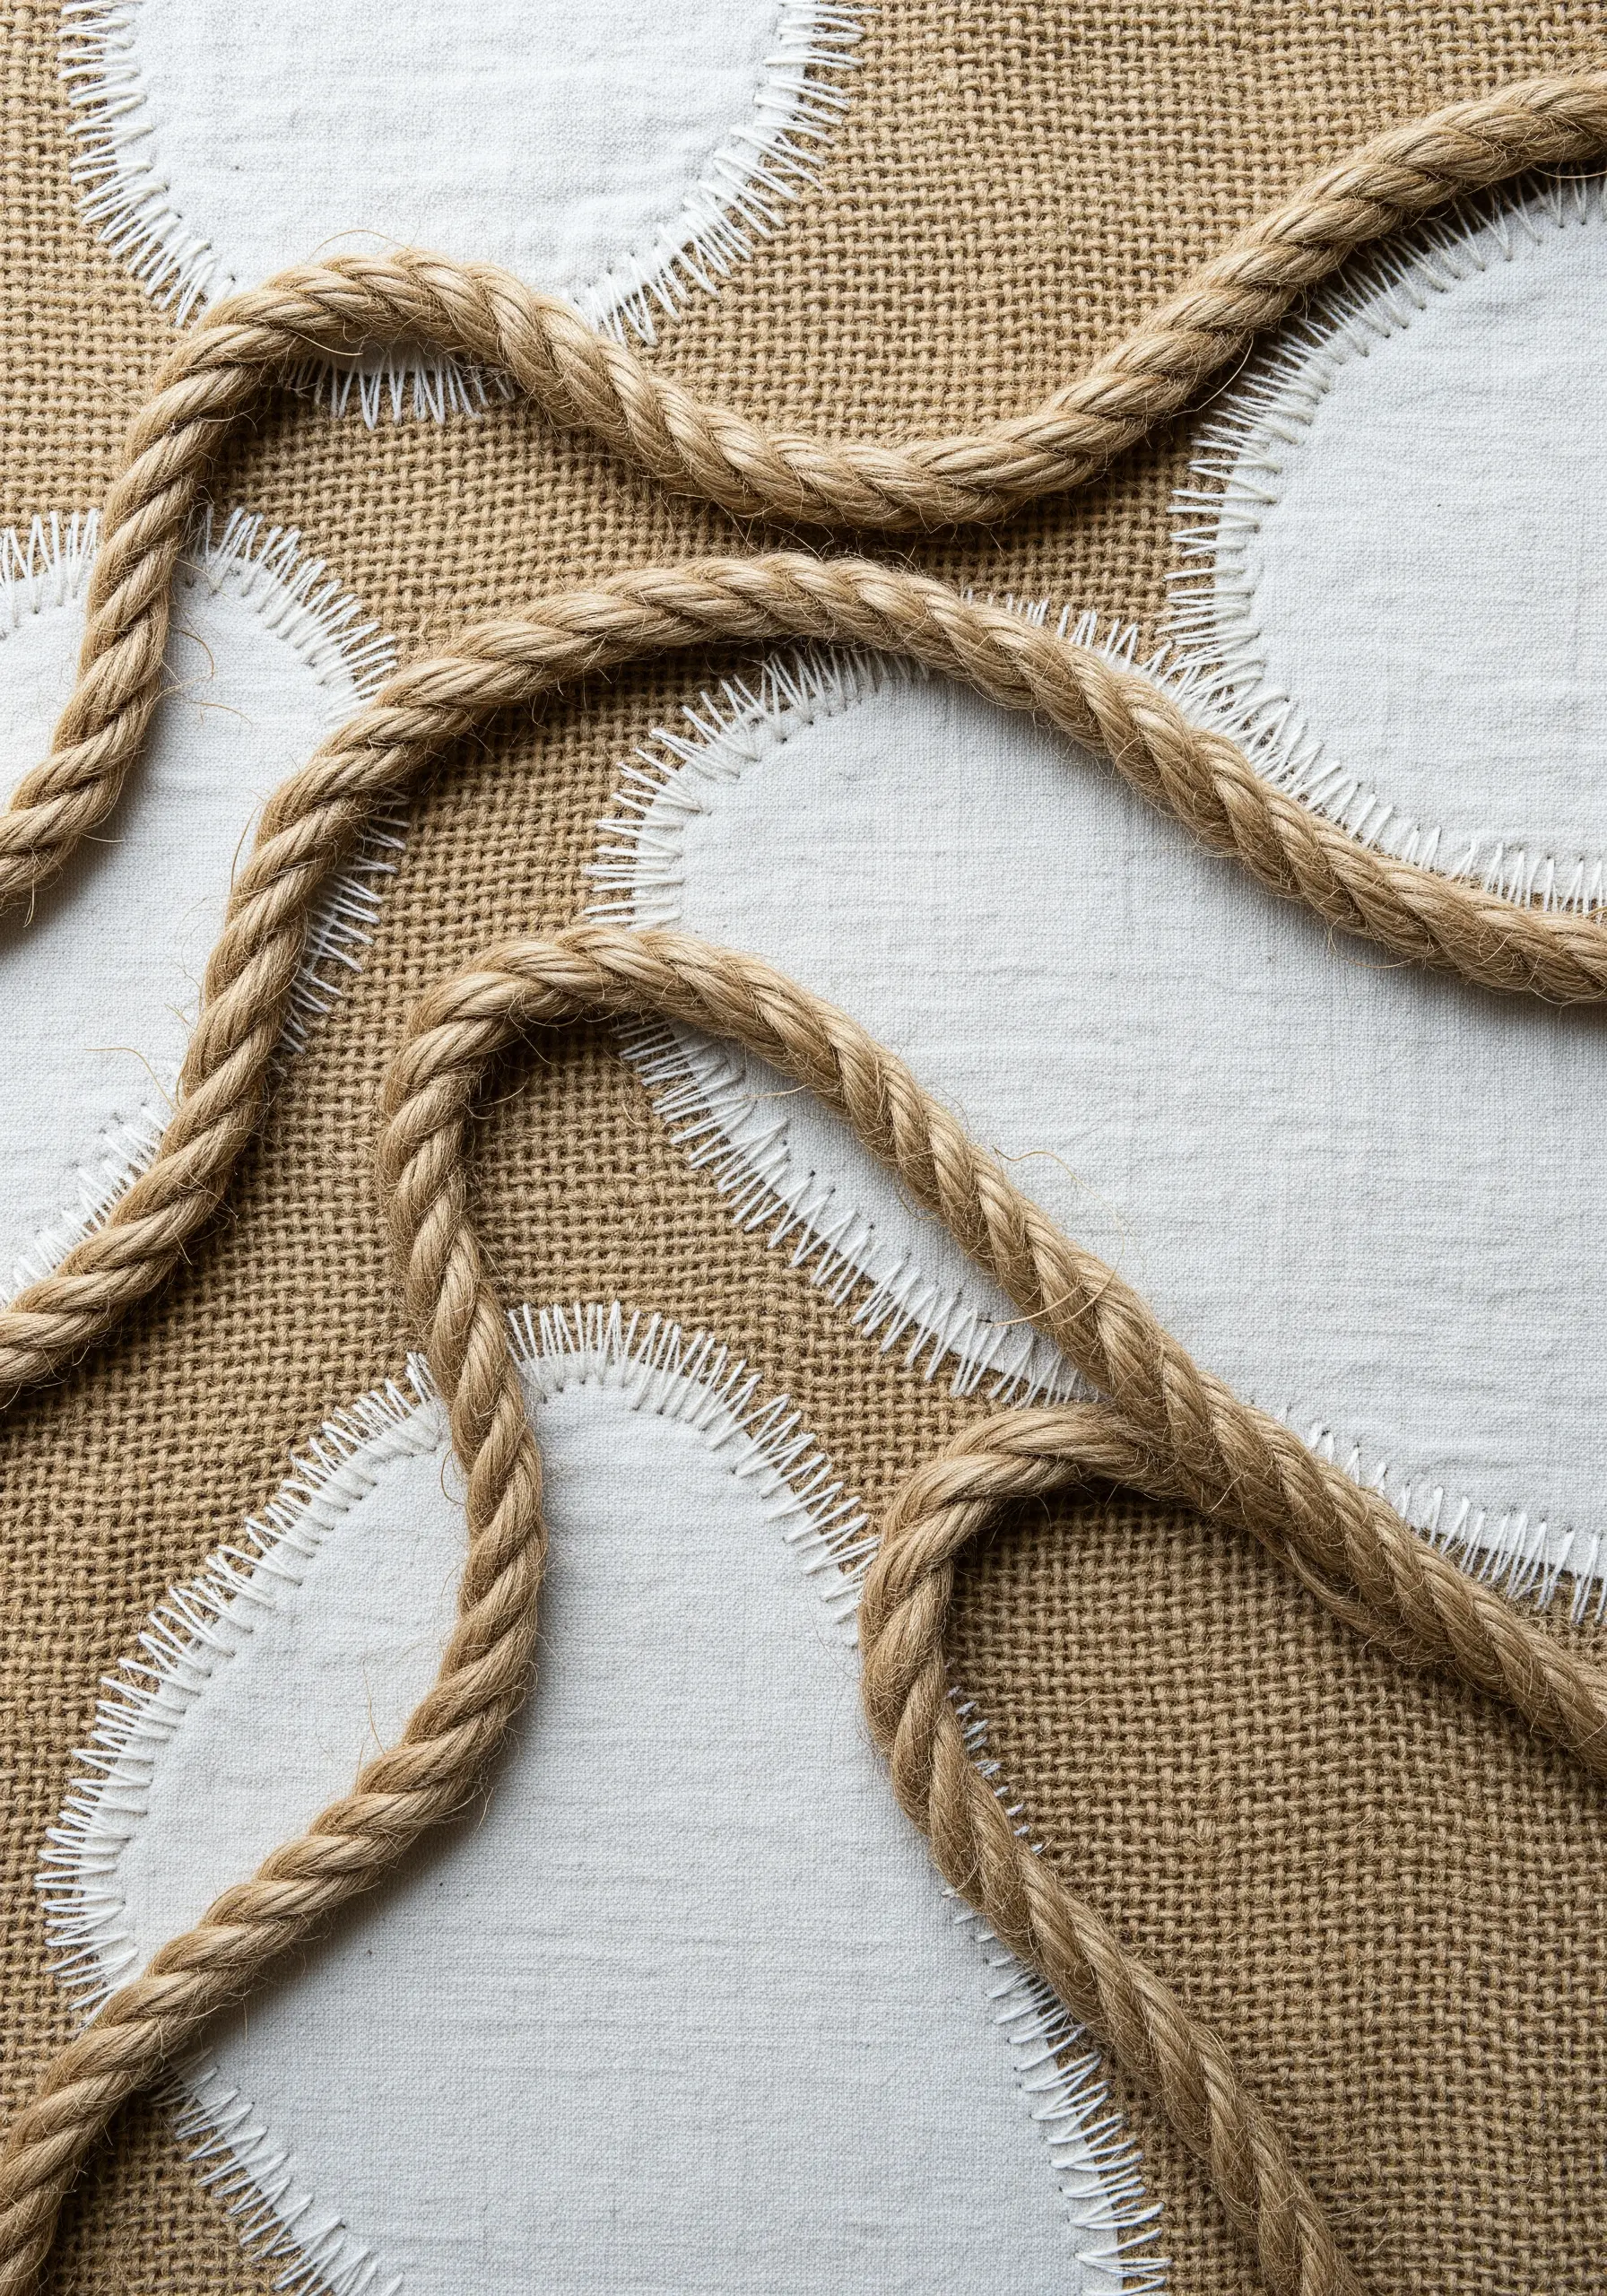
Elevate simple appliqué by framing it with a delicate, decorative stitch.
Cut organic, cloud-like shapes from a fine white cotton or linen and place them on a coarse burlap background for maximum textural contrast.
Instead of a simple running stitch, use a blanket stitch to secure the appliqué pieces. Place the straight part of the stitch on the appliqué and the ‘bite’ in the burlap.
This creates a clean, scalloped border that adds a touch of refinement to the rustic materials, beautifully finished by adding a thick, natural rope element.
26. Archive Textures on a Felt Sampler
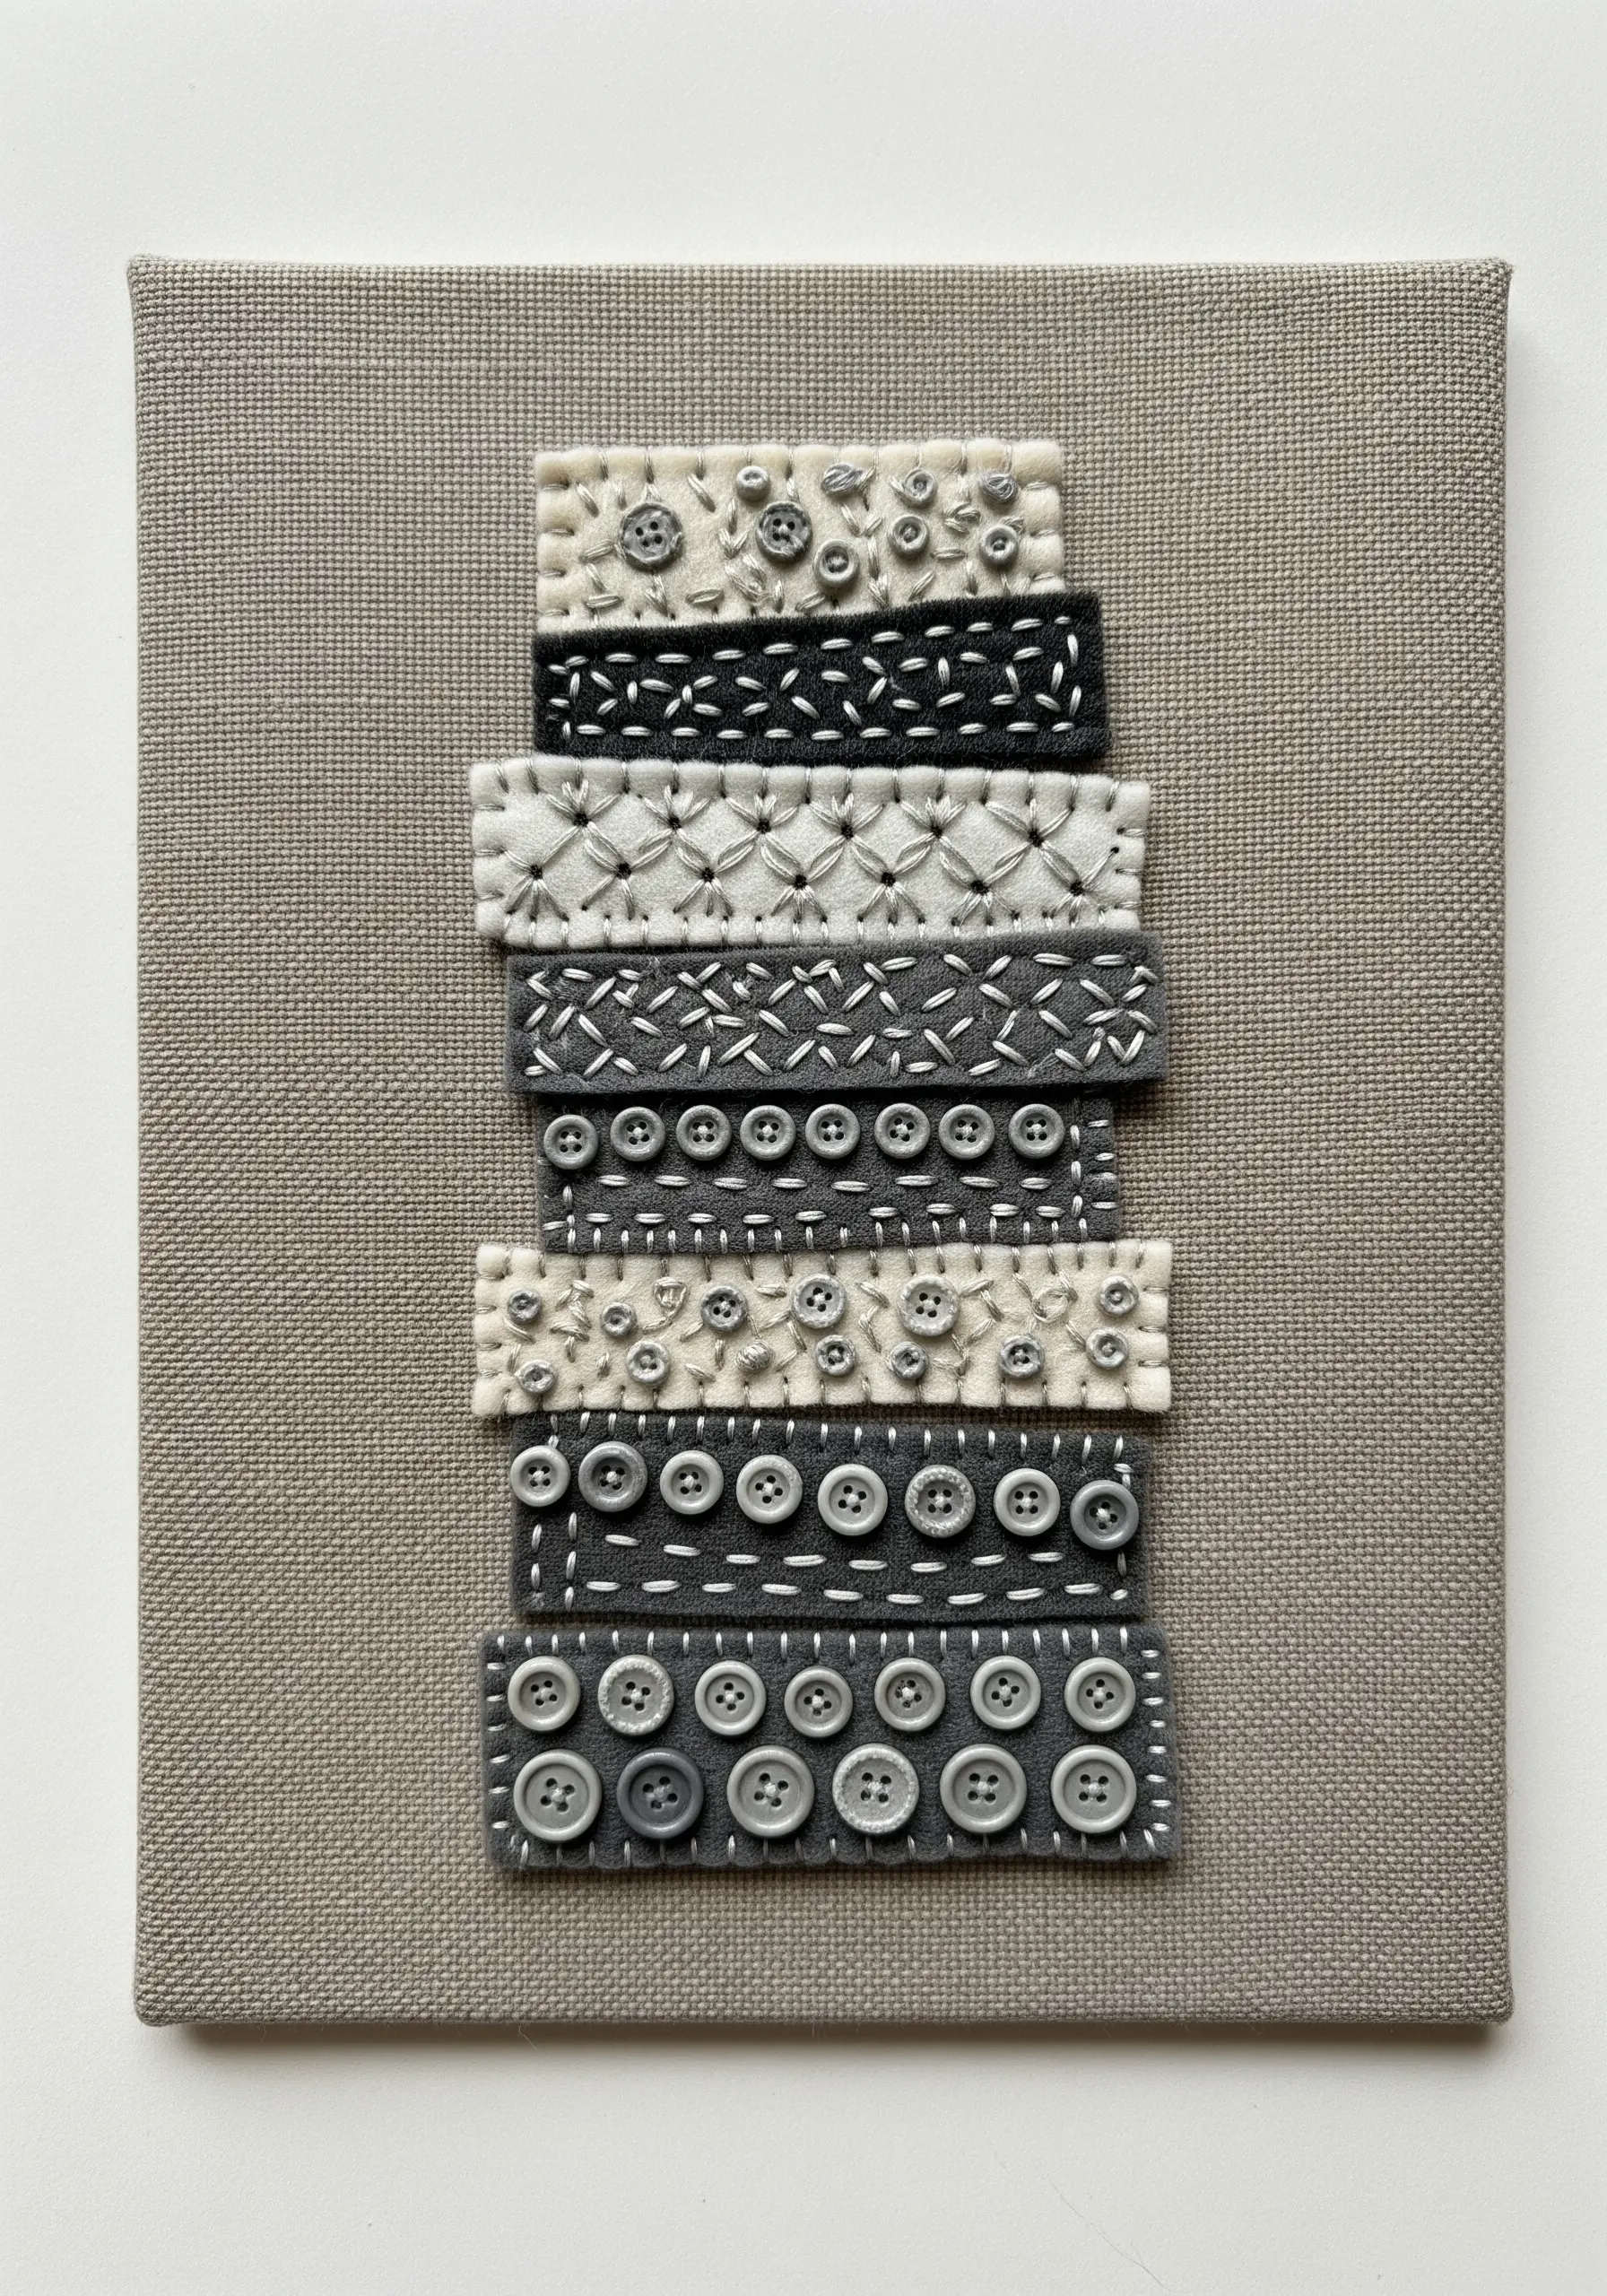
Create a tactile reference library by experimenting with stitches and embellishments on small felt rectangles.
Cut uniform strips of felt in neutral shades and dedicate each one to a different technique: running stitch grids, French knots, seed stitches, or cross-hatching.
Add another layer of interest by incorporating small buttons, arranging them in patterns or clusters.
Mounting these textured strips onto a canvas creates a beautiful, modern sampler that is both a piece of art and a record of your skills.
27. Stitch Graphic Starburst Blooms
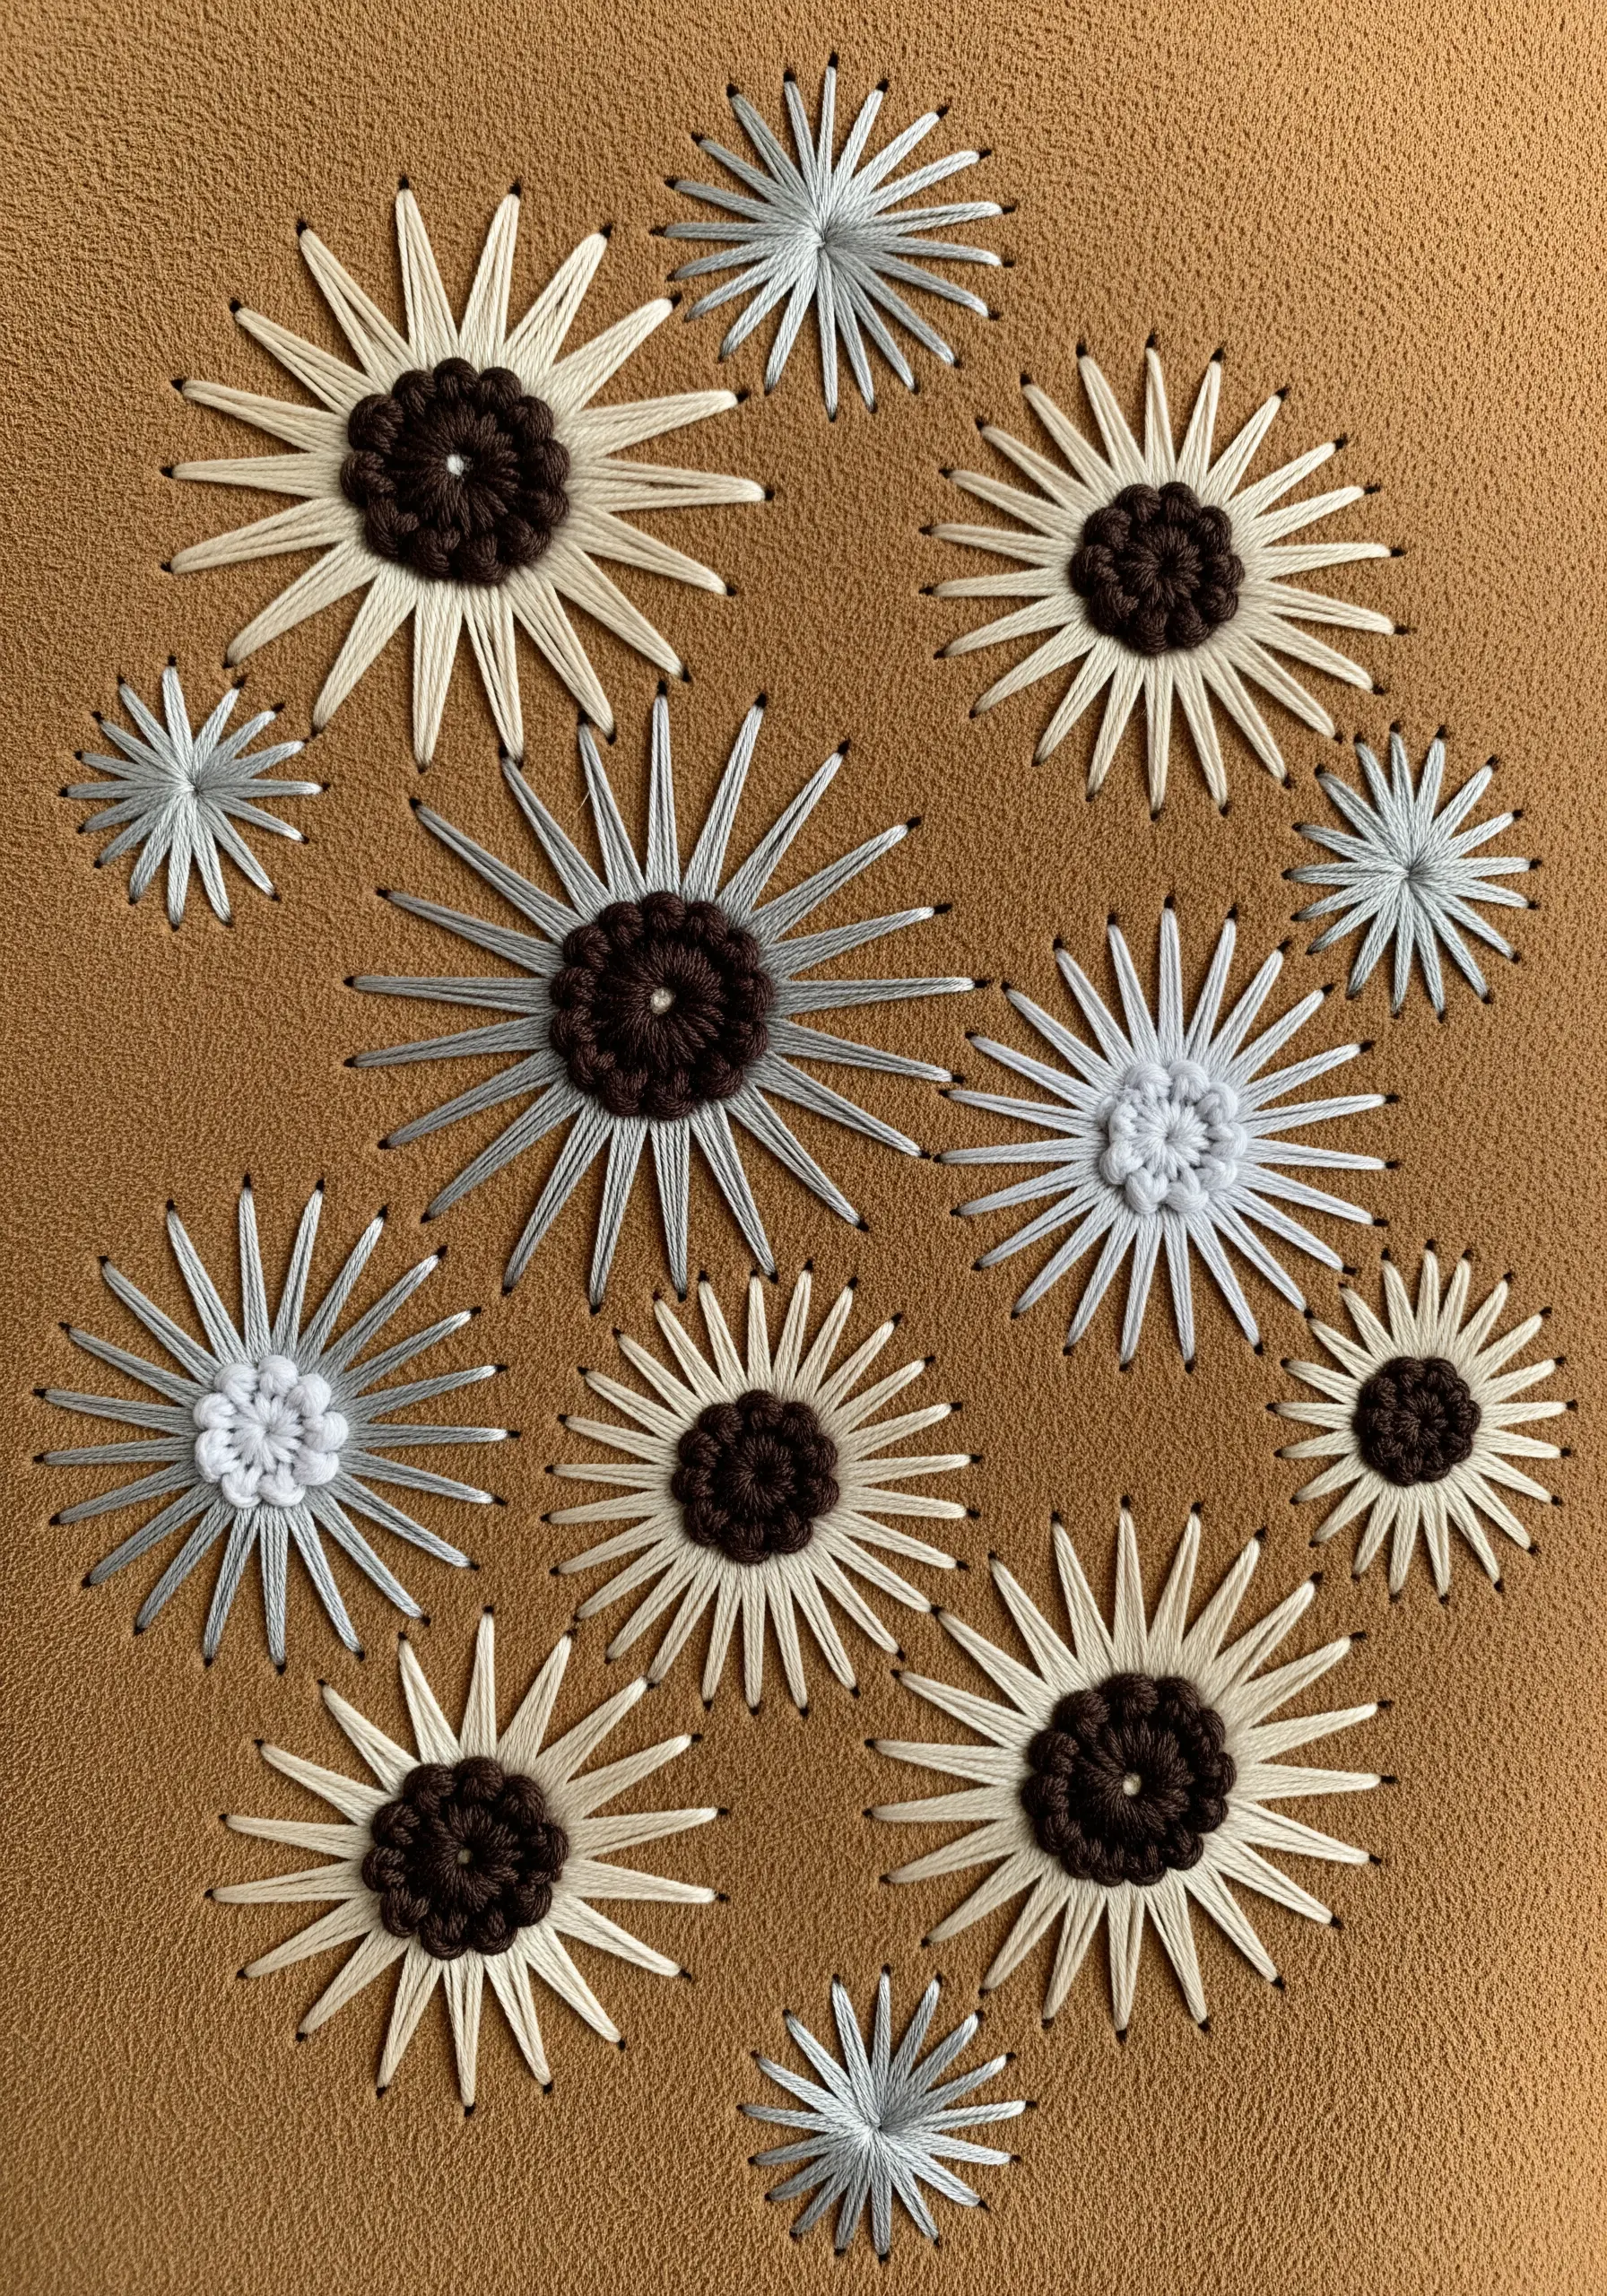
Achieve a bold, retro-inspired floral look with a combination of two simple stitches.
Create the flower centers with a dense cluster of dark brown French knots or a small satin stitch circle.
For the petals, work long, tapered straight stitches that radiate from the center, like rays of light. You can make these look fuller by working them as detached chain stitches (lazy daisies).
Varying the size of the flowers and the color of the petals within a neutral palette creates a playful yet sophisticated composition.
28. Create Texture with Stitched-Over Appliqué
Add subtle dimension to your work by layering stitches directly over fabric shapes.
Begin by cutting soft, organic shapes from lightweight cotton or linen and applying them to your base fabric.
Instead of stitching around them, fill the entire surface of each shape with dense, parallel straight stitches or satin stitches.
The slight relief of the appliqué underneath the stitching creates a gentle three-dimensional effect, and the direction of the stitches adds a beautiful, grain-like texture.
29. Incorporate Natural Found Objects
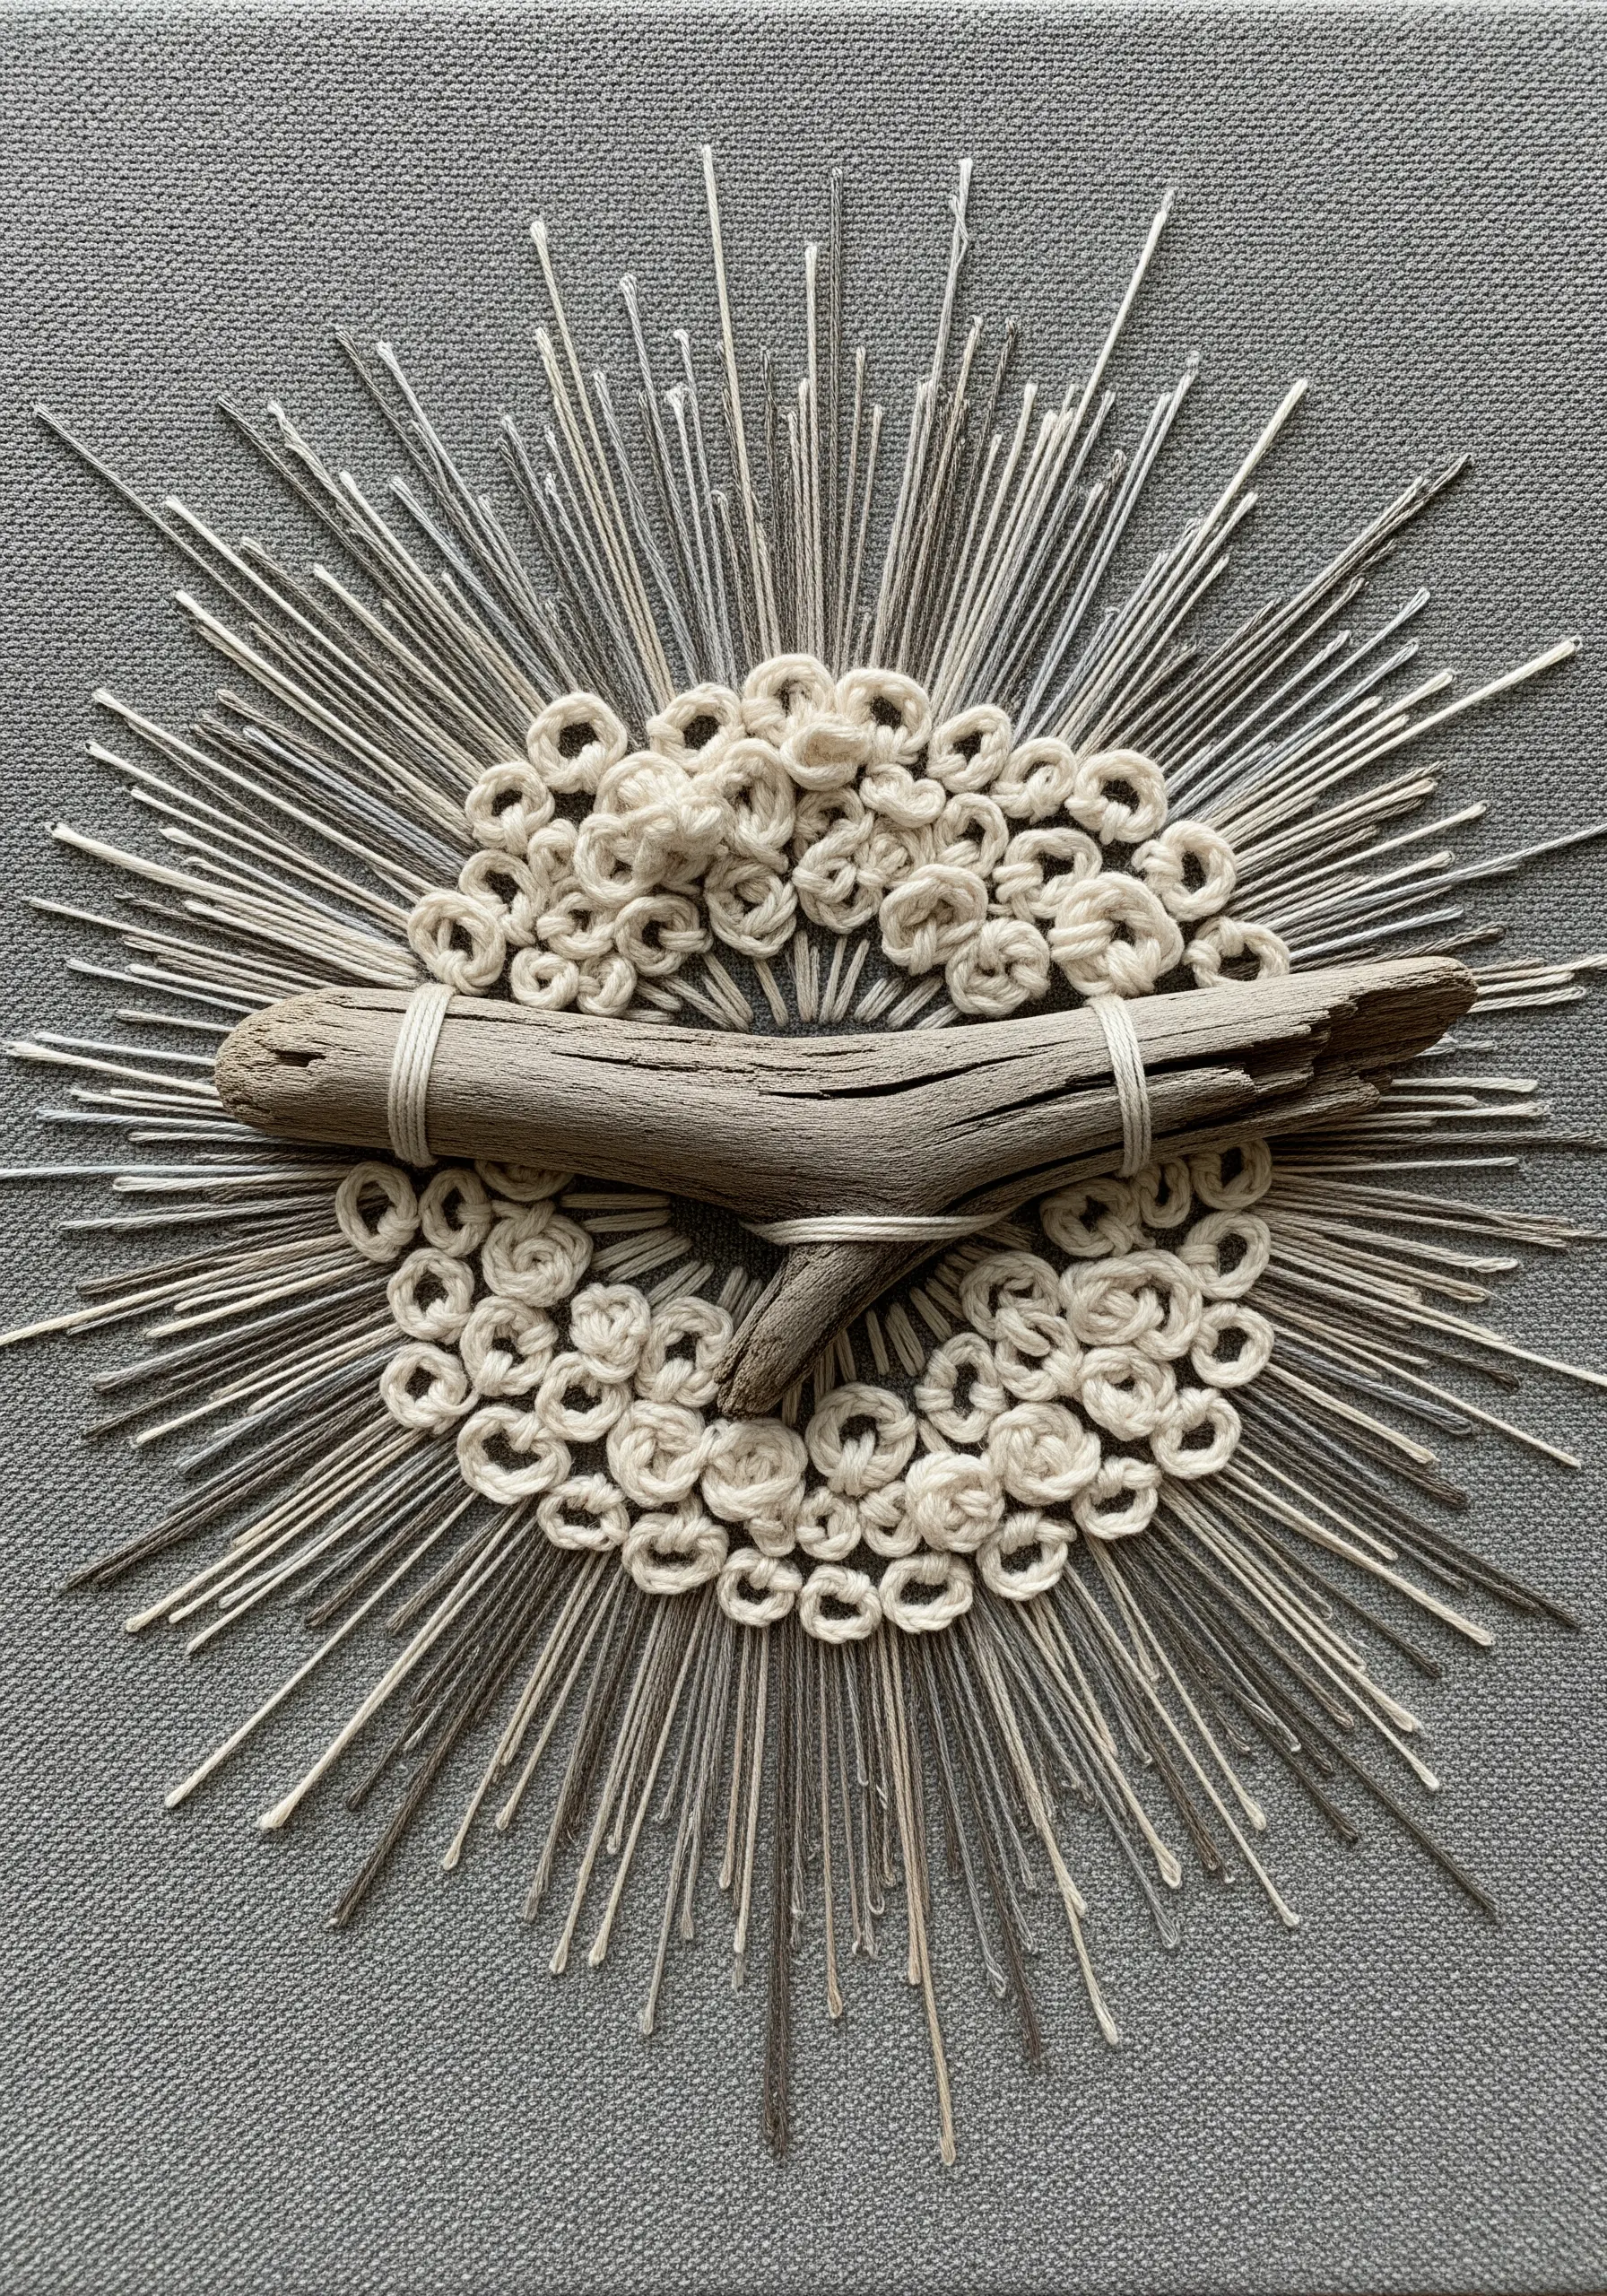
Ground your abstract work with a tangible piece of the natural world.
Create a textured, circular background using stitches like bullion knots or woven wheels, surrounded by a halo of radiating straight stitches.
Select a piece of driftwood, a smooth stone, or a dried seed pod as your focal point.
Secure it to the center of your embroidery by carefully wrapping it with a contrasting thread, integrating it seamlessly into the design. These are beautiful embroidery projects inspired by textures you’d find on a nature walk.
30. Embellish Apparel with Graphic Appliqué
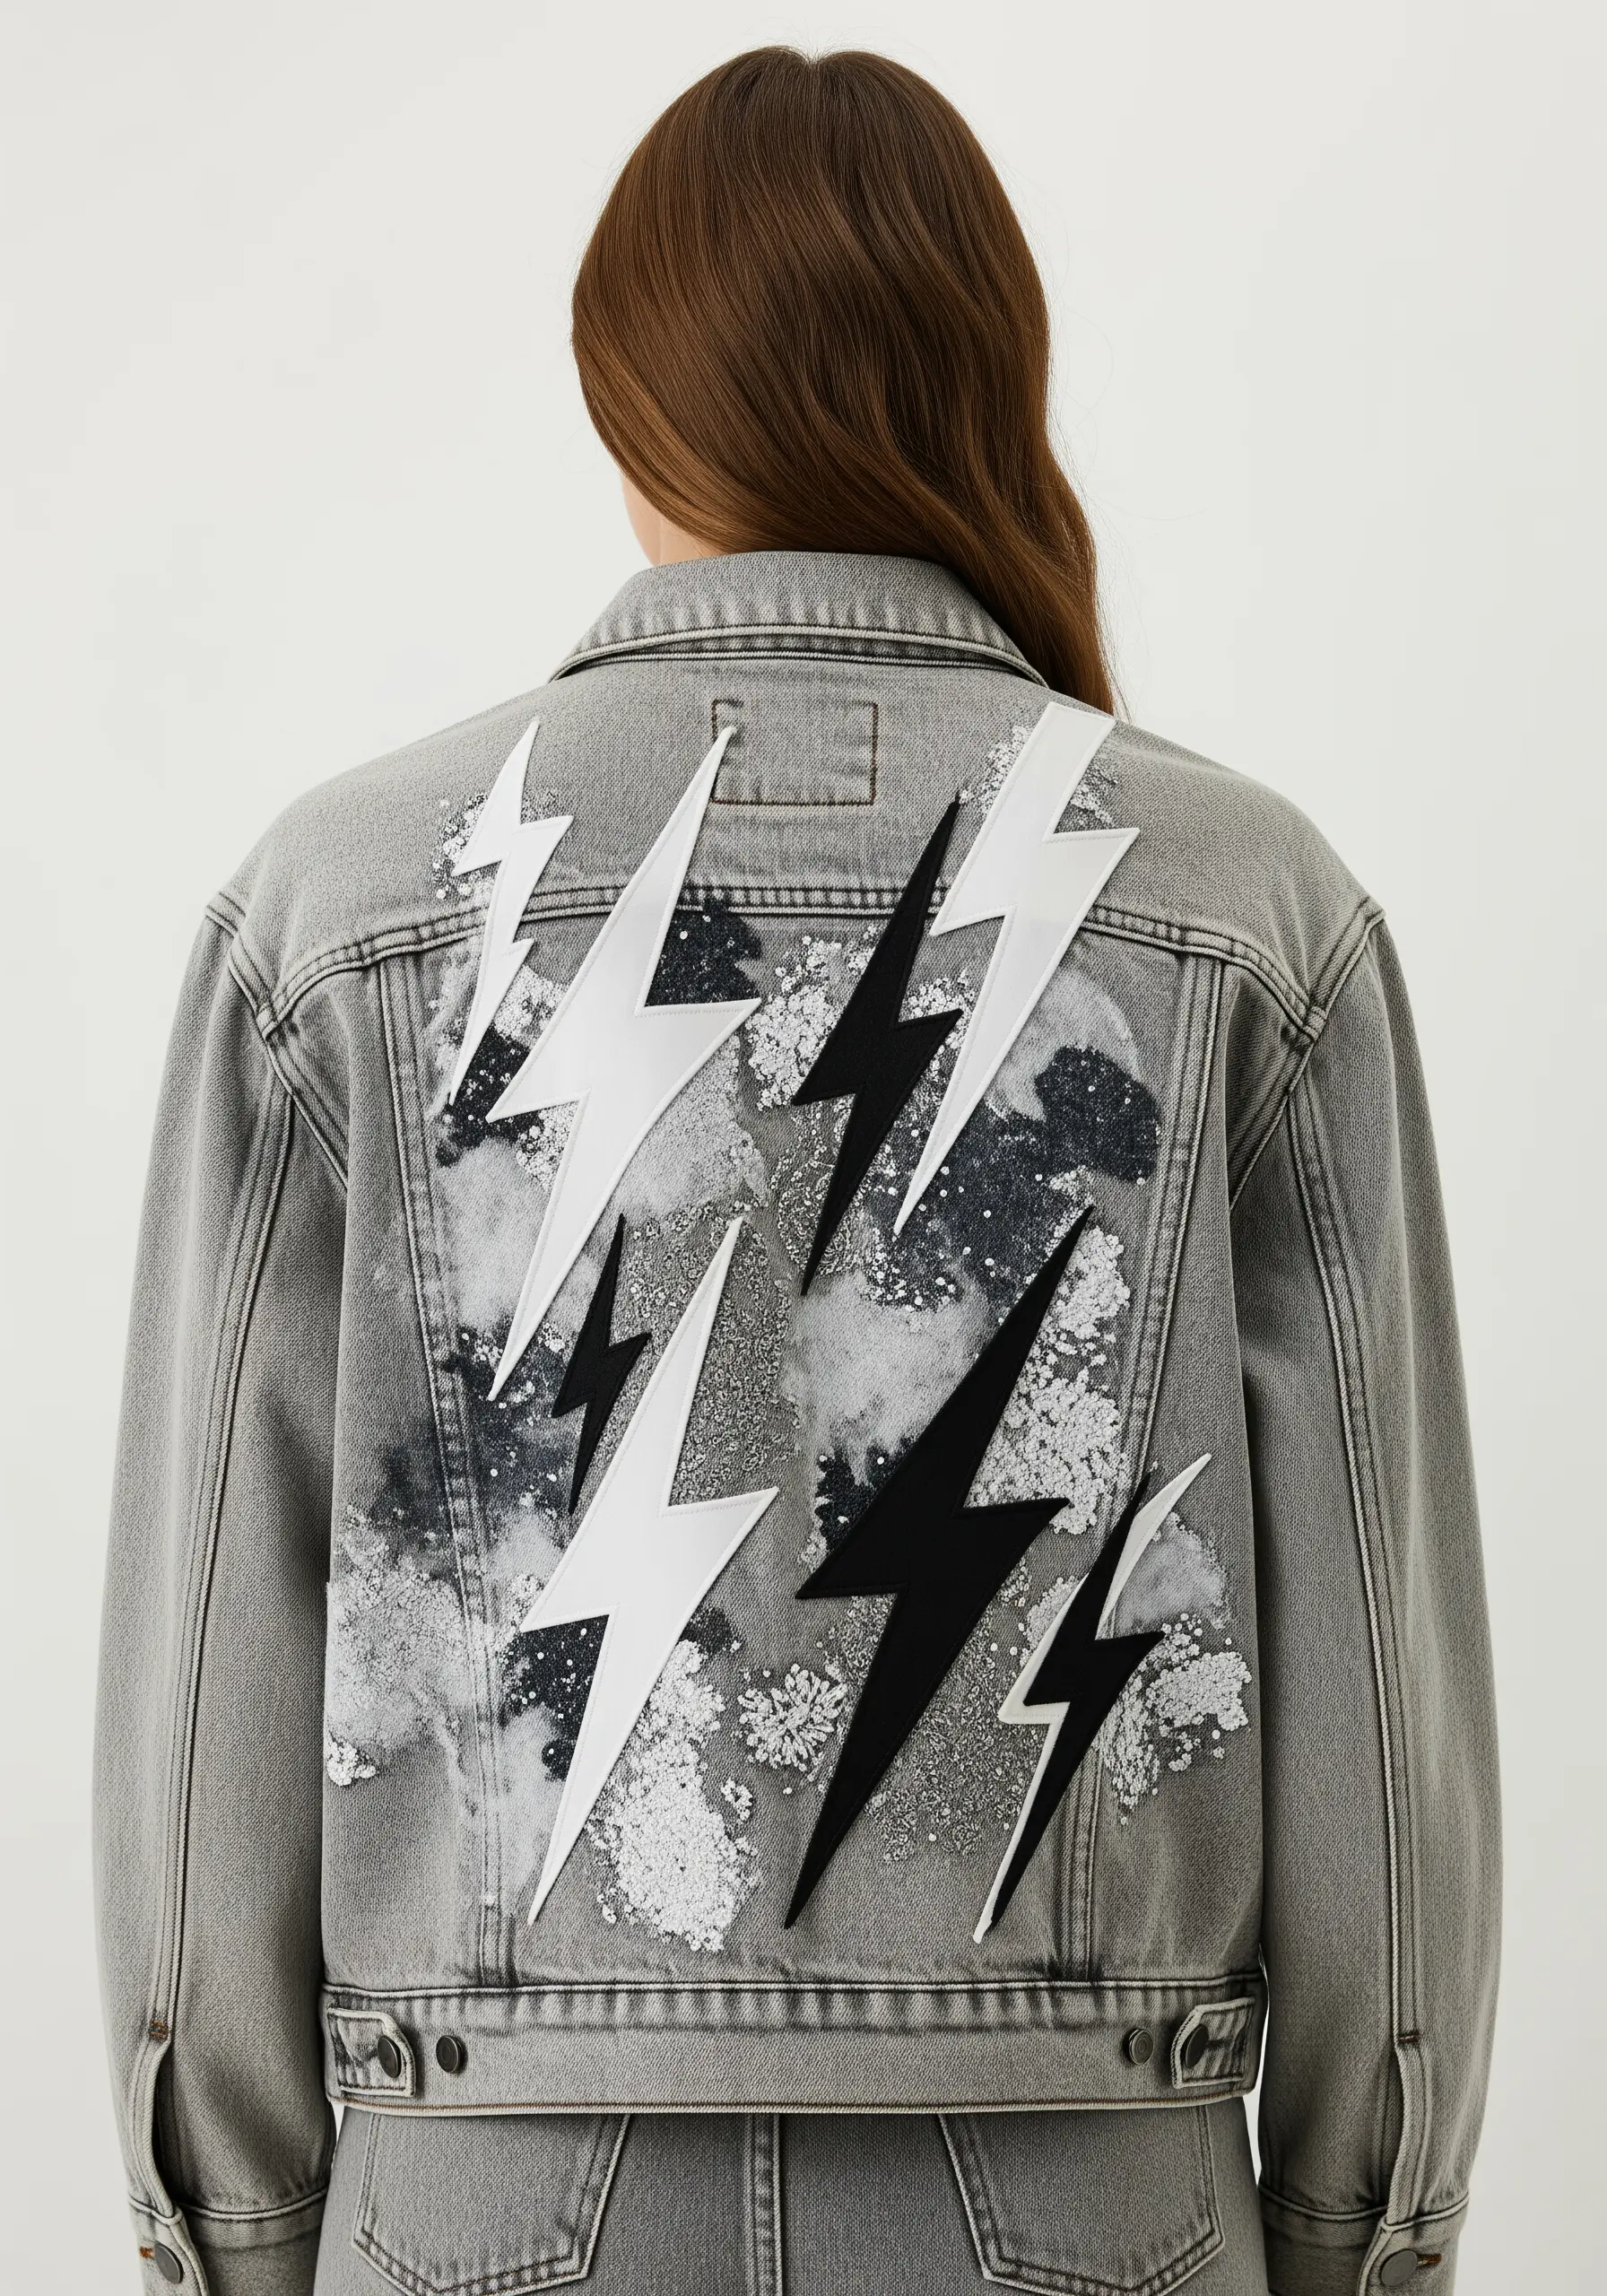
Transform a simple garment like a denim jacket into a piece of wearable art.
Choose a bold, graphic motif—like lightning bolts—and cut the shapes from a non-fraying material such as felt or leather in high-contrast black and white.
Arrange the shapes in a dynamic, asymmetrical pattern on the back of the jacket.
Secure them with a clean, simple whip stitch around the edges using a matching thread. This technique provides a durable and visually striking update to everyday apparel.
31. Map a Circuit with Thread and Knots
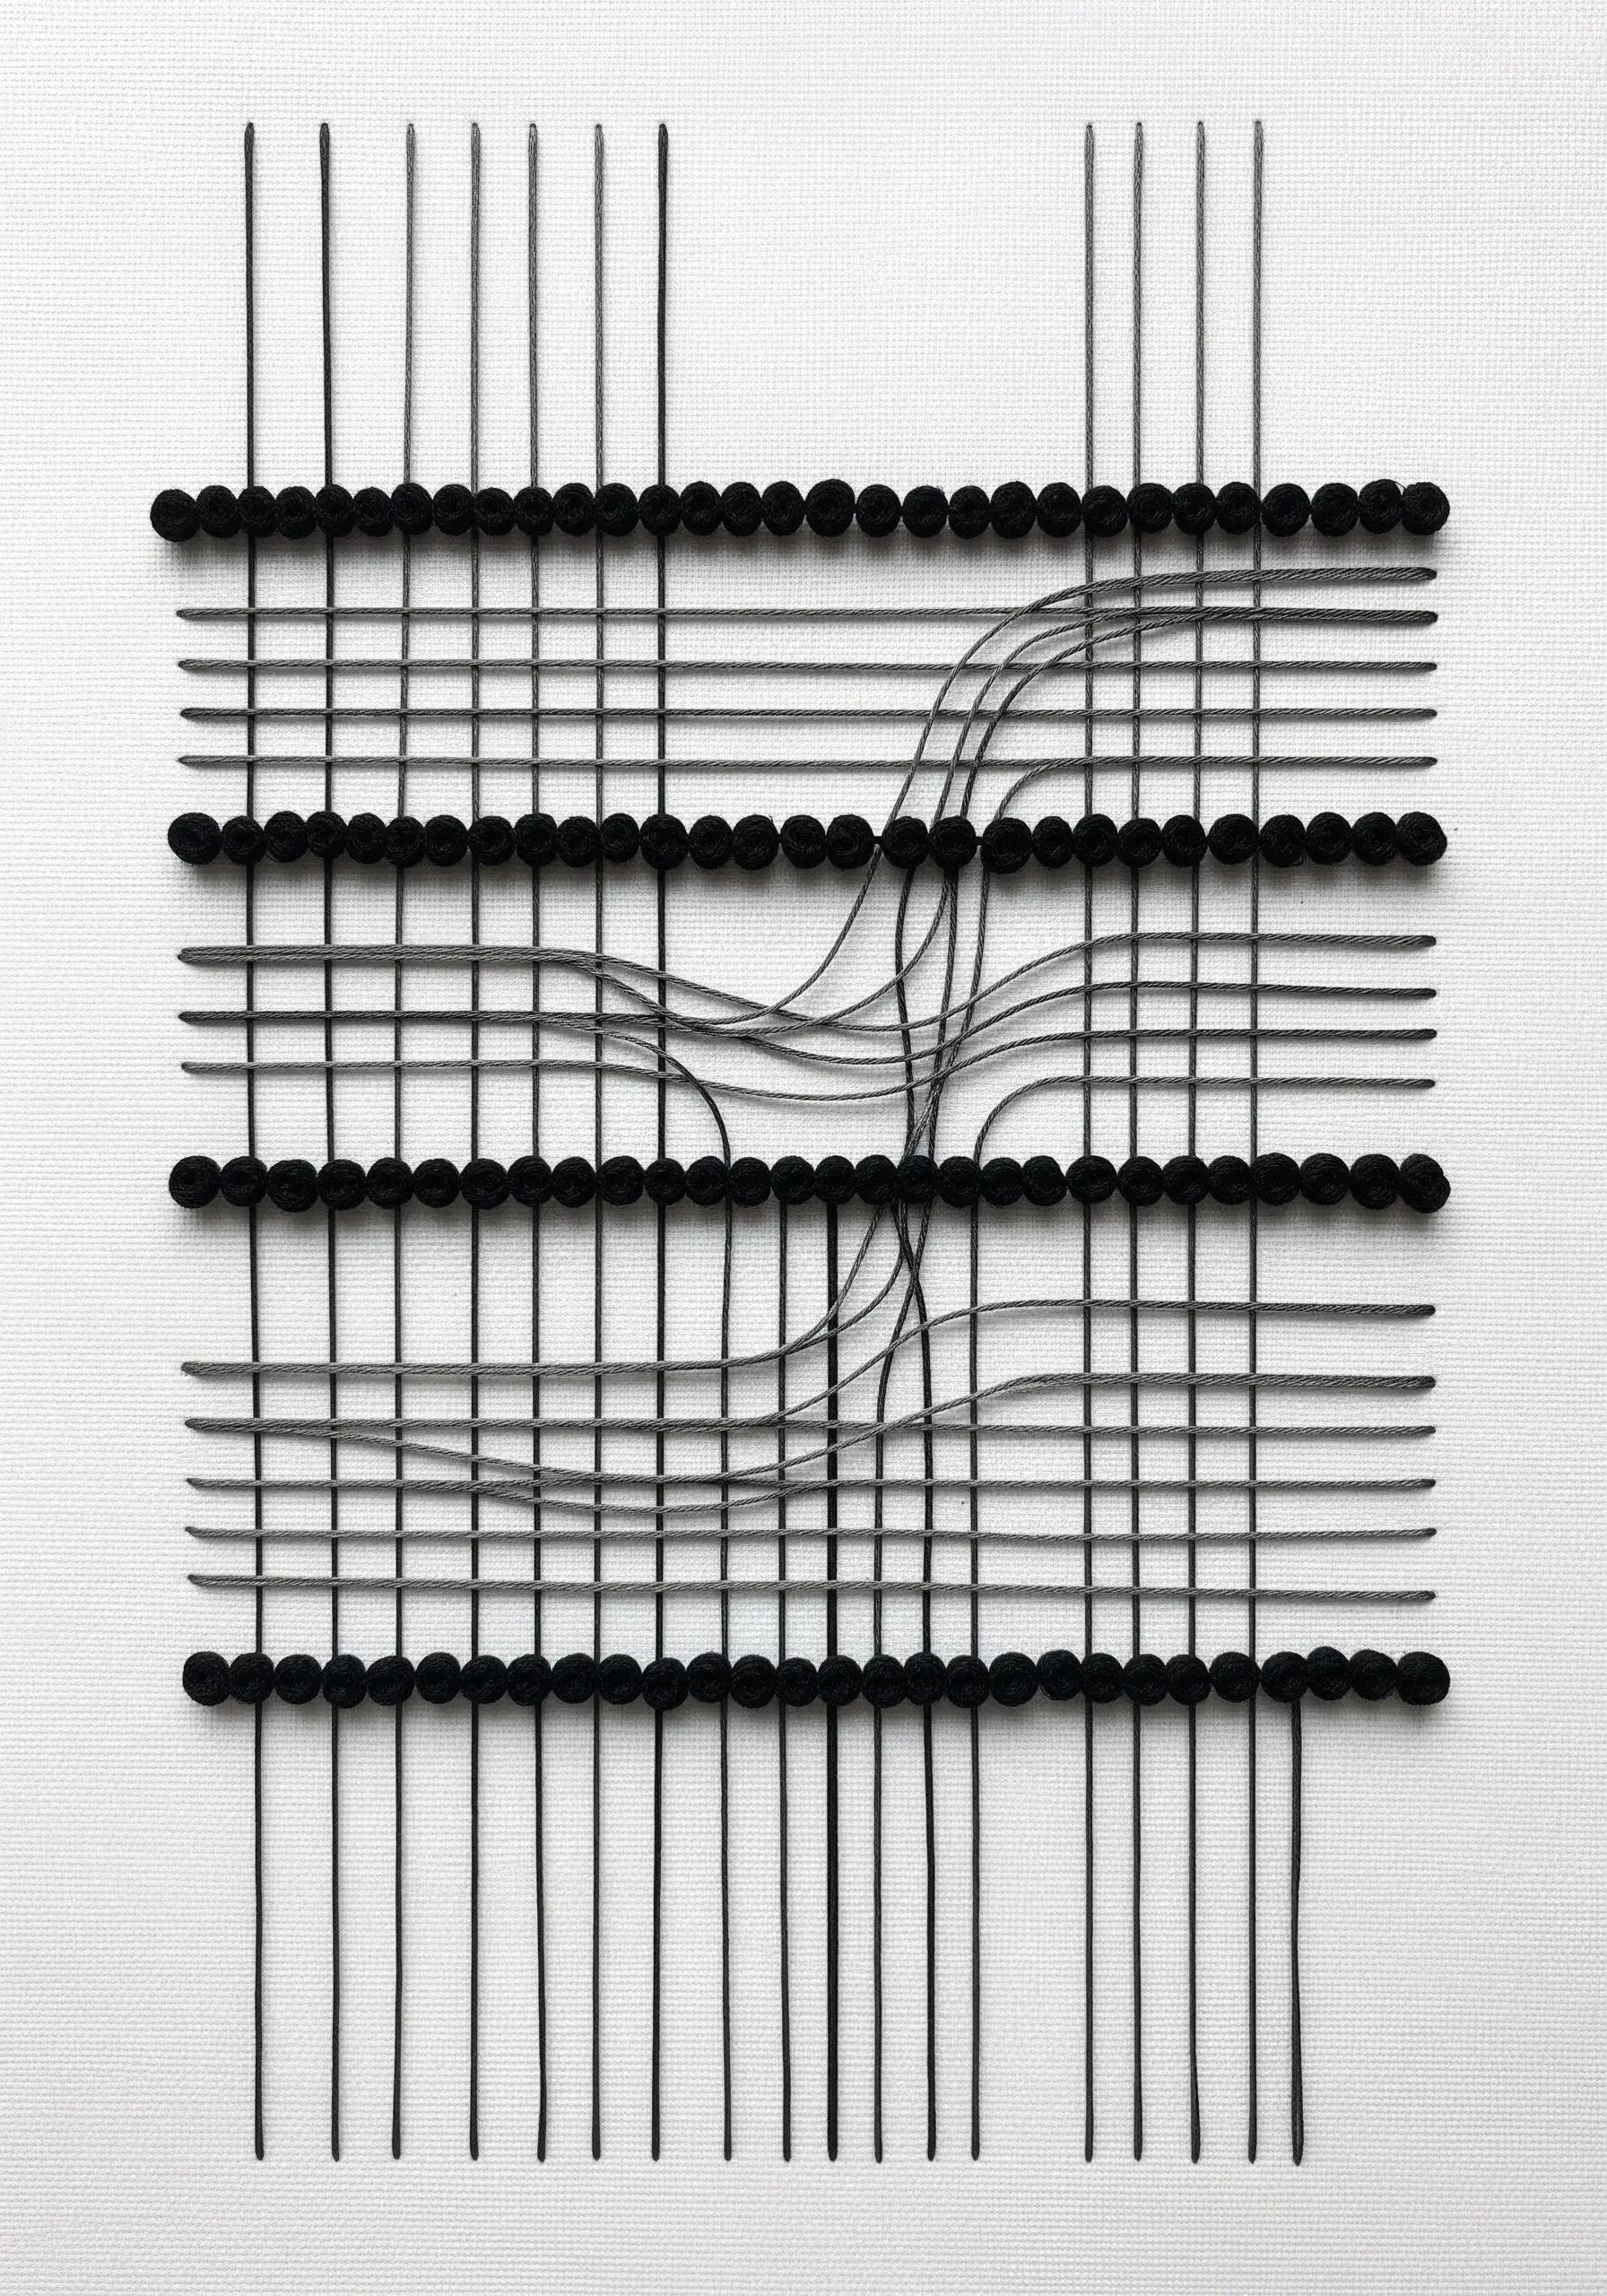
Create a precise, schematic-inspired design using linear stitches and textured knots.
Establish a grid with long, taut straight stitches in a dark grey thread.
Use this grid as a guide to add perpendicular lines and carefully couched curves, creating the look of an intricate circuit board or a musical score.
Place evenly spaced French knots or colonial knots along some of the lines to act as nodes or connection points, adding a tactile, dimensional element to the otherwise flat design.
32. Deconstruct Shapes with Thread Painting
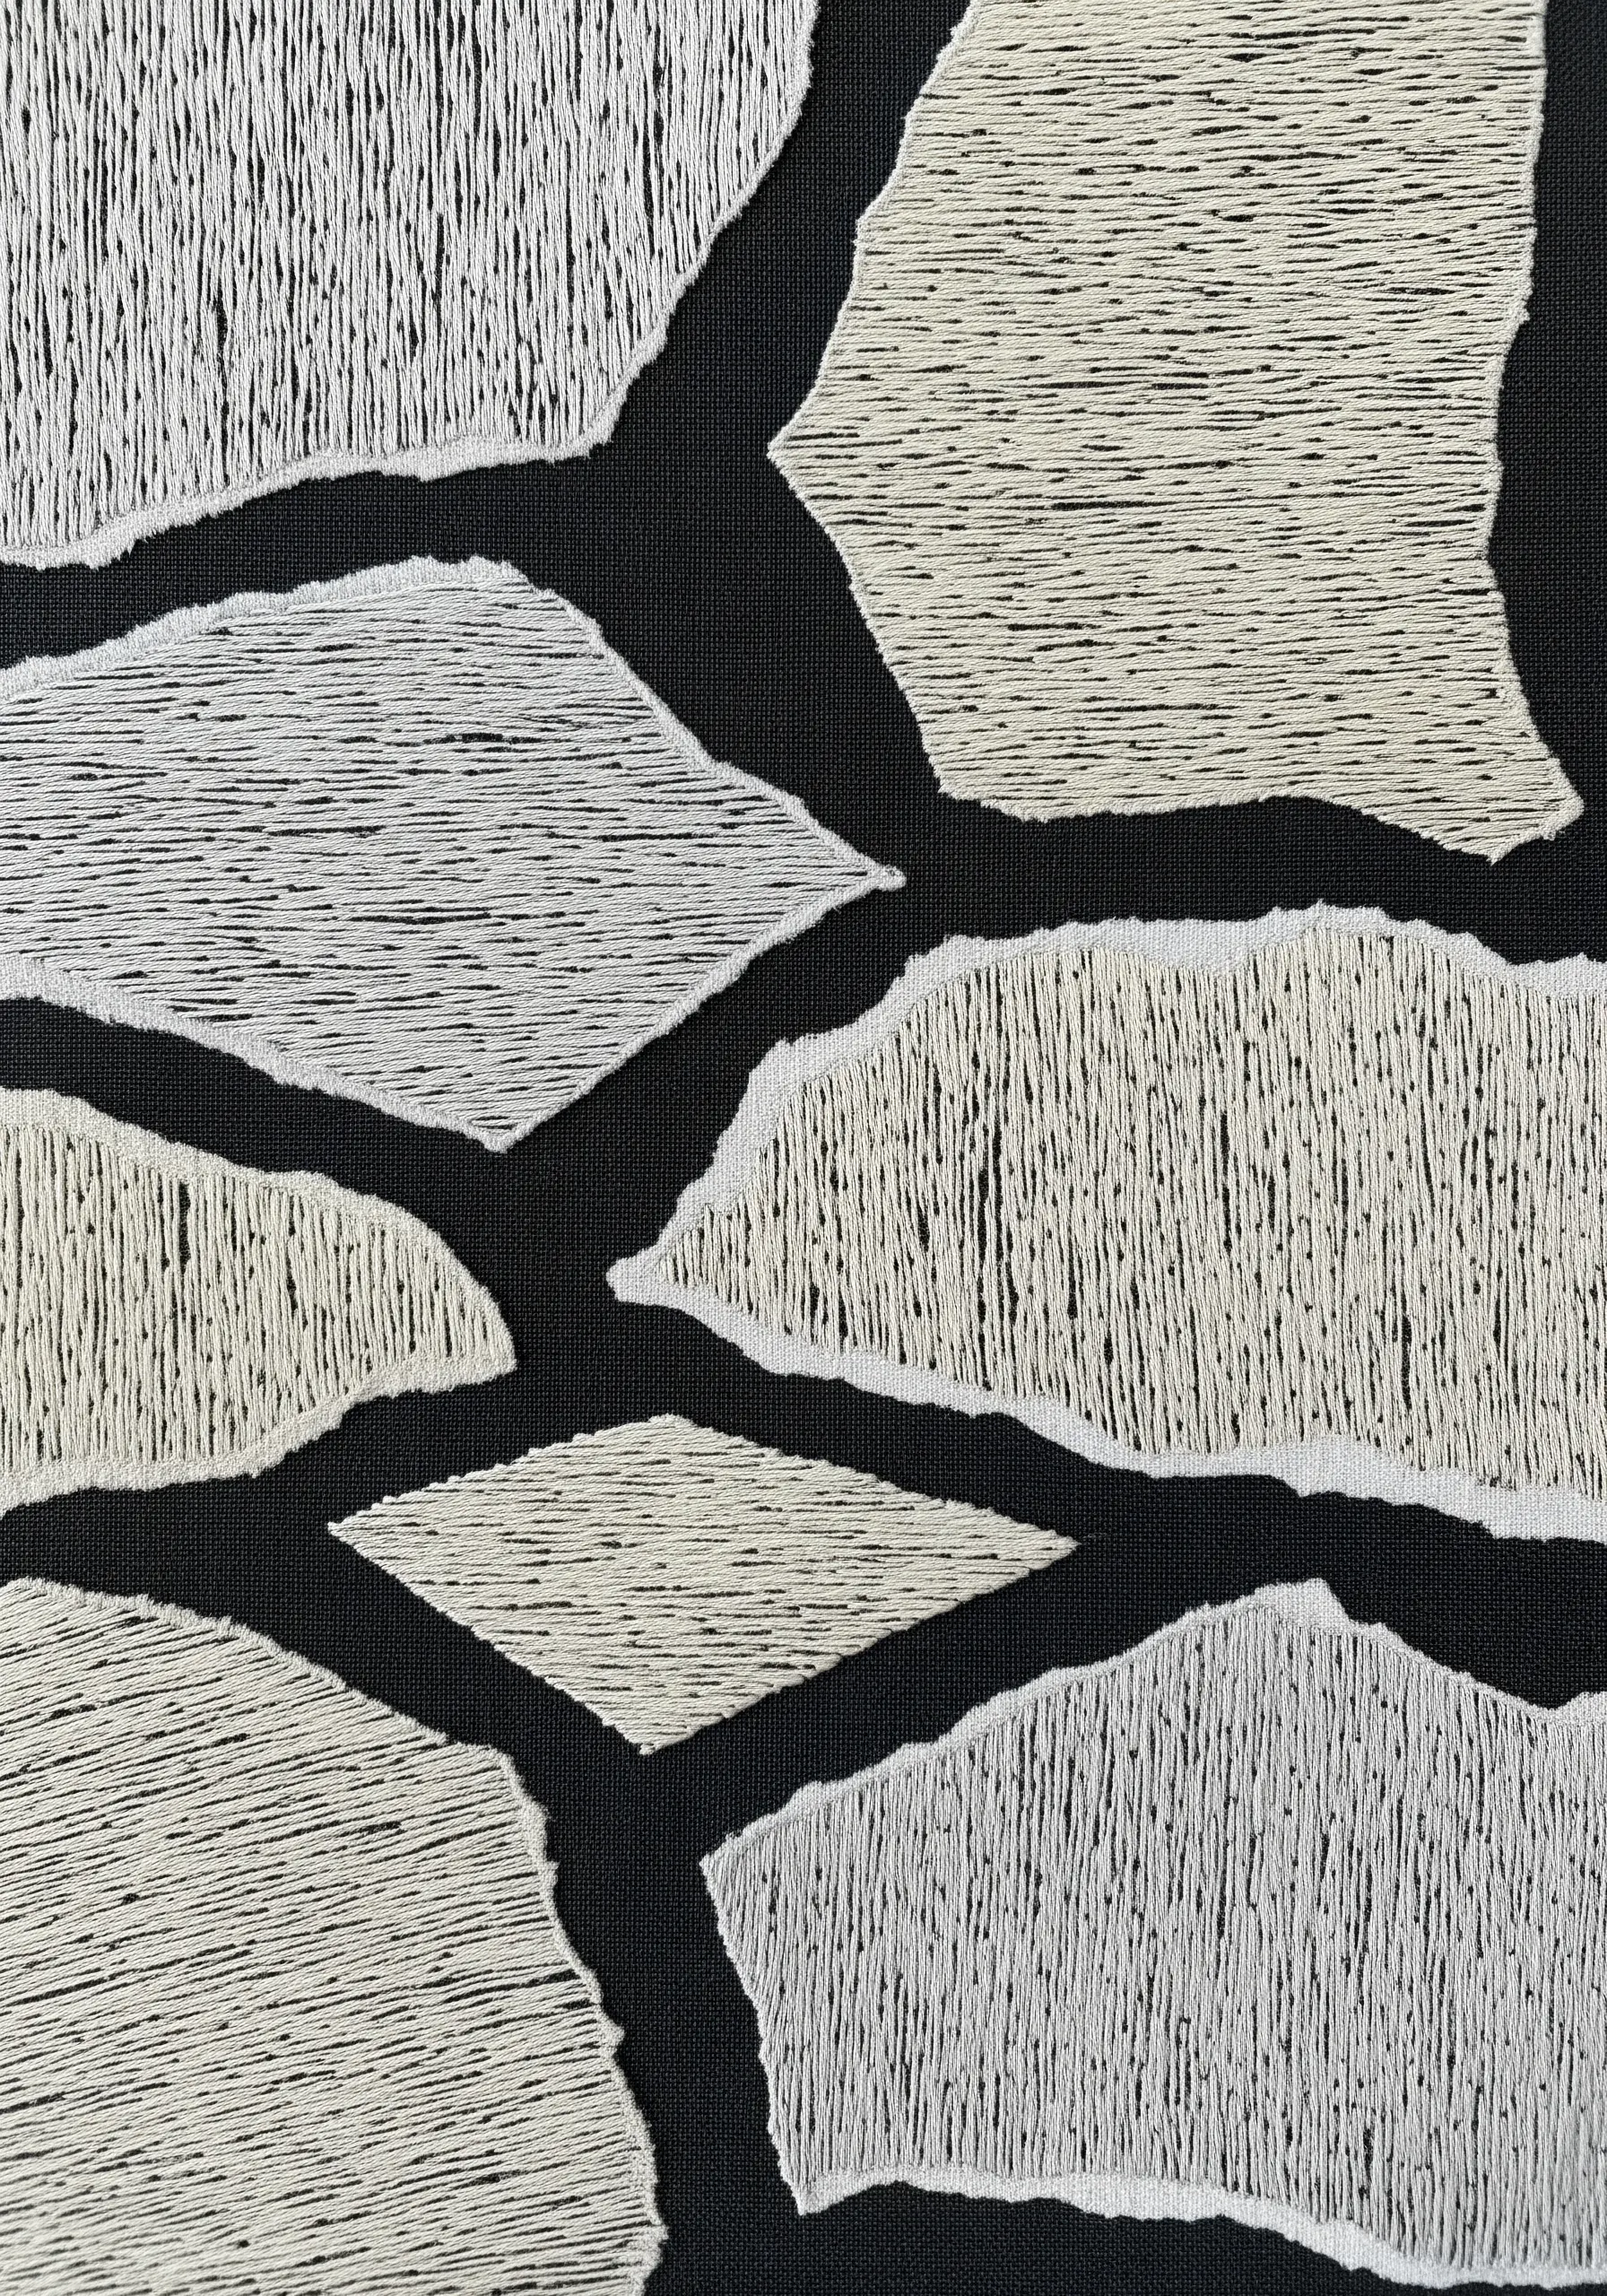
Give your work an organic, torn-paper effect using dense fill stitches on a dark background.
Lightly sketch several abstract, angular shapes onto your fabric, making sure they don’t touch.
Fill each shape with long-and-short stitch or dense straight stitches, keeping the stitches vertical but allowing the edges of the shape to be uneven and ‘torn’.
The contrast between the negative space of the black fabric and the textured, off-white stitched shapes creates a powerful graphic composition.
33. Construct a 3D Sculptural Wall Piece
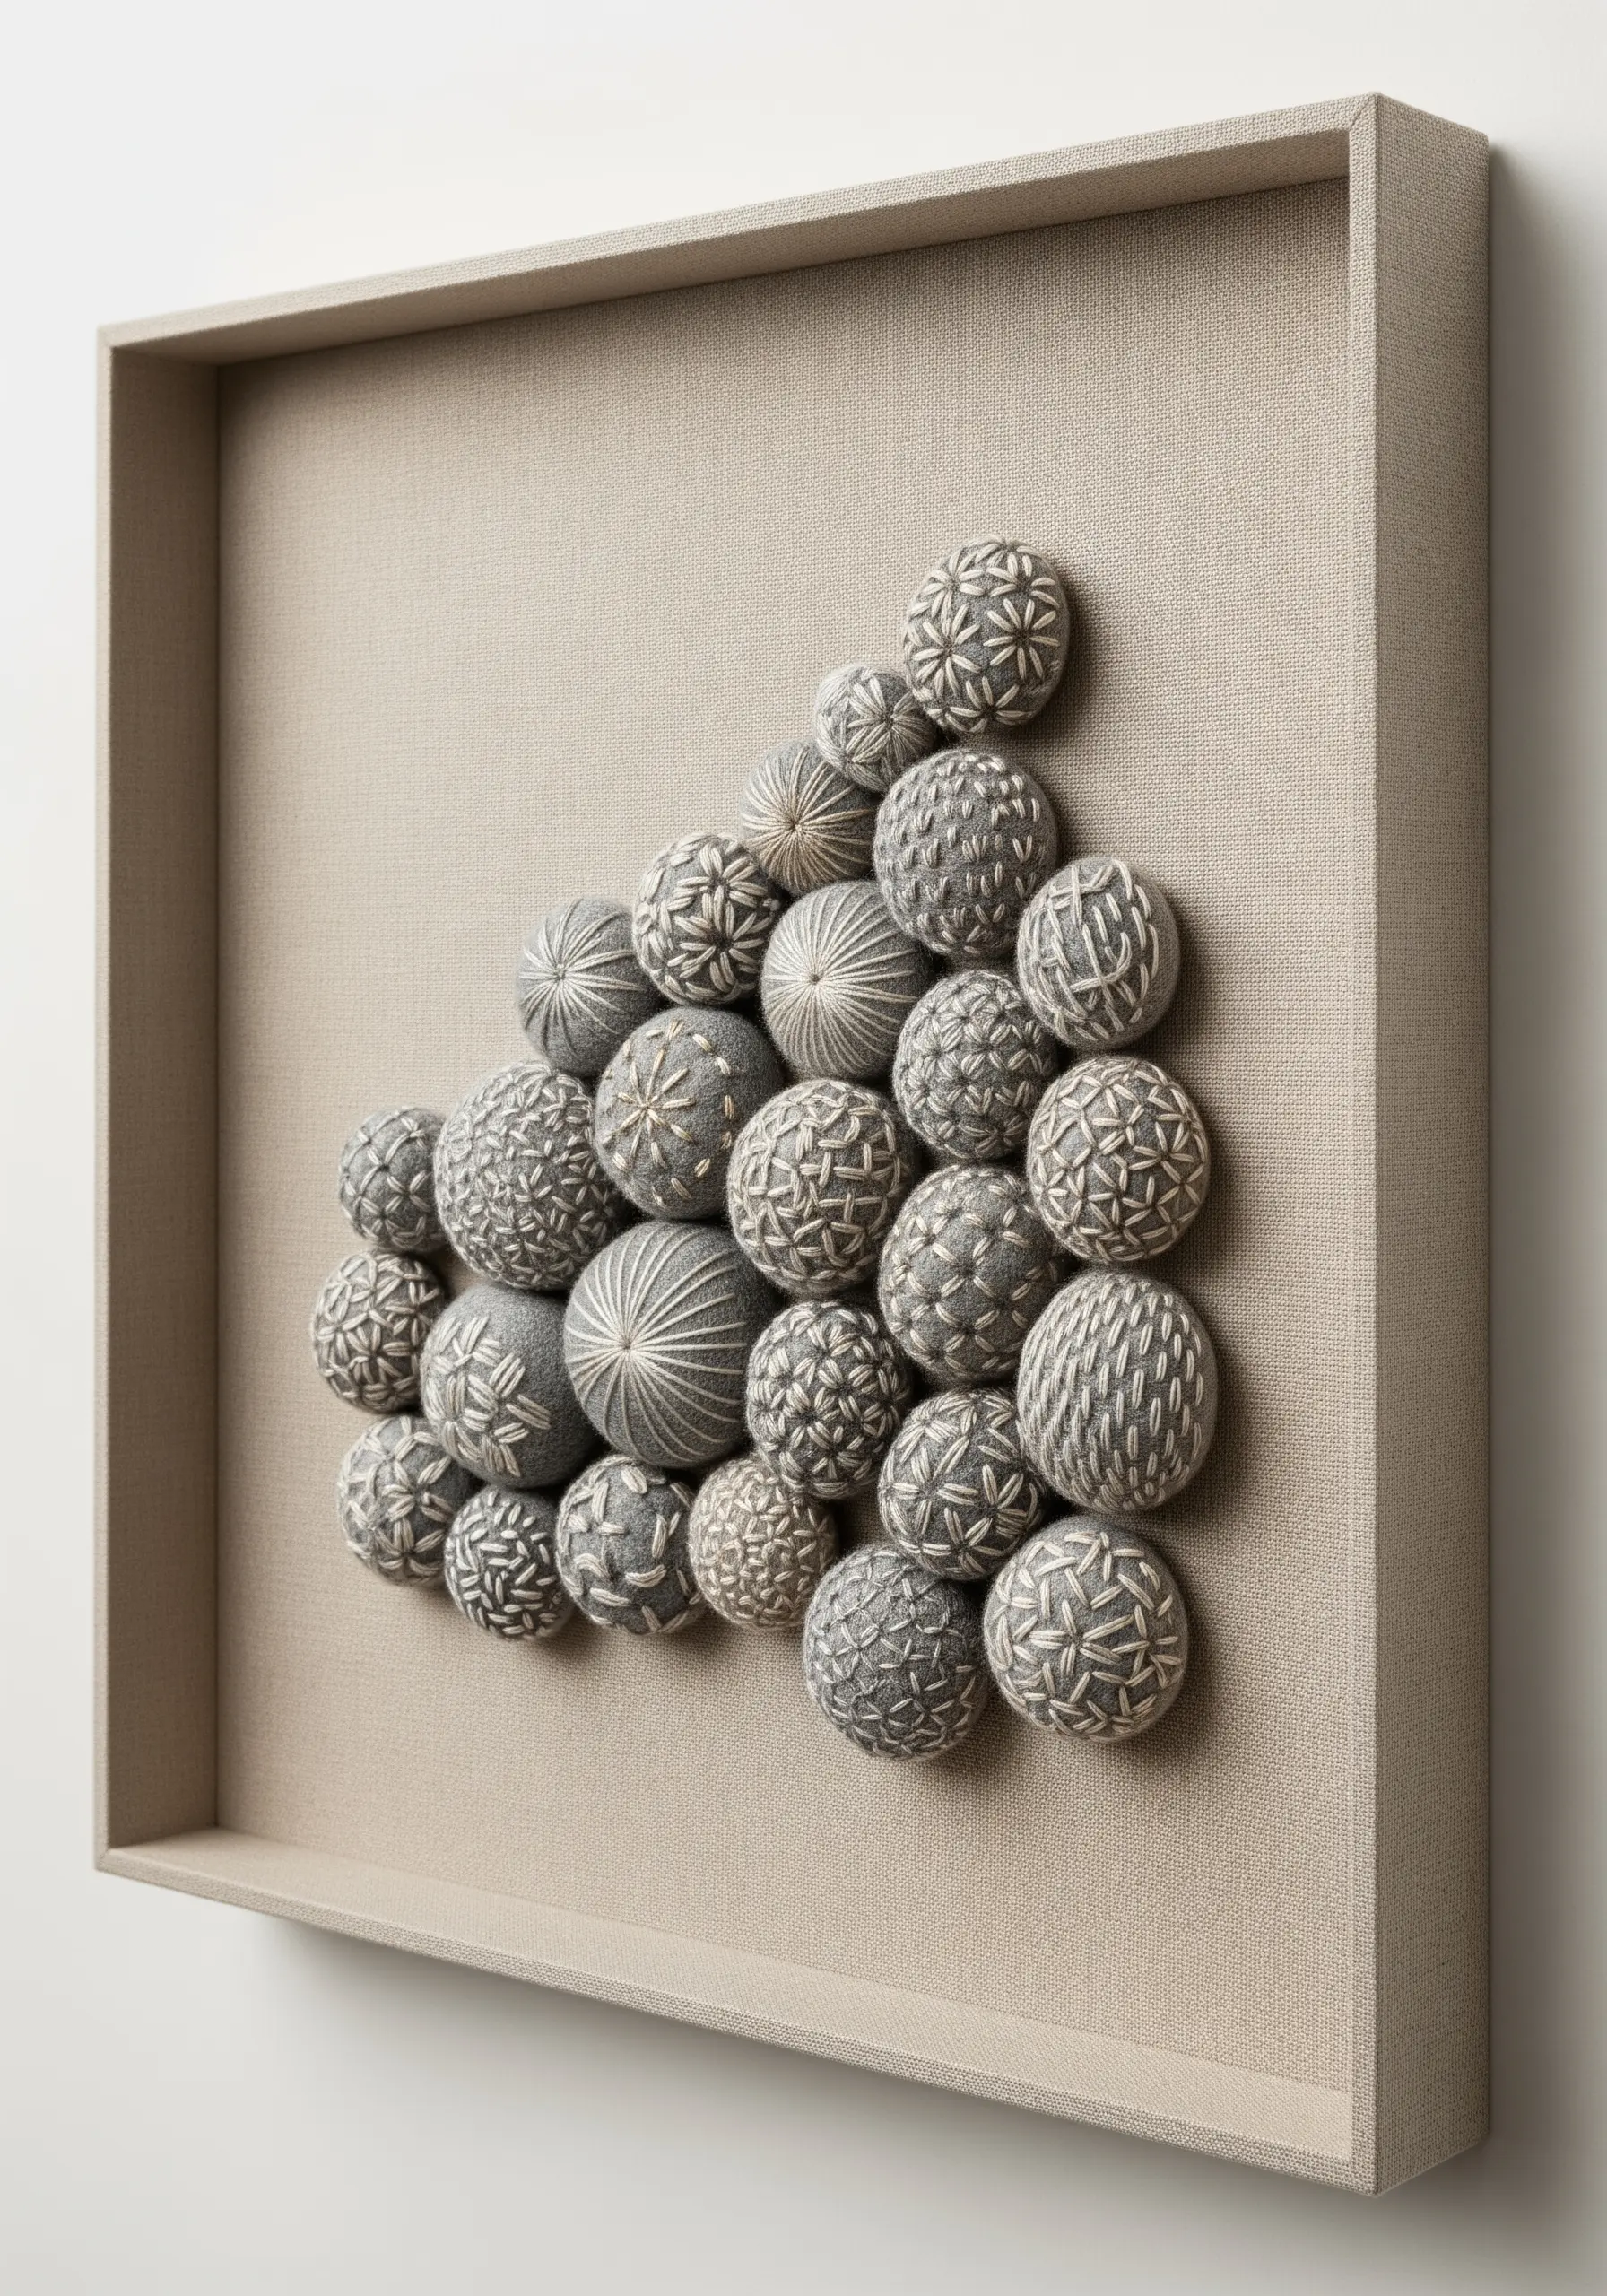
Take your embroidery off the hoop and into three dimensions by working on spherical forms.
Cover small foam or cotton balls with a neutral-toned fabric like linen.
Embroider each sphere with a different geometric pattern—straight stitch grids, radiating lines, or tiny seed stitch fills.
Arrange the finished, textured spheres in a cluster within a deep shadow box frame. These DIY framed embroidery art projects that look expensive but aren’t create a stunning, high-end sculptural piece.
34. Frame a Mini Weaving with Exposed Warp
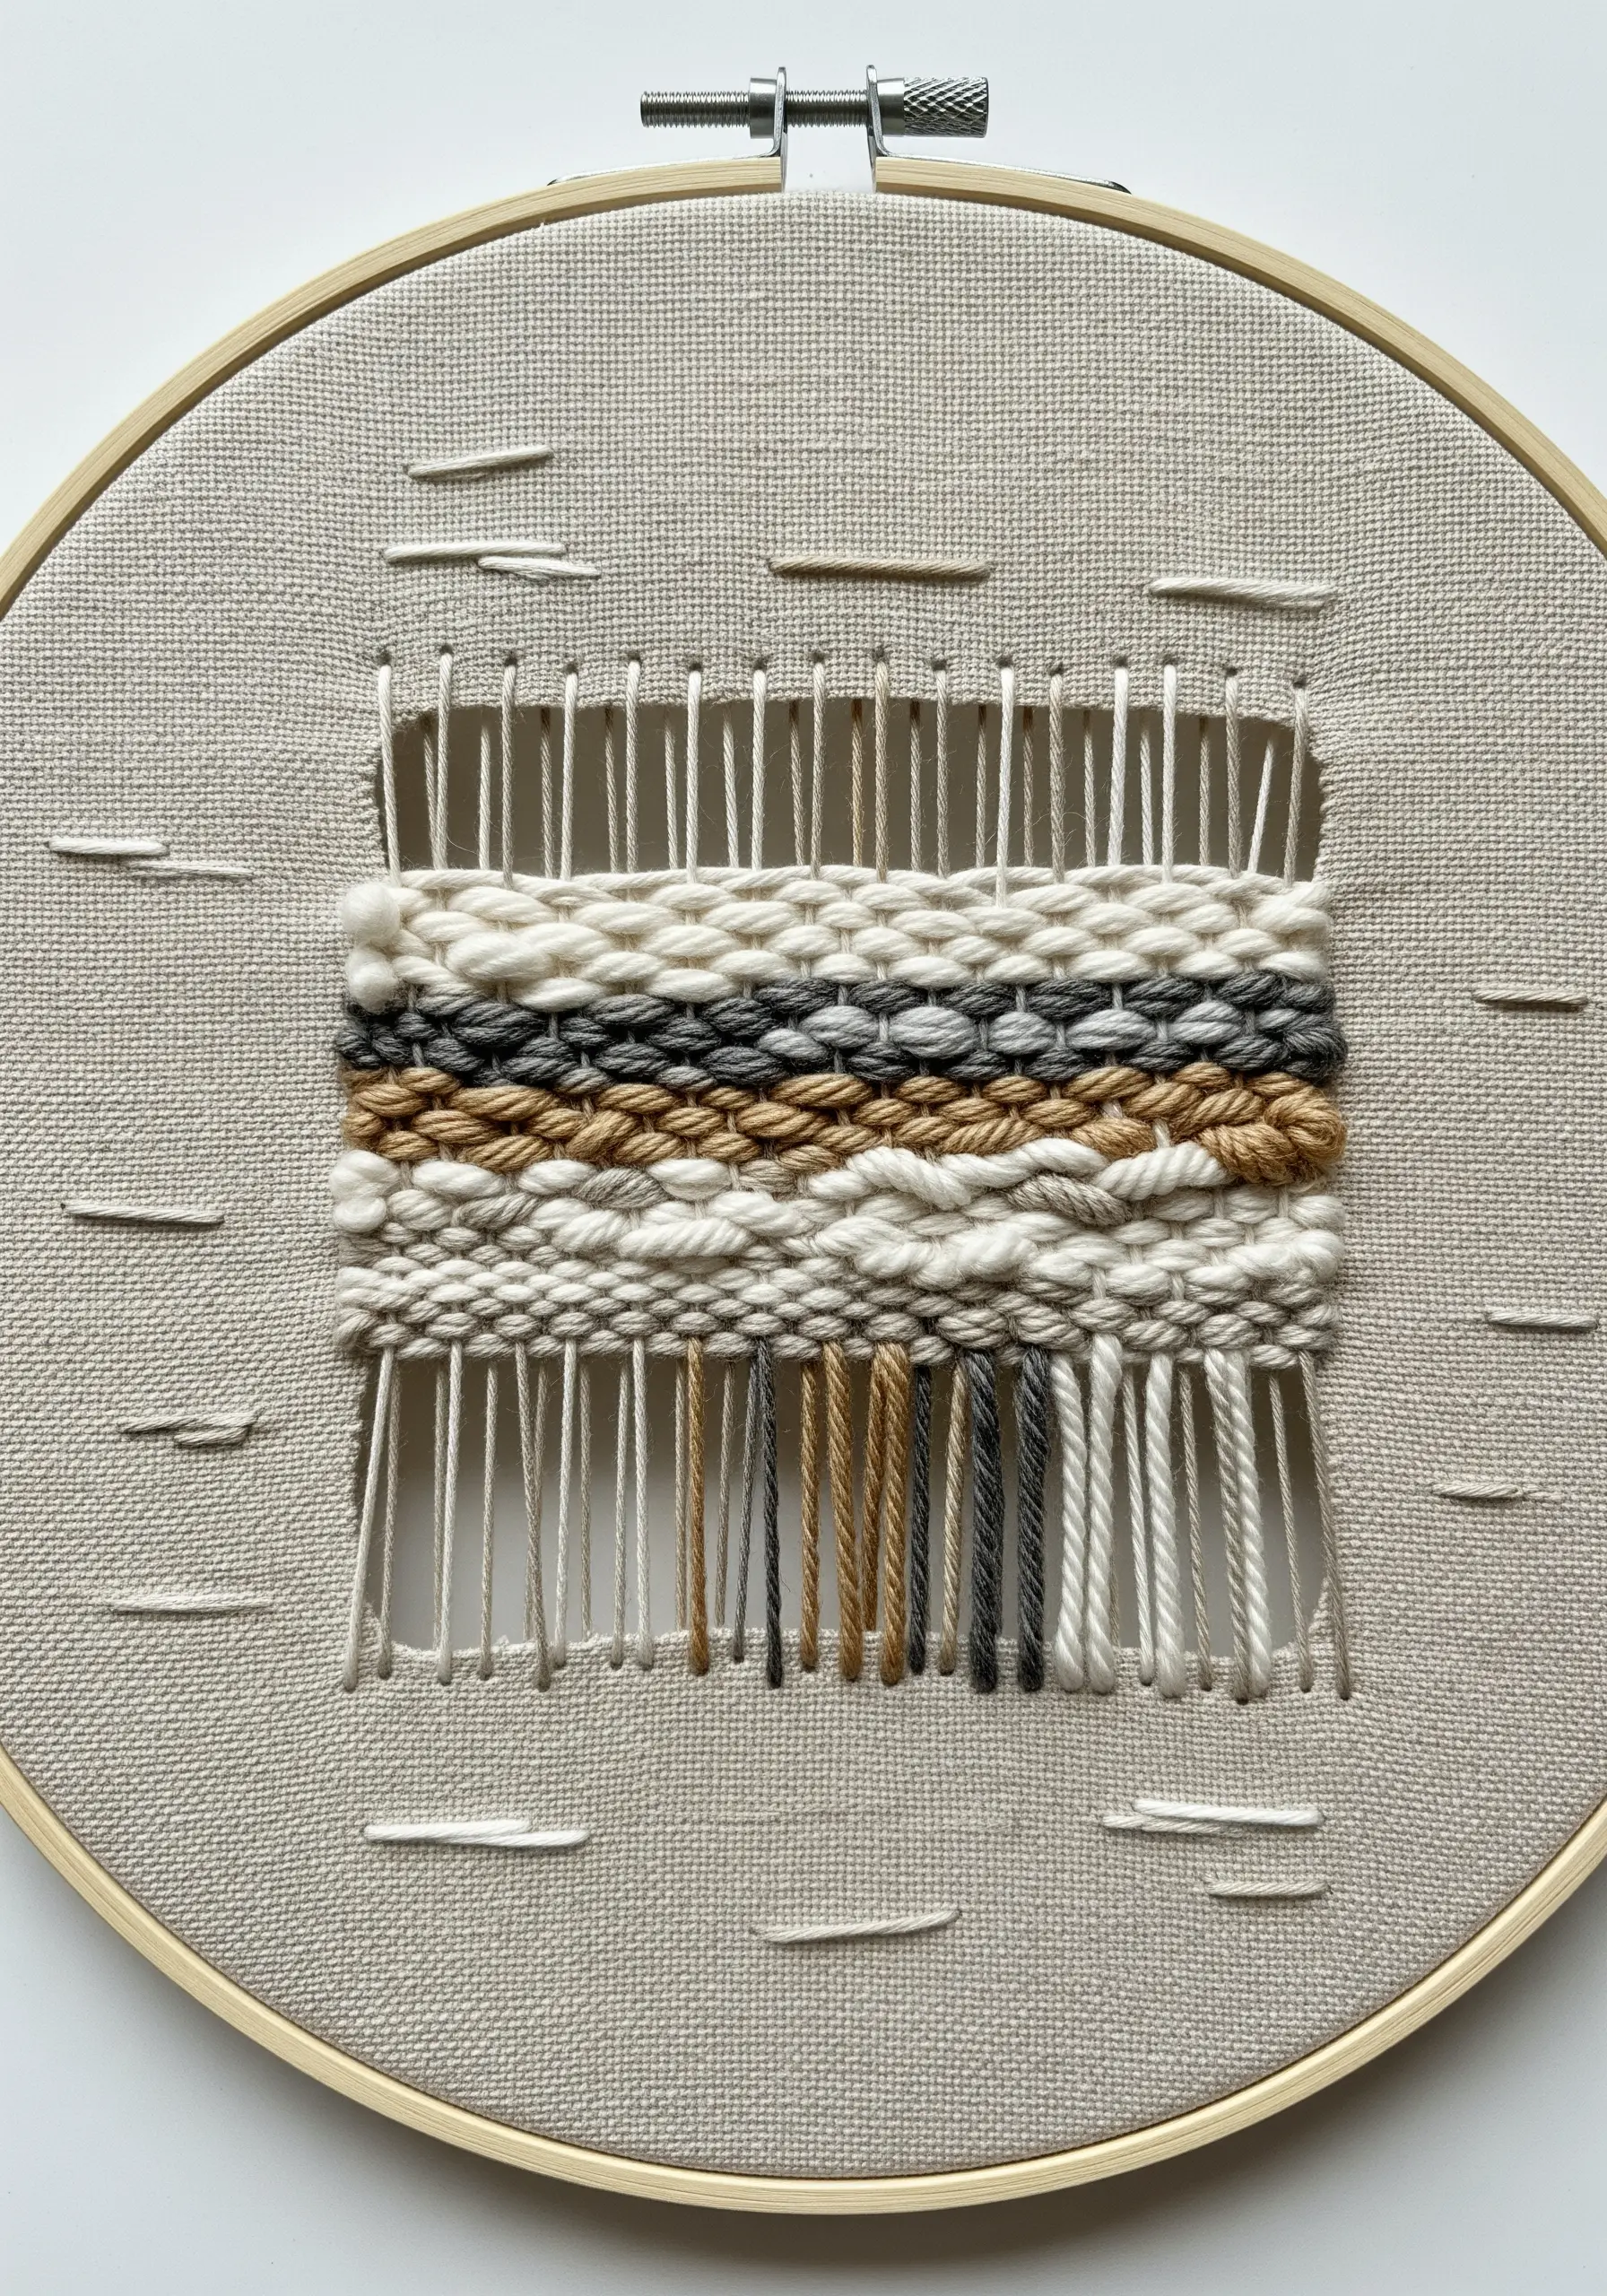
Highlight the structure of weaving by making the warp threads a visible part of the final design.
Create a set of vertical warp threads in the center of your hoop, but only weave across the middle section.
This leaves the warp threads at the top and bottom exposed, framing the woven portion and drawing attention to the process.
Add a few disconnected straight stitches around the main piece to create a sense of balance and intentionality within the negative space.
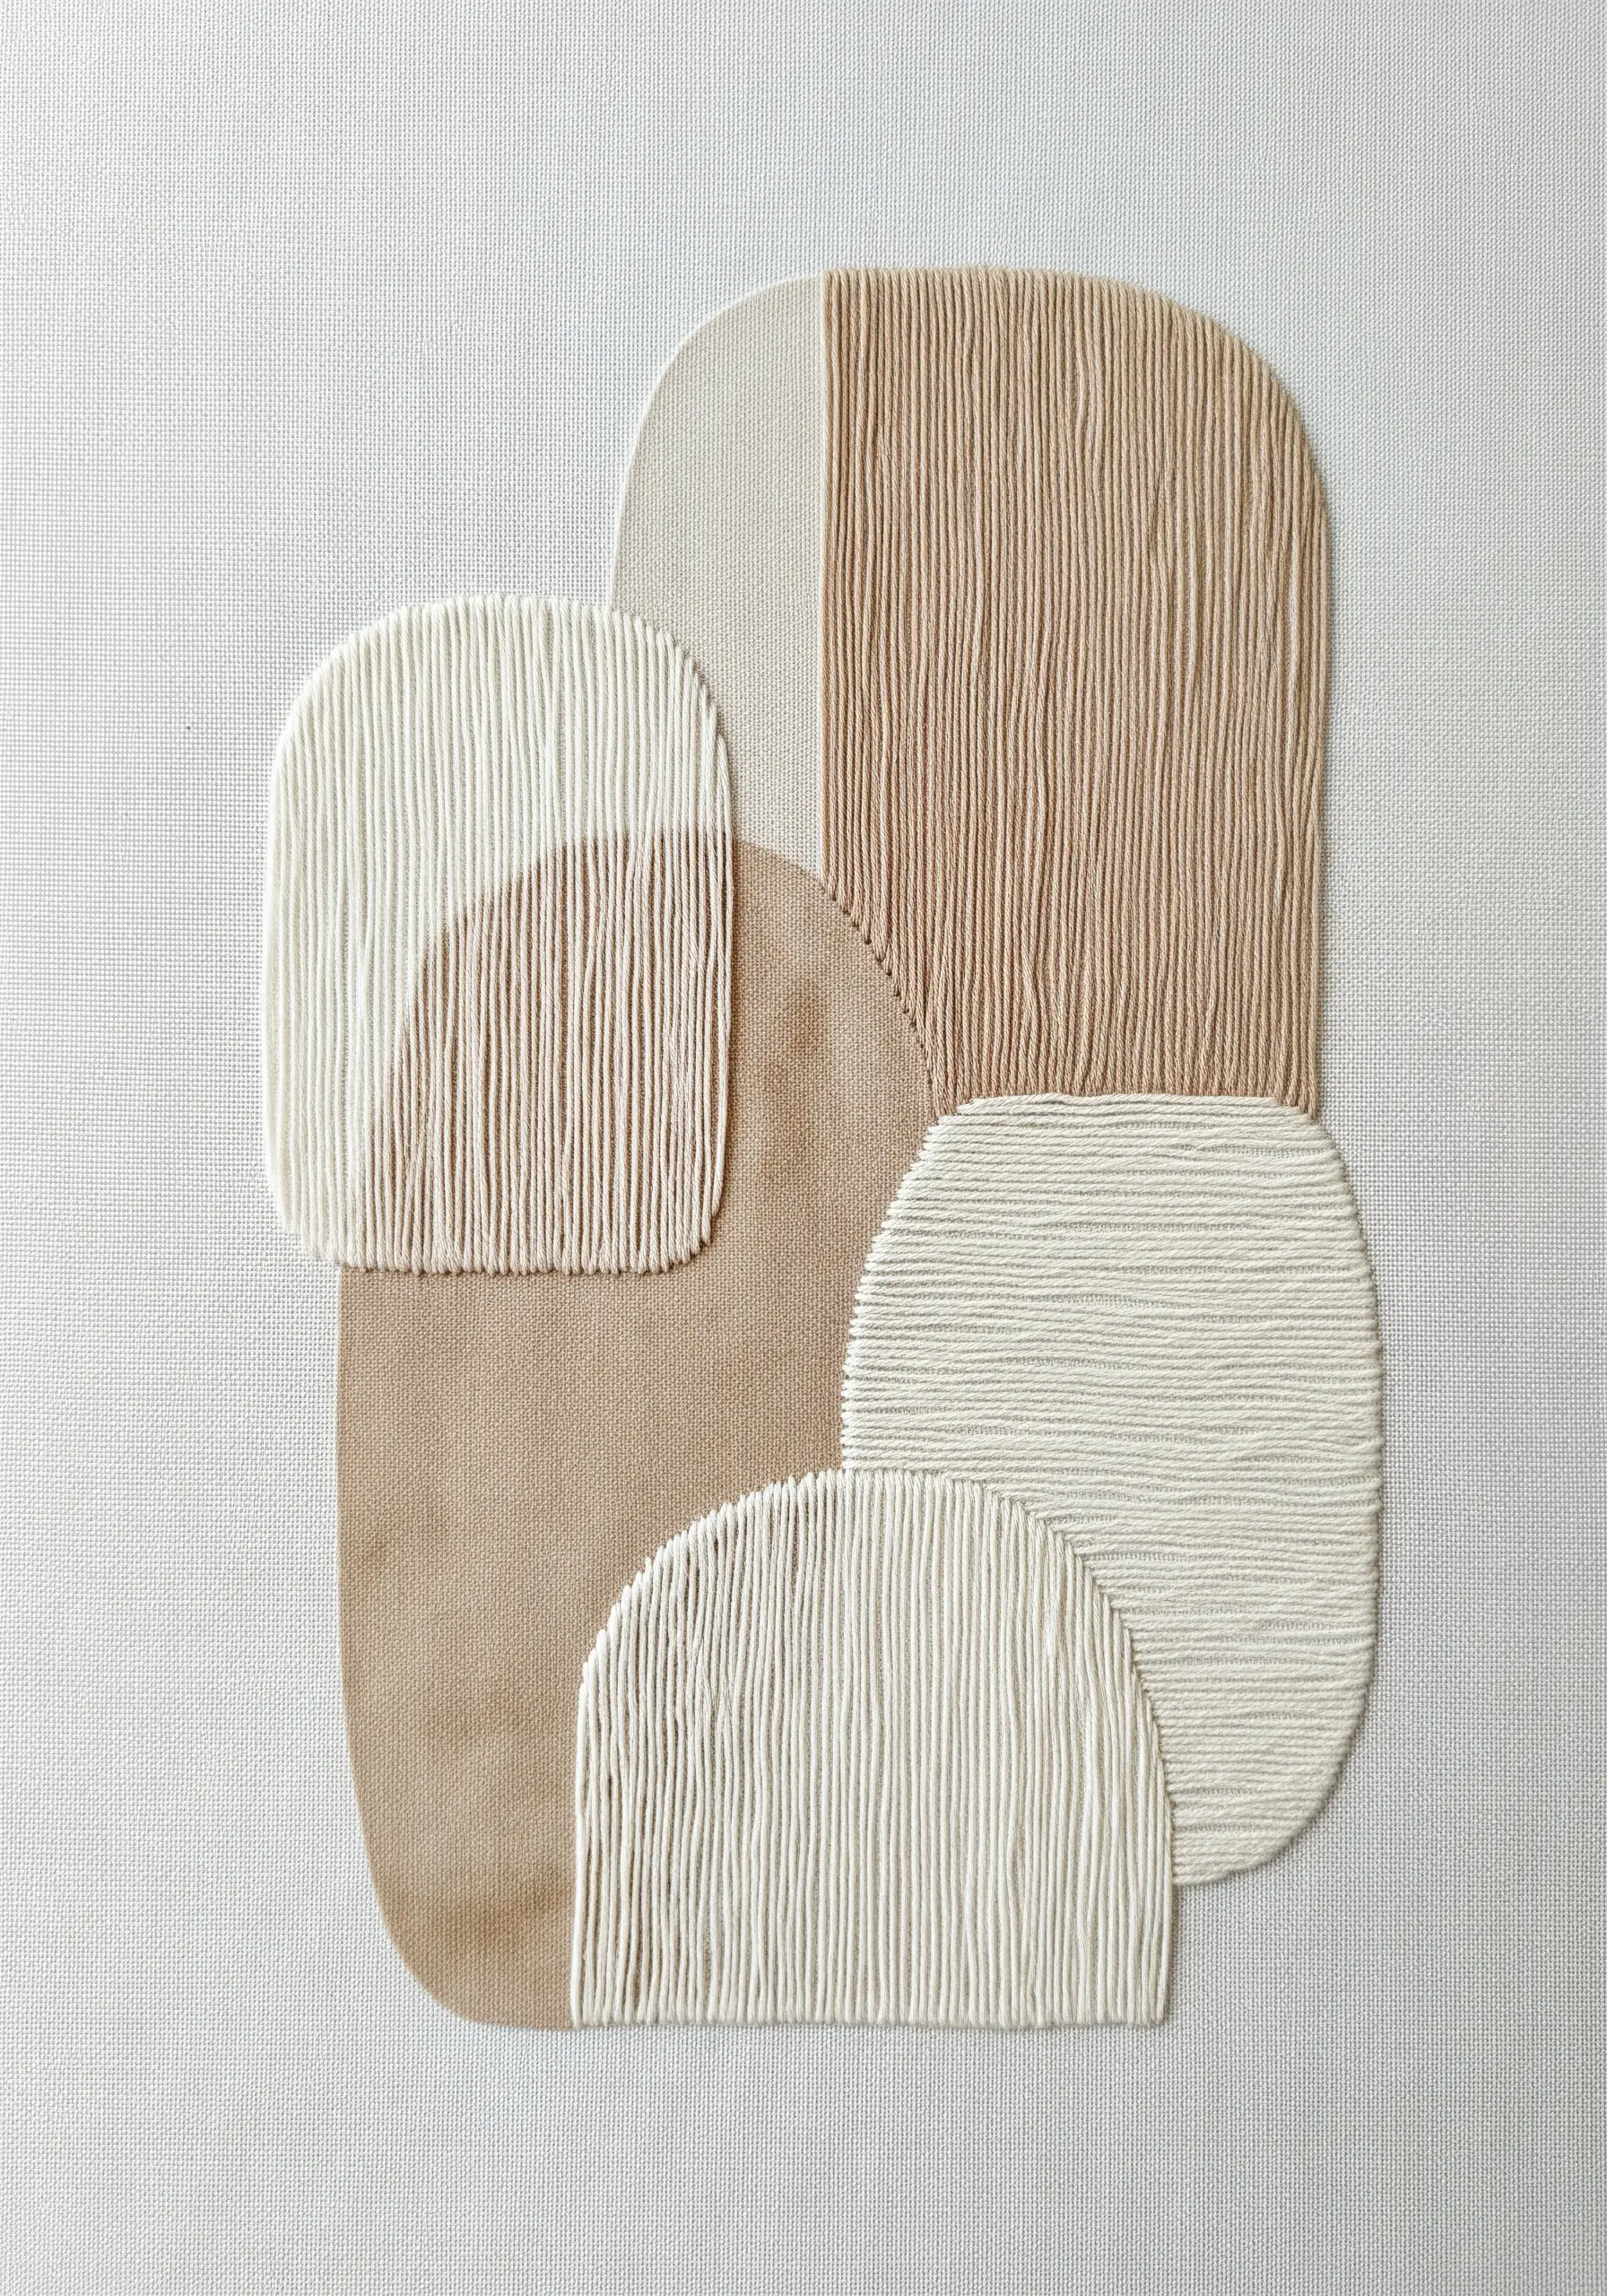
35. Imply Transparency with Overlapping Stitches
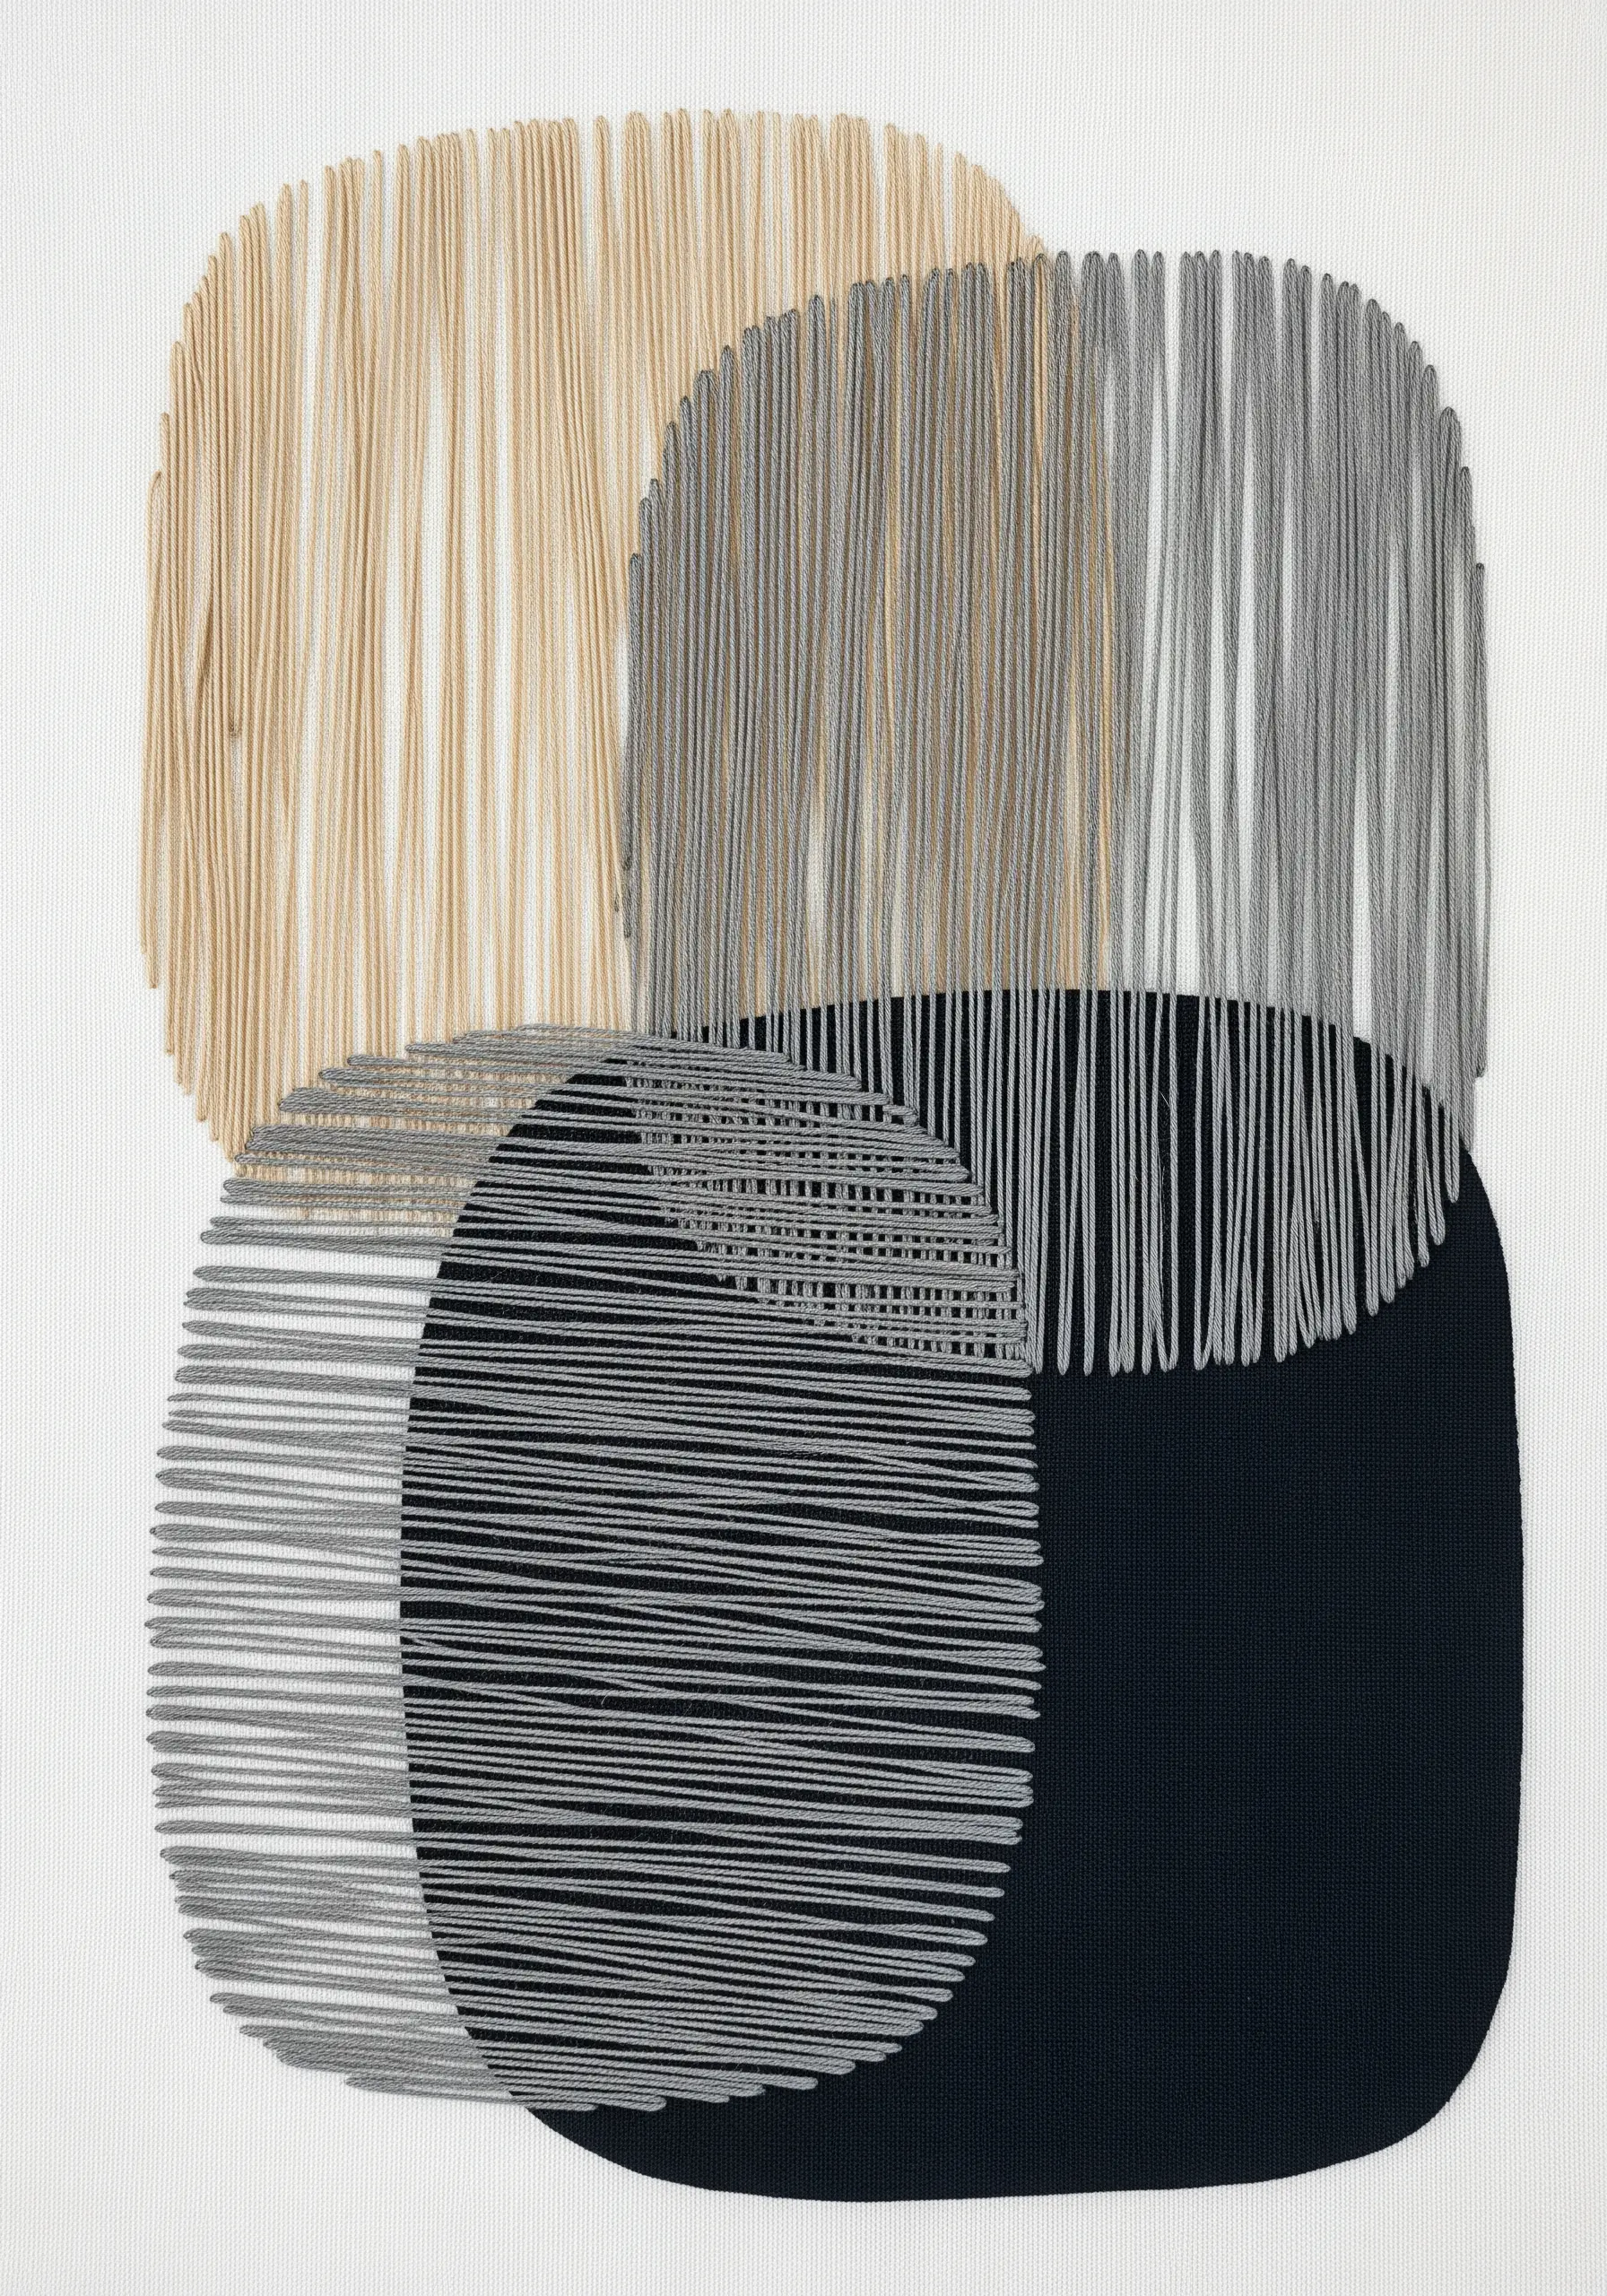
Create the illusion of layered, translucent shapes using only thread.
Draw four overlapping circles or organic forms. Where the shapes overlap, change the color or direction of your stitches.
Fill each section with long, vertical straight stitches. The eye will interpret the shifts in color and texture as one shape being visible through another.
This technique turns a flat surface into a complex study of depth and light, making it a perfect example of sophisticated minimalist embroidery wall art ideas.
36. Sculpt Fluid Lines with Couching and Beads
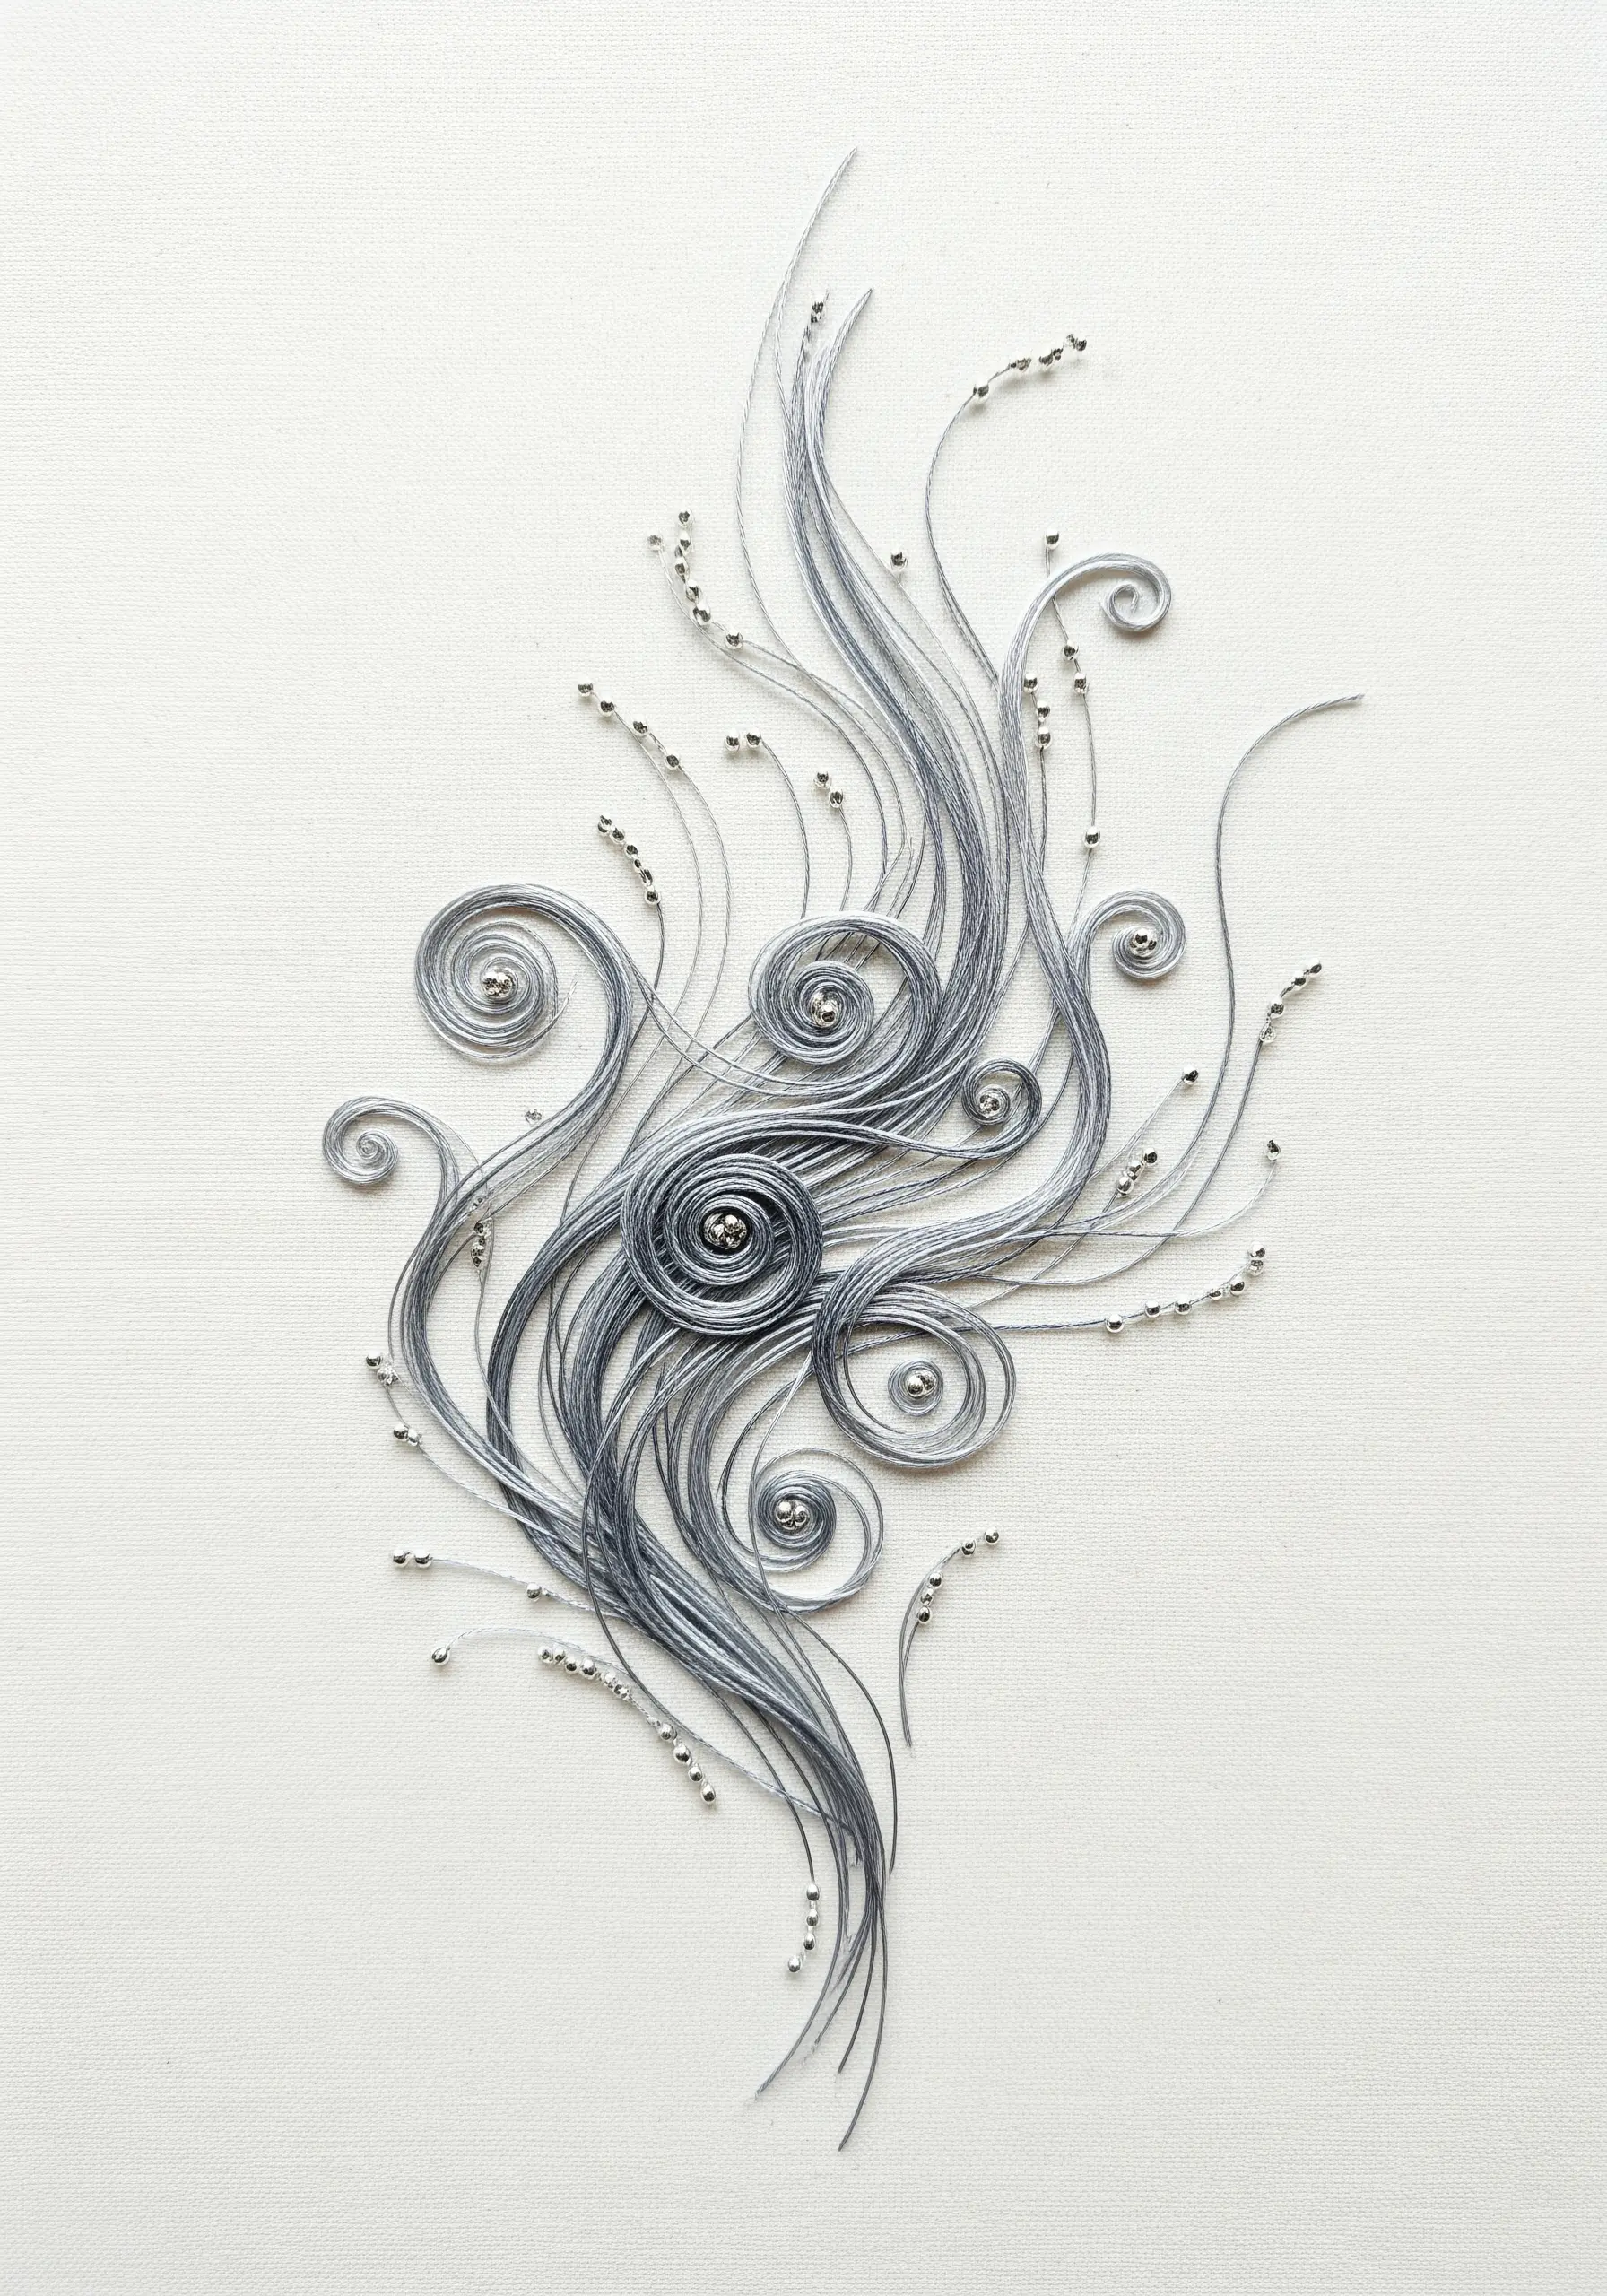
Create graceful, calligraphic swirls that seem to flow across the fabric.
Bundle several strands of fine, silky thread together and lay them on your fabric in sweeping curves and spirals.
Using a single, discreet strand of a matching color, tack the bundle down with tiny couching stitches.
To add a touch of light and punctuation, scatter small metallic beads along the lines. The beads catch the light and provide a subtle textural contrast to the smooth, flowing threads.


