
Have you ever looked at a masterpiece and wondered how you could capture even a fraction of its energy with just a needle and thread? It’s not about replicating a painting stitch-for-stitch, but about translating its essence—the bold texture, the soft light, the chaotic energy—into a language that fiber understands.
This is where your artistry can truly deepen. By moving beyond simple stitches and thinking like a painter, you can learn to use yarn to create impasto, single strands to mimic watercolor, and layered felt to build graphic forms. It’s a shift in perspective that transforms your craft from decorative to expressive.
Here, we’ll explore how to borrow from the masters not to copy, but to innovate. You will find tangible techniques that empower you to sculpt with wool, paint with thread, and construct with fabric, turning your next project into a personal, gallery-worthy installation.
1. Translating Van Gogh’s Energy with Directional Couching
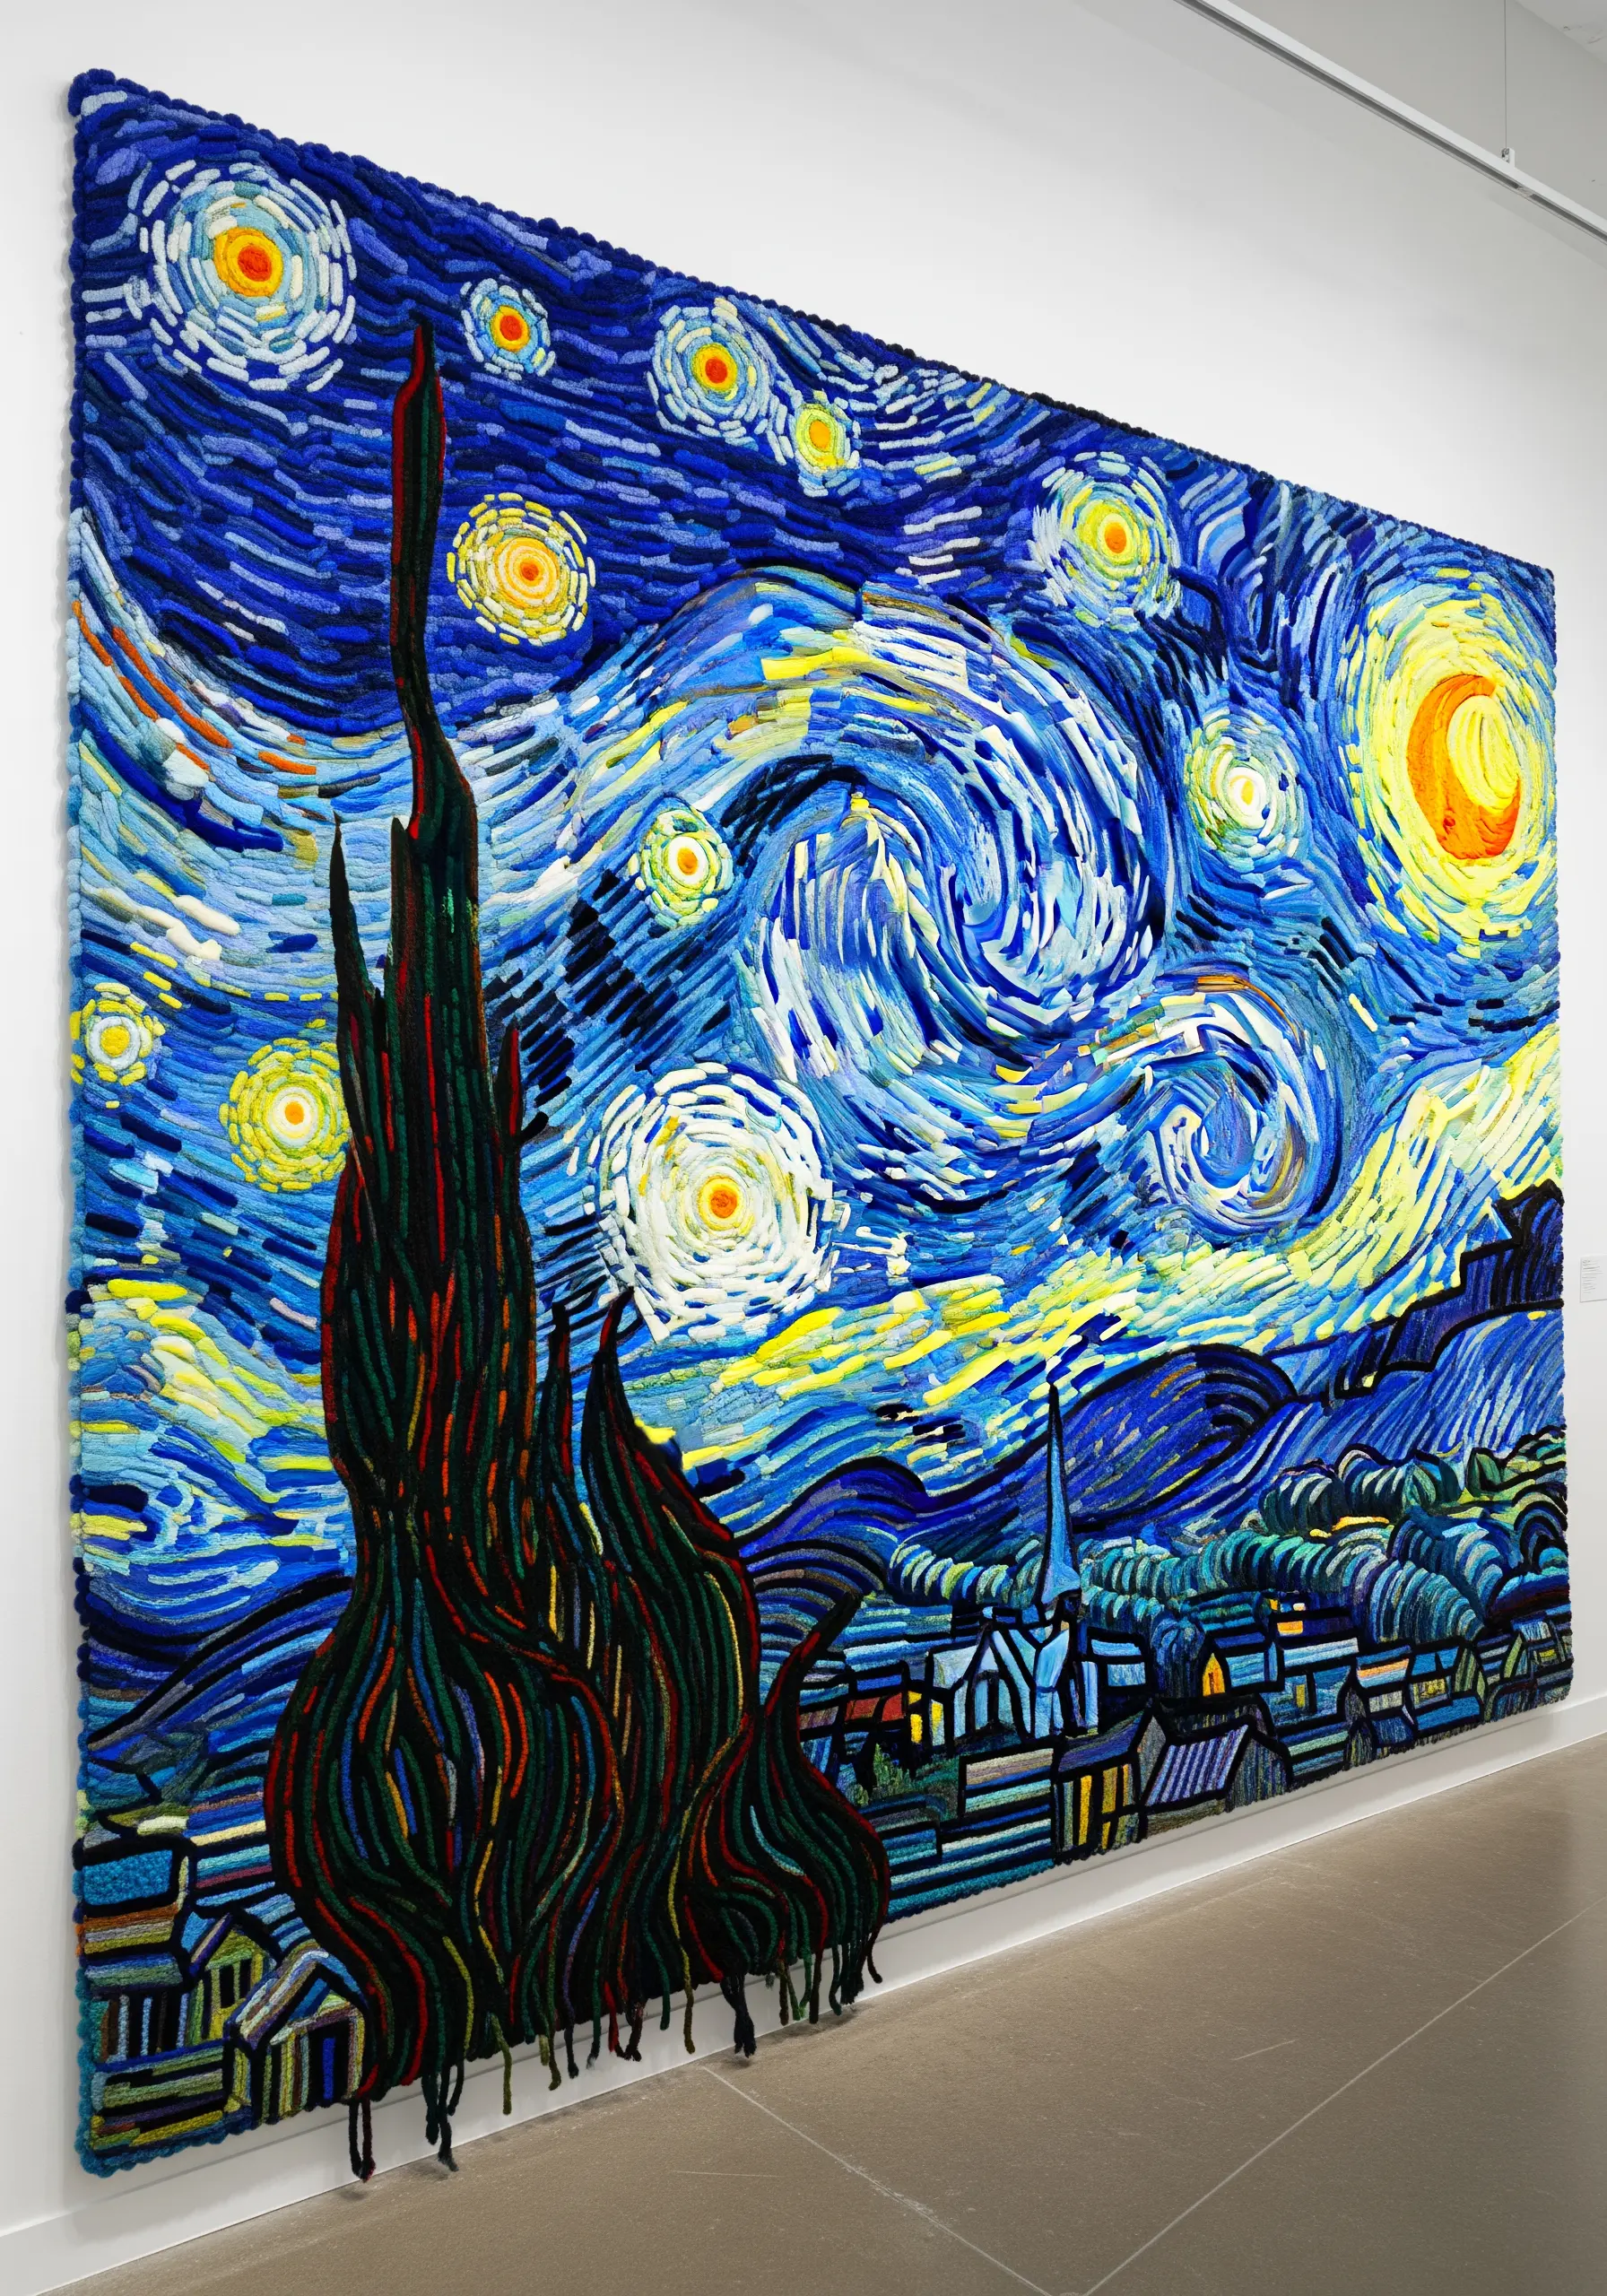
To capture the dynamic, impasto strokes of a post-impressionist masterpiece, think in terms of direction and volume.
Instead of filling areas with traditional satin stitch, use couching: lay down thick, multi-ply yarn or roving wool to follow the painted swirls, then tack it in place with a thinner, contrasting thread.
This technique builds incredible texture and allows the direction of your ‘strokes’ to define the energy of the piece, just as a painter would.
Vary the thickness of your couched yarn to create focal points—thicker for the foreground elements and thinner for the distant sky, enhancing the sense of depth.
2. Stitching Monet’s Haze with a Watercolor Wash Effect

Achieve the soft, diffused light of Impressionism by treating your thread like watercolor.
Work on a fine, sheer fabric like organza or silk gauze, allowing layers of color to show through.
Use single strands of floss and long-and-short stitches that blend seamlessly into one another without harsh lines.
By stitching layers of pastel pinks, blues, and lavenders first, you create an underpainting that subtly influences the greens and blues stitched on top, giving your work that signature hazy glow.
This approach transforms thread into a translucent medium, perfect for capturing reflections on water.
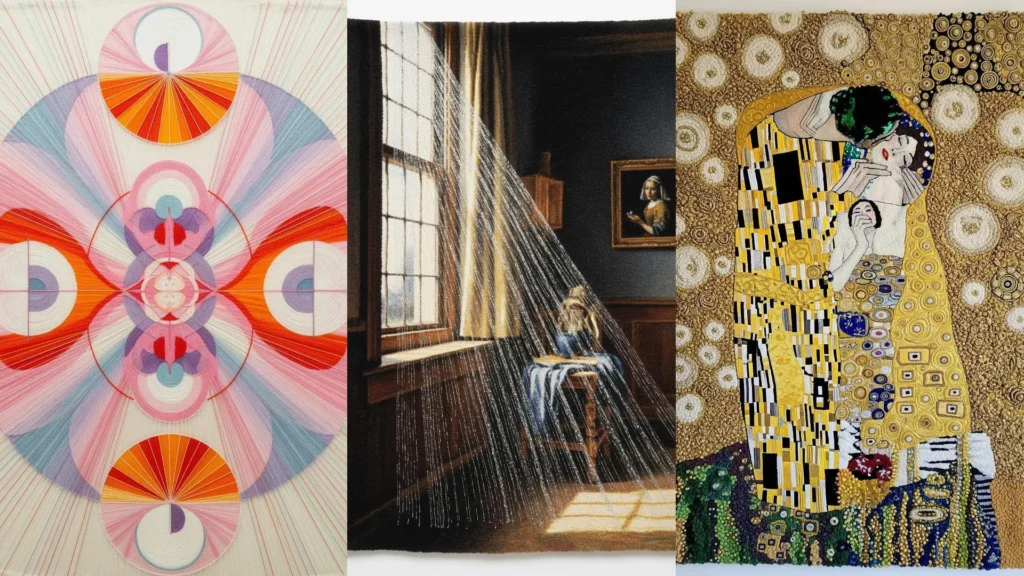
3. Embodying Klimt’s Opulence with High-Relief Texture
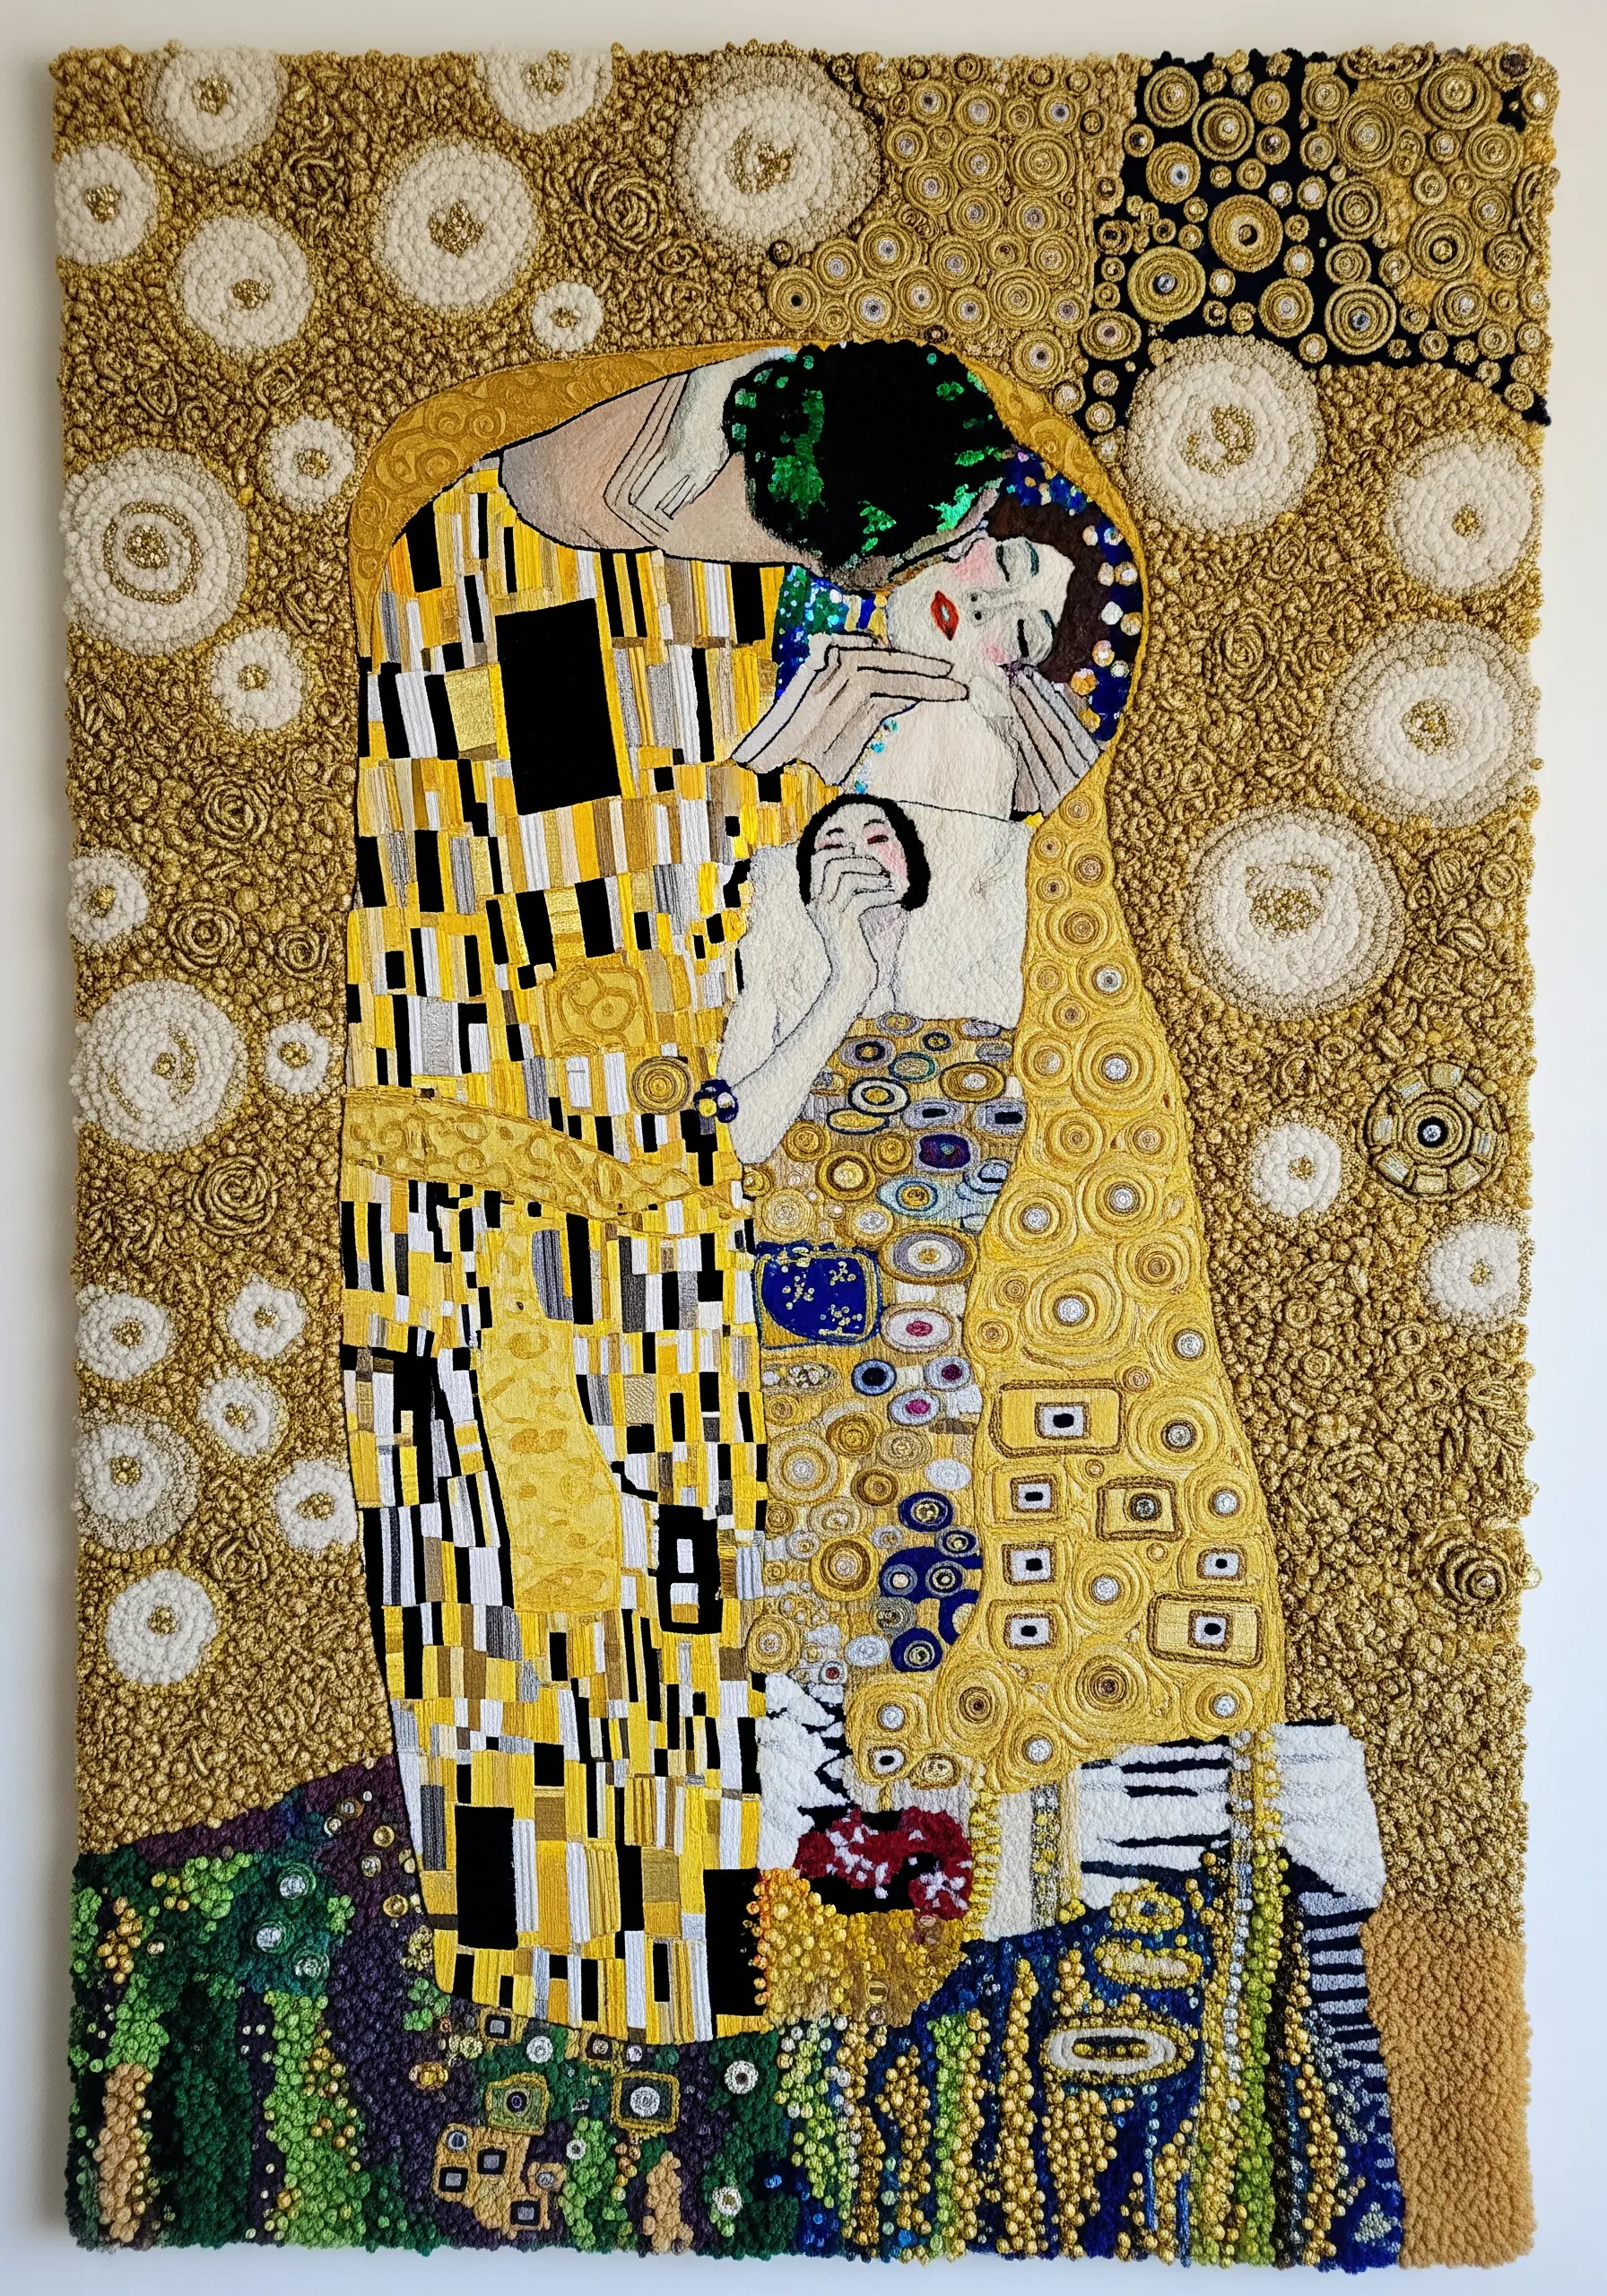
Recreate the decadent, gilded feel of Klimt’s work by combining multiple textures in a single piece.
For the golden swirls, use coiled rope or chunky yarn couched down with metallic thread to create raised, defined spirals.
Fill other areas with dense French knots, bullion stitches, or seed stitches to create a pebbled, mosaic-like surface that contrasts with the smoother satin-stitched sections.
Don’t be afraid to mix in beads or sequins, stitching them directly into the fiber. This layered approach creates a tactile richness that invites closer inspection.
4. Achieving Mondrian’s Purity with Geometric Color Blocking

For the clean precision of De Stijl, your focus must be on flawless geometry and uniform texture.
Instead of embroidery stitches, consider frame weaving or punch needle to create perfectly flat, dense blocks of color.
Stretch a sturdy canvas and use masking tape to create sharp, clean edges for each color section.
Work with a consistent loop height or weave density to ensure each block feels solid and visually equal. The black lines should be applied last, using couched cord or a raised satin stitch band to create a crisp, graphic separation.
5. Capturing Pollock’s Action Painting with Liquid Thread

Translate the chaotic energy of drip painting into a three-dimensional fiber installation.
Soak various weights of yarn and string in a fabric stiffener or PVA glue mixture, then drape, drip, and fling them onto a protected surface or a pre-built armature.
As the fibers dry, they will hold their dynamic, gestural shapes. Build the piece in layers, starting with a base of heavier, grounded threads and adding lighter, more energetic splatters on top.
This method moves beyond the needle, using the thread itself as a fluid line of paint.
6. Evoking Rothko’s Emotion Through Saturated Fiber Fields

To create the immersive color fields of a Rothko painting, texture and color blending are paramount.
Use a punch needle with plush wool yarn to create a deep, soft pile that absorbs light and softens the boundaries between colors.
Instead of a hard edge, create a transitional ‘bleed’ by subtly mixing the two colors in the central band, punching one color into the other sparingly.
This technique, known as ‘color grading,’ creates a vibrating edge that gives the piece emotional depth and replicates the soft, feathered look of his canvases. These monochrome thread embroidery ideas work beautifully for this technique.
7. Sculpting Dalí’s Surrealism with Draped Fiber Forms

Bring the fluidity of surrealism to life by taking your fiber work off the wall and into three-dimensional space.
Create the iconic melting clock form by stitching a base design onto a heavy, felt-like fabric. Then, use a heat-moldable stabilizer or internal wire armature to shape and drape the piece over a solid object.
The background can be created with loose-weave techniques like macrame or knitting, allowing the forms to feel as if they are materializing from a dreamscape.
This combination of structured embroidery and free-form fiber art captures the unsettling softness of Dalí’s world.
8. Deconstructing Portraits with Picasso-Inspired Appliqué

Capture the fragmented, multi-perspective style of Cubism by treating your fabric like cut paper.
Instead of filling every shape with thread, use appliqué with different colored and textured fabrics for the main geometric blocks of the face.
Stitch the bold, black outlines using a heavy couched cord or a thick chain stitch to define each plane. For finer details, like the eyes, use tightly coiled rope to create dimensional, sculptural elements that stand out from the flat background.
This mixed-media approach makes the portrait feel assembled and deconstructed at the same time.
9. Building a Kahlo-Inspired Portrait with Layered Felt
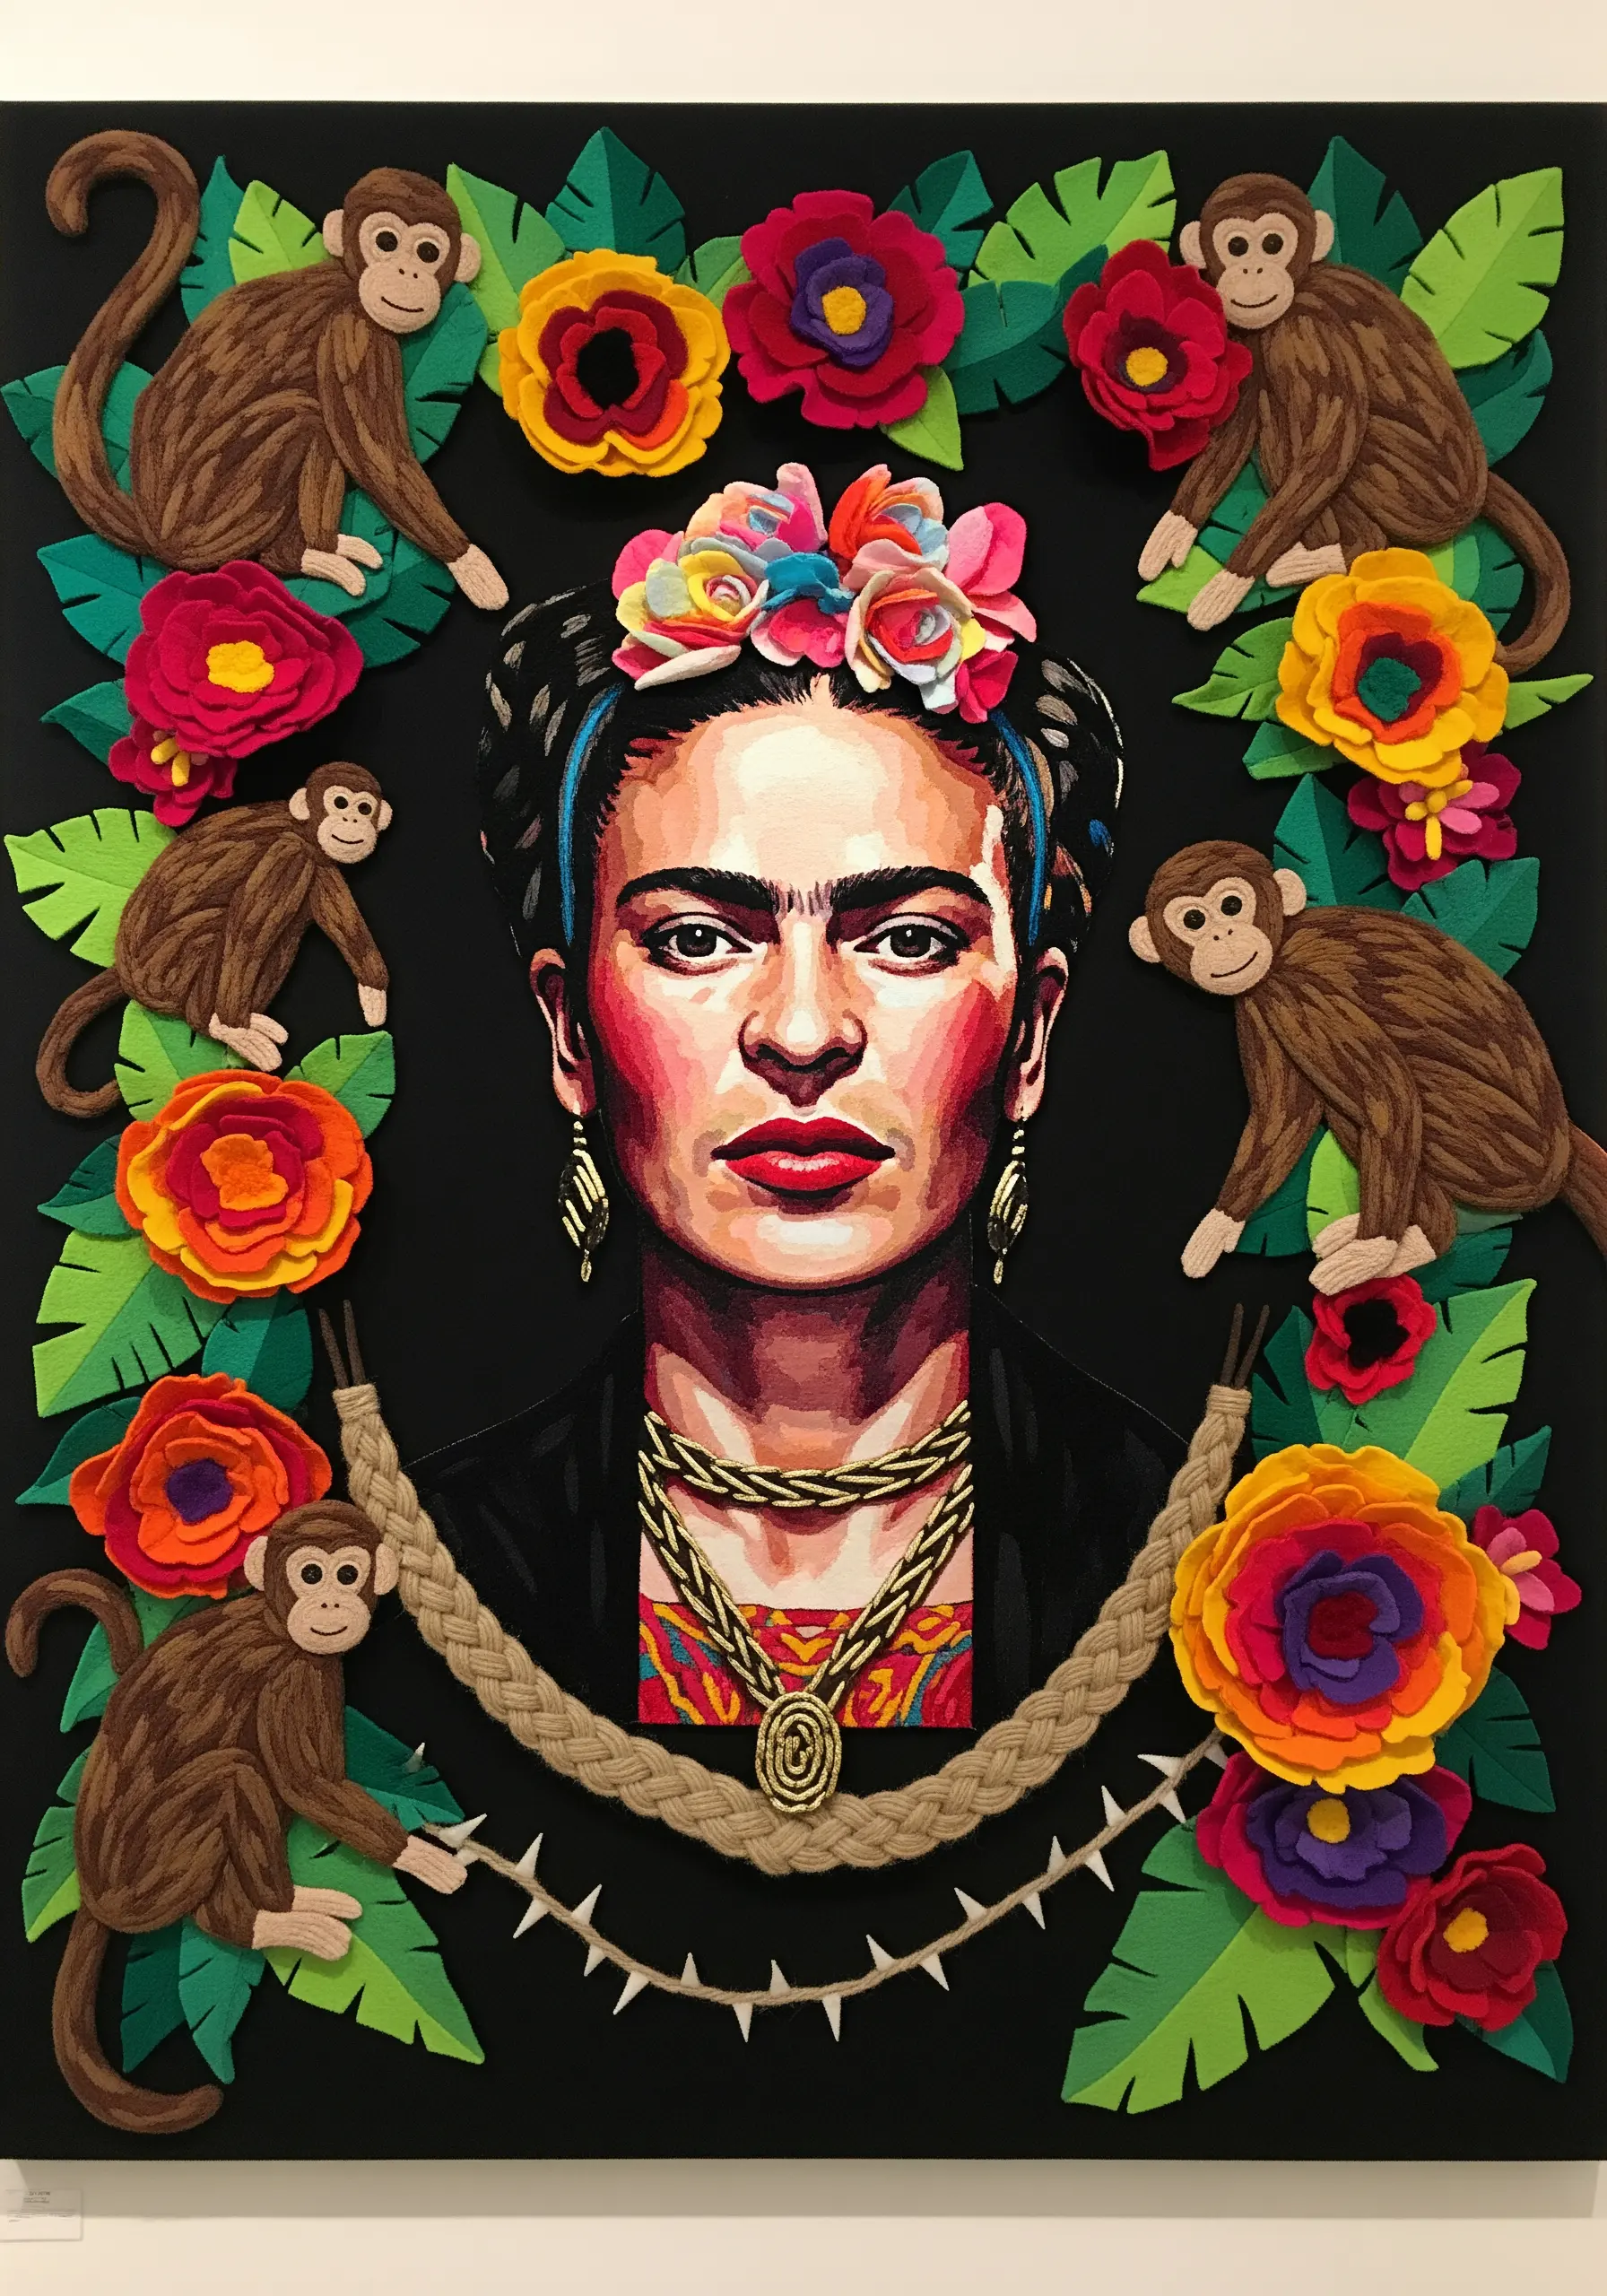
To achieve the bold, graphic quality of a Frida Kahlo portrait, work with layers of cut felt instead of thread painting.
Use a painted or printed fabric base for the face to establish the realistic details. Then, build the surrounding elements—flowers, leaves, and animals—by cutting shapes from stiff, high-quality felt and arranging them in overlapping layers.
Add subtle embroidered details like leaf veins or flower centers to give the flat shapes dimension. This collage technique creates a vibrant, folk-art feel that honors the source material’s strength.
10. Sculpting O’Keeffe’s Florals with Padded Satin Stitch

Give your embroidered florals the monumental, sculptural presence of a Georgia O’Keeffe painting with padded satin stitch.
Before you begin your satin stitch, create a foundation of felt padding or layers of split stitches within the shape of each petal.
Stitch over this padding with long, smooth satin stitches. The raised foundation will push the stitches upward, creating soft, curving volumes that catch the light beautifully.
Gradient thread is ideal for this, as it will naturally create the soft color transitions seen in her work.
11. Creating Kusama’s Infinity with Repetitive Appliqué

Replicate the immersive, obsessive quality of Yayoi Kusama’s installations through the power of repetition.
Instead of embroidering each dot, use a die-cutter or stencil to create hundreds of identical fabric circles. Apply them to your base fabric with a heat-activated adhesive for perfect placement.
For the sculptural elements, cover pre-made forms (like foam pumpkins) with the same dotted fabric. The key is absolute consistency in the dot size and spacing, which creates the hypnotic, pattern-based illusion of infinite space.
12. Weaving Light and Geometry like Hilda af Klint

Translate the spiritual geometry of abstract pioneers using string art techniques on a large scale.
Instead of a solid fabric background, work on a stretched canvas or a wooden frame with nails or pegs at key points.
Wrap thread from one point to another to create taut, radiating lines and translucent color fields. By layering different colors of thread, you can create optical mixtures and soft gradients where the lines overlap.
This method allows you to literally ‘draw’ with thread, creating a composition that feels both precise and ethereal.
13. Capturing Matisse’s Cut-Outs with Layered Felt

Embody the joyful simplicity of Matisse’s cut-outs by working with layered, sculptural felt forms.
Use thick, rigid industrial felt as your medium. Cut out the bold, organic shapes and mount them at varying depths on a gallery wall to create a dynamic sense of movement and shadow.
The beauty of this technique lies in its purity—no stitches are needed. The clean edges, saturated color, and interplay of layered forms are all that’s required to translate the artist’s vision into a tactile experience.
14. Stitching Seurat’s Pointillism with French Knots
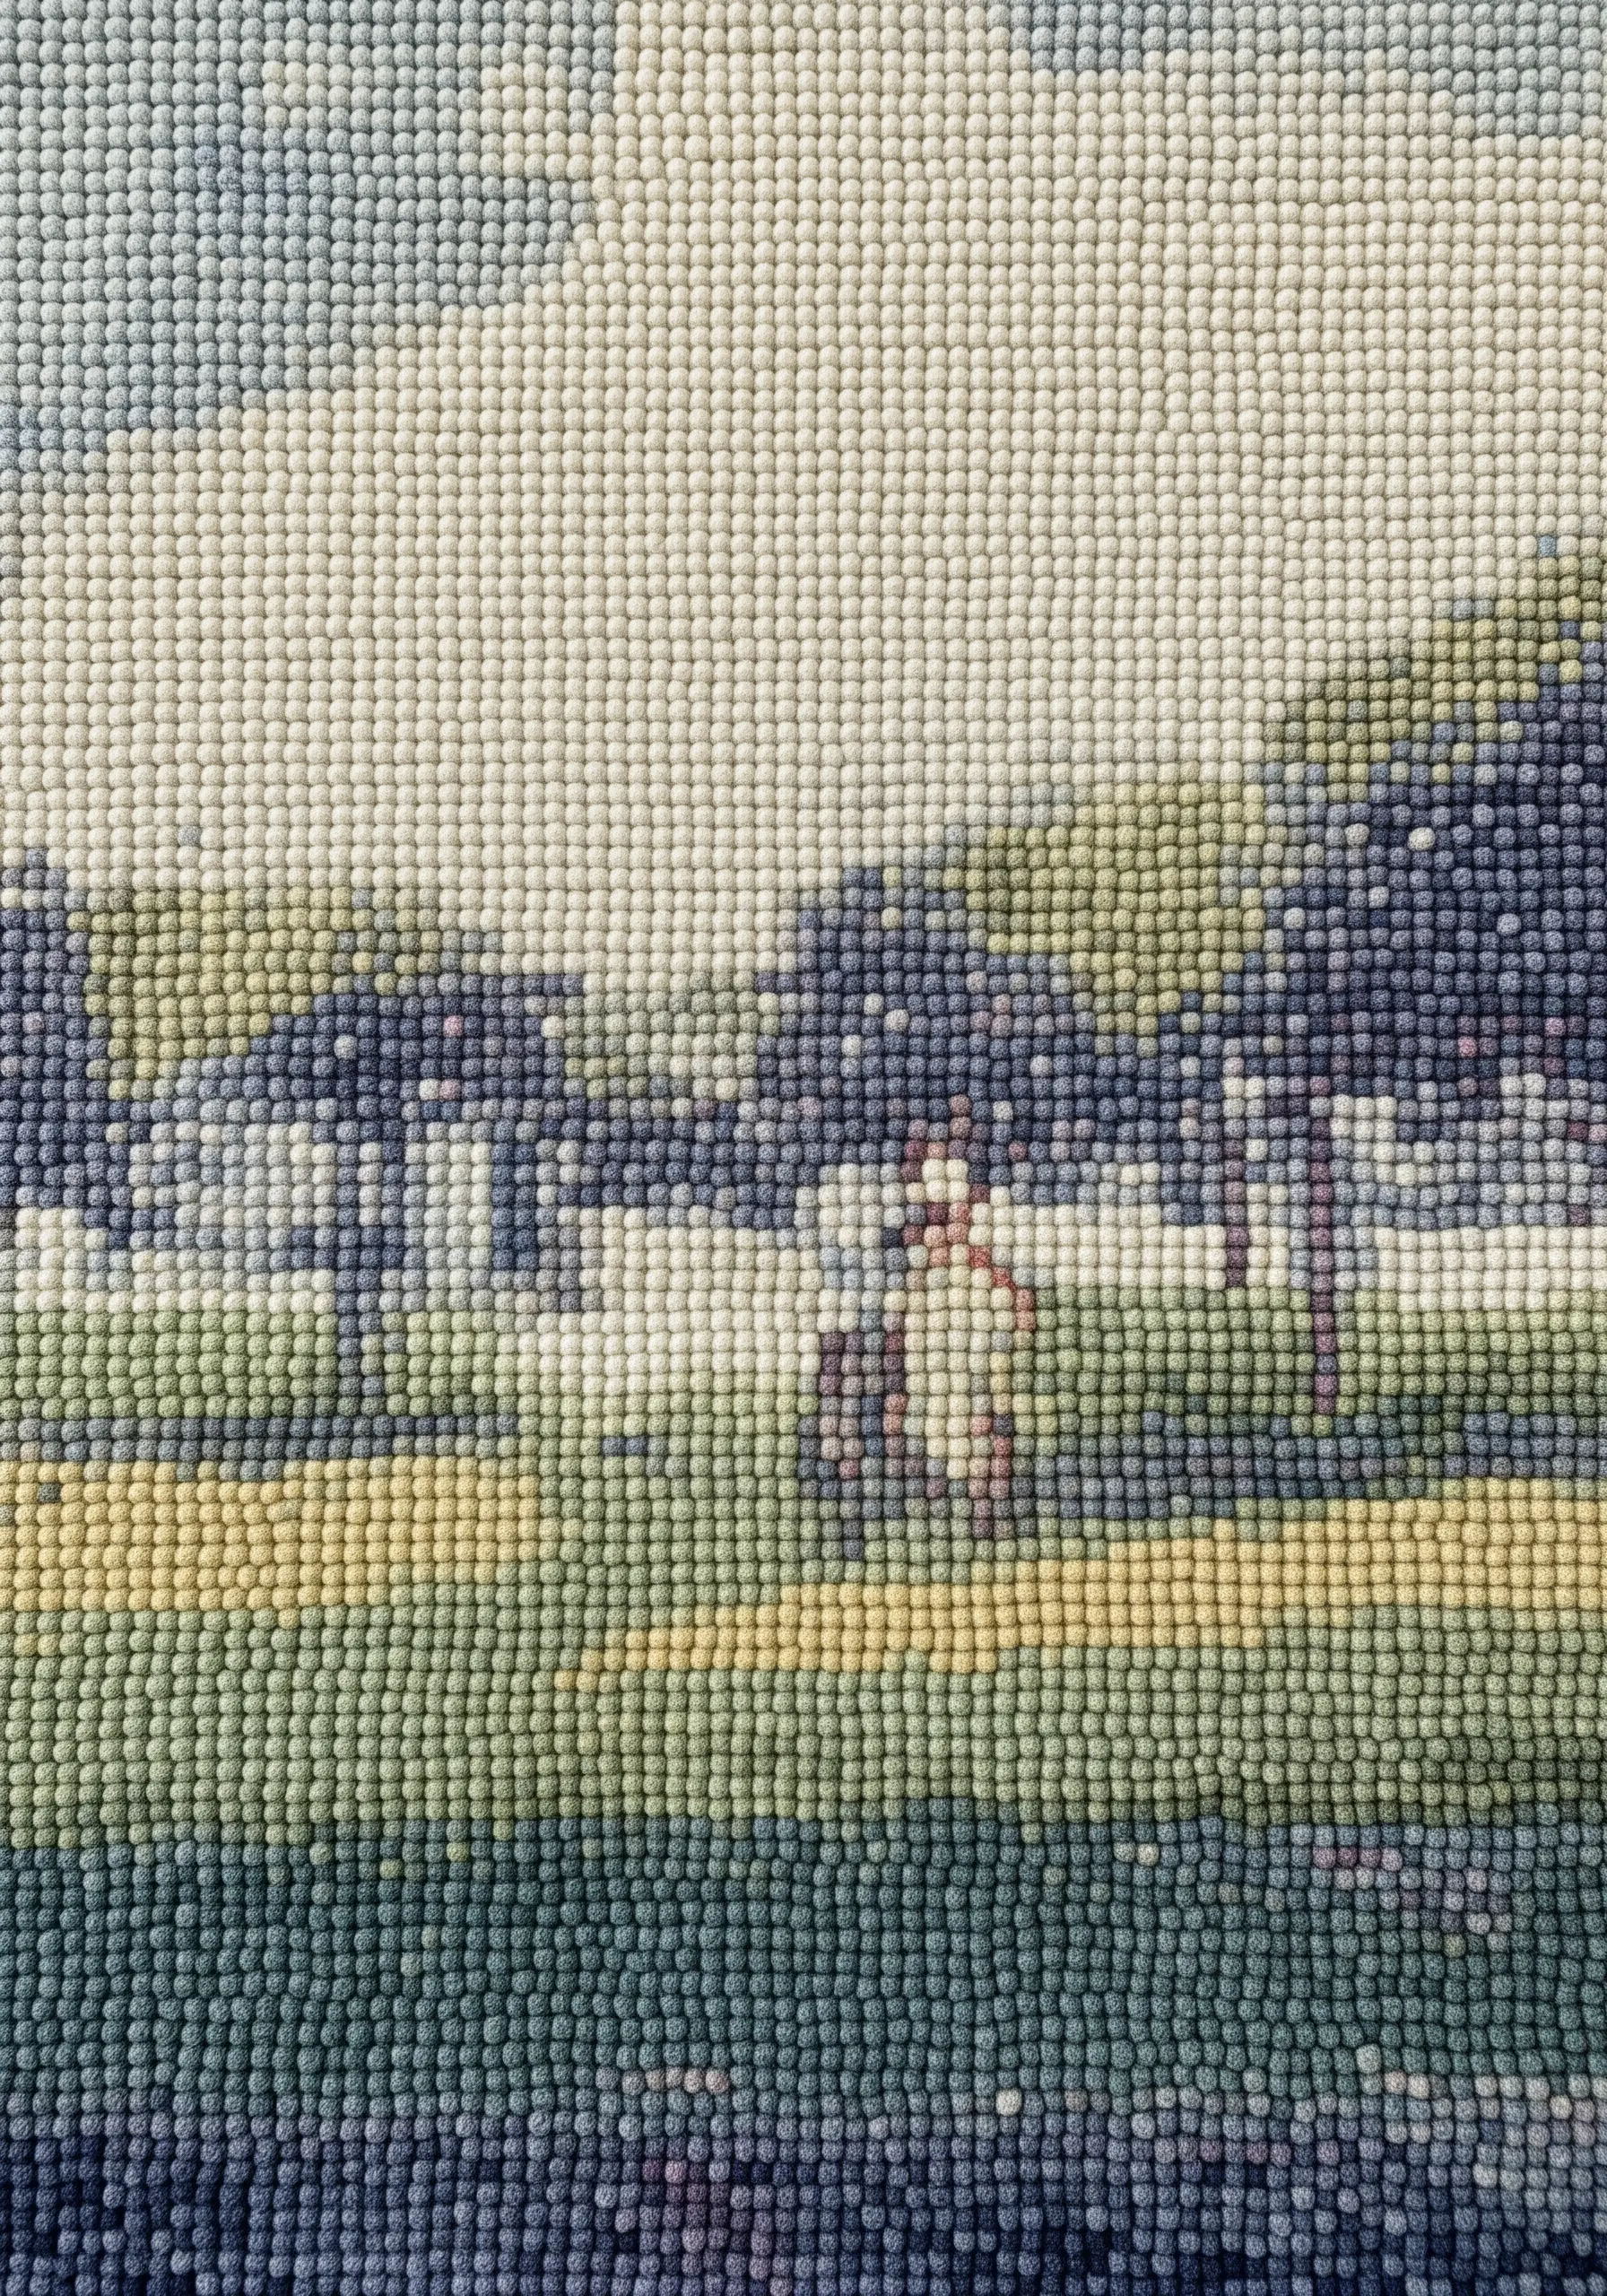
Recreate the optical blending of Pointillism by using French knots as your primary stitch.
Instead of blending threads in the needle, place individual knots of pure color next to each other. When viewed from a distance, the colors will mix in the viewer’s eye, creating the shimmering, luminous effect of a Seurat painting.
Use a single strand of floss for delicate, tiny dots, and vary the number of wraps to subtly change the knot’s size and texture. This meticulous technique offers unparalleled control over color mixing.
15. Composing with Kandinsky’s Shapes in Coiled Rope

Translate the abstract, musical compositions of Kandinsky into a tactile wall hanging.
Create the primary geometric shapes—circles, triangles, and squares—by coiling and stitching colored rope, then appliqué them onto a neutral linen background.
For the fine, energetic lines, use couched black yarn or a bold stem stitch. This approach separates color, form, and line into distinct textural elements, mirroring the artist’s focus on the pure emotional power of each component. These minimal embroidery patterns that look harder than they are can serve as a great starting point.
16. Reimagining Warhol with Punch Needle Portraits

Capture the bold, graphic nature of Warhol’s screen prints using the flat, uniform texture of punch needle embroidery.
Simplify your source image into a few distinct tonal values, just like a print. Assign a specific color to each value.
Work in blocks of solid color, ensuring your loop height is consistent for a flat, velvety finish. This technique perfectly replicates the depersonalized, mass-produced aesthetic of Pop Art while creating a surprisingly lush and tactile object.
These are the kinds of unique handmade objects every creative home needs.
17. Crafting Hokusai’s Wave with Sculptural Macrame

Give the iconic ‘Great Wave’ a new dimension by incorporating sculptural fiber elements.
Print the image onto a large, sturdy canvas as your base. Then, use embroidery to accentuate the lines and add texture to the water.
For the dramatic spray of the wave’s crest, create a fringe of unraveled macrame cord or thick wool roving. Attach it to the top edge, allowing it to cascade down and break the two-dimensional plane. This mixed-media approach makes the artwork physically crash into the viewer’s space.
18. Illustrating Vermeer’s Light with Metallic Thread

To capture the ethereal quality of light in a Vermeer painting, you need a material that interacts with its environment.
Stitch the main composition using traditional wool or cotton threads to create a soft, matte finish reminiscent of oil paint.
For the shafts of light streaming through the window, use a fine, reflective metallic or holographic thread. Stitch long, straight lines that span from the light source across the scene.
As the viewer moves, these threads will catch the light and shimmer, creating a living, dynamic representation of sunlight that flat thread cannot achieve.
19. Sculpting Clouds with Unspun Wool Roving

To create soft, voluminous clouds that feel weightless, move away from thread and embrace unspun wool roving.
Gently pull and tease clumps of wool into cloud-like shapes. The fine fibers will cling together, allowing you to create soft, diffuse edges and dense centers.
For subtle color variations, layer different shades of roving—white, grey, and even hints of pink or yellow—and gently blend them with your fingers.
Suspend these forms from the ceiling with clear filament to create an immersive, atmospheric installation.
20. Weaving Munch’s Expressionism with an Open Warp
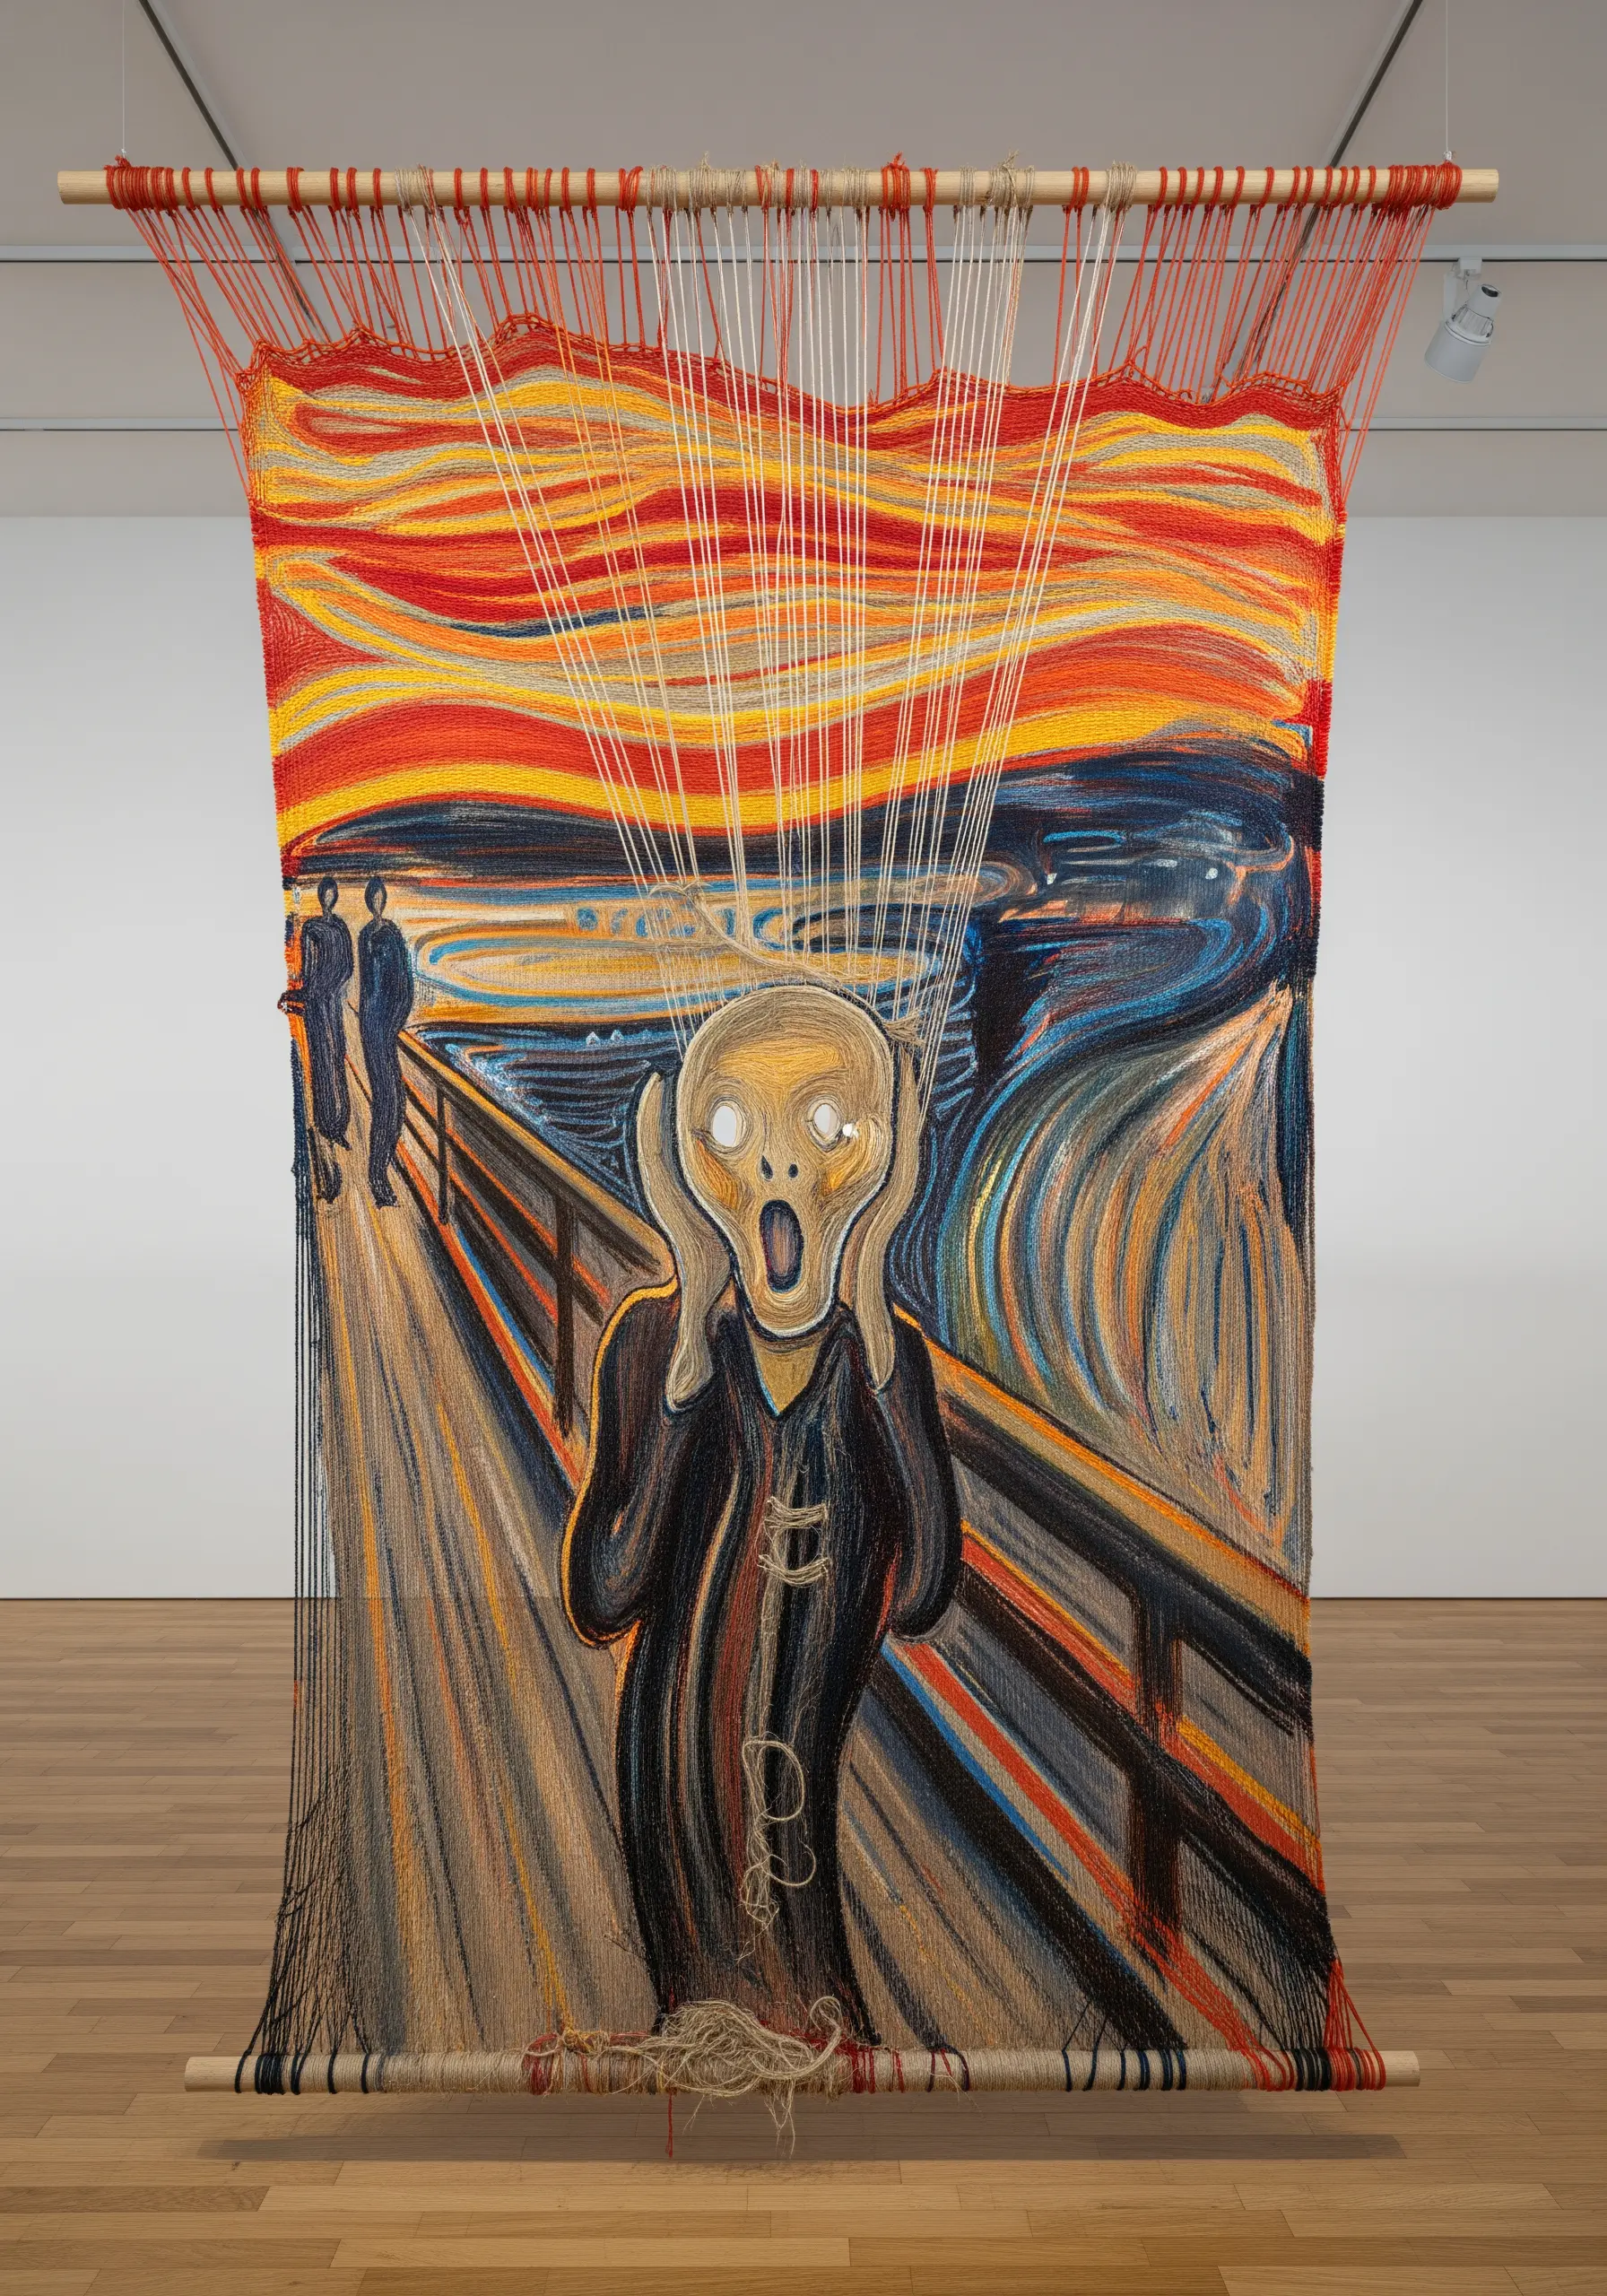
Capture the raw, psychological tension of ‘The Scream’ by deconstructing the weaving process itself.
Instead of a fully finished tapestry, leave the top and bottom sections of the warp threads exposed. Let the image appear to condense from and dissolve into these raw threads.
Use long, vertical stitches or weaving techniques that follow the distorted perspective lines of the bridge, pulling the viewer into the scene.
The contrast between the tightly woven image and the loose, exposed warp enhances the feeling of anxiety and dissolution central to the artwork.
21. Channeling Basquiat’s Energy with Raw-Edge Collage

Emulate the frenetic, layered style of Jean-Michel Basquiat through abstract fabric collage embroidery ideas.
Work on a neutral canvas base and build up layers of found fabric scraps, painted canvas, and raw-edged patches.
Secure the pieces with deliberately coarse, visible stitches—think thick black yarn applied with a running stitch or aggressive cross-stitches.
Draw directly onto the fabric with ink or paint, then stitch over the lines to add another layer of texture. The goal is not perfection, but a raw, immediate energy.
22. Creating Lichtenstein’s Pop Art with Ben-Day Knots

To replicate the Ben-Day dots of Roy Lichtenstein’s comic-inspired art, use a grid of uniform French knots or punch needle loops.
First, create the bold black outlines using a thick, smooth satin stitch or couched cord to define your shapes cleanly.
Then, fill the color fields. For the dotted sections, mark a precise grid on your fabric and place a single, consistent knot at each intersection. This painstaking process gives the work a mechanical, printed quality that is central to the Pop Art movement.
23. Weaving an O’Keeffe Landscape with Graduated Dyes
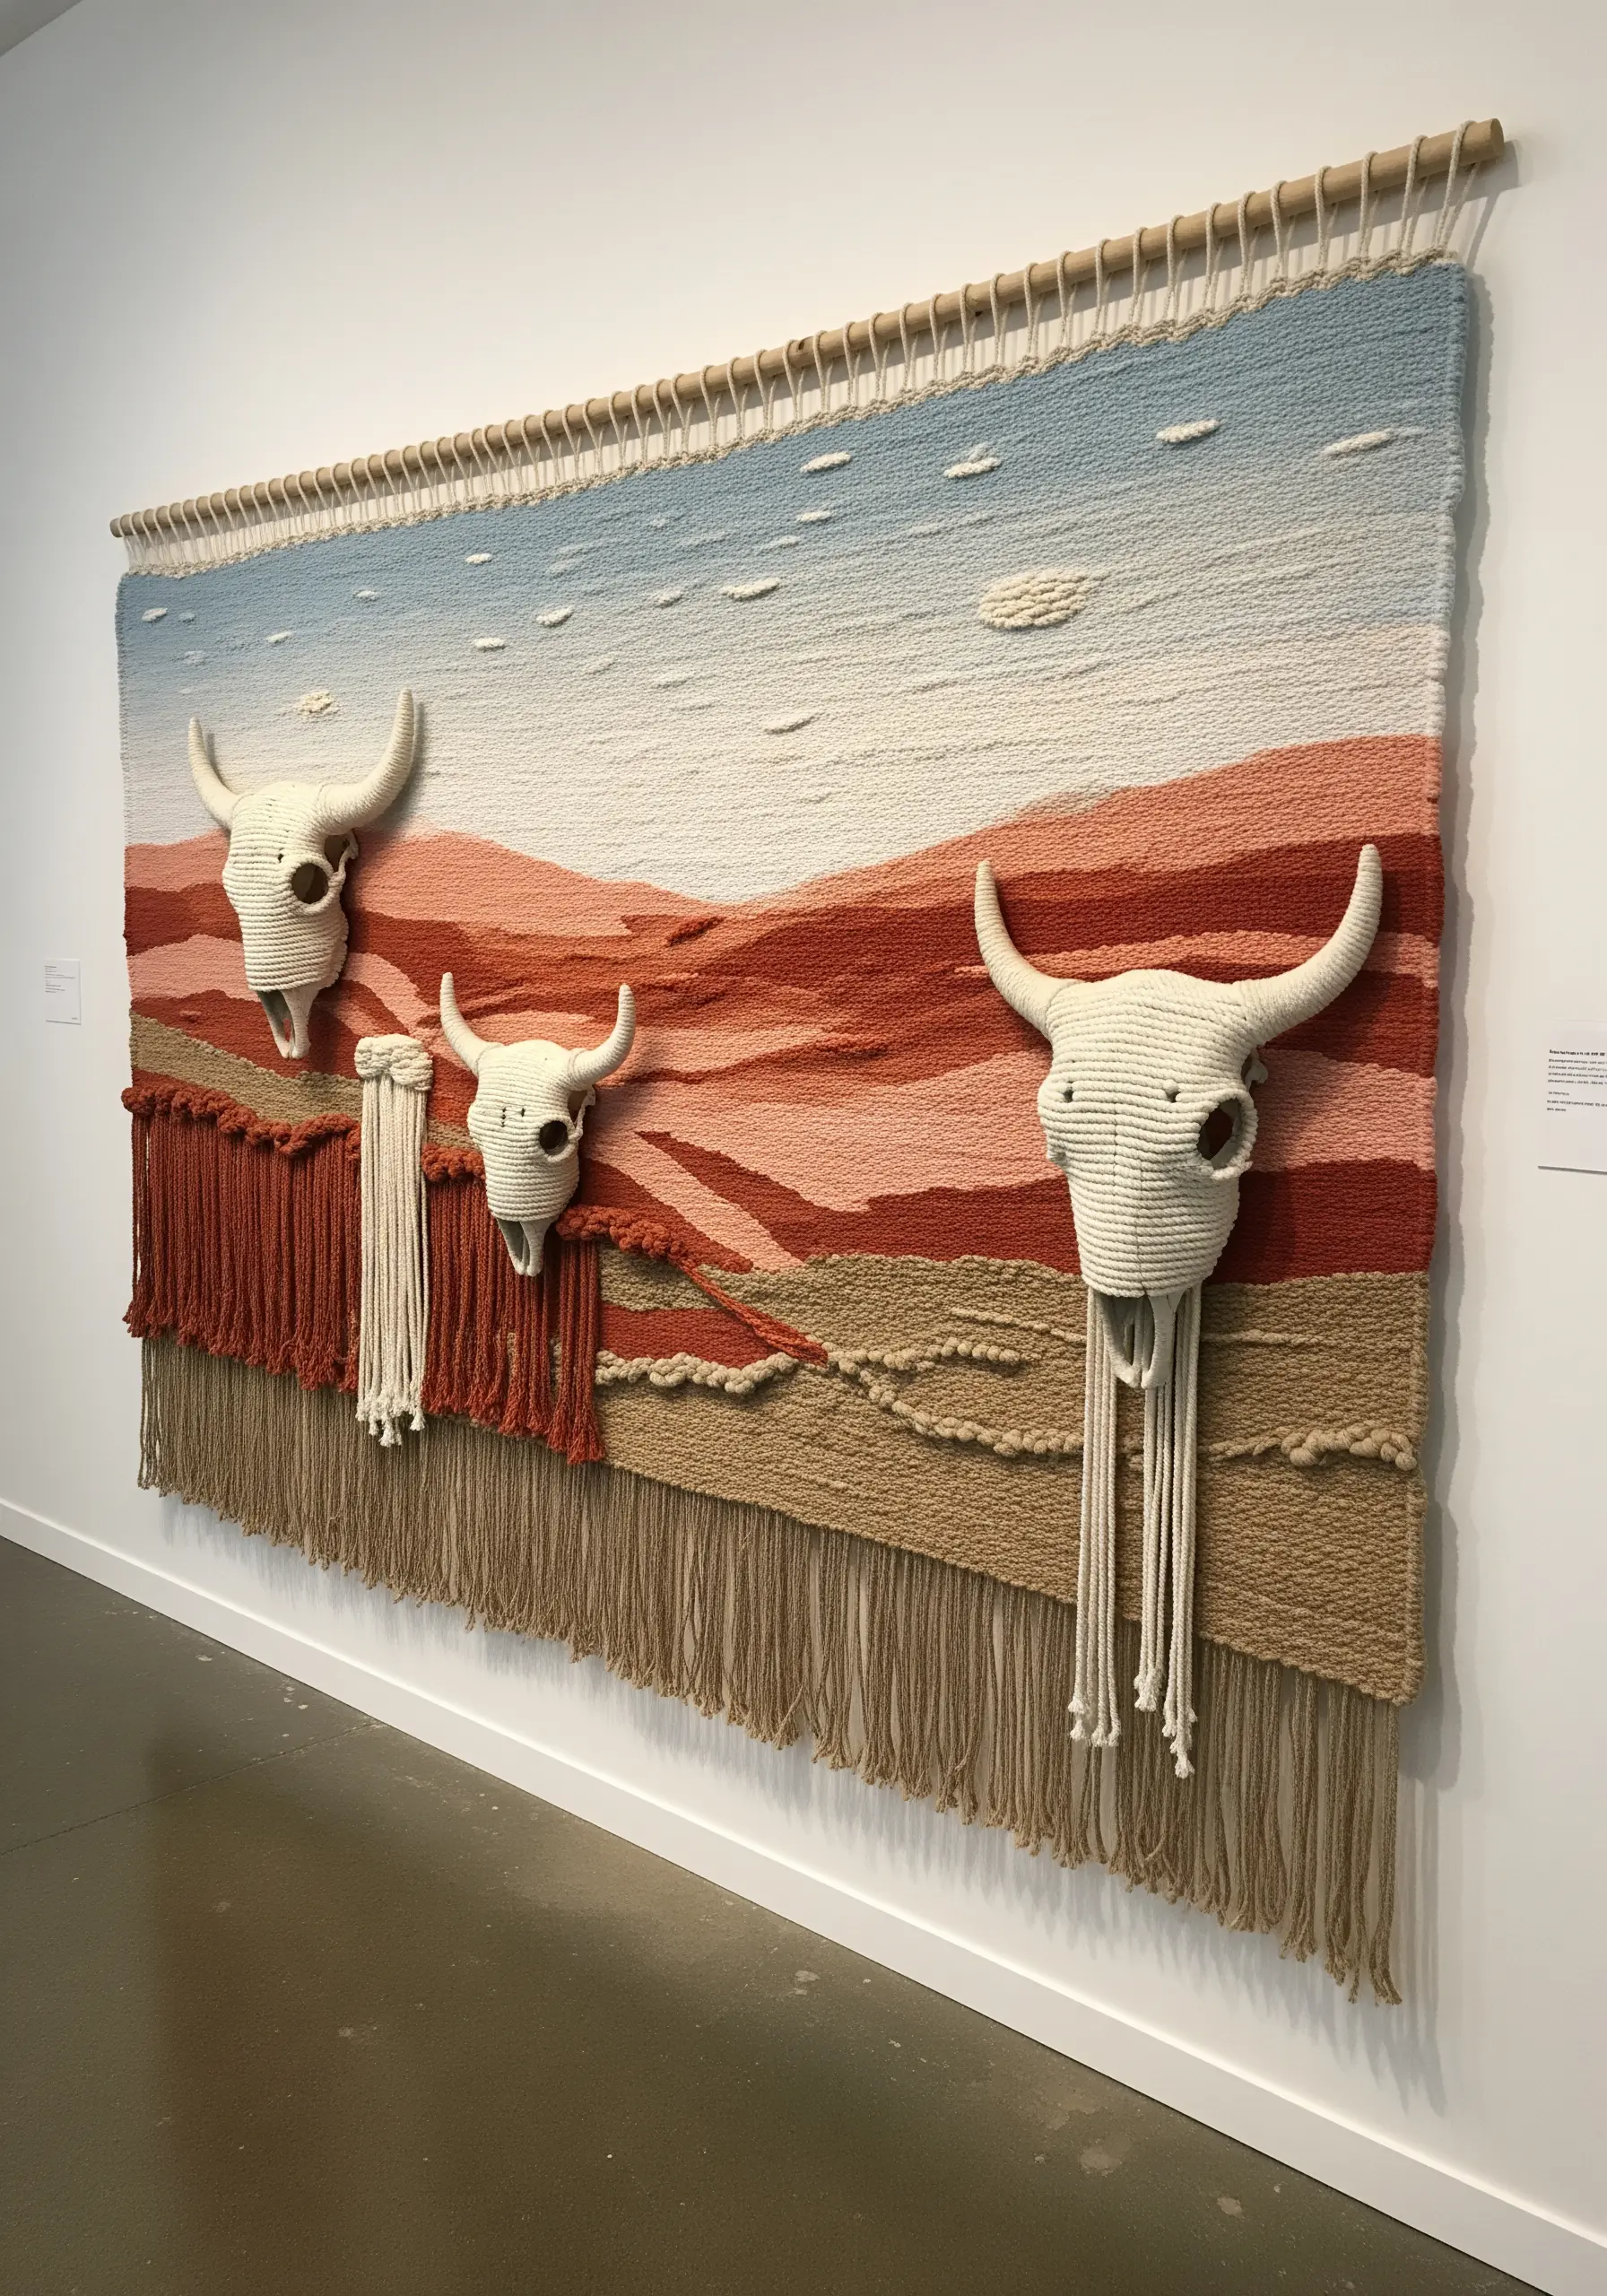
Capture the soft, sun-bleached gradients of a desert landscape by dyeing your own yarn.
Instead of switching colors, use yarn that has been hand-dyed in an ombré or variegated pattern. As you weave, the colors will shift naturally, creating subtle, organic transitions that mimic the way light falls across the land.
Combine this with sculptural elements, like woven skulls made from wrapped cord, to add a focal point and a sense of depth to your tapestry.
24. Constructing Magritte’s Surrealism with Found Objects

Bring the conceptual puzzles of René Magritte into the real world by combining fiber art with found objects.
Weave or embroider a realistic backdrop, such as a cloud-filled sky. Then, suspend real-world objects in front of it that play with logic and expectation.
The contrast between the soft, textural background and the hard, familiar objects creates the unsettling, dream-like quality that defines Surrealism. The piece becomes an environment rather than just an image.
This is a wonderful way to add coziness with embroidered throws and blankets as a backdrop.
25. Immersing in Rousseau’s Jungle with Sculptural Yarn
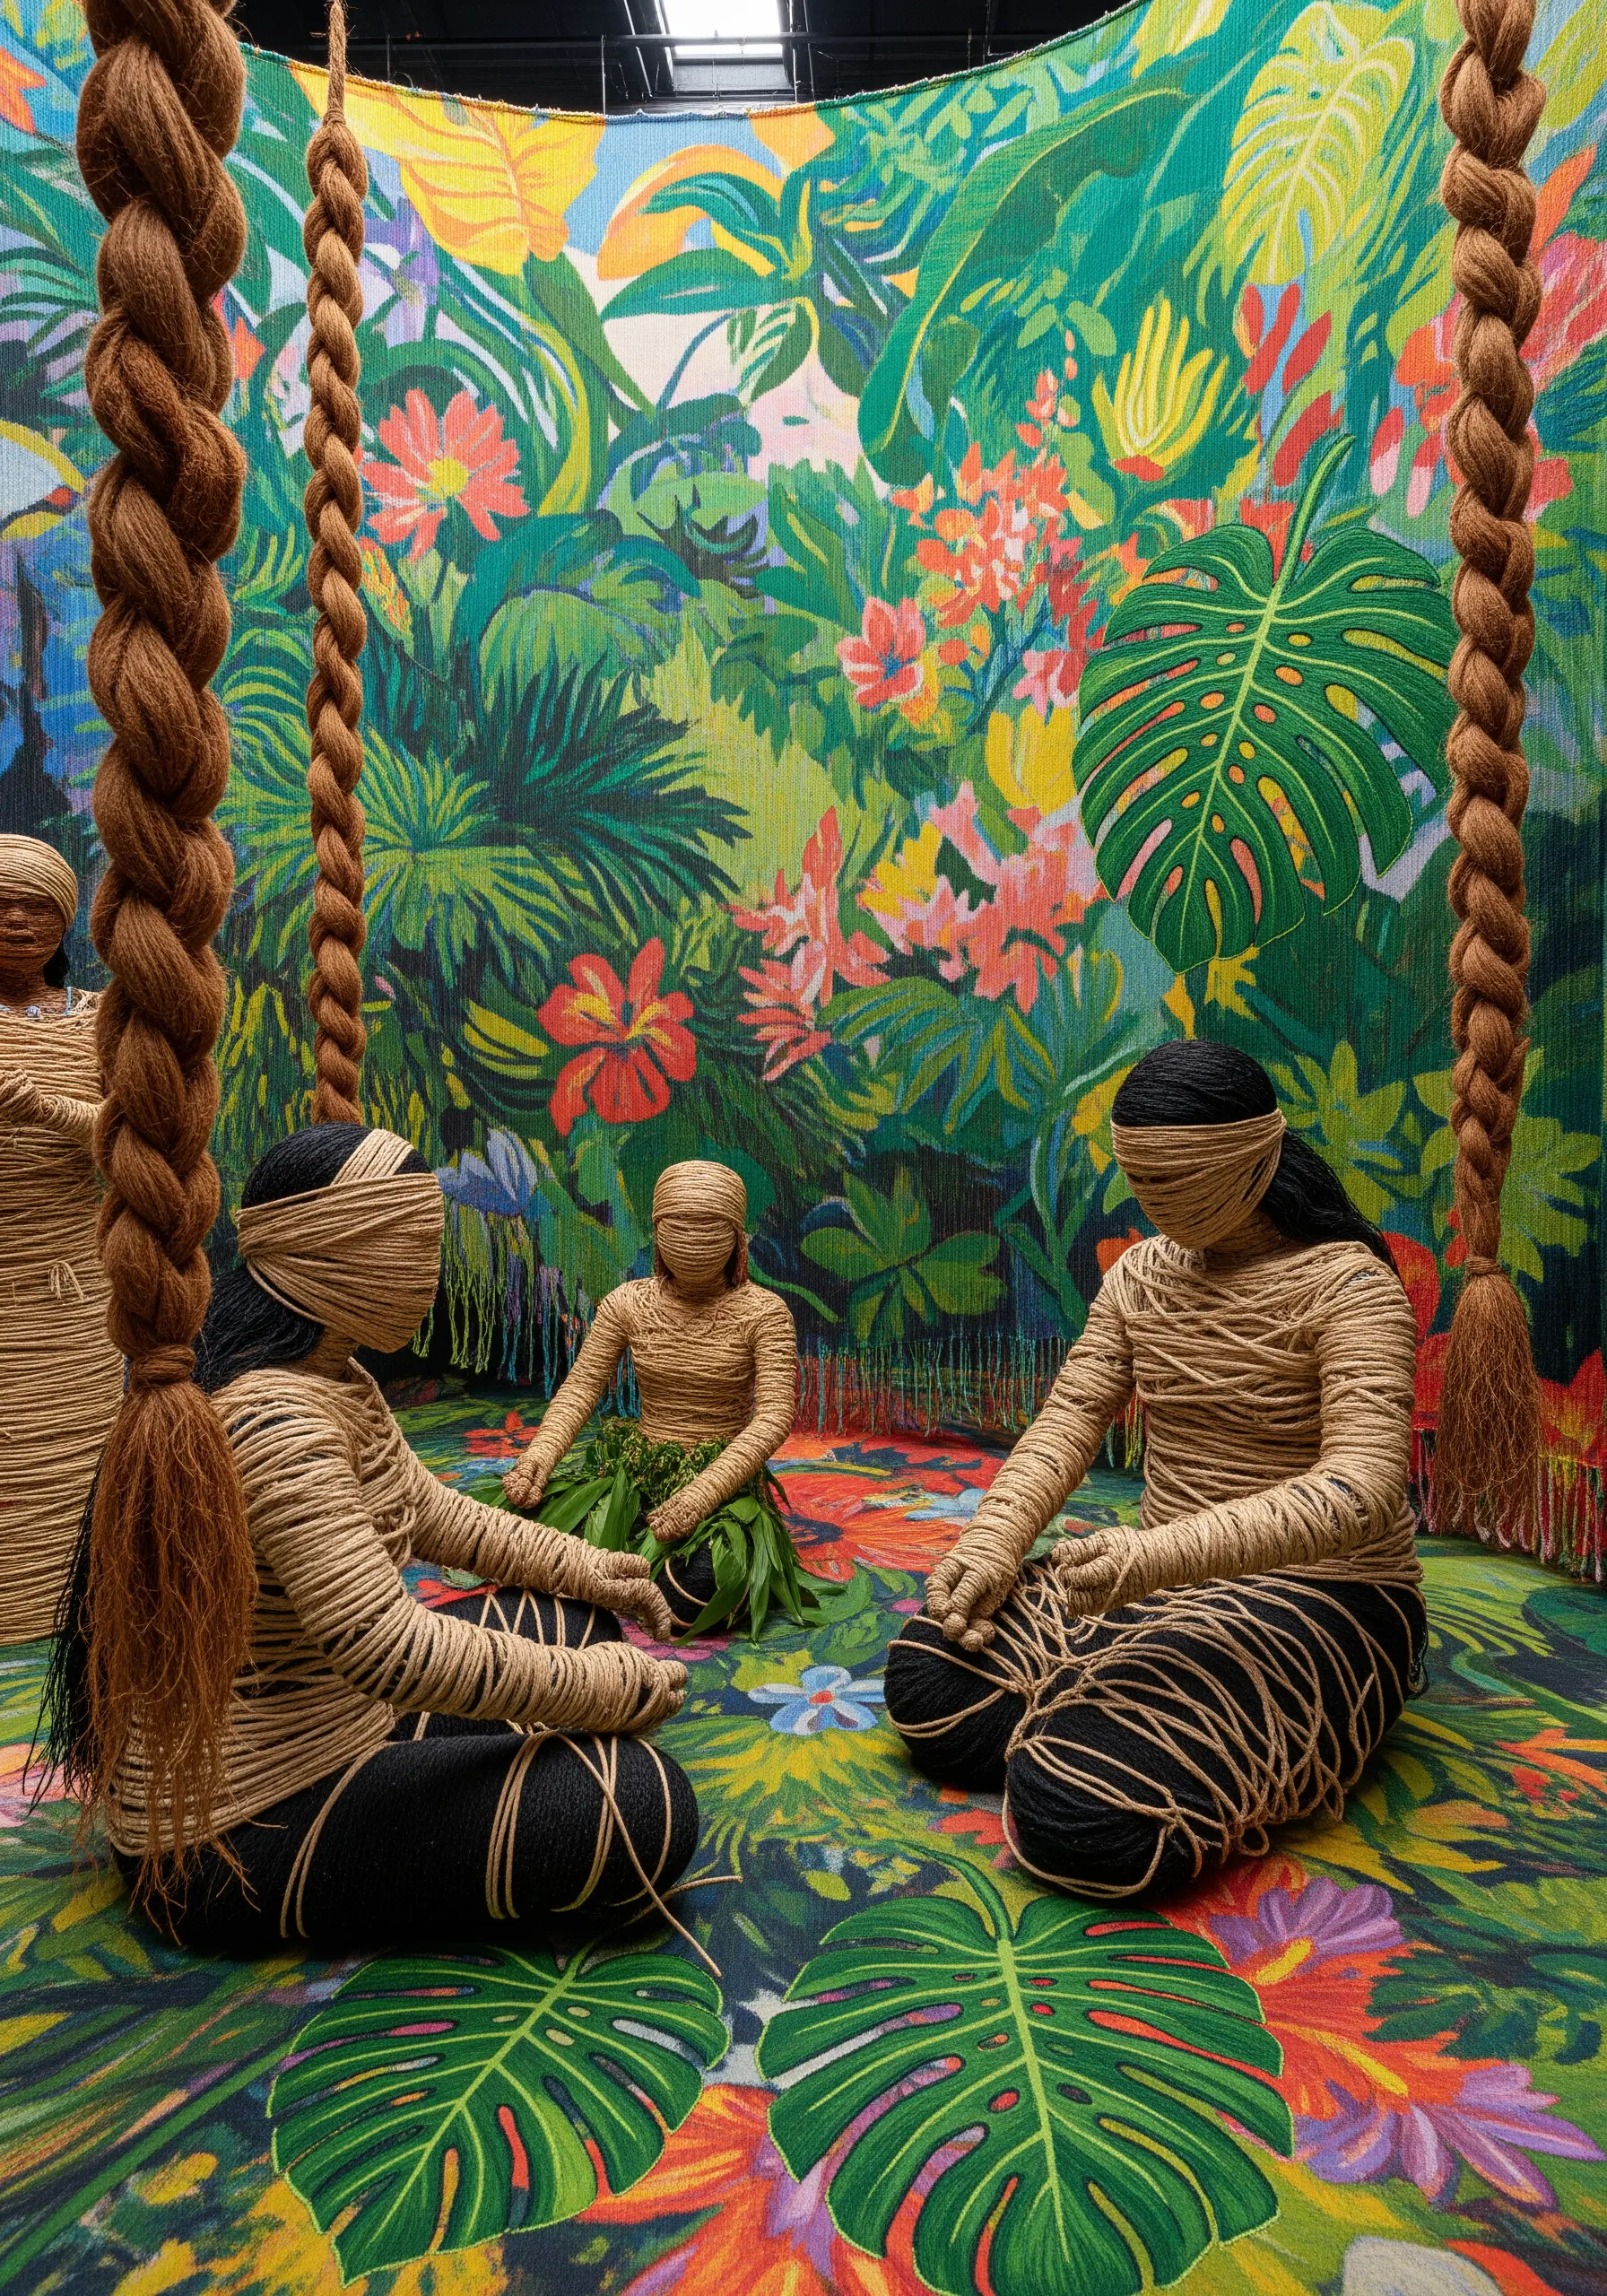
Transform a two-dimensional jungle scene into an immersive environment by creating large-scale sculptural elements from yarn.
Use techniques like braiding, wrapping, and macrame to construct thick, tactile tree trunks, vines, and even figures. Suspend these from the ceiling and anchor them to the floor.
The backdrop can be a printed tapestry or a painted mural, but the three-dimensional fiber elements are what will pull the viewer into the dense, dream-like foliage of the scene.
26. Capturing Degas’ Motion with Fabric and Ribbon

Translate the fleeting movement of Degas’ dancers by incorporating mixed media that suggests motion and light.
Start with a painted or lightly stitched canvas to define the figures. Then, construct the tutus from layers of gathered tulle or organza, stitching them directly onto the canvas for a soft, three-dimensional effect.
For the abstract rays of light, use tautly stretched ribbons or strips of fabric, anchoring them at the edges of the frame. This combination of painting, stitching, and appliqué creates a dynamic piece that captures a single, elegant moment in time.
27. Recreating Chagall’s Stained Glass with Sheer Fabrics
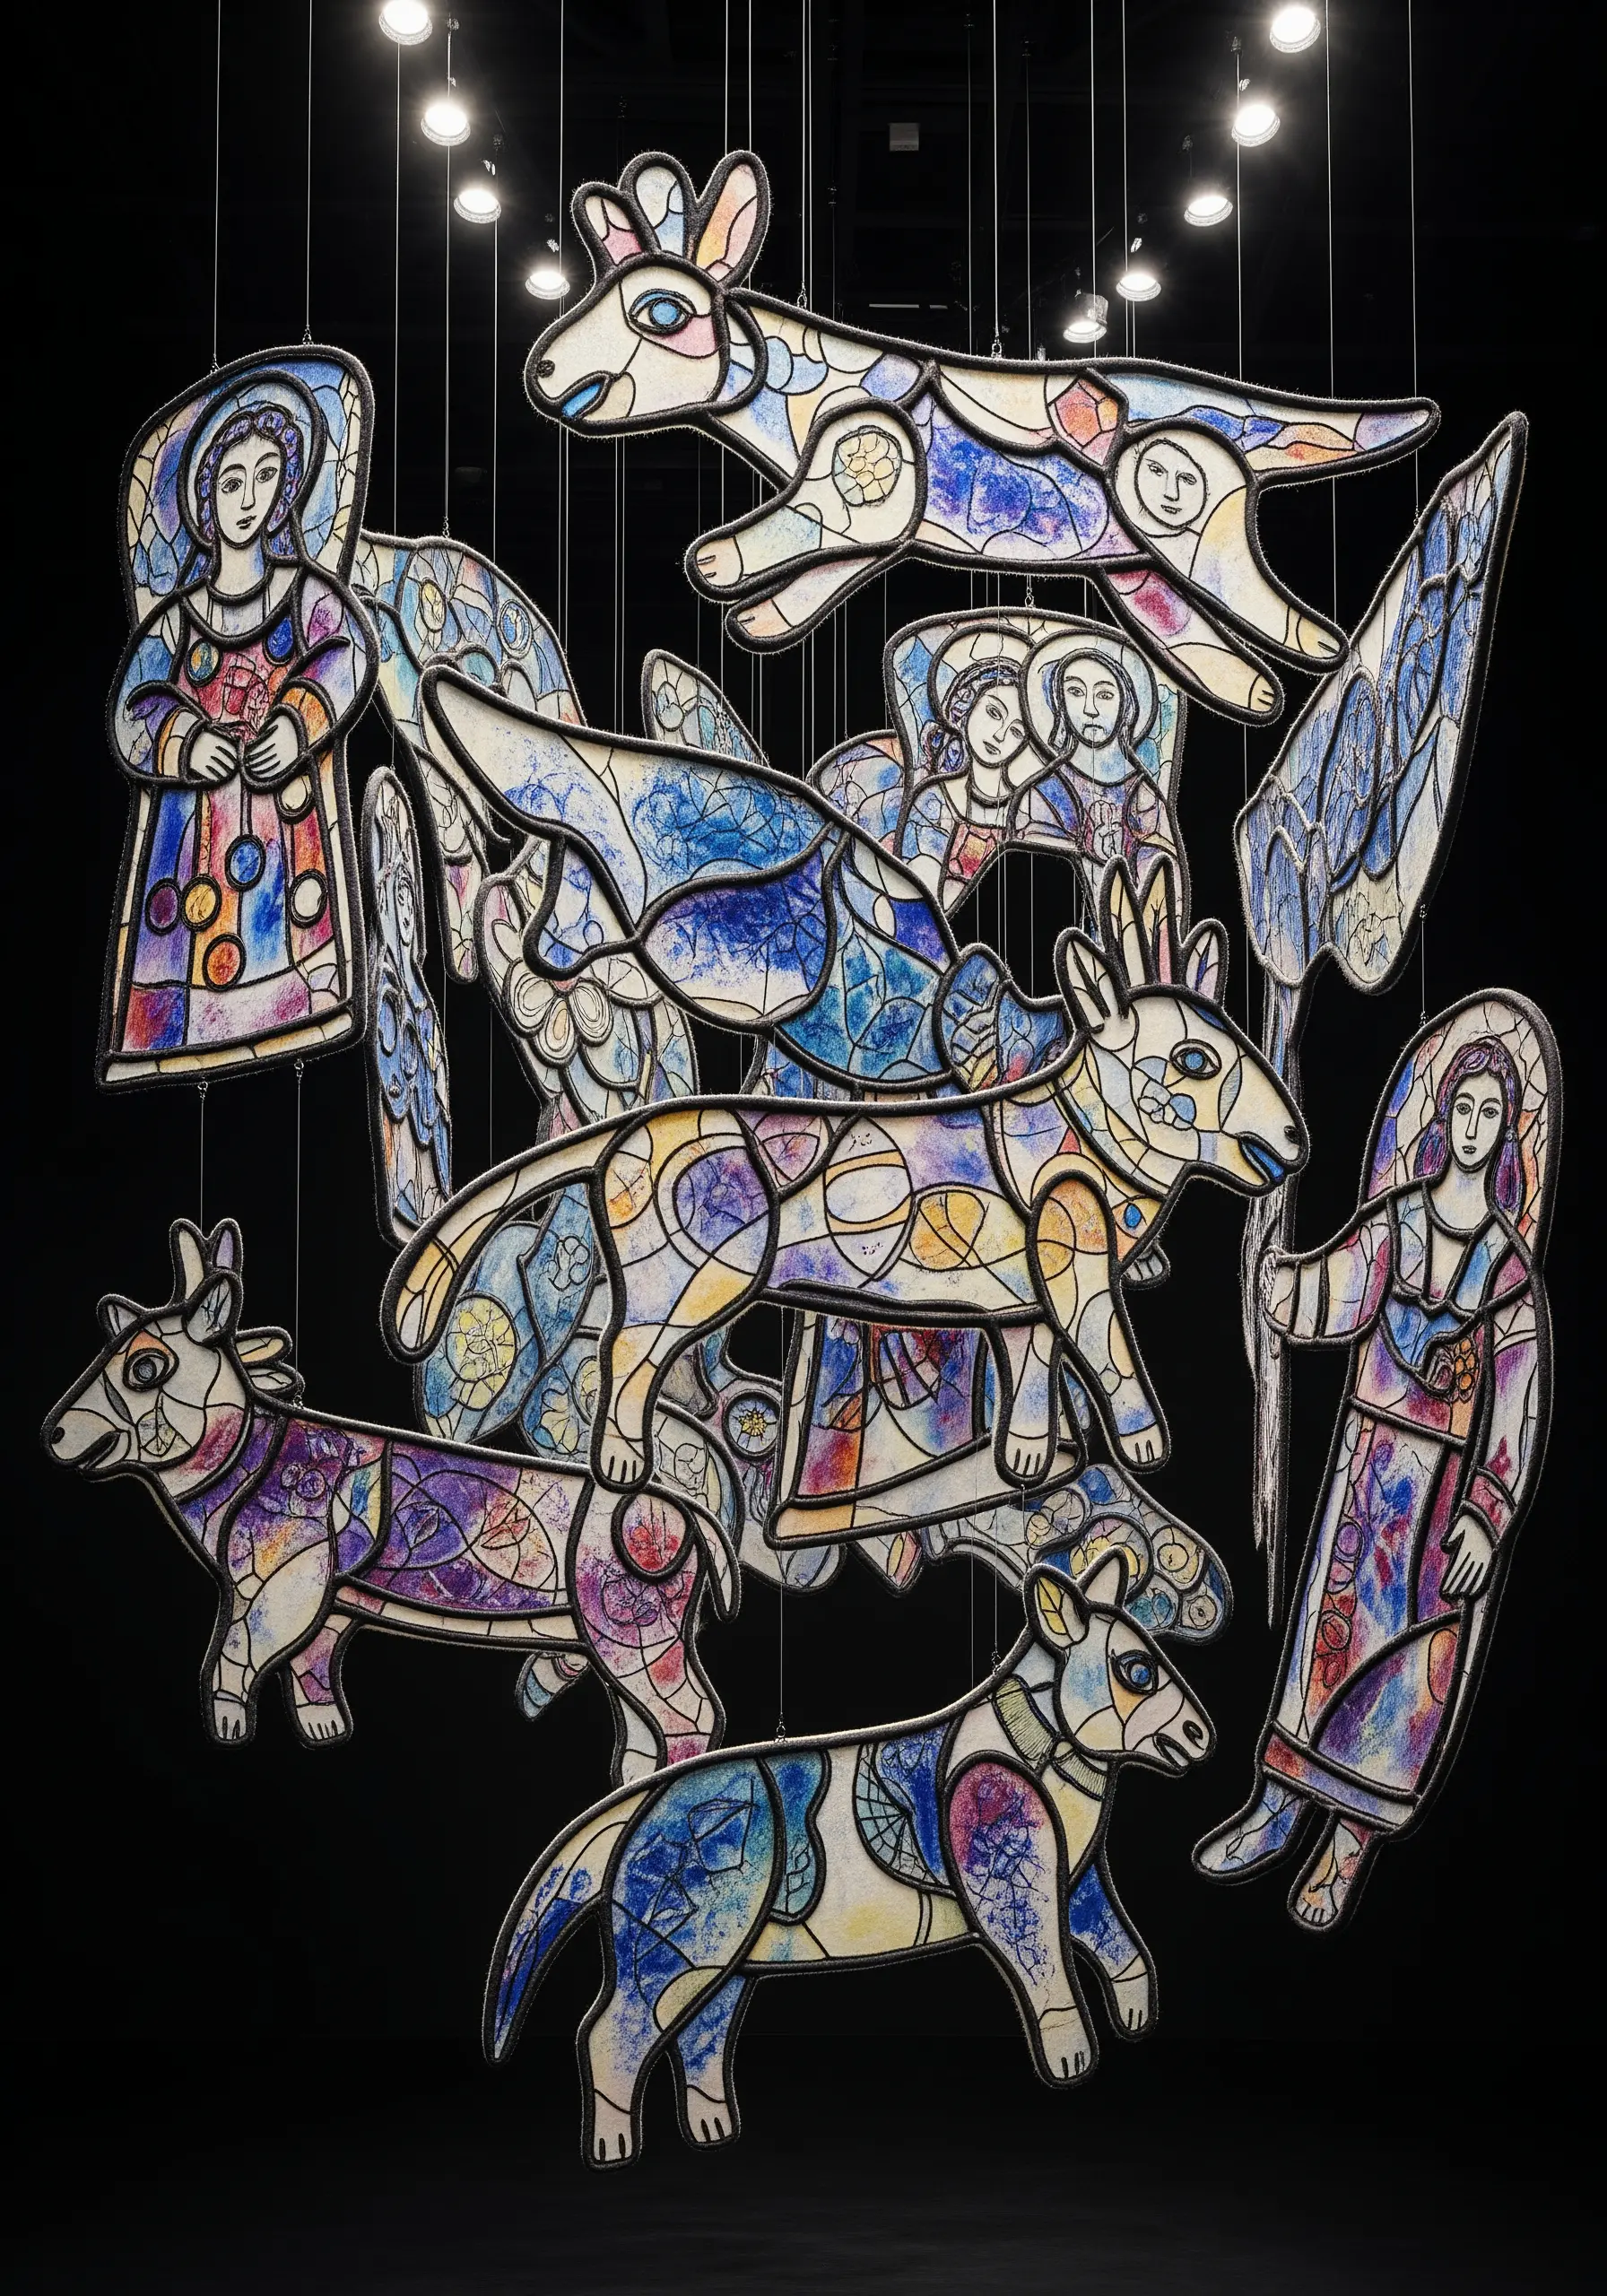
Mimic the luminous, layered quality of stained glass by working with appliqué on a sheer base fabric.
Use black yarn or bias tape to create the bold ‘leading’ lines of the design. Then, fill the sections with scraps of colored organza, silk, or other translucent fabrics.
Layering different colors of sheer fabric allows you to create new hues and subtle gradients, just as a glass artist would. When hung in a window or backlit, the piece will glow with captured light.
28. Designing Escher’s Tessellations with 3D Fabric Forms

Bring the interlocking patterns of M.C. Escher to life with positive and negative space using padded fabric shapes.
Create a template for your repeating motif, such as a bird or lizard. Cut out dozens of identical shapes from fabric, making half in a light color and half in a dark color.
Lightly stuff each shape with batting before stitching it closed. Arrange and attach these soft, sculptural tiles onto a backing board, fitting them together perfectly. The resulting piece is a tactile, optical illusion that invites touch.
29. Balancing a Calder-Inspired Mobile with Woven Shapes

Translate the playful equilibrium of an Alexander Calder mobile into a fiber art creation.
Create your geometric and organic shapes using various fiber techniques: wrap rope to form dense circles, weave small tapestries for the rectangular elements, or use macrame for more complex forms.
The key is to use materials that have some weight and substance. Attach these fiber components to a simple wire or dowel armature, adjusting their positions until you find the perfect, delicate balance.
30. Stitching Miró’s Constellations on a Linen Canvas

Capture the whimsical, biomorphic shapes of Joan Miró with a combination of appliqué and clean line work.
Use felt or thick wool fabric for the primary colored shapes, cutting them out with sharp scissors and attaching them to a neutral linen background with a hidden whip stitch.
For the connecting lines and celestial symbols, use a crisp, single-strand backstitch or stem stitch in black thread. The contrast between the soft, solid appliqué and the delicate, precise linework is what gives the composition its signature playful yet balanced feel.
31. Weaving an Albers-Inspired Color Study Sampler
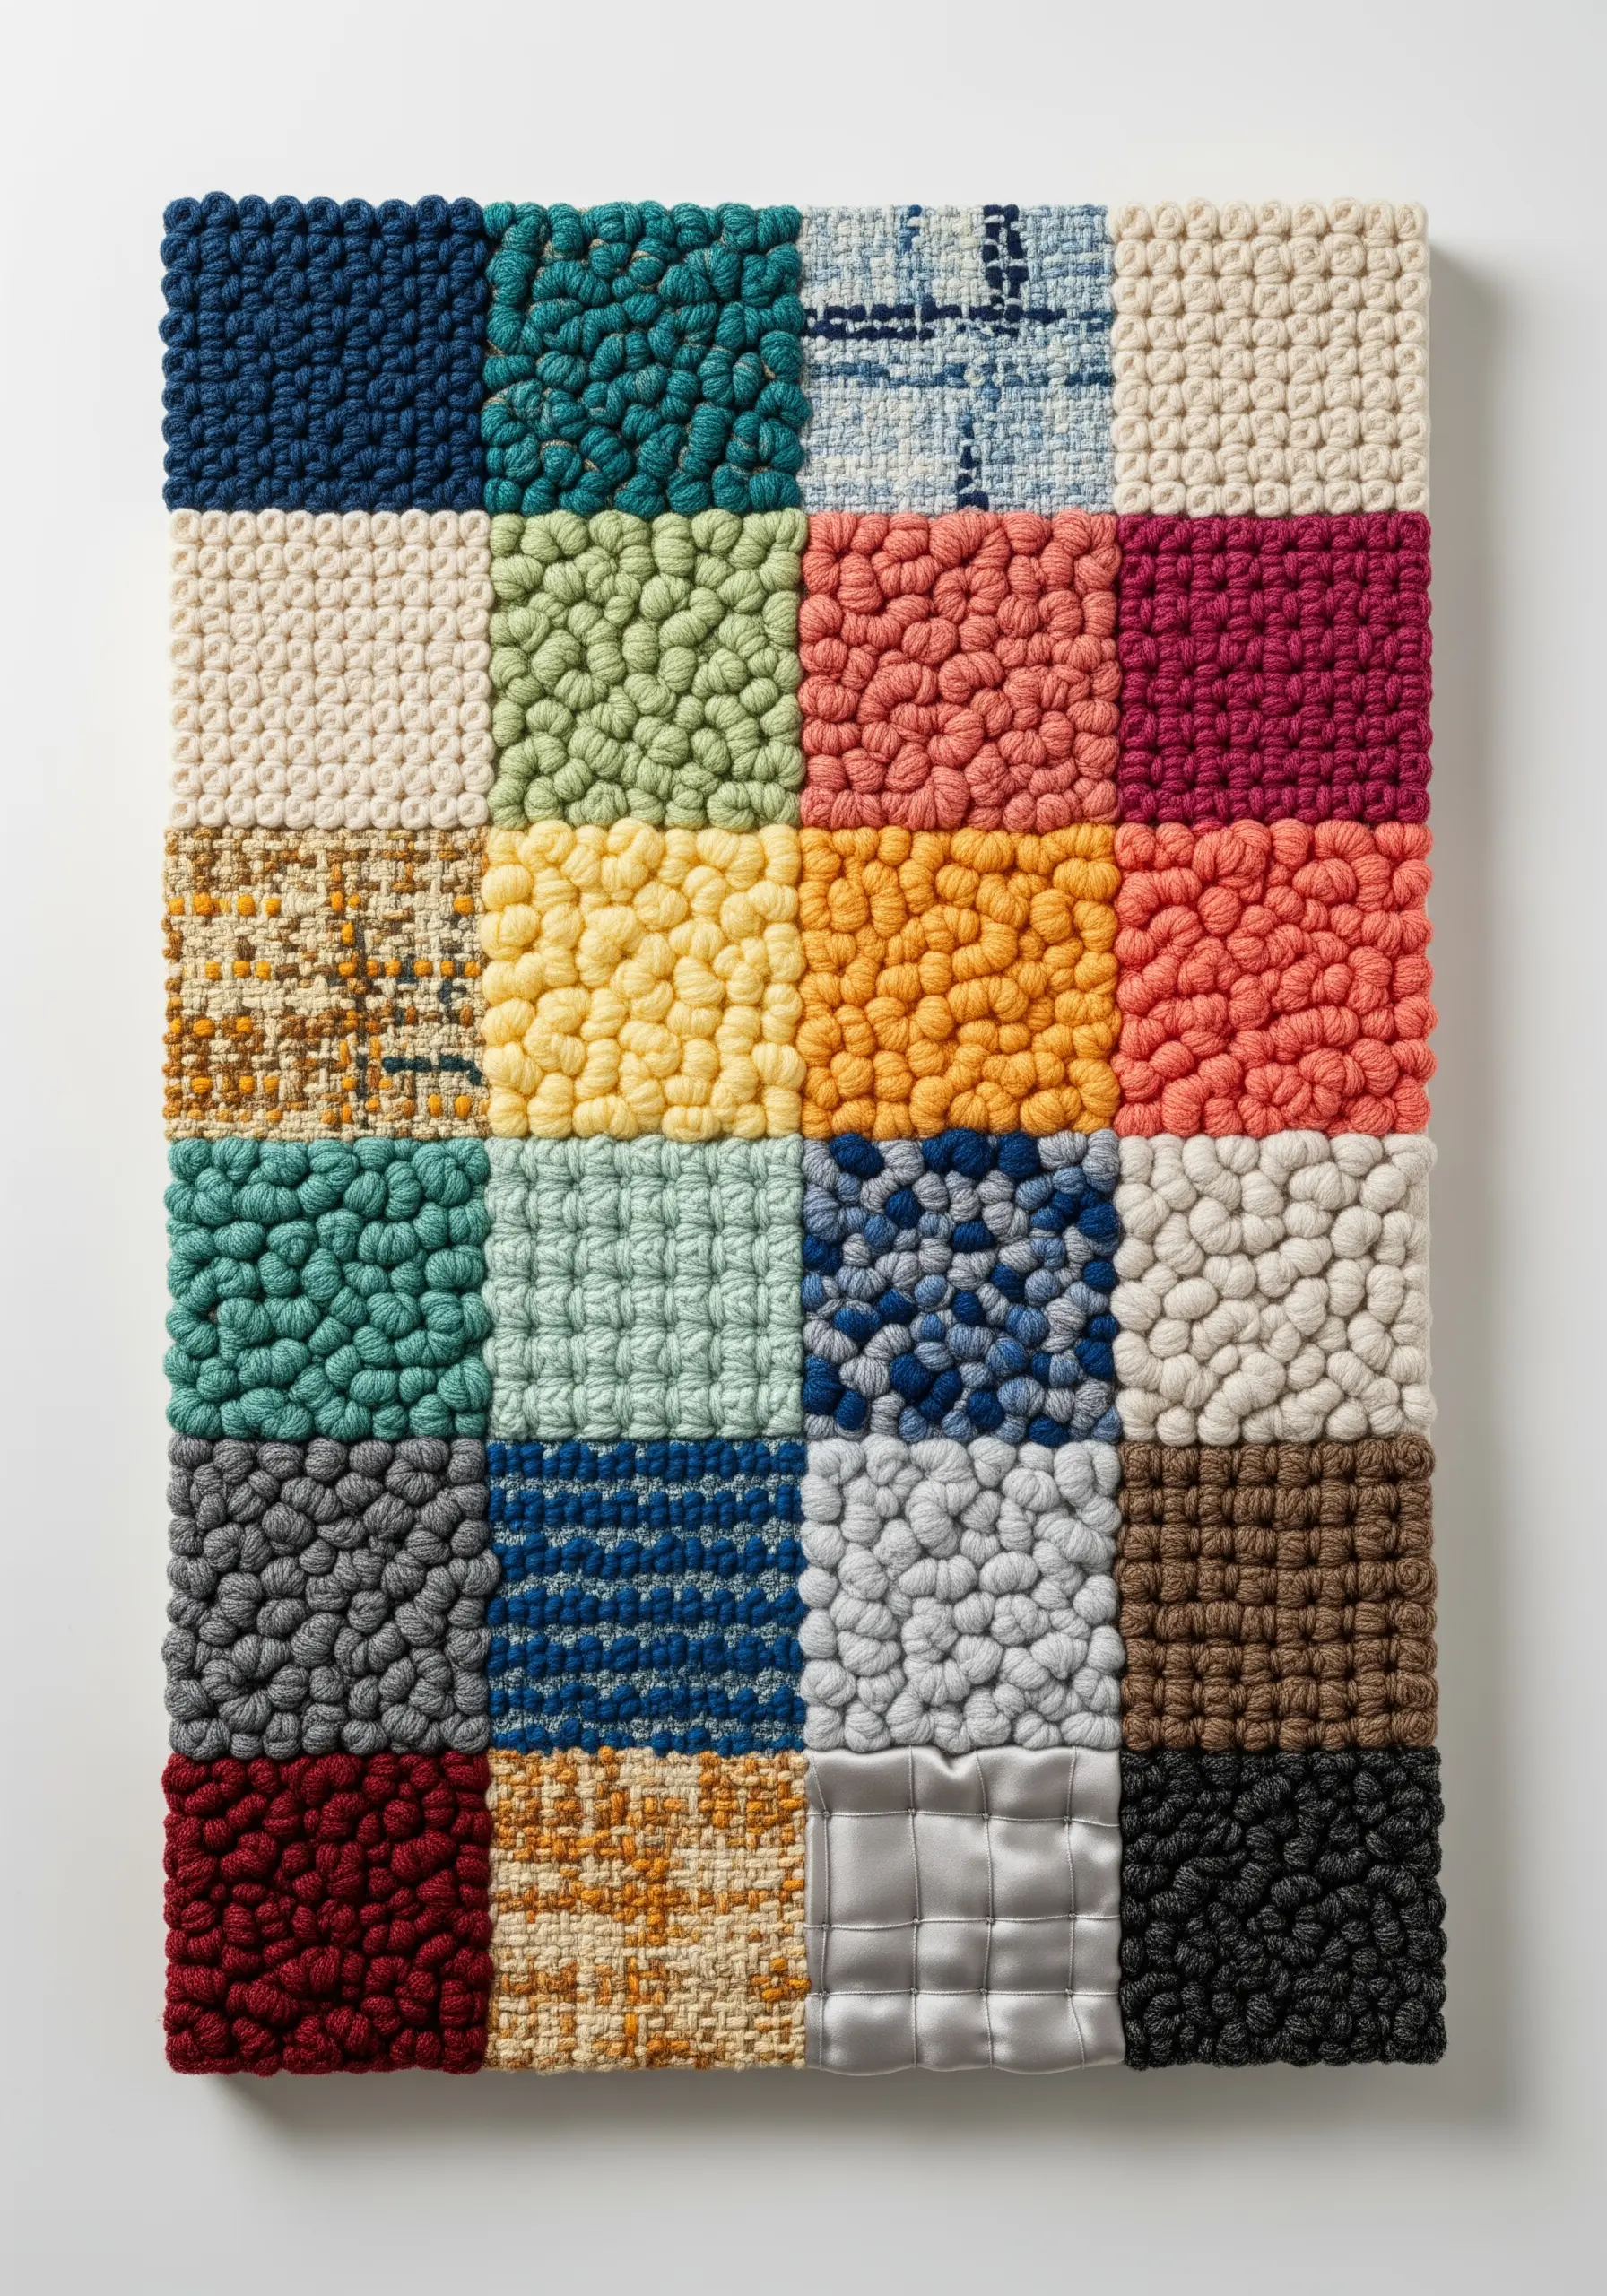
Explore the interaction of color, in the style of Anni Albers, by creating a sampler of different weaving and knotting techniques.
Divide your canvas into a grid. Within each square, experiment with a different texture: plush punch needle loops, dense French knots, clean satin stitches, or traditional weaving patterns like tabby or twill.
By placing these varied textures side-by-side, you’ll see how the material’s surface affects color perception. A plush red will feel different from a flat red, creating a rich study in both color and texture. Try one of these minimal DIY embroidery projects you’ll actually want to hang.
32. Capturing Hockney’s Light on Water with Satin Stitch
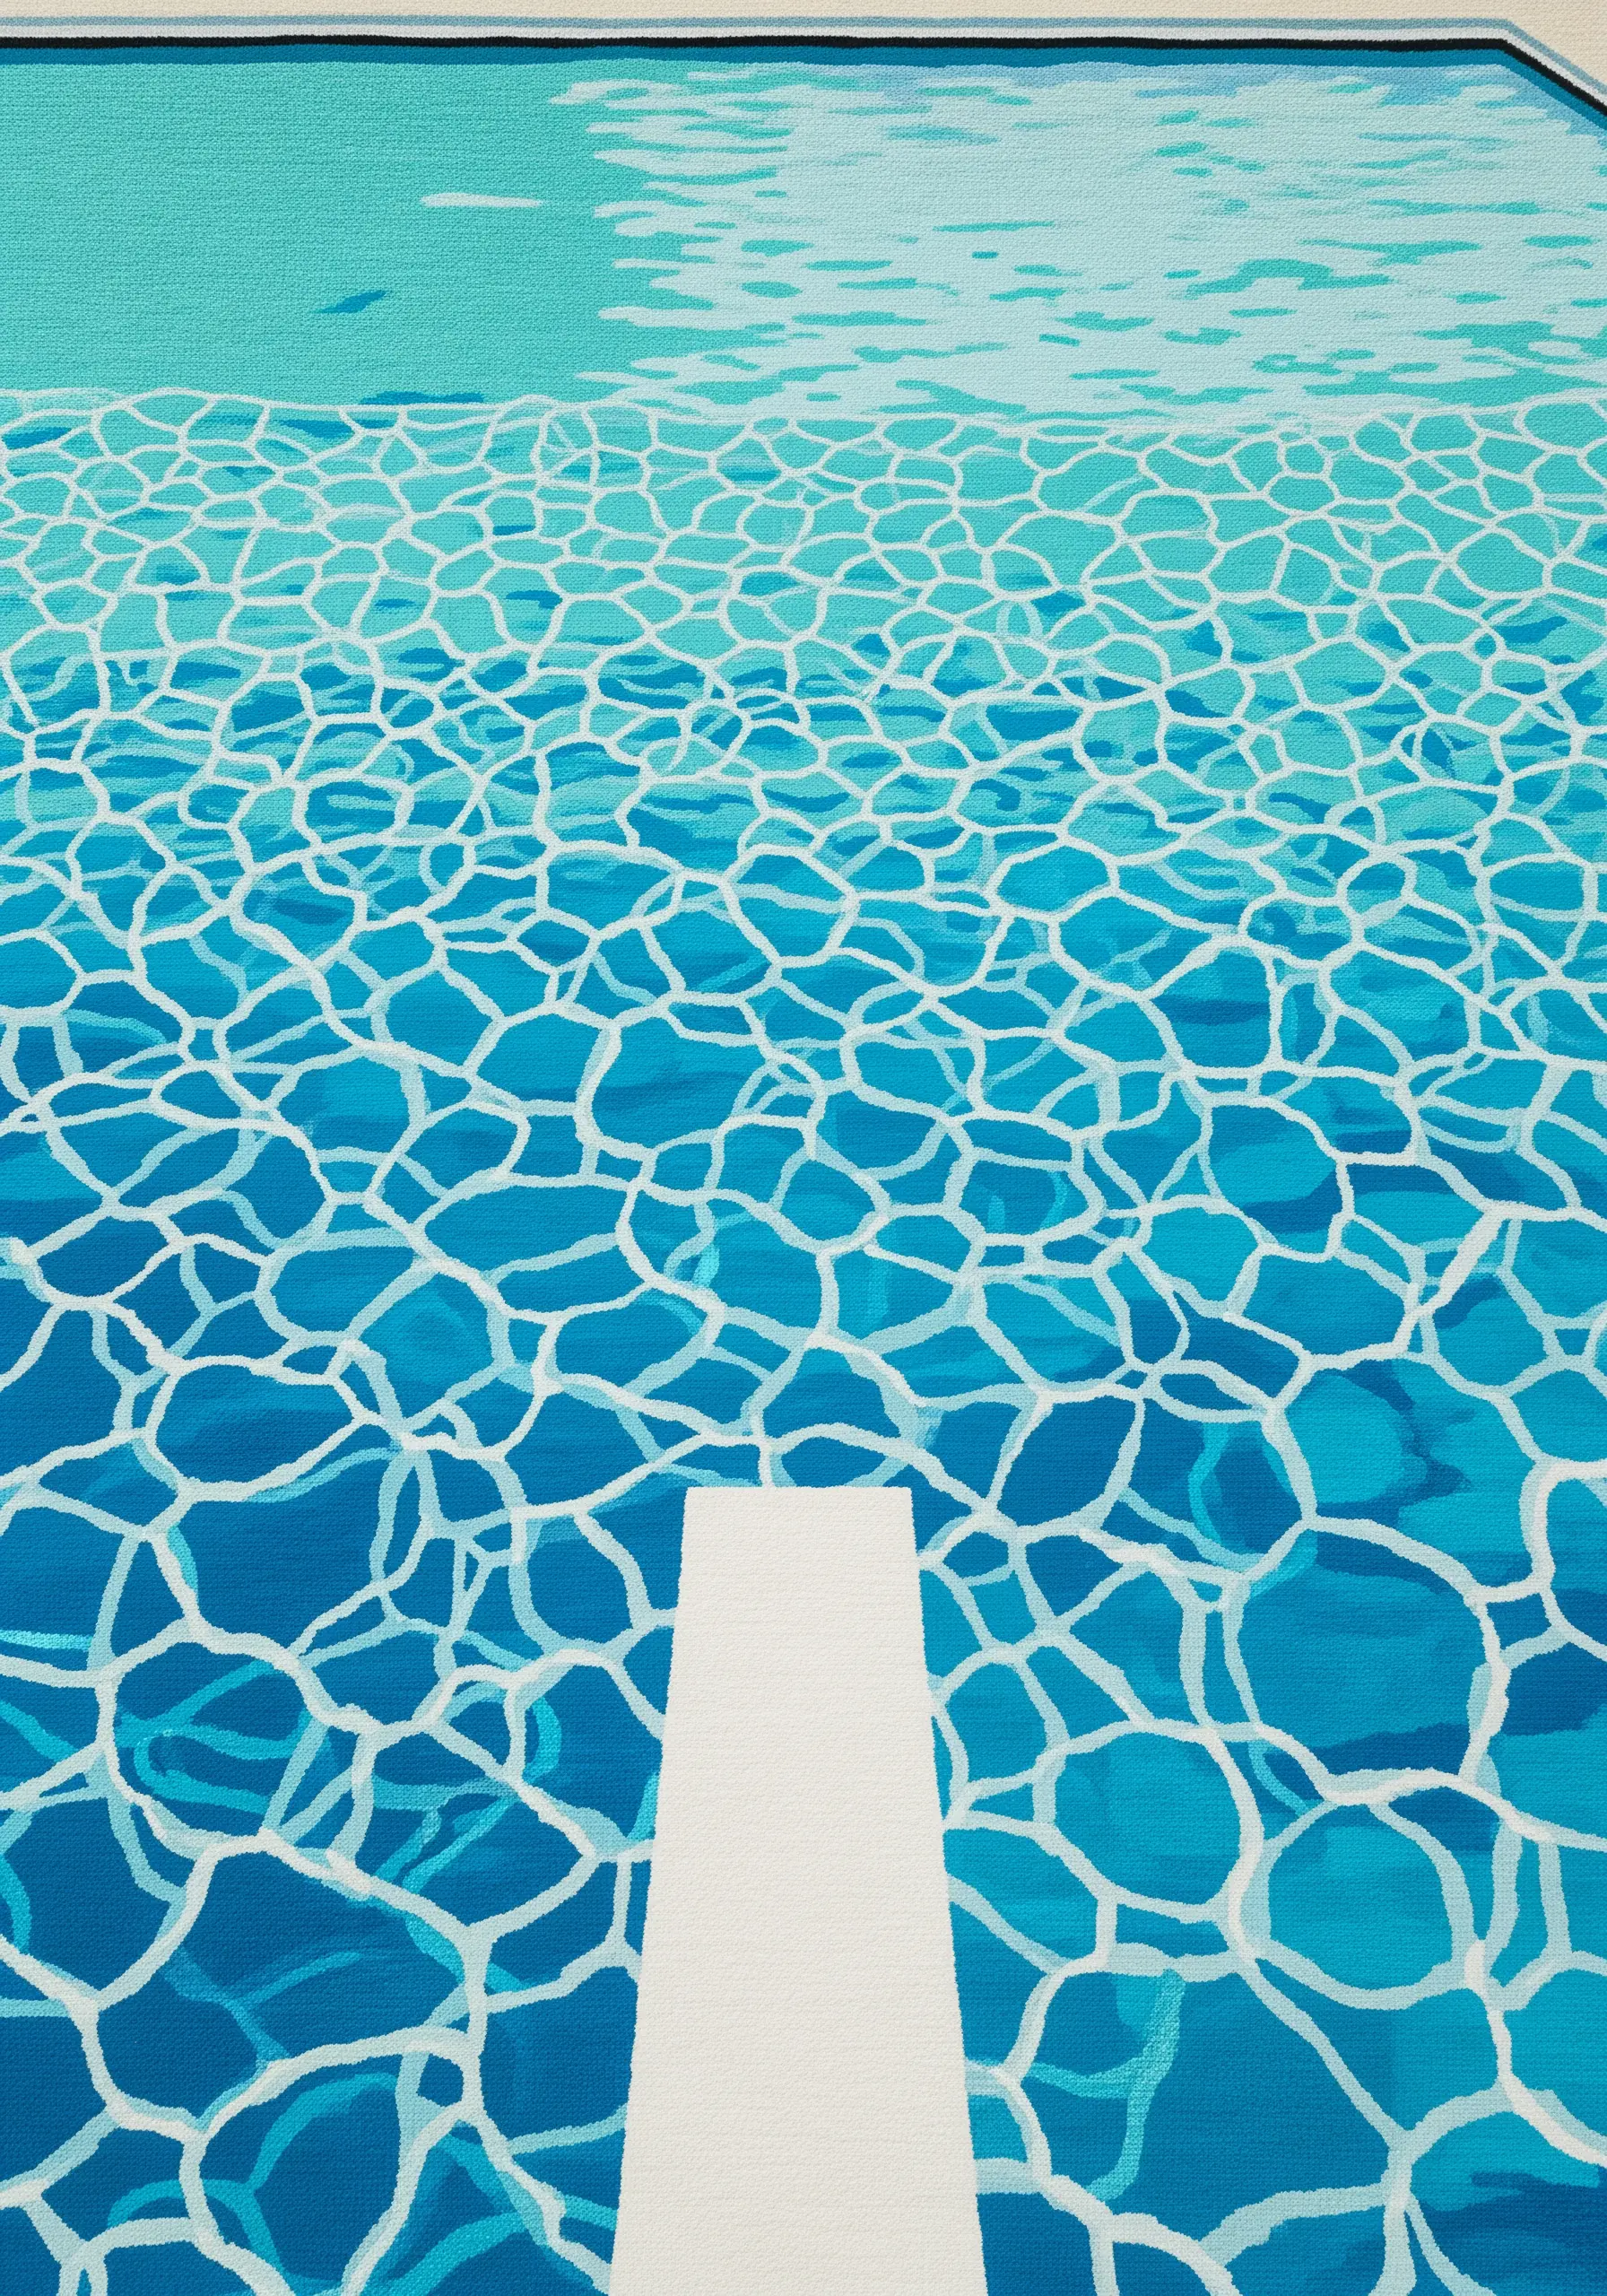
Recreate the shimmering, abstracted patterns of light on a swimming pool’s surface using directional satin stitch.
Fill the main body of water with blocks of flat, smooth satin stitch in varying shades of blue to create depth.
For the white light patterns, do not outline them first. Instead, let the edges be defined by long, interlocking satin stitches. Vary the direction of these white stitches—some horizontal, some diagonal—to mimic the way light refracts and moves on the water’s surface. This creates a graphic yet fluid effect.


