

Creating a piece of embroidery for a child’s room is about more than just decoration; it’s about stitching a little bit of softness, character, and love into their personal space. But it’s easy to feel stuck with the same simple stitches or flat designs. How do you create something that feels truly special, modern, and touchable?
The secret lies in texture and dimension. It’s in the small, intentional choices—choosing a looped yarn for a lion’s mane, layering felt for a dinosaur’s plates, or using directional stitches to make an animal’s fur look real enough to pet. These techniques don’t require complex tools, just a thoughtful approach to how thread and fabric can work together.
This collection of ideas is designed to show you *how* to make those choices. Think of each pillow not as a pattern to follow, but as an invitation to play with texture, to blend colors with purpose, and to transform a simple cushion into a cherished friend. You have the skills already; now, let’s give them new expression.
1. Create Fur Texture With Directional Seed Stitch
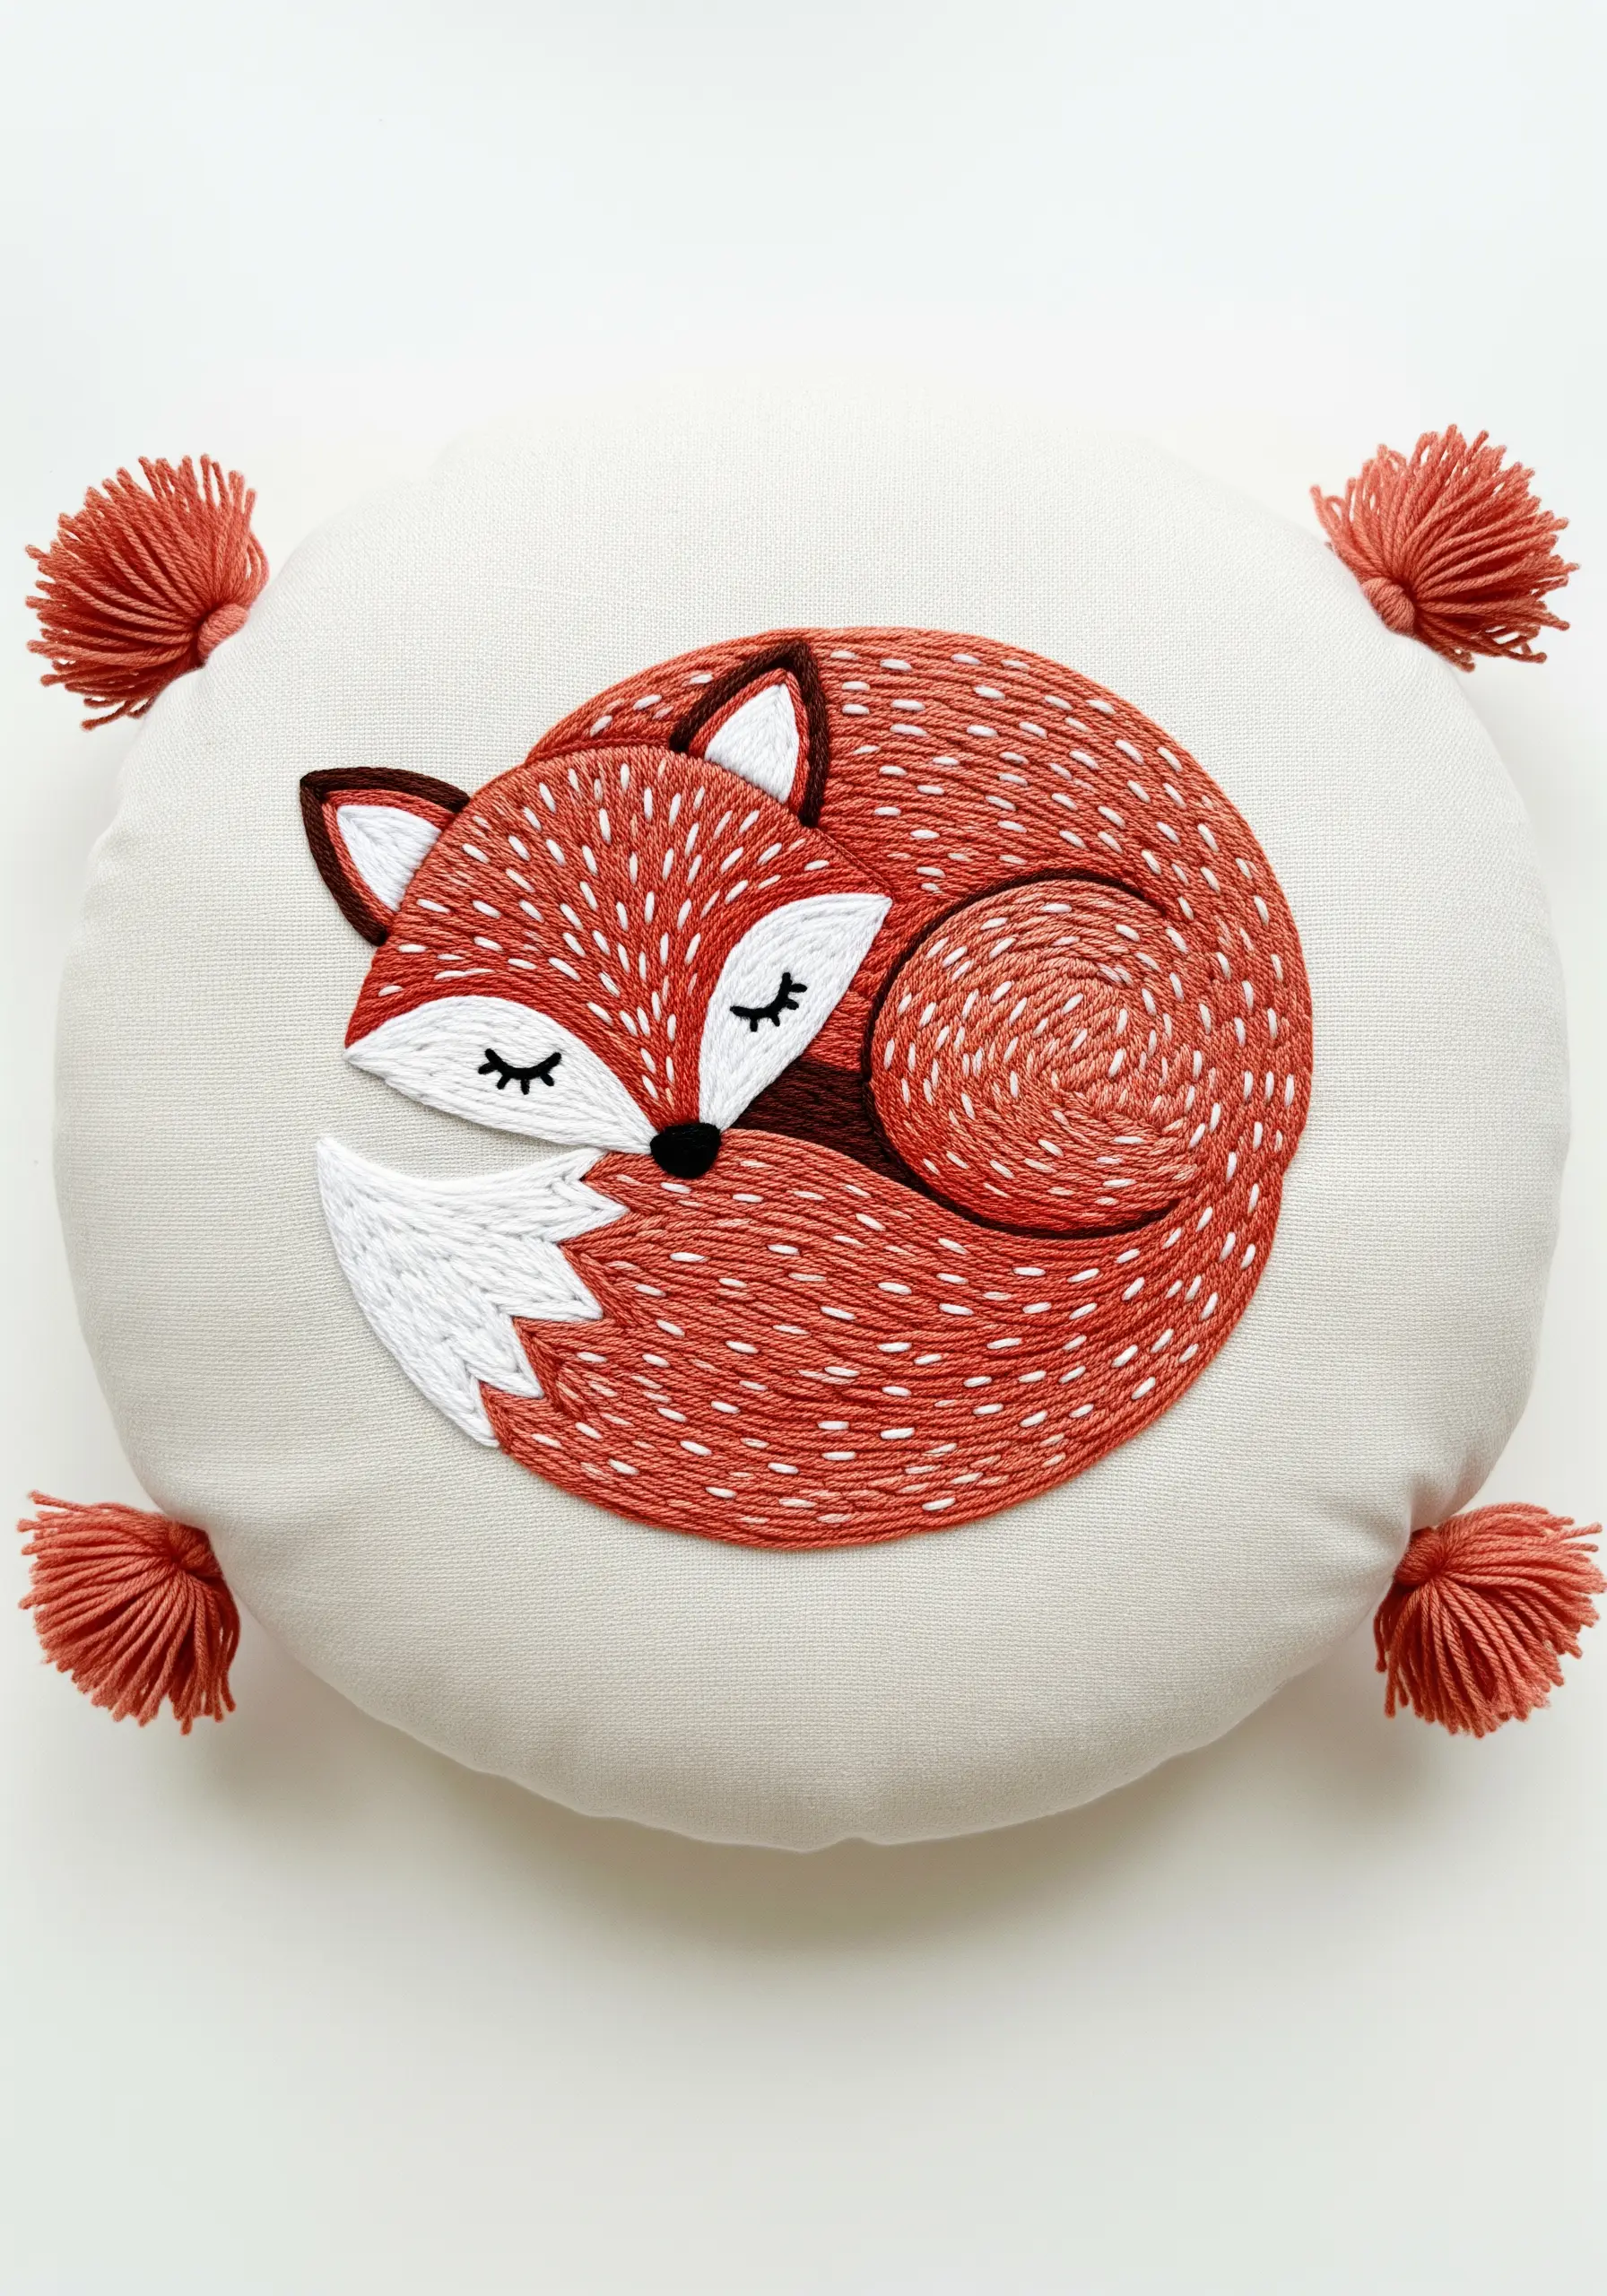
Instead of a dense satin stitch, fill your fox’s body with a scattered seed stitch, using two or three shades of rust-colored floss.
Vary the angle and length of each tiny stitch to mimic the unpredictable texture of fur.
This technique is not only faster than satin stitch but also creates a softer, more organic feel that is forgiving of imperfections.
Reserve a crisp, dark split stitch for the outlines to make the soft texture of the fill pop.
2. Combine Appliqué With Delicate Line Art
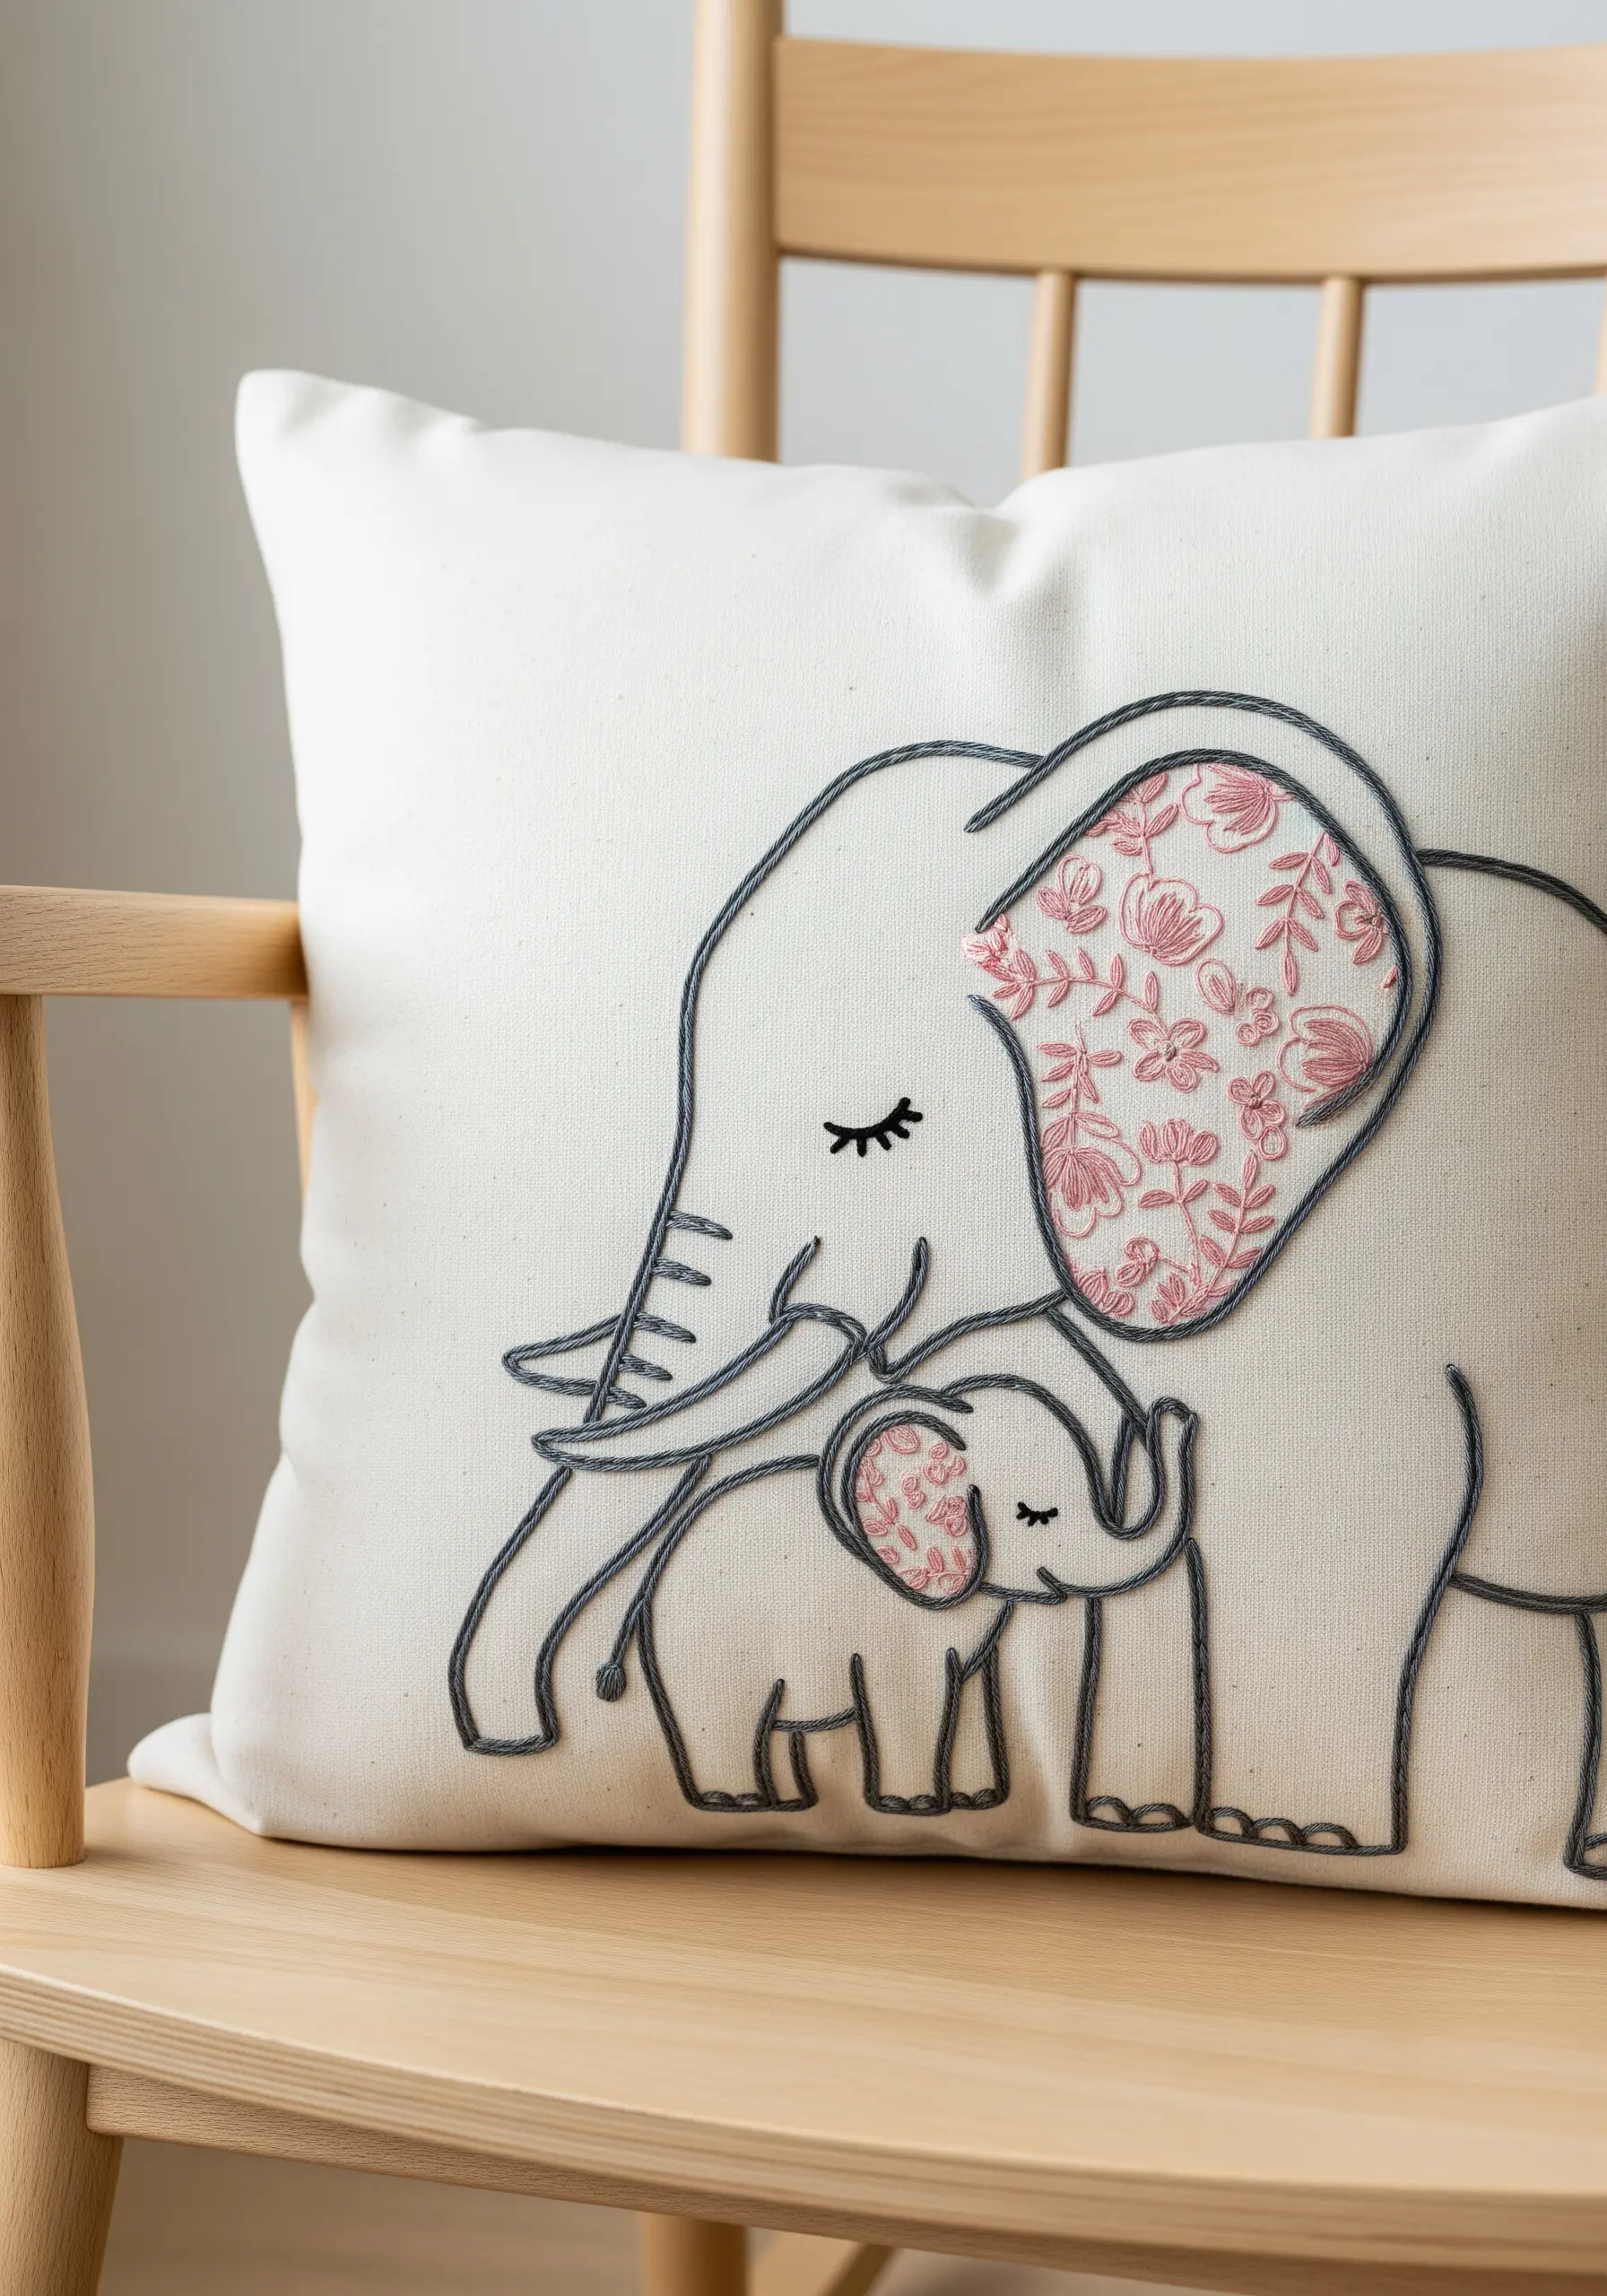
To add a touch of softness, use a patterned fabric scrap for the elephant’s ear instead of filling it with thread.
Secure the appliqué piece with a fusible web before stitching a neat buttonhole stitch around the edge to prevent fraying and add definition.
Trace the remaining outlines with a heavy thread, like a #8 pearl cotton, using couching stitch for perfectly smooth curves that contrast beautifully with the fabric inlay.
This is a gentle way to introduce mother-child line art motifs with added warmth and texture.
3. Layer Felt for a Playful, 3D Effect
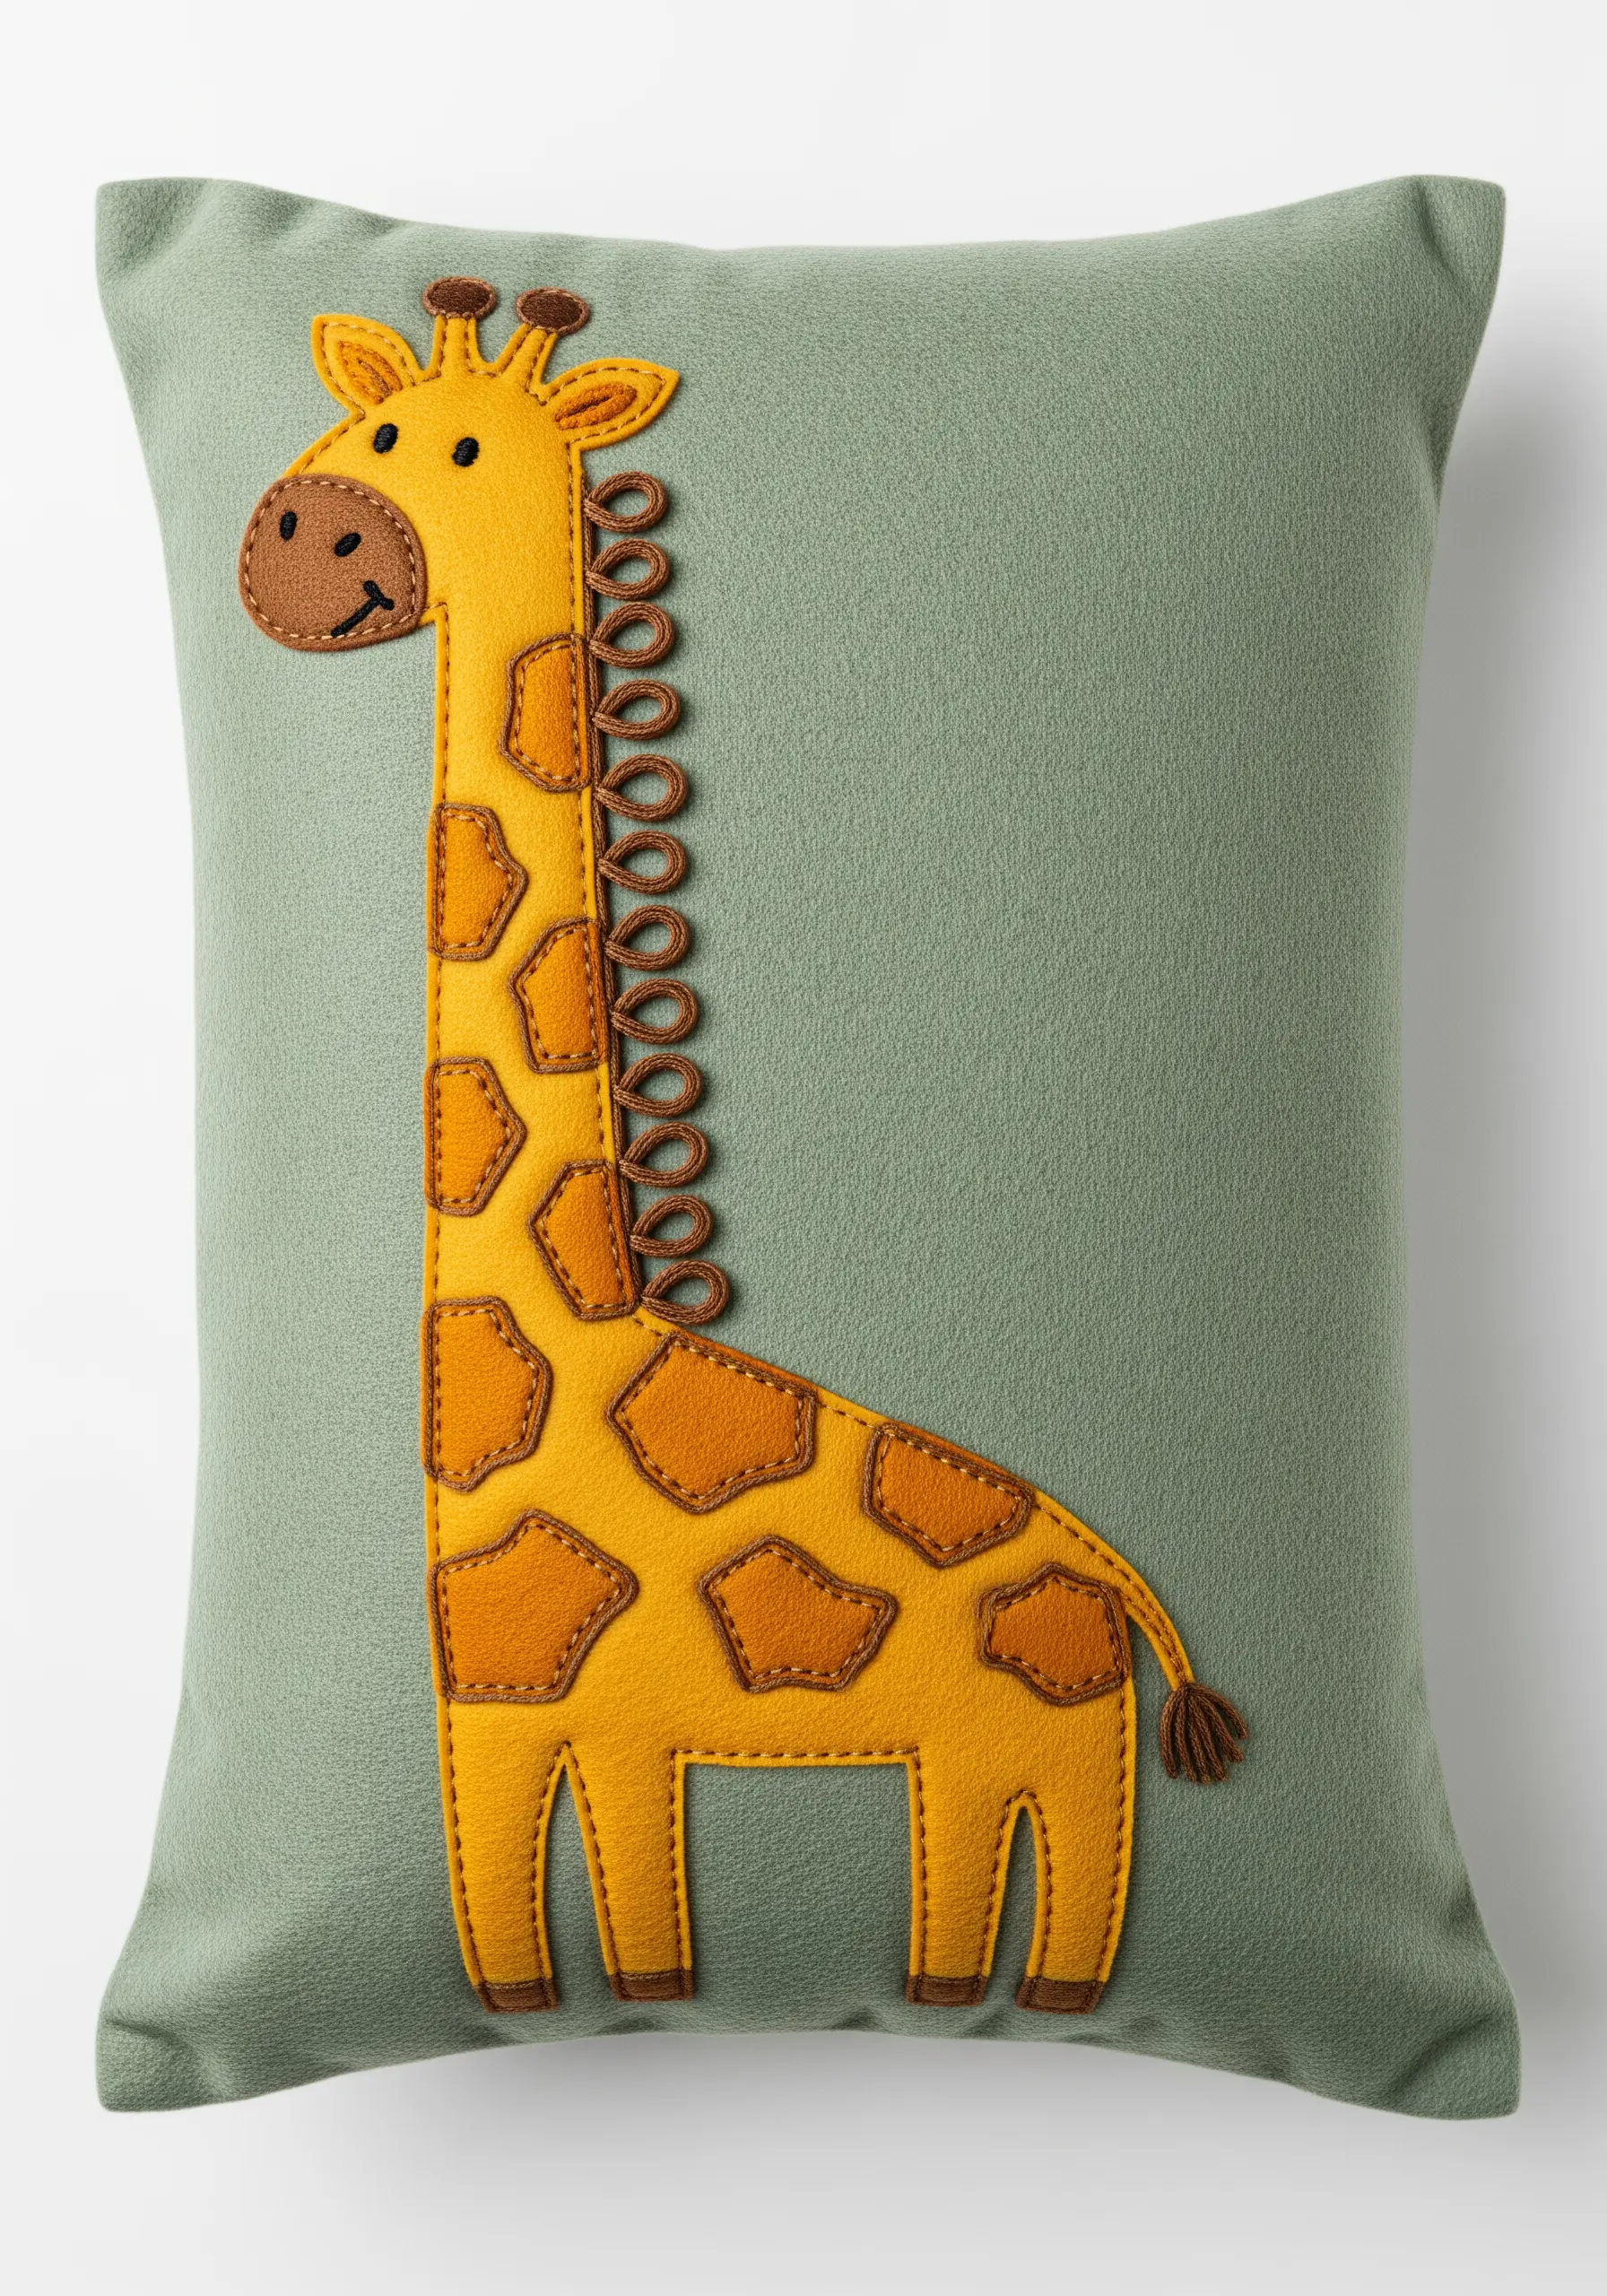
Build your design with layers of felt for a result that feels more like a soft sculpture than a flat embroidery.
Cut each shape precisely and use a coordinating thread color to attach them with a simple running stitch or a decorative blanket stitch for a clean, handcrafted look.
For the mane, create a series of loops with a thick, contrasting yarn using a detached buttonhole stitch—this adds dynamic, tactile interest.
4. Stitch a Sculptural Animal on Textured Fabric
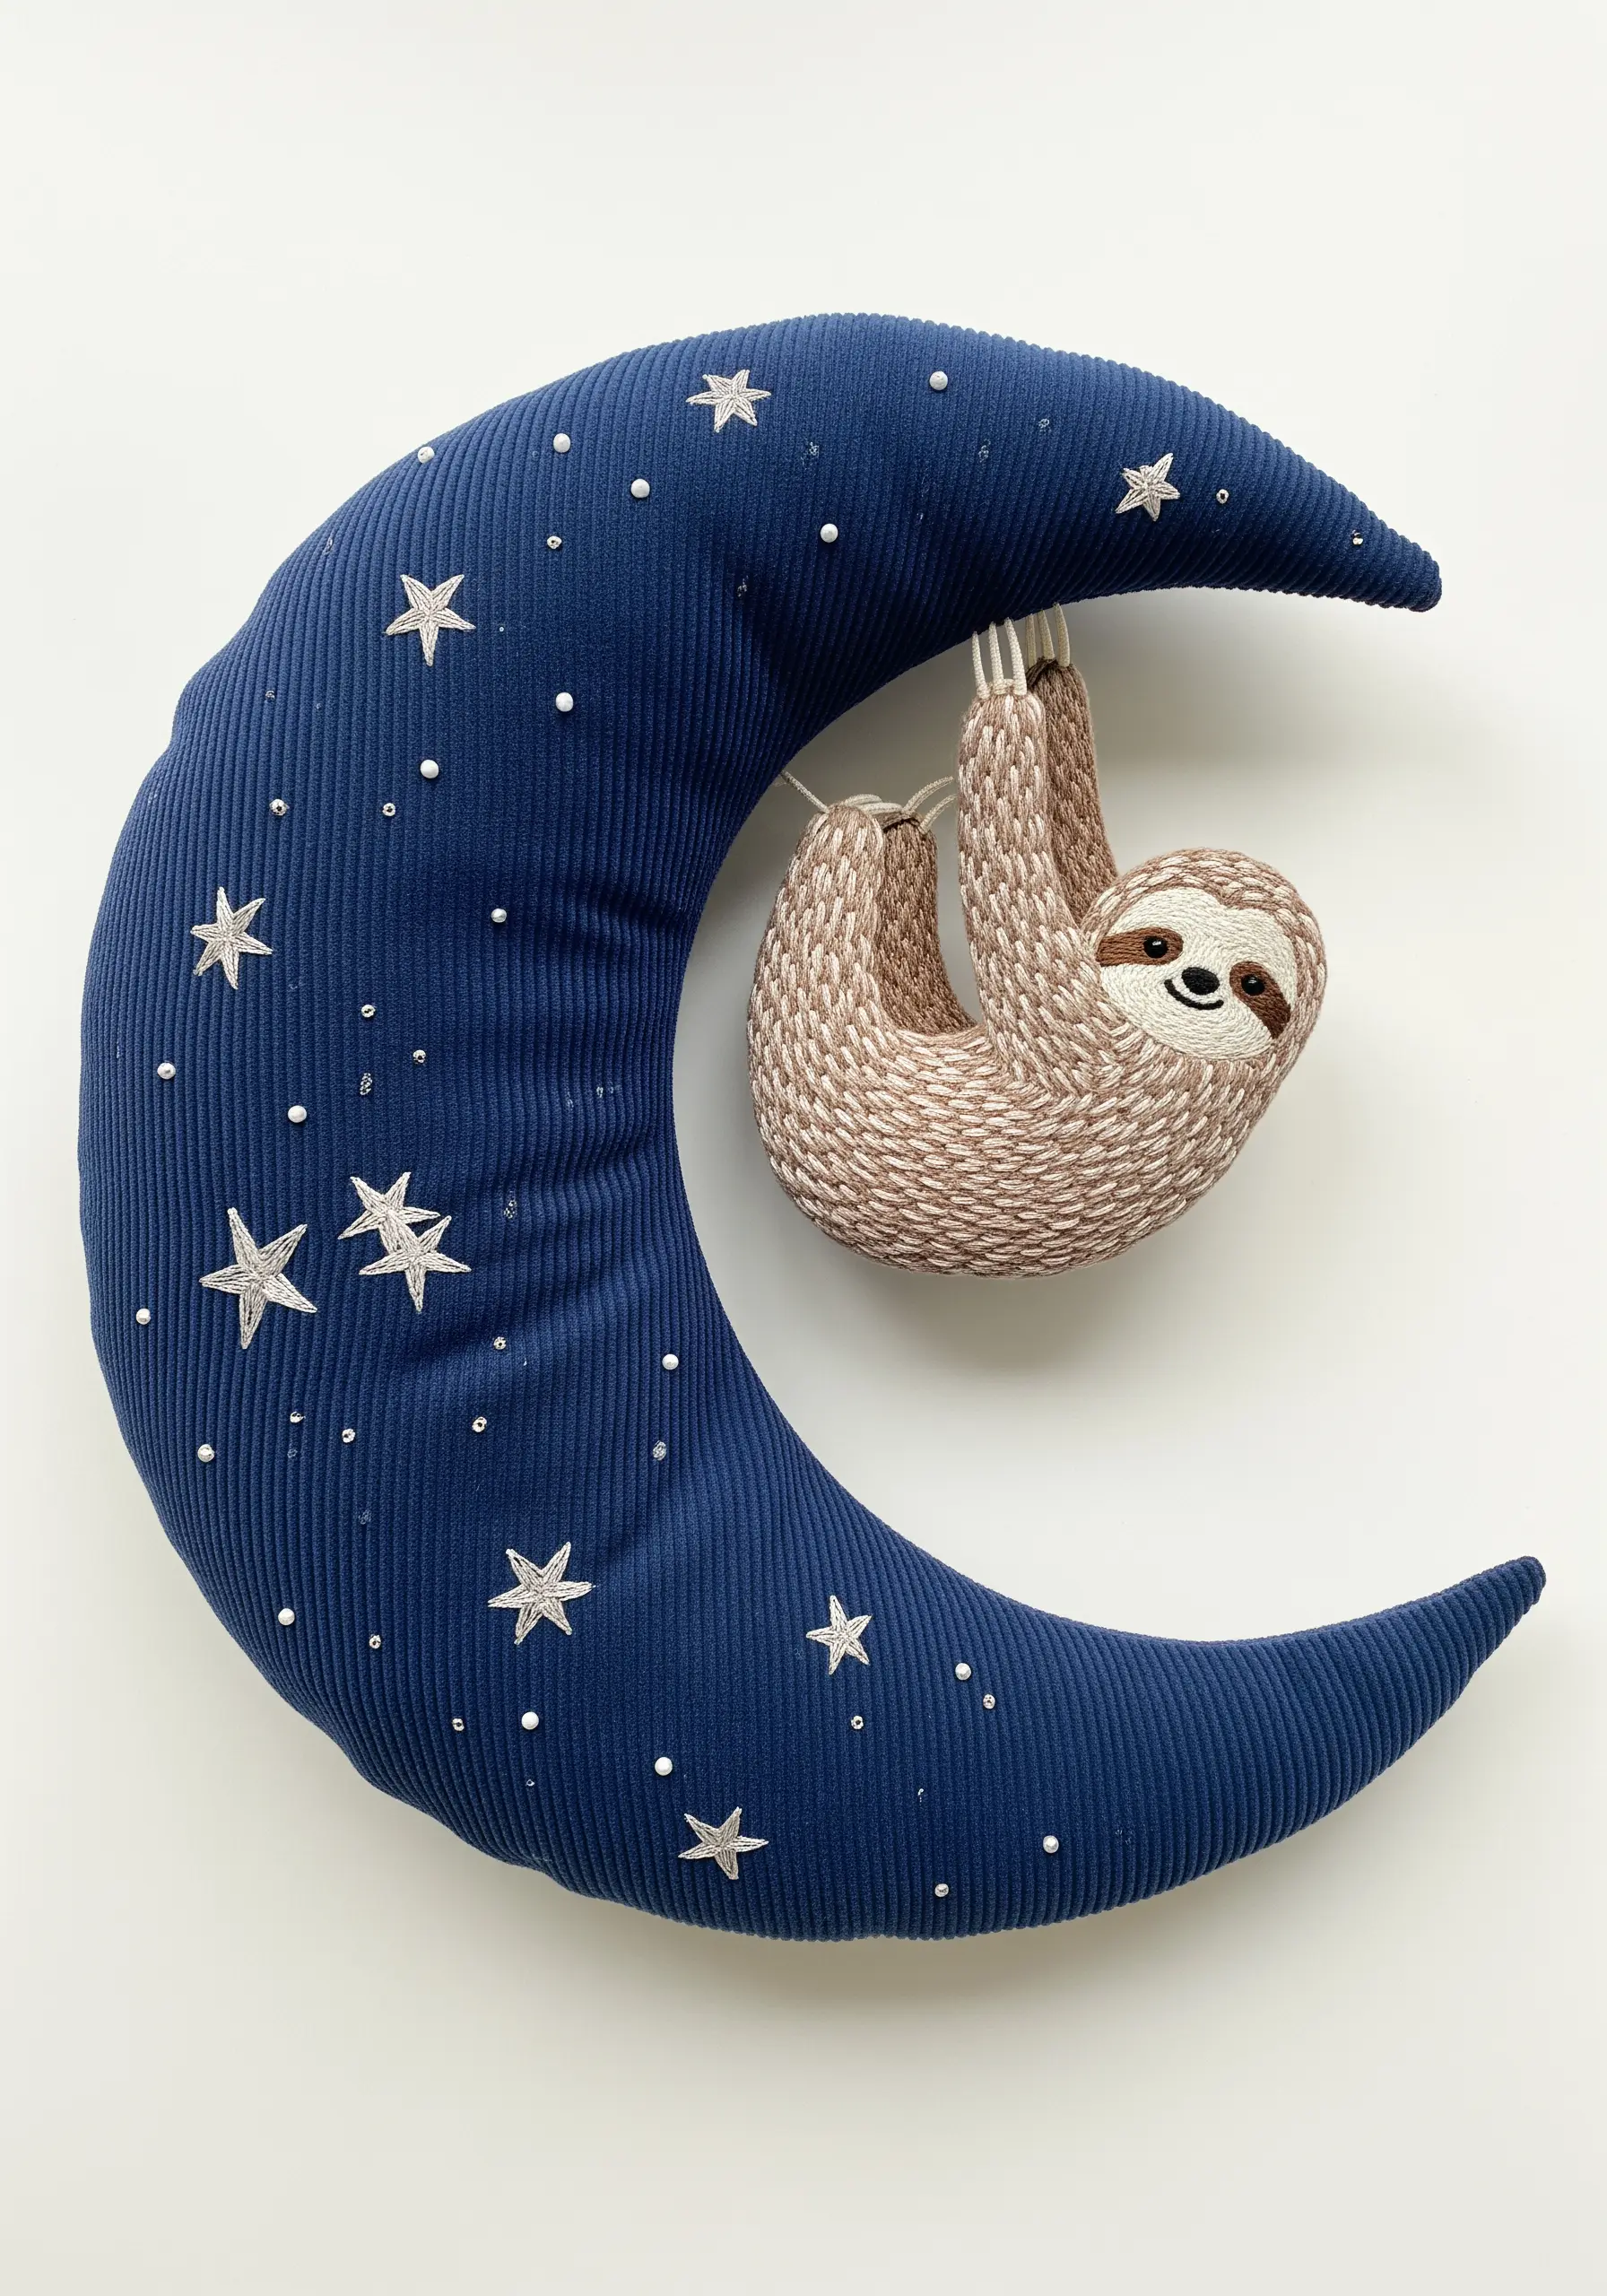
Emphasize your subject’s form by embroidering directly onto a fabric with its own texture, like corduroy or velvet.
Use a dense, directional satin stitch for the sloth’s body, ensuring your stitches follow the natural curve of its form to create a rounded, almost 3D appearance.
The fabric’s texture will recede, making your smooth stitching the primary focus.
Add tiny seed beads or French knots for the stars to create a subtle sparkle that contrasts with the matte thread.
5. Map Out Geometric Fills for a Modernist Feel
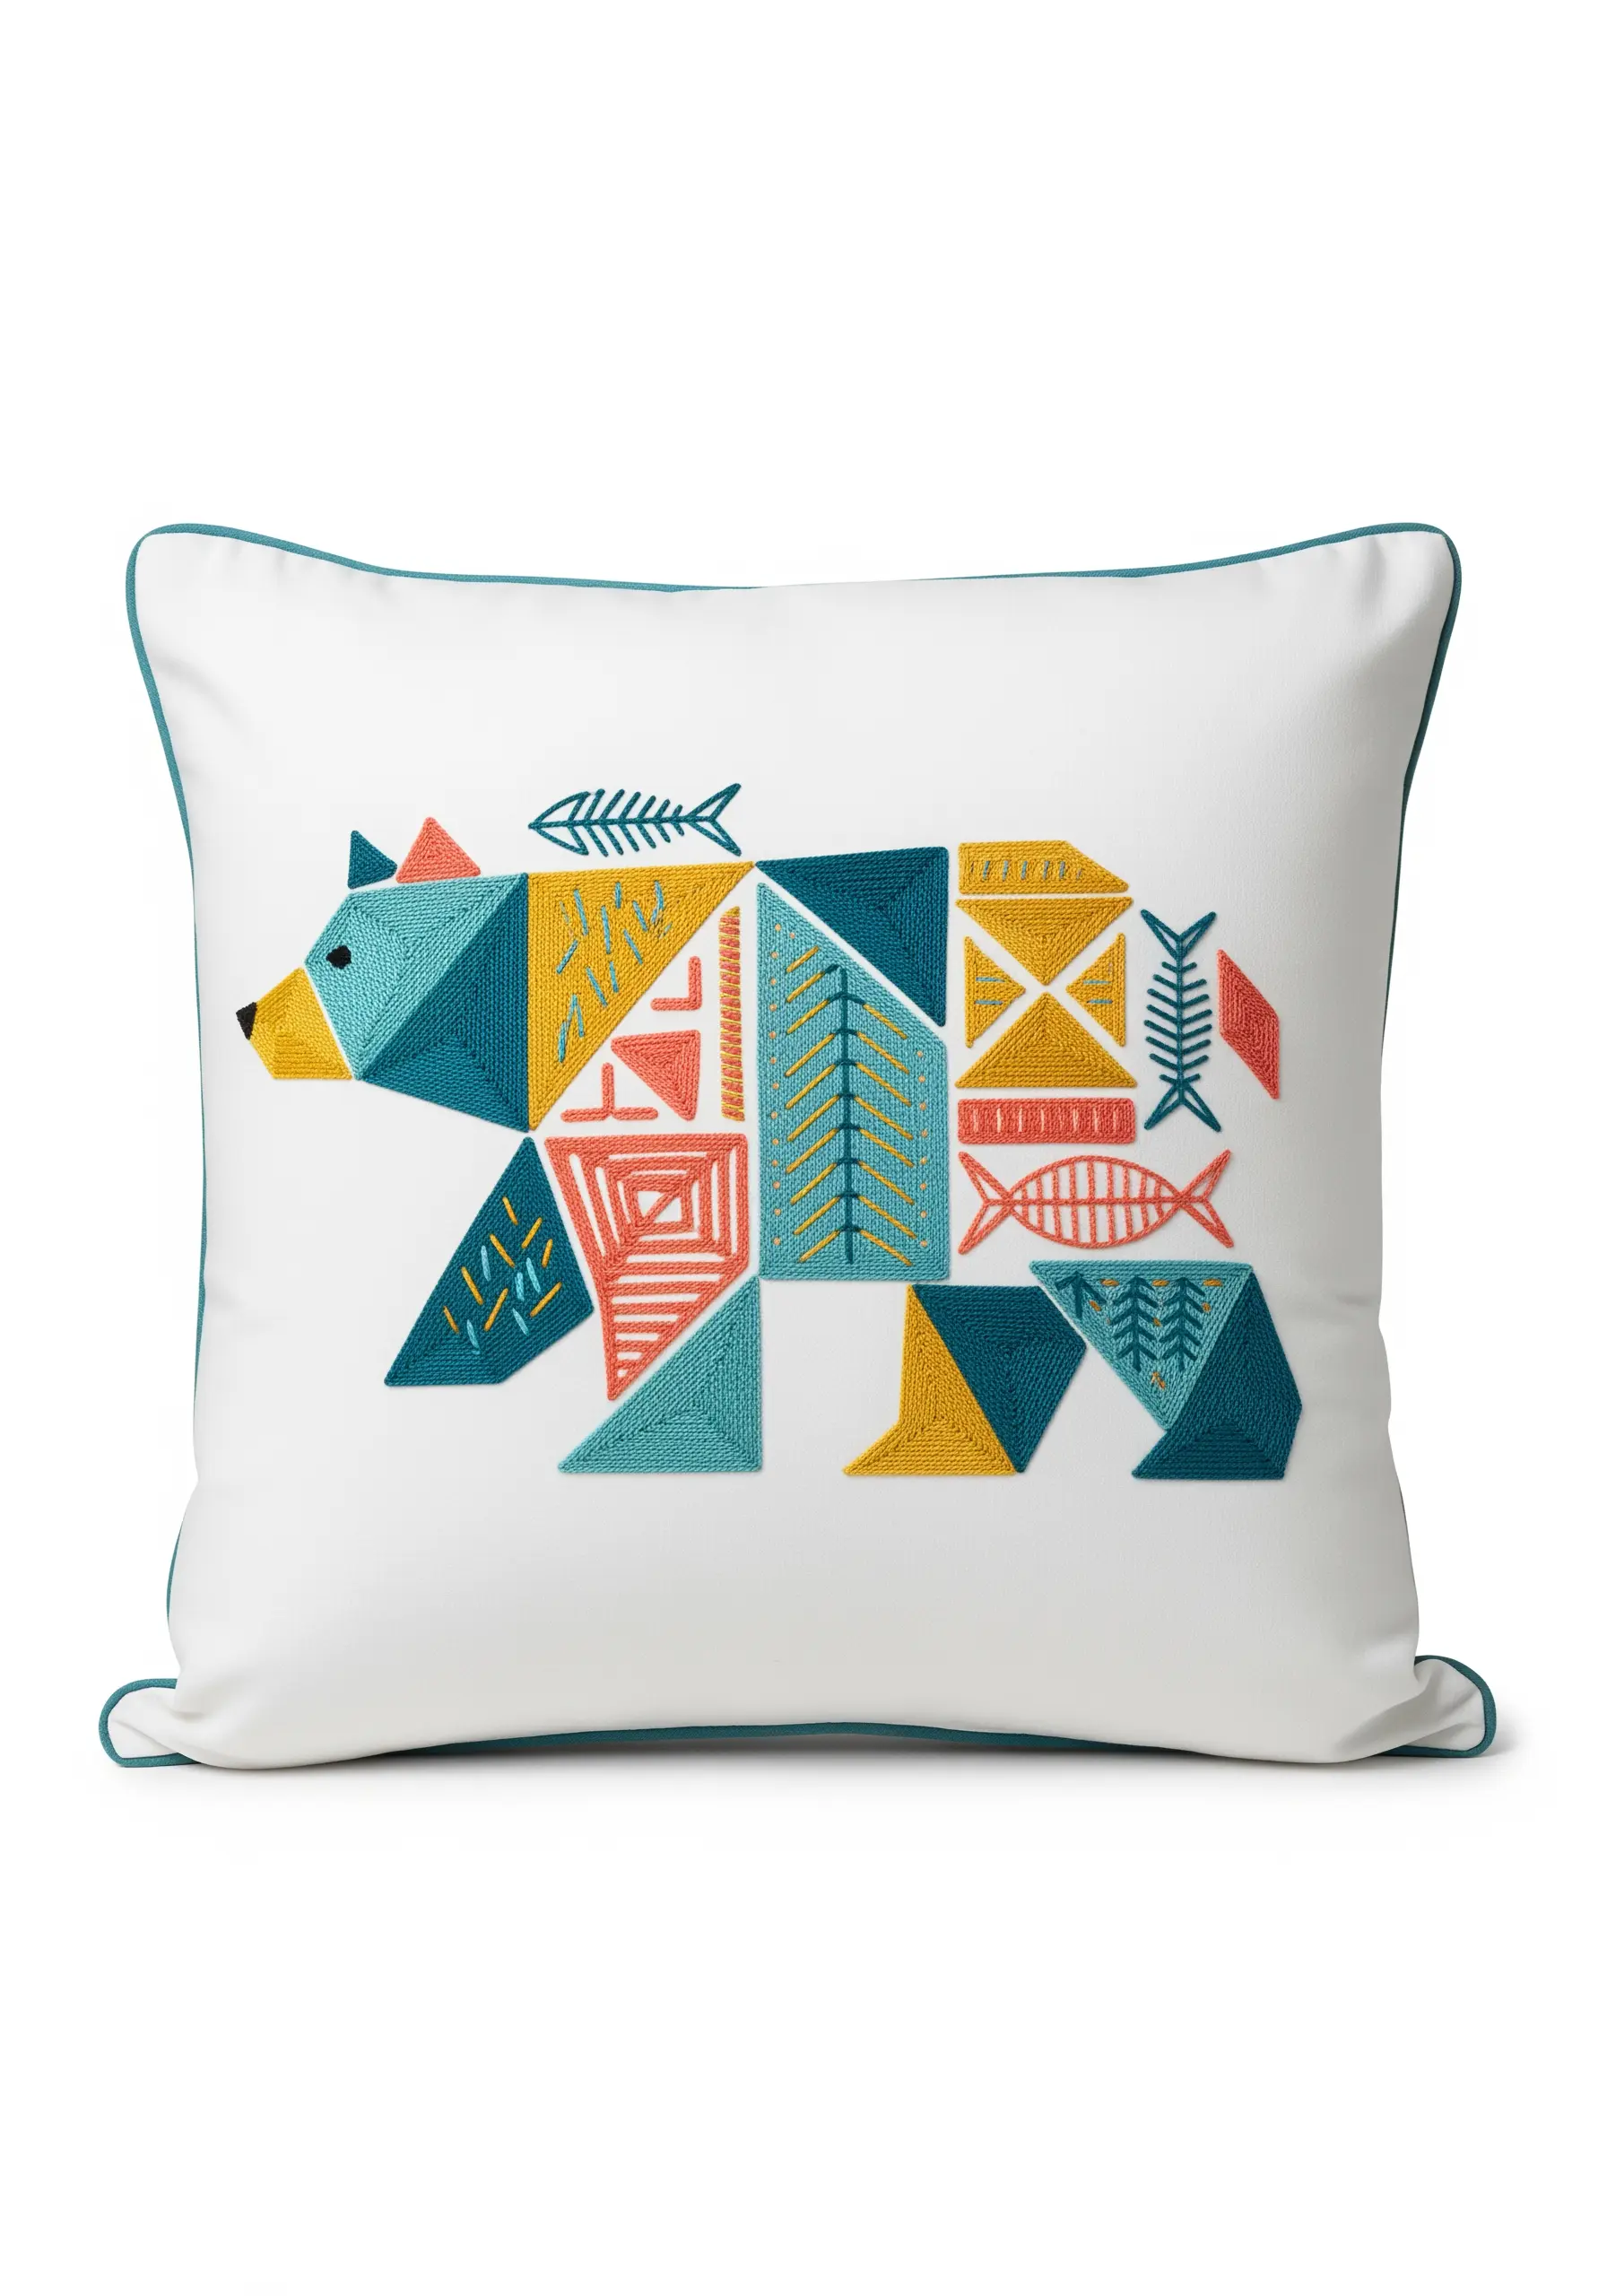
Transform a simple animal silhouette into a piece of modern art by dividing it into geometric sections.
Fill each shape with a different directional satin stitch, woven wheel, or long-and-short stitch to create a patchwork of textures.
To keep your geometric lines perfectly crisp, outline each section with a single strand of split stitch before filling it in.
This technique turns a simple pillow into one of those stitched details that make plain walls pop elegantly when displayed on a chair.
6. Use Raised Appliqué for a Soft, Puffy Finish
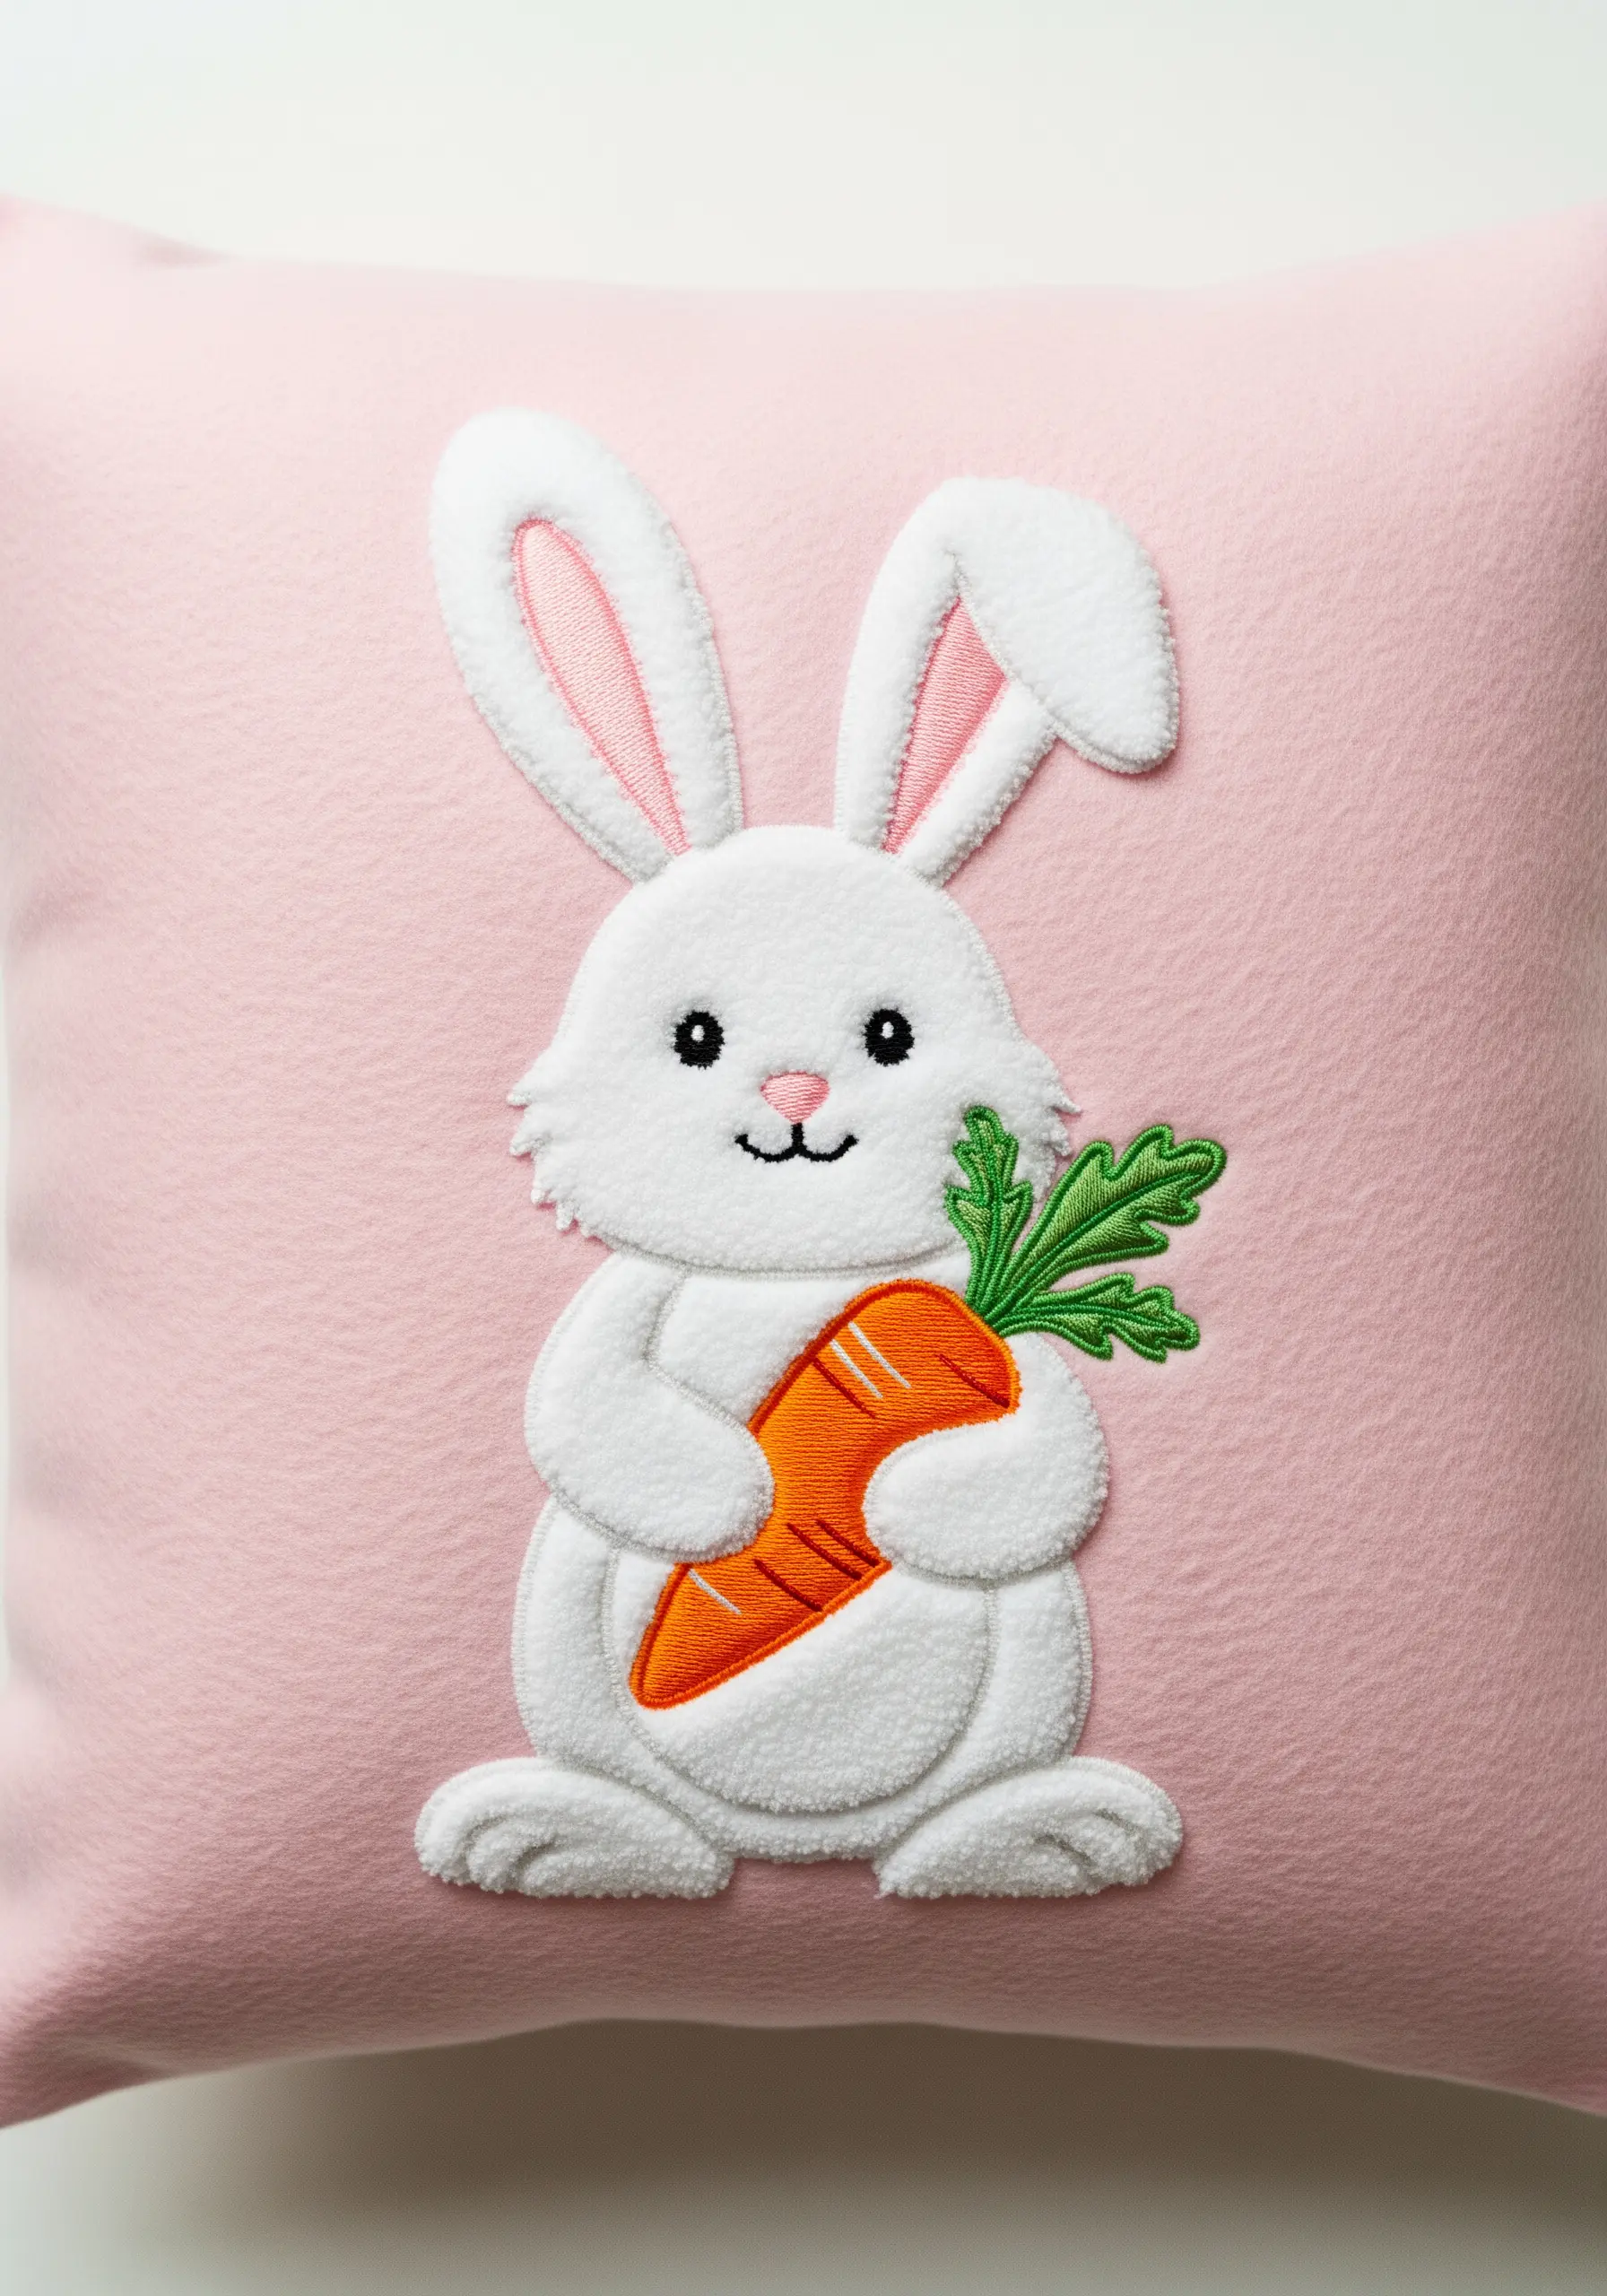
Create an irresistibly soft character by using a plush or fleece fabric for your appliqué.
Cut your shape and add a thin layer of batting underneath before stitching it to the pillow cover.
Secure the edges with a tight, dense satin stitch border; this not only frames the appliqué but also compresses the edges, making the center appear even puffier.
This method offers a professional, machine-embroidered look with the charm of handwork.
7. Master Thread Painting for Realistic Blending
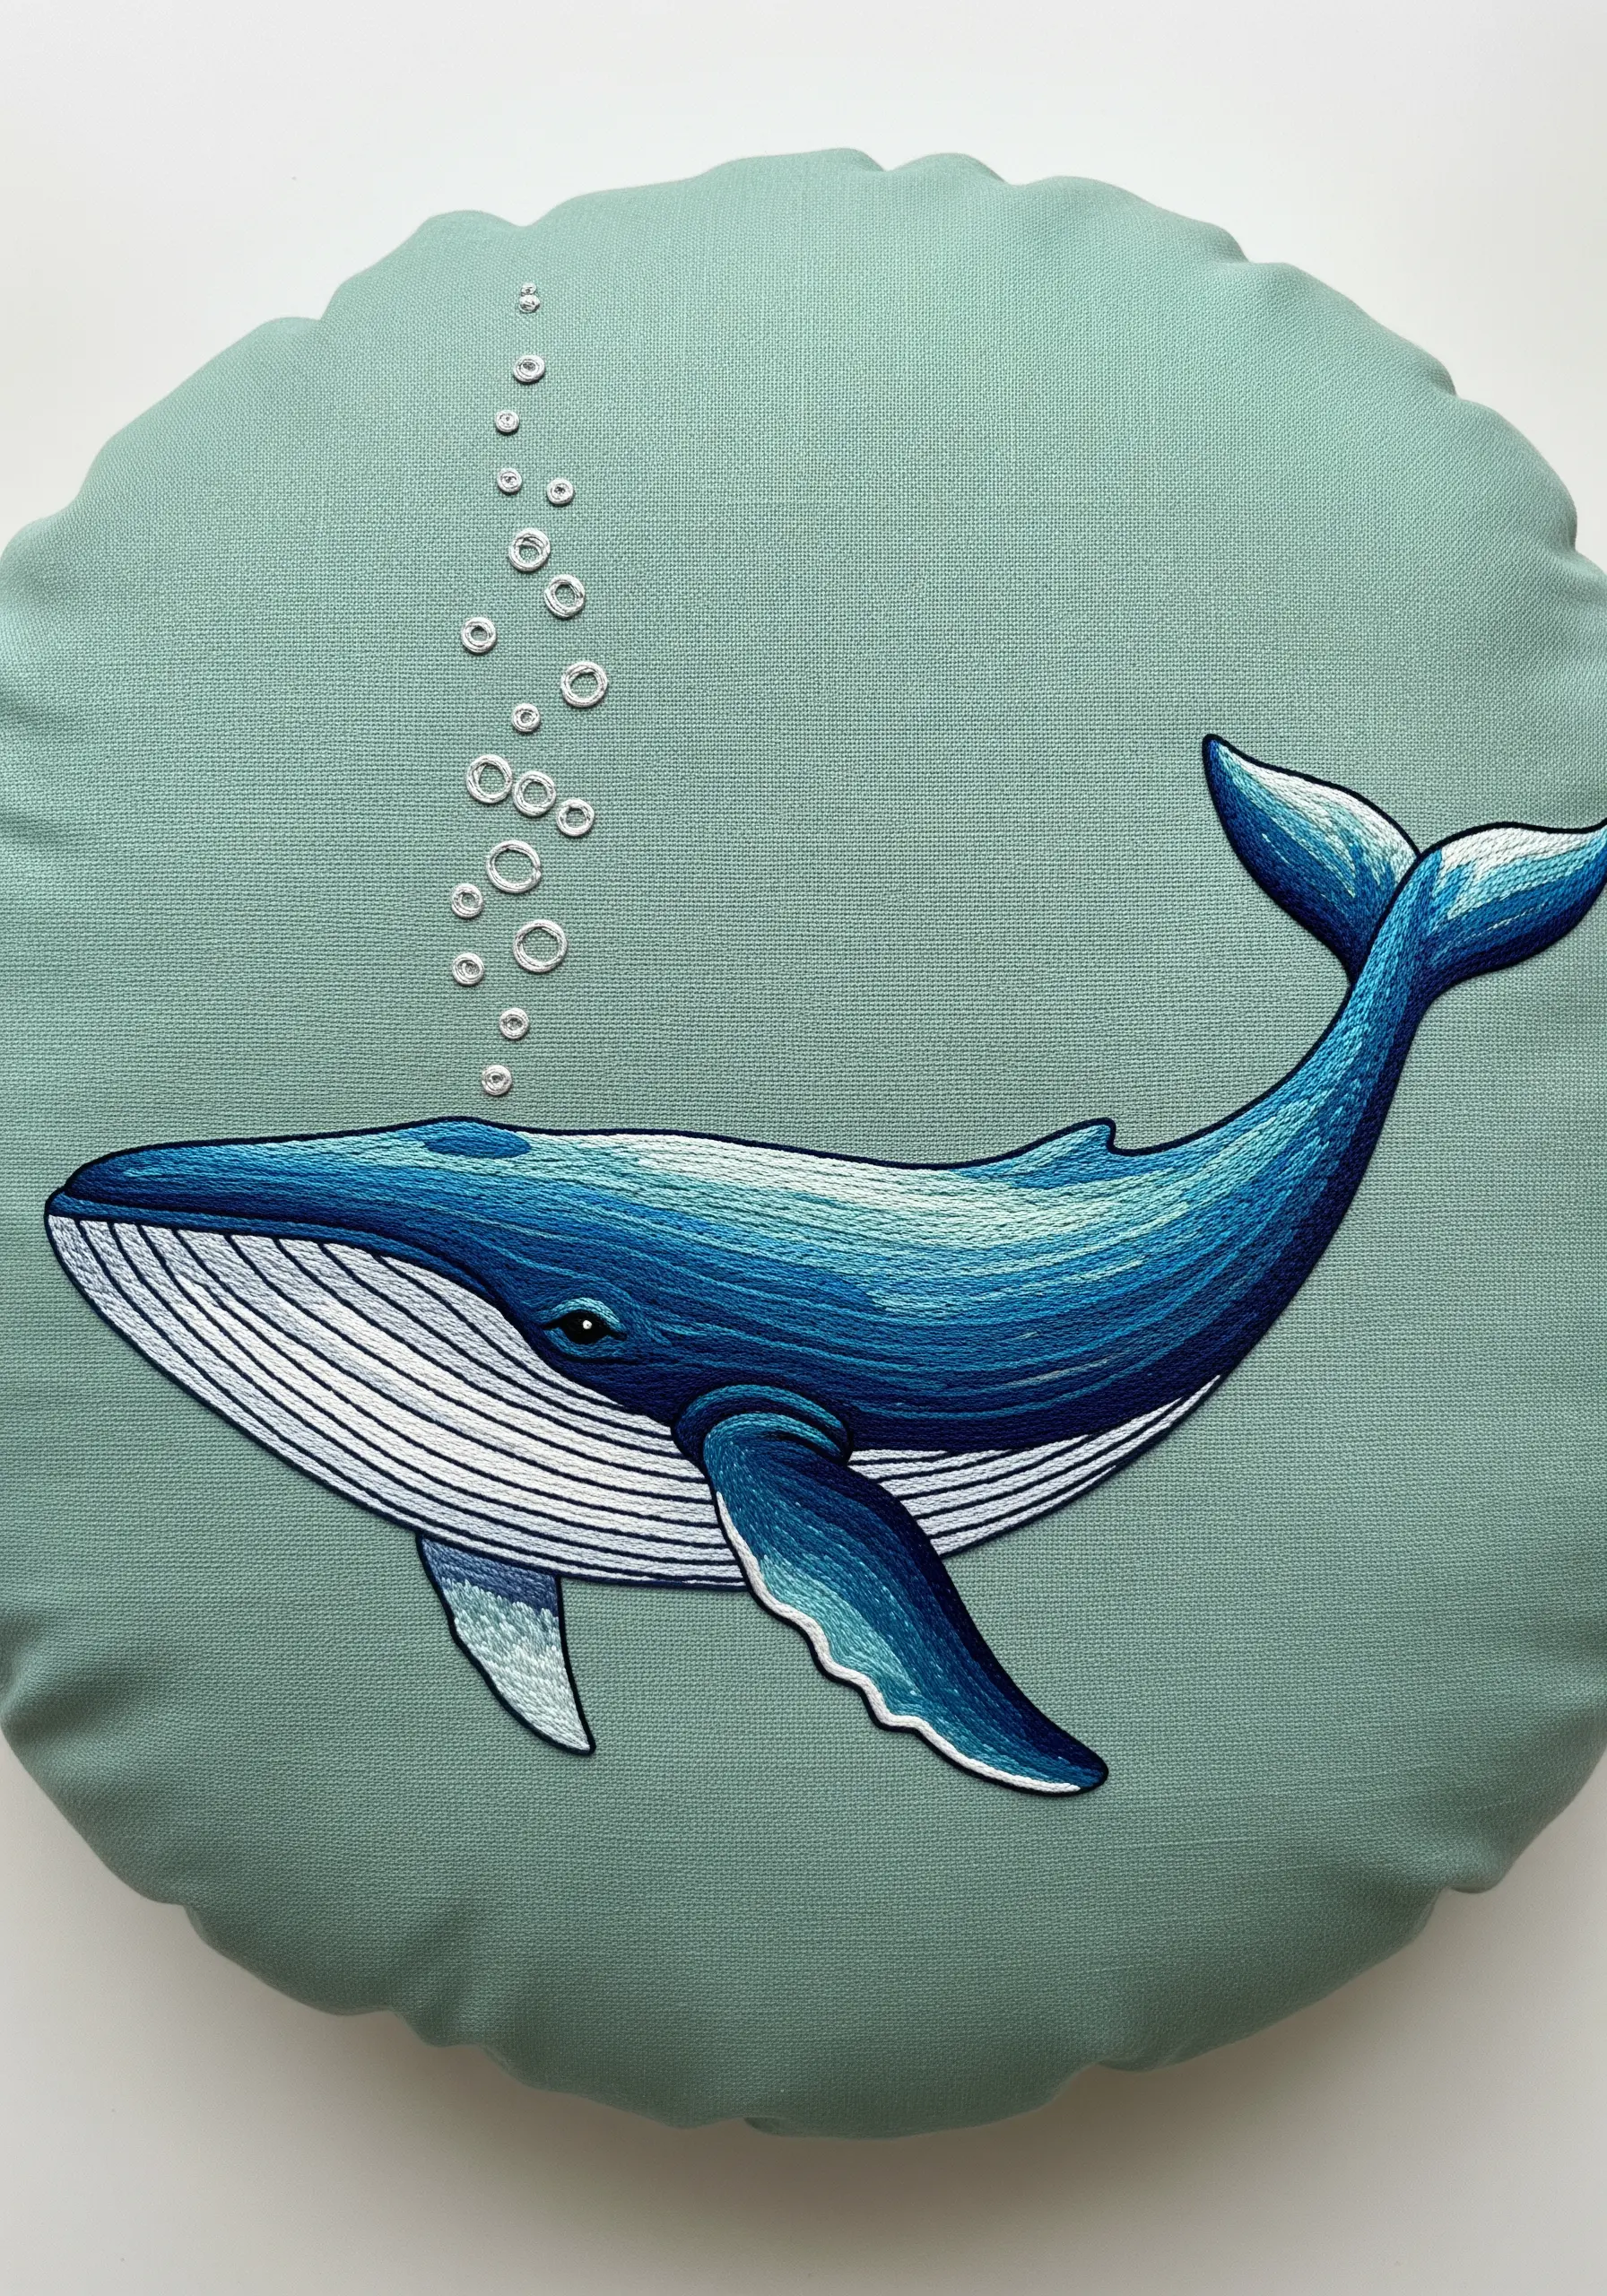
Achieve a smooth, painterly effect on the whale’s body using the long-and-short stitch with single-strand floss.
Work in sections, using at least three shades of blue—a dark, a medium, and a light—to create believable contours and highlights.
Keep your stitches parallel to the lines of the body to enhance its shape and movement.
For the bubbles, use a white or silver metallic thread to stitch tiny circles with backstitch, adding a touch of magic.
8. Design a Repeating Motif for a Custom Fabric Look
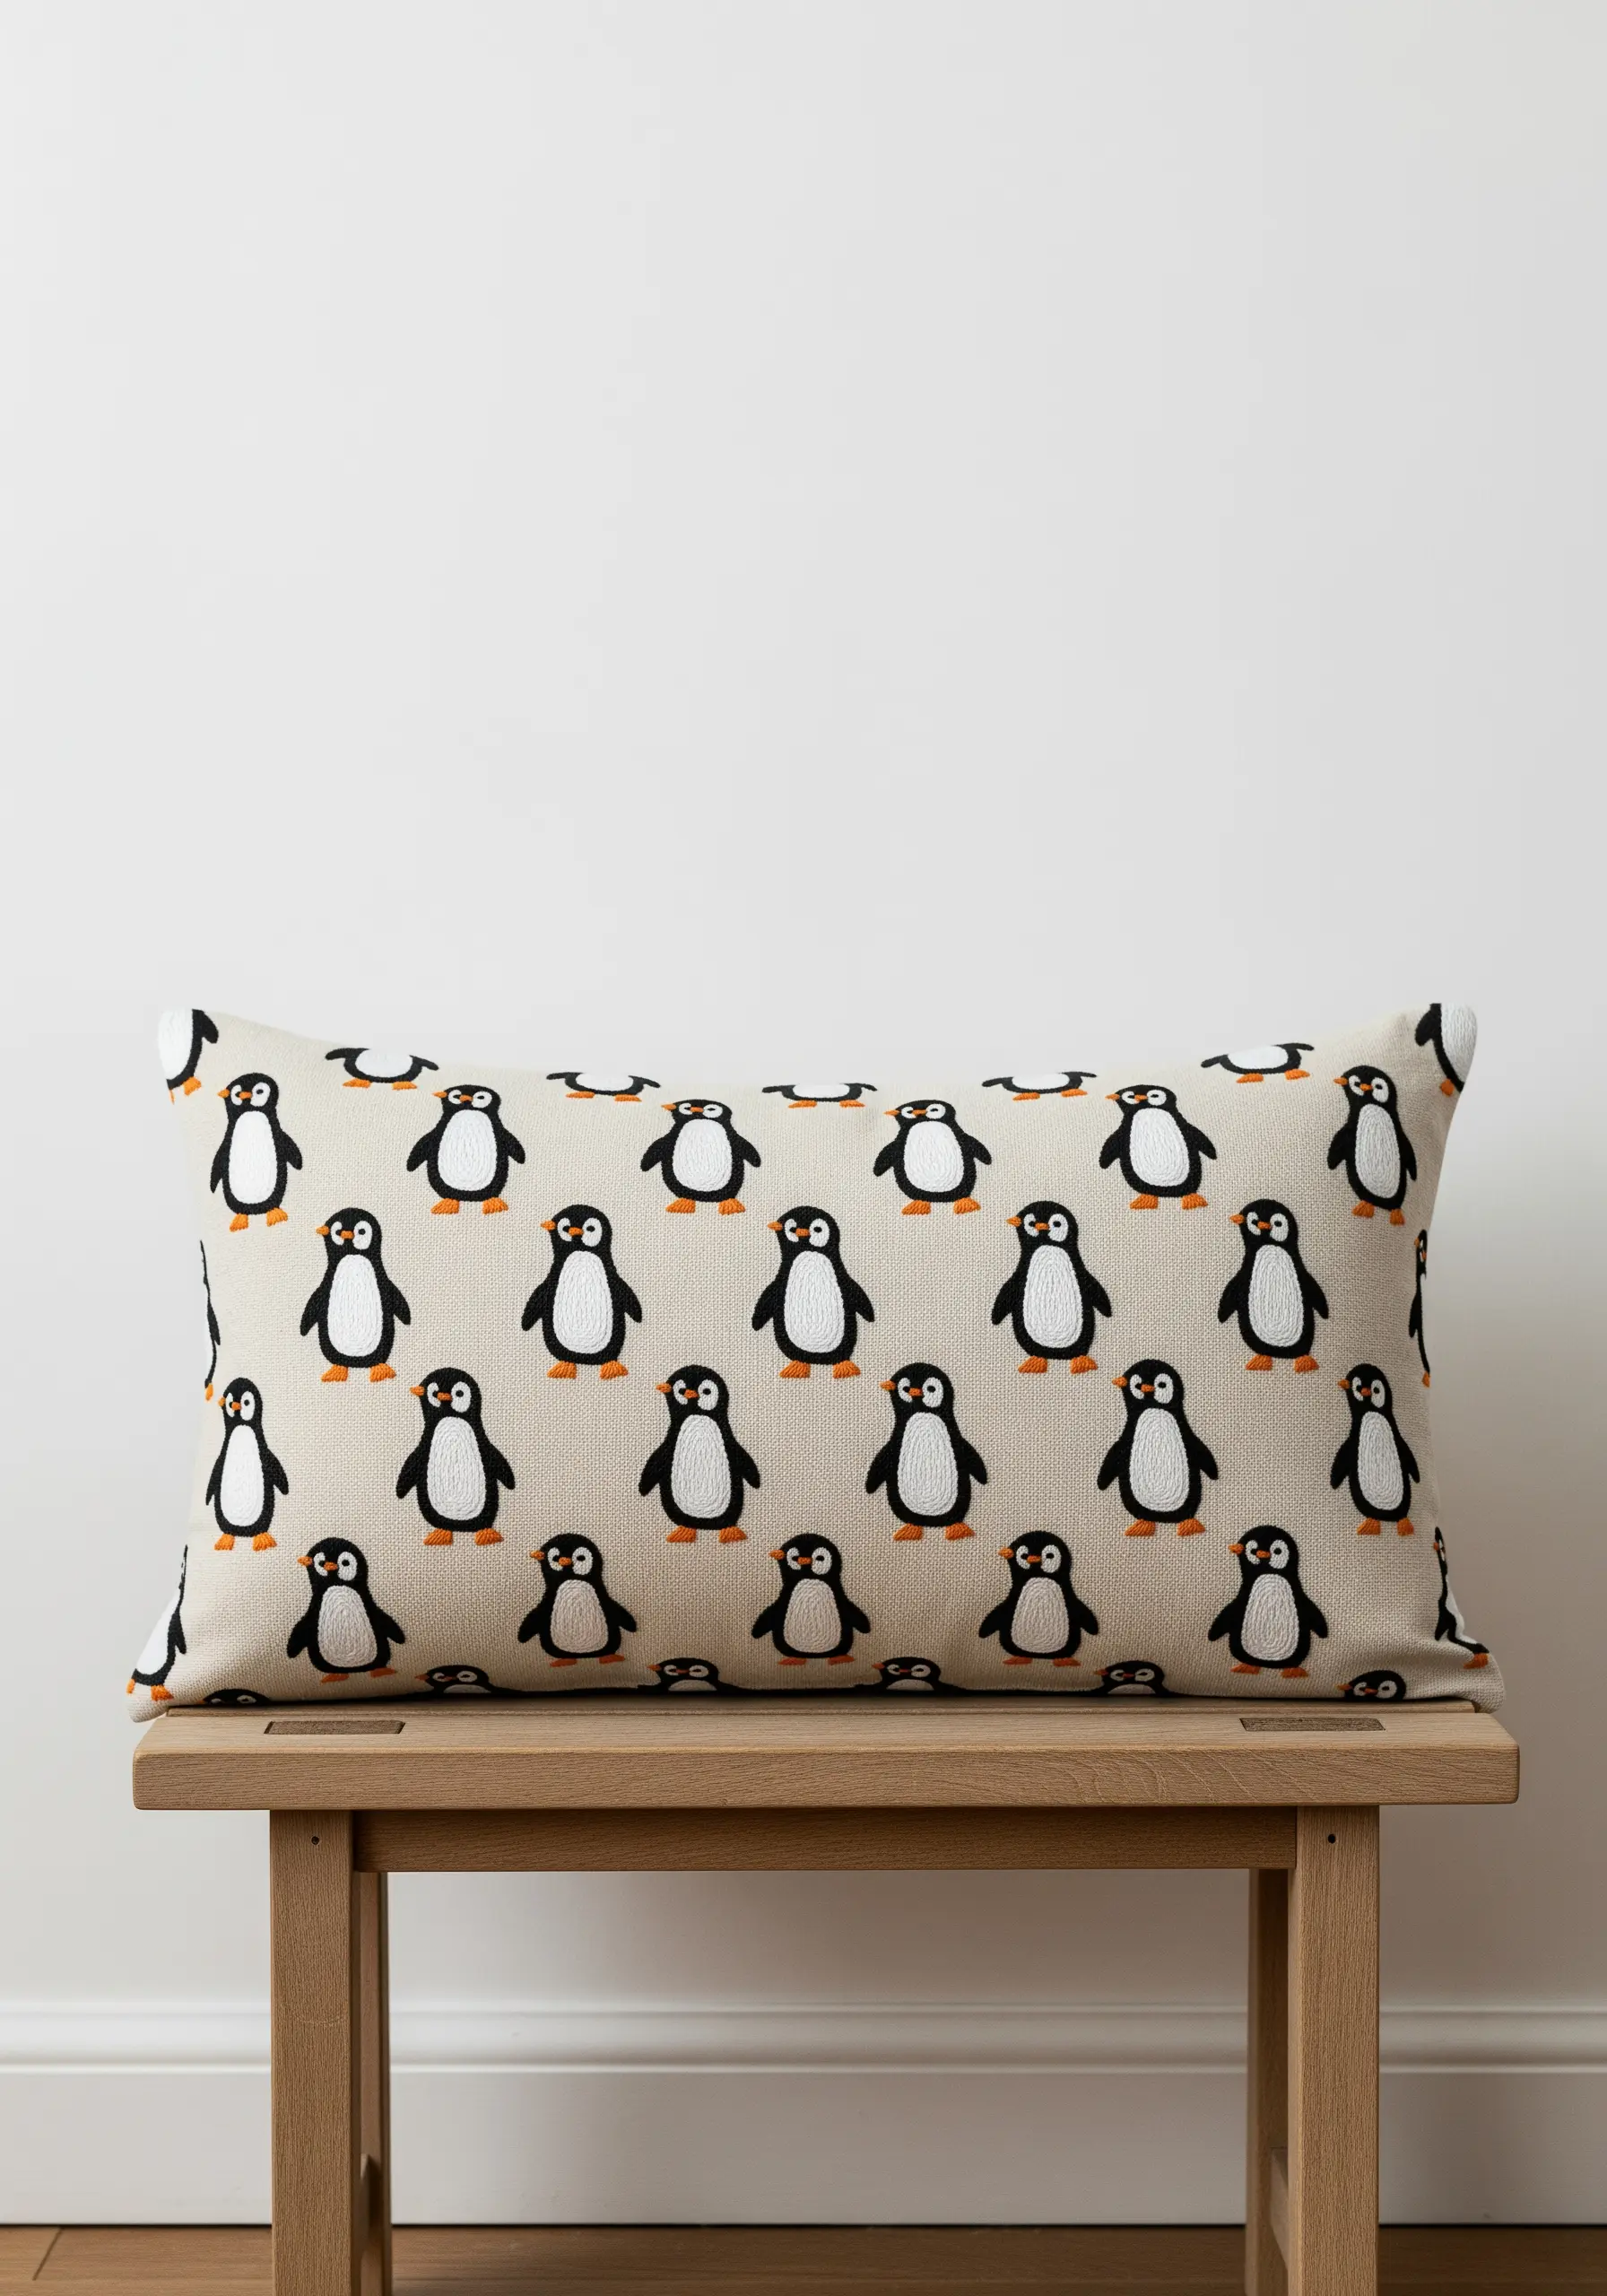
Instead of one large design, create a field of tiny, repeating animals for a playful, custom-printed effect.
Keep the motifs simple—a basic satin stitch fill with a backstitch outline is perfect.
The key to a polished look is consistent spacing. Use a water-soluble marker and a ruler to create a grid before you begin stitching.
This is a fantastic way to practice consistency with easy, small embroidery patterns.
9. Mix Stitch Textures for a Natural Scene
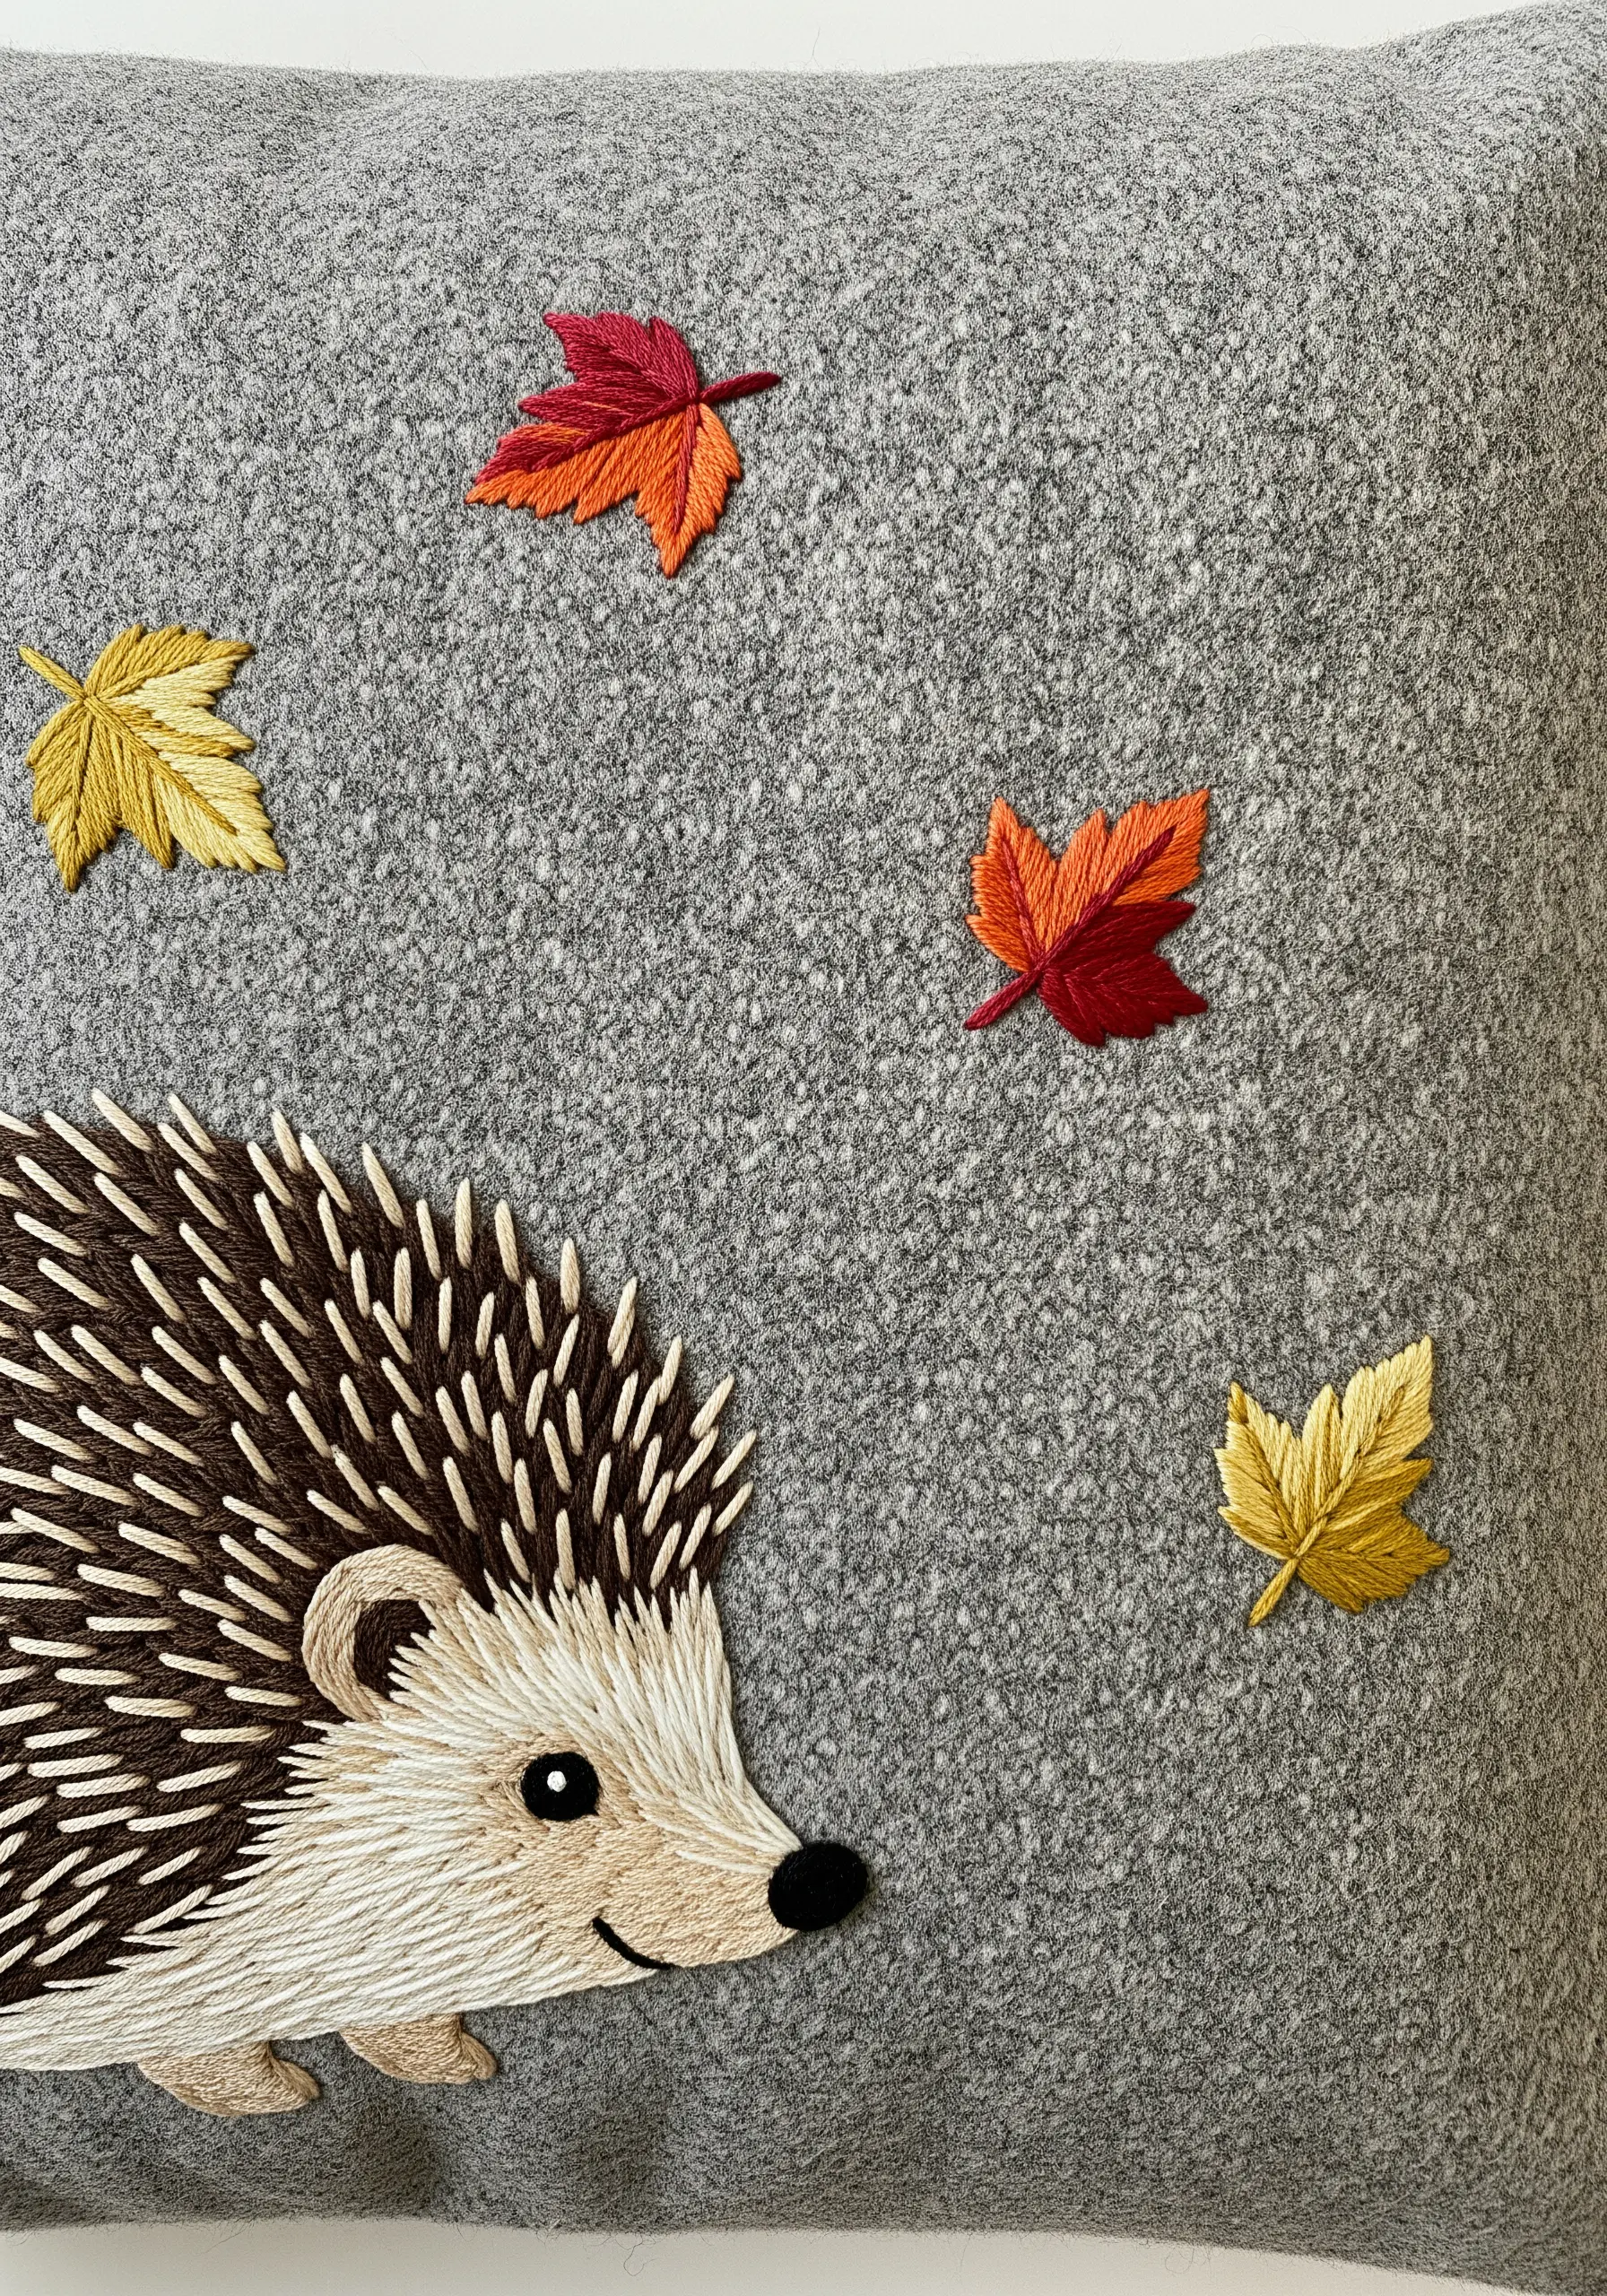
Create a tactile hedgehog by using varied stitches for different parts of its body.
Use offset rows of long straight stitches in brown and cream for the spines, creating a sharp, layered texture.
In contrast, fill the face and belly with a smooth, soft long-and-short stitch.
Scatter a few satin-stitched leaves around the scene; these handmade embroidery touches that make every room feel natural and cozy.
10. Craft a Dimensional Mane with Yarn Loops

For an exceptionally tactile and fun result, create the lion’s mane with chunky yarn instead of floss.
Use the turkey work stitch, leaving the loops uncut for a shaggy, three-dimensional effect that invites touch.
Mix several shades of yellow, brown, and gold yarn to give the mane depth and richness.
This is a perfect example of high-texture fabric collage embroidery that engages more than just the eyes.
11. Create an Elegant Scene with Minimalist Line Art
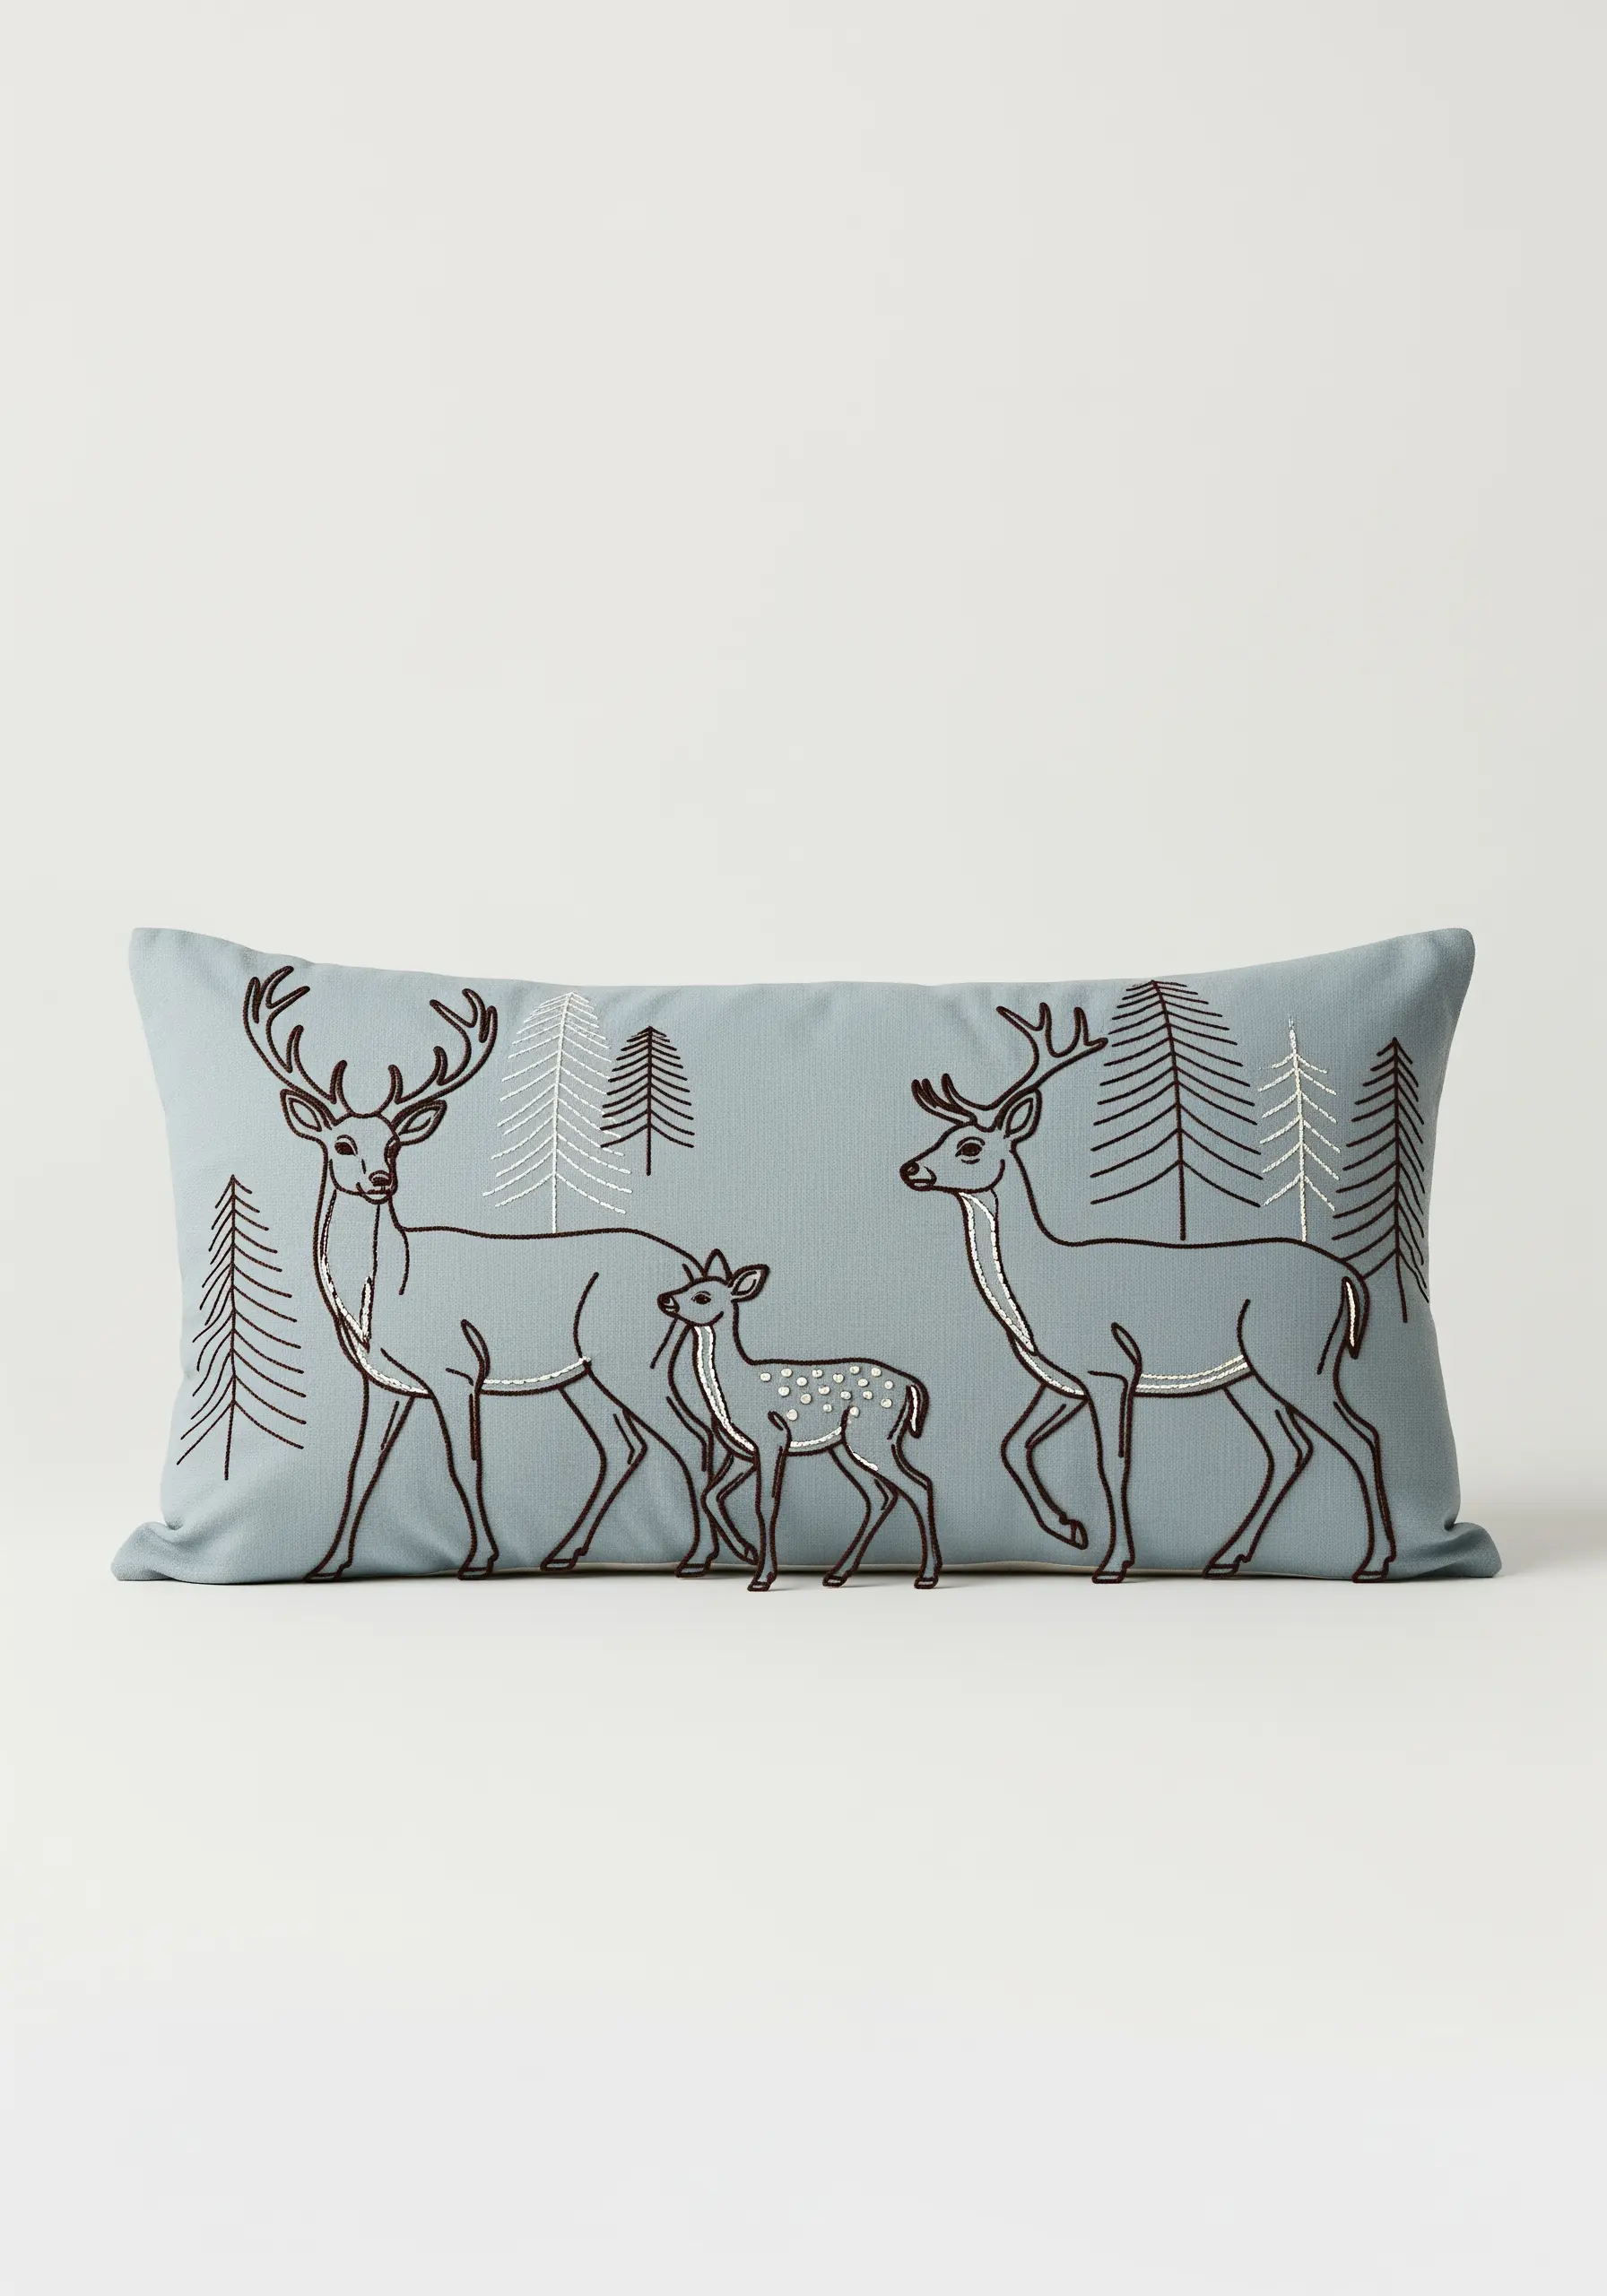
Tell a story with the simple elegance of line work. Use a dark, contrasting thread and a neat backstitch or stem stitch to create a clean, graphic look.
Vary your thread weight—use three strands for the main animal outlines and a single strand for finer details like the trees or fawn spots.
This subtle shift in line weight adds sophistication and visual hierarchy to the composition without adding complexity.
12. Use Metallic Thread for a Touch of Opulence
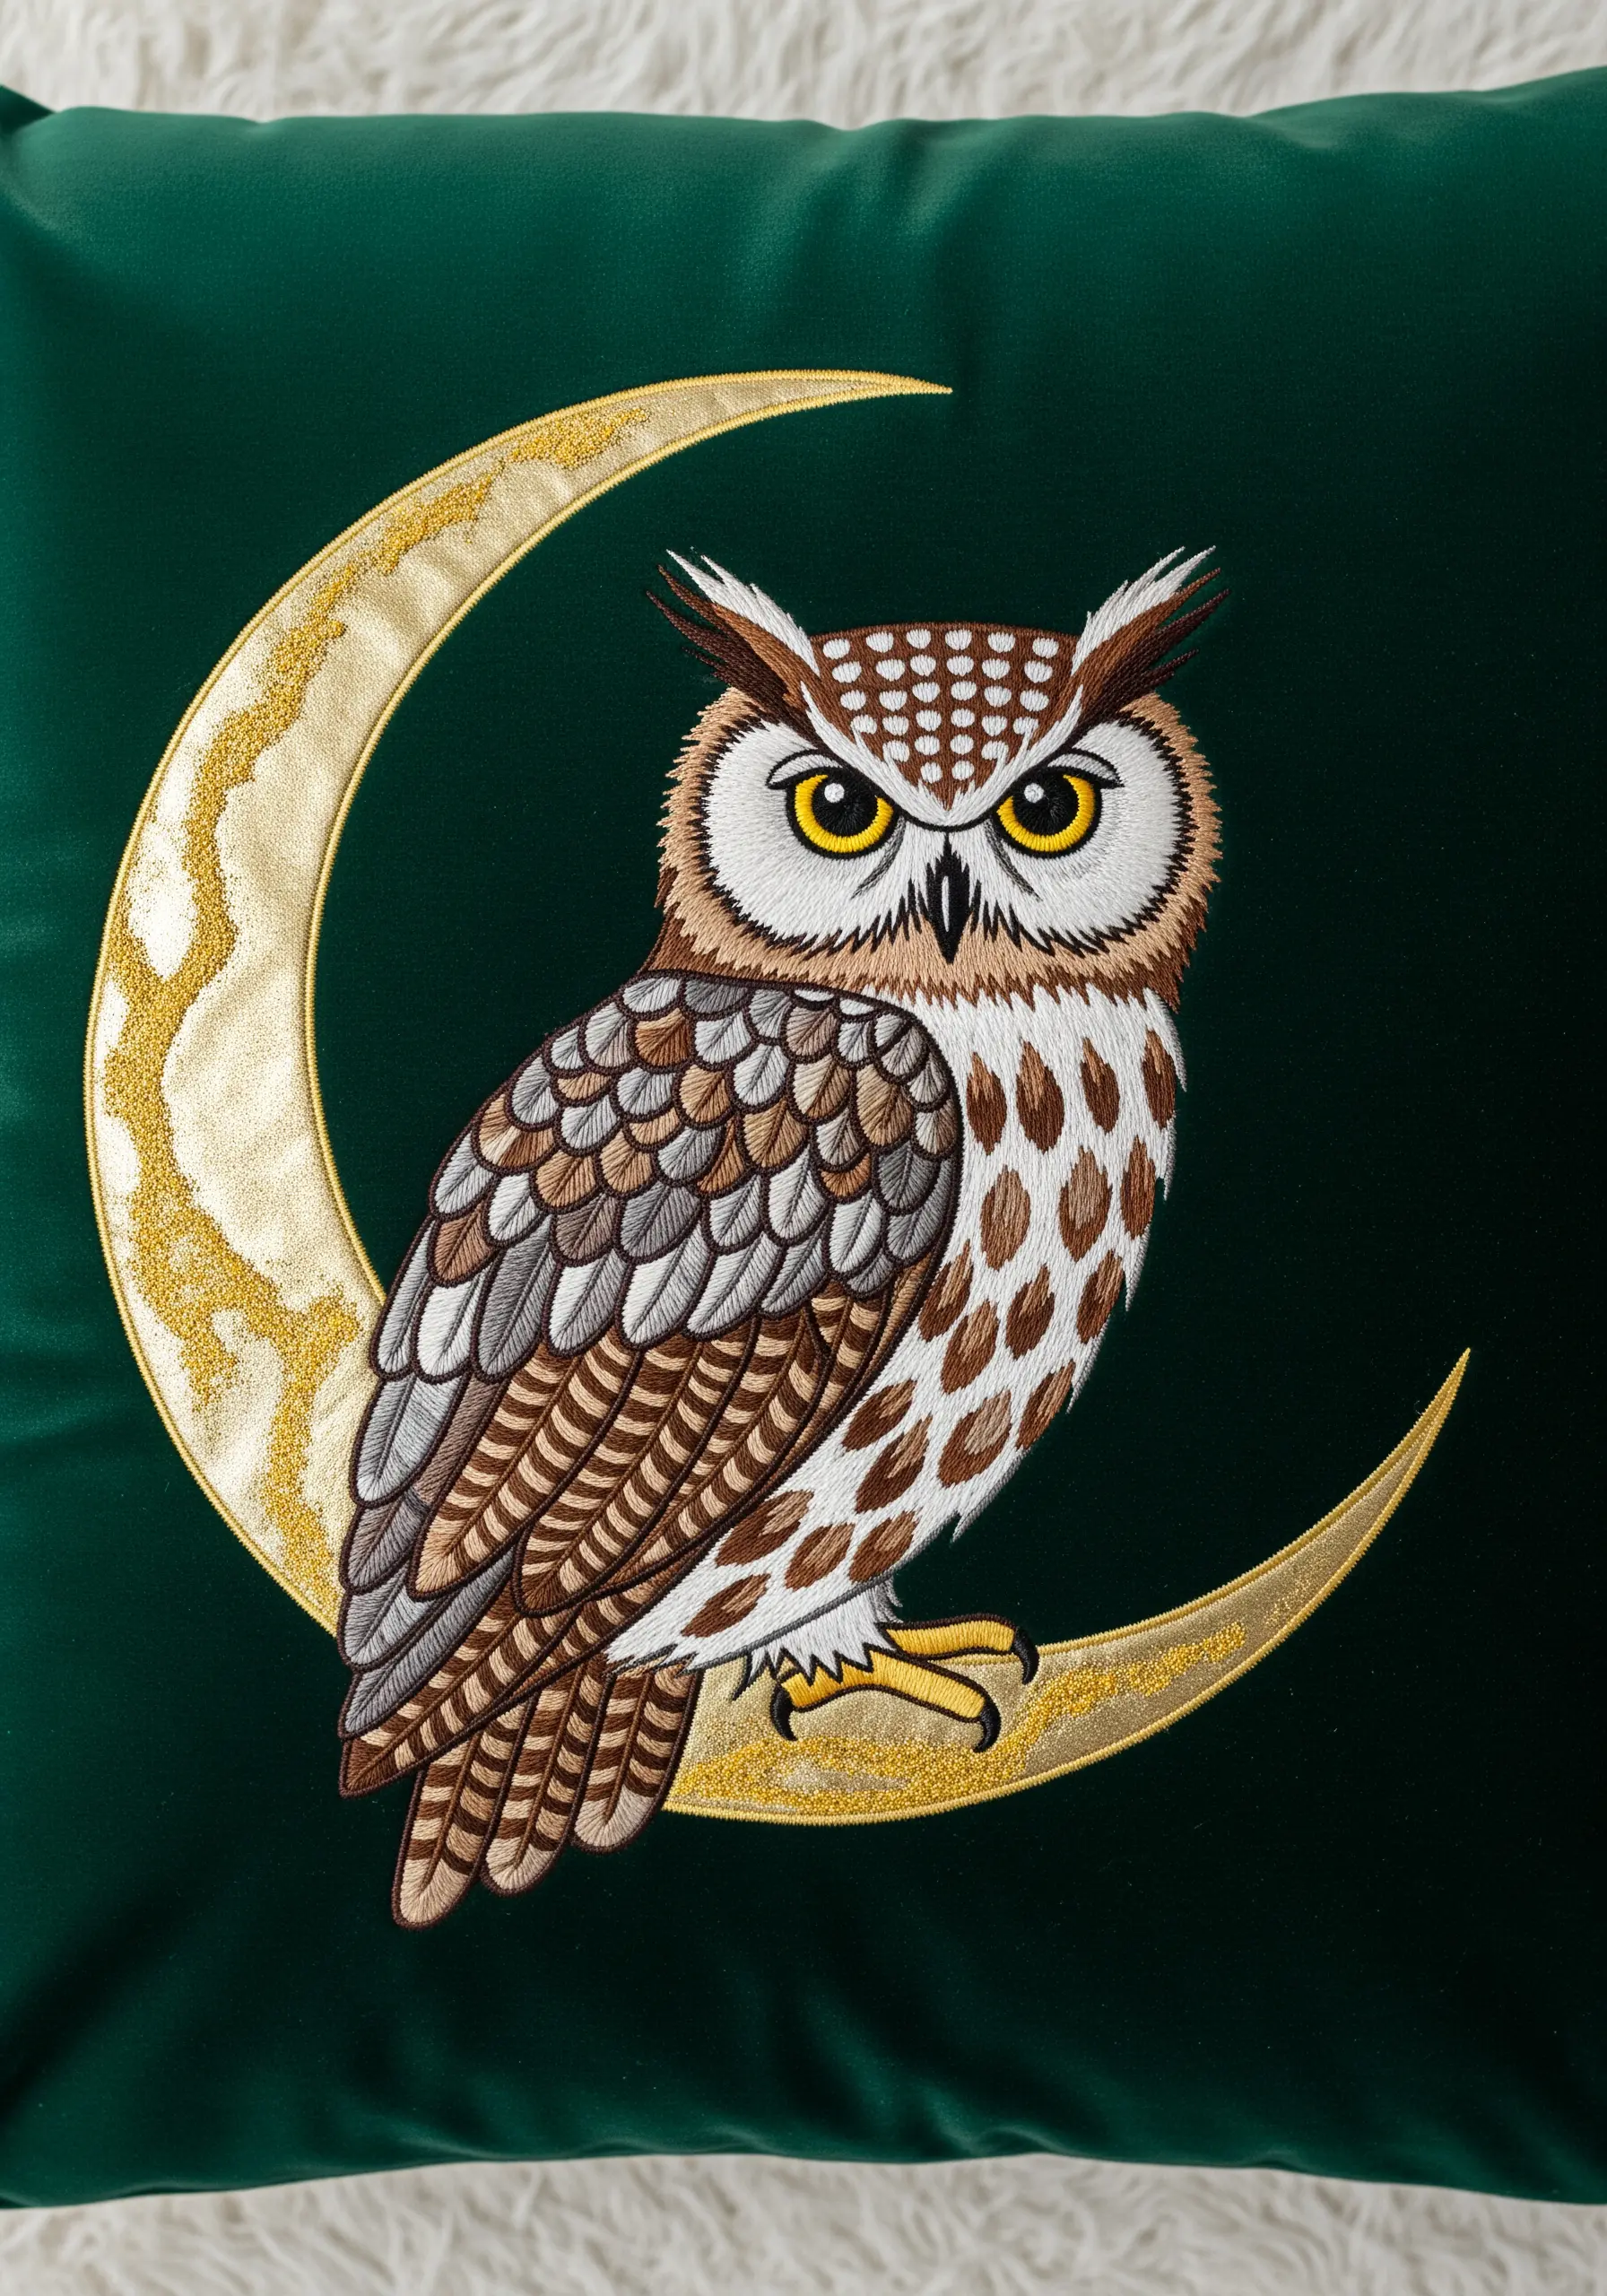
Elevate your design by incorporating metallic thread, perfect for a shimmering moon or glowing eyes.
To prevent metallic thread from snagging and fraying, use shorter lengths (no more than 12 inches) and a thread conditioner like beeswax.
Couching is an excellent alternative for applying metallic thread smoothly; lay the metallic thread on the surface and tack it down with a fine, matching cotton floss.
Pairing it with a rich velvet fabric enhances the luxurious feel.
13. Construct a Shaped Pillow with Appliqué Details
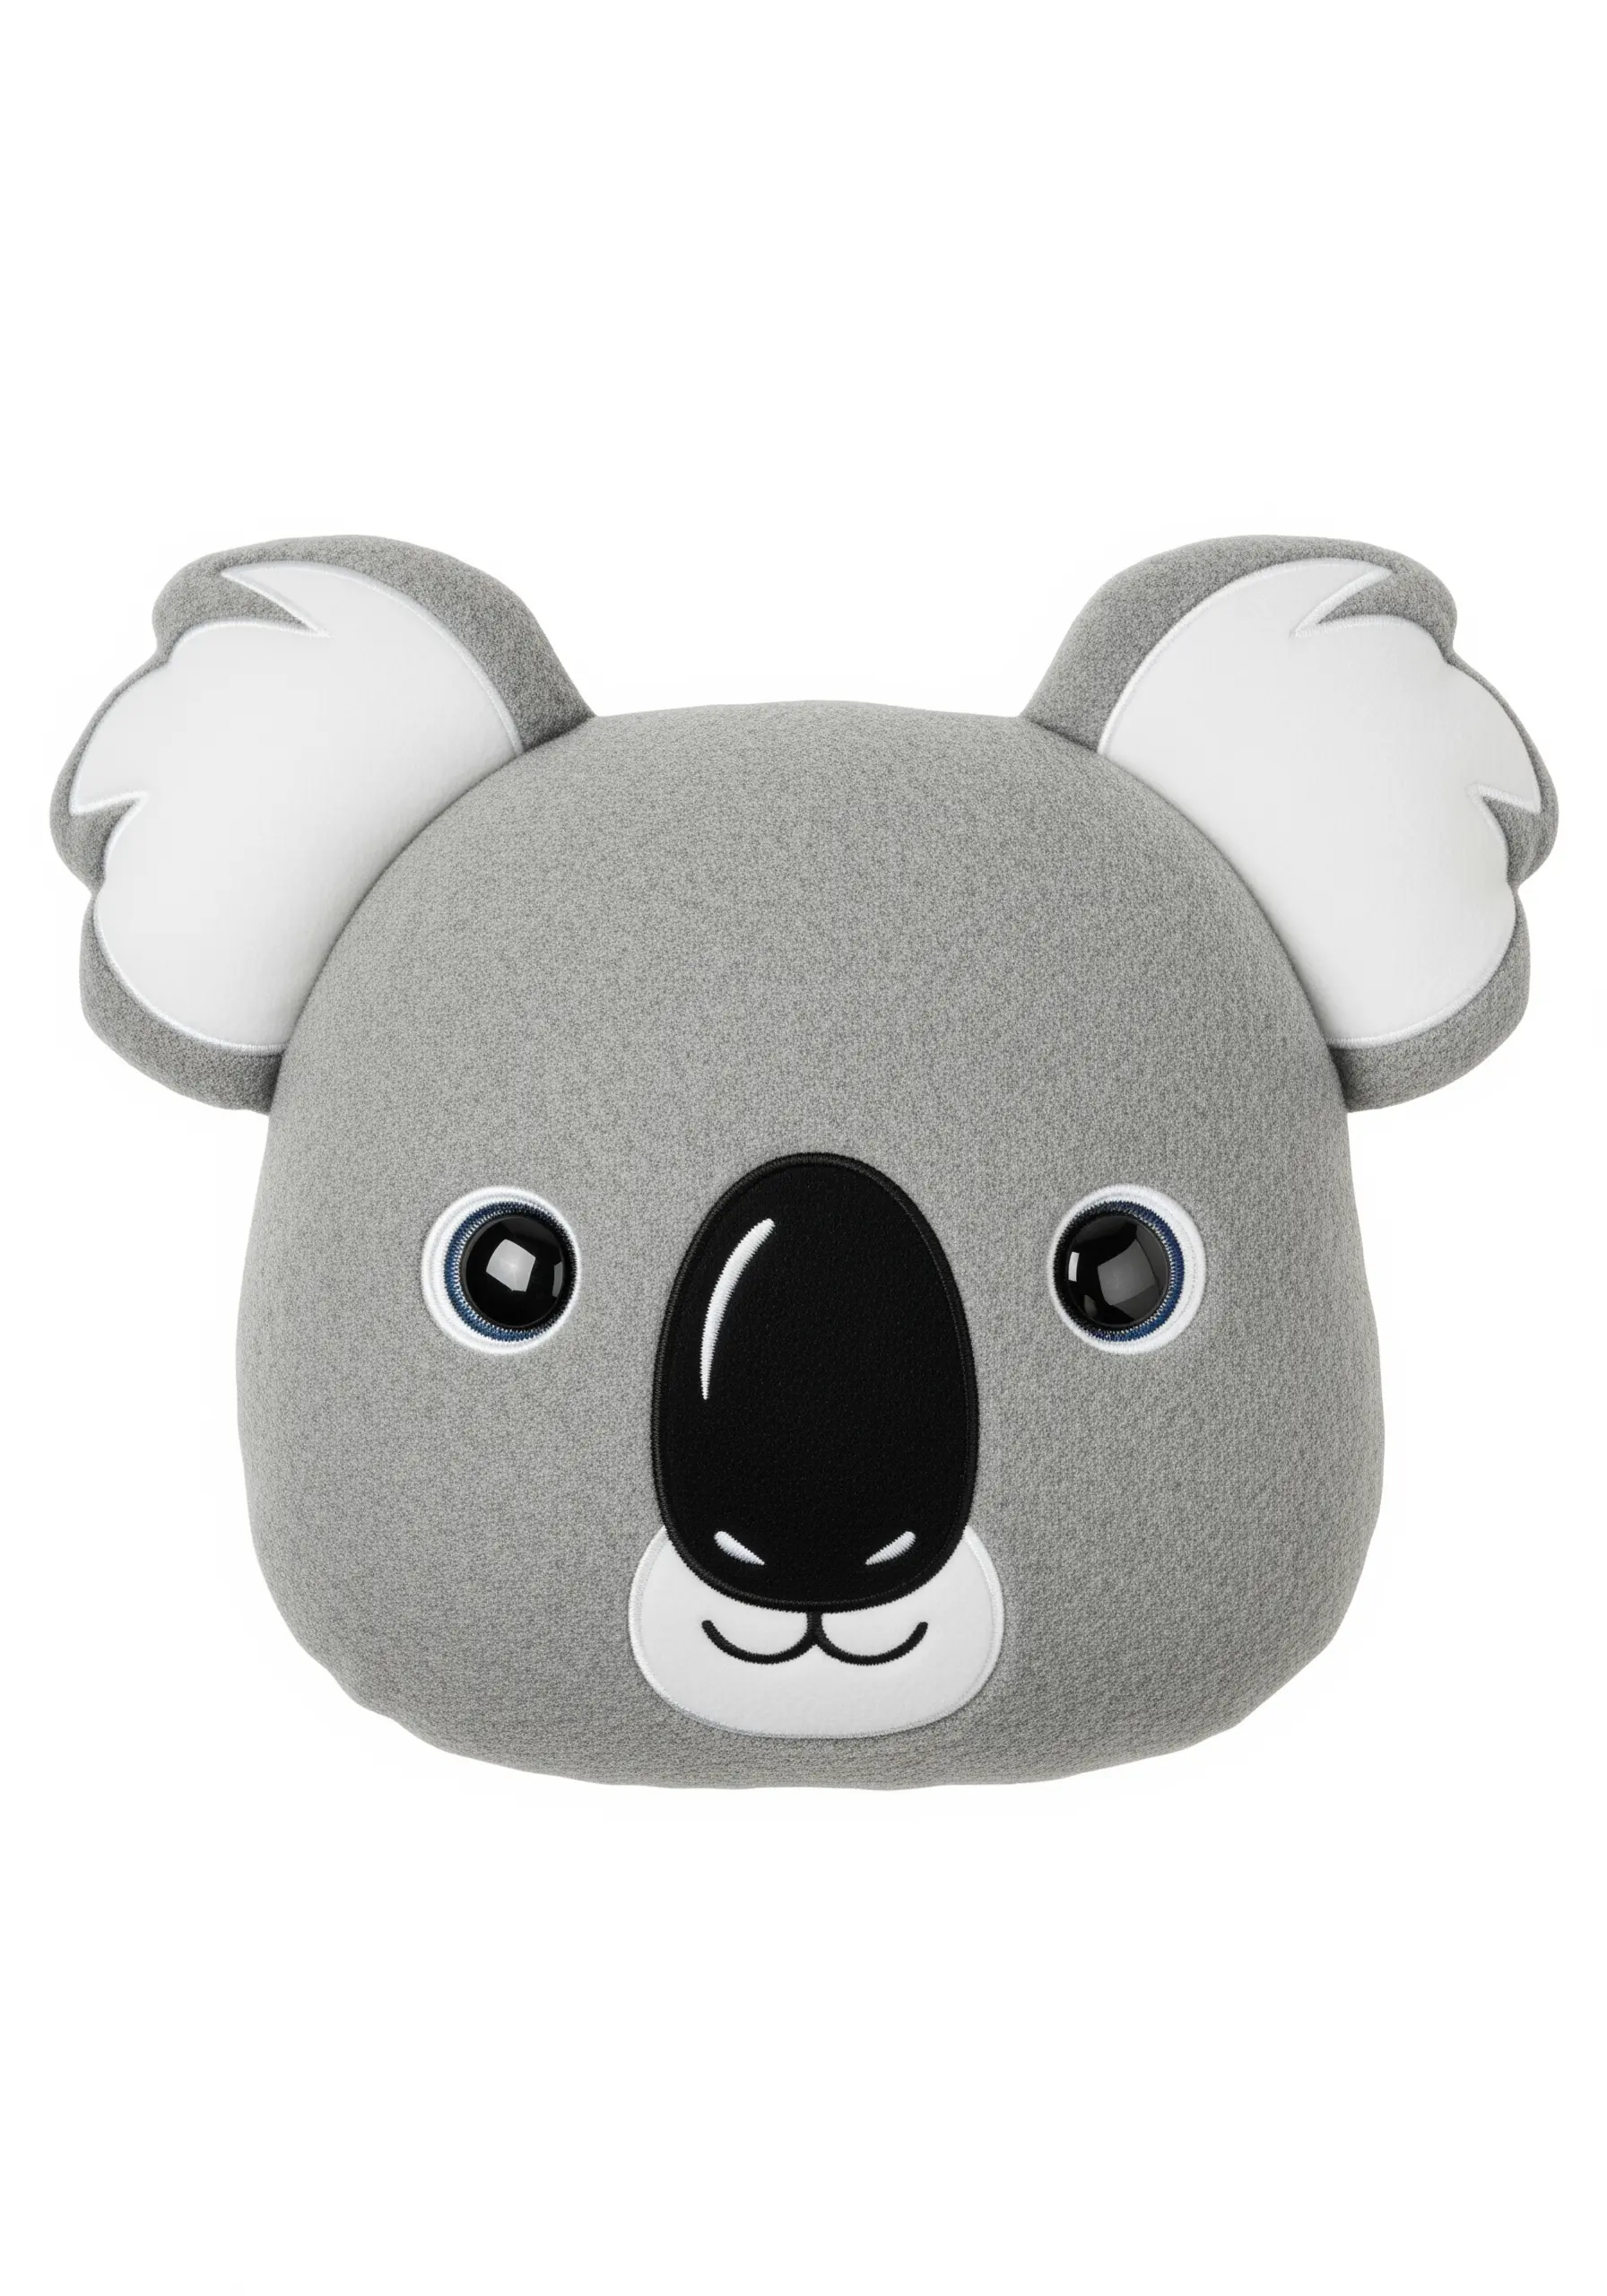
Move beyond the square and create a pillow shaped like the animal itself for maximum playful impact.
Use a soft, durable fabric like fleece or felt for the main body.
Create the facial features with simple felt appliqué shapes, attached with a clean whipstitch around the edges.
The embroidery is minimal but crucial—a few well-placed backstitches for the mouth and highlights in the eyes bring the character to life.
14. Embrace Bold Color Blocking with Satin Stitch
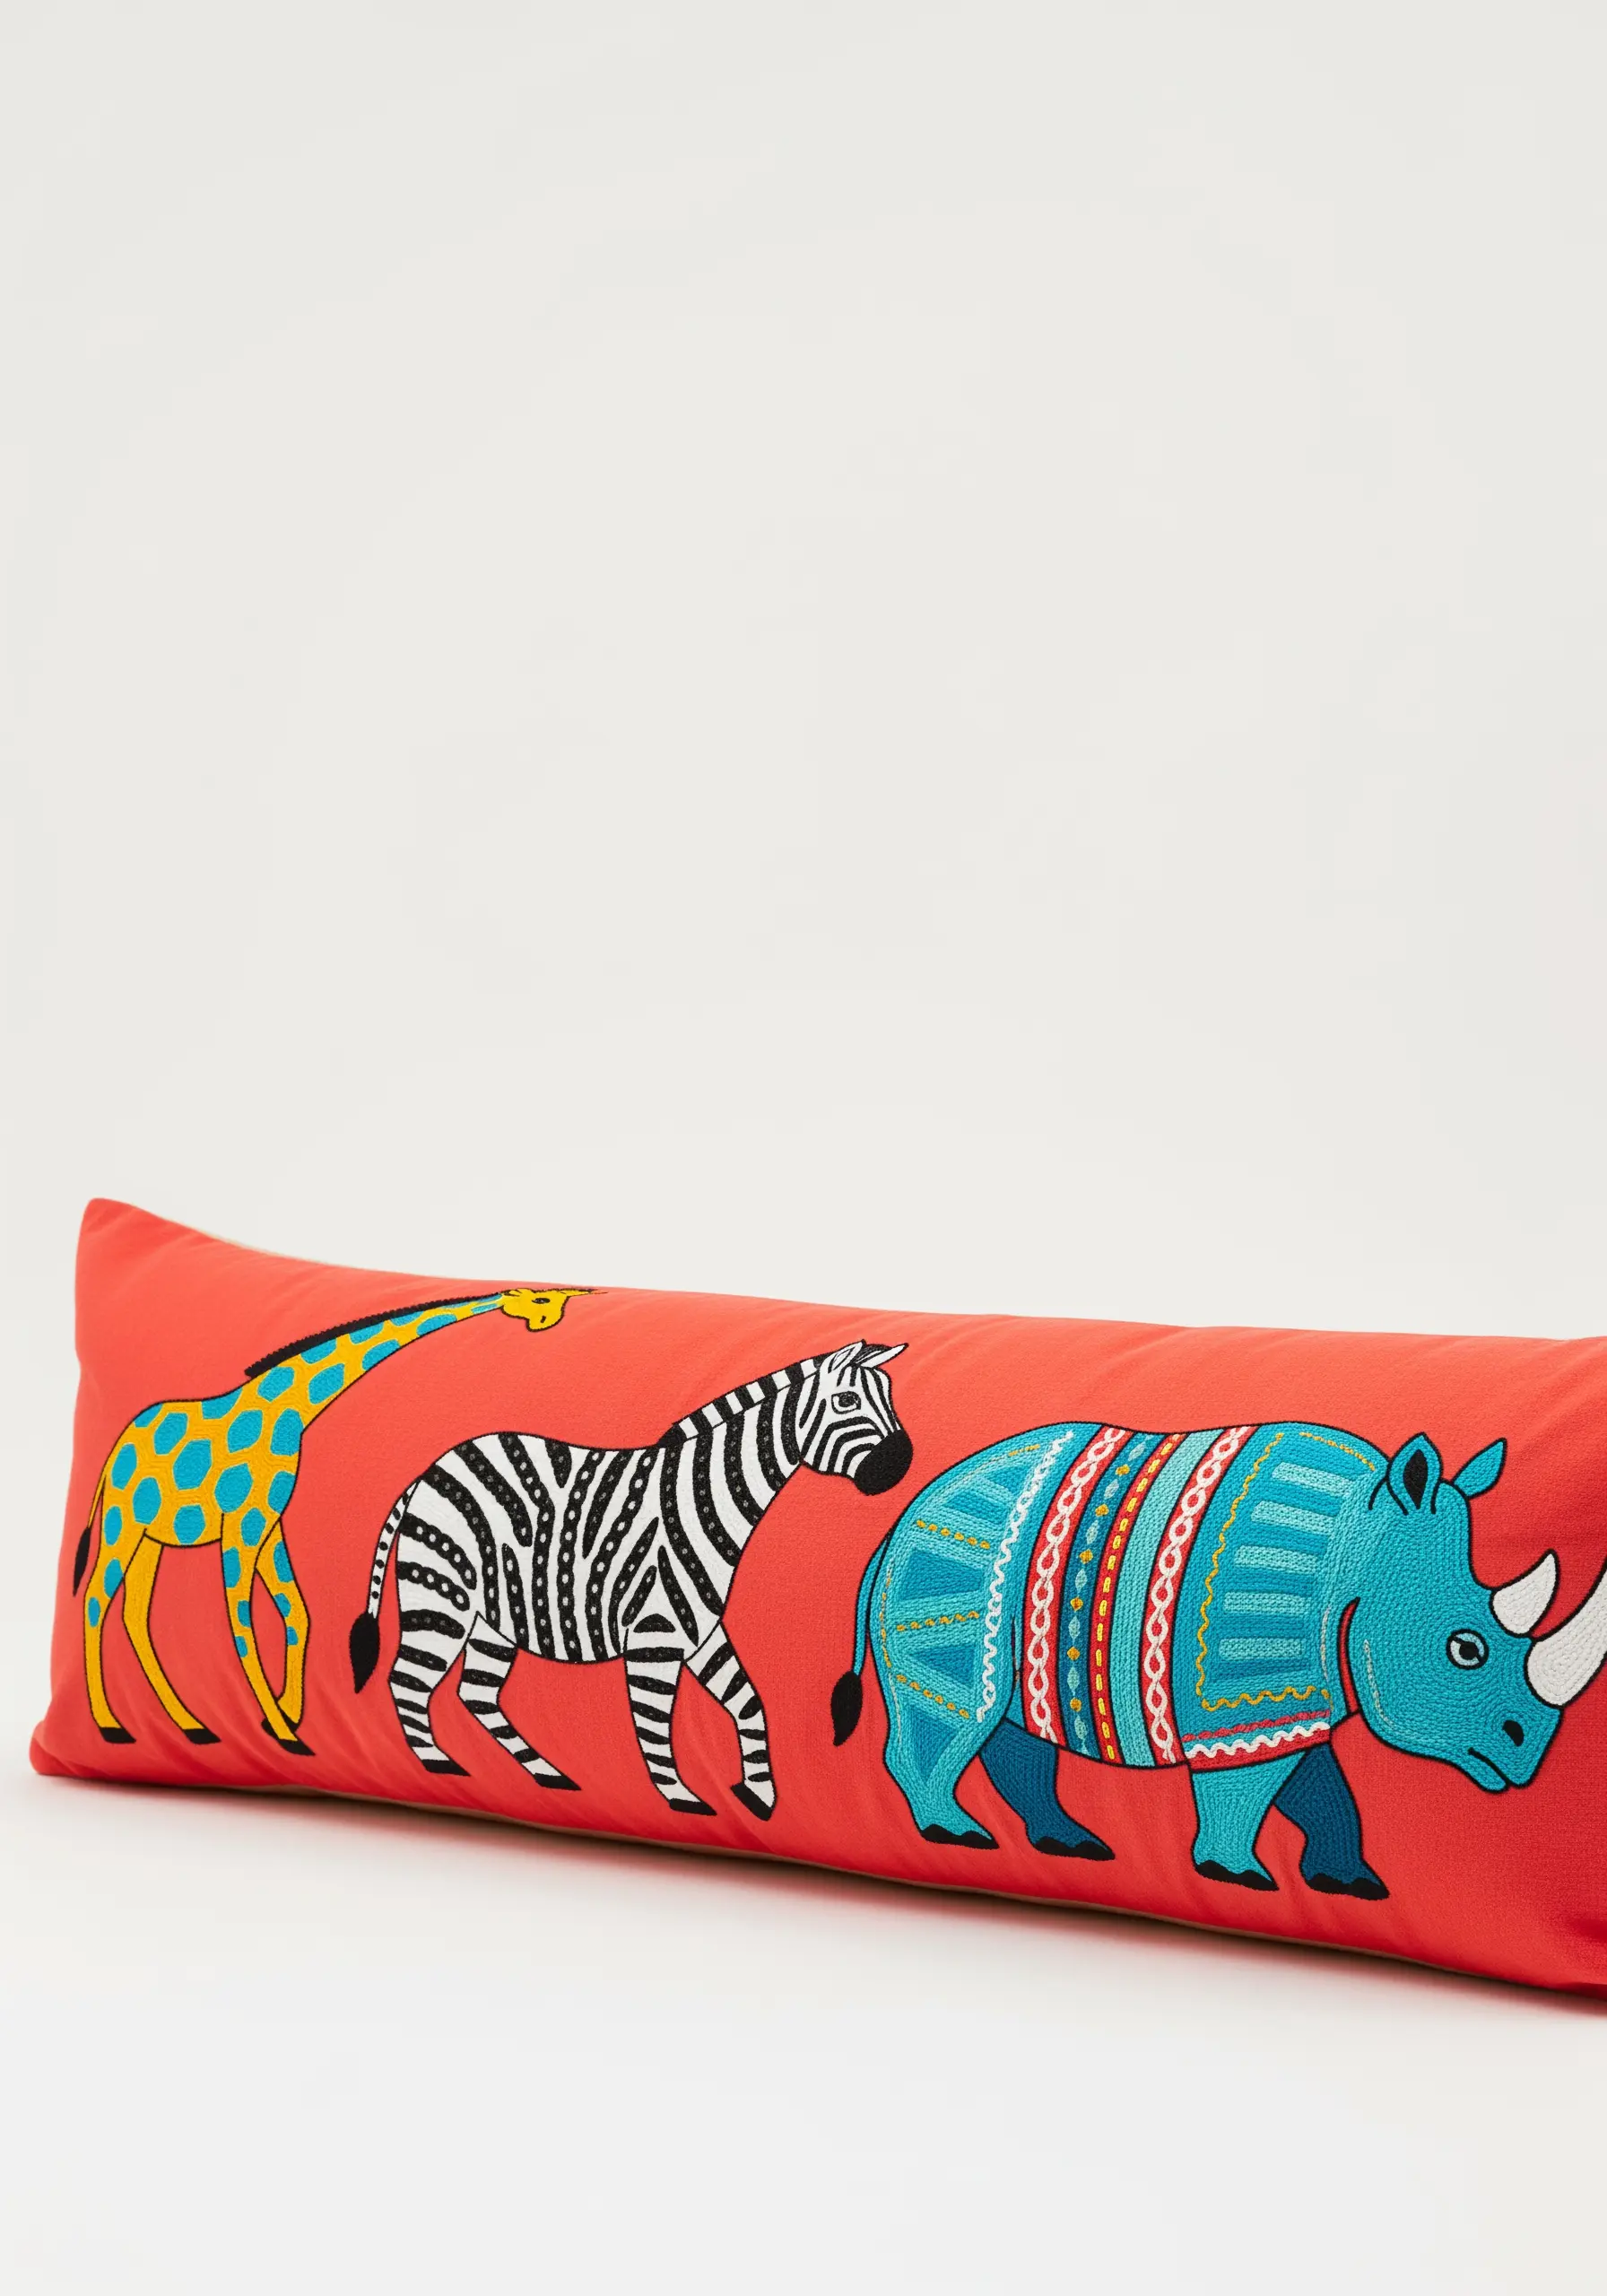
Create a vibrant, graphic safari scene using bold blocks of color.
Use a dense satin stitch to fill each area, ensuring your stitches are laid close together for a smooth, opaque finish.
A strong, black backstitch outline around each shape makes the bright colors pop and gives the design a clean, illustrative quality.
These lively figures are perfect examples of cartoon-style embroidery ideas for kids’ wear and decor.
15. Add Realism with Nuanced Thread Blending
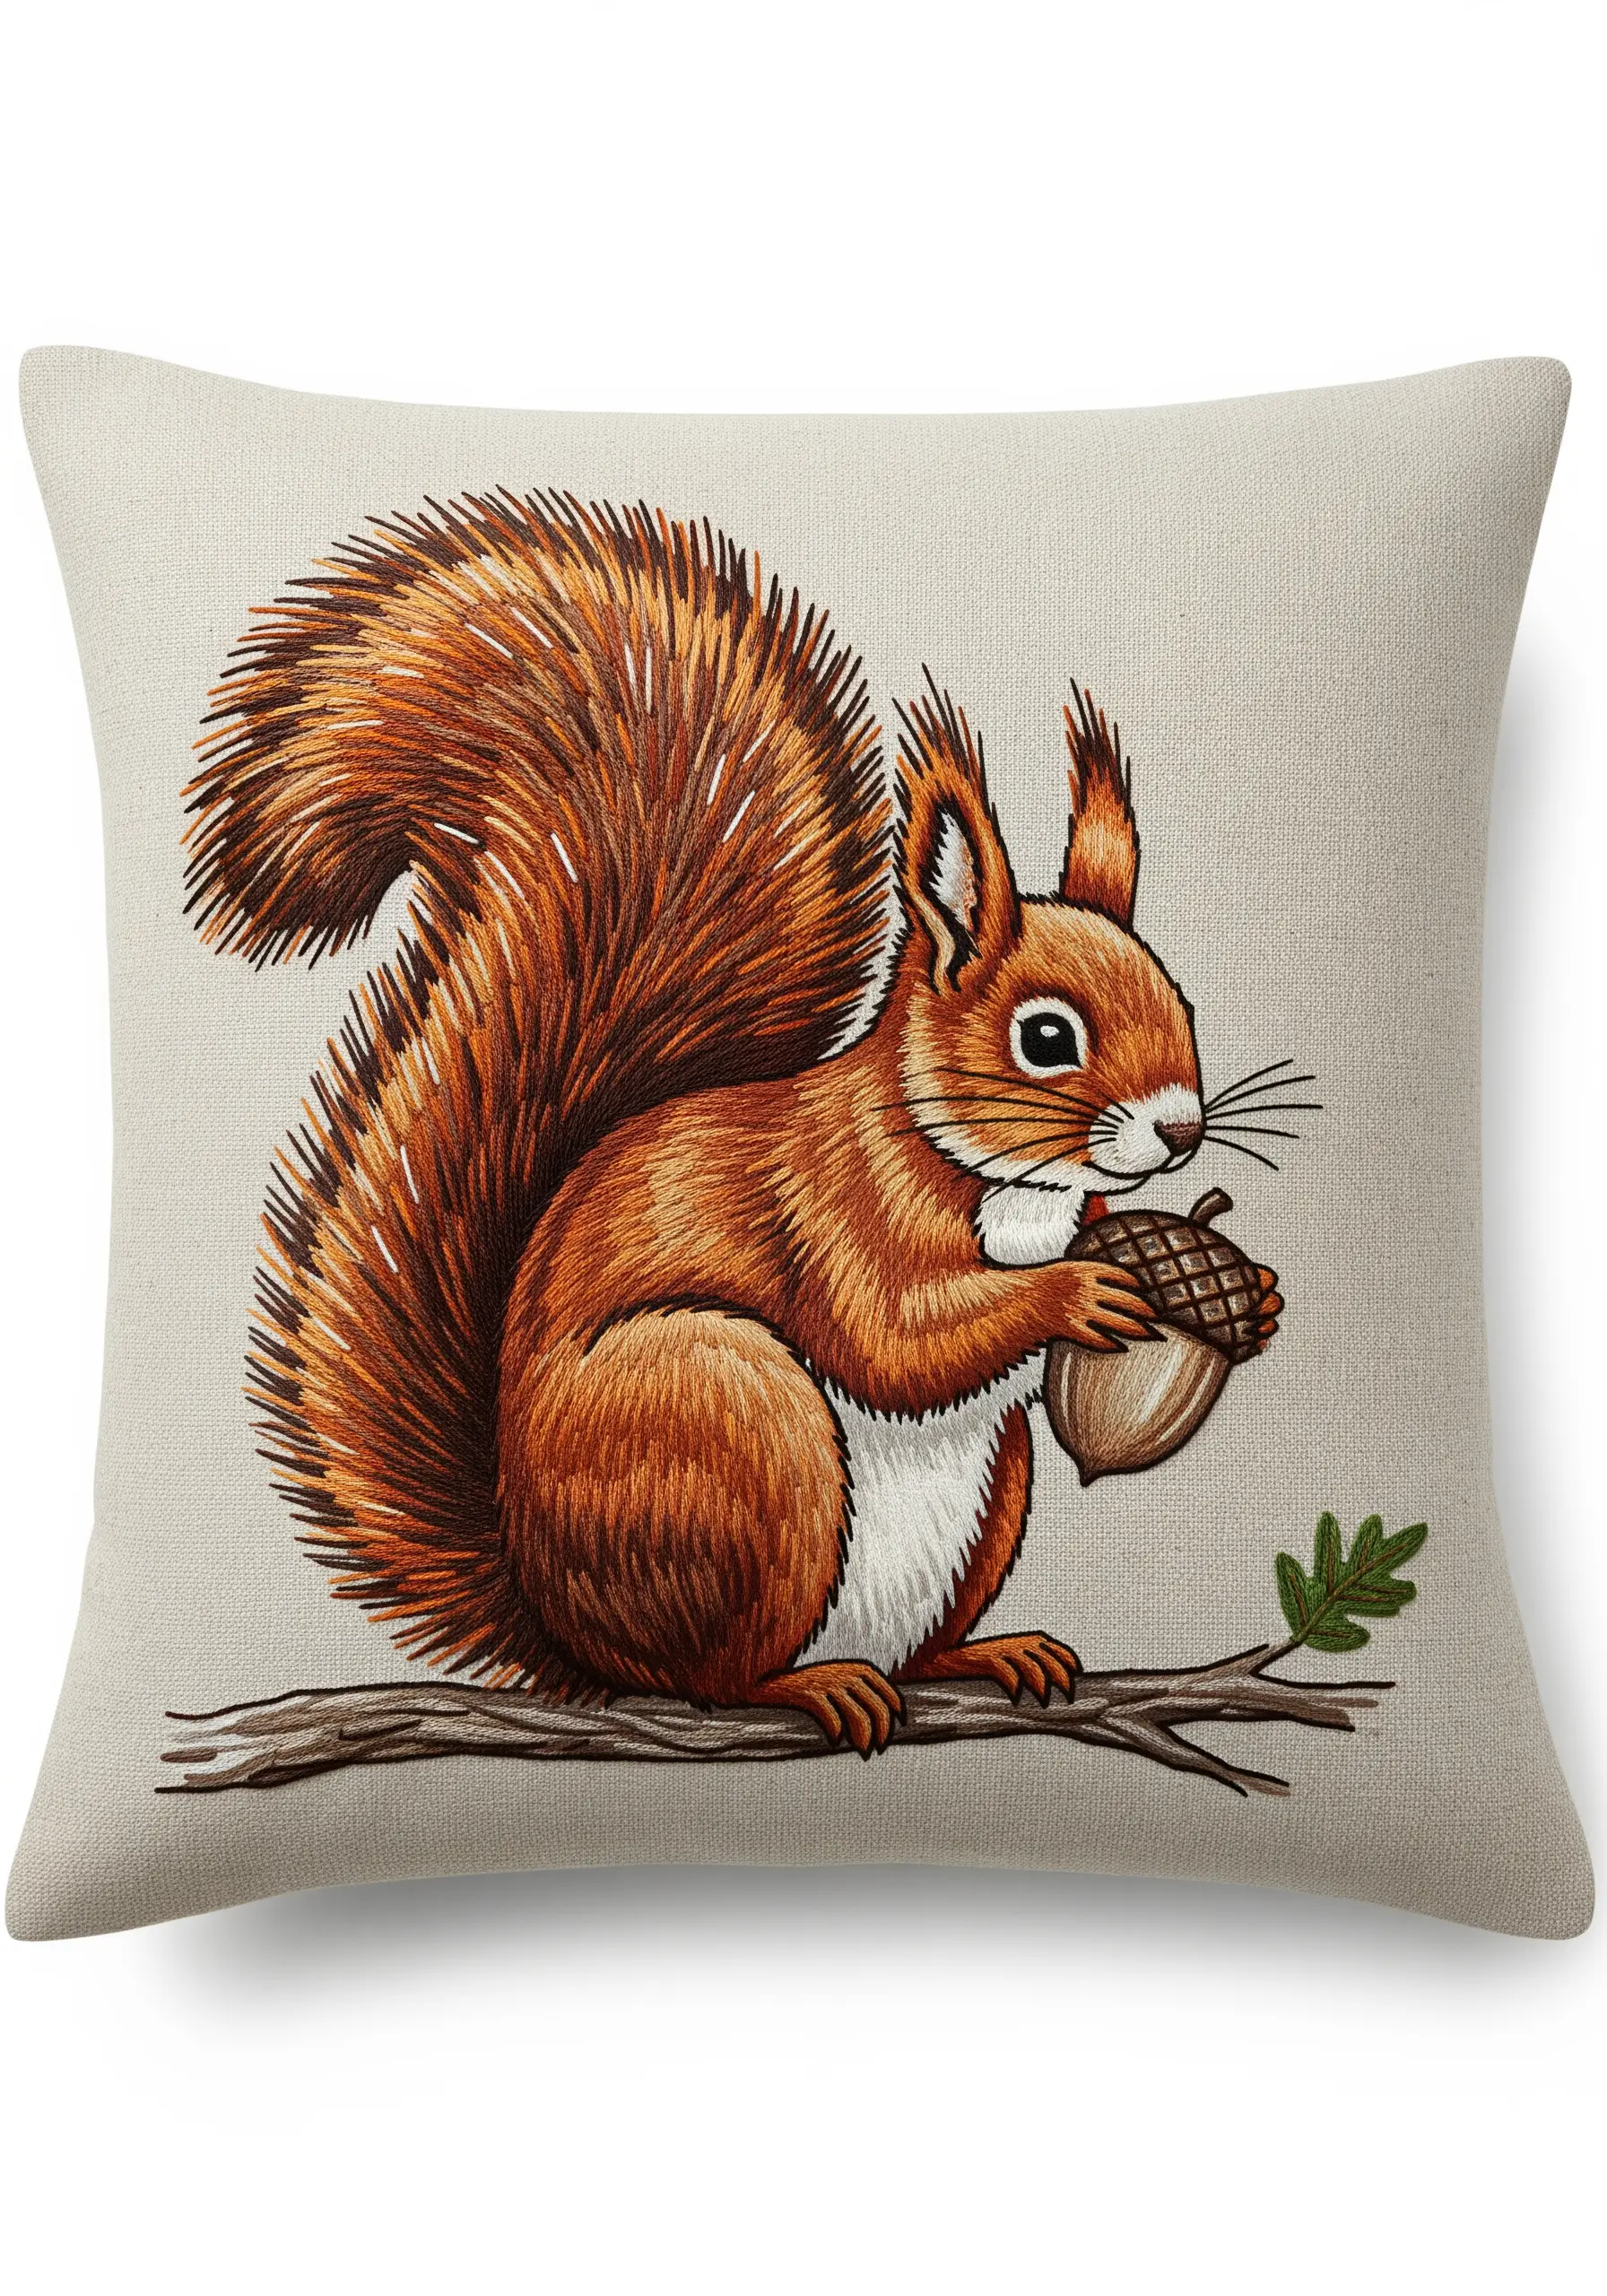
To create a lifelike squirrel, pay close attention to the direction of your stitches to mimic the flow of fur.
Use a single strand of floss and the long-and-short stitch technique, blending at least four or five shades of brown, red, and orange for the body and tail.
This method of ‘thread painting’ creates subtle shifts in color that capture light and form, giving your animal depth and vitality.
This detailed work can be adapted to many nature-themed embroidery samplers.
16. Fill Large Areas with High-Texture Knots
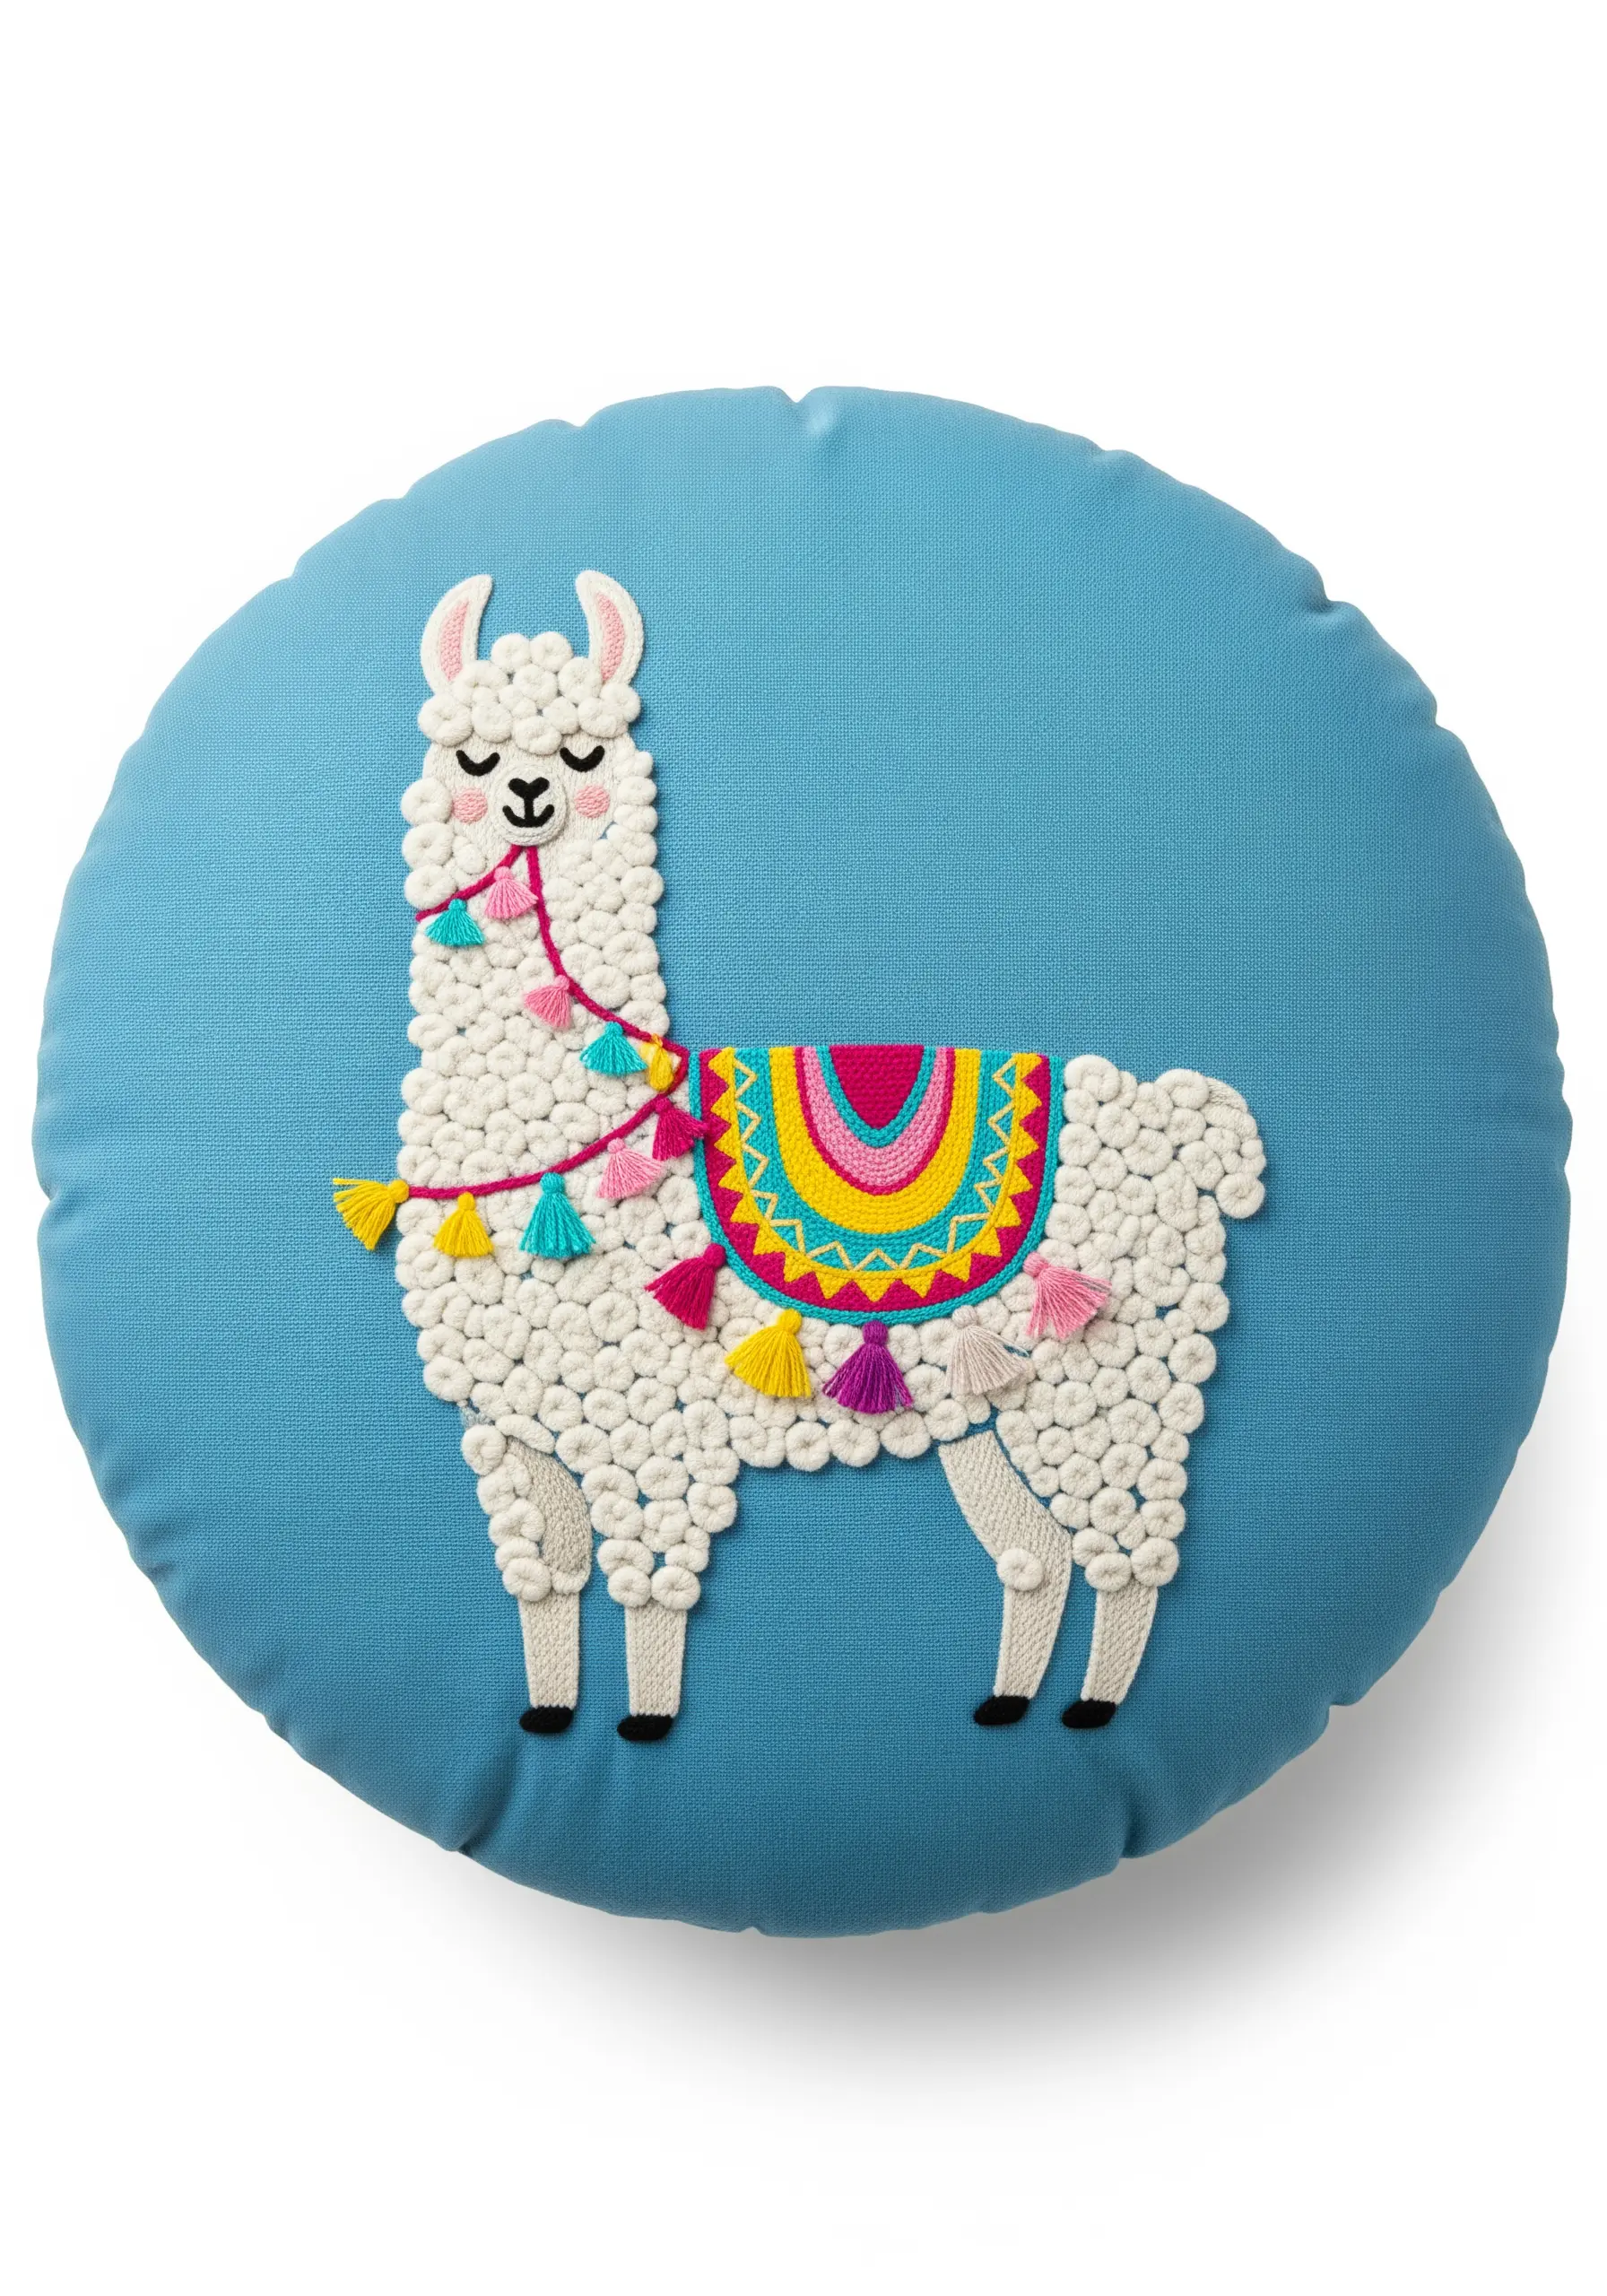
Instead of satin stitch, fill the llama’s body with densely packed French knots or colonial knots for a wonderfully bumpy, woolly texture.
Use a thicker pearl cotton or all six strands of embroidery floss to make the knots fuller and reduce the time it takes to fill the space.
This technique creates a durable, highly tactile surface that is perfect for a playroom pillow, and is one of the coziest boho embroidery patterns you can try.
17. Create Sharp Gradients with Block Satin Stitch
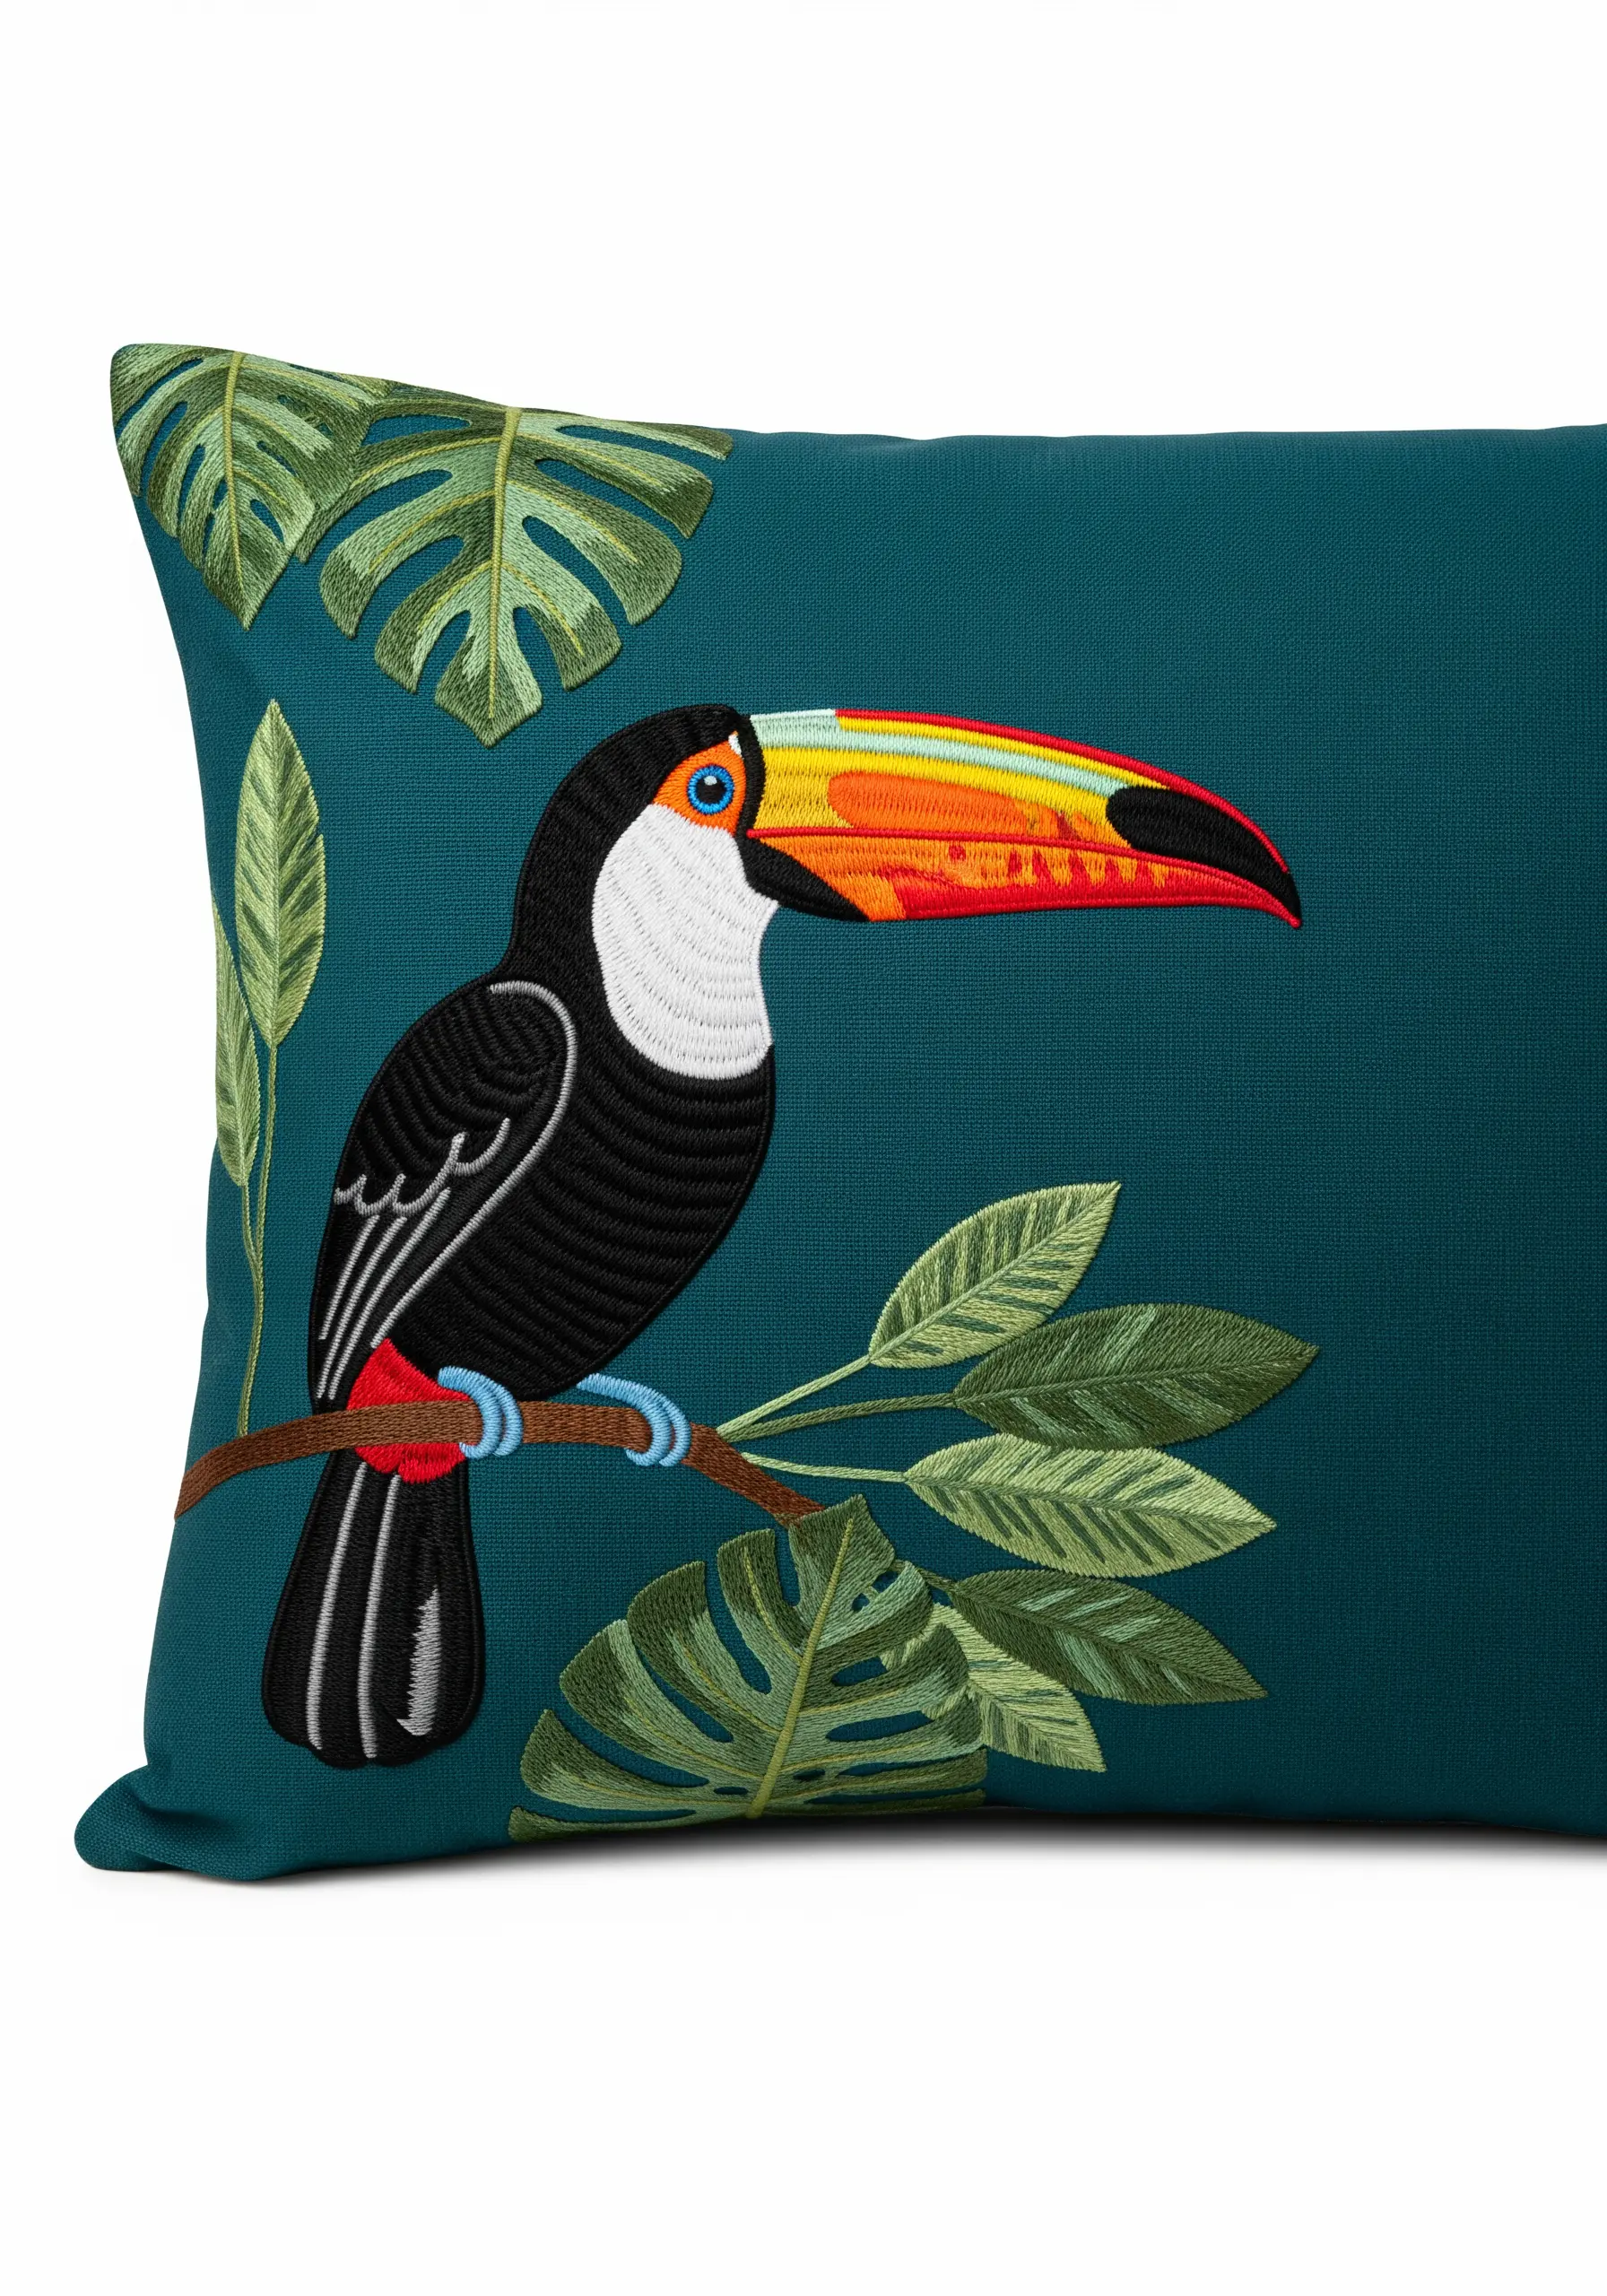
For the toucan’s vibrant beak, achieve a clean, graphic rainbow effect by stitching each color as a separate, solid block of satin stitch.
Ensure the edge where two colors meet is perfectly neat by first outlining each block with a split stitch in the corresponding color.
This prevents the colors from bleeding into one another and creates a sharp, defined look perfect for this kind of gradient color effect.
The key is precision—keep all satin stitches within a block perfectly parallel.
18. Embellish Your Stitching with Beads and Sequins
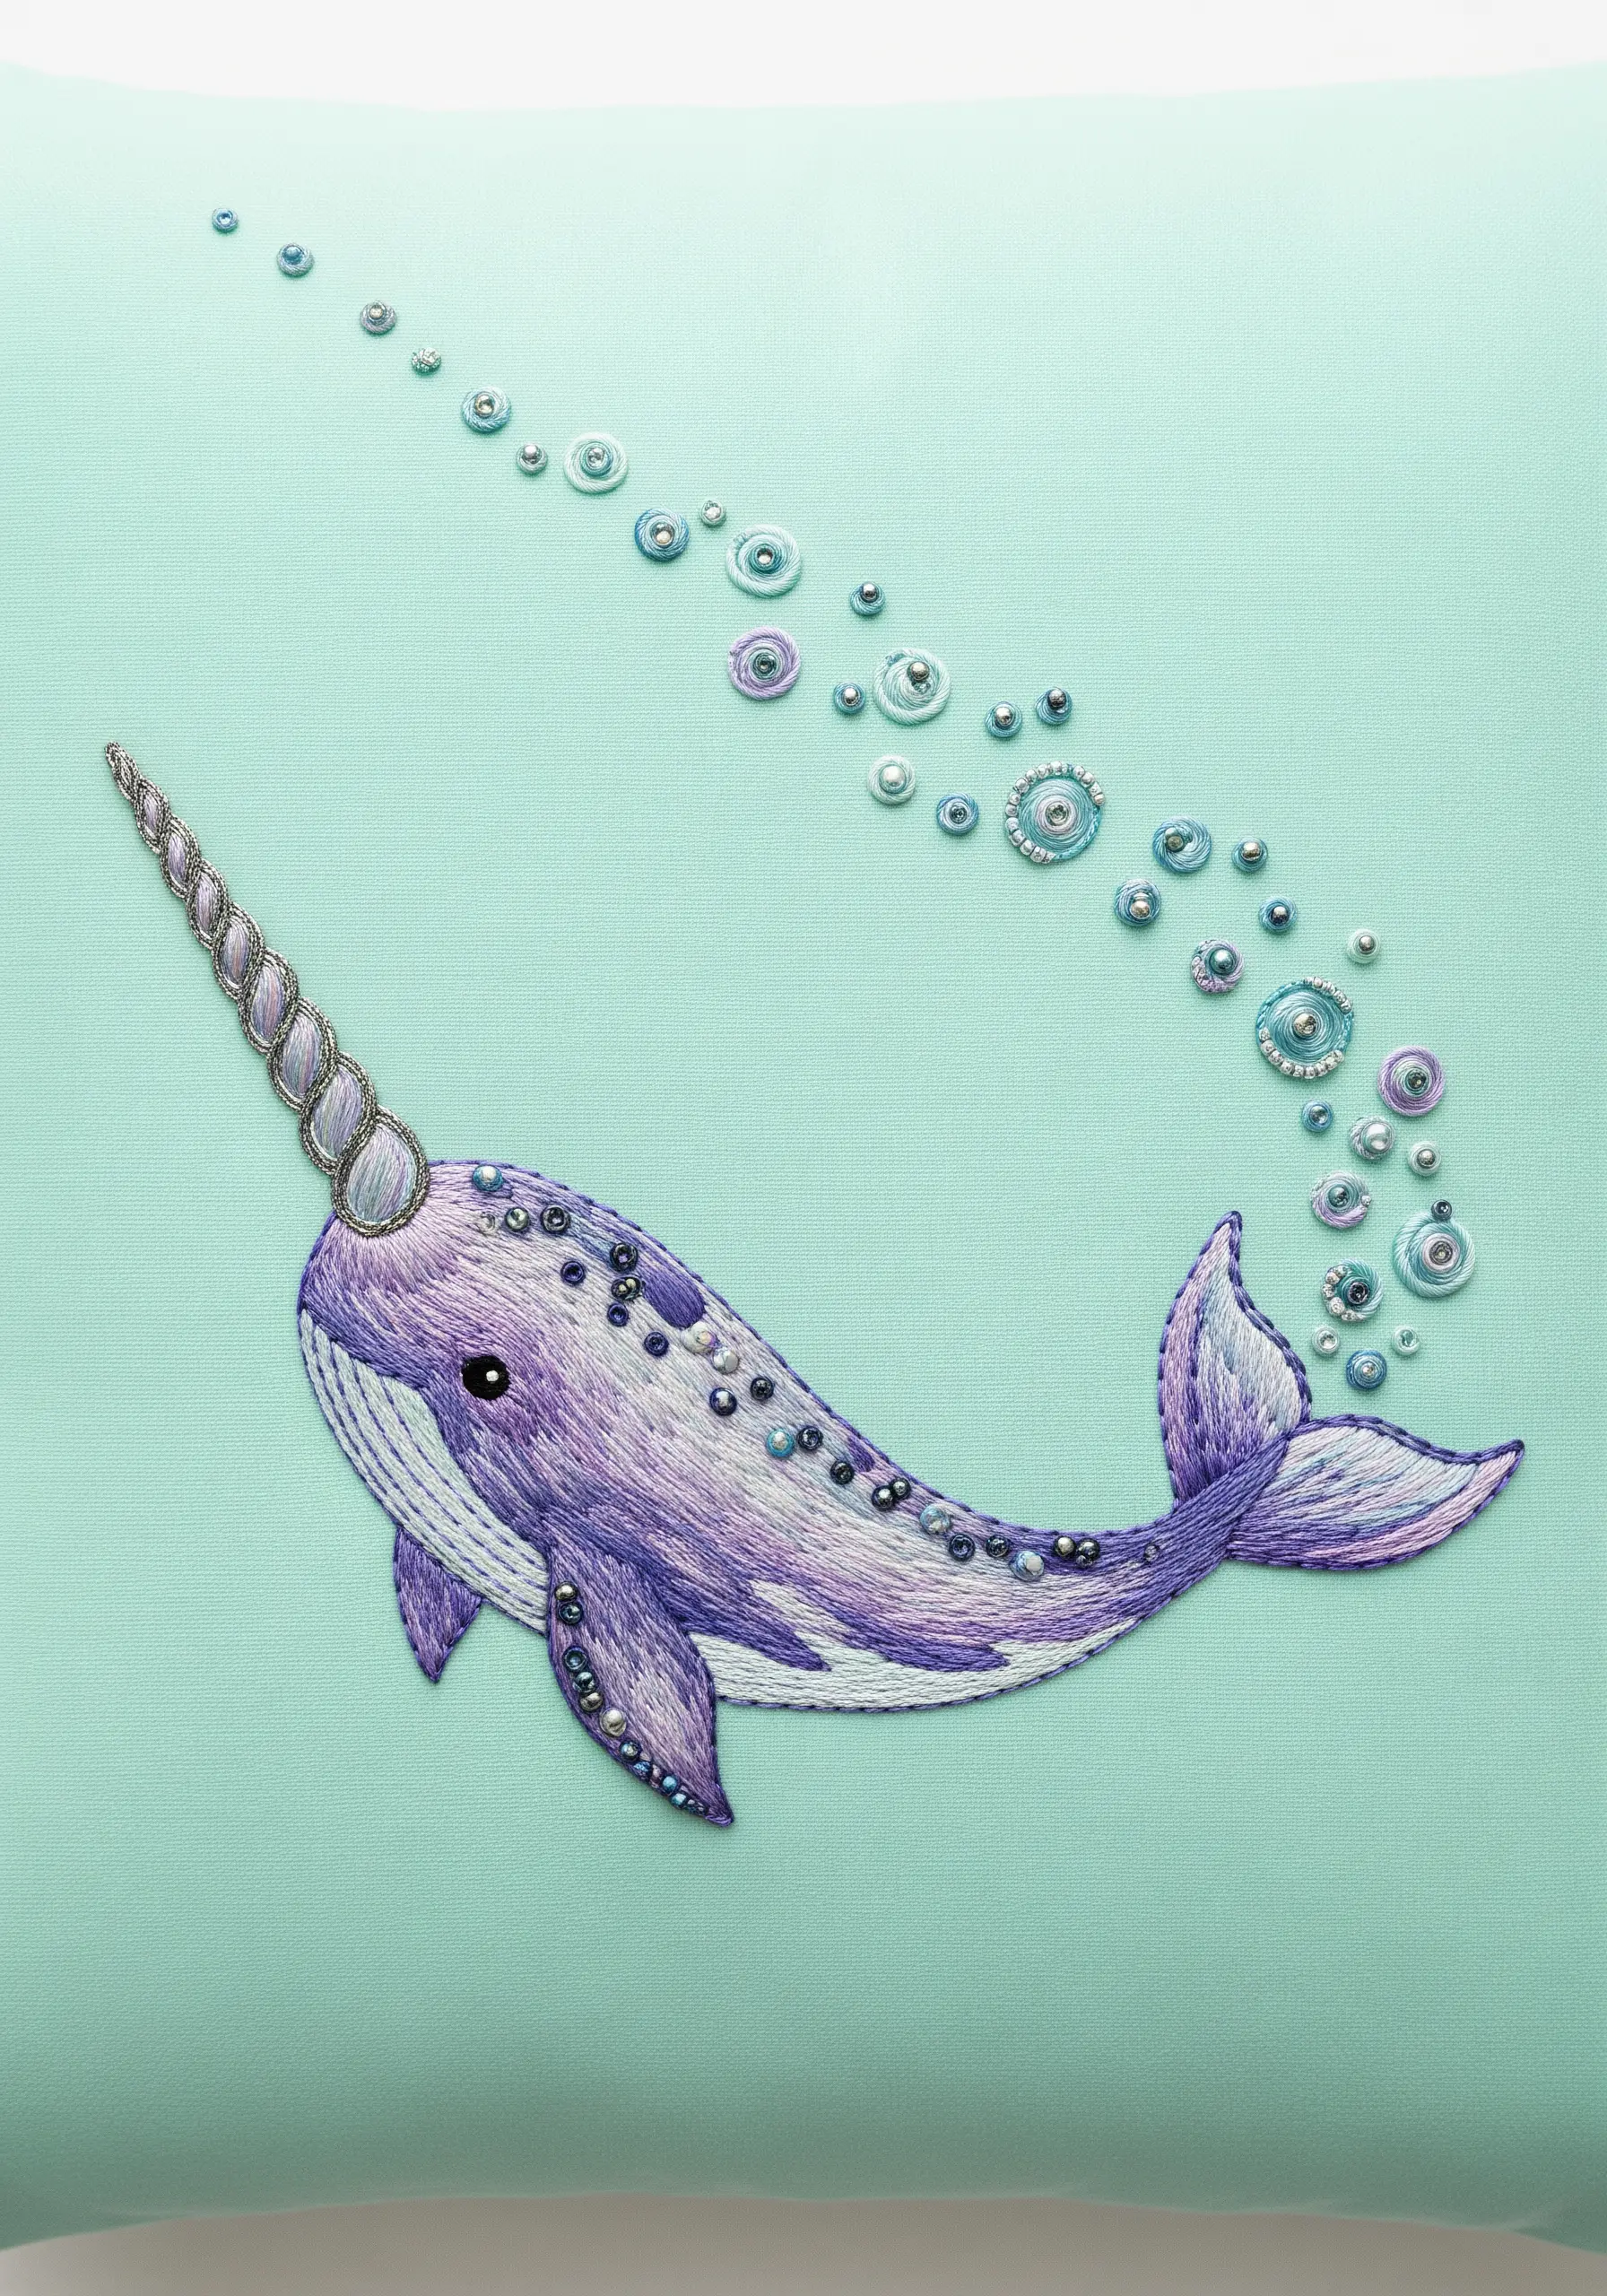
Add a magical, underwater sparkle by incorporating beads and sequins into your design.
Scatter iridescent seed beads across the narwhal’s body to catch the light and suggest shimmering scales.
For the bubbles, stitch sequins down with a single seed bead in the center, or create layered circles with backstitch and beads.
This mixed-media approach transforms a simple embroidery into a treasured, sparkling piece of art.
19. Integrate 3D Fabric Elements into Your Design
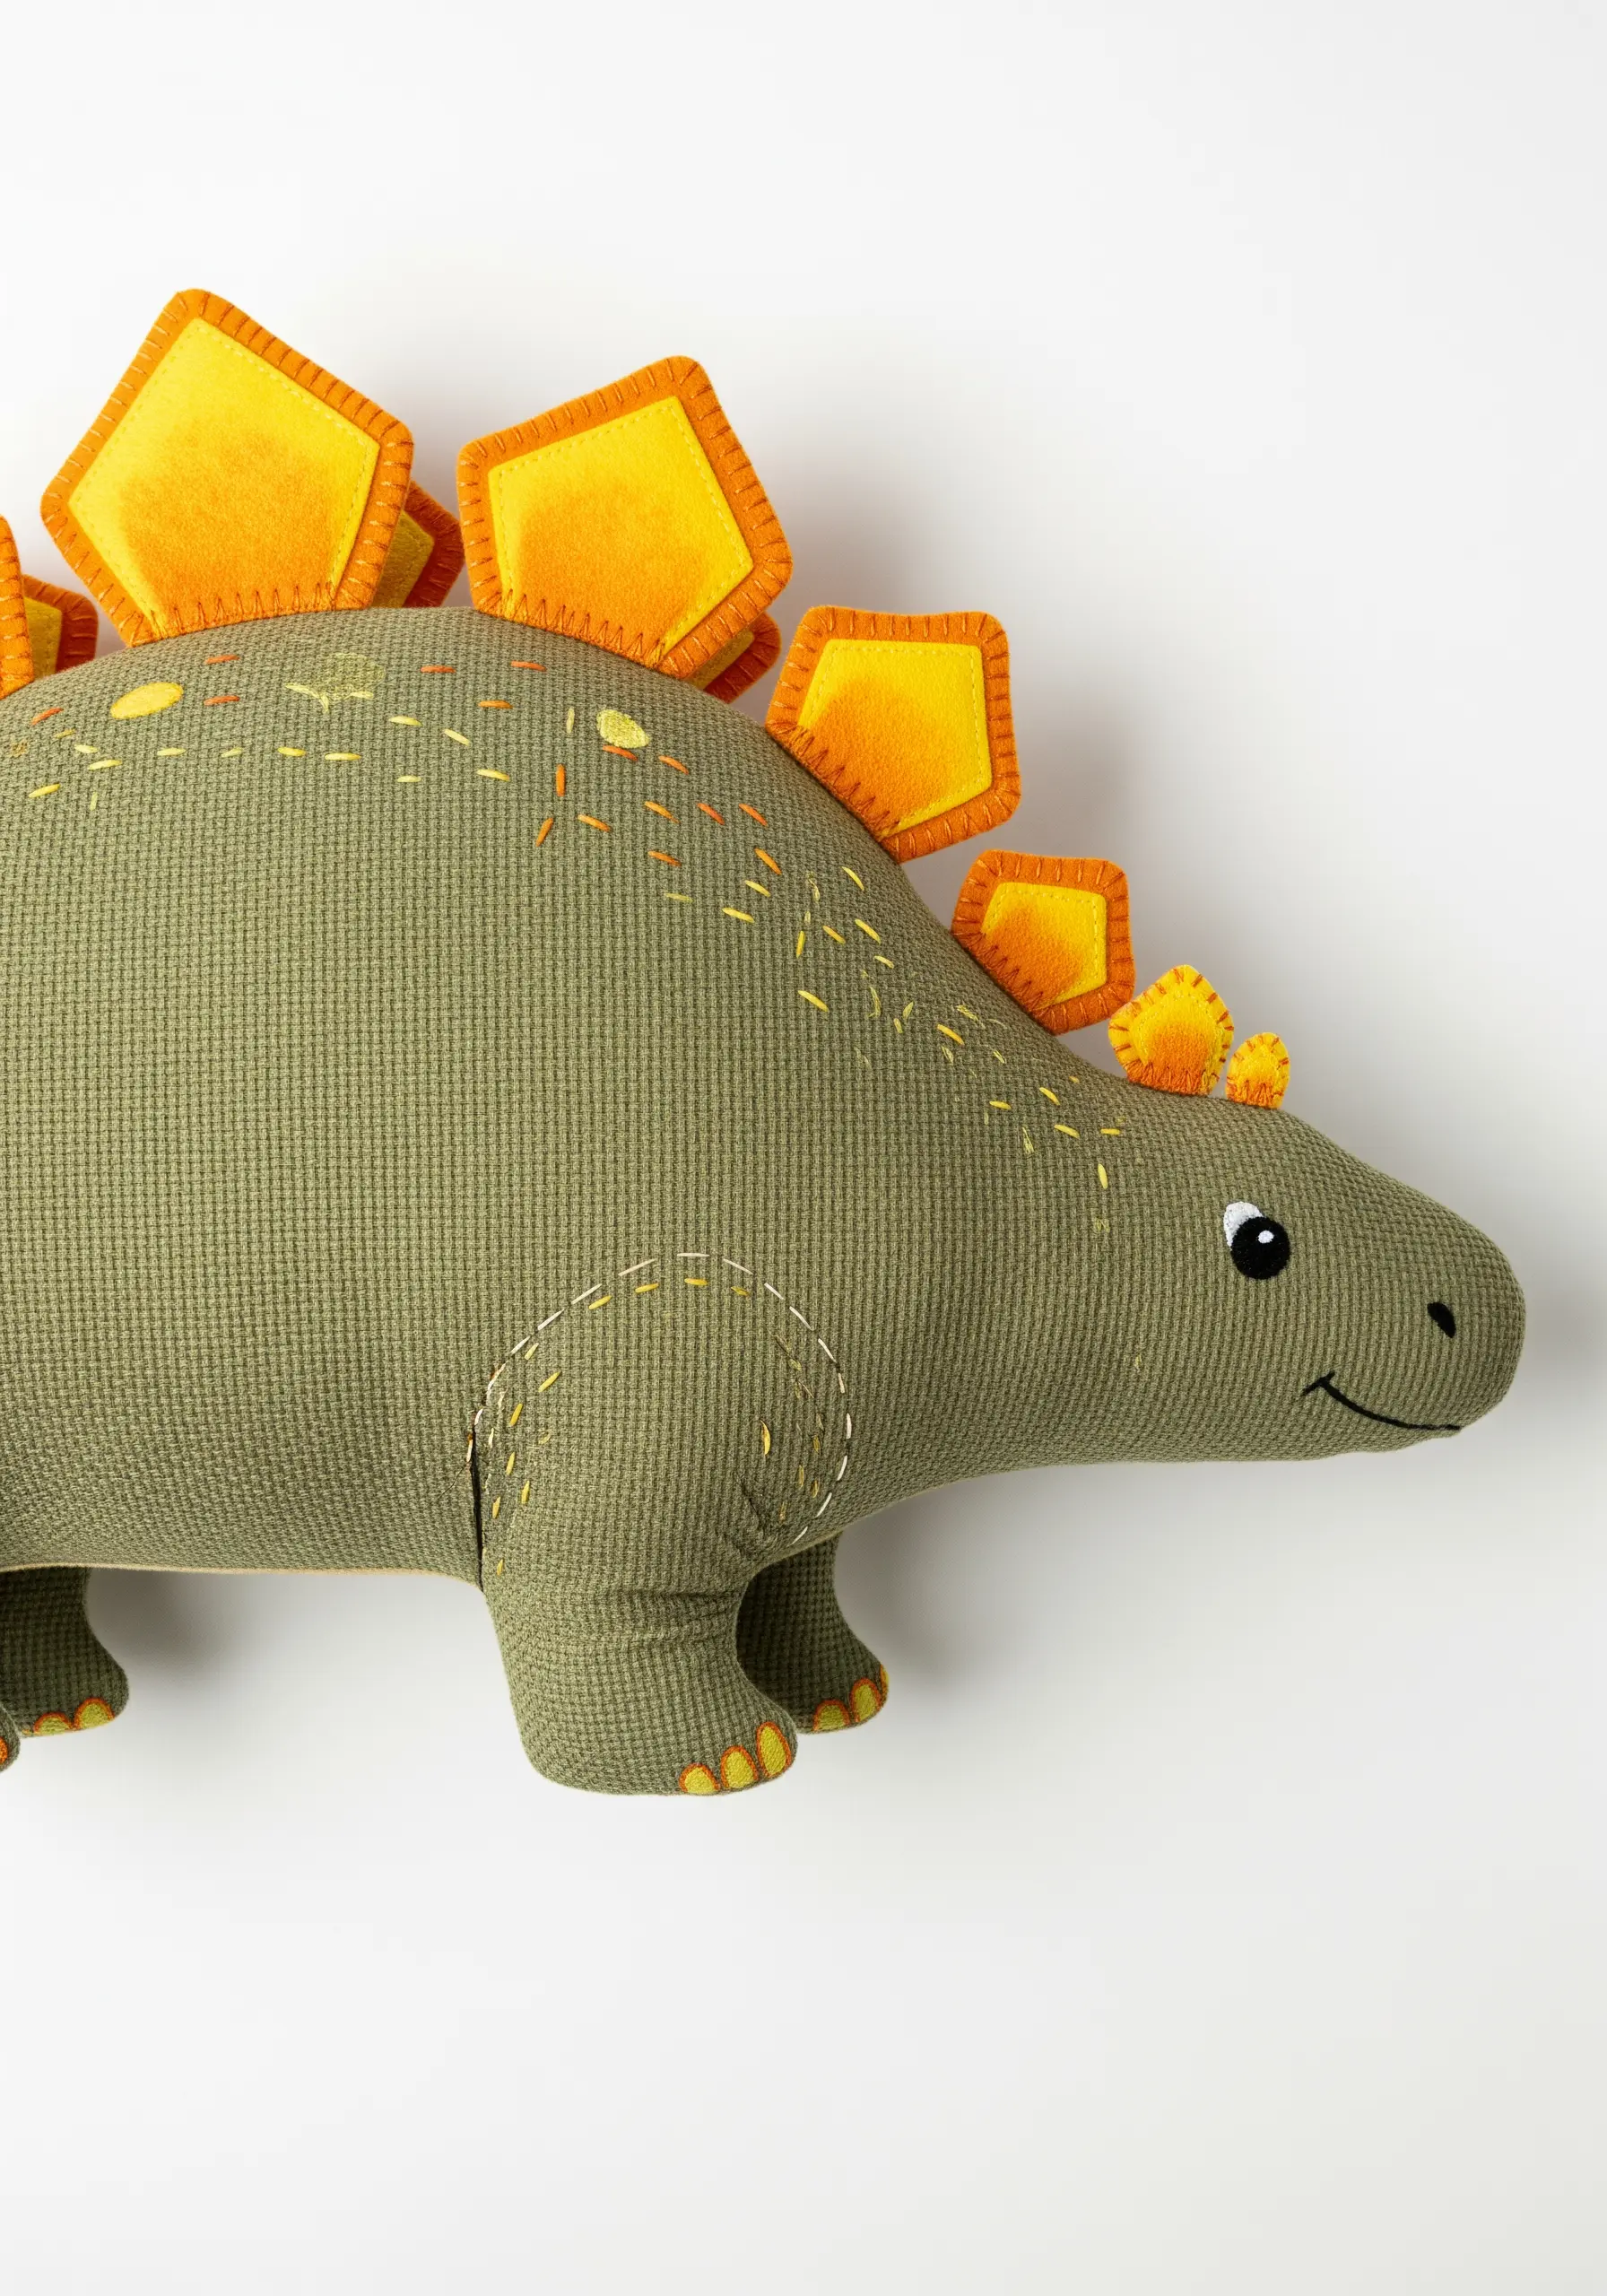
Give your dinosaur a truly unique look by creating its back plates from layered felt or fabric.
Cut out two identical plate shapes, place them together, and stitch around the edge with a simple running stitch or blanket stitch.
Attach only the bottom edge of the completed plate to the pillow, allowing it to stand up and create a fun, three-dimensional feature.
This is one of many abstract mixed-media embroidery ideas you can adapt for playful decor.
20. Layer Stitches to Simulate Feathery Texture
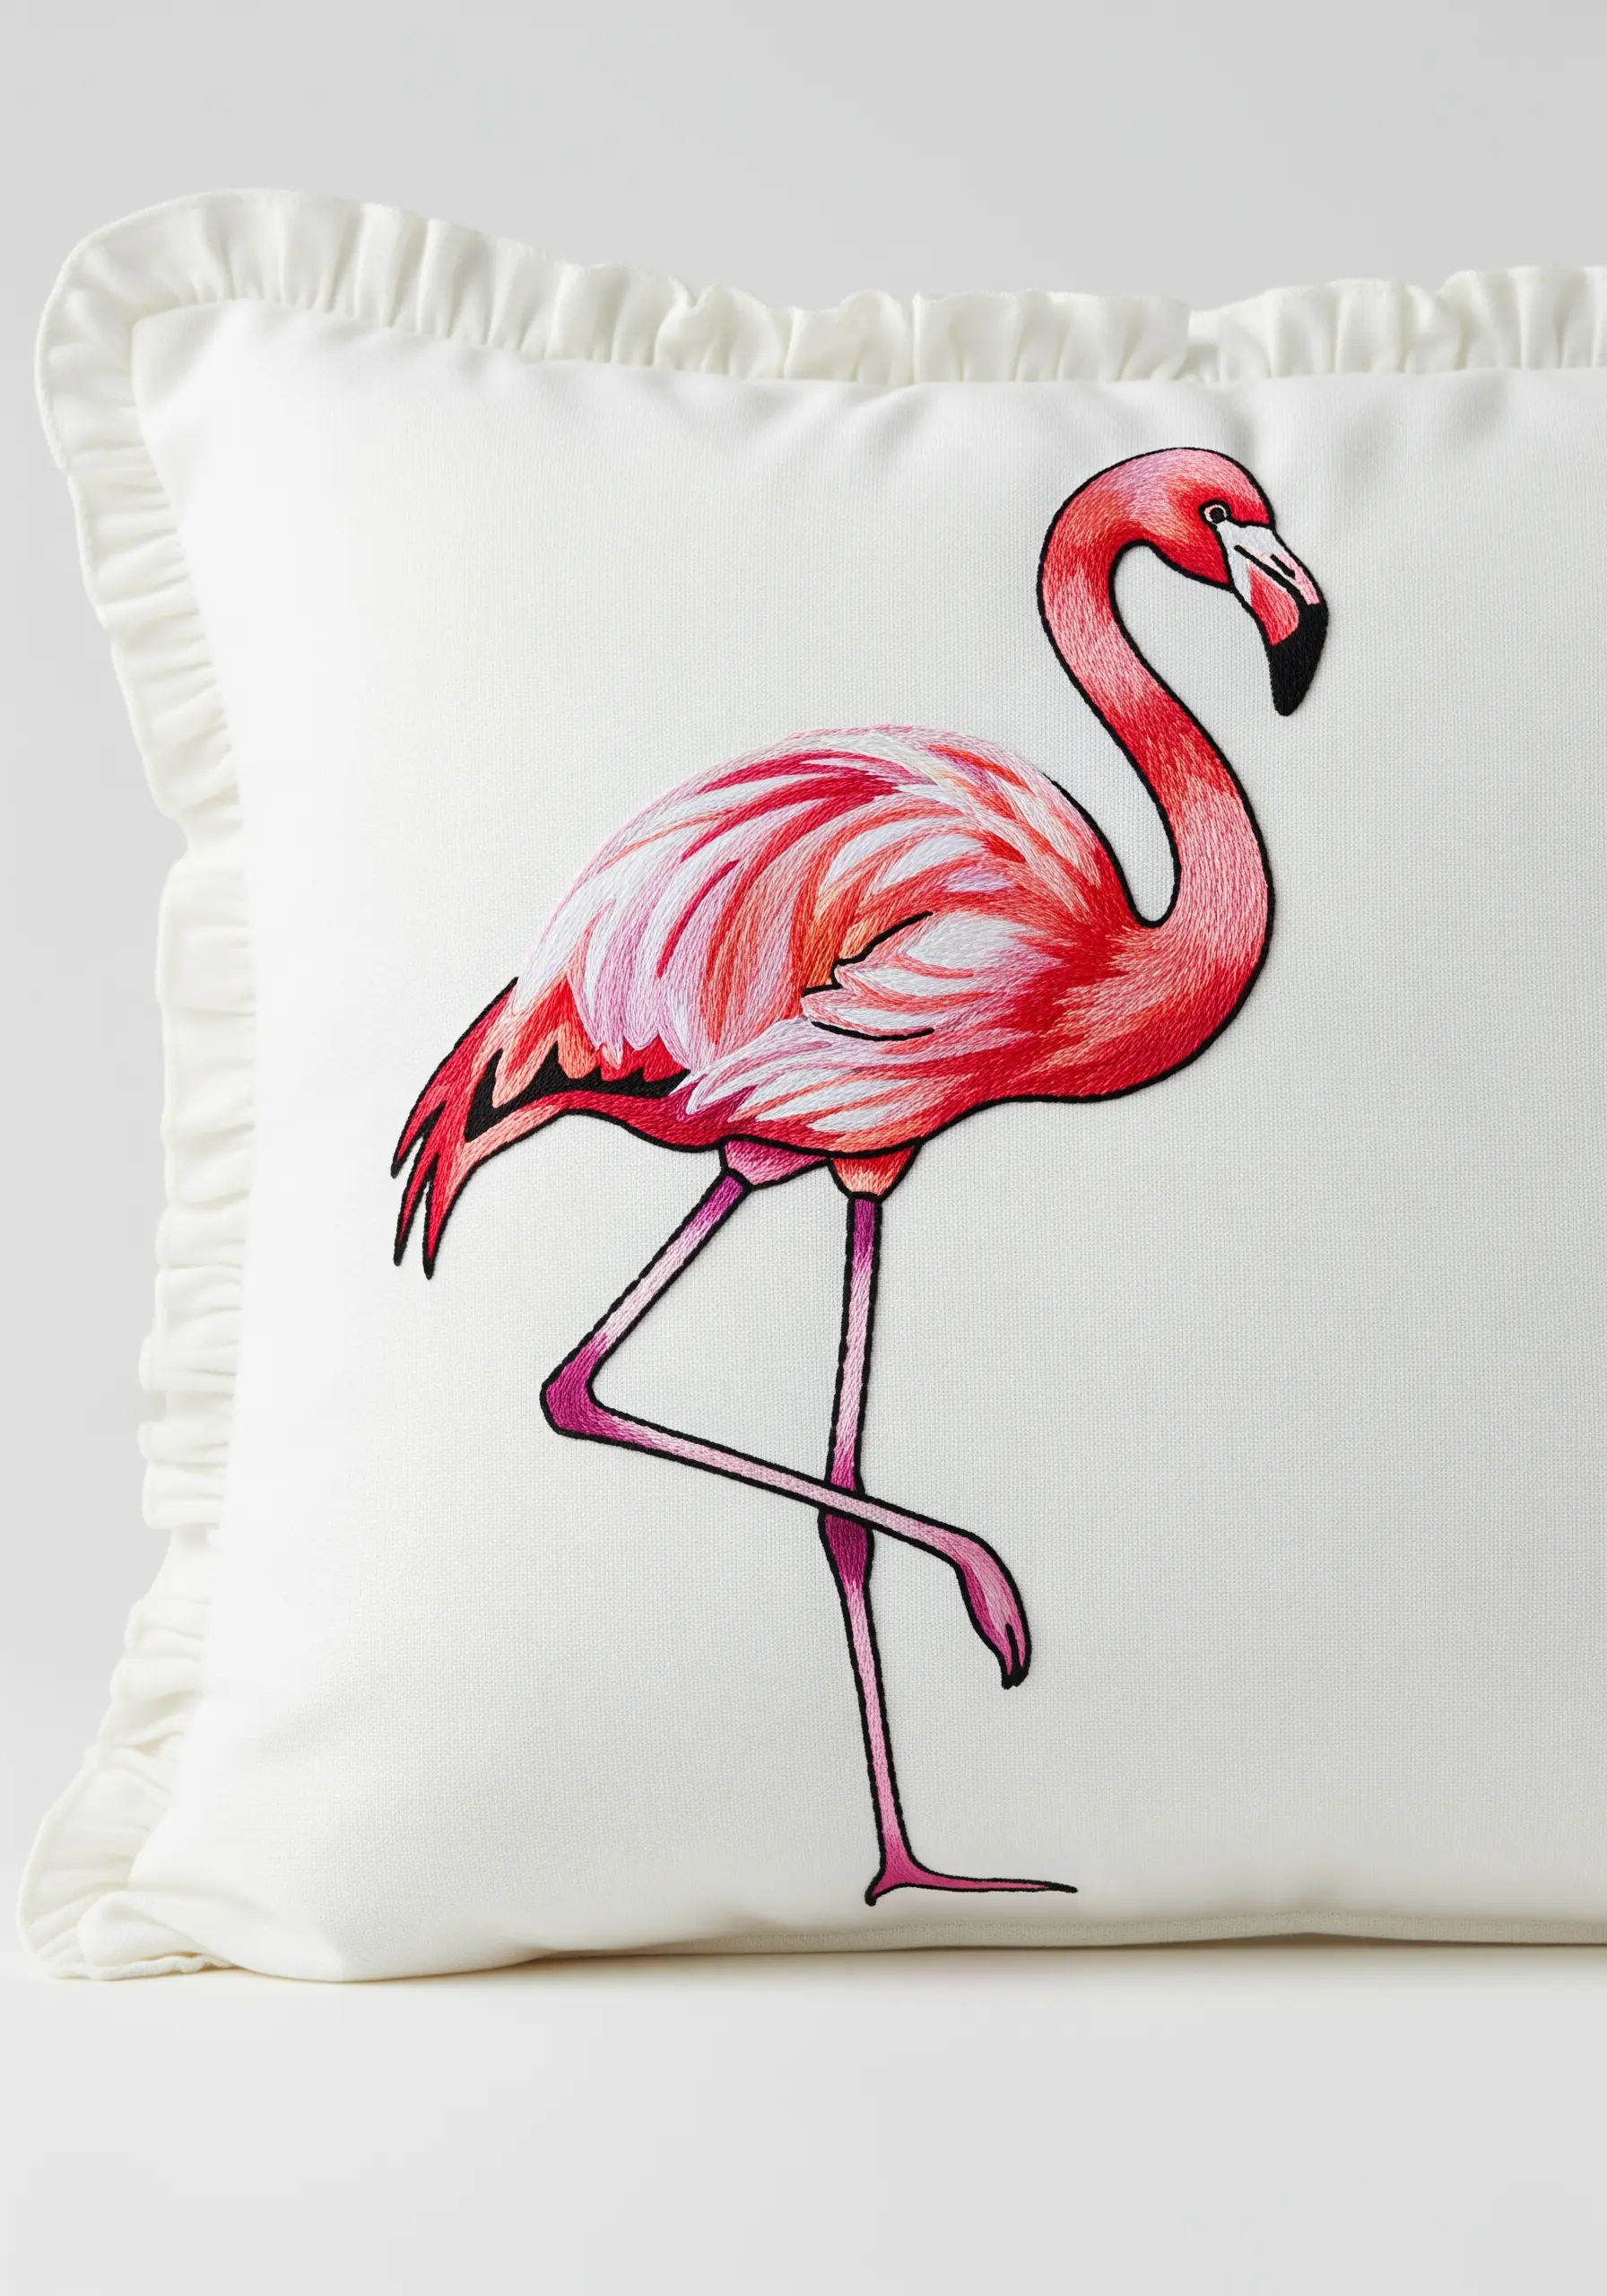
To give the flamingo’s wings a soft, feathered appearance, use a layered long-and-short stitch.
Start with the bottom layer of feathers in a darker pink, then stitch the next layer on top, slightly overlapping the first with a lighter shade.
Keep your stitches angled outward from the body to mimic the natural direction of feathers, creating a sense of lightness and movement.
This technique elevates a simple motif into something more dynamic and realistic.
21. Use Stitch Direction to Sculpt with Thread
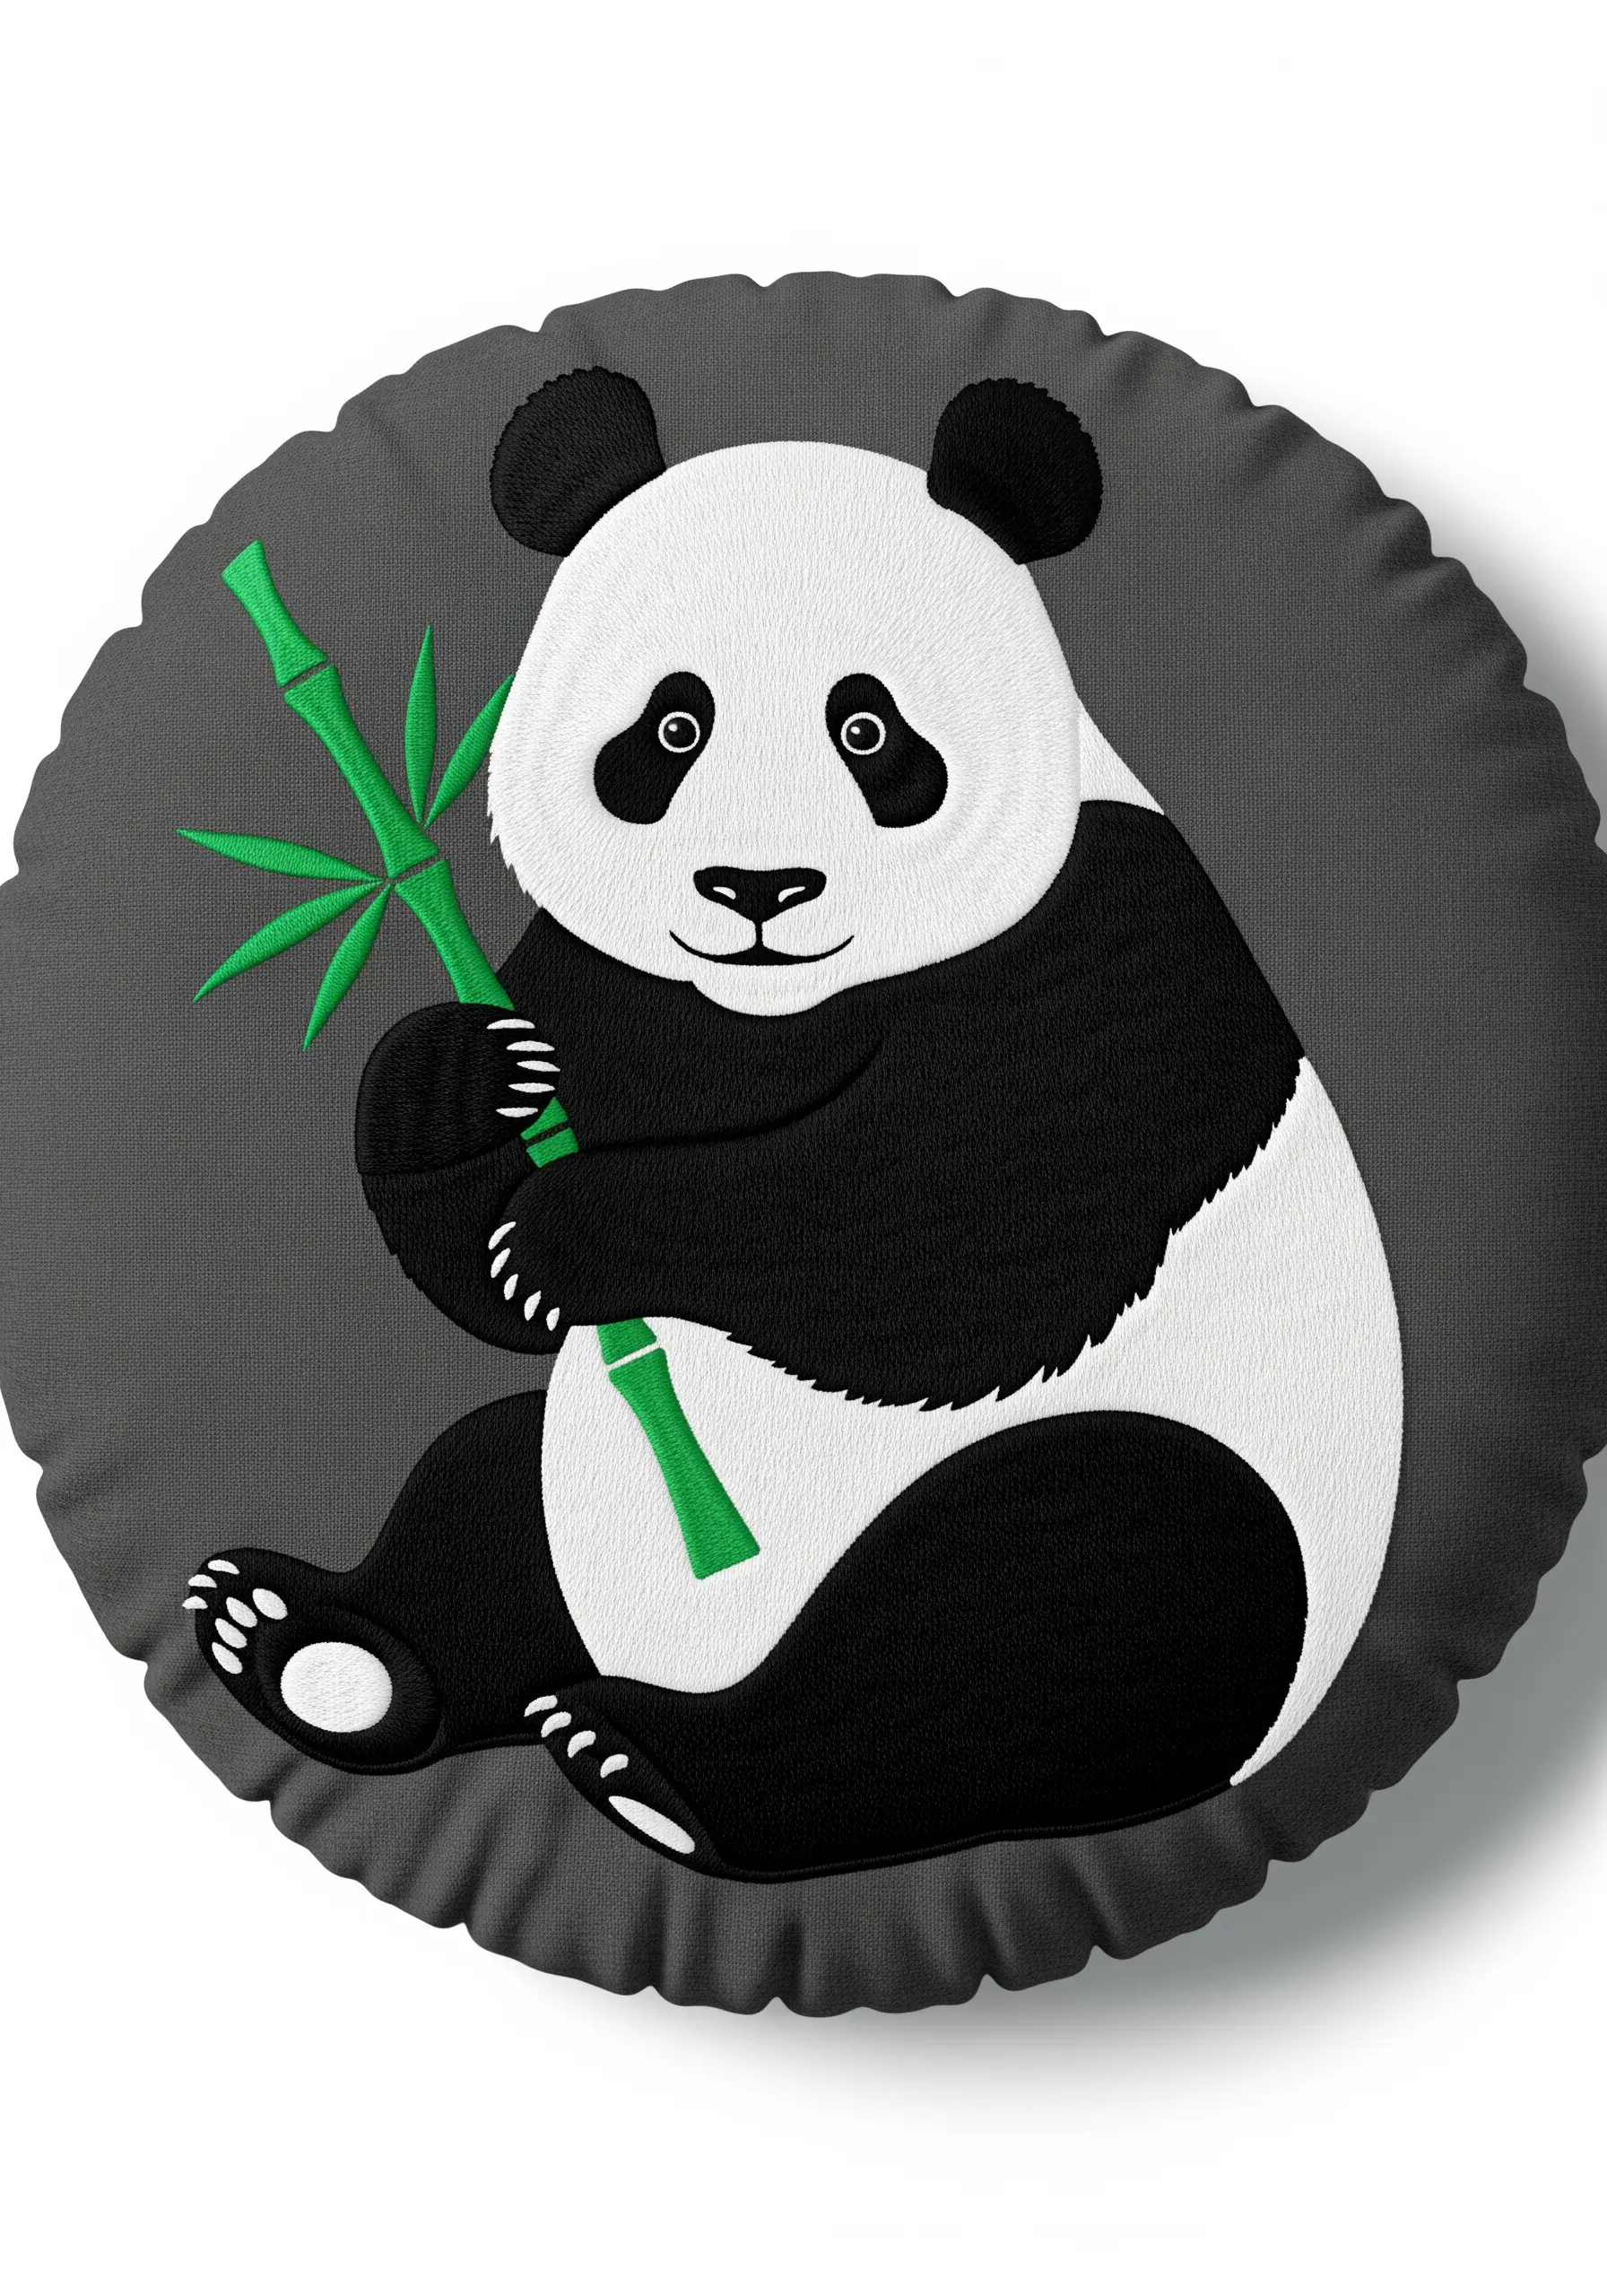
When filling large, simple shapes like a panda’s body, the direction of your satin stitch is everything.
Don’t just stitch horizontally or vertically; follow the natural curves of the animal’s form.
Angle your stitches to wrap around the belly and limbs. This simple adjustment creates subtle highlights and shadows, making the flat shape appear rounded and dimensional without any color changes.
22. Define Form with Decorative Topstitching

On a pre-shaped or sewn pillow, you can use embroidery to add definition and character.
Use a contrasting color of pearl cotton and a simple chain stitch or backstitch to create dividing lines, like the segments on this caterpillar.
This technique adds visual structure and a charming, handcrafted detail to an otherwise simple plush form, turning it into a more defined and engaging piece.
23. Create Vibrancy with Outlined Color Cells
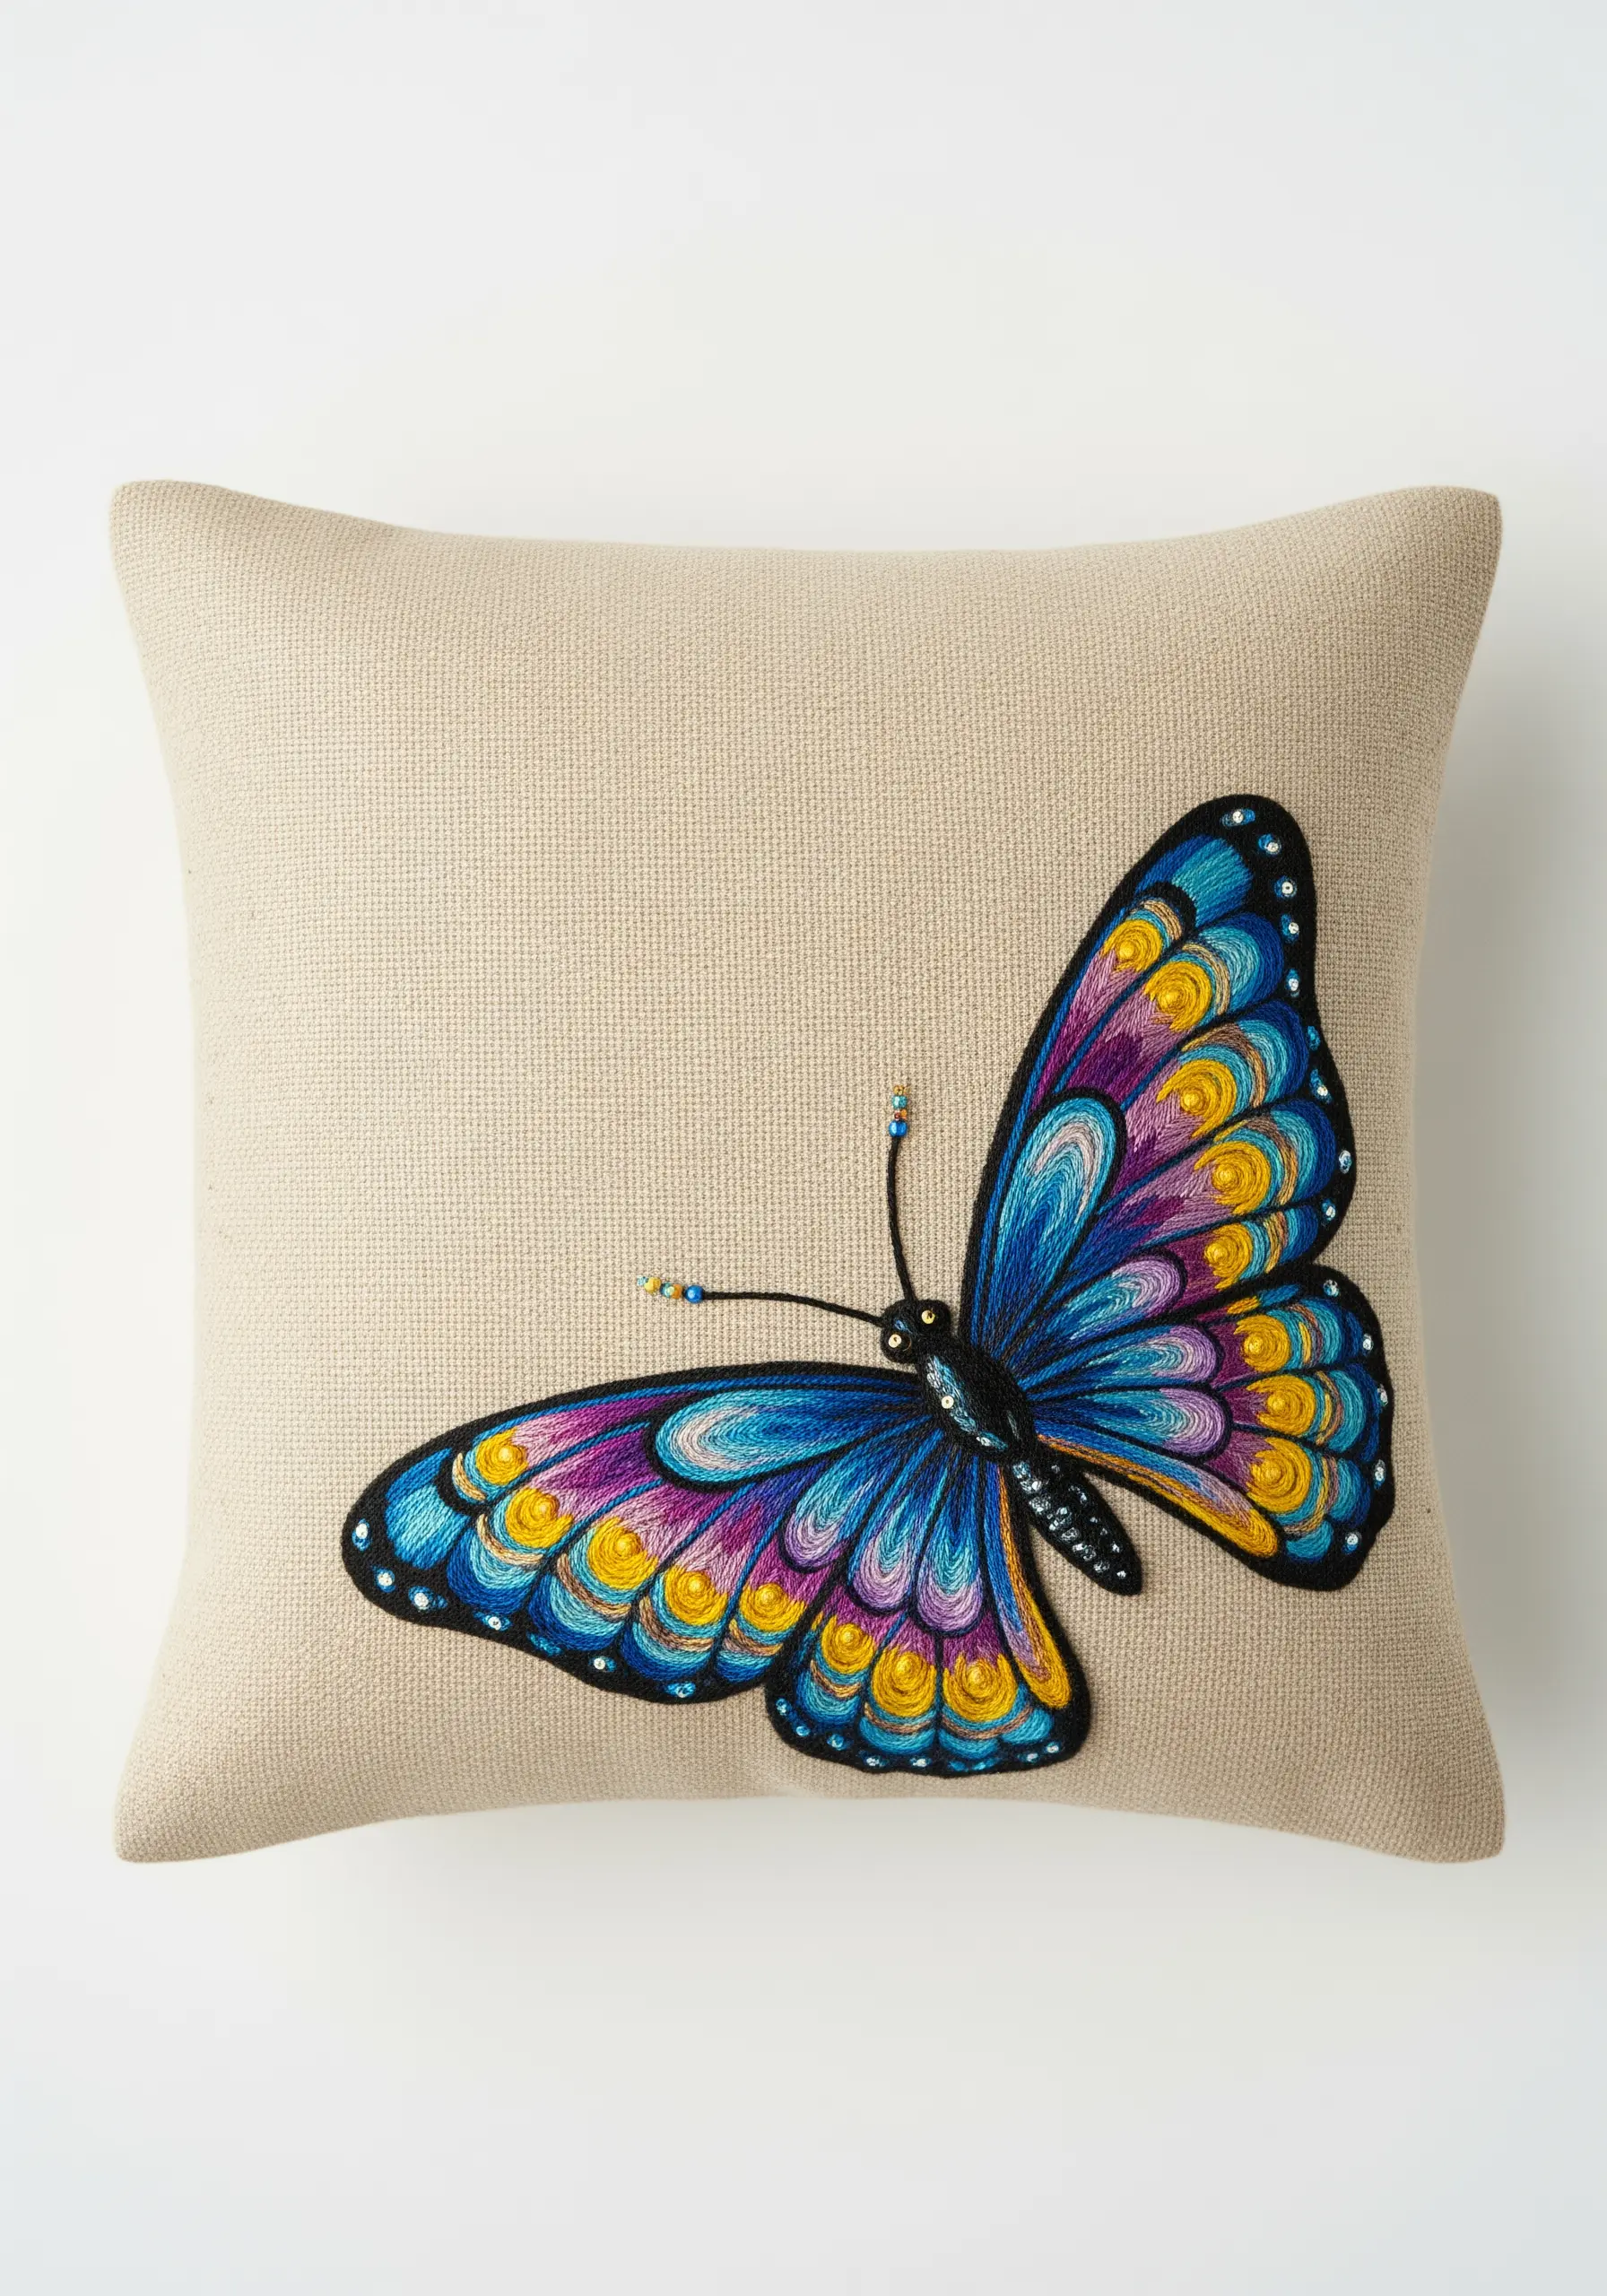
To make intricate patterns like butterfly wings look clean and jewel-like, treat each patch of color as its own cell.
First, outline every small shape with a single strand of black split stitch. This creates a barrier.
Then, carefully fill each cell with a vibrant satin stitch, ensuring your thread tucks neatly under the black outline.
This stained-glass window approach keeps your colors from looking muddy and makes the entire design radiate with energy, creating a truly stunning framed embroidery piece if you choose to hoop it instead.


