

You’ve mastered the basic stitches, and you follow patterns beautifully—but you feel a gap between the work you’re making and the art you want to create. That feeling is your artistry calling for a new language, one spoken not just in motifs, but in texture, depth, and intention.
Boho style isn’t about simply stitching a moon or a mandala; it’s about how that moon feels under your fingertips, how the mandala’s colors create a sense of calm. It’s a free-spirited approach rooted in the sensory details: the chunky weight of yarn, the subtle shine of a single metallic thread, the organic line of a stem stitch that looks like it grew there.
Here, we’ll move beyond the pattern and into the technique. You’ll learn how a simple shift—from satin stitch to long-and-short, from six strands of floss to two—can transform your work from a craft project into a piece of personal art. Let’s give your hands the vocabulary to express what’s in your heart.
1. Scale Up with a Statement Mandala Tapestry
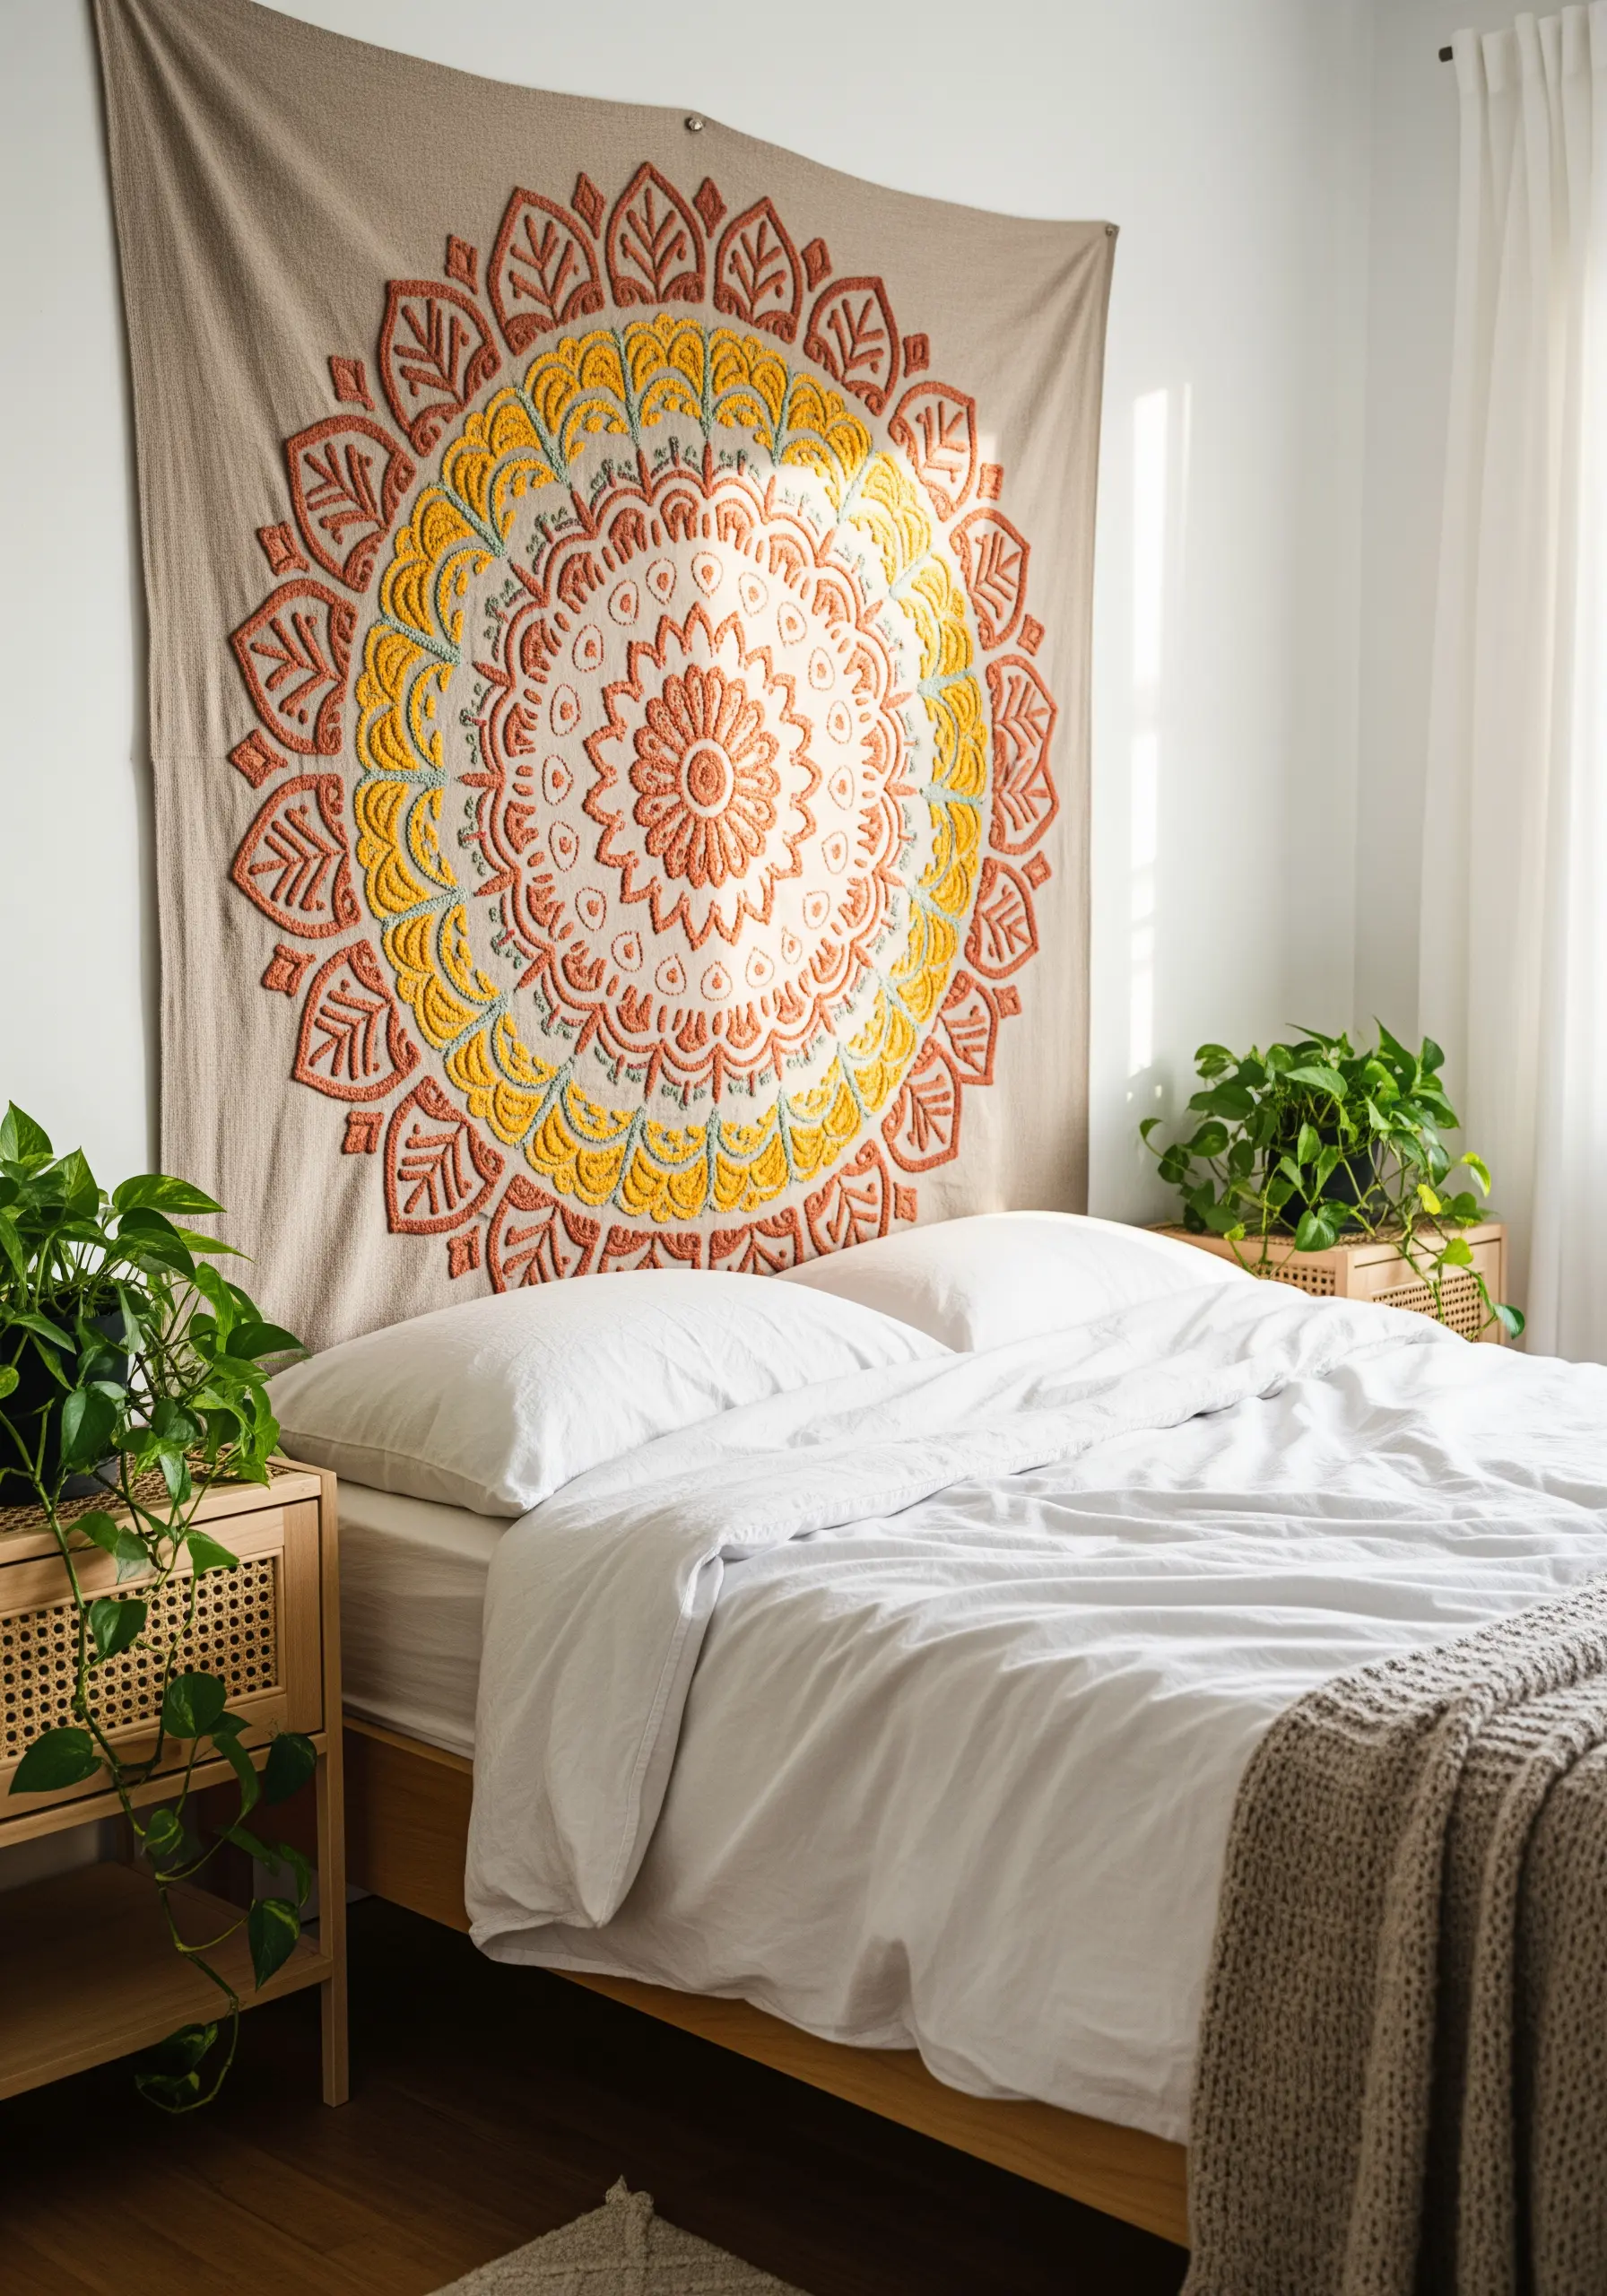
To create a large-scale piece without it taking a lifetime, choose stitches that offer fast, textured coverage.
Use a punch needle with thick yarn to fill large areas quickly, creating a lush, rug-like texture that makes the design pop.
For the outlines, switch to a traditional needle and use a bold chain stitch; it works up faster than satin stitch and adds a beautiful, rope-like definition.
Work on heavy-duty canvas or linen that can support the weight of the yarn, and consider building the piece in sections to keep it manageable.
2. Embellish a Throw with Celestial Details
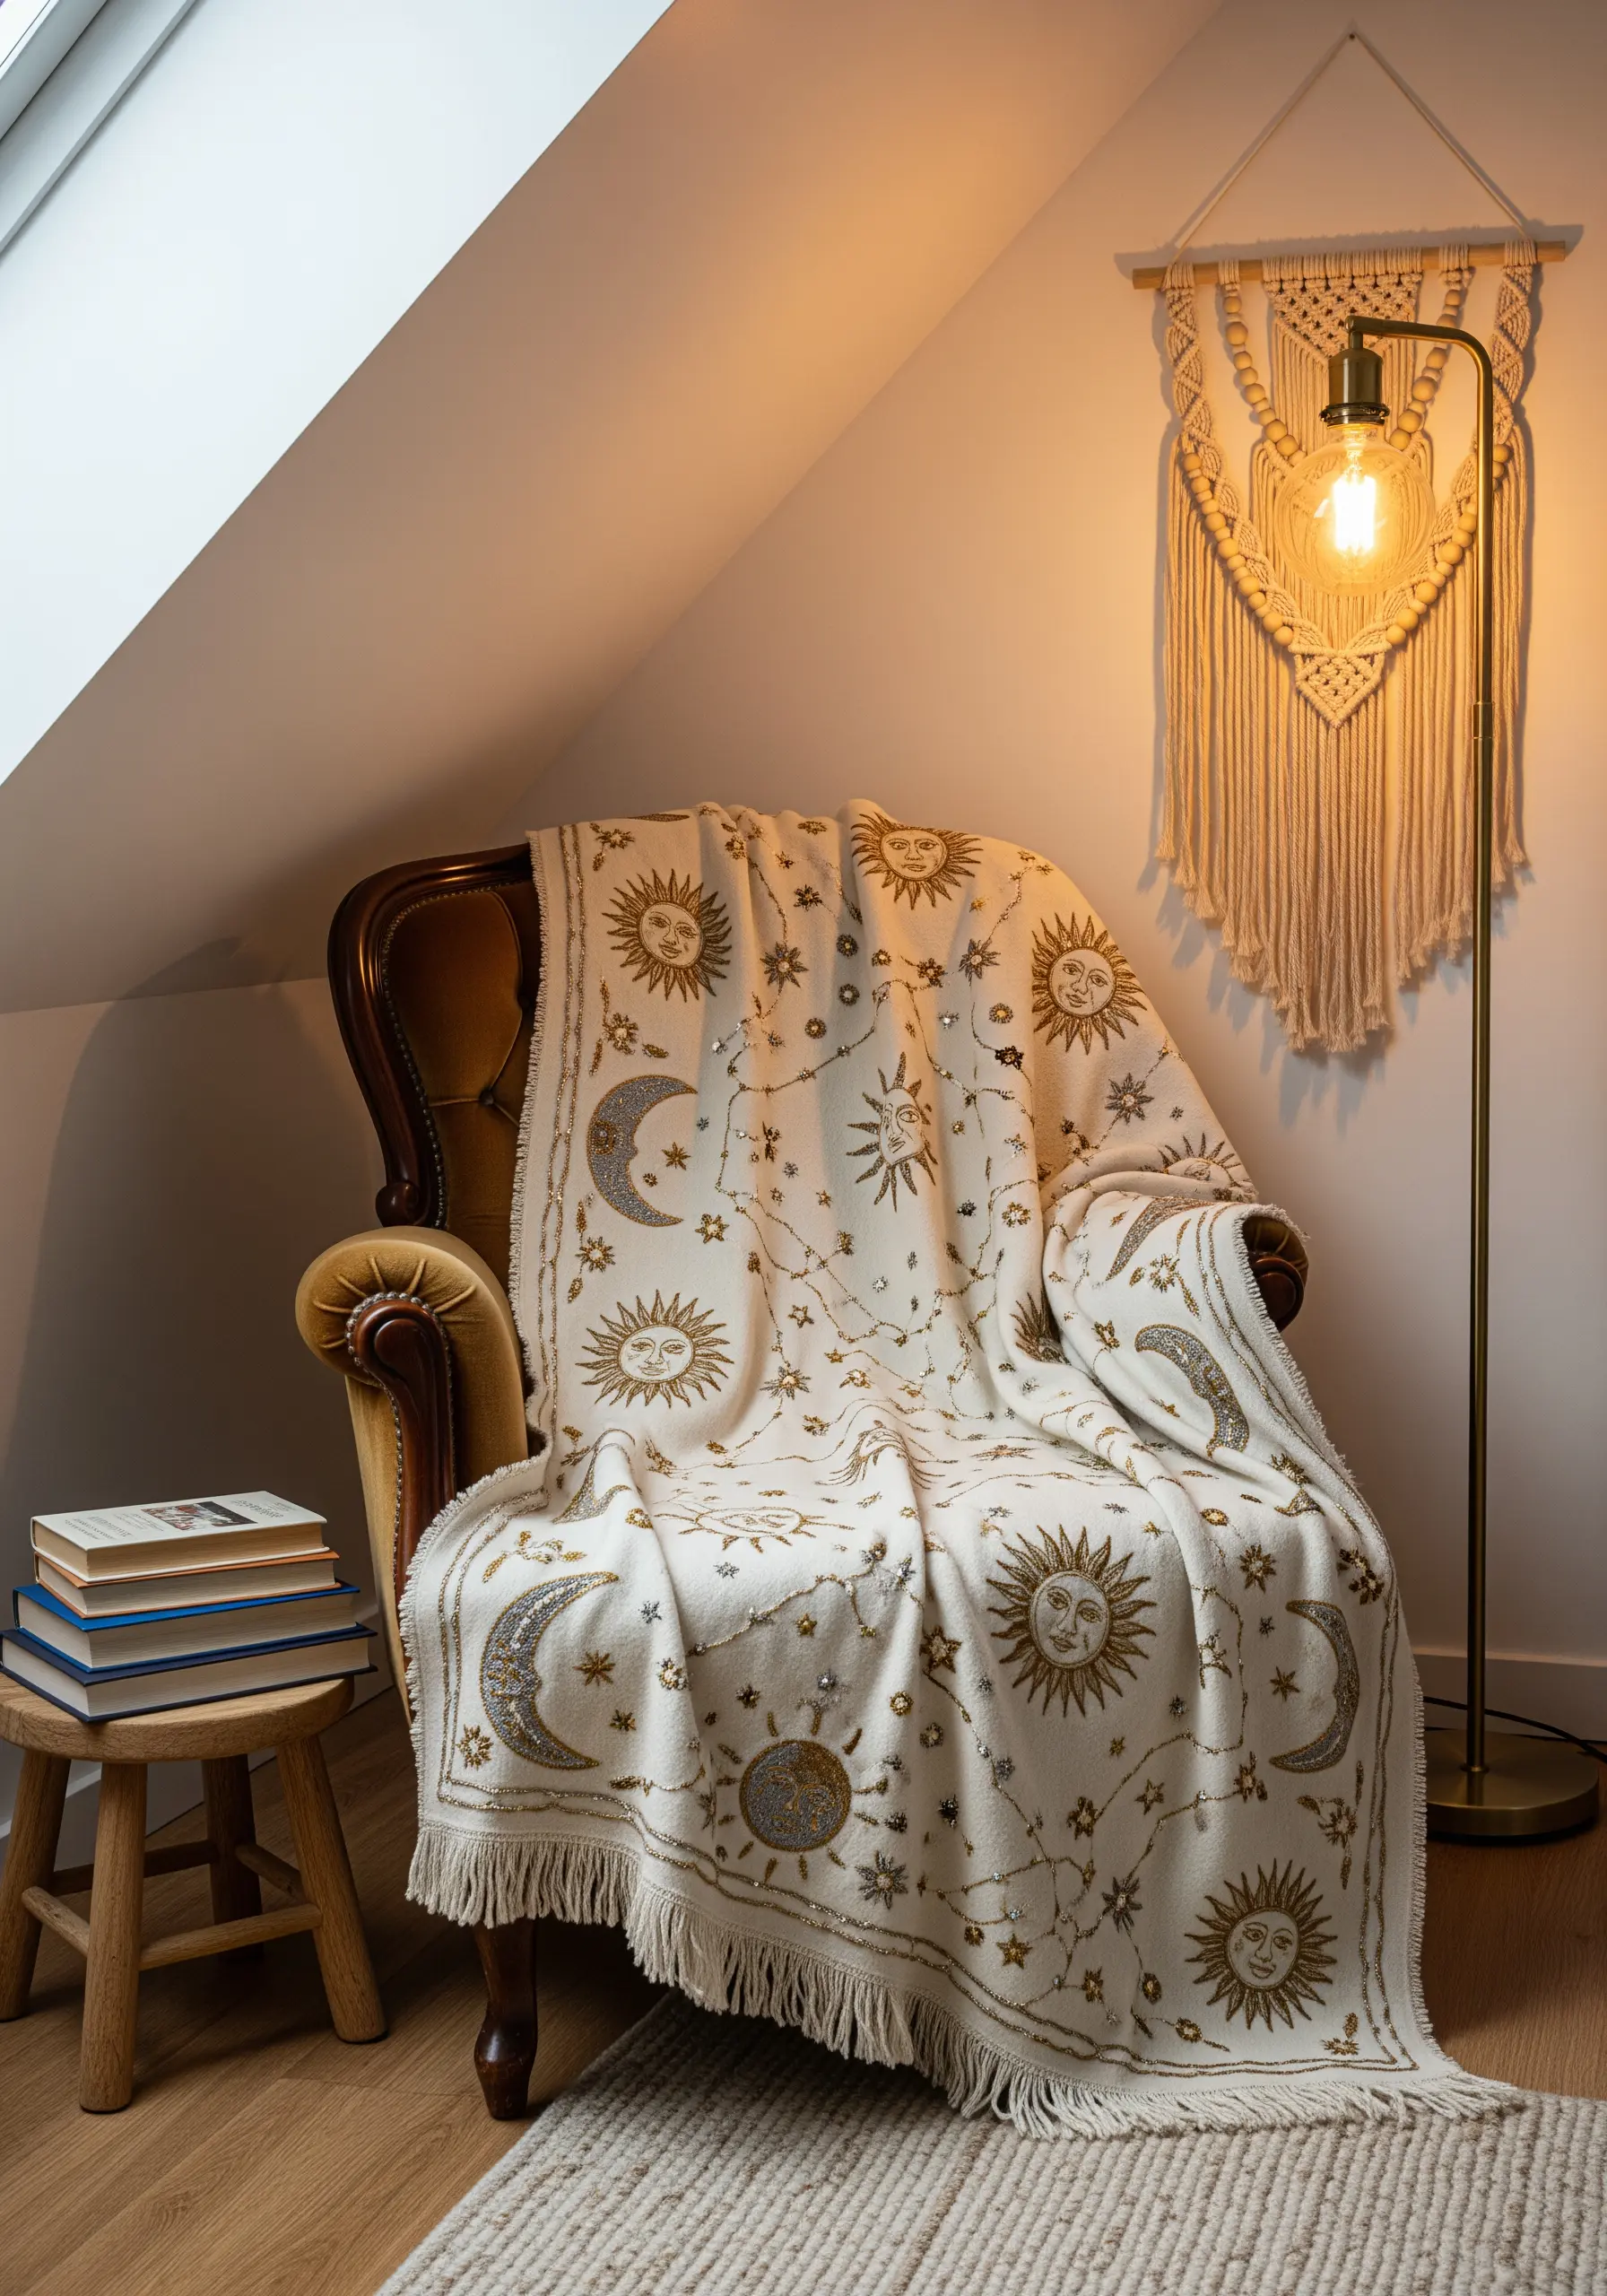
To add a touch of magic to a simple blanket, scatter celestial motifs across the surface.
Use a combination of metallic thread for shine and matte cotton floss for contrast—this keeps the design from looking flat.
Instead of struggling with metallic thread, try couching it: lay the metallic thread on the surface and tack it down with a finer, stronger thread.
For the stars, use a mix of single straight stitches, tiny seed beads, and French knots to create a varied, twinkling effect.
These embroidered throws and blankets become heirlooms with just a few thoughtful details.
3. Curate a Cohesive Botanical Gallery Wall
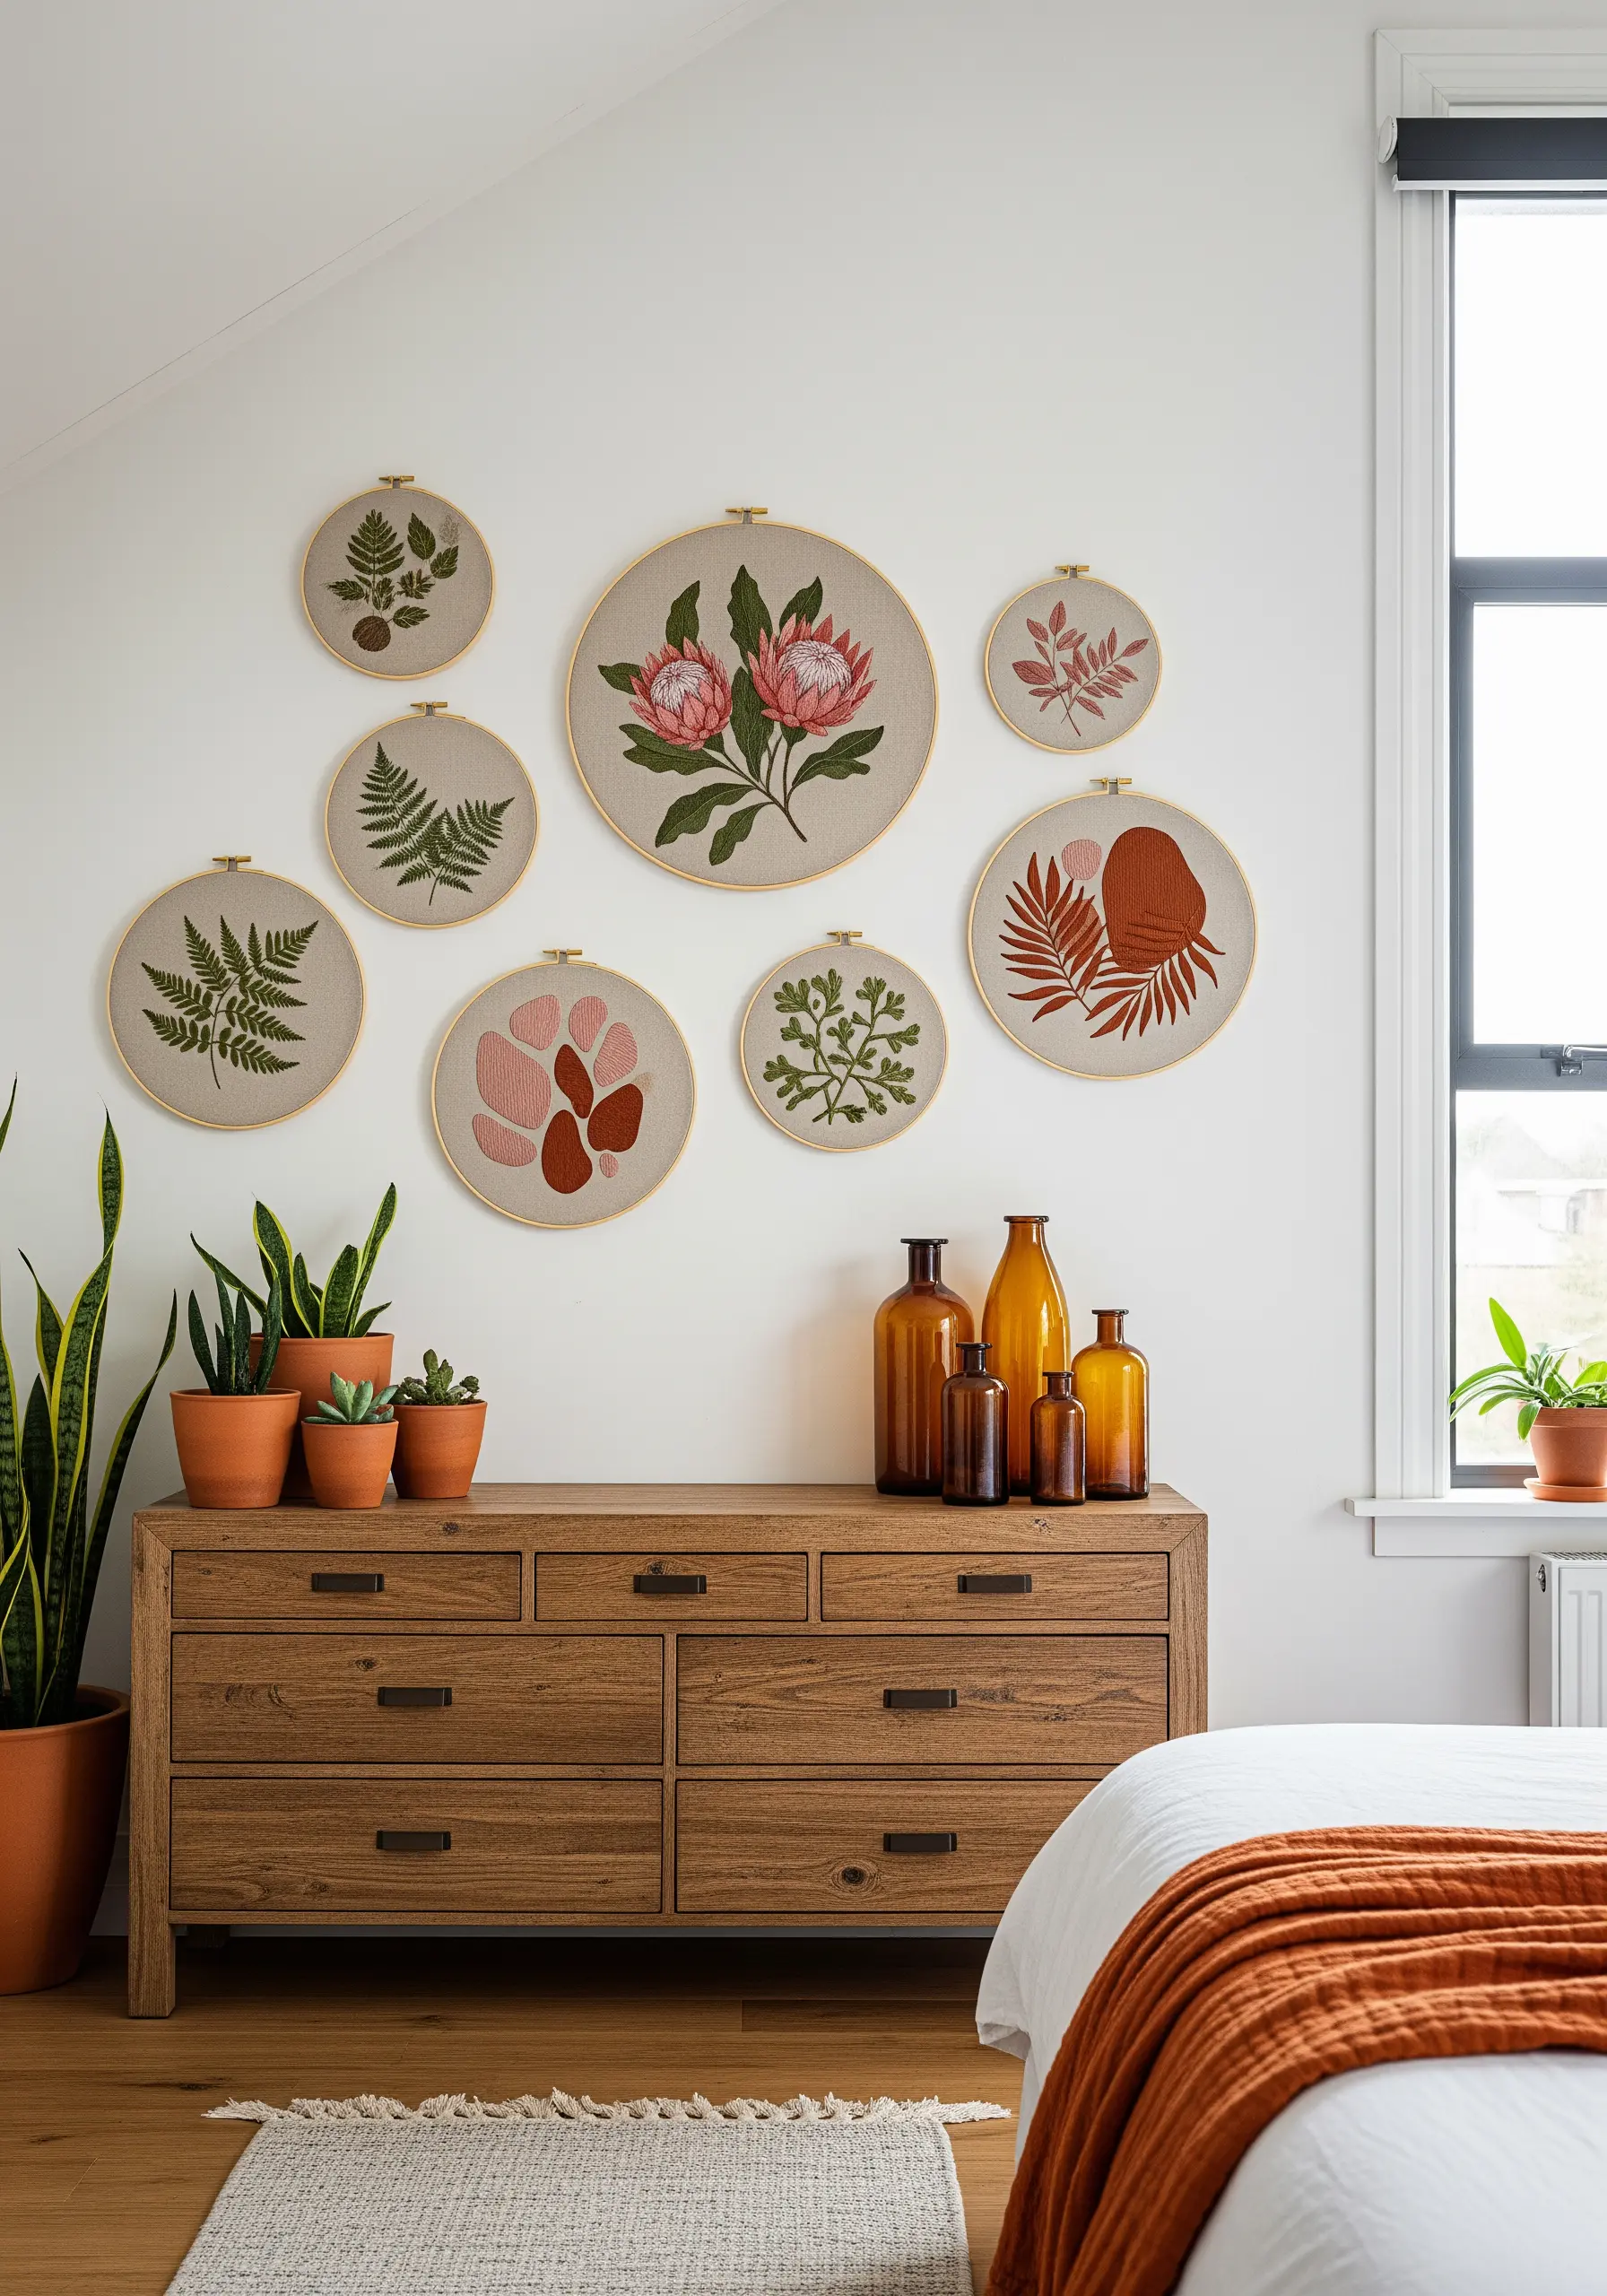
To ensure your collection of hoops looks like a deliberate gallery wall, establish a set of visual rules before you begin.
Select a unified color palette and use it across all the pieces, even if the botanical subjects differ. This is the single most important step for cohesion.
Maintain consistency in your materials: use the same type of fabric and hoop finish (e.g., all natural bamboo) for every piece.
Vary the scale and composition within the hoops—some close-ups, some full stems—to create visual interest while the colors and materials tie everything together.
Arranging framed embroidery pieces this way creates more impact than a single hoop alone.
4. Stitch a Panoramic Desertscape Pillow

Use stitch direction and texture to build depth in a landscape scene.
For the mountains, employ a long-and-short stitch to blend shades of blue and terra cotta, creating soft gradients that suggest distance.
Define the cacti with a vertical satin stitch to give them a solid, foreground presence, outlining them in a darker shade for crispness.
The couched yarn border not only frames the design but also adds a wonderful textural element that contains the scene. These kinds of embroidery pillow ideas make a functional item feel like art.
5. Add Ethereal Botanicals to Sheer Curtains
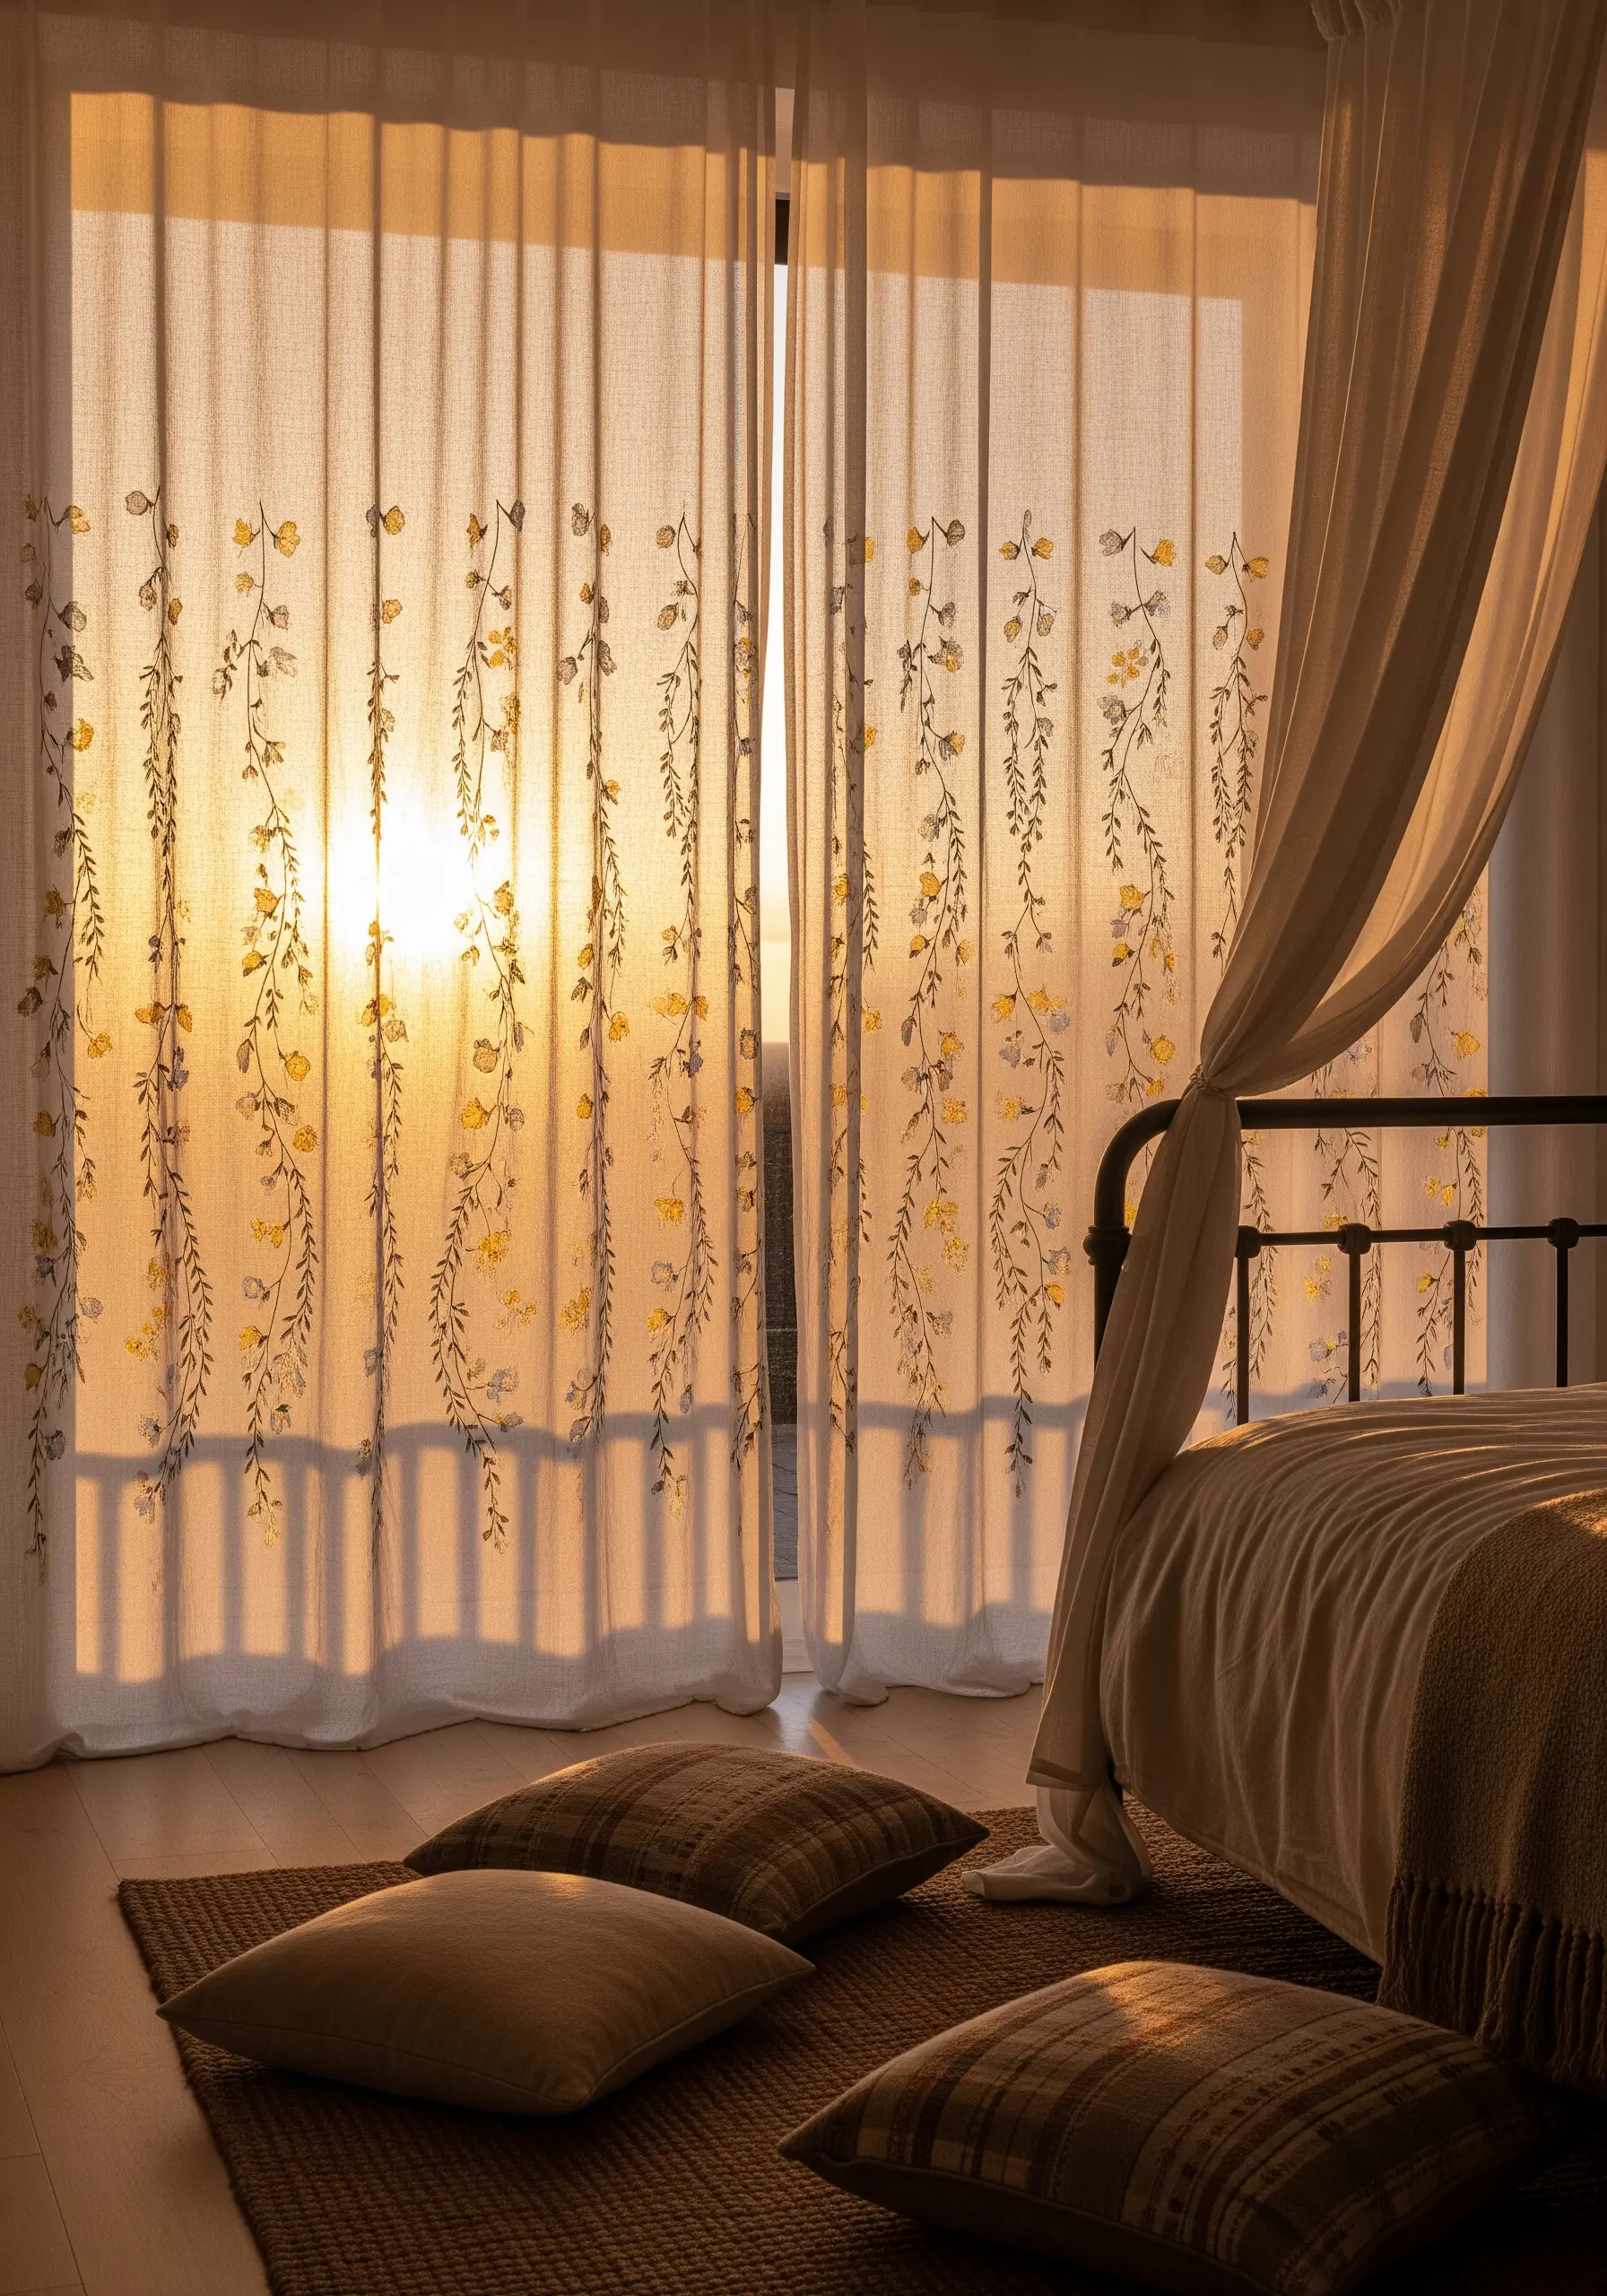
When stitching on lightweight or sheer fabric, your technique must be as delicate as the material itself.
Always use a stabilizer—a lightweight, water-soluble version is perfect here—to prevent the fabric from puckering and distorting under the tension of your stitches.
Choose simple, open stitches like stem stitch for the vines and lazy daisy stitch for the leaves. These minimal stitches won’t block the light, preserving the curtain’s airy quality.
Keep your thread weight light (2-3 strands) and your knots small and tidy, as they will be visible from the back. These handmade embroidery touches filter light beautifully.
6. Explore Abstract Shapes with Dimensional Stitches
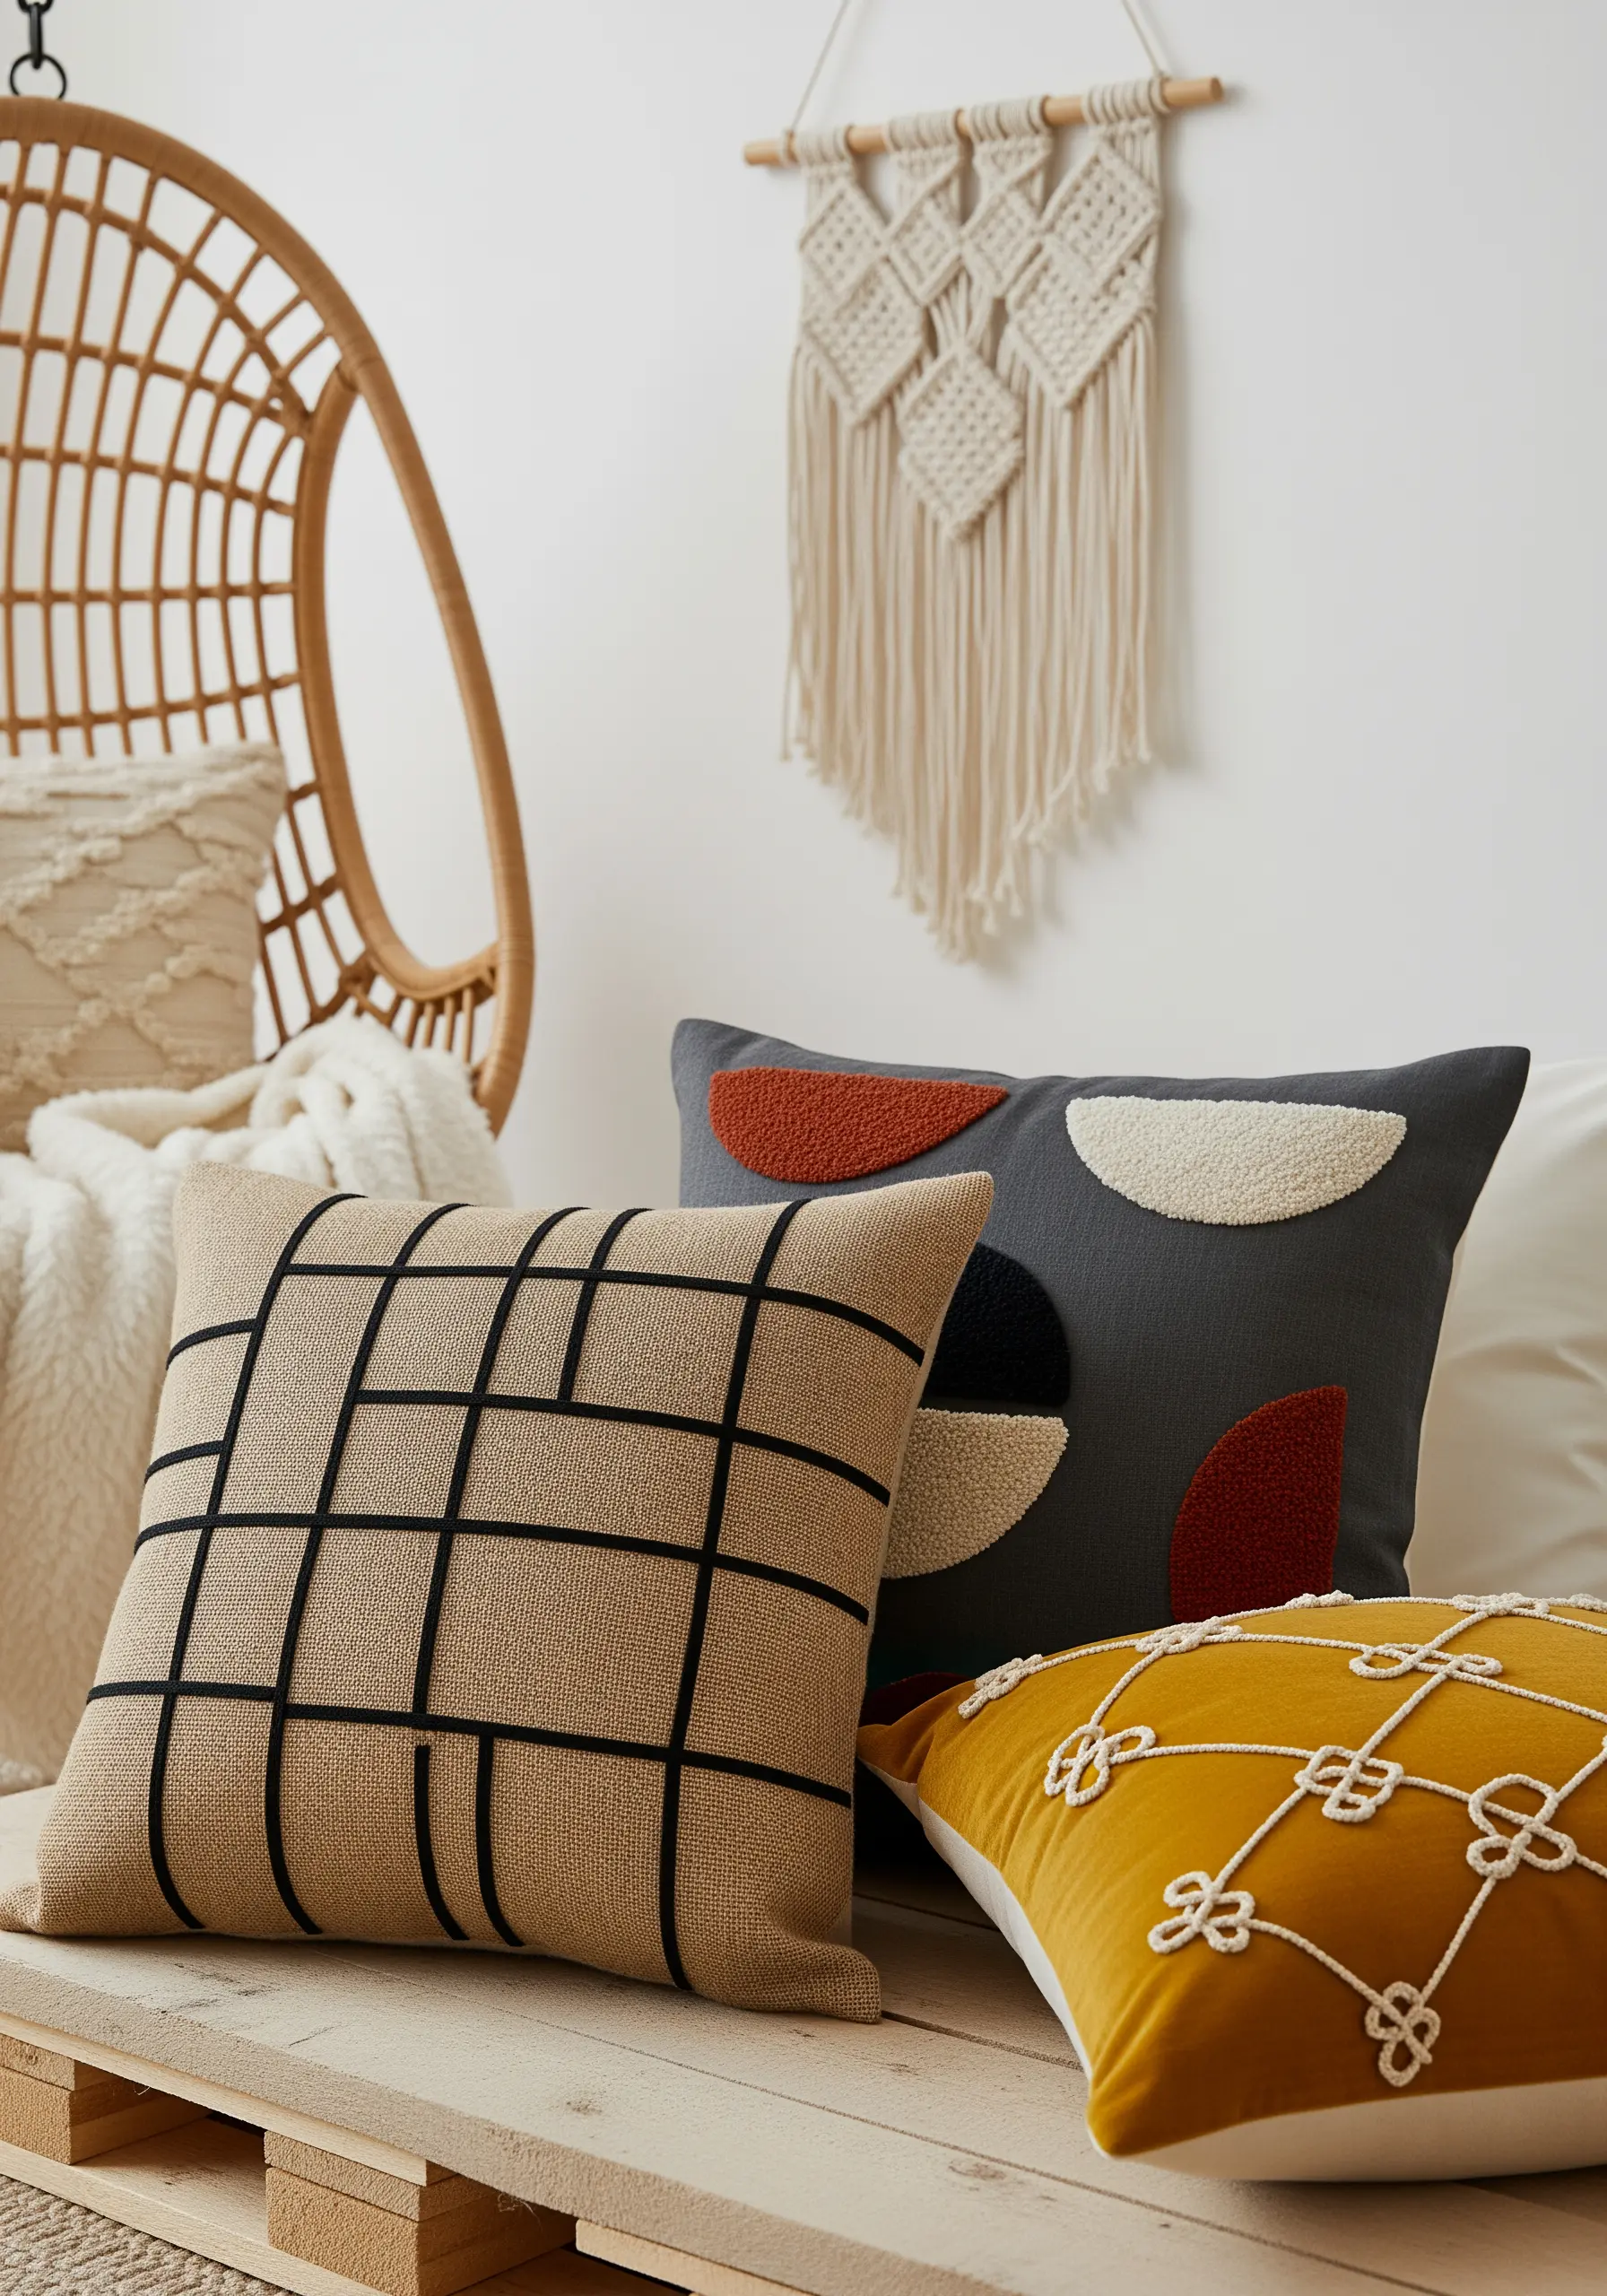
Move beyond flat color-blocking by introducing varied textures into your abstract designs.
For raised, fuzzy sections, fill shapes with tightly packed French knots or use a punch needle to create plush loops. This adds an irresistible tactile quality.
To create the bold, graphic grid, use couching: lay down a thick black yarn and tack it in place with a thinner thread. This ensures perfectly straight lines that a simple stitch can’t achieve.
This kind of abstract mixed-media embroidery thrives on the contrast between flat and raised surfaces.
7. Craft a Symbolic Meditation Cushion
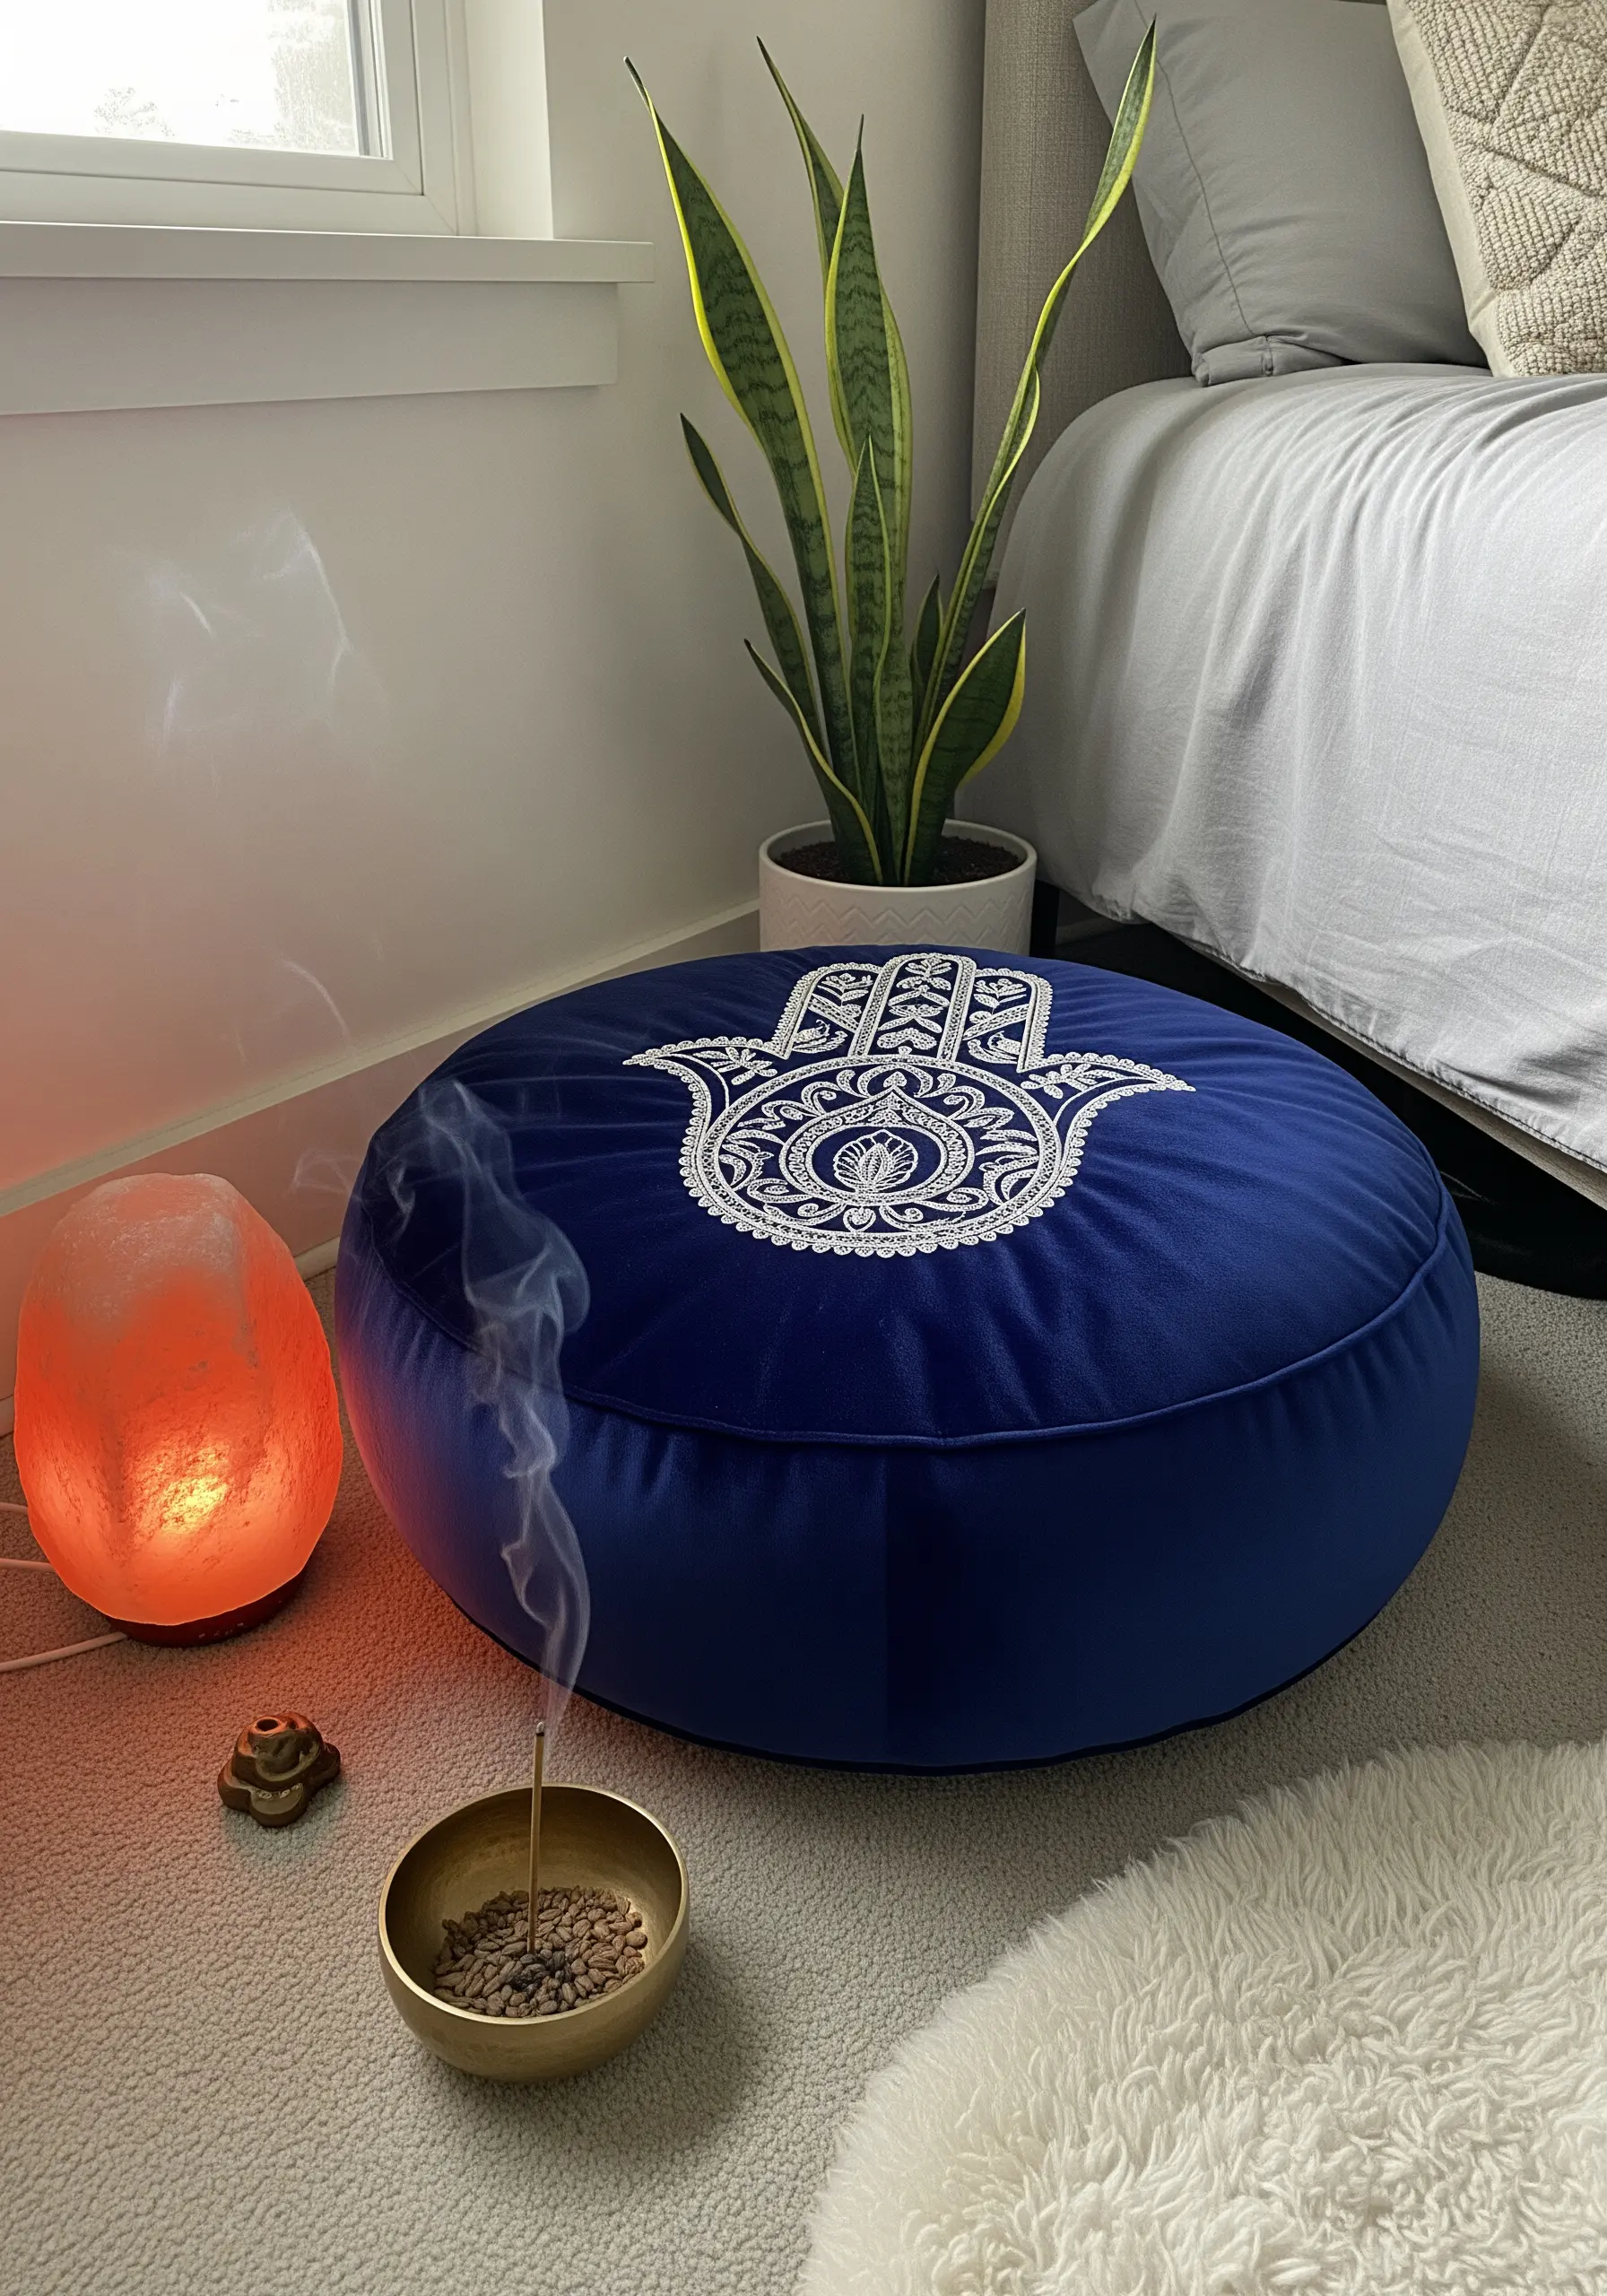
For intricate, symmetrical designs like a Hamsa hand, precision is paramount for a professional finish.
Trace your pattern onto a water-soluble stabilizer; this gives you a perfect guide that washes away, leaving no marks on your fabric.
Use a fine split stitch for all the outlines. It creates a sharper, more solid line than backstitch, which is crucial for detailed work.
When filling with satin stitch, ensure your stitches are dense, parallel, and consistent in tension to create a smooth, reflective surface that enhances the design’s power.
This is a form of mindful stitching that grounds you in the process.
8. Design a Lettered Banner with a Foliage Frame
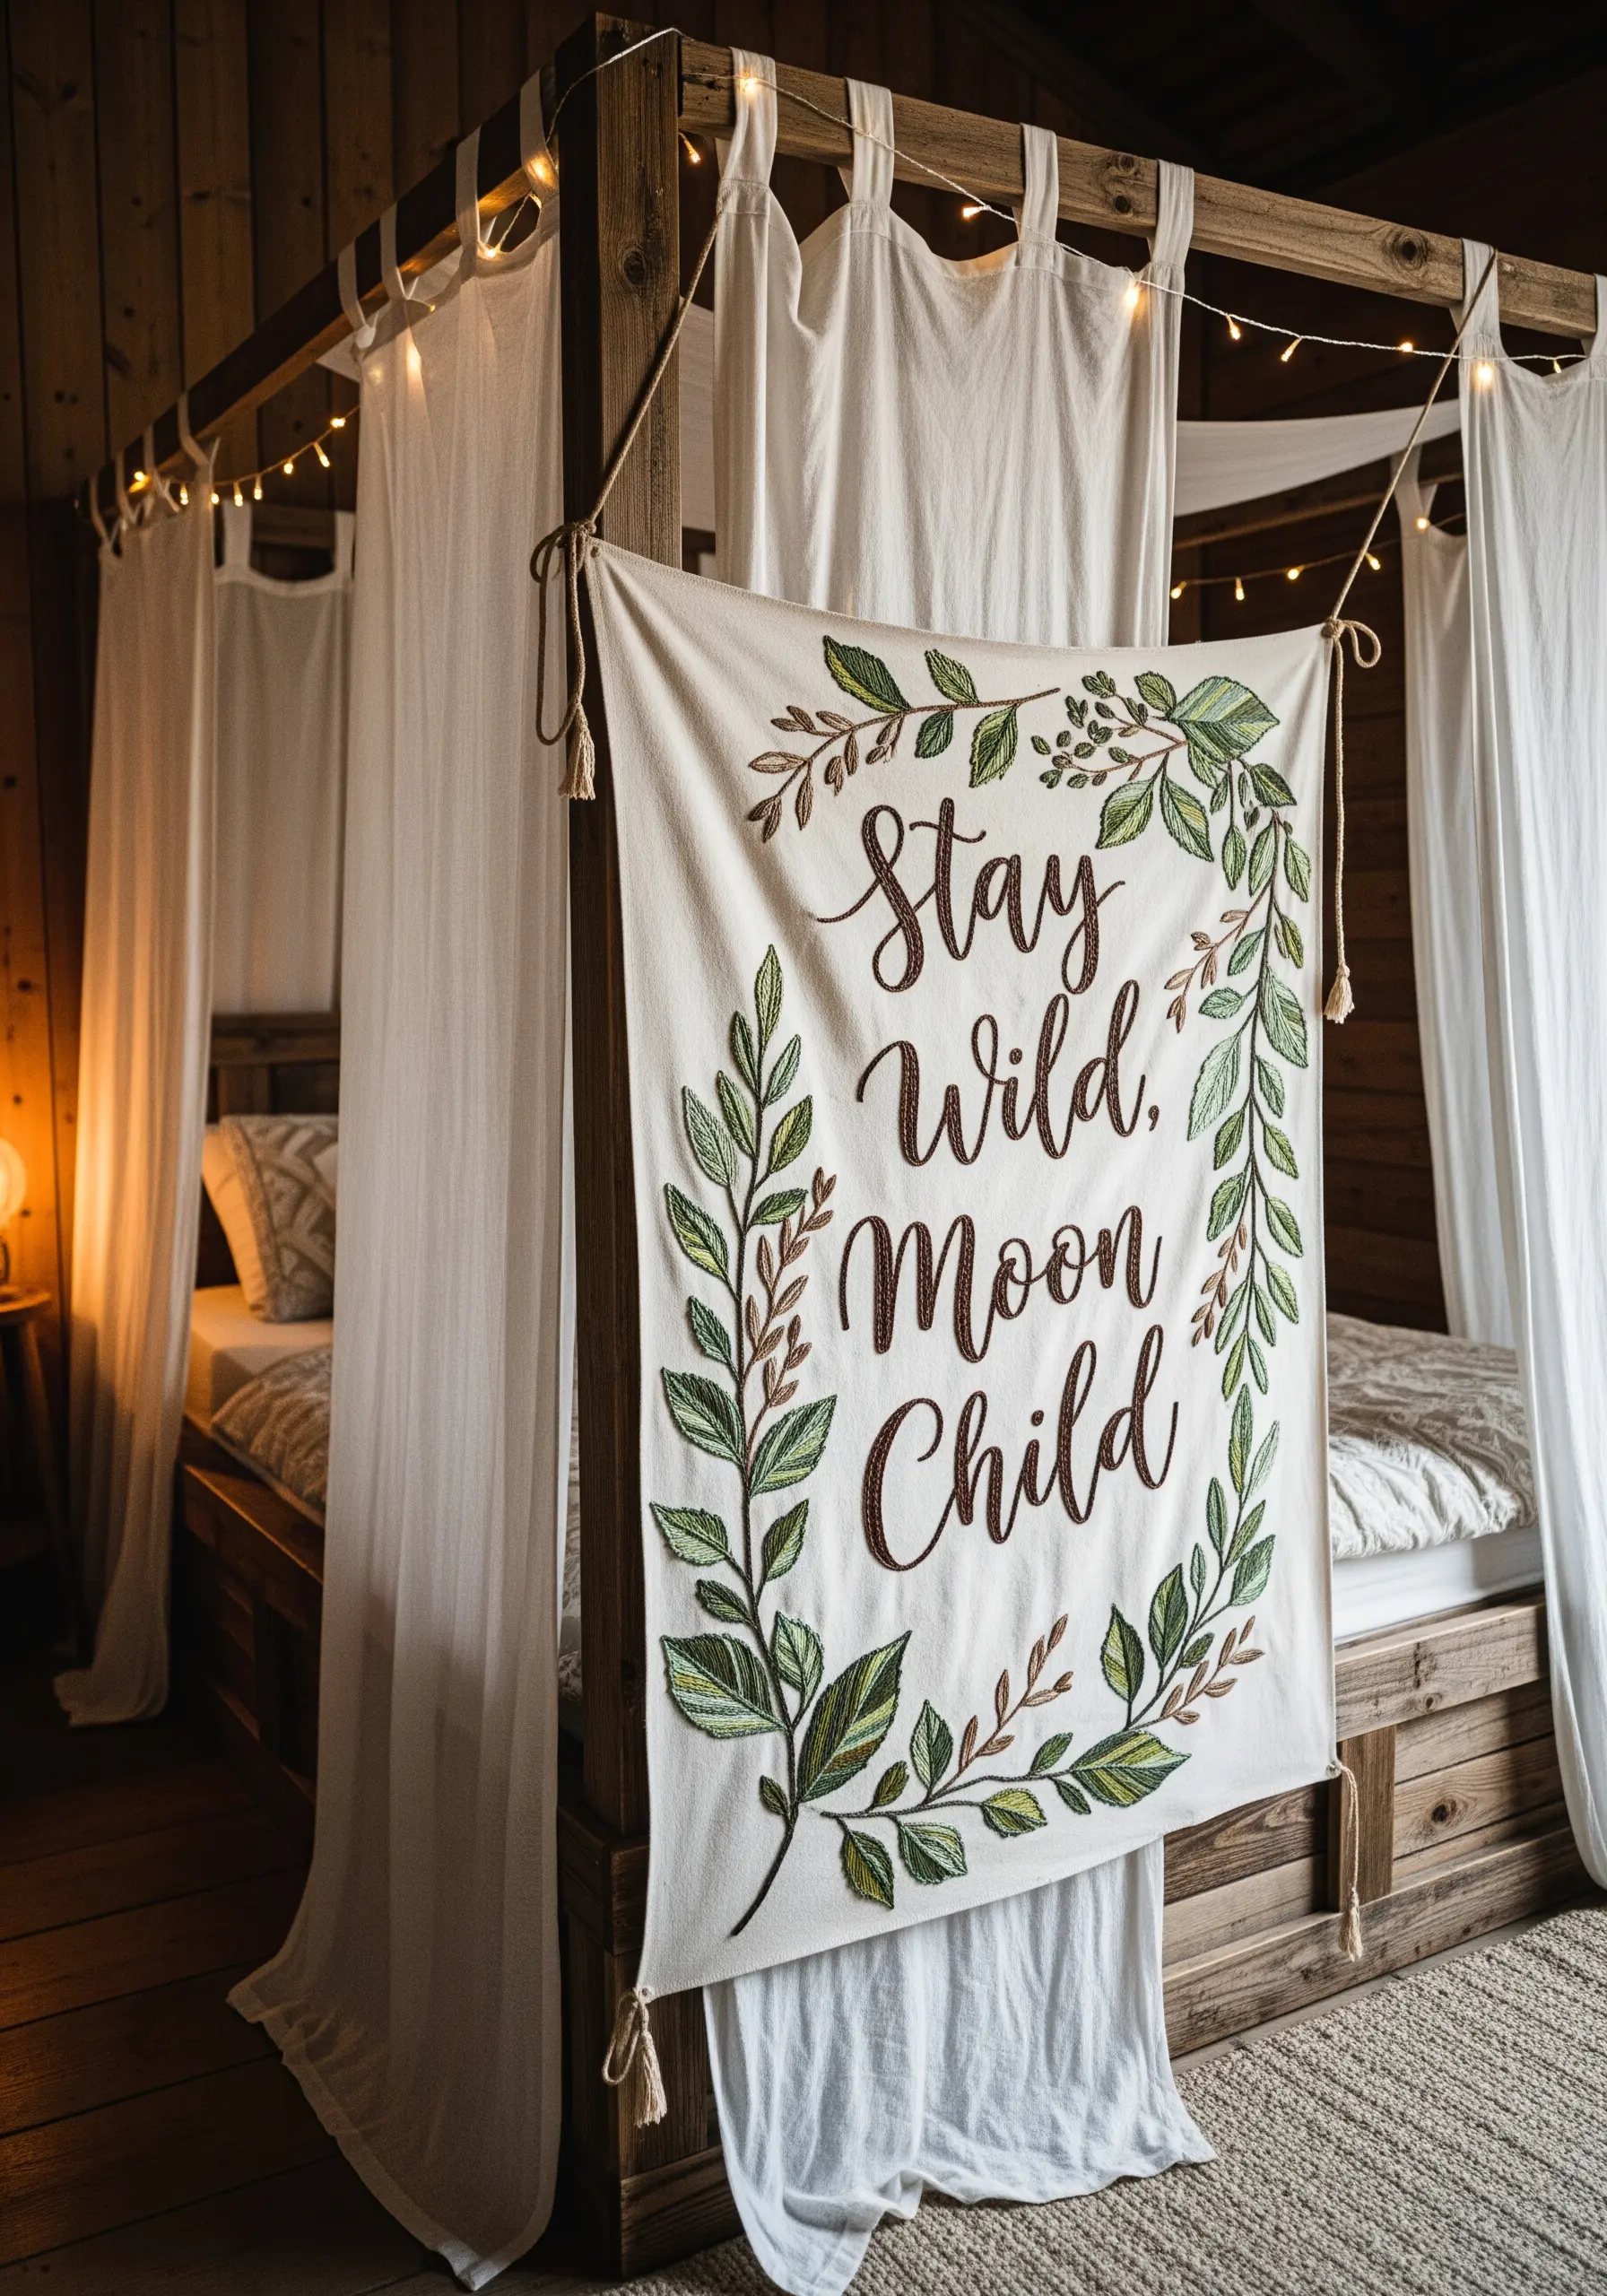
To make embroidered lettering stand out, give it dimension and frame it thoughtfully.
Stitch the letters using a padded satin stitch: first, create a base of small underlying stitches, then cover them with your final satin stitch. This raises the lettering from the surface.
For the leafy border, use fishbone stitch. It creates a beautiful, built-in central vein and allows you to angle the stitches for a natural, tapered leaf shape.
Using several shades of green adds depth and realism to the foliage, making the lettering feel nested within the design. You can adapt even mother child line art motifs with this framing technique.
9. Illuminate Your Space with a Stitched Lampshade

Embroidering a lampshade requires a minimalist approach to let the light be the star.
Choose a simple, open design, as dense stitching will create distracting dark spots when the lamp is on. Backstitch or running stitch works beautifully.
Use a sharp, strong needle (like a quilting needle) to pierce the stiff lampshade material without bending.
Secure your threads on the inside with tiny, flat knots, and trim the tails very short. This prevents them from casting unwanted shadows. These minimal festive motifs are perfect for this kind of project.
10. Define Edges with a Raised Stem Stitch Outline
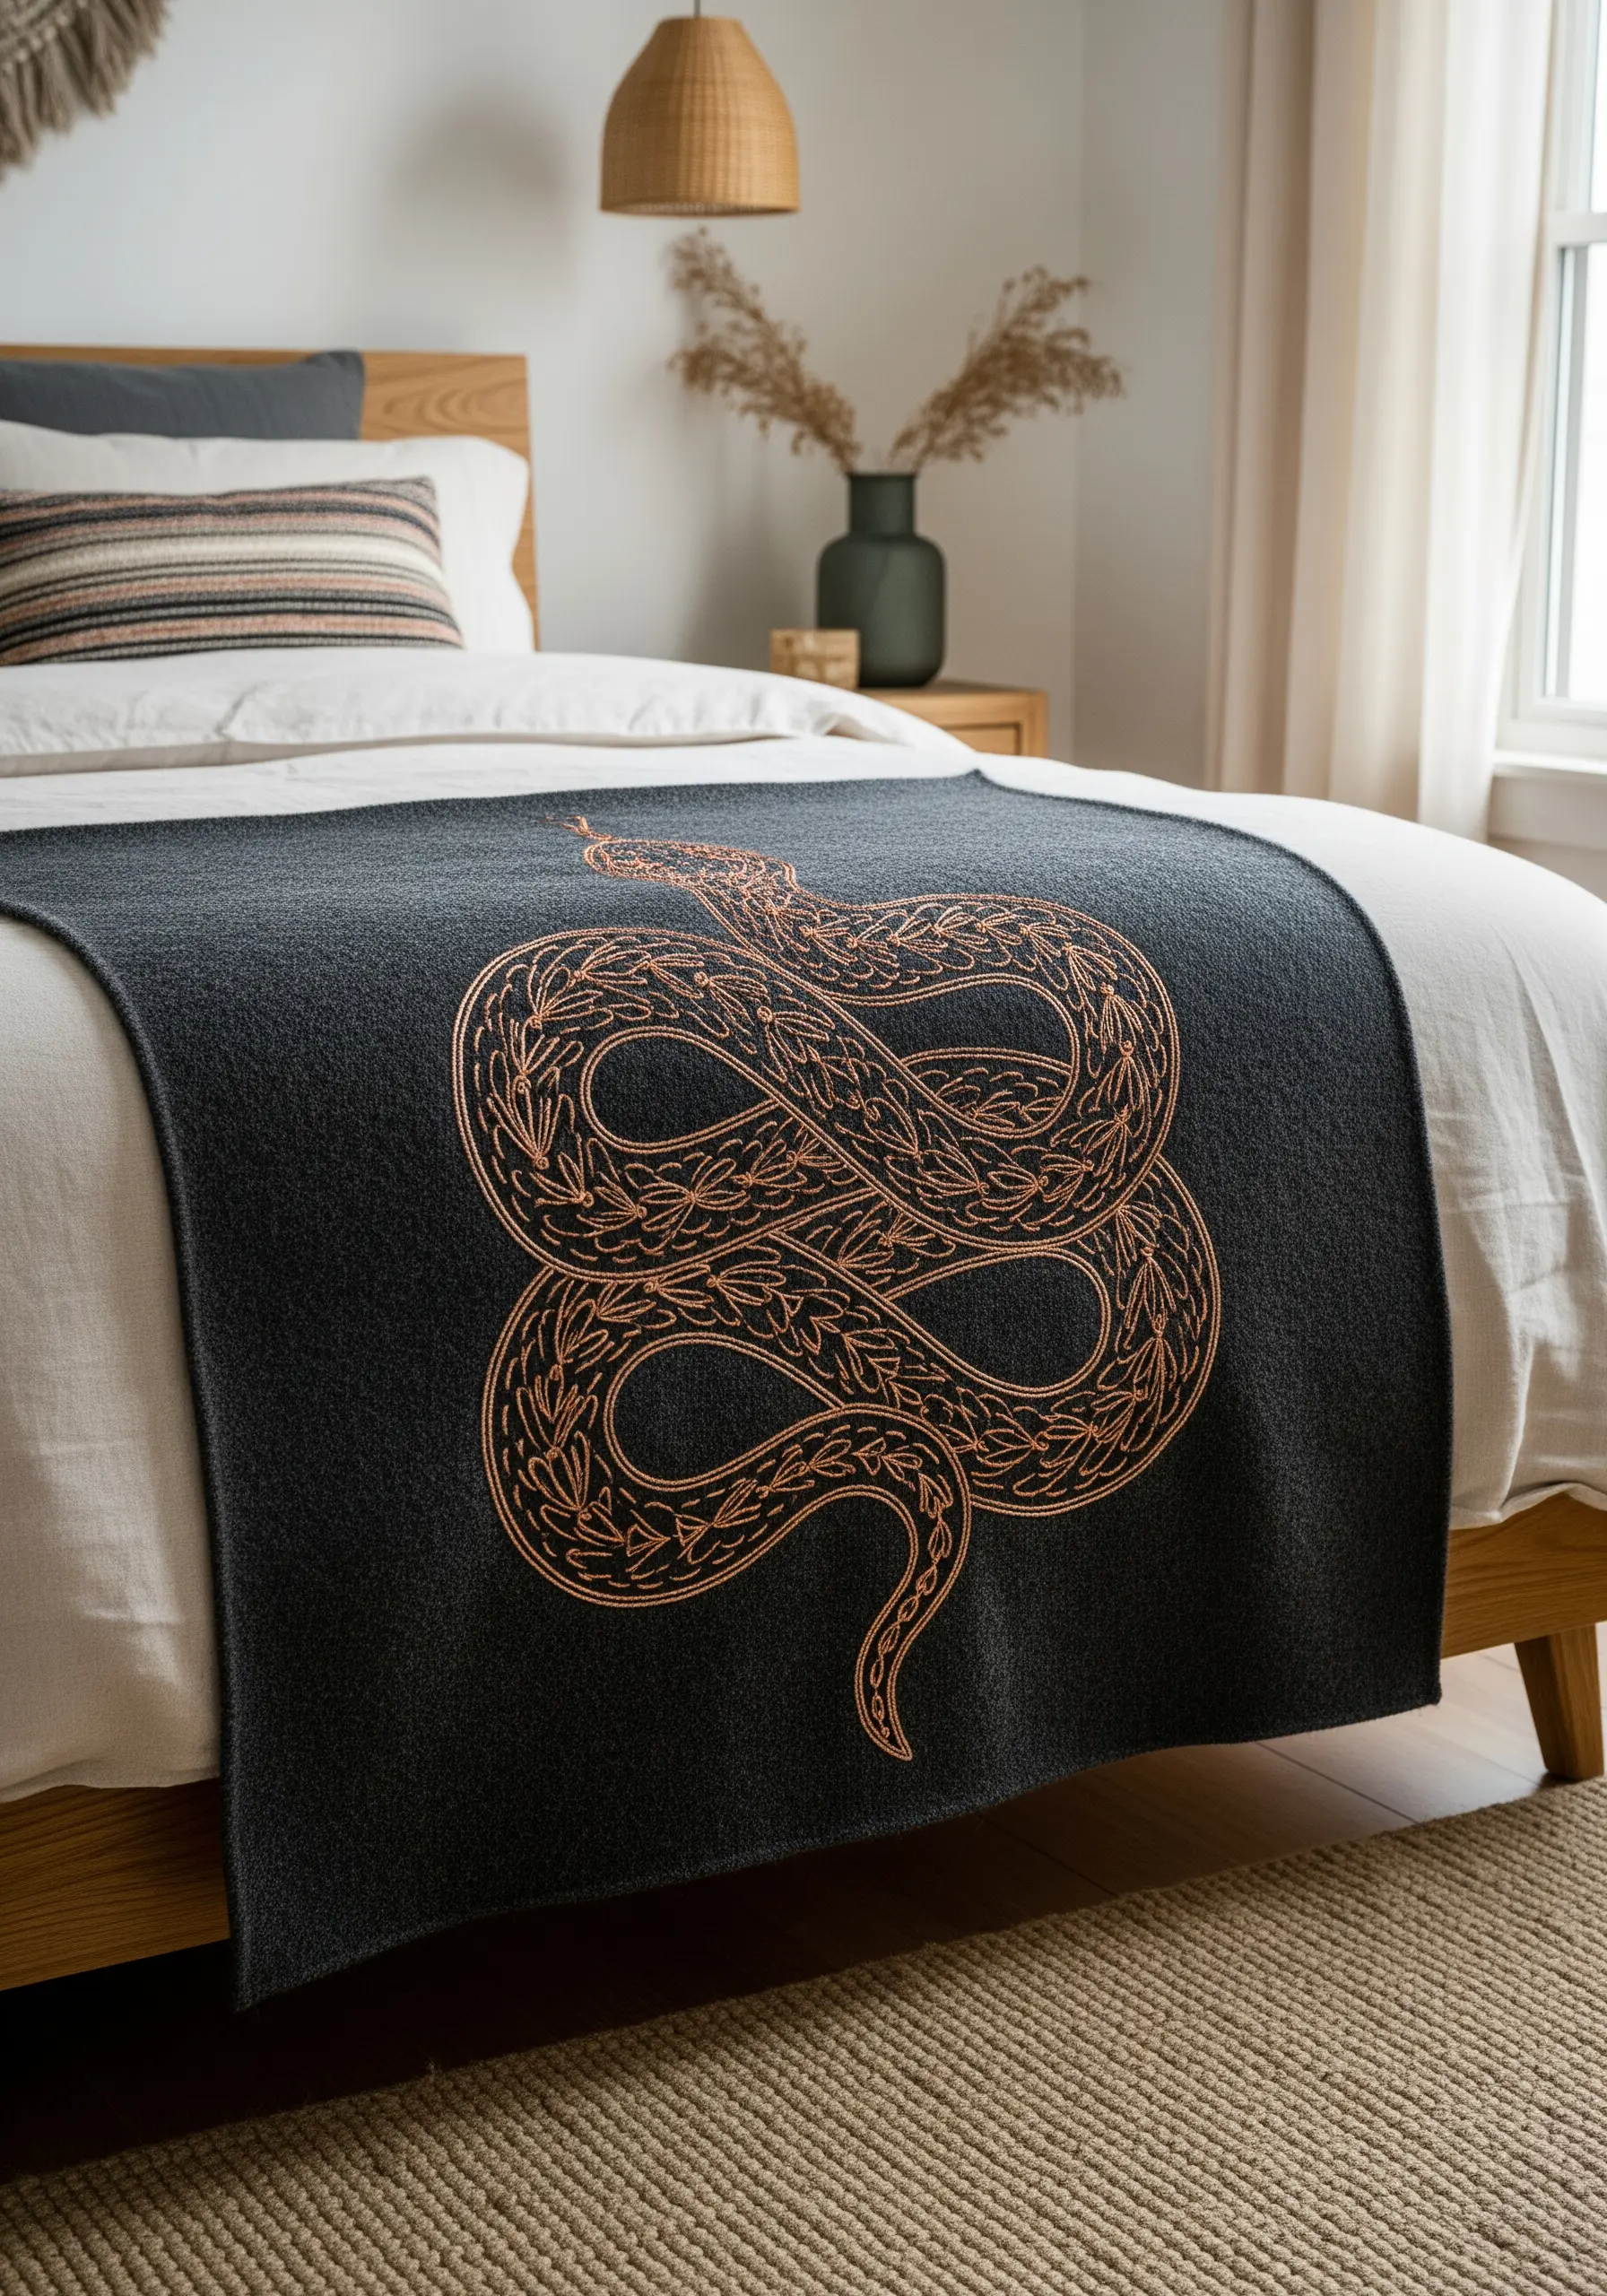
For a design that relies entirely on linework, make those lines as bold and dimensional as possible.
Instead of a simple backstitch, use a whipped backstitch or a raised stem stitch. Both techniques wrap the initial stitch, creating a thicker, cord-like line that stands out dramatically from the fabric.
This is especially effective when using a high-contrast thread color, like this copper on charcoal gray.
This technique elevates simple line drawings, giving them weight, texture, and a sculptural quality reminiscent of the textures you’d find on a nature walk.
11. Master Single-Line Art on Bed Linens
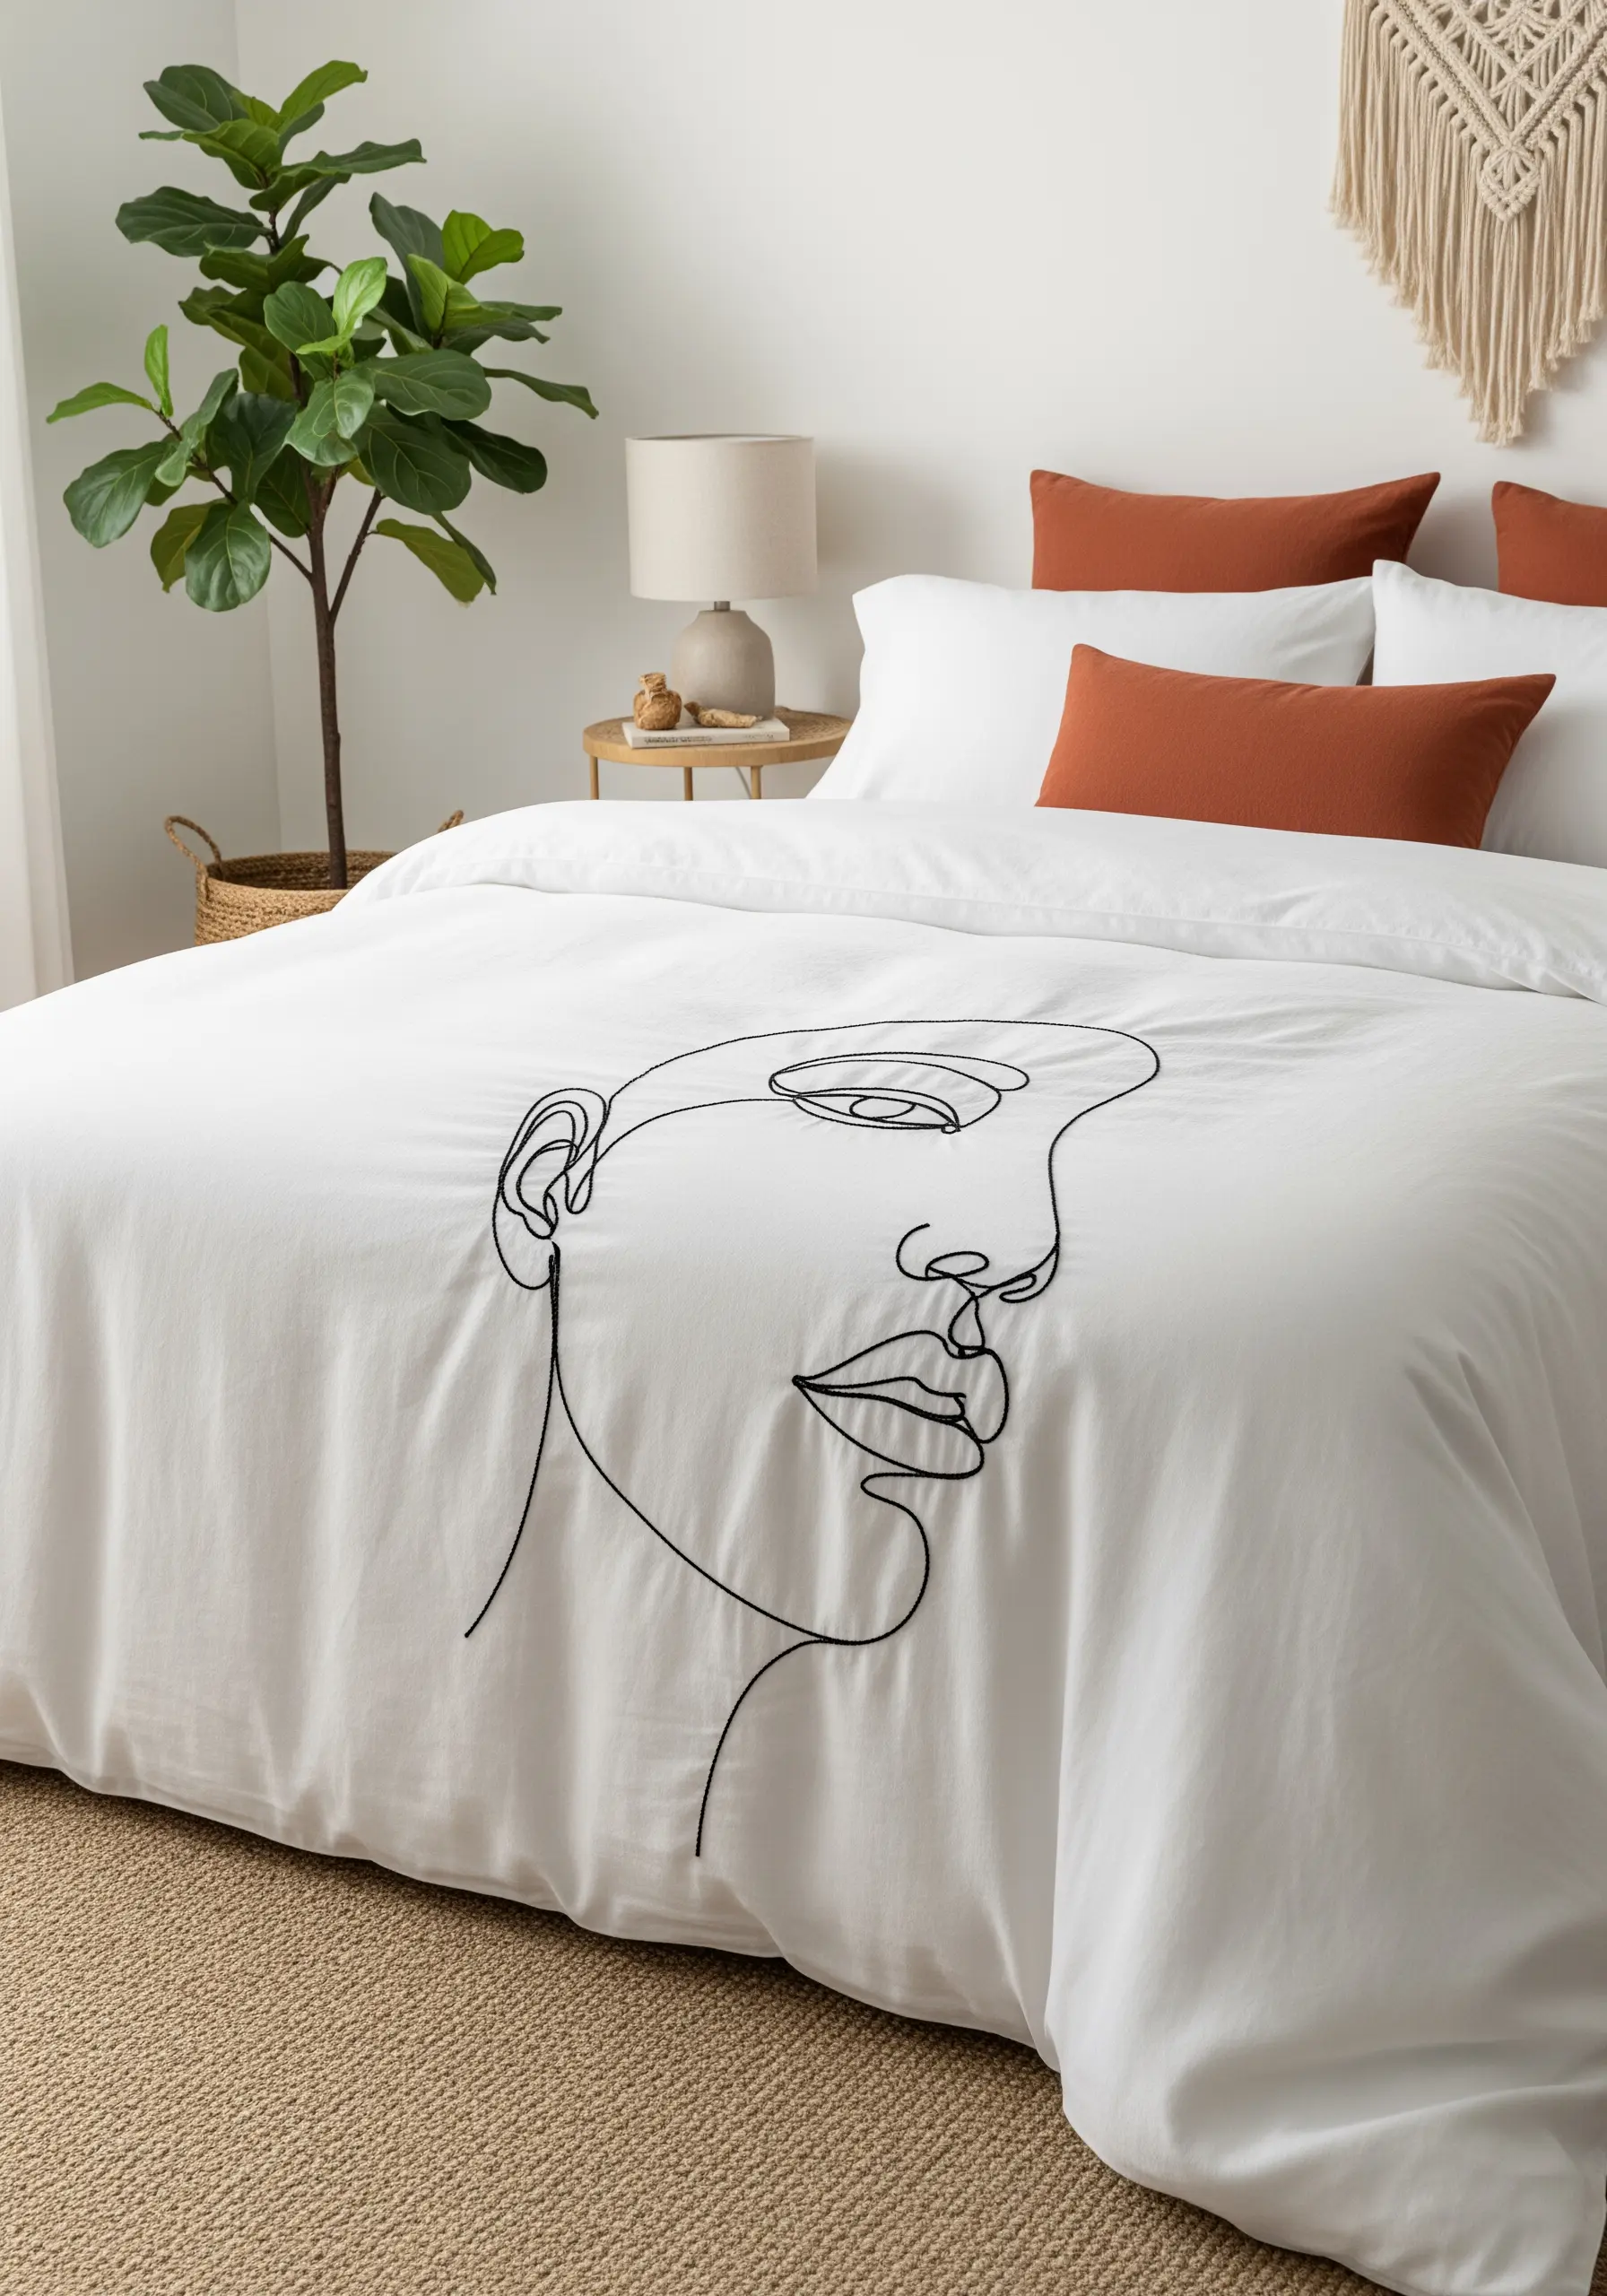
The beauty of continuous line art lies in its unbroken, fluid motion, and your stitch choice should reflect that.
Use a stem stitch for the entire piece. Its twisted, rope-like structure is perfect for creating smooth, elegant curves without the jagged appearance a backstitch can sometimes produce.
Work with all six strands of your embroidery floss to achieve a bold, graphic line that has weight and presence on a large surface like a duvet cover.
Practice the entire design on paper first to master the path of the line before you commit to fabric. Many line art embroidery patterns rely on this fluid technique.
12. Contrast Warm and Cool Tones with Celestial Pillows
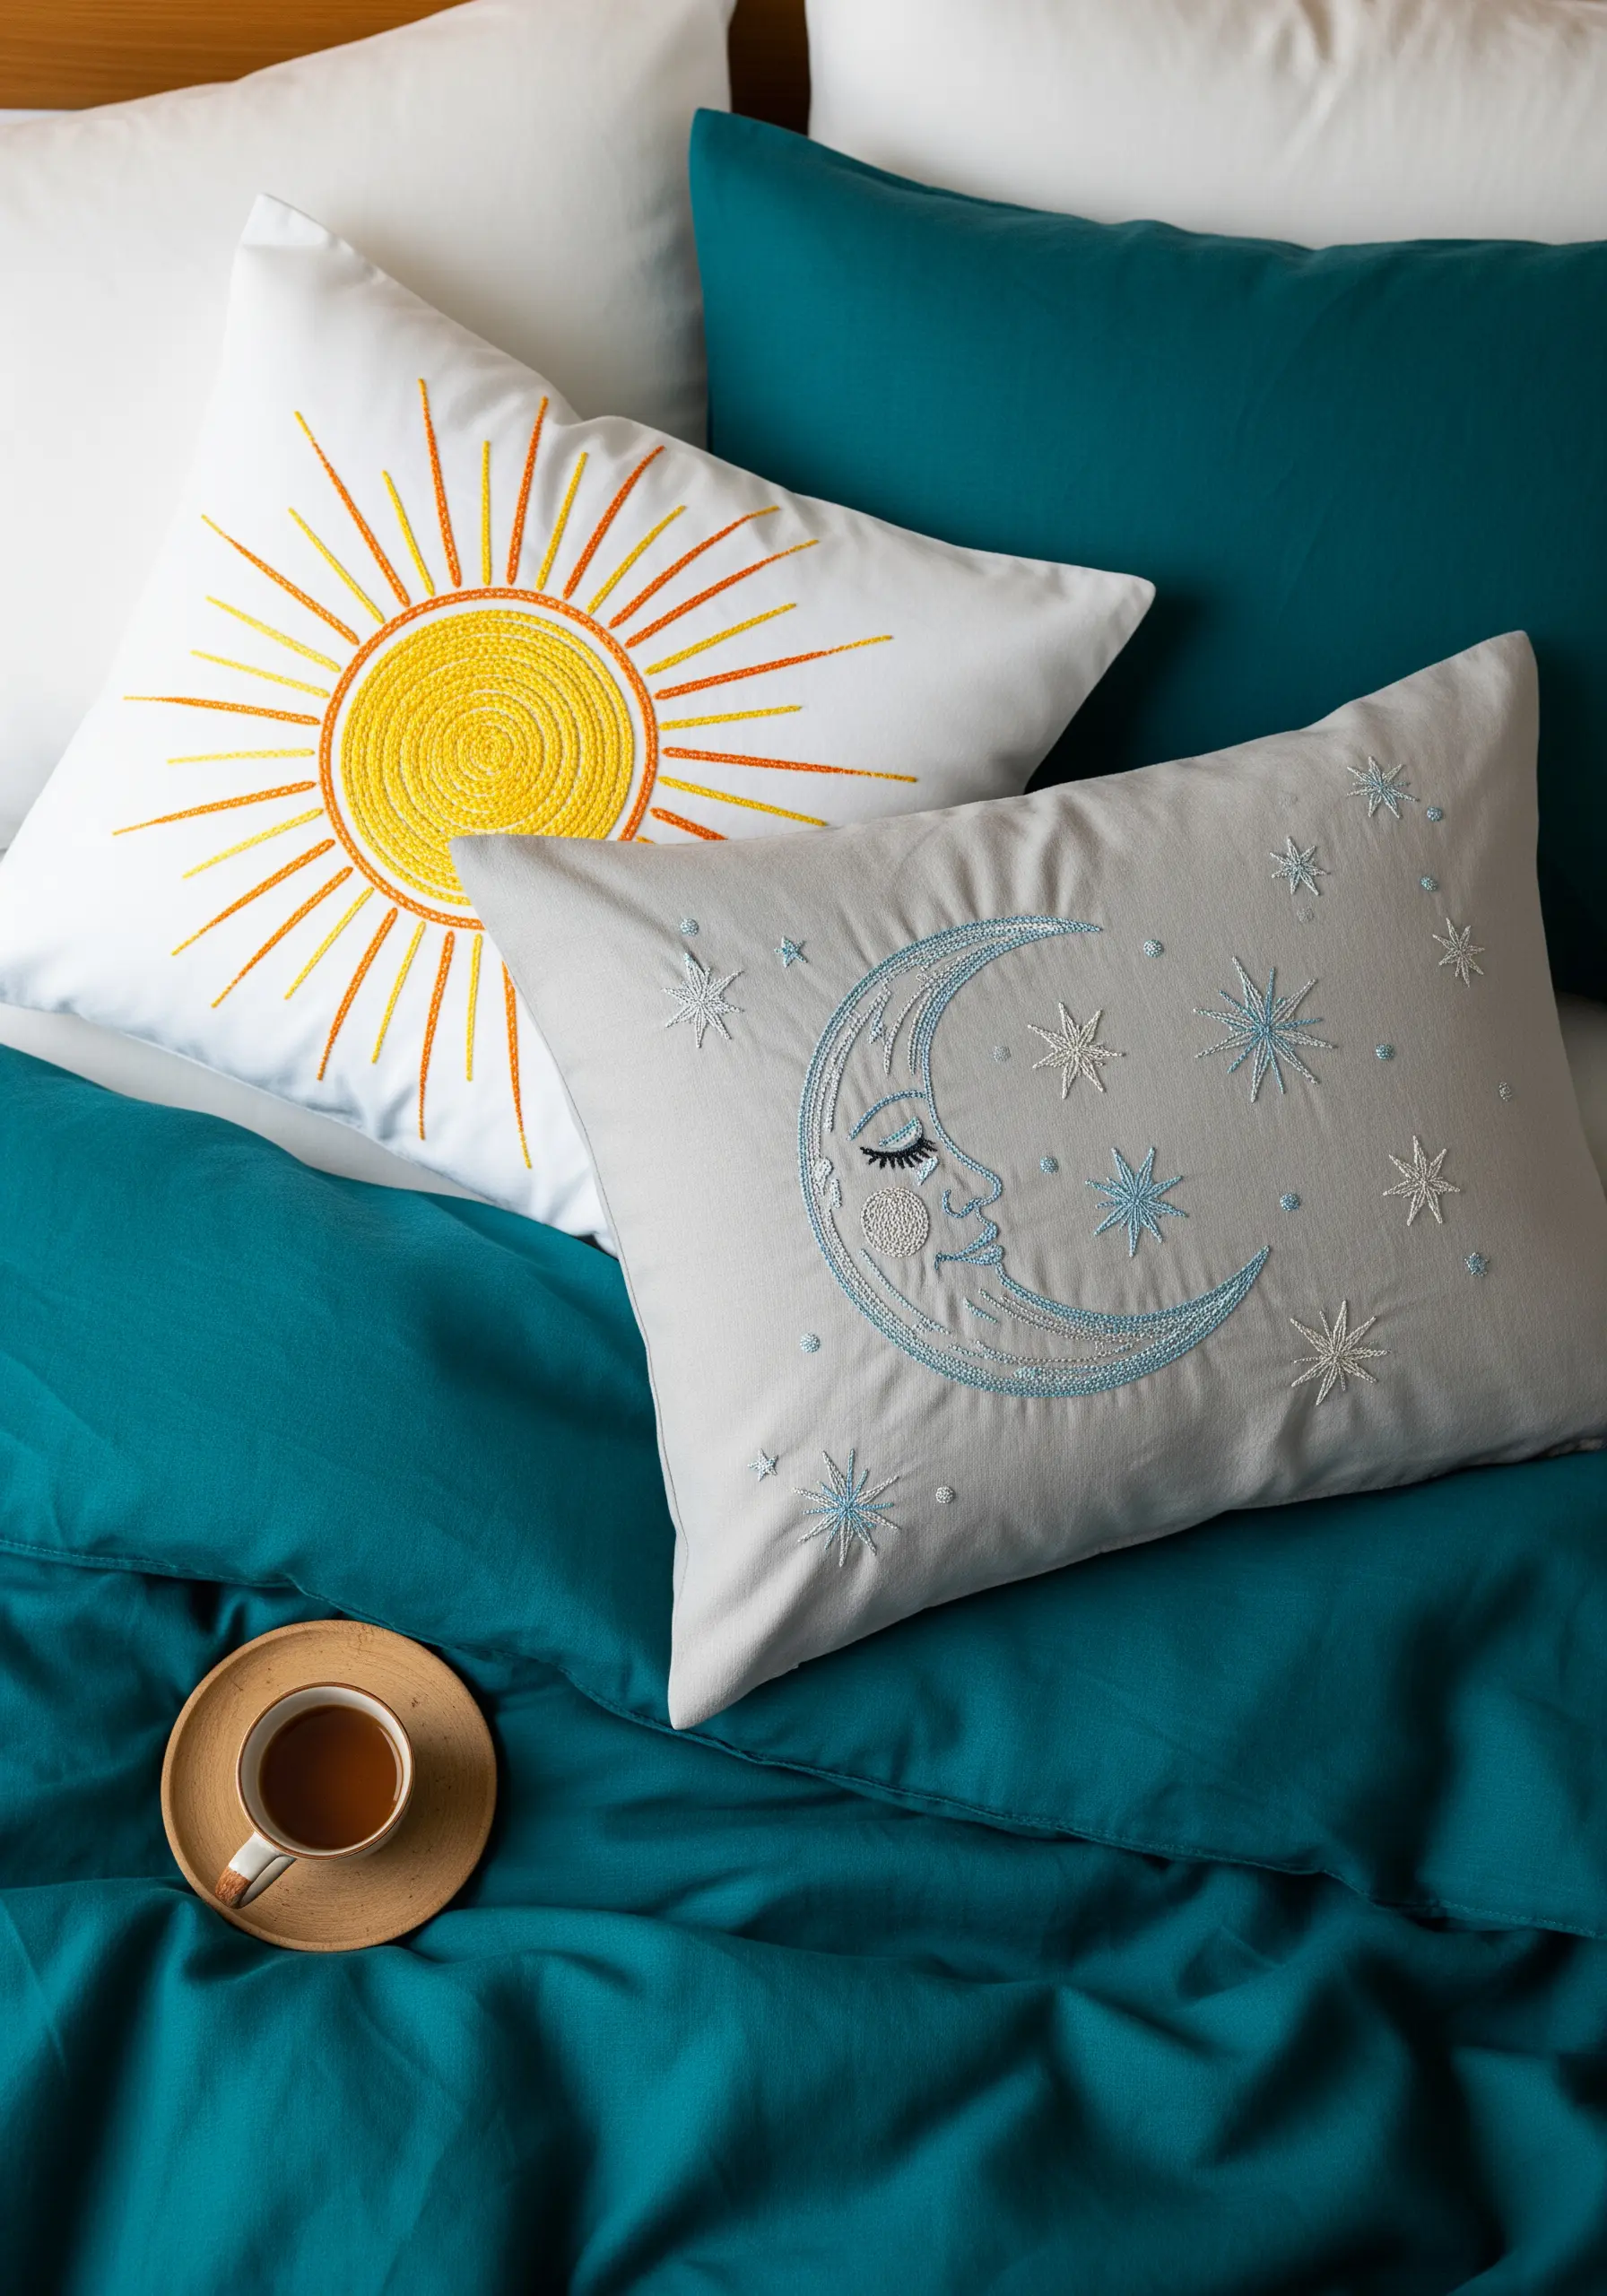
Create a dynamic pair of cushions by dedicating one to the sun’s warmth and the other to the moon’s coolness.
For the sun, fill the center with a spiral of chain stitch or radiating satin stitches in warm yellows and oranges to evoke energy.
For the moon, use cool silver, white, and pale blue threads. Fill the crescent with a smooth satin stitch and scatter tiny star stitches or French knots around it on the background fabric.
Using different fill stitches for each motif adds another layer of contrast beyond just color.
13. Turn a Room Divider into a Botanical Statement

For large-scale botanicals, the key to realism is seamless color blending.
Use long-and-short stitch to fill the leaves. This technique allows you to blend multiple shades of green without creating harsh lines, resulting in a soft, painted effect.
Before you begin filling, outline each leaf section with a split stitch. This creates a raised, sharp edge that contains your long-and-short stitches for a clean, professional finish.
This is how you can embroider realistic shadows under leaves, giving them dimension and life.
14. Map Out Complex Colorwork for a Vibrant Moth
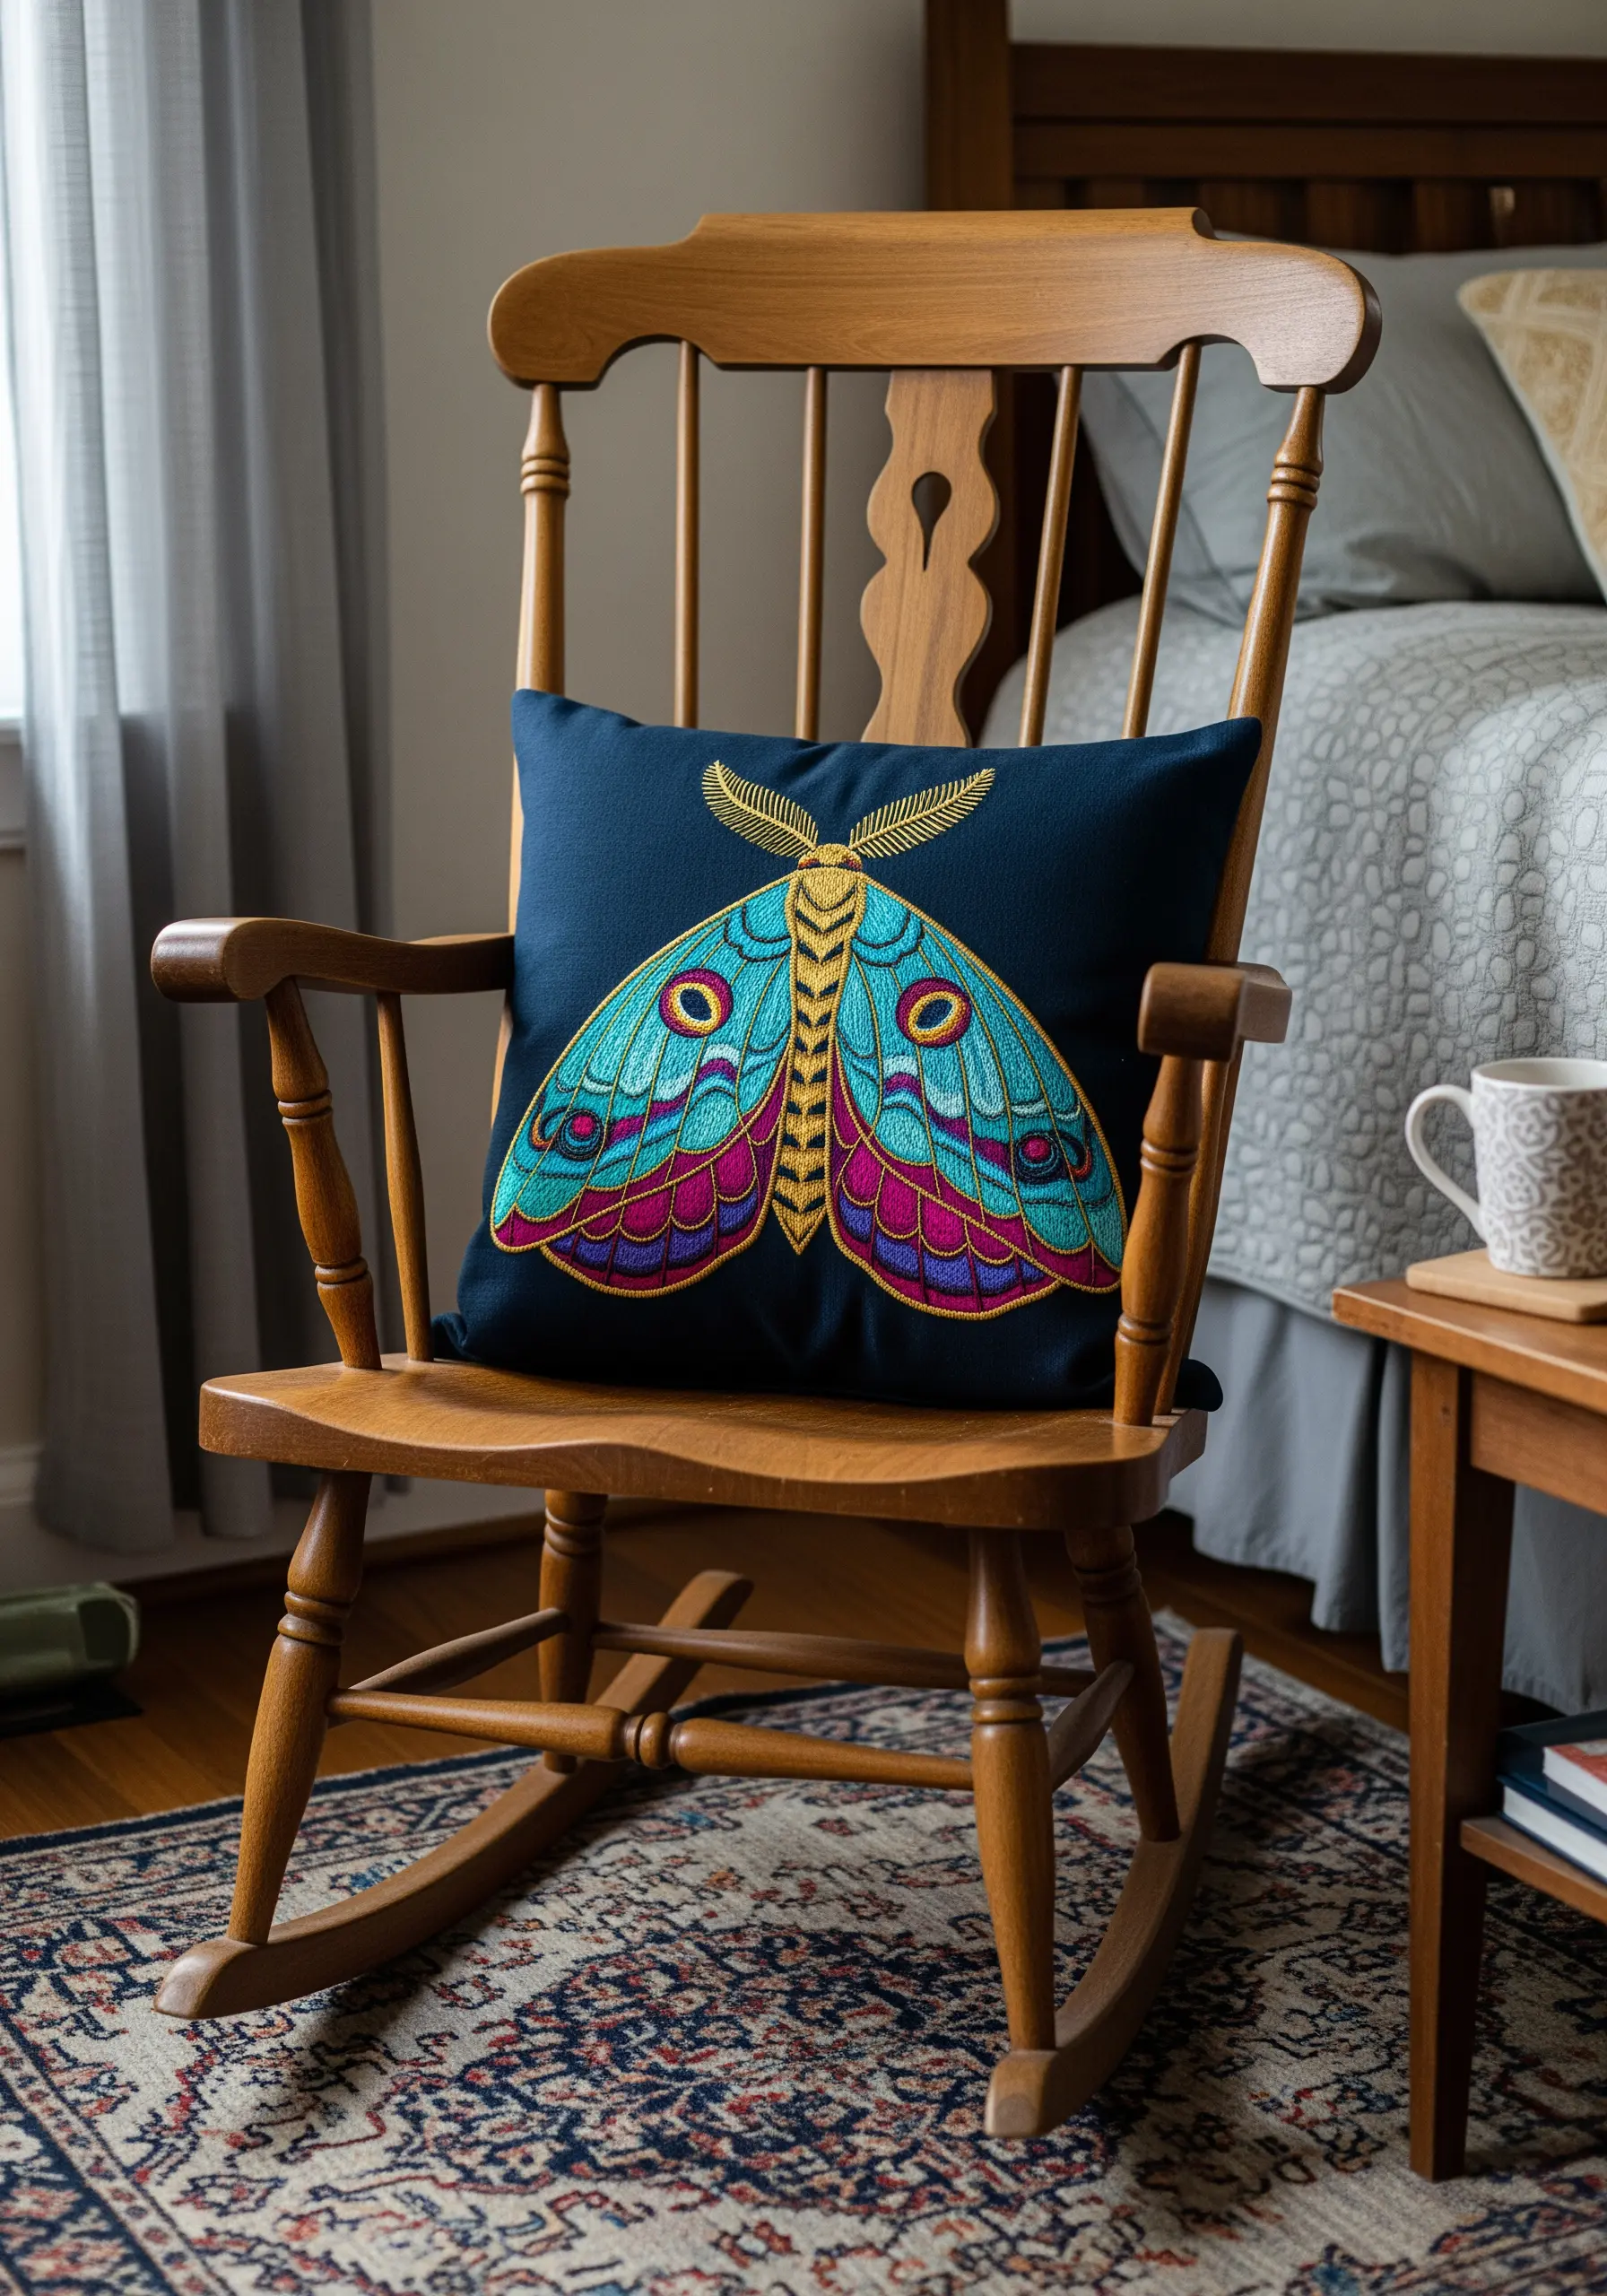
In a symmetrical, multi-colored piece like a moth or butterfly, a clear plan prevents mistakes and ensures a balanced result.
Create a color chart before you start, assigning a specific floss number to each section of your pattern. This eliminates guesswork and keeps your colors consistent.
Complete all the outlines first using a crisp backstitch in a dark, defining color. This creates contained cells, almost like a stained-glass window, that you can then fill with satin stitch.
Stitch one color at a time across the entire design to maintain even tension and flow.
15. Chart the Heavens with a Constellation Tapestry
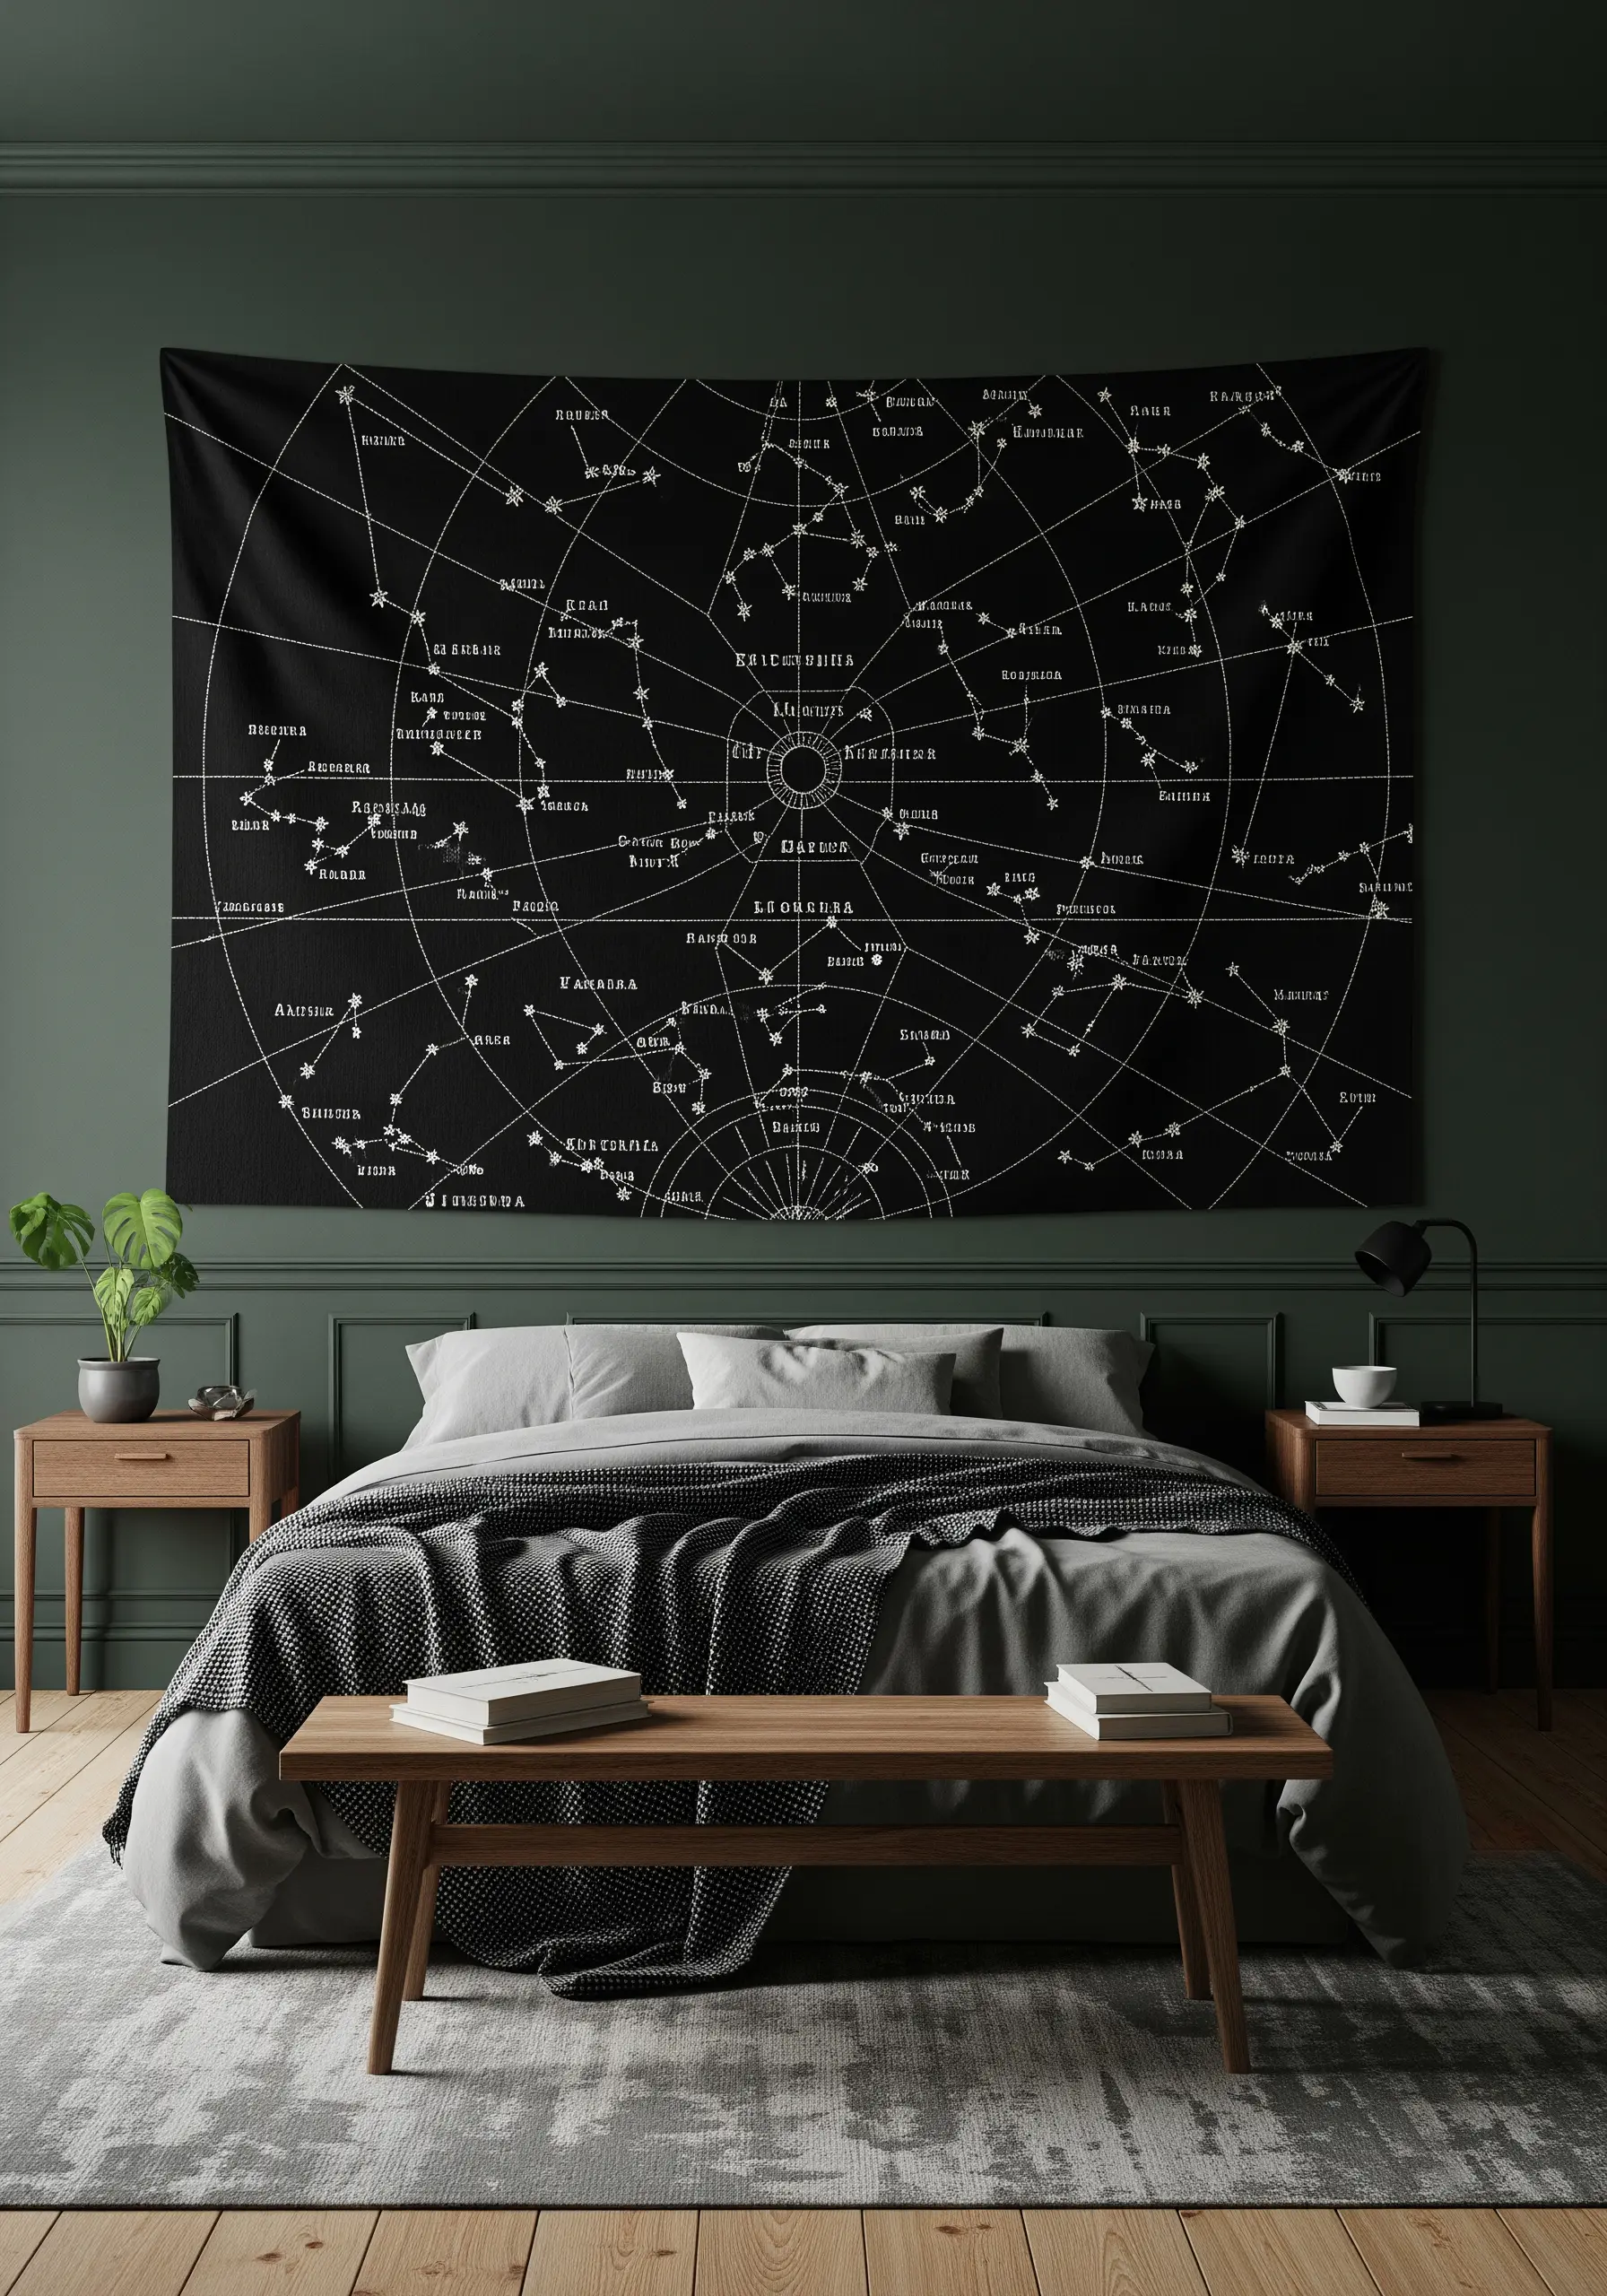
Recreate the magic of a vintage star chart with precise, minimal stitching.
Use a simple backstitch or running stitch for the constellation lines and a single strand of white or silver floss for a delicate, scientific look.
For the stars, create visual hierarchy by varying your stitches: use single seed stitches for small stars, tiny French knots for medium ones, and four-sided star stitches for the brightest ones.
Using a dark, heavy fabric like black denim or canvas makes the white stitches pop, mimicking a clear night sky. These become meaningful travel adventure symbols for the soul.
16. Weave a Geometric Band for a Planter
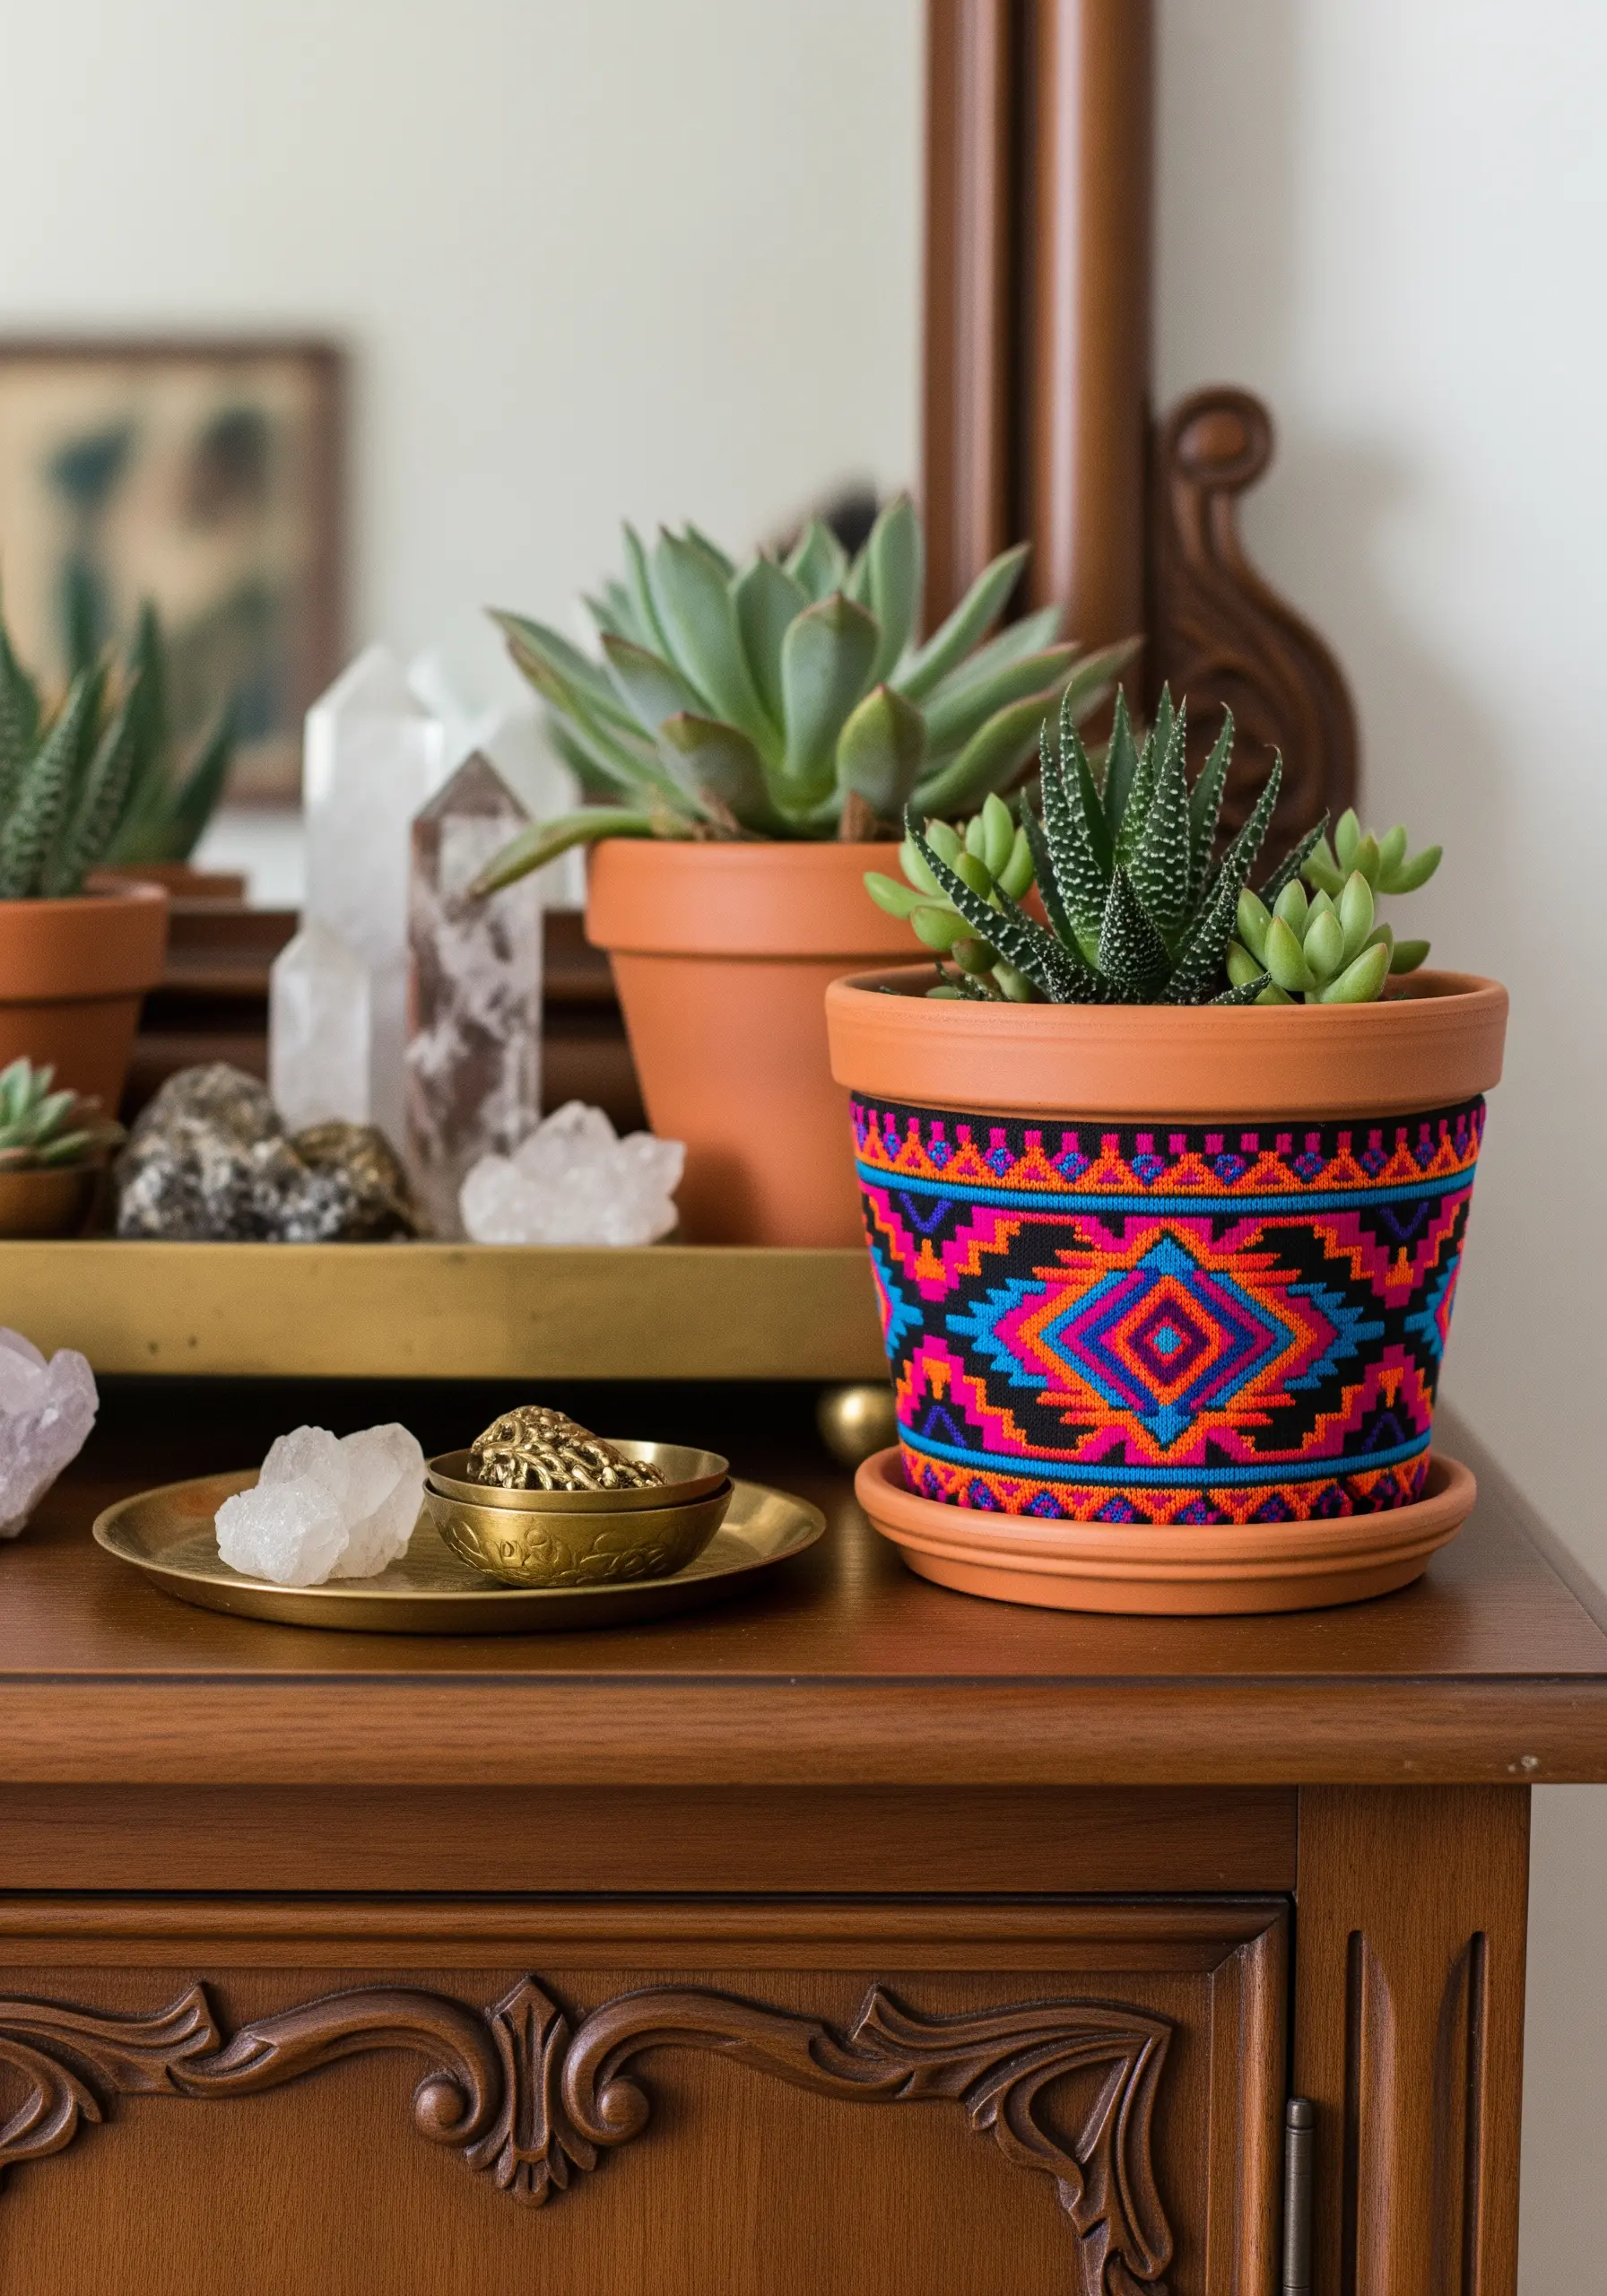
To get this woven, textile look on a solid object like a terracotta pot, you stitch on fabric first, then attach it.
Choose aida cloth or canvas for your base, as its grid structure is ideal for geometric work. Use a tapestry needle and thick pearl cotton or yarn for bold, textured stitches.
Fill your design with blocks of satin stitch or long straight stitches, packing them tightly to completely cover the base fabric.
Once finished, trim the band to size, fold the raw edges under, and secure it around the pot with a strong fabric glue. This mimics the look of complex geometric patterns found in weaving.
17. Recreate a Woven Look with High-Density Stitches
To give your embroidery the dense, durable feel of a woven textile or rug, choose stitches that build texture and completely cover the ground fabric.
The chain stitch, worked in tight, contiguous rows, is perfect for this. It creates a looped texture that mimics knitting or weaving and is incredibly durable.
Alternatively, use Romanian couching to fill large areas. This stitch involves laying down a long thread and tacking it with diagonal stitches, which uses less thread than satin stitch while providing excellent coverage.
Work on a heavy-duty fabric mounted securely in a frame to prevent distortion from the dense stitching.
18. Craft a Detailed Woodland Bookmark
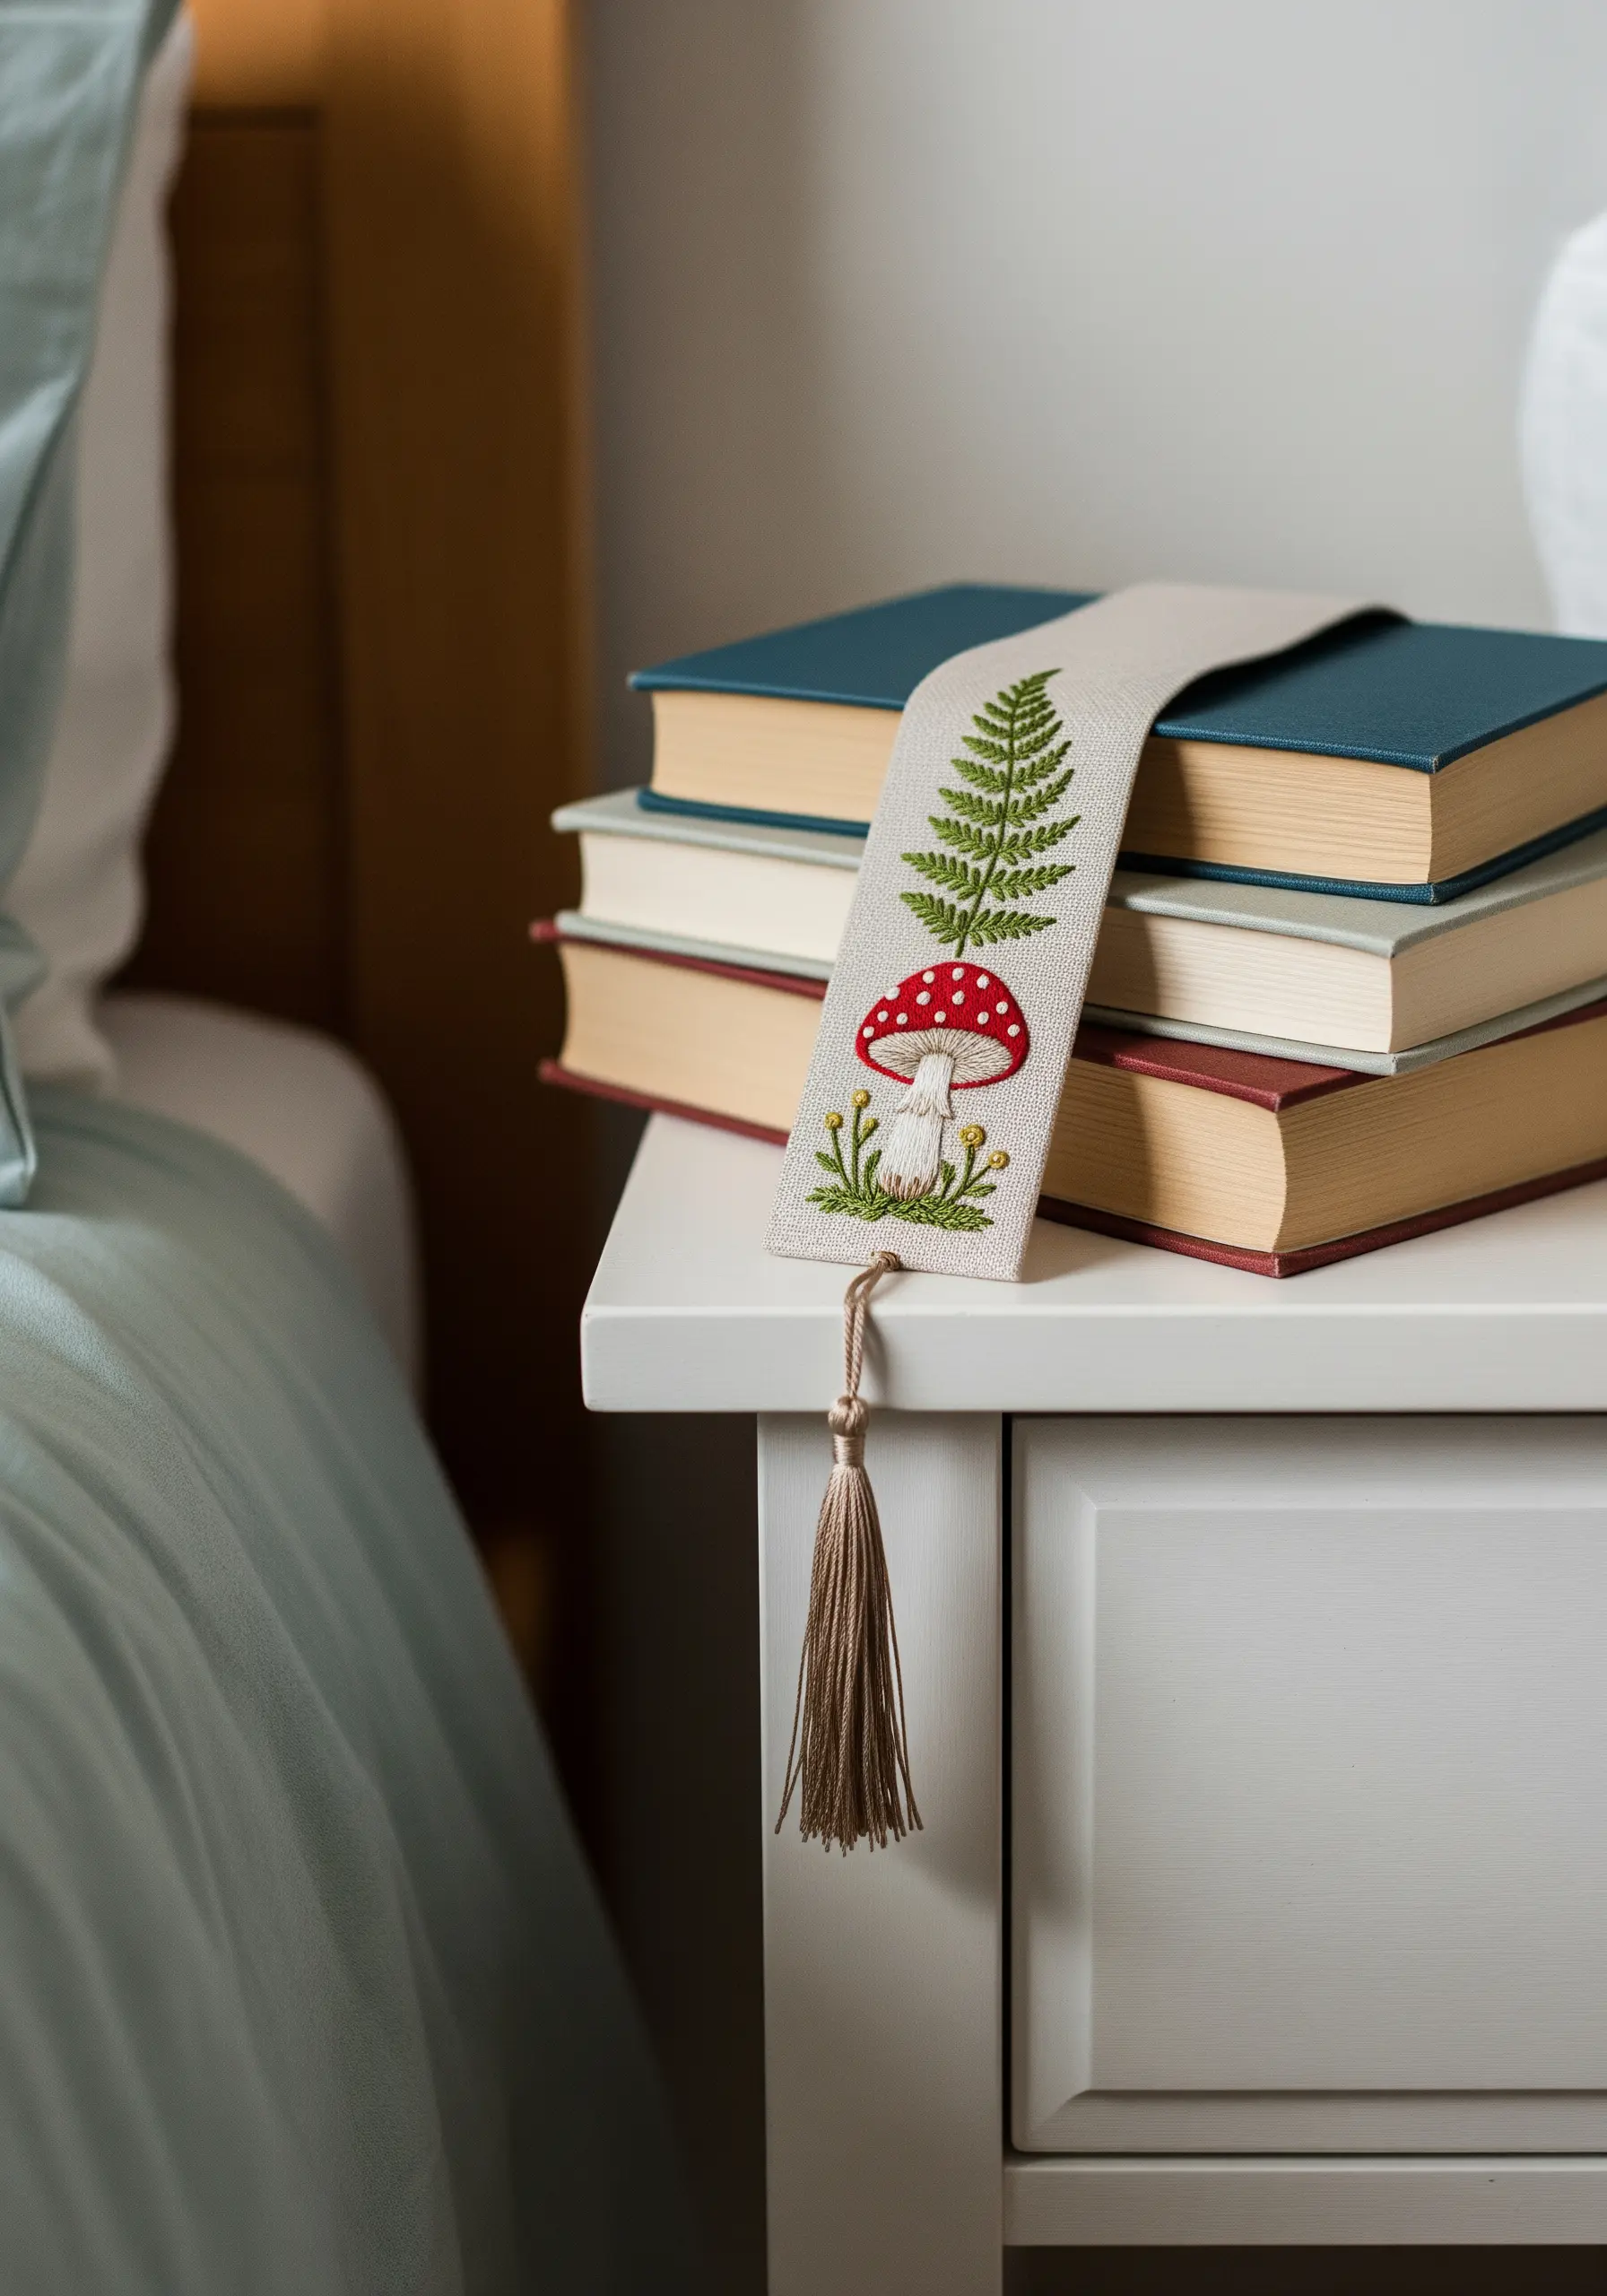
For projects that will be viewed up close, precision and detail are everything.
Work with just two strands of floss. This allows you to create finer details and smoother satin stitches, which is essential for small elements like the mushroom’s gills.
For the fern, use the fly stitch. By making a series of detached fly stitches down a central stem, you can create delicate, realistic fern fronds with ease.
These tiny embroidery patterns are perfect for using up small scraps of fabric and thread.
19. Cultivate a Wildflower Meadow on a Duvet

To create the feeling of an organic, overgrown meadow, embrace variety and imperfection.
Use a mix of simple stitches: lazy daisy for petals, French knots for flower centers, stem stitch for sturdy stems, and single straight stitches for wispy grasses.
Vary the height, color, and density of your flowers and stems to create a natural, layered look. Avoid planting everything in perfect rows.
Let some elements overlap. Stitching a blade of grass in front of a flower stem instantly creates a sense of depth and realism, much like in pressed flower art projects.
20. Construct a Lined and Stitched Valet Tray
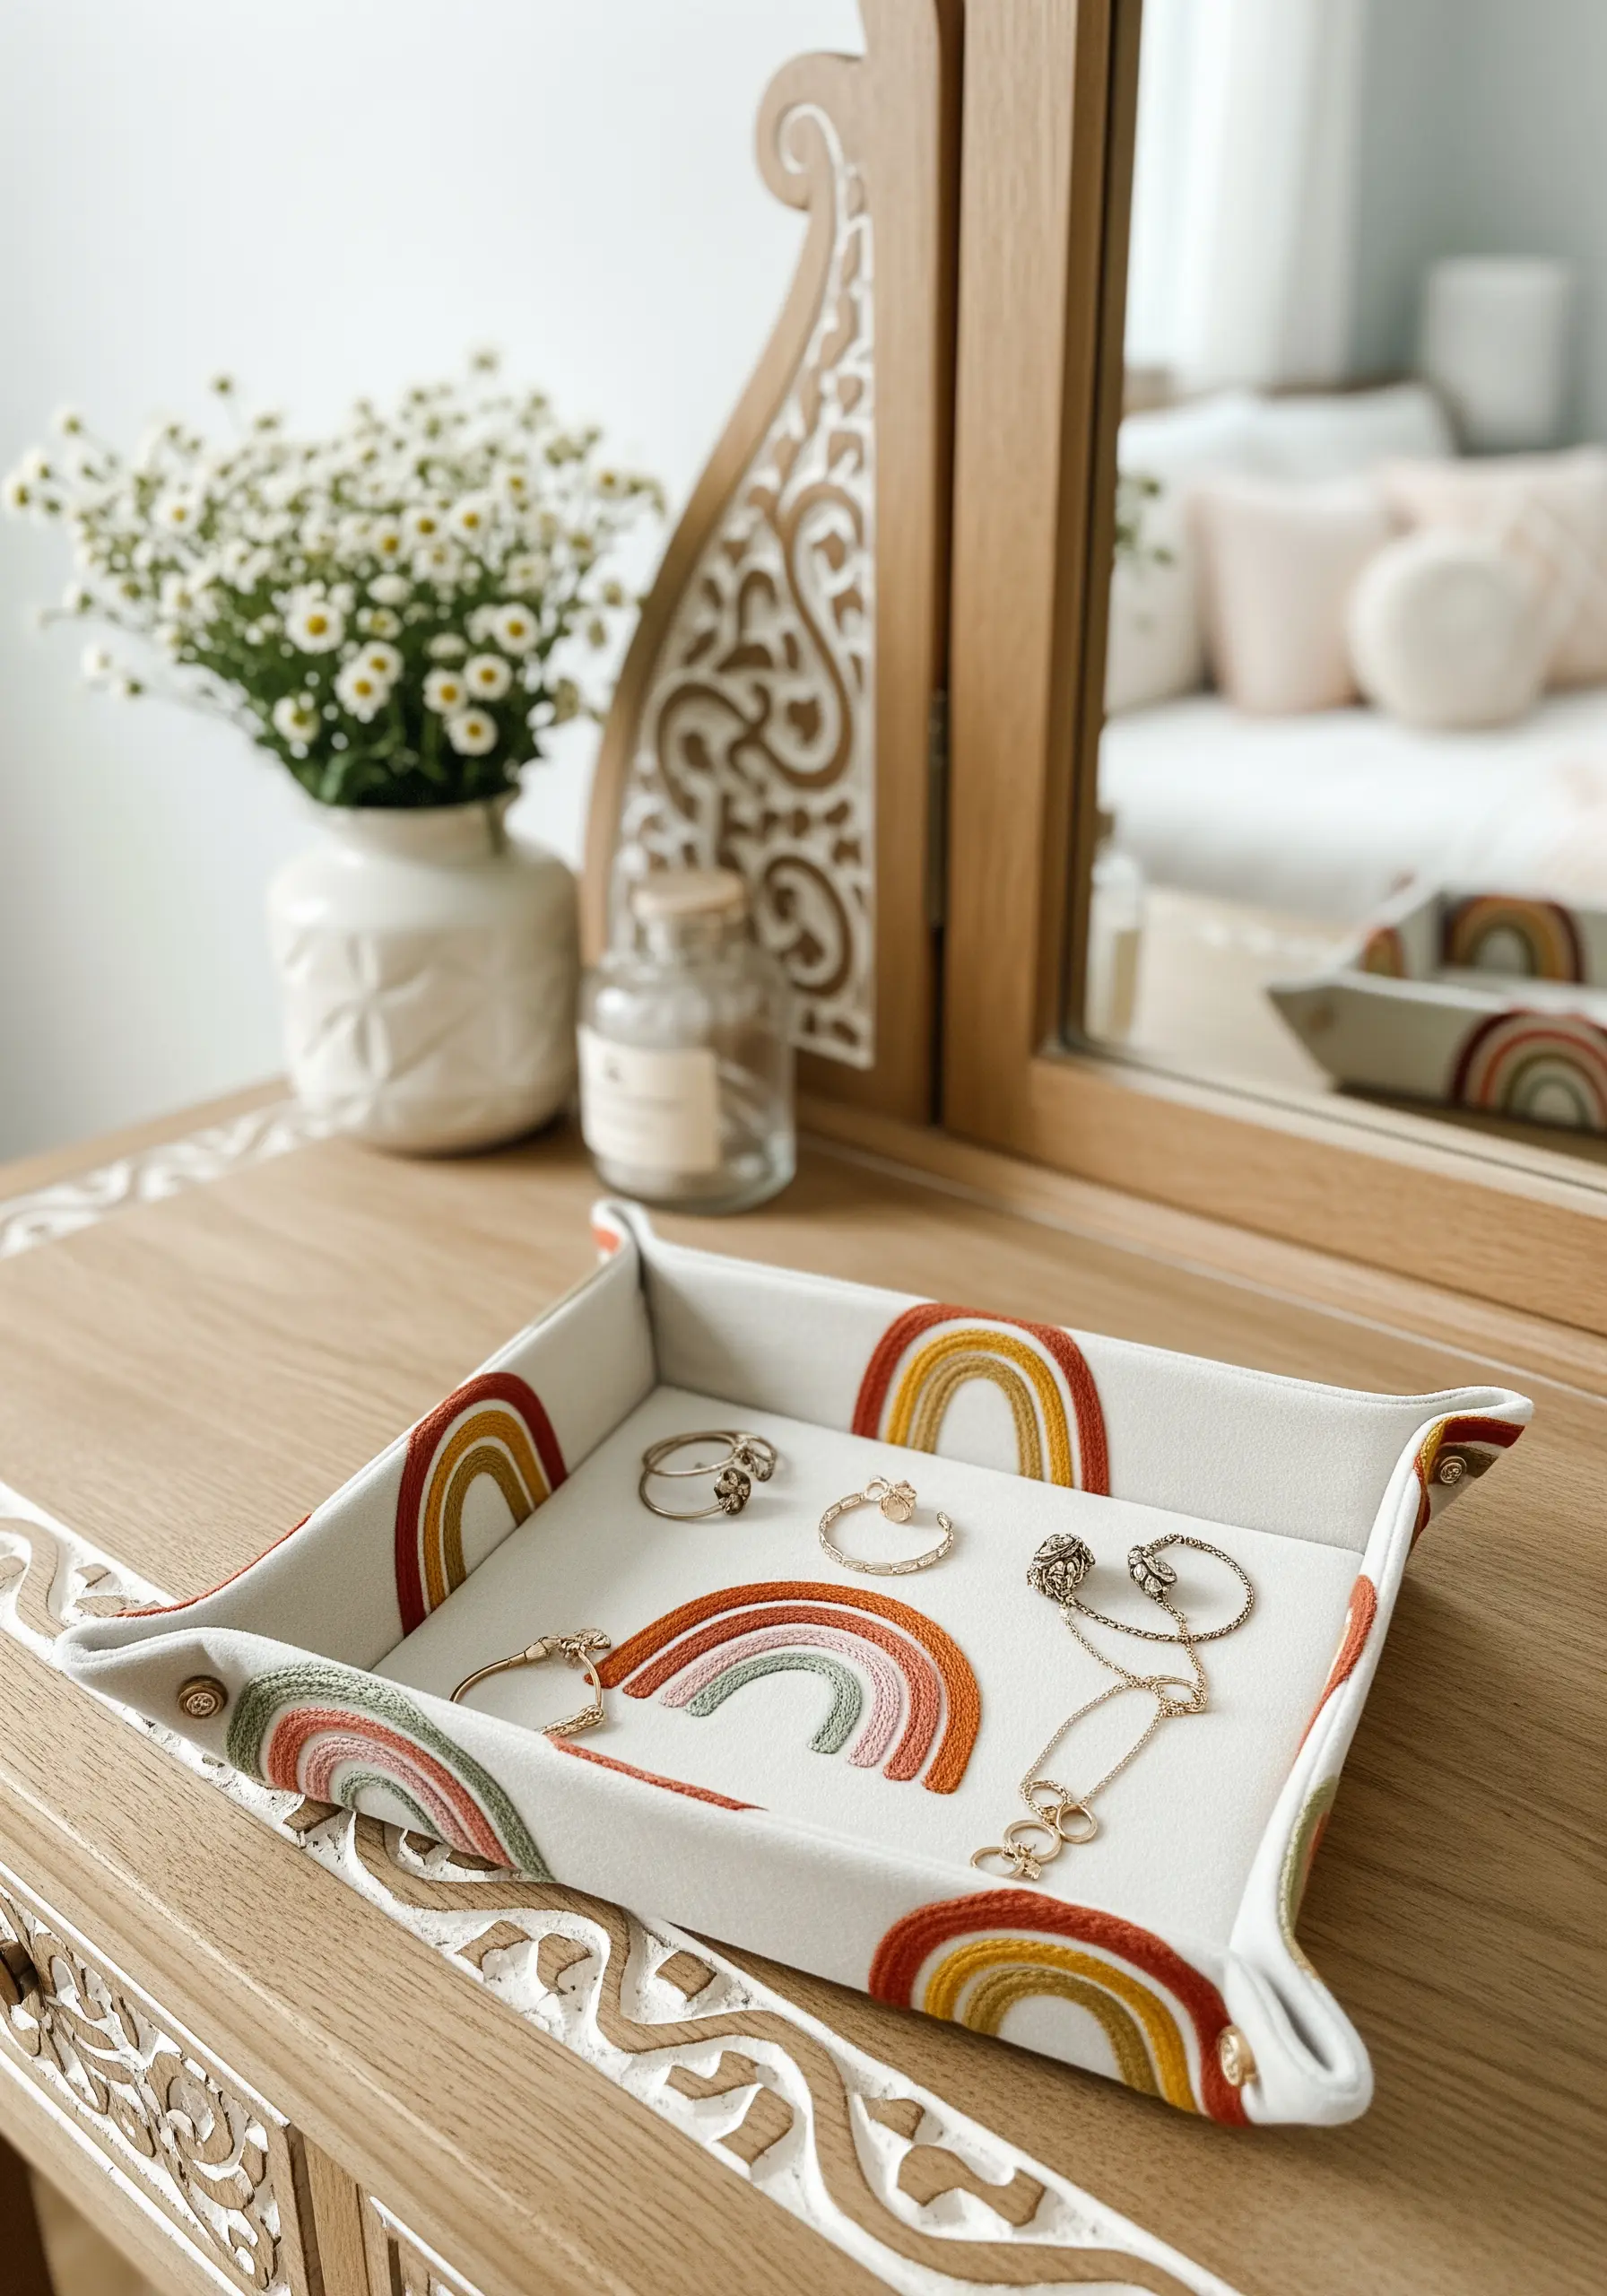
Turn a flat piece of embroidery into a functional, three-dimensional object.
First, complete your embroidery on a sturdy piece of canvas or linen. A simple satin stitch is perfect for these clean rainbow arches.
To give the tray structure, bond your embroidered piece to a stiff fusible interfacing. Then, place a backing fabric on top and stitch around the perimeter, leaving a gap for turning.
Turn it right-side out, press, topstitch the edge, and then pinch and stitch the corners to create the tray’s boxed shape. These contemporary rainbow blend stitches add a cheerful touch.
21. Create a Solid Silhouette with Appliqué
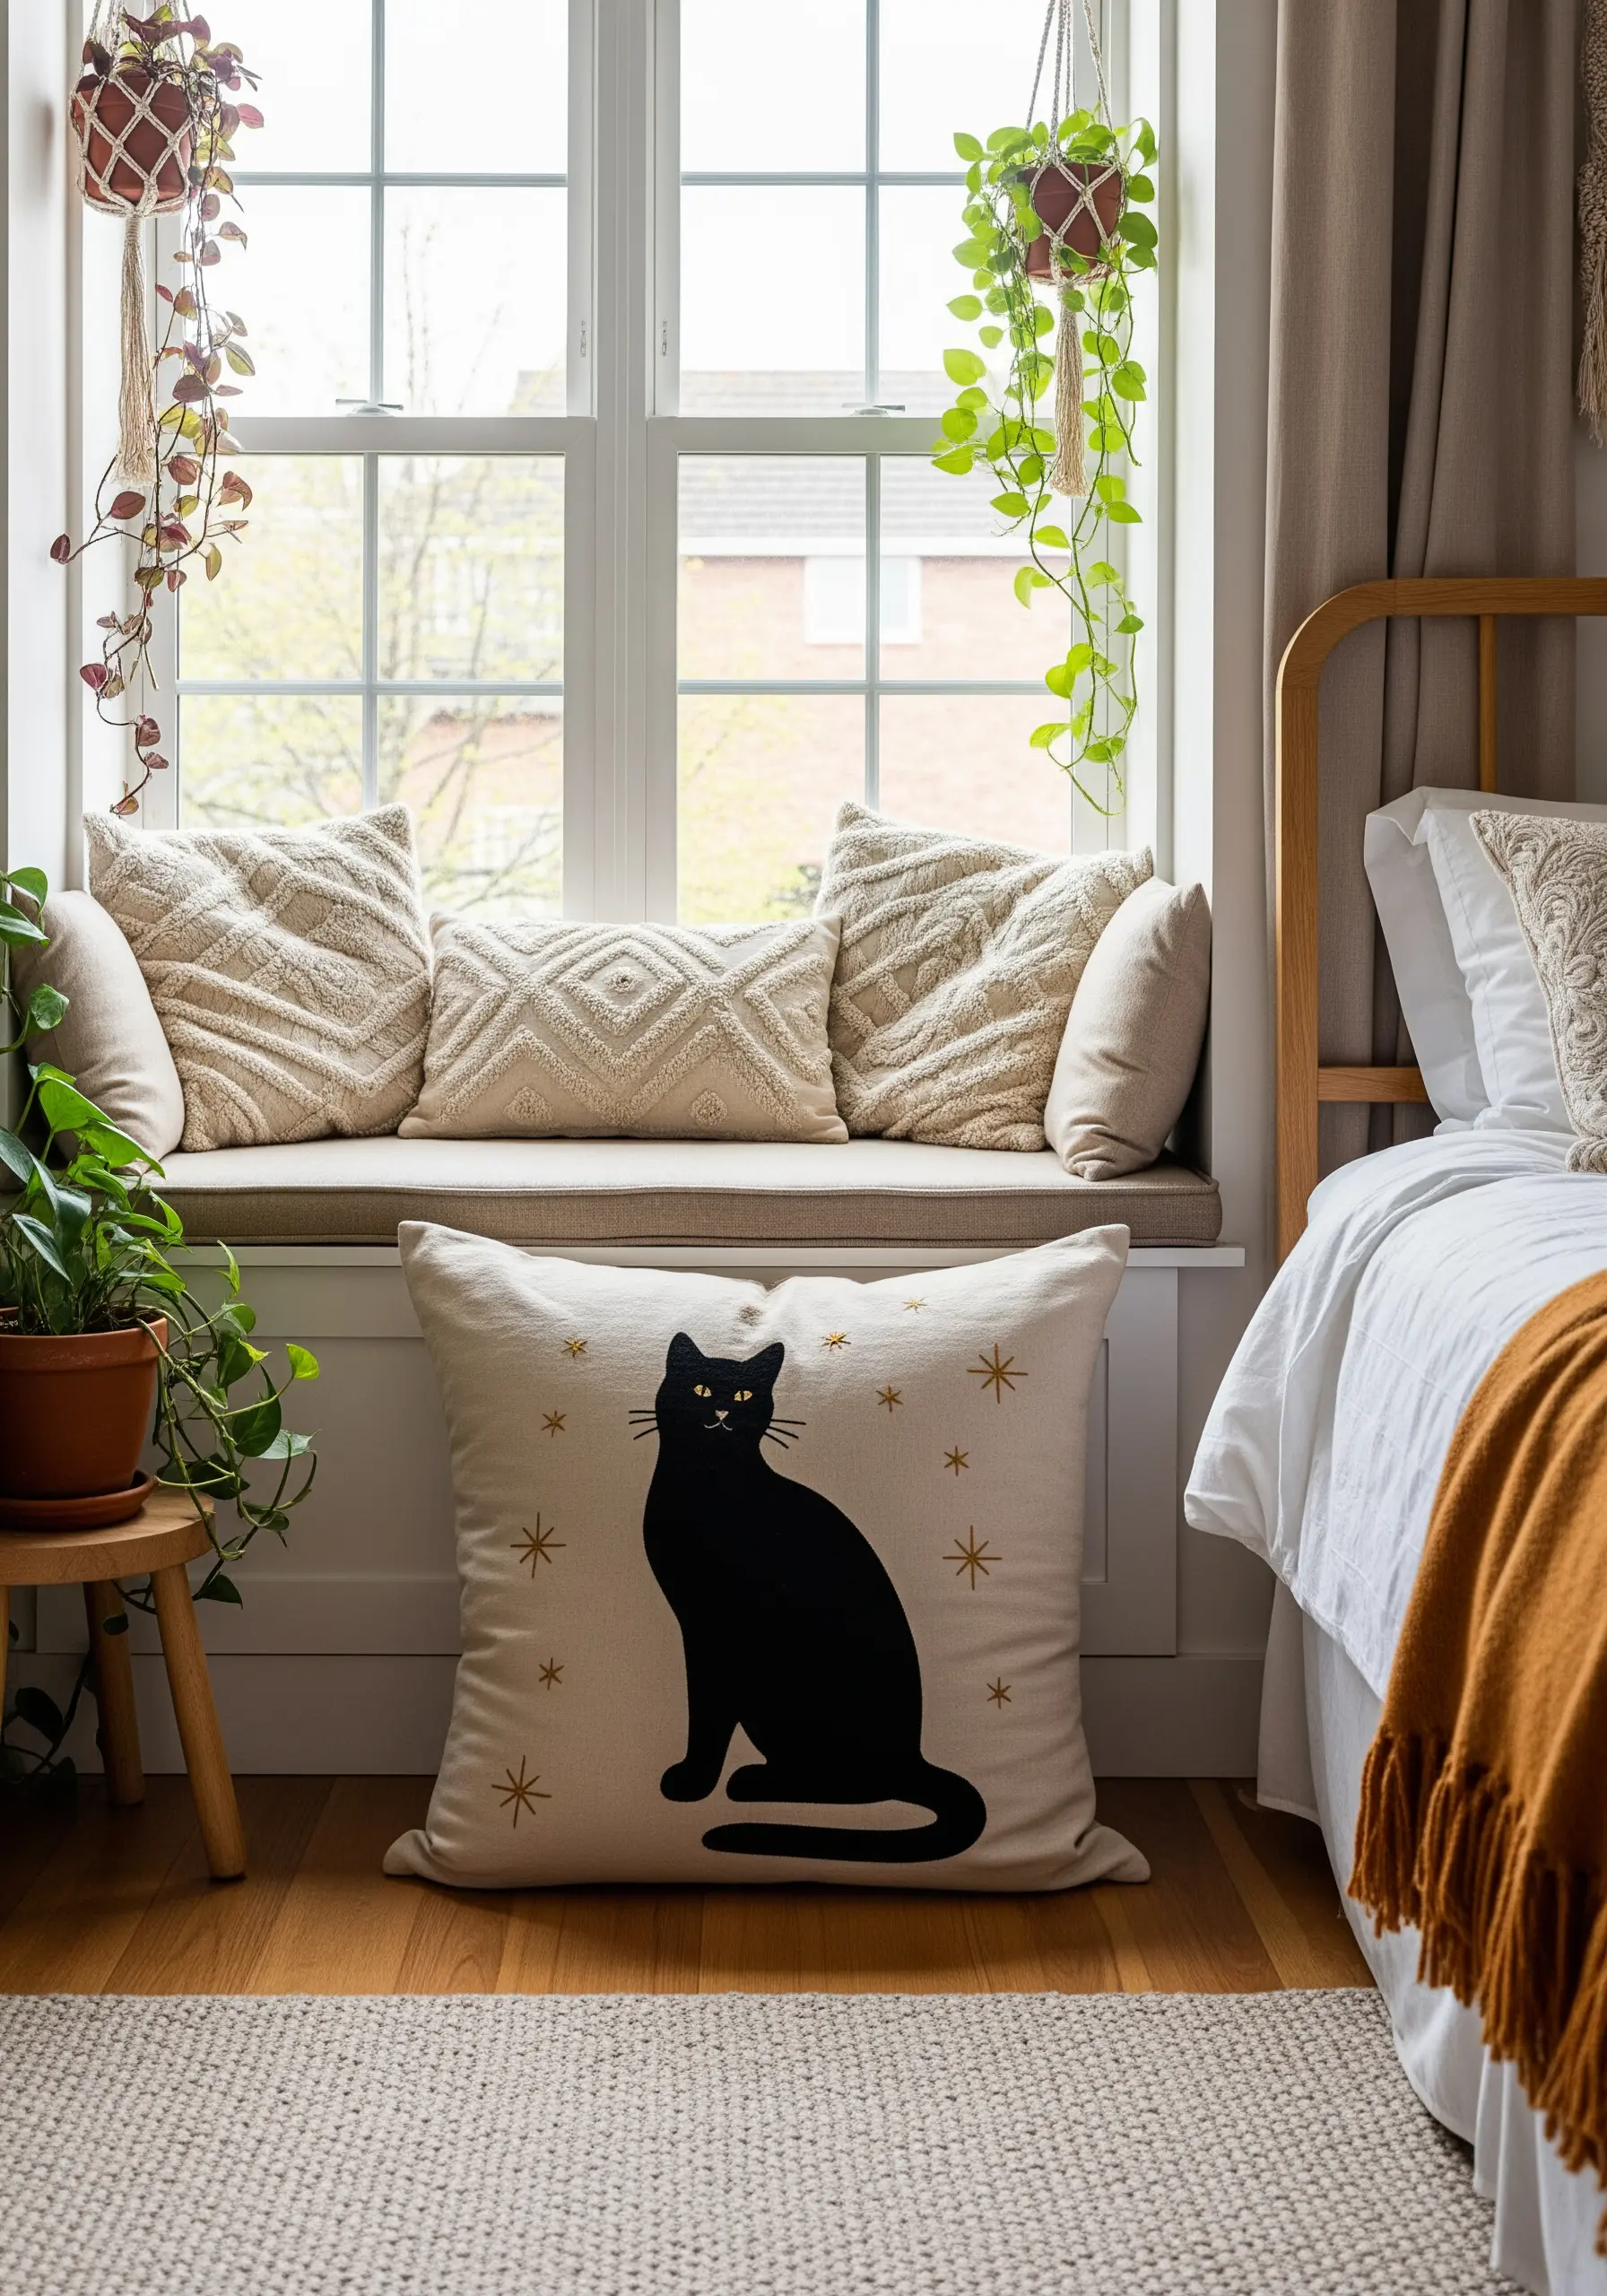
For large, solid blocks of color like a black cat, filling the entire area with satin stitch can be time-consuming and prone to gapping.
Instead, use appliqué for a perfectly smooth and opaque result. Cut the cat shape from black felt or a non-fraying cotton fabric.
Secure the shape to your pillow fabric using a lightweight fusible web, which acts as a permanent glue when ironed.
Finally, stitch around the edge with a decorative blanket stitch or a clean backstitch to secure the appliqué and give it a polished, finished look. These cartoon-style embroidery ideas come to life with this technique.
22. Label an Herb Mobile with Stitched Tags
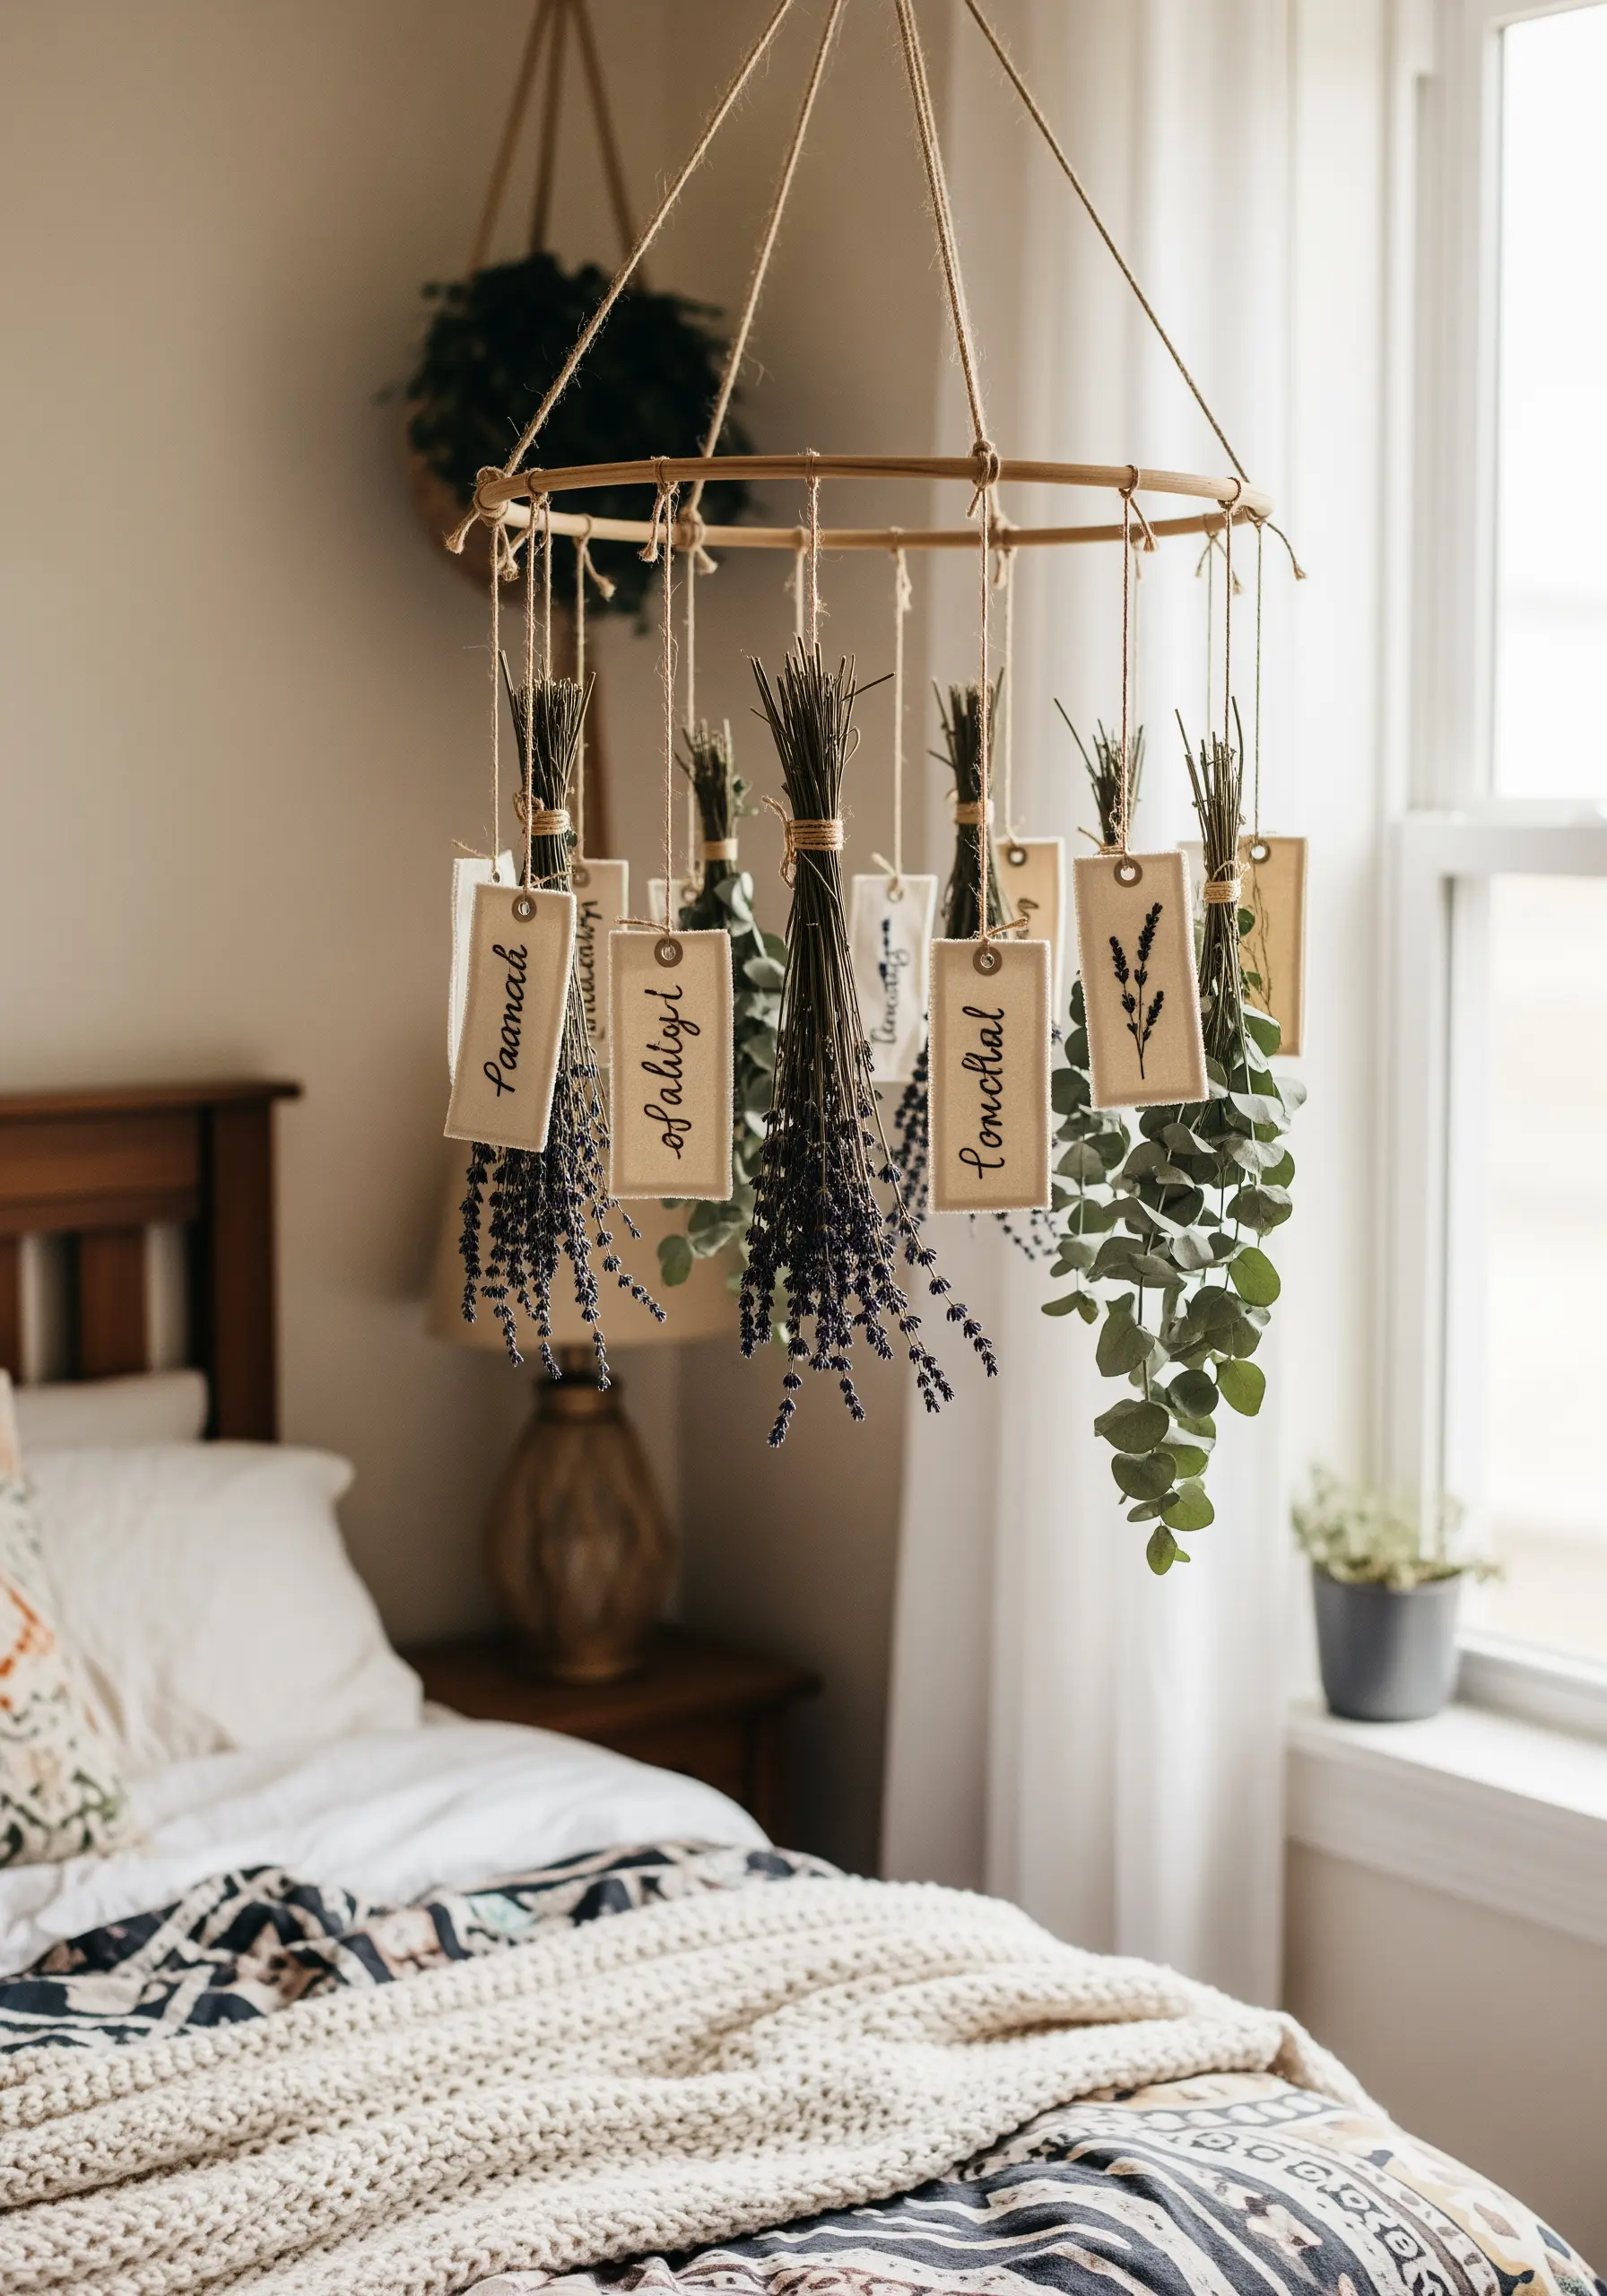
Combine the texture of embroidery with the crispness of ink for a modern mixed-media project.
On small canvas or heavy paper tags, stitch a simple botanical motif—a single sprig of lavender is perfect—using just two strands of floss for delicacy.
For the lettering, use a permanent, fine-tipped fabric pen. This gives you a clean, calligraphic line that is much faster and often more legible than stitched lettering at a small scale.
This technique of combining paper layers with subtle embroidery adds a sophisticated, handcrafted touch to your space.
23. Add Bold Texture with Yarn Couching
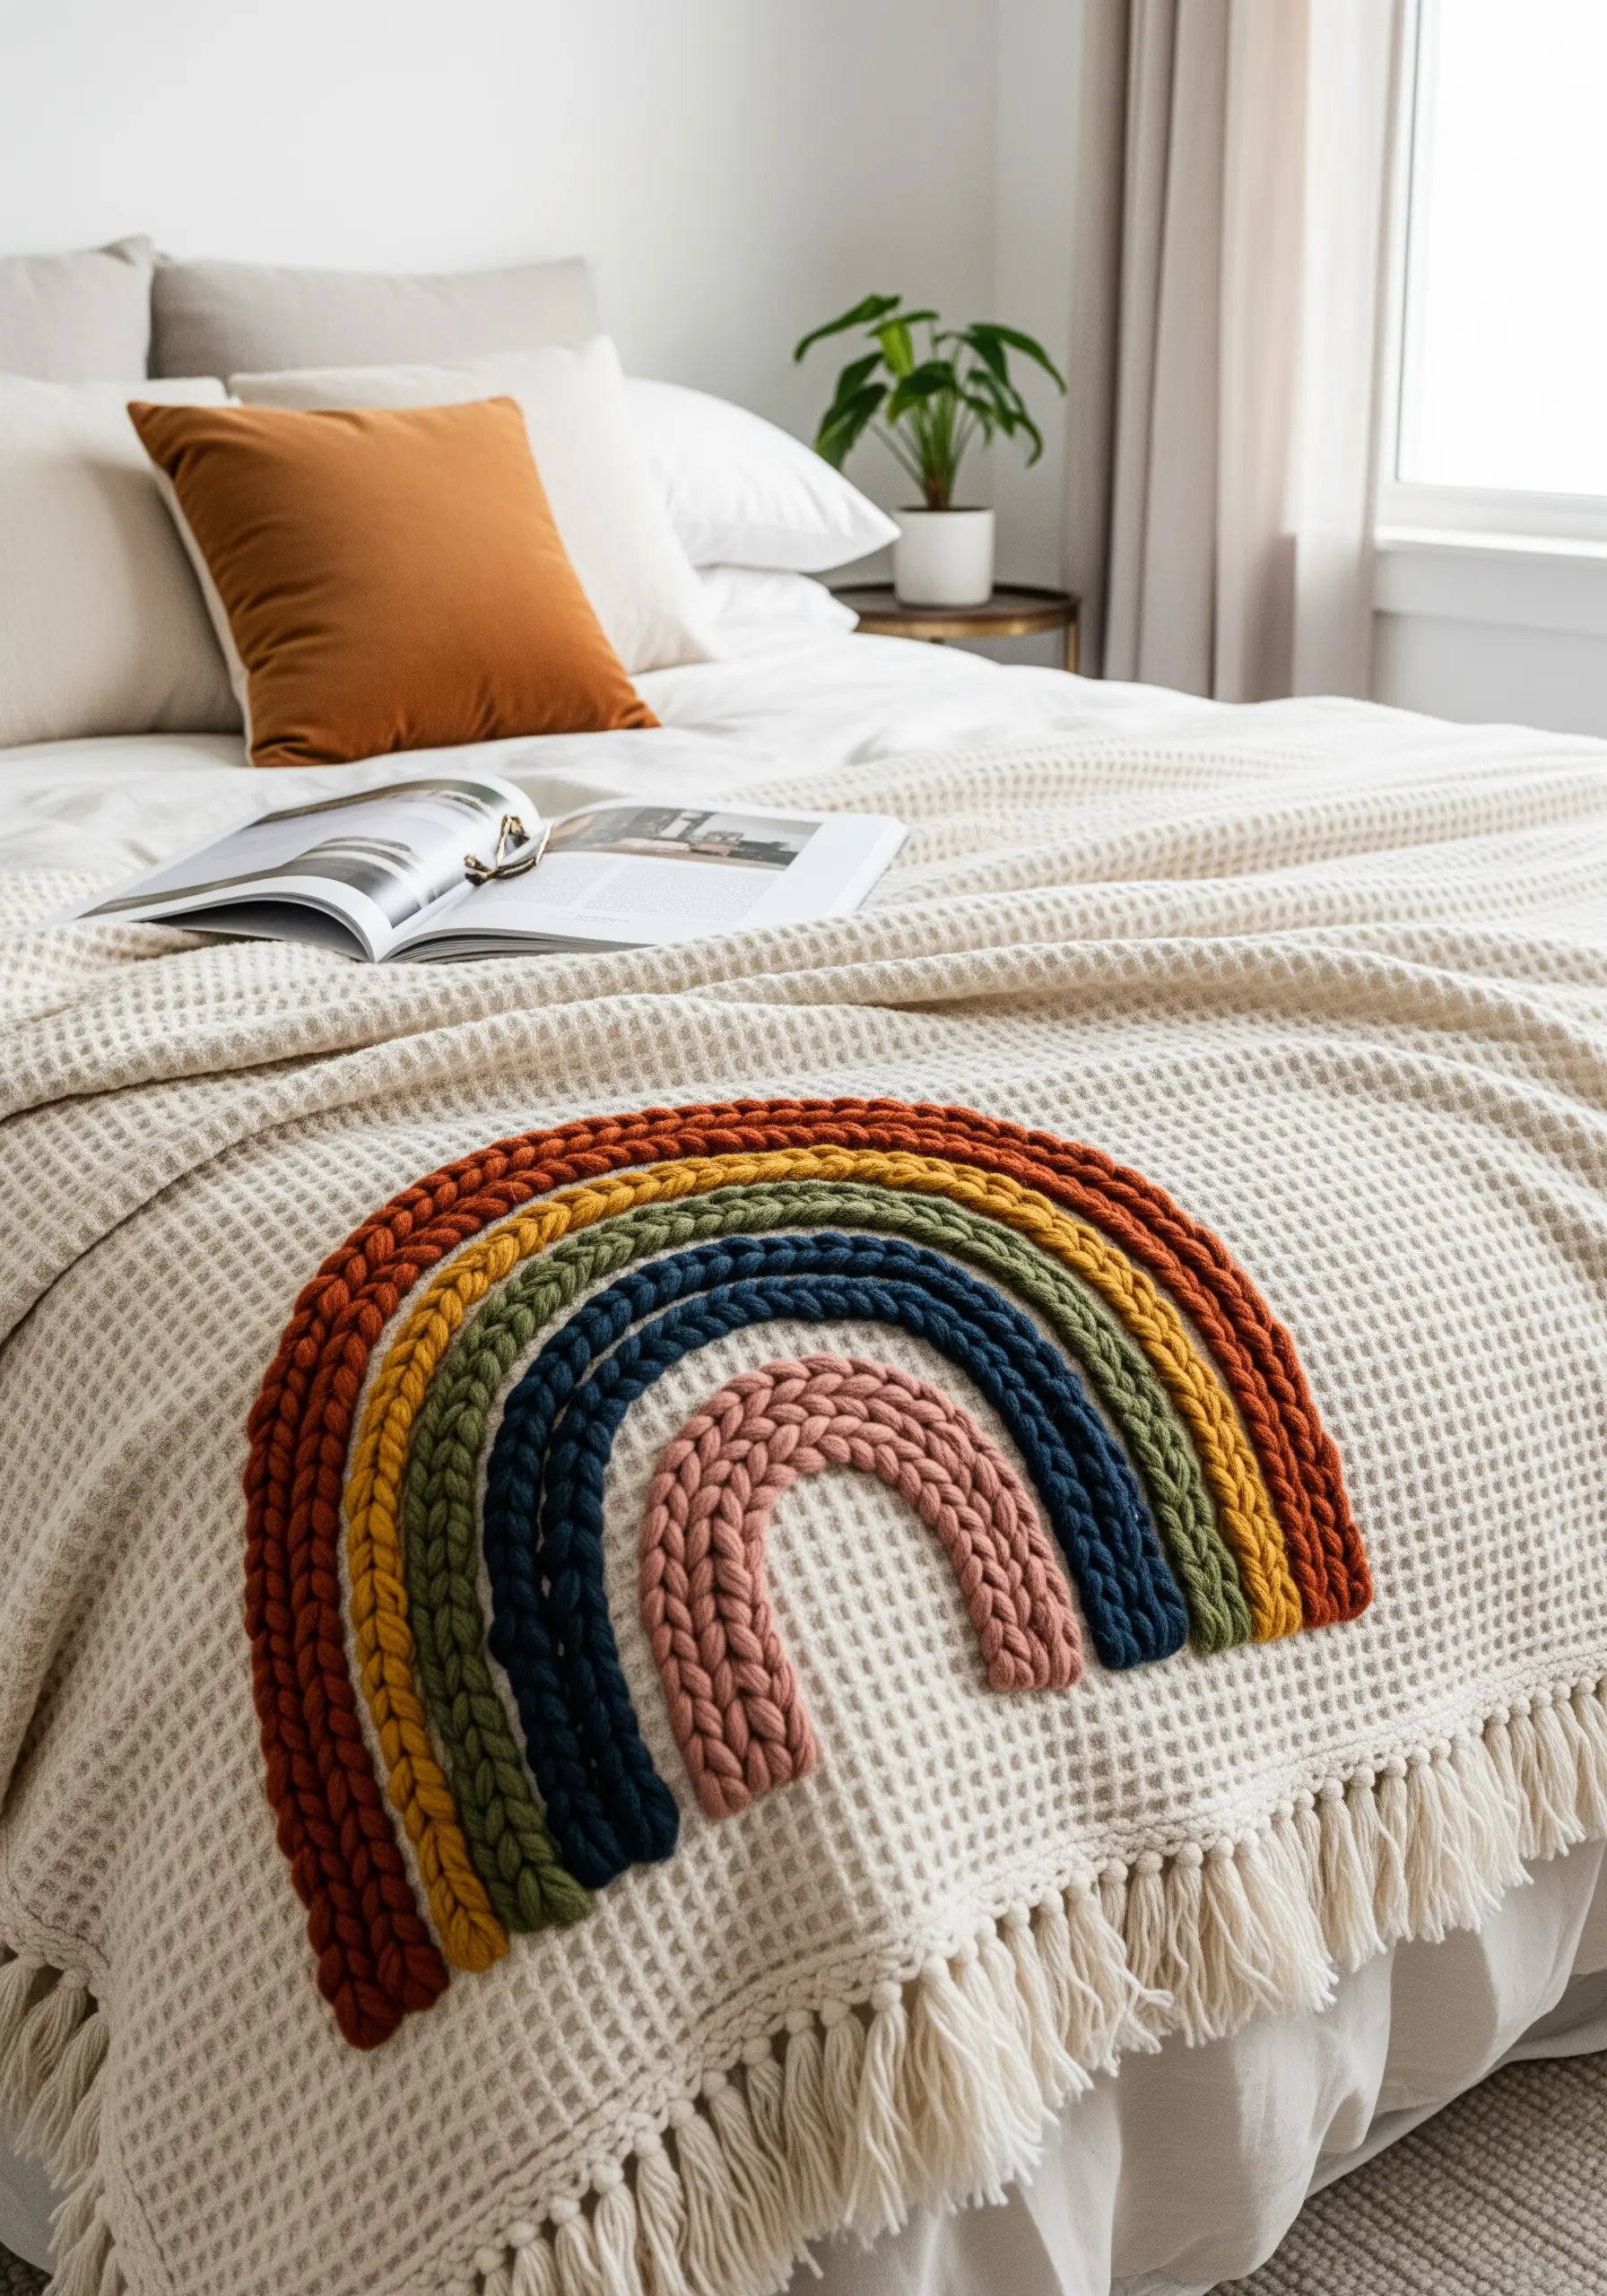
To achieve a super-chunky, high-relief effect without a giant needle, couching is the perfect technique.
Simply lay down a thick piece of yarn or wool roving onto your fabric, following the lines of your design.
Then, using a standard needle and a matching or contrasting color of embroidery floss, make small, evenly spaced tacking stitches over the yarn to hold it securely in place.
This allows you to add dramatic dimension and is a cornerstone of high-texture fabric collage, letting you work with materials too thick to stitch with directly.
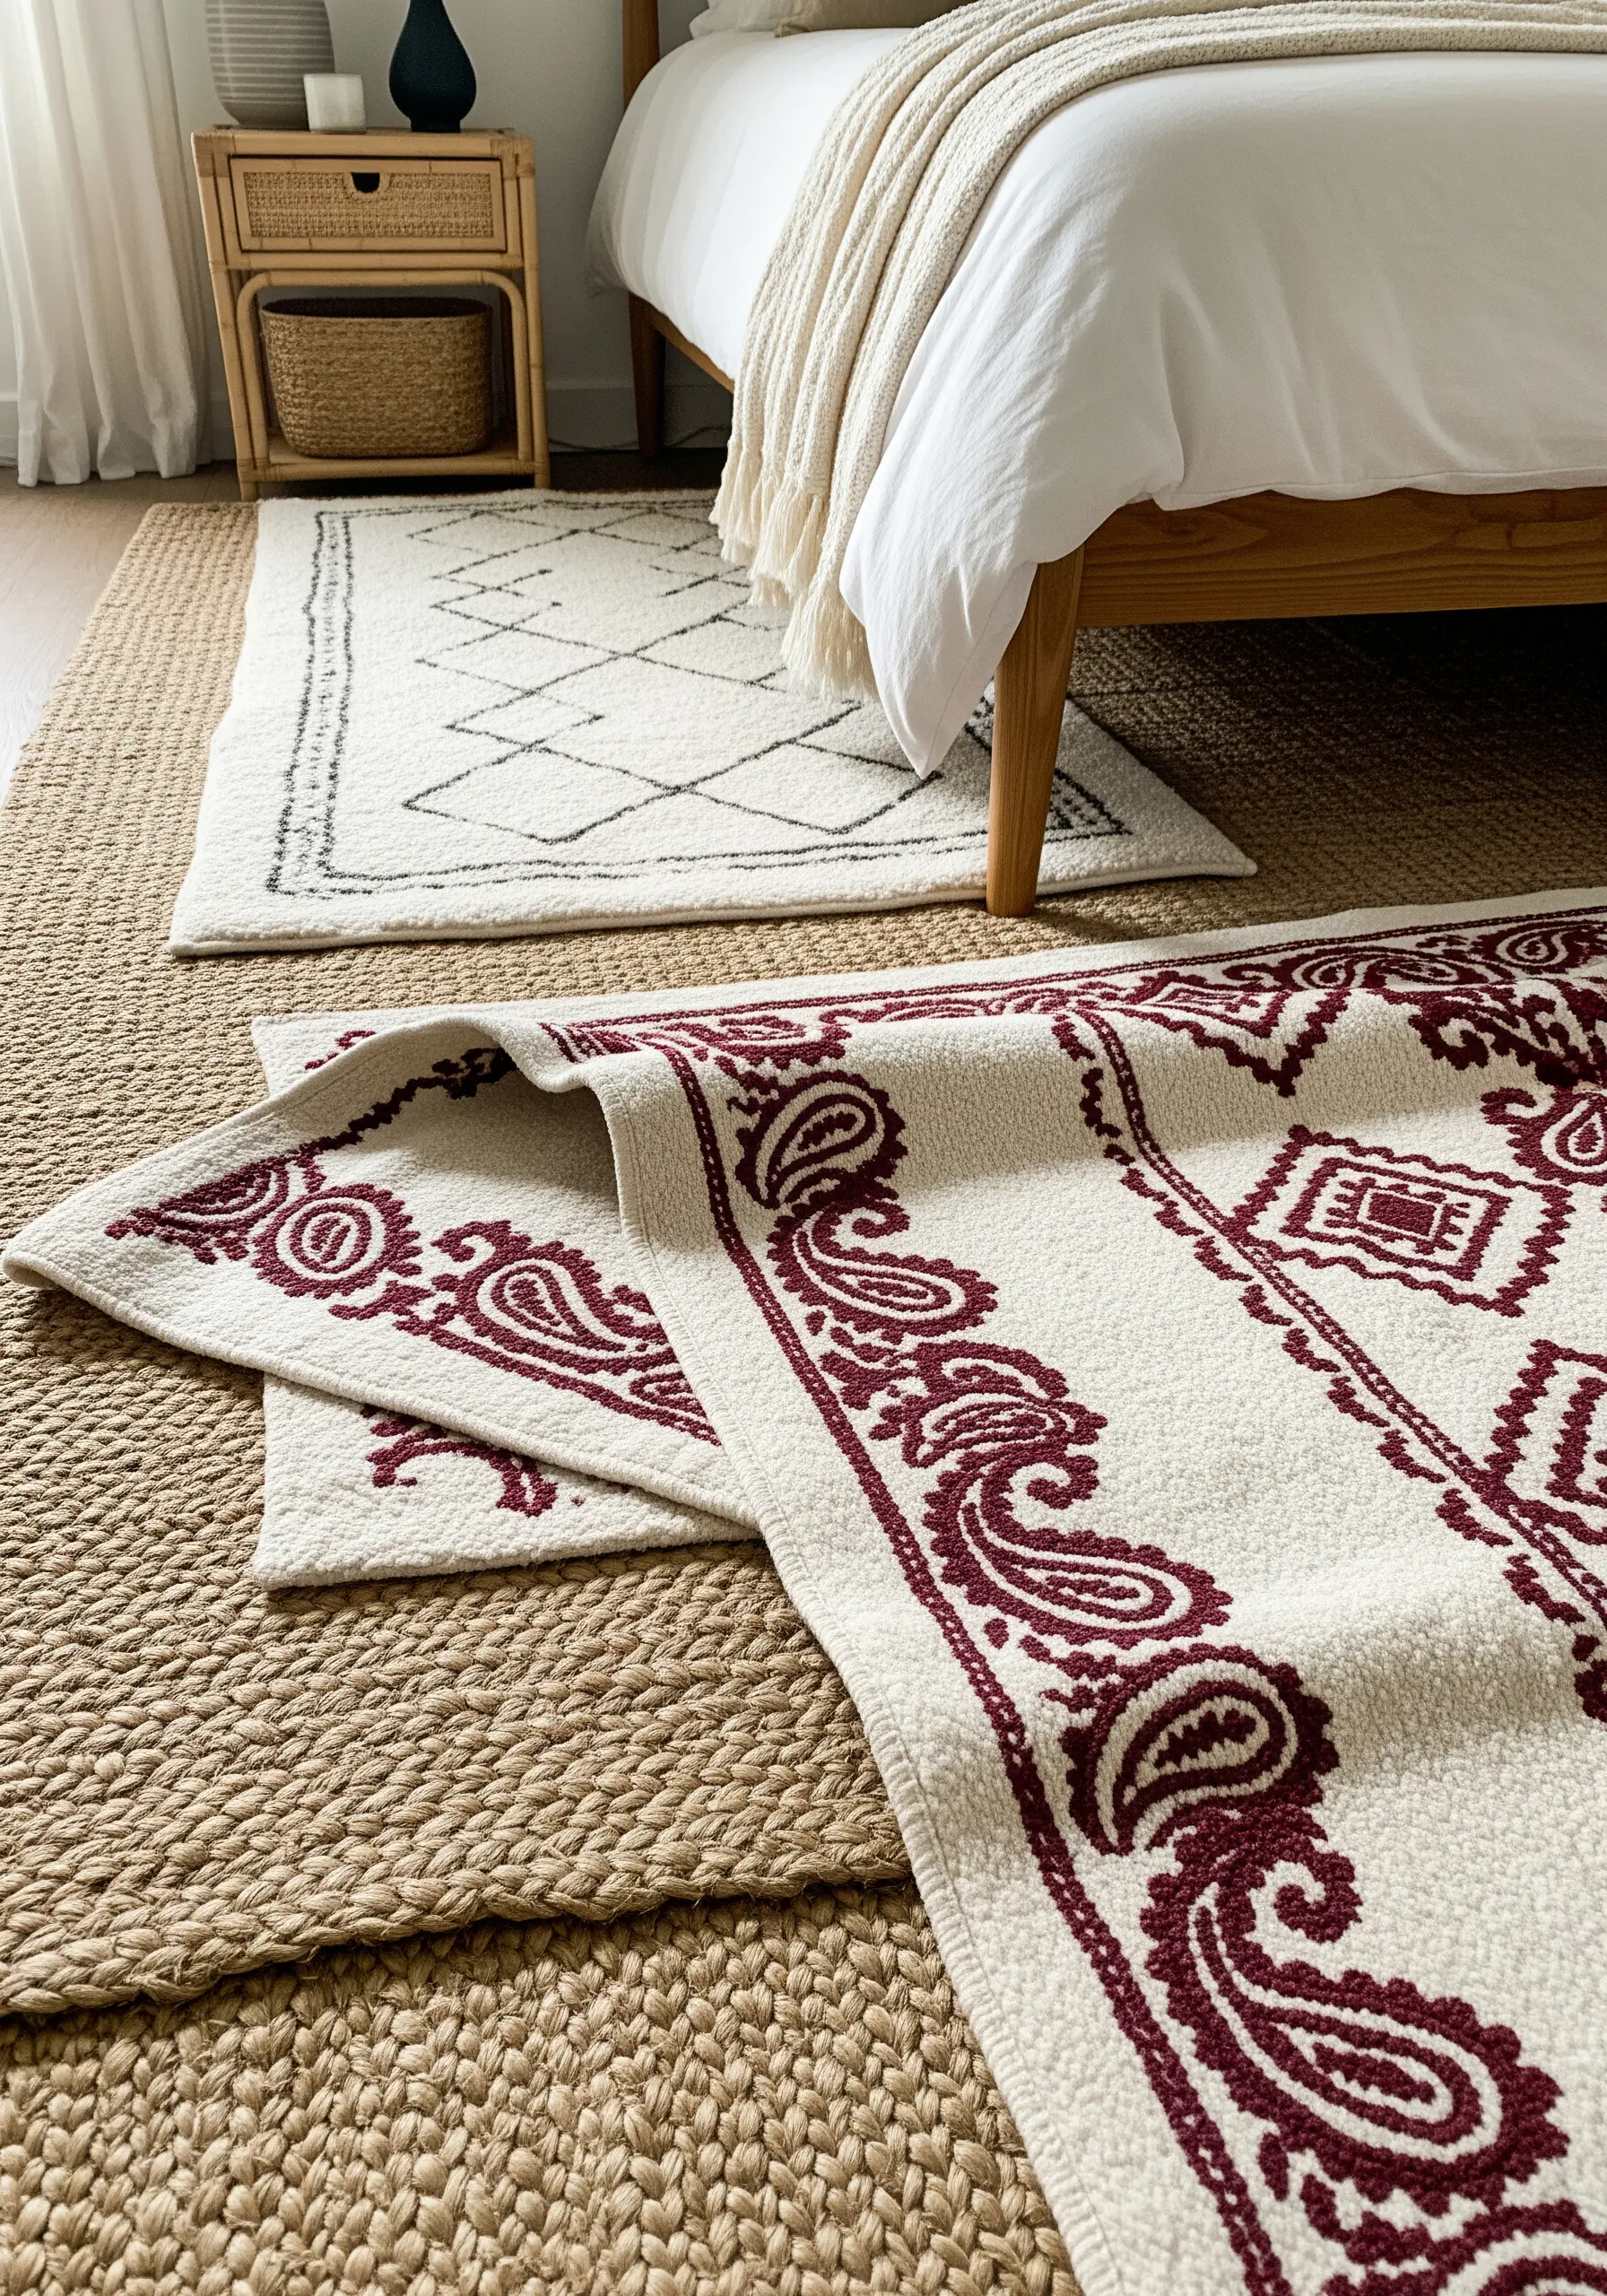
24. Mimic Intricate Lace with Negative Space
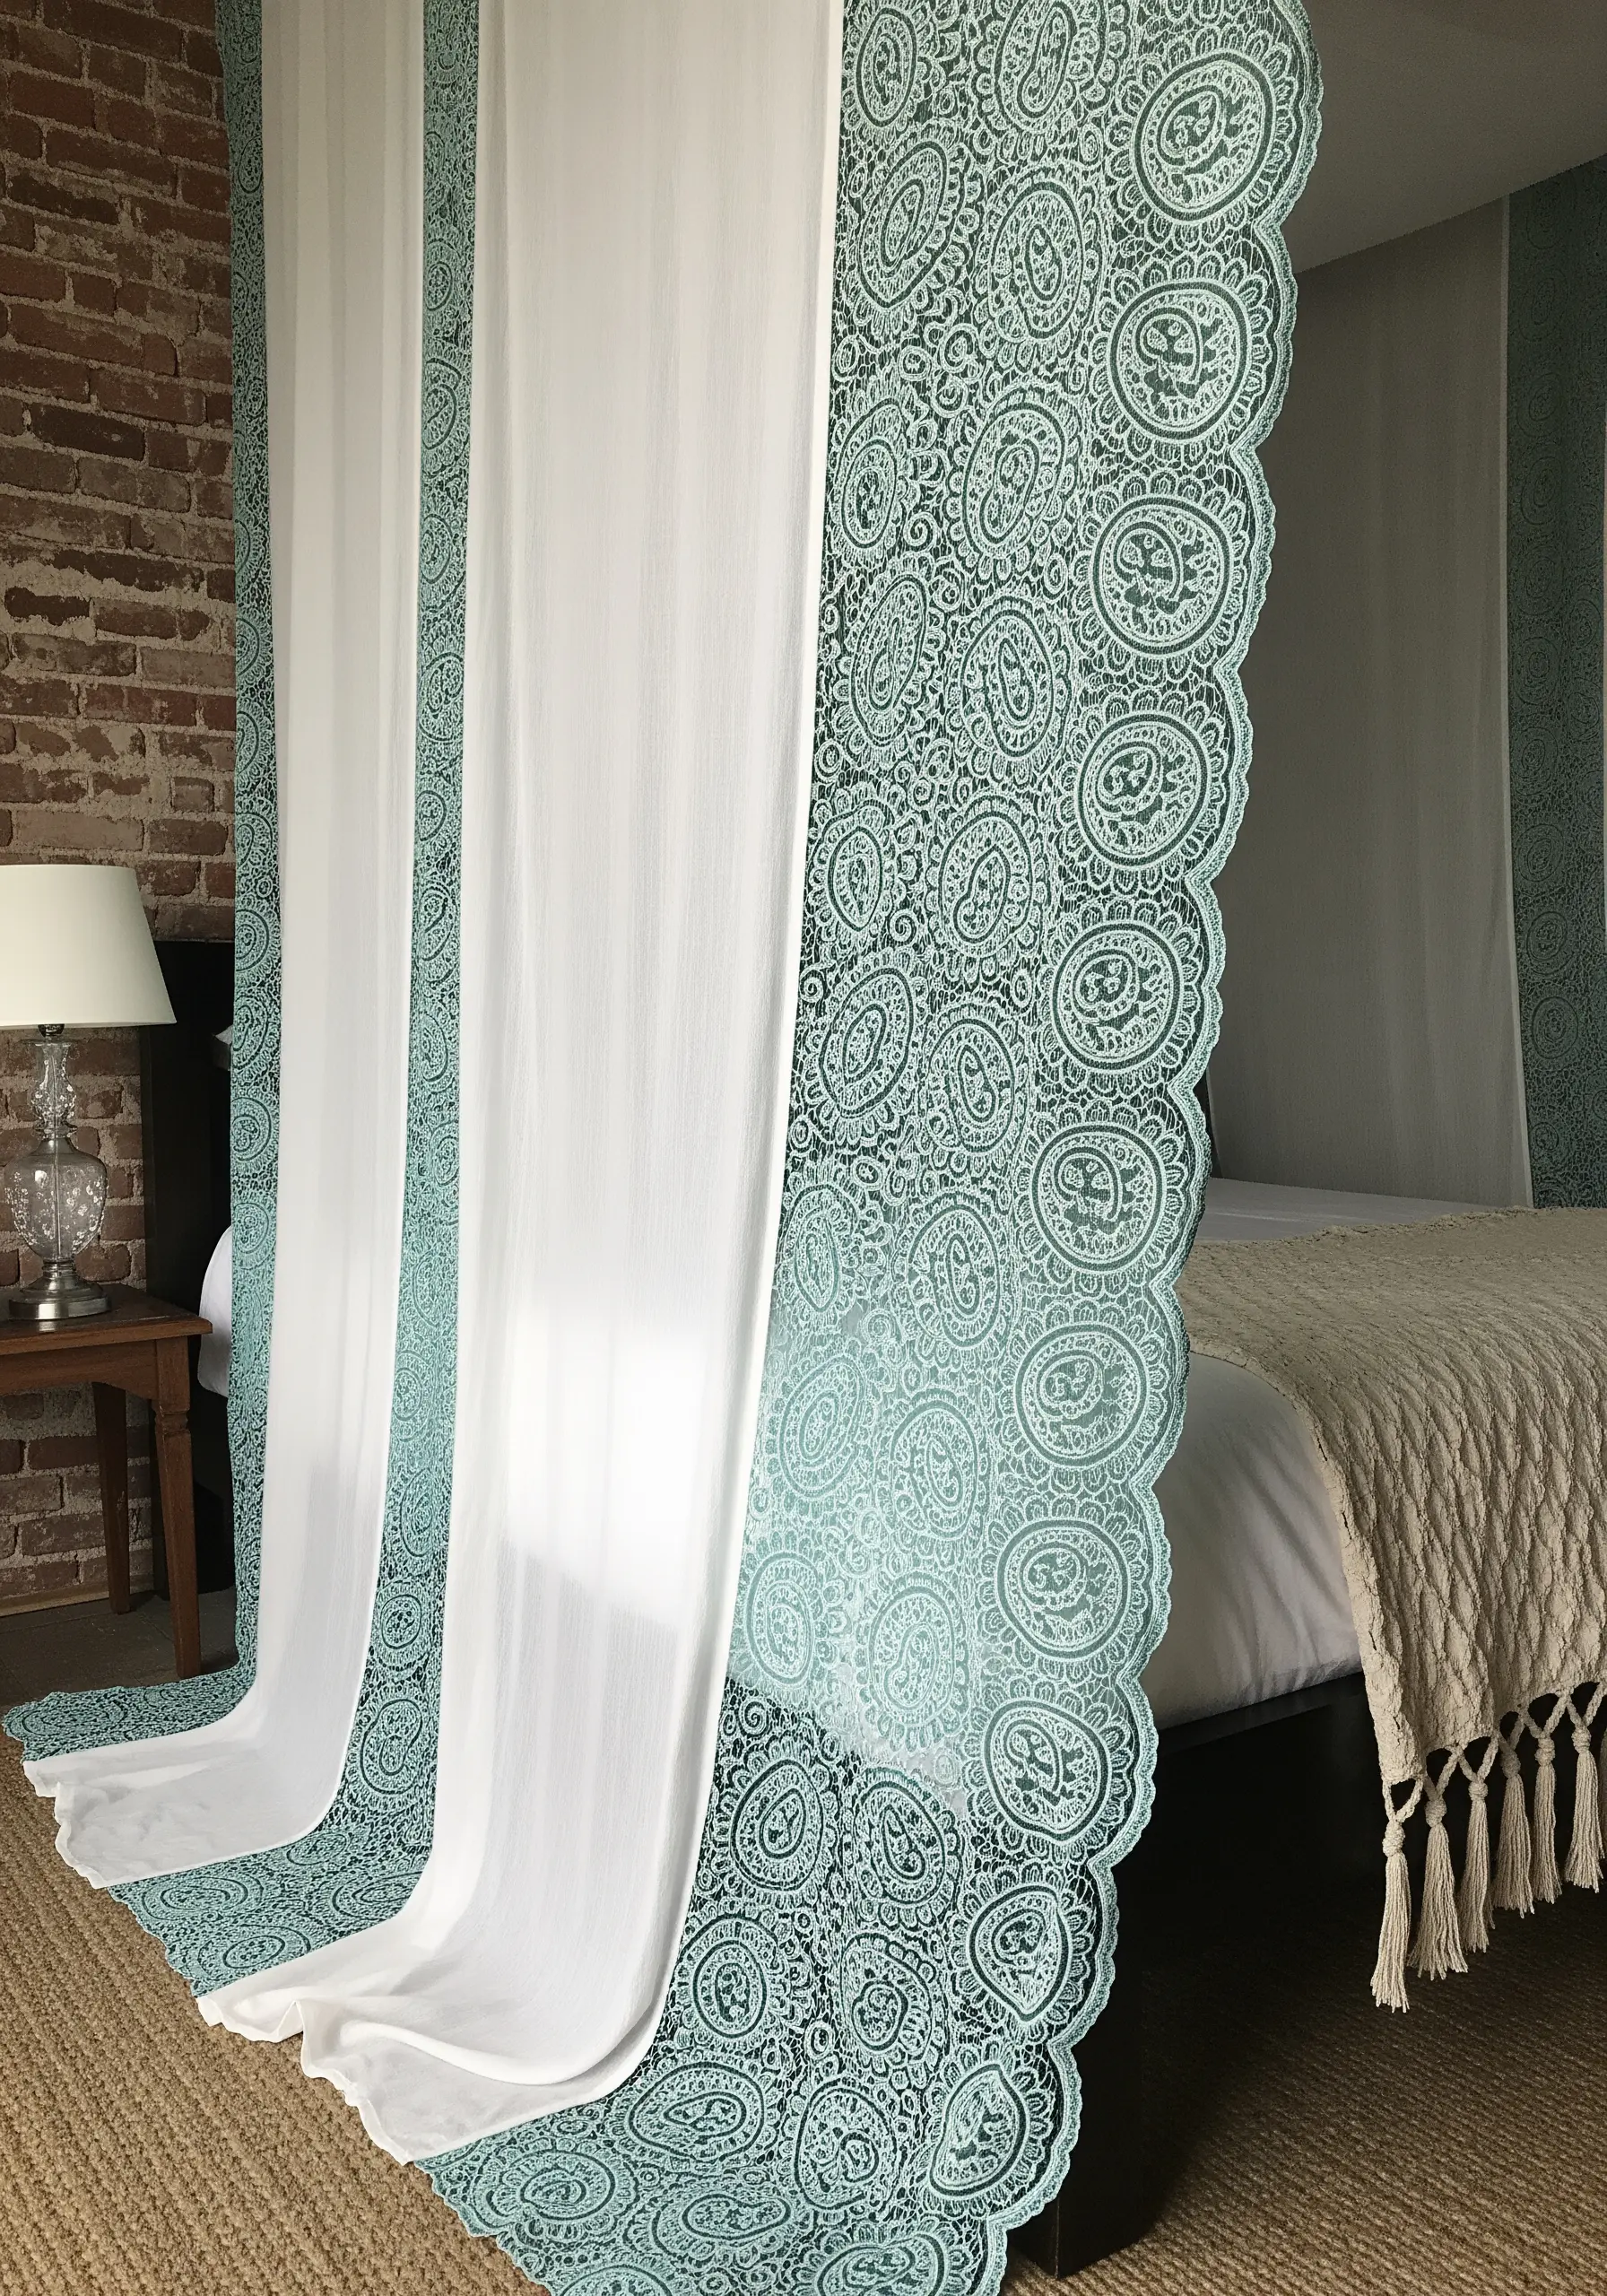
Create a stunning lace-like effect by using dense stitching to play against a sheer or lightweight fabric.
On a semi-transparent material like linen or voile, trace a complex pattern like a paisley motif.
Outline and fill the design completely using a dense satin stitch or chain stitch. Work with a thread color that contrasts with the fabric for maximum impact.
The magic happens when light hits the curtain: the densely stitched areas appear solid while the unstitched fabric remains sheer, creating a beautiful illusion of intricate lace through negative space.


